Design a Constructivist Logo Sheet for a Night Train
Build a Rodchenko-style logo sheet in Lopsy for a 1928 night train, with a photomontage locomotive, a −15° wordmark bar, a crossbuck monogram and a palette.
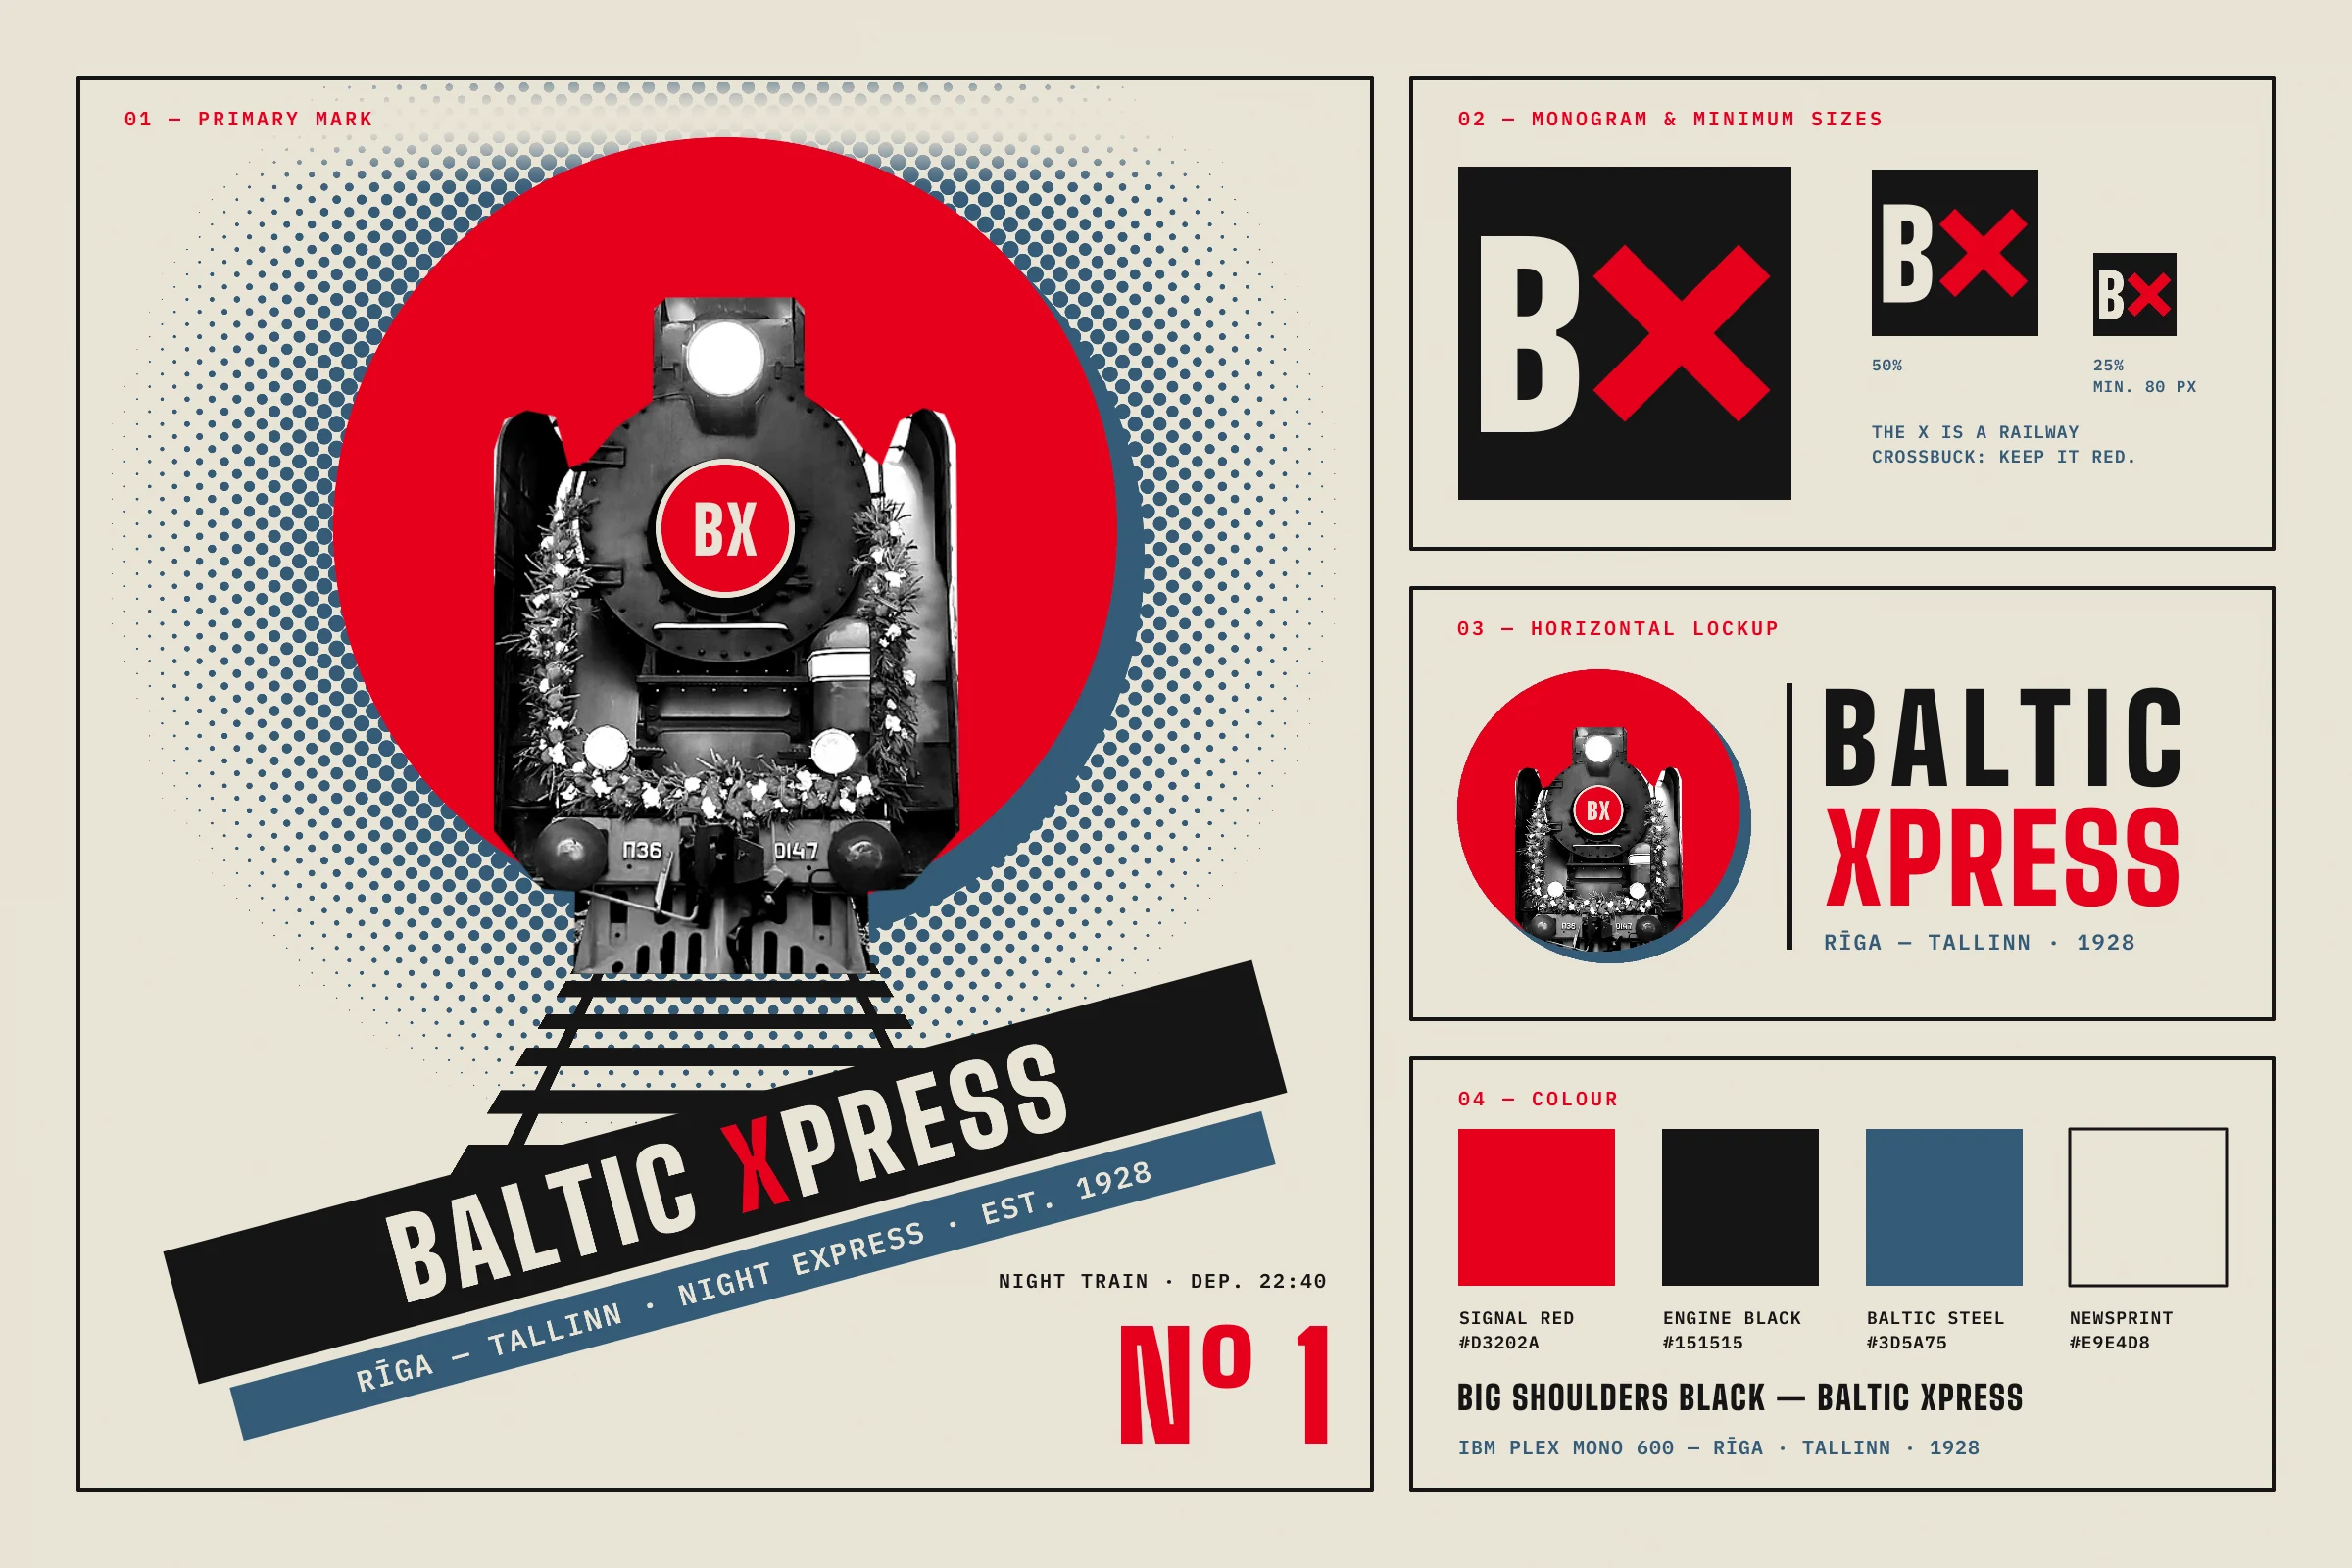
This tutorial makes a brand sheet for an imaginary 1928 sleeper train, Baltic Xpress, which runs overnight from Rīga to Tallinn. It's a 2400 × 1600 px logo sheet in the style of Russian Constructivism. Think of Alexander Rodchenko's posters and trademarks for the airline Dobrolet: a photo cut out and set against flat colour, one strong diagonal, heavy sans-serif capitals and only a few inks.
The sheet has four panels. The big primary mark on the left is the full emblem. On the right are the monogram at three sizes, a horizontal lockup for letterheads and tickets, and the colour chips with the two typefaces.
The engine is a real photograph, Steam locomotive P36-0147 (51170739681).jpg.jpg) by Ilya Onofriychuk, from Wikimedia Commons. It's in the public domain. Download the 1280 px wide preview (1280 × 1381). It's a perfect photomontage source: the engine is shot dead-on along the track, so it looks like it's driving straight out of the page.
Along the way you'll use:
- ruler guides, the 16 px grid and the exact-corners marquee dialog
- the Shape tool for filled and outlined rectangles and circles, with the click-to-size dialog
- the Lasso, Select → Inverse, Feather and Shift-drag to add to a selection
- Desaturate, Brightness/Contrast and Halftone
- a radial gradient
- the Move tool's scale and rotate handles, with Cmd to keep proportions and snap the angle
- the Perspective transform mode
- the Pen tool and Path to Selection
- the Pencil with a Shift-click straight line
- Text in Big Shoulders and IBM Plex Mono, with one letter coloured differently
- the Drop Shadow and Color Overlay layer effects, and the Multiply blend mode
- copy, paste, Flip Horizontal, Merge Down and Copy Merged
- New Group, and moving a whole group at once
The palette:
-
Newsprint
-
Signal red
-
Engine black
-
Baltic steel
-
Set up the sheet and the guides
Open Lopsy. In the New Document dialog, set Width to
2400and Height to1600and click Create. You get a whiteBackgroundand an emptyLayer 1. LeaveLayer 1alone for now. It becomes the paper grain at the very end.- Click the
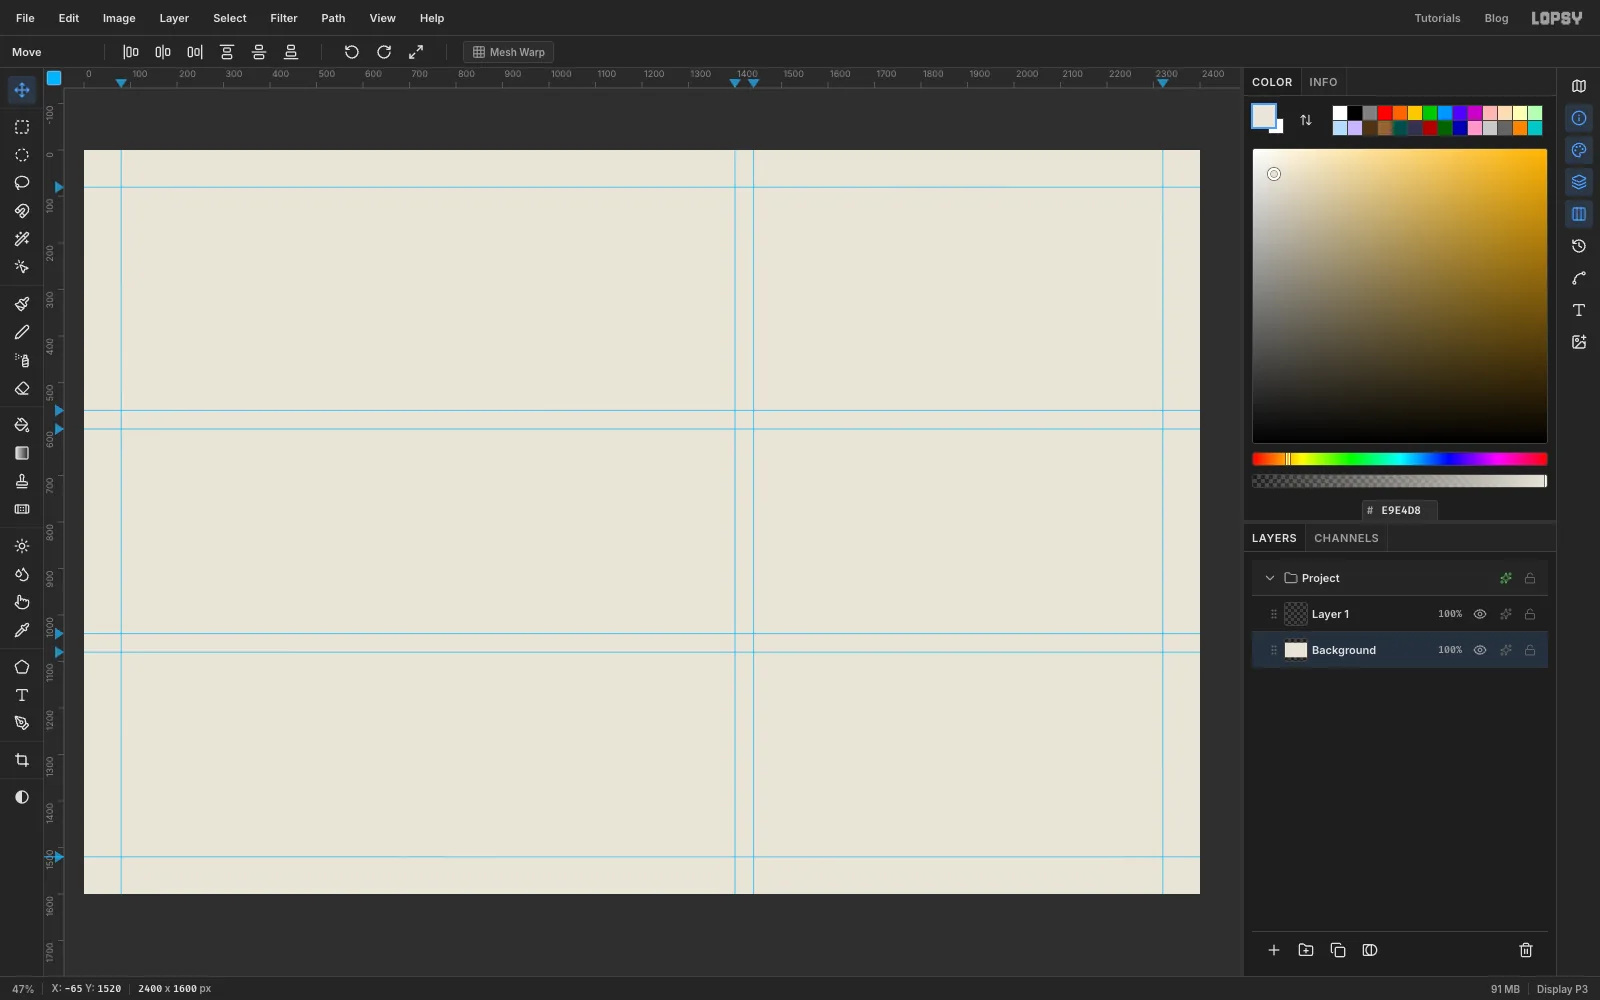
Backgroundrow, set the foreground colour to and choose Edit → Fill. - Click the top ruler at x
80,1400,1440and2320to drop four vertical guides. - Click the left ruler at y
80,560,600,1040,1080and1520for the horizontal guides.
That's a 40 px gap between every panel and an 80 px margin all round.
- Click the
-
Draw the four panel frames
- Click Add Layer and rename the new layer
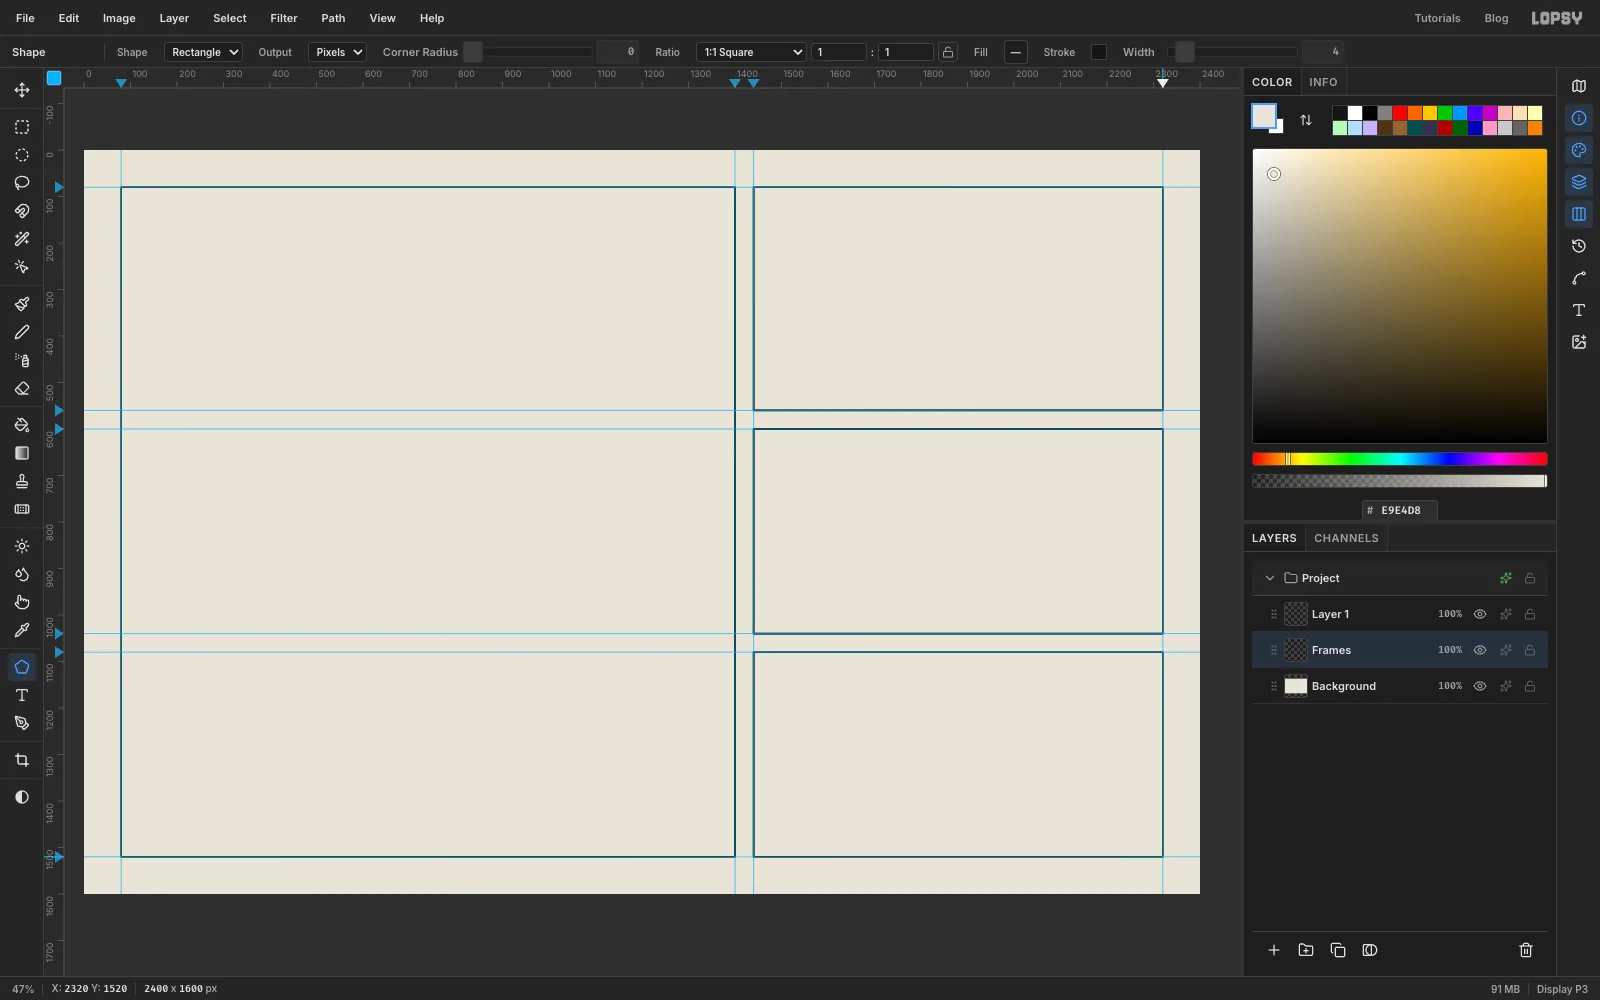
Frames. - Pick the Shape tool. In the options bar set Shape to Rectangle and Output to Pixels. Click the Fill swatch and choose Remove fill. Click Stroke, type
151515into its hex field, and set Width to4. - Shapes grow from where you press, so press in the middle of a panel and drag out to its bottom-right guide corner, where it snaps. The centres are 740, 800 for the left panel and 1880, 320, 1880, 820 and 1880, 1300 for the three cells. Watch the size in the Info panel: the left panel is
1320×1440, the top cell880×480, and the other two880×440.
- Click Add Layer and rename the new layer
-
Make the red sun
- With
Framesactive, click New Group at the bottom of the Layers panel and name itPrimary Mark. Everything in the emblem goes inside it. - Click Add Layer and rename it
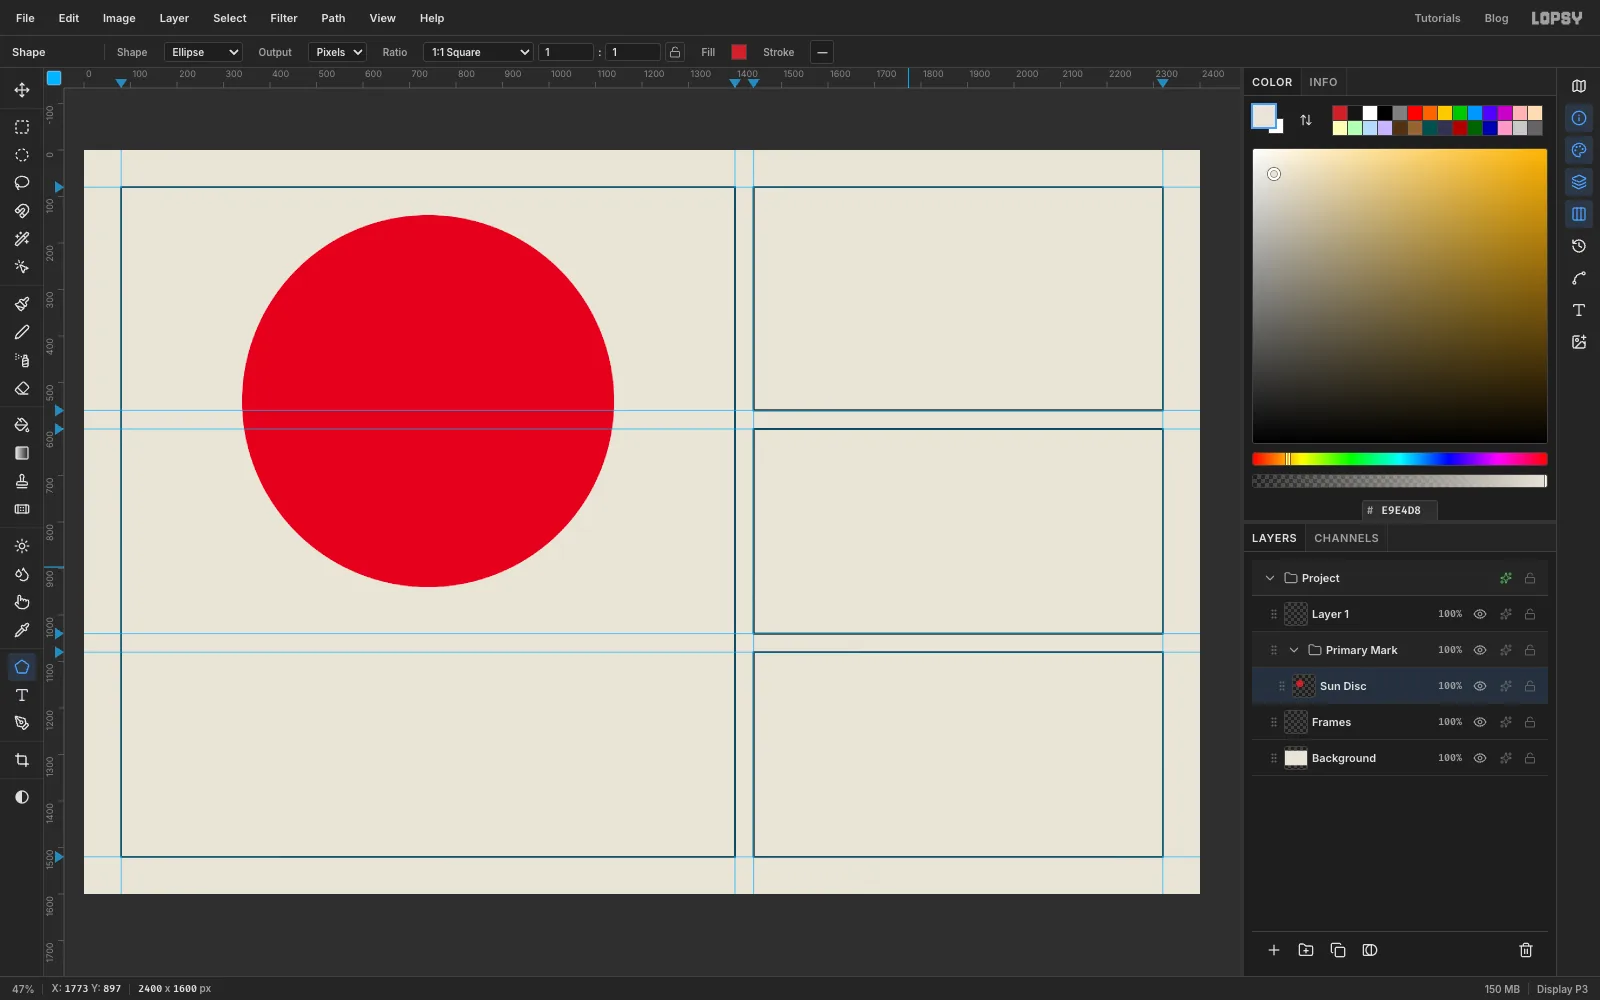
Sun Disc. - With the Shape tool, set Shape to Ellipse, set the Fill to
D3202Aand remove the stroke. - Click once at 740, 540 without dragging. In the Shape Size dialog type
800×800and confirm.
- With
-
Give the sun an offset shadow
Click the effects button (✦) on the
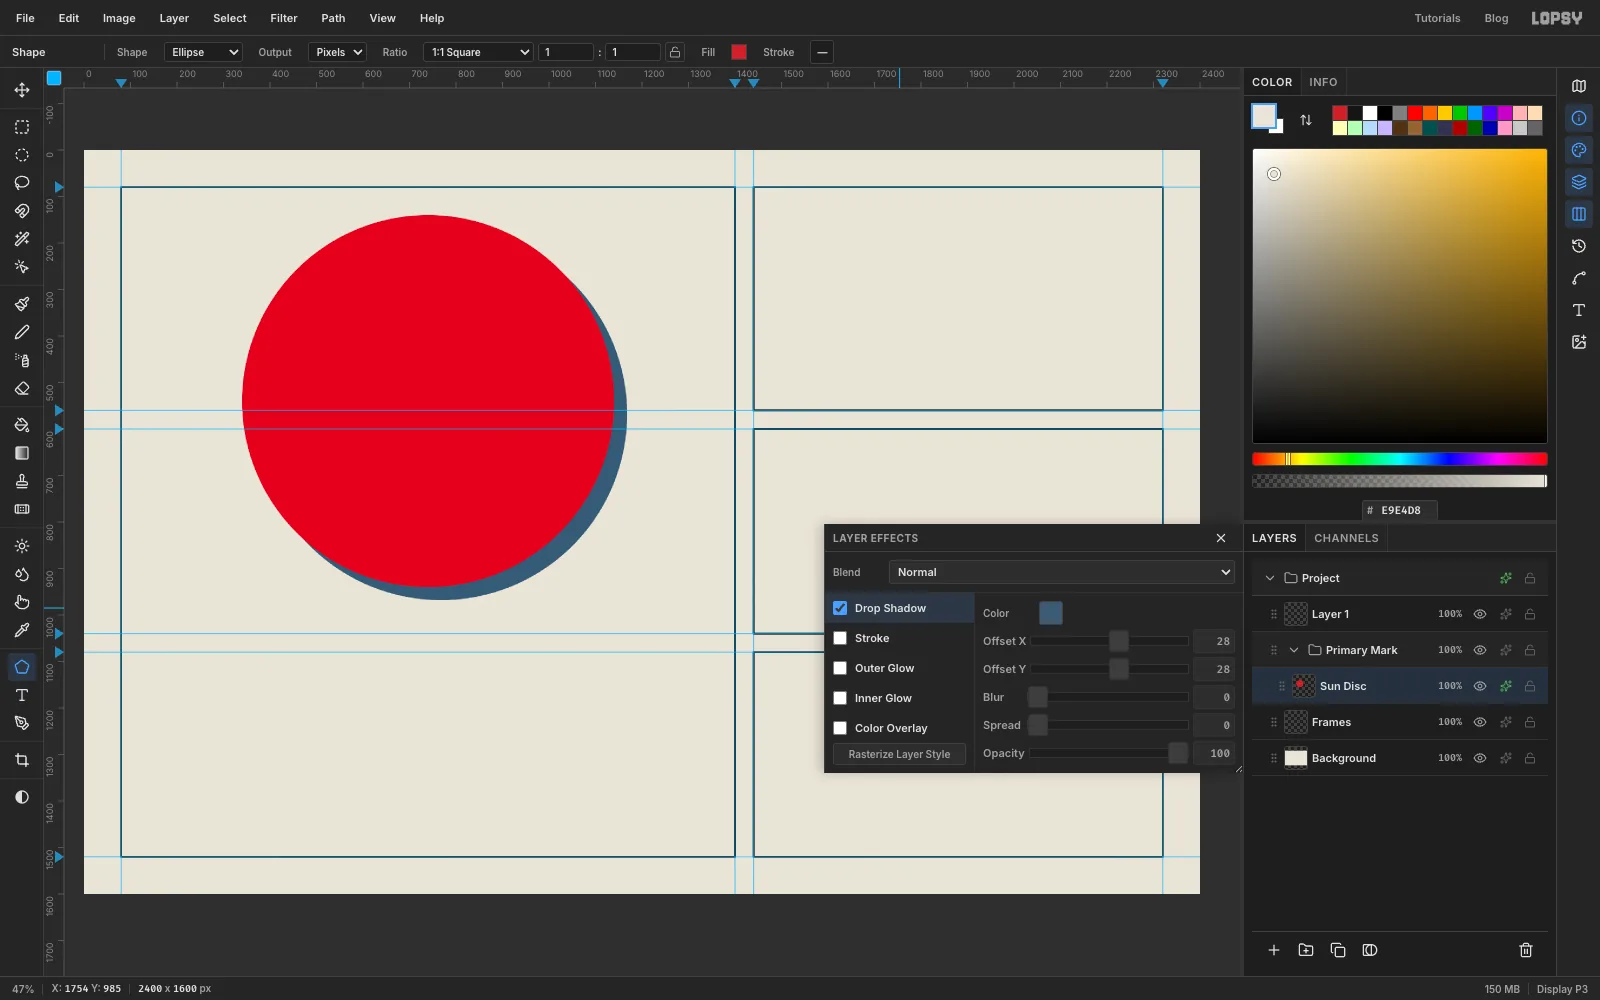
Sun Discrow and turn on Drop Shadow. Set the colour to , Offset X and Offset Y to28, Blur and Spread to0, and Opacity to100. Close the drawer.A hard offset like this is how a second ink, printed slightly out of register, looks on a 1920s poster.
-
Bring in the locomotive photo
Drag the downloaded photo onto the canvas. It lands at the top-left corner as a new layer above
Sun Disc. Rename itLocomotive, then press Cmd+D to drop the selection it arrives with.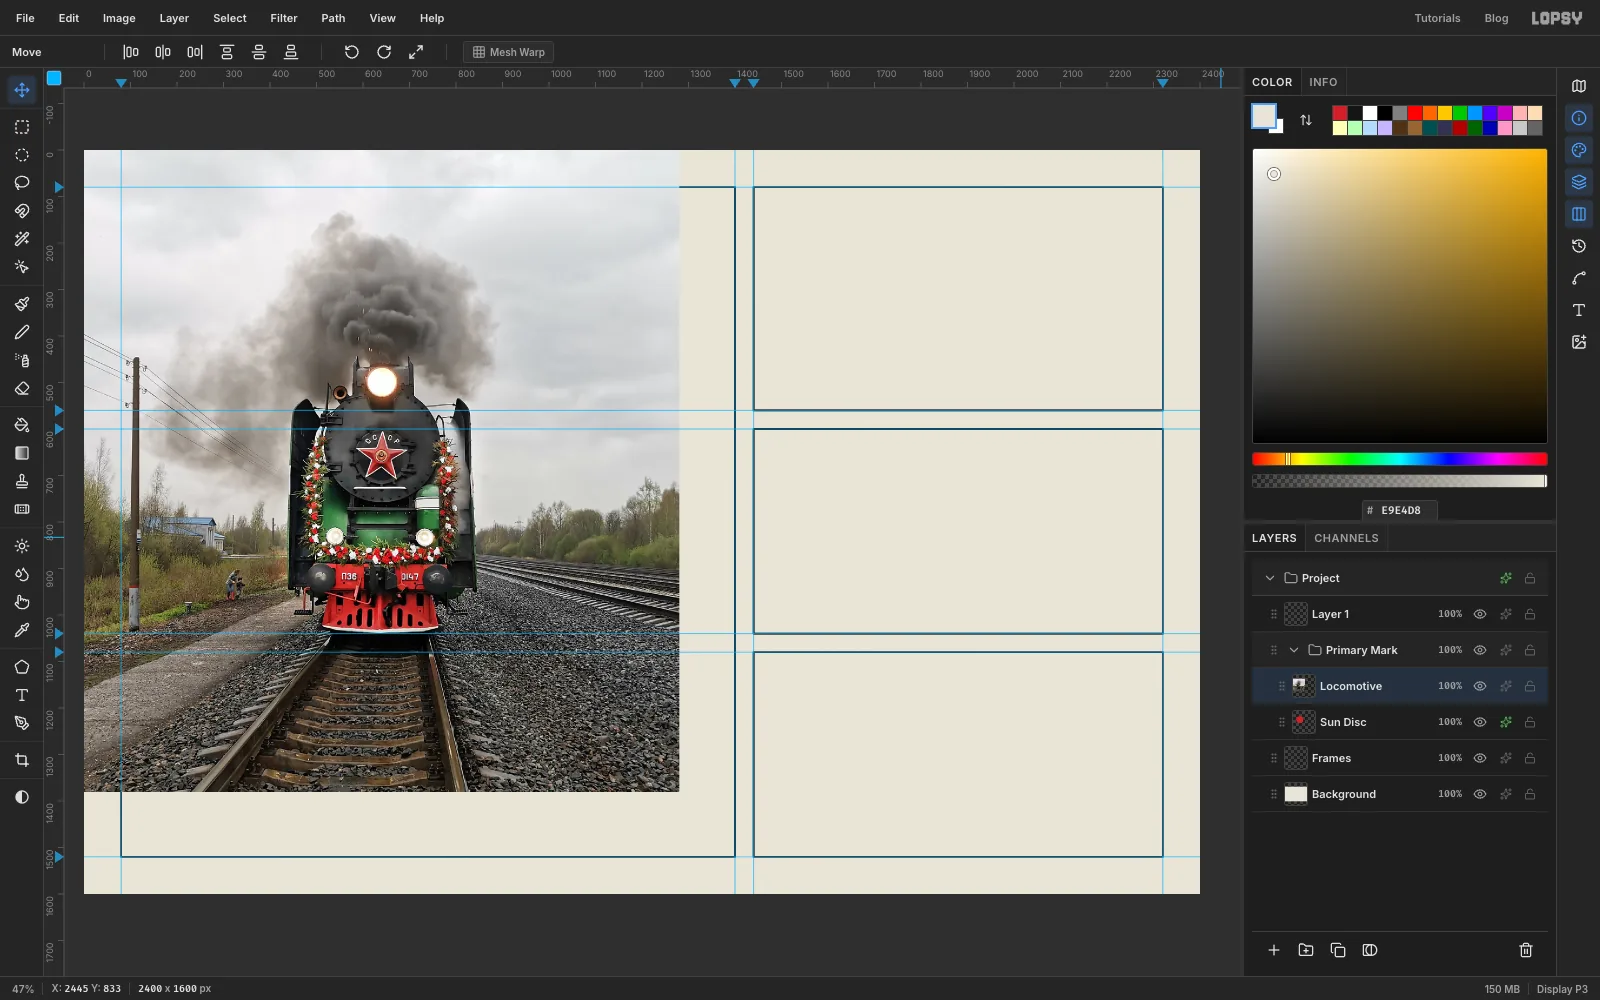
-
Trace round the engine
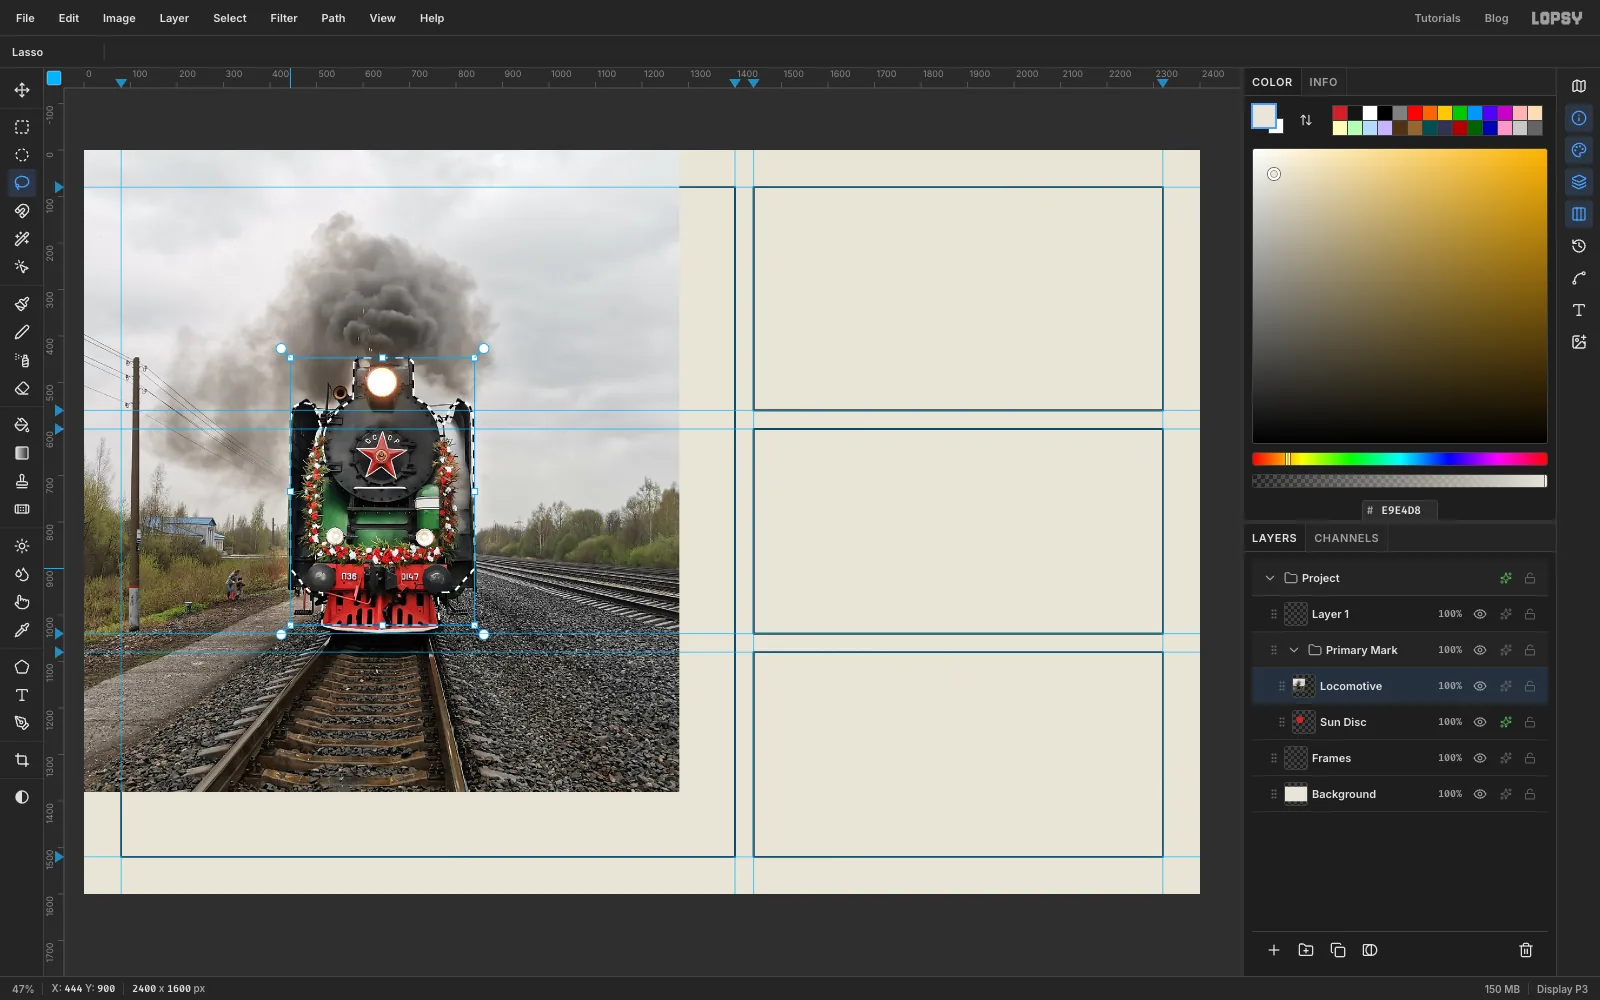
Zoom in and trace the engine with the Lasso. Go up the outer edge of the left smoke deflector, over the chimney and headlamp, down the right deflector and round the buffer beam. Keep just inside the edges so no grey sky gets in. Where the deflectors end, cut diagonally in towards the buffers rather than straight across. Under the buffers, follow the sides of the red buffer beam closely so no gravel comes along, and run along its bottom just above the thin white stripe. Against the halftone dots later, that stripe would look like a cut-out halo. Leave the smoke and the track out.
-
Cut it out
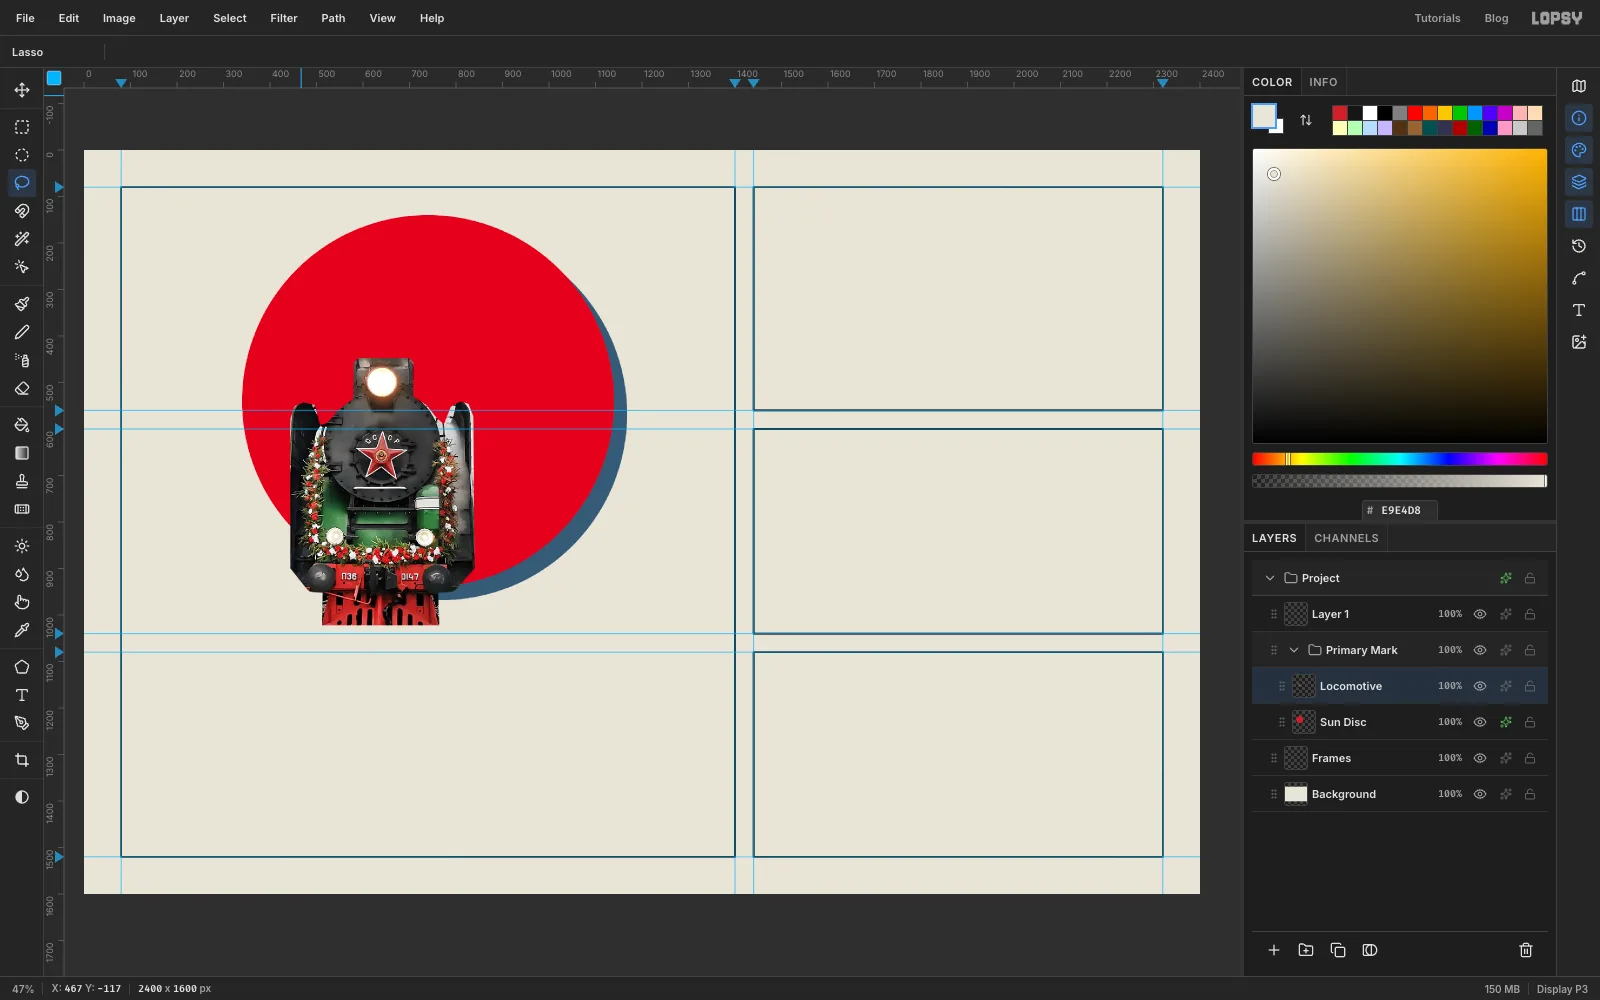
Choose Select → Inverse, press Delete, then Cmd+D.
-
Paint out the old emblem
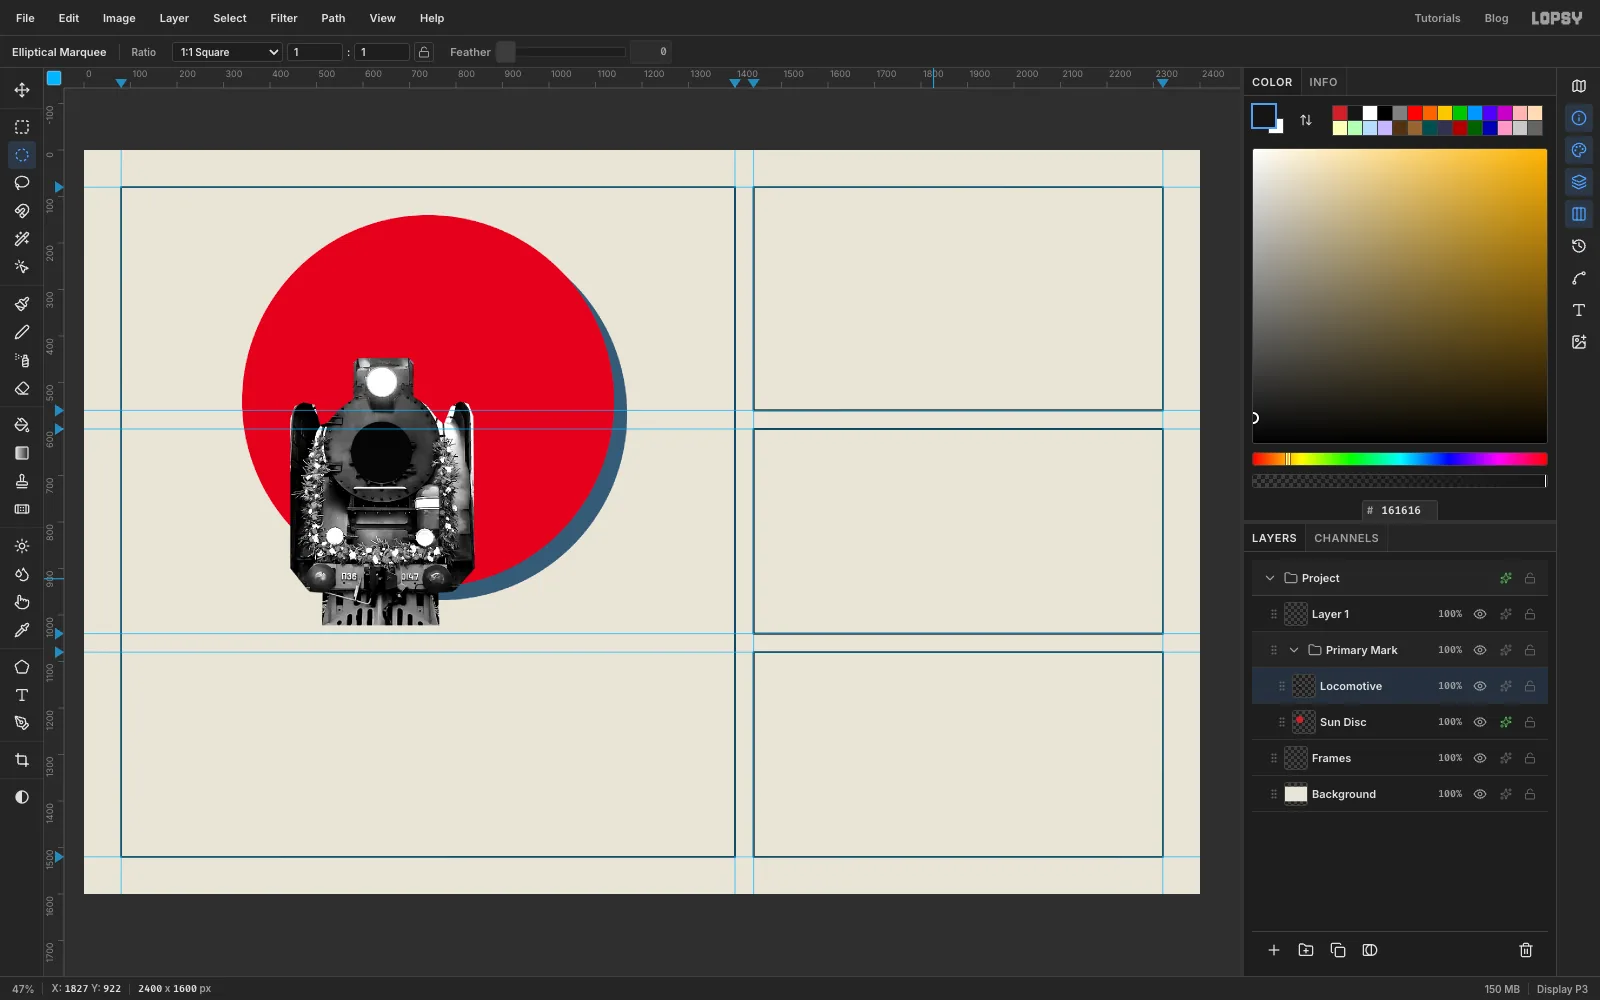
The smokebox door carries an old star badge, and our own roundel goes there instead. With the Elliptical Marquee, select From
574, 584To706, 716. Fill it with , then press Cmd+D.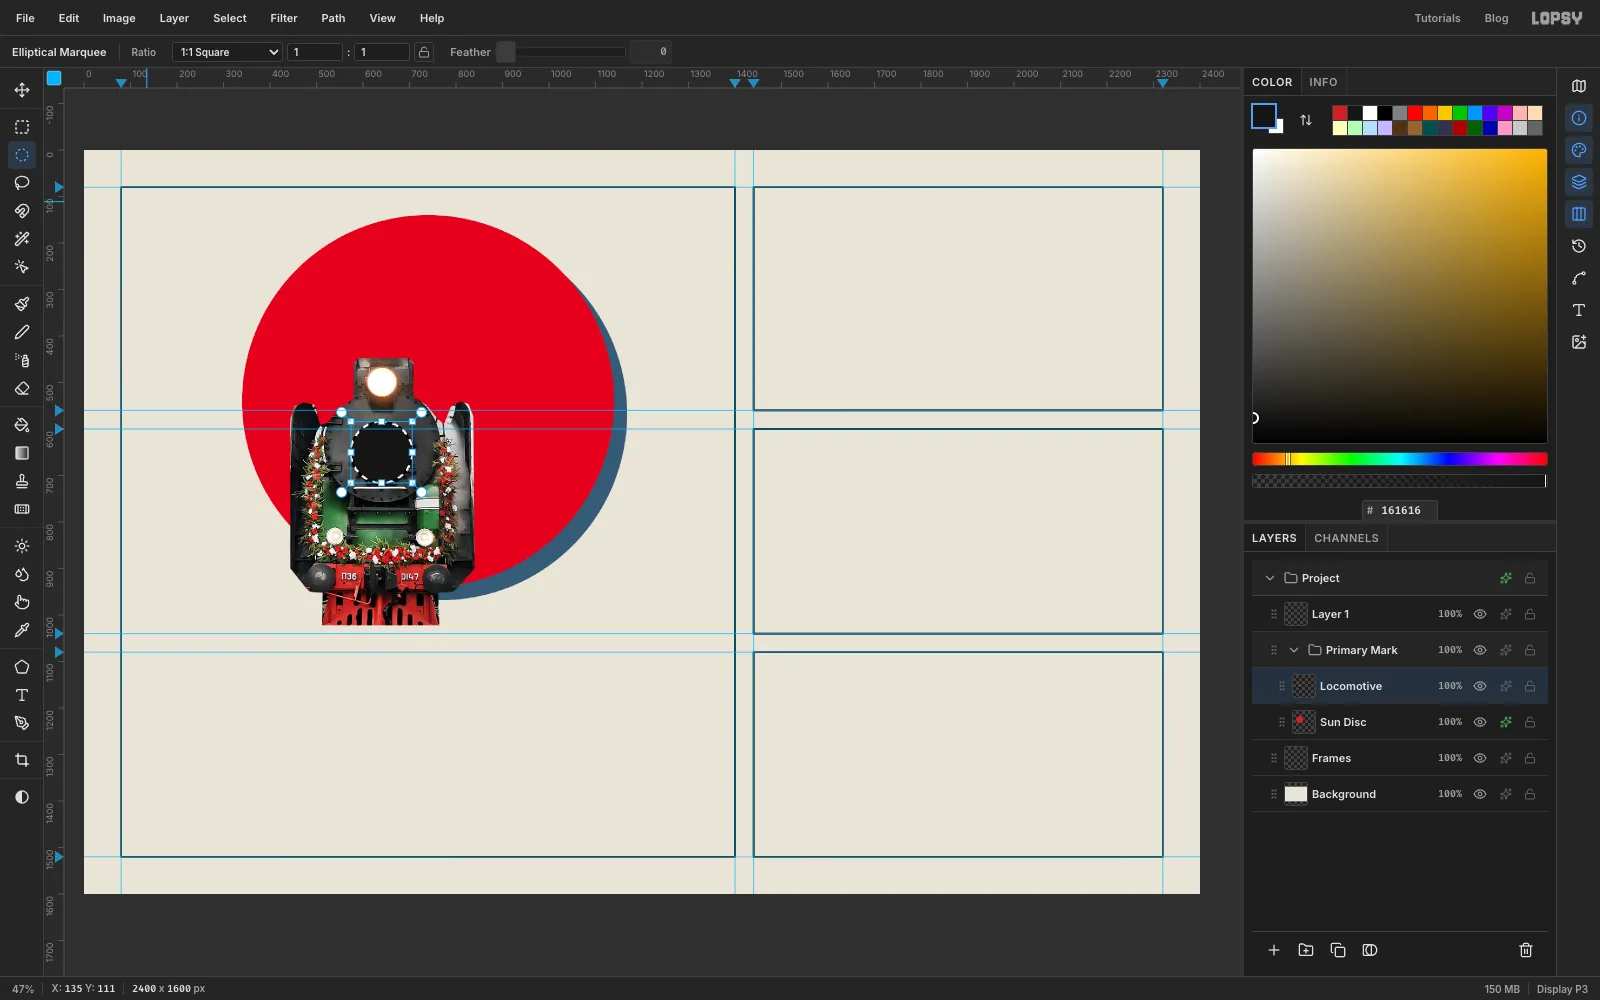
-
Turn it into a press photo
- Choose Filter → Desaturate.
- Choose Filter → Brightness/Contrast… and set Brightness to
8and Contrast to35.
Constructivist photomontage was almost always printed in black only, with the colour coming from flat shapes around the photo.
-
Scale the engine up
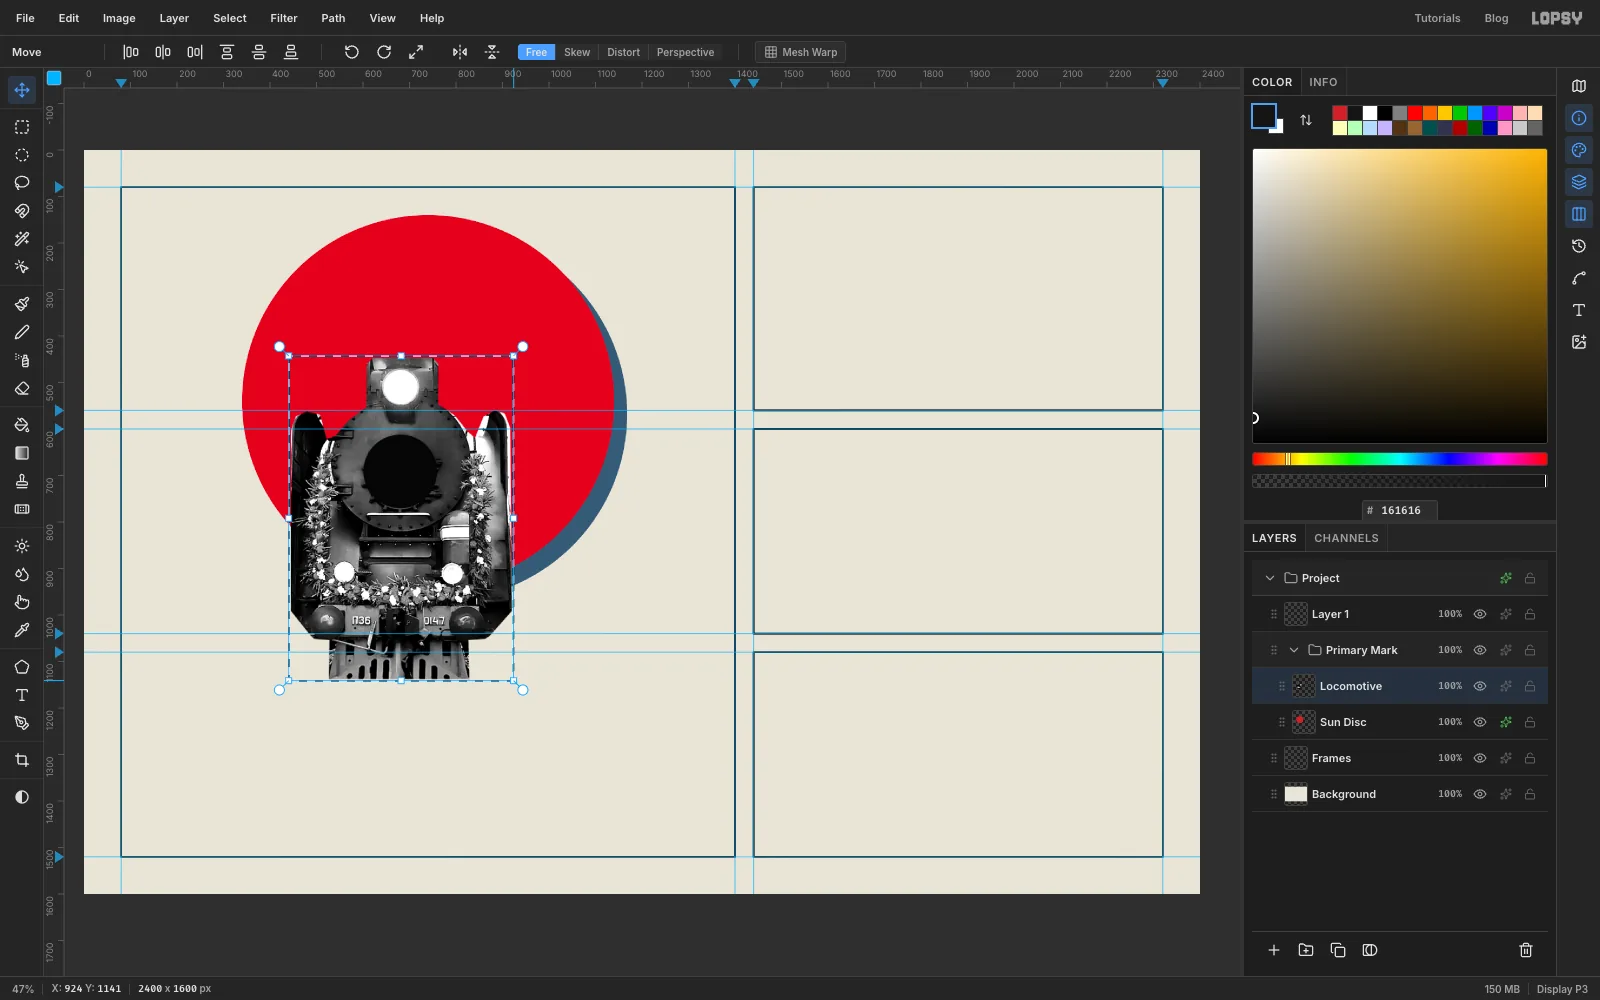
- With the Rectangular Marquee, drag a box that just encloses the engine. If you followed the trace above it's about
400×592, from about 440, 443. - Pick the Move tool. Hold Cmd and drag the bottom-right handle outward until the box is 120% of its size: about
480px wide and710px tall. - Press Enter, then Cmd+D.
- With the Rectangular Marquee, drag a box that just encloses the engine. If you followed the trace above it's about
-
Centre the smokebox on the sun
With the Move tool, drag the engine until the dark disc on its smokebox door sits on the centre of the sun, 740, 540. Finish with the arrow keys. The top of the chimney ends up near y
295and the buffer beam near y1000, just below the sun.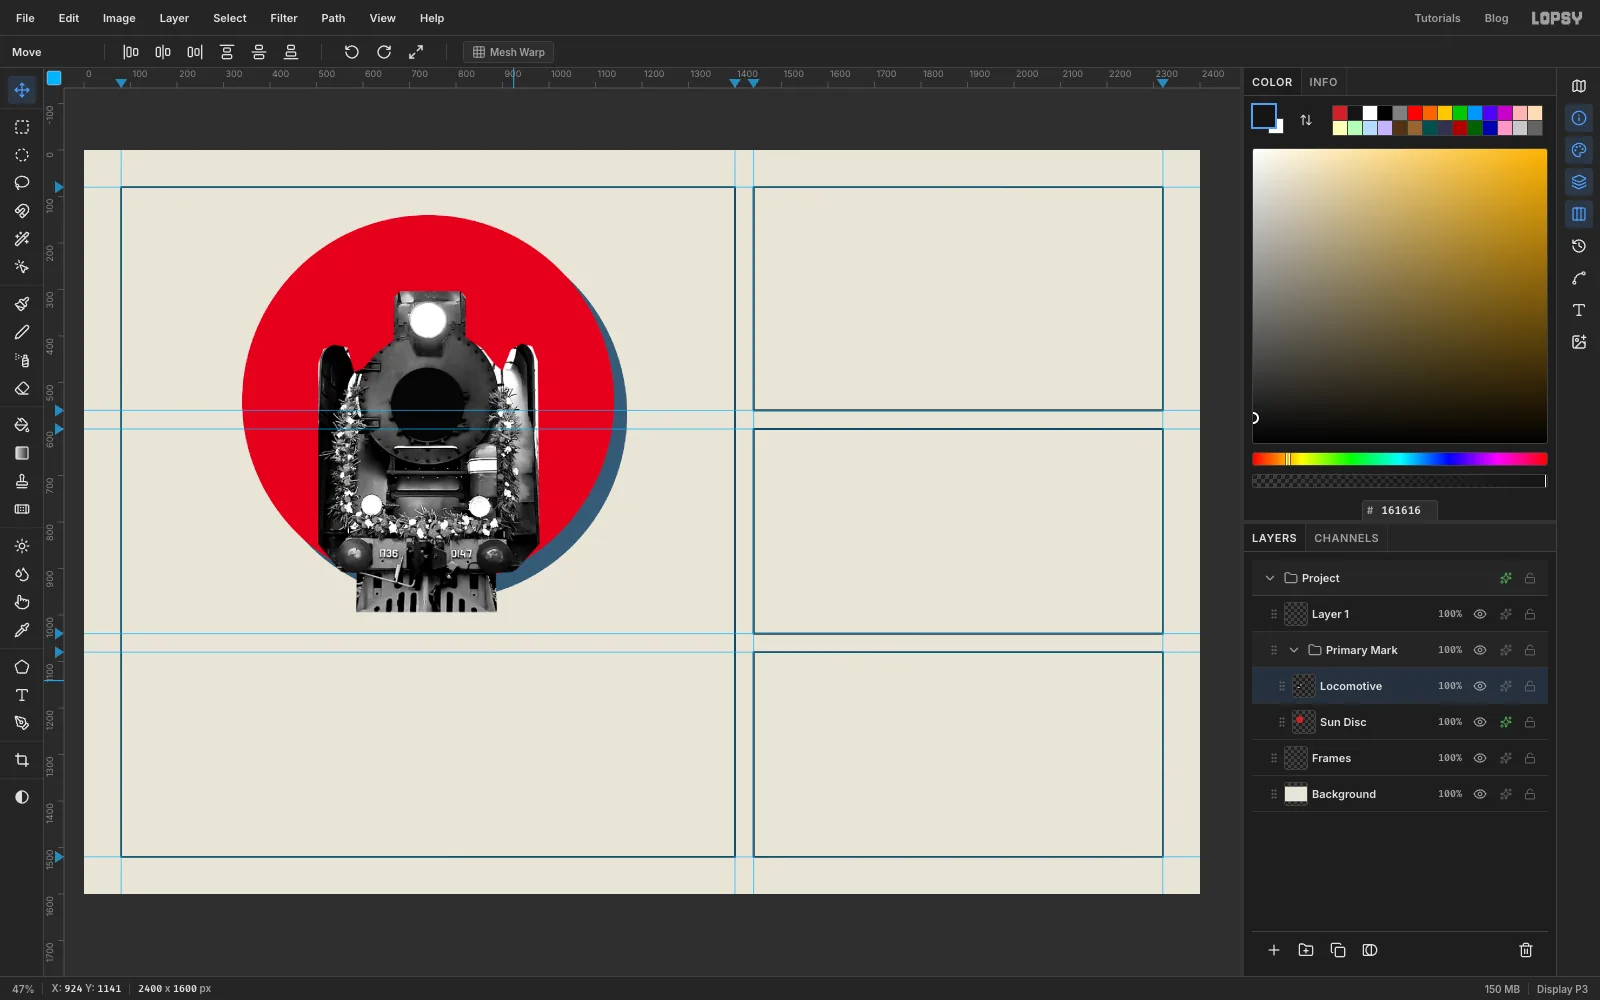
-
Select the sleepers
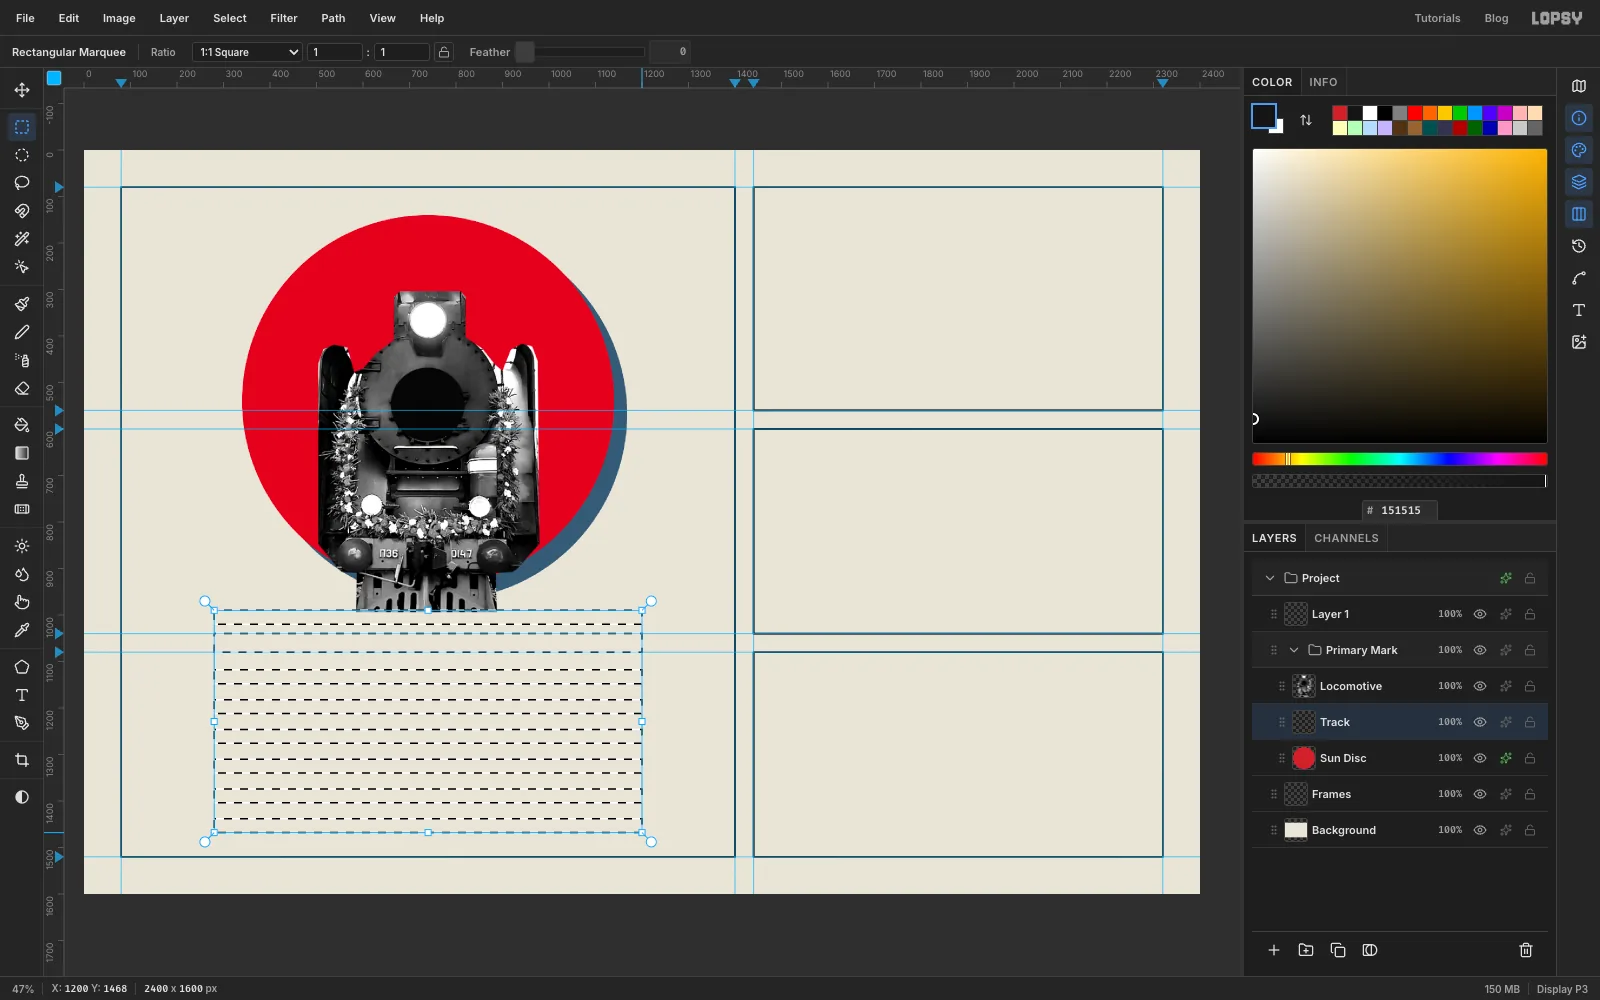
You draw the track flat first, like a ladder, then tilt it into perspective.
- Click
Sun Disc, click Add Layer and rename itTrack. It sits under the engine. - Select From
280, 990To1200, 1020. That's the first sleeper. - Hold Shift and drag seven more bars, each
920×30and 64 px lower than the last: the next starts at y1054, then1118,1182,1246,1310,1374and1438. Zoom in and watch the Info panel while you drag. A few pixels out won't show once the track is in perspective. - Fill with , then press Cmd+D.
- Click
-
Add the rails
Select From
350, 980To380, 1500. Hold Shift and drag a second rail from1100, 980to1130, 1500. Fill with and press Cmd+D.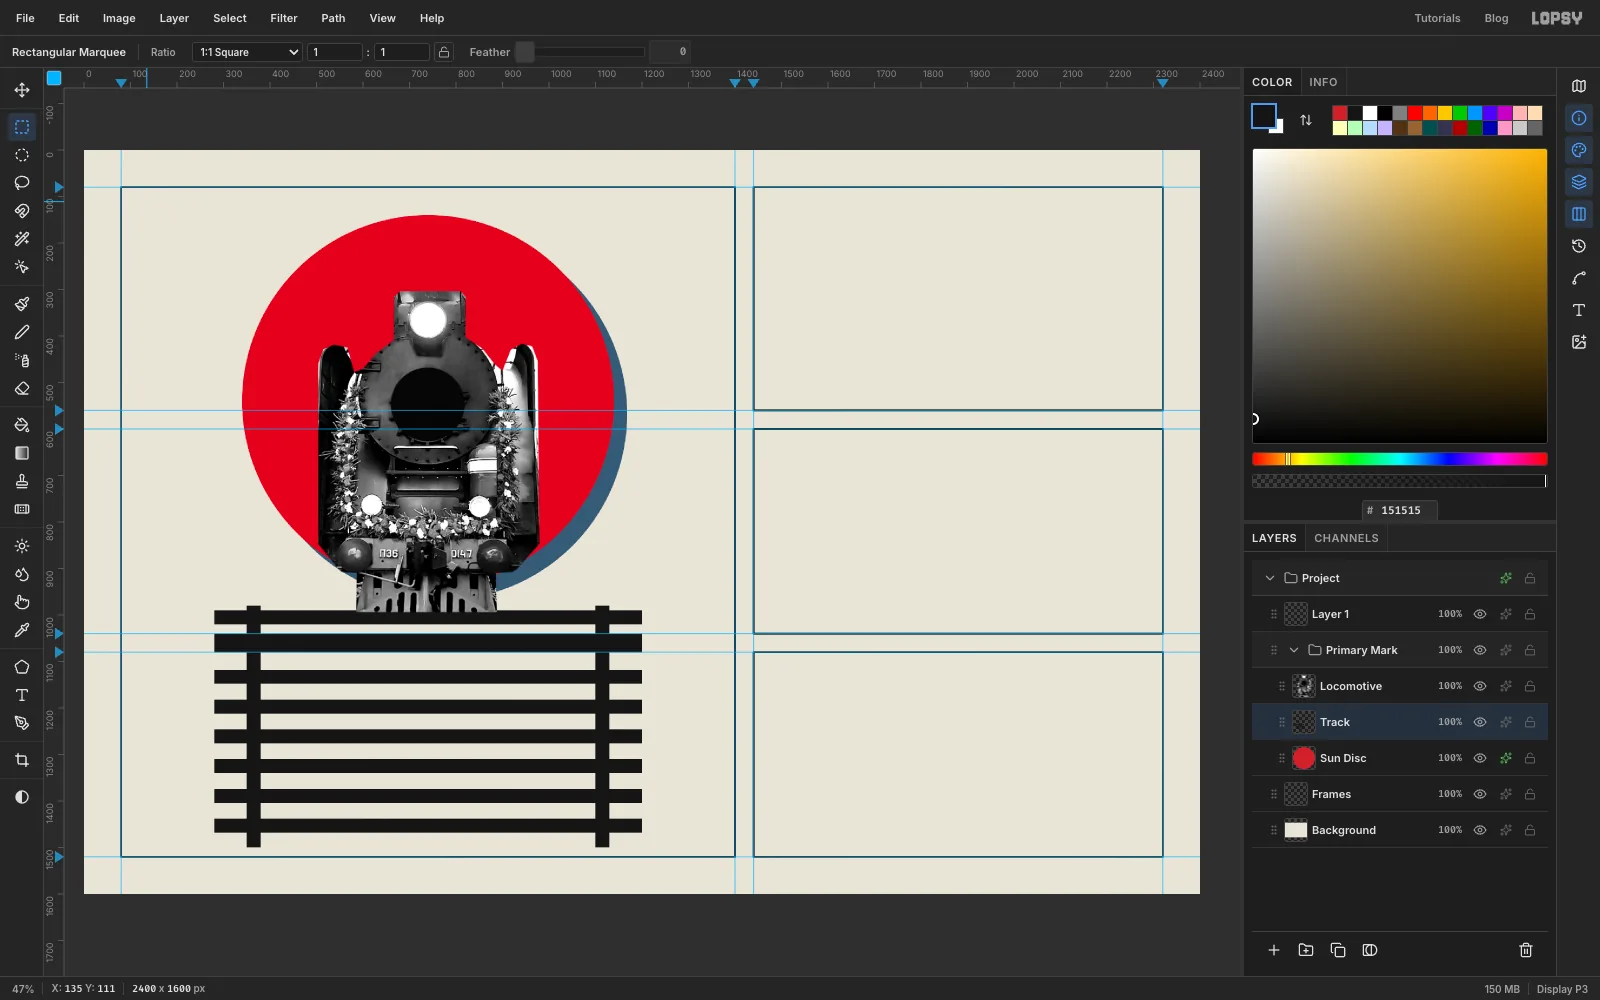
-
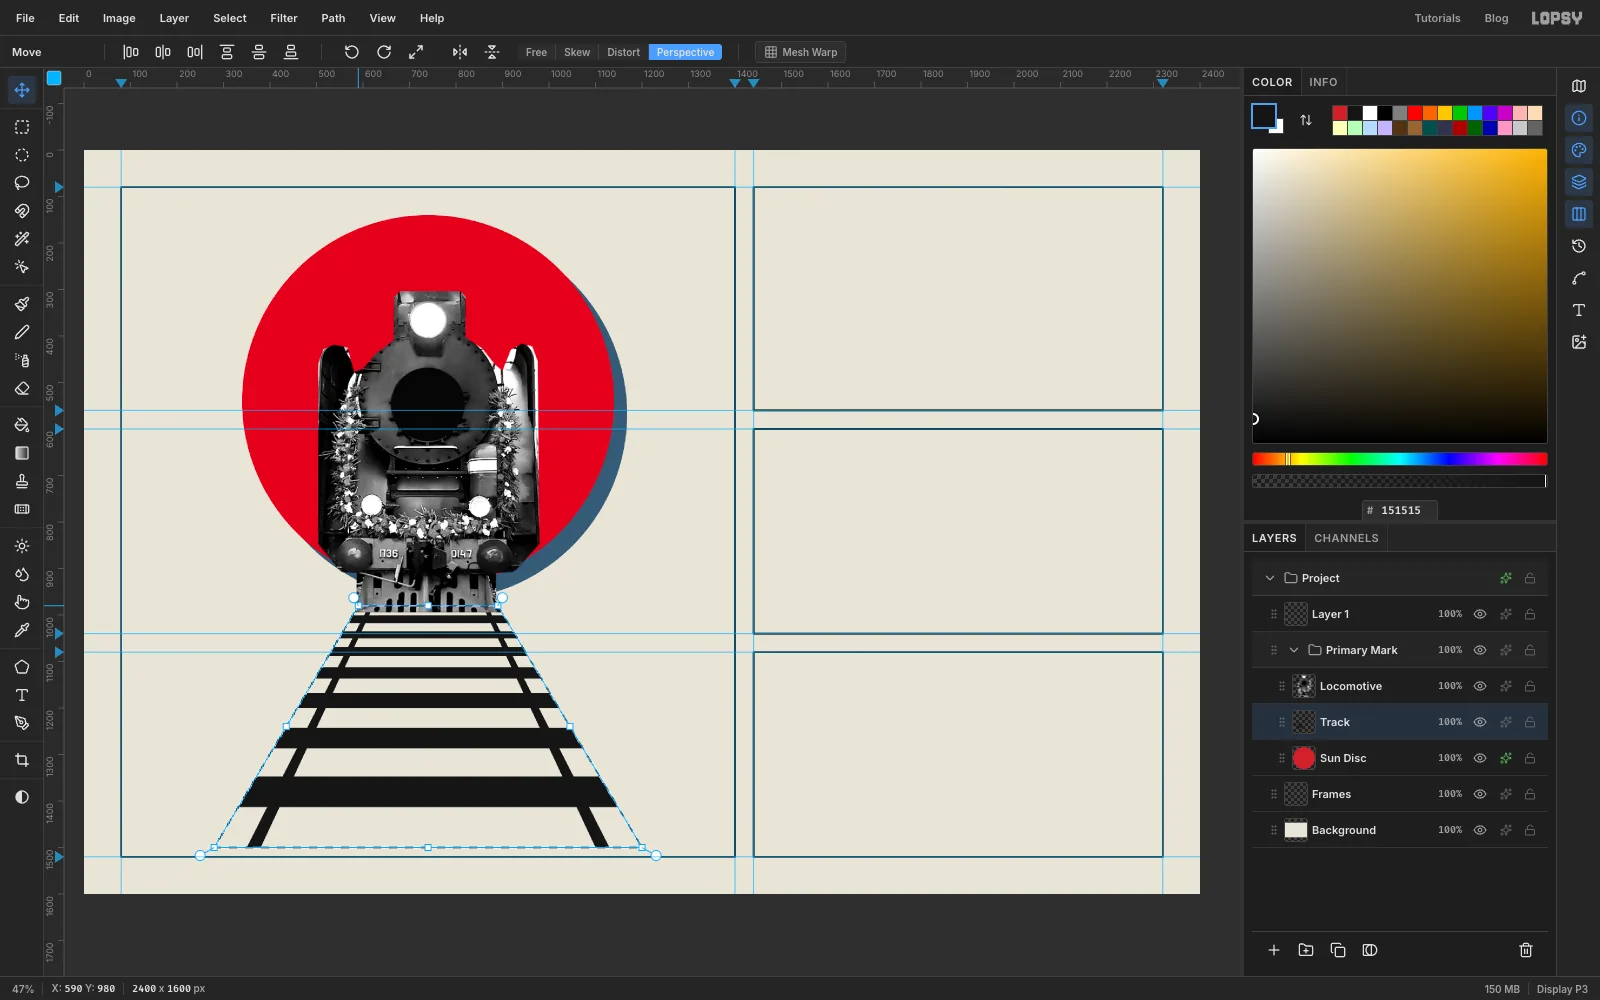
Pull the track into perspective
- Select From
280, 980To1200, 1500round the whole ladder. - Pick the Move tool and click Perspective in its options bar.
- Drag the top-left handle right by about
310px, to x590. The top-right handle moves in by the same amount, so the top edge shrinks to about300px and lines up with the engine's buffers. - Press Enter, click Free to put the mode back, and press Cmd+D.
The Perspective mode squeezes the far sleepers closer together on its own, so the track really recedes.
- Select From
-
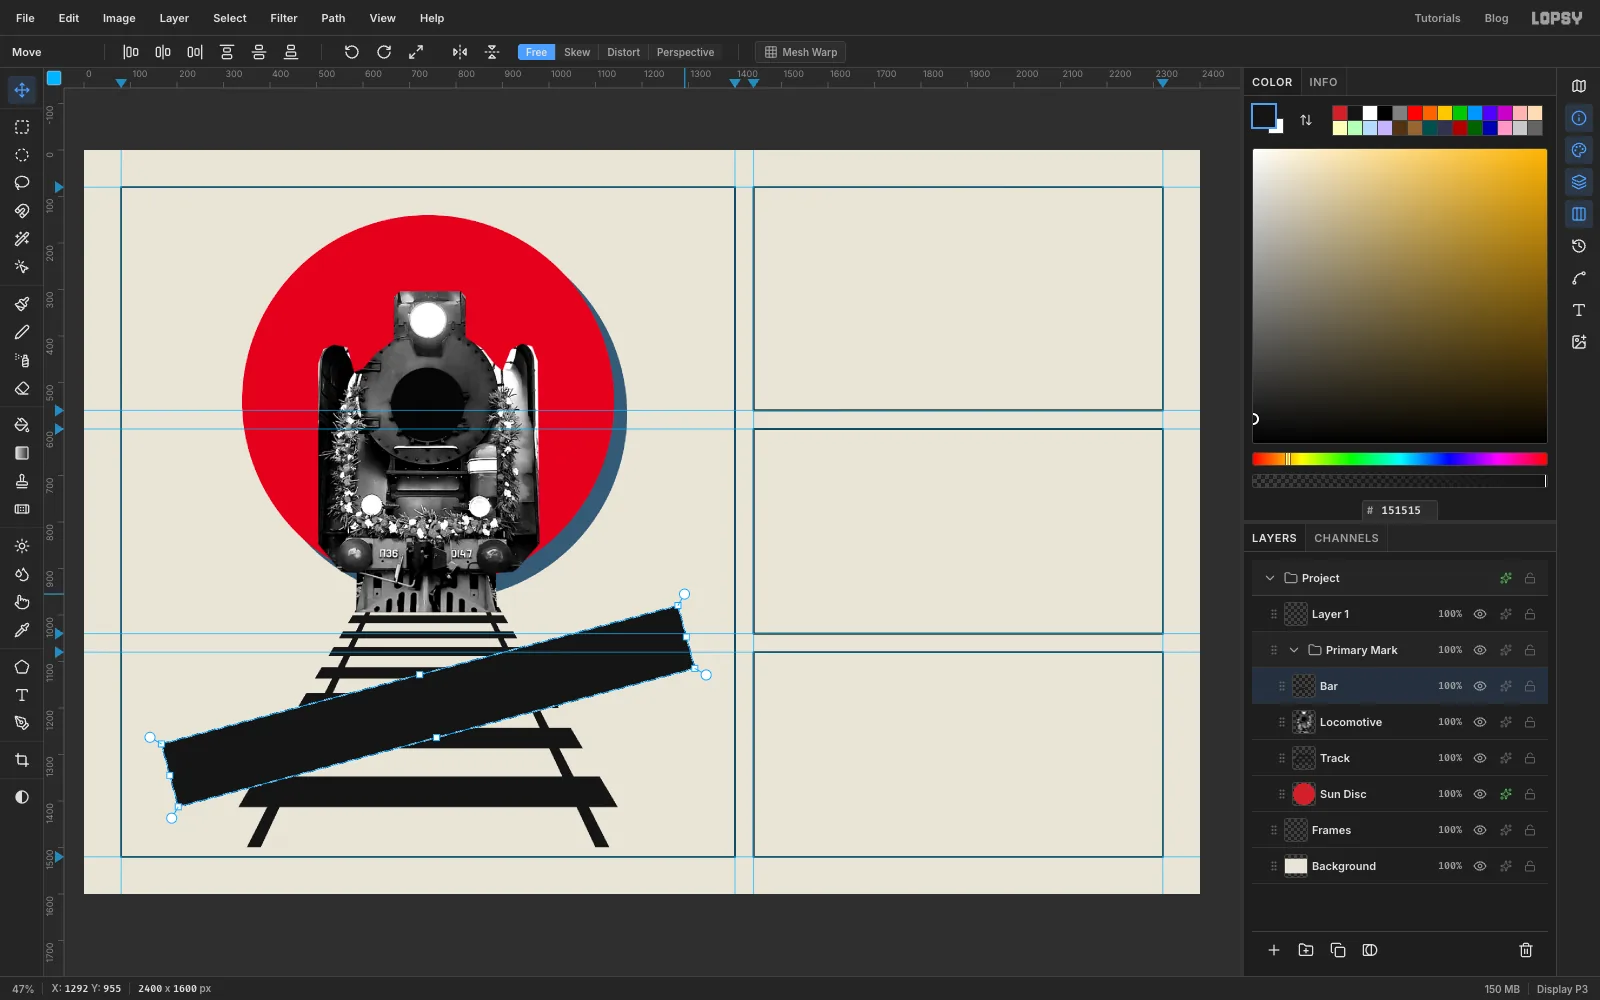
Rotate the black bar
- Click
Locomotive, click Add Layer and rename itBar. - Select From
165, 1126To1315, 1266and fill it with . - With the Move tool, hold Cmd and drag a corner rotation handle counter-clockwise until it snaps to −15°. Press Enter, then Cmd+D.
−15° is the classic Constructivist tilt. It reads as forward motion, rising to the right.
- Click
-
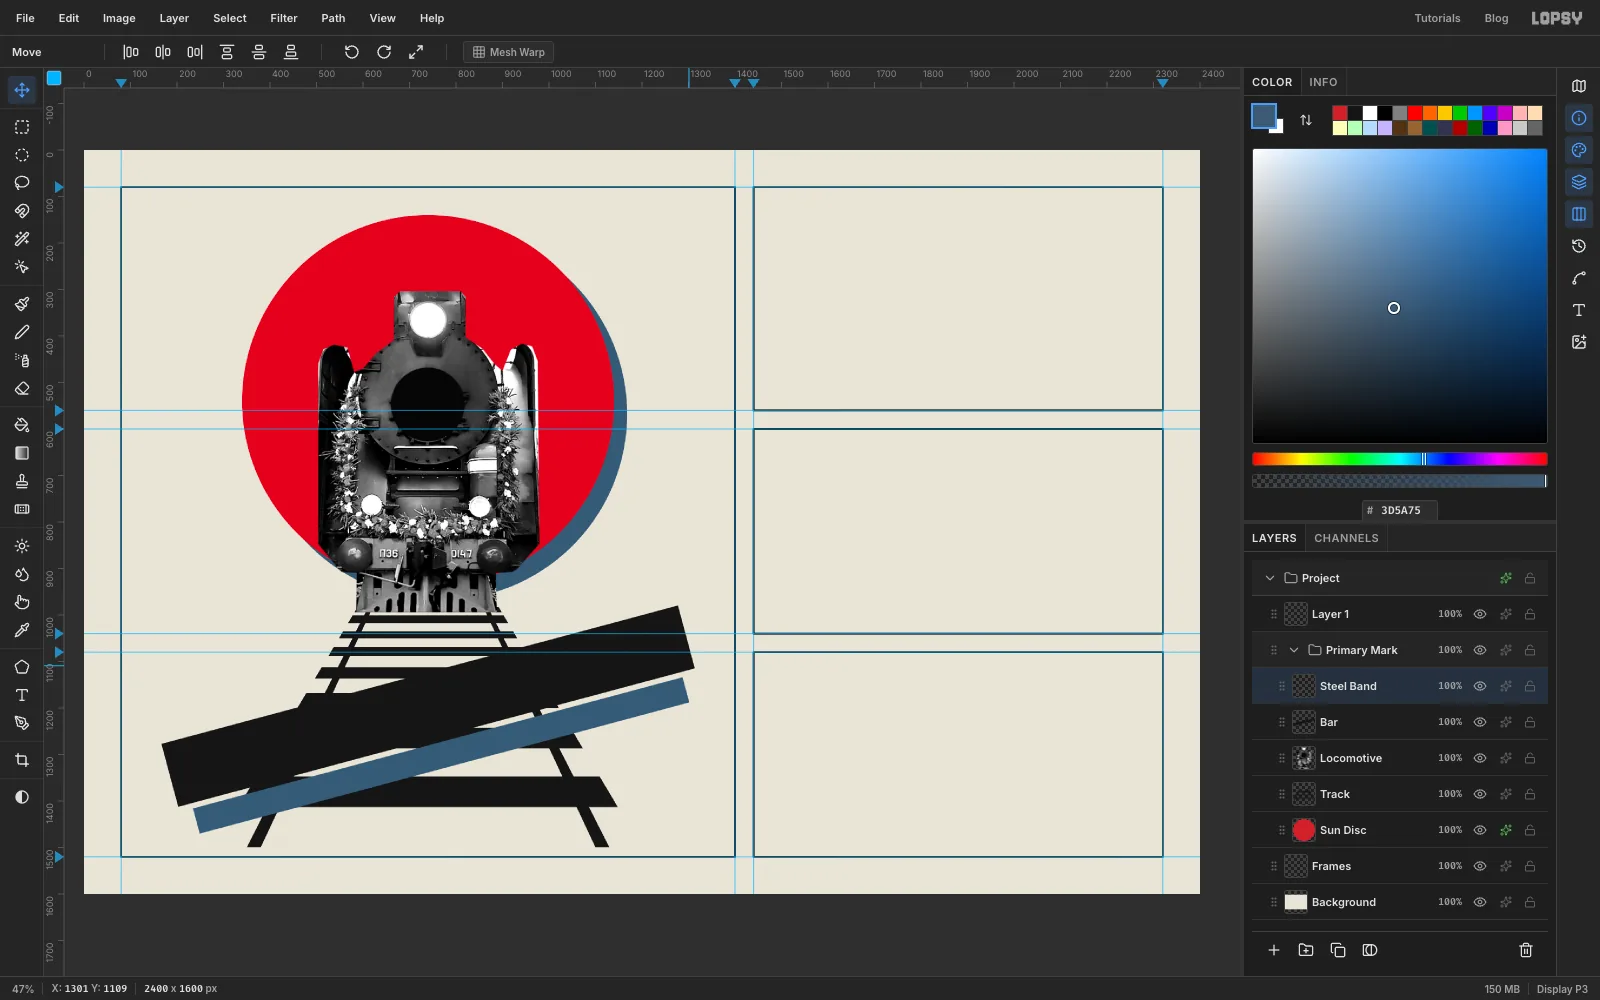
Add the steel band
- Click Add Layer and rename it
Steel Band. - Select From
224, 1274To1314, 1330and fill it with . - Rotate it to −15° exactly as before, press Enter and Cmd+D.
It's 60 px shorter than the bar, so the bar overhangs it at both ends.
- Click Add Layer and rename it
-
Trace a trim line with the Pen
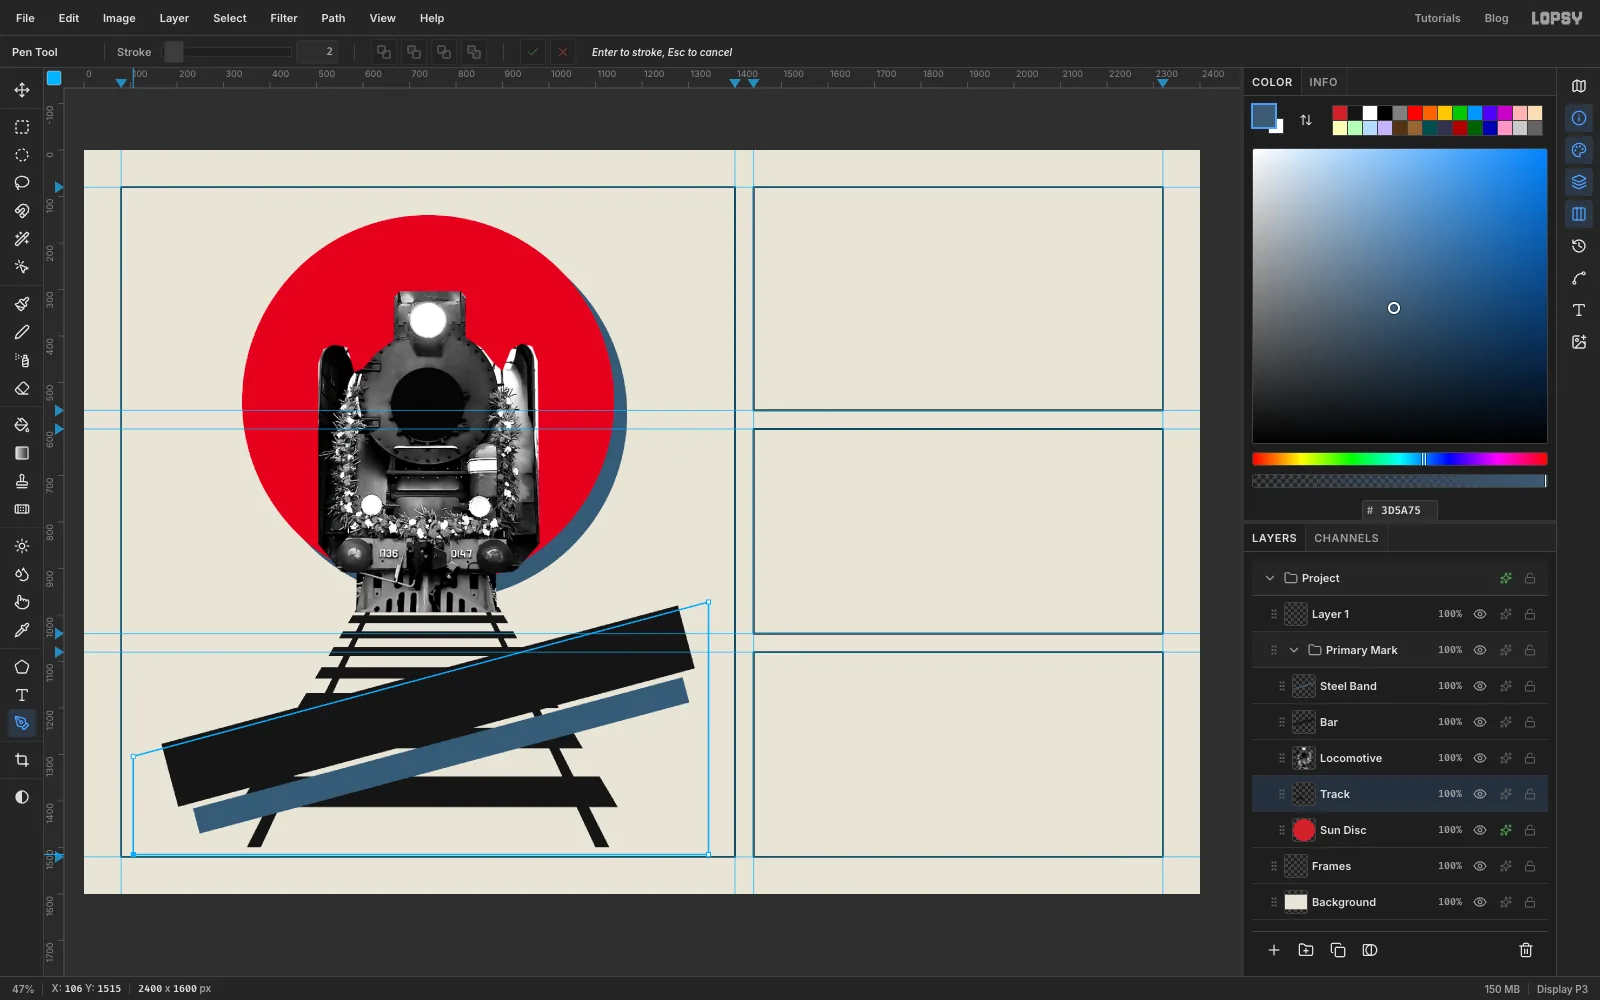
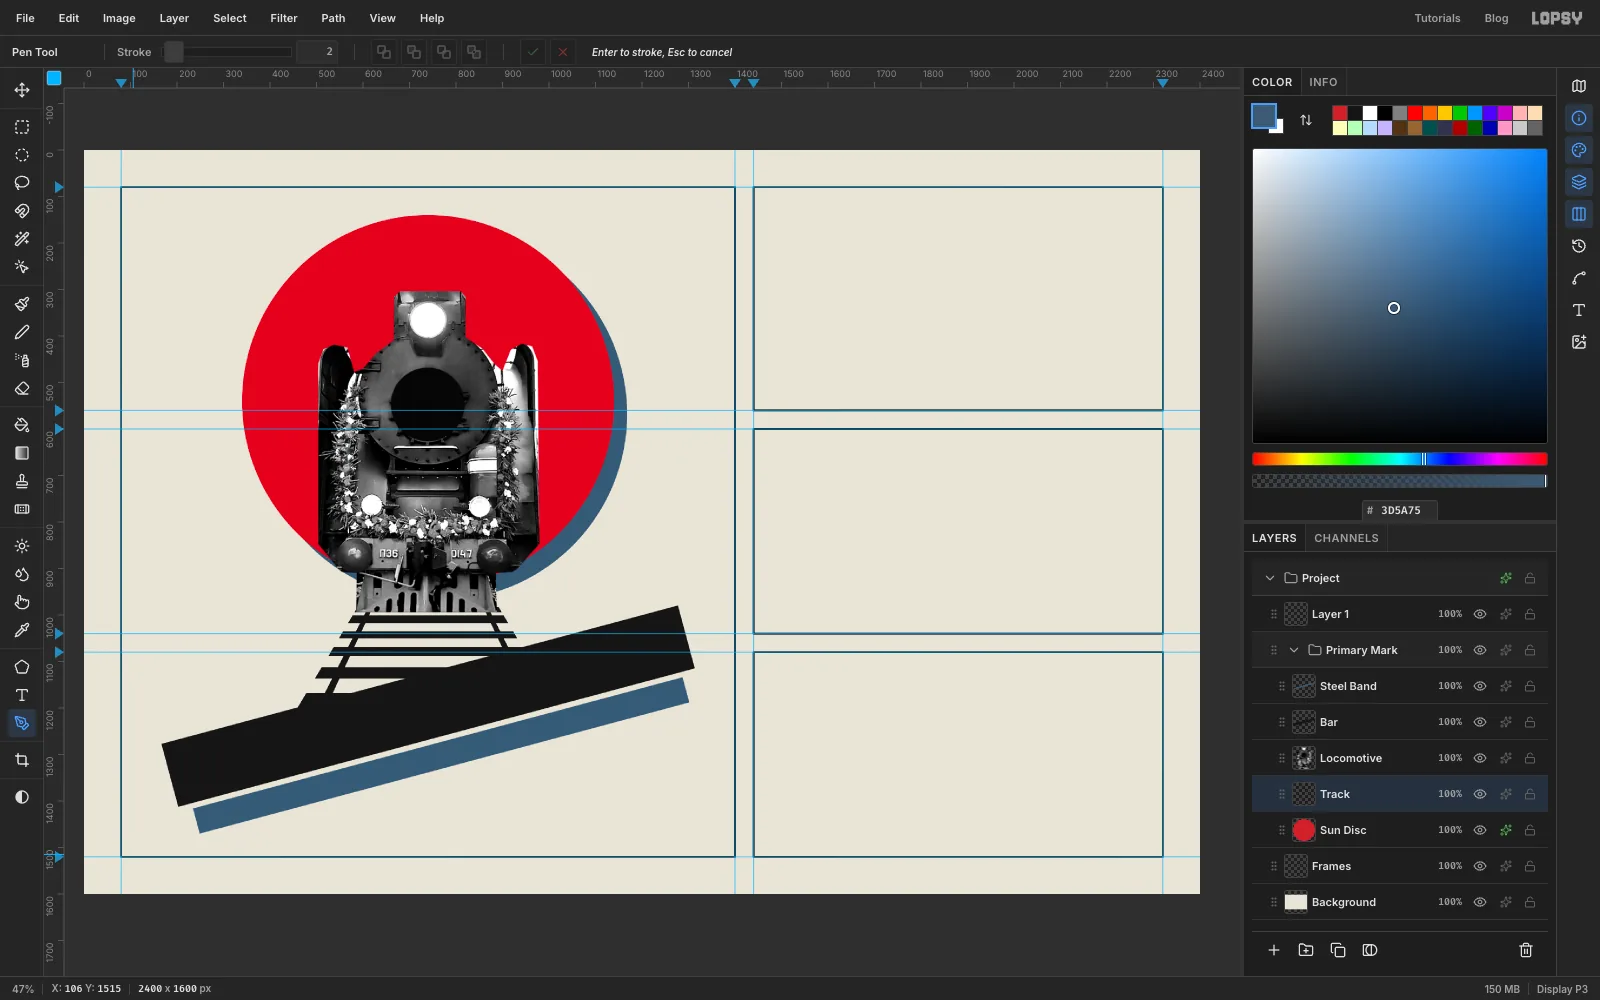
The track still pokes out under the bar. It should look as though it runs into the bar and stops.
- Click
Track. Pick the Pen tool. - Click once just inside the bar's top edge near its left end (about
106, 1304), then once just inside it near the right end (about1343, 972). - Click two points well below the track (
1343, 1515and106, 1515), then click the first anchor again to close the path.
- Click
-
Trim the track
Open the Paths panel, click Path to Selection, then Delete Path. Press Delete to clear that part of the track, then Cmd+D.
-
Add the smokebox roundel
- Click
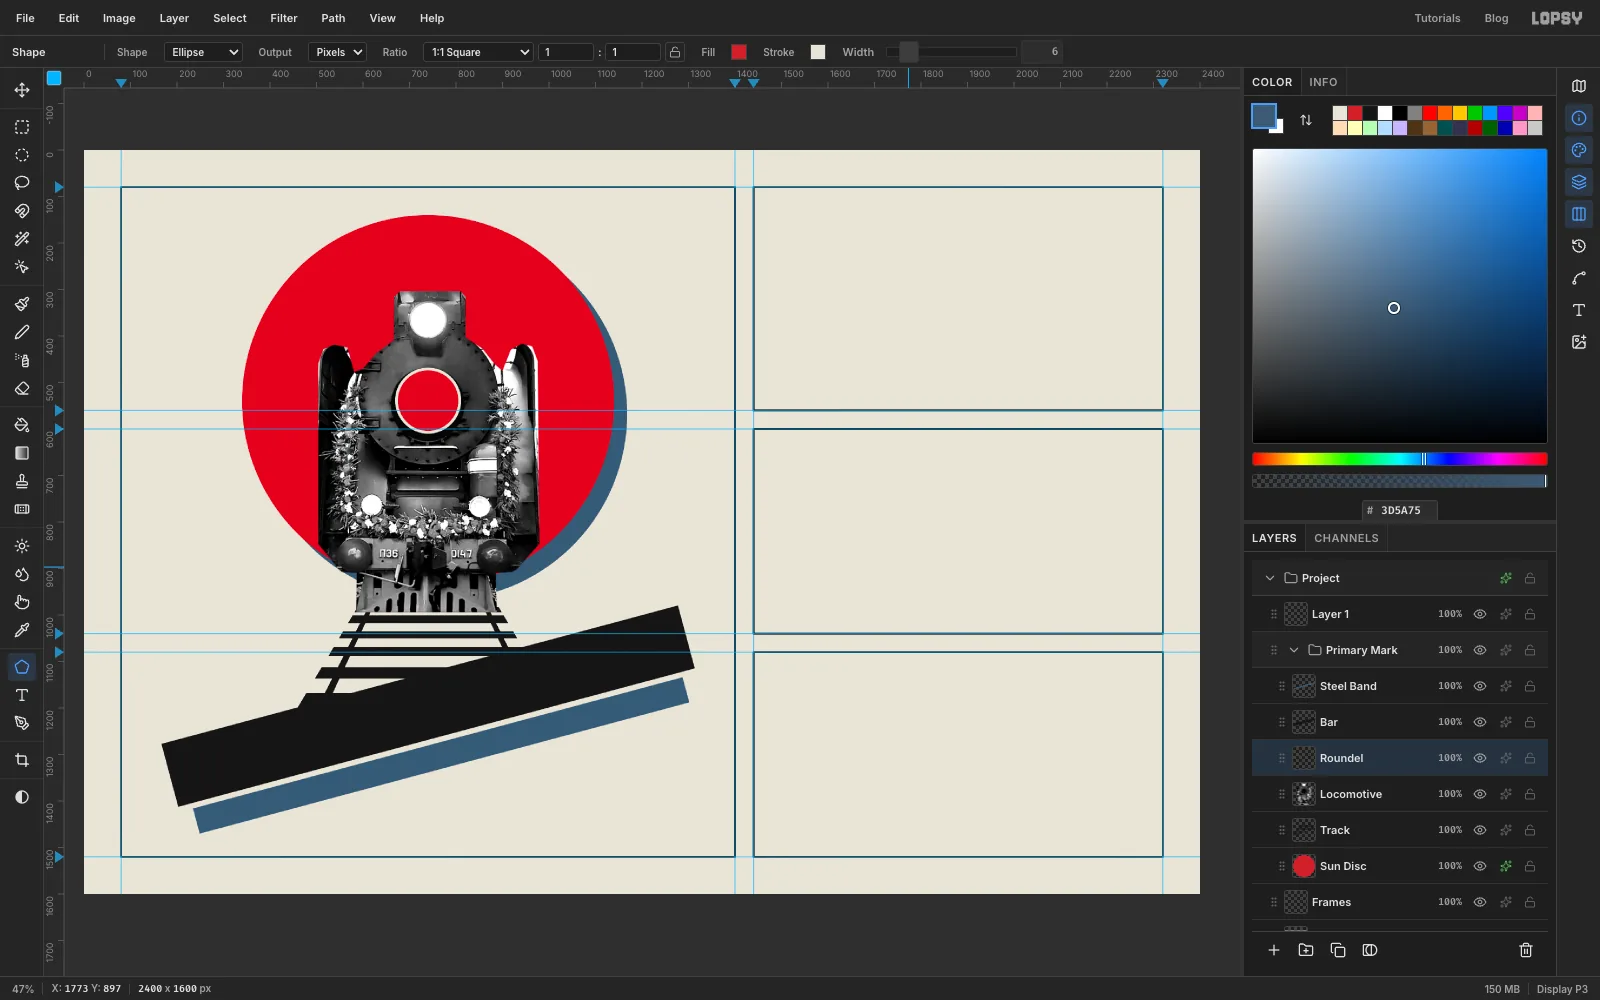
Locomotive, click Add Layer and rename itRoundel. - With the Shape tool on Ellipse, set the Fill to
D3202A, then turn on a Stroke ofE9E4D8with Width6. - Click once at 740, 539 and make it
136×136.
- Click
-
Type the wordmark with a red X
- Click
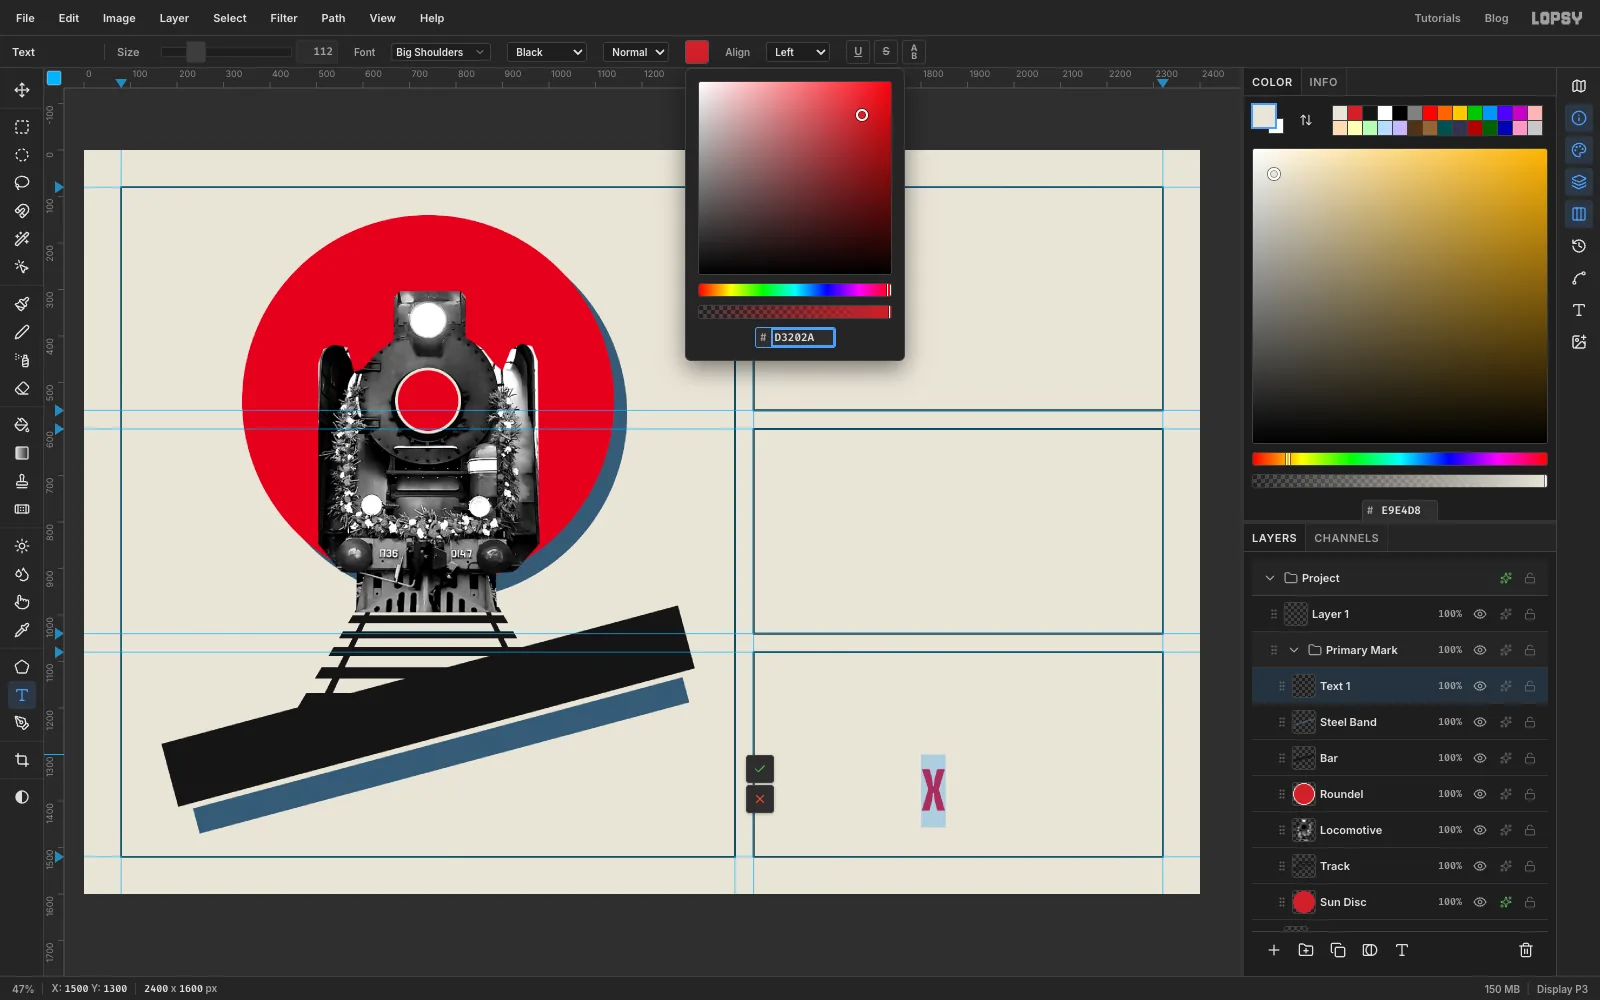
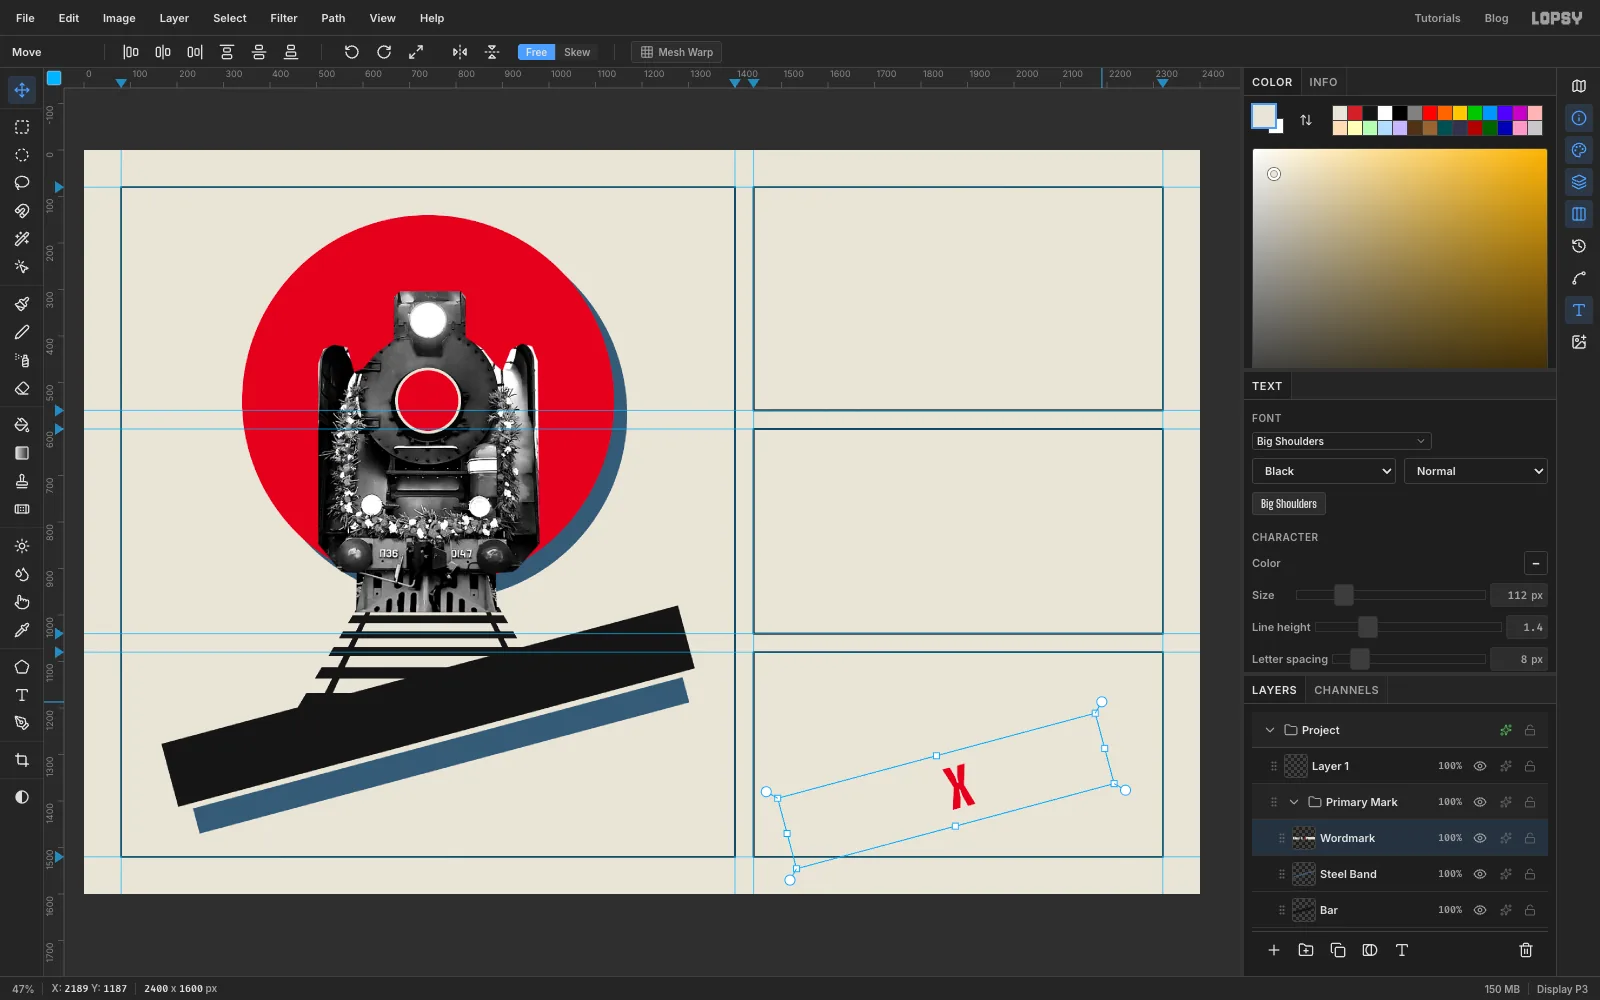
Steel Band. Pick the Text tool and set the font to Big Shoulders, weight Black, Size112, colour . - Click in the empty bottom-right cell (about 1500, 1300), out of the way, and type
BALTIC XPRESS. The letters are newsprint on newsprint, so you'll hardly see them yet. - Select just the X: press Left five times, then Shift+Left once.
- Click the Text color swatch in the options bar and type
D3202A. Click the swatch again to close it, then click ✓ to commit. - Rename the layer
Wordmarkand set Letter spacing to8in the Text panel.
- Click
-
Rotate the wordmark
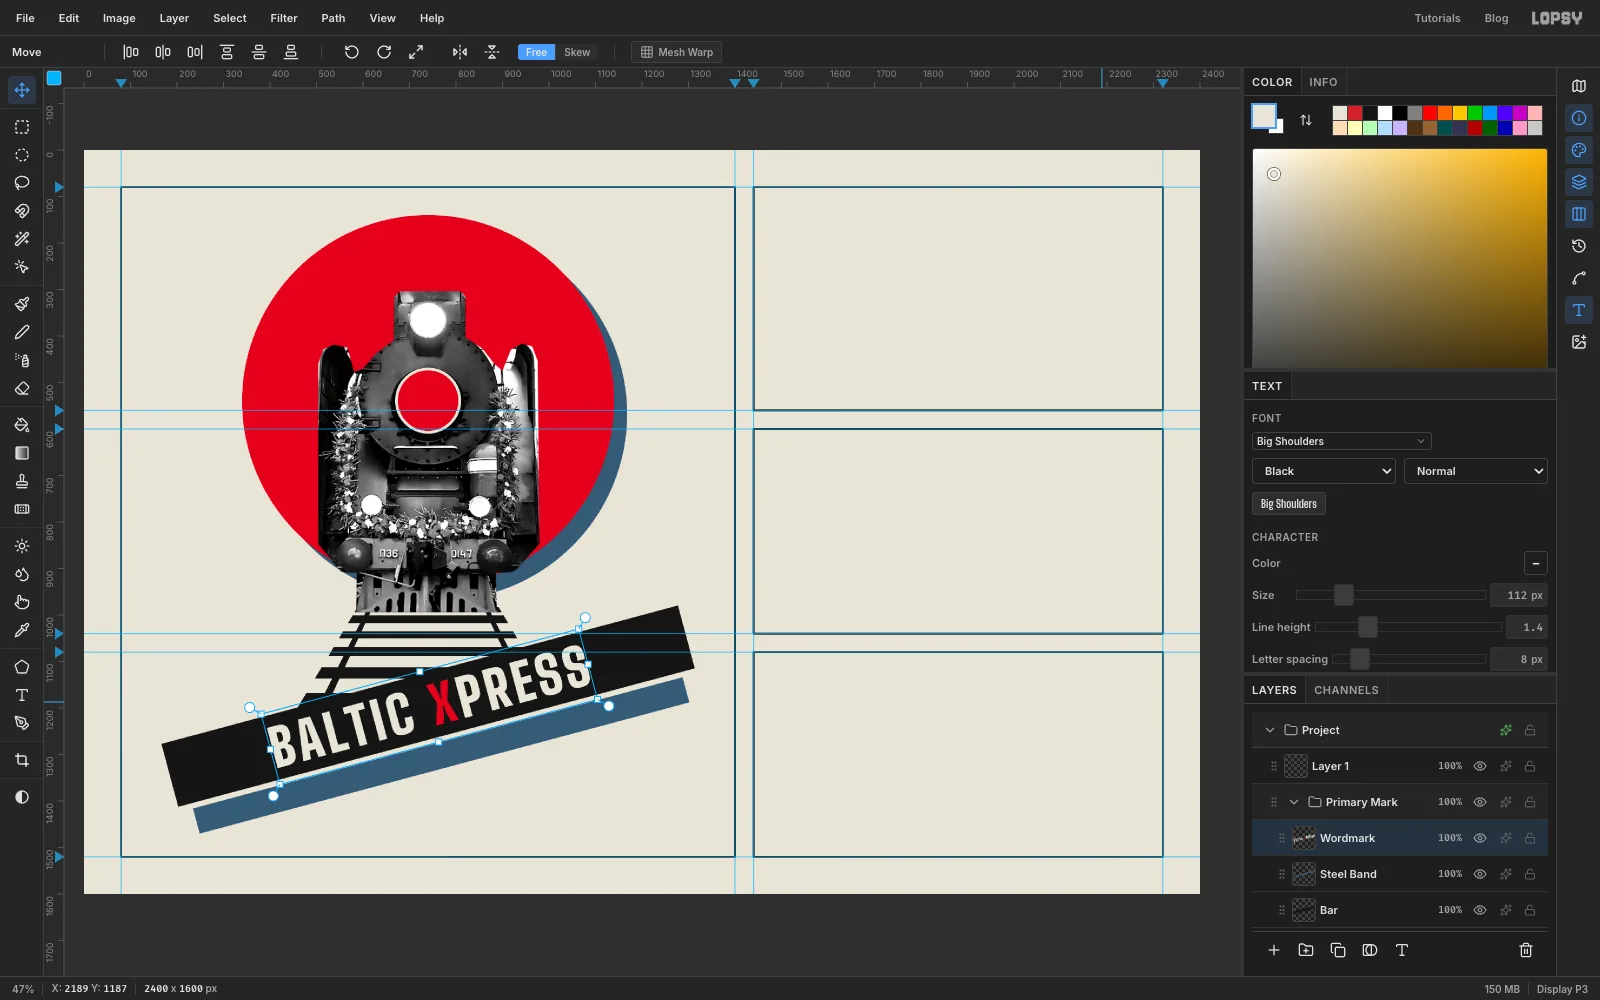
Pick the Move tool. Hold Cmd and drag one of the wordmark's rotation handles counter-clockwise until it snaps to −15°, the same as the bar. Press Enter. The text stays live and editable.
-
Seat it on the bar
Drag the wordmark onto the bar so its letters sit in the middle of it, centred on 740, 1196, the bar's centre. Nudge with the arrow keys until the space above the capitals matches the space below. It's about 26 px each side when measured square to the bar.
-
Add the tagline
- Click
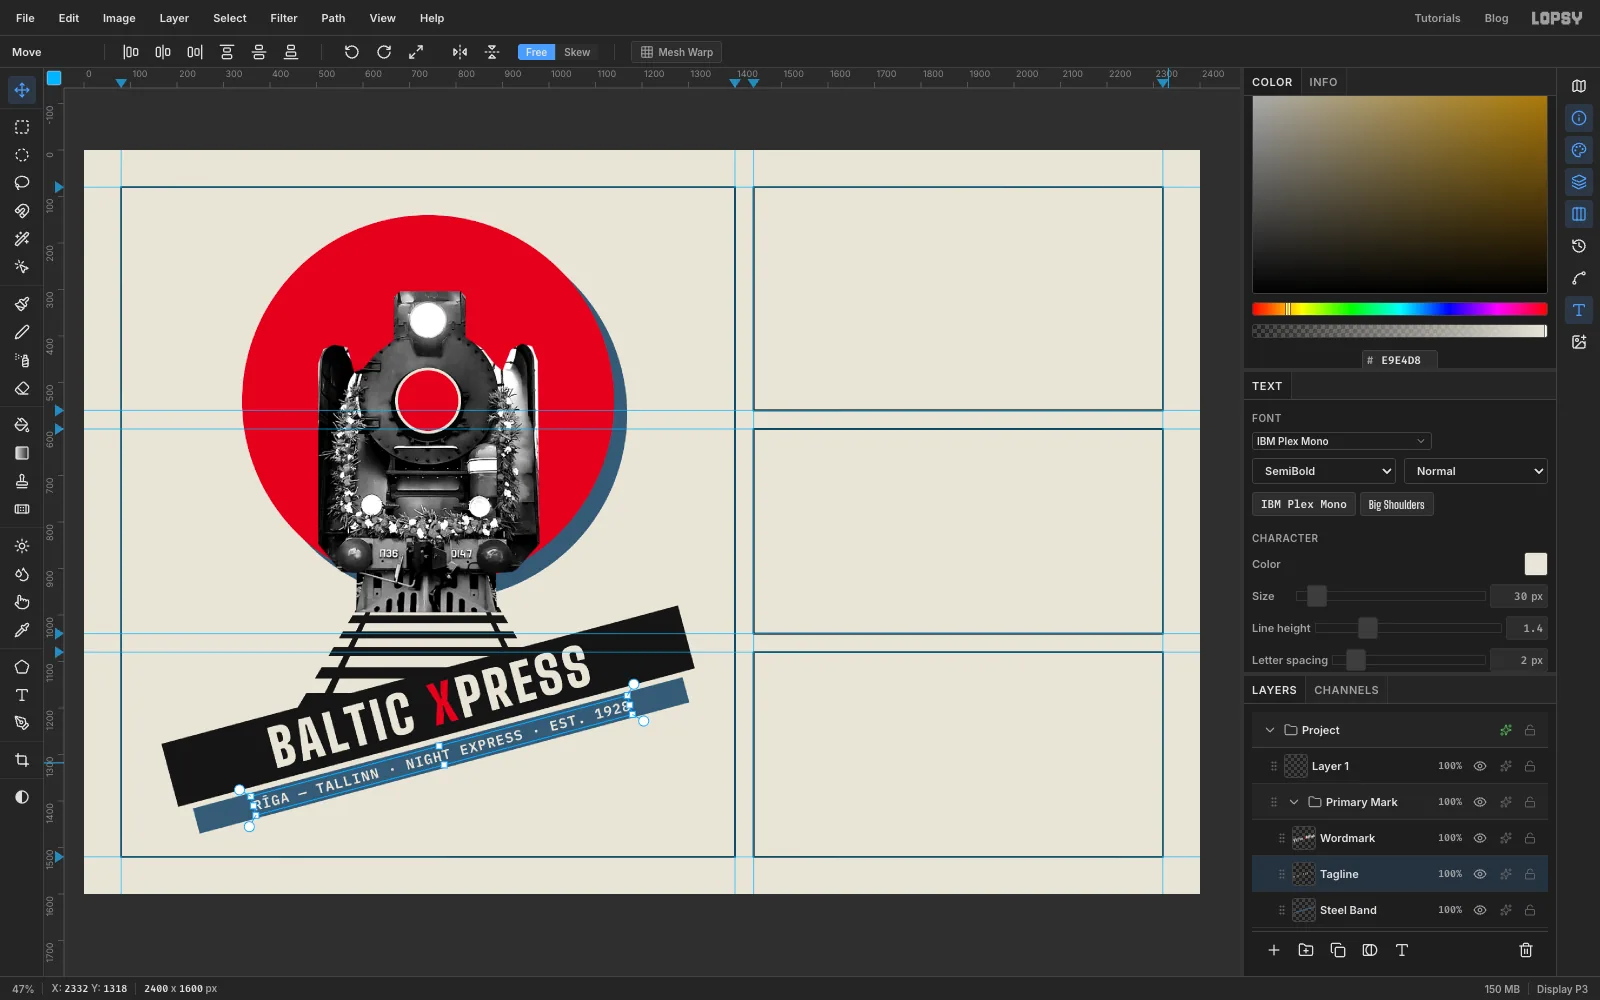
Steel Band. With the Text tool, choose IBM Plex Mono, weight SemiBold, Size30, colour . - Click in the empty bottom-right cell again, a little below where you started the wordmark (about 1500, 1450), and type
RĪGA — TALLINN · NIGHT EXPRESS · EST. 1928. If your keyboard has no Ī, paste it in. Commit it. Rename the layerTaglineand set Letter spacing to2. - Rotate it to −15° with Cmd as before, press Enter, and centre it on the band at 768, 1302.
- Click
-
Letter the roundel
Click
Roundel. Make a text layer in Big Shoulders Black, Size68, colour , letter spacing2, readingBX. Rename itRoundel BXand centre it on 740, 539.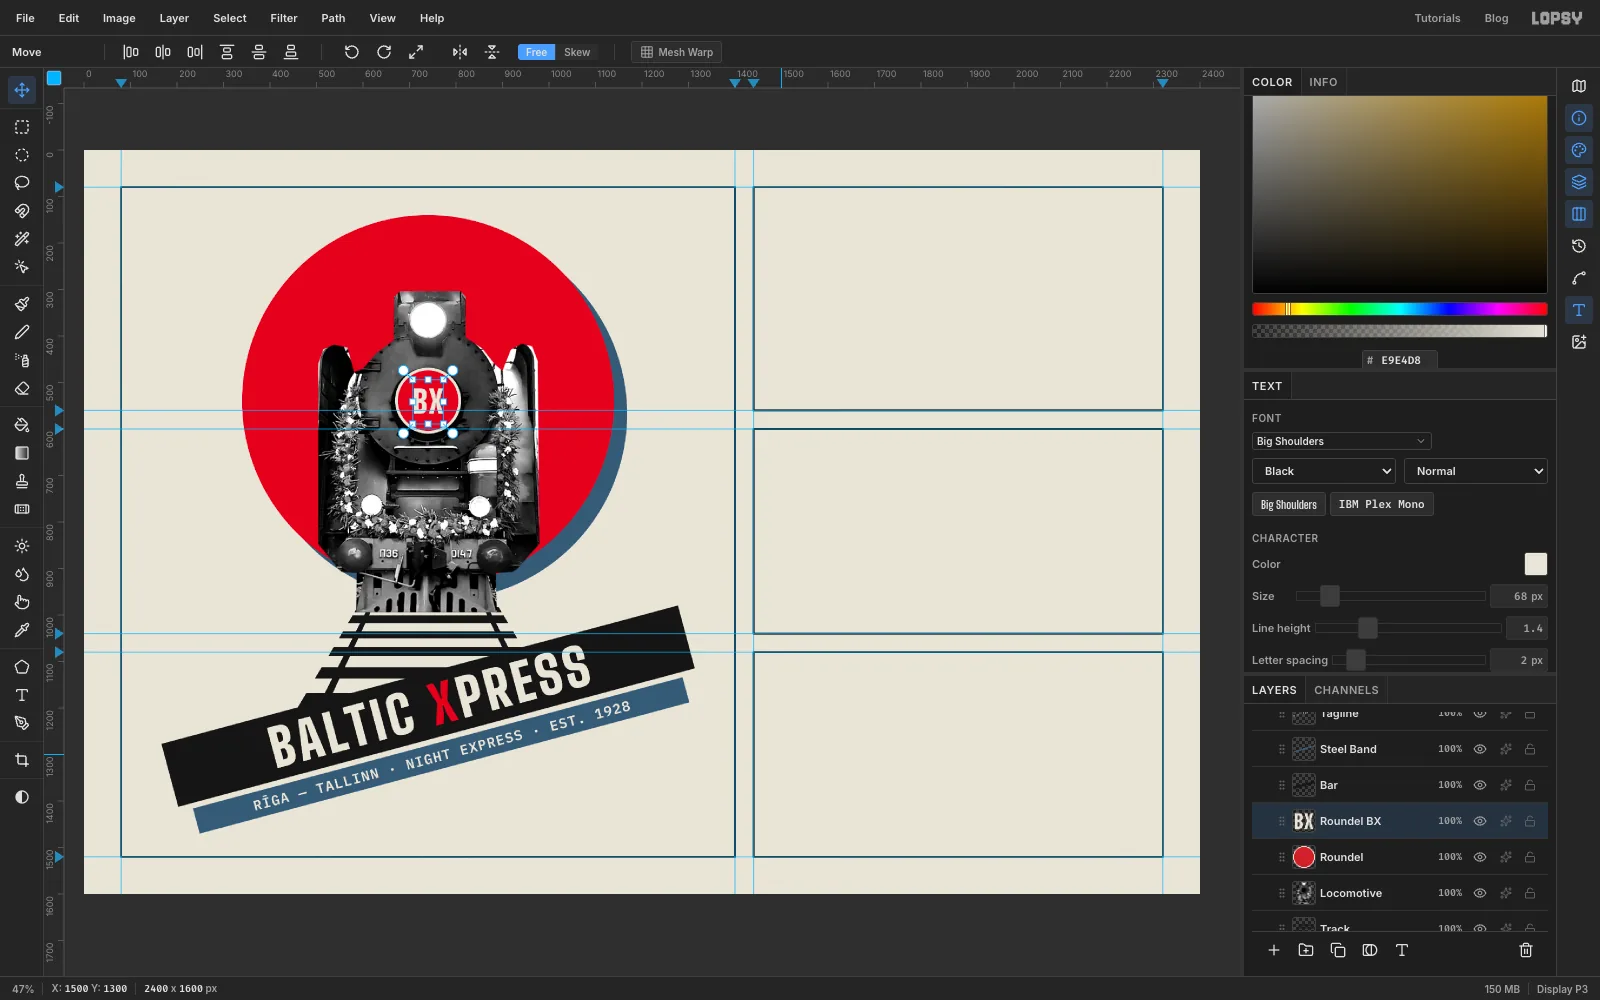
-
Check that the emblem moves as one
Before going on, make sure every piece of the emblem landed inside the group. Click the
Primary Markgroup row and drag on the canvas with the Move tool. The sun, engine, track, bars and all three texts should move together, shadow included. If something stays behind, it was made outside the group: drag its row intoPrimary Mark. Press Cmd+Z to put the emblem back, since it's already centred in its panel.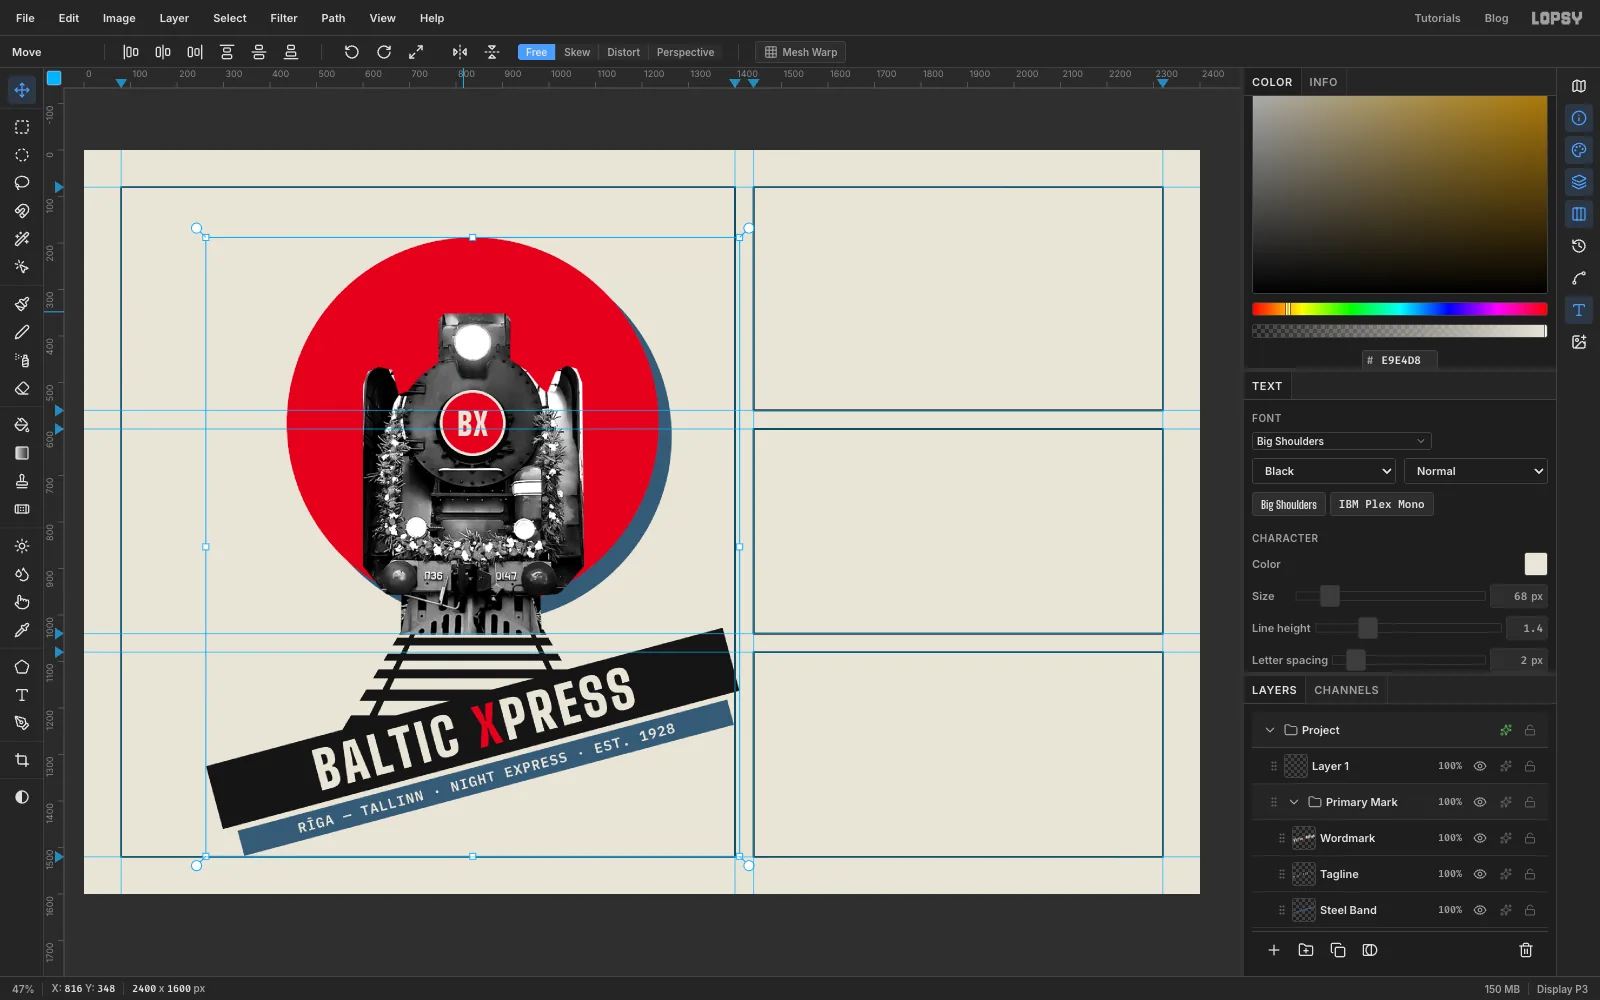
-
Lay a radial gradient for the halo
- Click the collapse arrow on
Primary Mark, then clickFrames. Click Add Layer and rename itDot Halo. It sits under the whole emblem. - Select From
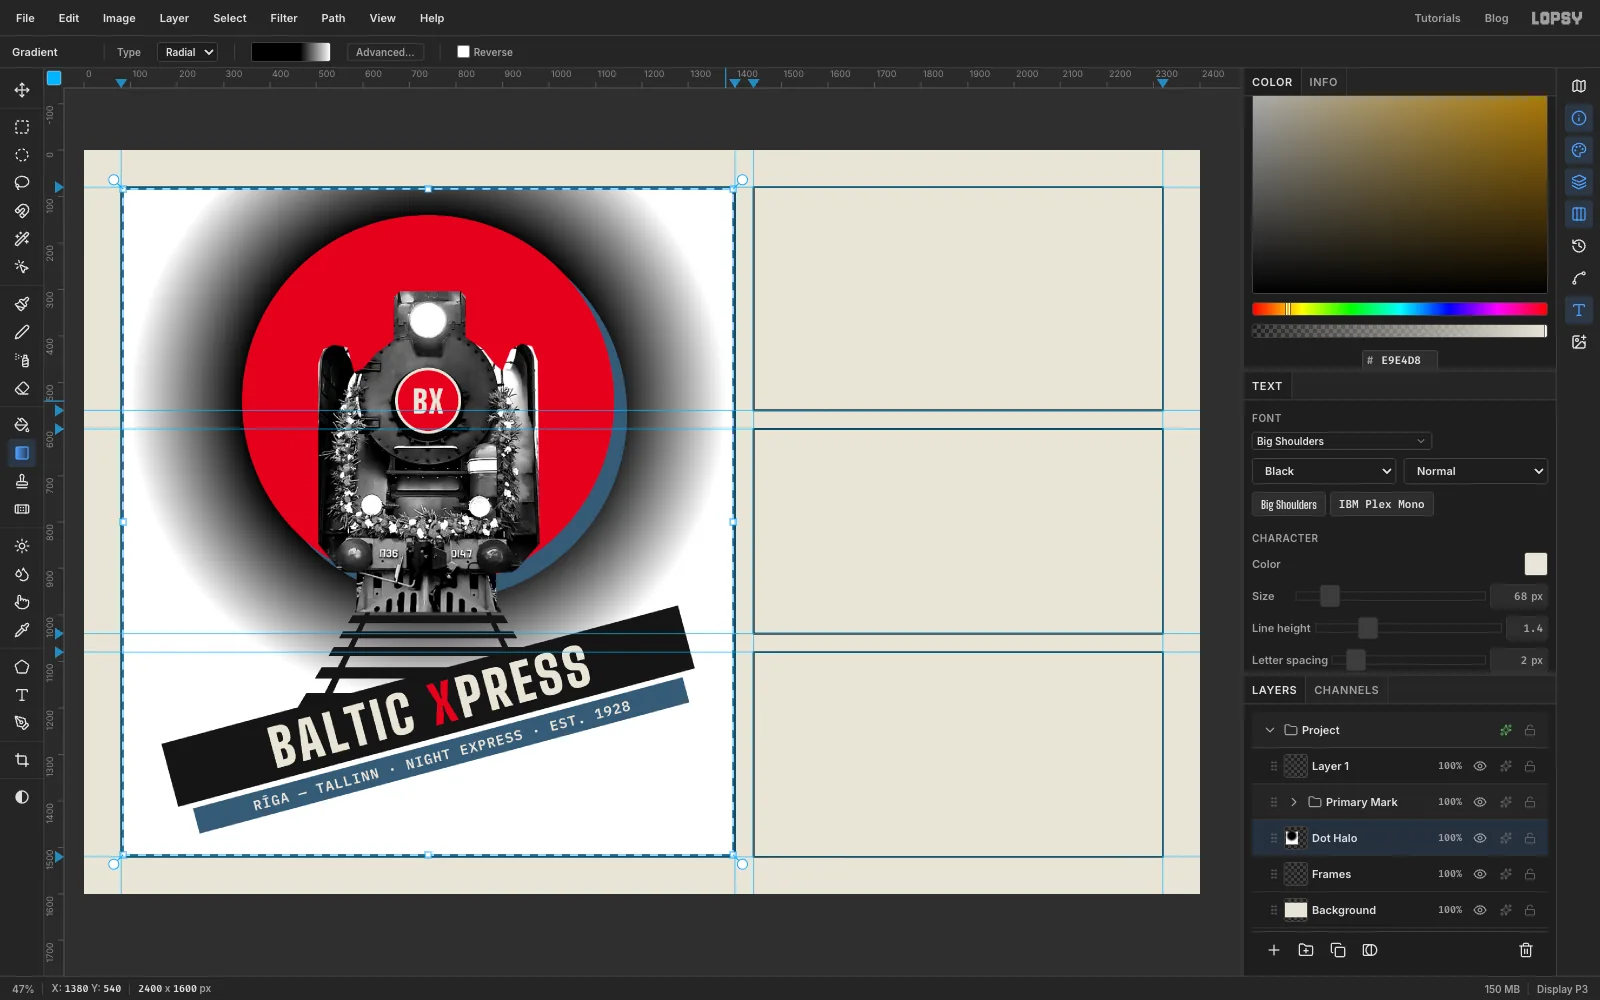
84, 84To1396, 1516, just inside the panel frame. - Pick the Gradient tool and set Type to Radial. Click Advanced…. Click the left stop and type
000000in the hex field, click the right stop and typeFFFFFF, then click the gradient bar at about 62% of the way along to add a third stop and type000000for it too. Click Done. - Drag from the sun's centre, 740, 540, straight right to 1380, 540. Black fills the sun's area and fades to white about 240 px outside it, so the dots die out before they reach the frame.
- Click the collapse arrow on
-
Screen it with Halftone
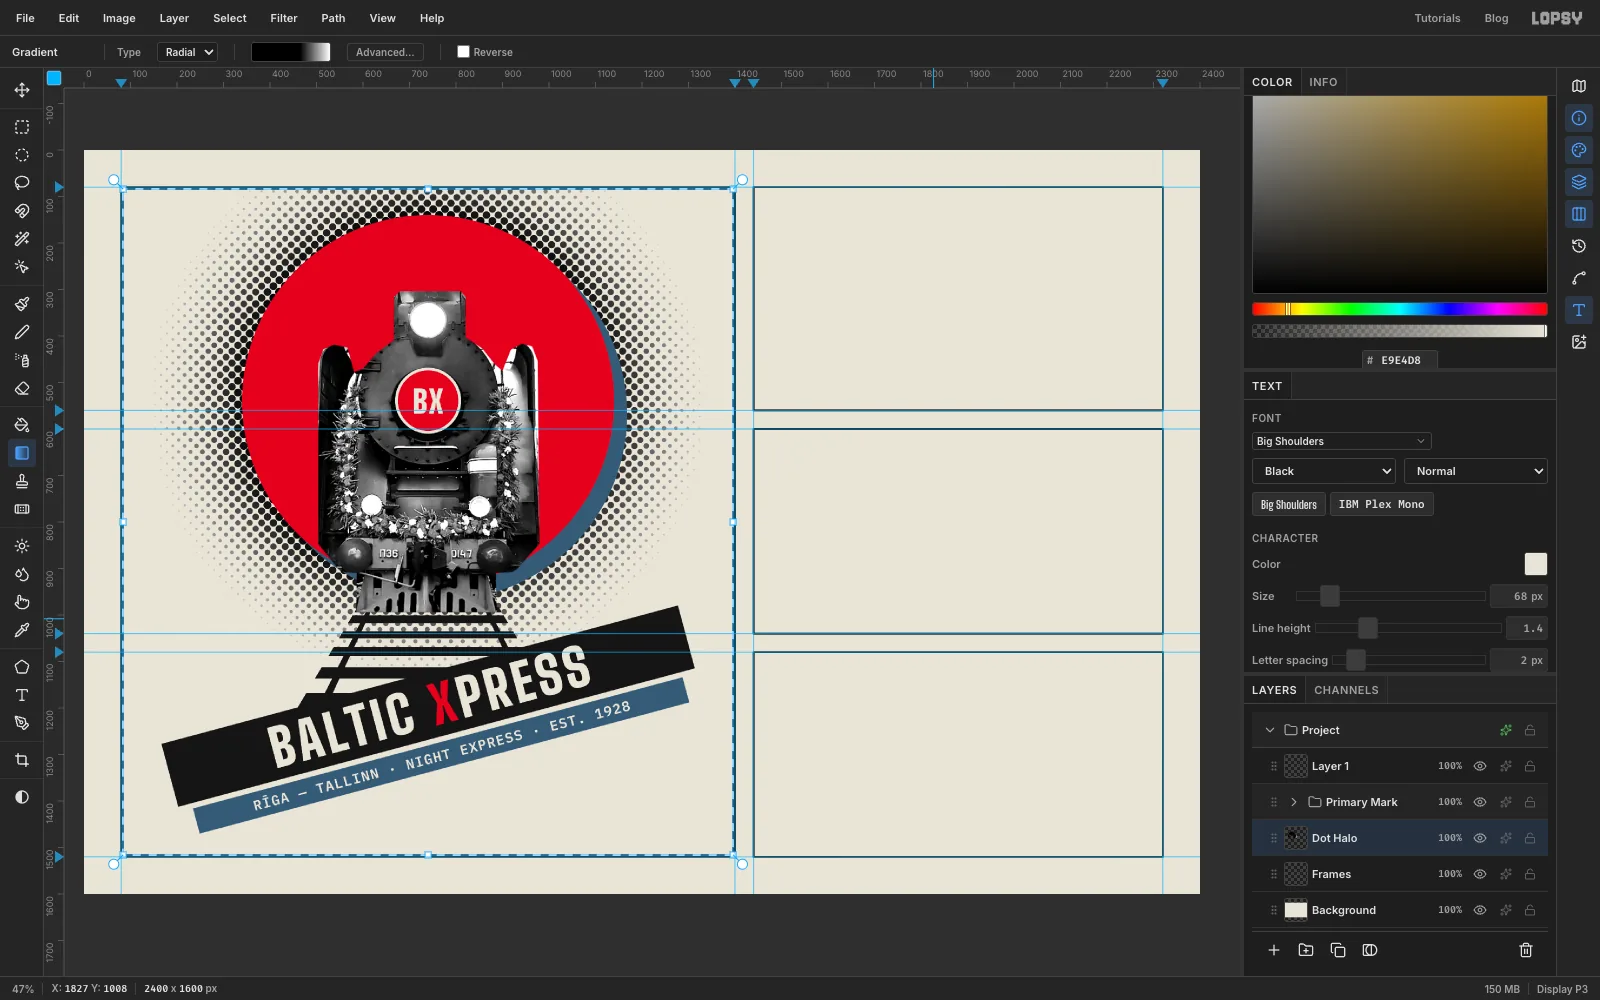
Keep the selection so no dot crosses the frame. Choose Filter → Halftone… with Dot Size
18, Density1, Angle45and Softness0.4, and click Apply. Then press Cmd+D.Halftone draws each dot from the tone under it. Pure white prints nothing, so the light areas become transparent.
-
Fade out the top
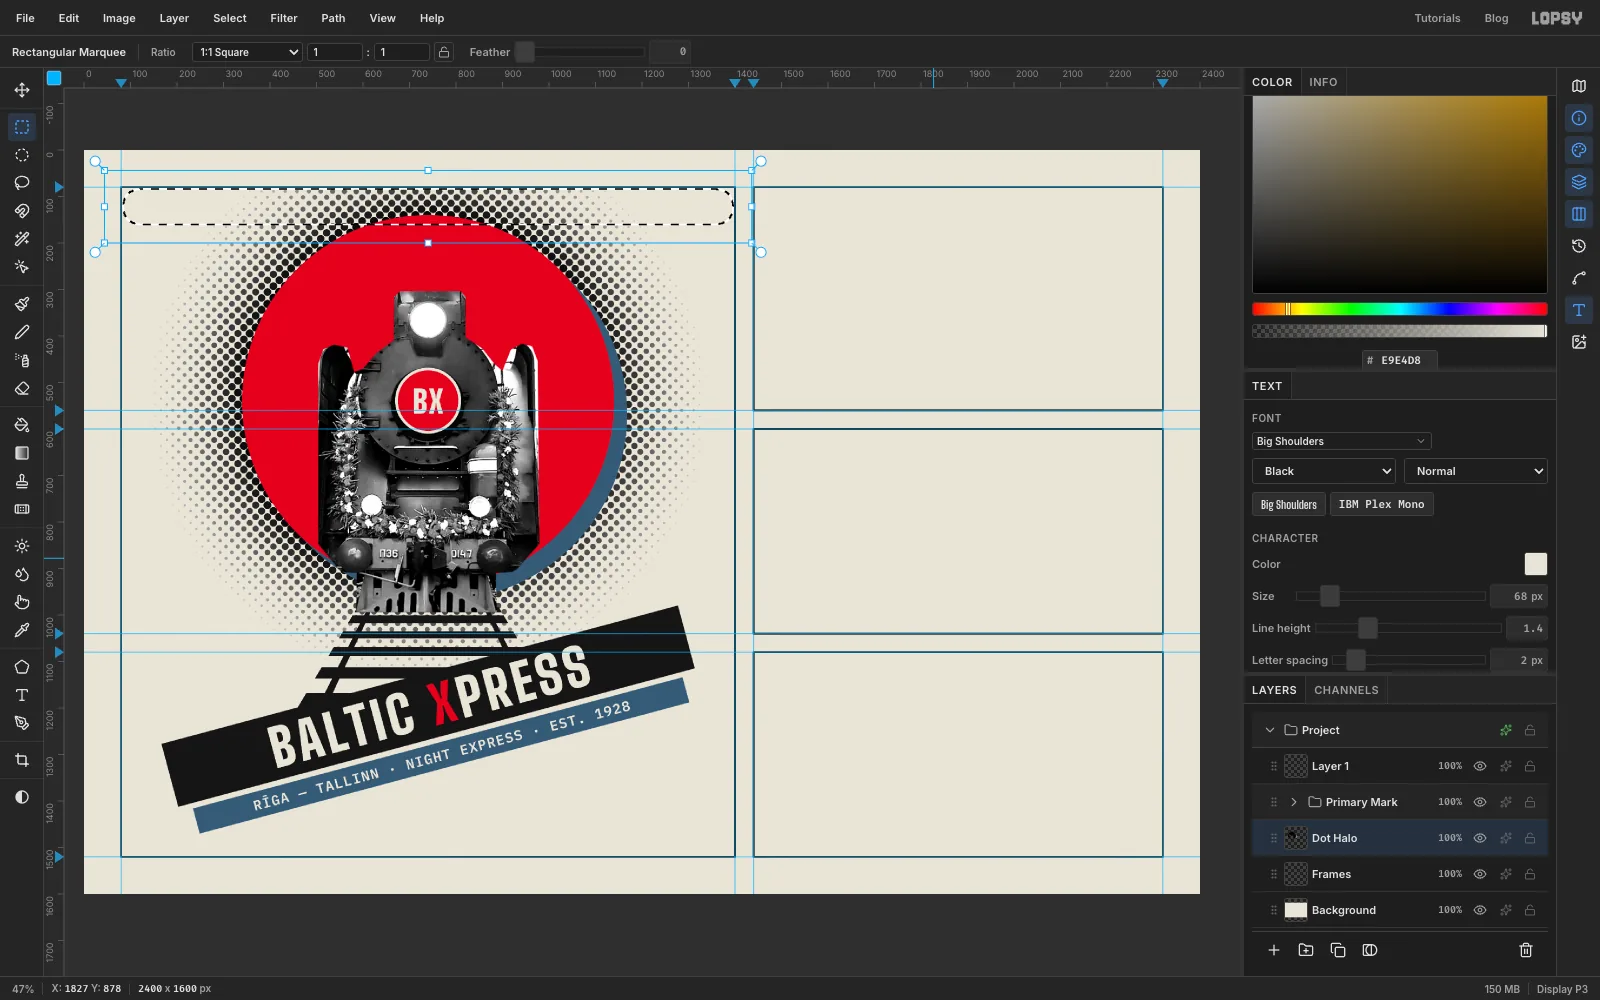
The panel label goes in the top-left corner, so the dots should fade out before they reach it.
- Select From
84, 84To1396, 160. - Choose Select → Feather…, set it to
40and click Apply. - Press Delete, then Cmd+D.
- Select From
-
Colour the dots steel
Open the effects drawer on
Dot Halo, turn on Color Overlay and set its colour to . Close the drawer.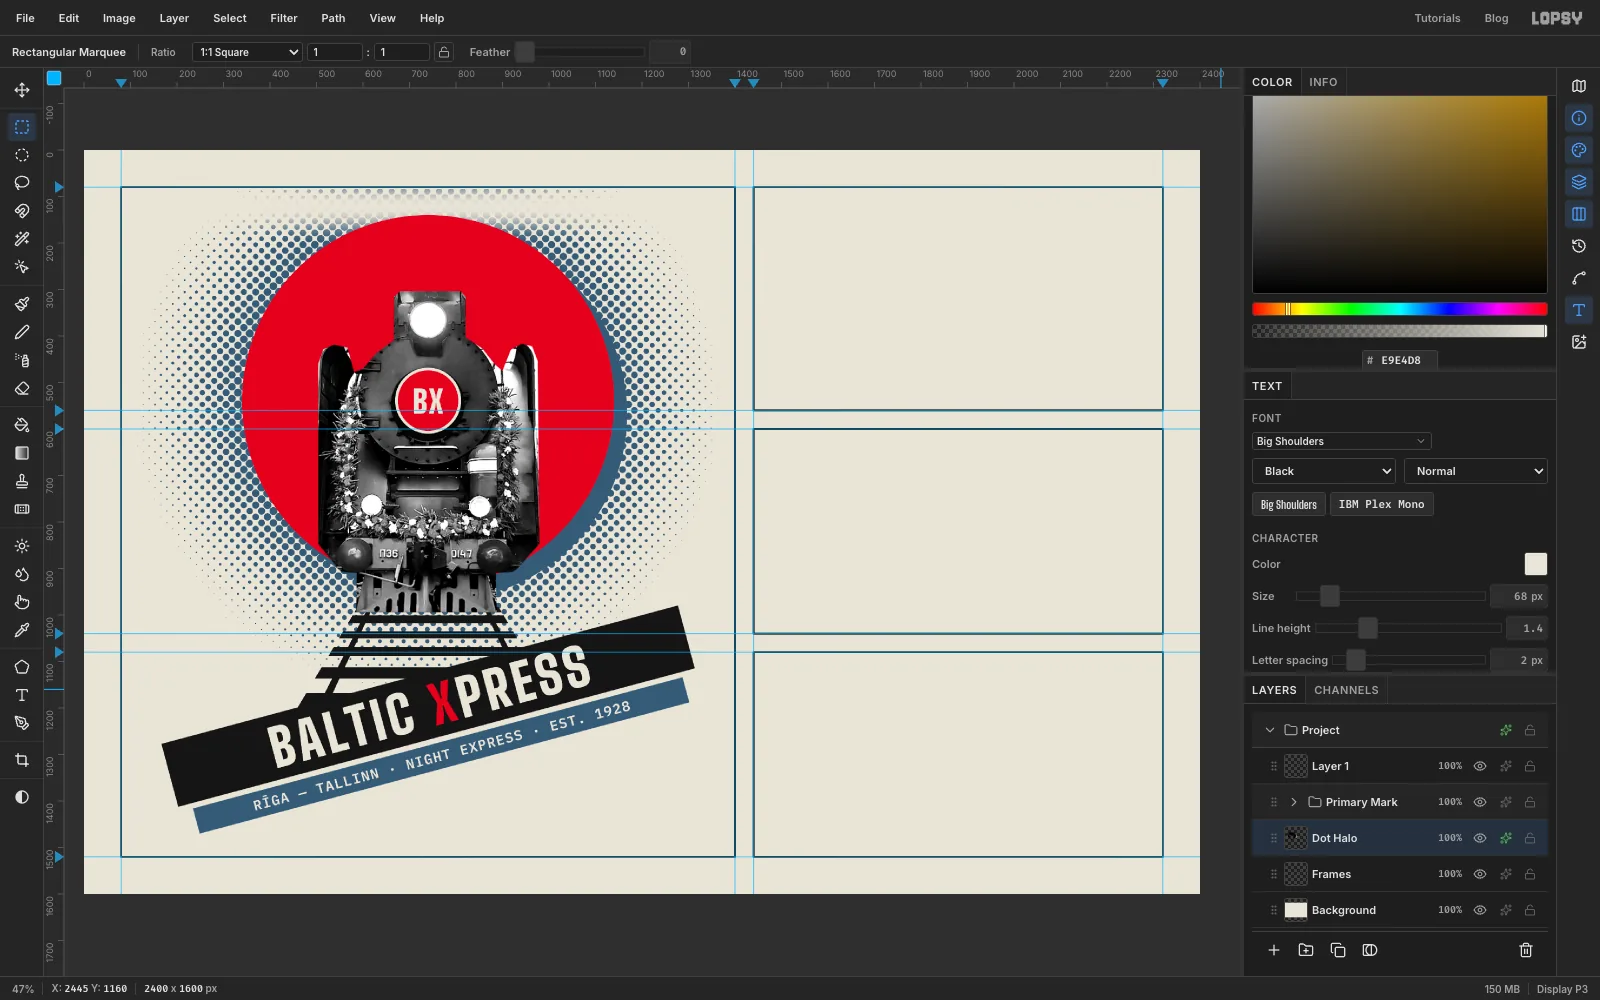
-
Build the monogram badge
- Click the
Primary Markgroup row (still collapsed) and click New Group. Name itMonogram. - Click Add Layer and rename it
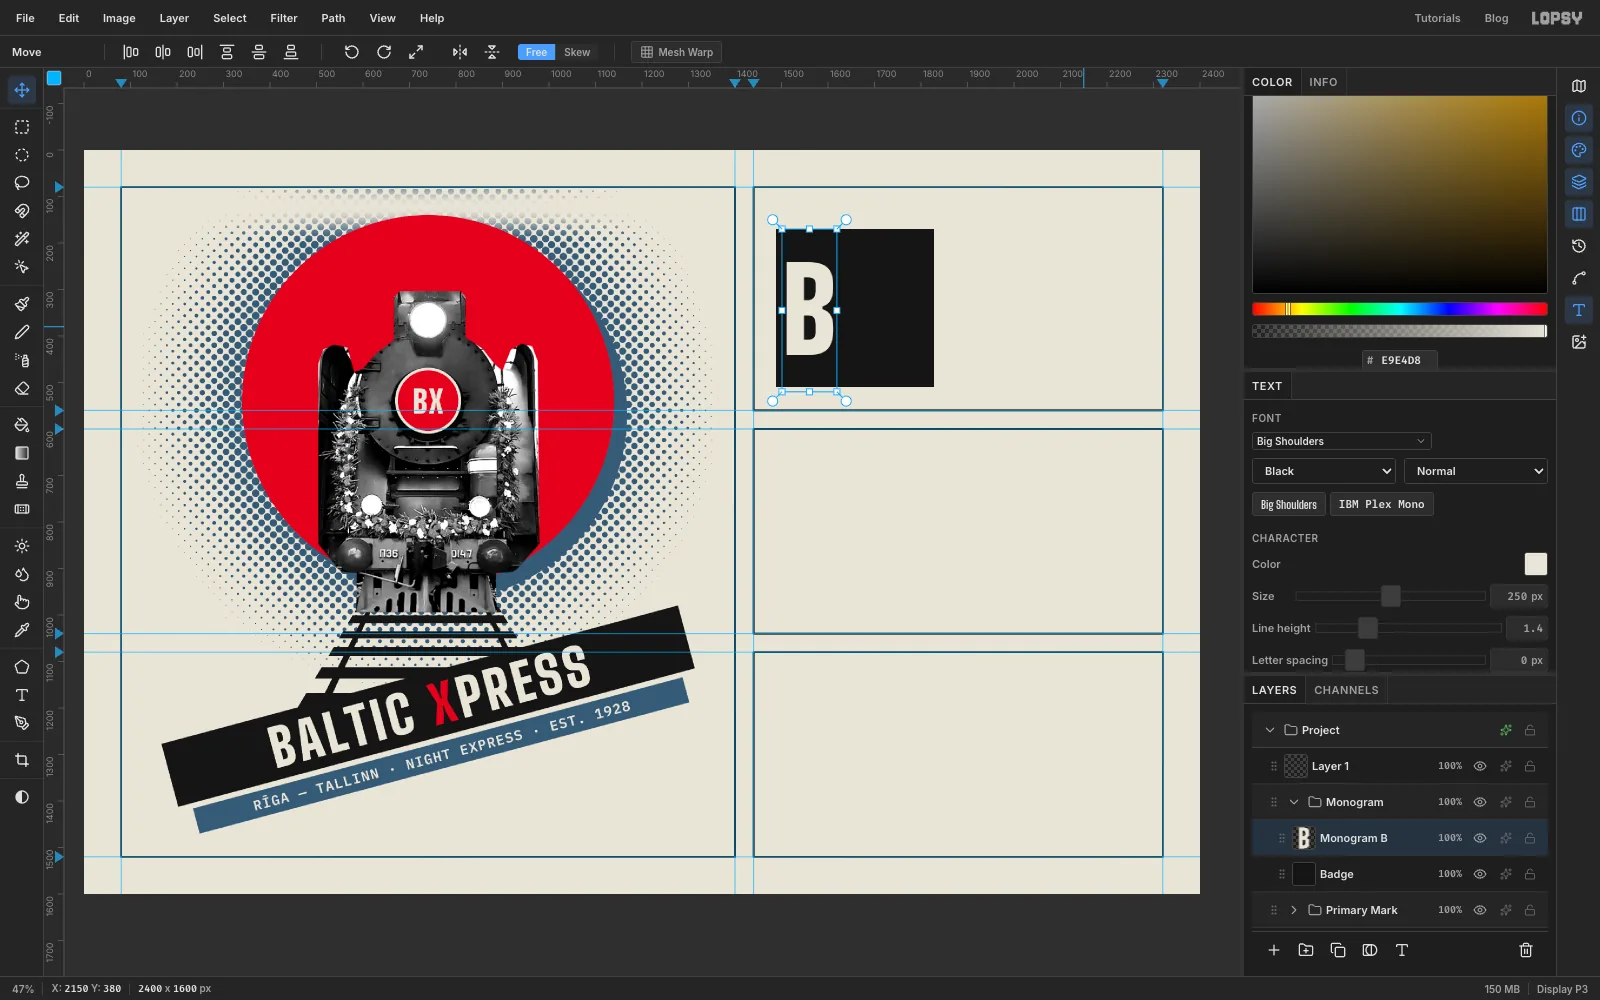
Badge. With the Shape tool on Rectangle, set the Fill to151515, remove the stroke, click once at 1658, 340 and make it340×340. - With
Badgeactive, make a text layer in Big Shoulders Black, Size250, colour , readingB. Rename itMonogram B. - Move it so the left edge of the B sits 22 px inside the badge (x
1510), centred top to bottom on y340.
- Click the
-
Make one bar of the crossbuck
The X is a railway crossbuck, the X-shaped sign at a level crossing.
- Click Add Layer and rename it
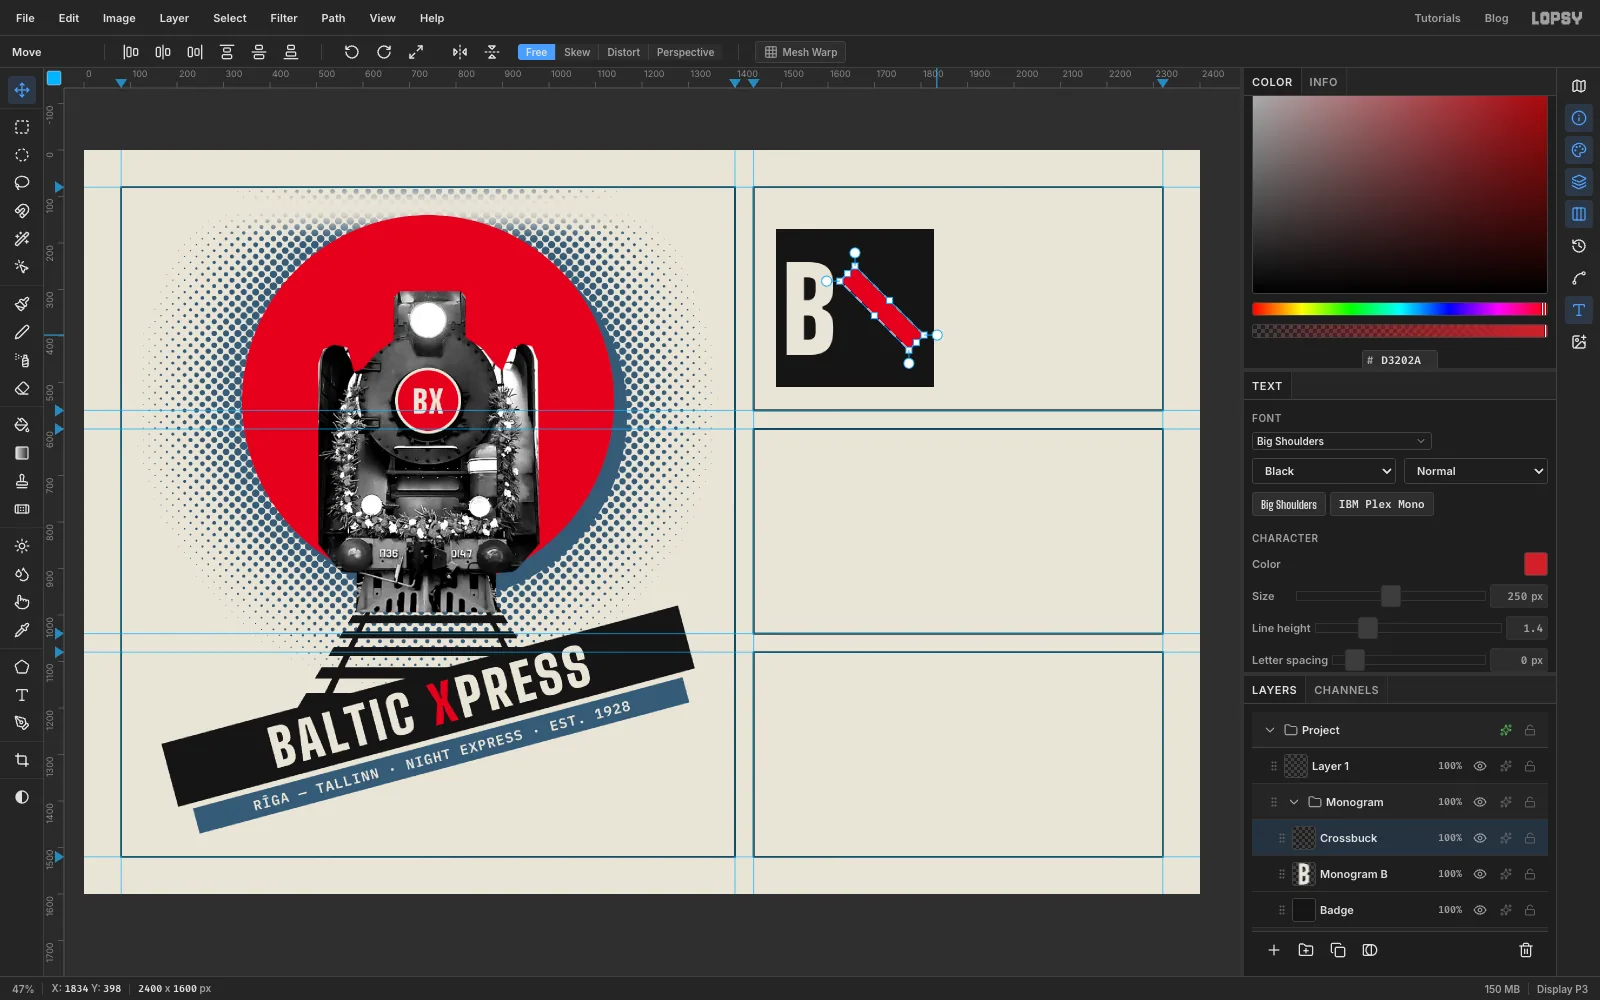
Crossbuck. - Select From
1611, 317To1821, 363and fill it with . - With the Move tool, hold Cmd and rotate it clockwise until it snaps to 45°. Press Enter, then Cmd+D.
- Click Add Layer and rename it
-
Copy, paste and flip the second bar
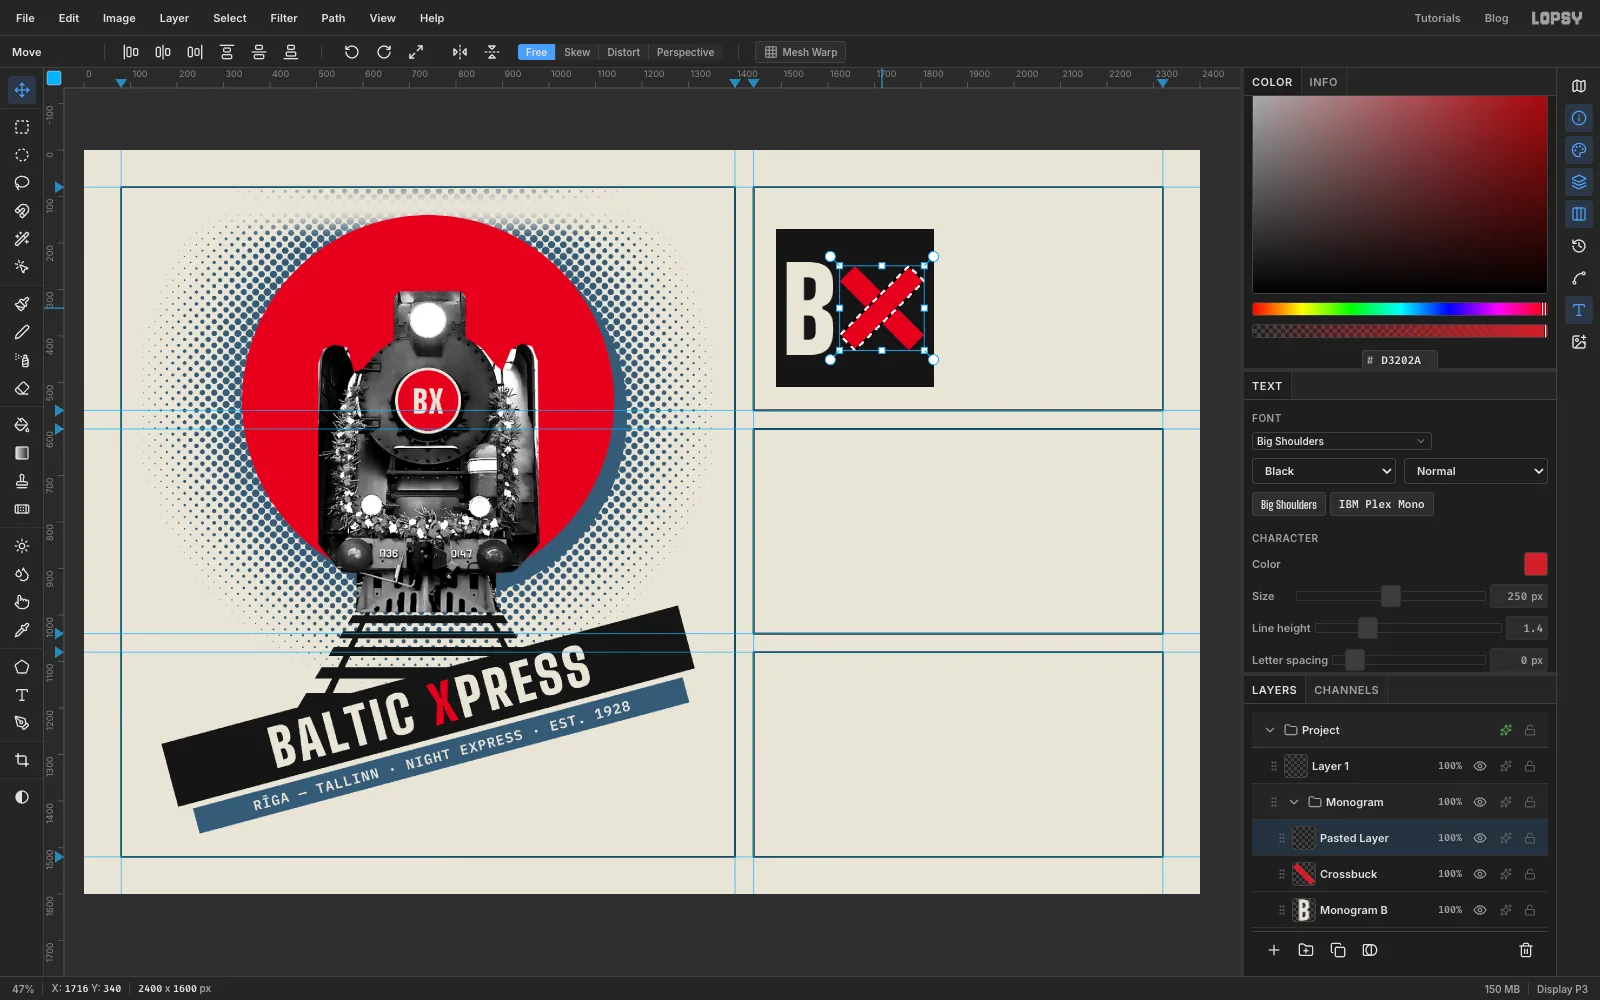
- Drag a Rectangular Marquee round the red bar and press Cmd+C, then Cmd+V. The copy lands on a new layer in the same place, with the Move tool active.
- Click Flip Horizontal in the Move tool's options bar. The copy mirrors in place and the two bars now cross.
- Press Enter, then Cmd+D.
-
Merge the crossbuck
Choose Layer → Merge Down to merge the pasted bar into
Crossbuck. The X ends 22 px inside the badge's right edge, the same margin as the B on the left.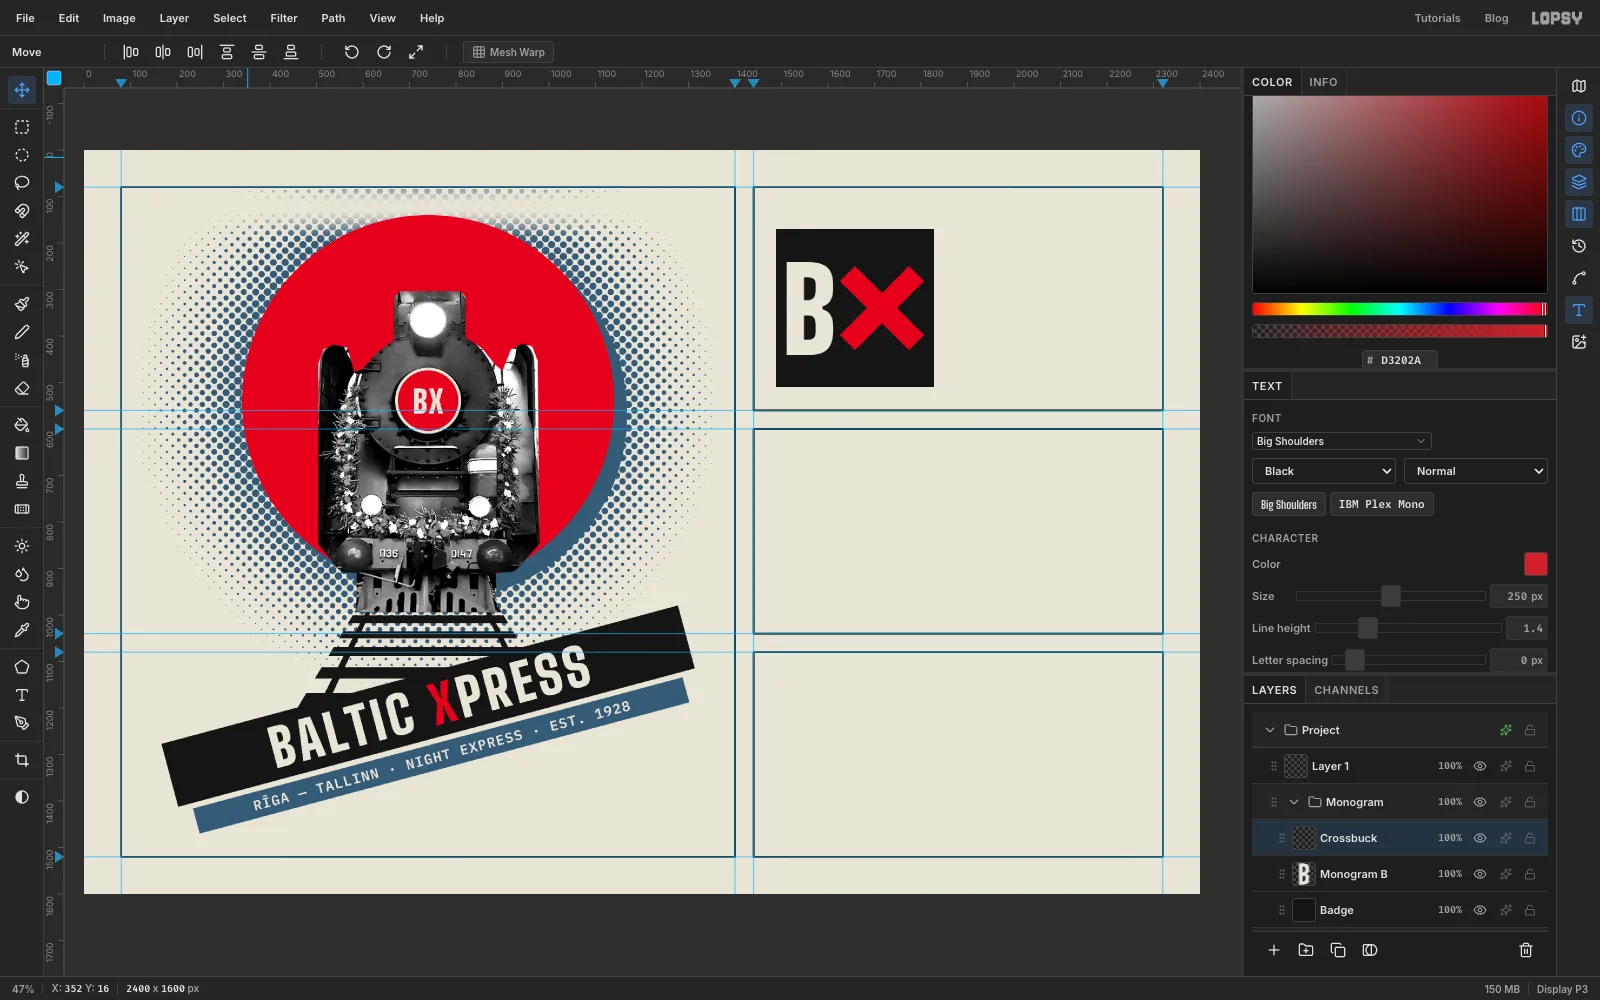
-
Make the reduced sizes
A logo sheet shows that the mark still works small.
- Click
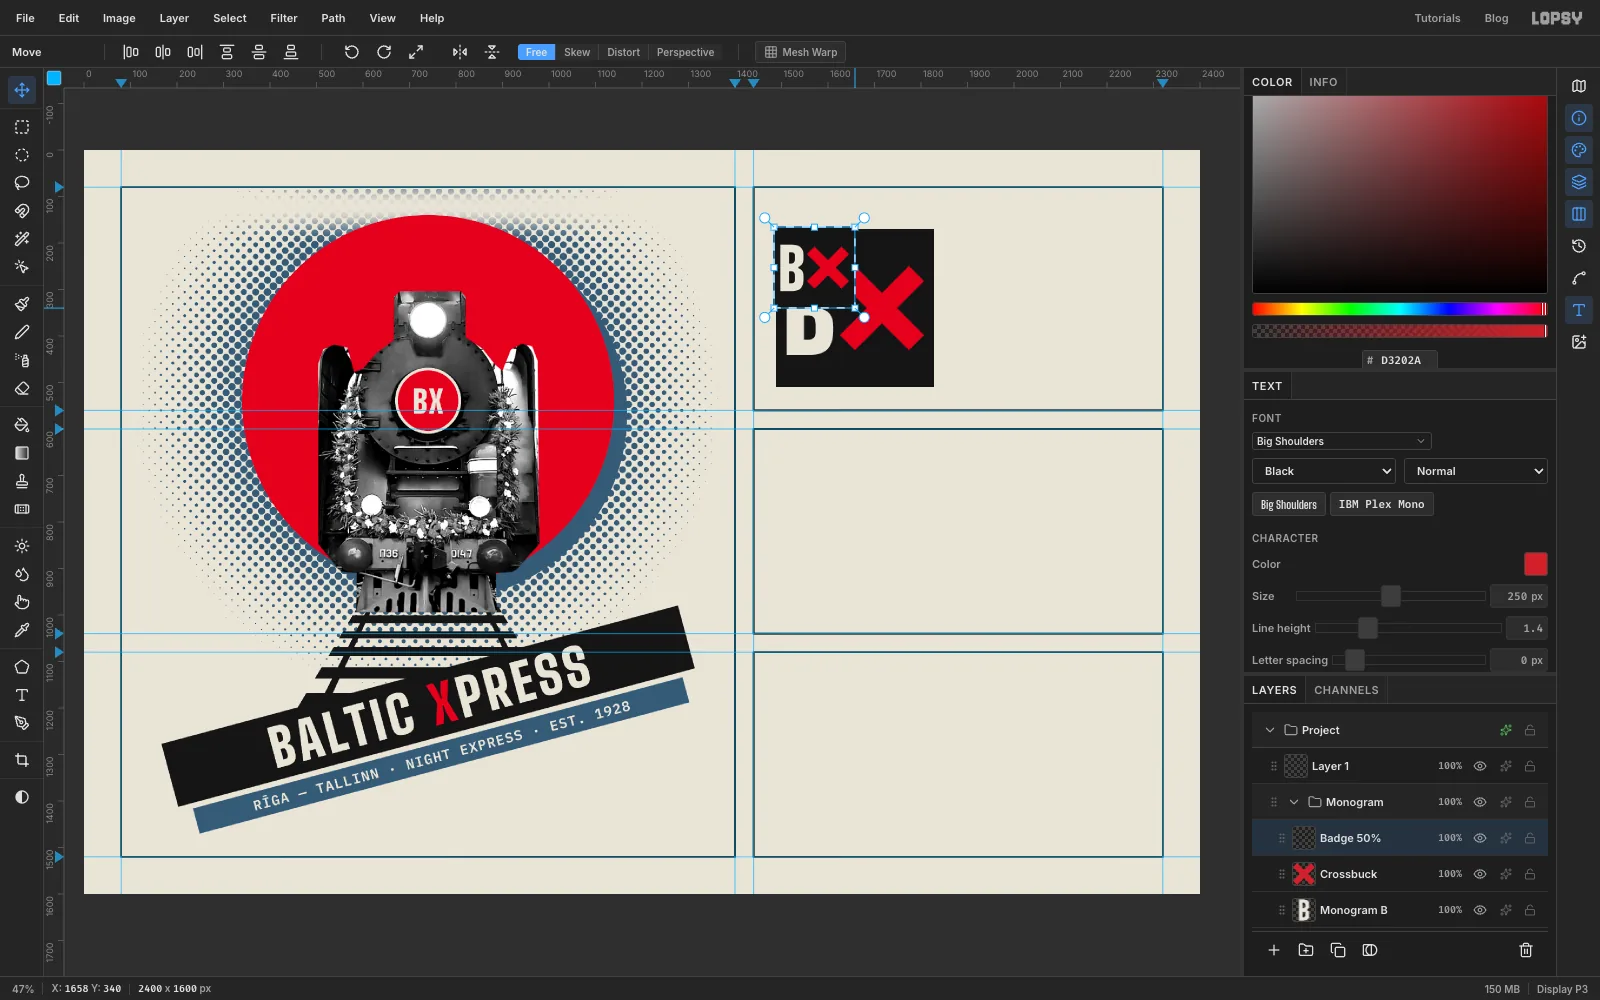
Crossbuck. Select From1484, 166To1832, 514round the badge. - Choose Edit → Copy Merged, then press Cmd+V. Rename the new layer
Badge 50%. - Drag a marquee round the pasted copy. With the Move tool, hold Cmd and drag the bottom-right handle in until the copy is half size, about
174px square. Press Enter and Cmd+D.
- Click
-
Place the small badges
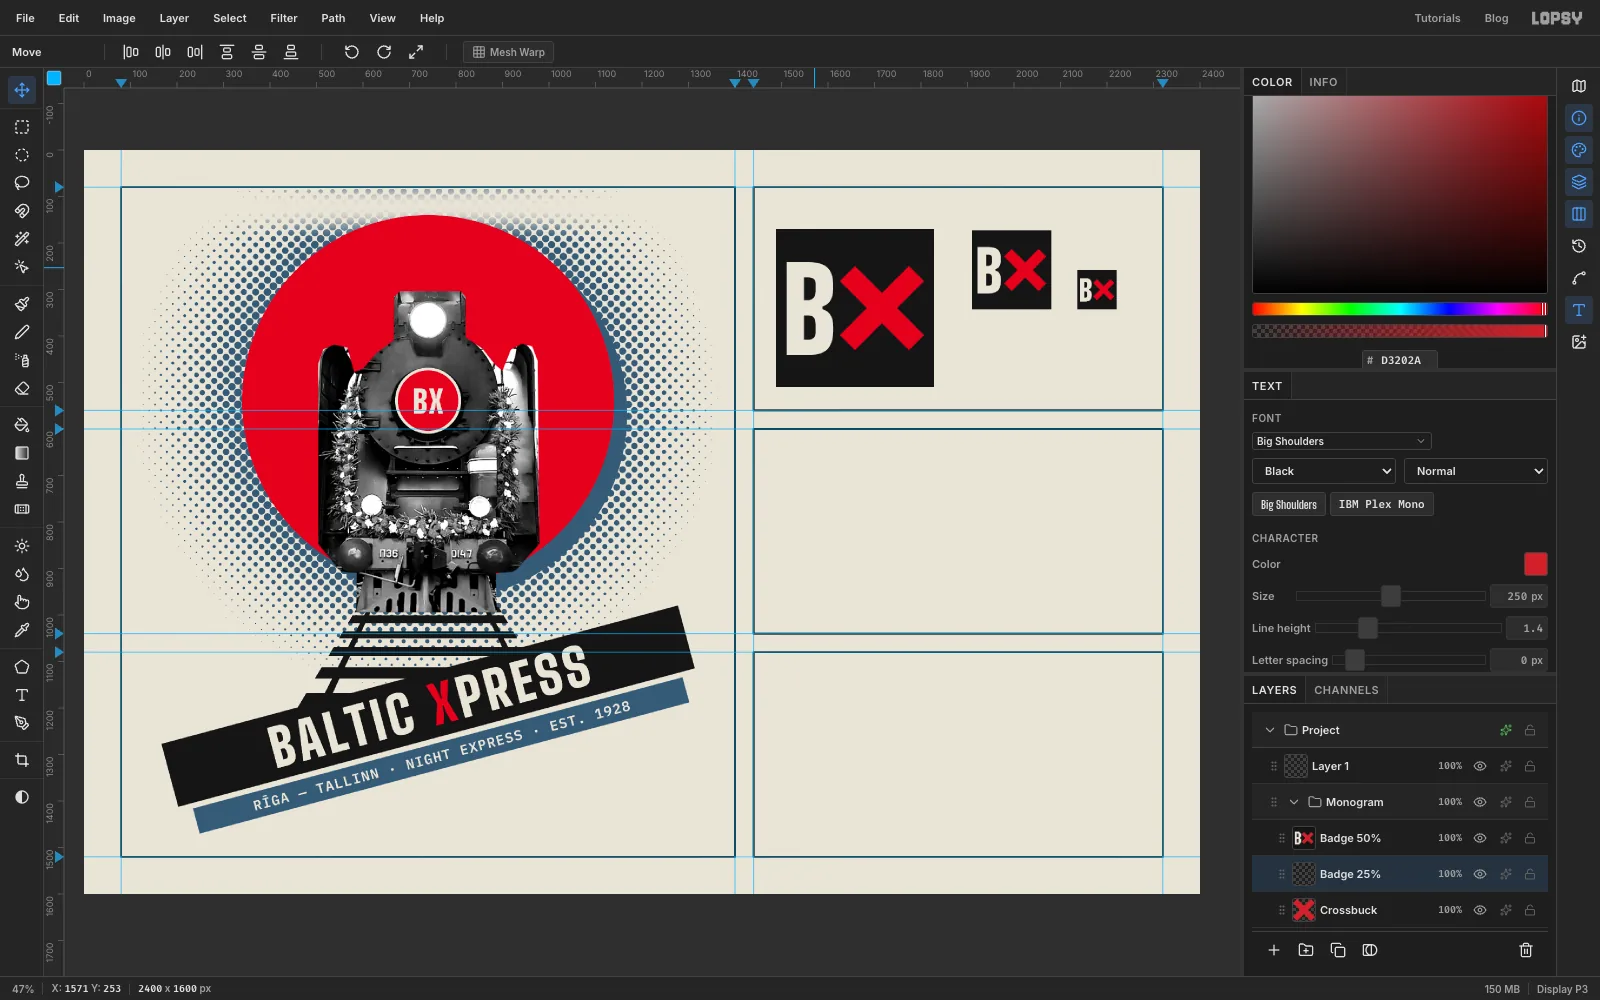
- Move
Badge 50%so its top-left corner is at about 1908, 171. - Repeat steps 1 to 3 of the last section for a quarter-size copy,
Badge 25%, about87px square. Place it to the right at about 2135, 257 so its bottom lines up with the half-size copy's.
- Move
-
Paste the round mark for the lockup
- Collapse
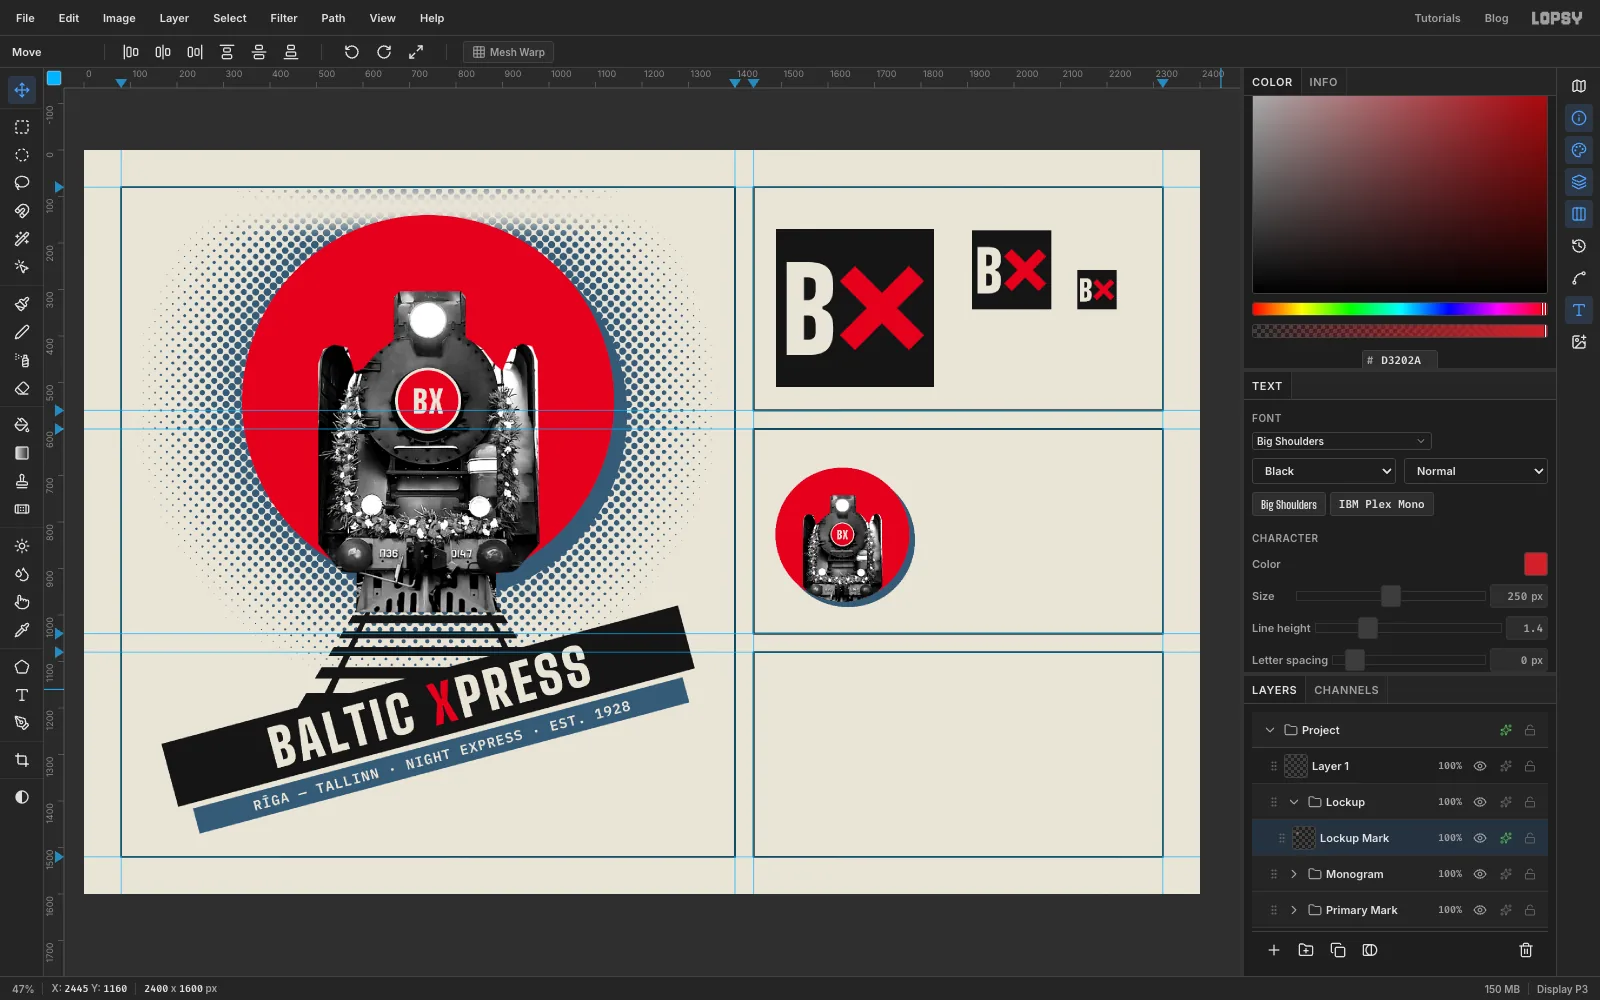
Monogram, click its row and click New Group. Name itLockup. - With the Elliptical Marquee, select From
340, 140To1140, 940, exactly round the sun. - Choose Edit → Copy Merged and press Cmd+V. Rename the layer
Lockup Mark. - Scale it down with Cmd on a corner handle to about
288px across, press Enter and Cmd+D, and centre it on 1630, 826. - Click its effects button (✦), turn on Drop Shadow and set the colour to , Offset X and Offset Y to
12, Blur and Spread to0, and Opacity to100. Close the drawer.
- Collapse
-
Set the lockup type
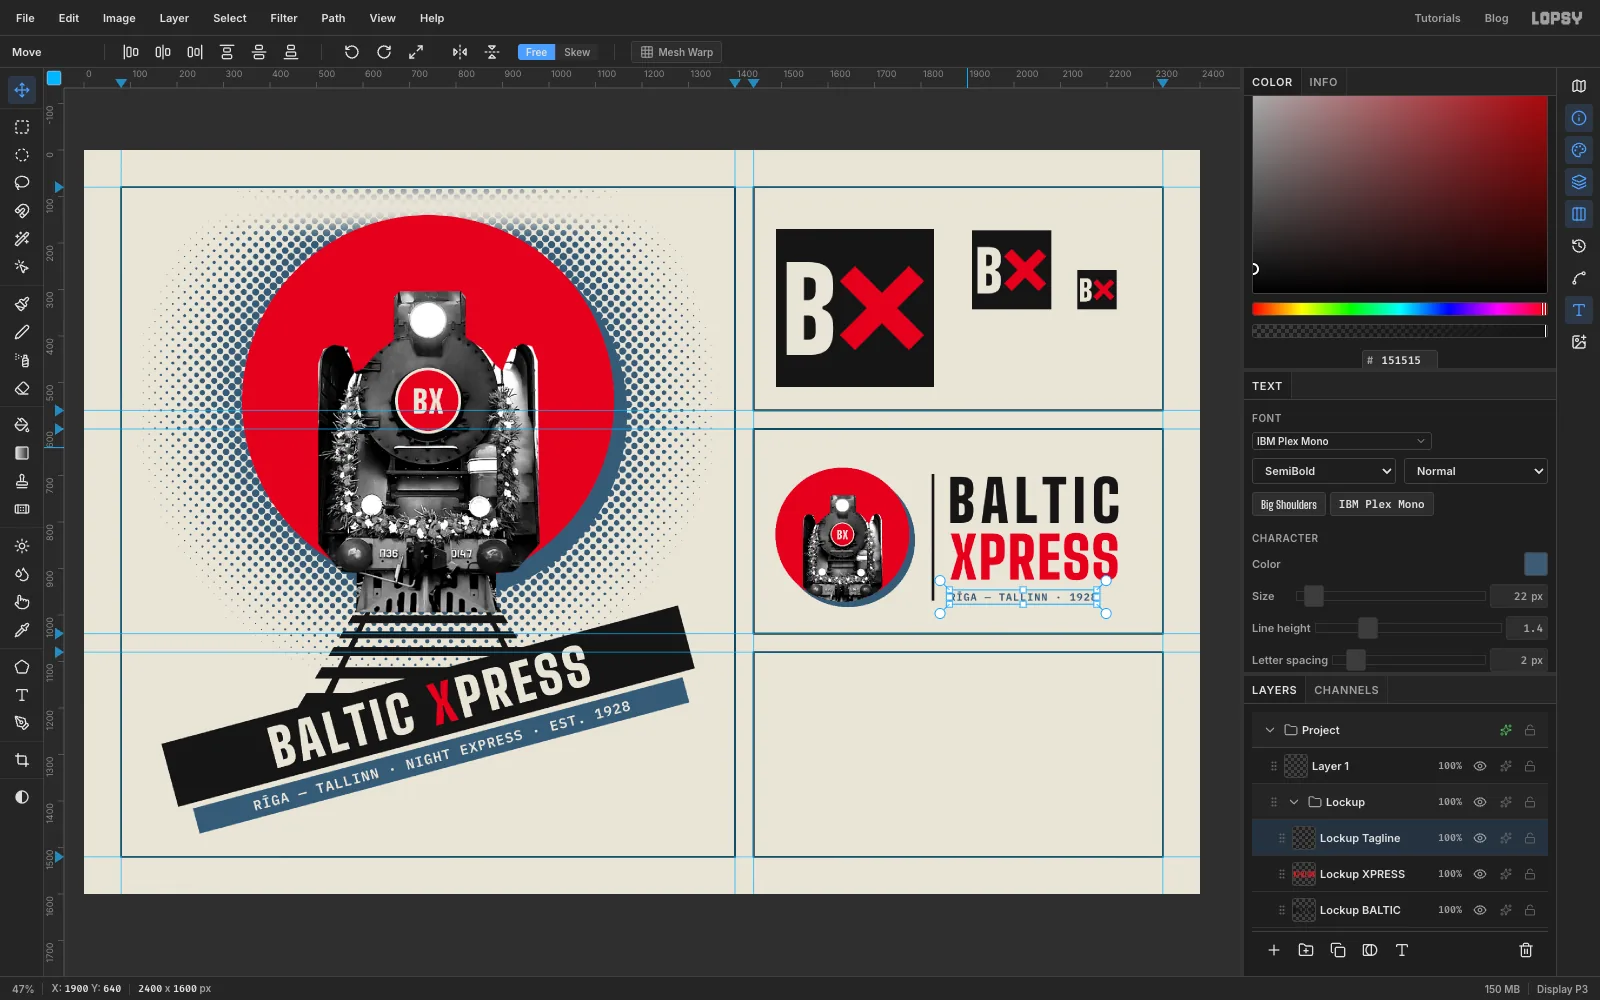
- Click Add Layer and rename it
Lockup Rule. Pick the Pencil, set Size to6and the colour to . Click at 1826, 700, then Shift-click at 1826, 966 for a straight vertical rule. - Make three text layers, clicking
Lockup Rulebefore each one. Work from the bottom up, clicking a little to the right of the rule each time, so no click lands in an earlier text box:
RĪGA — TALLINN · 1928in IBM Plex Mono SemiBold, size22, , letter spacing2. Click at about 2000, 1000.XPRESSin Big Shoulders Black, size124, , letter spacing4. Click at about 1900, 830.BALTICin Big Shoulders Black, size124, , letter spacing13. Click at about 1900, 640.
- Line up the left edges of all three at x
1862. Put the middle of BALTIC's capitals at y751, XPRESS at873and the tagline at958.
BALTIC has two letters fewer than XPRESS, which is why it gets the wider letter spacing. That way the two words come out almost the same width.
- Click Add Layer and rename it
-
Draw the colour chips on the grid
- Collapse
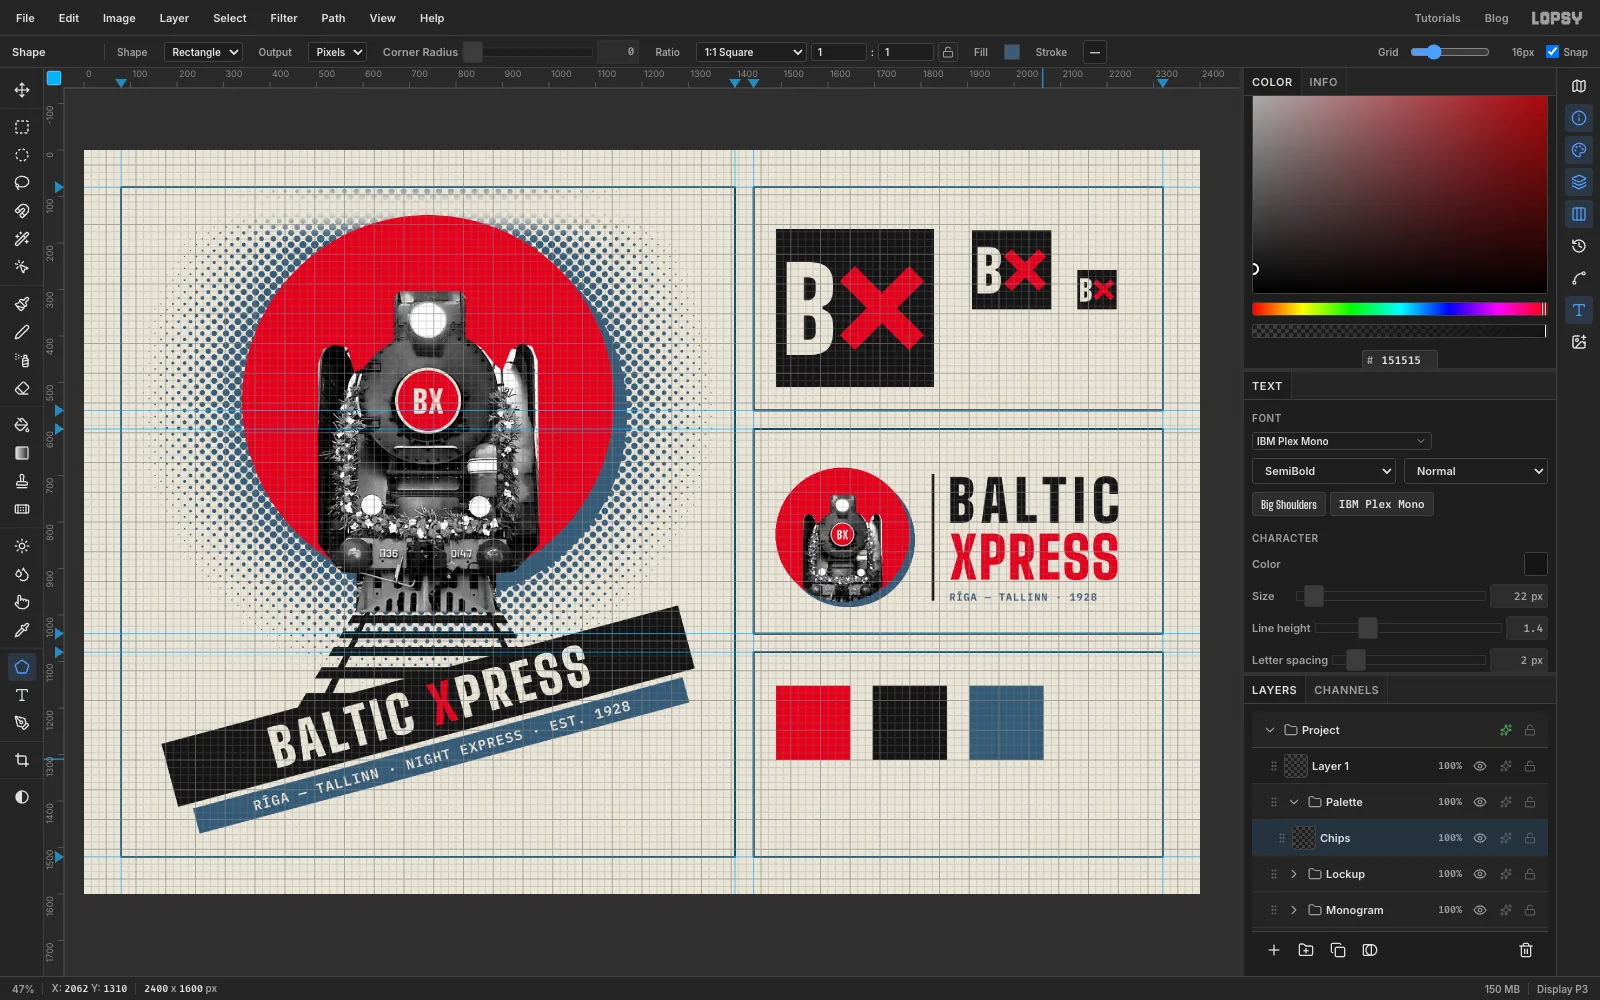
Lockup, click its row and click New Group. Name itPalette. Click Add Layer and rename itChips. - Choose View → Show Grid. The grid is 16 px and turns on snapping.
- With the Shape tool on Rectangle, draw four 160 px squares. For each, press on its centre and drag 80 px down and right to its corner; both points snap to the grid. The centres are 1568, 1232, 1776, 1232, 1984, 1232 and 2192, 1232, so the squares start at x
1488,1696,1904and2112, all from y1152. Change the Fill before each one:D3202A,151515,3D5A75, thenE9E4D8with a black Stroke of Width3so the newsprint chip shows. - Choose View → Show Grid again to hide it.
- Collapse
-
Label the palette
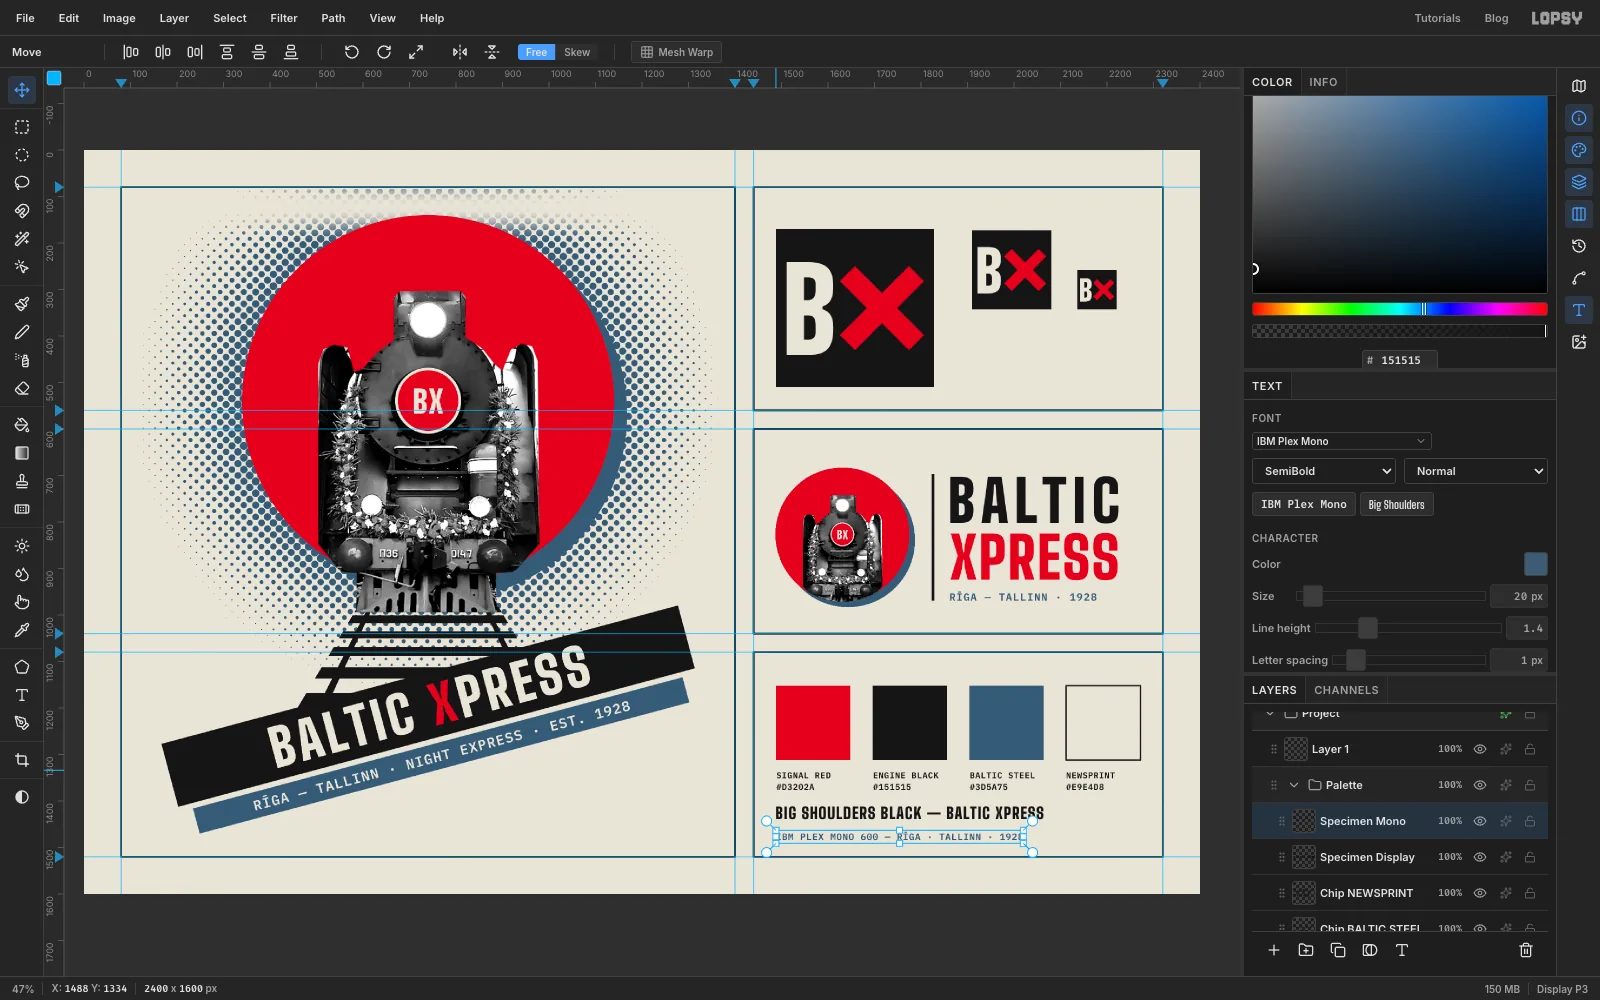
Click
Chipsbefore each new text layer. Start with the lowest text:IBM PLEX MONO 600 — RĪGA · TALLINN · 1928in IBM Plex Mono SemiBold, size20, , letter spacing1, left edge at x1488, centred on y1474.BIG SHOULDERS BLACK — BALTIC XPRESSin Big Shoulders Black, size34, , letter spacing2, at x1488, y1424.- Under each chip, two lines in IBM Plex Mono SemiBold, size
18, , letter spacing1, with Enter between the lines. Work right to left, clicking just under each chip:NEWSPRINT/ ,BALTIC STEEL/ ,ENGINE BLACK/ , thenSIGNAL RED/ . Line each one up with its chip's left edge, with its top at y1338.
-
Add the panel labels and captions
- Collapse
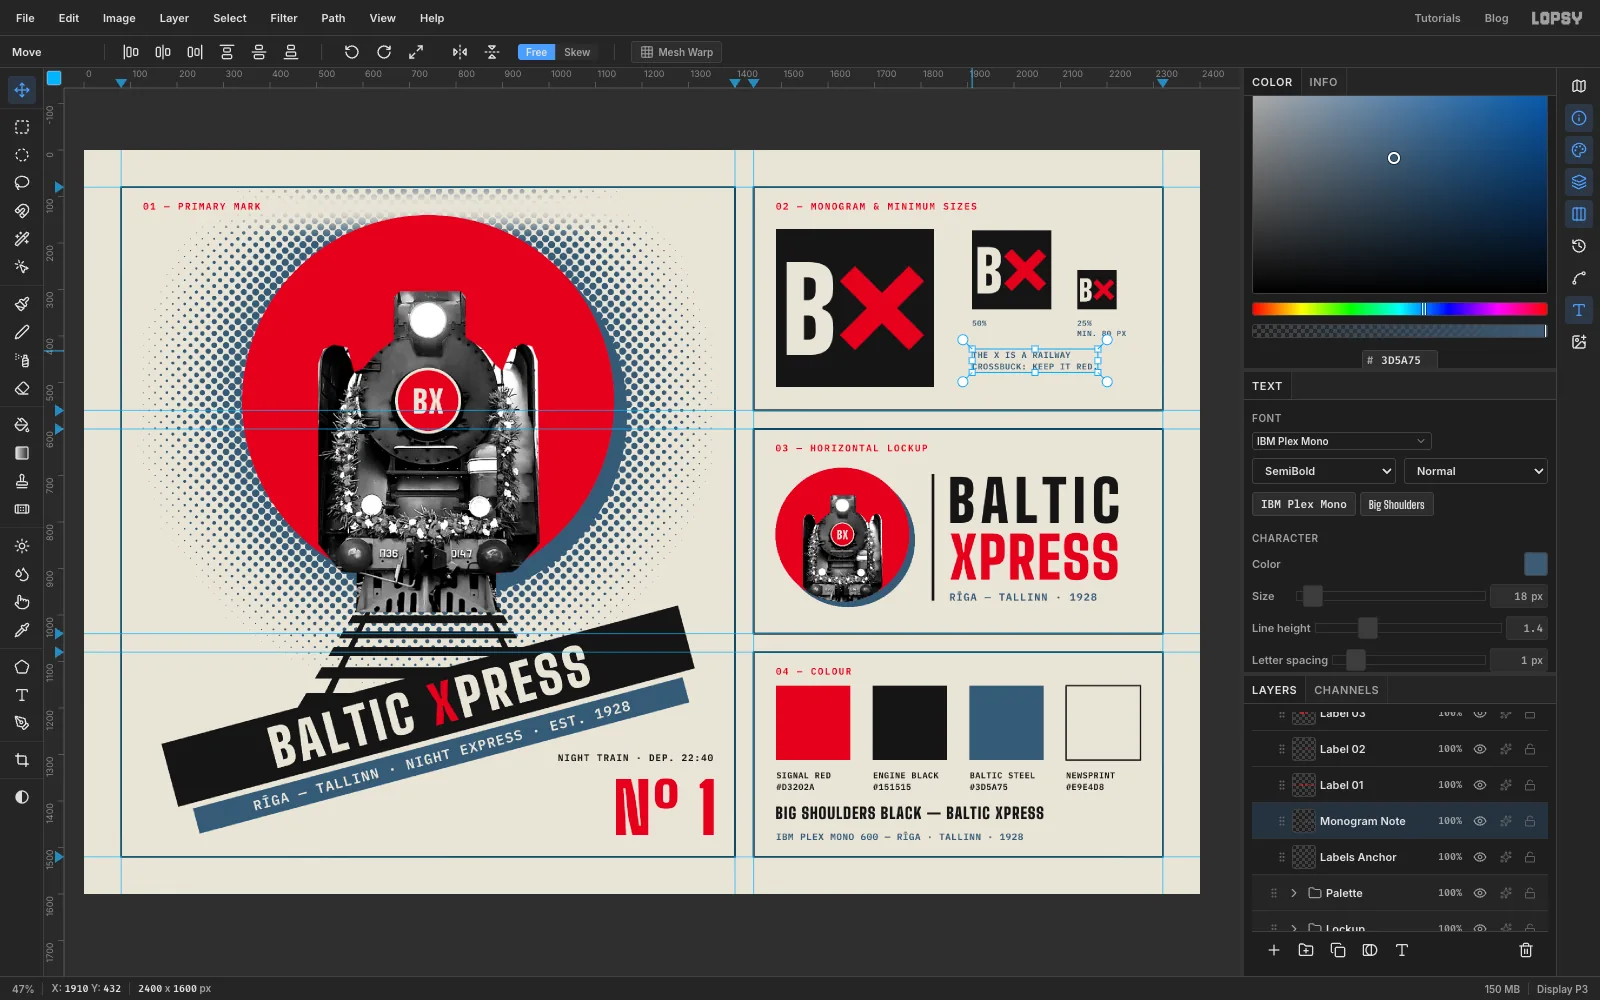
Palette, click its row, click New Group and name itLabels. Click Add Layer and rename itLabels Anchor. Click it before each text layer below, and start from the bottom of the sheet. - Train number. The bottom-right corner of the main panel is empty, and a big number balances the bar's lower-left end. Type
Nº 1(on a Mac, Option+0 types º) in Big Shoulders, Black,150, , letter spacing2. Line its right edge up 48 px inside the frame (x1352), with its foot at y1472. Above it, typeNIGHT TRAIN · DEP. 22:40in IBM Plex Mono, SemiBold,20, , letter spacing2, right edge at x1350, centred on y1306. - Captions. Under the small badges, in IBM Plex Mono, SemiBold,
16, , letter spacing1, type25%, Enter,MIN. 80 PXflush with the quarter-size badge (x2136), then50%flush with the half-size badge (x1910). Put both tops at y367. - Note. Below the captions, also at x
1910with its top at about y434, typeTHE X IS A RAILWAY, Enter,CROSSBUCK: KEEP IT RED.in the same font at size18, , letter spacing1. - Panel labels. Last, the four labels in IBM Plex Mono, SemiBold,
20, , letter spacing3. Each sits 48 px in from its frame's left edge and is centred 40 px below its frame's top edge:01 — PRIMARY MARKat 128, 120,02 — MONOGRAM & MINIMUM SIZESat 1488, 120,03 — HORIZONTAL LOCKUPat 1488, 640 and04 — COLOURat 1488, 1120.
- Collapse
-
Add paper grain, then save and export
- Collapse
Labelsand clickLayer 1, which has been sitting at the top of the stack all along. Rename itPaper Grain. - Fill it with . Choose Filter → Add Noise… with Amount
22, Mono and Gaussian, and click Apply. - Set its Blend mode to Multiply and its opacity to 40%. The white disappears and only a faint speckle of grain stays over the flat colour.
Choose File → Save Project to keep a
.lopsywith every layer and group, then File → Quick Export PNG for the finished sheet.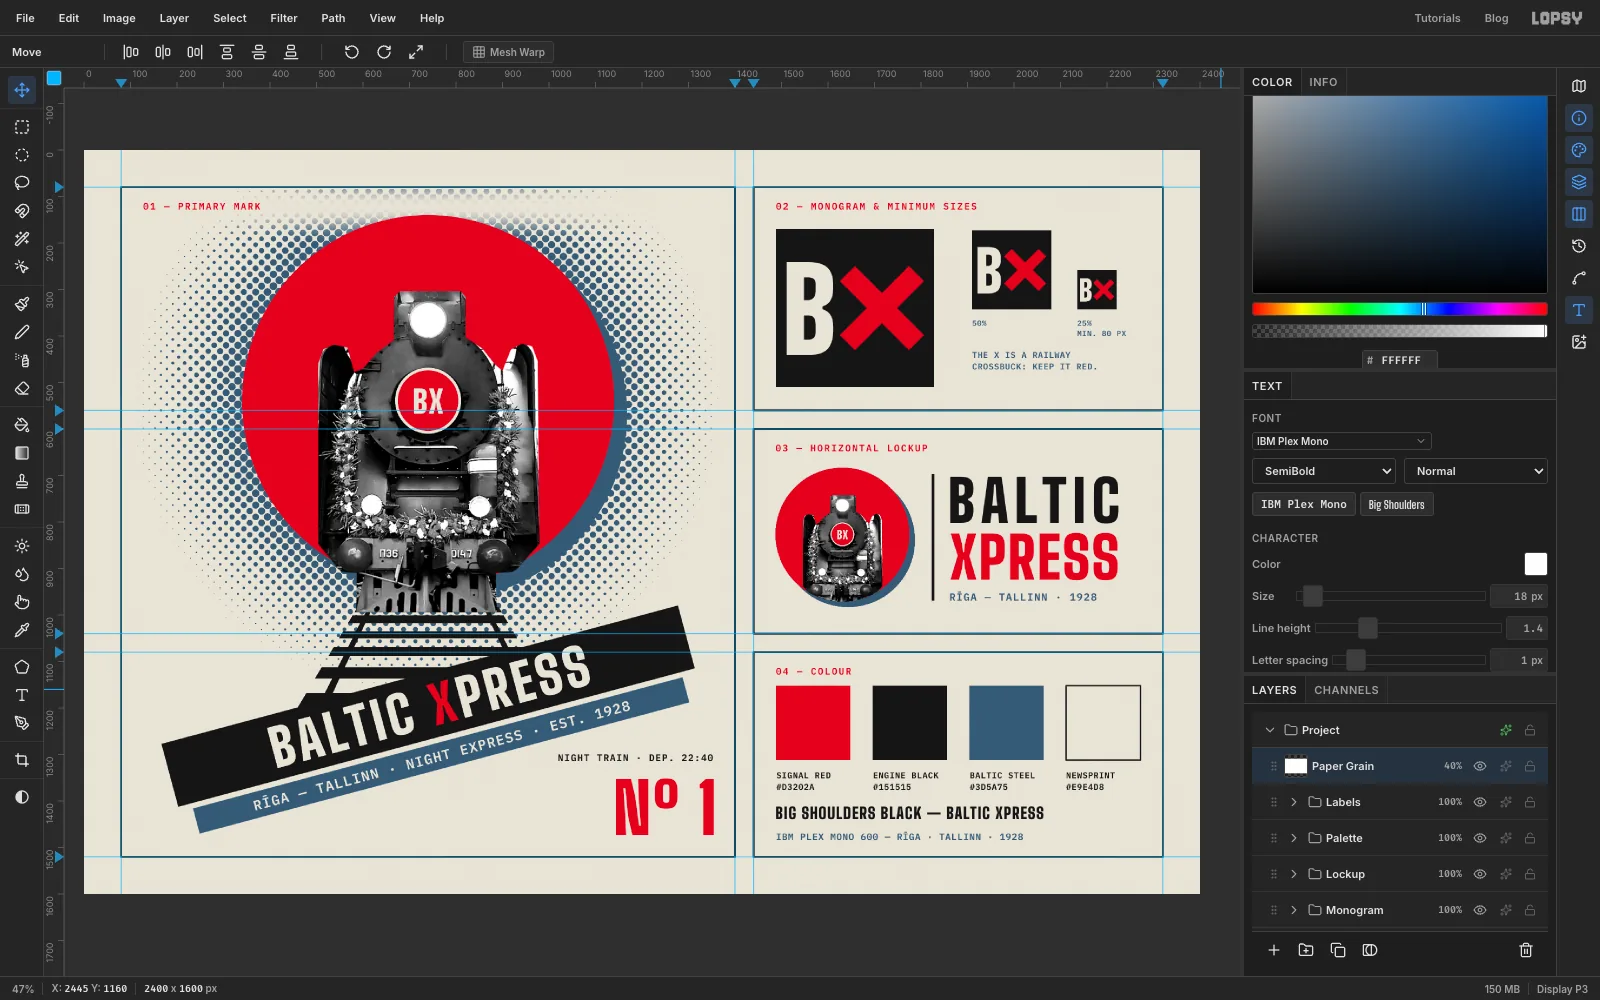
- Collapse