Design a Constructivist Crystal Radio Flier in Lopsy
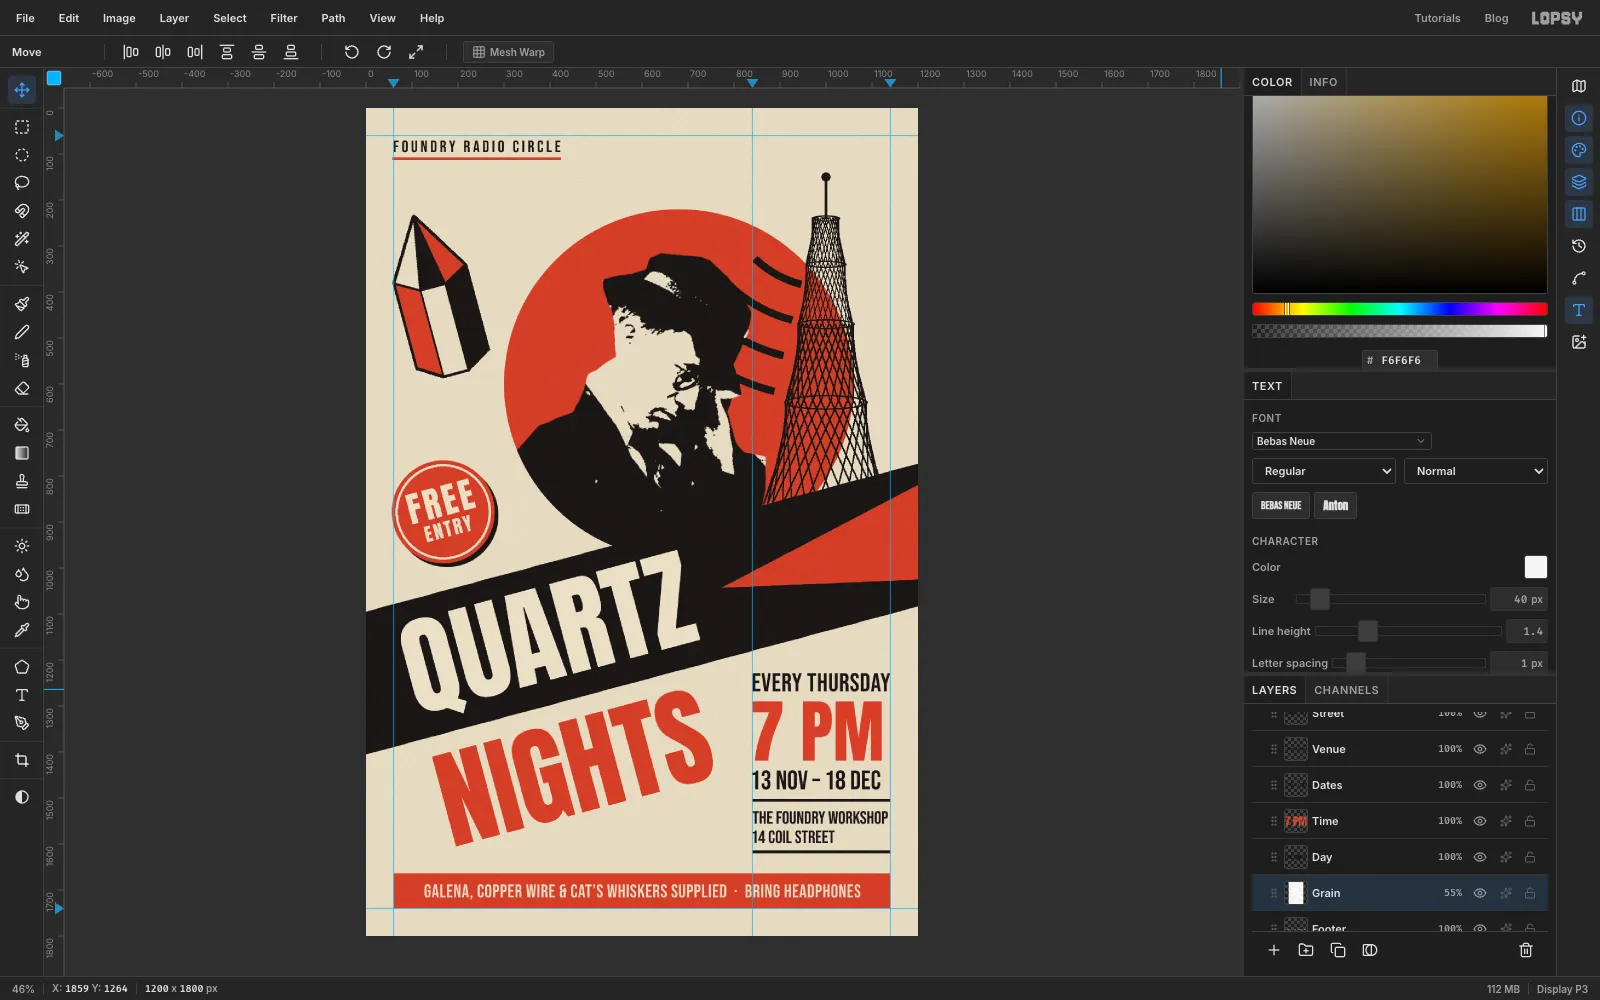
Make a Rodchenko-style flier in Lopsy with a thresholded 1921 photo masked into a red disc, a pencil-drawn radio tower and type rotated onto a diagonal band.
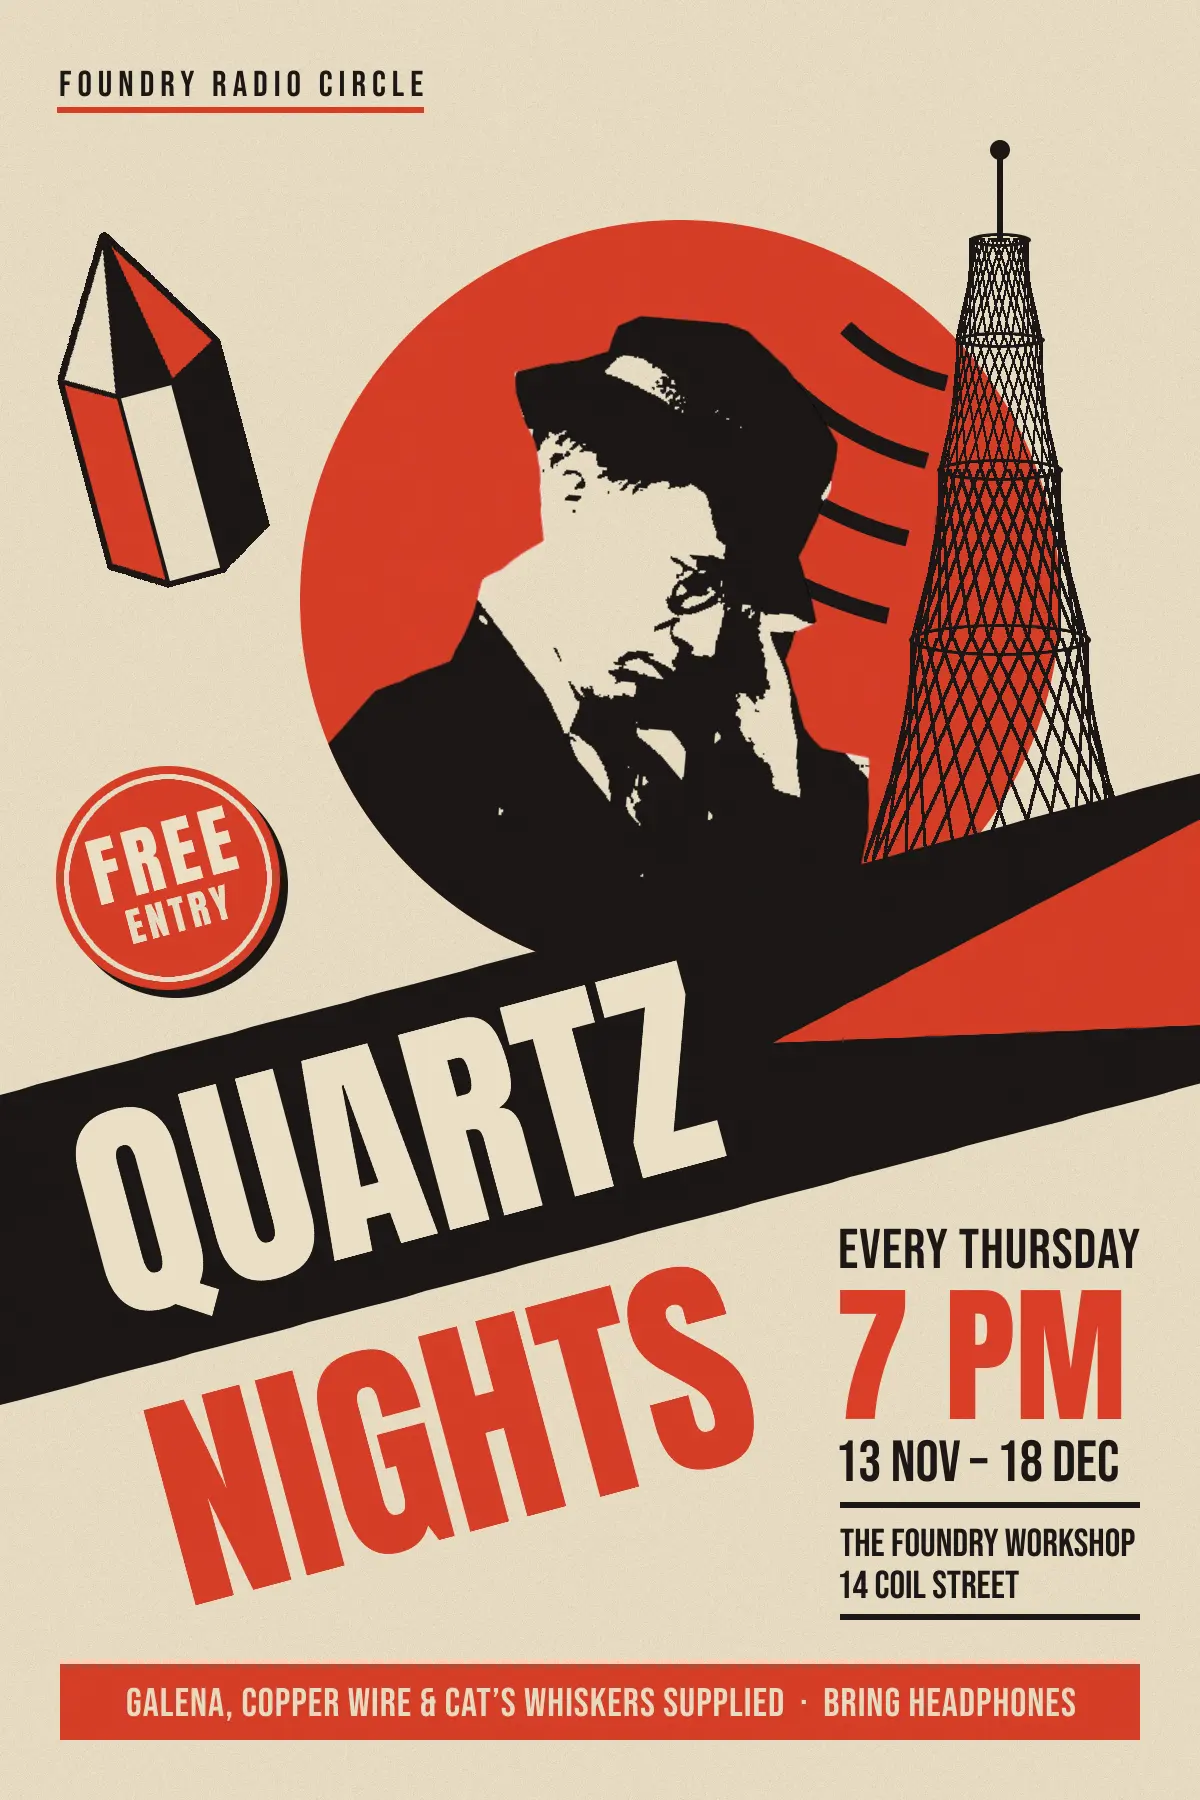
In the 1920s Alexander Rodchenko and El Lissitzky built posters from a short list of parts: a cut-out photograph printed as hard black ink, flat red circles and wedges, steep diagonals, and heavy condensed type set at an angle. Radio was one of their favourite subjects. Vladimir Shukhov's lattice broadcasting tower in Moscow, made from straight steel bars twisted into a hyperboloid, turns up again and again.
In this tutorial you'll use that kit to make a flier for Quartz Nights, a made-up weekly club where people build crystal radio sets. A 1921 photo of a man holding an earpiece to his ear becomes a black and cream cut-out inside a red disc. A pencil-drawn tower beams arcs toward him, and QUARTZ NIGHTS runs across a black band tilted at −15°. You'll practise the Lasso, Threshold, a non-contiguous Magic Wand, layer masks, Move-tool transforms, live text rotation and Pencil straight lines. The document is 1200 × 1800 px.
You'll need one public-domain photo:
- Man listening to an early radio LCCN2016887096.jpg by Harris & Ewing (1921, Library of Congress) on Wikimedia Commons. Download the 1280 px-wide preview and resize it to 1200 px wide before you start (for example with Preview's Tools → Adjust Size on a Mac), so it fits the canvas width when you drop it in.
The palette:
-
Paper
-
Warm ink black
-
Vermilion
-
Grain base
only for the texture layer
-
Lay down the paper and margins
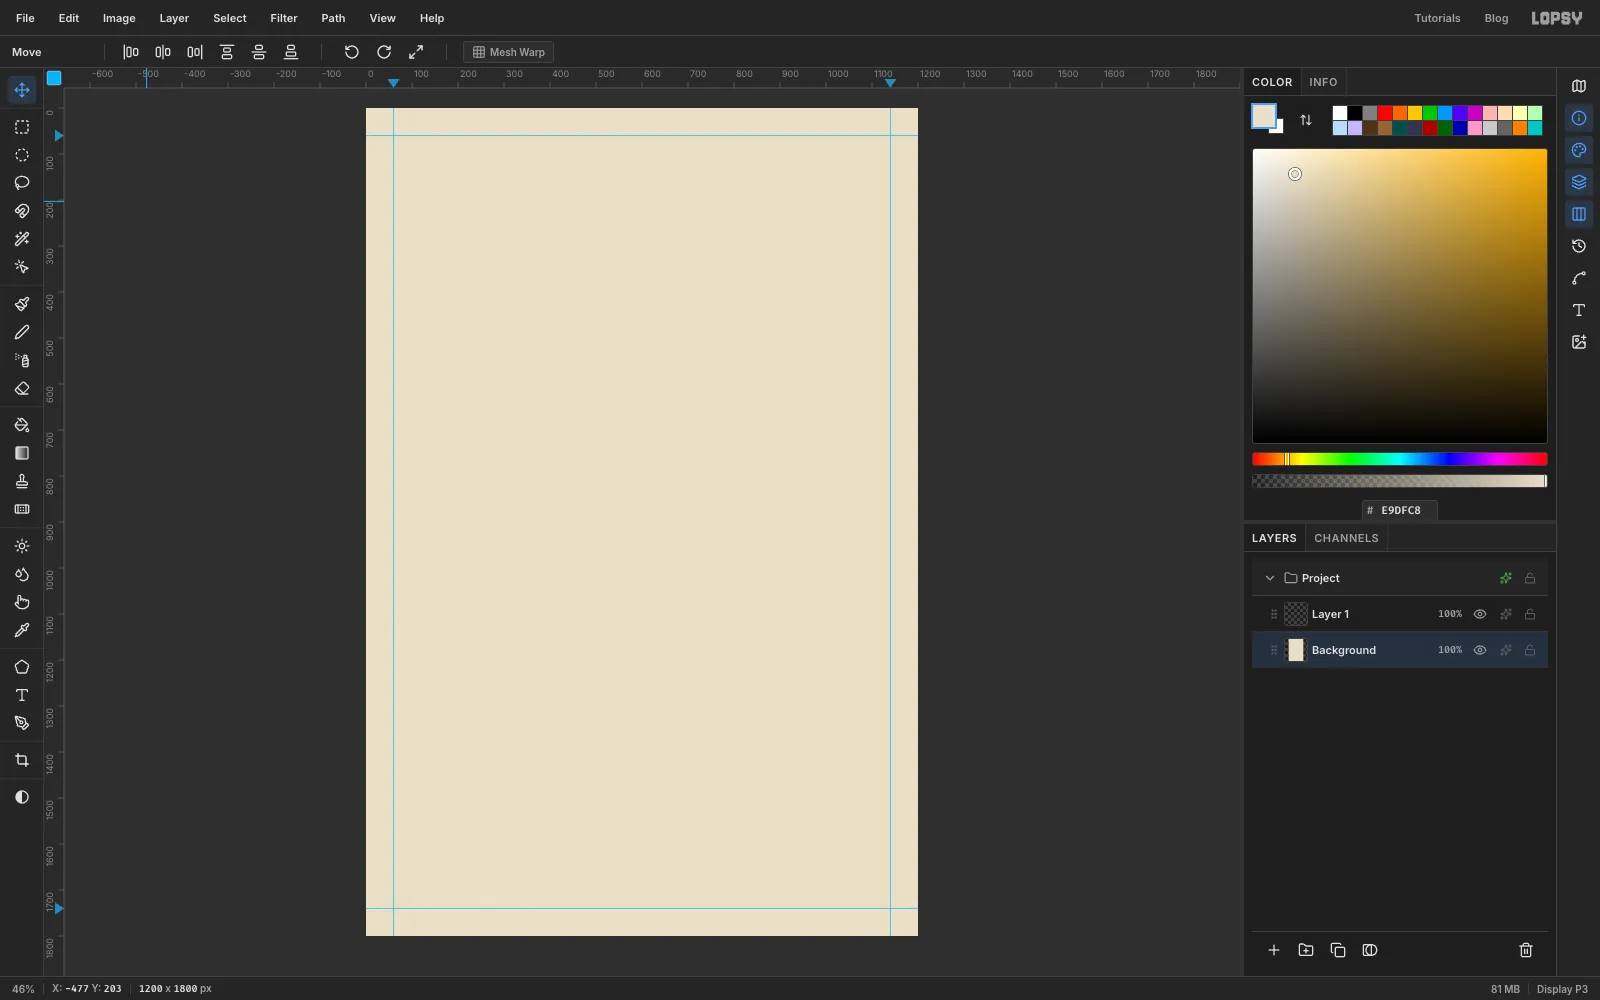
Choose File → New, check that Unit is Pixels, and enter 1200 × 1800. Set the foreground color to in the Color panel, select the Background layer and choose Edit → Fill.
Click the top ruler about 60 px in from the left and right edges, and the left ruler about 60 px from the top and bottom. Each click drops a guide. These four guides are your margins: text and the footer will line up on them.
-
Draw the red disc
Rename Layer 1 to
Disc. Pick the Elliptical Marquee. With nothing selected, a single click on the canvas (no drag) opens a dialog where you can type the exact corners. Enter From300,220and To1060,980. That gives a 760 px circle a little right of centre, reaching down to just above the middle of the page. Set the foreground to , choose Edit → Fill, then deselect with Cmd+D.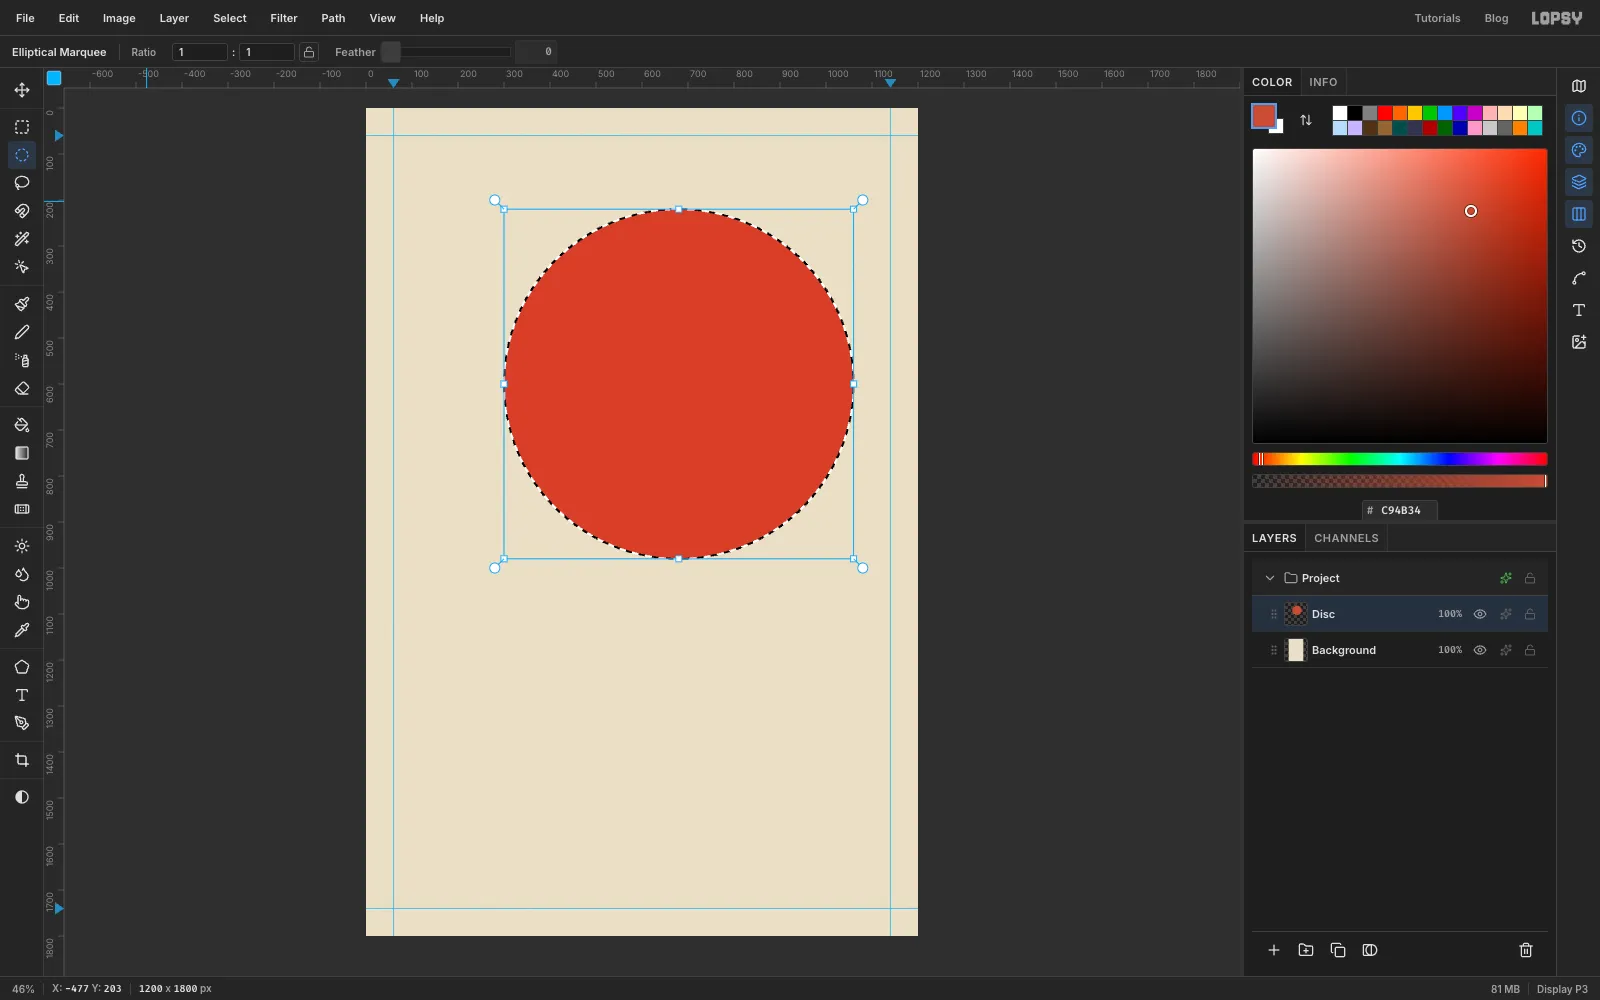
-
Build the broadcast rings
Click Add Layer and name it
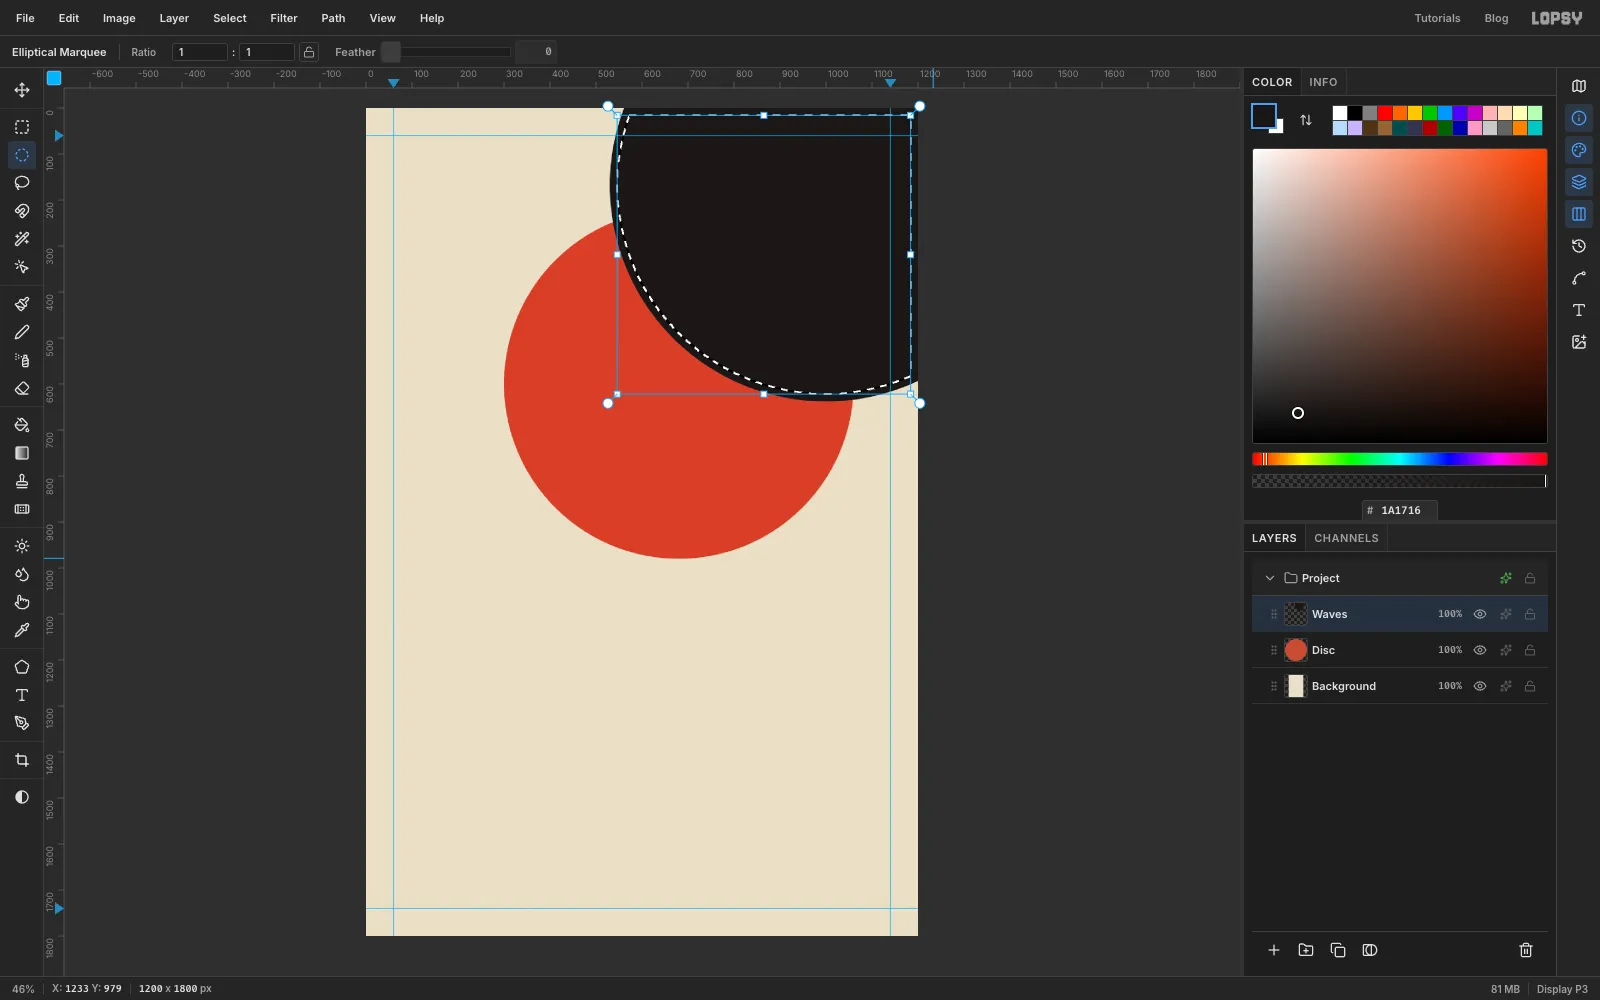
Waves. The radio tower's tip will sit at aboutx 1000,y 168, and the rings radiate from there. Set the foreground to ink . Then build four rings, largest first:- Click once with the Elliptical Marquee and enter a circle centred on the tip, 470 px in radius: From
530,-302, To1470,638. Parts of it run off the canvas, which is fine. - Choose Edit → Fill, then Select → Shrink… by
16and press Delete. You're left with a 16 px ring. - Repeat with radii 390 (From
610,-222To1390,558), 310 (From690,-142To1310,478) and 230 (From770,-62To1230,398).
Draw the biggest ring first. Filling a large circle covers everything inside it, so if you drew the small rings first, the next fill would paint over them.
- Click once with the Elliptical Marquee and enter a circle centred on the tip, 470 px in radius: From
-
Trim the rings to a fan
Choose the Lasso. Press at the tower tip and drag a 30°-wide fan down and to the left: a straight line out to about
x 610,y 570, a short curve round throughx 730,y 660to aboutx 865,y 710, and a straight line back up to the tip. The fan points at where the listener's ear will be, and its right edge stays clear of the tower. Choose Select → Inverse and press Delete, then Cmd+D. You're left with four short arcs beaming out from the tip.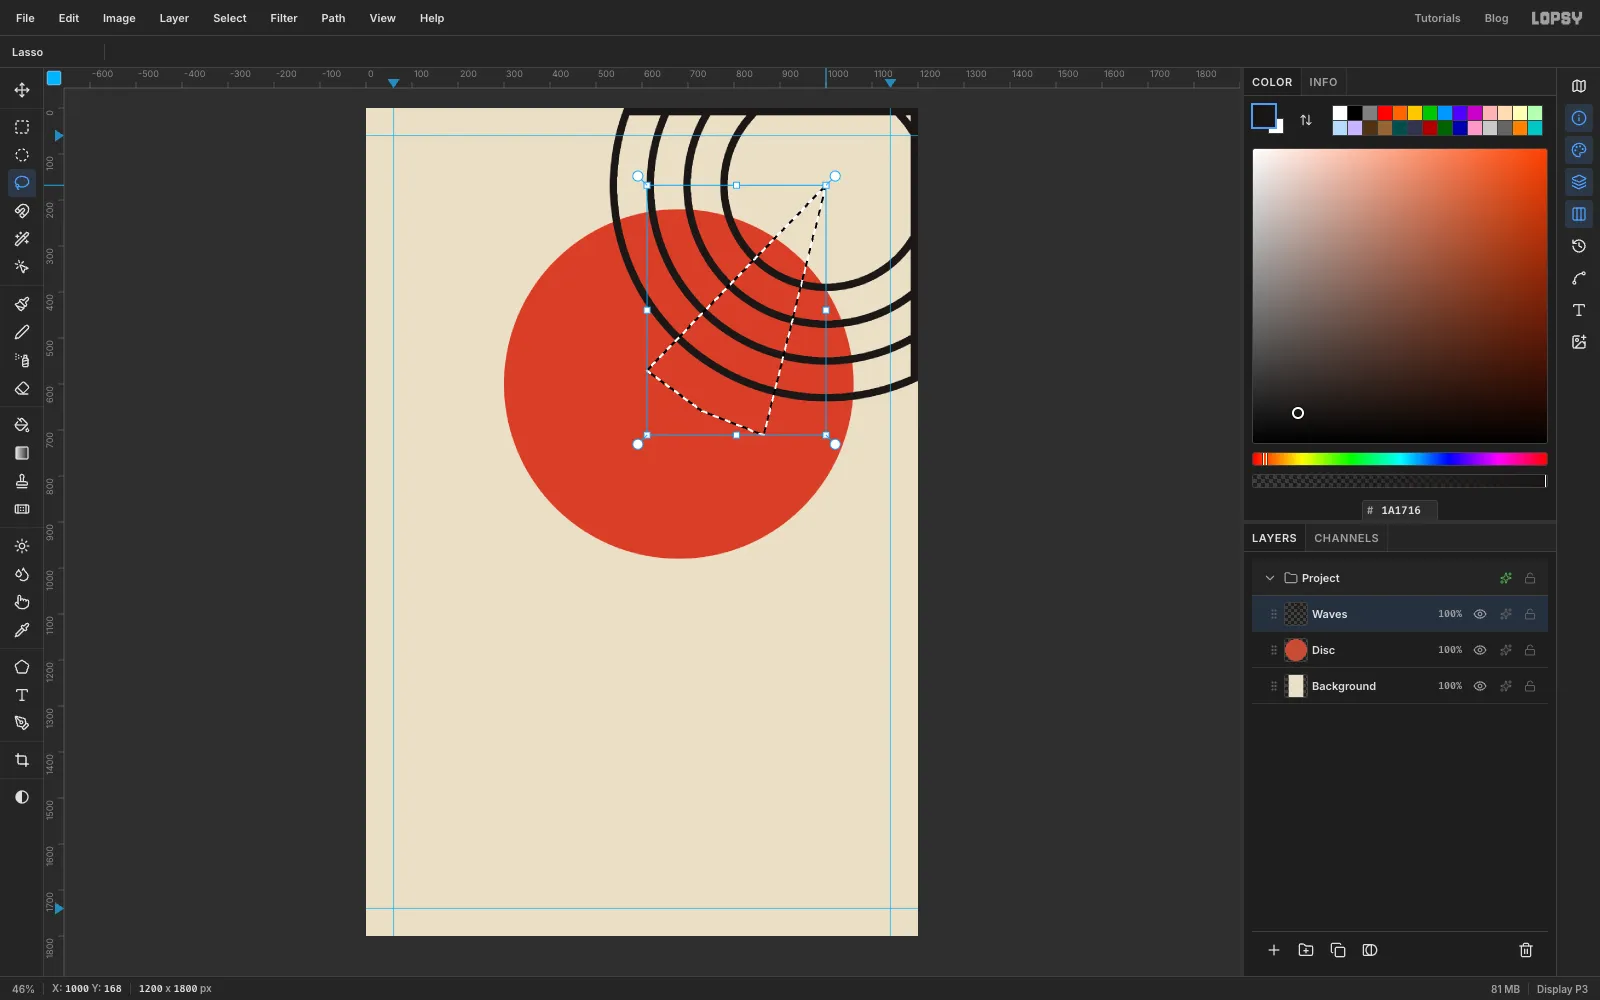
-
Draw the tower lattice with the Pencil
Add a layer called
Latticeand pick the Pencil (N) at Size 3. A Shukhov tower is a stack of hyperboloids. Each section is a ring of straight bars, every bar leaning the same way around the circle, crossed by a second set leaning the other way. You draw it with straight lines: click a point, then Shift-click another to join them.Work up the tower in four sections, all centred on
x 1000:- From
y 860up toy 640, narrowing from 135 px each side of centre to 88 px. Pencil Size 3. - From
y 640toy 470, 88 px to 60 px each side. Size 3. - From
y 470toy 340, 60 px to 42 px each side. Size 2. - From
y 340toy 240, 42 px to 28 px each side. Size 2.
For each section, picture 14 bars spaced evenly around a circle, seen from the side. Mark their feet on the bottom edge. Going once round the circle, the marks sit at these fractions of the half-width from the centre line: +0.94, +0.70, +0.32, −0.12, −0.54, −0.85, −0.99, then back across the far side at −0.94, −0.70, −0.32, +0.12, +0.54, +0.85, +0.99. For section 1 (half-width 135) that's
x1127, 1094, 1043, 984, 927, 885, 866, 873, 906, 957, 1017, 1073, 1115 and 1134. Mark the top edge the same way using the top half-width.Join every bottom mark to the top mark two places further along that list (wrapping round from the end to the start), then join every bottom mark to the top mark two places back. That's 28 lines per section, about 110 in all. The bars cross in a diamond mesh and the section pinches in at the waist on its own. Finish with the Pencil at Size 6: a vertical mast from
y 240up toy 150. The section 1 bars below abouty 830end up hidden behind the band, so they needn't be perfect.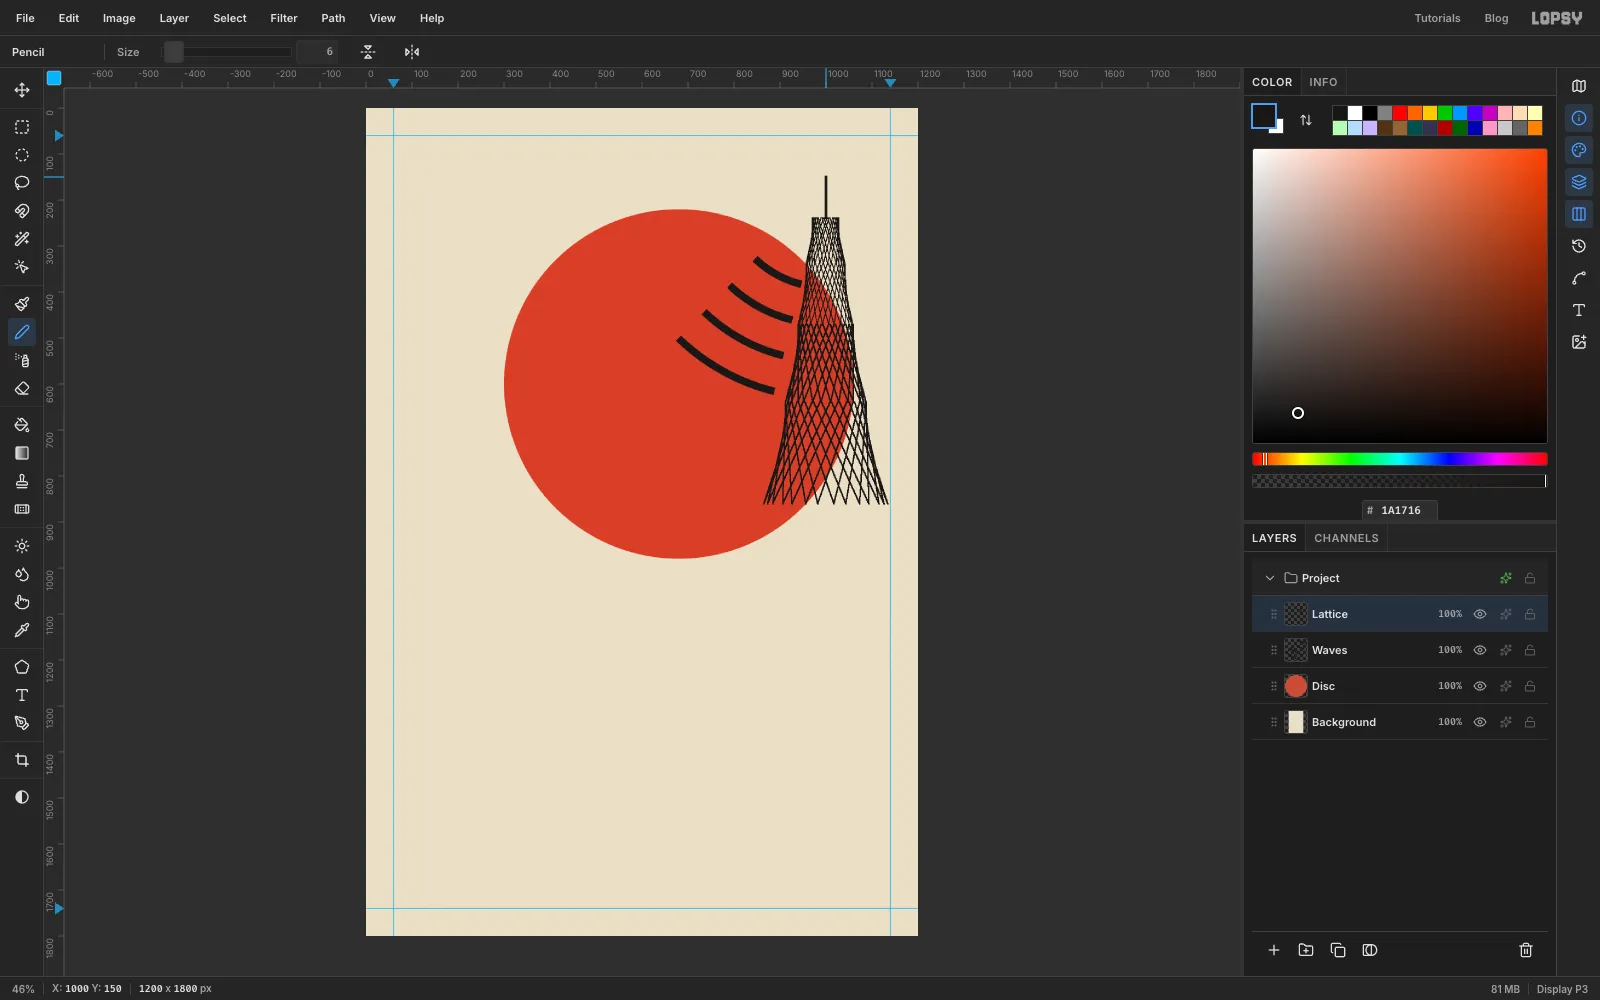
- From
-
Add the ring beams and group the tower
Add a layer called
Rings. At the top of each section, draw a flat ellipse with the Elliptical Marquee, as wide as the section plus 3 px on each side. Make them 32, 22, 16 and 14 px tall from the bottom ring up. For example, the first is From909,624To1091,656. Fill it, choose Select → Shrink… by3and press Delete. Then fill a 10 px-radius circle on top of the mast (From990,140To1010,160) for the antenna ball.Click Add Layer once more and name it
Photo Anchor. Once the tower is grouped, adding a layer while the group is selected would put it inside the group, so this empty layer gives you something to click above it. ClickLattice, Shift-clickRings, choose Layer → Group Layers, and rename the groupTower.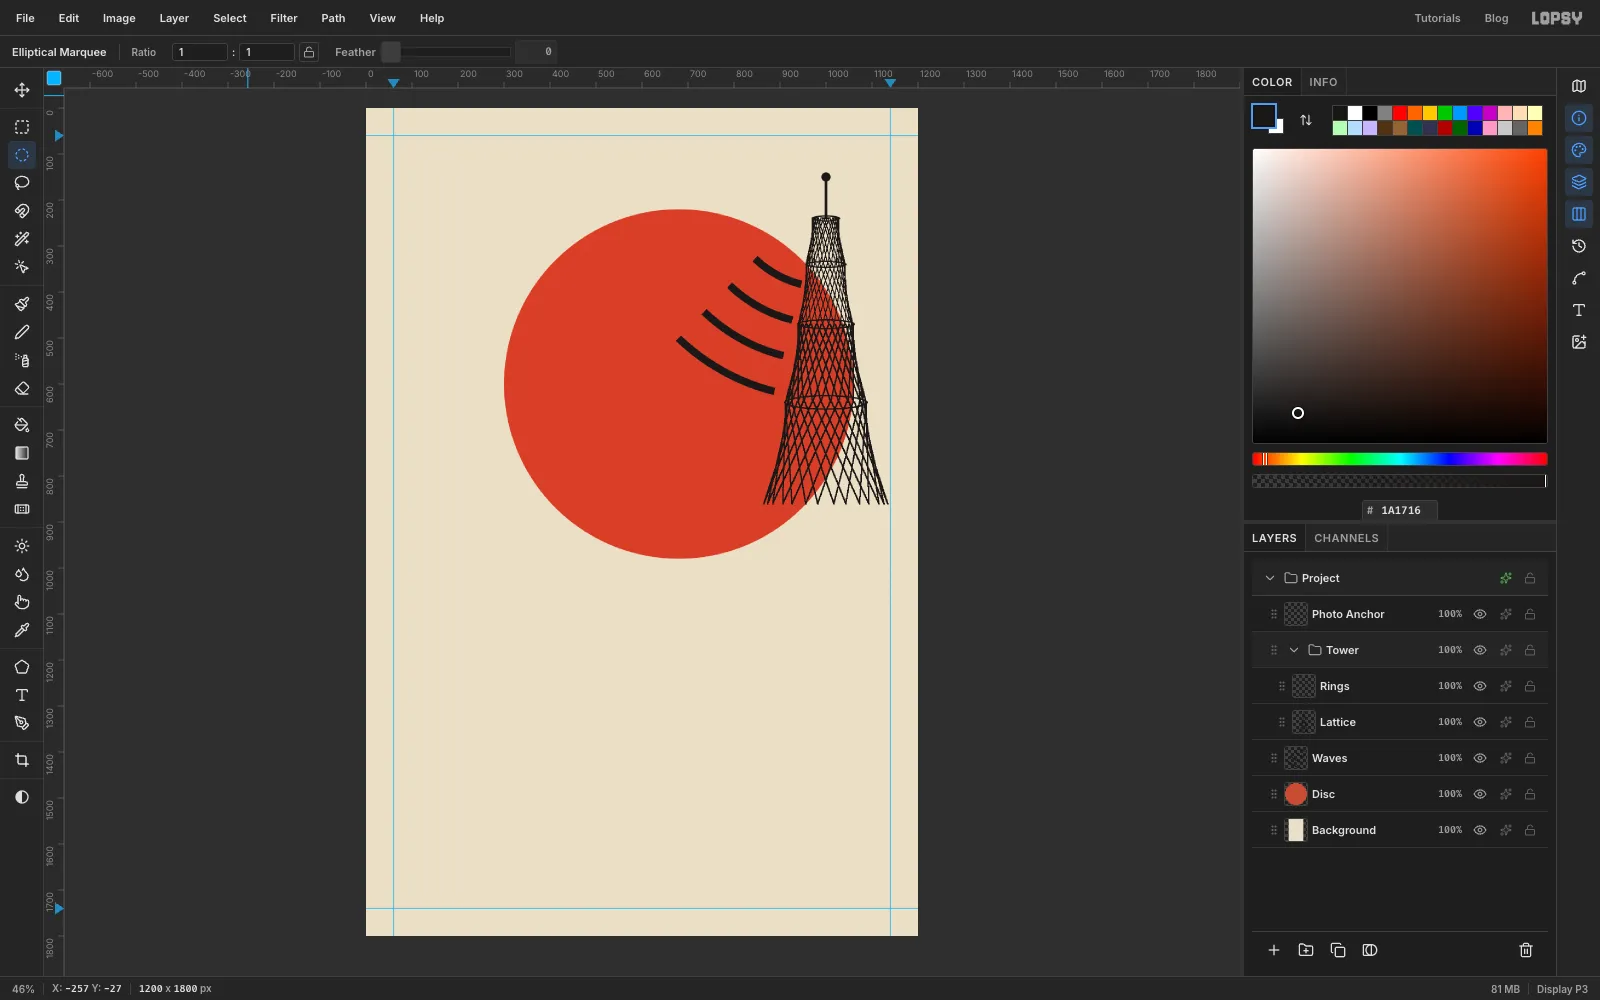
-
Drop in the photo
Click
Photo Anchorso the photo lands above it, then drag the resized photo from your desktop onto the canvas. It arrives as a new layer at the top-left corner, 1200 px wide. Rename itPhotoand press Cmd+D to drop the selection it comes in with.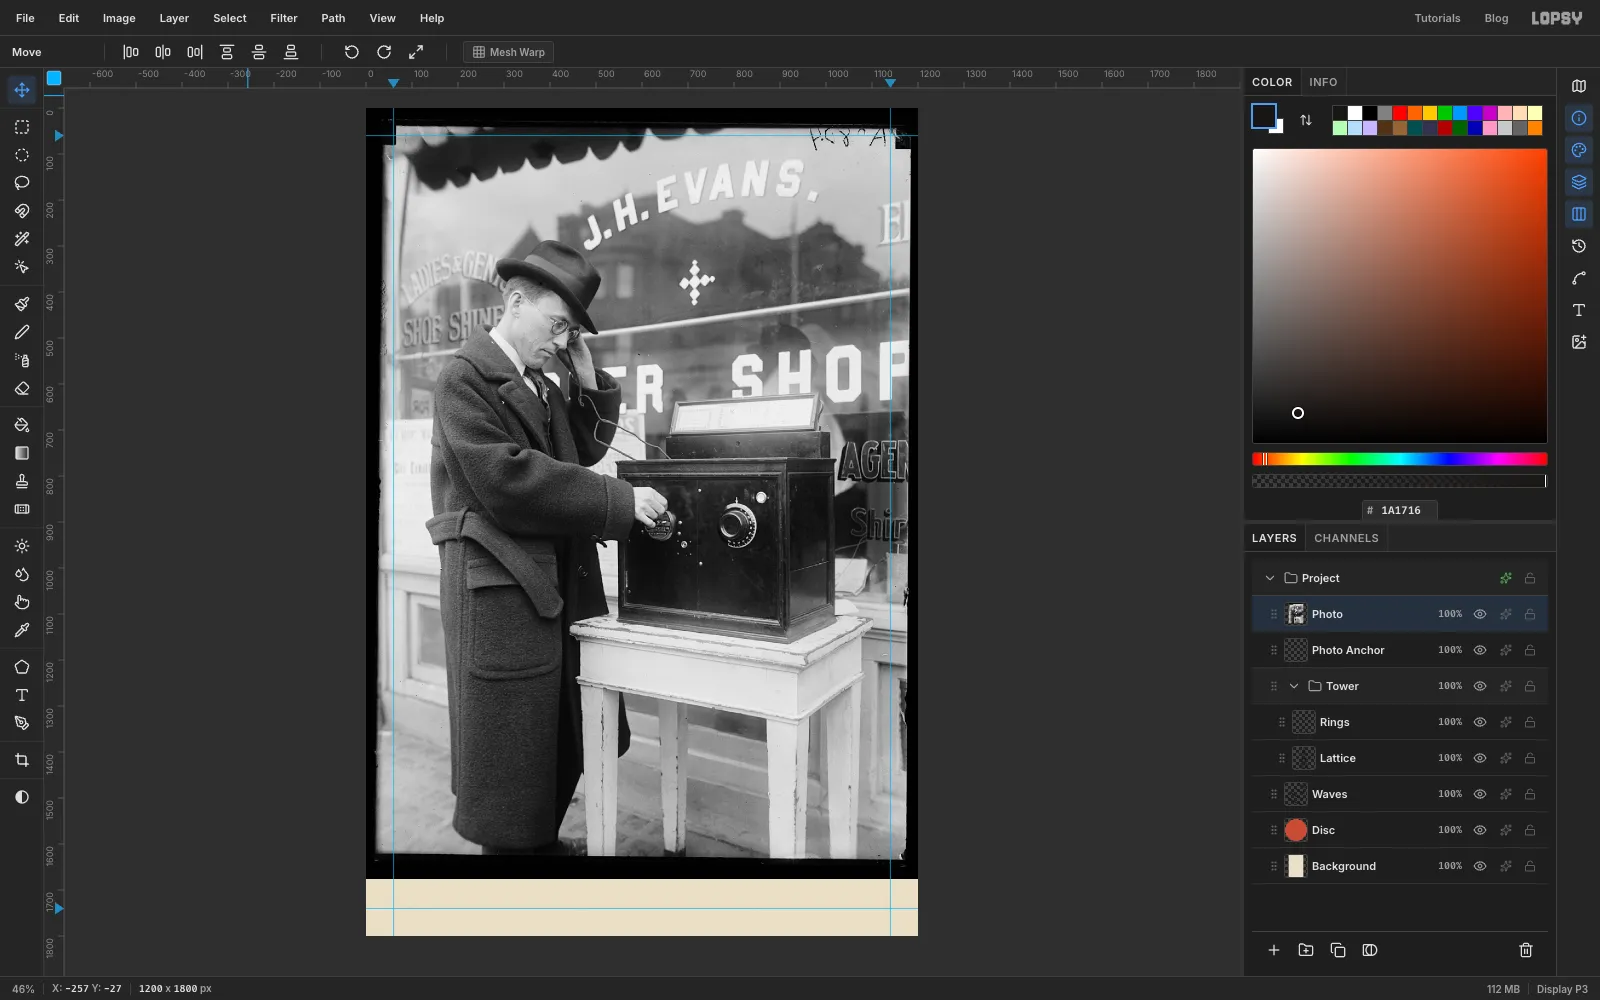
-
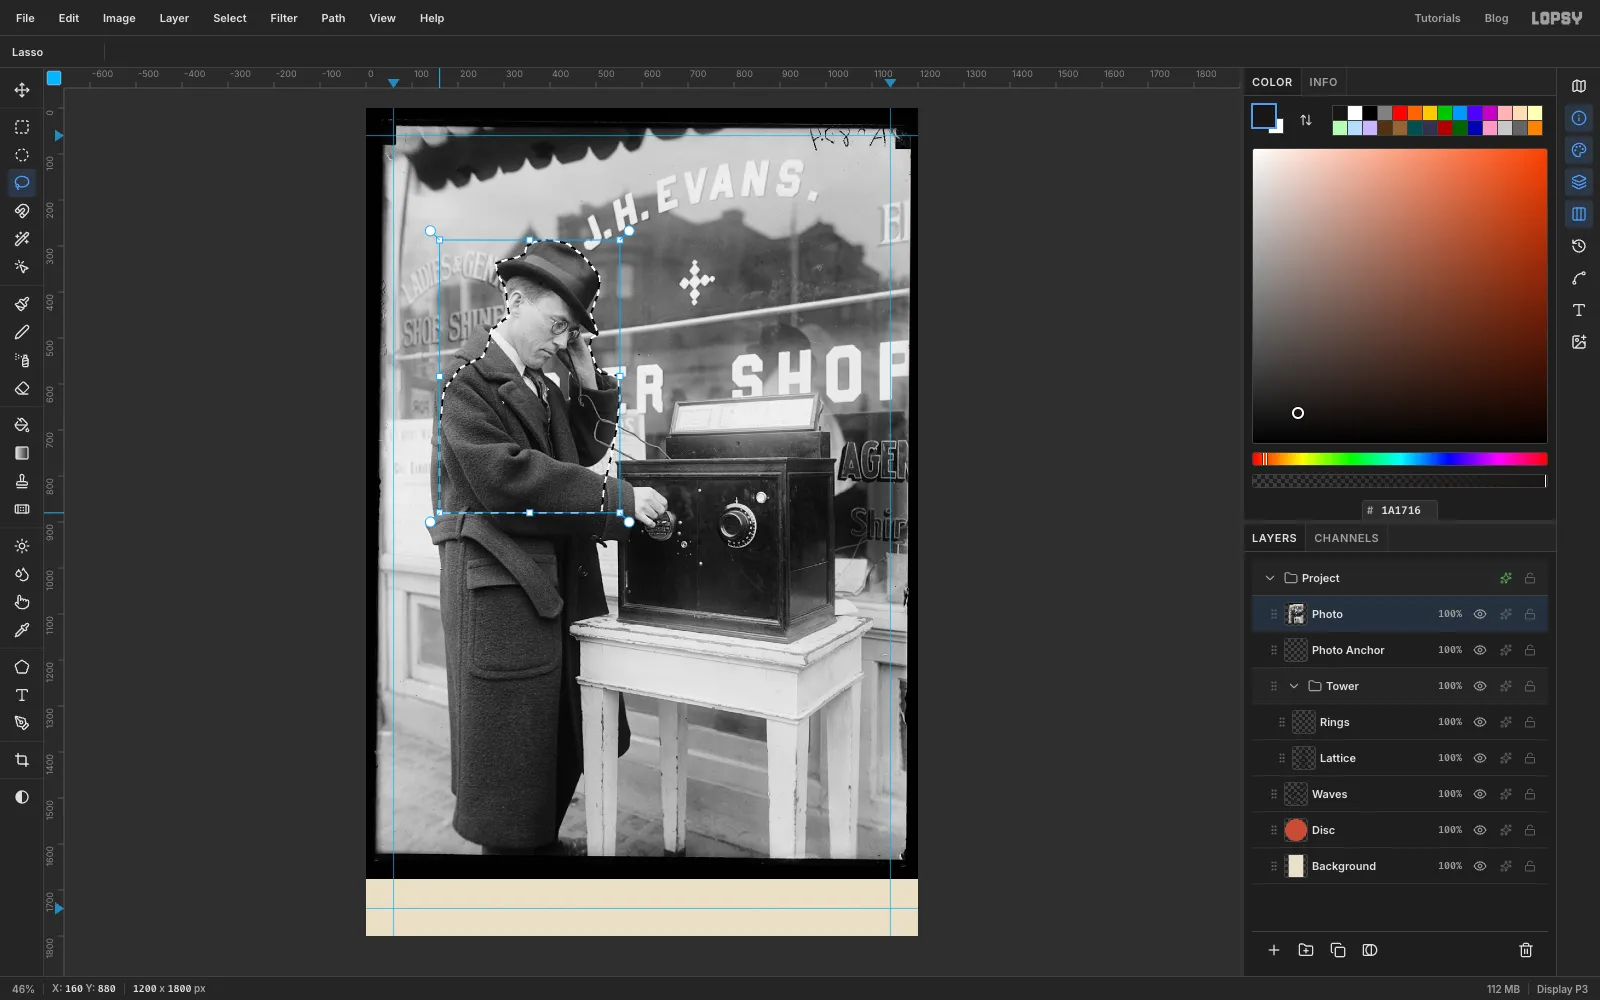
Lasso the listener
With the Lasso, trace the man in one drag. Start low on the left side of his coat, go up over the shoulder and the back of his neck, and follow the back of the ear and hair up to the hat brim. Go round the top of the crown, down the right edge of the hat and the brim's point, and then follow the outside of his raised hand and sleeve. Then run down the front of his coat and cut straight across, level with his other hand on the radio dial.
Stay tight to the hat crown and the back of the head. Any bright window you include will turn into a cream patch later. Leave out the wire to the radio.
-
Copy the cut-out to its own layer
Press Cmd+C and then Cmd+V. The paste lands in place as a new layer, still selected in the cut-out's shape. Rename it
Listener. SelectPhotoand click Delete Layer, then do the same forPhoto Anchor, which has done its job. ClickListeneragain. The selection can stay: the next two filters only need to work inside the cut-out anyway.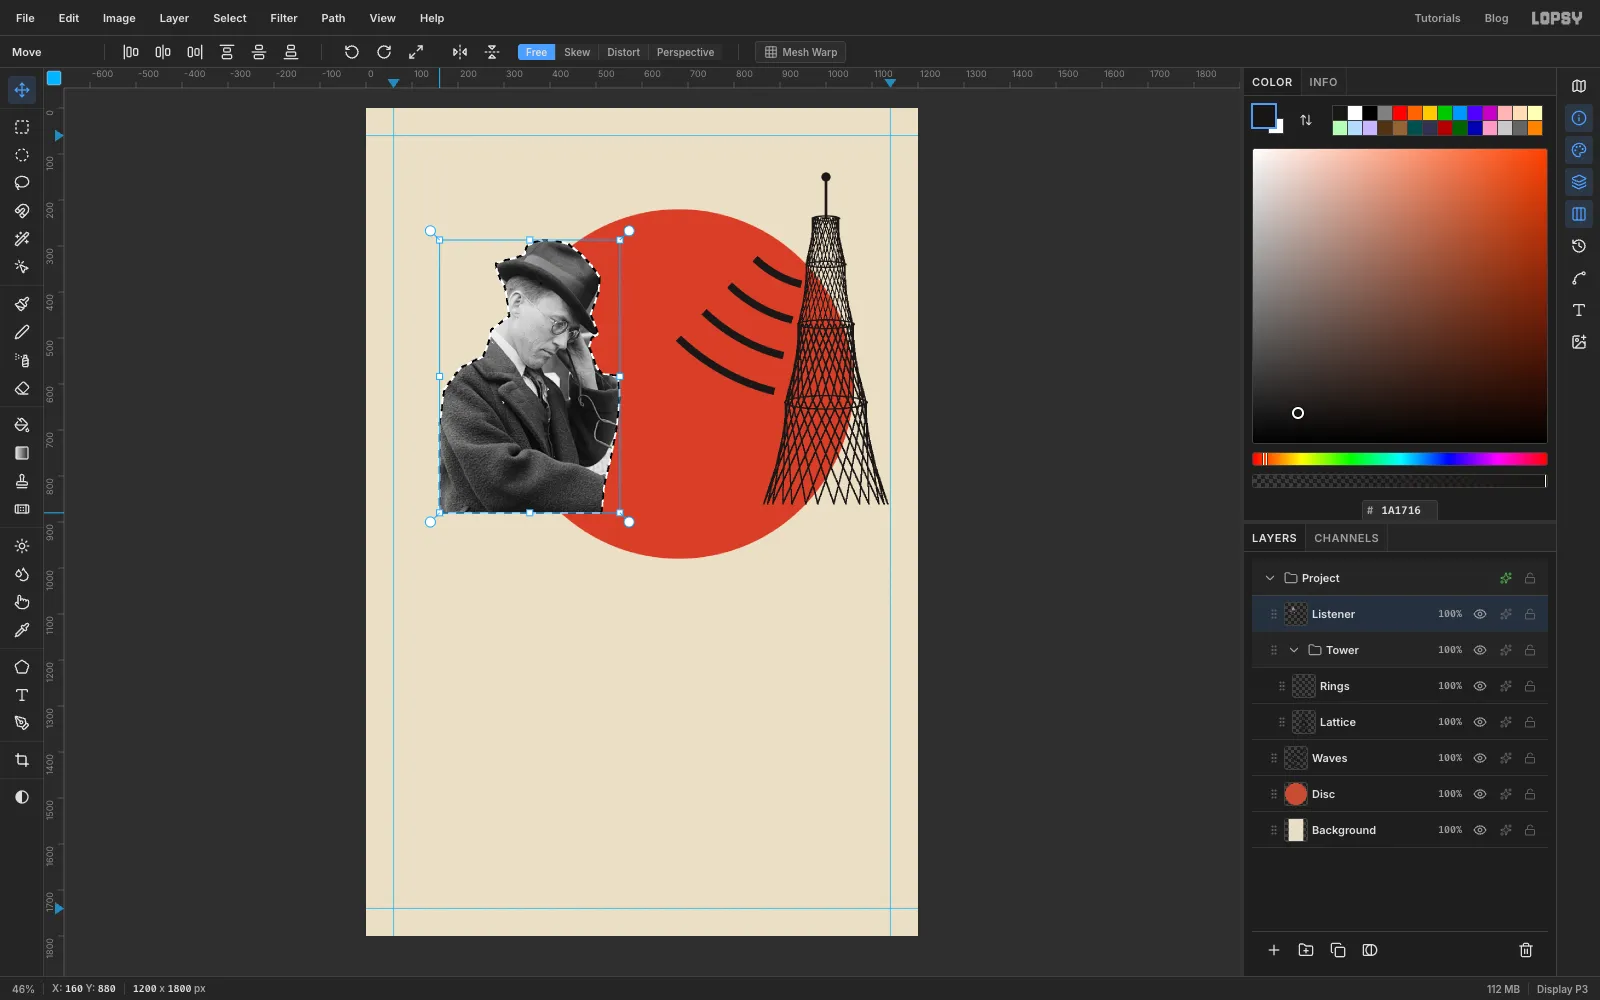
-
Turn the photo into ink
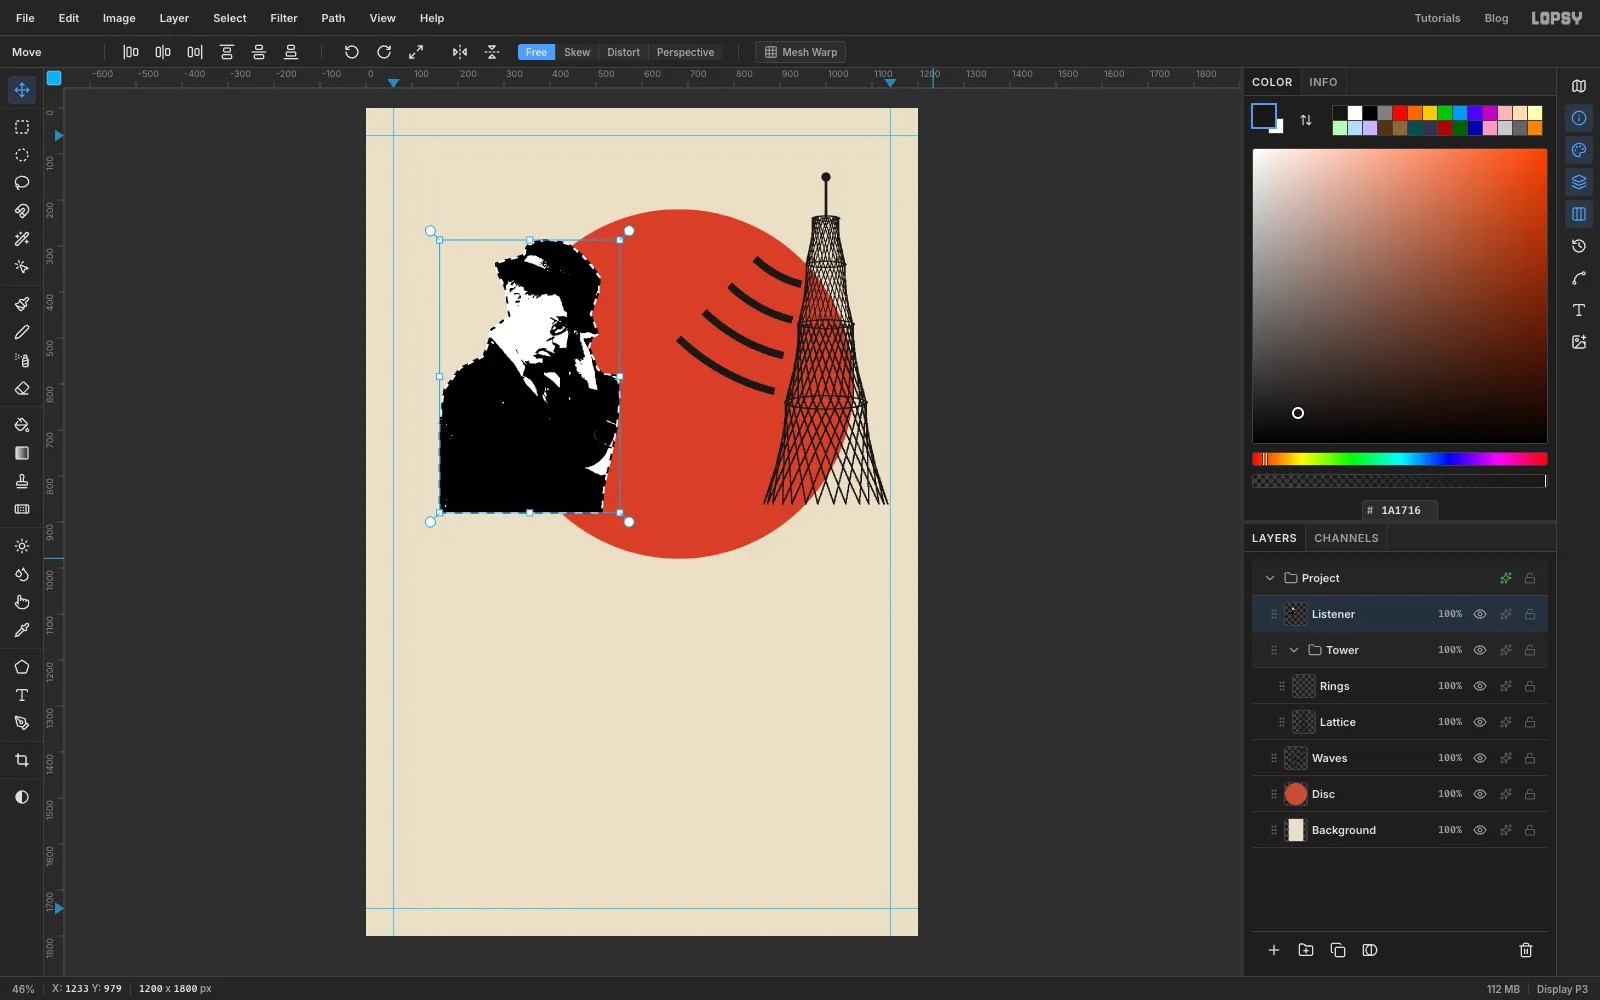
Choose Filter → Gaussian Blur… with Radius 2. It softens the film grain so the next step doesn't leave speckle. Then choose Filter → Threshold… with Level 138. Every pixel becomes pure black or pure white. At 138 the hat, coat and shadows go solid black and the face, hand and collar stay white. Try a few levels: lower ones bring back a pale stripe on the hat band, higher ones swallow the face.
-
Select every white pixel
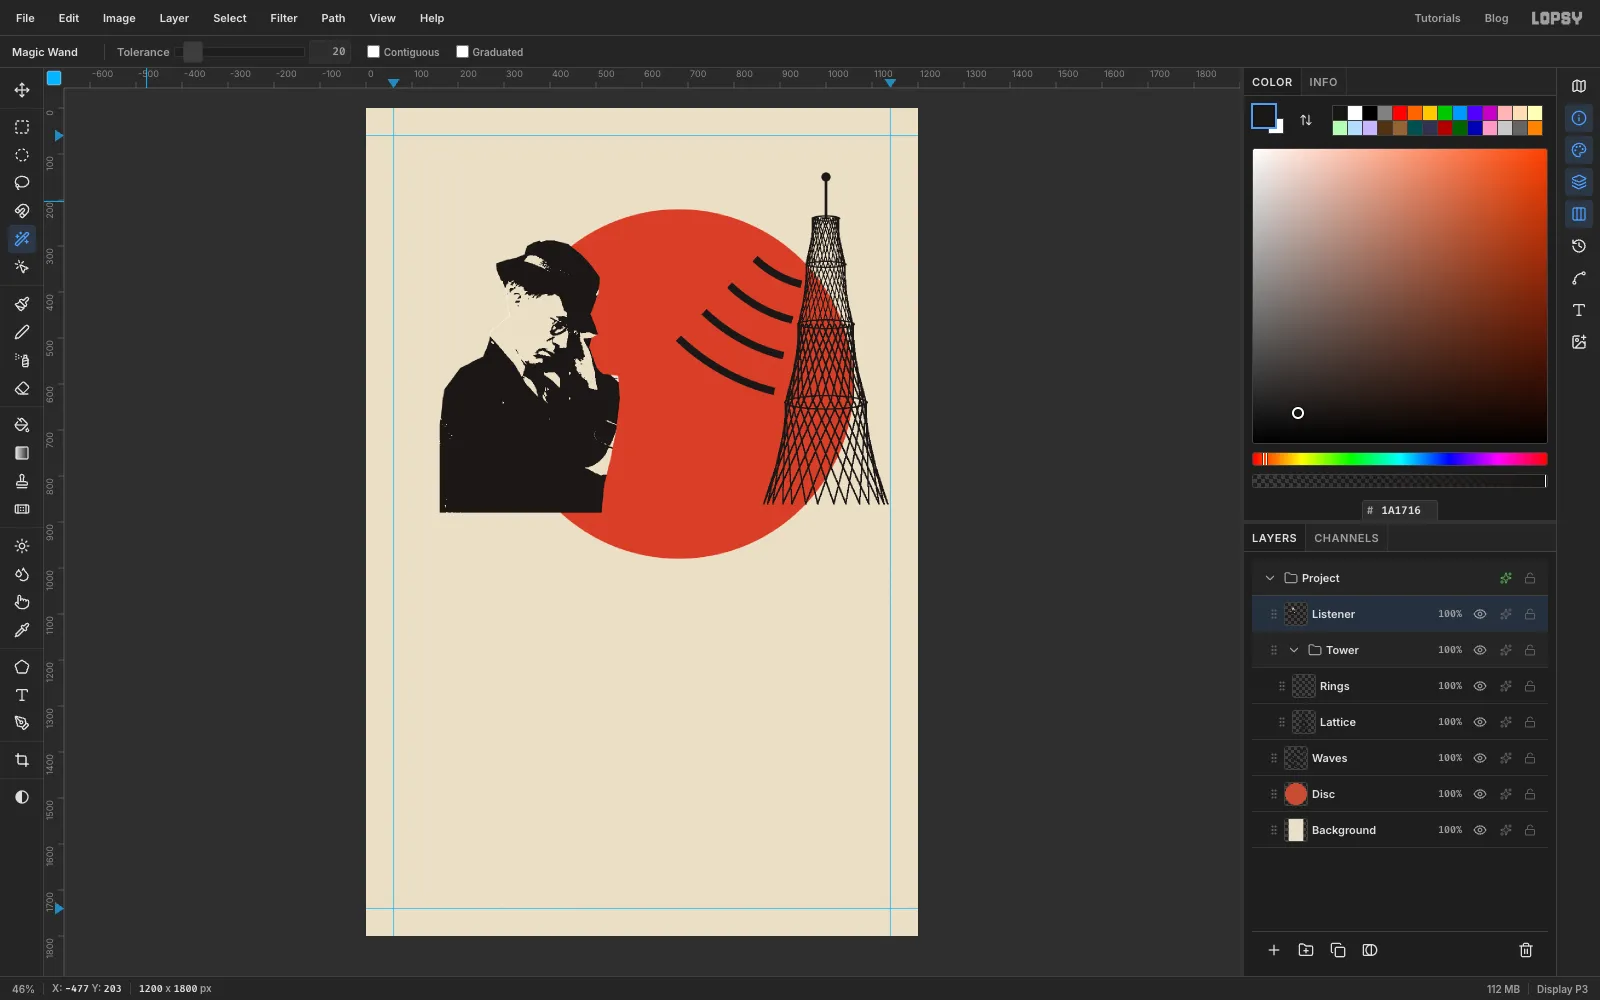
Pick the Magic Wand (W). In the options bar, set Tolerance to
20and untick Contiguous. Click once on his cheek. With Contiguous off, the wand selects every white pixel on the layer, including the separate patches of hand and collar.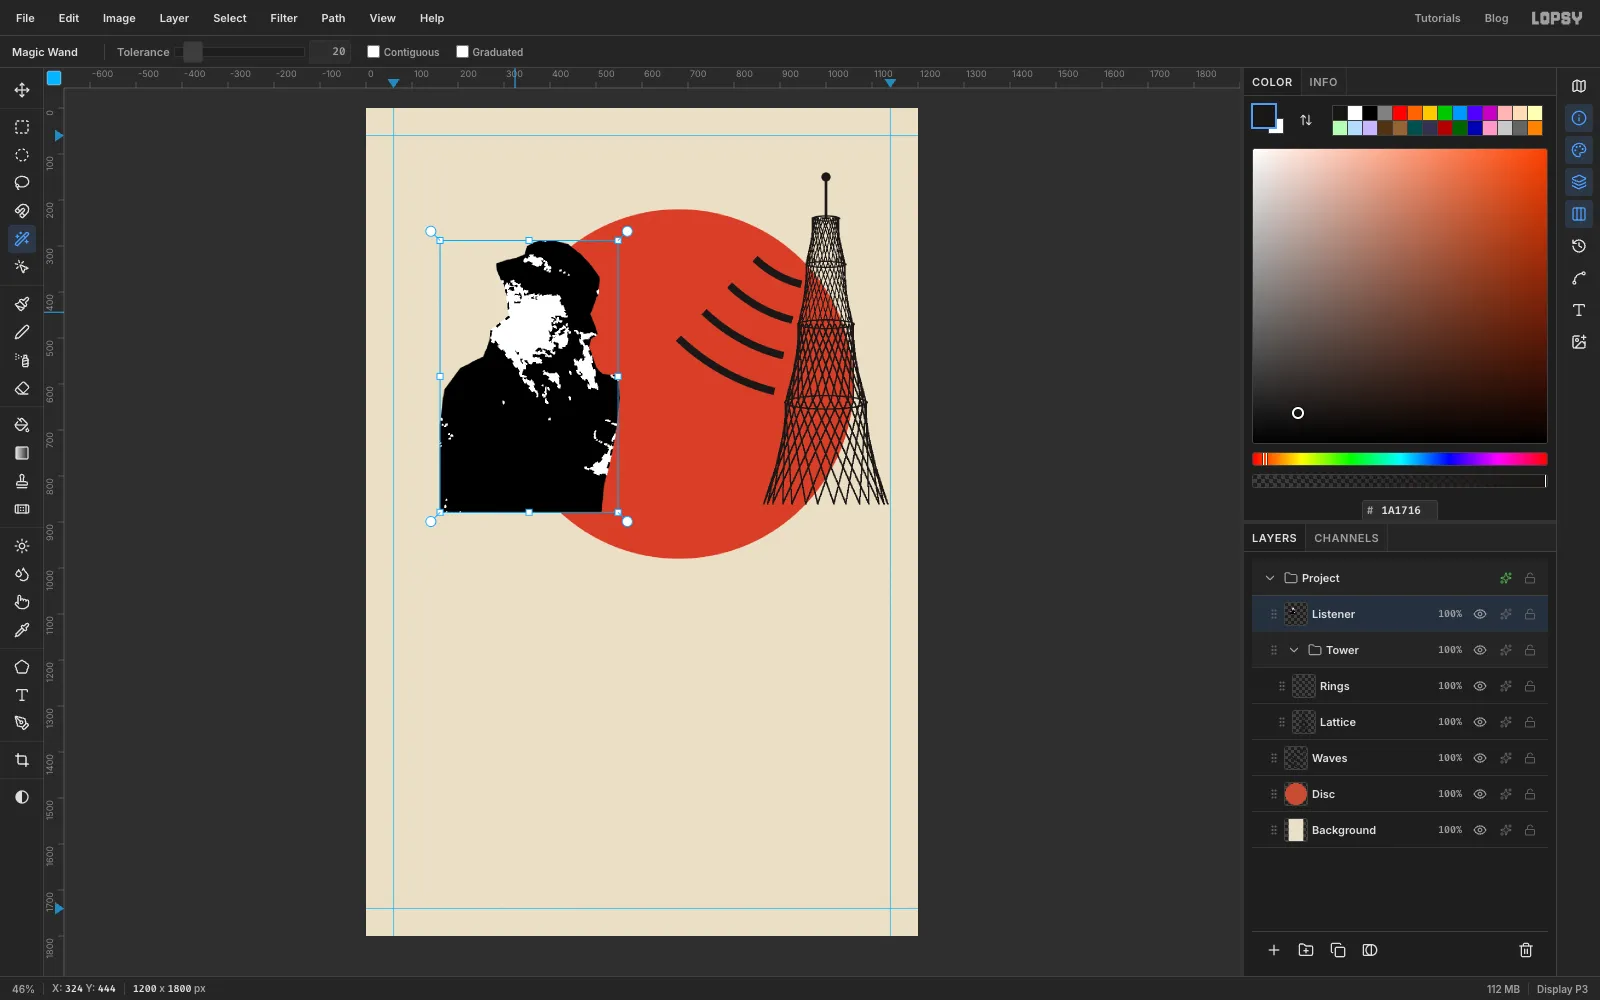
-
Recolor the whites and blacks
Set the foreground to and choose Edit → Fill, so the whites become paper cream. Press Cmd+D, click the hat with the Magic Wand (still non-contiguous), set the foreground to and fill again. Threshold's pure black would look colder than the warm black of the band and tower, and the join where they meet would show. Deselect.
-
Scale the listener up
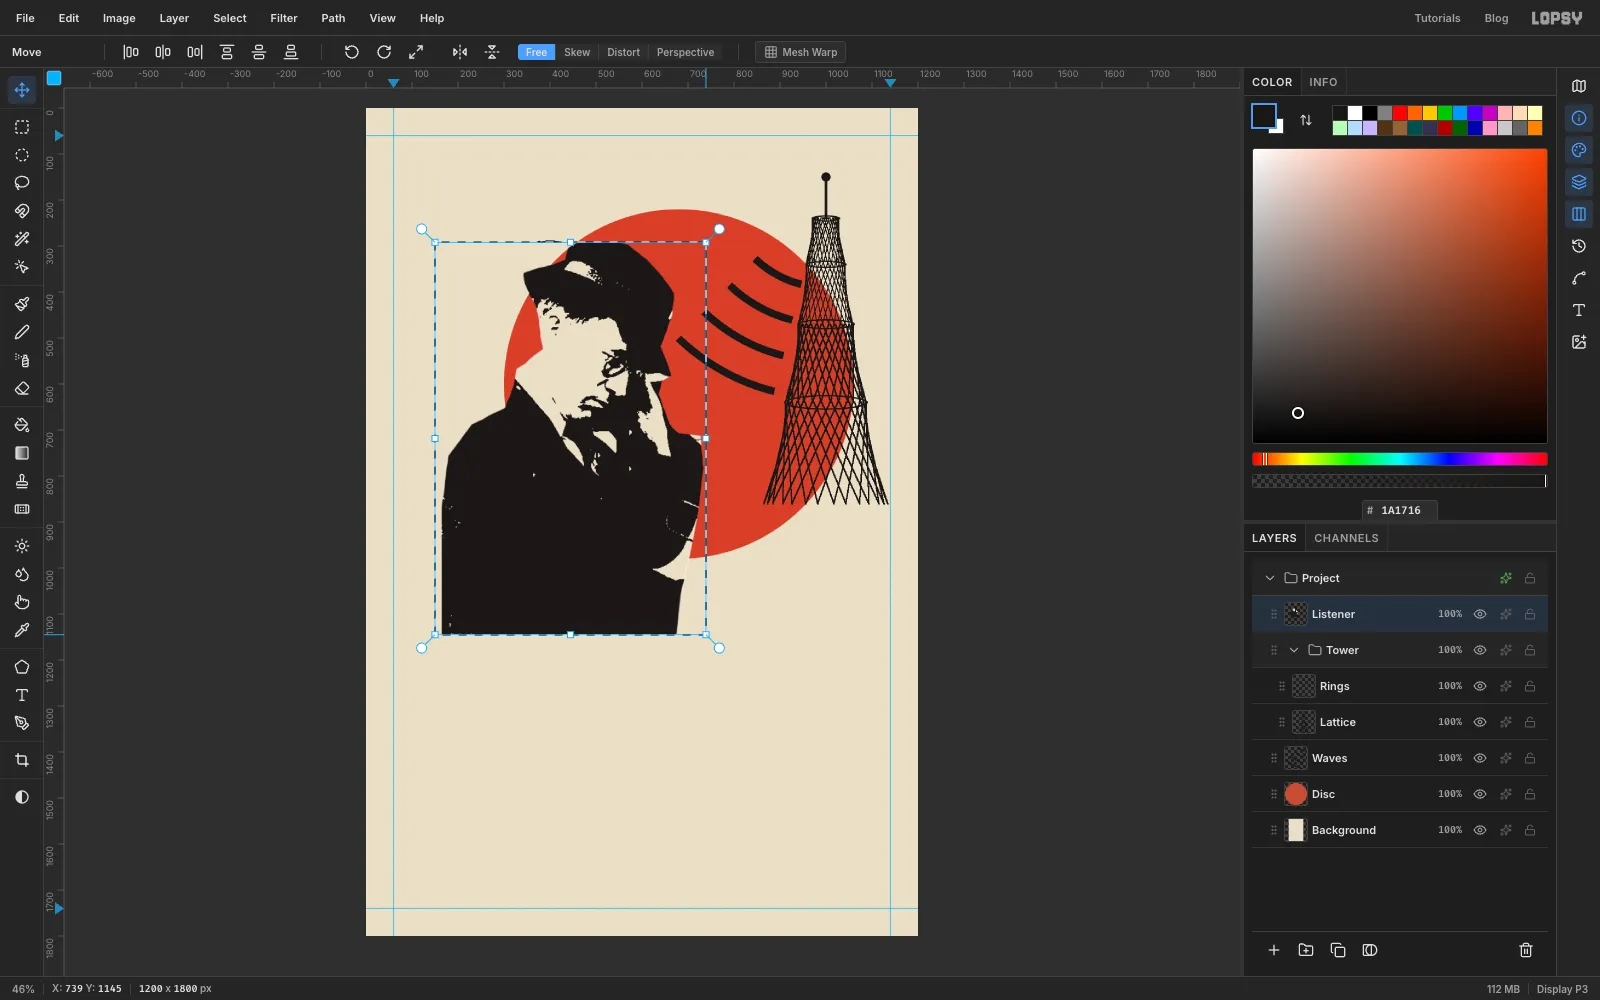
With the Rectangular Marquee, draw a box tight around the cut-out. Switch to the Move tool (V). Hold Cmd and drag the bottom-right handle down and to the right until the box is about 1.45 times its original size (roughly 590 px wide). Cmd keeps the proportions, and the top-left corner stays put.
-
Move and tilt him into the disc
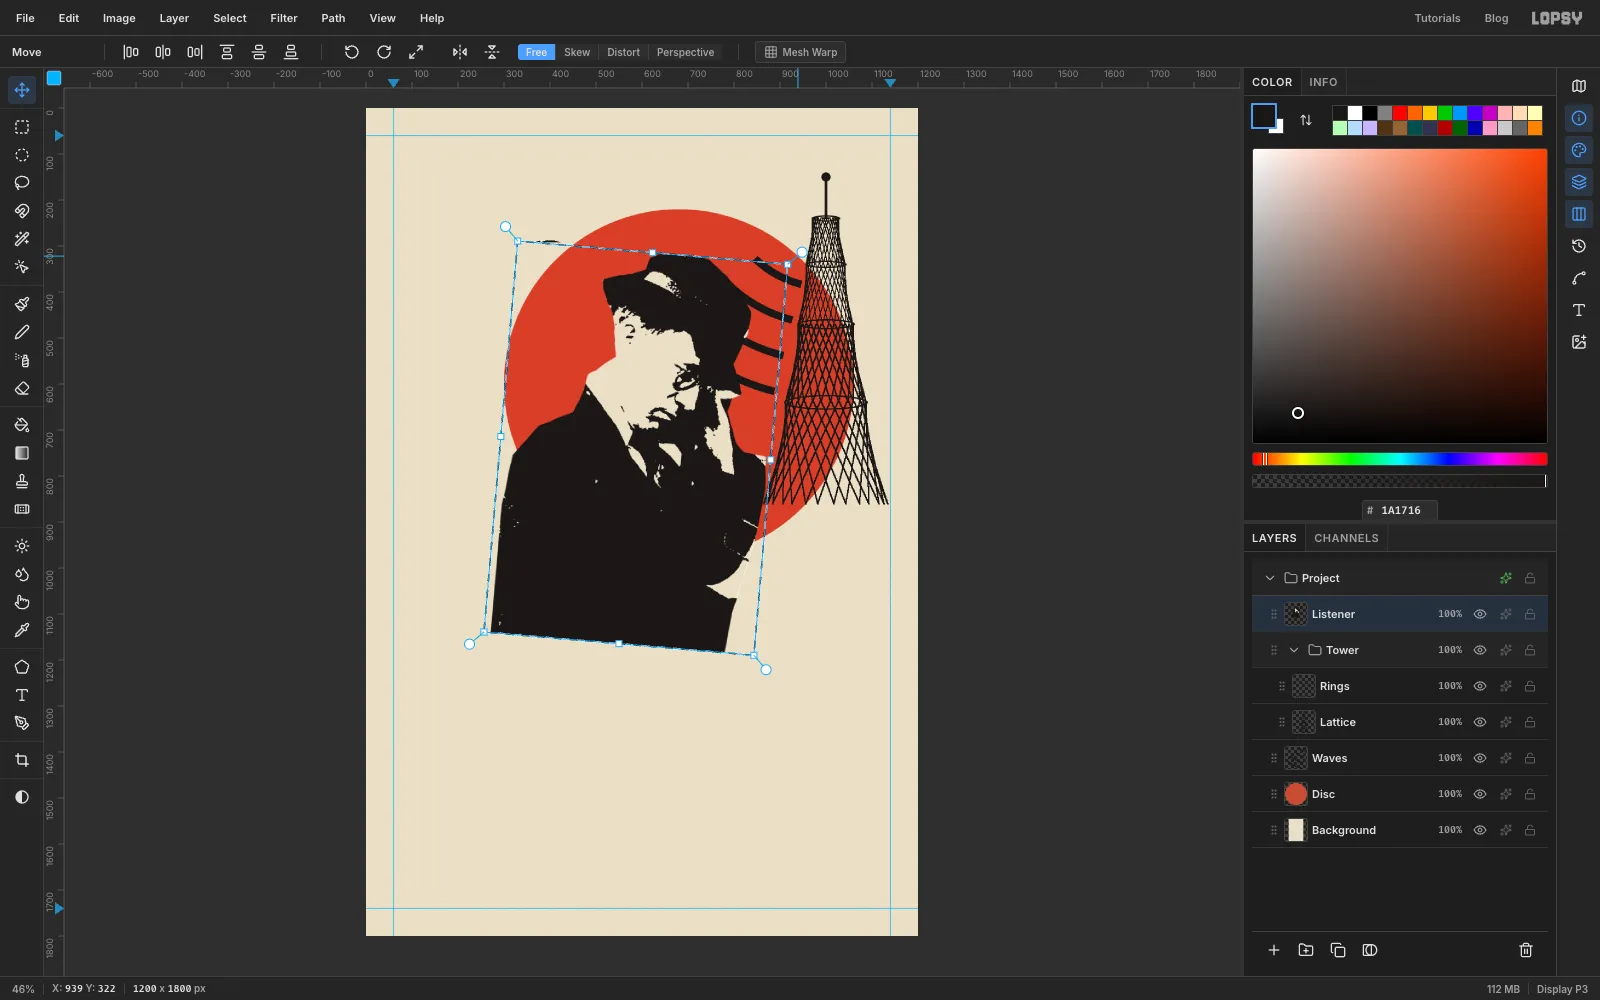
Still with the Move tool, drag from the middle of the selection to move him about 140 px right and 20 px down, so his face sits in the left half of the disc and his hand is near its centre. Then drag the rotation handle outside the top-right corner clockwise by about 5°, so he leans in toward the tower. Press Cmd+D to commit.
-
Mask him to the disc
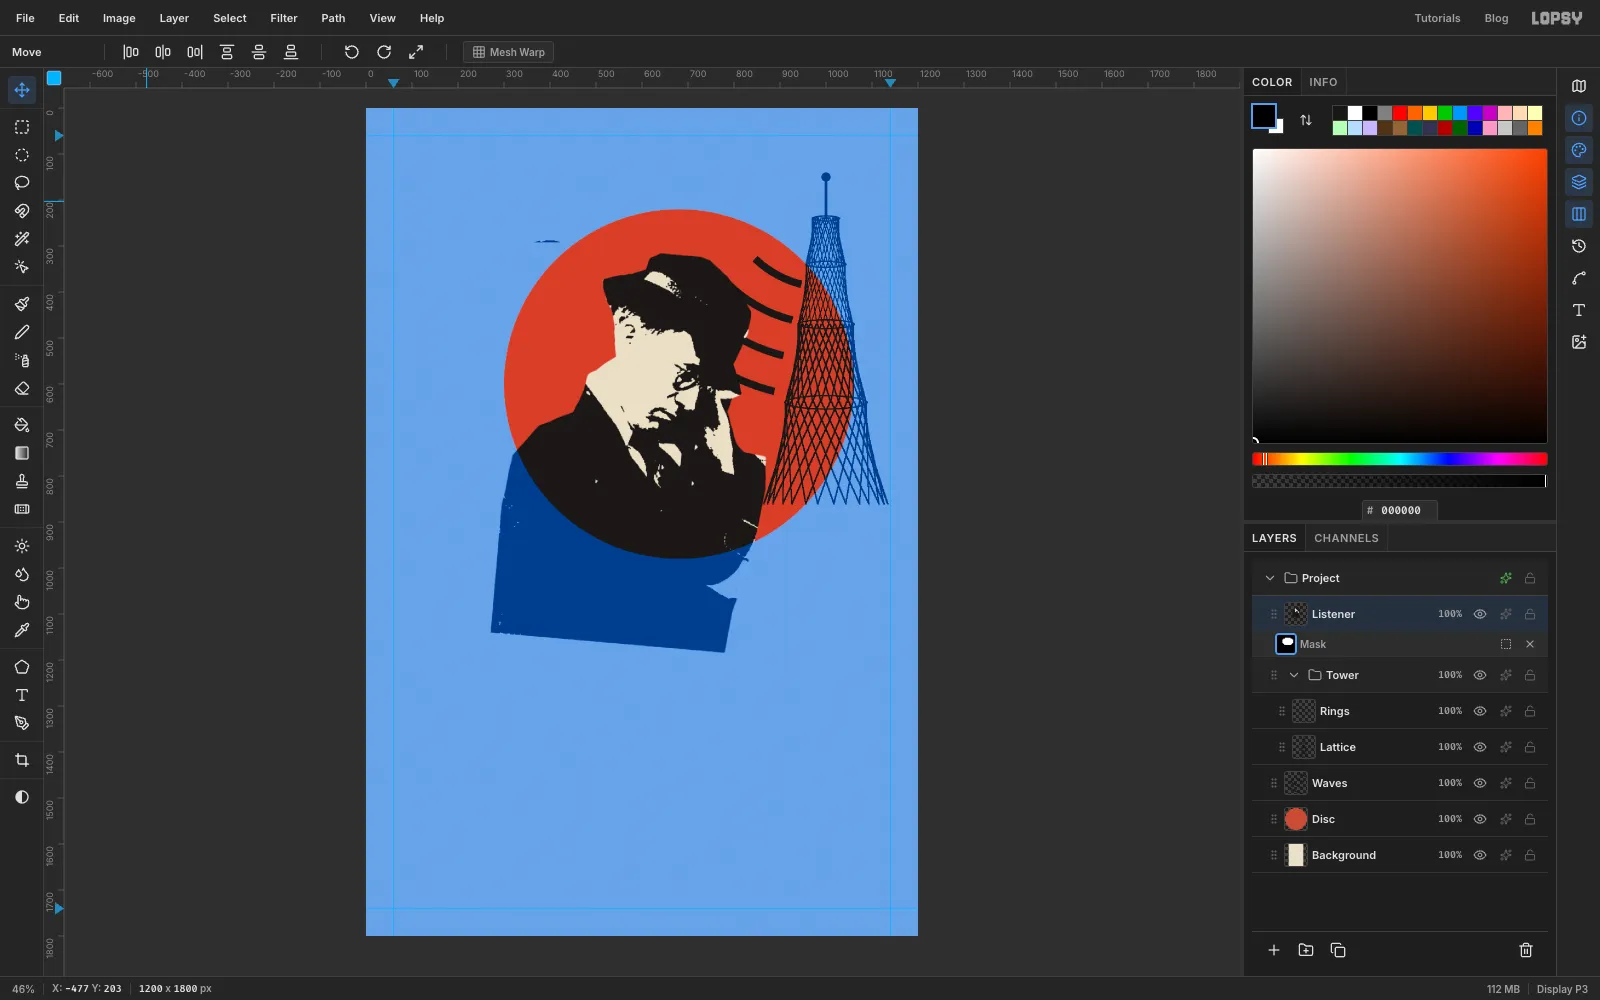
The coat hanging outside the disc looks untidy. Clip it with a mask:
- With
Listenerselected, click Add Mask, then click the new mask thumbnail to edit the mask. - Cmd-click the
Disclayer's thumbnail to select the disc's shape, and choose Select → Inverse. - Set the foreground to pure black and choose Edit → Fill. The blue overlay shows the masked area: everything outside the disc.
- Press Cmd+D, then click the
Listenerlayer name to stop editing the mask.
- With
-
Lay the diagonal band
Add a layer called
Band. With the Lasso, draw a long parallelogram tilted at −15° (rising to the right). Its top edge runs from abouty 1095on the left edge of the page to abouty 773on the right edge, and it's about 310 px tall measured straight down. Start on the top edge in the middle of the page, drag past the right edge and down, back across to the left past the canvas edge, and up, so all four corners sit off the canvas. Fill it with ink and deselect. A freehand lasso won't give a ruler-straight edge on its own, so zoom out until the whole band fits on screen and drag slowly. The corners run off the canvas, so any wobble there doesn't show. The band covers the bottom of the tower and the bottom of the coat.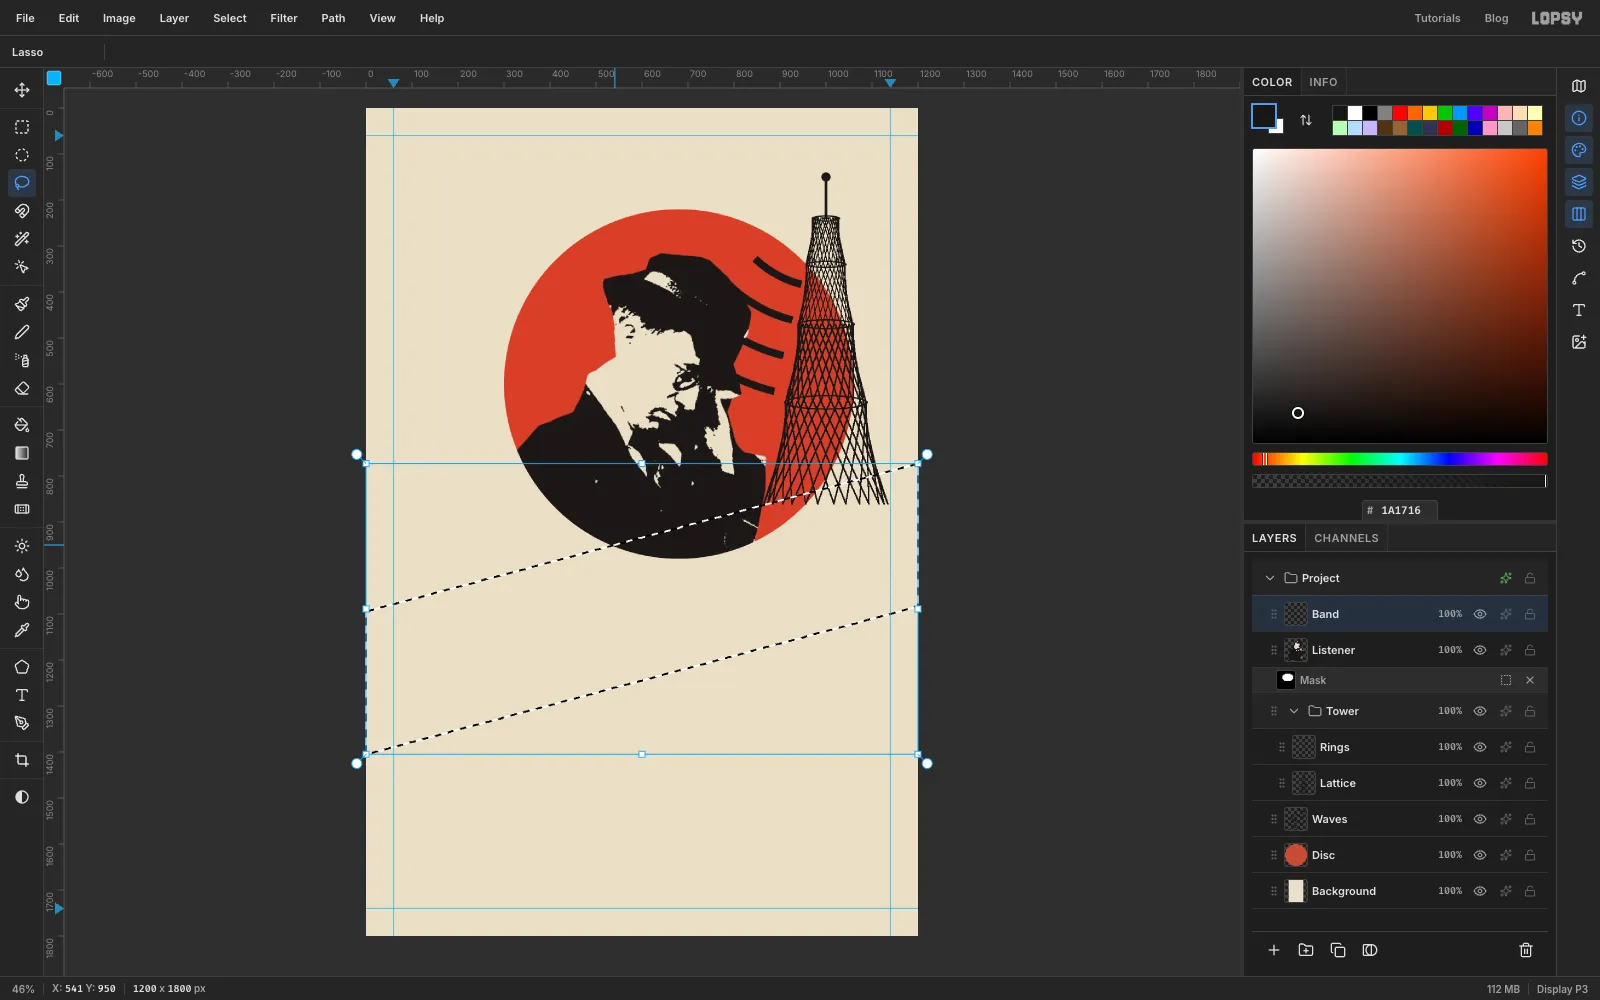
-
Set QUARTZ on the band
Select
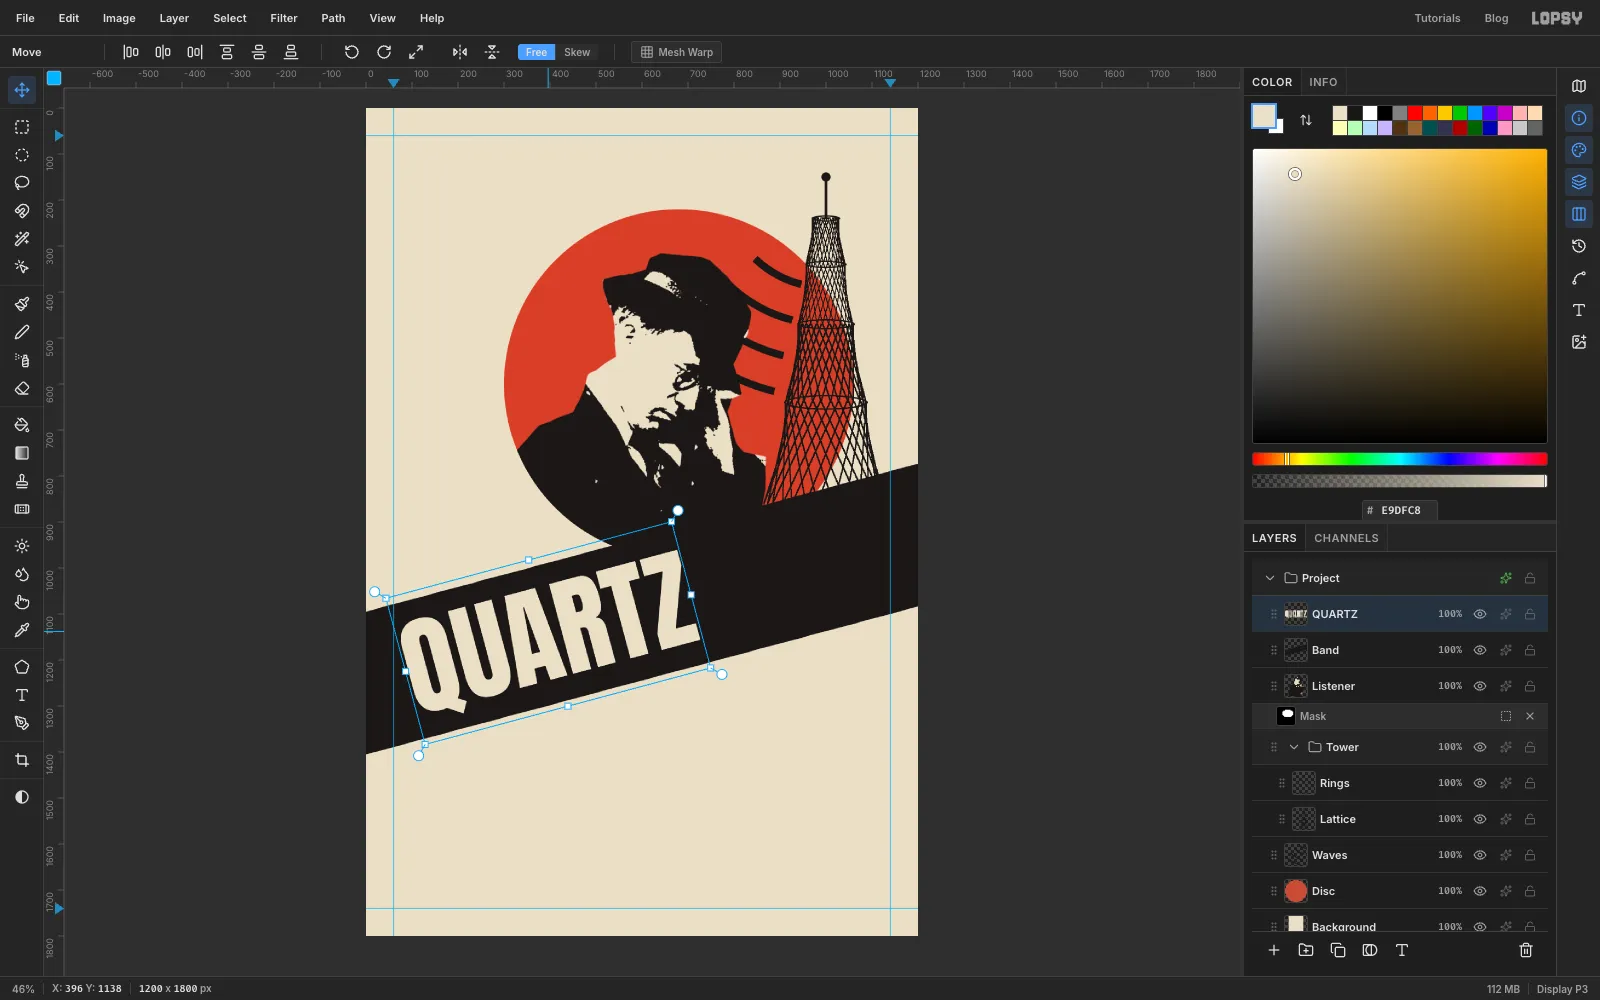
Bandfirst, so the new text lands above it and the text options don't restyle another text layer. Pick the Text tool (T), choose Anton at 235 px, set the foreground to cream , click in an empty area, typeQUARTZand press Tab to commit.Switch to the Move tool. A live text layer gets its own handles. Hold Cmd and drag the top-right rotation handle anticlockwise. Cmd snaps the angle to 15° steps, so stop at −15°, the same angle as the band. Then drag the word onto the band. Start the Q just inside the left margin guide, with roughly equal black above and below the capitals (about 45 px each). The Q's tail hangs a little lower, so let the caps sit a touch high.
-
Add NIGHTS in red
Click
Bandagain. Set the foreground to , keep Anton at 235 and typeNIGHTSin an empty area, then press Tab. Rotate it to −15° the same way, and drag it into place just under the band. Keep about a 40 px gap between the band's lower edge and the tops of the letters, with its left end lined up with the Q above.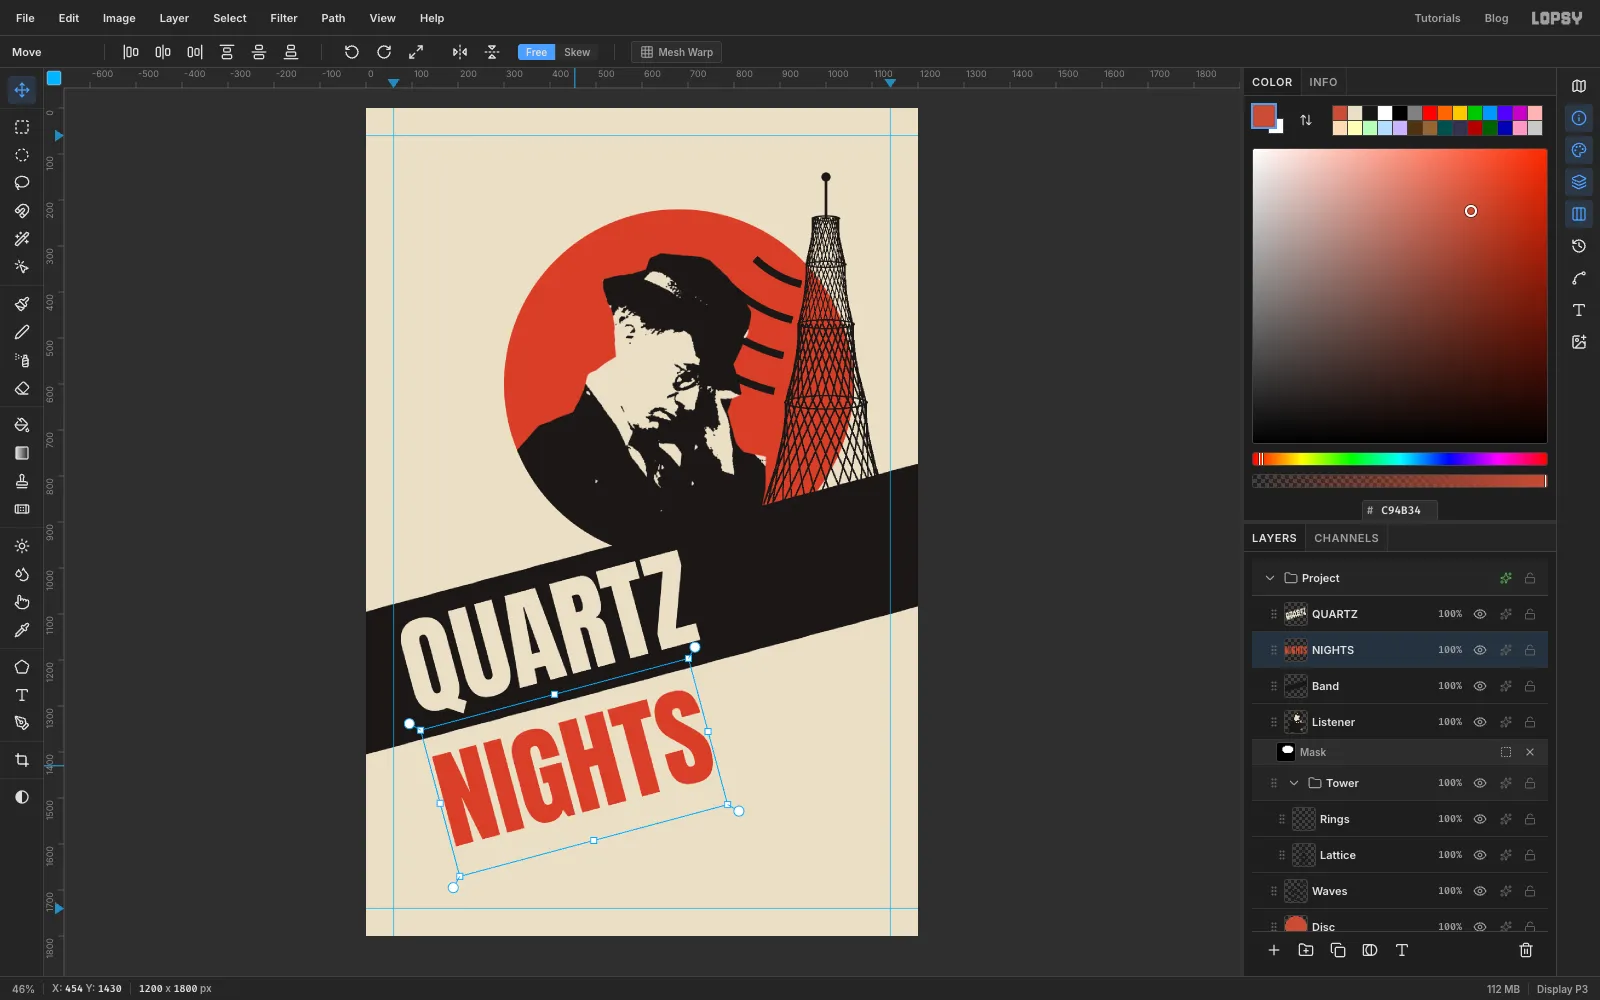
-
Drive a wedge into the title
Add a layer called
Wedge. Lasso a long thin triangle along the band. Put its base off the right edge of the page, about three-quarters of the band's height and centred on it, and its point on the band's centre line about 60 px past the Z. Fill it with and deselect. It's Lissitzky's red wedge, striking into the word.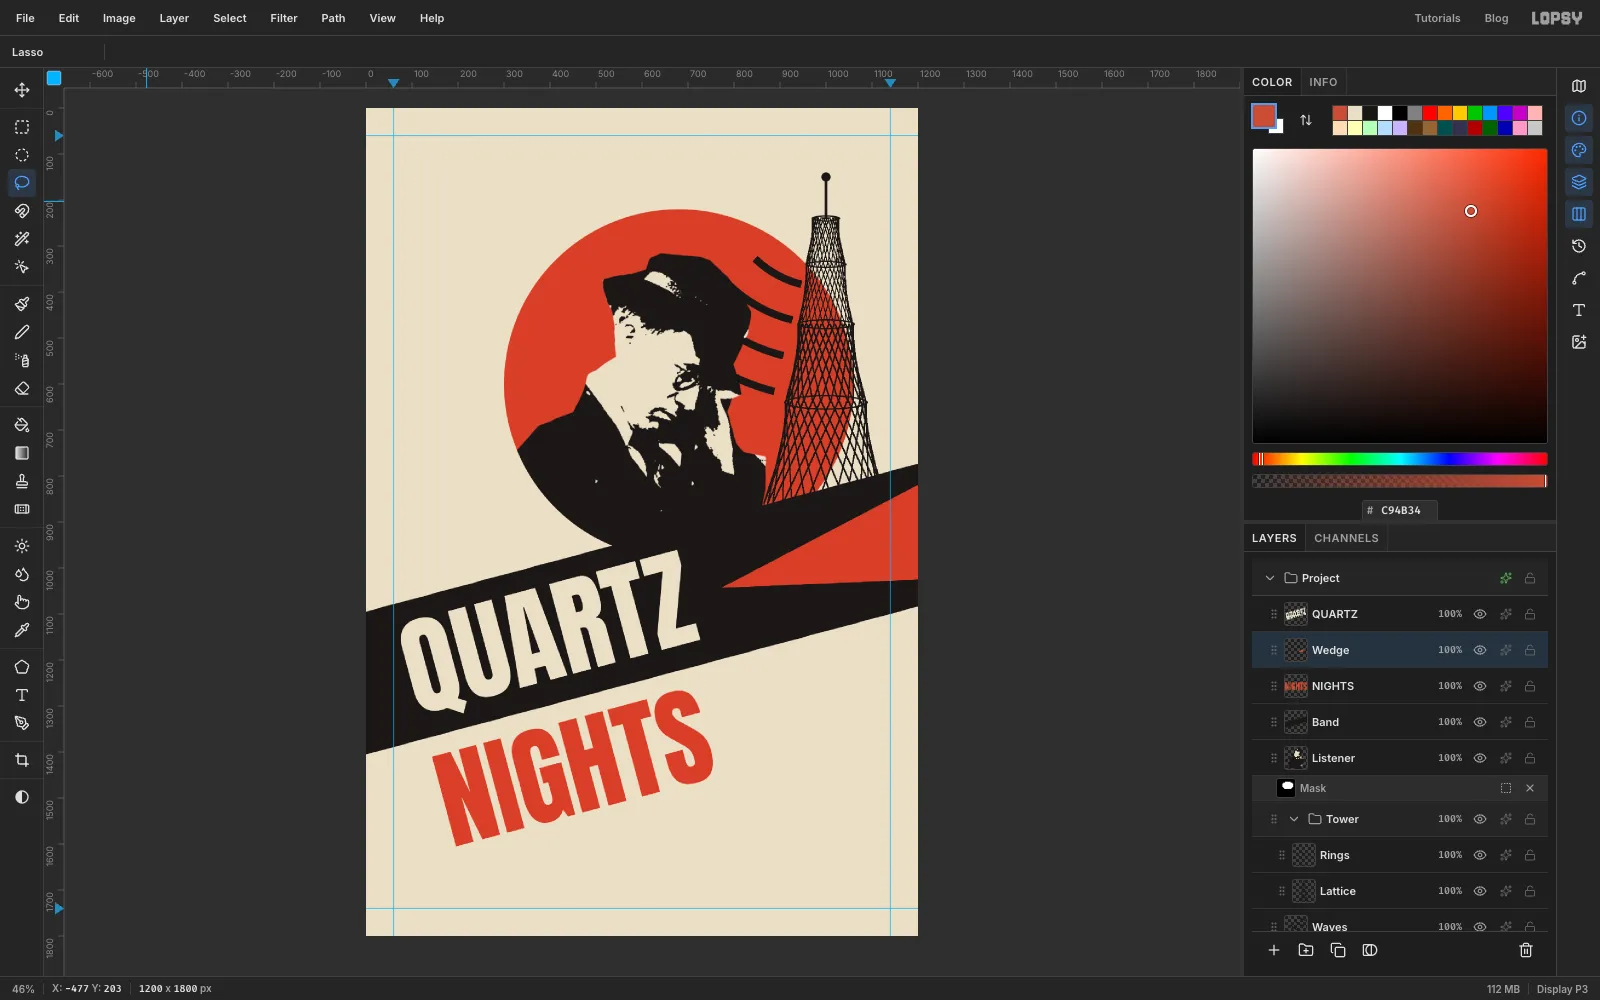
-
Cut the crystal facets
Add a layer called
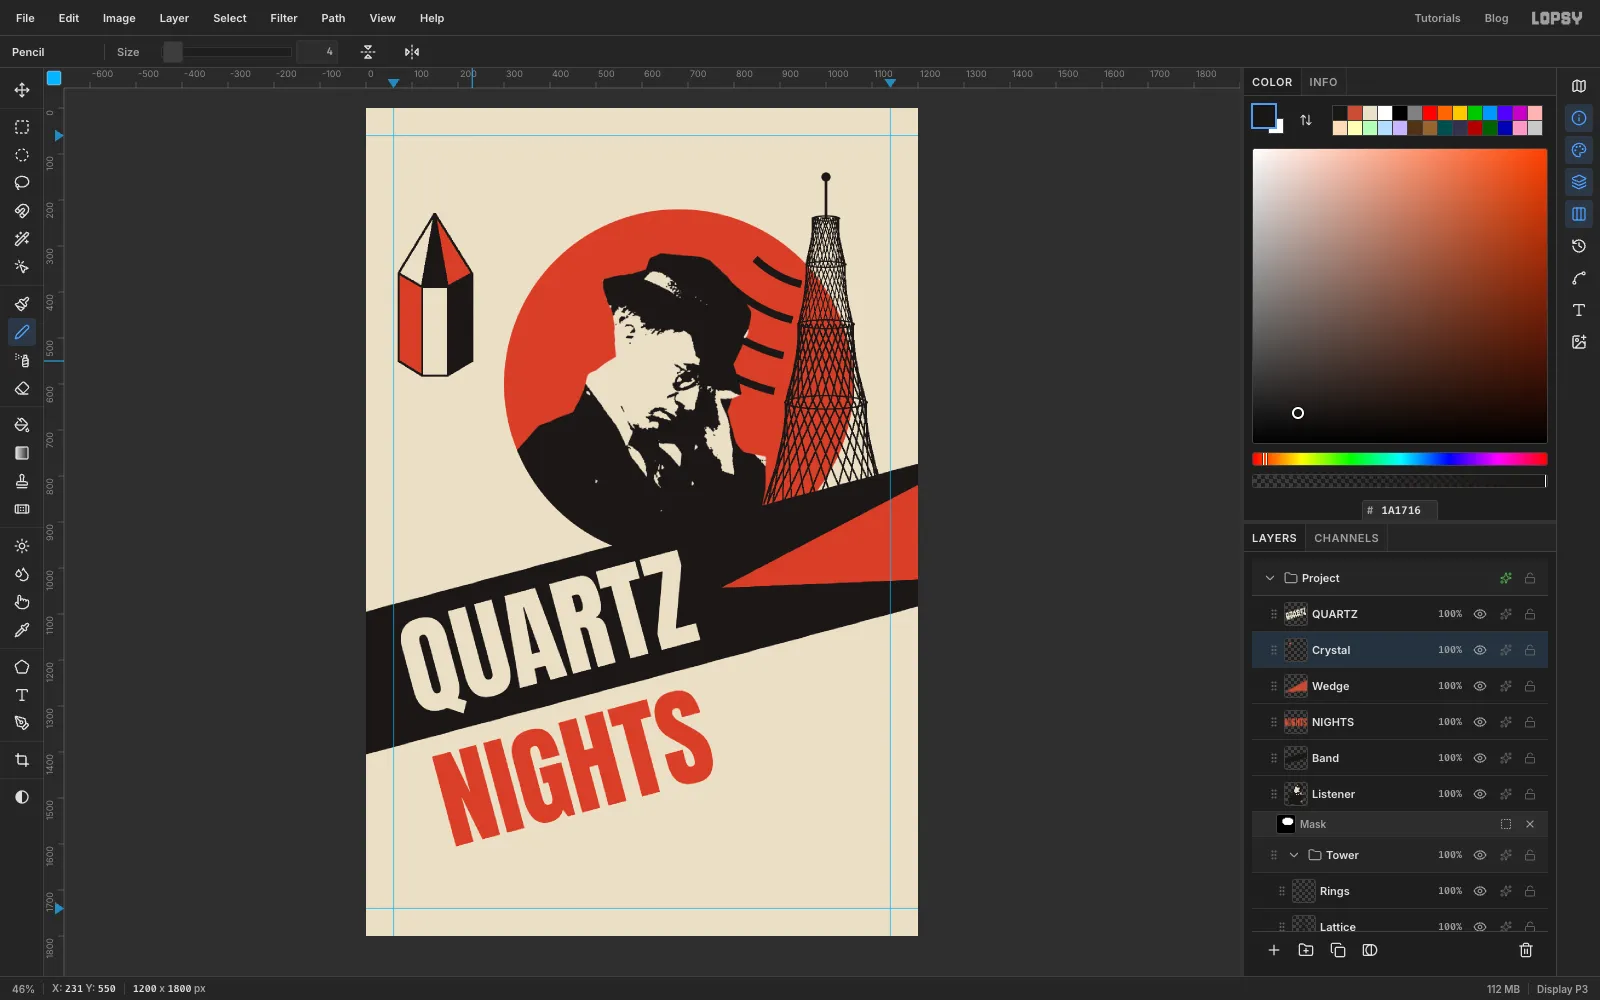
Crystal. It goes at the top left, under the header you'll add later. A quartz crystal is a hexagonal prism with a three-sided point, and you'll draw six shapes with the Lasso, filling each with Edit → Fill as you go:- Three body faces side by side. The outer two run from
y 360toy 550, atx 71–123on the left andx 179–231on the right. The middle face,x 123–179, sits about 30 px lower, fromy 390toy 582. Its dropped top and bottom edges make the ends read as the near half of a hexagon. Fill the left face vermilion, the middle cream and the right black. - Three triangles from the tops of the faces up to a single point at
x 151,y 230. Fill the left one cream, the middle one black and the right one vermilion, so no facet touches another of the same color.
Then set the Pencil to Size 4 with ink black, and Shift-click a line along every edge, inside and outside, so all the edges have the same weight.
- Three body faces side by side. The outer two run from
-
Tilt the crystal and outline it
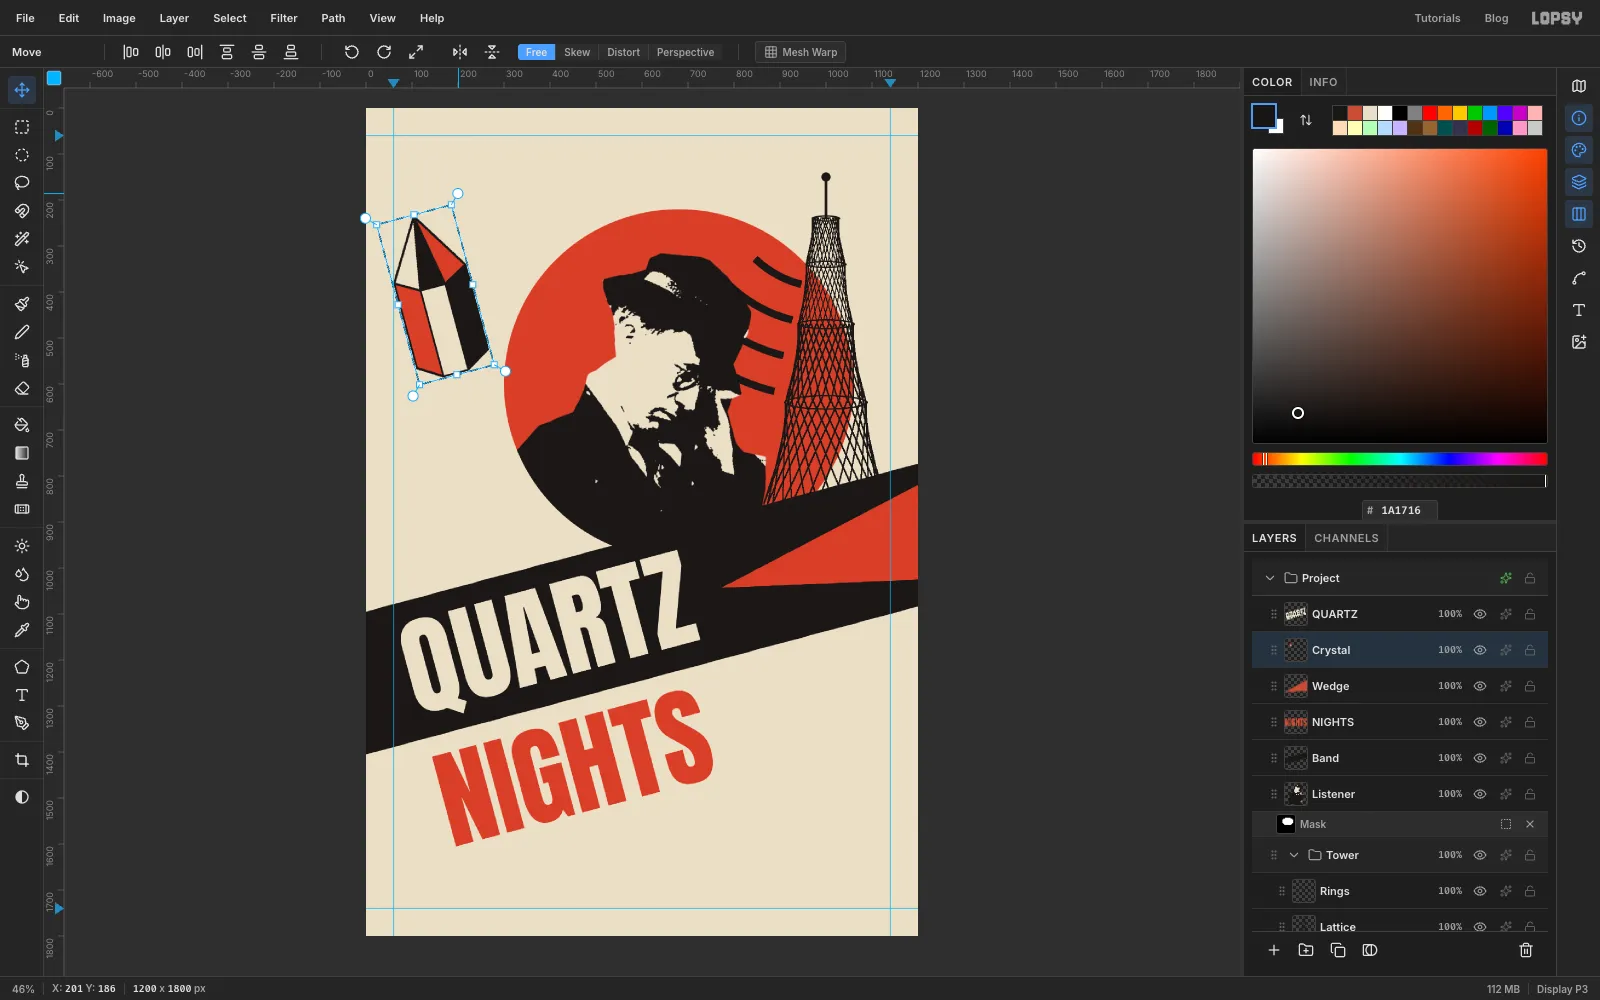
Draw a Rectangular Marquee around the whole crystal, switch to the Move tool, hold Cmd and drag a rotation handle anticlockwise to −15°, square to the band. Press Cmd+D. If it drifted, nudge it with the arrow keys until its leftmost corner touches the 60 px margin guide. Open the layer's effects (the effects button on its row), enable Stroke with Width 2 in ink black, and close the drawer. The stroke tidies the outline where the cream facet meets the paper.
-
Add the header and a red rule
Add a layer called
Header Rule. Pick the Text tool, choose Bebas Neue at 36 px in ink black, and set Letter spacing to6in the Text panel (the T button in the panel strip on the right opens it). Click near the top-left margin, typeFOUNDRY RADIO CIRCLE, press Tab, and nudge it so the capitals start on the left margin guide, about 70 px from the top.Click
Header Rule, pick the Pencil at Size 6 with vermilion, click 16 px under the left end of the text and Shift-click under its right end. That draws one straight rule as wide as the header.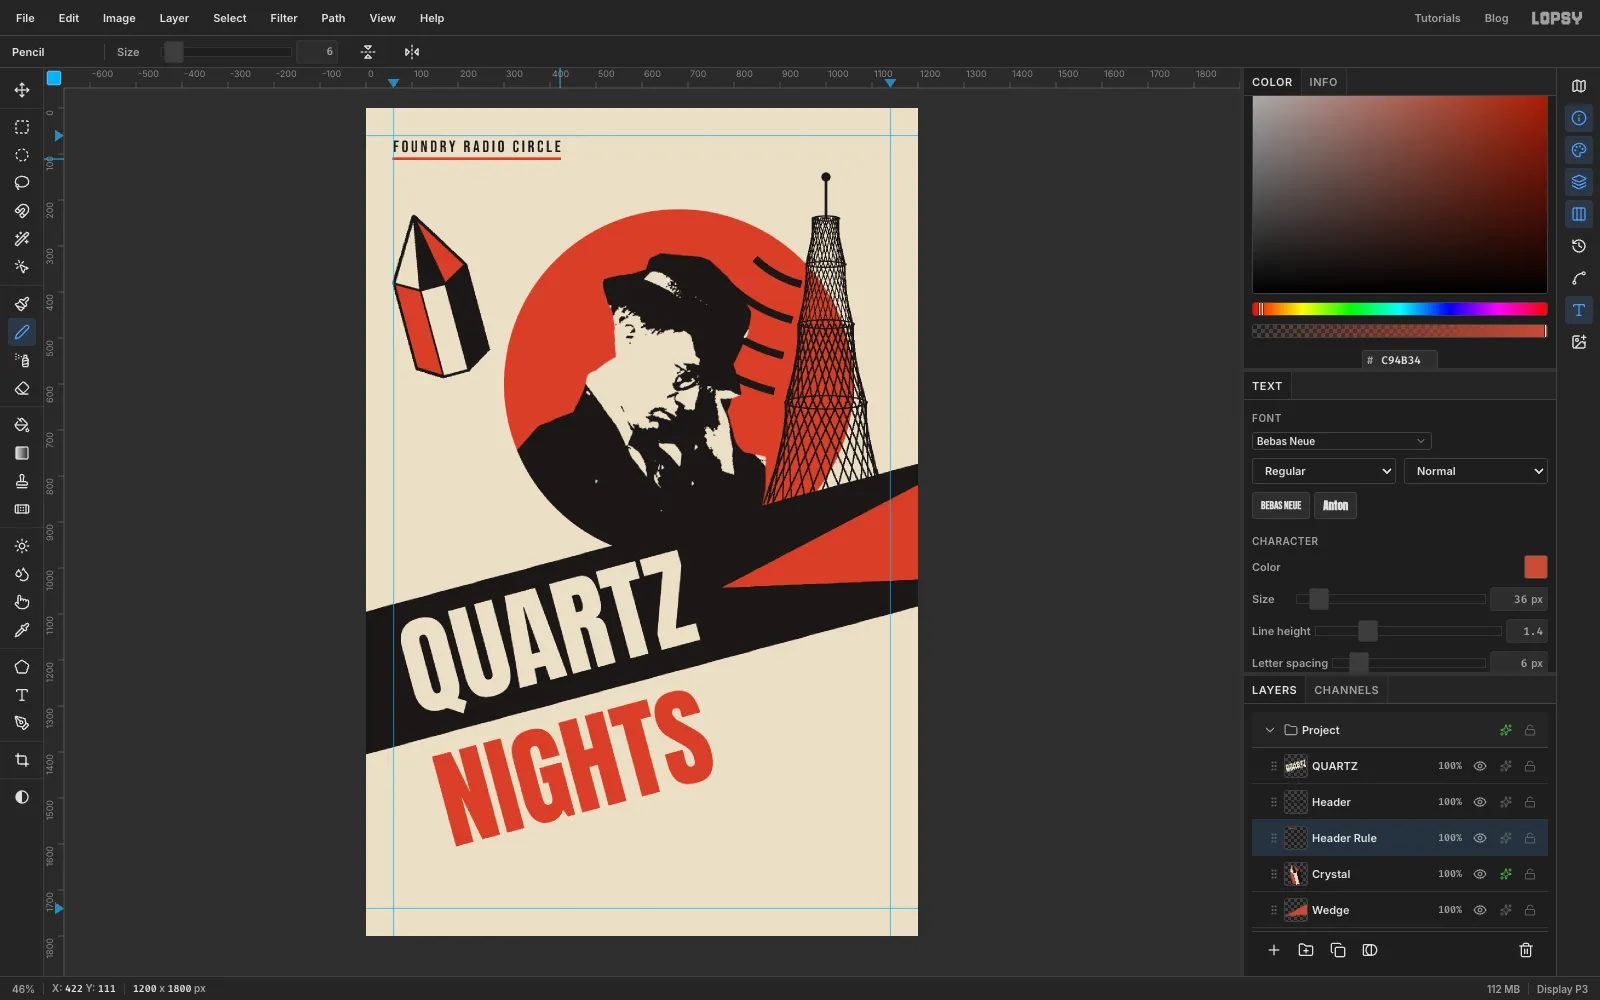
-
Stamp FREE ENTRY
Add a layer called
Stamp. The stamp sits in the gap left of the disc, at aboutx 168,y 878:- Set the foreground to ink and fill a 112 px-radius circle centred 8 px right of and 8 px below that point (From
64,774To288,998). It's a hard print shadow. Don't use a soft drop shadow: 1920s print didn't have them. - Fill a vermilion circle of the same size on the point itself (From
56,766To280,990). - Select → Shrink… by
8and fill cream, then Shrink… by5and fill vermilion. That leaves a thin cream ring.
Deselect. With
Stampselected, typeFREEin Anton 76 cream. It keeps the 6 px letter spacing from the header, which suits it. ClickStampagain and typeENTRYin Anton 40 with Letter spacing4. Rotate each to −15° with the Move tool's handles, then drag them into the stamp, FREE just above the centre and ENTRY below it, both centred on the same tilted line.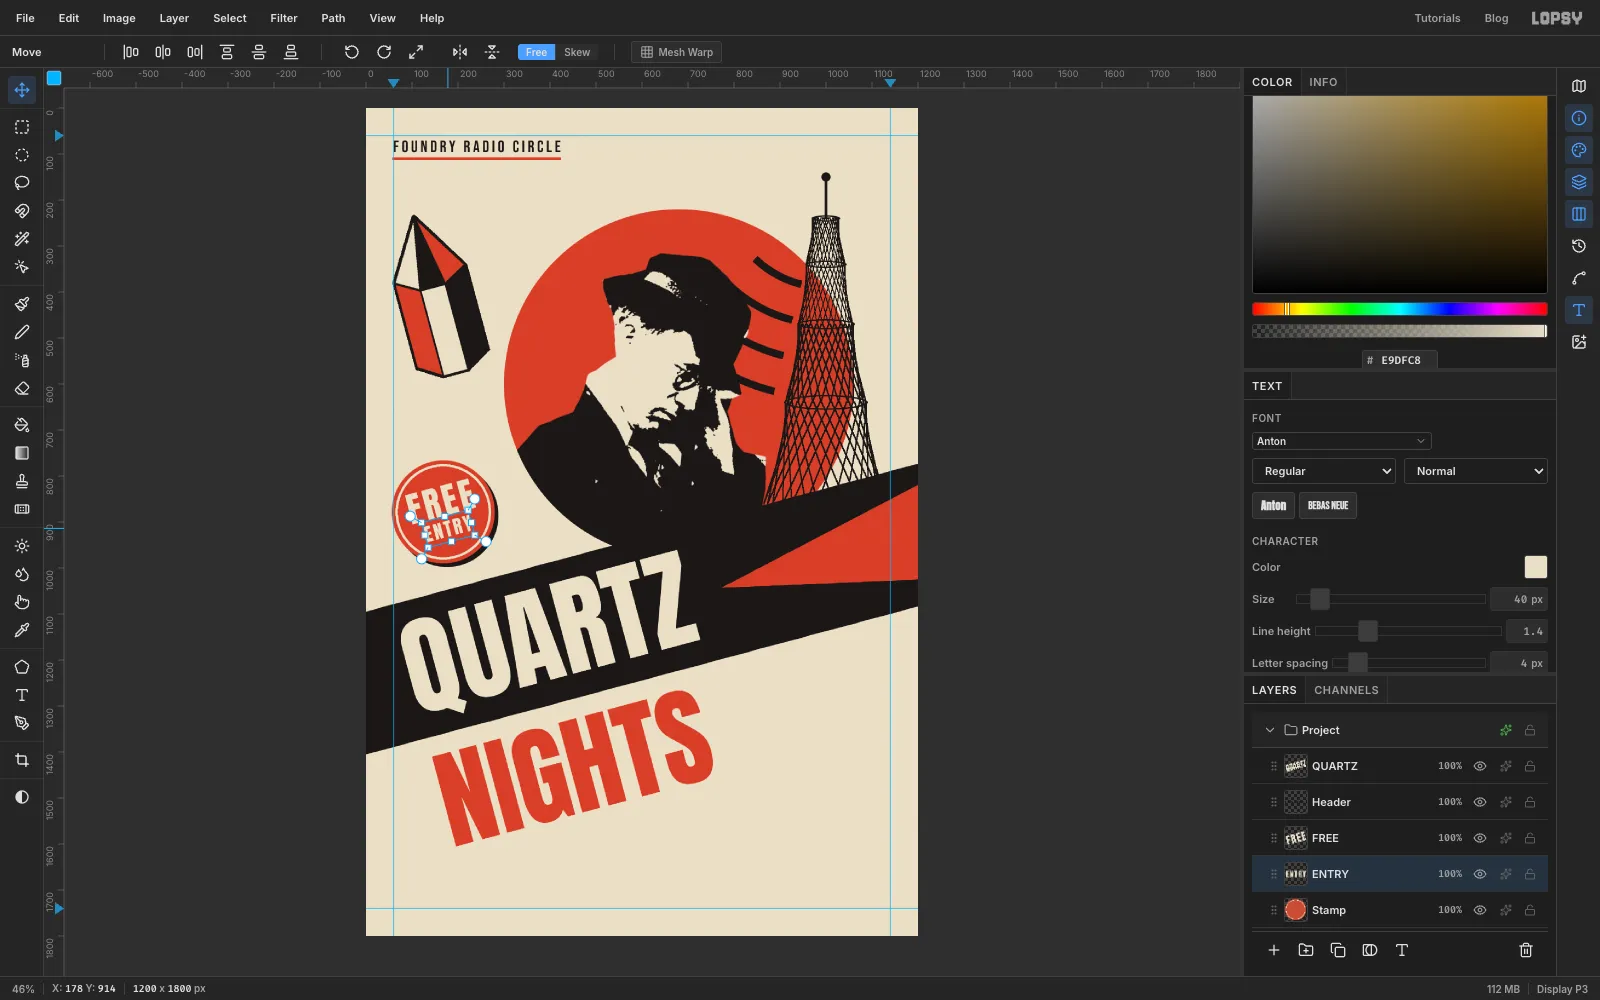
- Set the foreground to ink and fill a 112 px-radius circle centred 8 px right of and 8 px below that point (From
-
Set the info column
Click the top ruler at
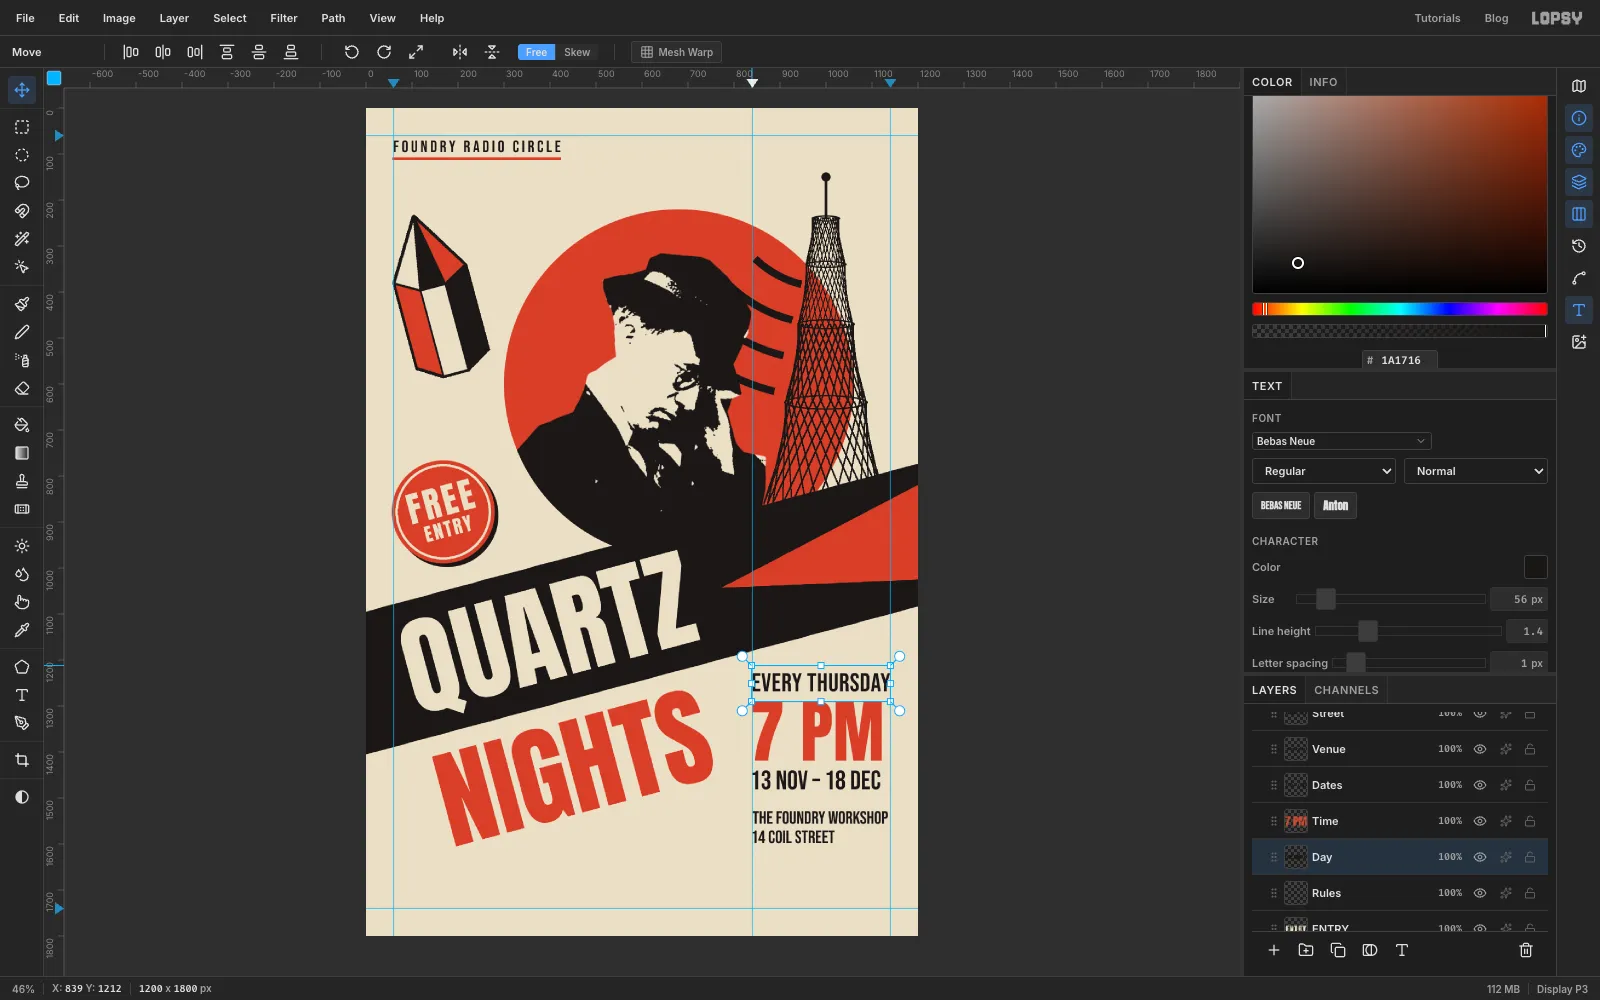
x 840for a guide. The column hangs off it. Add a layer calledRules, and click it again before each line, so the text tool never restyles the line before. Set Letter spacing back to0in the Text panel first, because it carries over from ENTRY.Make the lines from the bottom up, so each click lands above the lines already set. A click inside an existing line's text box would edit it instead.
The column starts about 45 px under the band and the lines are spaced 14 to 22 px apart. The numbers are where the top of each line's capitals goes (the Info panel shows the cursor position):
14 COIL STREET, Bebas Neue 39, ink, aty 1570THE FOUNDRY WORKSHOP, Bebas Neue 39, ink, just above it aty 152813 NOV – 18 DEC, Bebas Neue 58, ink, aty 14407 PM, Anton 150, vermilion, aty 1290EVERY THURSDAY, Bebas Neue 56, ink, letter spacing1, aty 1228
Line each left edge up on the 840 guide with the arrow keys.
-
Add the rules and the footer bar
Click
Rules. With the Rectangular Marquee, draw two 6 px-tall bars from the 840 guide to the right margin, one under the dates (y 1502) and one under the street (y 1614), and fill them with ink. Then marquee from the left margin to the right margin betweeny 1664and the bottom guide aty 1740, fill it with vermilion and deselect. Type the footer in Bebas Neue 40, cream, letter spacing1:GALENA, COPPER WIRE & CAT’S WHISKERS SUPPLIED · BRING HEADPHONESNudge it until it's centred both ways: about the same gap left and right, and its capitals centred on
y 1702.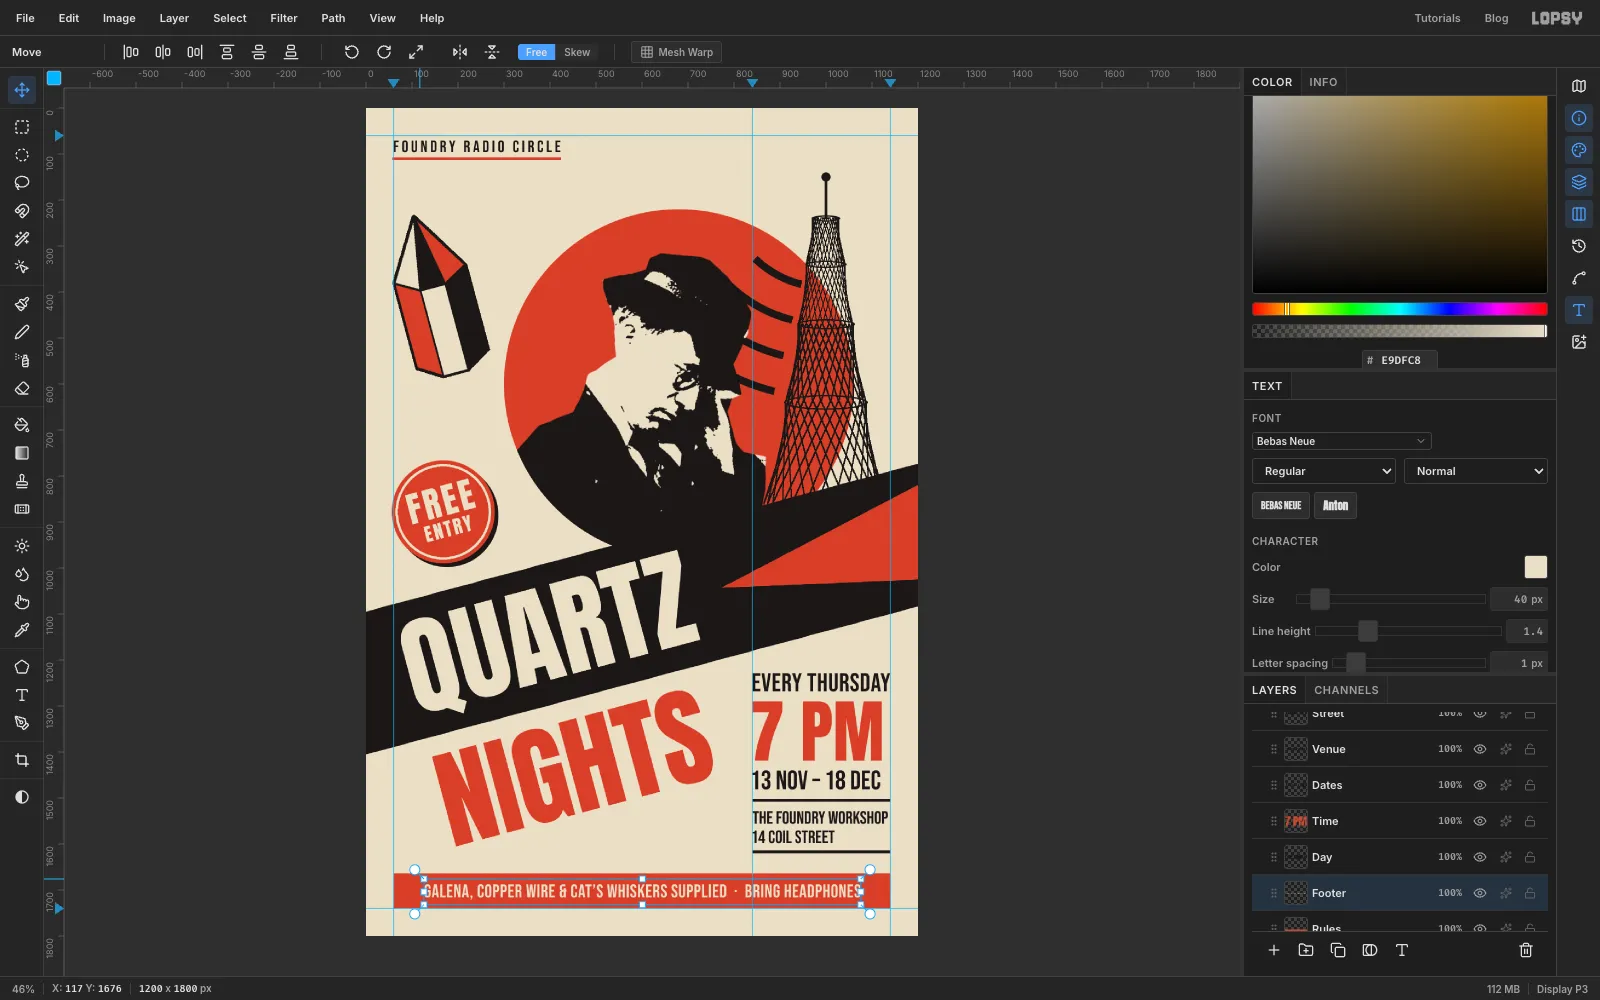
-
Finish with paper grain
Click
Footer, the text you just made, and add a layer calledGrain. It lands above everything except the five info-column lines, which stay crisp on top. Fill it with , choose Filter → Add Noise… with Amount 50, Mono and Gaussian, then Filter → Gaussian Blur… with Radius 0.8. In the layer's effects drawer, set Blend to Multiply, then set the opacity on the layer's row to55%. Near-white noise in Multiply gives the cream a soft paper tooth and barely touches the black. Avoid Fibers here: its streaks all run one way and read as wood grain.Hide the guides with View → Show Guides, export with File → Quick Export PNG, and save the project with File → Save Project so you can change the dates for next season.