Engrave a Zeppelin Stencil Set in Lopsy
Turn a 1919 airship photo into a ruled two-colour engraving, cut it into stencil plates and lay the set out as a contact sheet in Lopsy.
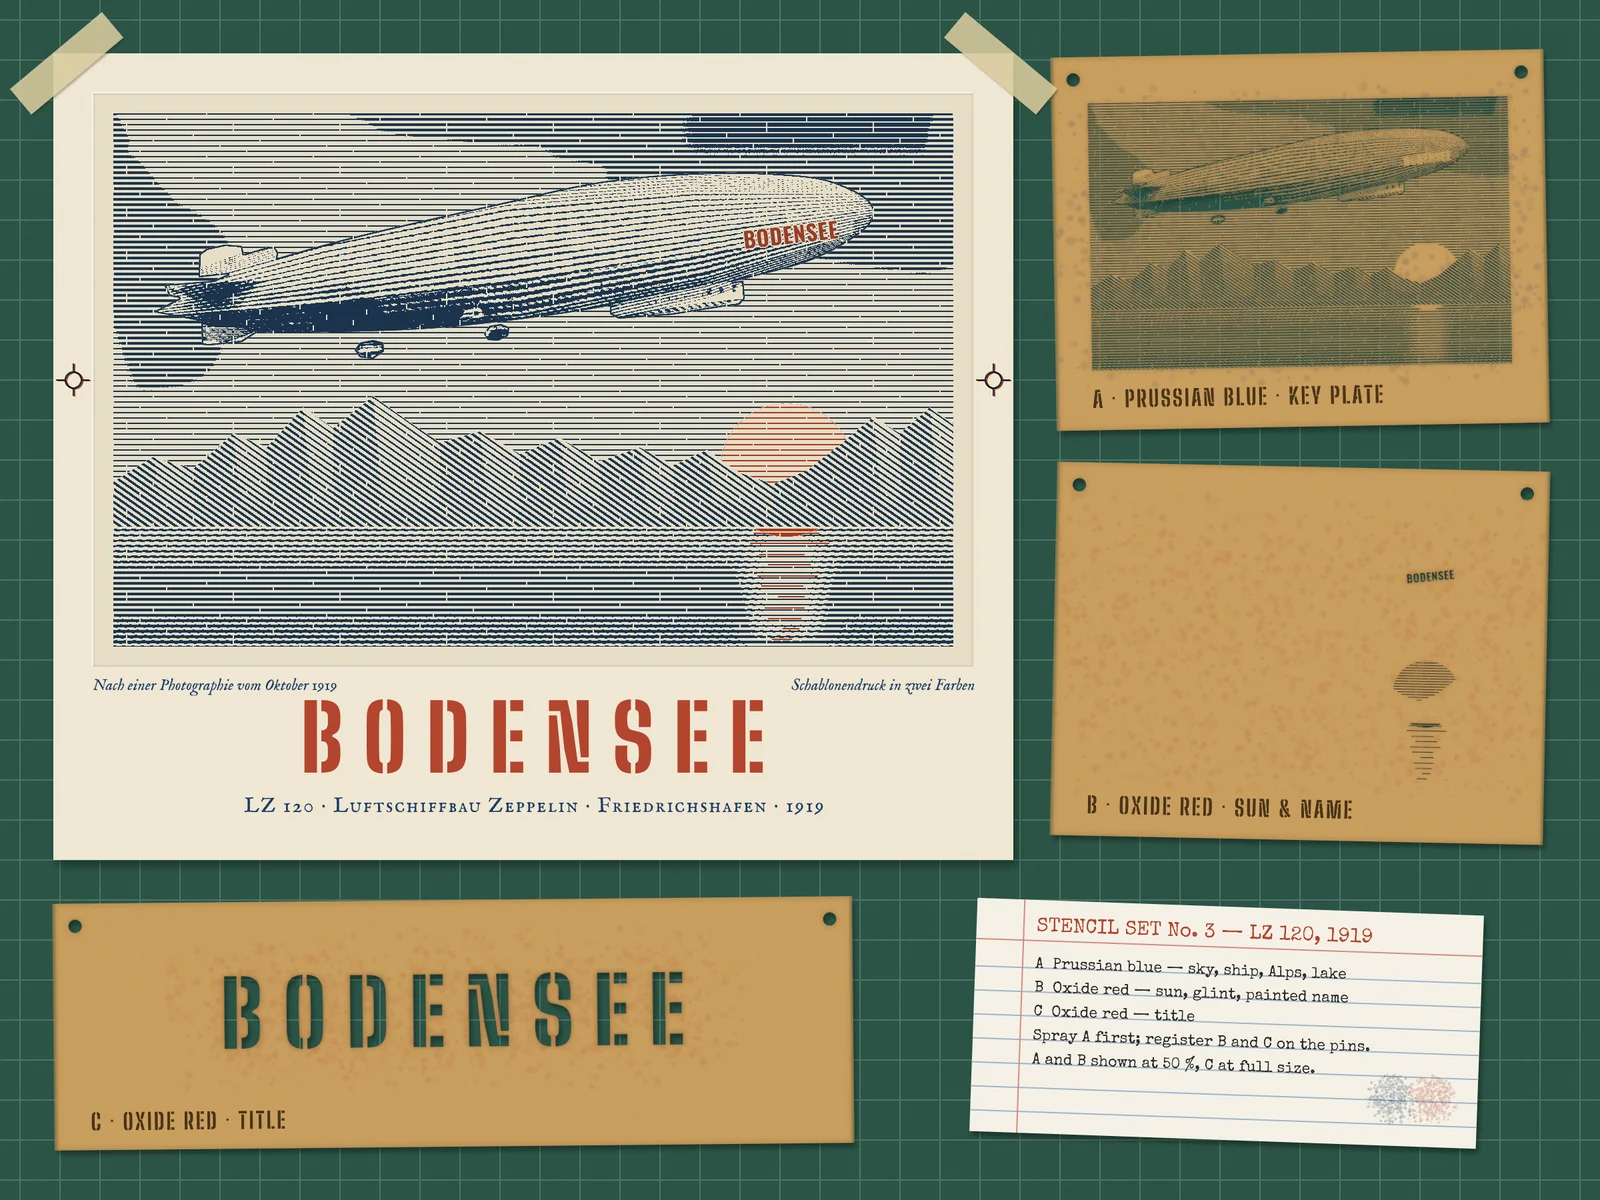
Before photographs could be printed in newspapers, pictures were engraved. The engraver cut thousands of parallel lines into a steel plate. Where a picture was dark the lines were cut wider, and where it was light they thinned out to nothing. Skies were ruled by a machine, one perfectly even line after another. Stencils work in a similar way: a sheet of oiled card with the picture cut out of it, one sheet per colour.
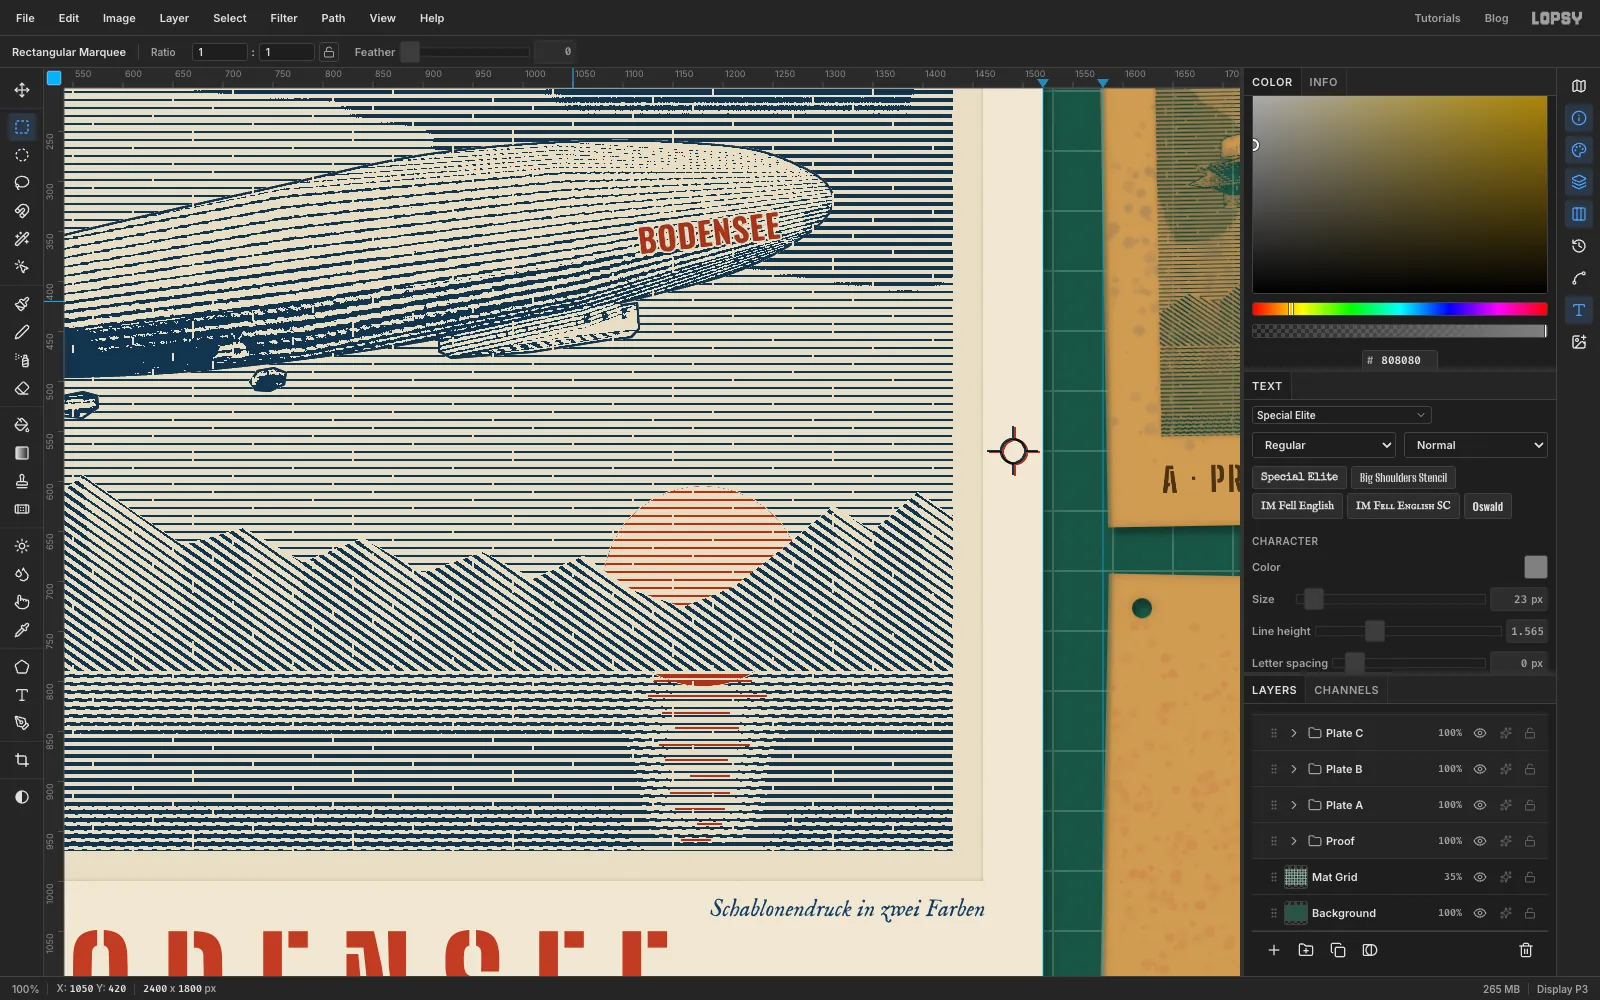
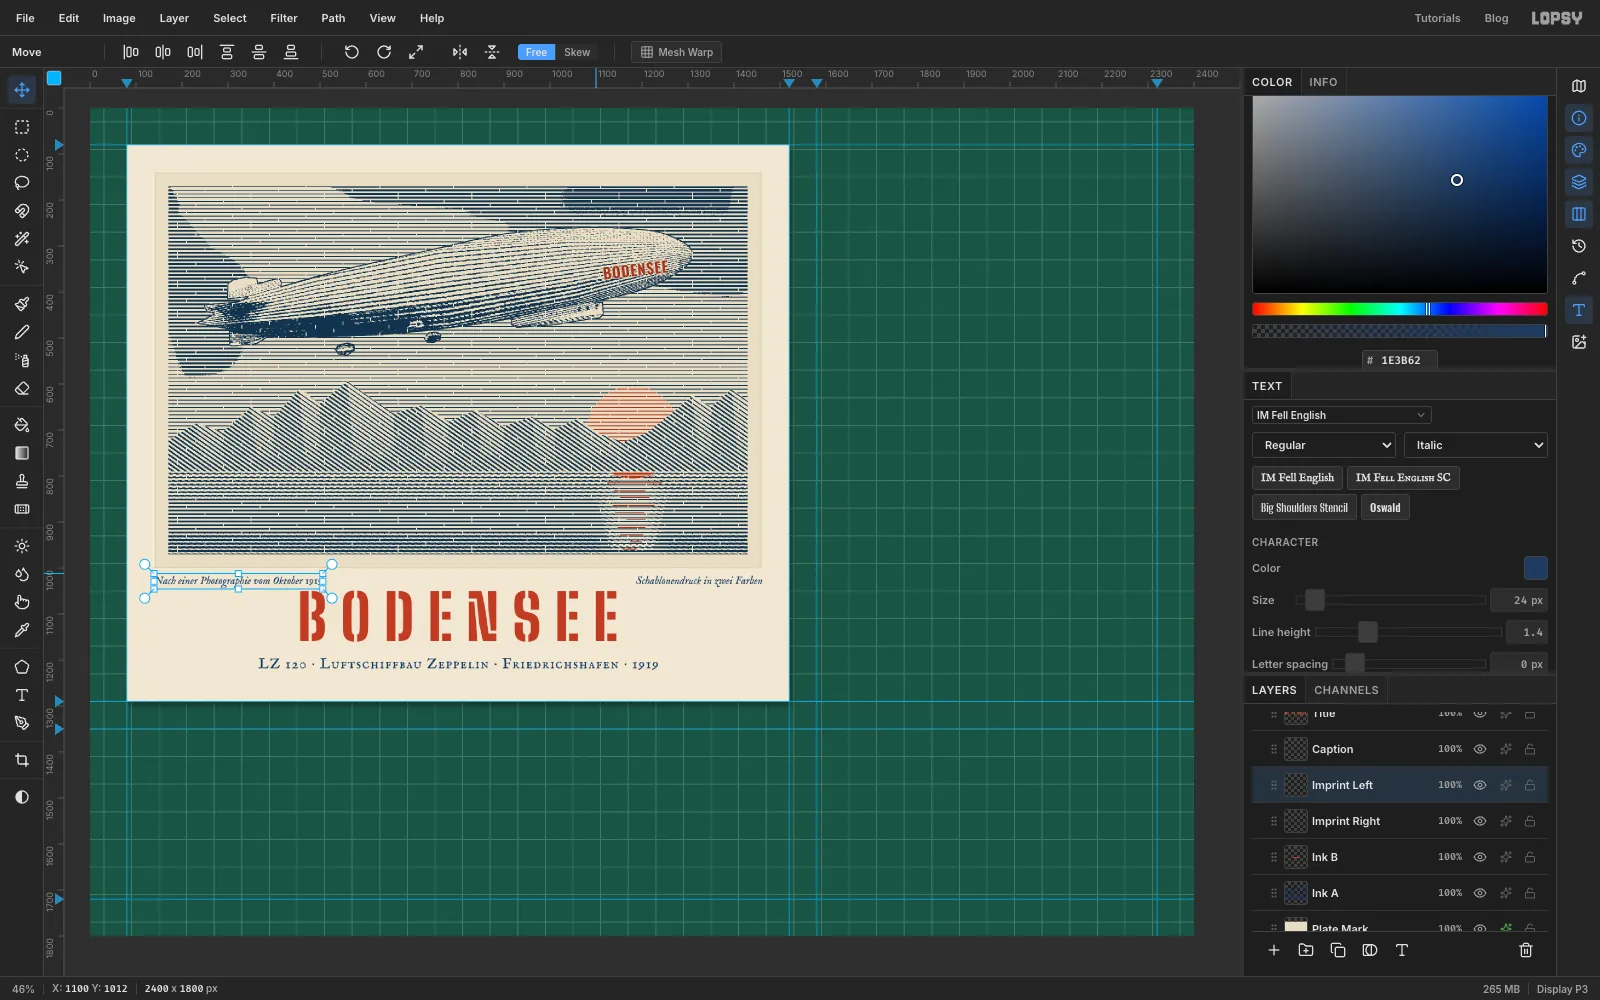
In this tutorial you'll combine the two. You'll make Bodensee, a 2400 × 1800 px contact sheet for the 1919 passenger airship LZ 120 Bodensee. A cream proof is taped to a green cutting mat. It shows the zeppelin over Lake Constance in Prussian blue ruled lines, with an oxide-red sun setting behind the Alps. Around it lie the three cut stencil plates and a typed index card.
The airship comes from Airship Bodensee, Oct. 1919 on Wikimedia Commons, a Library of Congress photo in the public domain. Download the 1920 × 1142 px version. Any side-on photo of an airship or a long boat works the same way.
The engraving comes from a simple trick, and you never draw a single engraved line by hand. You paint the picture as soft greys, lay evenly spaced blurred lines over it in Multiply, then run Threshold. Where the grey is dark the lines come out thick, and where it's light they come out thin. The steps explain why when you get there.
Along the way you'll use:
- ruler guides, the exact-corners marquee dialog and the Pencil with Shift-click straight lines
- a step-and-repeat loop of Duplicate Layer, arrow-key nudges and Merge Down
- Clouds, Motion Blur, Gaussian Blur, Surface Blur, Add Noise, Brightness/Contrast, Desaturate and Threshold
- linear and radial gradients, including a gradient that fades to transparent
- dropping in a photo and scaling it with the Move tool's handles
- the Pen tool with Path to Selection, the Lasso with Shift to add, and Select → Inverse
- the Clone Stamp
- Mesh Warp and rotation handles
- Cmd-clicking layer thumbnails, with Shift to add and Alt to subtract
- the Magic Wand with Contiguous off, Grow and Shrink
- Text in Big Shoulders Stencil, IM Fell English, Oswald and Special Elite, and Rasterize Layer
- copy and paste in place, Image → Flip Horizontal, the Spray tool
- layer effects (Drop Shadow, Inner Glow) and the Multiply and Overlay blend modes
- groups, including rotating a whole group with live text inside
The palette:
-
Cutting mat
-
grid lines
-
Proof paper
-
plate mark
-
Prussian blue
-
oxide red
-
Stencil board
-
board pencil
-
Index card
-
blue rules
-
red rules
-
typewriter ink
-
Masking tape
Keep the Info panel open throughout. It shows the active layer's X and Y and, while something is selected, the selection's size. Lopsy has no numeric fields for moving or scaling, so the Info panel is how you check a nudge or a scale.
-
Set up the sheet with guides
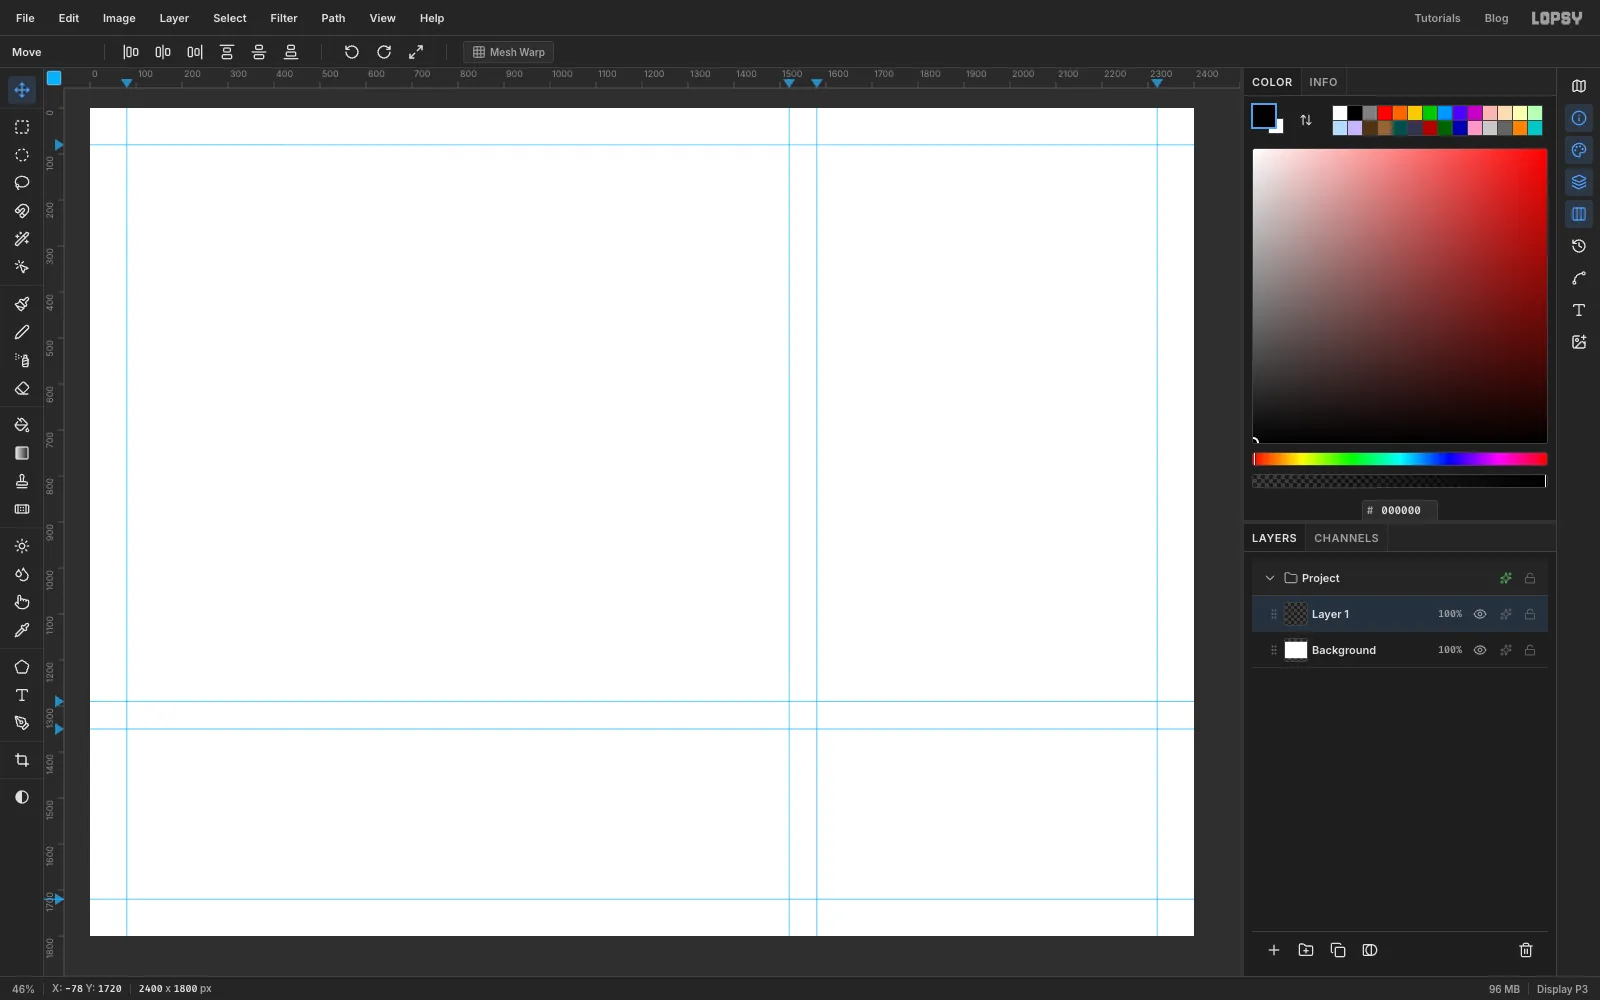
The sheet has a big proof at top left, a column of two plates on the right, and a bottom row with a long plate and an index card. Everything sits 80 px in from the edges, with a 60 px gap between the parts.
- Choose File → New, set Width
2400, Height1800, Pixels, and click Create. - Click the top ruler to drop vertical guides at the proof's left and right edges (
x 80and1520) and the plate column's left and right edges (1580and2320). Zoom in on each spot first so the click lands on the exact pixel, and watch X in the status bar. - Click the left ruler for the proof's top and bottom (
y 80and1290) and the bottom row's top and bottom (1350and1720).
- Choose File → New, set Width
-
Lay down the cutting mat
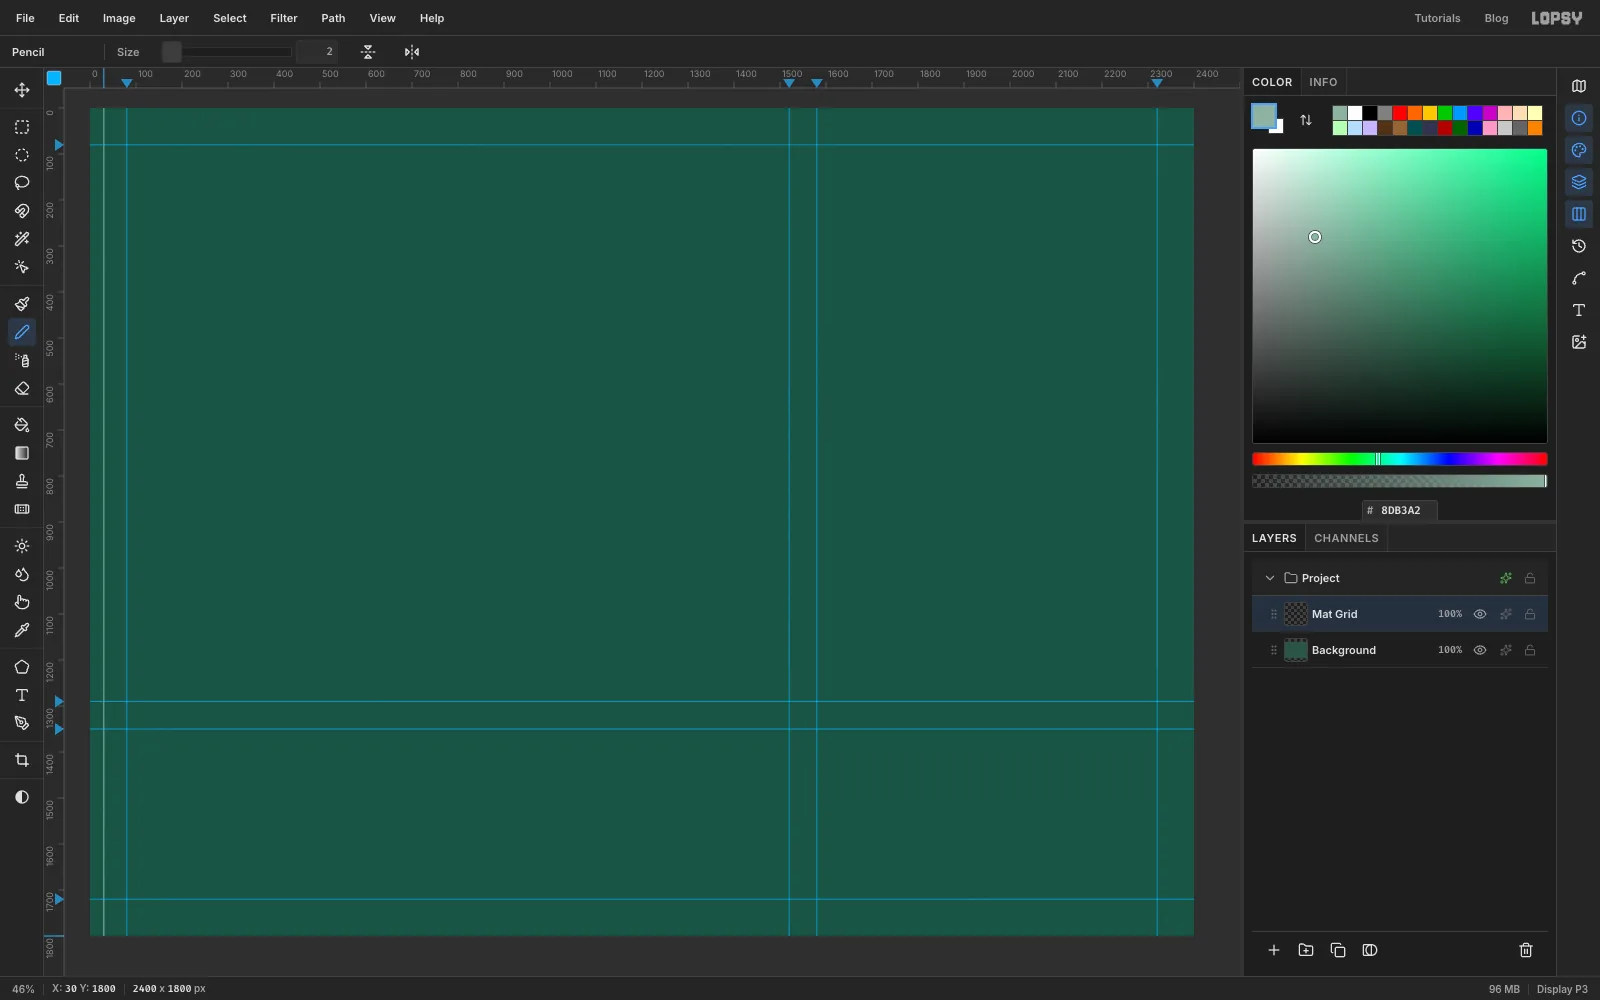
- Click Background, set the foreground colour to and choose Edit → Fill.
- Run Filter → Add Noise… with Amount
5and Mono. A plain flat green looks like a screen, not a mat. - Click Layer 1 and rename it
Mat Grid. Pick the Pencil (N), set Size2and colour . - Click at the very top of the canvas at
x 30, hold Shift and click at the very bottom. You get one straight vertical line.
-
Repeat the line across the mat
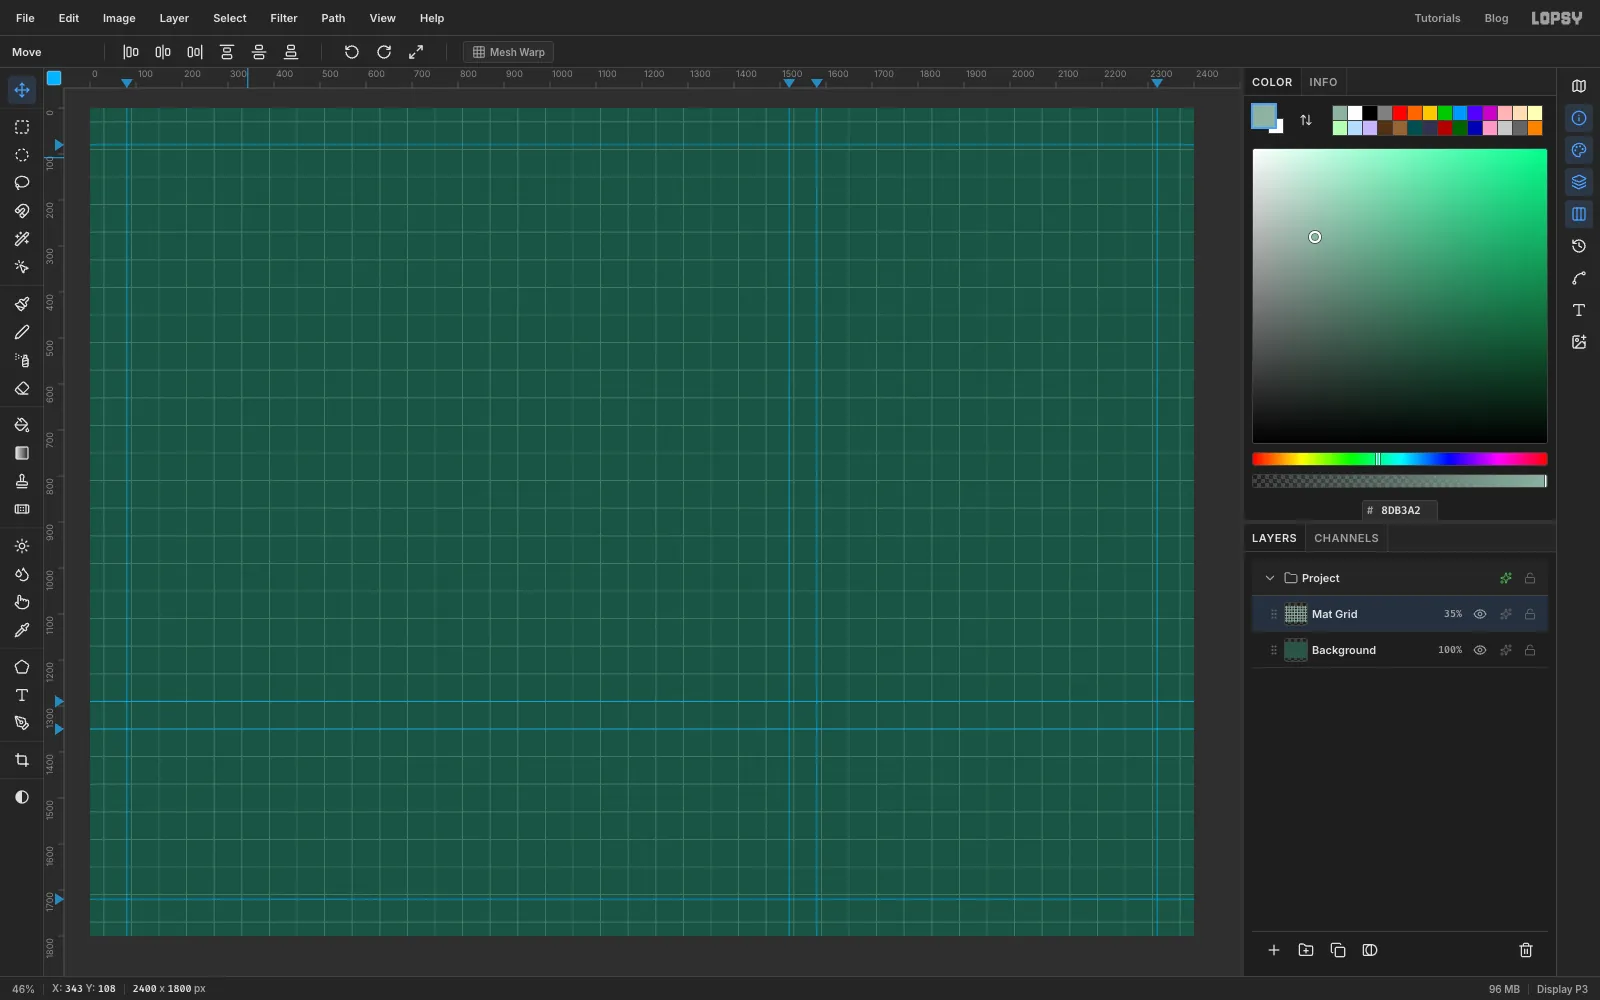
You need 40 lines, 60 px apart. Drawing them one by one is slow. Instead, double them with a step-and-repeat:
- Click Duplicate Layer at the bottom of the Layers panel. Press V for the Move tool and nudge the copy
60px right with the arrow keys. Shift+arrow moves 10 px, and holding it down repeats, so long nudges are quick. Watch Layer X in the Info panel. Choose Layer → Merge Down. You now have two lines. - Do it again, but nudge
120px. Now you have four. Keep doubling the nudge:240,480,960,1920. Six passes give 64 lines, more than enough for the width. The extra lines simply hang off the canvas. - Click Add Layer, draw one horizontal line across the full width at
y 30in the same way, and double it with nudges of60,120,240,480and960px straight down. - Merge Down the horizontal lines onto
Mat Gridand set the layer's opacity to35%.
You'll use this step-and-repeat four more times: for the engraving lines, the red sun's lines, the stencil ties and the index card's rules.
- Click Duplicate Layer at the bottom of the Layers panel. Press V for the Move tool and nudge the copy
-
Lay down the proof paper and the plate mark
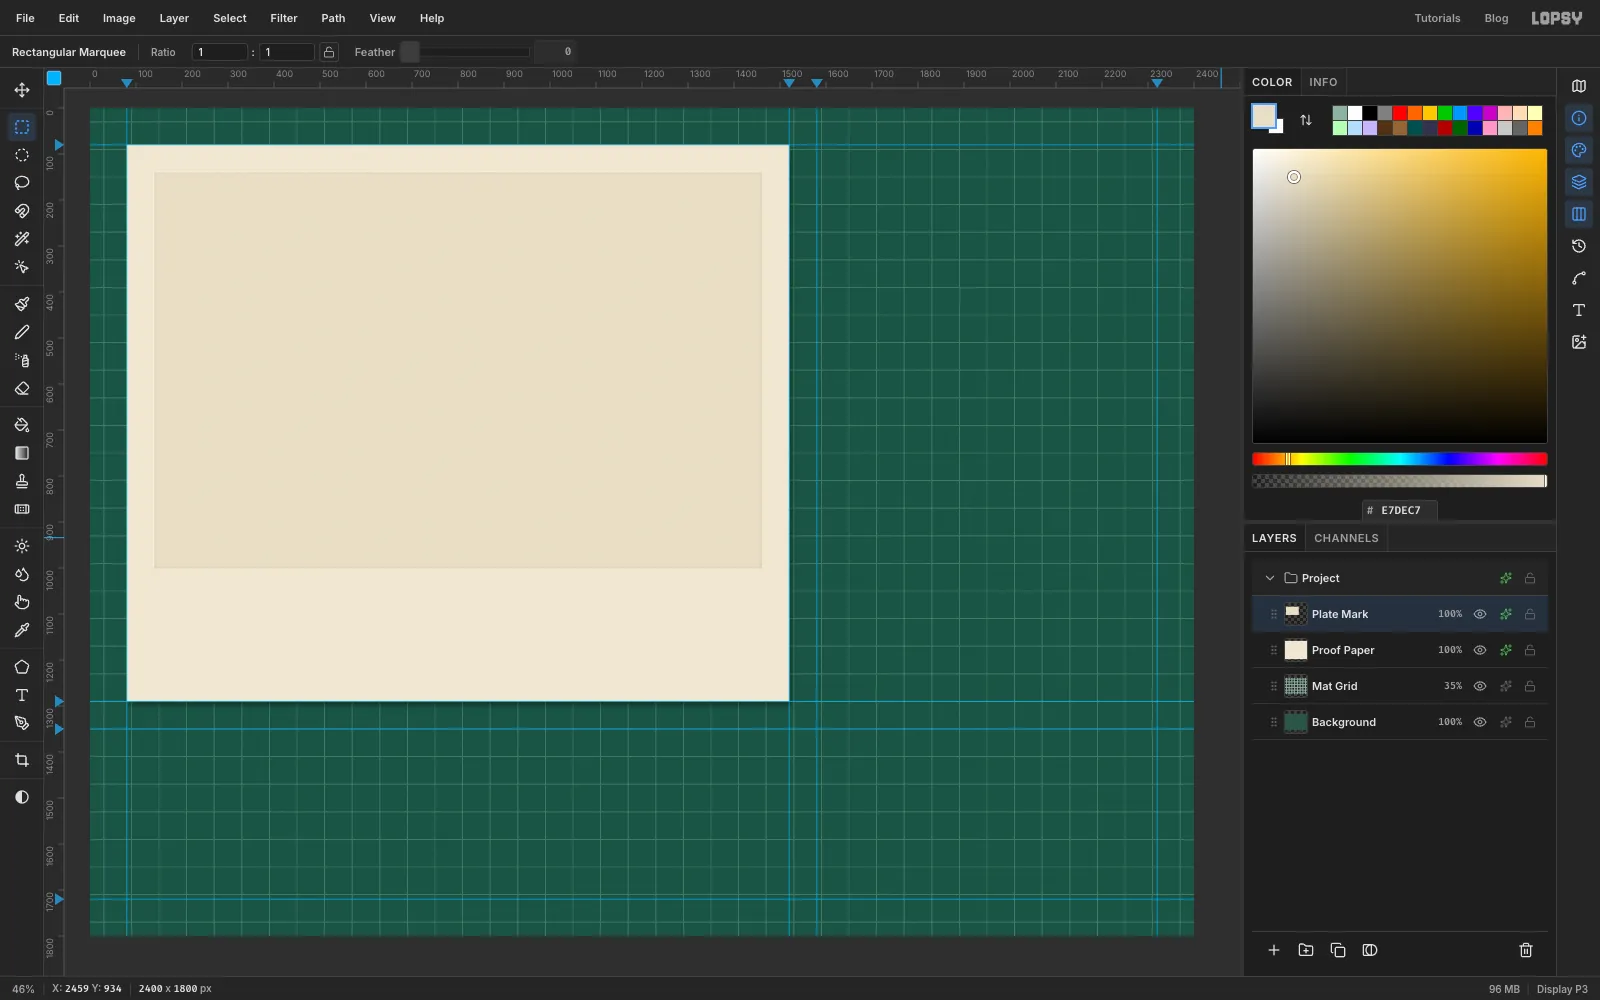
An engraving printed on a press leaves a shallow dent the size of the metal plate. That's the plate mark.
- Add a layer called
Proof Paper. Pick the Rectangular Marquee (M) and drag from the top-left guide corner (80, 80) to where the1520and1290guides cross. The marquee snaps onto the guides. - Fill it with , run Add Noise… at
3, Mono, and press Cmd+D. - Open the layer's effects drawer (the ✦ button on its row) and turn on Drop Shadow: Offset X
6, Offset Y10, Blur18, Opacity45, colour . - Add a layer called
Plate Mark. With nothing selected, click once on the canvas with the Rectangular Marquee without dragging. The Rectangular Selection dialog opens. Enter From140,140and To1460,1000, and fill with . - Give it an Inner Glow (Size
6, Opacity45, colour ) and a pale Drop Shadow up and to the left (Offset-2,-2, Blur2, Opacity80, colour ). The dark inner edge and the light rim read as a dent. Press Cmd+D.
- Add a layer called
-
Paint the sky as soft grey
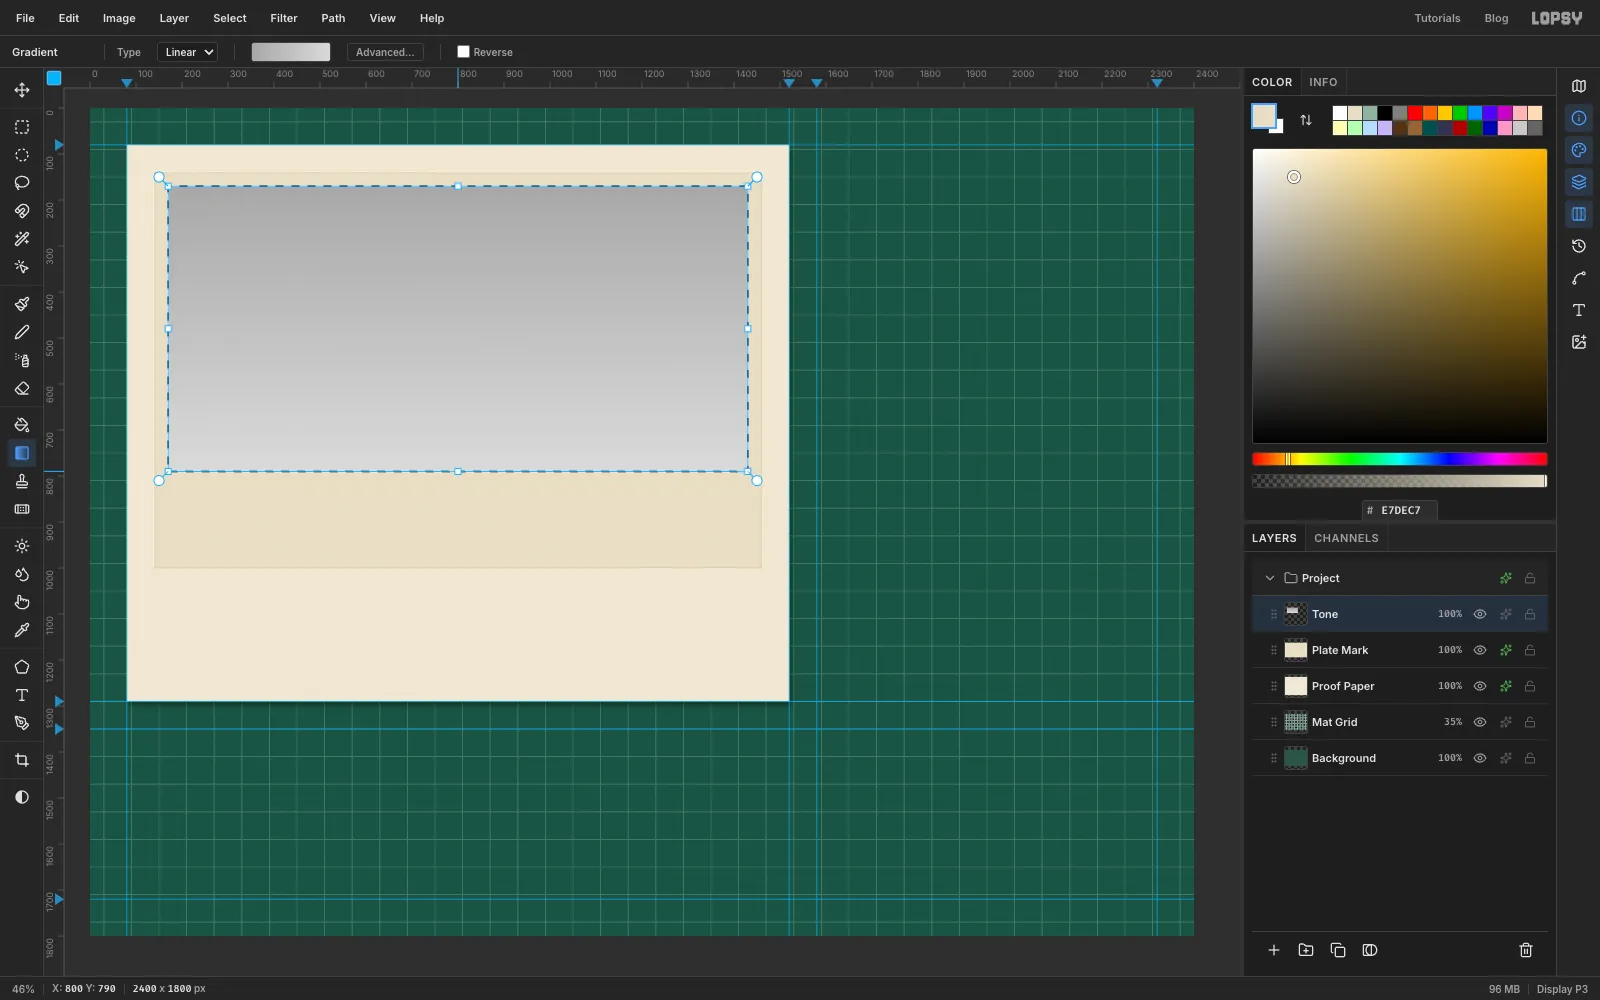
The picture lives inside the plate mark, from
170, 170to1430, 970, with the horizon aty 790. For now you paint it as plain greys. The grey decides how thick each engraved line will be later, so keep everything between mid grey and near white. Anything darker than about turns solid.- Add a layer called
Tone. Use the marquee dialog to select170, 170to1430, 790. - Pick the Gradient tool from the toolbox (it has no shortcut). Open the gradient editor and set the stops to and . Drag from the top of the selection straight down to the horizon. The sky gets darker toward the top, the way engraved skies do.
- Now a glow round the sun. Switch the gradient to Radial, set both stops to , and drag the right-hand stop's opacity to
0. Drag from the sun's centre at1180, 705about420px to the right. Then press Cmd+D.
- Add a layer called
-
Add the clouds
- Add a layer called
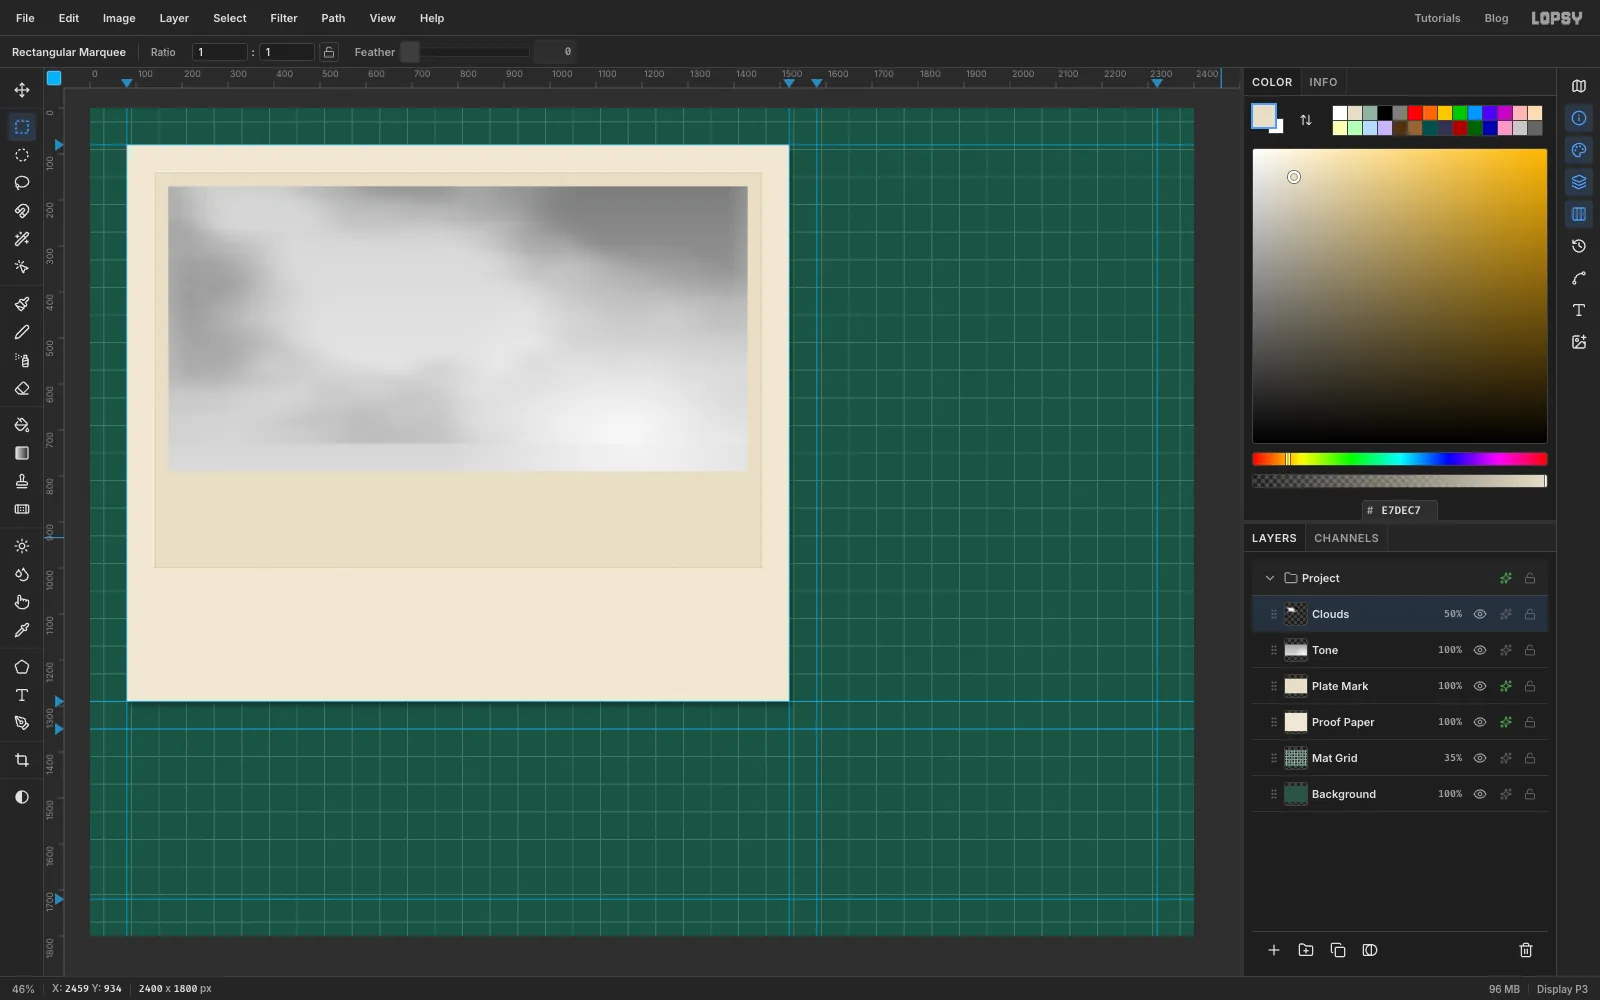
Clouds. Select170, 170to1430, 730. - Run Filter → Clouds… with Scale
4, then Brightness/Contrast… with Contrast25. - Run Motion Blur… with Angle
0and Distance90. Clouds in old engravings lie in long flat banks, and this stretches them sideways. - Press Cmd+D. In the layer's effects drawer (✦), set the blend mode to Overlay. Set the layer's opacity to
50%, then Merge Down ontoTone.
Clouds are random, so yours will look different from the screenshot. That's fine.
- Add a layer called
-
Paint the sun and the lake
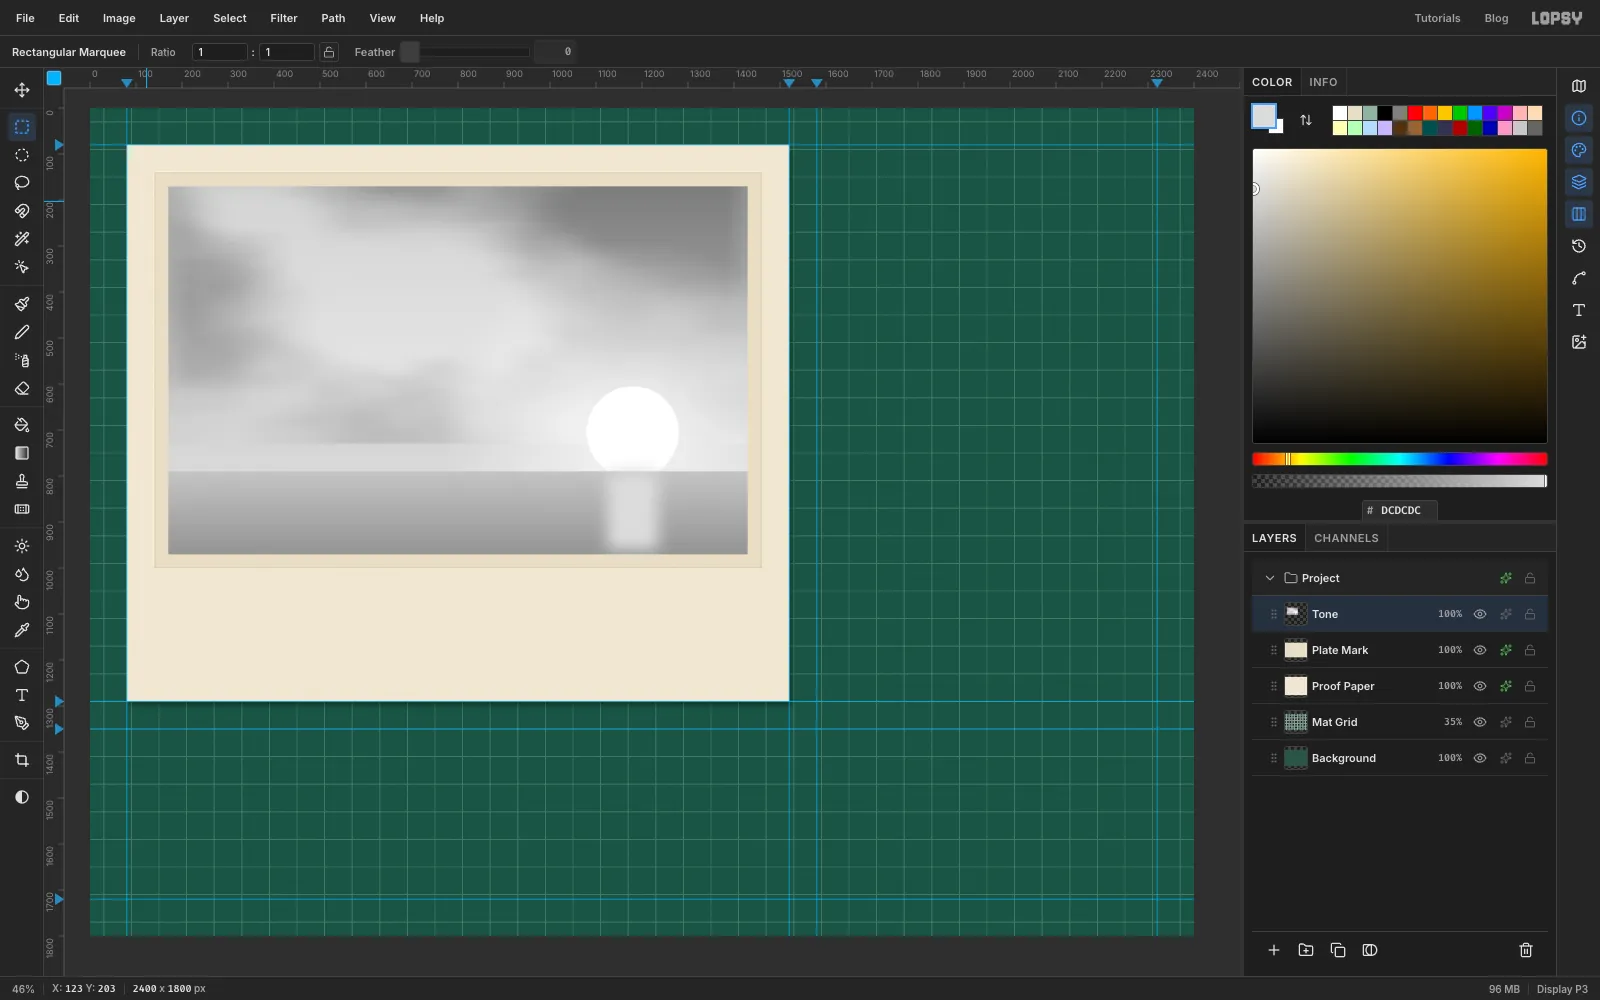
- Pick the Elliptical Marquee and use its dialog to select
1080, 605to1280, 805, a 200 px circle. Fill with white. The sun belongs to the red plate, so the blue lines will be cleared out of it later. - Press Cmd+D and select the lake:
170, 790to1430, 970. Draw a linear gradient from at the horizon to at the bottom. - Press Cmd+D and select a narrow strip under the sun, from
1125, 790to1235, 960. Choose Select → Feather… at35and fill with . That's the sun's reflection. With the edges feathered, it fades into the water. - Press Cmd+D.
- Pick the Elliptical Marquee and use its dialog to select
-
Draw the Alps
Lake Constance has the Alps on its far shore.
- Add a layer called
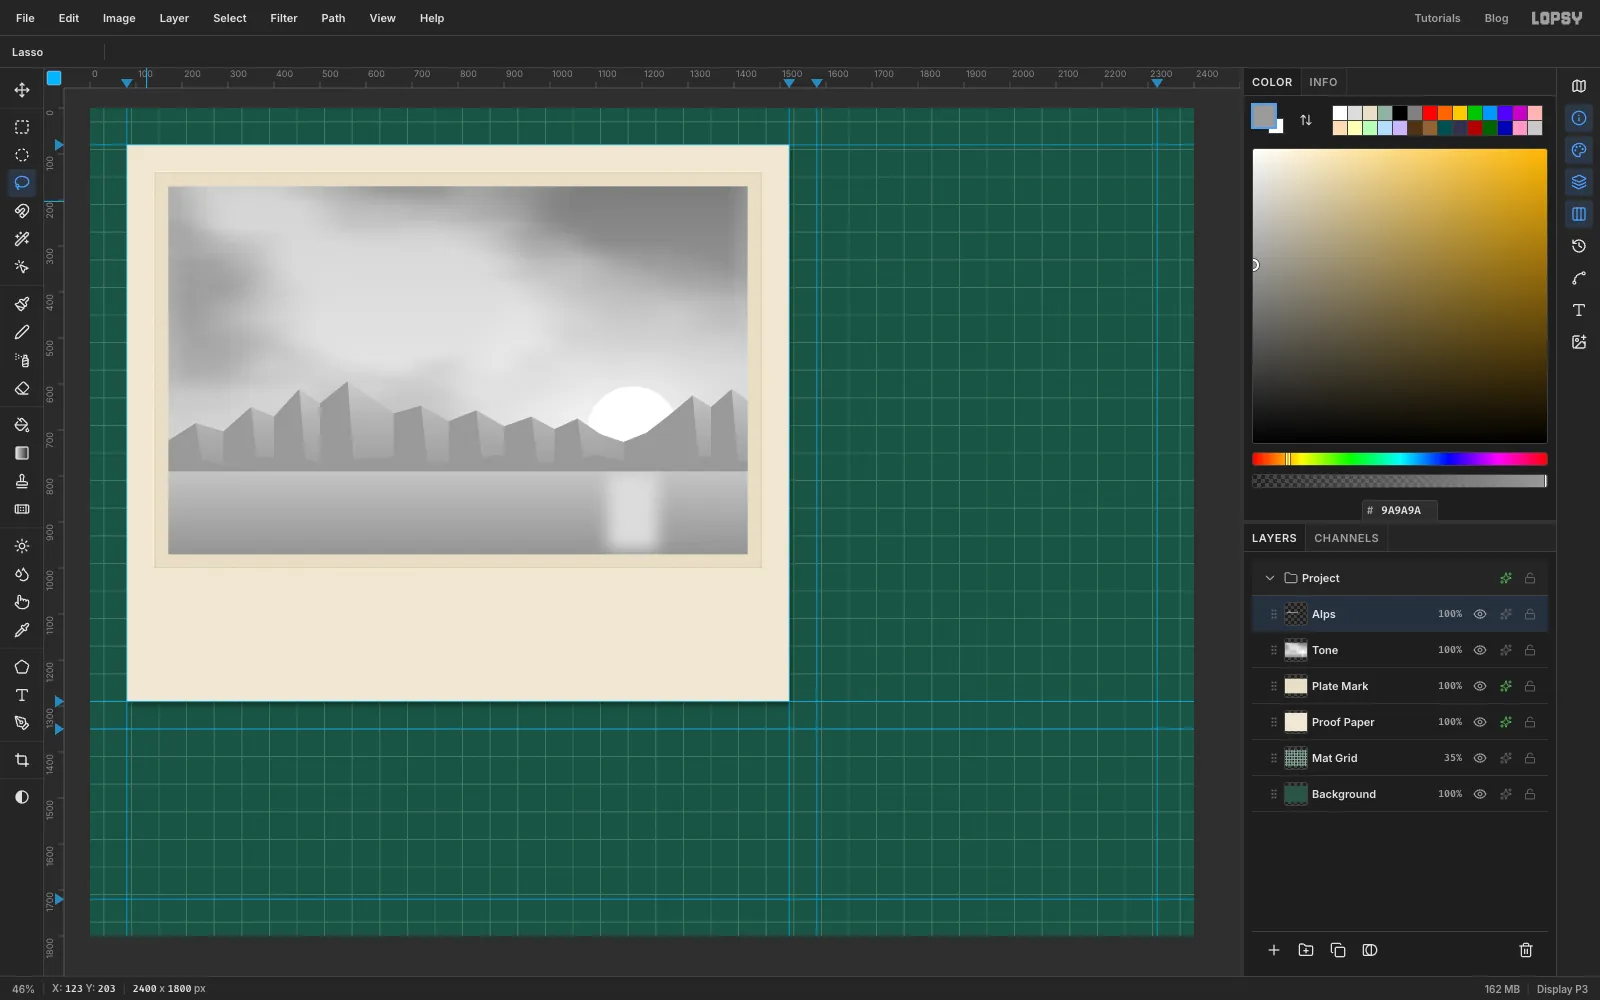
Alps. With the Lasso (L), drag a jagged ridge across the full width of the picture. Keep the peaks between abouty 560andy 750, put the tallest ones left of centre, and leave a dip aroundx 1160, where the sun will set. Then drag straight down to the horizon, back along it, and up to your starting point. - Draw a three-stop linear gradient inside it from
y 600to the horizon: , at 40%, and . - Lasso a low wavy band of foothills along the bottom of the range, about 20 px tall, and fill it with .
- The sun is low on the right, so each peak's left-hand slope is in shade. For every peak, lasso a thin triangle: start at the valley to its left, go up to the summit, then straight down to the foothills, and back. Fill each one with . Press Cmd+D.
- Add a layer called
-
Keep a copy of the Alps and finish the tone study
- Click Duplicate Layer, rename the copy
Alps Cutterand hide it with its eye icon. You'll use its outline several times to cut things. - Click
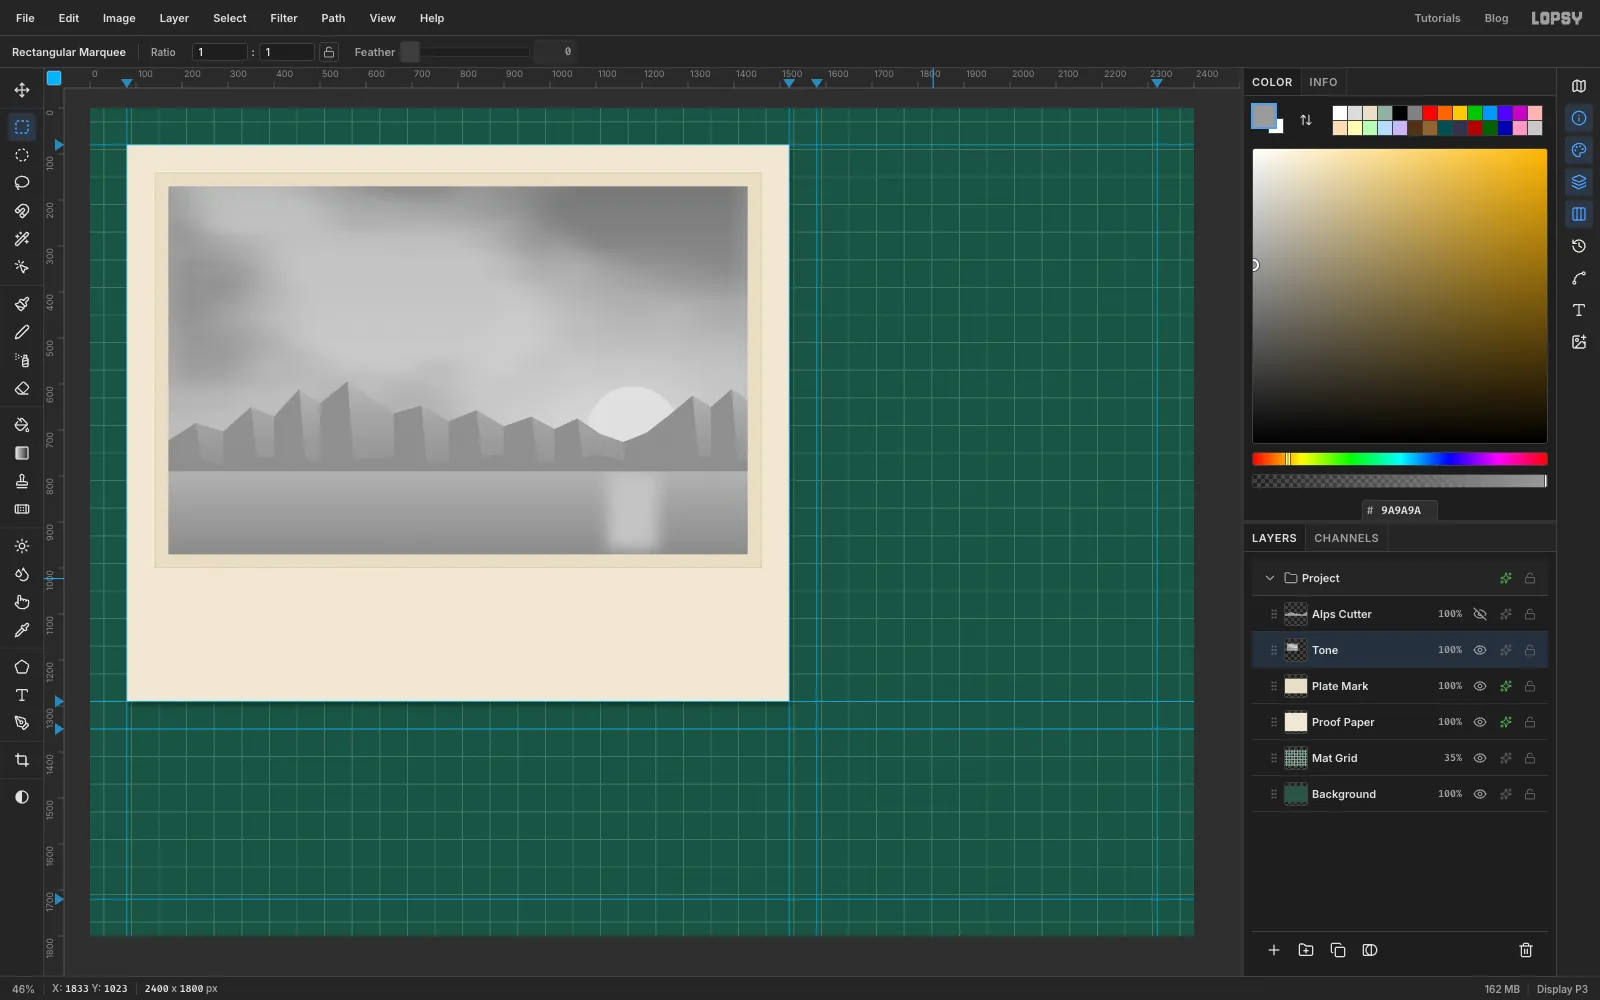
Alpsand Merge Down ontoTone. - Select the picture area (
170, 170to1430, 970), choose Select → Inverse and press Delete. This keeps the tone study inside the frame. Press Cmd+D. - Run Brightness/Contrast… on
Tonewith Brightness-2and Contrast-20. This pulls the very brightest greys down a little. Without it, a light patch of cloud can come out with no lines at all.
- Click Duplicate Layer, rename the copy
-
Drop in the photo and scale it
- With
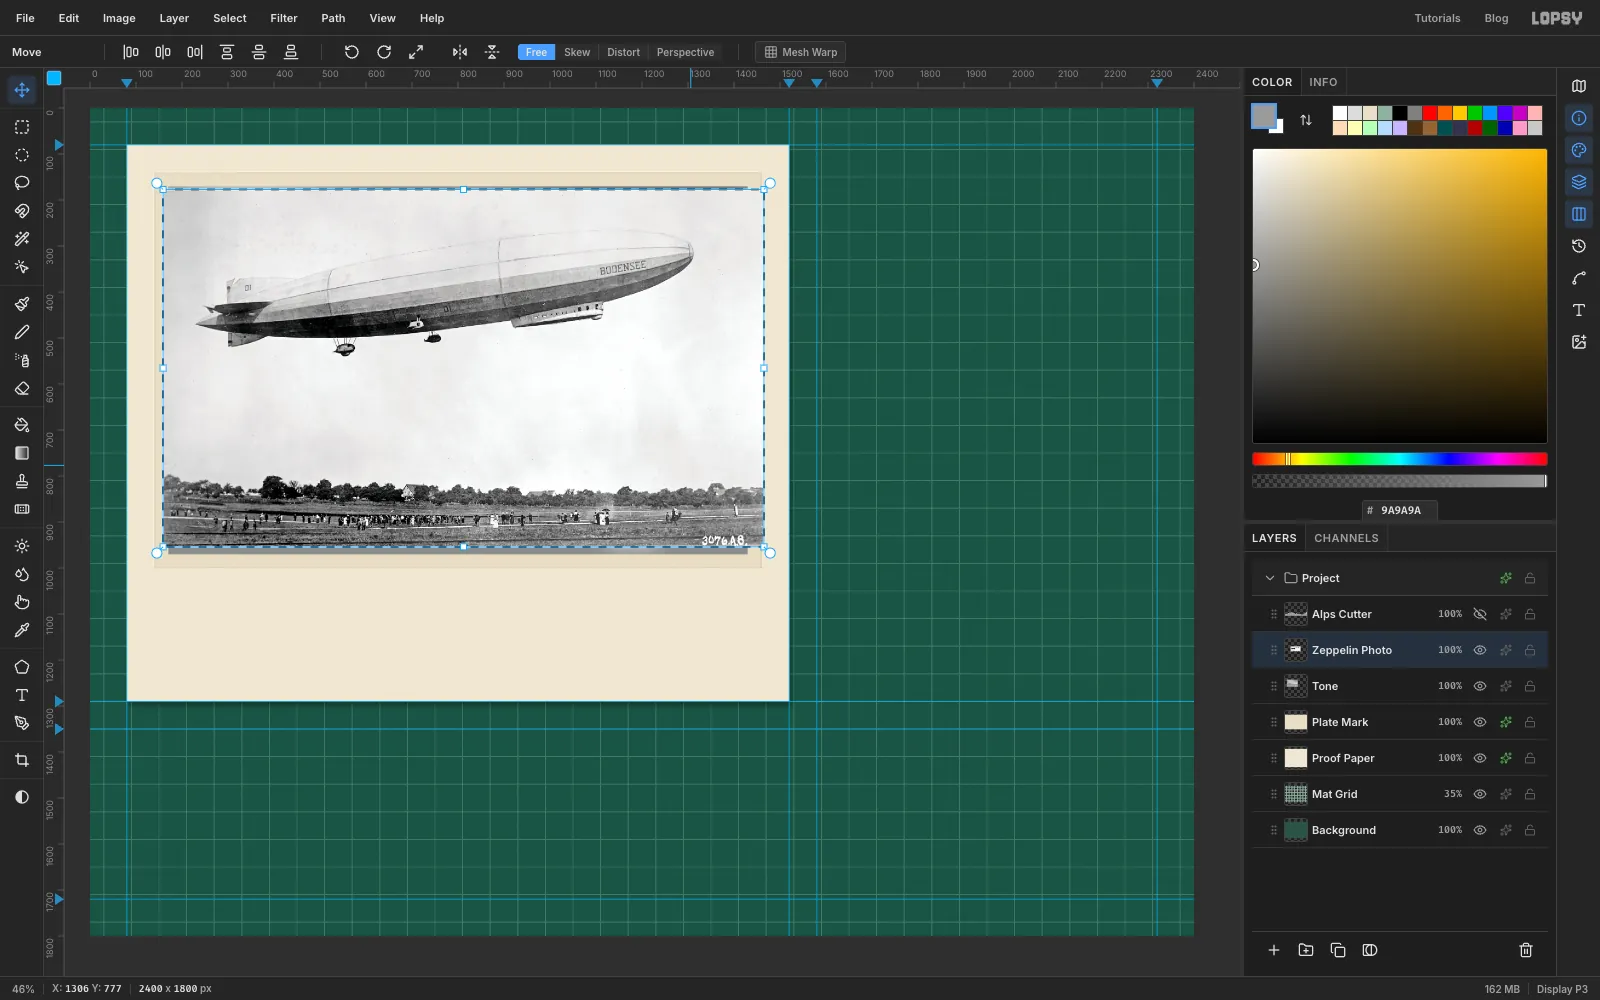
Toneselected, drag the downloaded photo from your desktop onto the canvas. It lands as a new layer at the top-left corner, already selected. Rename itZeppelin Photo. - With the Move tool, hold Cmd and drag the bottom-right corner handle up and to the left. Cmd keeps the proportions. Stop when the Info panel's selection W reads about
1306, which is 68%. - Nudge it with the arrow keys until the photo's top-left corner is at
159, 177. The zeppelin now crosses the upper half of the picture, nose high on the right. Press Cmd+D.
- With
-
Trace the hull with the Pen
The sky in this photo is almost as pale as the top of the hull, so the Magic Wand can't find the edge. Trace it instead.
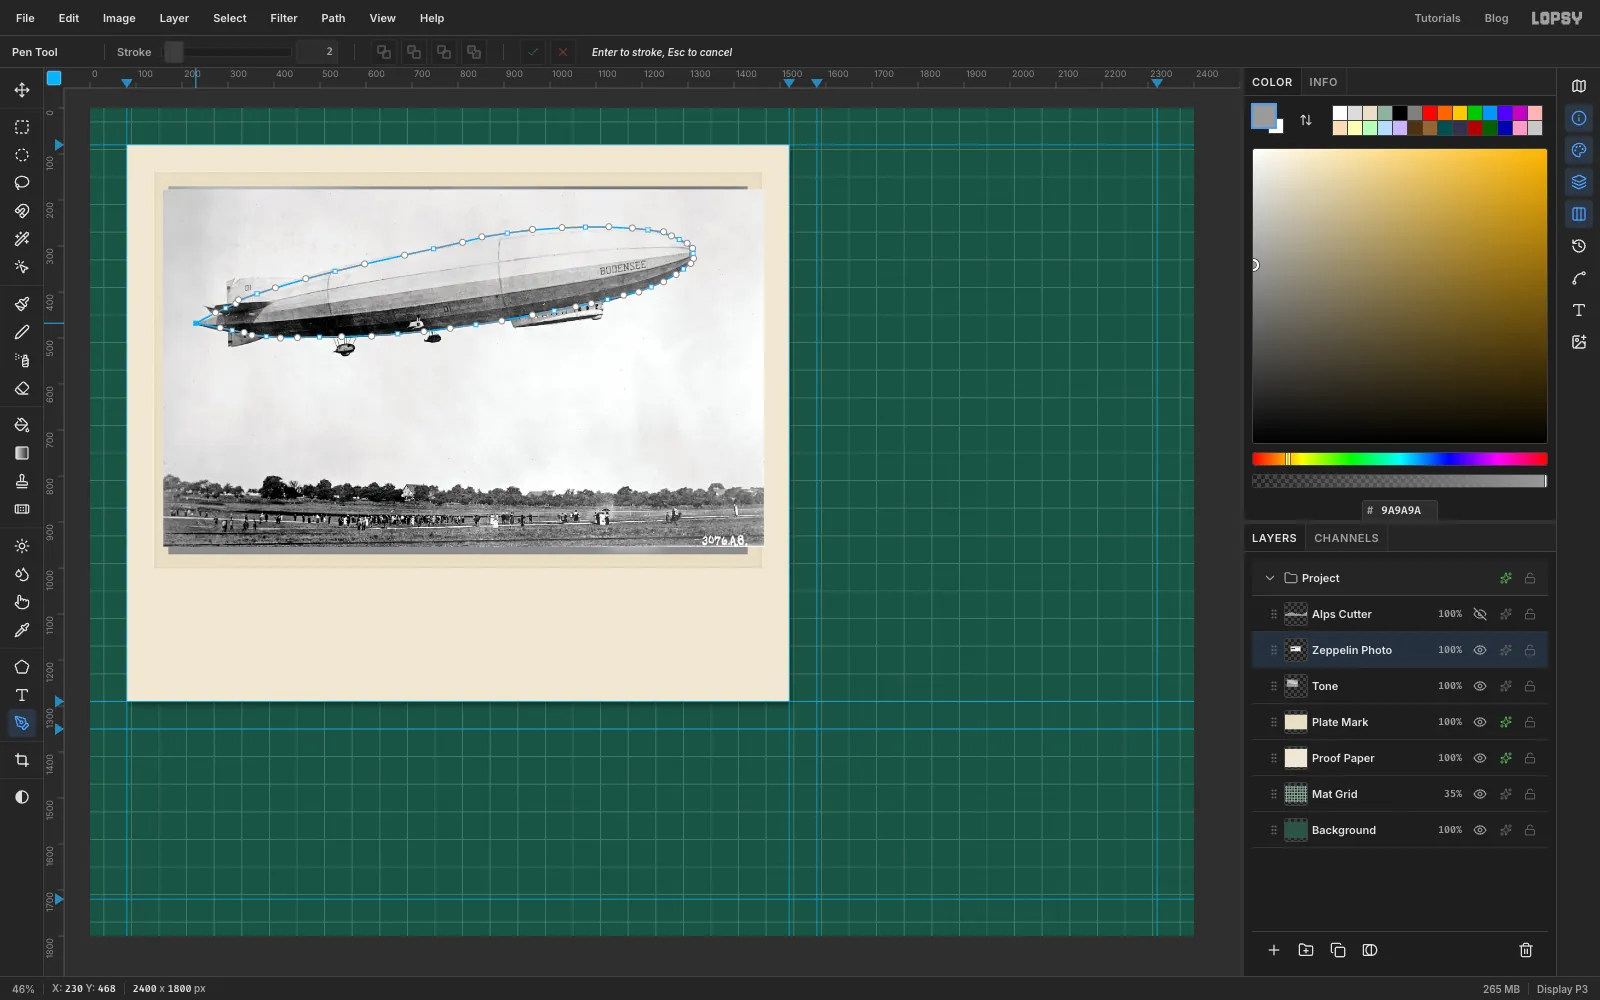
- Pick the Pen (P). Start with a plain click on the tip of the tail, so it stays a sharp corner.
- Work along the top of the hull to the nose and back along the underside. Press at each point and drag a short way along the hull's direction, so the curve stays smooth. Place points closer together round the nose and the tail, where the outline bends most. Around 40 points is about right. Follow the outside edge of the hull and leave out the fins and the cars.
- Finish by clicking the first point again. That closes the path.
-
Add the fins and cars to the selection
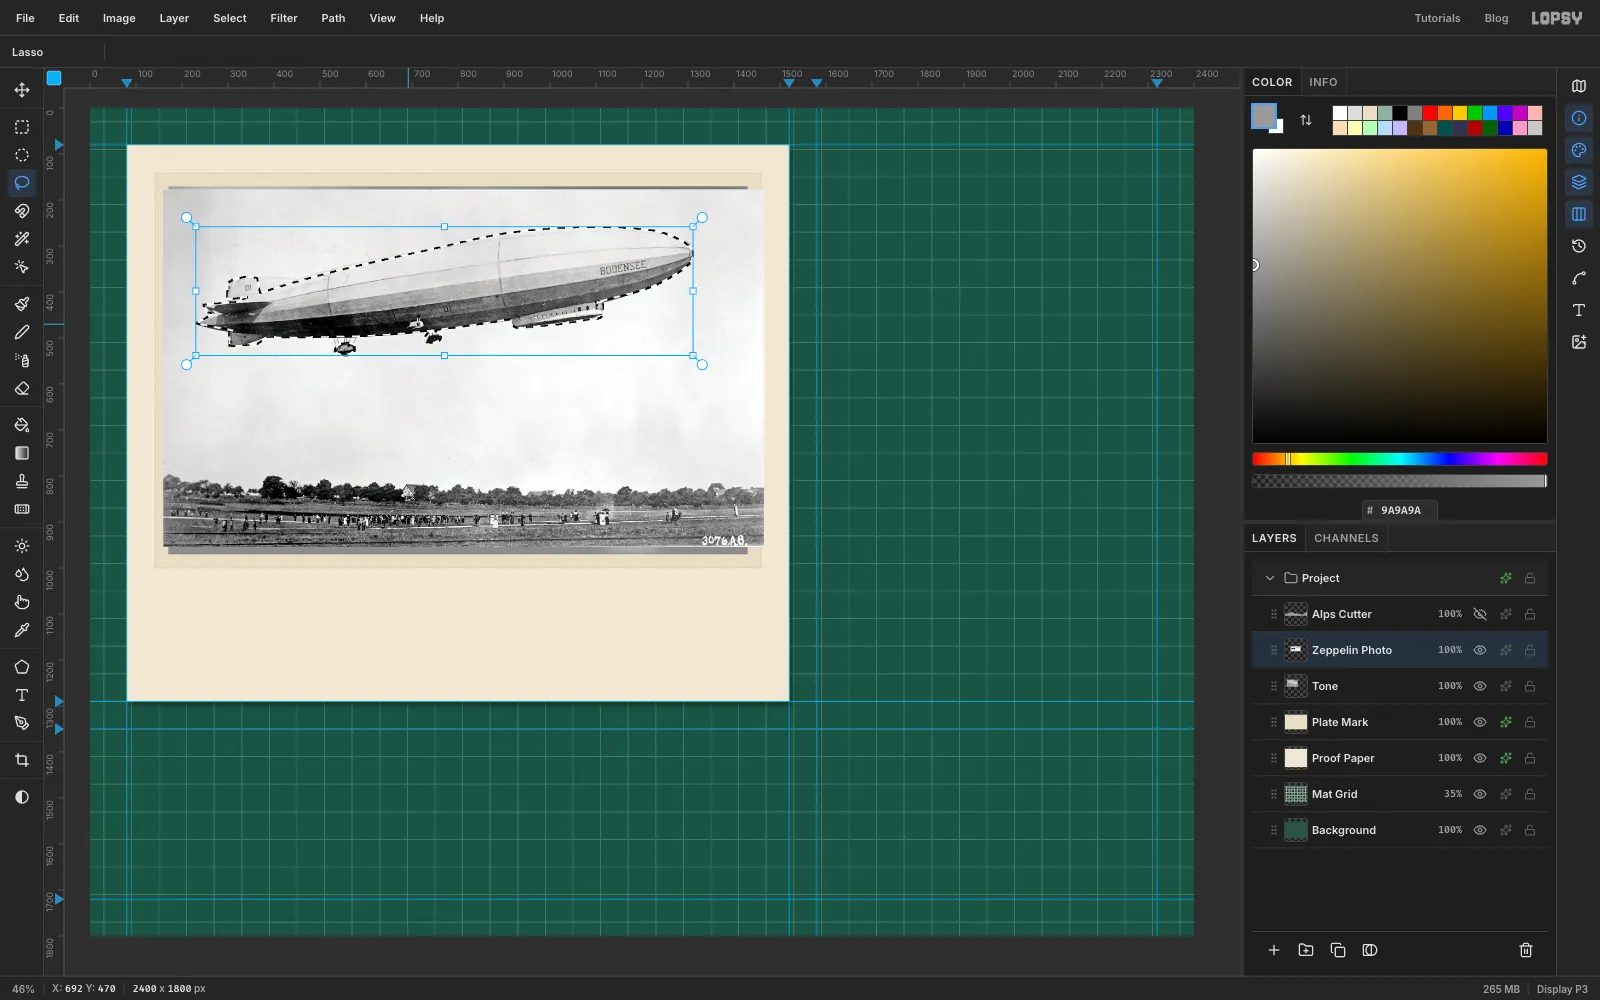
- Open the Paths panel and click Path to Selection, then Delete Path. The hull is now a marching-ants selection.
- Pick the Lasso, hold Shift and drag round the upper tail fin. Shift adds to the selection. Do the same for the long horizontal fin, the lower fin, the passenger car under the nose and the three engine cars.
-
Cut out the airship
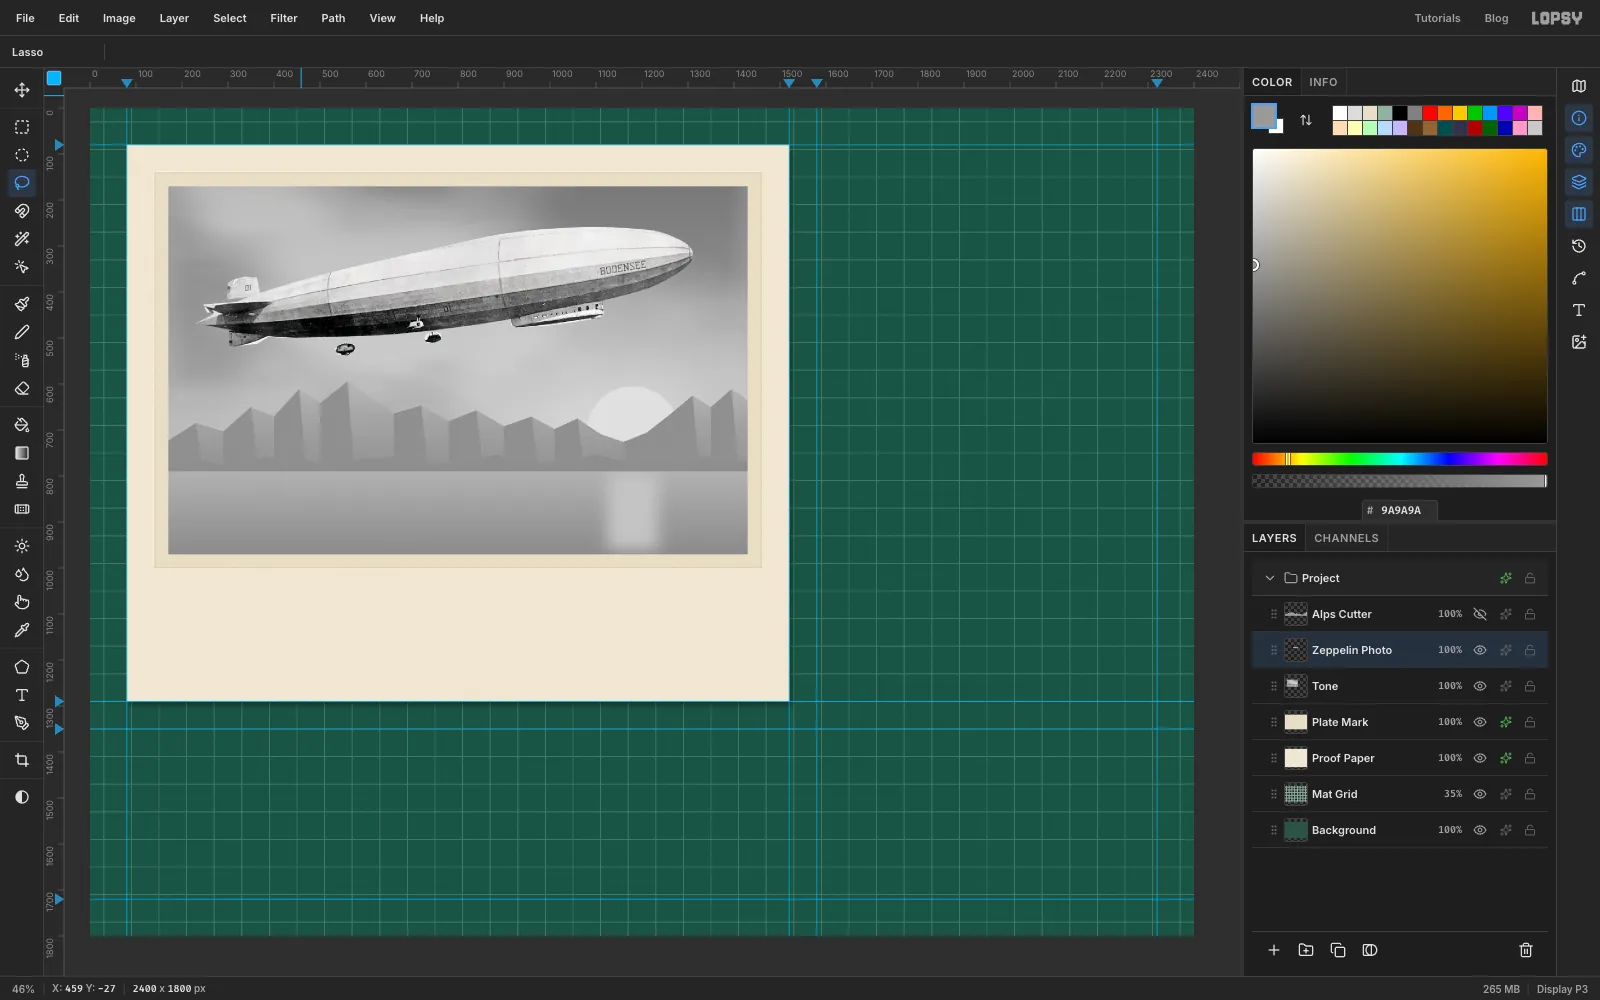
- Choose Select → Inverse and press Delete. The sky, the field and the crowd disappear.
- Press Cmd+D.
-
Clone out the painted lettering
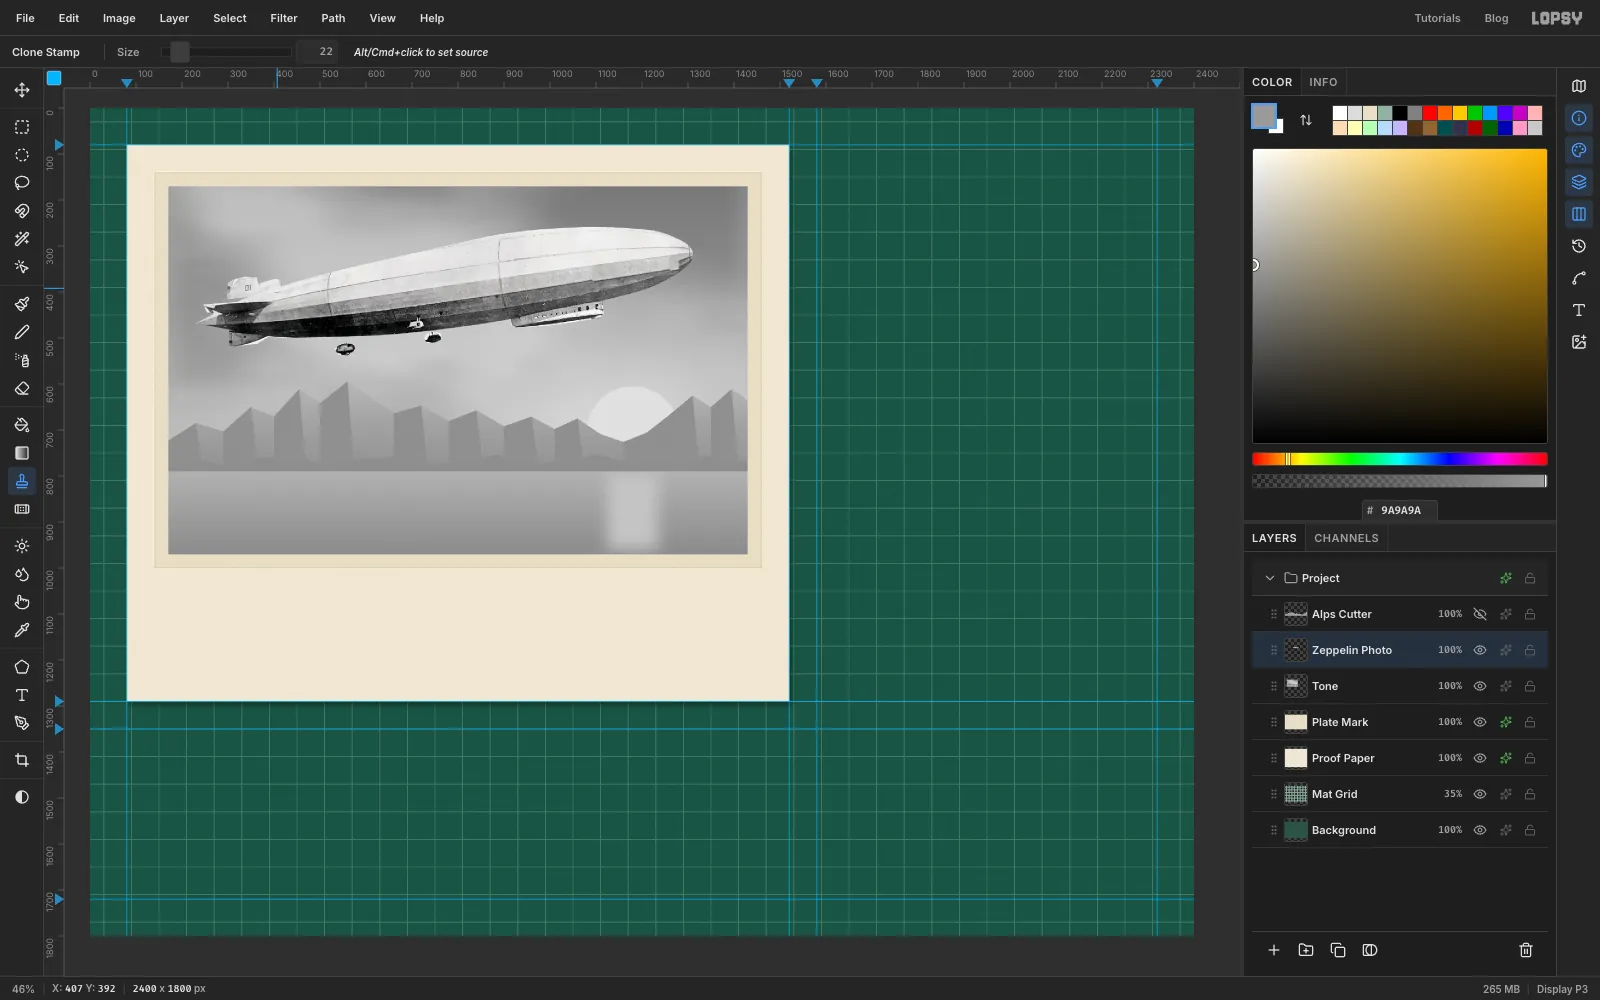
The real ship has BODENSEE painted near its nose. You'll add your own sharp red version later, so remove the photo's lettering now. If you left it, it would print as a blue smudge under the red.
- Pick the Clone Stamp (S) and set Size
22. - Alt-click on the plain pale band of the hull about 170 px to the left of the lettering, at the same height on the hull. That's the source.
- Paint three strokes along the lettering, following the hull's slope: one along the tops of the letters, one through the middle and one along the bottoms. The clean band is copied over the letters.
- Paint out the small D1 marks on the tail fin and under the hull the same way.
- Pick the Clone Stamp (S) and set Size
-
Tone the airship
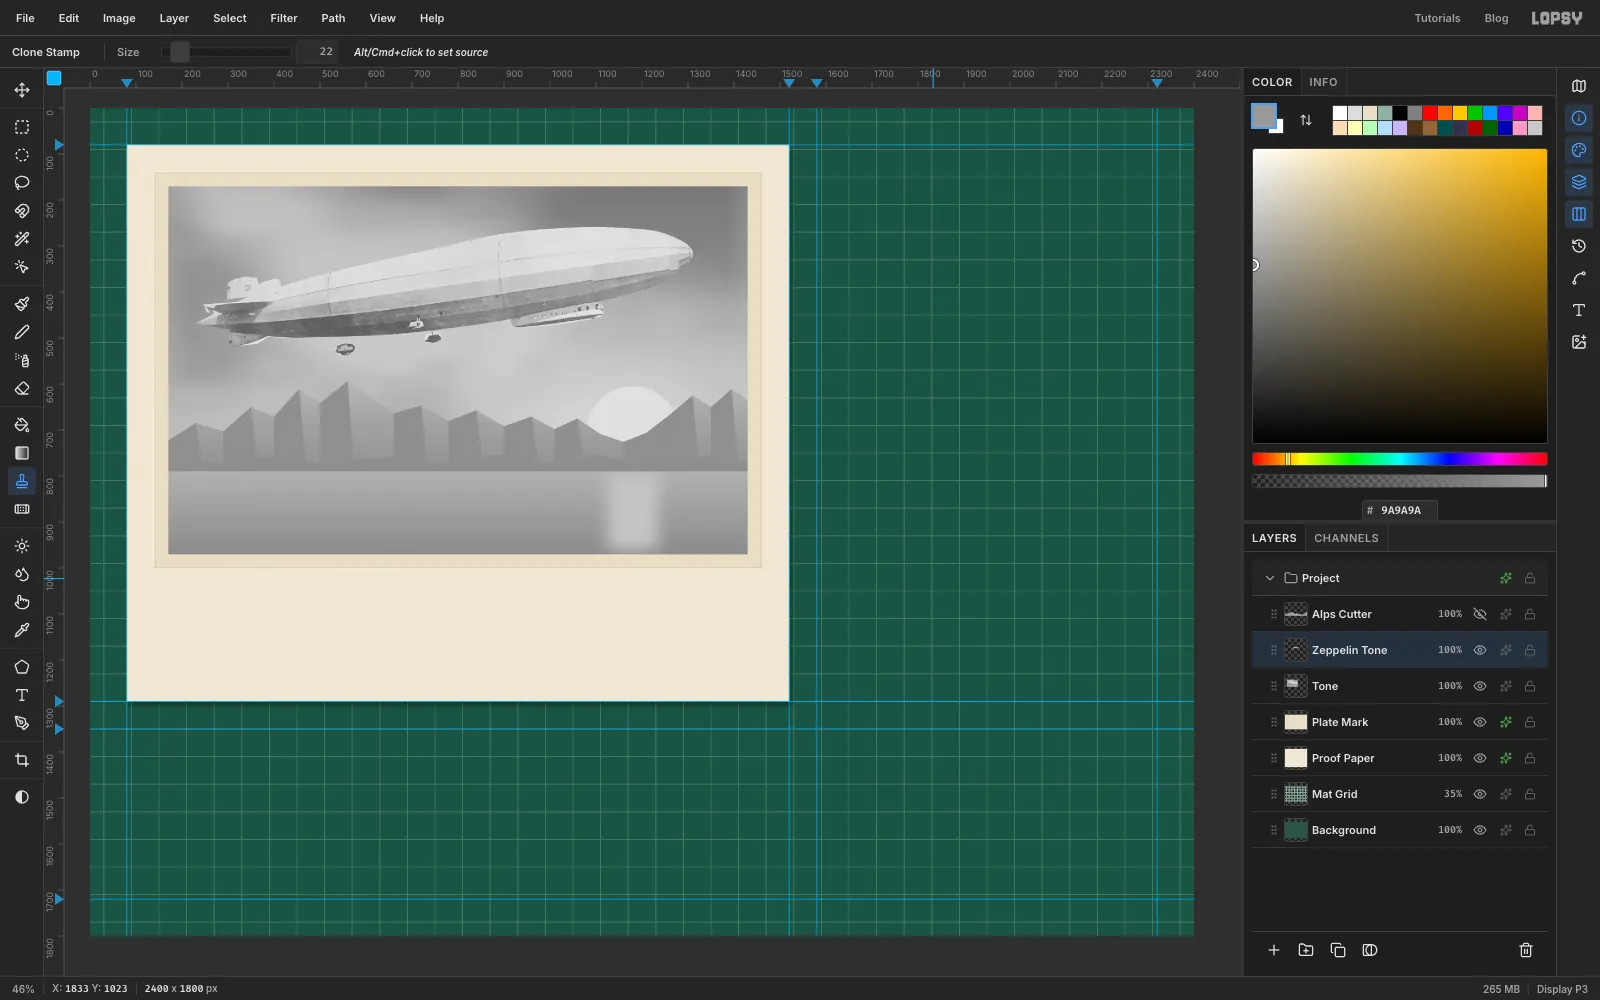
- Choose Filter → Desaturate.
- Run Surface Blur… with Radius
8and Threshold25. It smooths the photo's grain but keeps the edges sharp. Without it, the underside comes out as a blotchy speckle instead of clean lines. - Run Brightness/Contrast… with Brightness
14and Contrast-45. This keeps the darkest underside from going solid and leaves a few lines on the pale fins. - Rename the layer
Zeppelin Tone.
-
Rule the engraving lines
- Click Duplicate Layer on
Zeppelin Tone, rename the copyHull Cutterand hide it. - Click
Zeppelin Toneand Merge Down ontoTone. - Add a layer called
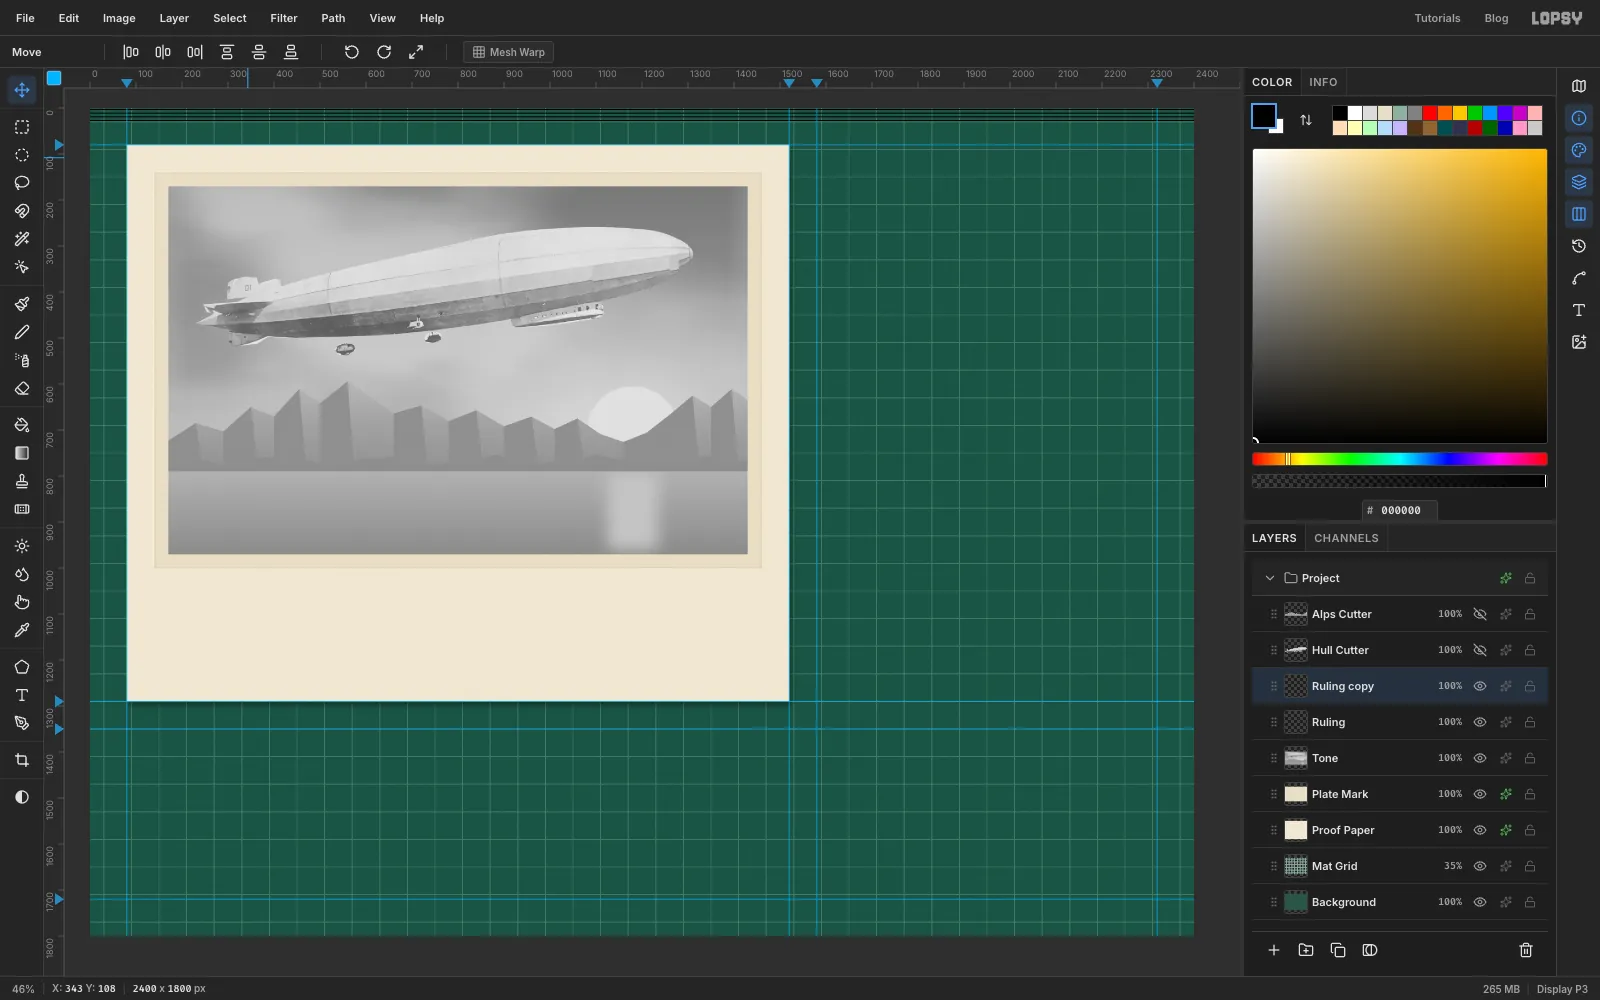
Ruling. With the Pencil at Size2, set the foreground to black and draw one line right across the canvas aty 4. - Double it with the step-and-repeat, straight down this time: nudges of
8,16,32,64,128,256,512and1024px. Eight passes give 256 lines, 8 px apart. This is your ruling machine.
- Click Duplicate Layer on
-
Soften the lines
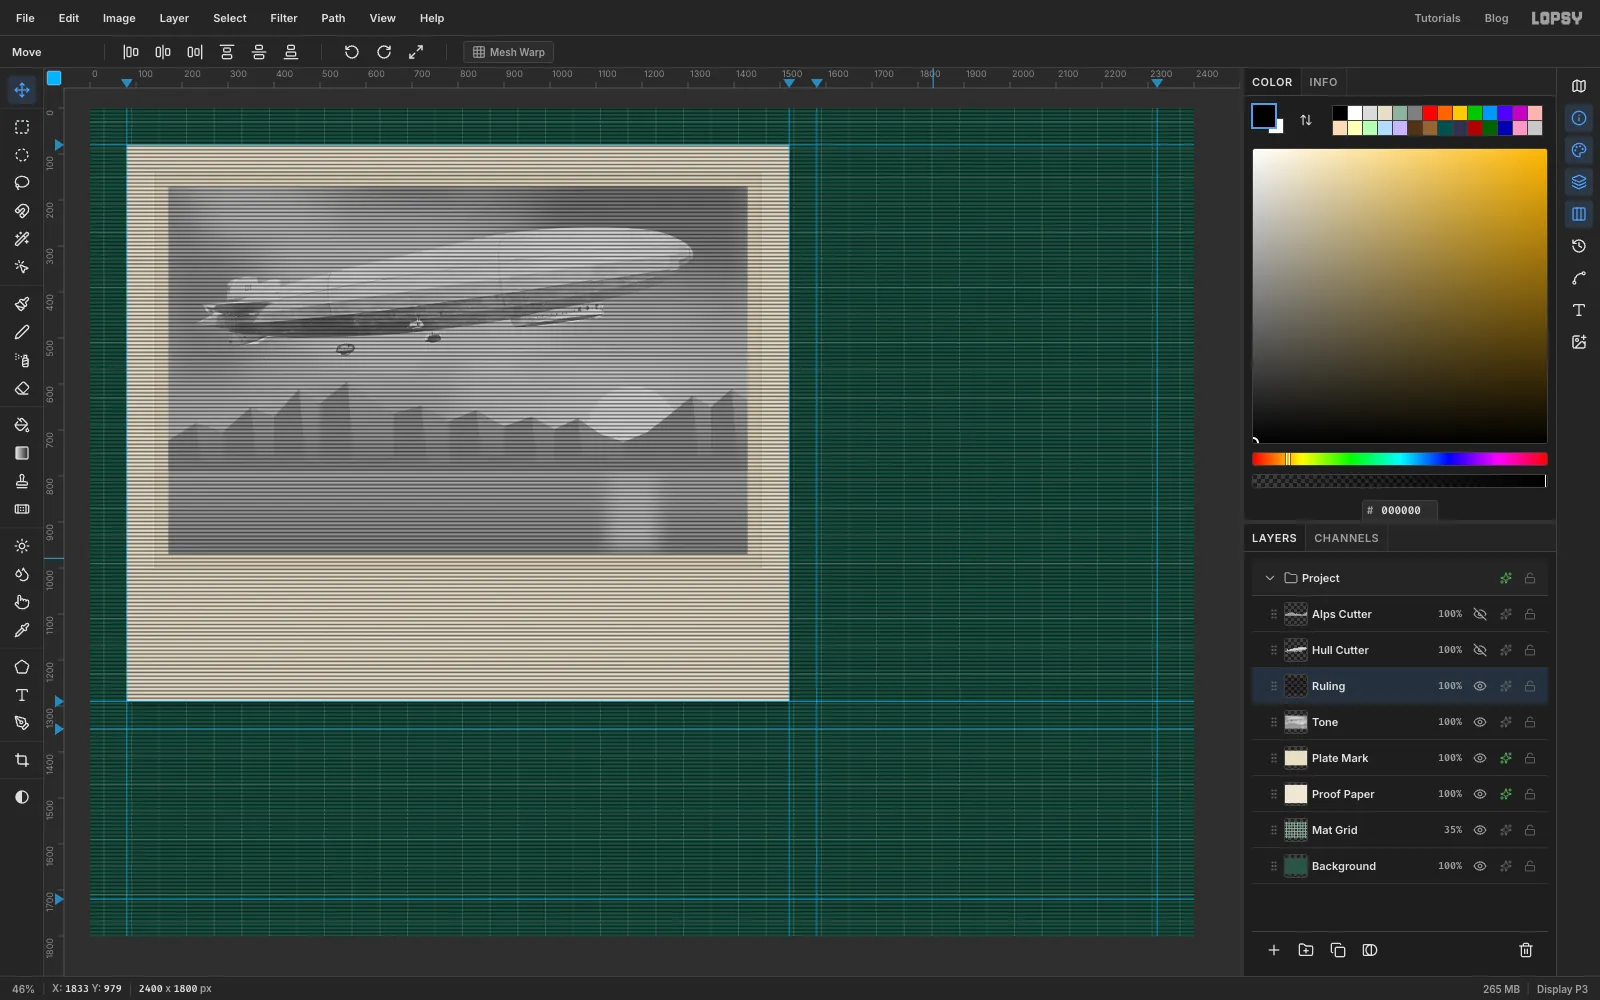
Run Filter → Gaussian Blur… with Radius
4.Here's why this works. Each line is now a soft hill of ink that fades out to nothing halfway to the next line. In Multiply the hills darken the grey picture underneath. Threshold then turns every pixel darker than one level black and everything else white, like a water level:
- Over dark grey, the hills already sit low, so more of each hill is below the level and prints as a thick line.
- Over pale grey, only the very centre of each hill dips below, so the line prints thin.
- A grey darker than about is below the level even between the hills, so it prints solid black.
-
Make the cross-ruling and the hull band
Real engravers changed the angle of their lines for different parts of a picture. You'll make three more copies of the ruling.
- Cross-ruling. Duplicate
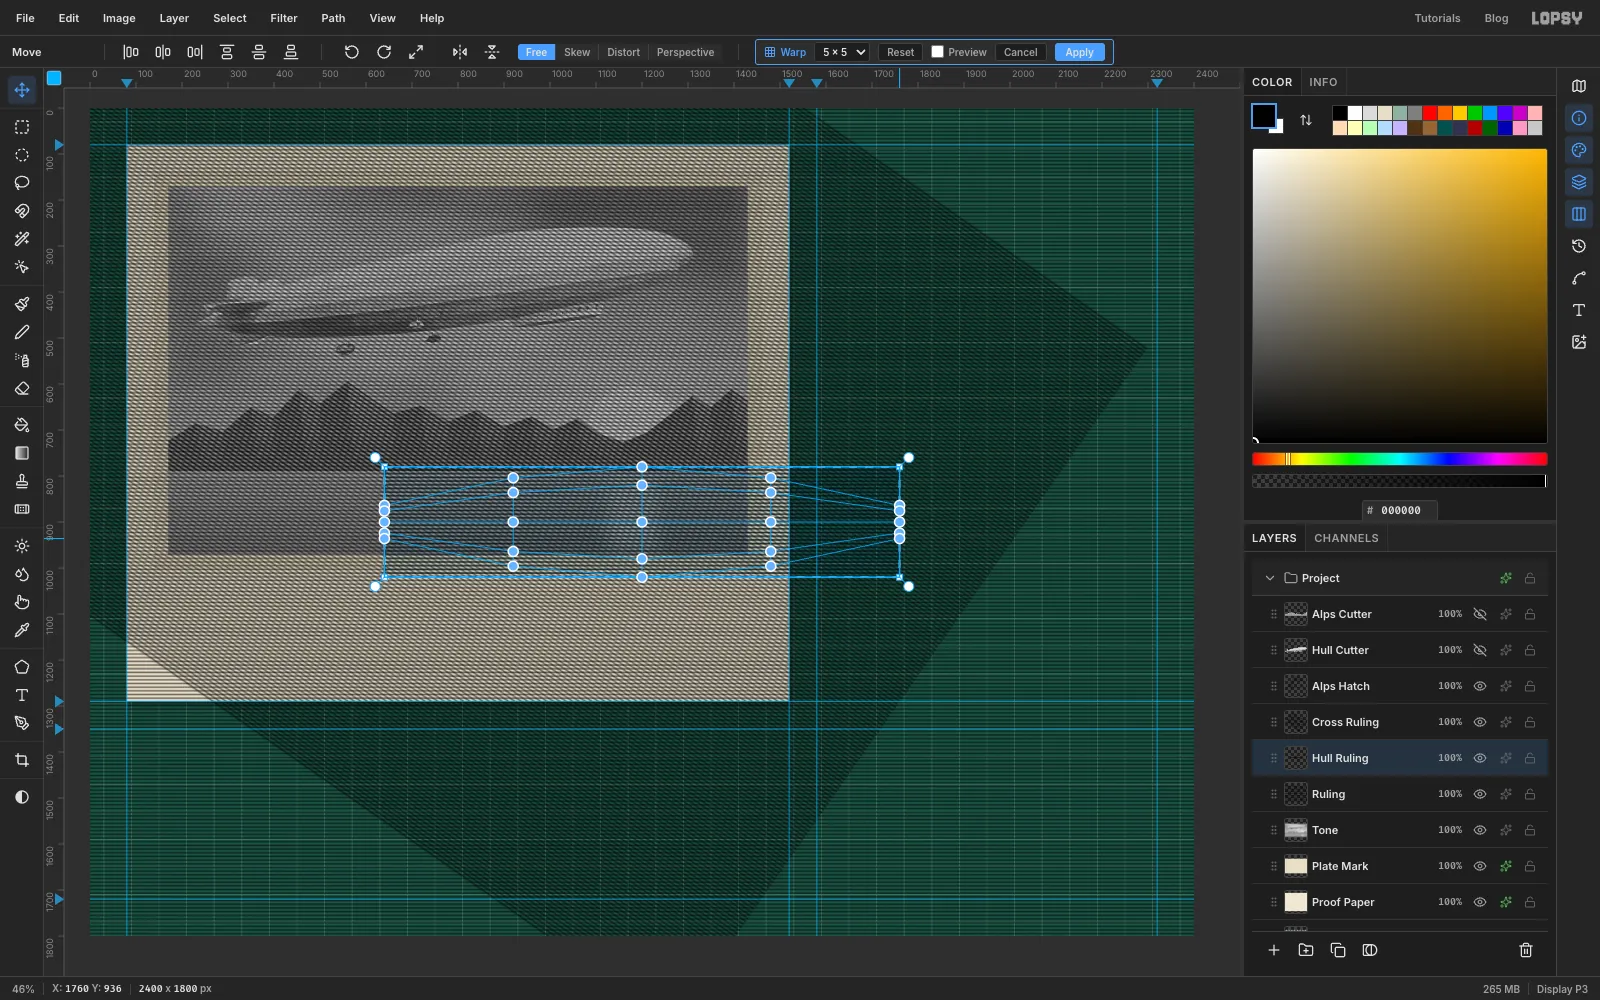
Rulingand rename the copyCross Ruling. Press Cmd+A. With the Move tool, drag the rotation handle just outside the top-right corner to turn it about 35° clockwise. There's no angle readout, so judge it by eye. If you hold Cmd it snaps to 30°, which works just as well. Press Cmd+D, then nudge the layer400px left and330px up so it covers the whole picture. - Alps hatch. Duplicate
Cross Rulingand rename itAlps Hatch. Cmd-click theAlps Cutterthumbnail, choose Select → Inverse and press Delete. Only the diagonal lines inside the mountains are left. Press Cmd+D. - Hull band. Click
Ruling, Duplicate it and rename the copyHull Ruling. Select a band from640, 780to1760, 1020. That's about the length and height of the hull. Select → Inverse, Delete, press Cmd+D, then select the band again with the same numbers. - With the Move tool, click Mesh Warp in the options bar and set the grid to 5 × 5.
- Cross-ruling. Duplicate
-
Pinch the band to the hull's shape
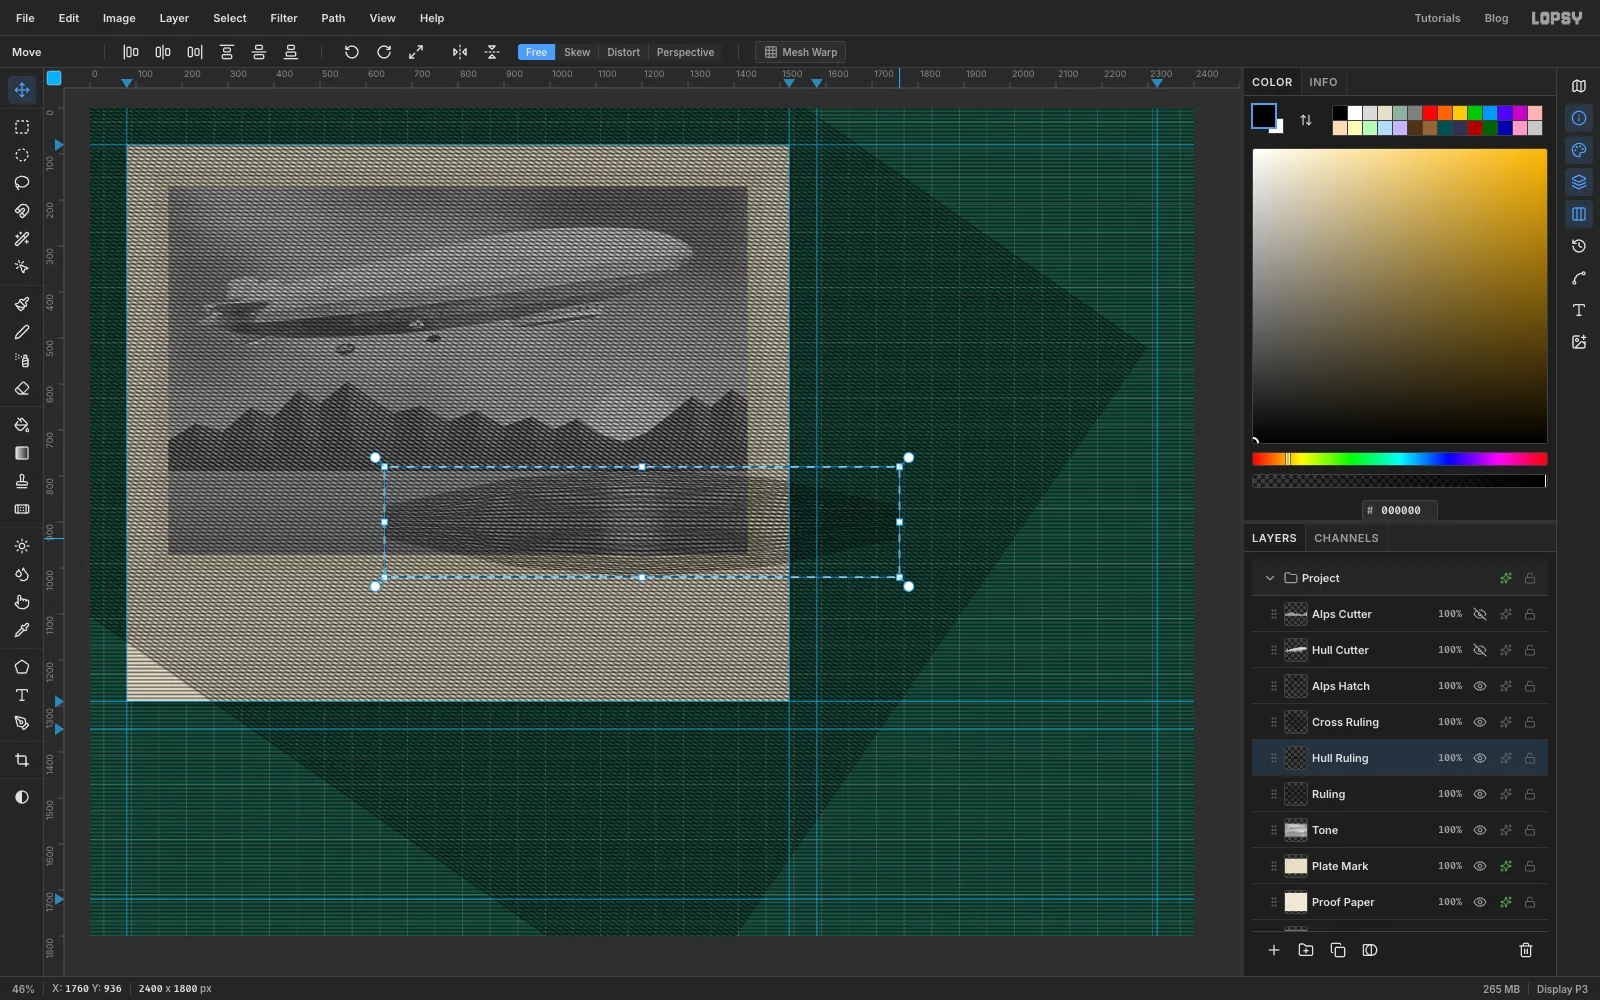
The lines on a cigar-shaped hull squeeze together toward the nose and the tail. Toward the top and bottom edges they crowd together too, because you see them at a slant. Recreate that with the grid. Number the five handles in each column 1 to 5 from the top. The middle handle (3) never moves.
- Left and right columns: drag handles 1 and 5 about 85 px in toward the middle, and handles 2 and 4 about 35 px in. The ends of the band pinch to about a third of their height.
- Second and fourth columns: drag handles 1 and 5 about 25 px in.
- Middle column: drag handle 2 up about 20 px and handle 4 down about 20 px. The lines spread out through the middle of the hull.
- Tick Preview to check, then click Apply.
Press each handle right on its dot. A drag that starts between handles moves the whole selection instead of warping it.
-
Turn the band to the hull's angle
The zeppelin climbs to the right at about 8°.
- Select the band again (
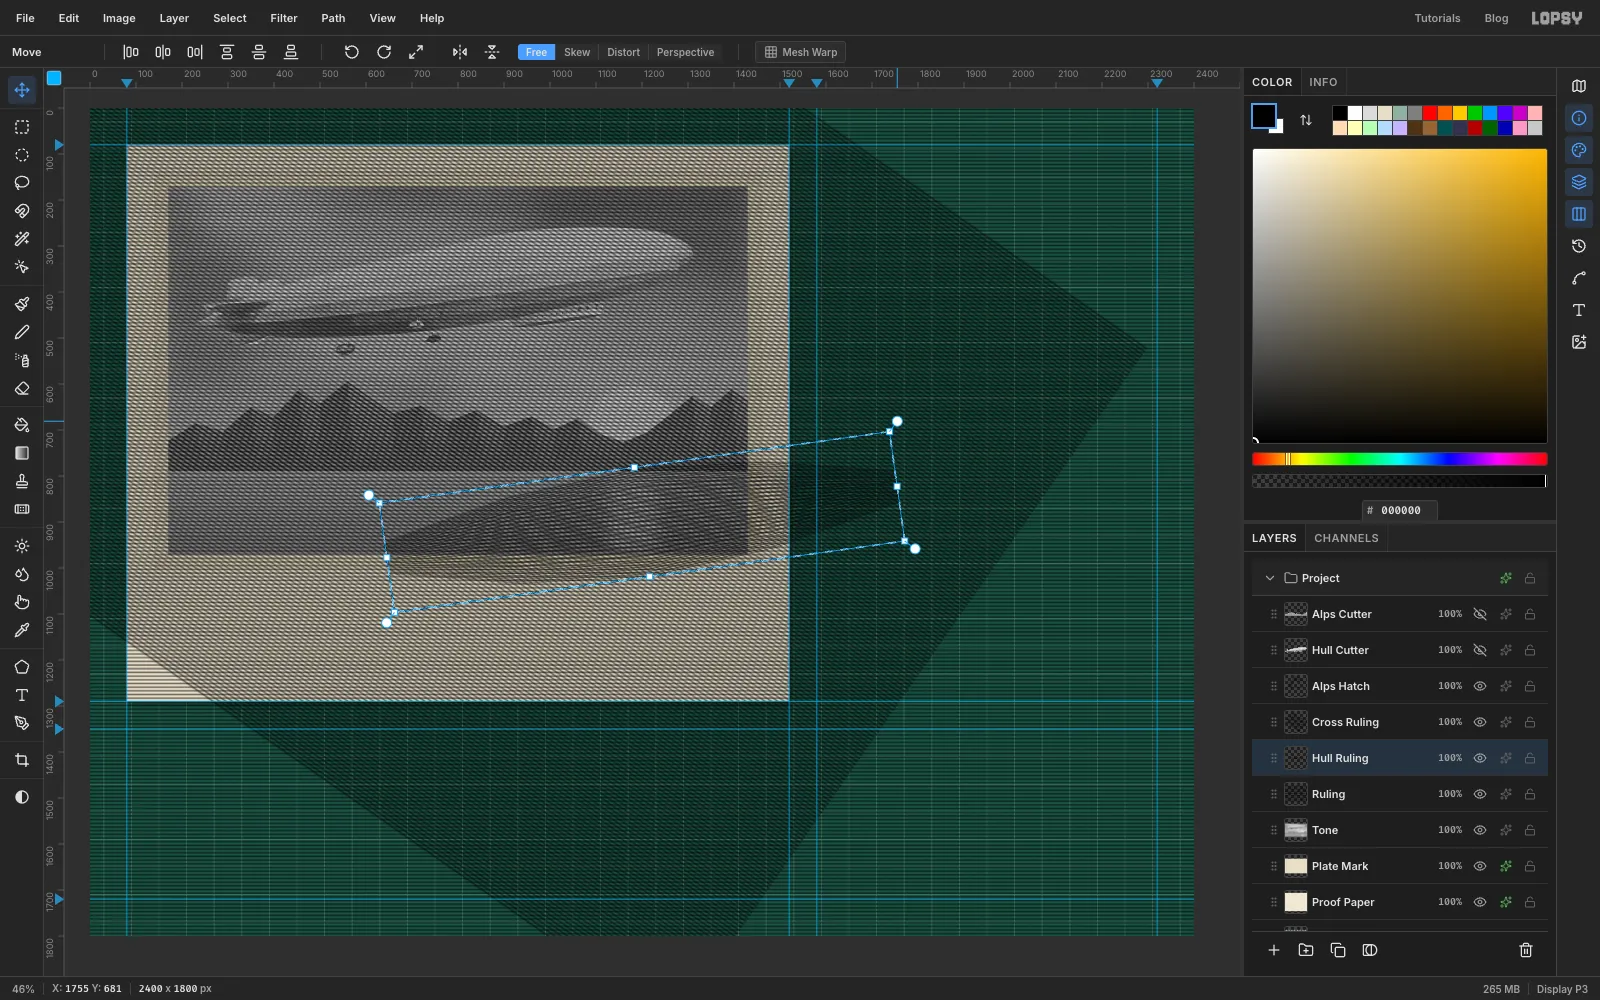
640, 780to1760, 1020). - Drag the rotation handle at the top-right corner upward until the band runs parallel to the hull. Its right end should finish about 155 px higher than its left. Press Cmd+D.
- With the Move tool, drag the band over the zeppelin. Then nudge it until its pinched ends meet the tail and nose and its middle runs along the hull's centre line.
- Select the band again (
-
Clip the band to the hull
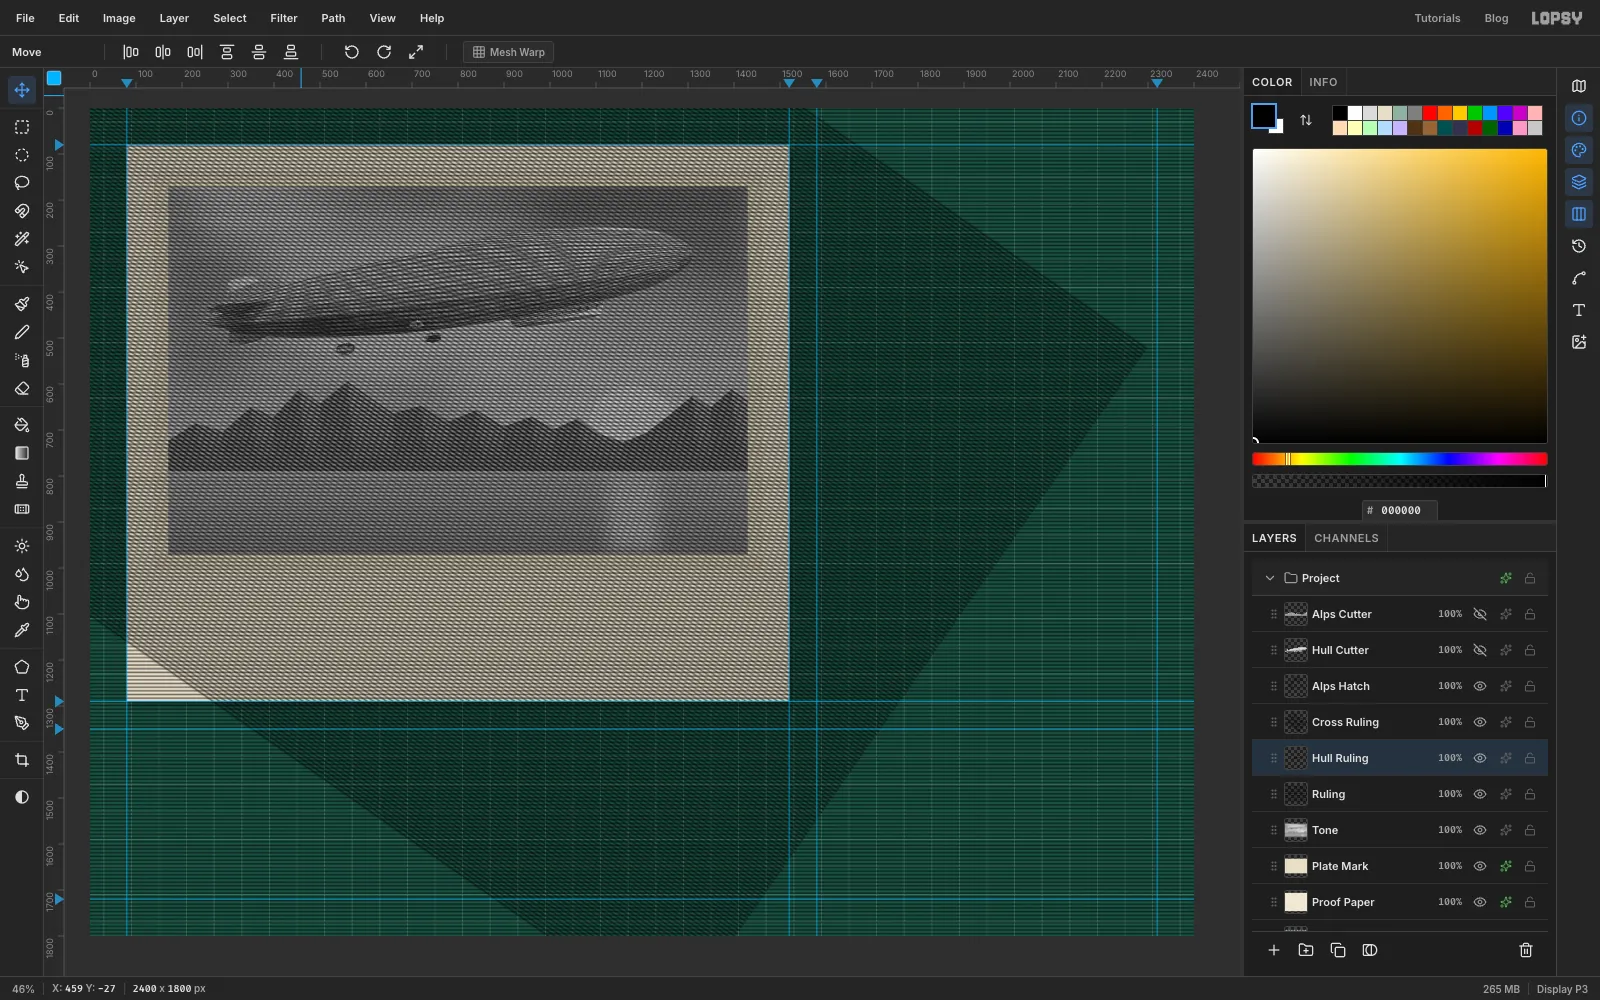
- Cmd-click the
Hull Cutterthumbnail. Its outline becomes the selection. - With
Hull Rulingactive, choose Select → Inverse and press Delete. Press Cmd+D.
- Cmd-click the
-
Trim the rulings and set them to Multiply
- Click
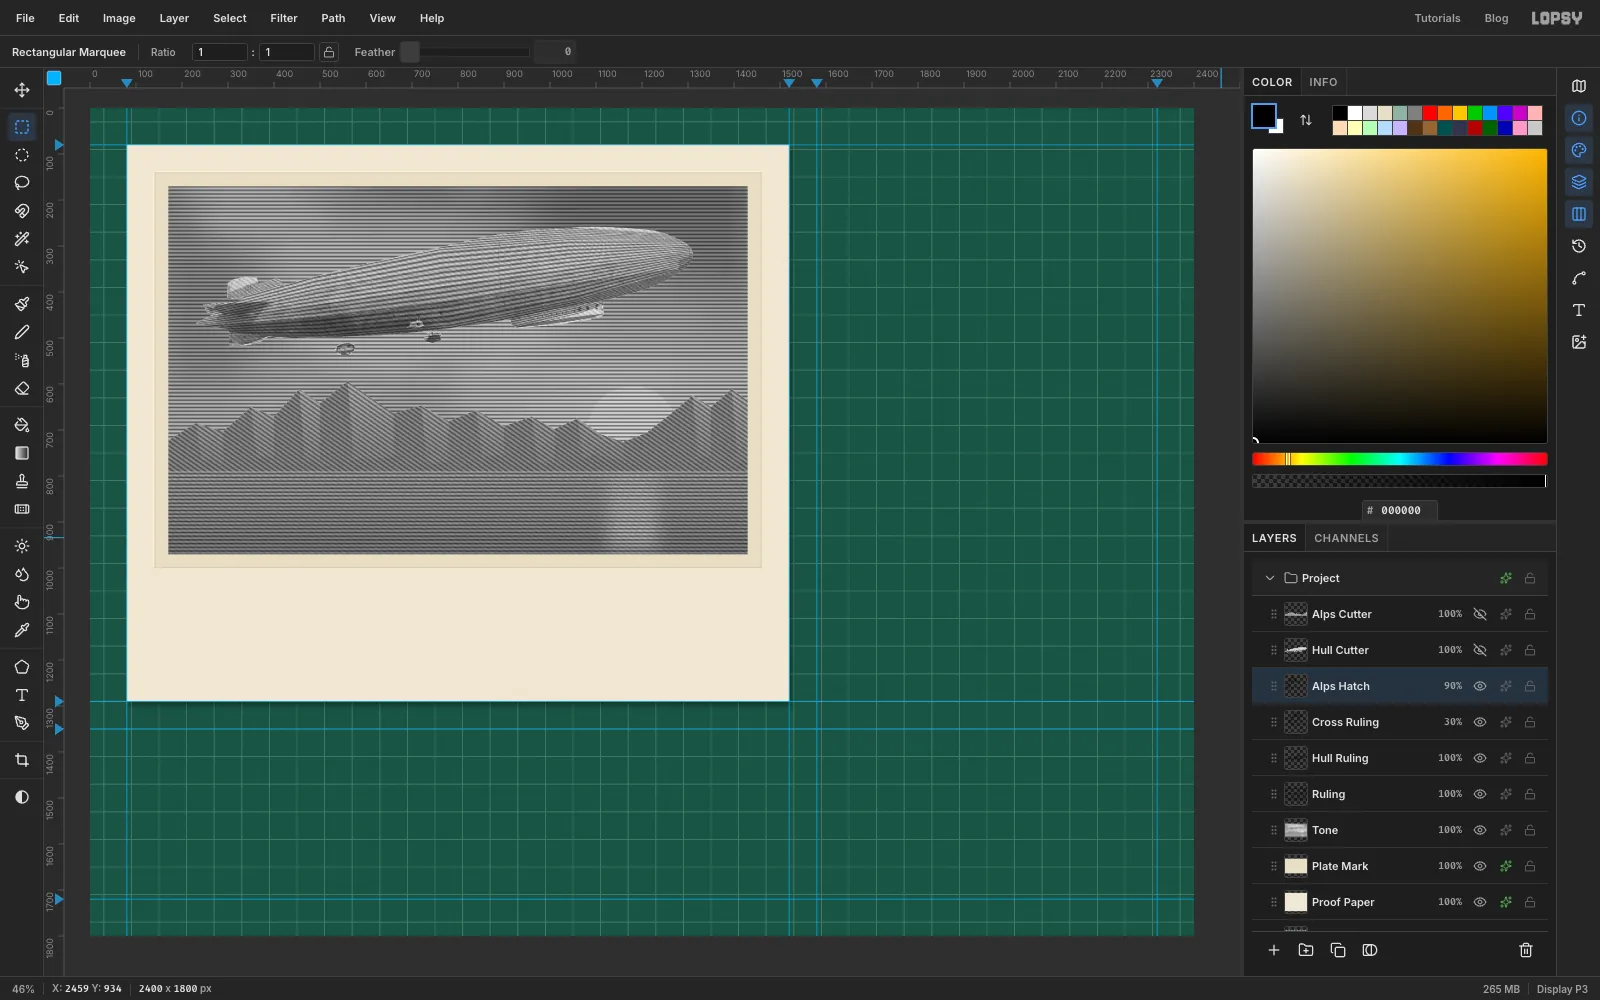
Ruling. Cmd-click theHull Cutterthumbnail, then Shift+Cmd-click theAlps Cutterthumbnail to add the mountains. Press Delete, then Cmd+D. The sky's straight lines no longer run over the hull or the Alps. - On both
RulingandCross Ruling, select the picture area (170, 170to1430, 970), choose Select → Inverse, press Delete and Cmd+D. - On
Cross Ruling, select the sky (170, 170to1430, 790), then Alt+Cmd-click theHull Cutterthumbnail to subtract the hull. Press Delete and Cmd+D. A clean ruled sky uses just one set of lines, so only the lake and the hull keep the cross-hatching. - In each layer's effects drawer, set
Ruling,Hull Ruling,Cross RulingandAlps Hatchto Multiply. SetCross Ruling's opacity to30%andAlps Hatchto90%. At 30% the cross lines only reach the threshold where the picture is dark.
- Click
-
Merge everything into one grey layer
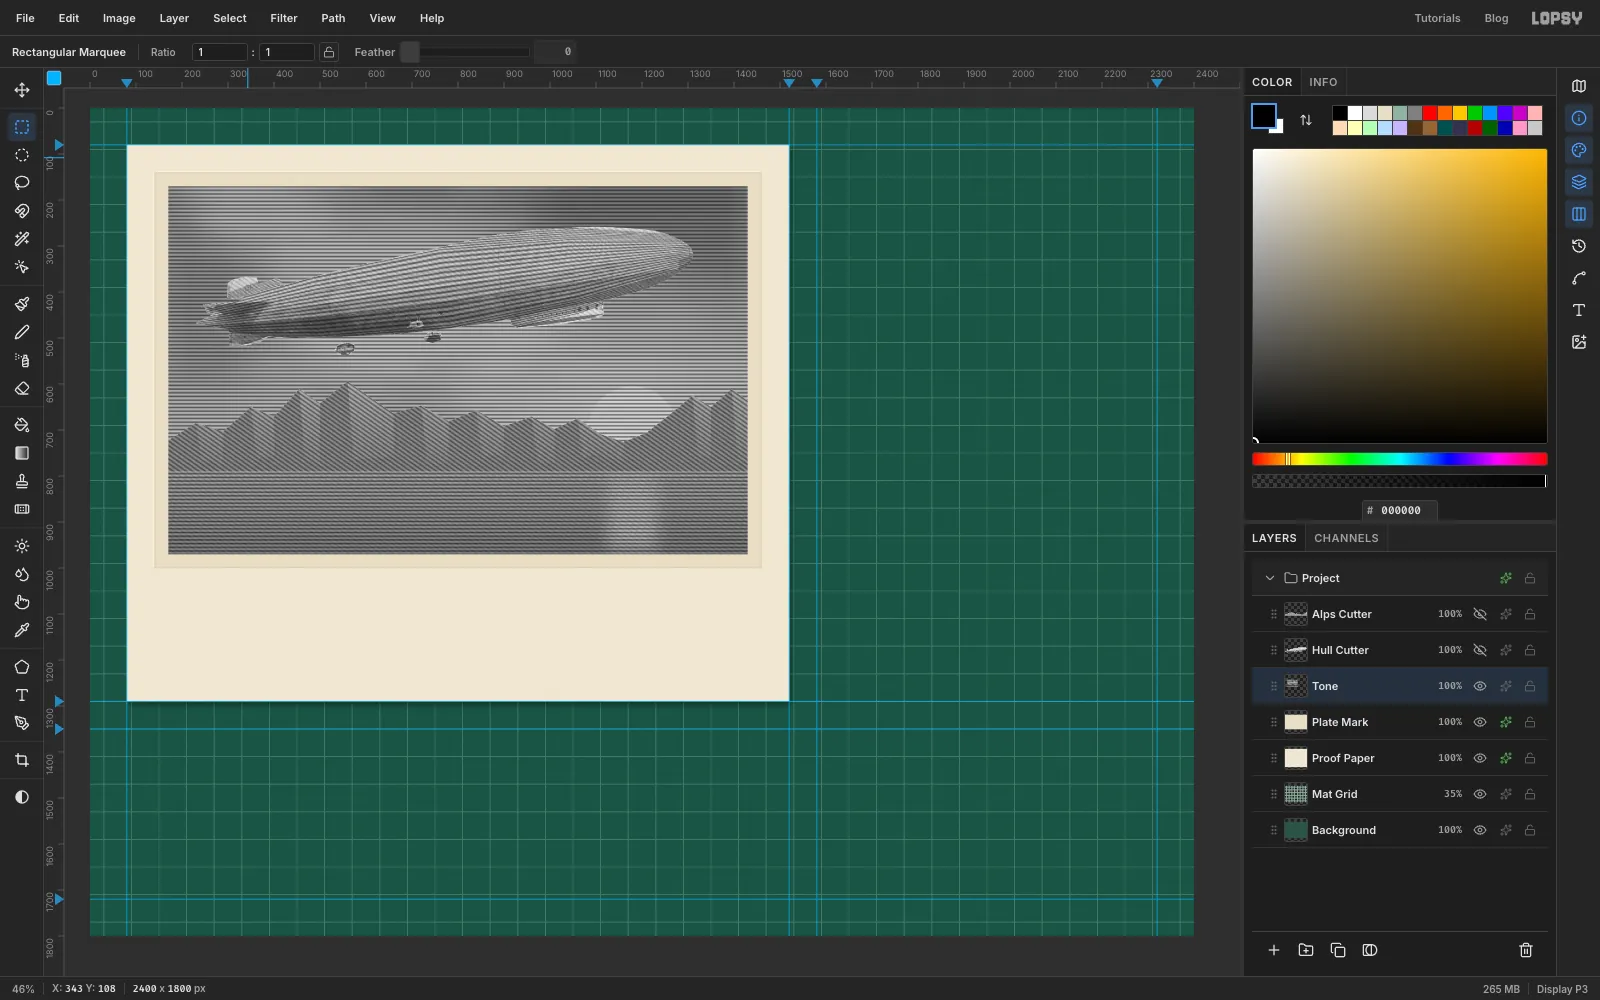
Check the Layers panel: the four ruling layers should sit directly above
Tone, with the hidden cutters above them. Then:- Click
Rulingand Merge Down. - Do the same for
Hull Ruling,Cross RulingandAlps Hatch, in that order. Each one lands onTone.
- Click
-
Run Threshold
- Run Filter → Threshold… with Level
110and click Apply. - Rename the layer
Ink A.
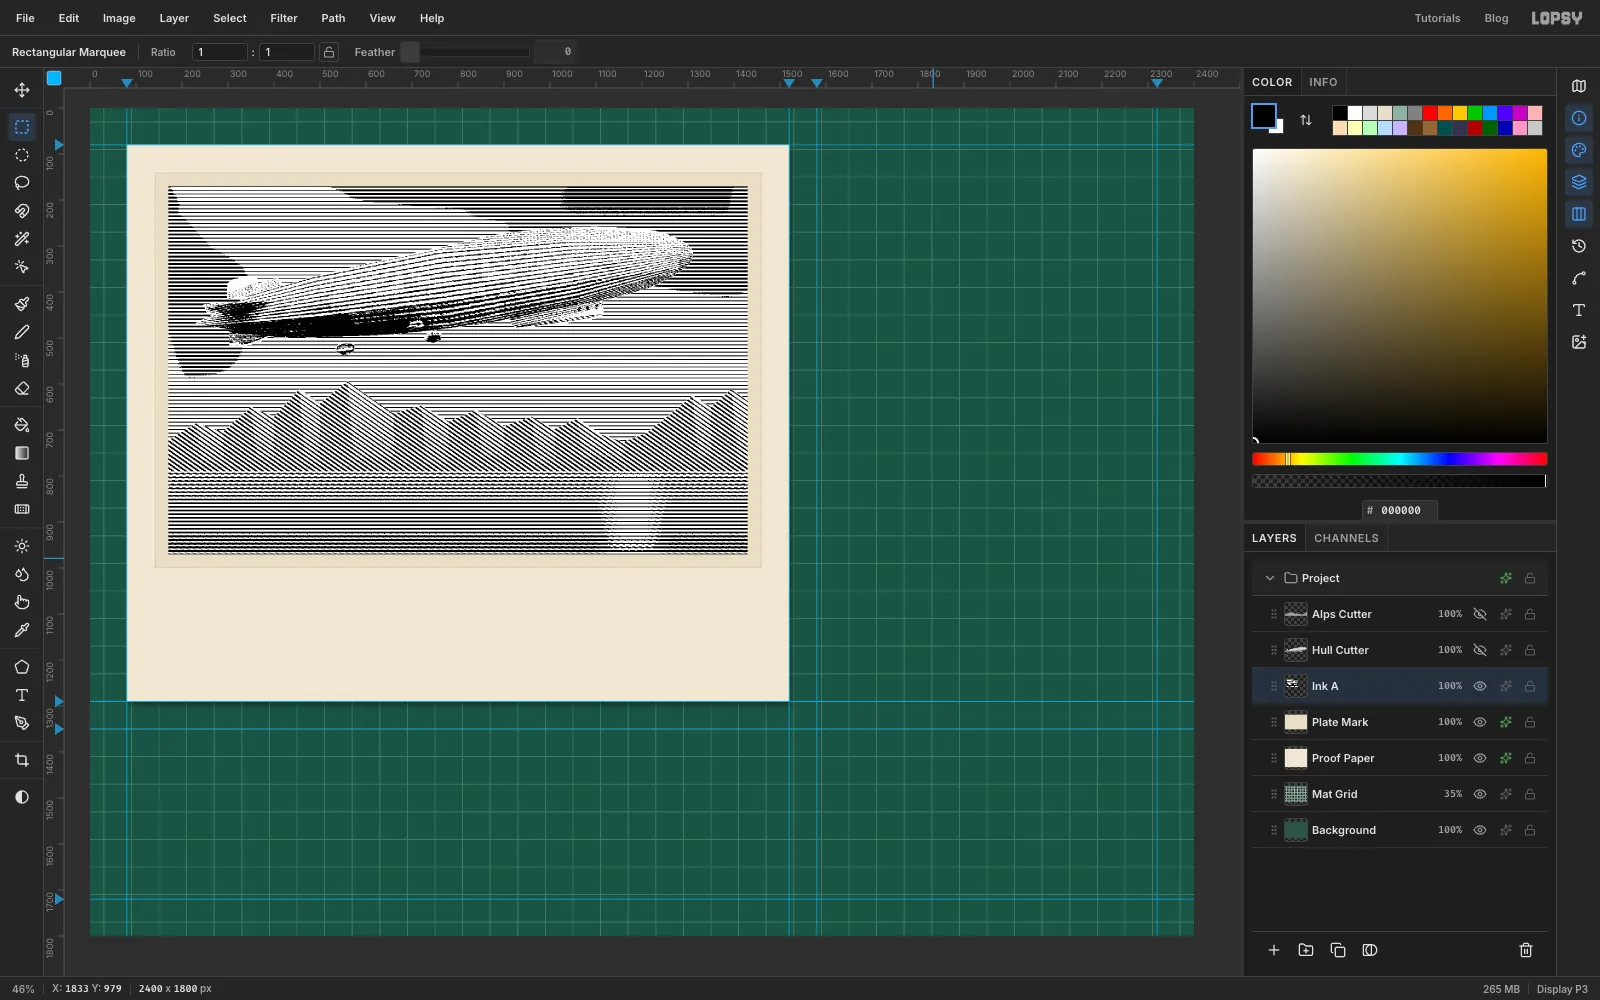
Zoom to 100% and look. The sky lines swell where the clouds are darker and thin out near the sun. The hull lines curve and pinch toward the ends. The lake gets heavier toward the shore.
- Run Filter → Threshold… with Level
-
Lift the ink off, add a contour and draw the ties
- Pick the Magic Wand (W), untick Contiguous and set Tolerance
40. Click a white gap between two lines. Every white pixel in the layer is selected. Press Delete, then Cmd+D. - Select the sun's circle 1 px larger than before (
1079, 604to1281, 806) so the soft rim goes too. Then Alt+Cmd-click theAlps Cutterthumbnail to subtract the mountains. Press Delete and Cmd+D. The sun is now clear for the red. - Add a layer called
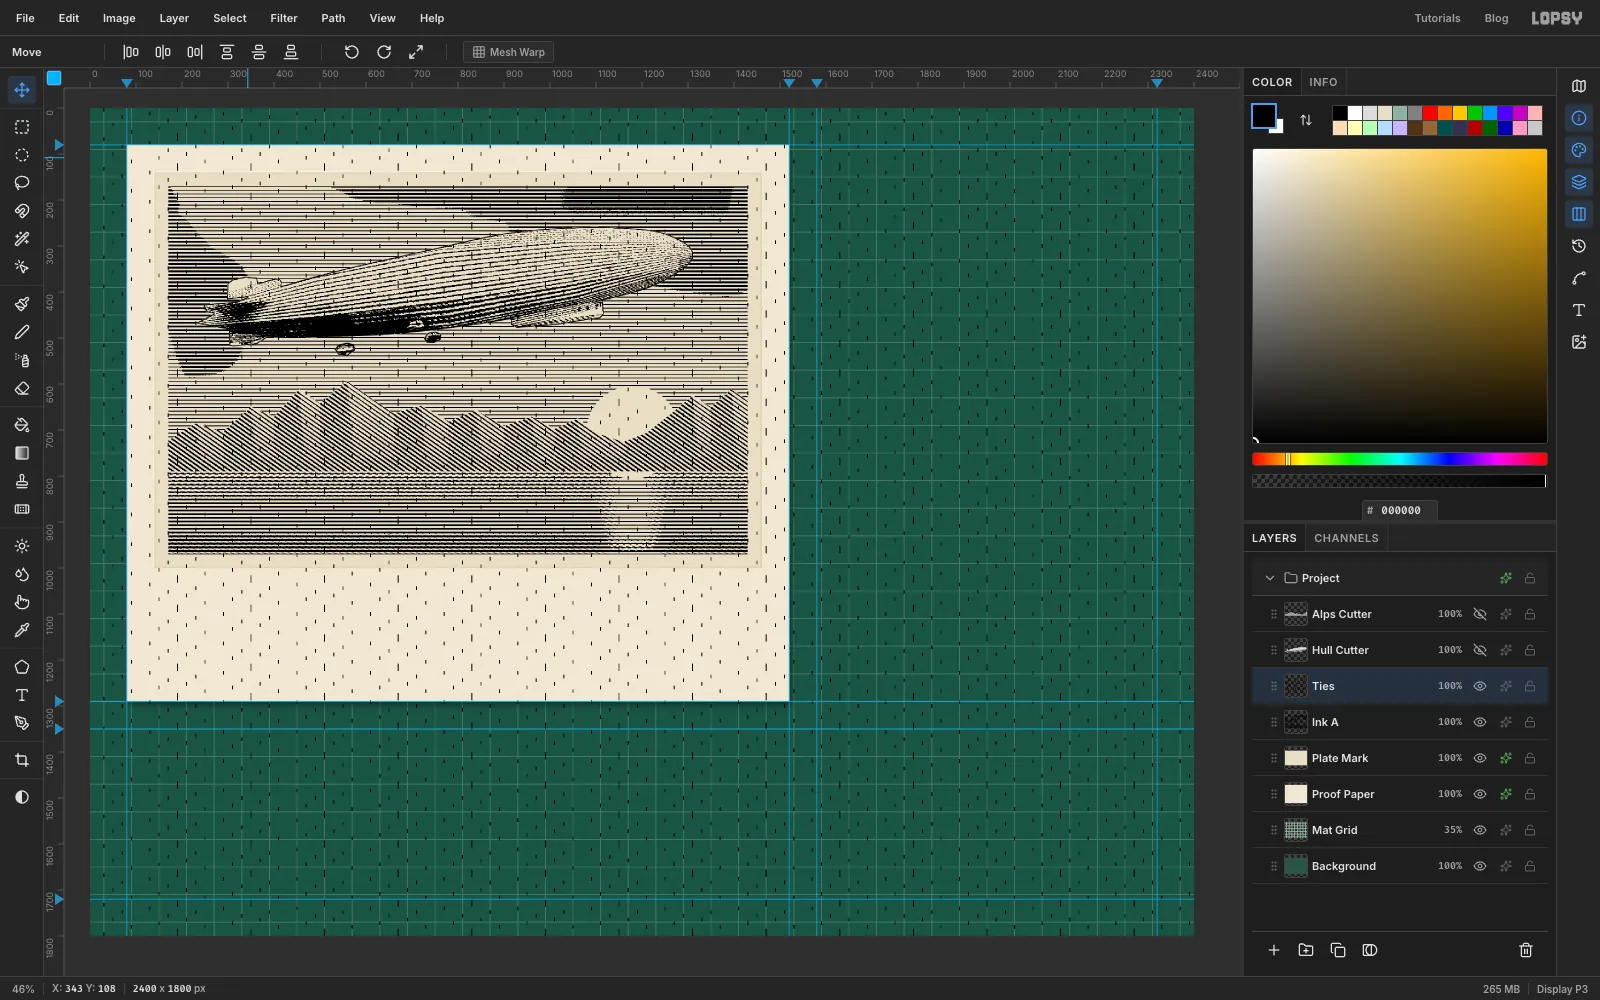
ContouraboveInk A. Cmd-clickHull Cutter, fill with black, choose Select → Shrink…2and press Delete. You're left with a 2 px outline round the hull. Press Cmd+D and Merge Down ontoInk A. - A stencil can't hold a long thin slot without falling apart, so every line needs small ties, or bridges. Add a layer called
Ties. With the Pencil at Size2in black, draw a short vertical tick from30, 1to30, 7. It's 6 px tall, so it crosses exactly one ruled line (the one aty 4). - Step-and-repeat it sideways with nudges of
160,320,640and1280px. That's one row of ties. - Now make the next rows start at different places, so the ties don't line up in columns. Duplicate, nudge
100right and8down (one line lower), merge. Duplicate, nudge40right and16down, merge. Duplicate, nudge20right and32down, merge. You have eight rows, each shifted differently. - Step-and-repeat those eight rows straight down with nudges of
64,128,256,512and1024. The ticks cover the whole sheet, but you'll hide them in a moment.
- Pick the Magic Wand (W), untick Contiguous and set Tolerance
-
Cut the ties and ink it blue
- Cmd-click the
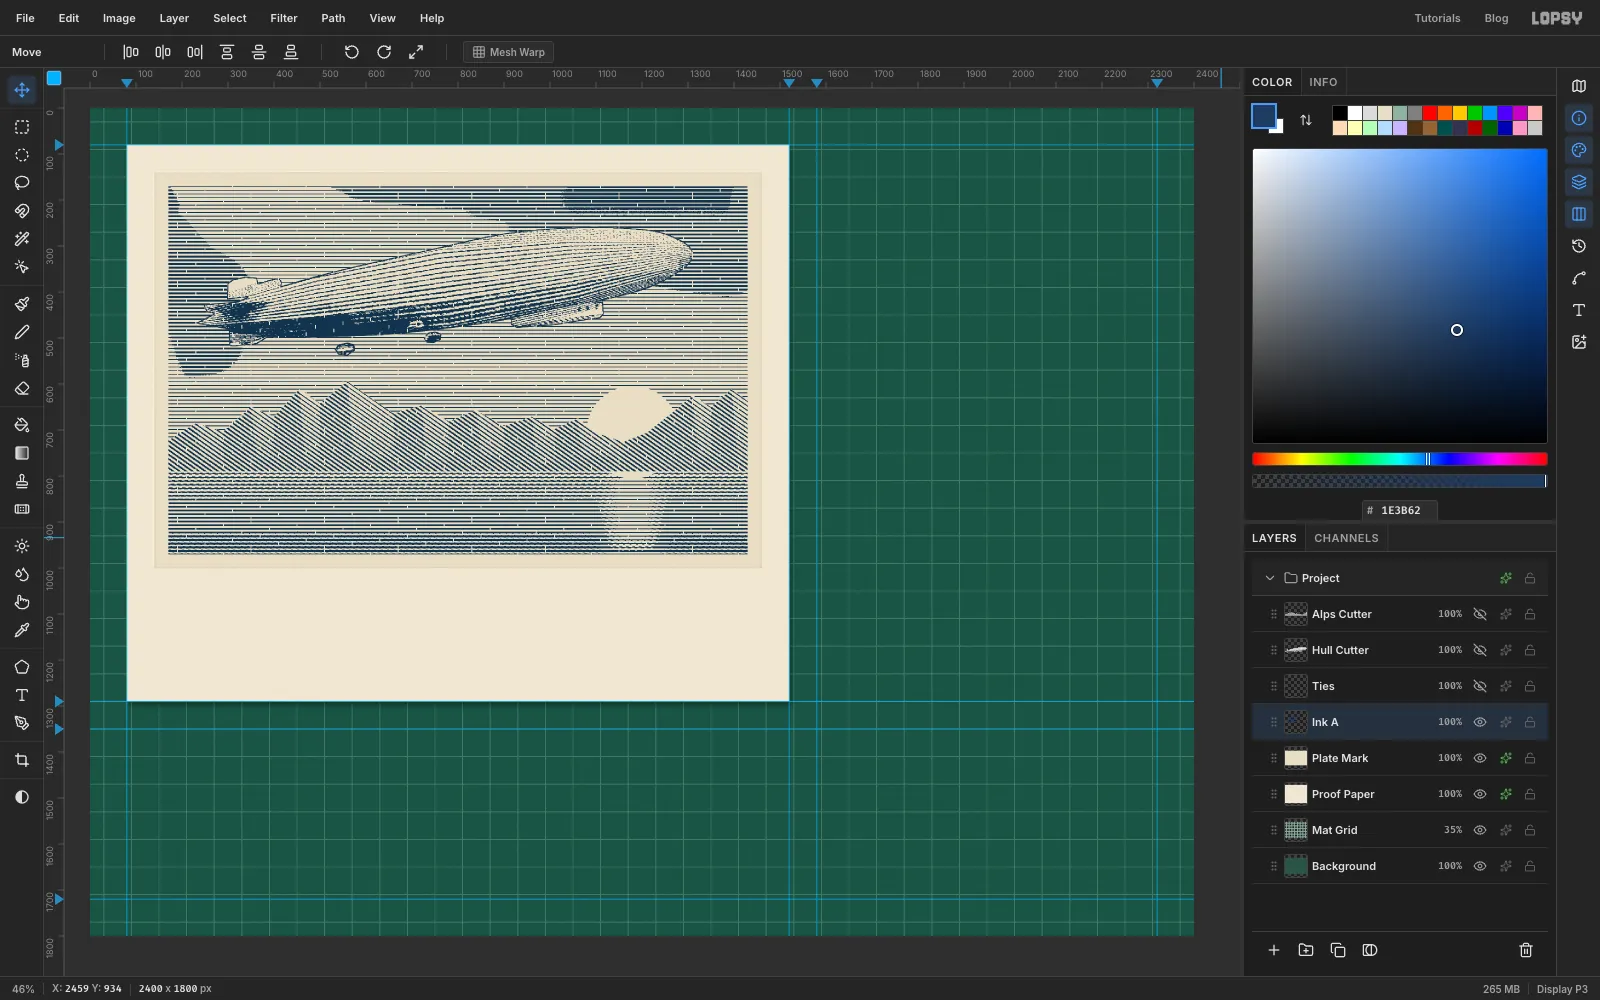
Tiesthumbnail, clickInk Aand press Delete. Press Cmd+D and hideTies. - Cmd-click the
Ink Athumbnail and fill with Prussian blue . Press Cmd+D. - In its effects drawer, set
Ink Ato Multiply, so the paper shows through the ink like a real print.
- Cmd-click the
-
Rule the red sun
The red plate gets its own small set of lines.
- Click
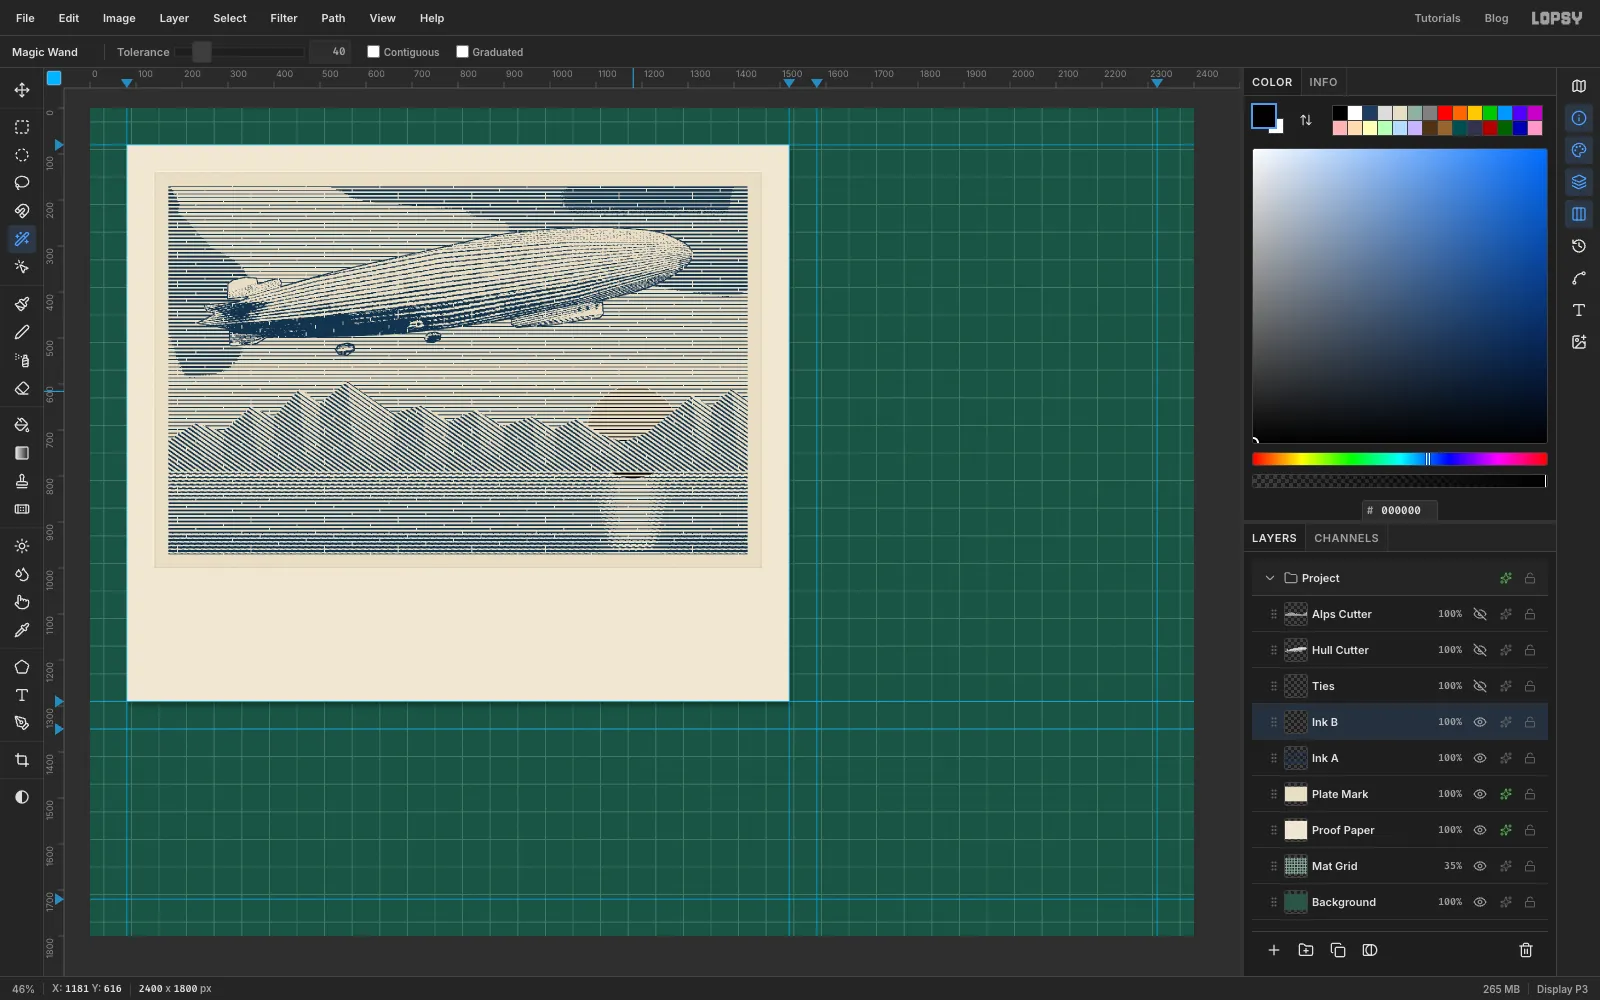
Ink Aand add a layer calledInk B. Select the sun's circle (1080, 605to1280, 805) and draw a linear gradient from at the top of the circle to at the bottom. Press Cmd+D. - Add a layer called
Sun Ruling. Set the foreground back to black (it's still blue from the last fill). With the Pencil at Size2, draw a line aty 604fromx 1060tox 1300. Step-and-repeat it straight down with nudges of8,16,32,64and128. - Run Gaussian Blur… at
4, set the layer to Multiply and Merge Down ontoInk B. - Select the circle again, Select → Inverse, Delete, Cmd+D.
- Run Threshold… at
110. With the Magic Wand (Contiguous still off), click a white gap and press Delete. - Cmd-click
Alps Cutter, press Delete so the sun sinks behind the ridge, and press Cmd+D.
- Click
-
Add the glint on the water
- Still on
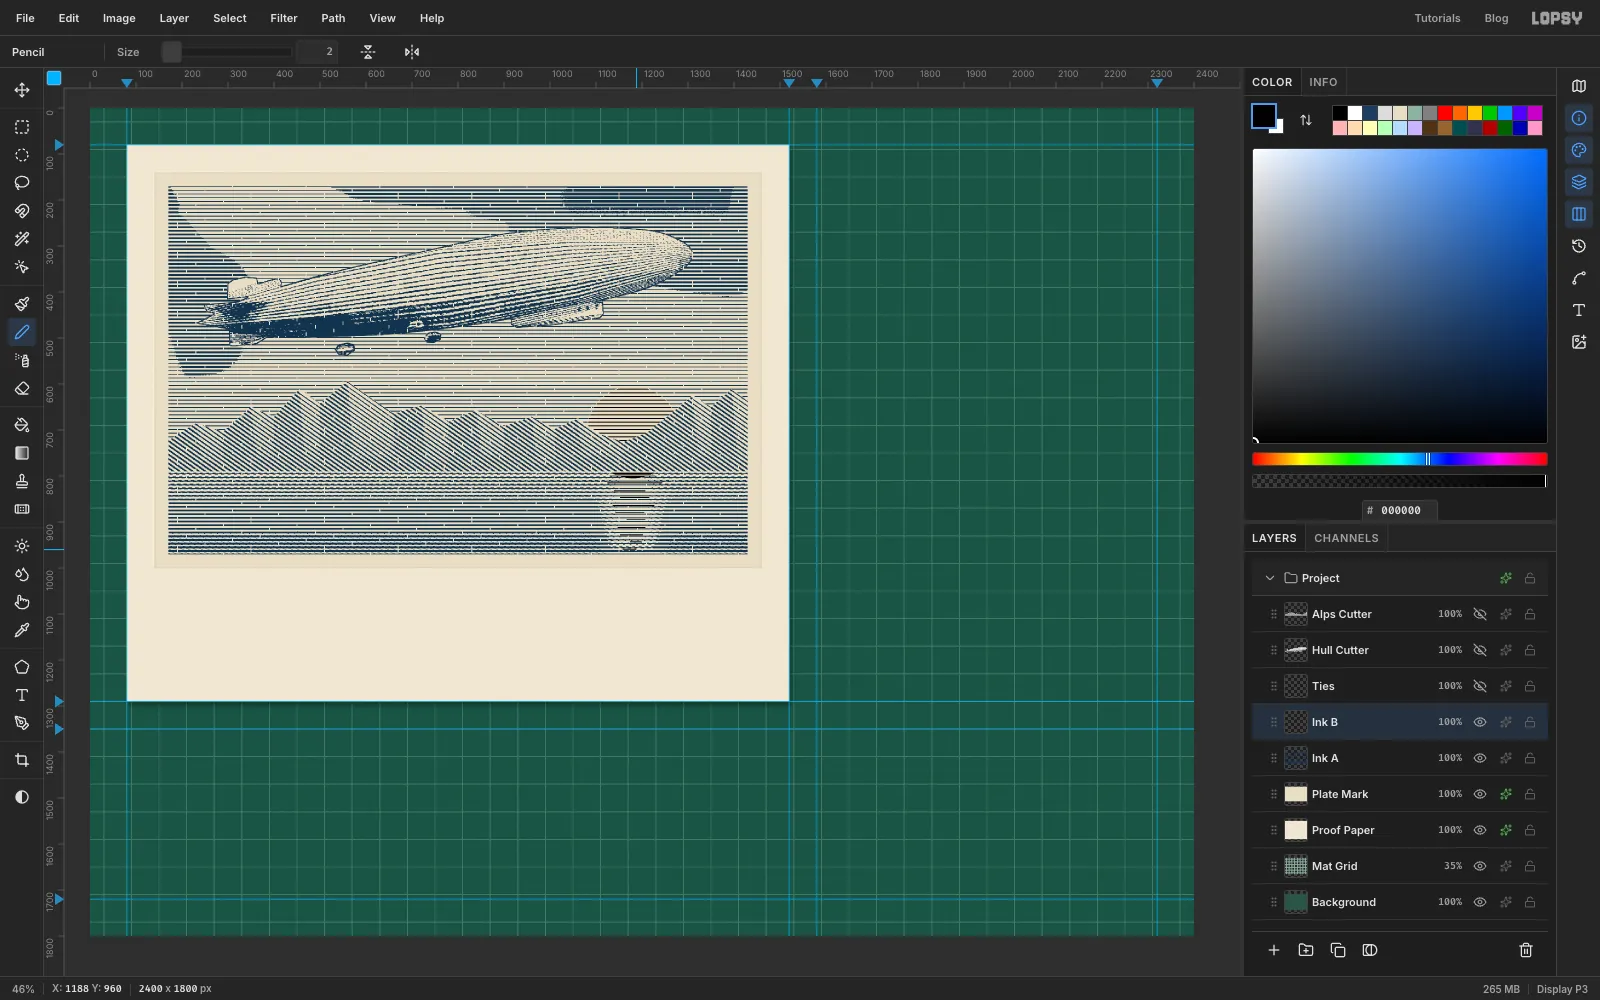
Ink B, with the Pencil at Size2in black, draw short horizontal dashes in the pale column under the sun. Use Shift-click for each one. Start aty 800with a dash about 130 px long, centred under the sun. Then draw ten more, 16 px apart, down toy 960. Make each a little shorter than the last, ending at about 20 px, and wobble them a few pixels left and right. Spaced 16 px apart, they fall between the blue lines. - Cmd-click
Ties, clickInk Band press Delete, so the red has ties too. Press Cmd+D.
- Still on
-
Type the painted name
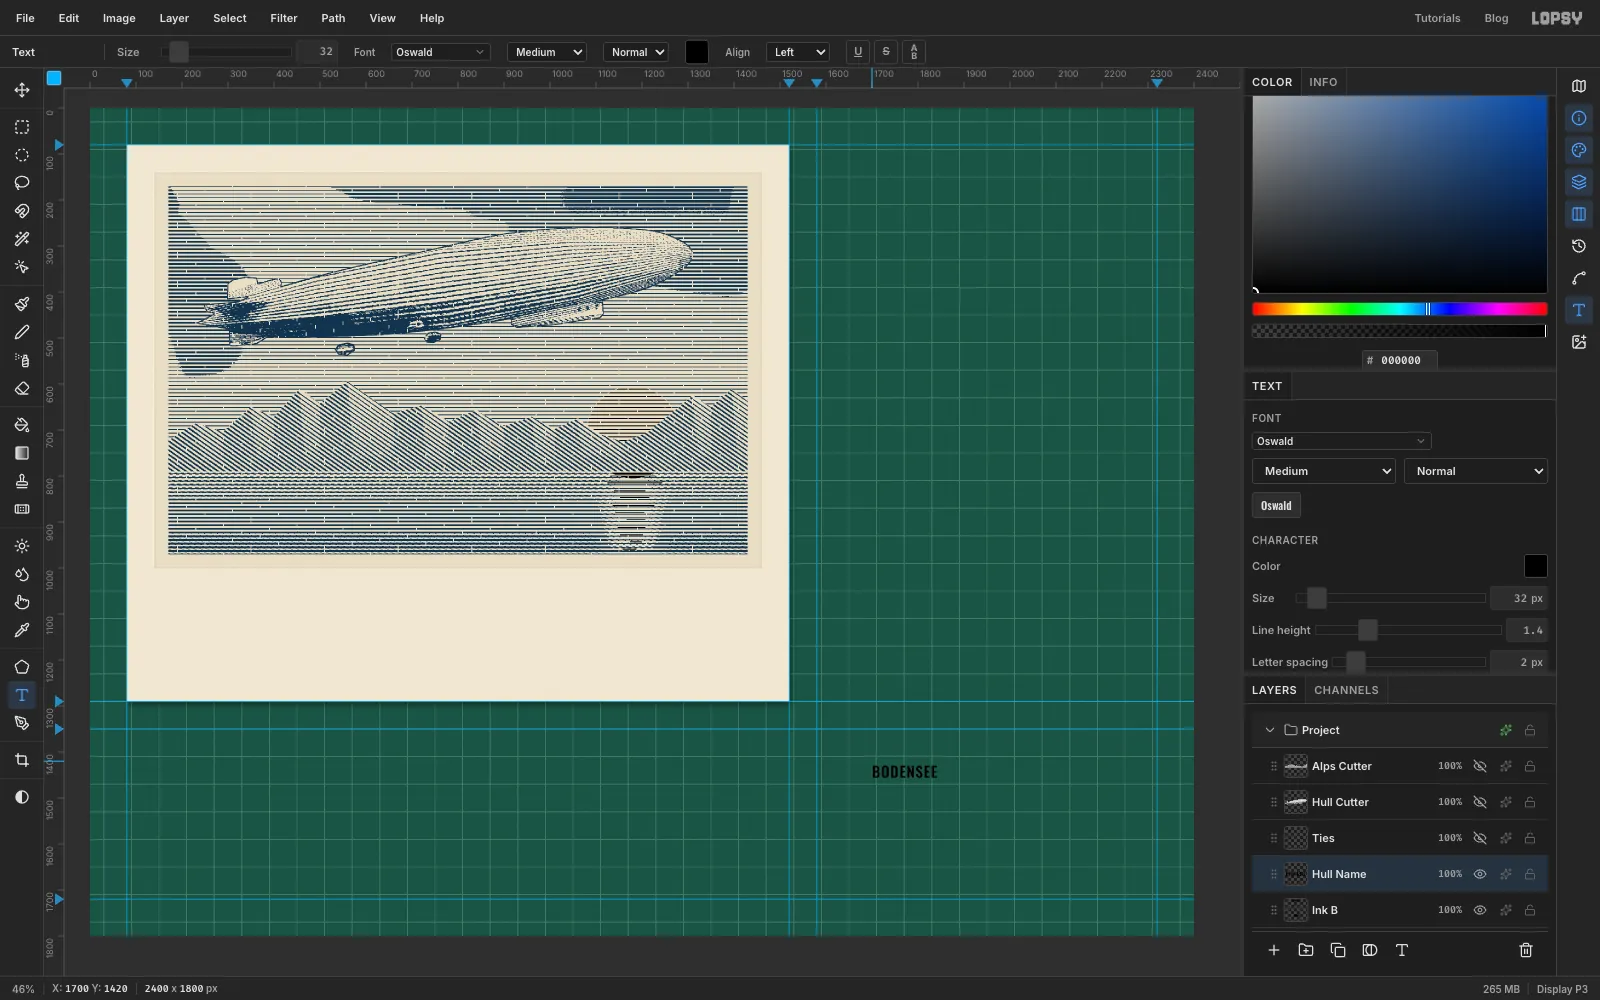
- Pick the Text tool (T). Set Oswald, Medium, size
32, colour black, and Align Left. - Click on an empty patch of mat, away from any other text, and type
BODENSEE. Press Tab to finish. Rename the layerHull Name. - In the Text panel, set Letter spacing to
2.
- Pick the Text tool (T). Set Oswald, Medium, size
-
Turn the name and seat it on the hull
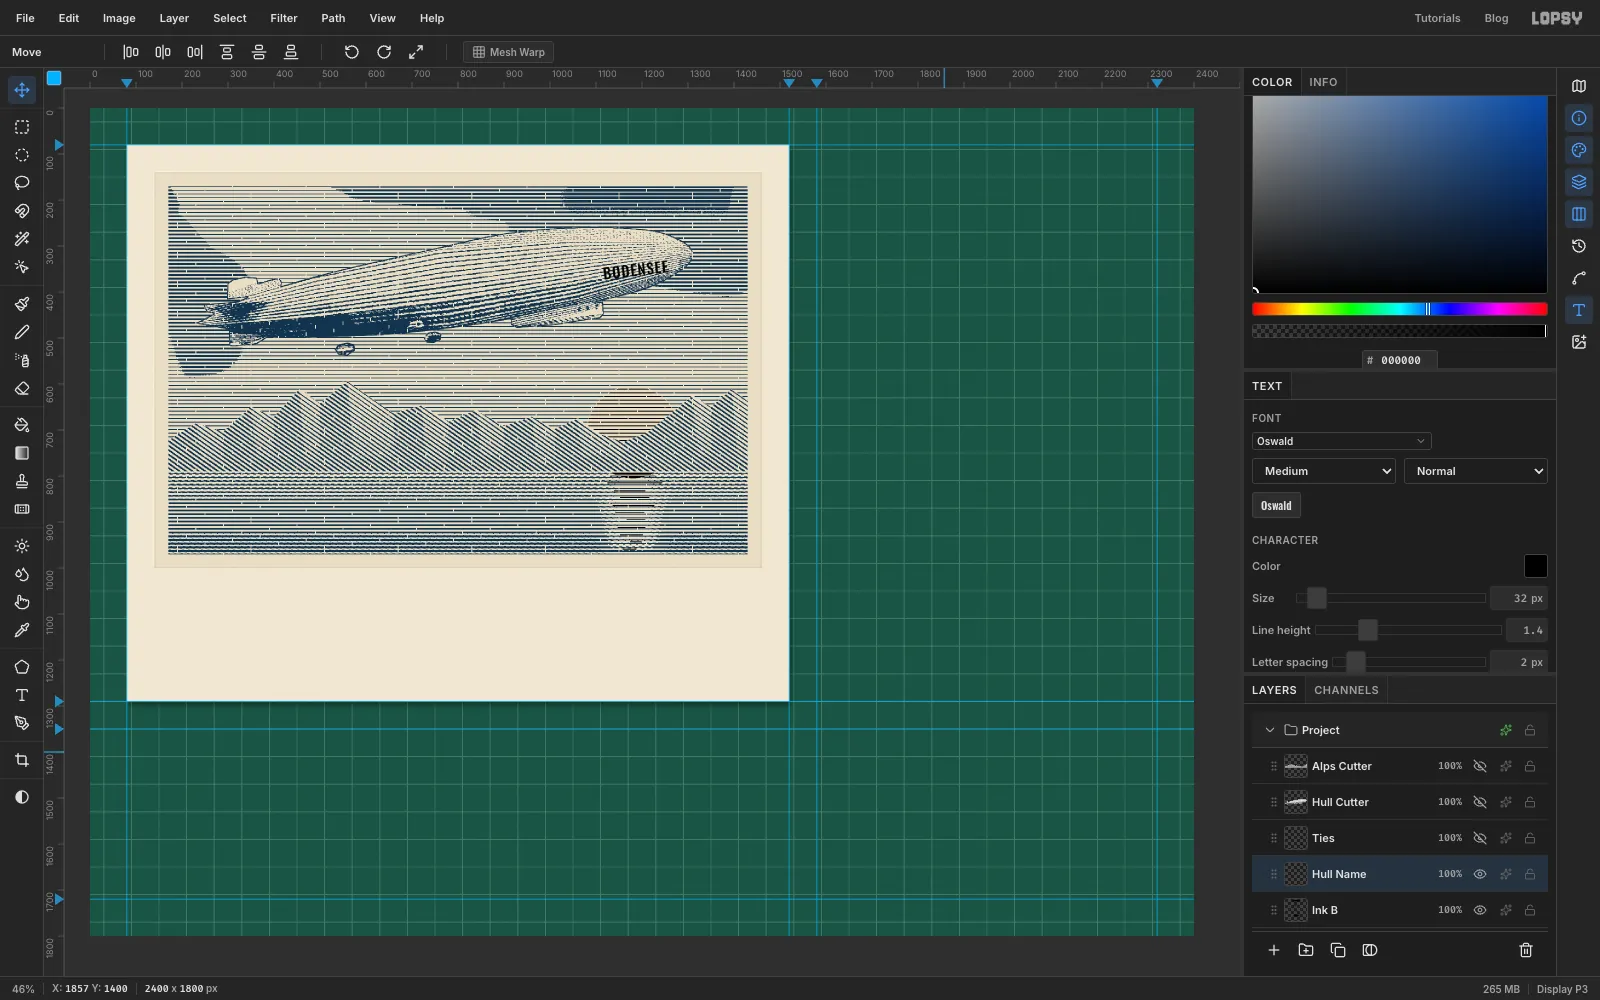
- Click Rasterize Layer at the bottom of the Layers panel.
- Cmd-click its thumbnail, then drag the rotation handle up until the word's slope matches the hull's lower edge near the nose, about 6° anticlockwise. Press Cmd+D.
- With the Move tool, place it on the pale band near the nose, where the photo's lettering was.
- Cmd-click
Hull Name, choose Select → Grow…2, clickInk Aand press Delete. This knocks the blue lines out from under the letters, so the red prints clean. Press Cmd+D. - Click
Hull Nameand Merge Down ontoInk B.
-
Ink the red plate
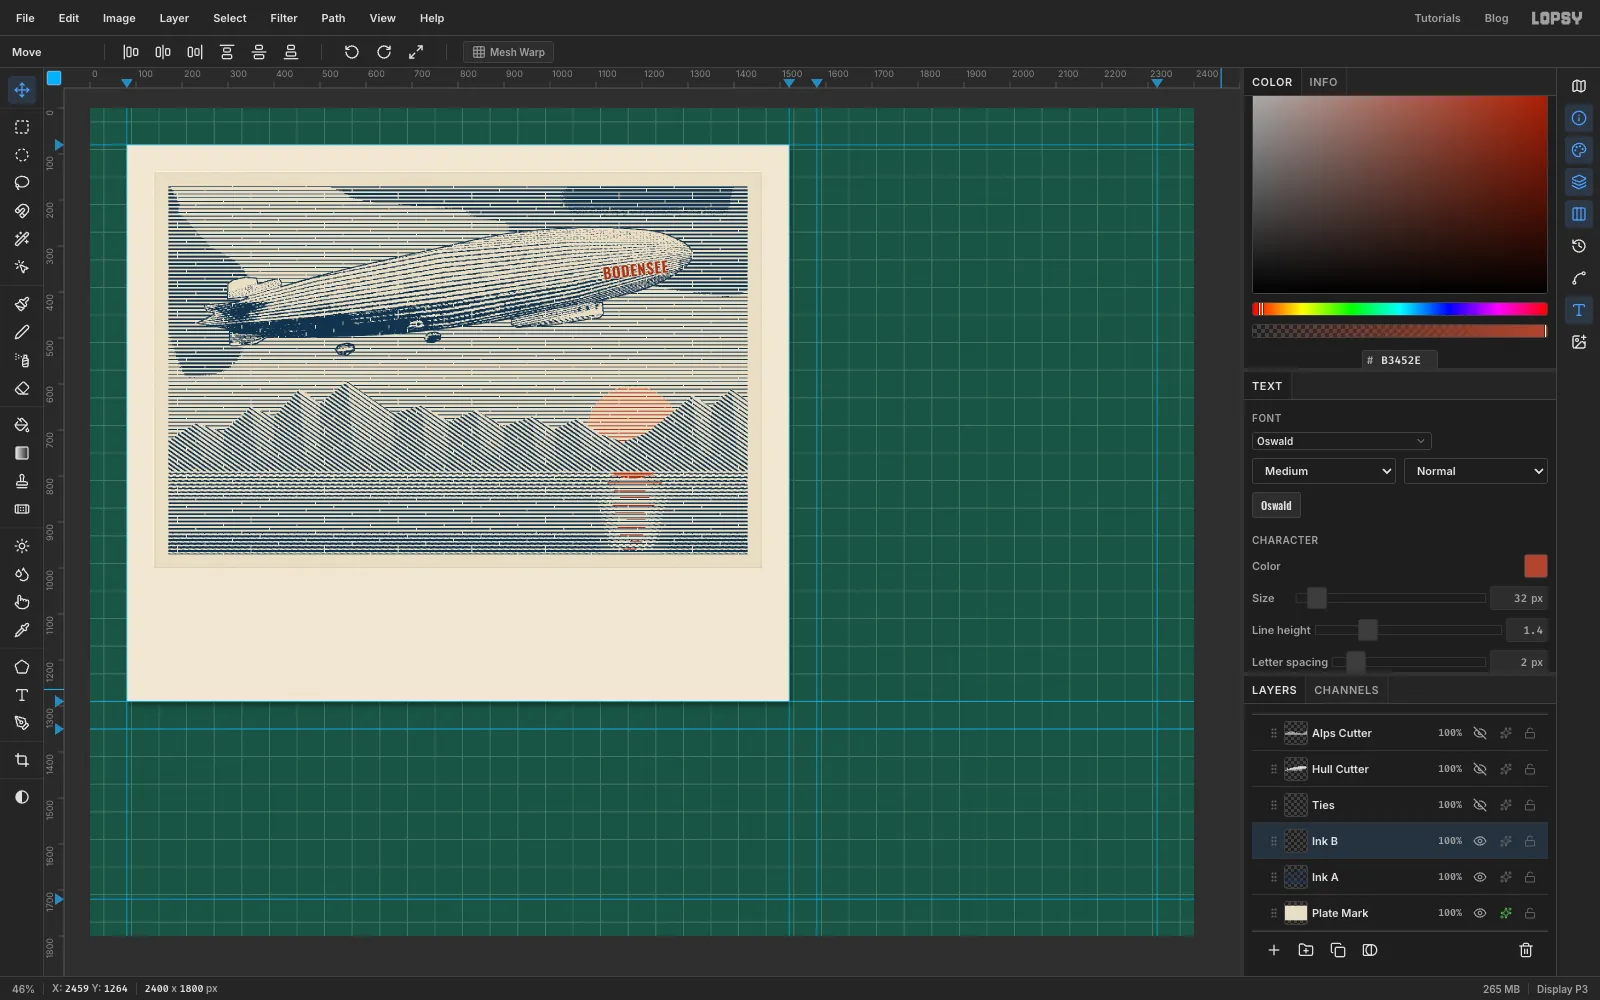
- Cmd-click
Ink Band fill with oxide red . Press Cmd+D. - Set
Ink Bto Multiply.
- Cmd-click
-
Set the title and the caption
Click
Ink Bbefore each new text, so the Text tool doesn't restyle the previous one. In the Text panel, set Letter spacing back to0before you type.- Title. Big Shoulders Stencil, ExtraBold,
136, . TypeBODENSEEand rename the layerTitle. Set Letter spacing30. With the Move tool, nudge it until it's centred on the paper: the middle of the word atx 800, about halfway between the plate mark and the bottom edge. Check the Layer X and width in the Info panel. - Caption. IM Fell English SC,
32, , letter spacing2:LZ 120 · Luftschiffbau Zeppelin · Friedrichshafen · 1919. Rename itCaptionand centre it the same way below the title. Leave at least 60 px of paper below it, a little more than at the sides. - Imprint lines. IM Fell English, Italic,
24, blue. TypeNach einer Photographie vom Oktober 1919just under the plate mark, lined up with its left edge, and rename itImprint Left. TypeSchablonendruck in zwei Farbenand nudge it until its right end lines up with the plate mark's right edge. Rename itImprint Right. Old prints credit the source and the printer in exactly this spot.
- Title. Big Shoulders Stencil, ExtraBold,
-
Make the first stencil board
- Click
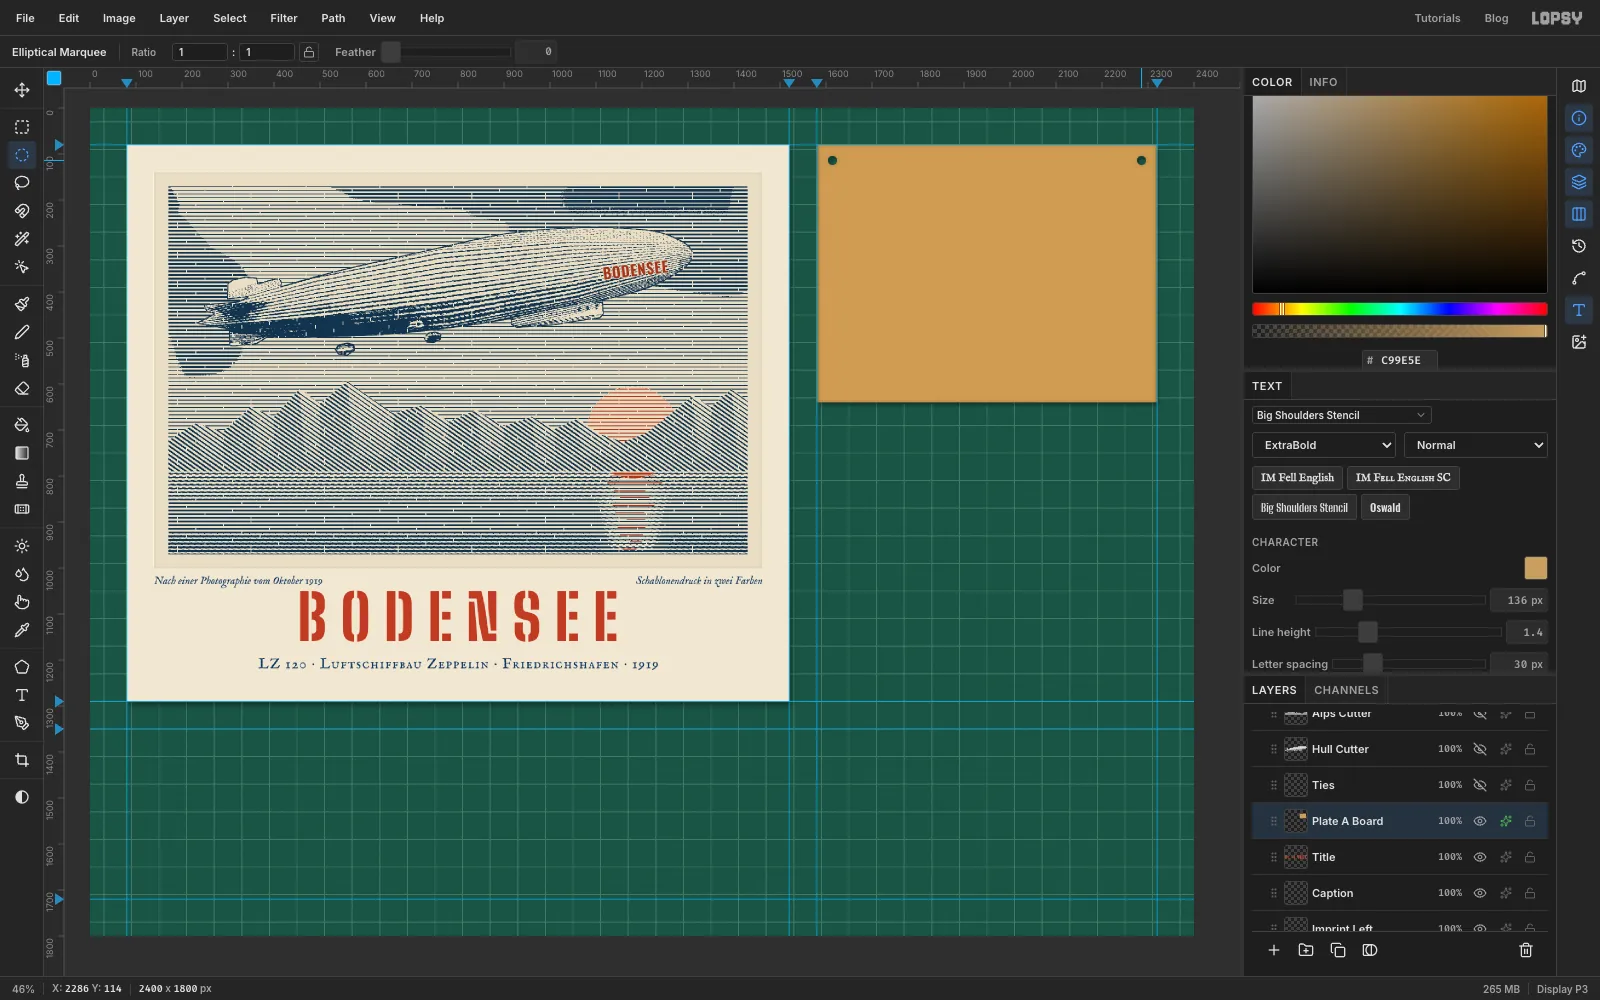
Titleand add a layer calledPlate A Board. (Check that it lands above all the proof's layers.) - Use the marquee dialog to select
1580, 80to2320, 640. Fill with . Run Add Noise… at8, Mono, then Motion Blur… at Angle0, Distance12for a fibrous card. Press Cmd+D. - Add a Drop Shadow (Offset
4,7, Blur10, Opacity42, colour ) and an Inner Glow (Size16, Opacity40, colour ) for oily edges. - Punch two registration holes. With the Elliptical Marquee dialog, select
1604, 104to1624, 124, press Delete, then do the same at2276, 104to2296, 124. Every plate gets holes in the same place, so they all line up on the same pins.
- Click
-
Copy the key plate onto the board at half size
A contact sheet shows the plates small. Plates A and B are shown at half size.
- Click
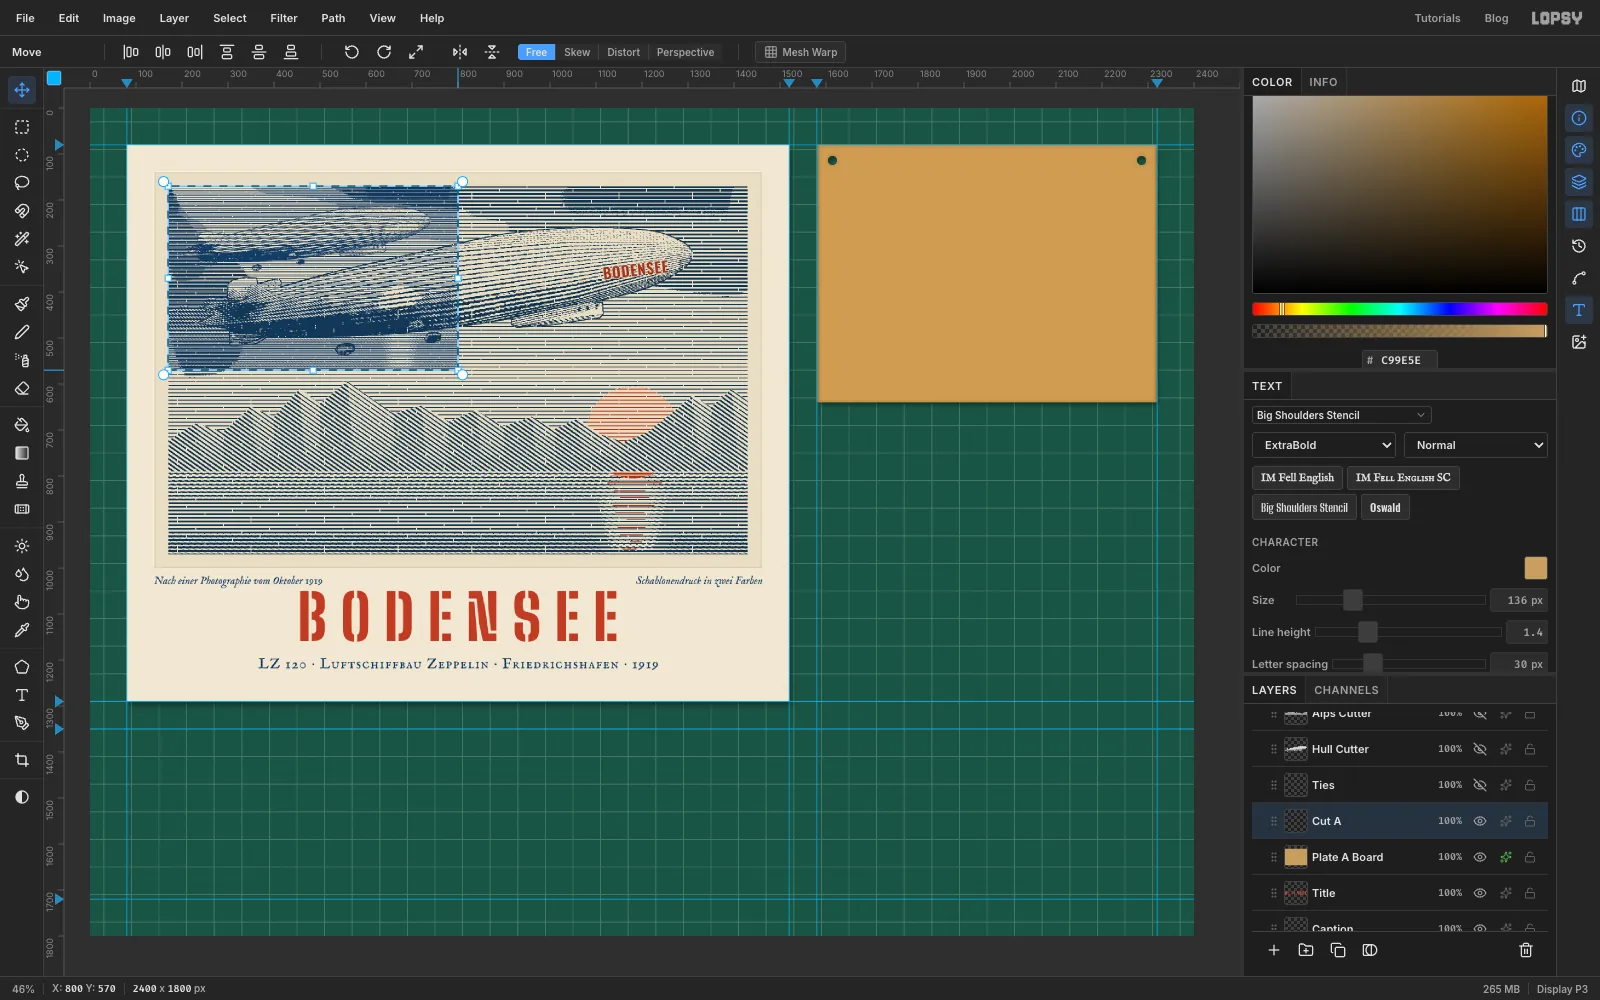
Ink A, select the picture area (170, 170to1430, 970) and press Cmd+C. - Click
Plate A Boardand press Cmd+V. The copy is pasted in place, right above the board. Rename itCut Aand press Cmd+D. - Select the picture area again. With the Move tool, hold Cmd and drag the bottom-right handle up and left until the selection W in the Info panel reads
630, half size. - Drag it onto the board, then nudge it until its top-left corner sits at
1635, 150, 55 px in from the board's left edge. Press Cmd+D.
- Click
-
Cut the plate
- Cmd-click the
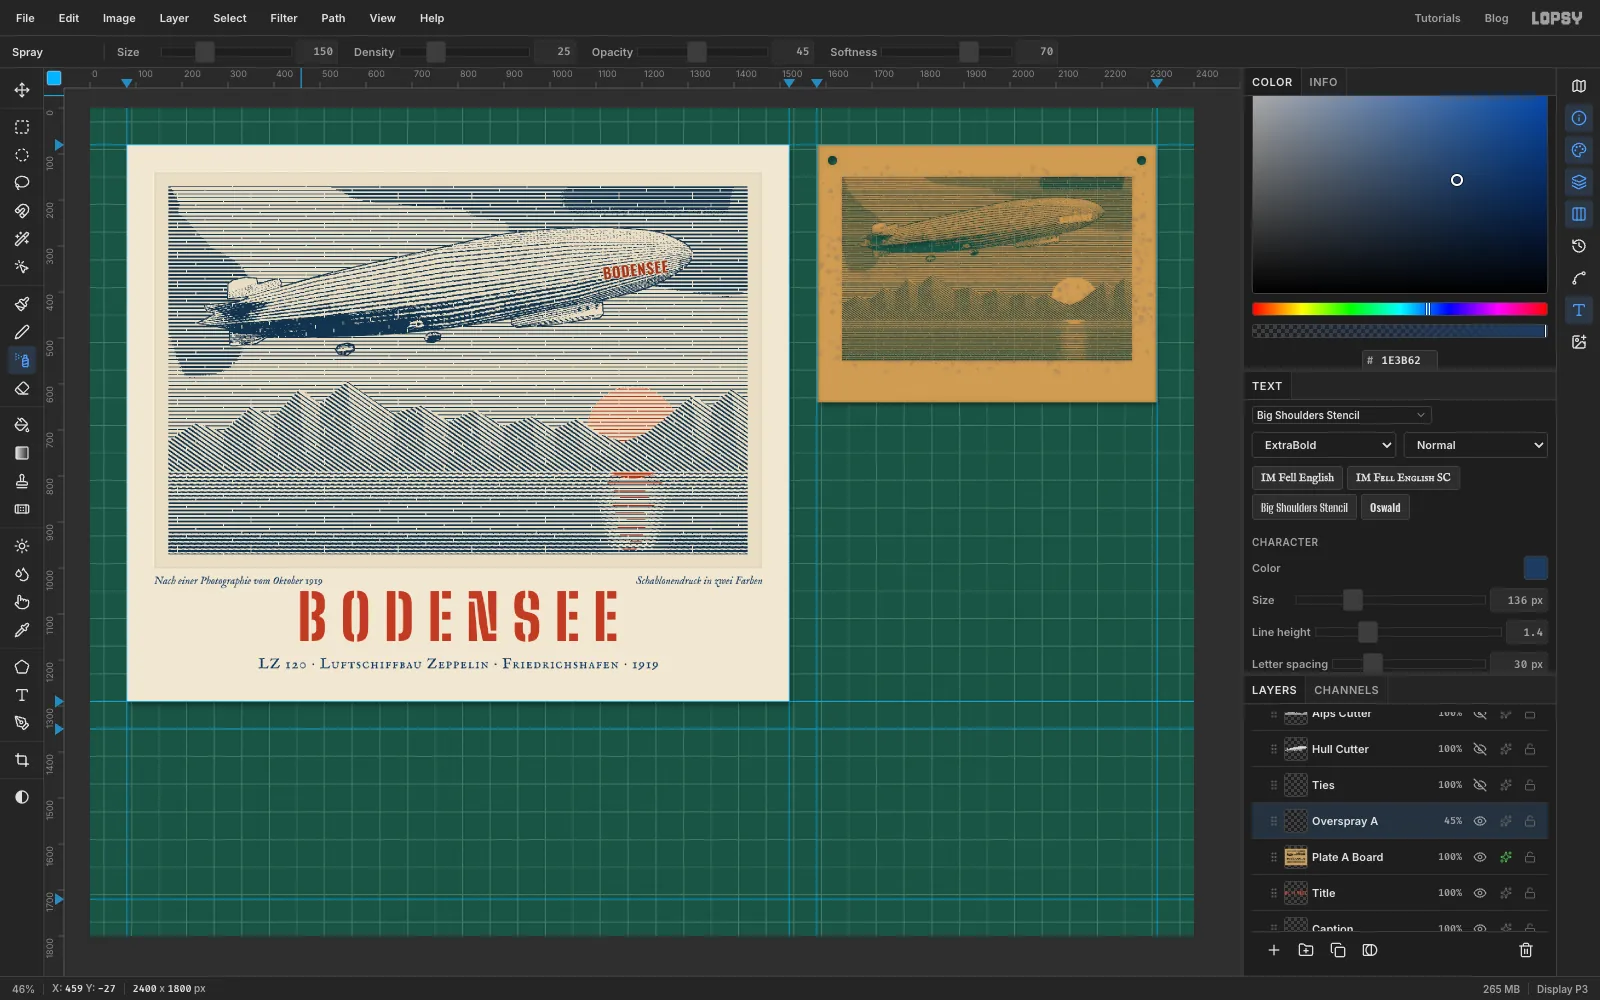
Cut Athumbnail, clickPlate A Boardand press Delete. The lines are now holes in the board. The mat grid shows through them, and the drop shadow gives the cuts depth. Press Cmd+D. - Click
Cut A, run Gaussian Blur… at6and rename itOverspray A. Sprayed paint always mists a little past the edges of the holes. - Pick the Spray tool (J) at Size
150, Density25, Opacity45%, in blue . Zigzag across the cut area four times. - Cmd-click
Plate A Board, Select → Inverse, Delete, Cmd+D. This keeps the haze on the card, so the holes stay clean. Set the layer to45%. - Label it: Text, Big Shoulders Stencil, Bold,
34, , letter spacing3. TypeA · PRUSSIAN BLUE · KEY PLATEalong the bottom-left of the board, starting 55 px in from the left like the art above. Rename itLabel A.
- Cmd-click the
-
Cut the red plate
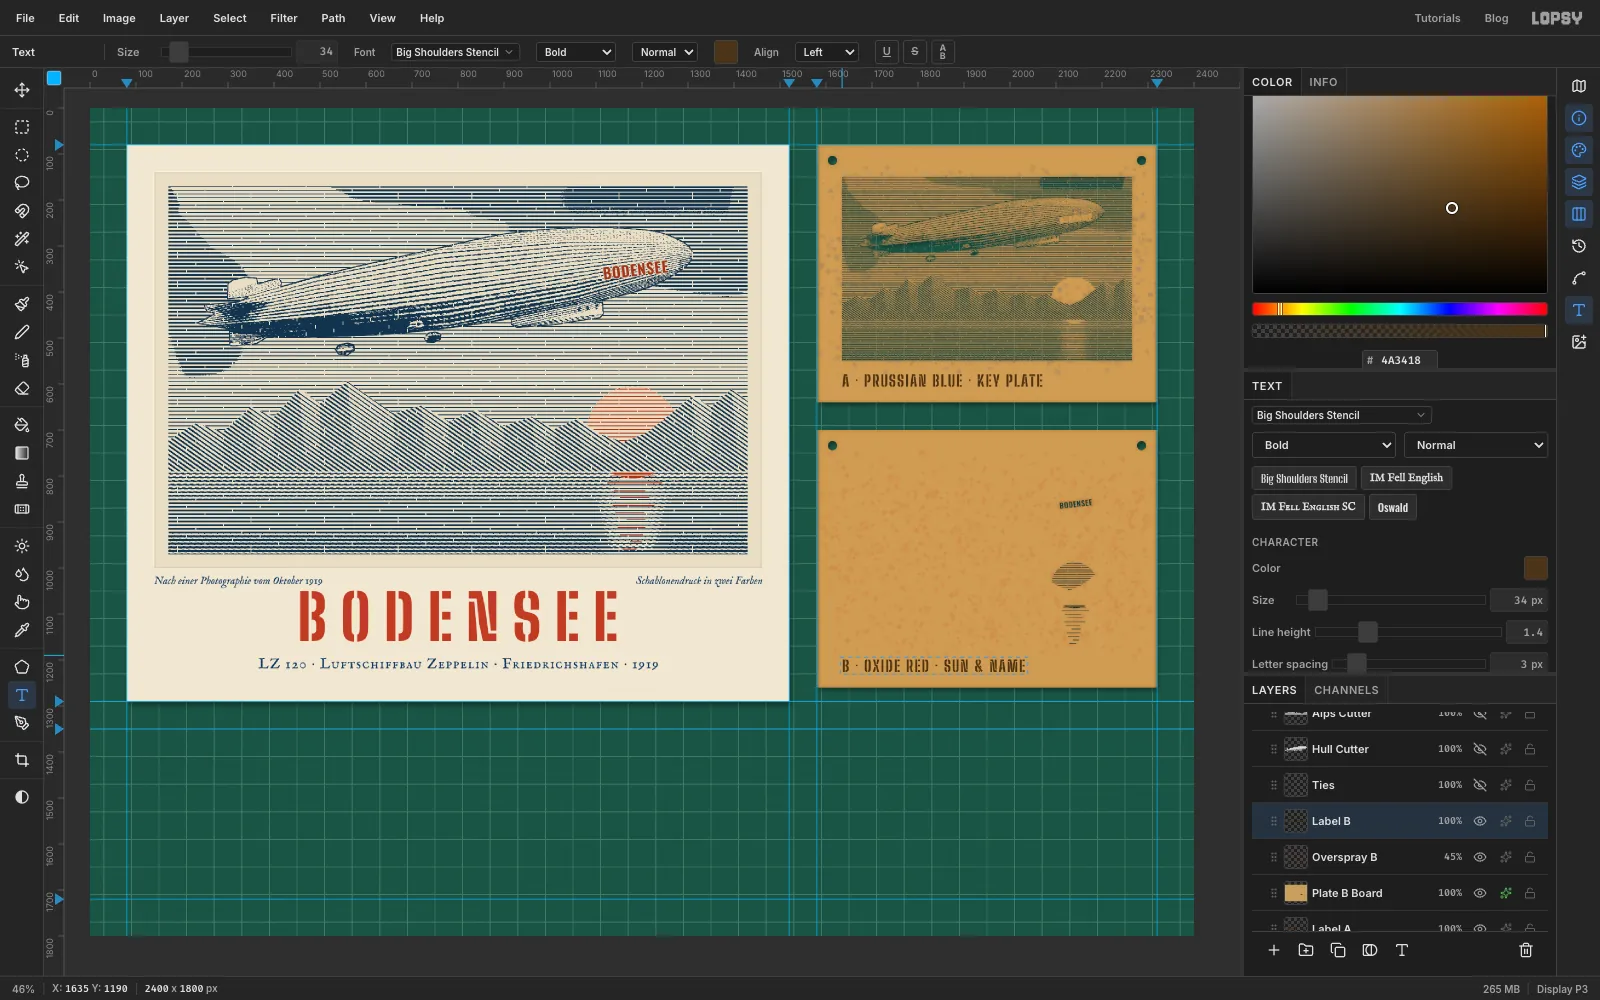
Plate B is made exactly like plate A, one cell lower.
- Click
Label Aand add a layerPlate B Board. Select1580, 700to2320, 1260and repeat steps 2 to 4 of Make the first stencil board: the fill, Noise and Motion Blur, both effects, and pin holes at1604, 724and2276, 724(20 px each). - Click
Ink B, select the picture area and copy. ClickPlate B Boardand paste, rename the copyCut B, and scale it to half size as before. - Nudge it to
1635, 770. That's the same spot in its cell as plate A's art, so the two plates register. - Cmd-click
Cut B, click the board and Delete. BlurCut Bat6and rename itOverspray B. Spray the haze over it in oxide red , trim it to the board, and set it to45%. - Label it
B · OXIDE RED · SUN & NAME, renamedLabel B. Reset Letter spacing to3if needed.
Most of plate B is plain card. A plate only carries its own colour.
- Click
-
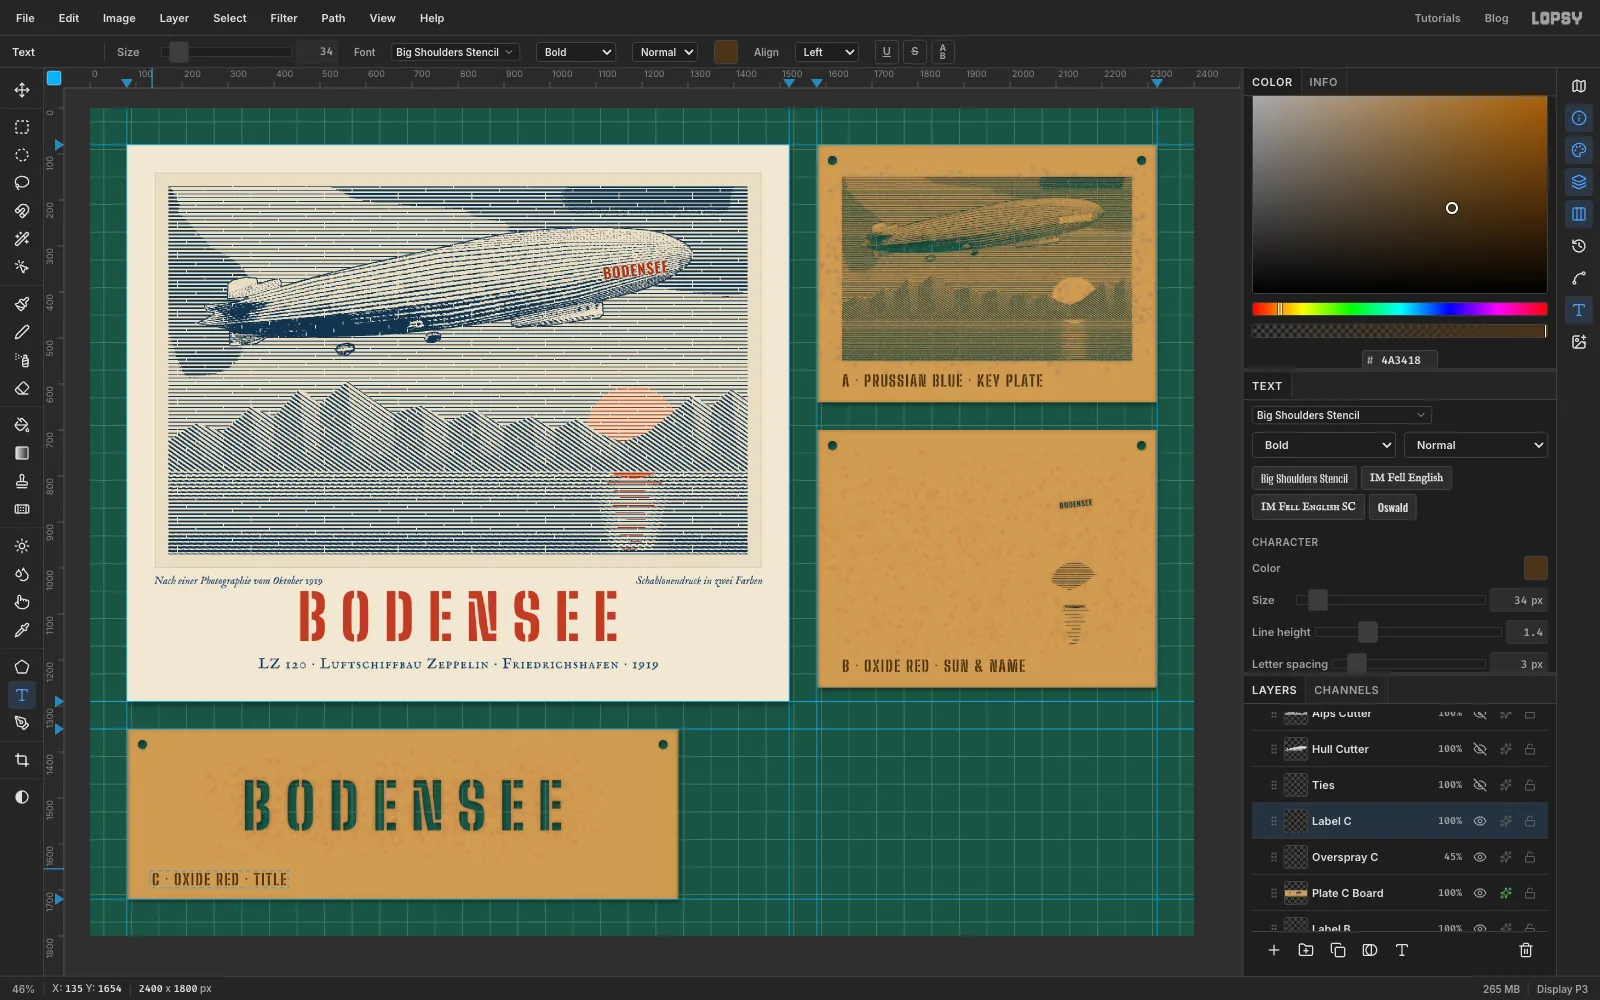
Cut the title plate at full size
- Click
Label Band addPlate C Boardfrom80, 1350to1280, 1720, styled like the others, with pin holes 34 px in from its top corners. - Click
Title, Duplicate it, and click Rasterize Layer. Cmd-click the copy and press Cmd+X. Delete the now-empty copy. - Click
Plate C Boardand press Cmd+V. The title is pasted in place above the board. Rename itCut C, press Cmd+D, and drag it down into the middle of the board, a little above centre to leave room for the label. - Cmd-click
Cut C, clickPlate C Board, Delete, Cmd+D. BlurCut Cat6, rename itOverspray C, spray red over the letters, trim it to the board and set it to45%. - Label it
C · OXIDE RED · TITLEand rename itLabel C.
- Click
-
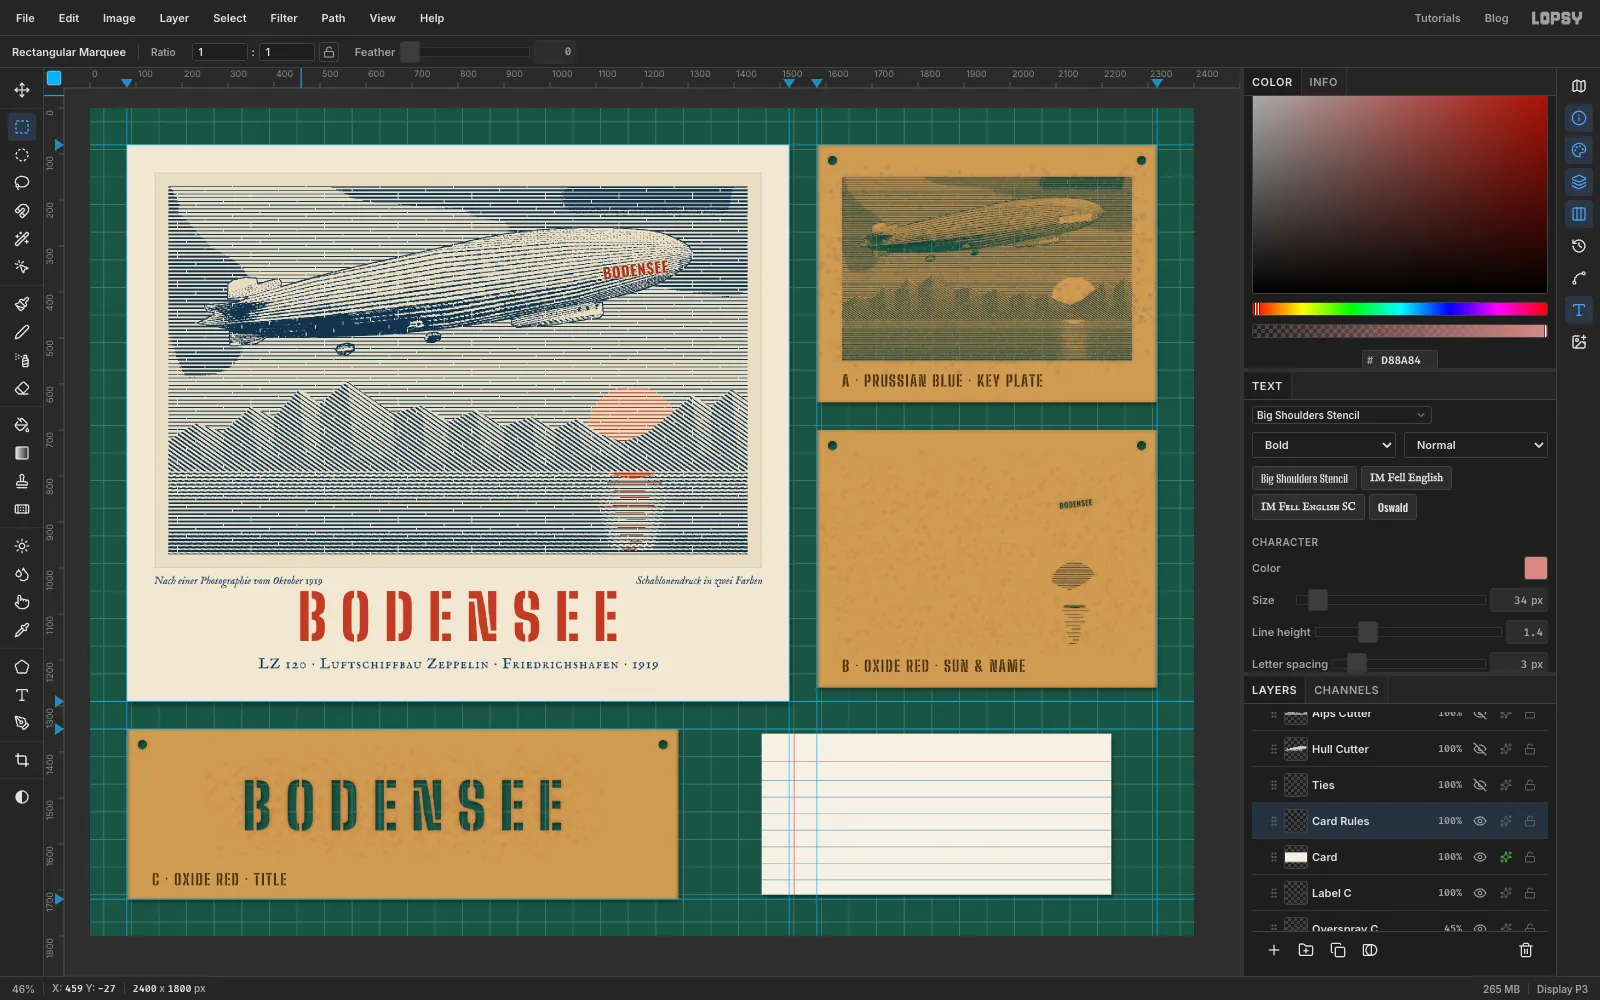
Rule an index card
- Click
Label Cand add a layer calledCard. Select1460, 1360to2220, 1710, fill with , add Noise3Mono, and give it a Drop Shadow (Offset4,7, Blur10, Opacity45, colour ). - Add a layer called
Card Rules. With the Pencil at Size2in , draw a line across the card aty 1462. Step-and-repeat it down with nudges of36,72and144. That gives seven rules on the card. The eighth falls off the bottom and gets trimmed. - In , draw the red header rule at
y 1422and a vertical margin line atx 1532. - Select the card's rectangle again, Inverse, Delete, Cmd+D to trim the rules to the card.
- Click
-
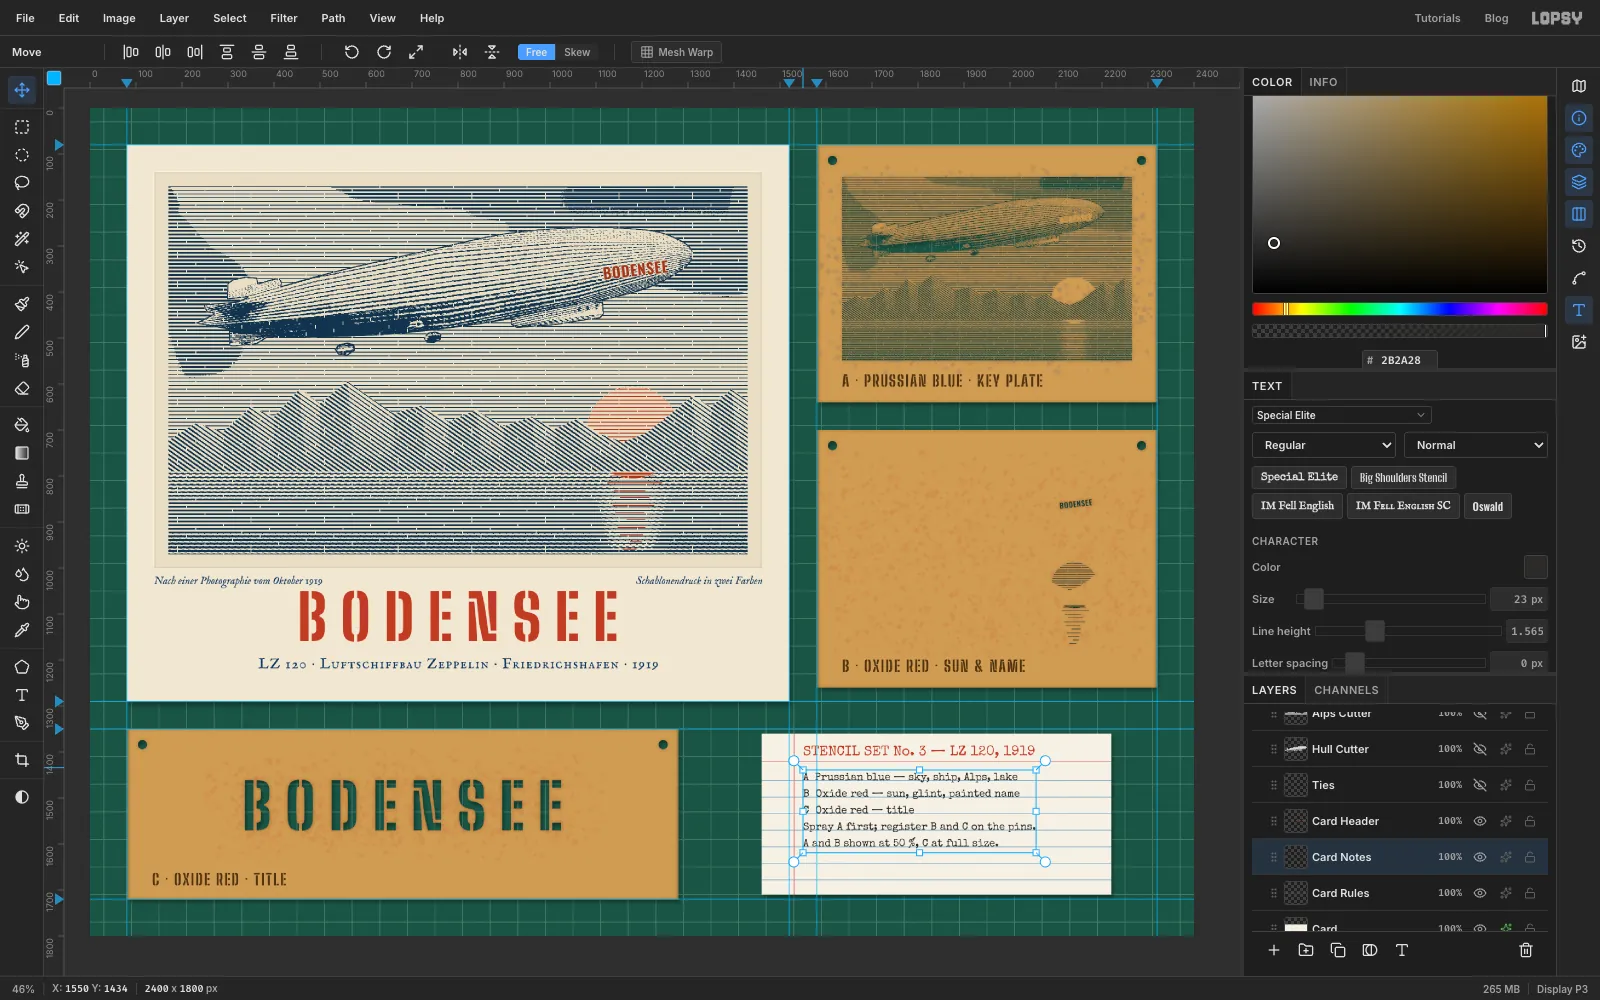
Type the card
- With
Card Rulesselected, set Letter spacing to0. Pick Text, Special Elite,30, and typeSTENCIL SET No. 3 — LZ 120, 1919just above the red rule, starting right of the margin. Rename itCard Header. - Click
Card Rulesagain. Switch to size23in , click below the red rule and type the notes, pressing Enter between lines:
A Prussian blue — sky, ship, Alps, lakeB Oxide red — sun, glint, painted nameC Oxide red — titleSpray A first; register B and C on the pins.A and B shown at 50 %, C at full size.
- Rename it
Card Notes. In the Text panel, set Line height to1.565. At this size that's exactly 36 px, the same as the rules. - Nudge the block with the Move tool until the bottoms of the letters sit just on the blue rules, with descenders hanging through them.
- For the ink tests, click
Card Rulesand add a layerTest Sprays. With the Spray tool at Size60, Density60, spray a small blue circle and a red one next to it near the bottom-right corner. Set the layer to Multiply.
- With
-
Group the card and tilt it
- Click
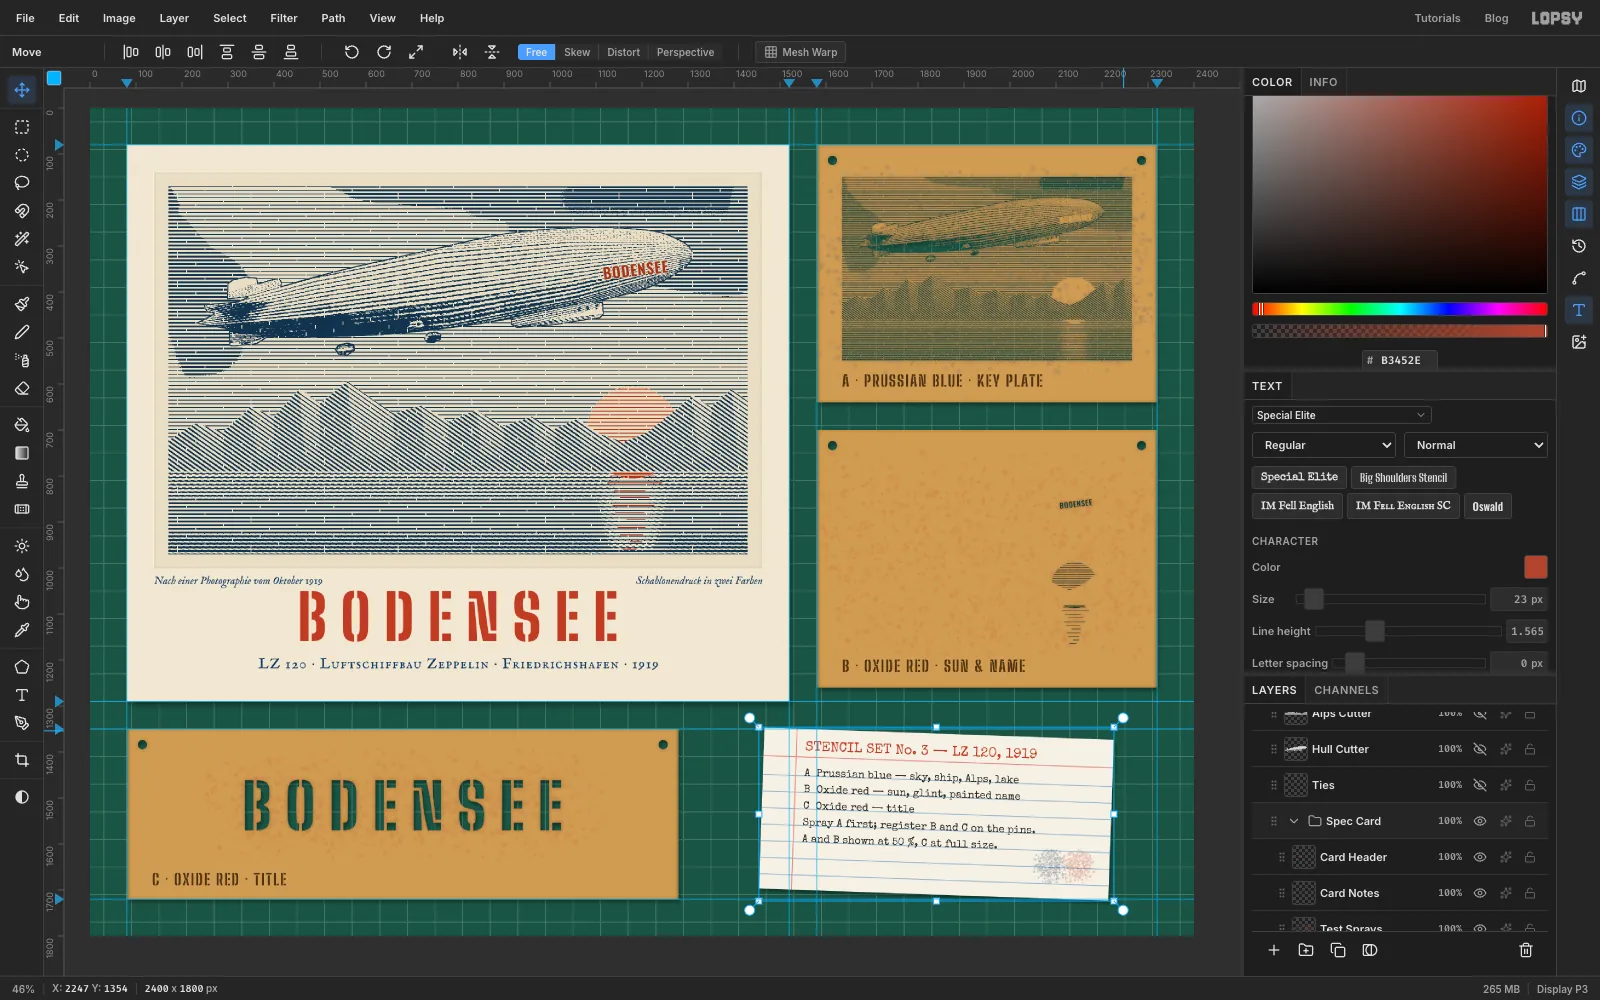
Cardin the Layers panel and Shift-clickCard Headerto select everything in between. Choose Layer → Group Layers and name the groupSpec Card. - With the group active and nothing selected, drag the Move tool's rotation handle to turn it a degree or two clockwise. The right end of the card should drop about 25 px.
The text stays live text. It turns with the card and stays sharp.
- Click
-
Group the plates and tilt them
- Click
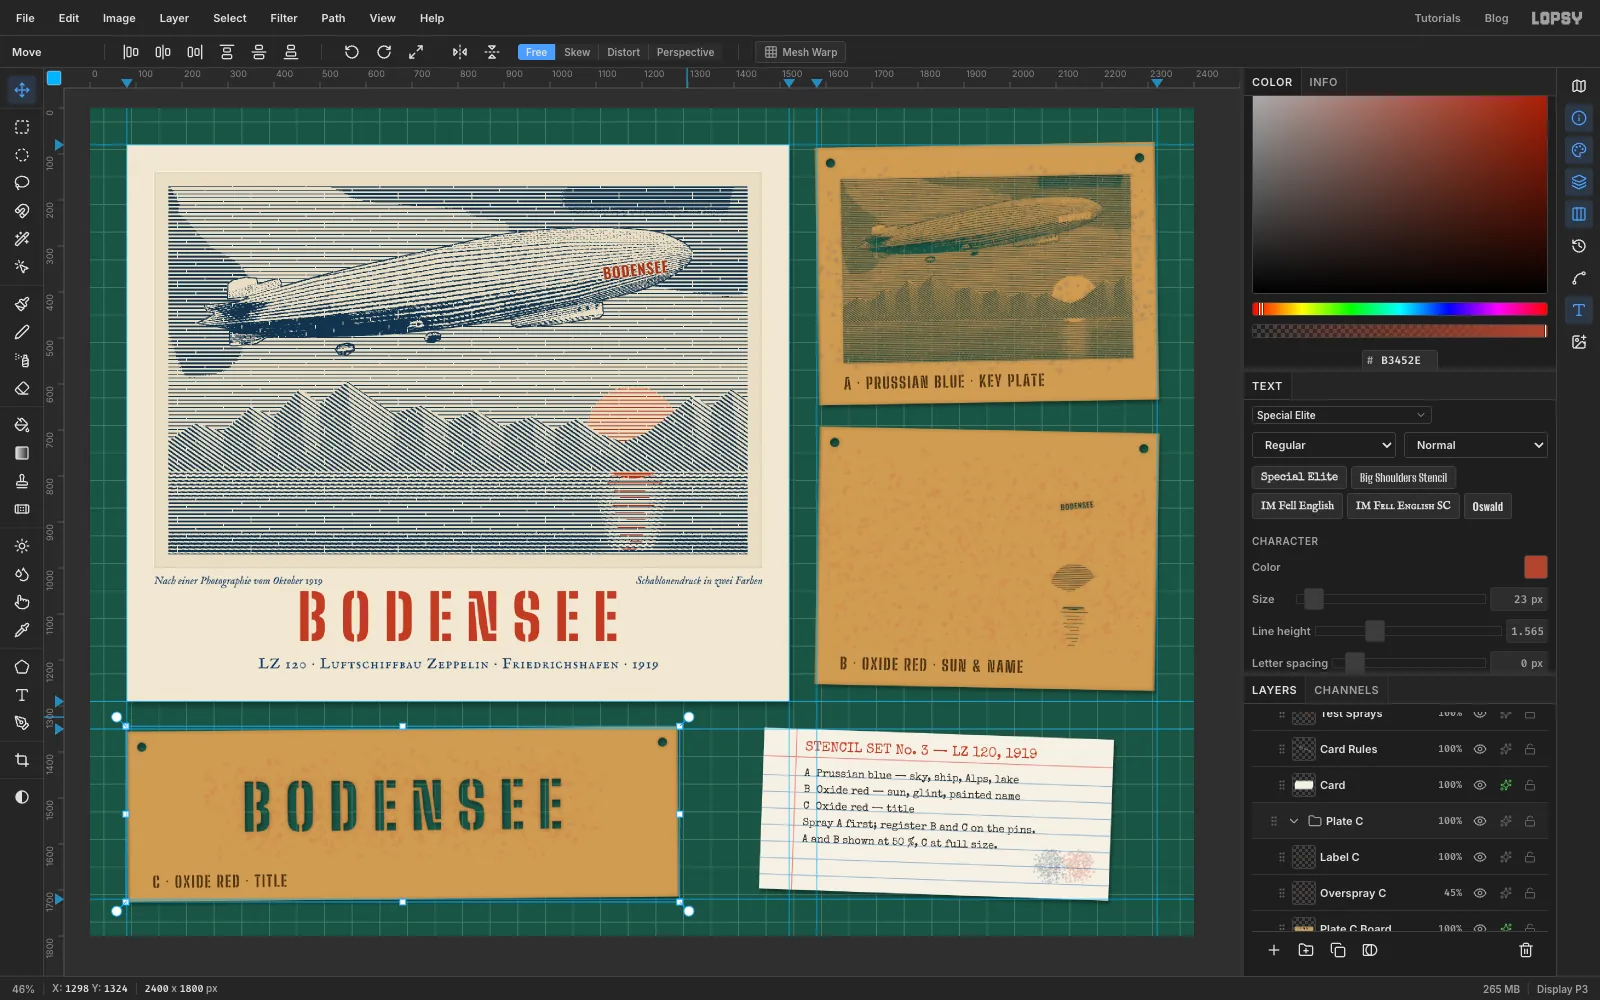
Proof Paper, Shift-clickTitle, and choose Layer → Group Layers. Name the groupProof. Group each board with its overspray and label the same way, asPlate A,Plate BandPlate C. - With nothing selected, rotate
Plate Aabout 1° anticlockwise (its right end rises about 13 px),Plate Babout 1° clockwise, andPlate Cjust over half a degree anticlockwise.
Nothing on a real workbench lies perfectly square, and alternating the tilts keeps the sheet lively.
- Click
-
Add registration targets and tape
- Click the hidden
Alps Cutter(still a top-level layer, above the groups) and add a layer calledReg Marks. That way it stays out of the groups. - With the Pencil at Size
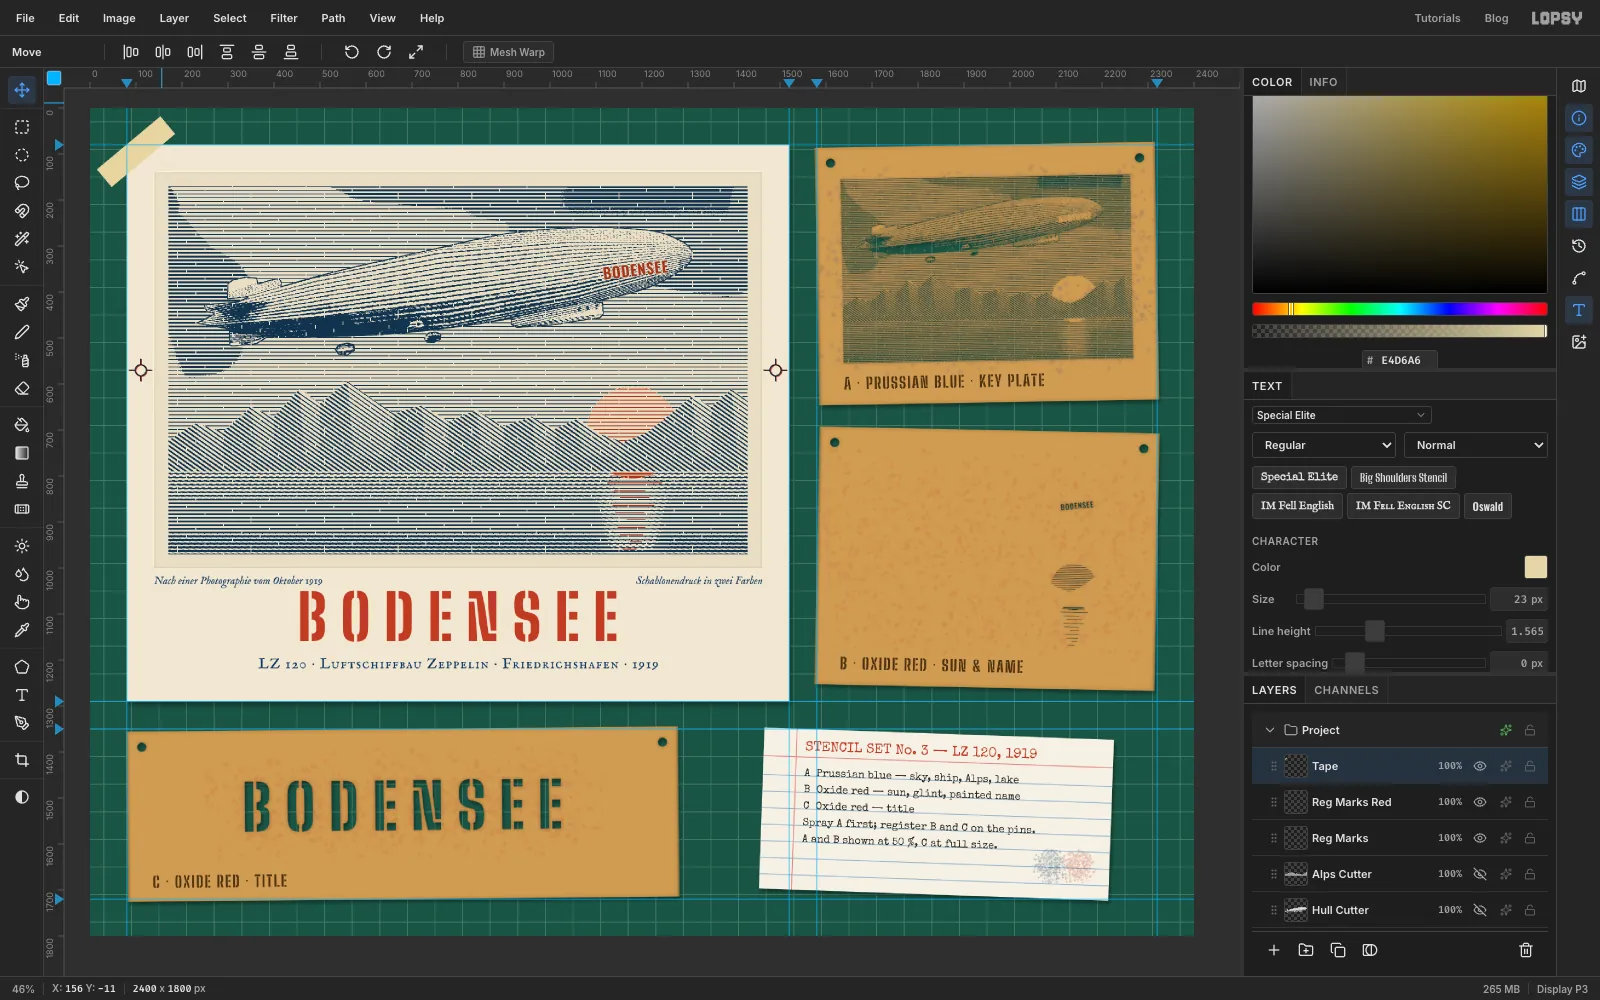
2in black, draw a 48 px cross in each side margin of the proof, centred at110, 570and1490, 570. Add a ring round each: select a 26 px circle on the centre, fill, Select → Shrink…2, Delete, Cmd+D. - Duplicate the layer and rename it
Reg Marks Red. Cmd-click its thumbnail, fill red, nudge it2px right and1down, and set it to Multiply. Then Cmd-clickReg Marks, fill it blue and set it to Multiply too. The slight mismatch is how real two-colour targets look. - Add a layer called
Tape. Select10, 70to190, 120, fill with , add Noise6. With the Move tool, turn it about 40° anticlockwise with the rotation handle so it crosses the proof's top-left corner. Press Cmd+D.
- Click the hidden
-
Copy the tape to the other corner
- Cmd-click
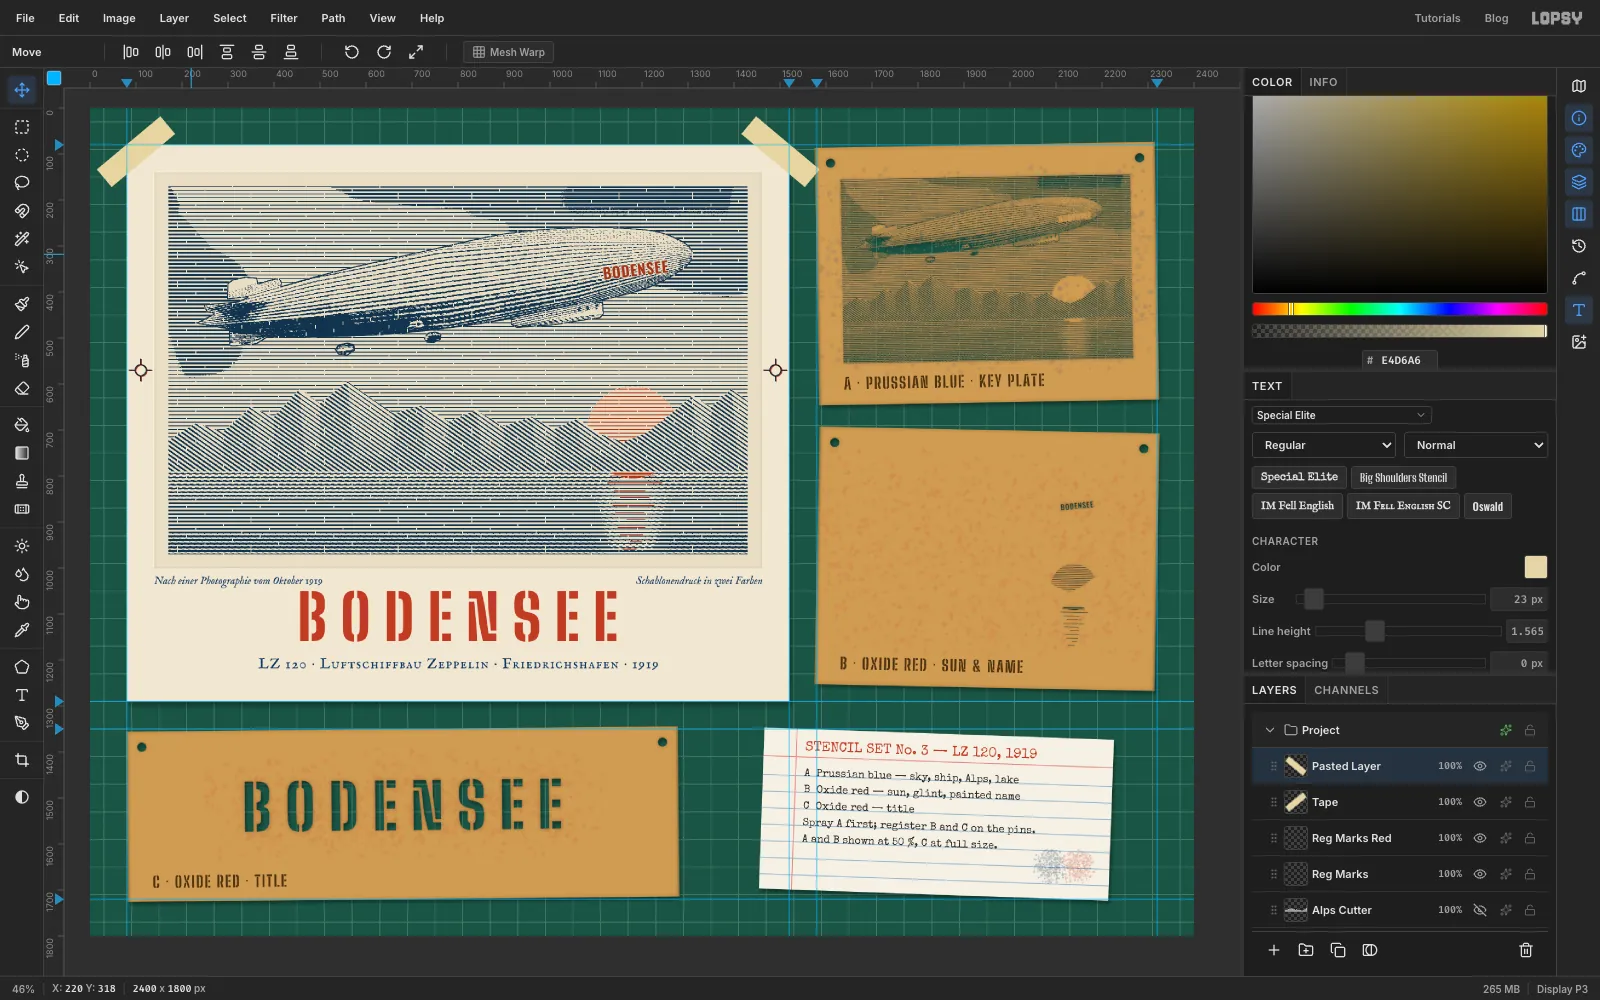
Tape, press Cmd+C then Cmd+V, and press Cmd+D. - Choose Image → Flip Horizontal to mirror the copy. It mirrors across the whole canvas, so the copy jumps to the far right edge. Drag it back over the proof's top-right corner, near
1520, 80. - Merge Down onto
Tape. Add a light Drop Shadow (Offset2,3, Blur4, Opacity30, colour ) and set the layer to82%. - Add a last layer called
Grain. Press Cmd+A, fill with , run Add Noise… at30Mono, set it to Overlay at14%and press Cmd+D. - Group
Ties,Hull CutterandAlps CutterasCutters. The three layers inside stay hidden, but keep them: they're handy if you re-cut a plate later.
- Cmd-click
-
Check the line work at 100%
Hold Cmd and scroll over the zeppelin's nose to zoom to 100%. Check that:
- the hull lines curve and pinch toward the nose, and the red name sits on clean paper
- the sky lines thicken under the darker cloud bands and never vanish completely
- the Alps' diagonals meet the sun's red lines without a gap
Choose File → Save Project to keep the
.lopsywith all its groups and live text, and File → Export… for a PNG.