Design a Film Noir Movie Poster of a Rainy Harbor
Make a 1950s-style noir one-sheet in Lopsy with crossing searchlights, a lamp-lit pier, a man cut from an old photo, rain and venetian-blind title type.
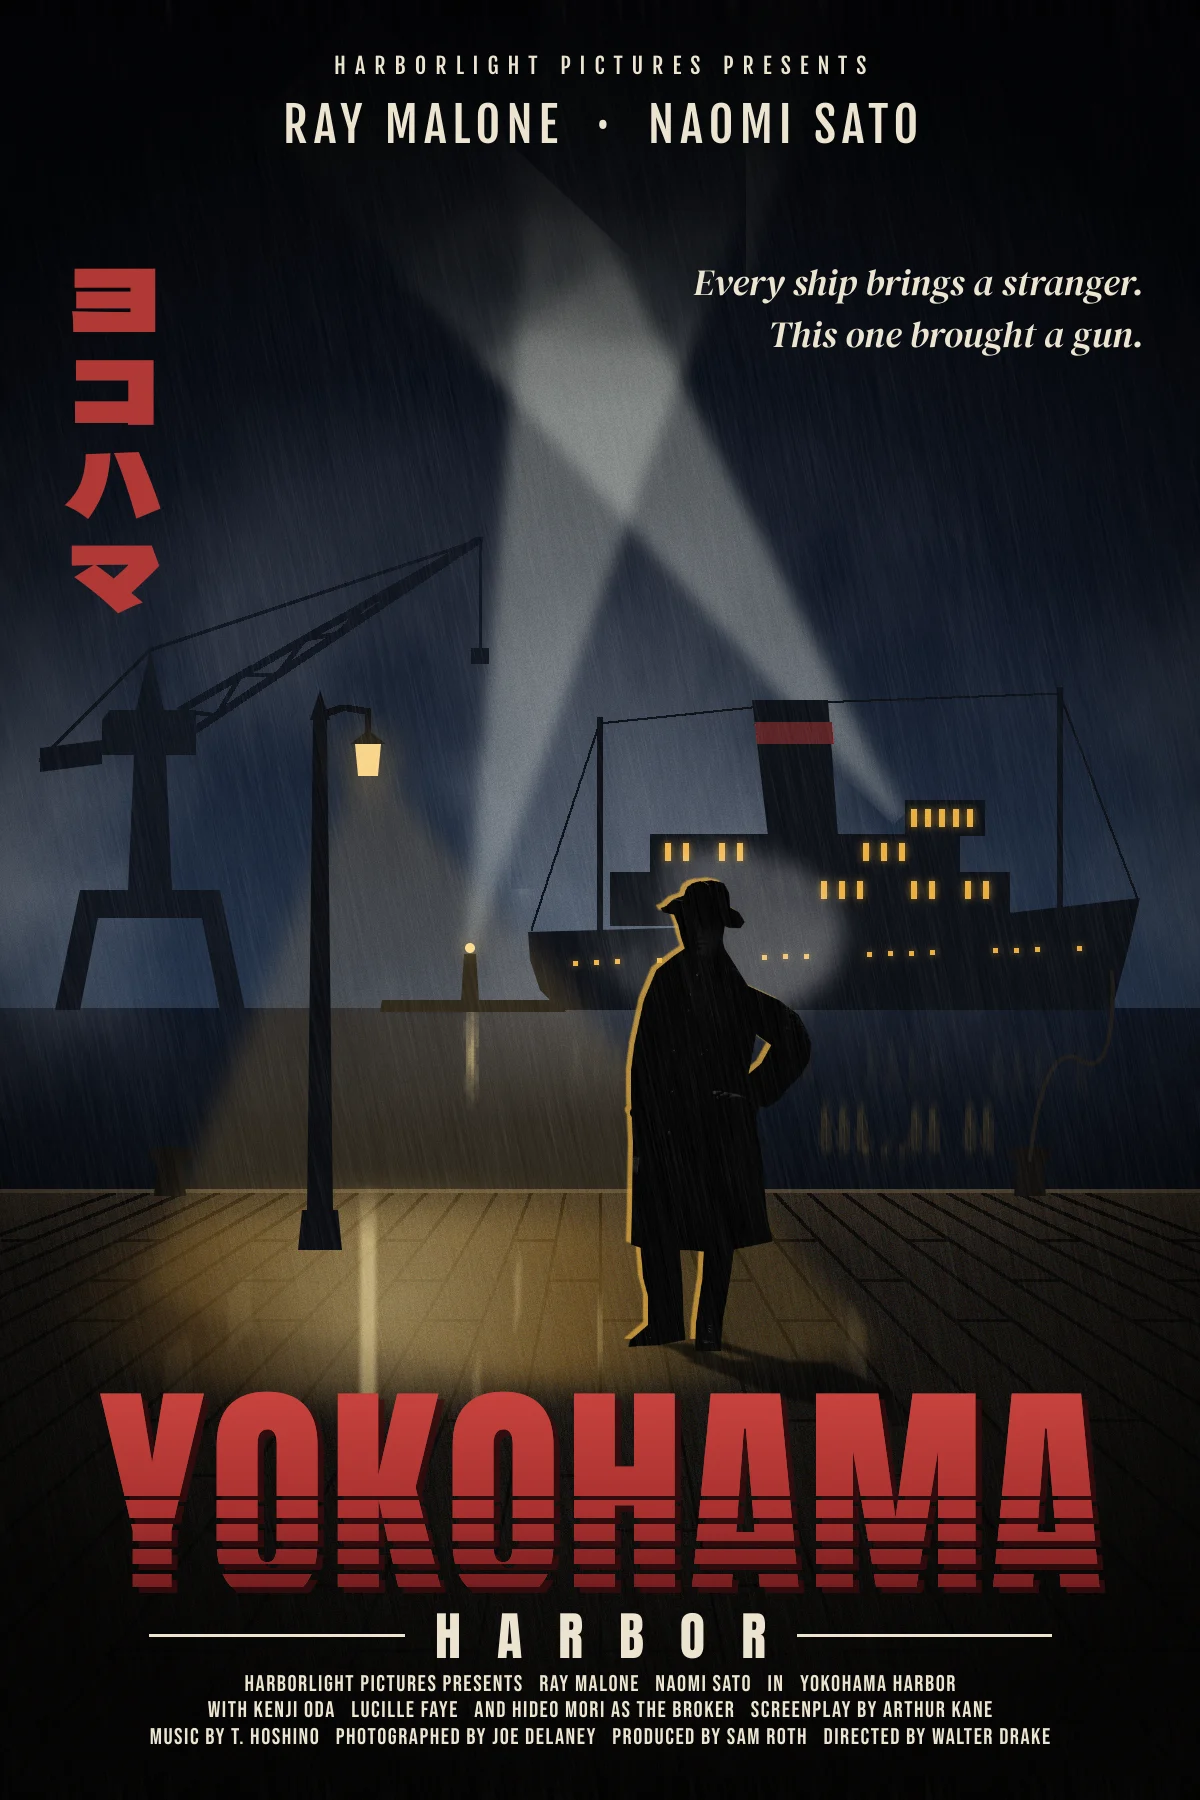
Film noir posters sold black-and-white films with loud colour. They used a night scene in hard light and shadow, a lone figure, one hot accent colour and big type. The films were moody and grey; the posters were operatic.
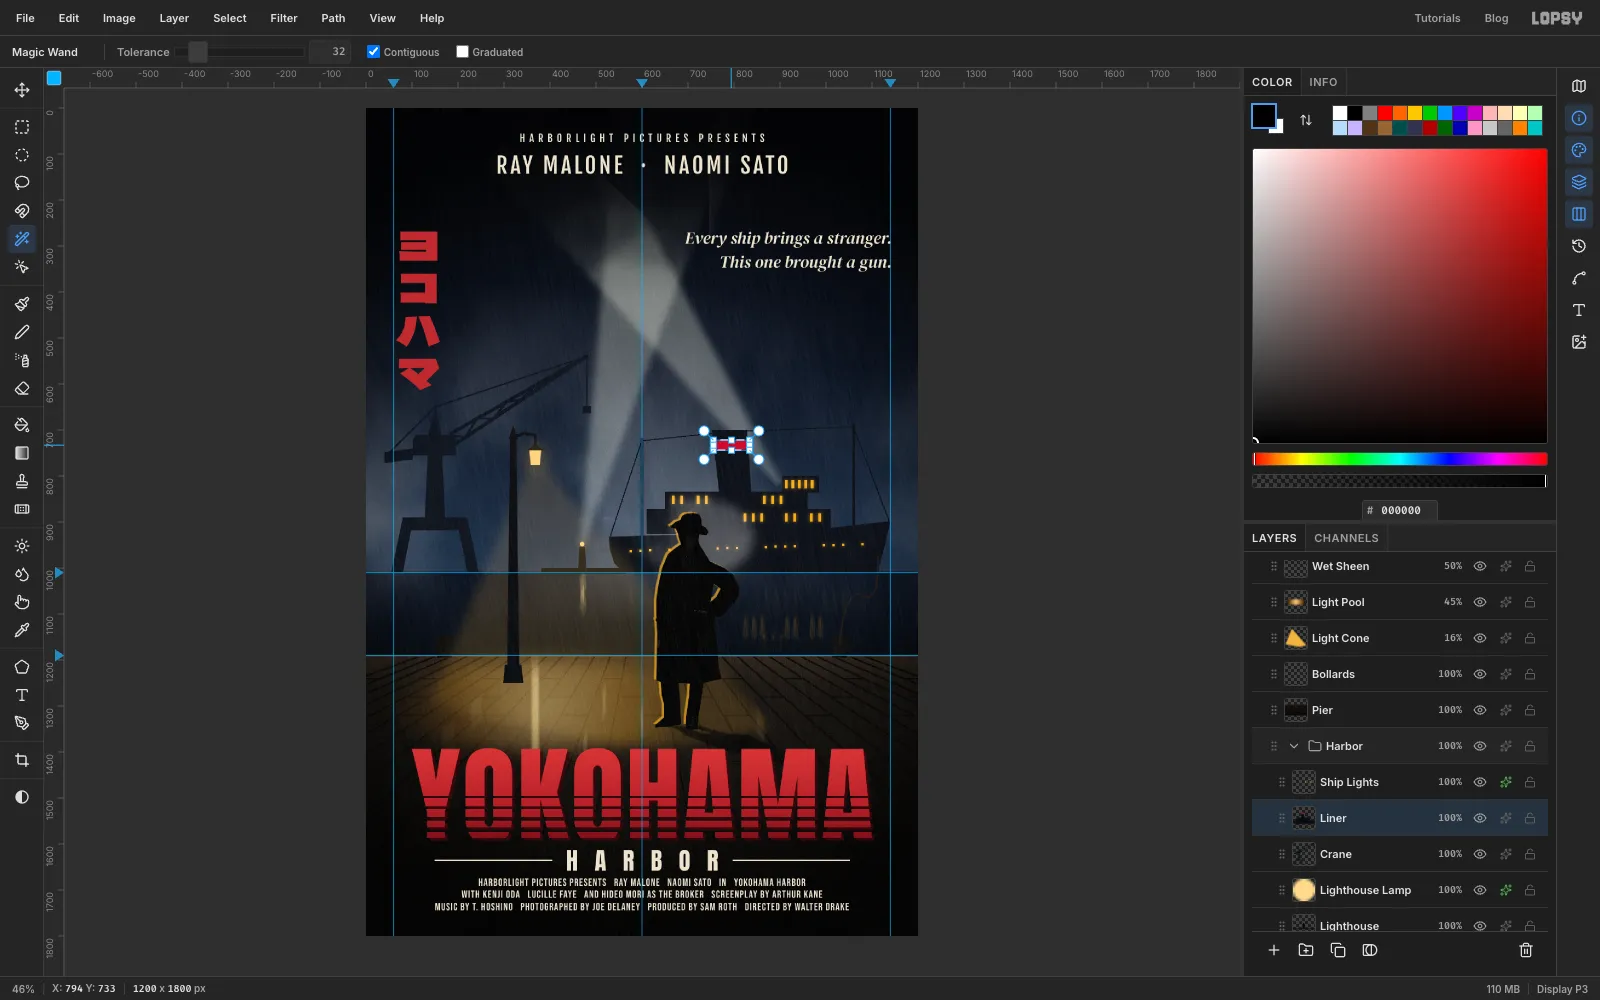
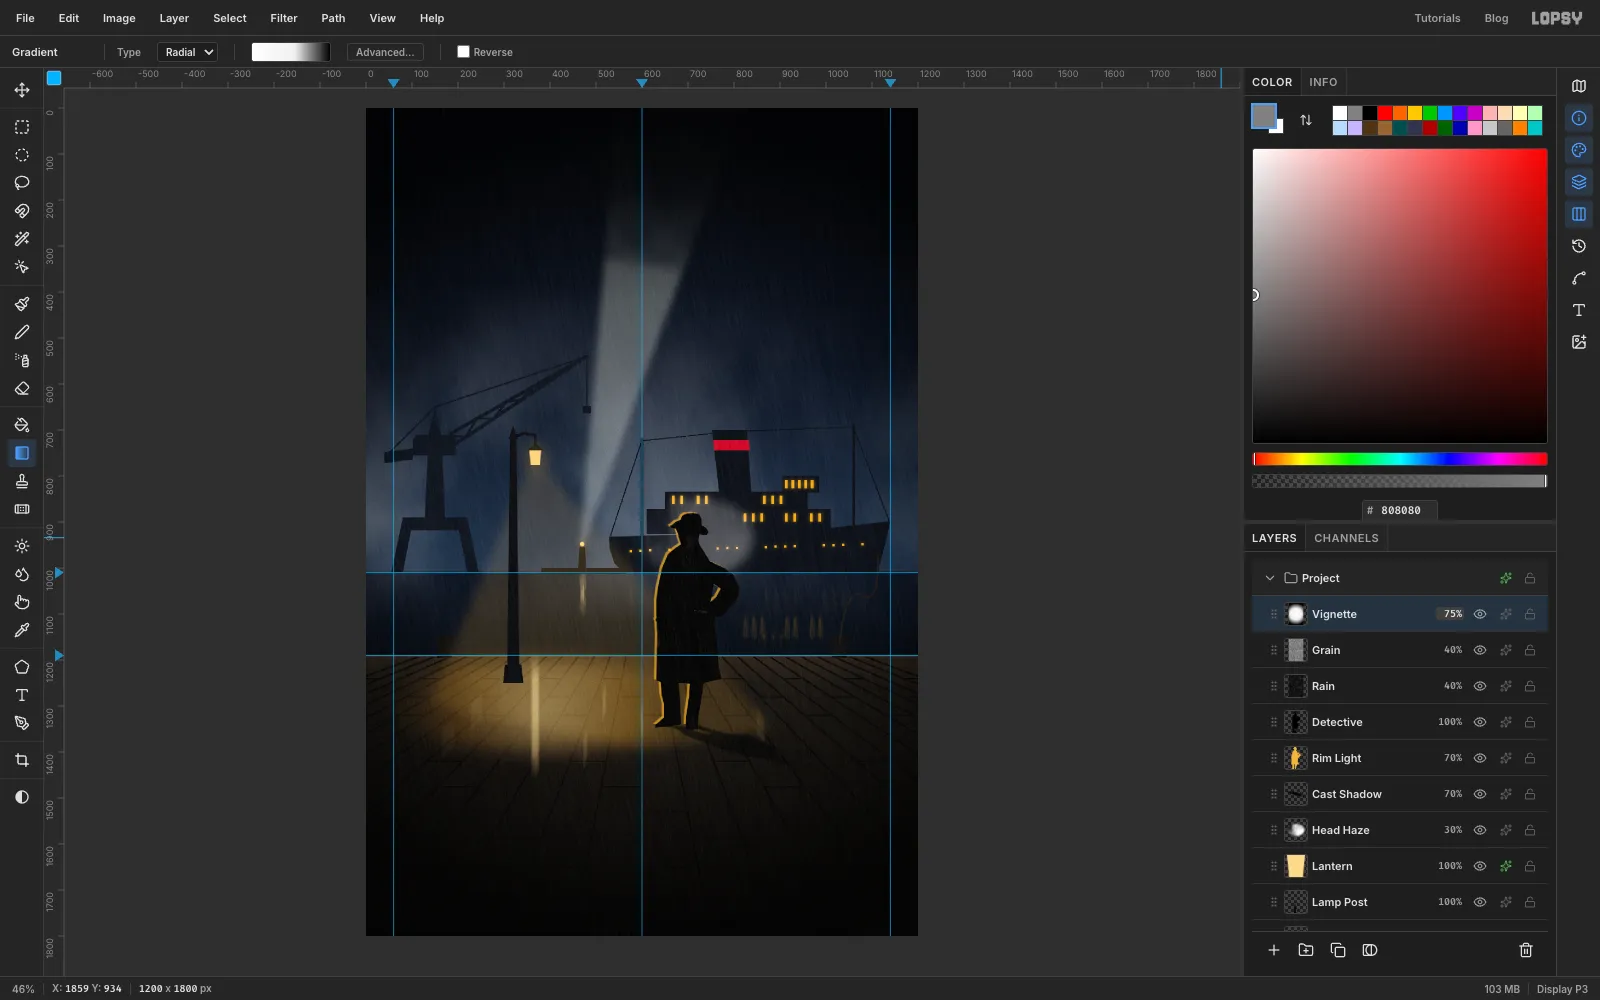
In this tutorial you'll make Yokohama Harbor, a 1200 × 1800 px one-sheet for an imaginary 1950s thriller. A man in a fedora waits under a lamp on a rainy pier while searchlights sweep the sky over a crane and an ocean liner. You'll build the harbour from lasso silhouettes and pencil lines, cut the man out of an old photograph, light him with a rim of lamp light and a cast shadow, then finish with rain, grain, a vignette and a red title sliced by venetian-blind slats.
The man comes from a public-domain portrait, Standing portrait of a young man … wearing a trench coat and fedora hat (H.F. Cooper, c.1920, Public Record Office of Northern Ireland, on Wikimedia Commons with no known copyright restrictions). Any full-length photo of a person in a coat and hat will do. Everything else is drawn in Lopsy.
The palette:
-
Night sky
-
Harbour water
-
Silhouettes
-
crane
-
liner
-
Searchlight
-
Lamp light
-
lantern glass
-
Pier deck
-
Noir red
-
title shading
-
Extrusion shadow
-
type
-
Set up the canvas and guides
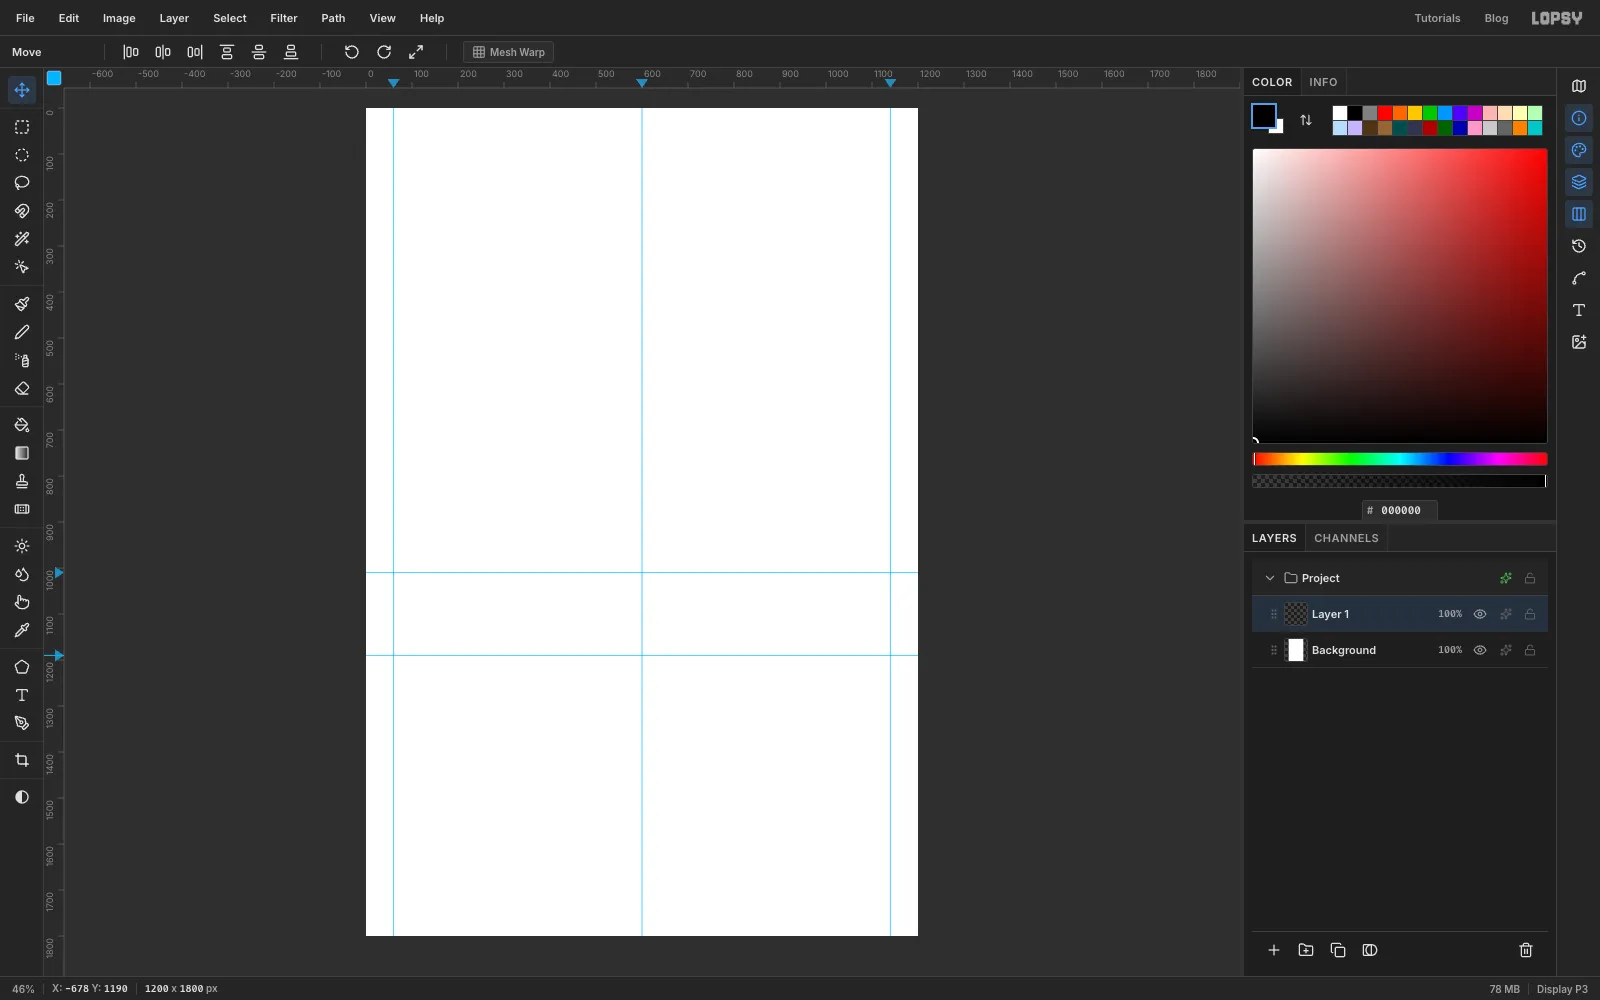
Choose File → New, make a 1200 × 1800 document with a white background, and click Create.
Guides keep the type and the scene lined up. Click the top ruler at 60, 600 and 1140 for vertical guides: the two margins and the centre. Click the left ruler at 1010 for the horizon, where the ship will float, and at 1190 for the far edge of the pier. Turn on View → Snap to Guides if it isn't already on.
-
Paint the night sky
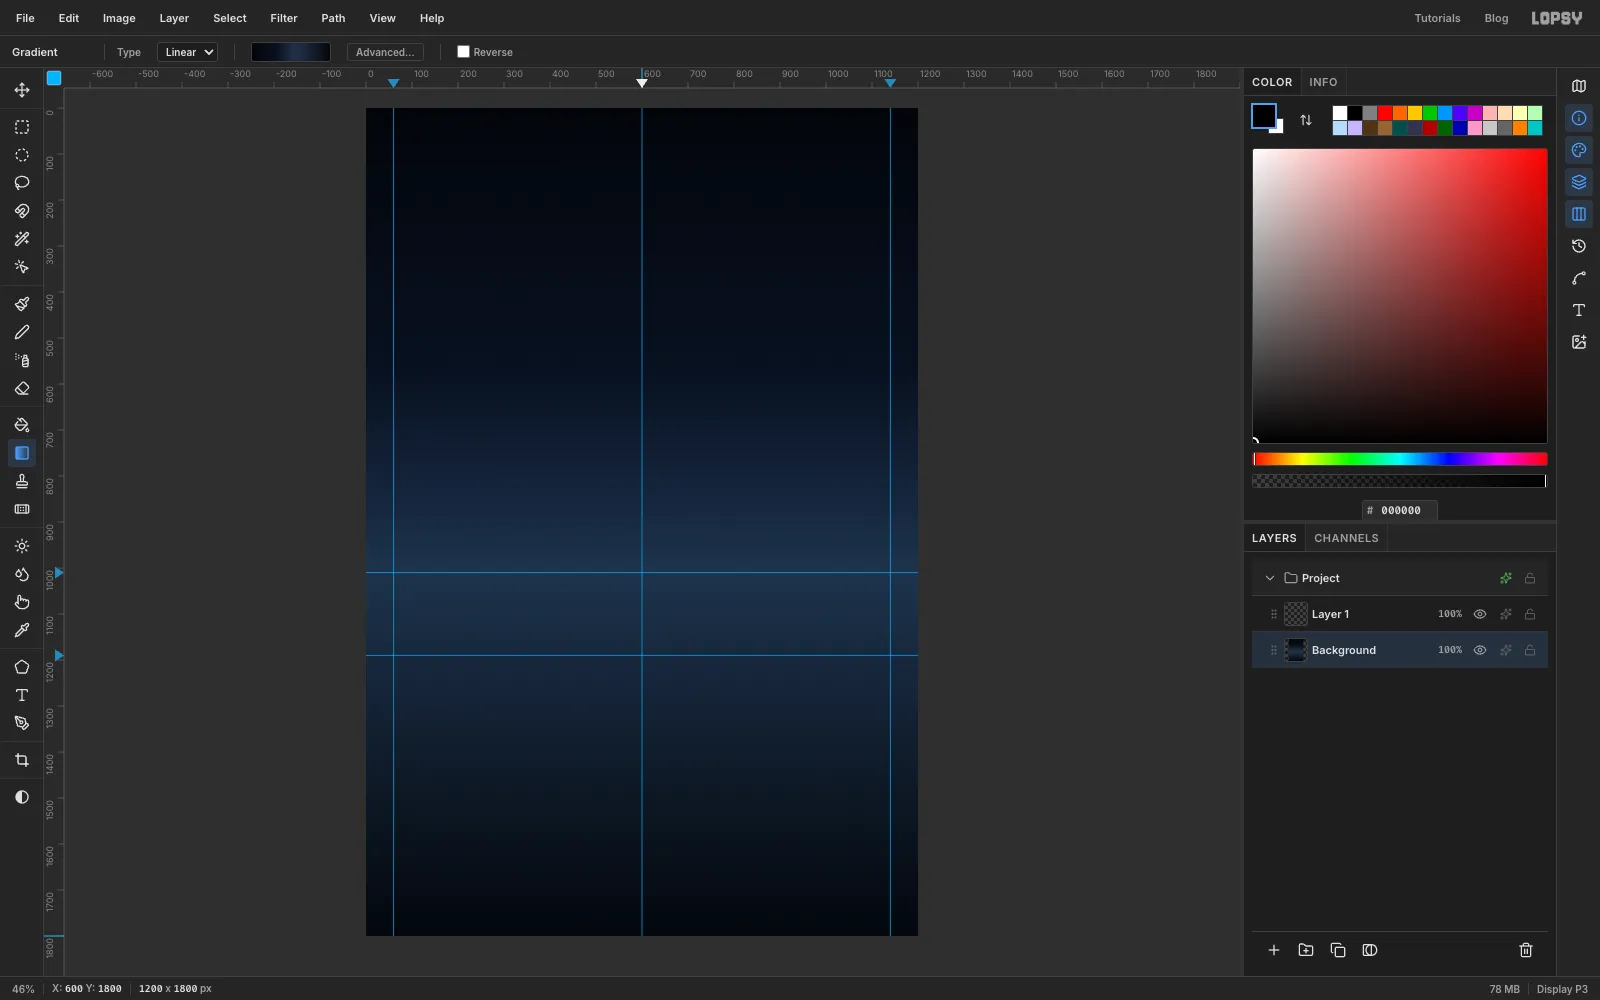
Select Background and pick the Gradient tool. Leave Type on Linear and click Advanced… to set four stops:
- at 0%
- at 32%
- at 56%
- at 100%
Drag from the top of the canvas straight down to the bottom. The lightest band lands on the horizon guide. That glow behind the ships is what makes black silhouettes readable.
-
Roll in fog with Clouds and a mask
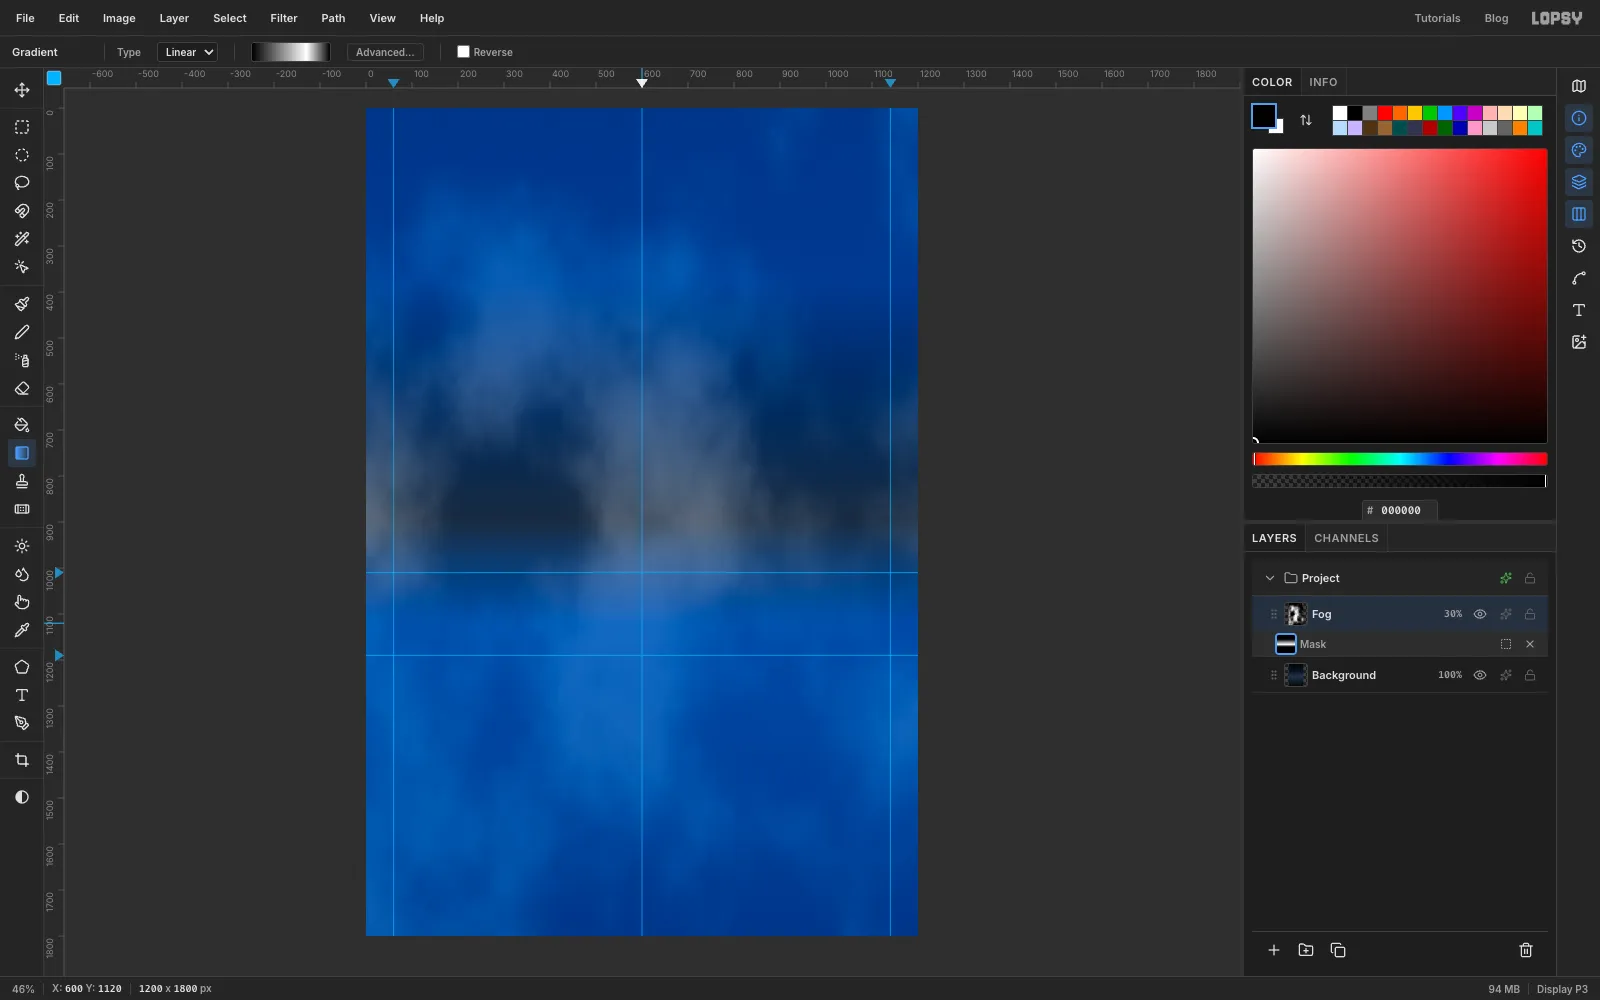
Rename Layer 1 to Fog and run Filter → Clouds… with Scale 4. Open the layer's effects drawer, set the blend mode to Screen, and lower the layer opacity to 30%.
The fog should hang on the water, not fill the sky. Click Add Mask at the bottom of the Layers panel, then click the new mask thumbnail to edit the mask. With the Gradient tool, set three stops: black at 0%, white at 70% and black at 100%. Drag from about a fifth of the way down the canvas to just below the pier guide. Click the Fog layer's name to leave mask editing.
-
Cut a searchlight beam
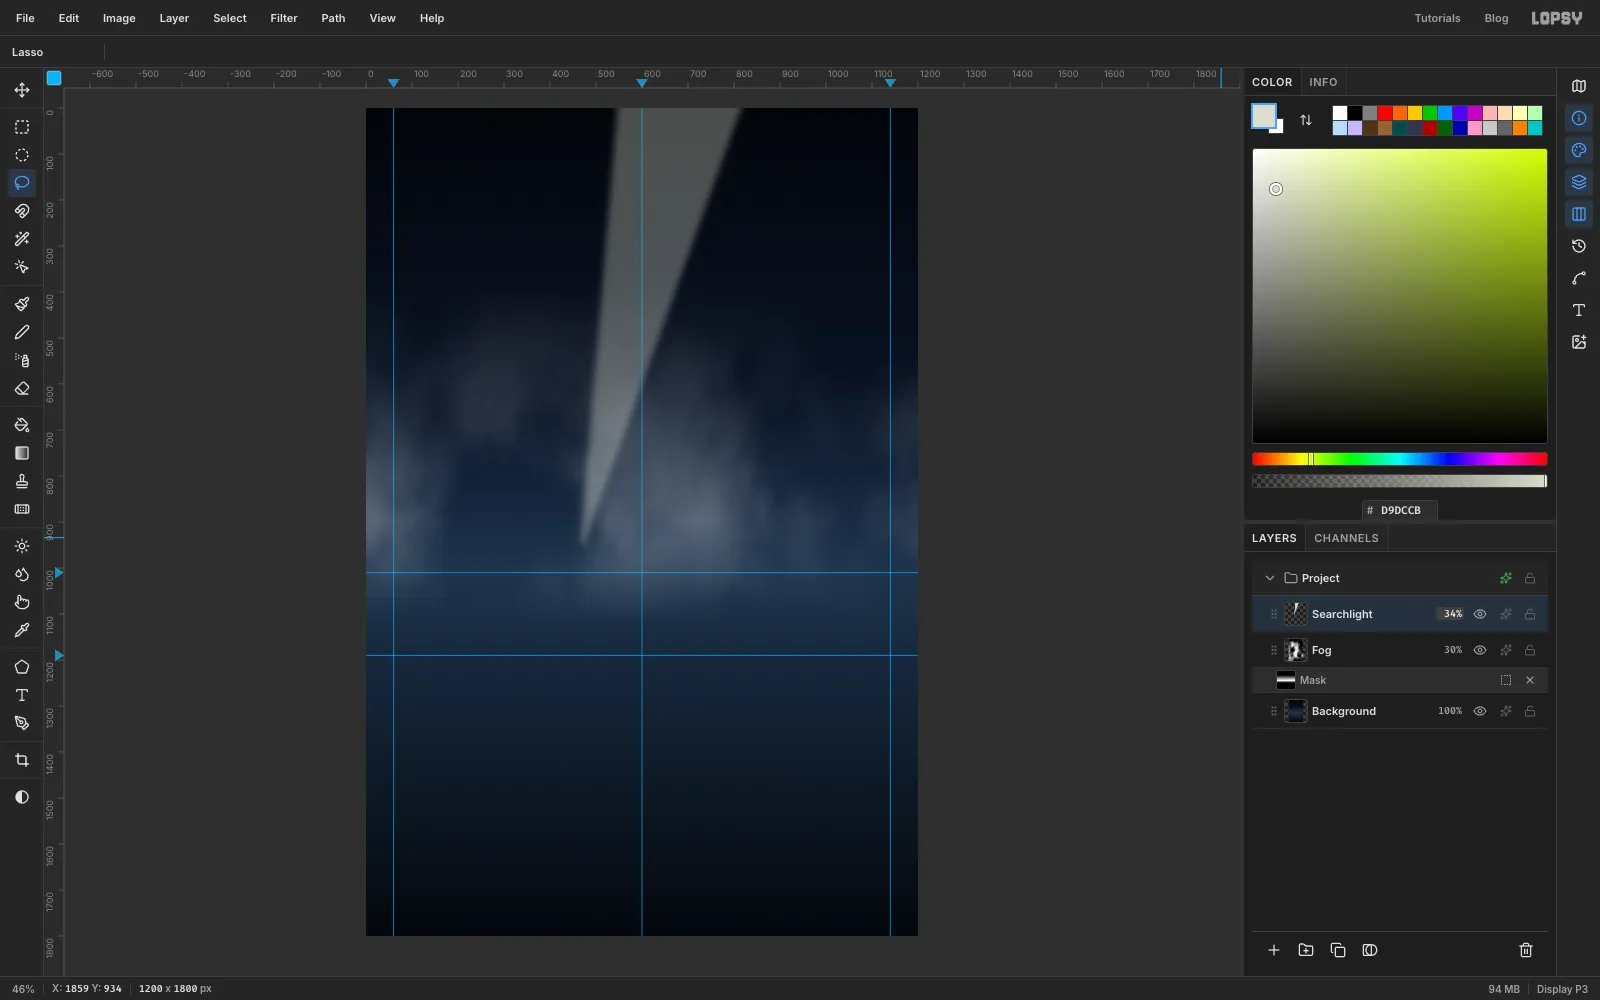
Click Add Layer and name it Searchlight. With the Lasso, draw a long thin wedge: start at a point on the horizon a little left of centre and widen it to about 280 px as it leaves the top of the canvas, leaning slightly right. Fill it with using Edit → Fill and deselect with Cmd+D.
Run Filter → Gaussian Blur… with Radius 22, set the layer to Screen, and drop it to 34% opacity.
-
Add a lighthouse on the breakwater
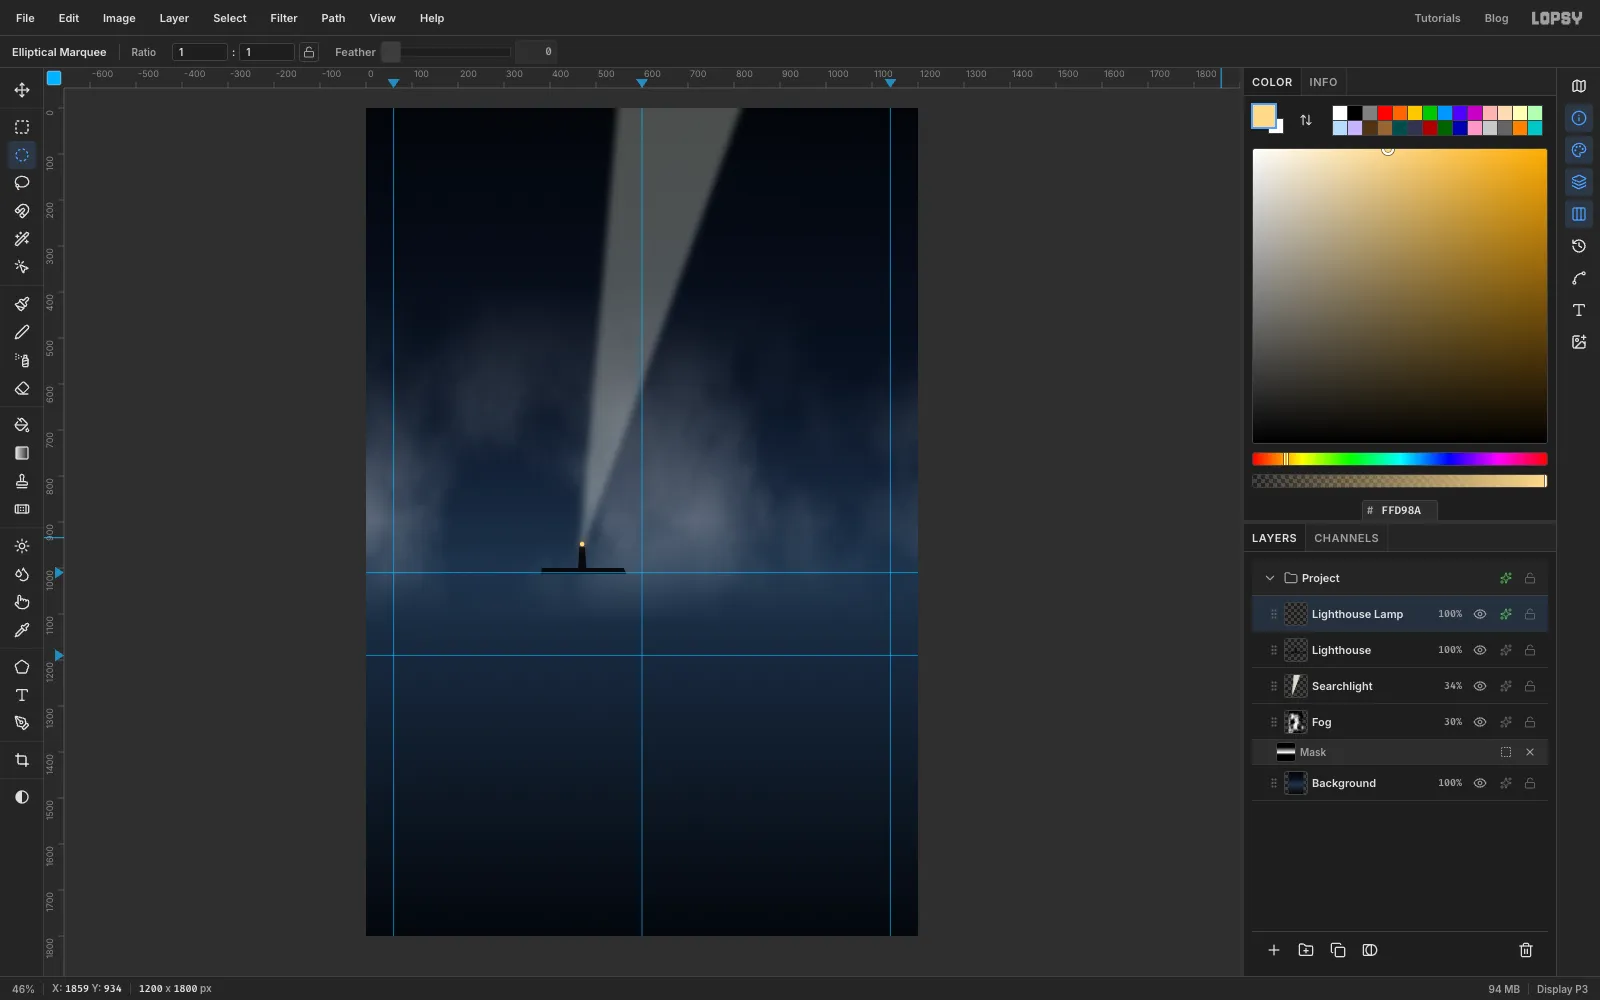
Add a layer called Lighthouse. Lasso a thin strip along the horizon, about 180 px long and 12 px tall, under the beam's point, and fill it with . Lasso a narrow tapering tower from the strip up to the beam's point and fill that too.
Put the bulb on its own layer, Lighthouse Lamp, so that only the bulb glows. Click the Elliptical Marquee once on the canvas (no drag), enter a 10 × 10 px circle at the top of the tower, and fill it with . In the effects drawer, add an Outer Glow in with Size 26 and Opacity 85.
-
Fade the far end of the beam
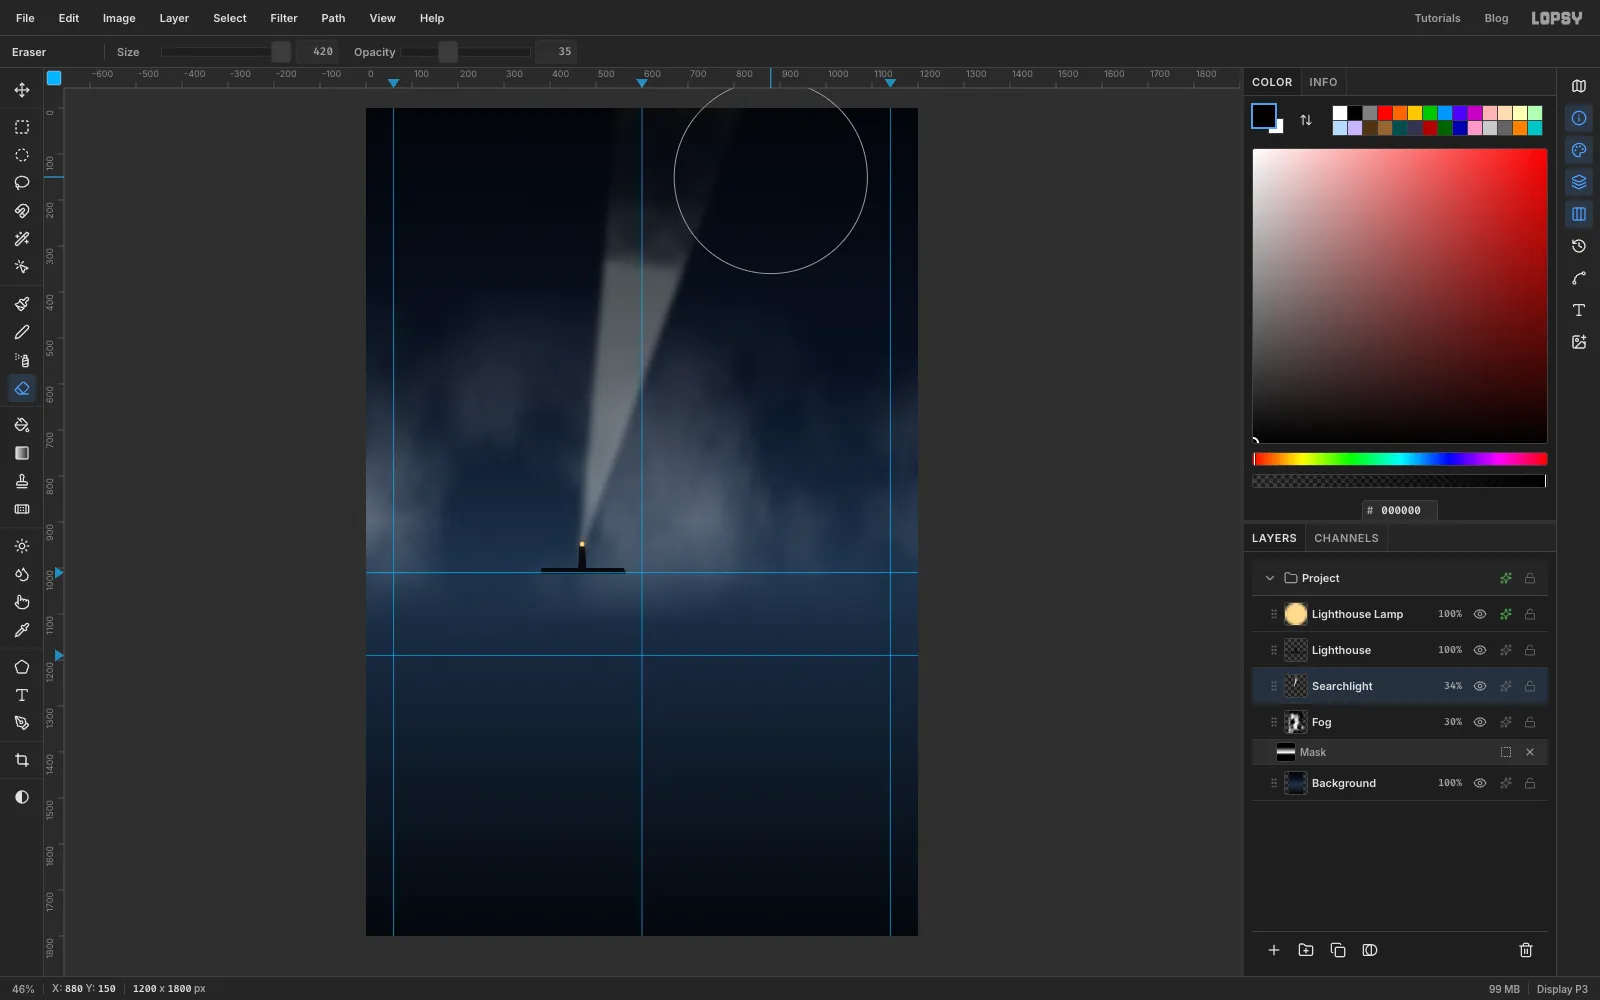
Real beams thin out with distance. Select Searchlight, pick the Eraser, and set Size 420 and Opacity 35. Drag two slow horizontal strokes across the top of the beam, one along the very top edge and one about 150 px lower. The beam now dissolves into the dark instead of stopping at the edge.
-
Build the crane's body
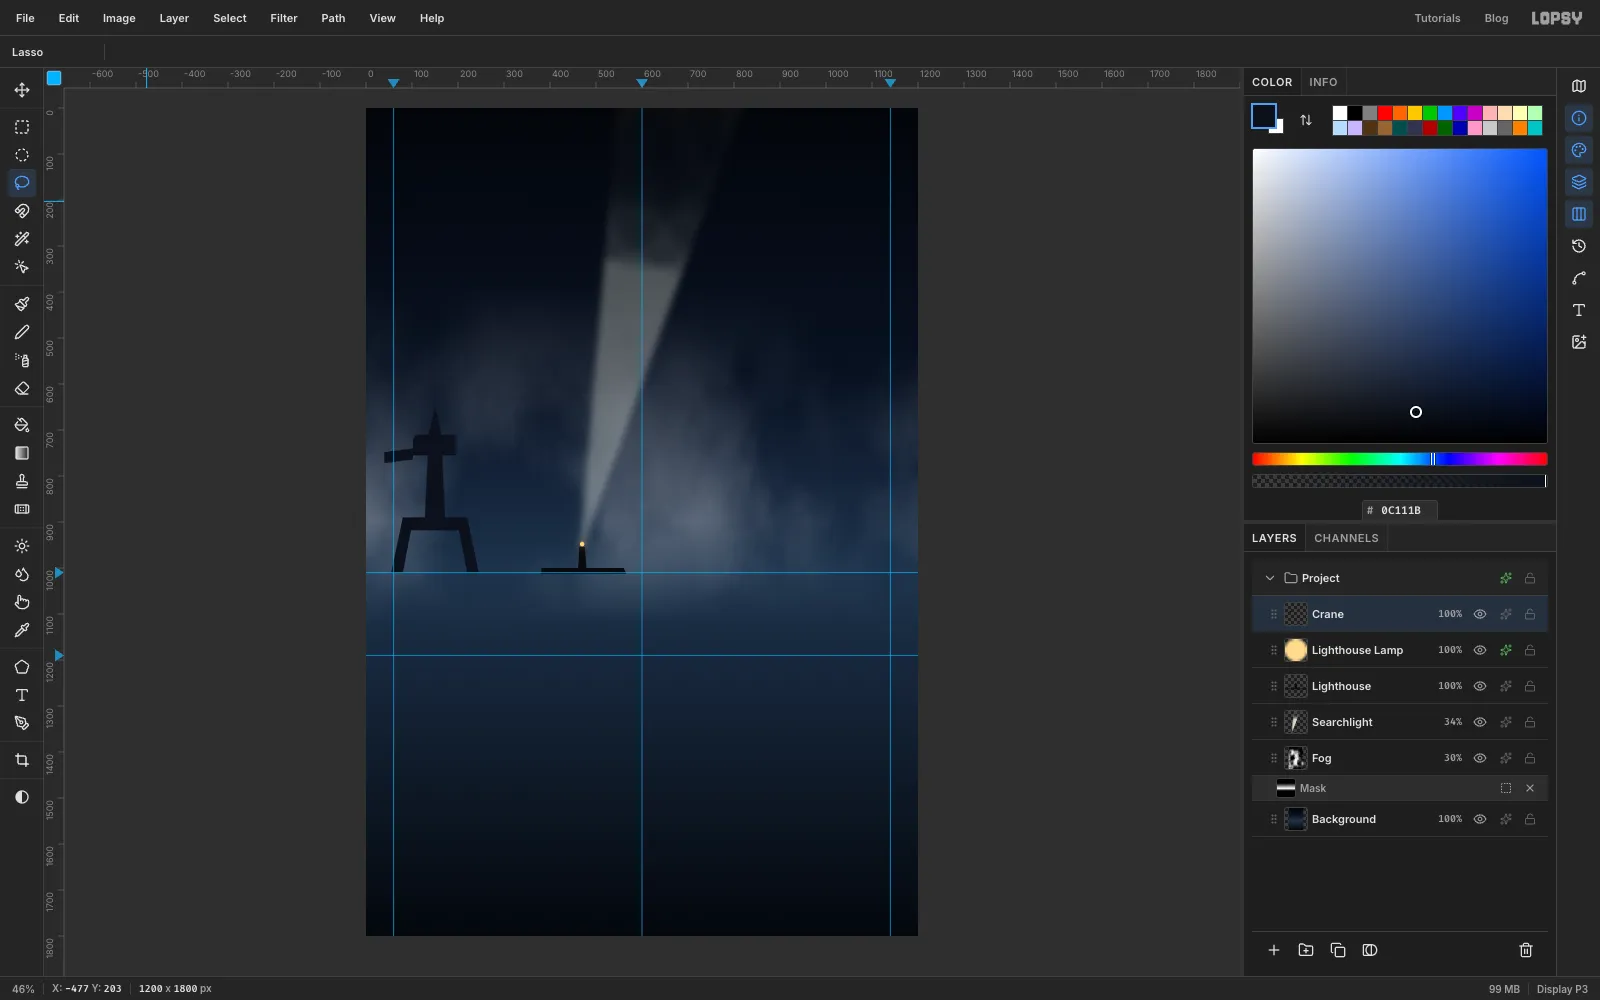
Select Lighthouse Lamp and add a layer called Crane above it. Set the foreground to . Each part of the crane is a lasso shape filled with Edit → Fill:
- A portal base about 190 px wide and 120 px tall, standing on the horizon at the left of the poster. Lasso it as an arch: two splayed legs joined by a beam at the top.
- A tapering tower about 40 px wide, rising 135 px from the portal.
- A cab, a box about 95 × 45 px, on top of the tower.
- A small pointed A-frame, 60 px tall, on the cab.
- A counterweight arm sticking out about 60 px to the left of the cab.
Deselect after each fill.
-
Lattice the jib with the pencil
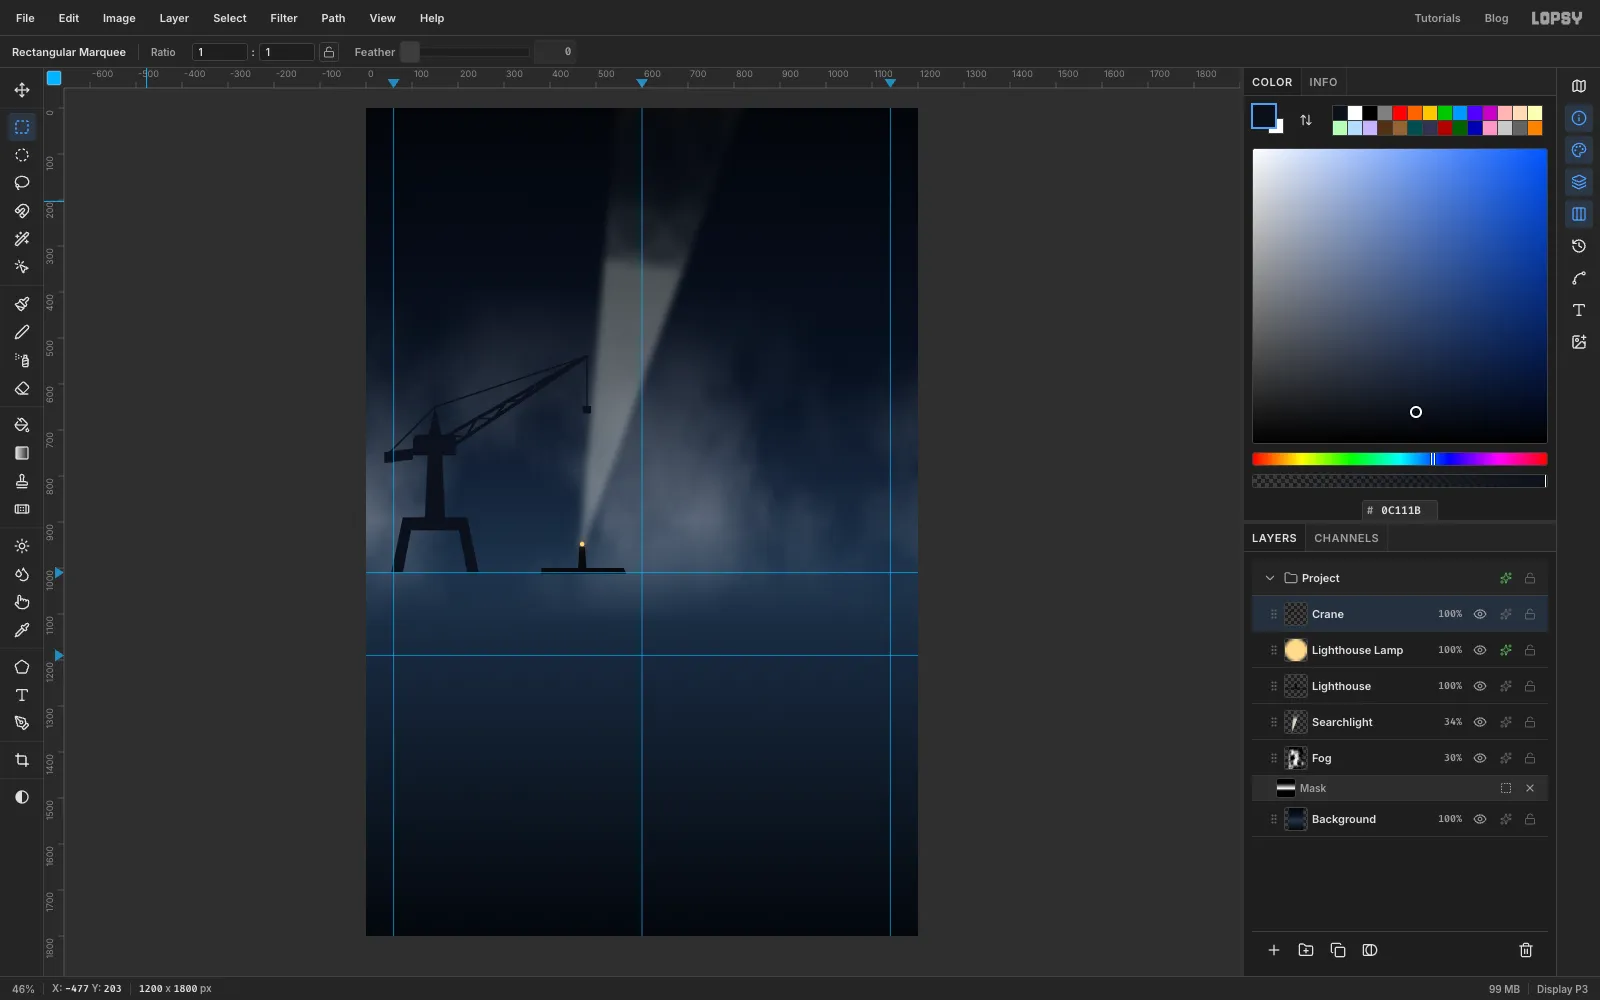
The jib is just lines, so pick the Pencil. At Size 6, click at the front of the cab, then Shift-click at the jib tip, about 300 px right and 185 px up. That draws a straight line. Click just below the first point and Shift-click the tip again for the second chord.
Drop to Size 4 and zigzag between the two chords. Click on the top chord near the cab, then Shift-click alternately on the bottom and top chords as you move towards the tip. At Size 3, draw cables from the A-frame peak to the jib tip and to the counterweight, and a short hook line hanging 110 px below the tip. Finish by marqueeing a tiny rectangle at the bottom of that line and filling it for the hook block.
-
Draw the ocean liner
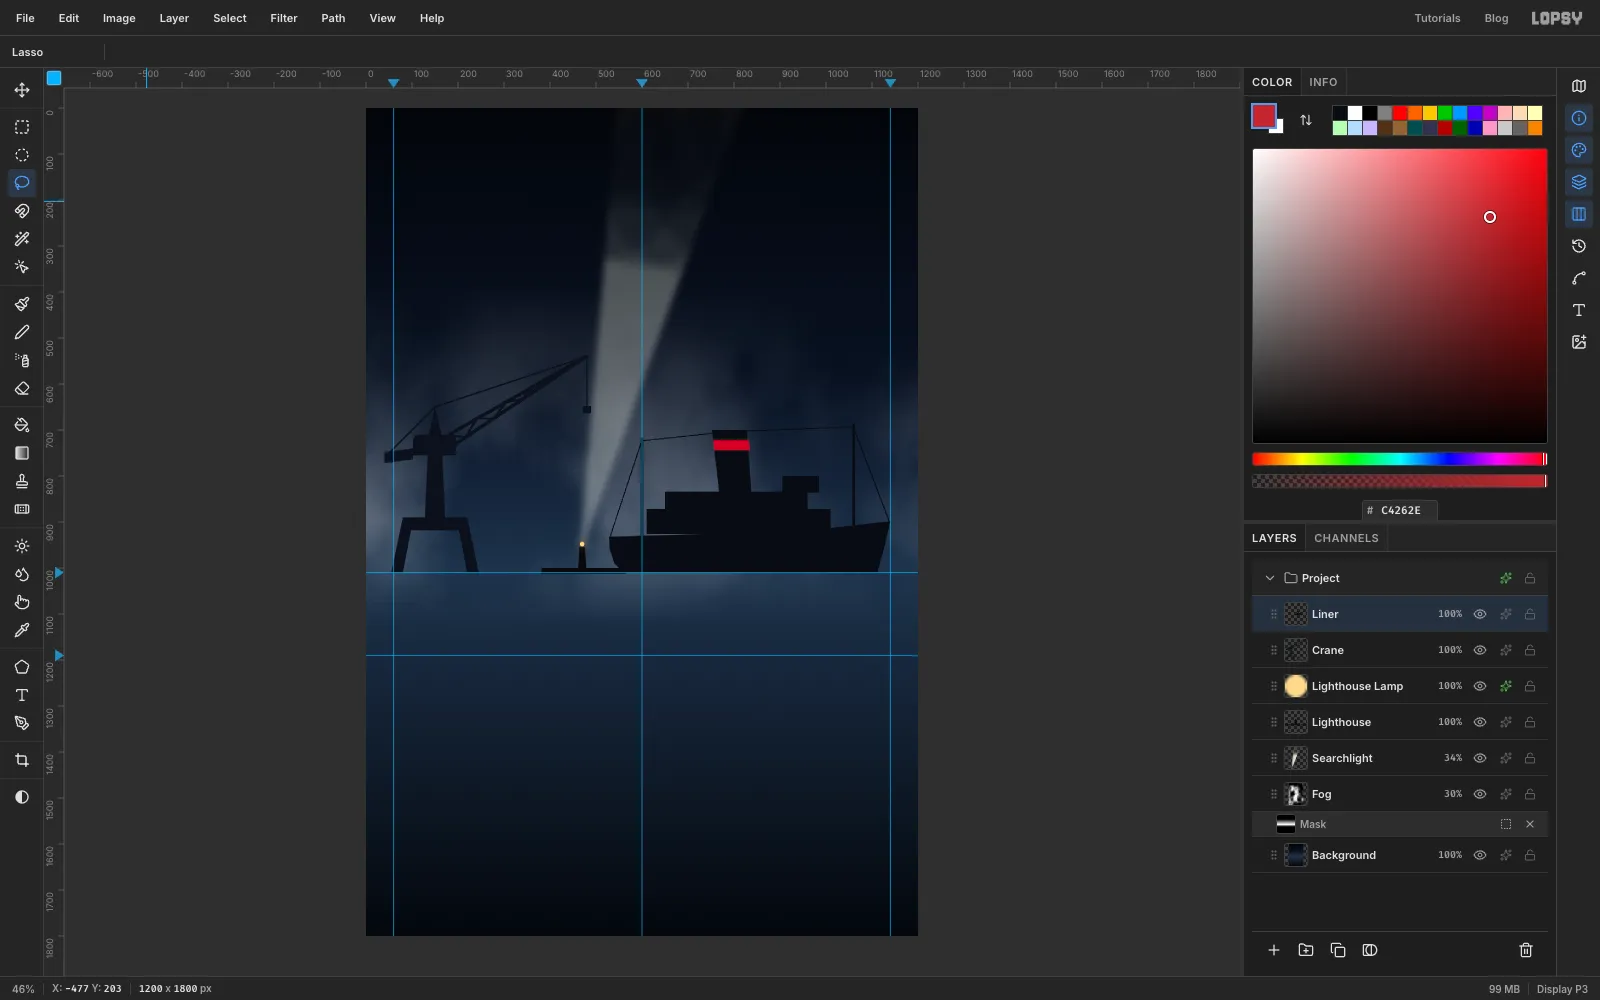
Add a layer called Liner. With the Lasso, draw the hull in : the stern starts just right of centre, the deck line rises gently towards a raked bow about 60 px from the right edge, and the bottom sits on the horizon. Keep the bow clear of the canvas edge so the two don't touch.
For the superstructure, use the Rectangular Marquee and fill each box. Make three tiers that step up and in from the stern: about 400 px wide and 55 px tall on the deck, 310 × 40 px on top of that, and a small 80 × 36 px bridge near the front. Clicking the marquee once instead of dragging opens a dialog where you can type the exact corners. Lasso a funnel that leans back slightly, and fill a thin band across it with .
With the Pencil at Size 6, Shift-click a fore mast and an aft mast. At Size 2, run one line of rigging from bow to fore mast, across to the funnel, the aft mast and the stern.
-
Light the portholes
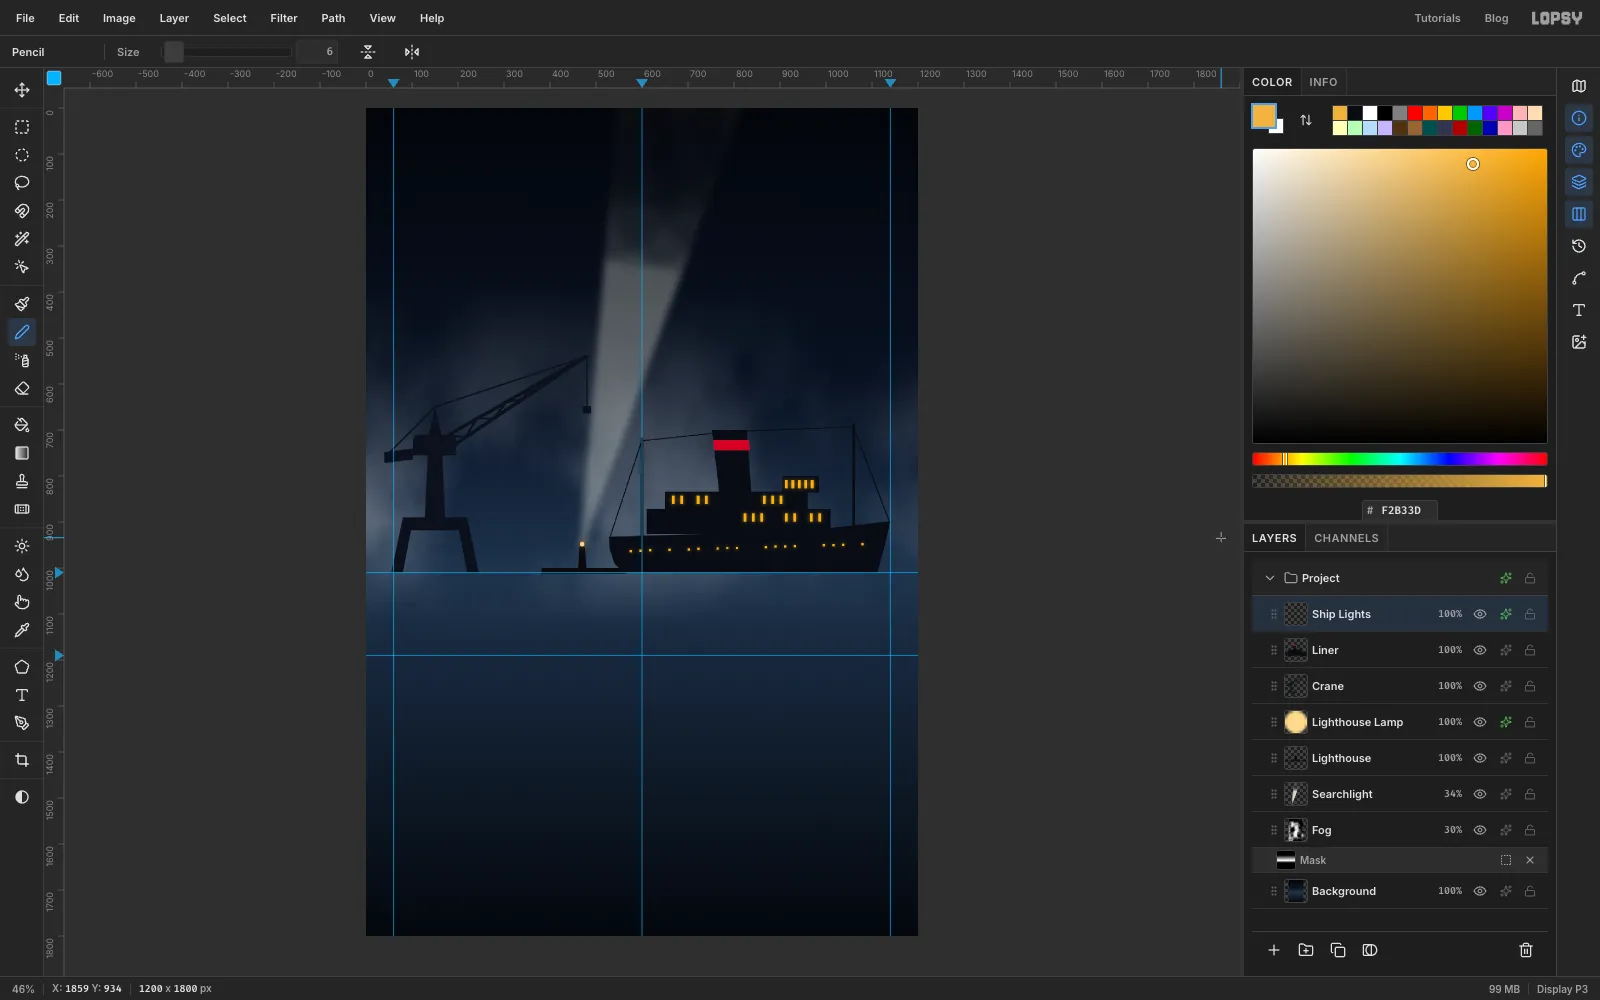
Add a layer called Ship Lights and set the foreground to . With the Pencil at Size 5, click along the hull to dot a row of portholes about 21 px apart. Skip a few here and there so the cabins look occupied, not lit by a spreadsheet.
At Size 6, draw the cabin windows as short vertical strokes, a click and a Shift-click 12 px apart, along each tier. Leave gaps behind the funnel, and leave the left part of the lower tier dark: the man's hat will sit in front of it, and lit windows touching his hat would fight it. Then give the layer an Outer Glow in , Size 12, Opacity 70.
-
Lay down the water
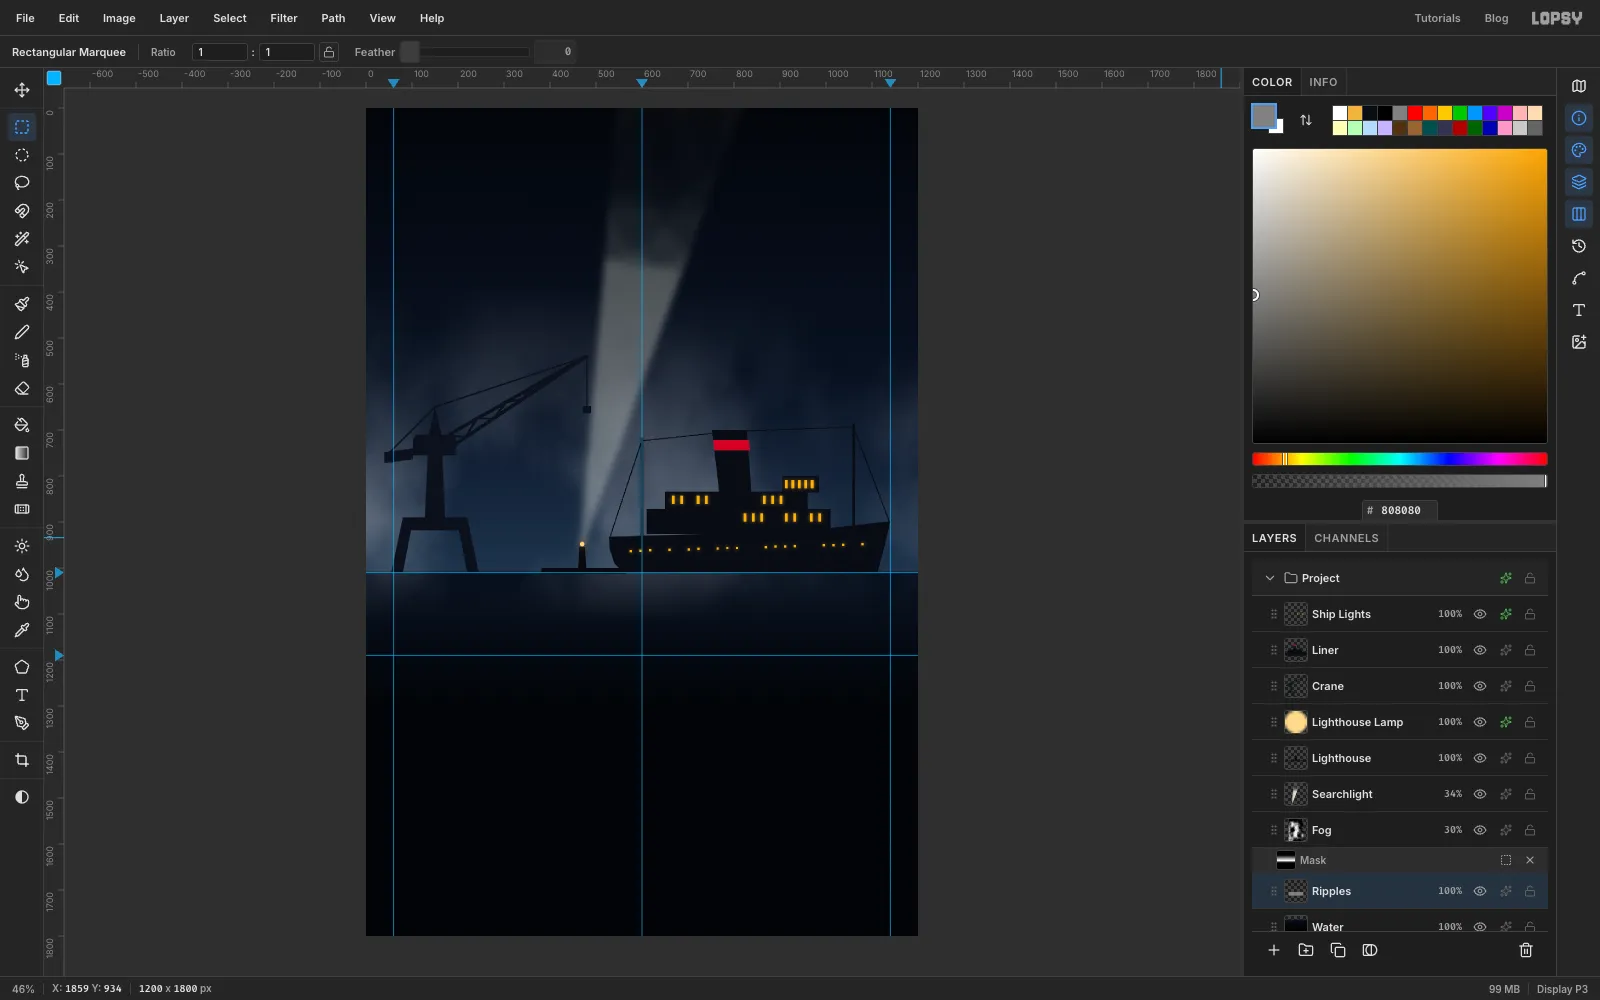
Select Background and add a layer called Water above it. Marquee everything from the horizon guide to the bottom of the canvas. With the Gradient tool set to → , drag from the horizon down about 300 px. The water should be darker than the sky. Deselect.
For ripples, add a layer called Ripples. Marquee from the horizon down to about y 1300, fill it with mid grey , and run Filter → Add Noise… at Amount 90, Mono. Then run Filter → Motion Blur… with Angle 0 and Distance 80 to stretch the speckle into streaks. Deselect and set the layer to Overlay.
-
Mirror the lights into the water
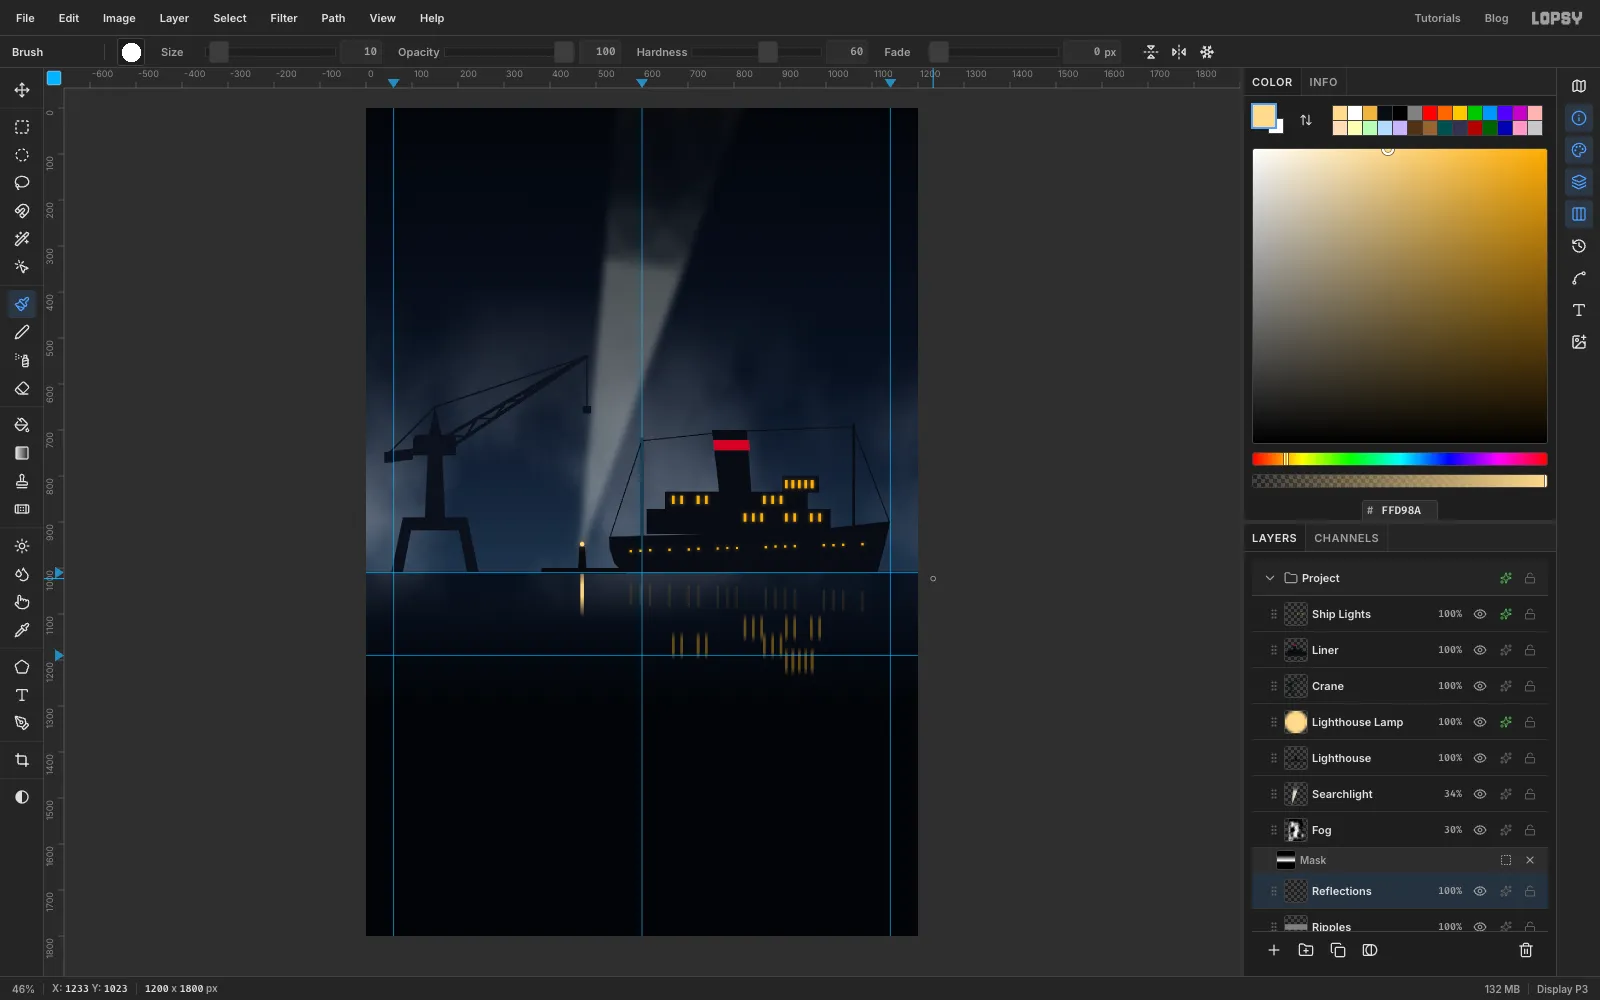
Select Ship Lights, choose Select → All, then Edit → Copy and deselect. Click Ripples and choose Edit → Paste. The copy lands in place on a new layer. Name it Reflections and deselect.
Choose Image → Flip Vertical. Lopsy flips the layer across the middle of the whole canvas, so the lights land too high. With the Move tool, drag the layer straight down 220 px so that the reflections hang from the waterline.
Pick the Brush at Size 10, Hardness 60, set the foreground to , click just below the lighthouse on the waterline, and Shift-click about 60 px lower to draw a short vertical line. Run Filter → Motion Blur… with Angle 90 and Distance 46 to drag everything into vertical streaks.
-
Break the reflections into ripples
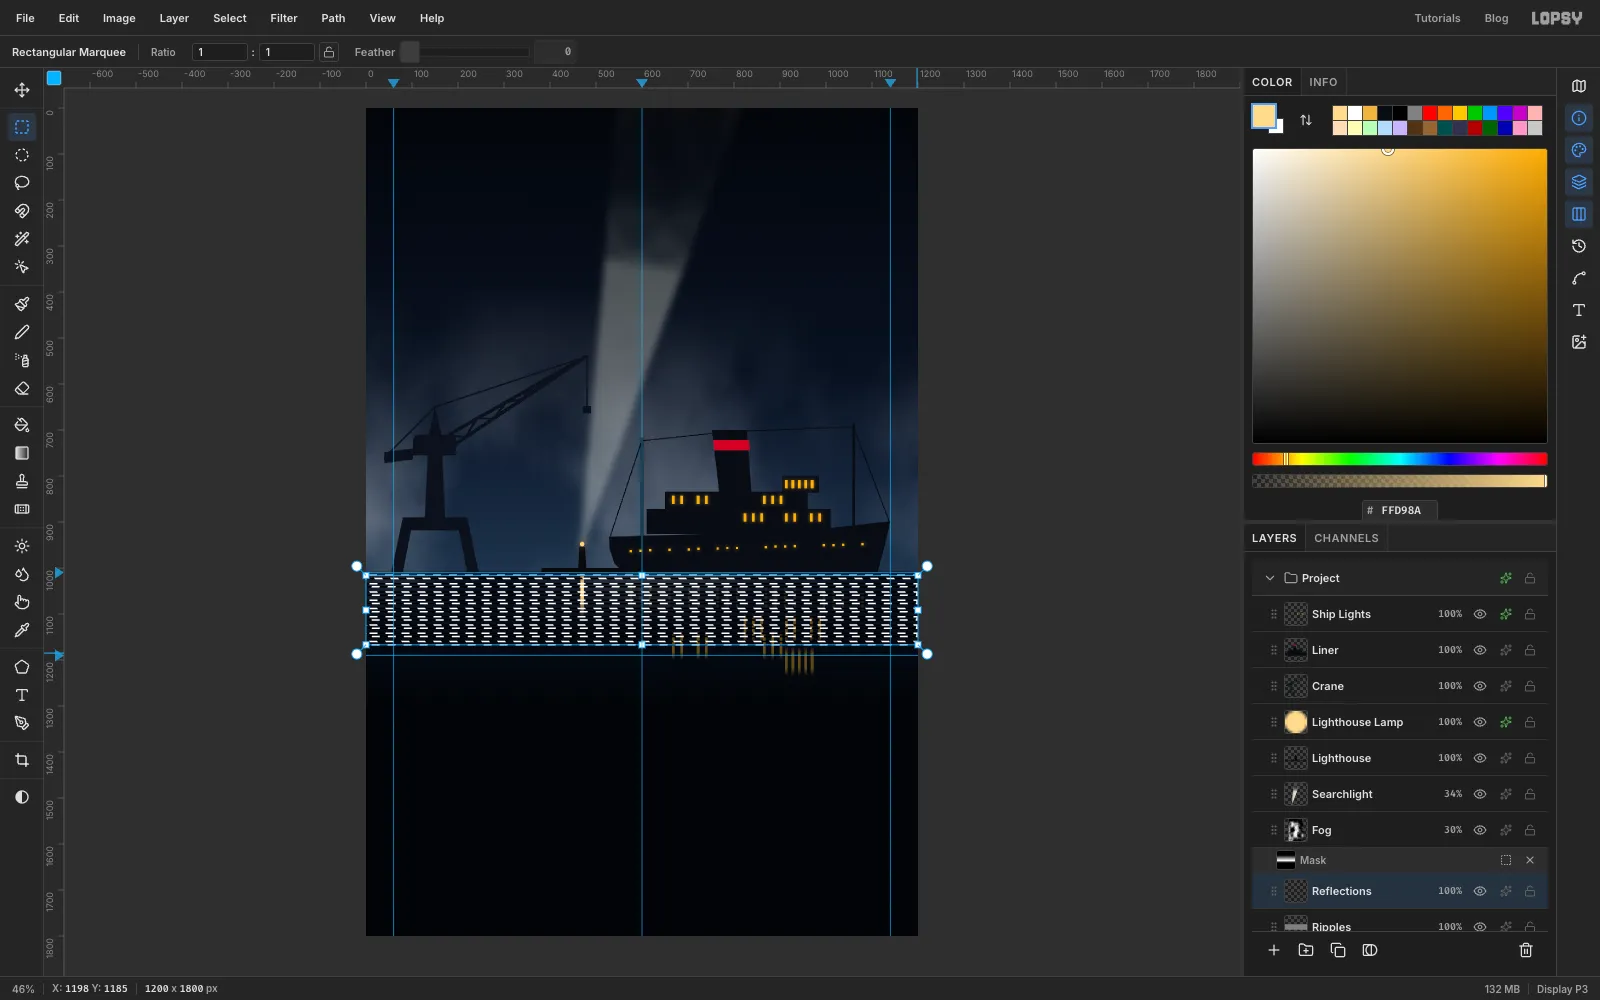
Straight streaks look like a picket fence. Water breaks them up. Zoom in to 200% or more first, because these slices are only a few pixels tall. With the Rectangular Marquee, select a thin 7 px slice right under the horizon, full width. Then hold Shift and drag more 7 px slices every 18 px down to the pier. Shift adds each one to the selection.
Switch to the Move tool and press Right five times. Only the selected slices shift, so every stripe of reflection jogs sideways. Deselect, then do it once more with a second set of thinner 4 px slices, every 27 px and starting a little lower, and press Left three times. Two sets of slices on different spacings stop the pattern from repeating. Then run Motion Blur again at Angle 90, Distance 18 to melt the steps into wobbles.
Finally take the Eraser at Size 140, Opacity 60, and drag along the pier guide so the reflections fade before they reach the boards. Set Reflections to 55%.
-
Group the harbour skyline
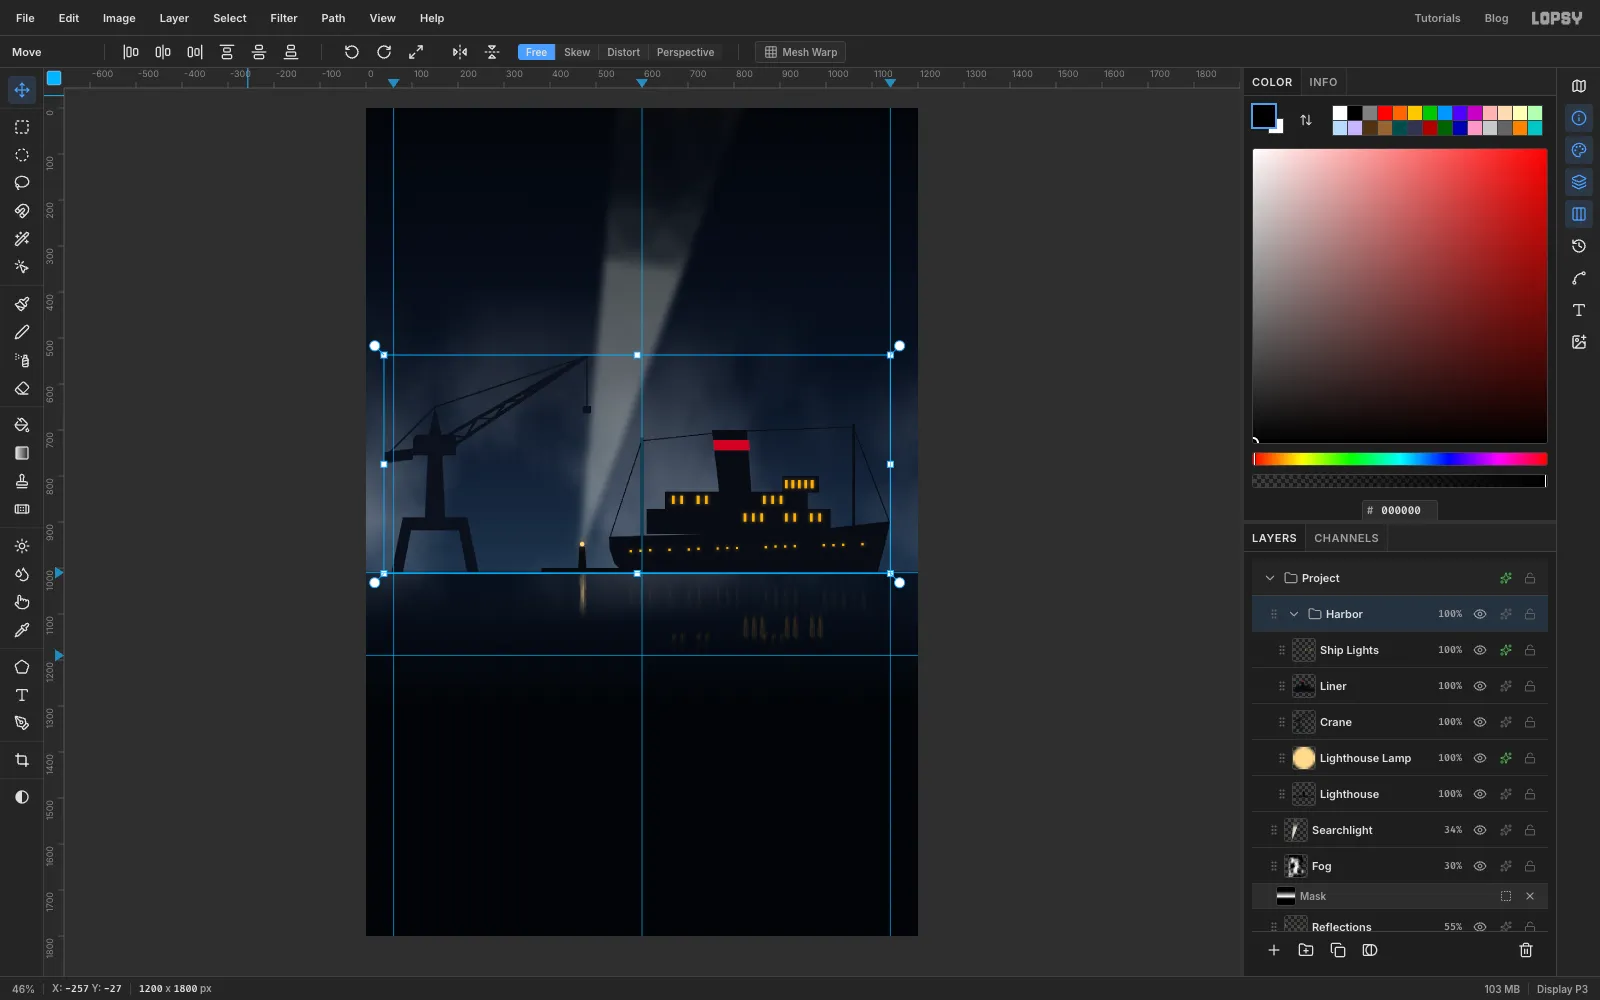
Click Lighthouse in the Layers panel, then Shift-click Ship Lights to select the range. Choose Layer → Group Layers and name the group Harbor, after the film.
With the group selected, the Move tool moves everything inside it at once. Try dragging the skyline a little to see it, then press Cmd+Z to put it back. Collapse the group with its arrow so new layers land beside it.
-
Build the pier deck
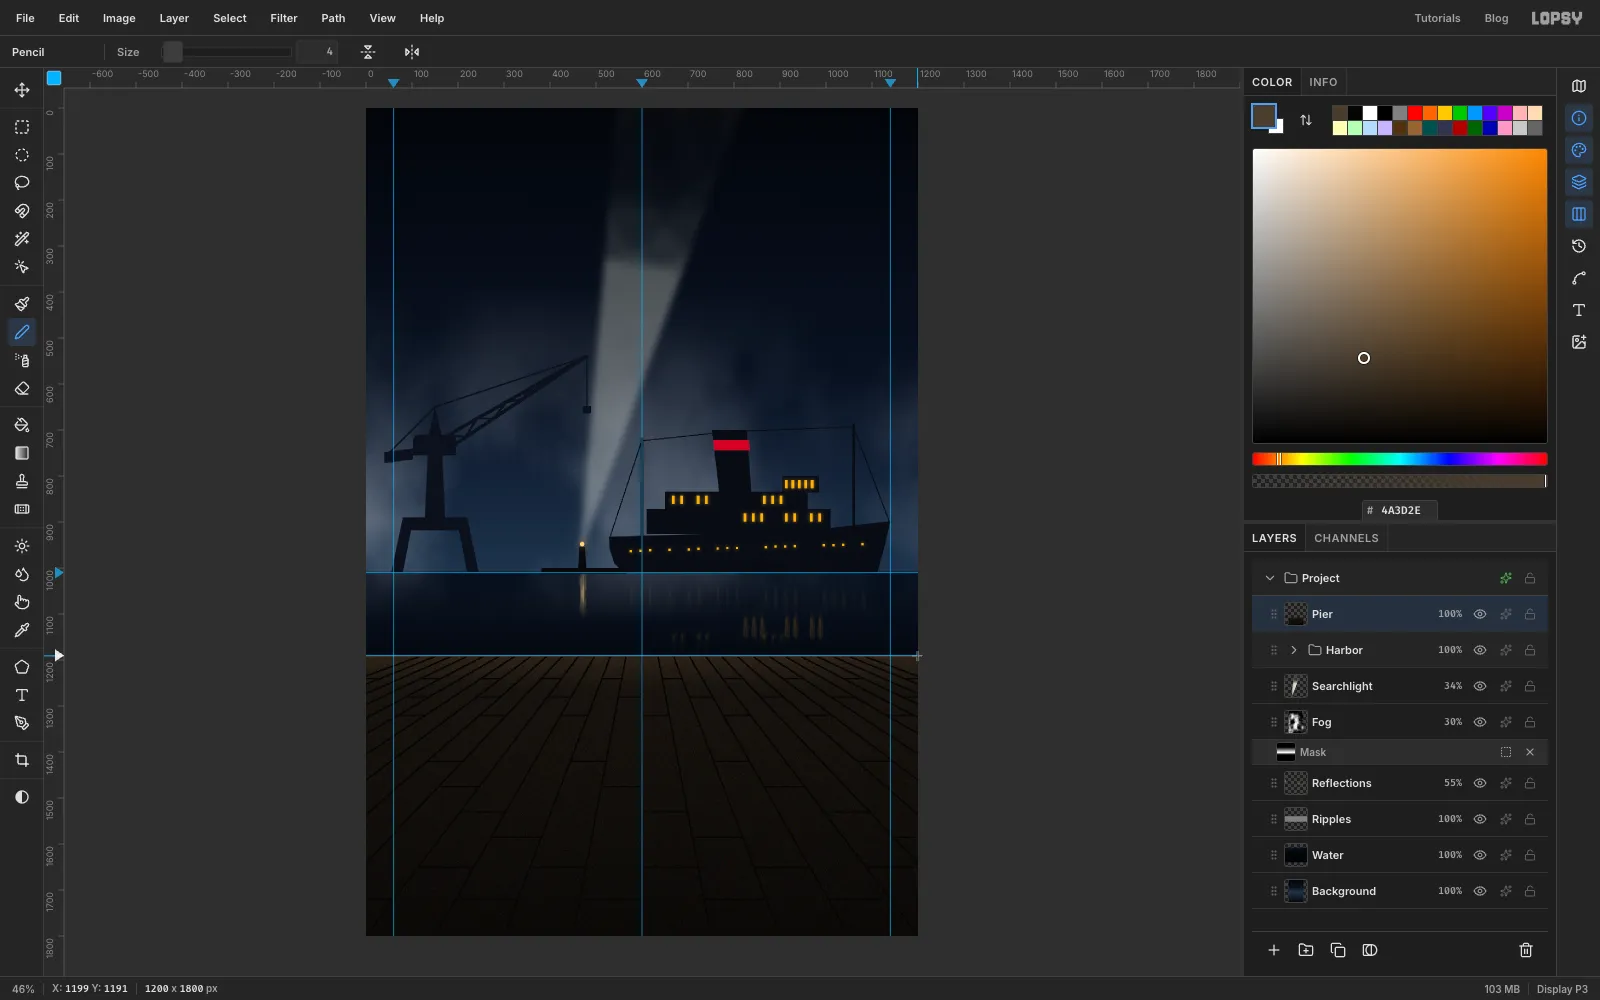
With Harbor selected, add a layer called Pier. Marquee from the pier guide to the bottom of the canvas. Fill it with a linear gradient, at 0%, at 12% and at 100%, dragged from the pier guide to the bottom. Run Filter → Add Noise… at 22 for a little grain in the wood, then deselect.
Planks in perspective all point at one vanishing point on the horizon, here where the centre guide crosses the horizon guide. With the Pencil at Size 3 in , draw each plank line with a click at the pier guide and a Shift-click at the bottom edge, aimed at that point. Space them about 35 px apart at the pier's far edge, widening to about 150 px at the bottom. Add short cross-cuts between neighbouring lines for the board ends, staggered so no two line up.
Finish with a 4 px line in along the pier guide: the edge of the deck catching a little light.
-
Add bollards and a mooring line
Add a layer called Bollards. For each bollard, lasso a squat post about 32 px wide on the pier edge in , then add an oval cap with the Elliptical Marquee and fill it. Put one near the left margin and one under the liner's bow.
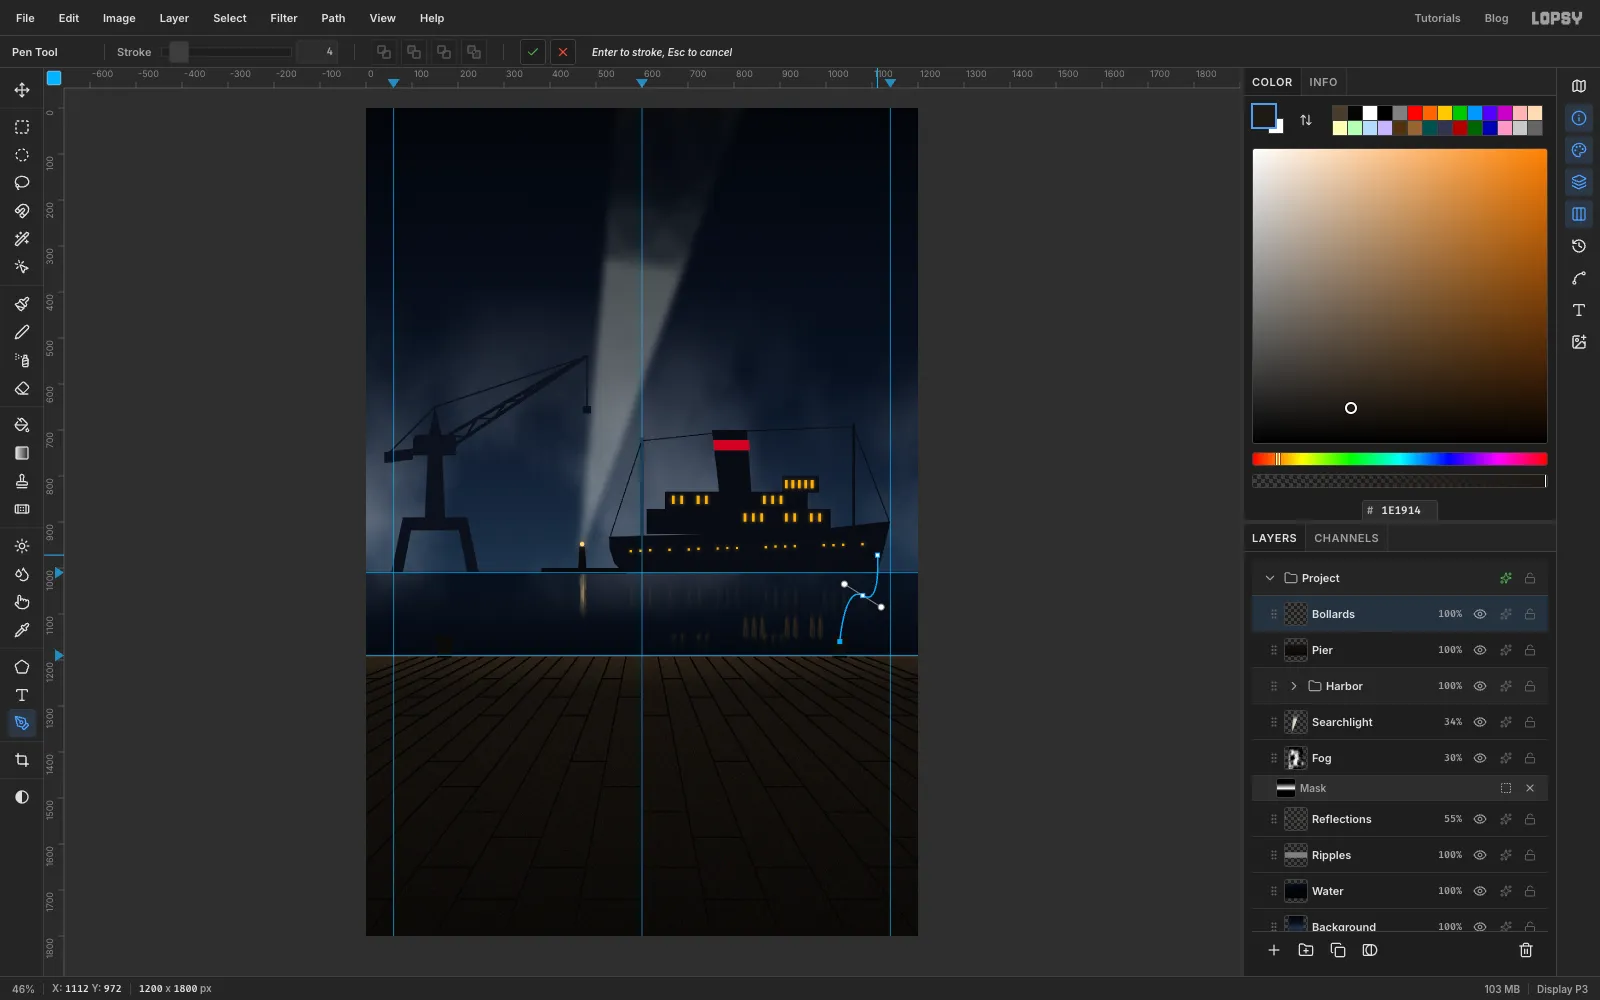
Now pick the Pen tool, set the foreground to and Stroke 4. Click on top of the right bollard, then press and drag partway up towards the bow to pull out a curve handle, so the rope sags. Click on the bow at the waterline. Press Enter to stroke the path.
The stroked rope stays, but the path outline would sit on top of every screenshot from now on. Open the Paths panel, click Delete Path, and close the panel.
-
Raise the lamp post and lantern
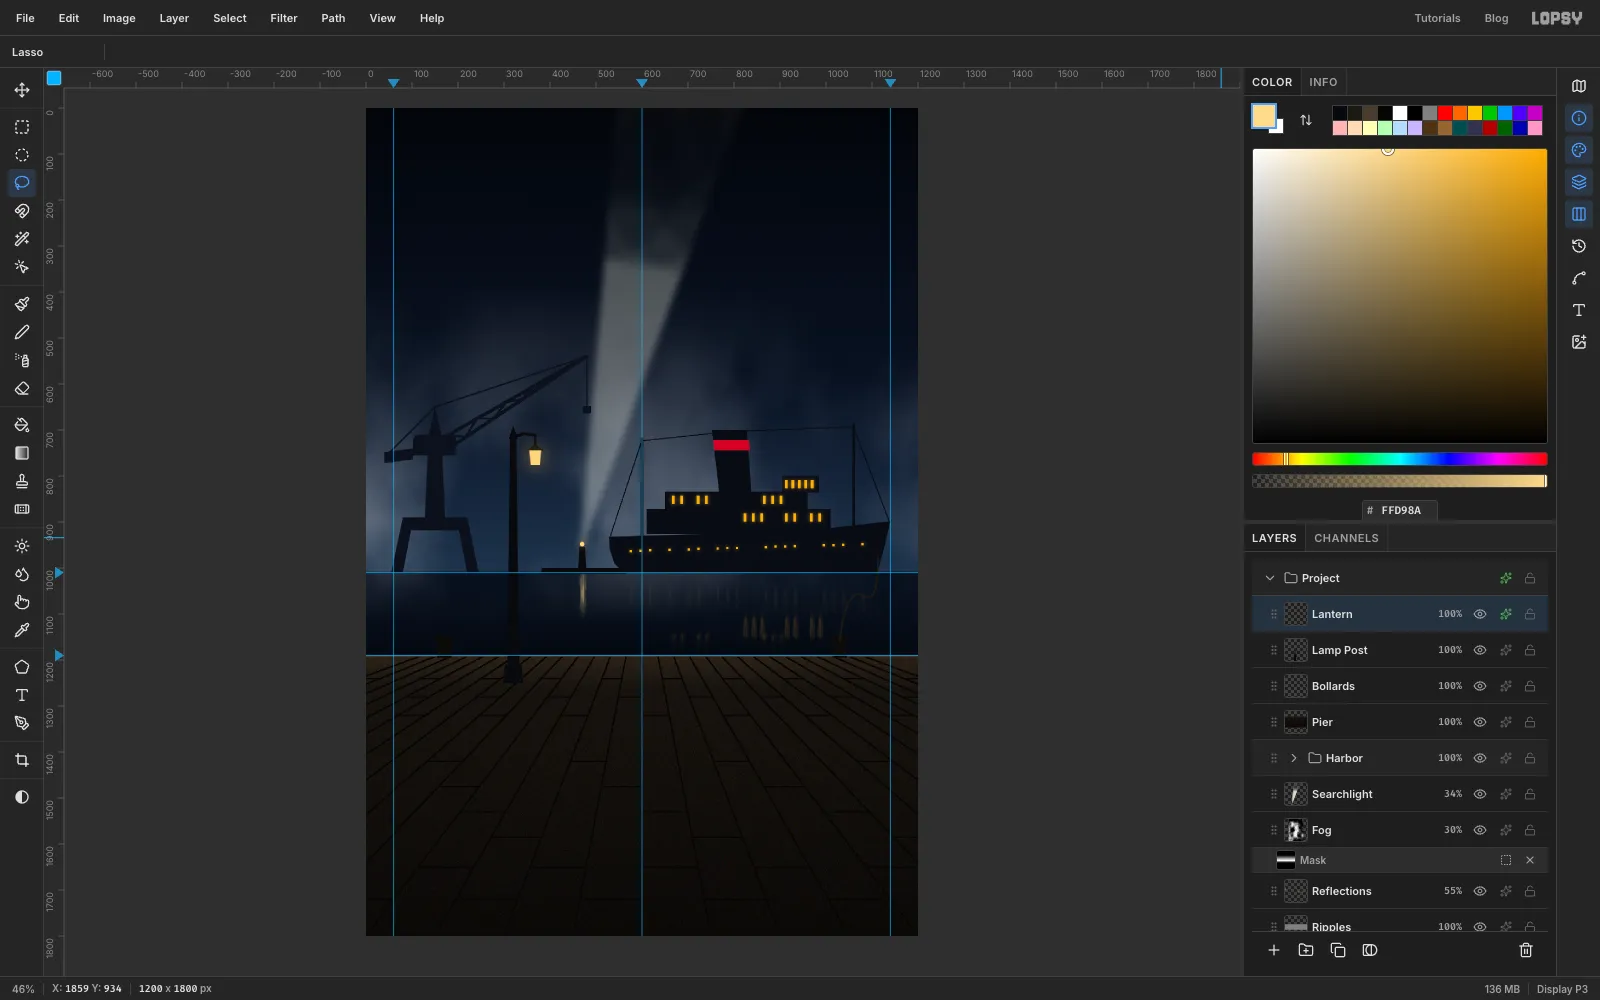
Add a layer called Lamp Post and build the lamp from lasso shapes in :
- A plinth about 44 px wide and 40 px tall standing on the deck, about 60 px in front of the pier edge and a quarter of the way in from the left.
- A slim tapering post rising to about y 720.
- A small point on top.
With the Pencil at Size 6, click near the top of the post, then Shift-click two or three short segments that bend out to the right and down to where the lantern hangs. Lasso a triangular cap for the lantern.
Add a layer called Lantern and lasso the lantern glass, a small trapezoid under the cap, in . Give it an Outer Glow in , Size 70, Opacity 80.
-
Pour light onto the wet boards
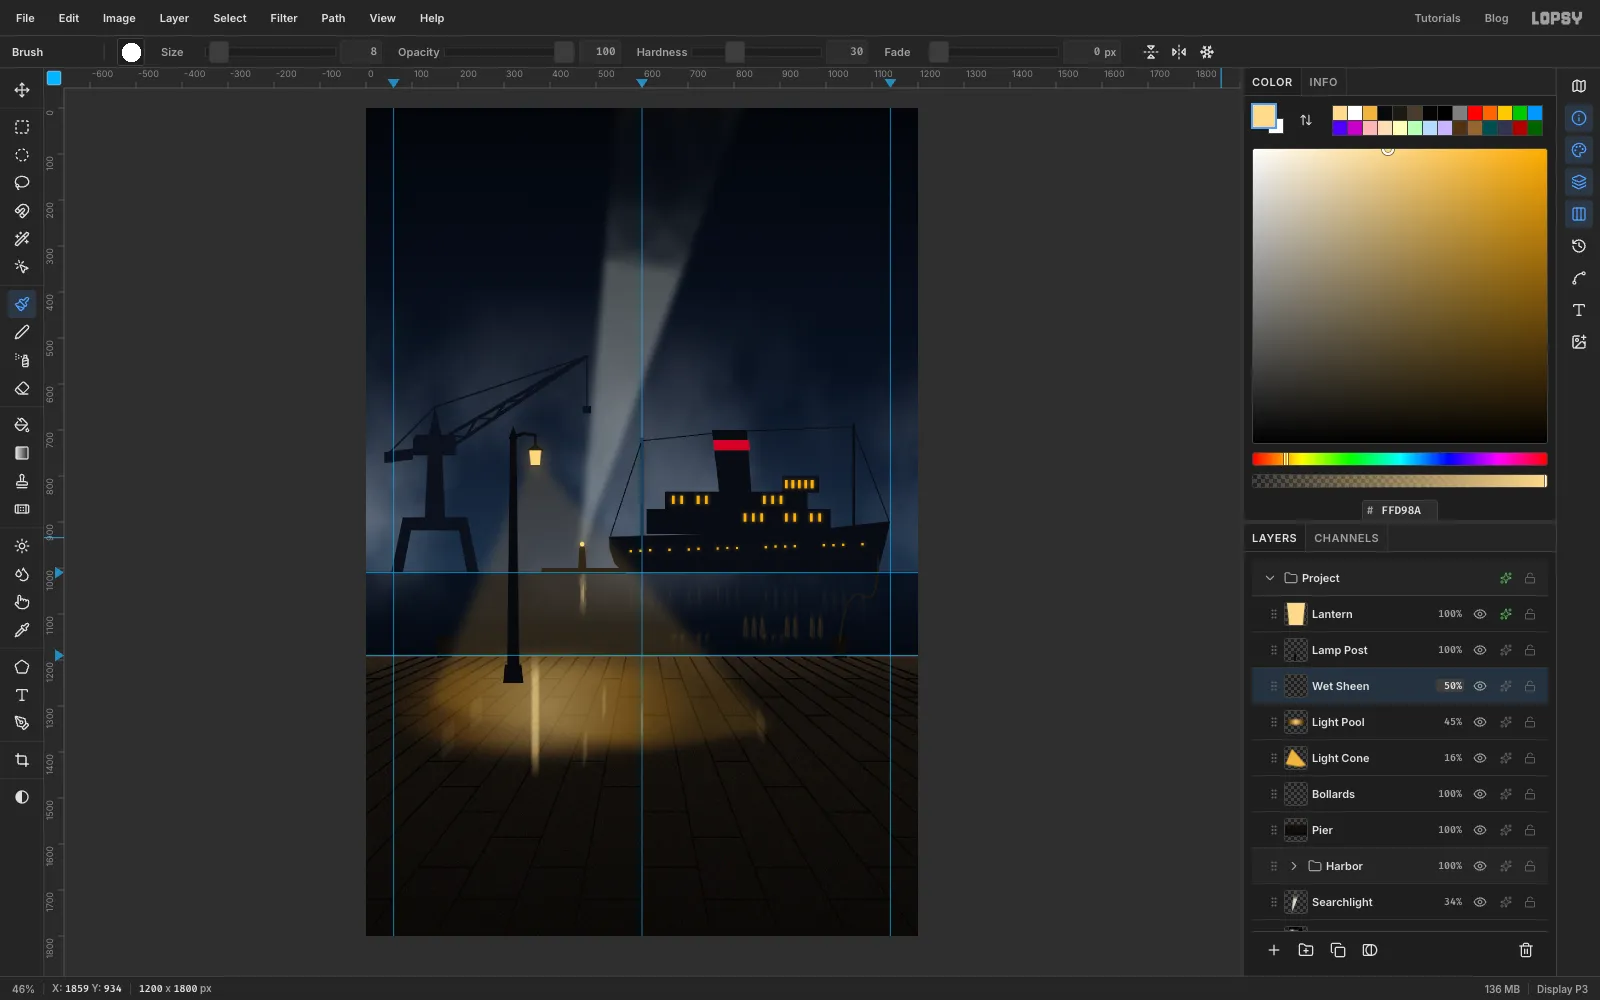
Select Bollards and add three layers above it.
- Light Cone: lasso a wide wedge from the lantern down to the deck, about 750 px across where it lands. Fill it with , blur it with Gaussian Blur 34, set it to Screen and 16%. It's barely there, like light in rain.
- Light Pool: click the Elliptical Marquee and make an ellipse about 700 × 200 px centred under the lamp. Choose Select → Feather… at 40. Fill it with a radial gradient, → (55%) → black, dragged from the centre to the right edge of the ellipse. Deselect, then set Screen at 45%.
- Wet Sheen: with a soft Brush (Size 24, Hardness 30) in , Shift-click one vertical stroke straight down the deck under the lantern. At Size 8, add a few short glints along the planks. Run Motion Blur at Angle 90, Distance 60, and set the layer to Screen, 50%. Wet boards reflect light as streaks, and that's what makes them read as wet.
-
Paste in the photo and lasso the man
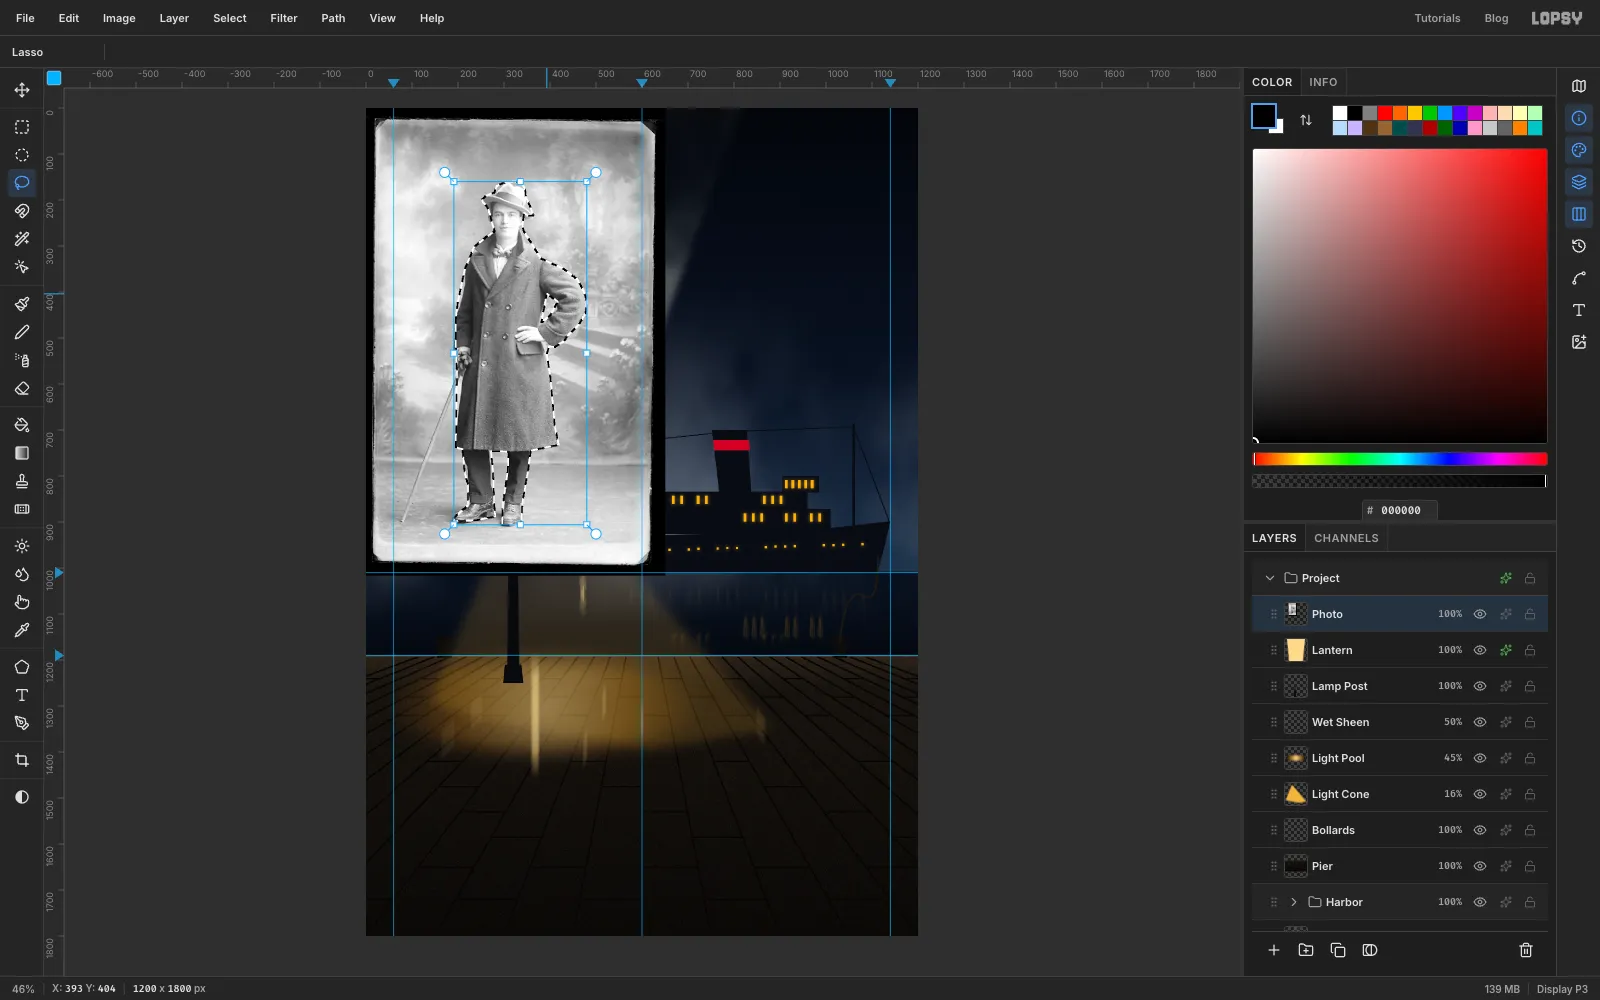
Open your reference photo in the browser, right-click it and choose Copy Image. Back in Lopsy, select Lantern and press Cmd+V. Name the new layer Photo. Its size doesn't matter yet; you'll scale the man down later.
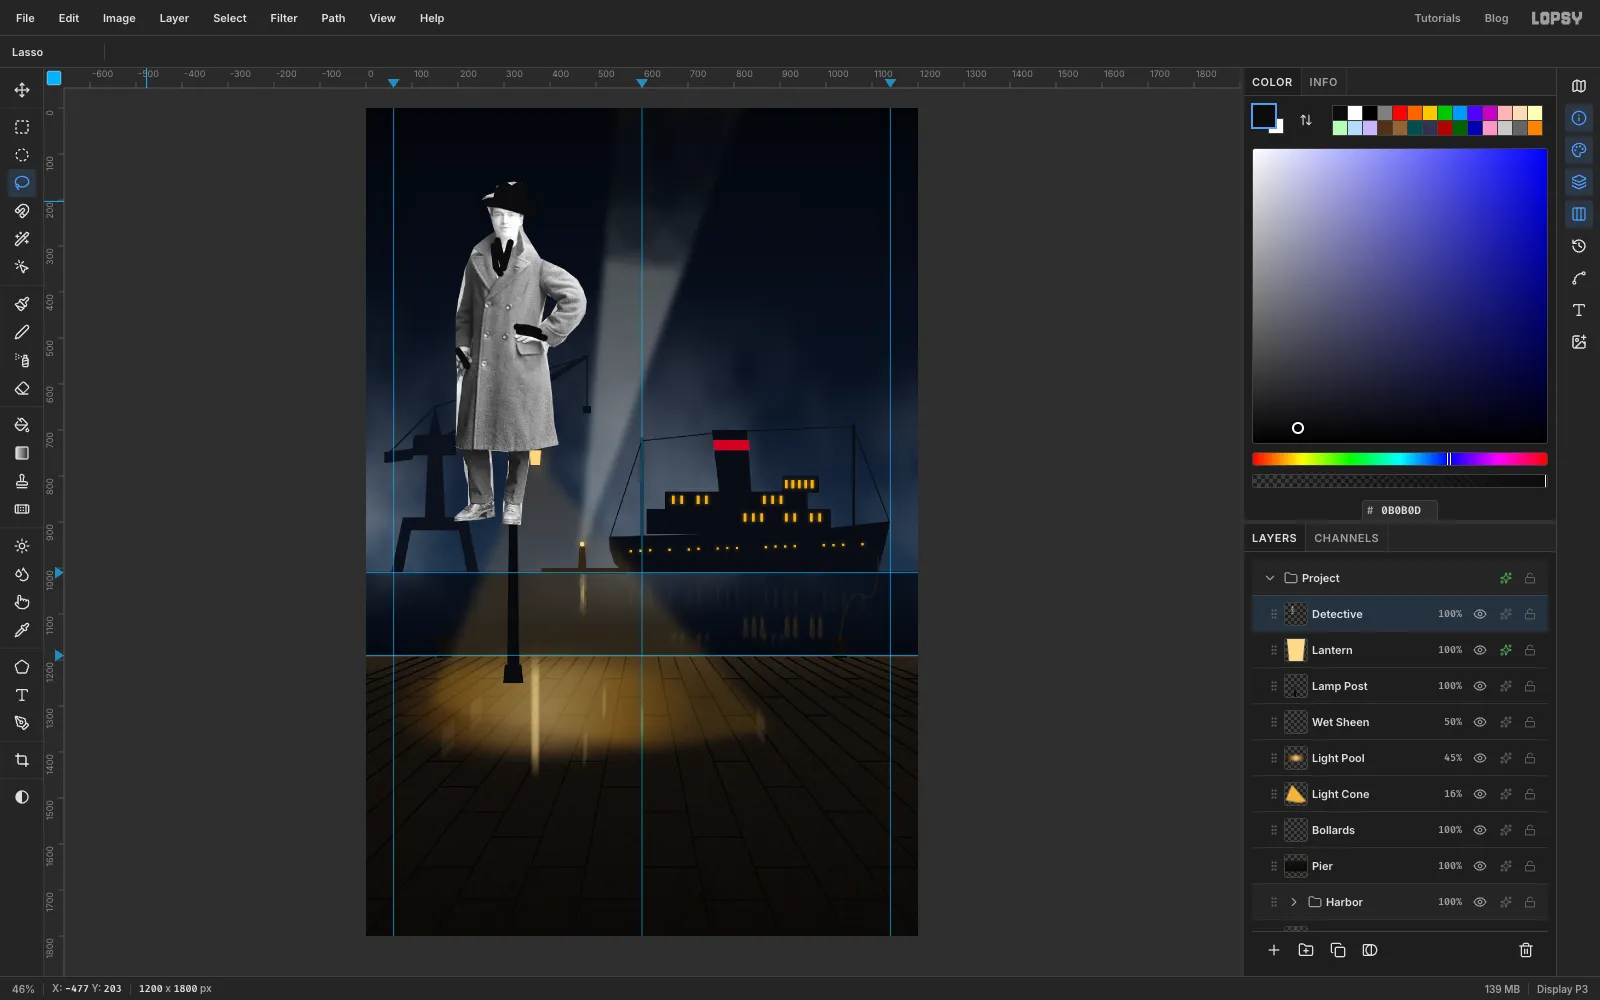
Pick the Lasso and trace the man slowly: up the hat, round the brim, down the collar, the akimbo arm and the coat hem, between the legs and round both shoes. Run straight down the coat's edge past his gloved hand, so the walking stick and the glove's knuckles are left out. Where his arm makes a loop on his hip, hold Alt and lasso the gap to subtract it from the selection.
Choose Edit → Copy, then Edit → Paste. The man comes in on a new layer in exactly the same place. Name it Detective, deselect, then select Photo and click Delete Layer.
-
Paint out the highlights and draw a fedora
A silhouette with a white shirt front looks like a cut-out, not a shadow. Select Detective, pick the Brush (Size 16, Hardness 80) in , and paint over the shirt front and bow tie, the hand on his hip and what's left of the glove at his side.
The photo's hat is soft and light. Lasso a cleaner fedora over it: a brim that slopes down slightly to his left, wider than the old one, and a crown with a pinch in the top. Fill it with the same near-black. In silhouette, the hat is what tells the viewer "noir".
-
Push him into silhouette
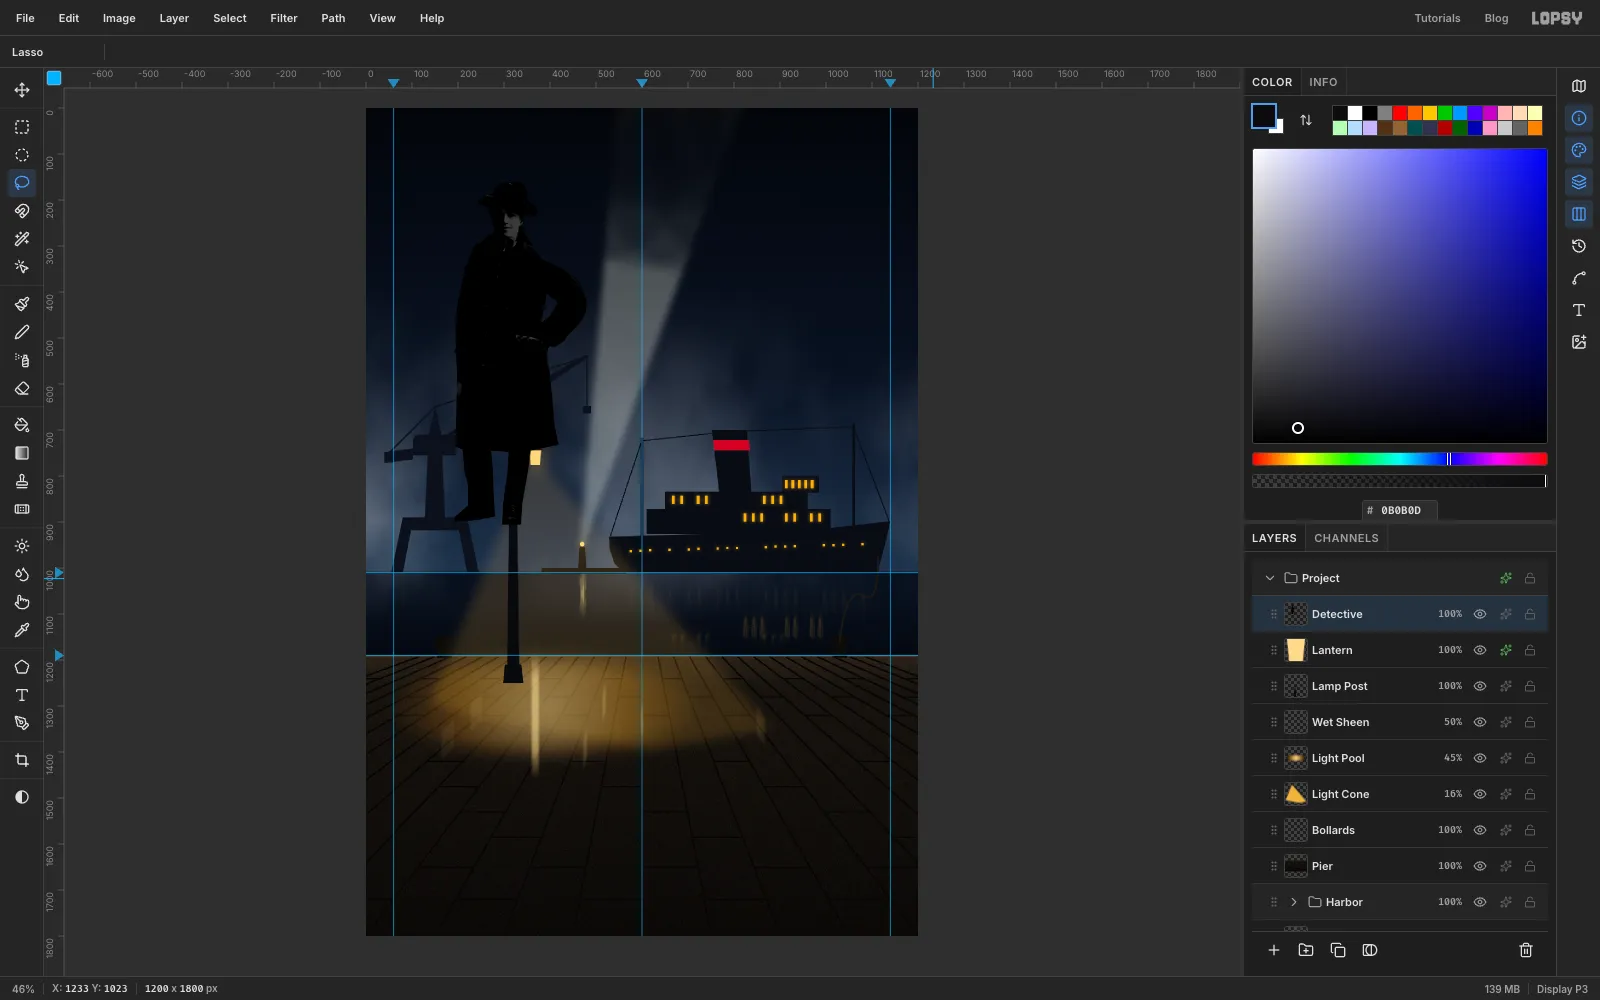
Run Filter → Brightness/Contrast… twice on Detective: first with Brightness −62 and Contrast 45, then with Brightness −40 and Contrast 25. Two moderate passes keep a trace of the coat's texture. One huge pass crushes everything flat.
-
Scale him to fit the scene
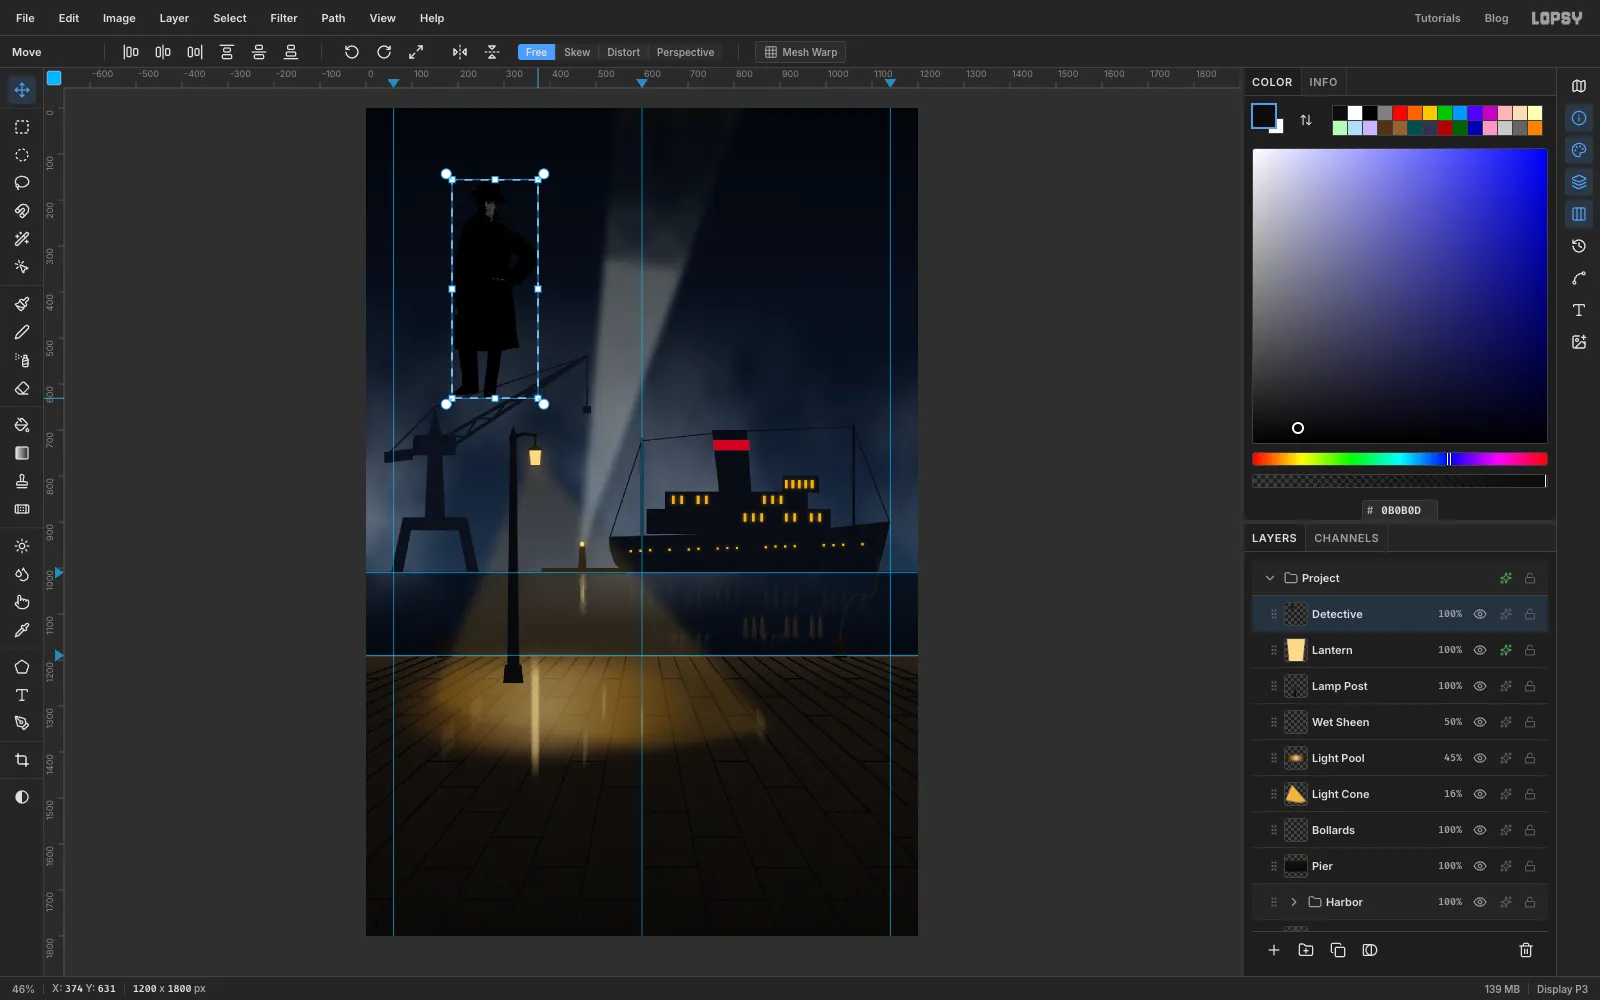
The man should be about 470 px tall, a little shorter than the lamp. Marquee around him with a few pixels to spare and switch to the Move tool. Hold Cmd and drag the bottom-right handle up and to the left until he's about 470 px tall. Cmd keeps his proportions. Press Enter, then Cmd+D.
Leave him where he is for now. He gets placed together with his rim light and shadow in a moment.
-
Add a rim of lamp light
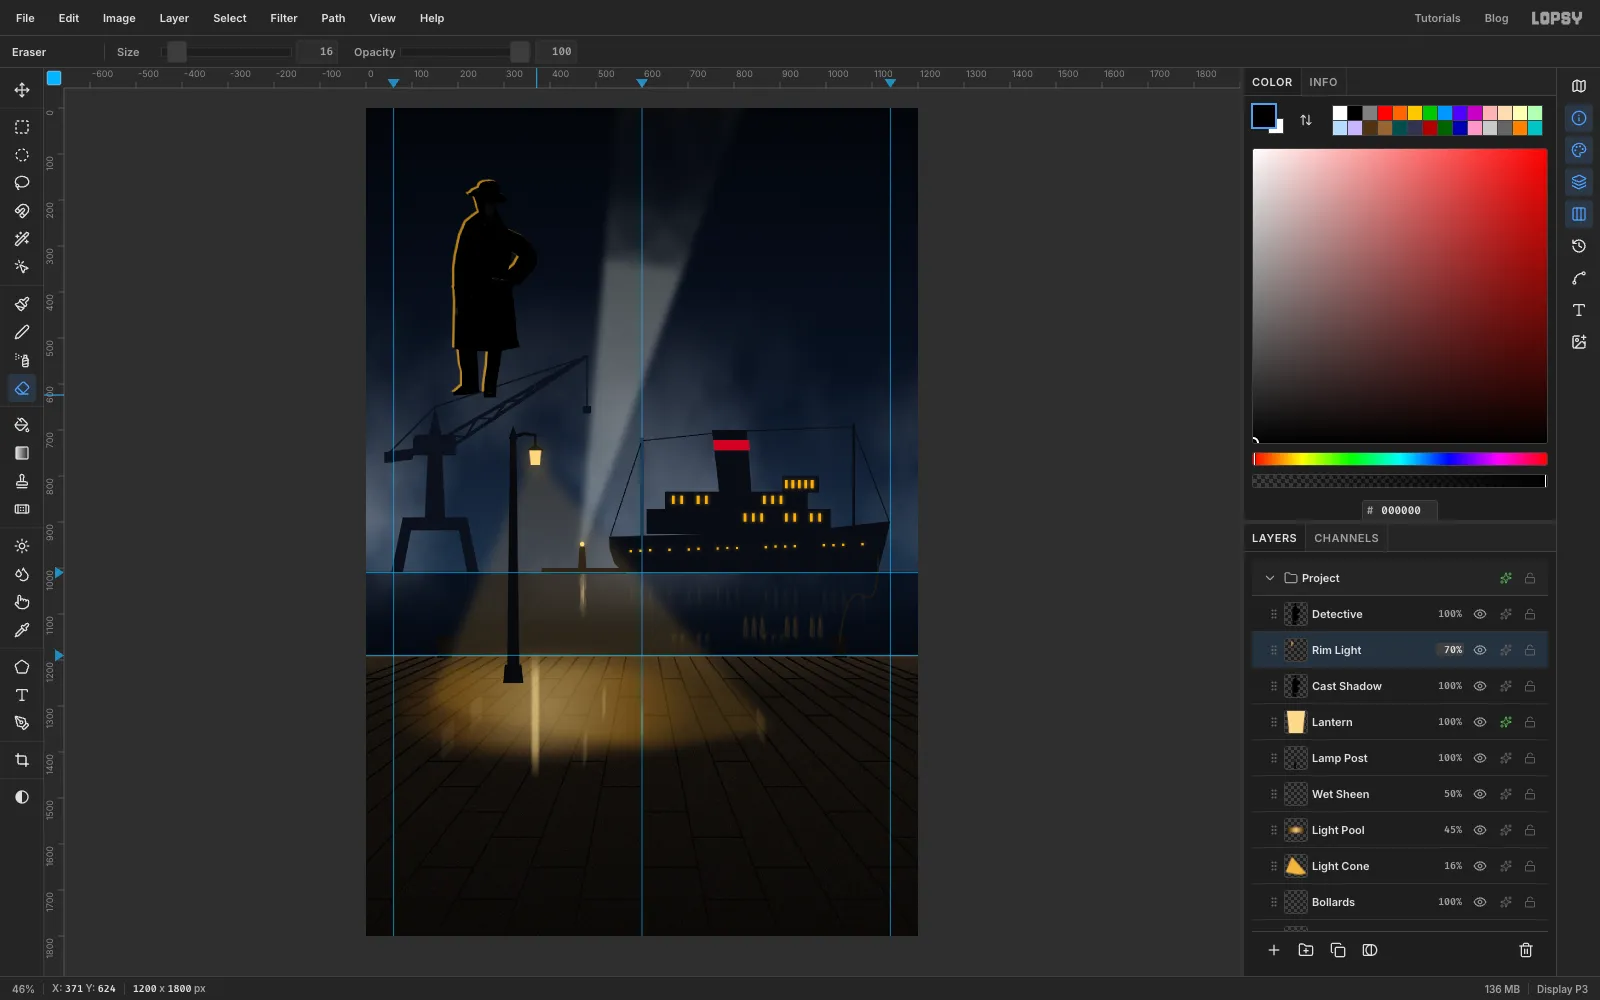
Rename Detective to Cast Shadow. Click Duplicate Layer and name the copy Rim Light. Duplicate again and name that copy Detective. You now have three identical men stacked up.
On the top Detective, pick Dodge / Burn, set the mode to Burn, Exposure 45, Size 70, and stroke down the right side of the coat, the side away from the lamp. At Size 44, Exposure 70, stroke twice across his face under the brim, so no features show.
Select Rim Light. Add a Color Overlay in and click Rasterize Layer Style so it becomes real amber pixels. Run Gaussian Blur at 2, then with the Move tool press Left five times and Up three times. Lamp light can't reach the soles of his shoes, so take the Eraser at Size 16, click at the toe of one shoe and Shift-click at the heel of the other, along the bottom of the shoes. Set the layer to 70%. A thin warm edge now shows only on the side facing the lamp, not all the way around him.
-
Lay his shadow across the deck
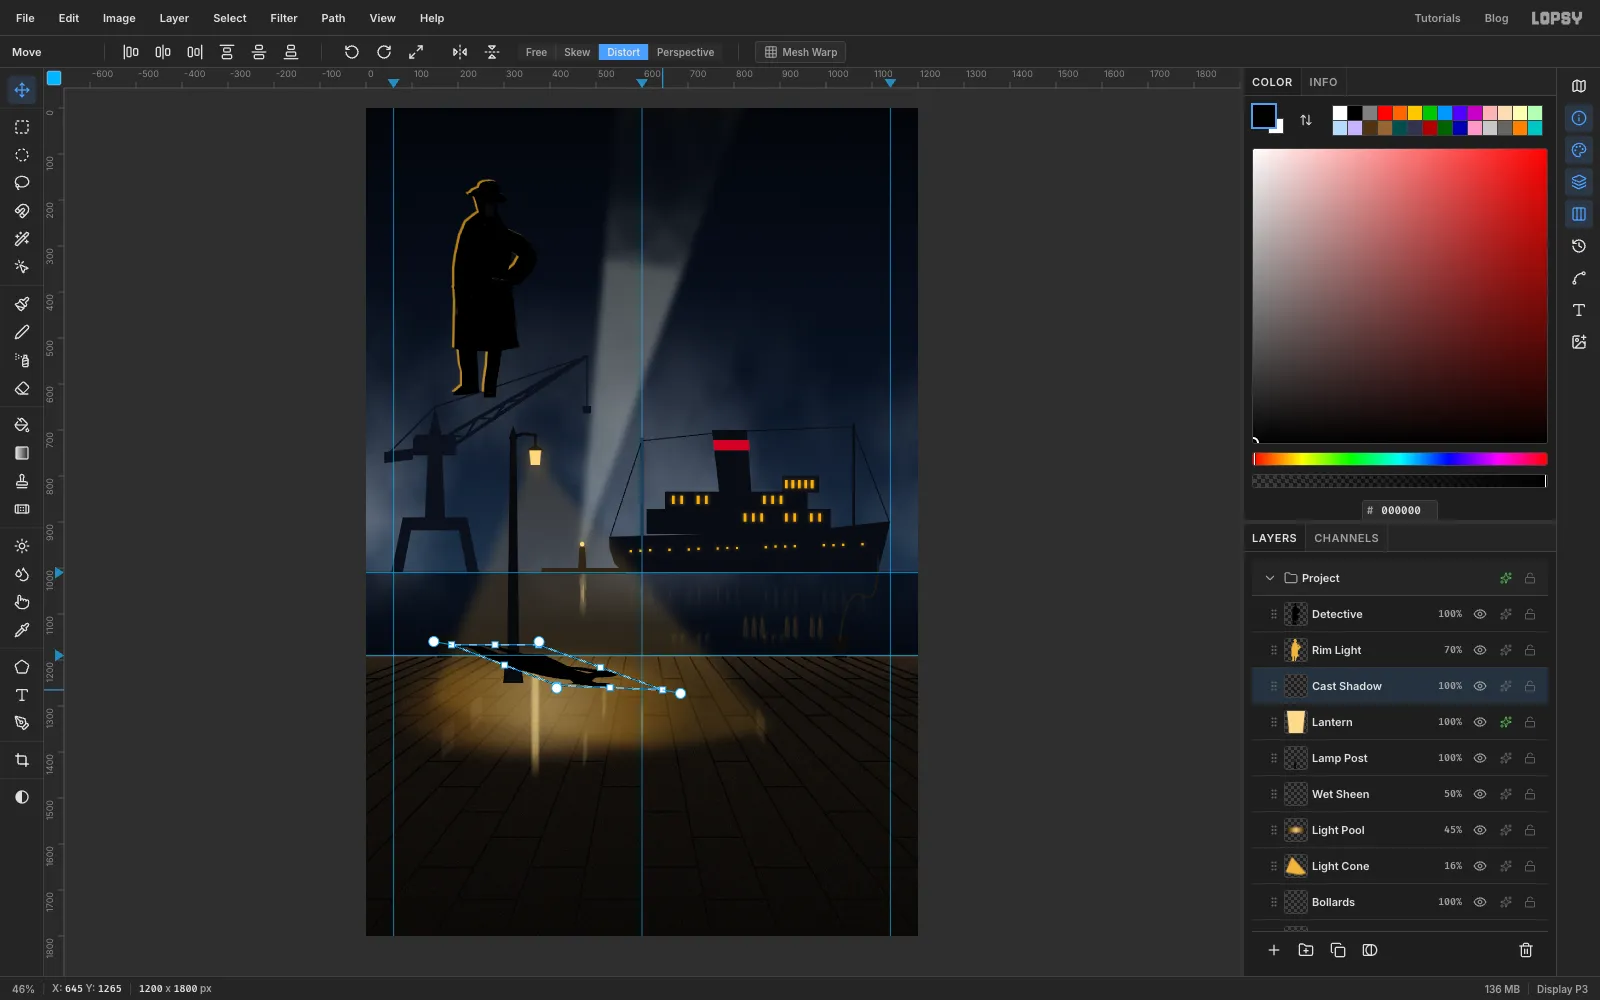
Select Cast Shadow. Add a black Color Overlay, click Rasterize Layer Style, and choose Image → Flip Vertical. His feet are now at the top of the shape and his head at the bottom. As with the reflections, the flip also drops it into the lower half of the canvas.
Marquee around the flipped shape, switch to the Move tool and click Distort in the options bar. Drag the bottom-left corner up and about 230 px right, and the bottom-right corner up and about 270 px right. Leave the shadow only about 80 px tall. Light from a low lamp on the left throws a long, flat shadow away to the right. Press Enter and deselect.
With the Move tool, drag the shadow so its foot end tucks under his shoes. Blur it with Gaussian Blur 4, set it to Multiply at 70%.
-
Place the man in the light
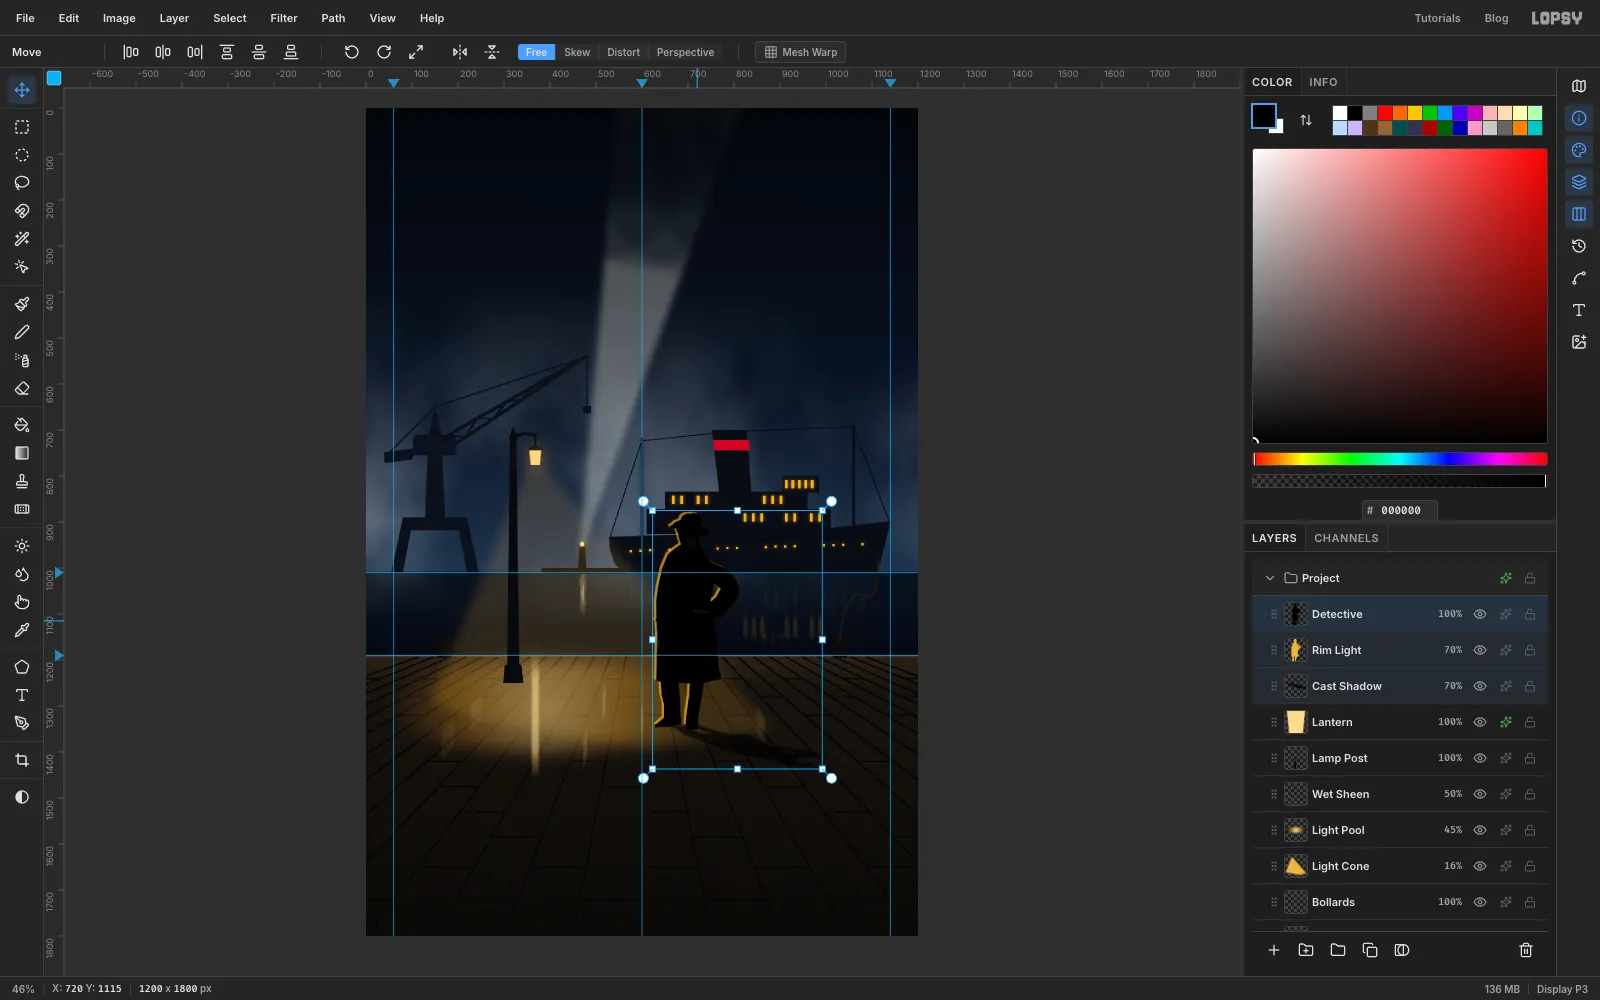
Click Detective in the Layers panel, then Cmd-click Rim Light and Cast Shadow to add them to the selection. With the Move tool, drag all three together until his feet stand on the boards about a third of the way down the deck, just right of the lamp's pool. The arrow keys nudge all three as well.
Select Cast Shadow and take the Eraser (Size 140, Opacity 45) over its far tip, so the shadow softens as it leaves the light.
-
Separate his hat from the ship
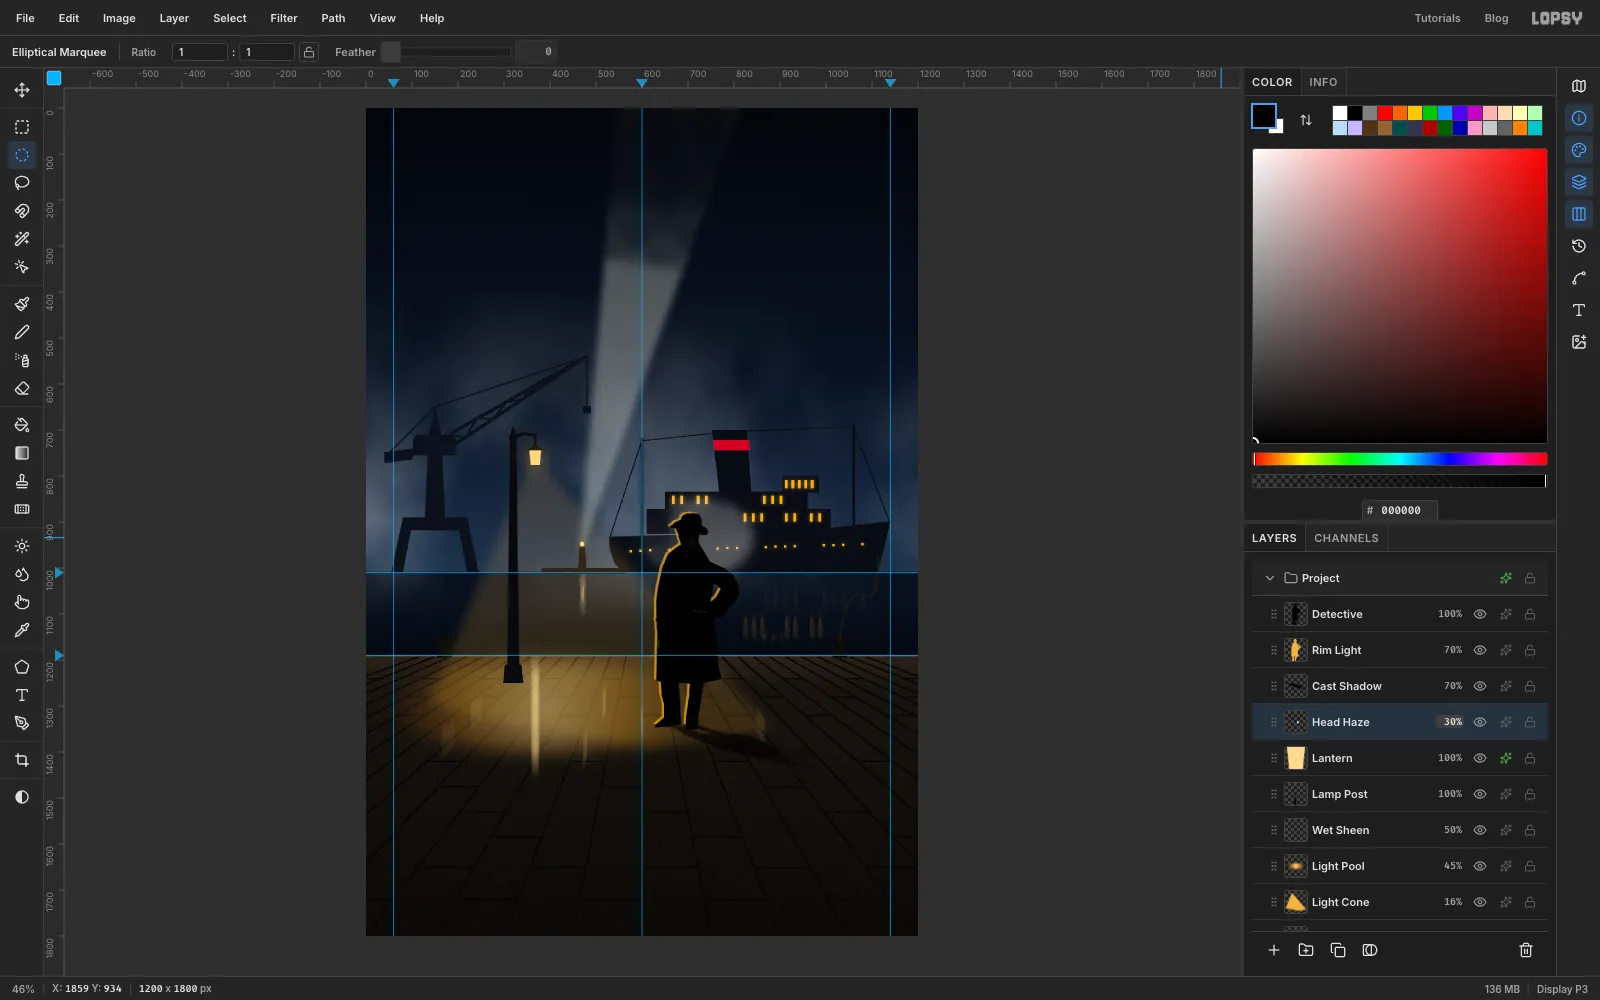
His hat now sits on the dark hull, and black on black disappears. Select Lantern and add a layer called Head Haze above it. Make an ellipse around his hat and shoulders with the Elliptical Marquee, choose Select → Feather… at 30, and run Filter → Clouds… at Scale 6. Deselect, and set the layer to Screen at 30%. A breath of fog behind his head makes the fedora's outline readable again.
-
Make it rain
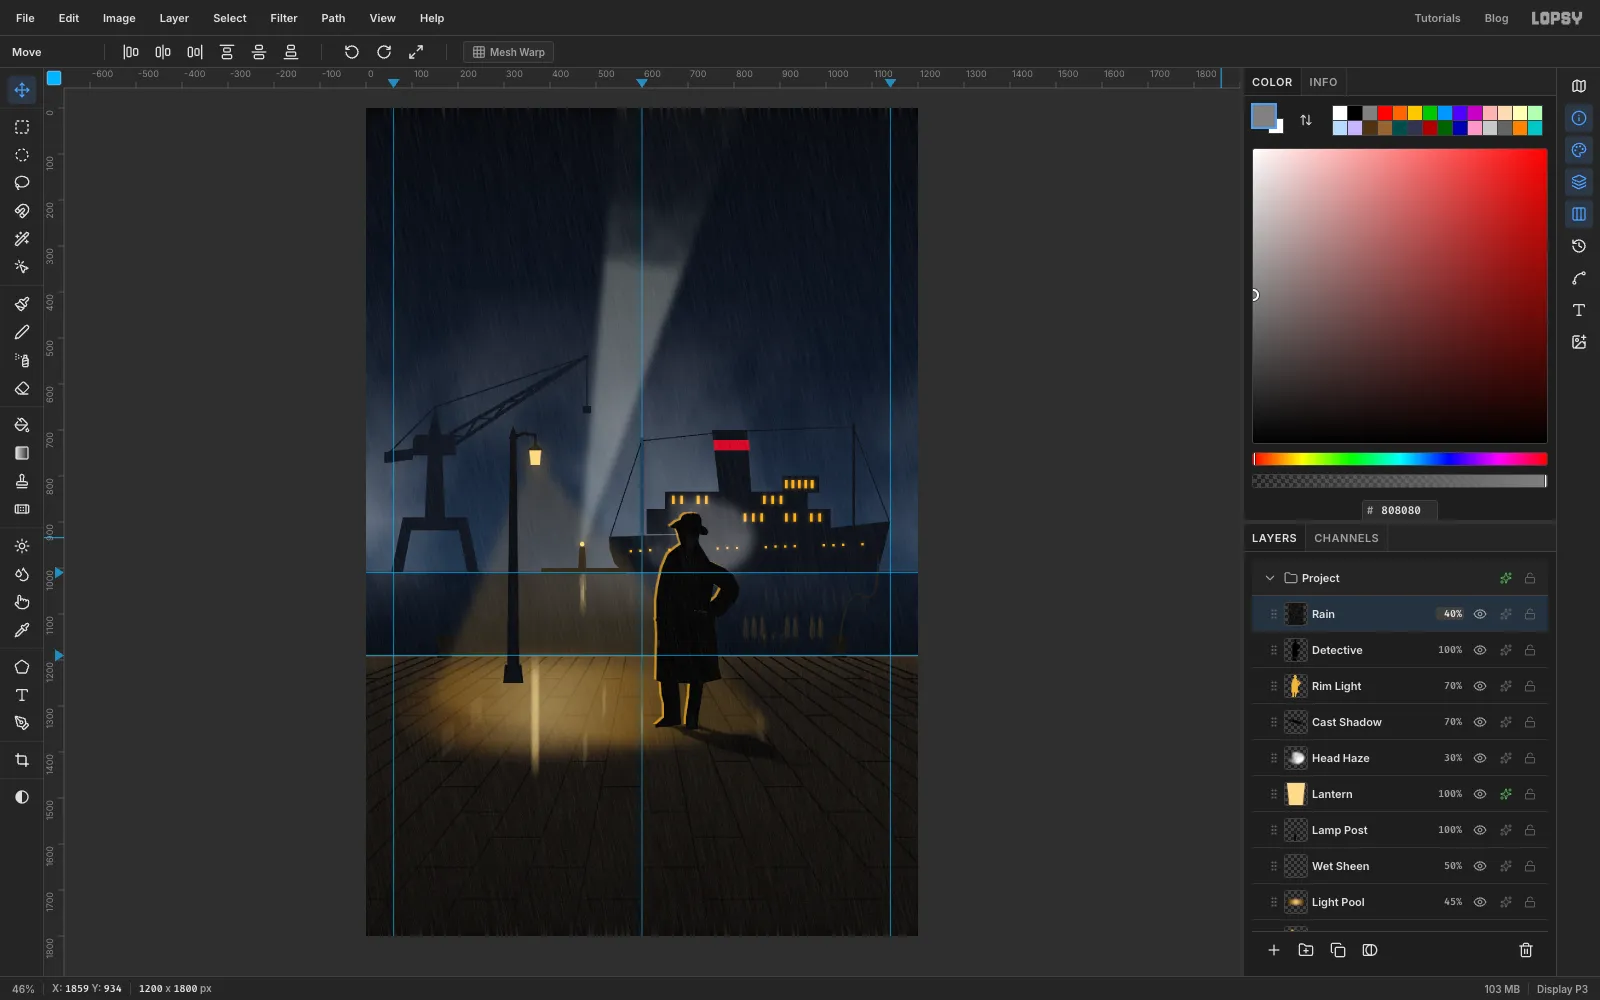
Select Detective and add a layer called Rain. Choose Select → All, fill it with and deselect. Run Add Noise at Amount 100, Mono, then Filter → Threshold… at 170. Only the brightest specks survive as white dots on black.
Run Motion Blur with Angle 78 and Distance 55 to pull each speck into a streak. Set the layer to Screen at 40%. Screen drops the black and keeps the rain.
-
Add grain and a vignette
Add a Grain layer: select all, fill , Add Noise at 40, Mono, and set it to Overlay at 40%.
Add a Vignette layer. Select all and fill it with a radial gradient: white at 0%, at 55% and black at 100%. Drag from just above the man's head down to the bottom edge. Set it to Multiply at 75%. The corners and the bottom go dark, which is where the title sits.
-
Set the title
Select Vignette, then pick the Text tool. Choose Anton, set the foreground to , and set Letter spacing in the Text panel to 4.
Click in an empty area and type
YOKOHAMA. Press Shift+Enter to commit. Adjust Size until the word spans 1000 px; about 238 px does it. Name the layer Title. With the Move tool and arrow keys, centre it on the middle guide with its top about 40–50 px below his shoes.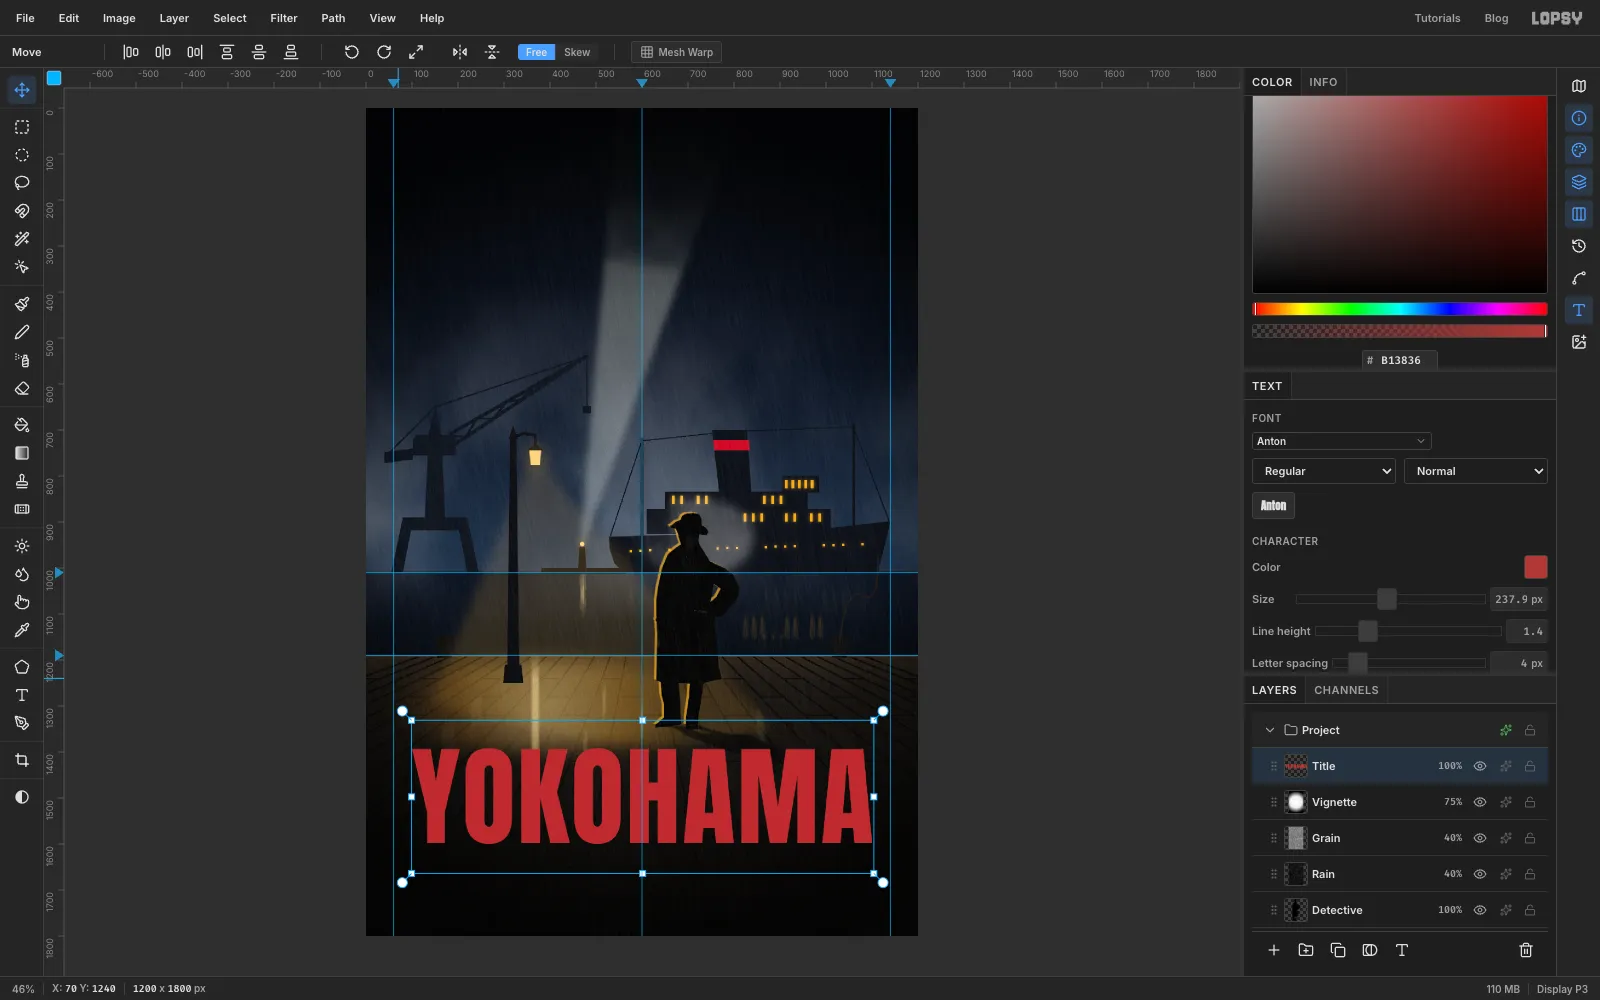
-
Set the rest of the type
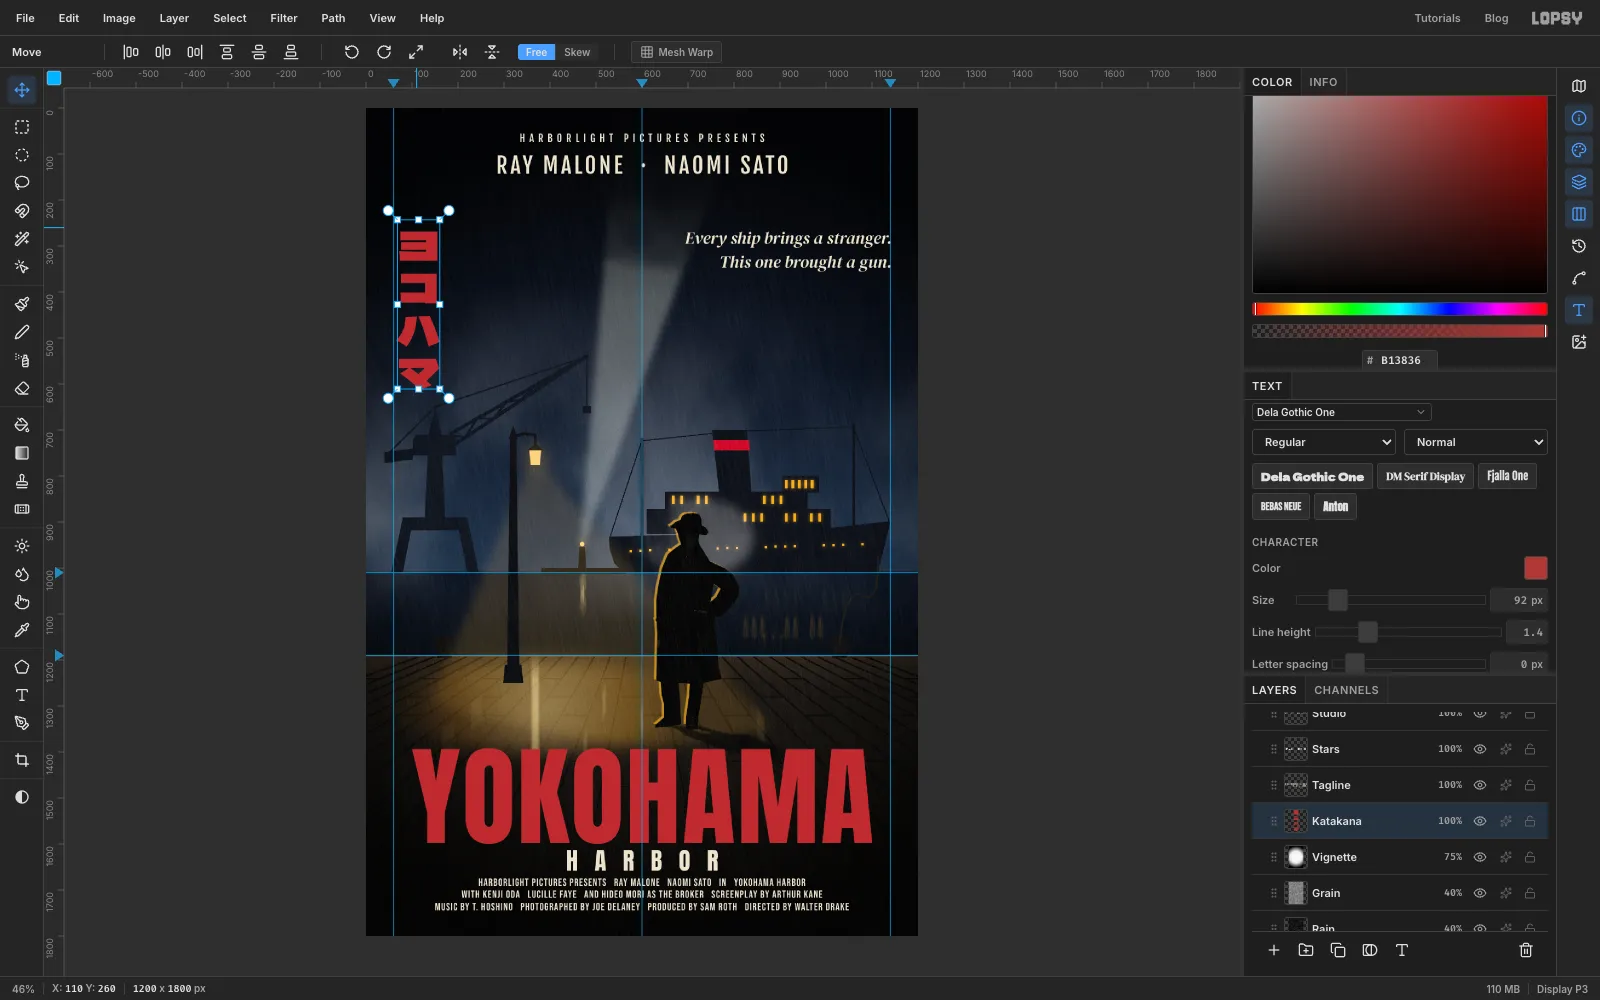
Before each new piece of type, click Vignette first. Otherwise the new settings restyle the last text layer. All of it is except the katakana. Create each one in empty space, then nudge it into place with the Move tool's arrow keys:
- Harbor Word:
HARBORin Anton, 52 px, letter spacing 36, , centred about 14 px under the title. - Billing: three lines of cast and crew names in Bebas Neue with Line height 1.15 and letter spacing 1.5, centred, about 18 px under HARBOR. Use Enter between lines, then change the font size until the block is as wide as the rules you'll draw later, 900 px. A size of about 23 px does it. Mine reads
HARBORLIGHT PICTURES PRESENTS RAY MALONE NAOMI SATO IN YOKOHAMA HARBOR, thenWITH KENJI ODA LUCILLE FAYE AND HIDEO MORI AS THE BROKER SCREENPLAY BY ARTHUR KANE, thenMUSIC BY T. HOSHINO PHOTOGRAPHED BY JOE DELANEY PRODUCED BY SAM ROTH DIRECTED BY WALTER DRAKE. - Studio:
HARBORLIGHT PICTURES PRESENTSin Fjalla One, 22 px, letter spacing 9, centred near the top. - Stars:
RAY MALONE · NAOMI SATOin Fjalla One, 48 px, letter spacing 6, centred under it. - Tagline:
Every ship brings a stranger.and, on a second line,This one brought a gun.in DM Serif Display, Italic, 37 px, Align Right, right edge on the right margin guide. - Katakana: switch on Toggle vertical text, choose Dela Gothic One at 92 px in , and paste
ヨコハマ. Seat it on the left margin with its top level with the tagline's first line. Switch vertical off again afterwards.
The bottom of the billing block should sit about 55 px above the bottom edge, the same as the margin above the studio line. Leave the same breathing room everywhere.
- Harbor Word:
-
Cut venetian-blind slats through the title
Shadow from venetian blinds is the most noir motif there is. Here it falls across the title.
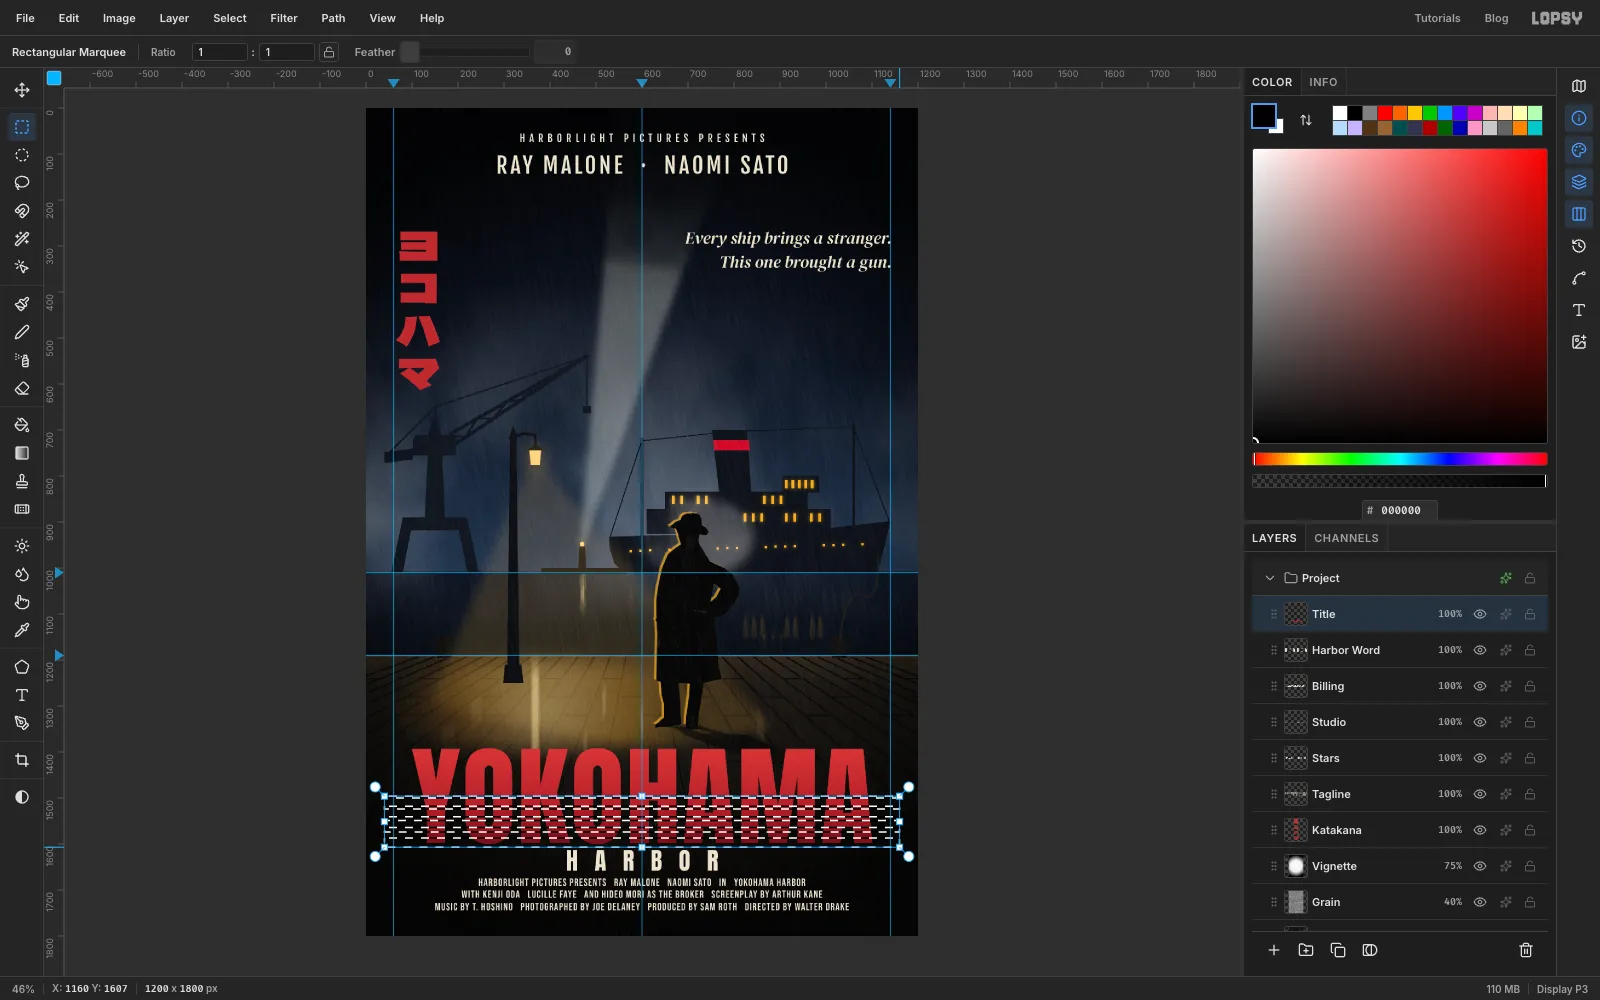
Select Title and click Rasterize Layer. Cmd-click its thumbnail to select the letters, then drag a linear gradient down through them: → (60%) → . Deselect.
Zoom in on the title, click the Rectangular Marquee once and make a 4 px slice across the full width, halfway down the letters. Then hold Shift and drag four more slices below it, each one thicker: 6, 8, 10 and finally a 20 px slice along the bottom of the letters. Press Delete and deselect.
-
Give the title weight and frame HARBOR
On Title, add a Drop Shadow in with Offset X 6, Offset Y 6, Blur 1 and Opacity 75. A hard, unblurred shadow reads as an extruded letter, the way 1950s title lettering was painted.
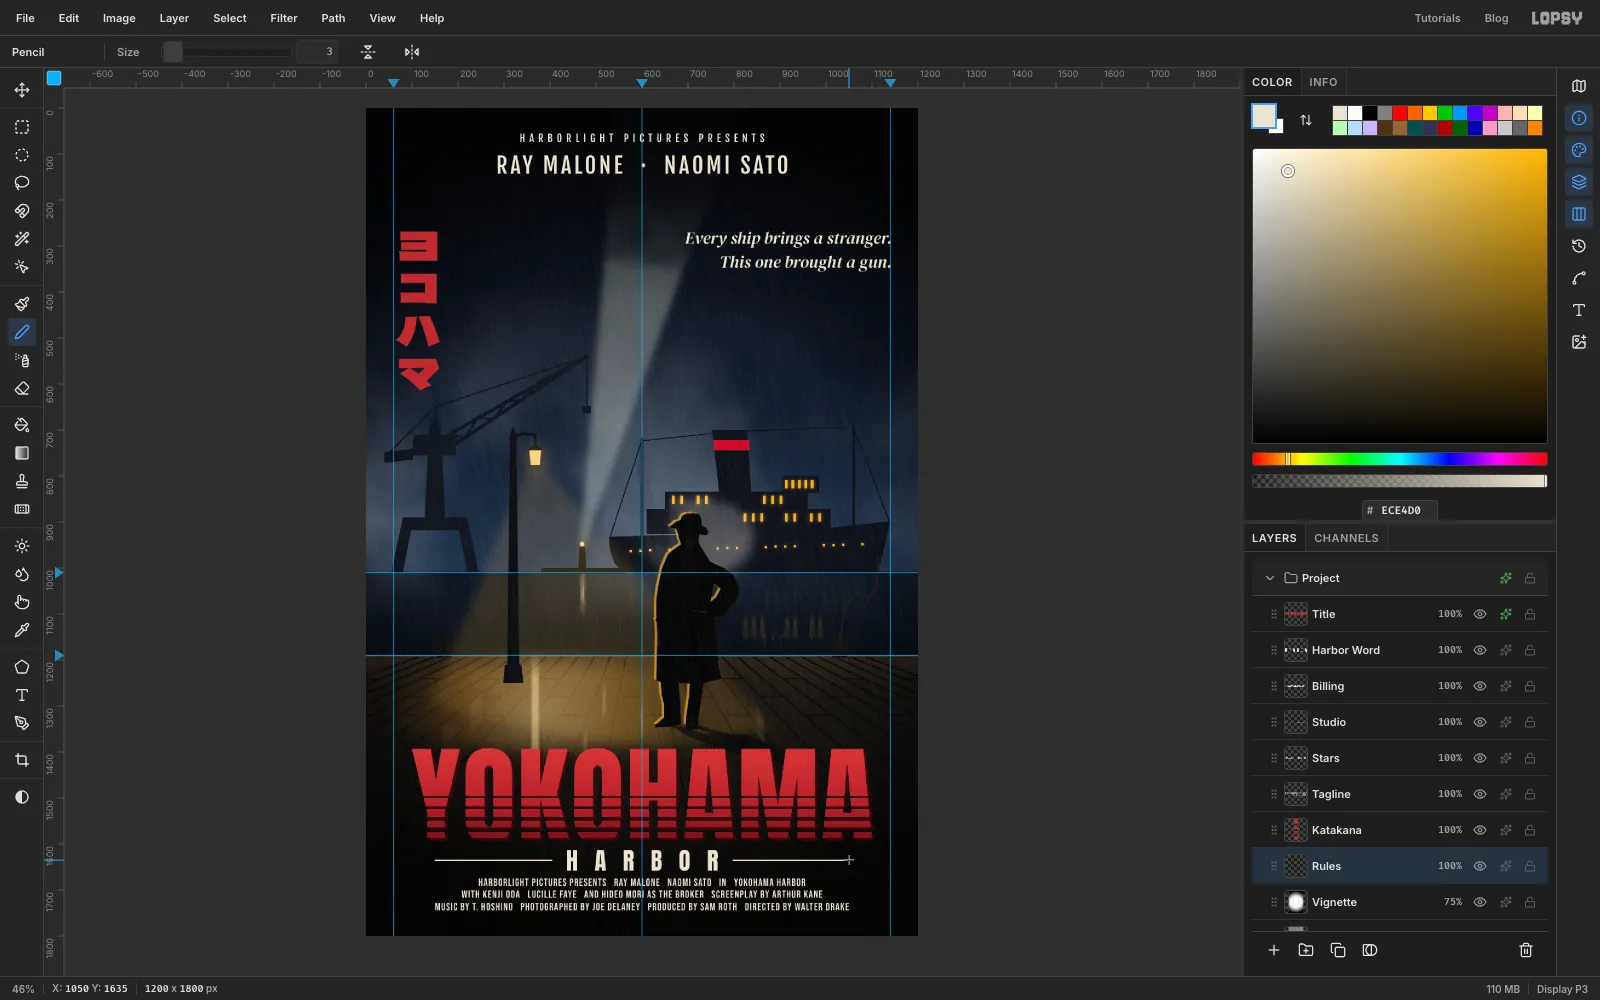
Select Vignette and add a layer called Rules. With the Pencil at Size 3 in , click level with the middle of HARBOR, under the billing block's left edge, and Shift-click just short of the H. Draw a matching rule on the right, from just past the R to the billing block's right edge.
-
Swing a second searchlight
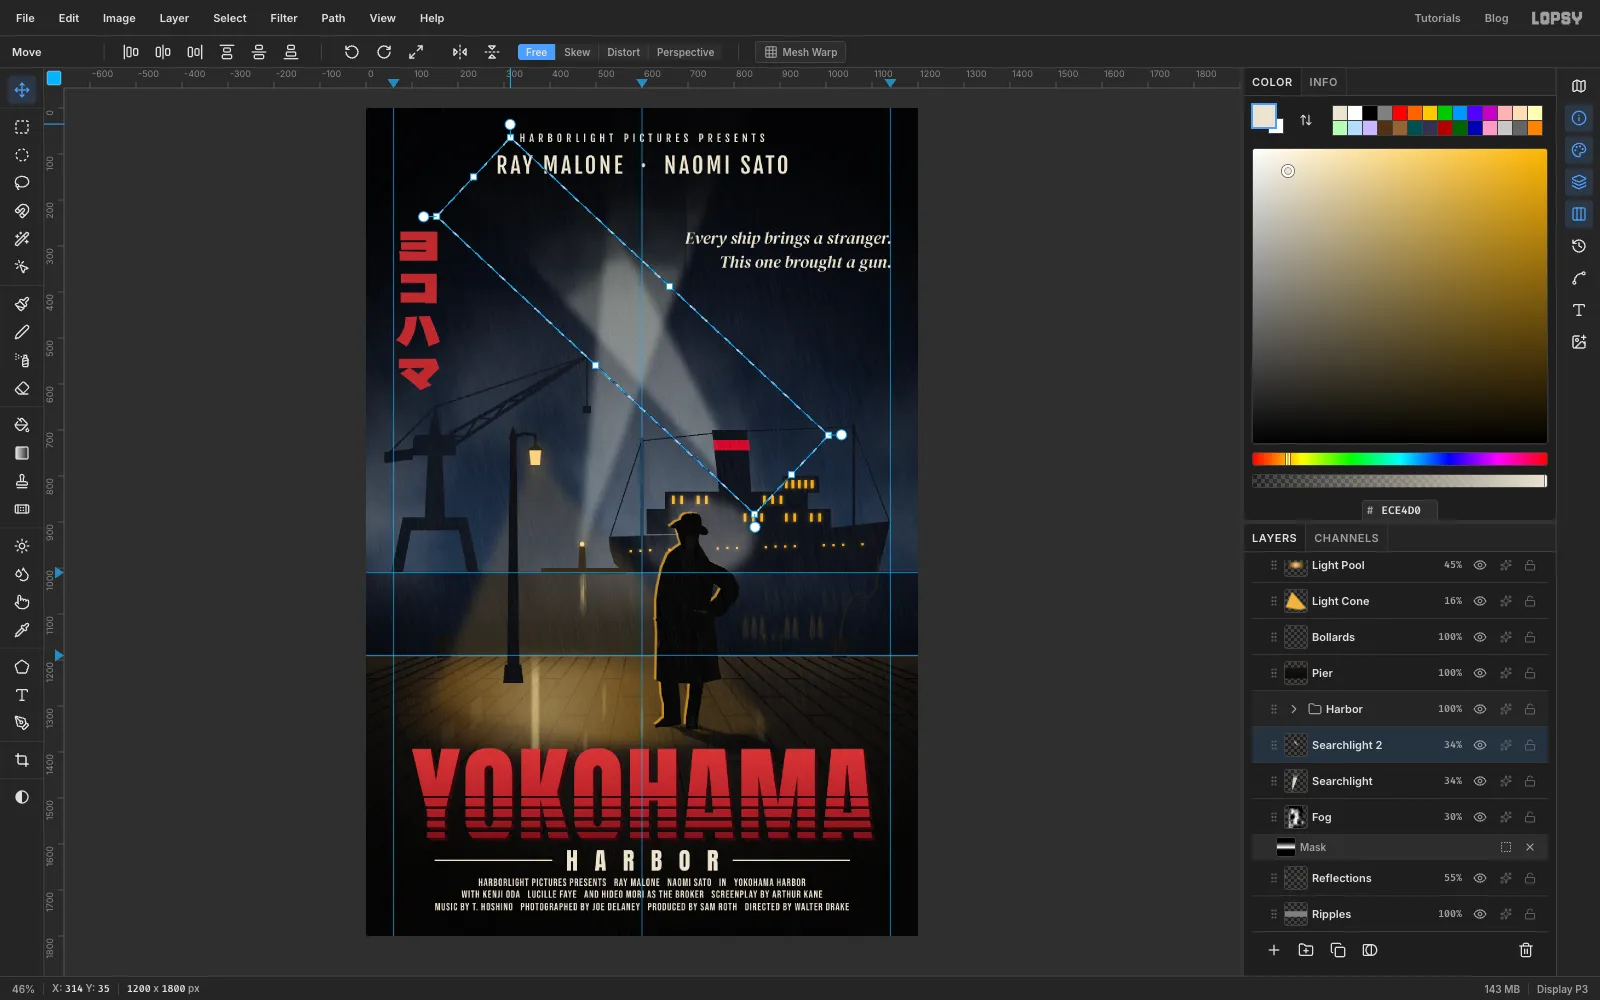
Two searchlights crossing in an X are a harbour-at-night shorthand. Select Searchlight, click Duplicate Layer, and name the copy Searchlight 2.
Marquee around the beam, from the top of the canvas to just below its point. With the Move tool, drag the rotation handle just outside the top-right corner anticlockwise by about 47°, until the beam leans up and to the left. Press Enter and deselect.
Then drag the layer so its point sits behind the liner's bridge, just under the top tier. The two beams now cross high above the man's head, a little above the crane's jib, and frame him.
-
Knock back the funnel band
The funnel's red band is the brightest red in the scene, and it pulls the eye away from the title. Expand Harbor, select Liner, pick the Magic Wand and click the band. Run Filter → Hue/Saturation… with Saturation −30 and Lightness −22, then deselect. Now it echoes the title instead of competing with it.
Save with File → Save Project and export with File → Quick Export PNG.