Make a Haeckel-Style Scientific Illustration Album Cover
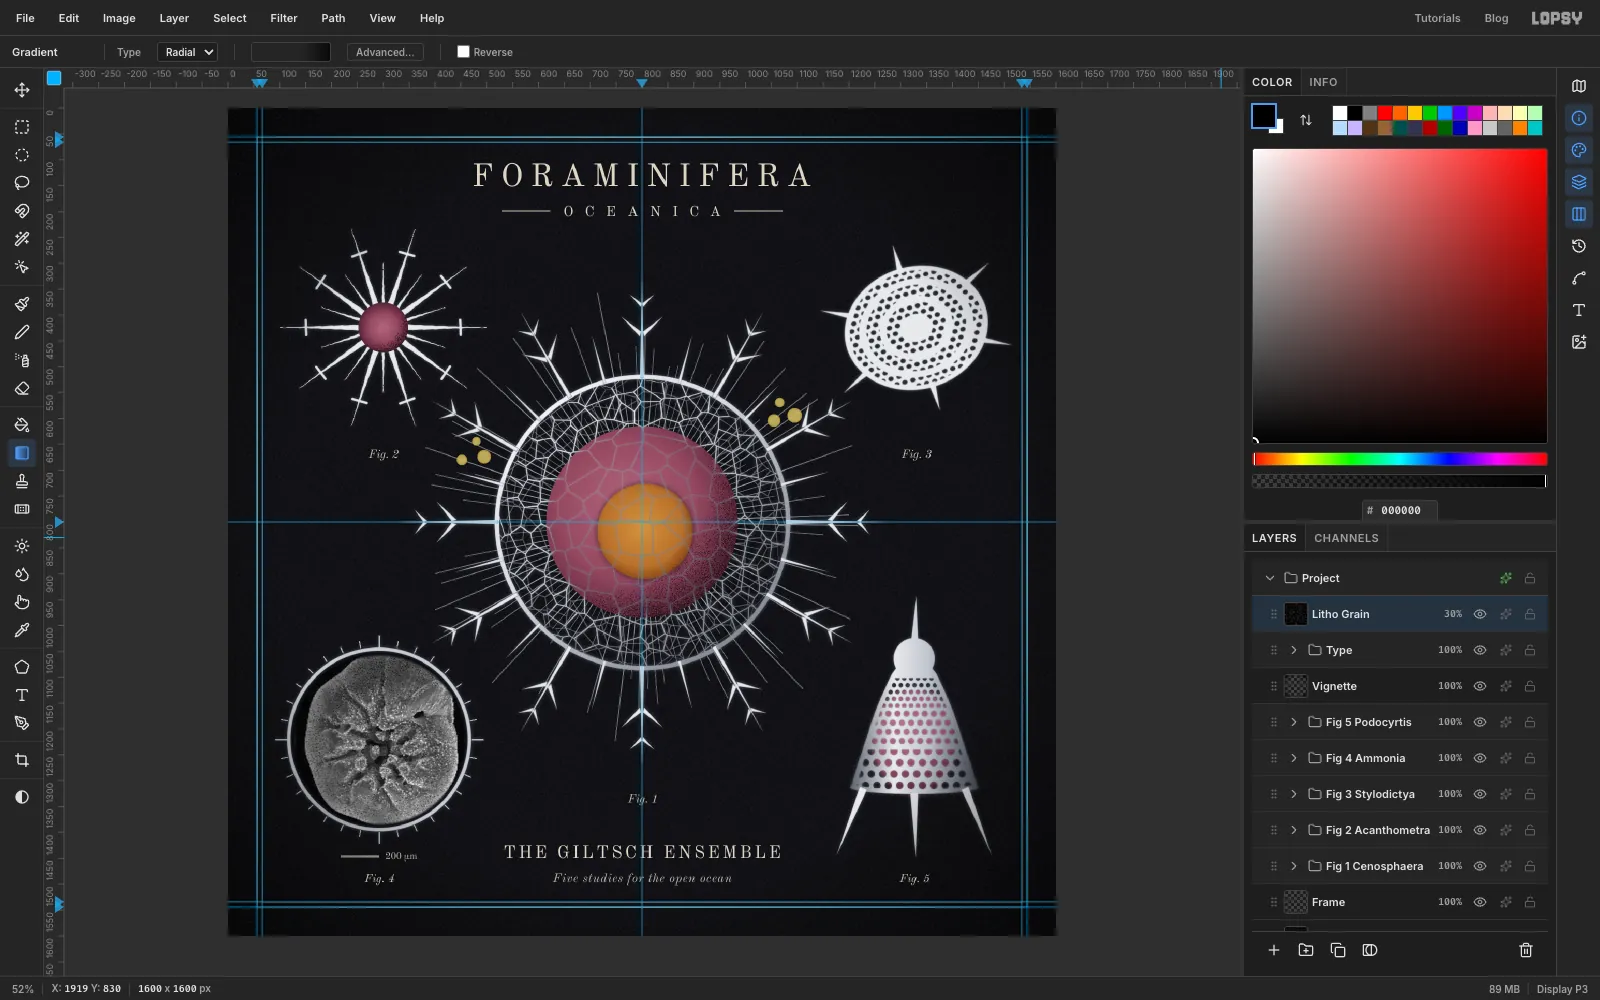
Draw a dark-field radiolarian plate for an album cover in Lopsy with Voronoi, Lens Distortion, Kaleidoscope, Sunburst, pattern pores and an SEM photo.
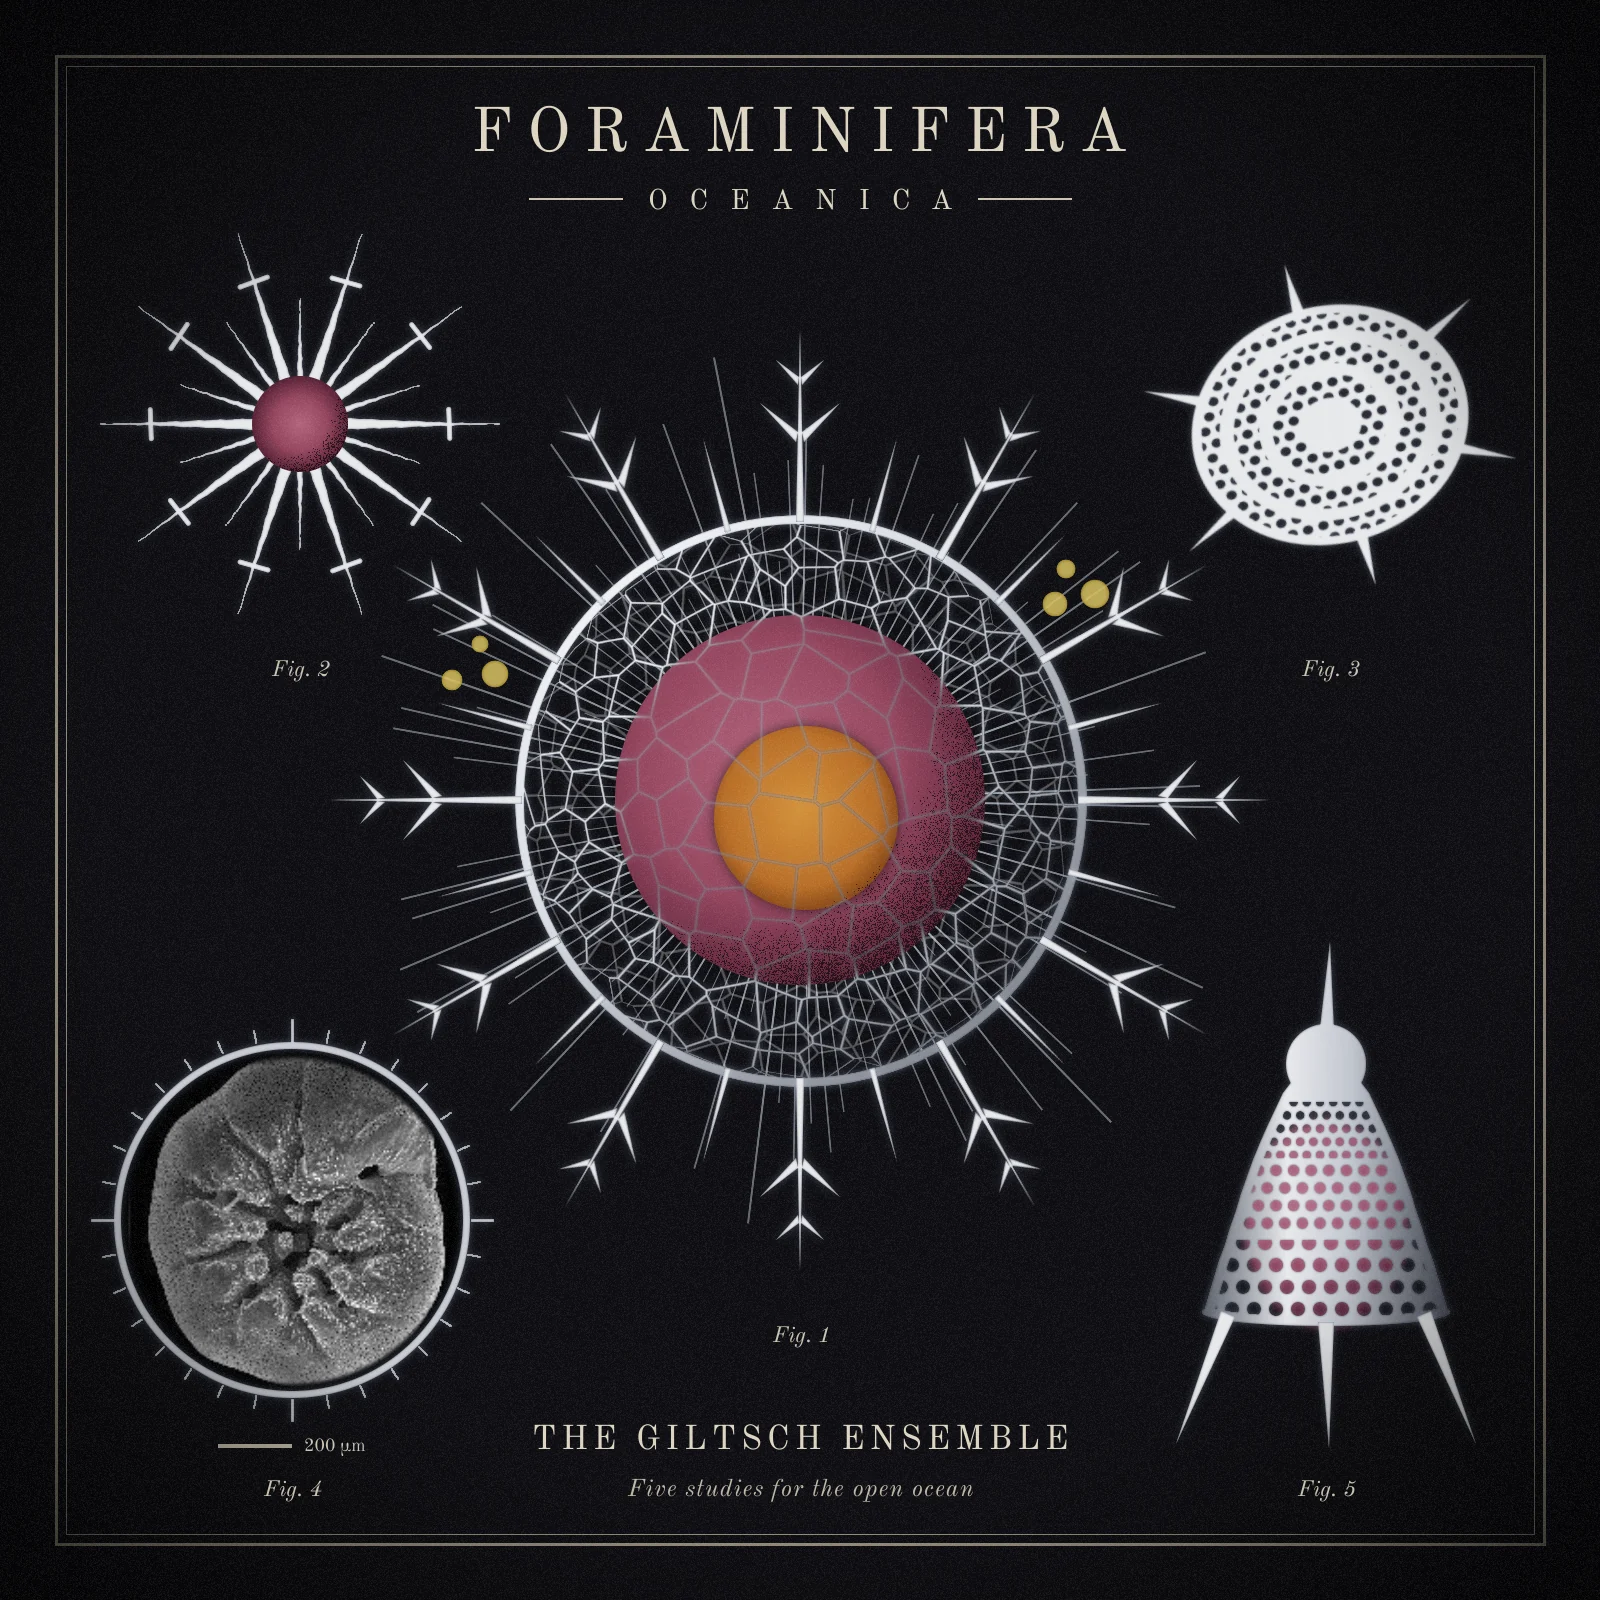
Between 1899 and 1904 the zoologist Ernst Haeckel published Kunstformen der Natur, a hundred plates of creatures most people had never seen. Several of the best-loved ones show radiolarians, microscopic plankton with skeletons of glass, drawn silver-white against a dark ground as if lit from the side under a microscope. Many have a rose-coloured capsule, an orange nucleus and a scatter of yellow cells.
This tutorial borrows that look for a fictional album, Foraminifera Oceanica by The Giltsch Ensemble (Adolf Giltsch was the lithographer who drew Haeckel's plates). The cover is a 1600 × 1600 px plate with five numbered figures. Four are drawn from scratch in Lopsy. The fifth is a real electron micrograph of a foraminifer, set in a microscope-field ring the way a modern paper might print a photo beside a drawing.
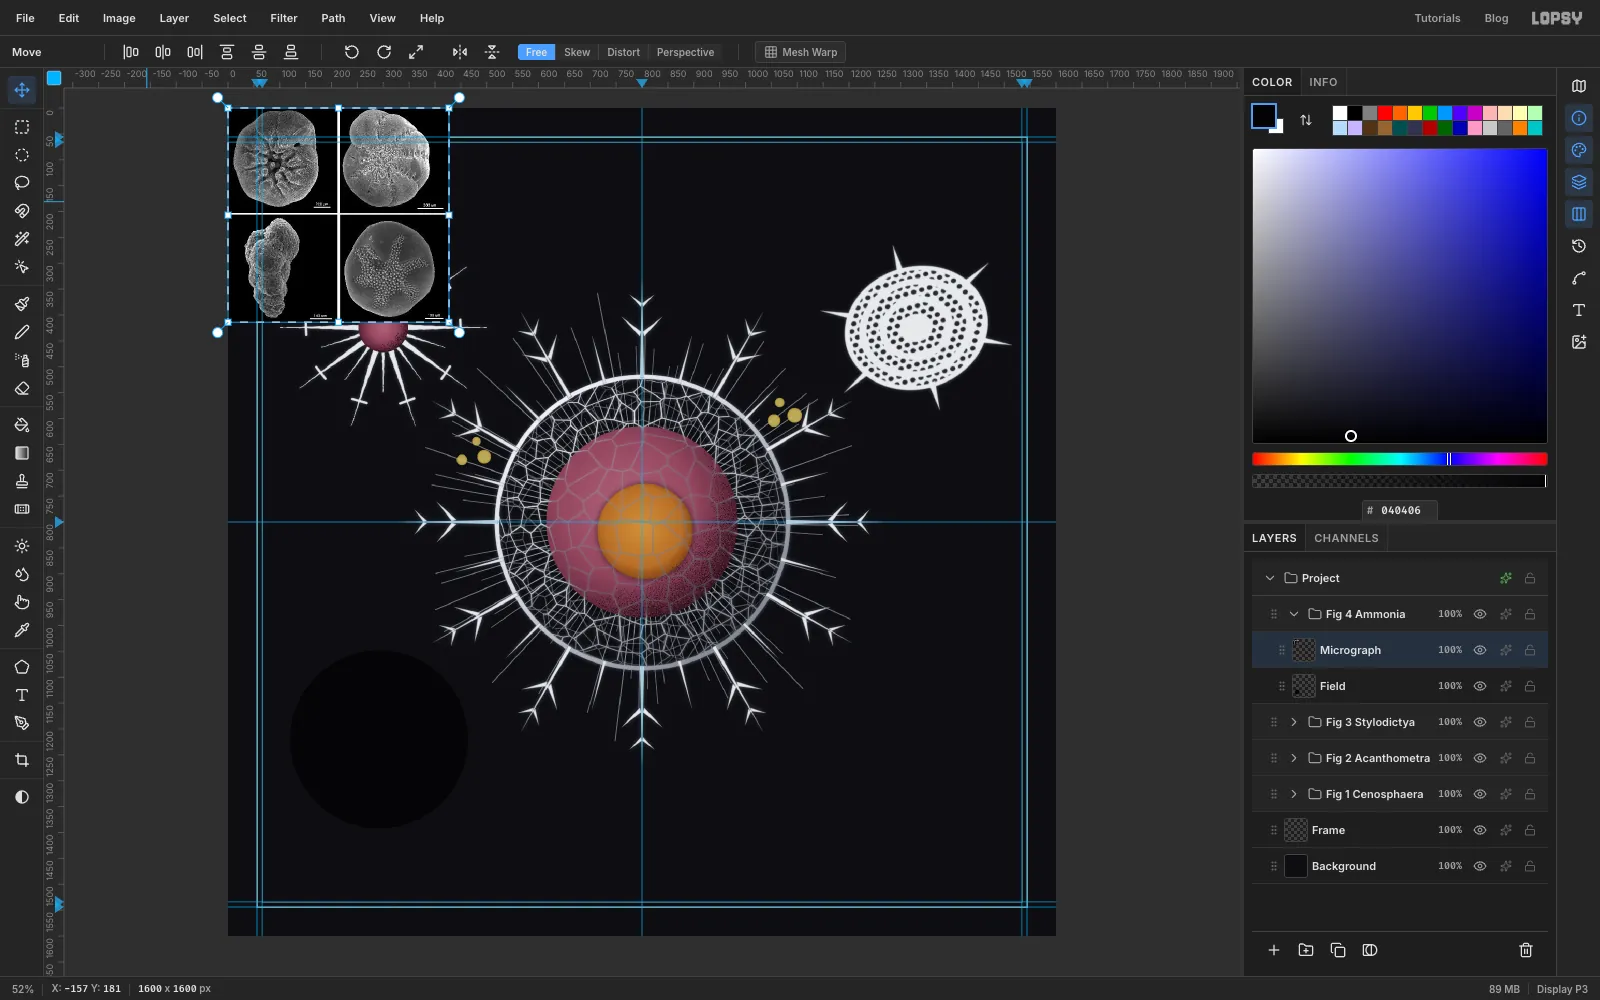
The micrograph is Benthic foraminifera.jpg on Wikimedia Commons, from the US Geological Survey. It's a work of the US federal government and in the public domain. It shows four specimens. The Commons caption names the top-left one Ammonia beccarii, and that's the one you'll use. Download the original file (427 px wide).
Along the way you'll use:
- Voronoi, the Magic Wand, Invert and Lens Distortion to grow a lattice sphere
- Kaleidoscope and Sunburst for the radiating spines and filaments
- the Brush's Radial Symmetry, the Pencil with Shift-click lines, and lasso thorns
- Define Pattern and Fill with Pattern to punch rows of pores
- Add Noise and Threshold to make lithograph stipple
- a layer mask, Inner Glow and Outer Glow, and Multiply shading layers
- exact selections, Shrink, Feather, and scaling, squashing and rotating with the Move tool
- ruler guides with Snap to Guides, groups, and Old Standard TT type
The palette is Haeckel's: silver on black, with dusty inks.
-
Plate
-
frame rule
-
microscope field
-
Silver
-
ring grey
-
glow shade
-
halo
-
Capsule
-
Nucleus
-
Symbionts
-
rim
-
filaments
-
Stipple grey
-
mask grey
-
Sphere shade
-
Bell shade
-
Title
-
labels
-
tagline
Three habits make this plate much easier:
- Exact circles. With nothing selected, a single click (no drag) with the Elliptical Marquee opens the Elliptical Selection box, where you type the From and To corners. The circle fits inside that box. The steps give the corners whenever a circle has to be exact. For a quick round shape by eye, hold Cmd while you drag.
- Finishing a transform. After you scale or rotate with the Move tool's handles, press Cmd+D. That applies the transform and drops the selection.
- The silver treatment. Every specimen gets the same two effects, so they read as drawn by one hand. Click the Layer effects button on the layer's row, then turn on Inner Glow in (Size 3, Opacity 85%) and Outer Glow in (Size 10, Opacity 30%). The dark inner edge makes thin parts look like round glass rods, and the pale outer glow is the dark-field halo.
-
Start a black plate with guides
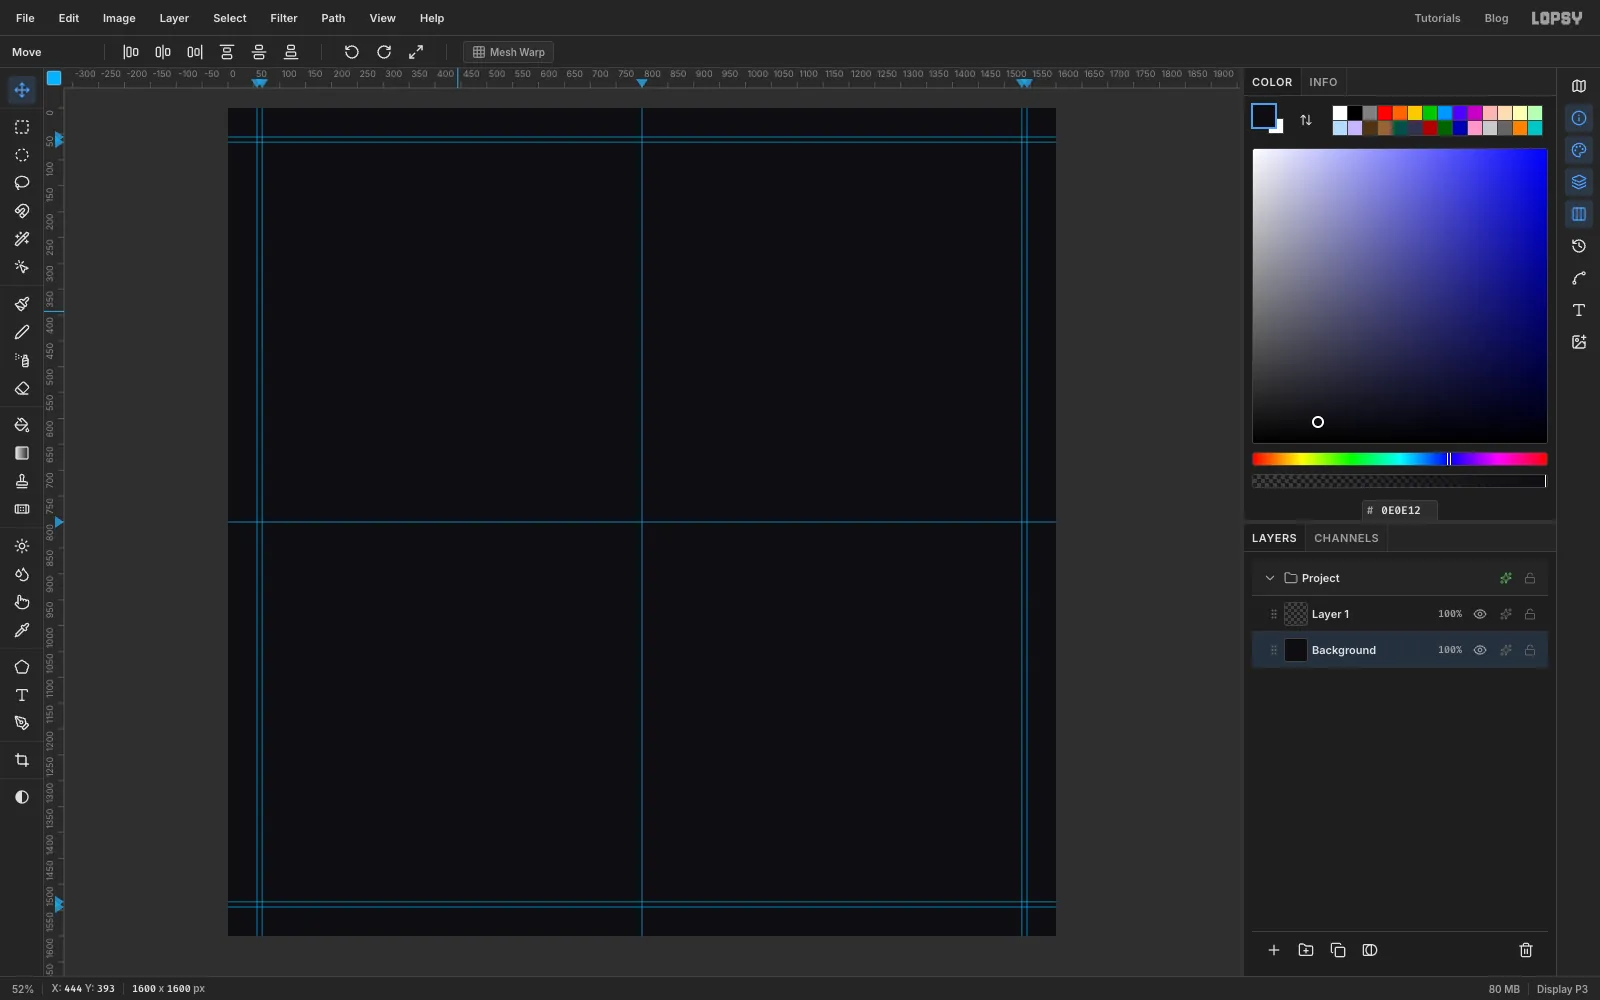
Choose File → New and make a 1600 × 1600 px document. Click the Background layer, set the foreground to and choose Edit → Fill.
Turn on the rulers if they aren't showing. Click the top ruler at 800 for a vertical centre guide, and at 56, 66, 1534 and 1544 for two pairs near the edges. Click the left ruler at the same five places for the horizontal guides. Turn on View → Snap to Guides.
-
Rule a double frame
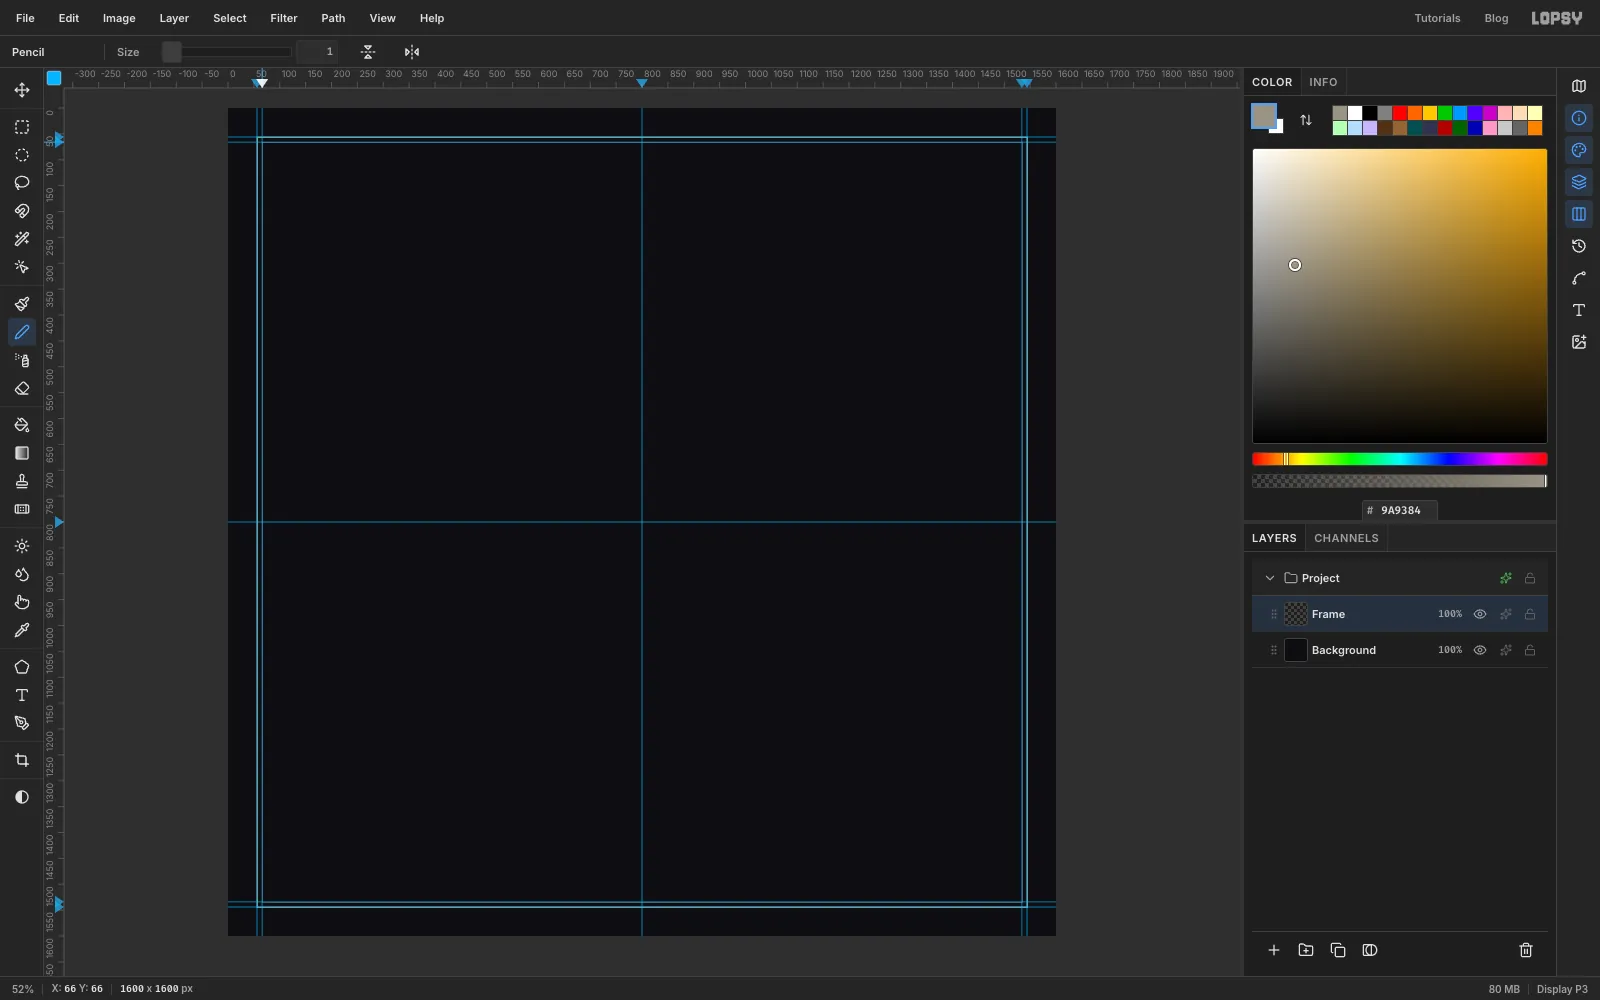
Click Layer 1 and rename it Frame. Pick the Pencil, set Size to 3 and the foreground to . Click where the outer guides cross at the top left, then hold Shift and click each of the other three outer corners and back to the first. Shift-click draws a straight line from the last point, and the clicks snap to the guides.
Set the Size to 1 and do the same around the inner guides. A thick rule with a hairline inside it is the classic engraved plate border.
-
Crack a white disc into Voronoi cells
The big sphere in the middle is Figure 1. Click New Group at the bottom of the Layers panel and name it Fig 1 Cenosphaera. Add a layer inside it called Lattice.
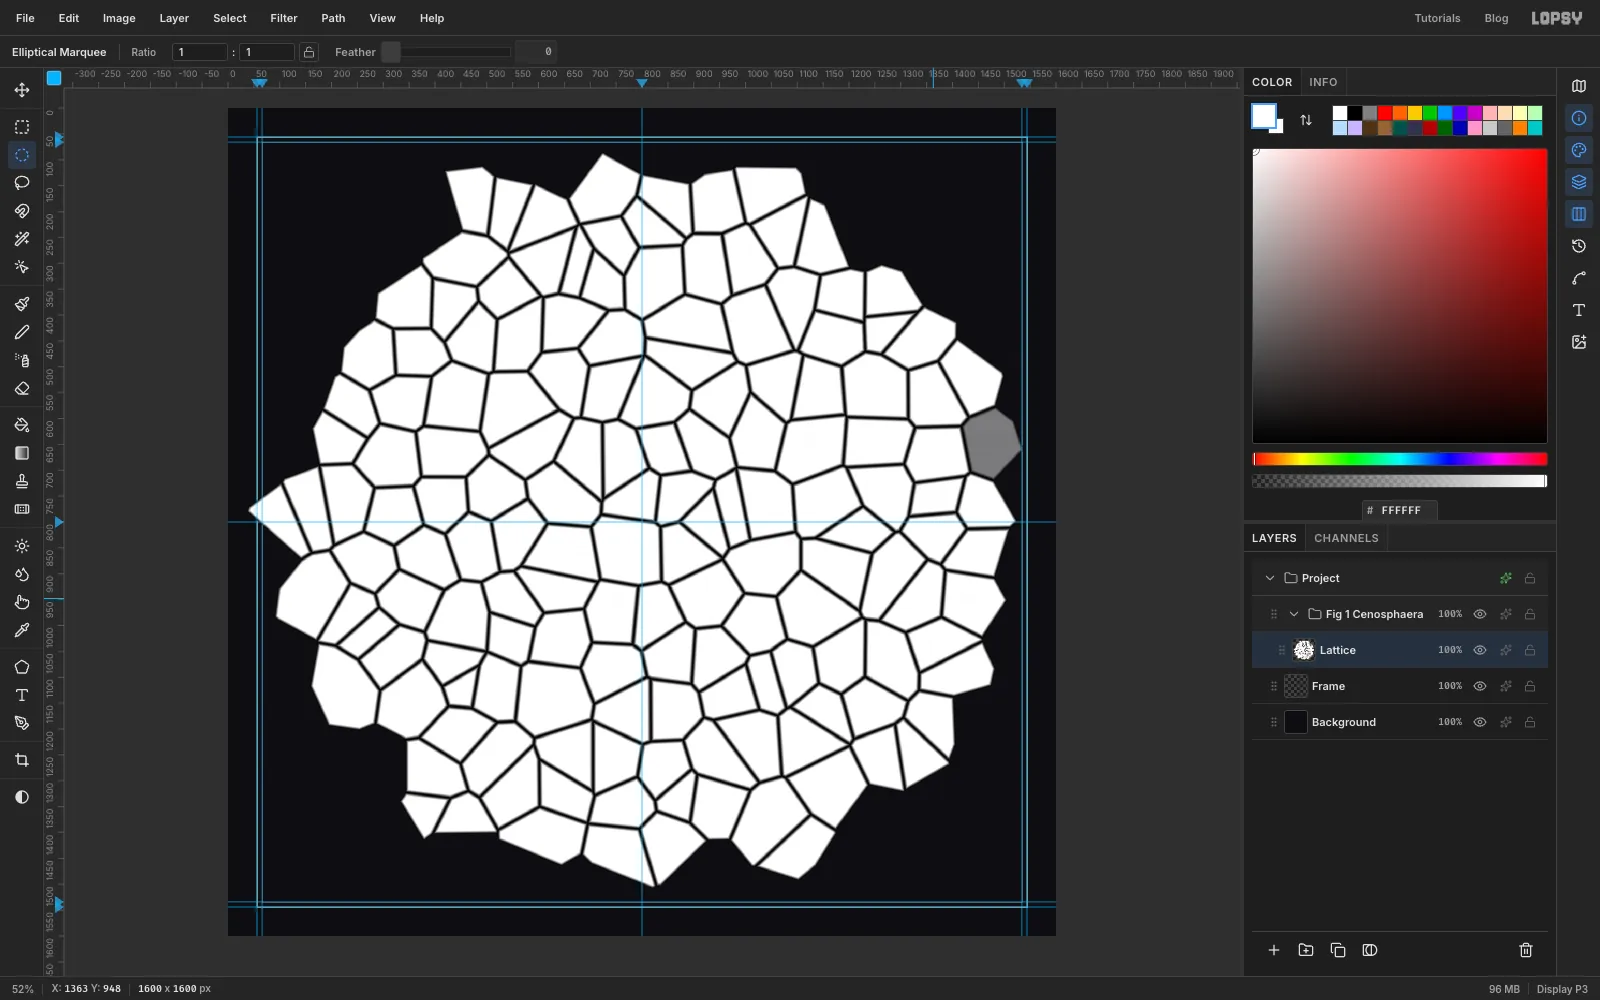
You'll build the shell large and shrink it later, so the cell walls end up fine. Click once with the Elliptical Marquee and enter From 100, 100 To 1500, 1500. Fill the circle with white and deselect (Cmd+D).
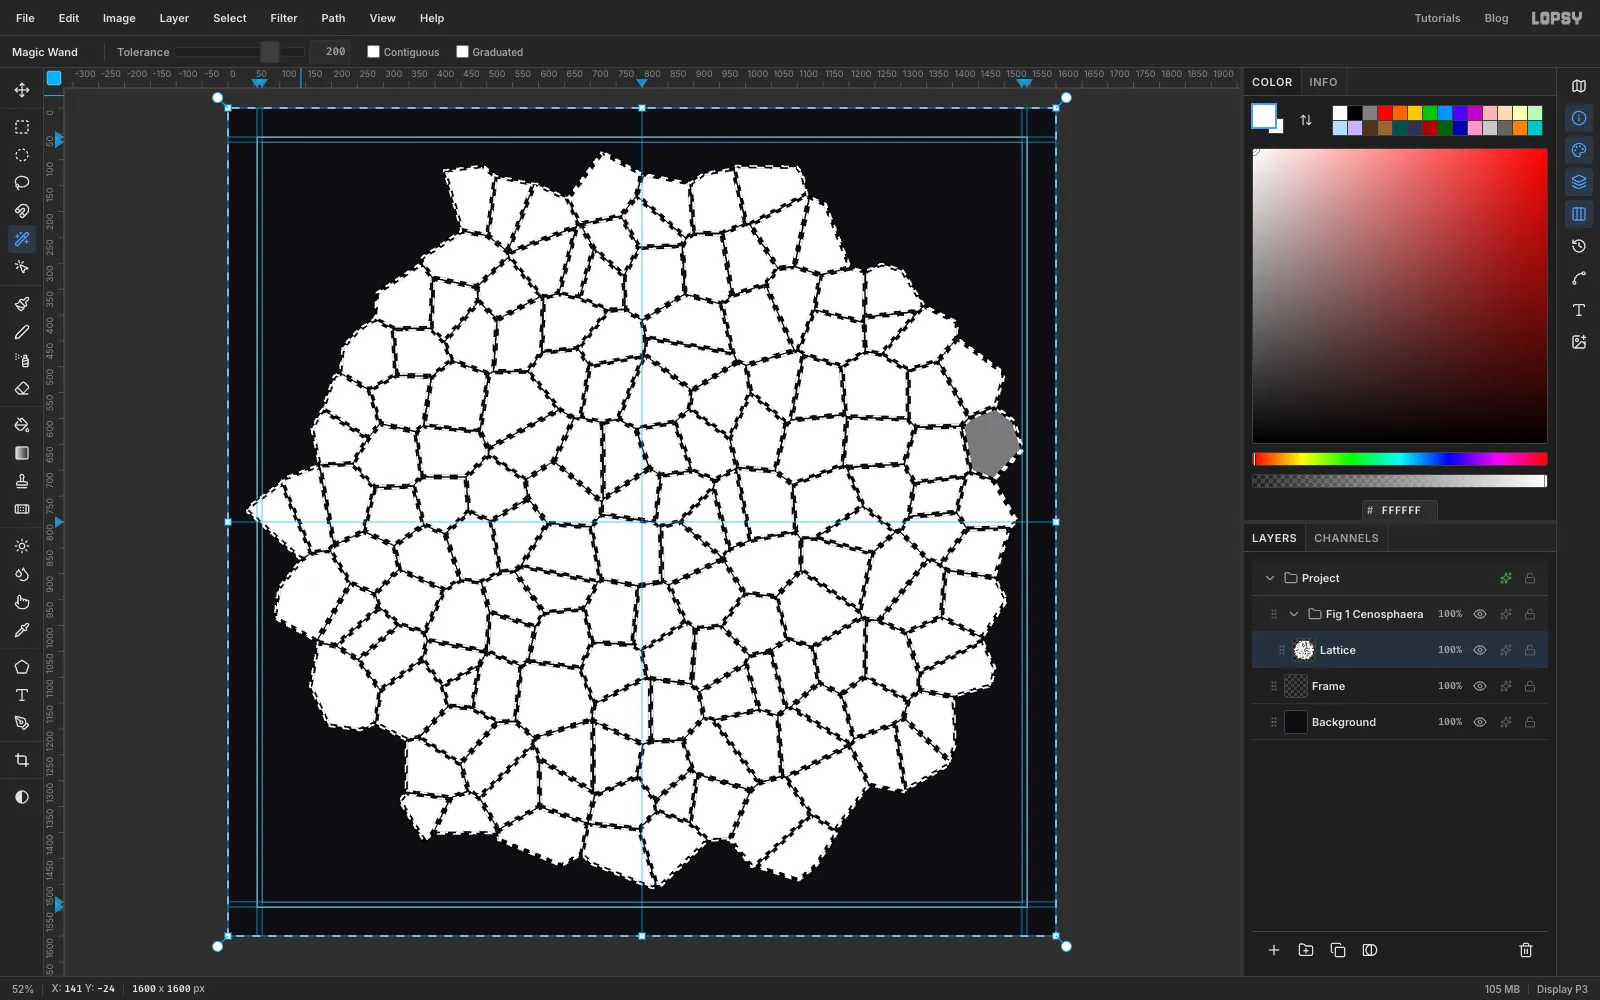
Choose Filter → Voronoi… and set Cells 16, Edge Width 14 and Seed 11. Voronoi splits the disc into cells, each filled with the colour at its centre, with dark walls between them. The outline goes ragged because each edge cell is kept or dropped whole, and a cell whose centre lands on the soft edge comes out grey. Both get trimmed away later.
-
Select the cells, not the walls
Pick the Magic Wand. Untick Contiguous and set Tolerance to 200, so the selection takes in the soft edges of the walls too. Click right on one of the dark walls. With Contiguous off, every wall in the disc is selected at once.
You want the opposite, so choose Select → Inverse. Now every cell is selected.
-
Turn the walls into a white net
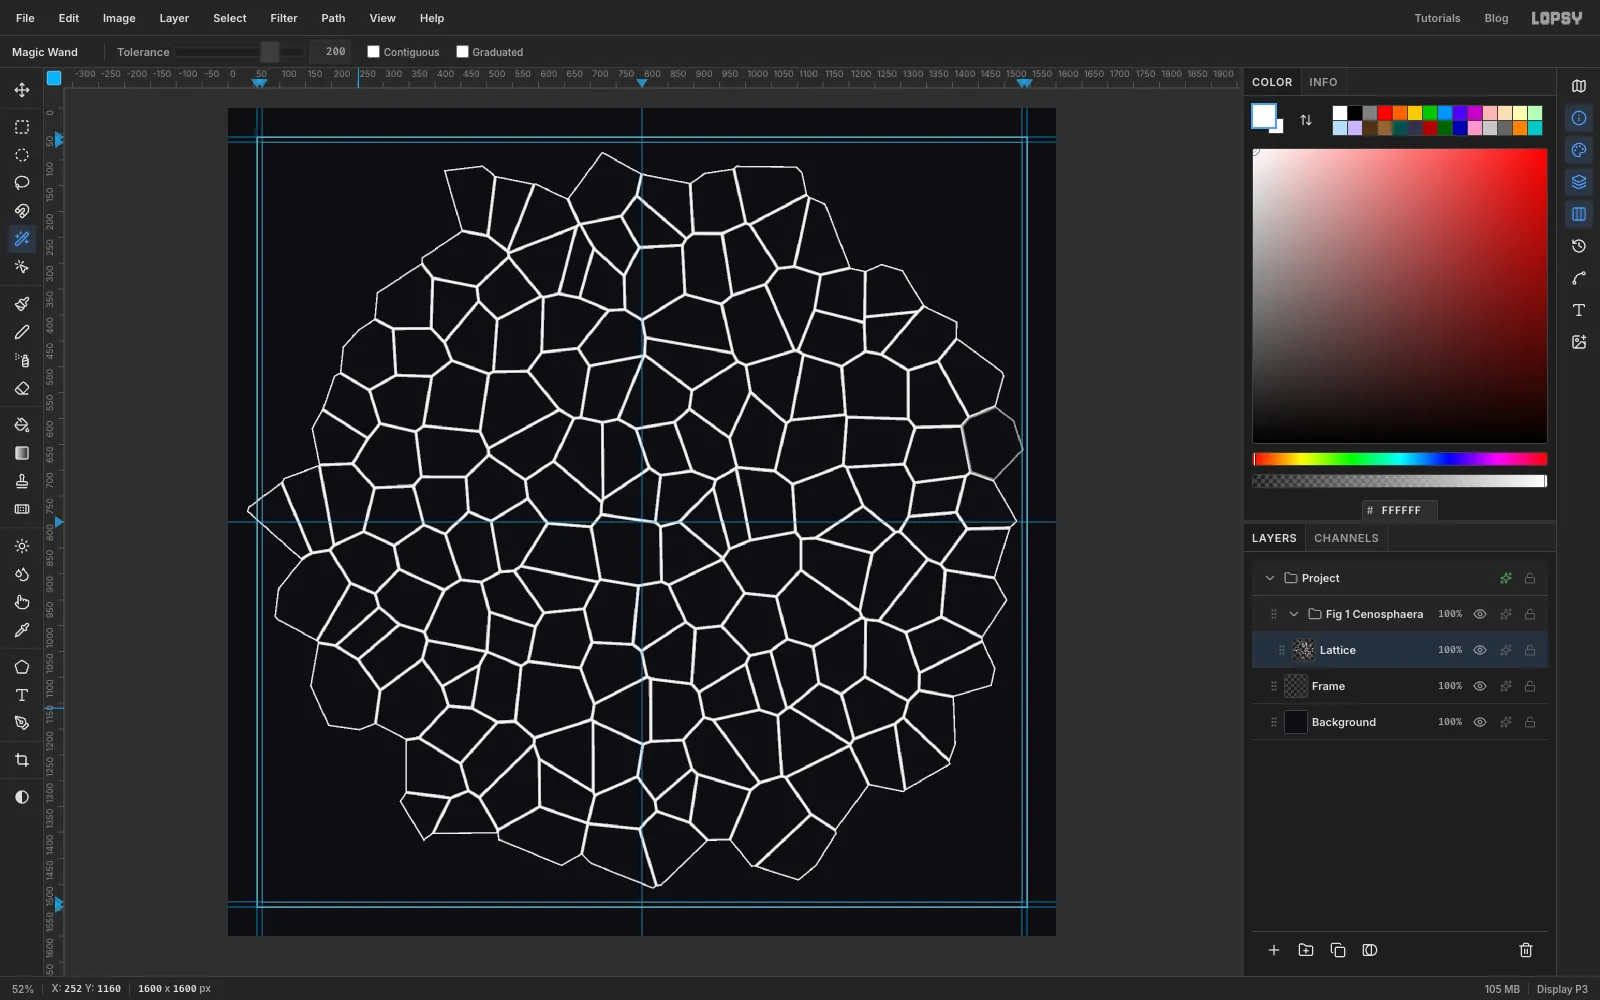
Press Delete to clear the cells, then deselect. What's left are the black walls on a transparent layer.
Choose Filter → Invert. Invert leaves transparent pixels alone, so the walls turn white and the gaps stay empty. You now have a flat silica net.
-
Bulge the net into a sphere
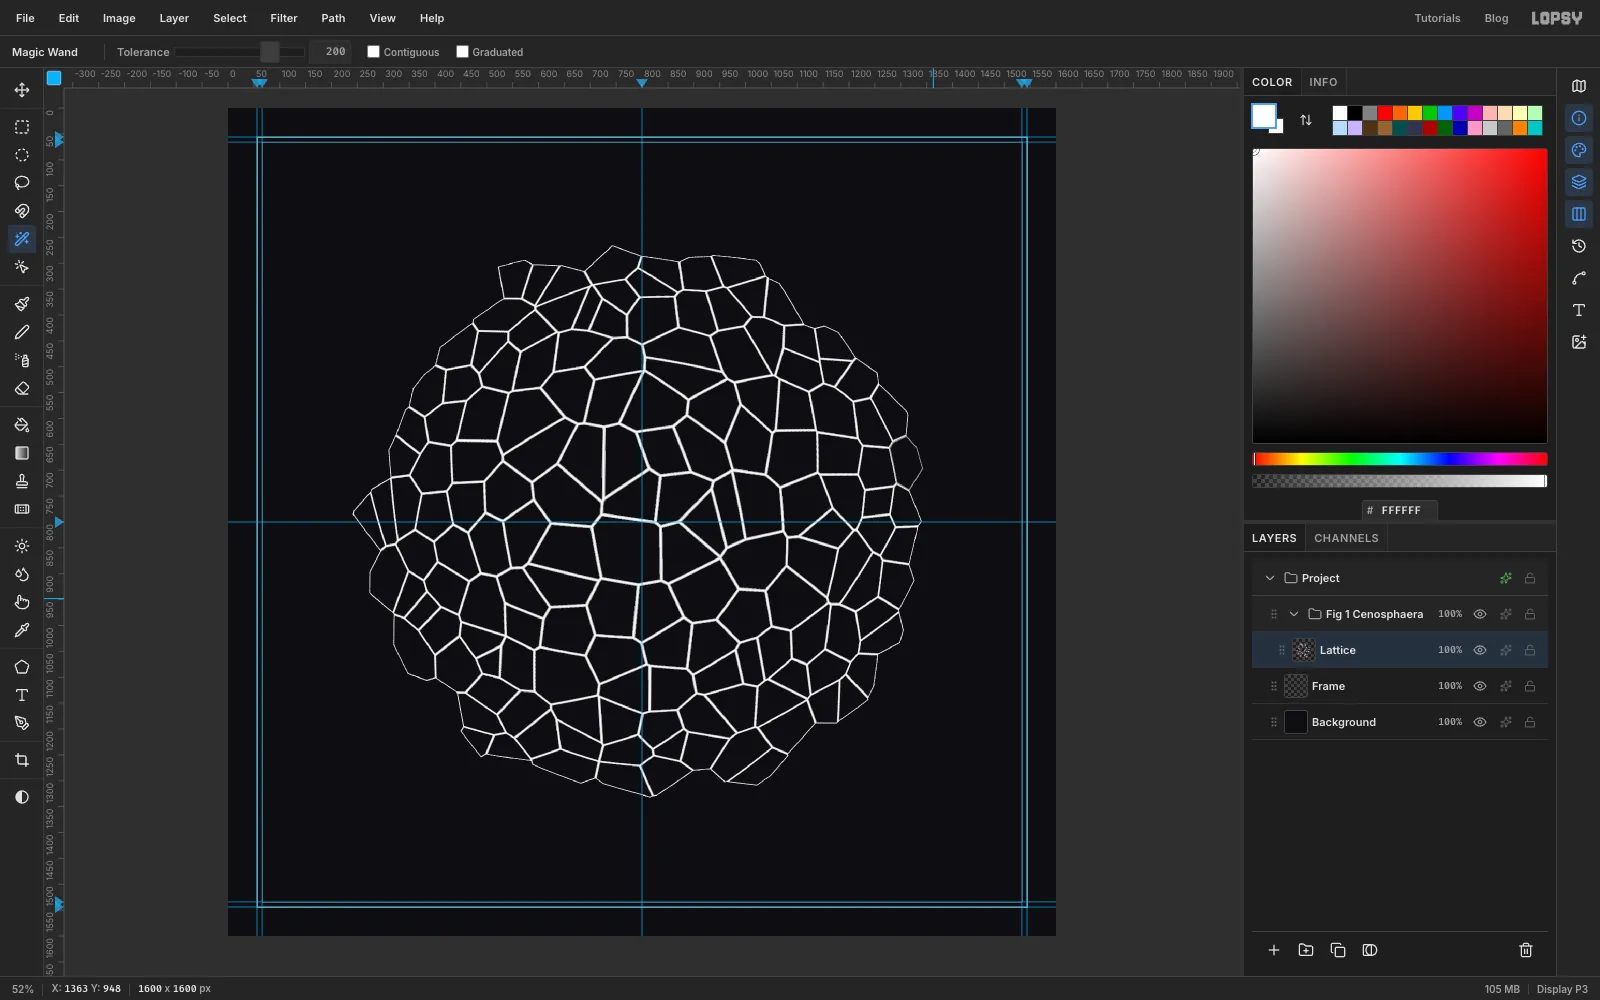
Choose Filter → Lens Distortion… and set Strength 100 (barrel) and Zoom 100. Lens Distortion is always centred on the canvas, which is why the disc sits at the exact centre. The cells in the middle swell and the ones near the rim crowd together, which is how a net on a ball looks from the front. The whole net also pulls in a little from its old edge.
-
Trim it round and add a rim
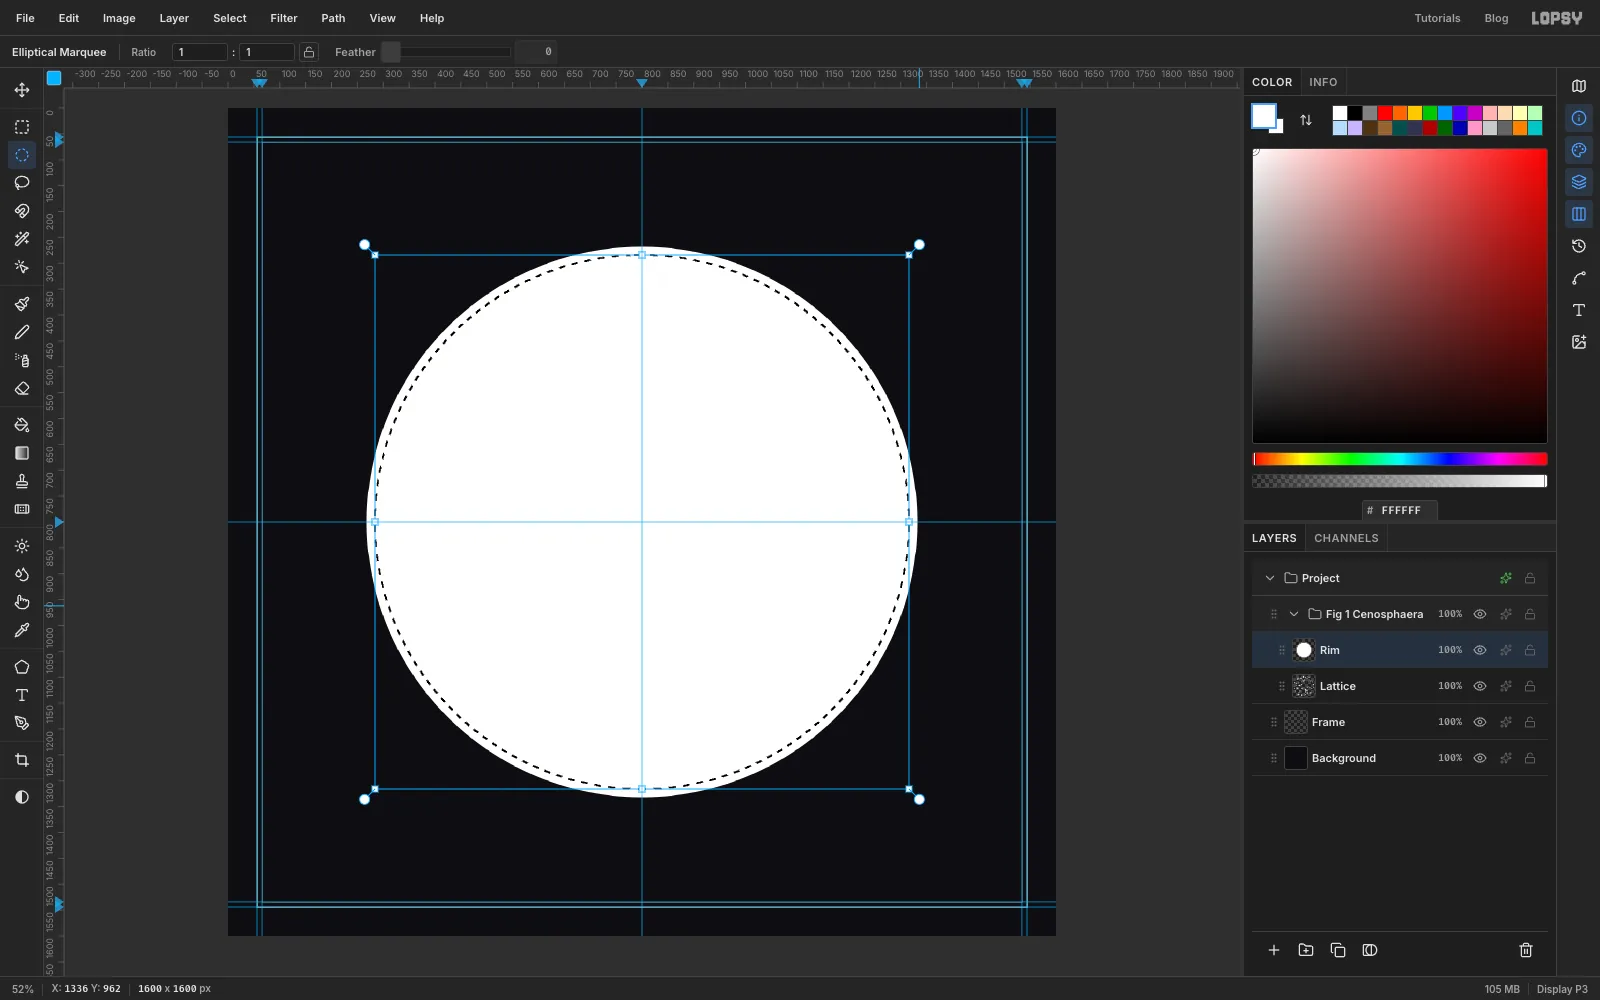
Click once with the Elliptical Marquee and enter From 280, 280 To 1320, 1320, just inside the ragged edge. Choose Select → Inverse, press Delete and deselect. The net is round now.
For a clean rim, add a layer called Rim. Select From 268, 268 To 1332, 1332 and fill it with white. The disc covers the net for a moment. Select From 284, 284 To 1316, 1316, press Delete and deselect. That leaves a 16 px ring. Choose Layer → Merge Down to merge the rim into Lattice.
-
Shrink the shell
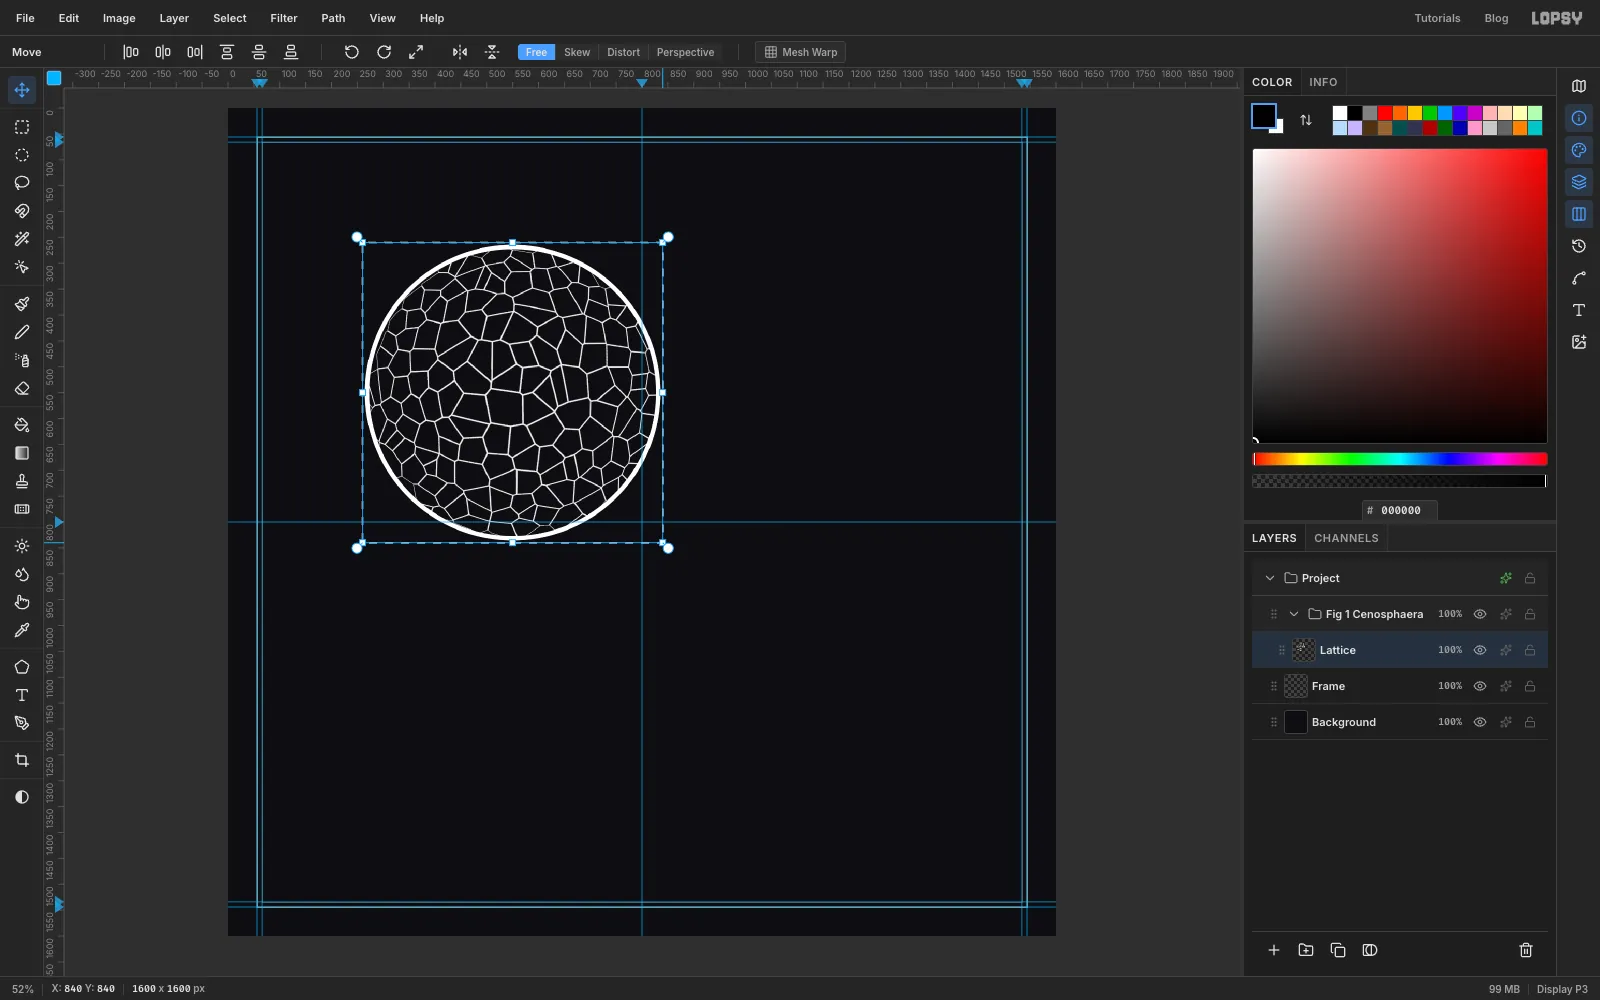
Draw a rectangular marquee around the whole net. Pick the Move tool, hold Cmd (it keeps the proportions) and drag the bottom-right corner handle up and to the left until the shell is a little over half its size, about 570 px across. Press Cmd+D.
The scale is anchored at the opposite corner, so the shell has slid towards the top left. Drag it back with the Move tool until it's roughly centred, then use the arrow keys to put its centre exactly on the guide crossing. The walls are now finer, like Haeckel's.
-
Make a far side and a capsule
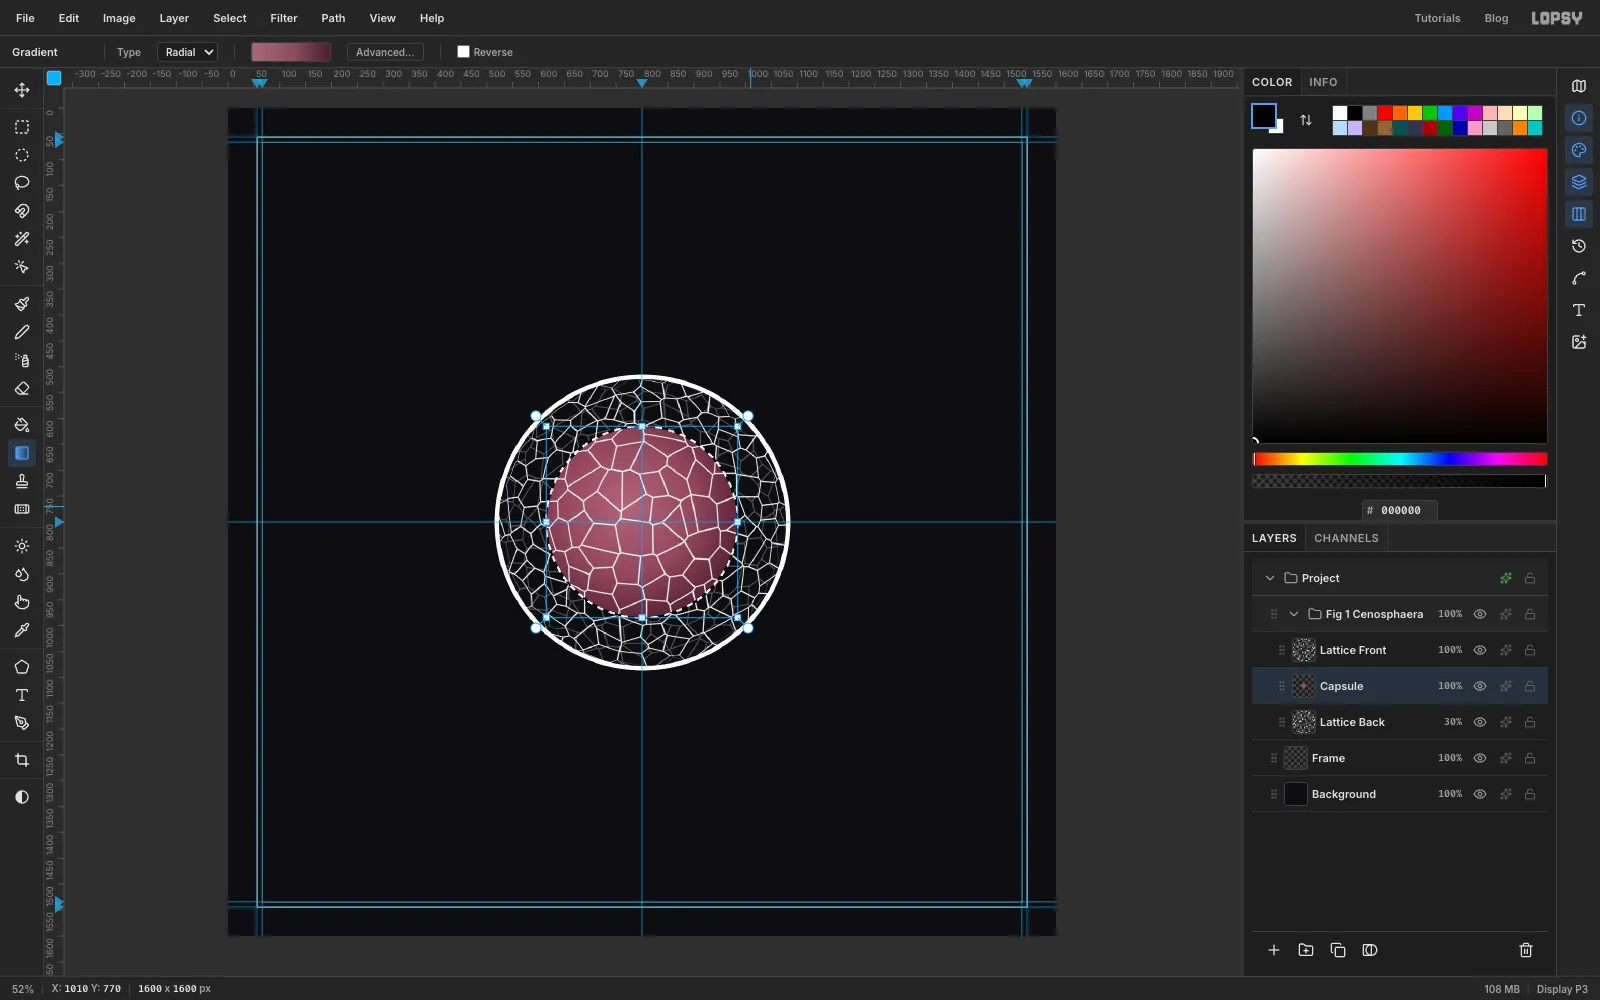
A glass sphere shows its back wall through the front. Choose Layer → Duplicate Layer and rename the copy Lattice Front. Rename the original Lattice Back. Click Lattice Back and choose Image → Flip Horizontal and then Image → Flip Vertical, so the back pattern doesn't line up with the front. Set its opacity to 30%.
With Lattice Back still selected, add a layer called Capsule. It goes in between the two halves. Select the circle From 615, 615 To 985, 985. Pick the Gradient tool, set it to Radial and open Advanced… to set the three capsule stops: , at 55% and . Drag from a little up and left of the centre outwards about 240 px, then deselect.
-
Stipple the capsule
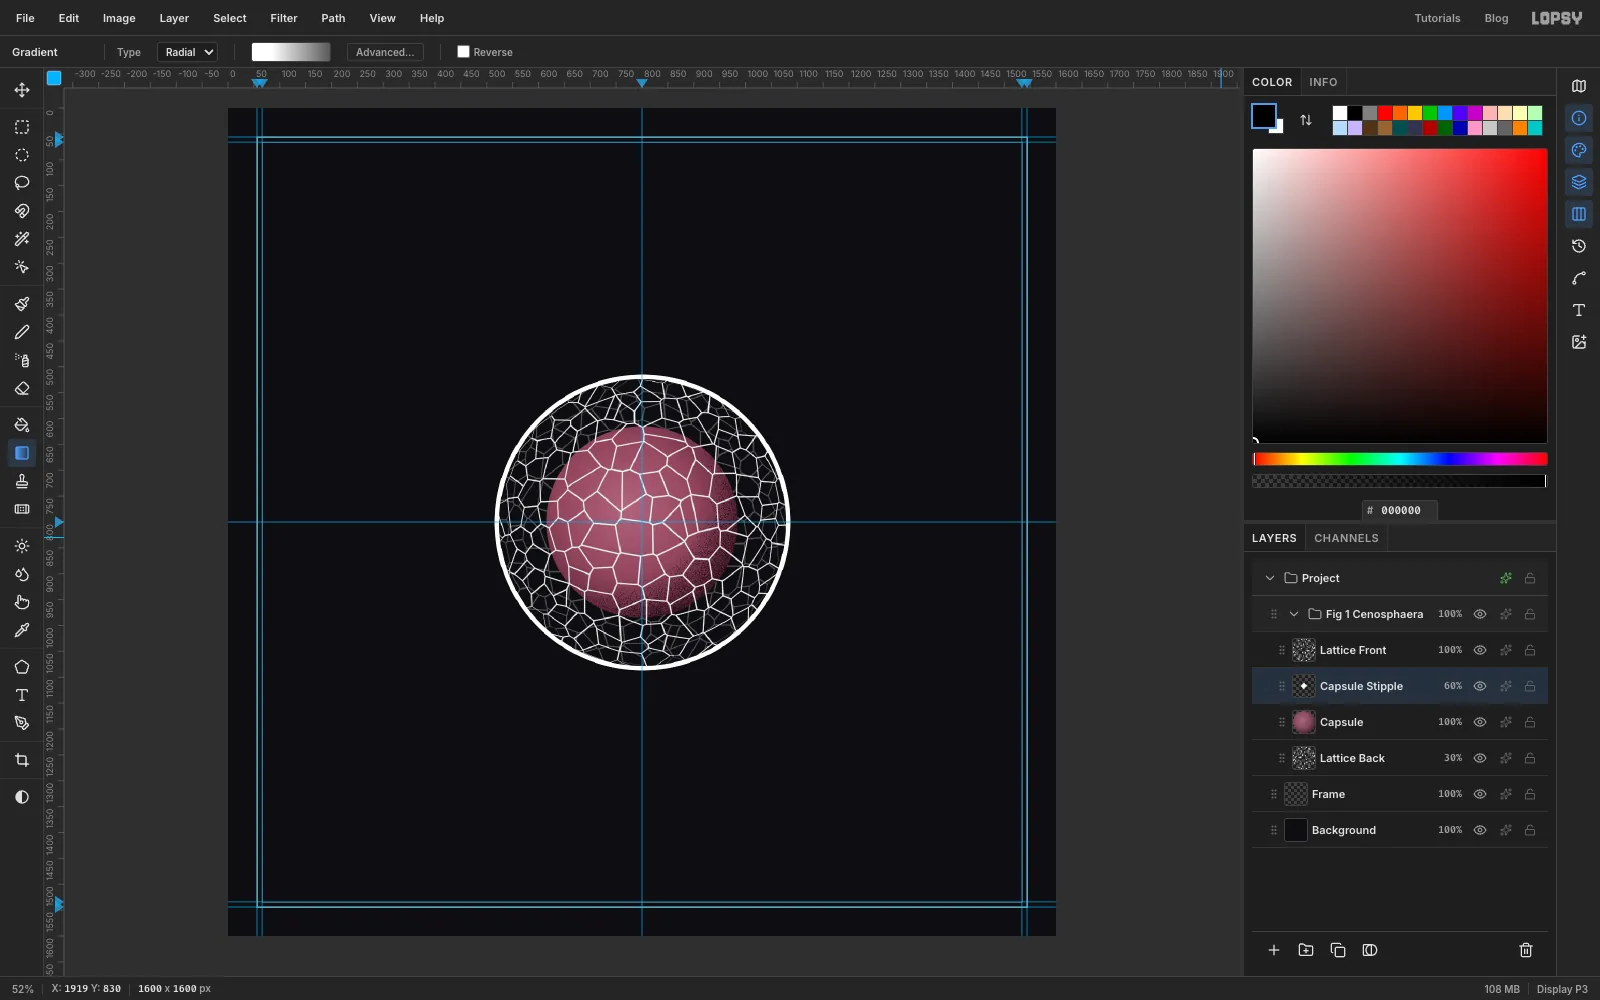
A lithograph shades with dots, not smooth gradients. Add a layer called Capsule Stipple. Cmd-click the Capsule thumbnail to load its shape as a selection.
Make a radial gradient from white, through white again at 25%, to . Drag it from the upper left of the capsule outwards about 330 px. Choose Filter → Add Noise… with Amount 100 and Mono, then Filter → Threshold… at 128. The noise breaks the grey side into random black and white specks, densest where the gradient was darkest.
Deselect, set the layer's blend mode to Multiply so the white disappears, and lower its opacity to 60%.
-
Silver the net and soften it over the capsule
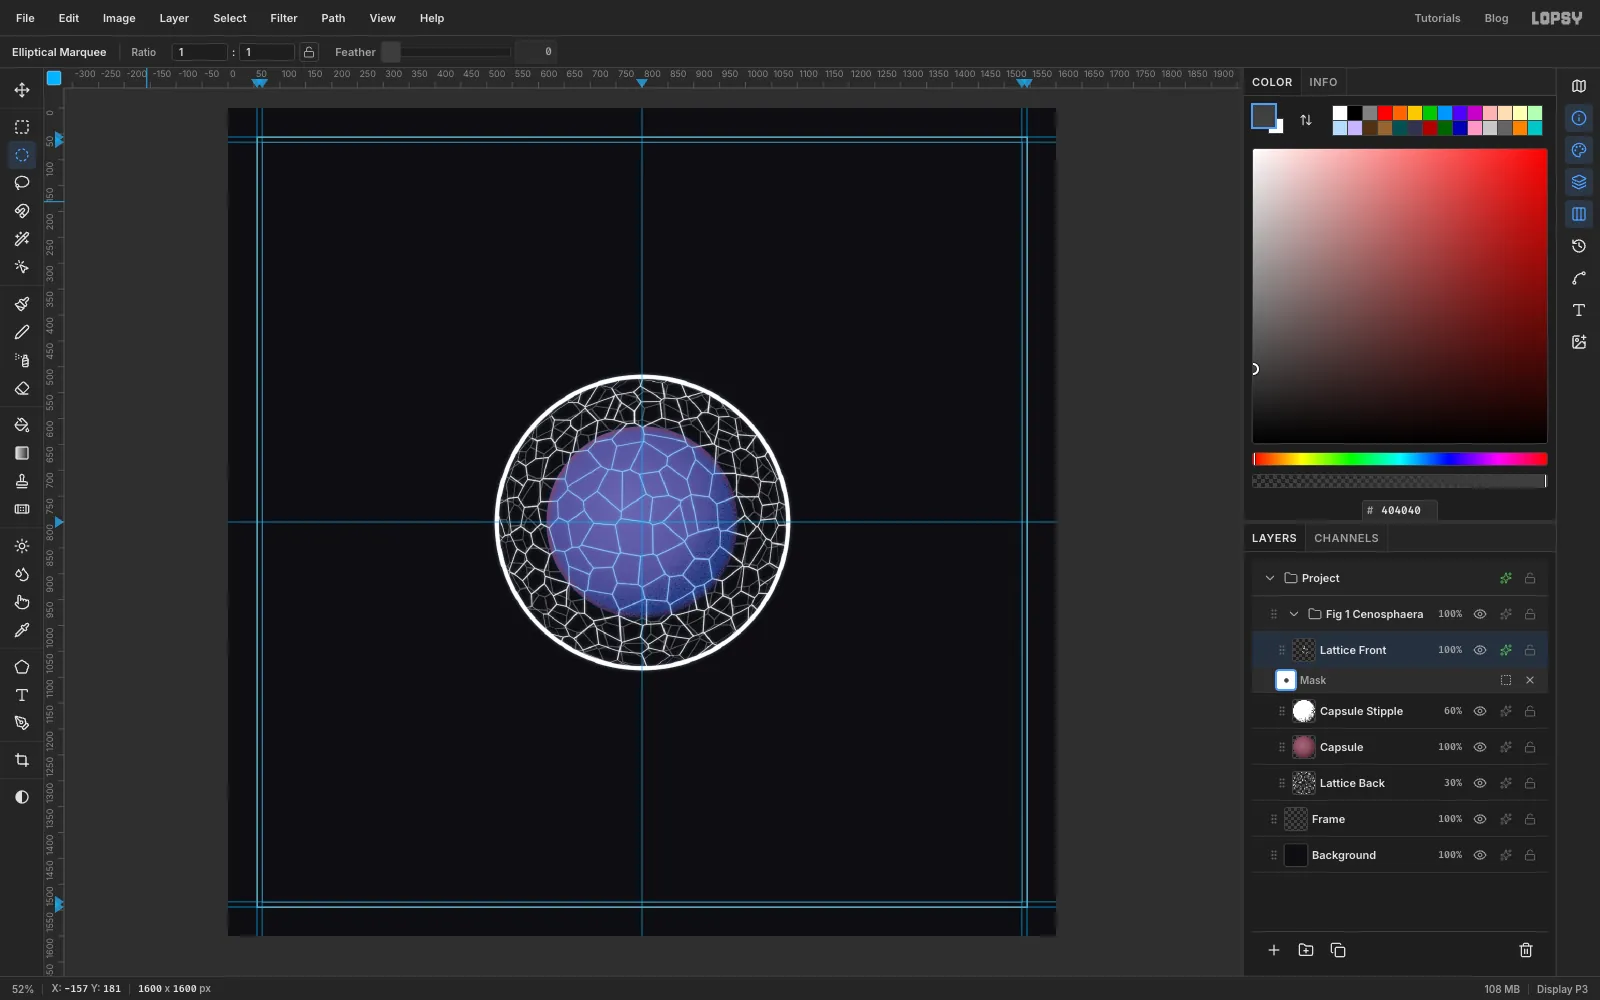
Click Lattice Front and give it the silver treatment.
The net is still too bright where it crosses the capsule, so the capsule reads as on top rather than inside. Click Add Mask at the bottom of the Layers panel, then click the new mask thumbnail to edit the mask. Select the circle From 618, 618 To 982, 982 and choose Select → Feather… at 12 px. Set the foreground to and choose Edit → Fill. Dark grey in a mask means "mostly hidden", so the net fades to about a quarter of its strength over the capsule. Deselect and click the layer thumbnail to stop editing the mask.
-
Add the nucleus
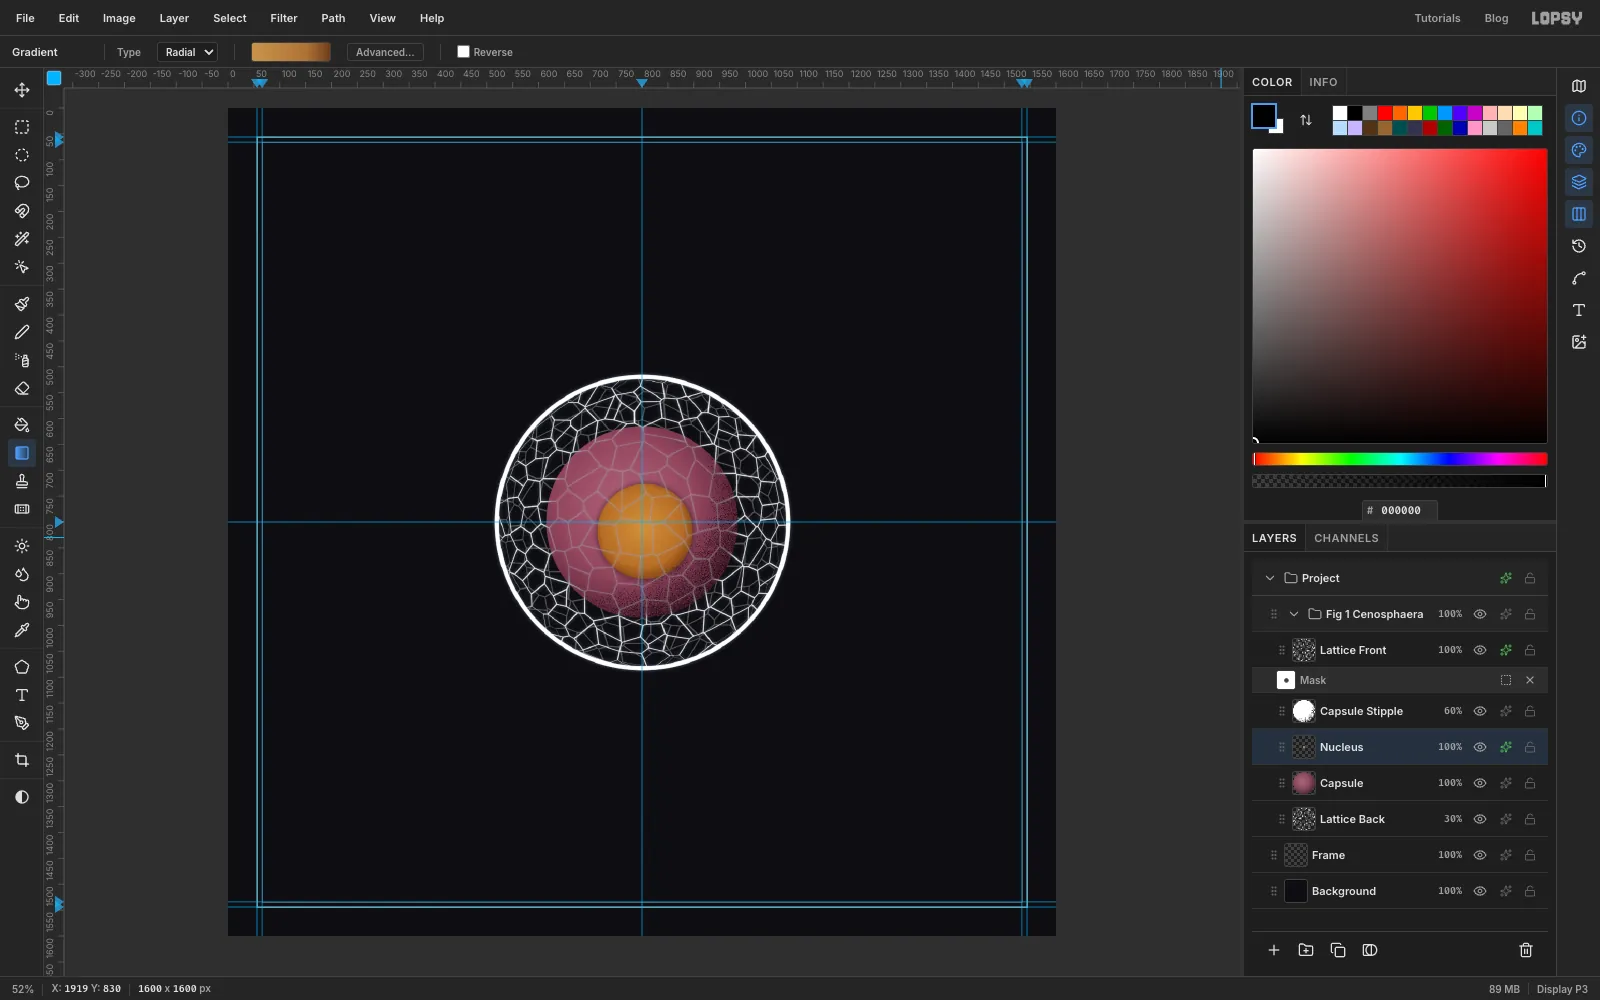
Click Capsule and add a layer called Nucleus, so it sits above the capsule and below the stipple. Select From 714, 726 To 898, 910, a circle a little below and right of the centre. Fill it with a radial gradient , at 70%, , dragged from its centre outwards. Deselect.
In the layer's effects, turn on Drop Shadow with both offsets at 0, Blur 18 and Opacity 60%. With no offset, the shadow is just a dark halo that sets the nucleus into the capsule.
-
Shade the sphere
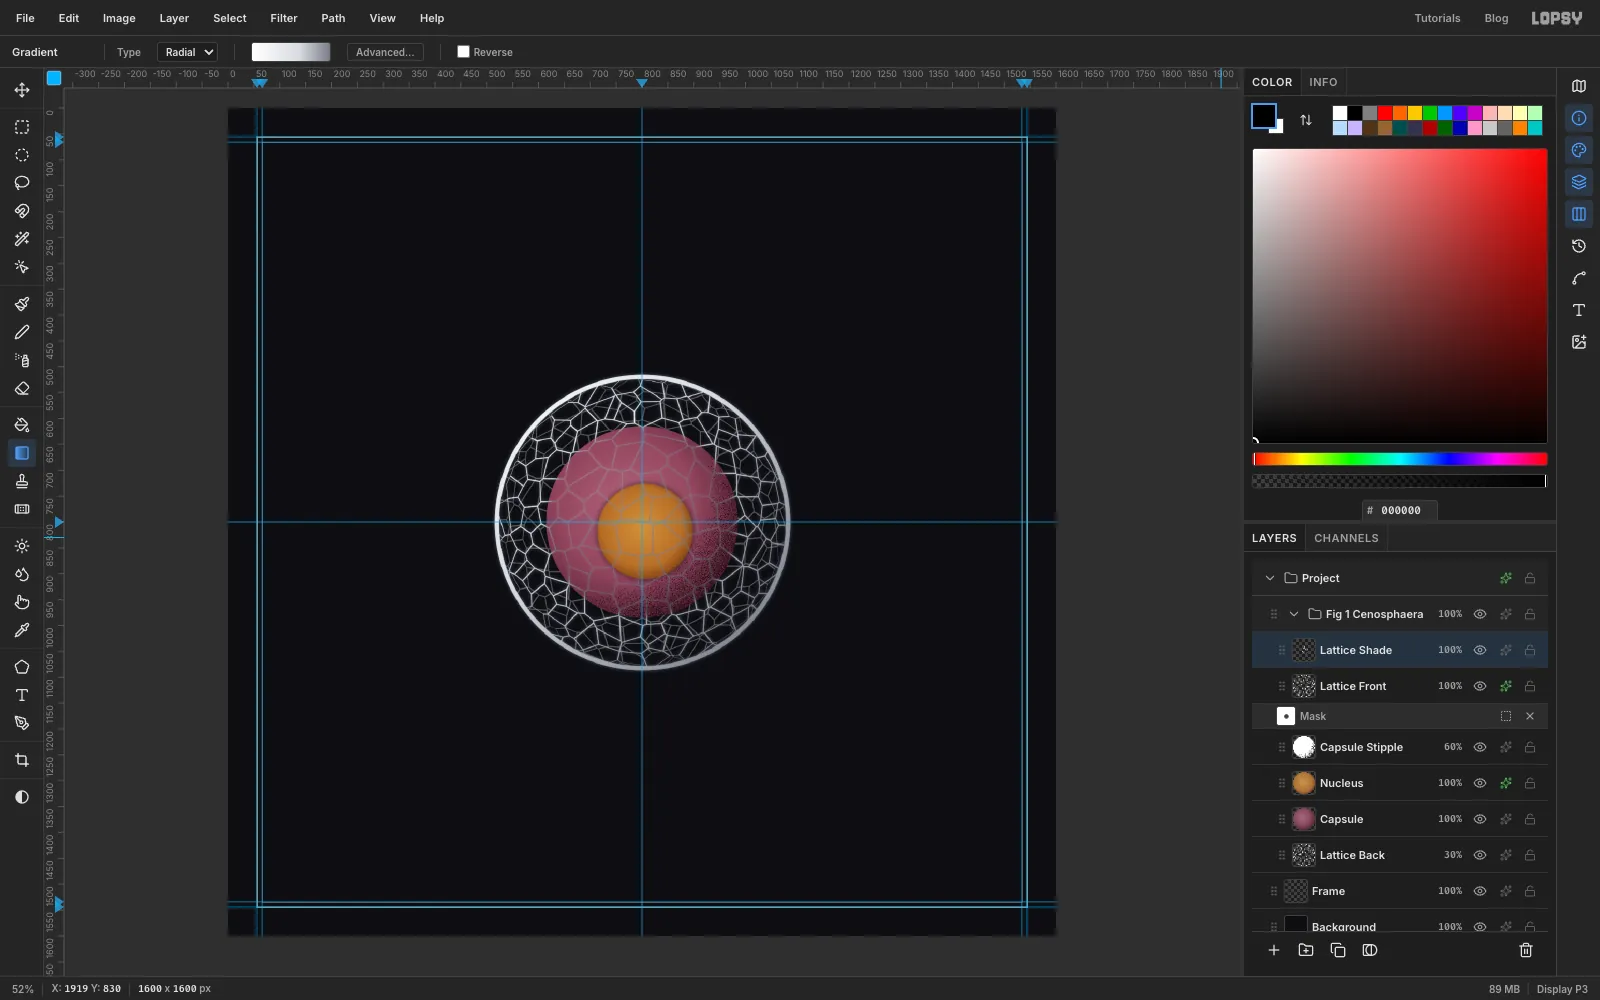
Click Lattice Front and add a layer called Lattice Shade. Cmd-click the Lattice Front thumbnail to select the net.
Make a radial gradient from white, through at 60%, to . Drag it from the upper left of the sphere out past the far side, about 470 px. Deselect and set the blend mode to Multiply. White leaves the lit side alone and the grey darkens the side away from the light.
-
Draw one master spine
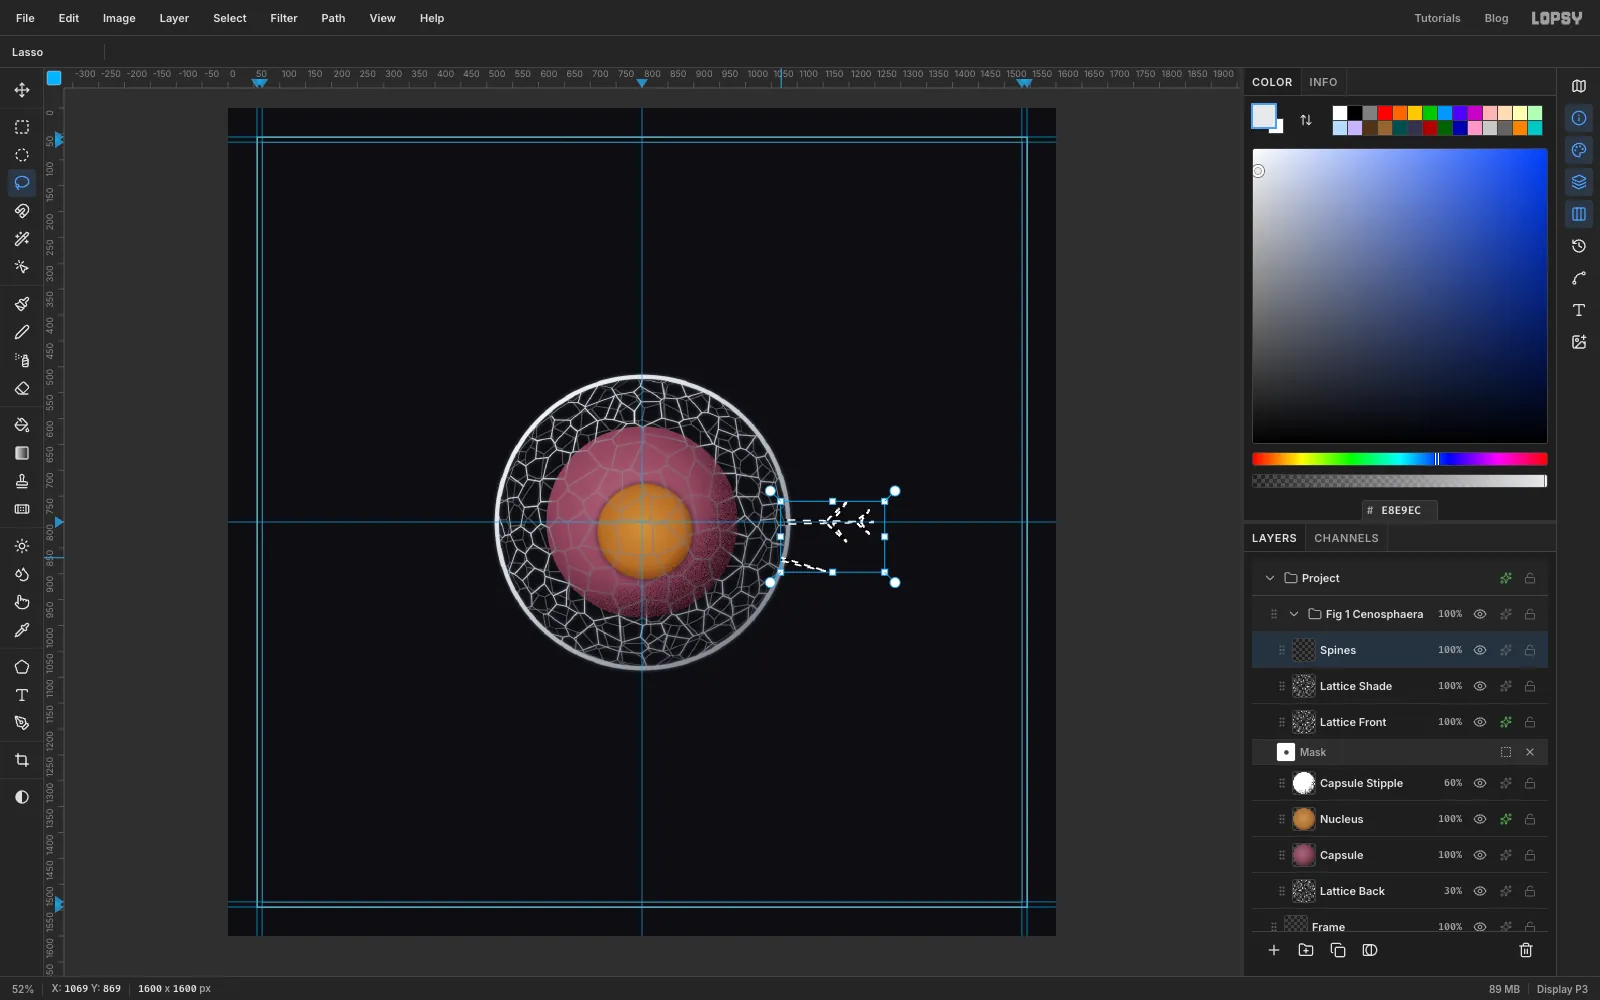
Add a layer called Spines. You'll draw one spine and let the Kaleidoscope filter copy it all the way round. Kaleidoscope mirrors the thin wedge just below the 3 o'clock line around the canvas centre, so the master spine has to lie along that line and be symmetrical about it.
With the Lasso, drag out a long, thin triangle: an 8 px base at the edge of the shell on the horizontal centre guide, out to a point about 185 px beyond the shell. Hold Shift and draw four small triangles as side thorns, a pair angled up and down about 40% of the way out and a smaller pair about 70% out. Shift adds each one to the selection.
Still holding Shift, draw a second, shorter spine pointing 15° below the line, reaching about 90 px beyond the shell. With 12 segments, 15° is the other mirror line, so this spine will land neatly between the long ones. Fill the selection with and deselect.
-
Copy it round with Kaleidoscope
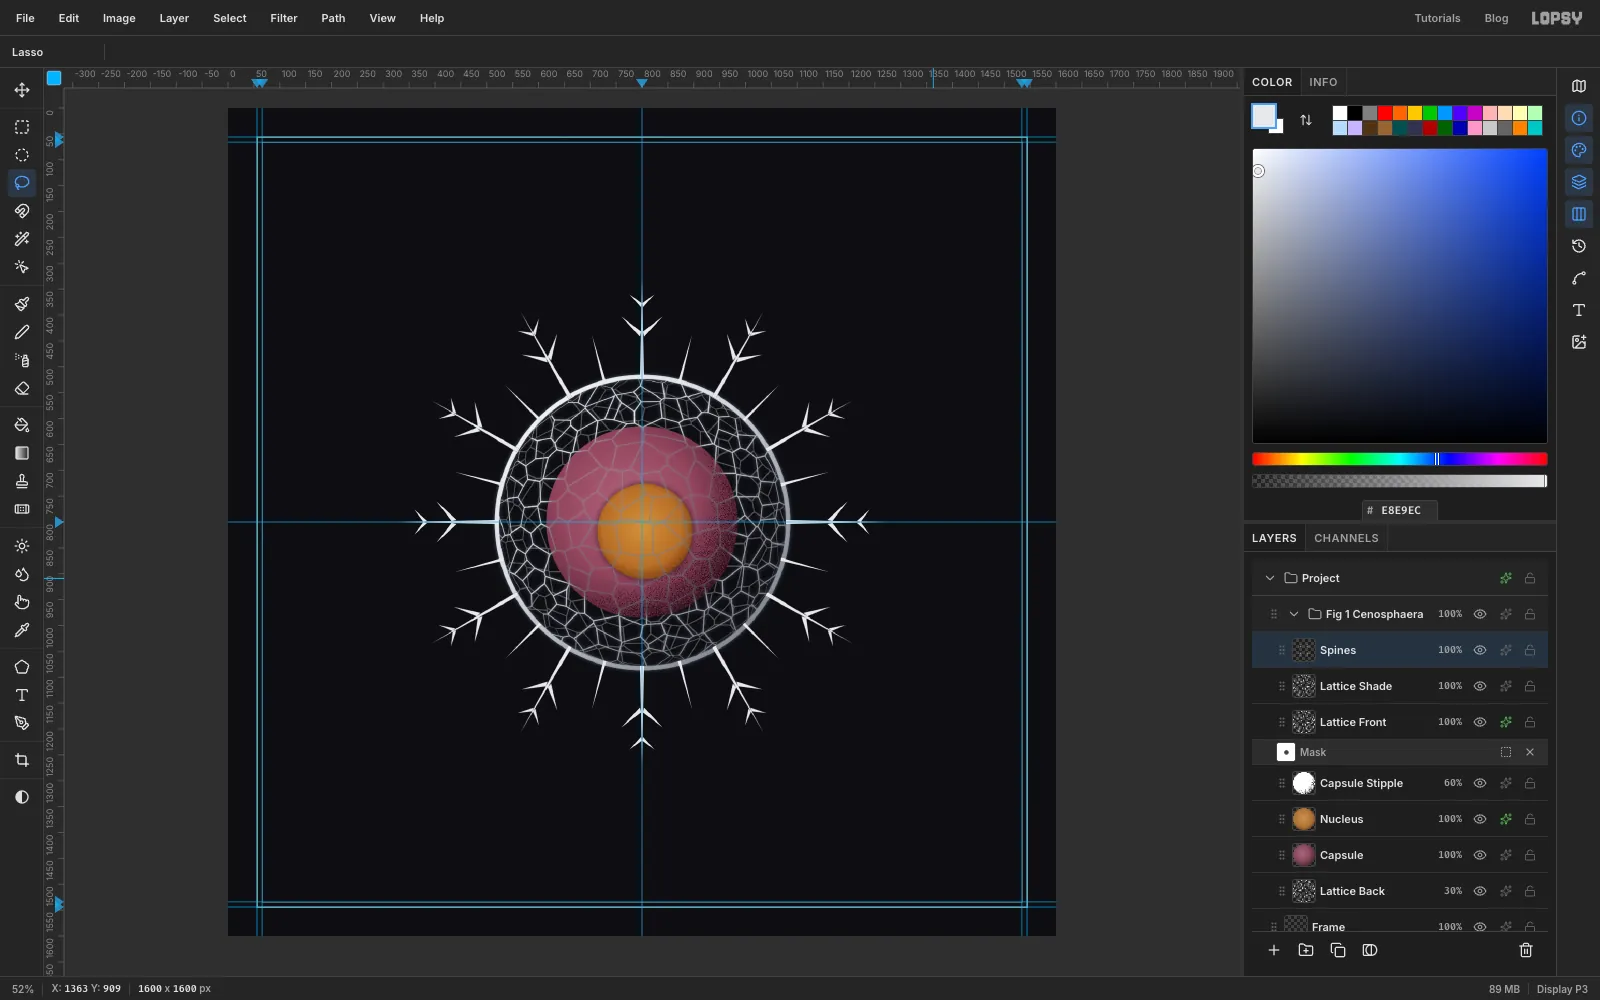
Choose Filter → Kaleidoscope…, set Segments to 12 and Rotation to 0, and apply. The long spine appears every 30° and the short one between them, all crisp because both were centred on mirror lines.
Give Spines the silver treatment.
-
Radiate fine filaments with Sunburst
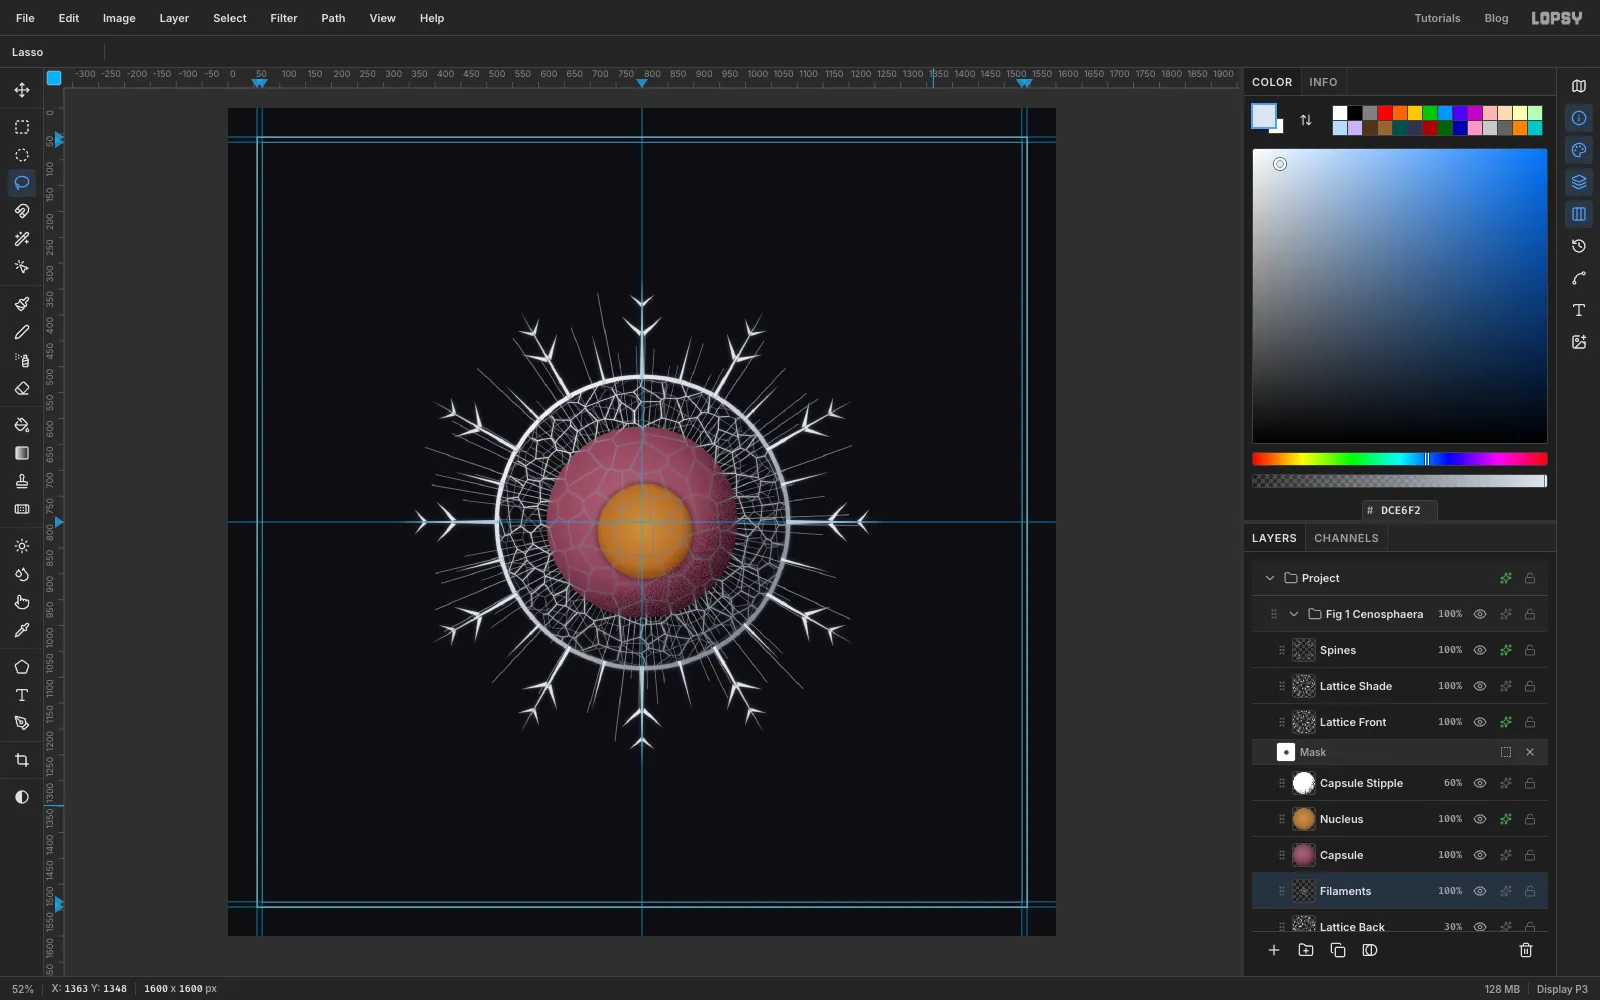
In Haeckel's drawings, hair-thin threads stream out of the capsule through the shell. Click Lattice Back and add a layer called Filaments above it. Set the foreground to .
Choose Filter → Sunburst…. Set Rays to the maximum, 120, and Length to 40, so the threads stop around the spine tips. Set Width 18 and Taper 50, which makes thin parallel-sided threads instead of wedges. Fade 50 and Softness 40 let them dissolve at the ends, and Jitter 55 (Seed 4) makes some shorter than others. Set Rotation to 1 so no thread hides exactly behind a spine, and Opacity to 85. The capsule hides their roots.
-
Add clusters of symbiont cells
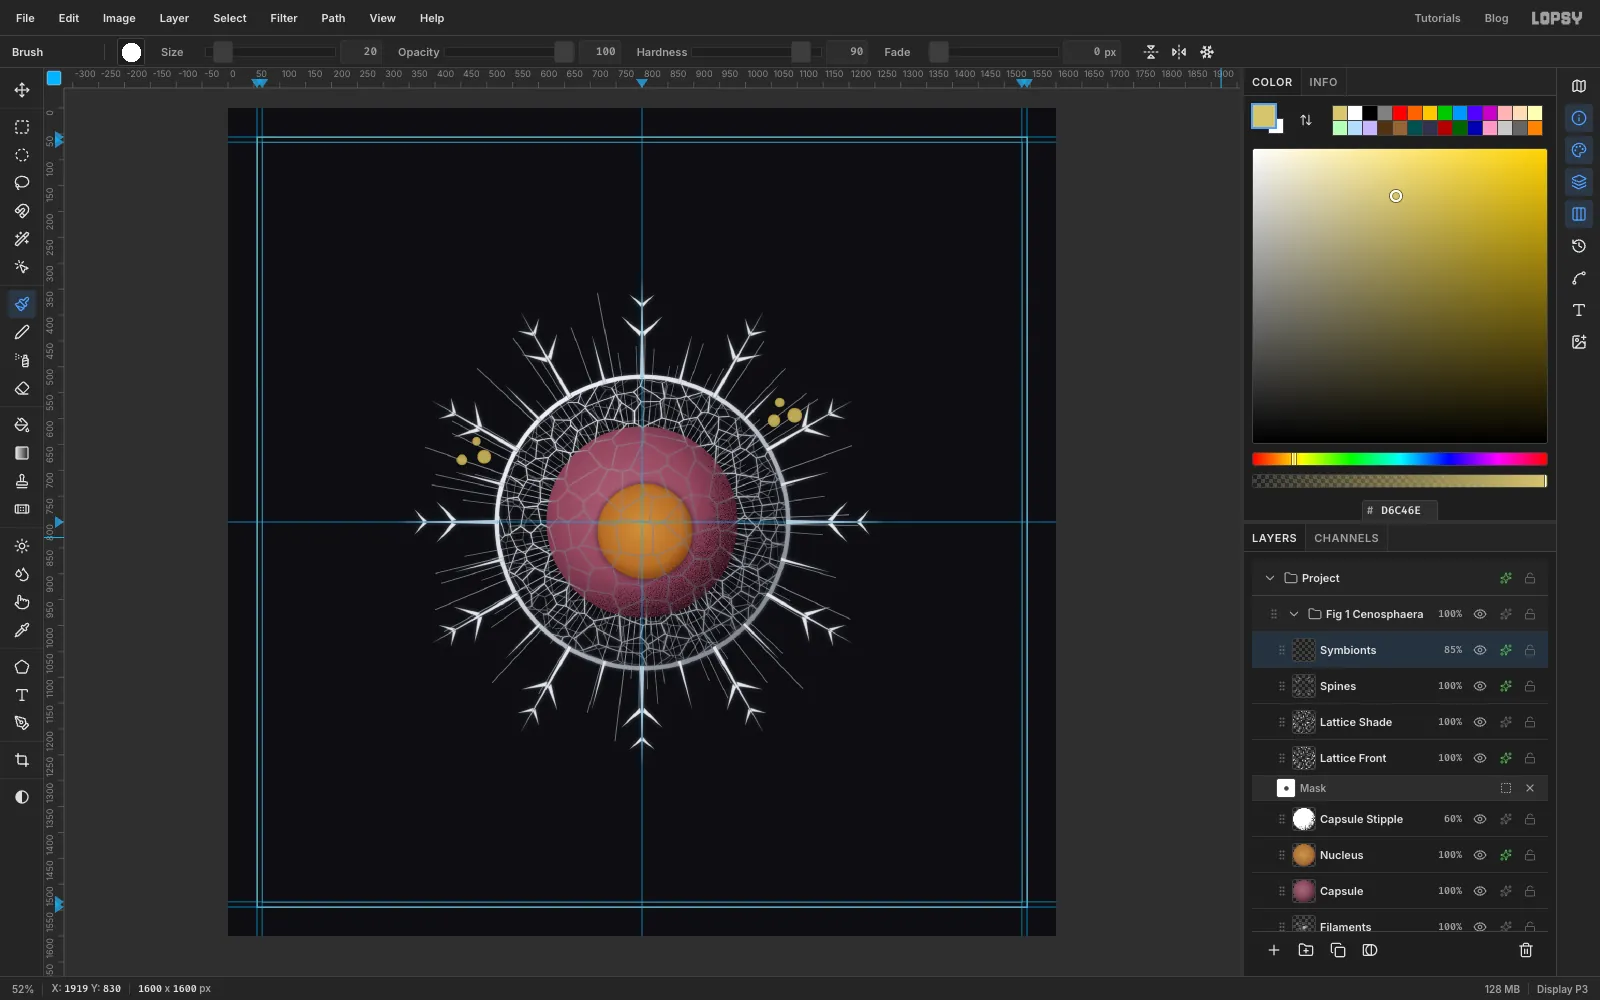
Click Spines and add a layer called Symbionts. Pick the Brush with Hardness 90 and the foreground . Click once for each cell, changing the Size between about 18 and 32 so they're not uniform. Put three just outside the shell between two spines at about 10 o'clock, and three more at about 2 o'clock. Tight little groups look alive. An even ring of dots looks like confetti.
Add an Inner Glow in , Size 5, Opacity 90%, for a darker rim, then set the layer opacity to 85%.
-
Figure 2: one spine with Radial Symmetry
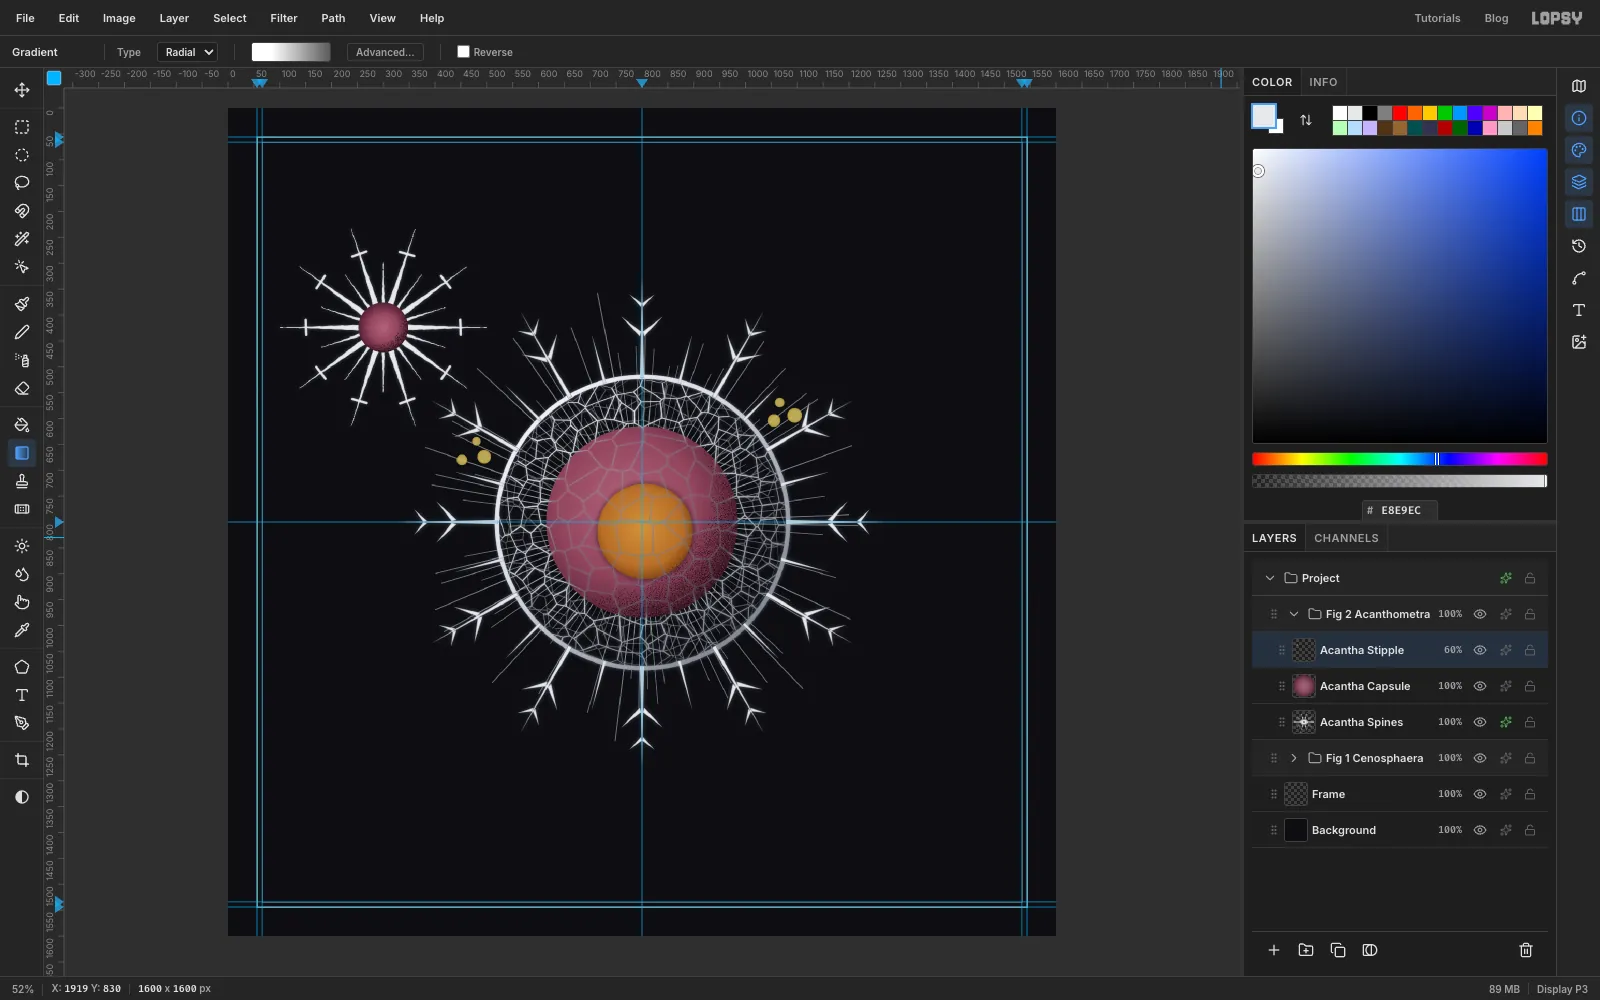
Collapse the Fig 1 group, click it, and click New Group. Name it Fig 2 Acanthometra. Add a layer called Acantha Spines.
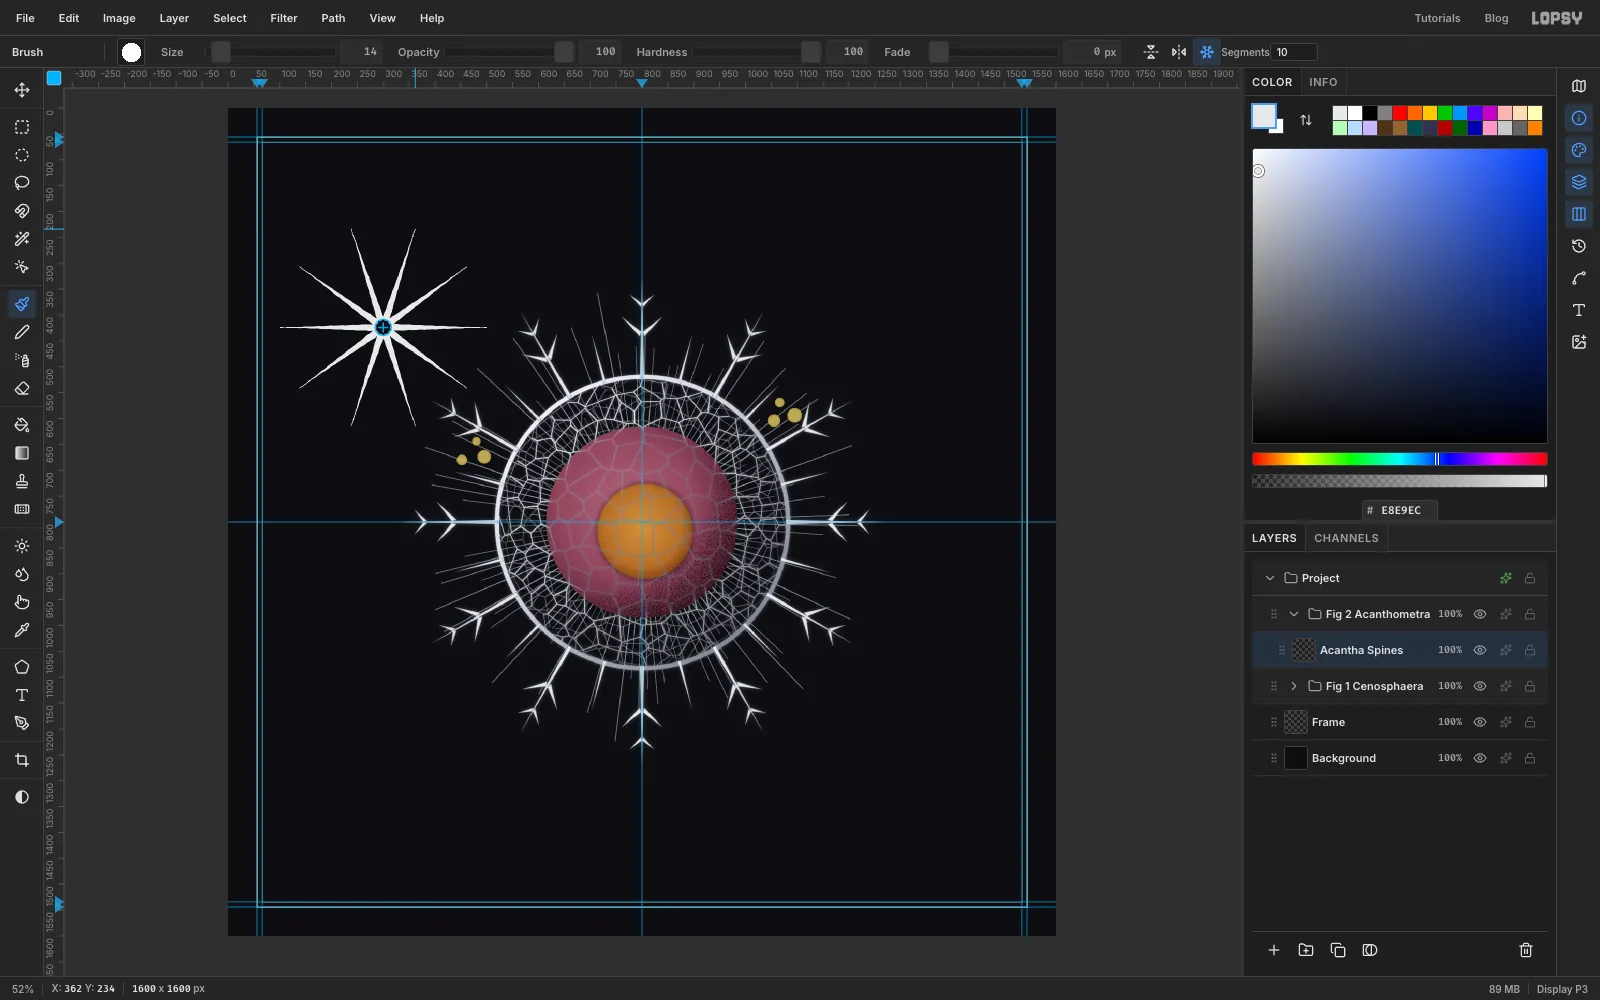
Pick the Brush. In its options bar click Radial Symmetry and set Segments to 10. Cmd-click the canvas at about x 300, y 424 on the rulers to move the symmetry centre there. Open the brush settings from the brush preview in the options bar and, on the Shape tab, set Size 14, Hardness 100, Spacing 5 and Taper 180, so each stroke thins to a point over its last 180 px.
Use the foreground . Drag from near the centre outwards about 200 px, aiming a little right of straight up. Lopsy paints ten copies.
-
Add short spines and cross-bars
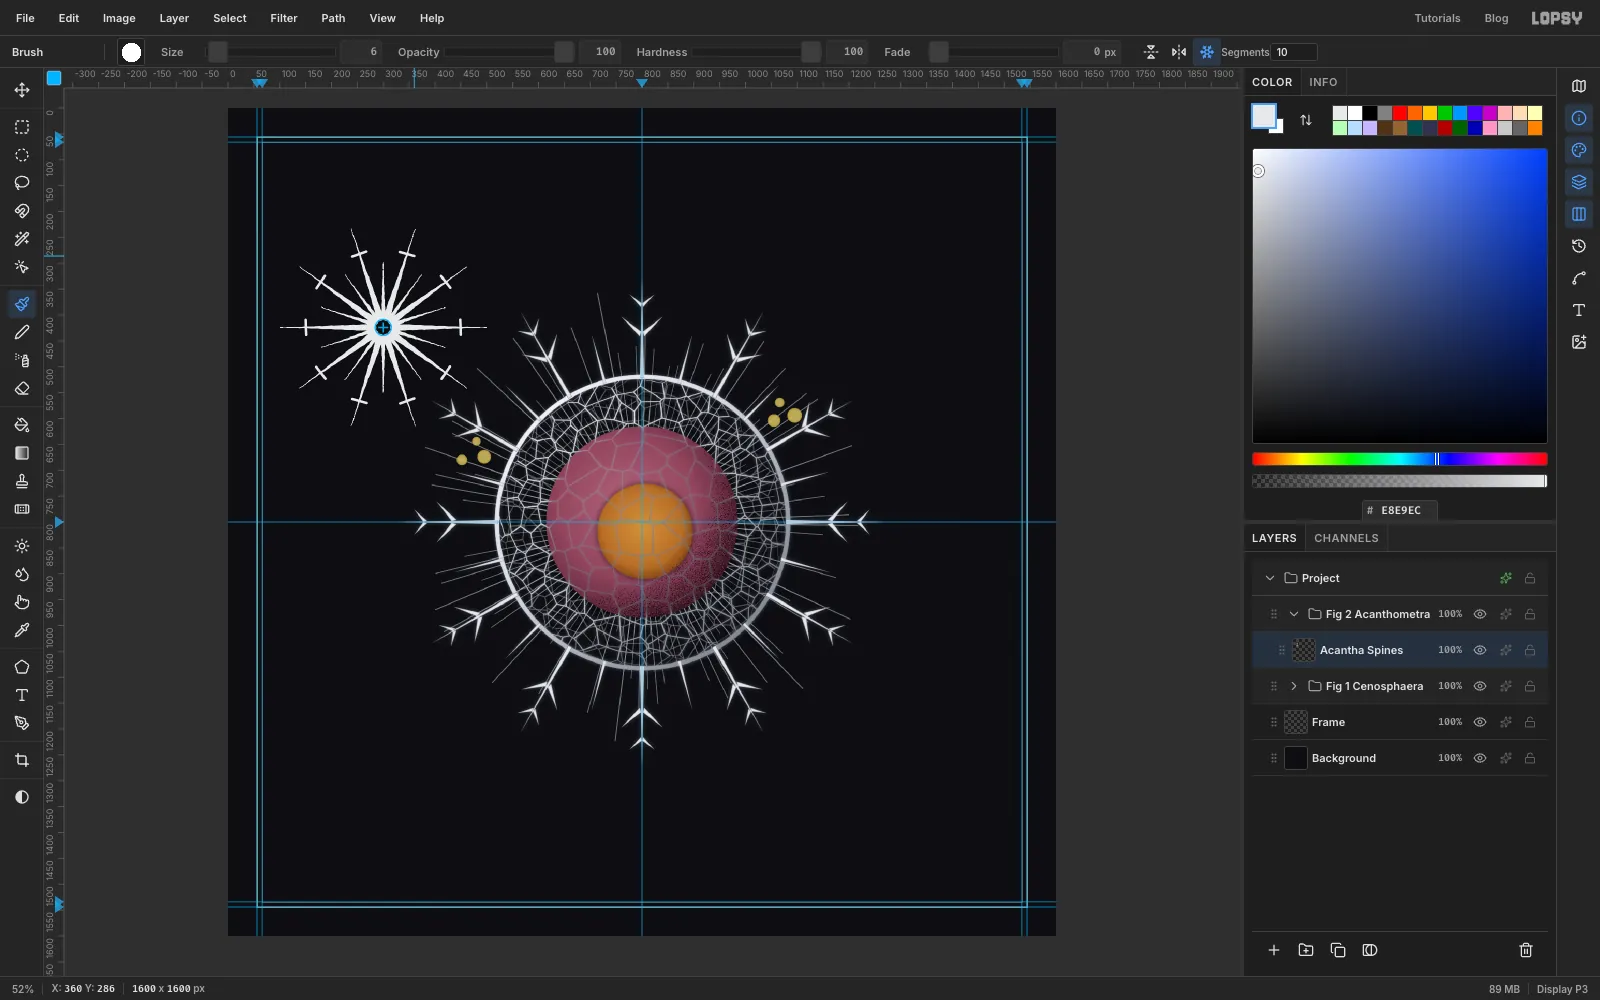
Set the brush to Size 9 and Taper 110 and drag a second, shorter spine of about 130 px, halfway between two long ones. Then set Size 6 and Taper 0. Click just to one side of a long spine about 150 px from the centre, and Shift-click just the other side to draw a short bar across it. Symmetry repeats the bar on all ten long spines. Acantharian spines have little blades like these.
Click Radial Symmetry again to turn it off. While it's on, it takes over Cmd-clicks for every tool. Give the layer the silver treatment.
-
Give Figure 2 a capsule
Add a layer called Acantha Capsule above the spines. Select the circle From 252, 376 To 348, 472 and fill it with the capsule gradient, dragged from the centre outwards about 50 px.
Stipple it the same way as the big capsule: a new Acantha Stipple layer, Cmd-click the capsule thumbnail, a white to radial gradient from its upper left, Add Noise 100 Mono, Threshold 128, then Multiply at 60%.
-
Figure 3: a disc and a pore tile
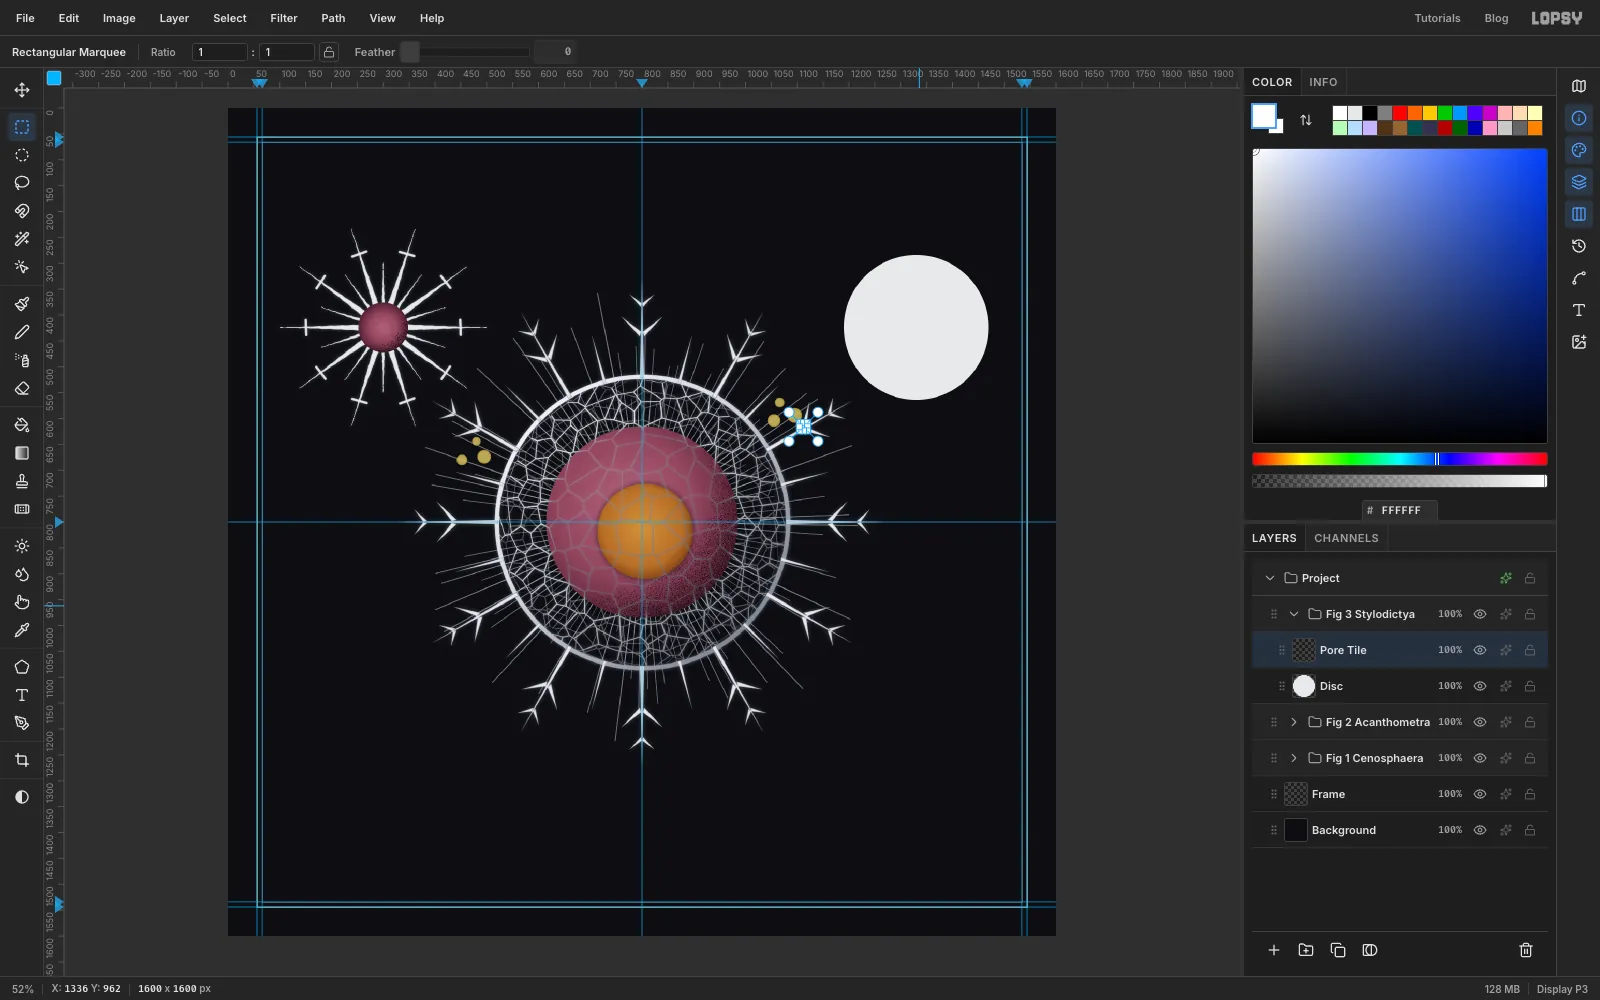
Collapse Fig 2, click it, and make a group called Fig 3 Stylodictya. Add a layer called Disc, select the circle From 1190, 284 To 1470, 564 and fill it with .
Now make a pore pattern. On a new scratch layer, select the tiny circle From 1107, 611 To 1117, 621 and fill it with white. Select the square From 1104, 608 To 1120, 624, which puts the dot in the middle of a 16 px tile, and choose Edit → Define Pattern. Delete the scratch layer. Small marquees like these are much easier to type than to drag.
-
Fill pores, then mark the chamber walls
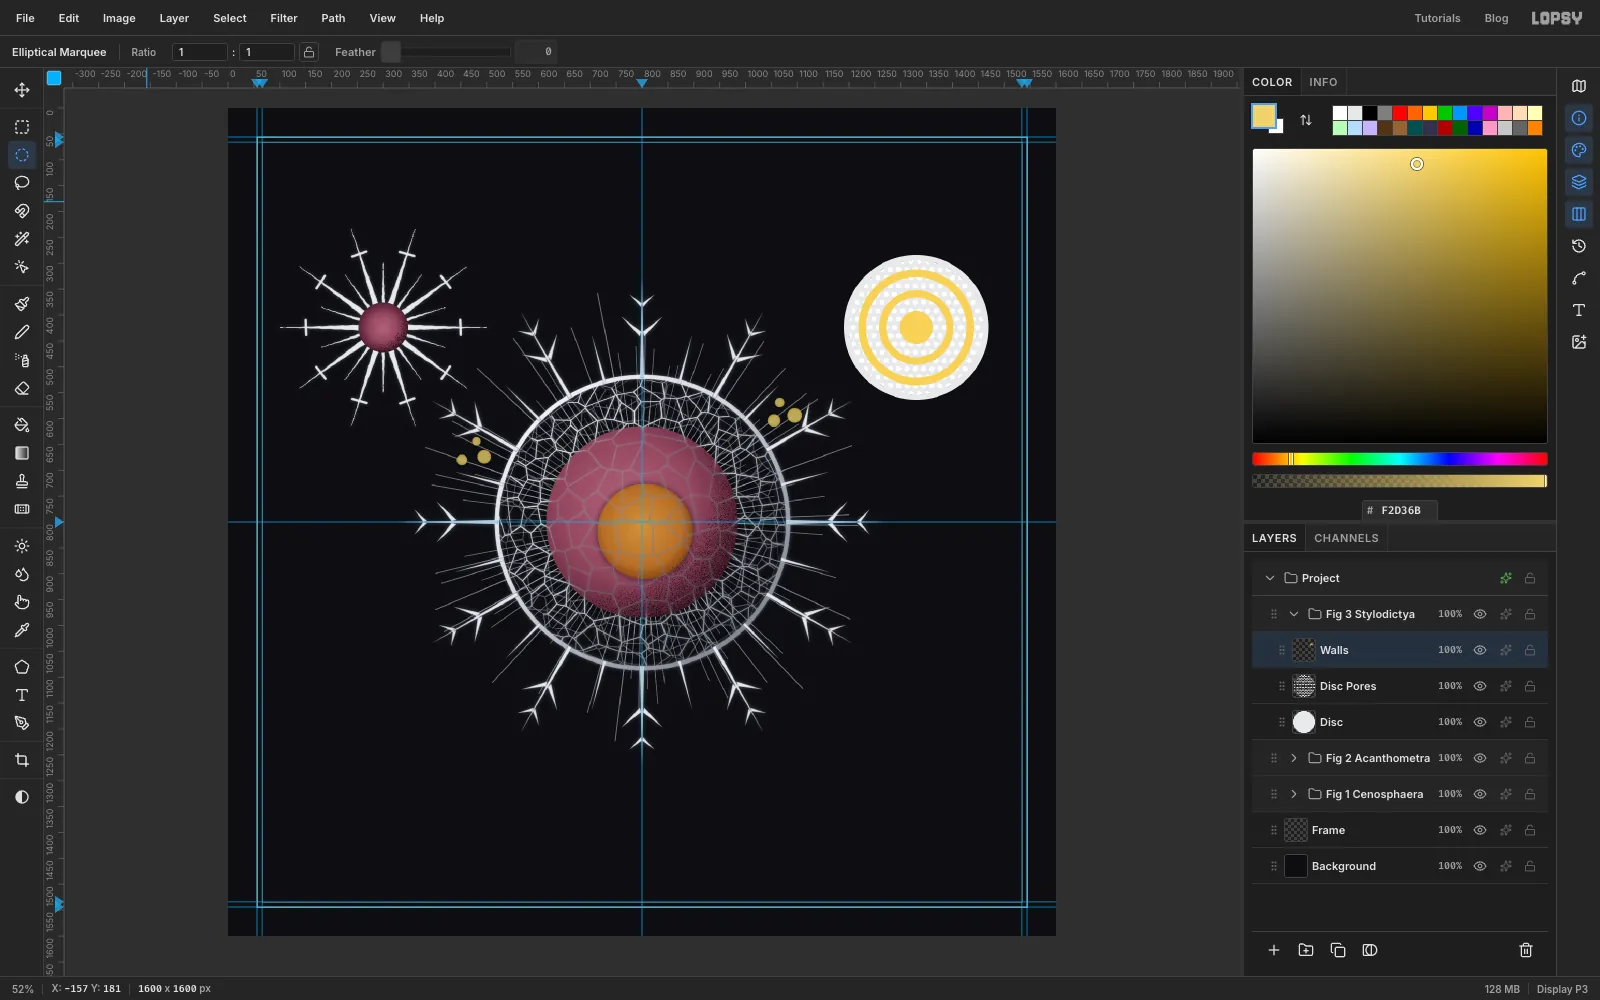
Add a layer called Disc Pores. Cmd-click the Disc thumbnail, choose Select → Shrink… 10 px, then Edit → Fill with Pattern…. Pick your 16 × 16 pattern and set Row Stagger to 50%, which offsets every other row into a honeycomb. Deselect.
The disc needs solid rings between the rows of pores. On a new scratch layer called Walls, using any bright colour you can see:
- fill the circle From 1218, 312 To 1442, 536, then select From 1233, 327 To 1427, 521 and press Delete (outer wall)
- fill From 1258, 352 To 1402, 496, then delete From 1272, 366 To 1388, 482 (middle wall)
- fill From 1298, 392 To 1362, 456 (solid hub)
Cmd-click the Walls thumbnail, click the Disc Pores row and press Delete to clear the pores under the walls. Deselect and delete the Walls layer.
-
Cut the pores out of the disc
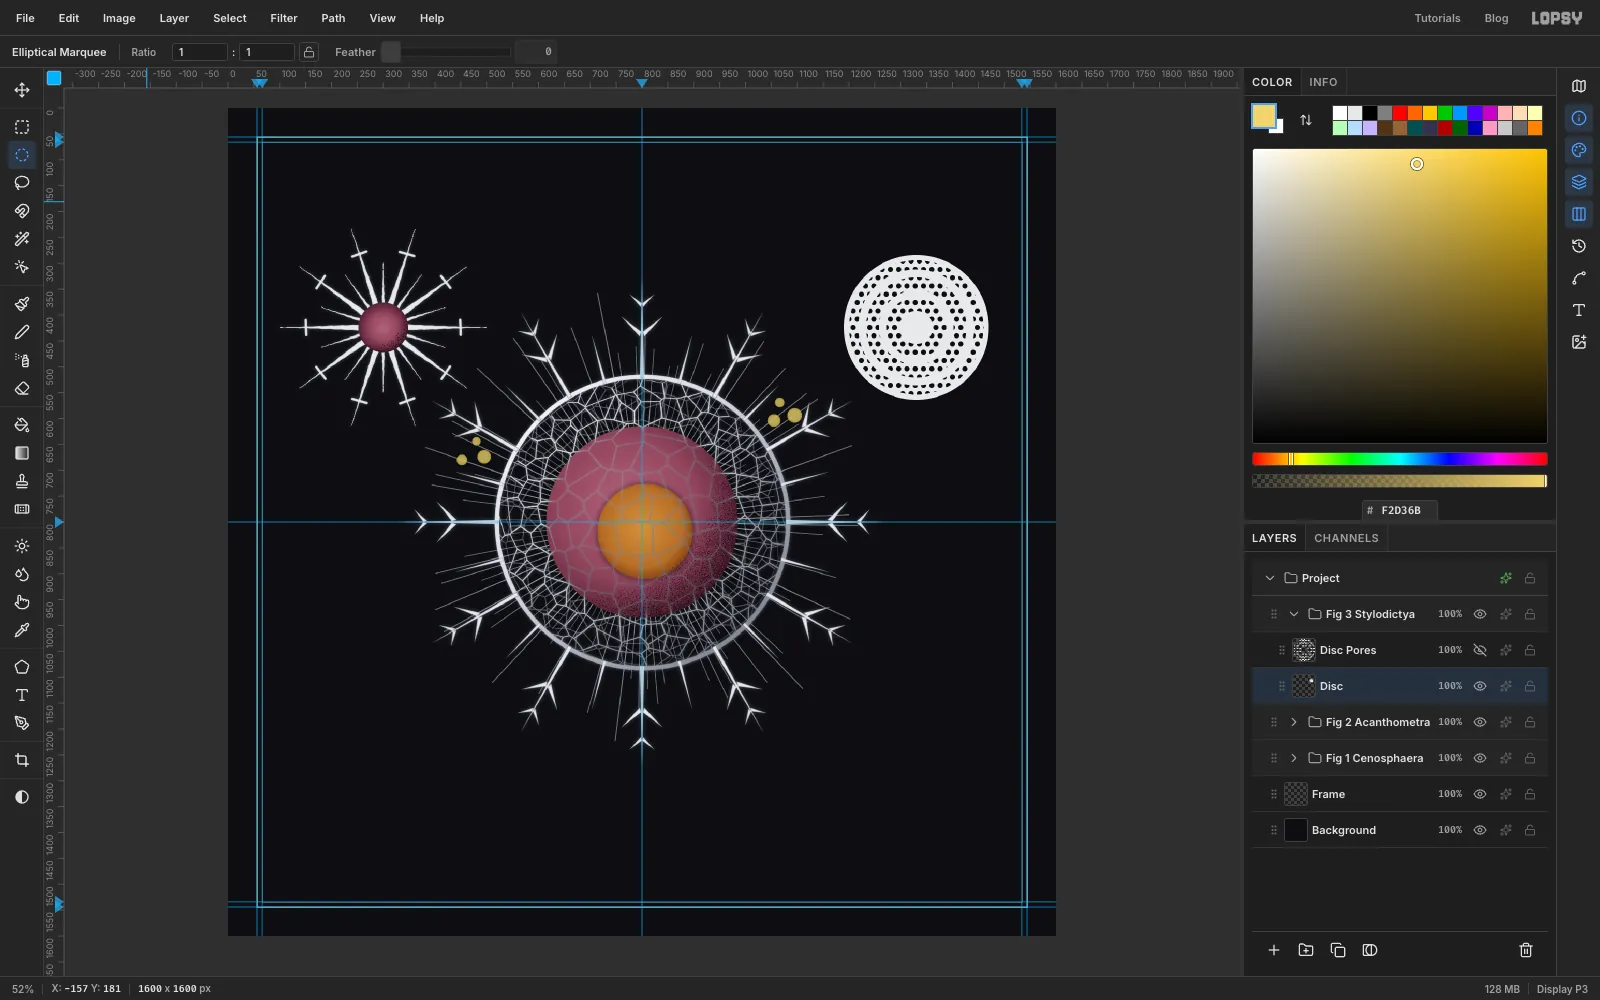
Cmd-click the Disc Pores thumbnail to select every dot, click the Disc row, and press Delete. The dots become holes. Deselect and hide the Disc Pores layer.
-
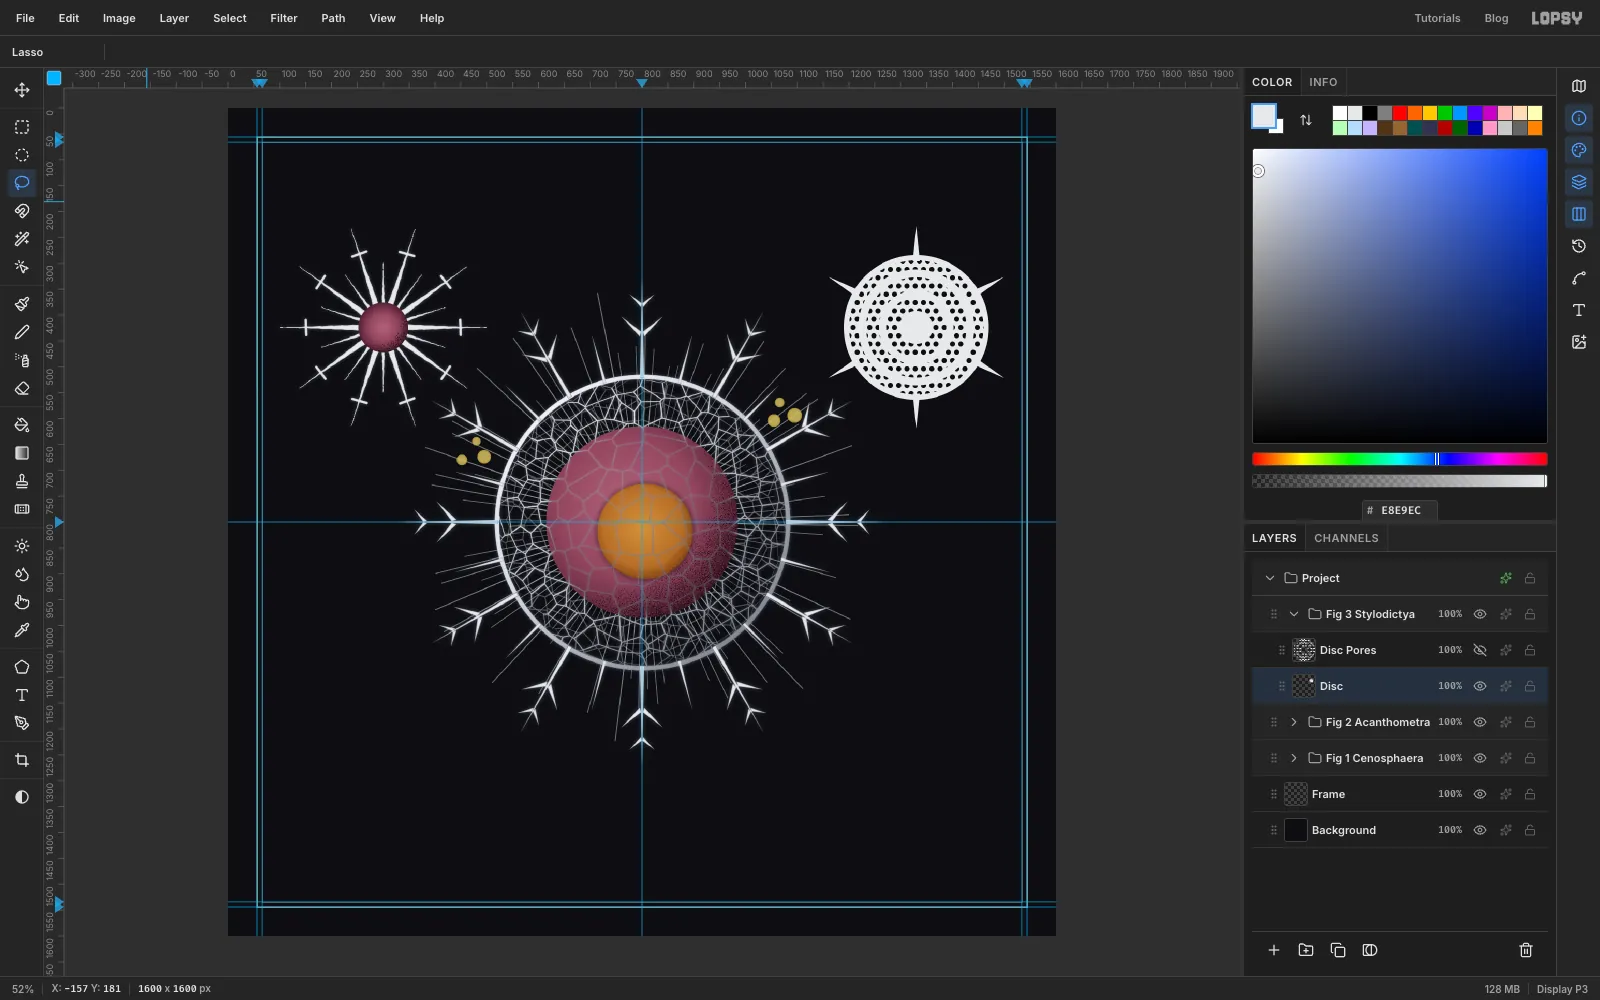
Add six spines
On Disc, use the Lasso to draw six thin, thorn-shaped triangles, holding Shift for each one after the first. Space them every 60°, starting at 30° (about 4 o'clock, then 6 o'clock, 8 o'clock and so on). Each starts just inside the rim and reaches about 55 px past it. Fill them with and deselect.
-
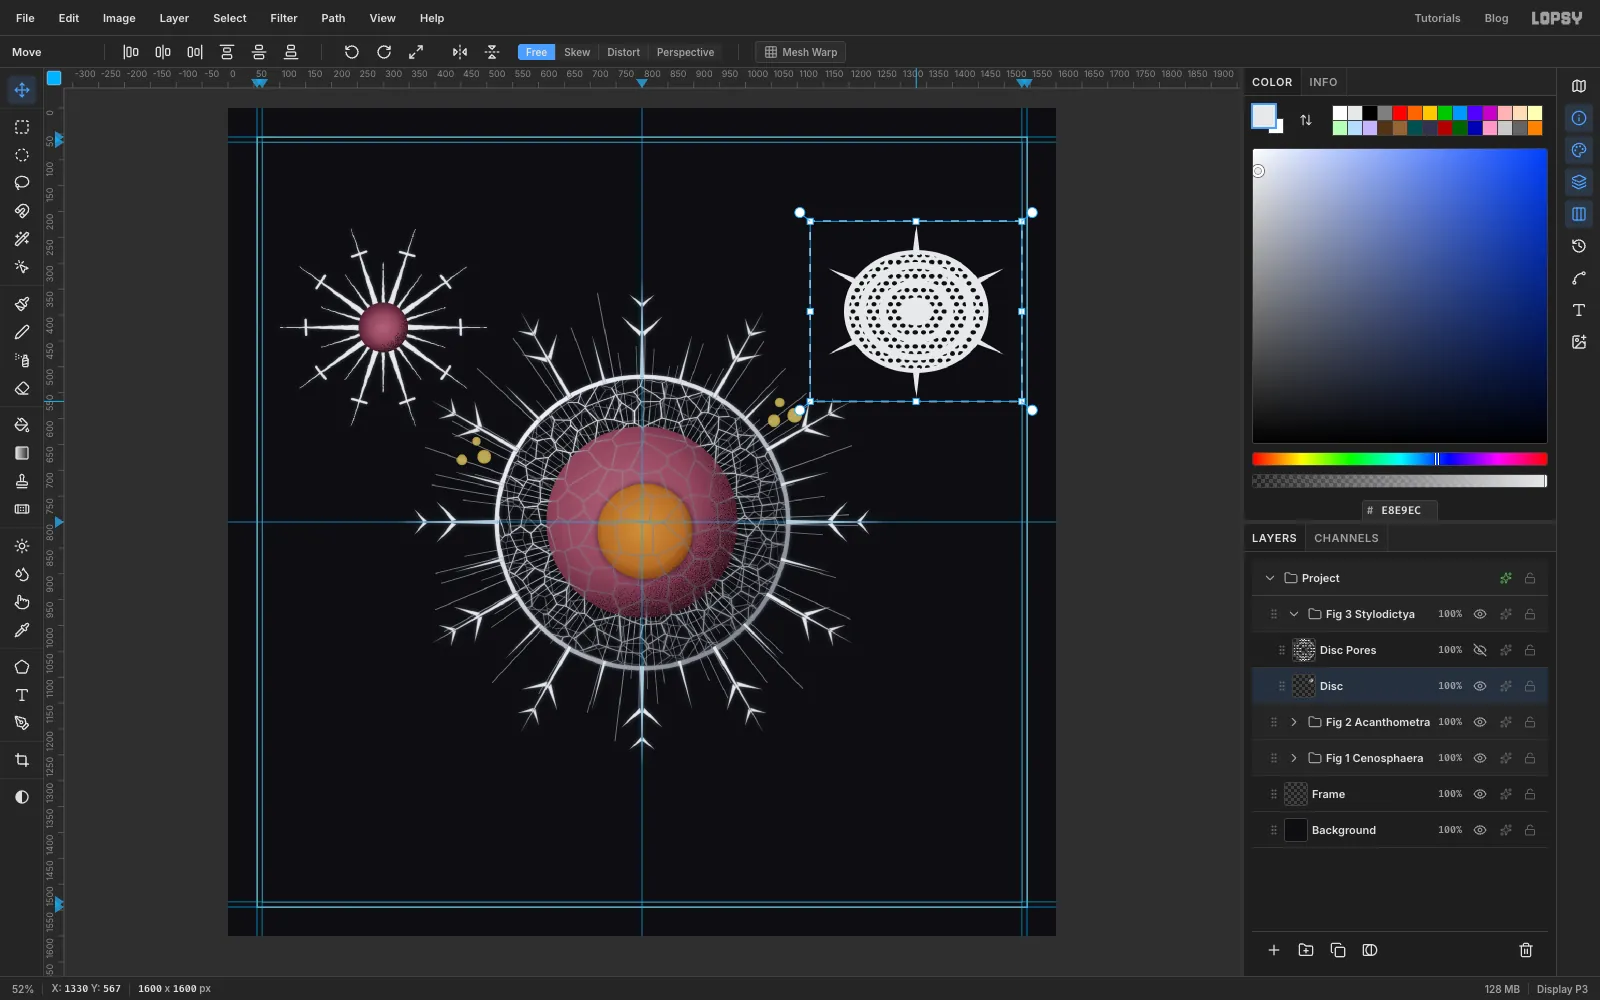
Tilt the disc: squash it
A disc seen square-on looks like a target, so tilt it. Draw a square marquee around the disc and its spines. With the Move tool, drag the bottom middle handle up about 60 px, to roughly 85% of the height. Press Cmd+D.
-
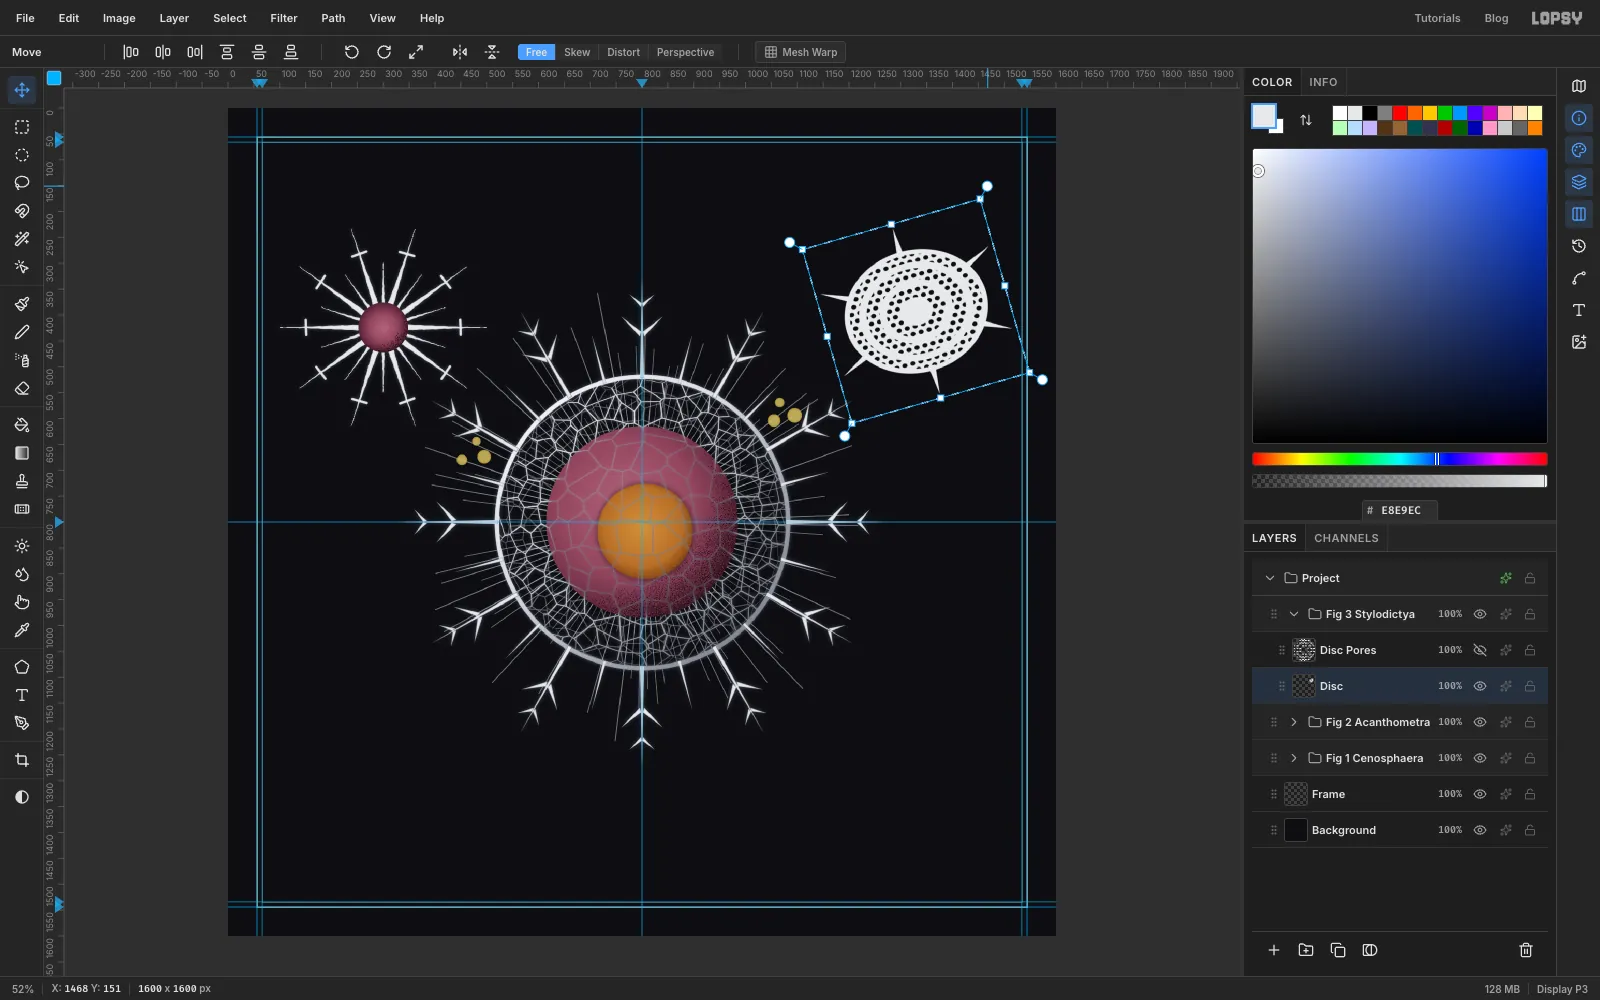
Tilt the disc: rotate it
Draw a new marquee just around the squashed disc. Drag the round handle just outside its top-right corner anticlockwise by about 16°, and press Cmd+D. Nudge the disc back to its spot if it drifted, and give Disc the silver treatment.
-
Figure 4: paste the micrograph
Collapse Fig 3, click it, and make a group called Fig 4 Ammonia. First add a layer called Field. Select the circle From 120, 1048 To 464, 1392 and fill it with . This is the dark microscope field, centred at x 292, y 1220.
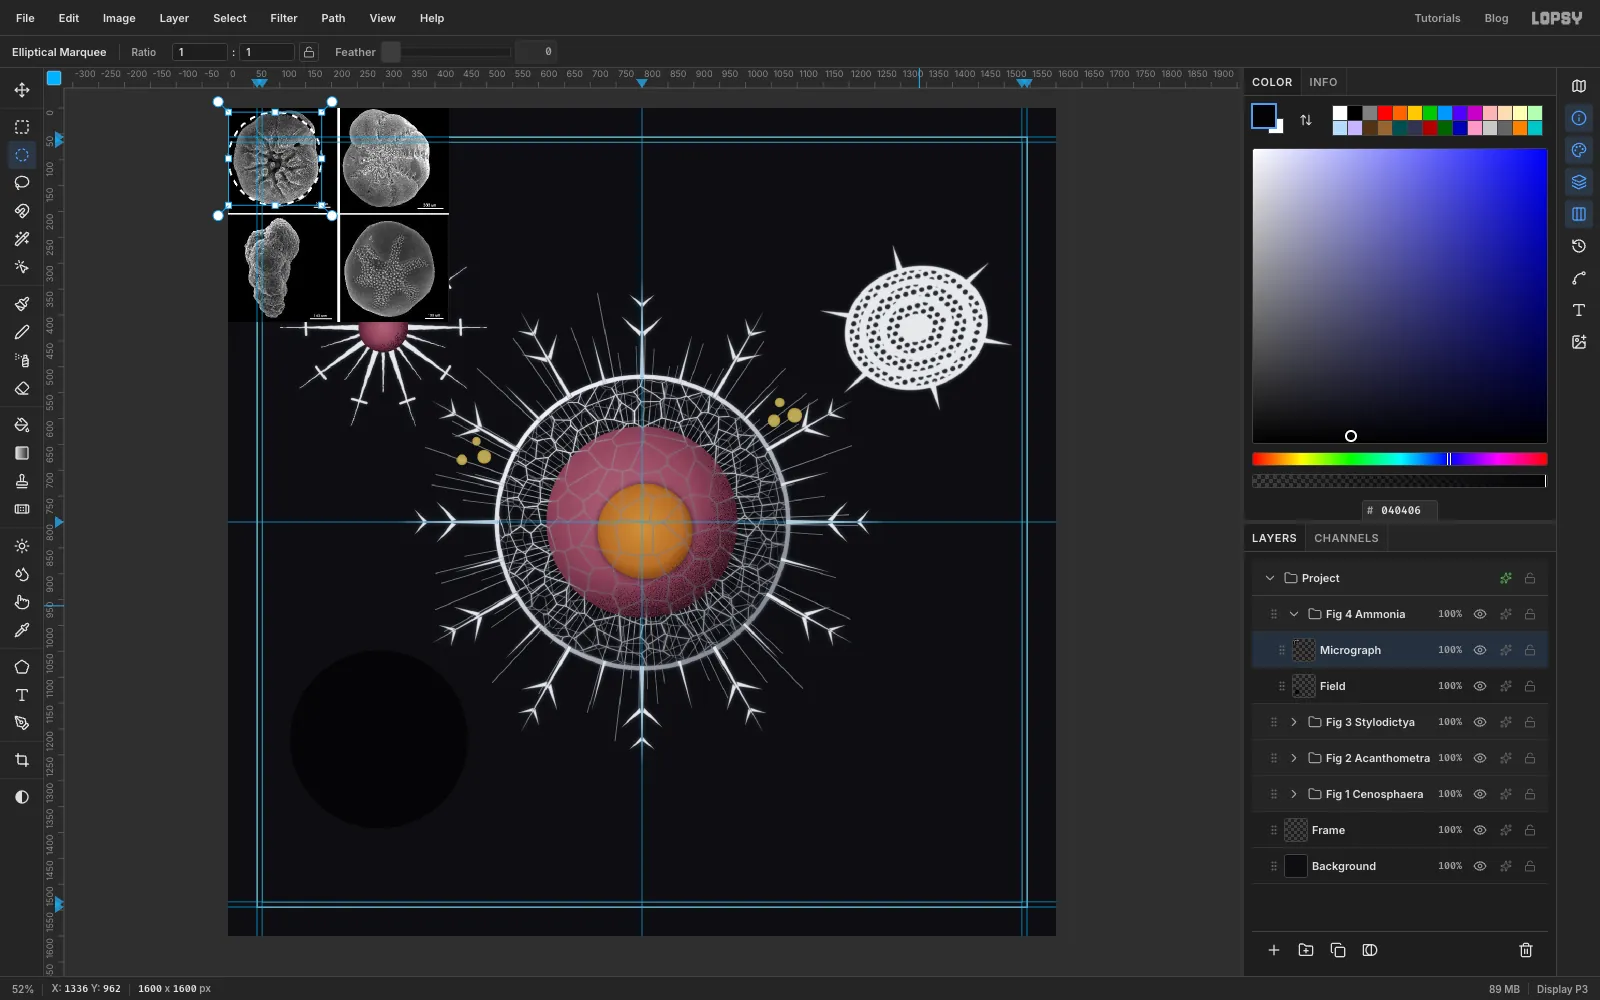
Open the downloaded micrograph in your browser, copy it, and press Cmd+V in Lopsy. A paste lands above the active layer, so it goes on top of the field, at the top-left corner of the plate. Rename it Micrograph.
-
Circle one specimen
Select the circle From 1, 8 To 181, 188. It sits around the top-left specimen, Ammonia beccarii, inside the photo's border, and leaves out the photo's own "200 µm" scale bar.
Choose Select → Feather… 2 px so the cut-out edge isn't jagged, then Select → Inverse, Delete, and deselect.
-
Scale the specimen up
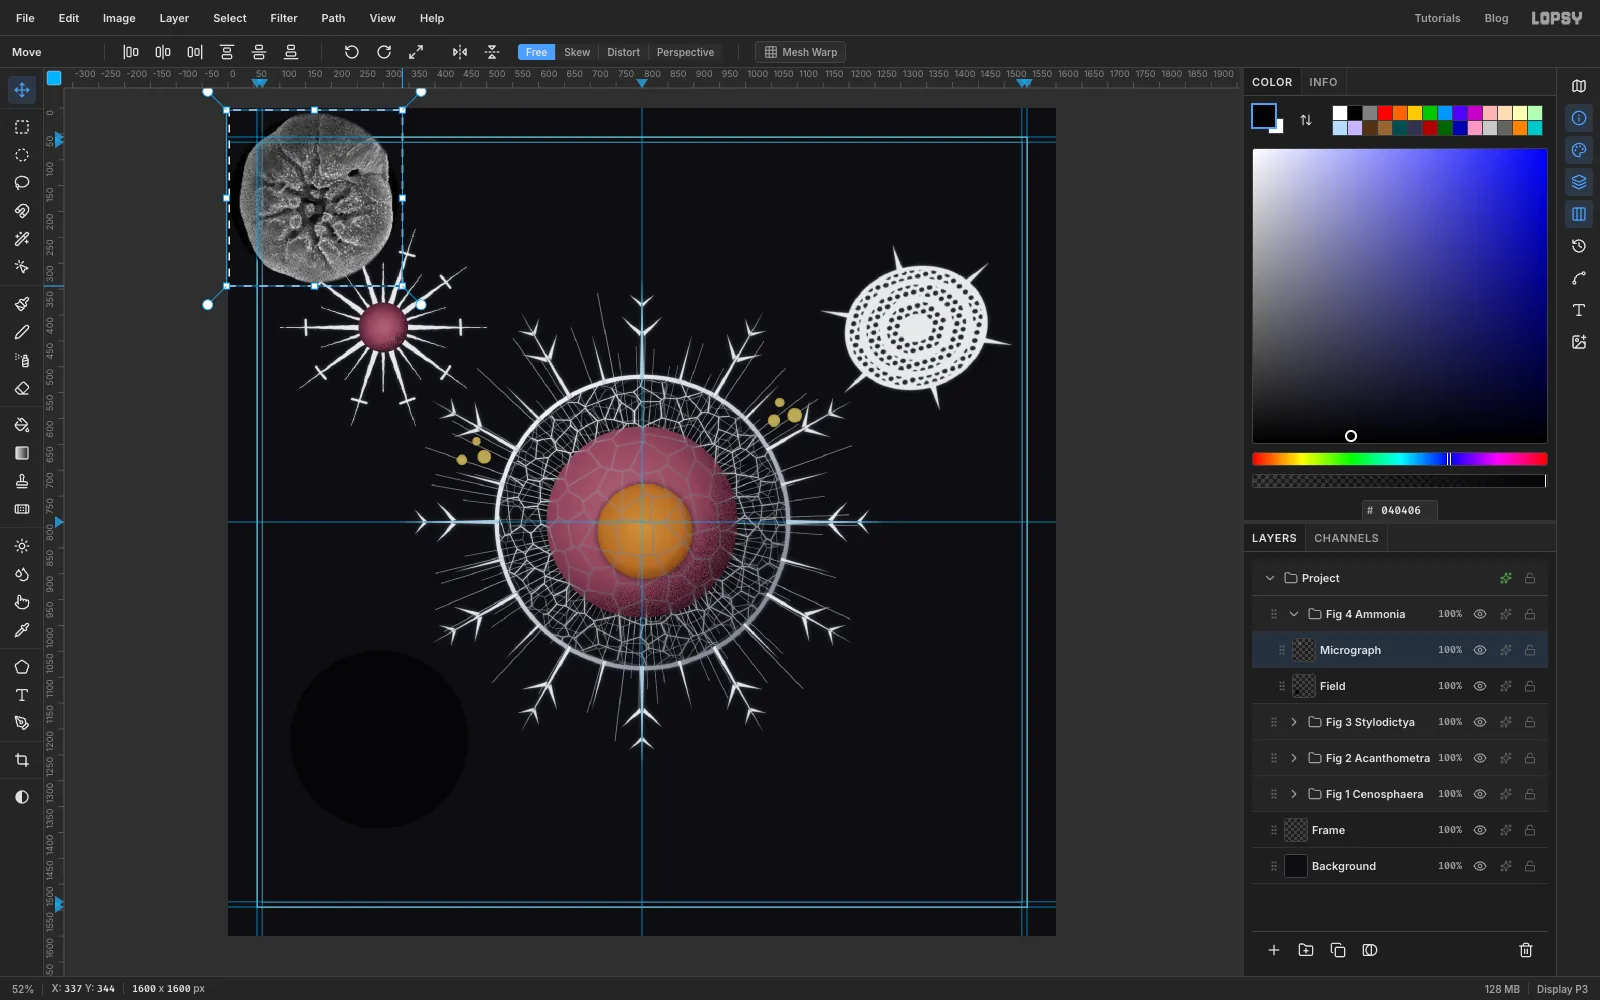
Draw a marquee around the circle, switch to the Move tool, hold Cmd and drag the bottom-right handle outwards until the photo is about 1.8× its size, about 325 px across. Press Cmd+D.
Drag the photo down onto the black field, then use the arrow keys to centre it. Enlarging a small photo softens it slightly, which suits a microscope image.
-
Ring the microscope field
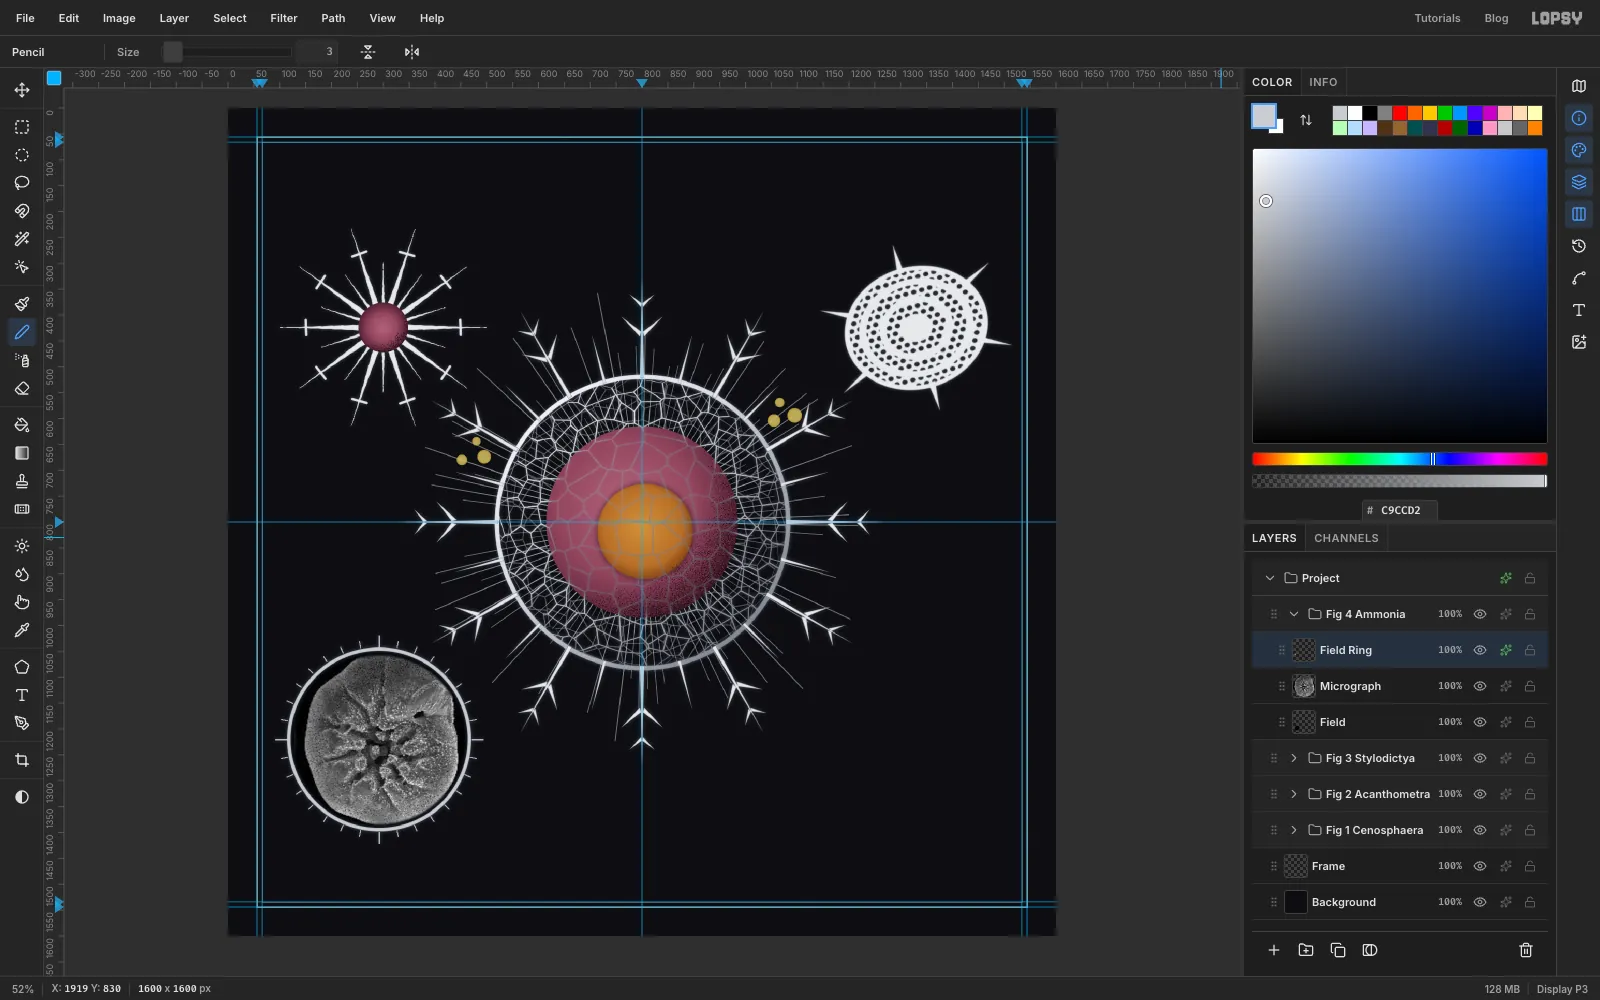
Add a layer called Field Ring. Select From 114, 1042 To 470, 1398, fill with , then select From 121, 1049 To 463, 1391 and press Delete. You have a 7 px ring.
For the ticks, pick the Brush and turn Radial Symmetry on with 32 segments, then switch to the Pencil. The symmetry setting is shared. Cmd-click the centre of the field. With the Pencil at Size 2, click just outside the ring at 12 o'clock and Shift-click 12 px further out. You get 32 even ticks. Turn symmetry off, then add four longer ticks (about 20 px) at 12, 3, 6 and 9 o'clock at Size 3. Give the layer the silver treatment.
-
Add a scale bar
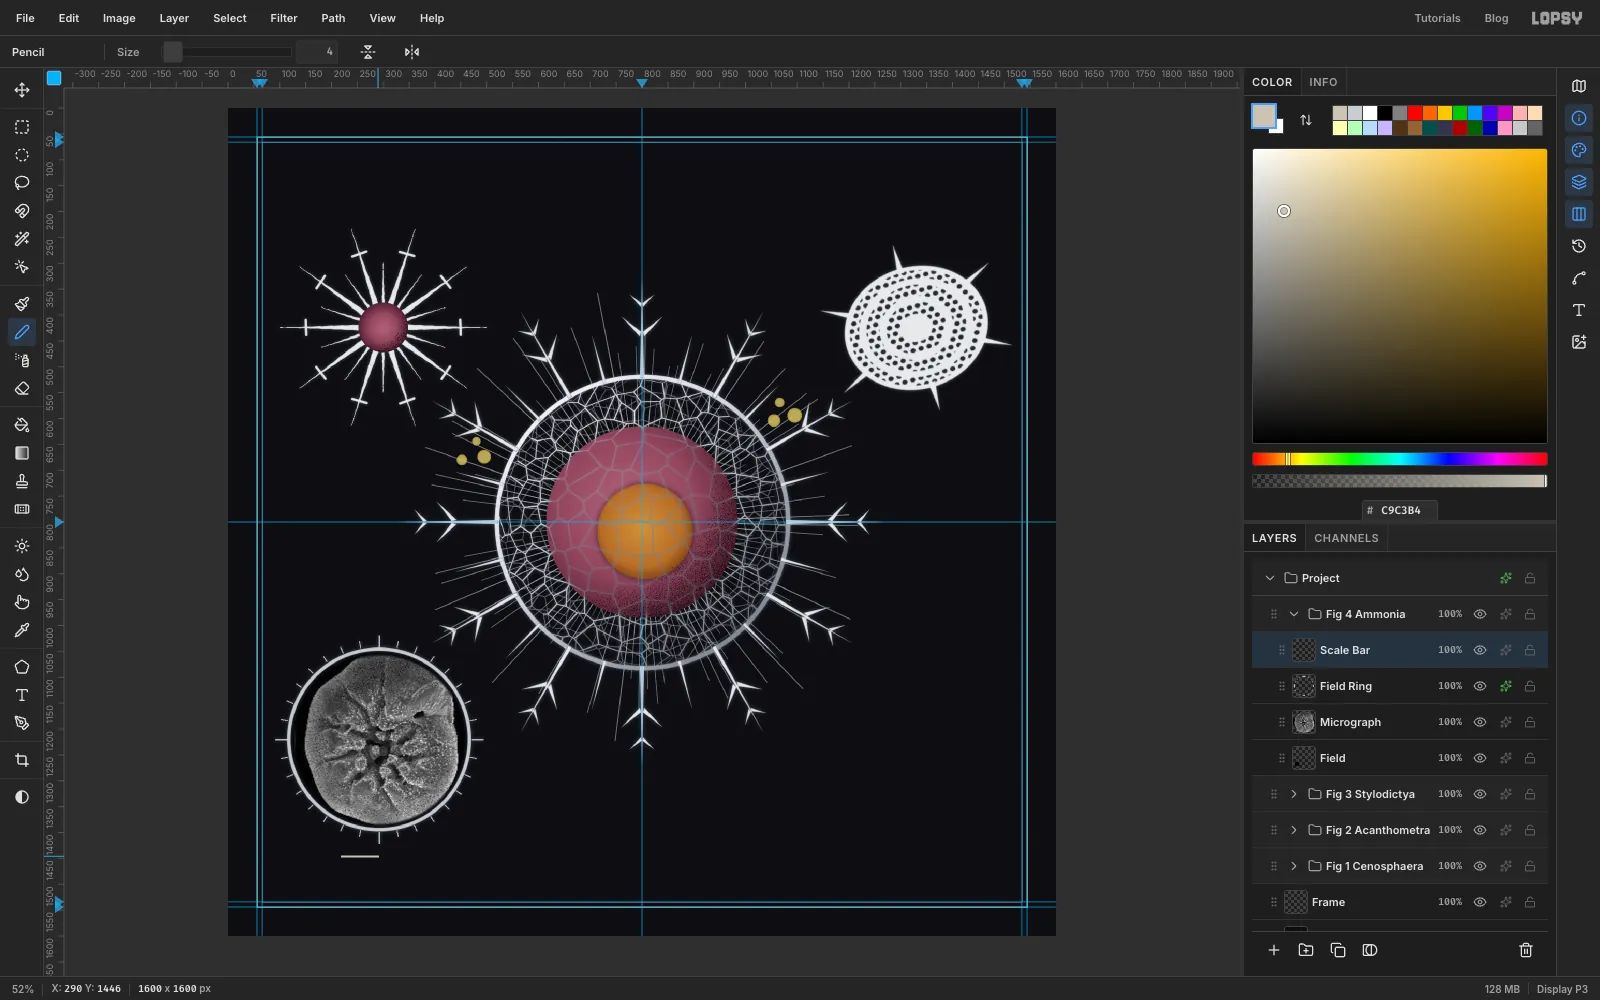
Add a layer called Scale Bar. With the Pencil at Size 4 and , draw a 70 px line about 25 px below the lowest tick, ending just left of the field's centre line. Click the start and Shift-click the end. The "200 µm" label goes to its right later.
-
Figure 5: a second pore pattern
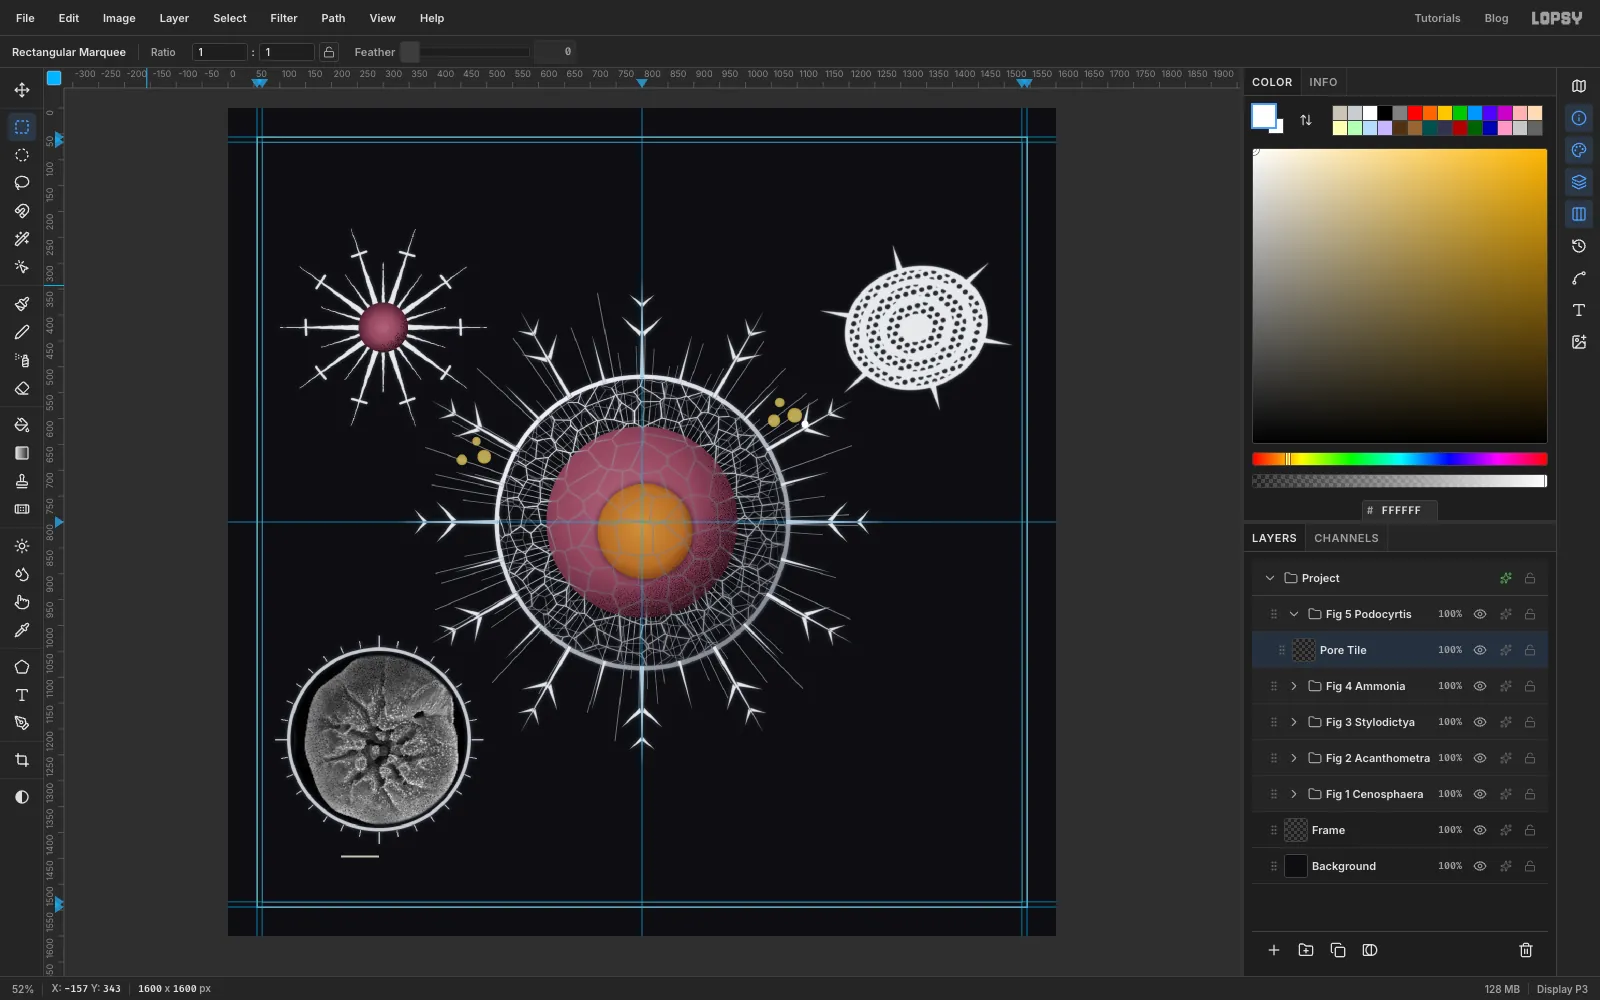
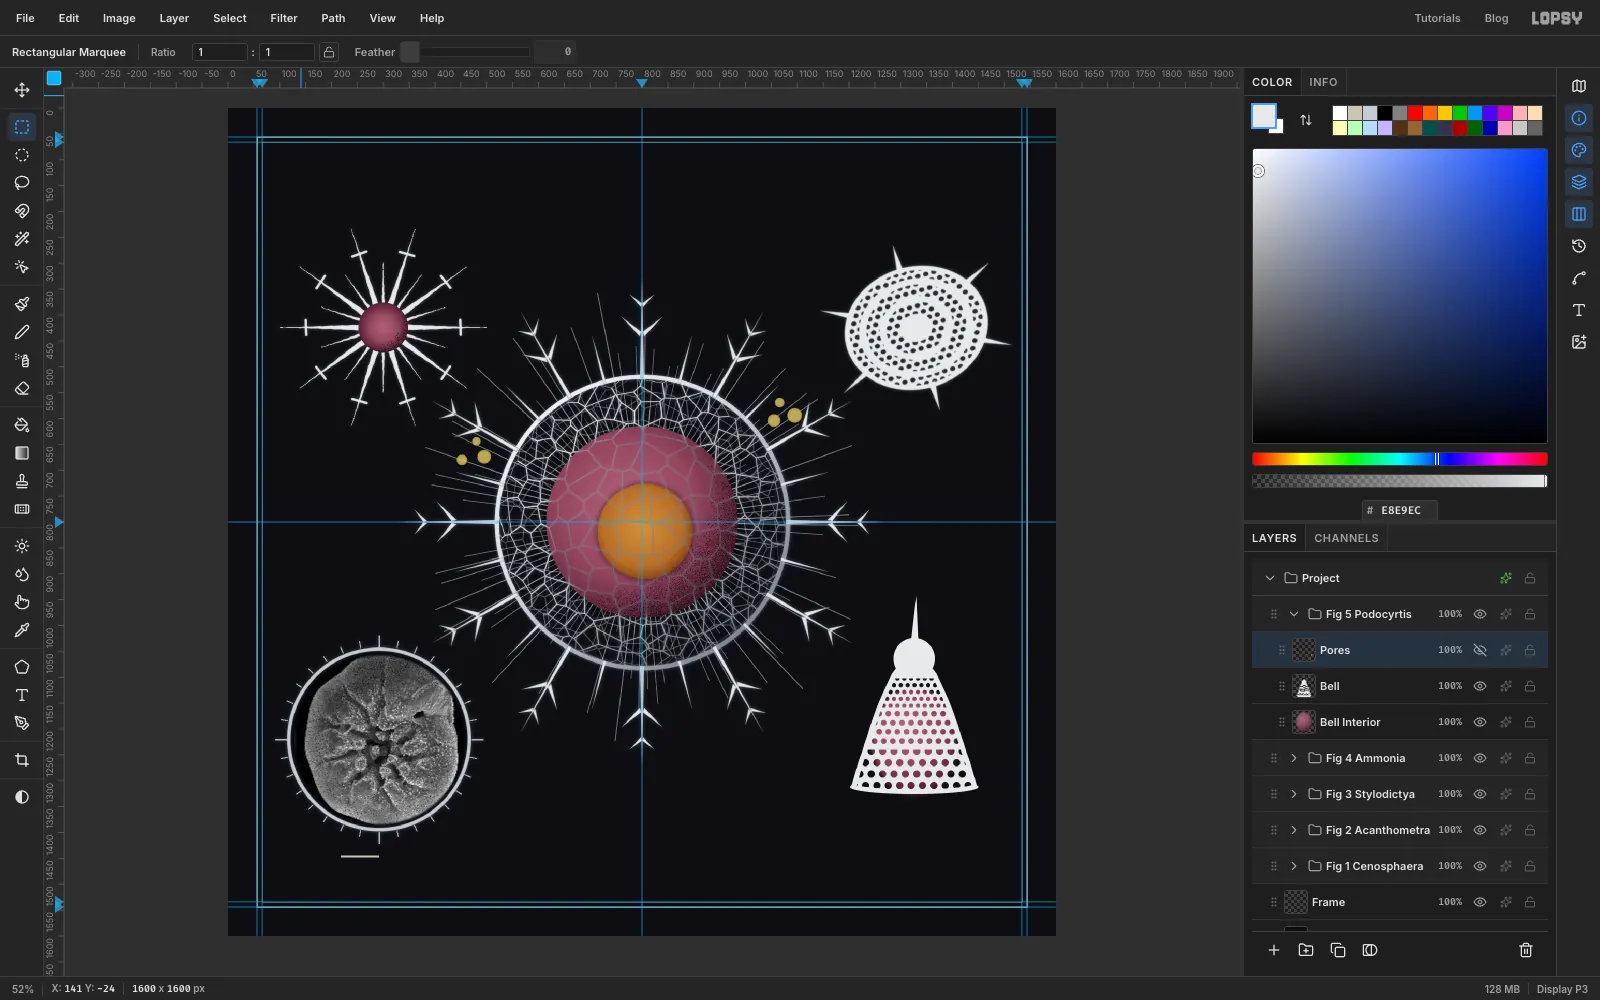
Collapse Fig 4, click it, and make a group called Fig 5 Podocyrtis. The bell needs bigger pores. On a scratch layer, select From 1108, 604 To 1122, 618 and fill it with white. Select the square From 1104, 600 To 1126, 622, choose Edit → Define Pattern and delete the scratch layer. You now have a 22 × 22 tile as well as the 16 × 16 one.
-
Draw the bell
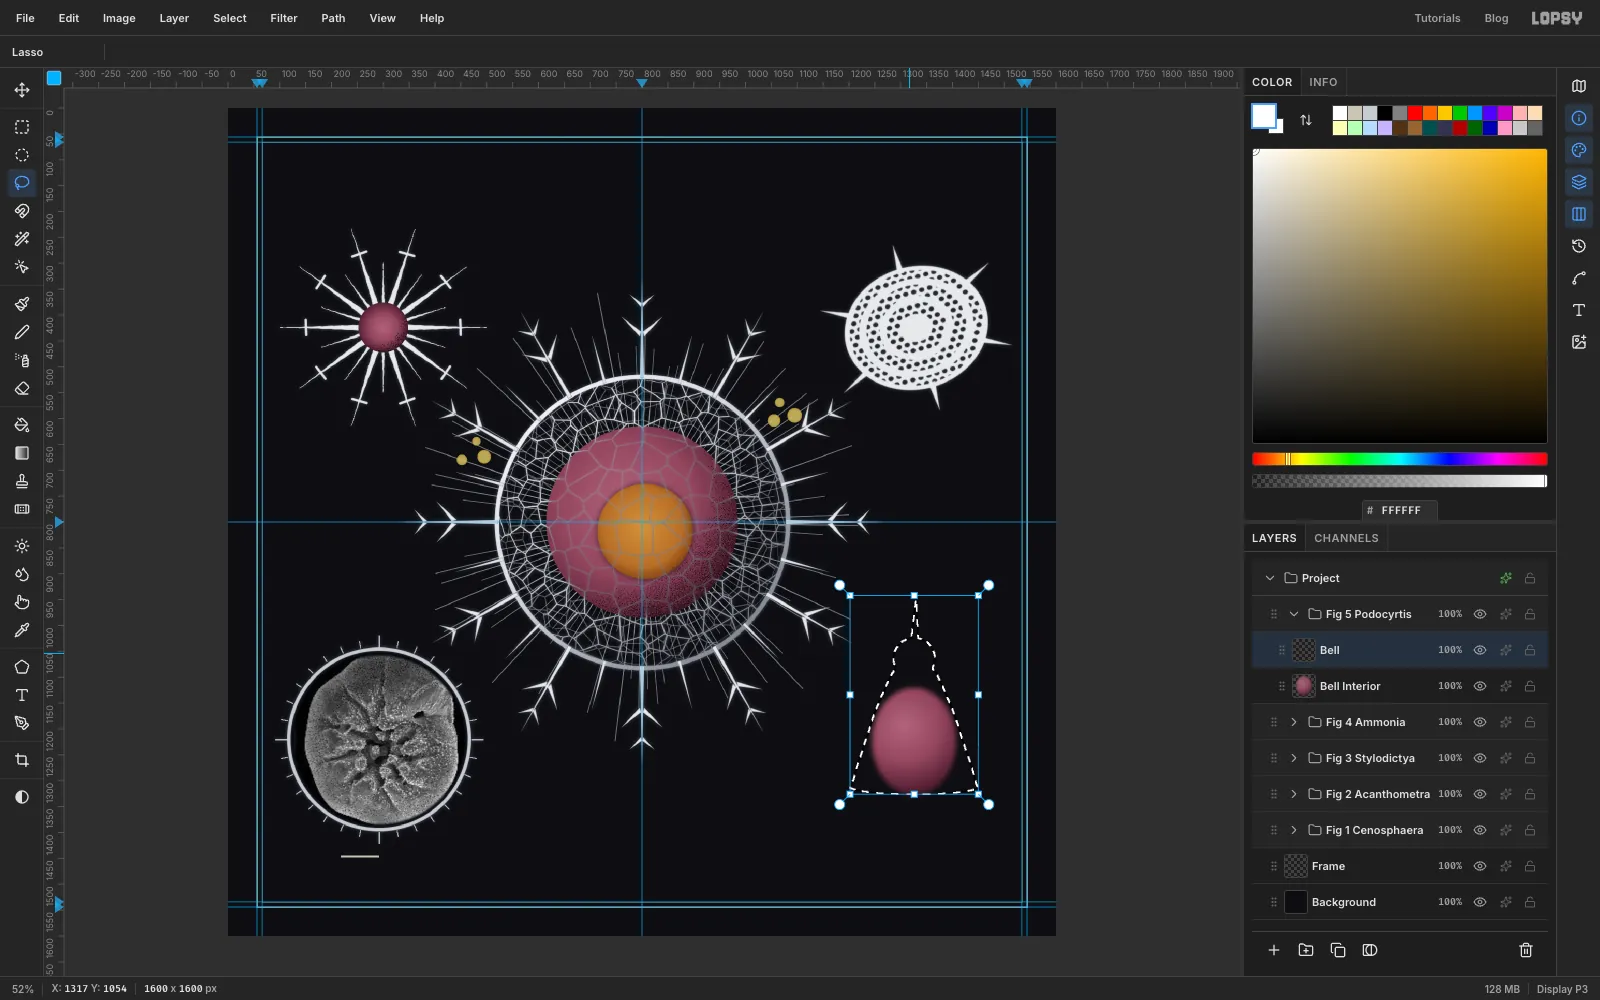
Add a layer called Bell Interior. Select the ellipse From 1244, 1120 To 1408, 1328, choose Select → Feather… 10 px and fill it with the capsule gradient. It will show through the pores.
Add a layer called Bell. With the Lasso, draw the bell's outline: a narrow top about 60 px wide at y 1076 that flares out in a gentle curve to about 245 px wide at y 1312, centred on x 1326. Then add to it:
- switch to the Elliptical Marquee and Cmd+Shift-drag an 80 px circle for the head, sitting on the narrow top
- Shift-drag a flat ellipse about 250 × 28 px along the bottom for the lip
- switch back to the Lasso and Shift-drag a thin triangle of a horn rising out of the head, about 110 px tall
Fill it all with and deselect.
-
Fill graded pores
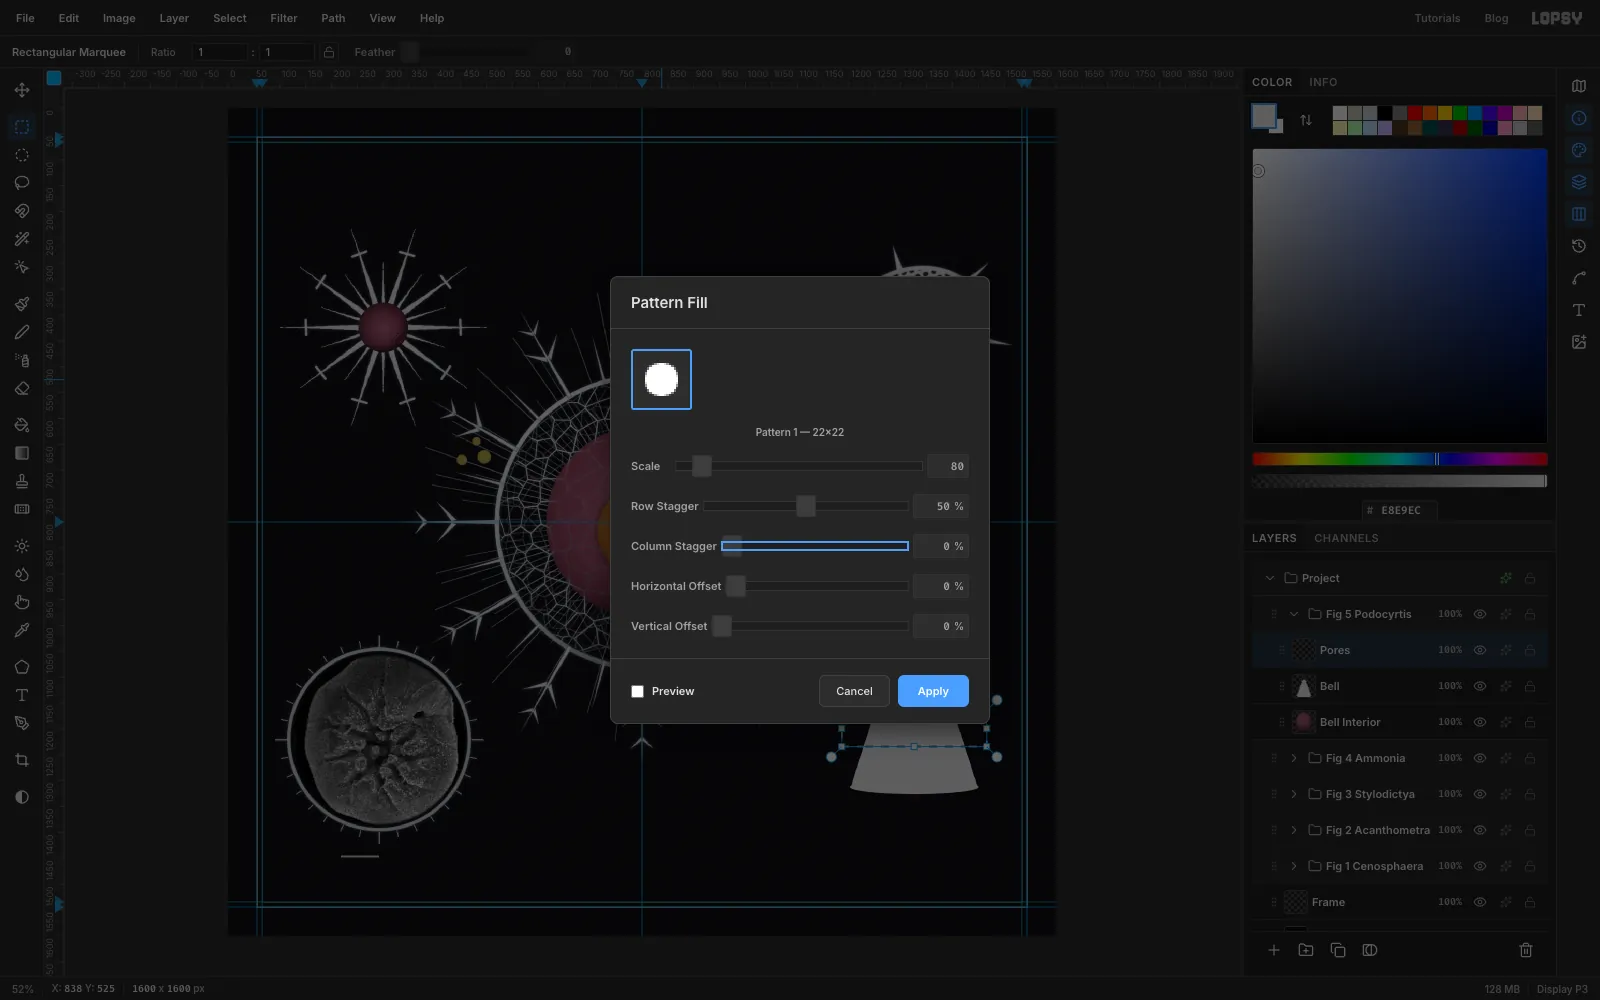
On real shells the pores are smaller near the head. Add a layer called Pores. Draw a rectangular marquee across the top third of the bell, below the head, and choose Edit → Fill with Pattern…. Pick the 22 × 22 pattern and set Scale 60 and Row Stagger 50%. Do the middle third at Scale 80 and the bottom third at Scale 100. Leave a few pixels between the bands so their rows don't collide.
-
Keep pores off the edge
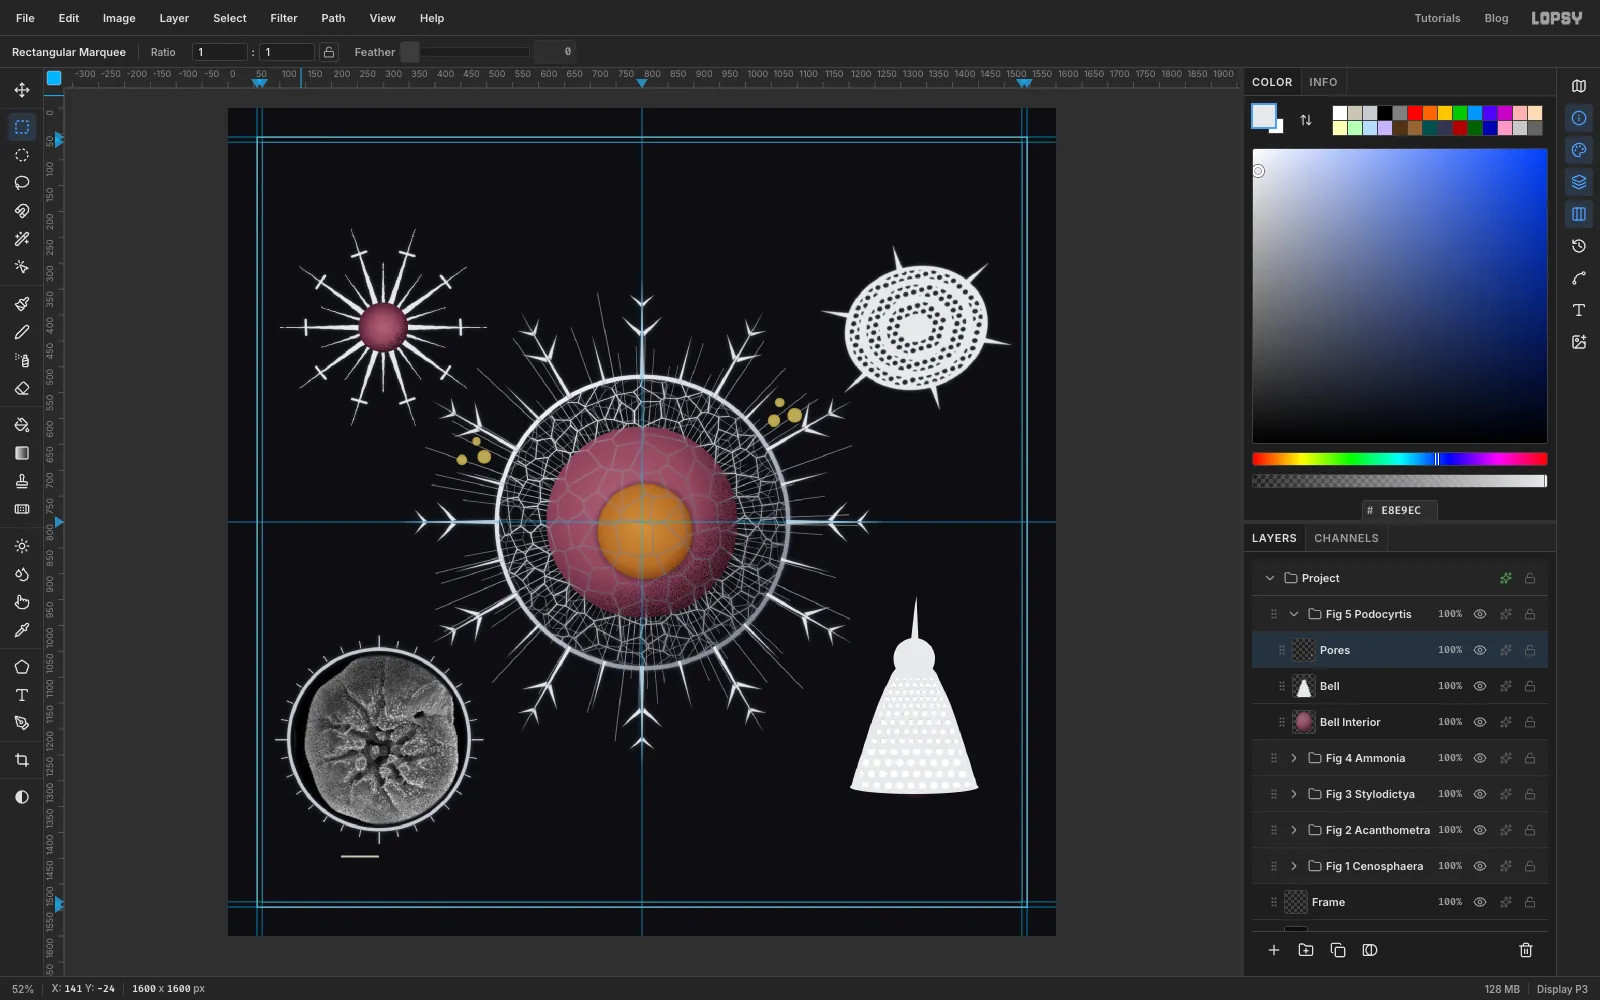
Pores sliced by the outline look like bites. Cmd-click the Bell thumbnail, choose Select → Shrink… 9 px and Select → Inverse, click the Pores row and press Delete. That clears every dot within 9 px of the edge. Deselect.
-
Punch the pores through
Cmd-click the Pores thumbnail, click the Bell row, and press Delete. Deselect, hide the Pores layer, and give Bell the silver treatment.
-
Shade the bell and add its feet
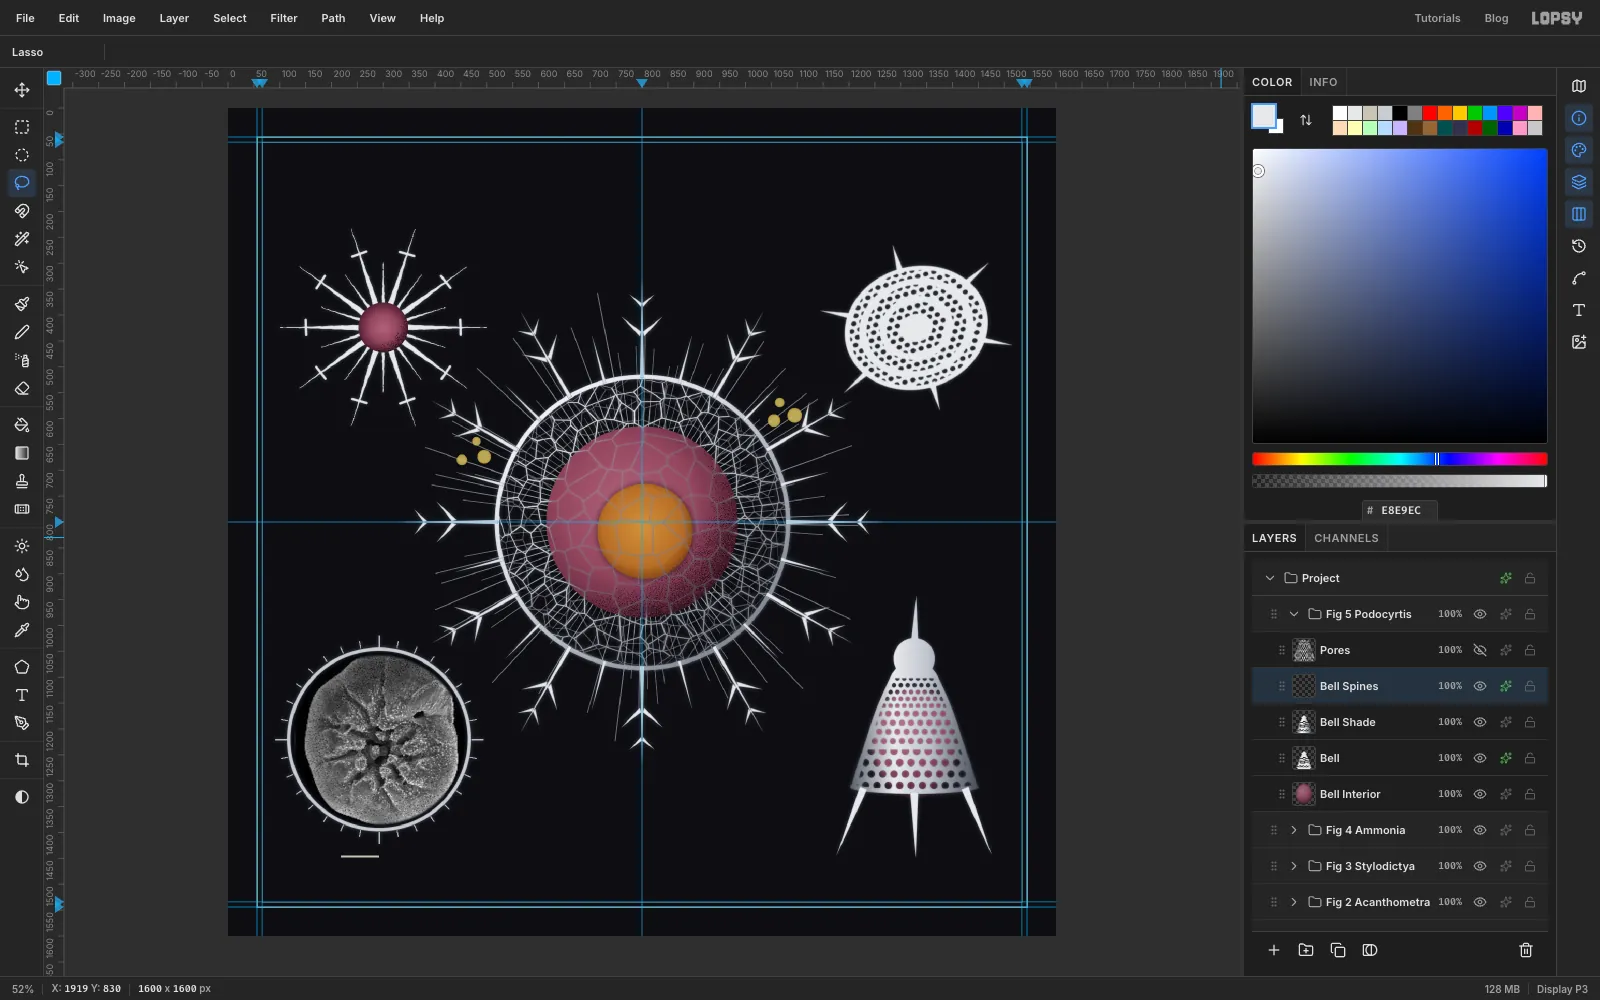
Add a layer called Bell Shade, Cmd-click the Bell thumbnail, and drag a linear gradient straight across it from left to right with the bell-shade stops: , white at 35%, at 60%, . Deselect and set the layer to Multiply. That's how light falls on a cone.
Add a layer called Bell Spines. With the Lasso, draw three long thin thorns for feet, using Shift to add each after the first: one under each side of the rim angling outwards, and one straight down the middle, each about 130 px long. Fill them with and give the layer the silver treatment.
-
Set the title
Collapse Fig 5, click it, and make a group called Type. Add a layer called Rules inside it. Click Rules each time before you set up a new piece of type. With a text layer active, the Text tool's options restyle that layer instead.
Pick the Text tool. Choose Old Standard TT, Size 62, colour , and in the Text panel set Letter spacing to 14. Click in the empty space at the top and type
FORAMINIFERA, then press Tab to commit. With the Move tool, nudge it so it's centred on the middle guide, with its tops about 105 px from the top edge.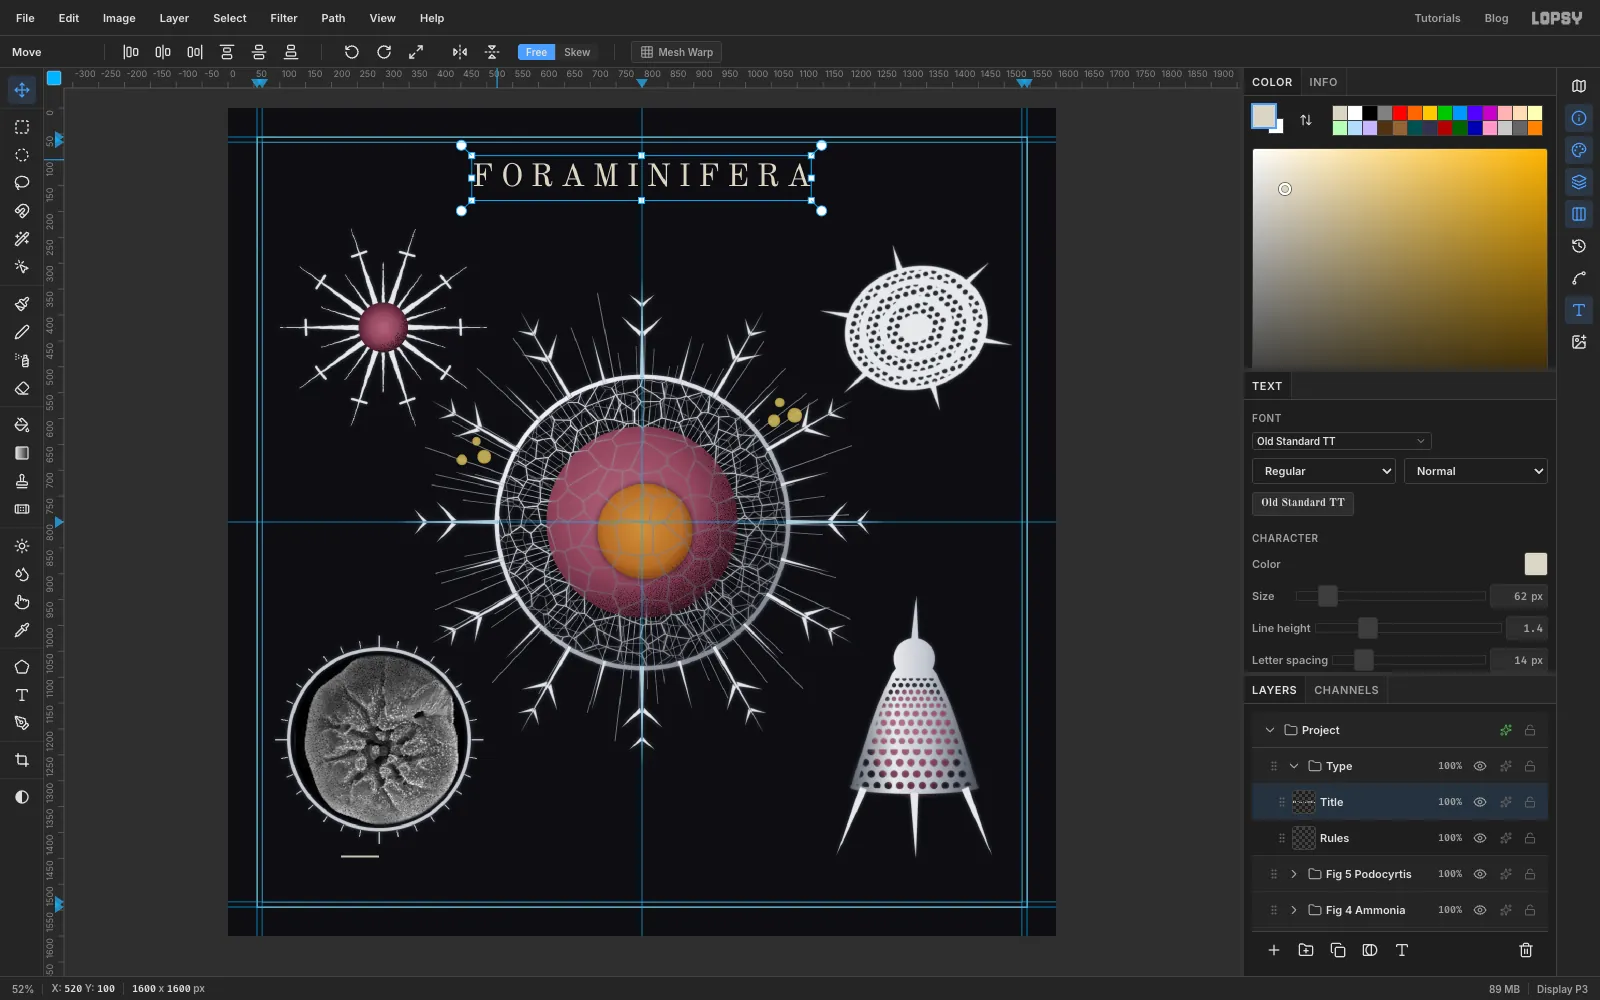
-
Add the credits and figure labels
Click Rules each time, then add, all in Old Standard TT:
OCEANICAat Size 28, letter spacing 22, in , centred about 40 px under the title200 µmat Size 18 in , just right of the scale barTHE GILTSCH ENSEMBLEat Size 34, letter spacing 5, in , centred near the bottomFive studies for the open oceanin Italic at Size 24 in , under the band name
Then label each figure
Fig. 1toFig. 5in Italic, Size 22, , centred under its figure. Put Fig. 2 and Fig. 3 on one line, and Fig. 4, Fig. 5 and the tagline on another, so the labels form a tidy grid. Fig. 1 sits about 55 px under the big sphere's lowest spine.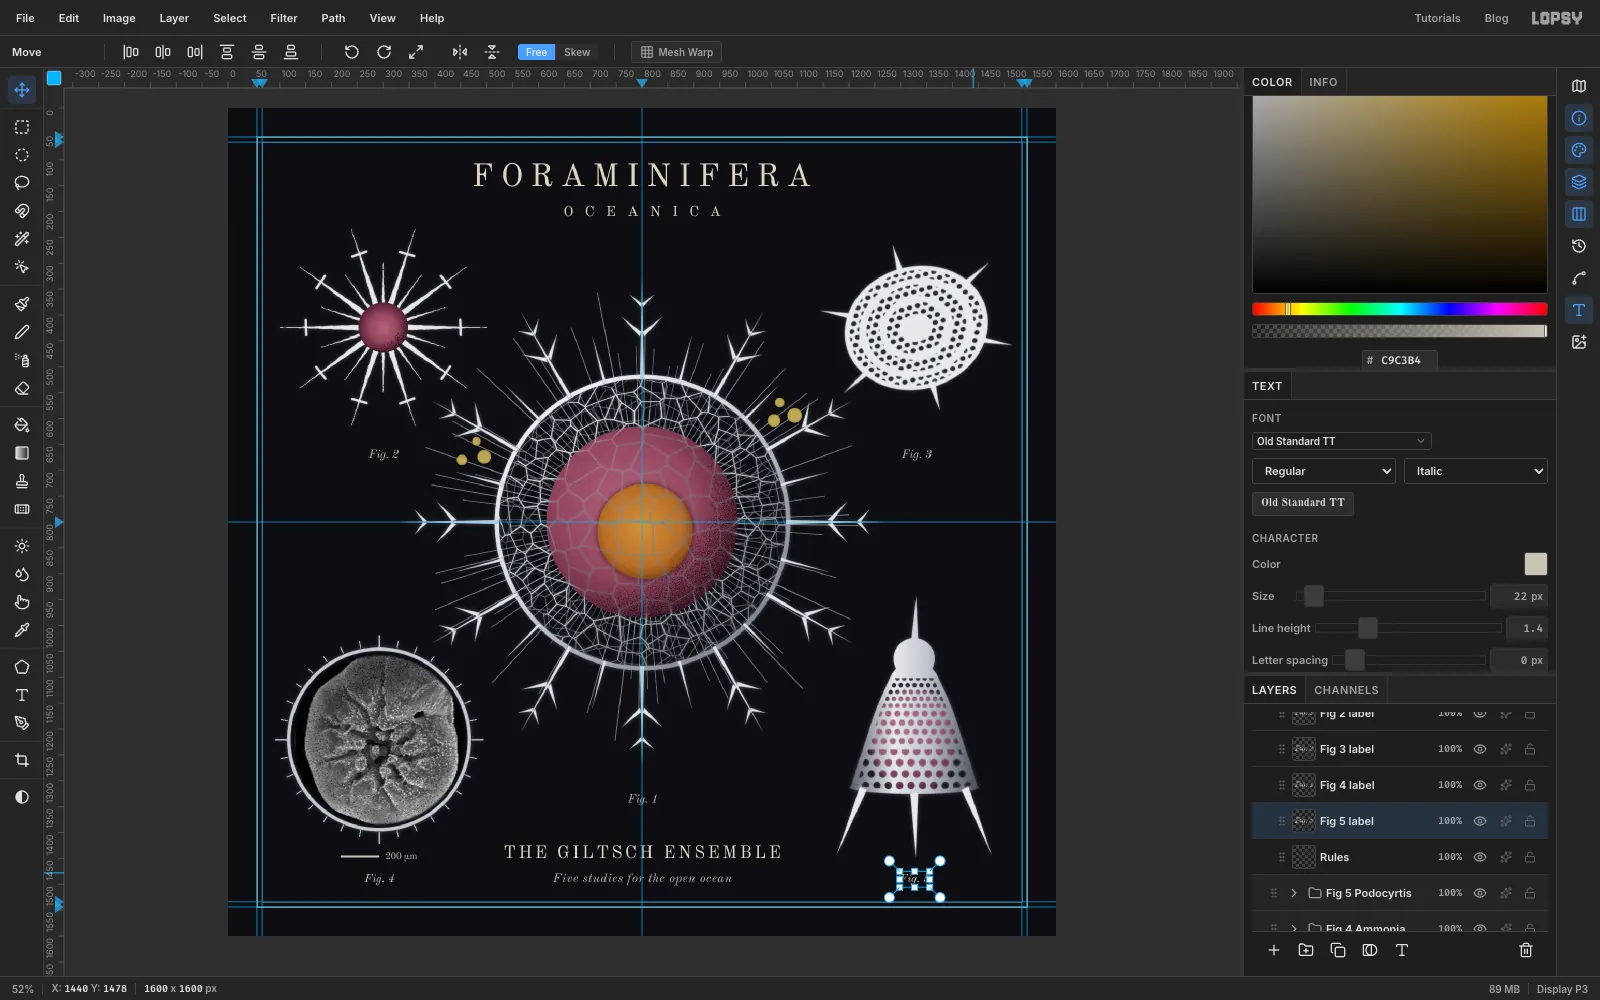
-
Rule off the subtitle
Click Rules. With the Pencil at Size 2 and , draw a line about 90 px long on each side of
OCEANICA, leaving about 28 px between the line and the letters. Keep the lines level with the middle of the capitals. Click the start and Shift-click the end.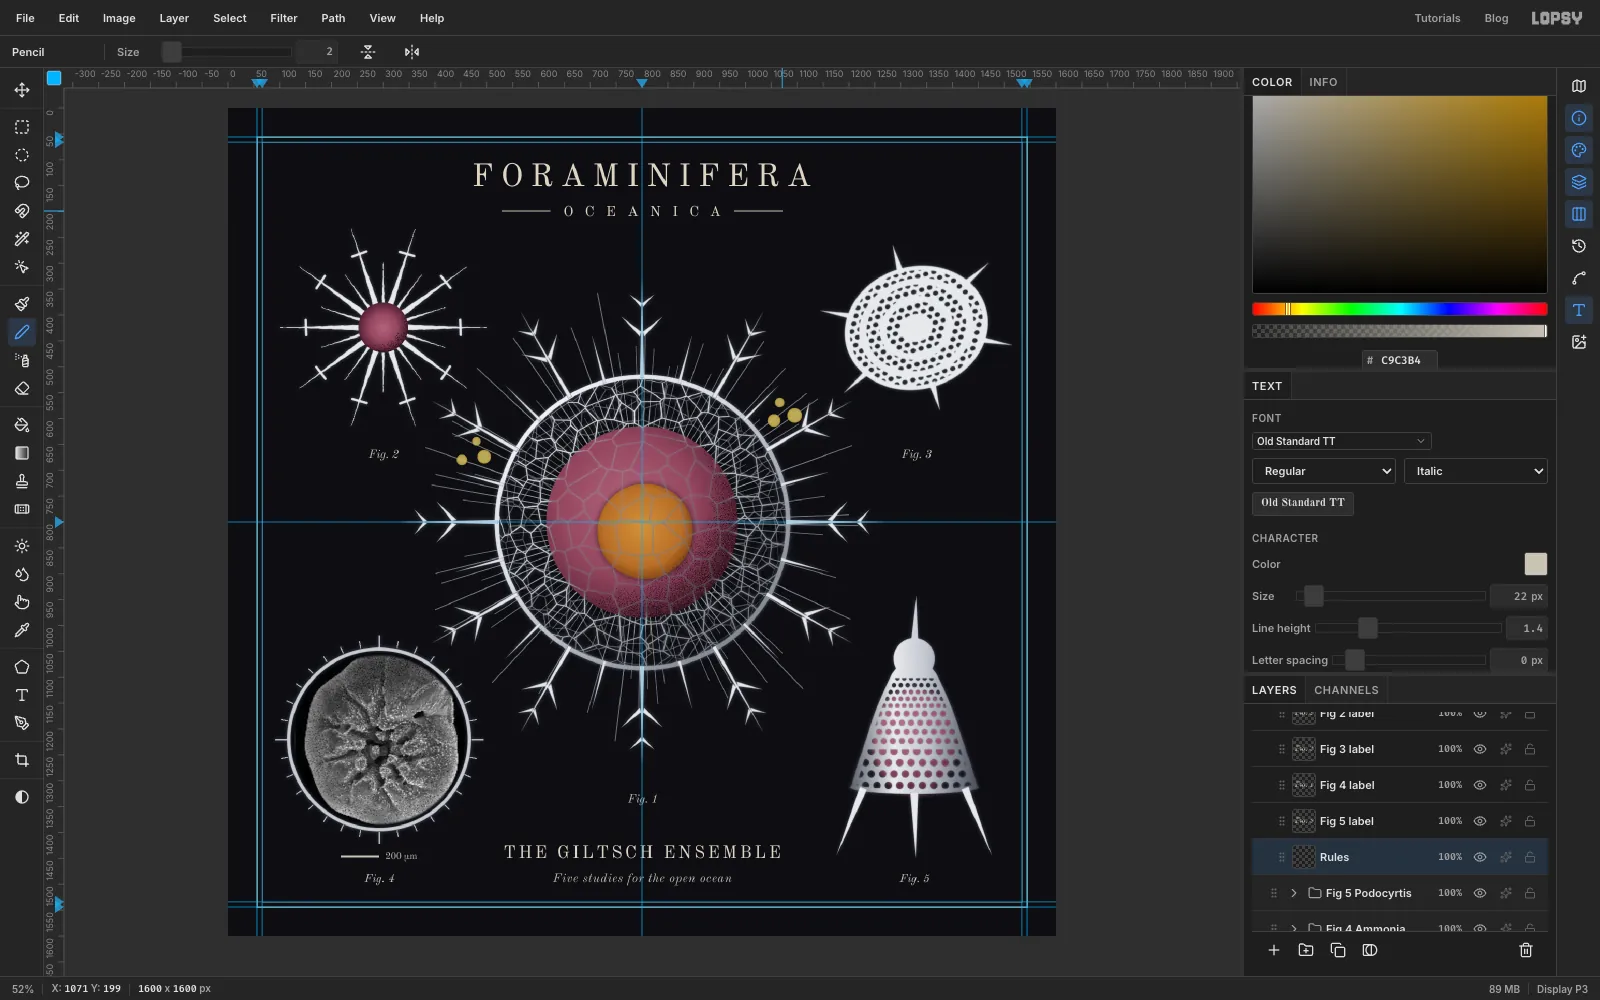
-
Darken the corners
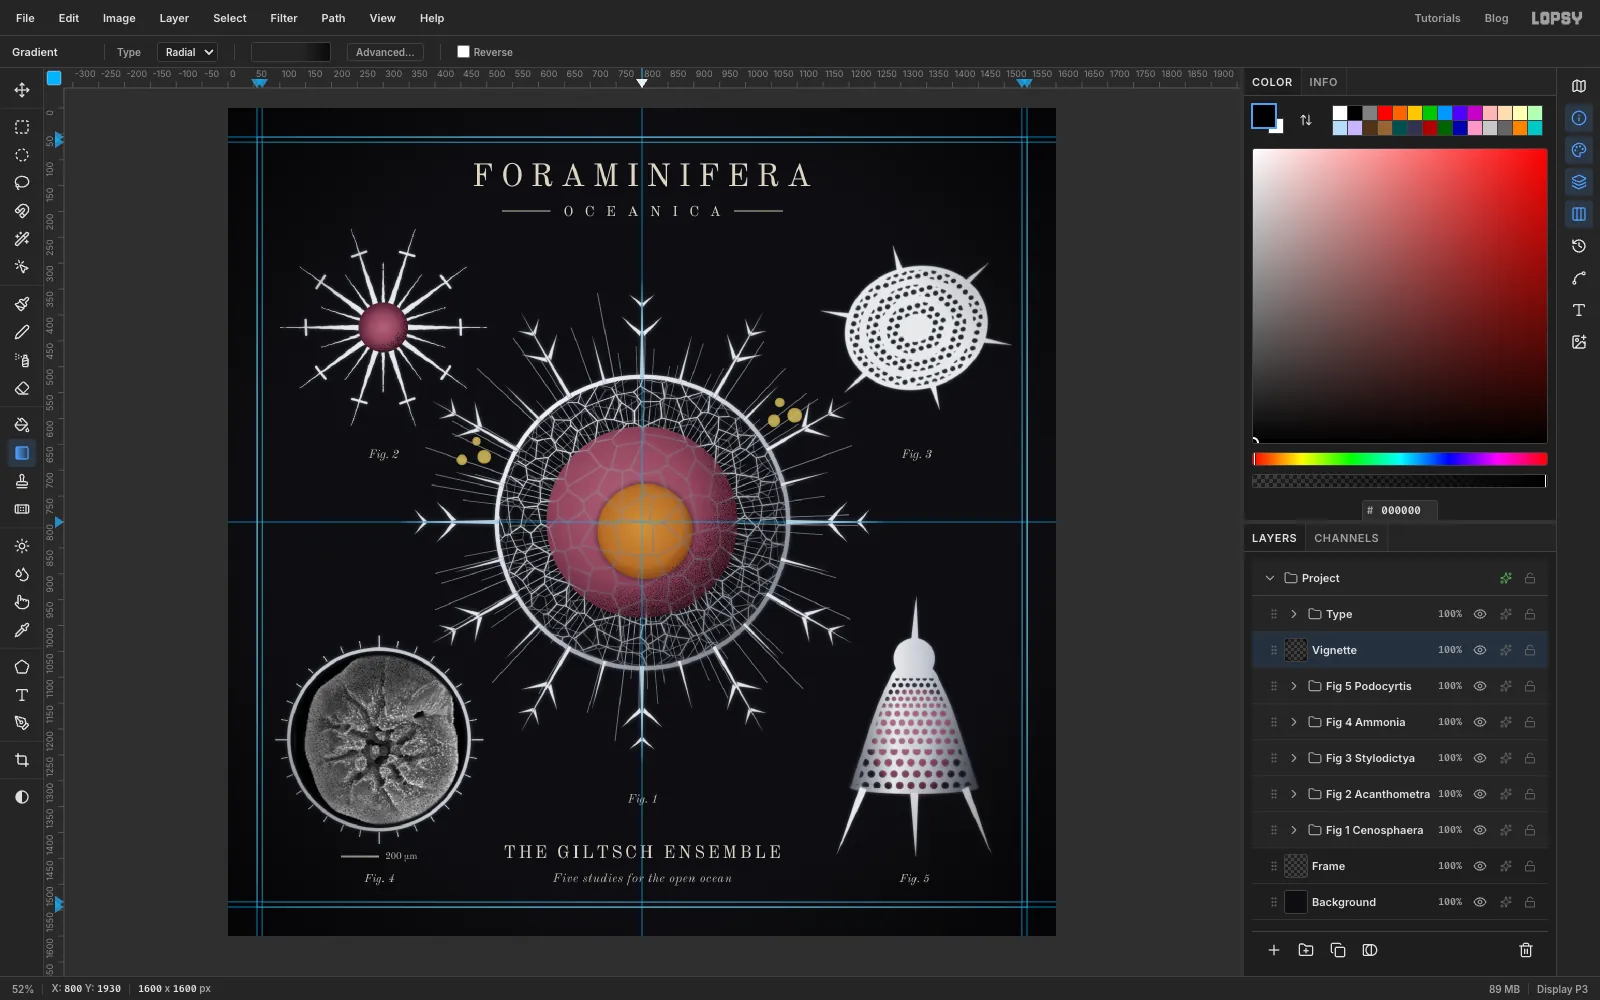
Click the collapsed Fig 5 group and add a layer called Vignette. It lands above the figures but below the Type group, so the labels stay bright. Make a radial gradient that's fully transparent black from 0 to 62% and black at 75% opacity at the end. Drag it from the centre of the plate out past a corner.
-
Add litho grain
Click the Type group and add a layer called Litho Grain at the top. Fill it with black, then choose Filter → Add Noise… with Amount 100 and Mono. Set the blend mode to Screen and the opacity to 30%. Screen hides the black and lets only the specks through, so the whole plate gets a printed tooth. Overlay or Soft Light would do almost nothing over a black ground.
Hide the guides with View → Show Guides, export with File → Quick Export PNG, and save the project with File → Save Project.