Make a Halftone Sci-Fi Movie Poster from a 1929 Photo
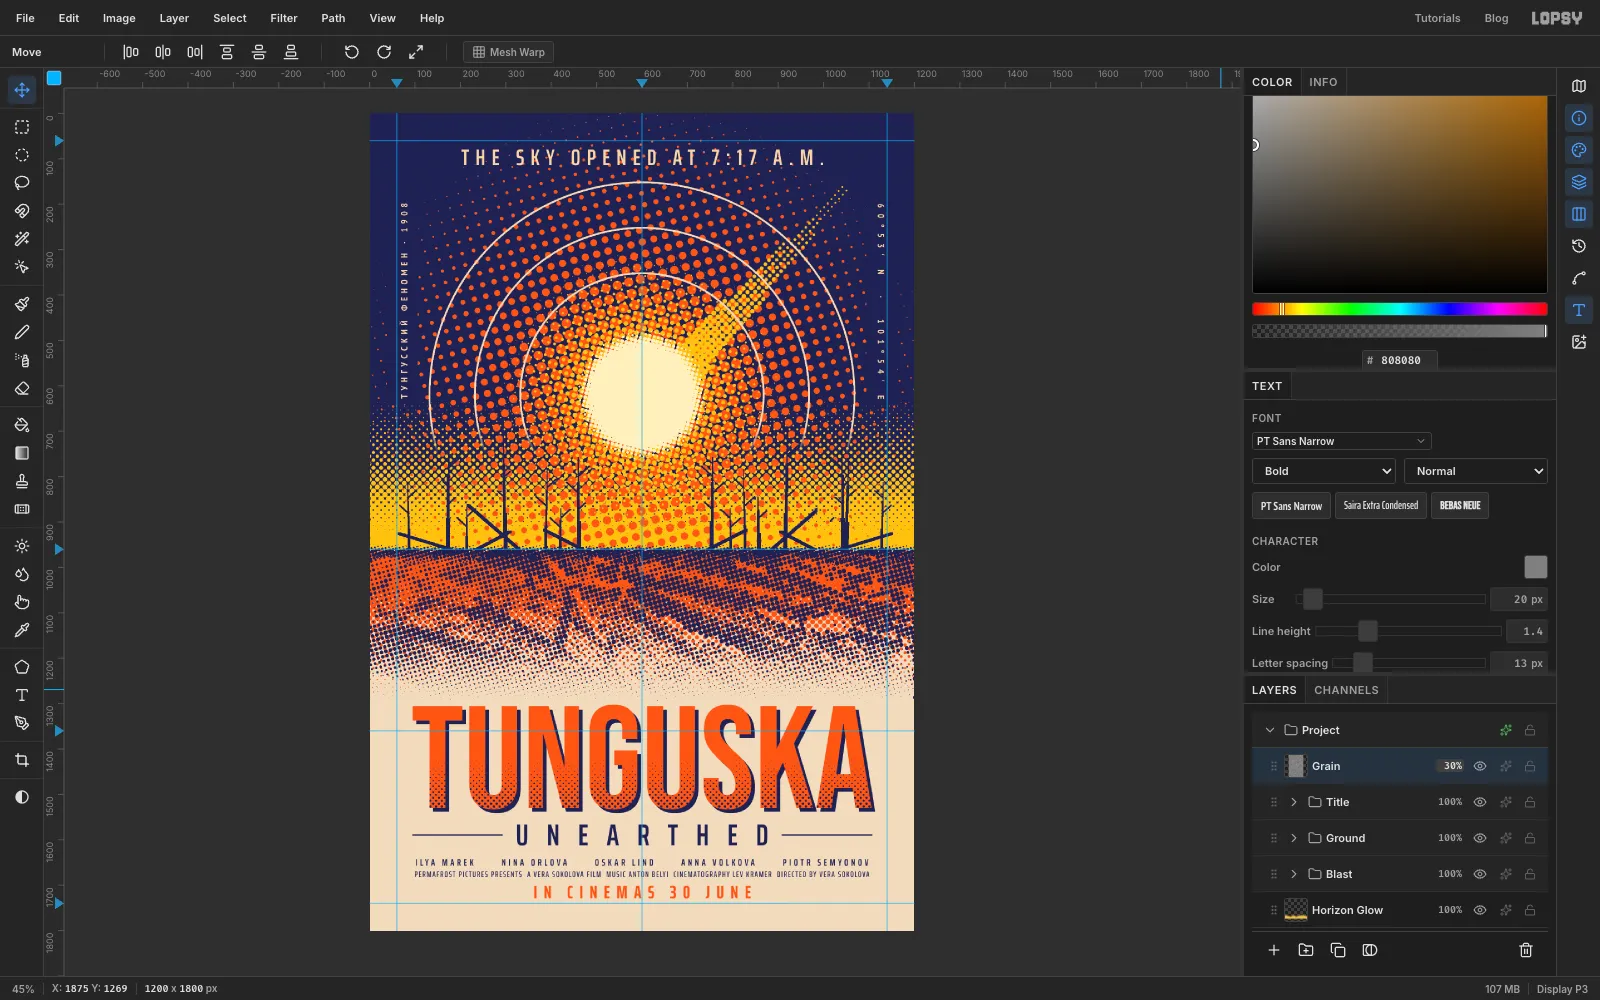
Build a three-ink halftone movie poster in Lopsy with a dotted blast, a screened meteor trail, a halftoned archive photo and a misregistered title.
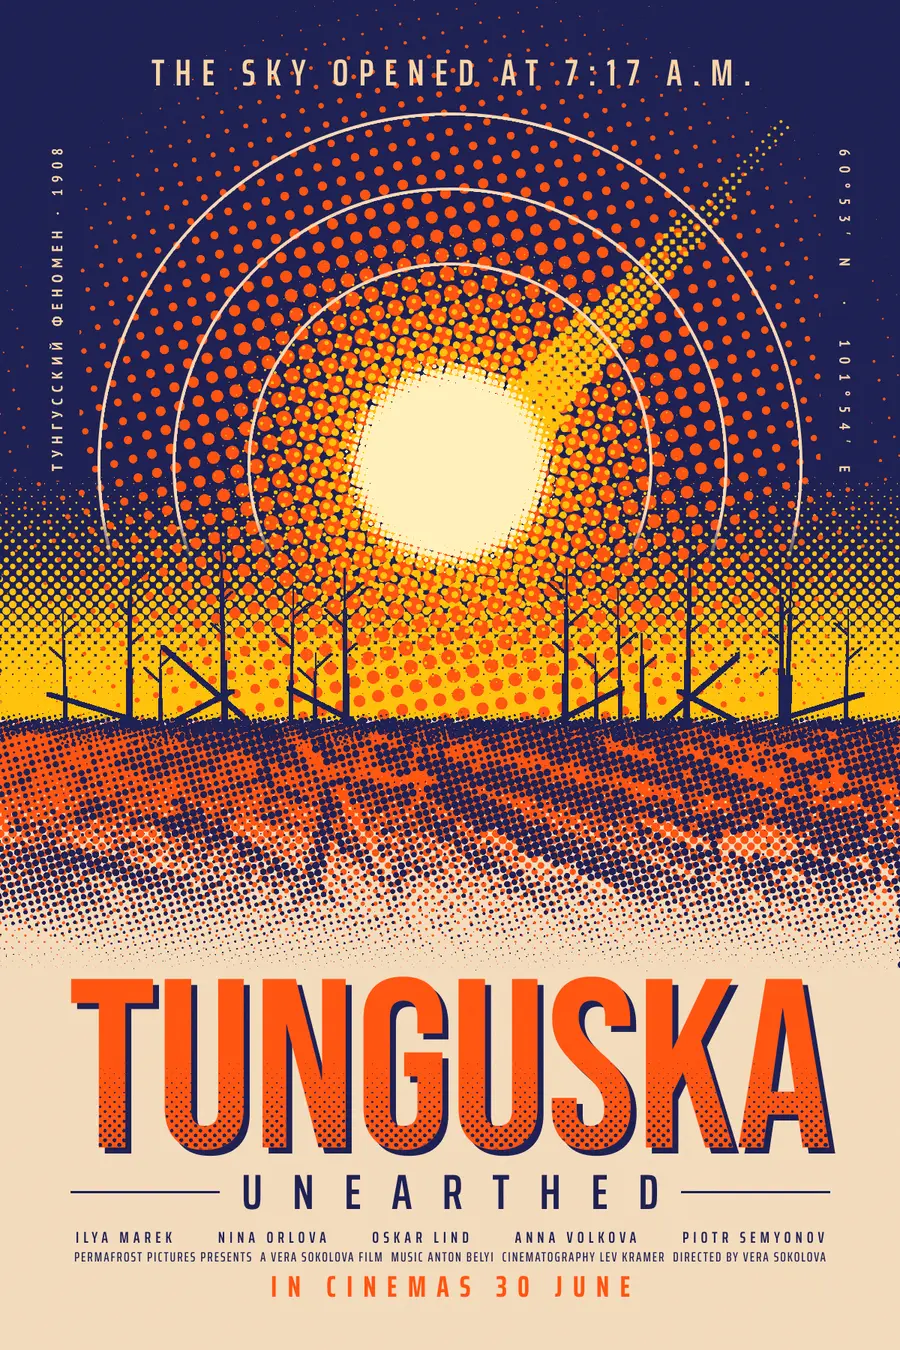
On 30 June 1908, at about 7:17 in the morning, something exploded in the air over the Tunguska river in Siberia. It flattened around 80 million trees. Nobody reached the site until 1927, when Leonid Kulik's expedition found trees lying in a vast ring, pointing away from the blast.
This tutorial turns that story into a poster for an imaginary film, TUNGUSKA UNEARTHED, printed in the style of an old halftone screen print. Everything is made of dots:
- the blast is a disc of orange dots;
- the sun's core and the meteor trail are yellow dots;
- the flattened forest, from one of Kulik's own photographs, is indigo dots.
Wherever two layers of dots overlap, they use different screen angles (0°, 15°, 45° or 75°), just as real colour printing does, so the overlapping dots form tidy rosettes instead of clashing into a moiré pattern.
The photo, taken on the expedition in 1929, is in the public domain. You can download it from Wikimedia Commons.
The recipe you'll use again and again is:
- paint a black-to-white gradient where you want the dots;
- run Filter → Halftone, which turns dark into big dots and white into nothing;
- recolour the dots with a Color Overlay, then Rasterize Layer Style.
Along the way you'll also use the Pen tool, Path to Selection, a layer mask, the Move tool's rotate and scale handles, copy, paste and flip, the Pencil with Shift-click lines, Cmd-clicked thumbnails, guides, groups and undo / redo.
The fonts are free Google Fonts:
- Bebas Neue for the title
- Saira Extra Condensed for the tagline, subtitle and credits
- PT Sans Narrow Bold for the Russian side text and the coordinates
The palette is three inks plus paper:
-
Paper
-
type peach
-
Indigo ink
-
Orange ink
-
Yellow ink
-
Sun cream
-
ring peach
-
Set up the page and guides
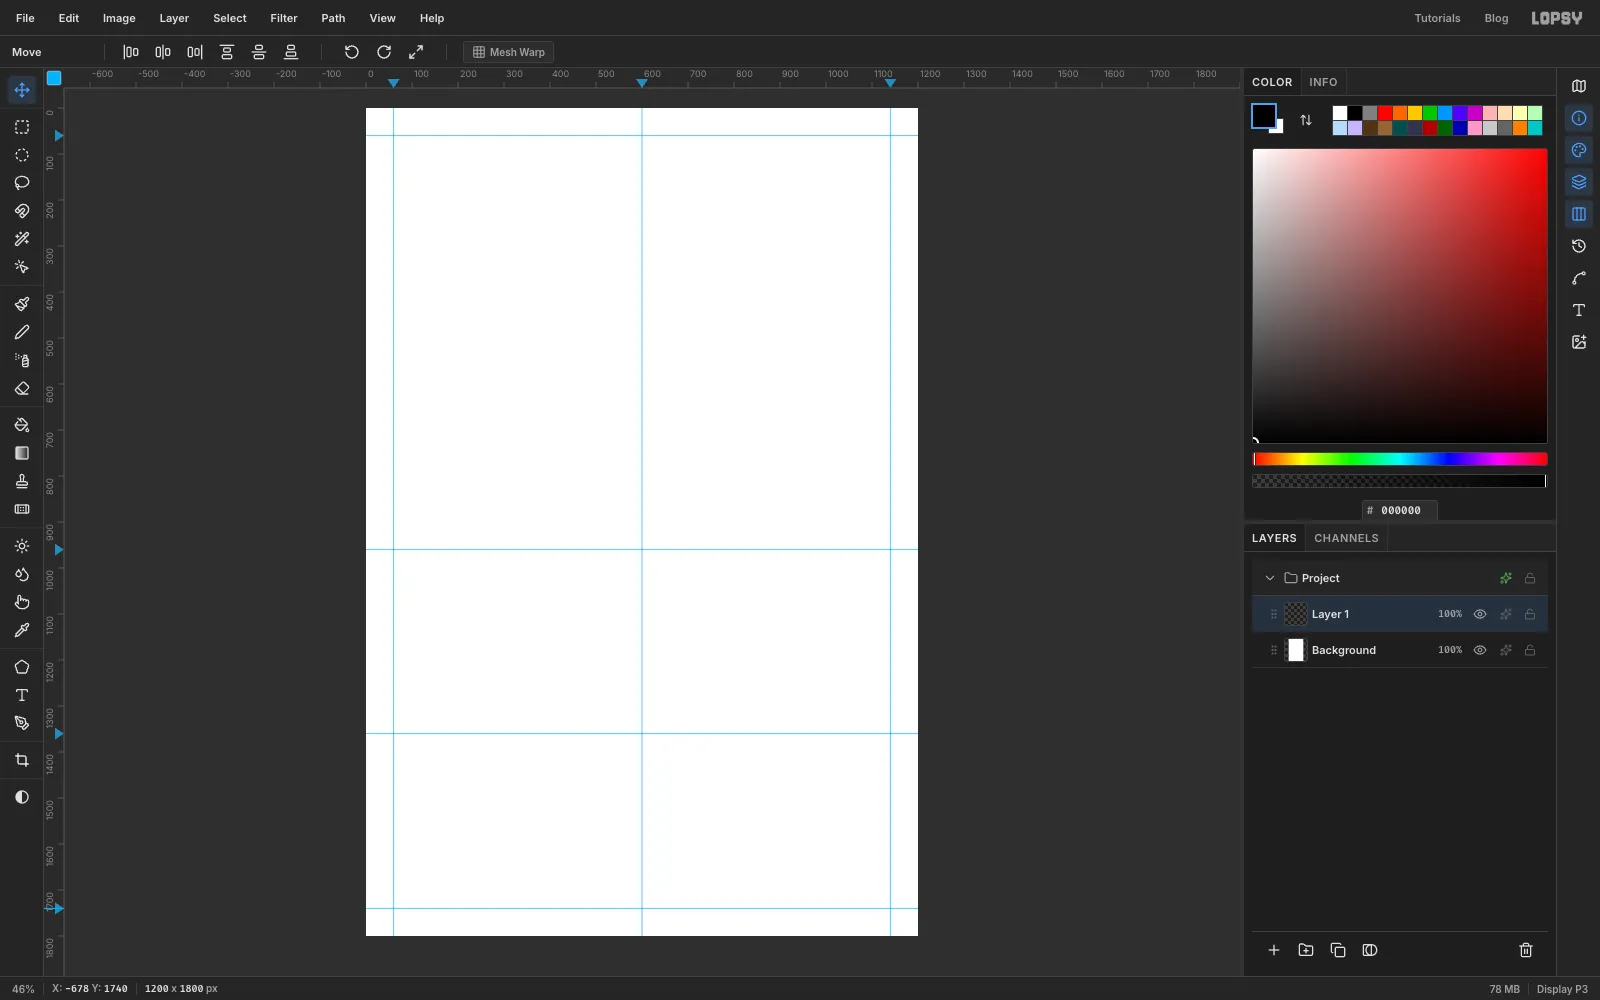
Choose File → New, set the size to 1200 × 1800 pixels with a White background, and click Create.
Click the top ruler at 60, 600 and 1140 to drop three vertical guides: the two side margins and the centre line. Then click the left ruler at 60, 960, 1360 and 1740. The guide at 960 is the horizon, where the sky meets the ground. 1360 roughly marks where the photo will fade out and the type will begin, and 1740 is the bottom margin.
-
Lay down the paper and the sky
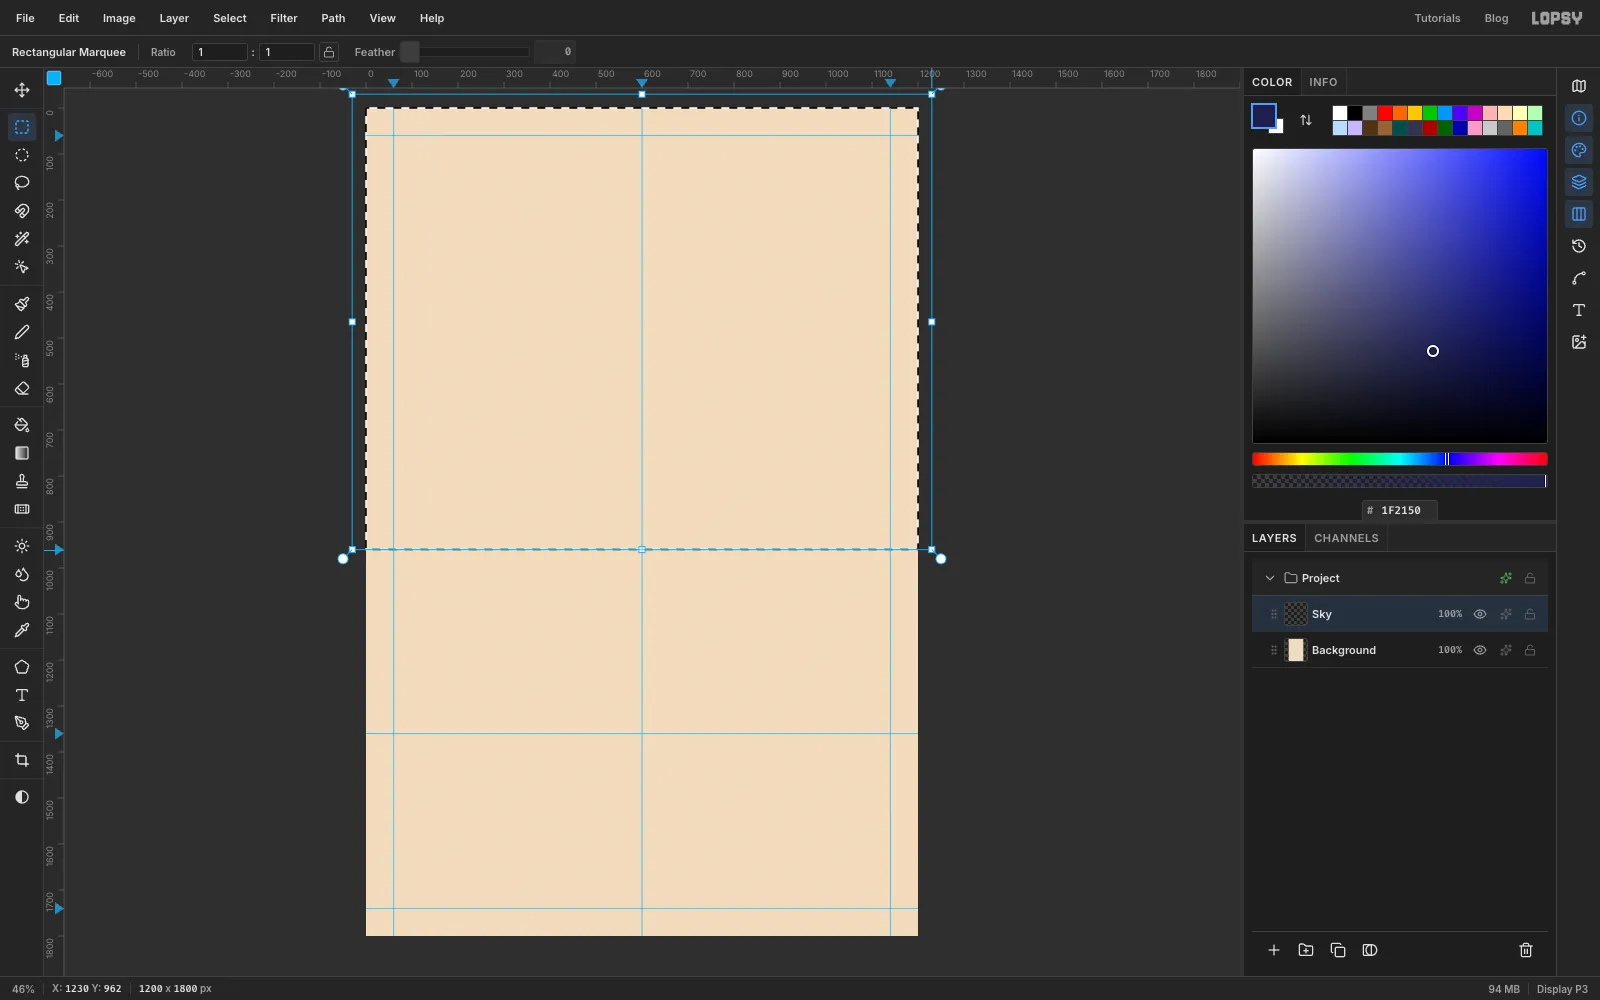
Click Background, set the foreground colour to paper , choose Select → All and then Edit → Fill. Press Cmd+D to deselect.
Double-click Layer 1 and rename it Sky. Set the foreground to indigo . With the Rectangular Marquee, drag from just outside the top-left corner of the canvas to just outside the right edge at the horizon. The bottom edge snaps onto the 960 guide. Choose Edit → Fill, then deselect.
-
Print a yellow glow above the horizon
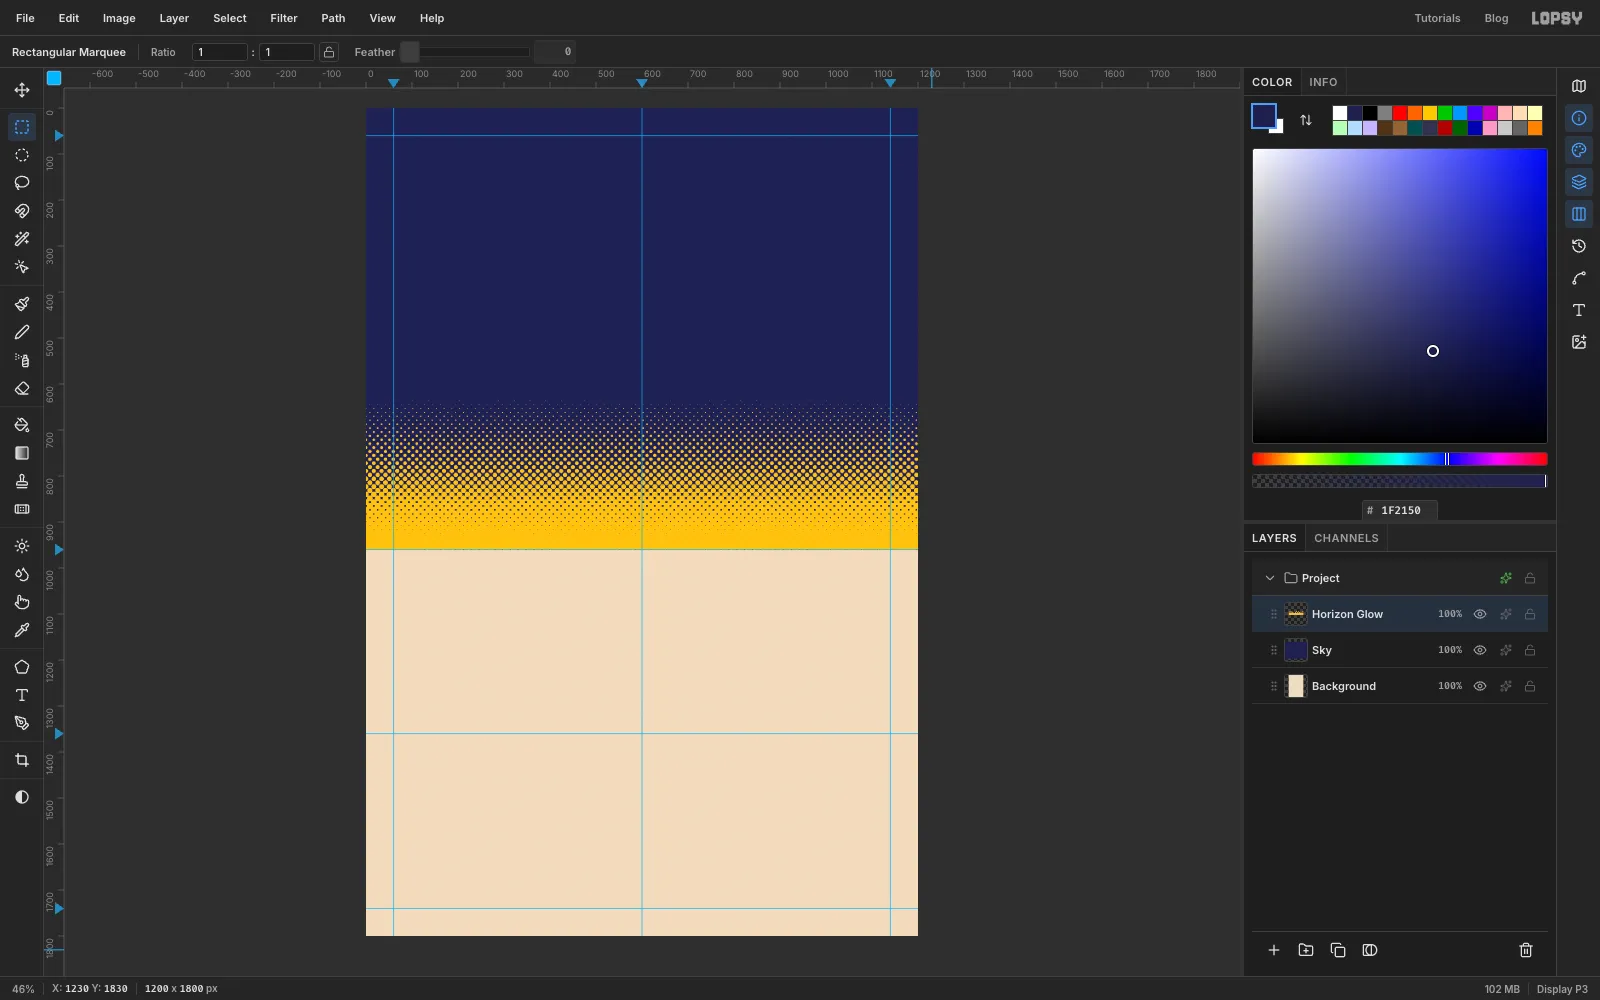
Click Add Layer in the Layers panel and name the new layer Horizon Glow. Select the sky again with the same marquee.
Pick the Gradient tool, set Type to Linear and click Advanced…. Make three stops:
- black at the left end;
- dark grey about a quarter of the way along;
- white at the right end.
Drag from the horizon straight up to about a third of the way into the sky, then deselect.
Now choose Filter → Halftone and set Dot Size 18, Density 1.5, Angle 45 and Softness 0.4. The halftone filter draws a big dot where the gradient is dark and nothing where it's white. Density 1.5 makes the darkest dots overlap, so the band turns solid at the horizon.
Open the layer's effects (✦), turn on Color Overlay with yellow , and click Rasterize Layer Style to bake the colour in. A few dots sit across the horizon line, so marquee everything below the horizon and press Delete.
-
Shade the blast as a grey gradient
Click the New Group button in the Layers panel and name the group Blast. Add a layer inside it called Blast Dots, and select the sky once more.
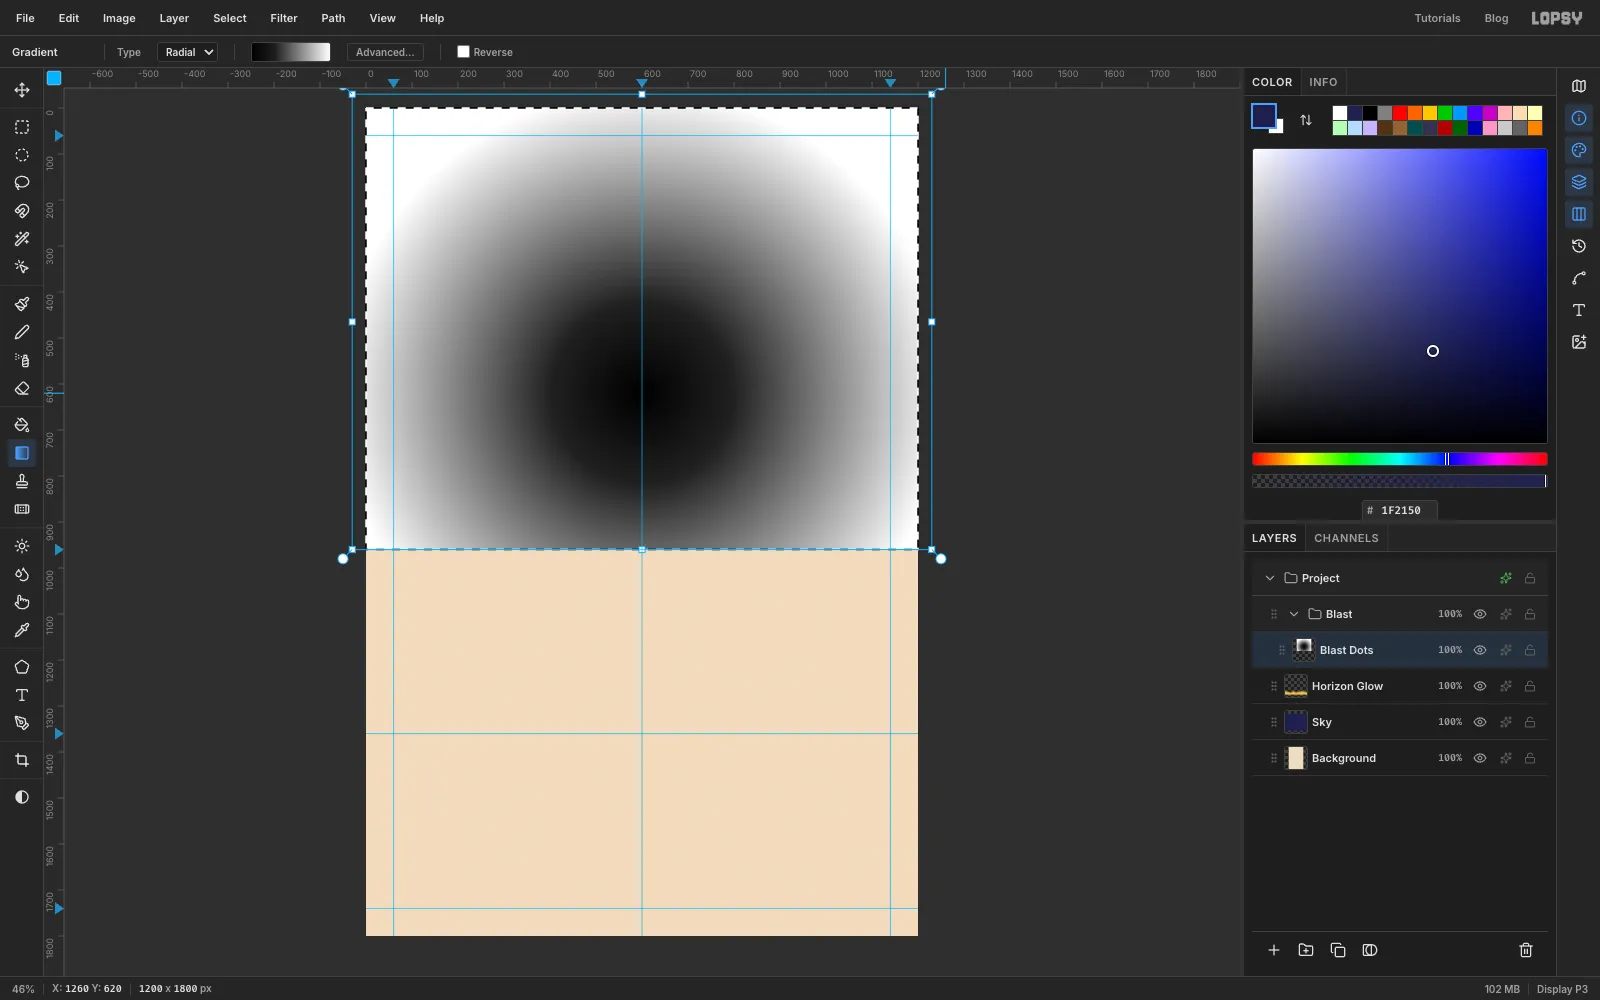
With the Gradient tool, switch Type to Radial and set up three stops: black, then about 30% along, then white. Drag from where you want the sun, on the centre guide a little below the middle of the sky (about two-thirds of the way down to the horizon), to just past the right edge of the canvas.
The darkest area will become the biggest dots, so this grey picture is really a map of how heavy the blast will be.
-
Turn it into dots with Halftone
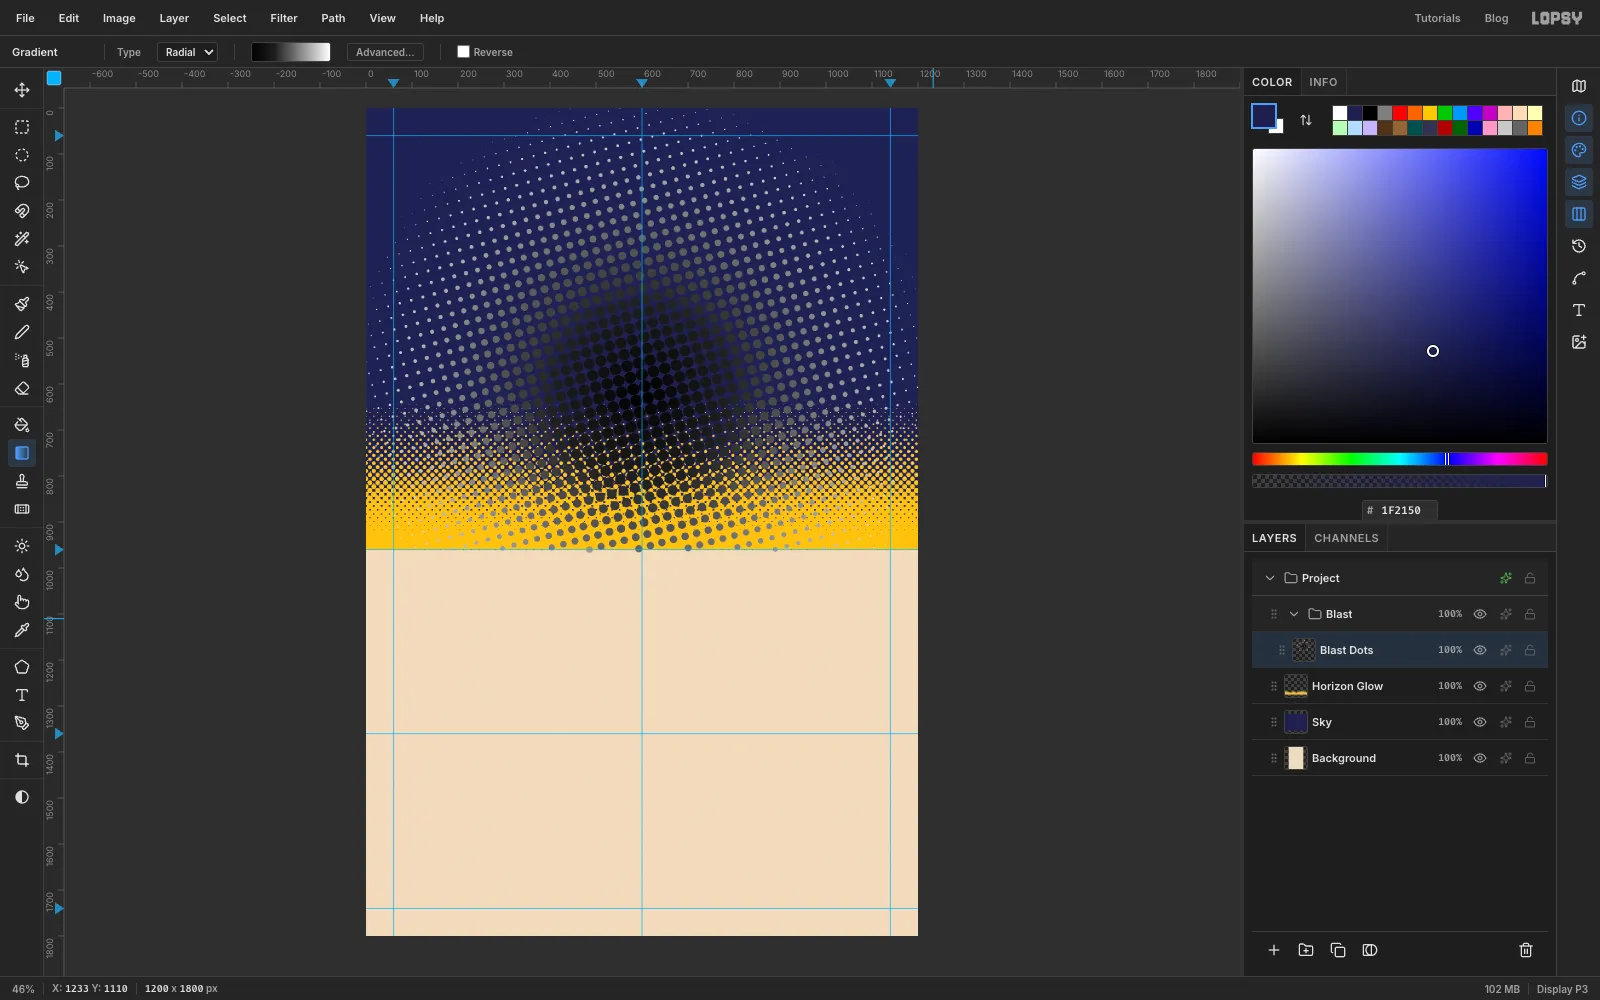
Deselect, then choose Filter → Halftone with Dot Size 26, Density 1, Angle 15 and Softness 0.4.
Big dots fill the middle and shrink to specks towards the edges. Where the gradient was white, the layer is now transparent, so the indigo sky shows between the dots.
-
Ink the blast orange
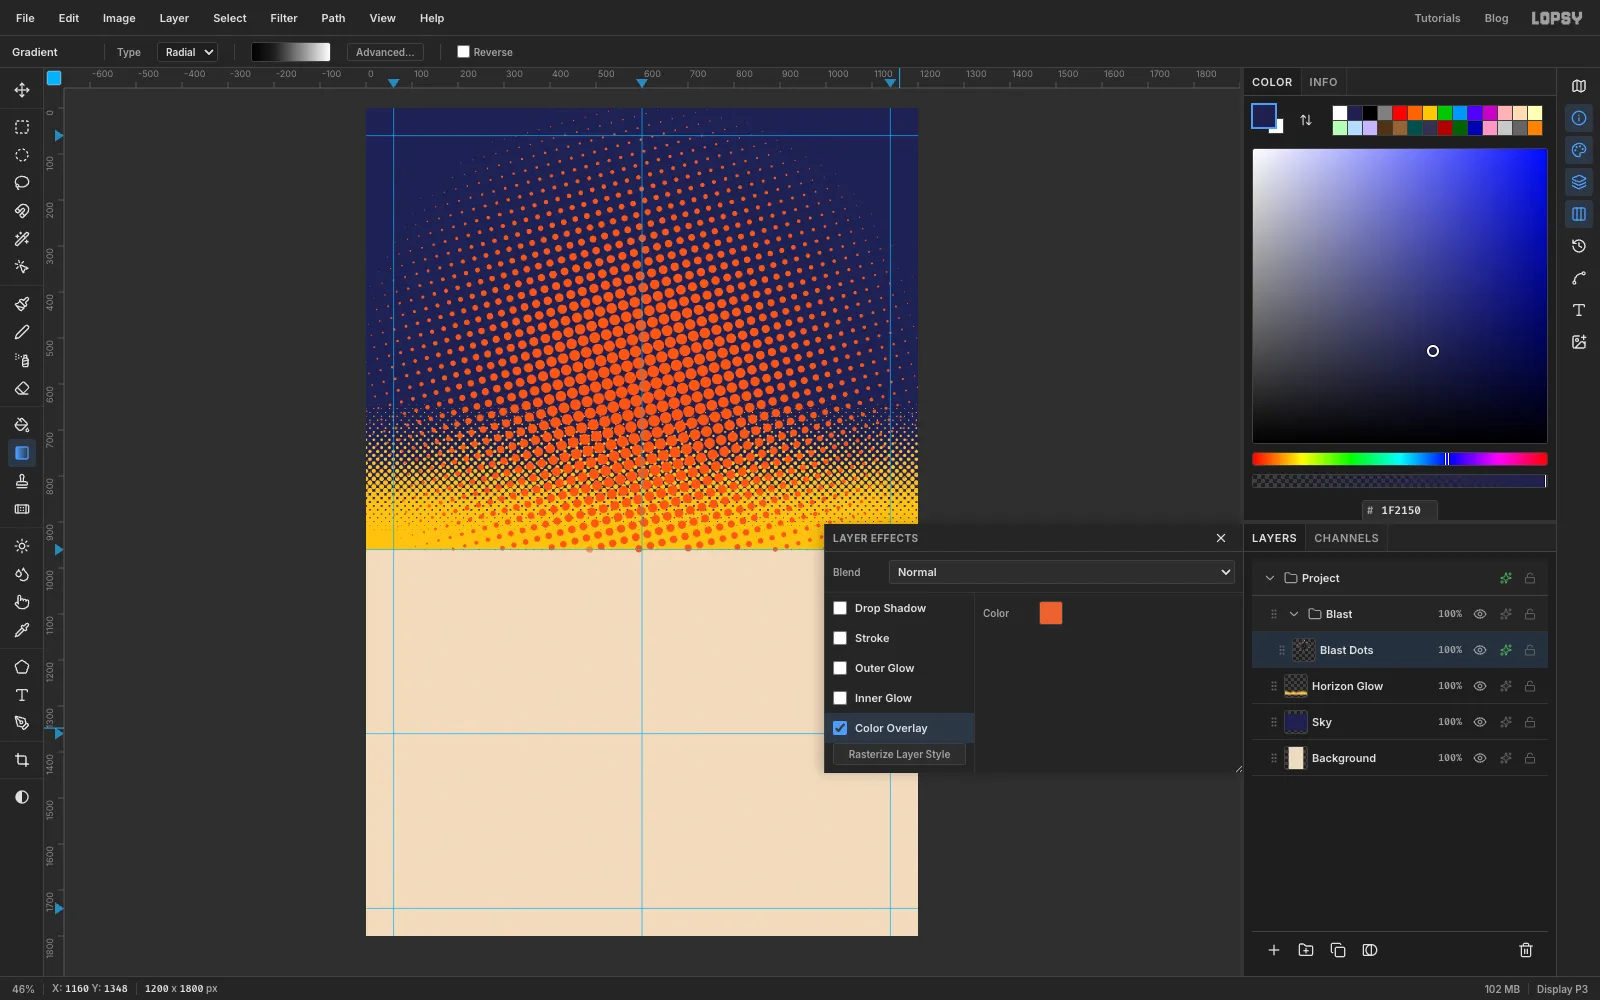
Open the effects for Blast Dots, turn on Color Overlay and set it to orange . Then click Rasterize Layer Style so the dots are really orange, not just displayed that way.
-
Draw the meteor trail with the Pen
Add a layer called Trail. You'll draw it lying flat first and rotate it into place afterwards, because a level wedge is much easier to draw evenly.
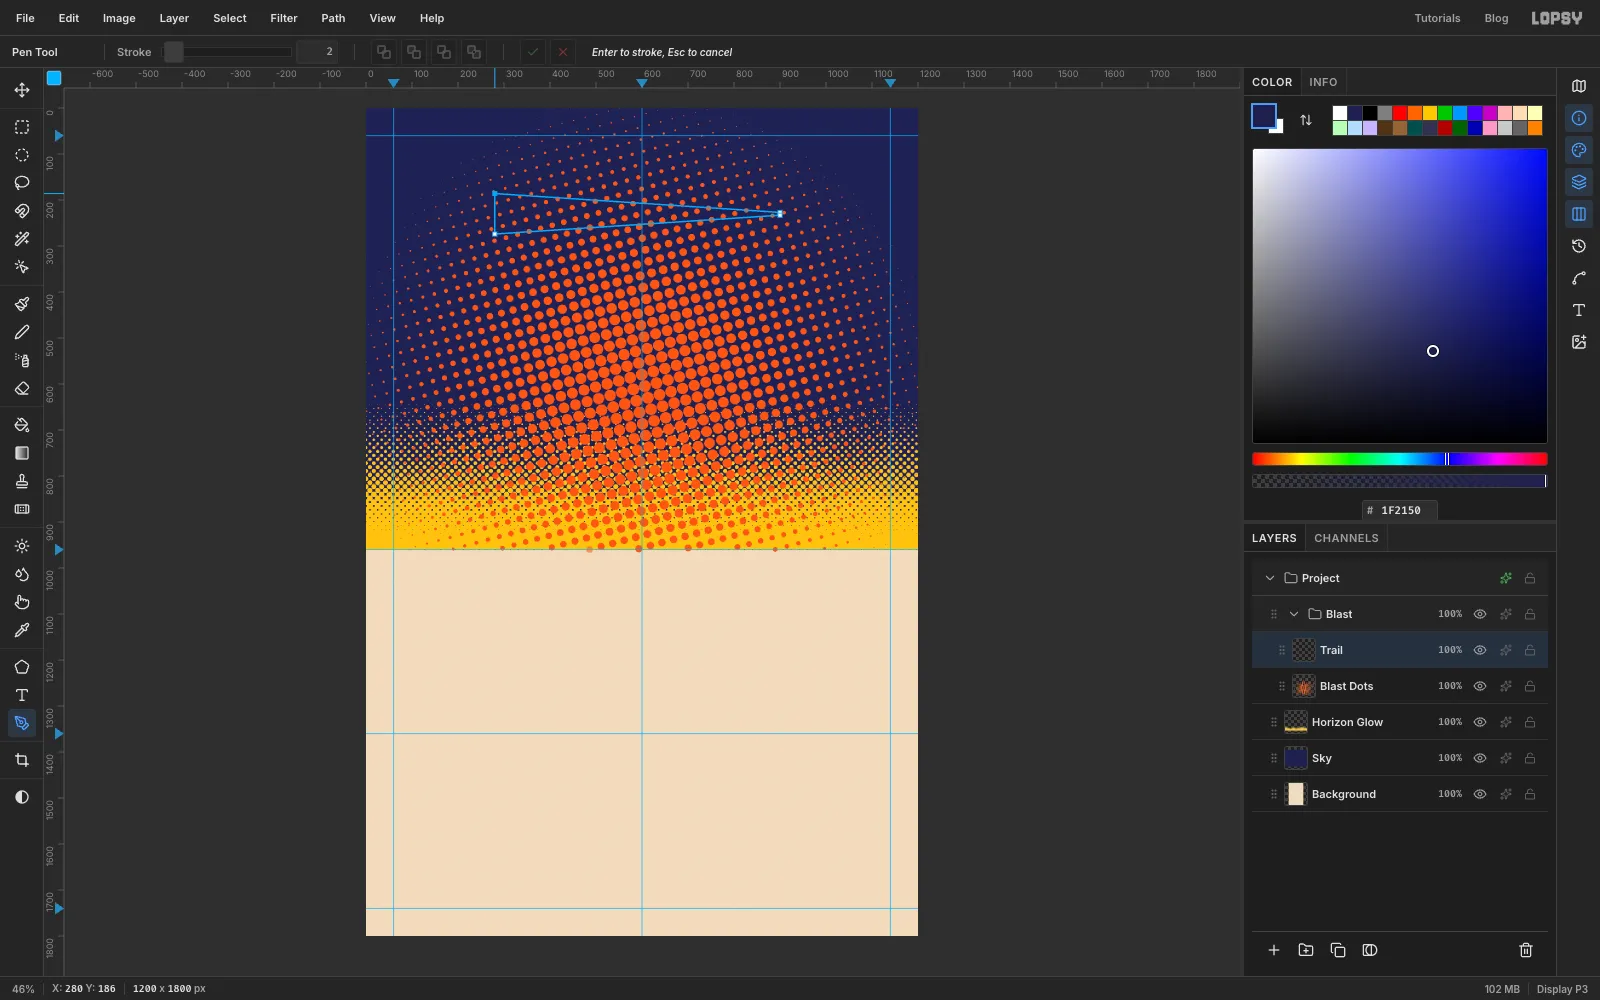
Pick the Pen tool and click four anchors to make a long, thin wedge in the upper sky:
- the top of the thick end, on the left;
- the point, about 620 px to the right;
- a second click just below the point, so the tip is blunt rather than a hairline;
- the bottom of the thick end, about 90 px below the first anchor.
Click the first anchor again to close the shape. In the Paths panel, click Path to Selection, then Delete Path. The path has done its job.
-
Print the trail in yellow dots
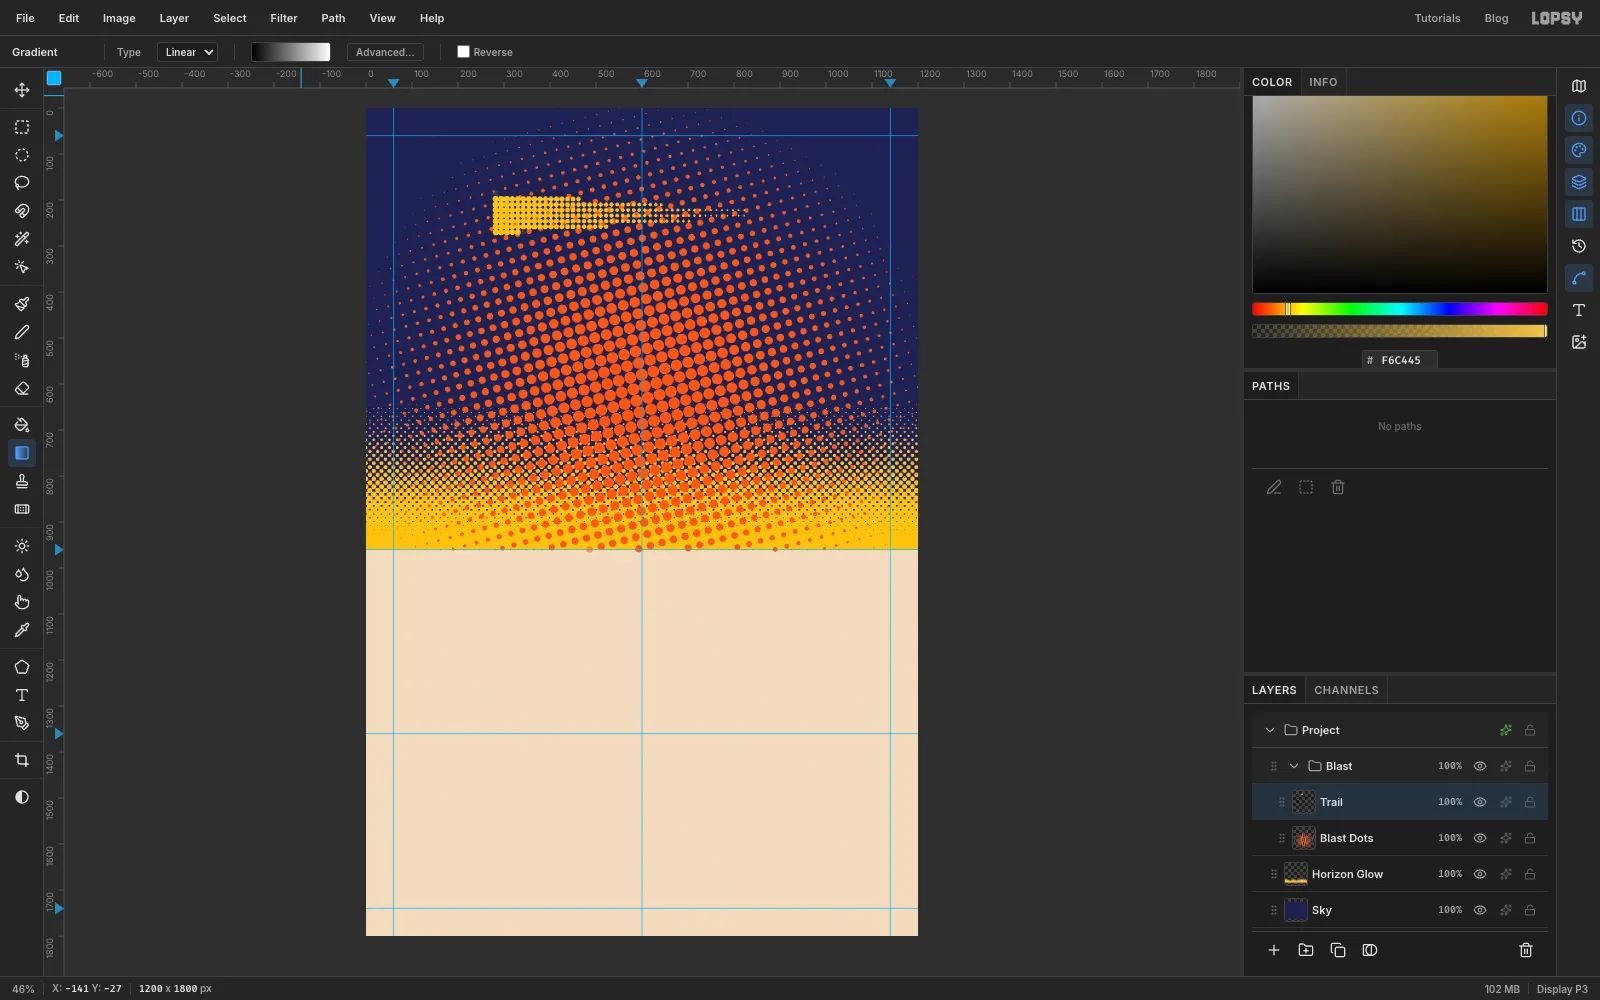
With the wedge still selected, drag a Linear gradient from black at the thick end to white at the point. Deselect, then run Halftone with Dot Size 12, Density 1, Angle 0 and Softness 0. Add a yellow Color Overlay and rasterize.
The tiniest dots at the tail are only partly opaque, so over indigo they'd print as a muddy olive. Clean them up:
- Cmd-click the Trail thumbnail to select its dots.
- Choose Select → Grow with a value of 1.
- Choose Edit → Fill with yellow.
- Choose Select → Inverse and press Delete, then deselect.
Every dot is now solid yellow with a crisp edge.
-
Rotate the trail with the handle
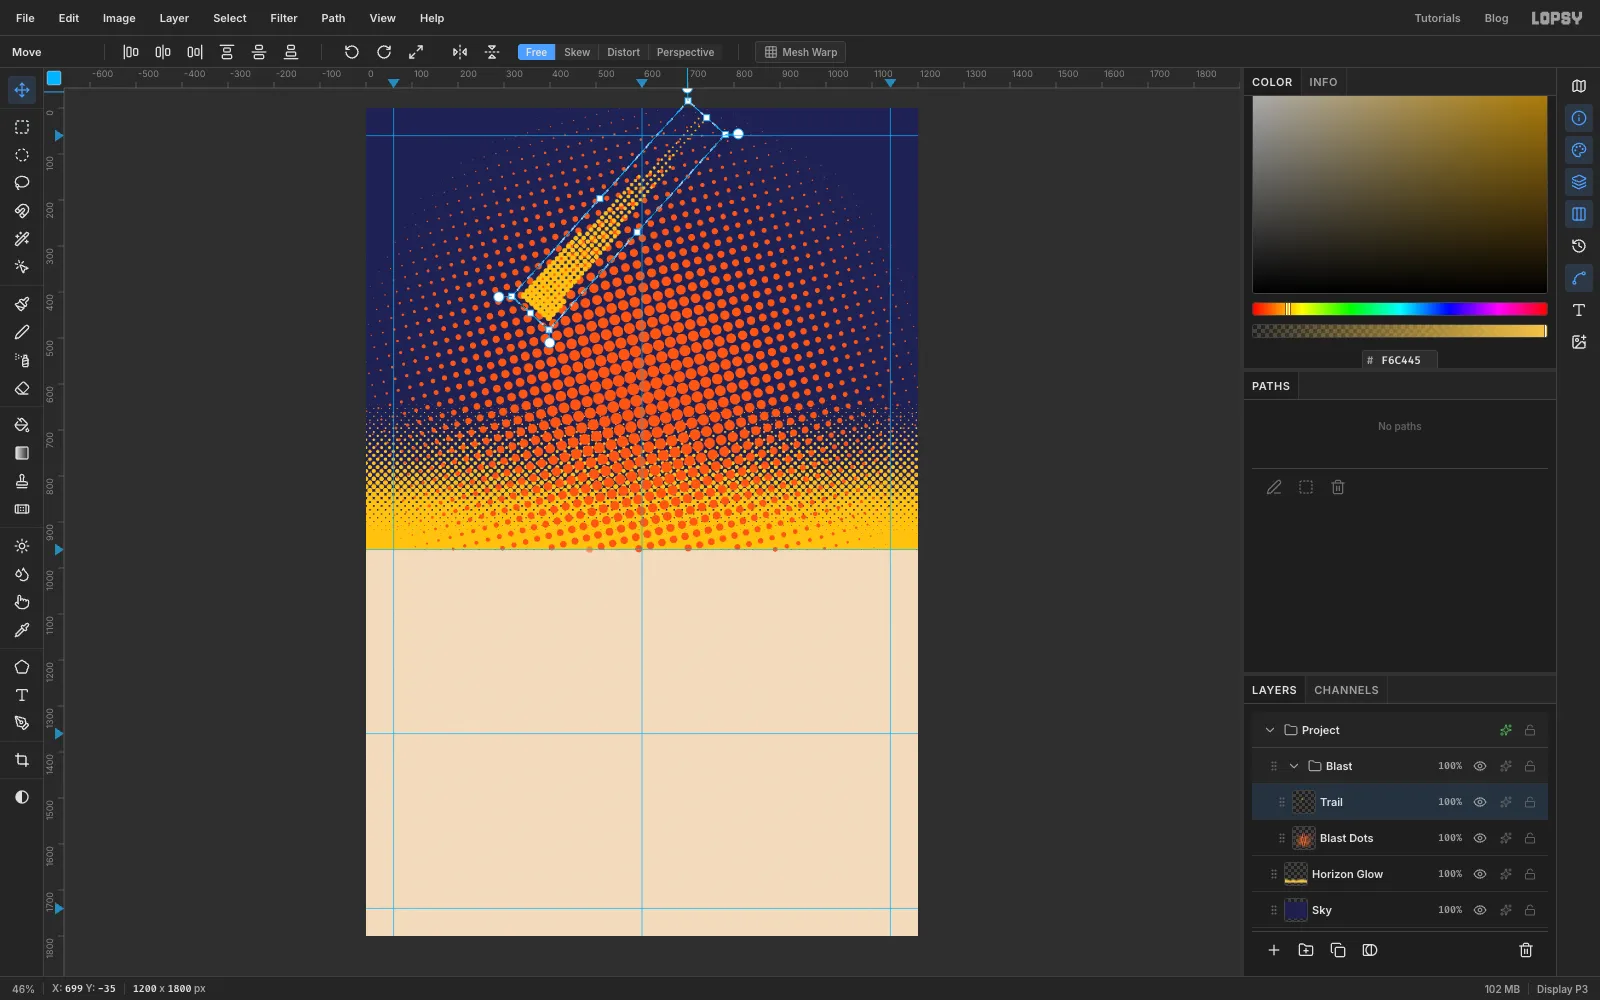
Drag a marquee around the trail with a little room to spare and switch to the Move tool. Hover just outside the top-right corner of the box until the cursor turns into the rotate arrow.
Drag that rotate handle anticlockwise about 48°, until the thin end points at the top-right corner of the poster. Press Cmd+D to commit the rotation.
-
Slide the trail into the blast
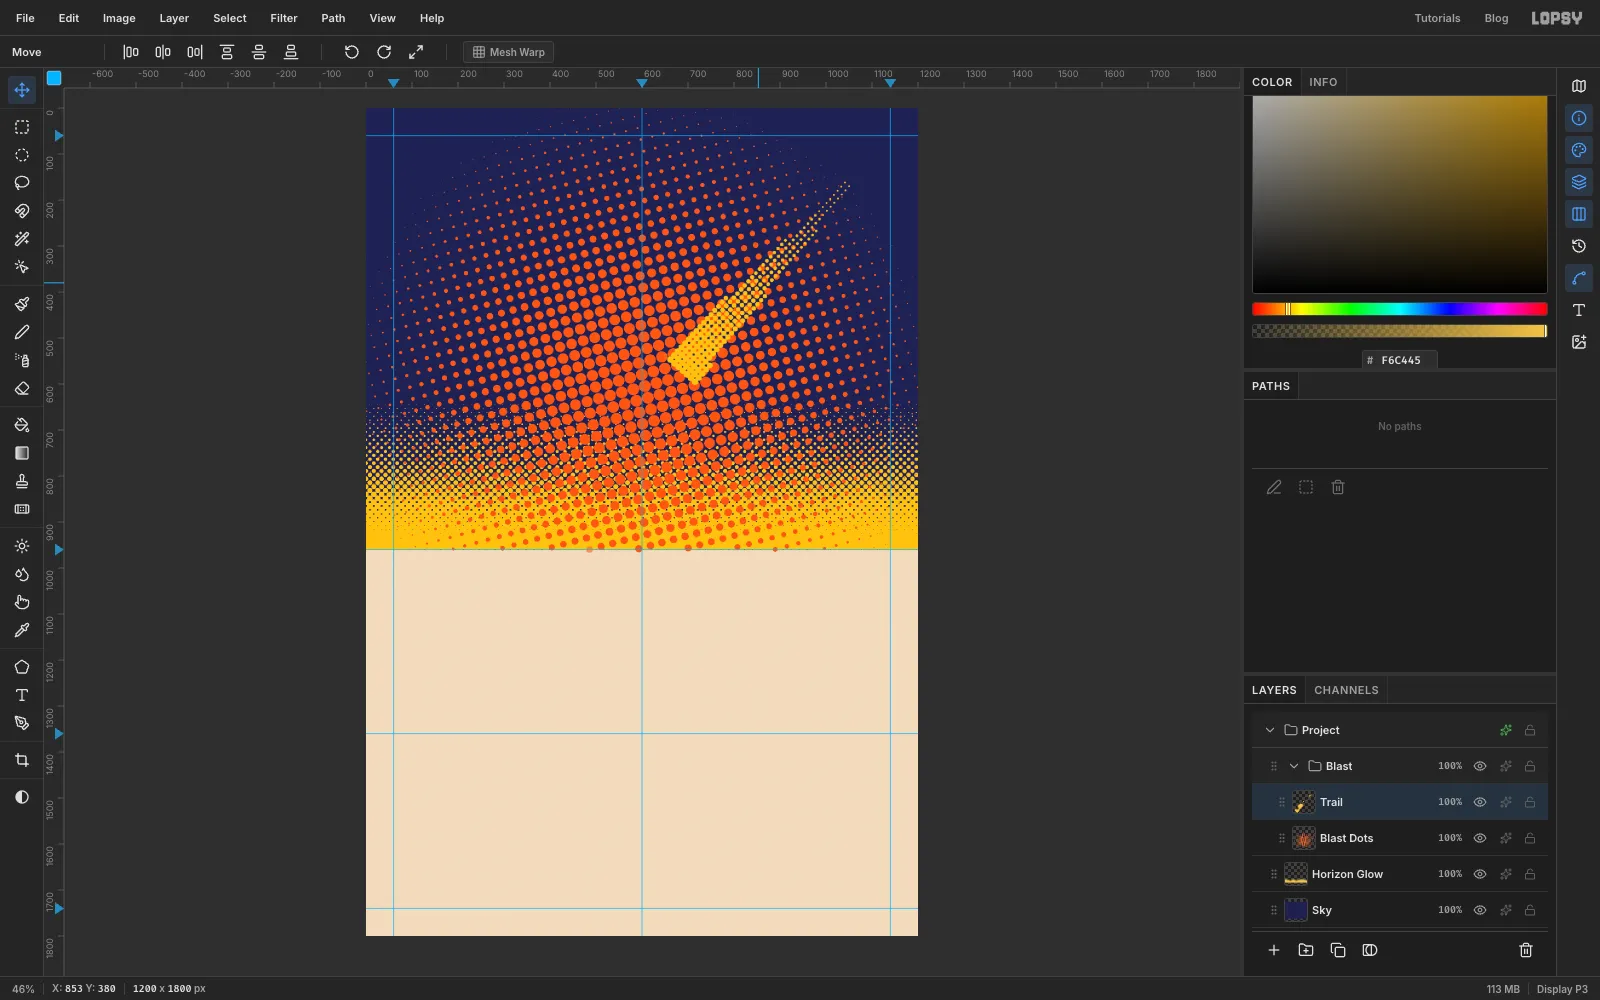
With the Move tool, drag the trail down and to the right until its thick end sits just above and to the right of the middle of the blast. The sun's core will cover that end in a moment, so it looks as if the meteor is diving into it.
-
Add yellow dots around the core
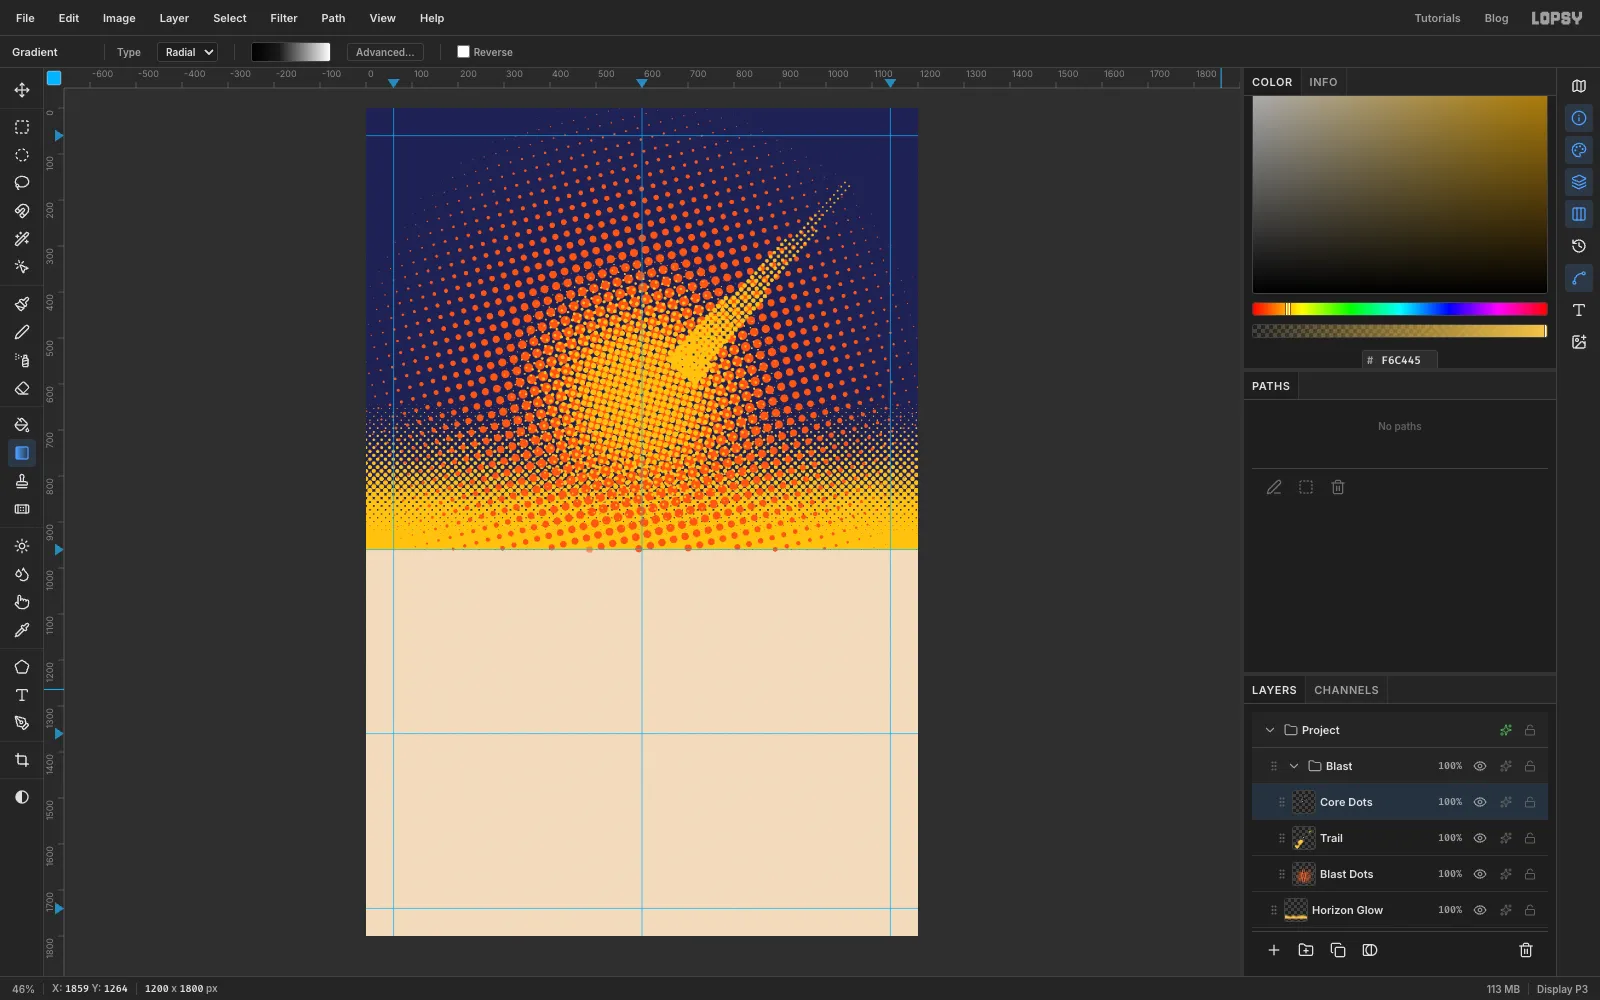
Add a layer called Core Dots. Drag a Radial gradient from the same centre point, black (with a second black-ish stop, , about 35% along) to white, about 330 px out.
Run Halftone with Dot Size 14, Density 1, Angle 75 and Softness 0.4, add a yellow Color Overlay, and rasterize. The yellow dots sit at 75° against the orange's 15°, so the two inks mix into a rosette instead of a moiré.
-
Give the sun a dotted edge
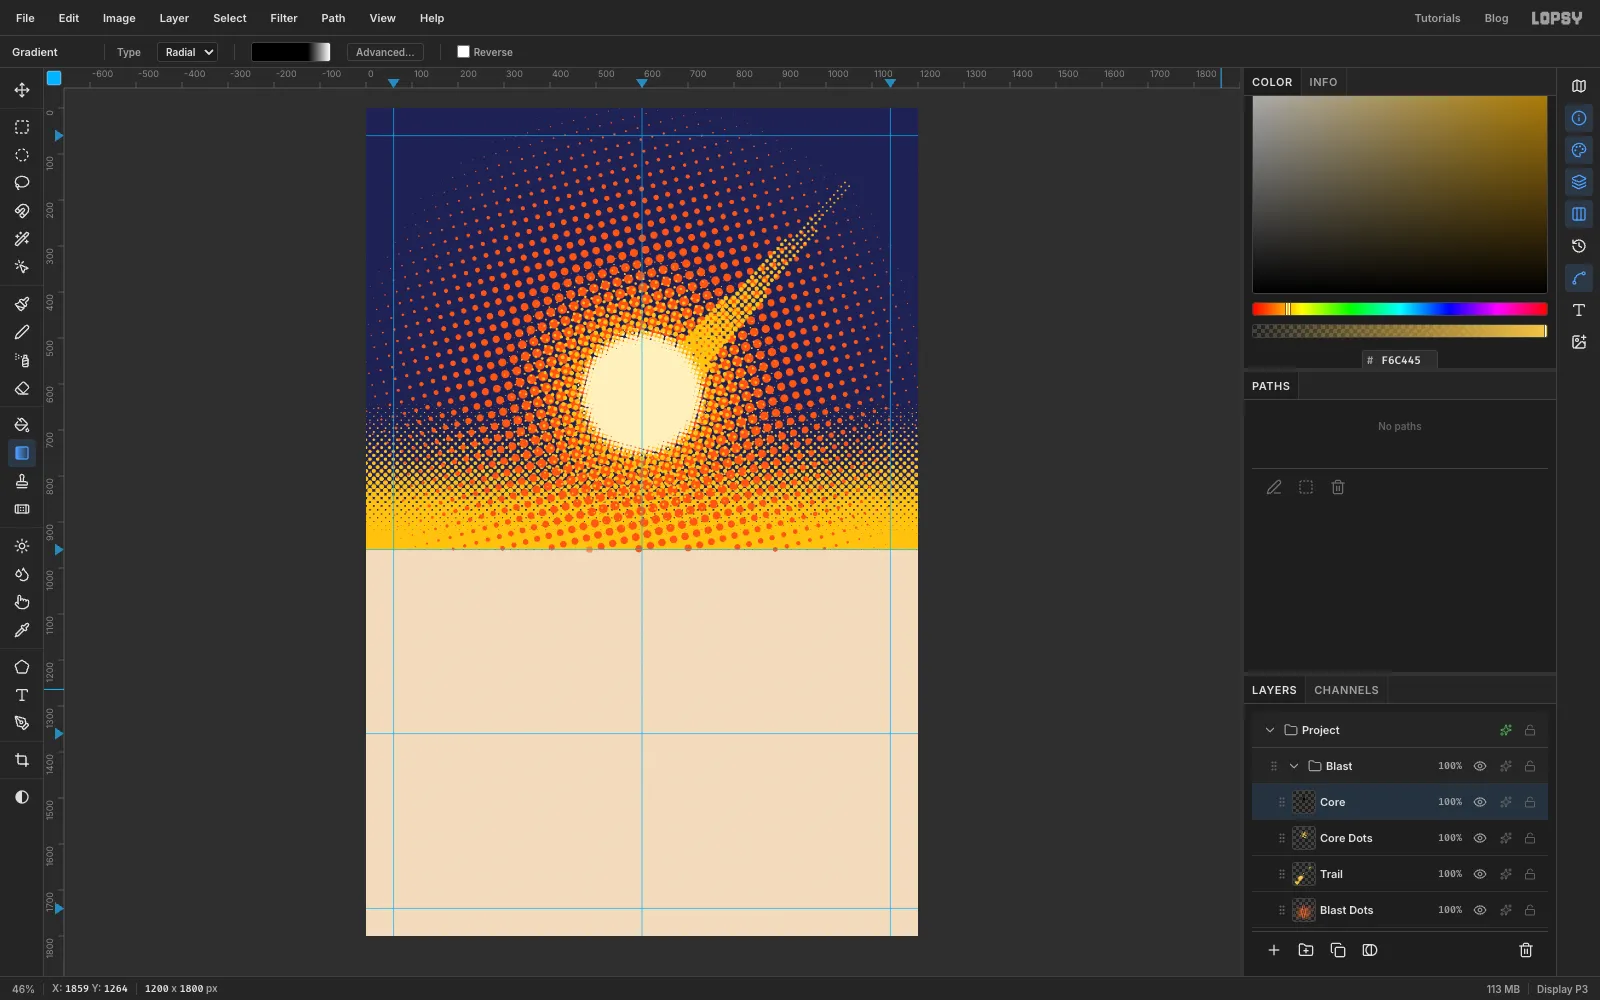
Add a layer called Core. Pick the Elliptical Marquee and, with nothing selected, click once on the canvas. In the Elliptical Selection dialog, enter From 450, 470 and To 750, 770 to get a 300 px circle centred on the blast.
Inside it, drag a Radial gradient from the centre to the edge, with black up to about 72% and white at the very edge. Deselect, then run Halftone with Dot Size 14, Density 1.5, Angle 75 and Softness 0. Colour it with a sun-cream Color Overlay and rasterize.
The middle merges into a solid disc, and only the rim breaks into dots, so the sun is printed like everything else around it.
-
Draw the shock rings
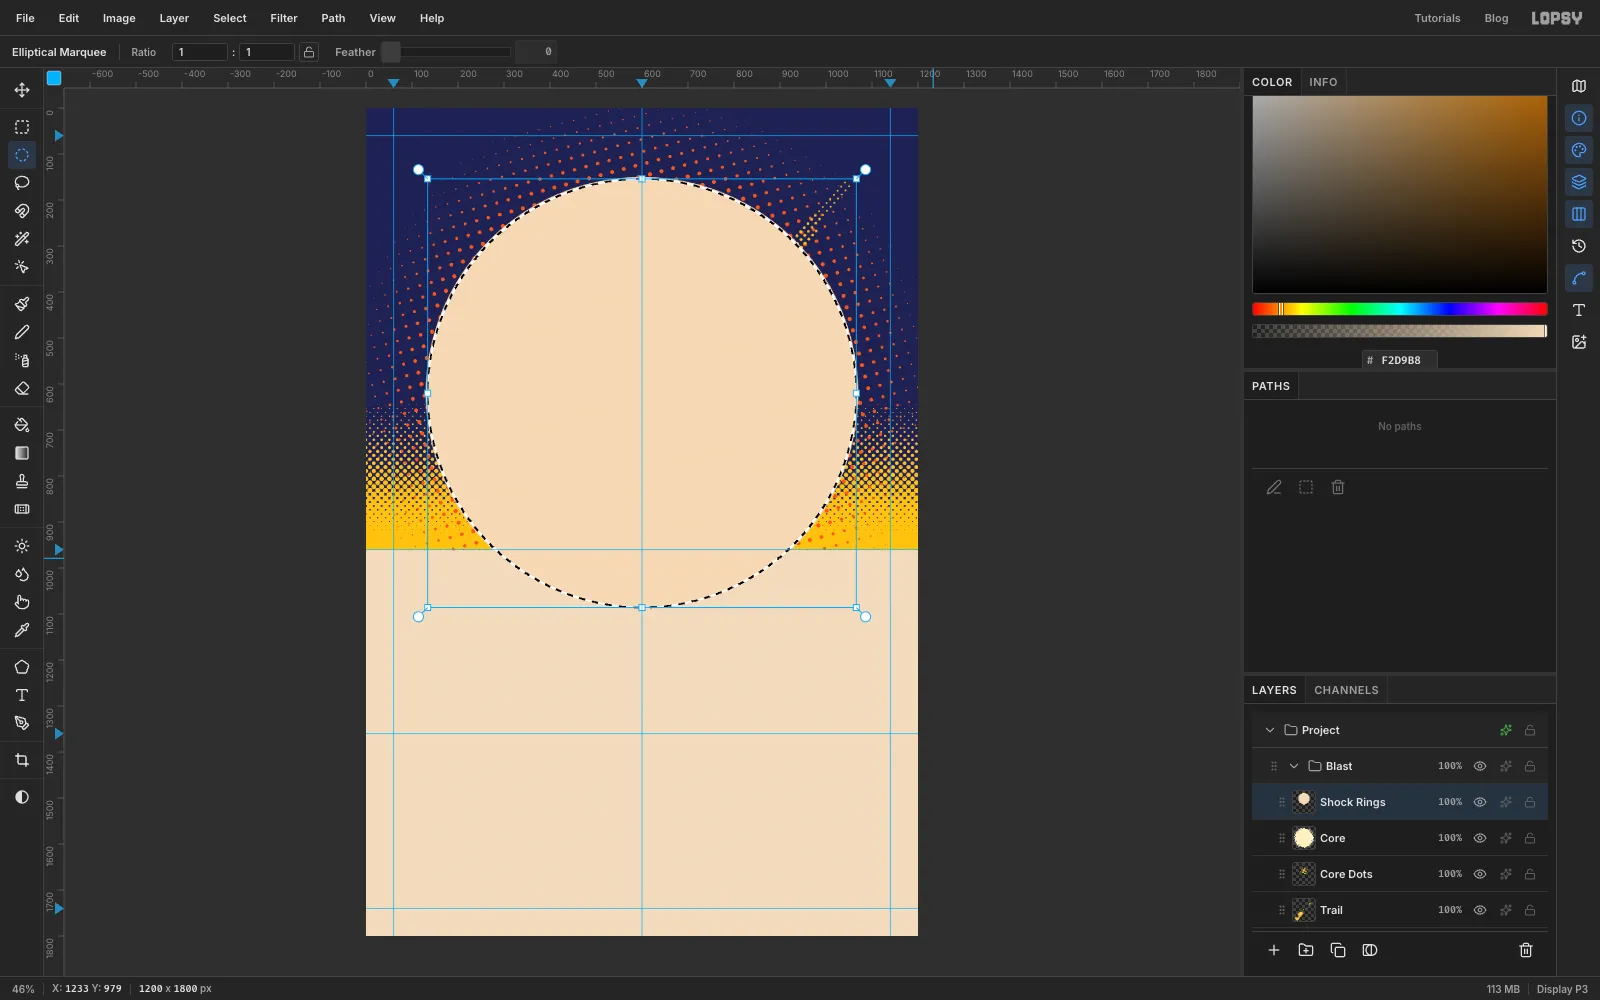
Add a layer called Shock Rings and set the foreground to ring peach . You'll make three rings, largest first. Each Delete clears everything inside the current circle, which would wipe out any smaller ring you'd already drawn.
For each ring:
- Click once with the Elliptical Marquee and type the corners.
- Choose Edit → Fill.
- Choose Select → Shrink by 4.
- Press Delete, then deselect.
The corners are:
- From 130, 150 to 1070, 1090
- From 230, 250 to 970, 990
- From 330, 350 to 870, 890
-
Fade the rings out with a mask
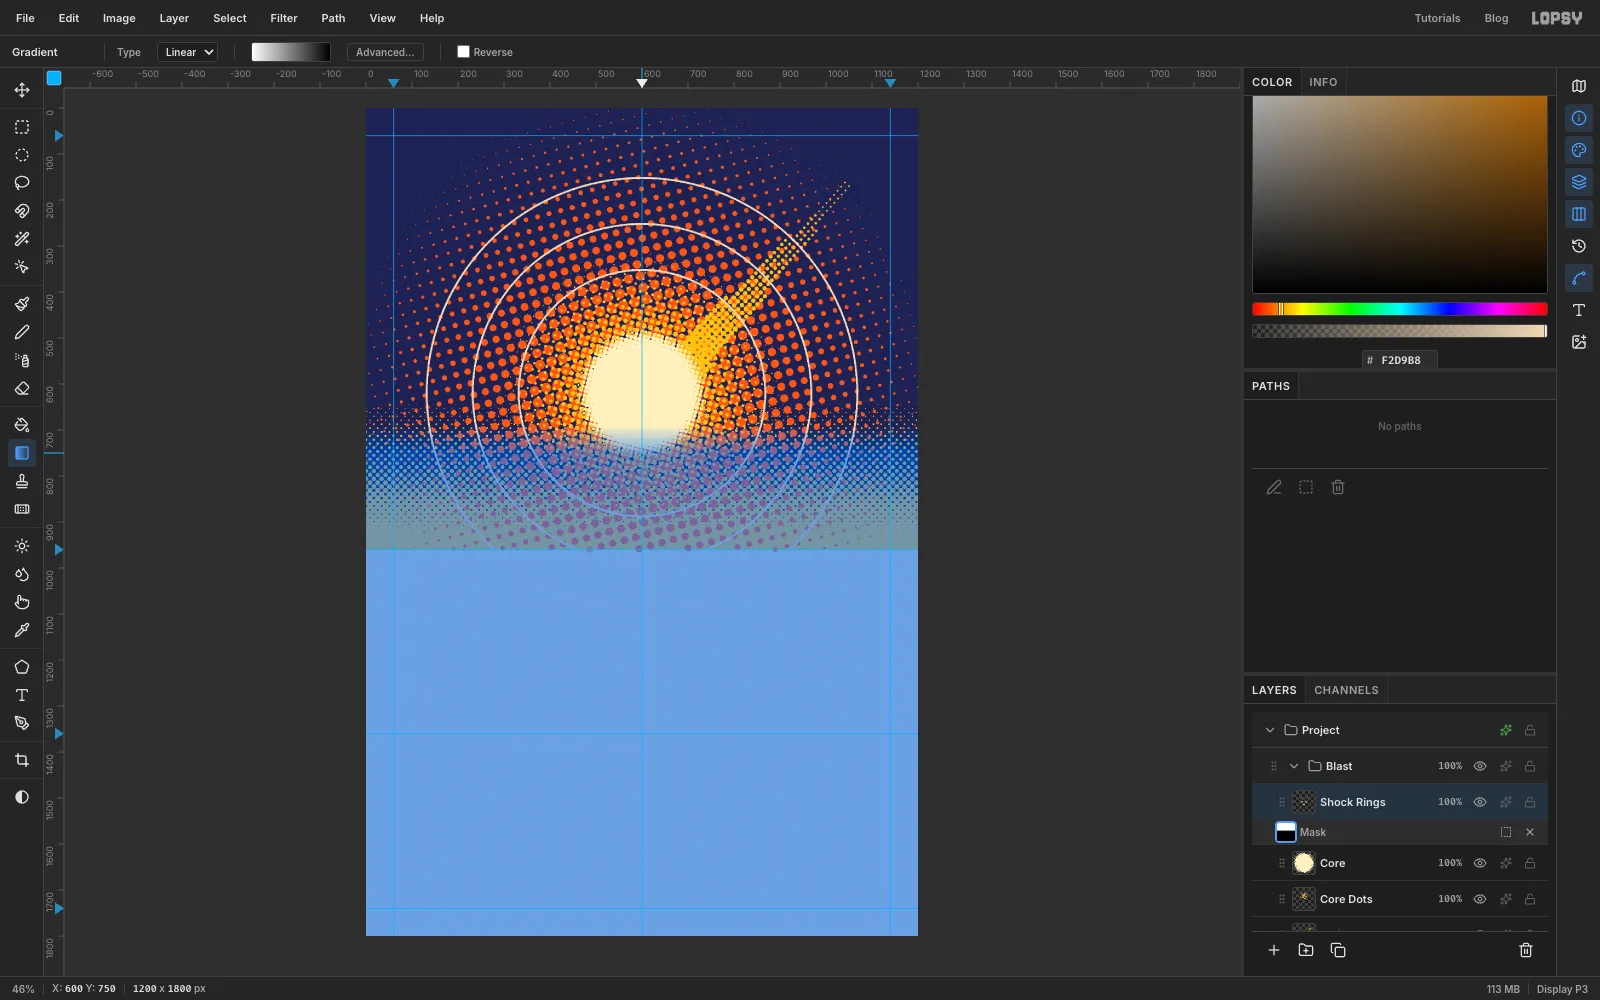
The rings would cross the yellow band and the trees, so fade them out instead. Click Add Mask in the Layers panel, then click the mask thumbnail to edit the mask. The canvas turns blue while you're editing it.
Drag a Linear gradient from white to black, starting level with the lower part of the sun (about y = 690) and ending 60 px further down. Above the gradient the rings show, and below it they're hidden. Click the Shock Rings row to stop editing the mask.
Finally, click Blast Dots, marquee everything below the horizon, and press Delete to trim the dots that spilled over it.
-
Print the ground in orange dots
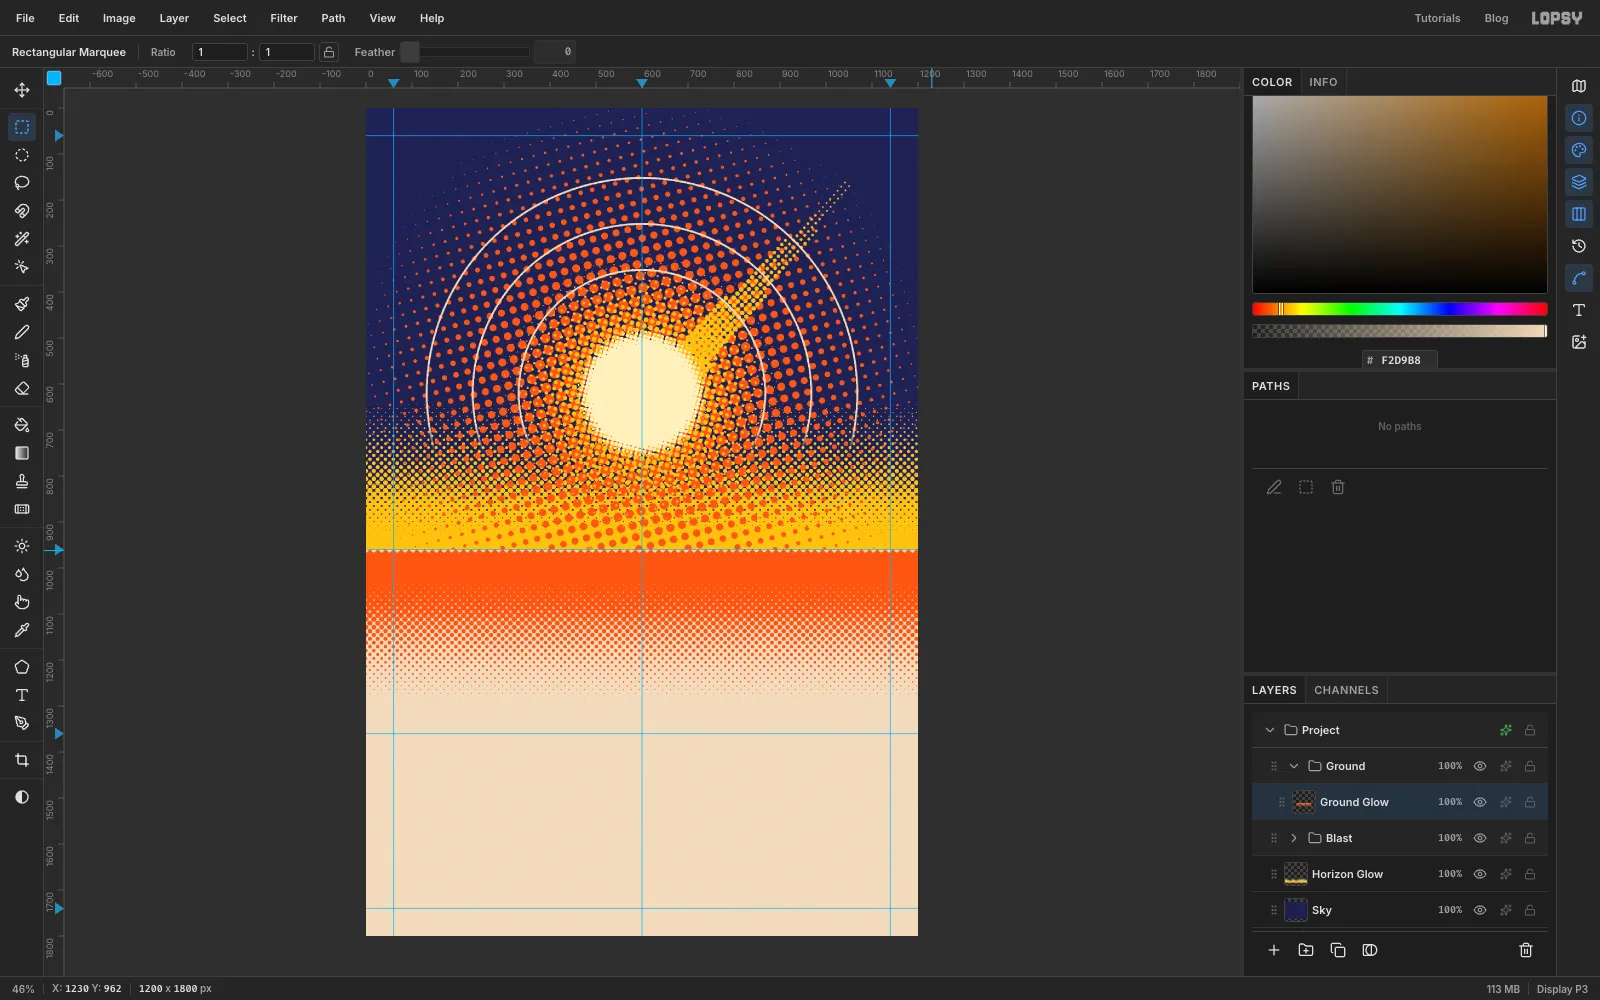
Click the Blast group row and collapse it with its arrow, so the next group goes beside it rather than inside it. Click New Group and name it Ground, then add a layer called Ground Glow.
Marquee the full width of the canvas from the horizon down to about 1420. Drag a Linear gradient from the horizon down to about 1300, using black at the top, about 20% along, and white at the bottom. Deselect.
Run Halftone with Dot Size 18, Density 1.5, Angle 45 and Softness 0.4, then add an orange Color Overlay and rasterize. This is the same screen as the yellow glow above the horizon, so the two bands mirror each other.
-
Paste in the photograph
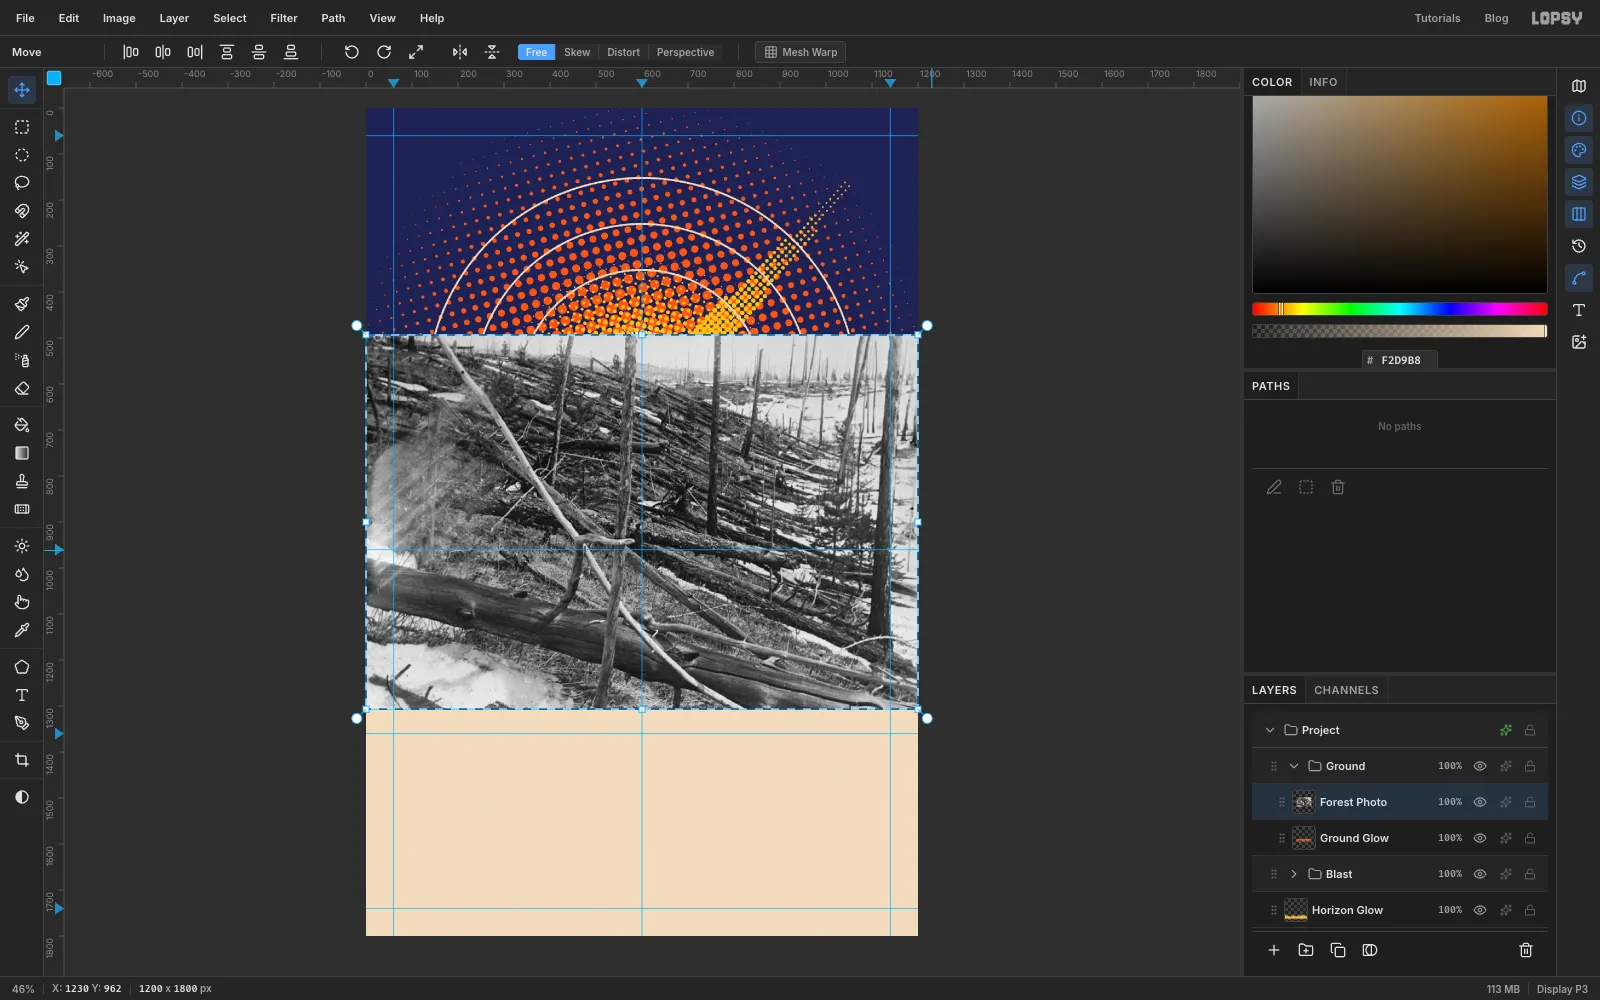
Open the Kulik photo in your browser, copy it, and press Cmd+V in Lopsy. It comes in as a new layer, scaled to fit the width of the canvas. Rename it Forest Photo.
-
Scale the photo up
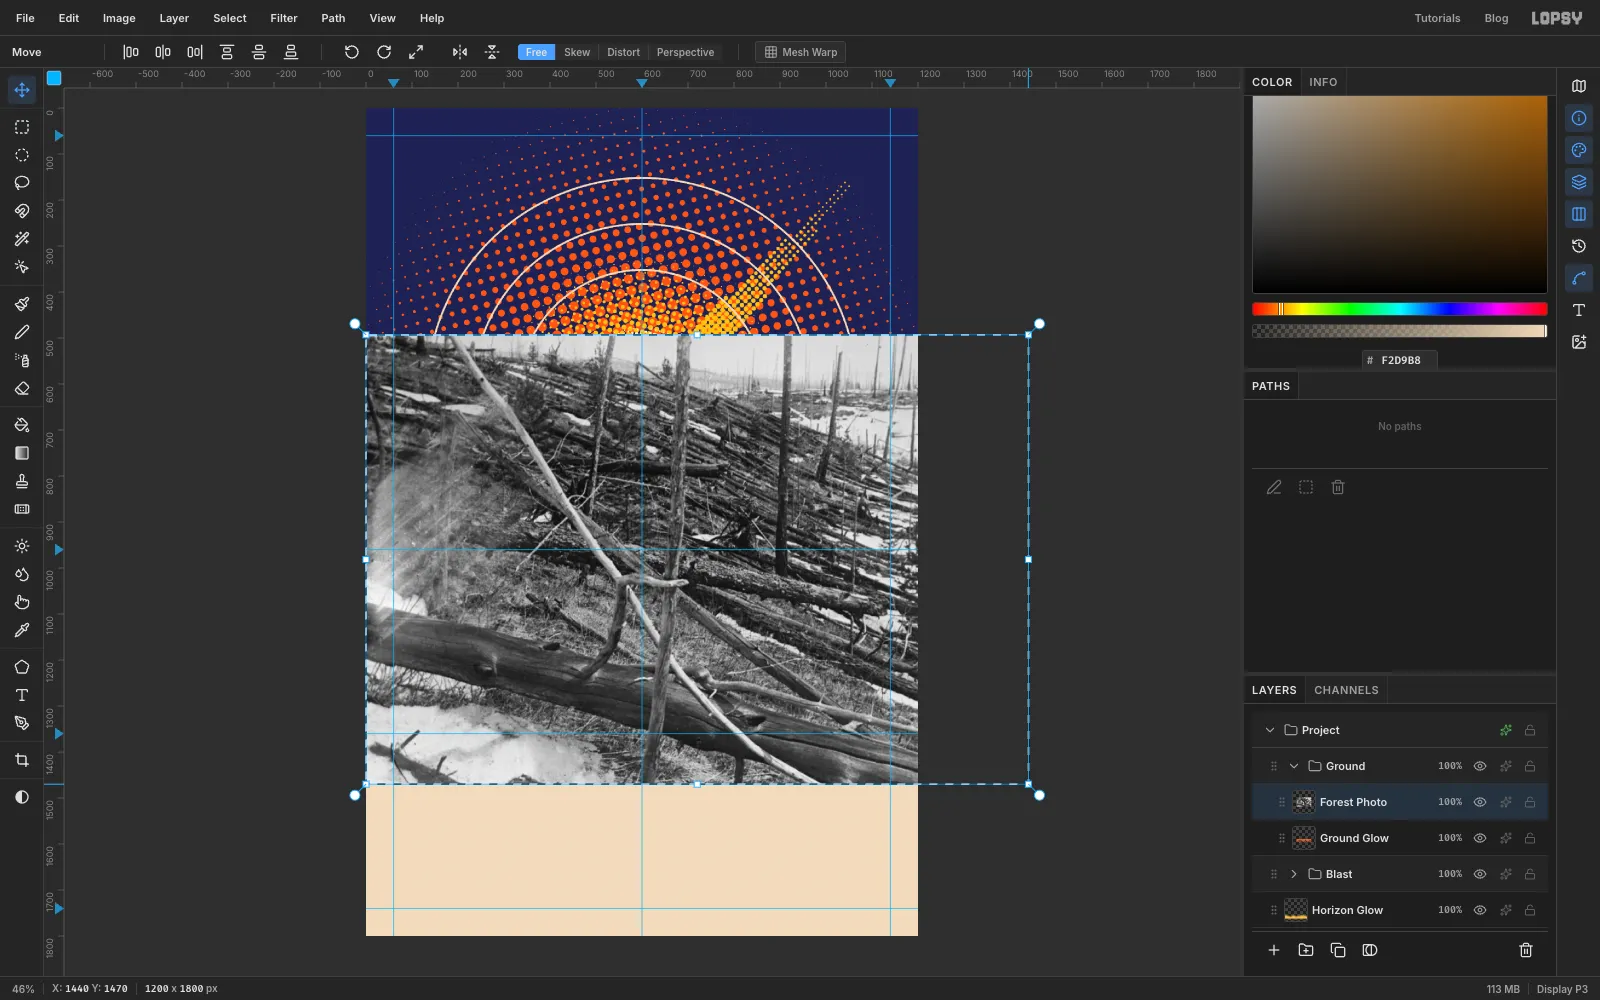
The interesting part of the photo is the fallen trunks in the middle, so make it bigger. Drag a marquee around the photo and switch to the Move tool. Hold Cmd (to keep the proportions) and drag the bottom-right handle out by about 240 px, so the photo is about 1440 px wide, then press Cmd+D to commit.
Drag the photo so it hangs evenly past both sides of the canvas, with its top edge at about y = 500.
-
Boost the photo and crop it to the ground
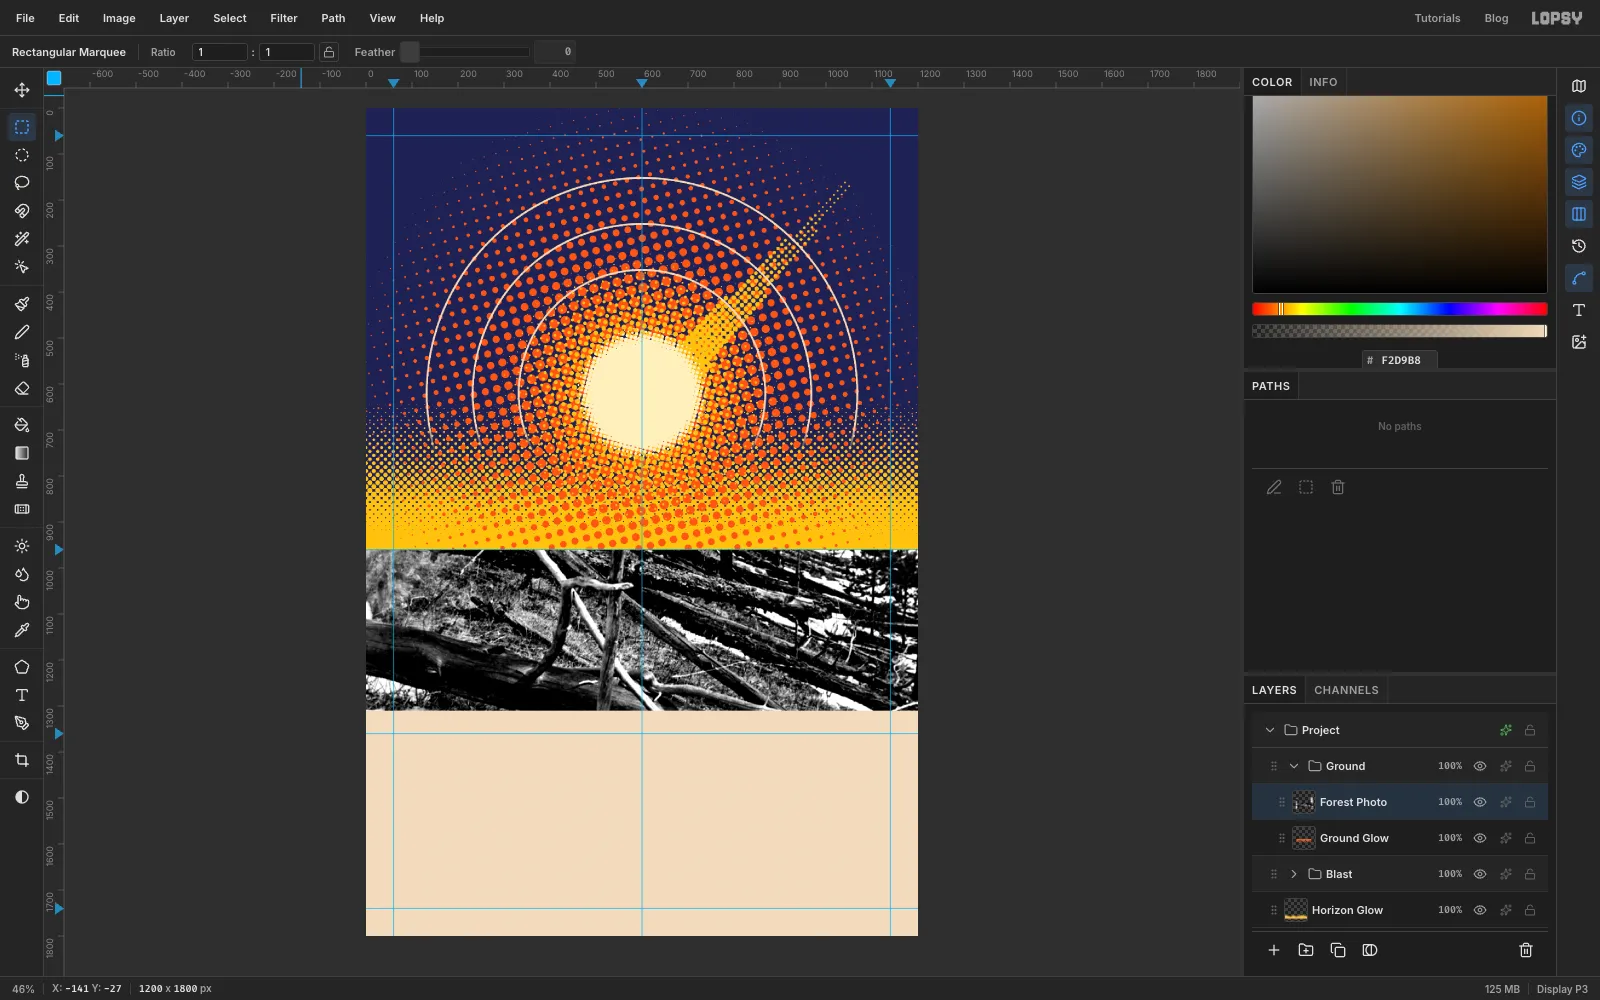
Choose Filter → Desaturate, then Filter → Brightness/Contrast with Brightness 0 and Contrast 85. The dark trunks and the bright snow need to be far apart for the dots to read.
Marquee the full width from the horizon down to about y = 1310, choose Select → Inverse, press Delete and deselect. What's left is a band of photo sitting right under the horizon.
-
Fade the bottom of the photo
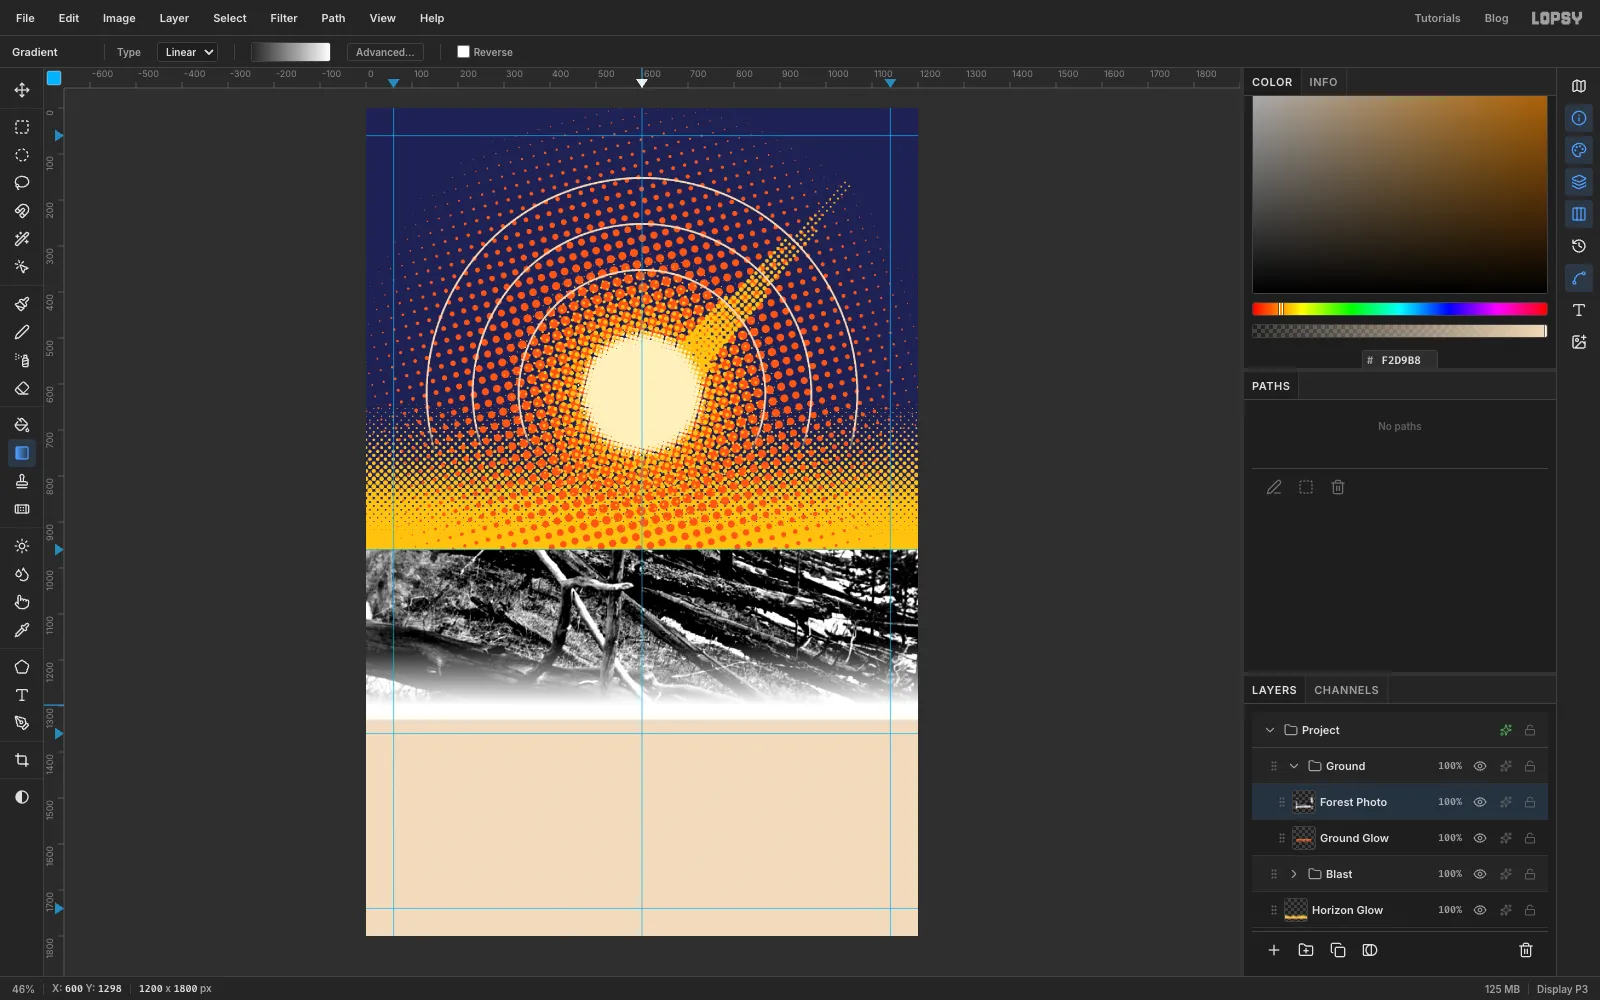
Marquee the bottom 150 px or so of the band, full width. In the gradient editor, set both stops to white and drag the left stop's opacity down to 0. Then drag the gradient from the top of that marquee straight down to the bottom of the photo, and deselect.
White prints no dots at all, so this fade will turn into dots that shrink to nothing as they reach the paper.
-
Halftone the photo in indigo
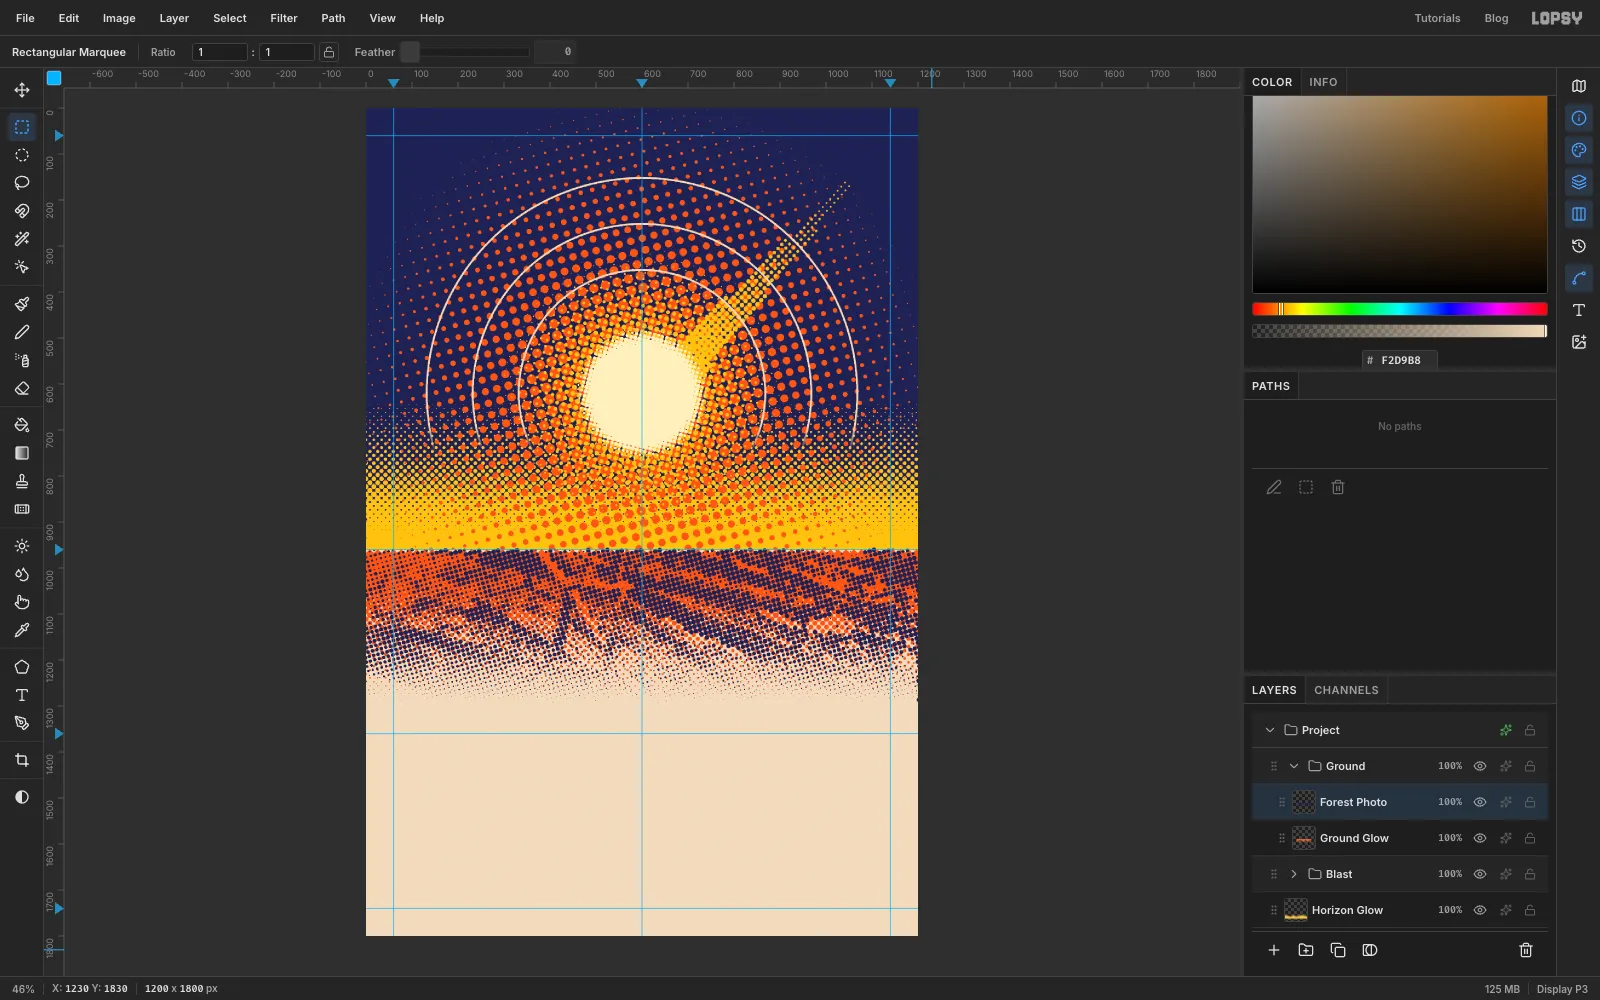
Run Halftone with Dot Size 10, Density 1, Angle 15 and Softness 0.3. Add an indigo Color Overlay and rasterize.
Parts of the photo hang off the sides of the canvas, and Select → Inverse never reached them, so a few dots can creep in at the edges below the band. Marquee everything below the band, full width, and press Delete to clean them up.
-
Draw the dead trees with the Pencil
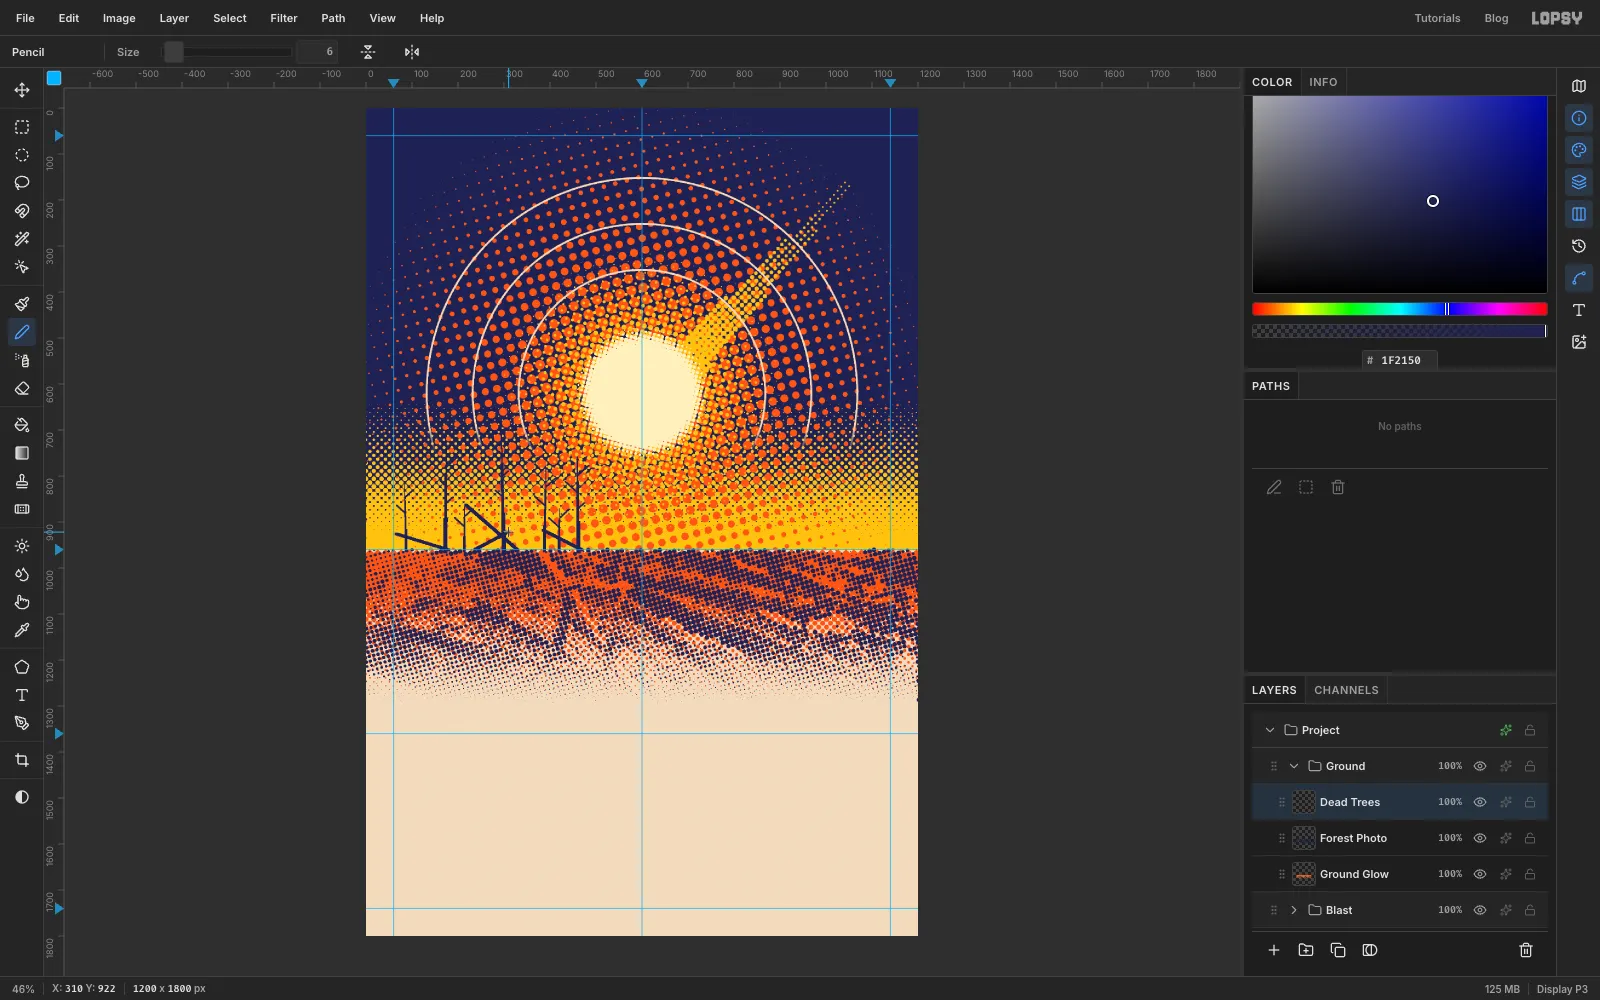
Add a layer called Dead Trees, set the foreground to indigo, and pick the Pencil. To draw a straight line, click where it starts and then Shift-click where it ends.
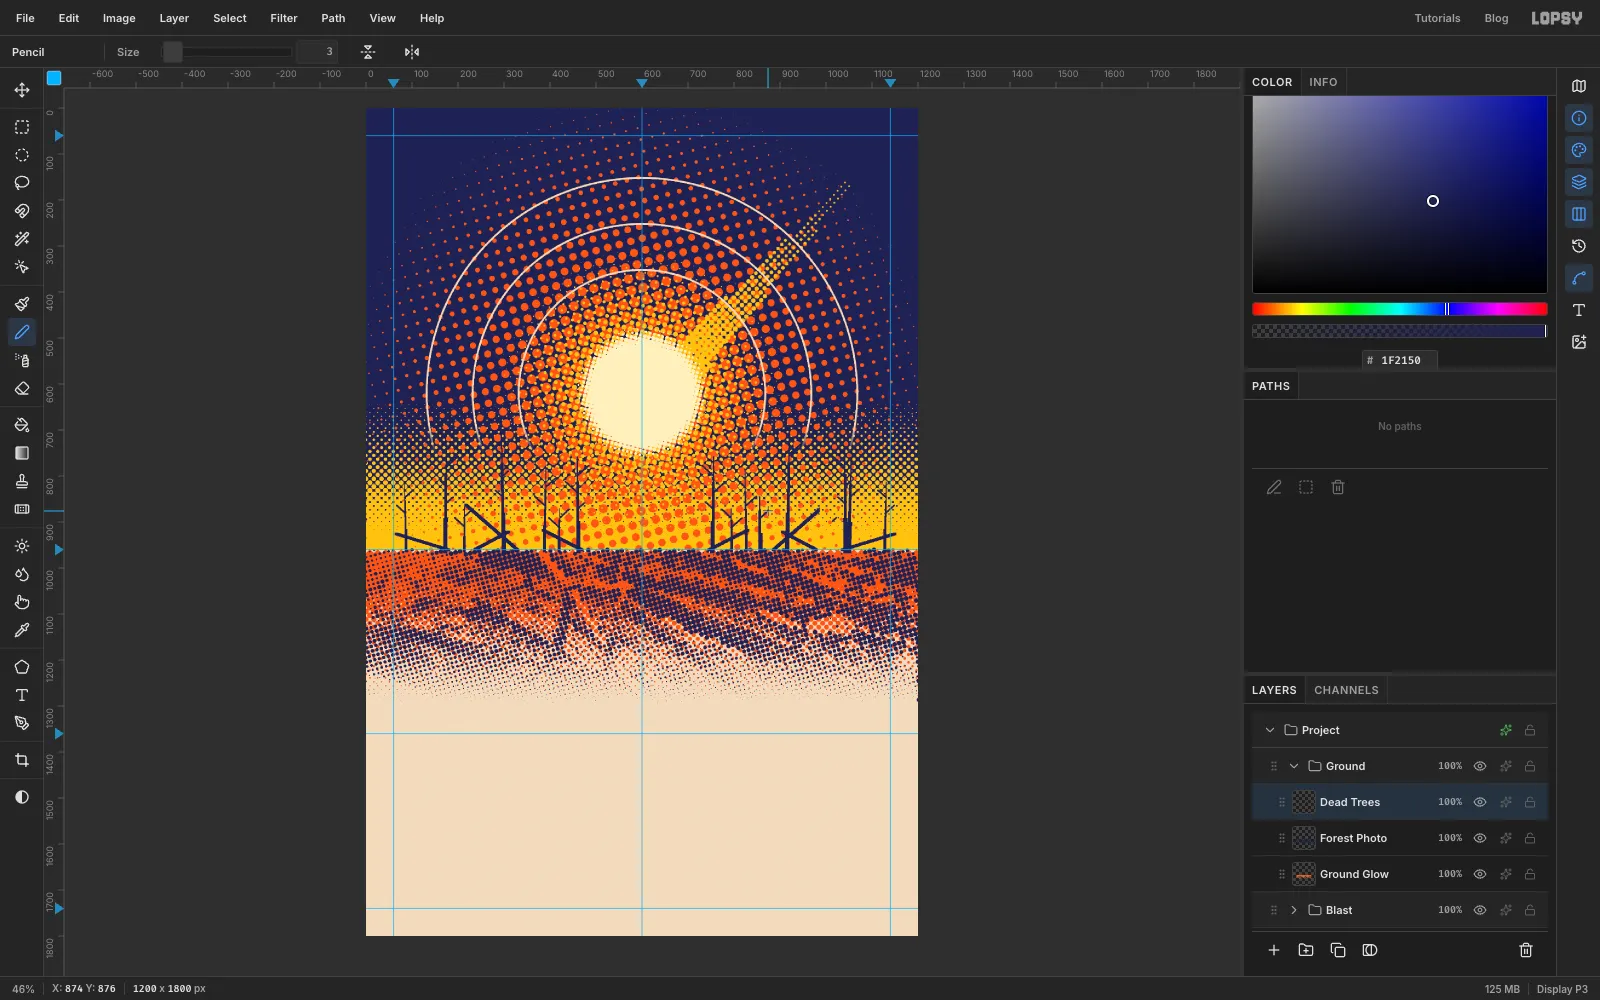
Draw seven bare trunks on the left half of the horizon, between about x = 90 and x = 460. Make them between 90 and 260 px tall, and lean each one a few pixels left or right. Space them unevenly. A tree line spaced like a fence looks fake.
Taper each trunk by drawing it in three pieces:
- Size 9 for the bottom third;
- Size 6 for the middle;
- Size 3 for the tip.
Use a size or two thinner for the short trees.
Add two or three short branch stubs to each tree at Size 3, angled up and out. Finally, at Size 6, draw four fallen trunks lying against the horizon at different angles. Three lean away from the sun and one leans the other way, like the toppled trees in the photo.
-
Copy the stand of trees
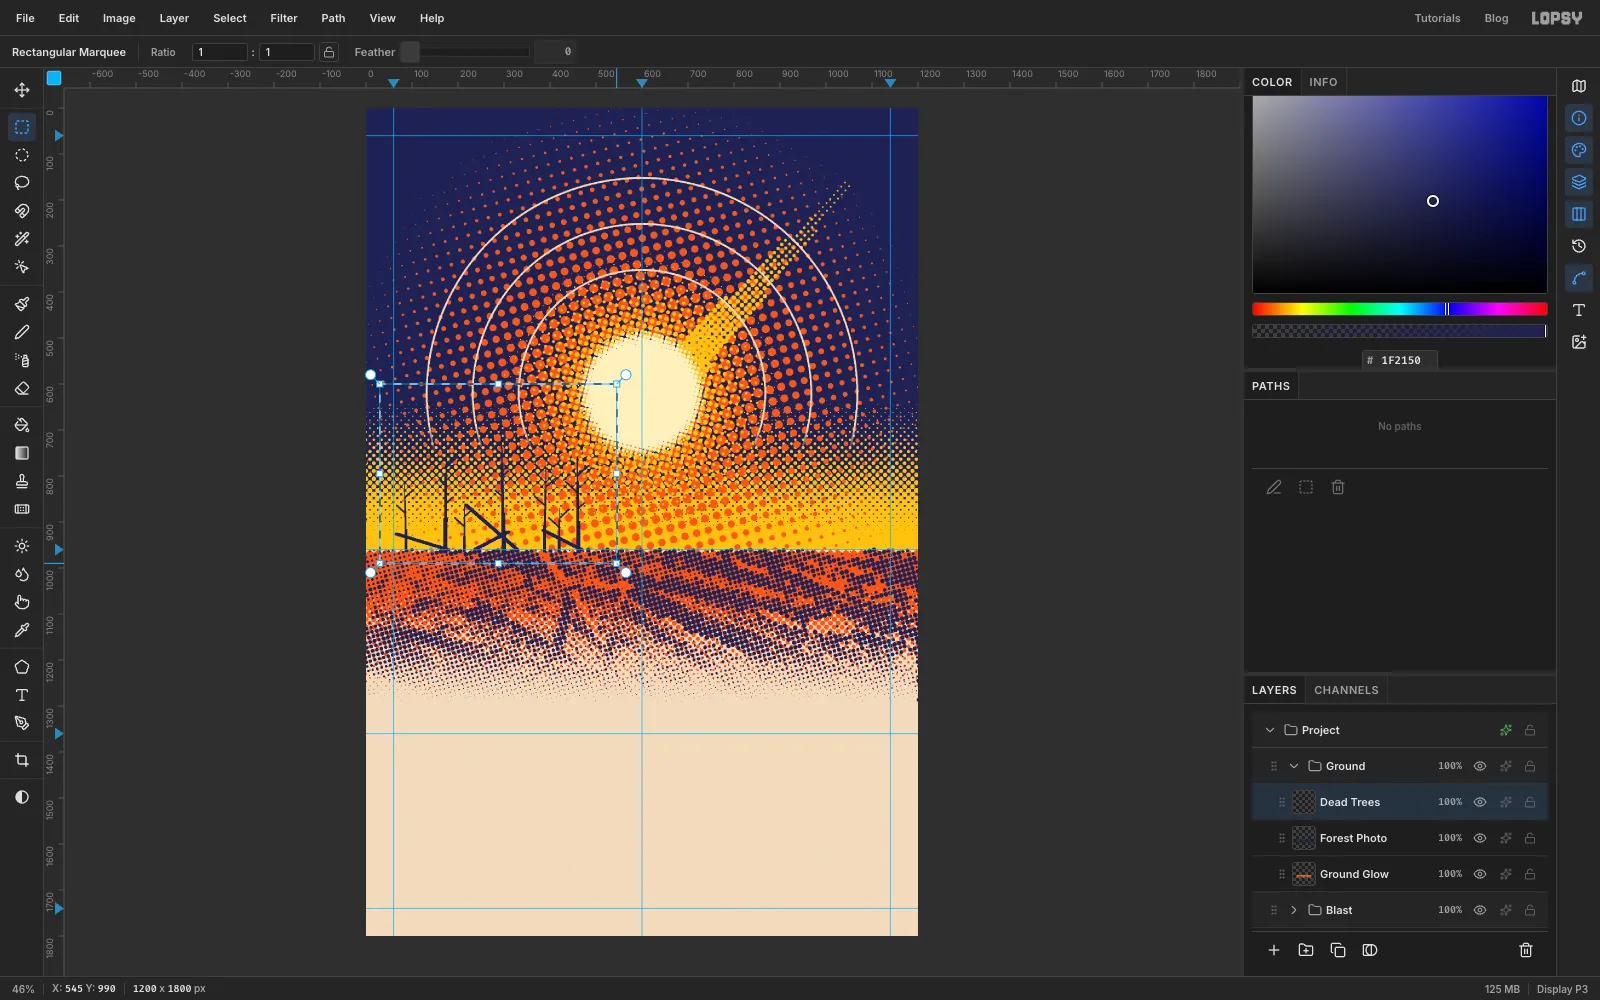
Drag a marquee around the whole stand, from just left of the first tree to just right of the last, and from above the tallest tip to just below the horizon. Press Cmd+C and then Cmd+V to paste a copy on its own layer, and name it Trees Copy.
-
Flip the copy across the poster
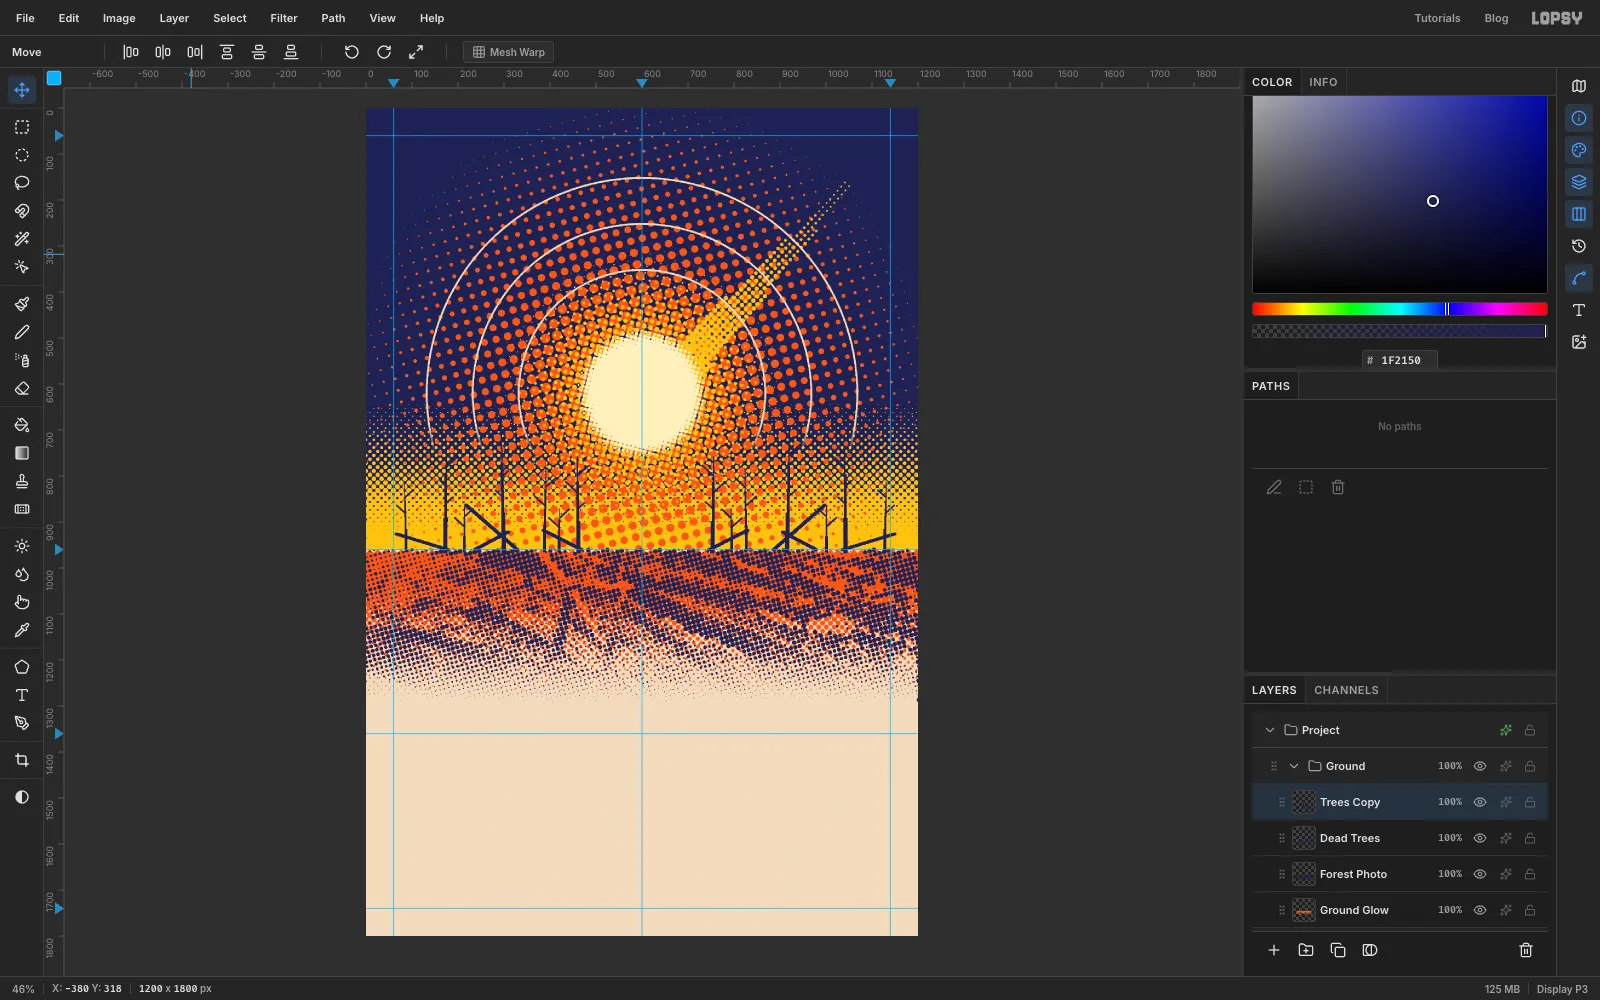
Choose Image → Flip Horizontal. The copy flips in place, so its fallen trunks now lean the other way. Switch to the Move tool and move it to the right half of the horizon, with Shift+arrow keys for big steps and the arrow keys to finish. Leave it slightly off a perfect mirror.
-
Break the mirror
Choose Layer → Merge Down to merge the copy into Dead Trees.
A perfect mirror gives the trick away. Pick the Eraser at Size 30 and drag up one of the short trees on the right to remove it. Then use the Pencil to draw two new tapered trees on the right side, at different heights from anything on the left.
-
Rough up the horizon
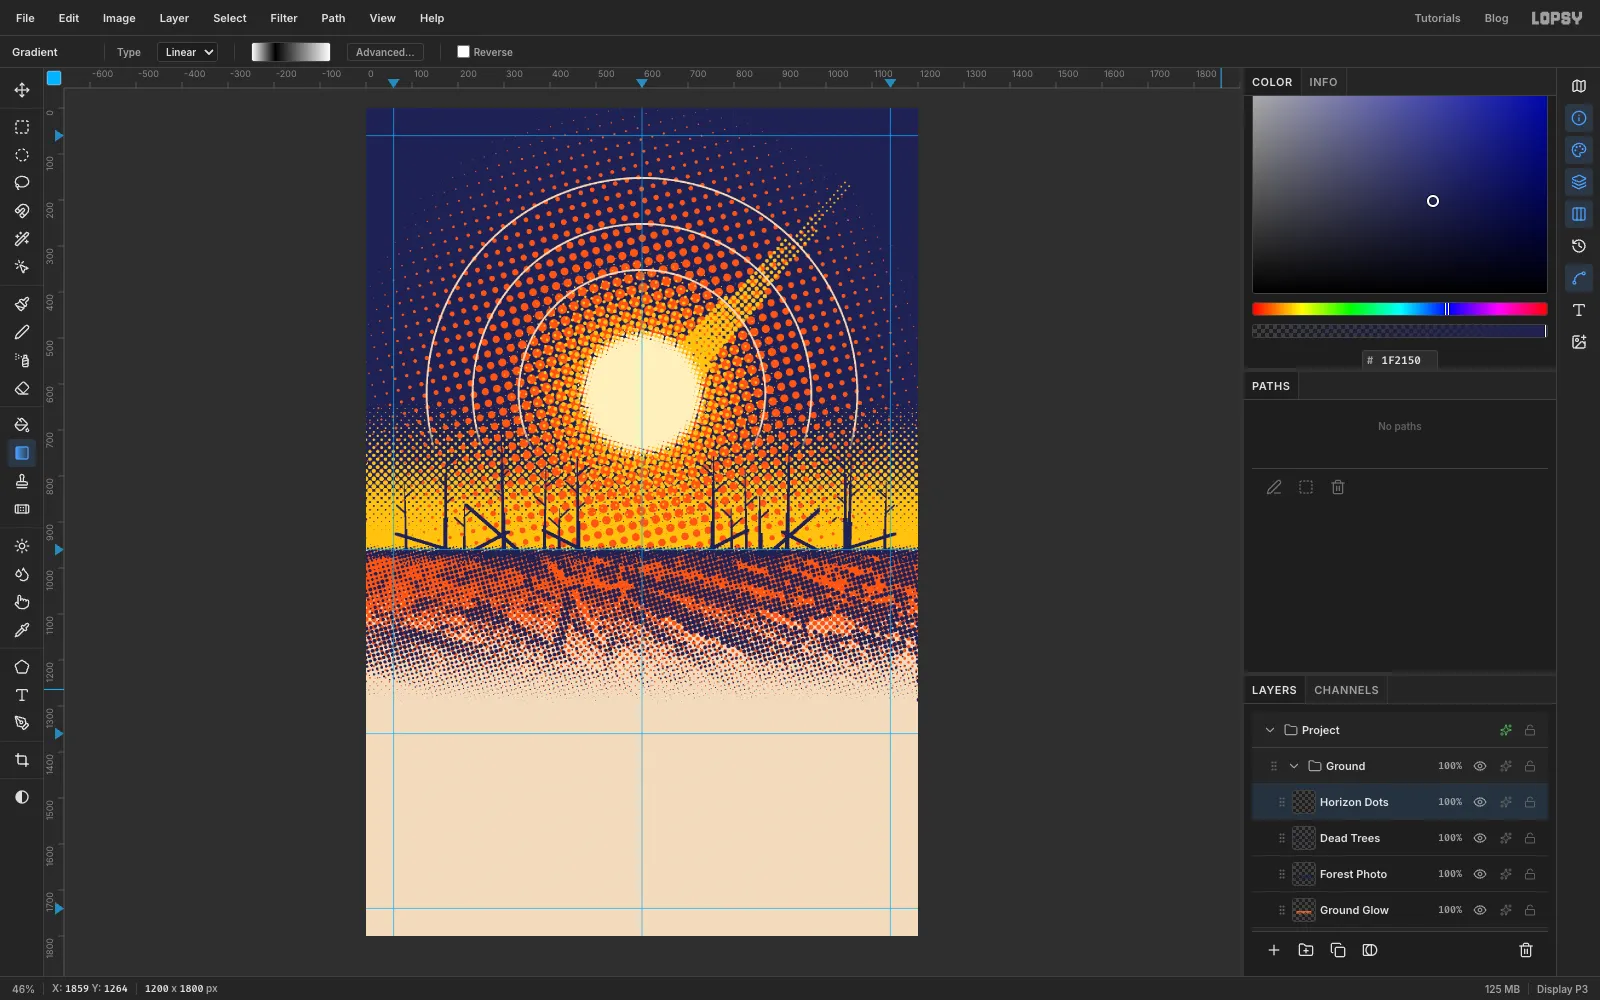
The horizon is still a ruler-straight line, so break it with dots. Add a layer called Horizon Dots and pick the Pen tool.
- Click once beyond the left edge of the canvas and once beyond the right, just above the horizon.
- Come back along the bottom with about twenty clicks that wander up and down between about 10 and 50 px below the horizon.
- Close the shape, then click Path to Selection and Delete Path.
Drag a Linear gradient straight down through the band, with white at the top, black about 30% of the way down, and white at the bottom. Deselect, then run Halftone with Dot Size 9, Density 1.2, Angle 15 and Softness 0. Add an indigo Color Overlay and rasterize.
-
Set the title
Collapse the Ground group, click New Group and name it Title.
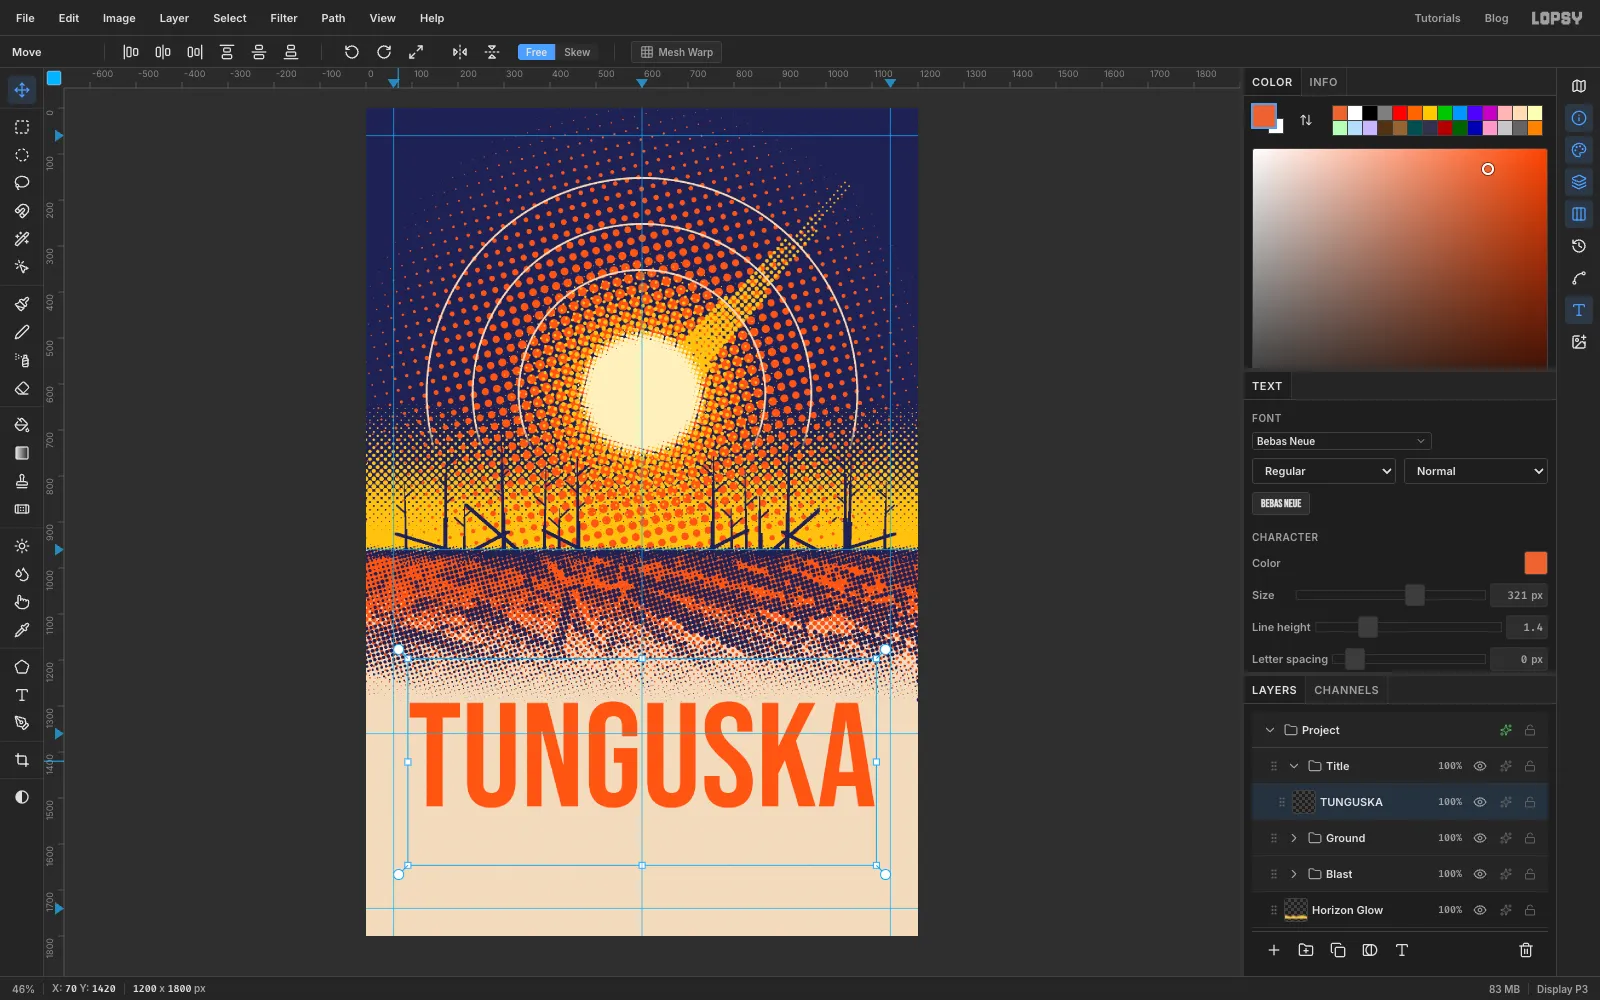
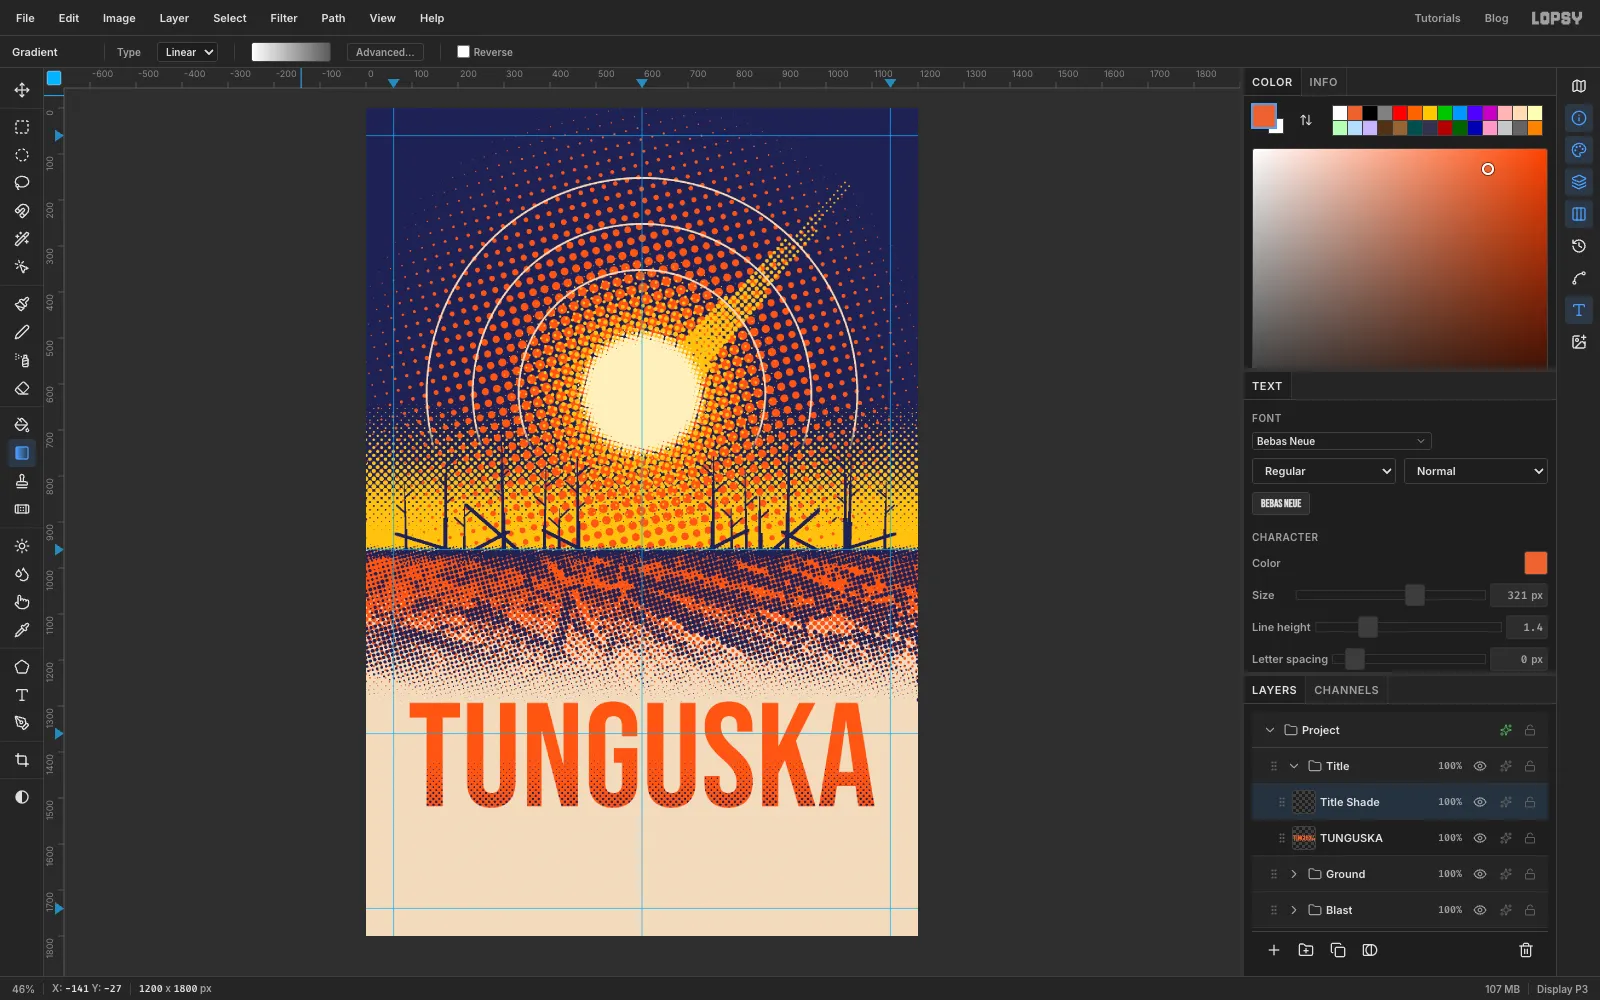
Pick the Text tool. Set the font to Bebas Neue, Size 321, and colour orange . Click in an empty part of the paper, type TUNGUSKA, and press Tab to commit. At that size the word spans almost the full width between the margins.
With the Move tool, nudge it with the arrow keys until it's centred on the centre guide, with the tops of the letters about 70 px above the 1360 guide, just clear of the last photo dots.
-
Select the title's letters
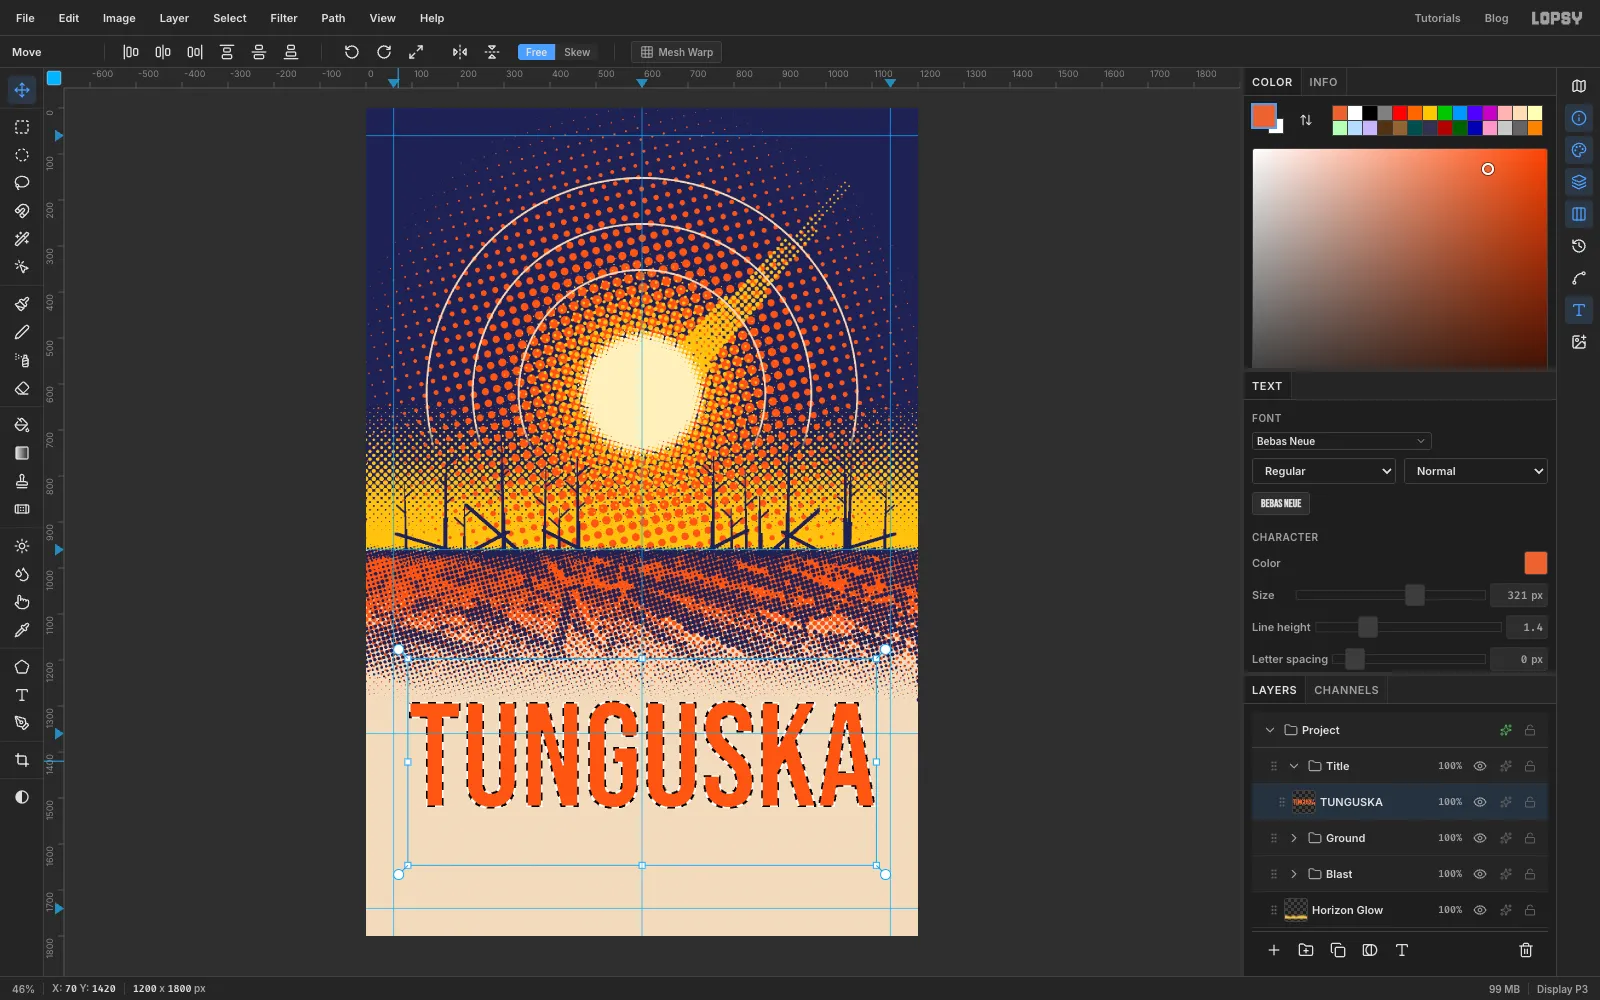
Cmd-click the TUNGUSKA thumbnail in the Layers panel. That loads the letters' shapes as a selection. Then click Add Layer and name the new layer Title Shade.
-
Shade the letters with dots
Your gradient still has the three stops from the horizon. In Advanced…, delete the middle stop and set the ends to white and mid-grey . Drag it from just below the middle of the letters down to their baseline. The selection keeps it inside the letters. Deselect.
Run Halftone with Dot Size 9, Density 1, Angle 45 and Softness 0.3. Add an indigo Color Overlay and rasterize.
The dots along the edges of the letters spill slightly outside them. Cmd-click the TUNGUSKA thumbnail again, choose Select → Inverse, press Delete and deselect.
-
Add a misregistered indigo plate
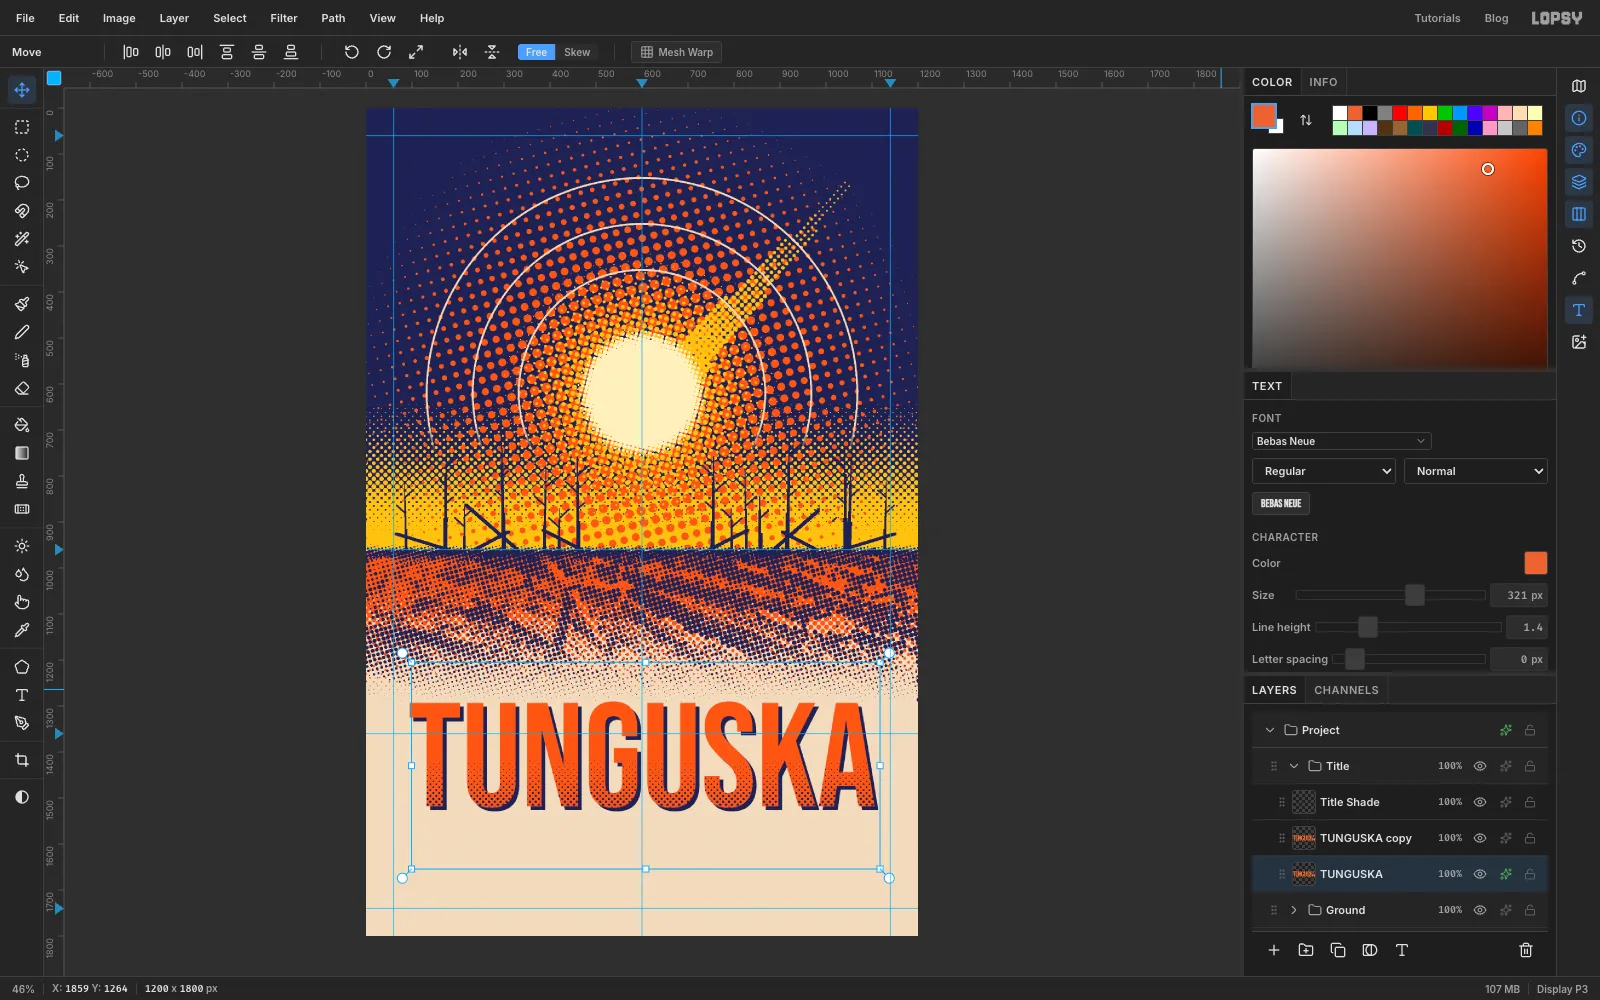
Click the TUNGUSKA layer and choose Layer → Duplicate Layer. The copy sits exactly on top of the original.
Click the original, the lower of the two, and give it an indigo Color Overlay. Then, with the Move tool, press → eight times and ↓ eight times. The orange copy stays on top with its dots, and the indigo plate peeks out down and to the right, like a print where the second ink landed slightly off.
-
Add the subtitle and rules
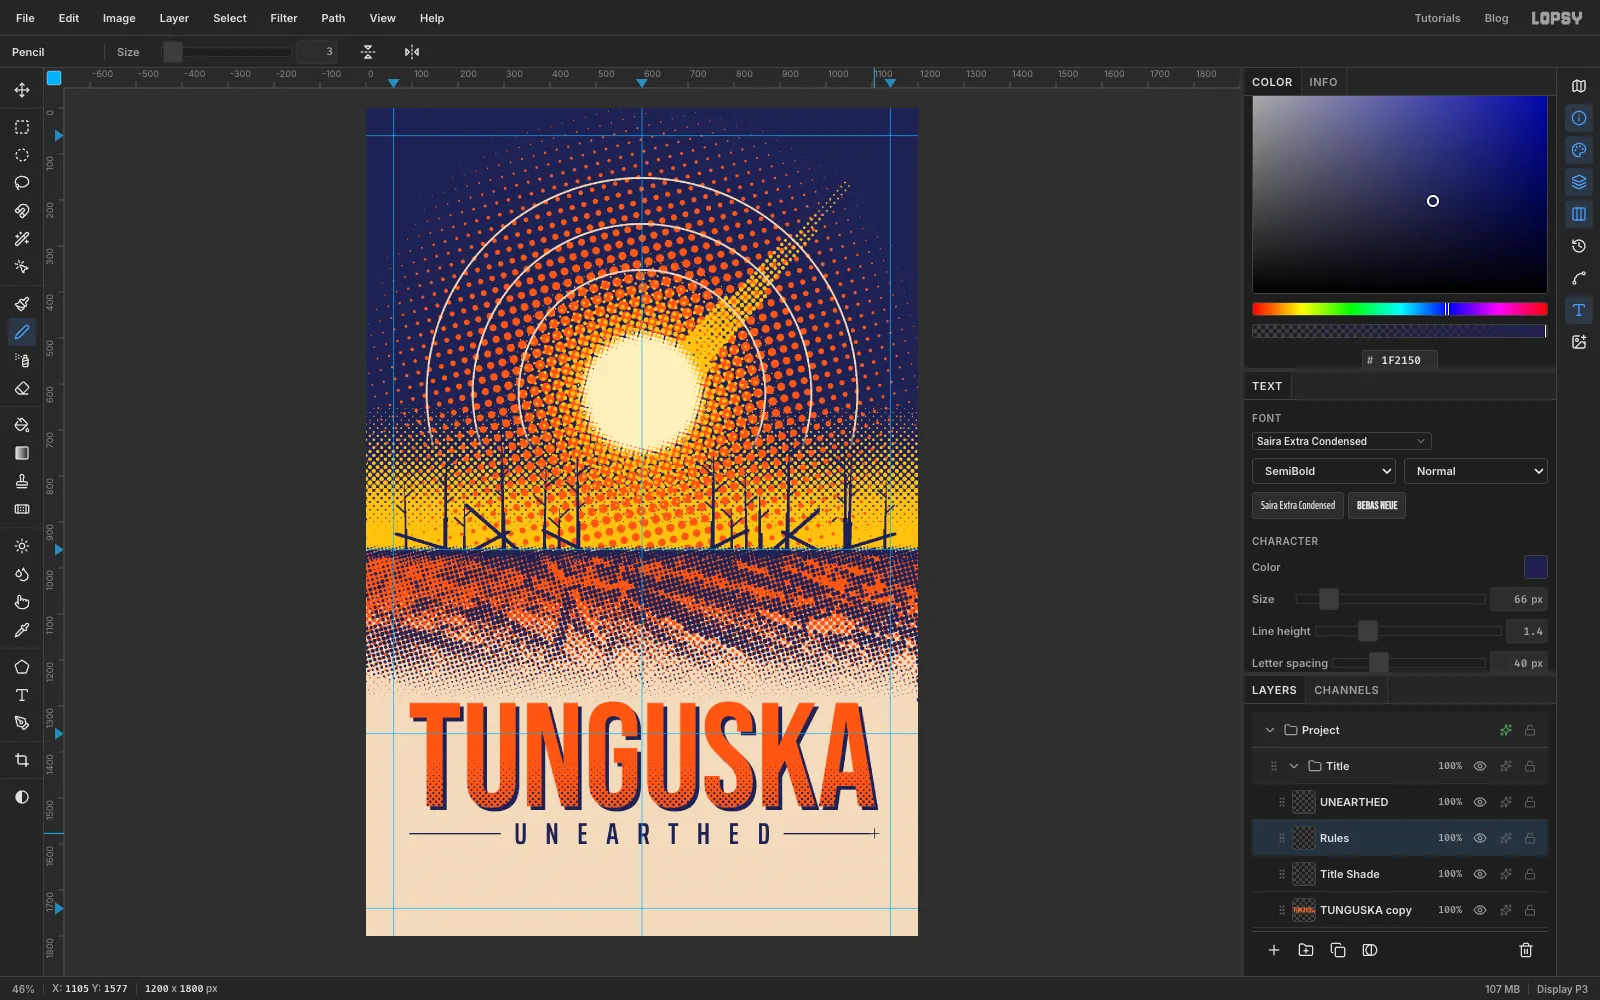
Click Title Shade first, so your new text settings don't restyle the title. With the Text tool, set Saira Extra Condensed SemiBold, Size 66, indigo, and in the Text panel set Letter spacing to 40. Click in empty paper, type UNEARTHED and press Tab. Centre it about 26 px below the bottom of the indigo plate.
Add a layer called Rules. With the Pencil at Size 3, draw two lines level with the middle of UNEARTHED. Click the start, then Cmd+Shift-click the end, which snaps the line perfectly level:
- from the left edge of the title to a letter-width short of the U;
- from a letter-width past the D to the right edge of the title.
Make the two gaps equal.
-
Set the billing block
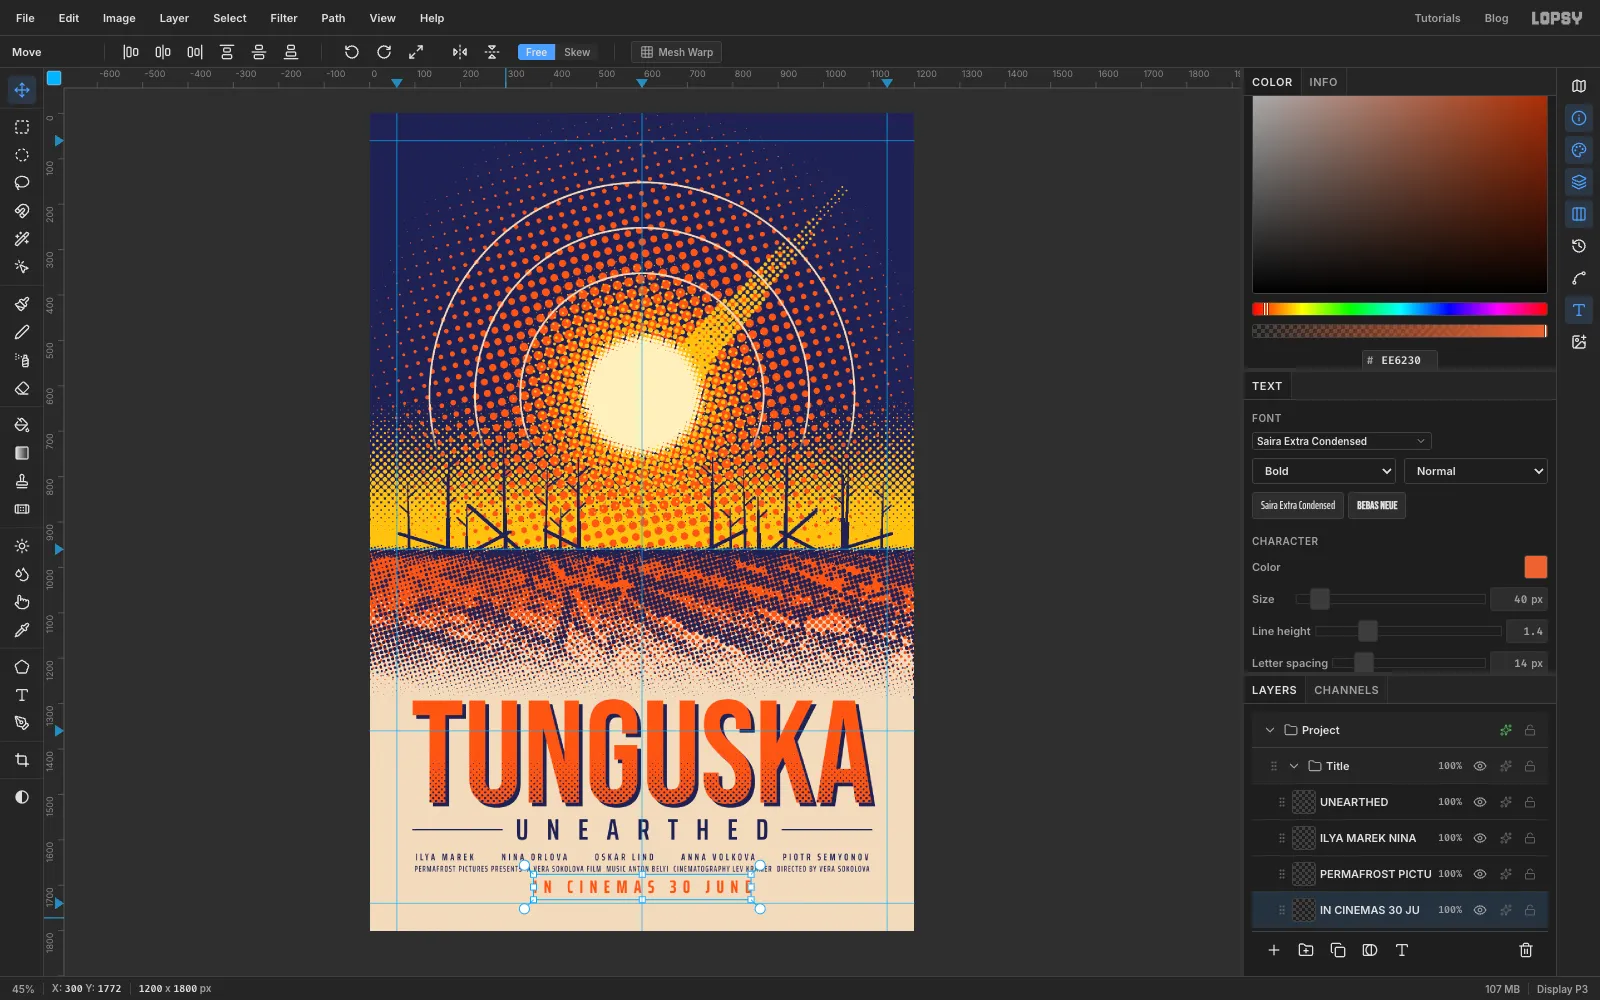
Every film poster needs a billing block. Click Rules again before each new piece of text, and type each one in empty paper before moving it.
- Cast: Saira Extra Condensed SemiBold, Size 21, Letter spacing 6, indigo. Type five names separated by six spaces, for example ILYA MAREK, NINA ORLOVA, OSKAR LIND, ANNA VOLKOVA and PIOTR SEMYONOV. Centre it about 30 px below UNEARTHED.
- Crew: the same font at Medium, Size 18, Letter spacing 2, about 13 px below the cast line. For example: PERMAFROST PICTURES PRESENTS, A VERA SOKOLOVA FILM, MUSIC ANTON BELYI, CINEMATOGRAPHY LEV KRAMER, DIRECTED BY VERA SOKOLOVA.
- Release: Bold, Size 40, Letter spacing 14, orange: IN CINEMAS 30 JUNE, centred just above the bottom margin.
-
Add the tagline
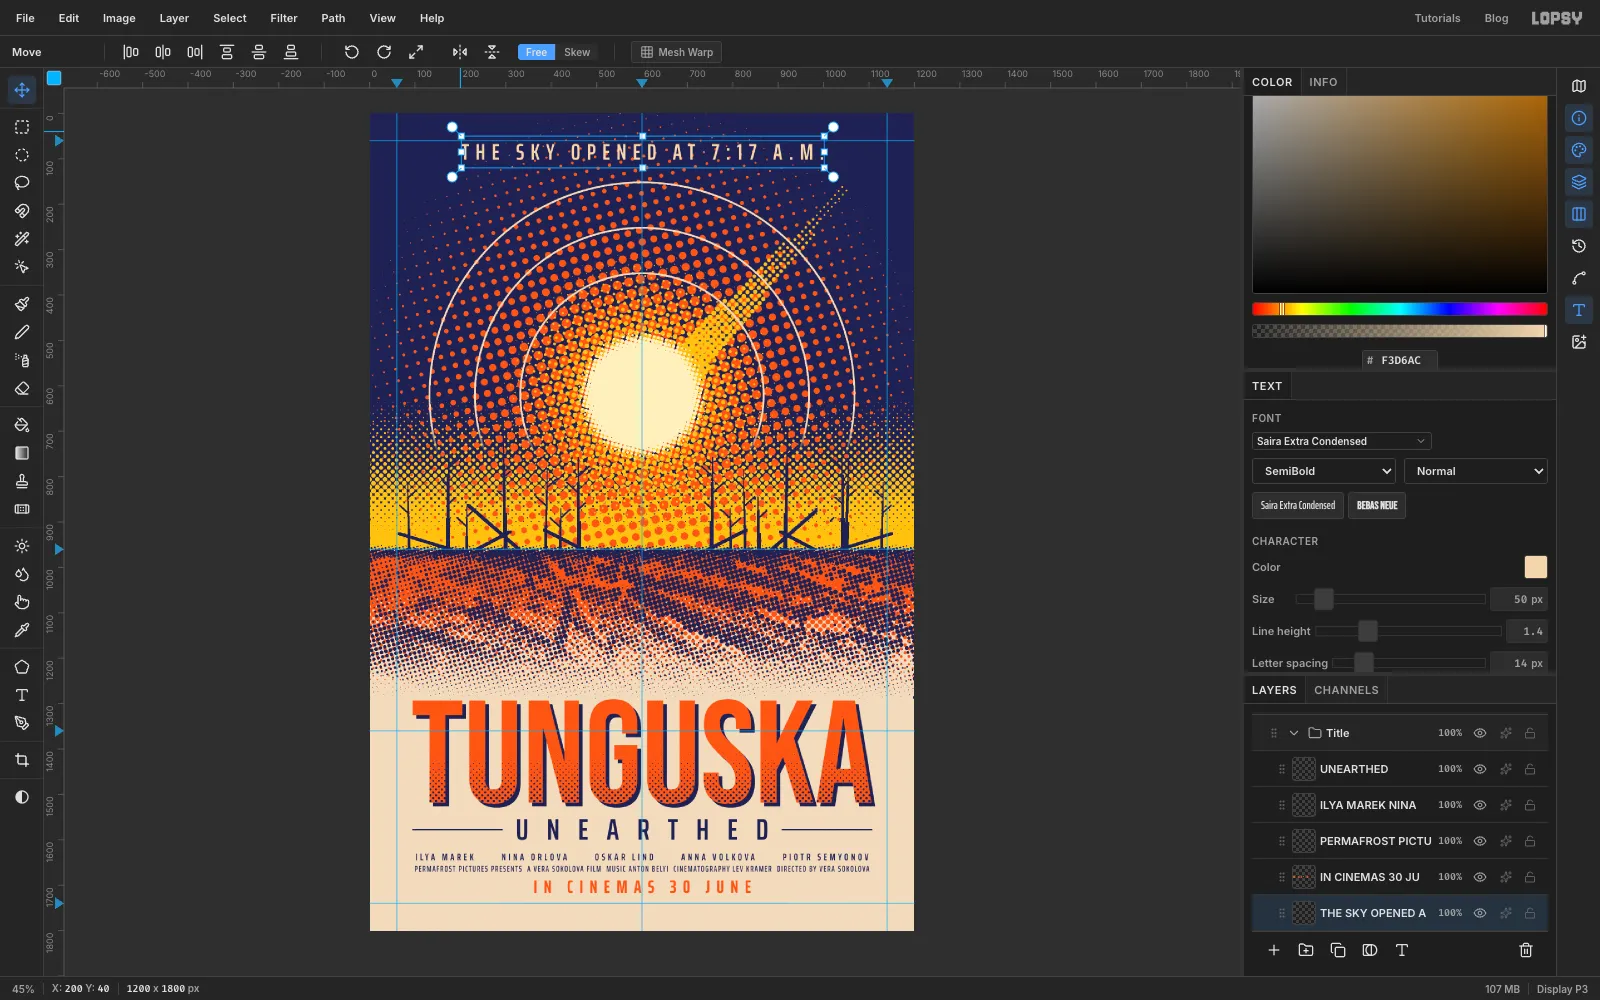
Click Rules, then type THE SKY OPENED AT 7:17 A.M. in Saira Extra Condensed SemiBold, Size 50, Letter spacing 14, peach . Type it in the empty top margin and centre it over the sun.
-
Run type up the sides
The sides of the sky still have stray orange dots, so give the side type a clean strip to sit on.
- Add a layer called Side Bars.
- With the Rectangular Marquee, select a strip about 70 px wide just inside the left margin, running from under the tagline down to about the height of the sun, and Edit → Fill it with indigo. Do the same just inside the right margin, then deselect.
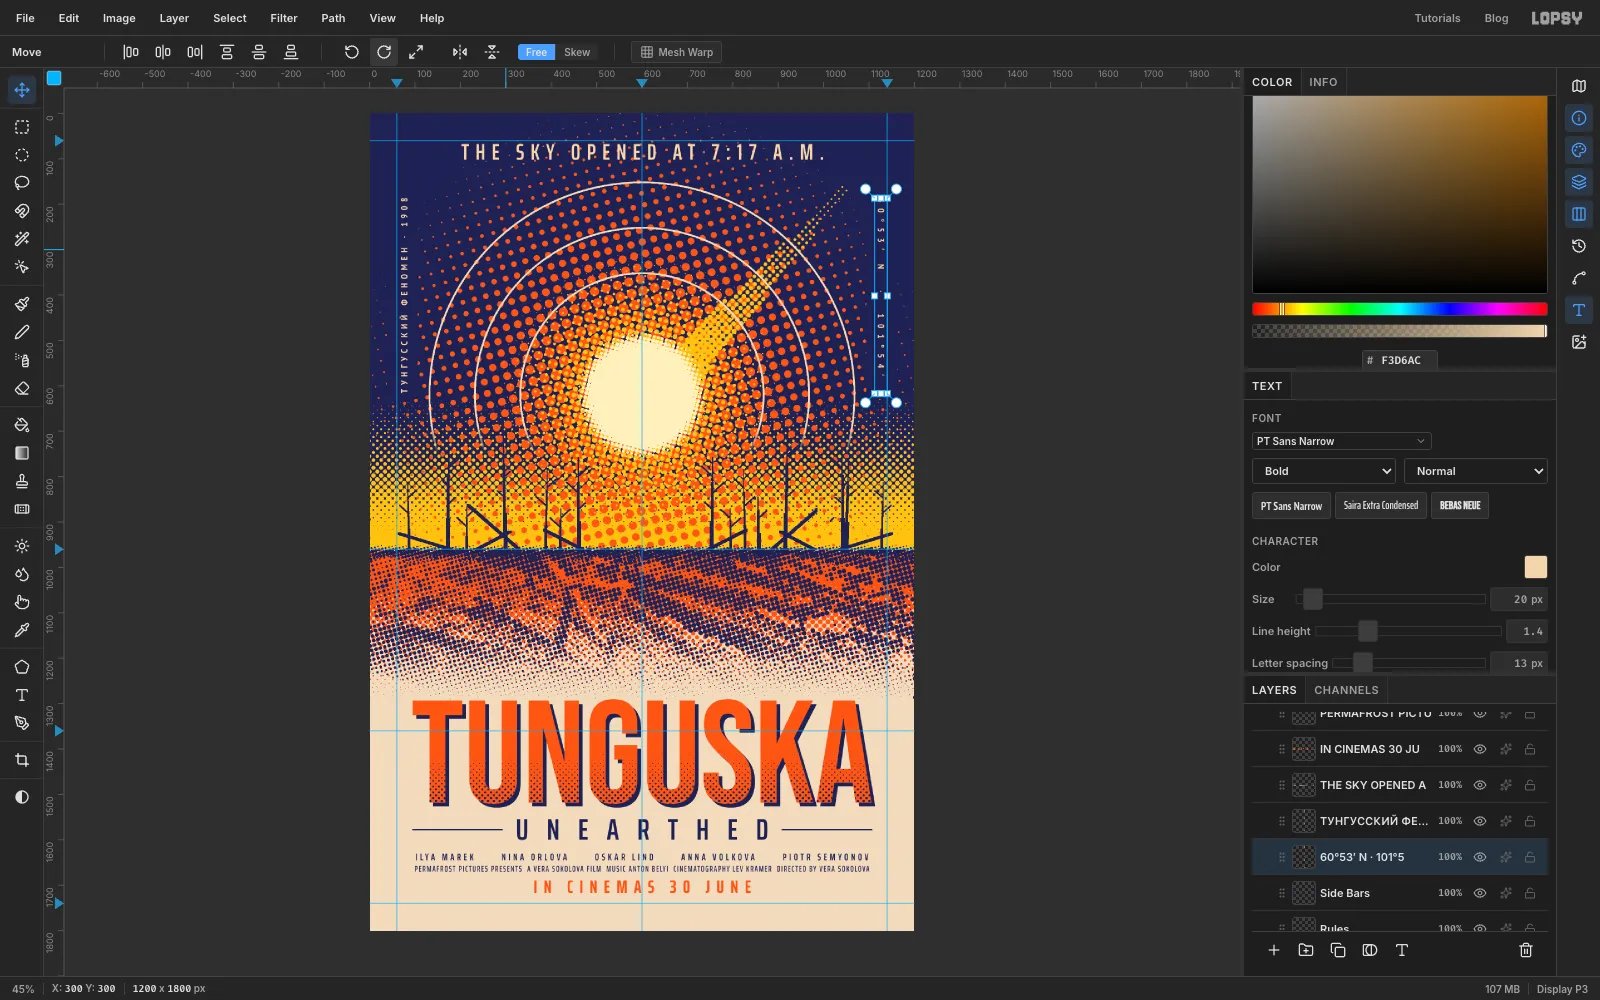
- With Side Bars still active, pick the Text tool and set PT Sans Narrow Bold, Size 20, Letter spacing 8.5, peach.
- Click in empty space and paste ТУНГУССКИЙ ФЕНОМЕН · 1908 ("Tunguska phenomenon"), then press Tab.
- Switch to the Move tool and click Rotate 90° CCW in the options bar, so the text reads upwards.
- Nudge it onto the left strip.
Do the same for the coordinates of the blast, 60°53′ N · 101°54′ E, with Letter spacing 13 and Rotate 90° CW, on the right strip. Adjust the letter spacing until both lines come out the same length, about 428 px.
-
Move the whole title group
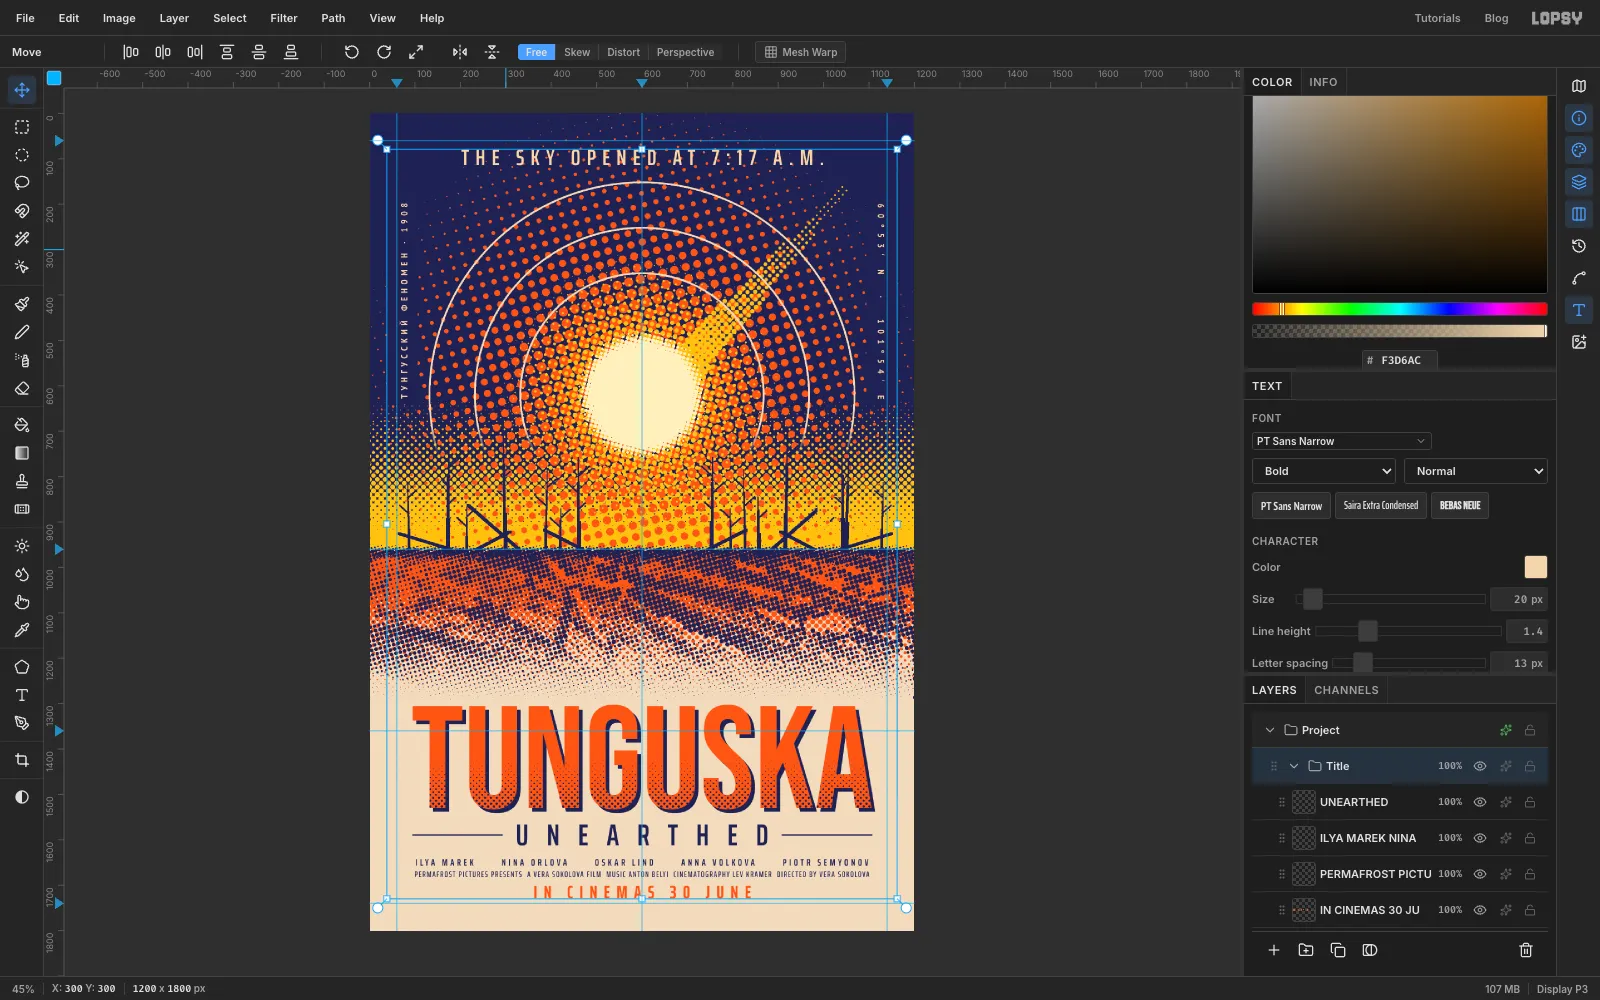
Step back and look at the whole poster. The bottom margin under the release line is tighter than the side margins, and the type block feels a touch high. Rather than moving seven text layers one at a time, move the group.
Click the Title group row, so the group itself is active, and switch to the Move tool. Press Shift+Down once and Down twice. Everything in the group moves down 12 px together: the title, the plate, the dots, the credits, the tagline and the side text. The release line now sits 72 px from the bottom edge.
To compare, press Cmd+Z three times to see the old position, then Cmd+Shift+Z three times to bring it back.
-
Add newsprint grain and export
Collapse the Title group, click it, and click Add Layer to make a layer called Grain above it.
- Choose Select → All.
- Fill the layer with mid-grey , then deselect.
- Run Filter → Add Noise with Amount 40, Mono and Gaussian.
- In the effects drawer, set the blend mode to Overlay.
- Drop the layer's opacity to 30%.
The grain makes the flat inks feel printed on paper rather than on a screen.
Save the project with File → Save Project, then export it with File → Quick Export PNG.