Make a Kawaii Frozen Yogurt Iron-On Patch
Design a cute die-cut embroidered patch in Lopsy, with a smiling froyo cup, a sprinkled soft-serve swirl, satin-stitch borders and thread textures.
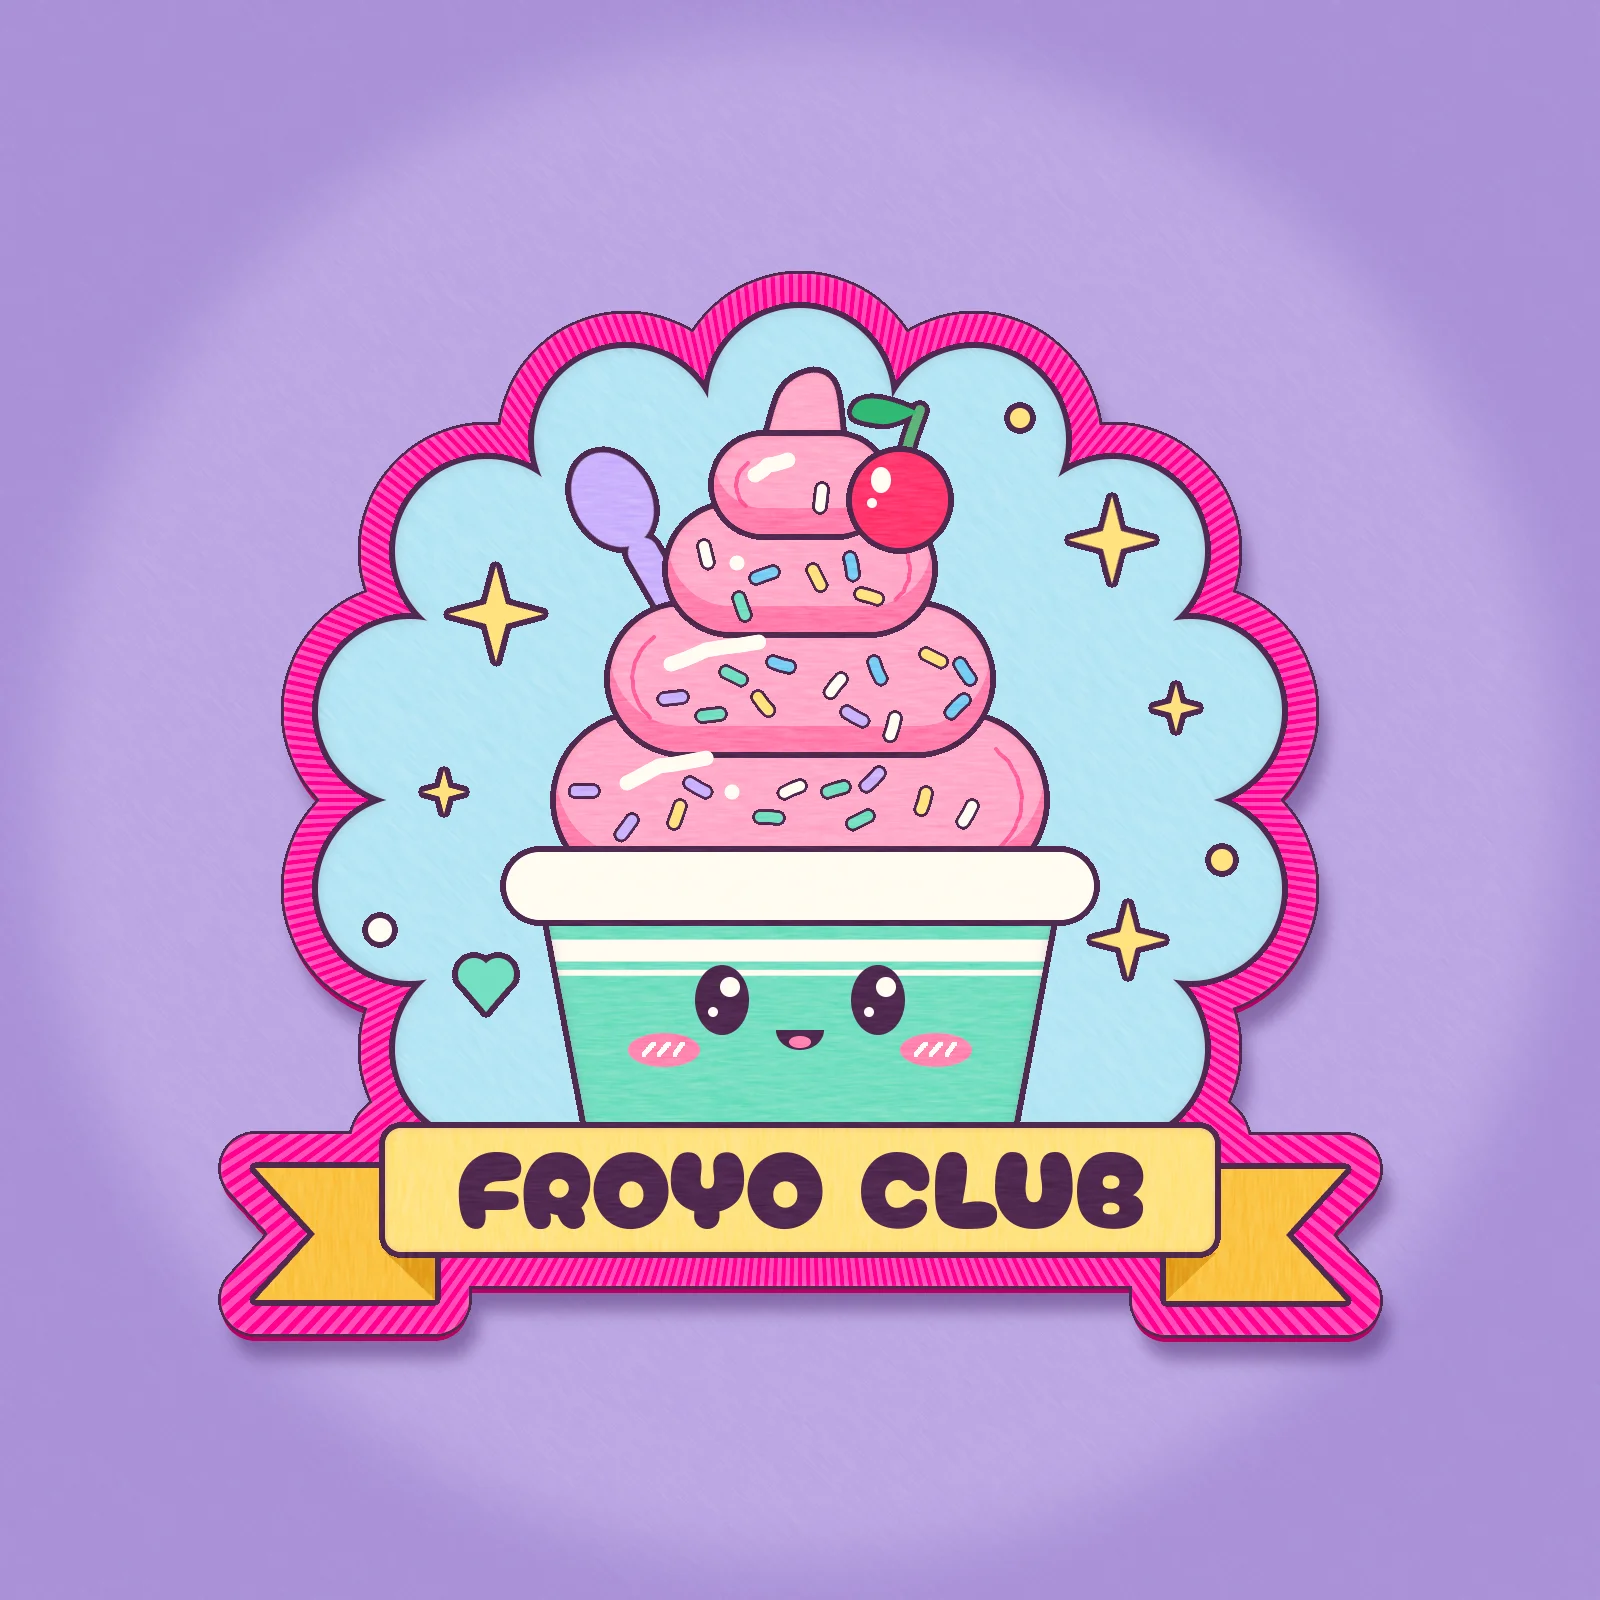
Kawaii (Japanese for "cute") art turns everyday things into tiny characters. They get round shapes, soft pastels, big shiny eyes and a blush on the cheeks. Iron-on patches suit the style well, because embroidery likes simple shapes with thick outlines.
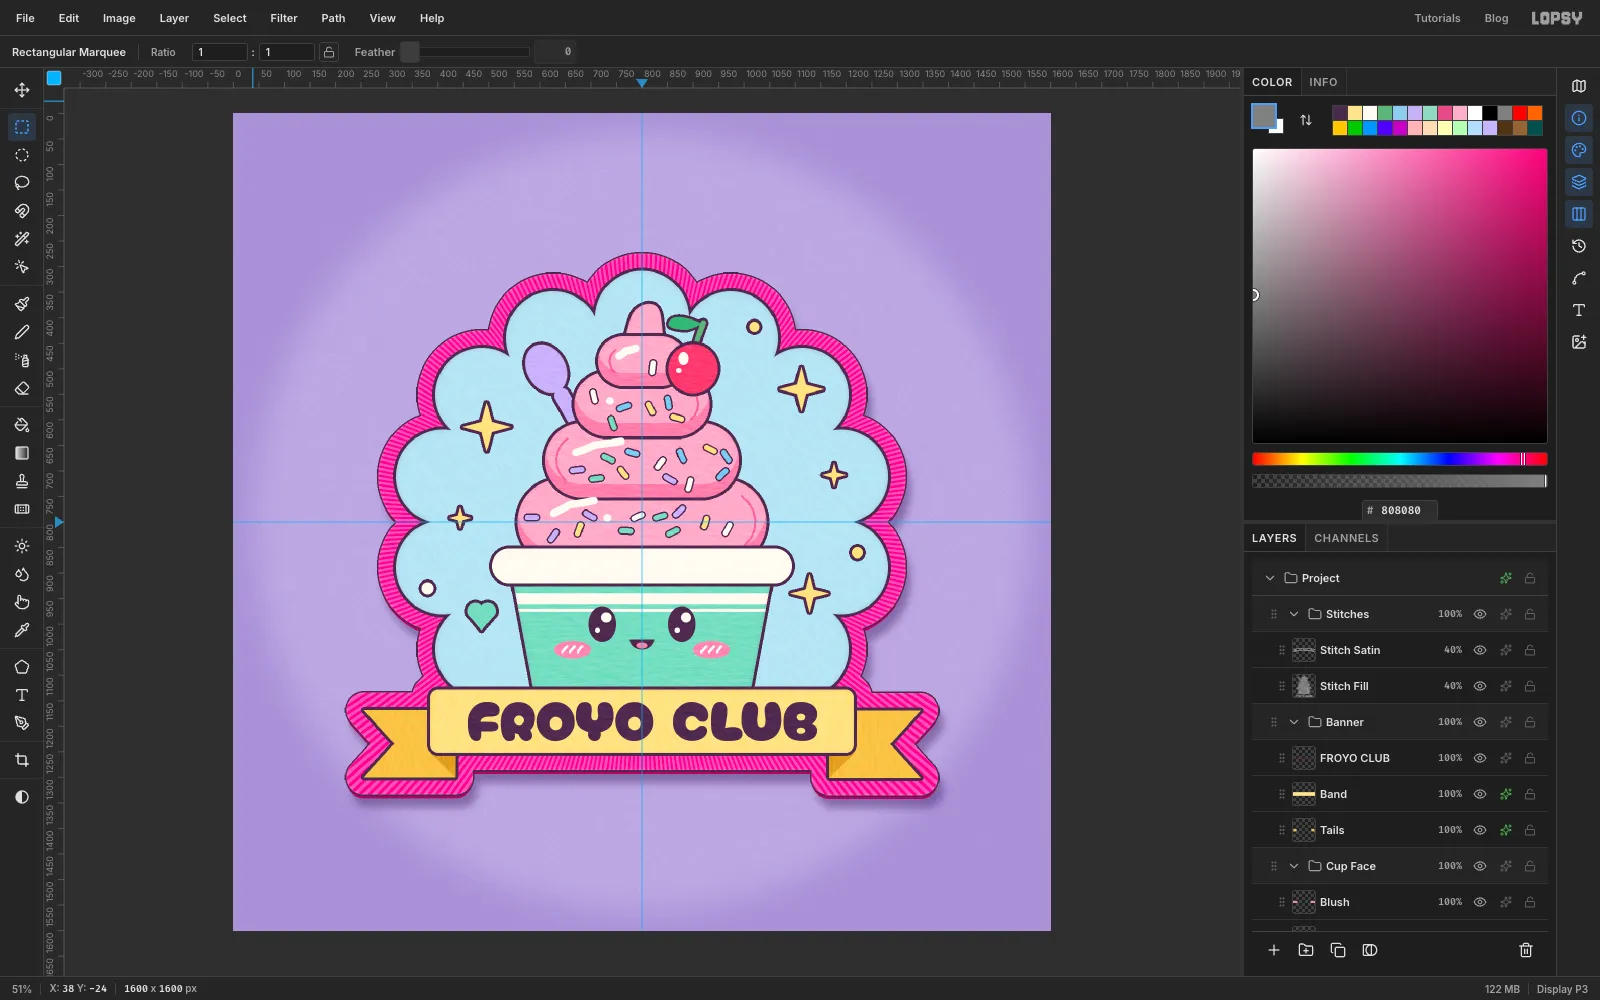
In this tutorial you'll design a patch for an imaginary frozen yogurt shop called Froyo Club. It's a die-cut patch: instead of a plain circle or rectangle, the edge follows the outline of the artwork. The design has:
- a scalloped cloud badge with sparkles and a heart
- a stacked soft-serve swirl with sprinkles, a cherry and a spoon
- a smiling paper cup
- a ribbon banner with the shop's name
At the end you'll add the parts that make it look like thread instead of a sticker: a satin-stitched border, raised fills, a darker cut edge and a soft shadow on lilac fabric.
The canvas is 1600 × 1600 px. You don't need any photos.
The tools you'll use:
- the Elliptical and Rectangular Marquee, including their exact-size dialog, Shift to add and Alt to subtract
- Cmd-click on a layer thumbnail to load its shape as a selection, plus Select → Grow / Shrink / Feather / Inverse
- the Pen tool, Path to Selection and Pen strokes
- the Shape tool's rounded rectangles
- the Move tool's scale and rotate handles, its Distort mode and Flip Horizontal
- Copy, Paste and Merge Down
- the Brush and Pencil, and Edit → Fill
- Add Noise, Gaussian Blur, Motion Blur, Brightness/Contrast, Emboss and Sunburst
- live text in the Google font Cherry Bomb One
- layer effects (Stroke, Inner Glow and Drop Shadow), the Overlay blend mode, and groups
The palette is candy-shop pastel, with one dark plum for every outline:
-
Fabric
-
vignette
-
Sky badge
-
Outline plum
-
Strawberry
-
shade
-
fold lines
-
Cream
-
Mint
-
Butter
-
ribbon tail
-
fold
-
Lavender
-
sprinkle blue
-
Cherry
-
leaf
-
blush
-
Border pink
-
cut edge
-
satin light
-
satin dark
Some habits that will save you trouble:
- To set a colour, type its hex code into the Hex field of the Color panel.
- Every outline in this design is a Stroke layer effect: 6 px, Outside, in plum . You'll open it from the effects button (✦) on a layer's row. Whenever a step says "give it the outline", that's what it means.
- Press Cmd+D to deselect after every fill, so the next tool isn't clipped by an old selection.
- After Path to Selection, click Delete Path in the Paths panel, so the next Pen click starts a new path.
- New layers appear directly above the active layer. Click the right layer before you click Add Layer.
- Most shapes here are placed with the marquee's exact-size dialog: click once on the canvas with the Rectangular or Elliptical Marquee (without dragging) and type the From and To corners. For anything you place by hand, the status bar shows the cursor's X and Y, and zooming in helps with small pieces.
-
Set up the canvas and centre guides
Choose File → New, keep the units on Pixels, and make the document 1600 × 1600. Delete the empty Layer 1 with the trash button under the Layers panel.
Click the top ruler at 800 to drop a vertical guide, and the left ruler at 800 for a horizontal one. They cross at the centre of the canvas, and almost everything in the patch is centred on that vertical line. Snap to Guides is on by default, so shapes drawn from the centre will lock onto it.
-
Make the lilac twill fabric
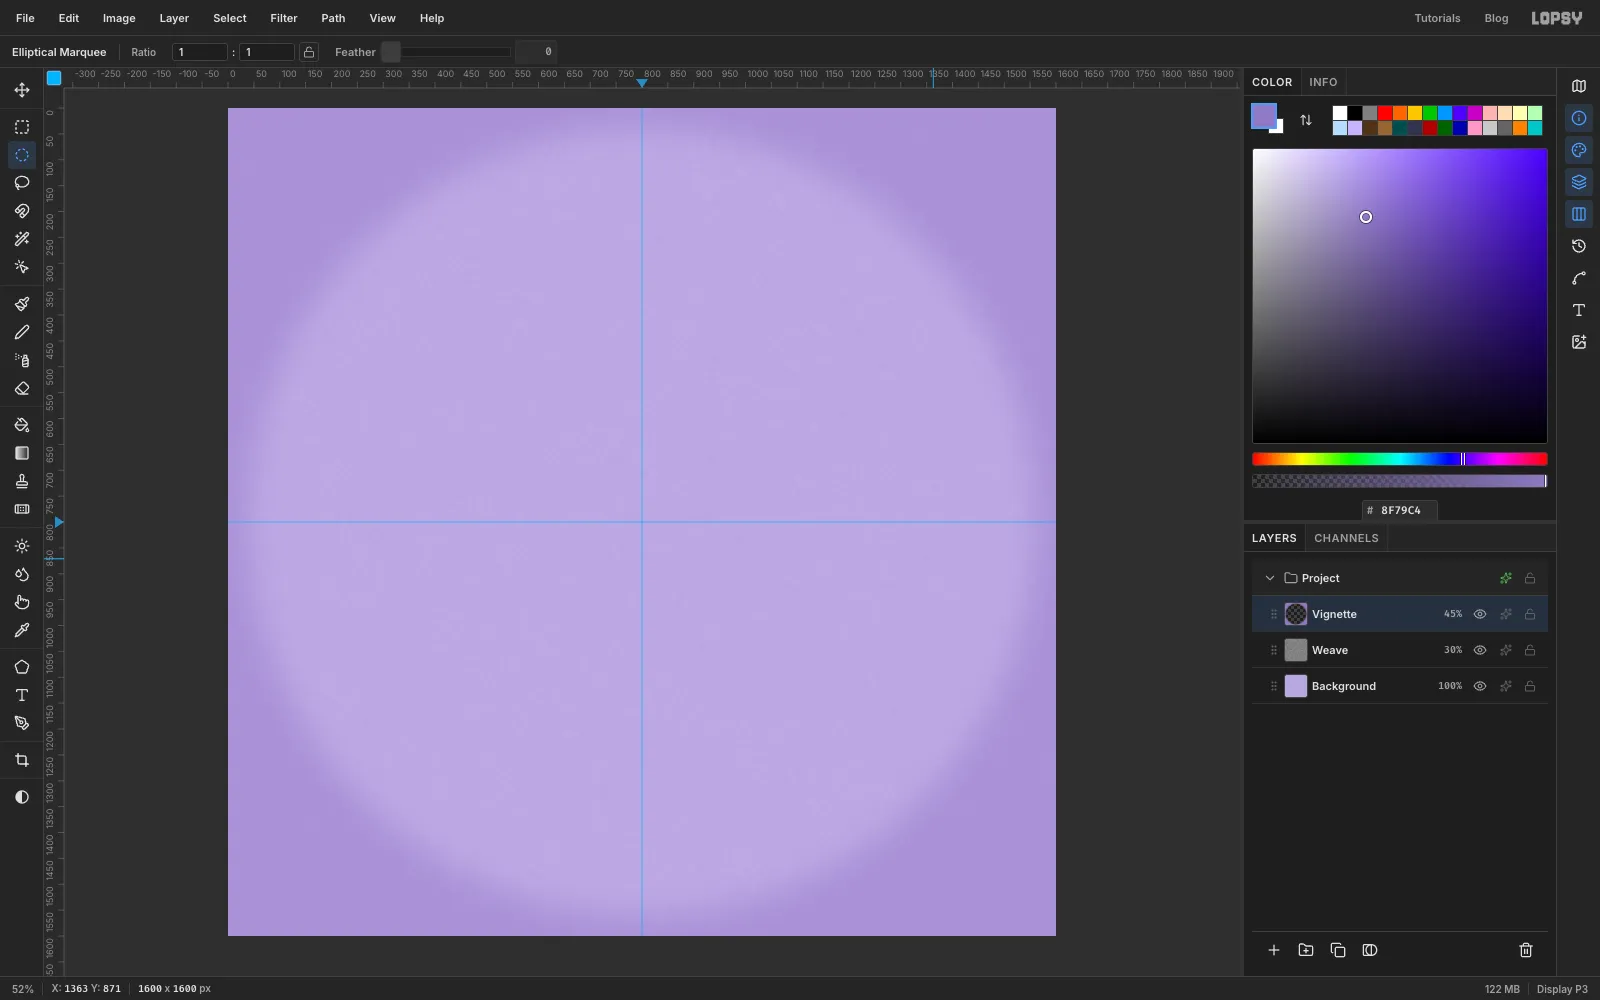
The patch will sit on a lilac jacket, so start with the fabric.
- Click Background, set the colour to and choose Edit → Fill.
- Click Add Layer and name it Weave. Fill it with grey .
- Run Filter → Add Noise… with Amount 60, Mono and Gaussian.
- Run Filter → Motion Blur… with Angle 45 and Distance 14. The specks stretch into diagonal threads, like twill.
- Run Filter → Brightness/Contrast… twice, each time with Contrast 100, so the threads stand out.
- Open the layer's effects drawer, set the blend mode to Overlay, then click the percentage on the row and set the opacity to 30%.
Now darken the edges a little. Add a layer called Vignette and fill it with . Click once on the canvas with the Elliptical Marquee (don't drag) to open its exact-size dialog, and enter From 40, 40 and To 1560, 1560. Choose Select → Feather… with 60, press Delete, then deselect. Set the layer to 45% opacity.
-
Draw the scalloped badge
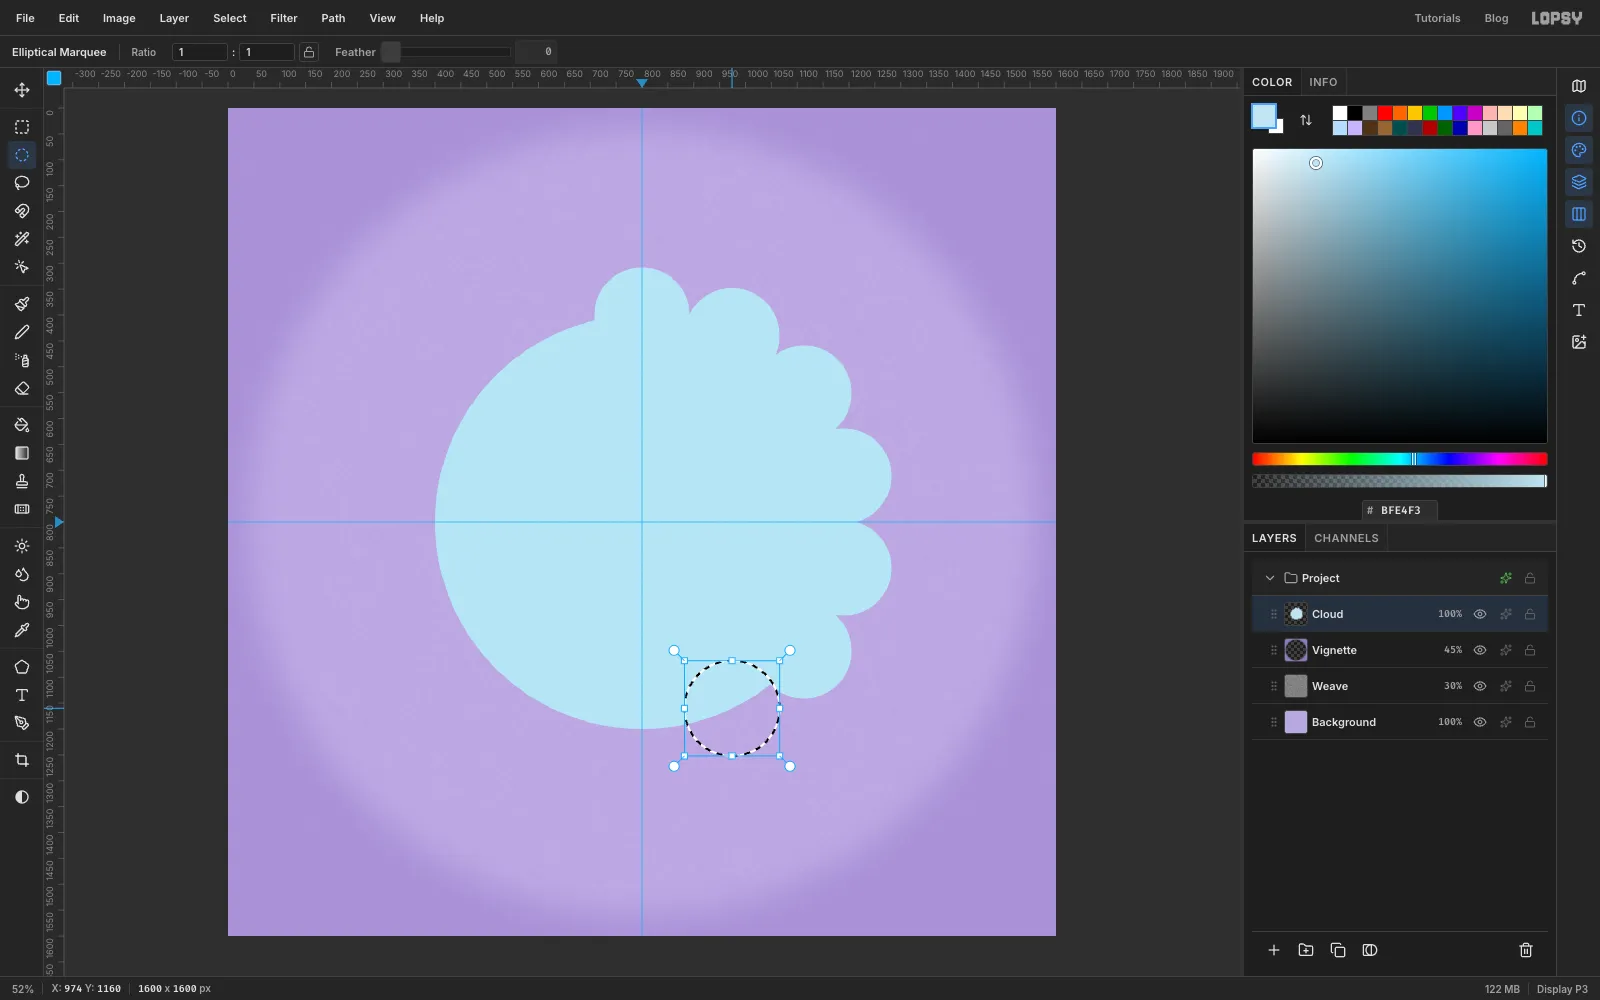
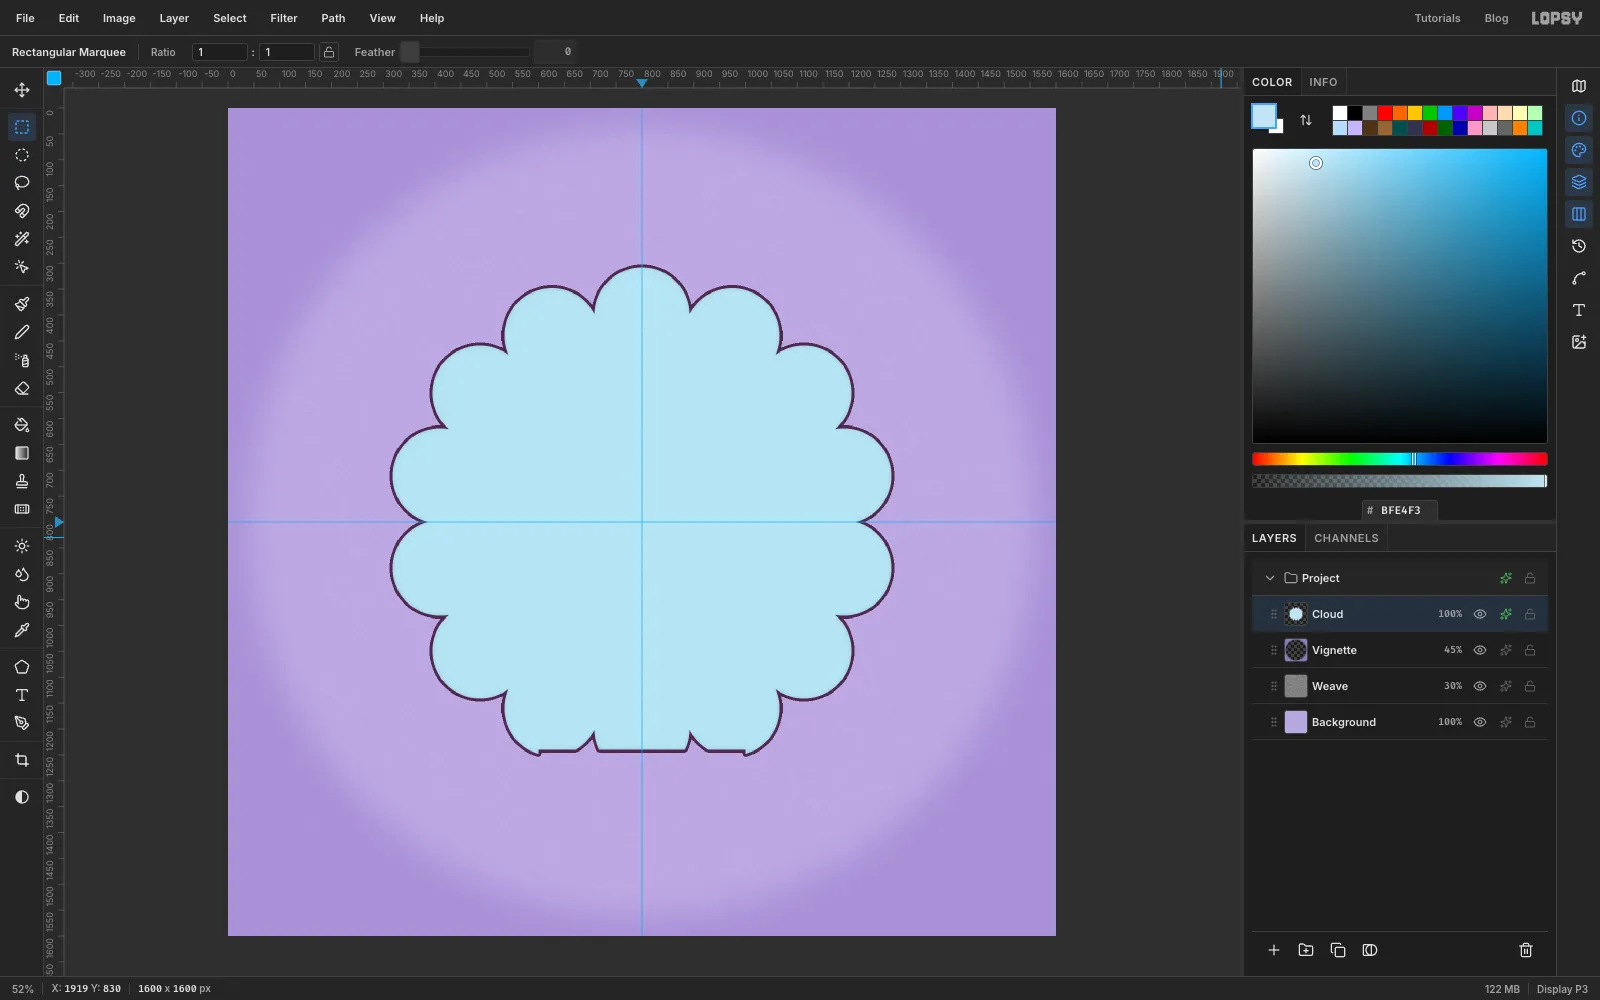
Add a layer called Cloud and set the colour to sky blue . With the Elliptical Marquee, click once on the canvas and enter From 400, 400 and To 1200, 1200. Choose Edit → Fill. That's an 800 px circle in the middle.
The scallops are 14 circles, each 184 px across, centred on the big circle's edge. Make each one with the dialog, then Edit → Fill it before making the next. Enter these From corners, and add 184 to both numbers for the To corner:
- 708, 308 (12 o'clock)
- 882, 348
- 1021, 459
- 1098, 619
- 1098, 797
- 1021, 957
- 882, 1068
- 708, 1108 (6 o'clock)
- 534, 1068
- 395, 957
- 318, 797
- 318, 619
- 395, 459
- 534, 348
Neighbouring bumps just overlap, so the edge becomes a row of soft scallops.
-
Outline the badge
Deselect.
The bottom bump would peek out under the banner later, so flatten it now. Drag a rectangular marquee from about 600, 1240 to 1000, 1310 and press Delete.
Give the layer the outline (Stroke, 6 px, plum). In the same effects drawer, turn on Inner Glow in plum with Size 16 and Opacity 18%. The darker rim makes the fill look padded, like dense embroidery.
-
Draw a sparkle with the Pen
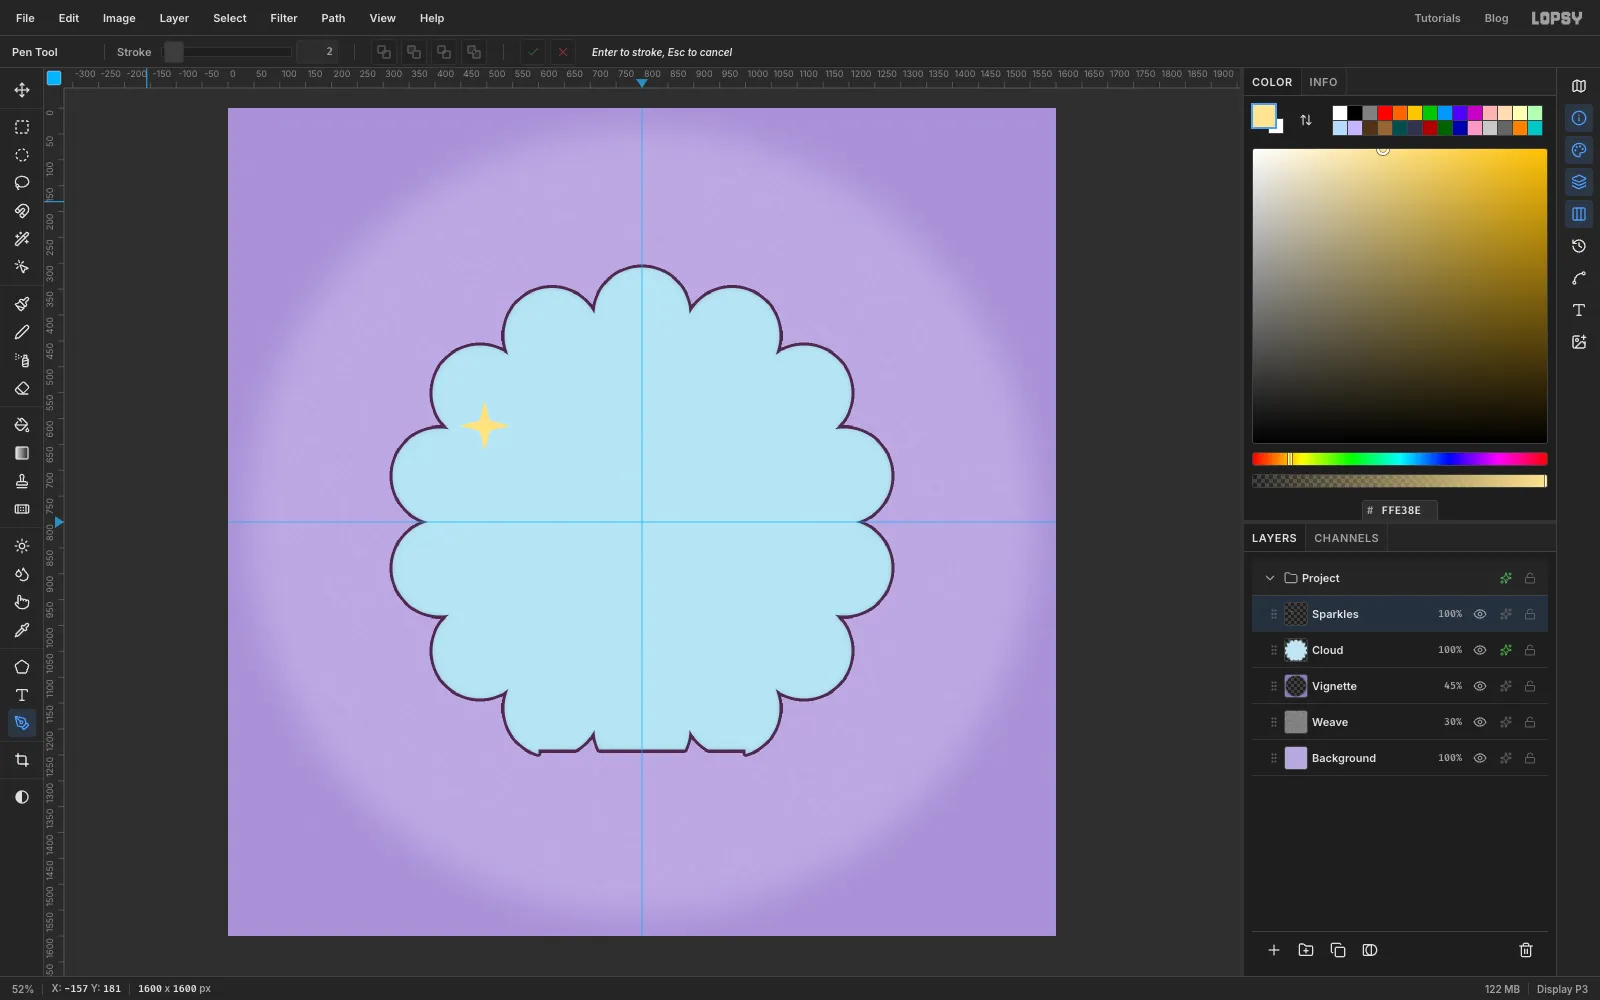
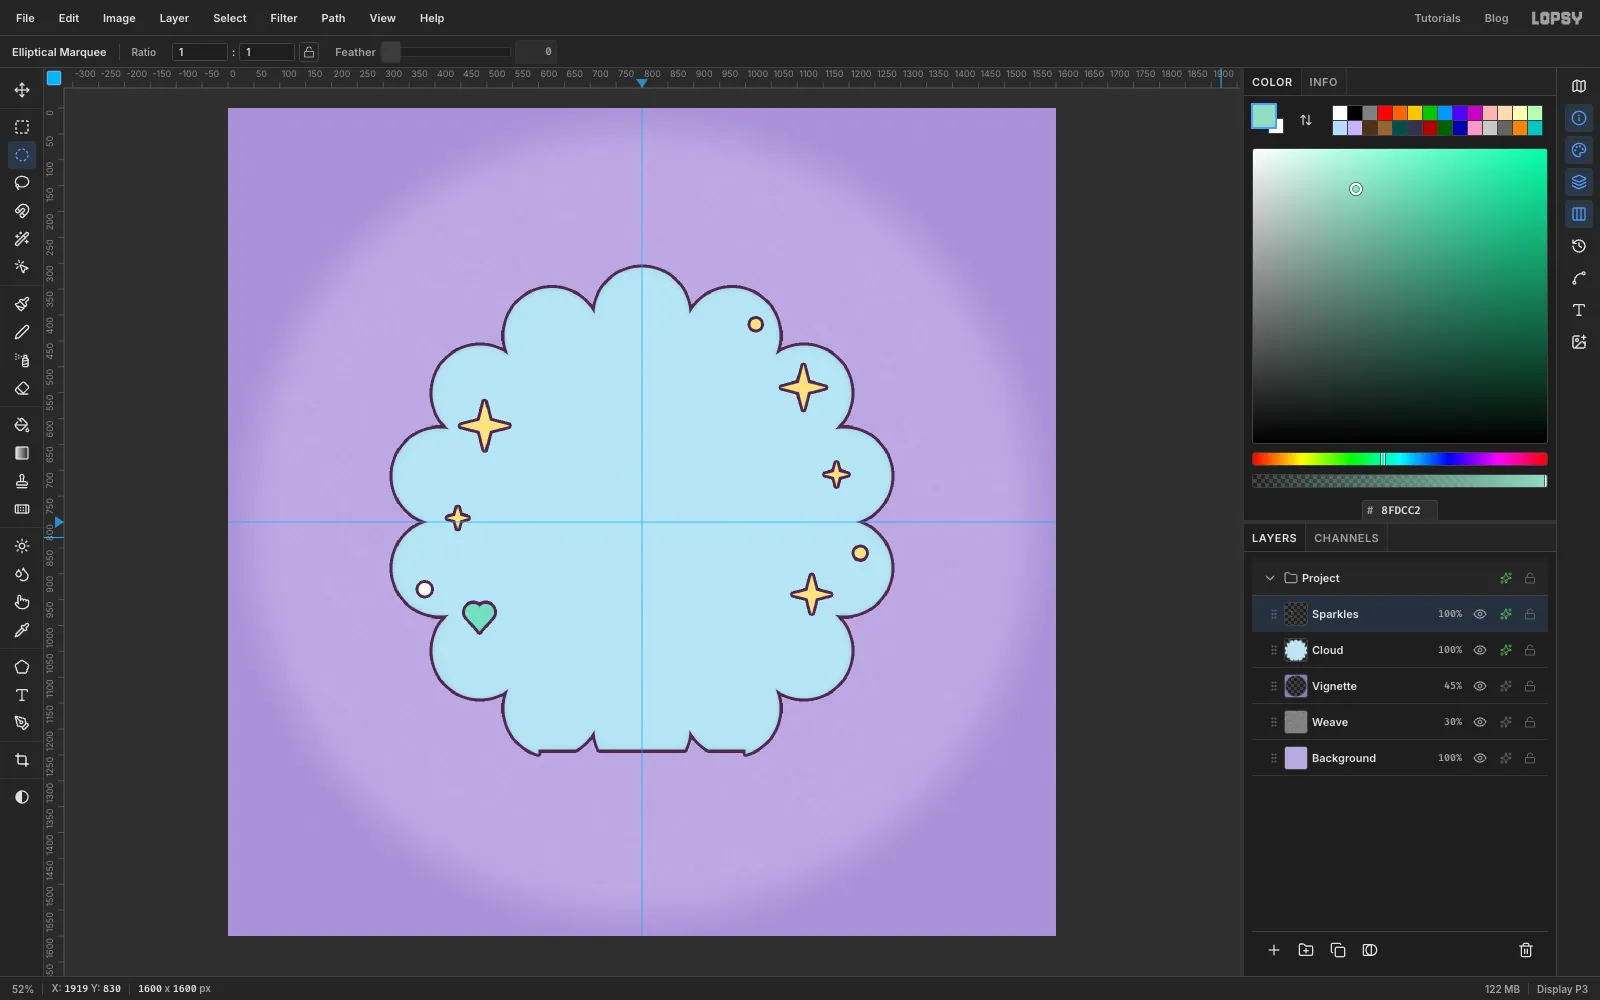
Add a layer called Sparkles. Pick the Pen and click these eight points in order to make a four-point star around 496, 614. The tips are 48 px from the centre and the inner corners are 14 px away:
496, 566 → 506, 604 → 544, 614 → 506, 624 → 496, 662 → 486, 624 → 448, 614 → 486, 604
Click the first point again to close the path.
Open the Paths panel, click Path to Selection, then Delete Path. Fill the selection with butter yellow and deselect.
-
Copy the sparkle and shrink the copies
You need four more sparkles in smaller sizes. For each one:
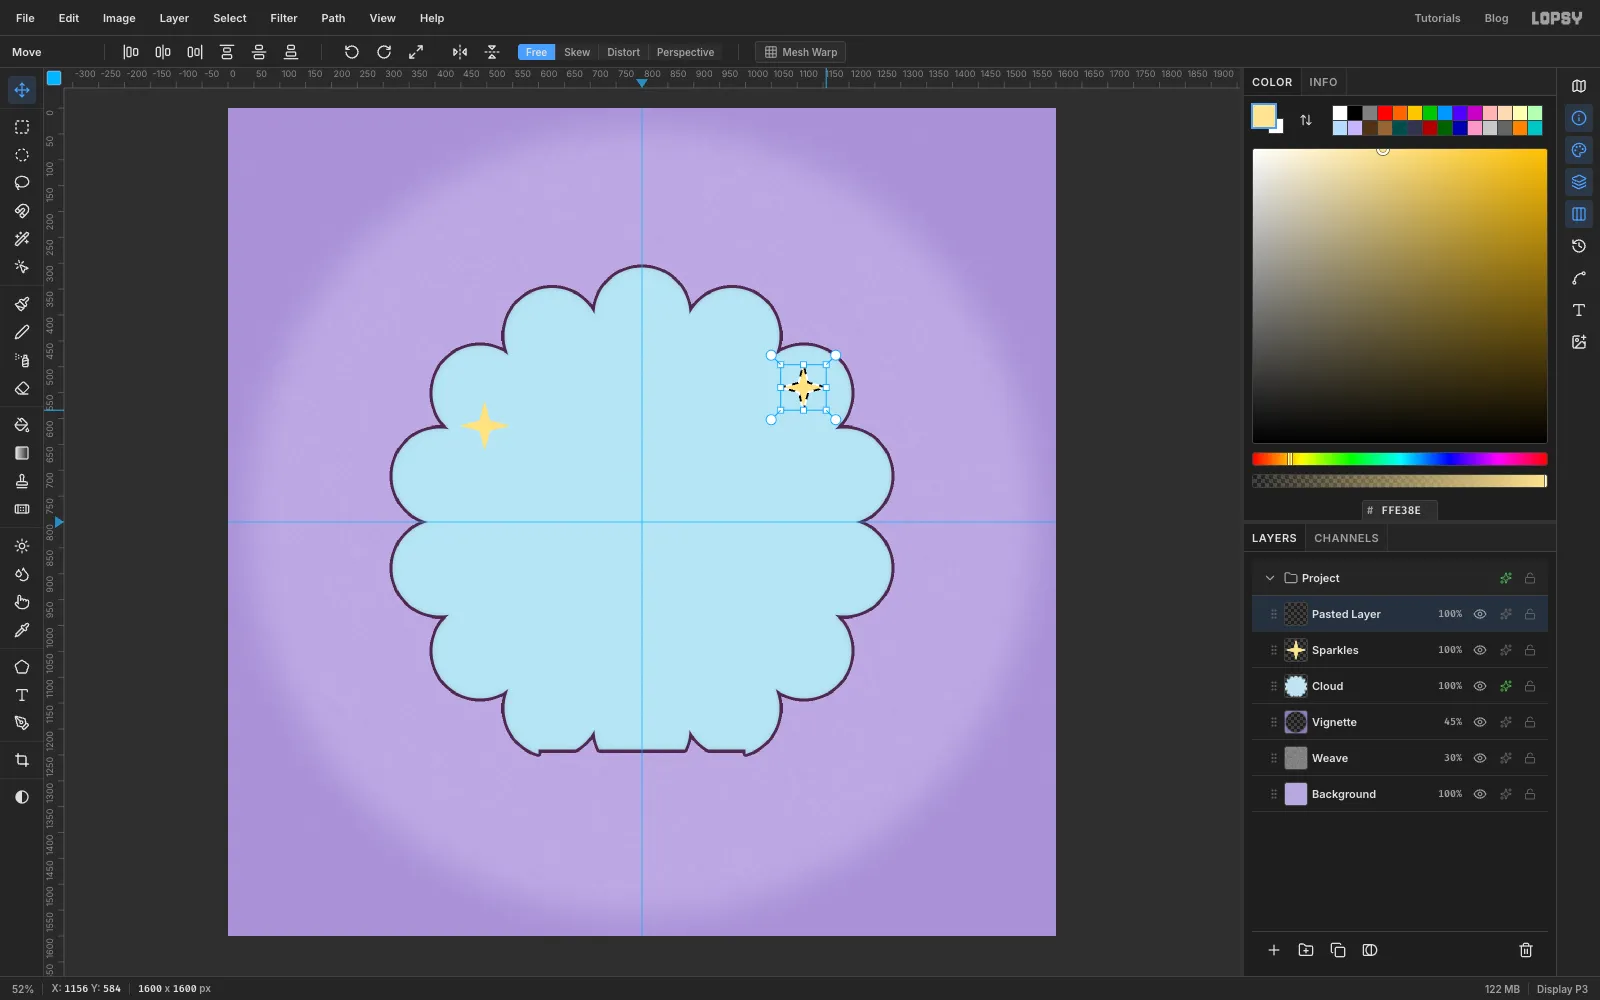
- Drag a marquee snugly around the first sparkle, press Cmd+C, then Cmd+V. The copy is pasted in place on a new layer. It arrives selected, with the Move tool already active.
- Drag the copy to where the new sparkle goes.
- Hold Cmd and drag the bottom-right corner handle inwards to shrink it evenly. Watch the size against the first sparkle.
- Press Enter, deselect, and choose Layer → Merge Down to put it back on Sparkles.
Make them a little smaller near the upper right (around 1112, 540), about half size on the right edge (1176, 708) and on the left (444, 792), and about three-quarters size at the lower right (1128, 940).
-
Add dots and a mint heart
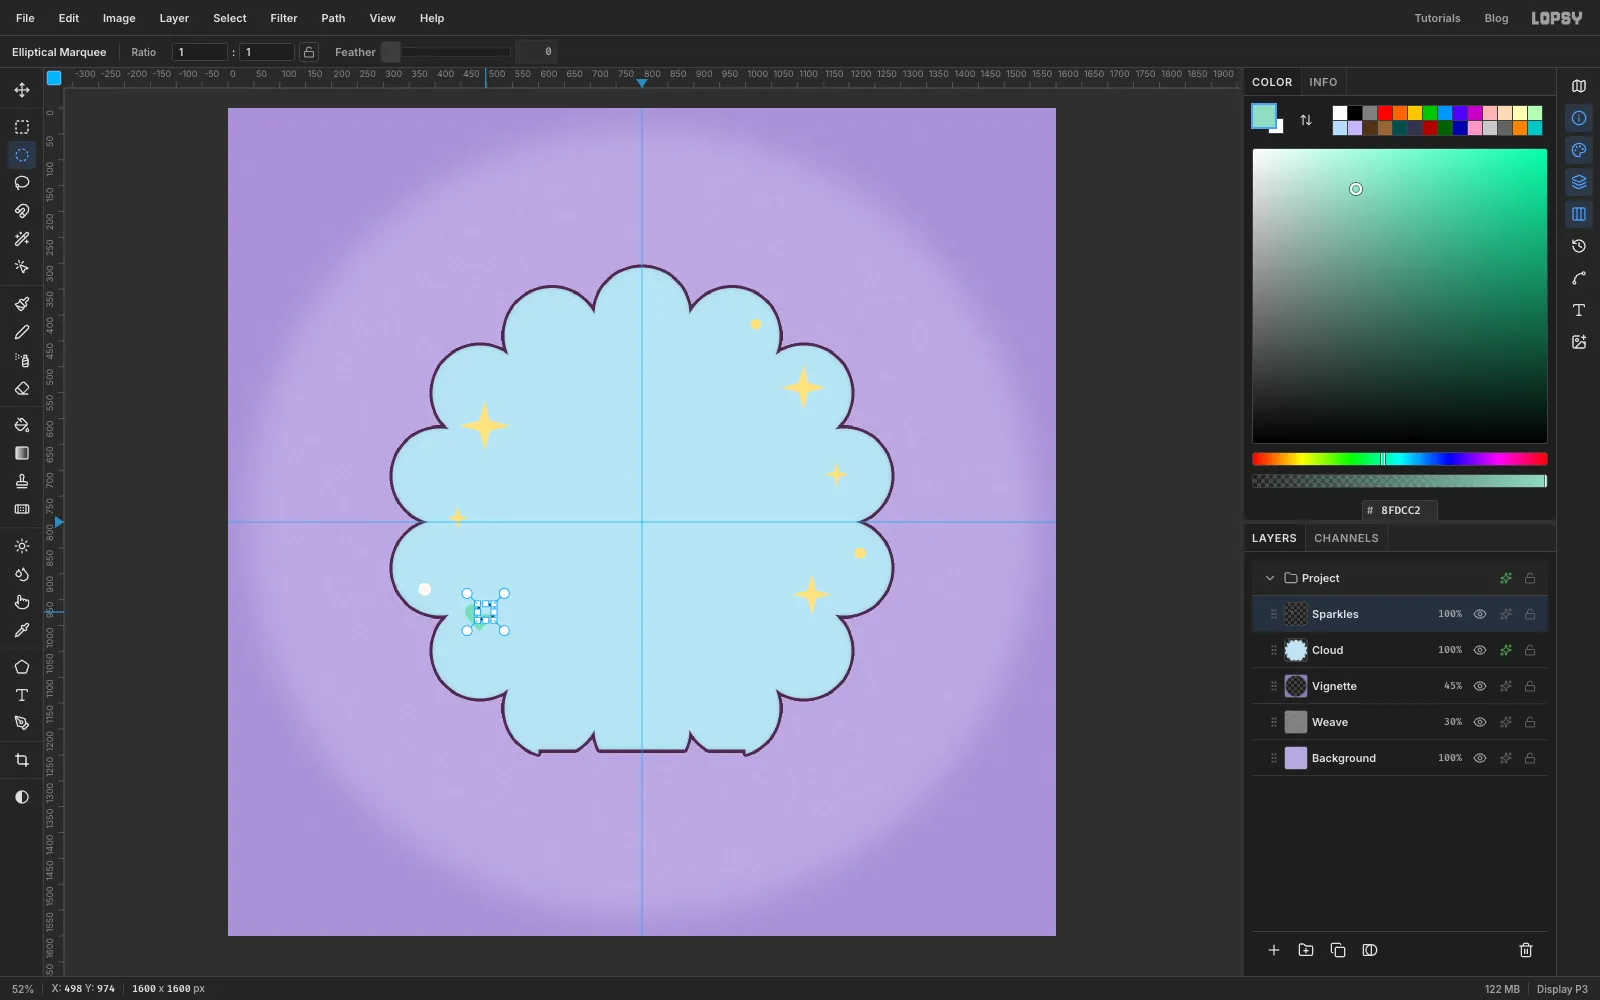
Still on Sparkles, add three little dots with the Elliptical Marquee and Edit → Fill: a 24 px cream dot at the lower left (380, 930), and 20 px and 22 px butter dots at the upper right (1020, 418) and on the right (1222, 860).
Then build a mint heart from three simple shapes, filling each one as you go:
- With the Pen, click a triangle with corners at 458, 979, 514, 979 and 486, 1012. Close it, use Path to Selection and Delete Path, and fill it.
- With the Elliptical Marquee's dialog, make a 32 px circle from 458, 958 to 490, 990 and fill it.
- Make a second circle from 482, 958 to 514, 990 and fill it.
The two circles round off the top of the triangle into a heart.
-
Outline the confetti
Deselect and give the Sparkles layer the outline. The 6 px plum line is the same weight as the badge's, so the small pieces belong to the same family. Keeping one outline weight everywhere is a big part of the kawaii look.
-
Build the spoon upright
Add a layer called Spoon. It's easier to draw the spoon straight and tilt it afterwards.
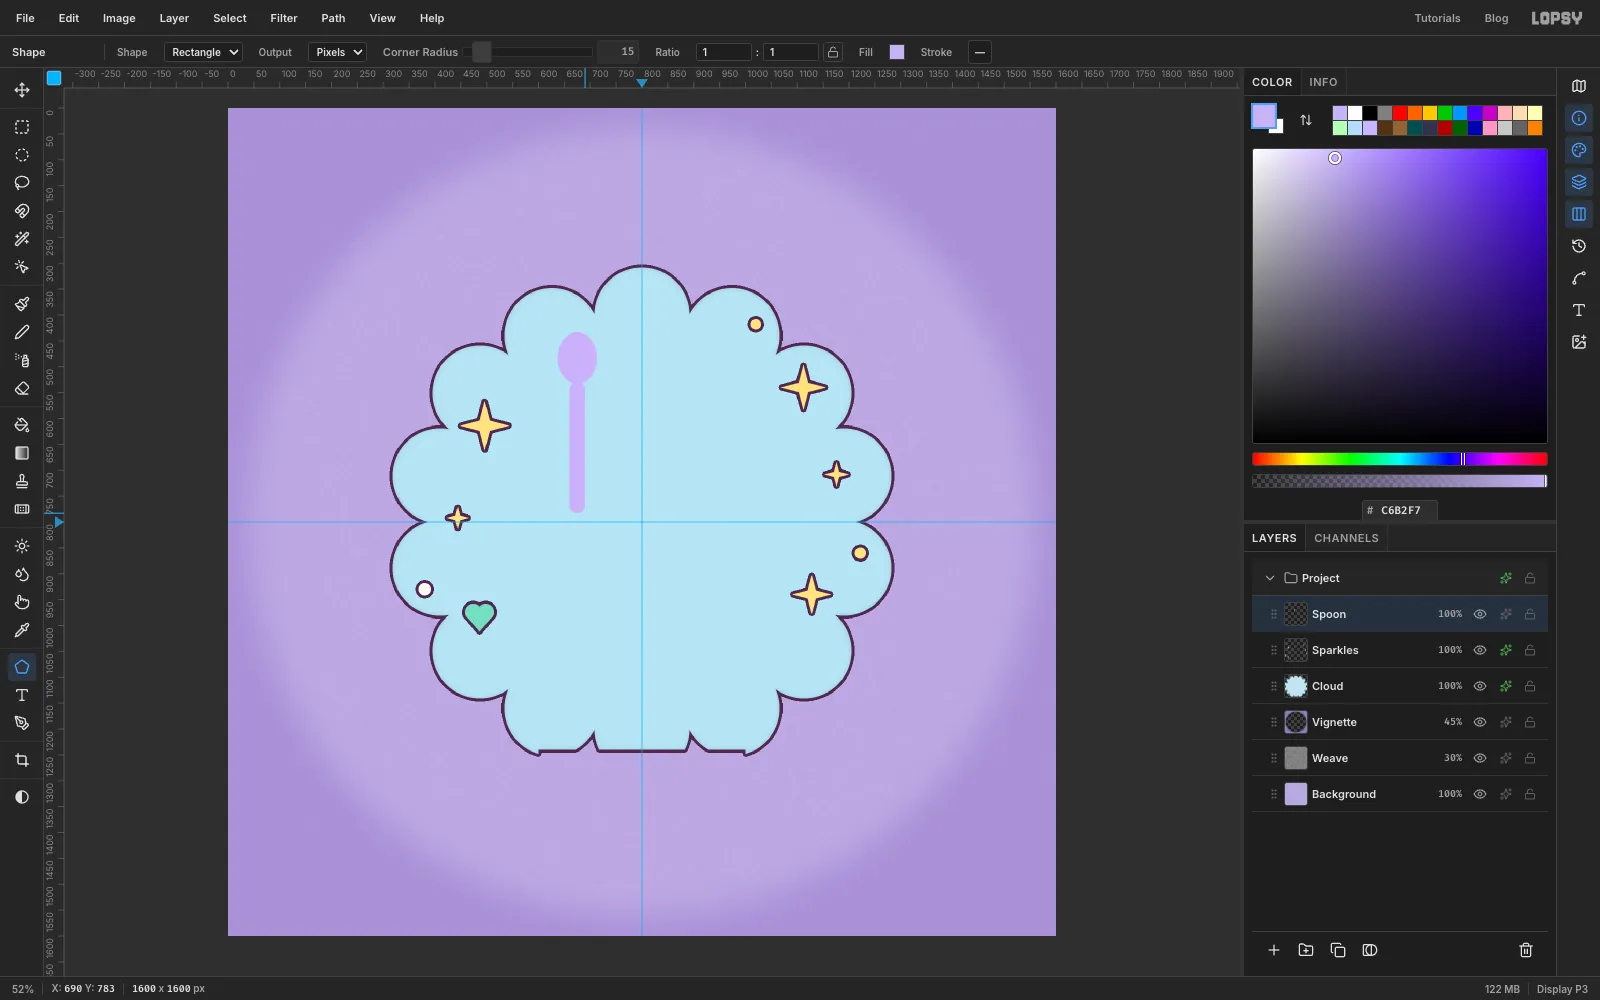
- Draw the bowl with the Elliptical Marquee's dialog, from 637, 433 to 713, 533, and fill it with lavender . Deselect.
- Pick the Shape tool. Set Shape to Rectangle, Corner Radius to 15, and the Fill swatch to . Shapes draw from the centre out, so press at 675, 656 and drag to 690, 783. This makes a 30 × 254 px handle that runs down from the bowl.
-
Tilt the spoon
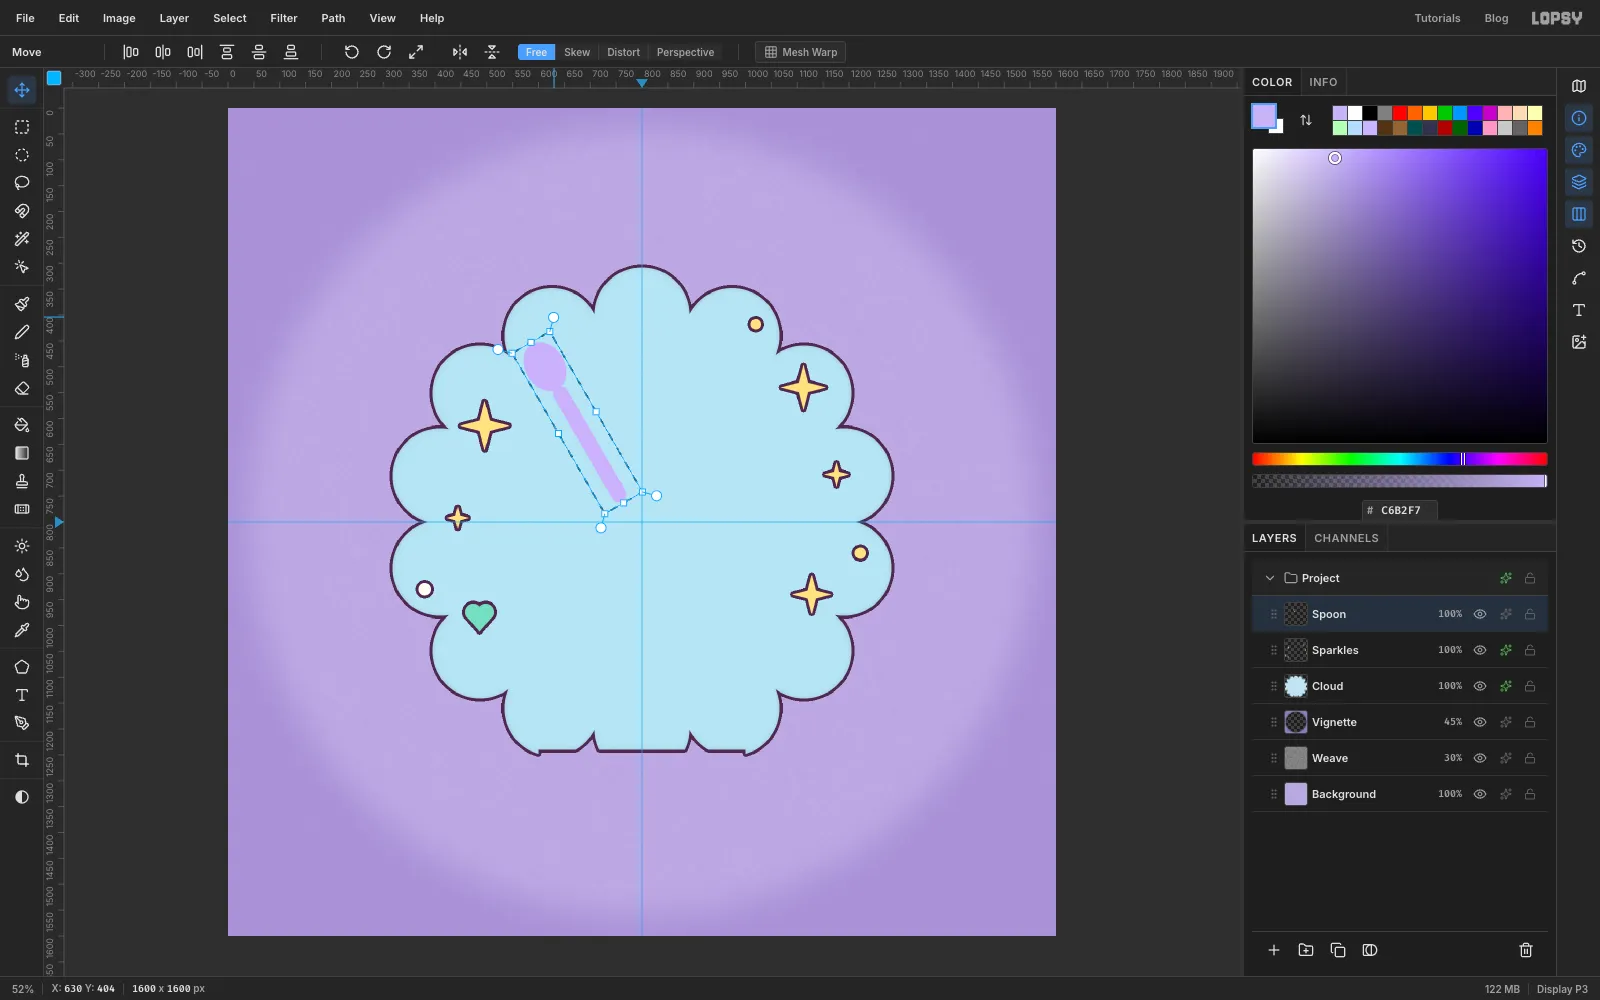
Drag a marquee around the whole spoon. Switch to the Move tool, hold Cmd, and drag one of the round rotation handles just outside the box's corners. With Cmd held, the rotation snaps in 15° steps. Turn it anticlockwise by two steps, 30°. The bowl should lean out to the upper left, with the handle pointing down towards the middle of the badge.
Press Enter to apply, deselect, and give the spoon the outline.
-
Stack the soft-serve tiers and draw the tip
Soft serve is a stack of rounded coils. Each coil is a pill: a rectangle with fully rounded ends, on its own layer.
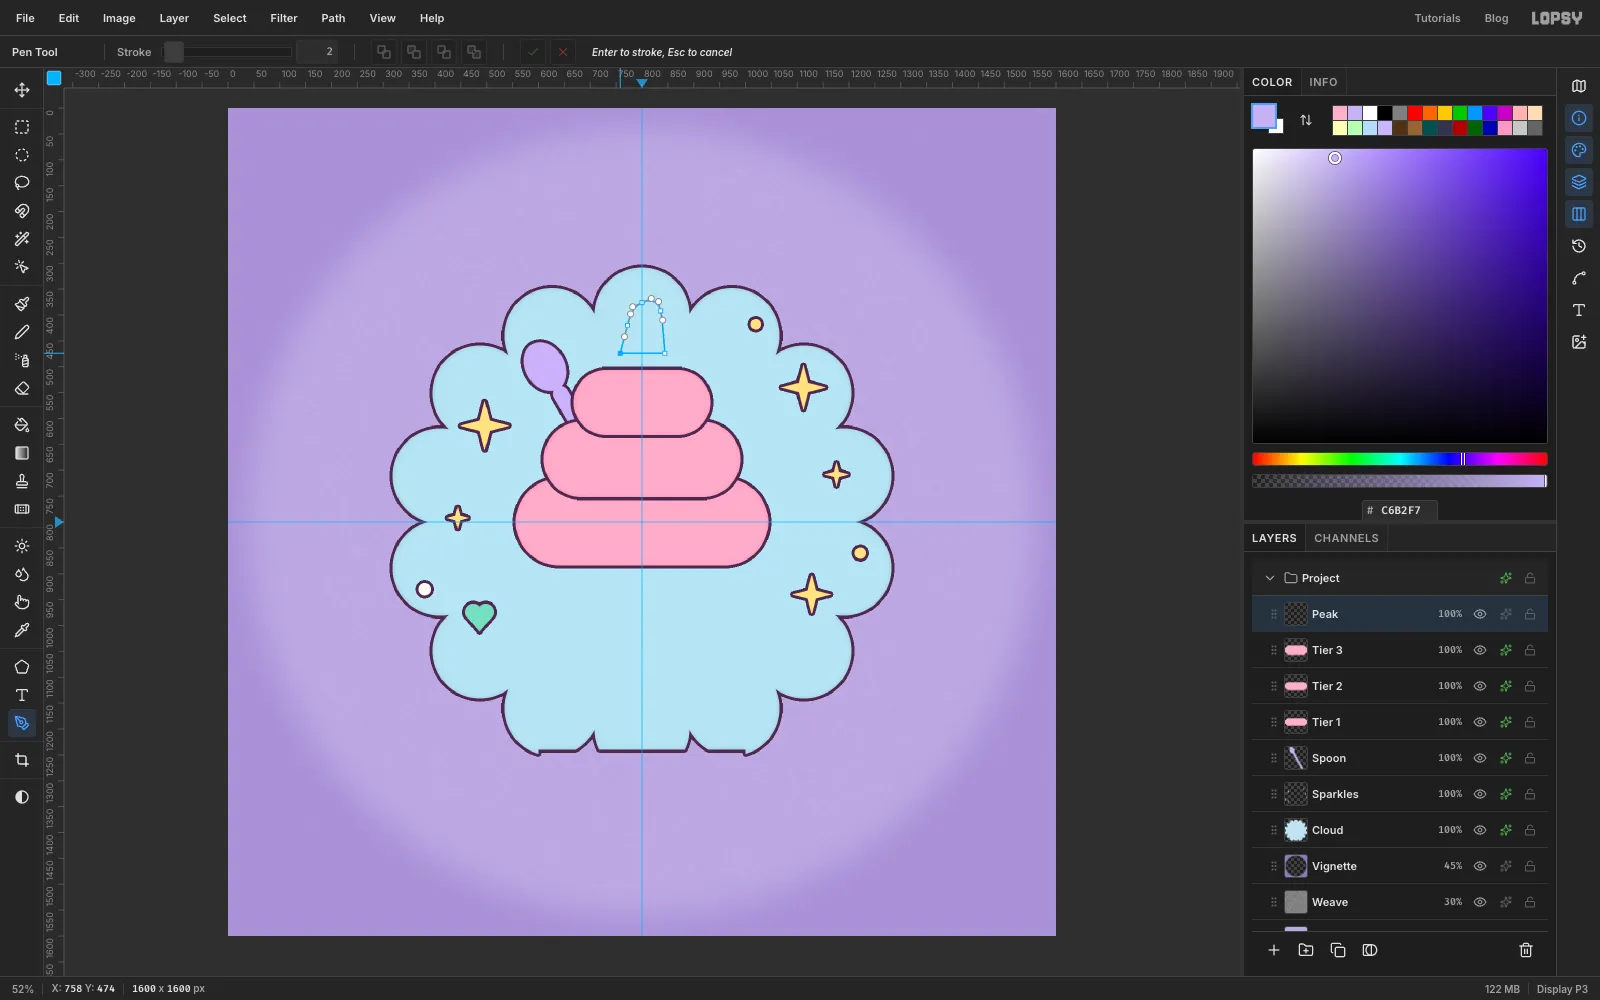
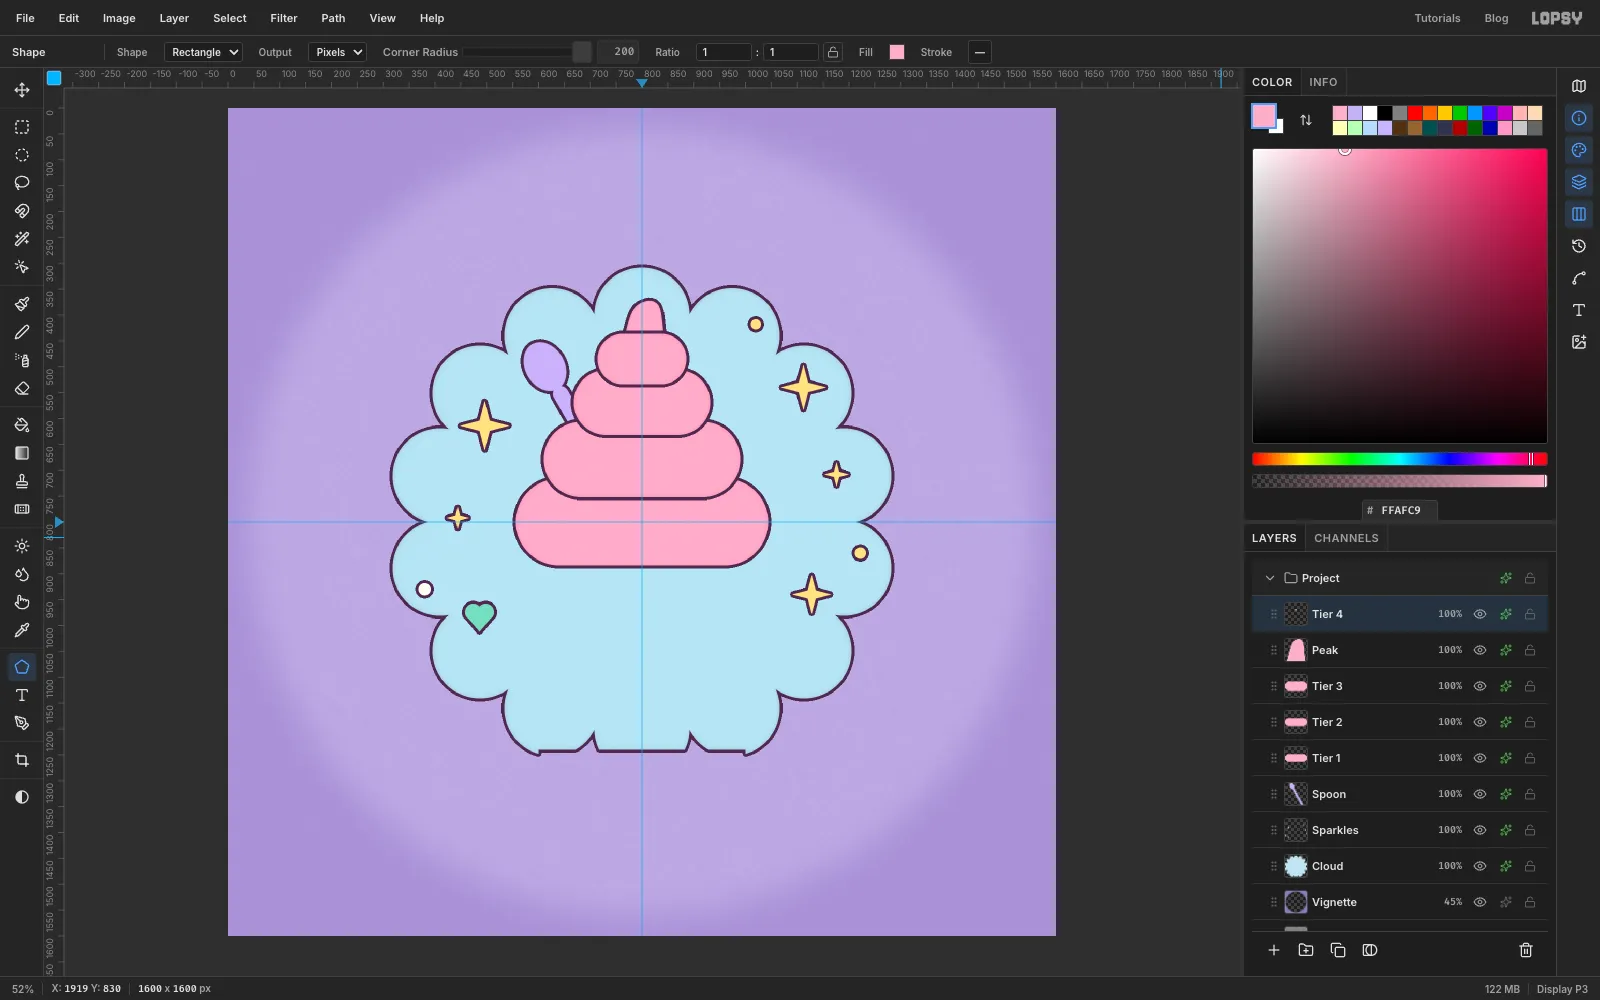
Select the Shape tool, choose Rectangle, and set the Corner Radius to 200. Lopsy limits the radius to half the shorter side, so every rectangle becomes a pill. Set the Fill to strawberry .
For each tier, click Add Layer, then press at the centre and drag out to the bottom-right corner:
- Tier 1: centre 800, 800 (the guide crossing), drag to 1044, 884. That's 488 × 168 px.
- Tier 2: centre 800, 679, drag to 990, 752.
- Tier 3: centre 800, 569, drag to 932, 632.
Give each tier the outline and an Inner Glow in plum at Size 12, Opacity 22%.
The curled tip goes behind the top tier, so draw it next. Add a layer called Peak and draw a closed Pen path:
- Click a corner at 758, 474.
- Drag from 772, 420 upwards.
- Drag from 800, 376 to the right to round the top.
- Drag from 836, 392 downwards.
- Click a corner at 844, 474, then click the first point to close.
It's a soft dollop leaning a little to the left. Its bottom will be hidden by the last tier.
-
Top it with a fourth tier
Use Path to Selection and Delete Path, fill the Peak with strawberry, and deselect. Give it the outline and an Inner Glow of Size 8, Opacity 22%.
Add Tier 4 above Peak with the same Shape settings: centre 800, 485, dragged to 886, 534. Give it the outline and the same Inner Glow as the other tiers.
-
Shade the underside of each tier
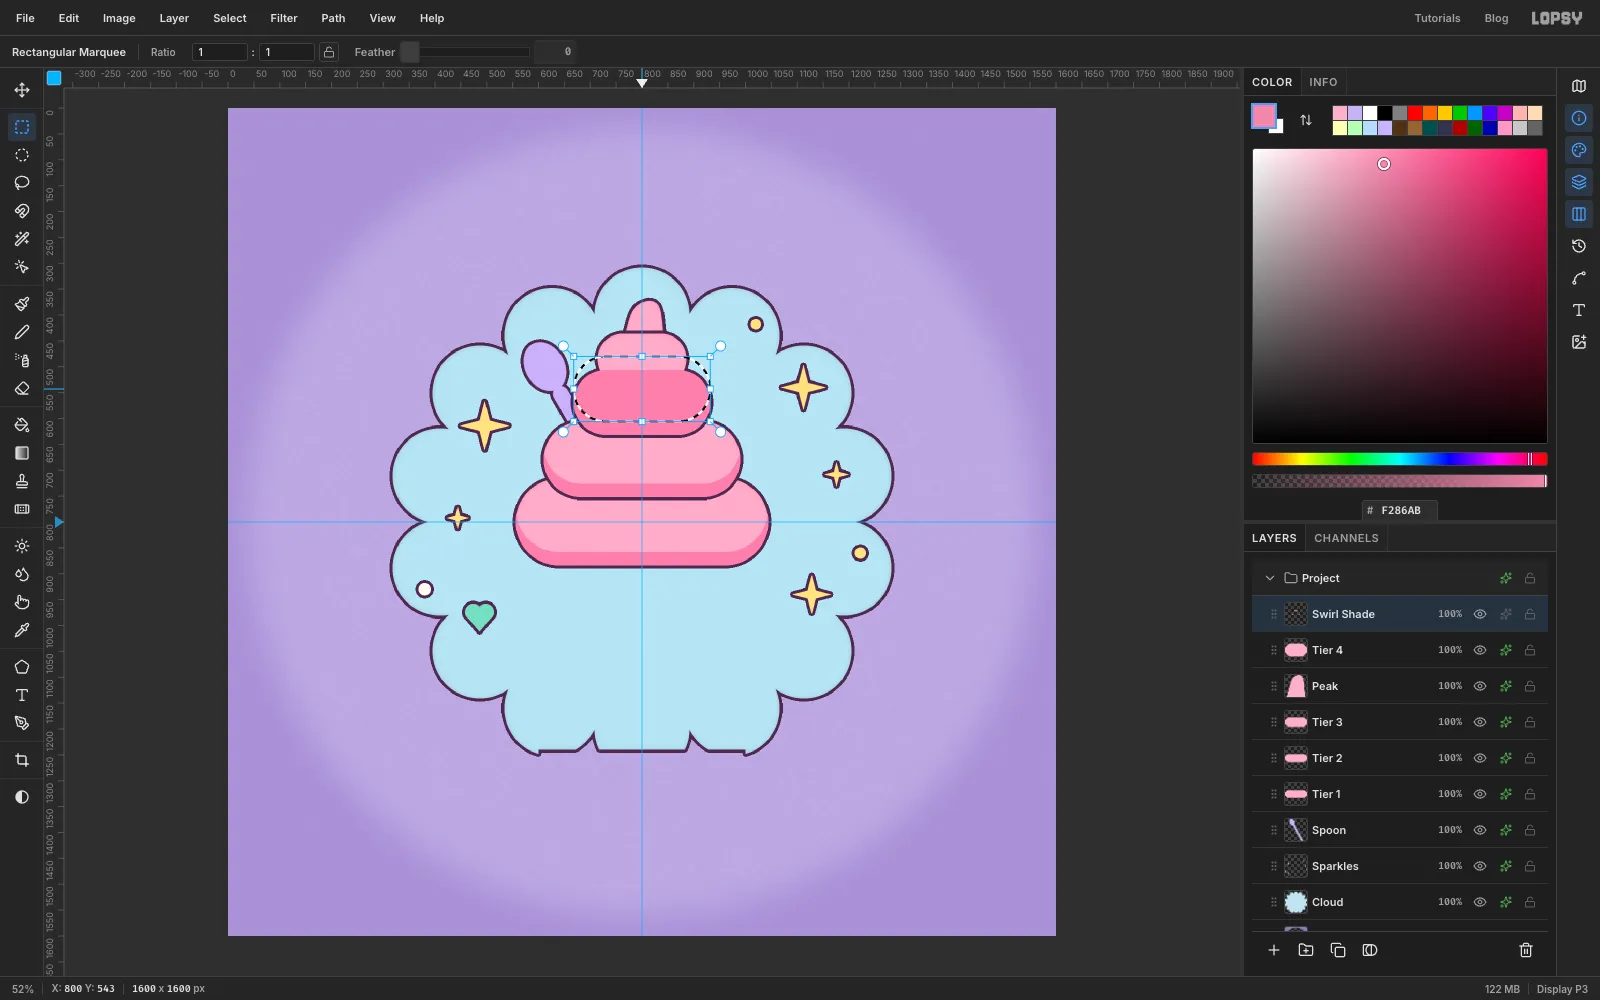
Add a layer called Swirl Shade above Tier 4. Each tier gets a darker crescent along its bottom:
- Cmd-click the Tier 1 thumbnail to load its shape as a selection.
- Fill it with .
- Pick the Rectangular Marquee, press inside the selection and drag it straight up about 26 px. Dragging inside a selection with a marquee tool moves the outline, not the pixels.
- Press Delete. Only a thin crescent at the bottom of the tier is left.
- Deselect, then repeat for Tier 2, Tier 3 and Tier 4.
-
Add the fold lines
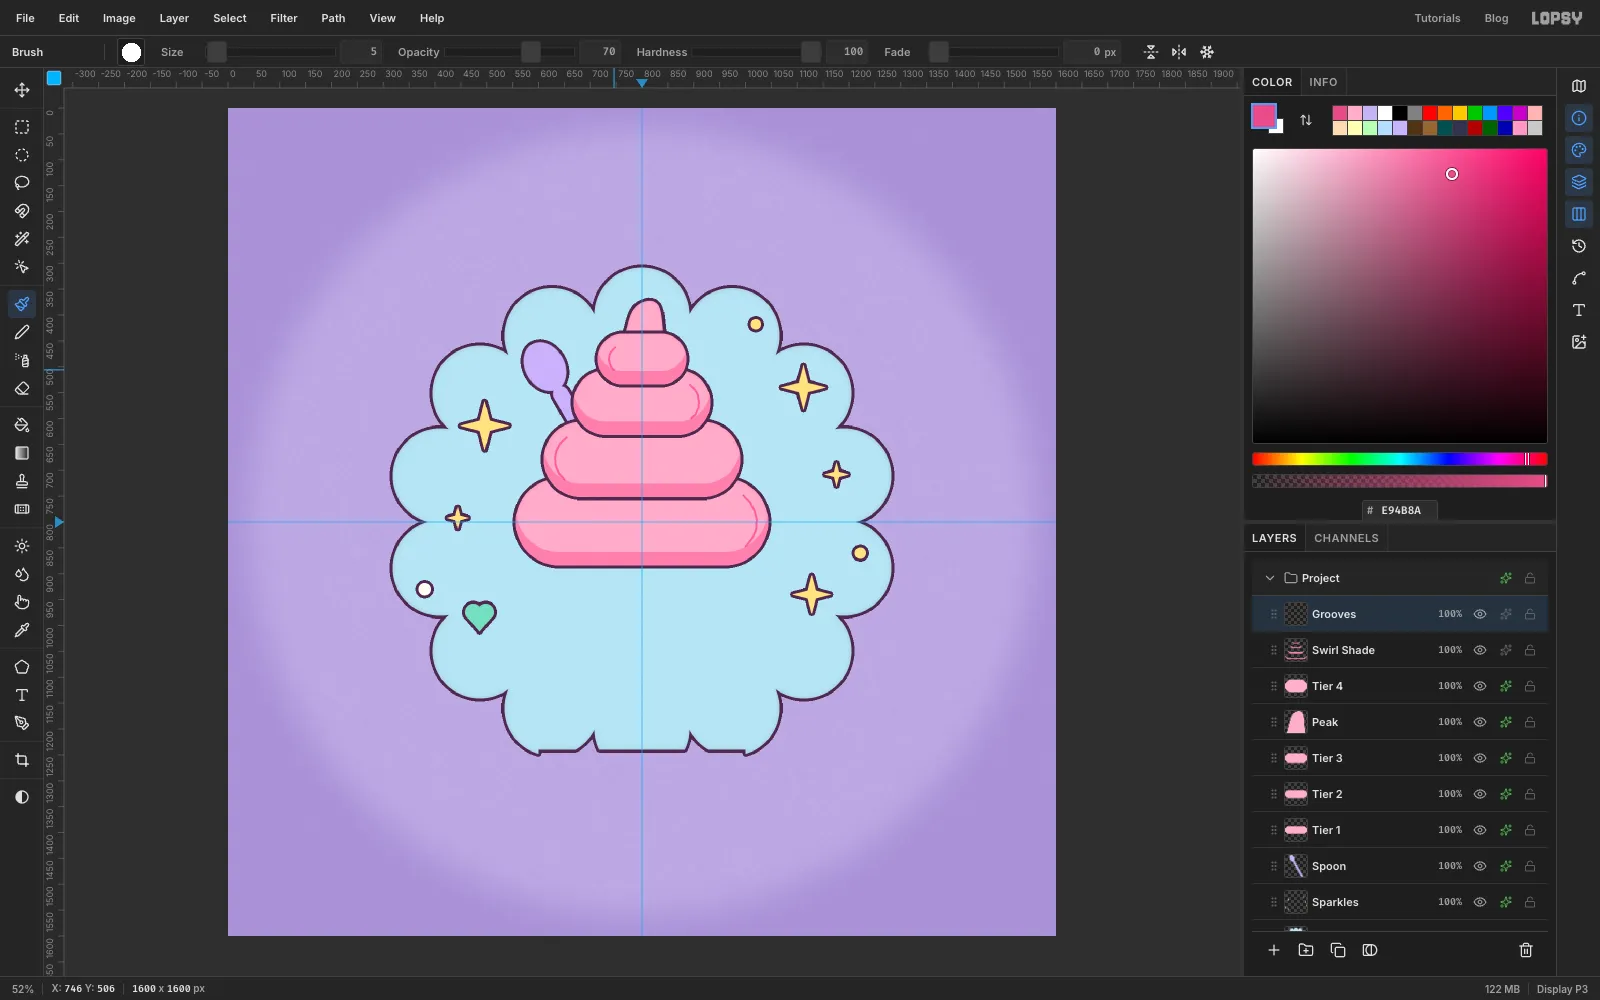
A real swirl wraps around, so each coil has a fold where it tucks under. Add a layer called Grooves.
Cmd-click Tier 1's thumbnail, then Cmd+Shift-click Tier 2, Tier 3, Tier 4 and Peak to add them. Choose Select → Shrink… with 8, so the lines can't touch the outlines.
Pick the Brush at Size 5, Opacity 70%, in . Inside each tier, draw one short curved stroke that follows the curve of a rounded end, about 22 px in from the edge. Alternate the sides: right end on Tier 1, left on Tier 2, right on Tier 3, left on Tier 4. The zig-zag reads as one coil spiralling up. Deselect when you're done.
-
Add the shine
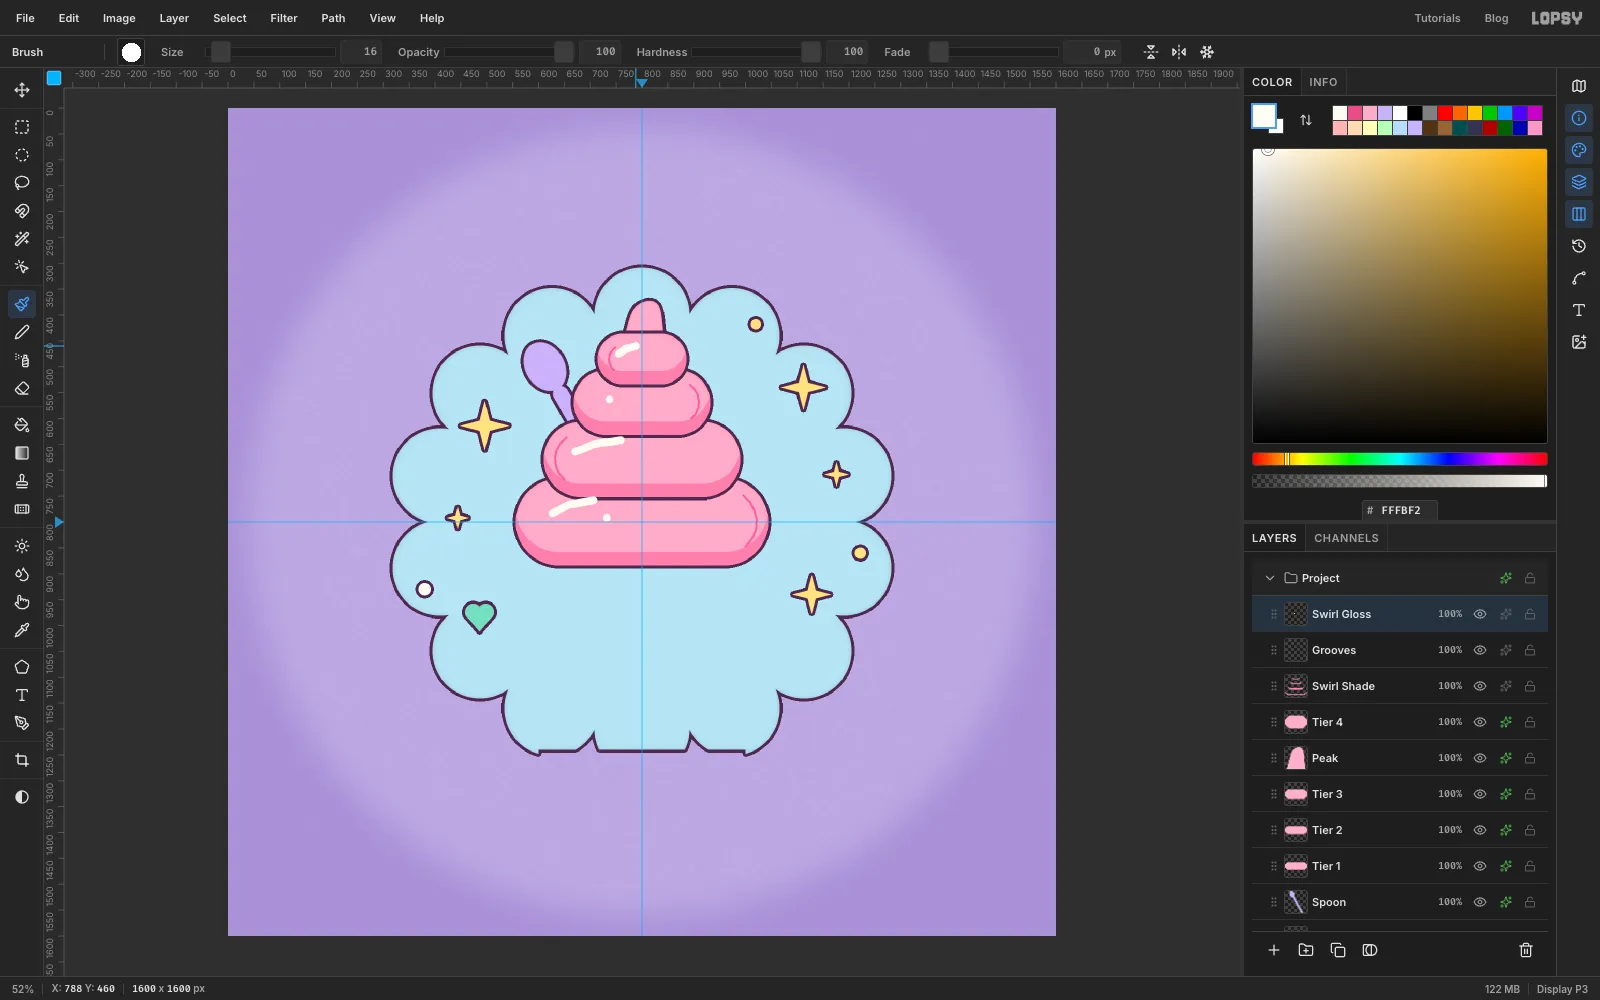
Add a layer called Swirl Gloss. Set the Brush back to Opacity 100%, Size 16, in cream .
Paint a short curved dash across the upper left of each tier, keeping it clear of the outlines and seams. Vary them so they don't look copied:
- Tier 1: a dash plus a dot just past its end
- Tier 2: a longer dash
- Tier 3: only a dot
- Tier 4: a short dash
Click once for a dot.
-
Scatter the sprinkles
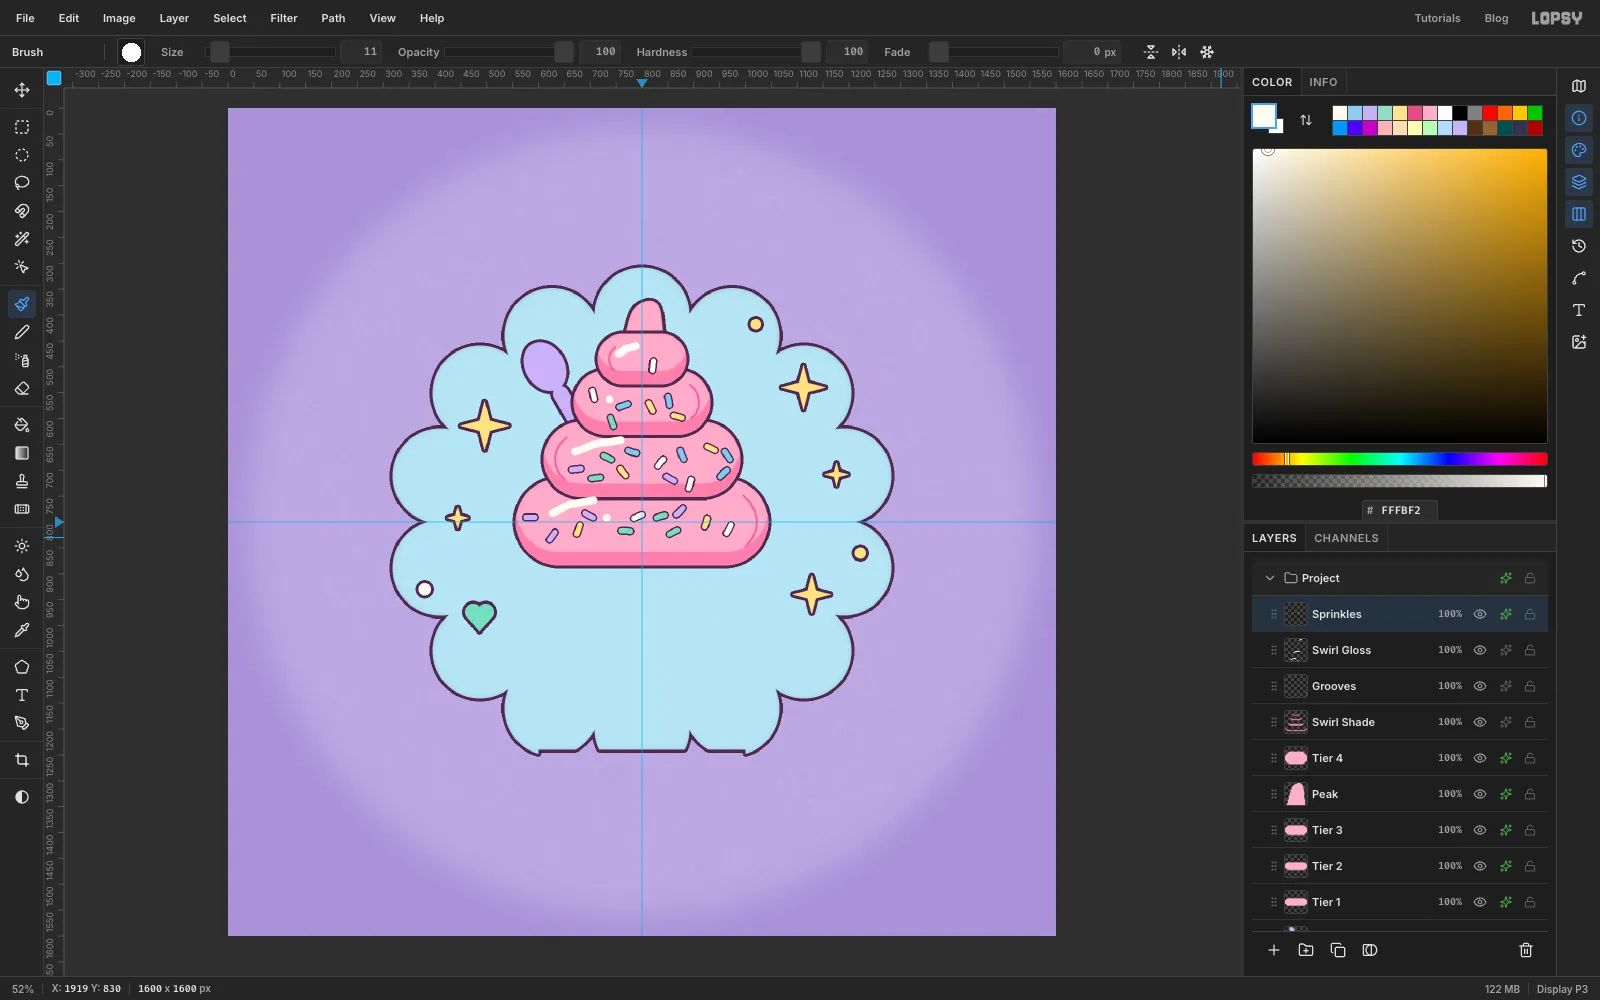
Add a layer called Sprinkles. Load the four tiers as one selection (Cmd-click Tier 1, then Cmd+Shift-click the others) and Shrink it by 14.
Set the Brush to Size 11, Hardness 100. Paint about 30 short strokes, each about 18 px long and at a random angle. Use five colours, about six sprinkles each: butter , mint , lavender , blue and cream .
Keep every sprinkle whole and on one tier. Don't let them cross a seam, a fold line or a shine mark, and leave space at the top right for the cherry. Deselect and give the layer a 3 px plum Stroke.
-
Put a cherry on top
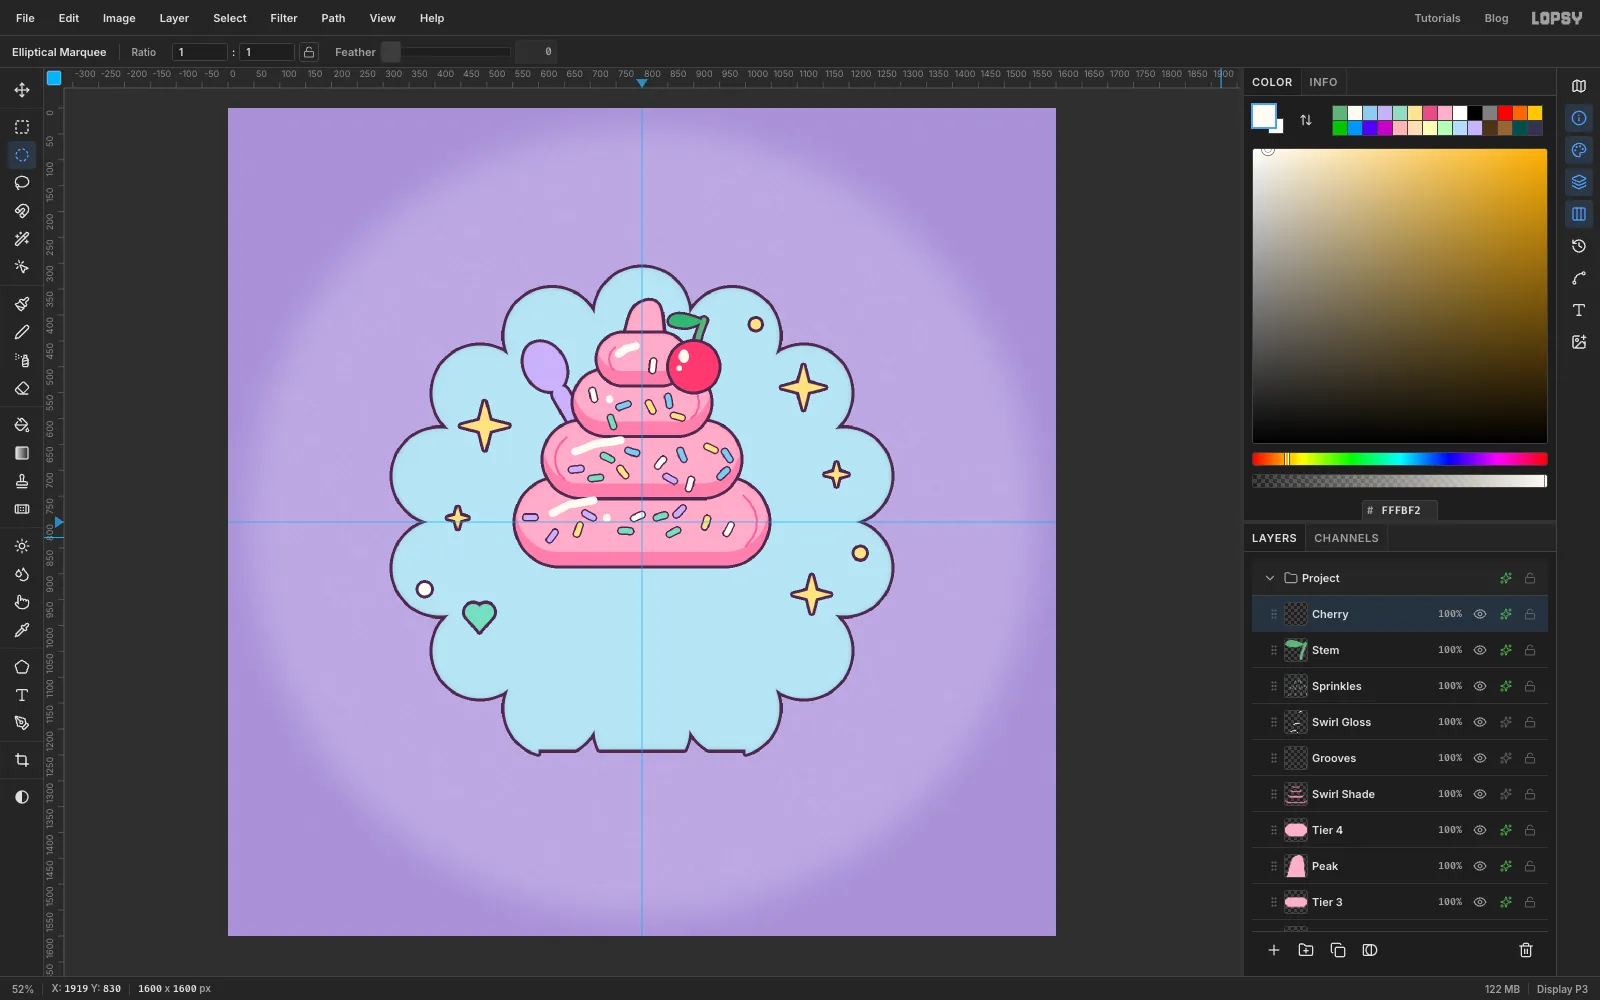
Add a layer called Stem and set the colour to leaf green . Pick the Pen and set Stroke in its options bar to 10. Press at 904, 462 and drag up a little, then press at 920, 410 and drag up and to the right. Press Enter to stroke the path, then click Delete Path.
Now a leaf pointing left from the top of the stem. With the Pen:
- Press at the left tip, 856, 404, and drag up and to the right a little to curve the top edge.
- Click (don't drag) the right tip at 918, 412, so it stays pointed.
- Press at 880, 424 and drag to the left to curve the underside.
- Click the first point to close it.
Use Path to Selection and Delete Path, fill it green, deselect, and give the layer a 5 px plum Stroke.
Add a layer called Cherry. With the Elliptical Marquee's dialog, draw a circle from 852, 452 to 948, 548 and fill it with . For the shine, fill a cream oval from 871, 467 to 891, 493 at its upper left, and a tiny dot from 867, 498 to 877, 508 below it. Deselect and give it the outline.
-
Make the paper cup
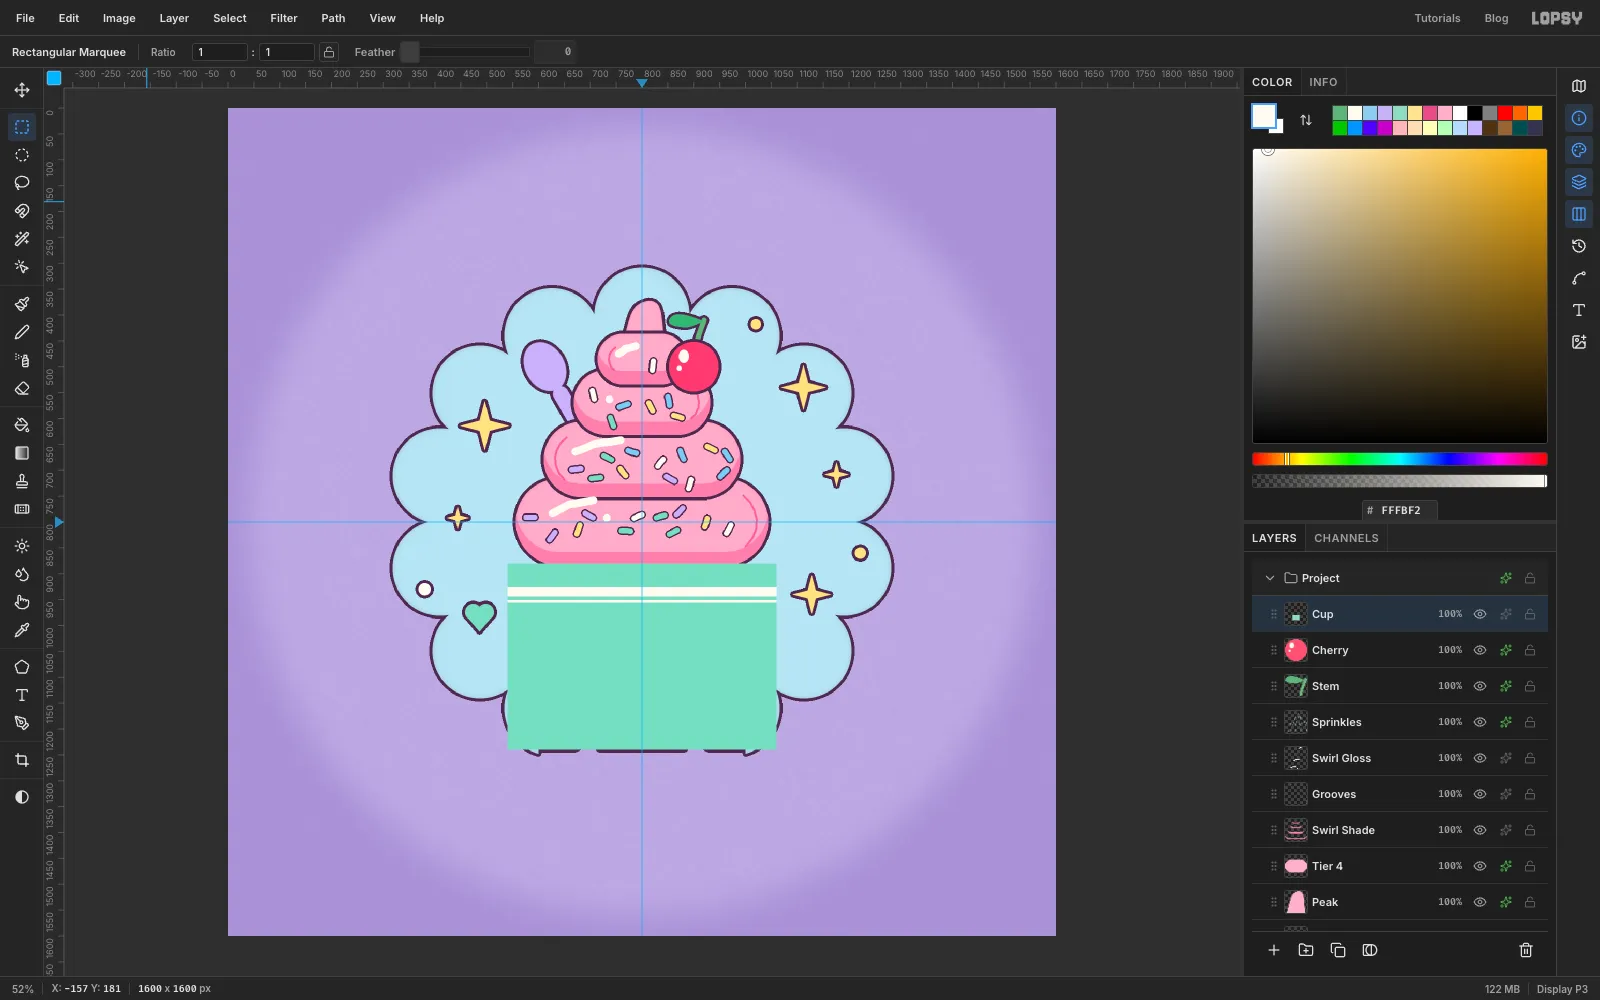
Click Cherry, then add a layer called Cup. Use the exact-size dialog of the Rectangular Marquee for a box from 540, 880 to 1060, 1240, and fill it with mint .
Paper cups have a printed band. Set the colour to cream, make a selection from 540, 926 to 1060, 944 and fill it. Then make a thin strip from 540, 951 to 1060, 956, fill that too, and deselect.
-
Taper the cup with Distort
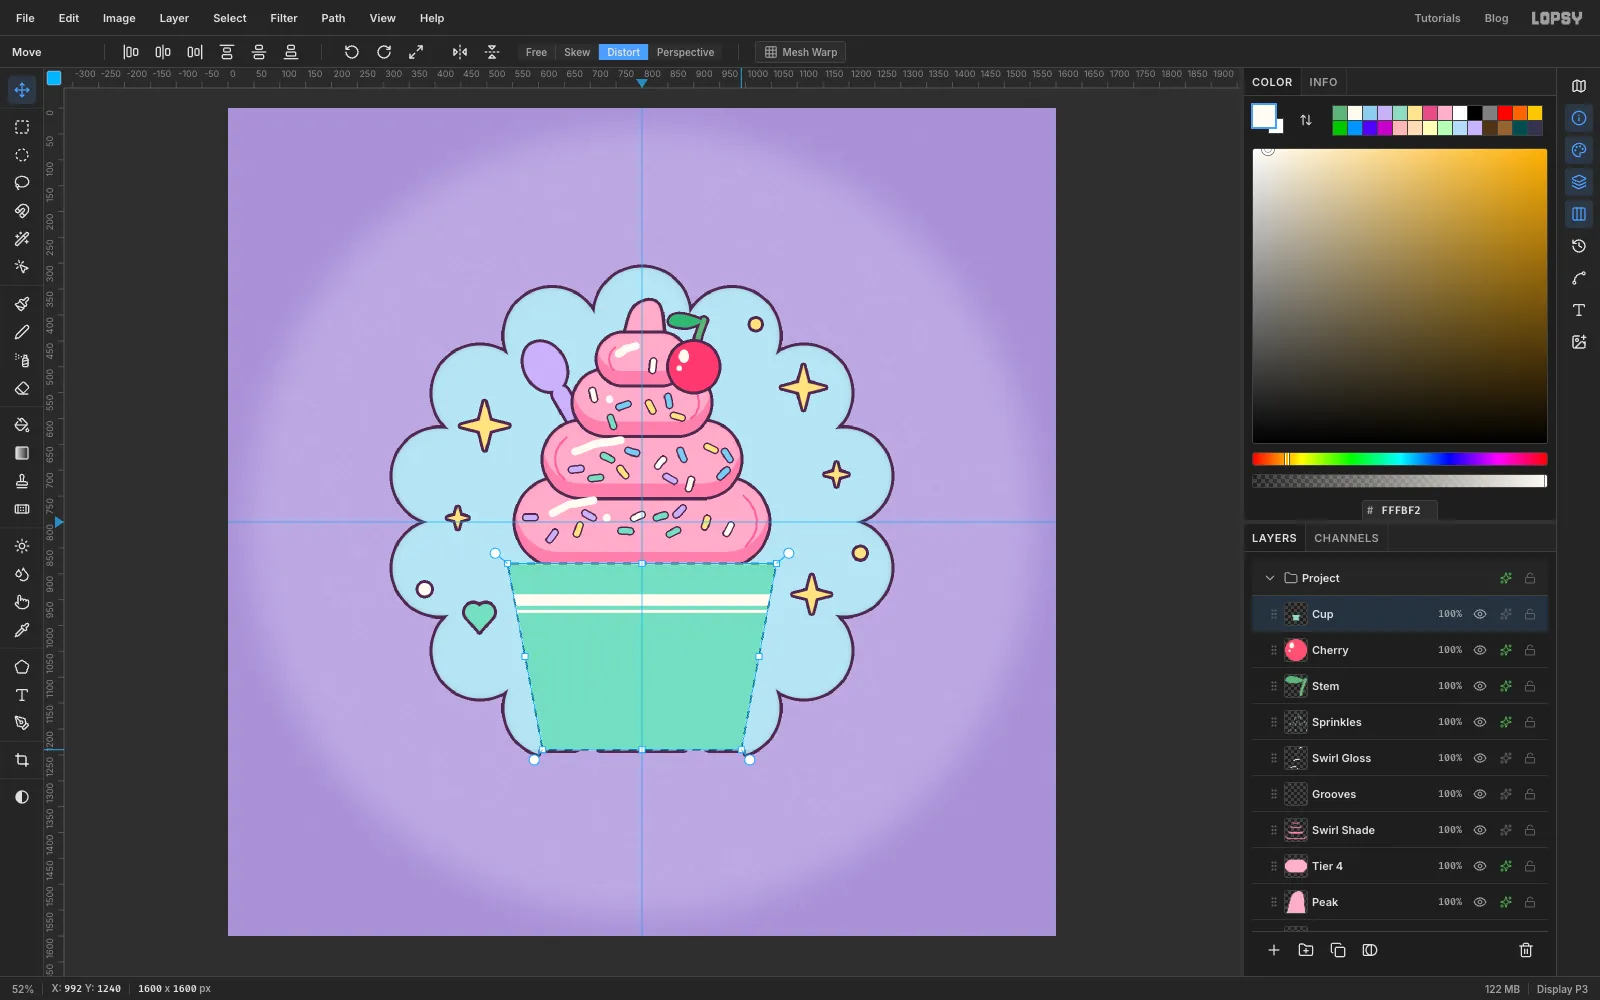
Select the cup again (540, 880 to 1060, 1240) and switch to the Move tool. In the options bar, click Distort. In this mode each corner handle moves on its own.
Drag the bottom-left corner handle 68 px to the right and the bottom-right corner 68 px to the left. The cup now narrows towards its base, and the cream band follows the new shape. Press Enter, click Free to leave Distort mode, and deselect.
Give the cup the outline and an Inner Glow in plum (Size 14, Opacity 20%).
-
Add the rim
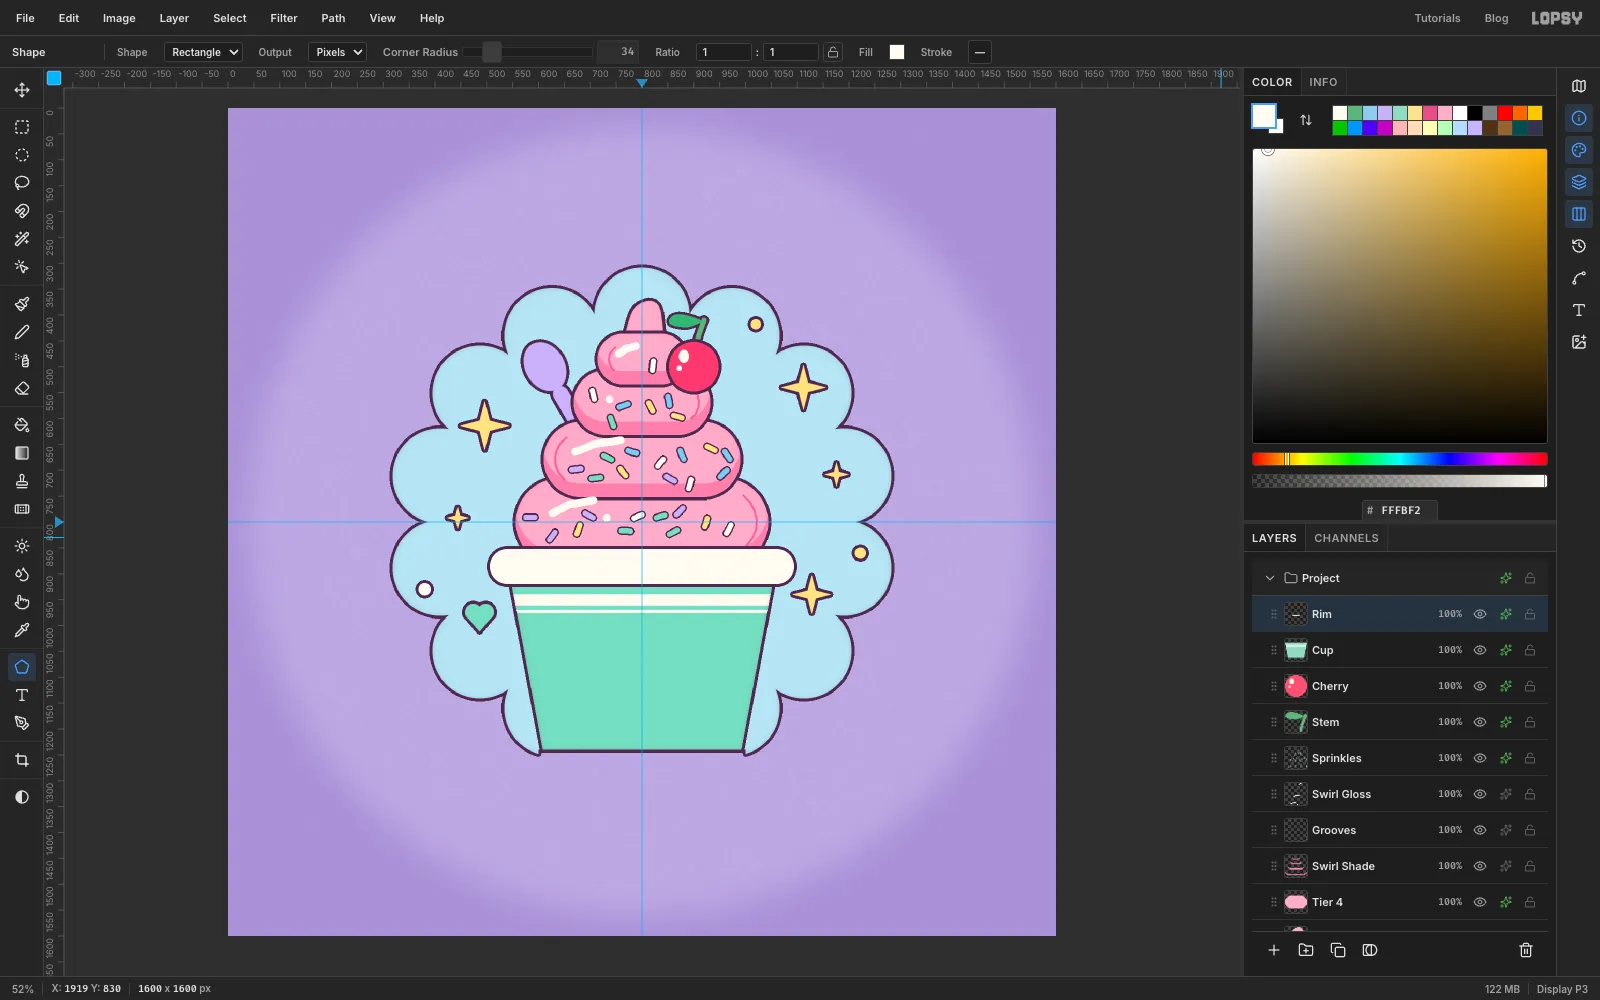
Add a layer called Rim. With the Shape tool (Rectangle, Corner Radius 34, Fill cream), press at 800, 886 and drag to 1094, 920. The rim covers the bottom edge of the swirl, so the swirl looks like it sits inside the cup. Give it the outline.
-
Draw the face
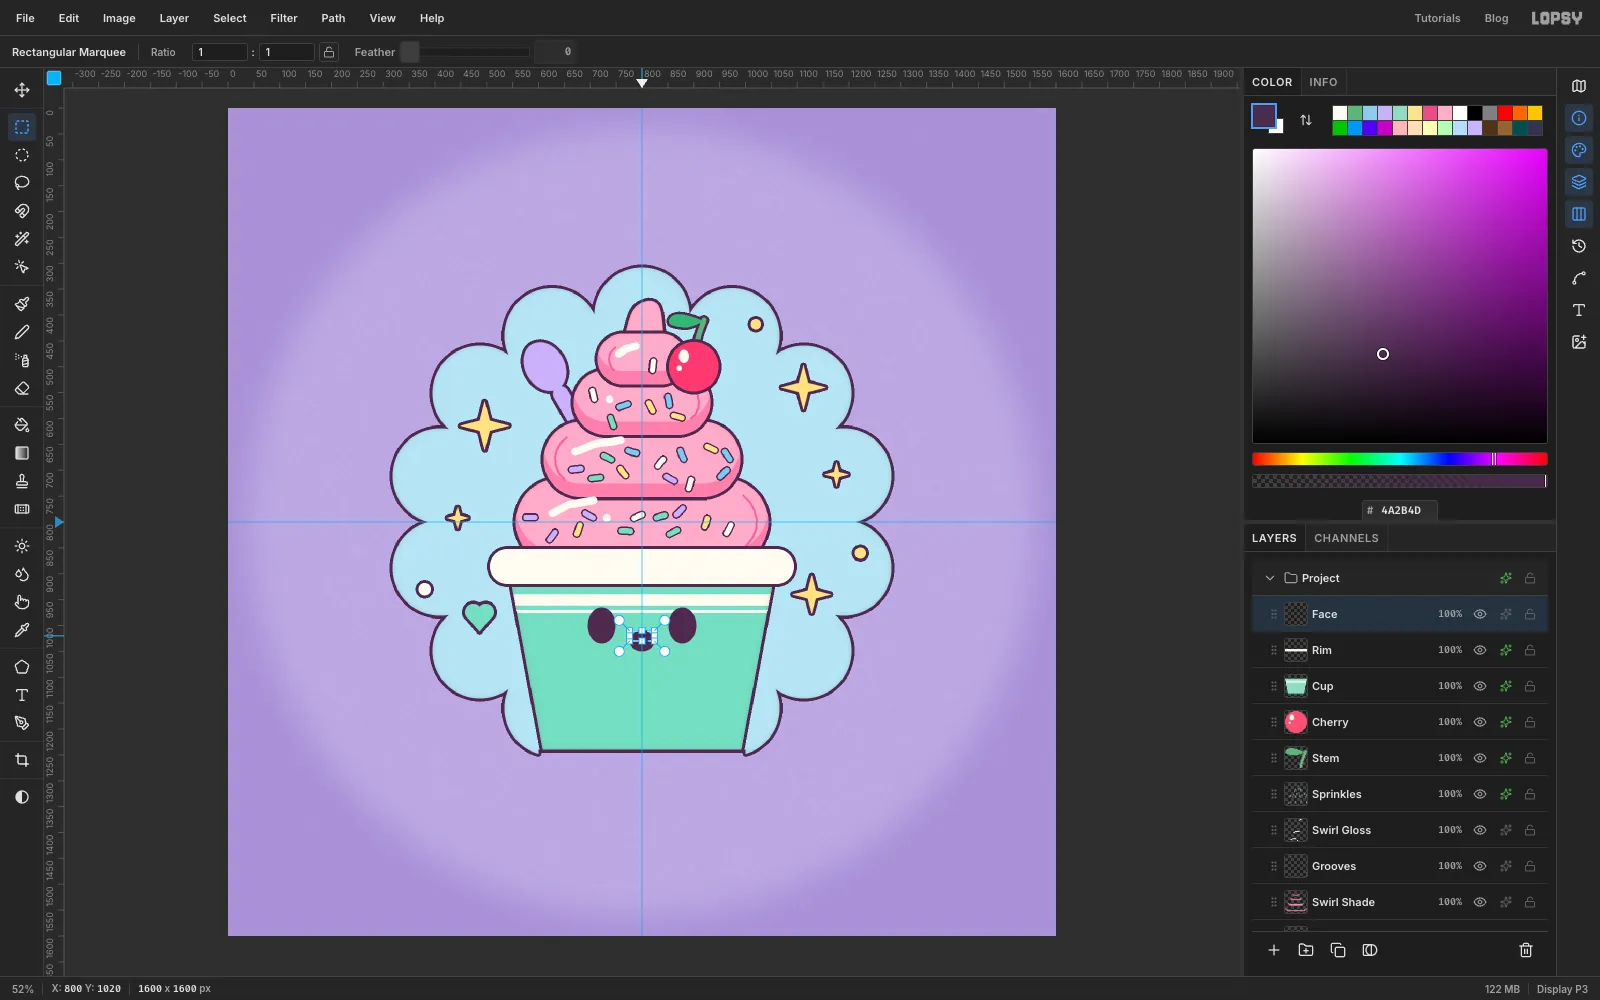
Add a layer called Face. Kawaii faces sit low and wide, with the eyes far apart.
- Eyes: with the Elliptical Marquee's dialog, fill a plum oval from 695, 965 to 749, 1035, then a second from 851, 965 to 905, 1035.
- Mouth: fill a plum oval from 776, 1010 to 824, 1050. Switch to the Rectangular Marquee, make a selection over its top half from 776, 1010 to 824, 1030, and press Delete. A half-moon smile is left.
- Tongue: back on the Elliptical Marquee, fill a small oval from 789, 1036 to 811, 1048.
- Eye shine: in each eye, fill a 20 px cream circle at the upper right and a 10 px cream circle at the lower left.
Deselect.
-
Add the blush
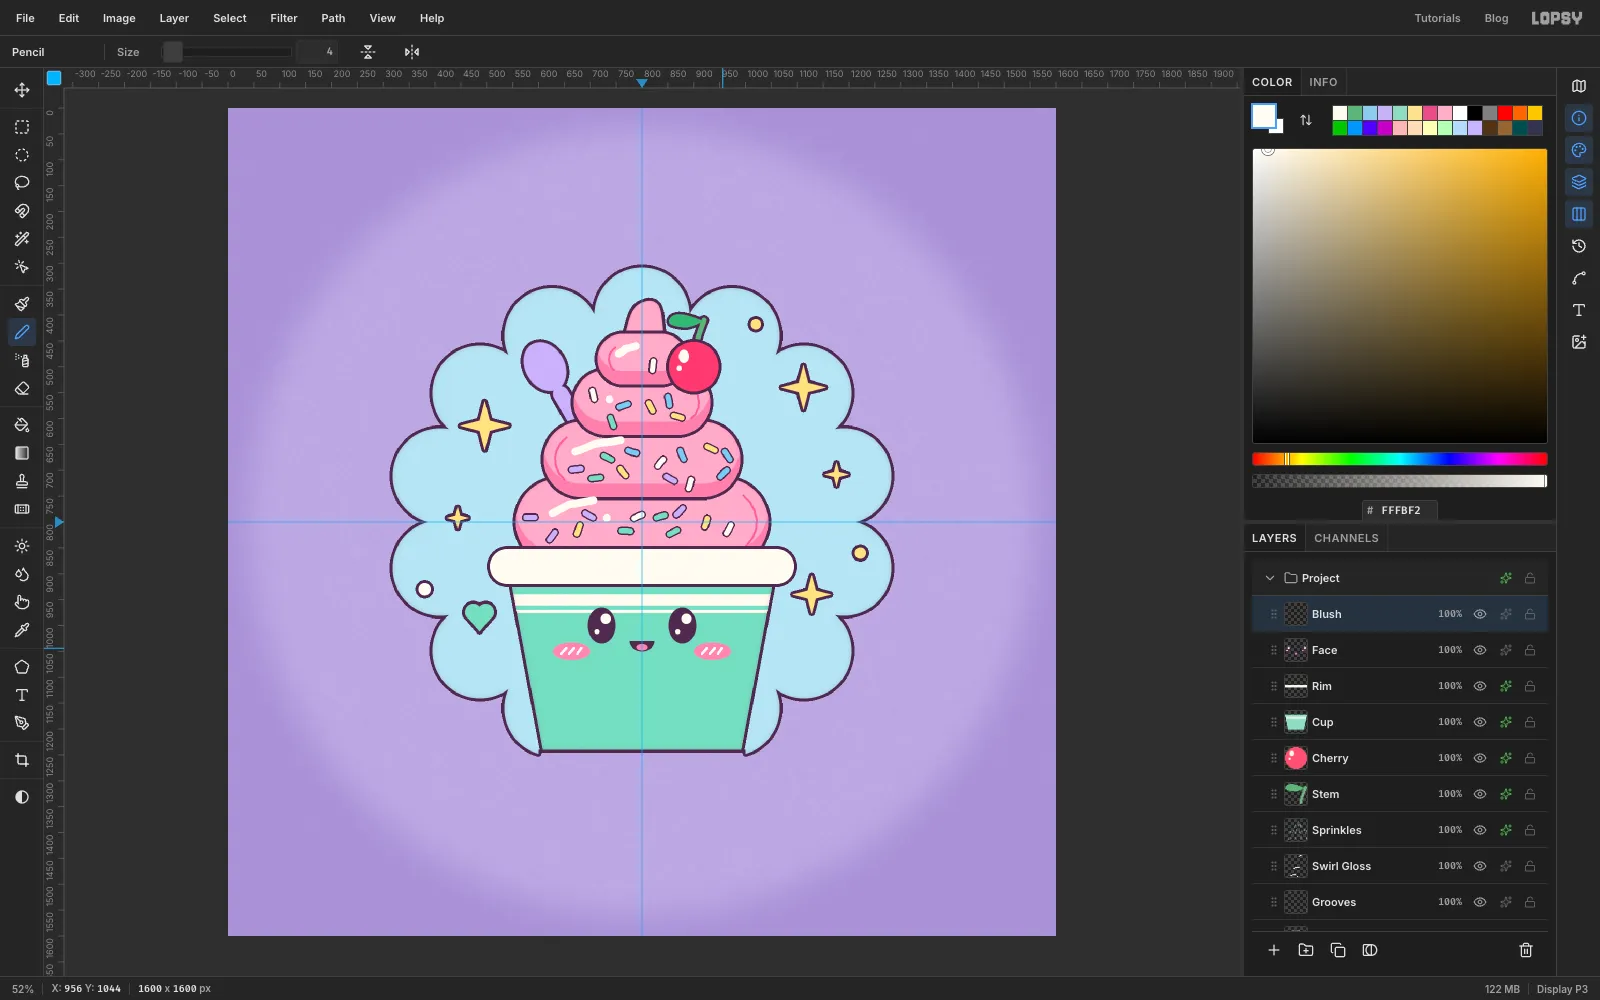
Add a layer called Blush. Draw two 72 × 34 px ovals, centred on 664, 1050 and 936, 1050, and fill them with . Deselect.
Pick the Pencil at Size 4 in cream. On each cheek, draw three short slanted lines about 15 px apart: click at the bottom of each line, then Shift-click at its top.
-
Draw a ribbon tail
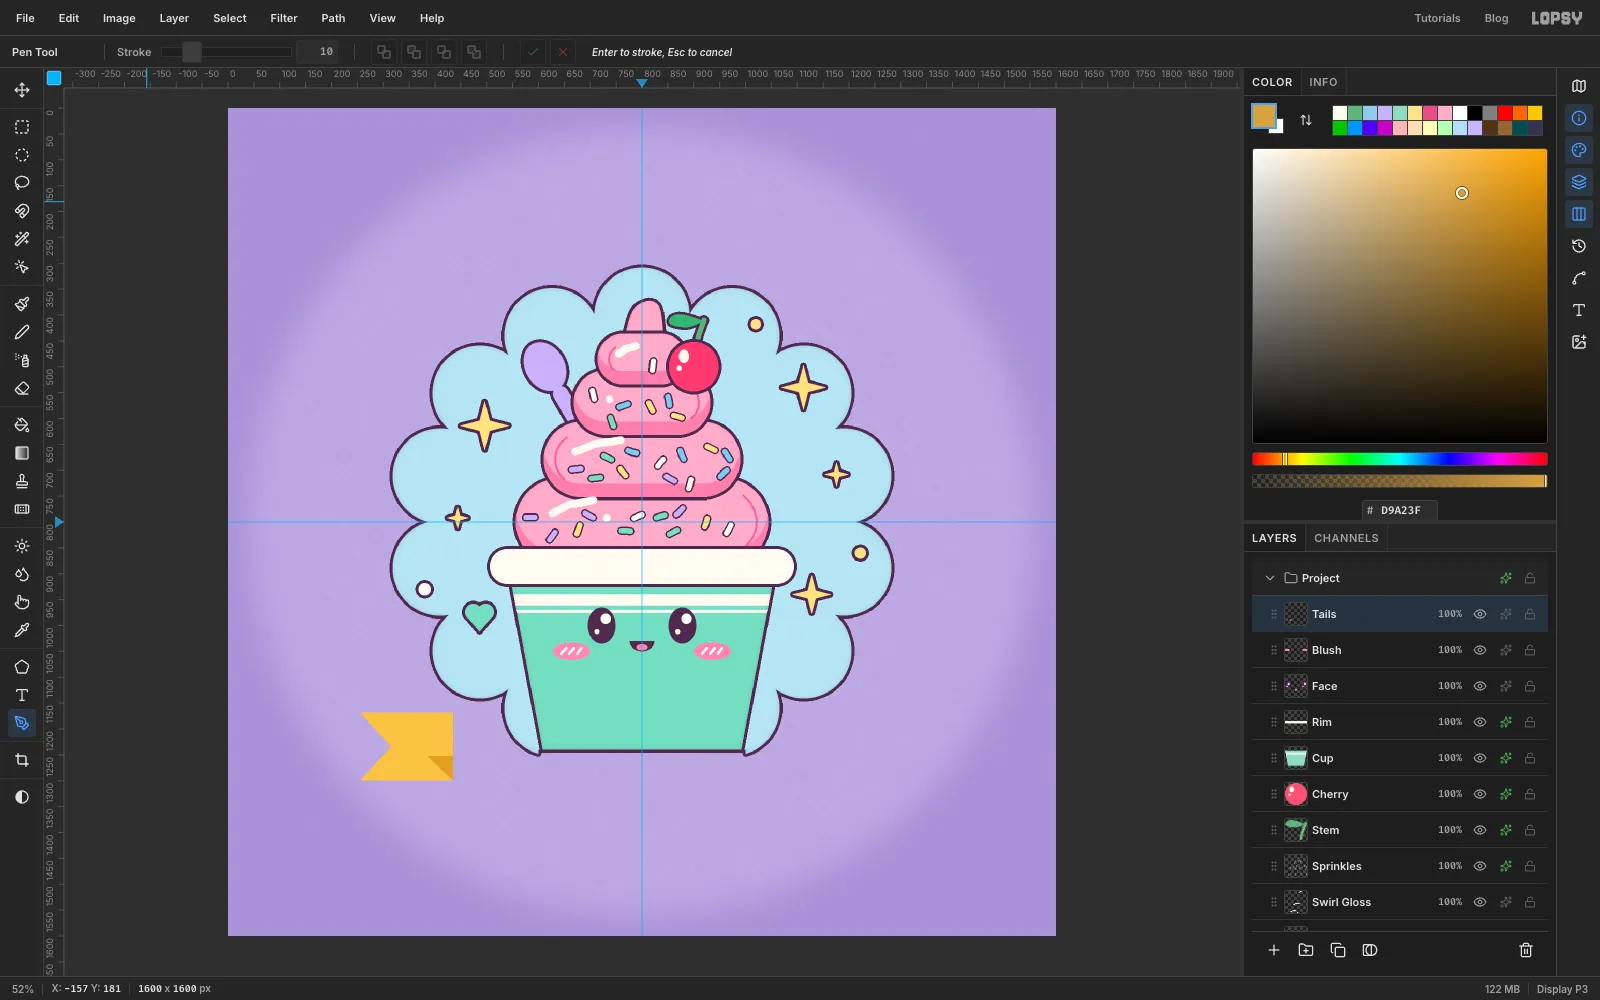
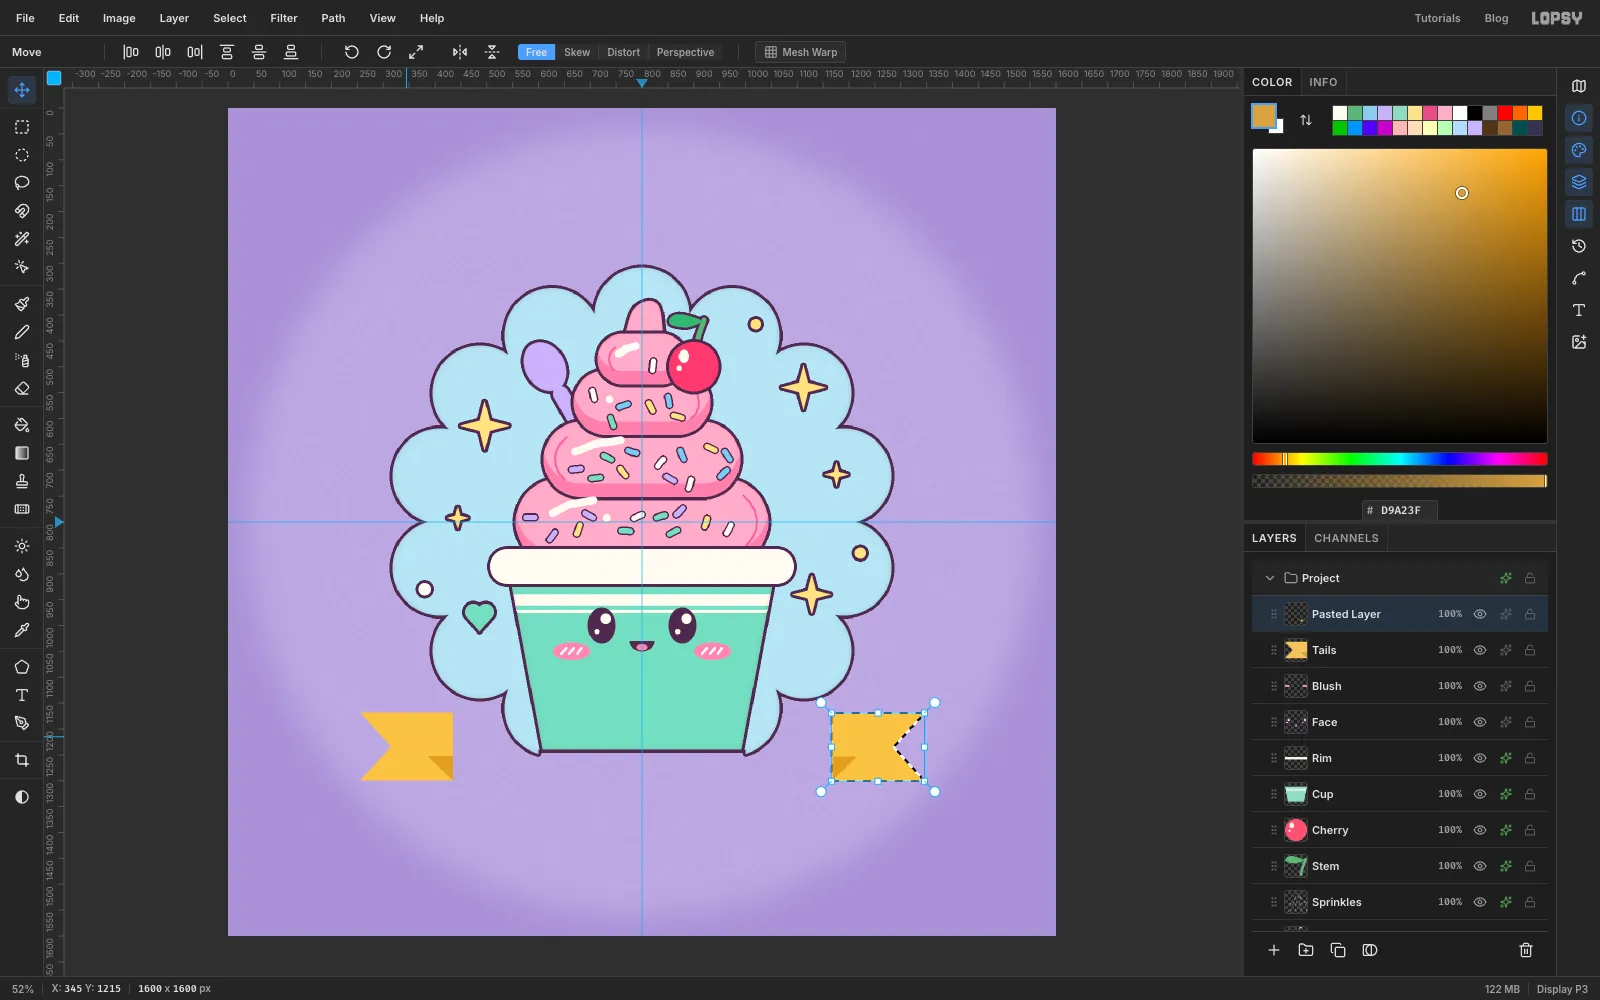
Add a layer called Tails. With the Pen, click these corners to make a strip with a V-notch cut into its end: 435, 1168, 435, 1300, 255, 1300, 315, 1234, 255, 1168. Then close the path. Use Path to Selection, Delete Path, and fill it with .
Draw a small Pen triangle at 385, 1252, 435, 1252 and 435, 1300, and fill it with the darker . This is the fold where the banner bends back into the tail.
-
Mirror the tail
Drag a marquee around the tail and its fold, then copy and paste. The paste comes in selected with the Move tool active. Click Flip Horizontal in the options bar.
Drag the flipped copy about 910 px to the right, so it mirrors the first tail across the centre guide. Its pointed ends should finish at about x 1345 (check the status bar), level with the first tail. Deselect, choose Layer → Merge Down, and give Tails the outline.
-
Add the banner
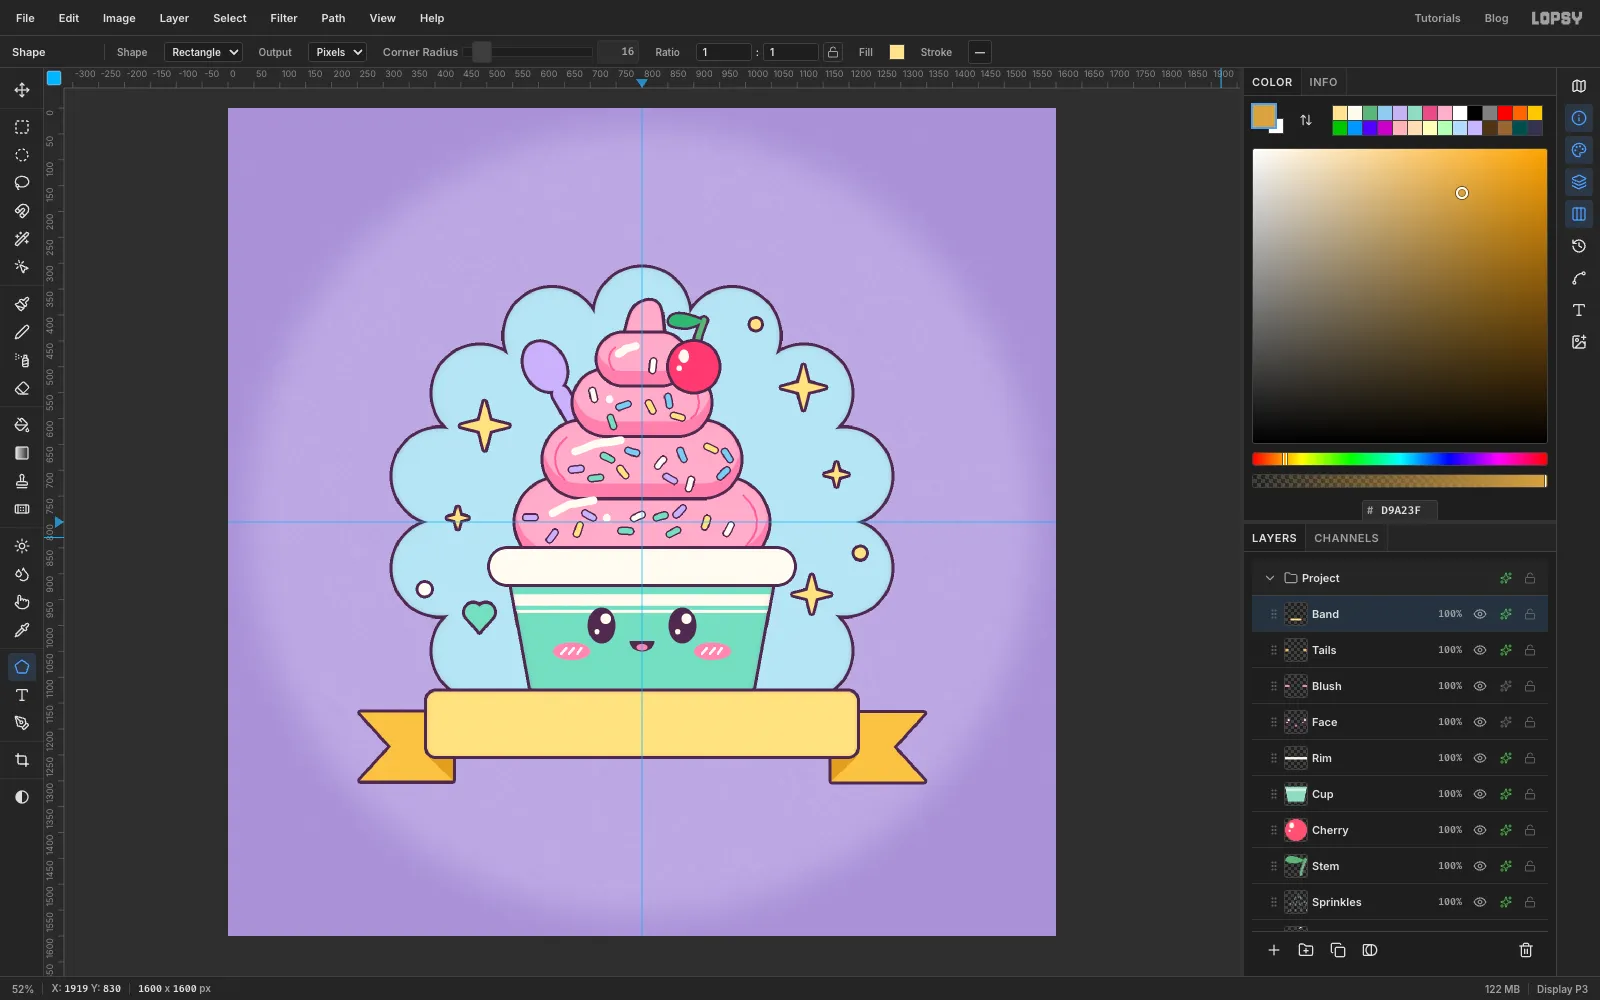
Add a layer called Band. With the Shape tool (Rectangle, Corner Radius 16, Fill ), press at 800, 1190 and drag to 1215, 1252. The 830 × 124 px band covers the bottom of the cup and the inner ends of both tails.
Give it the outline and an Inner Glow in plum (Size 10, Opacity 20%).
-
Set the title
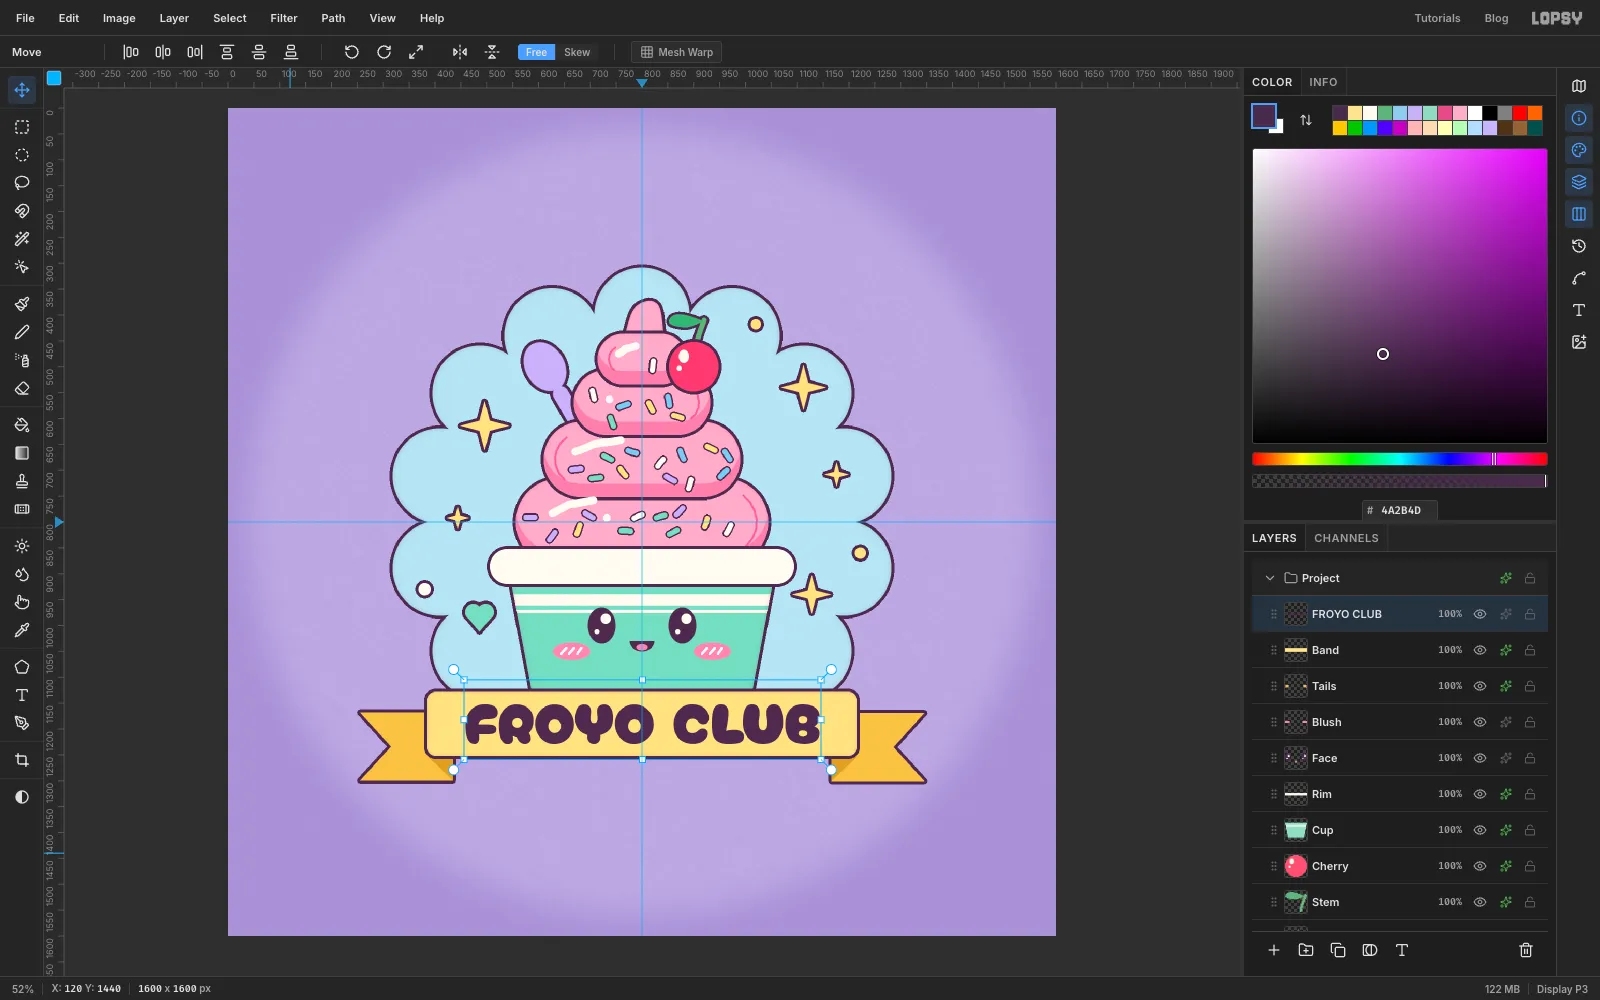
Pick the Text tool. Choose the Google font Cherry Bomb One at 110 px, in plum. Click in an empty spot below the patch, type FROYO CLUB and press Tab to finish.
Switch to the Move tool and drag the text onto the banner. Pink alignment lines appear as you drag. Let go when the line shows the text centred on the band. Then nudge it with the arrow keys until the gaps above and below the letters match. They come out about 24 px each, with roughly 74 px of yellow at each end. The rounded letters echo the pill-shaped tiers and the scallops.
-
Select the die-cut silhouette
The cut edge and border go under everything, so click Vignette and add a layer called Edge.
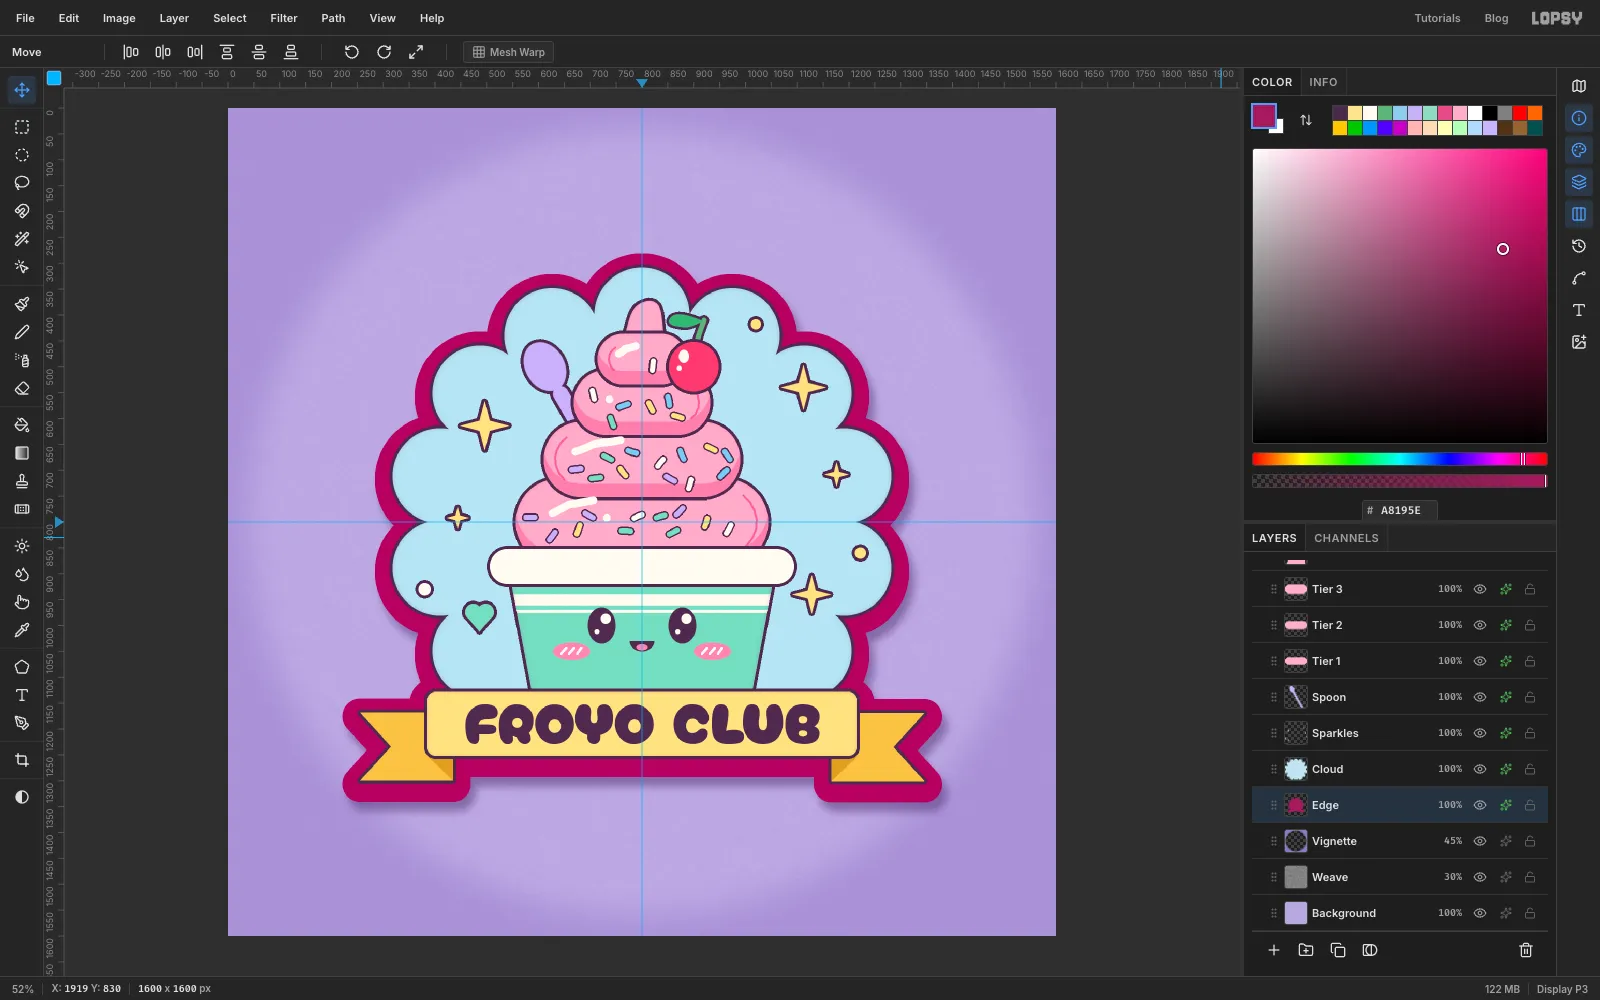
Cmd-click the Cloud thumbnail, then Cmd+Shift-click Tails, Band, Stem and Cherry to add them. Choose Select → Grow… with 34. This is the silhouette the patch would be cut along.
Fill it with dark and deselect. Switch to the Move tool and press the down arrow 7 times. This darker sliver under the bottom edge is the thickness of the patch. Add a Drop Shadow to Edge: Offset X 10, Offset Y 18, Blur 24, Opacity 45%, in .
Now add a layer called Border above Edge and make the same selection again (Cloud plus the four layers, then Grow 34). Fill it with border pink and deselect.
-
Stitch the satin border
On Border, add an Inner Glow in white (Size 10, Opacity 25%) and a 3 px plum Stroke as a crisp keyline around the cut edge.
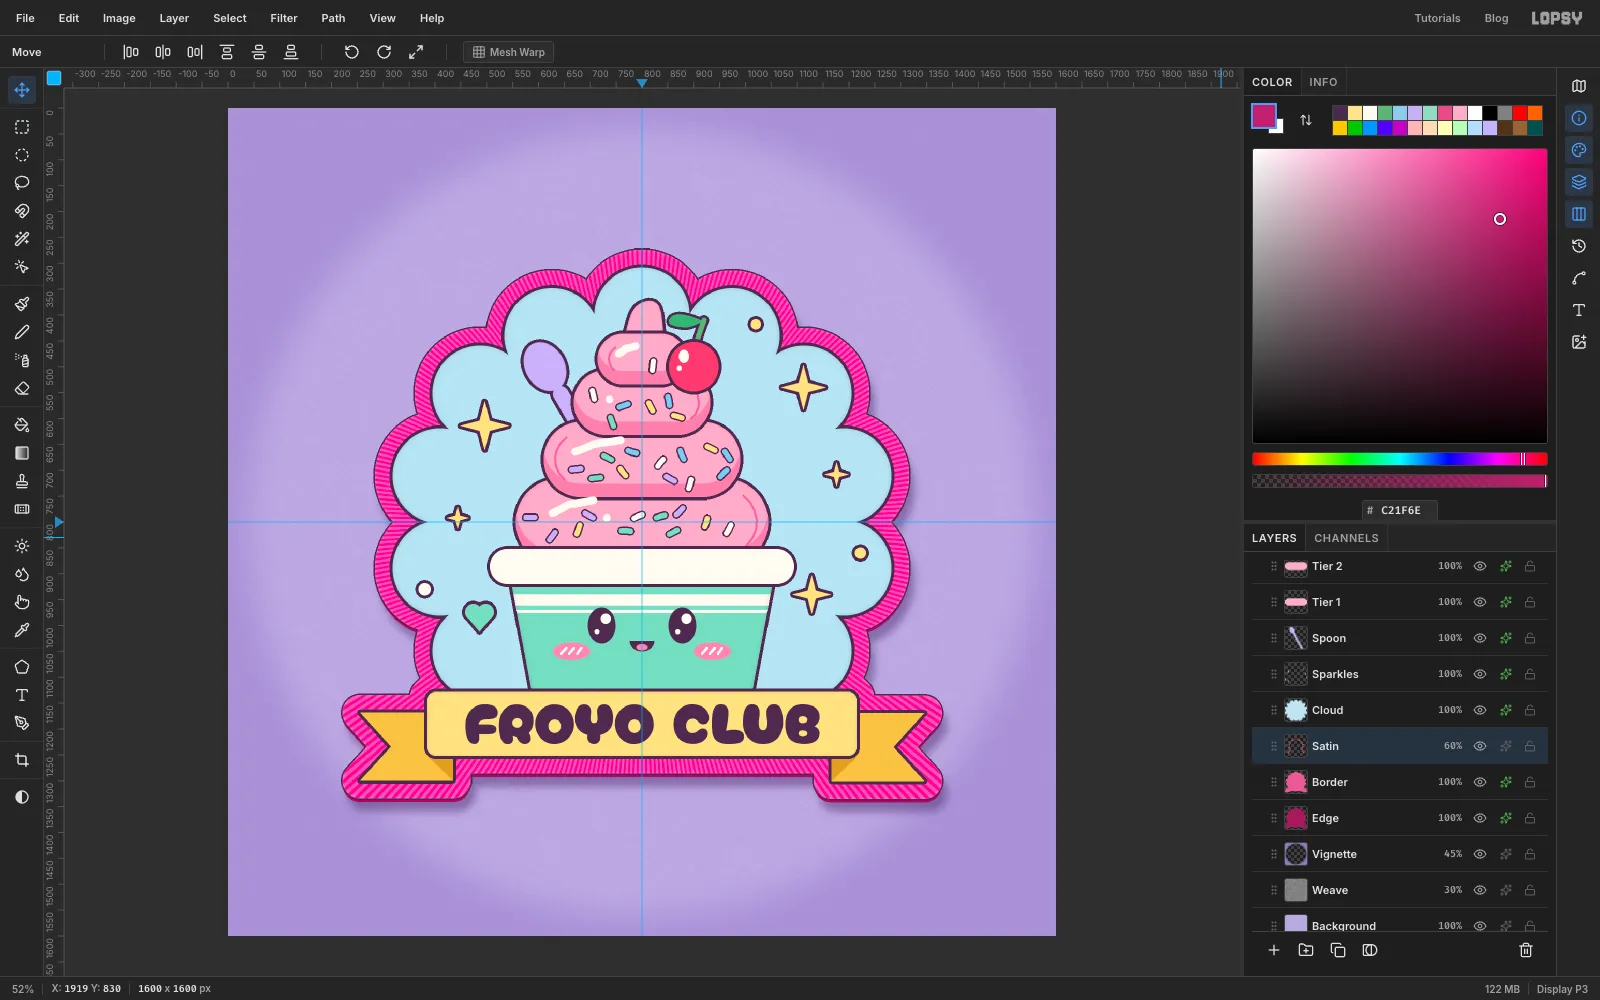
Satin stitch lays threads straight across the border. You can fake that with rays from the centre of the patch:
- Add a layer called Satin.
- Cmd-click the Border thumbnail. Then Cmd+Alt-click Cloud, Tails, Band, Stem and Cherry to subtract them. Only the border ring is left.
- Fill it with .
- Set the colour to . Run Filter → Sunburst… with Rays 120, Length 100 and Width 16, leaving Center X and Center Y at 50.
- Run Sunburst twice more. The dialog resets each time, so enter Rays 120, Length 100 and Width 16 again, with Rotation 1, then Rotation 2. That gives 360 thin rays, all crossing the border at roughly a right angle.
- Deselect, and set the layer to Overlay at 60%.
-
Add the badge's fill stitches
Embroidered fills are made of long parallel stitches. You'll make three thread textures, each running in its own direction.
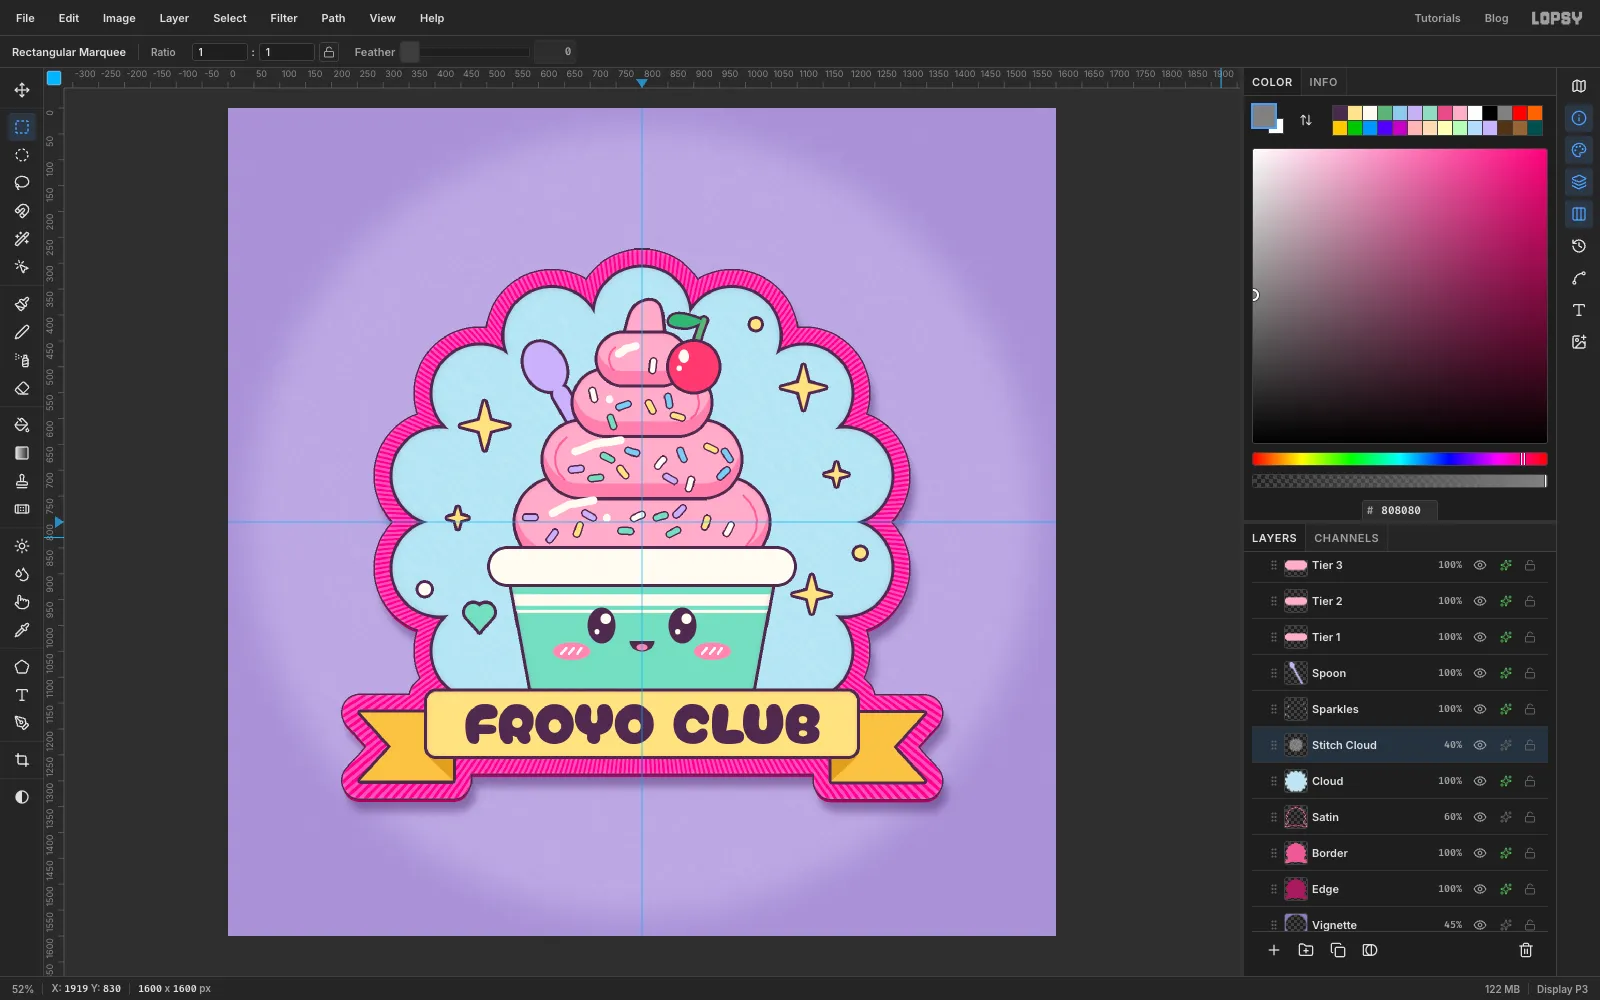
Click Cloud, then click Add Layer and name it Stitch Cloud. It sits right above the badge, so everything else in the design covers it. Fill it with grey and run:
- Add Noise 100, Mono, Gaussian
- Gaussian Blur with Radius 2, so the threads are thicker than single pixels
- Motion Blur with Angle 45, Distance 16
- Brightness/Contrast with Contrast 100, twice
- Emboss with Angle 135, Strength 40
Now trim it to the badge. Cmd-click the Cloud thumbnail, choose Select → Inverse, press Delete, and deselect. Set the layer to Overlay at 40%.
-
Stitch the swirl and cup
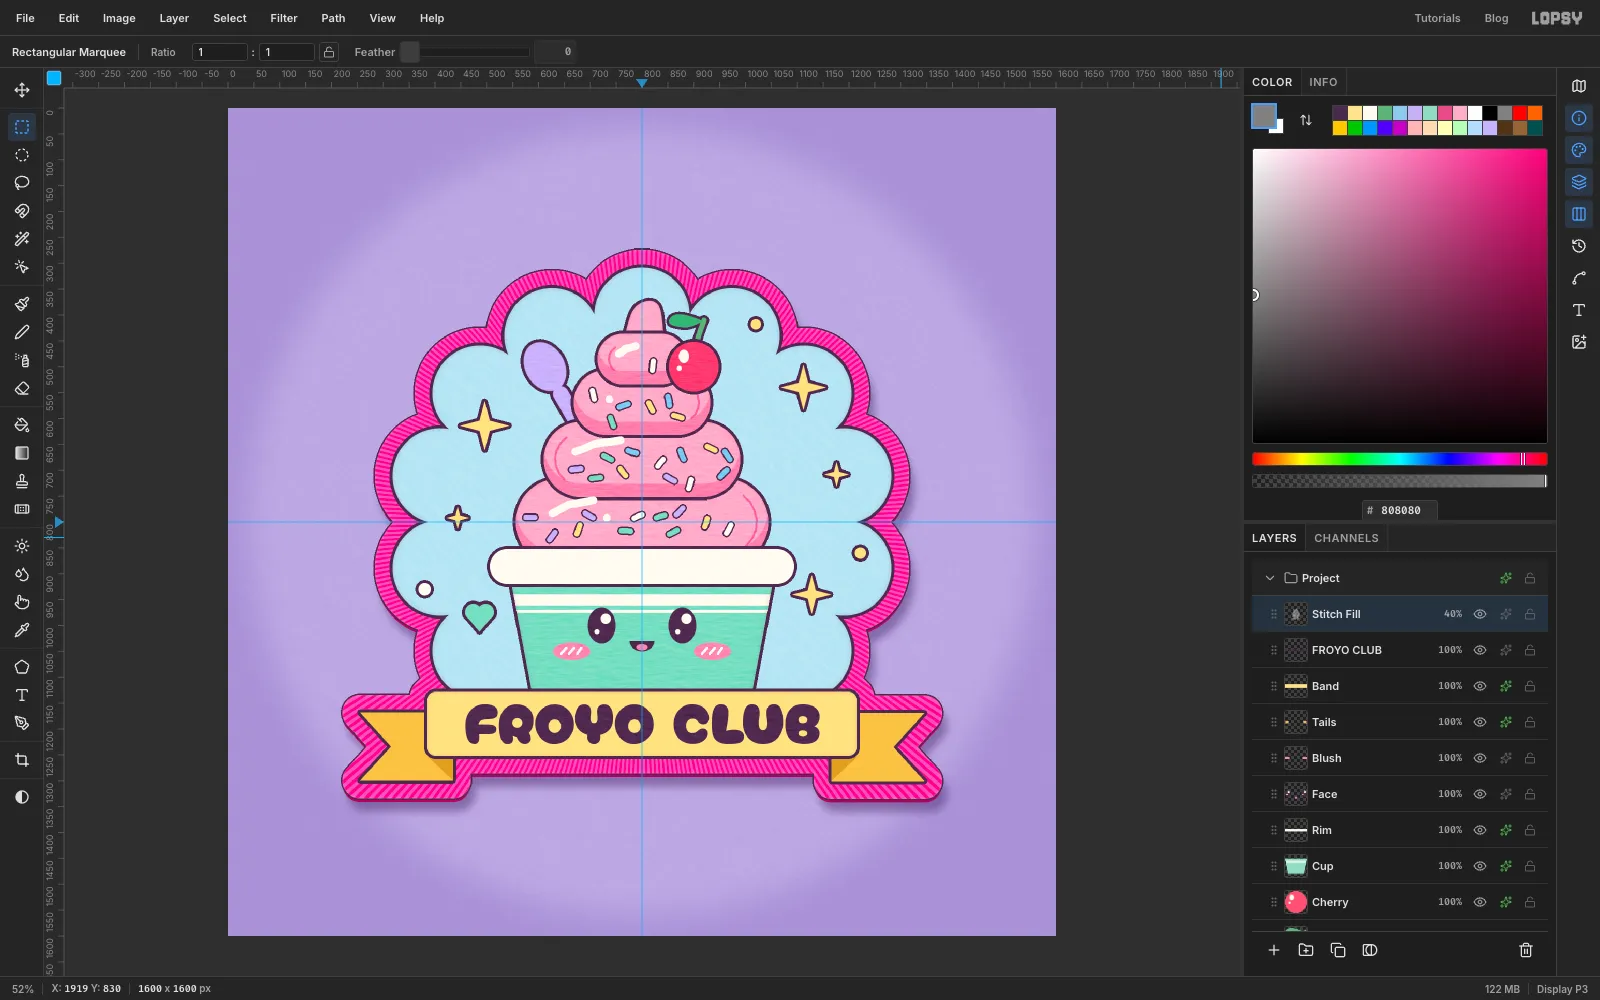
These threads have to sit on top of the art, so click FROYO CLUB (the top layer), then Add Layer and name it Stitch Fill. Make the same texture, but with the Motion Blur at Angle 0, so the threads run across the coils.
For the selection, Cmd-click Tier 1. Then Cmd+Shift-click Tier 2, Tier 3, Tier 4, Peak, Cup, Rim, Spoon and Cherry. Cmd+Alt-click Band to take out the part of the cup behind the banner, then Cmd+Shift-click FROYO CLUB so the letters get horizontal threads too. Inverse, Delete, deselect, and set it to Overlay 40%.
-
Satin-stitch the ribbon
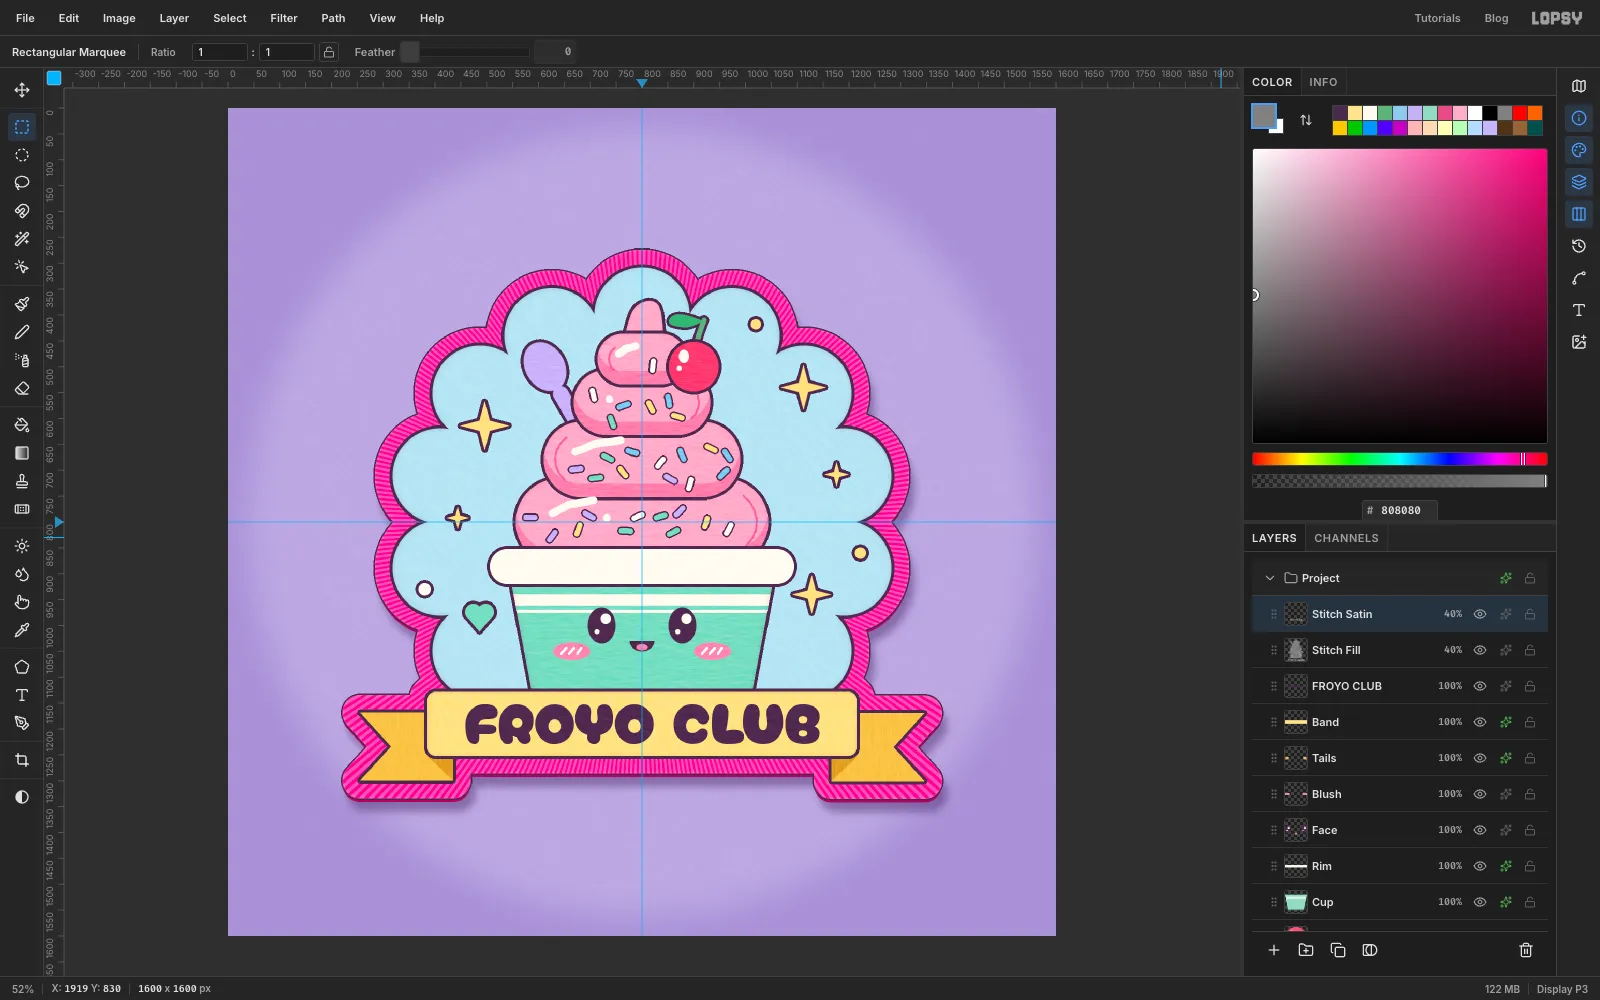
Add one more layer above it, Stitch Satin, with the Motion Blur at Angle 90. A ribbon is usually satin-stitched across its width, so these threads run up and down.
Select Band plus Tails, then Cmd+Alt-click FROYO CLUB to keep the letters out. Inverse, Delete, deselect, and set it to Overlay 40%.
-
Group the layers
Tidy the stack into groups. For each group, click its bottom layer, Shift-click its top layer, choose Layer → Group Layers, and double-click the new group to rename it:
- Froyo: Spoon up to Cherry
- Cup Face: Cup up to Blush
- Banner: Tails up to FROYO CLUB
- Stitches: Stitch Fill and Stitch Satin
Now you can move a whole part at once. Click the Cup Face group and drag with the Move tool to try a different height, then press Cmd+Z to put it back.
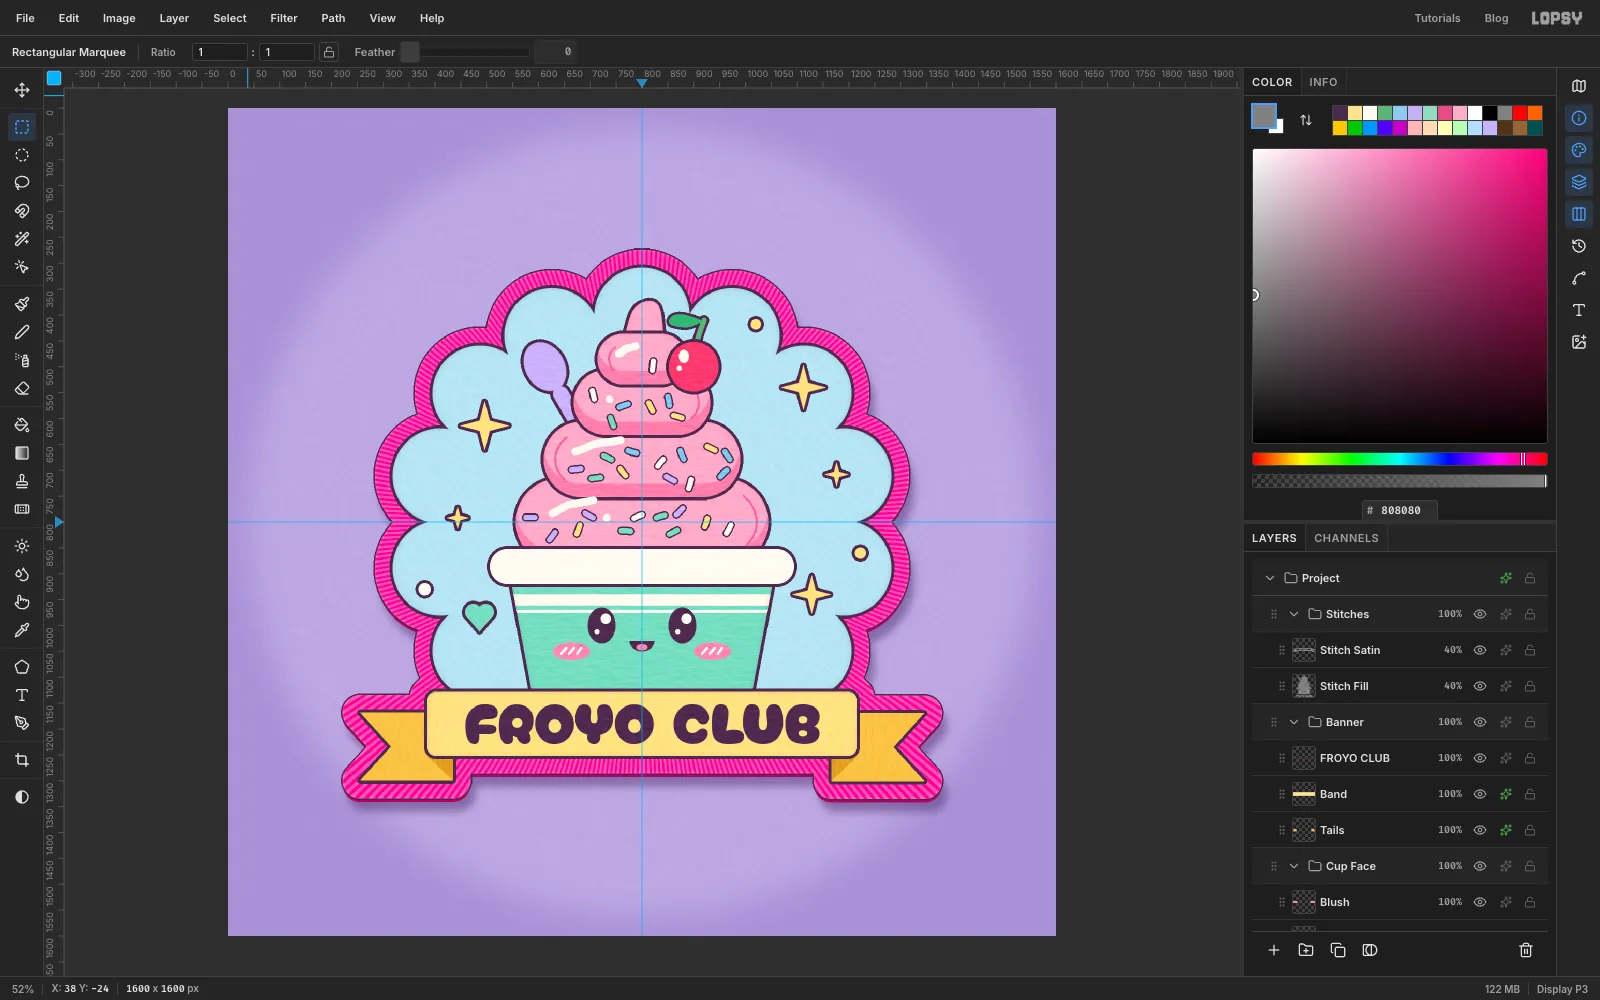
-
Export the patch
Press Cmd+0 to fit the canvas and check the whole patch. Look for anything touching that shouldn't: sprinkles on seams, shine dots on outlines, or decorations closer than about 20 px to the scalloped edge.
Choose File → Quick Export PNG to save the image. Use File → Save Project to keep the layers, so you can try other flavours later, like a mint swirl in a pink cup.