Make a Skeuomorphic Embroidered Iron-On Patch on Denim
Stitch a realistic ibex iron-on patch in Lopsy, with thread textures you make yourself, a rolled merrow edge, arched lettering and a denim backdrop.
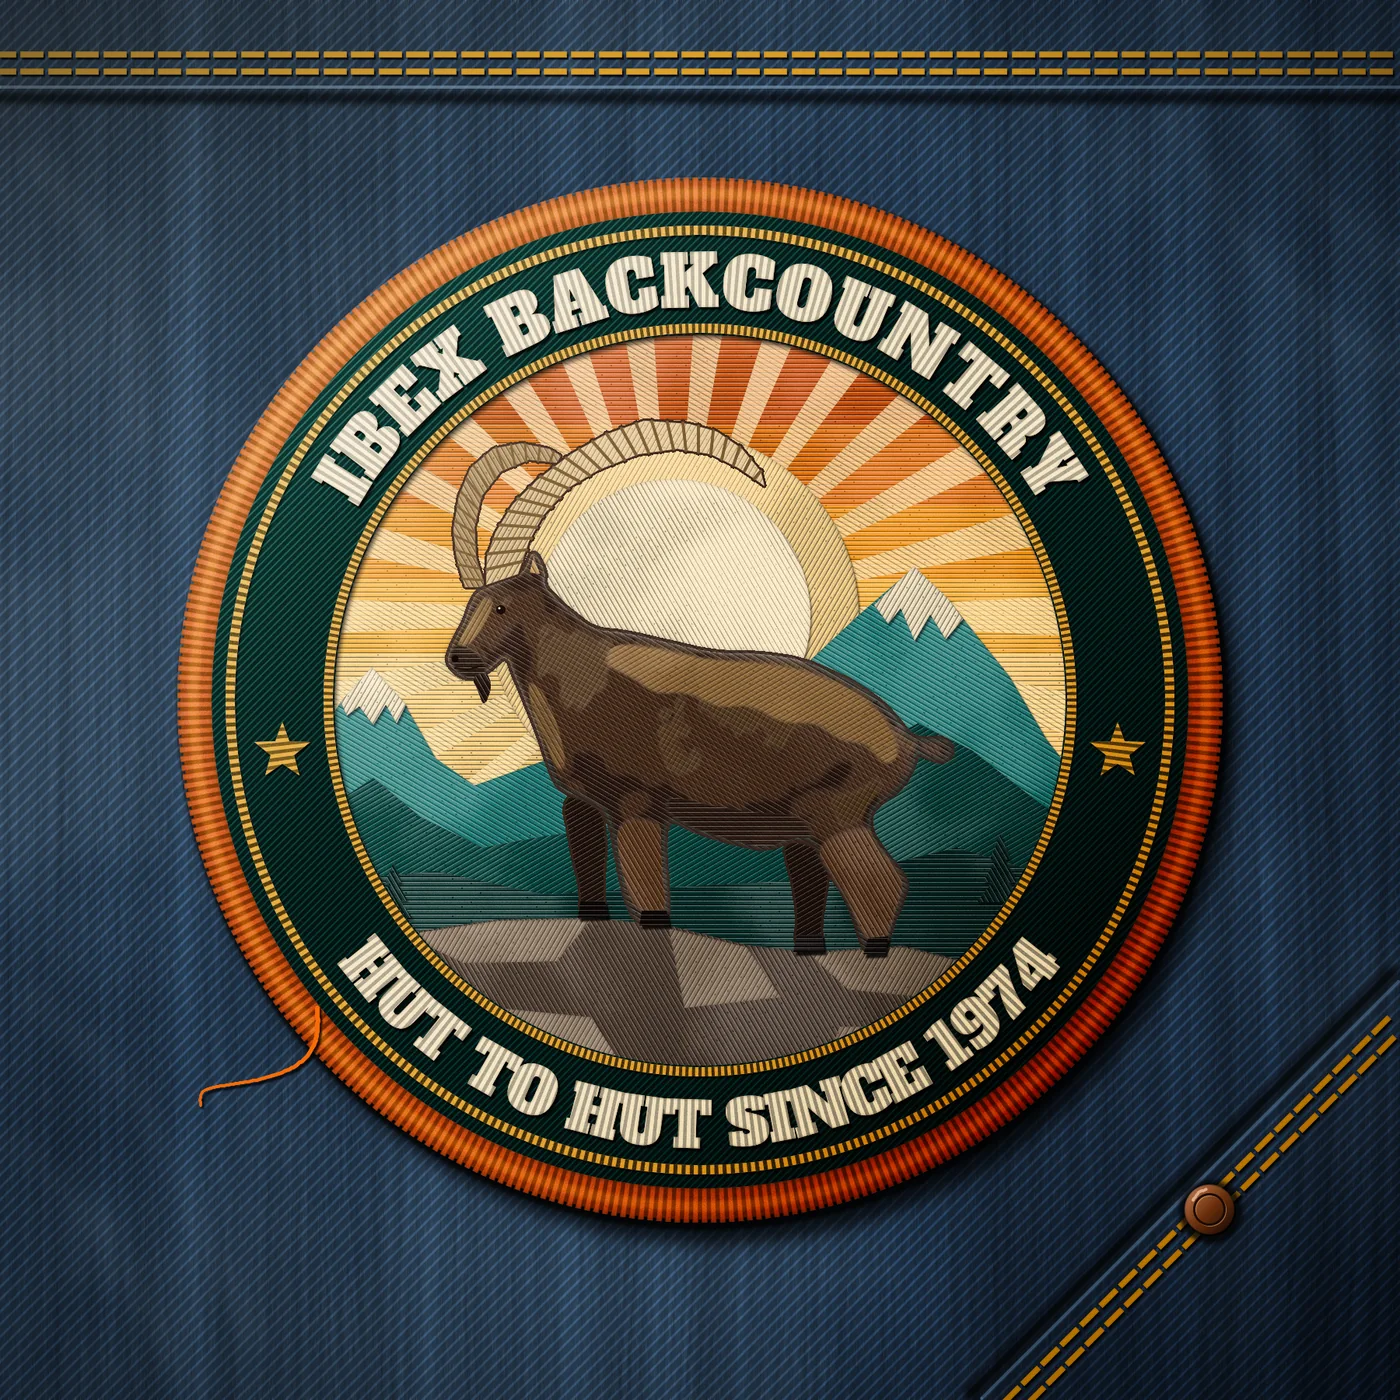
Look closely at an embroidered patch and you'll see why it's so hard to fake. Every colour is a field of parallel threads, each field runs in its own direction, and the light catches each one differently. The edge is a thick rolled cord of thread, and the whole thing sits slightly proud of the cloth and casts a shadow.
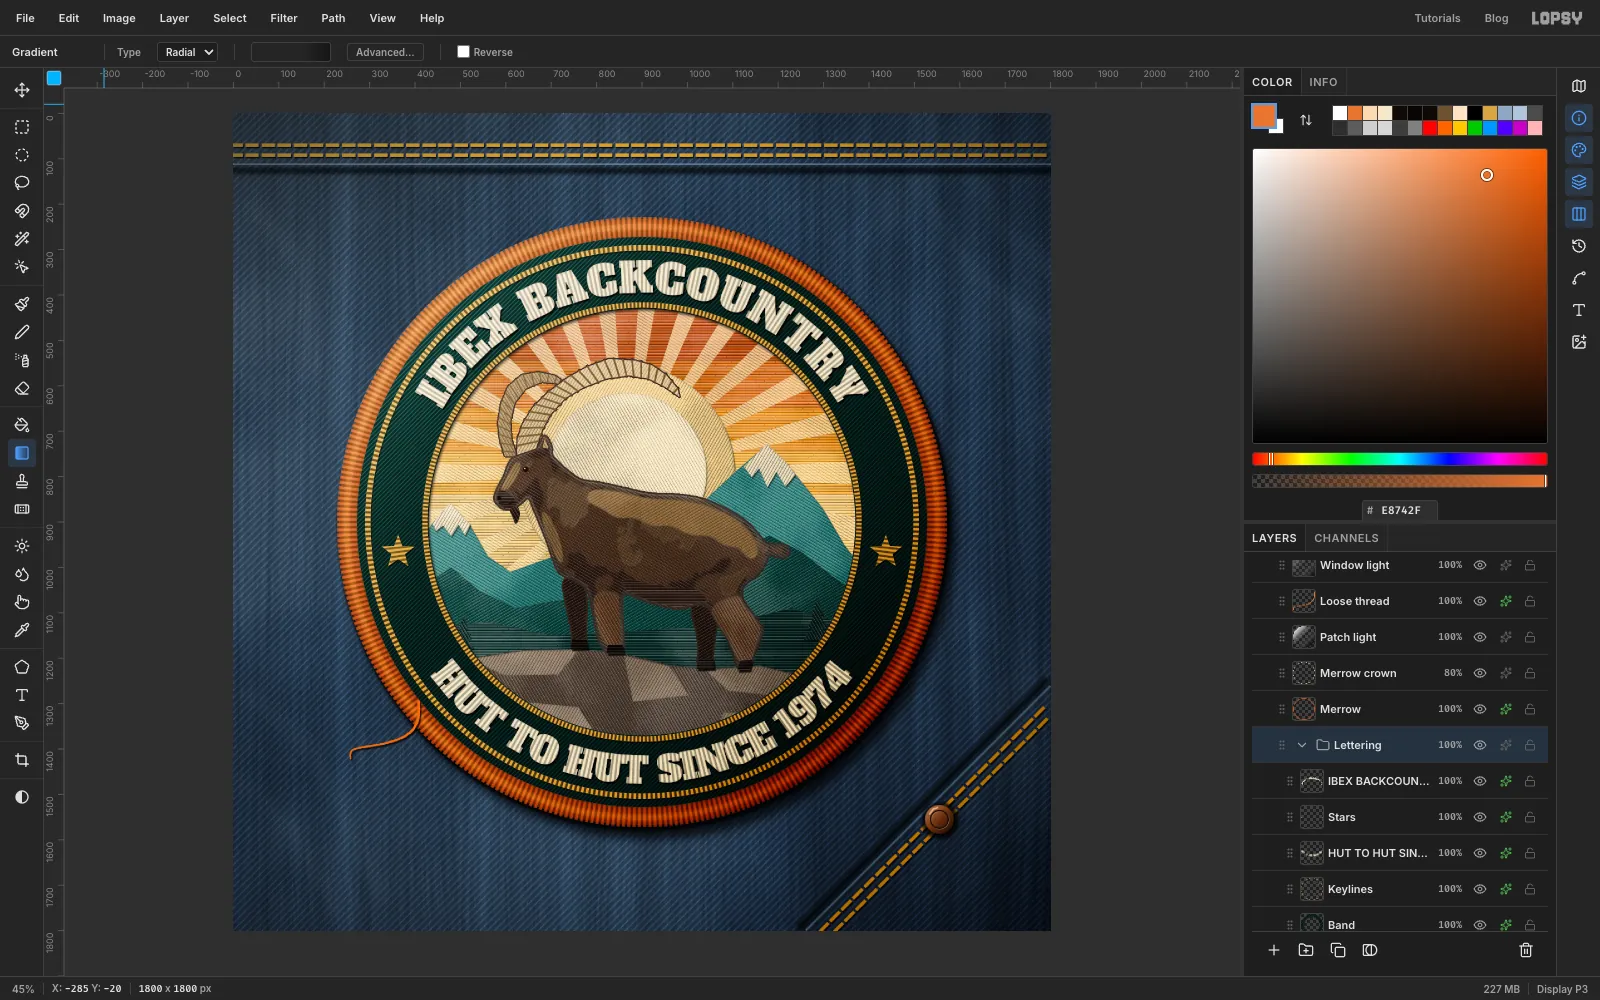
In this tutorial you'll make Ibex Backcountry, a 1800 × 1800 px picture of an iron-on patch for an imaginary alpine hut-to-hut club, lying on a denim jacket. You'll start by drawing a tiny tile of thread and turning it into big sheets of stitching at different angles. From then on, every shape in the patch gets the same treatment: fill it with a flat colour, clip a thread sheet to it, and blend the thread in. That one recipe does nearly all the work.
The ibex is traced from a photo, Capra ibex moraine du glacier de la Grande-Casse by Rémih on Wikimedia Commons, licensed CC BY-SA 4.0. The screenshots that show the photo share that license. Download it and resize it to 1800 px wide before you start. Any side-on photo of a standing ibex or mountain goat will work, though your outline and tone shapes will then differ from mine.
Two habits make this easier:
- Most circles are centred on the canvas, at 900, 900. I'll give you a radius, and you drag the Elliptical Marquee from 900 minus the radius to 900 plus the radius on both axes. Radius 672, for example, runs from 228, 228 to 1572, 1572. Hold Cmd as you drag to keep it perfectly round. The status bar shows the cursor position as you go, and it's worth zooming in for the thin rings.
- The light comes from the upper left, so every shadow falls down and to the right.
Along the way you'll use:
- the Pencil with Shift-click lines, Define Pattern and Fill with Pattern to make thread and twill
- Define Brush and the brush Angle dial for dashed topstitching
- Sunburst for radial threads, sun rays and a beaded edge
- Add Noise, Motion Blur, Gaussian Blur, Clouds, Fibers, Threshold, Desaturate, Brightness/Contrast and Posterize
- the Lasso, the Elliptical Marquee with Alt to subtract, the Magic Wand with Contiguous off, Grow, Shrink, Feather and Inverse
- Cmd-clicking thumbnails, copy and paste in place, and Merge Down
- Hard Light, Overlay, Soft Light, Screen and Multiply
- rotating and scaling with the Move tool
- Drop Shadow, Inner Glow and Stroke
- the Pen, text on a path and the Alfa Slab One font
- New Group and Group Layers
The palette:
-
Denim
-
crease
-
seam lip
-
topstitch
-
Rivet
-
ring
-
glint
-
Sky
-
rays
-
Sun
-
sun core
-
Mountains
-
pines
-
snow
-
Ledge
-
ledge lights
-
Ibex
-
muzzle
-
outline
-
Horns
-
horn ridges
-
hooves
-
inner ear
-
Band
-
lettering
-
lettering edge
-
Merrow
-
merrow shade
-
crown
-
loose thread
-
Start with indigo cloth
Choose File → New and create an 1800 × 1800 px document. Delete the empty Layer 1 with the trash button under the Layers panel.
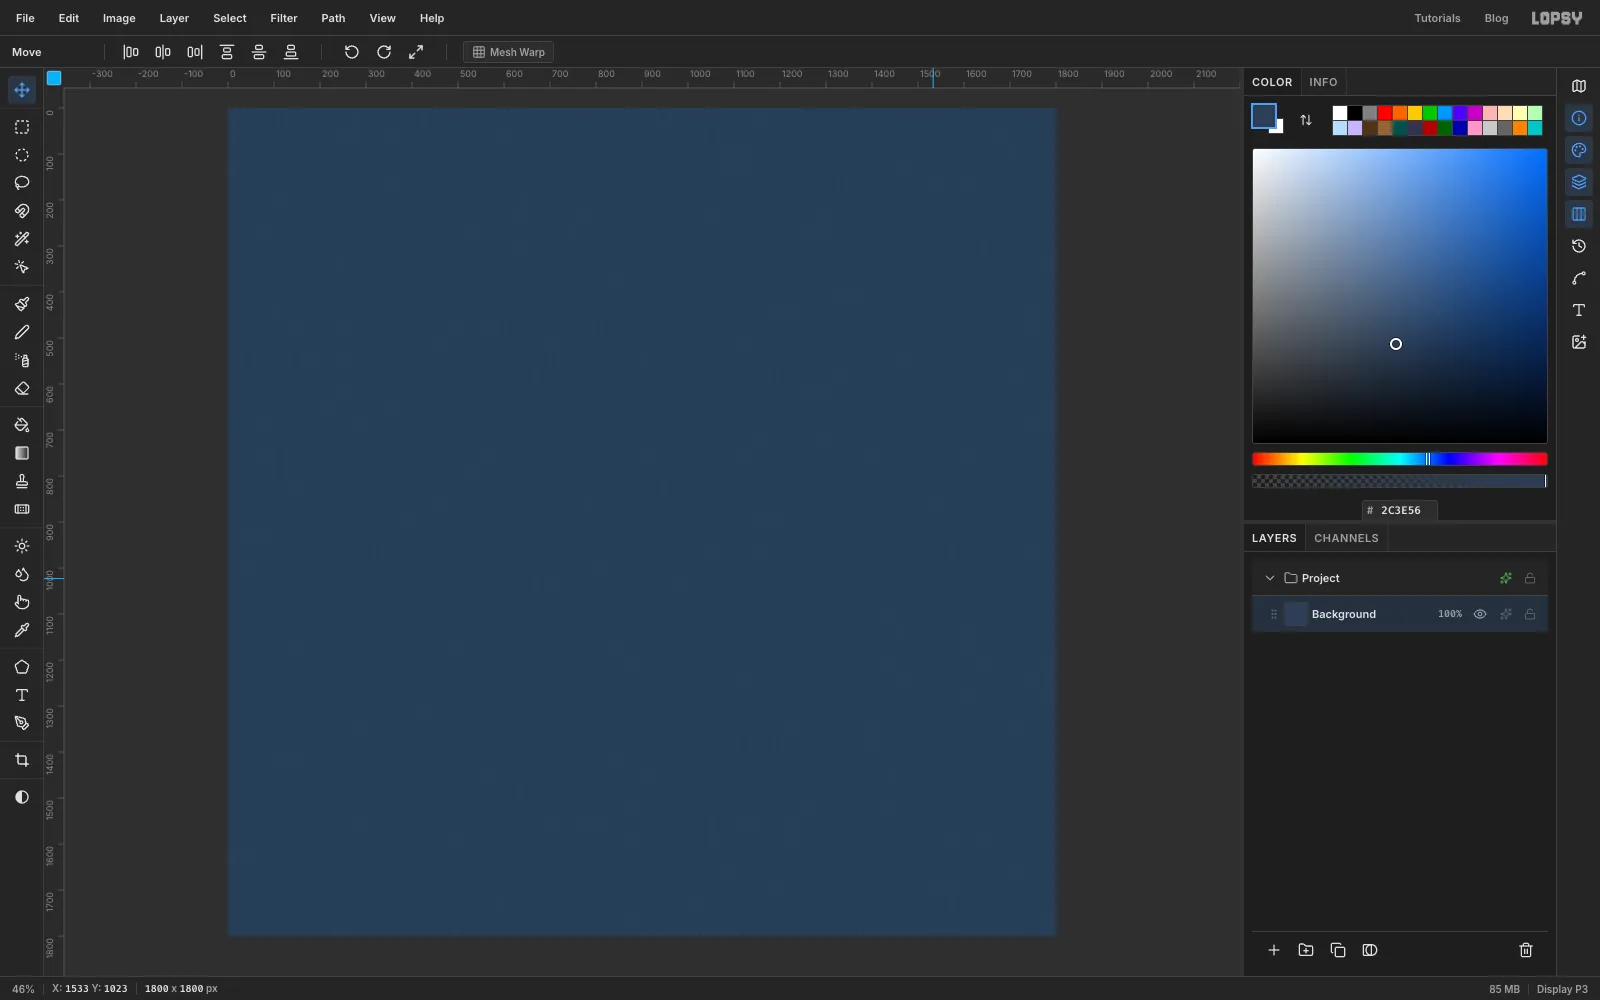
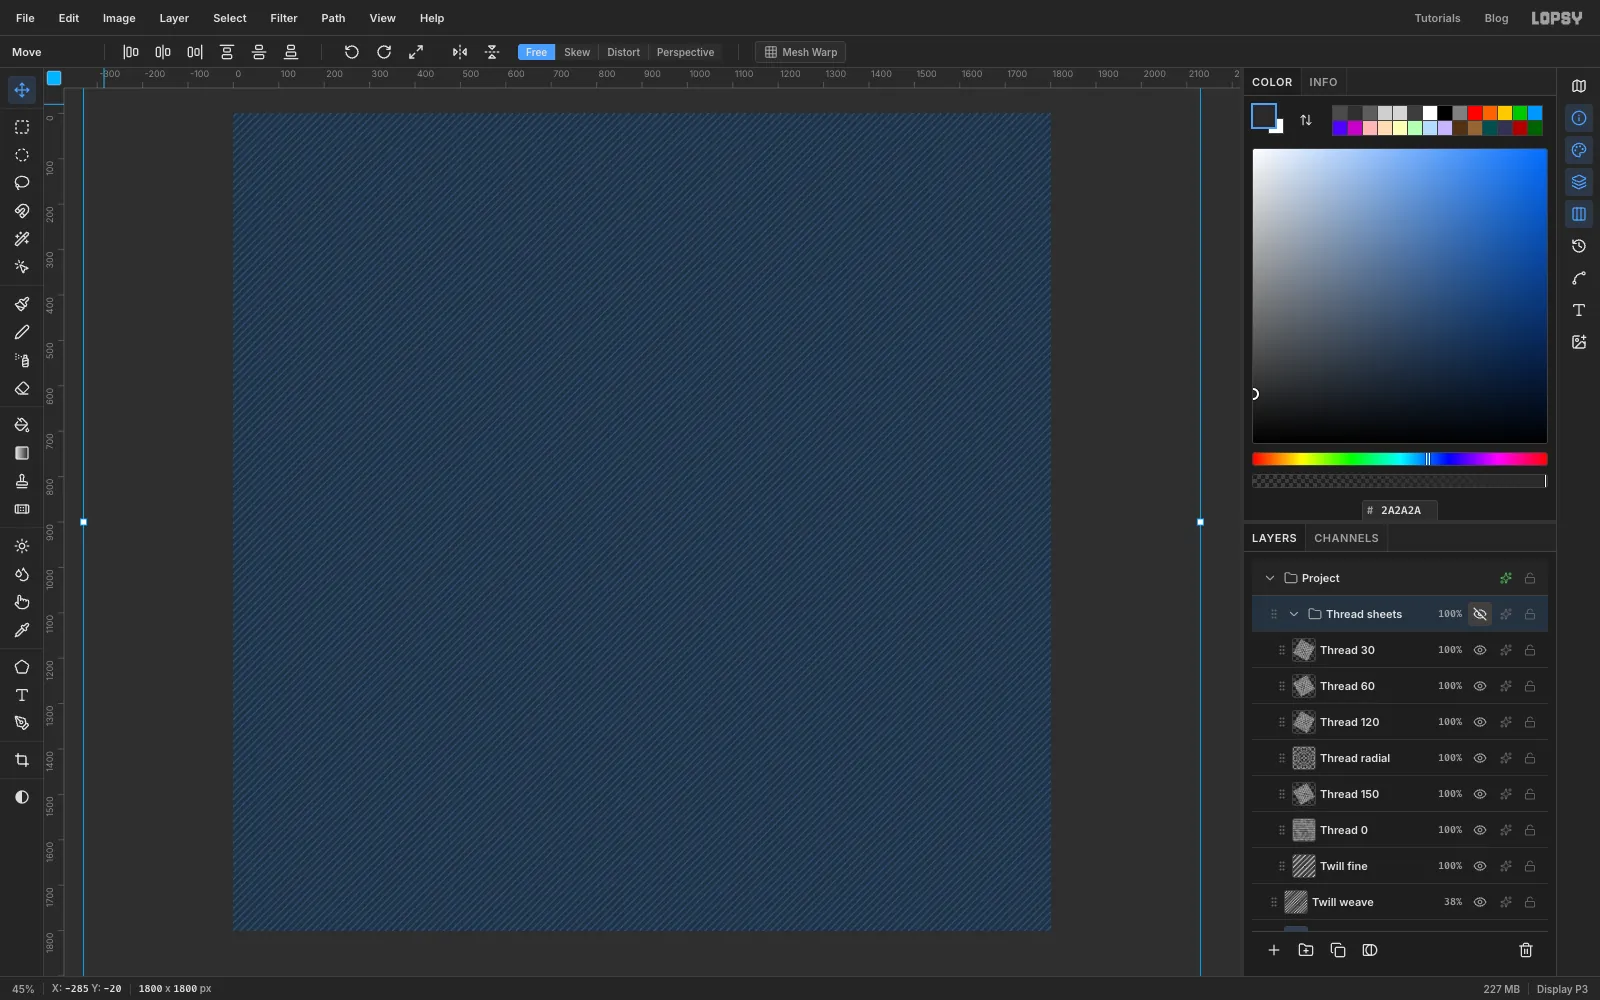
Click Background, set the foreground to and choose Edit → Fill. Run Filter → Add Noise… with Amount 40, Mono and Gaussian. Then run Filter → Motion Blur… with Angle 90 and Distance 26. The specks stretch into vertical streaks, like the uneven yarns in real denim.
-
Draw a twill tile
Denim is woven in diagonal ridges called twill. You'll draw a small tile of them.
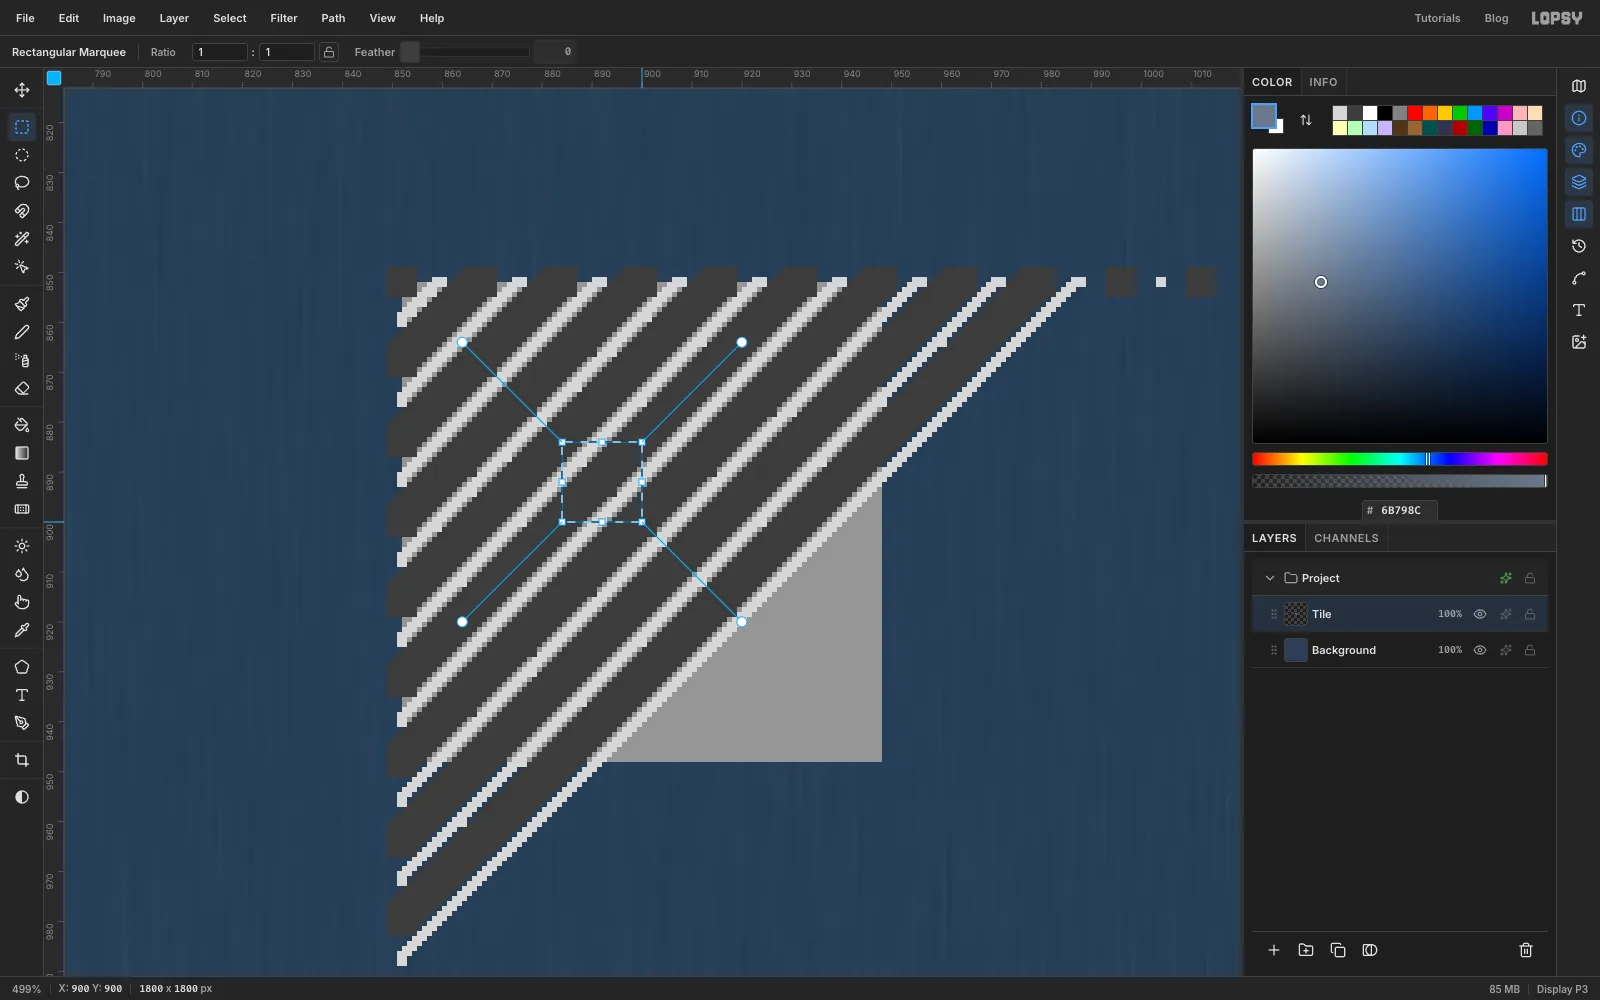
Click Add Layer and name it Tile. Zoom in on the middle of the canvas to about 500%. Use the Rectangular Marquee to draw a square about 96 px wide, fill it with , and press Cmd+D to deselect.
Pick the Pencil at Size 6 with . Draw diagonal lines across the square, going from the top edge down to the left edge: click on the top edge, then Shift-click the same distance down the left edge. Start each new line exactly 16 px further along than the last. Six or seven lines are plenty, because you only need stripes around the centre of the square. Don't worry about the rest.
Set the Pencil to Size 2 with and draw a thin line halfway between each pair of dark ones, so 8 px along from each.
Now draw a marquee of exactly 16 × 16 px near the centre of the stripes. Because the lines repeat every 16 px, this little square tiles without a seam. Choose Edit → Define Pattern. Press Cmd+D, then delete the Tile layer.
-
Weave the denim
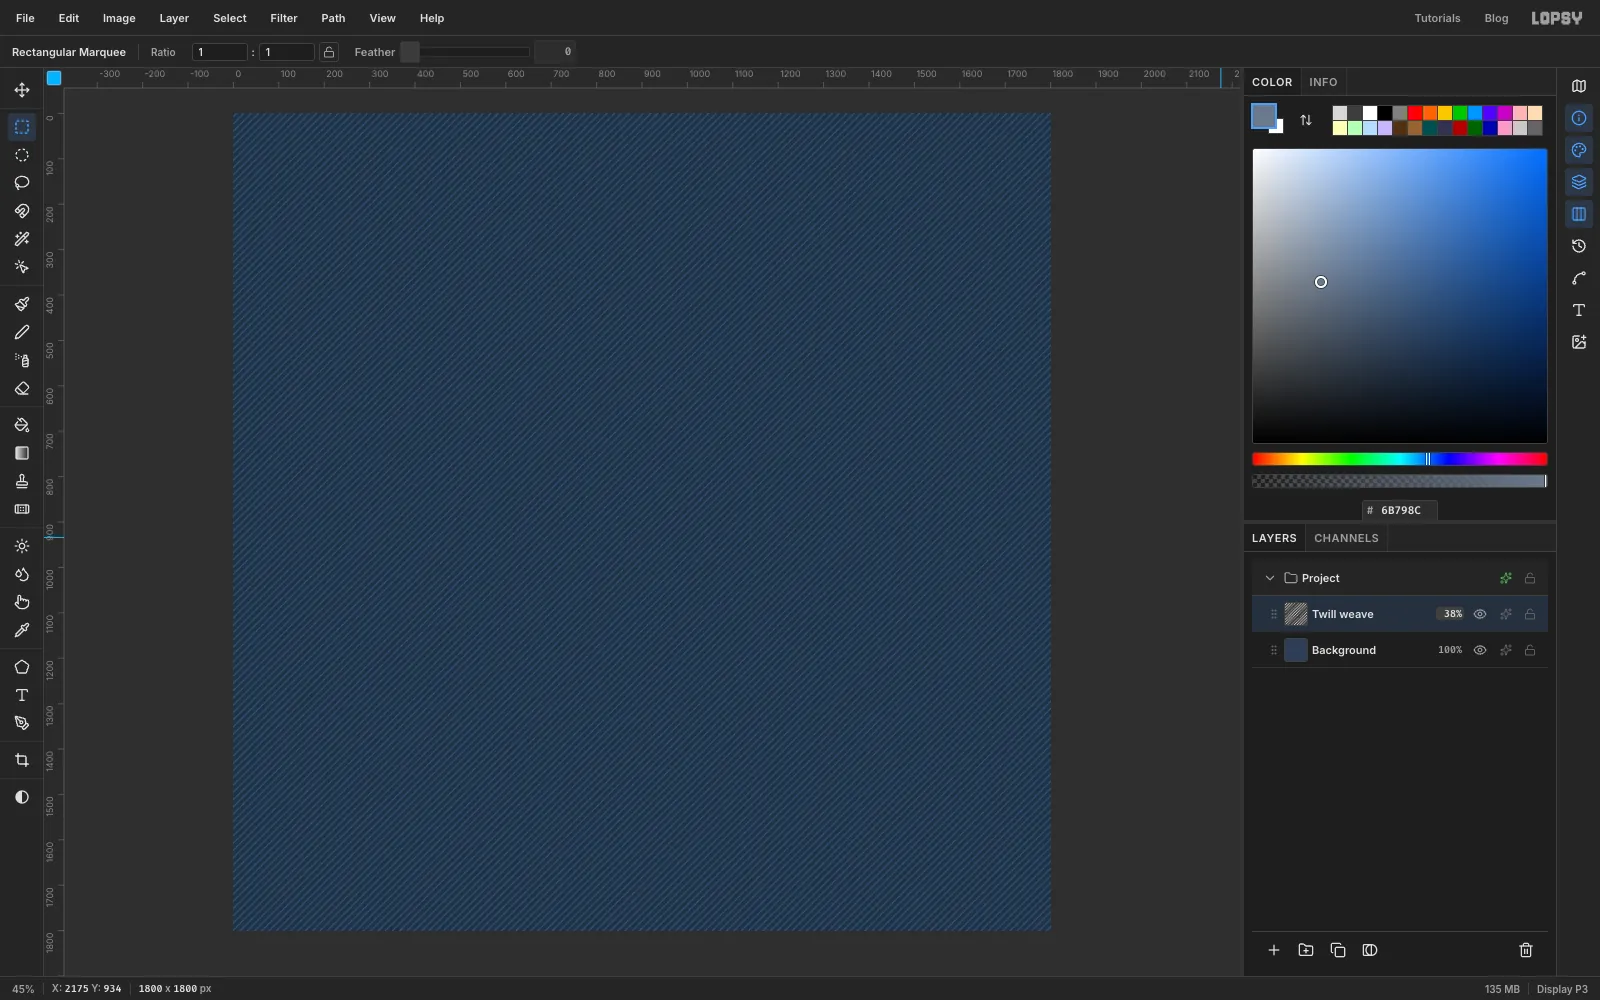
Press Cmd+0 to fit the canvas in the window. Click Add Layer and name it Twill weave. Choose Edit → Fill with Pattern…, pick your tile and click Apply. Set the layer to Overlay at 38%. The blend mode is at the top of the drawer that opens from the effects button on the layer's row, and clicking the percentage on the row gives you the opacity slider. You'll do this a lot.
Add one more layer, called Twill fine, and fill it with the same pattern, this time with Scale set to 60. Leave it at Normal. It covers the denim for now, which is fine, because you'll hide it shortly. It's the first of your stitching sheets.
-
Draw a thread tile
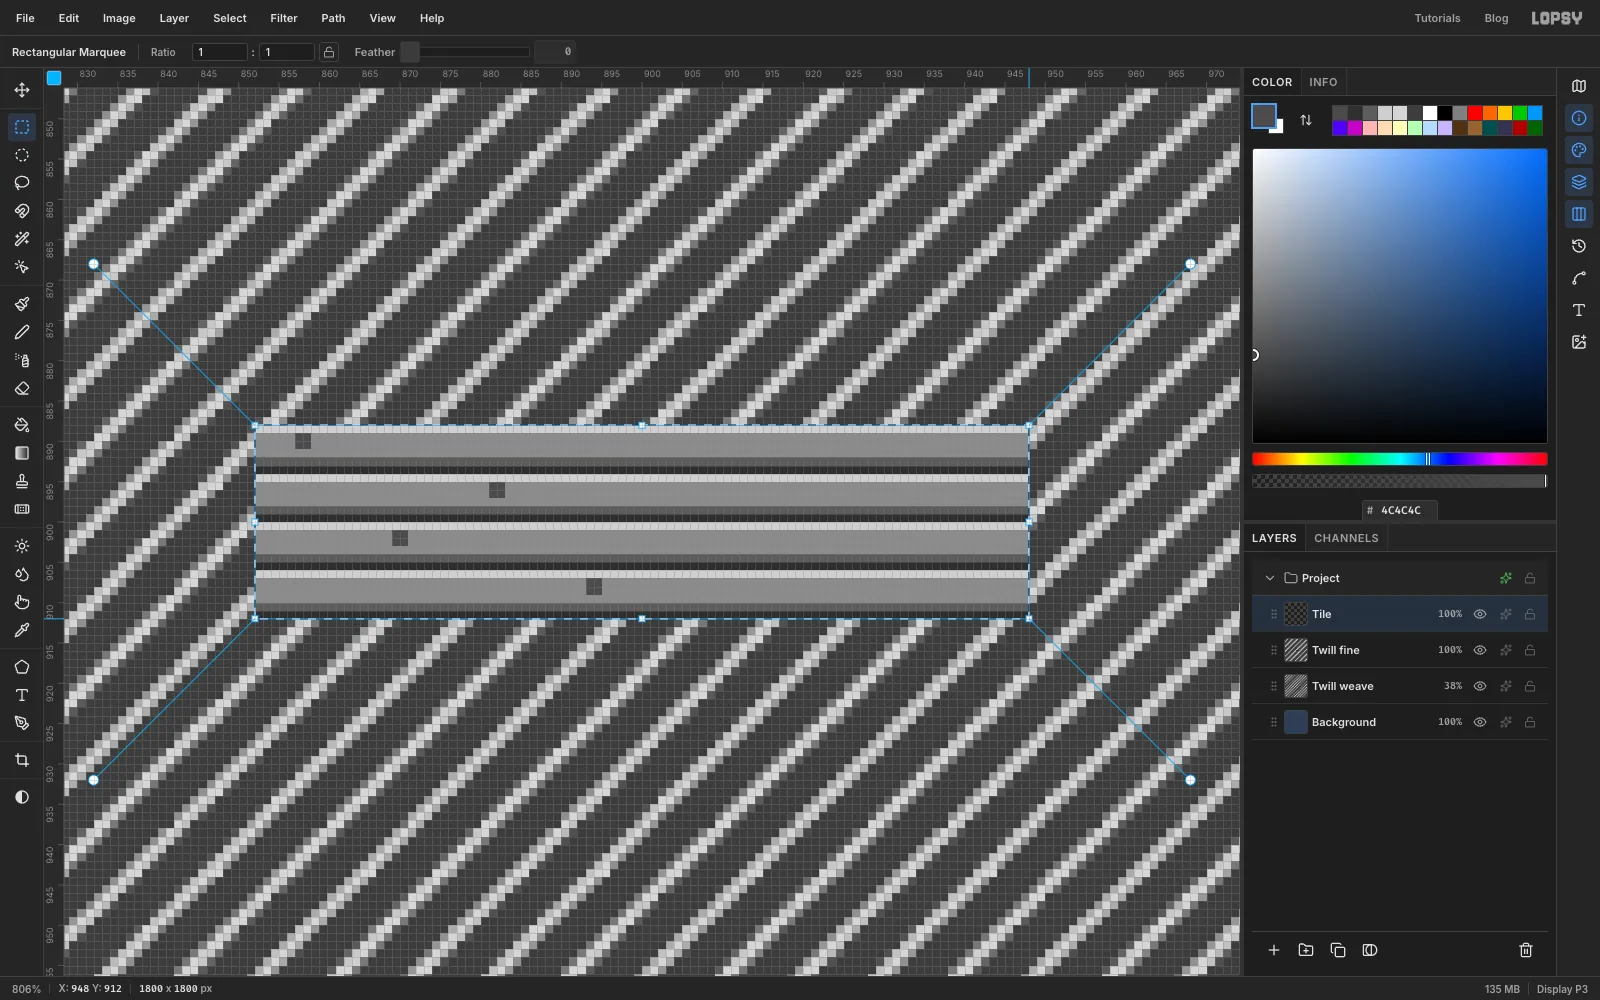
Add a new Tile layer and zoom in on the middle of the canvas to about 800%. Marquee a rectangle 96 × 24 px, fill it with , and deselect.
The tile holds four threads, each 6 px tall. With the Pencil at Size 1, use a click and a Shift-click to draw these lines across the full width of the tile, repeating them for each of the four threads:
- on the thread's first row of pixels, a highlight in
- on its fifth row, a shadow in
- on its sixth row, a darker shadow in
Next, each thread gets one needle hole. Set the Pencil to Size 2 with and click once in the middle of each thread. Stagger them, so the holes sit about 6, 30, 18 and 42 px from the left on the four threads. Evenly staggered holes are what make stitching look like brickwork rather than stripes.
Marquee the whole tile again, choose Edit → Define Pattern, deselect and delete the Tile layer. Press Cmd+0.
-
Make a sheet of thread
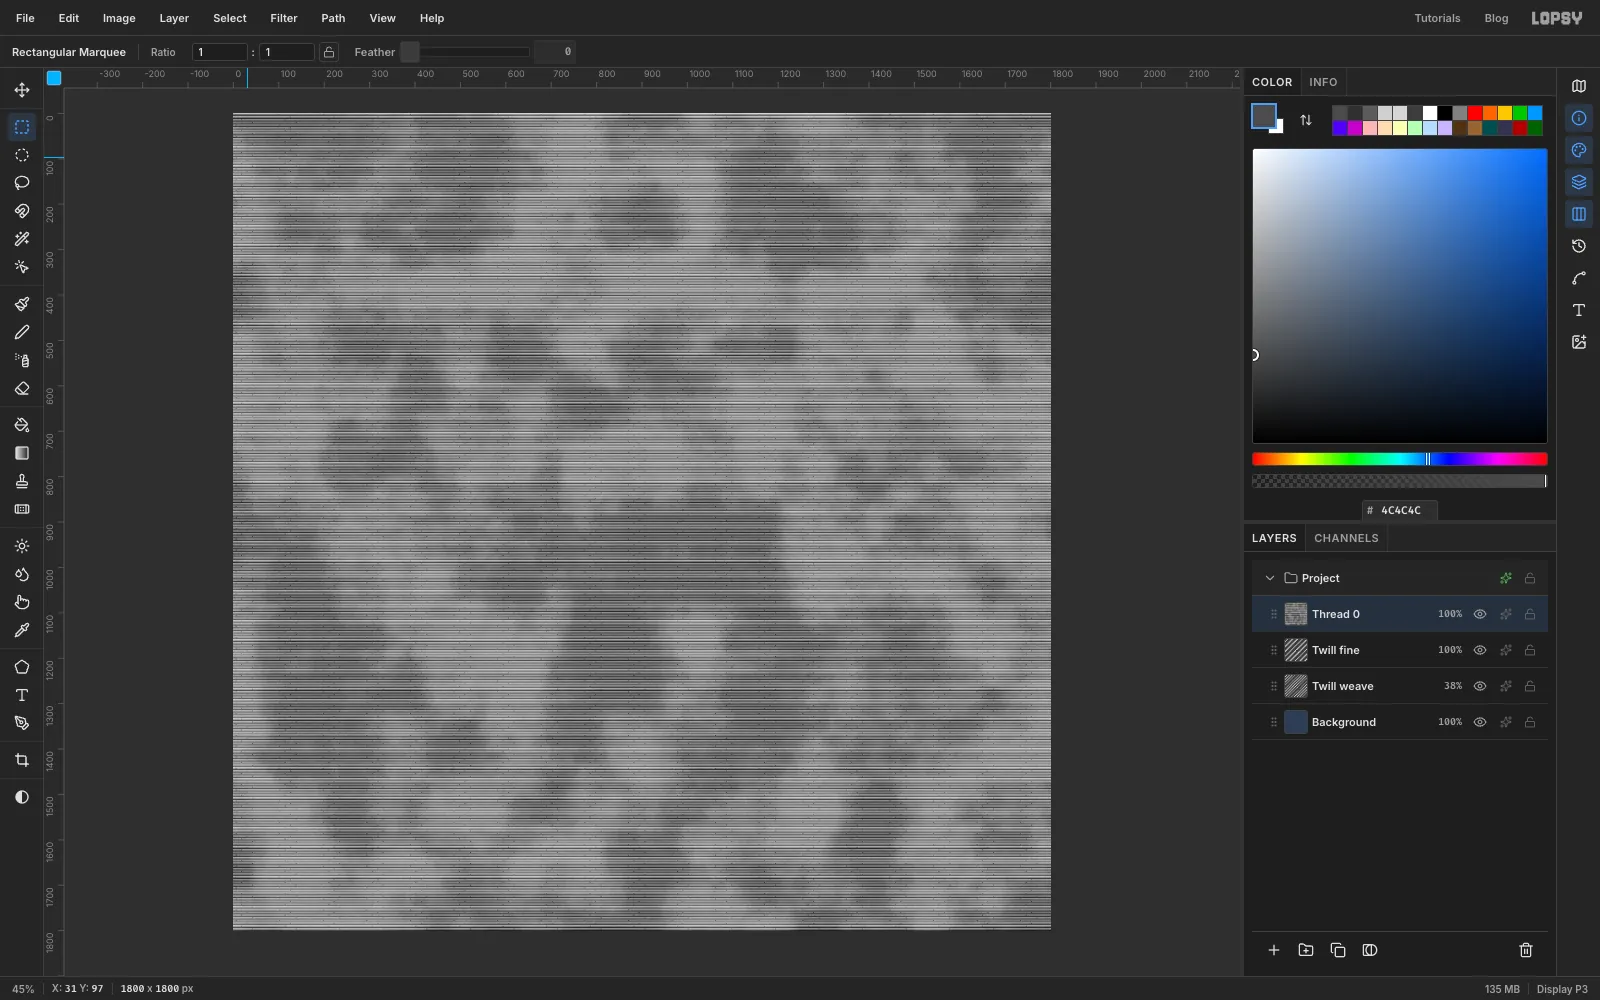
Add a layer called Thread 0 and use Edit → Fill with Pattern… to fill it with the thread tile at 100%. Run Filter → Add Noise… with Amount 18 and Mono, so no two threads are quite the same.
Real thread catches the light unevenly. Add a layer called Sheen, run Filter → Clouds… at Scale 14, set it to Soft Light at 40%, and choose Layer → Merge Down.
-
Rotate copies for each stitch direction
Each area of the patch needs its threads running a different way, so you need sheets at several angles.
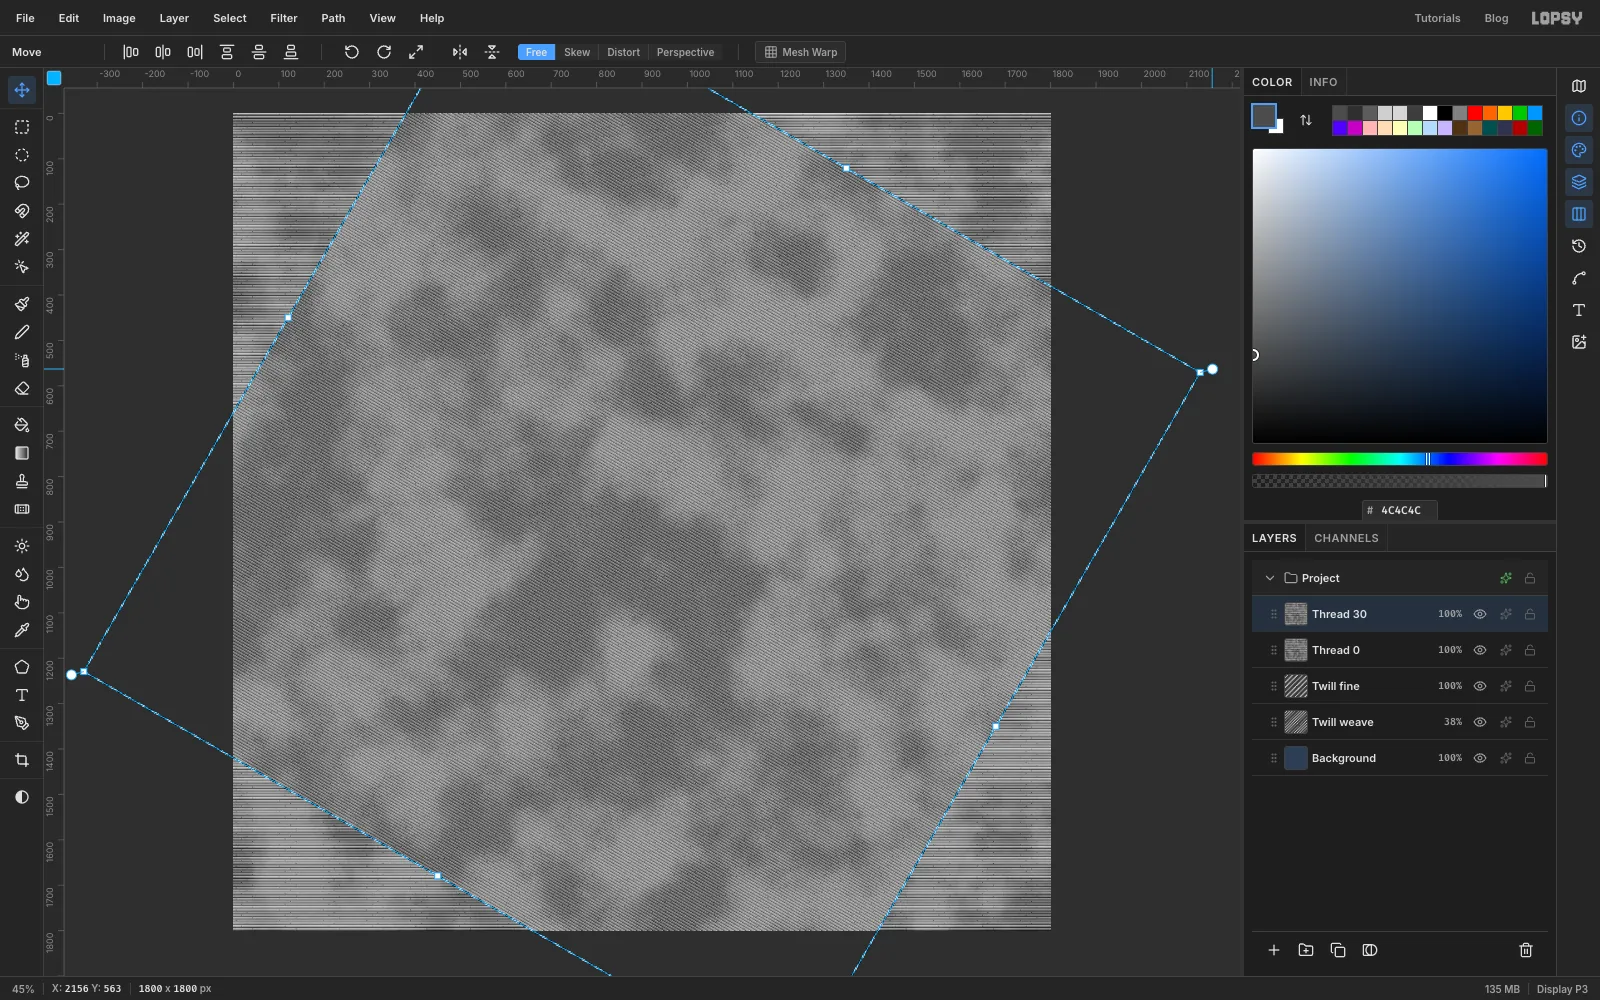
With Thread 0 active and the Move tool selected, click Duplicate Layer and rename the copy Thread 30. Click its row in the panel, then press Cmd+A. Hold Cmd and drag the round rotation handle just outside the top right corner to turn the layer 30° clockwise. Holding Cmd snaps it to 15° steps. Press Cmd+D to commit.
The corners of the rotated sheet go missing, but the patch only uses the middle of the canvas, so that doesn't matter.
Click Thread 0 again and repeat three more times:
- Thread 60, rotated 60° clockwise
- Thread 120, rotated 60° anticlockwise
- Thread 150, rotated 30° anticlockwise
-
Make a radial sheet
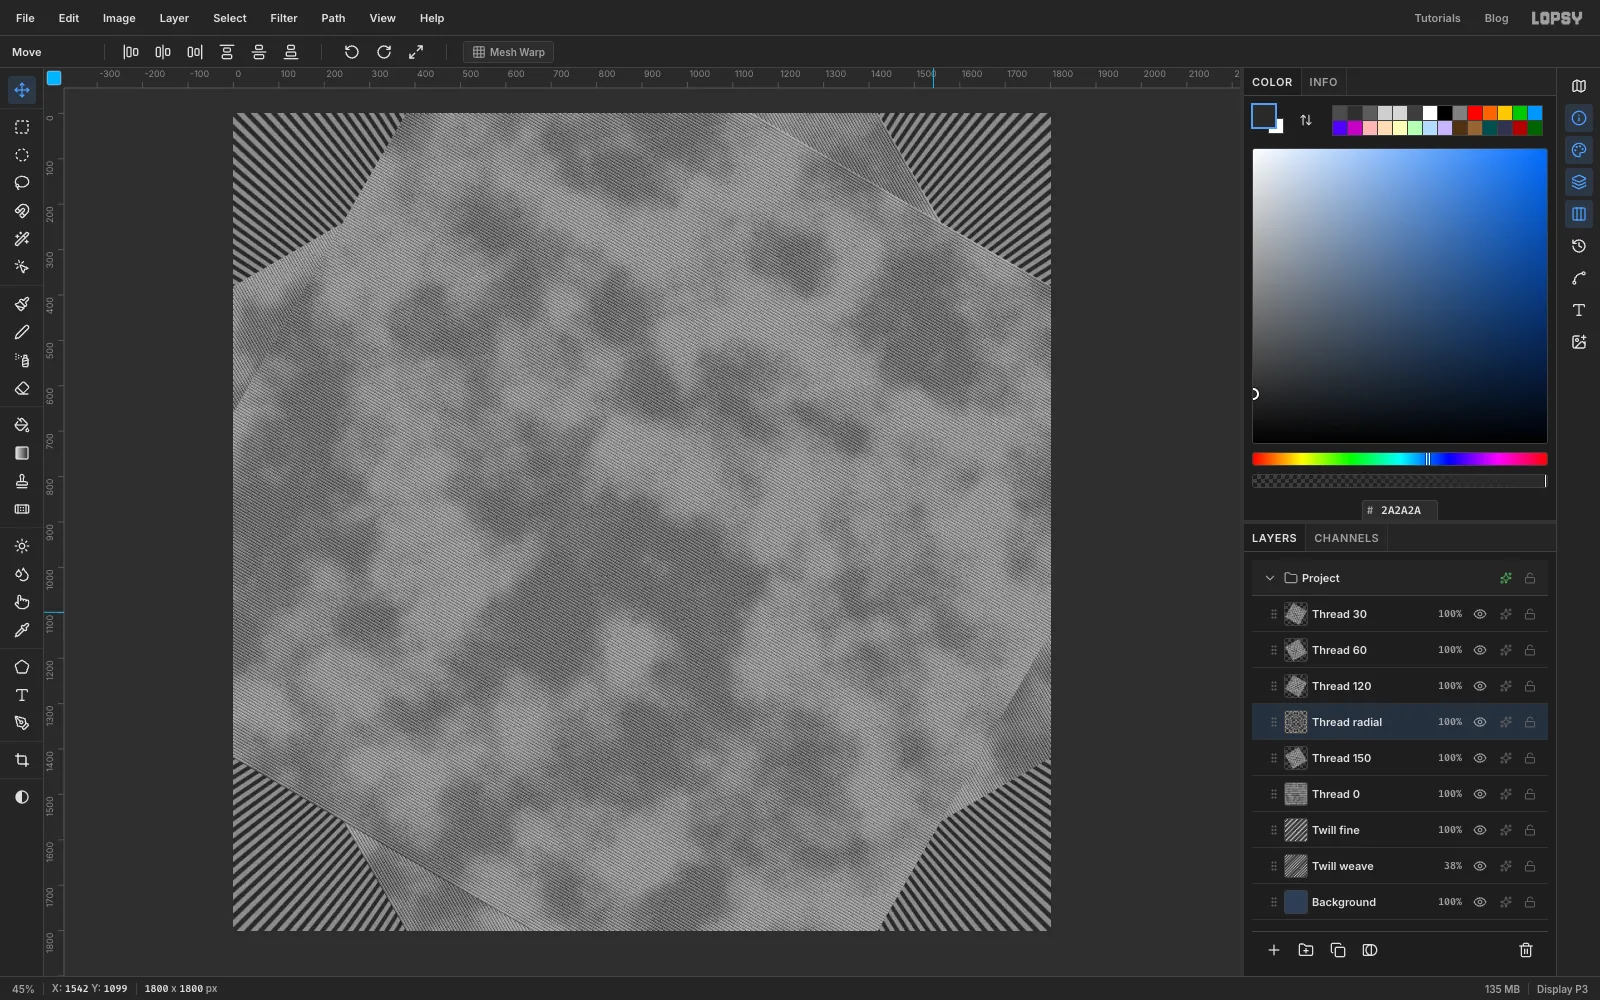
The round parts of the patch need threads that fan out from the centre. Add a layer called Thread radial, fill it with , and set the foreground to .
Run Filter → Sunburst… with Rays 120, Length 120, Width 16 and Softness 30, leaving the rest at their defaults. Run it twice more, changing Rotation to 1 and then 2. The dialog resets each time, so you'll need to enter the other values again. That gives you 360 fine dark lines. Then run Filter → Add Noise… with Amount 24 and Mono.
Don't worry about the odd patterns you can see while zoomed out. That's your screen struggling with such fine lines, and it'll look clean at 100%.
-
Put the sheets away
Click Twill fine, then Cmd-click Thread 0, the four rotated sheets and Thread radial so all seven are selected. Click Group Layers under the panel and rename the group Thread sheets. Click its eye icon to hide it. The denim comes back.
Leave the group expanded, because you'll be clicking these rows a lot.
-
Wash the denim
Click Twill weave so these next layers land underneath the sheets.
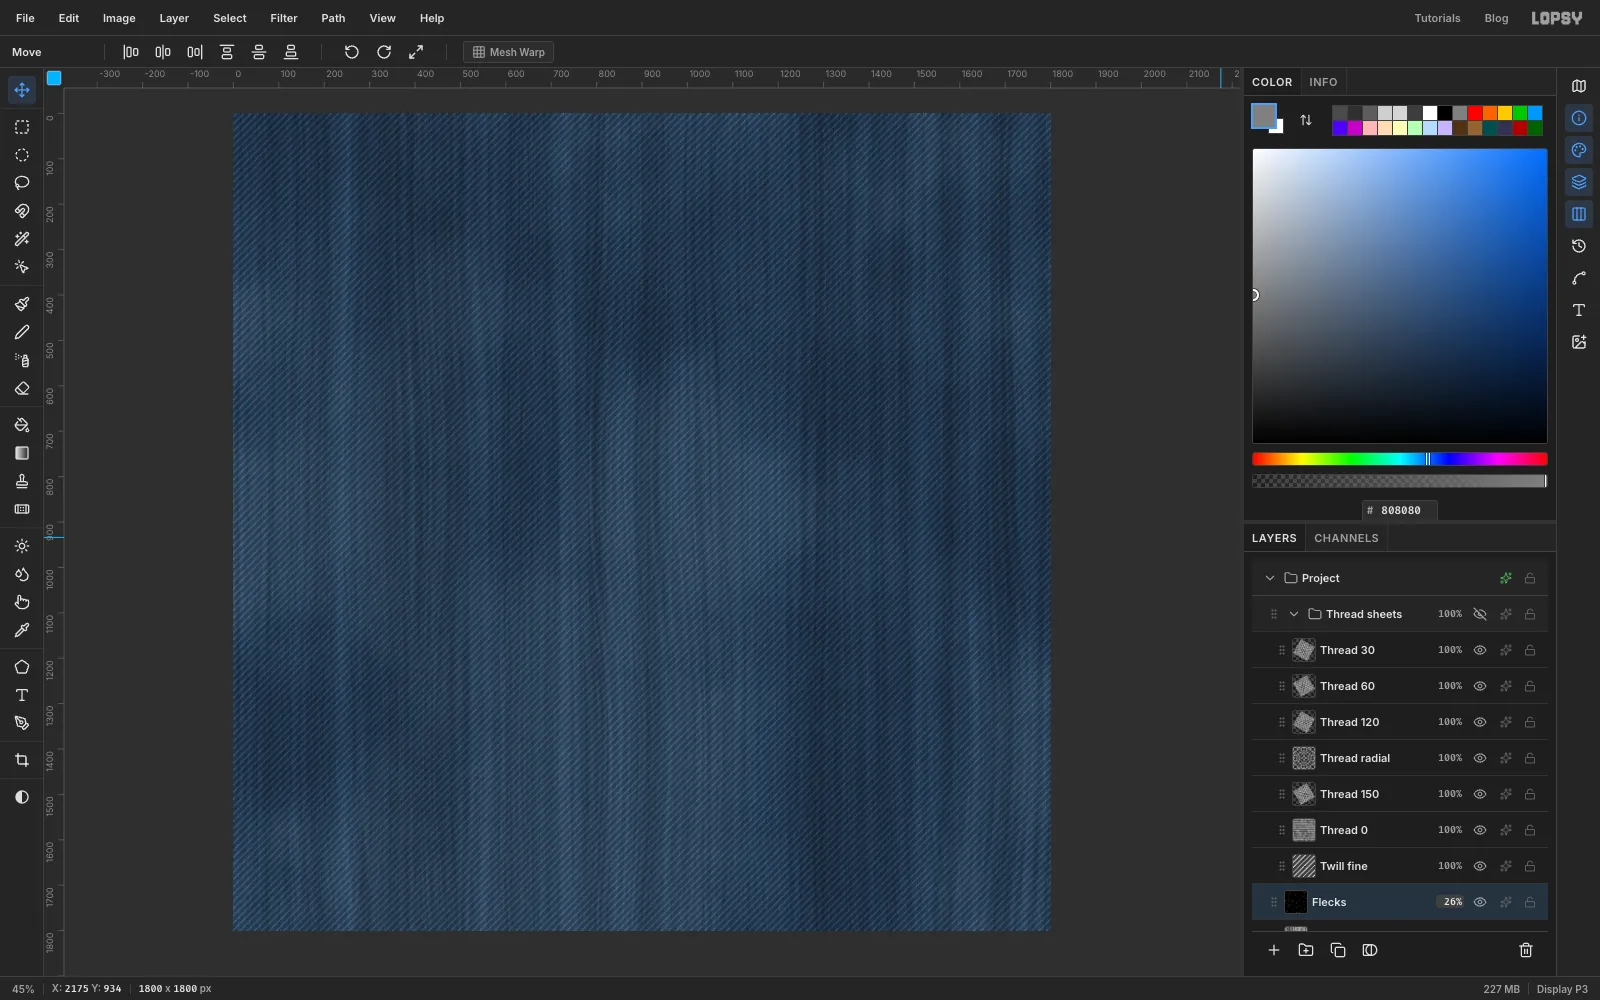
- Add a layer called Wash, run Filter → Clouds… at Scale 4, and set it to Soft Light at 17%.
- Add a layer called Slubs, run Filter → Fibers… with Variance 40 and Strength 50, and set it to Overlay at 30%.
- Add a layer called Flecks and fill it with . Run Filter → Add Noise… with Amount 100 and Mono, then Filter → Threshold… at 176, then Filter → Motion Blur… with Angle 90 and Distance 9. Set it to Screen at 26%. These are the pale flecks of undyed yarn you see in real denim.
-
Add creases and seams
Add a layer called Whiskers. Pick the Brush at Size 60, Hardness 0 and Opacity 12, with . Paint five loose, slightly curved strokes that fan out of the corners. Keep them away from the middle, because the patch will sit there. Run Filter → Gaussian Blur… at Radius 26 and set the layer to Screen at 34%.
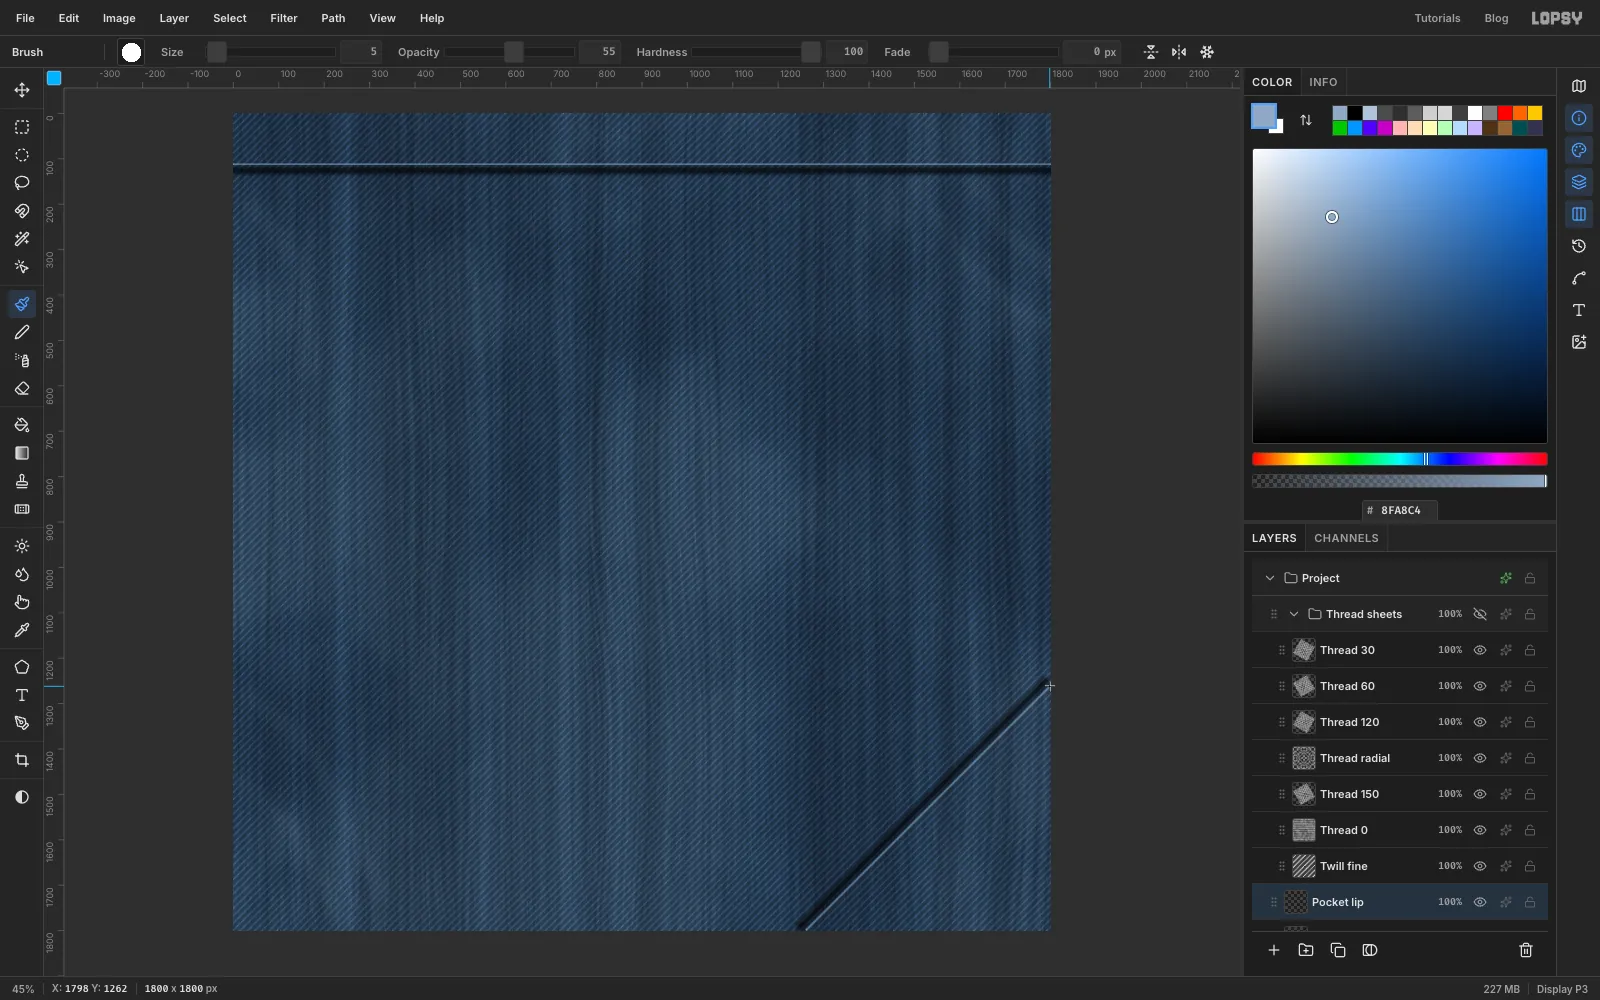
For the seam across the top, add a layer called Yoke shadow. Marquee a strip about 16 px tall across the whole width, roughly 120 px down from the top, and fill it with black. Deselect, blur it at Radius 12, and set it to Multiply at 70%. Add a layer called Yoke lip, and paint a straight line just above the shadow with the Brush at Size 5, Hardness 100 and Opacity 55, using . Click at the left edge and Shift-click at the right edge. This is the lit edge of the fold.
Do much the same for the pocket in the lower right. Add a layer called Pocket shadow. With a black Brush at Size 30, Hardness 0 and Opacity 100, draw a straight diagonal line from the bottom edge, about 550 px in from the corner, to the right edge, about 550 px up from the corner. Blur it at Radius 10 and set it to Multiply at 75%. Add a layer called Pocket lip, and draw a parallel line just inside the shadow, with the Brush back at Size 5, Hardness 100 and Opacity 55, using .
-
Make a stitch brush
Topstitching is a row of short dashes, which is a job for a custom brush tip.
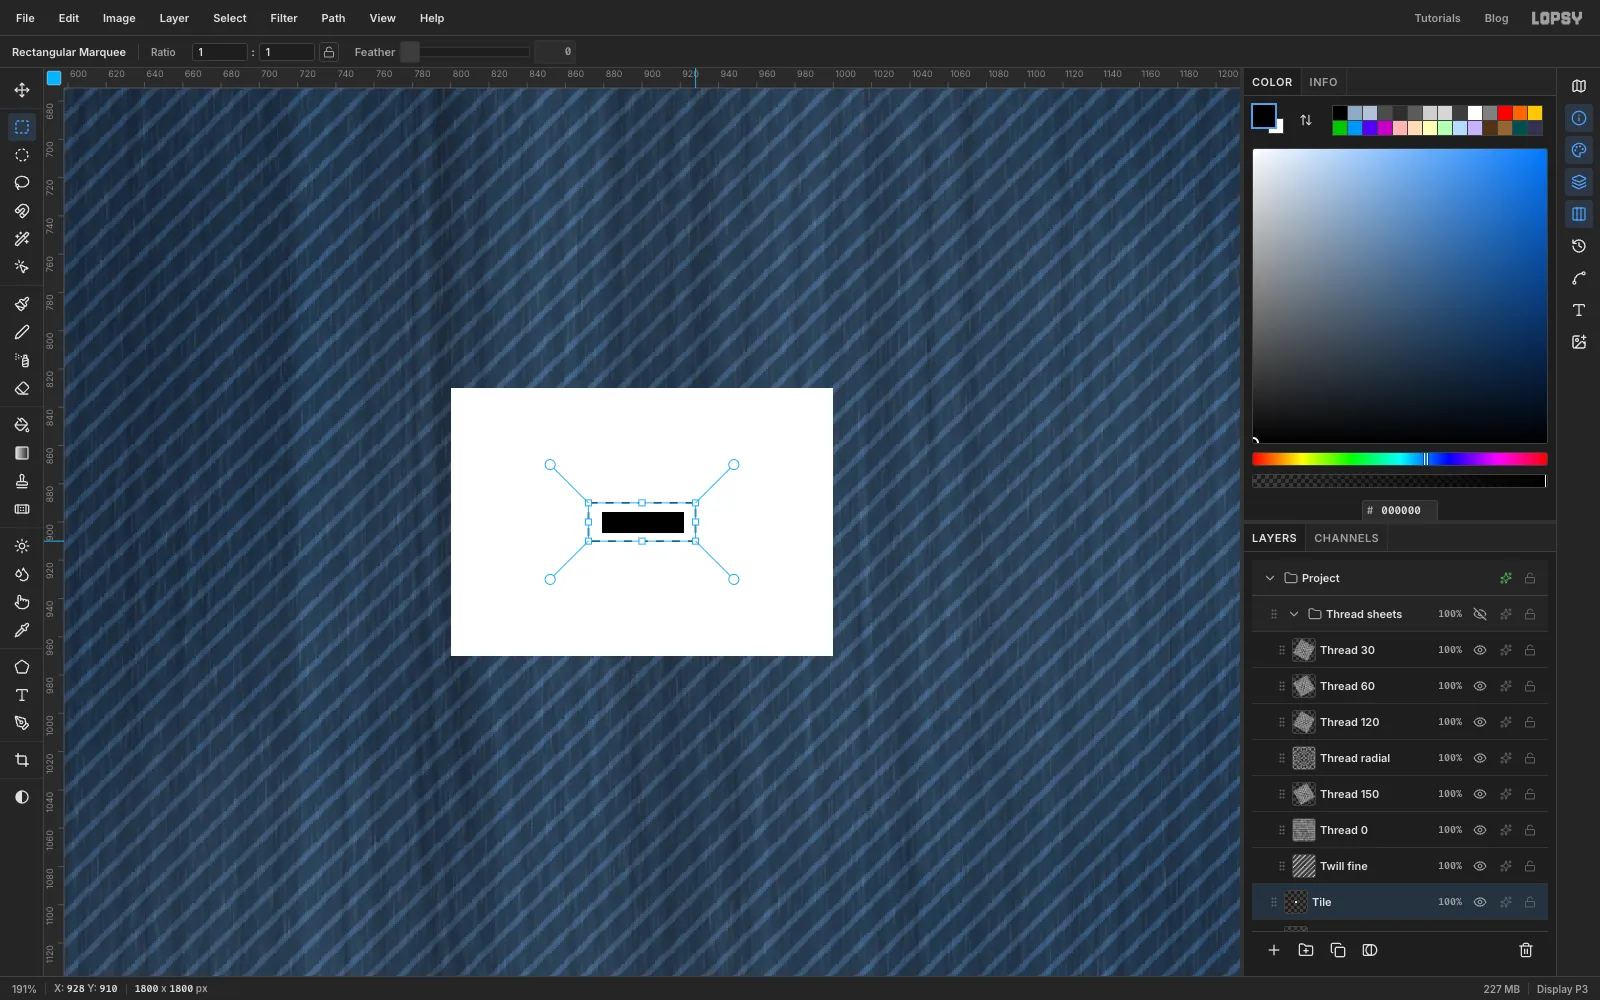
Add a new Tile layer and fill a small marquee with white. Zoom in a little. With the Pencil at Size 11 in black, click and Shift-click to draw a short horizontal dash about 32 px long. Marquee around it, leaving a small margin, about 56 × 20 px.
Choose Edit → Define Brush… and call it Topstitch. The dark pixels become the tip. Deselect, delete the Tile layer, and press Cmd+0.
-
Stitch the yoke
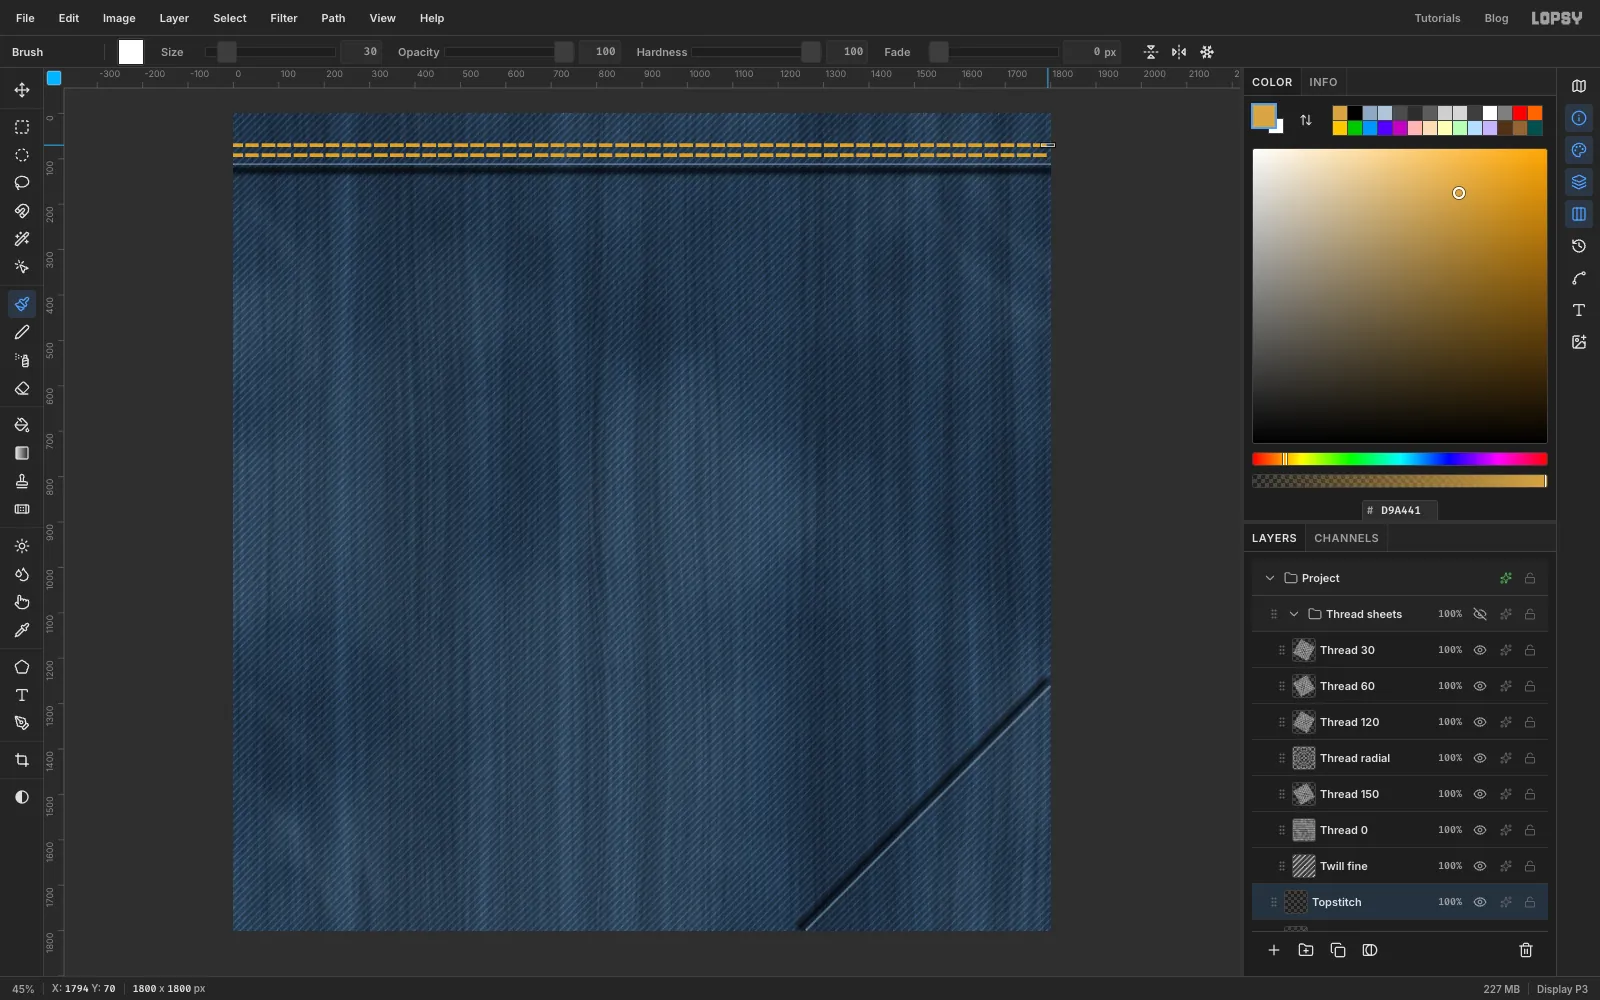
Click Pocket lip and add a layer called Topstitch. Set the foreground to and pick the Brush. Click the tip thumbnail at the left of the options bar to open the Brushes window, and on the Shape tab set Size 30, Spacing 118, Hardness 100 and Opacity 100. Close the window.
Click at the left edge, about 92 px down, and Shift-click at the right edge at the same height. Draw a second row the same way, about 70 px down.
-
Stitch the pocket
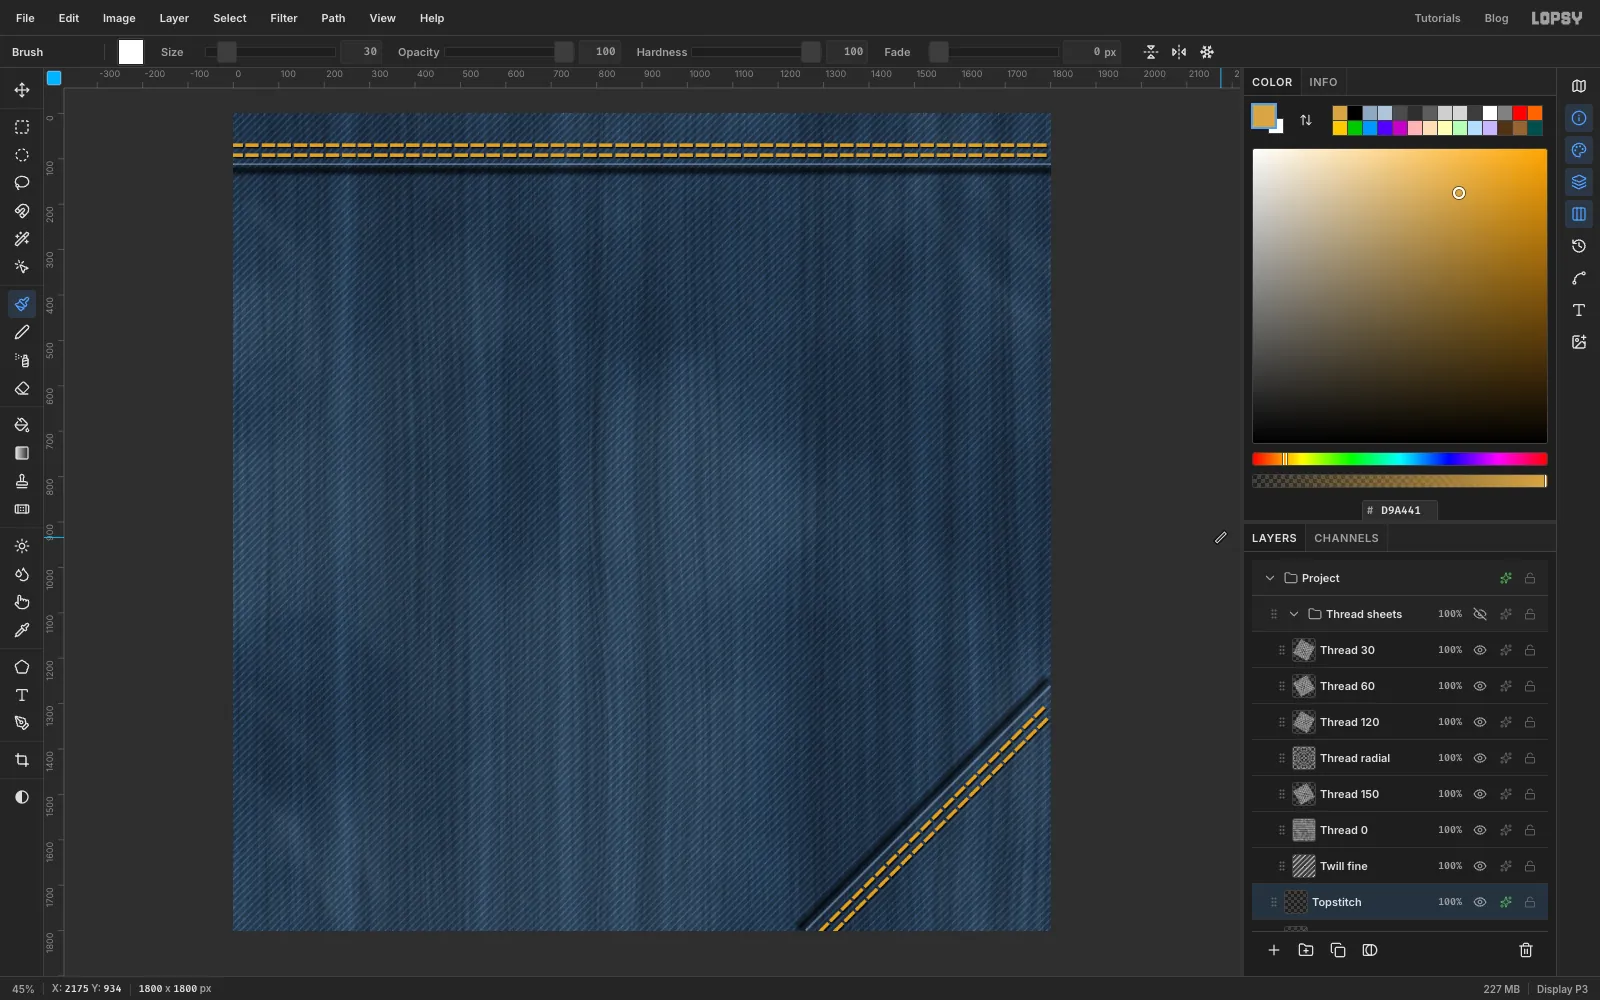
Open the Brushes window again. On the Shape tab, press inside the angle dial towards the upper right, halfway between the top and the right, so it reads 315. The dash now points along the pocket's diagonal seam. Close the window.
Draw two more rows parallel to the seam, on the pocket side of it. Put the first about 30 px inside the lip, and the second about 25 px further in. For each, click at the bottom edge and Shift-click at the right edge.
Click the effects button on the Topstitch row and turn on:
- Drop Shadow: black, Offset X 2, Offset Y 3, Blur 2, Opacity 80
- Inner Glow: , Size 3, Opacity 65
Then open the Brushes window, go to the Presets tab and click Hard Round. That swaps the dash tip out and resets the brush, so your next strokes are solid.
-
Press in a copper rivet
Build the rivet on top of the two rows of stitching, about 350 px in from the corner of the canvas.
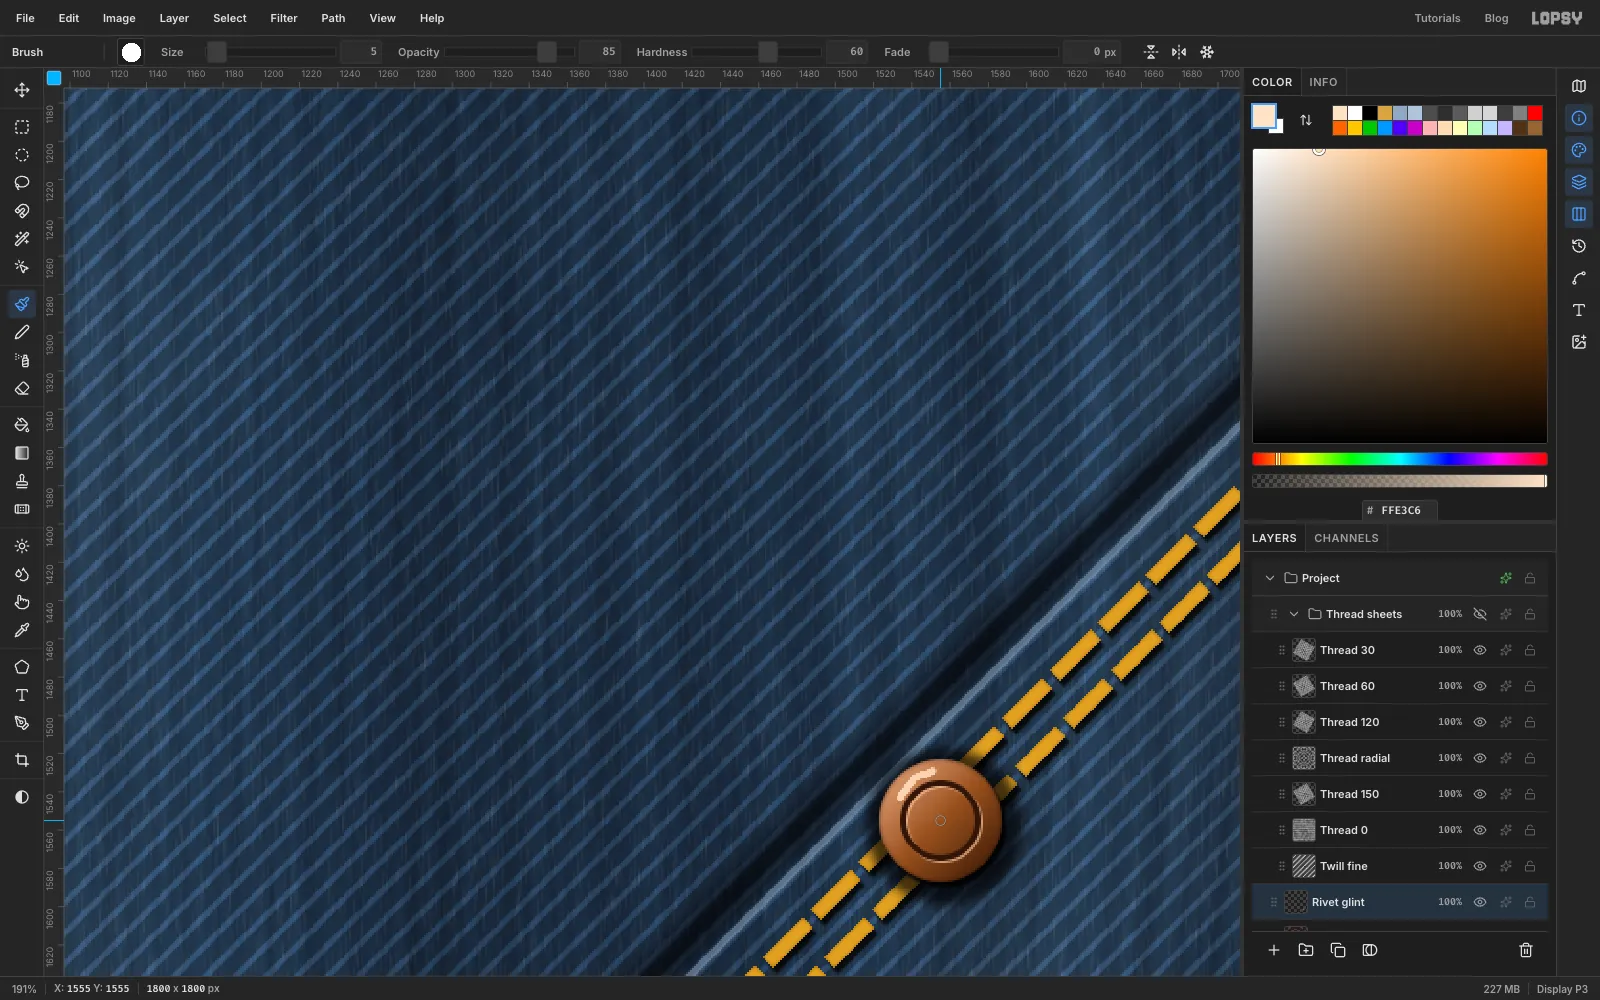
- Dent. Add a layer called Rivet dent. Fill a circle of radius 41 with black, centred just down and right of where the rivet will go. Blur it at Radius 8 and set it to Multiply at 70%. The denim now looks pressed in.
- Body. Add a layer called Rivet. Select a circle of radius 32. Pick the Gradient tool, set it to Linear, click Advanced…, and set three stops: , and . Drag from the upper left of the circle to the lower right, and deselect. Add a Drop Shadow in black (X 2, Y 3, Blur 2, Opacity 85) and an Inner Glow in (Size 4, Opacity 60).
- Stamped ring. Add a layer called Rivet ring. Select a circle of radius 21, hold Alt and drag a circle of radius 18 to cut out the middle, then fill the ring with . Add a Drop Shadow in (X 1, Y 1, Blur 0, Opacity 70), which reads as a lit lower edge on the groove.
- Glint. Add a layer called Rivet glint. With the Brush at Size 5, Hardness 60 and Opacity 85 in , paint a short curved stroke along the upper left of the rim.
That's the jacket finished. Save your work with File → Save Project.
-
Lift the patch off the cloth
With Rivet glint active, click New Group and name it Patch. Everything else goes inside this group.
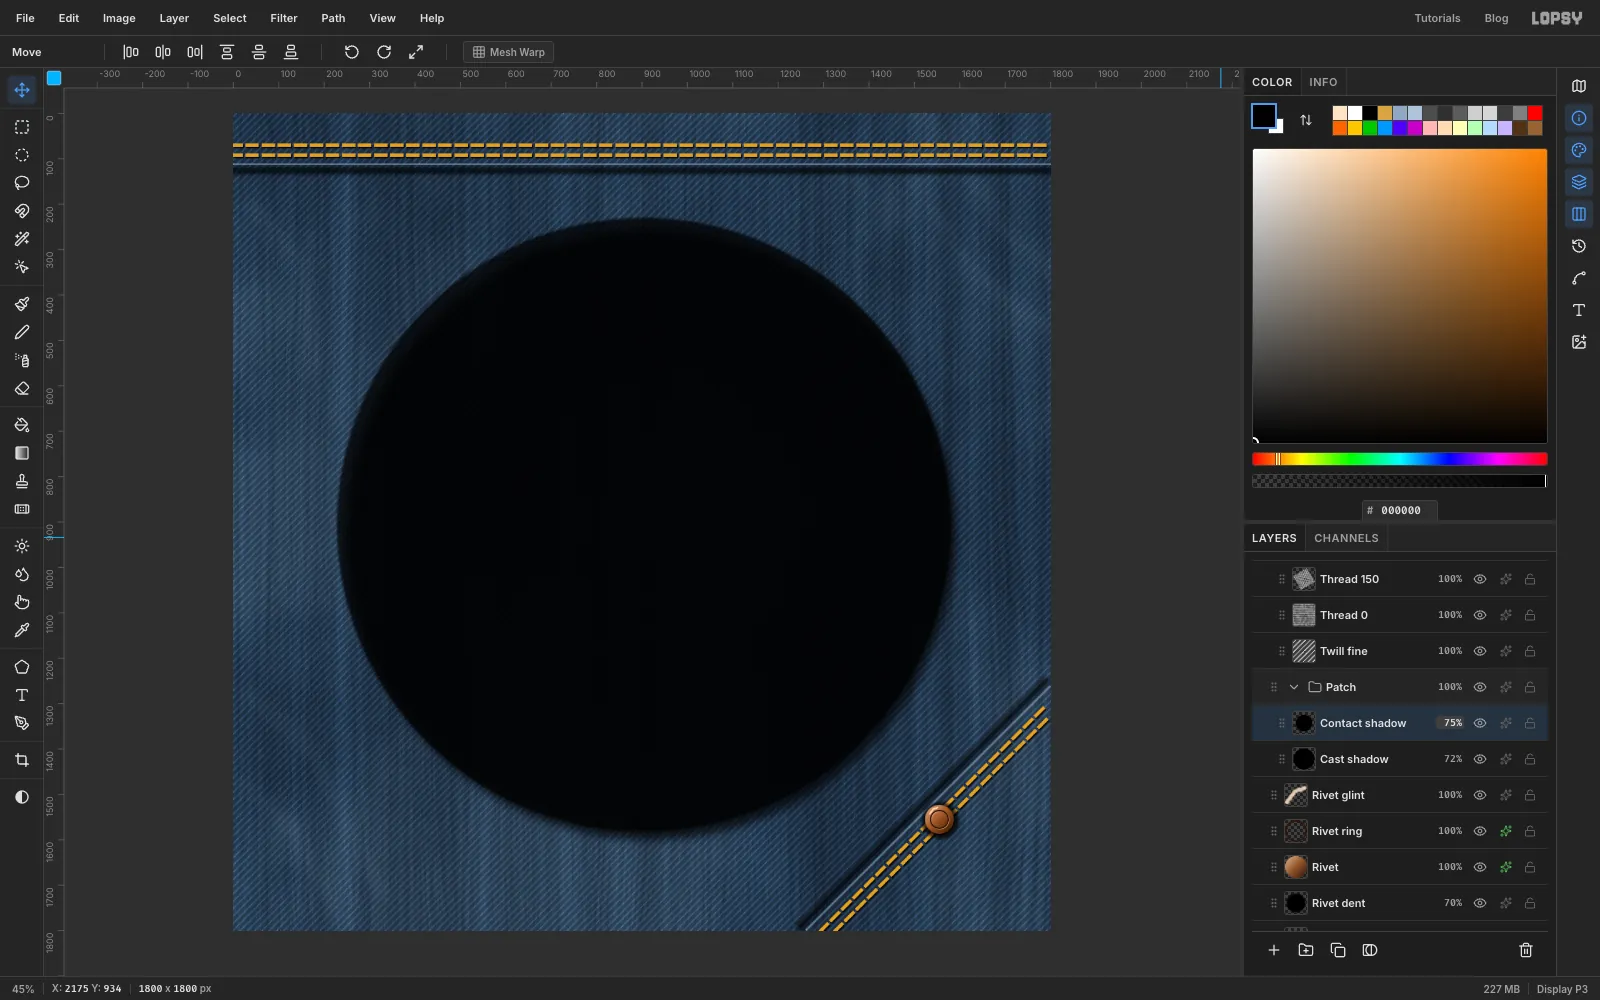
Add a layer called Cast shadow. Fill a circle of radius 672 with black, deselect, and blur it at Radius 30. Set it to Multiply at 72%. Pick the Move tool and press the arrow keys to nudge it 18 px right and 28 px down. Shift+arrow moves by 10 px.
Add a layer called Contact shadow. Fill a circle of radius 676 with black, deselect, and blur it at Radius 7. Set it to Multiply at 75%. Pick the Move tool again, because the arrow keys nudge a layer only with Move active, and nudge it 4 px right and 6 px down. This is the tight, dark line where the patch touches the denim, and it stops the patch looking like a sticker.
-
Lay in the sky
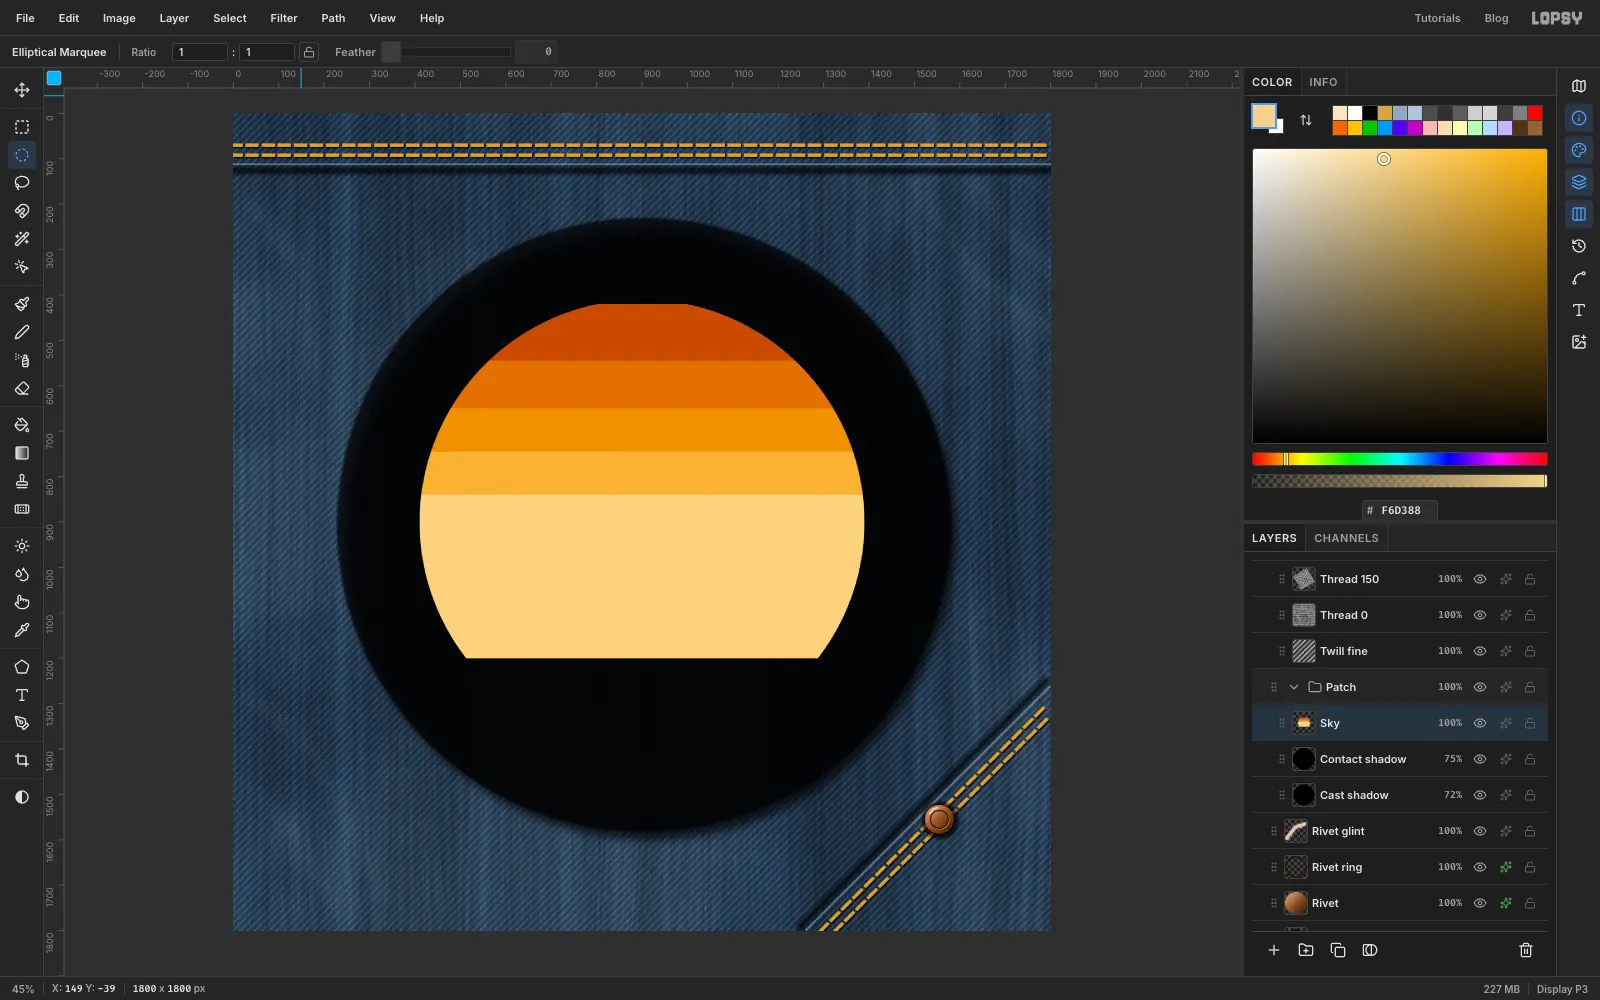
Add a layer called Sky. Draw five marquees, stacked on top of each other, each wide enough to reach beyond the circle, from about 390 to 1410 across. Fill each with its colour, and press Cmd+D before drawing the next one:
- from about 420 to 545 down,
- from 545 to 650,
- from 650 to 745,
- from 745 to 840,
- from 840 to 1200,
Select a circle of radius 490, choose Select → Inverse and press Delete, then deselect. You'll repeat this trim on most of the scene layers, because anything outside radius 490 would otherwise poke out from under the band. The flat top and bottom of the sky are fine, since the band and the rock ledge will hide them.
-
Learn the stitching recipe
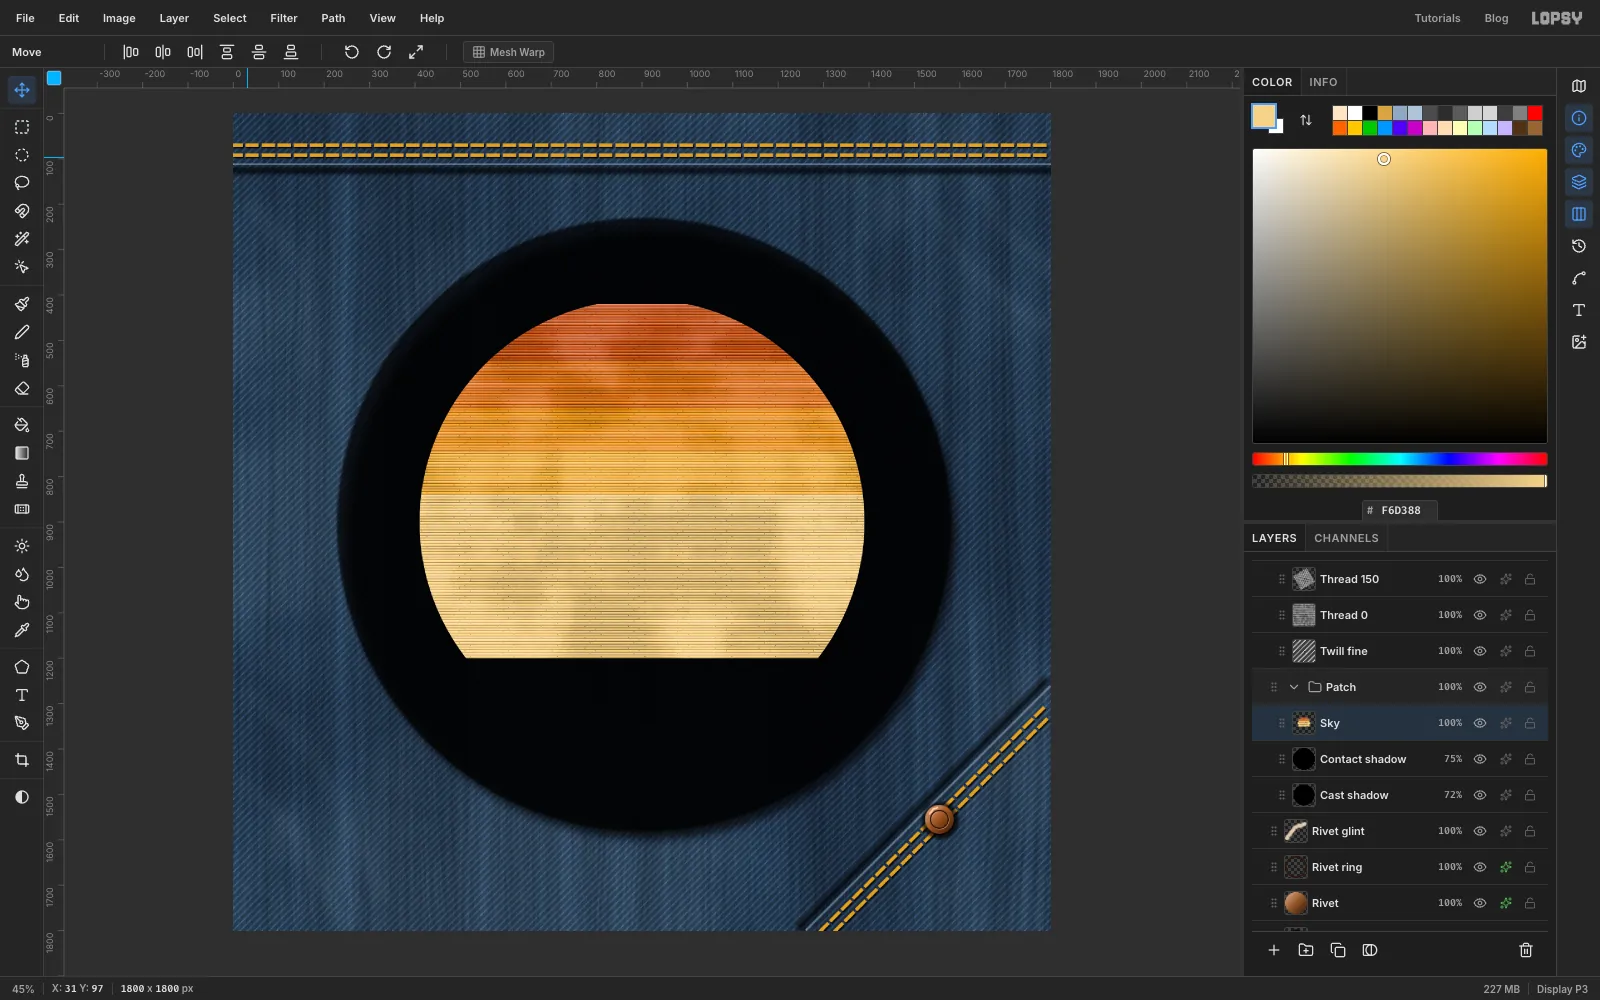
This is the technique behind the whole patch, so it's worth getting comfortable with it. To stitch the Sky layer with Thread 0:
- Cmd-click the Sky thumbnail to select its shape.
- Click the Thread 0 row in the Thread sheets group, and press Cmd+C.
- Click the Sky row, and press Cmd+V. The clipped thread pastes in exactly the right place, on a new layer above Sky. The app may switch you to the Move tool, so re-pick your selection tool before you draw anything else.
- Press Cmd+D.
- Set the new layer to Hard Light at 68%.
- Choose Layer → Merge Down.
From here on, when I say "stitch it with" a sheet, this is what I mean. Use Hard Light at 68% unless I say otherwise.
There's a second small habit too. When I say "puff it", add these two effects so the area looks raised:
- Drop Shadow: black, Offset X 2, Offset Y 3, Blur 3, Opacity 55
- Inner Glow: black, Size 7, Opacity 30
-
Check the thread up close
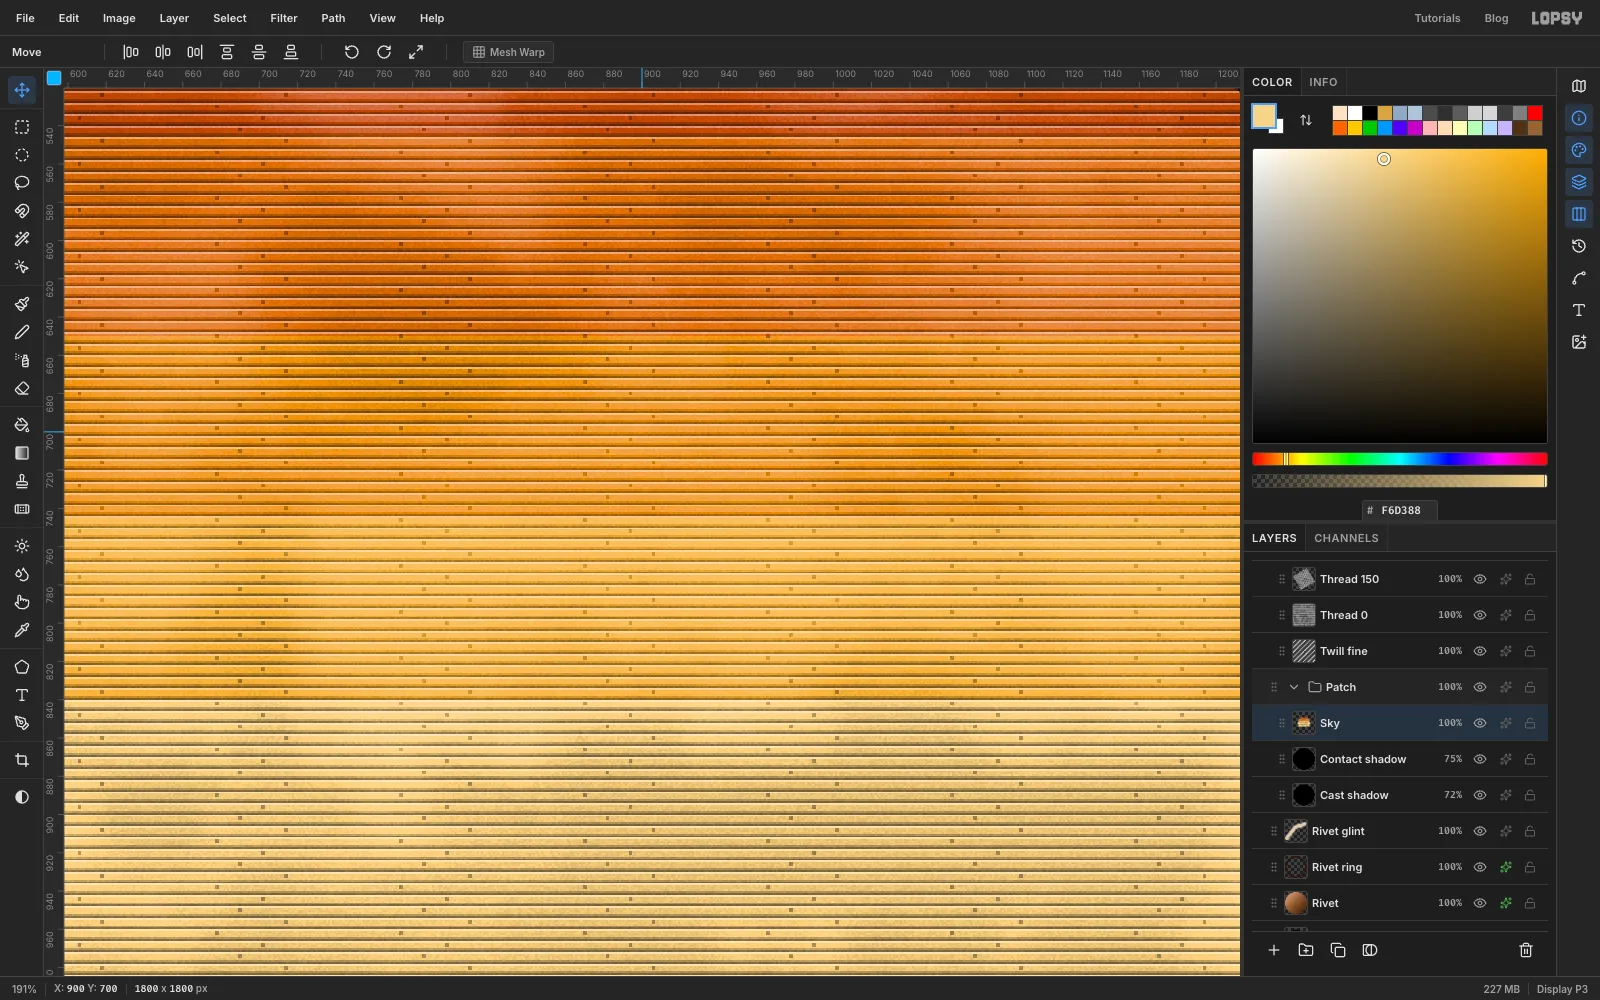
Zoom in on the sky. You should see individual threads with a bright top and a dark lower edge, plus a scattering of needle holes.
If the thread looks too strong or too faint, this is the moment to fix it. Undo the Merge Down and adjust the layer's opacity, then use the same value for the rest of the patch. Press Cmd+0 when you're happy.
-
Add the sun and its rays
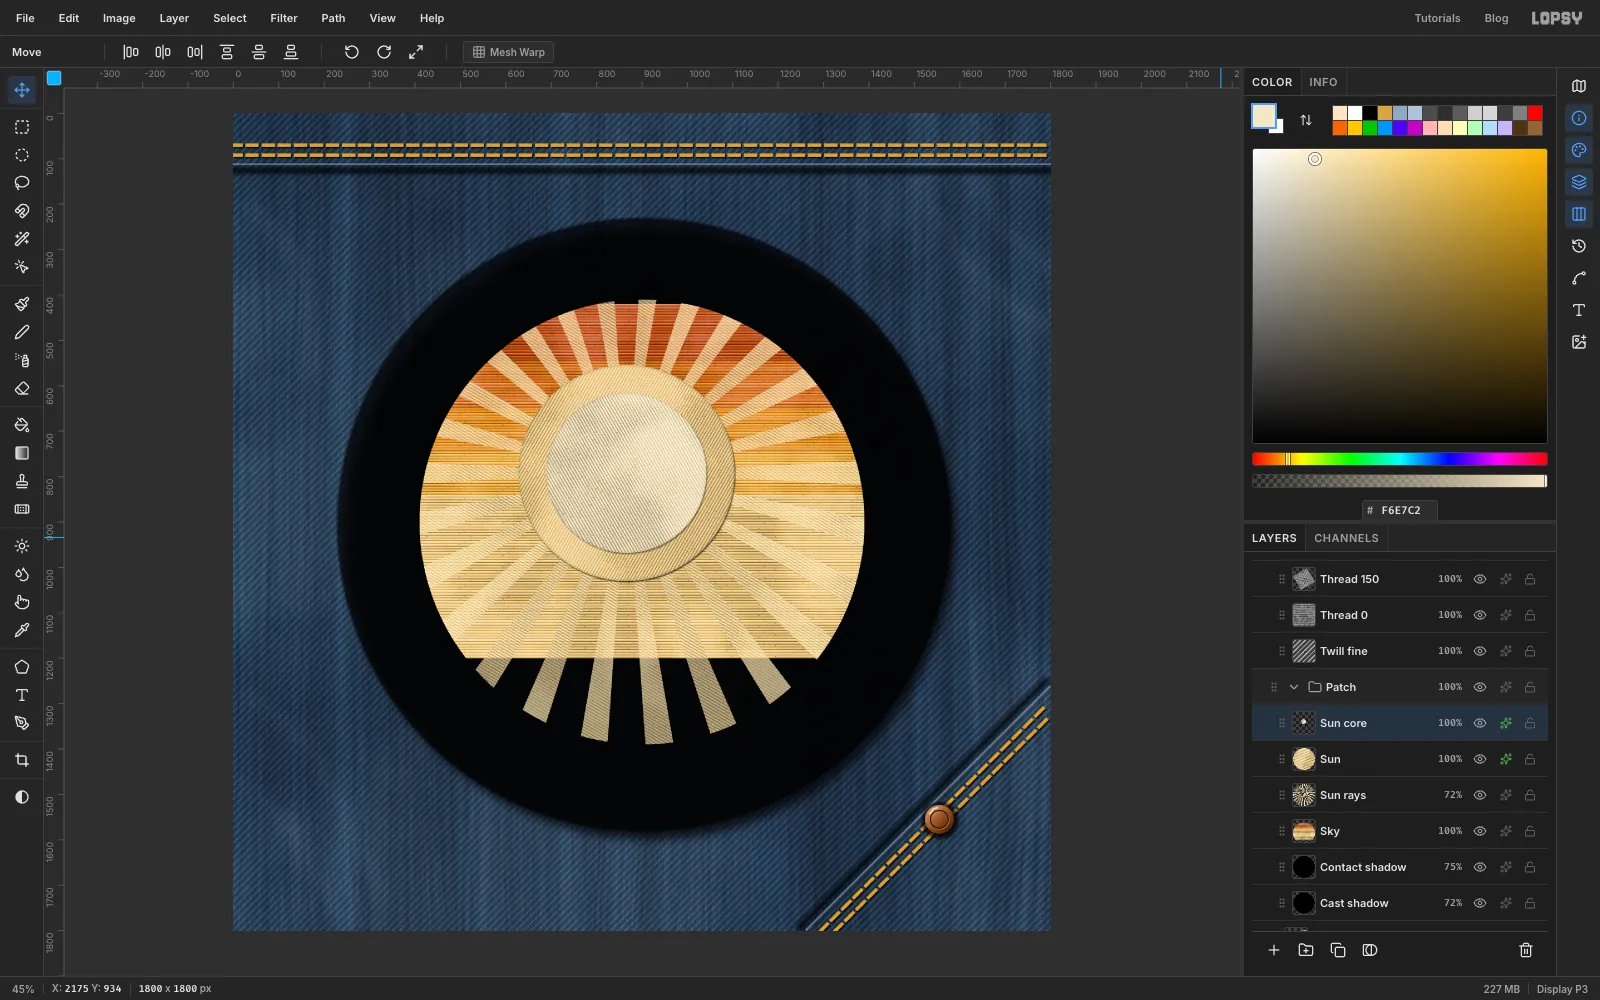
Add a layer called Sun rays. Set the foreground to and run Filter → Sunburst… with Rays 26, Length 45, Width 42, Center X 48 and Center Y 44. Trim it to radius 490 as you did for the sky. Stitch it with Thread 30, then lower the layer to 72%, so the bands of the sky show through.
Add a layer called Sun. Fill a circle of radius 238 centred at about 866, 792 with . Stitch it with Thread 120, and puff it, with the Inner Glow Size at 10.
Add a layer called Sun core. Fill a circle of radius 176 at the same centre with . Stitch it with Thread 60, which runs across the outer ring's threads and makes the two tones read as separate fields. Puff it, with the Drop Shadow Opacity at 40 and the Inner Glow at Size 8 and Opacity 16.
-
Build the mountains
Each range is its own layer, built the same way: add a layer, draw the shape with the Lasso, fill it, trim to radius 490, stitch it, and puff it. Draw each shape well past the circle at the sides and bottom. Work from back to front:
- Far range, , stitched with Thread 30. Draw a low peak near the left edge of the circle and a tall peak on the right, which rises to about 730 down. Between them, keep it low, around 900 to 1000, so the ibex's head will stand against the sky.
- Snow, , stitched with Thread 120. Lasso a jagged cap on each peak, holding Shift for the second one. Use an Inner Glow Opacity of 18.
- Mid range, , stitched with Thread 150. A long ridge in front, about 1000 down at the left and 930 at the right.
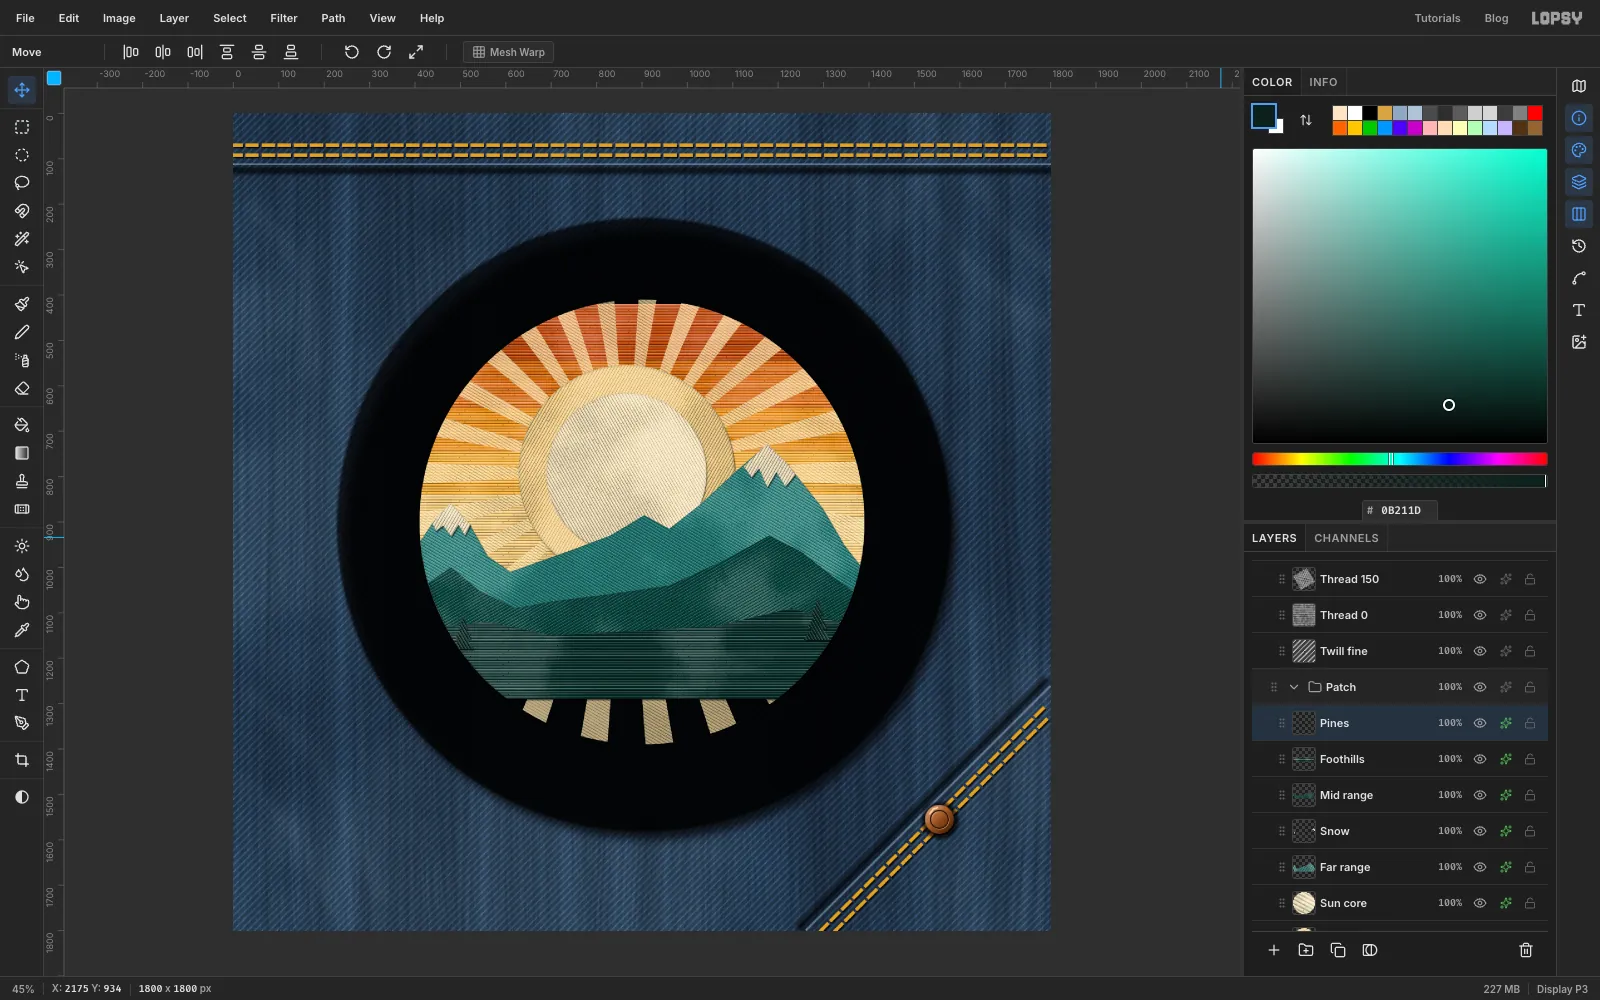
- Foothills, , stitched with Thread 0. A gentle line at about 1130 down.
- Pines, , stitched with Thread 60. Lasso five small zigzag trees along the foothills, three at the left and two at the right, holding Shift to add each one. These only need the Drop Shadow.
-
Add the rock ledge
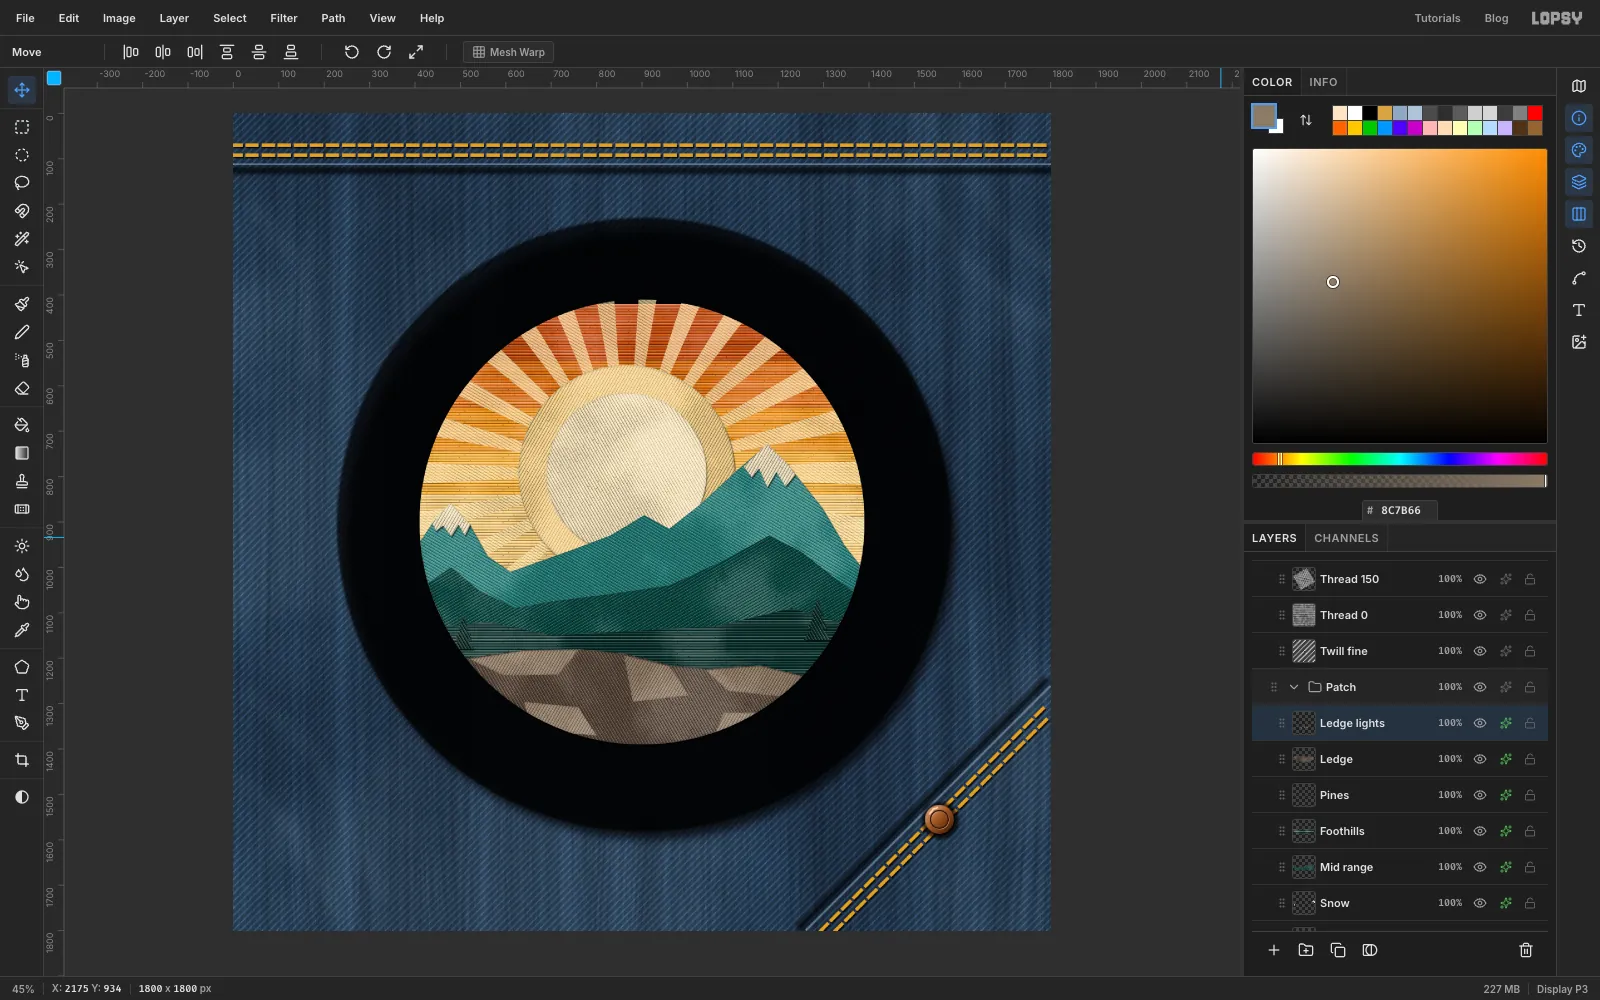
Add a layer called Ledge. Lasso a rock shape in , with the top edge wavering around 1180 to 1240 down, higher towards the middle left, where the ibex's front feet will go. Fill it and trim to radius 490. Stitch it with Thread 60, then puff it, with the Drop Shadow Opacity at 70, and the Inner Glow at Size 9 and Opacity 35.
Add a layer called Ledge lights. Lasso five flat, angular facets, three along the top surface and two lower down, holding Shift to add each one, and fill them with . Trim, then stitch with Thread 120. Add just an Inner Glow: black, Size 7, Opacity 25.
-
Bring in the ibex photo
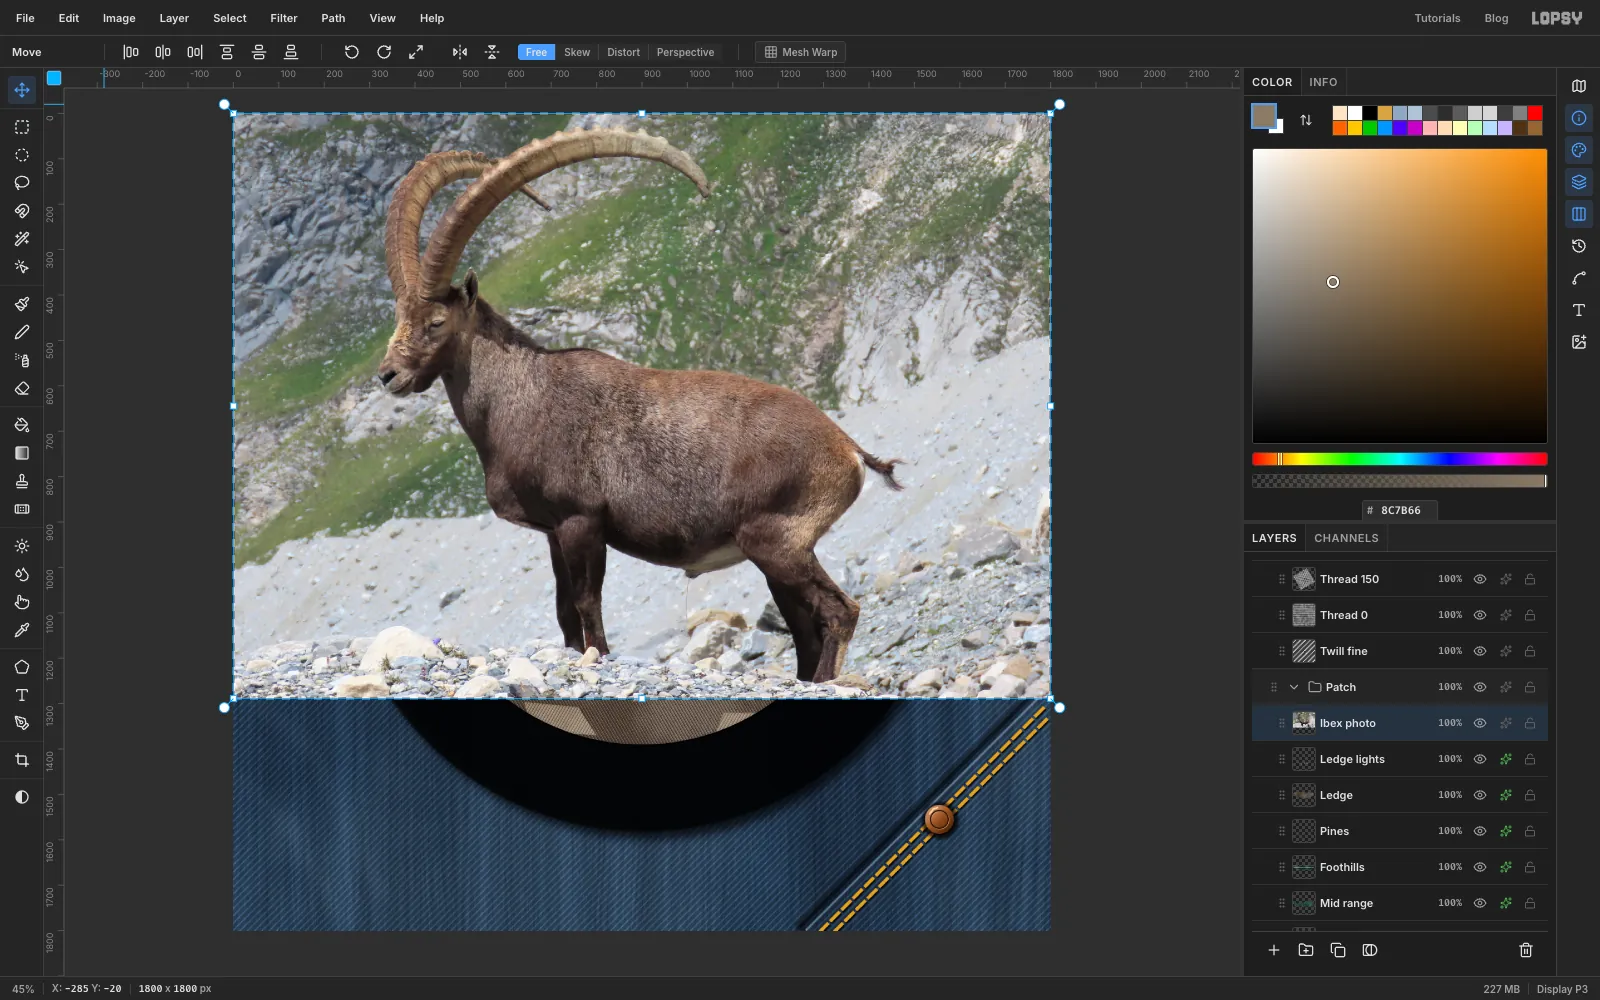
Open your resized photo in an image viewer and copy it. Back in Lopsy, click Ledge lights and press Cmd+V. Rename the new layer Ibex photo.
The photo is only a guide. You won't keep any of its pixels in the finished patch, but you will borrow its outline and its light and dark shapes.
-
Size the photo to the patch
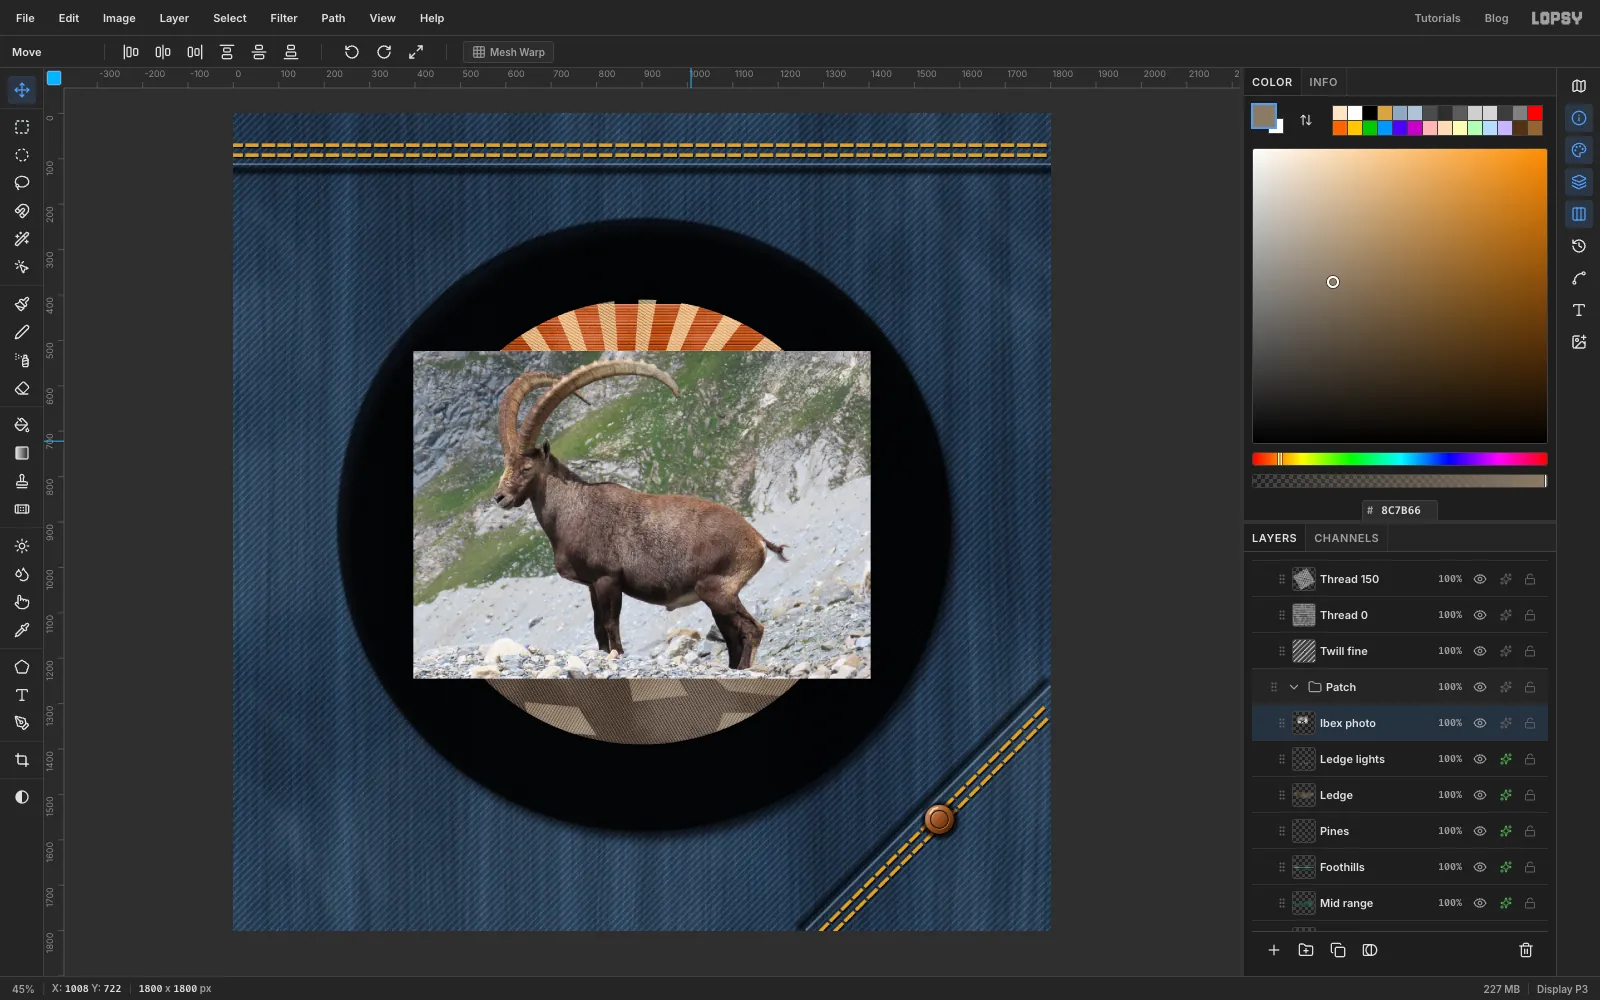
Cmd-click the Ibex photo thumbnail to get handles around it. Hold Cmd and drag the bottom right corner handle inwards until the photo is about 1000 px wide. Holding Cmd keeps the proportions. Press Cmd+D to commit.
Using the Move tool, drag the photo so the ibex stands on the ledge, roughly centred in the circle. The tips of its horns should sit well inside the circle, and the back hoof should land on the ledge.
-
Trace the body
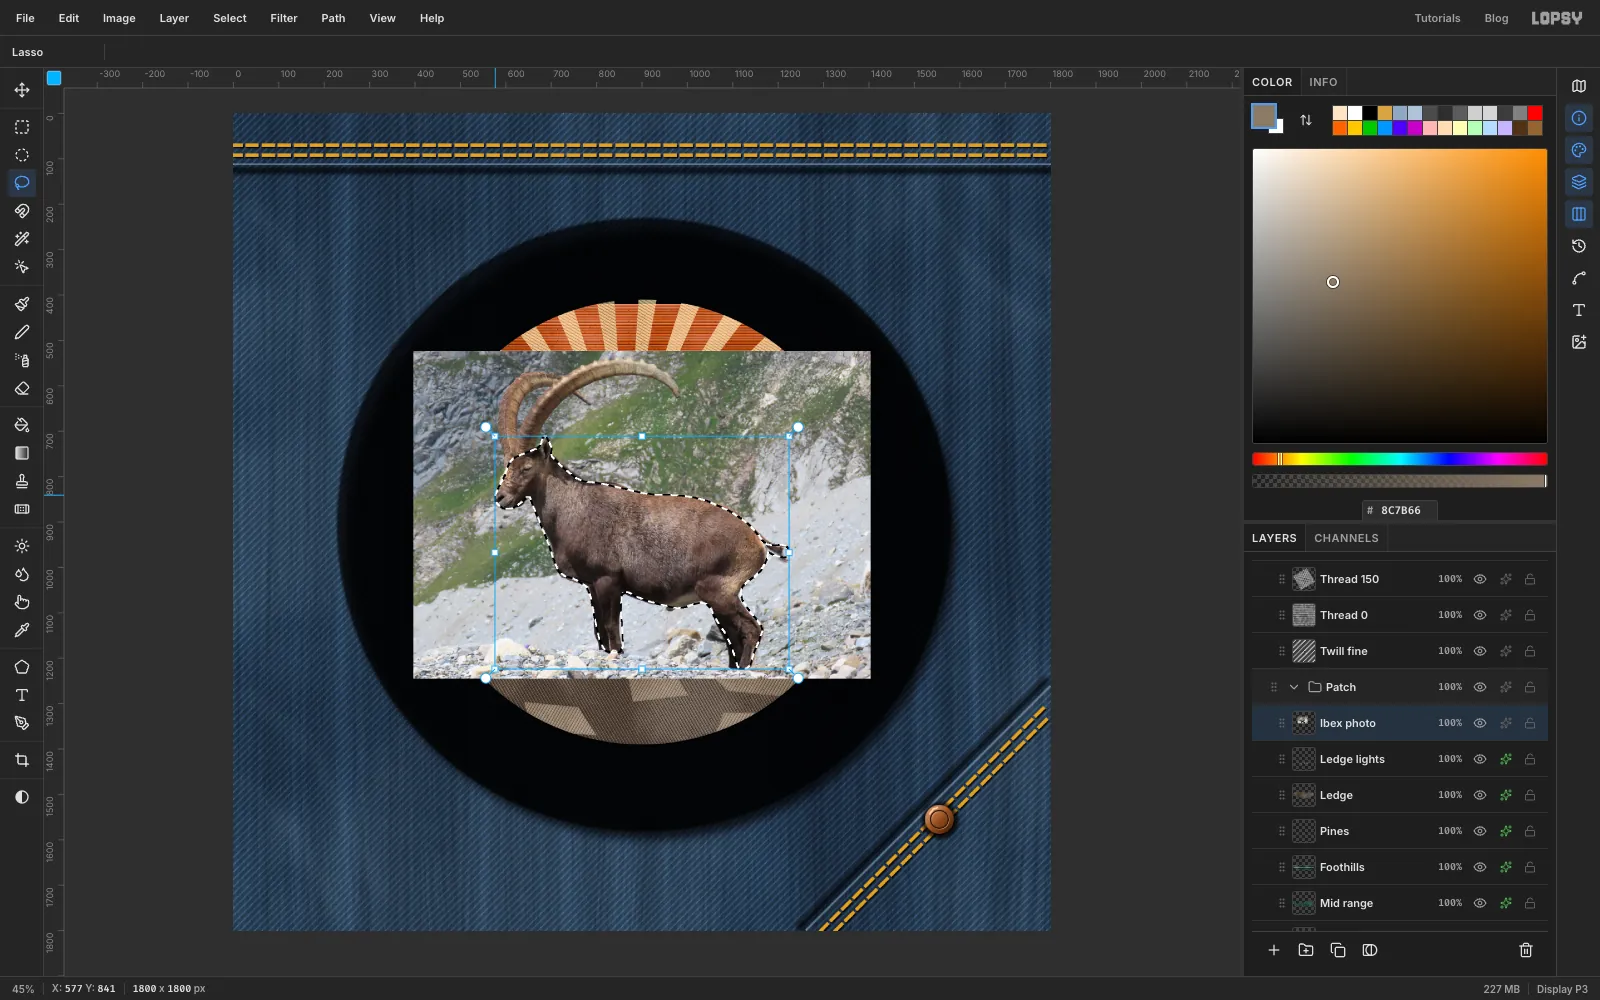
Click the Ibex photo row and pick the Lasso. Zoom in if it helps. Drag slowly around the head, neck, back, tail, legs and chest. Leave out the horns, because you'll draw those on their own layers. Exaggerate the ear a little, and make the tail a soft, simple tuft.
Press Cmd+C, then Cmd+V. Rename the new layer Ibex cut, press Cmd+D, and click the eye icon on Ibex photo to hide it.
-
Simplify the tones
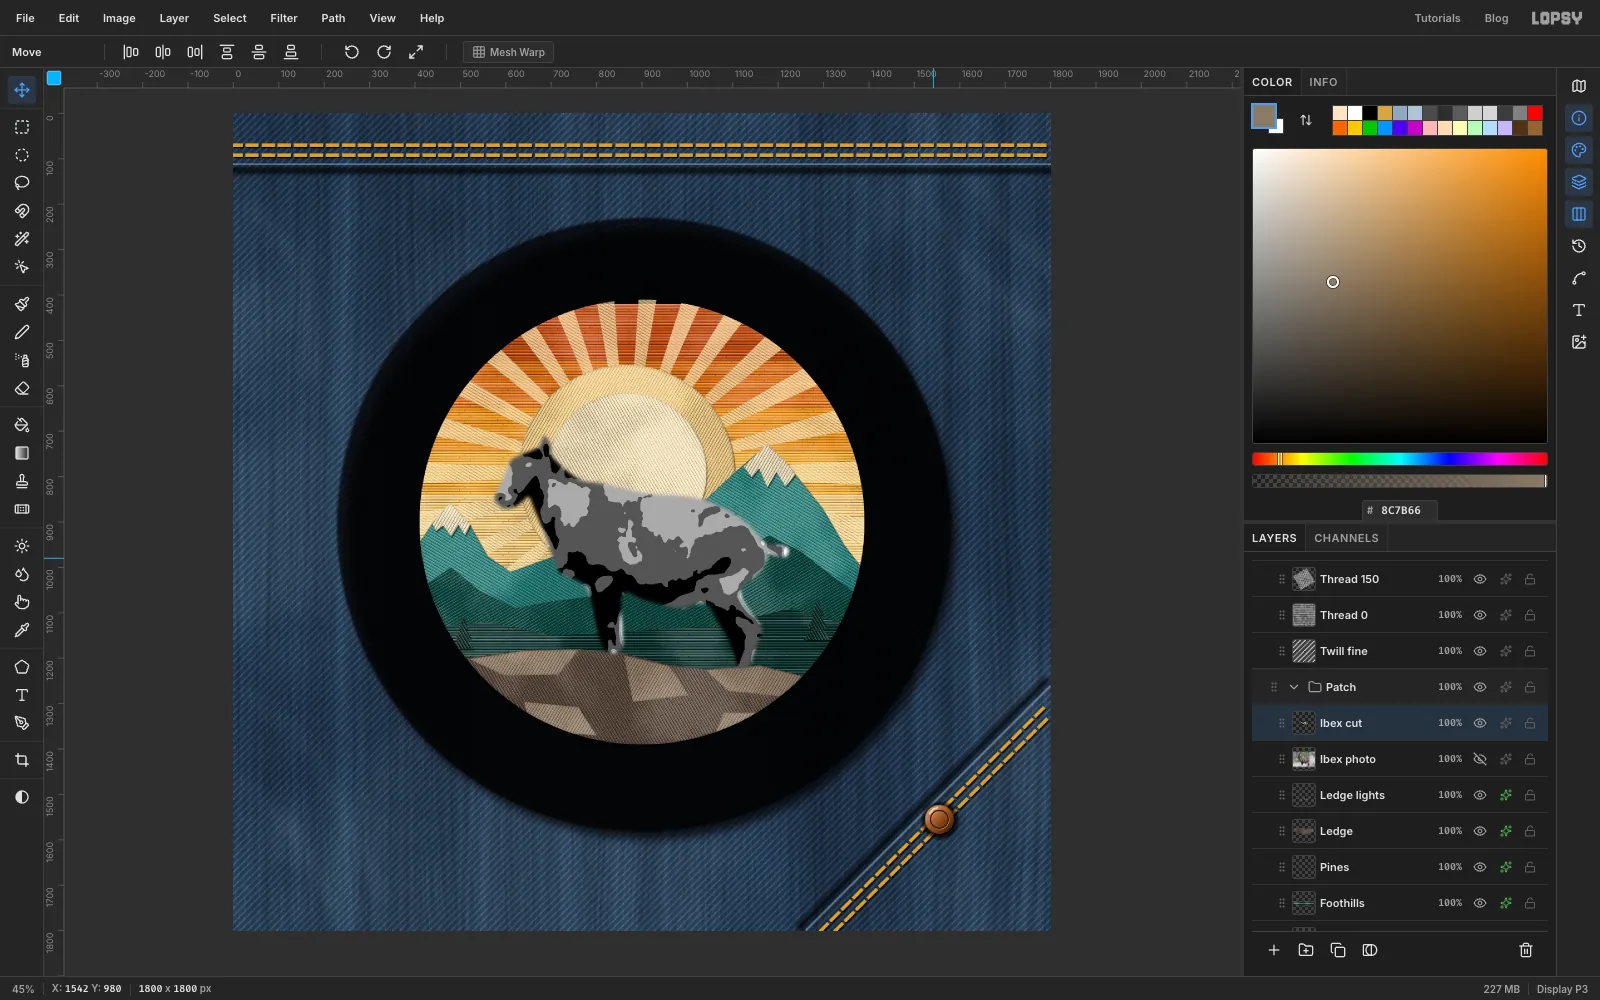
With Ibex cut active, run these in order:
- Filter → Desaturate
- Filter → Gaussian Blur… at Radius 11, which rounds the shapes off, since thread can't hold tiny details
- Filter → Brightness/Contrast… with Brightness 8 and Contrast 45
- Filter → Posterize… at Levels 4
You now have a simple map of the animal's light and dark areas, with sharp edges that the Magic Wand can pick up.
-
Stitch the far horn
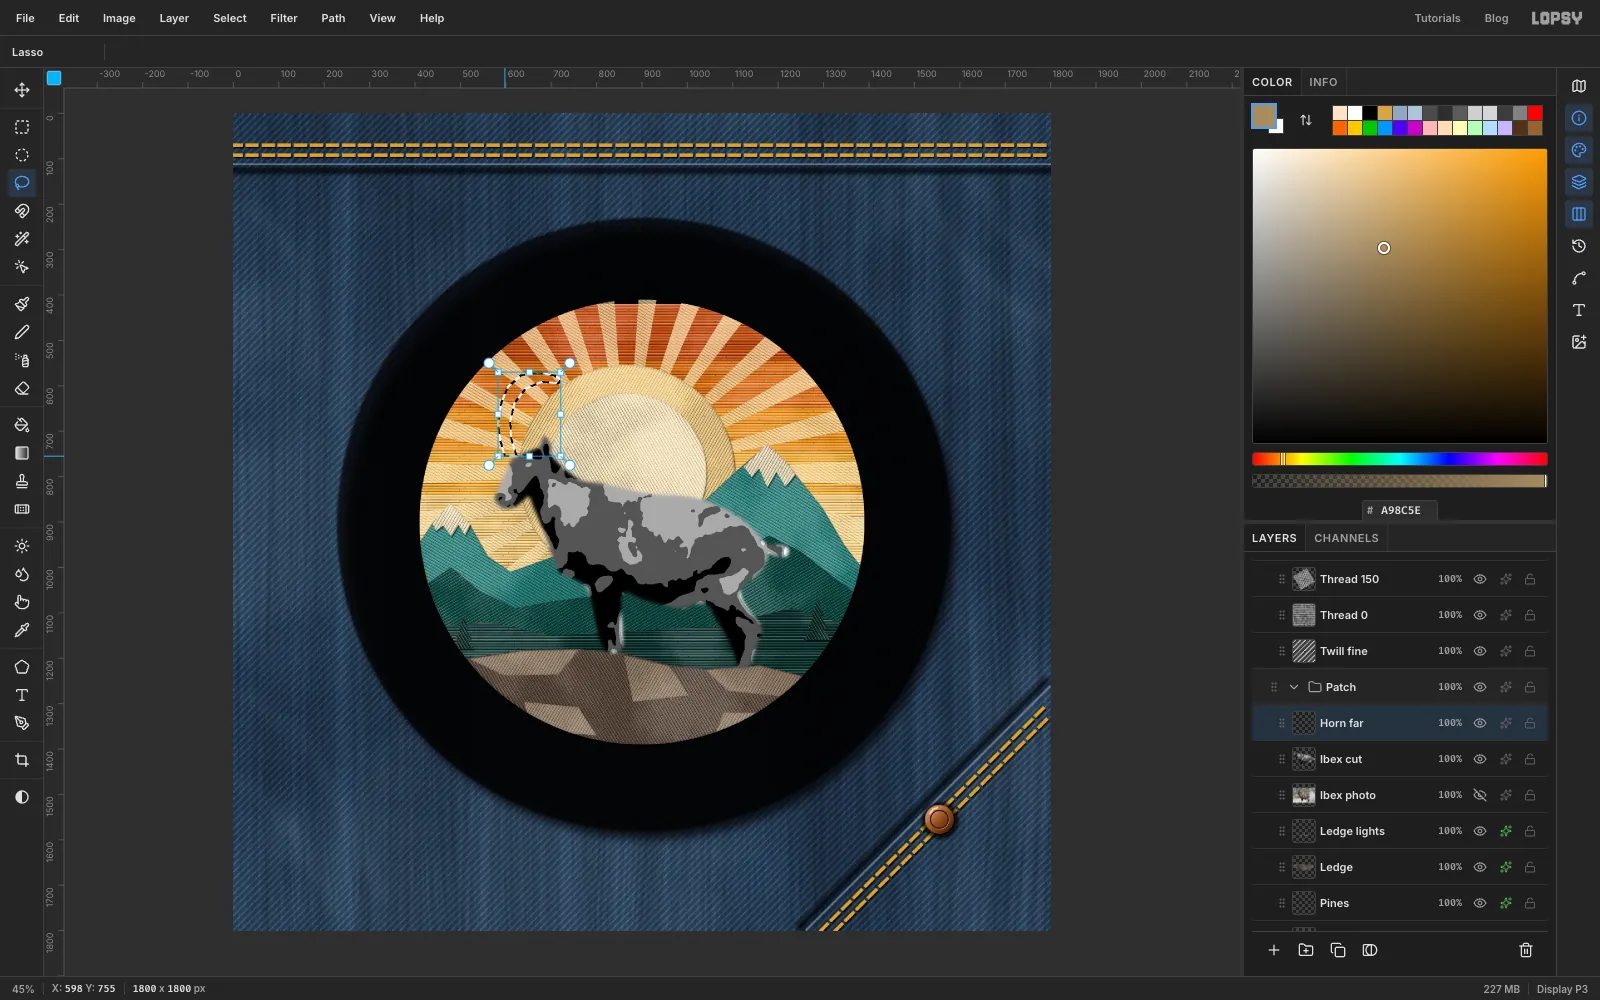
With Ibex cut still active, add a layer called Horn far. Turn Ibex photo on again for a moment so you can see the horn, and Lasso the horn on the far side of the head. Follow it from the top of the skull, up and around, to where the near horn crosses in front of it. Hide the photo again, fill the selection with , and stitch it with Thread 60.
Pick the Brush at Size 4, Hardness 100 and Opacity 100, with . Add about 15 short strokes across the horn, each a click on one edge and a Shift-click on the other, spaced evenly along its length. These are the ridges that make an ibex's horns so recognisable.
Add a Stroke effect: , Width 3.
-
Add the far legs
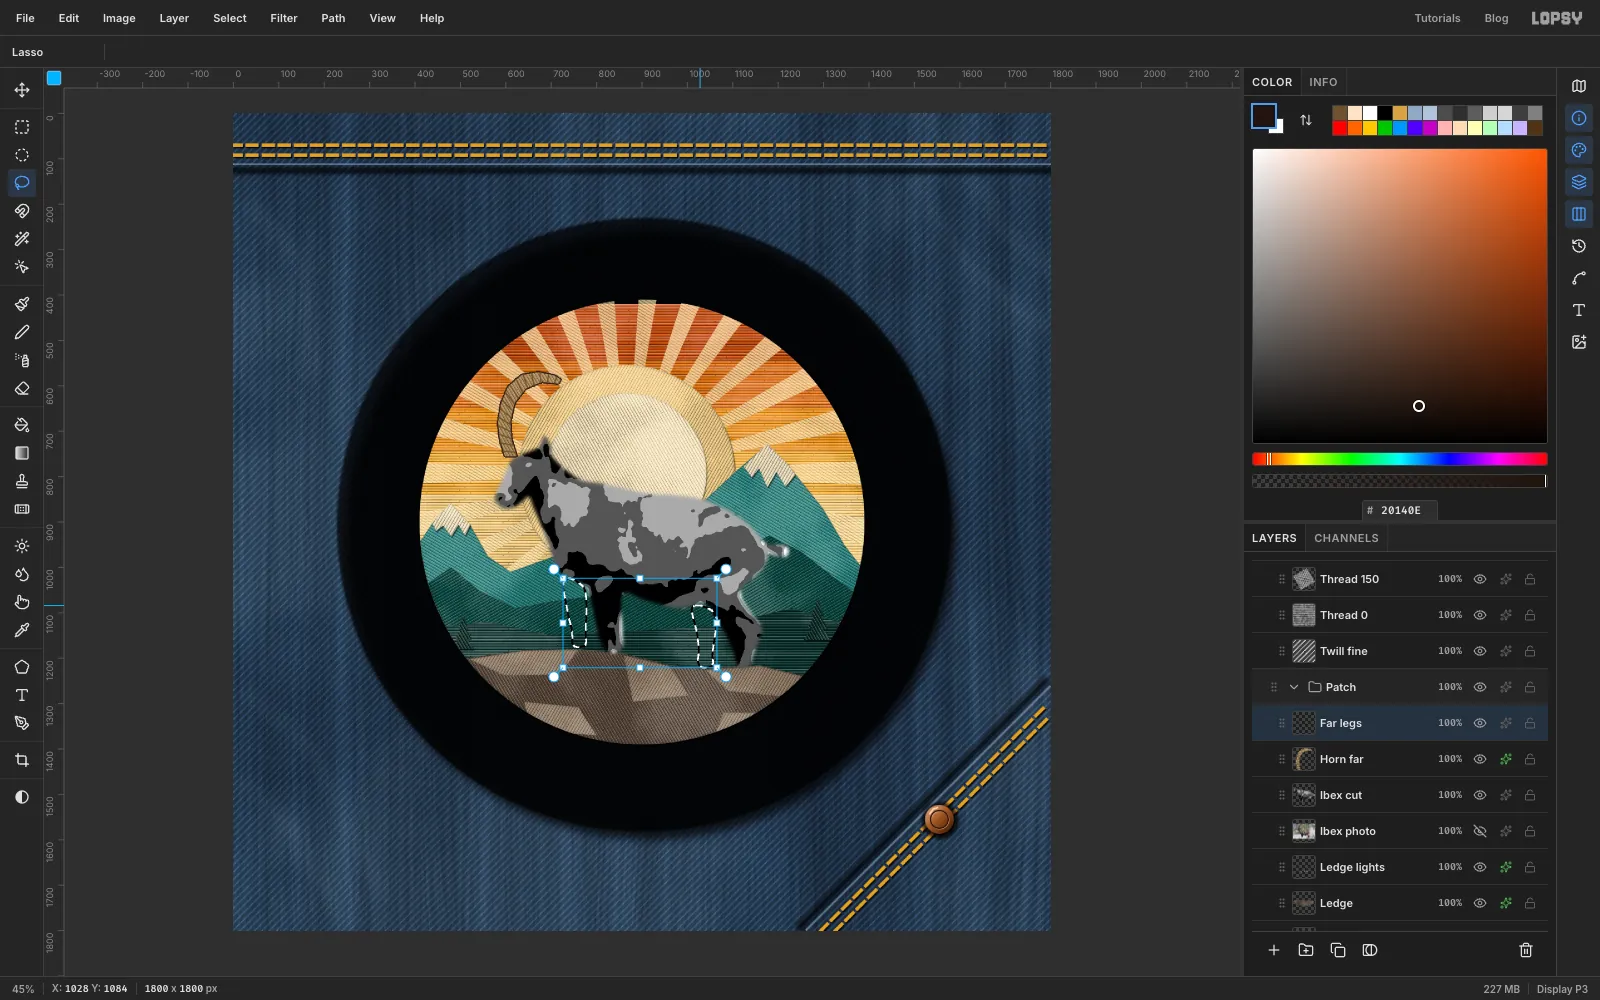
The photo only shows two clear legs, and two legs would make the animal read badly, so you'll add a far pair.
Add a layer called Far legs. Lasso a leg just in front of the near front leg, and, holding Shift, a second one just in front of the near back leg. Both should start up inside the body so that they join it cleanly. Fill them with , stitch with Thread 150, and add the same Stroke as the horn.
-
Pick out the tones with the Magic Wand
Now the base coat. Cmd-click the Ibex cut thumbnail, add a layer called Ibex dark, fill it with and deselect. Stitch it with Thread 30, and add the same Stroke again. The whole animal is now a dark silhouette.
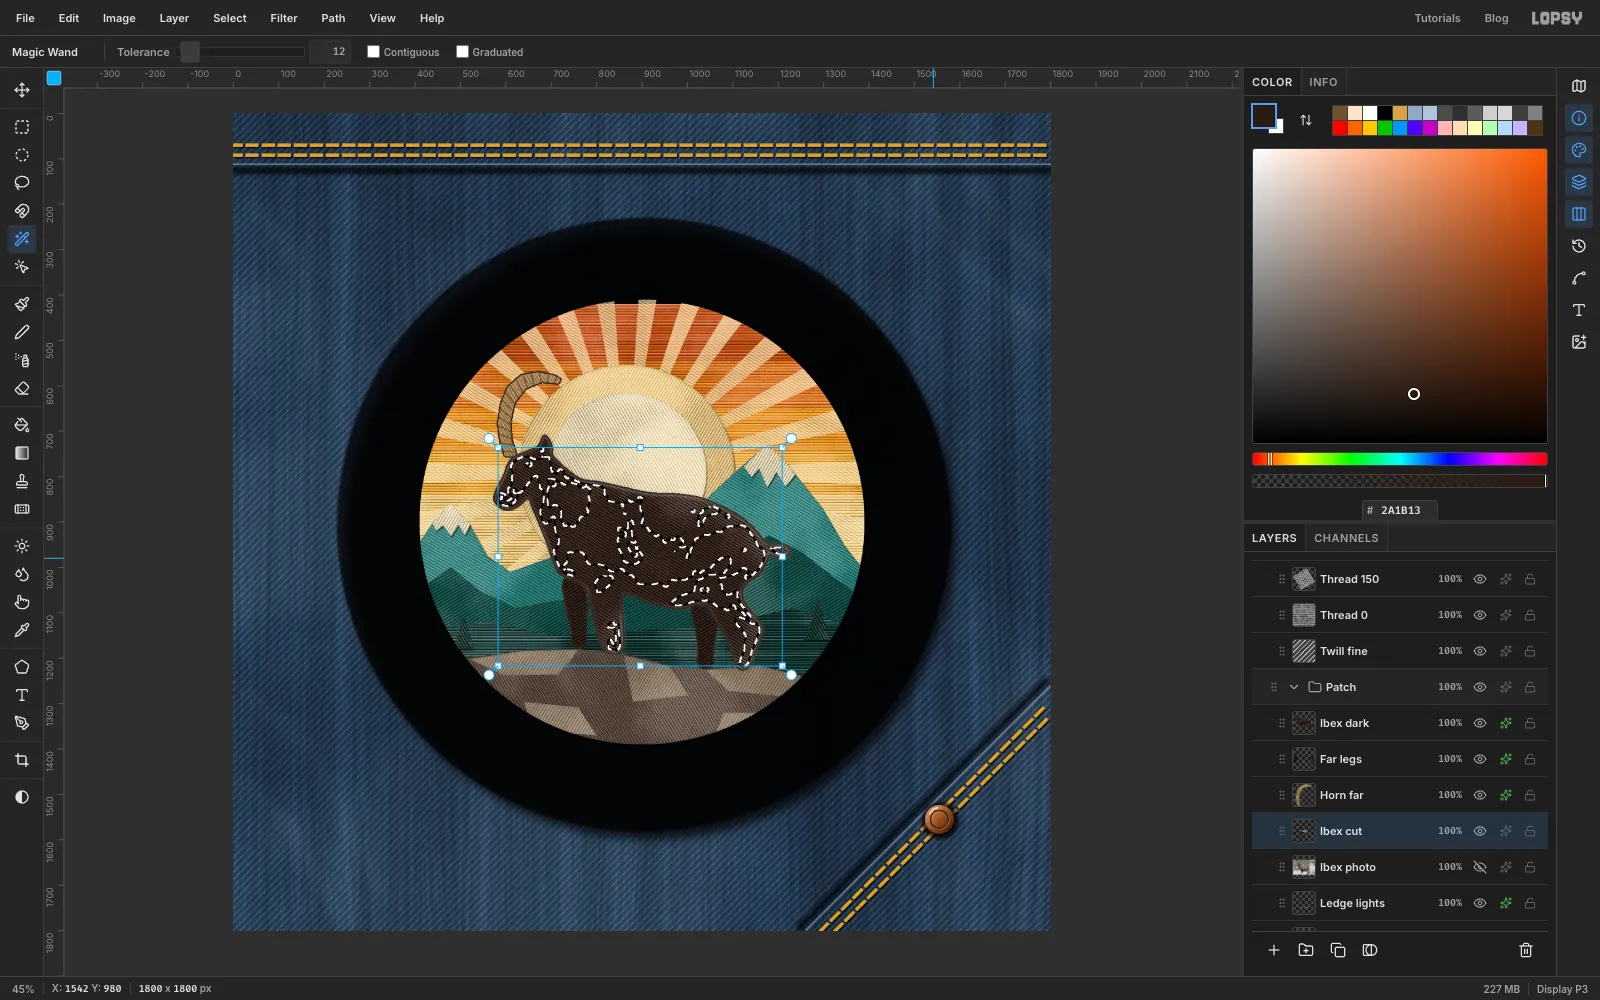
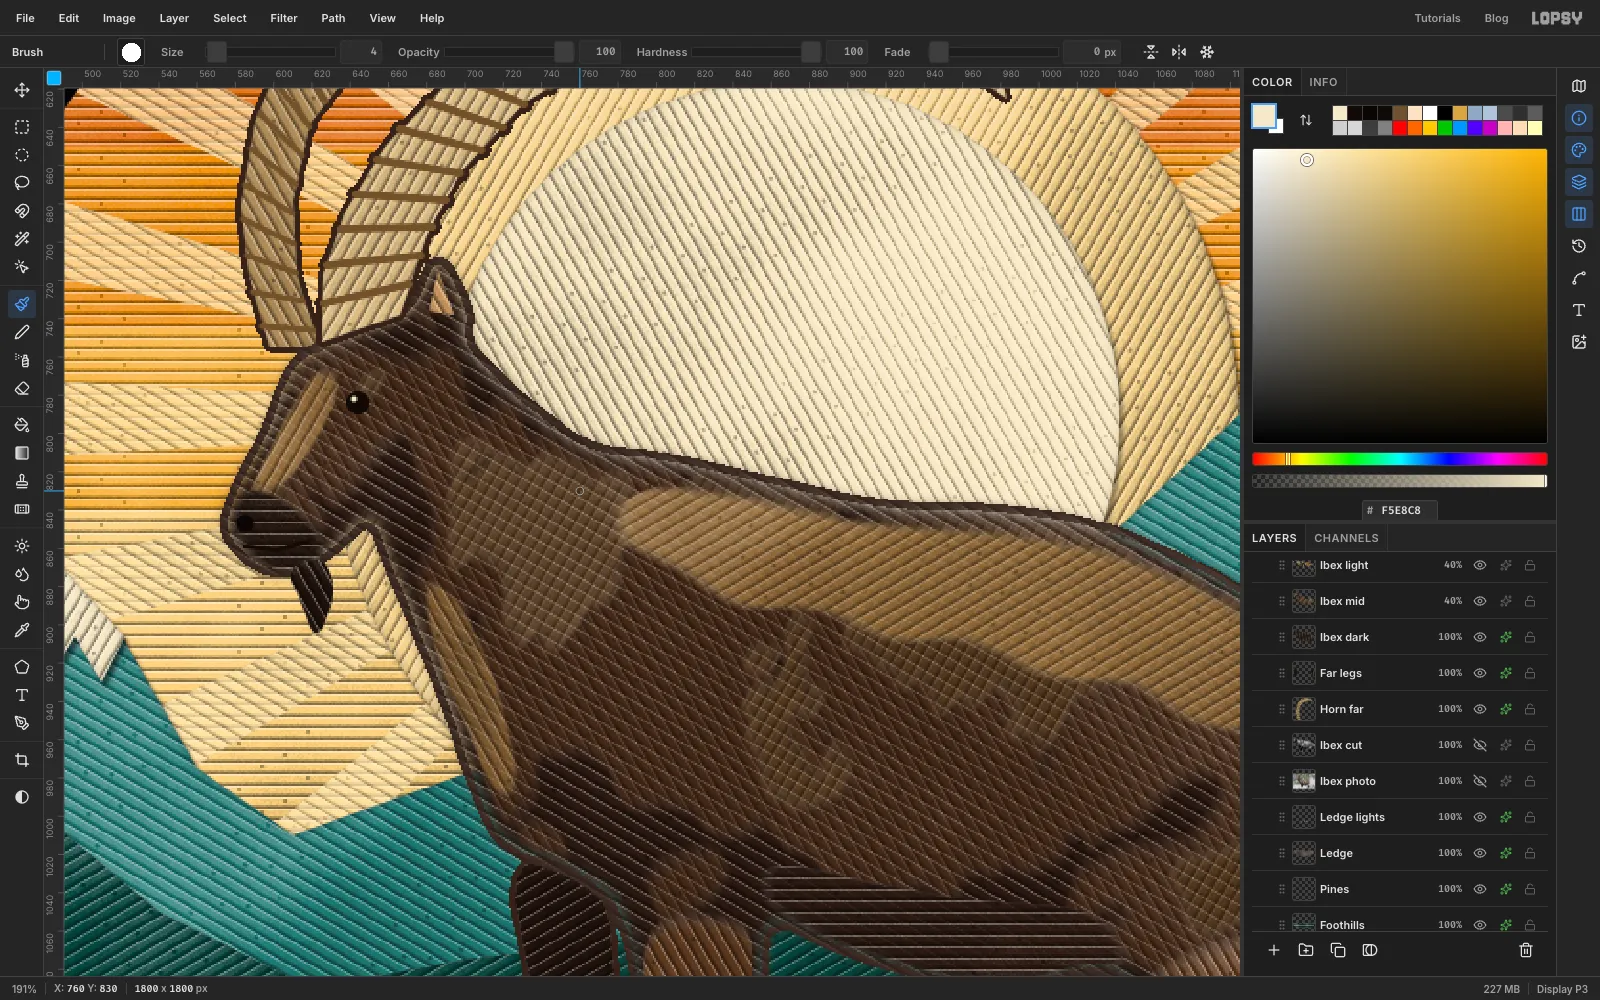
The silhouette now hides the tone map underneath, so click the eye icon on Ibex dark to hide it for a moment. Click the Ibex cut row. Pick the Magic Wand, set Tolerance to 12 and untick Contiguous. Click any dark grey area, and every dark grey area on the layer is selected. Tidy the small specks with Select → Shrink… at 3, and then Select → Grow… at 3. Show Ibex dark again. The screenshot shows the selection with the silhouette back on.
-
Lay the coat colours
With that selection still live, click the Ibex dark row and add a layer called Ibex mid. Fill it with and deselect.
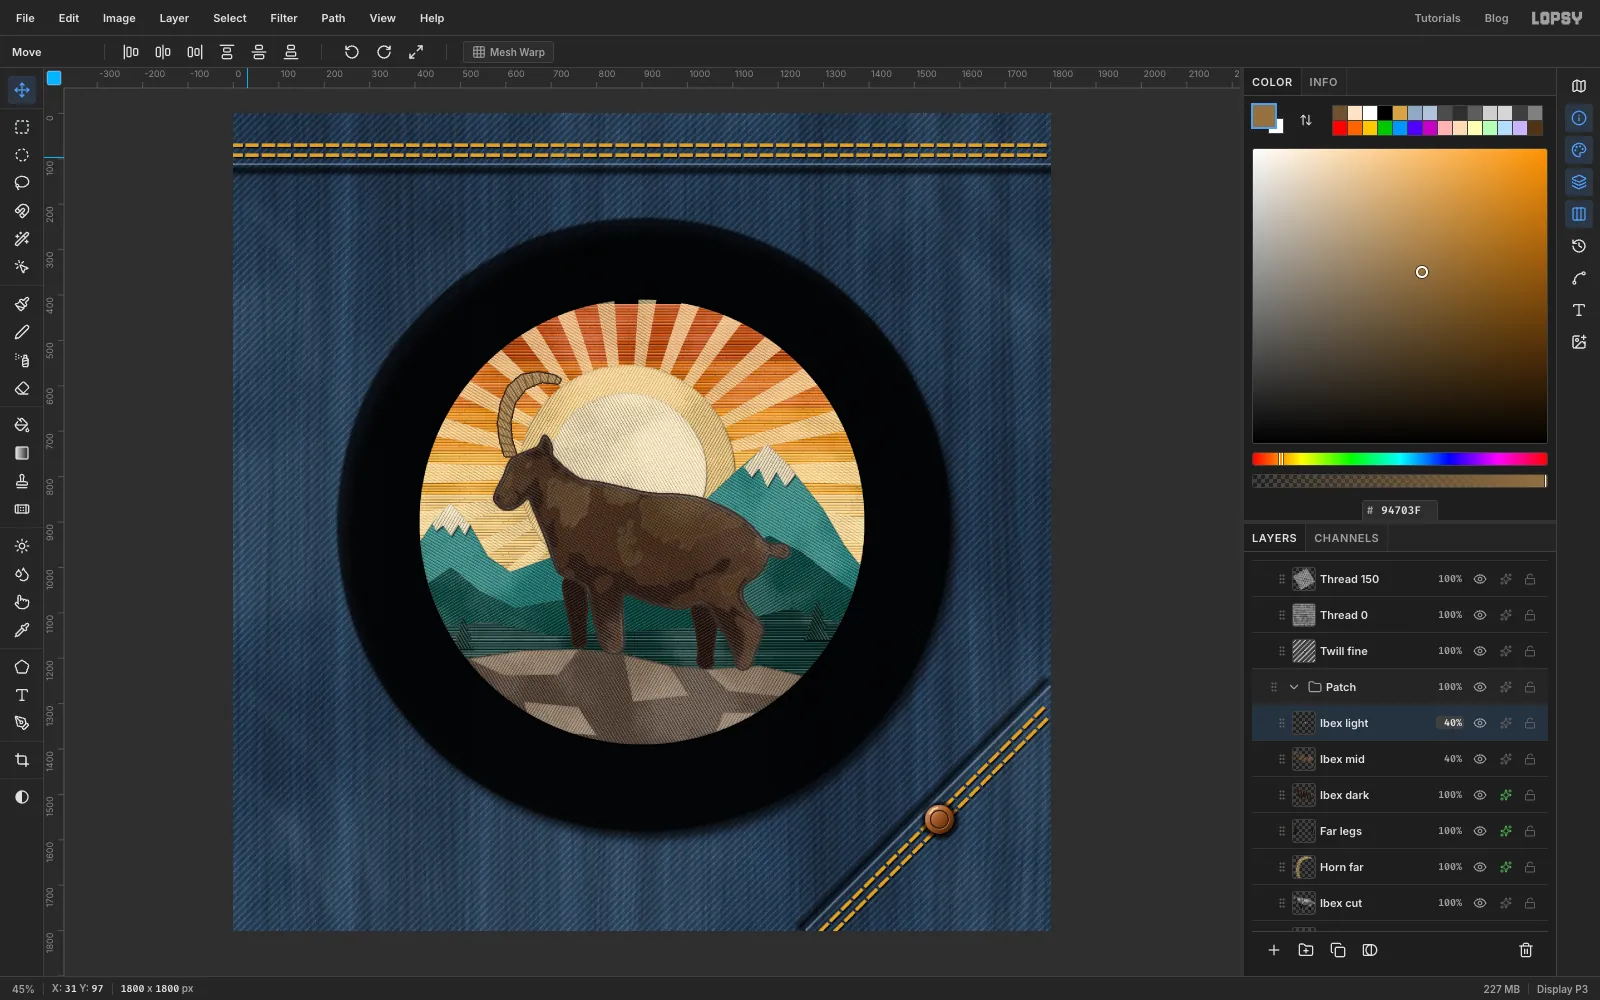
Embroiderers blend colours with long-and-short stitches, where the two colours overlap in a ragged edge. You can get close with a blur along the thread. Run Filter → Motion Blur… with Angle 60 and Distance 12. Then stitch it with Thread 60 and lower the finished layer to 40%.
Do the same for the lightest areas. Hide Ibex dark and Ibex mid, click Ibex cut, wand a light grey area, shrink and grow by 3, and show both layers again. Click Ibex mid, and add a layer called Ibex light. Fill it with , Motion Blur at Angle 120 and Distance 12, stitch it with Thread 120, and lower it to 40%.
-
Add anatomy on top
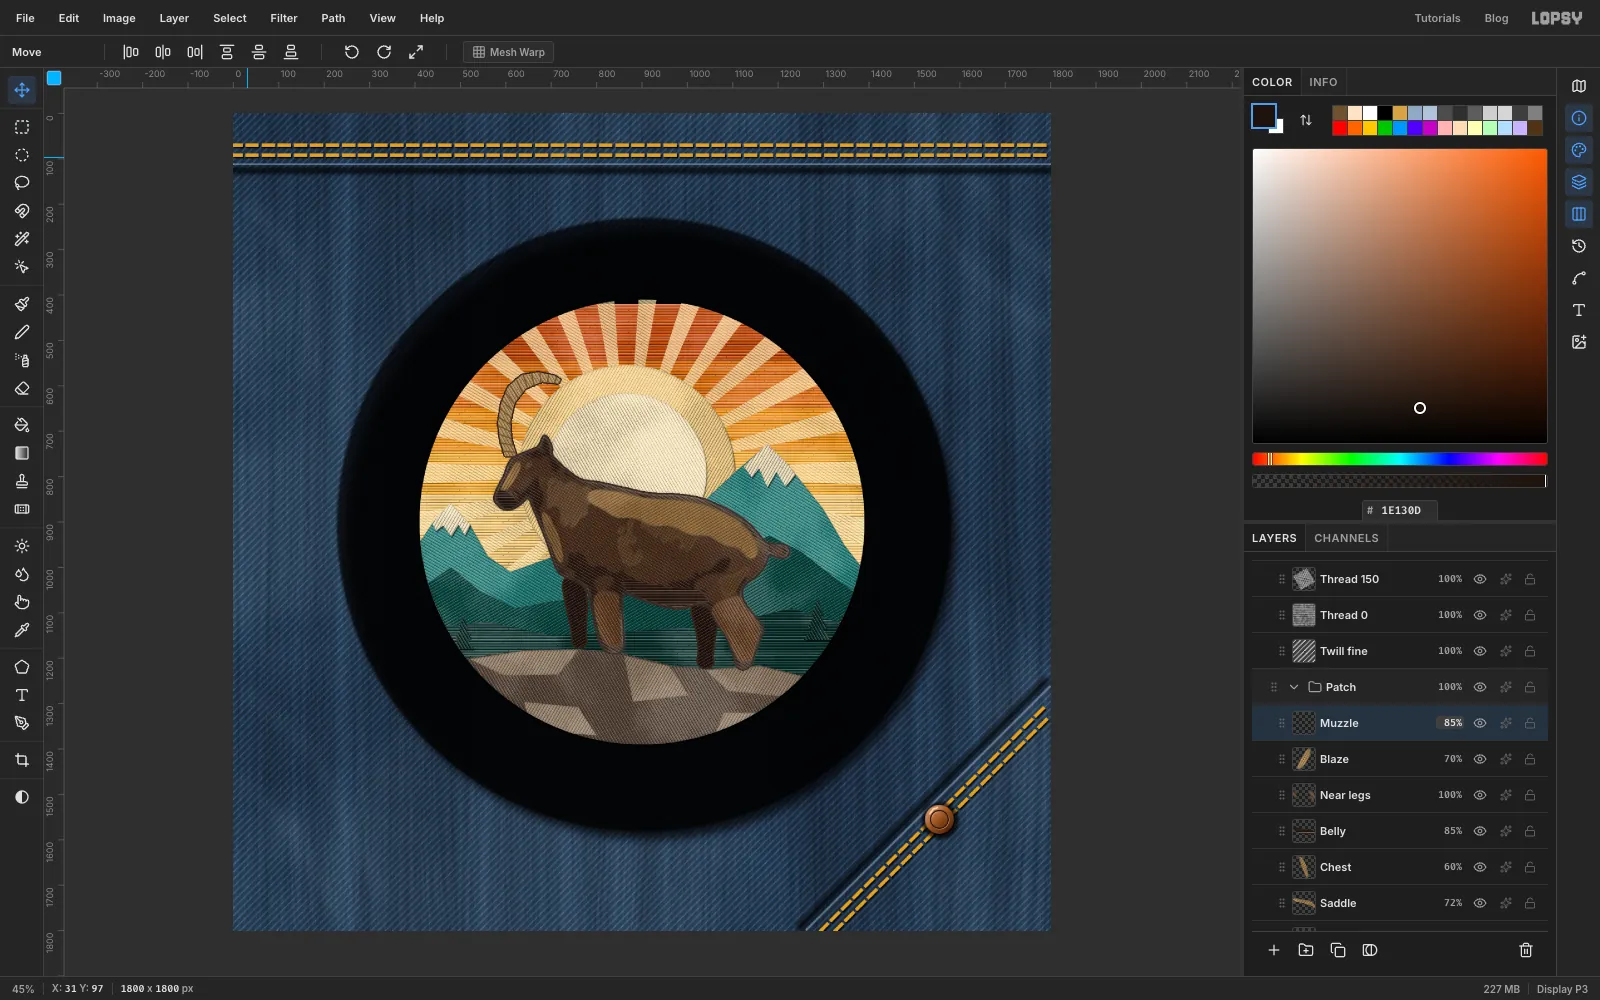
Photo tones alone look blotchy. Give the eye clear shapes that follow the body. Each of these is a new layer, drawn with the Lasso, then filled and deselected. Then run Motion Blur with the Angle and Distance given, stitch the layer, and set the opacity last. Click Ibex light first, and each new layer will land on top of the one before:
- Saddle: the upper back from the withers to the rump, with a wavy lower edge. Fill , Motion Blur Angle 150 and Distance 8, stitch with Thread 150, and set the layer to 72%.
- Chest: a narrow strip down the front of the chest. Fill , Motion Blur Angle 60 and Distance 6, stitch with Thread 60, and set the layer to 60%.
- Belly: the underside between the legs. Fill , Motion Blur Angle 0 and Distance 8, stitch with Thread 0, and set the layer to 85%.
- Near legs: both near legs, from where they leave the body to just above the hoof. Fill , Motion Blur Angle 90 and Distance 10, and stitch with Thread 60. Leave this one at 100%, because it separates the near legs from the darker far ones.
- Blaze: a thin stripe along the bridge of the nose. Fill , Motion Blur Angle 120 and Distance 8, stitch with Thread 120, and set the layer to 70%.
- Muzzle: the nose and mouth. Fill , Motion Blur Angle 0 and Distance 6, stitch with Thread 0, and set the layer to 85%.
-
Stitch the near horn
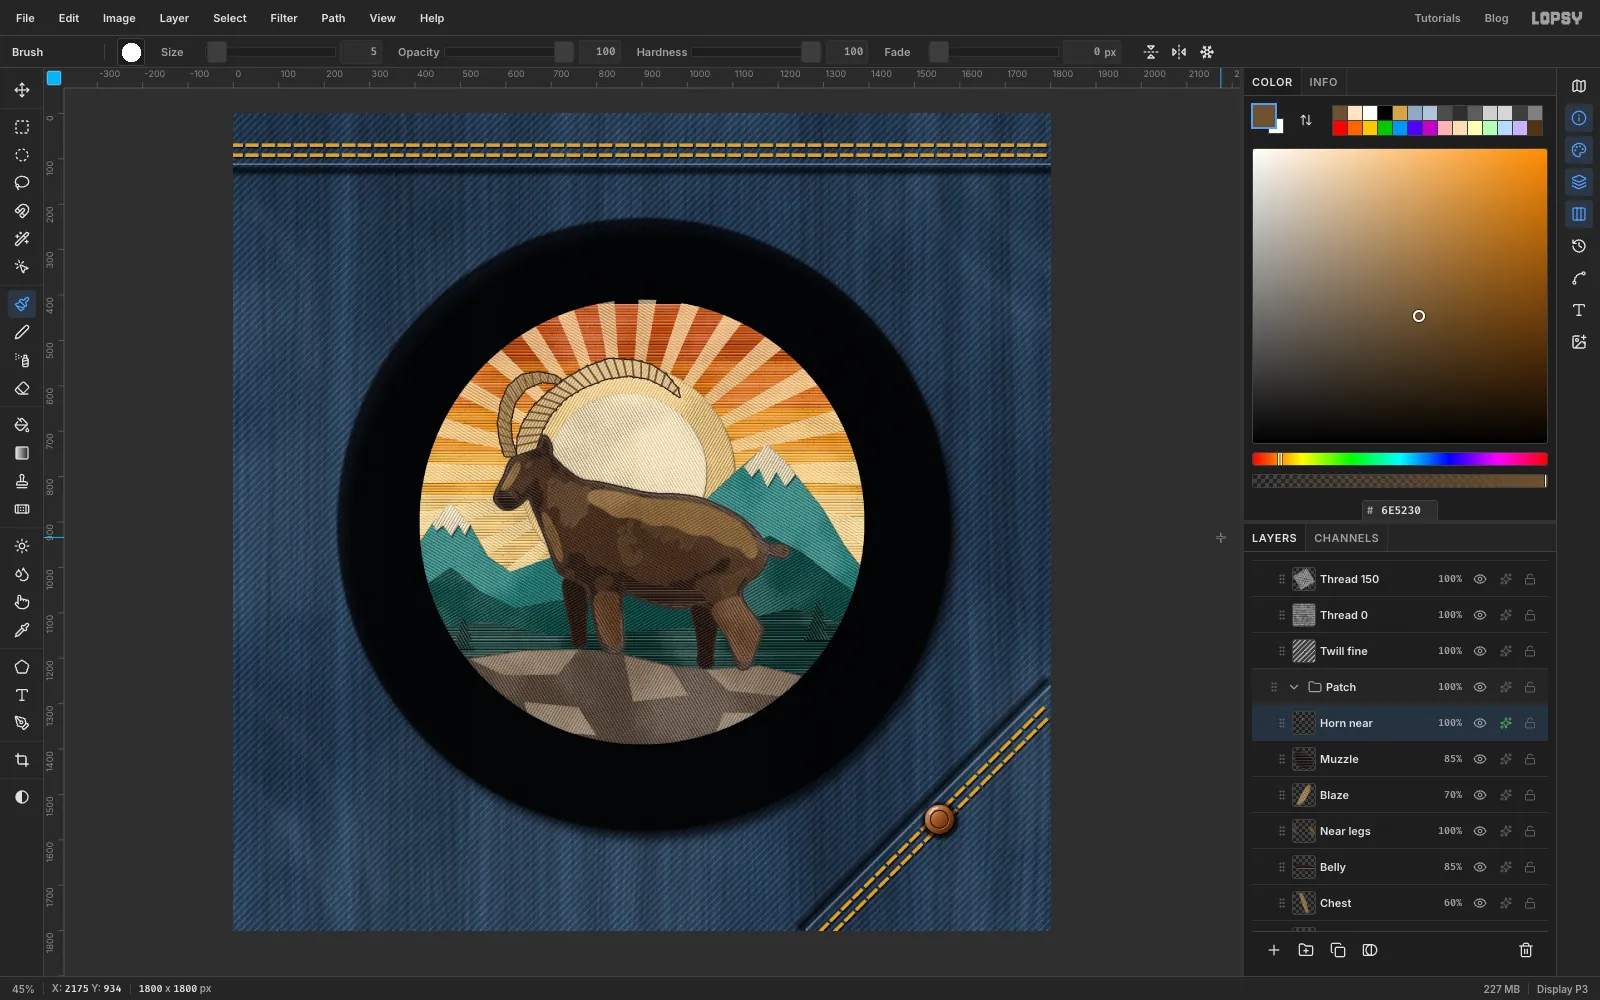
Click Muzzle and add a layer called Horn near. Show Ibex photo for a moment again, and Lasso the big front horn, from the top of the head, along its outer edge to the tip, and back along its inner edge. Hide the photo again.
Fill it with and stitch it with Thread 120. Using the Brush at Size 5 with , add about 24 ridges across the horn, spaced evenly and fanning around the curve. Add the same Stroke.
-
Finish the face and feet
Add a layer called Hooves. Lasso a small dark wedge at the bottom of each of the four legs, holding Shift to add each one, and fill them with . Stitch them with Thread 0 at 45%. Add a Drop Shadow: black, X 3, Y 5, Blur 3, Opacity 80.
Add a layer called Face. Lasso a small pointed beard under the chin, fill it with , then lasso the inside of the ear, and fill it with . Deselect and stitch the layer with Thread 60.
Now paint the small details on the same layer, with the Brush at Hardness 100:
- the eye: a single click at Size 13 in
- the nostril: a single click at Size 10 in
- the mouth: a short click and Shift-click line at Size 3 in
- the eye's glint: a single click at Size 4 in , just up and left of the eye's centre
Hide Ibex cut with its eye icon.
-
Make the twill band
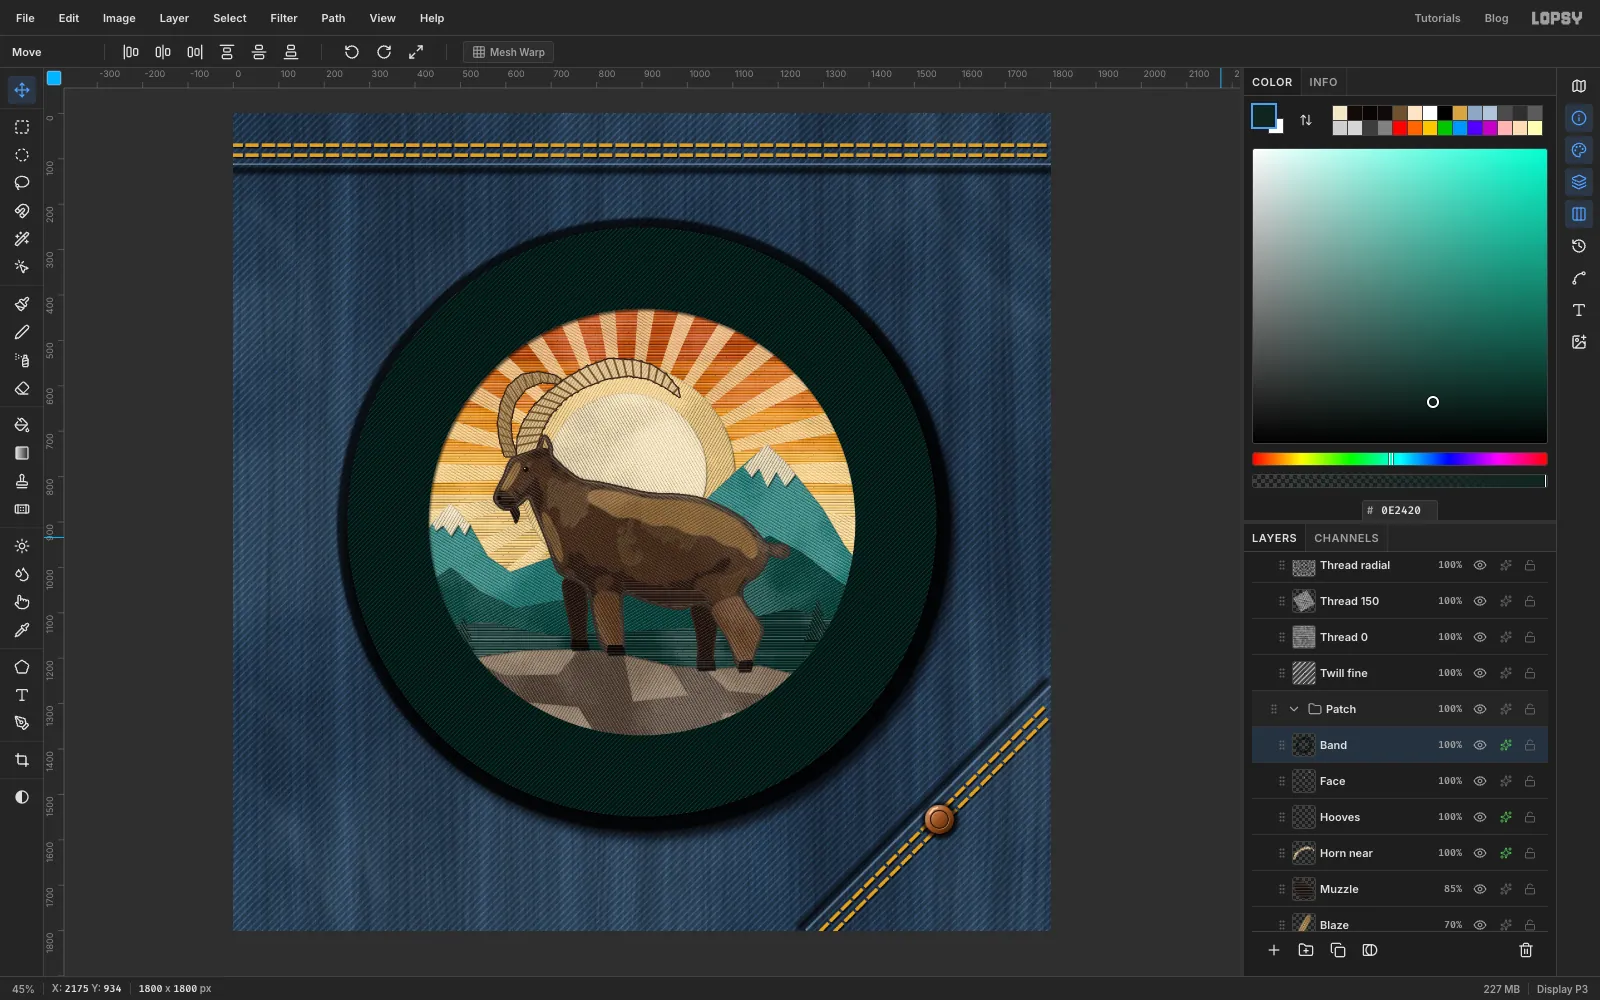
Click Face and add a layer called Band. With the Elliptical Marquee, select a circle of radius 648. Hold Alt and drag a circle of radius 470 to cut out the middle. Fill the ring with and deselect.
Stitch it with Twill fine, but with two changes: Overlay at 100%. This part of a real patch is woven fabric, not embroidery, so you want the diagonal twill rather than thread. Add a Drop Shadow in black: X 3, Y 5, Blur 7, Opacity 60, which throws a shadow on to the scene.
-
Add the gold rims
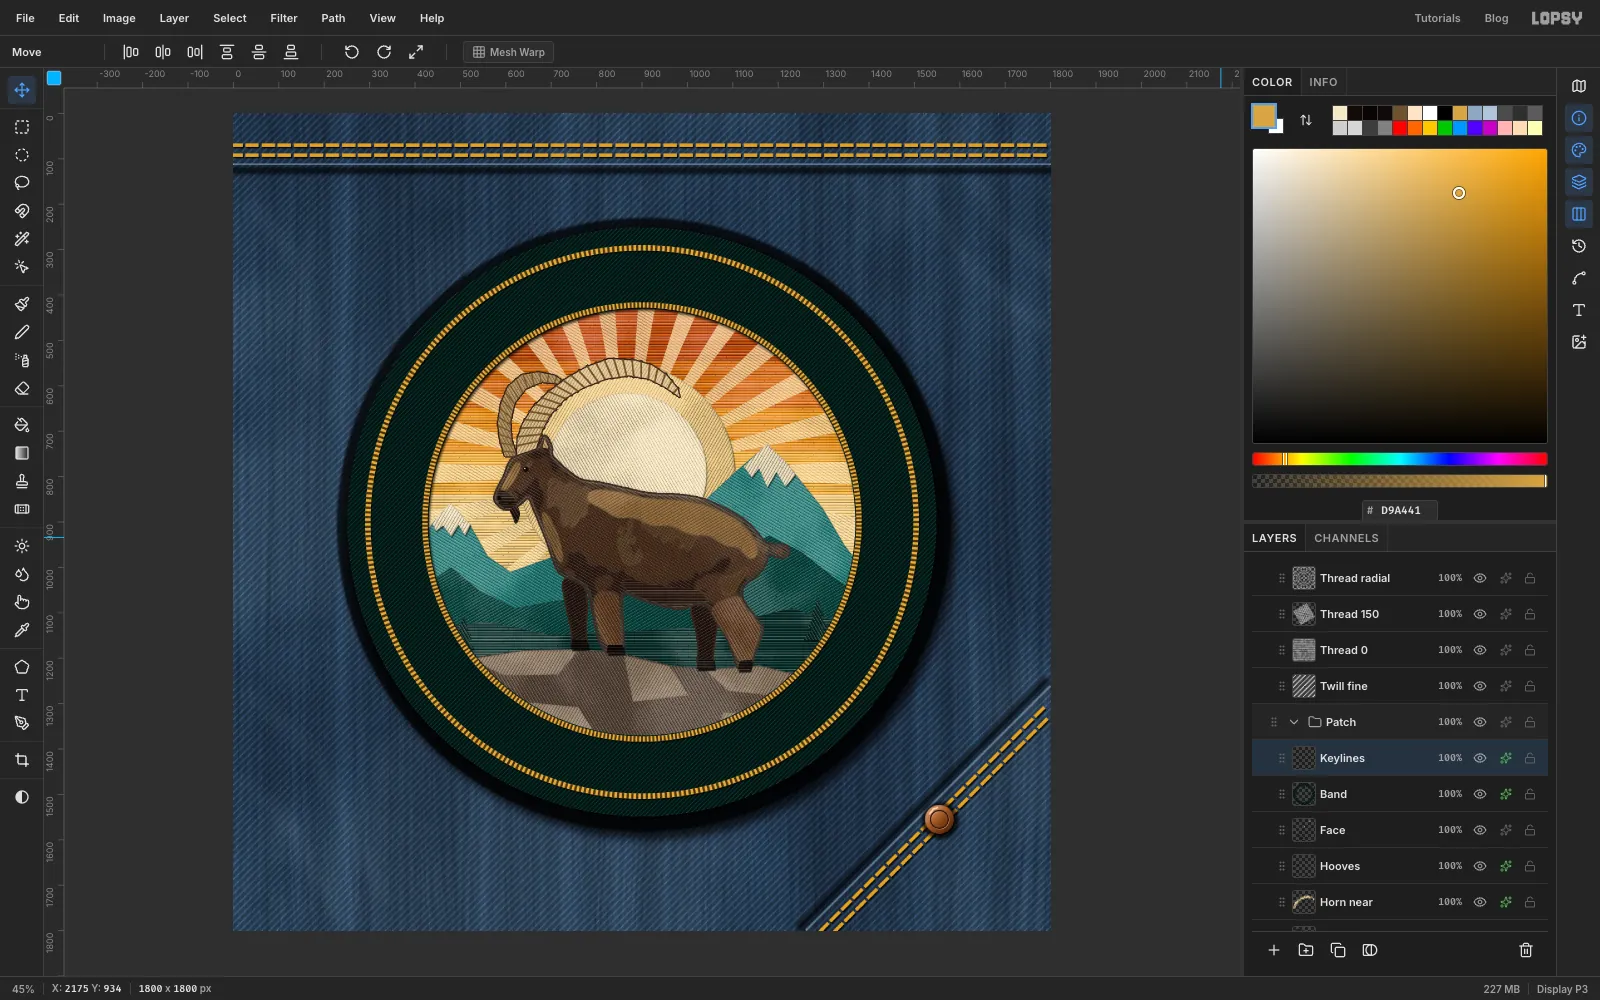
Add a layer called Keylines, and set the foreground to . Select a ring from radius 610 down to radius 598, and fill it. Press Cmd+D, then select another ring from radius 484 down to radius 472, and fill that as well. Deselect.
Stitch it with Thread radial at Hard Light and 100%, so these rims look like tiny chain stitches. Add a Drop Shadow in black: X 2, Y 3, Blur 3, Opacity 60.
-
Draw two curved paths for the lettering
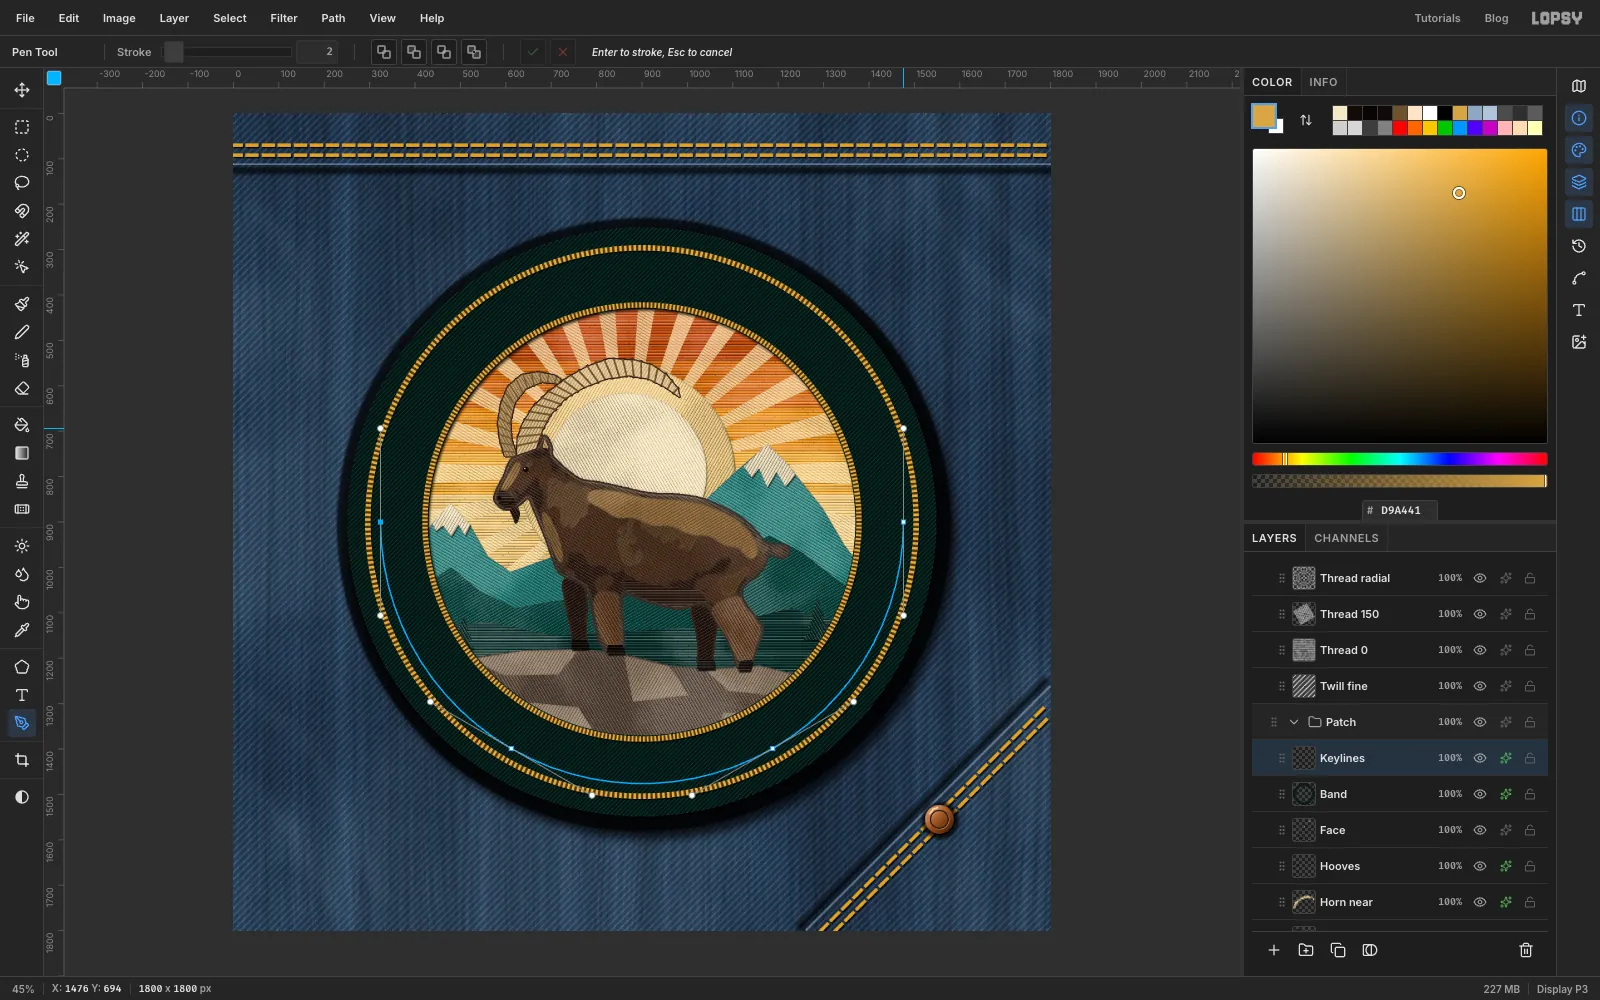
Pick the Pen tool. You'll draw each arc as three spans of a circle, with four anchors. Press at each anchor and drag along the direction of travel to pull out the handles.
For the top path, the circle has radius 505. Start at the far left of the circle, at 395, 900, and work clockwise over the top: press and drag at 395, 900, then at about 648, 463, then at about 1152, 463, and finally at 1405, 900. Drag about 180 px each time, following the curve. Click the tick button in the options bar to commit the path.
For the bottom path, the circle has radius 576. Start at 324, 900 and go anticlockwise under the bottom: press and drag at 324, 900, at about 612, 1399, at about 1188, 1399, and at 1476, 900. Drag about 205 px each time, and commit. Only the selected path is drawn on the canvas, so the top one disappears here. It's safe in the Paths panel.
The direction matters. Letters stand on the left side of the direction you drew in, so both paths have to run from left to right for the text to end up upright.
-
Set the top lettering
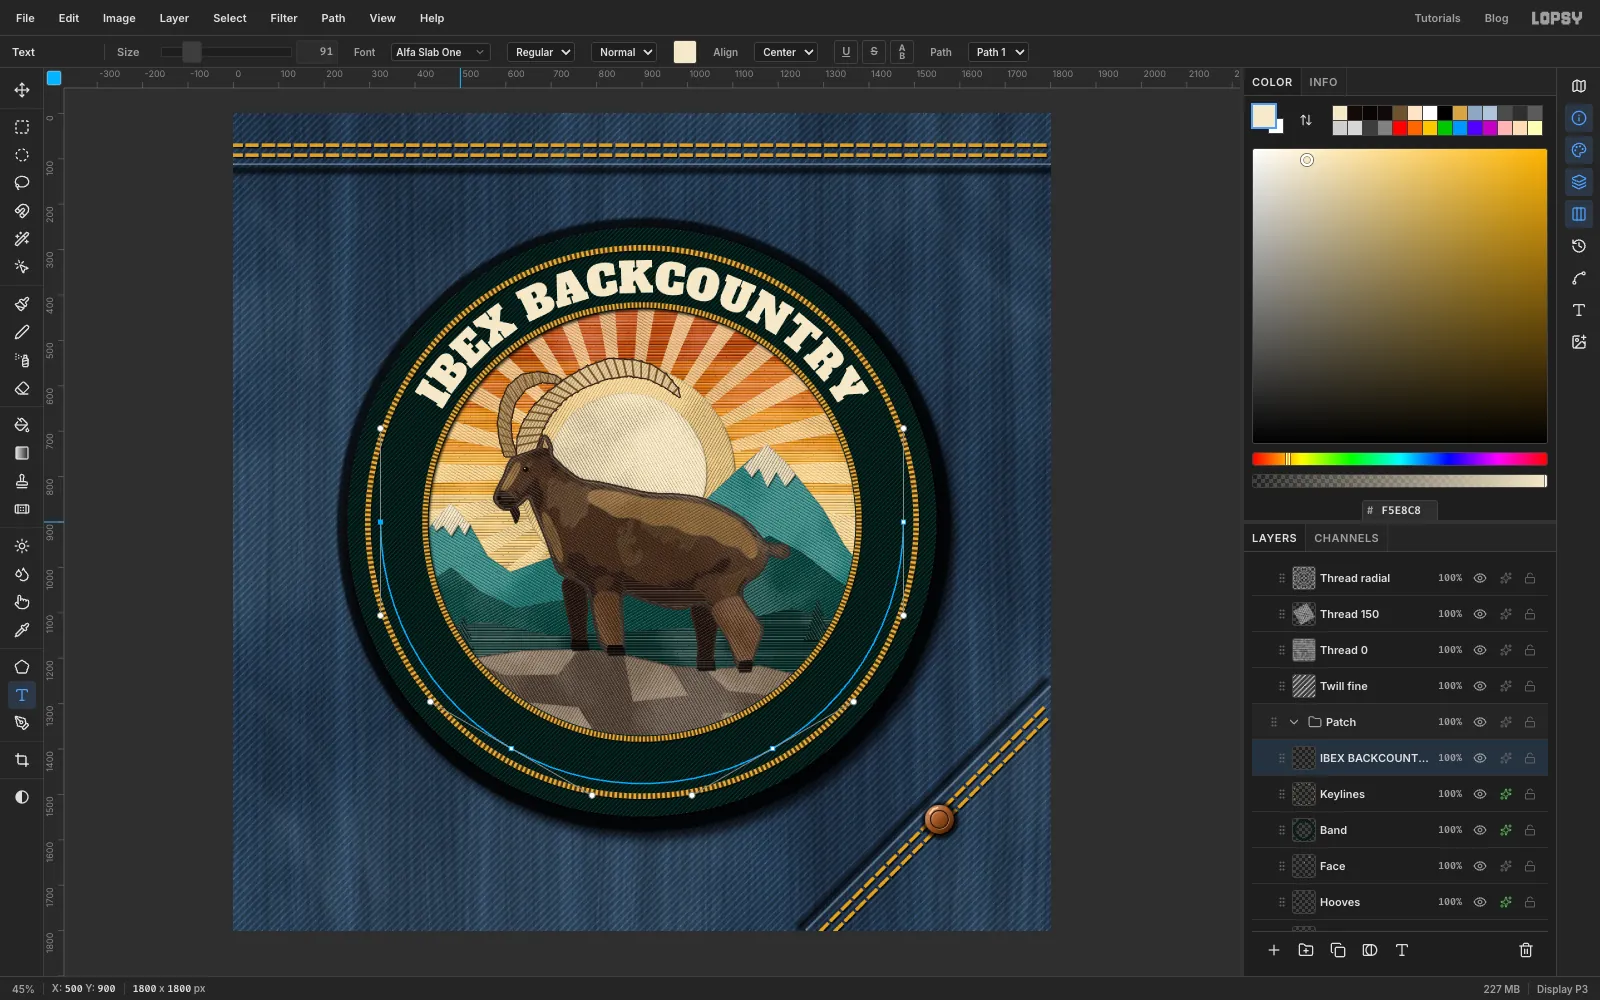
Click Keylines so the text lands above it. Set the foreground to and pick the Text tool. In the options bar, choose the Alfa Slab One font at Size 91.
Click anywhere in empty space, type IBEX BACKCOUNTRY and press Tab. In the options bar, set Path to Path 1, and Align to Center. The text jumps on to the arc and centres itself.
Look at the margins: the letters should have an even gap to the gold rims on both sides. If not, change the Size a little.
-
Stitch the lettering
Click Rasterize Layer, the T icon under the Layers panel, because the recipe needs pixels. Stitch it with Thread radial at Hard Light and only 42%, because letters need to stay crisp. Run Filter → Add Noise… with Amount 6 and Mono, so the ridges aren't too perfect. Then add:
- Drop Shadow: black, X 3, Y 4, Blur 3, Opacity 85
- Inner Glow: , Size 5, Opacity 45
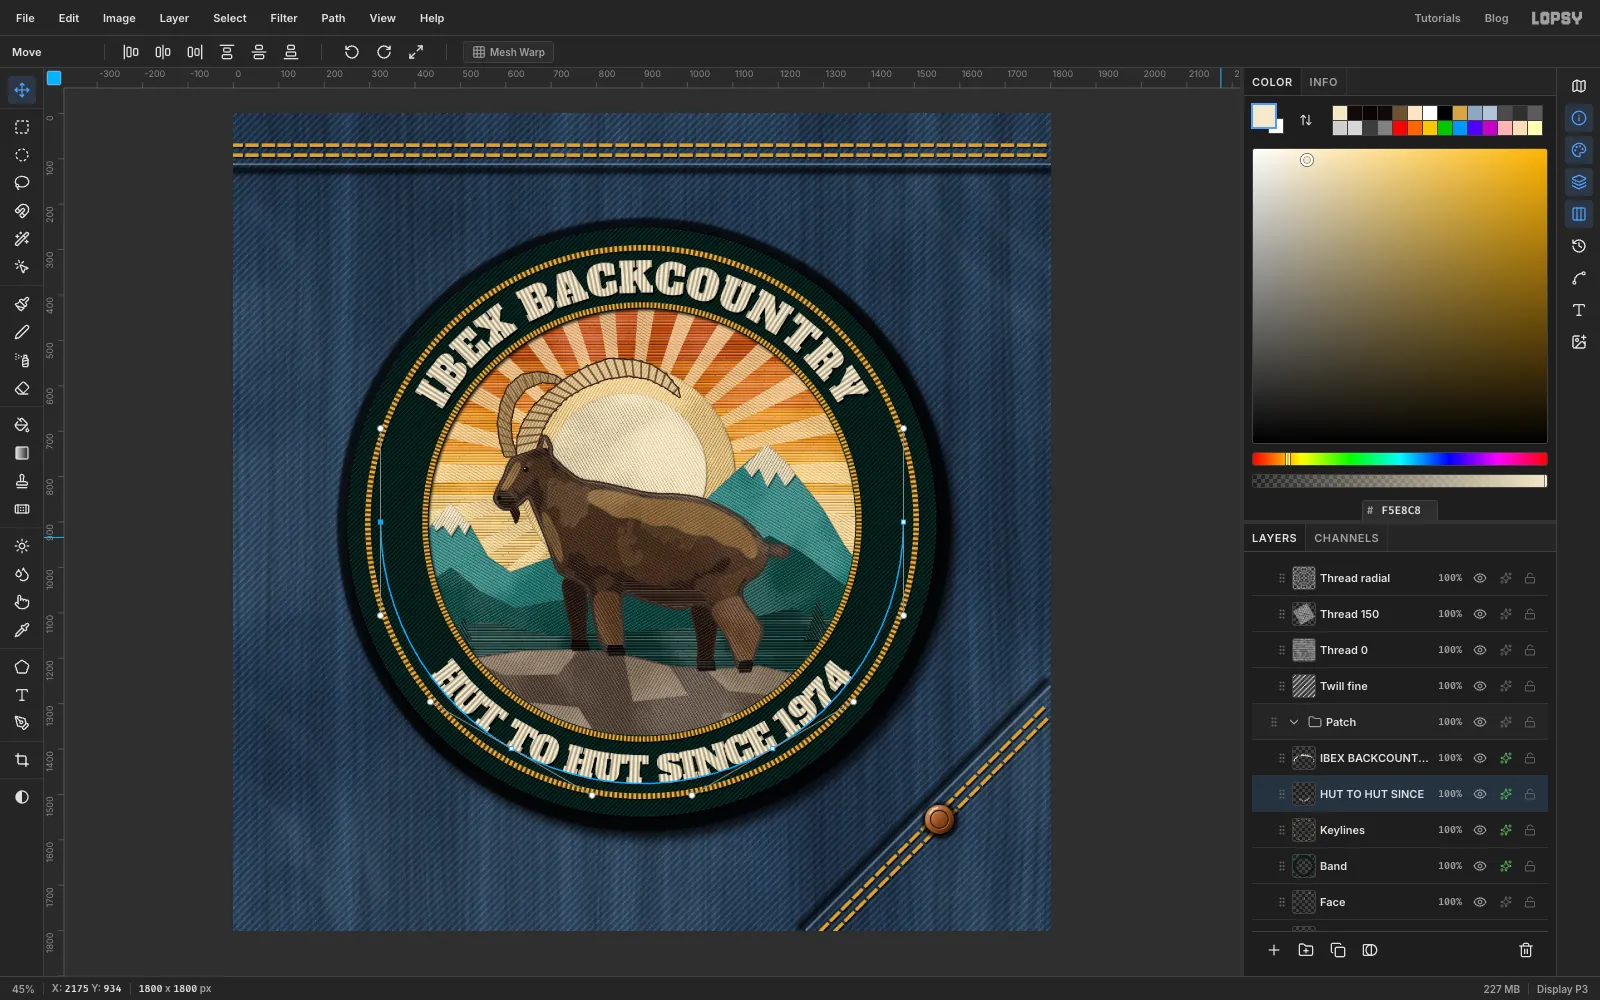
Click Keylines again and set the second line the same way: HUT TO HUT SINCE 1974 at Size 80, on Path 2, centred. Rasterize it, stitch it, and add the same noise and effects. The layer's name will be cut short, which is fine.
-
Add the stars
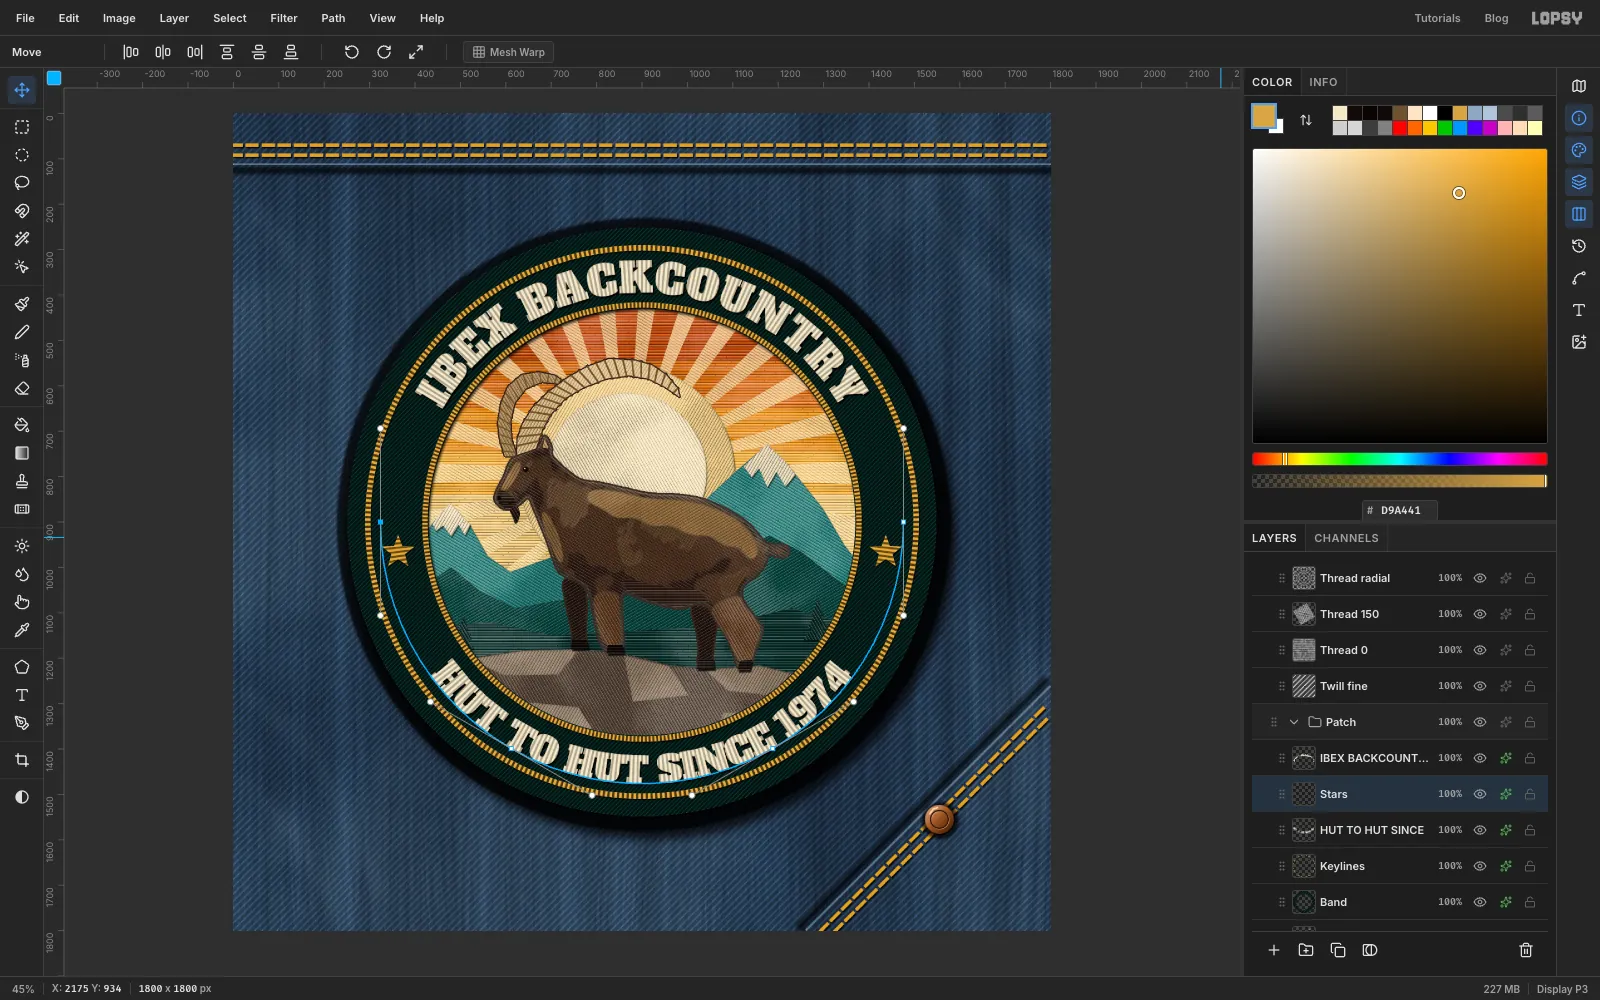
Add a layer called Stars. Set the foreground to . Using the Lasso, draw a five-pointed star about 76 px across, midway across the band at the far left, a little below the patch's halfway line. Hold Shift and draw a matching star at the far right. Fill them and deselect.
Stitch with Thread radial at 80%. Add a Drop Shadow in black: X 2, Y 3, Blur 3, Opacity 70.
Stars sit nicely in the gaps because the top text spans a wider arc than the bottom. Placing them slightly low splits the gaps evenly.
-
Lay down the merrow edge
A merrow is the thick, overlocked cord around a patch's edge. It's the first thing anybody notices.
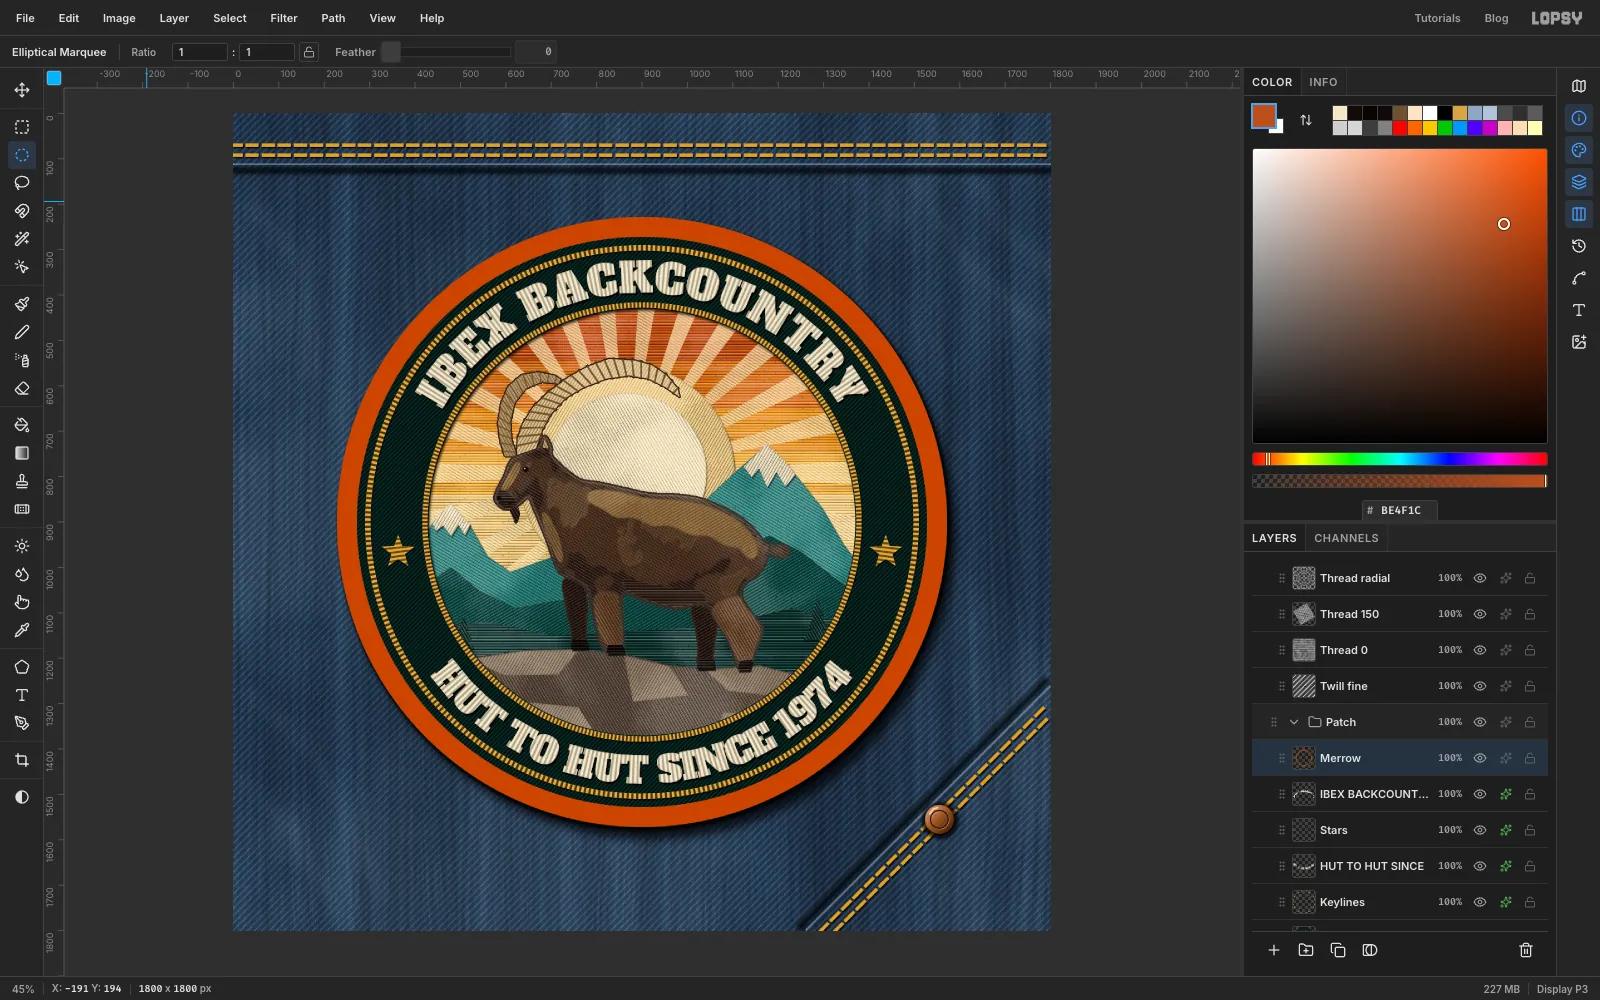
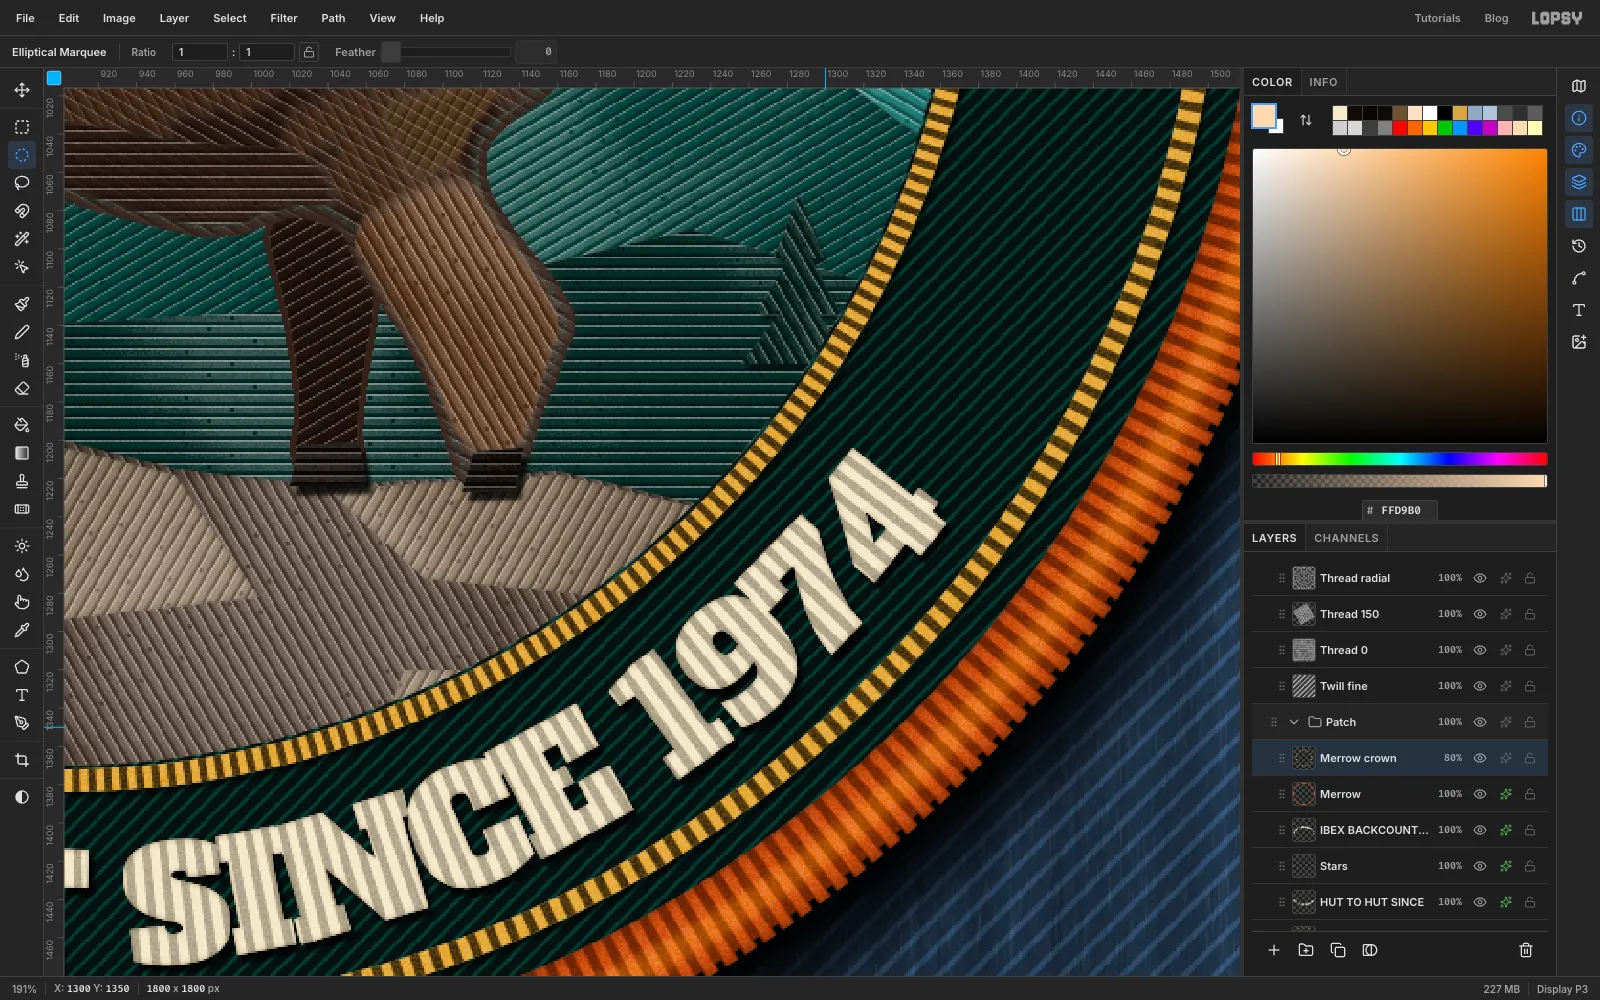
Open the Paths panel and click the selected path's row to deselect it, so its blue line stops showing on the canvas. Then click the IBEX BACKCOUNTRY row, and add a layer called Merrow. Select a ring from radius 672 down to radius 628, fill it with , and deselect.
-
Roll the merrow
Stitch it with Thread radial at 62%, then run Filter → Add Noise… with Amount 10 and Mono.
Next, bead the outer edge, because real merrow isn't a perfect circle:
- Add a layer called Notch. Select a ring from radius 680 down to radius 668.
- Set the foreground to black and run Filter → Sunburst… with Rays 120, Length 120 and Width 11. Run it twice more, entering those values again each time, with Rotation 1 and then Rotation 2. Then deselect.
- Cmd-click the Notch thumbnail, click the Merrow row, press Delete and deselect.
- Delete the Notch layer.
Give the cord a rounded form. Add an Inner Glow to Merrow: , Size 14, Opacity 75. Then add a layer called Merrow crown, select a ring from radius 658 down to radius 644, and use Select → Feather… at 5. Fill it with , deselect, and set it to Soft Light at 80%. That's the soft highlight along the top of the cord.
-
Light the patch
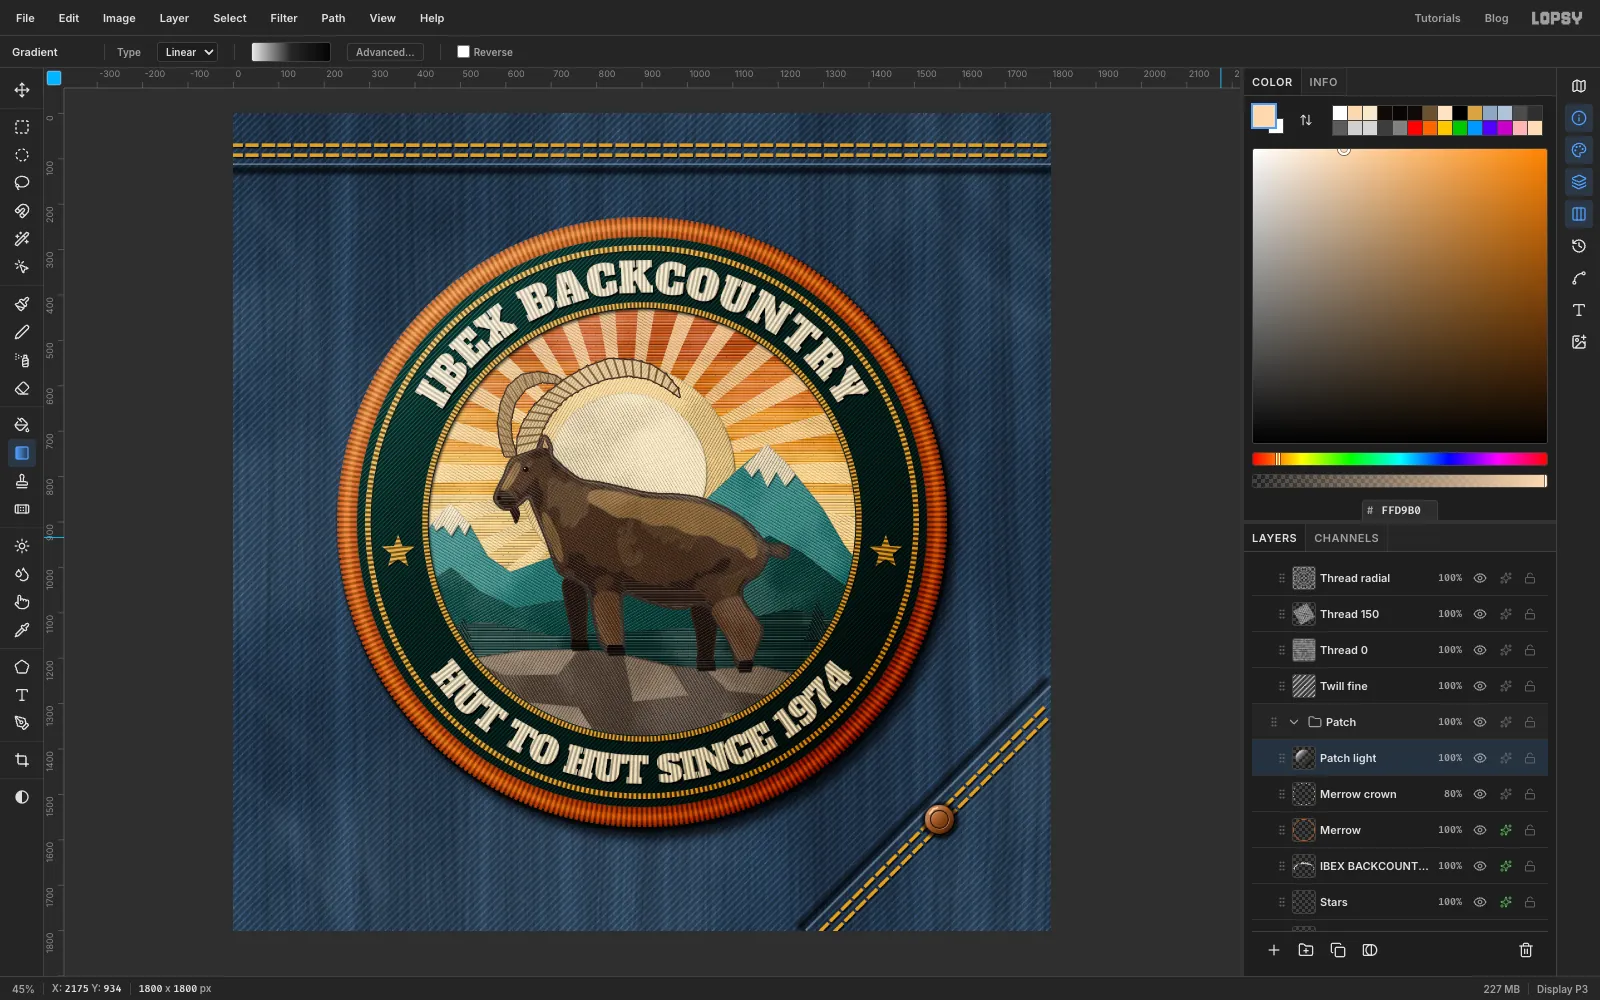
Add a layer called Patch light. Select a circle of radius 672. Pick the Gradient tool, set it to Linear and click Advanced…. Set three stops:
- at 90% opacity on the left
- at 0% opacity in the middle
- at 90% opacity on the right
Drag from the upper left of the patch to the lower right, and deselect. Set the layer to Soft Light. All the separate fields now share the same light, which ties them together.
-
Leave a loose thread
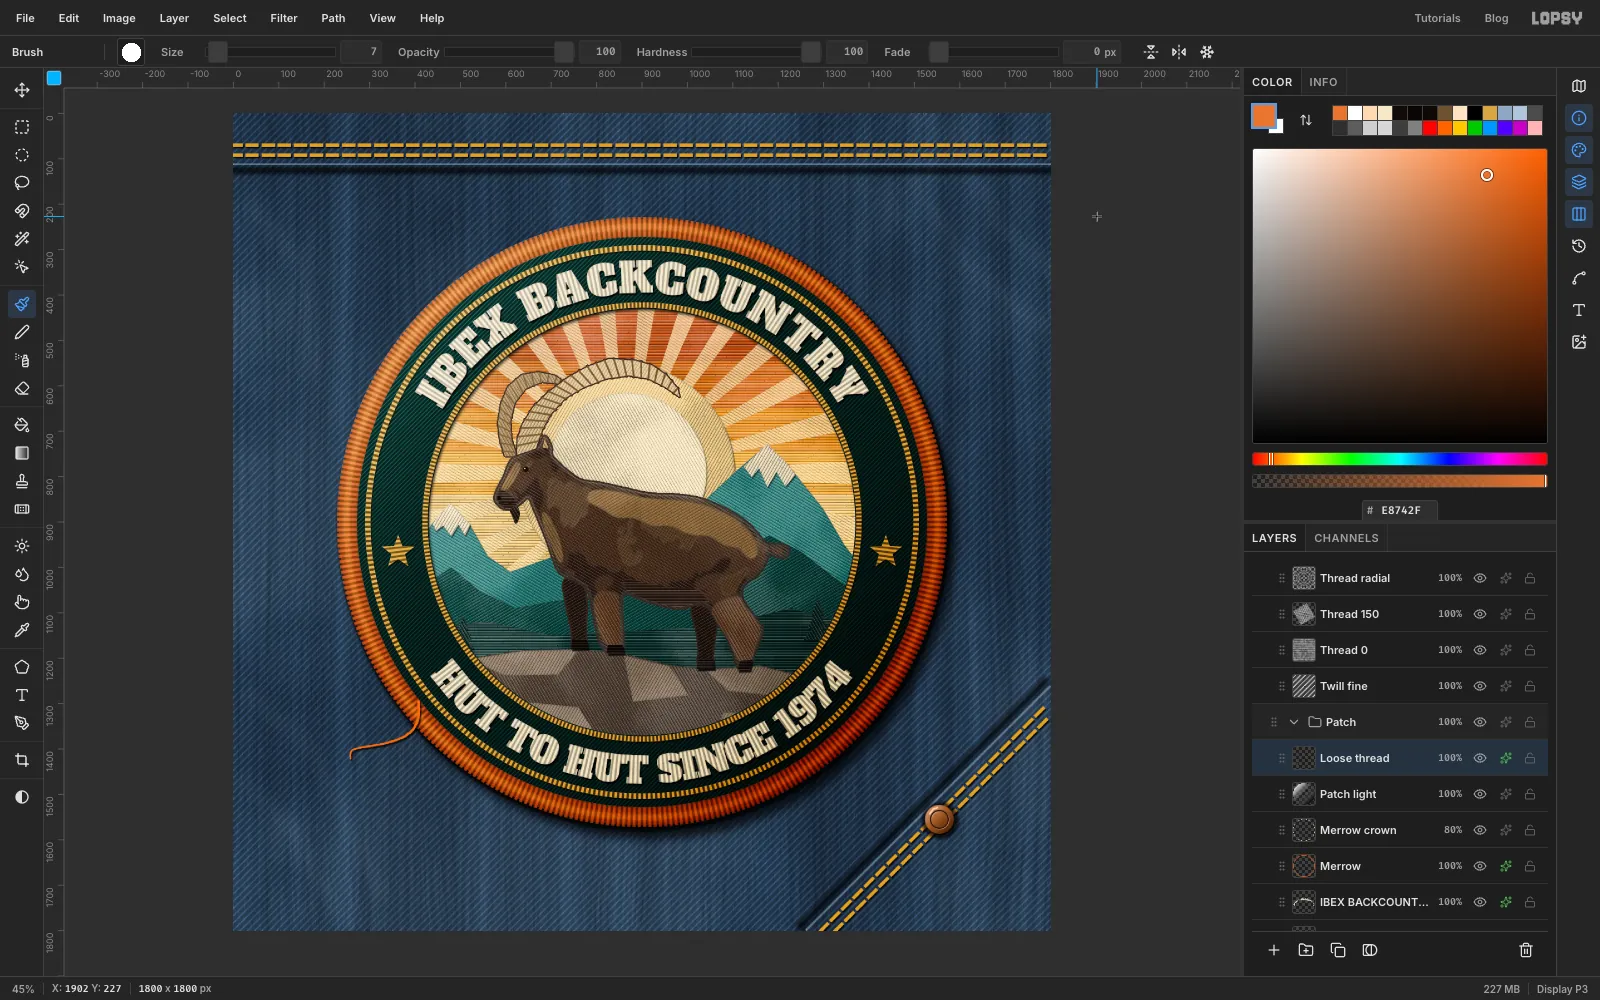
Every real patch has one. Add a layer called Loose thread, and set the foreground to . Open the Brushes window and, on the Shape tab, set Size 7, Hardness 100, Opacity 100 and Taper 620. Close it.
Press on the merrow at about 7:30 on the clock face, and drag a loose S-curve down and to the left on to the denim. Taper thins the stroke from where you start, so the thread is thickest at the patch, and fades to a point. Add a Drop Shadow in black: X 3, Y 4, Blur 3, Opacity 75.
Open the Brushes window again and set Taper back to 0.
-
Add window light and a vignette
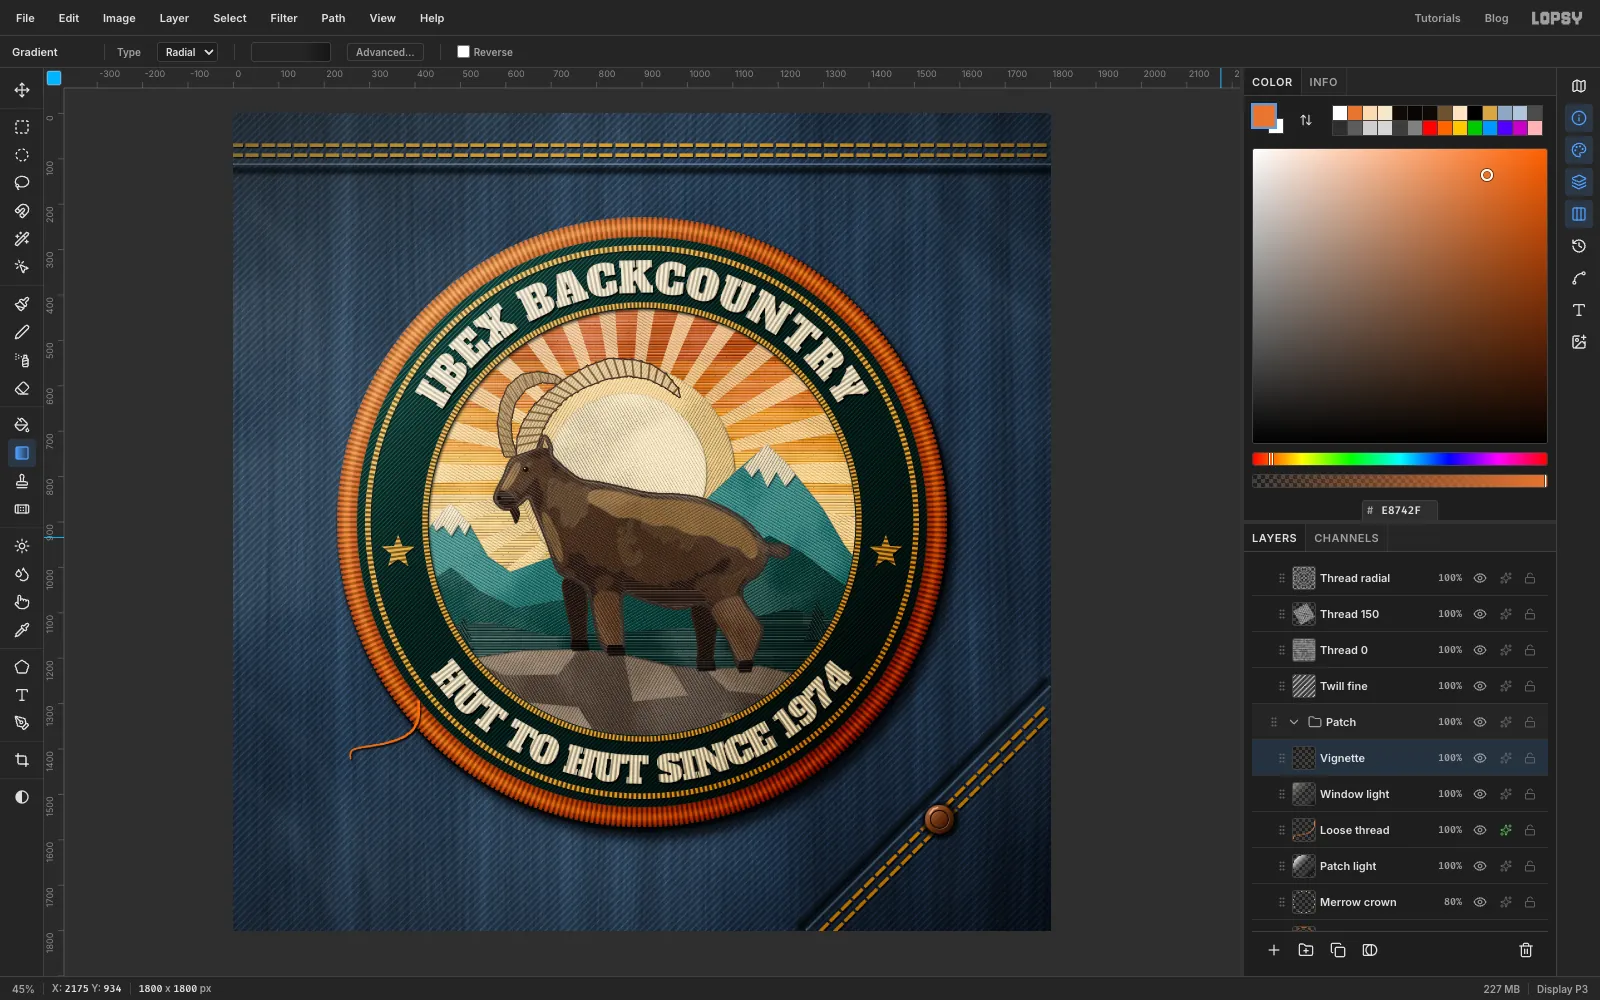
Click the Patch group's row, with the group still expanded, and add a layer called Window light. It lands at the top of the group, above everything else in the picture except the thread sheets.
Set up a Linear gradient with these stops:
- at 45% opacity on the left
- at 0% opacity at about 55%
- at 80% opacity on the right
Drag from the upper left corner of the canvas to the lower right. Set the layer to Soft Light.
Add a layer called Vignette. Set up a Radial gradient with these stops, all of them black:
- 0% opacity at the start
- 0% opacity at about 62%
- 42% opacity at the end
Drag from the centre of the canvas to past the right edge, about 350 px outside the canvas. Set the layer to Multiply.
-
Tidy the layers and save
Delete Ibex cut and Ibex photo. Delete the Thread sheets group too, unless you want to keep stitching, because the sheets make the project file much bigger.
To group the rest, click the first layer in each list, Cmd-click the others, click Group Layers, and rename the group:
- Scene: Sky, Sun rays, Sun, Sun core, Far range, Snow, Mid range, Foothills, Pines, Ledge, Ledge lights
- Ibex: Horn far, Far legs, Ibex dark, Ibex mid, Ibex light, Saddle, Chest, Belly, Near legs, Blaze, Muzzle, Horn near, Hooves, Face
- Lettering: Band, Keylines, the two text layers, Stars
Save with File → Save Project and export with File → Quick Export PNG.
If you want the patch on its own, hide the jacket layers, both shadows and the Window light and Vignette layers before you export.