Design a Skeuomorphic Turntable Logo for a Record Shop
Build a glossy, iOS 6 style turntable app icon and wordmark in Lopsy, with chrome, vinyl grooves, a curved label and a lacquered deck.

Skeuomorphism is design that imitates real materials. Think of the leather-stitched calendars and wooden bookshelves of early-2010s phones. An iOS 6 app icon was a little object: a glossy tile with a highlight across the top, chrome that caught the light, and soft shadows underneath.
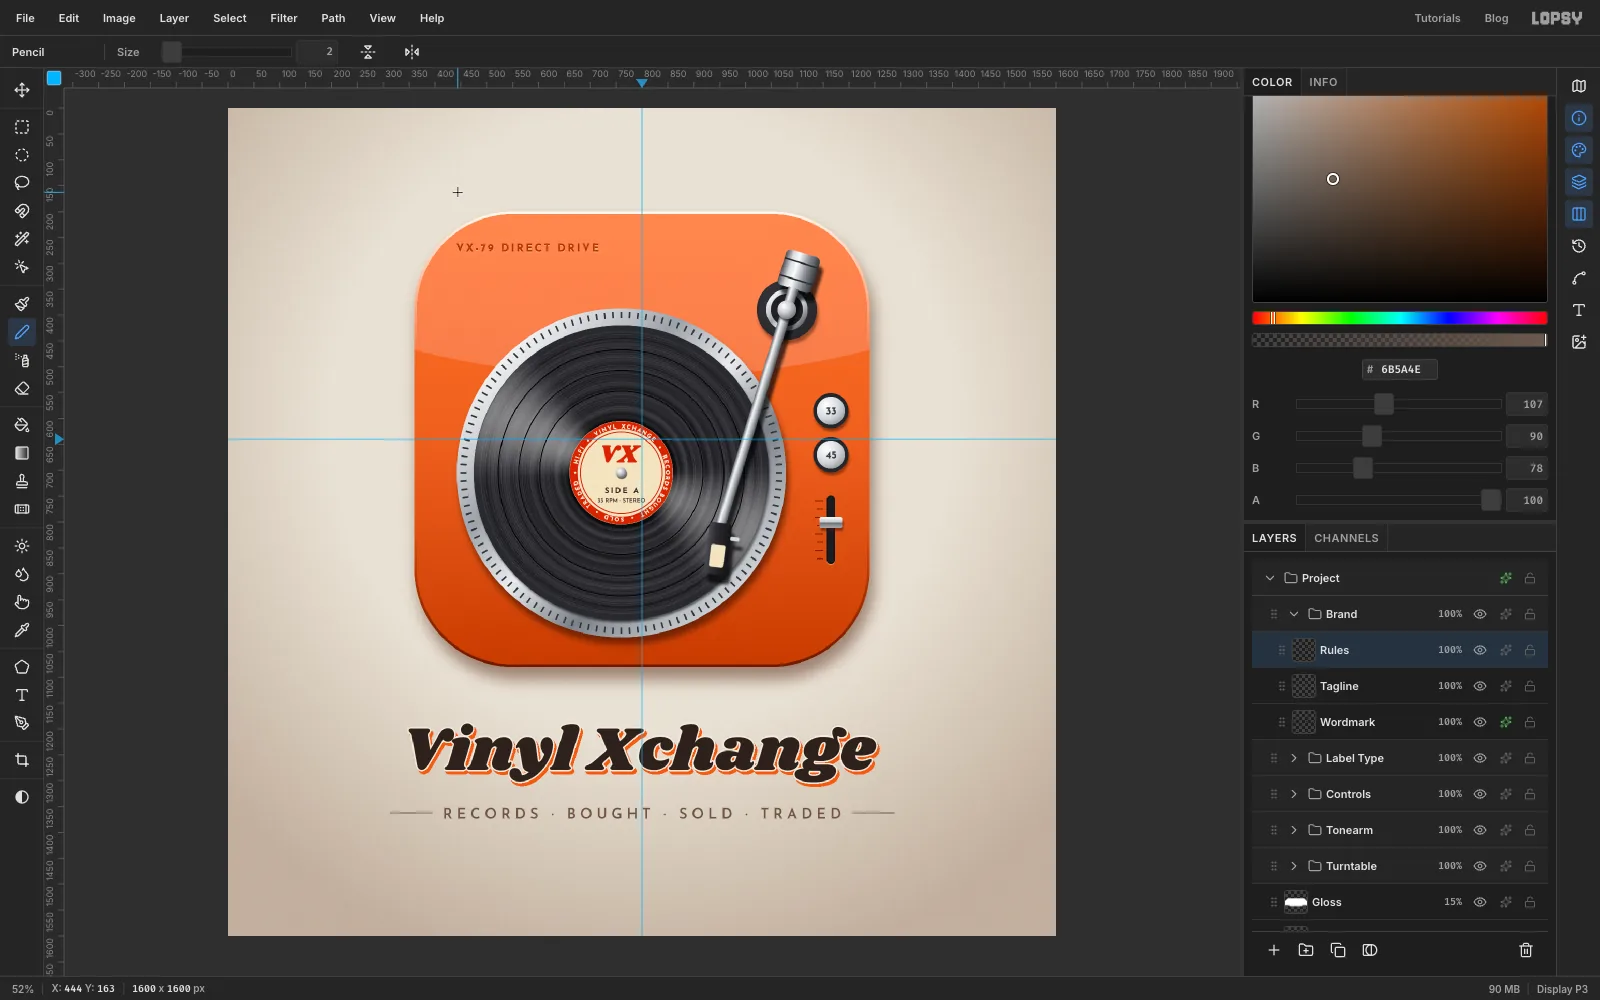
In this tutorial you'll make Vinyl Xchange, a logo for a record shop. The mark is a 1600 × 1600 px presentation board: a lacquered tangerine turntable seen from above, built as an app-icon tile, with the shop's name set underneath. Every part is a simple shape. The realism comes from gradients, noise, fine detail and consistent shadows.
The light comes from above and slightly to the left, so every shadow in this piece falls down and a little to the right. Keep that in mind each time you add a Drop Shadow.
Along the way you'll use:
- the Shape tool for rounded rectangles, circles, rings and a circle path
- many-stop linear and radial gradients for lacquer, chrome and vinyl
- Add Noise, Motion Blur, Gaussian Blur and two very different uses of Sunburst
- marquee intersect and subtract, Shrink and Cmd-clicking thumbnails
- Duplicate Layer, scaling and rotating with the Move tool, Merge Down, and copy and paste
- Drop Shadow, Inner Glow and Stroke effects
- text in Shrikhand and Josefin Sans, letter spacing, and text on a path
- ruler guides, the grid, the Pencil and the Eraser, and groups
The palette:
-
Linen
-
thread grey
-
vignette
-
Lacquer
-
flat fill
-
Bevel light
-
bevel dark
-
tile shadow
-
Chrome
-
Vinyl
-
grooves
-
track gaps
-
strobe marks
-
Label cream
-
label red
-
label ink
-
band text
-
Model line
-
deboss lip
-
slider ticks
-
Wordmark
-
offset shadow
-
keyline
-
tagline
-
rules
-
Weave a linen backdrop
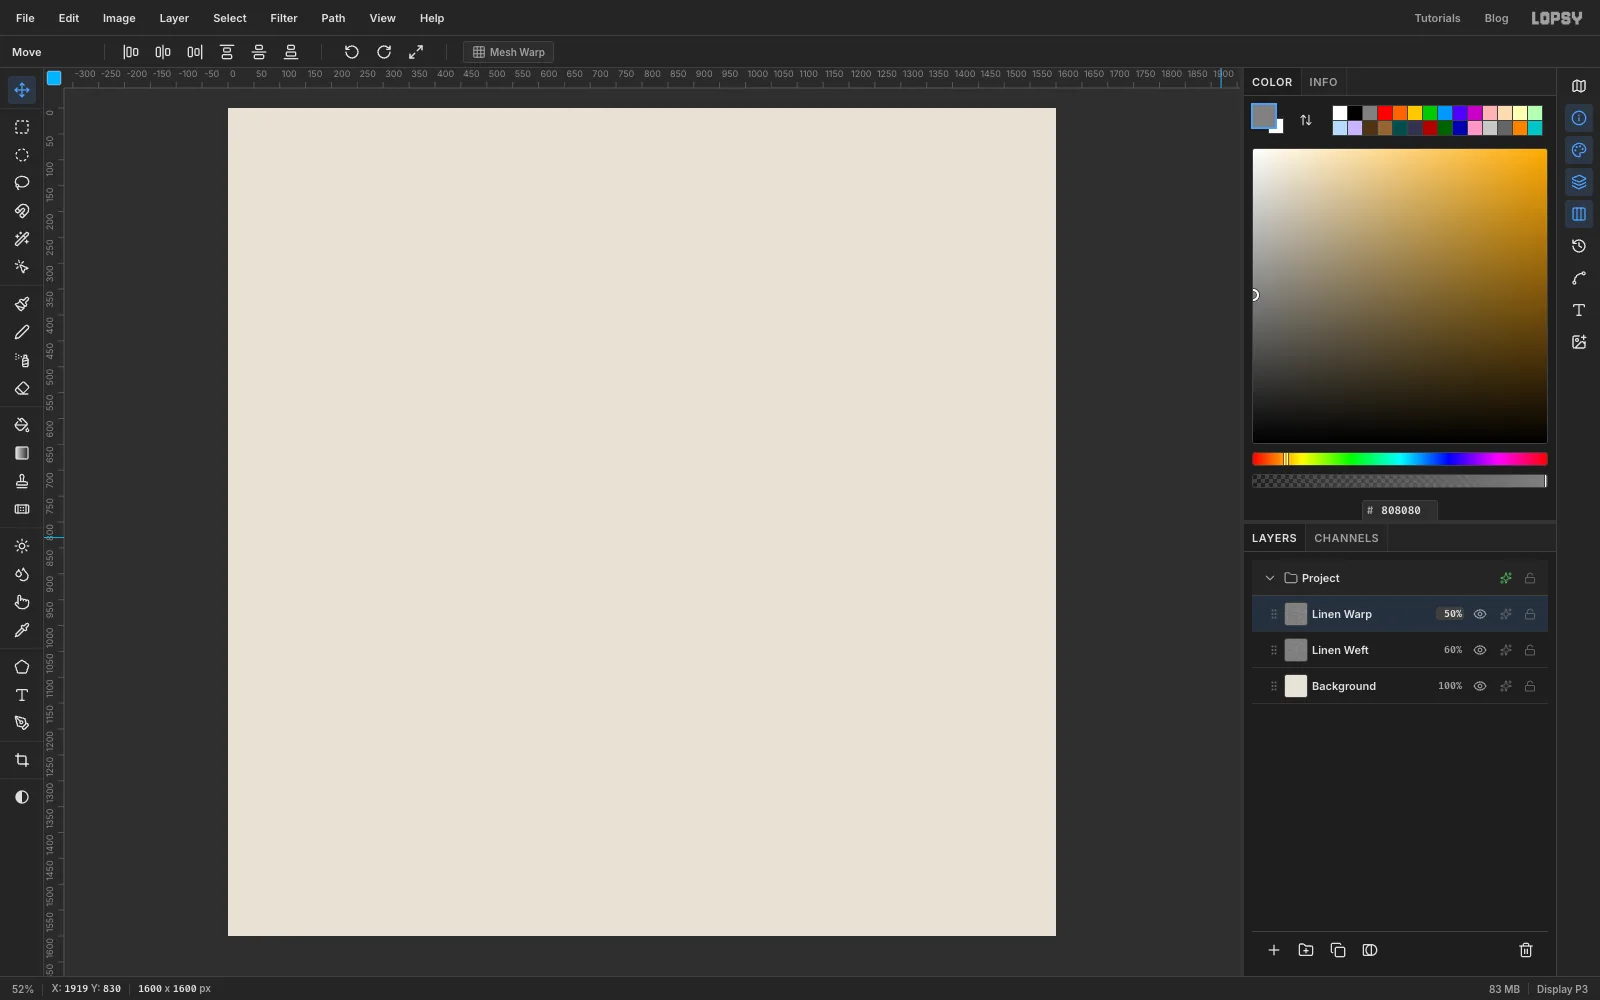
Choose File → New and create a 1600 × 1600 px document. Click the Background layer, set the foreground to and choose Edit → Fill.
Rename Layer 1 to Linen Weft. Set the foreground to , choose Edit → Fill, and run Filter → Add Noise… with Amount 100, Mono and Gaussian. Then run Filter → Motion Blur… with Angle 0 and Distance 4, which stretches the specks into horizontal threads. Set the layer to Overlay at 60%.
Add a layer called Linen Warp and repeat the fill, noise and blur, but use Angle 90 for the blur so the threads run vertically. Set it to Overlay at 50%.
-
Add a warm vignette
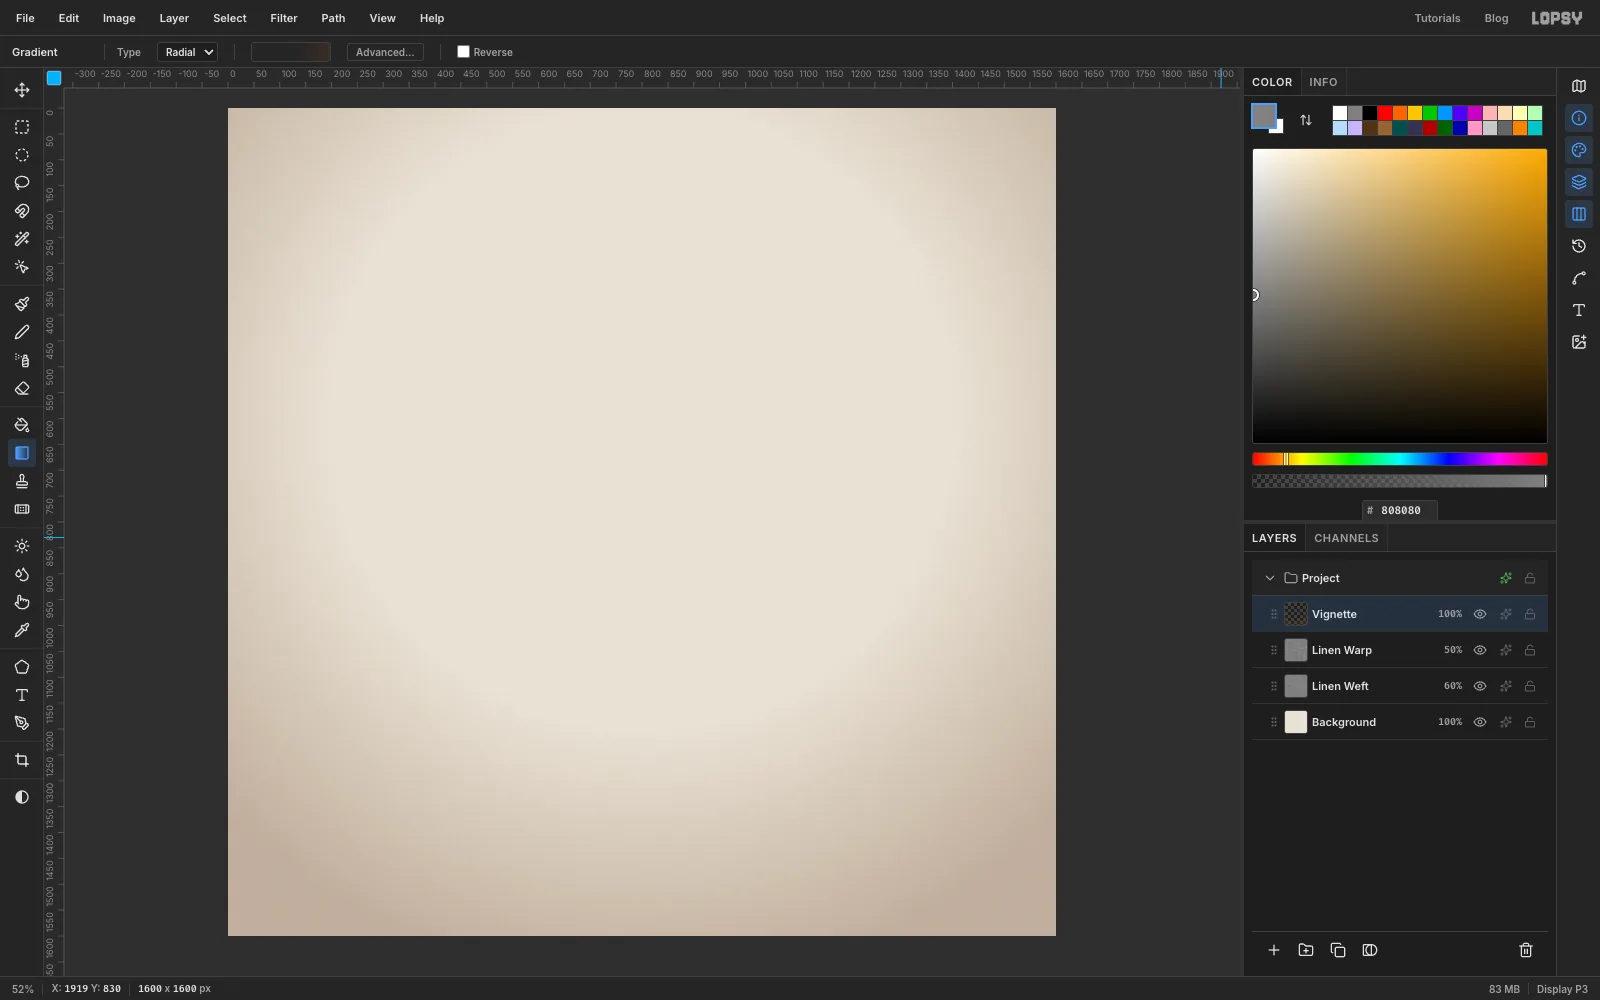
Add a layer called Vignette. Pick the Gradient tool, set Type to Radial, and open Advanced…. Make three stops, all : one at the left end at 0% opacity, one just past the middle also at 0%, and one at the right end at 30%.
Drag from just above the middle of the canvas down past the bottom edge. Set the layer to Multiply. The centre stays clean and the corners darken gently.
-
Drop two guides
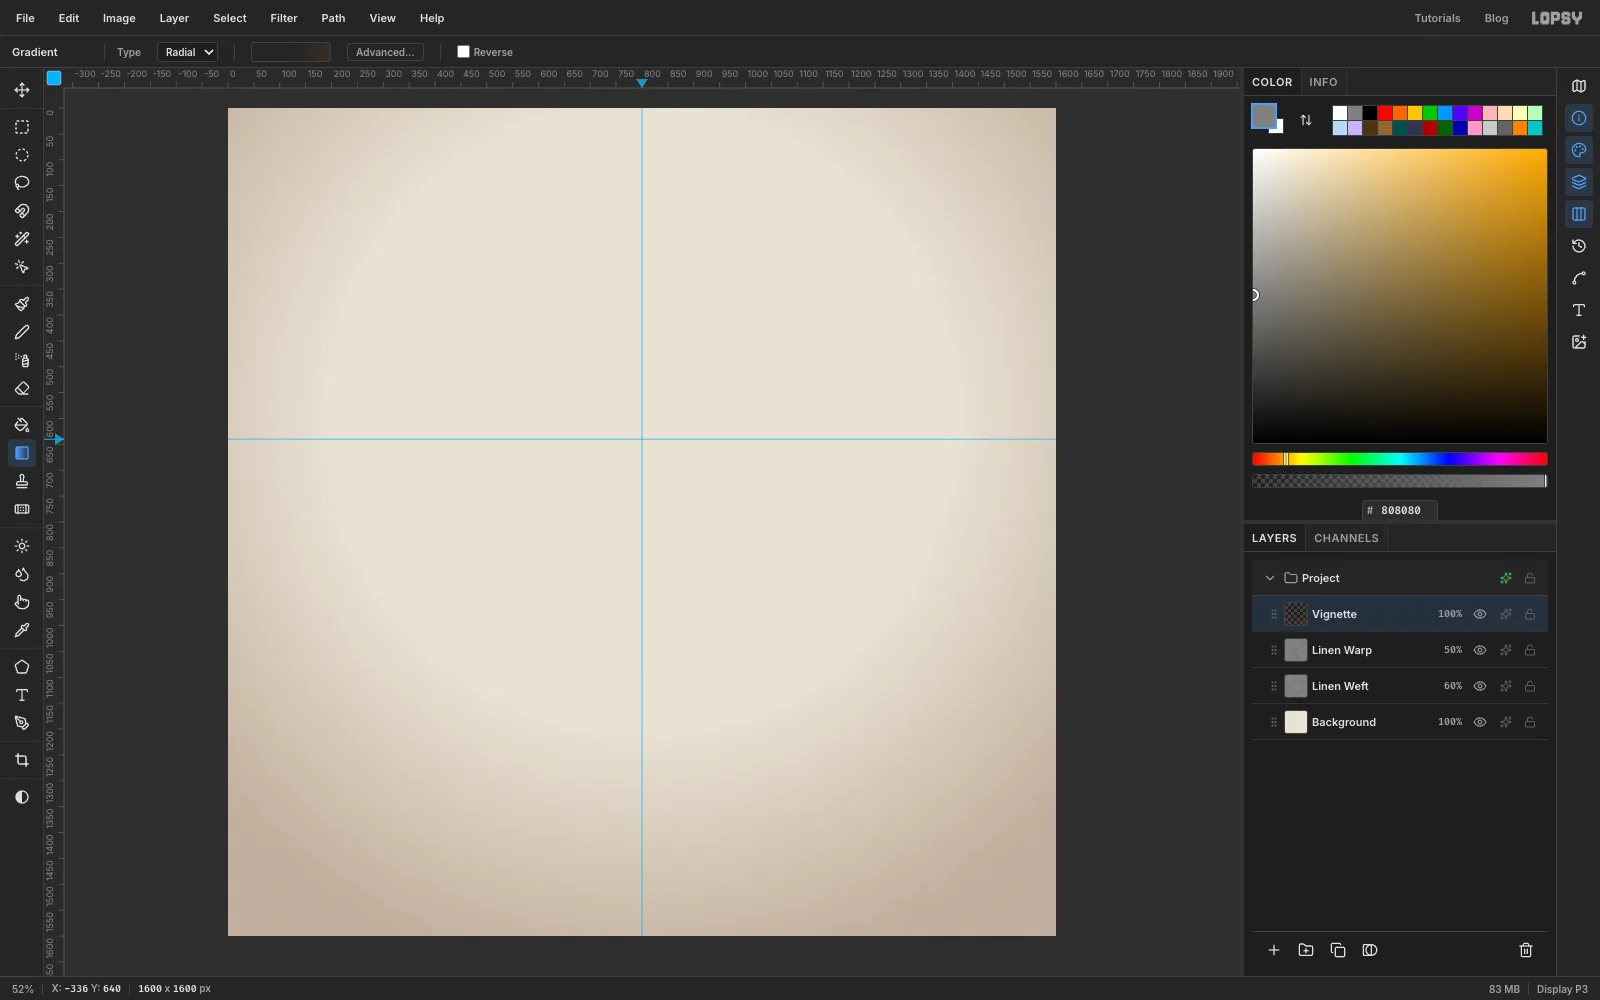
The tile is centred across the canvas but sits above the middle, to leave room for the name underneath. Click the top ruler at 800 to drop a vertical guide, and click the left ruler at 640 for a horizontal one. Most of the turntable will be drawn out from where they cross.
-
Draw the tile
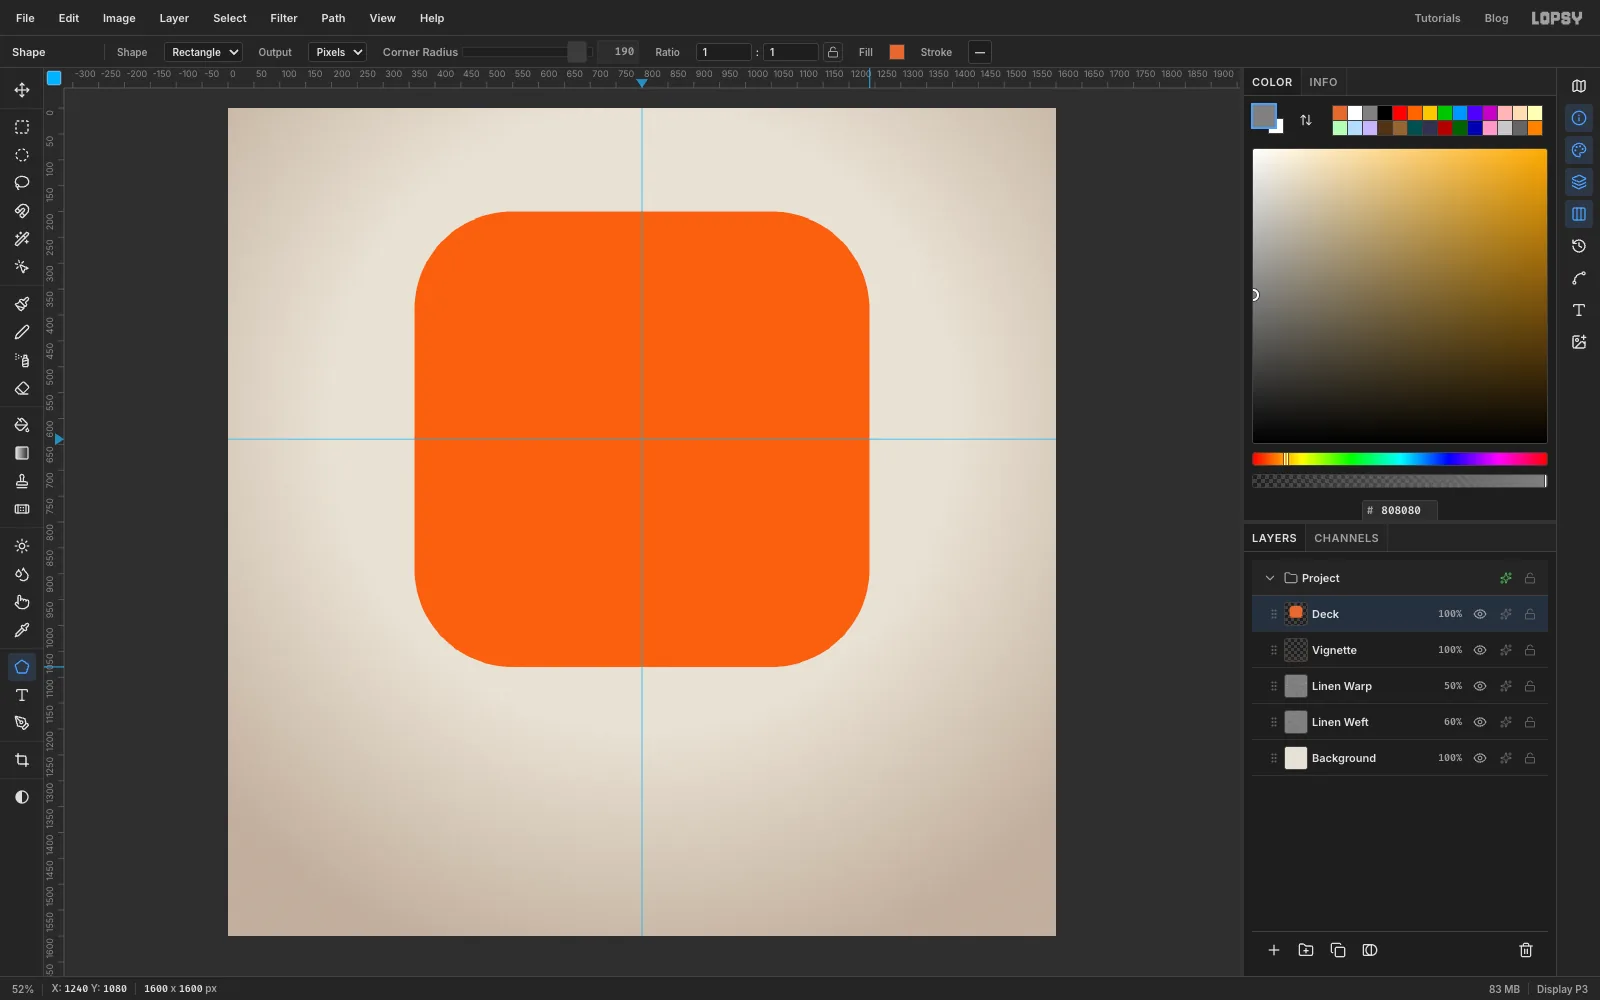
Add a layer called Deck. Pick the Shape tool and set Shape to Rectangle, Output to Pixels and Corner Radius to 190. Set the fill to and remove the stroke.
Shapes grow from where you press. Press on the guide crossing and drag down and right until the box is 880 × 880 px. Its corner should land at 1240, 1080.
-
Shade it like lacquer
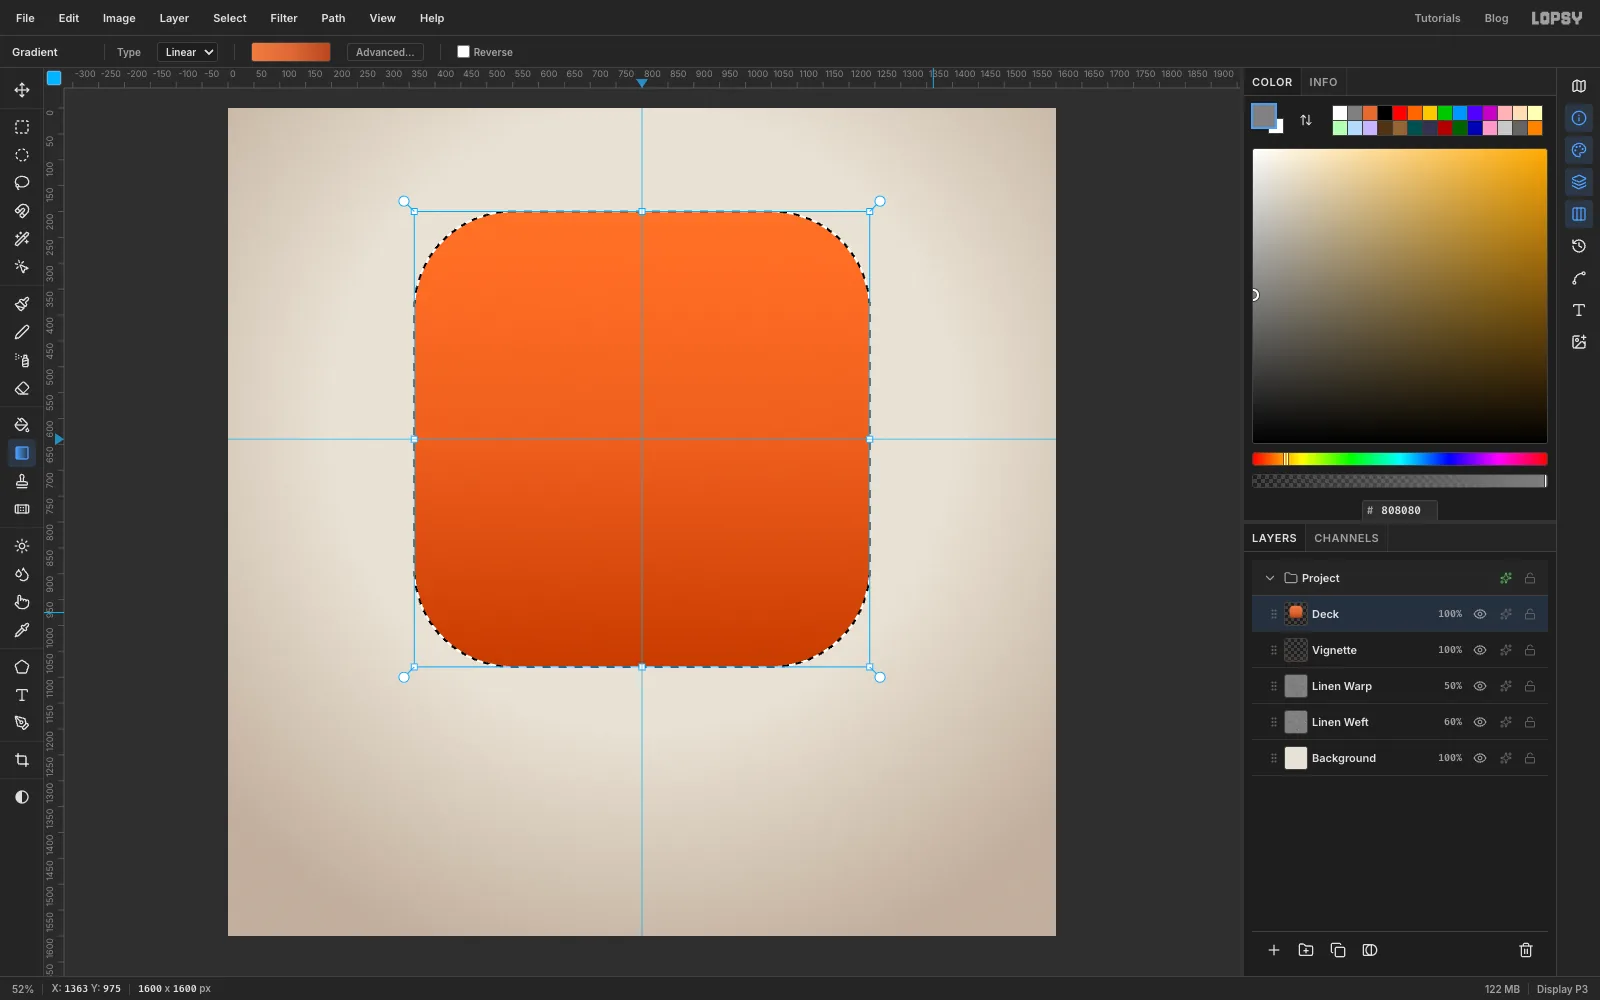
Cmd-click the Deck thumbnail in the Layers panel to load its shape as a selection. Pick the Gradient tool, set it to Linear, and use three stops: , in the middle and . Drag from the top edge of the tile straight down to its bottom edge.
Run Filter → Add Noise… with Amount 6, Mono and Gaussian. The faint grain is what keeps a large gradient from looking like plastic. Press Cmd+D.
-
Bevel the edge
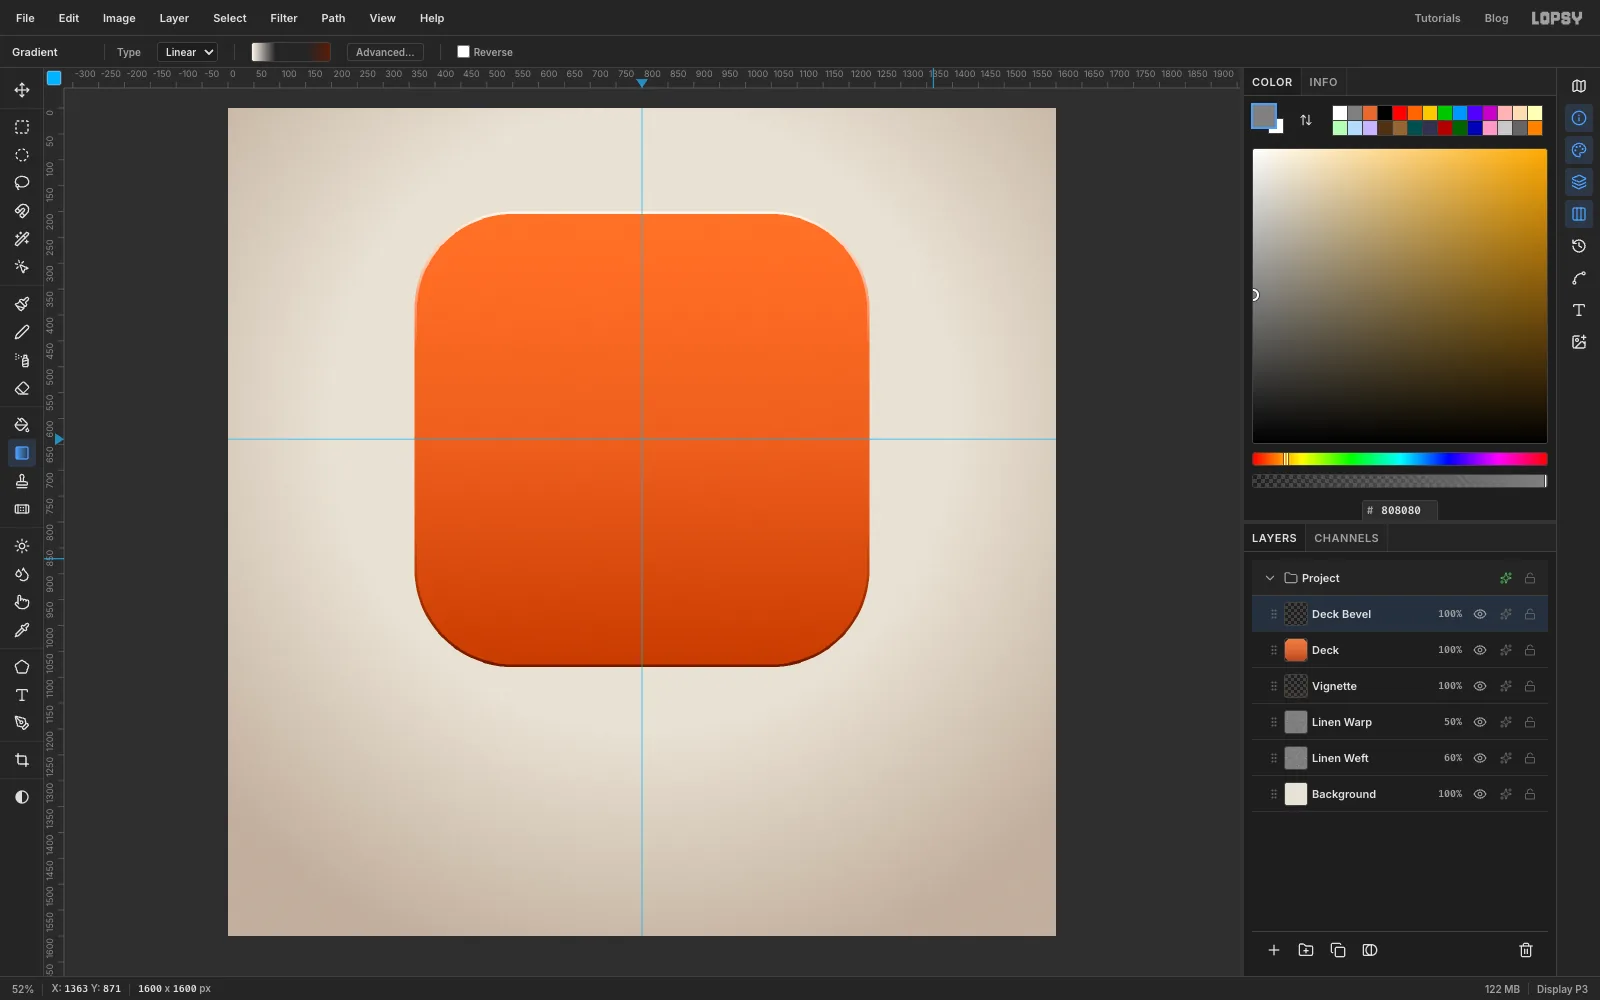
Add a layer called Deck Bevel and Cmd-click the Deck thumbnail again. Use a four-stop linear gradient: at 100% opacity on the left, at 0% about a third of the way along, at 0% two thirds of the way, and at 90% on the right. Drag from the top of the tile to the bottom.
Choose Select → Shrink… with 5 px and press Delete, then Cmd+D. Only a 5 px ring is left. It is pale where light hits the top edge and dark where the bottom edge turns away.
-
Select the gloss
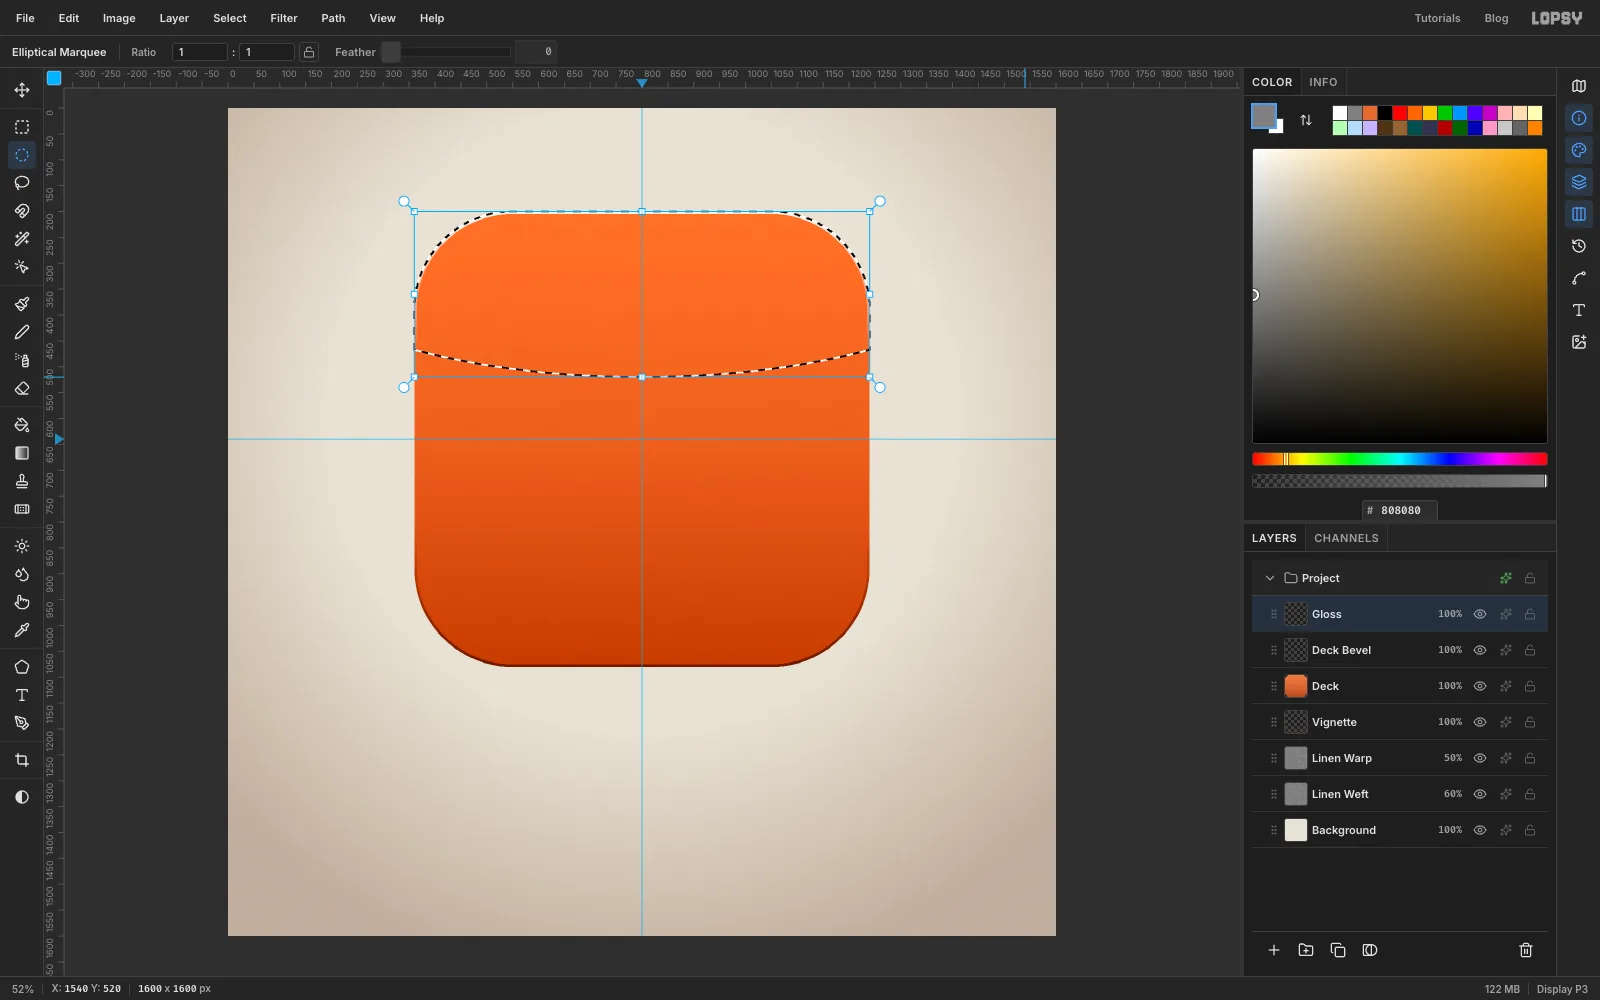
Add a layer called Gloss and Cmd-click the Deck thumbnail.
Pick the Elliptical Marquee. Hold Shift and Alt together, then drag a very wide ellipse from just above the top-left corner of the canvas to the right edge, ending about 520 px down. With both keys held, the new ellipse intersects the tile selection. What's left is the top of the tile with a gently curved lower edge.
-
Fill the gloss and lift the tile
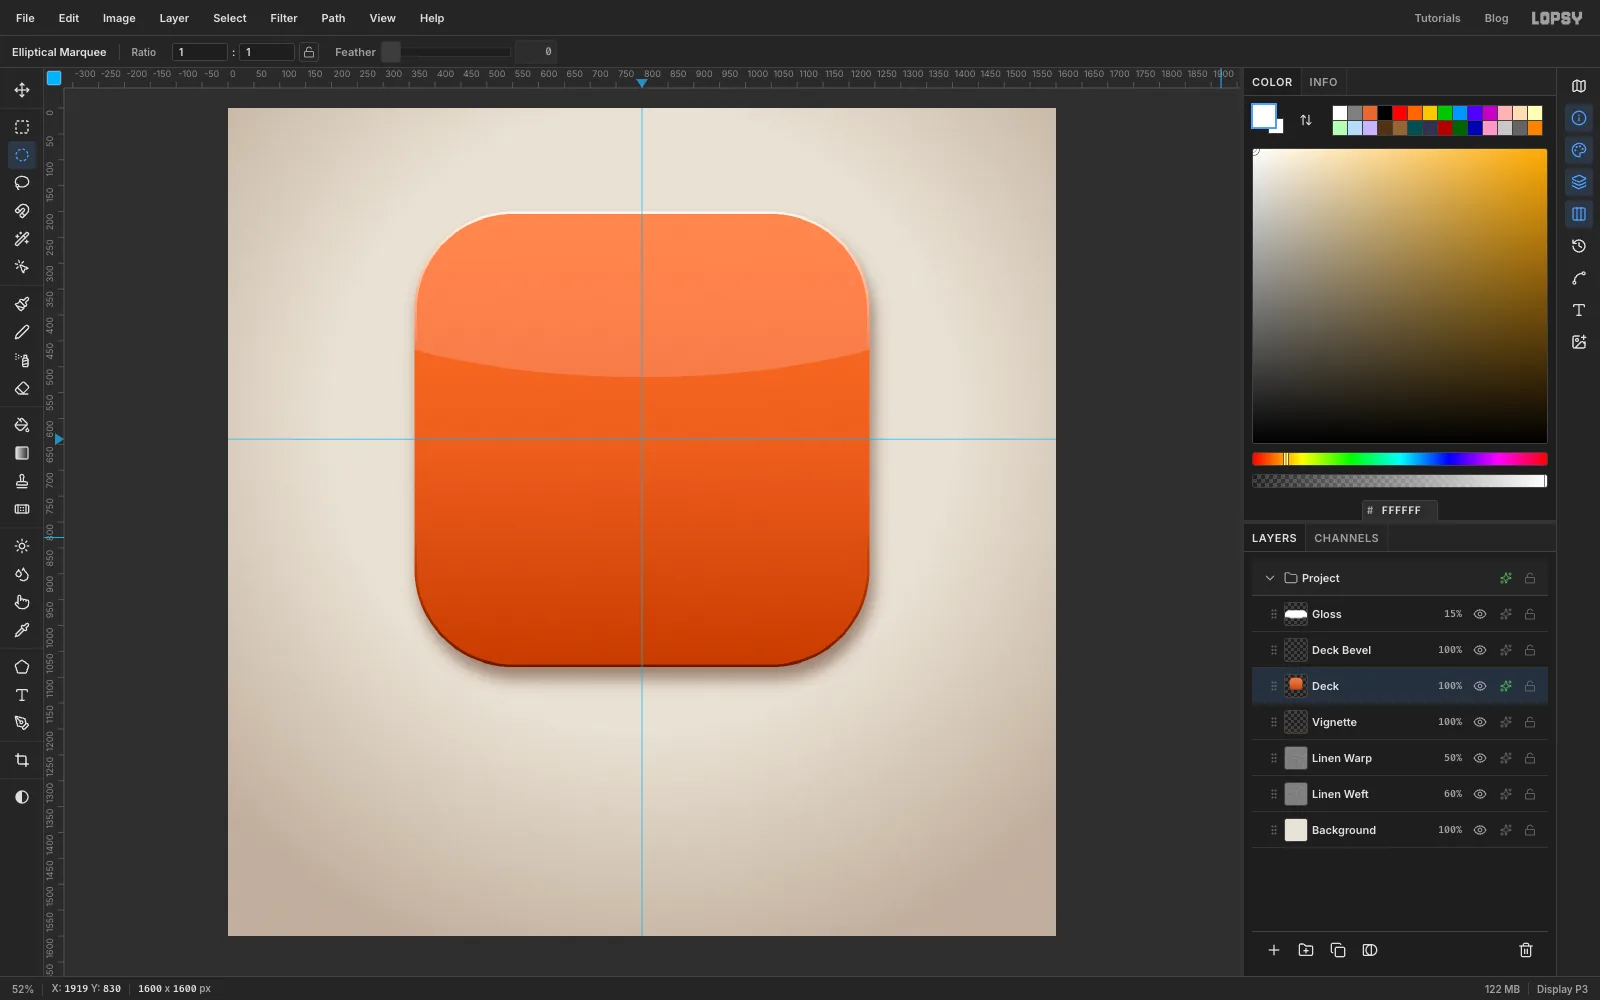
Set the foreground to white, choose Edit → Fill, press Cmd+D and set the Gloss layer to 15%. A crisp lower edge reads as a reflection on a glossy surface. A soft gradient would read as a faded one.
Click the Deck layer and click the effects button on its row in the Layers panel to open the effects drawer. Turn on Drop Shadow: Offset X 8, Offset Y 24, Blur 44, Spread 0, Opacity 50, colour .
-
Spin up a chrome platter
Click Gloss, then click New Group in the Layers panel and name it Turntable. Inside it, add a layer called Platter.
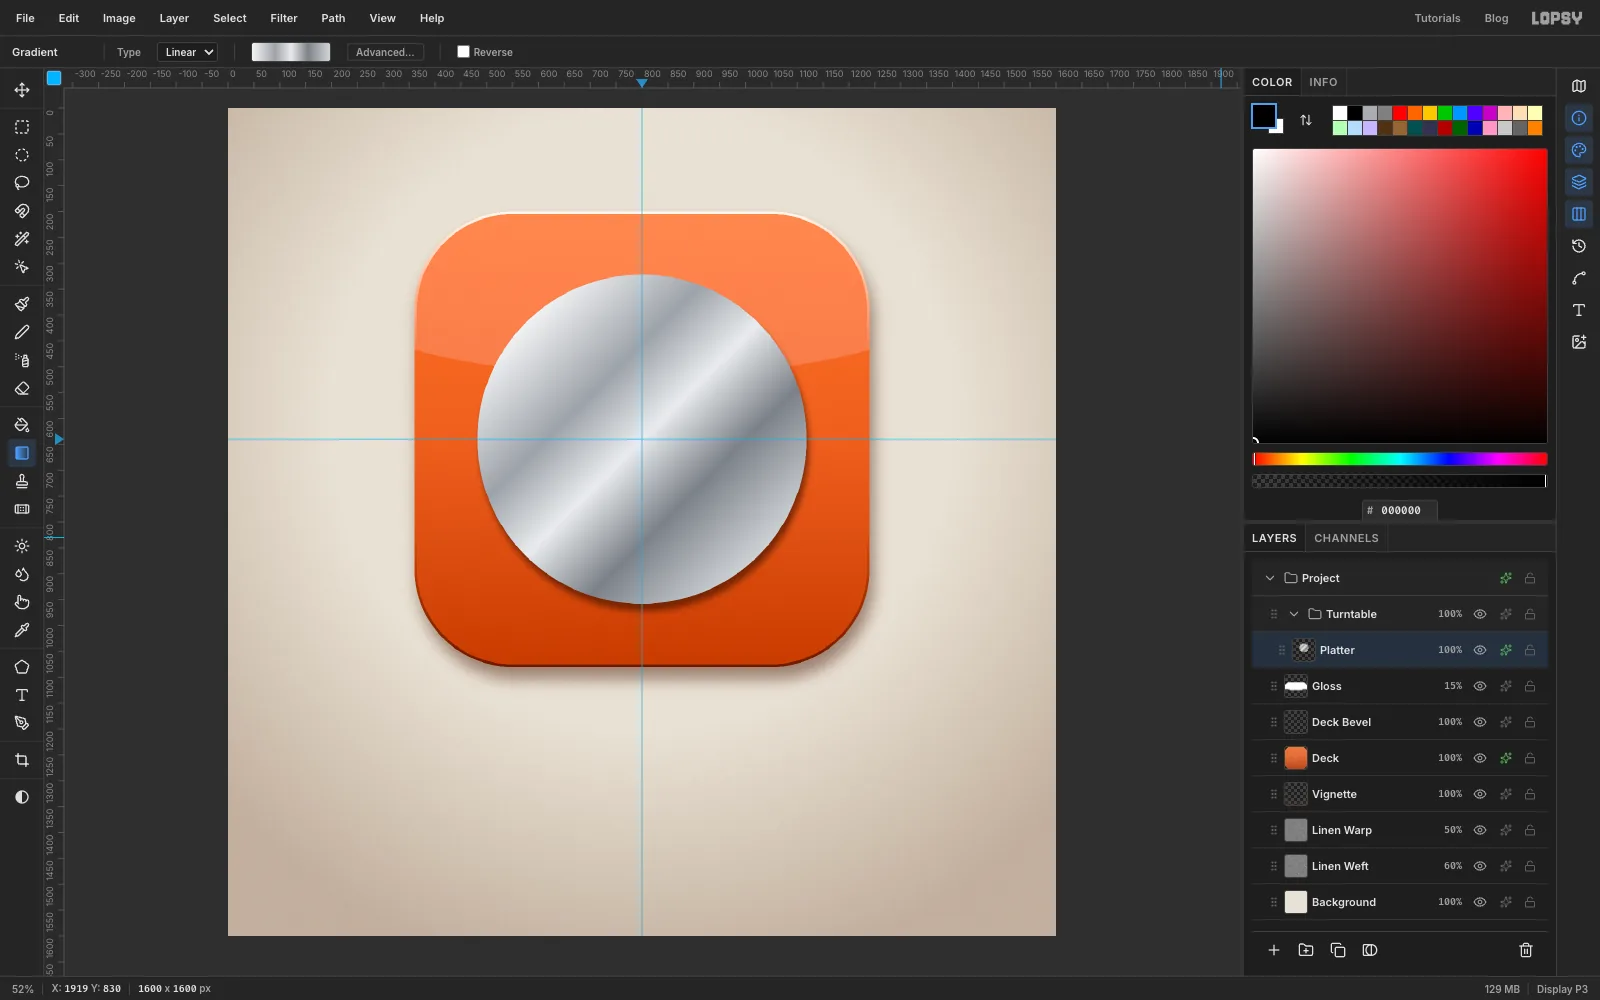
With the Shape tool set to Ellipse, fill and no stroke, drag a circle out from the guide crossing 318 px in each direction. Hold Cmd while you drag so the ellipse stays a perfect circle; do the same for every circle in this tutorial. Cmd-click its thumbnail and drag a five-stop linear gradient diagonally across the disc, from upper left to lower right: , , , , . Alternating light and dark bands are what make metal read as chrome. Press Cmd+D.
Give the platter a Drop Shadow of 5, 14, Blur 18, Opacity 70, colour .
-
Select just inside the rim
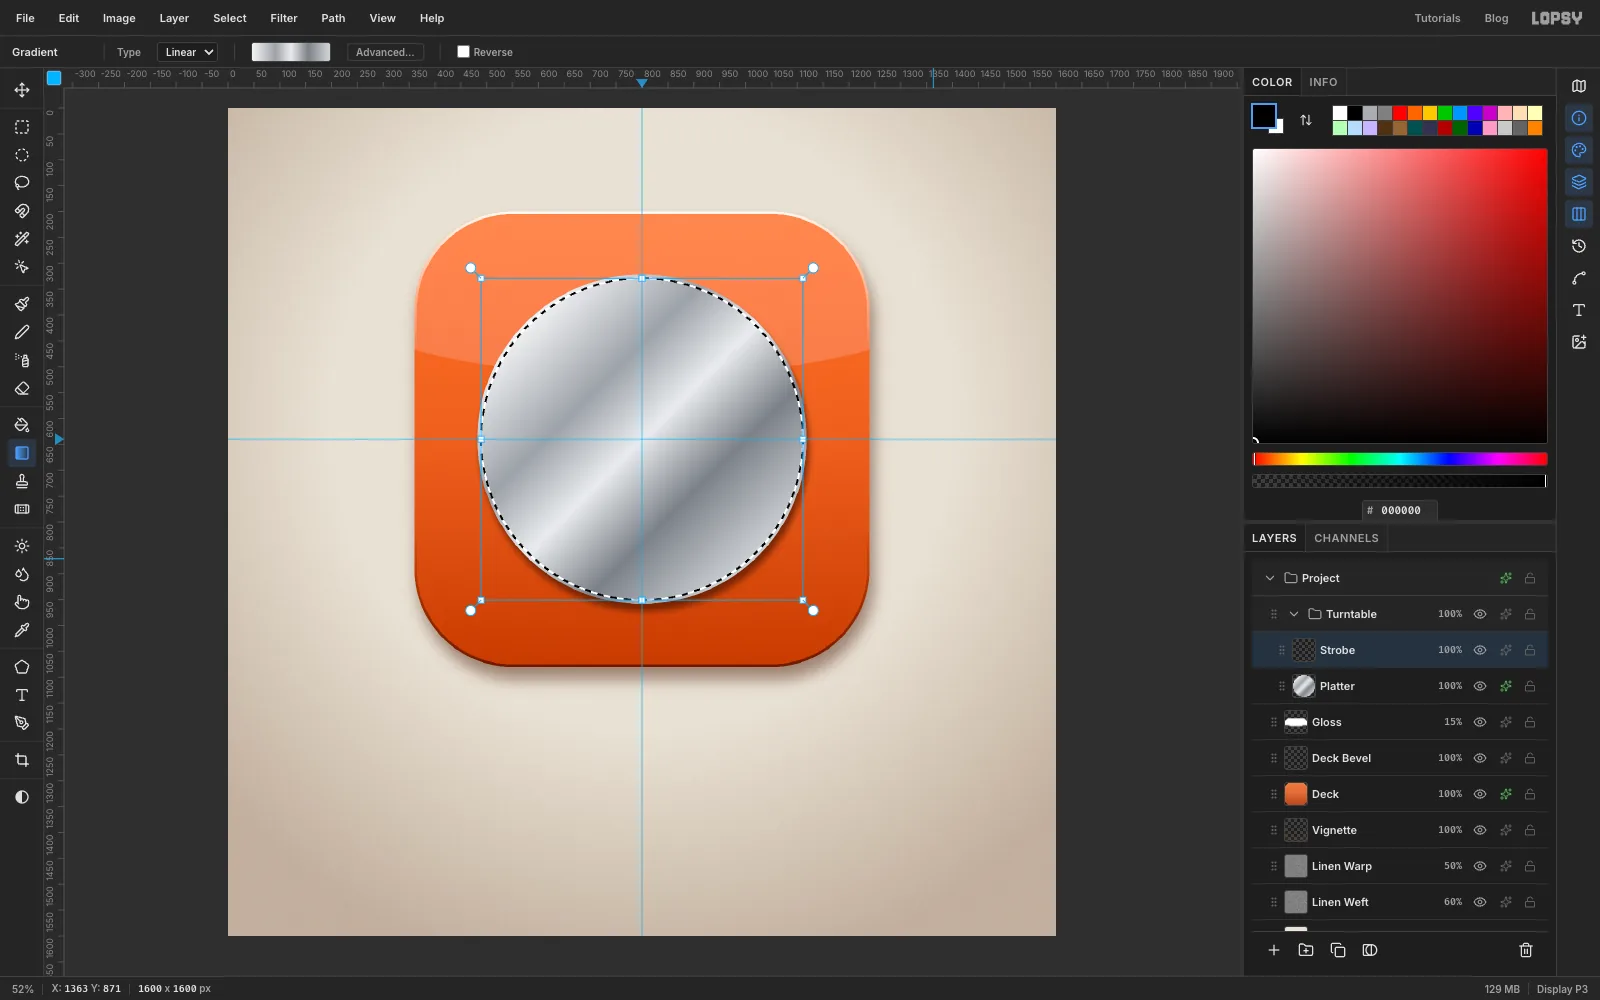
Real turntable platters have rows of strobe marks round the rim for checking the speed. Add a layer called Strobe, Cmd-click the Platter thumbnail, and choose Select → Shrink… with 7 px.
-
Fire Sunburst rays
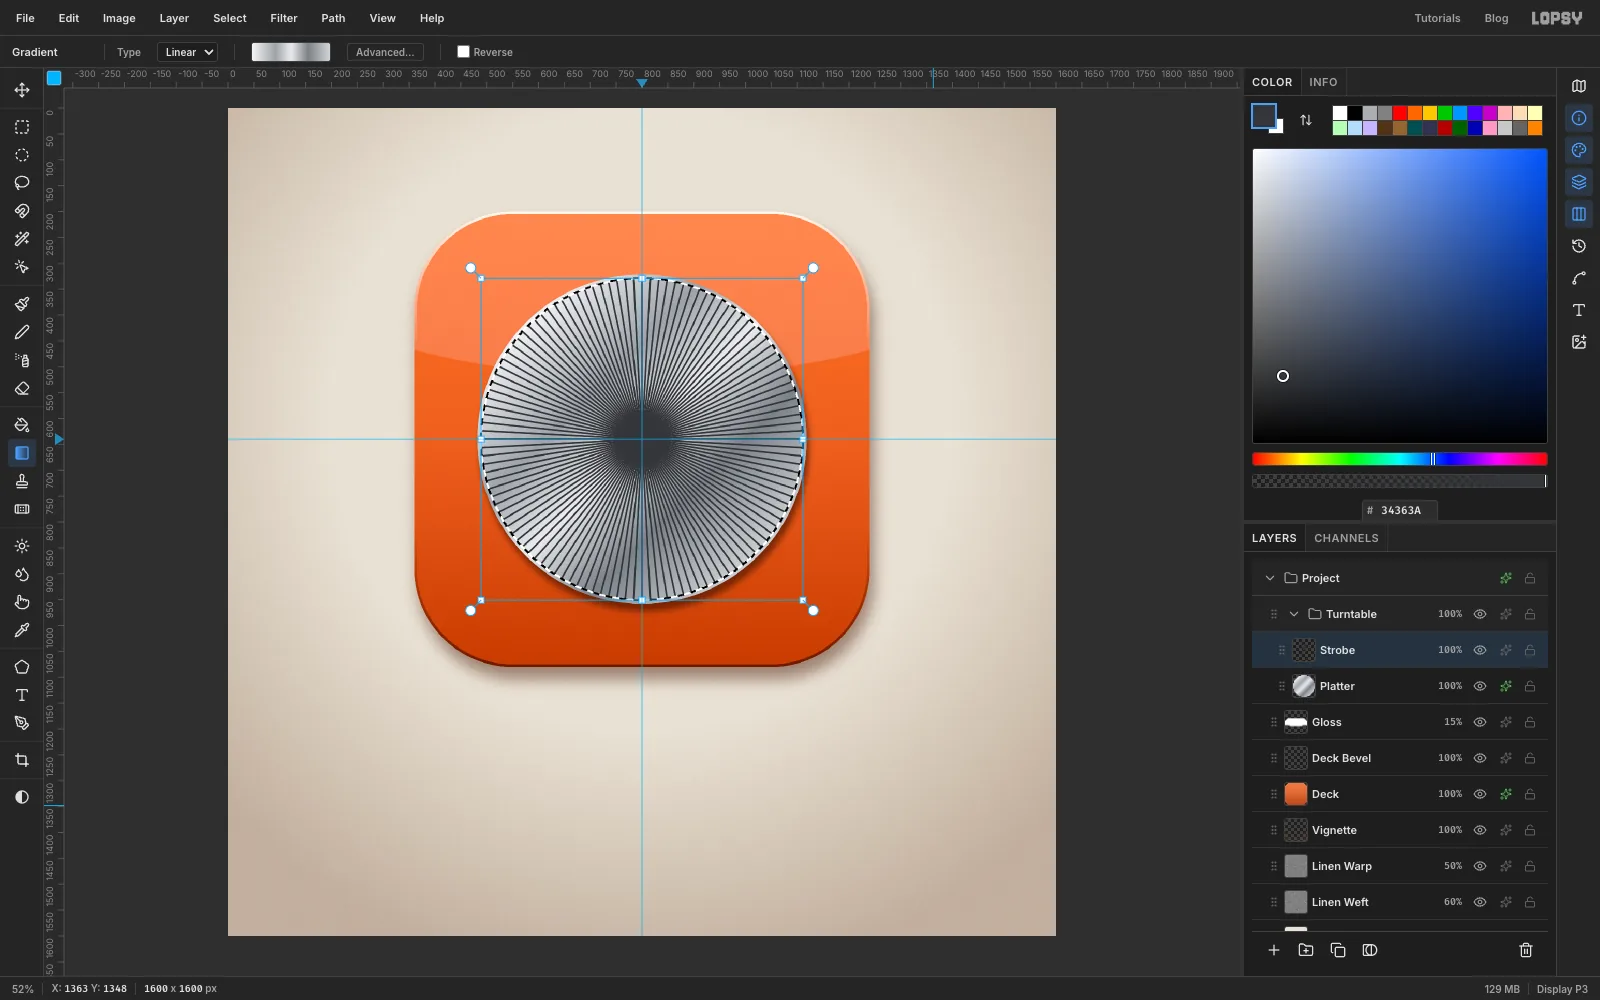
Sunburst draws rays from a point. Set the foreground to and run Filter → Sunburst… with Rays 120, Length 26, Width 38, Taper 50, Softness 10 and Opacity 100. Set Center X to 50 and Center Y to 40: the centre is a percentage of the canvas, and the guide crossing at 800, 640 is 50% across and 40% down. The selection stops the rays just short of the rim.
-
Cut away the middle
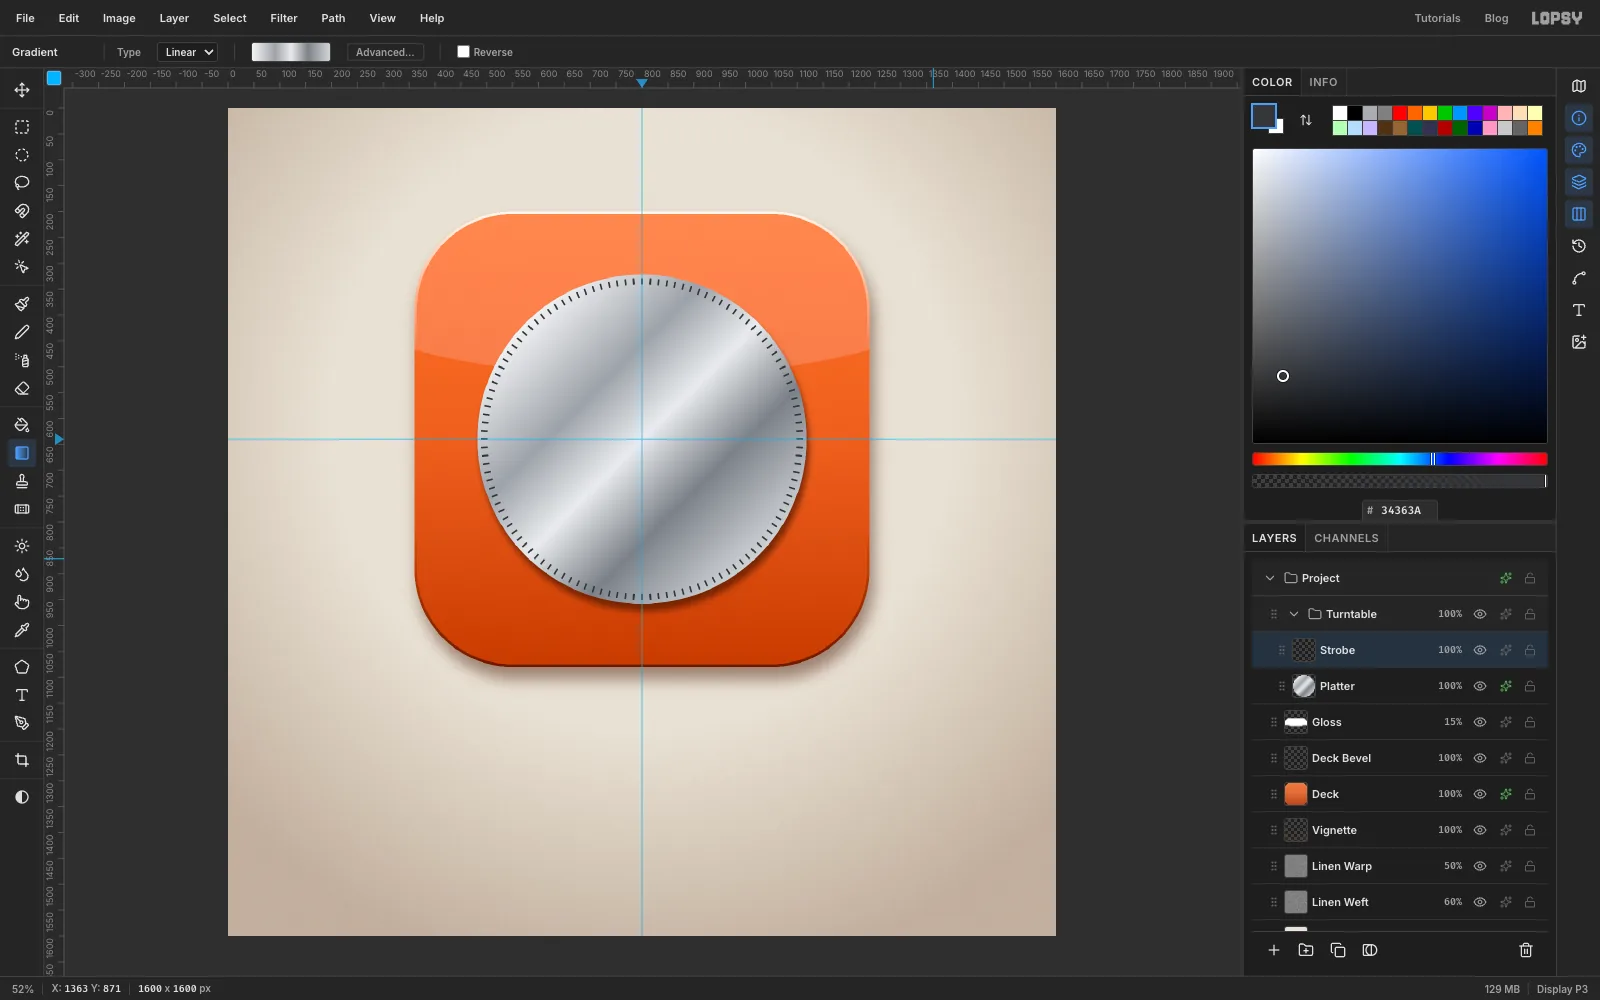
Cmd-click the Platter thumbnail again and choose Select → Shrink… with 19 px. Press Delete and then Cmd+D. Only the outer 12 px of each ray is left, as a ring of tick marks.
-
Lay the record on
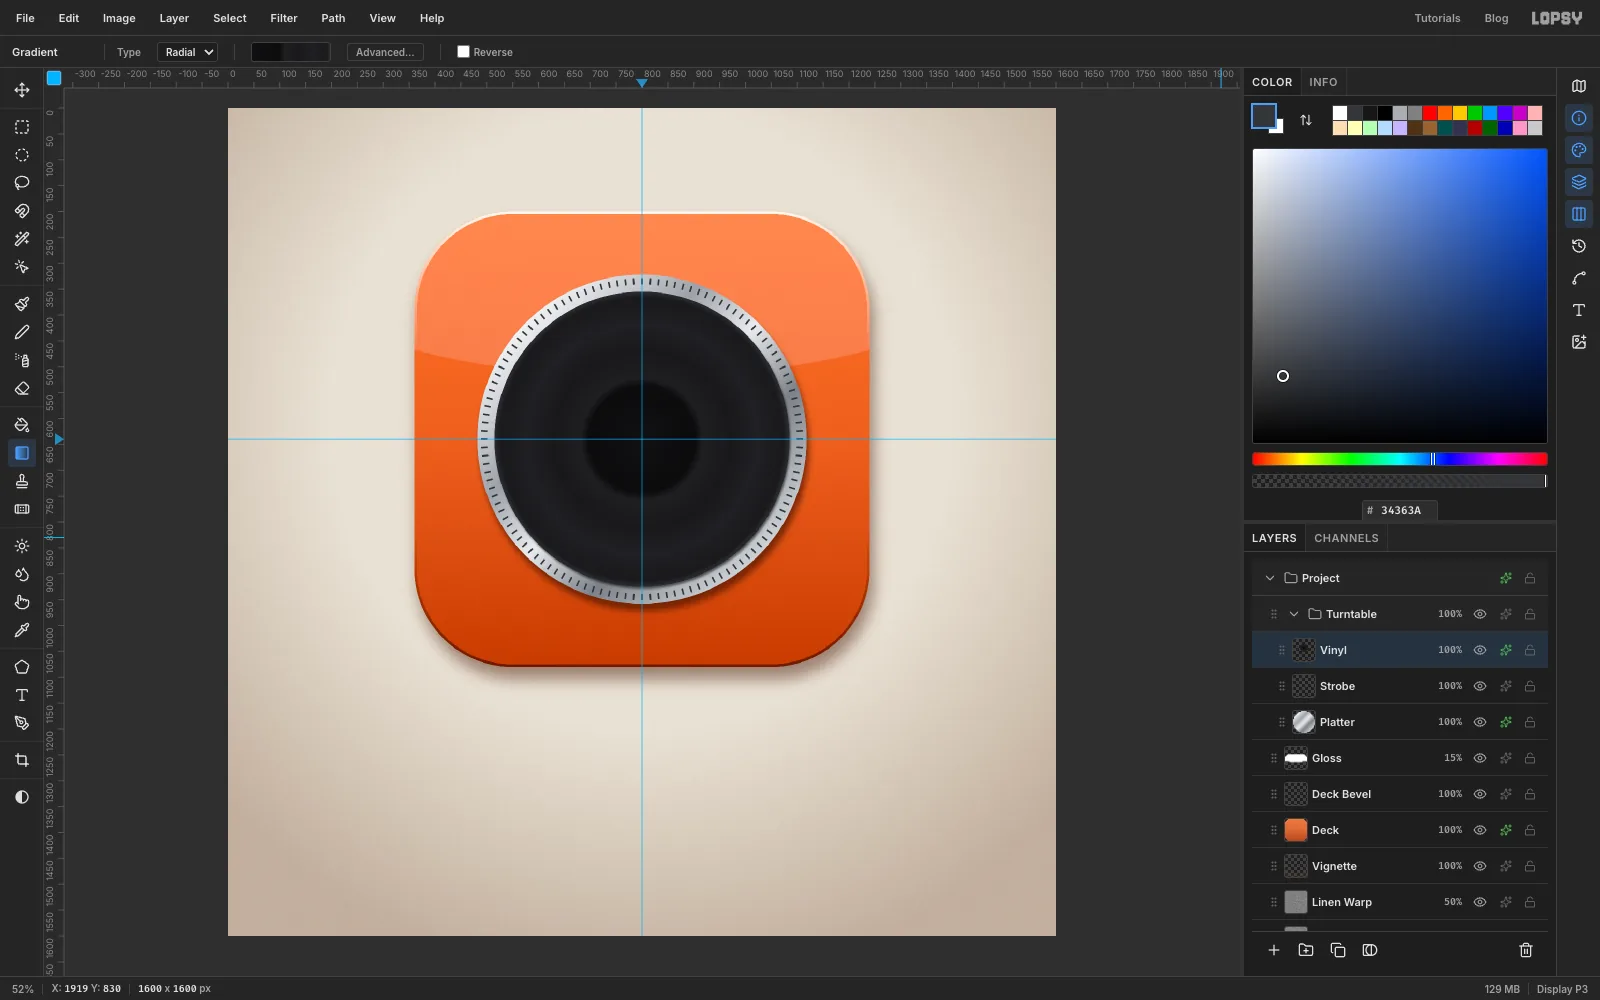
Add a layer called Vinyl and draw an circle 285 px out from the crossing. Cmd-click it and drag a Radial gradient from the centre out to the edge, with seven near-black stops: , at about 36%, at 42%, at 60%, at 78%, at 96% and at the very edge. The dark band near the middle is the smooth run-out groove.
Add Noise at 5 (Mono, Gaussian) and press Cmd+D. Give the record a small Drop Shadow: 2, 4, Blur 6, Opacity 60, .
-
Add soft groove bands
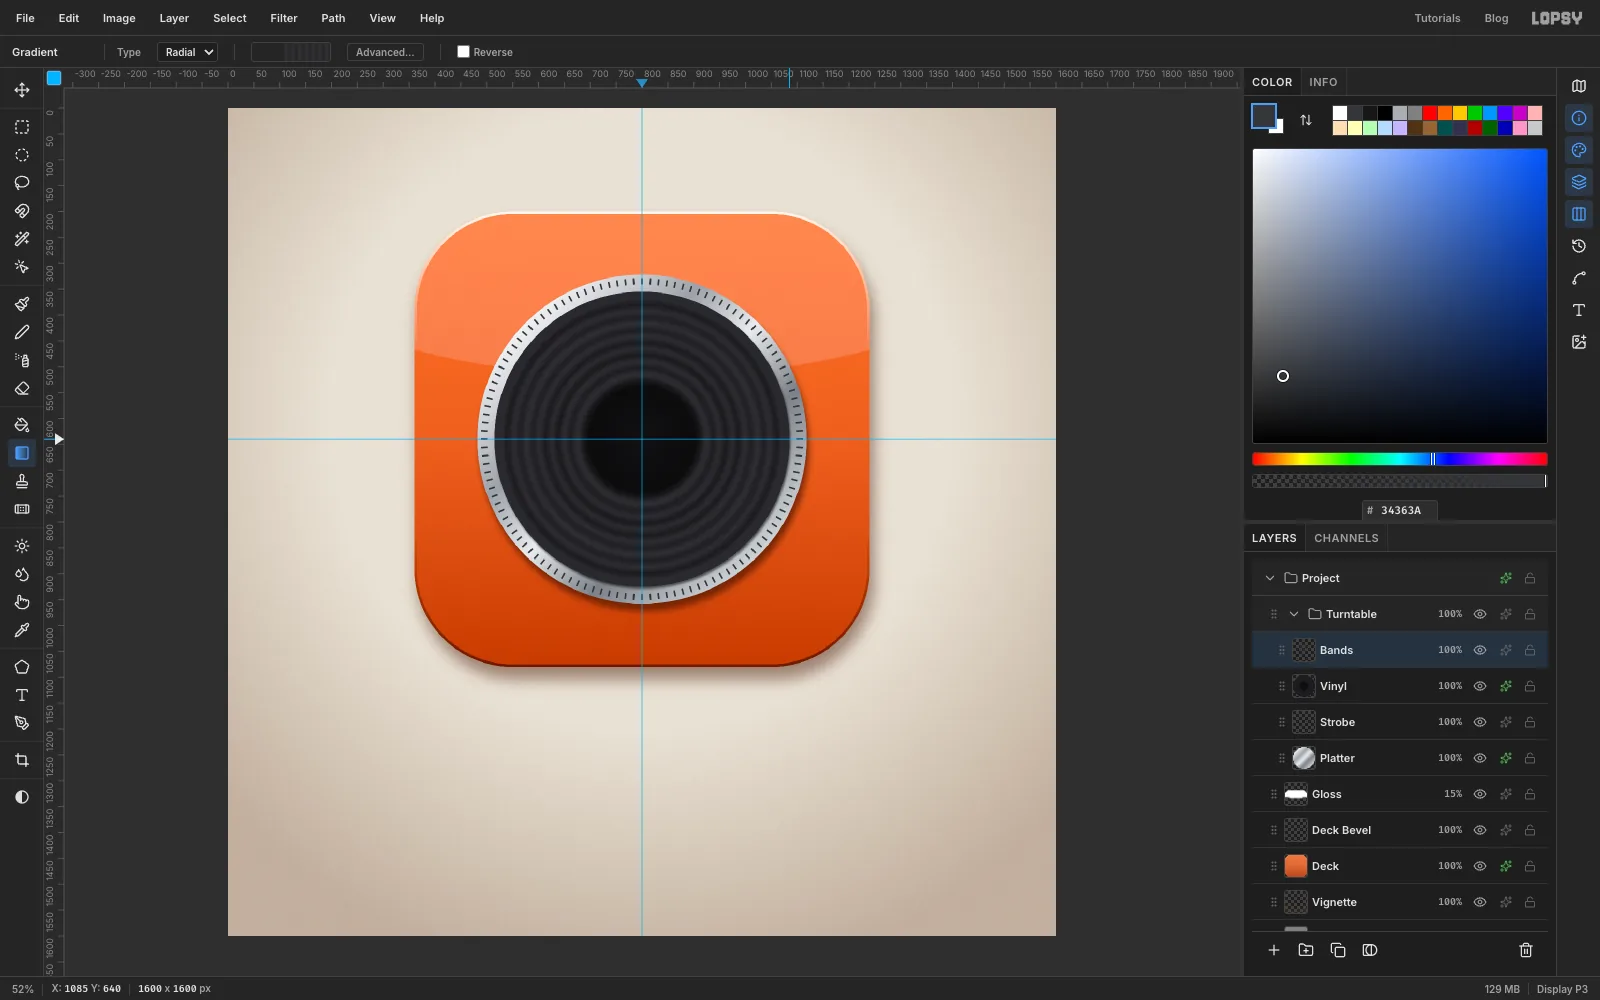
Add a layer called Bands and Cmd-click the Vinyl thumbnail. In the gradient editor, make every stop . Keep the first stop transparent, then click the bar to add stops evenly across its right-hand 60%, alternating 0% and 55% opacity. That's 16 stops in all. Drag the radial gradient from the centre to the record's edge, then press Cmd+D.
-
Draw hairline grooves
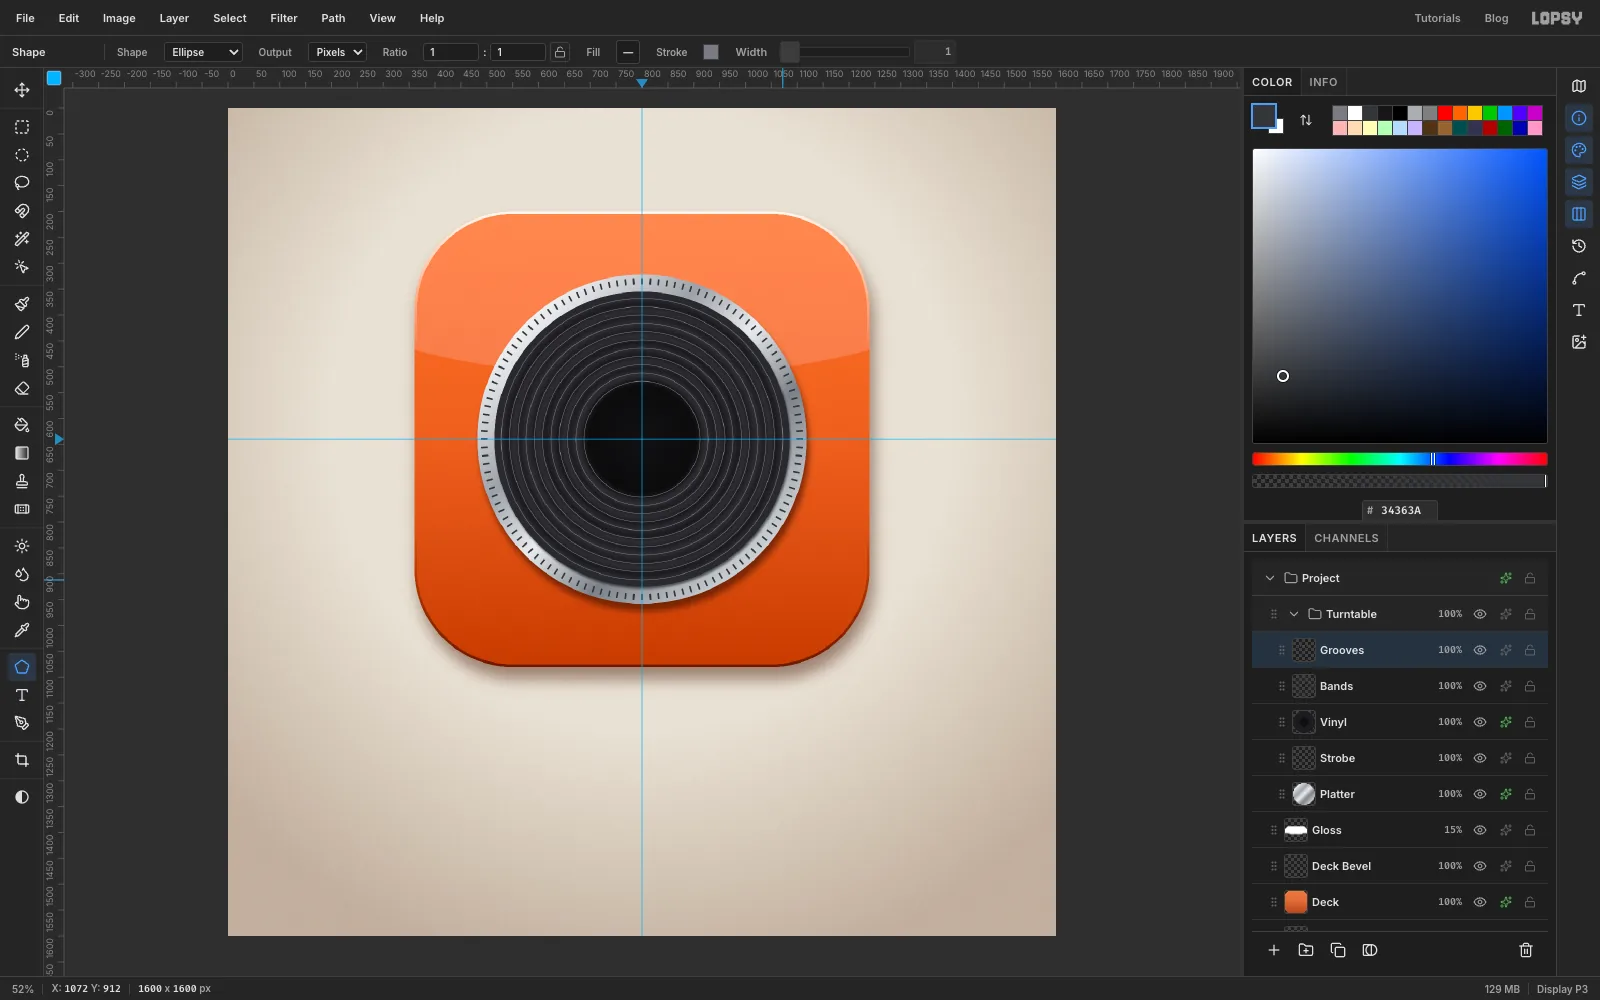
Add a layer called Grooves. Set the Shape tool to Ellipse with no fill, a stroke and Width 1. Starting on the guide crossing each time, drag out circles every 16 px, from a 112 px radius to 272 px. That's eleven rings.
-
Scale copies between them
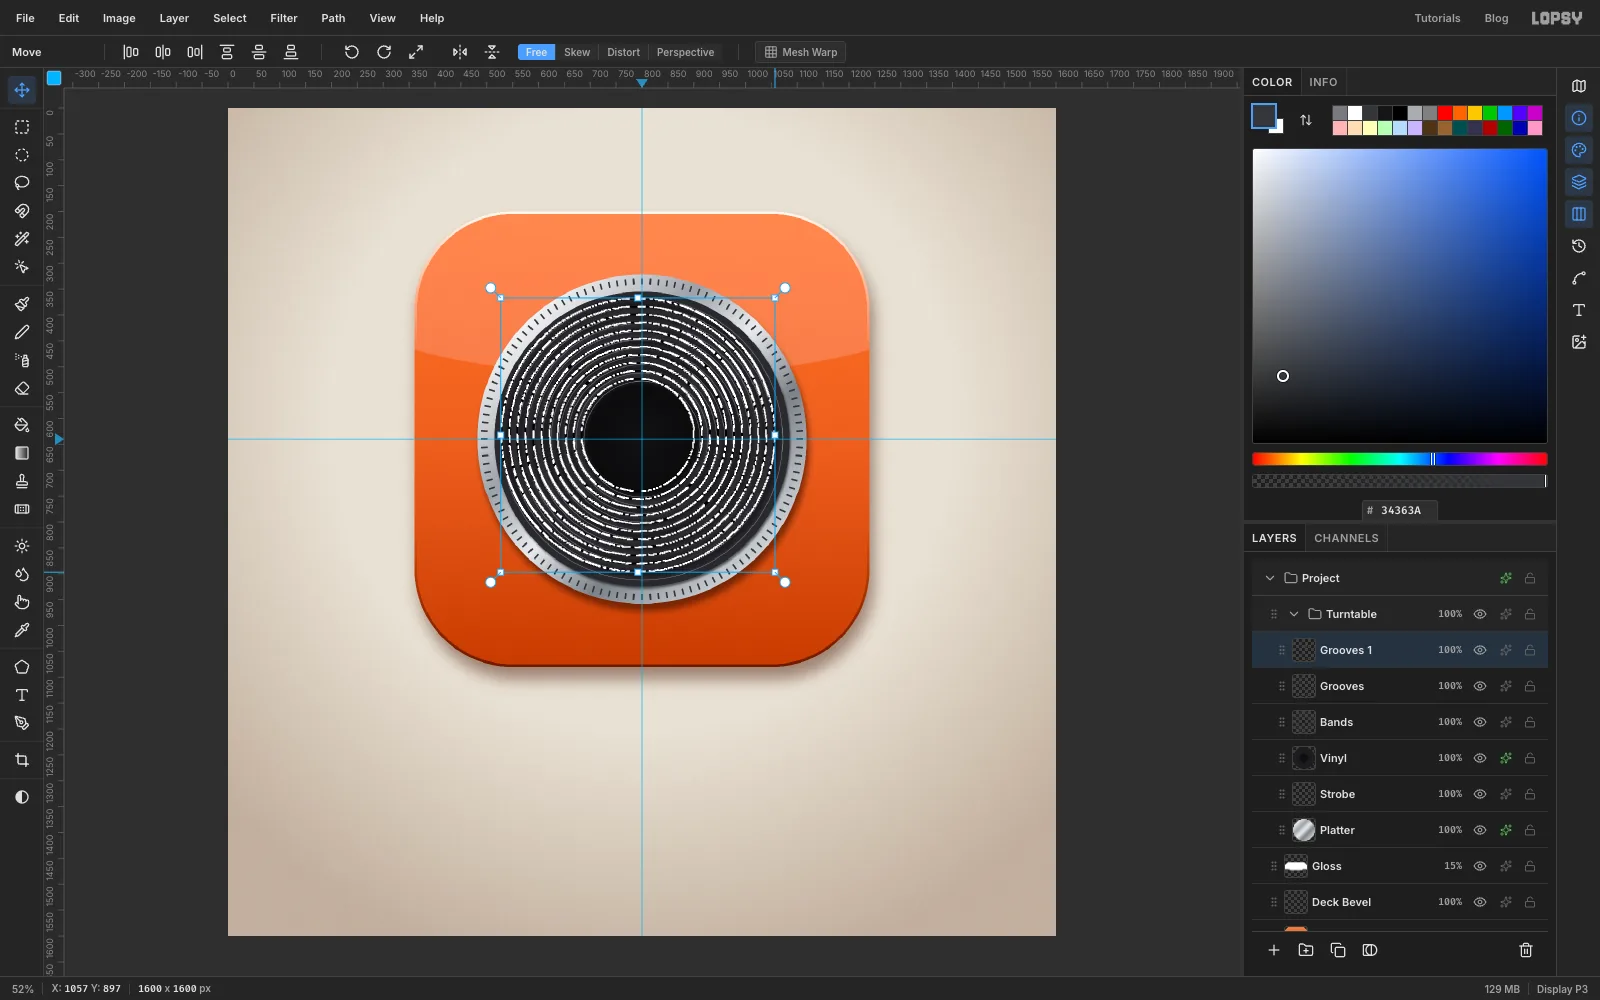
Choose Layer → Duplicate Layer and Cmd-click the copy's thumbnail. With the Move tool, hold Cmd and drag the bottom-right corner handle in about 16 px, until the copy's outer ring sits halfway between the two outermost original rings. Press Cmd+D.
Scaling pins the opposite corner, so the copy is now off-centre by half that amount. Press ← and ↑ about 8 times each, until the rings are concentric again, then choose Layer → Merge Down. Do it once more, dragging the corner in about 8 px and nudging back about 4 px, and merge again.
-
Fade the grooves
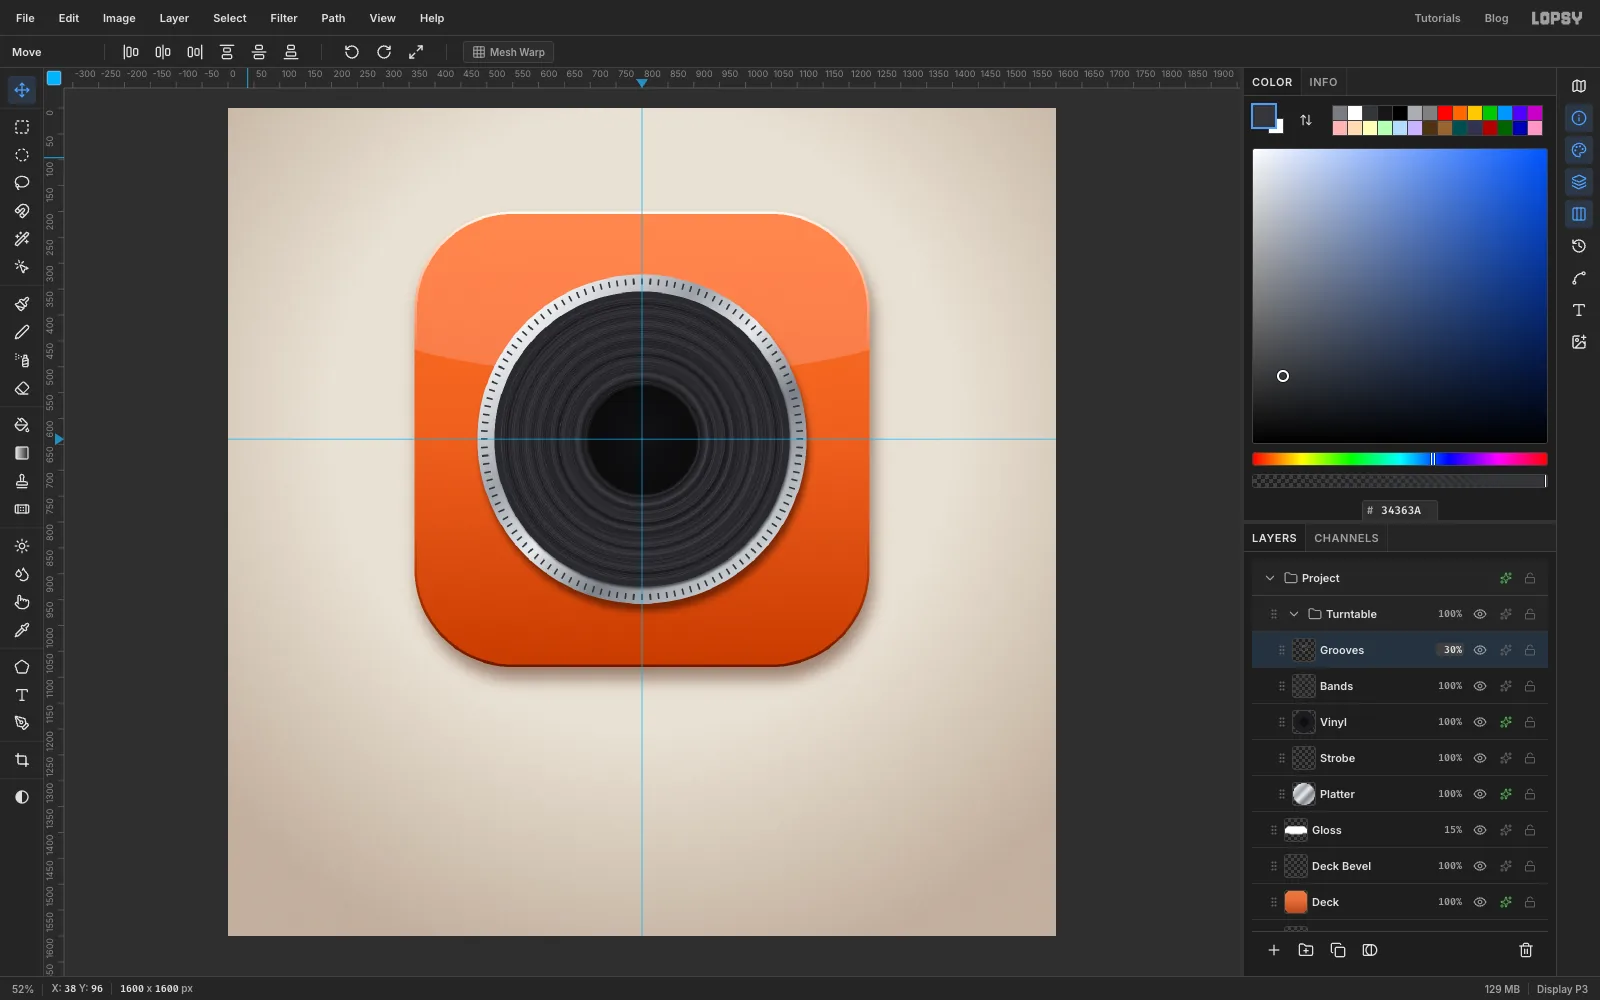
You now have about 40 rings. Because the copies scale by a percentage, the spacing changes across the disc, which looks more natural than a perfectly even pattern. Rename the merged layer Grooves and set it to 30%.
-
Throw light across the record
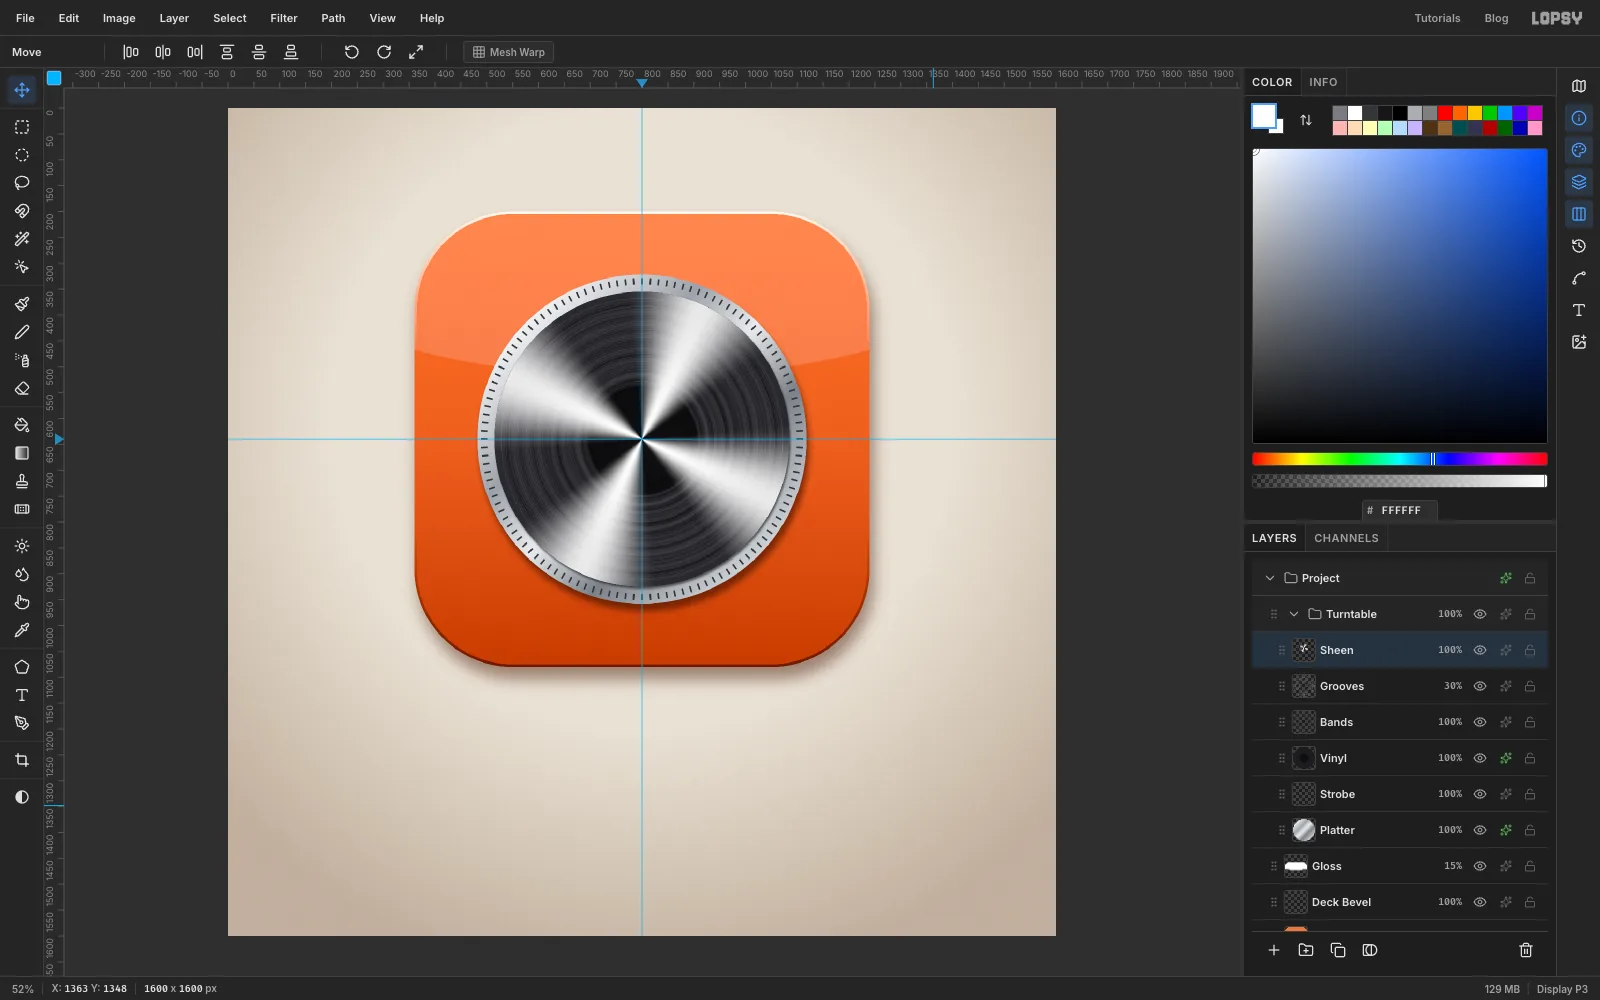
Vinyl catches light in two opposite wedges that look like a bow tie. Sunburst can draw those too.
Add a layer called Sheen, Cmd-click the Vinyl thumbnail and set the foreground to white. Run Filter → Sunburst… with Rays 4, Length 23, Width 38, Taper 0, Fade 10, Softness 100, Rotation 25, Center X 50, Center Y 40 and Opacity 100. Press Cmd+D.
-
Keep a bow tie
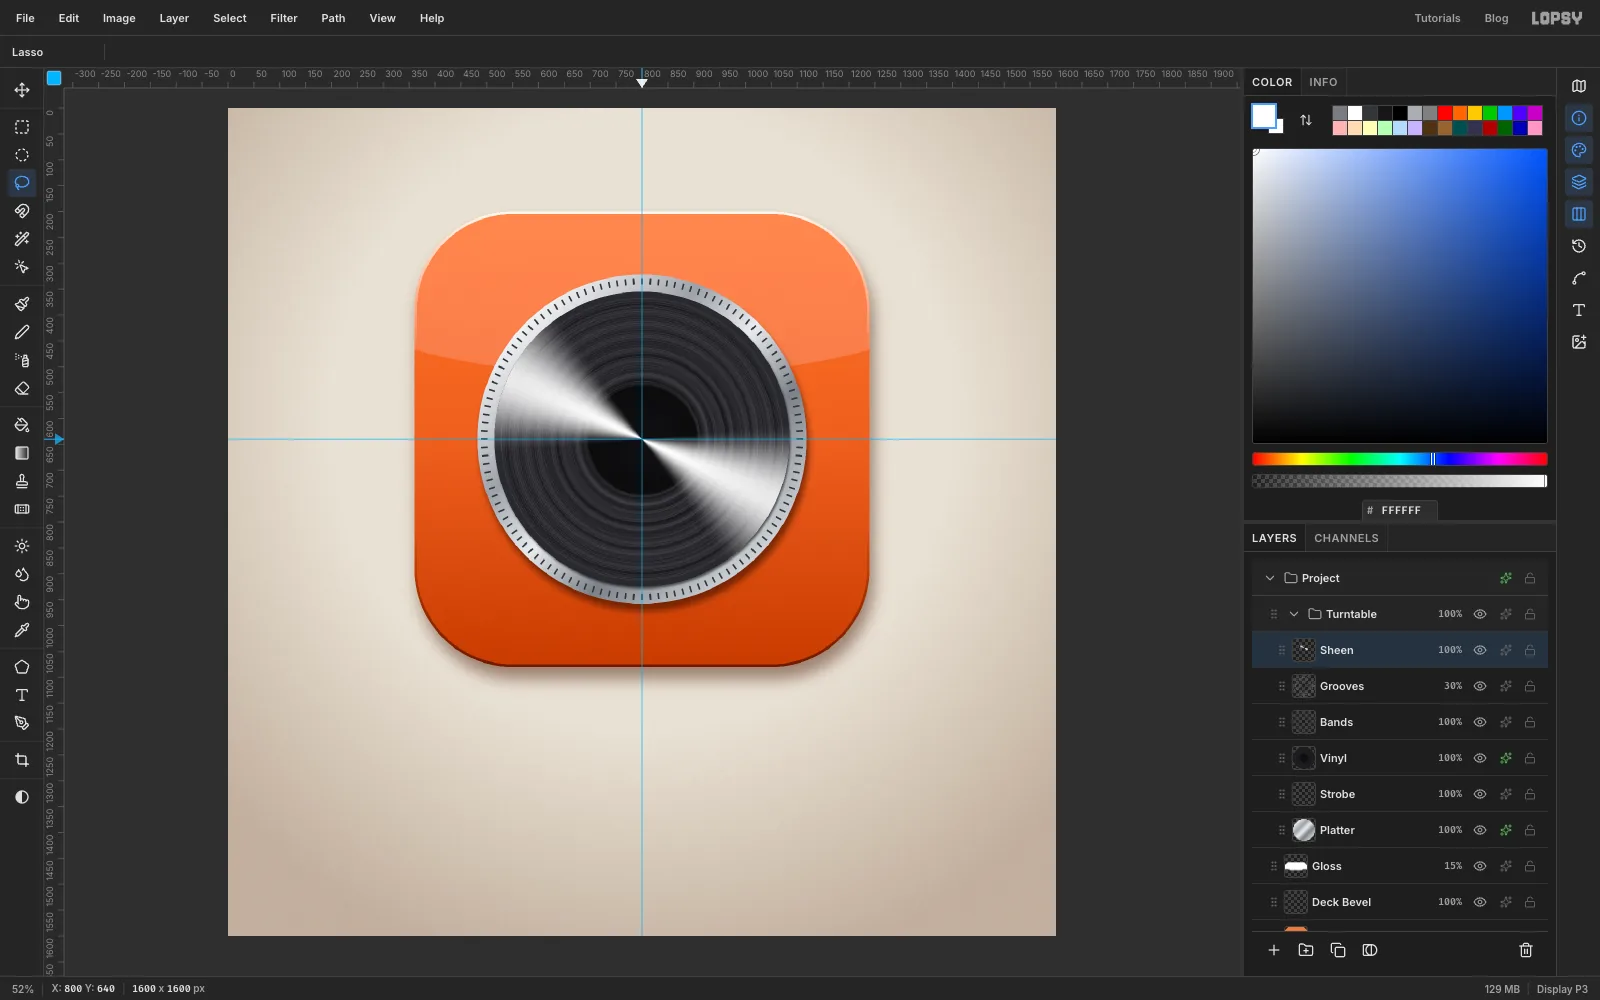
The light is coming from the upper left, so keep that wedge and its opposite. With the Lasso, draw a generous pie slice around the wedge pointing up and to the right and press Delete. Do the same for the wedge pointing down and to the left, then press Cmd+D.
-
Soften the sheen
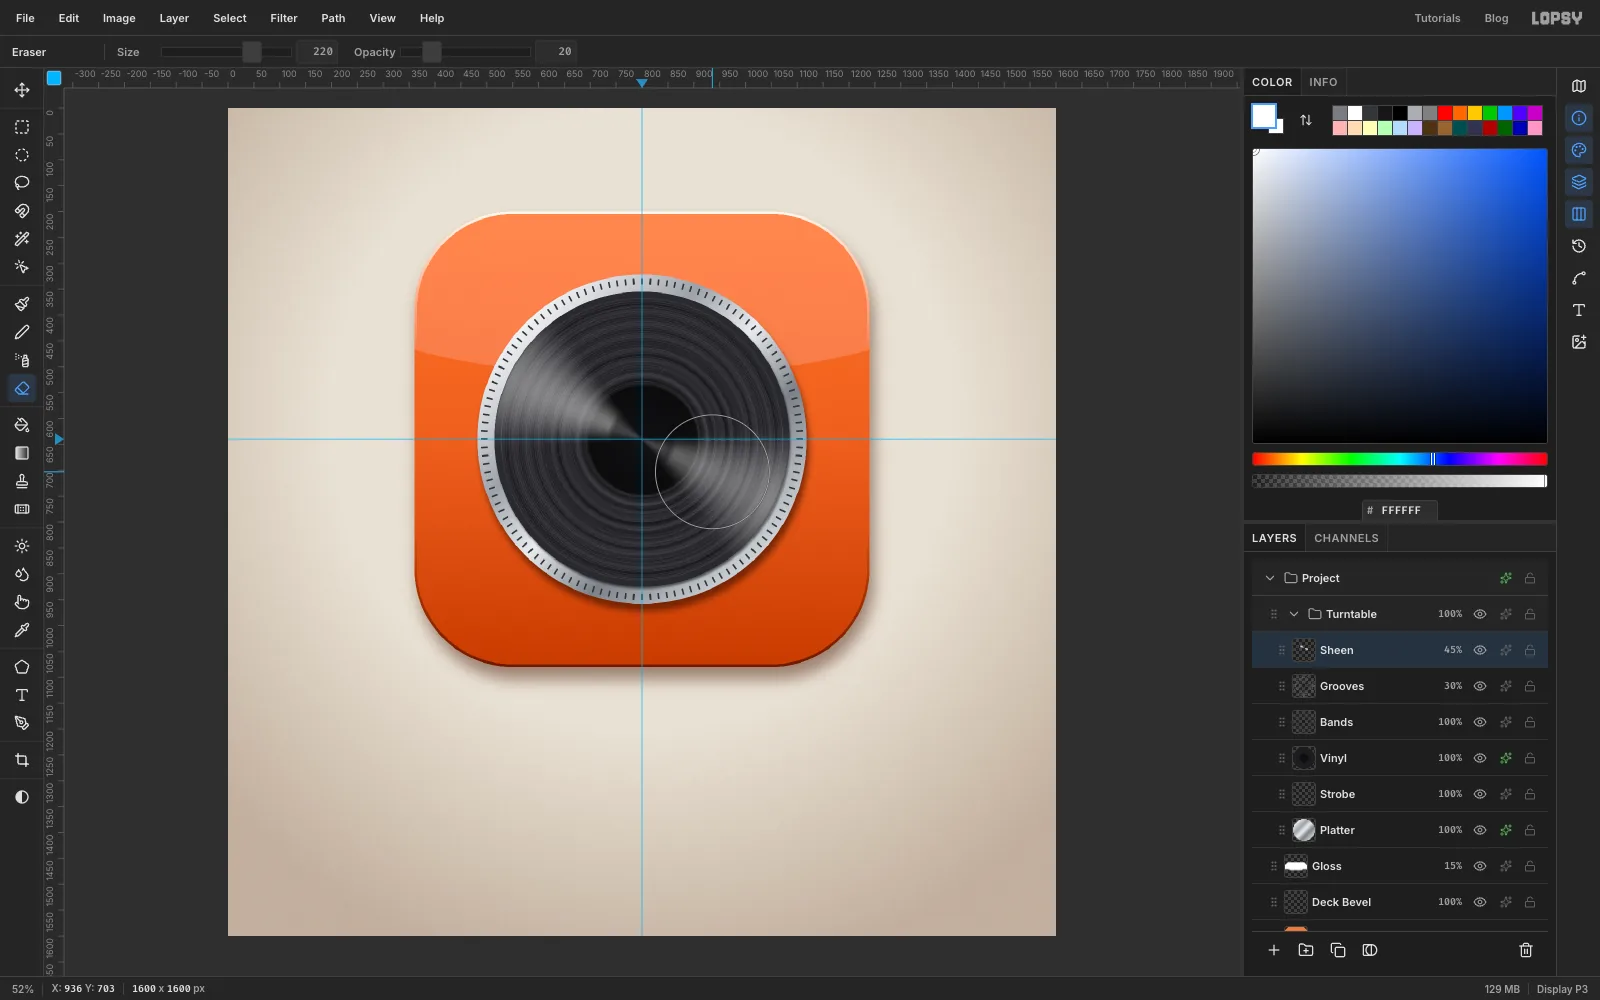
Run Filter → Gaussian Blur… with Radius 6 and set the layer to 45%.
Pick the Eraser at Size 140 and Opacity 50, and click once on the centre of the record so the wedges don't meet in a hard point. The lower lobe will look a little brighter than the upper one. Set the Eraser to Size 220, Opacity 20 and click once in the middle of the lower lobe to even them up.
-
Cut the track gaps
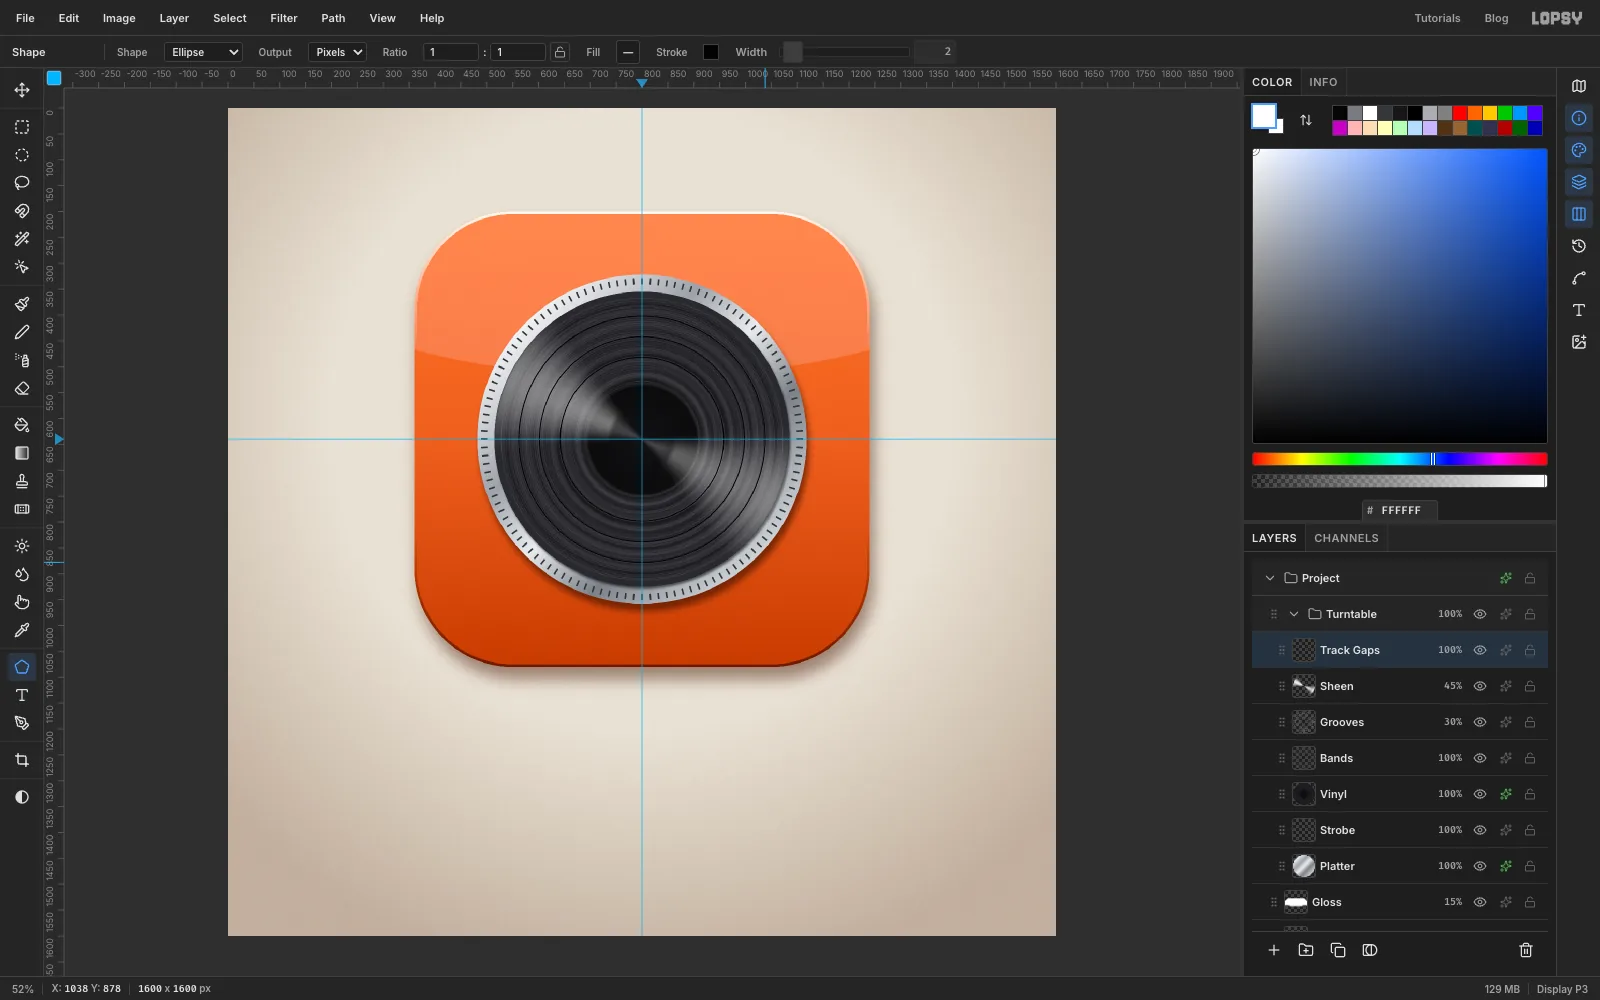
The smooth gaps between songs show up as darker rings. Add a layer called Track Gaps and draw three stroke-only circles from the crossing in at Width 2: radius 158, 198 and 238.
-
Stick on the label
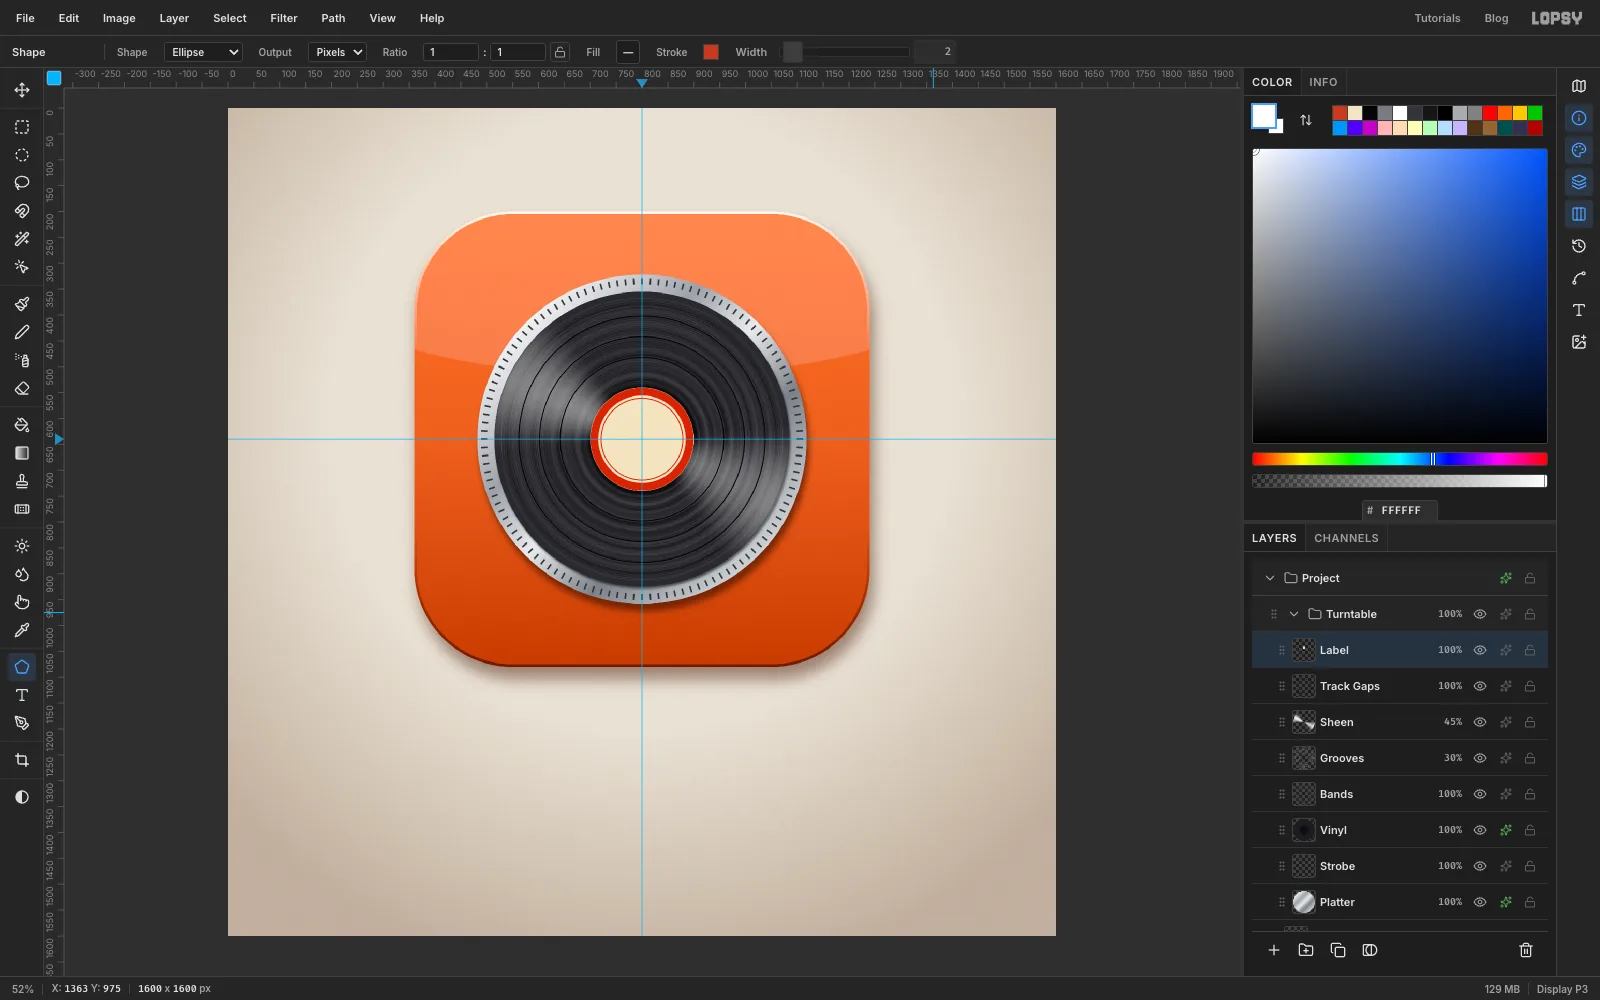
Add a layer called Label. Draw a filled circle with a 100 px radius. On the same layer, draw two stroke-only circles in : one at radius 92 with Width 15, and one at radius 79 with Width 2.
Cmd-click the thumbnail and add Noise at 16 (Mono, Gaussian) for a paper feel. Press Cmd+D.
-
Add the spindle
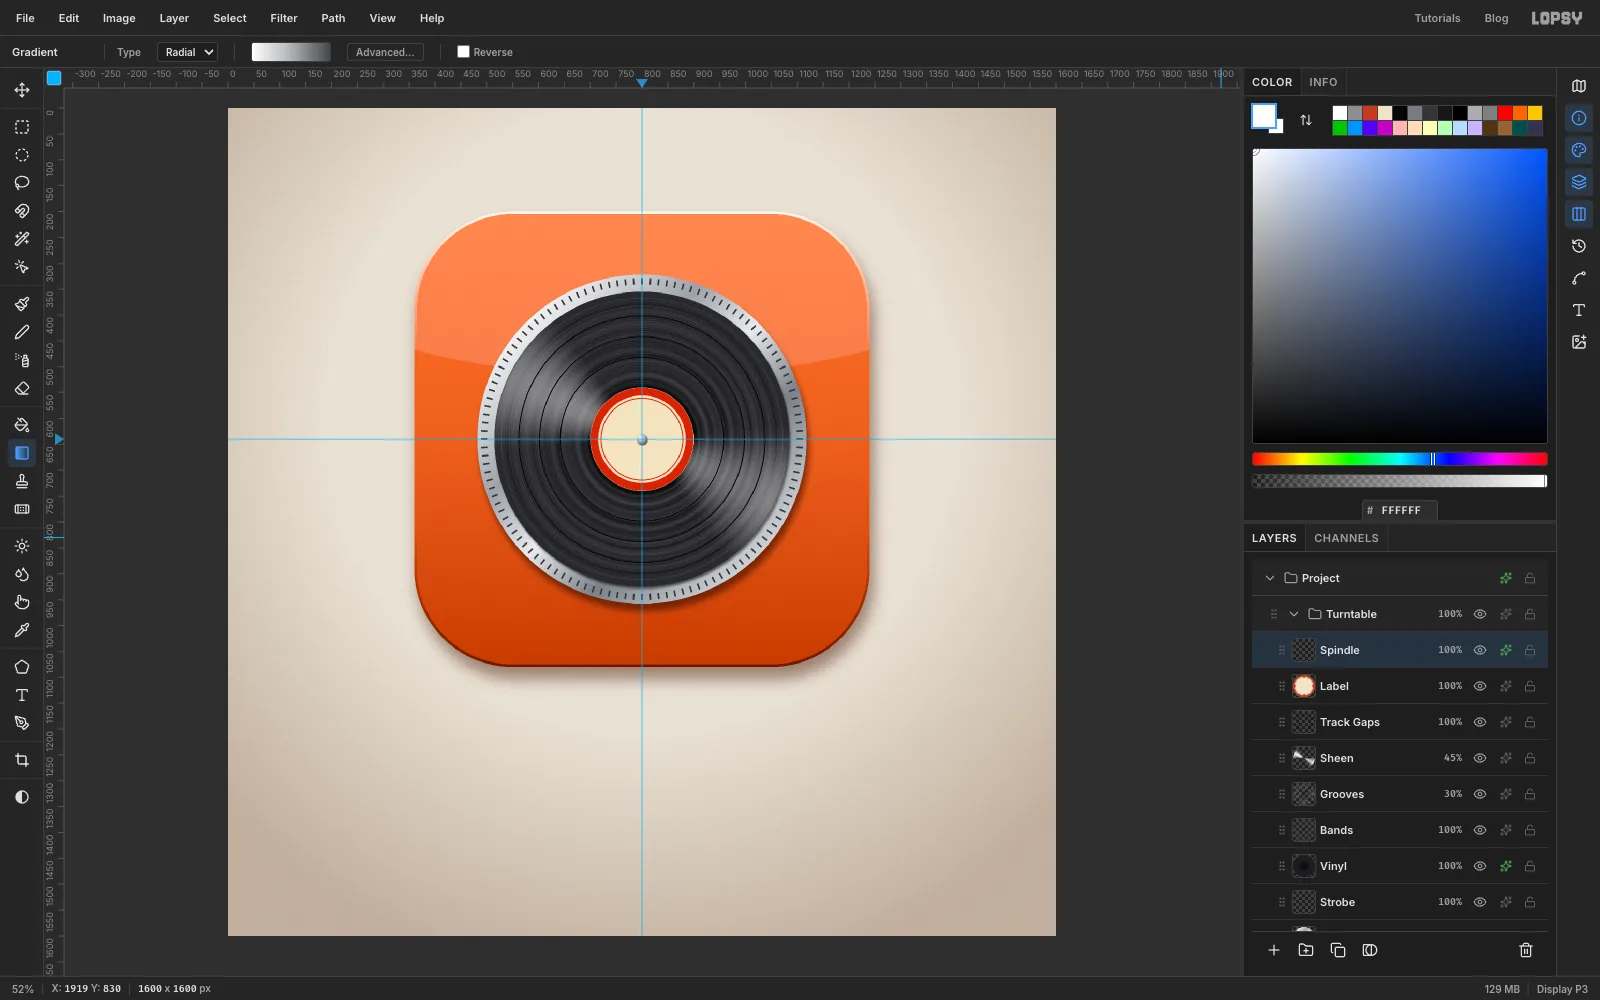
Add a layer called Spindle. A 20 px circle is too small to drag out, so with the Shape tool set to fill , click the guide crossing without dragging. In the Shape Size dialog that opens, enter 20 × 20 and click Create.
Cmd-click it and drag a radial gradient of white, and from just above and left of the centre to the lower right. Give it a Drop Shadow of 1, 2, Blur 2, Opacity 70, .
-
Slide the whole turntable over
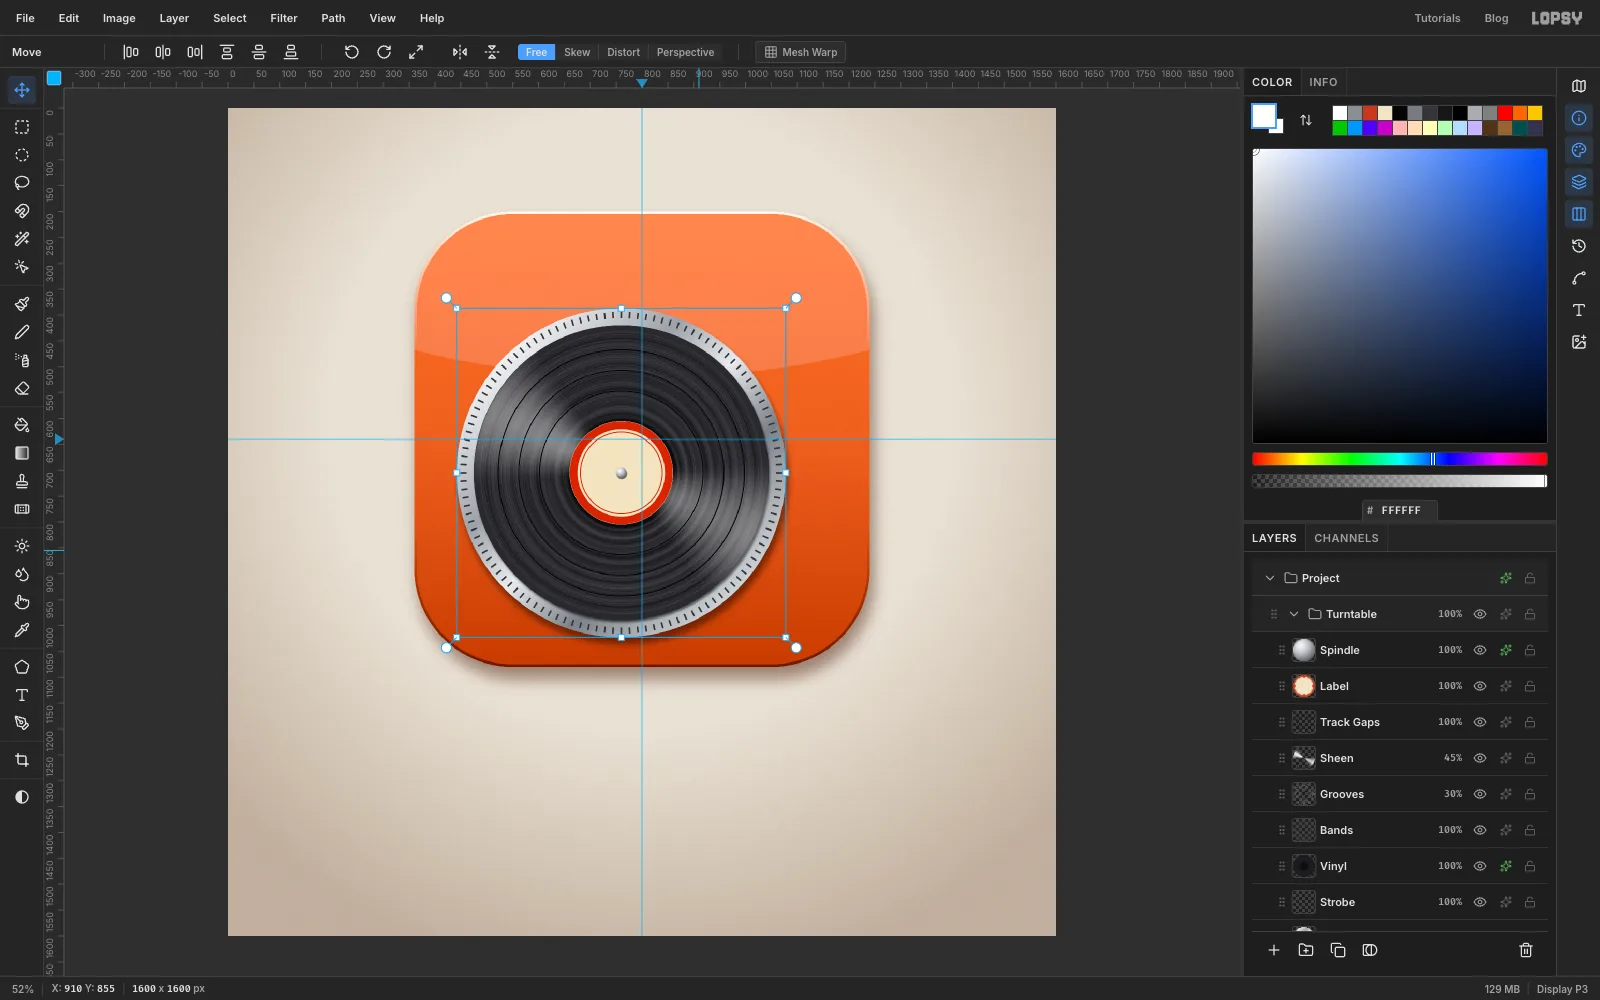
The tonearm needs room on the right. Click the Turntable group row, pick the Move tool and drag on the canvas 40 px left and 65 px down. Every layer in the group moves together. The record's centre is now at 760, 705.
-
Build the pivot base
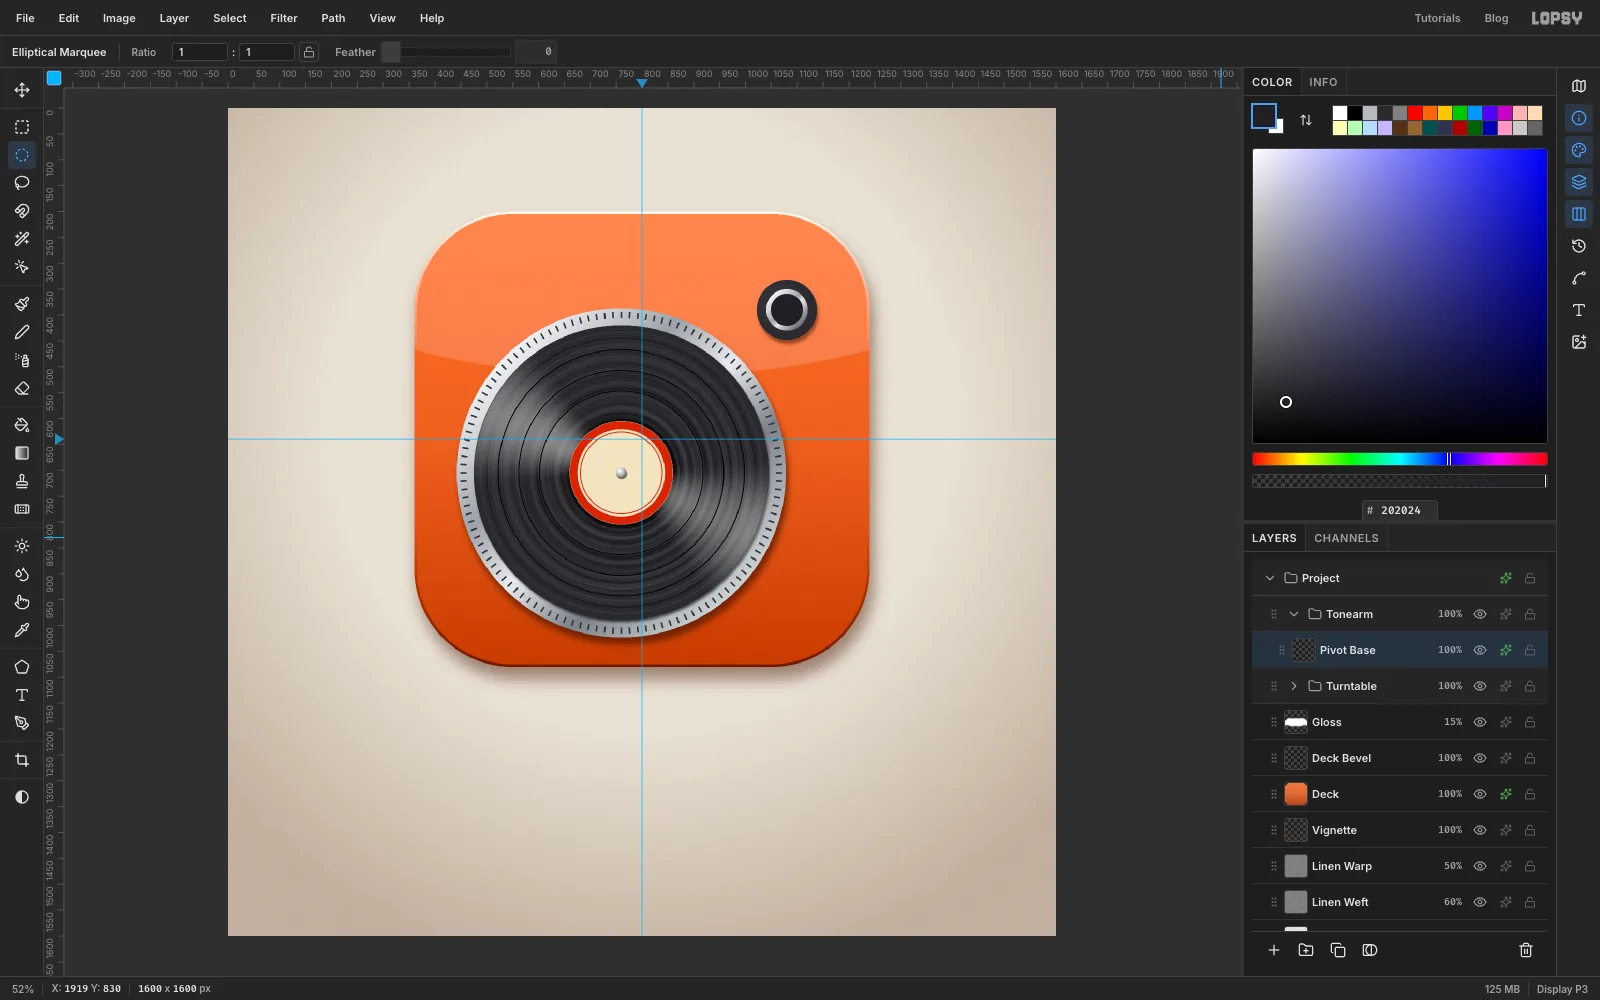
Collapse the Turntable group, click New Group and name it Tonearm. The pivot sits at 1080, 390. Watch the cursor position in the status bar to find it.
Add a layer called Pivot Base. Draw a circle with a 58 px radius on the pivot point. Cmd-click the thumbnail and drag a radial gradient of , and from just up and left of the centre out past the lower-right edge. Press Cmd+D.
On the same layer, draw a circle with a 40 px radius. To select just that circle, pick the Elliptical Marquee and click without dragging: the Elliptical Selection dialog lets you type its corners, 1040, 350 to 1120, 430. Drag a chrome gradient across it from upper left to lower right: , , , . Then select a circle with a 31 px radius in the middle (1049, 359 to 1111, 421) and fill it with . Press Cmd+D.
Give the layer a Drop Shadow: 3, 8, Blur 8, Opacity 50, .
-
Machine the counterweight
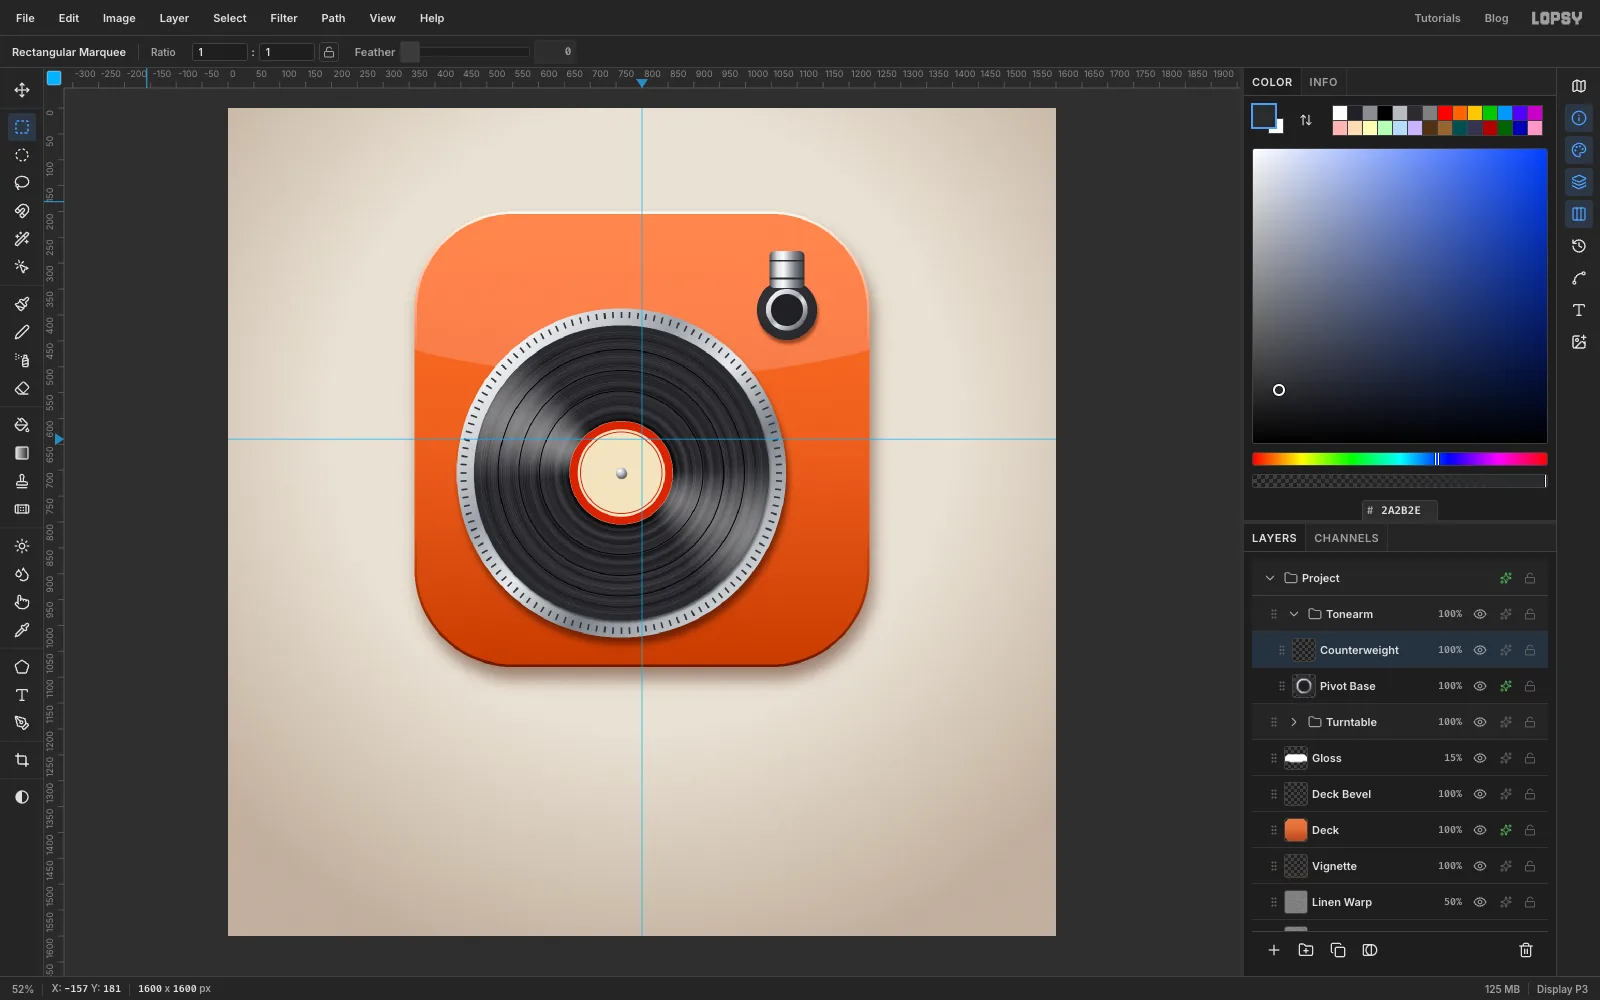
Draw the whole arm straight up and down first. It's much easier to shade a vertical rod, and you'll rotate it into place afterwards.
Add a layer called Counterweight. Draw a Rectangle with Corner Radius 10 and fill , 68 × 72 px, centred 78 px above the pivot. Cmd-click it and drag a five-stop linear gradient from its left edge to its right edge: , , , , . For the machined grooves, marquee two 3 px strips right across the weight, about a quarter and three quarters of the way down, and fill them with . Press Cmd+D.
-
Run the arm tube down
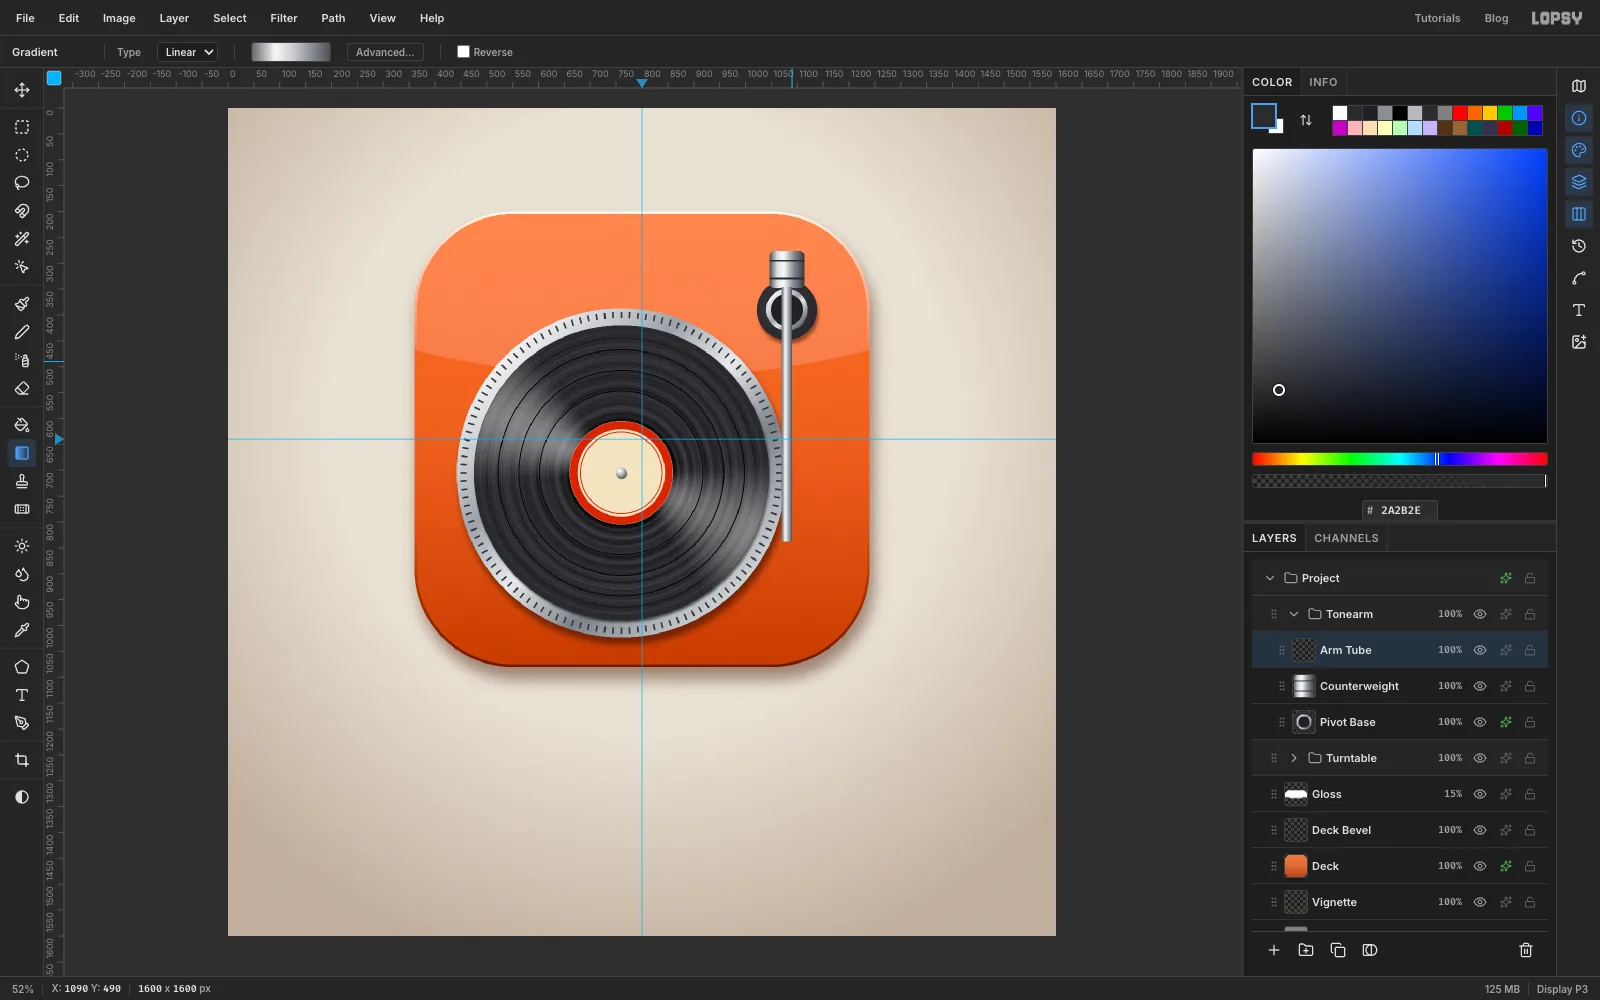
Add a layer called Arm Tube. With the Rectangular Marquee, select a strip 20 px wide centred on the pivot's x position. Start it just inside the counterweight and run it down about 490 px. Shade it with a linear gradient dragged straight across the strip: , , , . The narrow bright stripe near one side is what reads as a round, polished rod. Press Cmd+D.
-
Angle the headshell
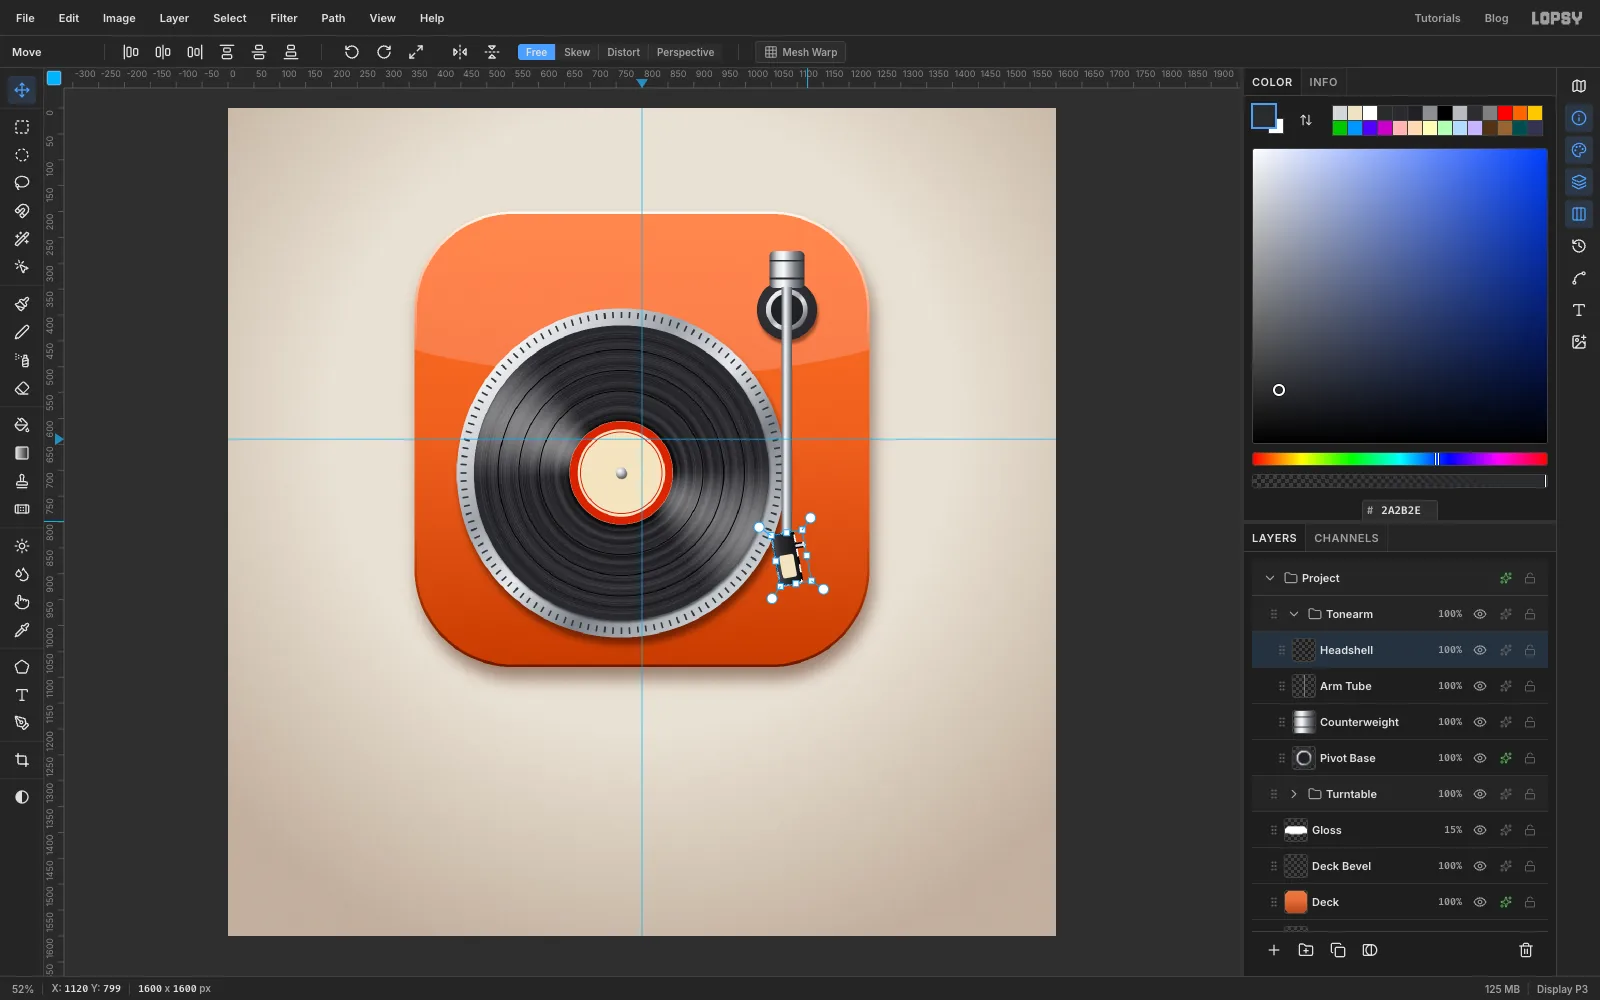
Add a layer called Headshell. Draw a Rectangle with Corner Radius 8 in , 44 × 100 px, centred on the bottom of the tube. Shade it by Cmd-clicking the thumbnail and dragging a linear gradient from its left edge to its right edge: , and . Press Cmd+D.
On the same layer, use click-to-size for two small shapes. Make a cream cartridge, 28 × 44 with Corner Radius 4, in the lower half. Then make a chrome finger lift, 18 × 8 with Corner Radius 3, sticking out of the right side.
Headshells are set at an angle to the arm. Cmd-click the Headshell thumbnail, pick the Move tool and drag a corner's rotation handle counter-clockwise for a slight tilt, about 10°. Press Cmd+D. The rotation swung the top of the headshell sideways, so tap → until the tube meets the middle of its top edge again.
-
Merge the arm
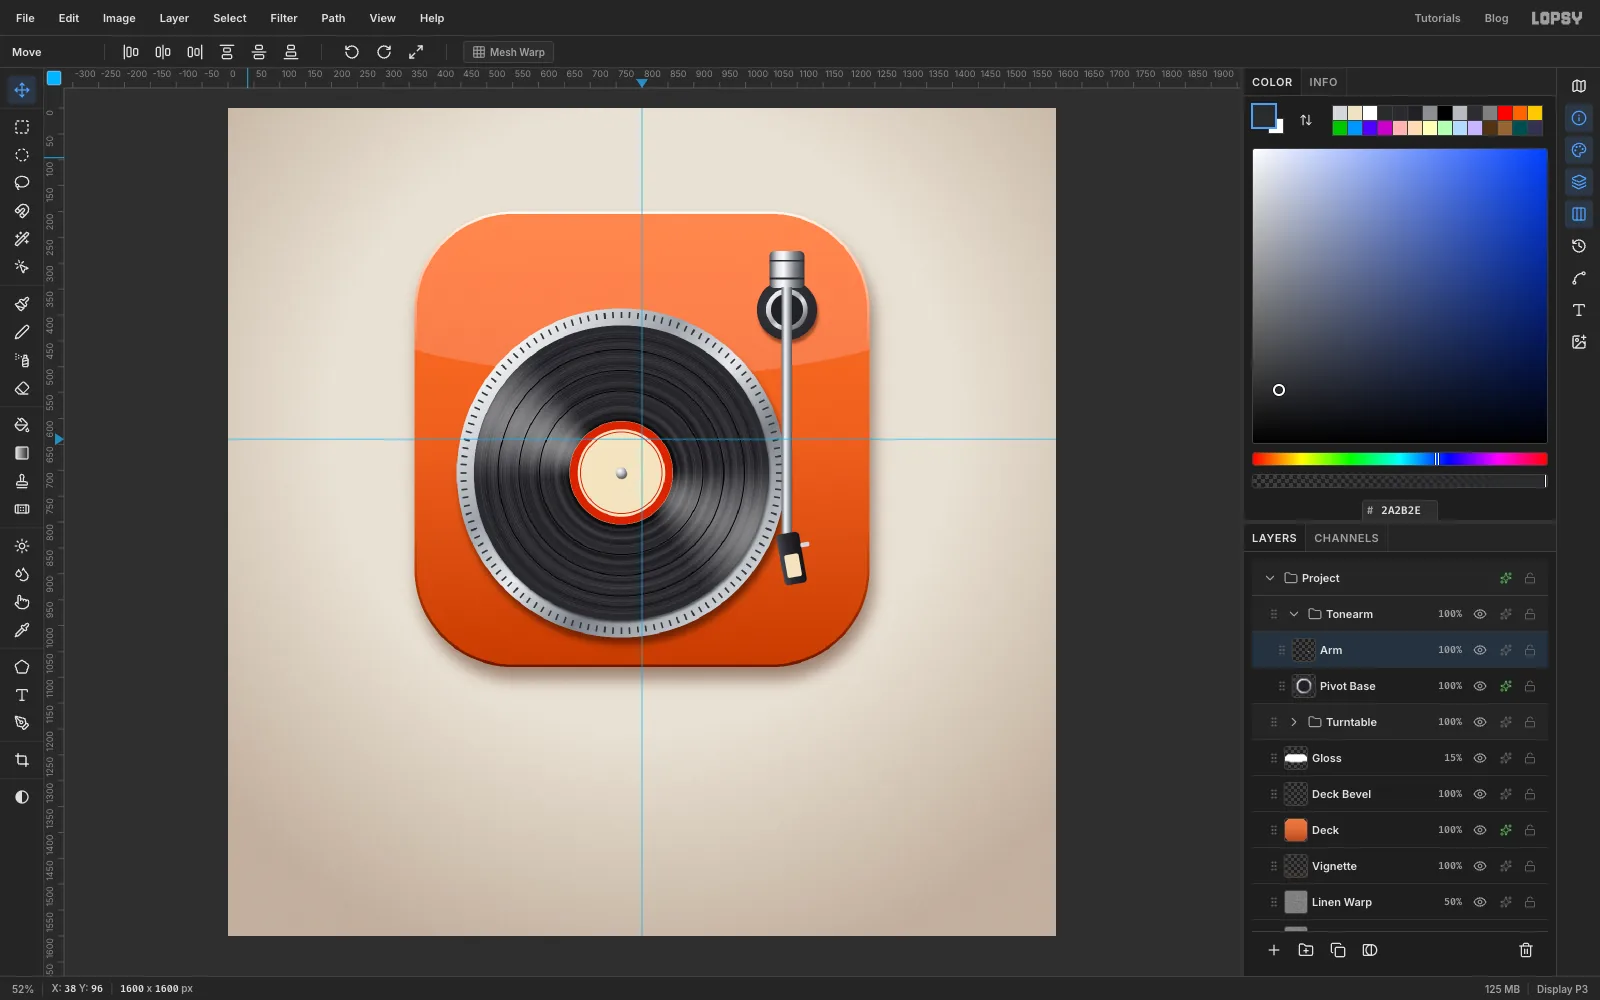
With Headshell selected, choose Layer → Merge Down. Then click Arm Tube and merge it down into Counterweight. Rename the result Arm.
-
Swing the arm onto the record
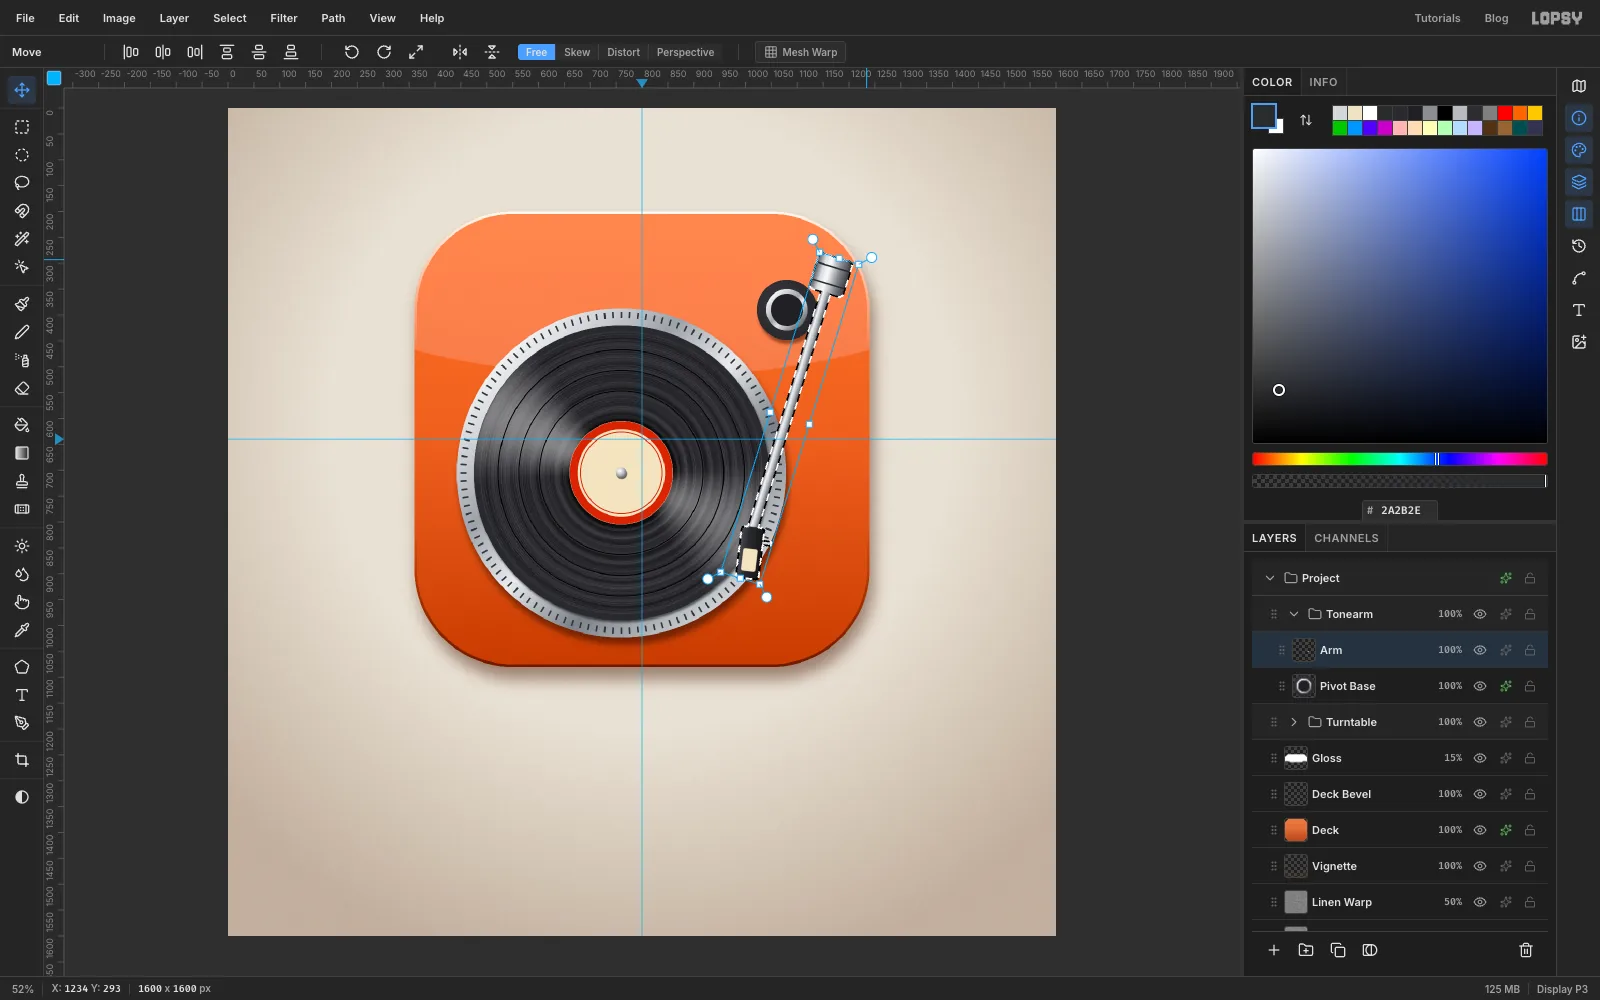
Cmd-click the Arm thumbnail and, with the Move tool, drag a rotation handle clockwise until the cartridge swings in over the outer grooves, around 930, 875. That's roughly 17°. Press Cmd+D.
-
Re-seat it on the pivot
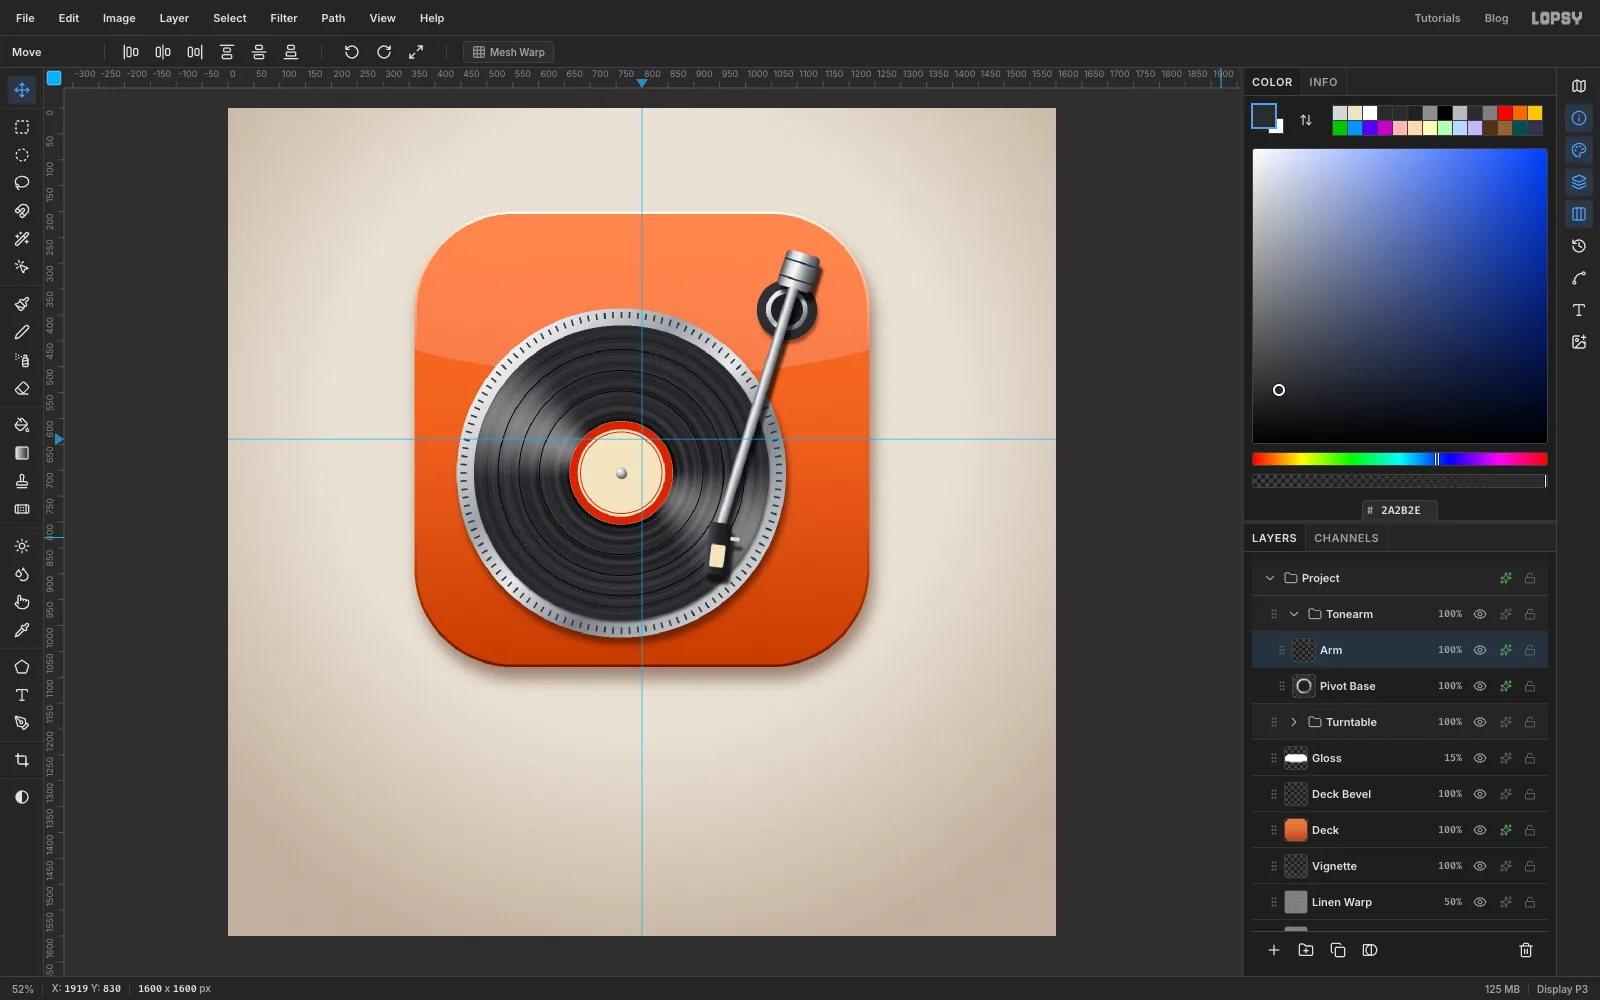
Rotating turns the arm around the middle of its box, not around the pivot. Use the arrow keys (hold Shift to move 10 px at a time) until the tube runs through the centre of the pivot again.
Add a Drop Shadow of 6, 18, Blur 8, Opacity 70, black. The arm stands higher off the deck than anything else, so its shadow falls furthest.
-
Cap the bearing
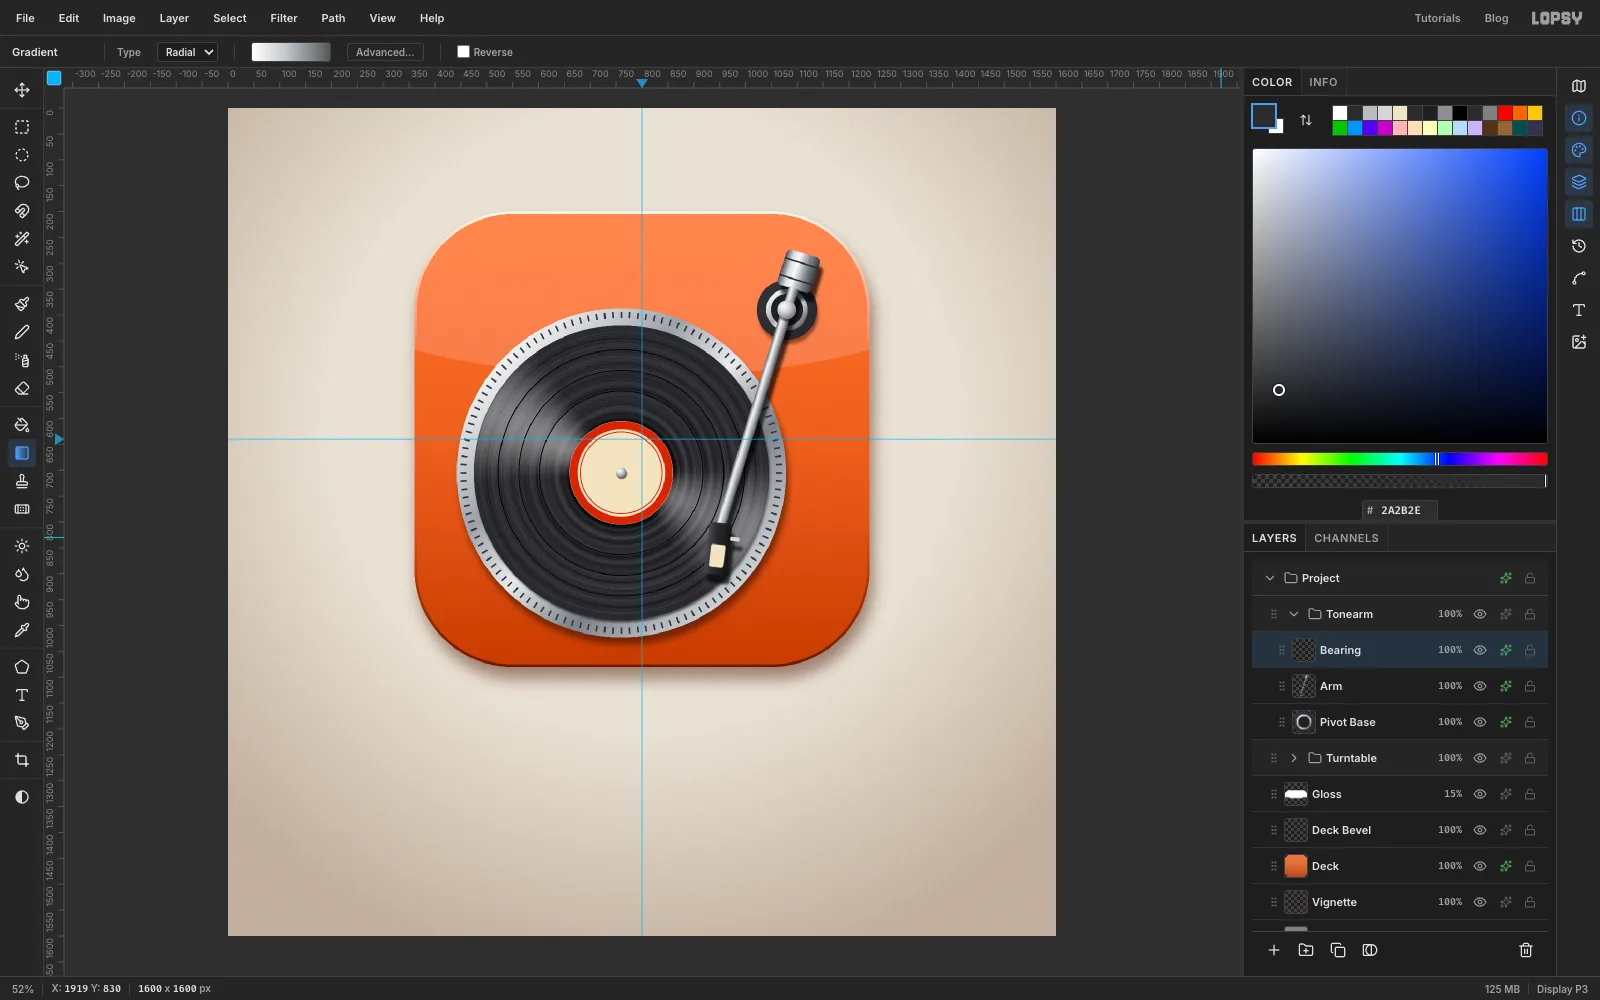
Add a layer called Bearing. Click the pivot point with the Shape tool and make a 36 × 36 circle. Cmd-click it and drag a radial gradient of white, and from just up and left of its centre. Add a Drop Shadow: 2, 5, Blur 4, Opacity 60, . The arm now looks like it comes out of the middle of the bearing.
-
Make one speed button
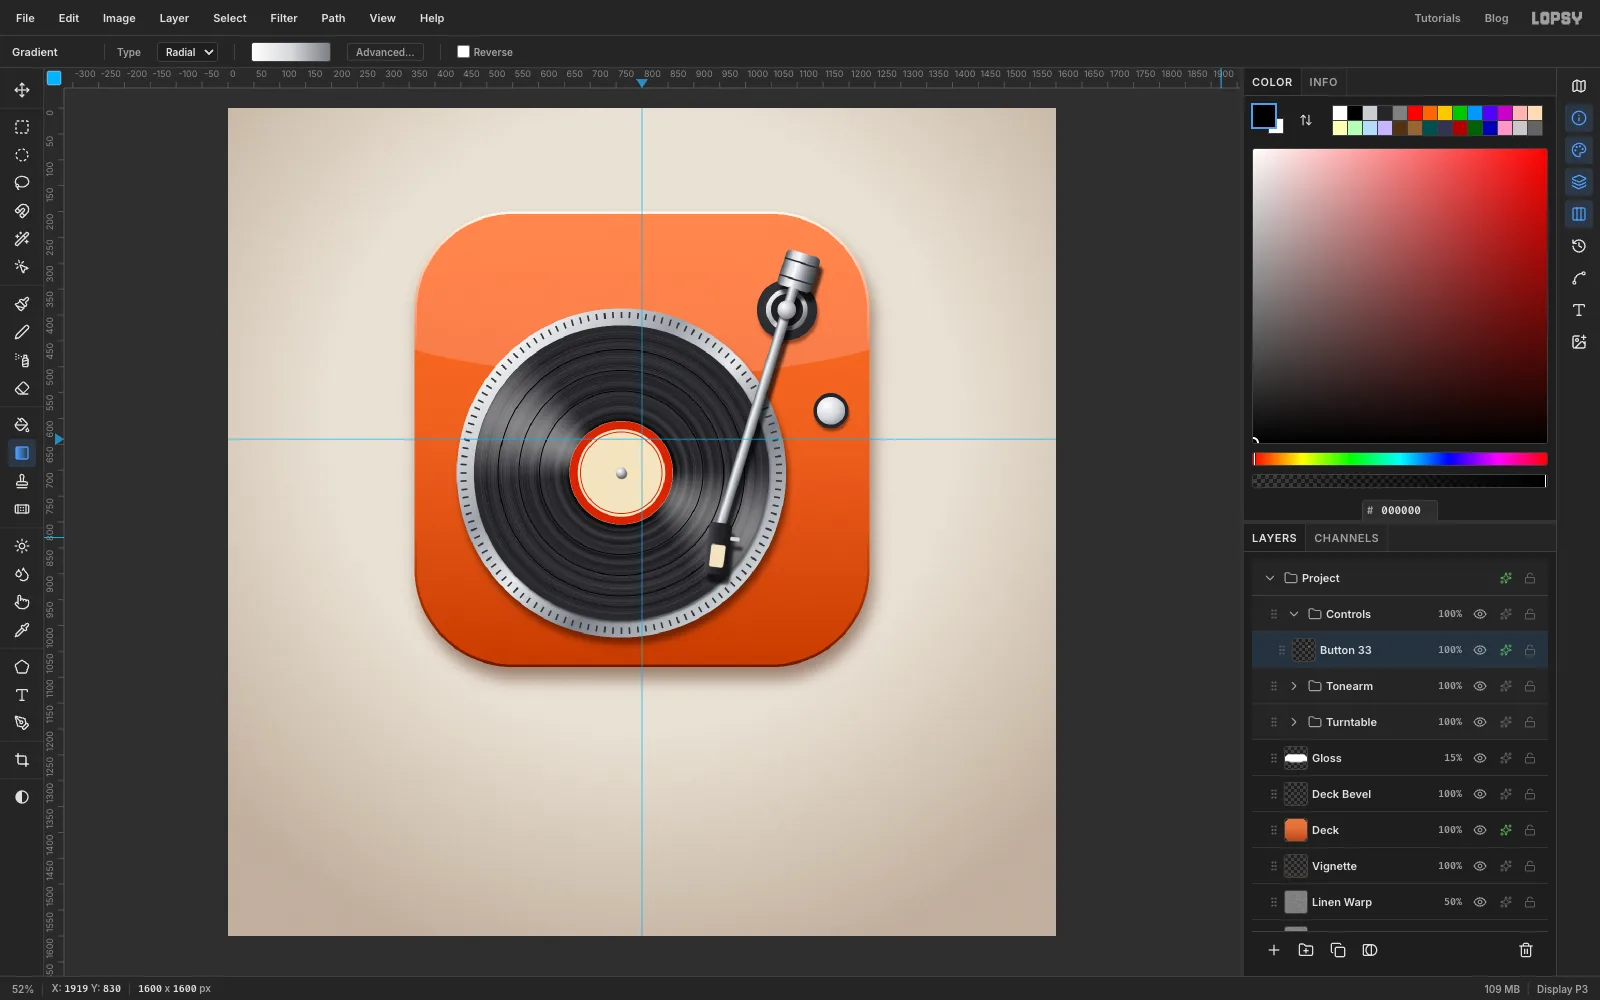
Collapse Tonearm, click New Group and name it Controls. Add a layer called Button 33.
At 1165, 585, draw a circle with a 34 px radius, then a circle with a 27 px radius on top. Click the Elliptical Marquee without dragging and select the inner circle exactly, 1138, 558 to 1192, 612. Drag a radial gradient of white, and from its upper left down past its lower-right edge. Press Cmd+D and add a Drop Shadow: 2, 6, Blur 6, Opacity 55, .
-
Copy it for the second button
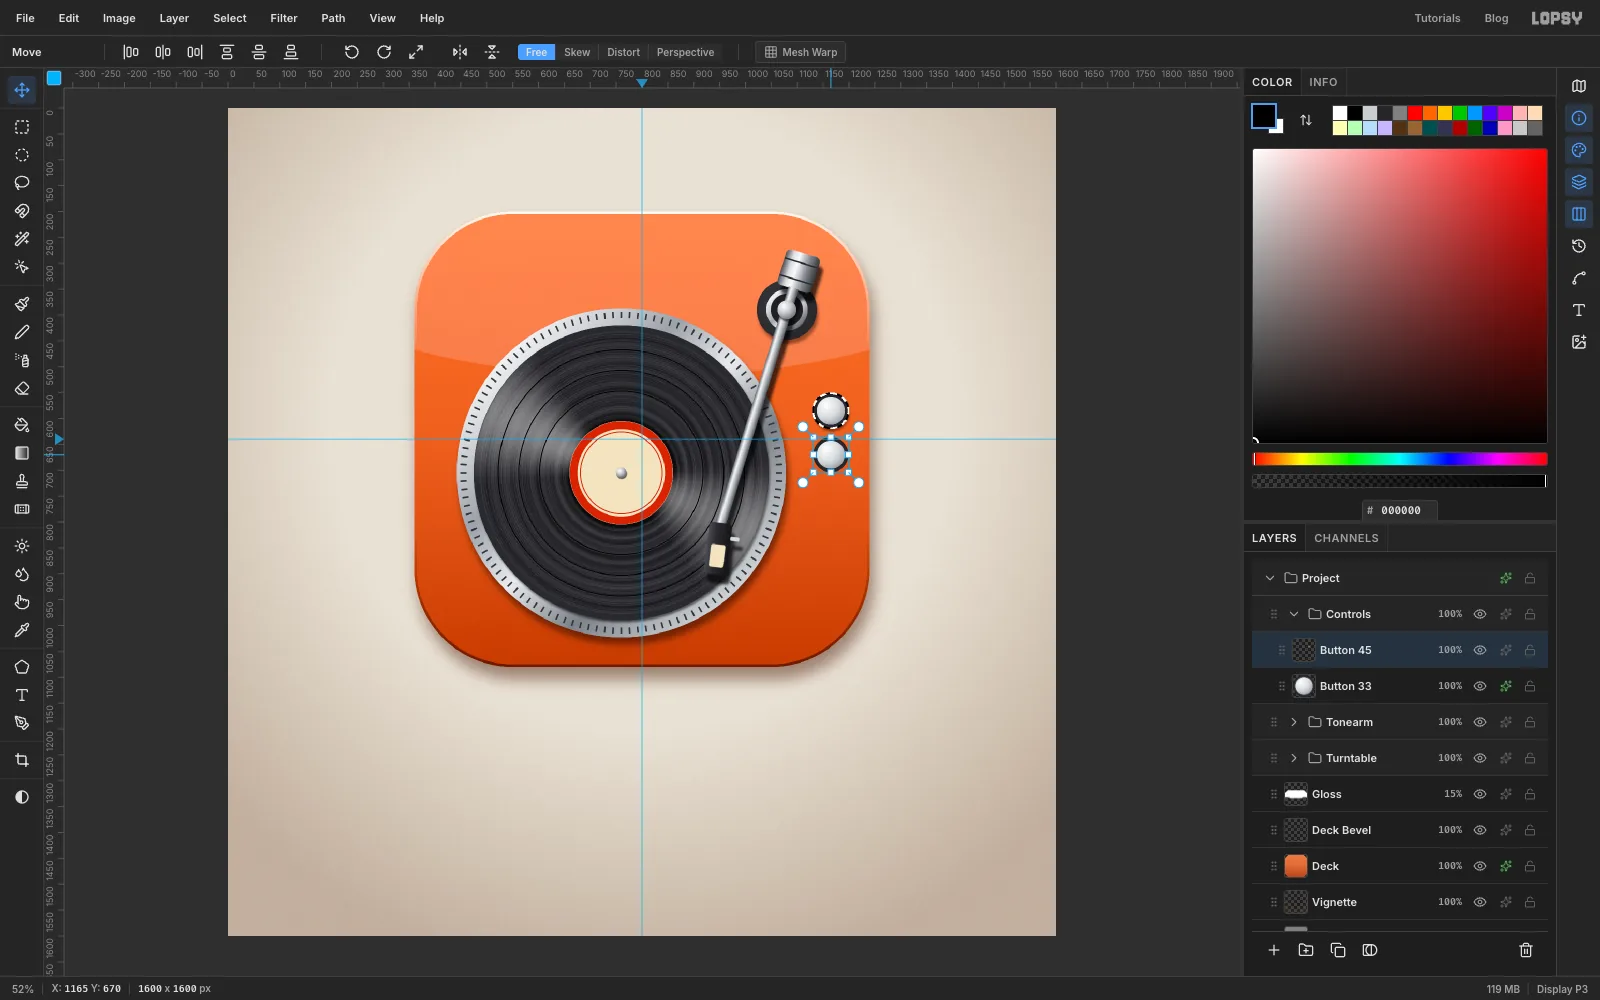
Cmd-click the Button 33 thumbnail and press Cmd+C then Cmd+V. The copy pastes on its own layer in the same spot. Rename it Button 45. Drag it 85 px straight down with the Move tool and press Cmd+D.
Copy and paste only copies pixels, so add the same Drop Shadow to Button 45.
-
Add a pitch slider
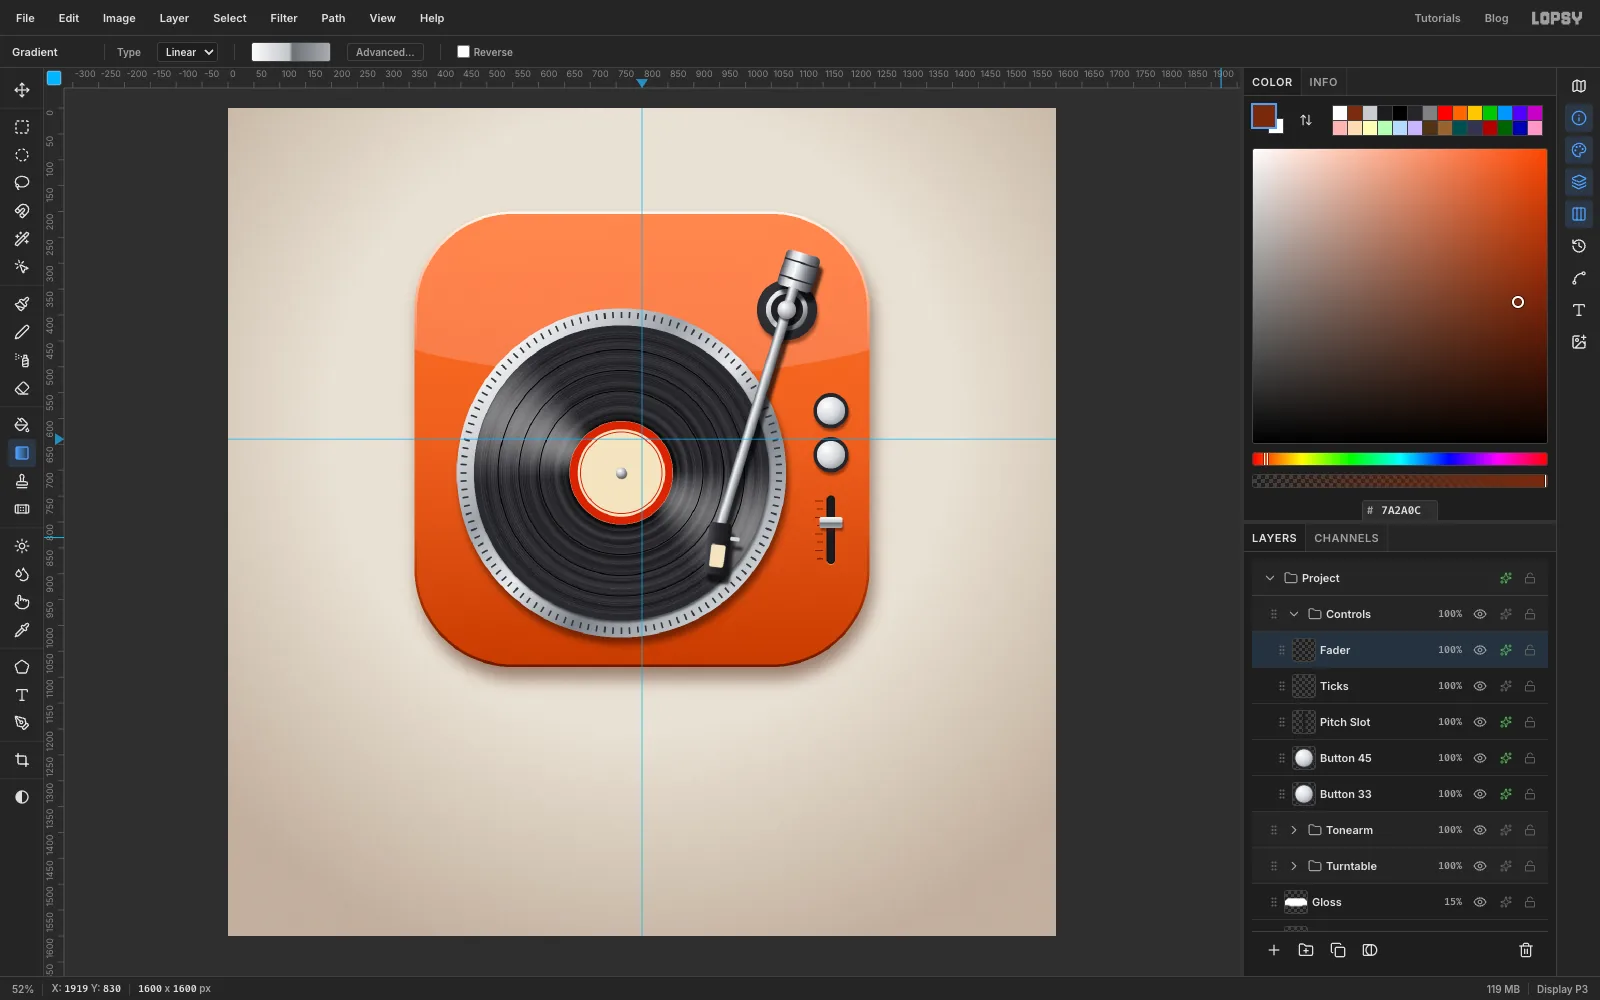
Add a layer called Pitch Slot. Draw a rectangle with Corner Radius 8, 16 × 132 px, centred at 1165, 815. Turn on Inner Glow in black at Size 5 and Opacity 90 so it looks sunk into the deck. Add a Drop Shadow at 0, 2, Blur 1, Opacity 60 in . The light lip under the slot catches the light.
Add a layer called Ticks. Pick the Pencil at Size 2 with . Draw a short line left of the slot every 16 px: click where it starts and Shift-click where it ends. Alternate 14 px and 10 px lengths.
Add a layer called Fader. Draw a 44 × 22 rectangle with Corner Radius 4 over the top half of the slot. Shade it top to bottom with , , and . Put the middle two stops right next to each other so the cap has a crisp ridge. Add a Drop Shadow: 2, 5, Blur 5, Opacity 55, .
-
Number the buttons
Pick the Text tool and set Josefin Sans, Bold, Size 20, colour . Click on the top button, type
33and press Tab to commit. Use the arrow keys with the Move tool to centre it on the cap.Click the Fader layer before setting new type. If a text layer is active when you change the options, they restyle that layer. Then type
45on the lower button and centre it the same way.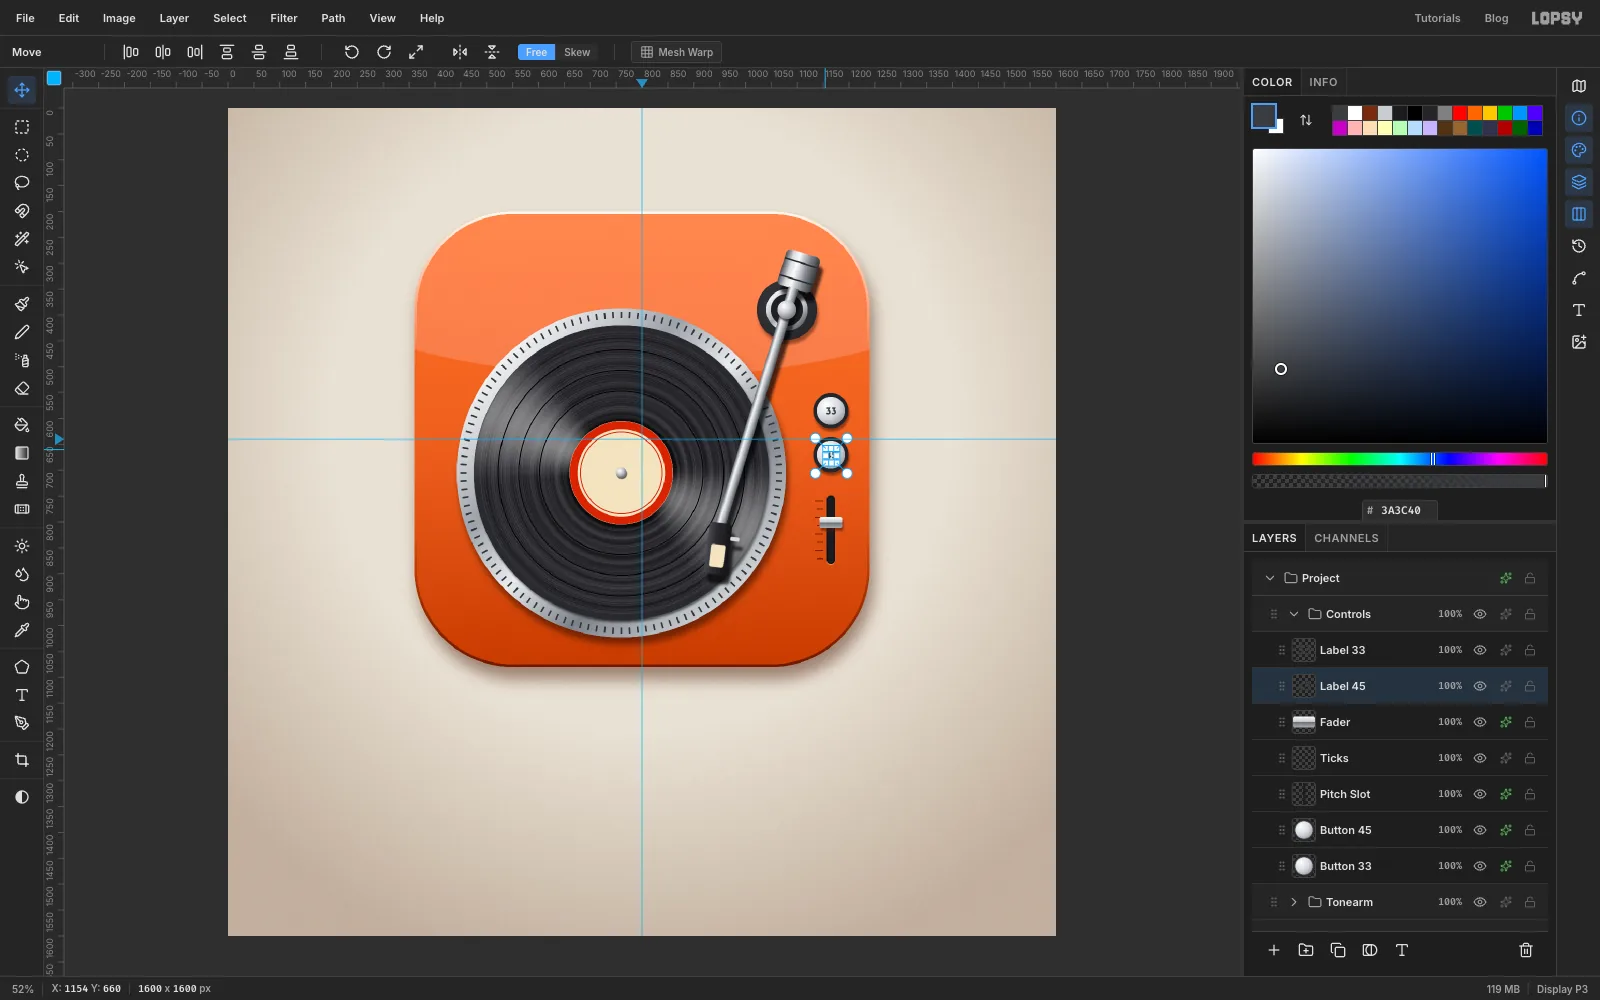
-
Press in the model name
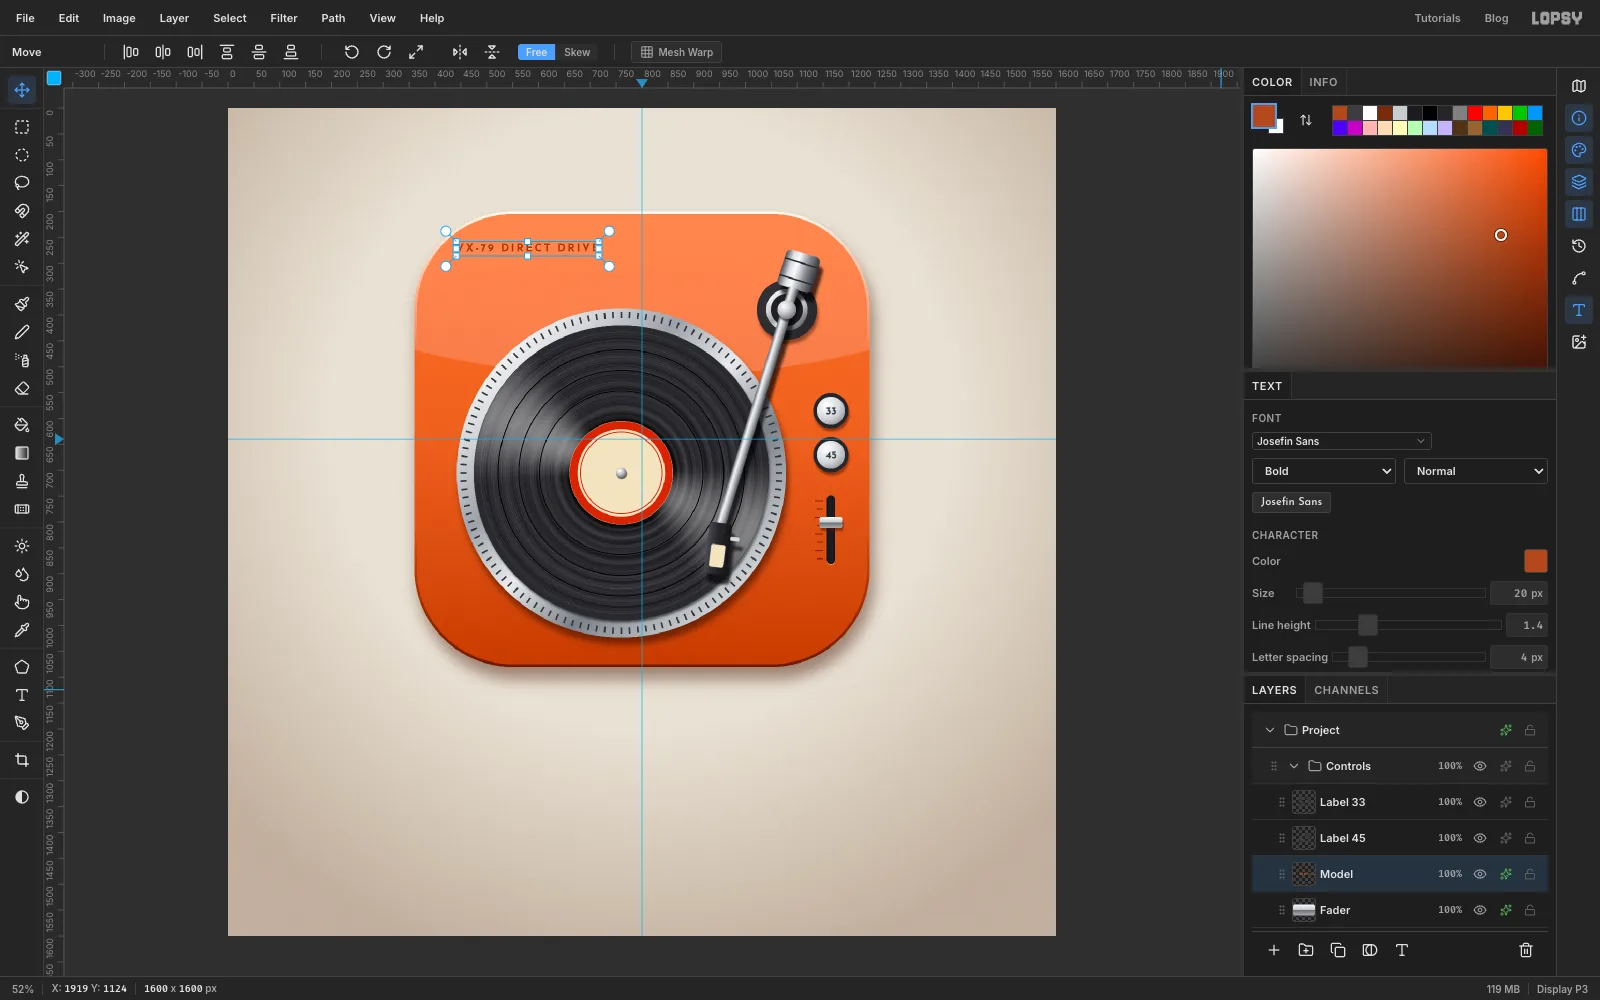
Click Fader again. Set Josefin Sans Bold 20 in , click near the top-left of the tile and type
VX-79 DIRECT DRIVE. In the Text panel, set Letter spacing to 4. Nudge the text so its left edge lines up with the platter's left edge.To press it into the lacquer, add an Inner Glow in at Size 3, Opacity 85, which darkens the letter edges. Then add a Drop Shadow of 0, 2, Blur 1, Opacity 90 in . The pale lip below each letter makes it look pressed in.
-
Letter the label
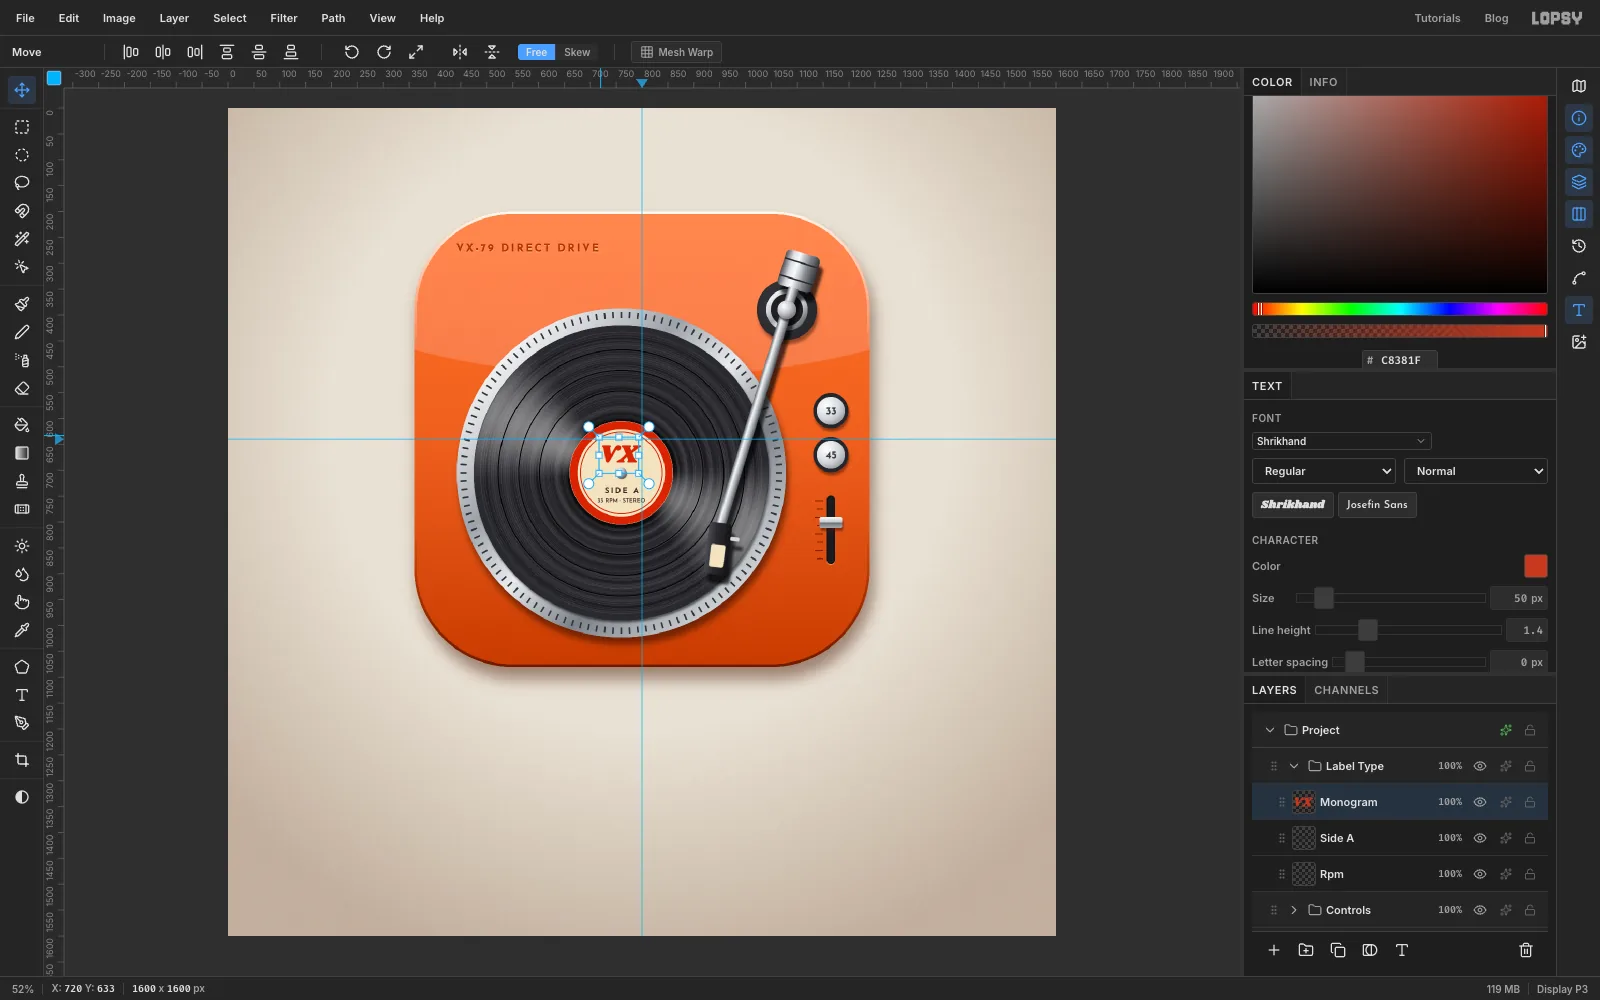
Collapse Controls, click New Group and name it Label Type. Before setting each line, click the Label Type group row again and only then change the options; otherwise they restyle the line you just typed. Press Tab to commit each line. Work from the bottom up so each click lands in empty space rather than on the text you just set.
- Josefin Sans SemiBold 11, , letter spacing 0:
33 RPM · STEREO. Centre it about 52 px below the spindle. - Josefin Sans Bold 15, letter spacing 3:
SIDE A, about 33 px below the spindle. - Shrikhand 50, , letter spacing 0:
VX, centred about 38 px above the spindle.
The space above and below the spindle should look about the same, and the lower line has to clear the thin red inner ring.
- Josefin Sans SemiBold 11, , letter spacing 0:
-
Draw a circle for the band text
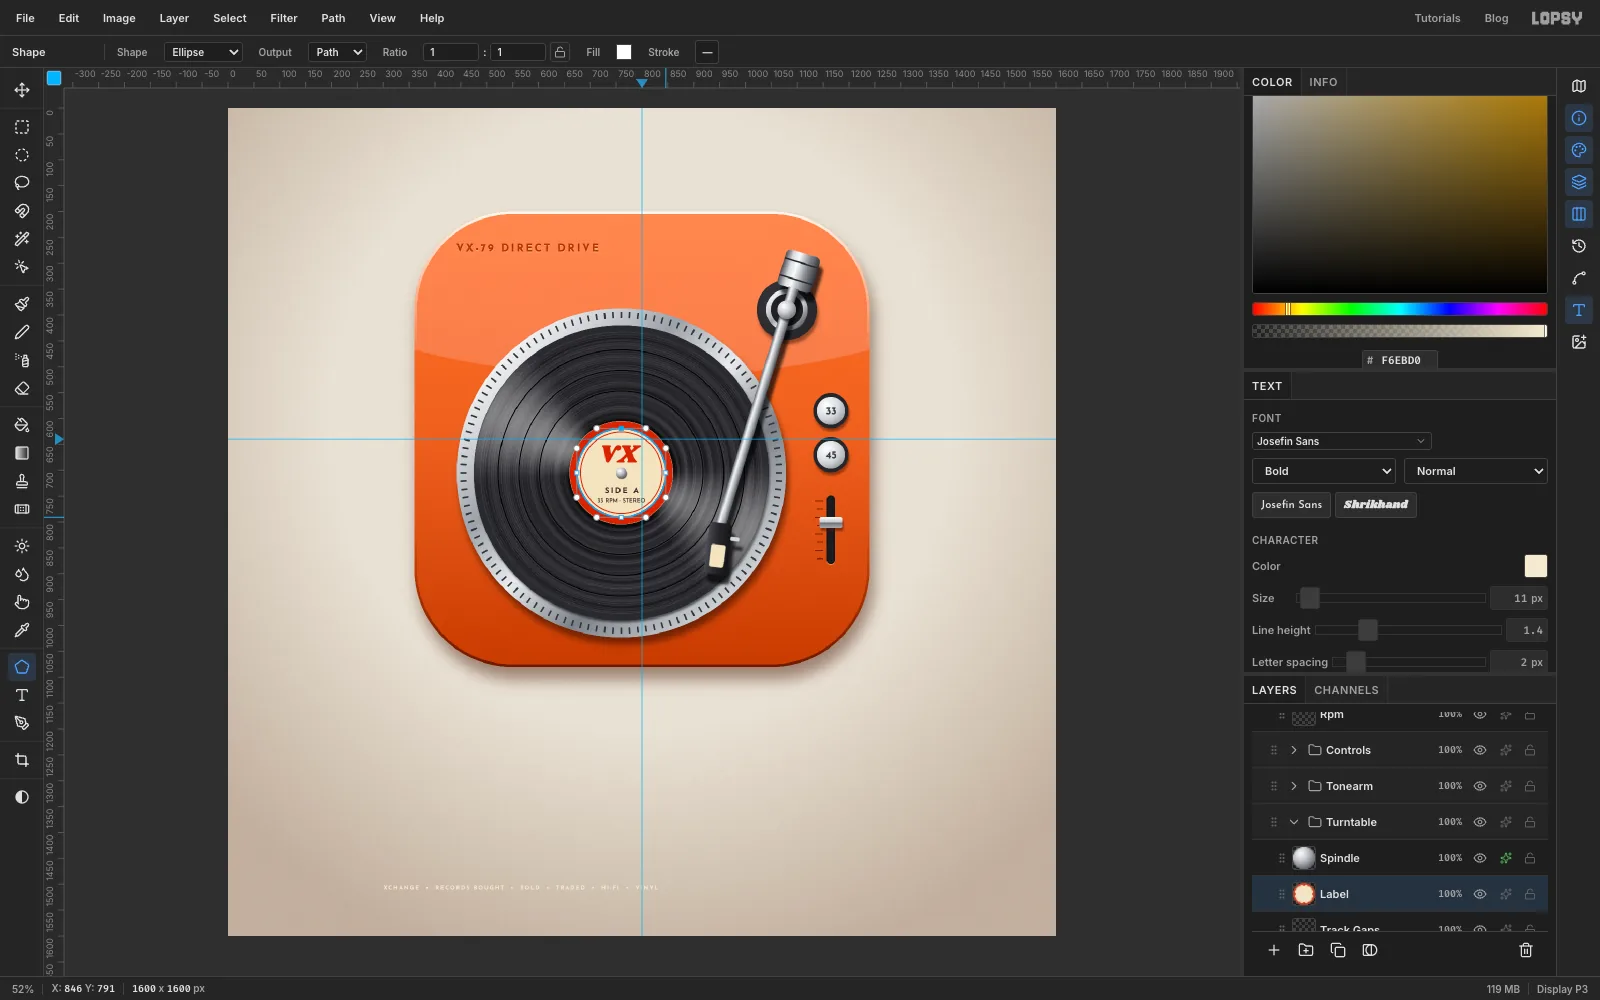
Click the Label Type group and set Josefin Sans Bold 11 in . Click in an empty corner of the canvas and type:
XCHANGE • RECORDS BOUGHT • SOLD • TRADED • HI-FI • VINYLUse two spaces each side of the bullets, and end with one space. Press Tab to commit, then double-click the new layer's name and rename it Band Text. Set Letter spacing to 2 in the Text panel. At this size the run is about 540 px long.
Now expand Turntable and click the Label layer, because the Shape tool won't draw while a text layer or a group is active, even for a path. Set the Shape tool to Ellipse and Output to Path. Then drag a circle with an 86 px radius out from the record's centre. Its circumference is 2 × π × 86 ≈ 540 px, the same as the text.
-
Wrap the text round the band
Click the Band Text layer, pick the Text tool and choose Path 1 in the Path menu on the options bar. The type flows clockwise from the top of the circle, which is where the path starts.
The text starts with
XCHANGEand ends withVINYLbecause that puts VINYL XCHANGE across the top, joined over the start of the circle. Because the run matches the circumference, the last space closes the gap exactly. Collapse Turntable again.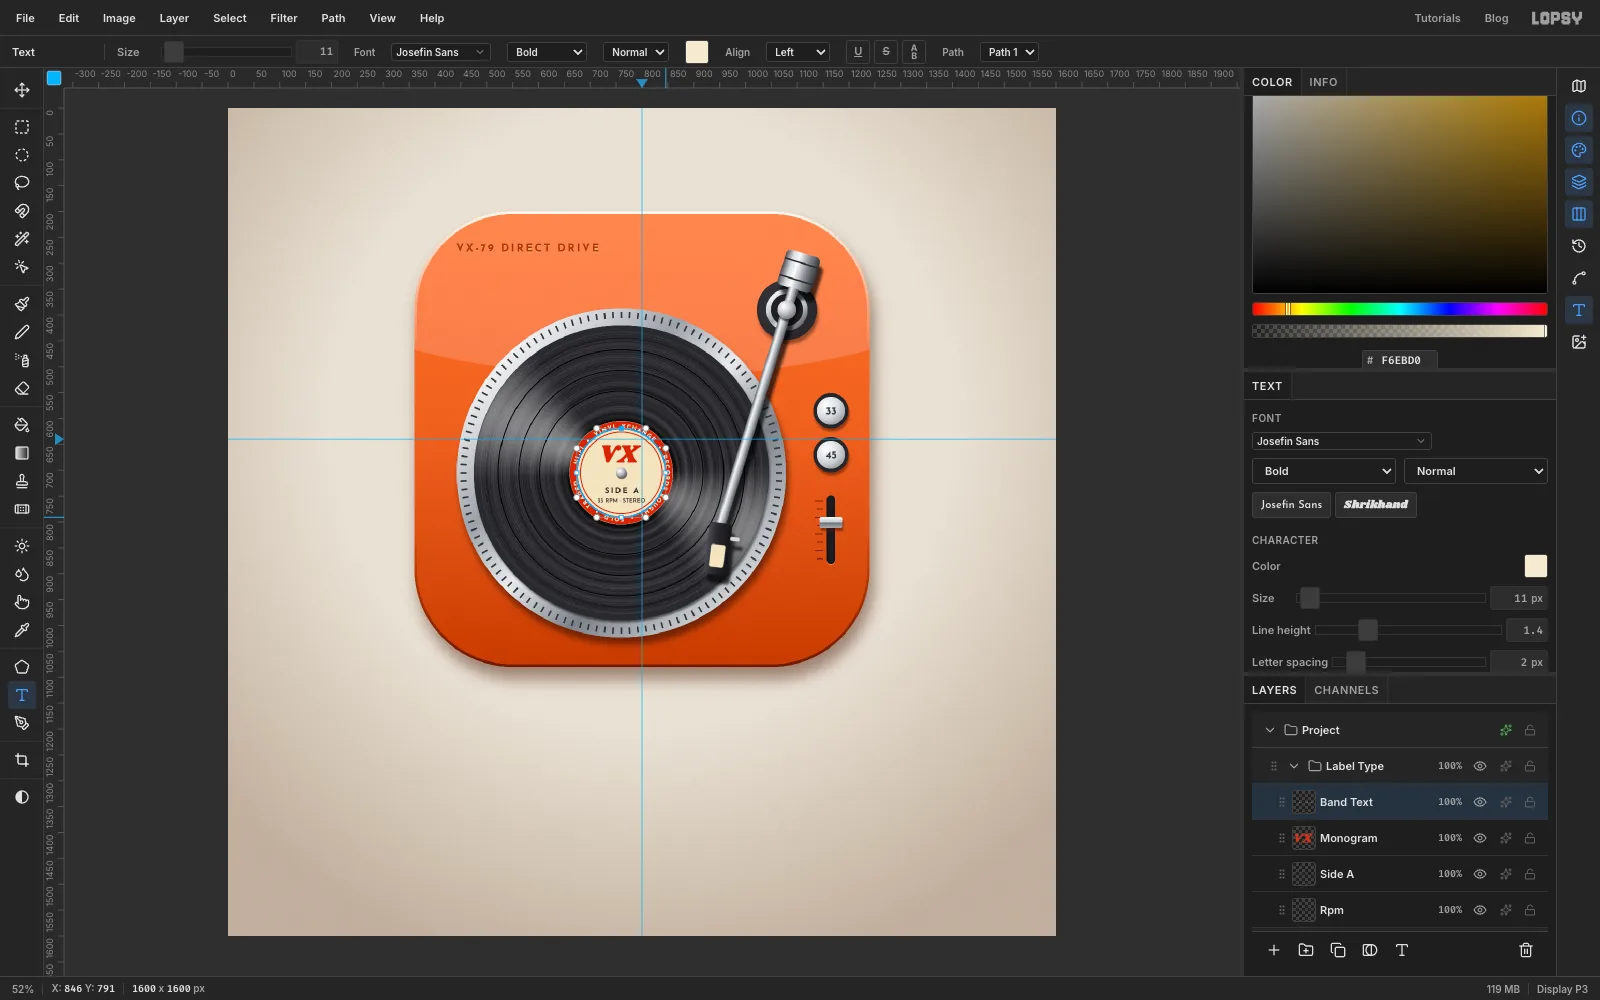
-
Set the wordmark
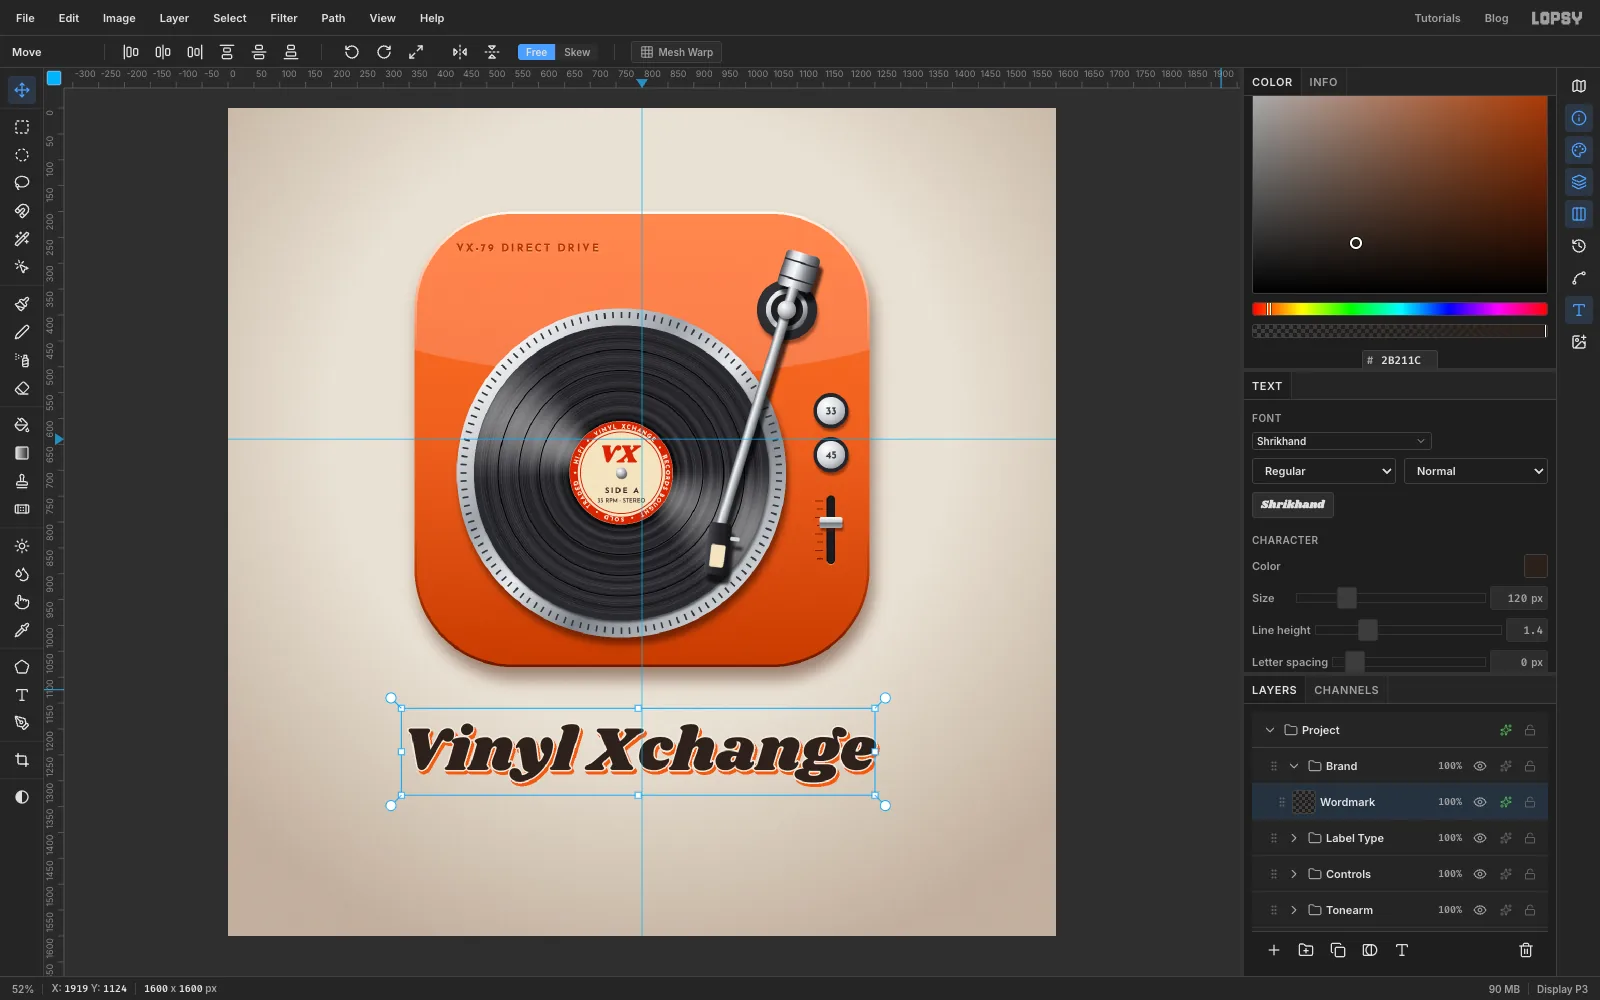
Collapse Label Type, click New Group and name it Brand. Set Shrikhand 120 in , letter spacing 0. Type
Vinyl Xchangebelow the tile, press Tab, and centre it on the vertical guide, about 165 px below the tile. At this size it's about 900 px wide, the same width as the tile.Add a Stroke, Outside, Width 3, in . Then add a Drop Shadow at 4, 6, Blur 1, Opacity 100 in . The cream keyline keeps a gap between the letters and the tangerine shadow, like a two-colour print.
-
Add the tagline
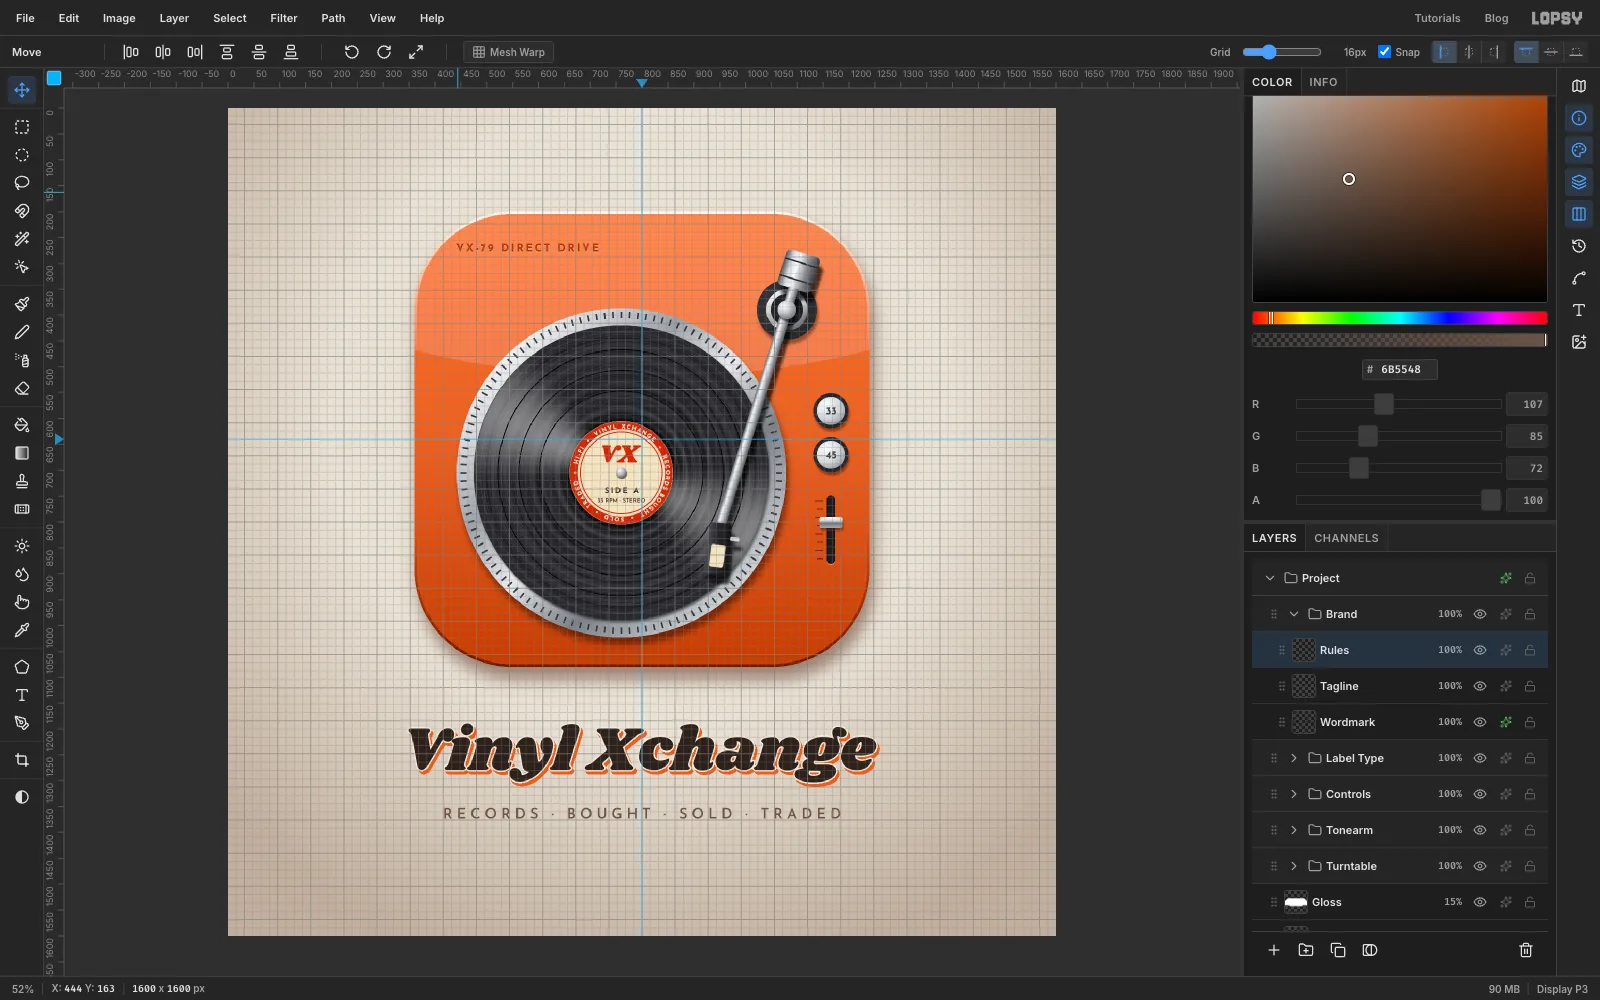
Click the Brand group, set Josefin Sans SemiBold 28 in , and type
RECORDS · BOUGHT · SOLD · TRADEDunder the wordmark. Set Letter spacing to 8 and centre it on the guide, about 60 px below the wordmark.Add a layer called Rules and choose View → Show Grid. The grid makes it easy to see that the tagline sits level and centred under the wordmark.
-
Frame it with rules
Pick the Pencil at Size 2 with . Leave a 24 px gap before the tagline's first letter and draw an 80 px rule leading up to it: click where the rule starts and Shift-click where it ends. Draw a matching rule after the last letter. Turn the grid off with View → Show Grid.
Save with File → Save Project and export with File → Quick Export PNG.