Make a Lithograph Holiday Card with a Juggling Fox
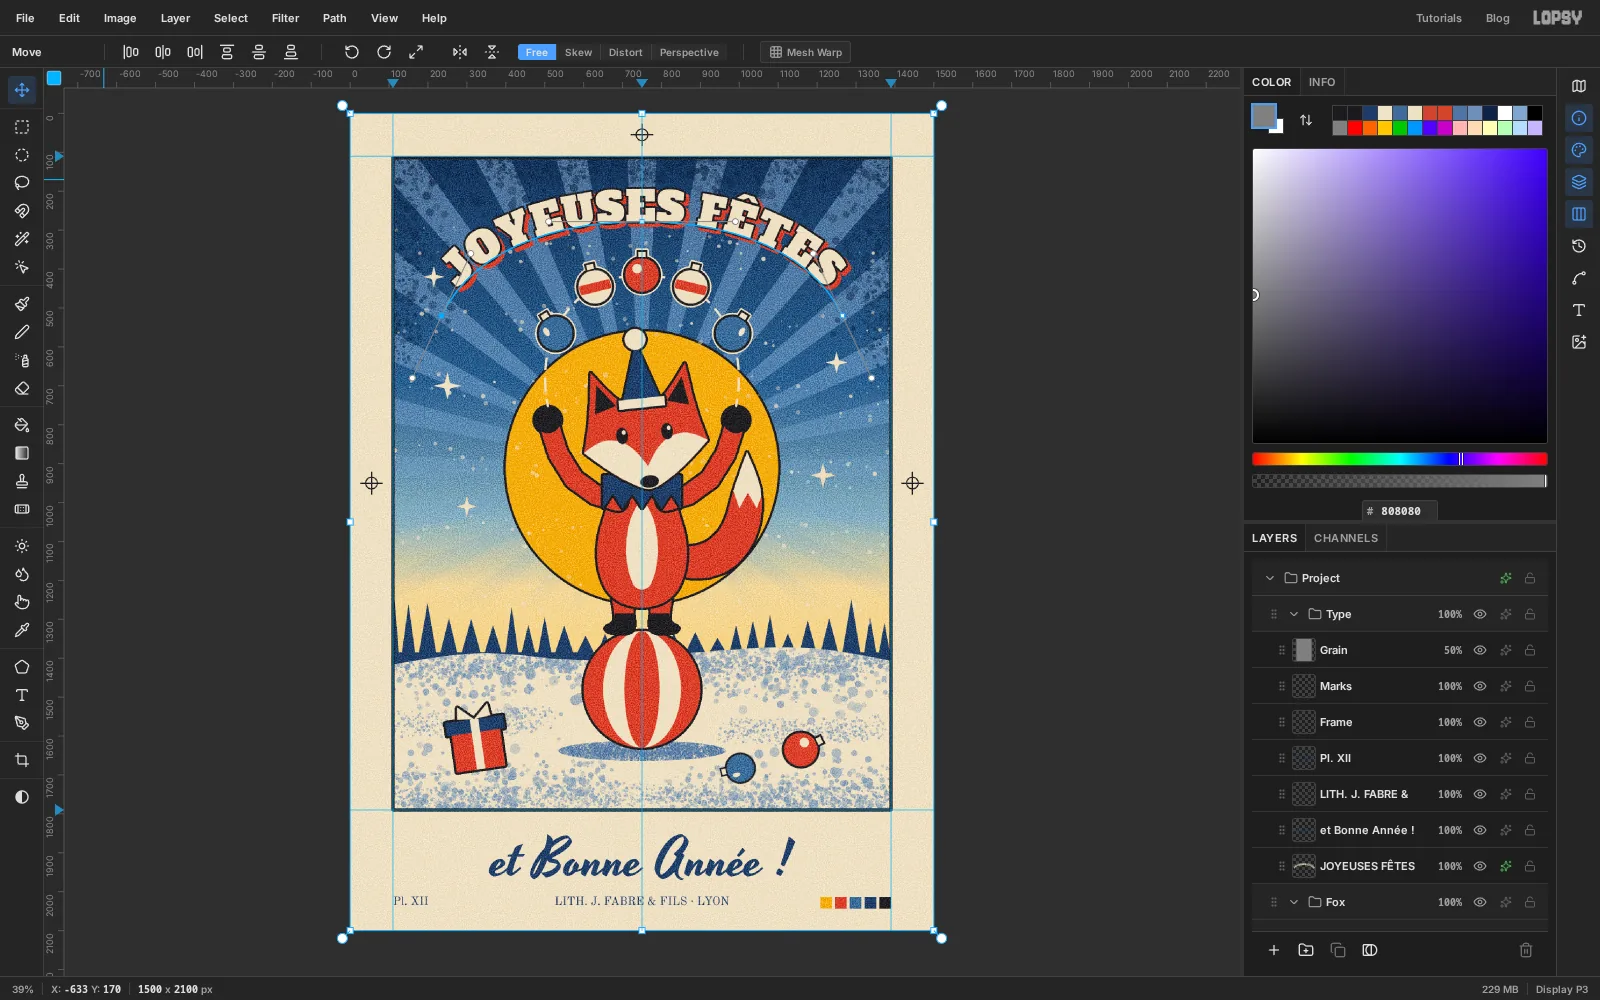
Draw a Belle Époque circus-poster holiday card in Lopsy with flat inks, a sunburst sky, sprayed spatter, a juggling fox, arched type and crayon grain.
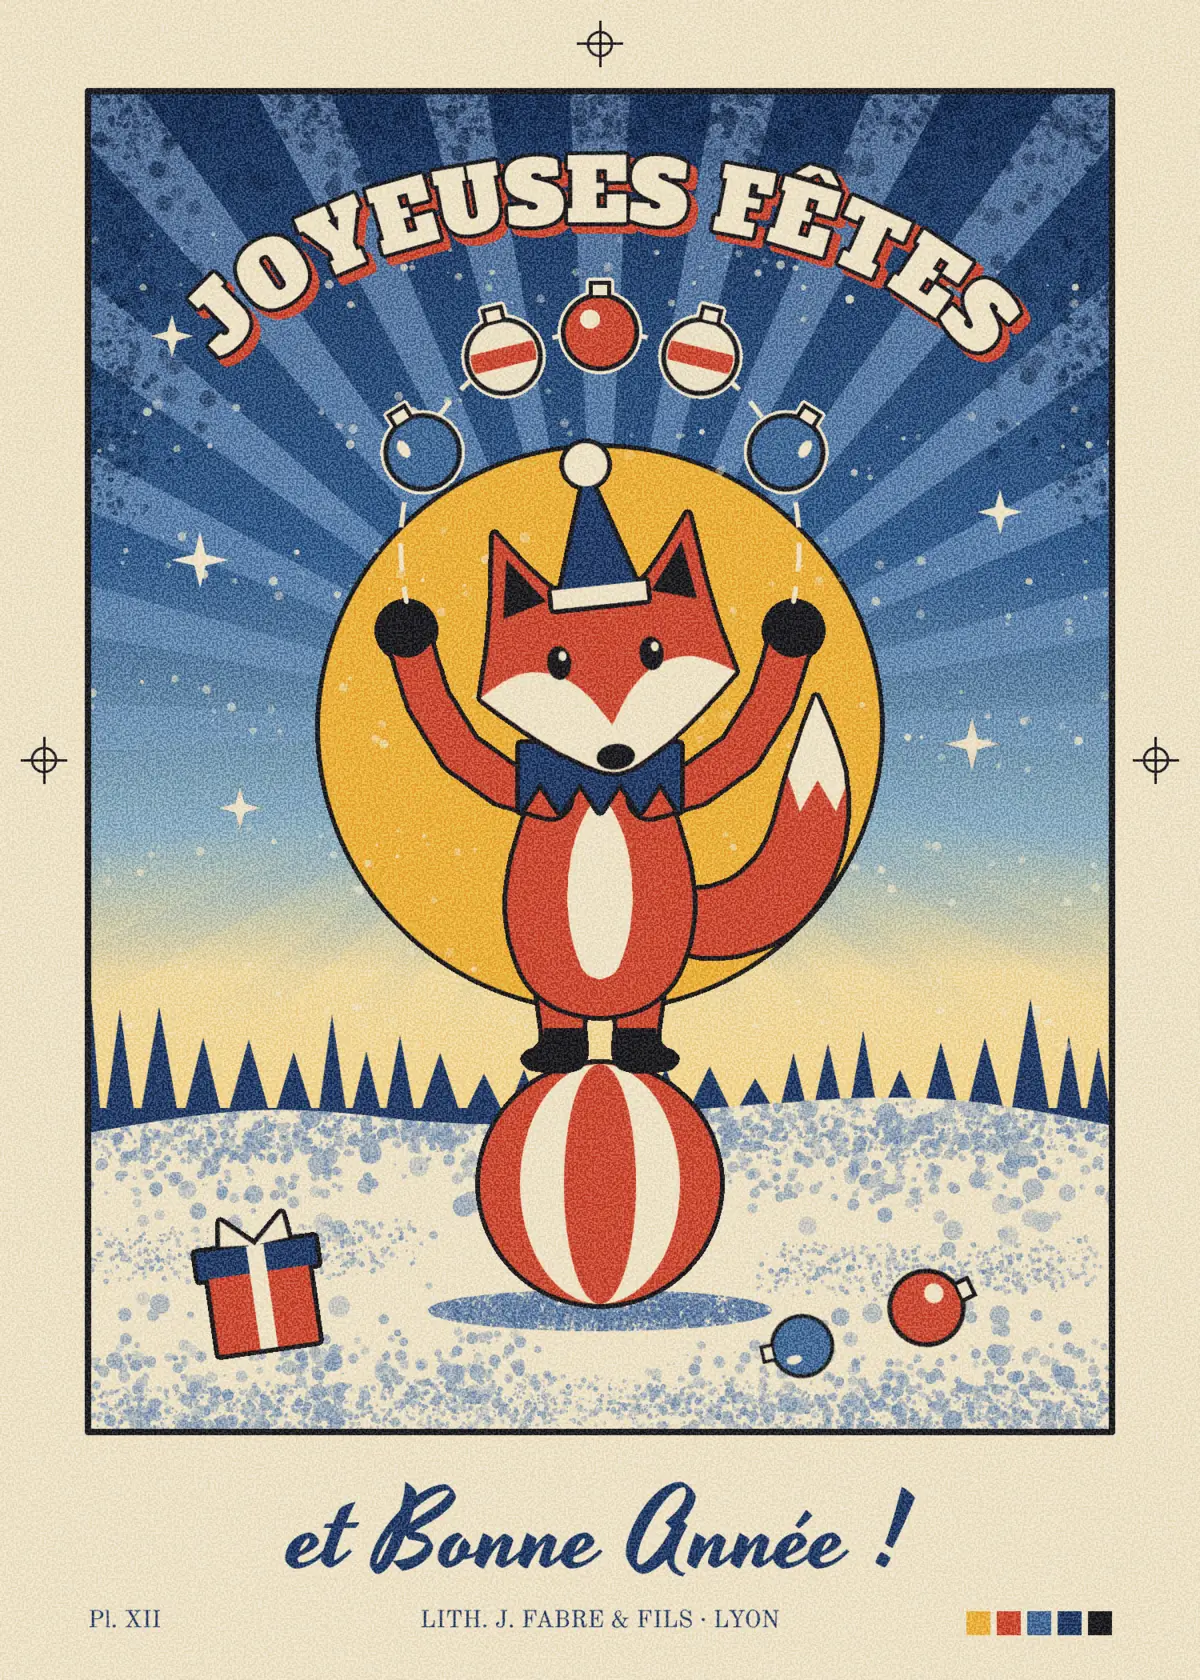
Around 1890, Jules Chéret's Paris workshop was printing circus and theatre posters as colour lithographs. Each ink was drawn on its own stone and the stones were printed one after another, so the posters share a look: a few flat inks on cream paper, a black "key" line around everything, tone made from grain and from crachis (ink spattered off a brush) rather than smooth blends, and bold lettering on a curve.
This card borrows all of it for a French season's greeting. A fox in a party hat balances on a circus ball and juggles five baubles in front of a big yellow sun. Joyeuses Fêtes arches over the top, and et Bonne Année ! is written underneath, next to the printer's marks you'd find in the margin of a proof. The card is 1500 × 2100 px, a 5 × 7 inch shape, and everything is drawn in Lopsy. You don't need any photos.
The tools you'll use:
- guides, and the Rectangular and Elliptical Marquee snapping to them
- the Gradient tool, on a layer and on a layer mask
- Filter → Sunburst… and Filter → Texture…
- the Spray tool for spatter, kept inside selections
- the Lasso, with Shift+Alt to keep only the part of a shape that sits inside another selection, and Cmd-click on a layer thumbnail to load its shape
- the Brush, Eraser, Pencil and Clone Stamp
- the Shape tool for circles and the frame, and the Pen for two curves
- Text bound to a path, in three Google fonts: Alfa Slab One, Yesteryear and Old Standard TT
- the Move tool's rotate and scale handles on a marquee, on a pasted layer and on a whole group
- copy and paste, Duplicate Layer and Flip Horizontal
- Stroke, Drop Shadow and Color Overlay layer effects, the Soft Light blend mode and the document's Hue / Saturation adjustment
The palette is four inks and black on cream paper, plus a few tints:
-
Paper
-
Vermilion
-
Chrome yellow
-
Prussian blue
-
mid blue
-
ray blue
-
Key black
-
Sky
-
Spatter navy
-
snow shade
-
ball shadow
A few things you'll repeat a lot:
- Positions. The status bar at the bottom shows the pointer's X and Y in pixels. When a step gives a position, watch those numbers as you move. Close is good enough everywhere: this is a hand-drawn print.
- Fill a shape. Set the foreground colour, make a selection, choose Edit → Fill, and press Cmd+D to deselect.
- Keep a shape inside another. Make the first selection, then draw the second while holding Shift+Alt. Only the overlap stays selected.
- Layer effects, blend mode and opacity. The sparkle button on a layer's row opens its effects drawer, with the effects in a list and the Blend dropdown at the top. Click the percentage on the row to change the layer's opacity.
-
Set up the card and its guides
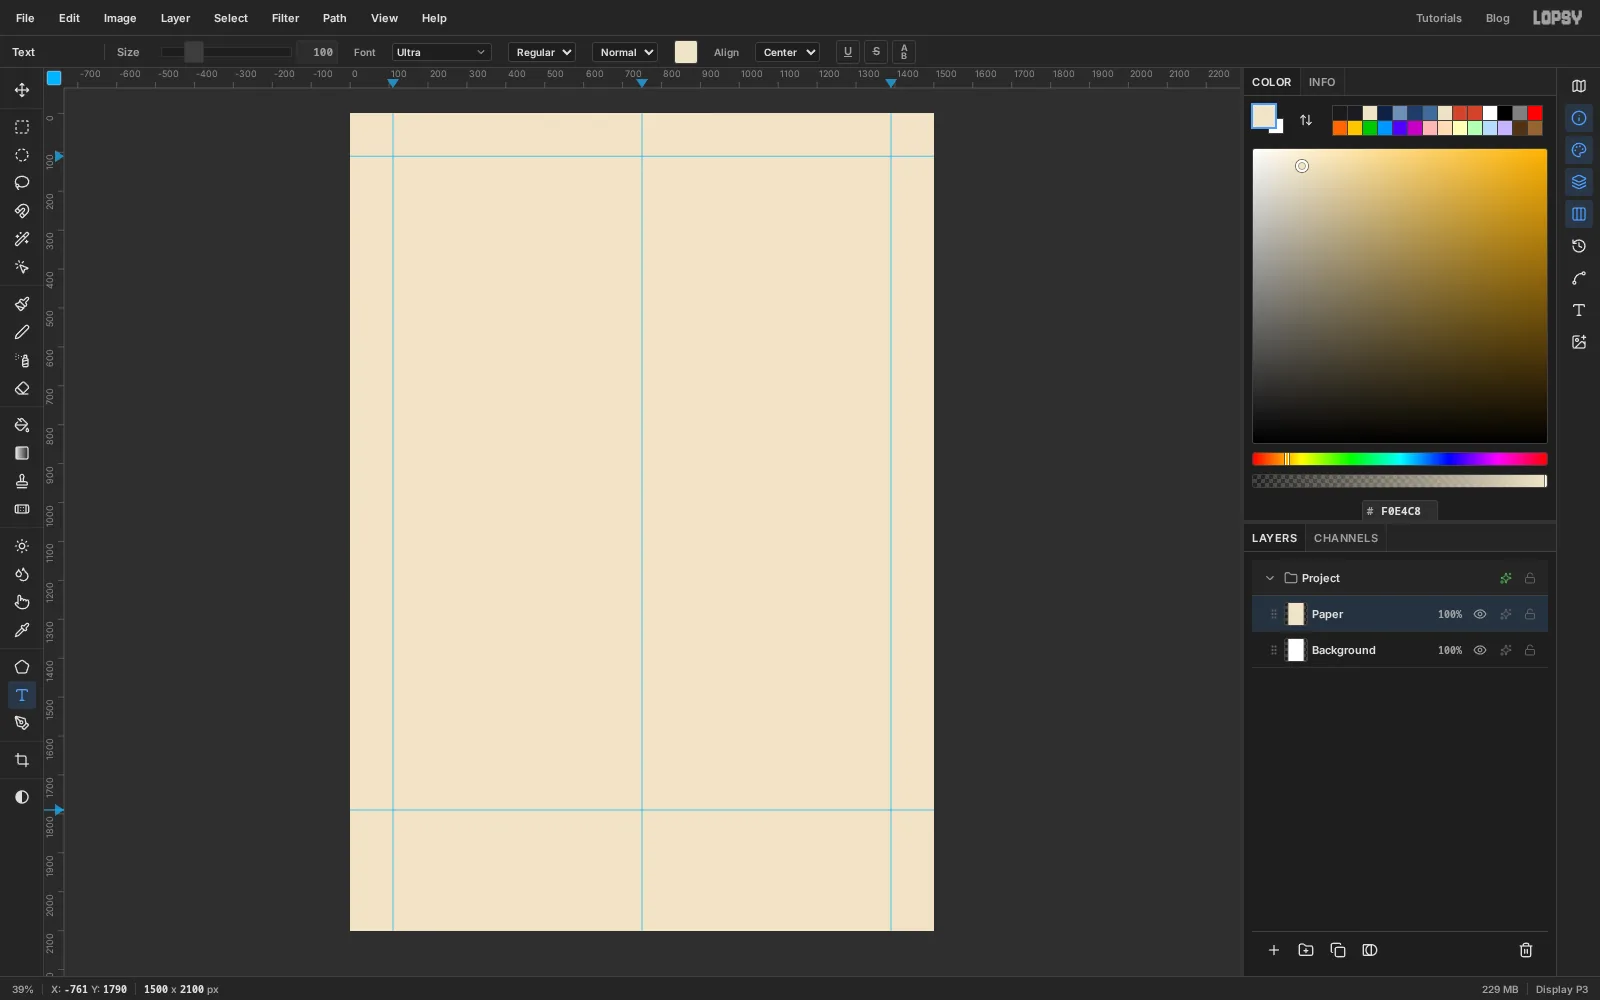
Choose File → New, set the units to Pixels, and make the document 1500 wide and 2100 high with a white background.
Double-click Layer 1 in the Layers panel and rename it Paper. Set the foreground colour to paper , press Cmd+A, choose Edit → Fill and press Cmd+D.
Now mark out the picture panel. Click the top ruler to drop vertical guides at 110, 750 and 1390, then click the left ruler for horizontal guides at 110 and 1790. A guide lands where you click, so watch the readout next to the pointer. The panel leaves a deep margin at the bottom for the greeting.
-
Roll a sky into the panel
Printers sometimes loaded one roller with two inks so that they blended across the sheet. That is the one smooth blend on this card.
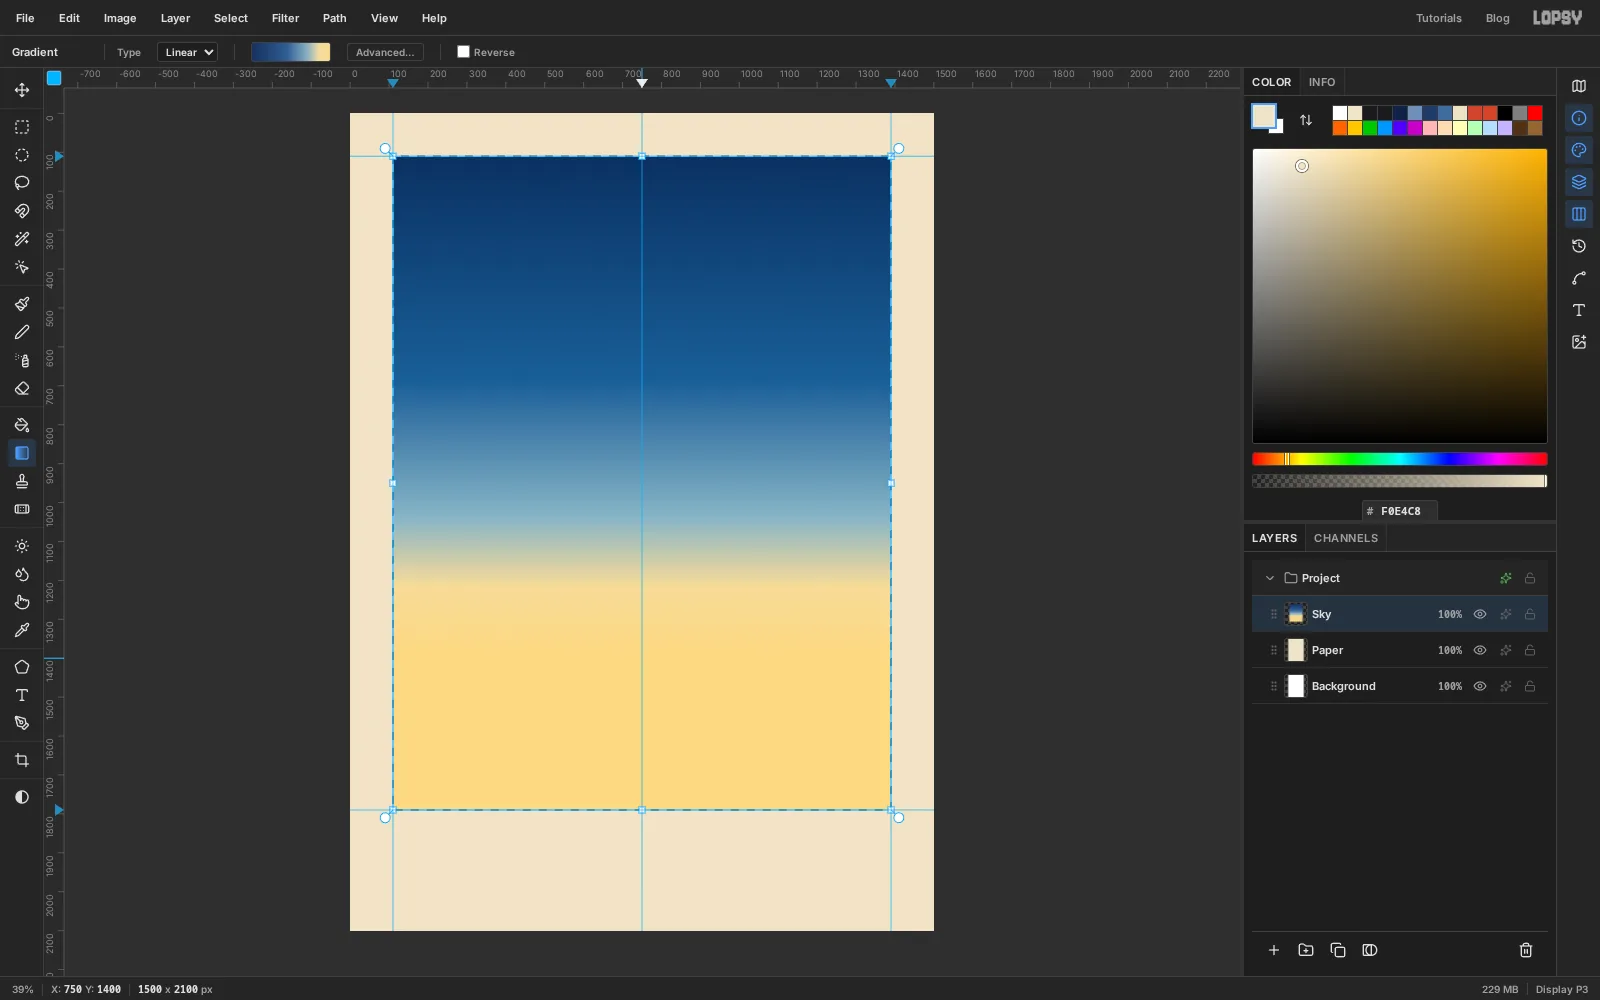
Click Add Layer and name the layer Sky. Pick the Rectangular Marquee and drag from just outside the top-left corner of the panel to just outside the bottom-right corner. The edges snap onto the guides.
Pick the Gradient tool, set Type to Linear and click Advanced…. Set the two end stops to and , then click the bar to add three stops between them: a little left of the middle, at about three-quarters and shortly after it. Click Done.
Drag straight down the centre guide from the top of the panel to about y 1400, where the horizon will be. Press Cmd+D.
-
Fan out the rays
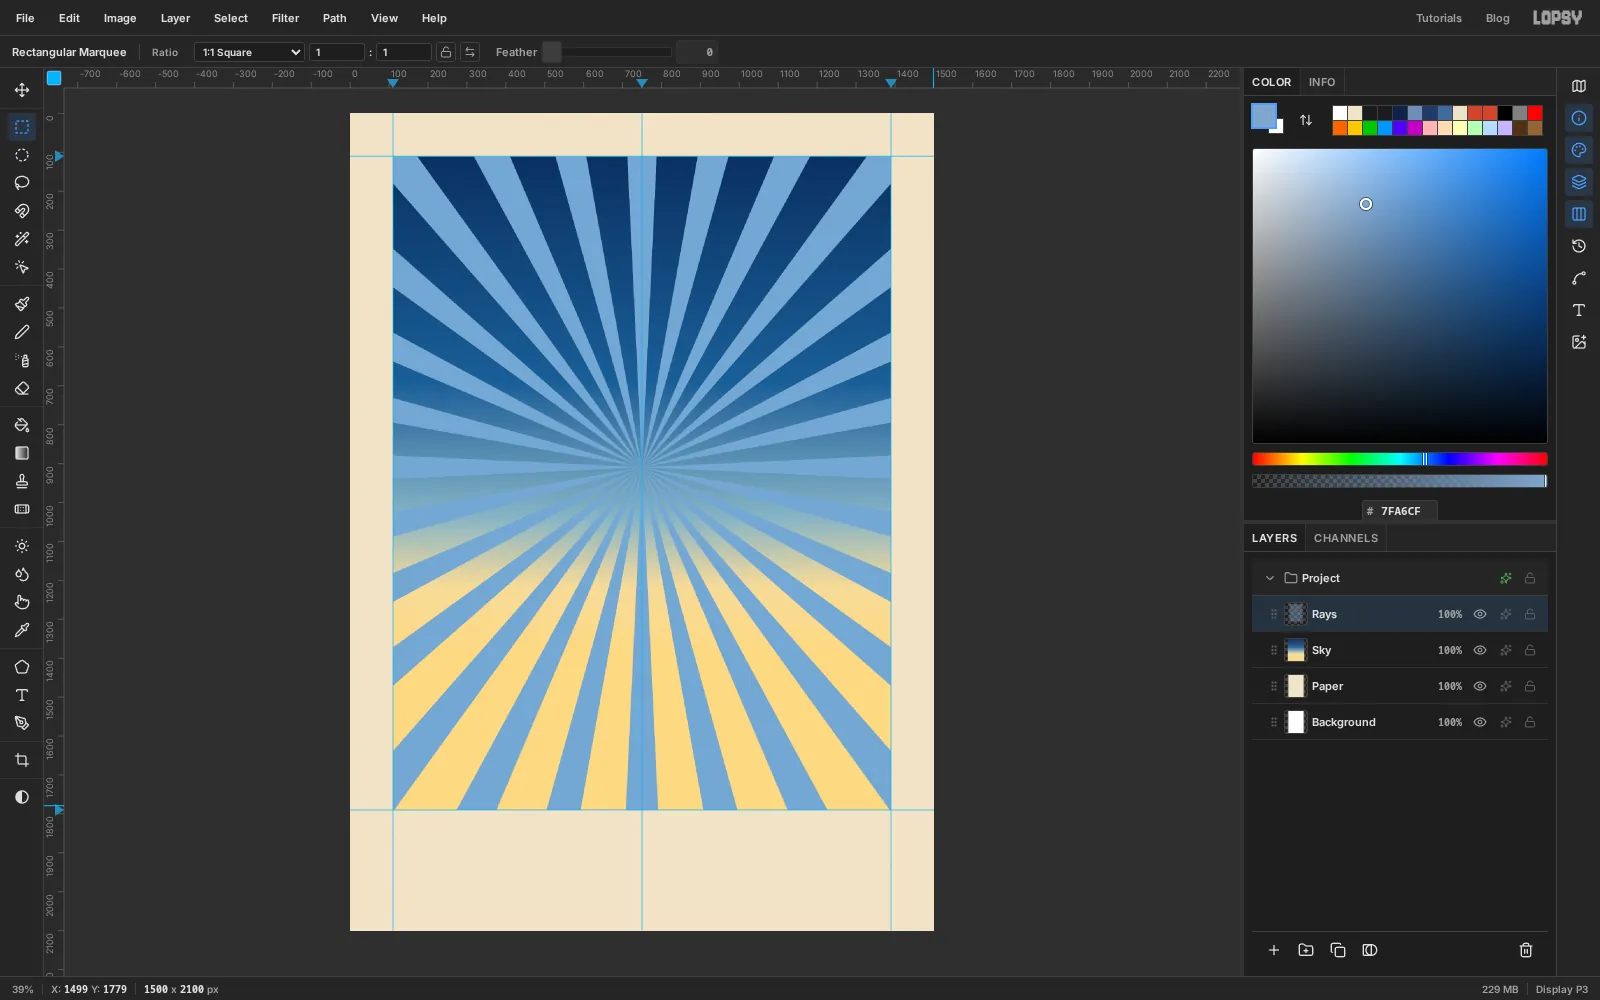
Add a layer called Rays. Select the panel again with the Rectangular Marquee, and set the foreground to ray blue .
Choose Filter → Sunburst…. Set Rays to 28, Width to 42 and Center Y to 43, and leave Center X at 50. That puts the centre where the sun will sit. Click Apply and deselect.
-
Fade the rays toward the horizon
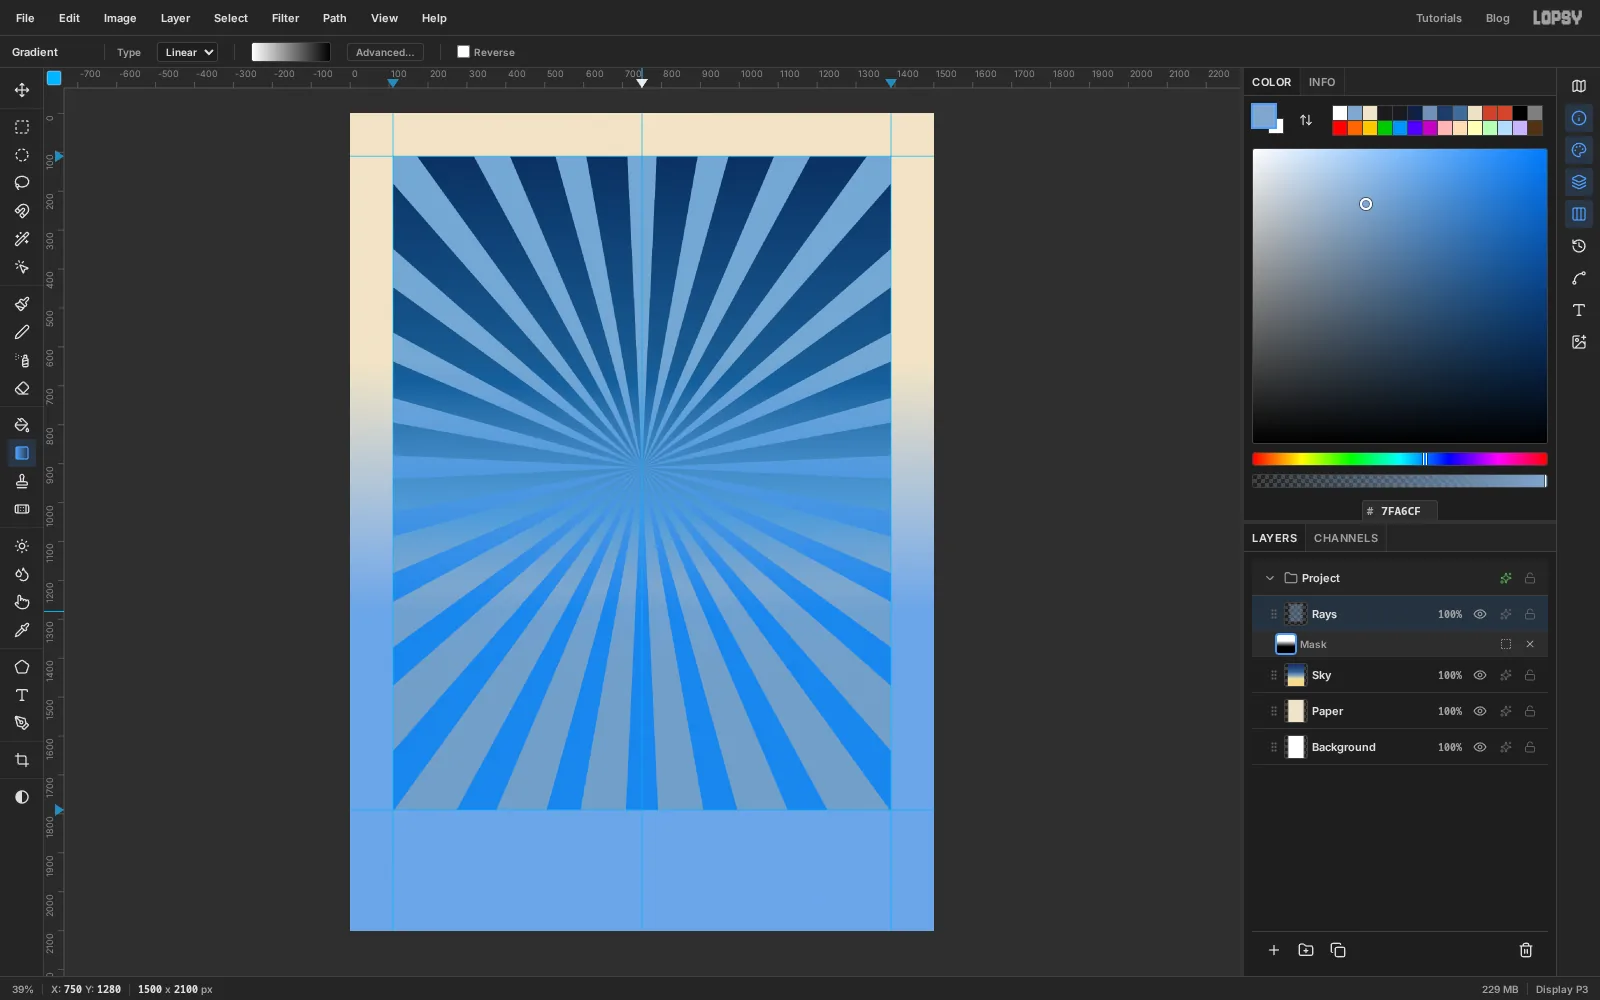
The rays should die away into the yellow glow at the bottom. With Rays active, click Add Mask in the Layers panel toolbar. Lopsy switches to editing the mask straight away.
Pick the Gradient tool, open Advanced… and delete the three middle stops (click one, then the delete button). Set the left stop to white and the right stop to black . Drag down the centre guide from about y 640 to about y 1280. White keeps the rays and black hides them, and the blue tint on the canvas shows the hidden part.
Click the Rays row to leave the mask, then click its percentage and lower the opacity to 55%.
-
Add the sun
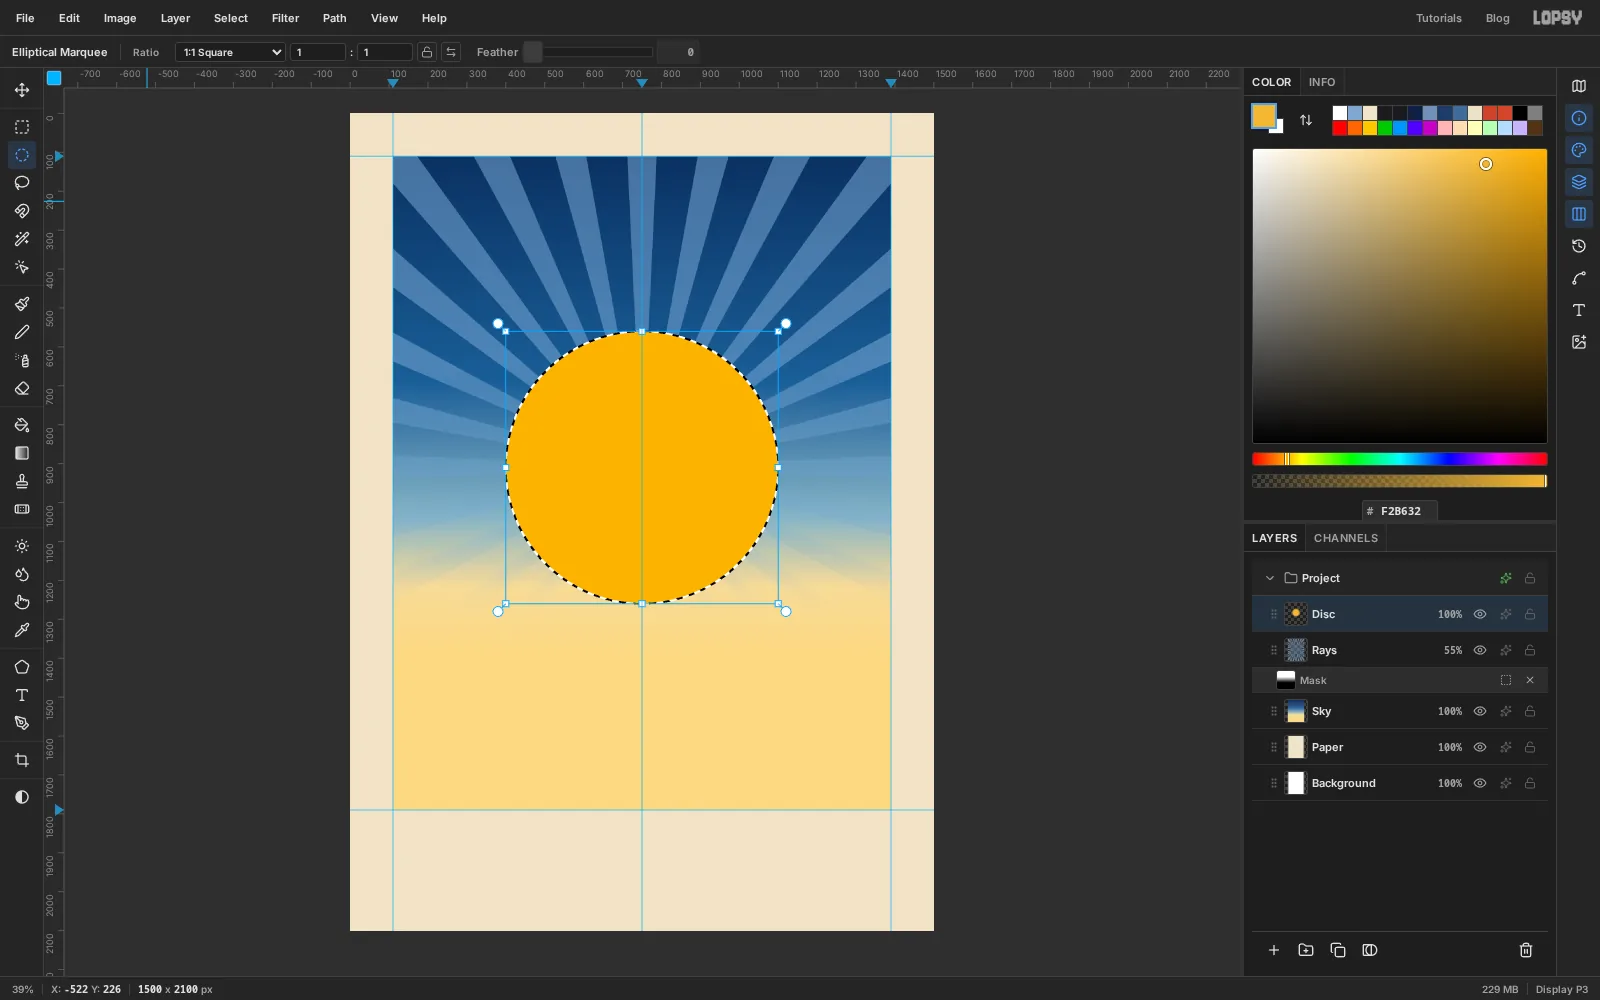
Add a layer called Disc. Pick the Elliptical Marquee and click once on the canvas without dragging. A dialog asks for the corners of the box the ellipse fits in: type From 400, 560 and To 1100, 1260 and press Enter. That is a circle 700 px across, centred on the middle guide. (You can also drag it by hand. Holding Cmd keeps it round.) Fill it with chrome yellow and deselect.
Open the layer's effects drawer, tick Stroke, set Width to 6 and the colour to key black . This is the key line, and almost every shape on the card gets the same one.
-
Cut a row of pines
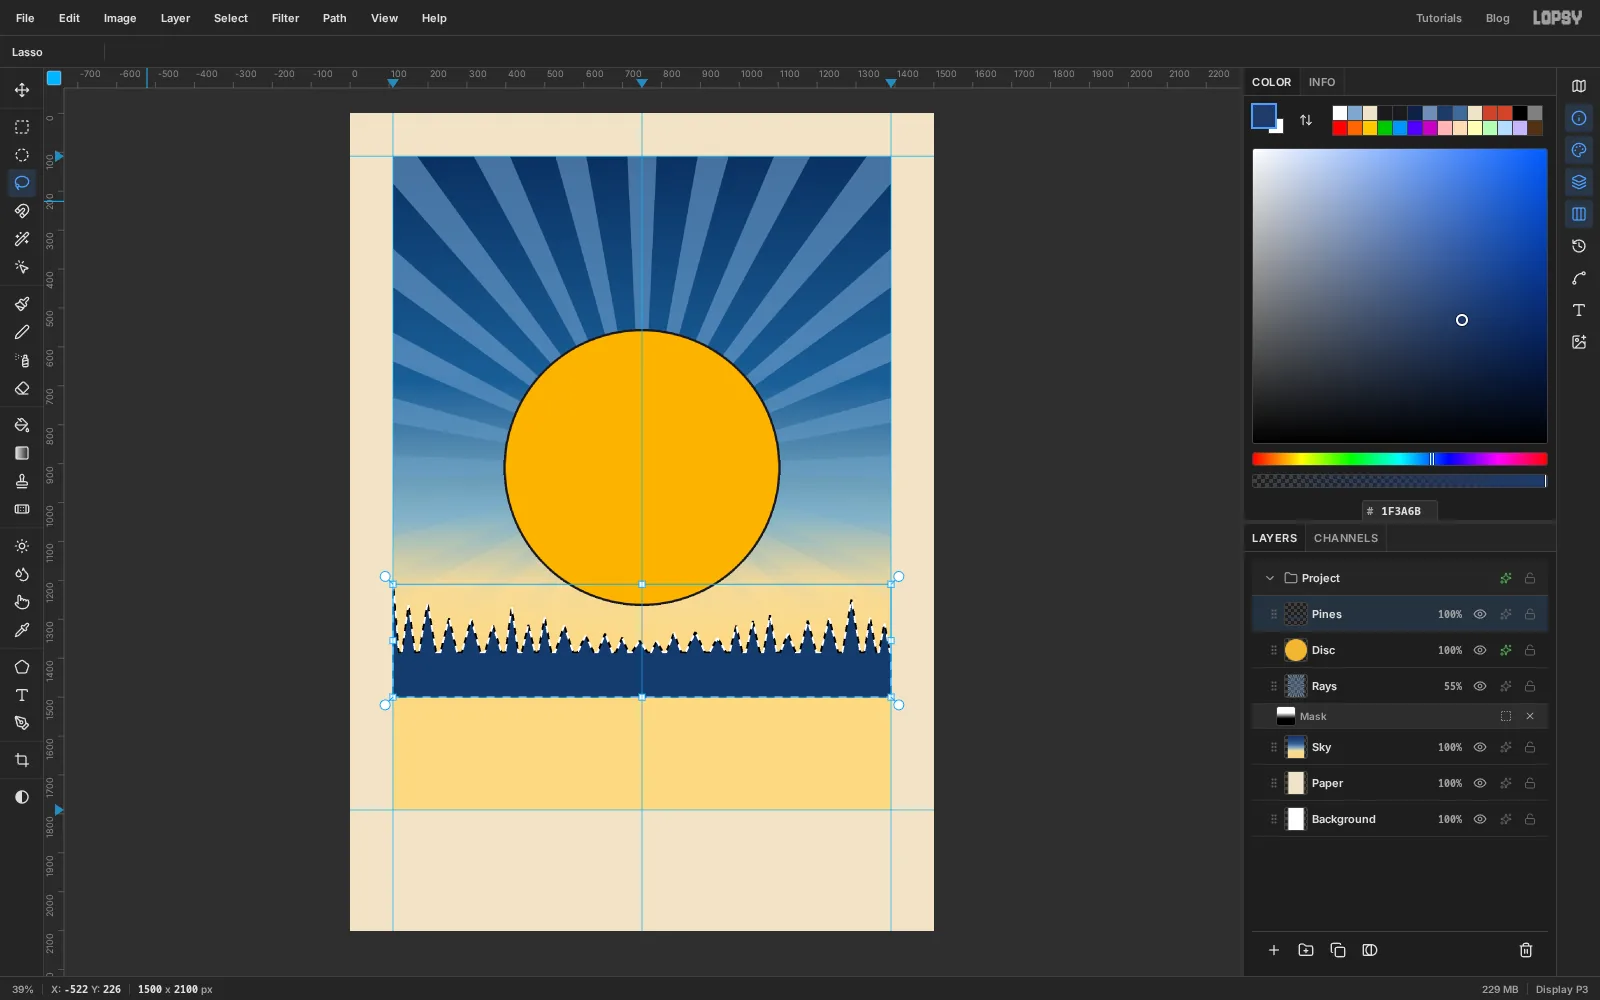
Add a layer called Pines and set the foreground to Prussian blue .
Select the panel with the Rectangular Marquee. Then pick the Lasso, hold Shift+Alt and draw a long zigzag of pointed trees: start outside the panel on the left at about y 1500, zigzag across between y 1385 at the feet and anywhere from y 1250 to y 1350 at the tips, and finish outside the panel on the right. Make the trees tall at the edges and short in the middle, where the fox will stand. Because you held Shift+Alt, only the part inside the panel stays selected.
Choose Edit → Fill and deselect.
-
Lay down the snow
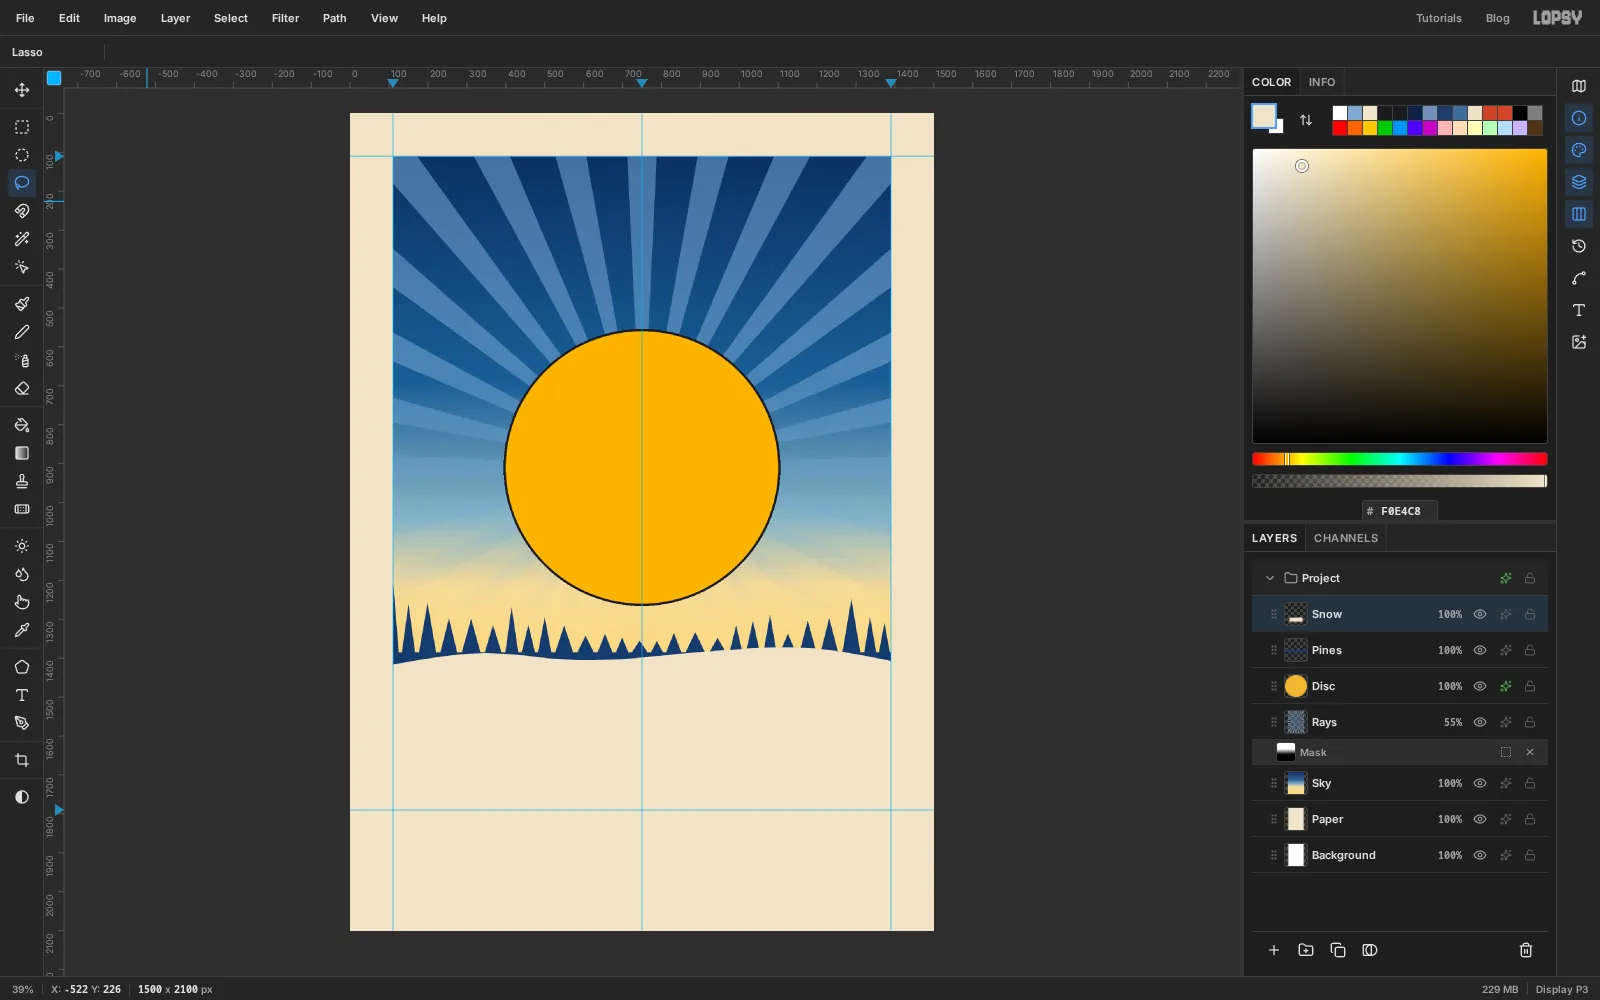
In a lithograph, white is just the paper showing through. Add a layer called Snow, select the panel, and with the Lasso and Shift+Alt draw a shape that covers everything below the trees: a gently rolling top edge between y 1365 and y 1425, then down and around outside the panel. Fill it with paper and deselect.
-
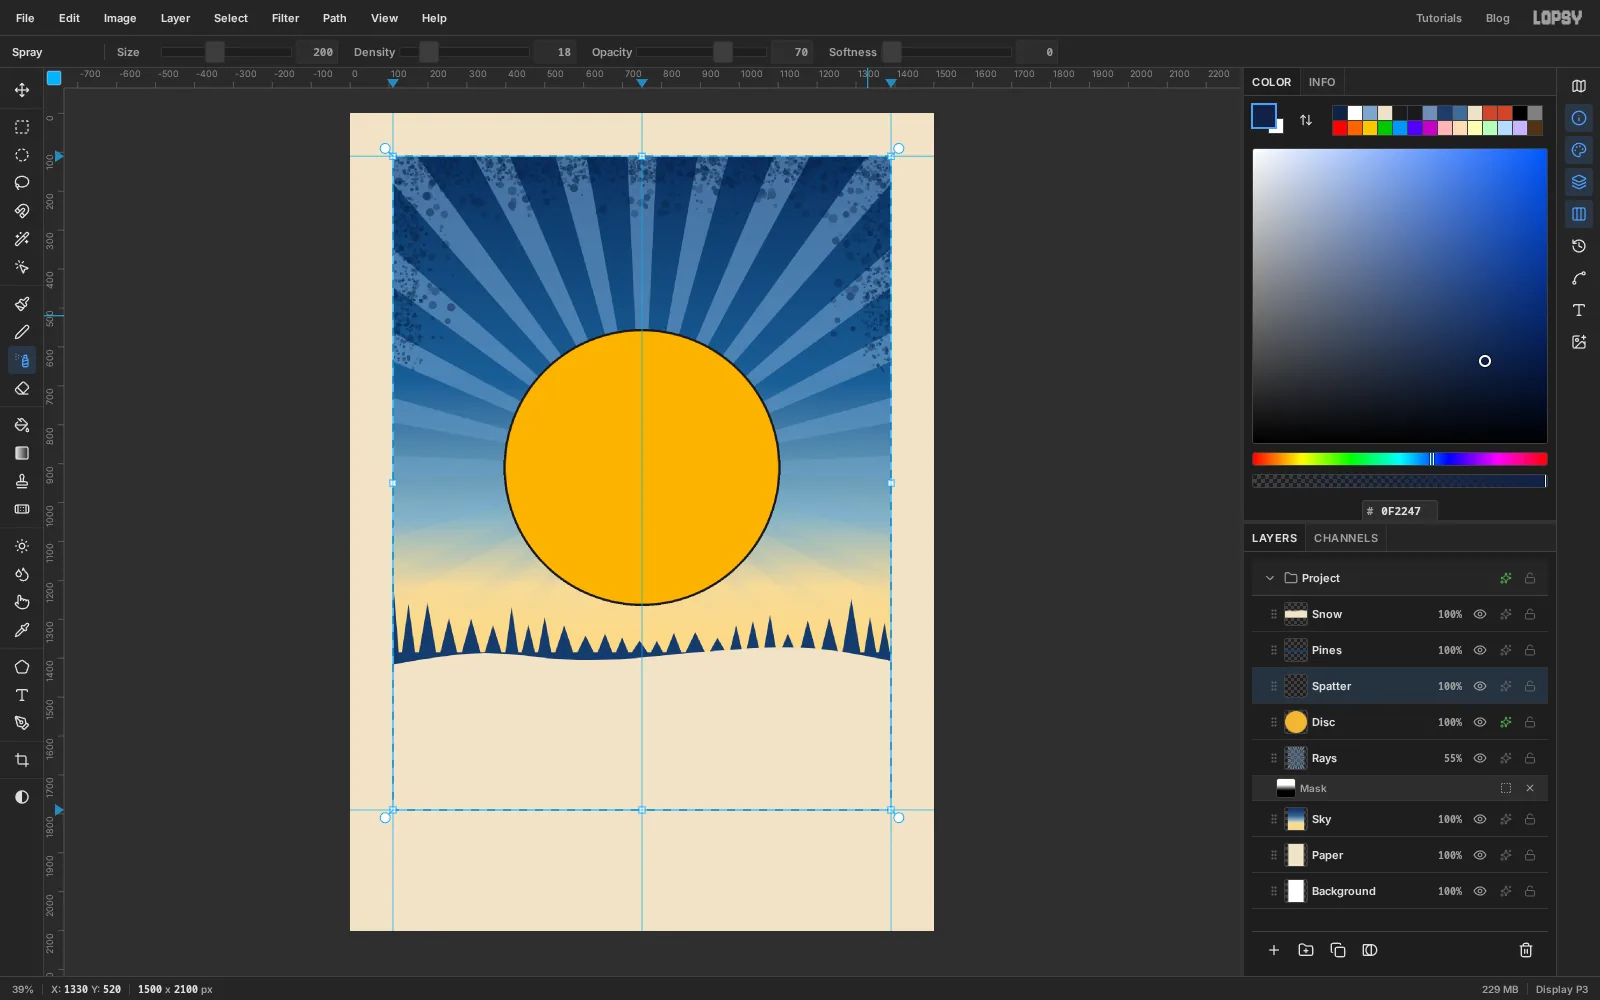
Spatter the top of the sky
Click Disc and add a layer called Spatter, so it sits under the trees. Select the panel, so nothing lands in the margin.
Pick the Spray tool and set the foreground to spatter navy . Real spatter comes in mixed sizes, so spray twice:
- Size 90, Density 40, Opacity 80, Softness 0. Drag once along the top edge of the panel, then down each side to about y 620.
- Size 200, Density 18, Opacity 70. Go along the top again and a short way down each side. The dots are bigger and more scattered.
Deselect.
-
Spatter the snow
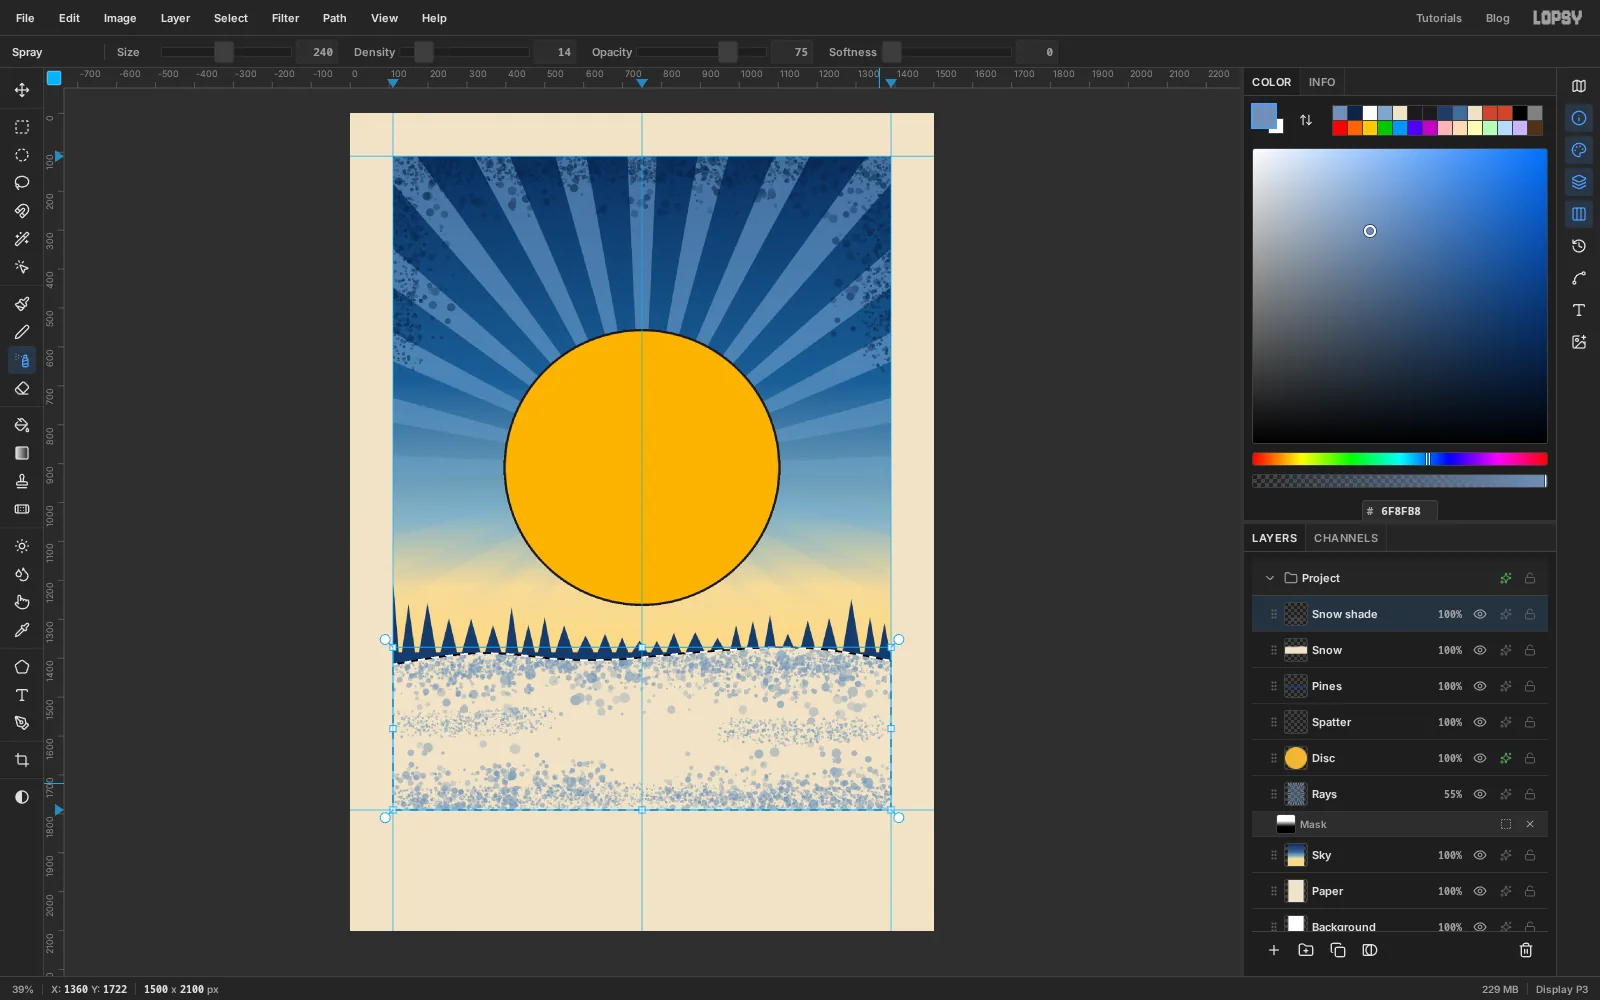
Click Snow and add a layer called Snow shade. Hold Cmd and click the Snow thumbnail to load its shape as a selection, so the spray stays on the snow.
Set the foreground to snow shade and spray in three passes with Softness 0, dragging in gentle waves from side to side:
- Size 70, Density 40, Opacity 85: along the top of the snow just under the trees, along the bottom edge, and two short bands at mid-height on the left and right.
- Size 140, Density 30, Opacity 80: over the top band again, and along the bottom left and bottom right.
- Size 240, Density 14, Opacity 75: a loose pass over the same places for a few big drops.
Leave the middle clear for the ball, and press Cmd+D when you're done.
-
Spray a shadow for the ball
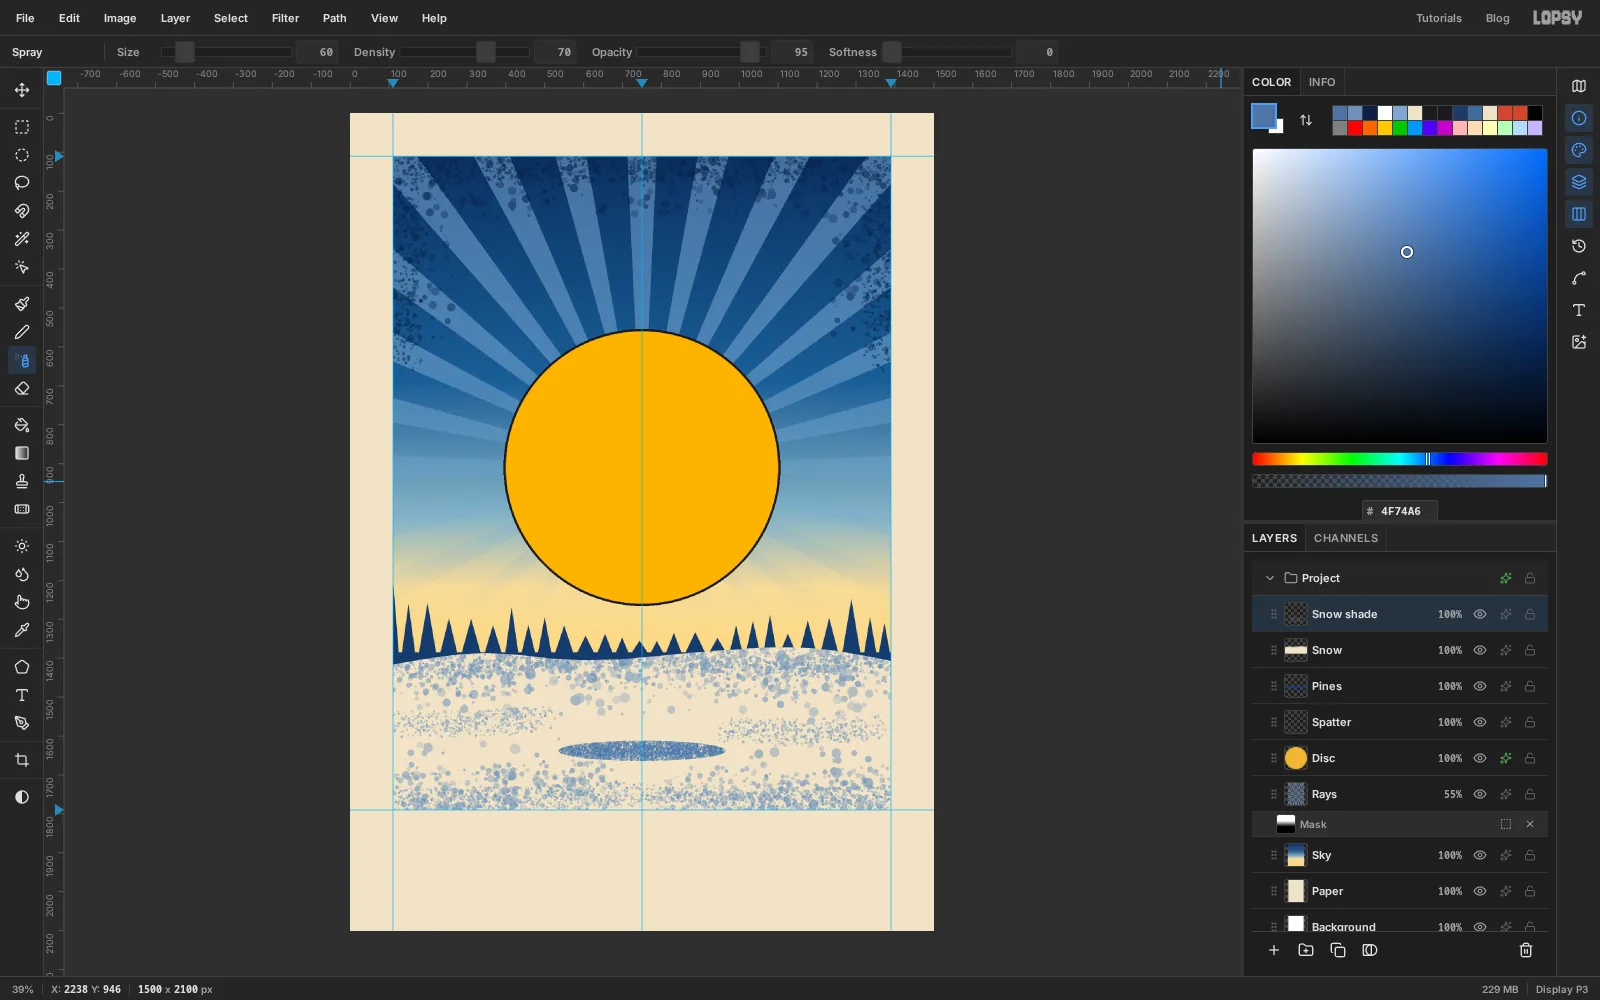
Still on Snow shade, pick the Elliptical Marquee and drag a wide, flat oval from about 535, 1612 to 965, 1664. Set the Spray to Size 60, Density 70, Opacity 95 and the foreground to , and go back and forth across the oval four times until it is nearly solid. Deselect.
-
Draw two stars and stamp three more
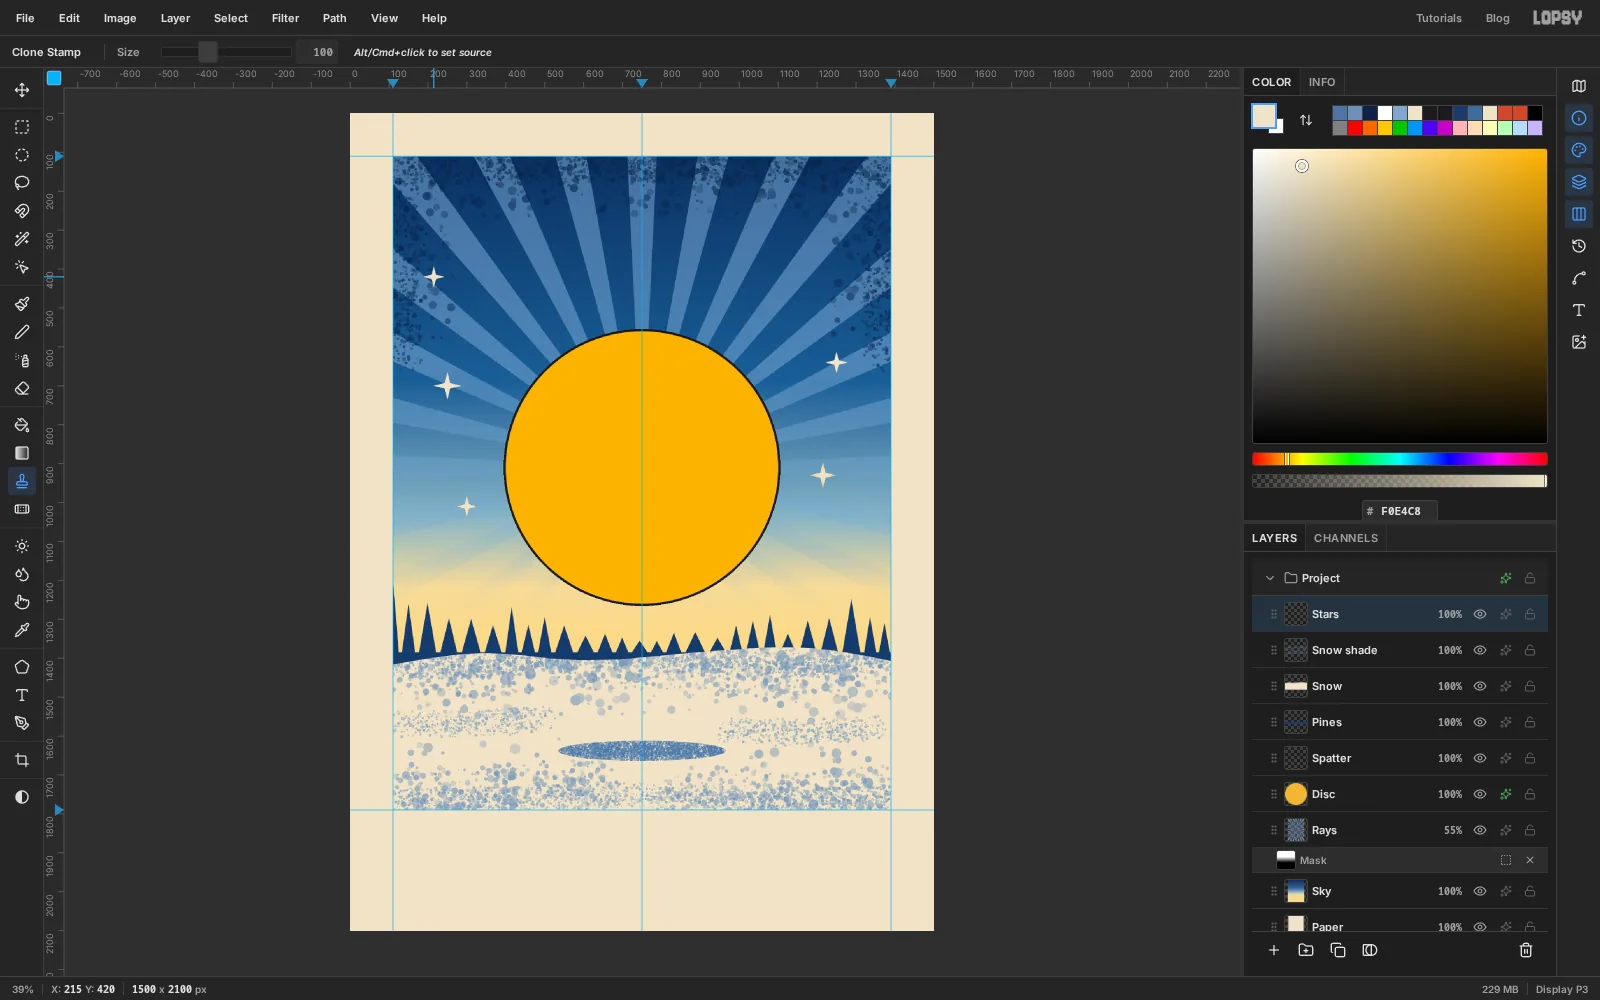
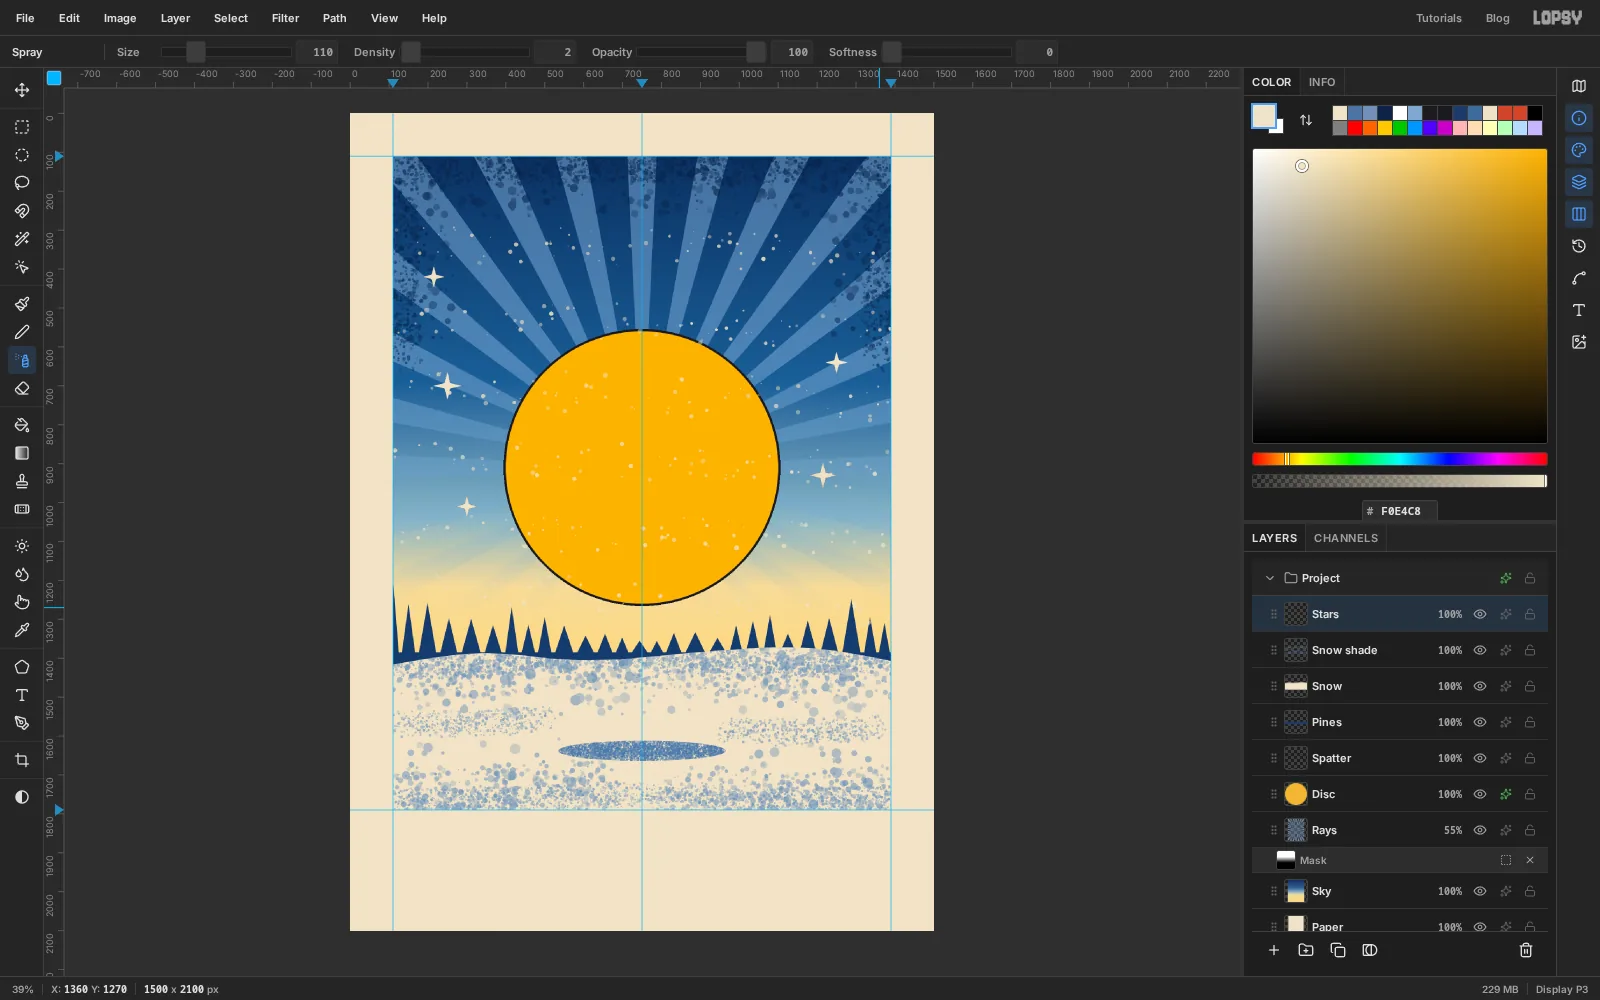
Add a layer called Stars. With the Lasso, draw a four-pointed sparkle about 70 px tall at around 250, 700: four long points with shallow dips between them. Fill it with paper. Draw a slightly smaller one at around 1250, 640.
Pick the Clone Stamp and set Size to 100. Hold Alt and click the middle of the first star to set the source, then click once at about 1215, 930. Alt-click the second star and click once at about 300, 1010, then Alt-click it again and click at about 215, 420. Each click stamps a whole star.
-
Let it snow
Still on Stars, select the panel. Set the Spray to Size 110, Density 2, Opacity 100 and the foreground to paper. Drag six quick lines across the sky from left to right, about 180 px apart, from just under the top spatter down to the pine tips. With the density this low, each pass leaves a thin trail of flakes. Deselect.
-
Make the groups, the ball and the tail
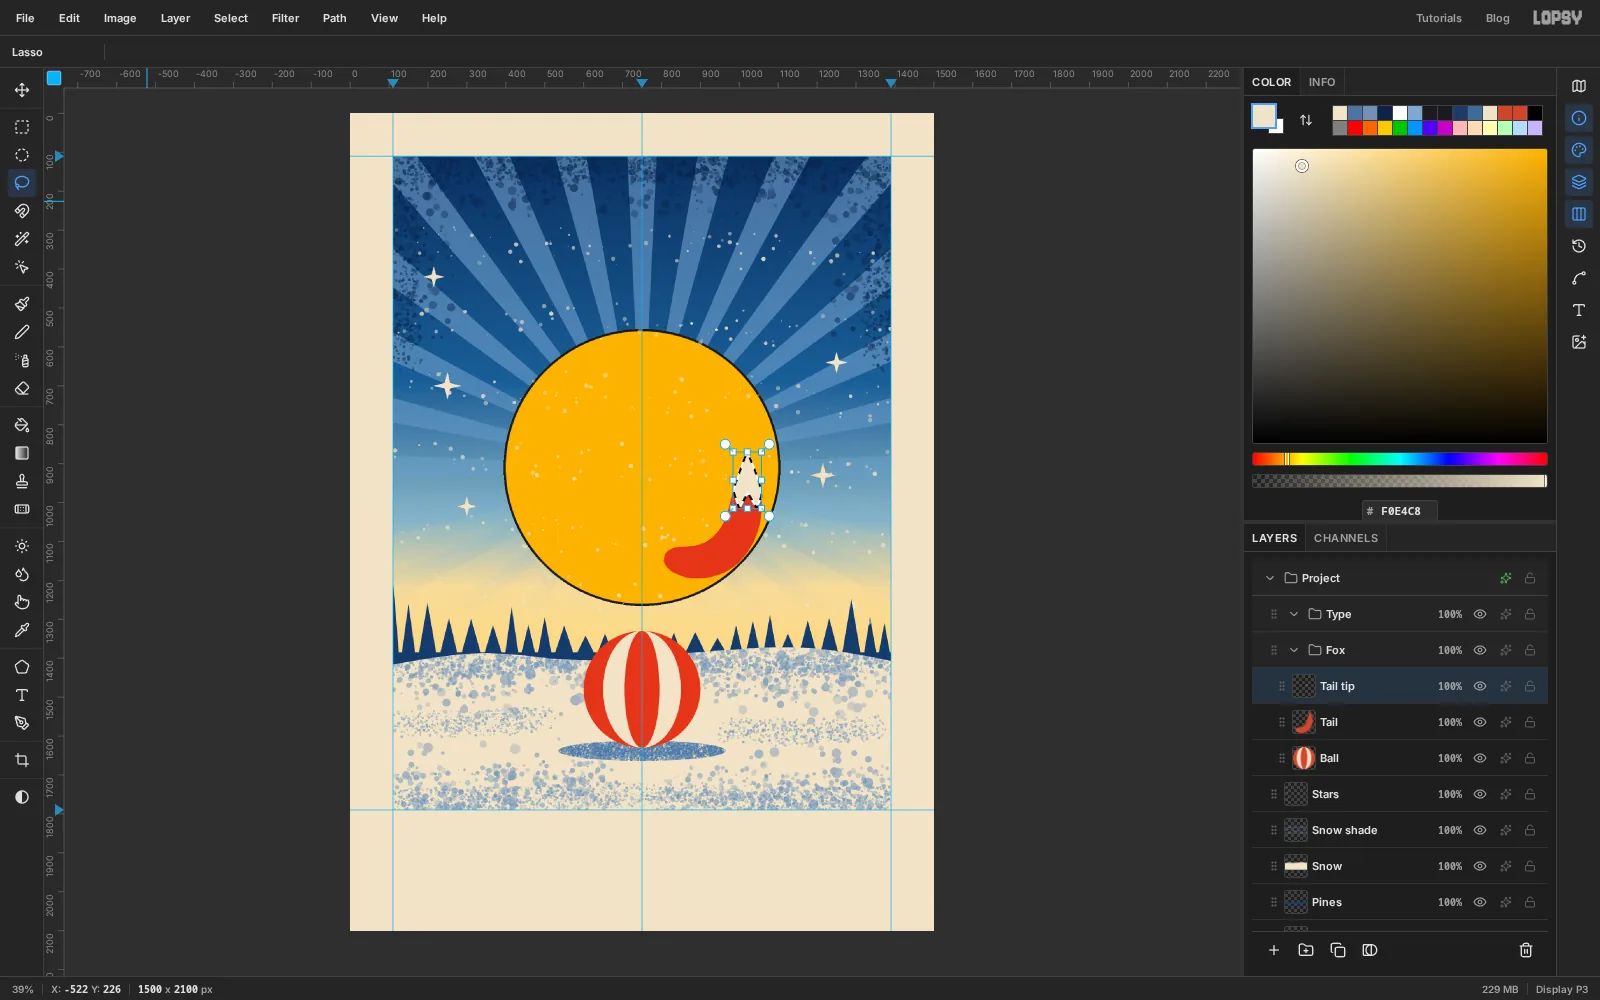
The type will sit on top of everything and the fox just below it. With Stars active, click New Group and name the group Type. Click Stars again, click New Group and name this one Fox. It lands between Stars and Type. Layers you add while a group, or a layer inside it, is active go into that group.
With Fox active, add a layer called Ball. Using the Elliptical Marquee's exact dialog (click without dragging), fill three shapes on it, all centred on 750, 1480:
- a circle 300 px across in vermilion (From 600, 1330 To 900, 1630)
- an upright oval 200 px wide in paper (From 650, 1330 To 850, 1630)
- a narrower oval 90 px wide in vermilion (From 705, 1330 To 795, 1630)
That gives the ball its stripes.
Add a layer called Tail. With the Lasso, draw a fat comma to the right of where the body will be. Start where the hip will be, at about 810, 1150. Run right along the bottom to about 985, 1175, swing up the outside through 1060, 1000 to a sharp point at 1020, 870, then come back down the inside through 965, 1060 and 905, 1110 to the start. The tail is about 90 px thick. Fill it with vermilion.
Add a layer called Tail tip. Cmd-click the Tail thumbnail, then with the Lasso and Shift+Alt circle the top third of the tail, drawing the lower edge as a zigzag with three teeth at about y 1000. Fill with paper and deselect.
-
Draw the legs, body and belly
Each part goes on its own layer, in this order, so the key line can go around each one. Draw them with the Lasso and fill them.
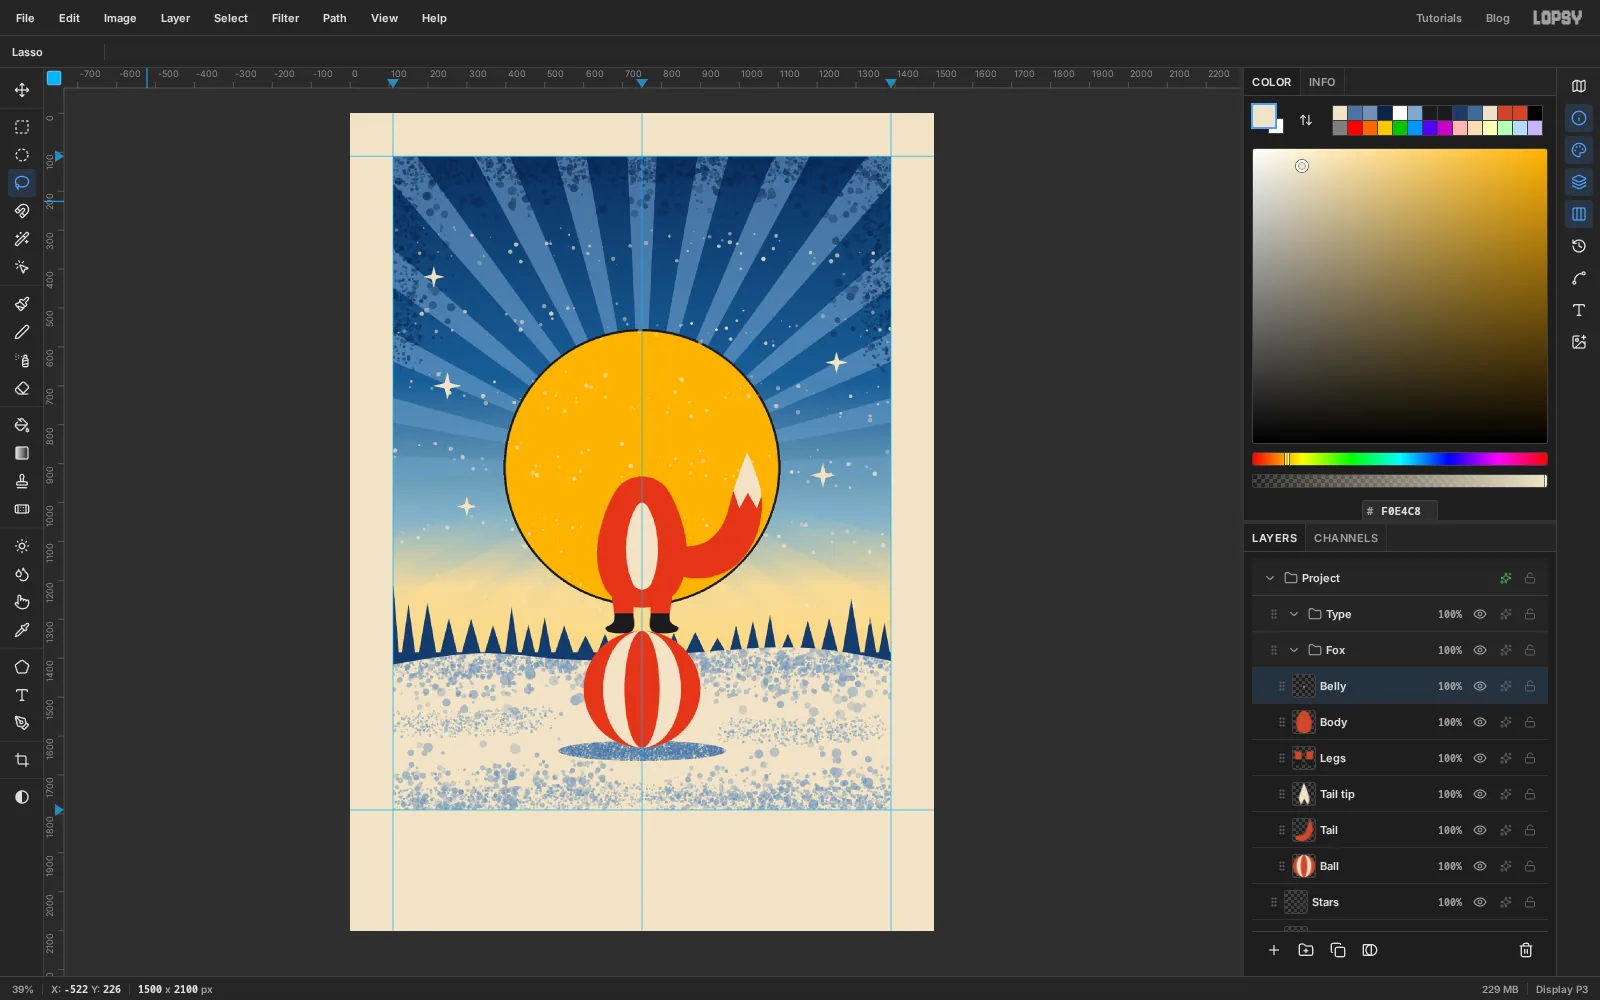
- Legs. Two vermilion legs, one each side of the centre guide with a 40 px gap between them. Each is a simple block about 60 px wide, from y 1210 down to y 1297: the left one runs from about x 668 to 730, the right one from 770 to 832. Under each, draw a black foot from y 1285 down to the top of the ball at about y 1337: a rounded boot shape about 80 px wide, with its toe pushed outward, away from the centre.
- Body. A vermilion pear, symmetrical about the centre guide. Start at the left of the neck (700, 933), bulge out to the widest point at about 640, 1145, curve in under the hips to the bottom at 750, 1277, and mirror that up the right side through 860, 1145 to the neck at 800, 933. It overlaps the tops of the legs.
- Belly. A tall paper-coloured oval down the middle of the body, about 80 px wide, from y 990 to y 1225.
-
Brush in the arms
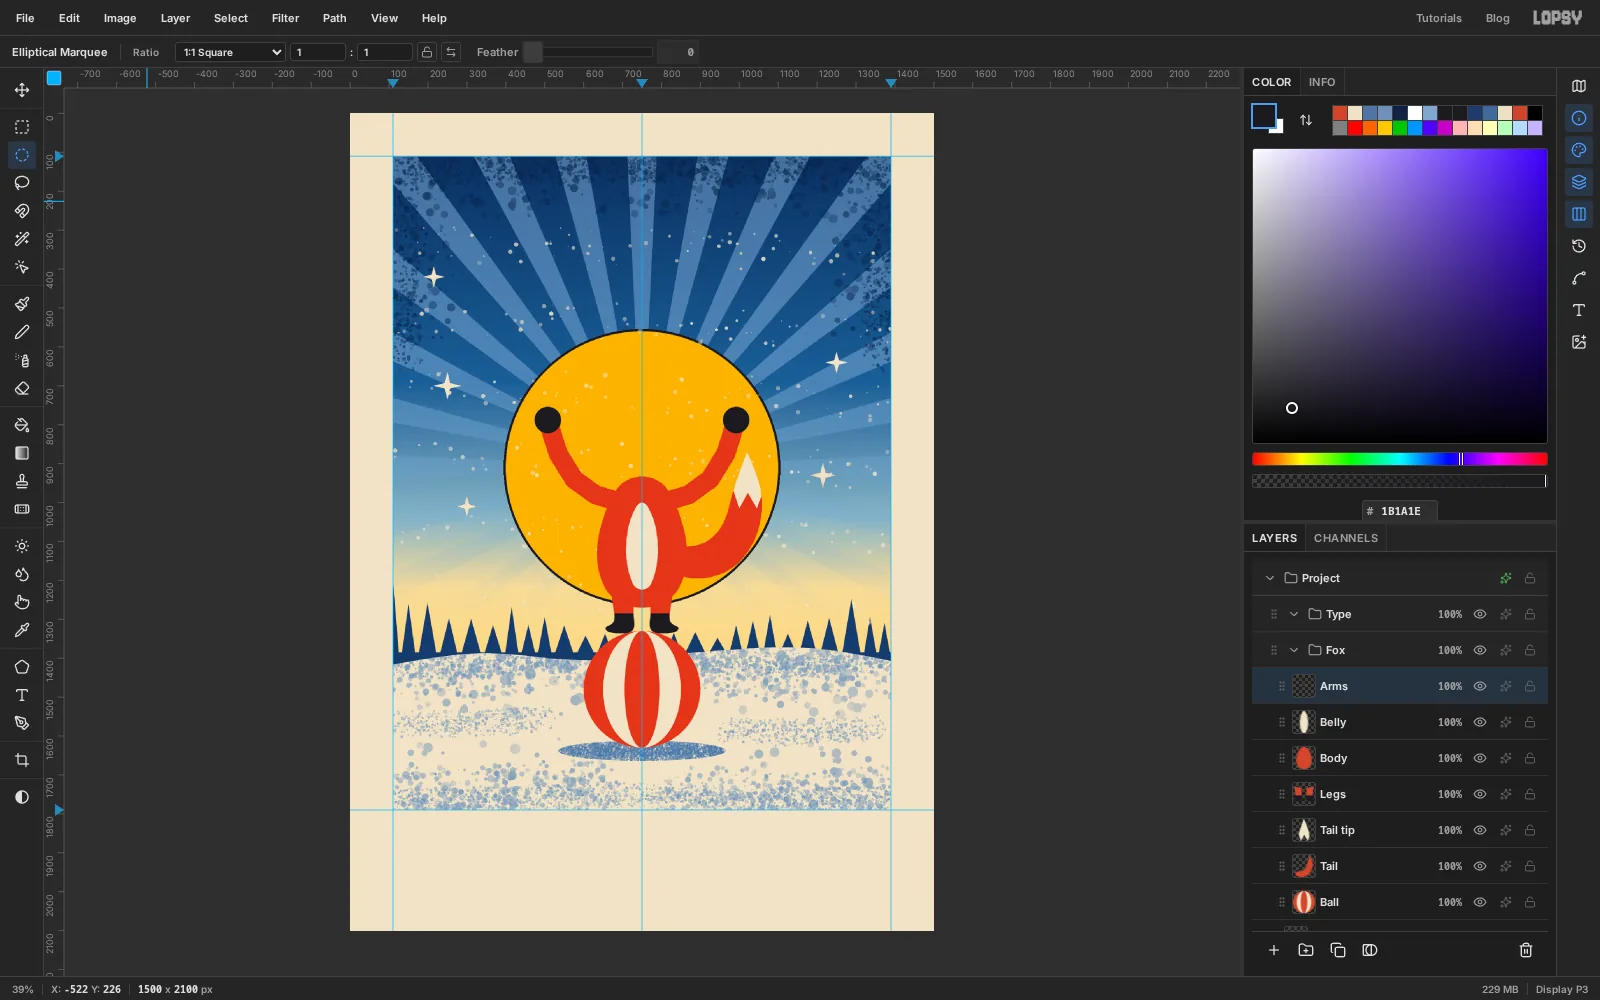
Add a layer called Arms. Pick the Brush, set Size to 50 and Hardness to 100, and paint in vermilion. The arms go up and out in a shallow curve, like a letter V with a bend at the elbows.
For the left arm, start at the shoulder at about 688, 997, sweep out through the elbow at about 575, 940, and finish at 512, 803. For the right arm, do the same from 812, 997 through 925, 940 to 988, 803.
Then give each arm a round black paw. With the Elliptical Marquee's exact dialog, fill a circle From 474, 754 To 542, 822 on the left, and From 958, 754 To 1026, 822 on the right.
-
Add the ruff and the head
Add a layer called Ruff and, with the Lasso, draw a blue collar across the neck. The top edge is straight, from 650 to 850 at y 930. The bottom edge is a zigzag: five points reaching down to y 1015, with the notches between them coming back up to about y 977. Fill it with Prussian blue.
Click New Group and name it Head, so the head can be tilted later as one piece. Inside it, add a layer called Skull and draw the head with the Lasso, working clockwise and keeping it symmetrical about the centre guide:
- Start at the tip of the left ear, 628, 653, and come down the inside of the ear to about 700, 747.
- Cross the top of the head in a shallow dip (750, 735 on the guide) to 800, 747, and go up to the tip of the right ear at 872, 653.
- Come down the outside of that ear to about 888, 775, then out to a sharp cheek point at 910, 857.
- Slope in along the jaw through 848, 913 and 790, 953 to a narrow chin at 750, 970.
- Mirror the jaw, cheek point (590, 857) and ear up the left side.
Fill it with vermilion.
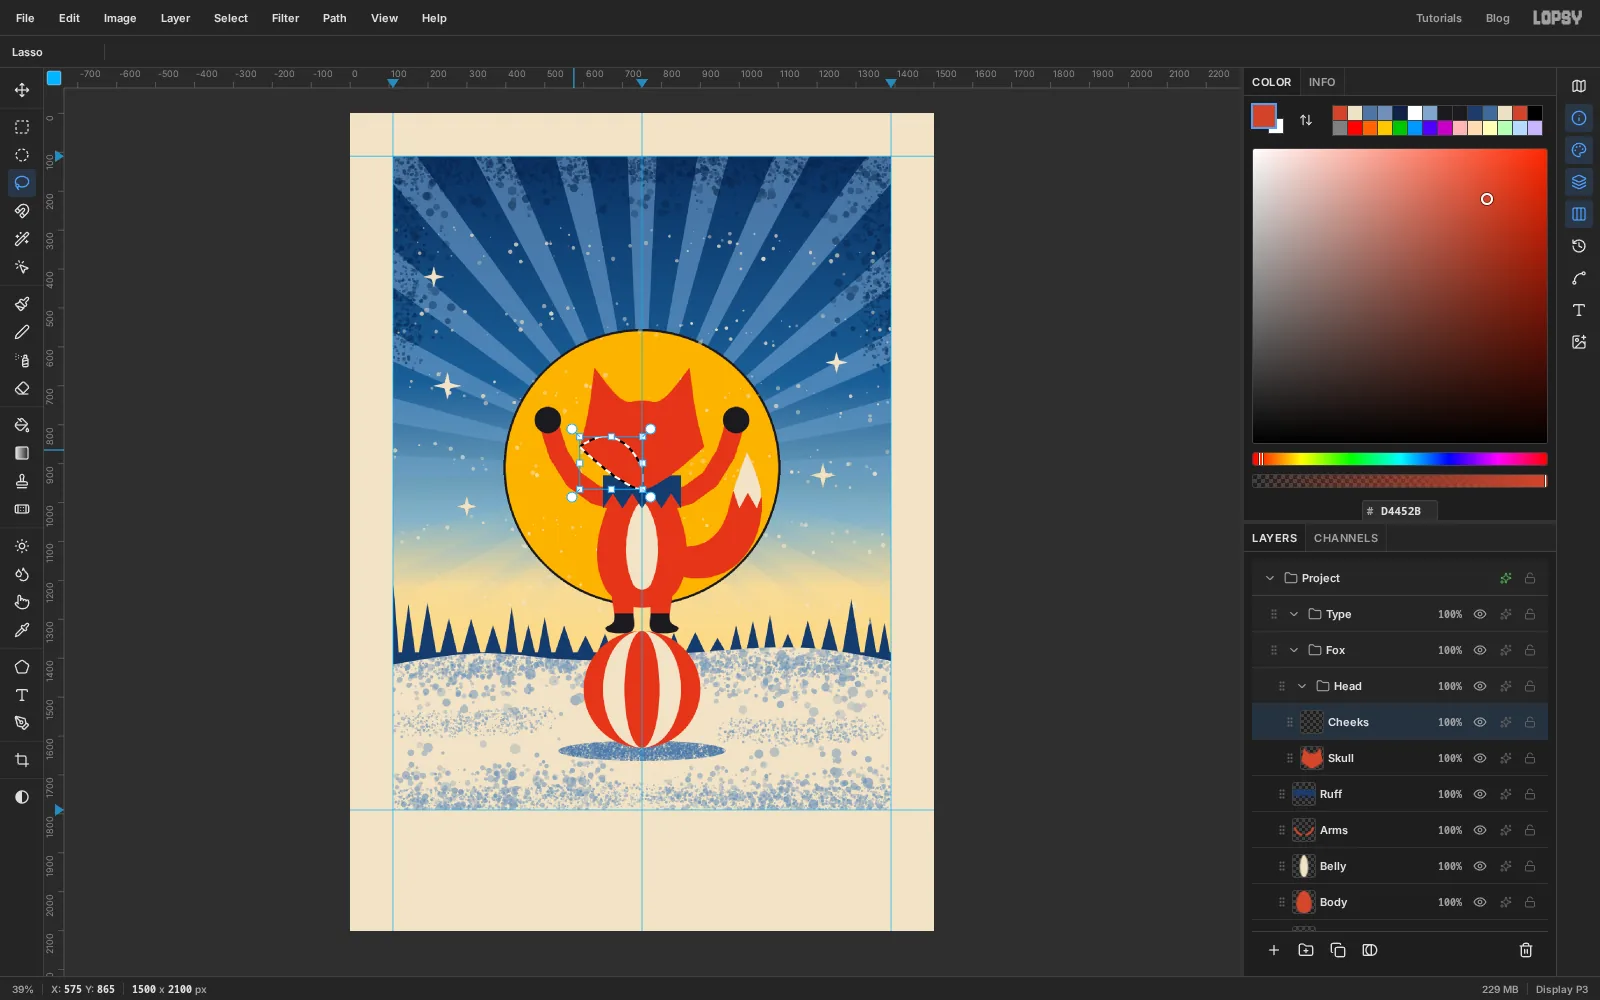
Add a layer called Cheeks. Cmd-click the Skull thumbnail, then hold Shift+Alt and lasso the lower left of the face. Start outside the left cheek point, rise to about 645, 823, dip slightly as you cross to the centre guide at about y 910 (this edge passes just under where the eye will go), run down the guide past the chin, and loop back outside the jaw. The selection is clipped to the head. Fill it with paper, then do the same on the right. The two patches meet in a V between the eyes.
-
Give it a face and a party hat
Add a layer called Face. Everything on it is key black except the glints:
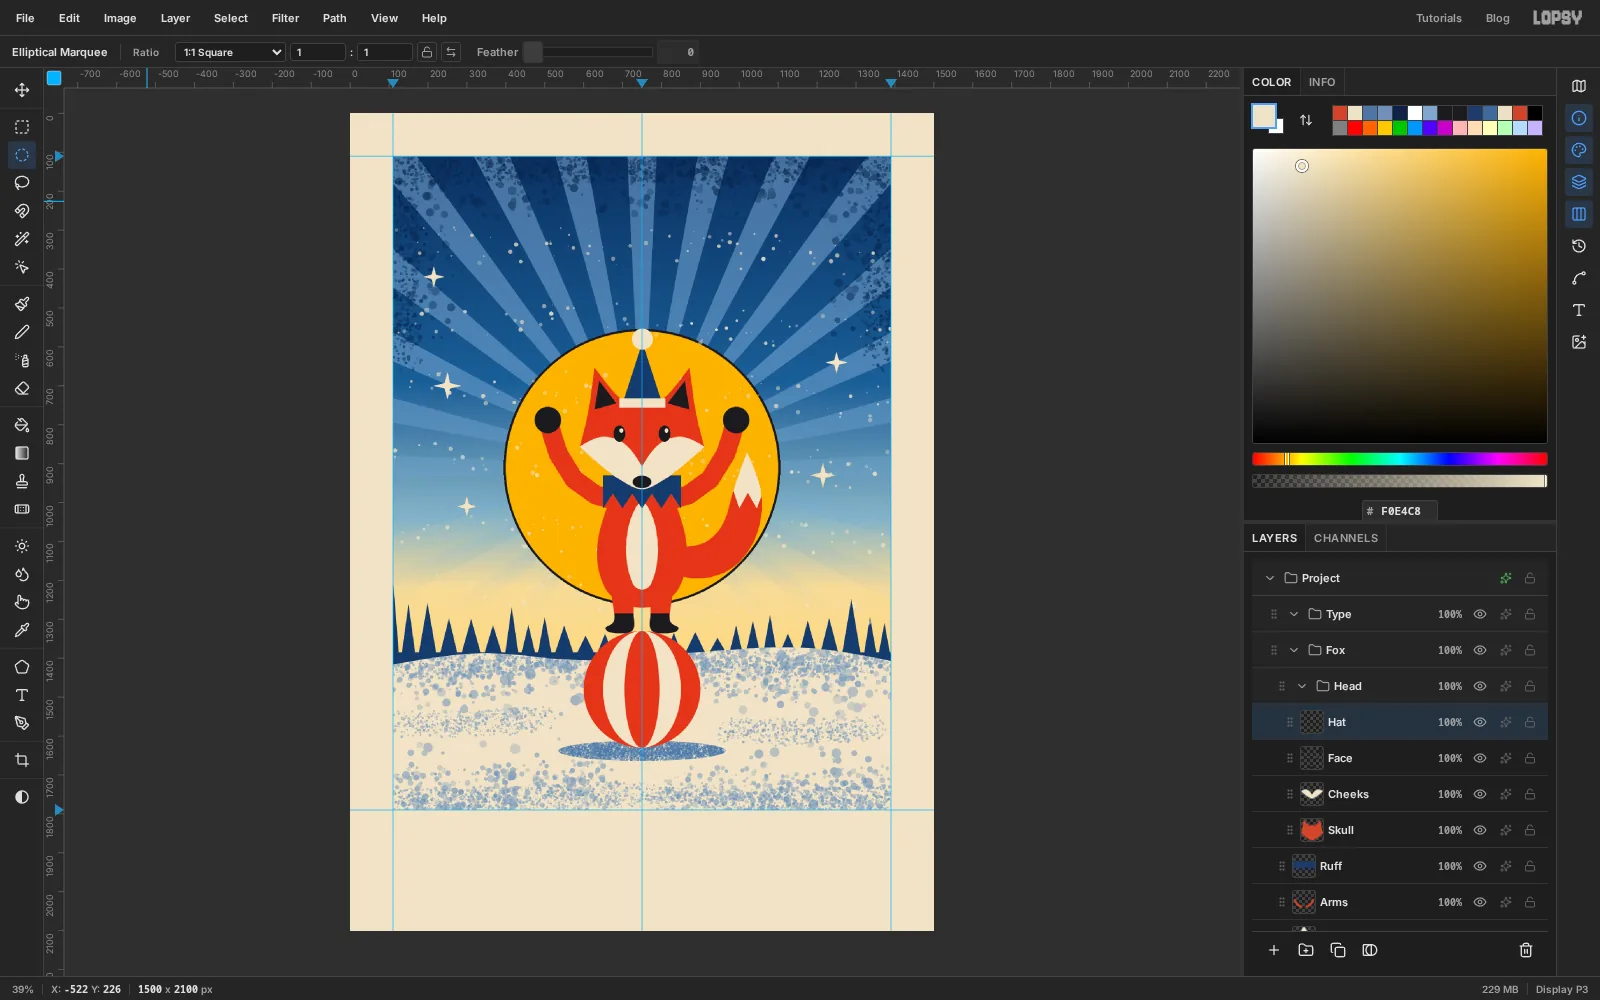
- With the Lasso, a triangle inside each ear, leaving a red rim around it. The left one has corners at about 640, 687, 684, 745 and 628, 761.
- Two upright oval eyes with the Elliptical Marquee's exact dialog: From 677, 802 To 707, 844, and From 793, 802 To 823, 844. They sit on the red, just above the cream cheeks.
- An oval nose on the centre guide, at the bottom of the cream V: From 726, 931 To 774, 963.
- A small paper-coloured glint in the upper right of each eye, about 10 × 12 px.
Add a layer called Hat. With the Lasso, draw a tall triangle in Prussian blue between the ears: the base runs from 698 to 804 at y 752, and the tip is at 751, 588. Then, with the marquees' exact dialogs, fill a paper-coloured brim across its base (Rectangular, From 692, 732 To 810, 756) and a paper-coloured pompom on its tip (Elliptical, From 724, 553 To 778, 607).
-
Put a key line around everything
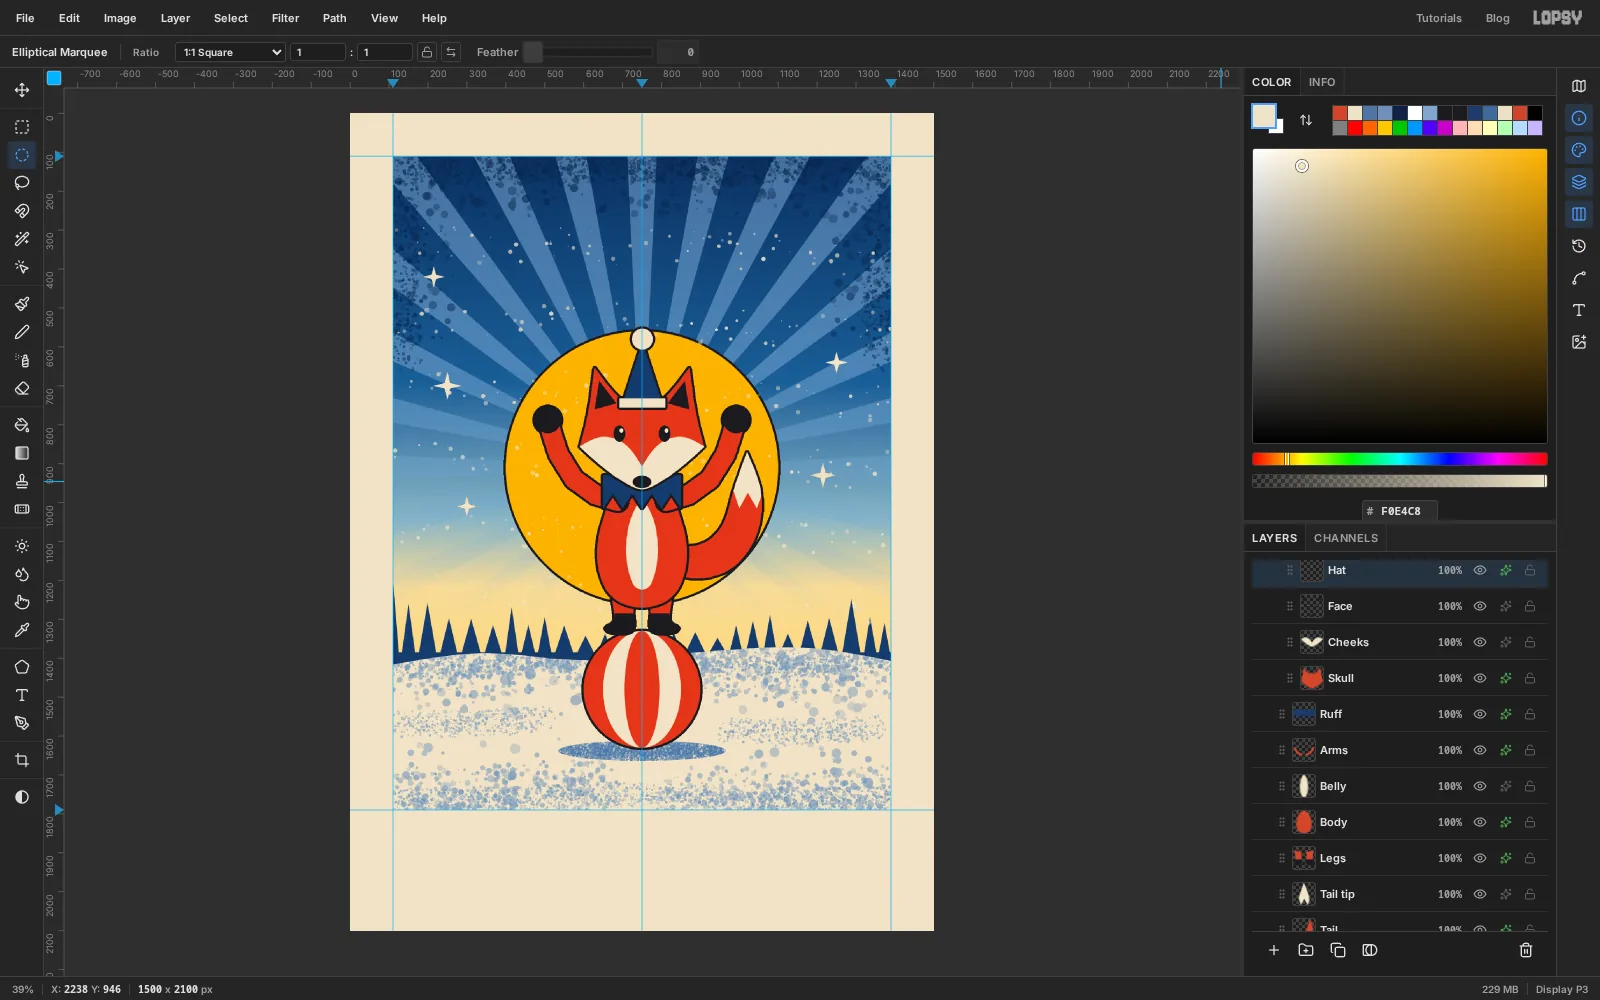
Open the effects drawer on each of these layers and add the same Stroke you gave the sun, Width 6 in key black: Ball, Tail, Legs, Body, Arms, Ruff, Skull and Hat. Leave Belly, Cheeks, Tail tip and Face without one, so they stay as flat patches inside the outlines.
-
Tilt the head
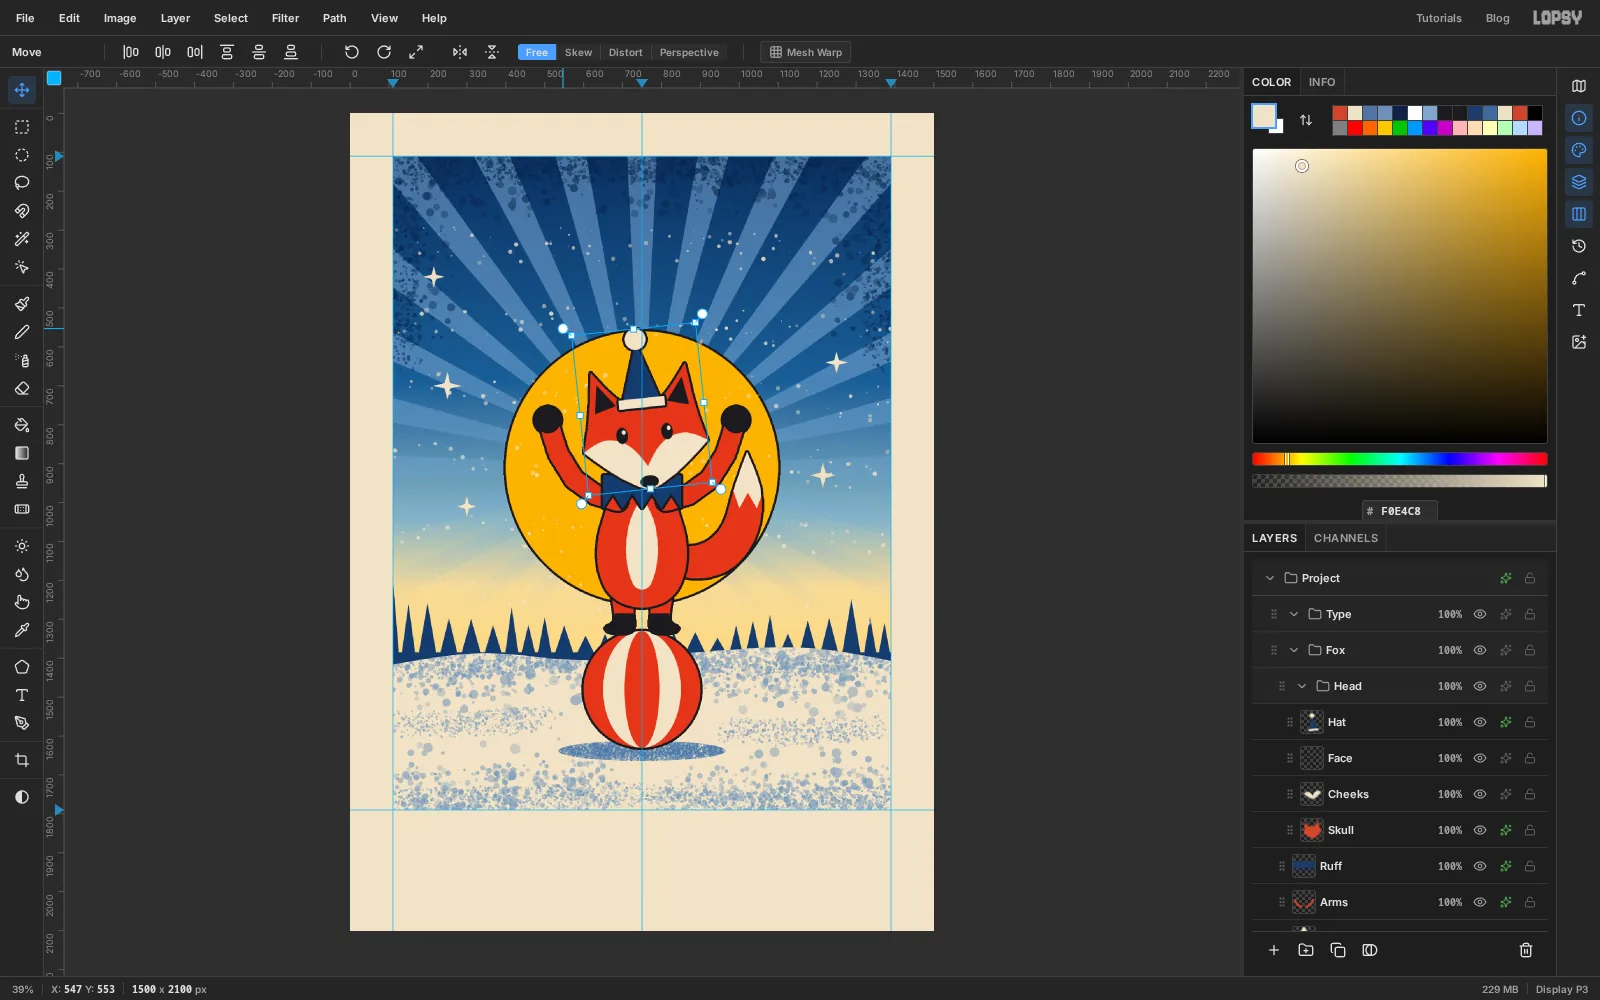
Click the Head group in the Layers panel and pick the Move tool. With nothing selected, the handles frame everything in the group. Move the pointer just outside the top-left corner, where the round rotate handle is, and drag it a short way down and to the left. The head turns anticlockwise. Stop when the pompom has moved about 20 px to the left, which is a turn of about 6°. Press Cmd+D to commit.
Press Cmd+Z and then Cmd+Shift+Z to compare the two poses. The tilted head looks up at the baubles.
-
Draw the path of the baubles
Click the Fox group, click New Group and name it Juggling. Inside it, add a layer called Trajectory.
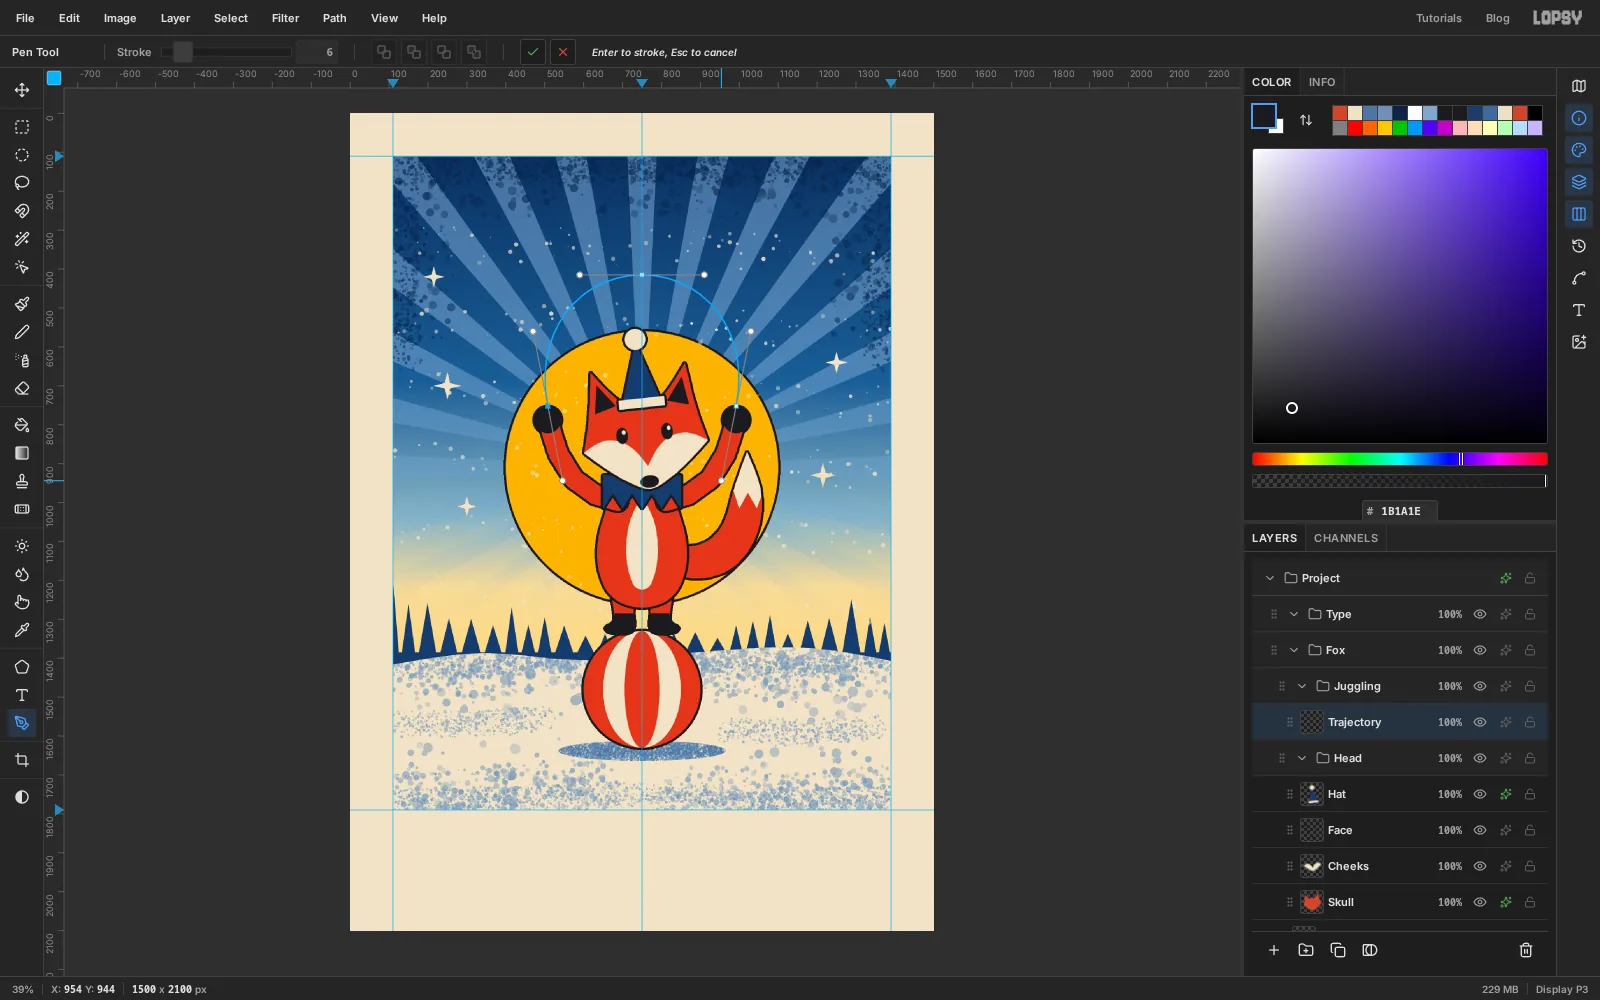
The baubles travel along one tall arch from paw to paw, peaking above the hat. Pick the Pen, set Stroke to 6 and the foreground to key black. Dragging as you place a point pulls out curve handles:
- Press just above the left paw at about 508, 752 and drag up to about 470, 560.
- Press at the top of the arch, 750, 415, and drag right to about 910, 415.
- Press just above the right paw at 992, 752 and drag down to about 954, 944.
Press Enter to stroke the curve onto the layer.
-
Break the arc into dashes
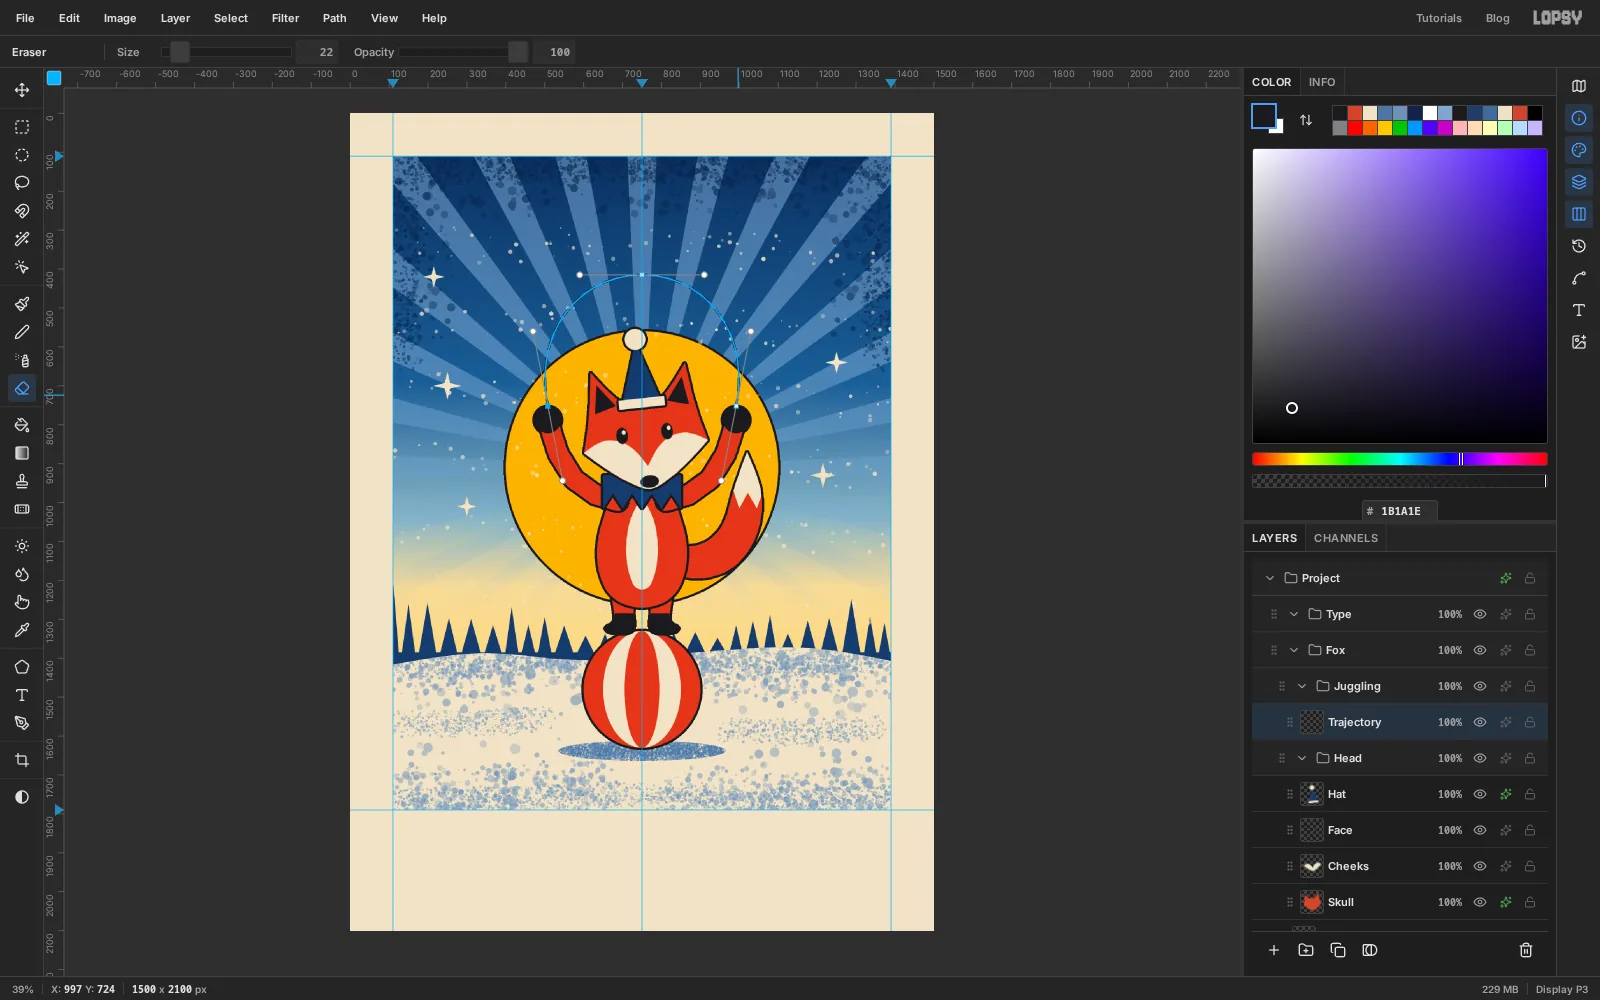
Pick the Eraser, set Size to 22, and click along the arc at even intervals, leaving a dash between each click. About ten clicks on each half does it. The Pen's blue outline stays on screen while you work, which helps you aim. It doesn't export, and you can hide it by clicking the path's row again in the Paths panel.
-
Draw the first bauble
Black dashes get lost against the dark sky. Open the effects drawer on Trajectory, tick Color Overlay and set its colour to paper.
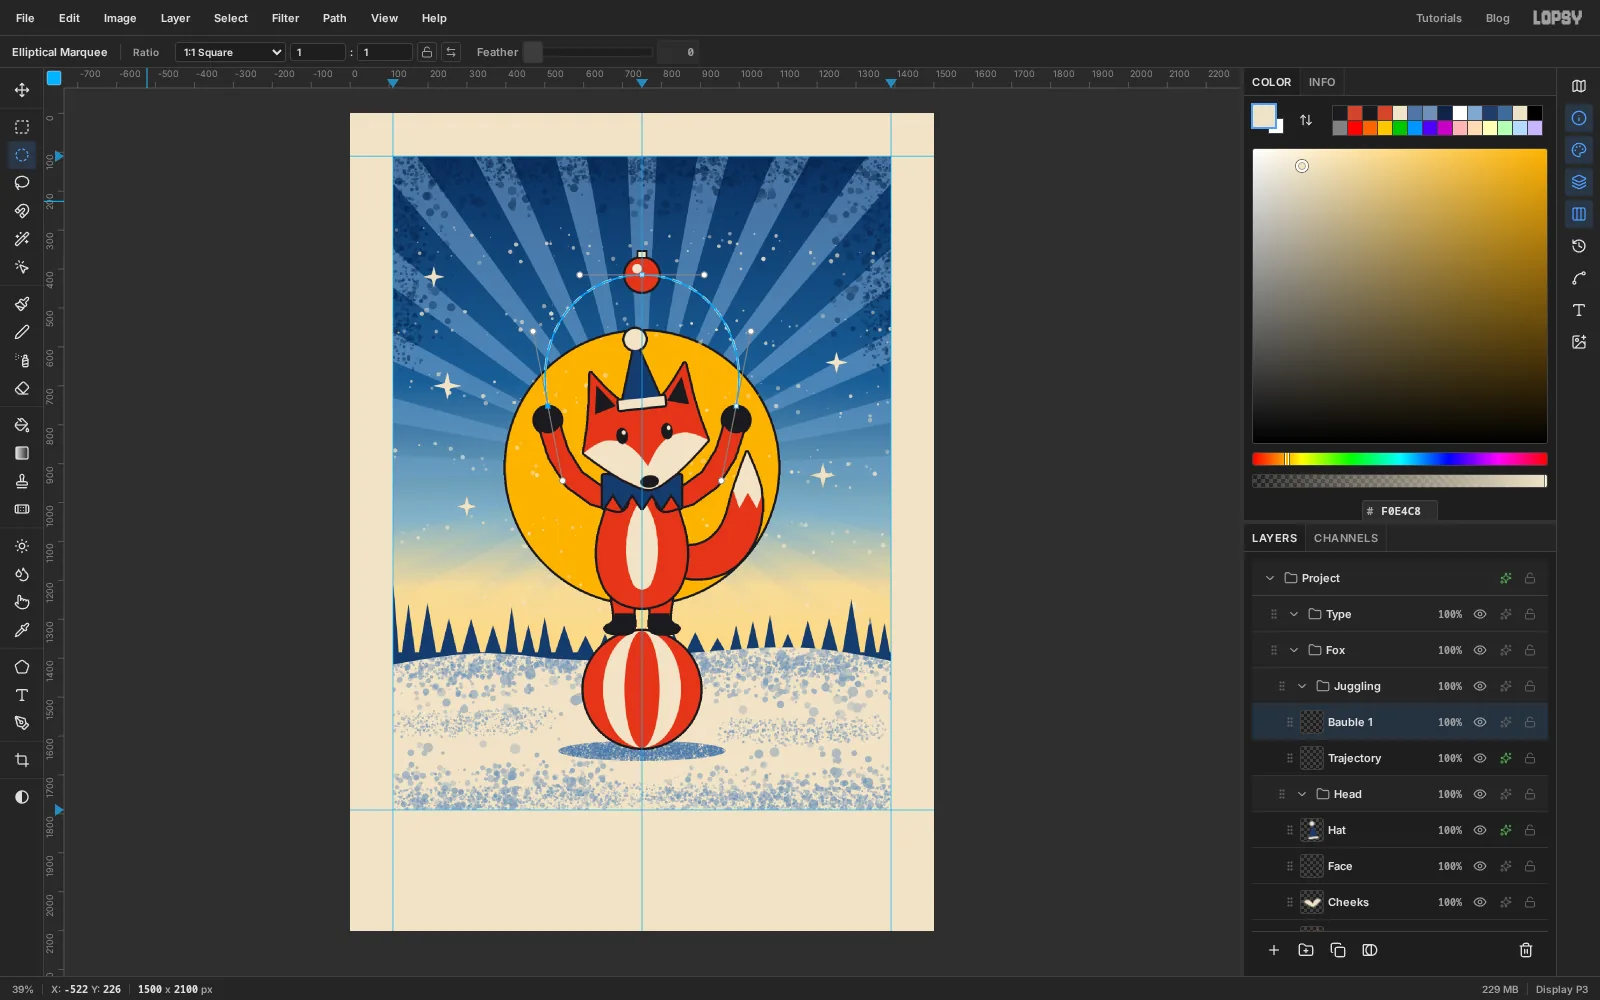
Add a layer called Bauble 1. Pick the Shape tool and choose Ellipse. Click the Fill swatch and set it to vermilion, click the Stroke swatch and set it to key black, and set Width to 6. The shape grows outward from where you press. Press at the top of the arch (750, 415), hold Cmd to keep it round, and drag down and to the right until the status bar reads about 796, 461. The circle is about 92 px across.
Give it a cap with the Rectangular Marquee's exact dialog: fill a black rectangle From 736, 351 To 764, 373, then a paper-coloured one inside it From 741, 356 To 759, 369. Finish with a small upright paper-coloured oval on the upper left as a highlight (Elliptical, From 725, 387 To 739, 411).
-
Add a banded bauble
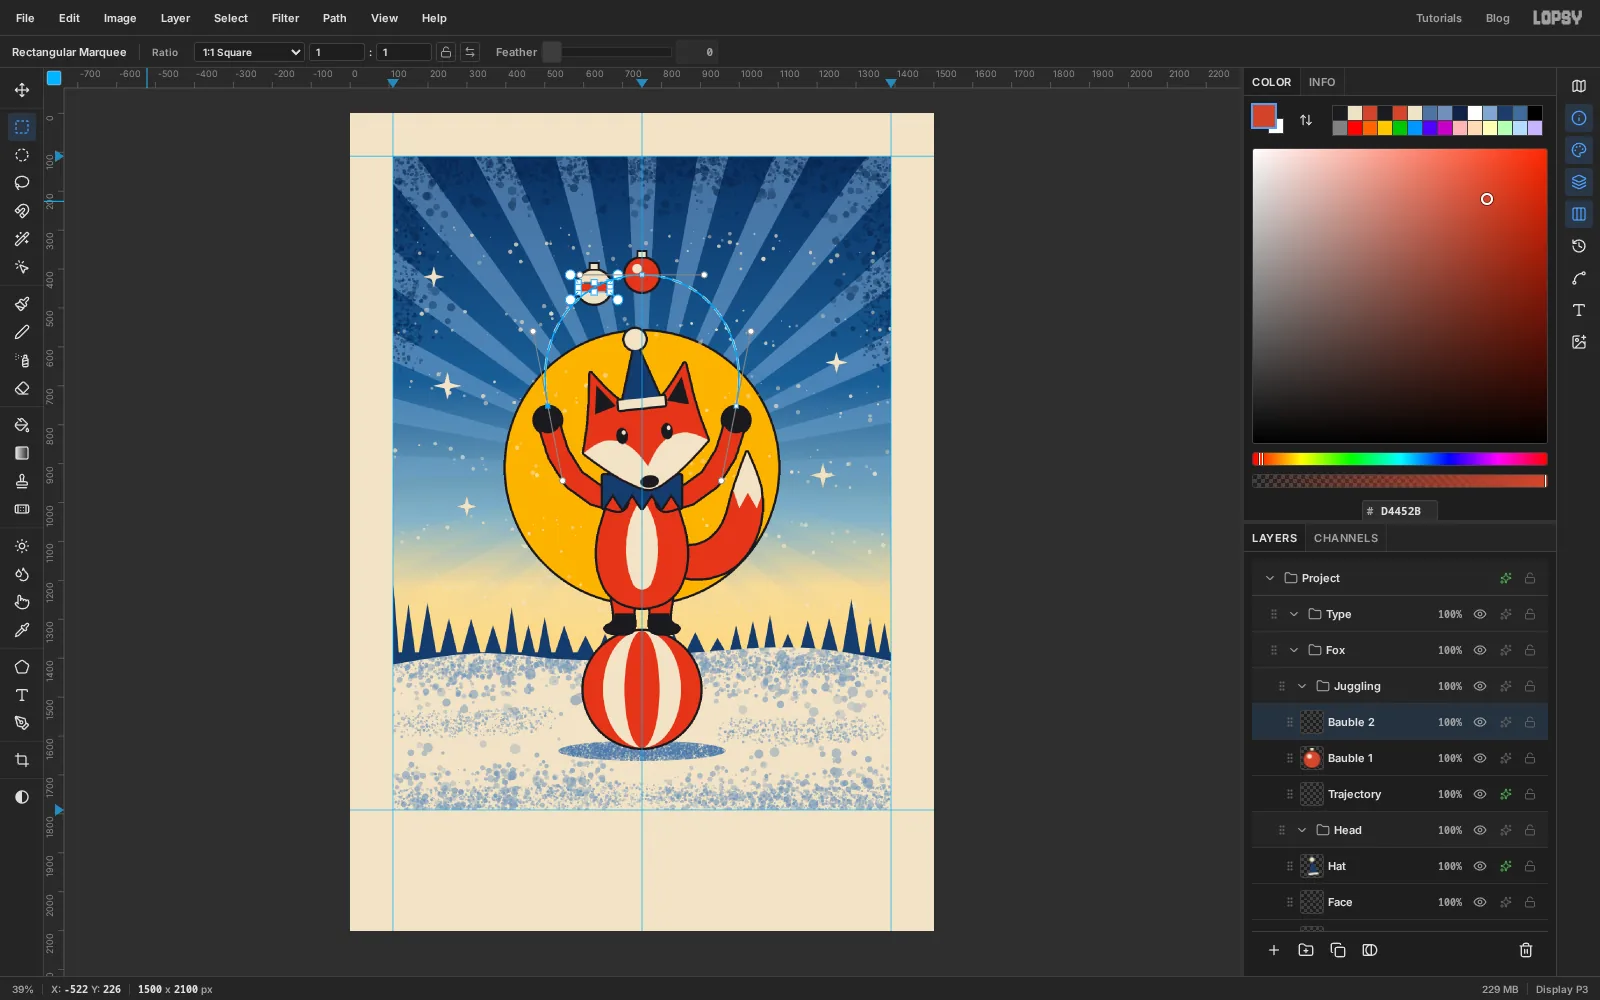
Add Bauble 2. Change the Shape tool's fill to paper and draw the same size circle on the arch, pressing at about 627, 446. Add the same cap, 123 px to the left and 31 px lower than the first one.
For the band, select a circle just inside the bauble's outline with the Elliptical Marquee's exact dialog (From 586, 405 To 668, 487). Then pick the Rectangular Marquee, hold Shift+Alt and drag a strip across the middle, from about 577, 435 to 677, 459. Only the part of the strip inside the circle stays selected. Fill it with vermilion and deselect.
-
Add a blue bauble and tumble them
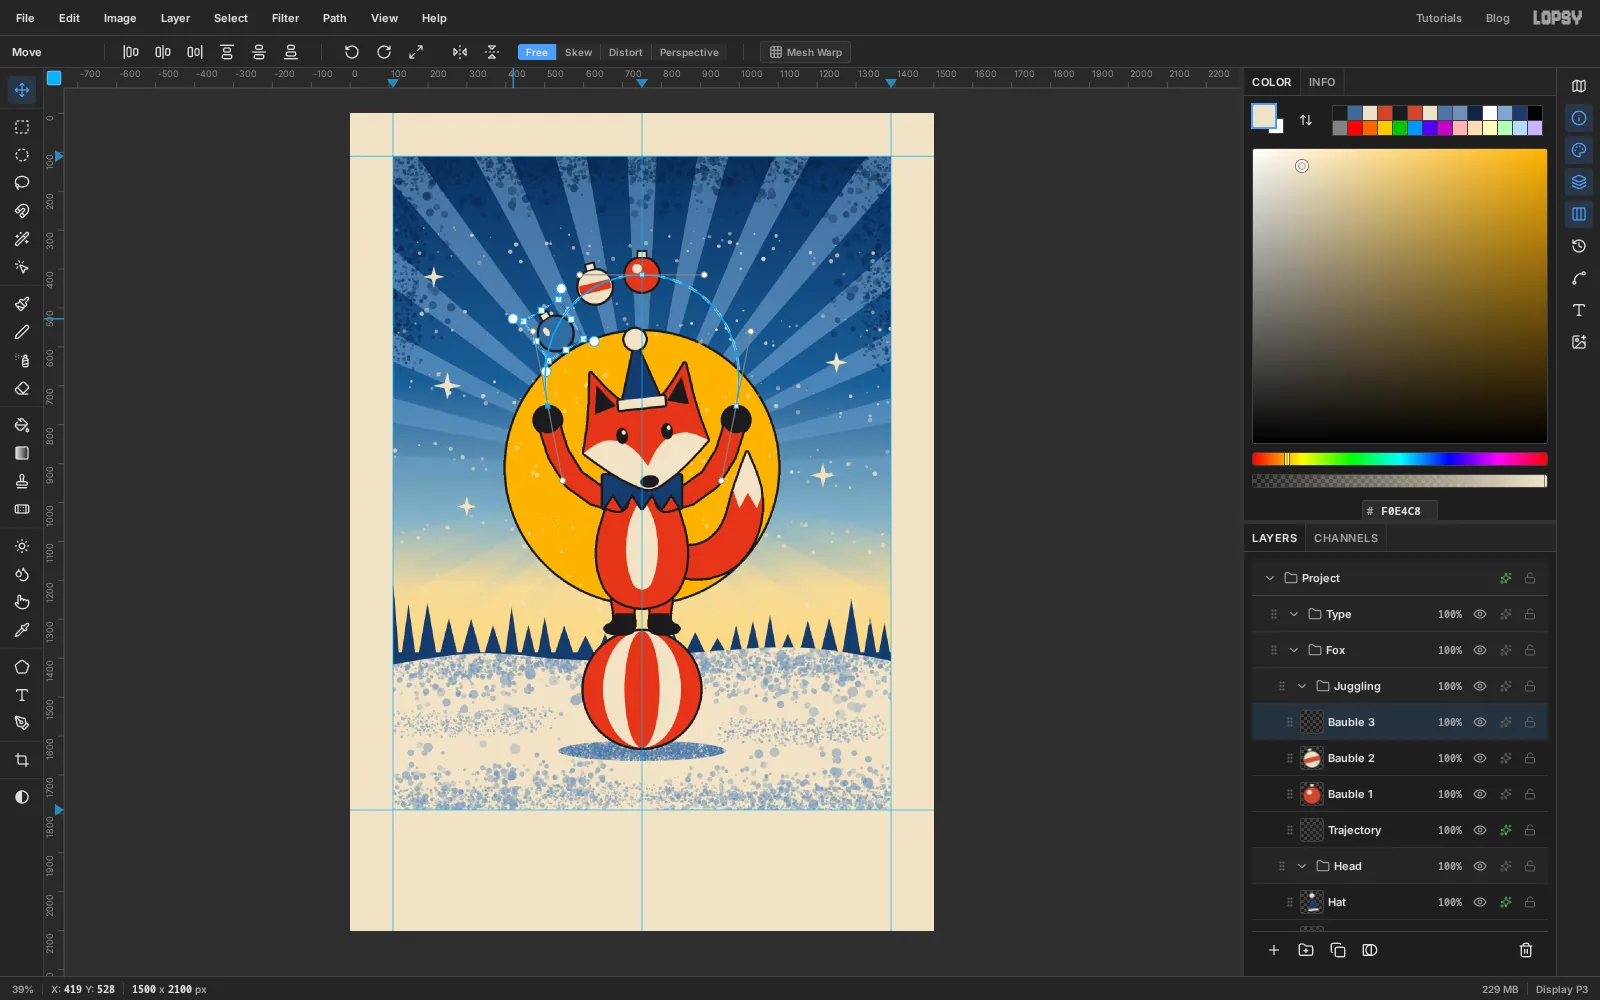
Add Bauble 3 in mid blue , pressing at about 523, 567, with a cap and a highlight.
Baubles in the air shouldn't all sit upright. Click Bauble 2, drag a Rectangular Marquee around the whole bauble, pick the Move tool and drag the round rotate handle anticlockwise until the cap points to about eleven o'clock (roughly 14°), leaning away from the fox. Press Cmd+D. Do the same to Bauble 3, turning it further, until its cap points to about ten o'clock.
-
Duplicate and flip the other side
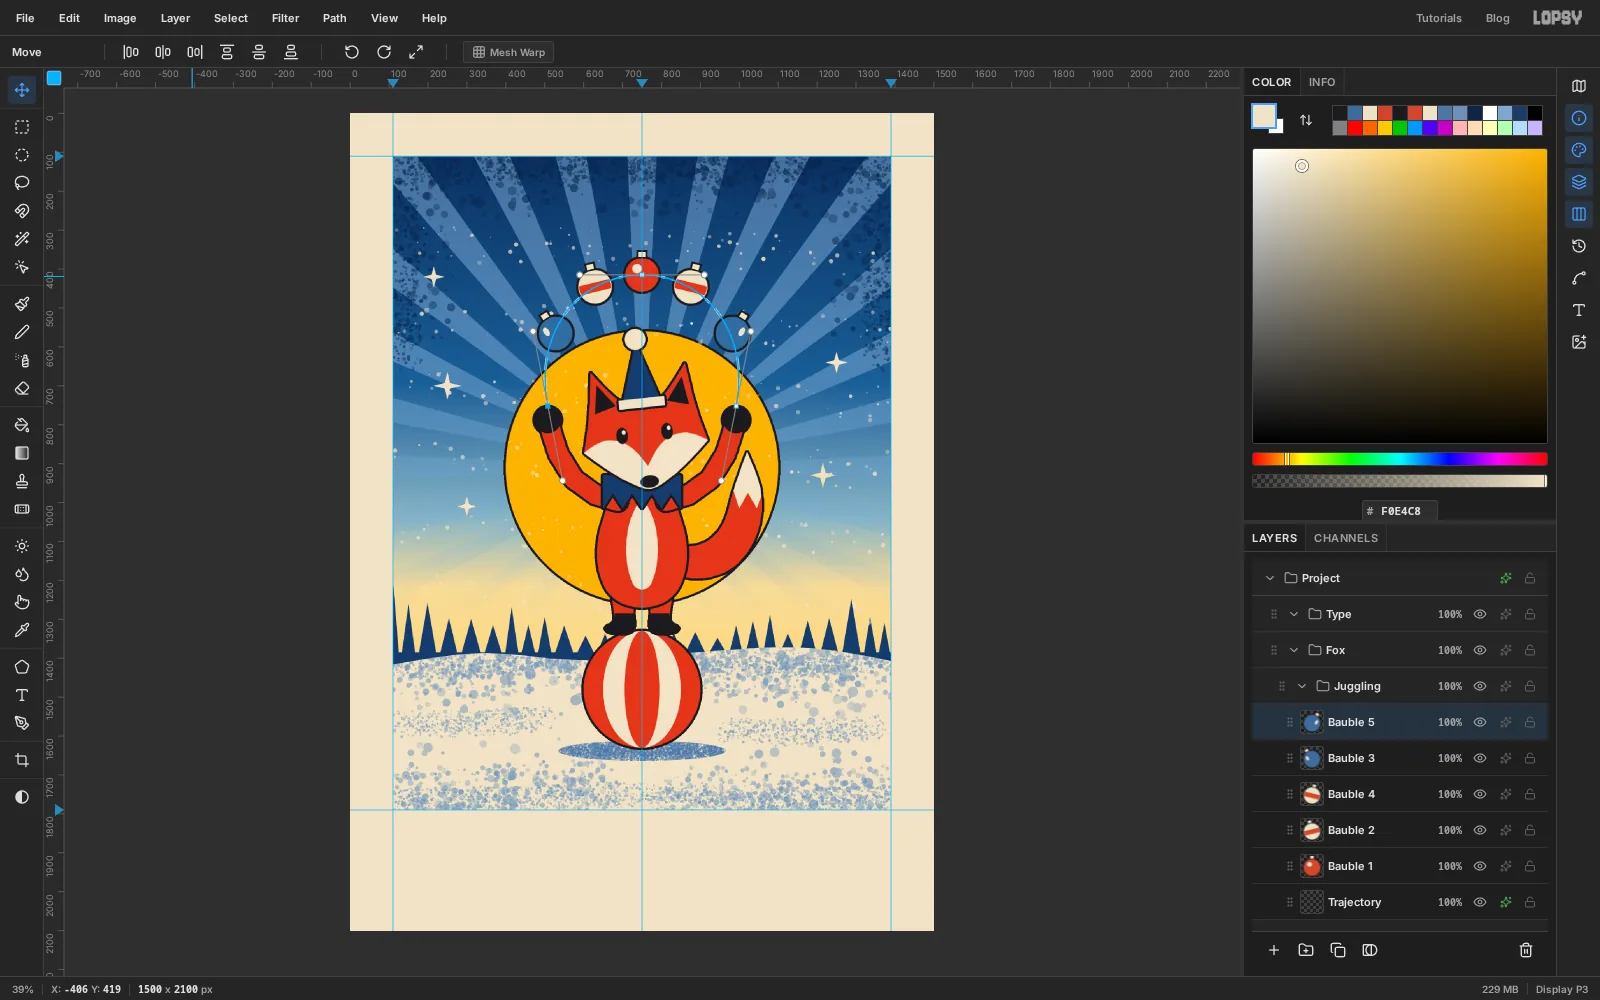
Click Bauble 2 and choose Layer → Duplicate Layer. Rename the copy Bauble 4. With the Move tool, drag it straight across to the matching spot on the right, at about 873, 446. Pink lines appear when it lines up with its twin. Choose Image → Flip Horizontal so it leans the other way.
Do the same with Bauble 3 to make Bauble 5 at about 977, 567.
-
Ring the baubles with a cream halo
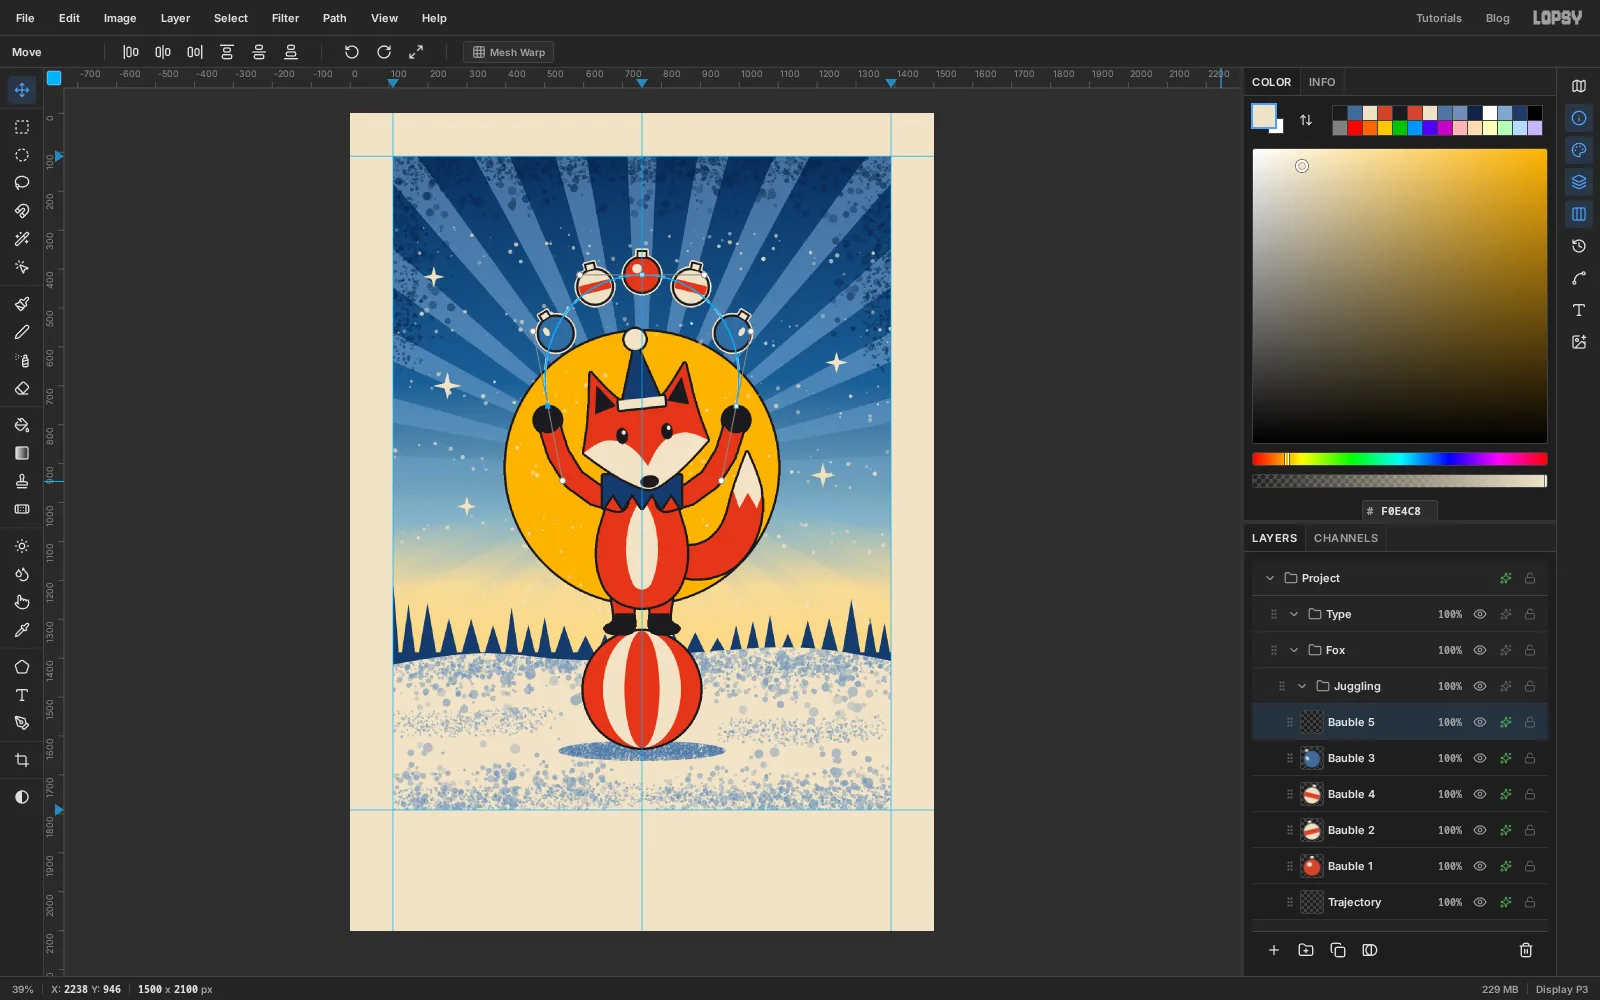
The black outlines disappear against the navy sky. A thin ring of bare paper around each bauble lifts it off the background. On each of the five bauble layers, add a Stroke effect with Width 4 in paper.
-
Drop a bauble in the snow
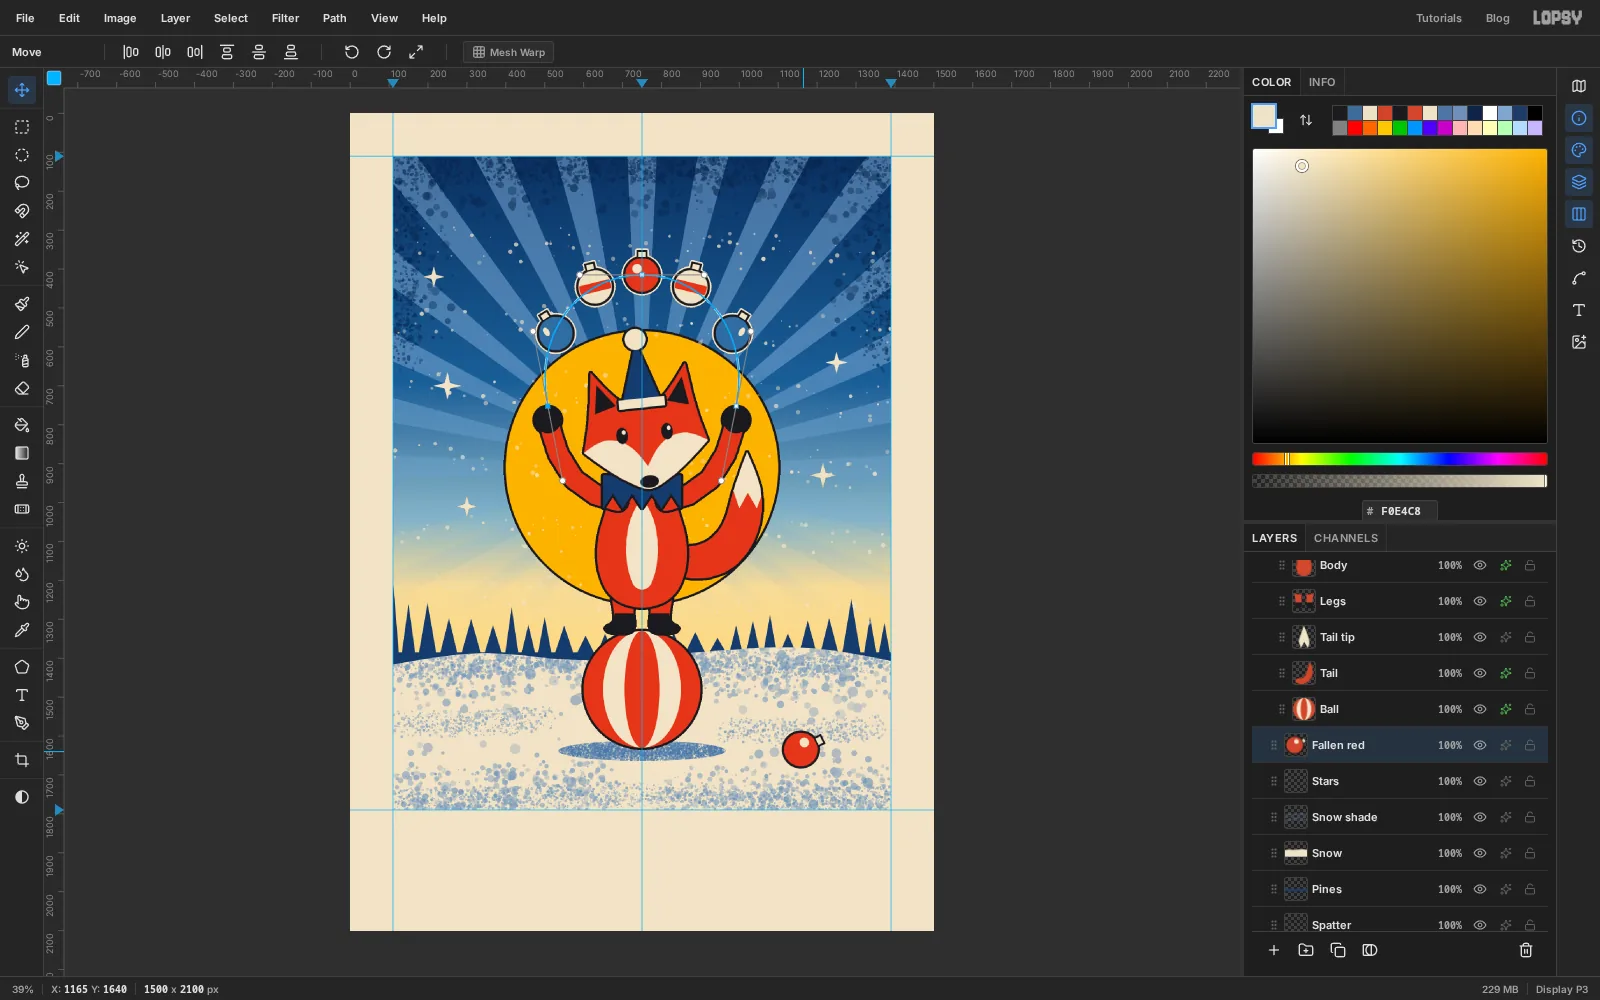
Click Bauble 1, press Cmd+A and Cmd+C, then Cmd+D. Click Stars (below the Fox group) and press Cmd+V. The copy arrives as Pasted Layer, in the same place and already selected. Rename it Fallen red.
Pick the Move tool and drag the rotate handle clockwise until the cap points to about two o'clock, then press Cmd+D. Drag the bauble down to the snow at about 1165, 1640, to the right of the ball.
-
Add a second one and shrink it
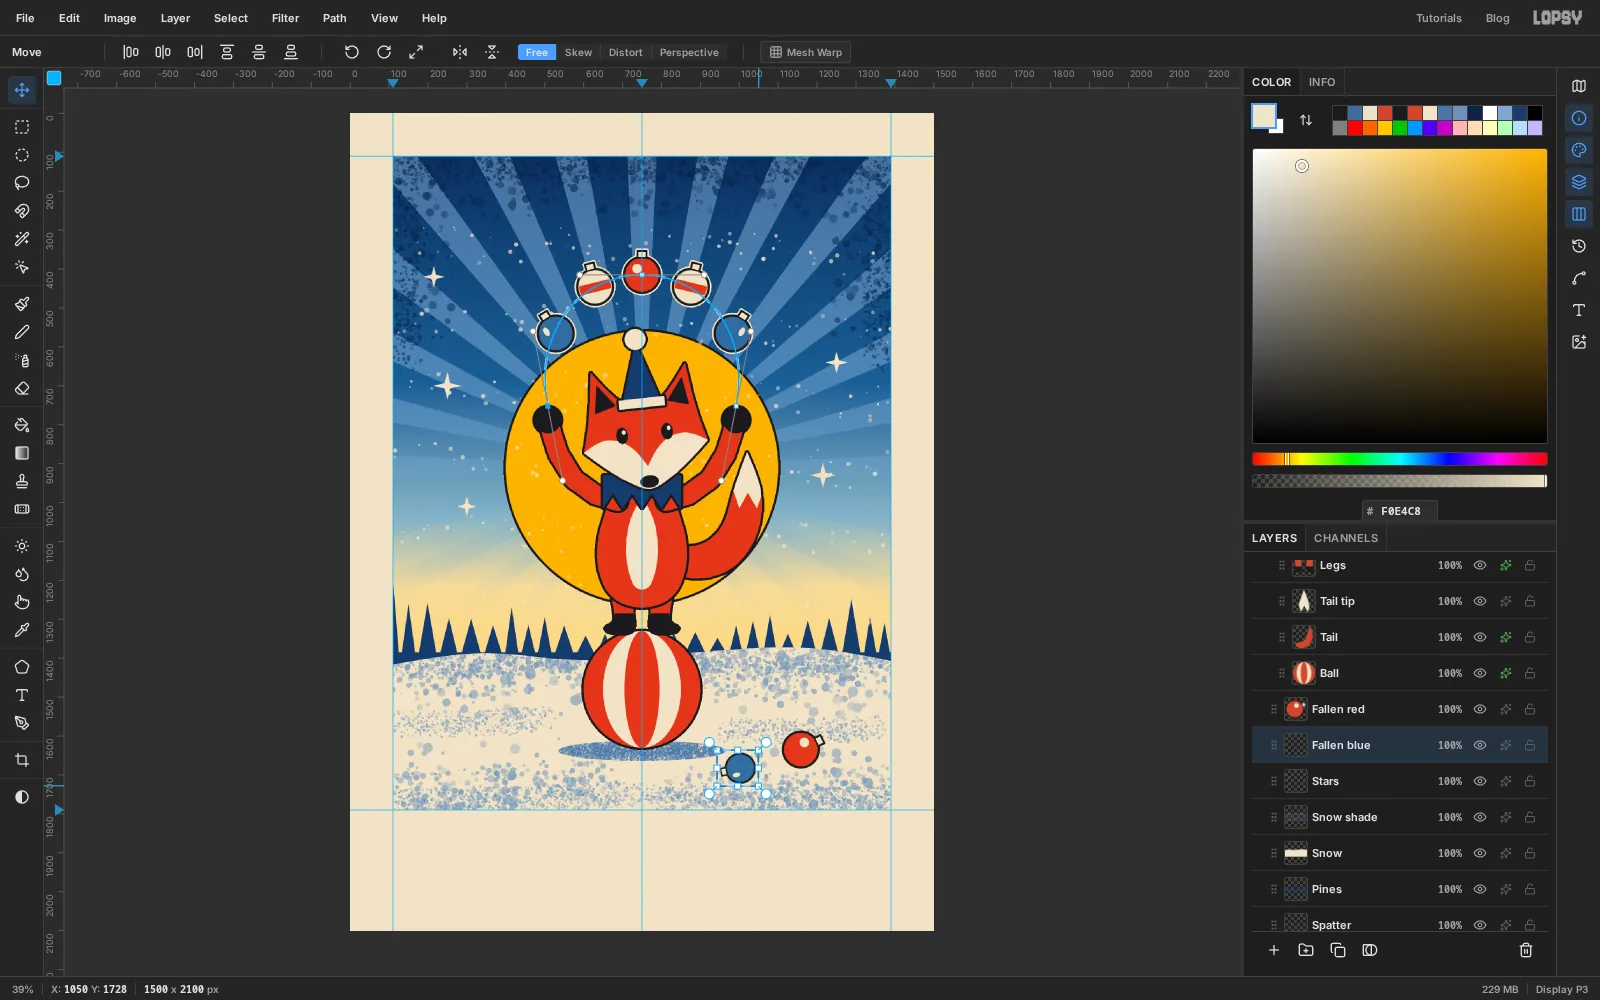
Copy Bauble 3 the same way, click Stars again and paste, and rename the layer Fallen blue. Turn it anticlockwise until its cap points left and slightly up, commit, and drag it to about 1010, 1700, a little in front of the red one.
To make it a little smaller, drag a marquee around it, pick the Move tool, hold Cmd to keep the proportions and drag a corner handle inward by about 20 px. Press Cmd+D.
-
Wrap a gift
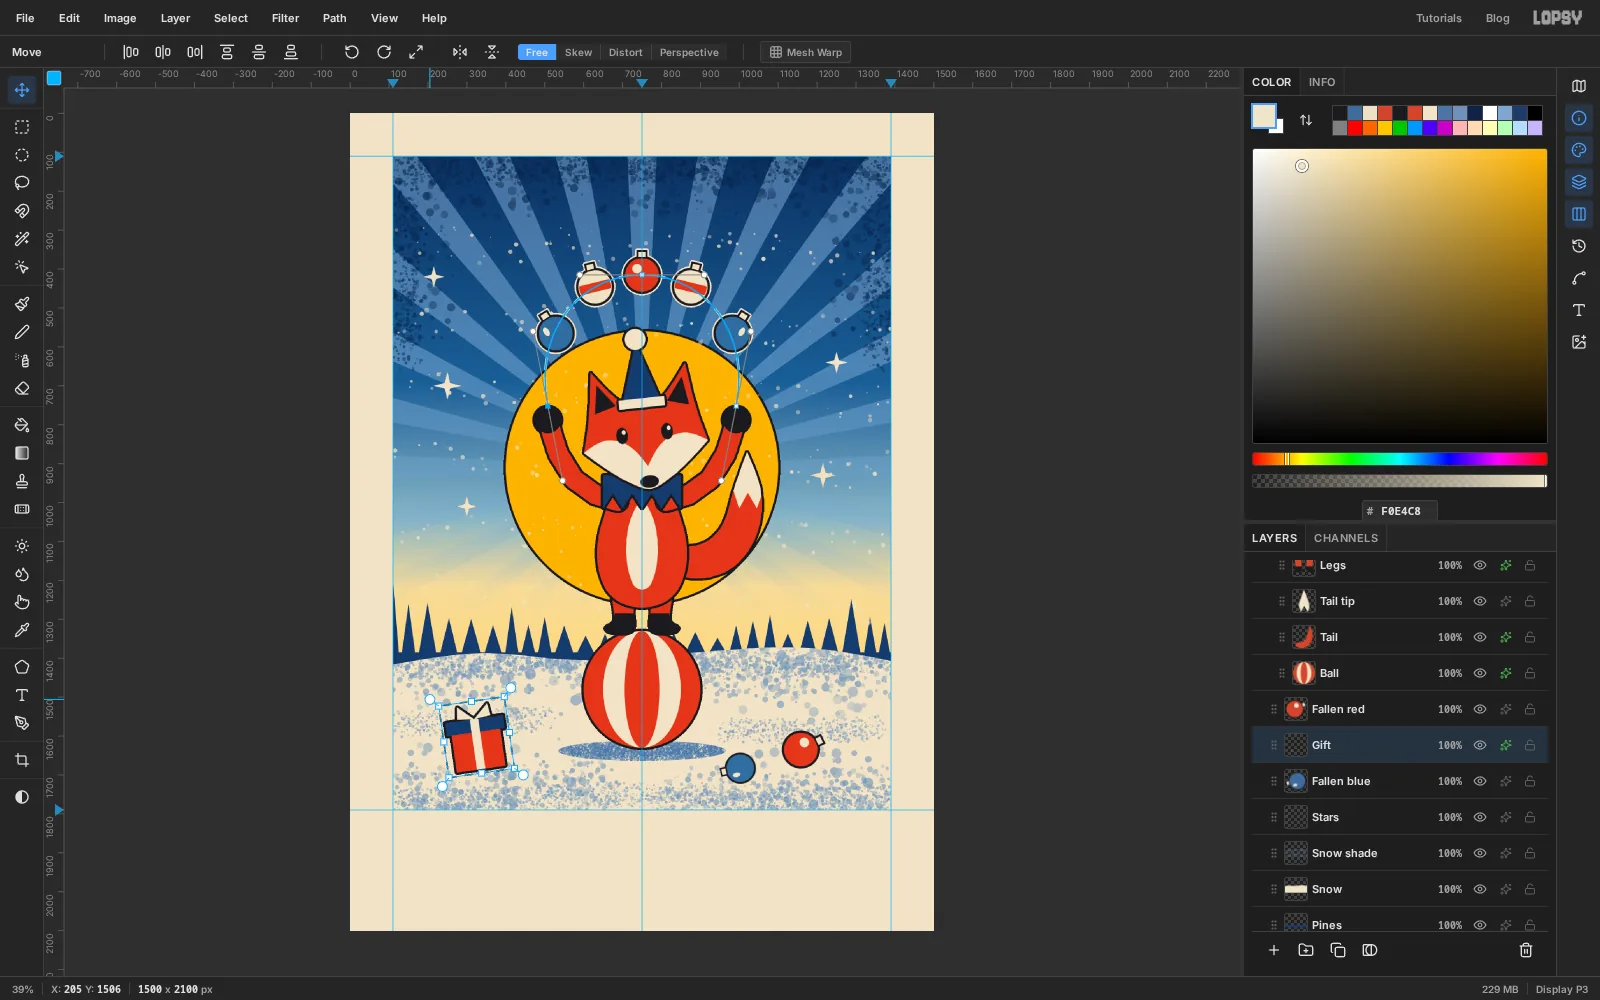
Click Fallen blue and add a layer called Gift. Build it from rectangles with the Rectangular Marquee's exact dialog, at the left of the snow:
- a vermilion box, From 262, 1582 To 388, 1686
- a Prussian blue lid across the top, a little wider than the box, From 250, 1556 To 400, 1590
- a paper-coloured ribbon down the middle of both, From 314, 1556 To 336, 1686
With the Lasso, add two small paper-coloured triangles above the lid for the bow. They meet at the top of the ribbon and open upward like rabbit ears, about 40 px tall. Give the layer the 6 px black Stroke.
Drag a marquee around the whole gift and turn it slightly anticlockwise with the Move tool, so that it leans to the left (about 8°). Press Cmd+D.
-
Draw an arc for the title
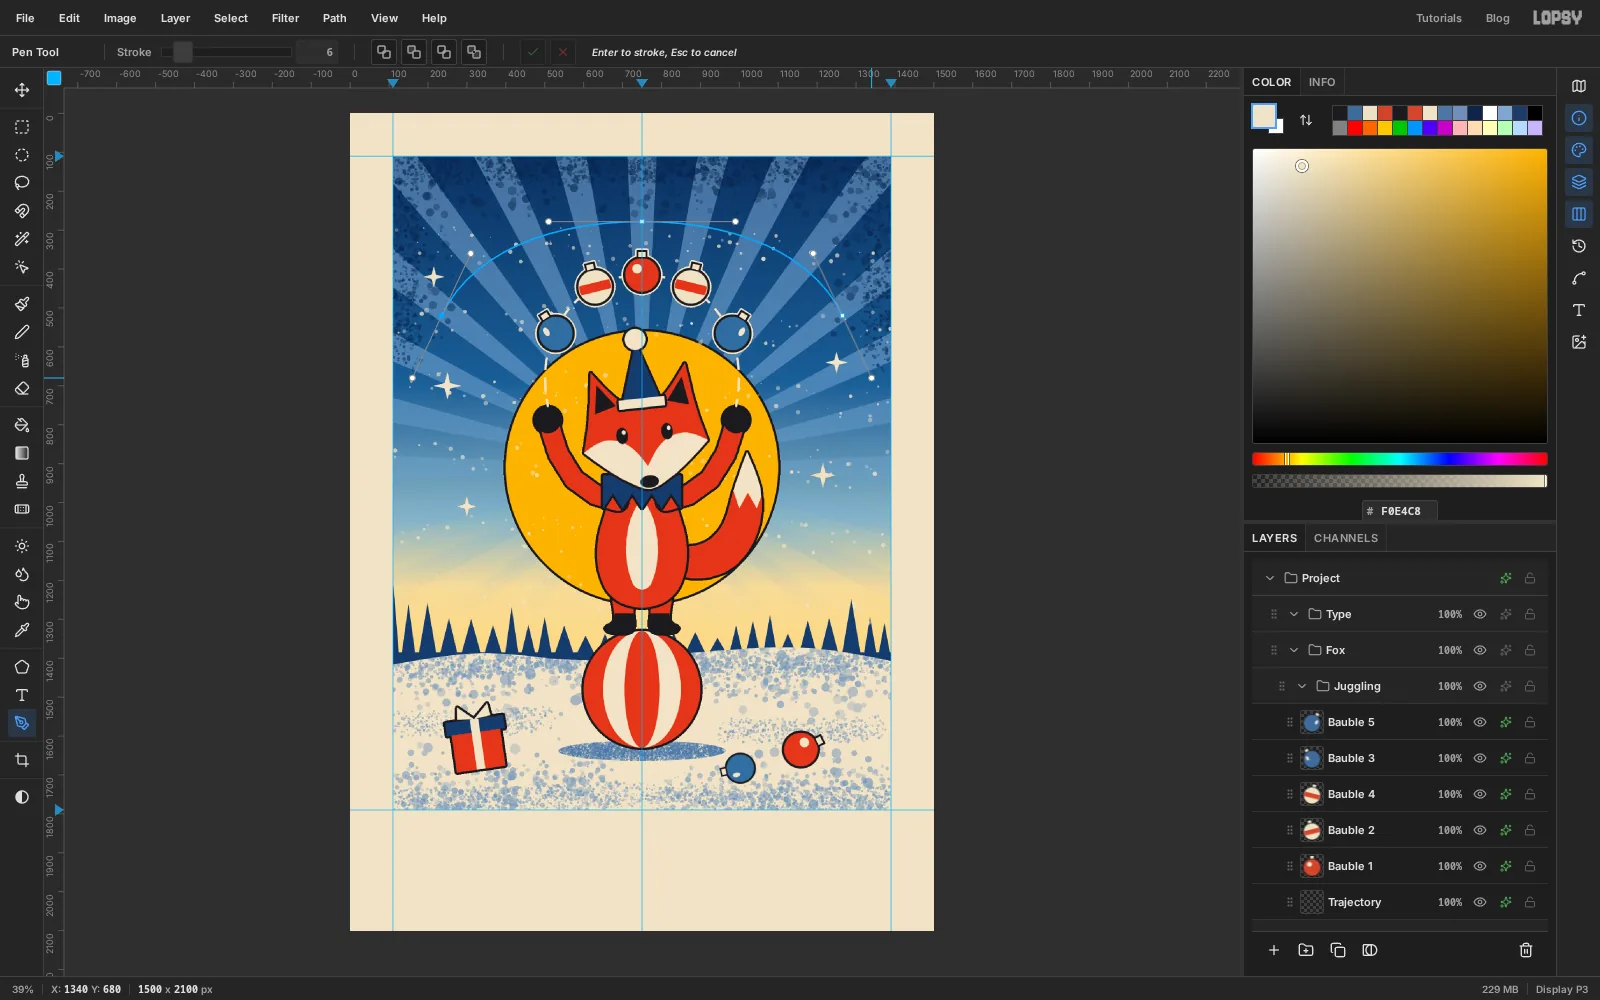
Click the Type group and pick the Pen. The title follows a wider, flatter arch above the baubles. Place three points, dragging each one as before:
- Press at 235, 520 and drag up to about 310, 360.
- Press at 750, 278 and drag right to about 990, 278.
- Press at 1265, 520 and drag down to about 1340, 680.
This time click the ✓ (Commit path) button in the options bar instead of pressing Enter. The path is saved without being stroked.
-
Set the title on the arc
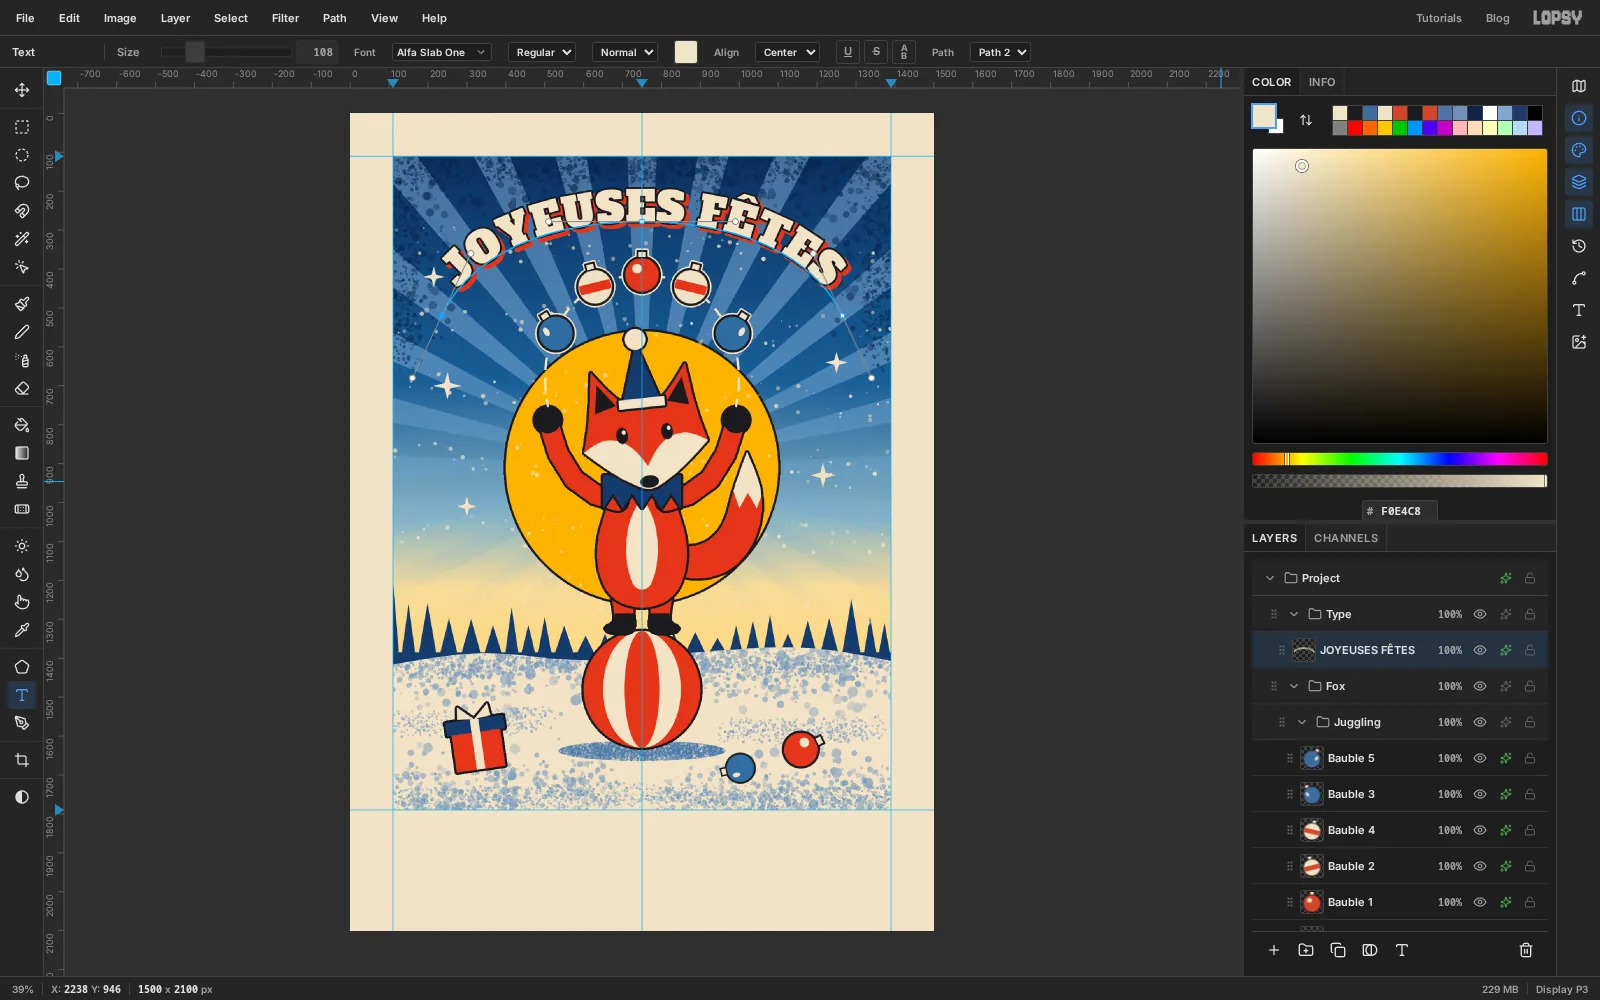
Click the Type group again so that no text layer is active. Pick the Text tool, choose Alfa Slab One from the font list and set Size to 108. Set the foreground to paper.
Click in the empty margin under the panel, type
JOYEUSES FÊTESand press Tab to commit. (On a Mac, type Ê with Option+I then Shift+E. On Windows, use the on-screen keyboard or copy it from here.) In the options bar, open the Path dropdown and choose Path 2 (Path 1 is the baubles' arch). Then set the Align dropdown beside it to Center. The words move up onto the arc with equal space at both ends.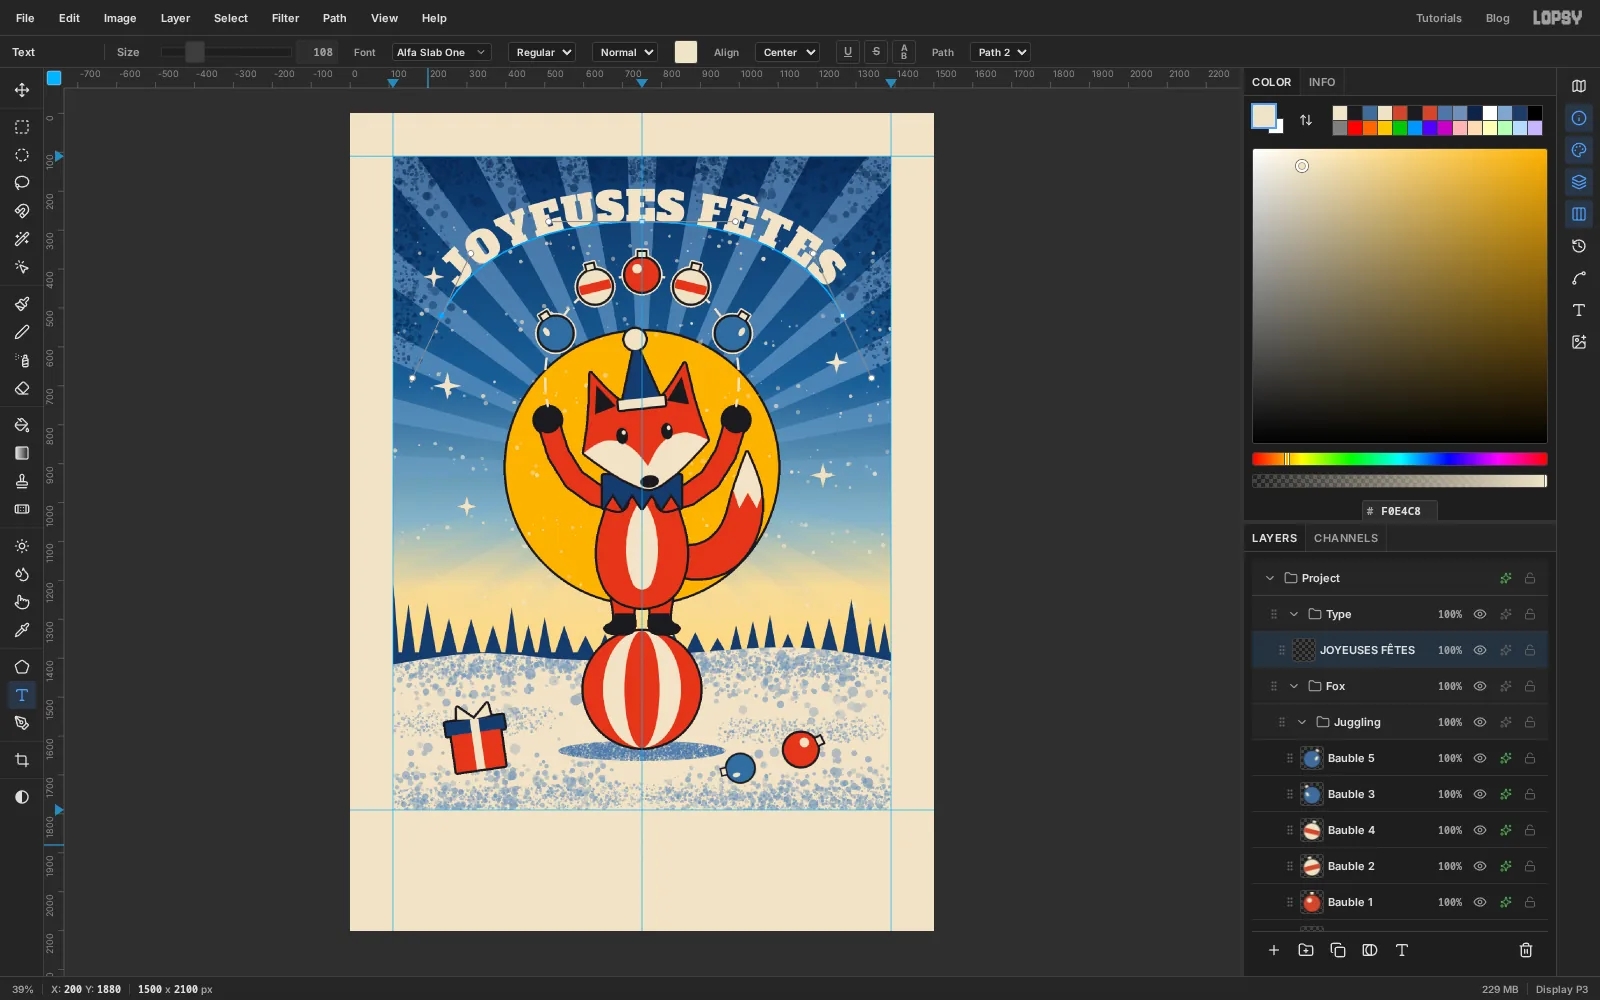
-
Give the title a key line and a shadow
Open the title's effects drawer:
- Tick Stroke: Width 5, key black.
- Tick Drop Shadow: Offset X 9, Offset Y 9, Blur 0, Opacity 100, colour vermilion.
With no blur, the shadow is a second, solid printing of the letters. Check the gaps: the letters should clear the frame guide at the top and the caps of the baubles underneath by a similar amount. If they don't, change the Size by a few points.
-
Write the greeting
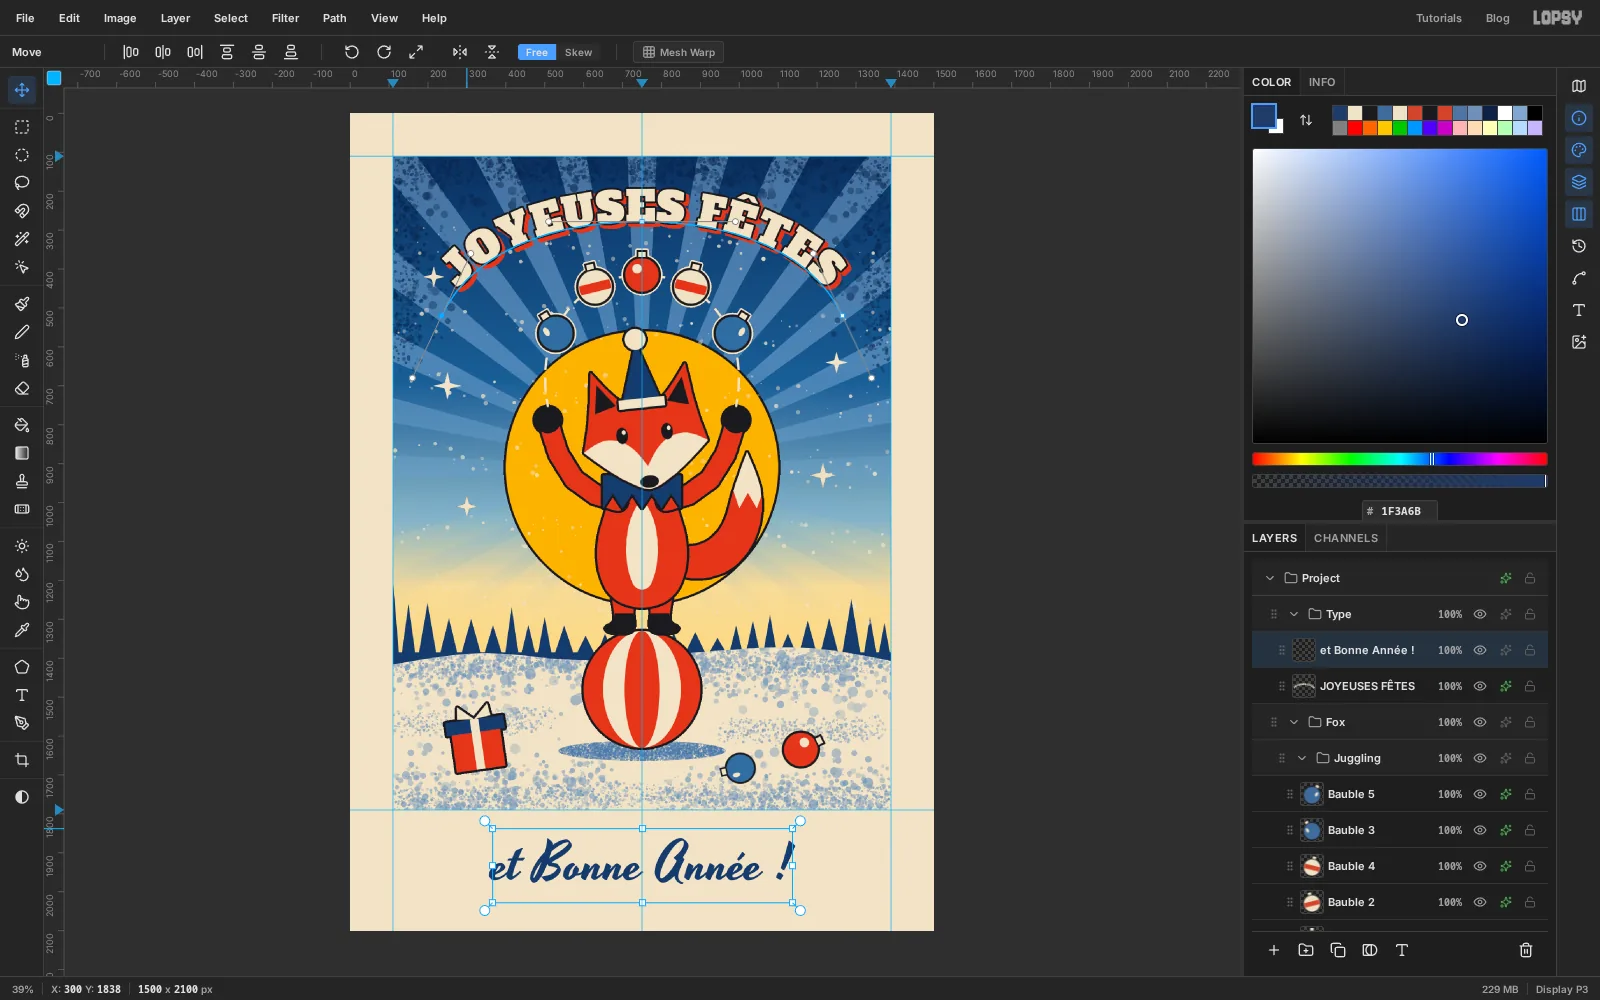
Click the Type group. With the Text tool, set the Align dropdown back to Left, choose Yesteryear, set Size to 136 and the foreground to Prussian blue. Click in the bottom margin at about 300, 1838, type
et Bonne Année !and press Tab.Pick the Move tool and click Align center horizontally in the options bar. Then press Shift+↑ once to lift the line 10 px. It should sit about 60 px below the panel, with room underneath for the small print.
-
Add the printer's line and a plate number
Lithographs carried the printer's name in the margin. Click Type, choose Old Standard TT at Size 30, click at about 300, 2006 and type
LITH. J. FABRE & FILS · LYON. Commit, and centre it with Align center horizontally.Click Type again and add
Pl. XIIat 110, 2006, so its left edge lines up with the panel. Both lines share a baseline about 55 px above the bottom of the card.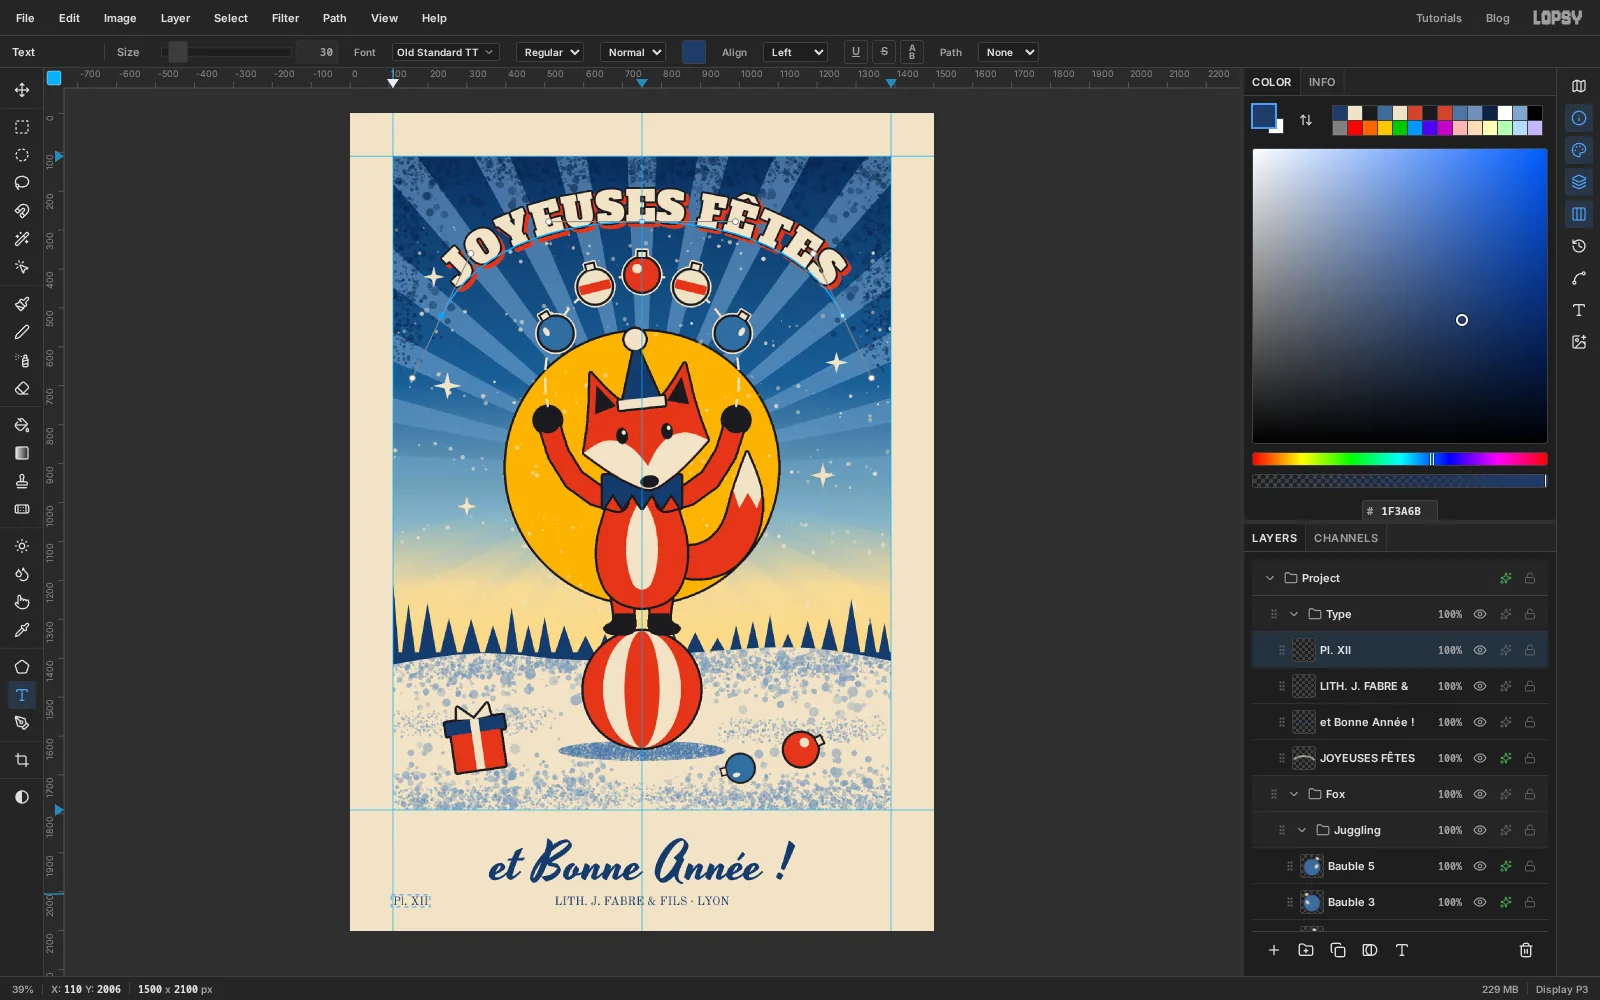
-
Frame the panel
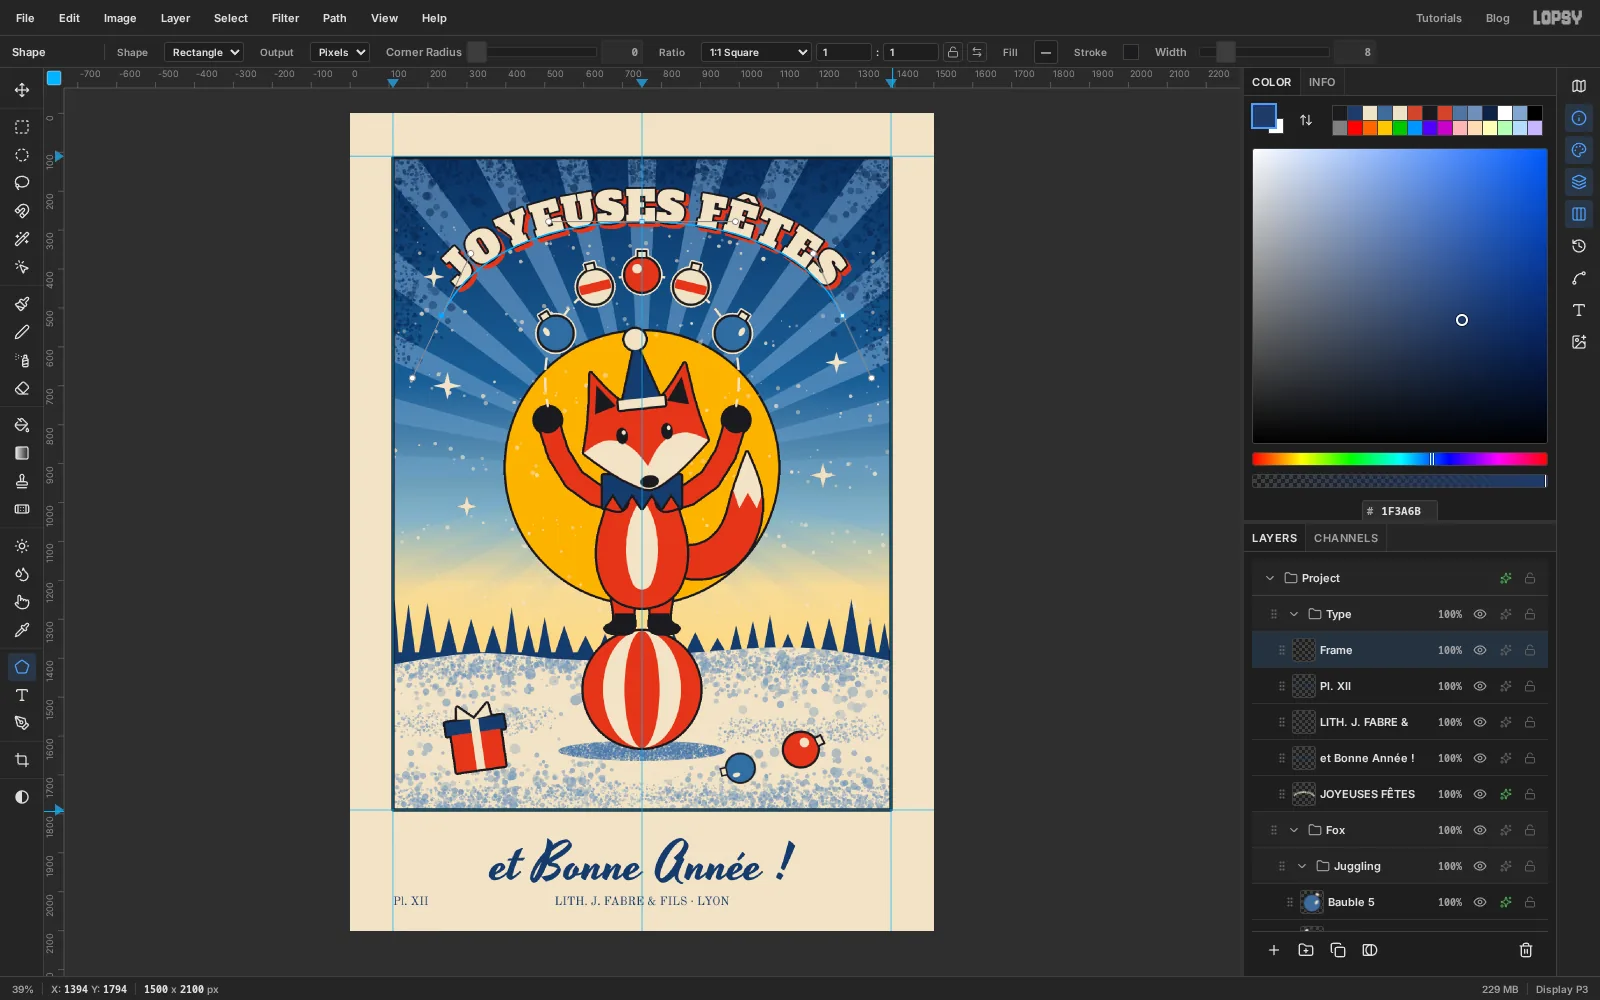
Click Type and add a layer called Frame. Pick the Shape tool and choose Rectangle. Click the Fill swatch and choose Remove fill, keep the black stroke, and set Width to 8.
Press on the centre guide halfway down the panel (750, 950) and drag to the bottom-right corner of the panel. The corner snaps to the guides, and the frame covers the panel's edges.
-
Add registration marks and an ink bar
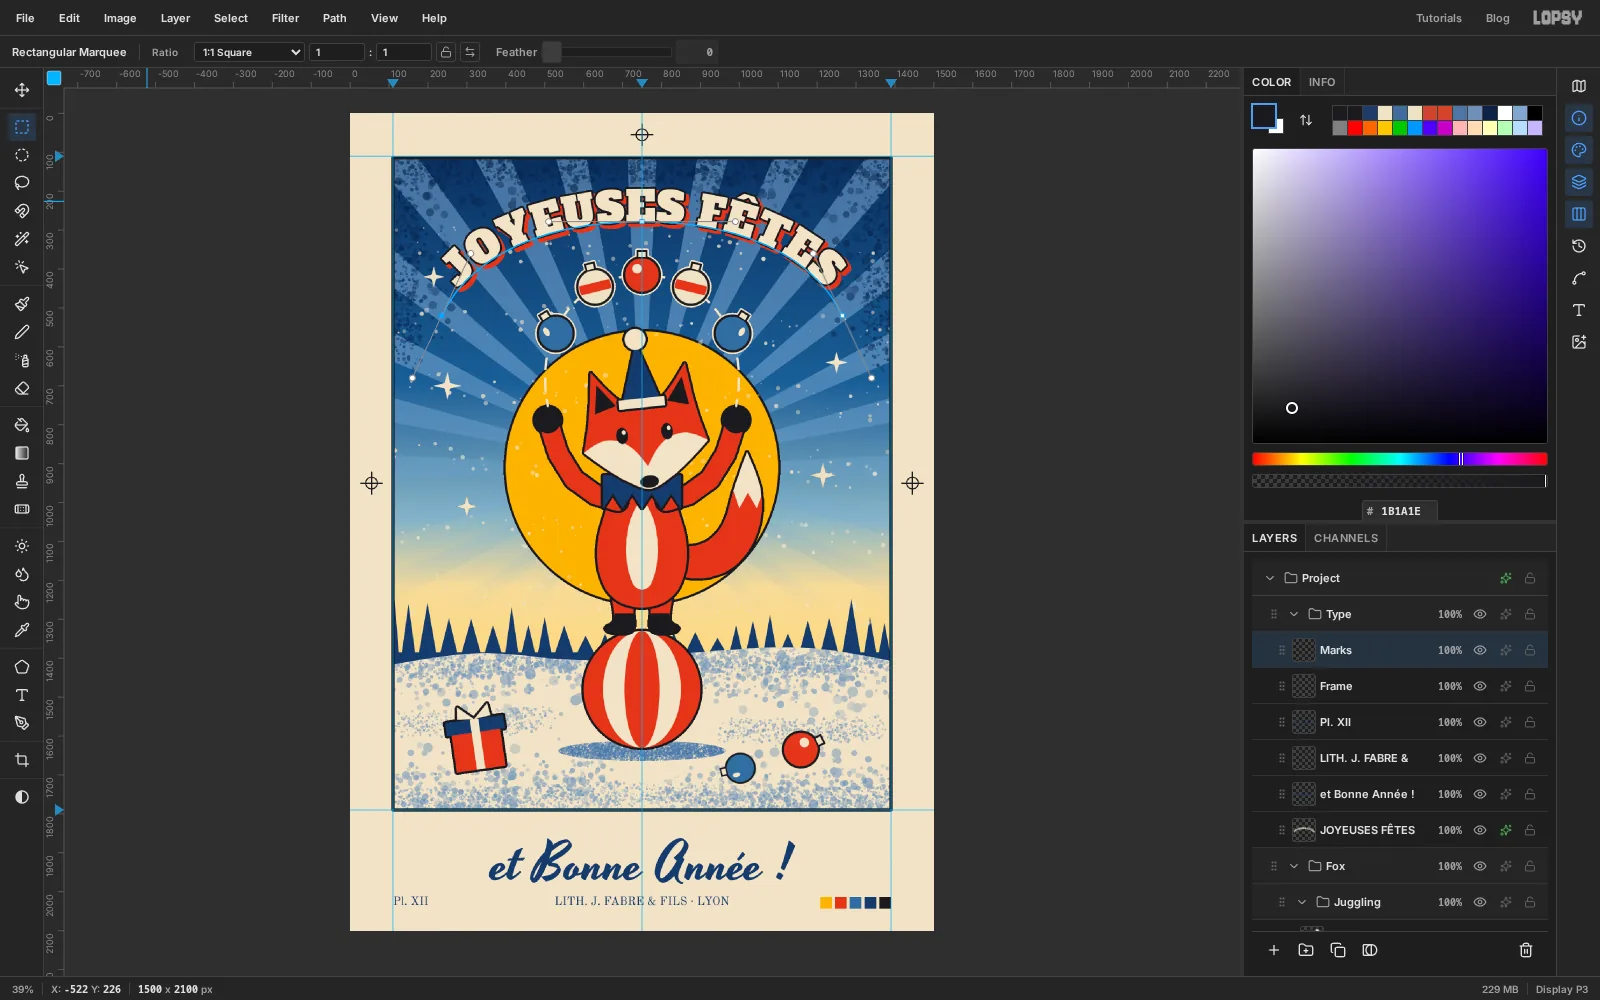
Printers lined up each stone with crosshairs in the margin, and proofed their inks in a row of patches. Add a layer called Marks.
Pick the Pencil, set Size to 3 and the foreground to key black. Click once at 27, 950, then hold Shift and click at 83, 950 for a straight line. Do the same from 55, 922 to 55, 978 to make a cross. Repeat in the right margin around 1445, 950 and in the top margin around 750, 55.
Switch to the Shape tool, choose Ellipse with no fill and a 3 px stroke. Press on the centre of each cross, hold Cmd and drag out about 15 px for a small circle.
Finally, fill five 30 px squares in a row at the bottom right, level with the printer's line. With the Rectangular Marquee's exact dialog, make the first one From 1208, 2014 To 1238, 2044 and move 38 px to the right for each of the others, so the last one ends at the panel's right edge (x 1390). Fill them in chrome yellow, vermilion, mid blue, Prussian blue and key black.
-
Make a sheet of crayon grain
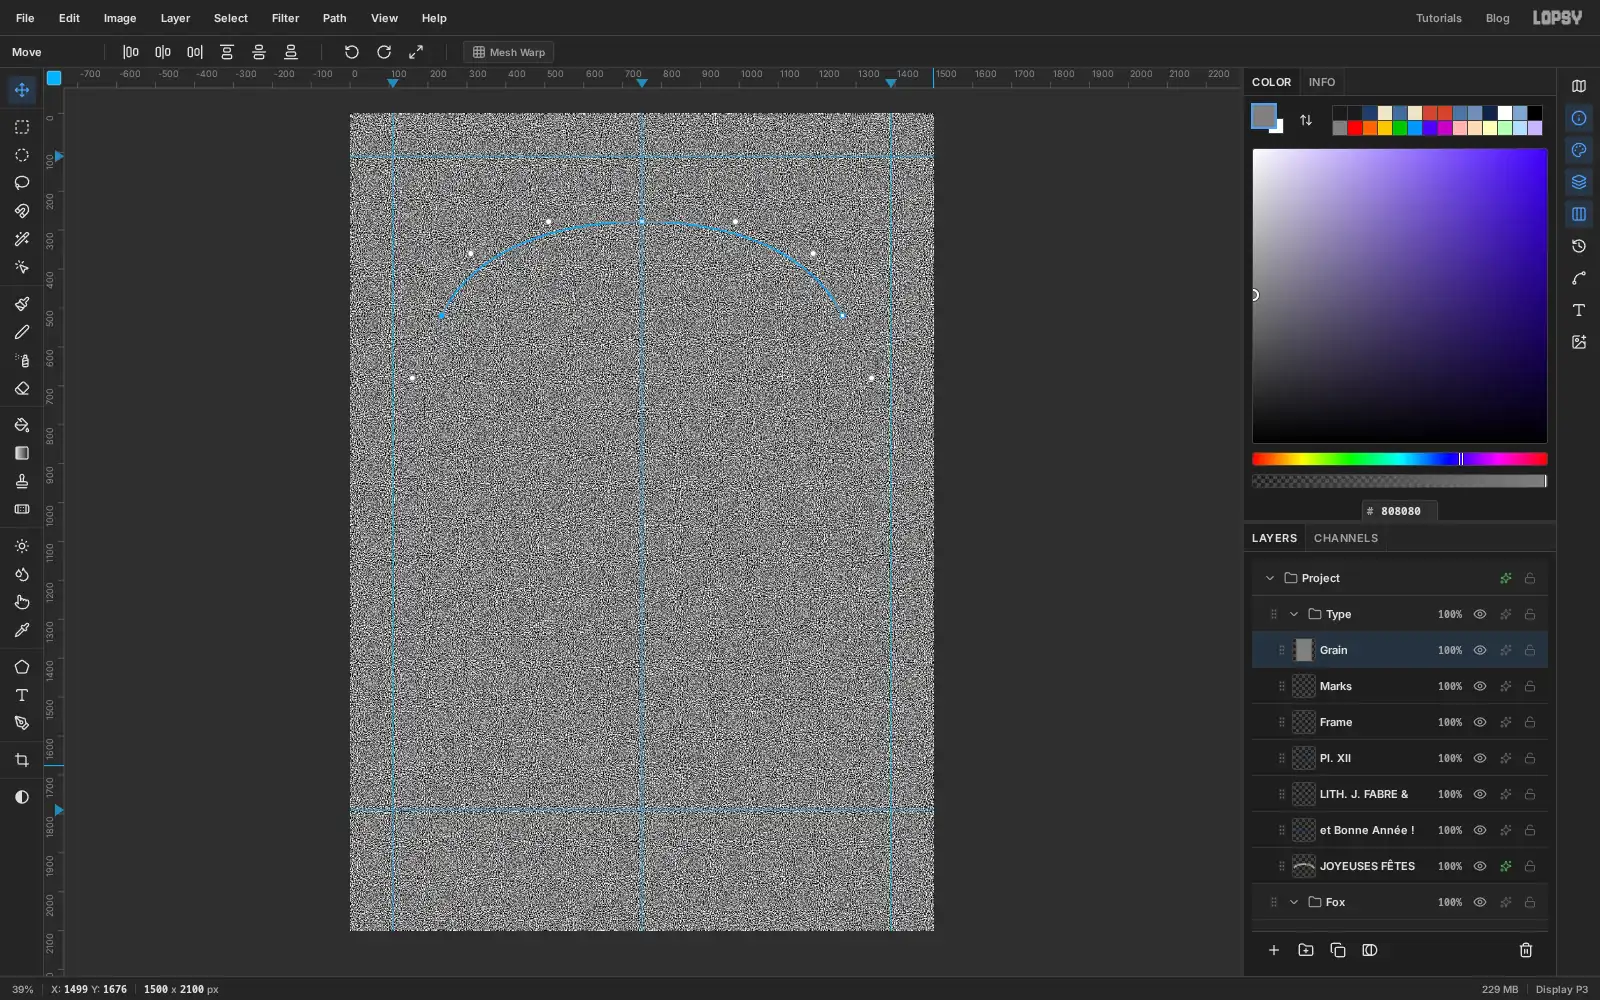
A lithograph stone has a tooth that breaks flat ink into grain. With Marks active, add a layer called Grain, so it sits on top of everything. Set the foreground to mid grey , press Cmd+A, fill and deselect.
Choose Filter → Texture…. Pick Grain, Light & Dark and Mono, then set Amount to 100, Size to 2.5, Detail to 70 and Contrast to 55. Click Apply.
-
Blend the grain into the inks
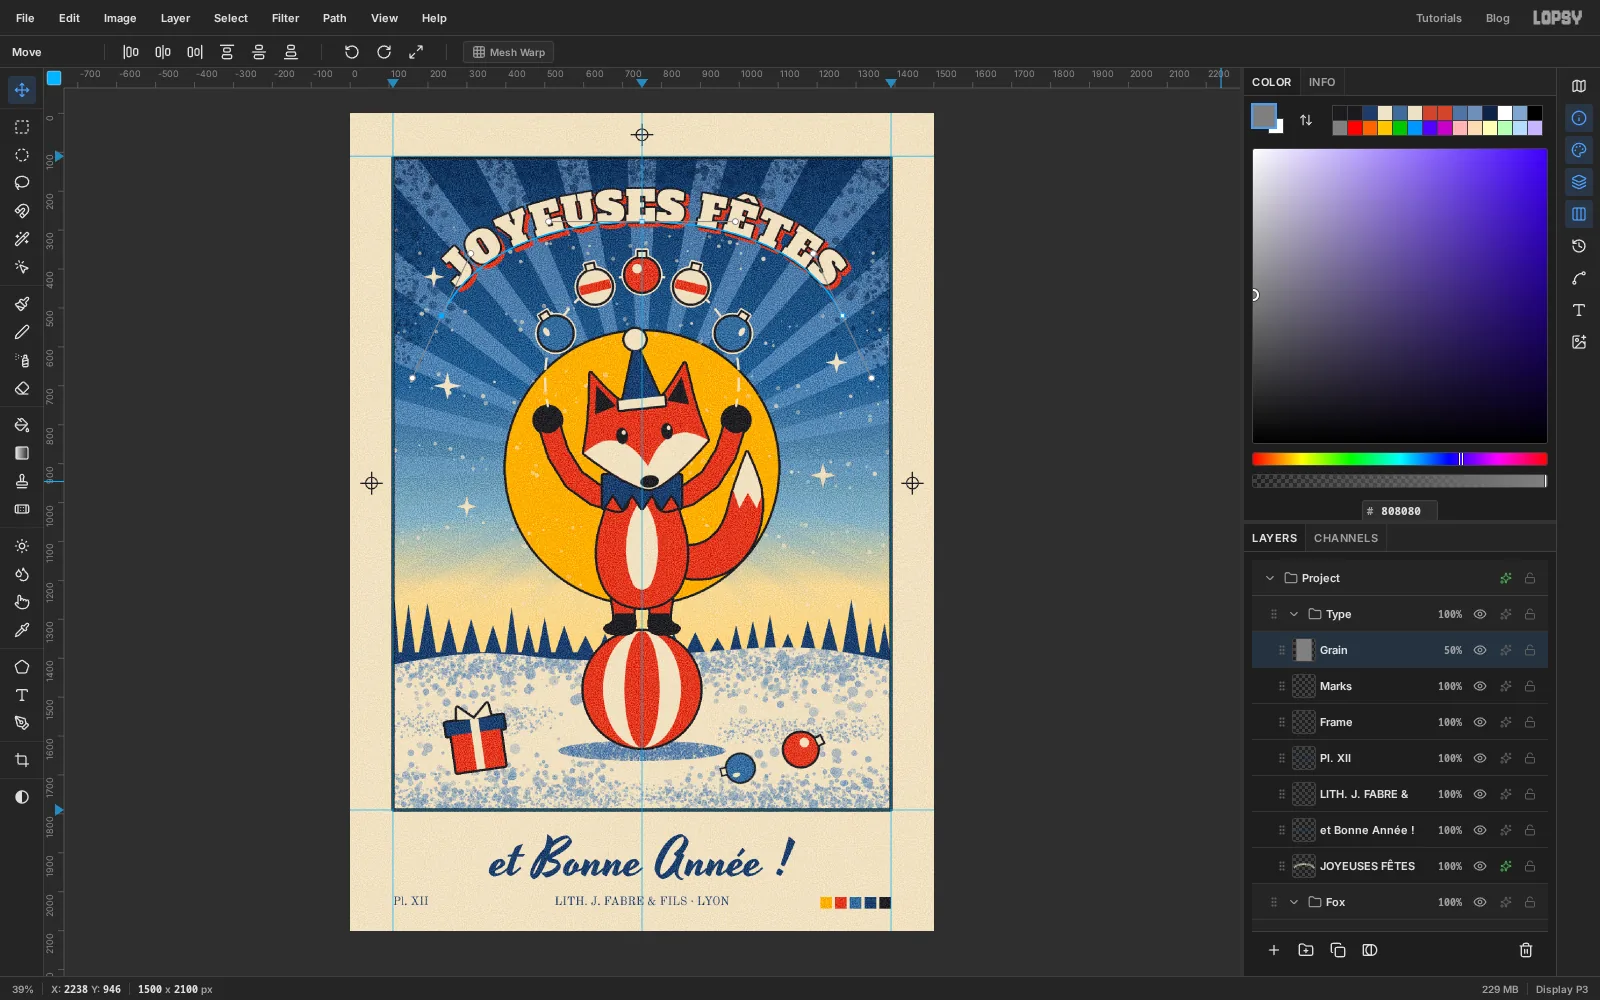
Open the Grain layer's effects drawer and set Blend to Soft Light, then lower the layer's opacity to 50%. Soft Light leaves mid grey alone and lets the light and dark specks nudge the colours underneath. The flat inks pick up a crayon tooth, the paper gets a faint texture, and the black key line stays almost solid, as it would in print.
-
Settle the inks
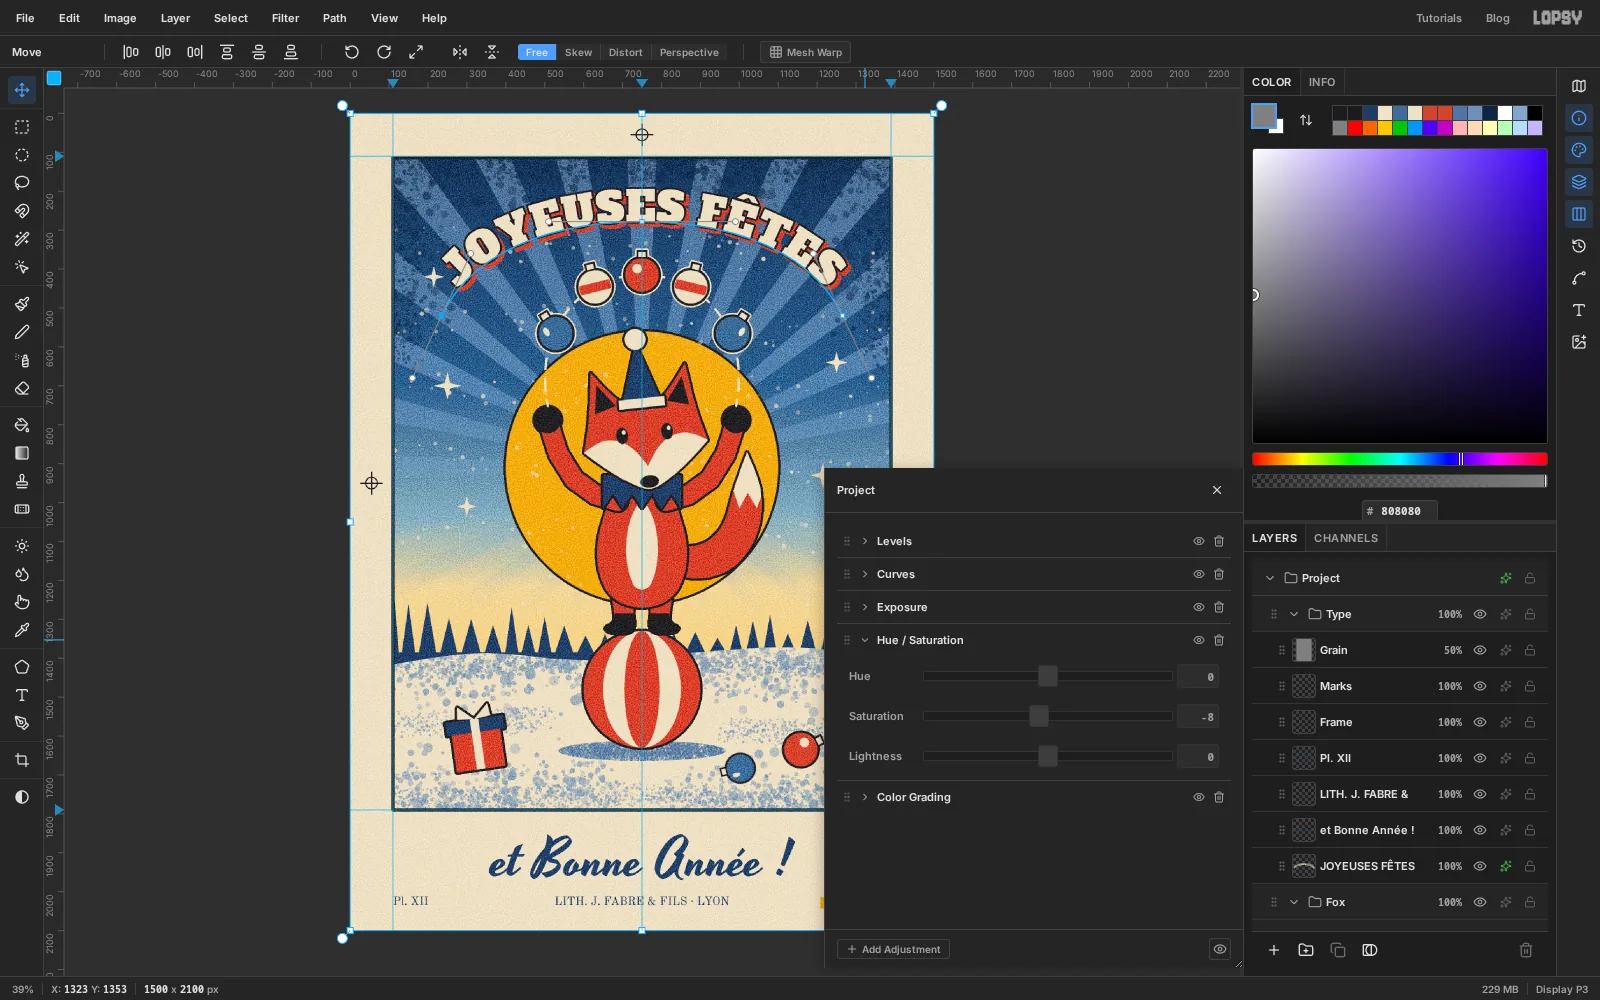
Choose Layer → Adjustment Layer… and click Got it. New documents come with five adjustments on the Project group. Expand Hue / Saturation and set Saturation to −8, which takes the screen brightness off the colours. Close the drawer and click any layer, so the whole document is no longer the active selection.
-
Save and export
Choose File → Save Project to keep the layers, then File → Quick Export PNG for the finished card.
To take it further, change the greeting for another language, swap the baubles for stars or oranges, or duplicate the Fox group and scale the copy down for a second performer.