Make a Colour-Lithograph Holiday Card with Oranges
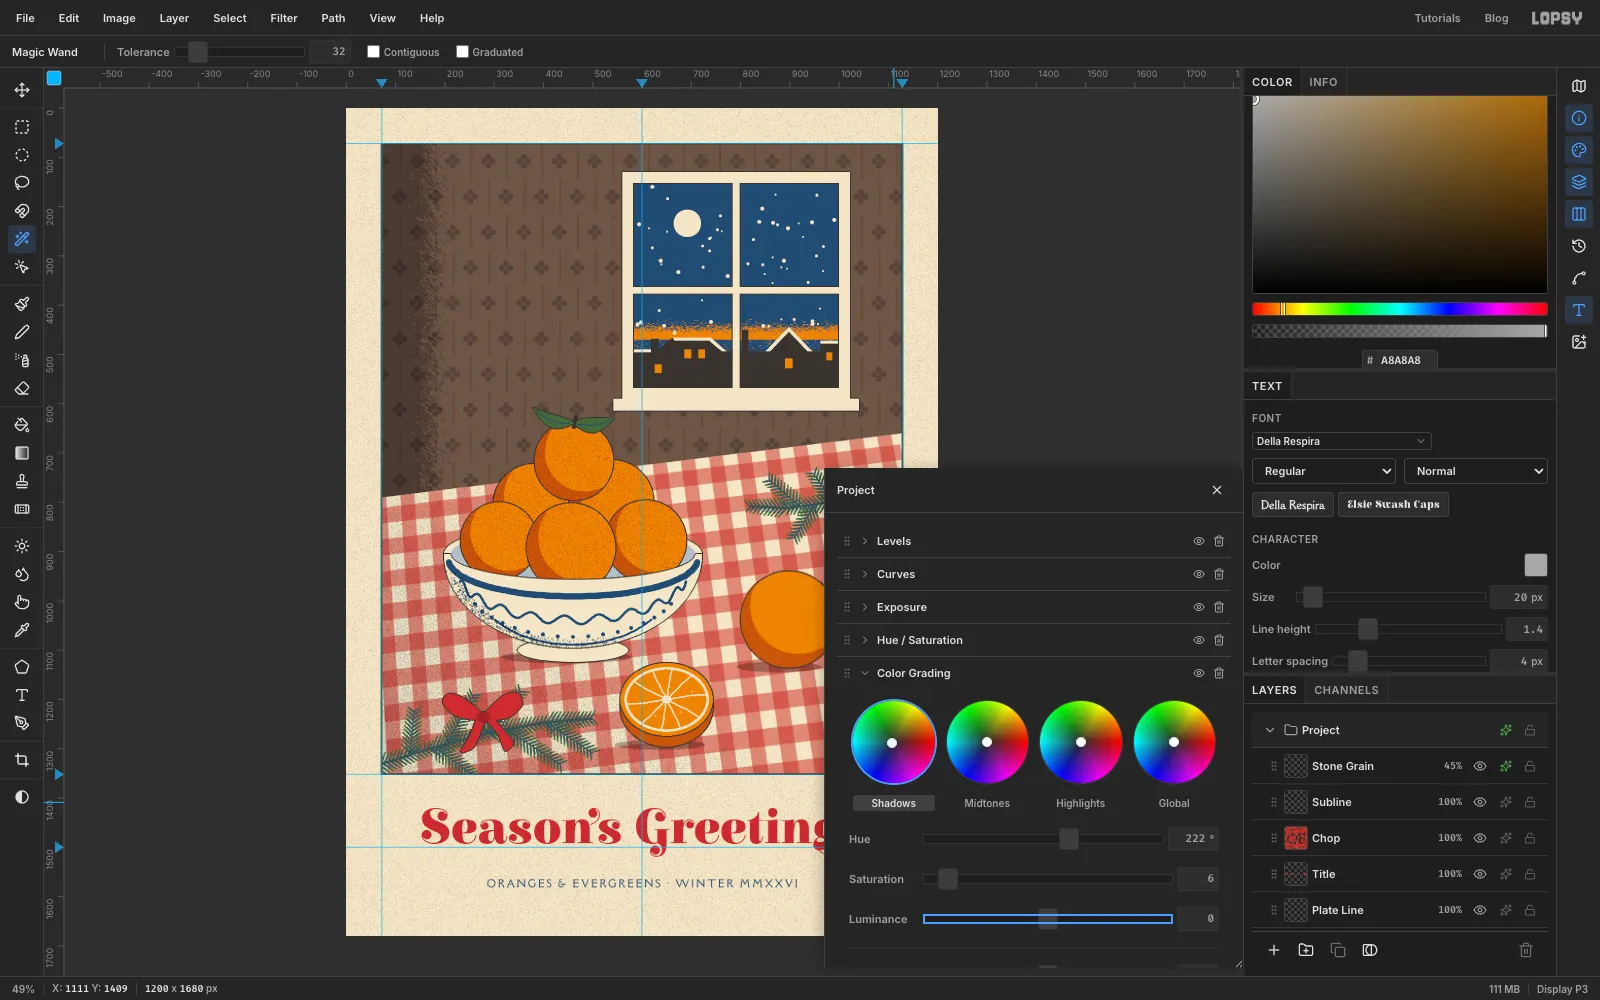
Make an 1890s colour-lithograph holiday card in Lopsy: a bowl of oranges, gingham, fir boughs and crayon grain, printed in a handful of flat inks.
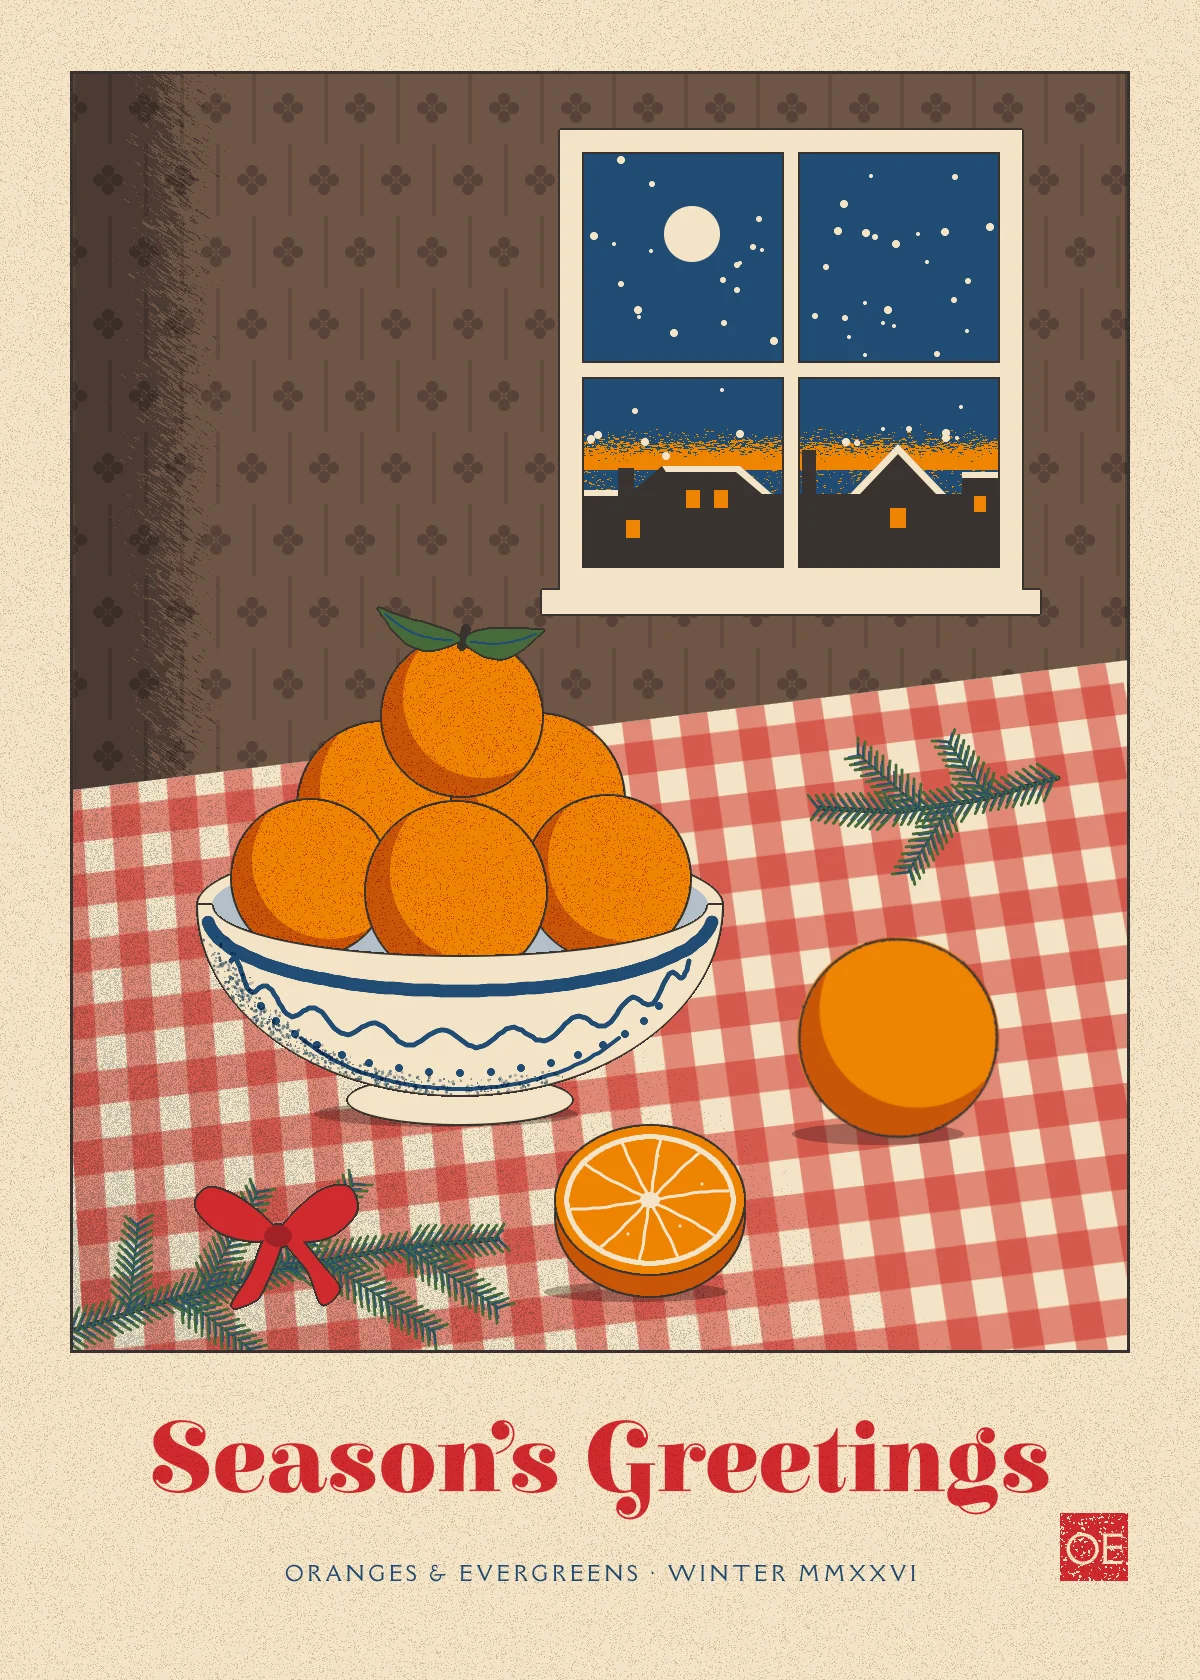
In the 1890s, Paris print shops turned out colour lithographs by Bonnard, Vuillard and Toulouse-Lautrec. Each colour was drawn on its own limestone, with a greasy crayon or brush, and the stones were printed one after another onto the same sheet. That process gives the style its look:
- big, flat areas of colour, with a few inks reused everywhere
- shading drawn in crayon, so it shows up as grain rather than a smooth gradient
- tilted, Japanese-print tables and busy patterned wallpaper
- a thin dark "key" line that holds the shapes together
- a printed caption under the picture and a small red chop, the printer's stamp
This card uses all of that. A bowl of oranges sits on a gingham cloth in front of a snowy window. A fir bough with a red bow lies at the front, and Season's Greetings is printed underneath. The card is 1200 × 1680 px, a 5 × 7 inch shape. Everything is drawn in Lopsy, so you don't need any photos.
The tools you'll use:
- the Rectangular and Elliptical Marquee (with their exact-size dialogs, and Shift / Alt to add and subtract), the Lasso, the Magic Wand and the Pen for straight-edged shapes
- Select → Shrink / Inverse, and Cmd-click on a layer thumbnail to load its shape
- Edit → Define Pattern and Edit → Fill with Pattern…
- the Gradient, Brush, Spray and Pencil tools, the Brush's Radial Symmetry, and Path to Selection
- Add Noise, Motion Blur, Gaussian Blur and Threshold, which together make the crayon grain
- the Move tool's Perspective mode, scale and rotate handles, plus copy and paste
- layer effects (Stroke and Color Overlay), the Multiply blend mode, groups, and the document's Hue / Saturation and Color Grading adjustments
- live text in two Google fonts: Elsie Swash Caps and Della Respira
The palette is five inks on cream paper, plus a few tints of them:
-
Paper
-
Red
-
knot red
-
Orange
-
shadow orange
-
Olive
-
Prussian blue
-
bowl tint
-
Key
-
Wall
-
motif
-
stripe
-
Grain
Two things you'll repeat a lot:
- Exact marquees. Pick the Rectangular or Elliptical Marquee and click once on the canvas without dragging (with nothing selected). A dialog asks for From and To corners. Type them and press Enter. For an ellipse, the corners are its bounding box. When a step adds or subtracts a second shape with Shift or Alt, drag it by hand. The dialog only opens with nothing selected, so the numbers given for those drags are approximate. The Info panel shows the pointer position while you drag.
- Straight-edged shapes. The Lasso is freehand, so for shapes with long straight sides use the Pen (P). Click each corner, click the first point again to close the shape, then click Path to Selection in the Paths panel. Delete the path afterwards.
- Blend mode and opacity. The sparkle button on a layer's row opens its effects drawer. The Blend dropdown at the top of the drawer sets the layer's blend mode. Click the percentage on the layer's row to set its opacity.
- Crayon grain. Fill a grey (or a grey gradient), run Filter → Add Noise… at Amount 100 with Mono on, then Filter → Threshold… at 128. Dark greys become dense black specks and light greys sparse ones. Then pick the Magic Wand, untick Contiguous, click any white speck, press Delete and deselect. Only the black grain is left, ready to be recoloured with a Color Overlay effect.
-
Set up the card and the wall
Choose File → New, keep the units on Pixels, and make the document 1200 wide and 1680 high.
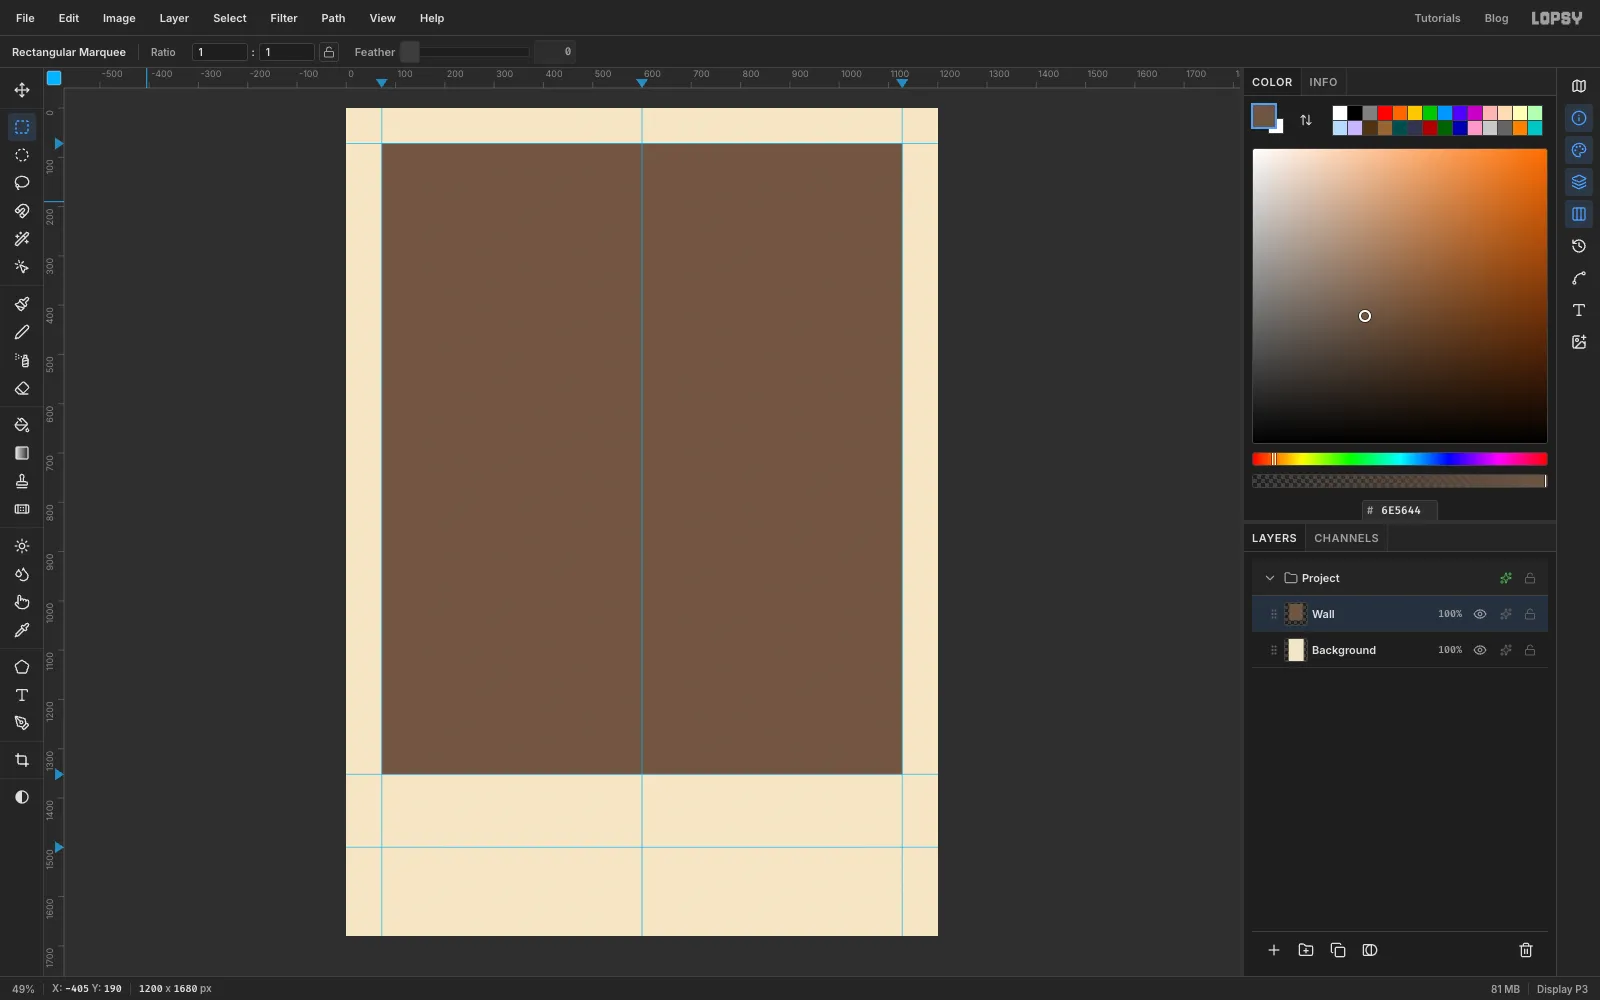
Click the top ruler to drop vertical guides at 72, 600 and 1128. Click the left ruler for horizontal guides at 72, 1352 and 1500. The outer guides mark the image area, which printmakers call the plate. The caption goes below it, around the guide at y 1500. Then open the View menu and turn off Snap to Guides, so marquees drawn near a guide don't jump onto it.
Click Background, set the foreground to paper and choose Edit → Fill. Click Layer 1 and double-click its name to rename it Wall. With the Rectangular Marquee's exact dialog, select from 72, 72 to 1128, 1352. Fill it with wall and press Cmd+D.
-
Draw a wallpaper tile
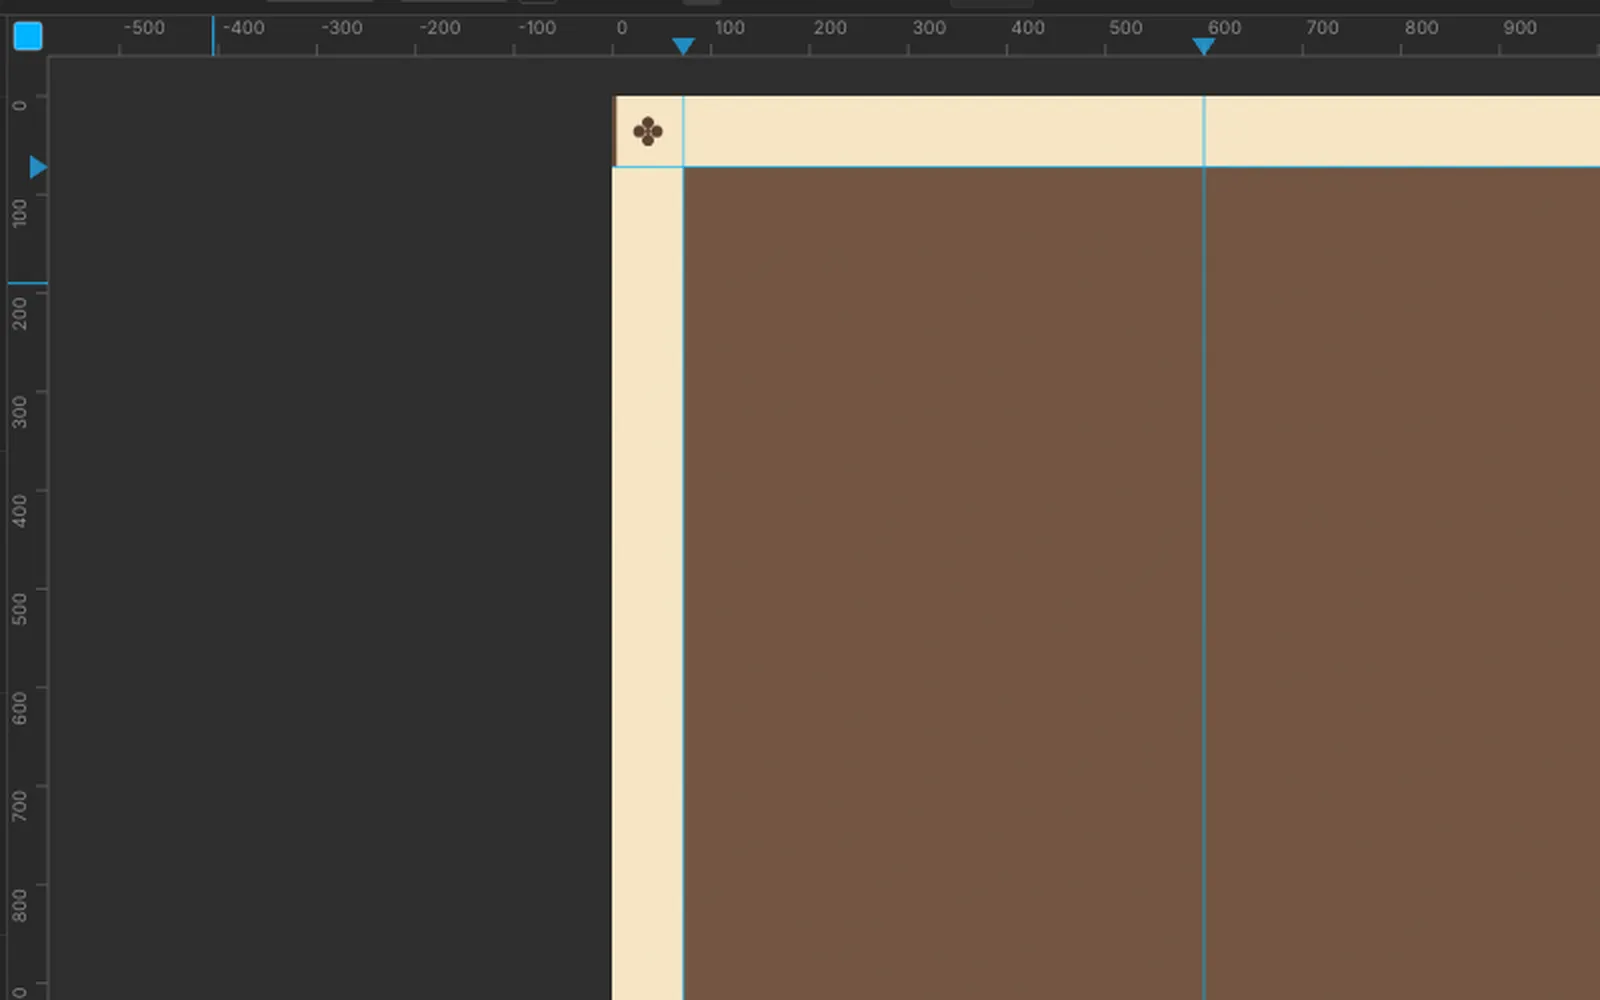
Wallpaper is a small tile repeated, so draw one tile in the empty top-left corner. Click Add Layer and name the layer Tile.
- Select from 0, 0 to 4, 72 and fill it with stripe .
- With the Elliptical Marquee, draw four 12 px circles around the point 36, 36, filling each one with motif before you draw the next: 30, 21 to 42, 33; 39, 30 to 51, 42; 30, 39 to 42, 51; and 21, 30 to 33, 42.
- Put a 6 px dot in the middle (33, 33 to 39, 39) in stripe .
Deselect when you're done.
-
Paper the wall with the pattern
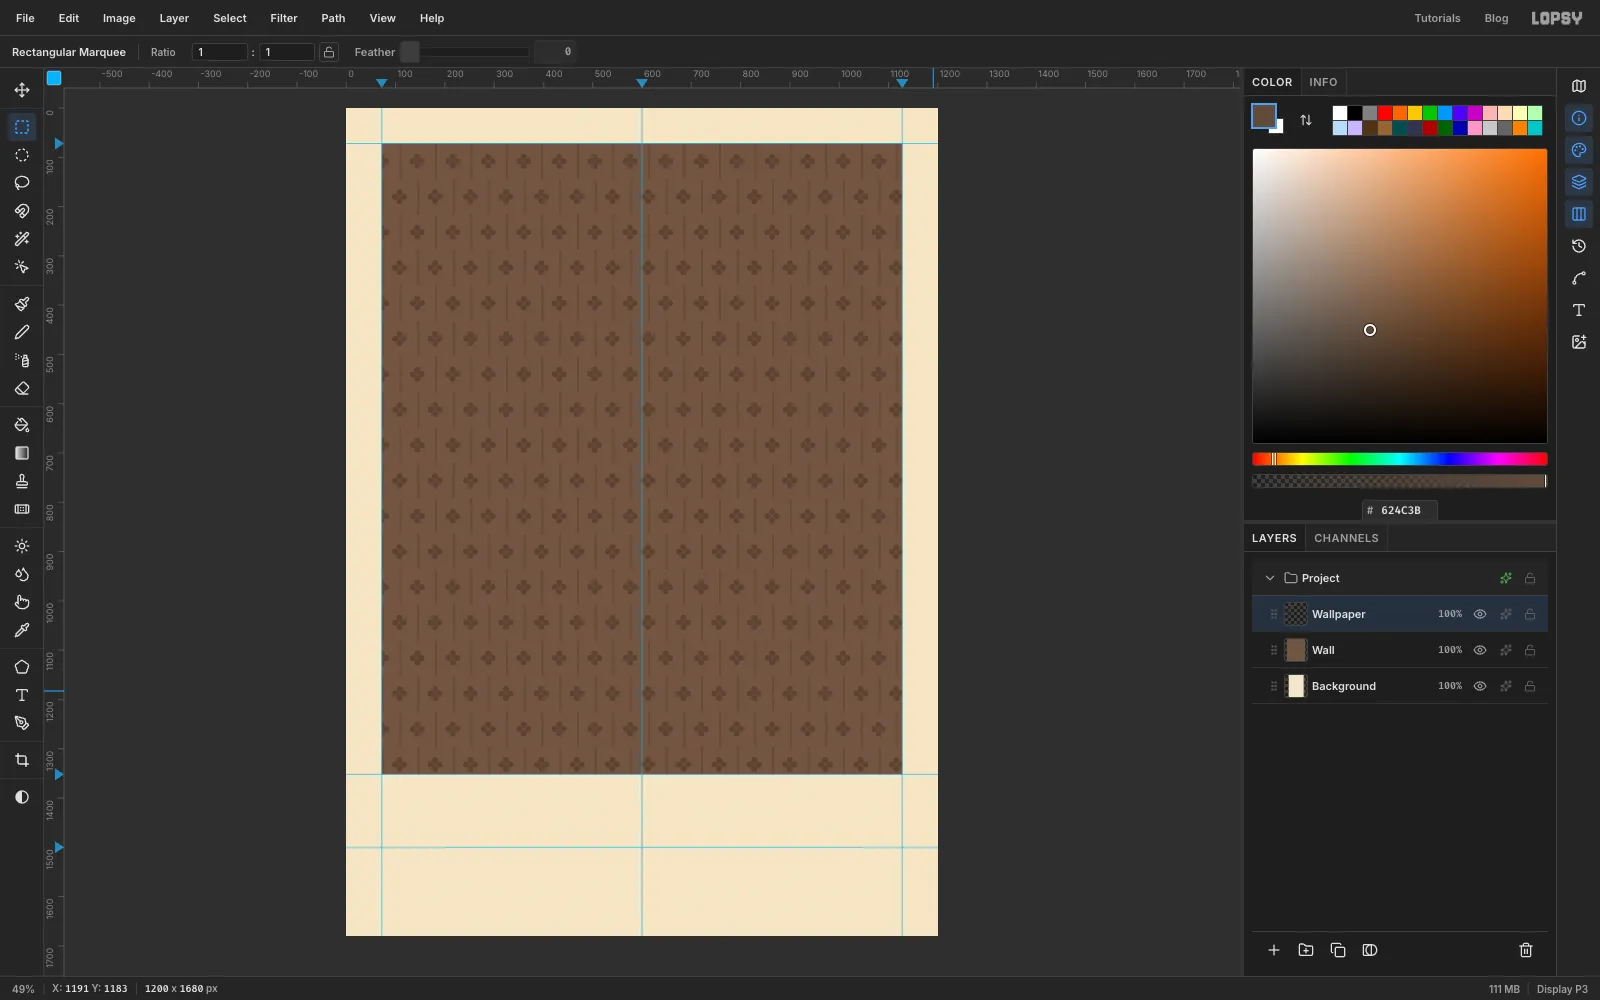
Select the tile, 0, 0 to 72, 72, and choose Edit → Define Pattern. Deselect, then delete the Tile layer with the bin button.
Click Wall and add a layer called Wallpaper. Select the plate again (72, 72 to 1128, 1352) and choose Edit → Fill with Pattern…. Click your tile, set Row Stagger to 50%, which shifts every other row half a tile sideways like real wallpaper, and click Apply. Deselect.
-
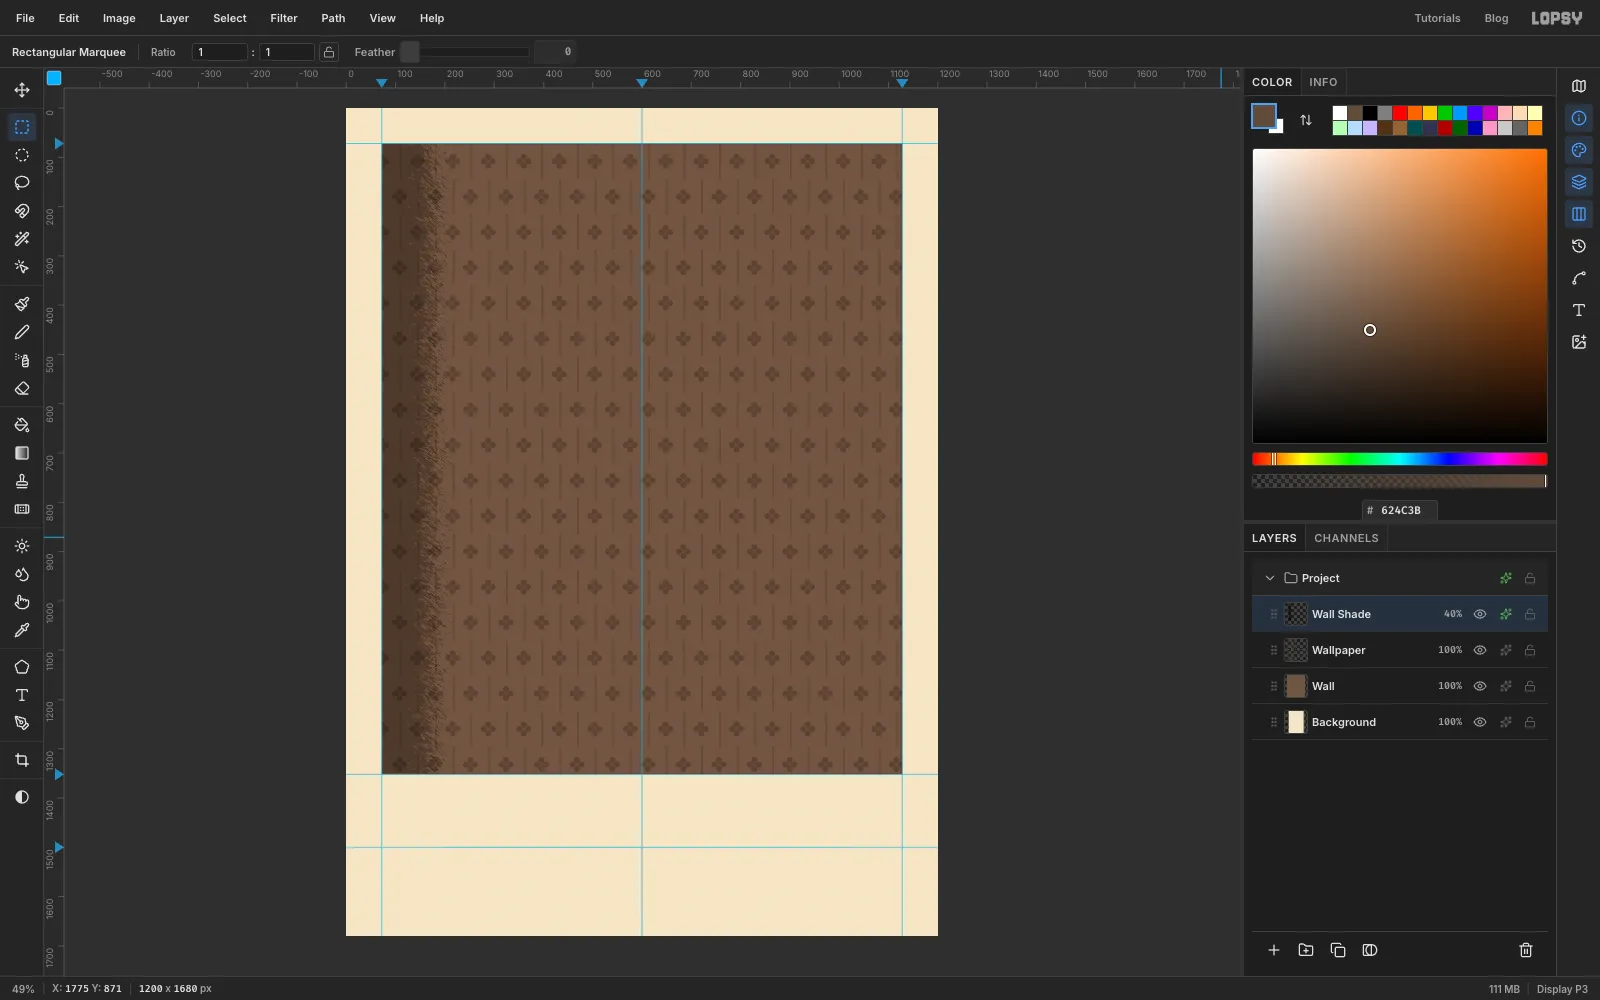
Shade the wall with crayon grain
The left of the wall is furthest from the window, so darken it the way a lithographer would, with crayon.
- Add a layer called Wall Shade and select the plate.
- Pick the Gradient tool, set it to Linear, and in Advanced… make the left stop and the right stop . Drag from the left edge of the plate across to about x 360, then deselect.
- Run Add Noise… (Amount 100, Mono). Then run Filter → Motion Blur… at Angle 35 and Distance 10, so the specks become slanted crayon strokes. Then run Threshold… at 128.
- Wand away the white as described above.
- The blur smeared a few strokes past the plate, so select the plate, choose Select → Inverse, press Delete and deselect.
Open the layer's effects drawer and add a Color Overlay in key . Set the layer's Blend to Multiply, close the drawer, and set the layer's opacity to 40%.
To tidy up, click Wall Shade, Shift-click Wall, choose Layer → Group Layers, name the group Room, and collapse it with its arrow. With a collapsed group selected, new layers land above the group rather than inside it.
-
Paint the night sky and the dusk glow
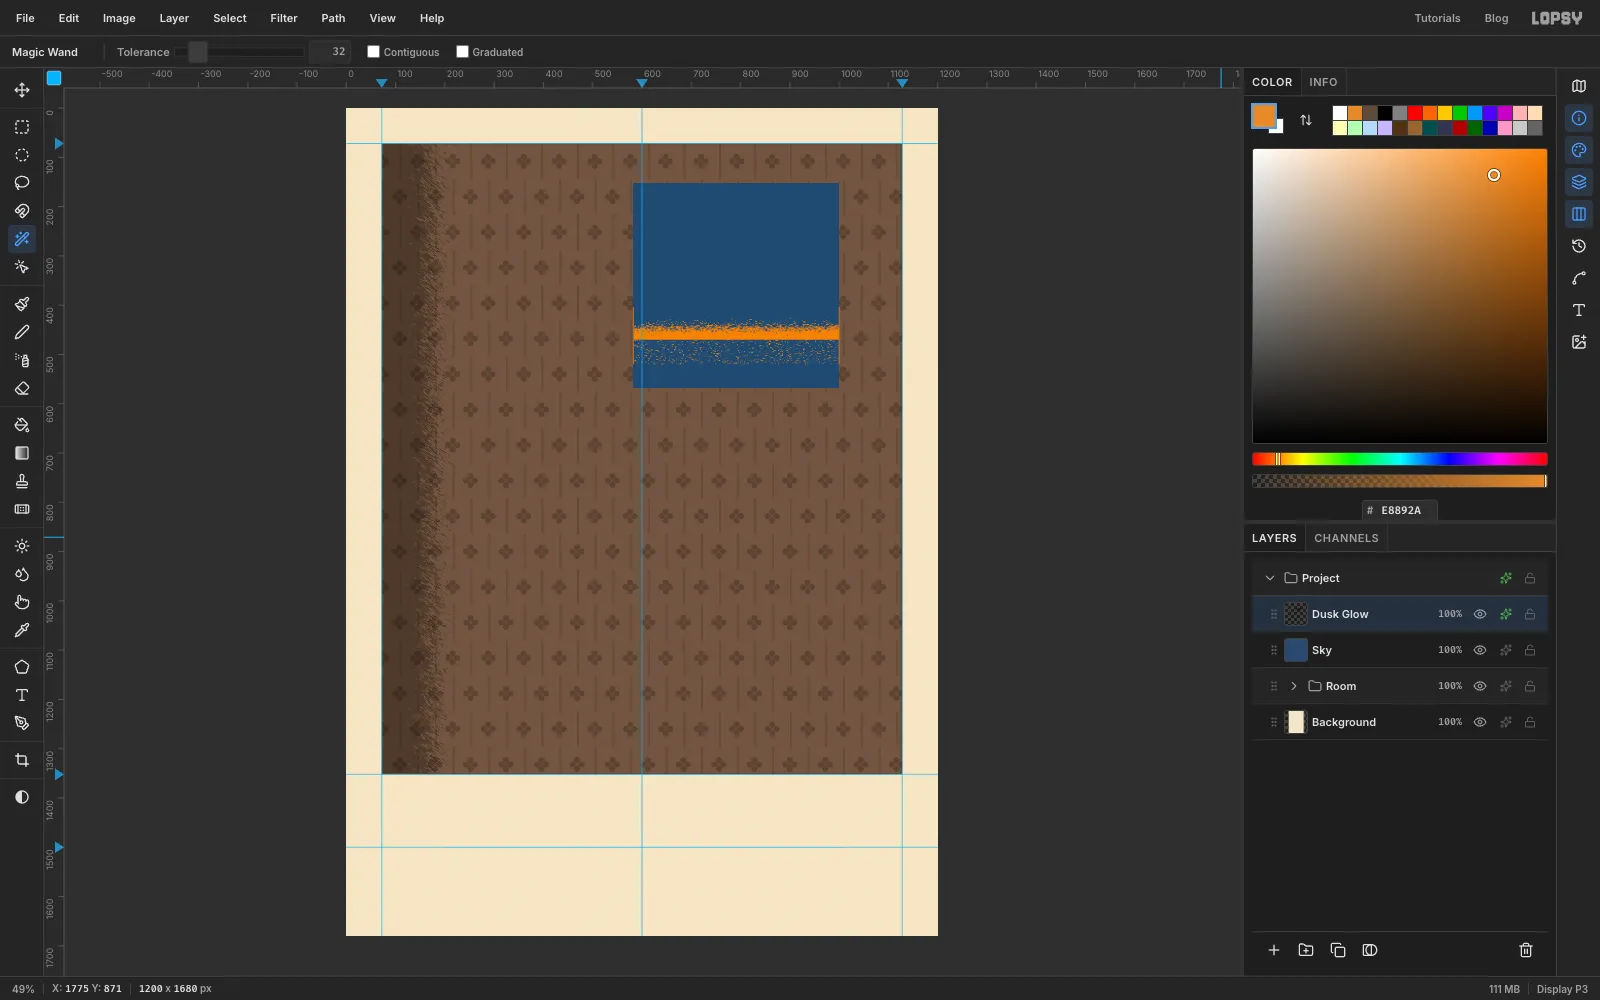
With Room selected, add a layer called Sky. Select from 582, 152 to 1000, 568 and fill it with Prussian blue .
Add a layer called Dusk Glow. Select a strip from 582, 470 to 1000, 520 and fill it with orange , the last light along the horizon.
Now select the strip just above it, from 582, 404 to 1000, 470. Drag a linear gradient with the dark stop () at the bottom of that strip and the light stop () at its top, and deselect. Make crayon grain from the whole layer, as in the last step, but use Motion Blur at Angle 0 and Distance 4 for short horizontal strokes. Then add a Color Overlay in orange .
The grain does two things. The gradient turns into a solid orange stripe that frays upwards into the blue. The orange strip below it is lighter than the threshold, so it breaks up into loose speckle that sinks behind the roofs.
-
Add the moon and the rooftops
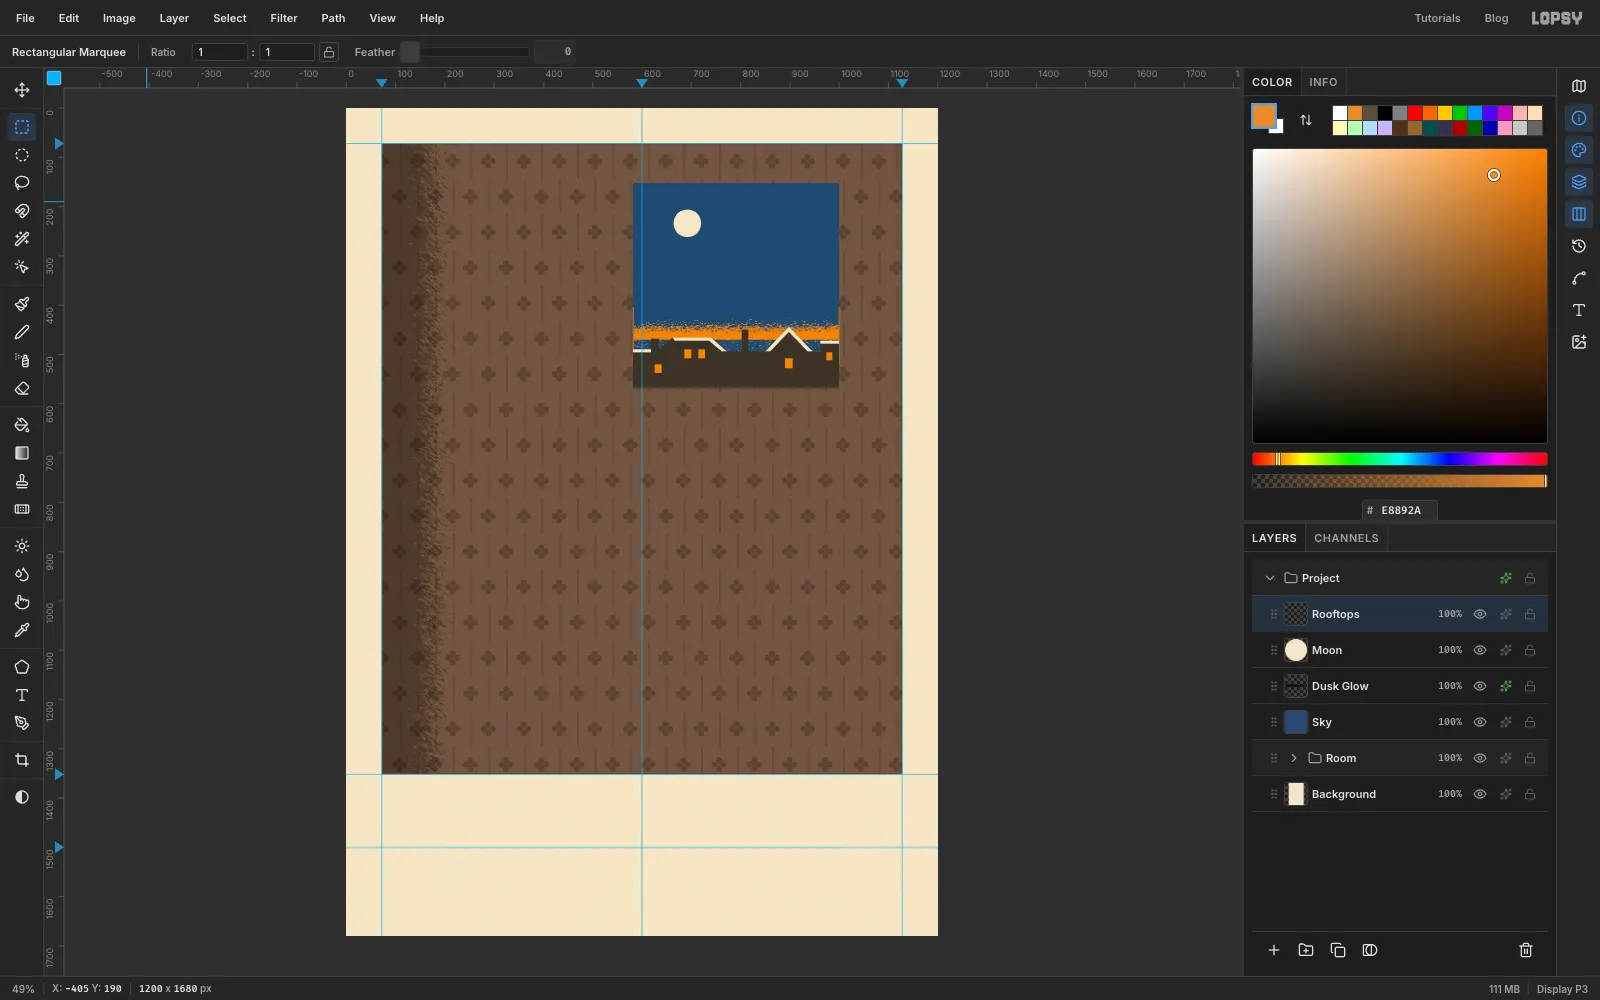
Add a layer called Moon. Select a circle from 664, 206 to 720, 262 and fill it with paper .
Add a layer called Rooftops. With the Pen, click out a town skyline across the bottom of the sky. Include a low roof and a chimney on the left, a long sloping roof, a tall chimney stack in the middle, and a steep gable on the right. Close the shape along the bottom of the sky, turn it into a selection, and fill it with key .
Make thin slivers along the tops of the sloping roofs the same way and fill them with paper for snow. Then draw five small rectangles (about 14 × 18 px) on the houses and fill them with orange for lit windows. The silhouette covers the bottom of the orange band, so the glow only shows between the roofs.
-
Dab in the falling snow
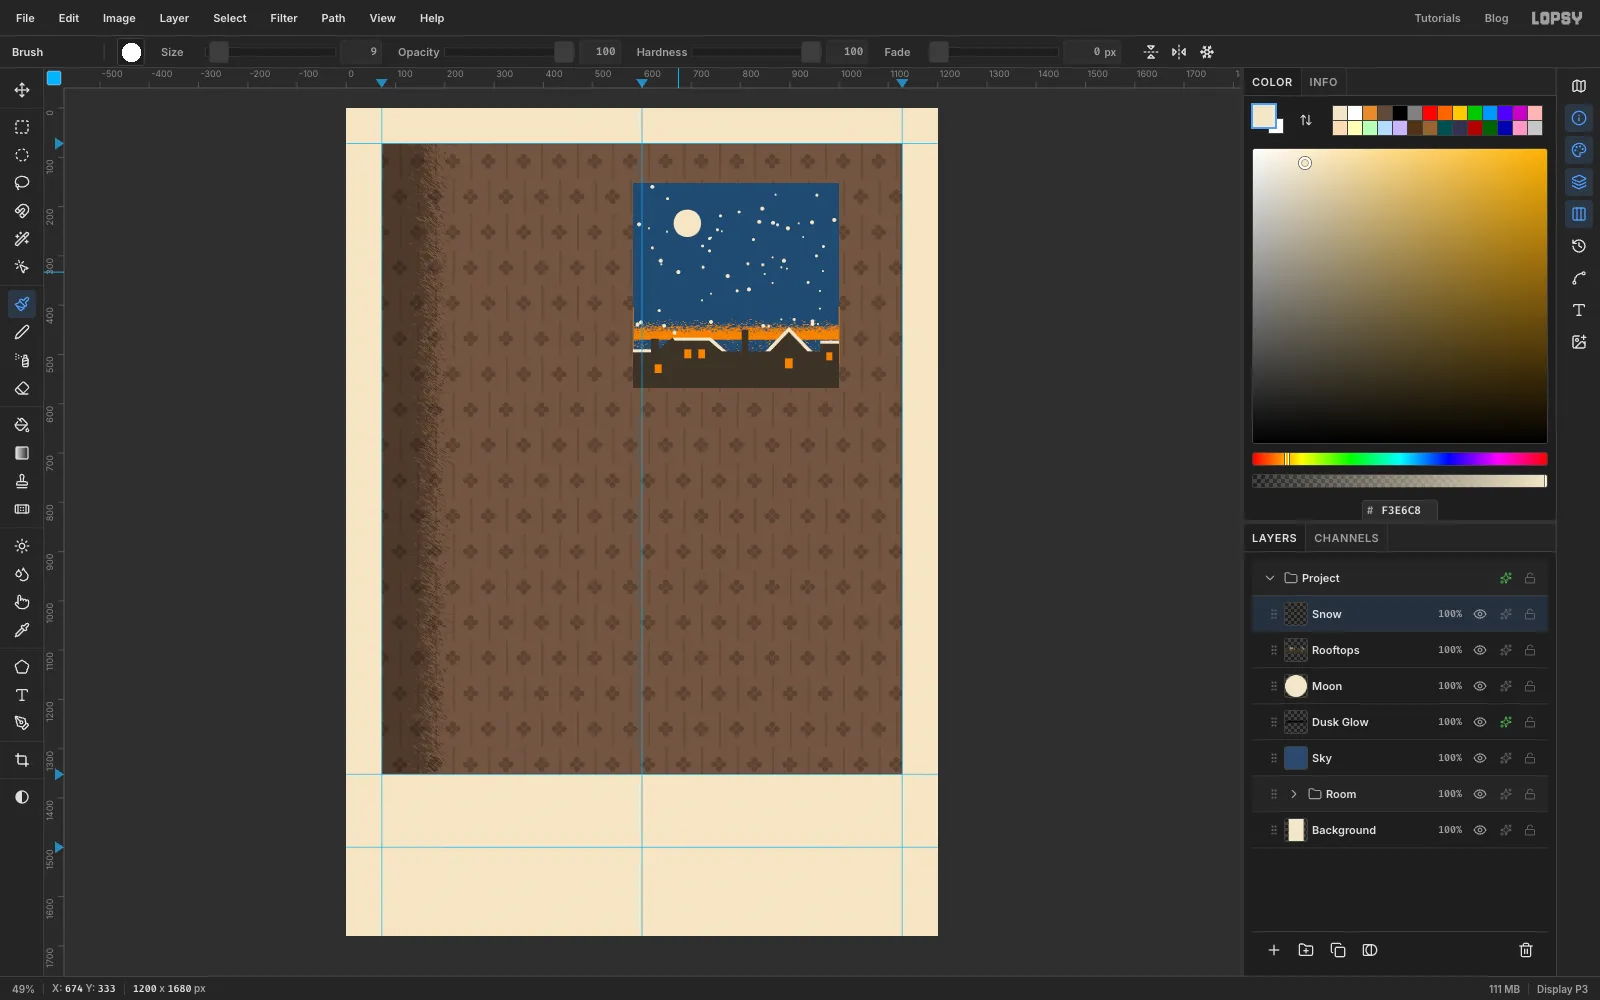
Add a layer called Snow and select the sky rectangle again (582, 152 to 1000, 568), so stray dabs can't land on the wall.
Pick the Brush with Hardness 100 and set the foreground to paper . Click about twenty single dots across the upper sky at Size 5, twenty more at Size 7, and twenty at Size 9. Scatter them unevenly and keep most of them above the roofs. Deselect.
-
Cut the window frame and its panes
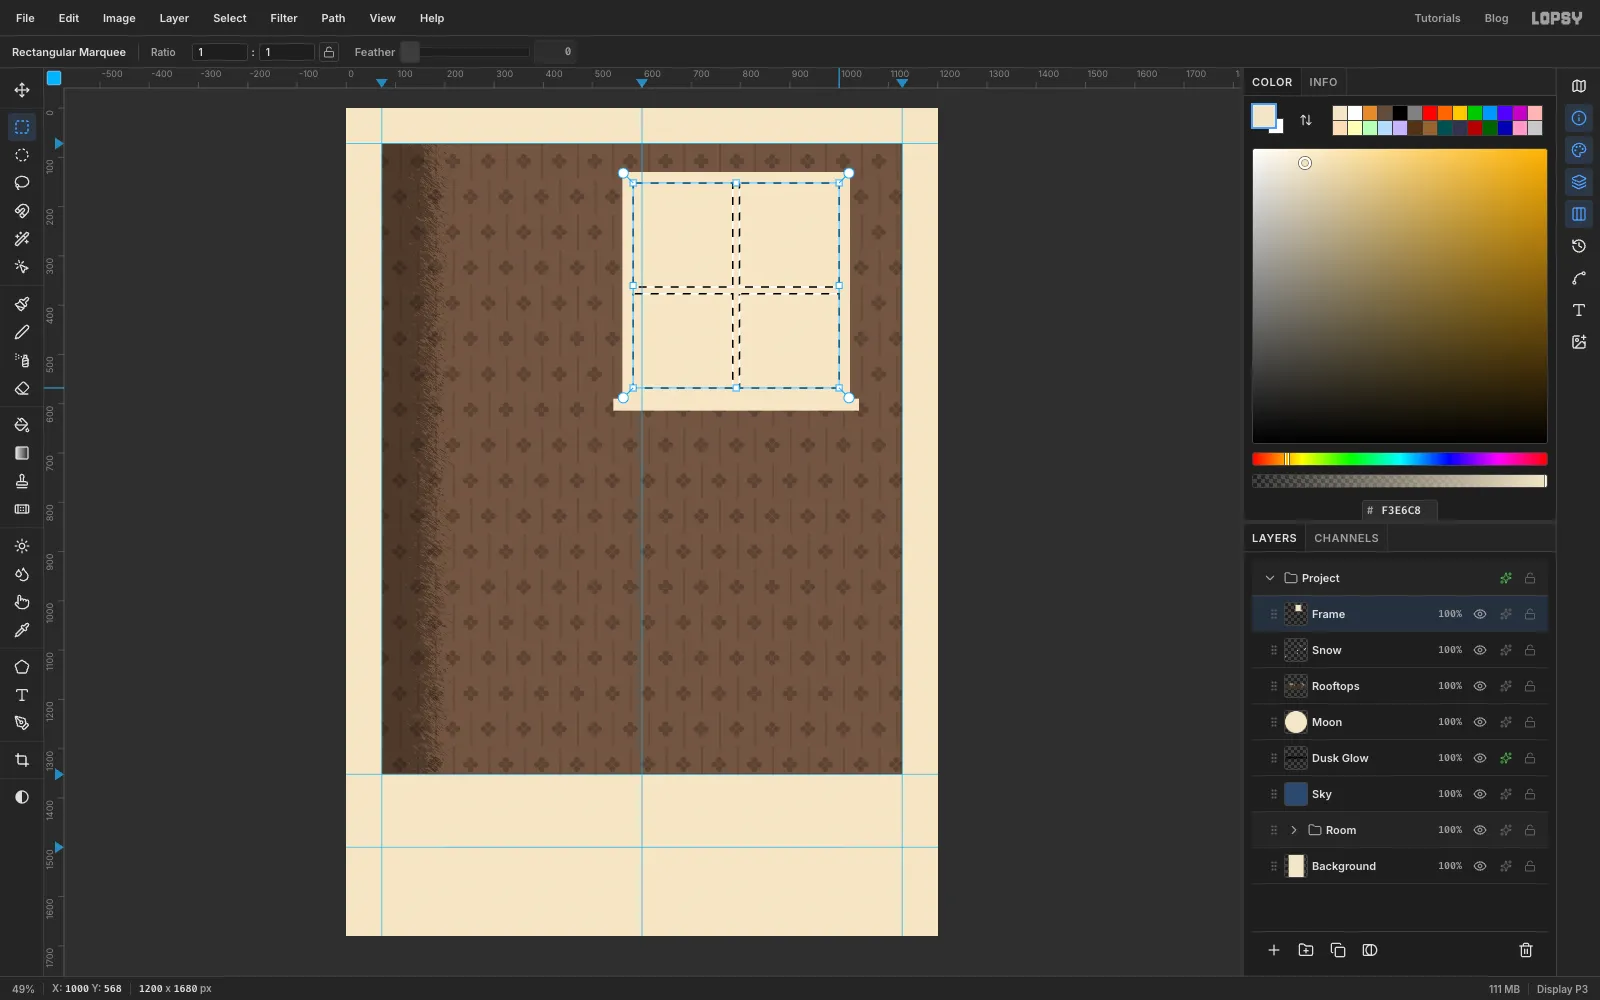
Add a layer called Frame. Select 560, 130 to 1022, 590. Then hold Shift and drag a second rectangle for the sill, about 18 px wider on each side and 24 px tall, from about 542, 590 to 1040, 614. Fill with paper and deselect.
Now cut out the glass. Select the top-left pane (582, 152 to 784, 363). Shift-drag over the other three panes to add them, leaving 14 px bars between them:
- 798, 152 to 1000, 363
- 582, 377 to 784, 568
- 798, 377 to 1000, 568
Press Delete and deselect. That leaves a 14 px cross of glazing bars.
Add a Stroke effect to Frame: Width 2 in key . Click Frame, Shift-click Sky, choose Layer → Group Layers, name the group Window, and collapse it.
-
Lay the tablecloth
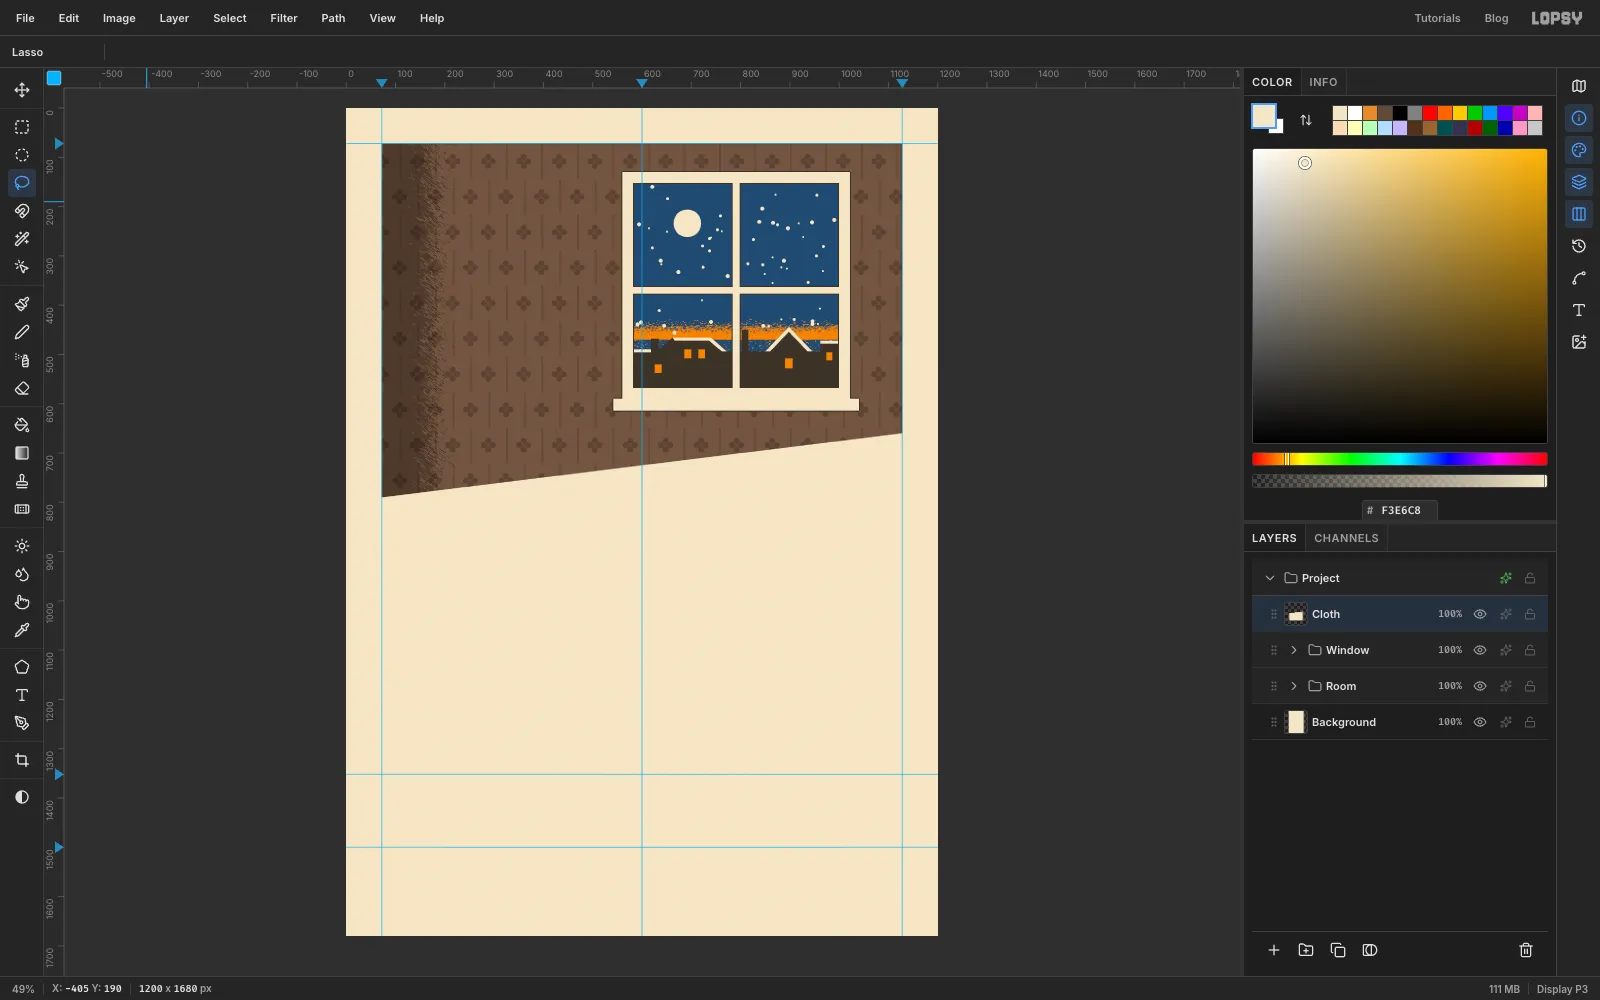
With Window selected, add a layer called Cloth. Use the Pen to draw the table:
- Click the left plate edge at y 790.
- Click the right plate edge at y 660.
- Click the bottom-right and bottom-left corners of the plate, then click the first point to close the shape.
Click Path to Selection and delete the path. The back edge tilts about 7°, like the steep, flattened tables in Japanese prints. Fill it with paper and deselect.
-
Make a gingham pattern
Add a layer called Gingham Tile. In the Color panel, set the foreground to red and its A (alpha) to 50.
- Fill a tall half tile, 0, 0 to 32, 64.
- Fill a wide half tile, 0, 0 to 64, 32.
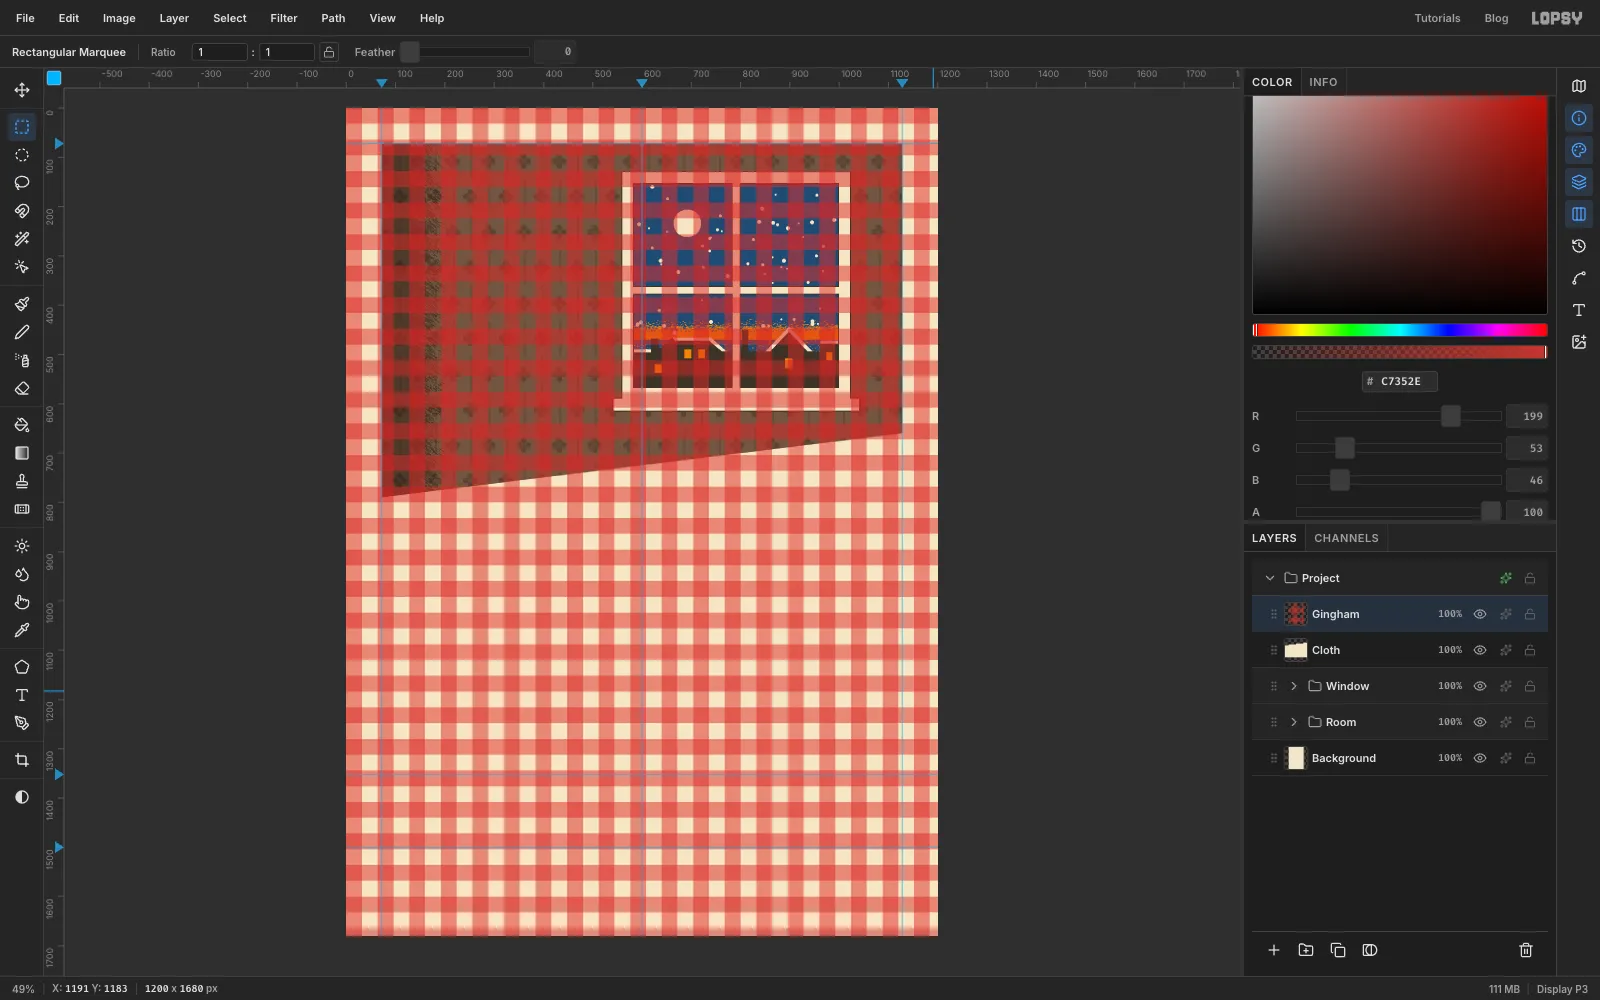
Where the two overlap, the colour doubles up to a darker square, just like woven gingham. Set A back to 100. Select 0, 0 to 64, 64, choose Edit → Define Pattern, deselect, and delete the tile layer.
Click Cloth, add a layer called Gingham, and choose Edit → Fill with Pattern… with no selection. Pick the gingham tile, leave the staggers at 0, and click Apply. The pattern covers the whole document for now.
-
Foreshorten the checks with Perspective
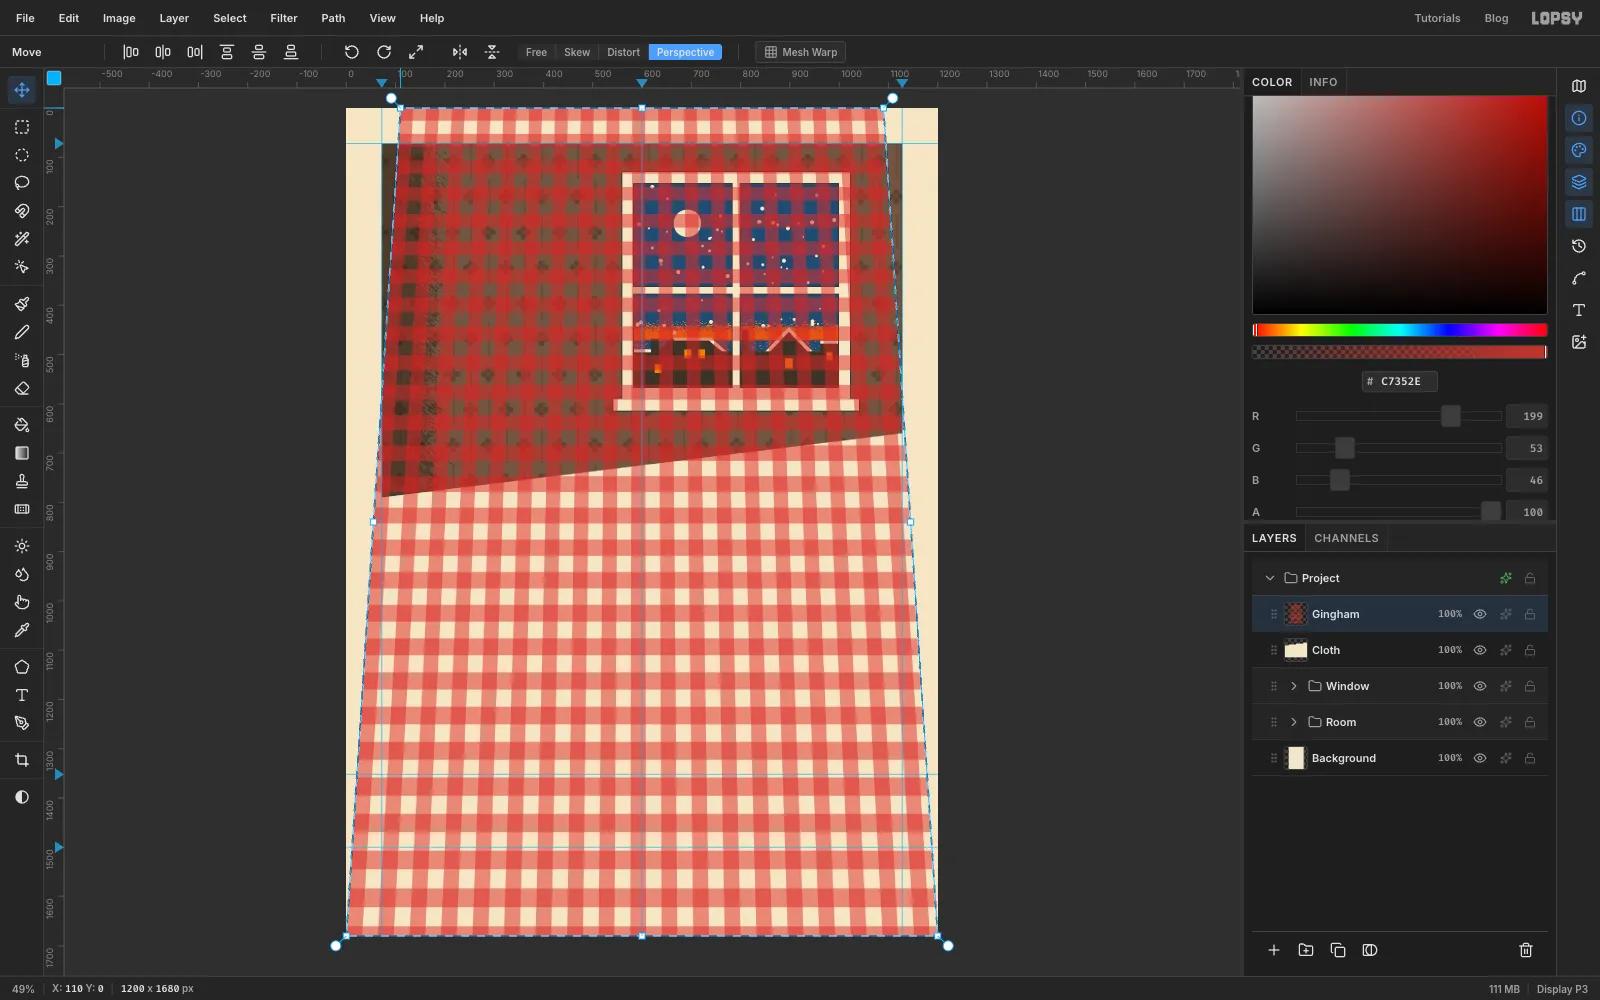
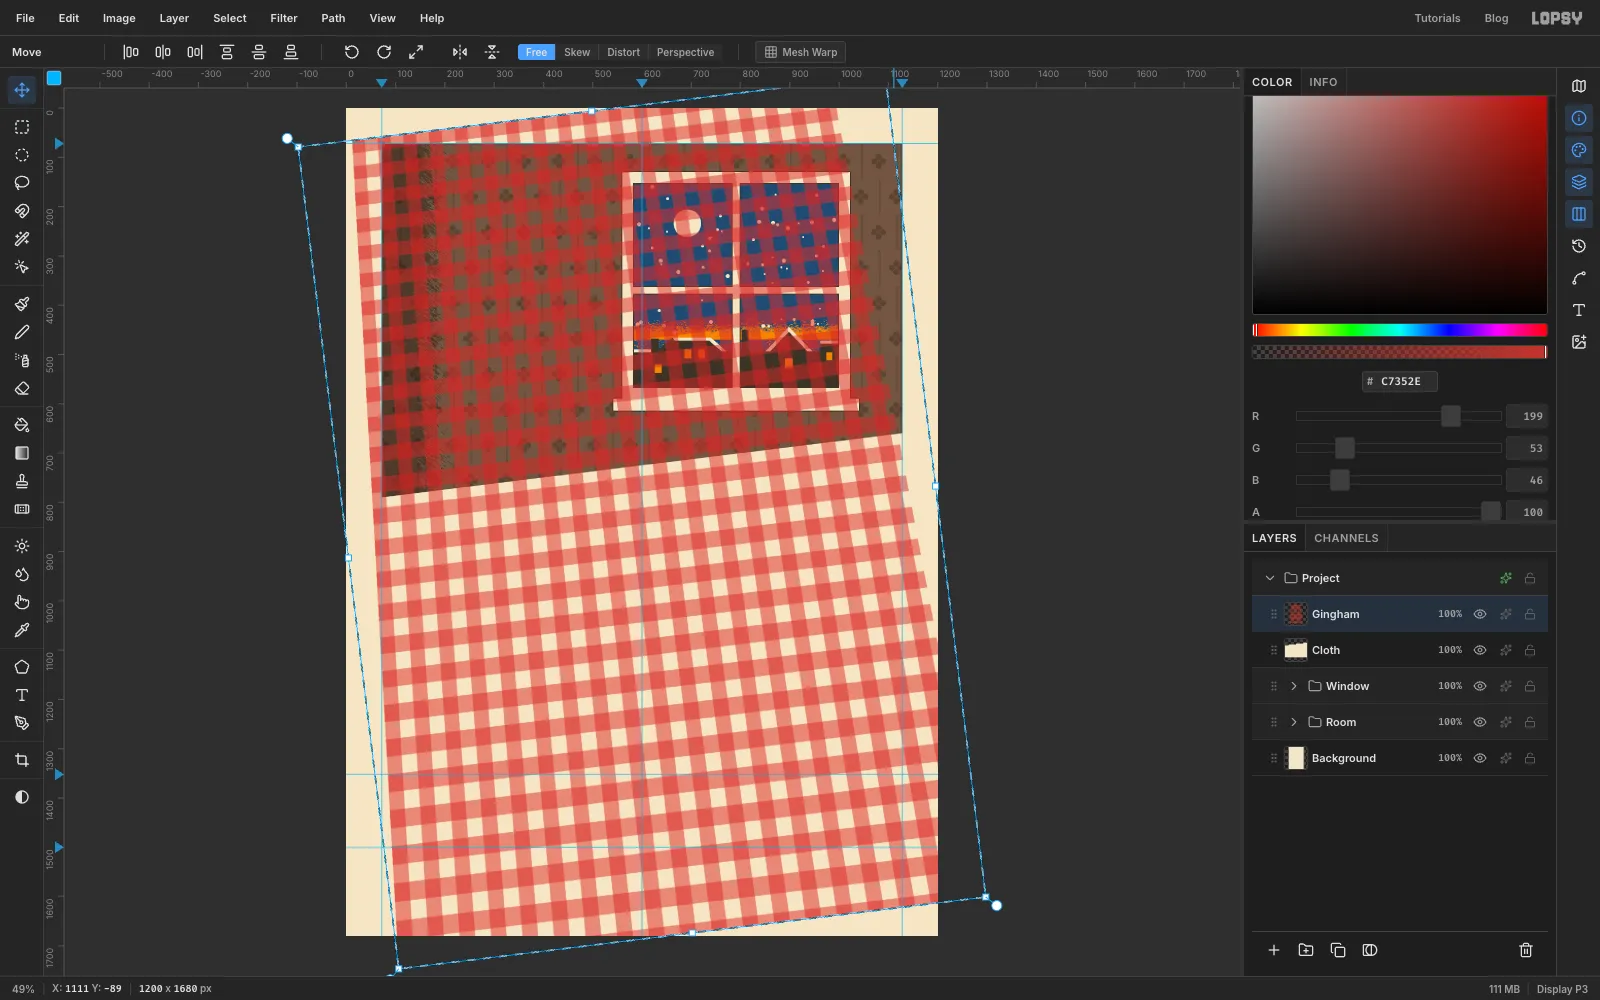
Checks the same size all the way up make the table look like a wall. Press Cmd+A and pick the Move tool (V). In the options bar, click Perspective. Drag the top-left corner handle about 110 px to the right. The top-right corner mirrors it, and the rows of checks shrink towards the top. Press Cmd+D to commit.
-
Turn the gingham to match the table
Press Cmd+A again, and click Free in the options bar. Drag the rotation handle just outside the top-right corner a little upwards, about −7°, so the rows run parallel to the cloth's back edge. Press Cmd+D.
-
Trim the gingham to the table
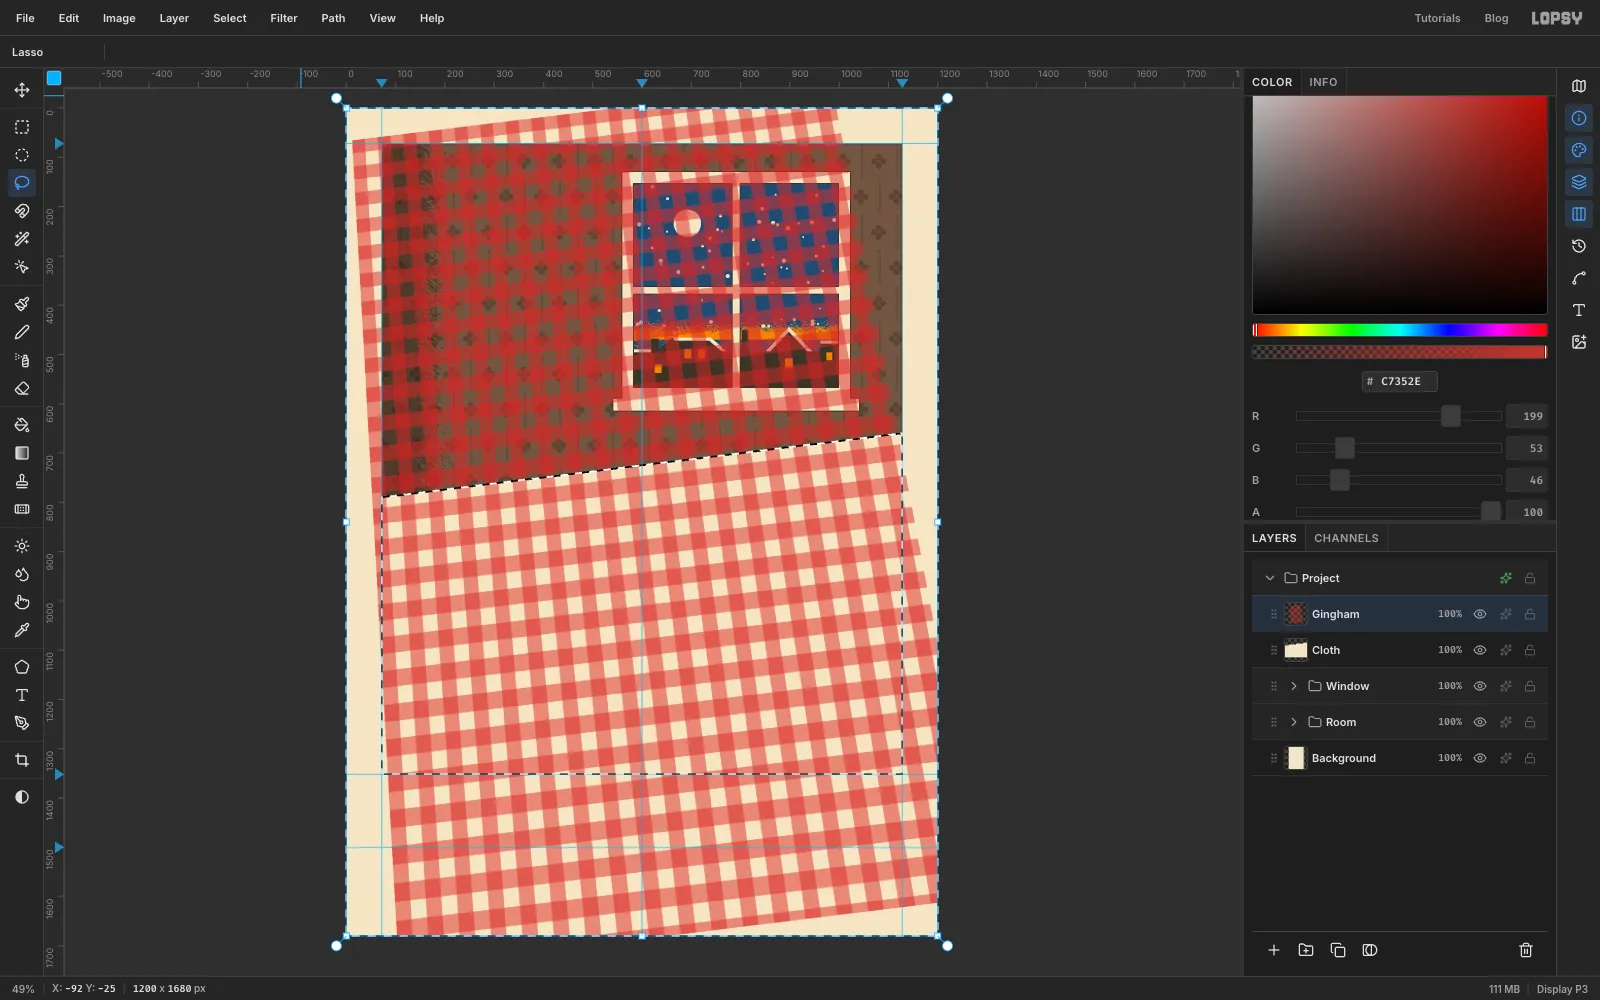
Cmd-click the Cloth thumbnail to load the table shape. Choose Select → Inverse, press Delete and deselect.
Open the effects drawer and set Gingham's Blend to Multiply, so the cream squares let the cloth show through.
-
Shade the cloth with cool grain
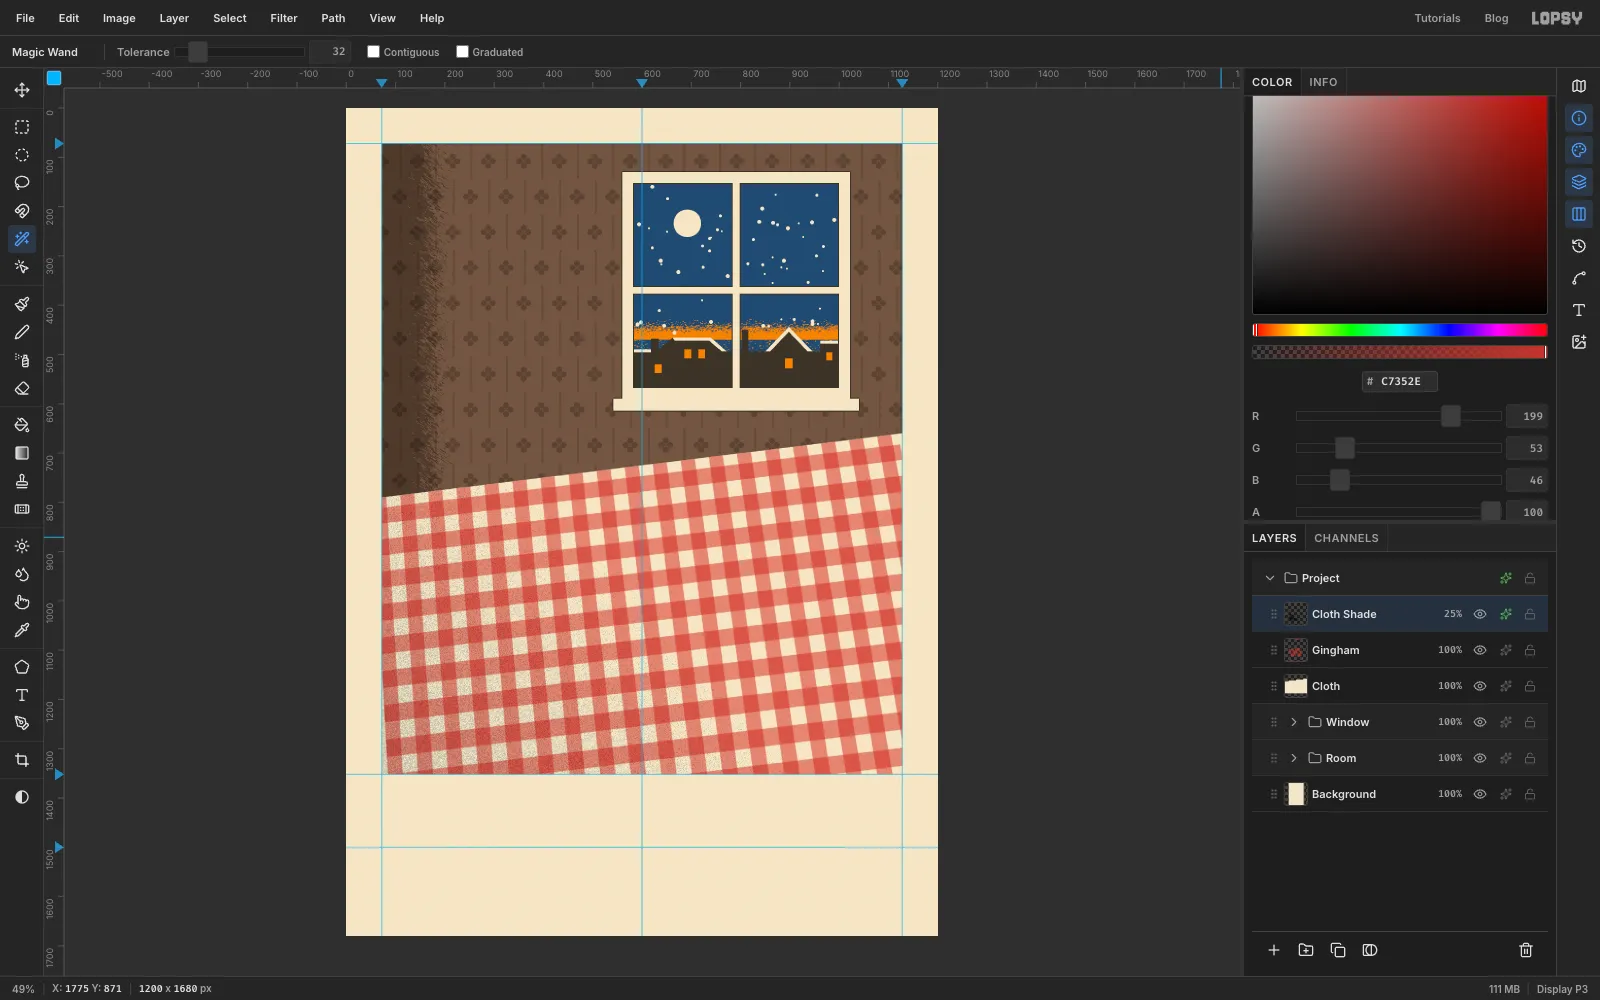
Add a layer called Cloth Shade and Cmd-click the Cloth thumbnail again. Drag a linear gradient with the dark stop () at the bottom-left corner of the plate and the light stop () up towards the middle of the window sill. Turn it into crayon grain with no motion blur.
Add a Color Overlay in Prussian blue , set the layer to Multiply at 25%. Click Cloth Shade, Shift-click Cloth, group them as Table, and collapse the group.
-
Draw the back of the bowl
The oranges have to sit inside the bowl, so the bowl is built in two layers: the back now, and the front over the oranges later.
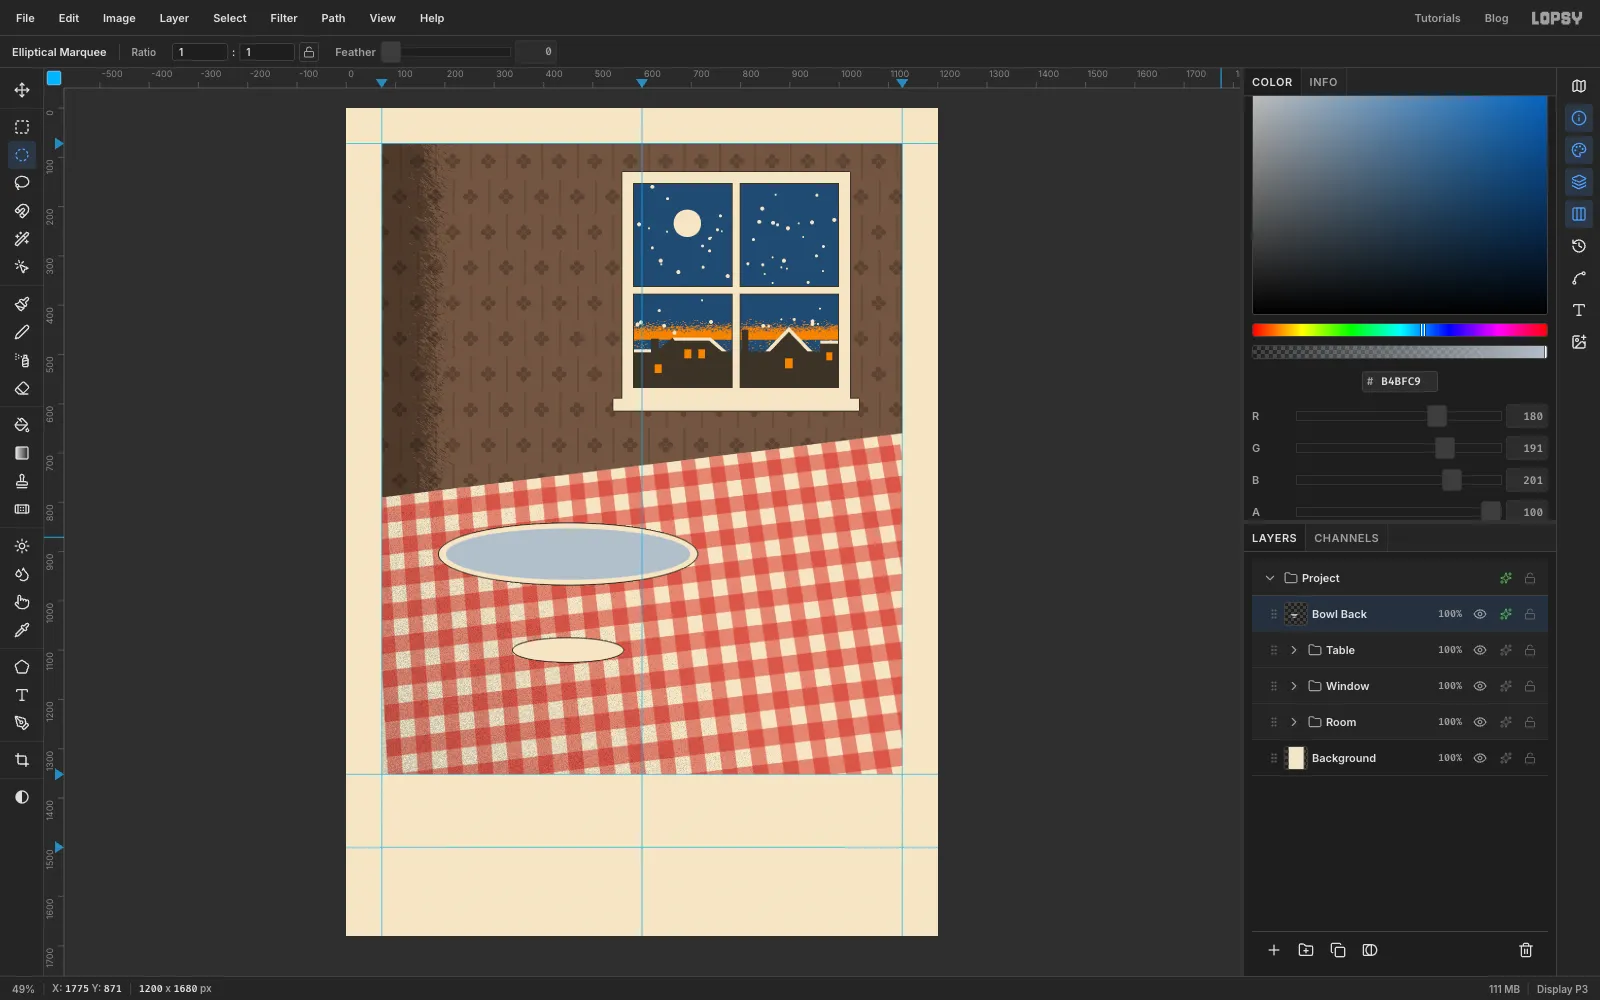
With Table selected, add a layer called Bowl Back.
- With the Elliptical Marquee, select 338, 1076 to 562, 1124 for the foot.
- Shift-drag the rim ellipse, from about 188, 843 to 712, 967.
- Fill with paper .
- Select the inside of the mouth, 202, 853 to 698, 957, and fill it with bowl tint .
- Deselect and add a Stroke of Width 2 in key .
-
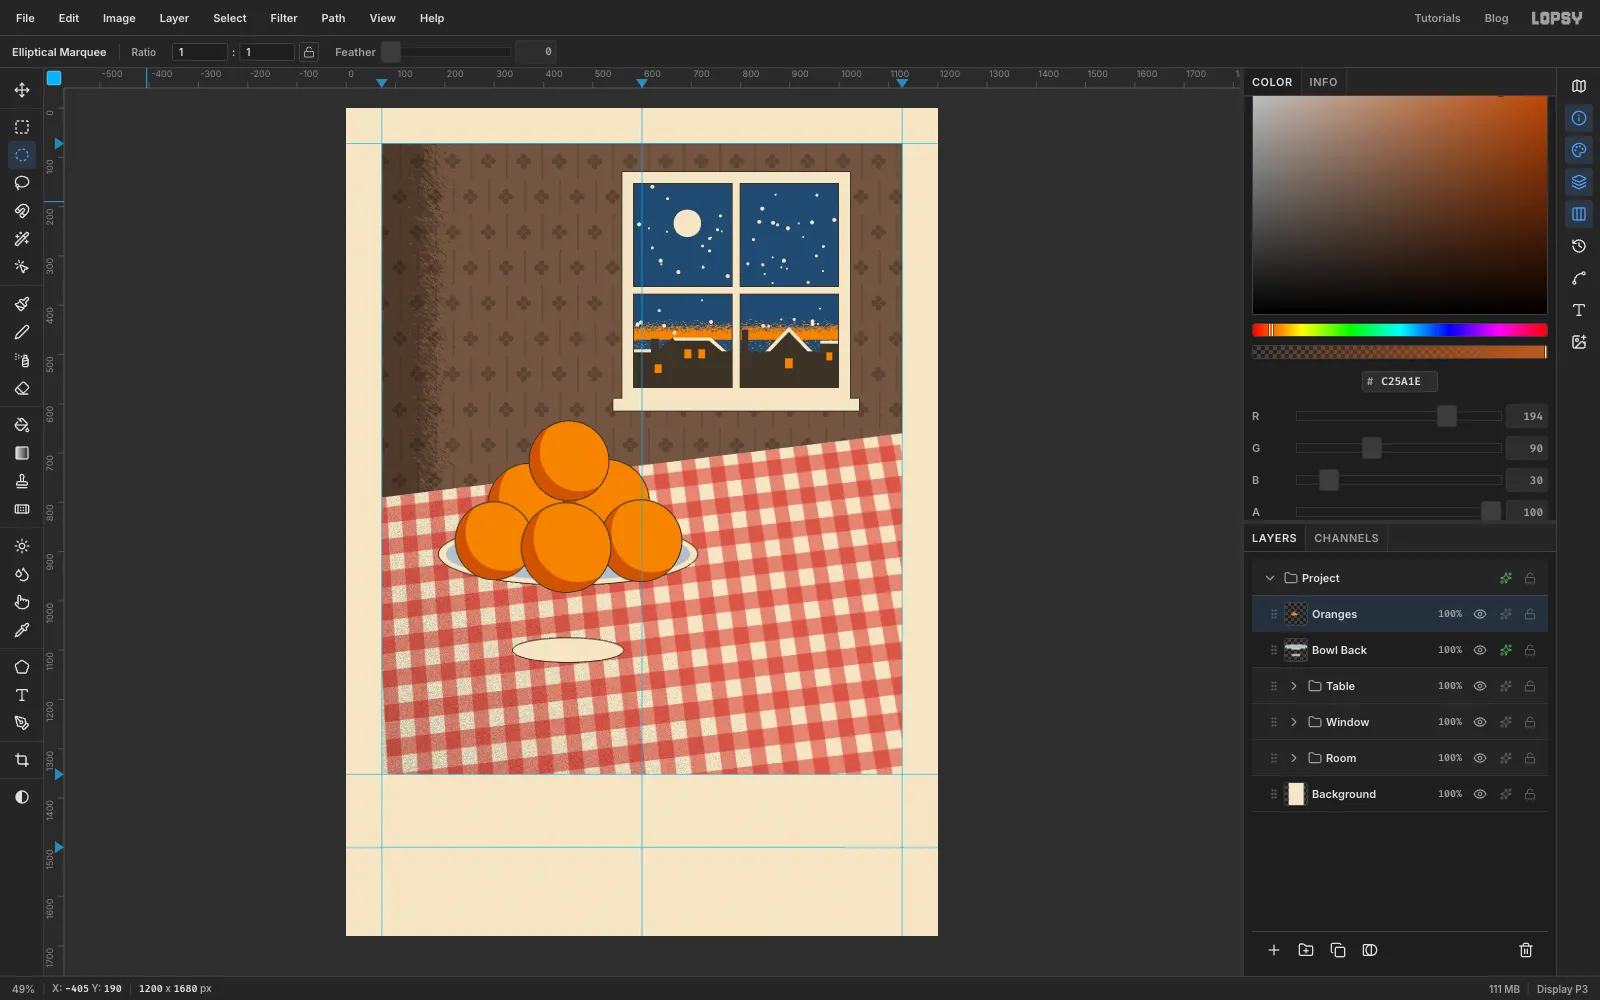
Pile up the oranges
Add a layer called Oranges. Every orange is drawn the same way:
- Select a circle with the Elliptical Marquee.
- Fill it with key . Then choose Select → Shrink… by 2 and fill with orange . That leaves a thin key outline.
- Hold Alt and drag an equal circle shifted about a quarter of the radius up and to the right. This subtracts most of the orange from the selection and leaves a crescent on the lower left, away from the window. Fill it with shadow orange and deselect.
Draw them from the back to the front, so each new orange overlaps the ones behind it:
- 286, 720 to 458, 892
- 440, 712 to 616, 888
- the top orange, 370, 634 to 534, 798
- 220, 798 to 380, 958
- 514, 794 to 682, 962
- the front orange, 354, 800 to 538, 984
-
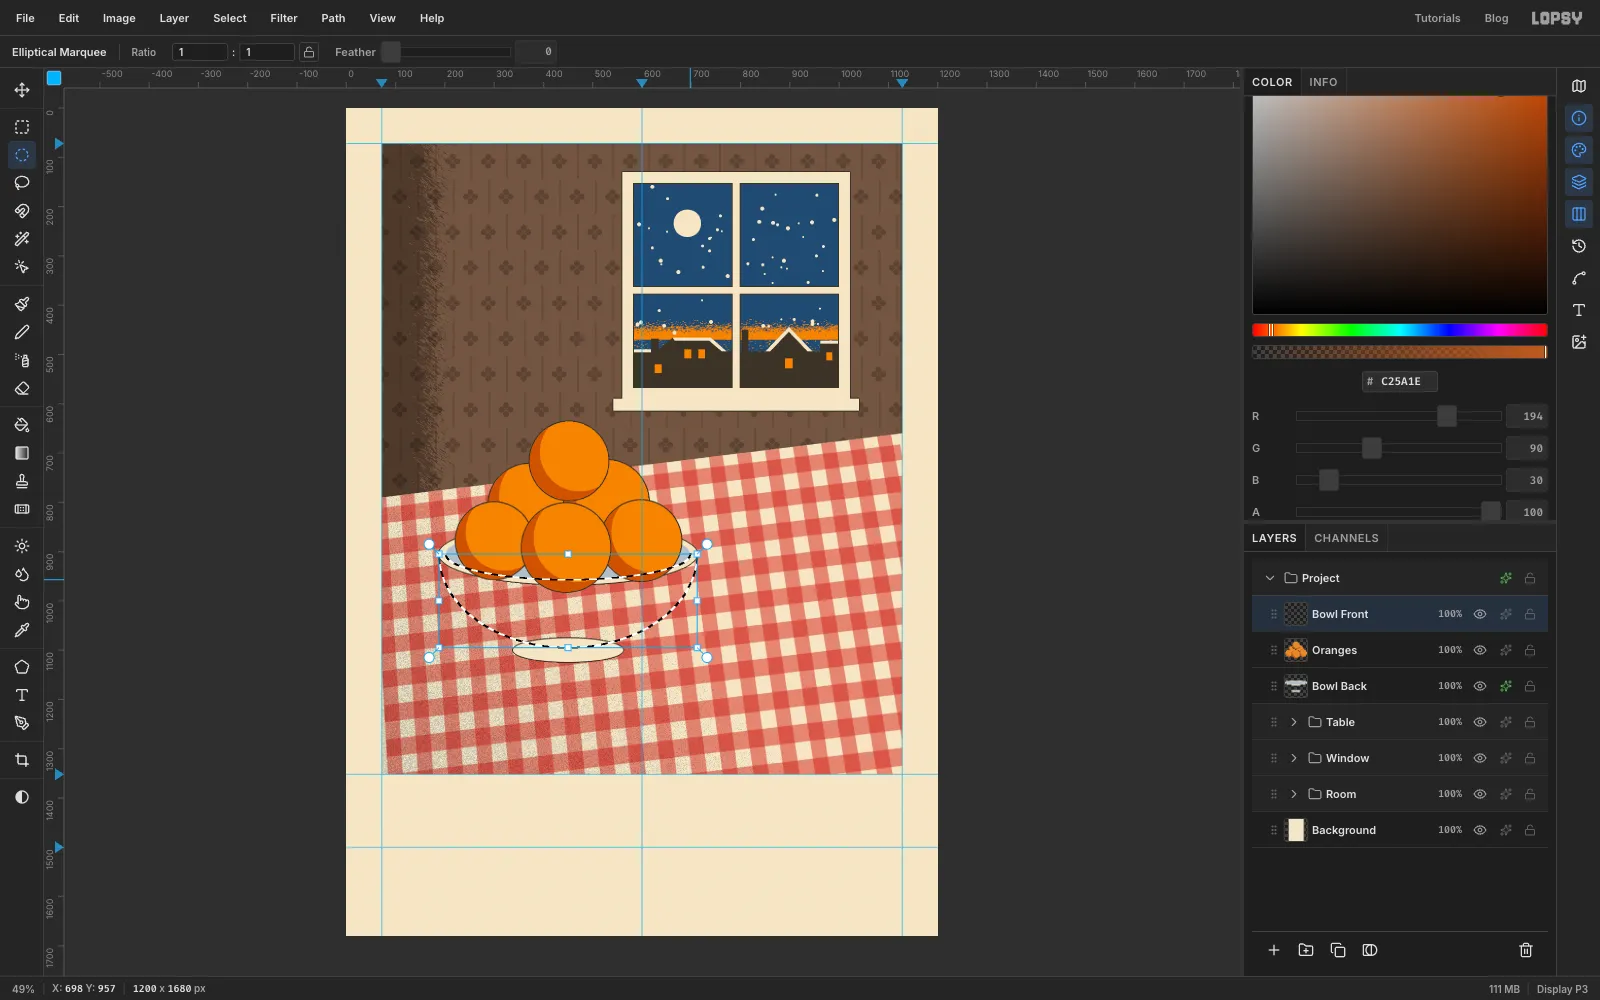
Draw the front of the bowl
Add a layer called Bowl Front, above Oranges.
- Select a tall ellipse from 188, 715 to 712, 1095.
- With the Rectangular Marquee, Alt-drag a box over the whole top half of the ellipse, down to the rim line at y 905, to remove it.
- With the Elliptical Marquee, Alt-drag over the mouth (about 202, 853 to 698, 957) to remove it as well.
What's left is the bowl's body below the front of the rim. Fill it with paper, deselect, and give it the same 2 px key Stroke. The oranges now drop into the bowl.
-
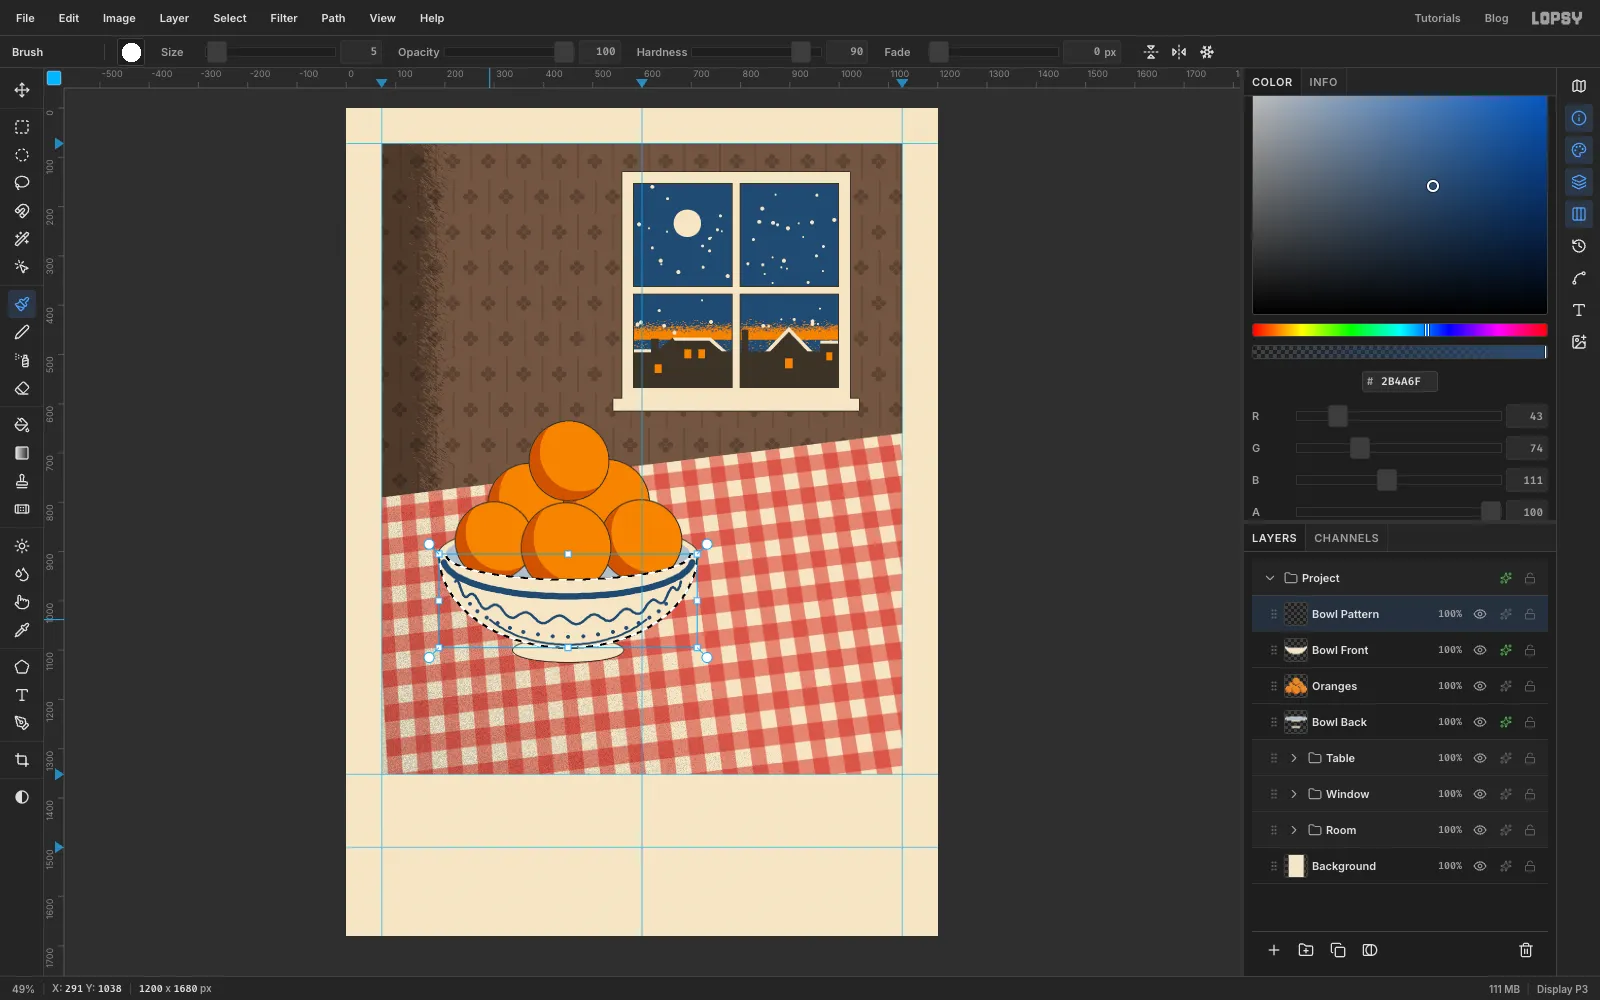
Paint the blue bowl pattern
Add a layer called Bowl Pattern and Cmd-click the Bowl Front thumbnail, so your strokes can't spill off the bowl. Set the foreground to Prussian blue and pick the Brush (Hardness 90, Spacing 2):
- At Size 14, paint a band that follows the curve of the rim, about 25 px below it.
- At Size 6, paint a wavy line under it, about nine waves across.
- At Size 9, click a row of evenly spaced dots below the wave.
- At Size 5, paint one thin line around the bowl just above the foot.
Deselect.
-
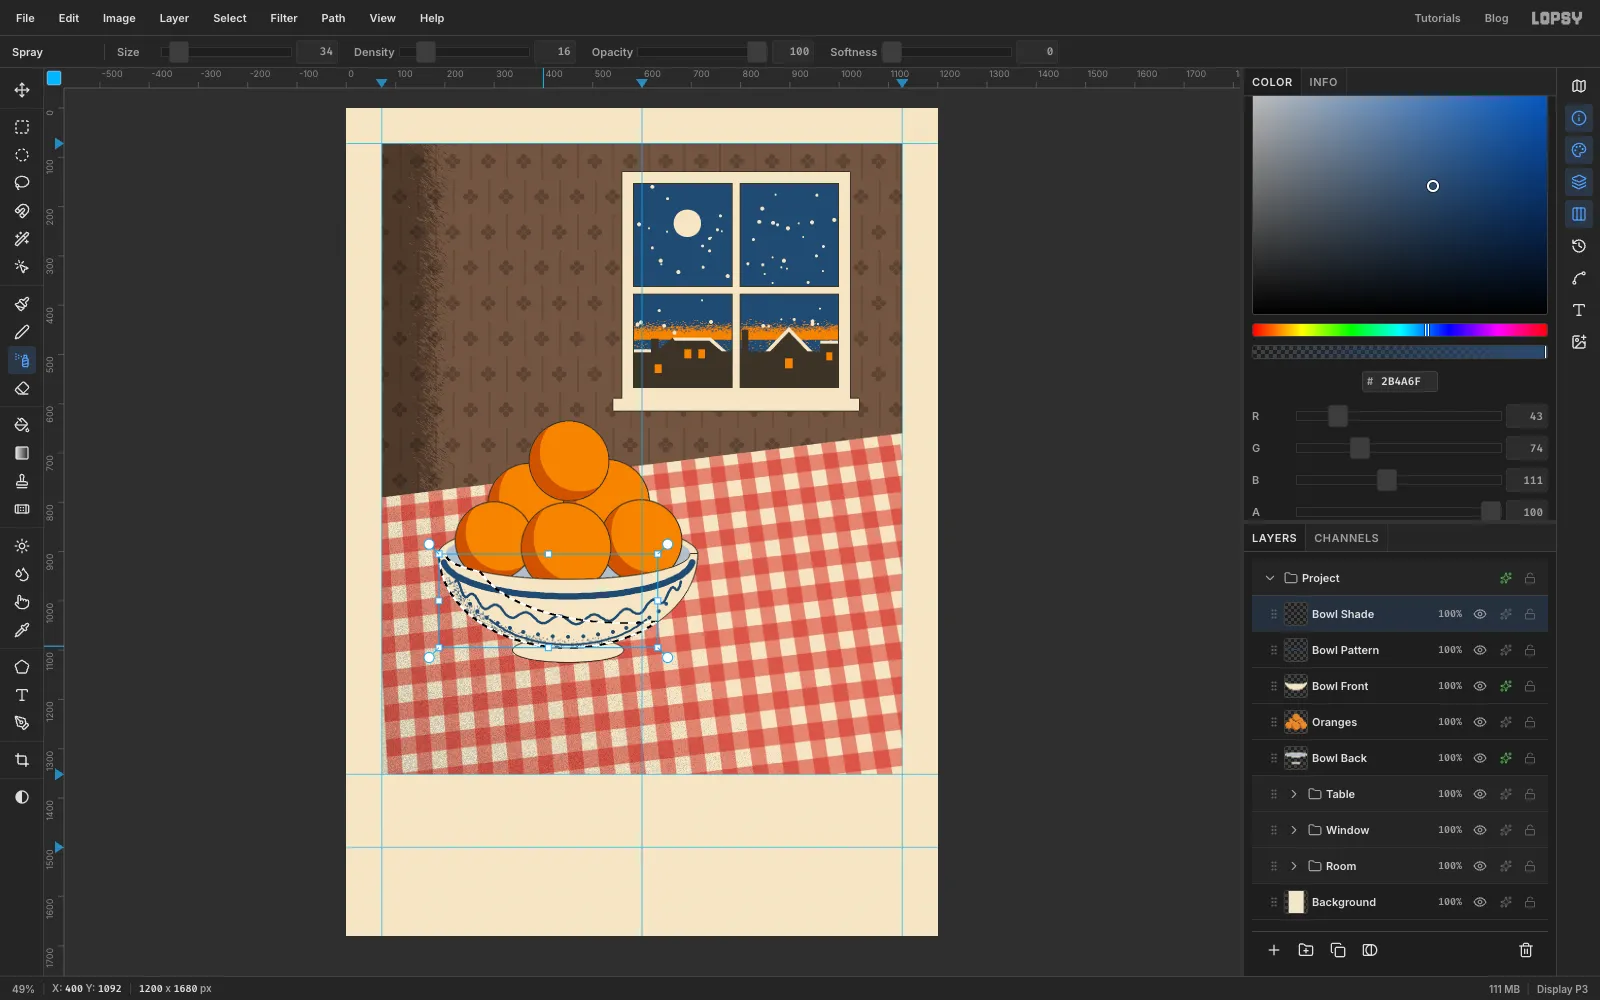
Spatter shade on the bowl
Lautrec shaded with crachis: ink flicked off a toothbrush. The Spray tool does the same job.
Add a layer called Bowl Shade. Cmd-click the Bowl Front thumbnail, then Alt-drag a big ellipse over the right two-thirds of the bowl to remove it. That leaves a crescent along the lower left.
Pick the Spray (J) at Size 34, Density 16, Opacity 100 and Softness 0, in Prussian blue. Make two quick passes along the bottom curve, thickest under the bowl and thinning out towards the rim. Deselect and set the layer's Blend to Multiply.
-
Top the pile with leaves
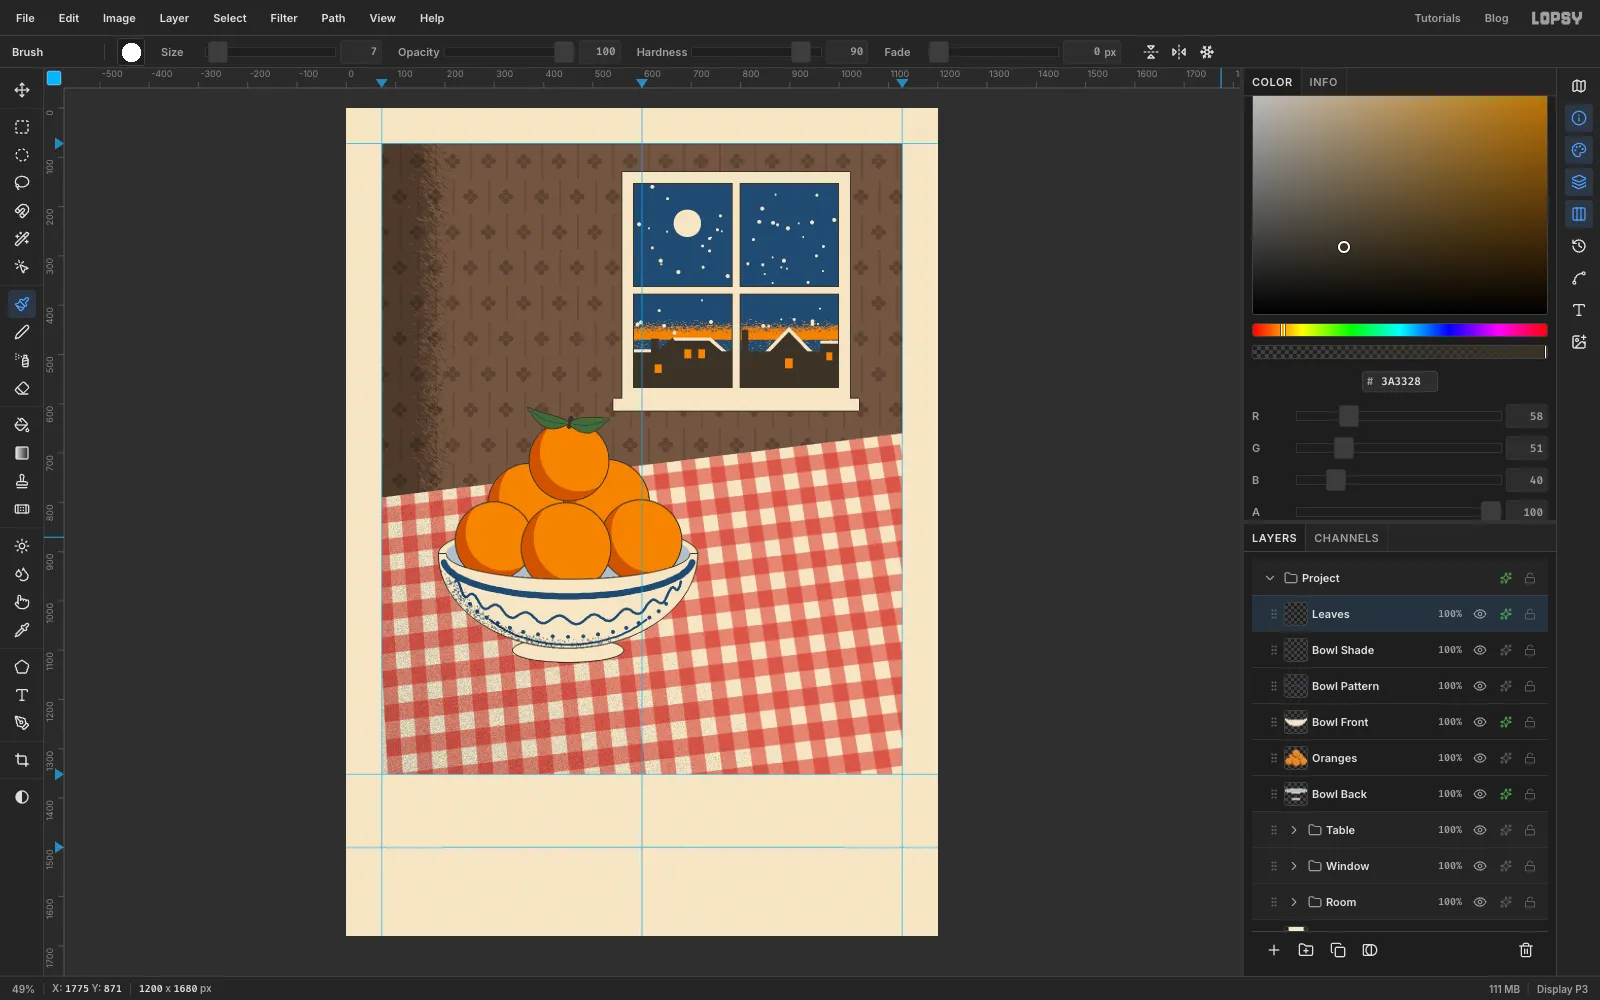
Add a layer called Leaves. With the Lasso, draw two pointed leaves from the top of the top orange (about 452, 640). One reaches right to about 534, 630, the other left to about 368, 608. Fill them with olive and deselect.
Paint a midrib down each leaf with a Size 3 brush in Prussian blue, and a short Size 7 stem in key. Add a 2 px key Stroke.
-
Give the peel some grain
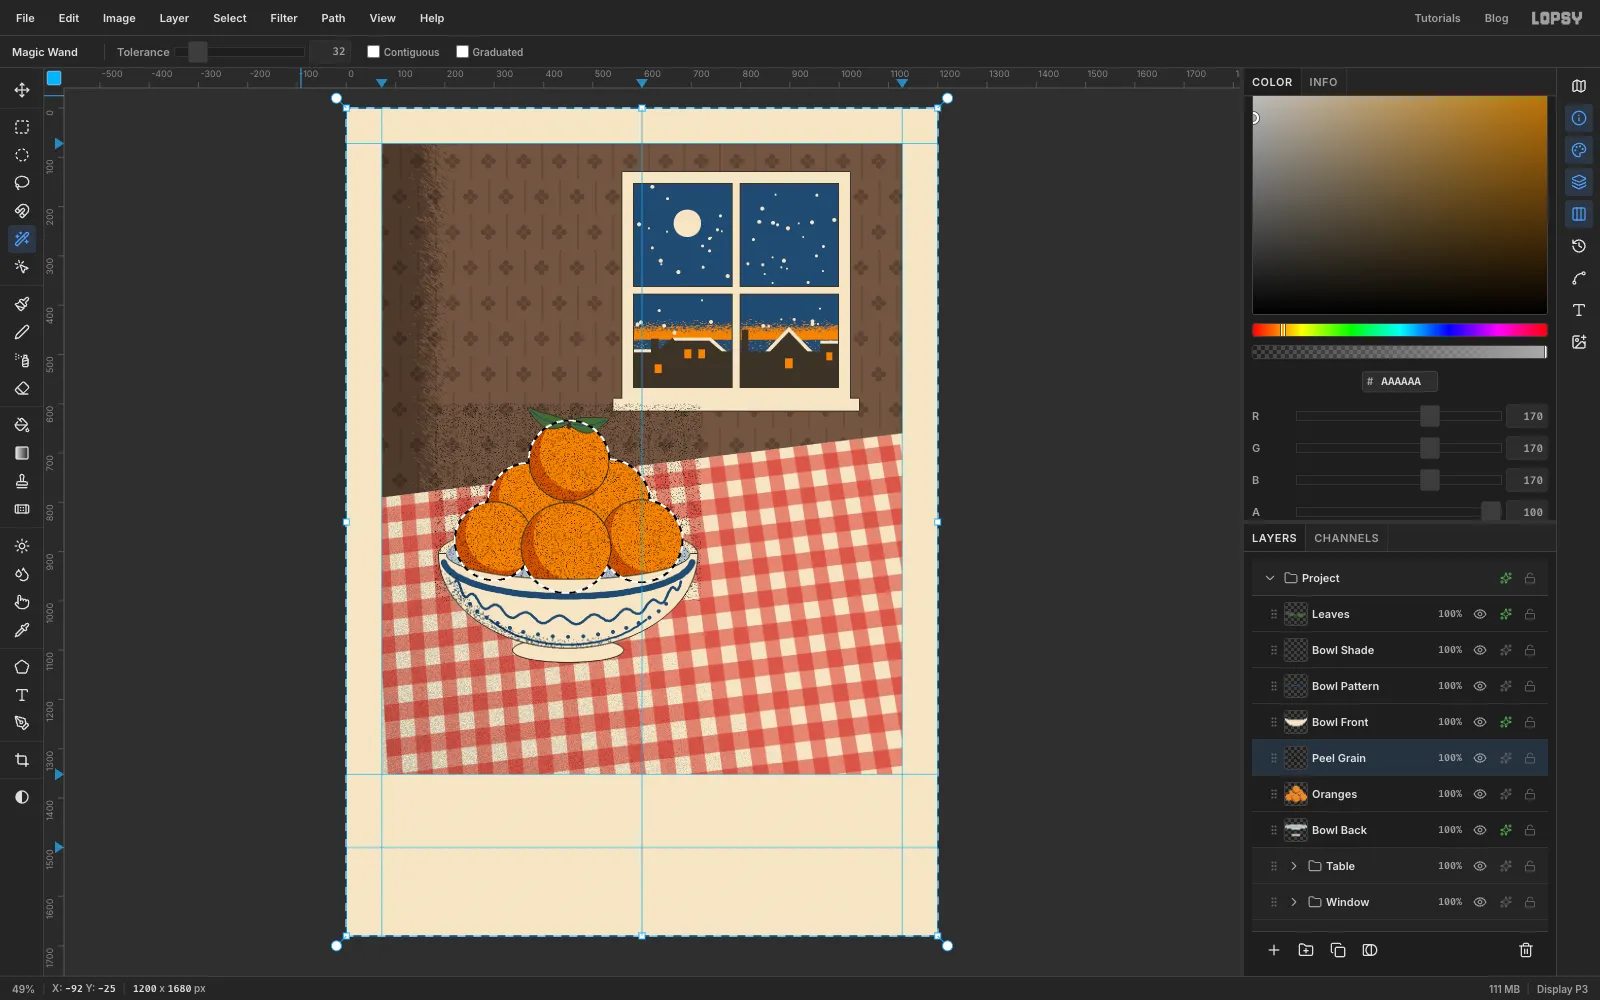
Click Oranges and add a layer called Peel Grain. Select a rectangle covering the whole pile (180, 600 to 720, 1000). Fill it with , deselect, and turn it into crayon grain.
Now Cmd-click the Oranges thumbnail to load the pile's shape. Choose Select → Inverse, press Delete, and deselect. Add a Color Overlay in shadow orange , then set the layer to Multiply at 70%. The flat oranges now have a pitted, crayoned peel.
-
Copy an orange onto the table
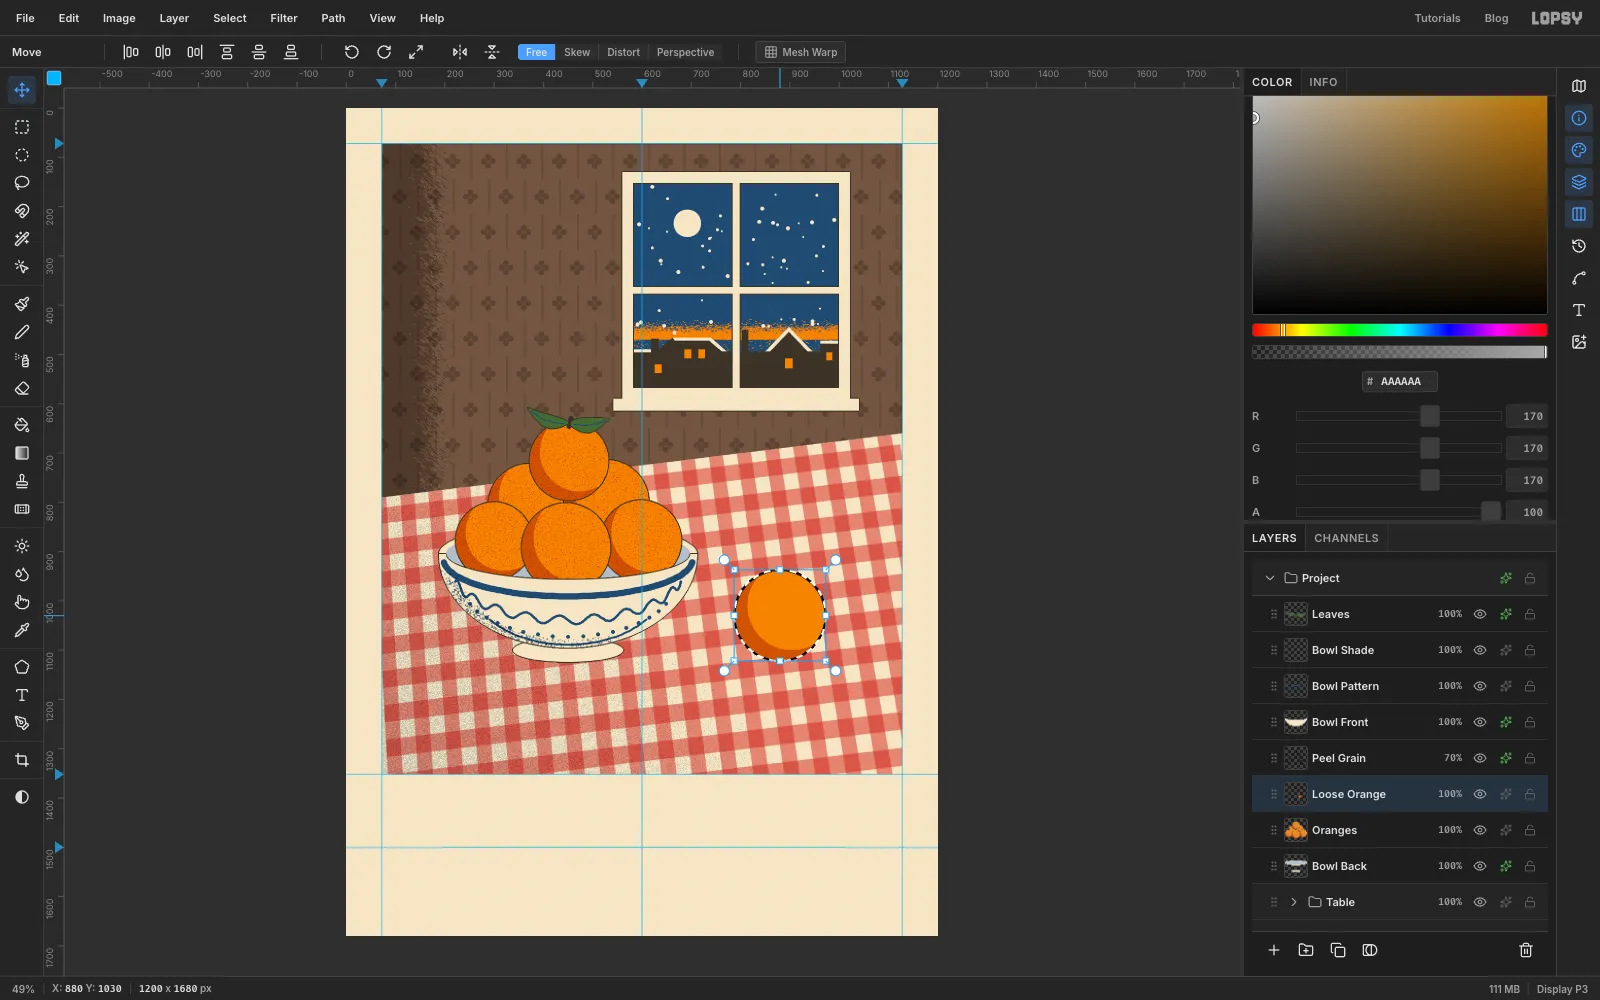
Click Oranges and select the front orange with a circle just around its outline (353, 799 to 539, 985). Press Cmd+C, then Cmd+V. The copy lands on a new layer in the same spot, and the Move tool is active. Rename the layer Loose Orange.
Drag it out onto the cloth, to the right of the bowl. Its centre should sit at about 880, 1030. Press Cmd+D.
The copy comes from the Oranges layer, so it doesn't pick up the peel grain. The smoother skin helps this orange, nearest the window, read as catching more light.
-
Scale and turn the loose orange
A pasted copy looks stamped, so change it a little.
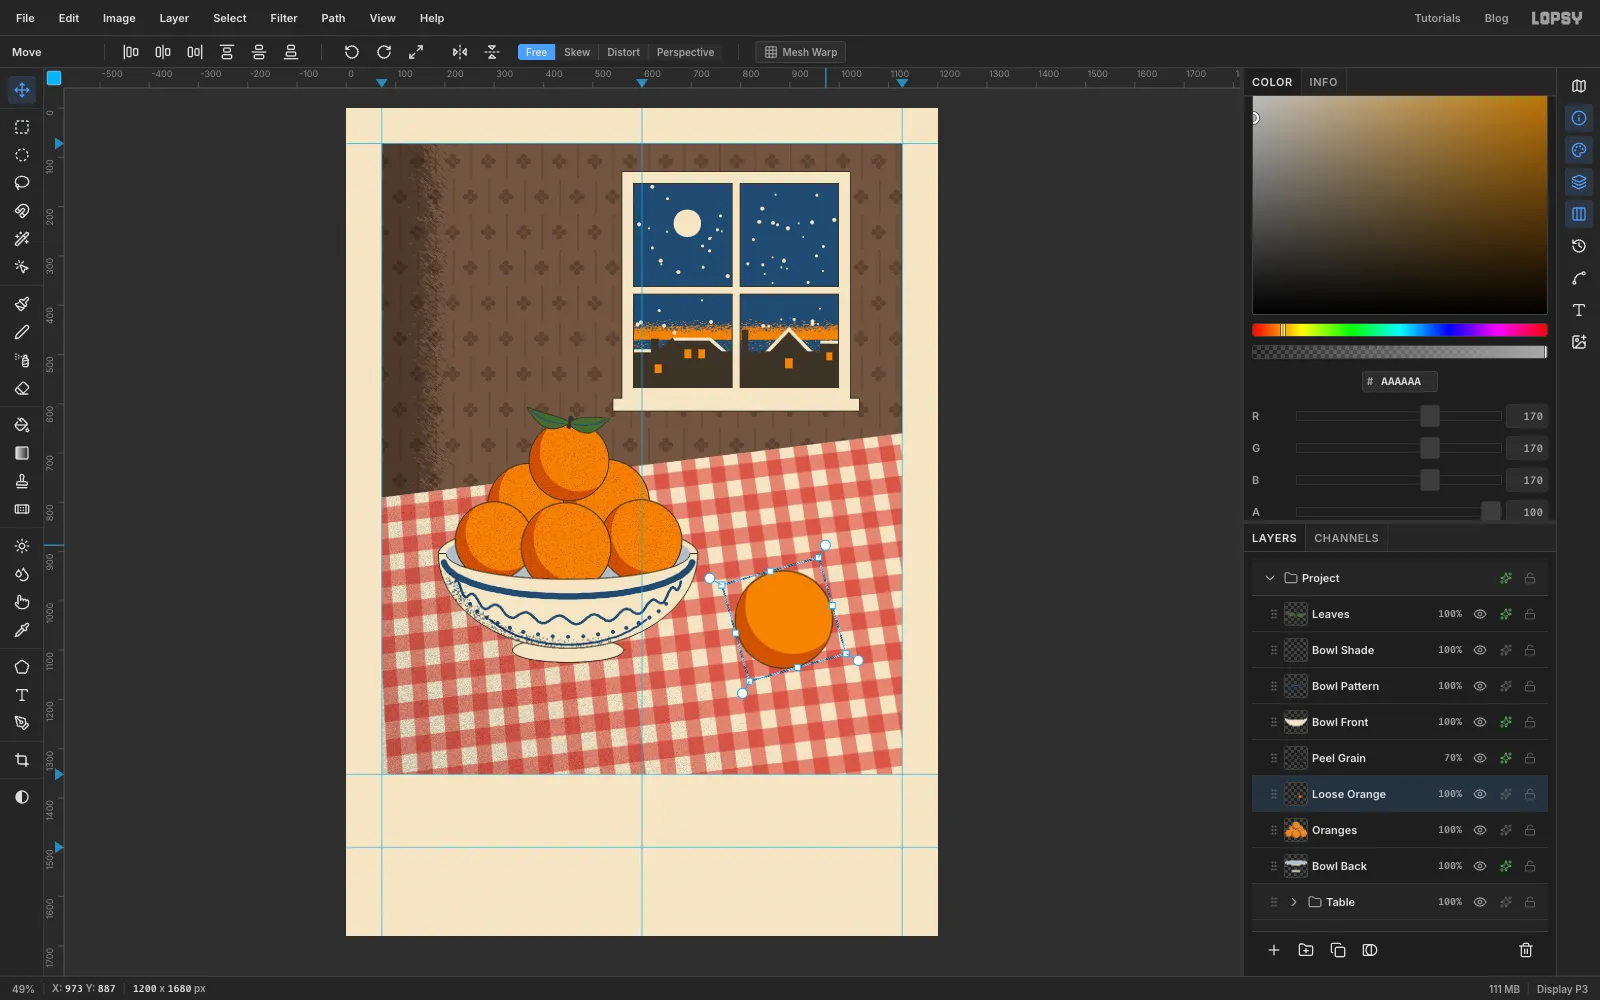
- Draw a marquee just around the loose orange. Hold Cmd and drag the bottom-right handle about 16 px outwards (Cmd keeps it round). Press Cmd+D.
- Marquee it again and drag the corner rotation handle about 16° anticlockwise. Press Cmd+D.
-
Cut an orange in half
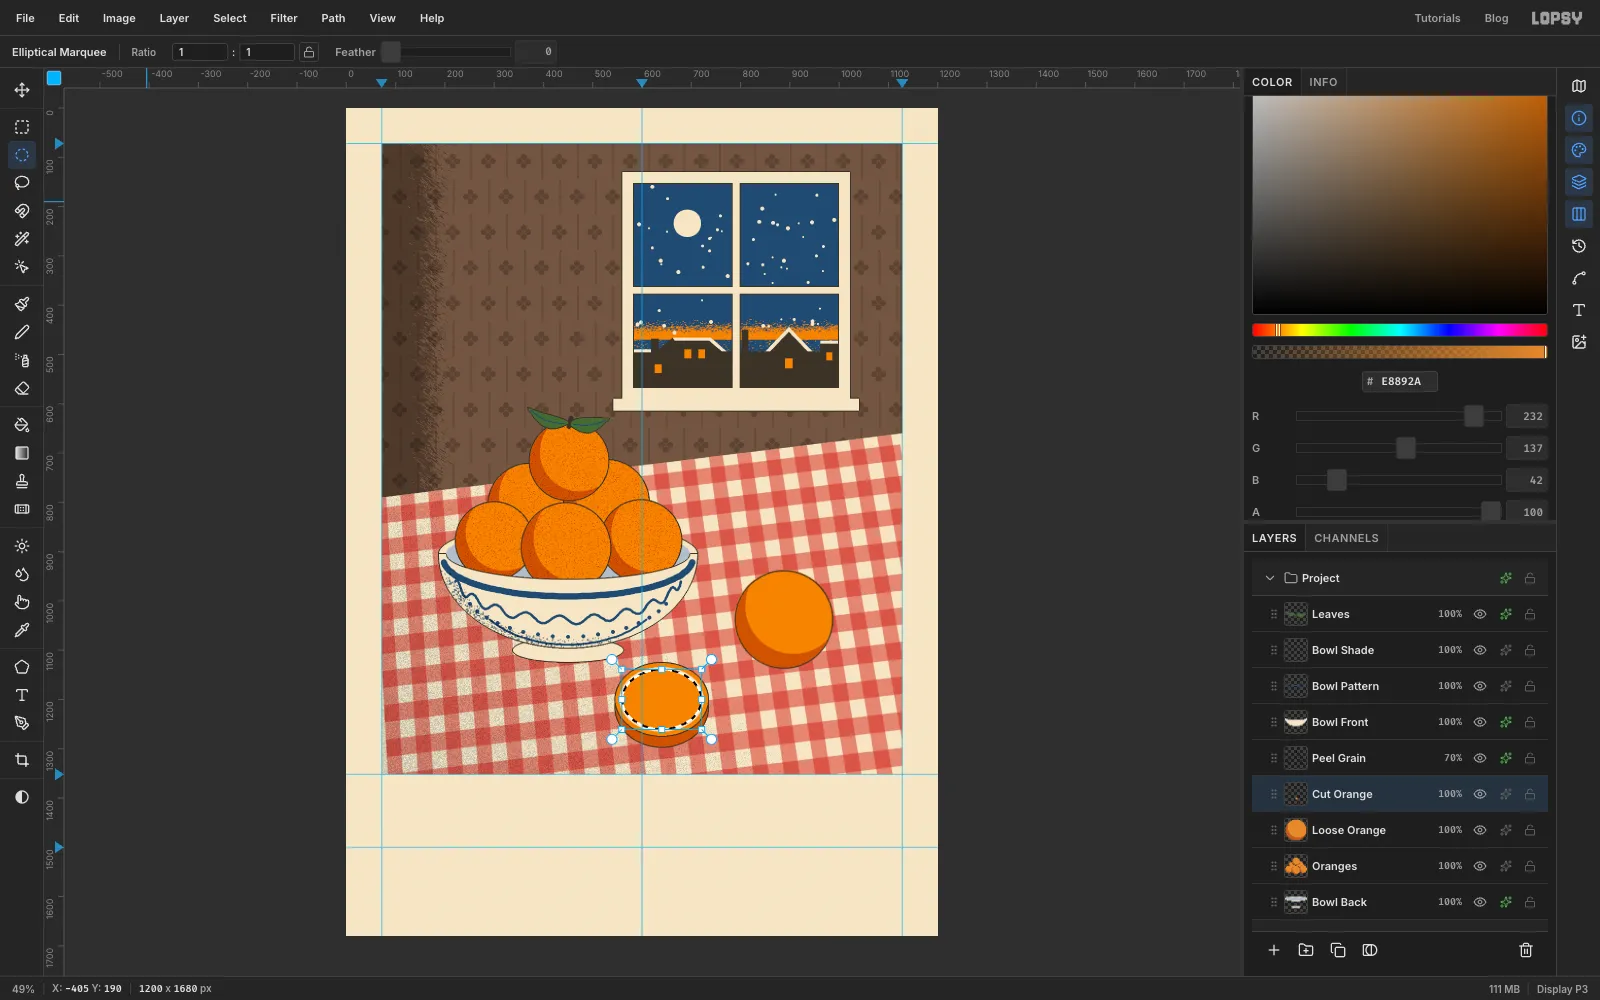
Add a layer called Cut Orange. It sits in front of the bowl, at about 640, 1200. Use the Elliptical Marquee for both ovals.
- The side of the peel: select 544, 1134 to 736, 1298. Fill it with key, shrink by 2, and fill with shadow orange.
- The cut face: select 544, 1124 to 736, 1276. Fill with key, shrink by 2, and fill with orange (the rind). Shrink by 8 and fill with paper (the pith). Shrink by 5 and fill with orange (the flesh).
Keep that last selection active.
-
Draw the segments with Radial Symmetry
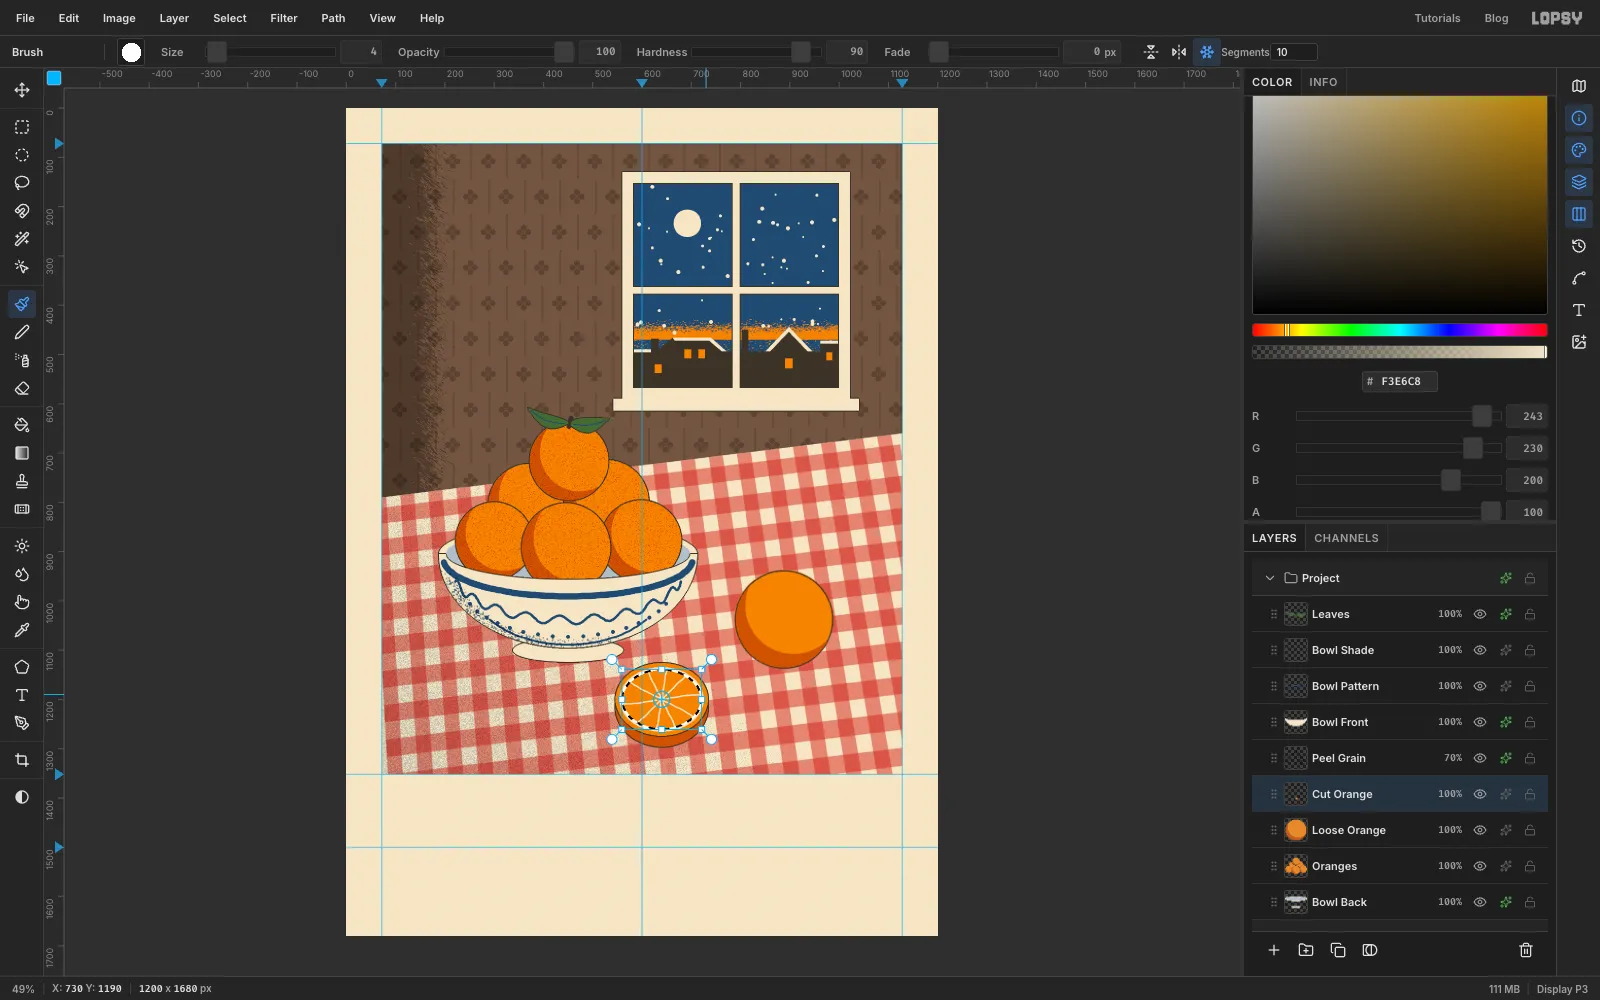
Pick the Brush at Size 4 with paper as the foreground. In the options bar, click Radial Symmetry and set Segments to 10. Cmd-click the centre of the cut face to move the symmetry centre there.
Drag one stroke from the centre out to the edge of the flesh. Lopsy repeats it ten times around the centre, and the selection keeps every line inside the flesh. Turn Radial Symmetry off again.
Select a small dot in the middle (630, 1192 to 650, 1208), fill it with paper and deselect. Then click a few Size 4 paper flecks on the flesh for juice.
-
Ground everything with contact shadows
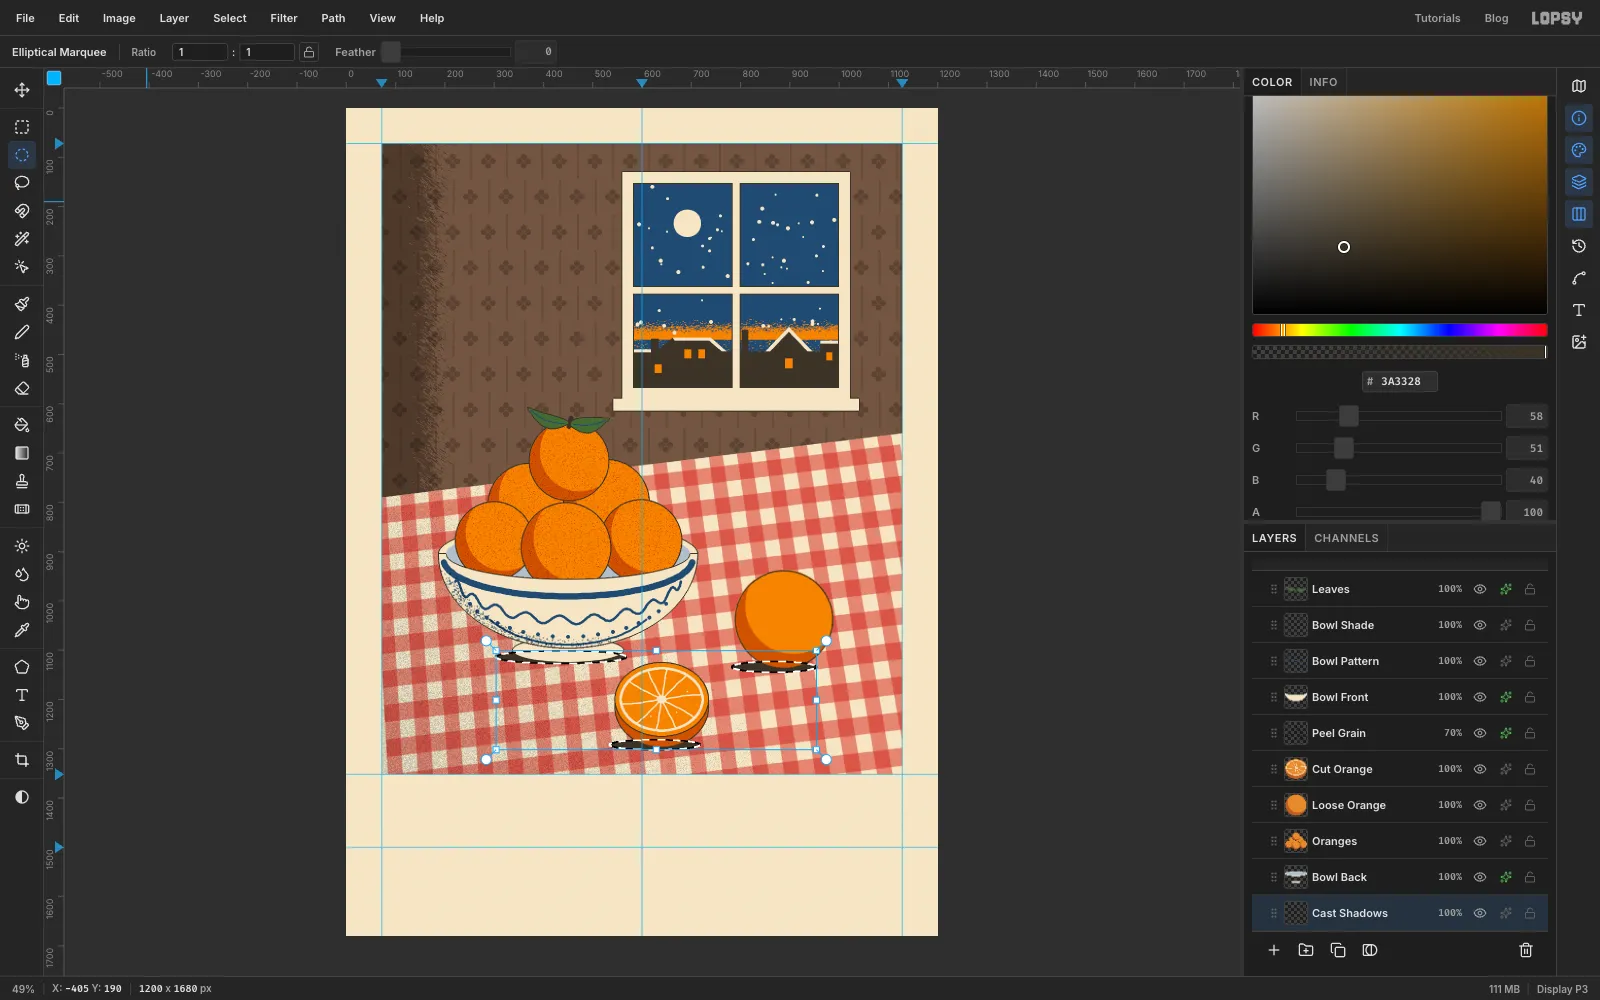
Without shadows the bowl and the oranges seem to float. Select Table and add a layer called Cast Shadows, so it sits under everything on the cloth. Select a flat ellipse just left of where each object touches the table:
- Bowl foot: 304, 1101 to 568, 1127.
- Hold Shift and drag one under the loose orange, from about 782, 1123 to 954, 1145.
- Hold Shift and drag one under the cut orange, from about 534, 1282 to 718, 1302.
Fill with key , deselect, and set the layer to Multiply at 35%.
-
Lay down the fir stems
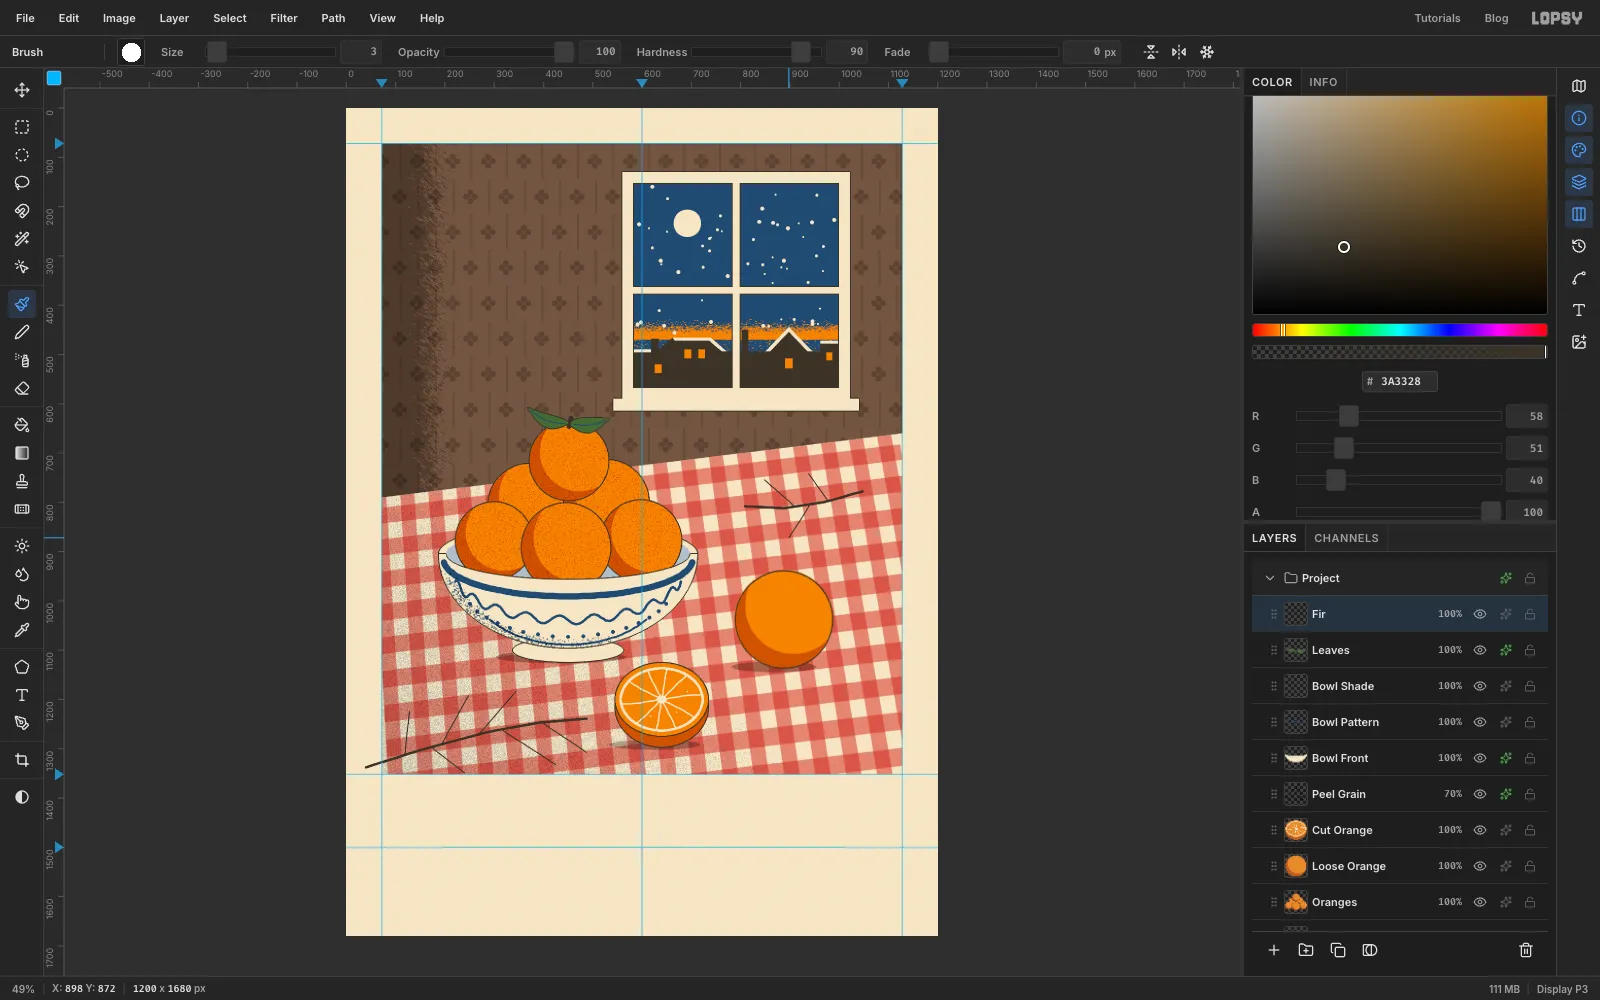
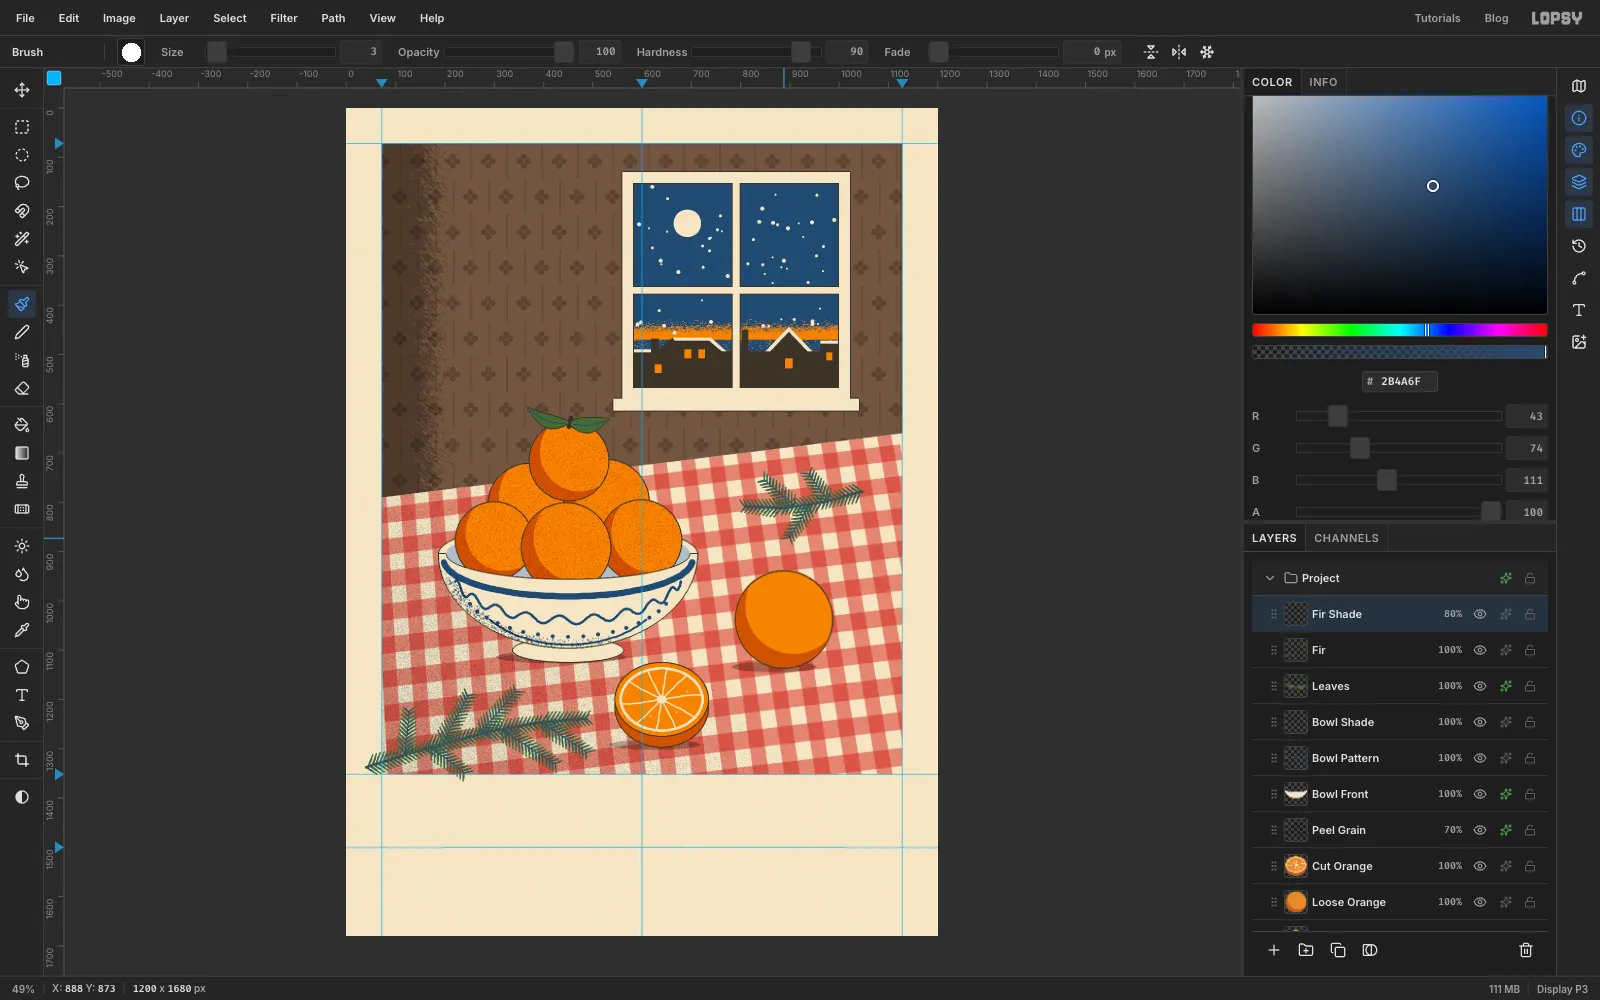
Click Leaves and add a layer called Fir. Pick the Brush (Hardness 90) with key as the foreground.
- Bough: at Size 6, drag a gently curving stem from just off the left edge at about y 1340 to about 490, 1240. At Size 3, add six side twigs. Three angle up and back, and three angle down towards the bottom edge.
- Sprig: draw a second, shorter stem lying on the cloth to the right, from about 1050, 778 to 810, 808, with three twigs.
-
Draw the needles in two inks
Set the foreground to olive and the brush to Size 4. Along every stem and twig, draw short separate strokes, packed close together like the teeth of a comb. Alternate sides, and slope each needle forwards towards the tip of its twig. Make them about 25 px long, a little shorter near the tips.
Add a layer called Fir Shade. With Prussian blue at Size 3, draw a second set of shorter needles (about 16 px) in the gaps between the olive ones. Set the layer's opacity to 80%. Two inks laid side by side give the fir its depth.
-
Tie a red ribbon with the Pen
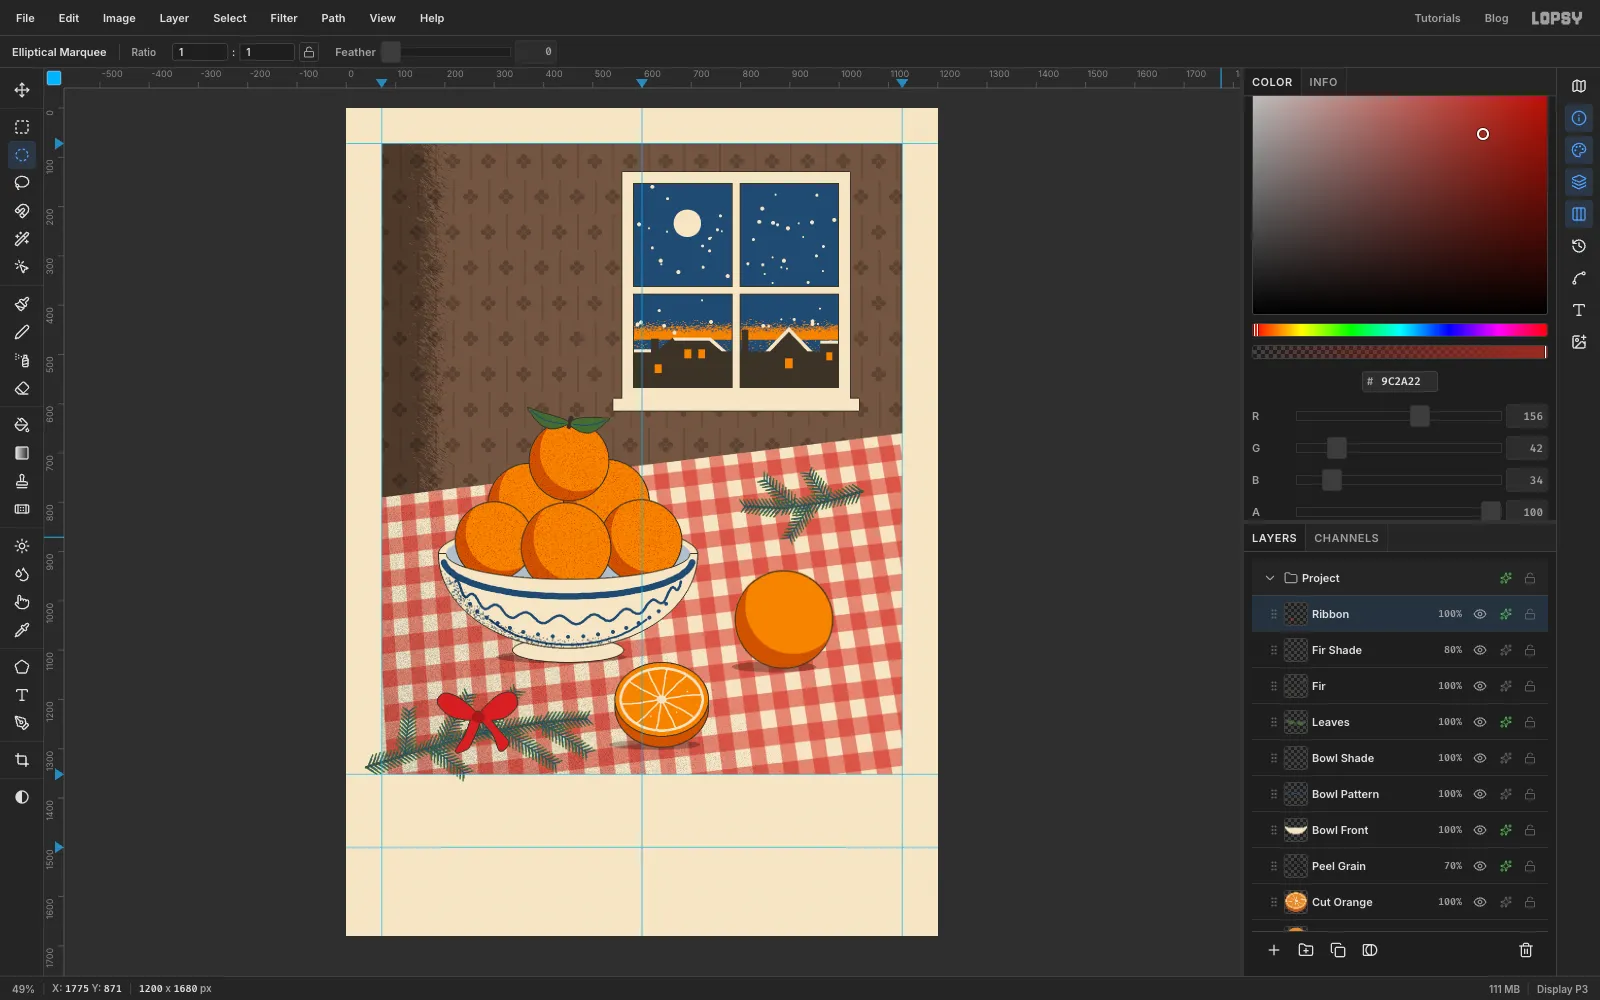
Add a layer called Ribbon. Pick the Pen (P). Draw four closed shapes around a knot at about 268, 1236:
- two rounded loops, one reaching up to the left and one up to the right
- two tails that hang down and outwards
For each one, click and drag at each point to curve the line, then click the first point to close it. Open the Paths panel and click Path to Selection. Fill with red , delete the path, and deselect.
Fill a small knot ellipse (28 × 22) with , then add a 2 px key Stroke.
-
Group the still life and nudge it
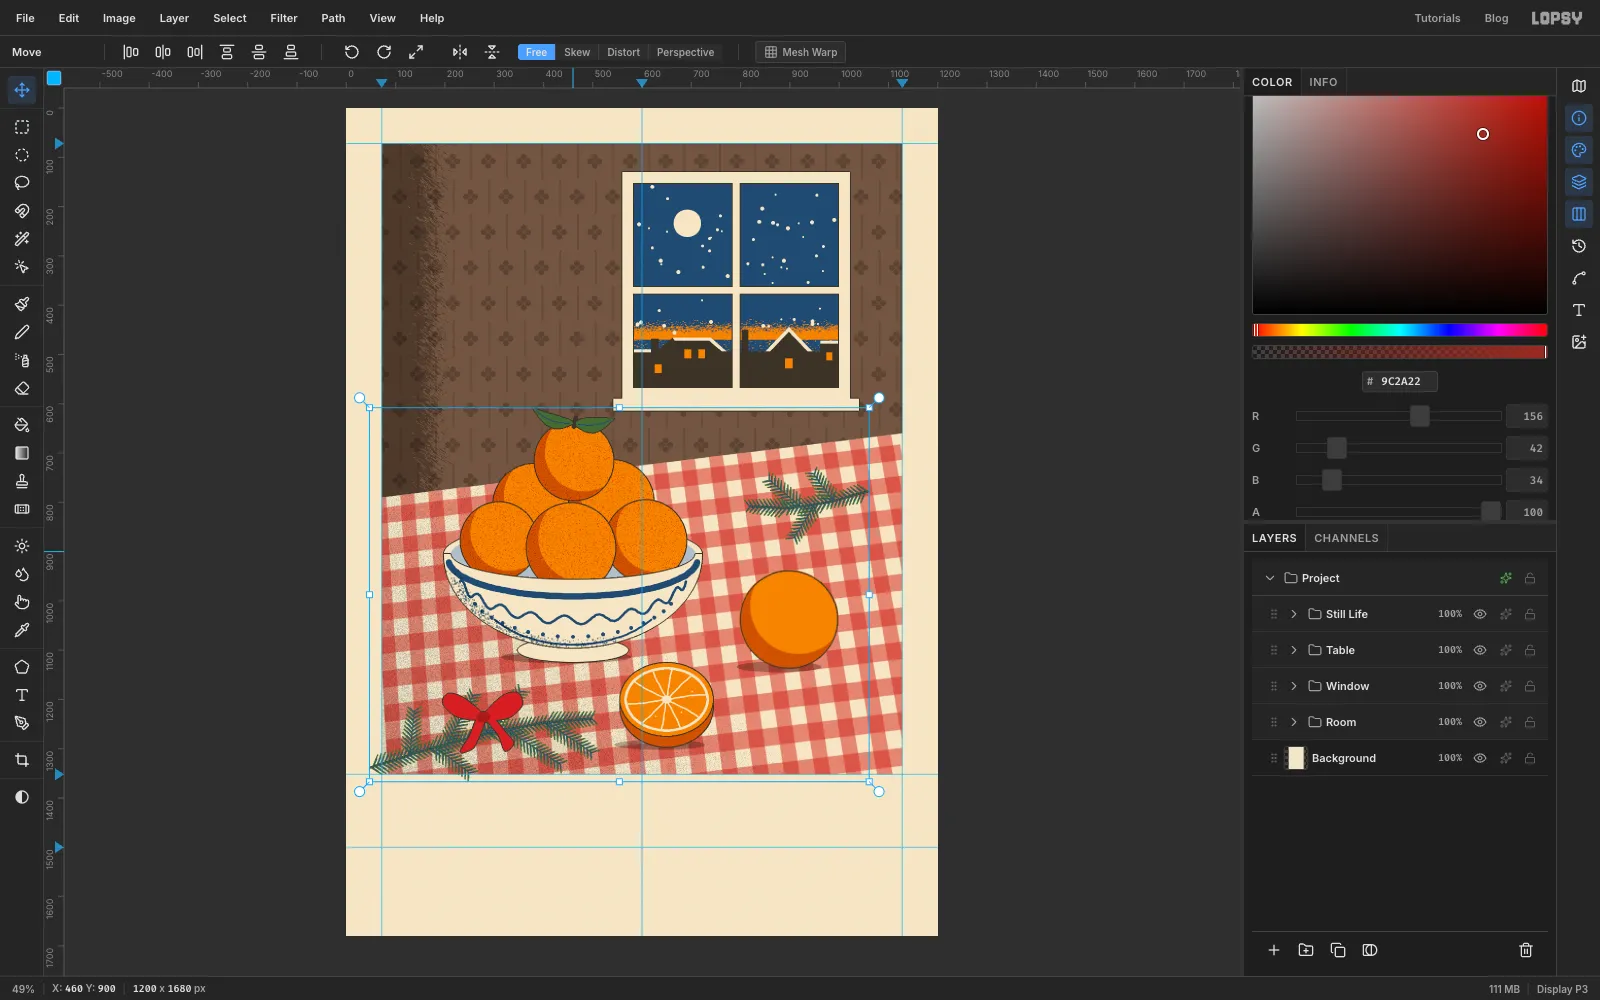
Click Ribbon, Shift-click Cast Shadows, and choose Layer → Group Layers. Name the group Still Life and collapse it.
With the group selected, drag anywhere on the bowl with the Move tool to shift the whole arrangement about 10 px right. Every layer inside moves together.
-
Mat the plate and draw the border
The fir runs off the plate on both sides. Instead of trimming every layer, lay a paper mat over the top.
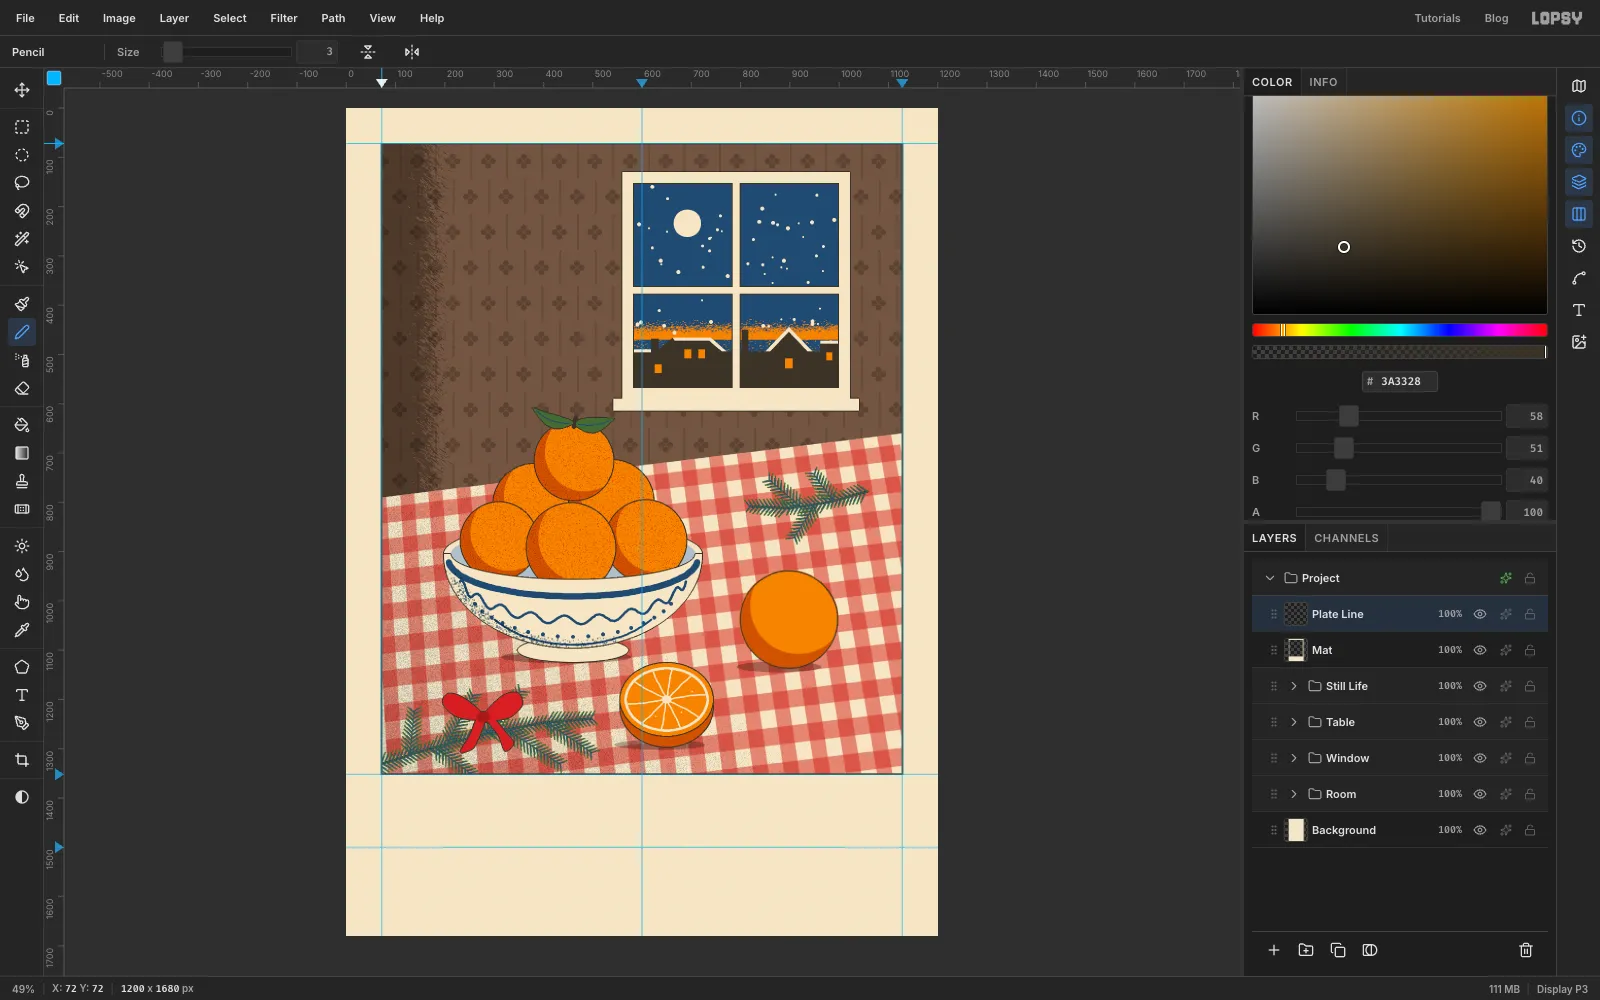
- With Still Life selected, add a layer called Mat.
- Select the plate (72, 72 to 1128, 1352), choose Select → Inverse, and fill with paper. Deselect.
- Add a layer called Plate Line. Pick the Pencil at Size 3 with key as the foreground.
- Click the top-left corner of the plate, then Shift-click the other three corners and the first one again, for four straight lines.
-
Set the caption and kern the apostrophe
Set the small line first. Once the big title is on the canvas, its text box reaches down to where you'd click for the subline, and the click would edit the title instead.
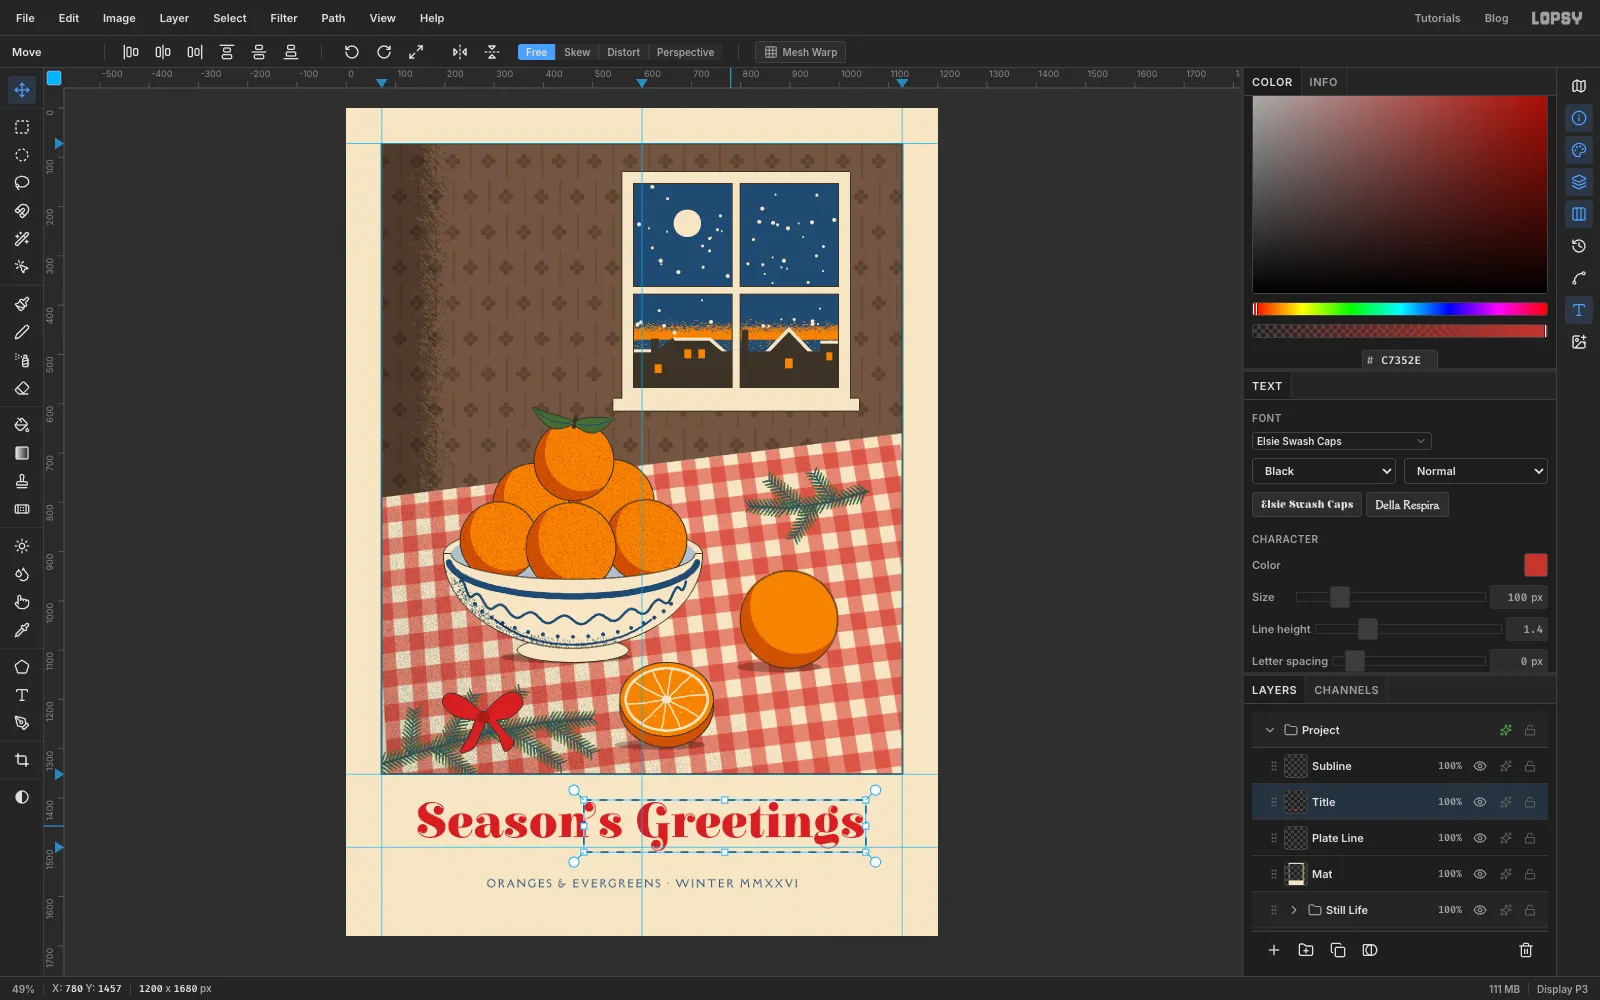
Pick the Text tool (T). Choose Della Respira at 20 px in Prussian blue. In the Text panel, set Letter spacing to 4. Click in the empty margin near the bottom of the card and type
ORANGES & EVERGREENS · WINTER MMXXVI. Press Tab to finish, and rename the layer Subline (text layers name themselves after their text). Drag it with the Move tool so it's centred on the middle guide, with its baseline at about y 1580.Click Plate Line, so the next text doesn't restyle the subline. Pick the Text tool, choose Elsie Swash Caps, weight Black, at 100 px in red . Set Letter spacing back to 0. Click in the caption band and type
Season’s Greetings, with a curly apostrophe. Press Tab, rename the layer Title, then click Rasterize Layer at the bottom of the Layers panel.The swash font leaves loose gaps around the apostrophe, so close them by hand:
- Draw a marquee from just left of the apostrophe to past the end of the line.
- With the Move tool, press Shift+Left once and Left twice (12 px), then Cmd+D.
- Do the same from just left of the s, moving it 10 px.
-
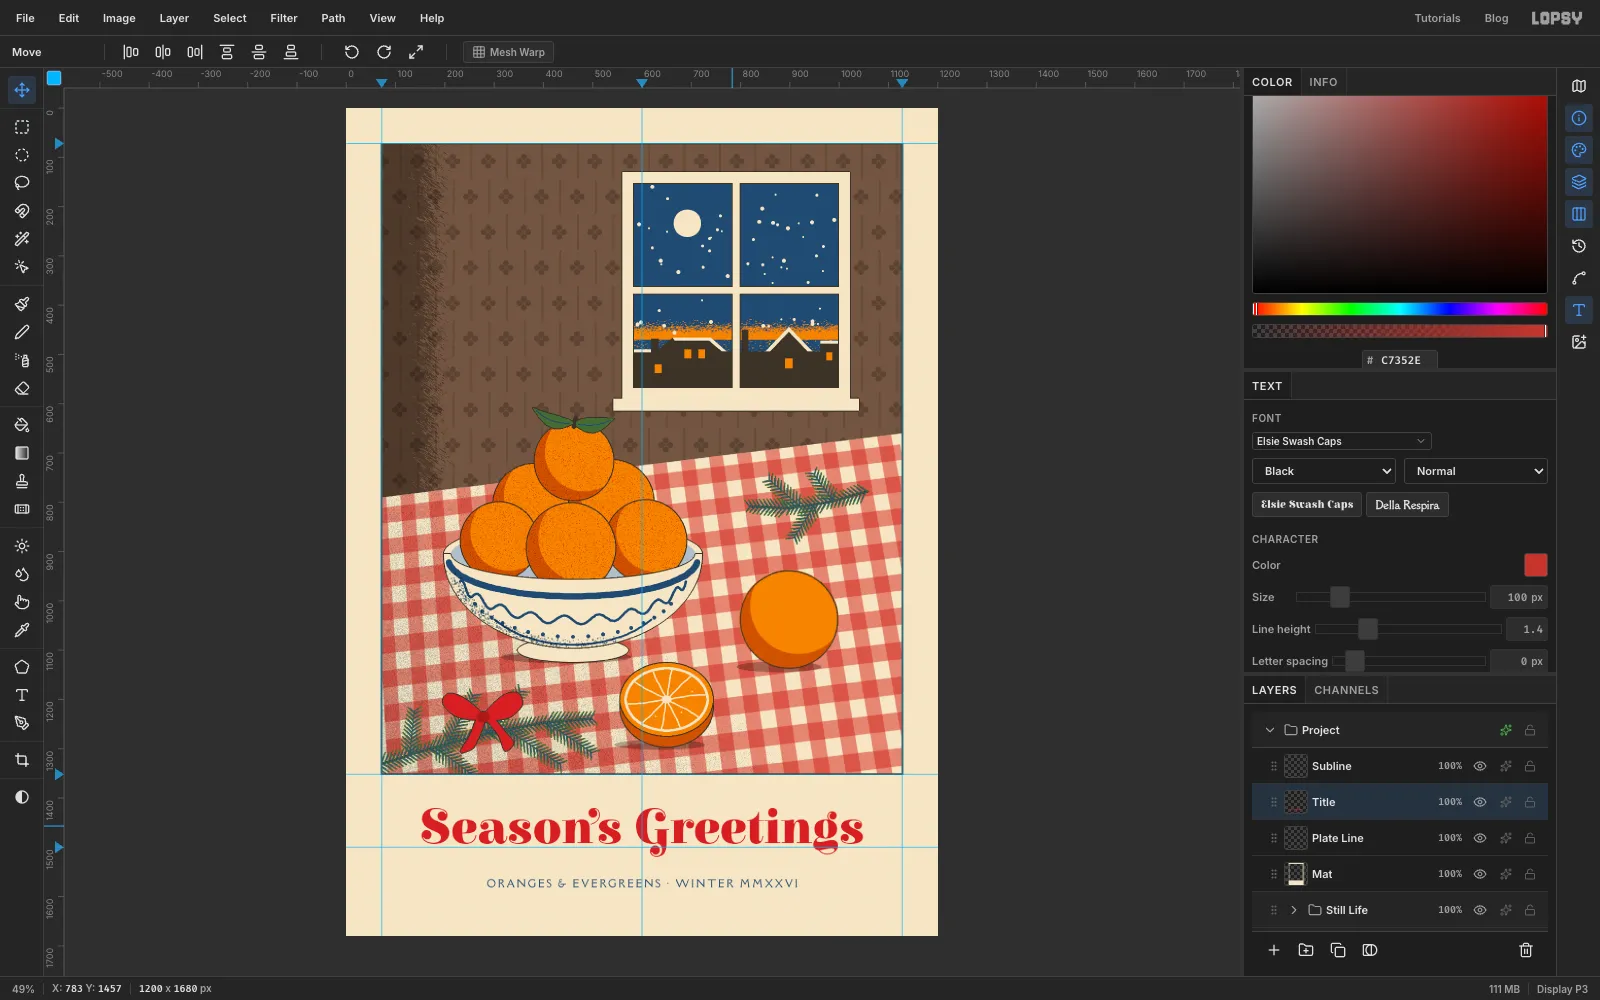
Centre the title
Move the title so it's centred on the middle guide, with the tops of the capitals at about y 1420, so the y 1500 guide runs just through the lower half of the letters. That's 68 px below the plate, which gives the swash capitals room to breathe. Use the arrow keys for the last few pixels.
-
Stamp a red chop
A chop is the small stamp printers pressed into the margin.
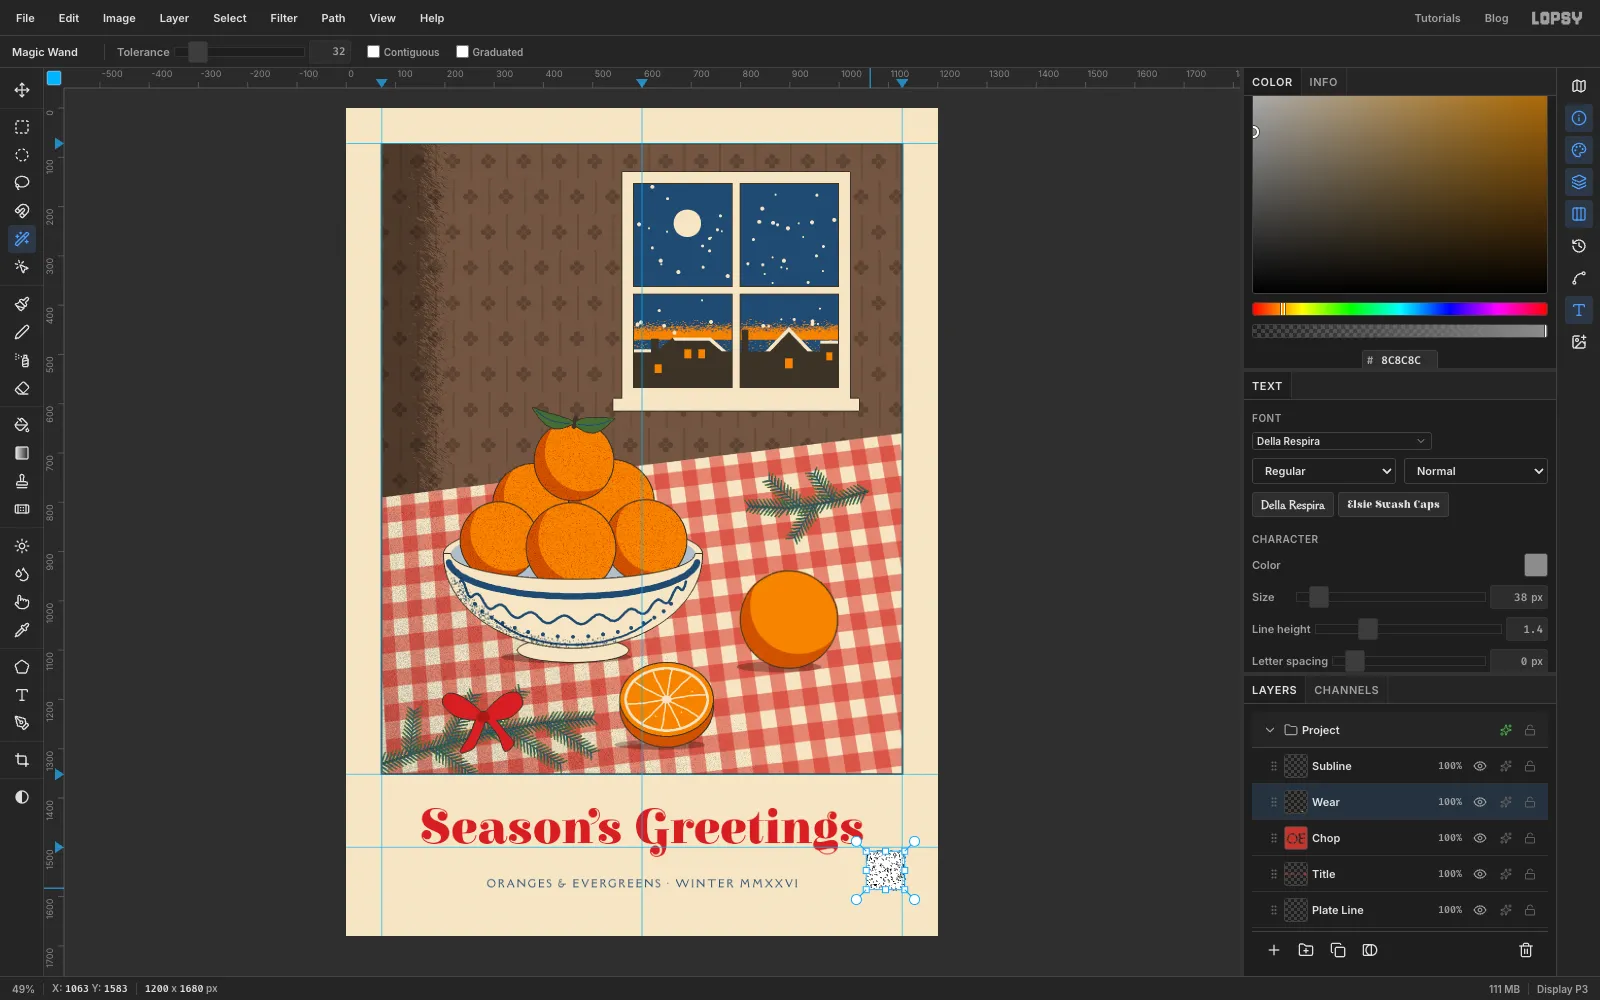
- Click Title and add a layer called Chop. Fill a square from 1060, 1513 to 1128, 1581 with red. Its right edge lines up with the plate, and its bottom with the subline.
- Type
OEin Della Respira at 38 px in any colour, in empty margin, and name the layer OE. Rasterize it and move it to the centre of the square. - Cmd-click the OE thumbnail, click Chop, press Delete, and deselect. Then delete the OE layer. The letters are now knocked out of the red.
To wear the edges like a used rubber stamp:
- Add a layer called Wear. Fill a square 6 px larger all round with and deselect.
- Run Add Noise (100, Mono), Gaussian Blur (2) and Threshold (124).
- Pick the Magic Wand (Contiguous off) and click a black blot.
- Click Chop, press Delete, deselect, and delete Wear. The square now has a worn, broken edge and pitted letters.
-
Add paper grain to the margin
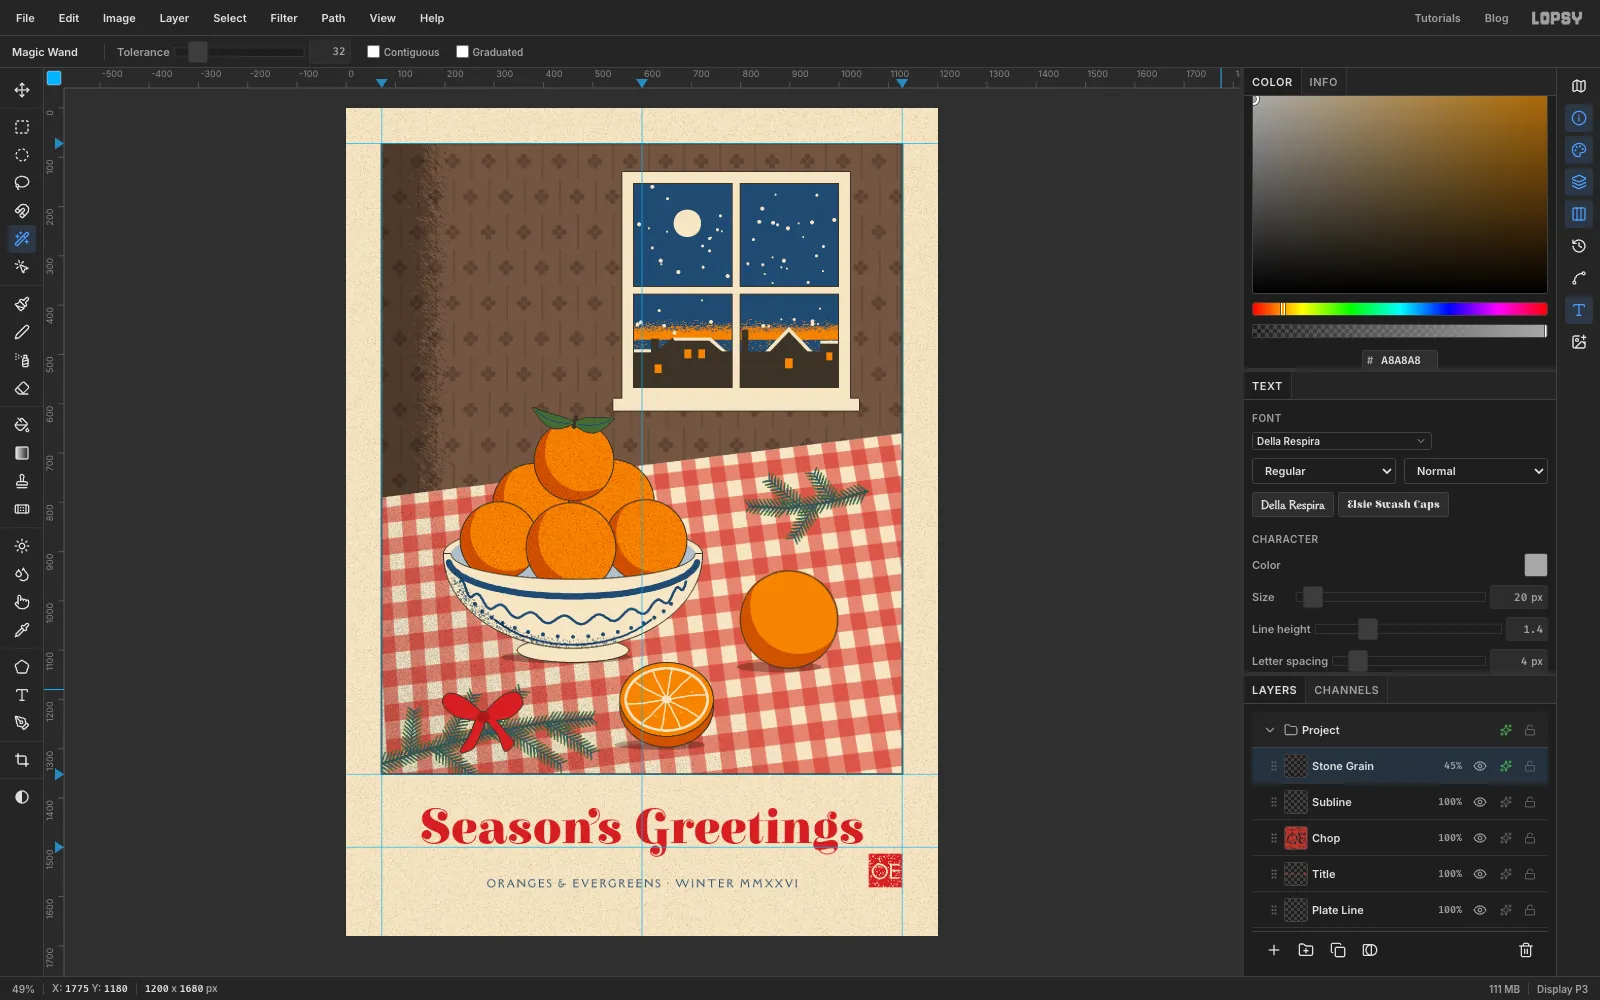
Click Subline, the top layer, and add a layer called Stone Grain. Select the plate, choose Select → Inverse, and fill with . Deselect and turn it into crayon grain. The grey is light, so only about one pixel in seven turns into a speck.
Add a Color Overlay in grain , then set the layer to Multiply at 45%.
-
Settle the inks
Choose Layer → Adjustment Layer… and click Got it. New documents come with five adjustments already in the list.
- Expand Hue / Saturation and set Saturation to −8, so the inks look less like screen colours.
- Expand Color Grading, click Shadows, and set Hue to 222 and Saturation to 6. This gives the darkest inks a cool cast, like Prussian blue printed under them.
Close the drawer. Choose File → Save Project to keep the layers, then File → Quick Export PNG for the finished card.