Design a Memphis-Style Album Cover
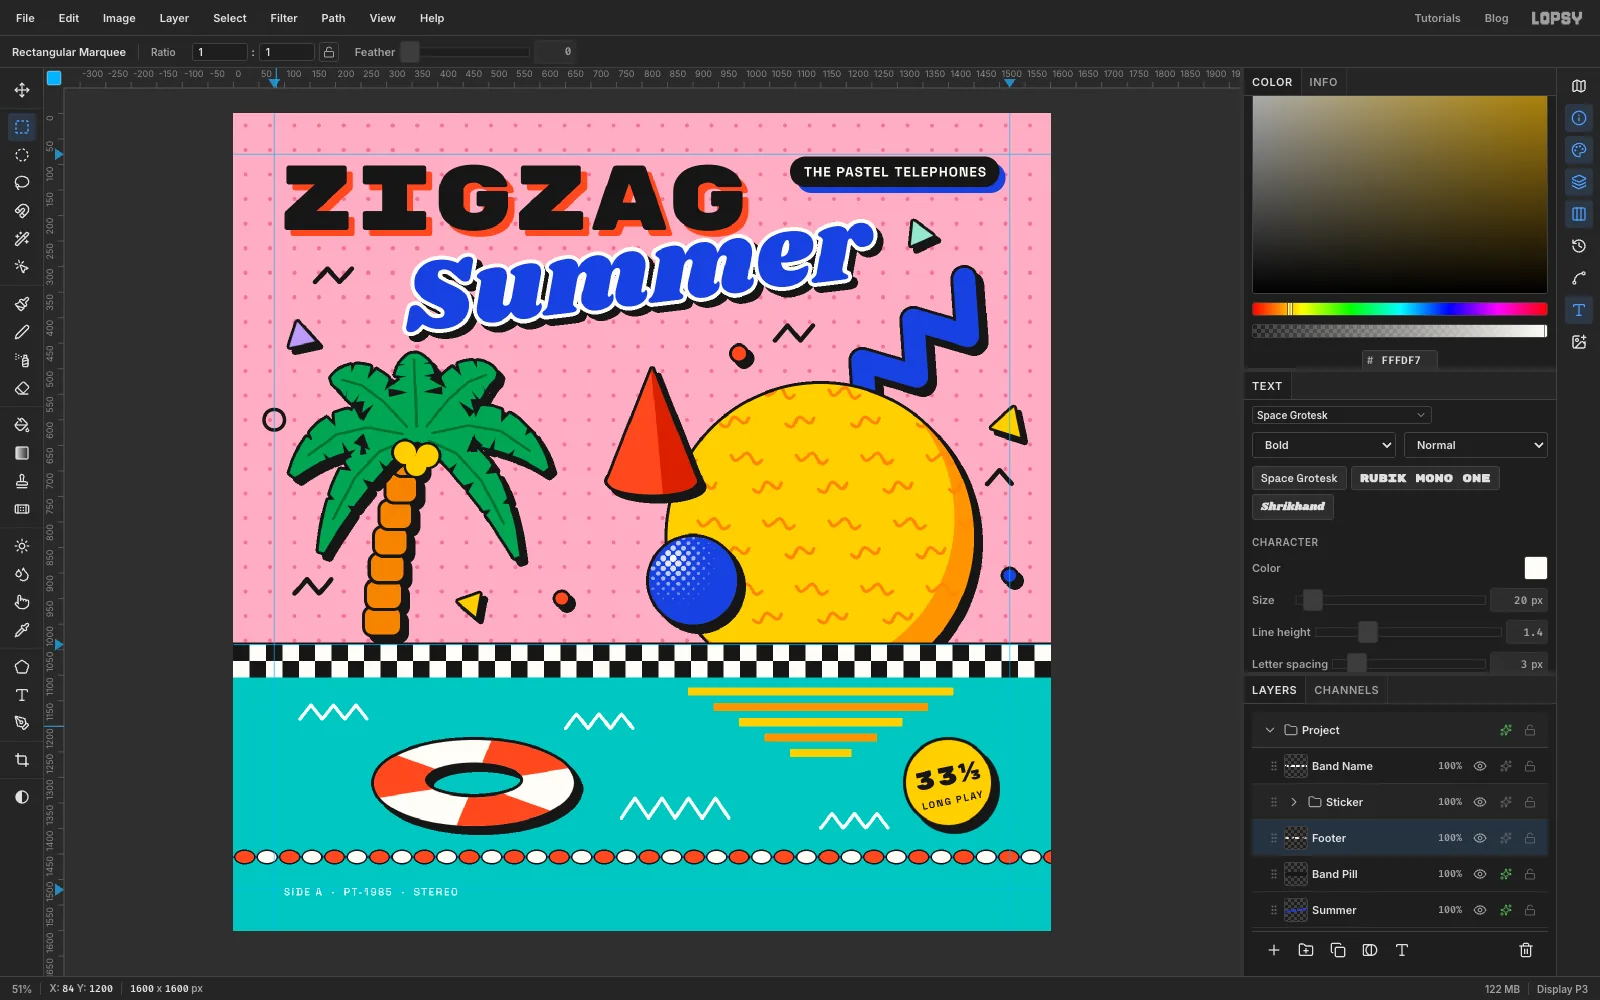
Make an 80s Memphis Group album cover in Lopsy with home-made pattern tiles, flat shapes with hard shadows, a halftone sphere, a palm tree and rotated type.

Memphis was a design collective that formed in Milan in 1981 around Ettore Sottsass. Their furniture and fabrics broke every rule of good taste on purpose. They put flat candy colours next to each other: bubblegum pink, signal yellow, cobalt and mint. They drew thick black outlines, laid down checkerboards and dot grids, and covered surfaces in squiggly "Bacterio" prints. Simple solid shapes like cones, balls and stepped blocks sat in a scatter of confetti. The look took over record sleeves, TV sets and shop windows for most of the decade.
In this tutorial you'll make a square album cover in that style: Zigzag Summer by an imaginary new-wave band, The Pastel Telephones. It's 1600 × 1600 px. The finished cover has:
- a pink sky with a dot grid, a checkerboard horizon and a turquoise pool
- a big yellow sun with a squiggle pattern, and a cobalt zigzag ribbon rising from behind it
- a geometric palm tree, a red cone and a blue ball with halftone highlights
- a striped life ring, sun reflections, zigzag ripples and a lane rope of beads
- chunky title type, a band-name pill and a tilted 33⅓ sticker
The tools you'll use:
- Edit → Fill, Edit → Define Pattern and Edit → Fill with Pattern
- the Shape tool for circles, rounded rectangles and triangles
- the Brush, the Lasso, and both Marquee tools with Shift (add), Alt (subtract) and Shift+Alt (intersect)
- the Stroke and Drop Shadow effects
- the Gradient tool, Filter → Halftone, Filter → Invert and the Screen blend mode
- Copy, Paste, Merge Down, the Move tool with its scale and rotate handles, and groups
- guides and the grid with snapping, and the Text tool
The fonts are free Google Fonts from Lopsy's font picker: Rubik Mono One for ZIGZAG and the sticker, Shrikhand for Summer, and Space Grotesk for the small type.
The palette is flat, with no gradients you can see. Every colour is used at full strength:
-
Sky pink
-
dots
-
Ink
-
cream
-
Sun yellow
-
sun orange
-
squiggles
-
Vermilion
-
cone shade
-
Cobalt
-
pool turquoise
-
Palm green
-
midribs
-
trunk orange
-
Confetti mint
-
lilac
-
Set up the canvas and guides
Open Lopsy. In the New Document dialog set Width and Height to
1600and click Create.- Delete the empty
Layer 1with the bin button at the bottom of the Layers panel. - Click Background, type
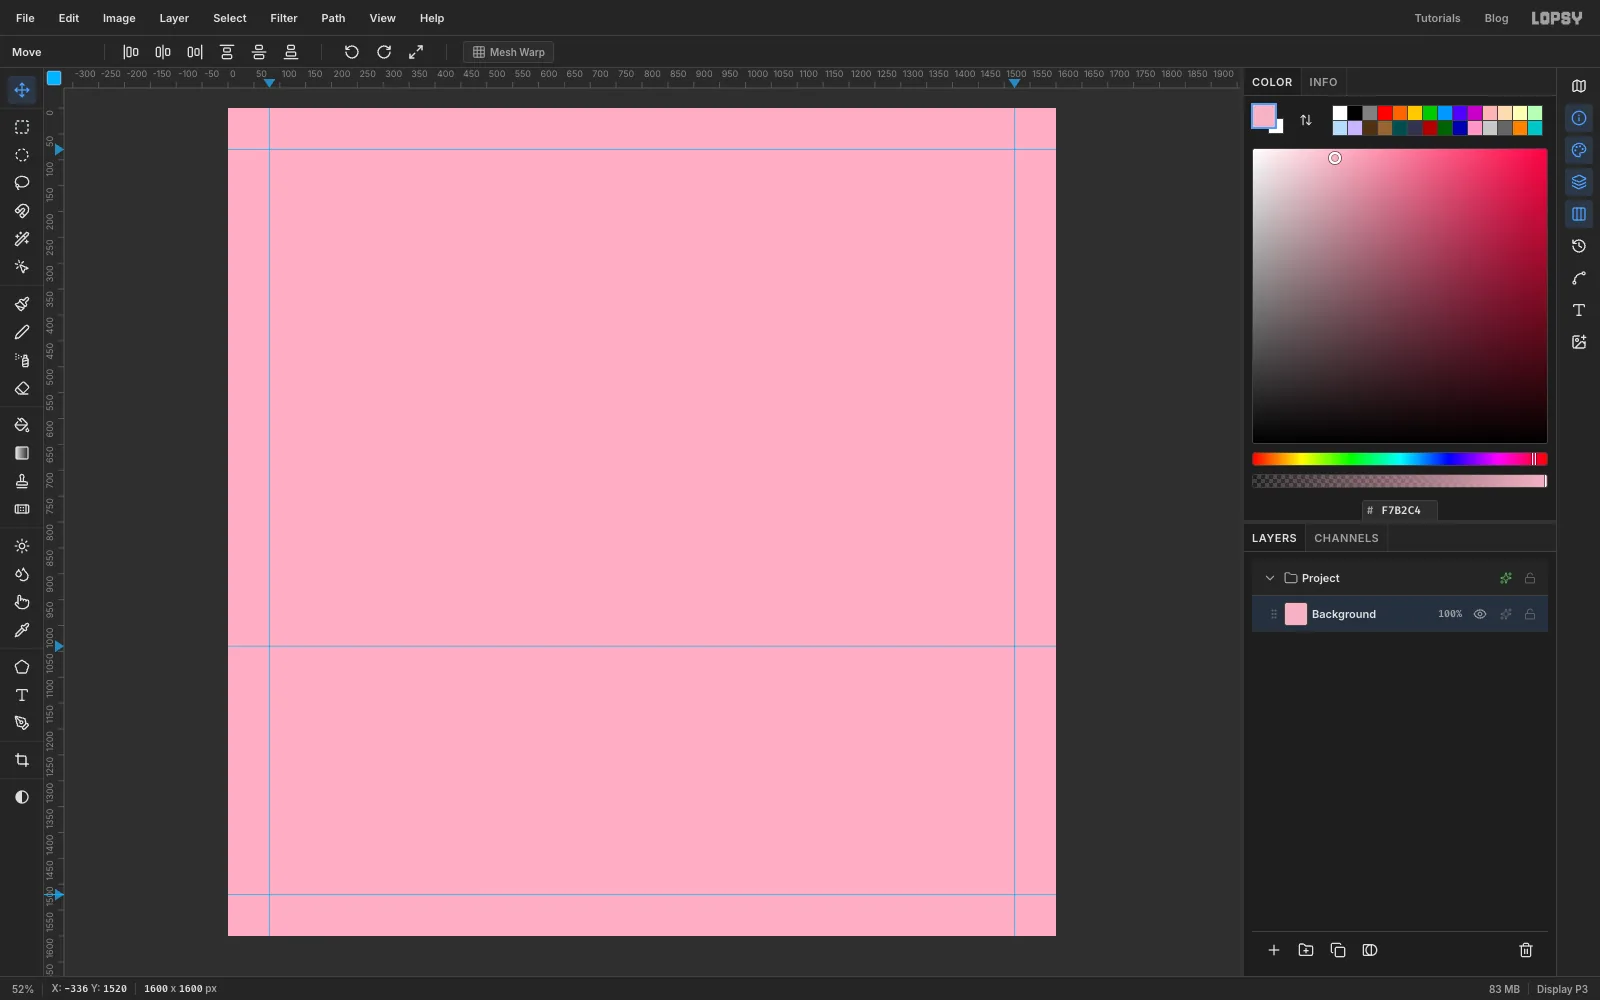
F7B2C4into the hex field of the Color panel, and choose Edit → Fill. - Click the top ruler at 80 and 1520 to drop two vertical guides for the side margins.
- Click the left ruler at 80 and 1520 for the top and bottom margins, and at 1040 for the horizon.
The 80 px guides mark a safe area: nothing important goes outside them. The type will sit 20 px further in, on a 100 px margin, so it never crowds the guides.
- Delete the empty
-
Make a dot tile
Memphis surfaces are rarely plain, so the sky gets a dot grid. You'll make one dot and let Lopsy repeat it.
- Add a layer with the + button and name it
Dot Tile(double-click a layer's name to rename it). - Set the foreground colour to .
- Pick the Elliptical Marquee (M cycles the marquees) and click once on the canvas without dragging. In the dialog enter From
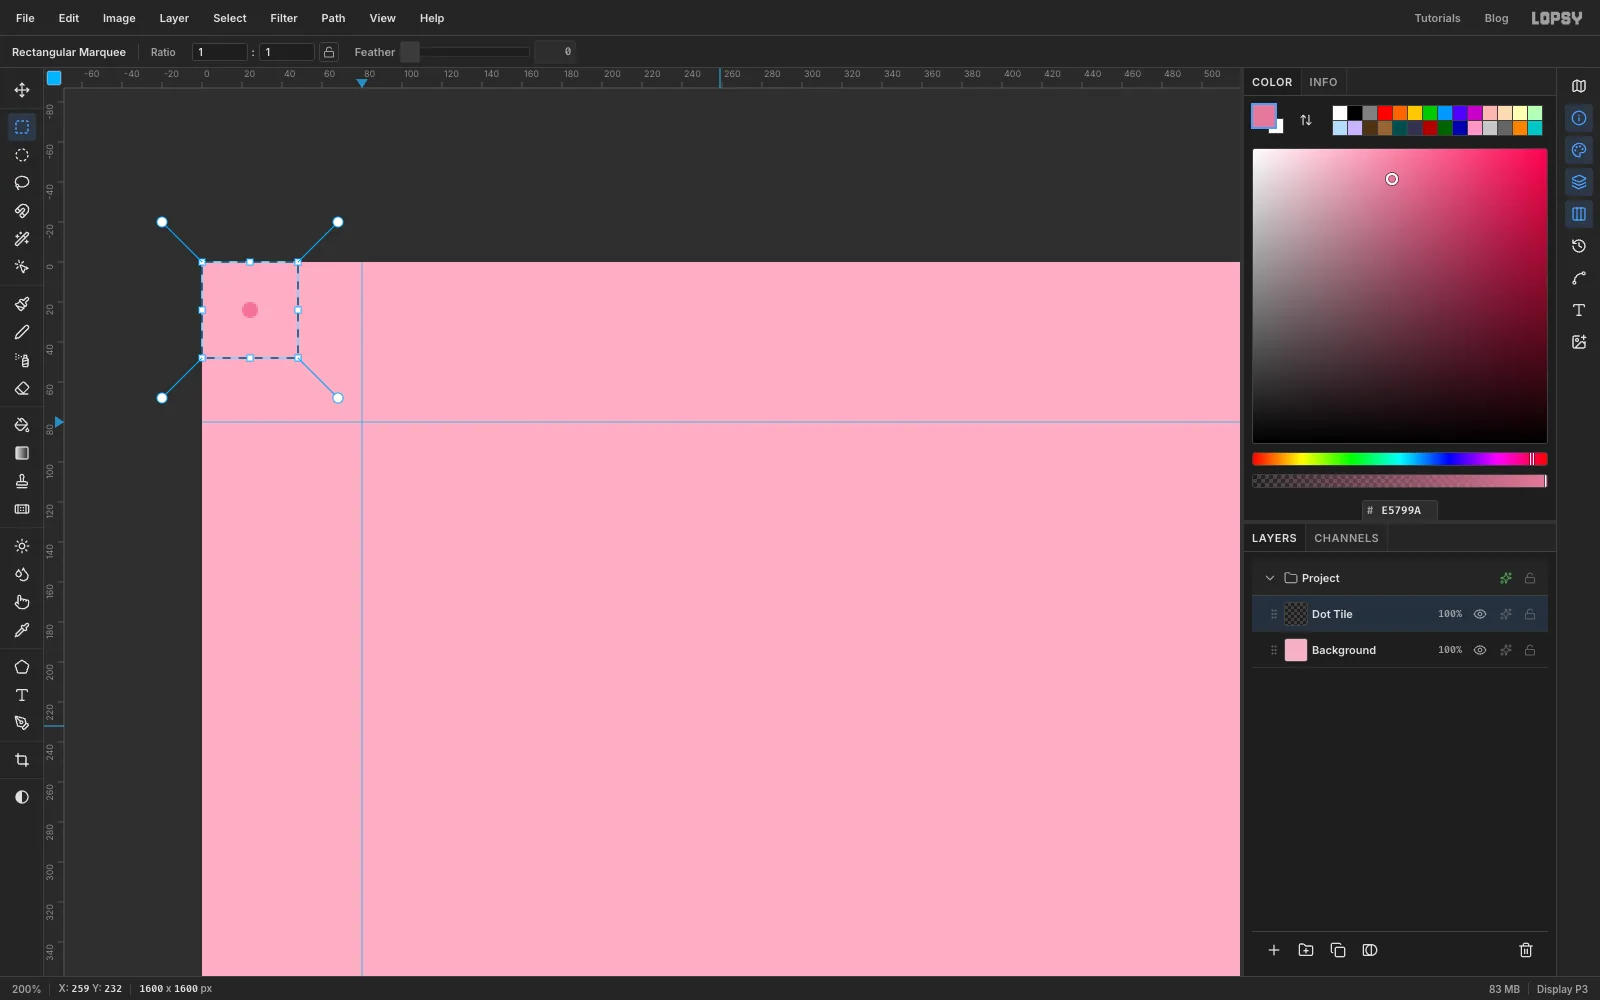
20, 20and To28, 28and press Enter, then choose Edit → Fill. That's an 8 px dot. Zoom in on the top-left corner to see it. - Press Cmd+D, switch to the Rectangular Marquee, click once, and enter
0, 0to48, 48. The dot now sits in the middle of a 48 px square. - Choose Edit → Define Pattern, then delete the
Dot Tilelayer. The pattern is saved, so you don't need the layer any more.
- Add a layer with the + button and name it
-
Fill the sky with dots
- Add a layer named
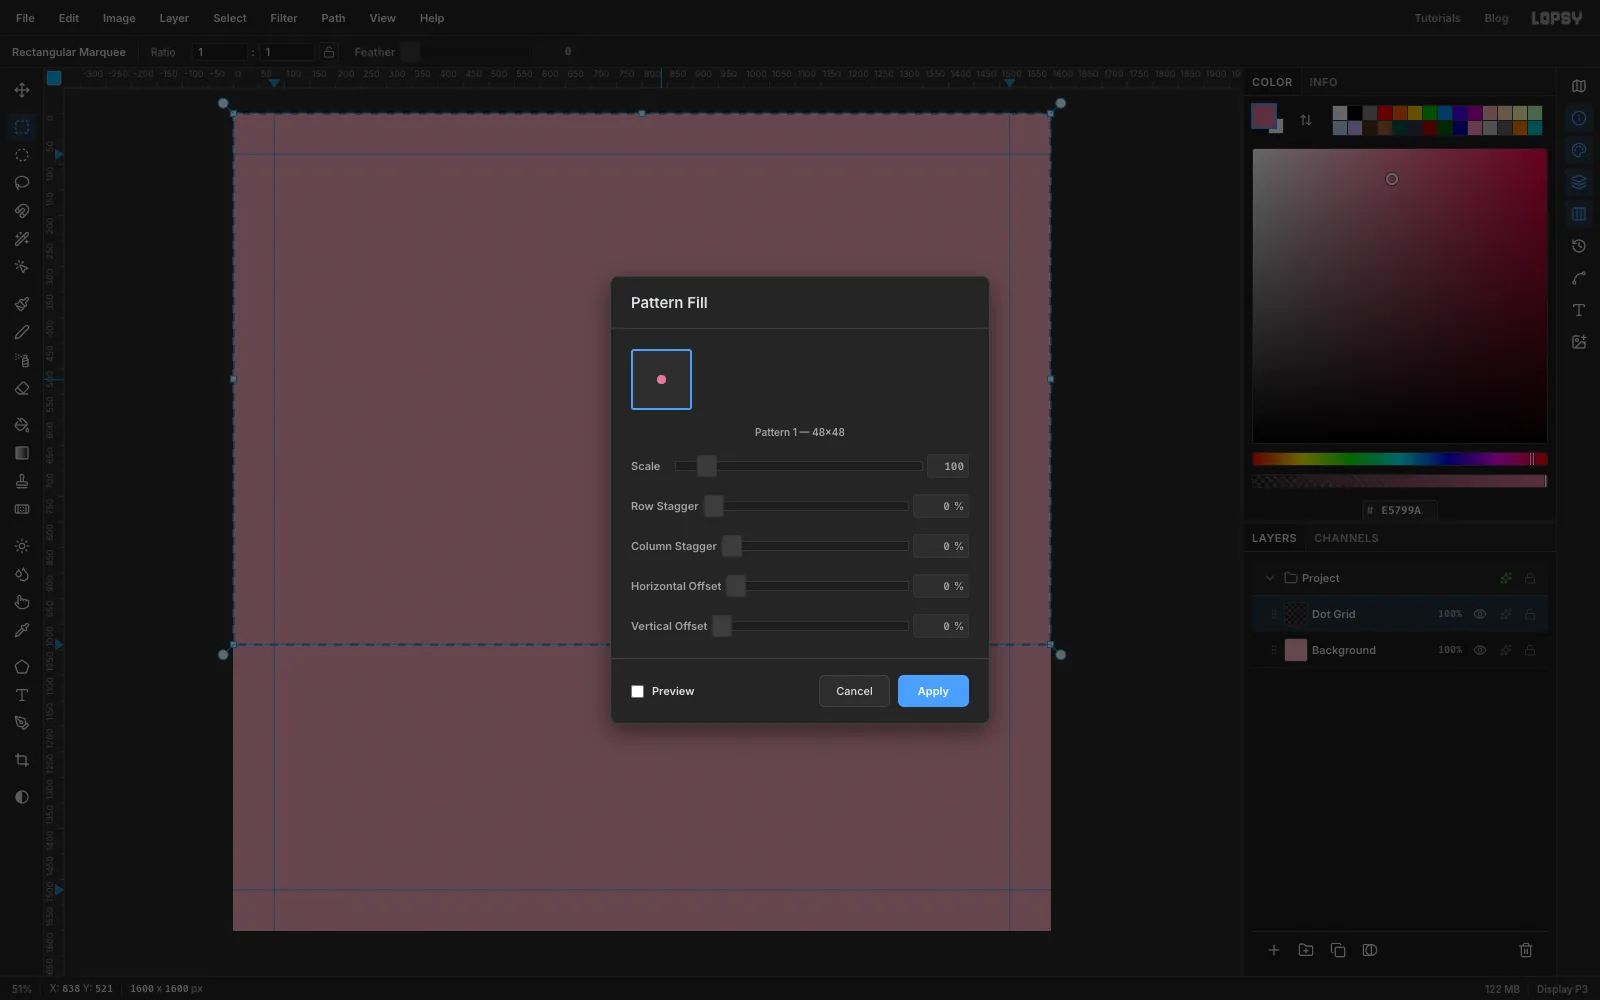
Dot Grid. - Click once with the Rectangular Marquee and select
0, 0to1600, 1040: the whole sky down to the horizon guide. - Choose Edit → Fill with Pattern…, click the dot thumbnail, leave Scale at
100%and click Apply. - Press Cmd+D to deselect.
The dots repeat every 48 px, in neat rows.
- Add a layer named
-
Brush the zigzag ribbon
- Add a layer named
Zigzag Ribbon. - Pick the Brush (B) and set Size to
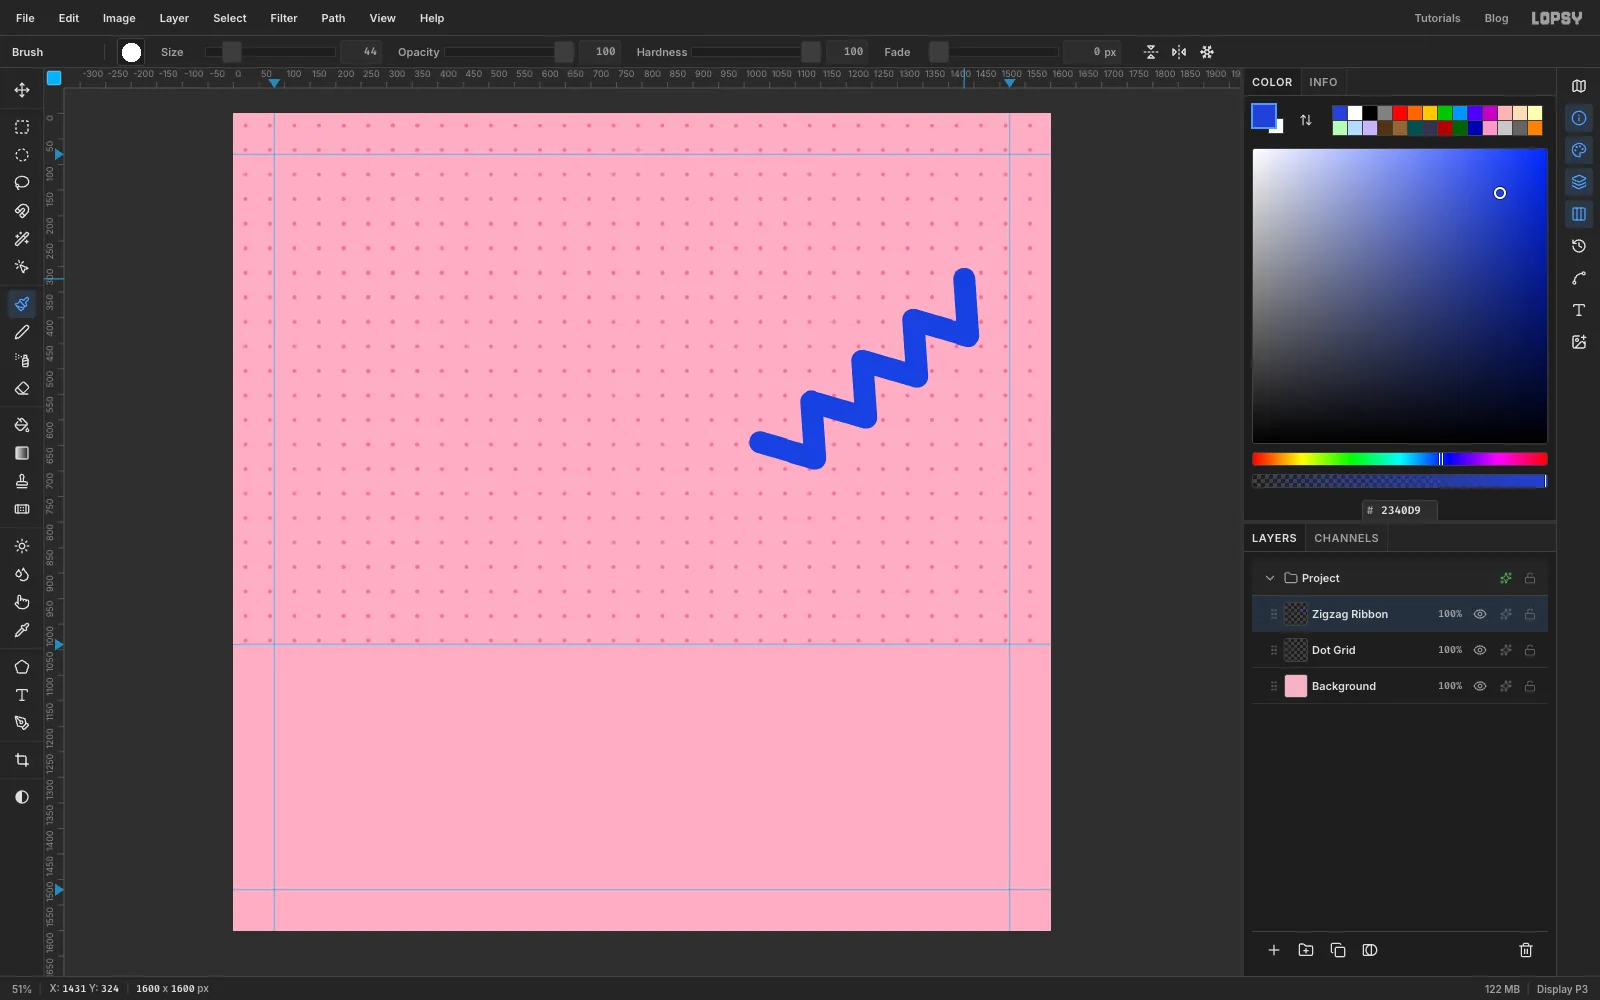
44, Hardness100and Opacity100. Set the colour to . - Click at
1031, 644, then Shift-click each corner in turn so the brush joins them with straight strokes. Each tooth is two moves: about 108 px right and 32 px down, then 8 px left and 112 px up. The first corners are1139, 676and1131, 564. - Make four teeth, so the ribbon ends at about
1431, 324, well inside the right margin.
The zigzag climbs up and to the right. Its first two corners will end up hidden behind the sun, so the ribbon looks as if it comes out from behind it.
- Add a layer named
-
Outline the ribbon and give it a hard shadow
Click the fx button on the
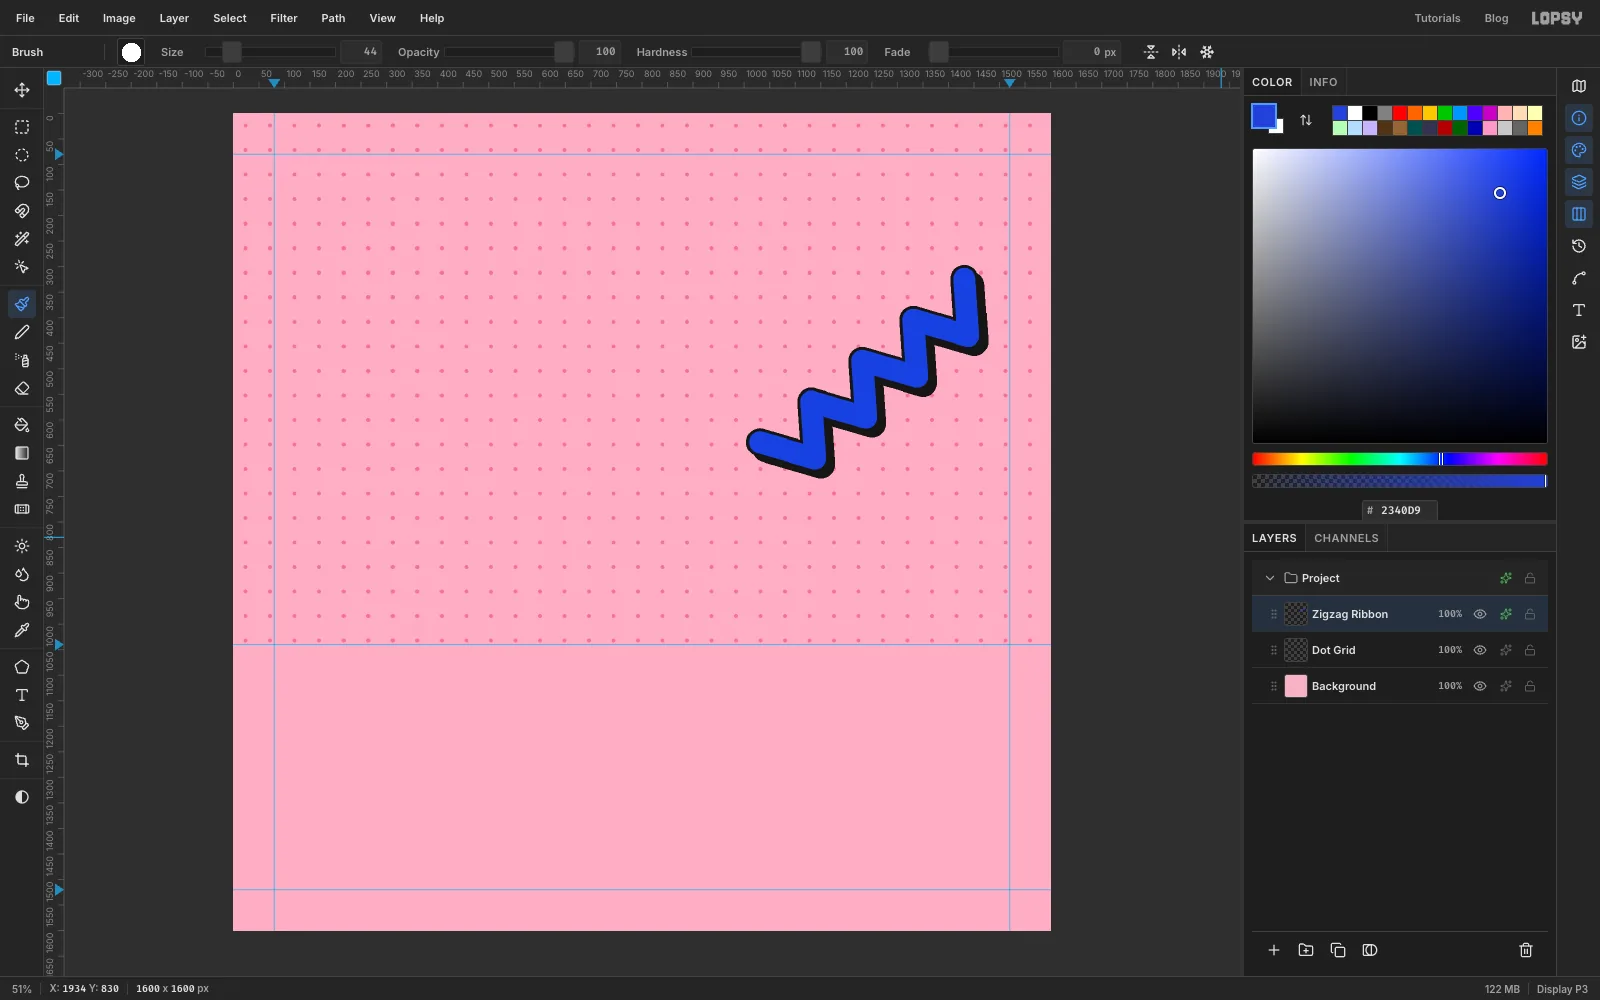
Zigzag Ribbonrow to open the effects drawer.- Tick Stroke. Set Width to
6, keep the position outside, and type161616for the colour. - Tick Drop Shadow. Set Offset X and Offset Y to
12, Blur to0, Spread to0and Opacity to100, with the colour161616. - Close the drawer.
A shadow with no blur reads as a solid flat shape, the way a screen-printed sleeve would print it.
- Tick Stroke. Set Width to
-
Draw the sun with the Shape tool
- Add a layer named
Sun. - Pick the Shape tool (U). In the options bar, set Shape to Ellipse and Output to Pixels. Click the fill swatch and enter
FFD12E. Make sure there's no stroke: the stroke swatch should show a dash. If it shows a colour, click it and choose Remove stroke. - Shapes grow out from where you press. Hold Cmd (to keep it a perfect circle), press at
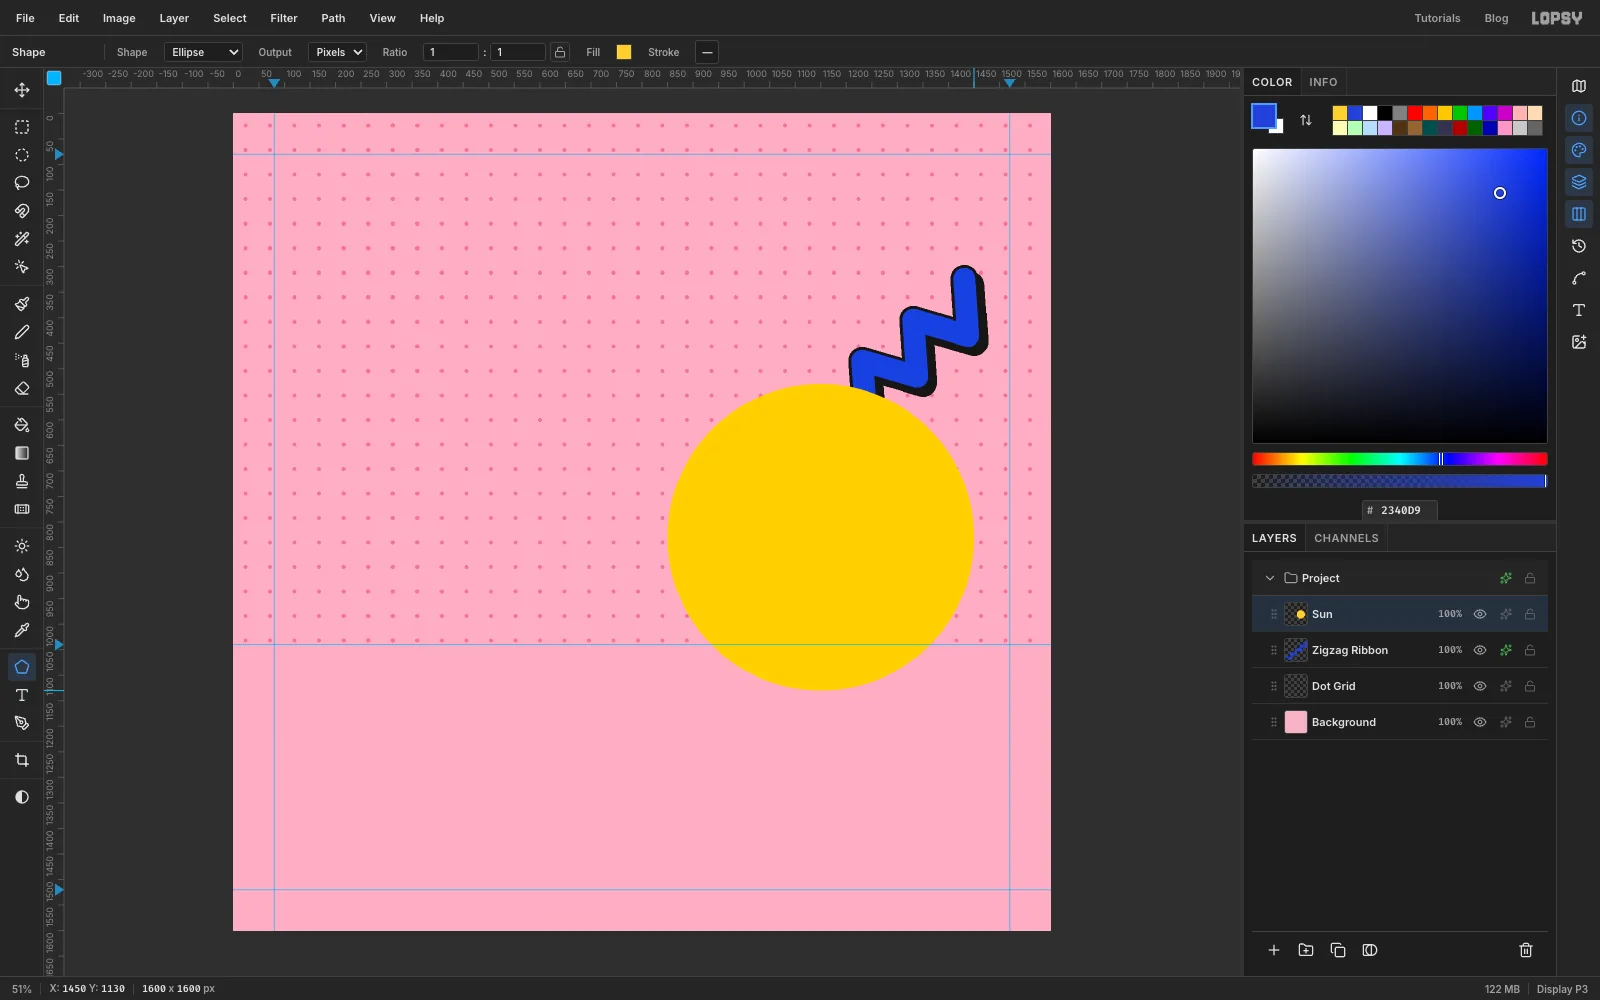
1150, 830and drag out to1450, 1130. That makes a circle 600 px across. - Outline it and give it the same 12 px hard shadow as the ribbon.
The circle's lower part runs past the horizon. The checkerboard deck will cover it later, so the sun looks as if it's setting behind the pool.
- Add a layer named
-
Select a crescent for the sun's shade
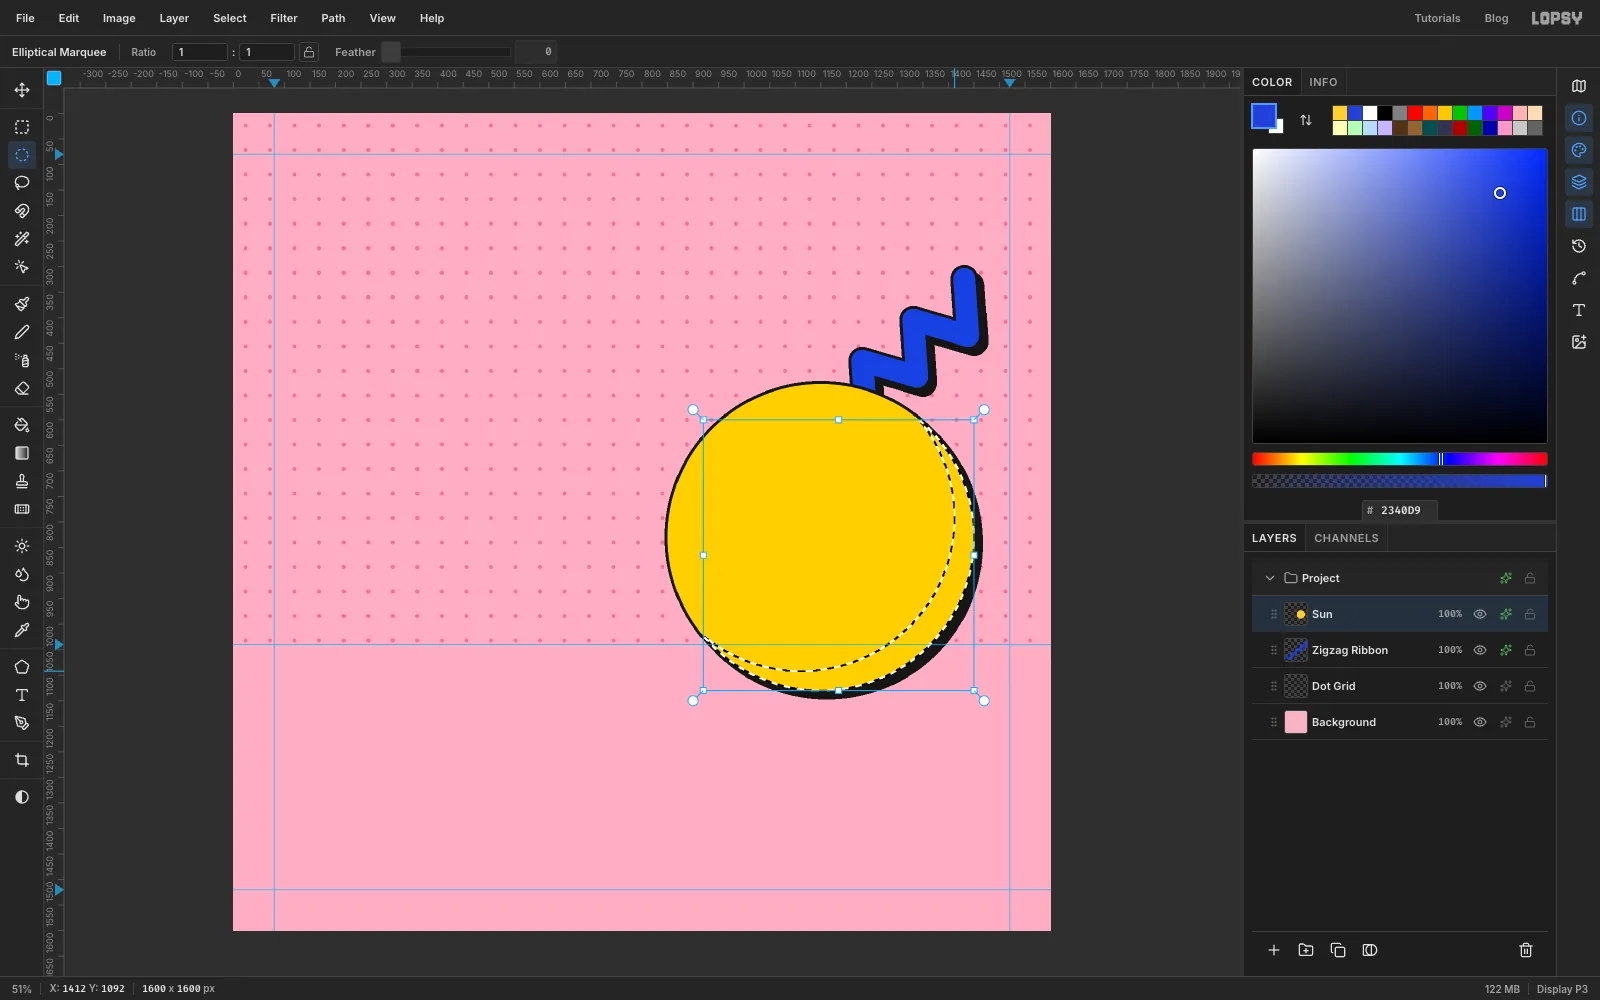
Memphis shading is flat: one darker shape on the side away from the light.
- Cmd-click the
Sunlayer's thumbnail. That selects everything on the layer, so the whole circle is selected. - Pick the Elliptical Marquee, hold Alt and drag a second circle of the same size from
812, 492to1412, 1092. It's the sun's circle moved 38 px up and to the left. Alt subtracts it, so only a crescent on the lower right is left. - Add a layer named
Sun Shade, set the colour to and choose Edit → Fill. Deselect.
- Cmd-click the
-
Draw a Bacterio squiggle tile
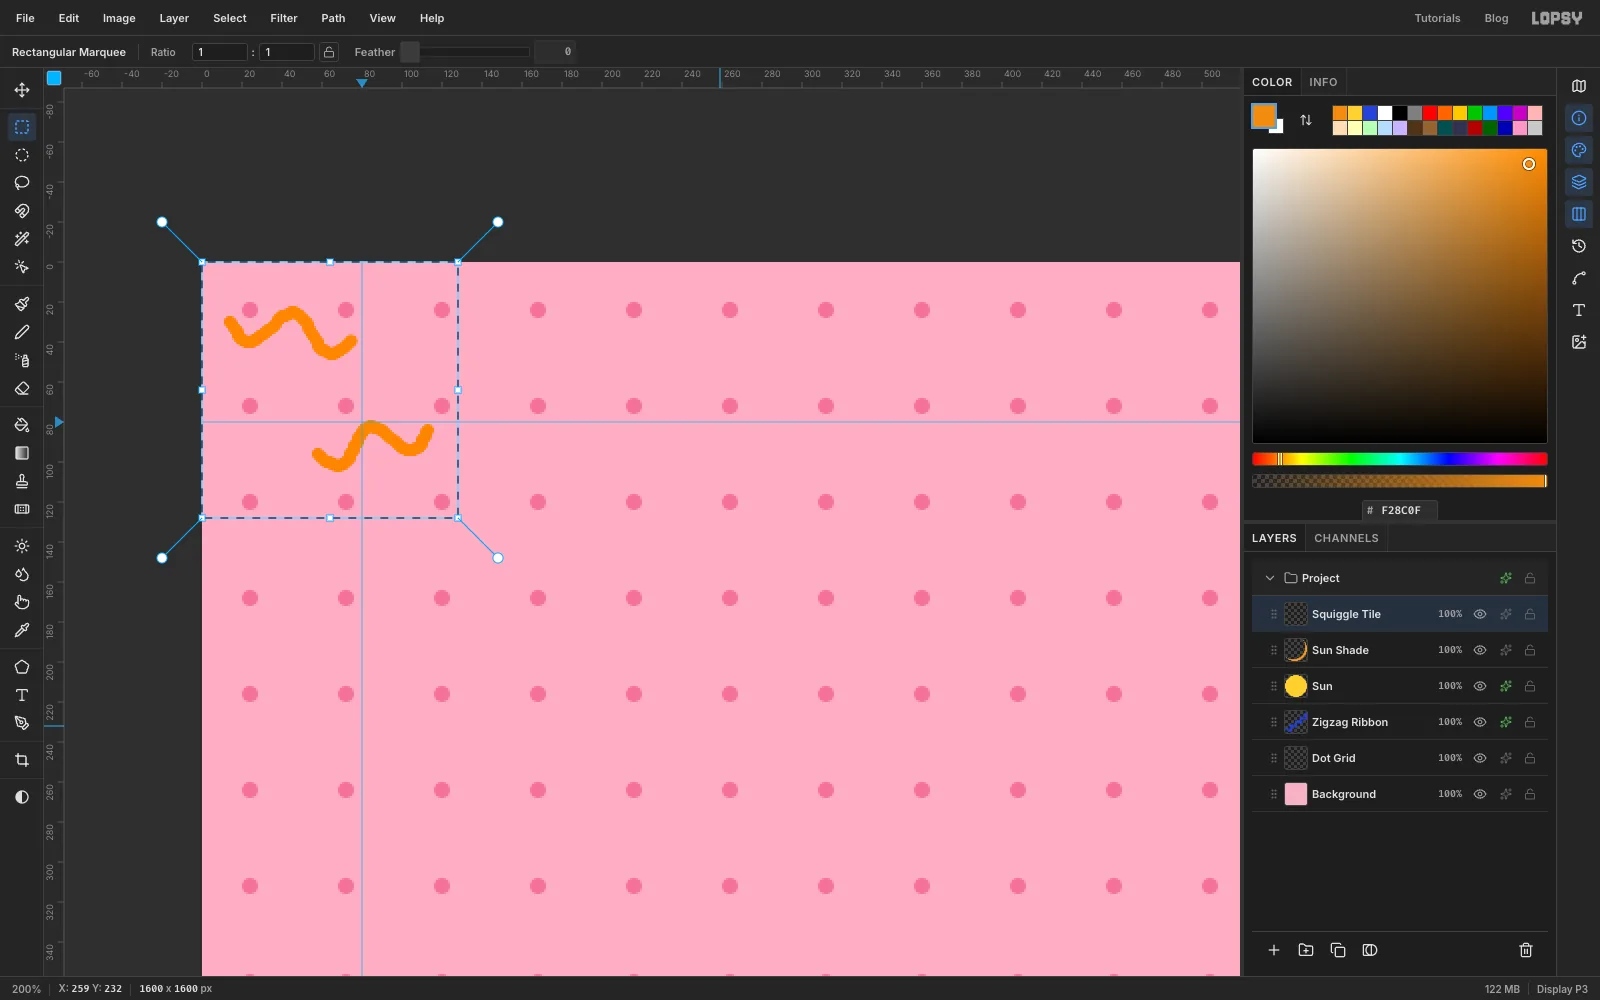
Sottsass's "Bacterio" print is a scatter of little worm shapes. You'll draw two and repeat them.
- Add a layer named
Squiggle Tile. - Pick the Brush, set Size to
7and the colour to . - Zoom in on the top-left corner. Inside the first 128 px of the canvas, drag two short wiggles, each about 60 px long with a wave and a half in it. Draw one near the top and one near the bottom, tilted slightly differently. Keep both well away from the square's edges.
- Click once with the Rectangular Marquee, select
0, 0to128, 128and choose Edit → Define Pattern. Delete theSquiggle Tilelayer.
- Add a layer named
-
Pour the squiggles into the sun
- Click
Sun Shade, then add a layer namedSun Squiggles. - Cmd-click the
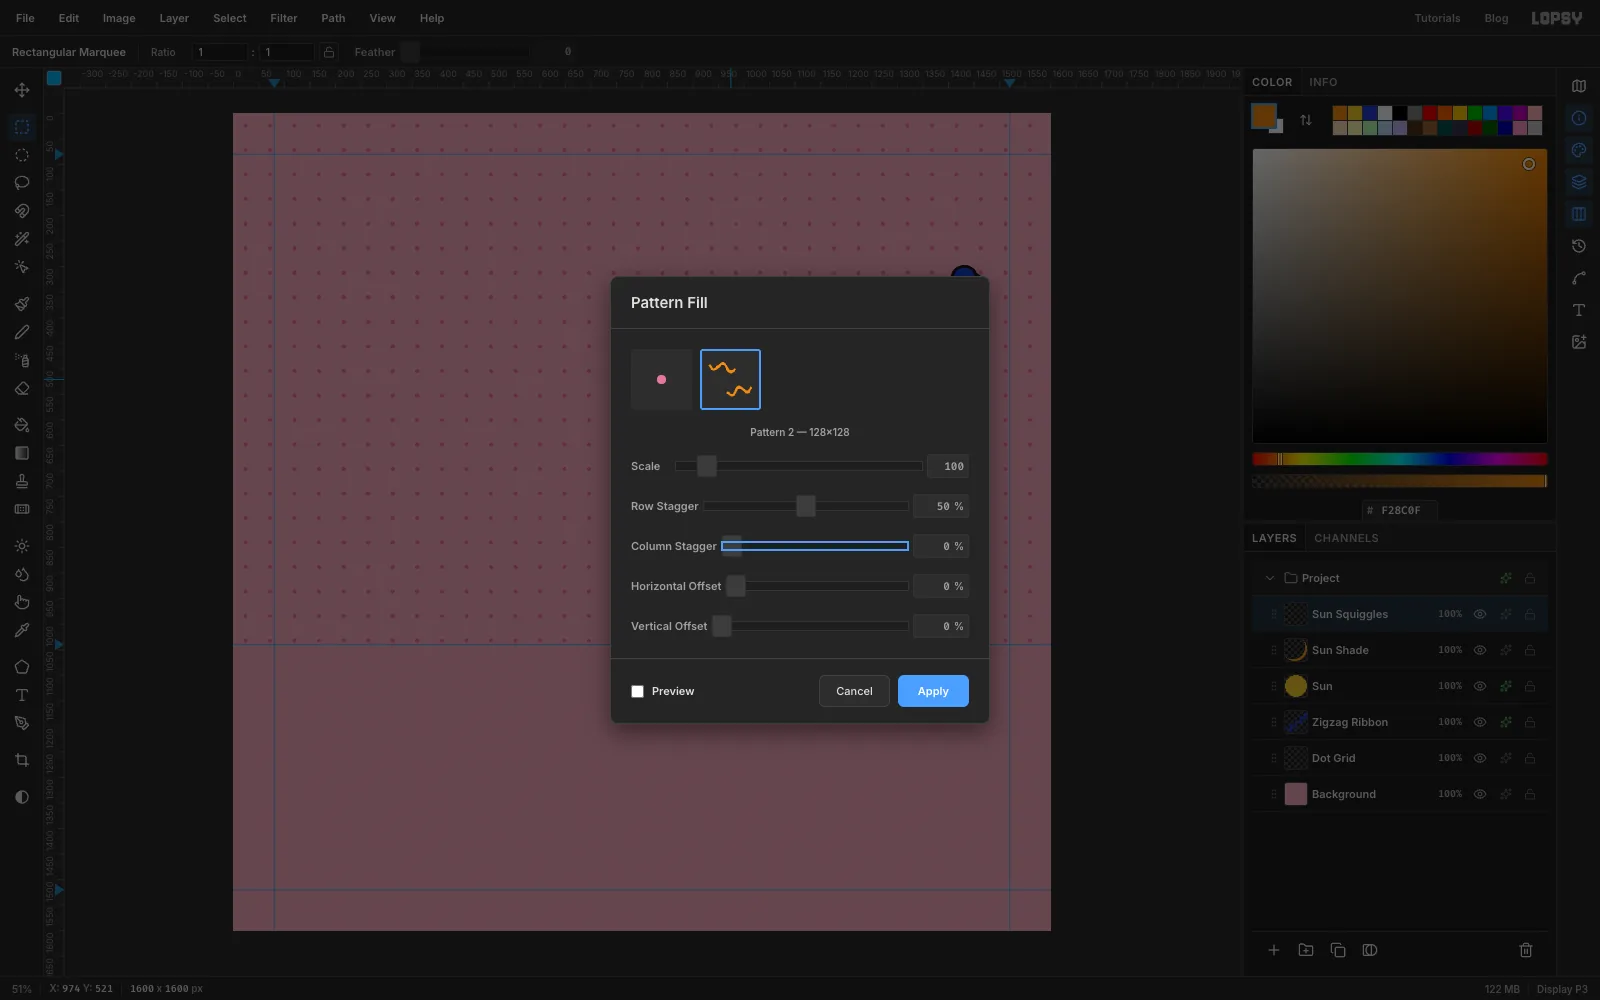
Sunthumbnail to select the circle again. - Choose Edit → Fill with Pattern…, pick the squiggle tile and set Row Stagger to
50%. Each row of tiles shifts half a tile sideways, so the worms look scattered rather than lined up in a grid. - Click Apply and deselect.
The fill stays inside the selection, so only the sun gets the pattern. Because the squiggles are a deeper orange, they all but disappear over the shade crescent, which keeps the shading readable.
- Click
-
Turn on the grid for the deck
- Add a layer named
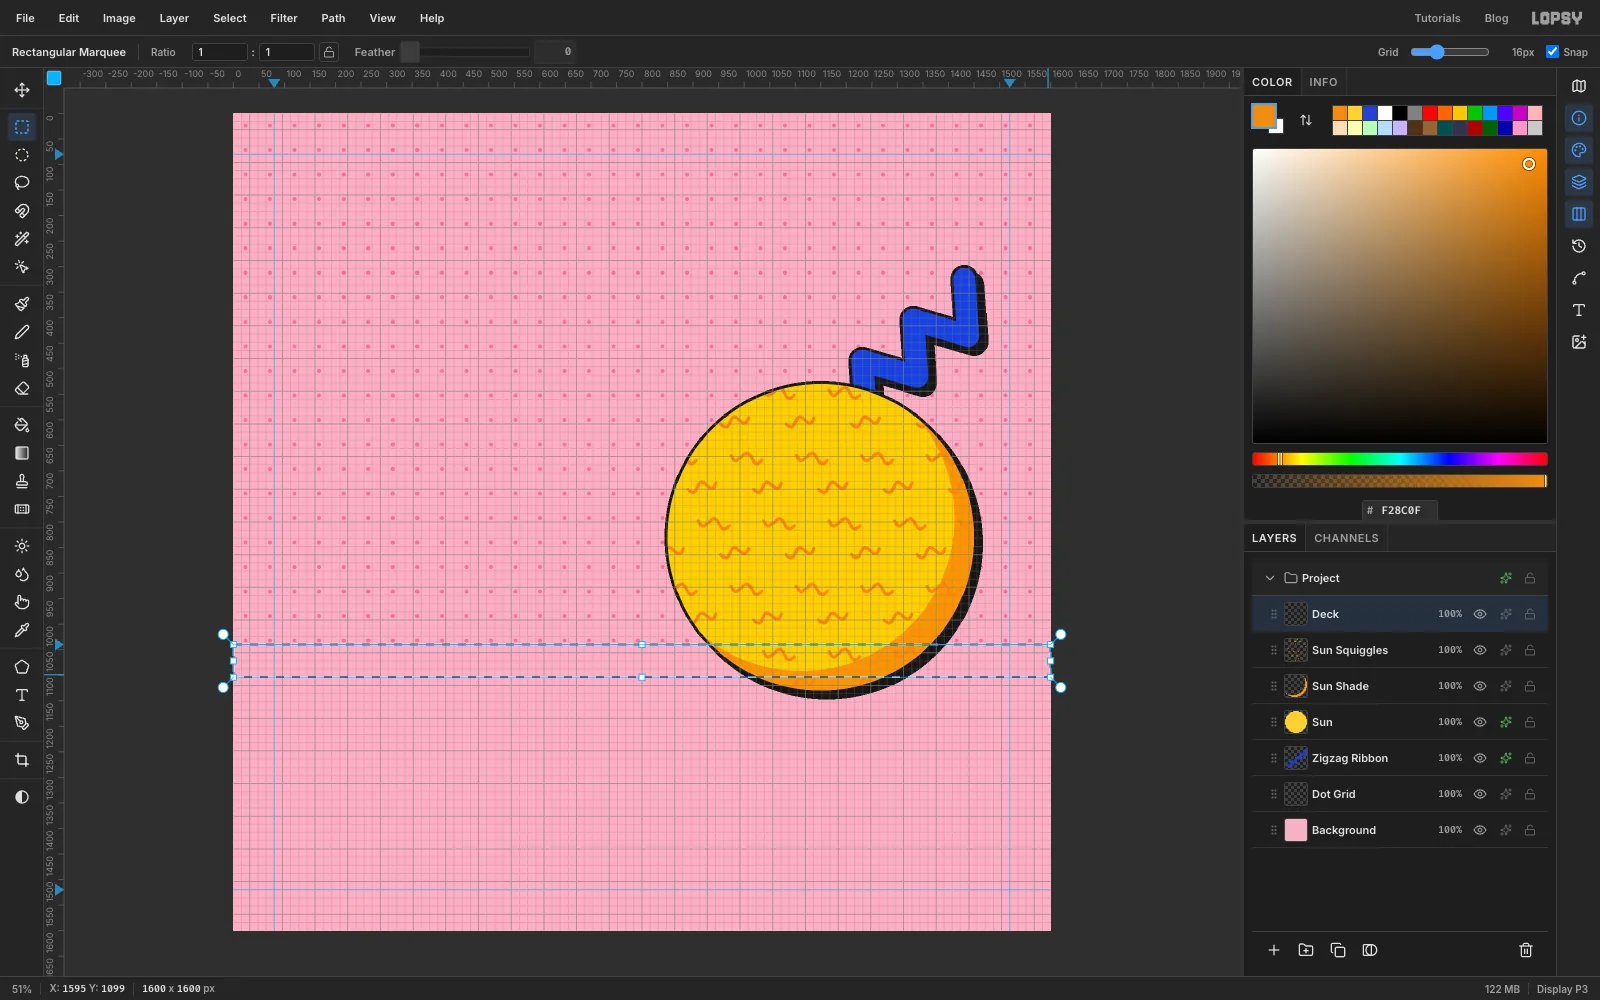
Deck(aboveSun Squiggles). - Choose View → Show Grid. The grid is 16 px, and turning it on also turns on Snap to Grid.
- With the Rectangular Marquee, drag from the left edge at the horizon to the right edge one 64 px band lower. You don't have to be exact: the corners snap to the grid lines, giving a selection from
0, 1040to1600, 1104. - Set the colour to and choose Edit → Fill. Deselect.
- Add a layer named
-
Make a checkerboard tile
- Add a layer named
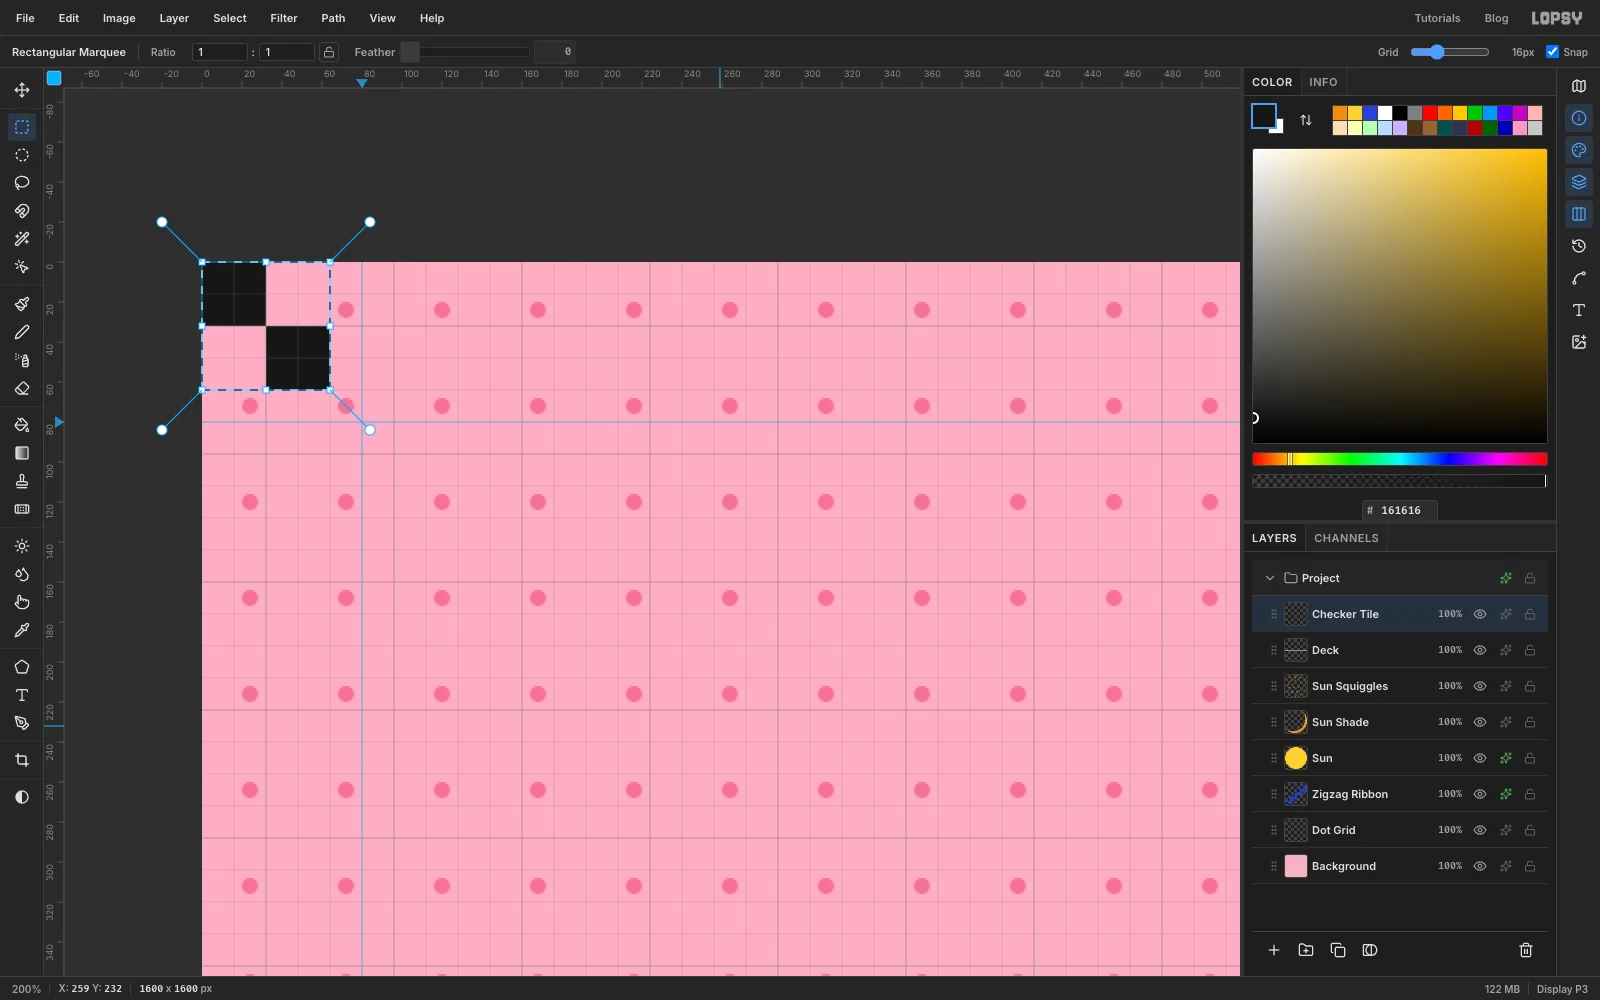
Checker Tileand set the colour to . - Drag a marquee over the first 32 px square at the top-left corner, then Shift-drag a second one from
32, 32to64, 64. The grid snaps them to exact 32 px squares. Fill. - Press Cmd+D, click once with the Rectangular Marquee to select
0, 0to64, 64, choose Edit → Define Pattern, and delete the layer.
- Add a layer named
-
Fill the deck with the checkerboard
- Click
Deckand select the deck band again (0, 1040to1600, 1104; the grid still snaps). - Choose Edit → Fill with Pattern… and pick the checker tile.
- Set Vertical Offset to
25%and click Apply.
The tiles are counted from the top of the canvas, and 1040 isn't a multiple of 64, so without the offset the squares would be cut in half at the top of the band. A quarter of a tile is 16 px, which lines the rows up exactly with the band. Deselect, then give
Decka Stroke of Width4in161616. That draws a crisp black rule along its top and bottom.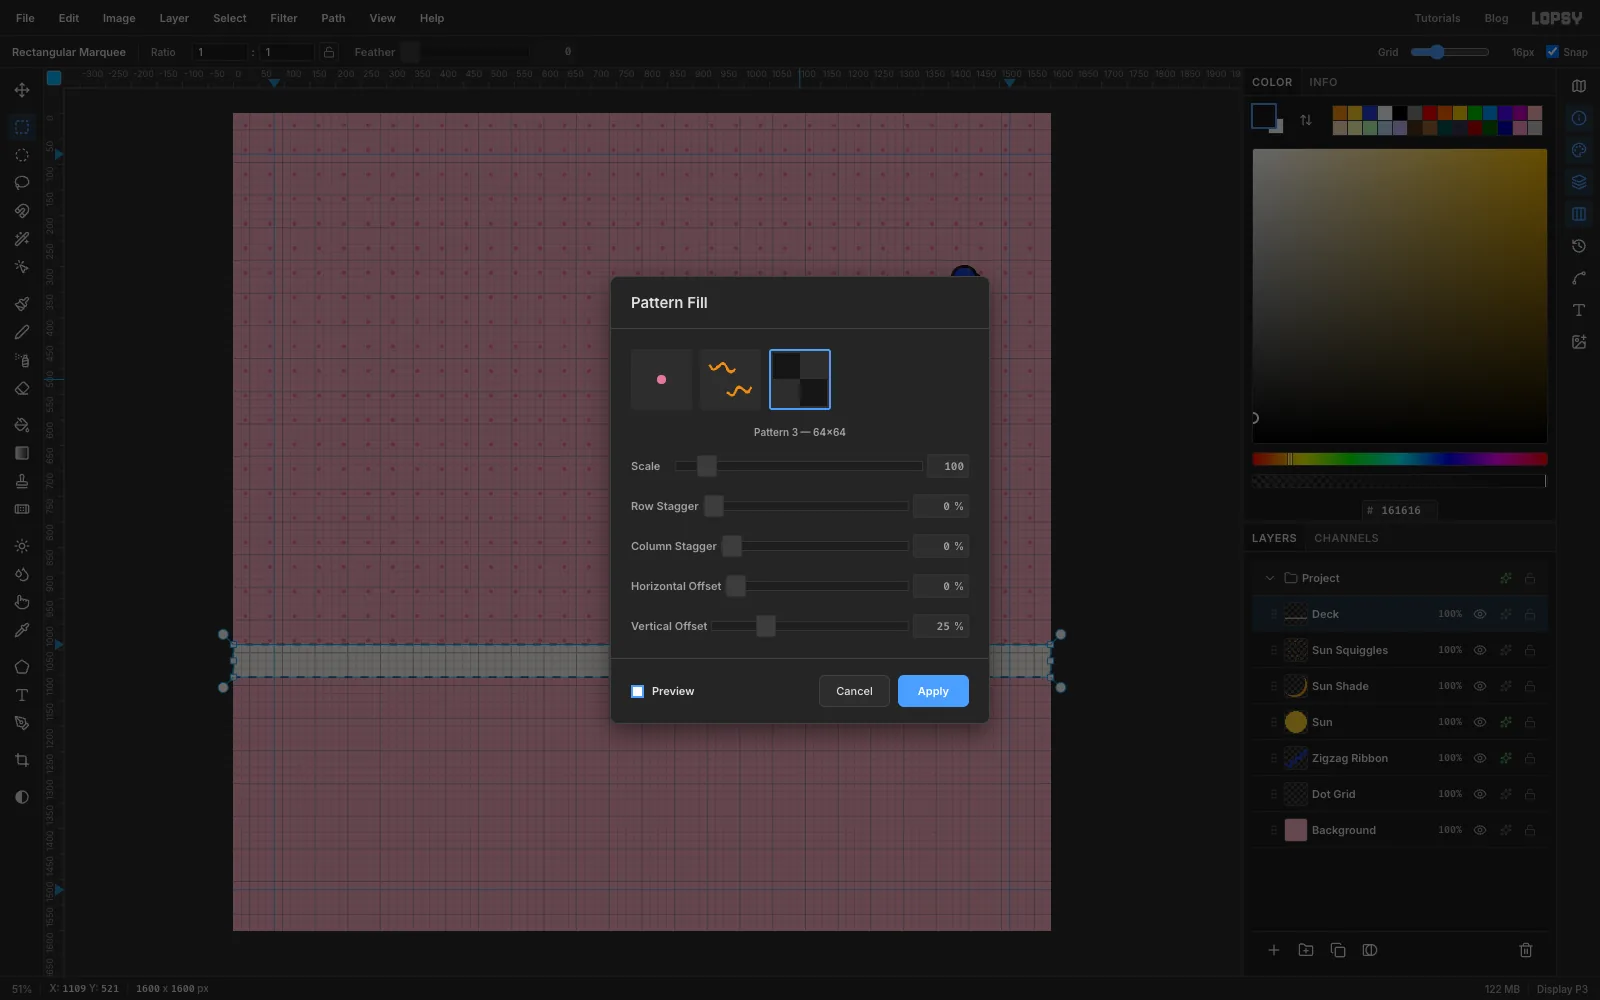
- Click
-
Fill the pool
- Add a layer named
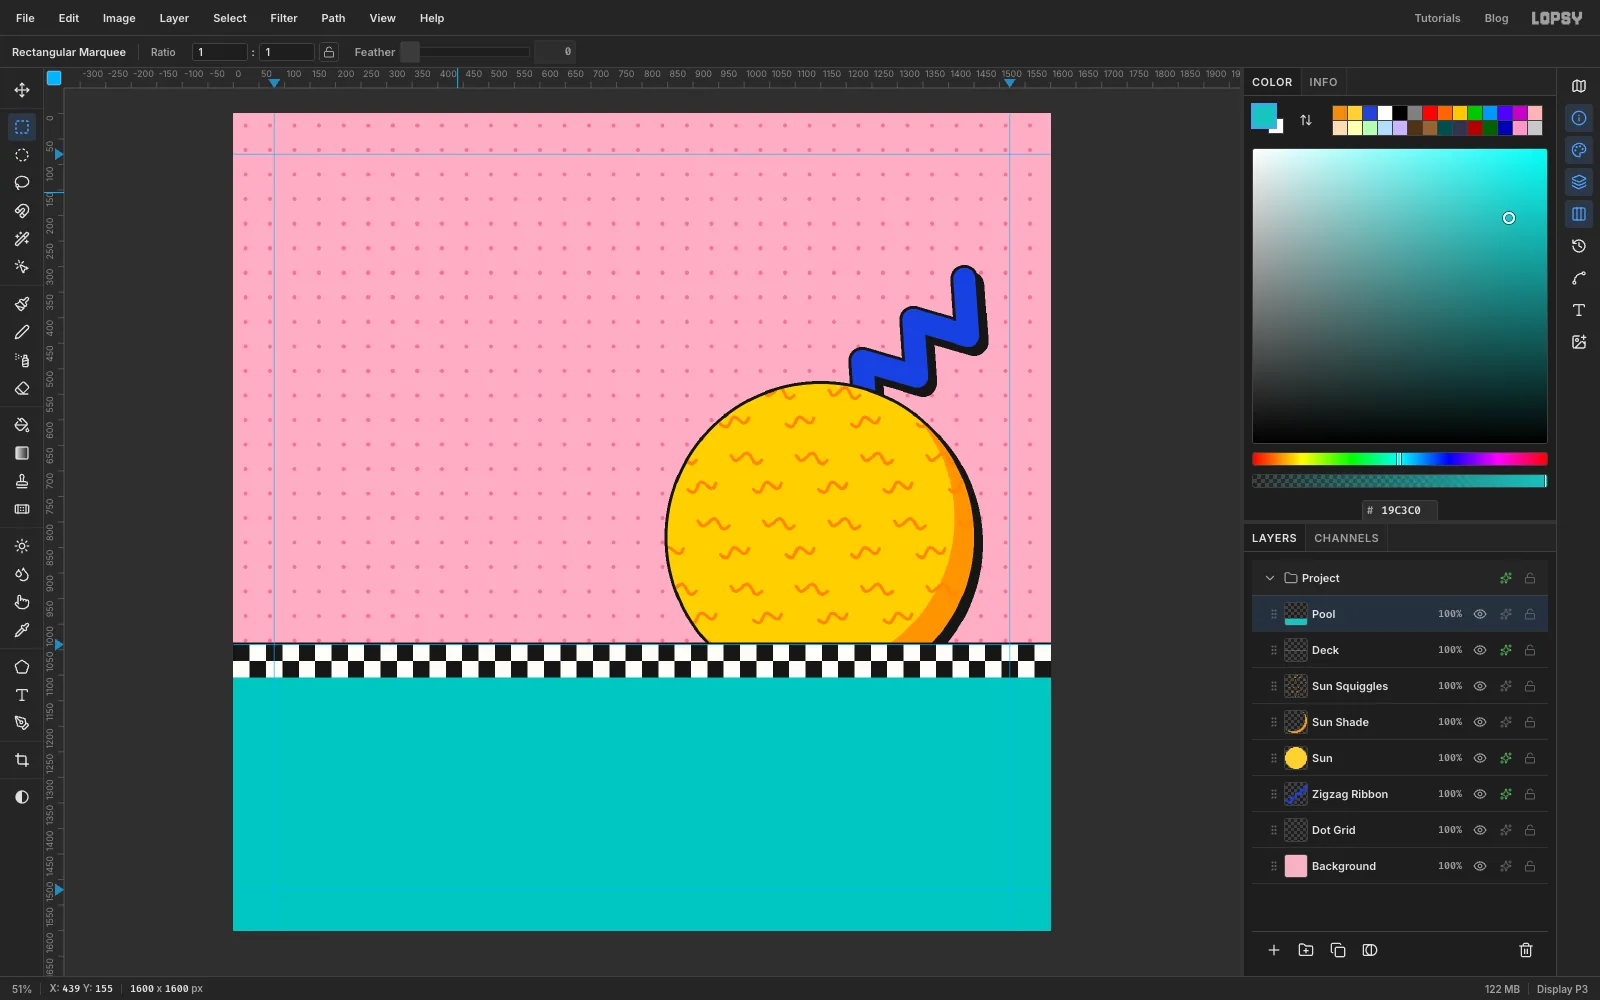
Pool. - Drag a marquee from just under the deck to the bottom-right corner. It snaps to
0, 1104to1600, 1600. - Fill with and deselect.
- Choose View → Show Grid again to hide the grid and turn off its snapping.
The sun now sinks behind the deck.
- Add a layer named
-
Lay down the sun's reflection
A reflection in Memphis isn't a soft fade. It's a stack of solid bars that get shorter toward you.
- Add a layer named
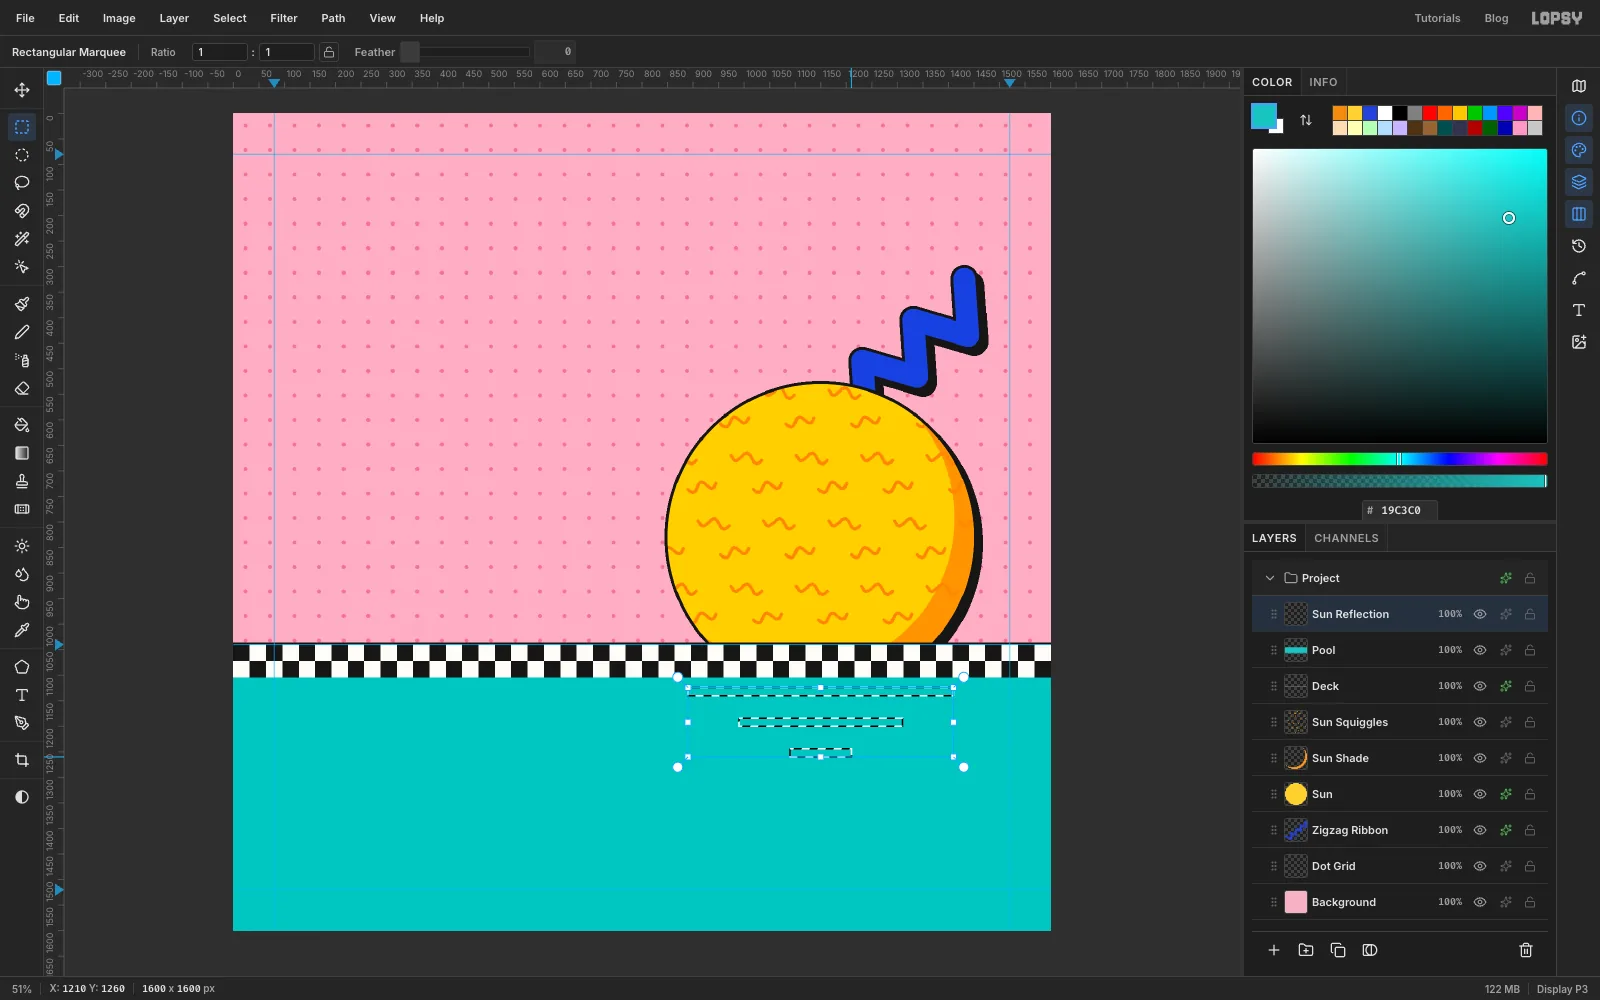
Sun Reflection. Zoom in to 100% so each bar is easy to drag; watch the status bar for the corners. - Drag a marquee for the first bar, 520 px wide and 16 px tall and centred under the sun:
890, 1124to1410, 1140. - Shift-drag two more:
990, 1184to1310, 1200and1090, 1244to1210, 1260. Fill them with . - Deselect, then marquee the two bars in between,
940, 1154to1360, 1170and1040, 1214to1260, 1230, and fill them with .
You now have five bars stepping down from 520 px to 120 px wide, alternating yellow and orange.
- Add a layer named
-
Draw one ripple and paste copies
- Add a layer named
Ripples. - Pick the Brush, set Size to
8and the colour to . - Click at
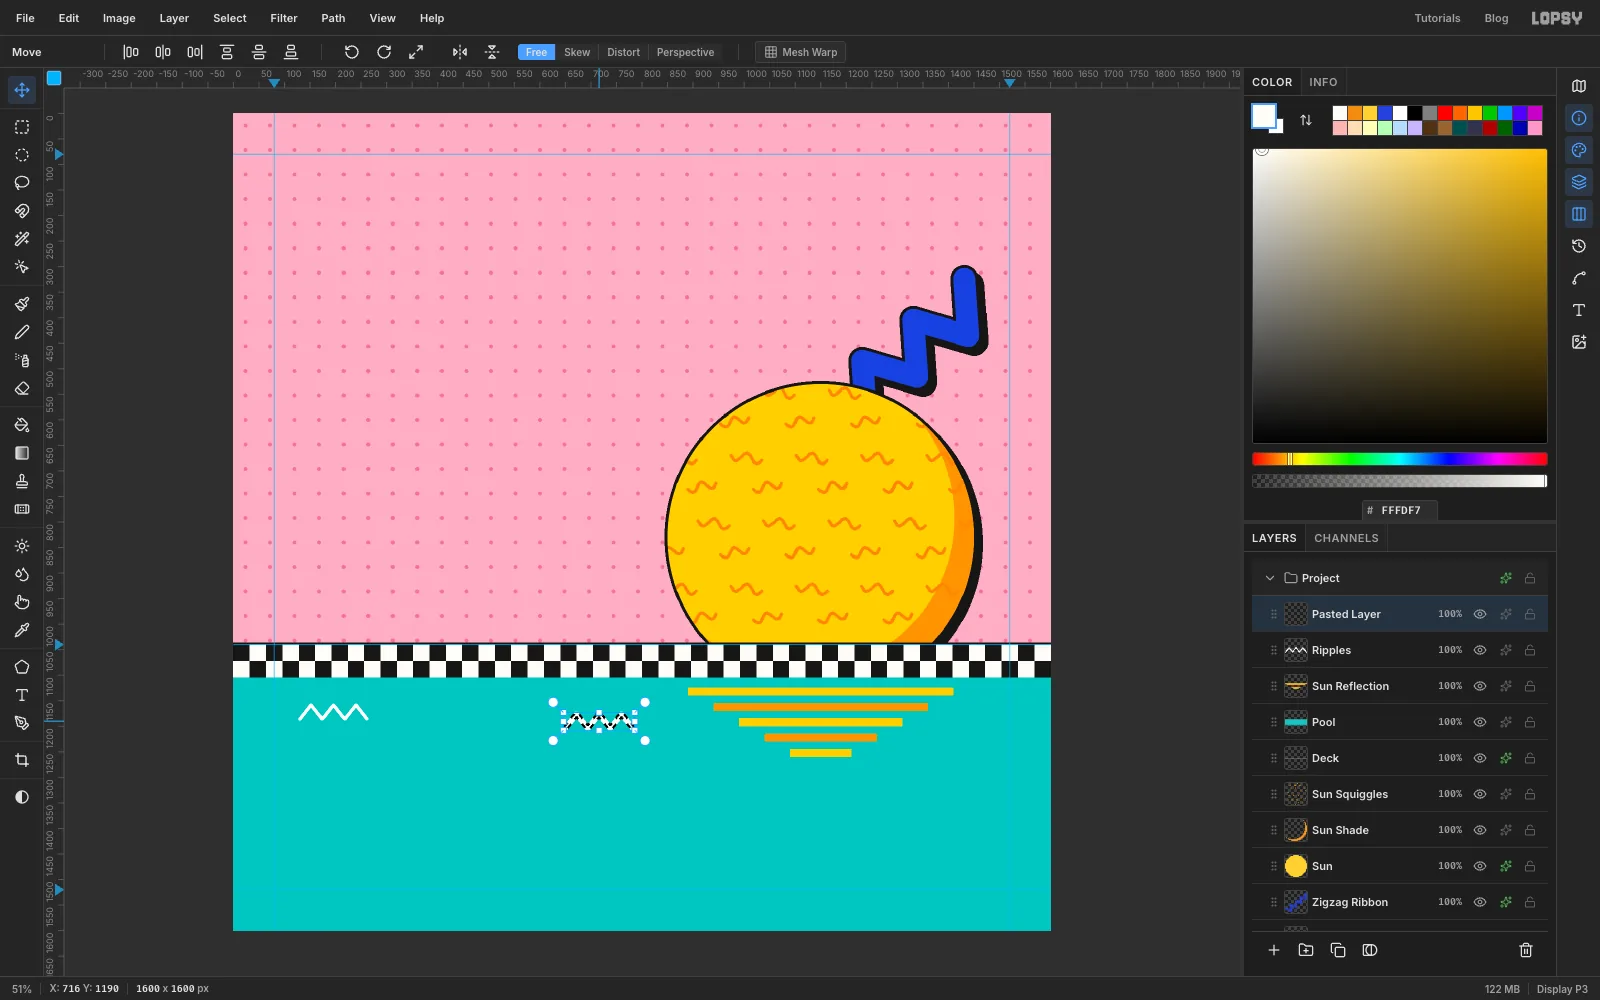
130, 1186, then Shift-click your way to the right, alternately 28 px up and 28 px down every 22 px. Stop at262, 1186. That's a little zigzag with three peaks. - Drag a marquee around it and press Cmd+C.
- Press Cmd+V. The copy lands on a new layer in the same place, already selected, with the Move tool active. Drag it to the right, to start at about
650, 1190, and choose Layer → Merge Down to fold it intoRipples. - Paste again and drag the next copy to about
1150, 1385, below the reflection. Merge Down.
- Add a layer named
-
Add a bigger ripple
Ripples that are all the same size look like wallpaper, so draw one bigger one by hand.
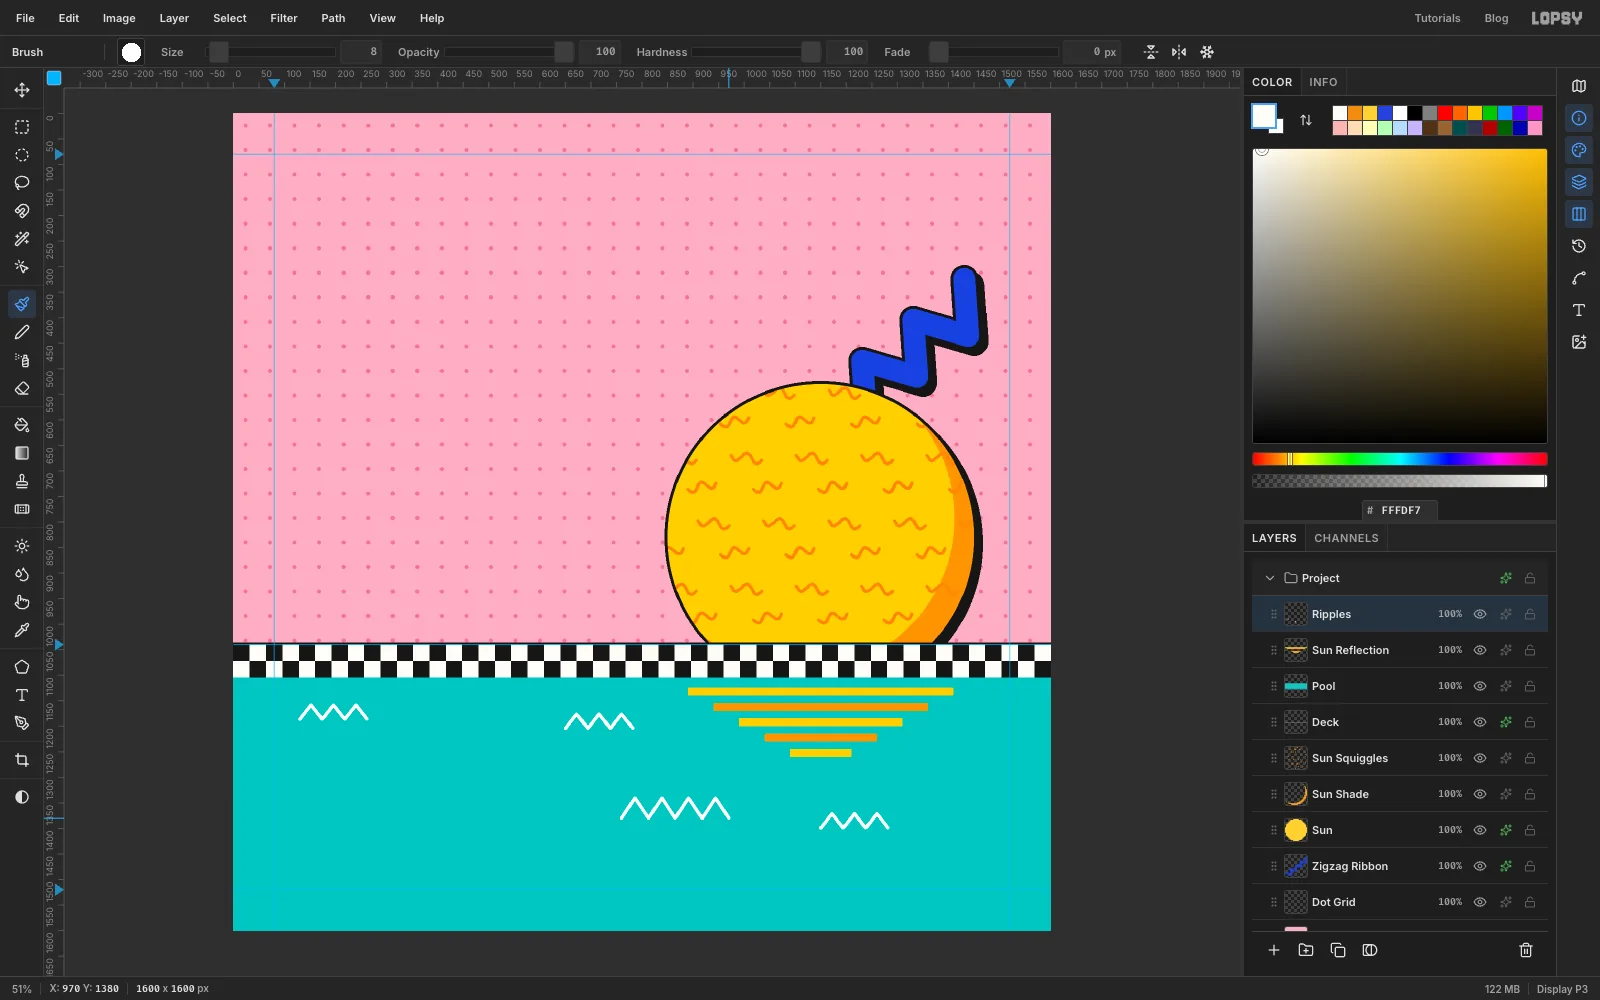
On
Ripples, with the same brush, click at760, 1380, then Shift-click up and down across 210 px: alternately 40 px up and 40 px down about every 26 px, ending at970, 1380.That's four peaks, twice the height of the small ripples.
-
Make a bead tile for the lane rope
- Add a layer named
Lane Rope. With the Brush at Size6in , click at2, 1456and Shift-click at1598, 1456. That draws a straight line across the pool. - Add a layer named
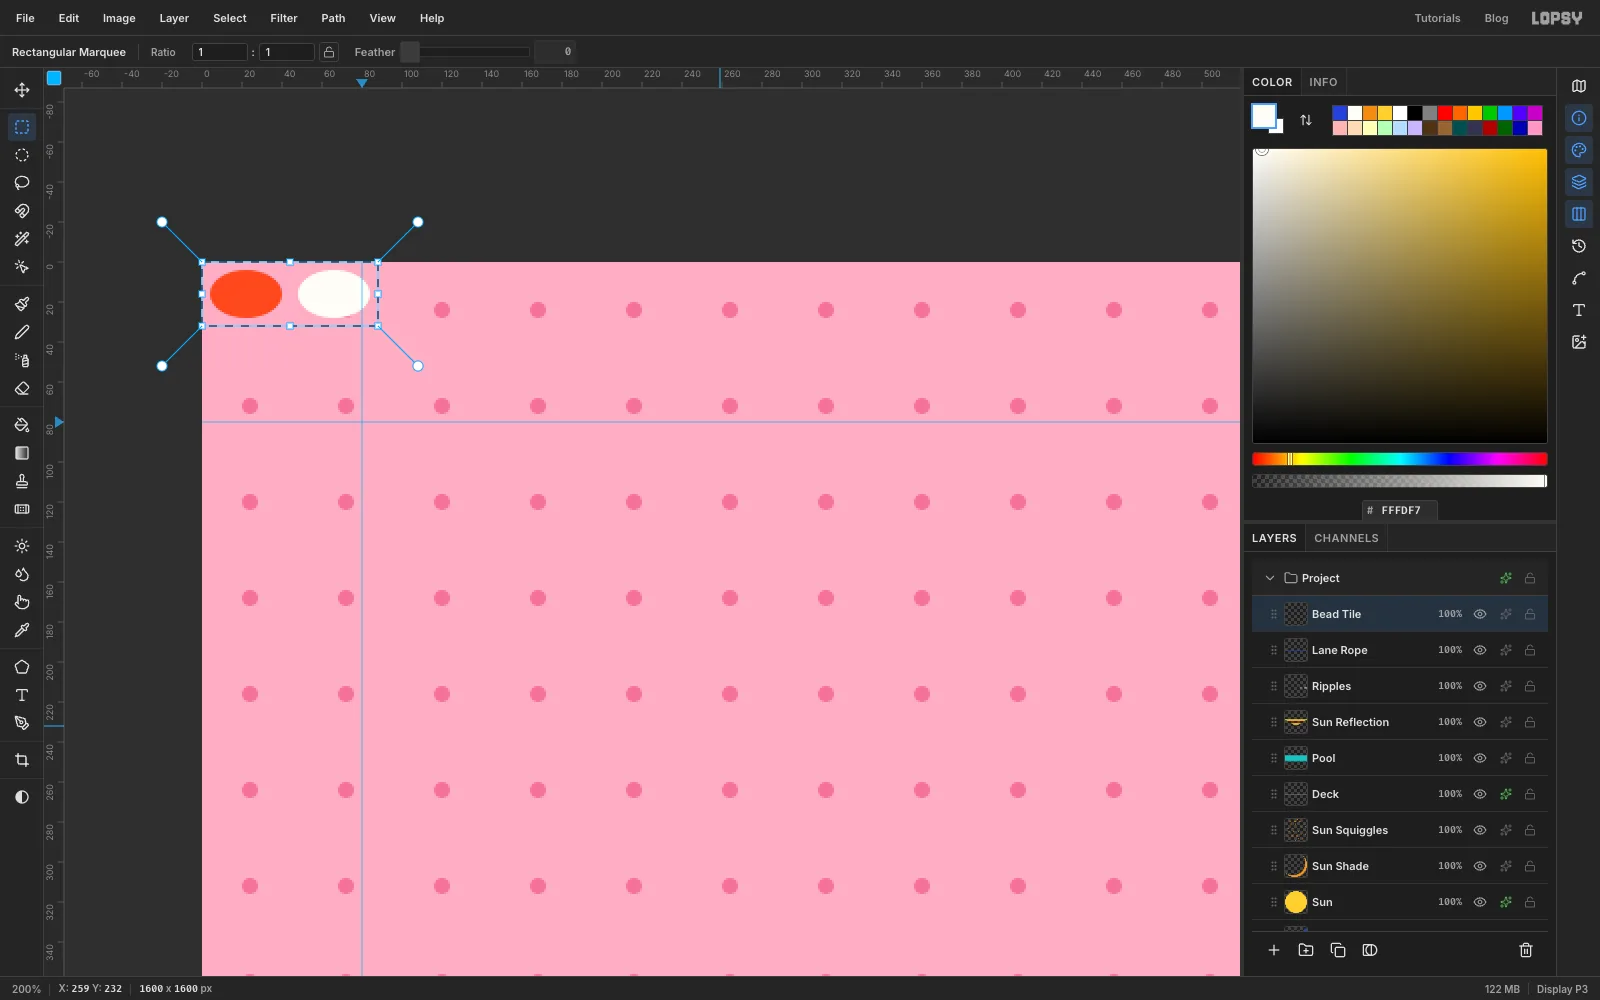
Bead Tile. Click once with the Elliptical Marquee, select4, 4to40, 28and fill it with . Press Cmd+D, click again, select48, 4to84, 28and fill it with . - Press Cmd+D, click once with the Rectangular Marquee to select
0, 0to88, 32, choose Edit → Define Pattern, and delete the layer.
- Add a layer named
-
String the beads across the pool
- Click
Lane Ropeand add a layer namedRope Beads. - Click once with the Rectangular Marquee and select
0, 1440to1600, 1472. That's a 32 px band centred on the rope, and 1440 is a multiple of 32, so no offset is needed this time. - Choose Edit → Fill with Pattern…, pick the bead tile and click Apply. Deselect.
- Give
Rope Beadsa Stroke of Width3in161616.
The rope gives the bottom of the cover a strong horizontal line and a band of pattern to balance the sky.
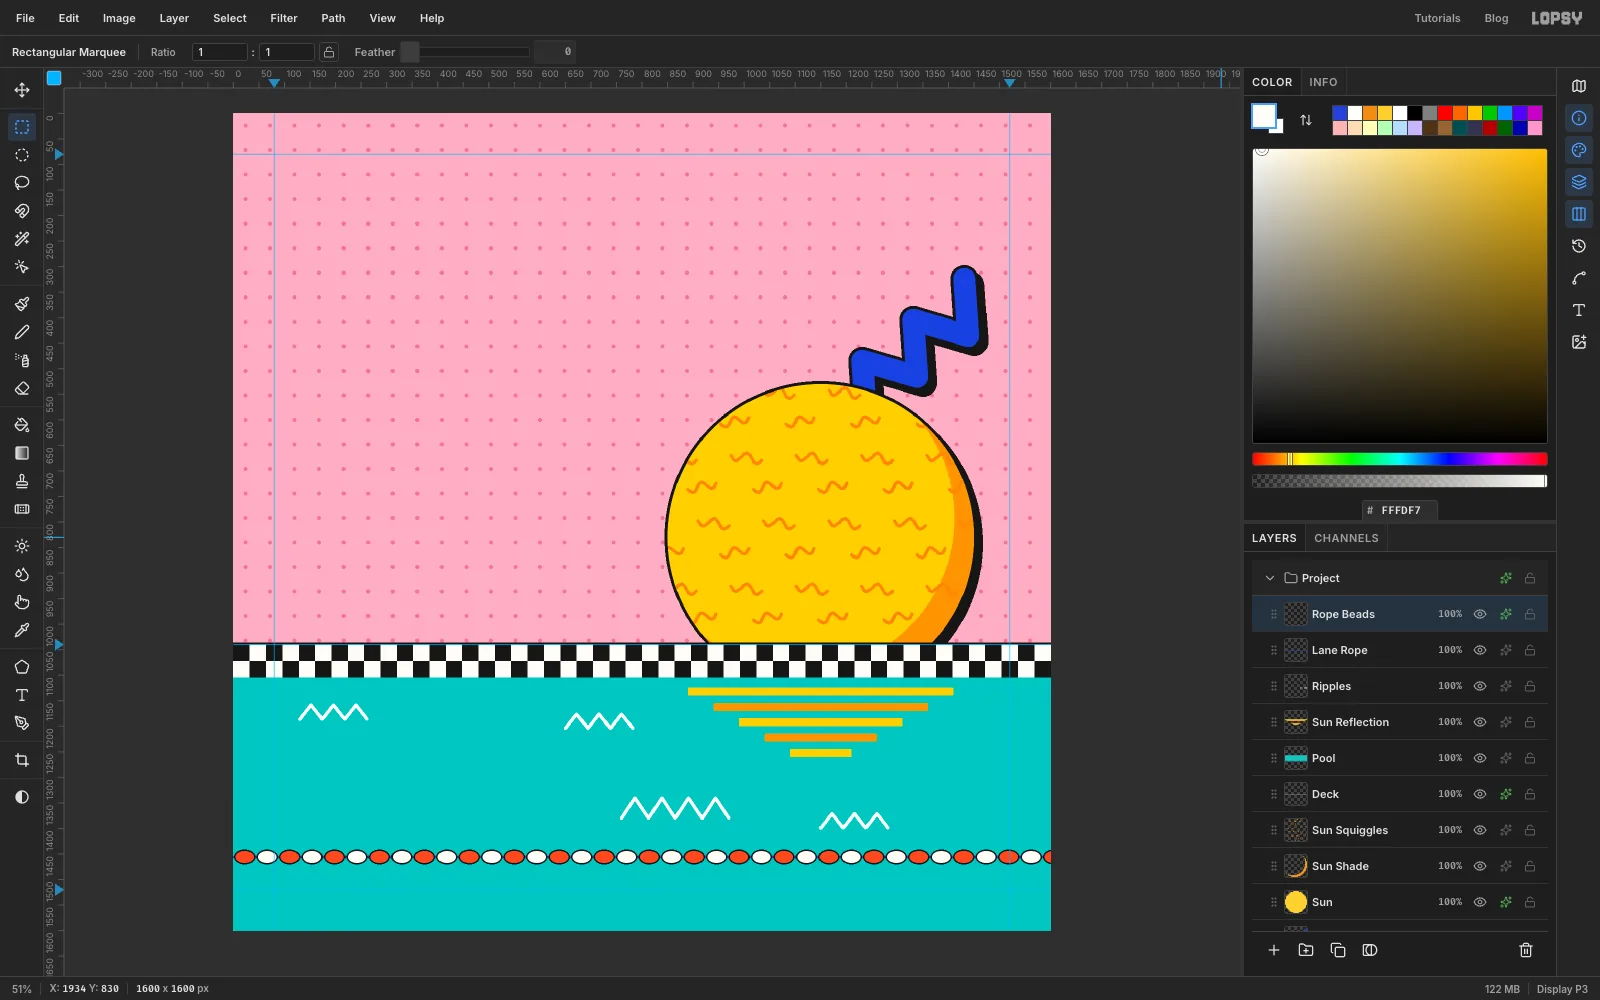
- Click
-
Select a life ring
You'll build the ring a little too big, where it's easier to place the hole and stripes, then scale it down to fit beside the reflection.
- Add a layer named
Pool Ring(aboveRope Beads). - With the Elliptical Marquee, drag from
230, 1207to710, 1413. That's a flat oval 480 px wide, so the ring looks as if it's lying on the water. - Hold Alt and drag the hole from
352, 1261to588, 1345. The hole sits a few pixels above the centre, because you see the ring at an angle. - Fill with .
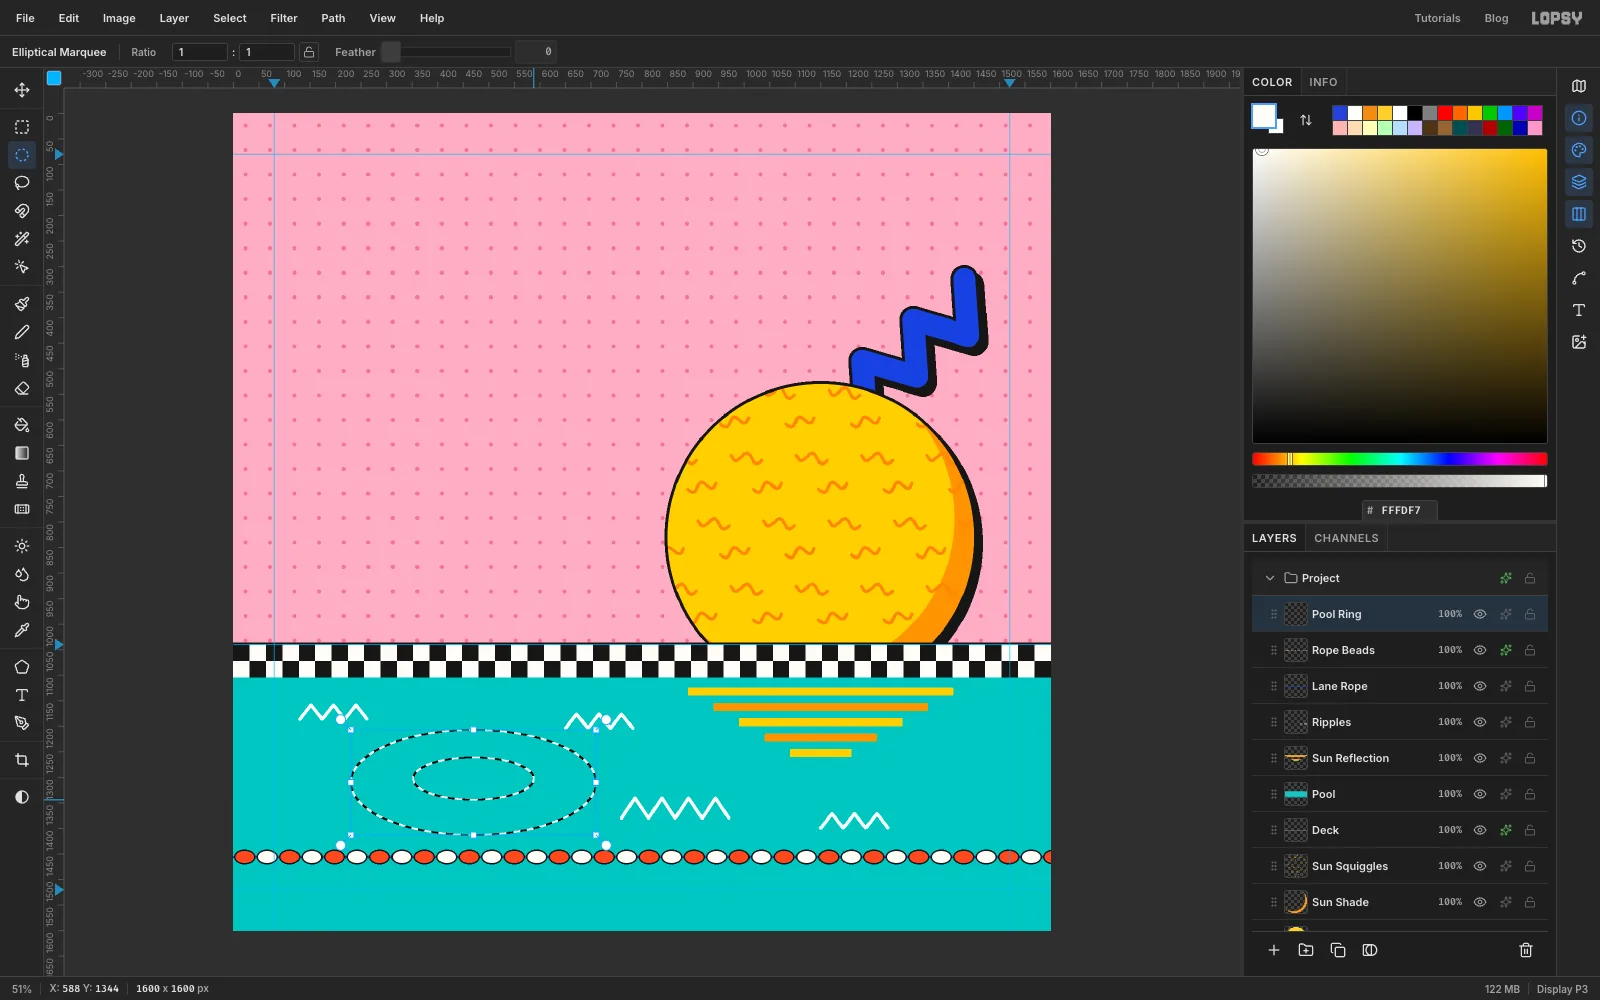
- Add a layer named
-
Paint the red stripes with an intersect lasso
- Set the colour to .
- Cmd-click the
Pool Ringthumbnail to select the ring. - Pick the Lasso (L). Hold Shift+Alt and draw a pie slice that starts at the ring's centre and fans out past its edge, covering one sixth of the ring at the top right. Shift+Alt keeps only the overlap, so you get a single stripe with clean ring edges. Choose Edit → Fill.
- Repeat steps 2 and 3 twice more, for a slice at the bottom and one on the left. You get three red stripes with white between them, spaced evenly around the ring.
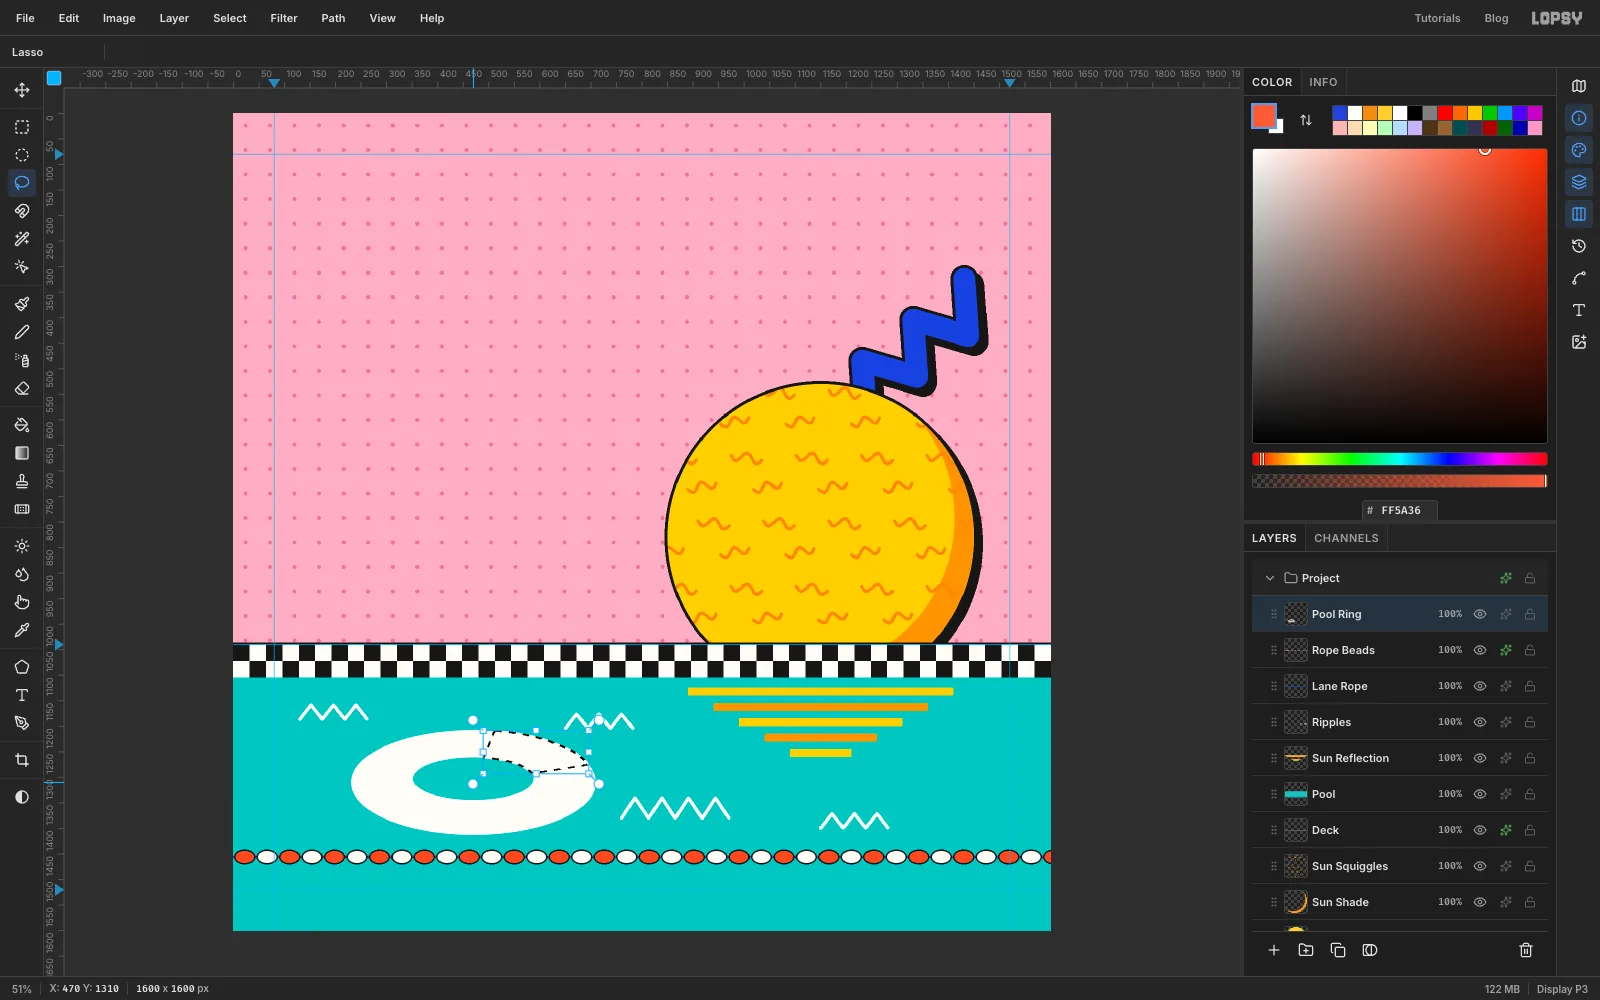
-
Scale the ring down
- Cmd-click the
Pool Ringthumbnail. - Pick the Move tool (V). Hold Cmd and drag the bottom-right corner handle inward until the ring is about 392 px wide, about 82% of its size. Cmd keeps the proportions.
- Press Enter to apply, then deselect.
- Drag the ring back so it's centred at about
470, 1310, with a clear gap between its bottom edge and the lane rope.
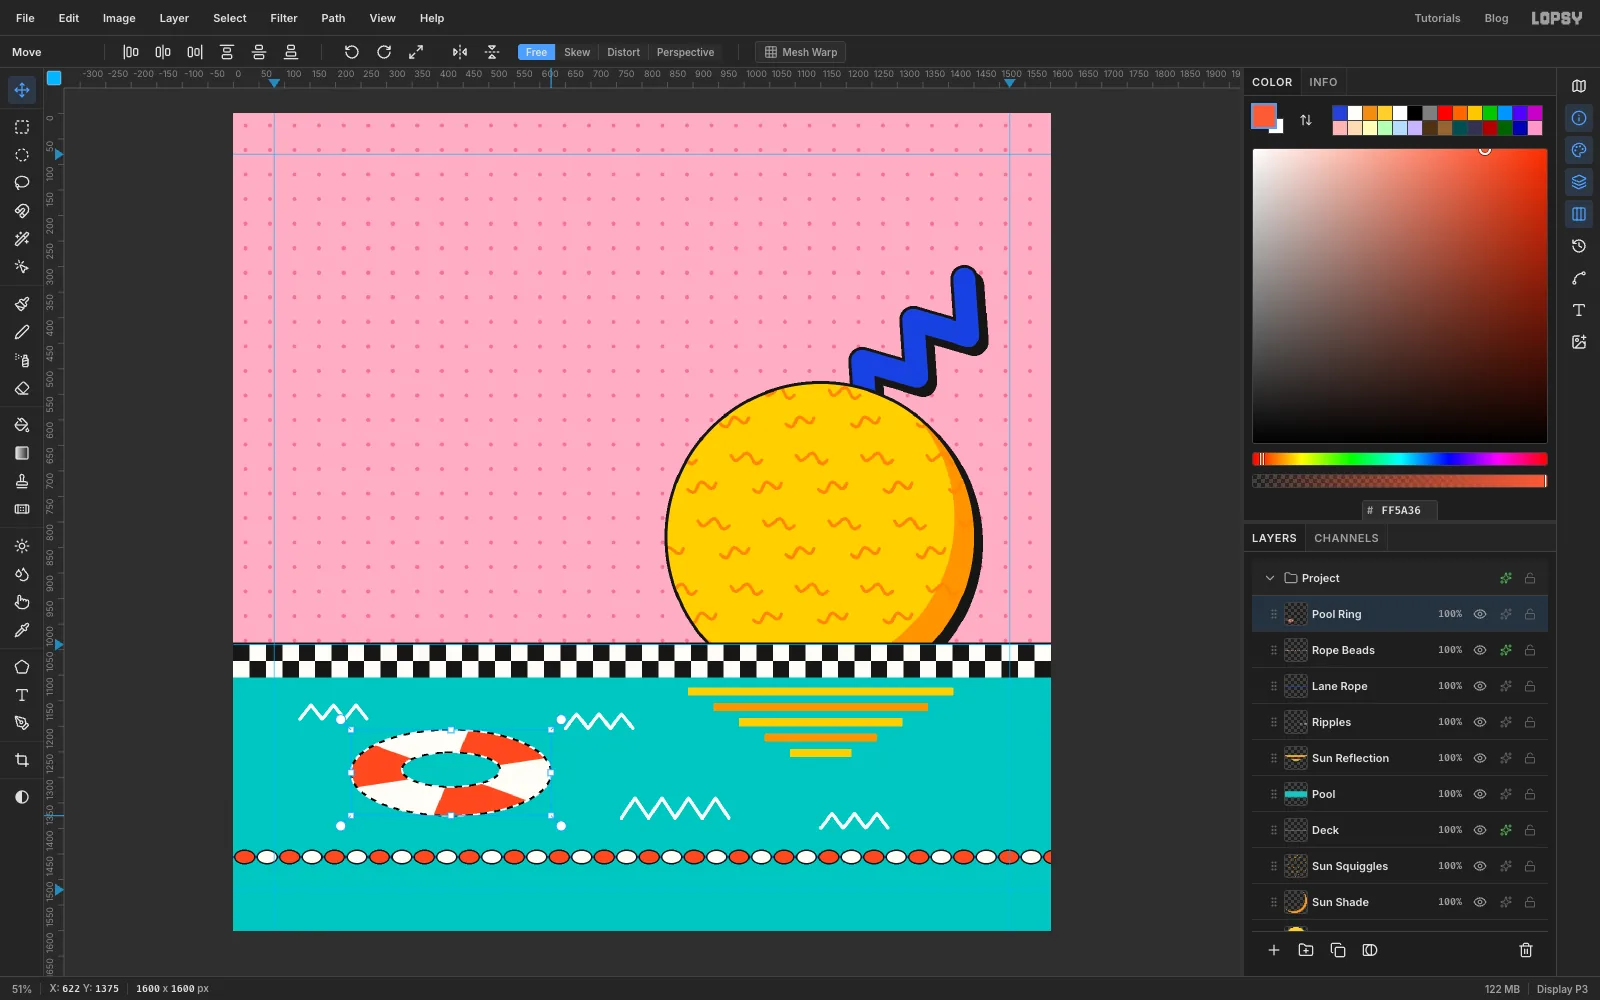
- Cmd-click the
-
Outline the ring
Outline and shadow the
Pool Ringlayer. The shadow lands on the water to the lower right, like the shadows in the sky.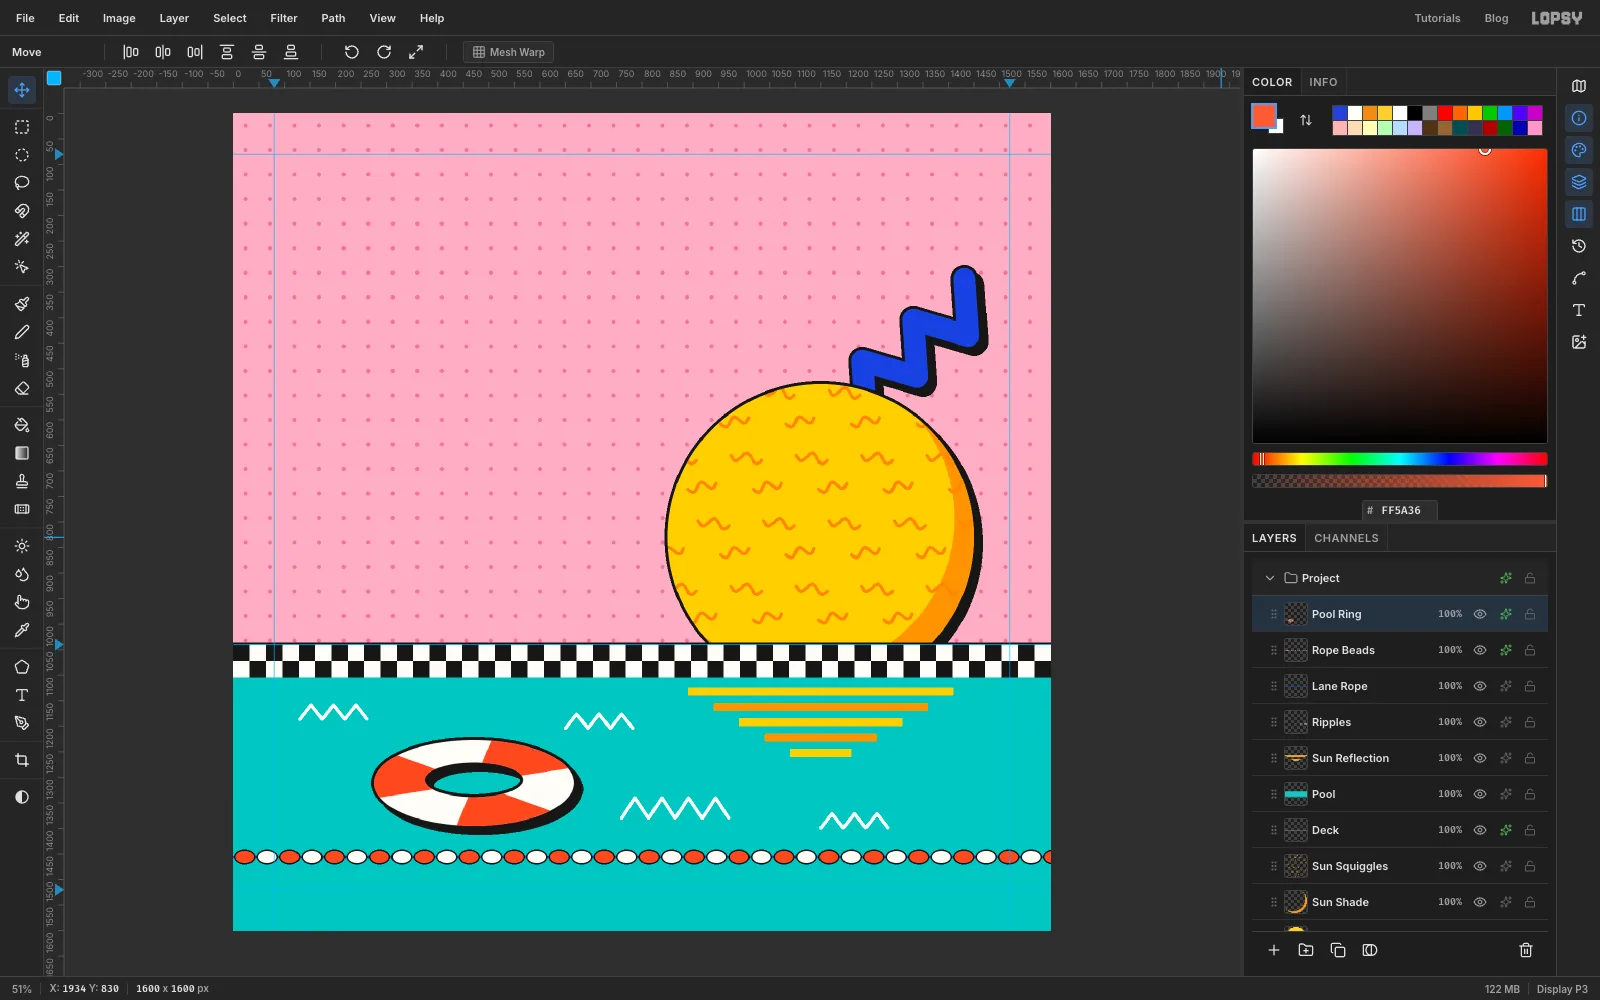
-
Stack the palm trunk from rounded rectangles
- Click
Pool Ring, then click the New Group button at the bottom of the Layers panel and name the groupPalm. Add a layer inside it namedTrunk. - Pick the Shape tool and set Shape to Rectangle. Set the fill to
E8892B, add a stroke in161616at Width6, and set Corner Radius to18. - Draw eight segments from the bottom up. For each one, press at its centre and drag out to its corner. Shapes grow from the press point, so drag half the segment's width to the right and 29 px down.
- Start with a segment 74 × 58 centred at
260, 994, just above the deck. - Put each next segment's centre 52 px higher, so it overlaps the one below, and make it 2 px narrower.
- Shift each one slightly more to the right than the last: 3 px for the second segment, growing to about 14 px for the top one. The top segment ends up 60 px wide at about
324, 630.
Each new segment is drawn over the last, and the Shape tool's own stroke draws a black line where they overlap. The trunk curves to the right and tapers as it rises. Give
Trunkthe 12 px hard shadow.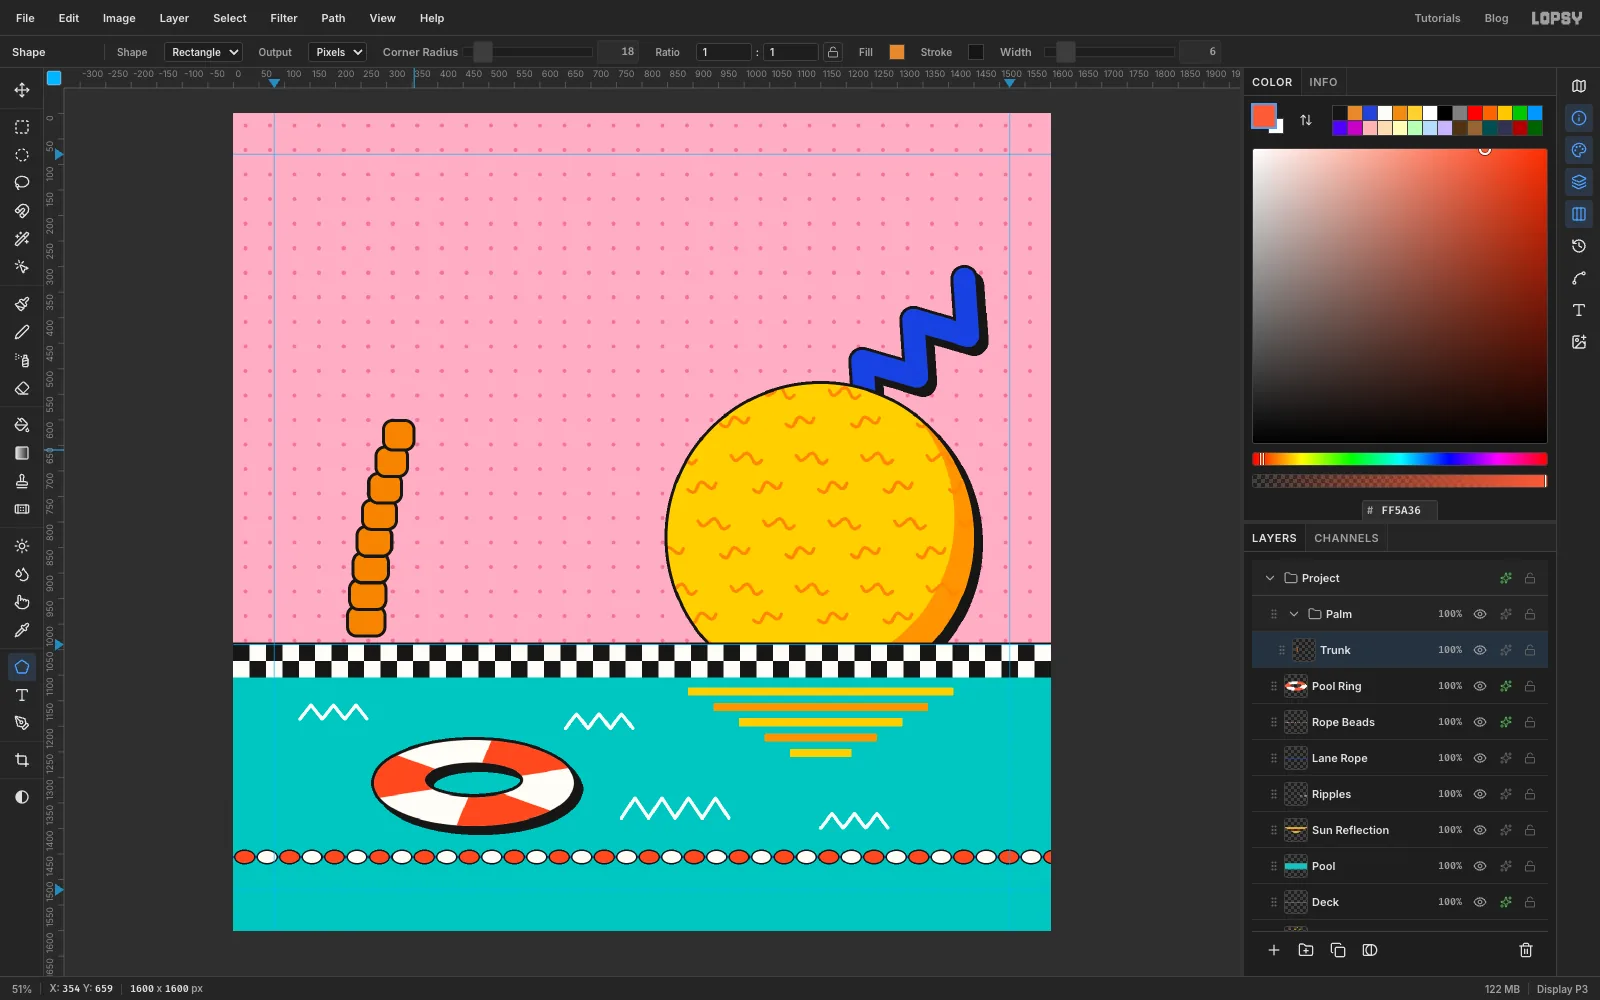
- Click
-
Lasso the fronds
- Add a layer named
FrondsinsidePalm. - With the Lasso, start at the top of the trunk (about
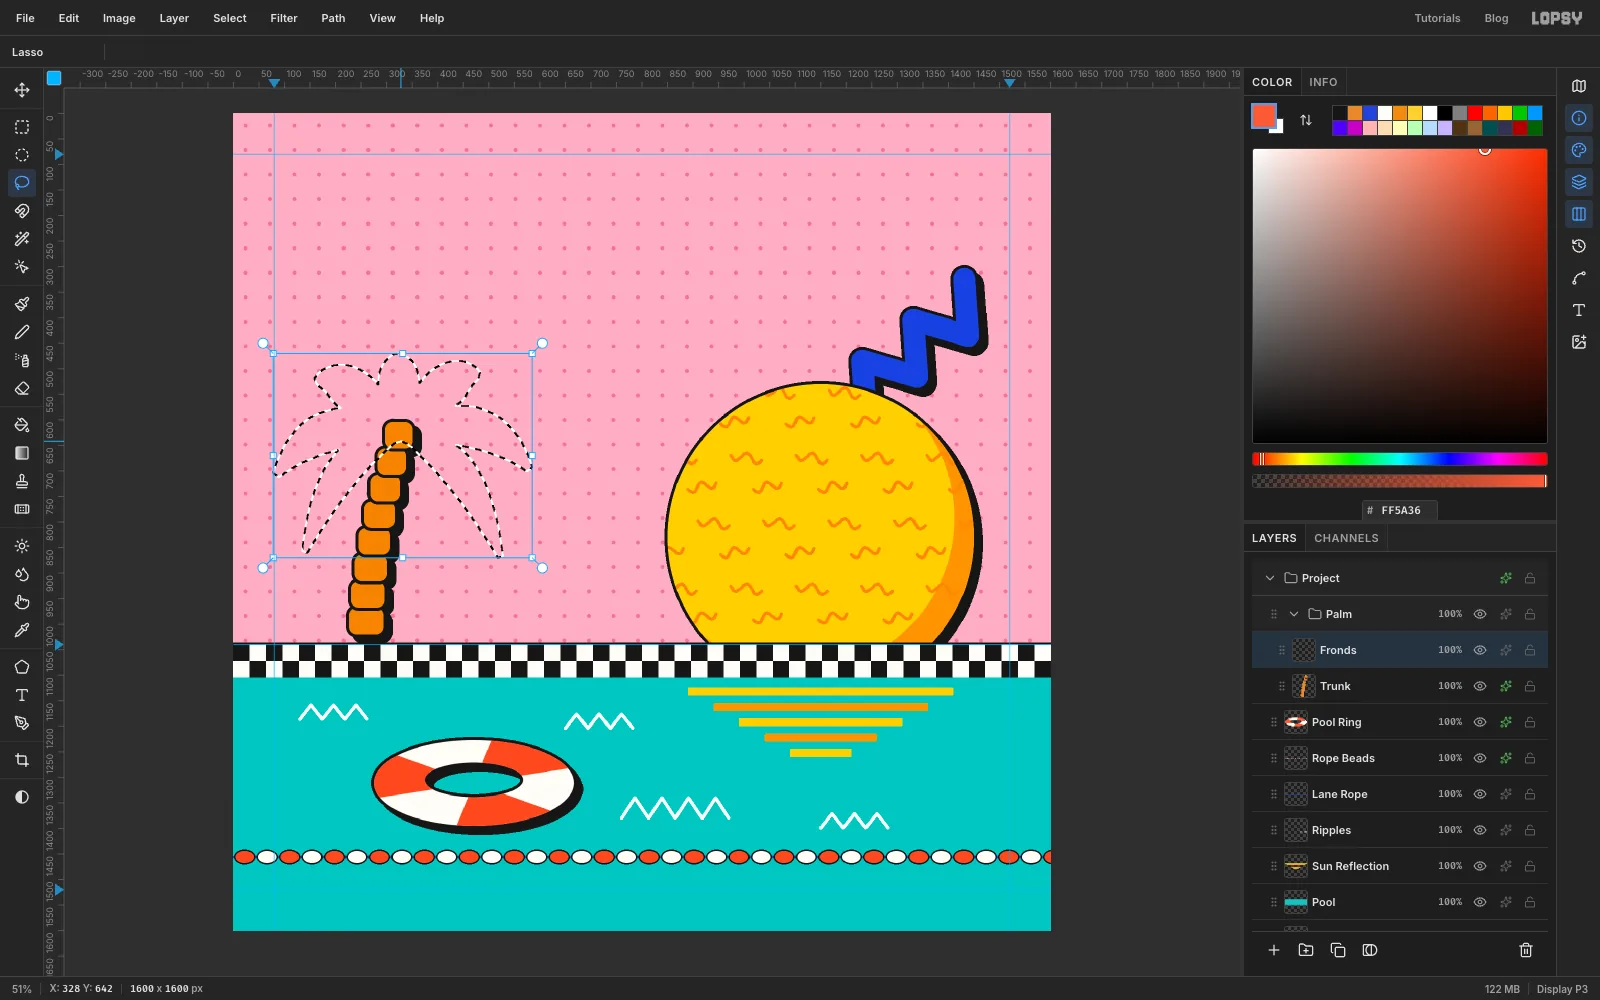
328, 640). Draw out along the top edge of a leaf, arching up and then down to its tip. Come back along the underside and let go near where you started to close it. Make it narrow at both ends and about 80 px wide in the middle. - Hold Shift for each of the next six leaves so they add to the selection. Aim the seven tips at about:
83, 708(far left),161, 524,321, 470(straight up, the shortest),482, 513and580, 697(far right)- two long leaves that droop almost to the ground, at
140, 858and523, 869
- Fill with and deselect.
- Add a layer named
-
Bite notches out of the fronds
Palm fronds are made of many separate leaflets. A few V-shaped notches along each edge are enough to suggest them.
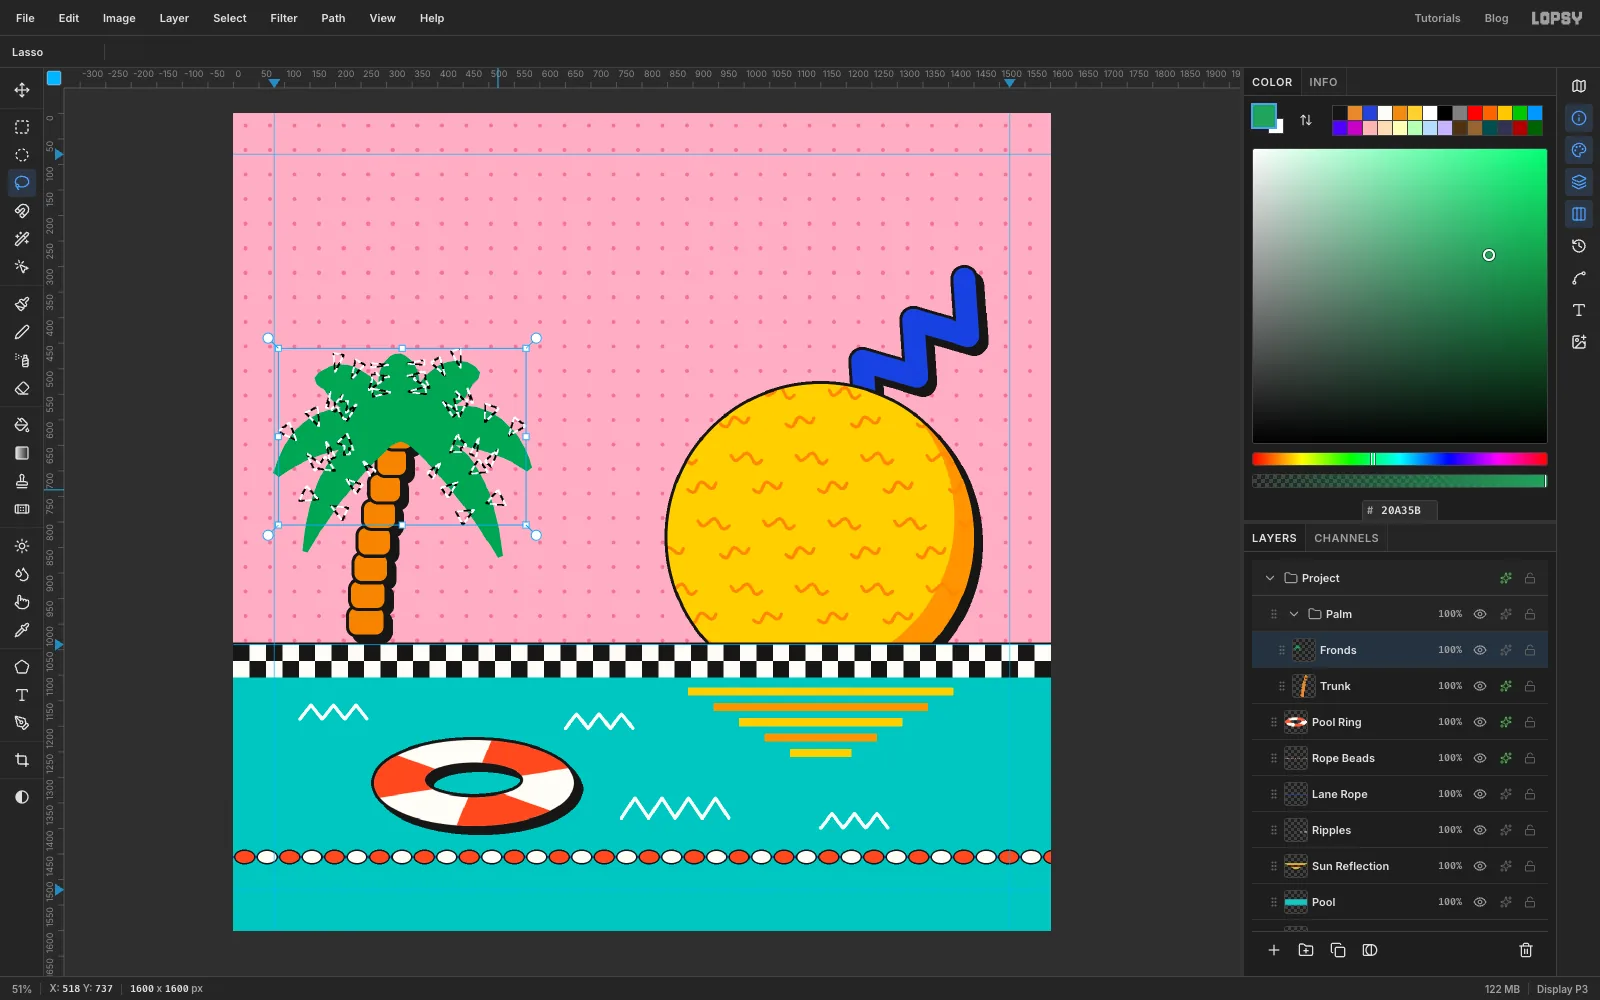
- With the Lasso, draw a small V-shaped notch on one frond's edge, about 20 px wide at the edge and 25 px deep. Start just outside the edge, cut in to a point about halfway to the middle of the leaf, and come back out. Hold Shift and add more: three on each side of every frond, spaced along its outer half.
- Press Delete to cut them out, then deselect.
- Outline and shadow
Fronds.
The black outline follows each notch, so every bite turns into a sharp serration.
-
Finish the palm and move the group
- Add a layer named
Midribs. With the Brush at Size6in , click near the base of each frond and Shift-click three more points down its middle, following its curve. - Add a layer named
Coconuts. With the Elliptical Marquee, Cmd-drag a 44 px circle just under the crown at about306, 664. Cmd+Shift-drag two more: one overlapping it on the right and one just below, between the two. Fill with , deselect, and give the layer a 5 px black Stroke. - Step back and look at the palm: its leaves crowd the left margin. Click the
Palmgroup's row in the Layers panel and, with the Move tool, drag on the canvas to move it about 32 px to the right, until the trunk's base is centred at about x = 292. The trunk, fronds, midribs and coconuts all move together, and their shadows come with them.
If you overshoot, Cmd+Z puts the whole group back at once. Collapse the
Palmgroup when you're done.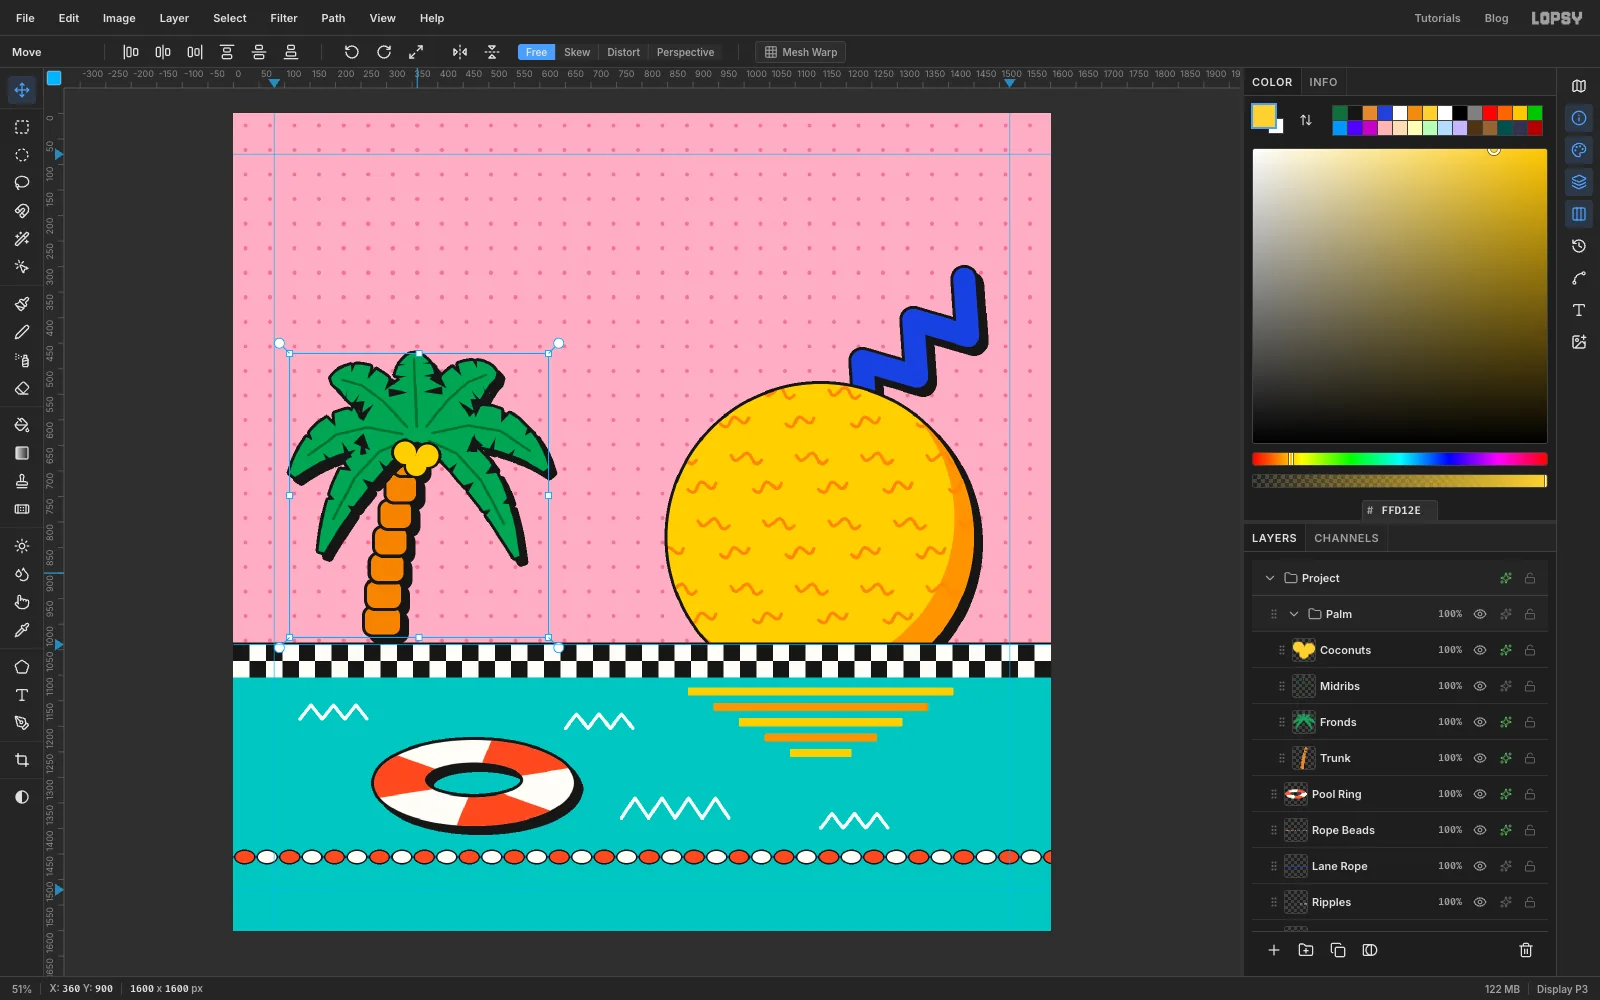
- Add a layer named
-
Build the cone
- Click
Palmand make a New Group namedFloaters. Add a layer namedCone. - With the Lasso, draw a triangle with its tip at
820, 500and its base corners at732, 720and908, 720. - Hold Shift and, with the Elliptical Marquee, drag a flat ellipse from
732, 694to908, 746to round off the base. Fill with . - Cmd-click the
Conethumbnail. With the Lasso and Shift+Alt, draw a four-sided shape around the cone's right part: from816, 480just left of the tip, across to960, 480, down to960, 780, and back to844, 780, slightly right of the base's centre. Only the part inside the cone stays selected. Add a layer namedCone Shadeand fill the selection with . Deselect. - Click
Coneand outline and shadow it.
The base's right corner overlaps the sun on purpose. A small, clear overlap reads as depth. A near-miss that almost touches reads as a mistake.
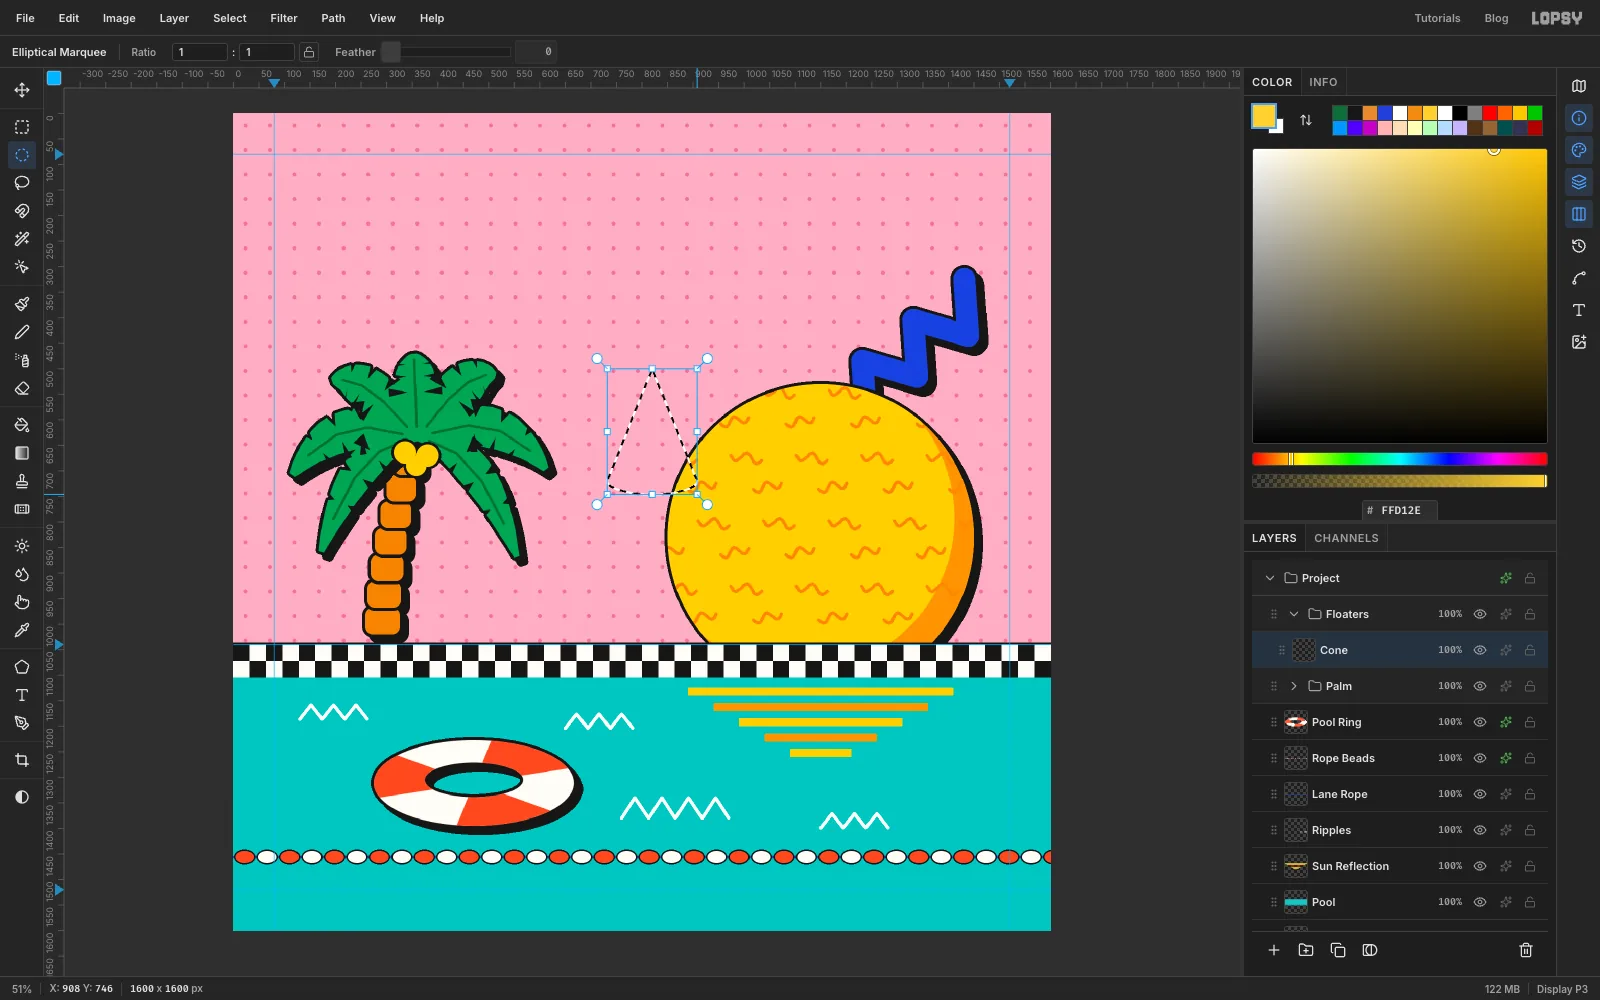
- Click
-
Shade a ball with a radial gradient
- Click
Cone Shadeand add a layer namedSphere. - With the Shape tool, set Ellipse, fill
2340D9, no stroke. Hold Cmd and drag from900, 915to986, 1001, a 172 px ball. Outline and shadow it. - Add a layer named
Sphere Dotsand Cmd-click theSpherethumbnail. - Pick the Gradient tool and set Type to Radial. Click Advanced… and set the two stops to black on the left and white on the right.
- Drag from
860, 875, the upper-left of the ball where the light hits, to934, 949.
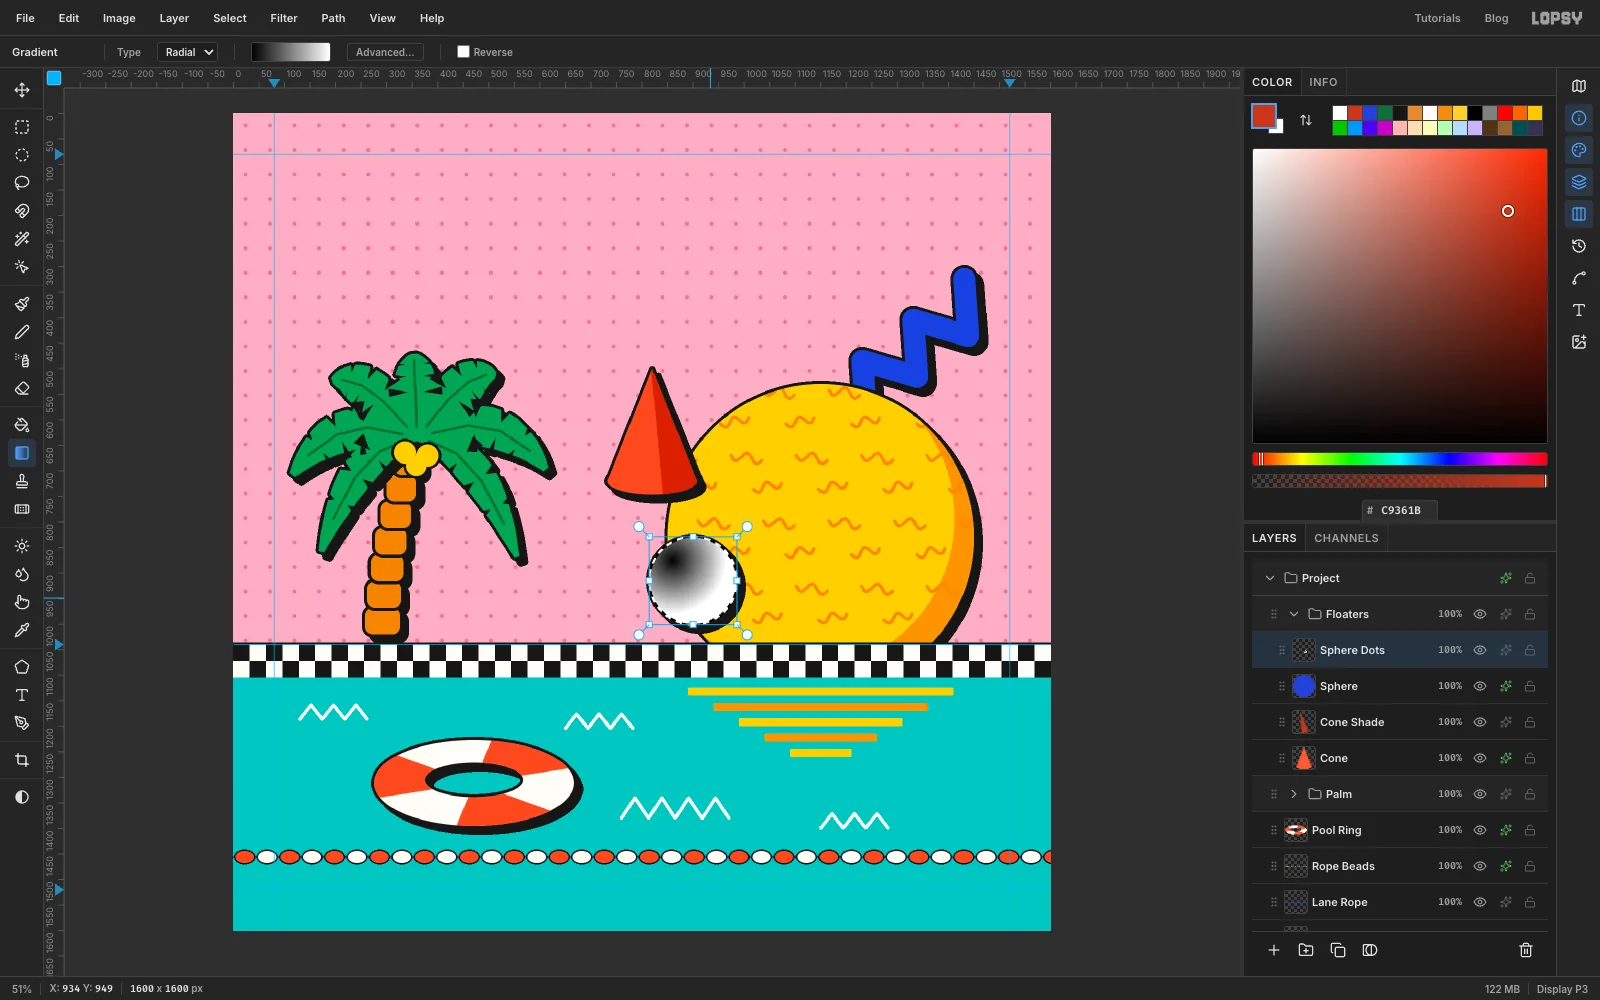
- Click
-
Turn the gradient into halftone dots
- With the selection still active, choose Filter → Halftone…. Set Dot Size to
14, Angle to45and Softness to0, and click Apply. Dark areas turn into big dots and white into none, so the dots are biggest where the gradient started. - Choose Filter → Invert. The dots turn white and the background turns black.
- Deselect, open the layer's fx drawer and set the blend mode to Screen. Black vanishes in Screen mode, so only the white dots stay, as a printed highlight.
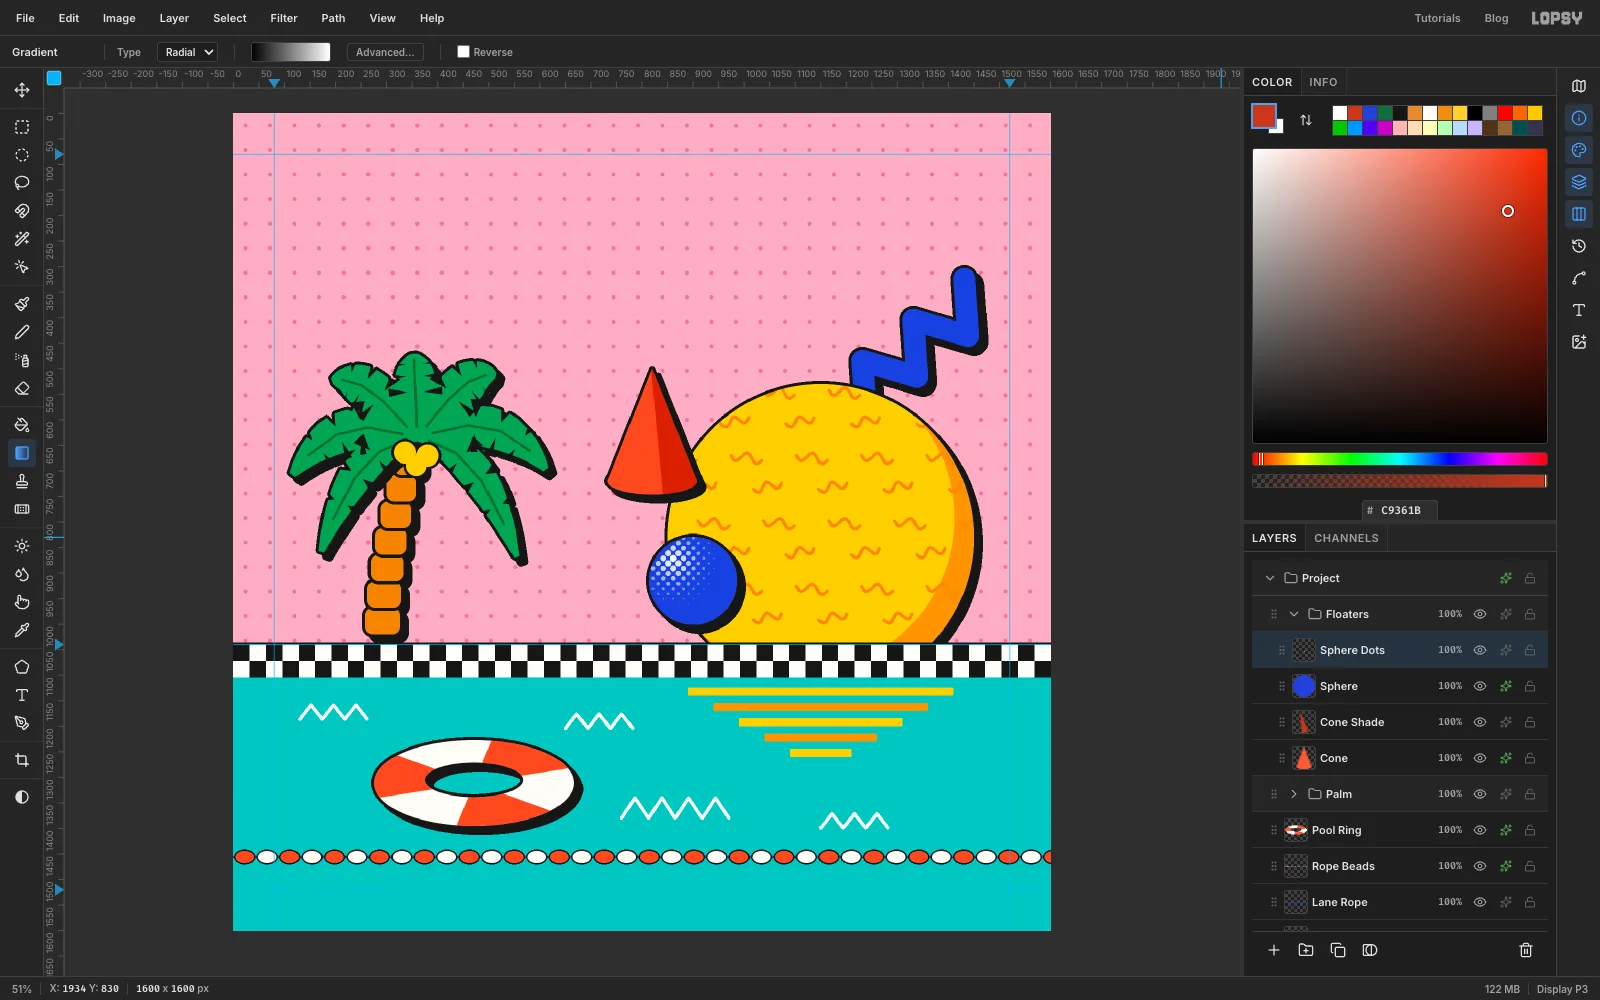
- With the selection still active, choose Filter → Halftone…. Set Dot Size to
-
Scatter and rotate the confetti
- Collapse
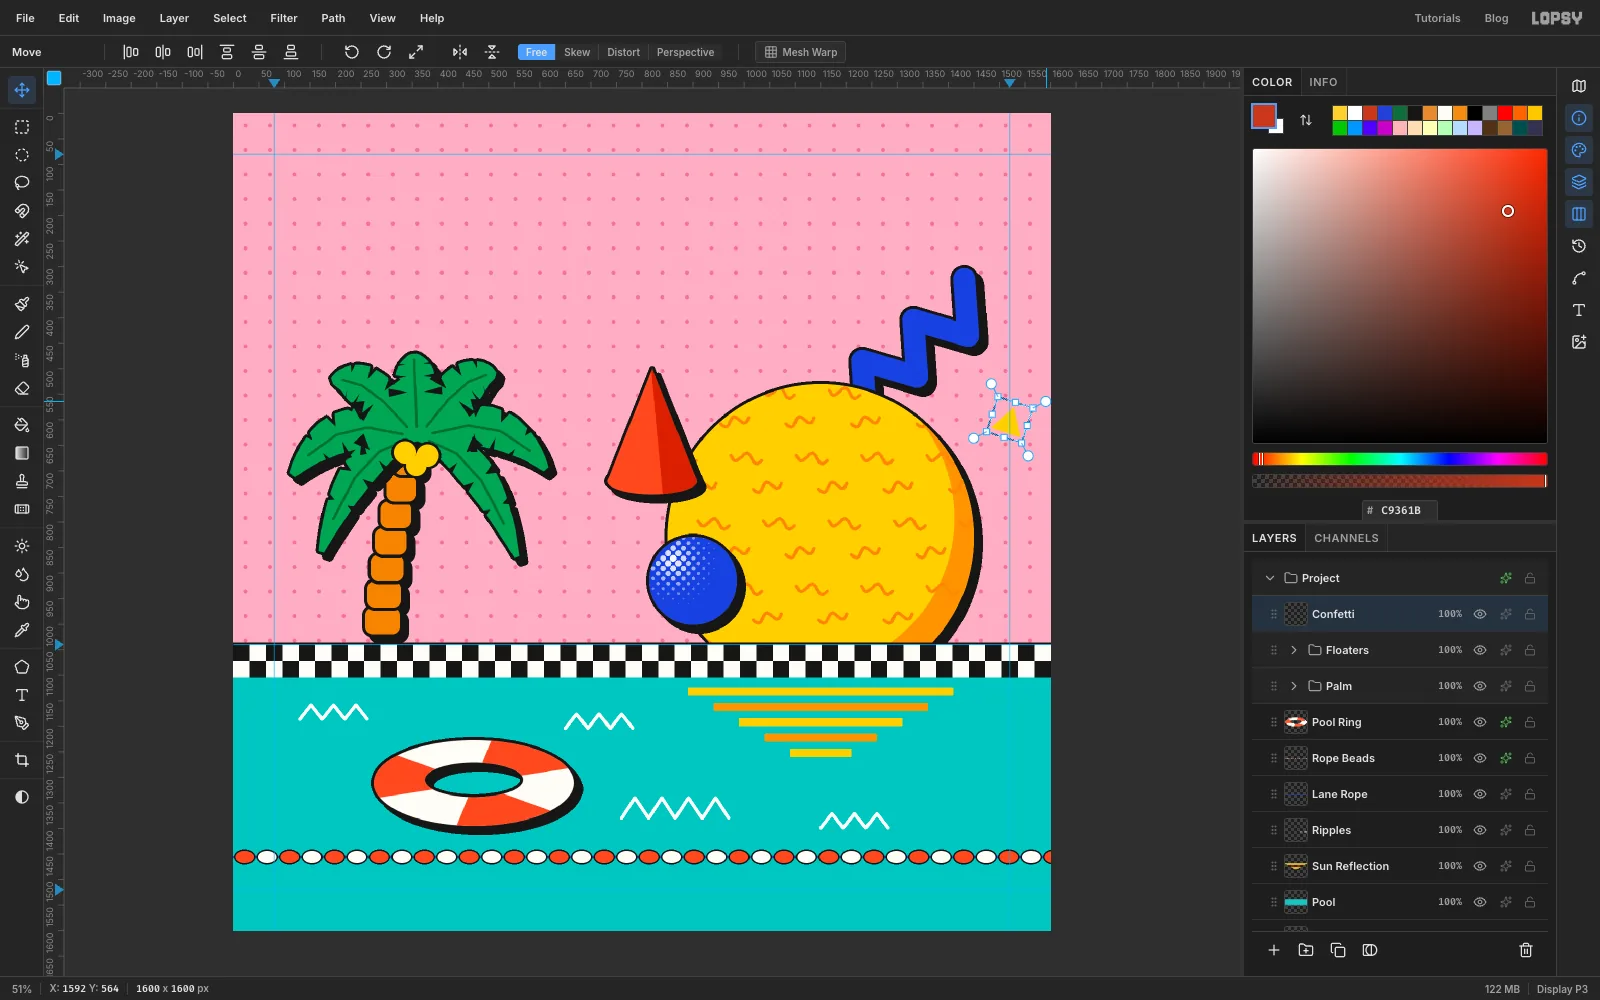
Floaters, click it and add a layer namedConfetti. - Pick the Shape tool, set Shape to Polygon and Sides to
3, with no stroke. You'll draw four triangles and tilt each one as soon as you draw it:
- yellow
FFD12E, 60 px, centred at1520, 600 - mint
A8E6CF, 48 px, at1340, 230 - yellow, 46 px, at
470, 955 - lilac
B79CF2, 52 px, at130, 430
- For each one, set the fill, hold Cmd and drag from its centre. Then drag a marquee just around it, pick the Move tool, and drag just outside a corner of the box to rotate it. Give each a different tilt, from a small nudge to about a ninth of a turn, some clockwise and some counter-clockwise. Press Enter, deselect, and go back to the Shape tool for the next.
- Add three small dots with the Elliptical Marquee and Edit → Fill: red , 28 px across, at
990, 470; red, 24 px, at643, 950; and cobalt , 24 px, at1520, 905. - Give
Confettia 6 px black Stroke and a hard Drop Shadow with offsets of10.
- Collapse
-
Add squiggles and a ring
- Add a layer named
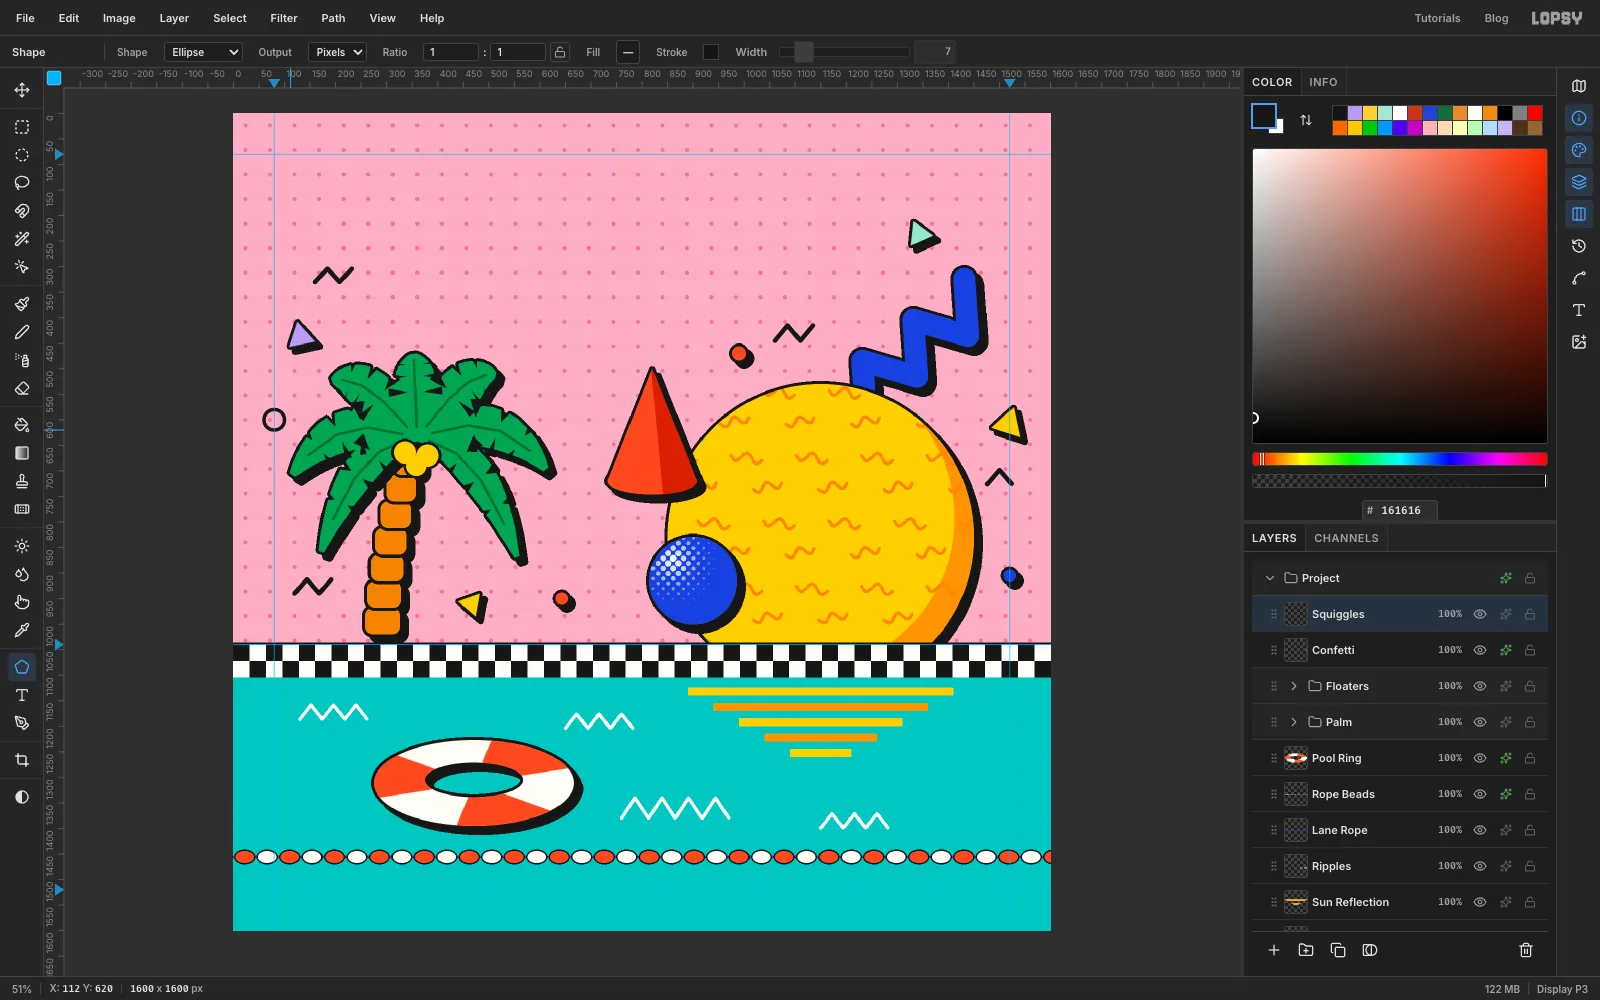
Squiggles. With the Brush at Size10in , draw four short zigzags by clicking and Shift-clicking, each about 75 px long and 28 px tall, with two or three peaks. Put them in the open pink at about196, 317,1098, 430,1500, 712and156, 926. - Pick the Shape tool, set Ellipse, remove the fill and add a
161616stroke at Width7. Hold Cmd and drag a 40 px ring at92, 600.
Keep every piece of confetti at least a few dozen pixels away from the big shapes and from the horizon. Confetti that touches something looks like a mistake.
- Add a layer named
-
Set the title type
- Click
Squiggles. Before each new piece of type, click a non-text layer first. Otherwise, changing the font or size restyles the text layer that's selected. - Pick the Text tool (T). In the options bar choose Shrikhand, set Size to
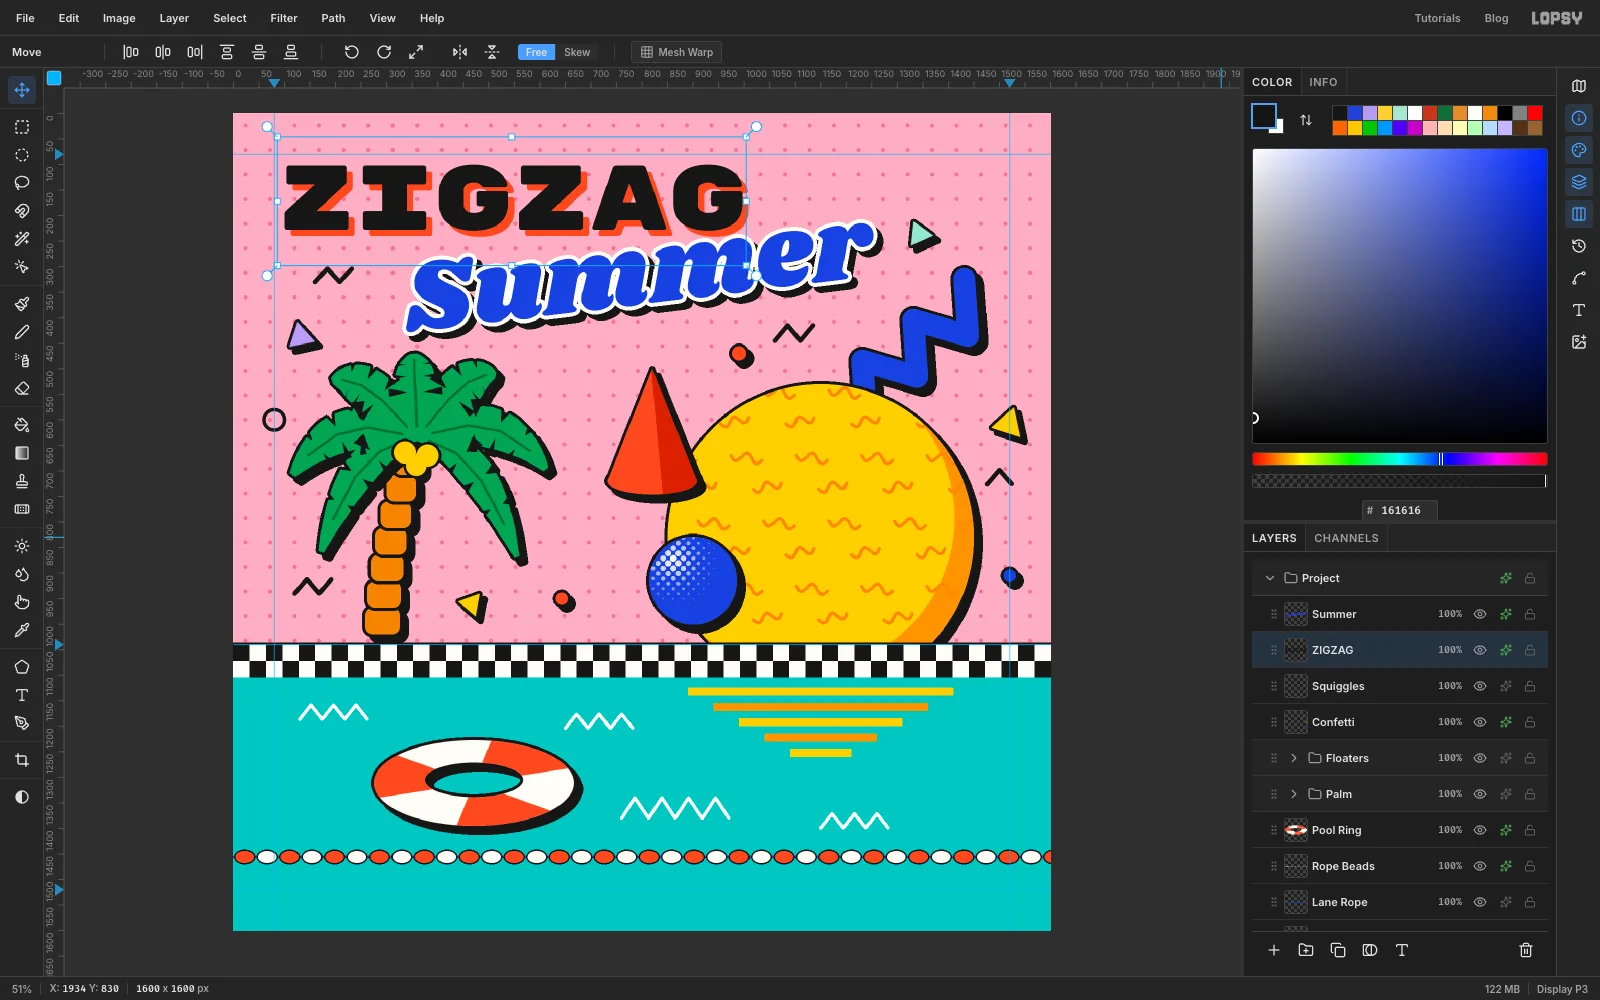
200, and set the colour to . Click at330, 175and typeSummer. Press Tab to finish. - Click
Squigglesagain. Choose Rubik Mono One at Size180in , click at86, 46and typeZIGZAG. Press Tab.
The point you click is the top-left of the line box, which is taller than the capitals and has a little space before the Z. Clicking at
86, 46puts the capitals' top-left corner at100, 100, on the type margin. ZIGZAG is created on top ofSquiggles, which puts it under Summer, so Summer can overlap it.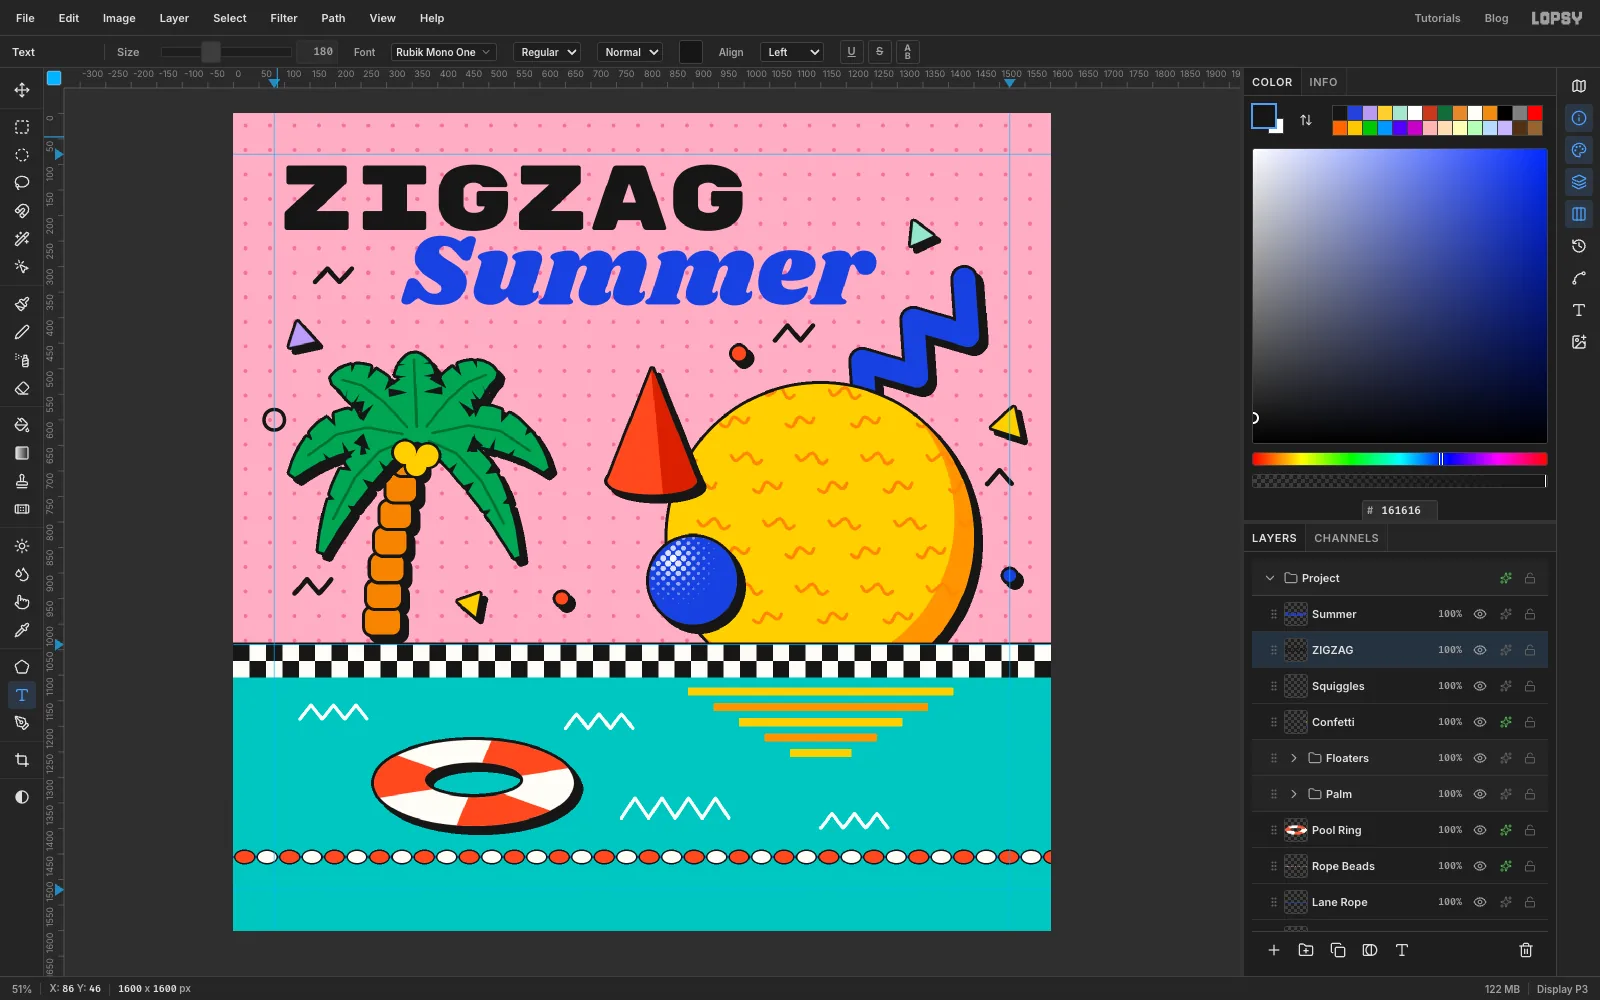
- Click
-
Tilt Summer
- Click the
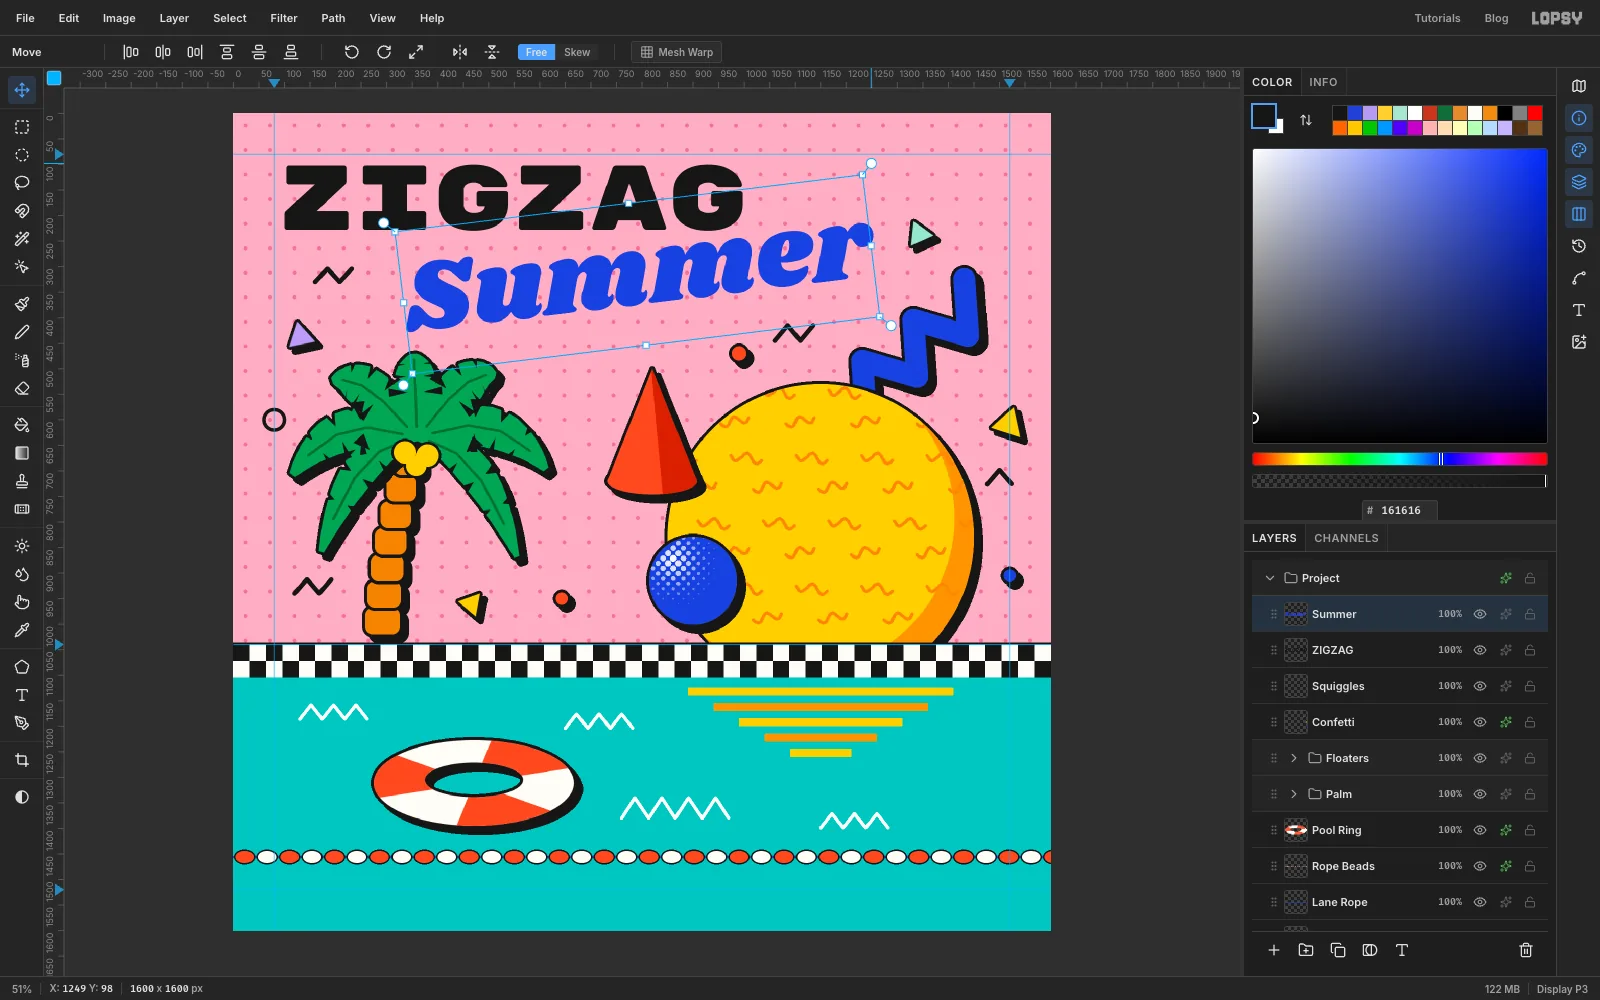
Summerlayer and pick the Move tool. - Hover just outside the top-right corner of its box until the cursor becomes a rotate arrow, and drag up to turn it counter-clockwise a little, about 7°. That's when the end of the r sits roughly 90 px higher than the bottom of the S.
- Press Enter.
The text stays live, so you can still change the font or the word later. The S tucks in under the I of ZIGZAG, and the r rises toward the band-name pill without touching it.
- Click the
-
Outline and shadow the title
- On
Summer, add a Stroke of Width8inFFFDF7(cream), plus the black 12 px hard shadow. - On
ZIGZAG, add only a Drop Shadow: offsets12, Blur0, Opacity100, colourFF5A36.
The cream outline separates the blue script from everything behind it. The vermilion shadow makes the black capitals look stamped twice, slightly out of register.
- On
-
Make the band-name pill
- Click
Summerand add a layer namedBand Pill. - With the Shape tool, choose Rectangle, fill
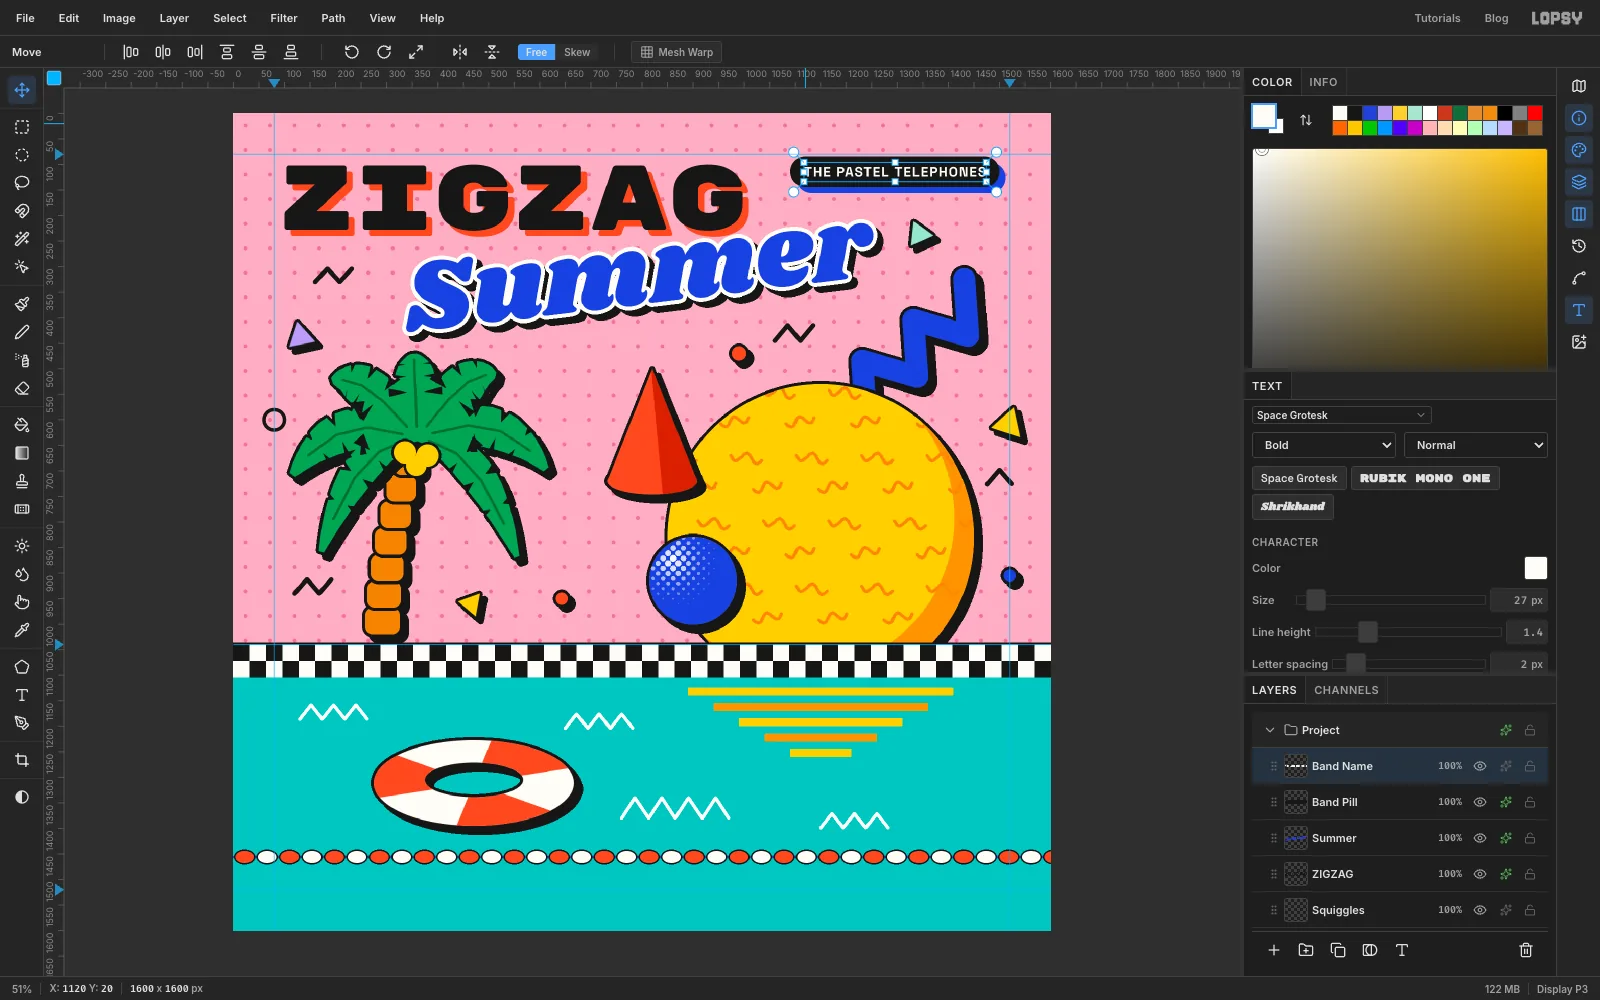
161616, no stroke, Corner Radius30. Press at1295, 114and drag out to1500, 144. That makes a 410 × 60 pill whose right edge sits on the 100 px margin, matching ZIGZAG's left margin. - Give it a hard Drop Shadow with offsets of
12in2340D9. - With
Band Pillactive, pick the Text tool, choose Space Grotesk, Bold, Size27, colour , click in an empty area of the canvas and typeTHE PASTEL TELEPHONES. Press Tab, rename the layerBand Name, and in the Text panel set Letter spacing to2. - With the Move tool and the arrow keys, nudge the text until it sits in the middle of the pill, with equal space at both ends.
- Click
-
Build the sticker as a group
- Click
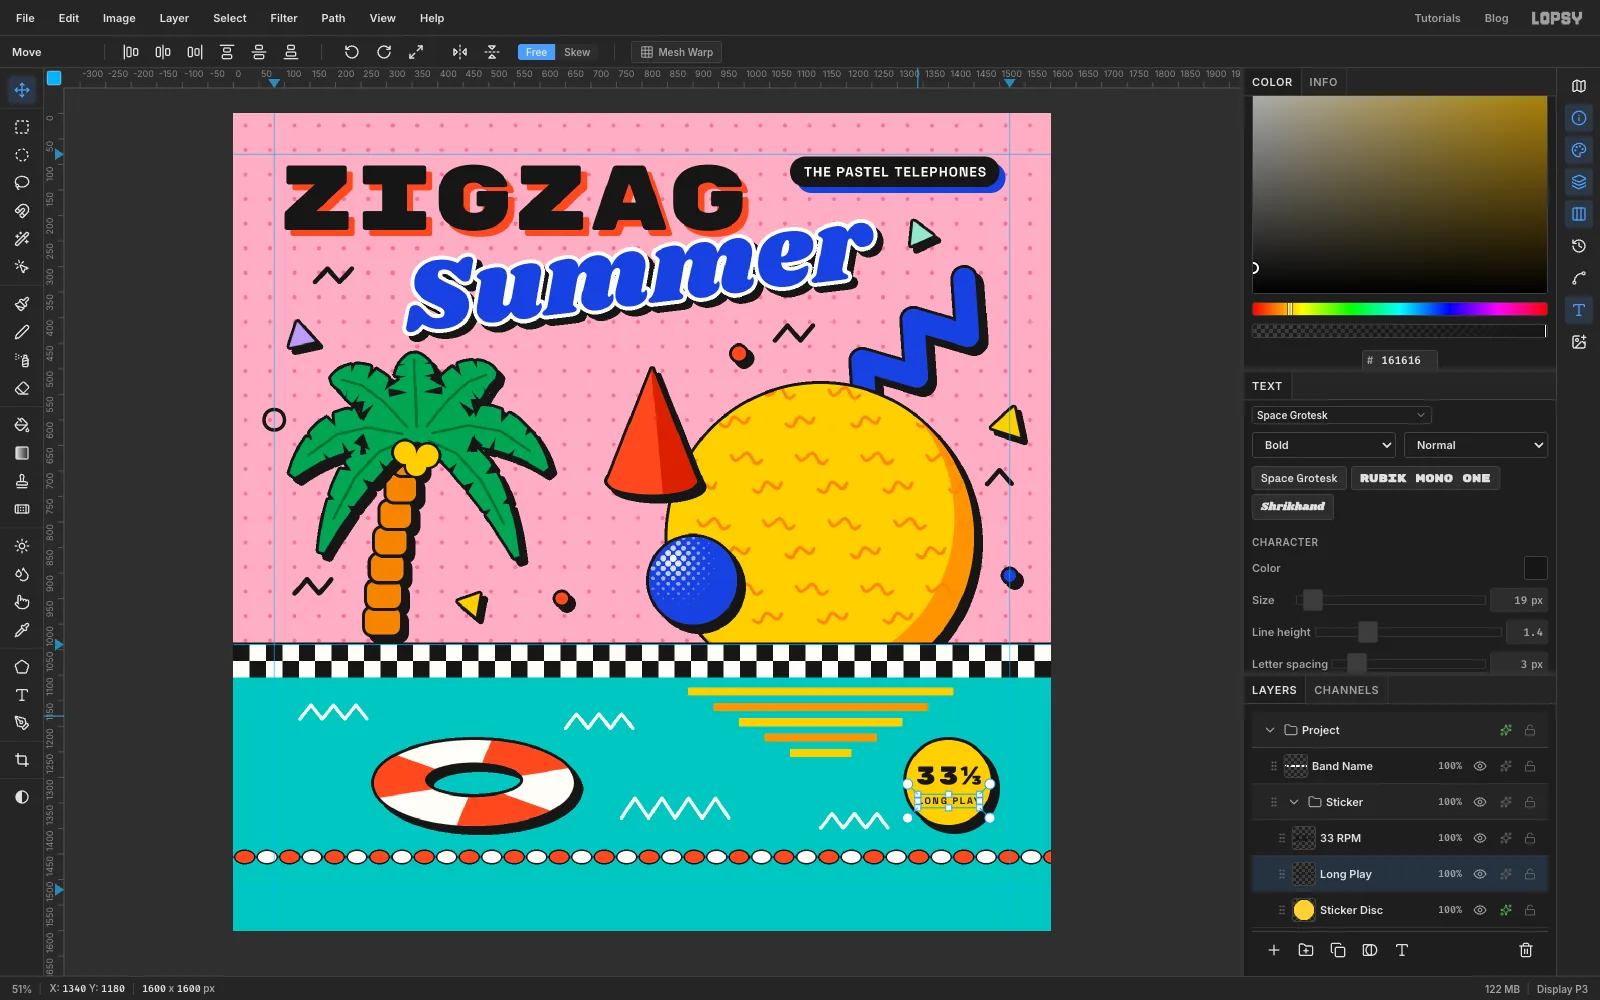
Band Pill, make a New Group namedSticker, and add a layer namedSticker Discinside it. - With the Shape tool, choose Ellipse, fill
FFD12E, stroke161616at Width6. Hold Cmd and drag from1400, 1310out to1486, 1396. Give the layer a 12 px hard shadow. - With
Sticker Discactive, pick the Text tool, choose Rubik Mono One, Size50, black, click in an empty area and type33⅓. There's no key for ⅓: copy it from this page, or use the Character Viewer (Ctrl+Cmd+Space) and search for "one third". Press Tab and rename the layer33 RPM. - Click
Sticker Discagain and typeLONG PLAYin Space Grotesk Bold, Size19, letter spacing3. Rename itLong Play. - With the Move tool, nudge them so
33⅓sits just above the middle of the disc andLONG PLAYabout 50 px below it. Leave at least 25 px between the ends of33⅓and the outline.
- Click
-
Rotate the whole sticker
- Collapse
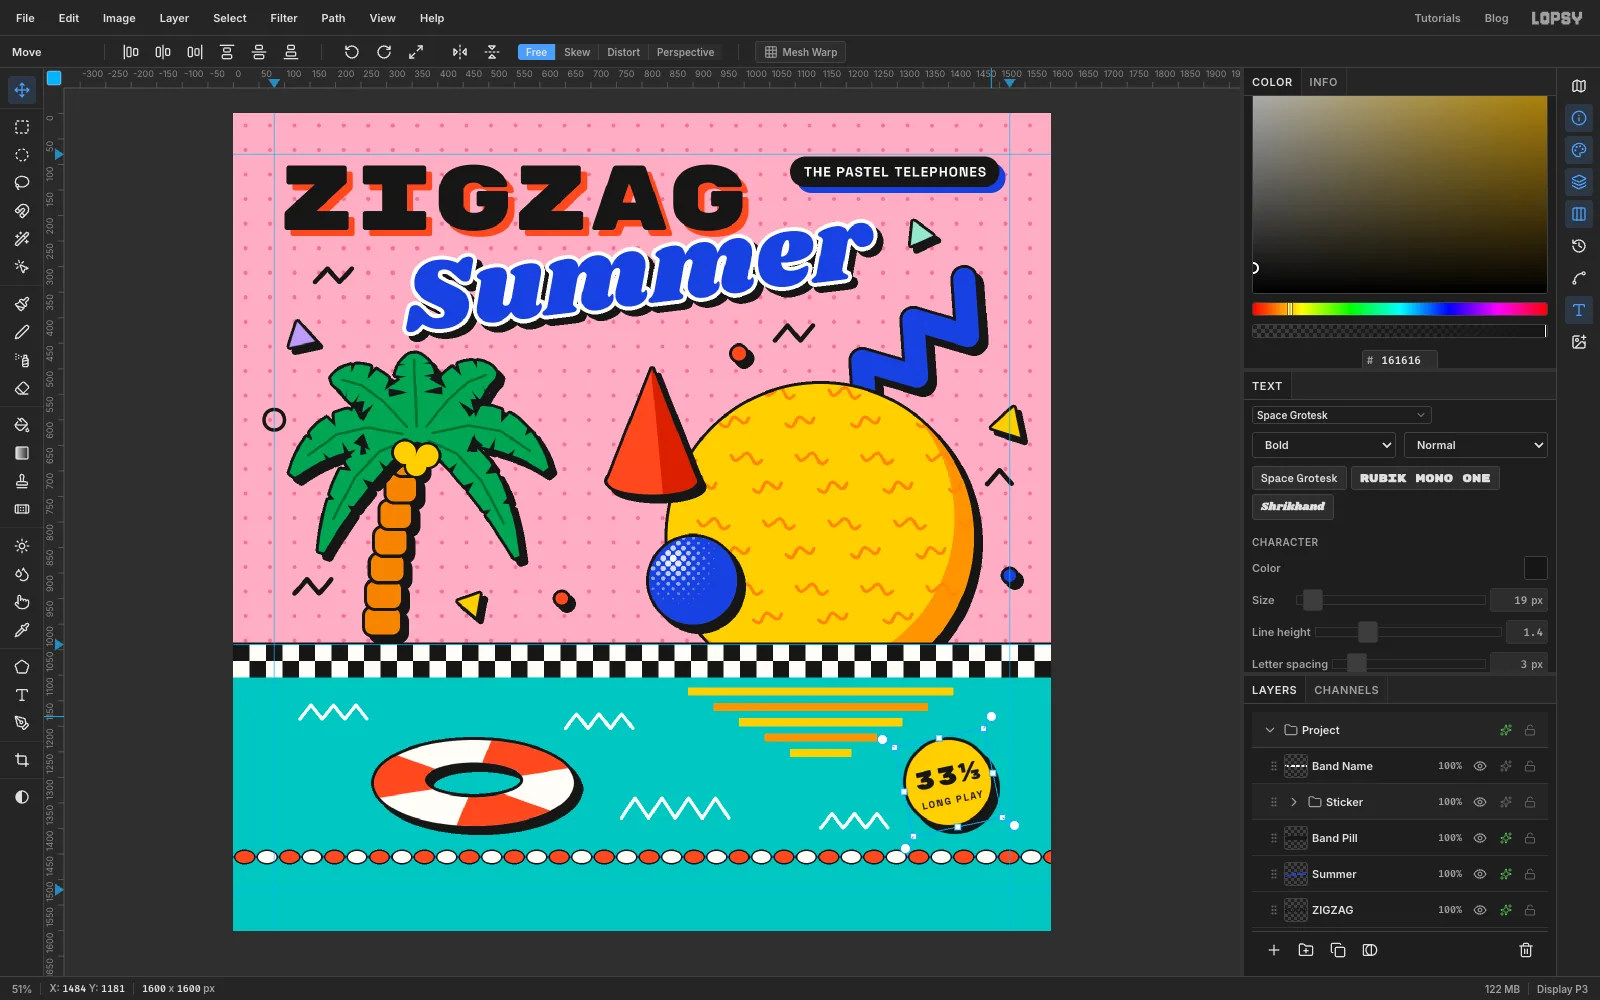
Stickerand click its row, so the Move tool transforms the whole group. - With the Move tool, drag from just outside a corner to tilt it counter-clockwise, about 12°: a bit less than the 15° steps you get by holding Cmd. 33⅓ should climb gently to the right.
- Press Enter.
The disc and both text layers turn together around the same centre, so the two lines stay on one angle.
- Collapse
-
Add the catalogue line and export
- Click
Band Pill, pick the Text tool, click in an empty area and typeSIDE A · PT-1985 · STEREOin Space Grotesk Bold, Size20, colour , letter spacing3. The middle dot is Option+Shift+9 on a Mac. Rename the layerFooter. - Nudge it so it starts at x = 100, the same margin as ZIGZAG, with its baseline at about 1530: halfway between the lane rope and the bottom edge.
- Save the project with File → Save Project, then File → Quick Export PNG for the artwork.
Before you call it finished, look closely at every edge where two things meet. Each overlap should be clearly an overlap, and each gap clearly a gap. That one check is what makes a busy Memphis cover look designed rather than thrown together.
- Click