Design a Memphis-Style Aerobics App Mockup
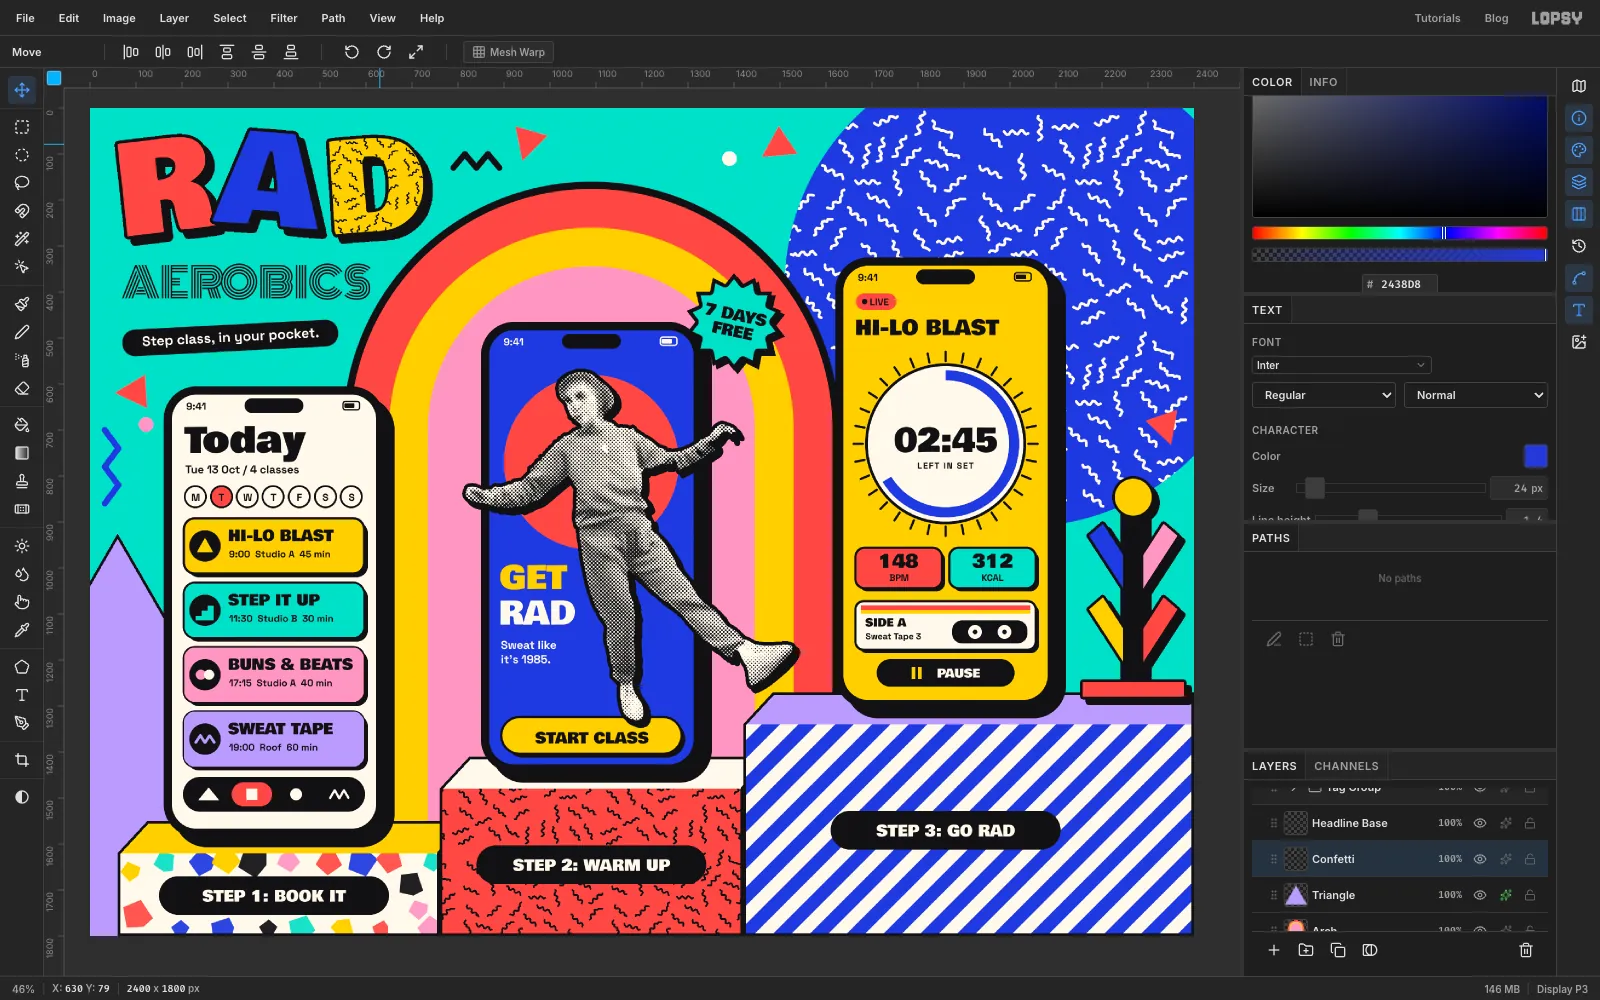
Make an 80s Memphis app mockup in Lopsy. Three phone screens climb a patterned staircase, with a halftone photo cut-out kicking out of the frame.
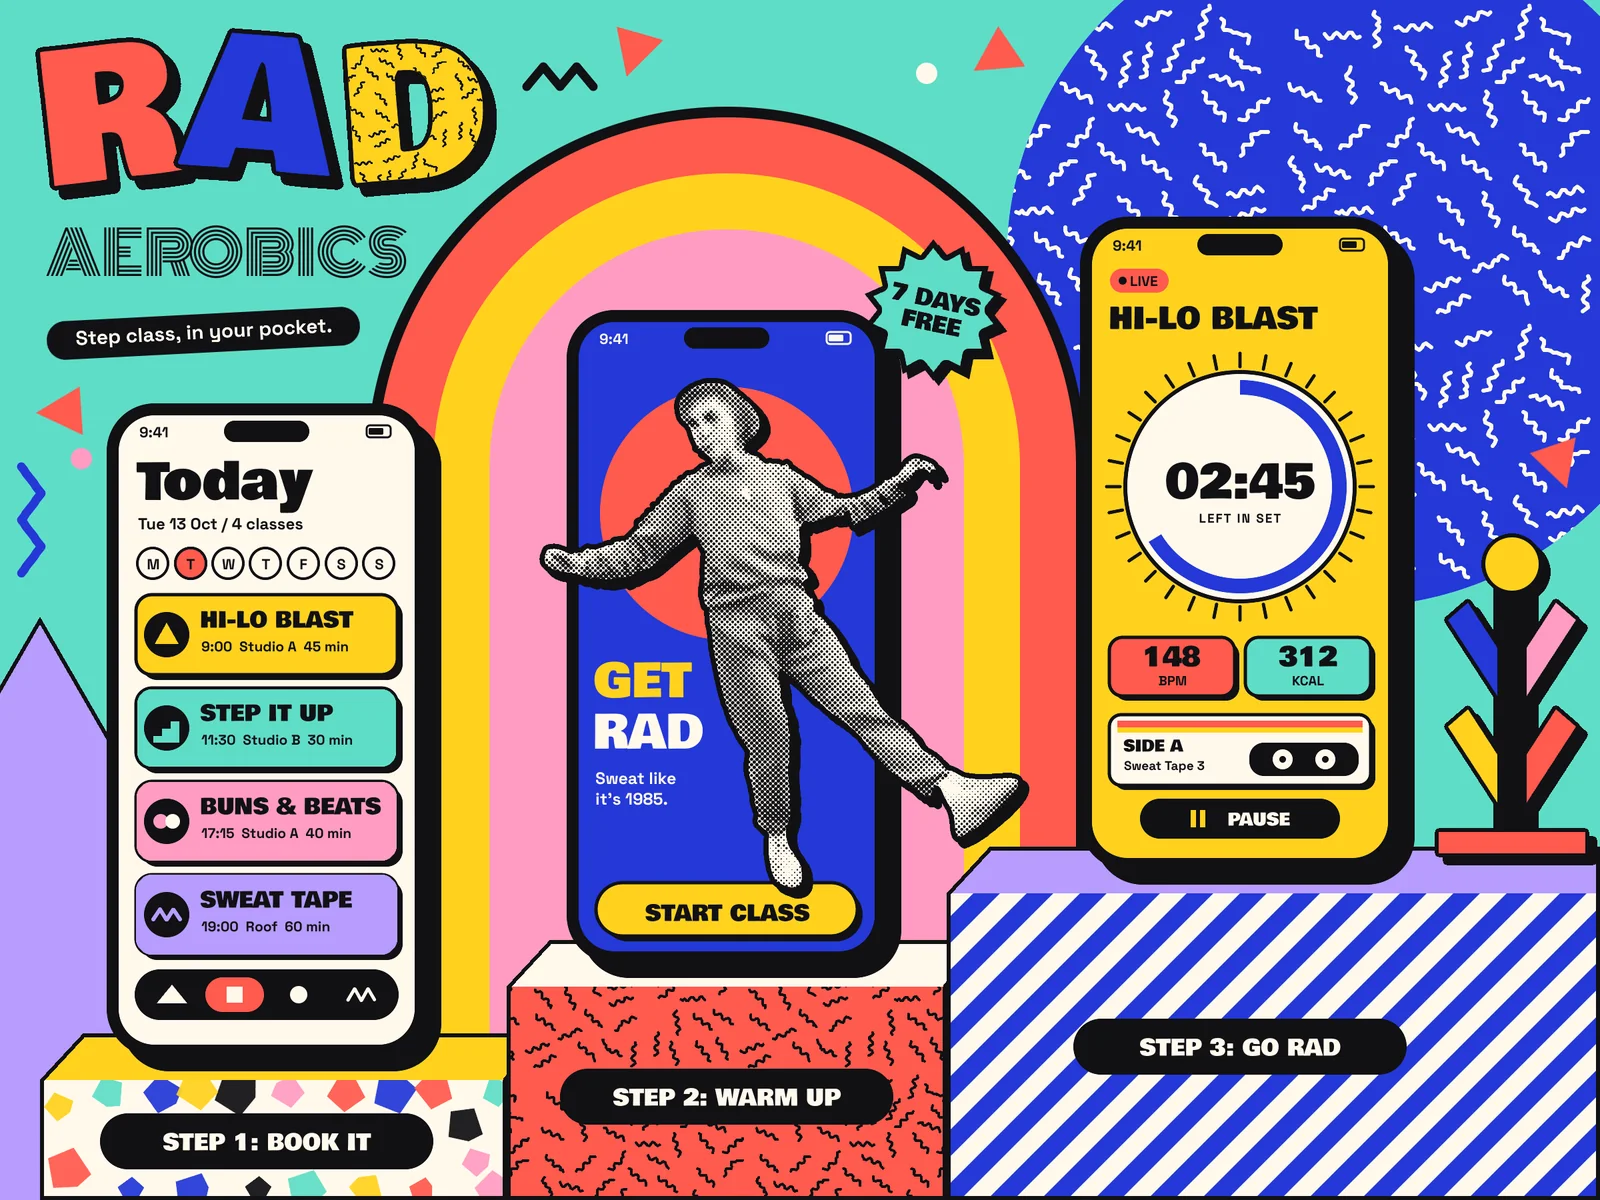
In 1981 a group of Milan designers led by Ettore Sottsass showed a collection of furniture under the name Memphis. It looked nothing like tasteful modern design: loud plastic laminates, clashing colours, squiggly prints and bookcases that seemed to be dancing. It went on to define the look of the 1980s, which makes it a good fit for an app about 80s aerobics.
This board presents Rad Aerobics, a made-up fitness app. The idea is a pun: three phone screens stand on a staircase, because it's a step class, and each step is one stage of using the app. Here's what makes it read as Memphis:
- flat, clashing colour with heavy black outlines
- a different laminate pattern on every surface
- hard shadows with no blur
- a black and white photo cut out like a paper collage
The board is 2400 × 1800 px and holds a tilted headline, a concentric arch, three working-looking app screens, a staircase in three patterns, and a halftone dancer who kicks out of her phone.
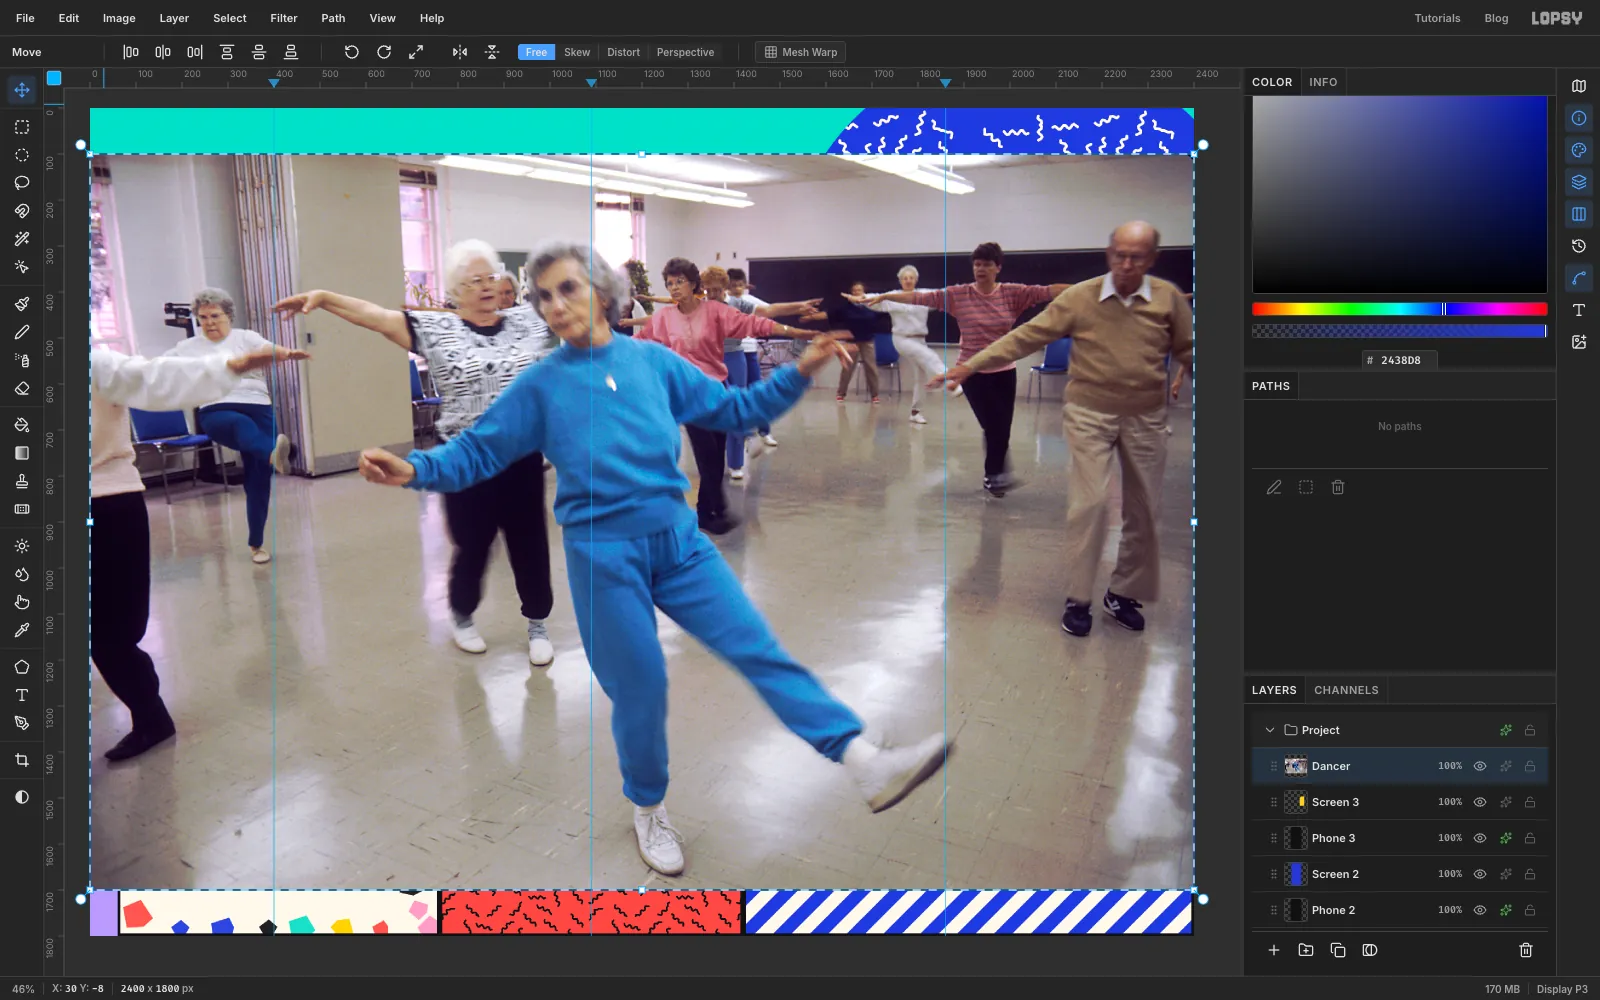
You'll need one photo from Wikimedia Commons: Aerobics class.jpg by Bill Branson, released by the National Cancer Institute and in the public domain. It shows a class at a senior centre, with a woman in a blue tracksuit kicking in the foreground. Download the full-size version (2700 × 1800).
The tools you'll use:
- Show Seamless Pattern, Define Pattern, Fill with Pattern and Define Brush
- the Shape tool's exact-size dialog, with corner radius and stroke
- the marquees' exact-corners dialog
- the Pen tool with Path to Selection, for straight-edged shapes
- Quick Selection, the Lasso and the Magic Wand, and adding and subtracting from a selection
- layer masks, Convert mask to selection, Copy and Paste
- Select → Feather, Grow, Shrink and Inverse
- Dodge/Burn, Desaturate, Brightness/Contrast and Halftone
- the Brush's Radial Symmetry
- live text in three Google fonts, including rotating live text
- scaling two layers at once, rotating a group, duplicating a group, and Merge Down
- layer effects: Stroke, Drop Shadow and Color Overlay
The palette is the kind of thing Memphis laminates were made of:
-
Wall mint
-
Coral
-
canary
-
pink
-
Cobalt
-
lilac
-
Ink
-
paper
-
Draw a squiggle tile
The squiggle print is a nod to Bacterio, the laminate Sottsass designed in the late 1970s and later used on Memphis furniture. You'll draw one square of it and repeat it.
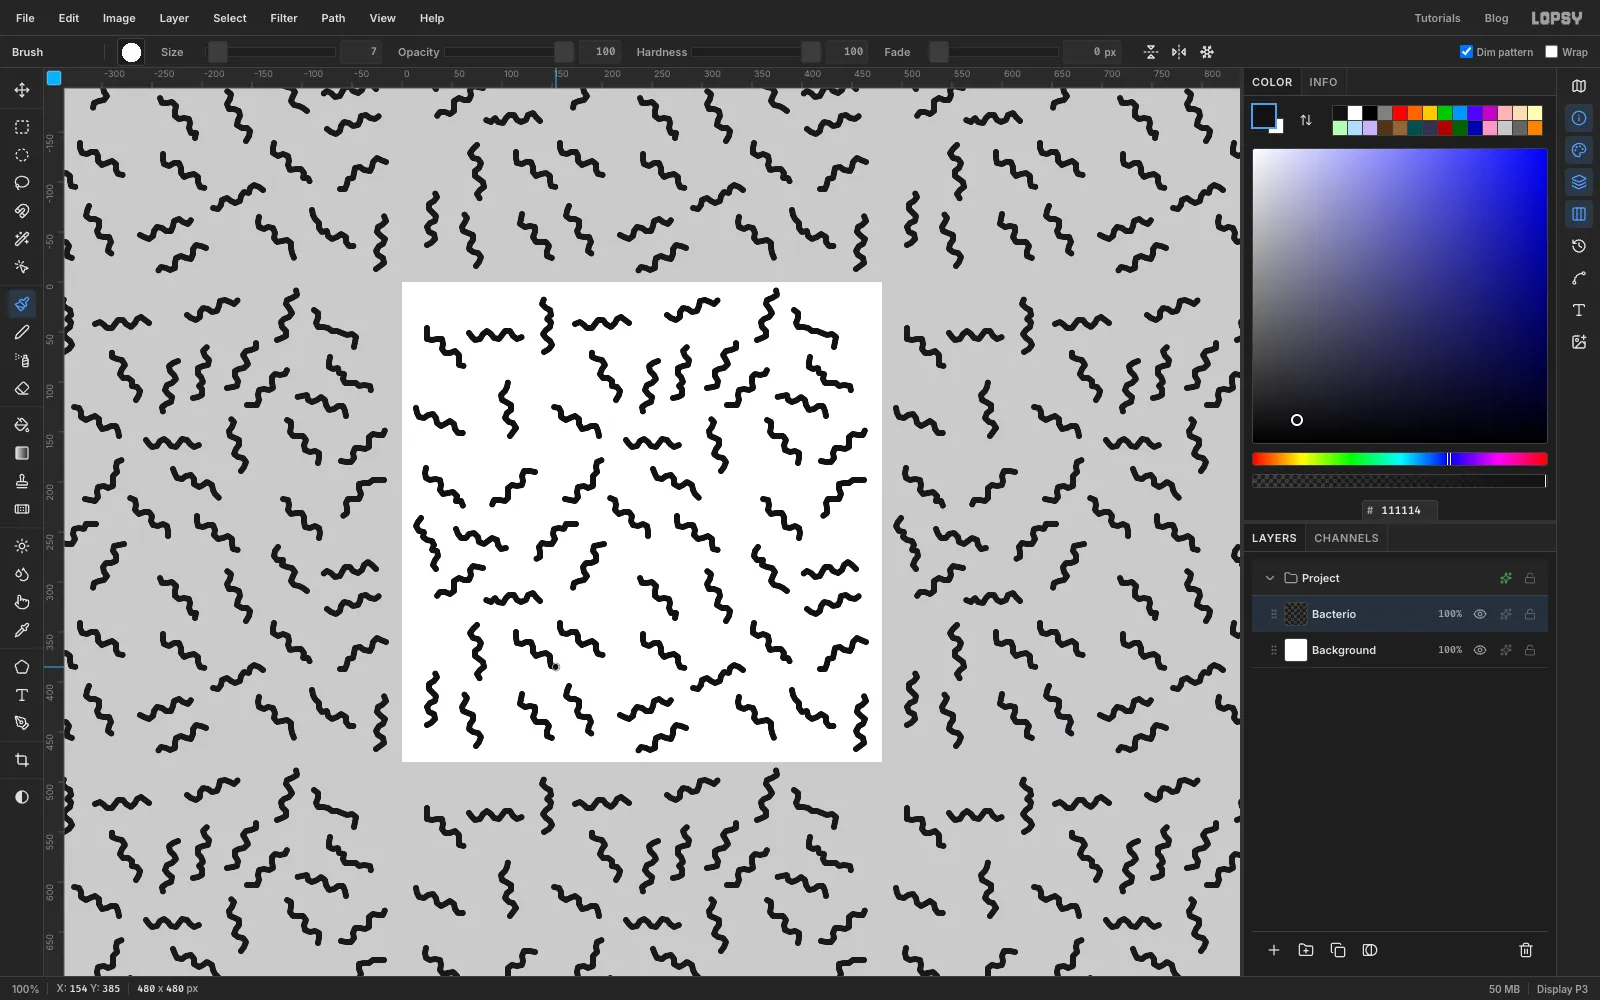
Choose File → New, make a document 480 × 480 and leave the background White. Click Layer 1 and rename it Bacterio. Turn on View → Show Seamless Pattern, so you can see the tile repeating while you draw.
Pick the Brush (B). Click the brush-tip thumbnail at the left of the options bar to open the Brushes window, choose Hard Round, and set Size to 7 and Spacing to 5. Set the foreground to ink .
Paint about 55 short wiggles, each roughly 70 px long, pointing in every direction. Two rules make it look right:
- Don't let any wiggle touch another. Real Bacterio is evenly spaced, and crossings look like mistakes.
- Stay about 8 px inside the tile's edges, so nothing gets cut off at a seam.
Look at the grey repeats. If you can see a bald patch or a clump, undo a few wiggles and redo them.
With Bacterio active and nothing selected, choose Edit → Define Pattern. The tile is saved with its transparent background, so you can fill it over any colour.
-
Cut a stripe tile with the Pen
You'll use the Pen for every straight-edged shape in this project, because the Lasso is freehand. Here's the recipe, which later steps call a Pen shape:
- Pick the Pen (P) and click each corner.
- Click the first anchor again to close the path.
- In the Paths panel (the curve icon in the strip on the far right), click Path to Selection.
- Click Delete Path, so your next click starts a new path. The selection stays.
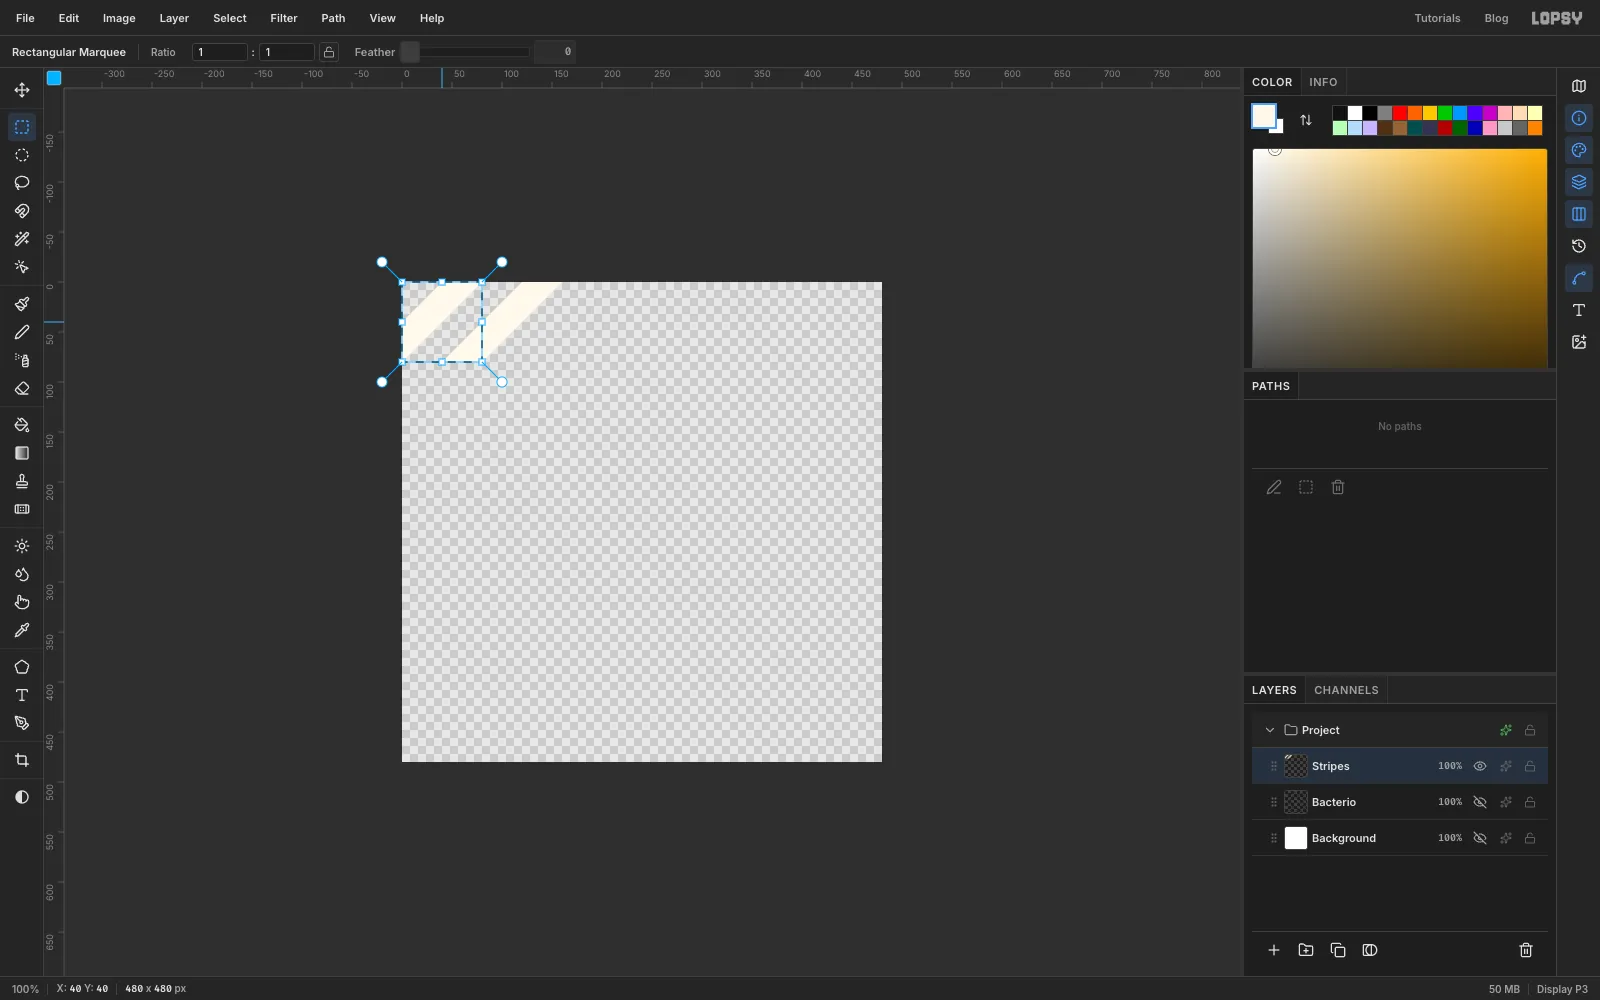
Turn View → Show Seamless Pattern off. Add a layer called Stripes. Click the eye icons on Bacterio and Background to hide them, so the stripes show up against the checkerboard. Set the foreground to paper .
This is one place where exact numbers matter, because the stripes have to meet at the tile's edges. The status bar shows your cursor's position as you move. Zoom in on the top left corner and make a Pen shape with corners at 40, 0, 80, 0, 0, 80 and -40, 80. That last one is off the canvas, which is fine. Choose Edit → Fill.
Make a second Pen shape at 120, 0, 160, 0, 80, 80 and 40, 80, and fill it too.
Press Cmd+D. Pick the Rectangular Marquee and click once on the canvas without dragging. With nothing selected, that opens a dialog for exact corners. Enter From 0, 0 and To 80, 80. Choose Edit → Define Pattern, which saves only what's inside the marquee.
-
Start the board and drop three guides
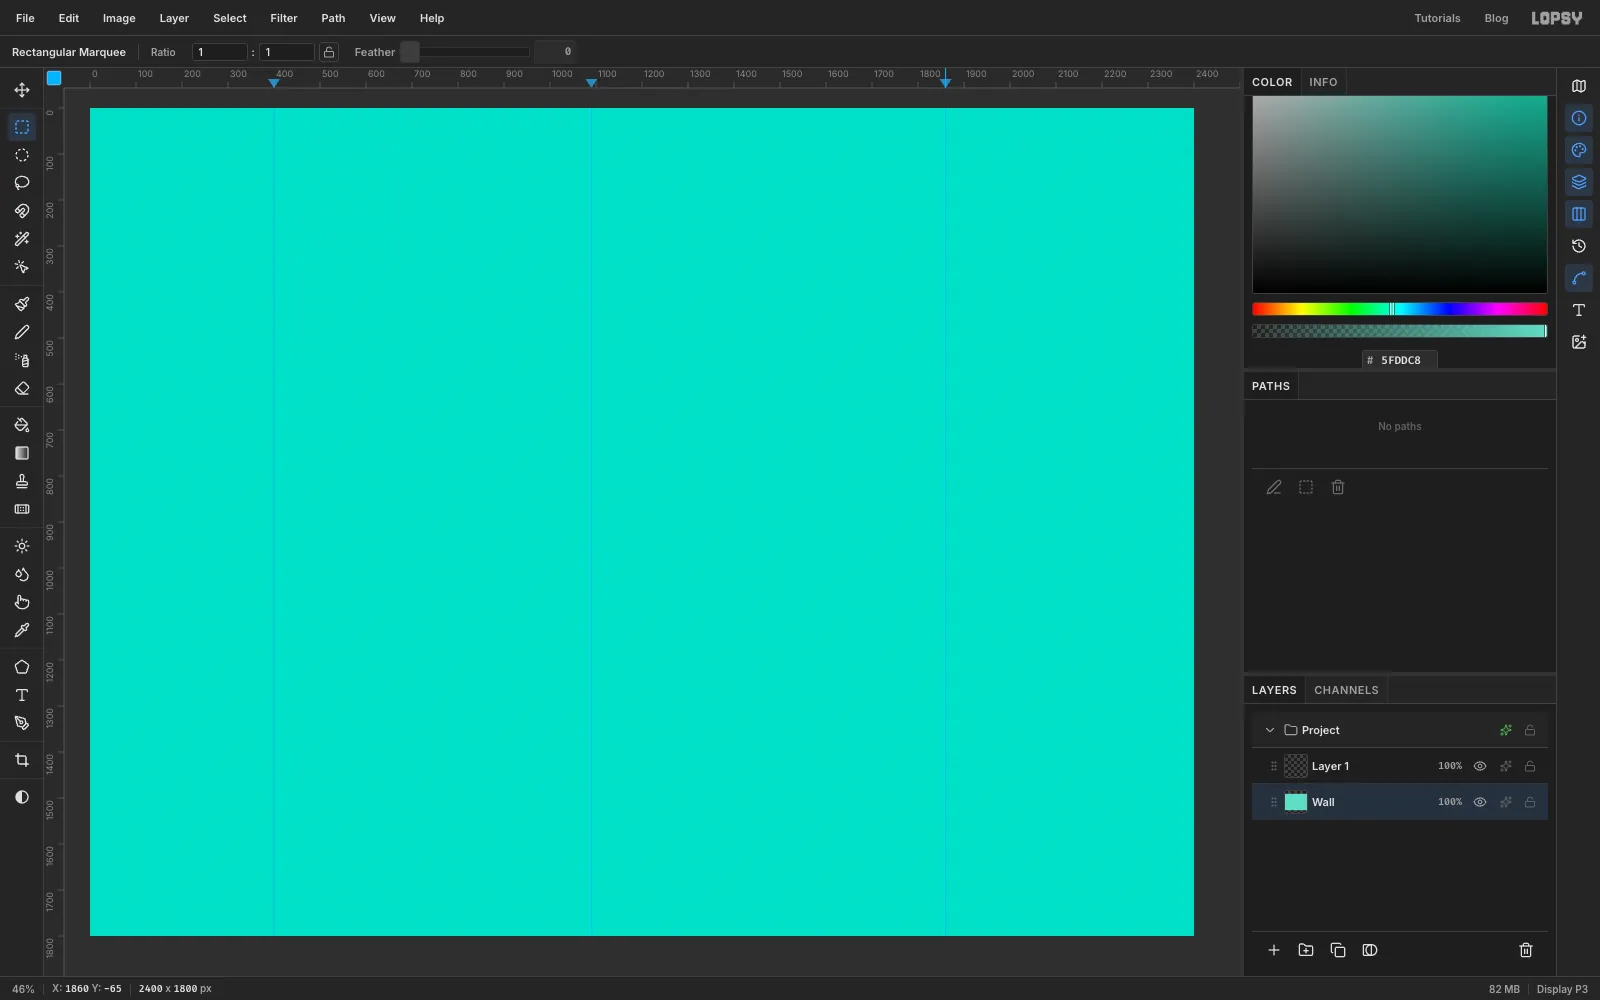
Press Cmd+D, choose File → New, and make the board 2400 × 1800 with a White background. Your two patterns carry over to the new document.
Click Background, rename it Wall, set the foreground to mint and choose Edit → Fill.
Click the top ruler at 400, 1090 and 1860 to drop three vertical guides. These are the centre lines of your three phones.
-
Add a blue disc with squiggles
Click Layer 1 and rename it Cobalt Disc.
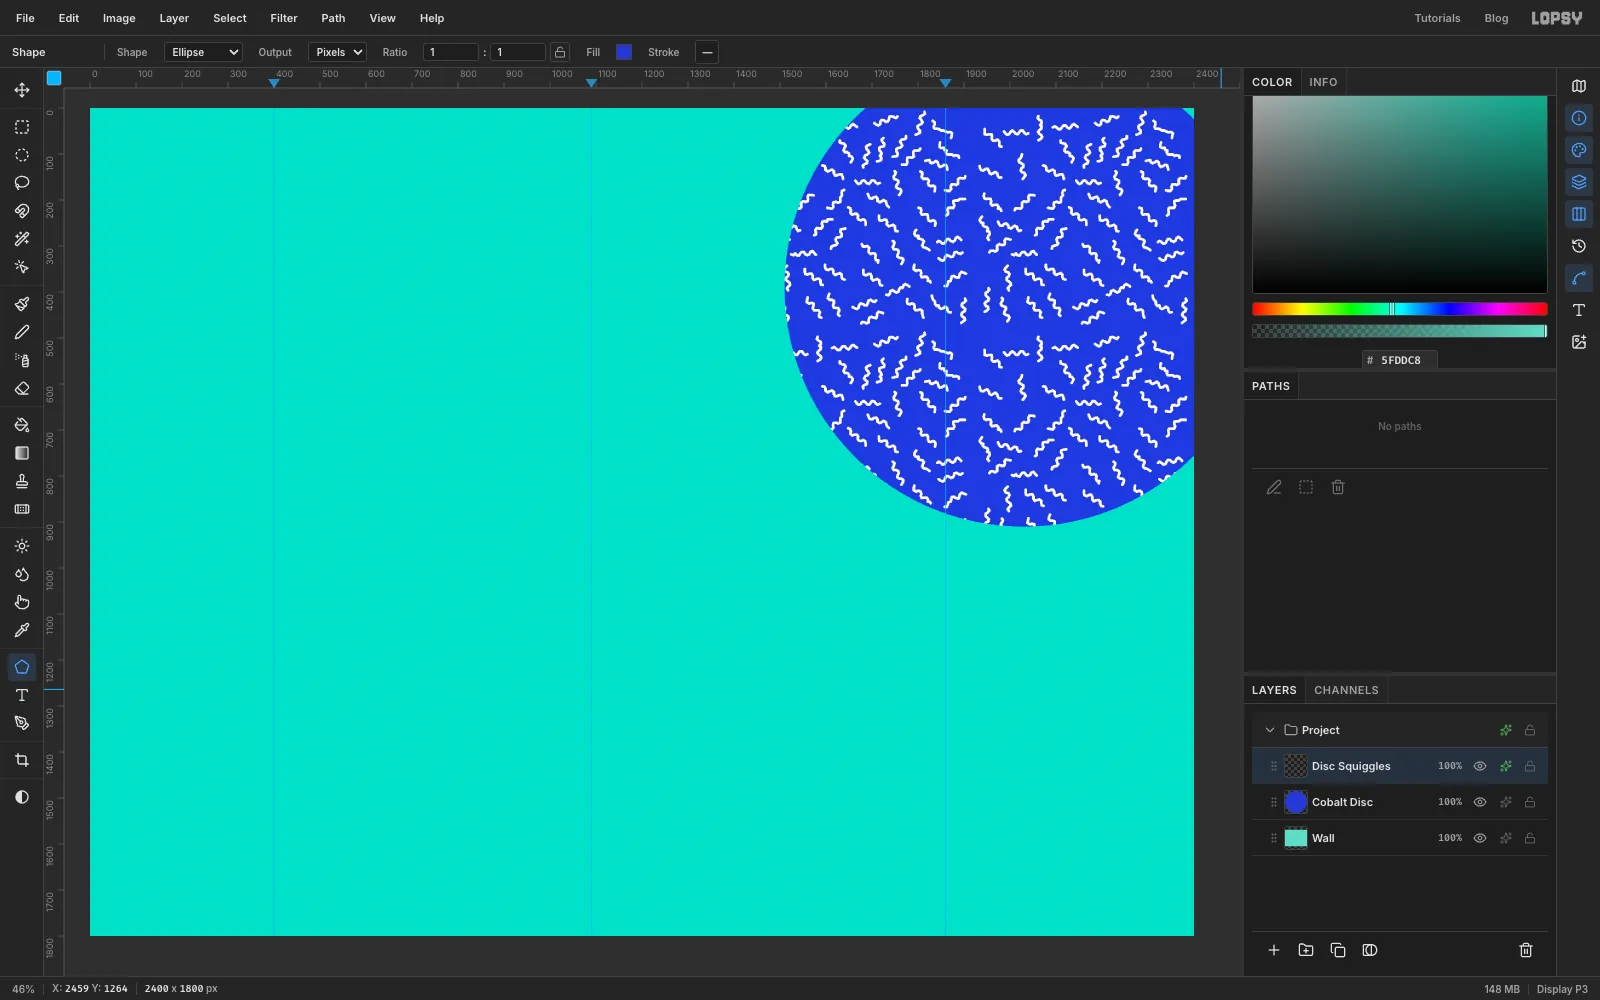
Pick the Shape tool (U). Set Shape to Ellipse, Output to Pixels, Fill to cobalt and Stroke to none. Click once towards the top right of the canvas, and in the size dialog enter 1040 × 1040. The shape appears centred on your click, and you want it running off the top and right edges. If it's not quite there, pick the Move tool (V) and drag it.
Cmd-click the Cobalt Disc thumbnail in the Layers panel to load its shape as a selection. Click Add Layer and name the new layer Disc Squiggles.
Choose Edit → Fill with Pattern…, pick your squiggles and leave Scale at 100. Click Apply, then press Cmd+D.
The squiggles are black, and you want them cream. Click the layer's effects button, tick Color Overlay and set it to paper .
-
Build the concentric arch
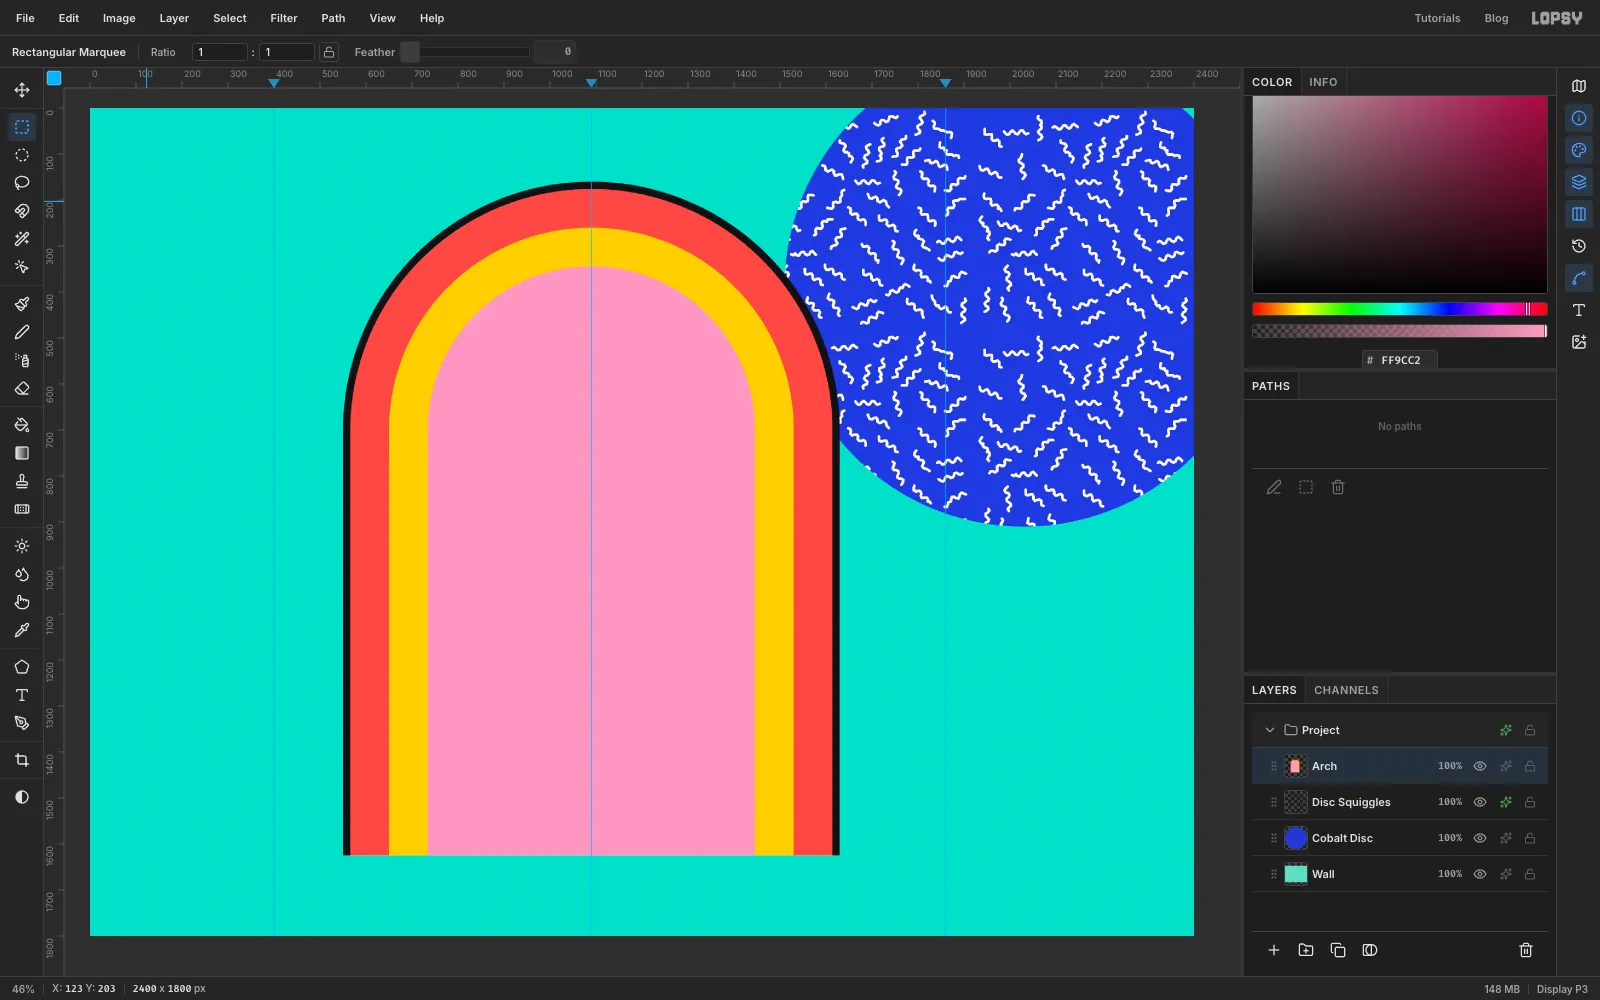
Add a layer called Arch. An arch is a circle with a rectangle underneath it, and you'll build it four times, from the largest down. The bands only look right if they're concentric, so use the exact-corners dialog rather than dragging.
For each band below, set the foreground colour, then:
- With the Elliptical Marquee, click once and type the circle's corners. Choose Edit → Fill, then press Cmd+D.
- With the Rectangular Marquee, click once and type the rectangle's corners. Fill it and press Cmd+D.
The bands, as From and To corners:
- Ink: circle 550, 160 to 1630, 1240, rectangle 550, 700 to 1630, 1625
- Coral: circle 566, 176 to 1614, 1224, rectangle 566, 700 to 1614, 1625
- Canary: circle 650, 260 to 1530, 1140, rectangle 650, 700 to 1530, 1625
- Pink: circle 734, 344 to 1446, 1056, rectangle 734, 700 to 1446, 1625
-
Add a lilac peak
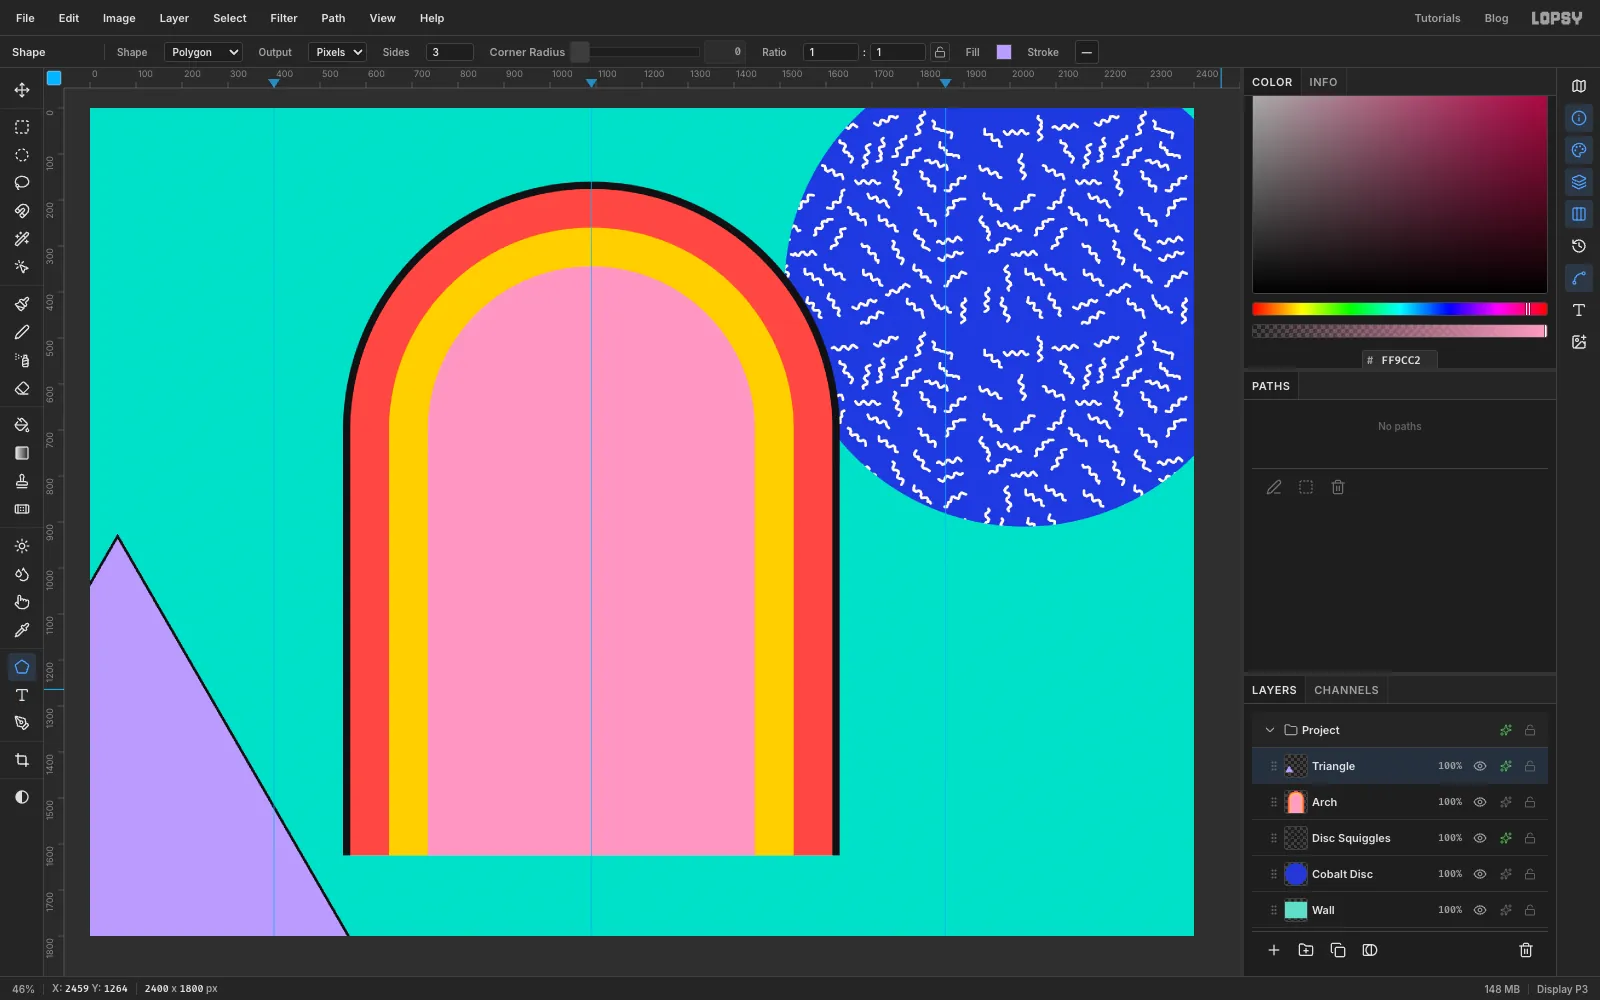
Add a layer called Triangle. With the Shape tool, set Shape to Polygon, Sides to 3, and Fill to lilac .
Click near the lower left corner and enter 1120 × 1120. With the Move tool, drag it so its point sits about halfway down the canvas, about 60 px in from the left edge, and its base runs off the bottom.
Open the layer's effects and add a Stroke: Width 6, ink, position inside. The rest of the board has heavy outlines, and without one this shape looks like something left behind.
-
Block out the staircase
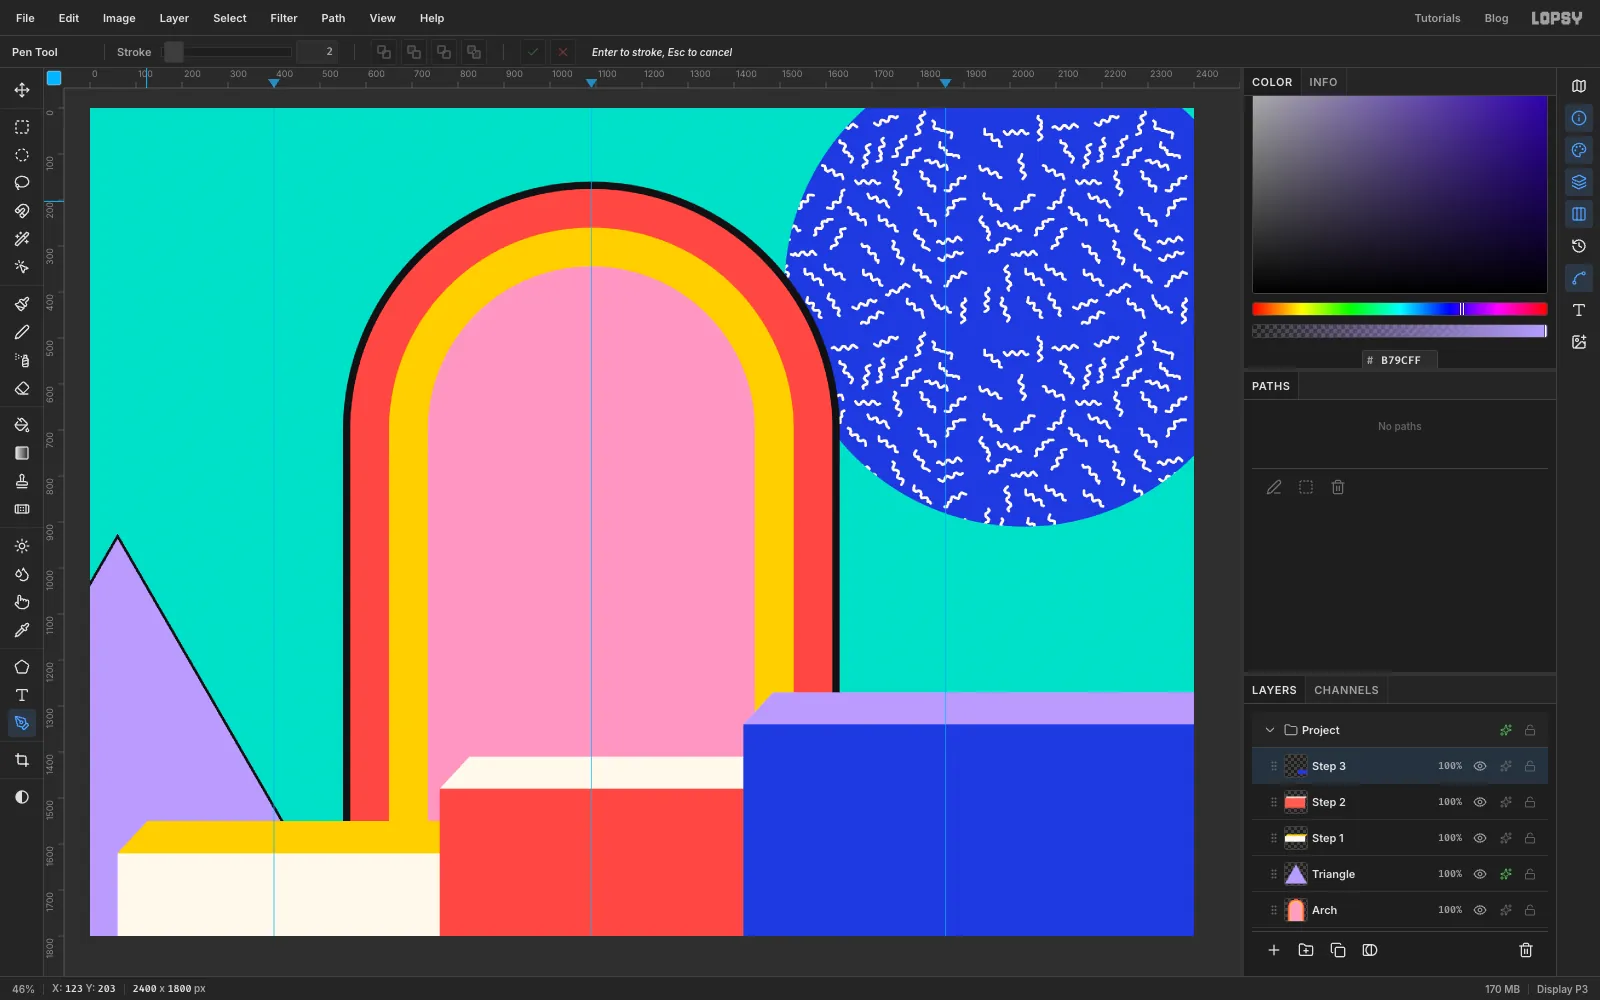
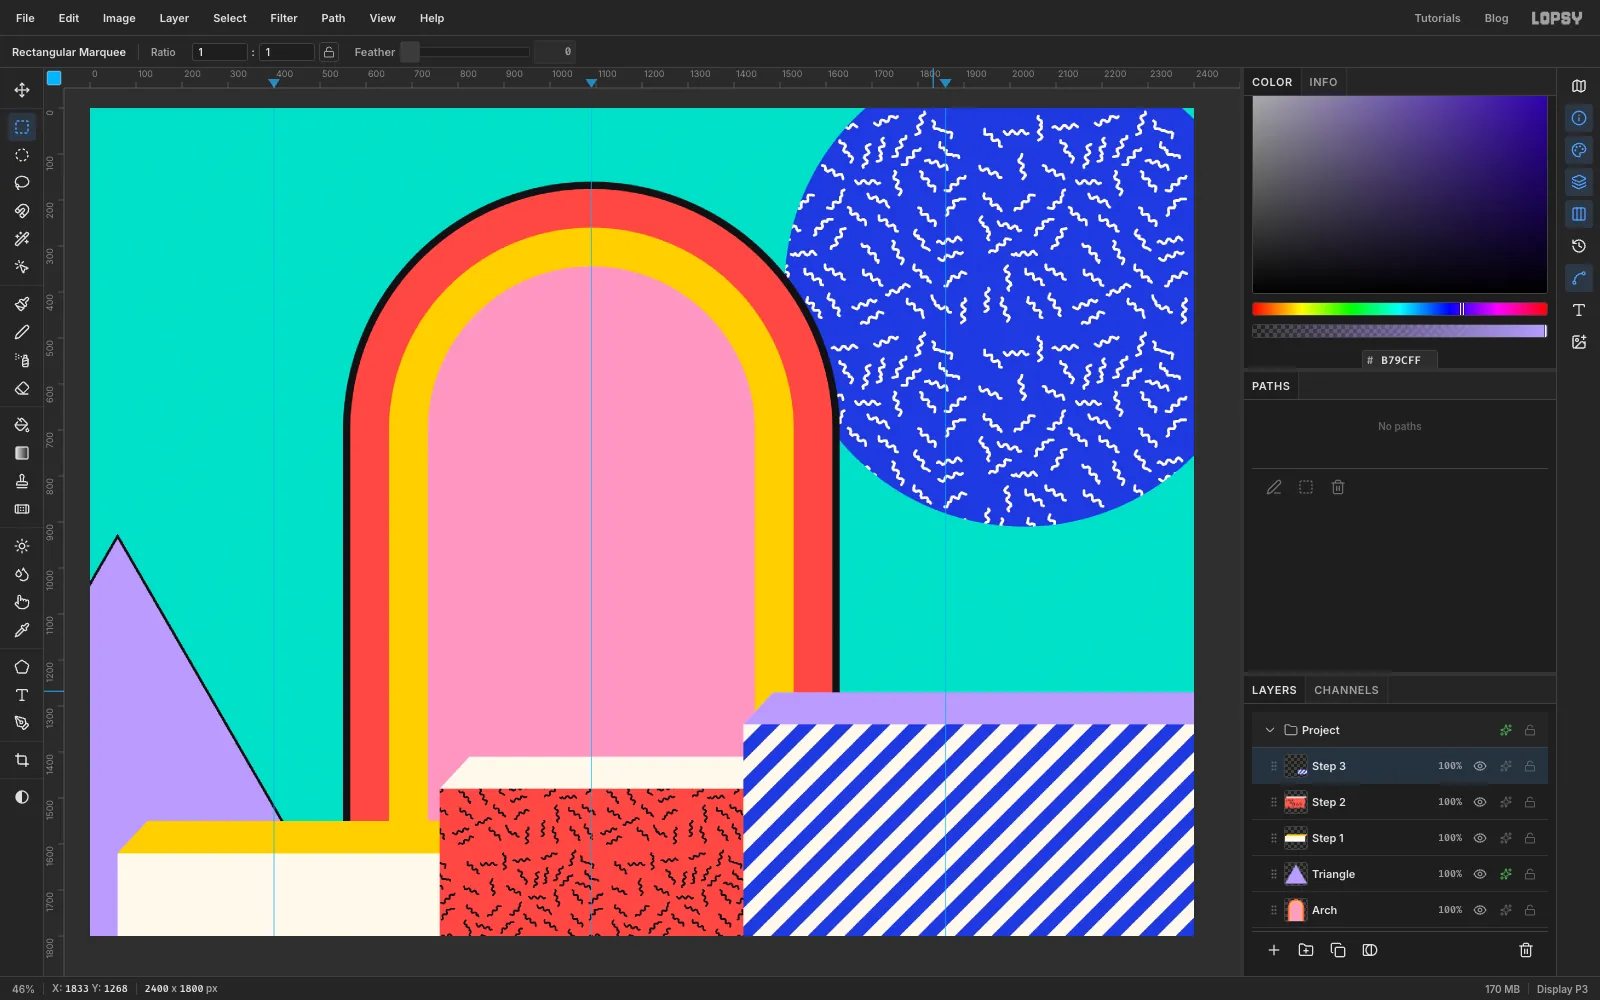
Each step is a flat front with a slanted top, which gives you a simple 3D look. Each one goes on its own layer, and each is about 140 px taller than the last. Draw the fronts with the Rectangular Marquee, and the tops as Pen shapes: a parallelogram 70 px tall that leans 65 px to the right.
Step 1. Add a layer called Step 1. Draw the front from about 60 px in from the left edge to about a third of the way across, and from 180 px above the bottom of the canvas down past the bottom edge. Fill it with paper. Make the top as a Pen shape sitting on the front, and fill it with canary. Press Cmd+D.
Step 2. Add a layer called Step 2. Start its front where Step 1 ends and make it about 660 px wide, with its top about 320 px above the bottom of the canvas. Fill it with coral, then make the same leaning top and fill it with paper.
Step 3. Add a layer called Step 3. Start its front where Step 2 ends, run it off the right edge, and put its top about 460 px above the bottom of the canvas. Fill it with cobalt. Make its top run off the right edge and fill it with lilac.
-
Give the steps their laminates
Click Step 2 and marquee just its coral front. Choose Edit → Fill with Pattern…, pick the squiggles, and set Scale to 67 and Row Stagger to 50. Staggering the rows hides the repeat. Apply and deselect.
Click Step 3, marquee its cobalt front and run Fill with Pattern with your stripe tile at Scale 100. Apply and deselect.
Painting the stripes directly on the step's own layer matters here. If they sit on a layer above, they'll cover the outline you're about to add.
-
Paint terrazzo with a custom brush
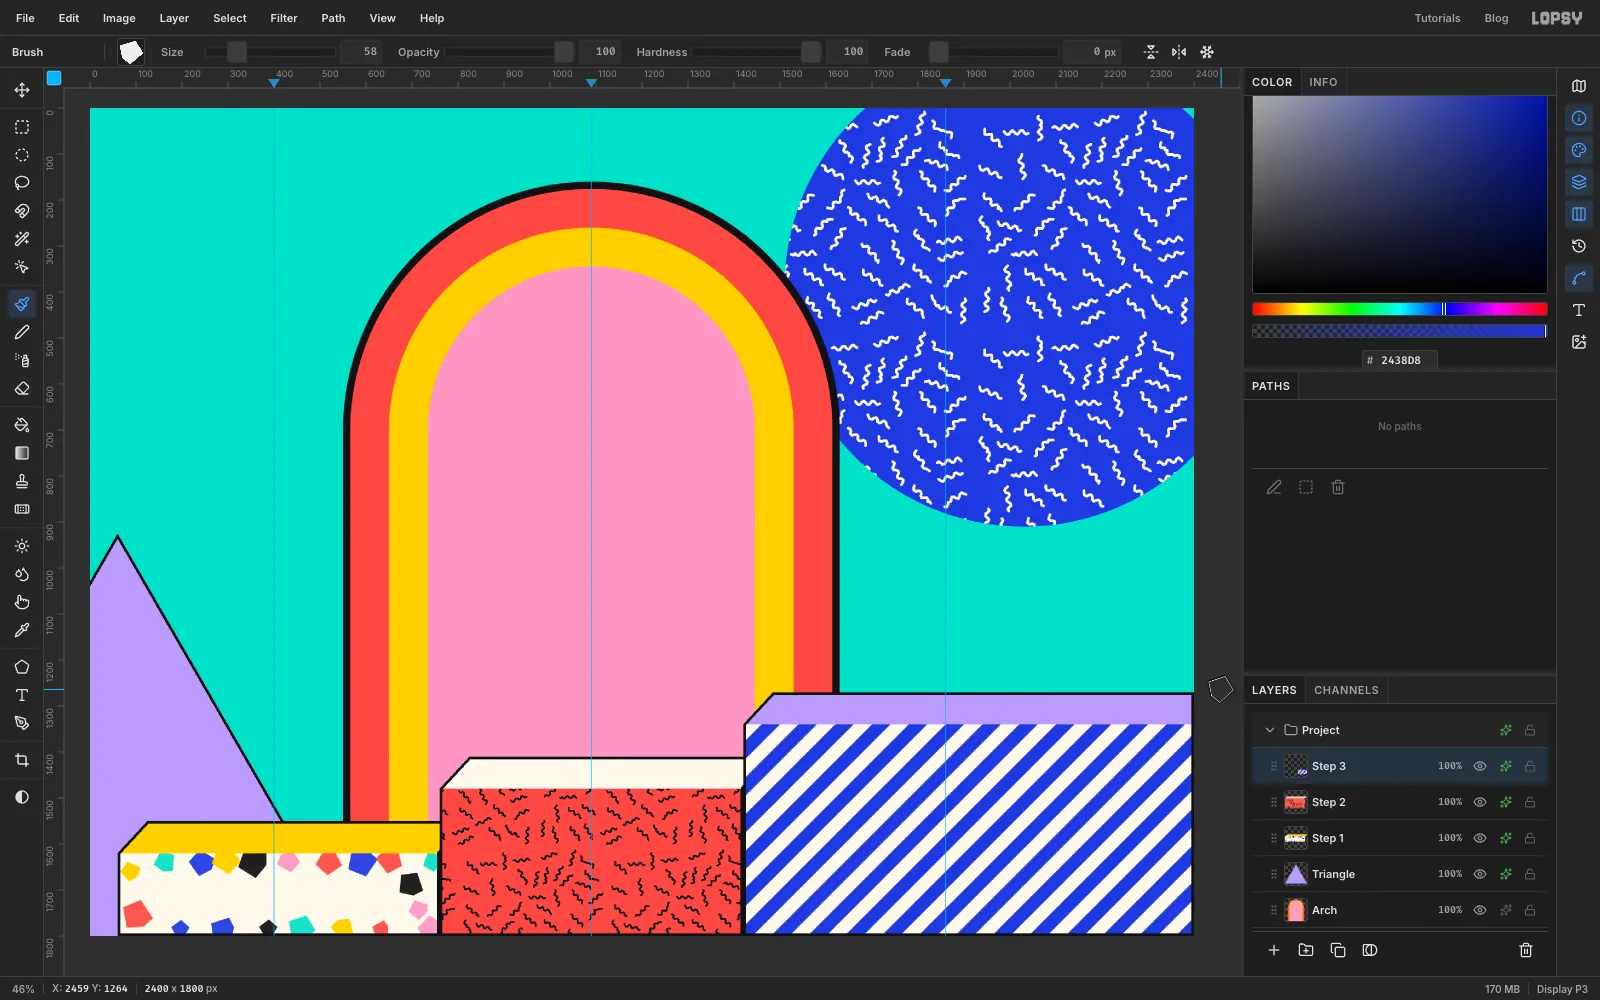
Terrazzo is stone chips set in a pale floor, and you can paint it with a brush tip shaped like a chip.
Add a temporary layer. With the Lasso, draw an irregular five-sided chip about 90 px across and fill it with ink. Choose Edit → Define Brush…, name it Shard, then press Cmd+D and delete the temporary layer.
Click Step 1. In the Brushes window, set Angle Jitter to 100 and Scatter to 0, then close it. Marquee the cream front of the step, so nothing paints outside it.
Now click once for each chip, changing the foreground colour as you go. Use coral, cobalt, ink, mint, pink and canary in turn. Every few chips, change Size in the options bar to something between 40 and 70, because Size Jitter only works along a stroke and has no effect on single clicks. Leave a gap between chips, and keep them to the outer edges of the step: you'll need clear space across the middle for a label. About 45 chips is plenty. Deselect.
Finally, click each step in turn and add a Stroke: Width 6, ink, position inside.
-
Stand three phones on the steps
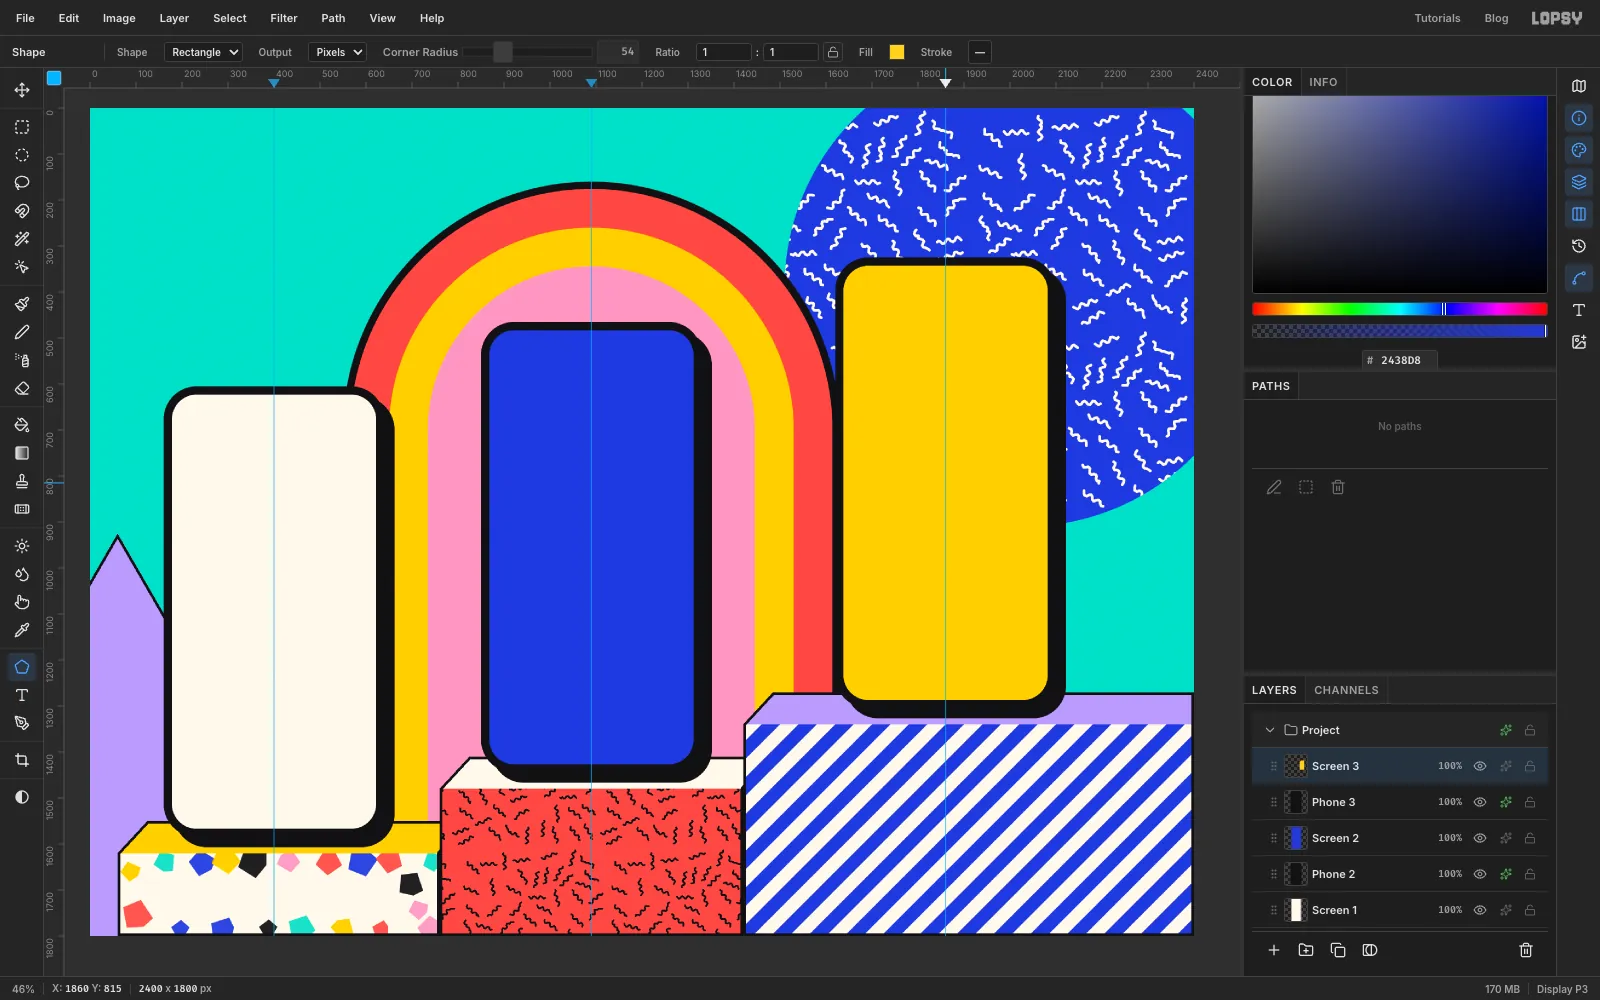
Click Step 3, so the phones land above all the steps. For each phone you'll make two layers, a body and a screen.
Add a layer called Phone 1. With the Shape tool, set Shape to Rectangle, Fill to ink, Stroke to none and Corner Radius to 72. Click on the left guide and enter 480 × 980. With the Move tool, drag it so its base is halfway across the top surface of Step 1. Pink alignment lines appear as you drag, to show when you're centred on something.
Add a Drop Shadow with Offset X 22, Offset Y 22, Blur 0, Spread 0, Opacity 100, in ink. Blur 0 gives you the hard, printed-looking shadow that suits this style.
Add a layer called Screen 1. With the Shape tool, set Fill to paper and Corner Radius to 54, click in the centre of the body, and enter 444 × 944.
Repeat for the other two, on the middle and right guides, with each standing on its own step:
- Phone 2 and Screen 2, with a cobalt screen
- Phone 3 and Screen 3, with a canary screen
-
Drop in the photo
Click Screen 3, then drag Aerobics class.jpg from your desktop onto the canvas. It lands on a new layer, scaled to fit. Rename the layer Dancer.
A dropped image comes in with a selection around it, and that matters for the next step: Quick Selection adds to whatever is already selected. Press Cmd+D now.
-
Select the tracksuit with Quick Selection
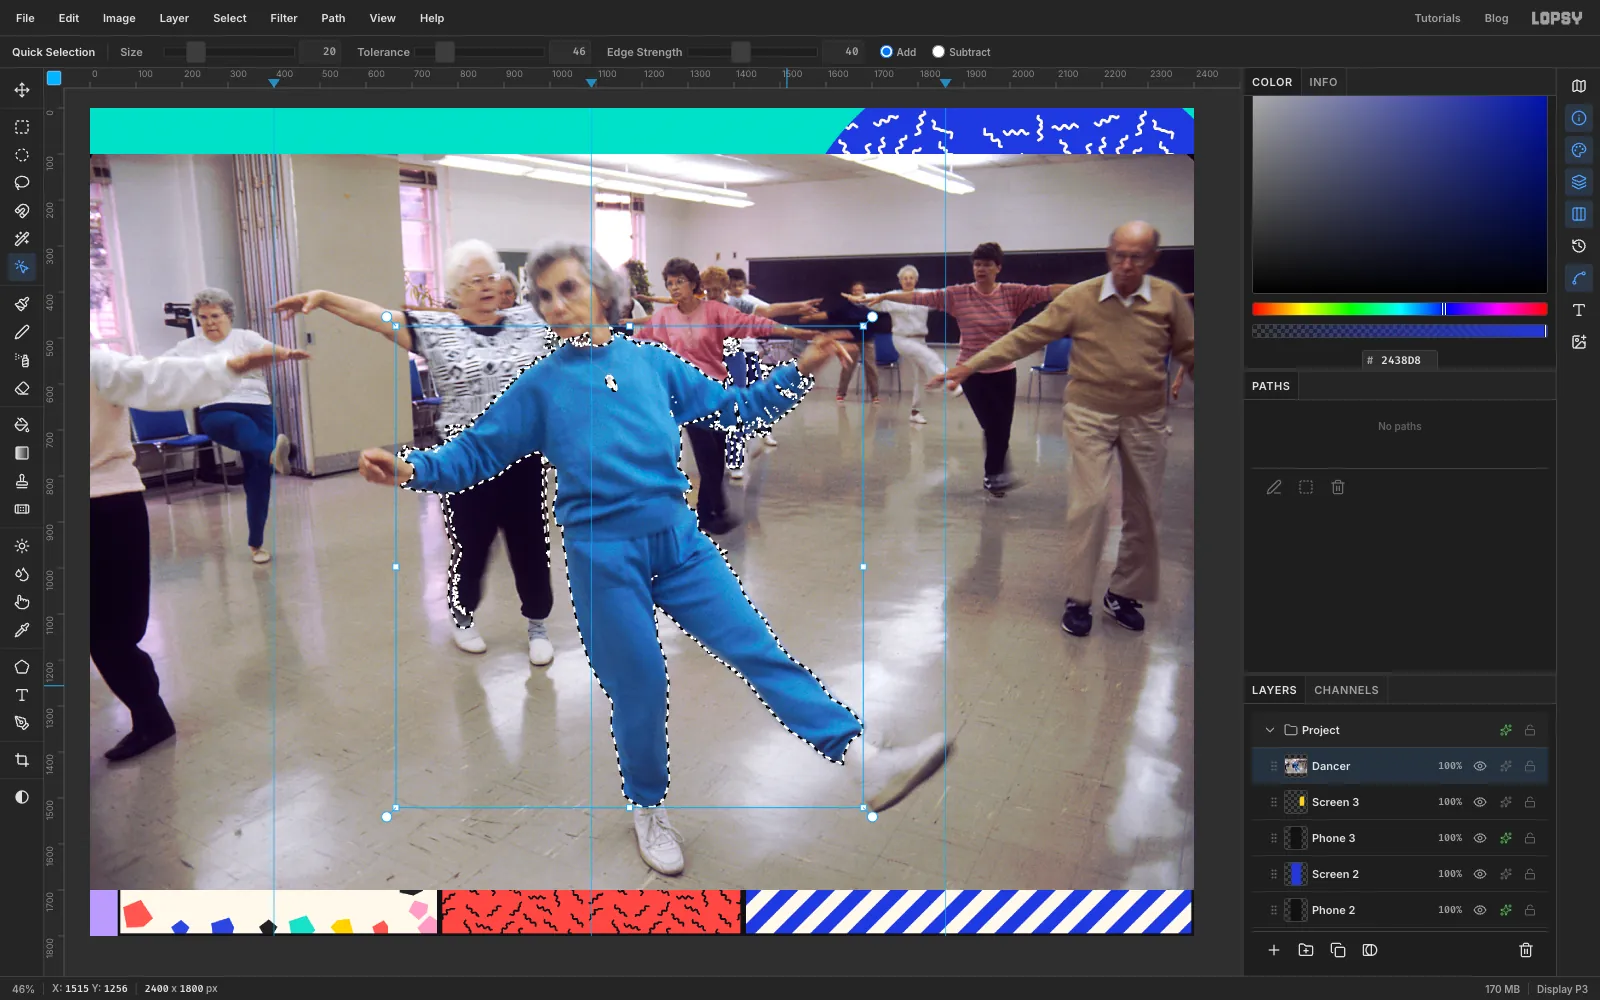
Pick Quick Selection from the toolbox. Set Size to 20, Tolerance to 46 and Edge Strength to 40.
Her tracksuit is a strong blue against a duller room, so this tool does most of the work. Paint short strokes well inside the blue: one down the torso, one along each sleeve, one down each trouser leg. Each stroke grows the selection to the edges of the colour. Keep your strokes on the blue. A single stroke that touches the floor will select the whole room, and you'd need to undo it.
It won't be perfect. It picks up some blue and dark clothing from the people behind her, and you'll fix that next.
-
Add her head, hands and shoes with the Lasso
Pick the Lasso, and zoom in to around 200% so you can follow the edges. If a shape goes wrong, Cmd+Z takes back only that shape.
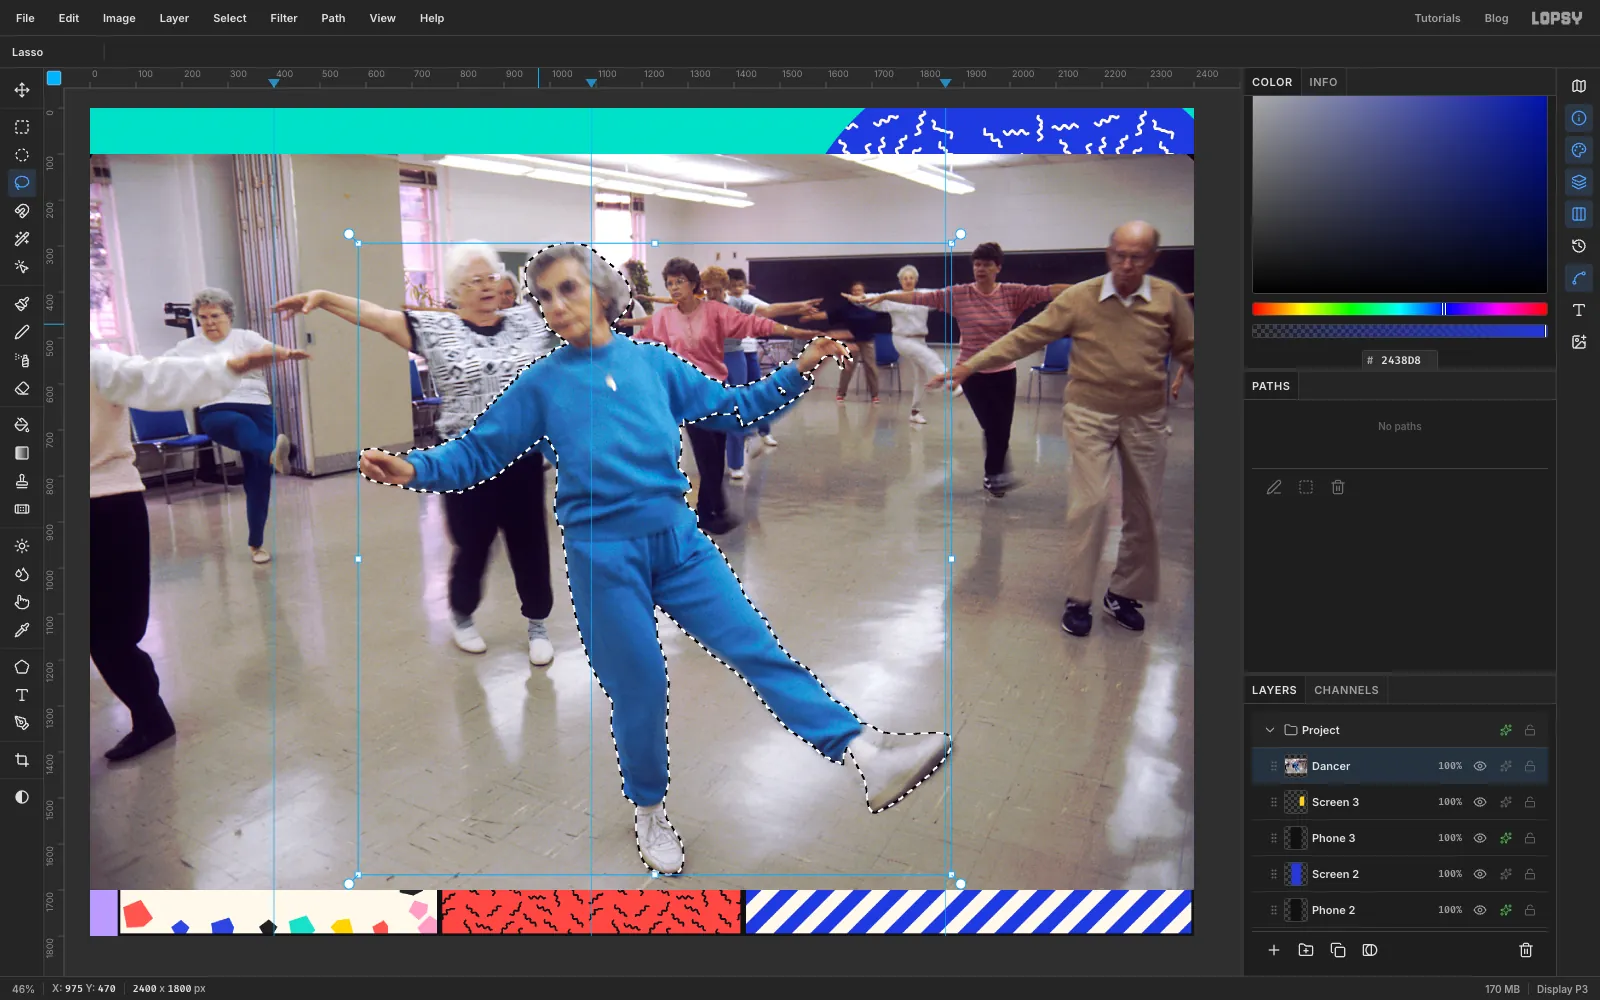
Adding. Hold Shift and trace each part that isn't blue. Take your time on these, because the outline you draw is the outline you'll see in the final design:
- her head, around the outside of the hair and into the collar
- each hand, following the fist on the left of the photo and the fingers on the right
- both shoes, overlapping the trouser cuffs
- the pendant on her sweater, which Quick Selection left as a hole
Subtracting. Hold Alt and draw around anything that doesn't belong:
- under the sleeve on the right of the photo, where another woman's blue trousers got picked up
- along the arm and hip on the left of the photo, where there's a strip of dark trousers
- the bit of patterned shirt beside her cheek and neck
To close small gaps, choose Select → Grow… at 2, then Select → Shrink… at 2.
-
Turn the selection into a layer mask
Using a mask means you can check the cut against the board and fix it without losing any of the photo.
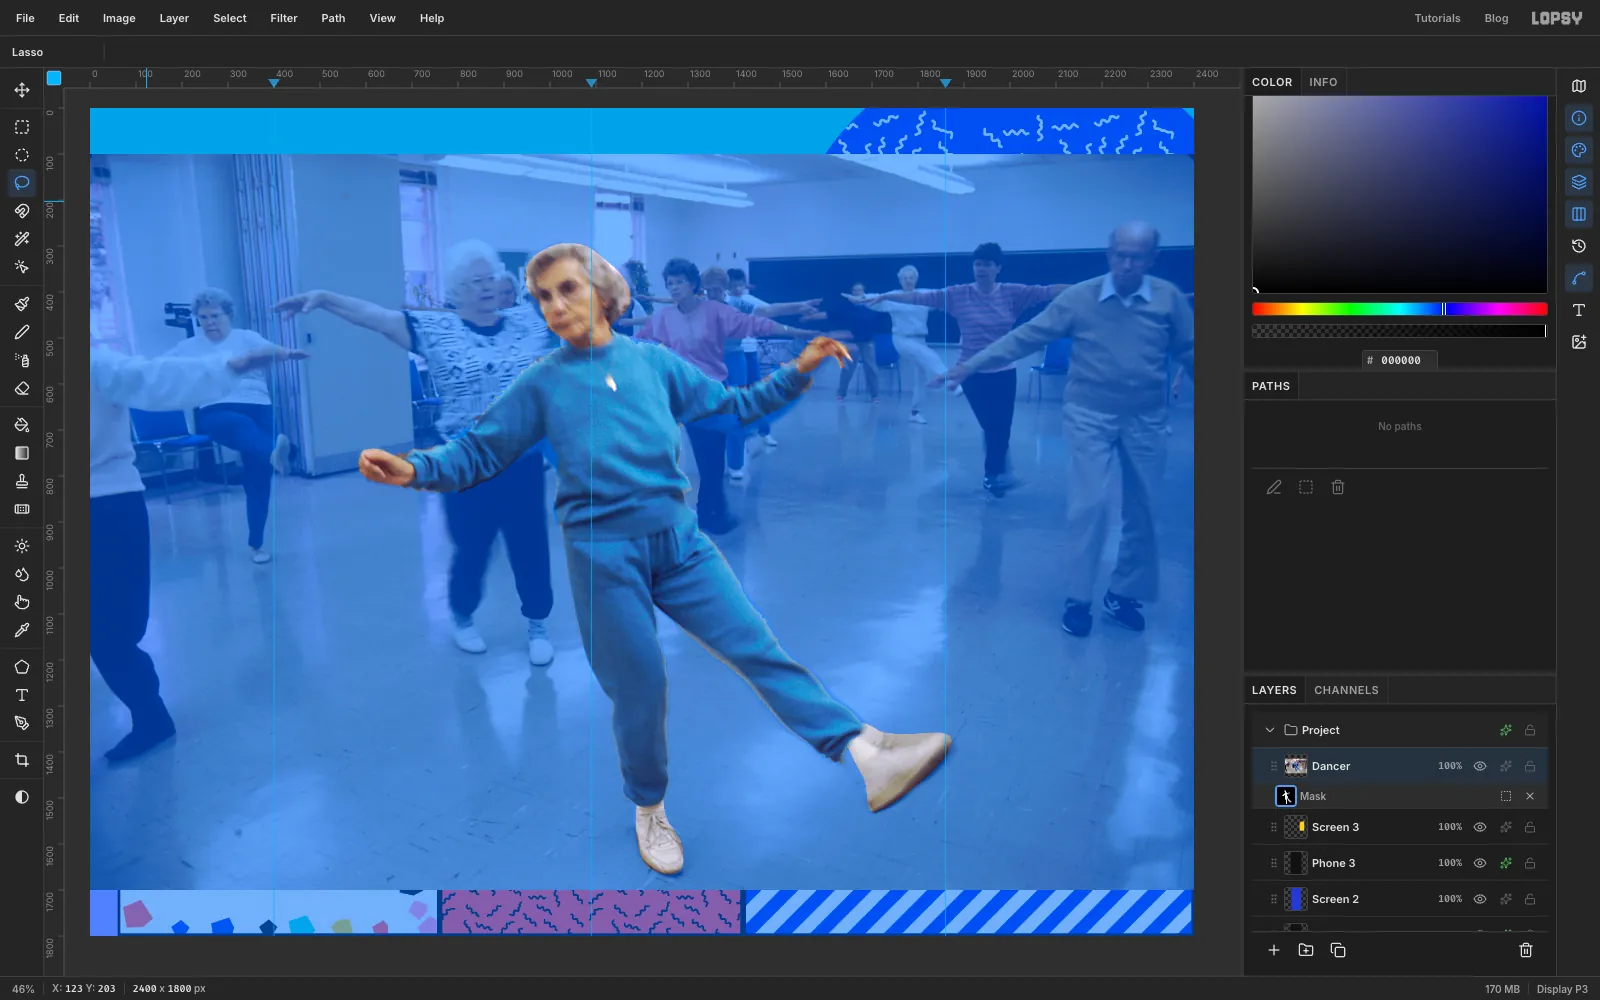
With Dancer active, click Add Mask in the Layers panel. A new mask starts out showing everything, whatever you have selected, so you need to hide the rest yourself.
Click the mask thumbnail to edit the mask. Choose Select → Inverse to select the room, set the foreground to black and choose Edit → Fill. Press Cmd+D. The blue tint you can see is the mask overlay, which only shows while you're editing the mask.
-
Lift the cut-out onto its own layer
A layer mask stays put when you scale the layer's pixels, so you need the cut-out as real pixels on its own layer.
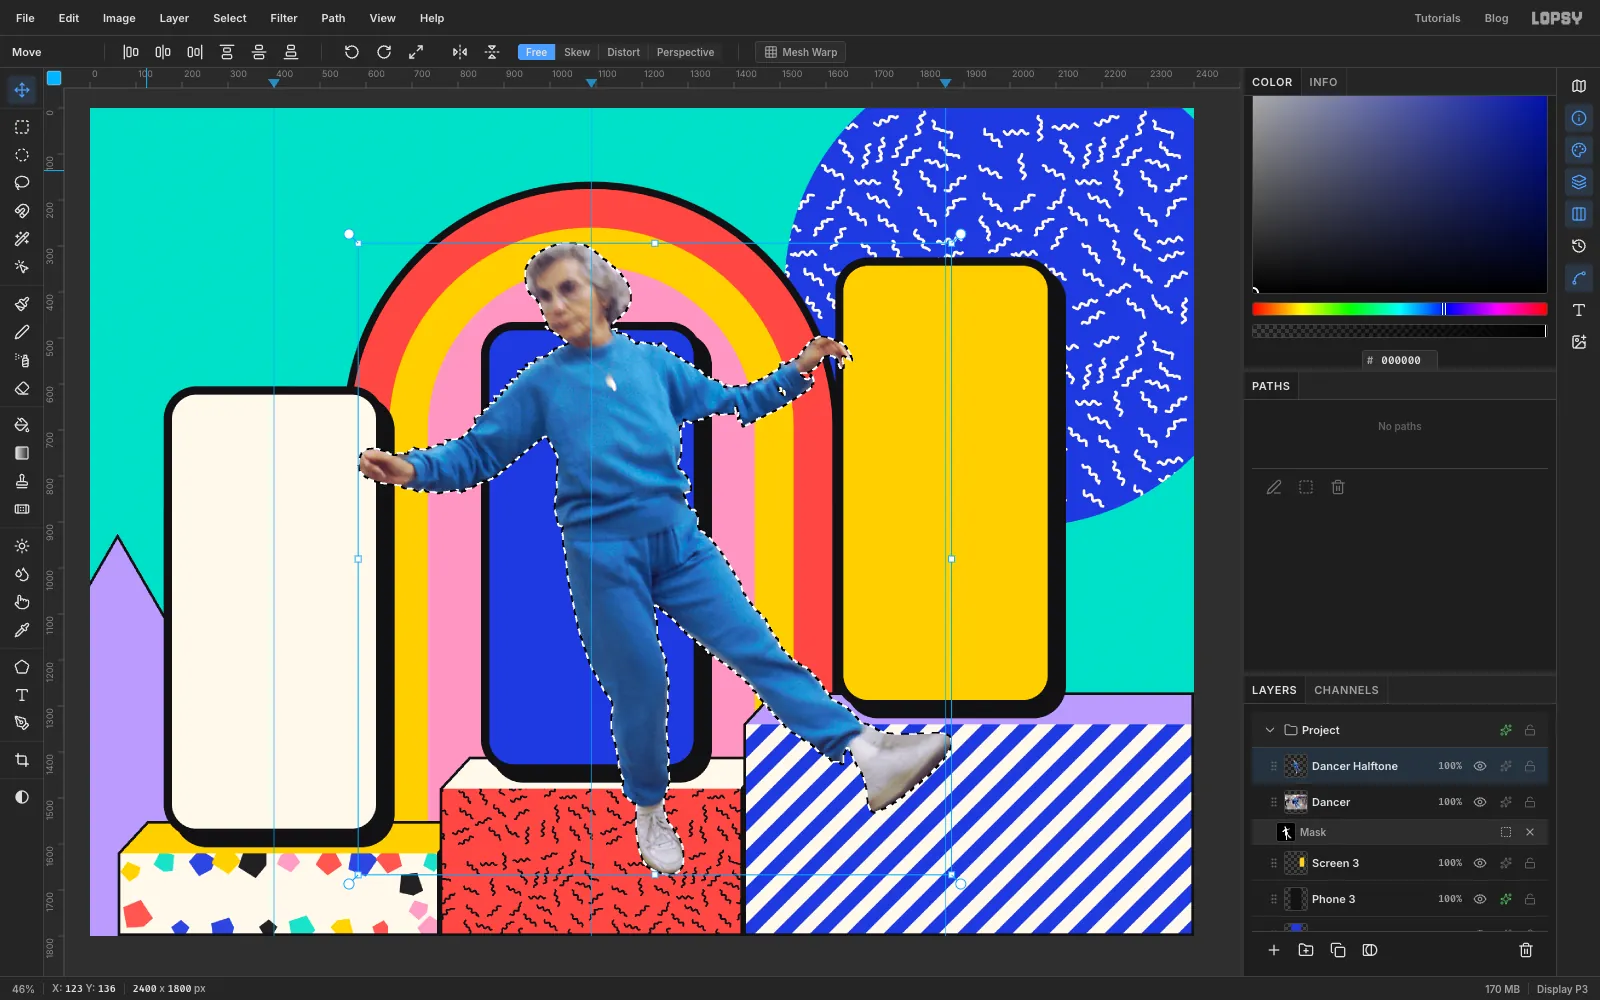
Click Convert mask to selection on the mask row. This selects the area the mask hides, so choose Select → Inverse to select the woman instead. Choose Edit → Copy, then Edit → Paste. The cut-out lands right on top of the original. Rename the new layer Dancer Halftone.
-
Give her a smooth die-cut outline
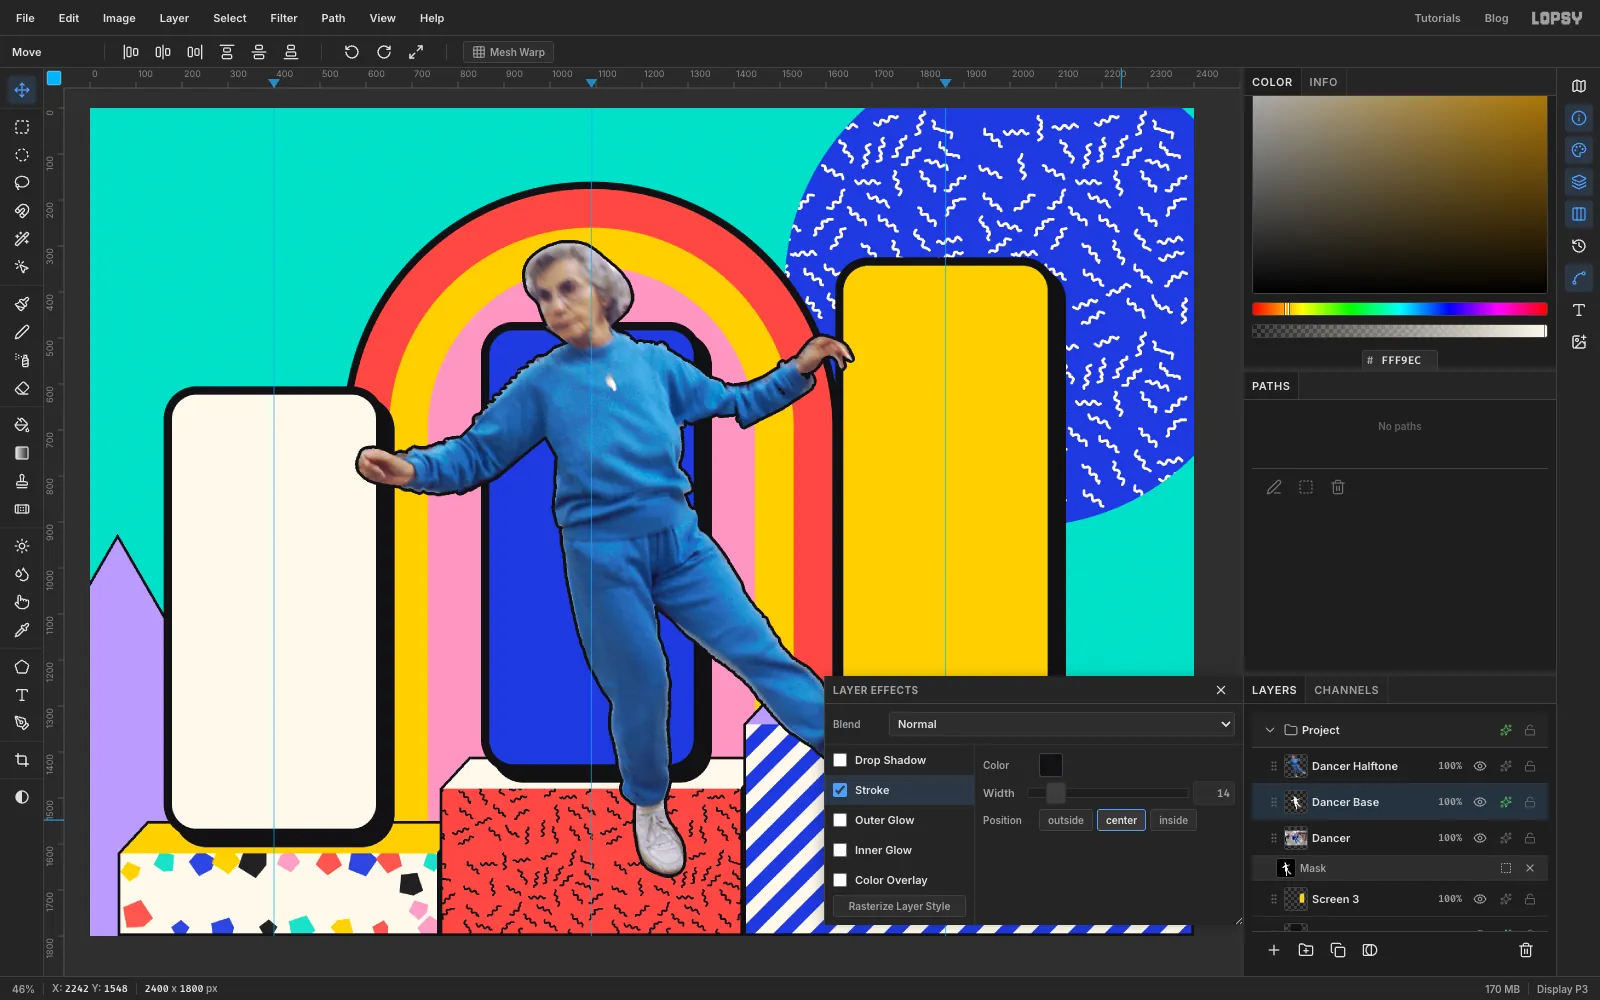
The edge from the selection is a bit lumpy, and a heavy outline would show every lump. Here's a way to smooth it: feather the shape, then let a stroke trace it.
Click Dancer and add a layer called Dancer Base, so it sits between the photo and the cut-out. Cmd-click the Dancer Halftone thumbnail to load the figure's shape, then choose Select → Feather… at 5. Set the foreground to paper and choose Edit → Fill. Press Cmd+D.
Add a Stroke to Dancer Base: Width 14, ink, position center. A stroke follows the middle of a soft edge, so the feather rounds off the lumps. A centred stroke also covers the blurry part of that edge, which would otherwise show as a grey ring.
Click Rasterize Layer Style to bake it in. Doing this while the figure is still big means it stays smooth when you scale it down.
-
Scale the figure and its outline together
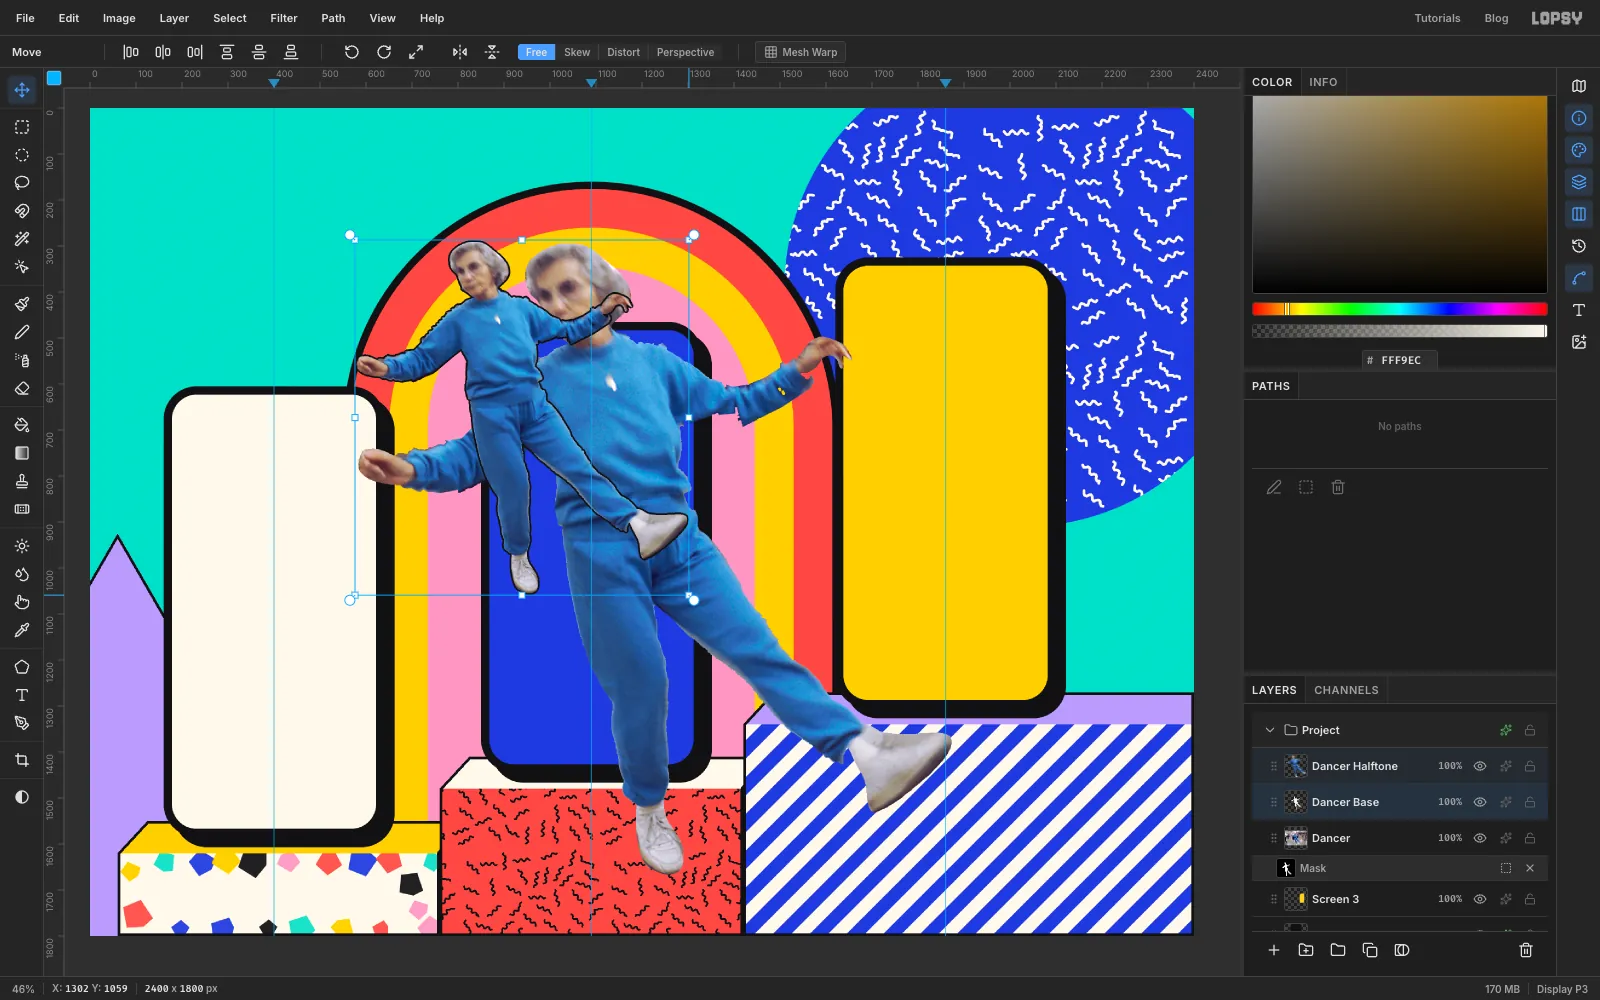
Click Dancer Base, then Shift-click Dancer Halftone so both are selected. Press Cmd+D if there's still a selection, then pick the Move tool. The handles now frame both layers together.
Hold Cmd to keep the proportions, and drag the bottom right corner handle inward until the figure is about 56% of its size. Her outline should end up roughly 730 px wide.
-
Place her on the middle phone
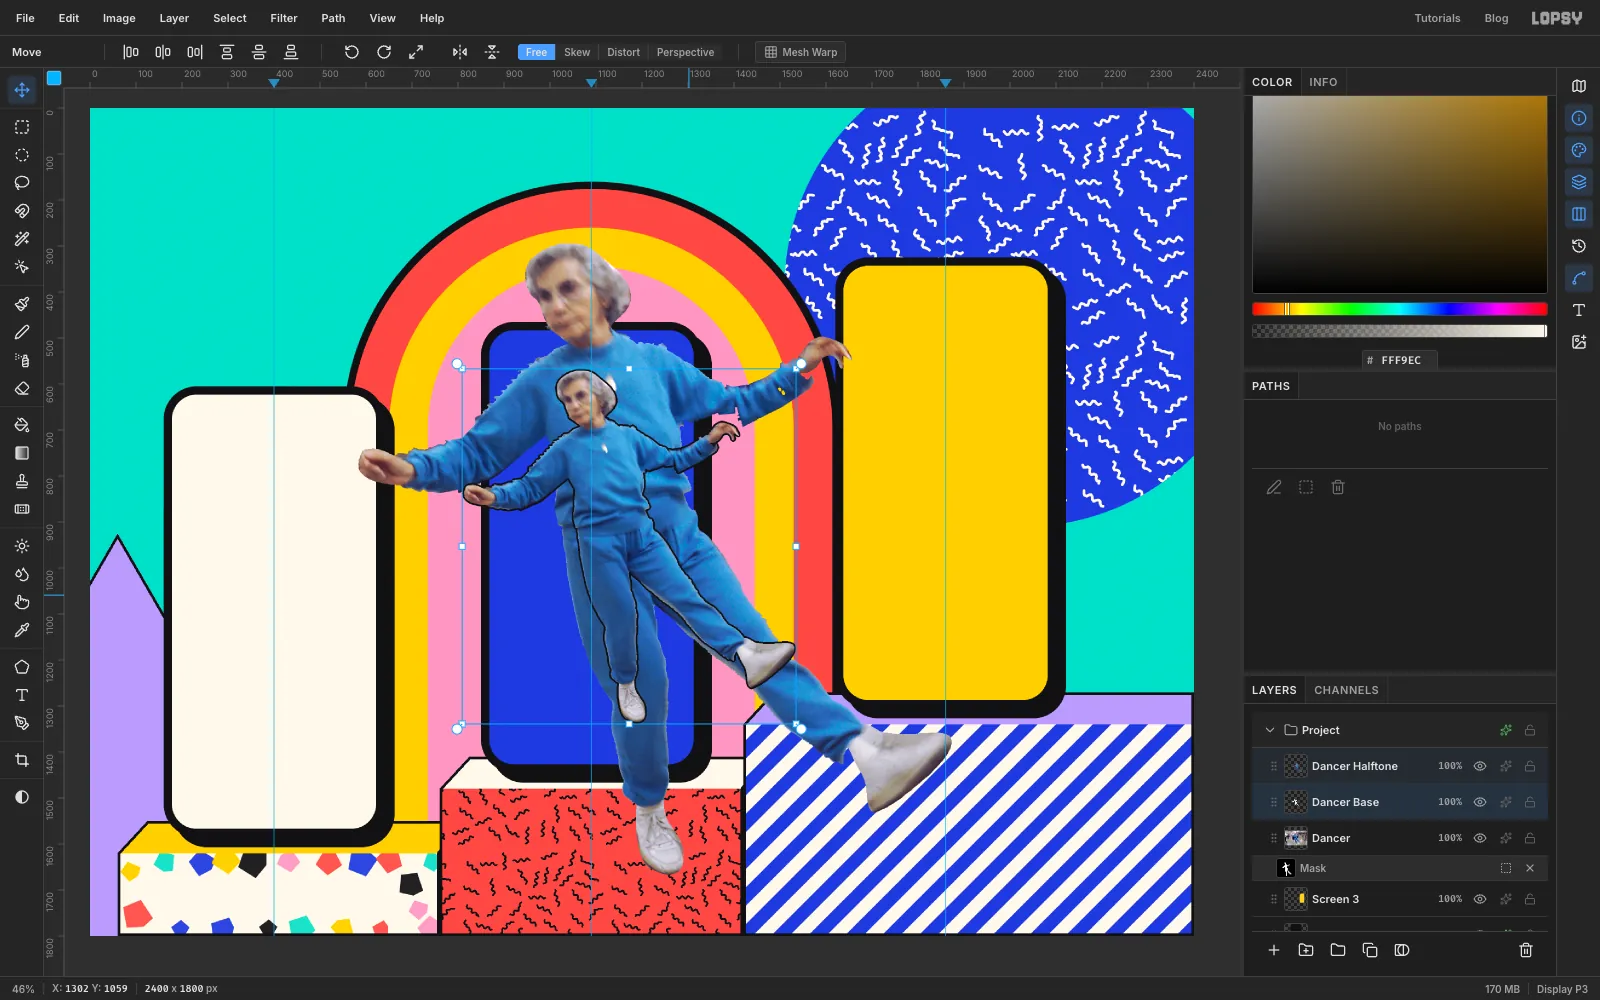
With both layers still selected, drag the figure onto the middle phone, and use the arrow keys for the fine positioning.
Her head should sit about 100 px below the top of the phone, because a notch goes there later. Her standing foot should end about 90 px above the bottom of the screen, because she'll be standing on a button you'll add there. The hand on the left should poke out over the phone's edge, and her kicking shoe should reach well past the other edge, without touching Phone 3.
Now click the Dancer photo layer and click Delete Layer.
-
Add a solid shadow and set the contrast
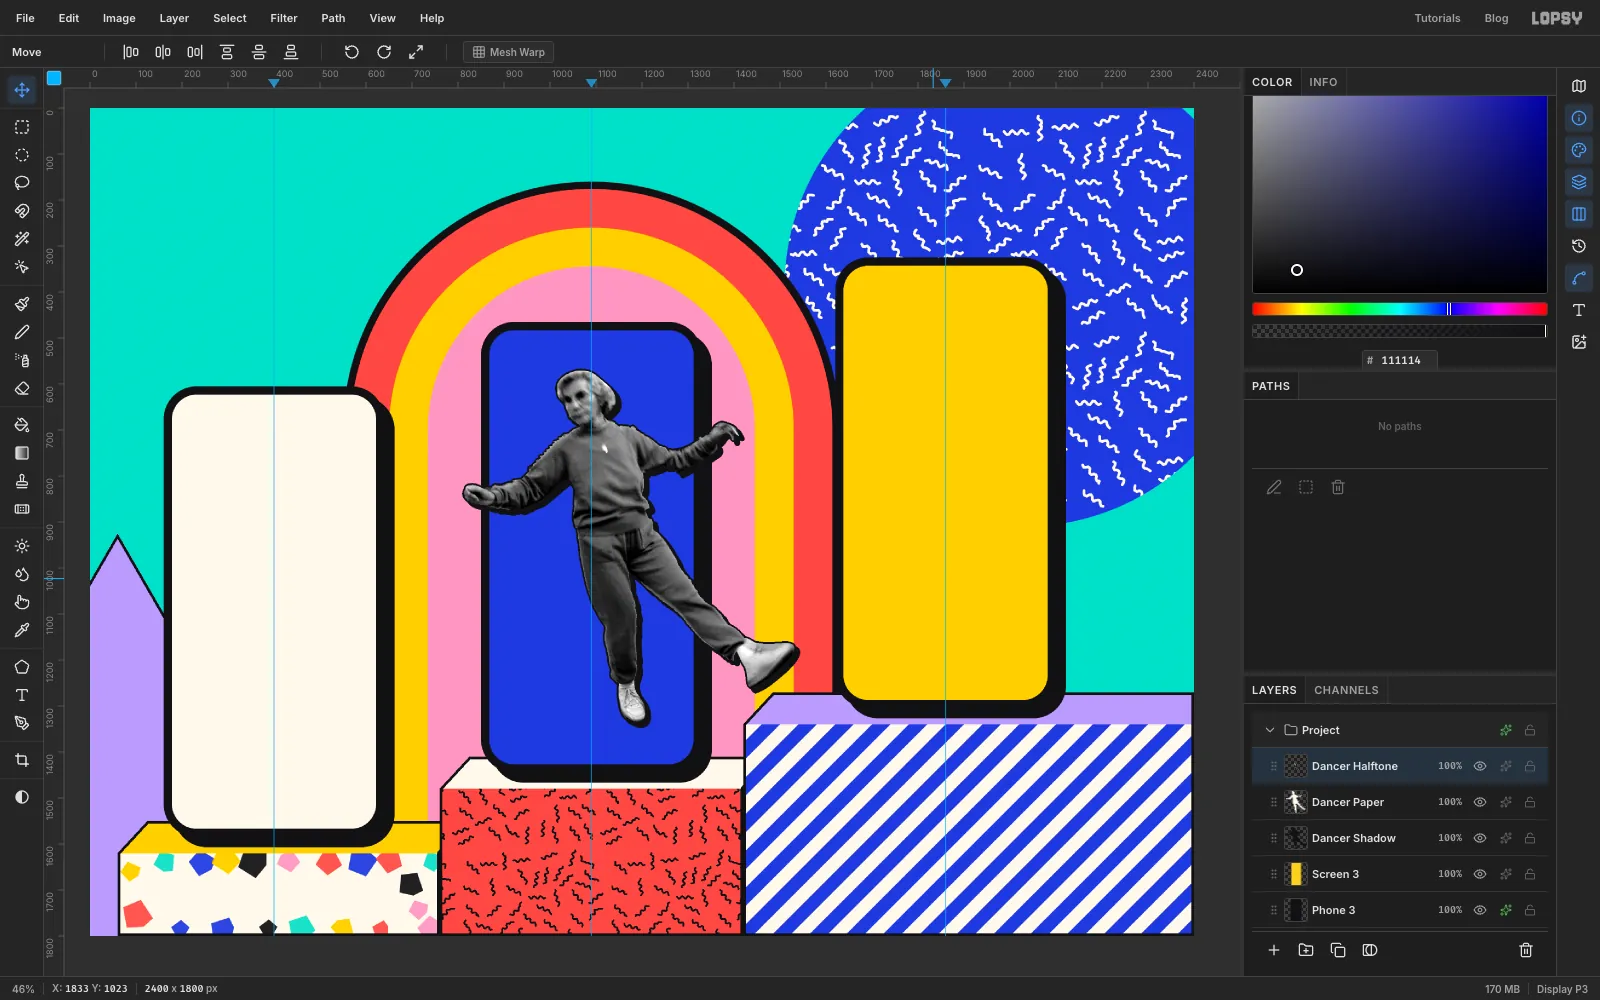
Click Dancer Base and choose Layer → Duplicate Layer. Name the copy Dancer Paper, and rename the original Dancer Shadow.
Cmd-click the Dancer Shadow thumbnail, set the foreground to ink, choose Edit → Fill, then press Cmd+D. With the Move tool, press the arrow keys to nudge it about 9 px right and 9 px down.
This does the same job as a Drop Shadow, but it's a plain shape, so you get solid ink all the way to the edge.
Click Dancer Halftone. Choose Filter → Desaturate, then Filter → Brightness/Contrast… with Brightness -12 and Contrast 58.
-
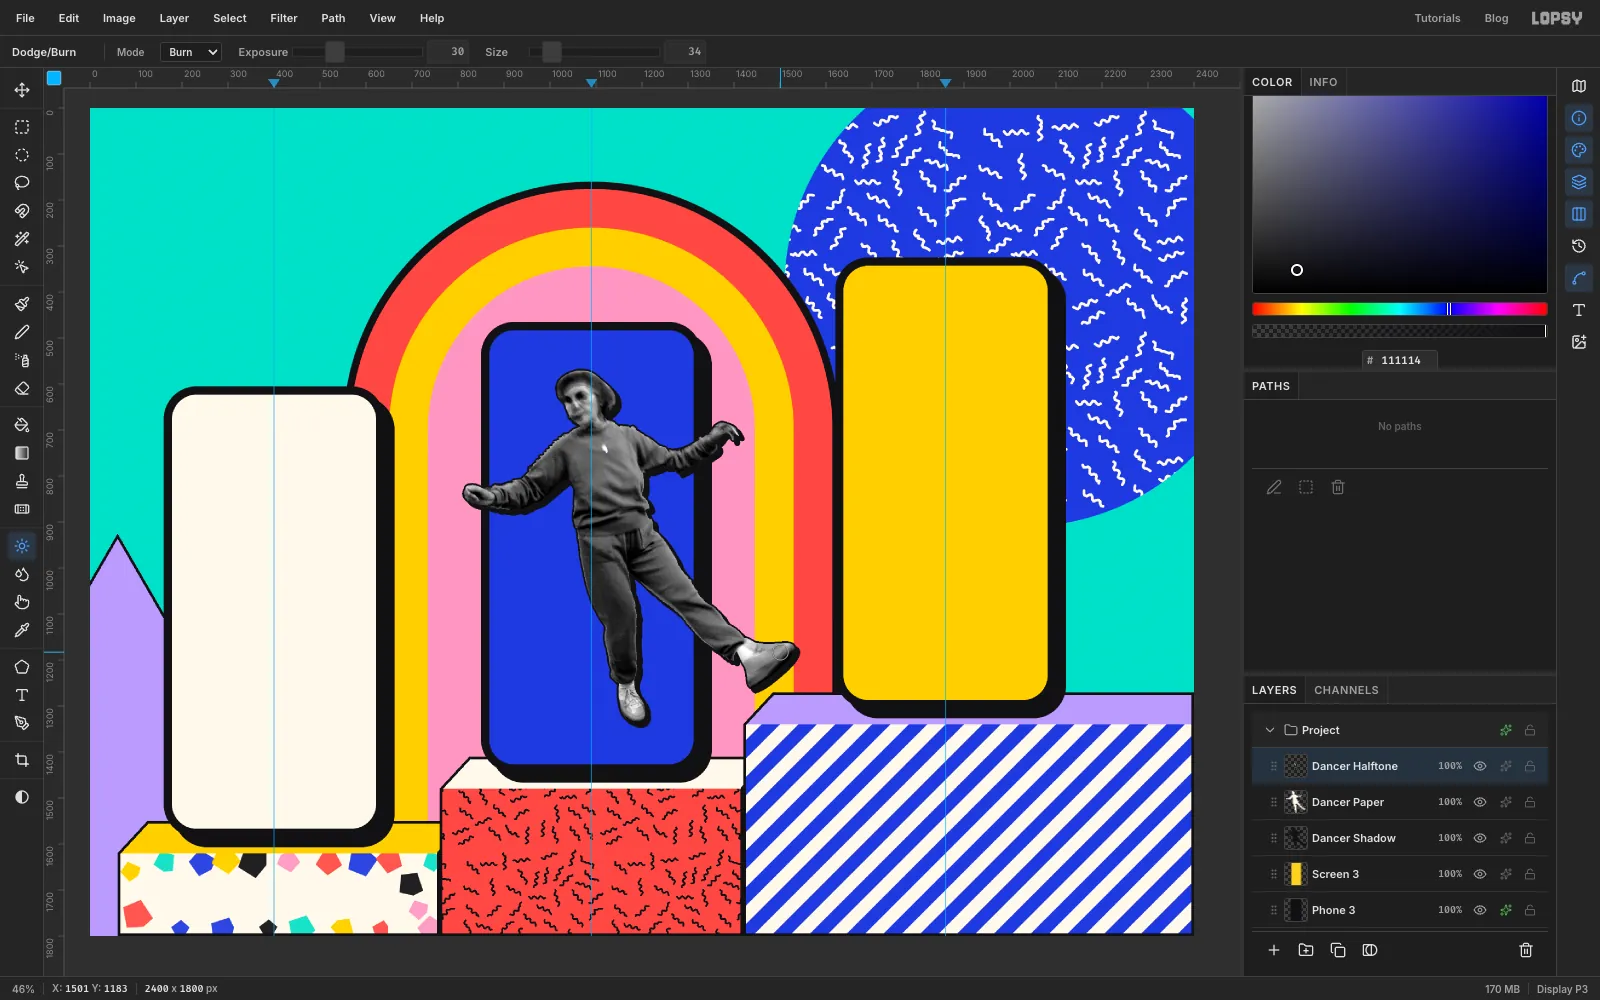
Bring her face back with Dodge and Burn
The photo is slightly motion-blurred, so at this size her face and hair blend into the same grey. Halftone dots will make that worse, so fix it first. Zoom in on her head and pick Dodge/Burn (O).
- Lighten the skin. Mode Dodge, Exposure 22, Size 26. Paint once over her forehead, down her cheek and along her jaw.
- Darken the hair. Mode Burn, Exposure 45, Size 30. Paint a couple of arcs right around the hair, so it reads as a dark mass around a light face.
- Draw the features. Still Burn, Exposure 35, Size 12. Add one short stroke over each eye, one down the side of the nose and one along the mouth.
- Shape the shoes. Still Burn, Exposure 30, Size 34. Paint along the sole and heel of each shoe. Otherwise they go solid white and look like socks.
-
Print her as a halftone
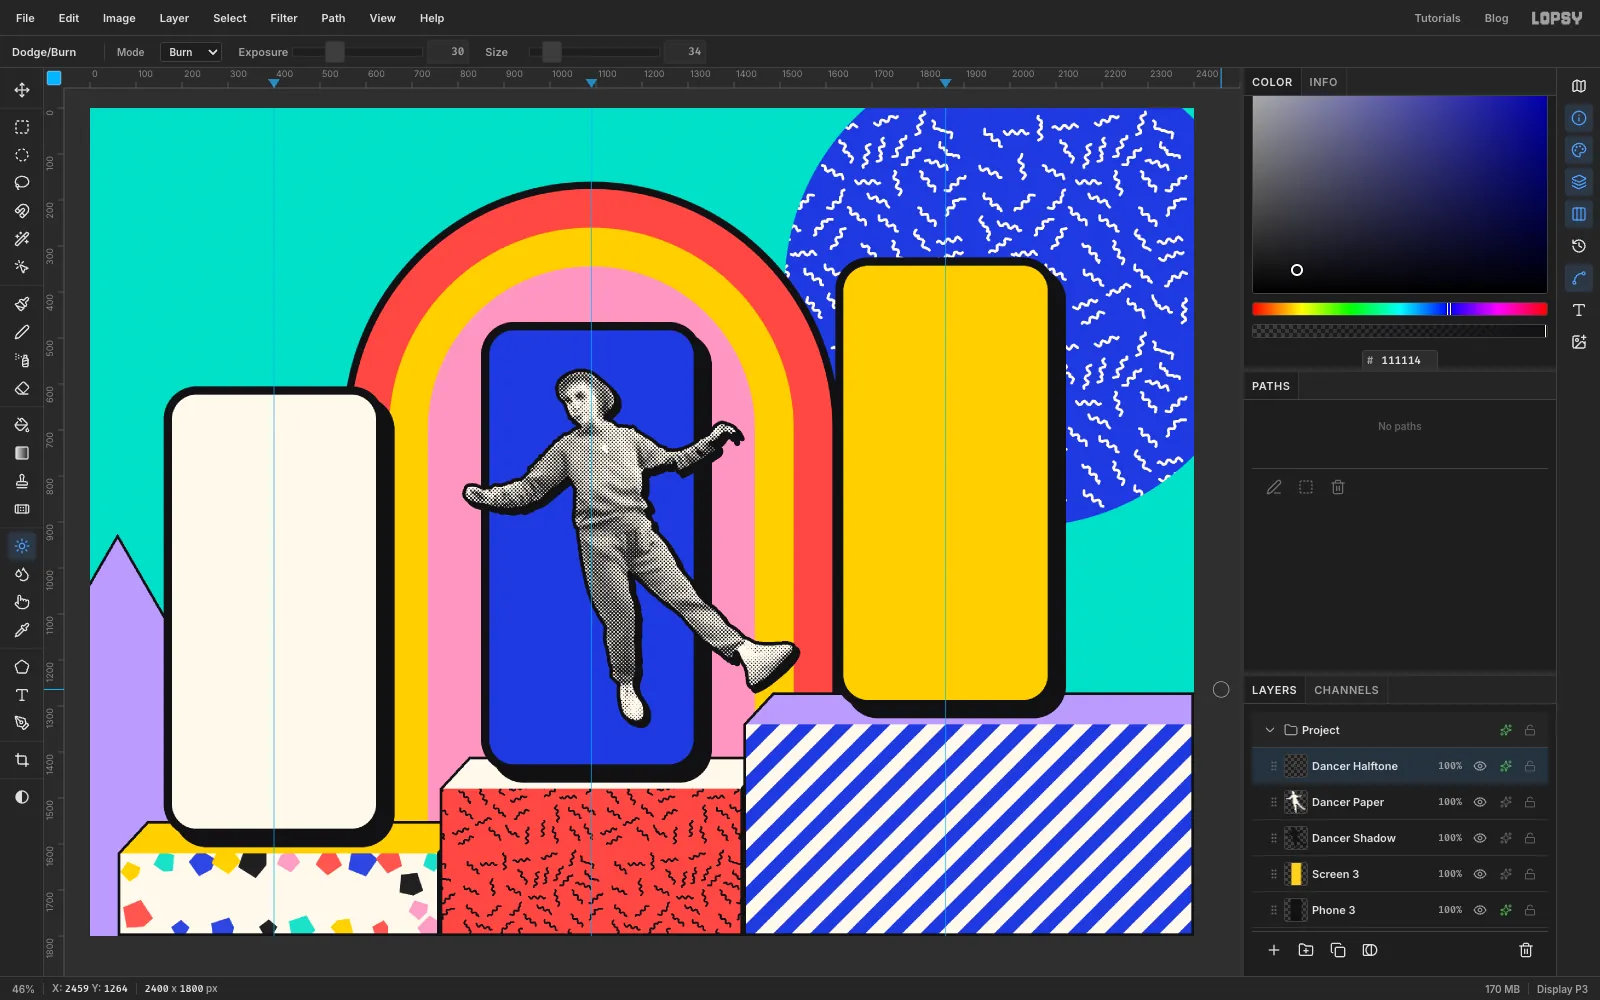
With Dancer Halftone still active, choose Filter → Halftone… with Dot Size 6, Density 1.05, Angle 45 and Softness 0.5. White areas print no dots, so the paper layer shows through.
The dots keep some of the photo's grey, and you want them black. Add a Color Overlay in ink.
Zoom to 100% to judge it. Don't judge halftone when zoomed out, because the dots blend together on screen and it just looks grey.
-
Add the status bar and title
Now for the screens. Click Screen 1, so what you add stays below the later phones and the dancer.
Three text rules apply from here on:
- Colour. New text takes the foreground colour, so set it before you type.
- Settings carry over. Letter spacing, Line height and Align all stick from one text layer to the next, so check them. Line height and Letter spacing are in the Text panel, the T icon in the strip on the far right. Keep Letter spacing at 0 and Align on left unless a step says otherwise.
- Where you click. Before typing new text, click a non-text layer in the Layers panel, because with a text layer active the settings change that layer instead. Click well away from existing text too, because a click inside another text box edits that text. Line boxes reach further than the letters do.
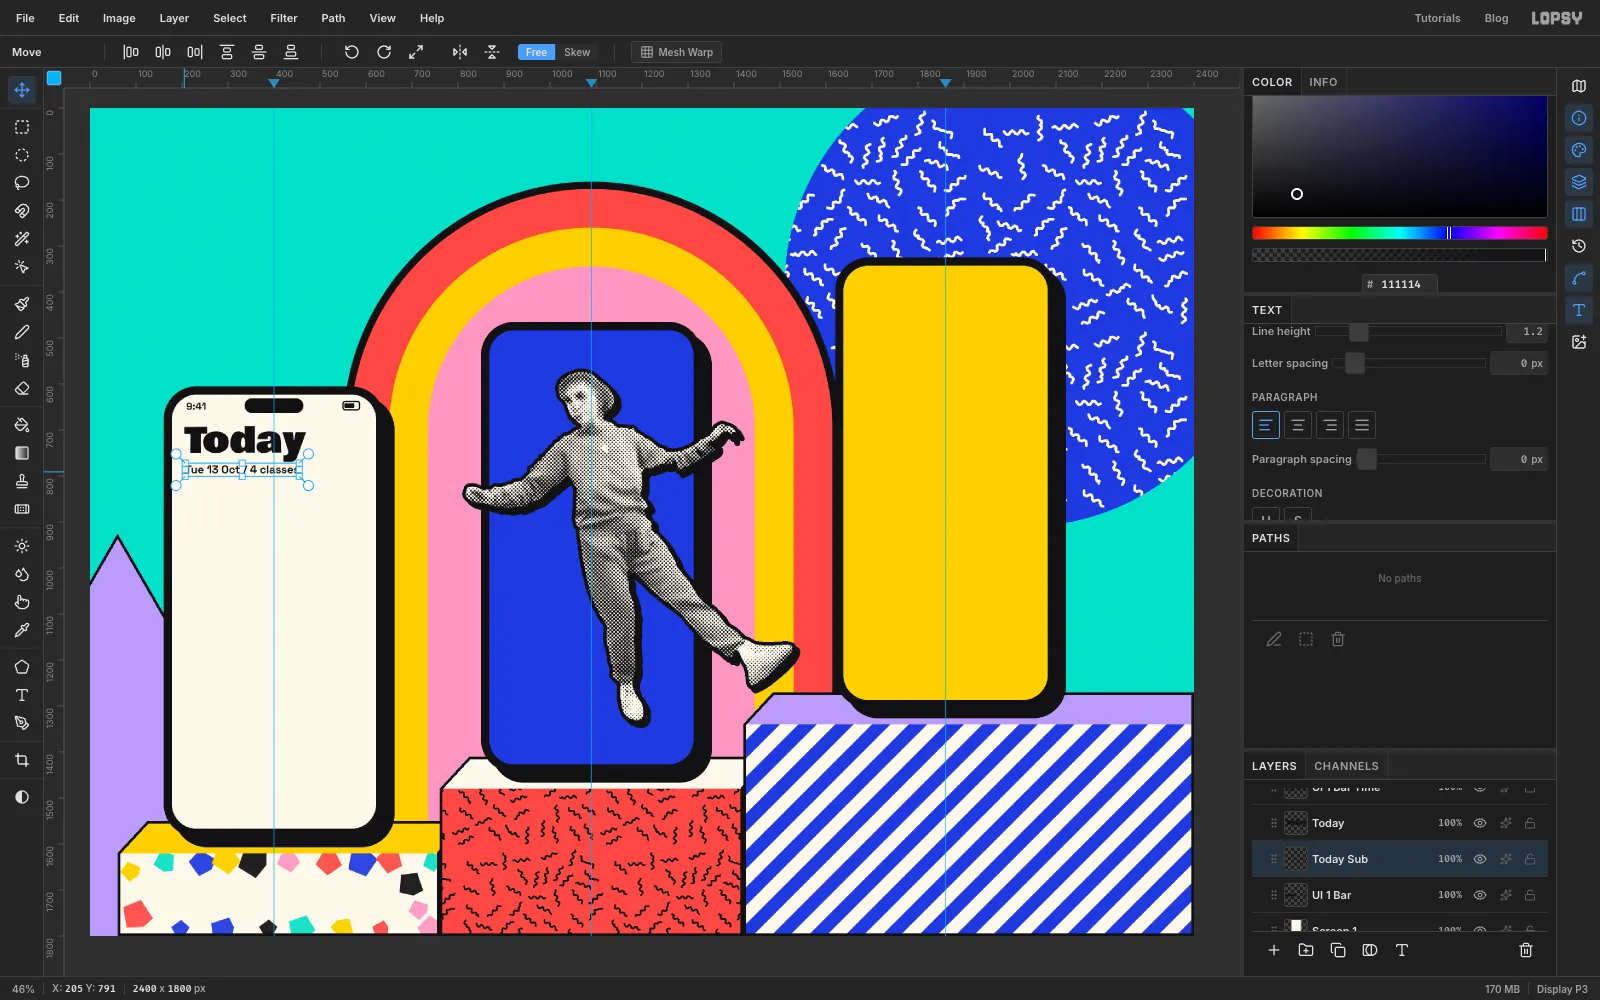
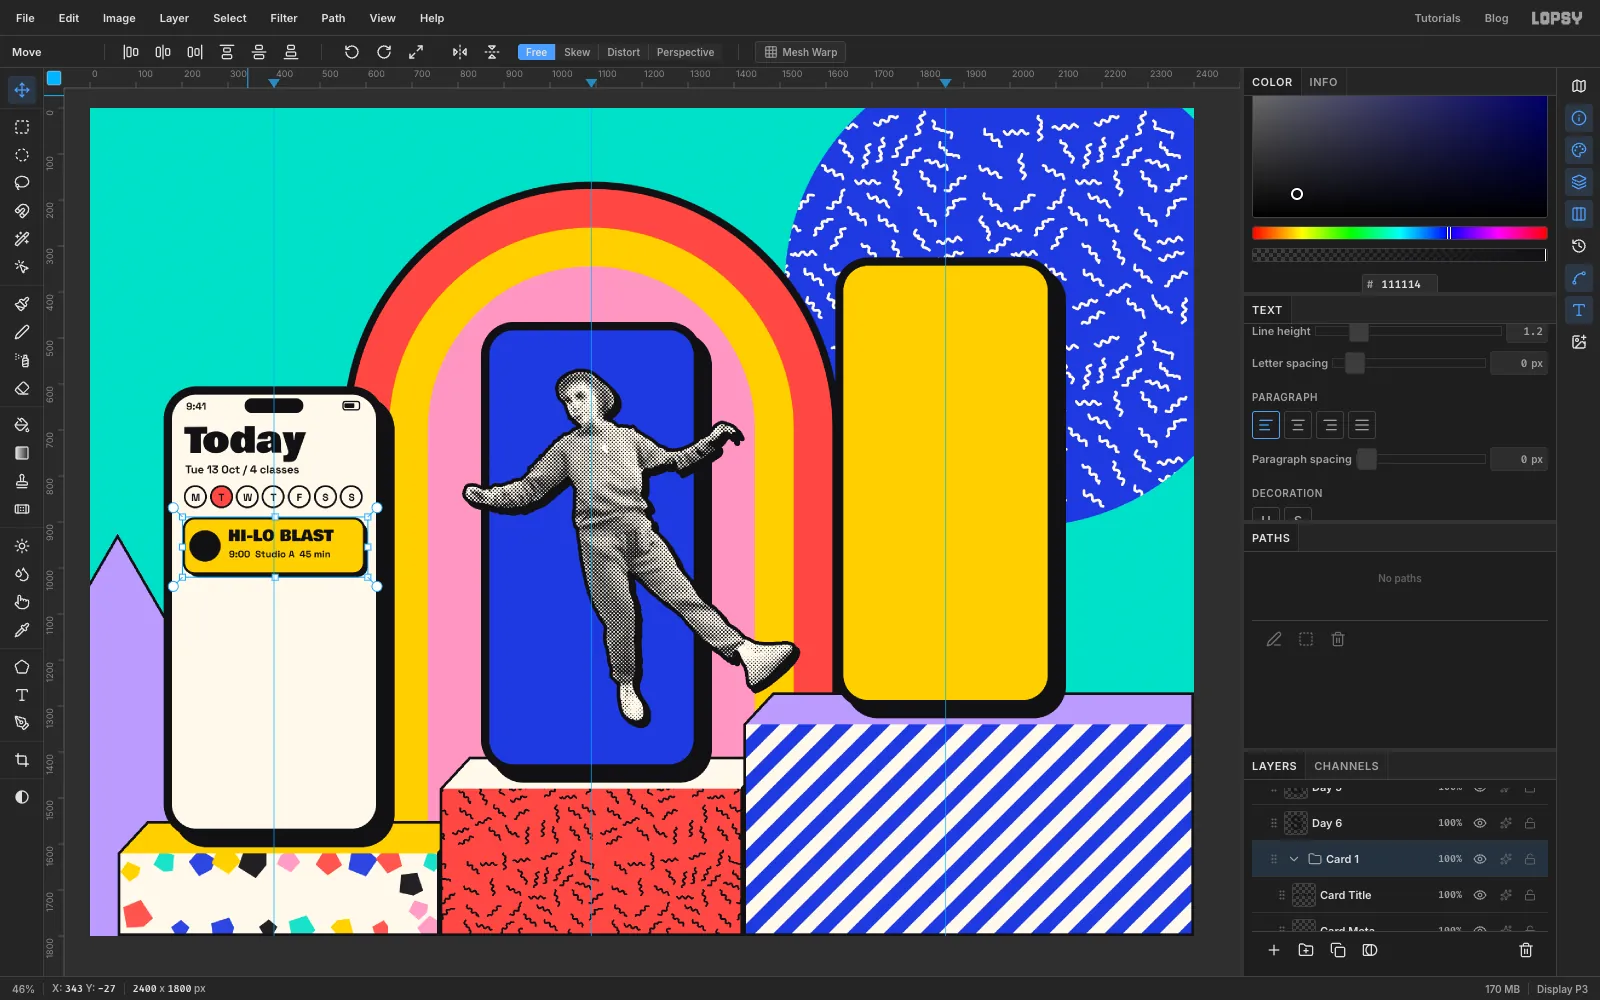
Status bar. Add a layer called UI 1 Bar. With the Shape tool draw an ink notch, 128 × 32 with Corner Radius 16, centred at the top of the screen. Add a tiny battery at the top right: a 36 × 18 rectangle with no fill, an ink stroke of Width 3 and Corner Radius 5, and a solid ink 22 × 10 rectangle inside it, with Corner Radius 2 and no stroke. Then pick the Text tool and type 9:41 in ink at the top left, in Space Grotesk, Bold, Size 22.
Title. Type Today in Bowlby One at Size 76, with Line height 1. Below it, type Tue 13 Oct / 4 classes in Space Grotesk Bold at 24, with Line height 1.2. Commit each with Tab.
To position text, pick the Move tool and drag it, or use the arrow keys for small moves.
-
Add the week strip
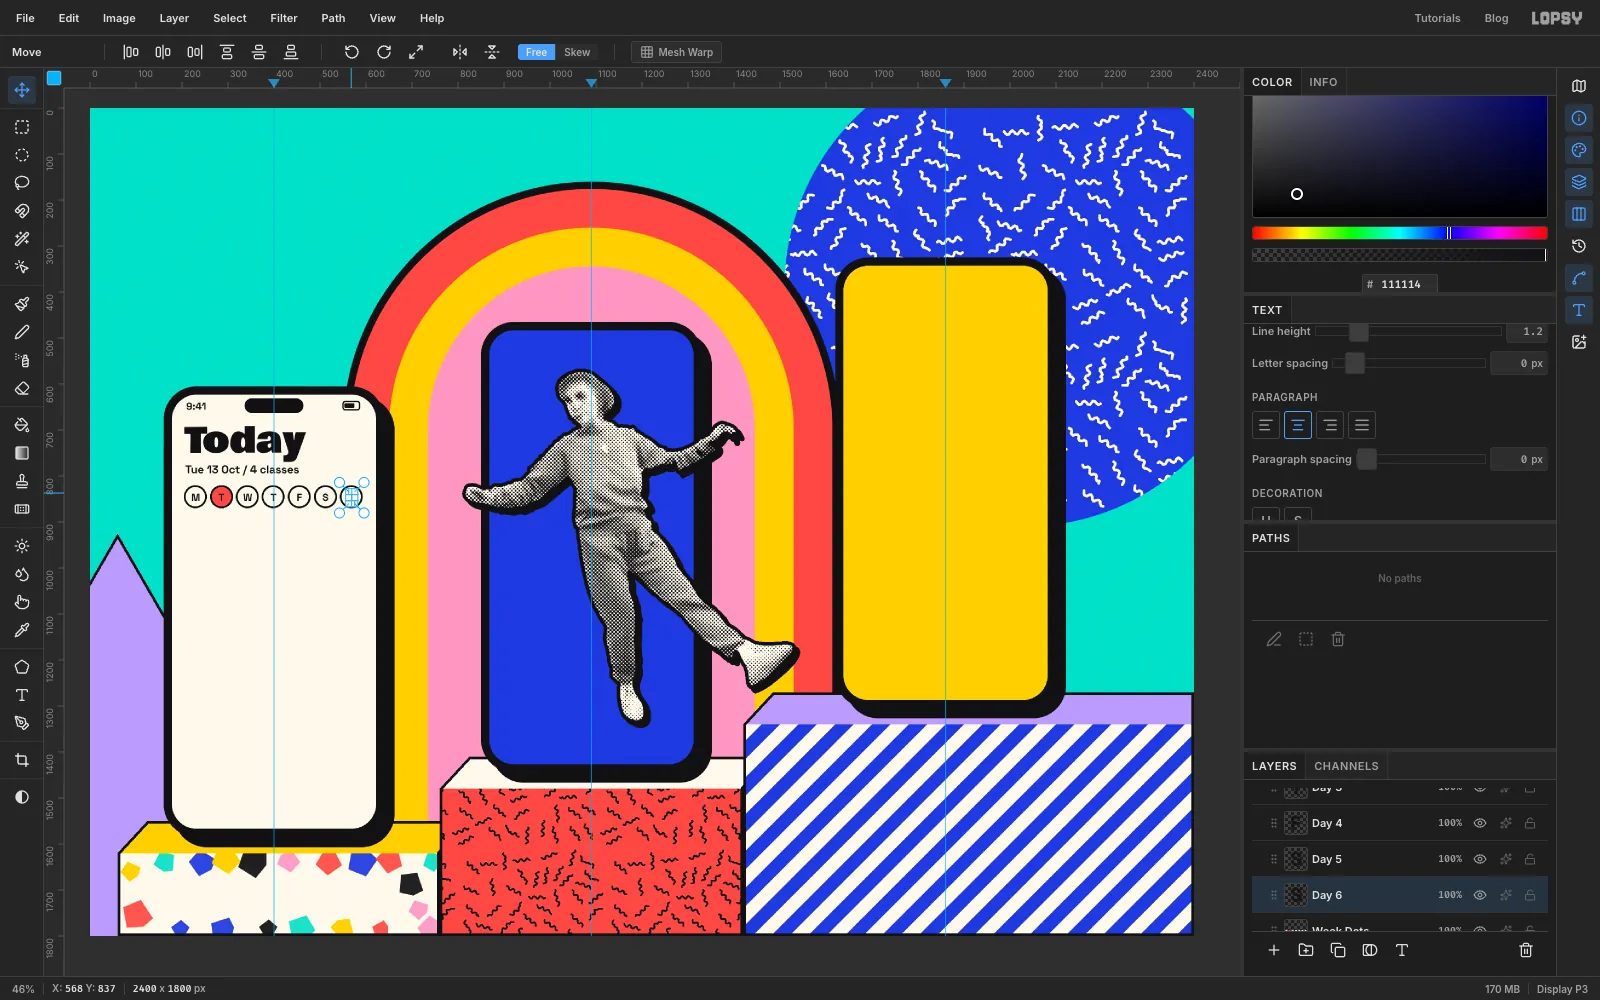
Add a layer called Week Dots. Set the Shape tool to Ellipse, Fill paper, Stroke ink, Width 4. Click to make seven circles 46 × 46, with their centres about 56 px apart. Then set Fill to coral and draw another on top of the second circle, for today.
Set the foreground to ink. Add a letter on each circle (M T W T F S S) in Space Grotesk Bold at 22, with Align set to center. Click Week Dots before typing each one.
-
Build one class card
Click Week Dots and add a layer called Card BG.
With the Shape tool set to Rectangle, Corner Radius 24, first draw the shadow: Fill ink, no stroke, 392 × 120. Then draw the card itself, 8 px up and to the left of the shadow: Fill canary, Stroke ink, Width 5, same size.
Add a layer called Card Disc and draw an ink circle 68 × 68 near the card's left end, leaving about 12 px of space around it.
With Align back on left and the foreground on ink, type the title HI-LO BLAST in Bowlby One at 33, to the right of the disc. Then click Card Disc and type 9:00 Studio A 45 min in Space Grotesk Bold at 21 below it. Rename them Card Title and Card Meta.
Click Card BG, Shift-click Card Title, and choose Layer → Group Layers. Name the group Card 1. Check that all four layers are inside it.
-
Duplicate the card three times
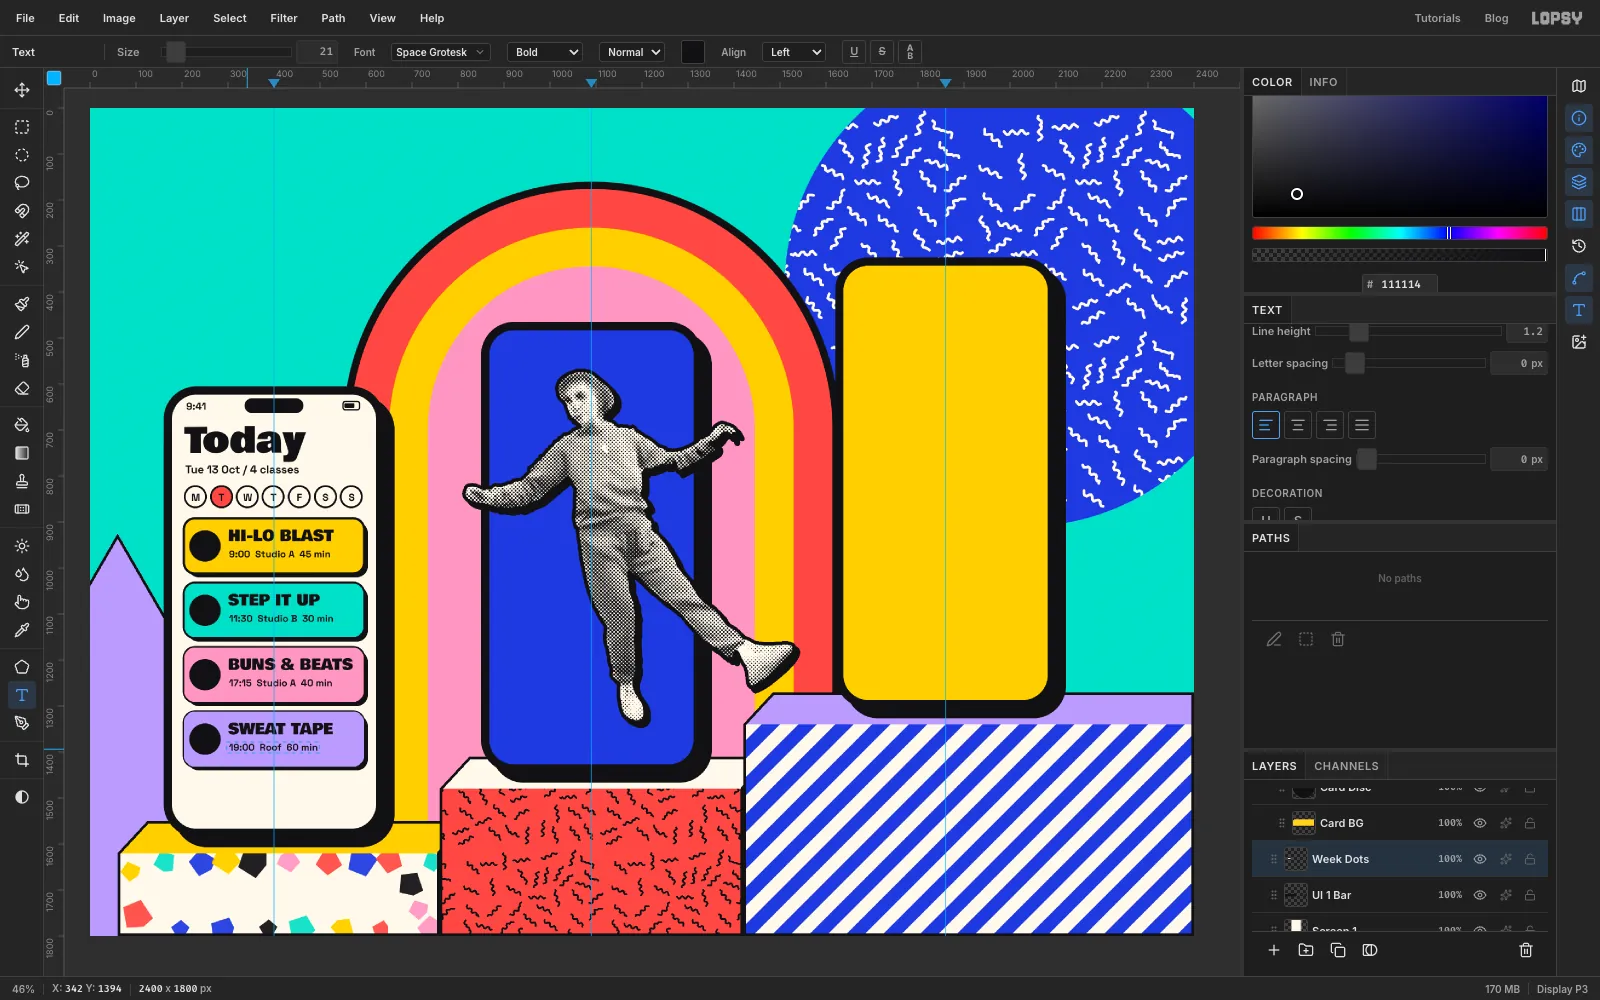
With Card 1 active, choose Layer → Duplicate Layer and name the copy Card 2. With the Move tool, drag it straight down about 140 px, so it clears the card above by about 20 px.
Expand the group and click its Card BG… row. Pick the Magic Wand (W) and click the yellow inside the card. Choose Select → Grow… at 1, so the fill reaches under the outline. Set the foreground to mint, choose Edit → Fill, and press Cmd+D.
To change the words, pick the Text tool, click on the title, press Cmd+A, type STEP IT UP, then press Tab. Do the same for the time line, typing 11:30 Studio B 30 min. The font and size stay as they were.
Duplicate the newest card twice more the same way:
- pink, BUNS & BEATS, 17:15 Studio A 40 min
- lilac, SWEAT TAPE, 19:00 Roof 60 min
-
Add icons and a nav bar
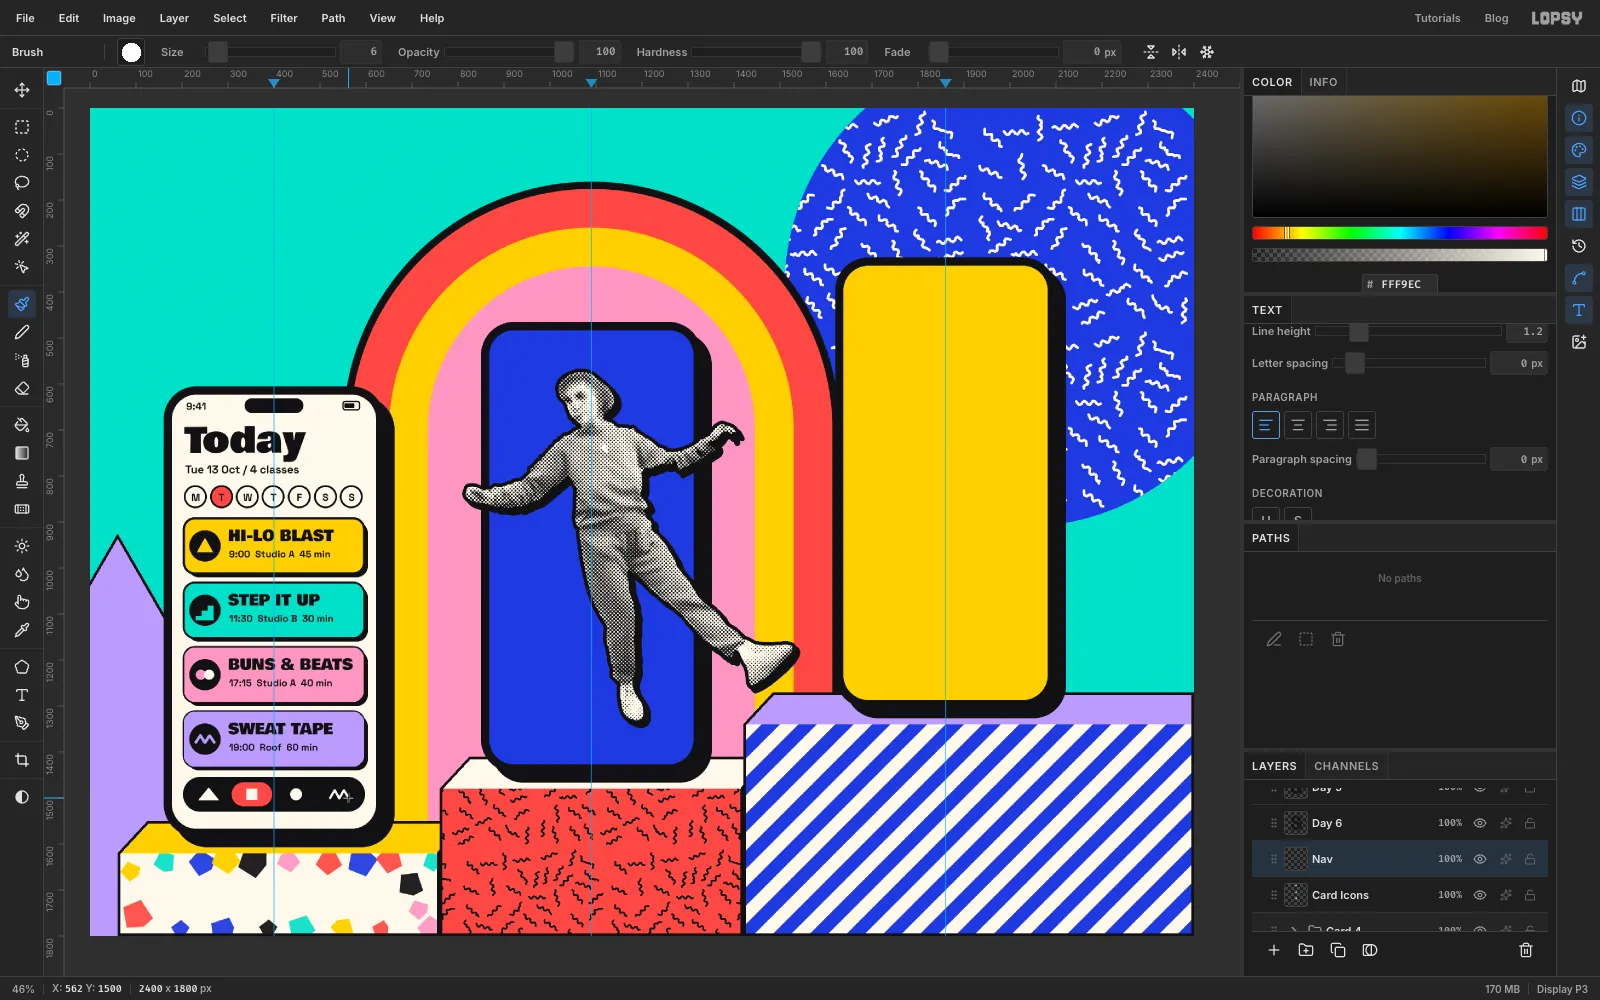
Collapse Card 4 with the arrow on its row and click the row. Then add a layer called Card Icons, which lands directly above the group rather than inside it.
Memphis loves plain geometry, so keep each icon to basic shapes about 36 px across, in the card's colour:
- a canary triangle, as a Pen shape
- three small mint marquee rectangles, stepping up
- two small overlapping circles, one pink and one paper, with the Elliptical Marquee
- a lilac zigzag, with the Brush
For the zigzag, the Brush still has your Shard tip. Open the Brushes window, choose Hard Round, set Size to 7, and set Angle Jitter back to 0. Click once, then Shift-click each corner to draw straight lines between them.
Add a layer called Nav. Draw an ink pill 396 × 76 with Corner Radius 38 under the cards. Add a coral highlight 88 × 52, Corner Radius 26, on the second icon's spot. Then add four small paper icons along it: a triangle as a Pen shape, a marquee square, an elliptical marquee circle and a Brush zigzag at Size 6.
-
Design the hero screen
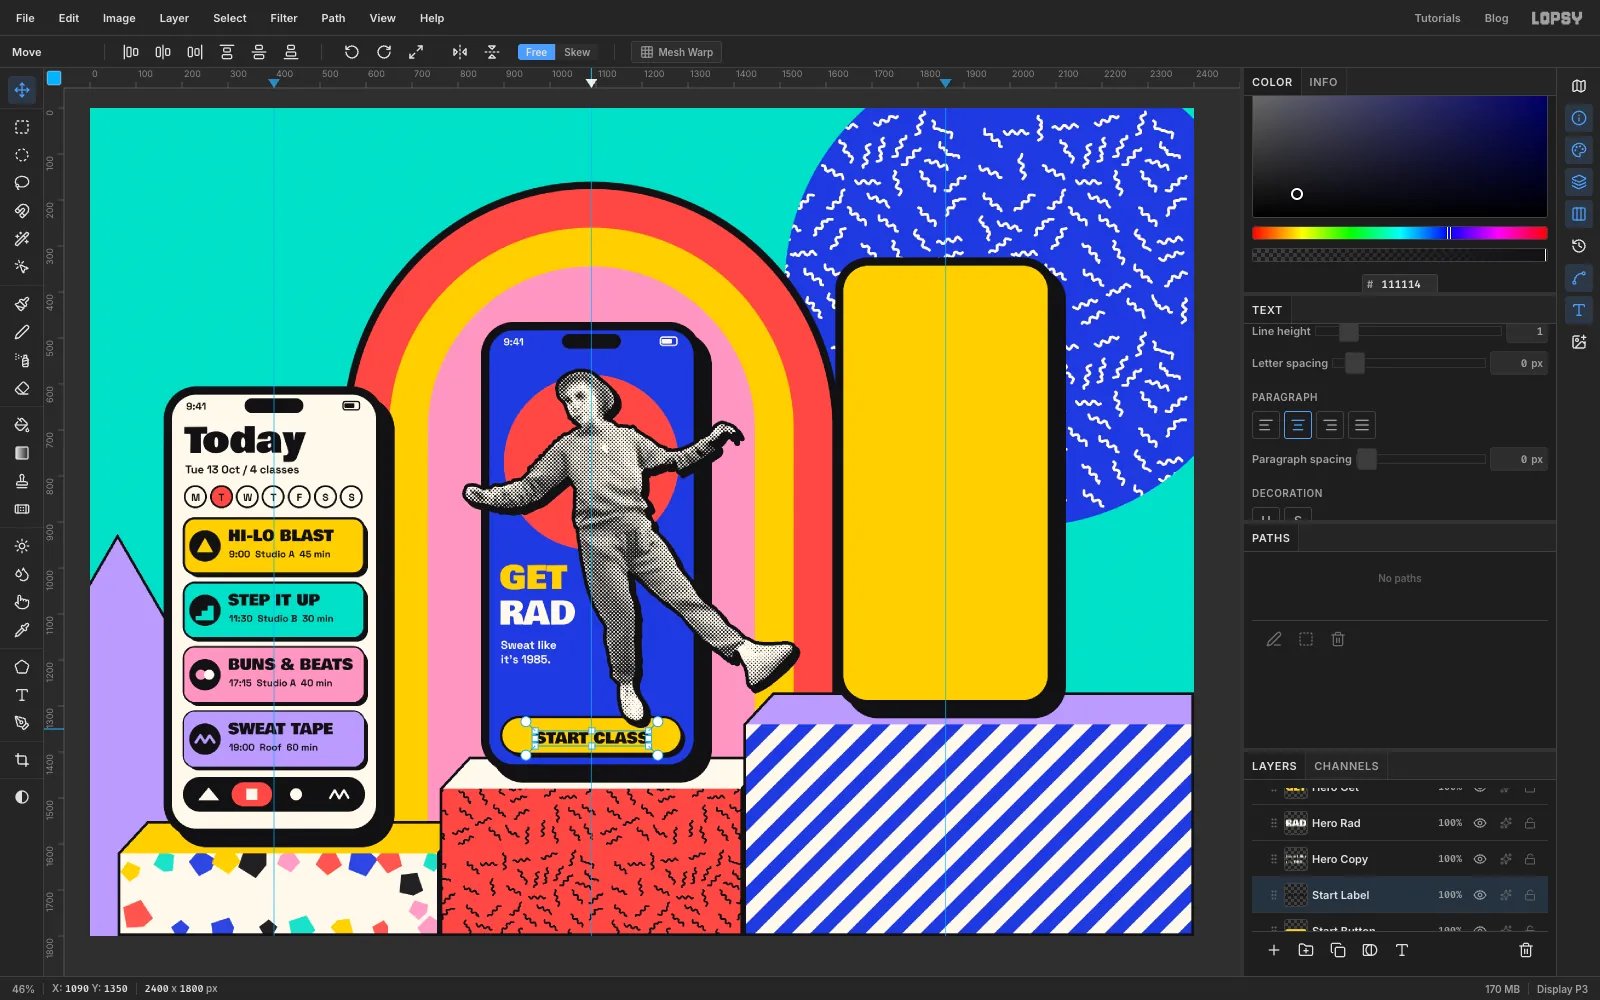
Click Screen 2, then repeat the status bar in paper instead of ink. Everything here goes under the dancer, so it's fine to place it right behind her.
Sun. Add a layer called Hero Disc. Draw a coral circle 380 × 380 centred on the phone, sitting behind her head and shoulders. Leave blue around all sides of it, including above, so it doesn't touch the notch.
Headline. In the empty space below the arm on the left, type GET in canary and then RAD in paper, both Bowlby One at 70, on separate text layers. Below them, type two lines, Sweat like and it's 1985., in Space Grotesk Bold at 25, paper. Leave a clear gap between the type and her leg.
Button. Add a layer called Start Button. Draw it the same way as the cards: an ink shadow, then a canary pill 392 × 80 with Corner Radius 40 and Stroke ink 5. Slide it up under her foot, so the shoe overlaps the top of the button by about 16 px. Set the foreground to ink and type START CLASS in Bowlby One at 33, with Align set to center, and centre it in the button.
-
Draw the timer's ticks with Radial Symmetry
Click Screen 3 and add the status bar in ink.
Add a layer called Live Pill. Draw a coral pill 88 × 36 with Corner Radius 18 at the top left of the screen, with a small ink dot at its left end. With the foreground on ink and Align back on left, type LIVE in Space Grotesk Bold at 21. Dark text is easier to read on coral than cream. Below the pill, type HI-LO BLAST in Bowlby One at 45.
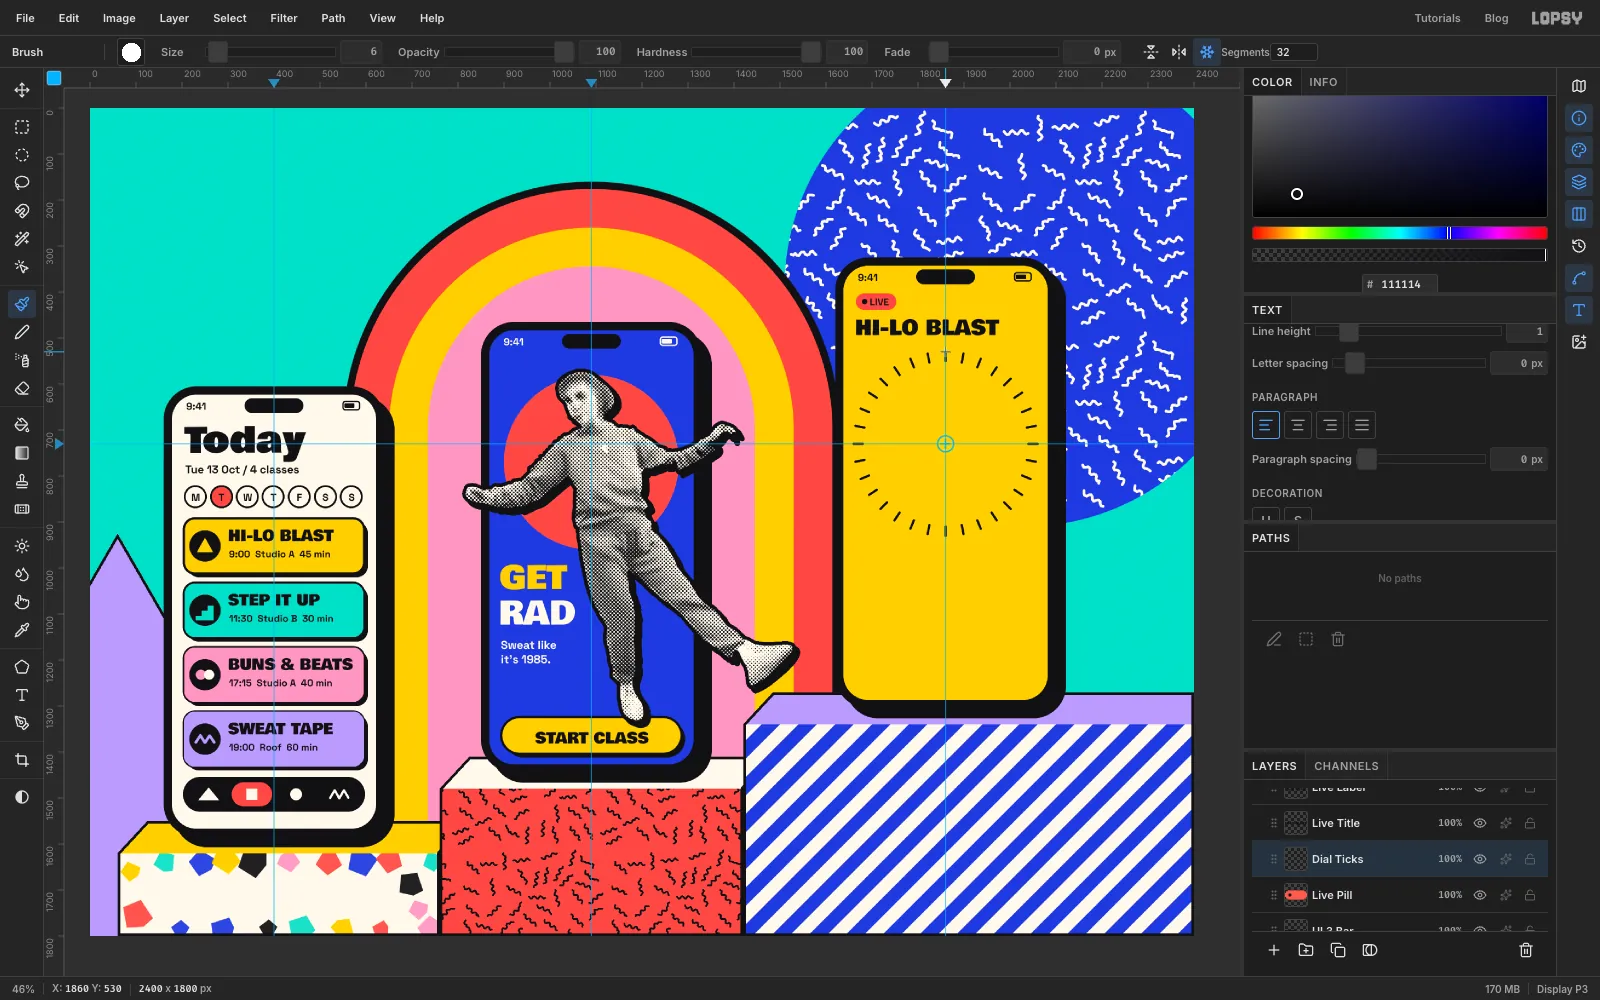
Click the left ruler at about 730 to drop a horizontal guide. Where it crosses the right-hand guide is the centre of your dial, and you'll use that crossing for everything in the next two steps.
Add a layer called Dial Ticks. Pick the Brush with Hard Round at Size 6, in ink.
Click Radial Symmetry in the options bar and set Segments to 32. Cmd-click the crossing to set the symmetry centre. Then drag one short tick, about 20 px long and about 180 px straight above that centre. All 32 appear at once. Click Radial Symmetry again to turn it off.
-
Add the dial and its progress ring
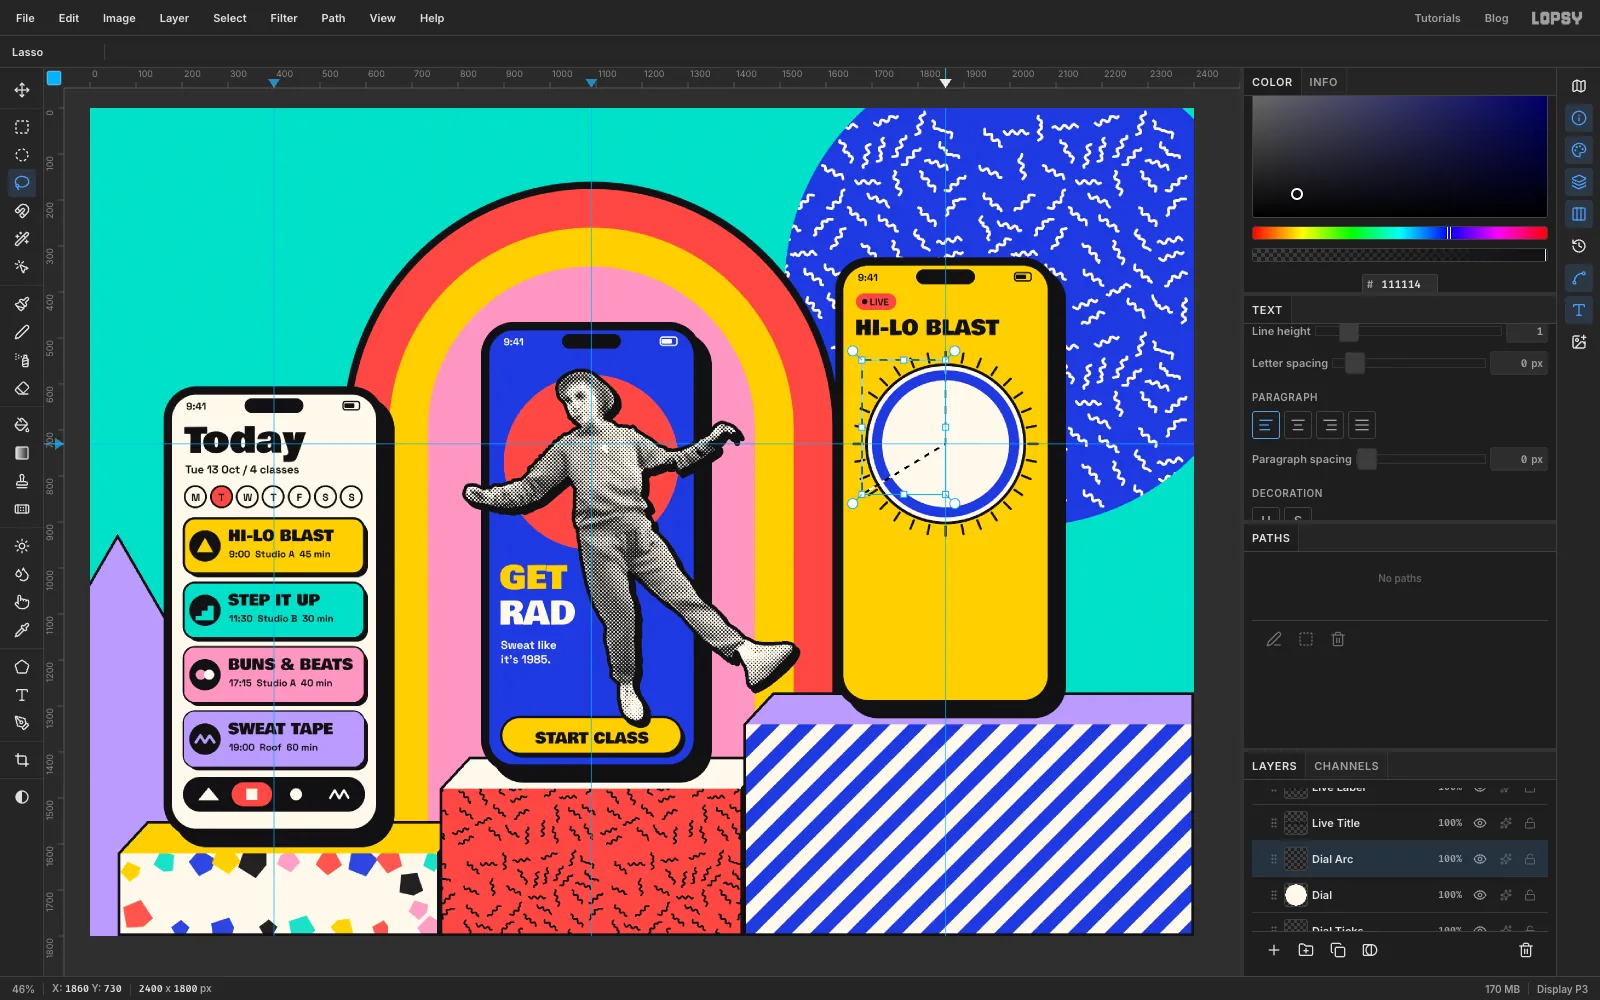
Add a layer called Dial. Draw an Ellipse with the Shape tool, 344 × 344, Fill paper, Stroke ink, Width 6, centred on the crossing.
Add a layer called Dial Arc. Draw another Ellipse, 298 × 298, with no fill and a cobalt Stroke of Width 22, on the same centre. That's a full ring, and the timer should look part-way through.
With the Lasso, draw a wedge over the piece of ring you want to remove, from the centre out and around from about 8 o'clock to 12 o'clock. Press Delete, then Cmd+D.
-
Set the timer and stat chips
Set the foreground to ink for all the text in this step.
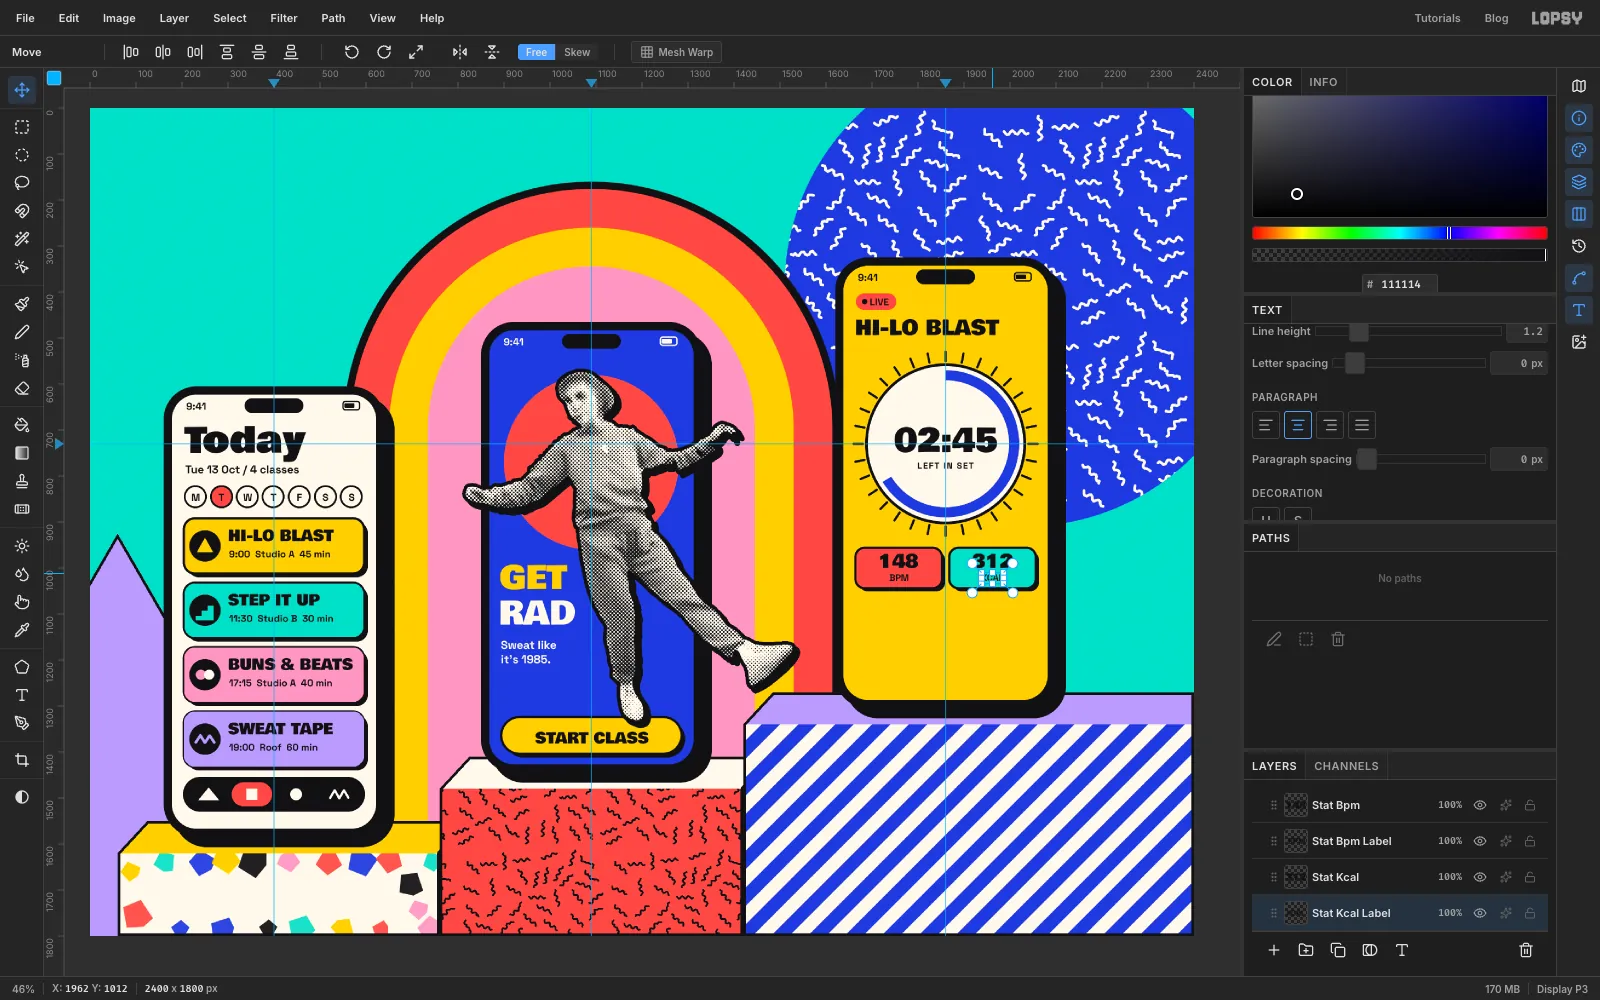
Timer. Type 02:45 in the dial in Bowlby One at 70, with Align set to center. A workout timer has to be readable at arm's length, so don't be tempted to use a thin font here. Below it, type LEFT IN SET in Space Grotesk Bold at 19, with Letter spacing 2. Then set Letter spacing back to 0.
Stats. Add a layer called Stat Chips. Draw two cards with their shadows, 188 × 88, Corner Radius 20, side by side below the dial: coral on the left and mint on the right. Keep them clear of the ticks.
In the coral one, type 148 in Bowlby One at 40, with BPM below it in Space Grotesk Bold at 20, both centred. In the mint one, type 312 and KCAL the same way.
-
Add the cassette and Pause button
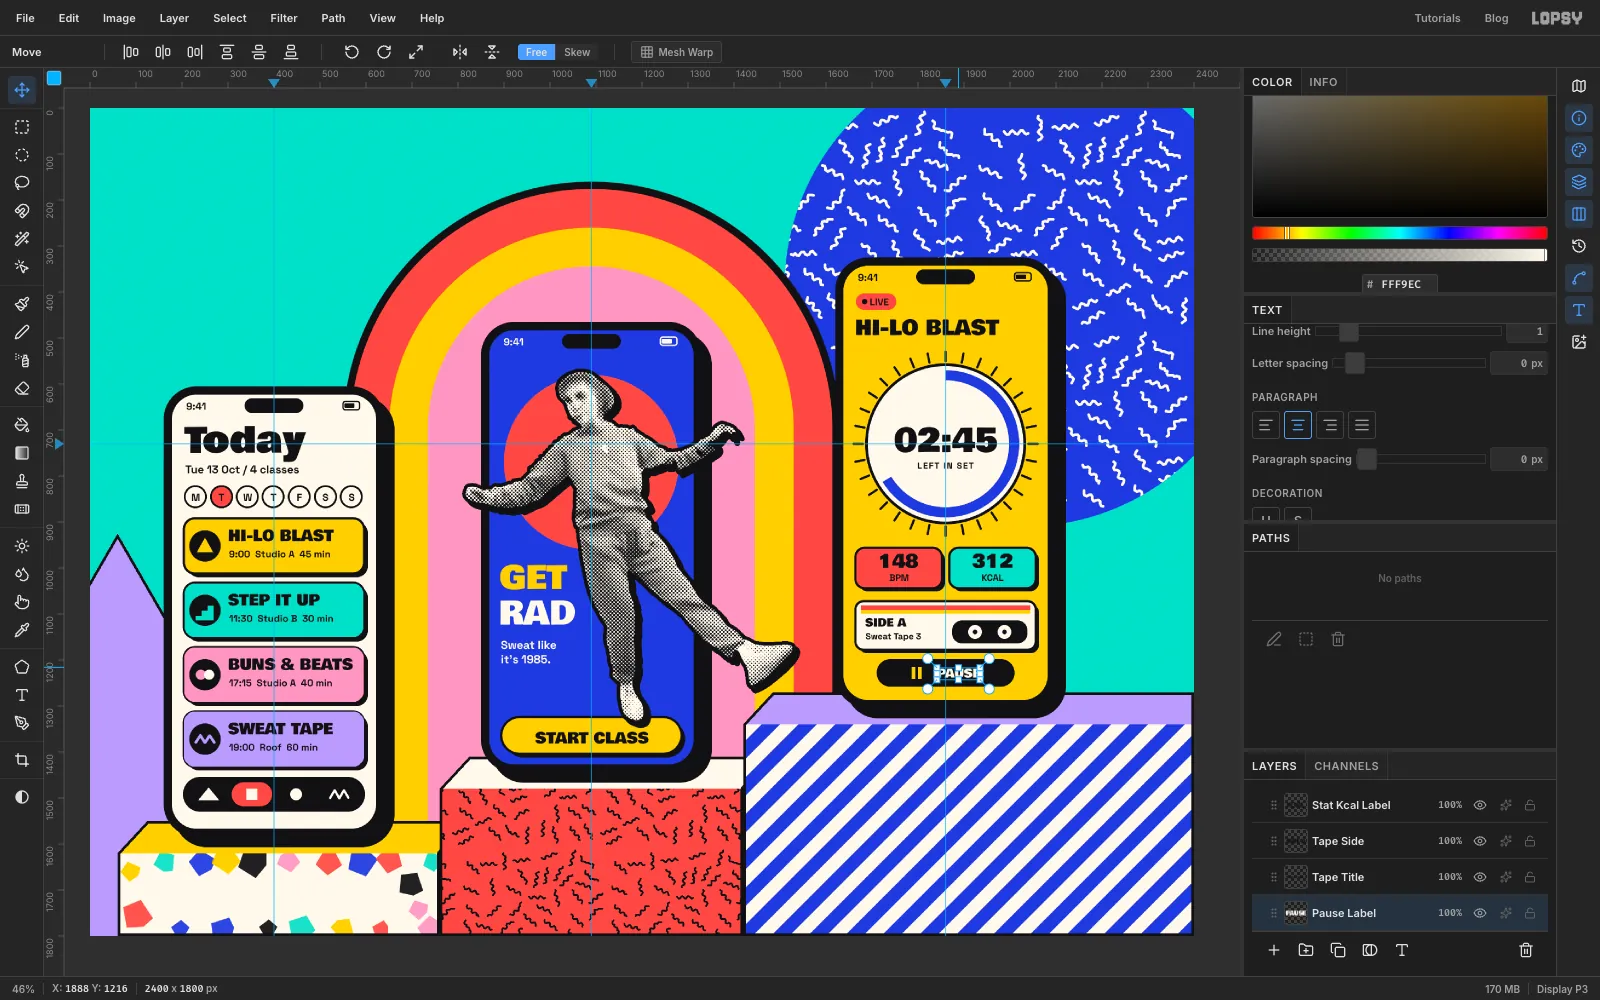
Cassette. Add a layer called Tape and draw a paper card with its shadow, 392 × 106, Corner Radius 18.
Add a layer called Tape Parts. Along the top of the card, marquee a thin coral stripe and a thin canary one below it. On the right, draw an ink pill 164 × 50 with Corner Radius 22, then two paper reels 30 across and two ink hubs 10 across inside it.
With the foreground on ink and Align back on left, type SIDE A on the left in Bowlby One at 24, and Sweat Tape 3 below it in Space Grotesk Bold at 19.
Pause. Add a layer called Pause. Draw an ink pill 300 × 60 with Corner Radius 30 at the bottom of the screen. Add two small canary marquee bars for the icon, then type PAUSE in Bowlby One at 26 in paper. Centre the icon and word together in the pill. A live screen with no way to stop looks like a poster, not an app.
-
Set and tilt the RAD letters
Click Triangle and add a layer called Headline Base. It stays empty, and it's only there to keep text in the right spot in the stack.
Each letter gets its own text layer, so it can tilt and overlap with its own outline. Using one text layer and cutting up the letters leaves faint ghost lines behind.
Set the text to Bowlby One at 270, Line height 1. Then, working from right to left and clicking Headline Base before each one:
- type D in canary, with its left edge about 525 px from the canvas edge, and rename the layer RAD D
- type A in cobalt, about 275 px in, and rename it RAD A
- type R in coral, about 70 px in, and rename it RAD R
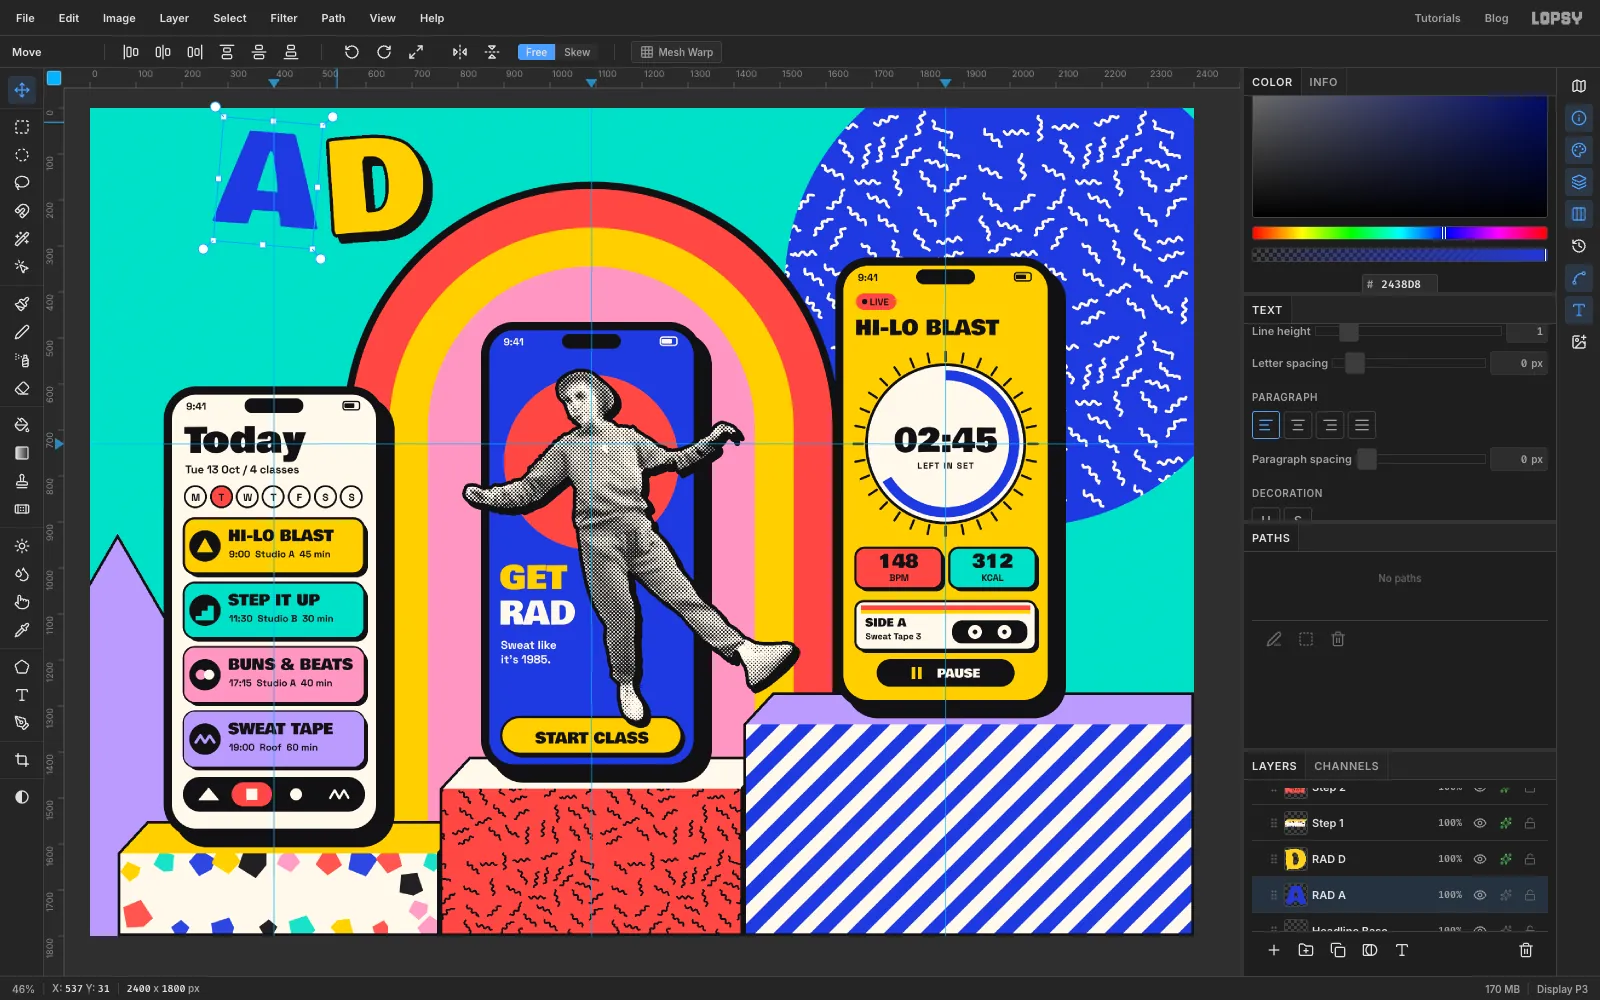
Now tilt them. With a letter active, pick the Move tool and drag the round handle just outside a corner of its box. Turn D a little anticlockwise, A a little clockwise and R a bit further anticlockwise, so the word rocks from side to side. Compare with the finished image. Text stays editable while it's rotated. Nudge each up or down a few pixels, so the baseline bounces.
Give each letter a Stroke (Width 7, ink, outside) and a Drop Shadow (Offset X 14, Offset Y 14, Blur 0, Spread 0, Opacity 100, ink).
-
Fill the D with squiggles
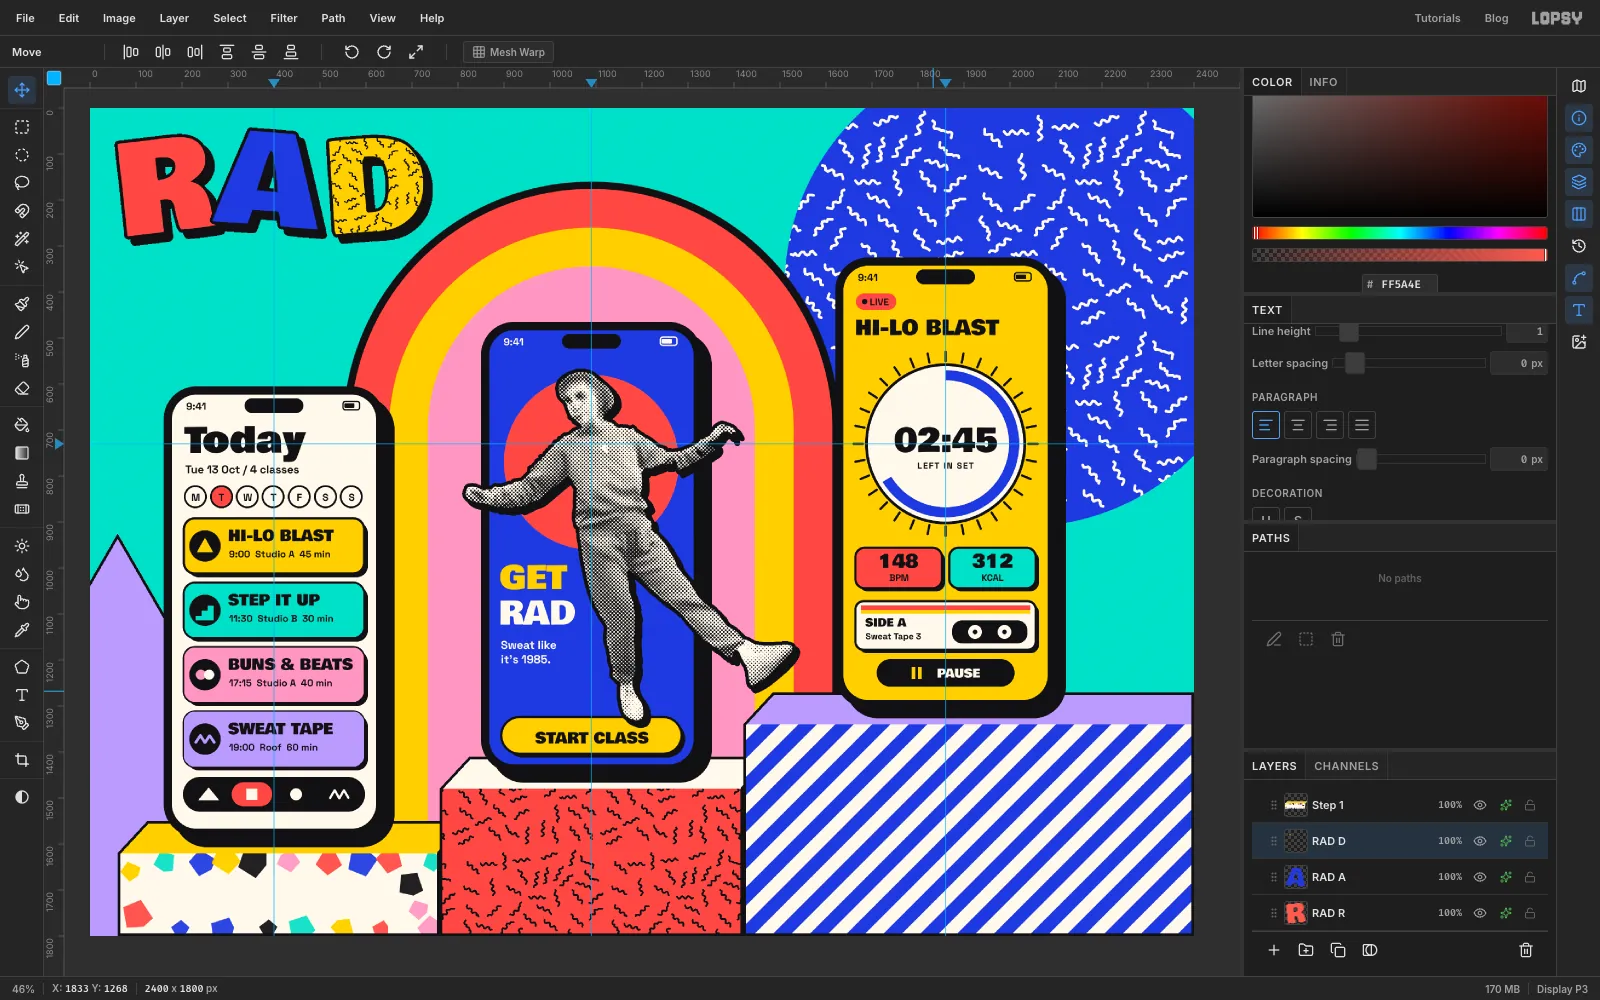
A pattern fill needs pixels, so click RAD D and click Rasterize Layer in the Layers panel.
Cmd-click its thumbnail to select the letter. Choose Edit → Fill with Pattern…, pick the squiggles, and set Scale to 47. Apply, then press Cmd+D.
-
Add AEROBICS and the tilted tagline
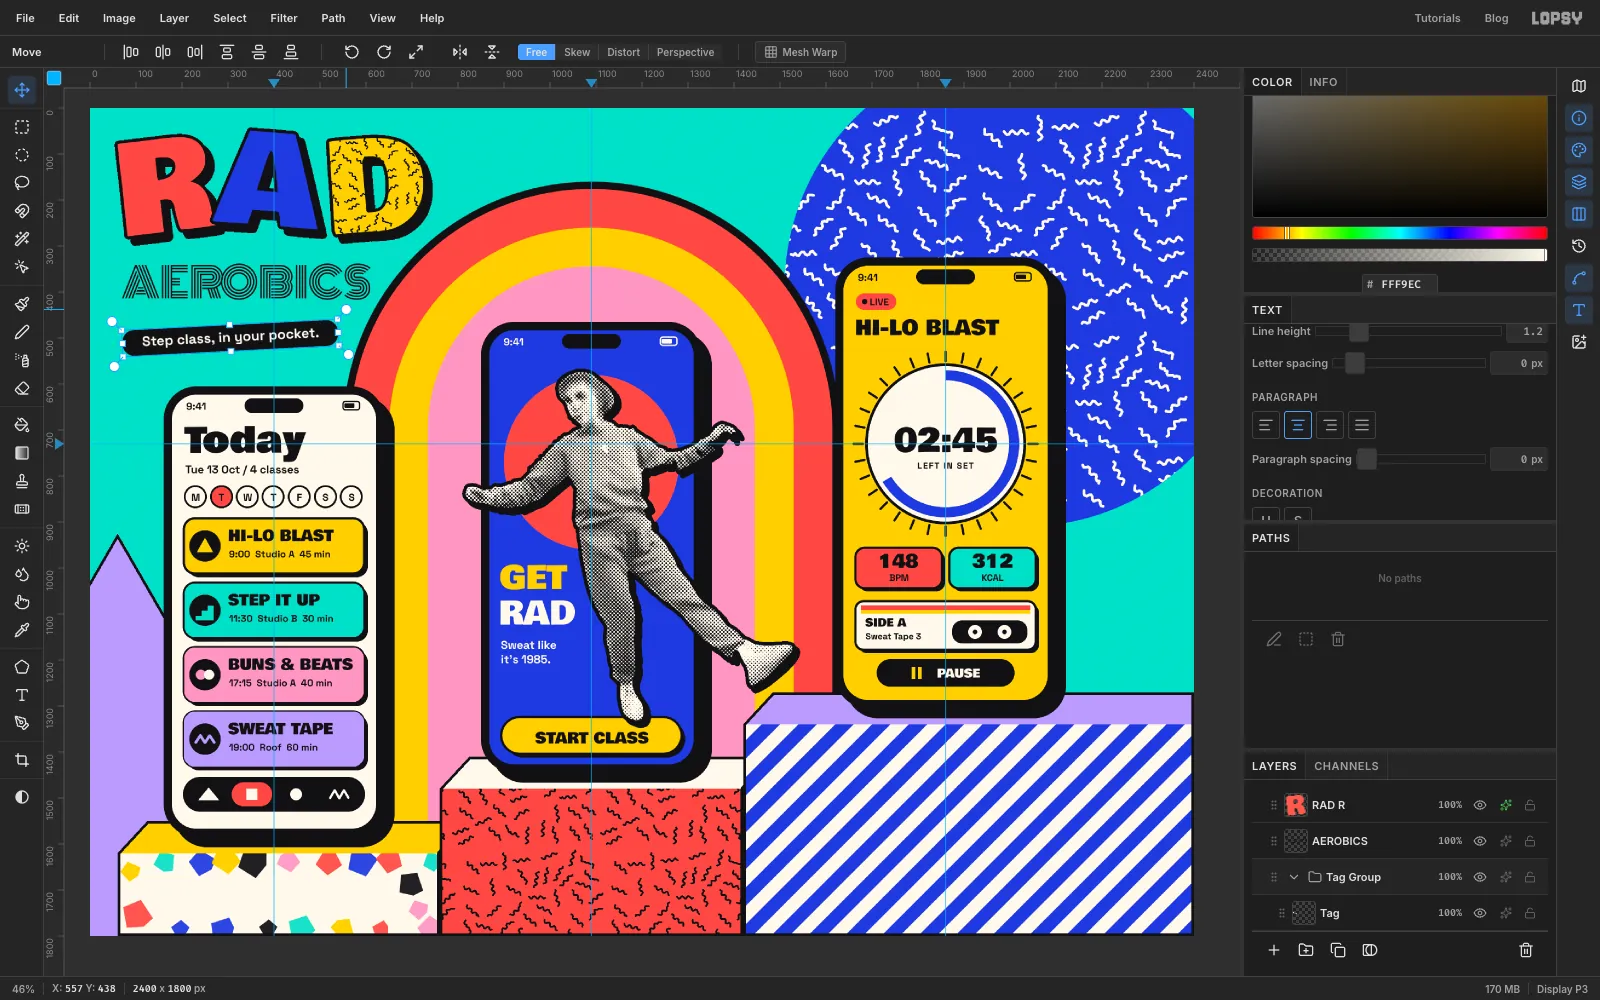
Click Headline Base and type AEROBICS in Monoton at 90, in ink. Line it up with the left side of the R, and check it stays clear of the arch.
Add a layer called Tag Pill. Draw an ink pill 470 × 58 with Corner Radius 28 under the word, with the same left edge. Type Step class, in your pocket. on it in Space Grotesk Bold at 30, in paper, with Align set to center. Centre it in the pill, and check that the comma and the p hang inside the pill with room to spare.
Click Tag Pill, Shift-click the text, and choose Layer → Group Layers. Name it Tag Group. With the group active, pick the Move tool and drag the round handle outside a corner to give it a slight tilt, rising to the right. The live text turns with its pill.
-
Label the steps
This is where the pun pays off. Click Step 3 and add a layer called Plates.
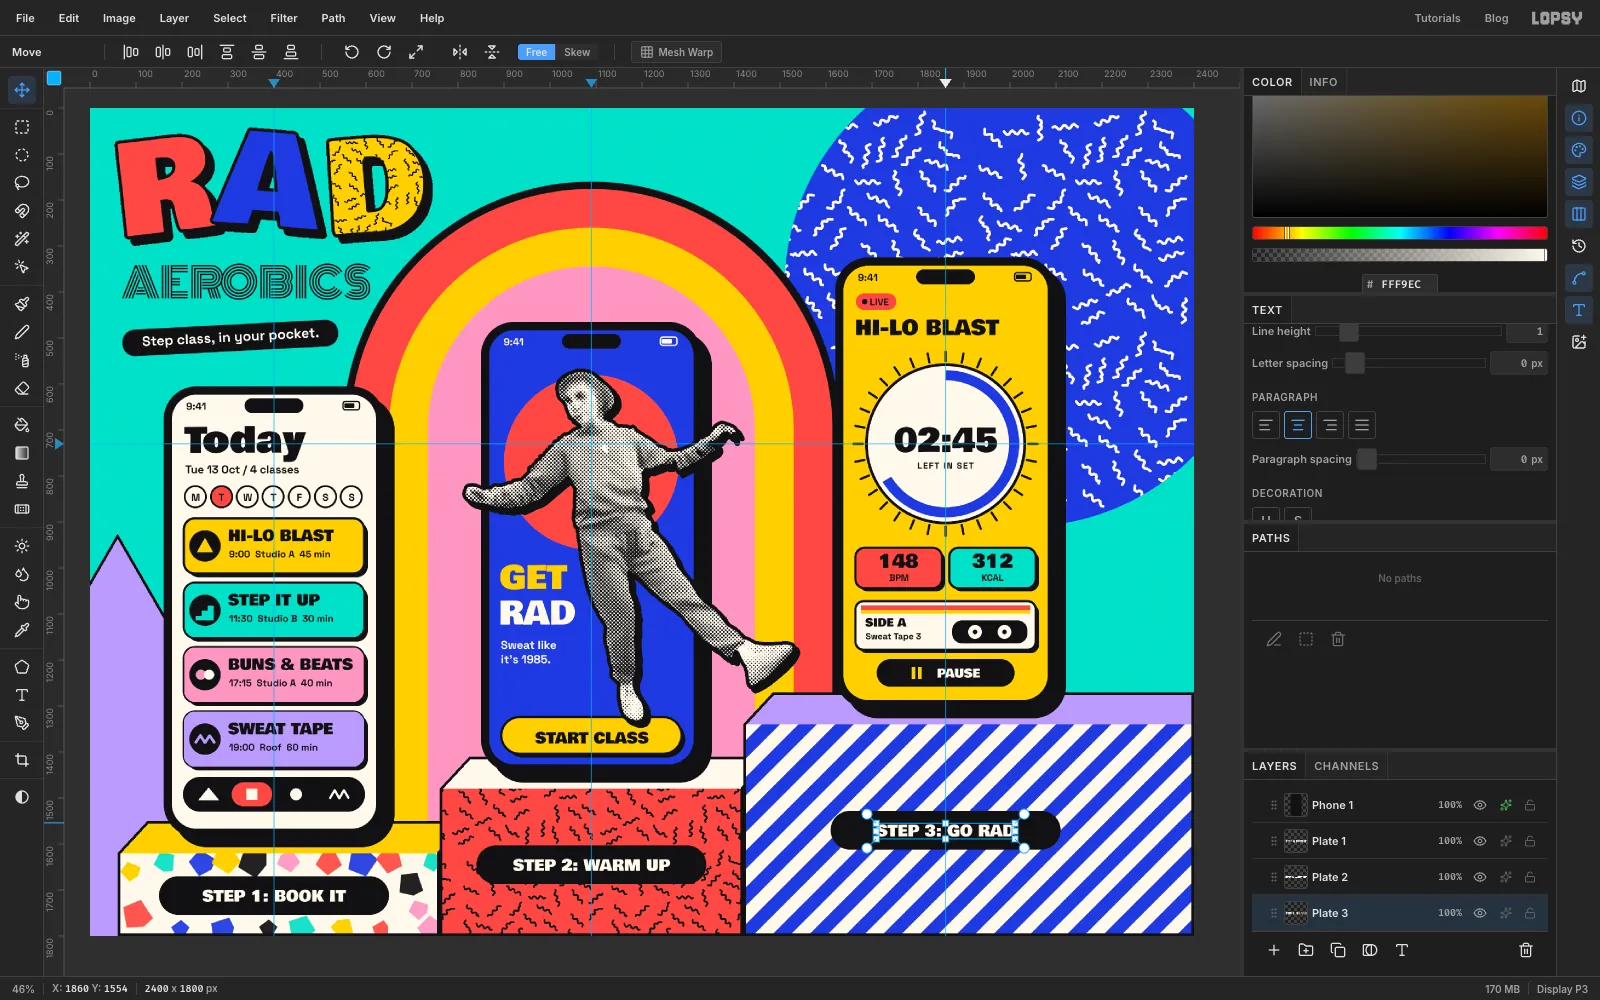
With the Shape tool, draw three ink pills 500 × 84 with Corner Radius 42, one centred under each phone, in the middle of each step's front. The pill on Step 1 should sit in the clear space you left in the terrazzo.
Then type the three labels in Bowlby One at 34, in paper, with Align set to center: STEP 1: BOOK IT, STEP 2: WARM UP and STEP 3: GO RAD. Centre each one in its pill. Click Plates before typing each one.
-
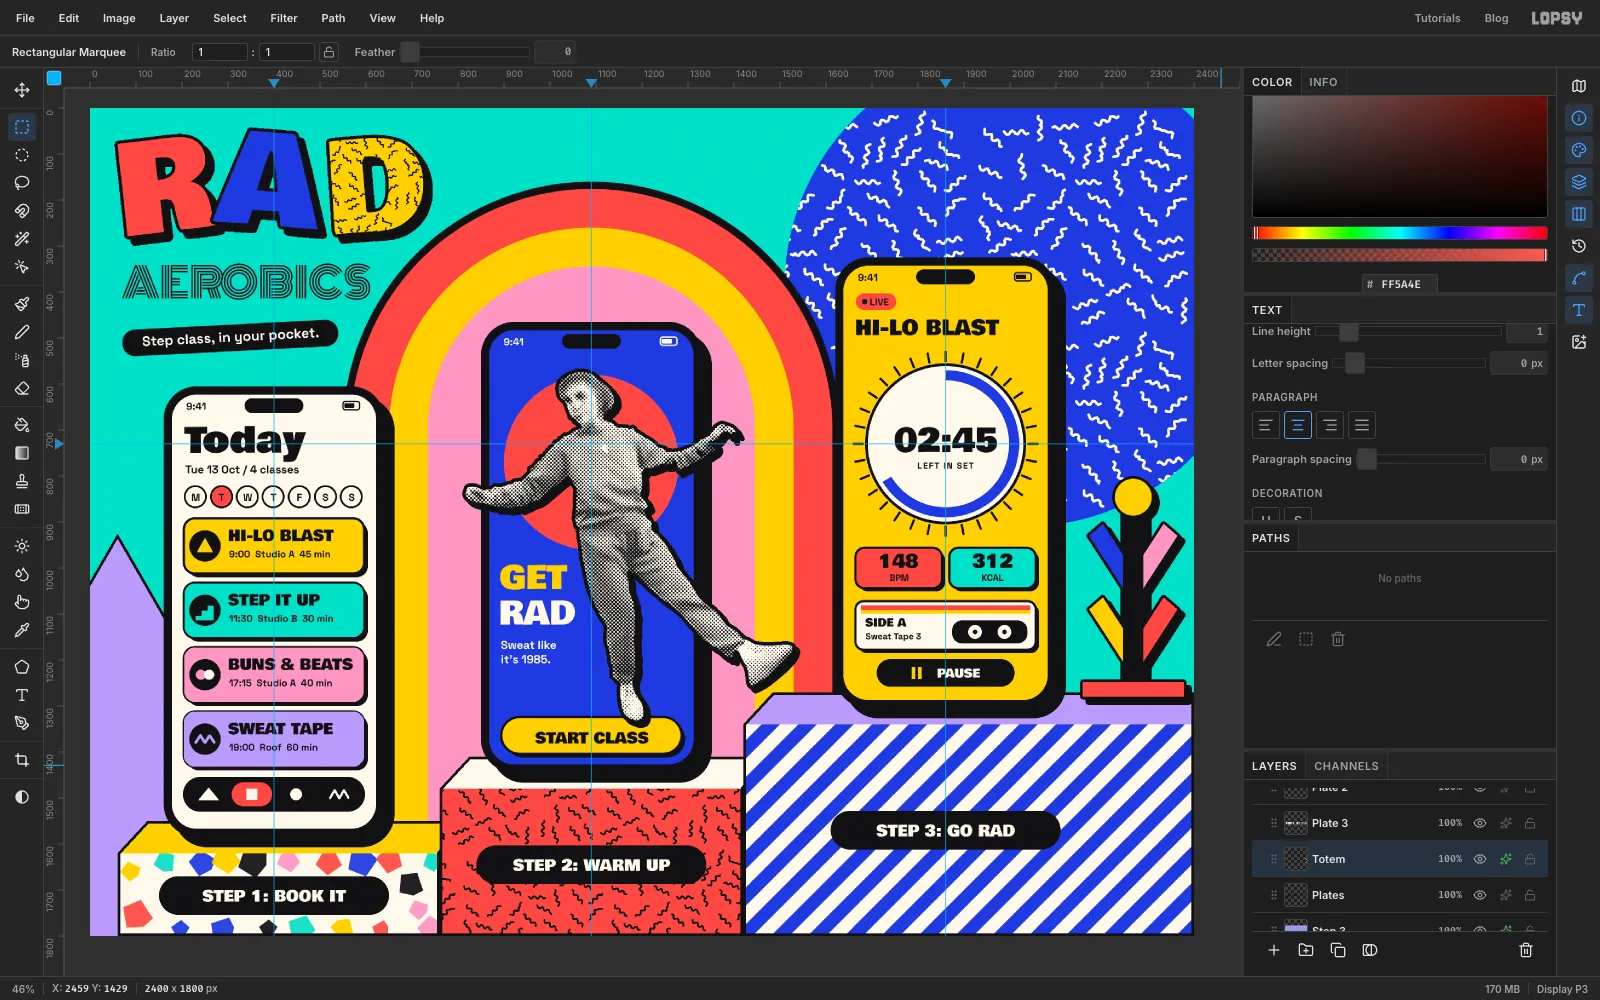
Build a Memphis totem
The space to the right of Phone 3 needs something tall, so here's a small nod to Sottsass's Carlton bookcase, with its splayed, slanted arms.
Add a layer called Totem. It stands on the top step, about 150 px to the right of the phone, and it's about 460 px tall.
Make four slanted bars as Pen shapes, each about 40 px wide and 130 px long, in two rising V shapes, and fill each one: canary and coral for the lower pair, cobalt and pink for the upper pair. Marquee a post 44 px wide up the middle and fill it with ink, so it covers the point where the arms meet. Add a canary circle 80 across on top and a coral 220 × 32 plinth at the bottom, standing on the lilac step.
Give the layer a Stroke (Width 6, ink, outside) and a Drop Shadow (Offset 12, 12, Blur 0, Opacity 100, ink). Keep the plinth clear of the phone's shadow.
-
Stick on a starburst
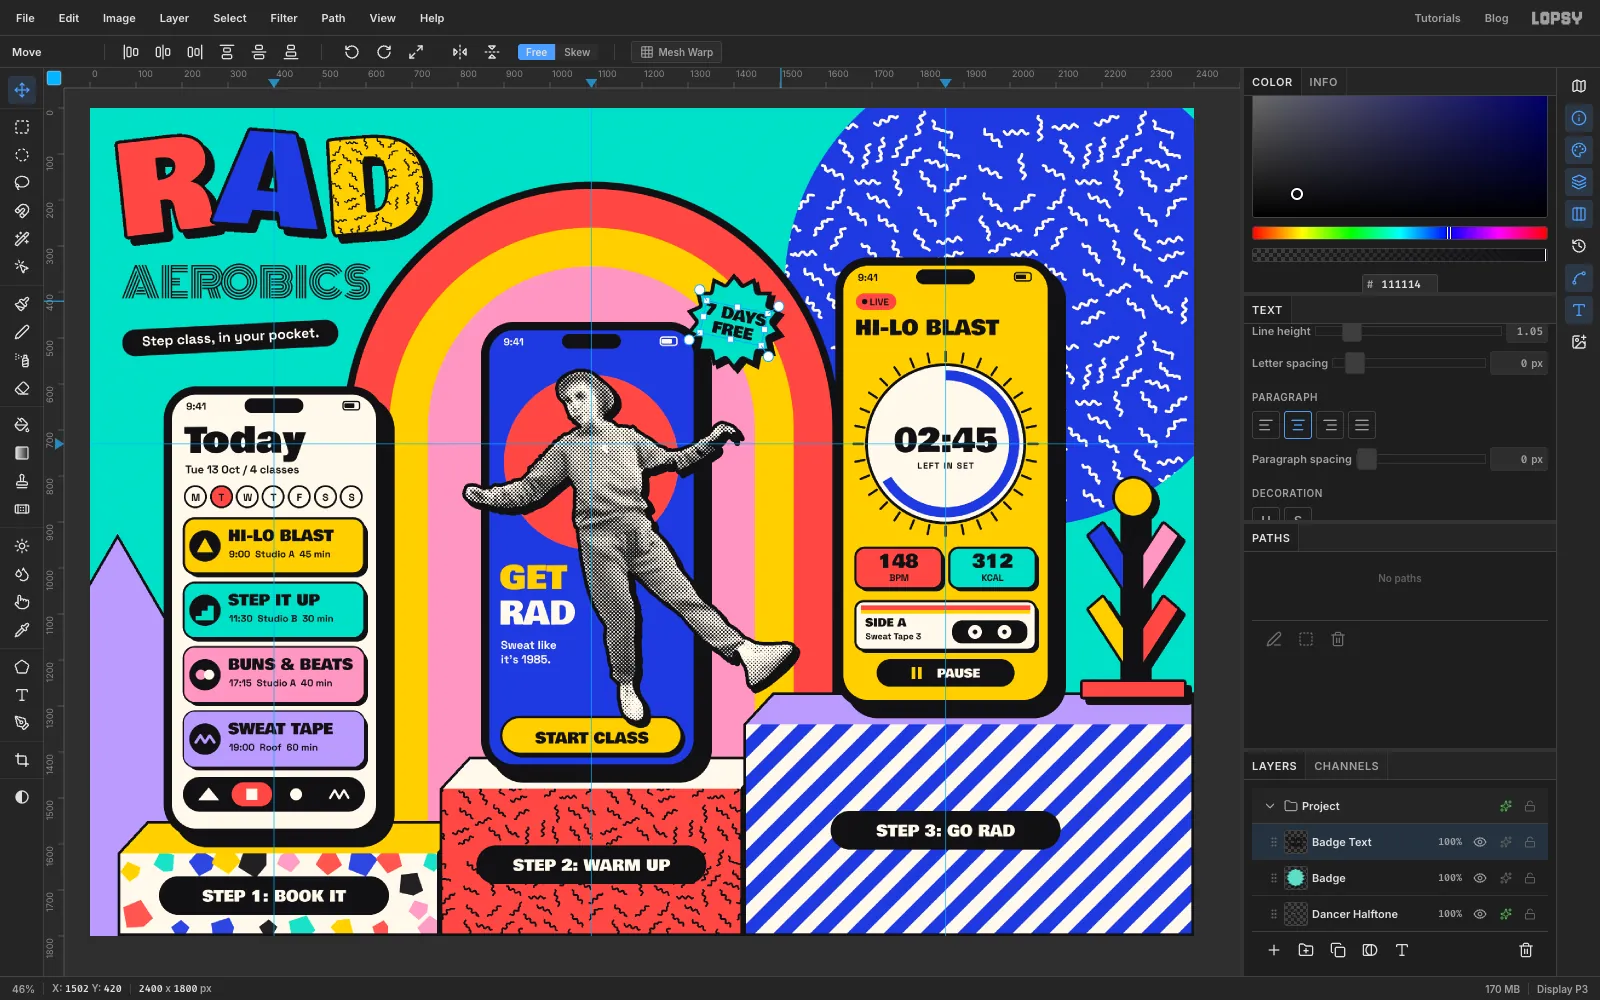
Click Dancer Halftone and add a layer called Badge, so the badge sits on top of everything on that phone.
On the phone's top right corner, make a 14-point star as a Pen shape, about 210 px across. That's 28 clicks, alternating between an outer and an inner circle, and it doesn't need to be perfect. Fill it with ink.
Pick the Rectangular Marquee, so the arrow keys move the outline rather than the pixels. Nudge the selection about 8 px right and 8 px down, and fill it again. That gives you a hard shadow. Nudge it back, choose Select → Shrink… at 8, and fill that with mint. Press Cmd+D.
Type 7 DAYS and FREE on two lines in Bowlby One at 34, in ink, with Align set to center and Line height 1.05. Centre it in the star, then rotate the live text clockwise by about 12° with the Move tool's round handle.
-
Scatter the confetti
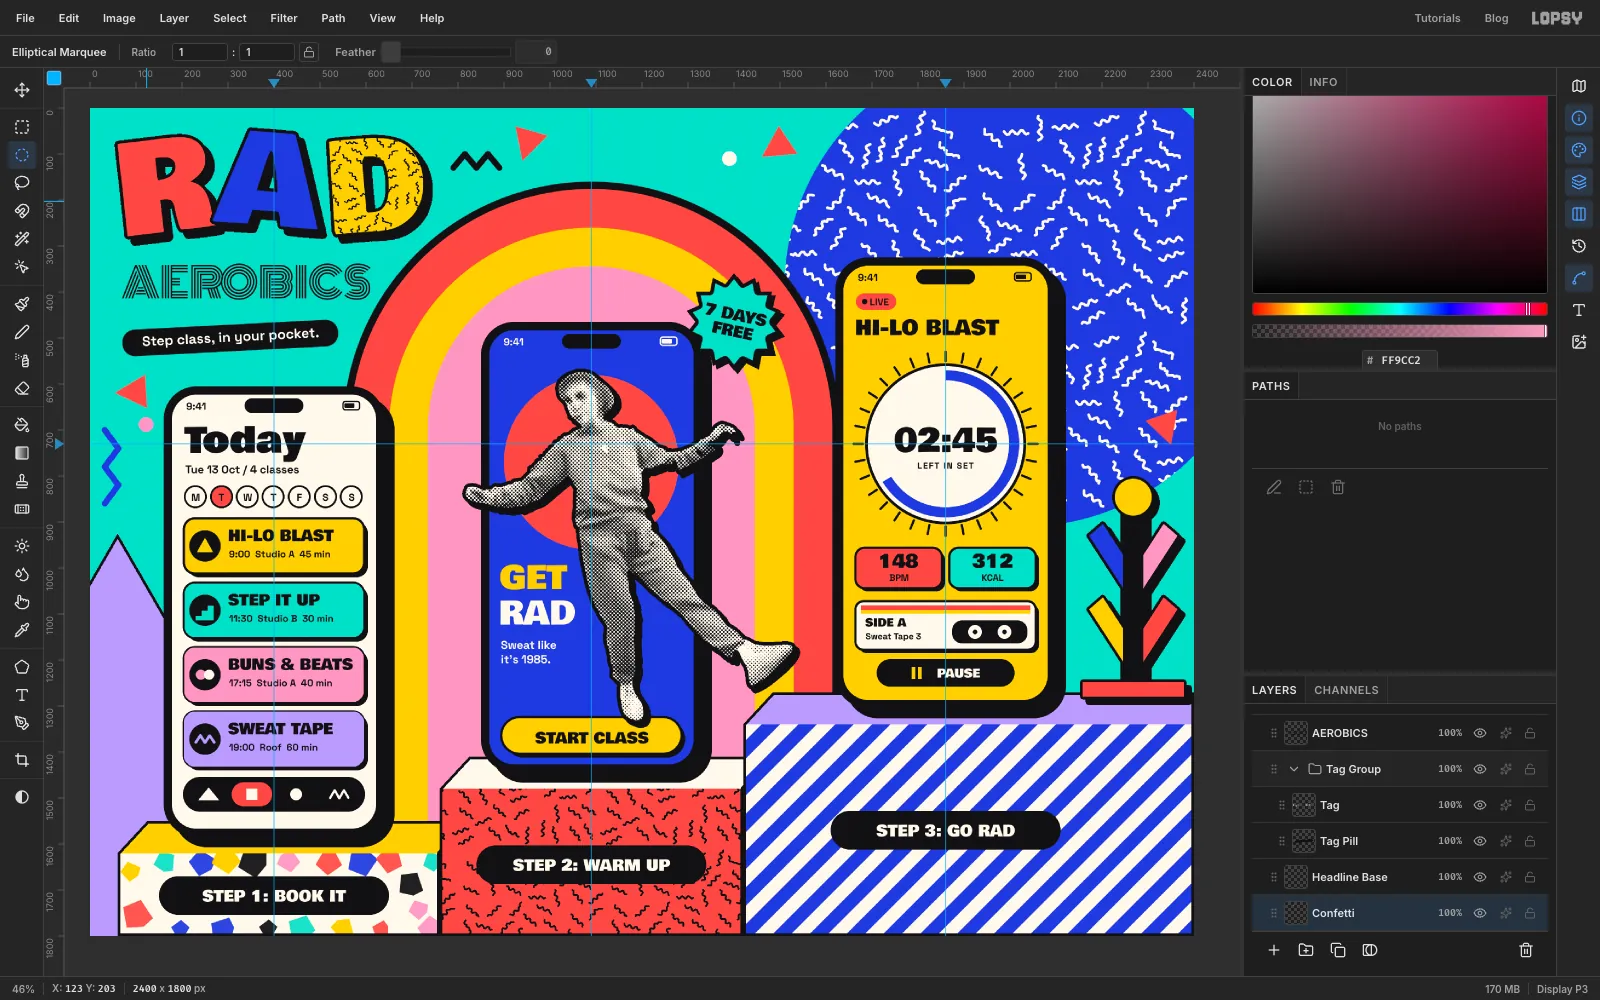
Click Triangle and add a layer called Confetti. It sits behind the phones, so nothing can overlap the screens.
Make one small coral triangle at the top of the board as a Pen shape and fill it. Choose Edit → Copy. Then, for each of three more:
- Choose Edit → Paste.
- With the Move tool, rotate it with the round handle outside a corner, and drag it to an open area.
- Press Cmd+D and choose Layer → Merge Down.
Then use the Brush at Size 14 for an ink zigzag at the top, near the triangle (click, then Shift-click the corners), and a cobalt one on the far left. Add a few dots with small circle marquees, in paper and pink.
Be careful with placement. Give each piece some room, because a shape that nearly touches a neighbour looks like a mistake. Overlapping something on purpose is fine, like the triangle on the blue disc. A few pieces placed well will look better than lots scattered around.
-
Group everything and test it
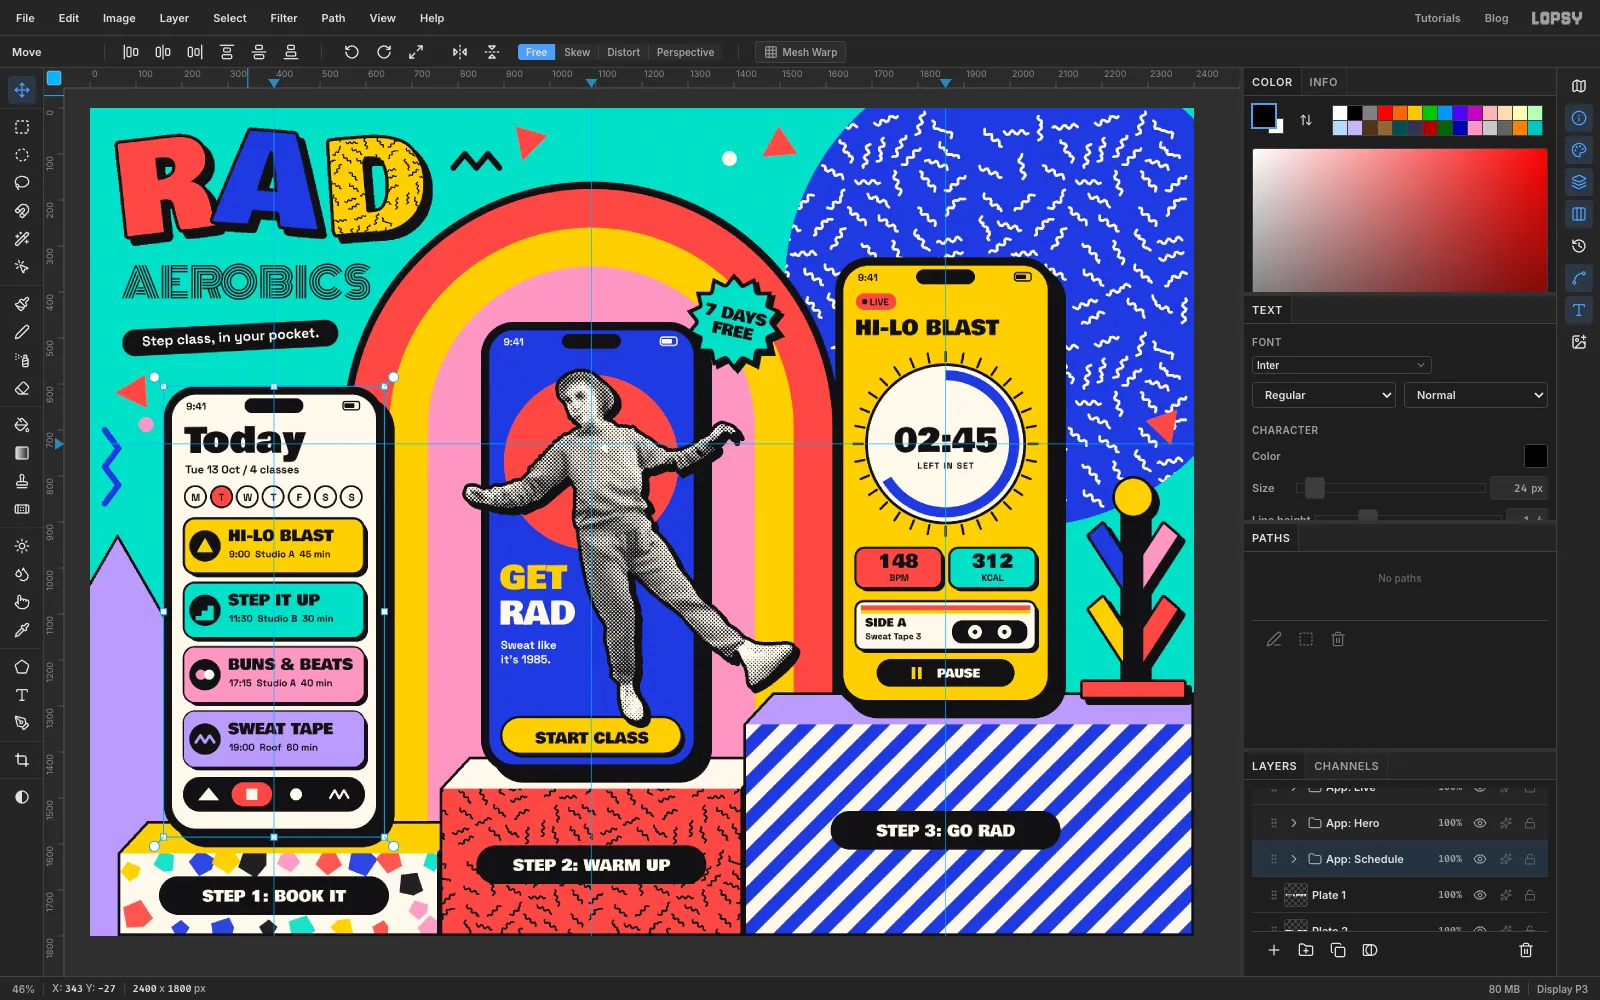
Tidy the stack. Click Phone 1, Shift-click the top layer of that phone's screen, and choose Layer → Group Layers. Name it App: Schedule. Do the same for App: Hero and App: Live, and group the three dancer layers as Dancer. Collapse the groups with the arrows on their rows.
Now check it holds together. Click App: Live and drag it with the Move tool. The whole phone moves, text and all. Press Cmd+Z to put it back. If you try the same with a rotation on App: Hero, its text and effects turn with it. Undo that too.
-
Clean up and export
Choose Edit → Clear Guides and press Cmd+D. Zoom in to 100% and check these:
- Her hands, shoes and head should have a smooth black outline.
- No type should touch the edge of its pill or card.
- Nothing should nearly touch anything else, especially around the notch on the middle phone, and between the kicking shoe and Phone 3.
Save with File → Save Project, then File → Quick Export PNG.