Paint a Naive Folk Art Cheese Label
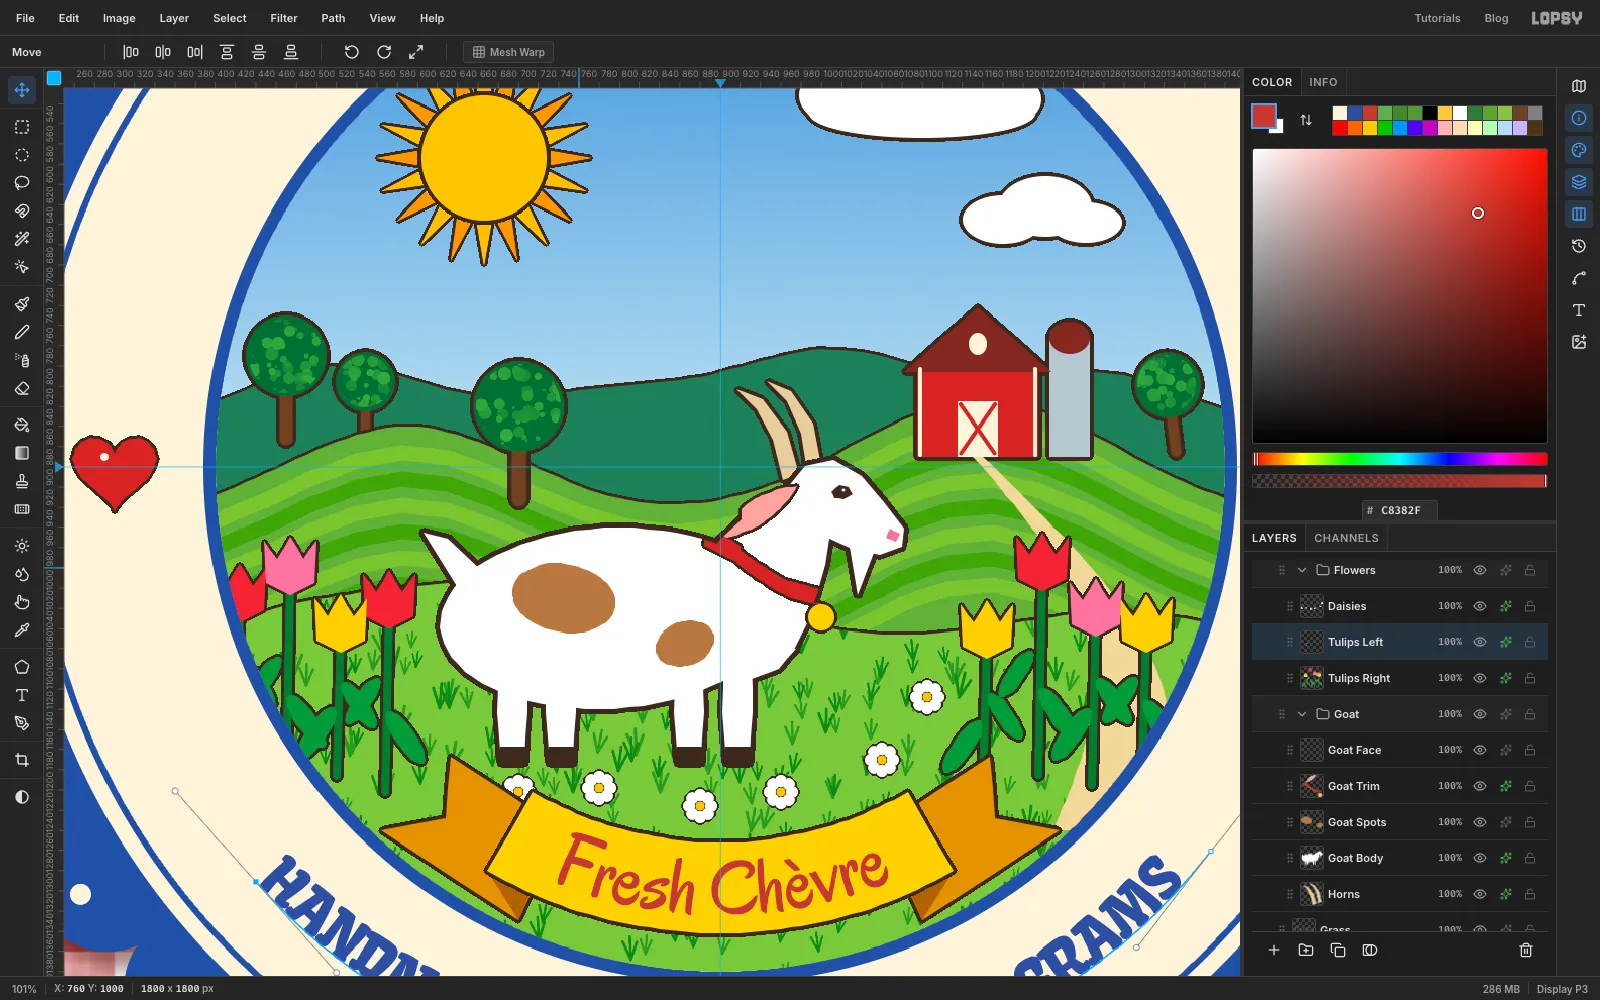
Design a round goat-cheese label in naive folk art style in Lopsy with radial-symmetry scallops, a painted farm scene, a custom grass brush and text on a path.
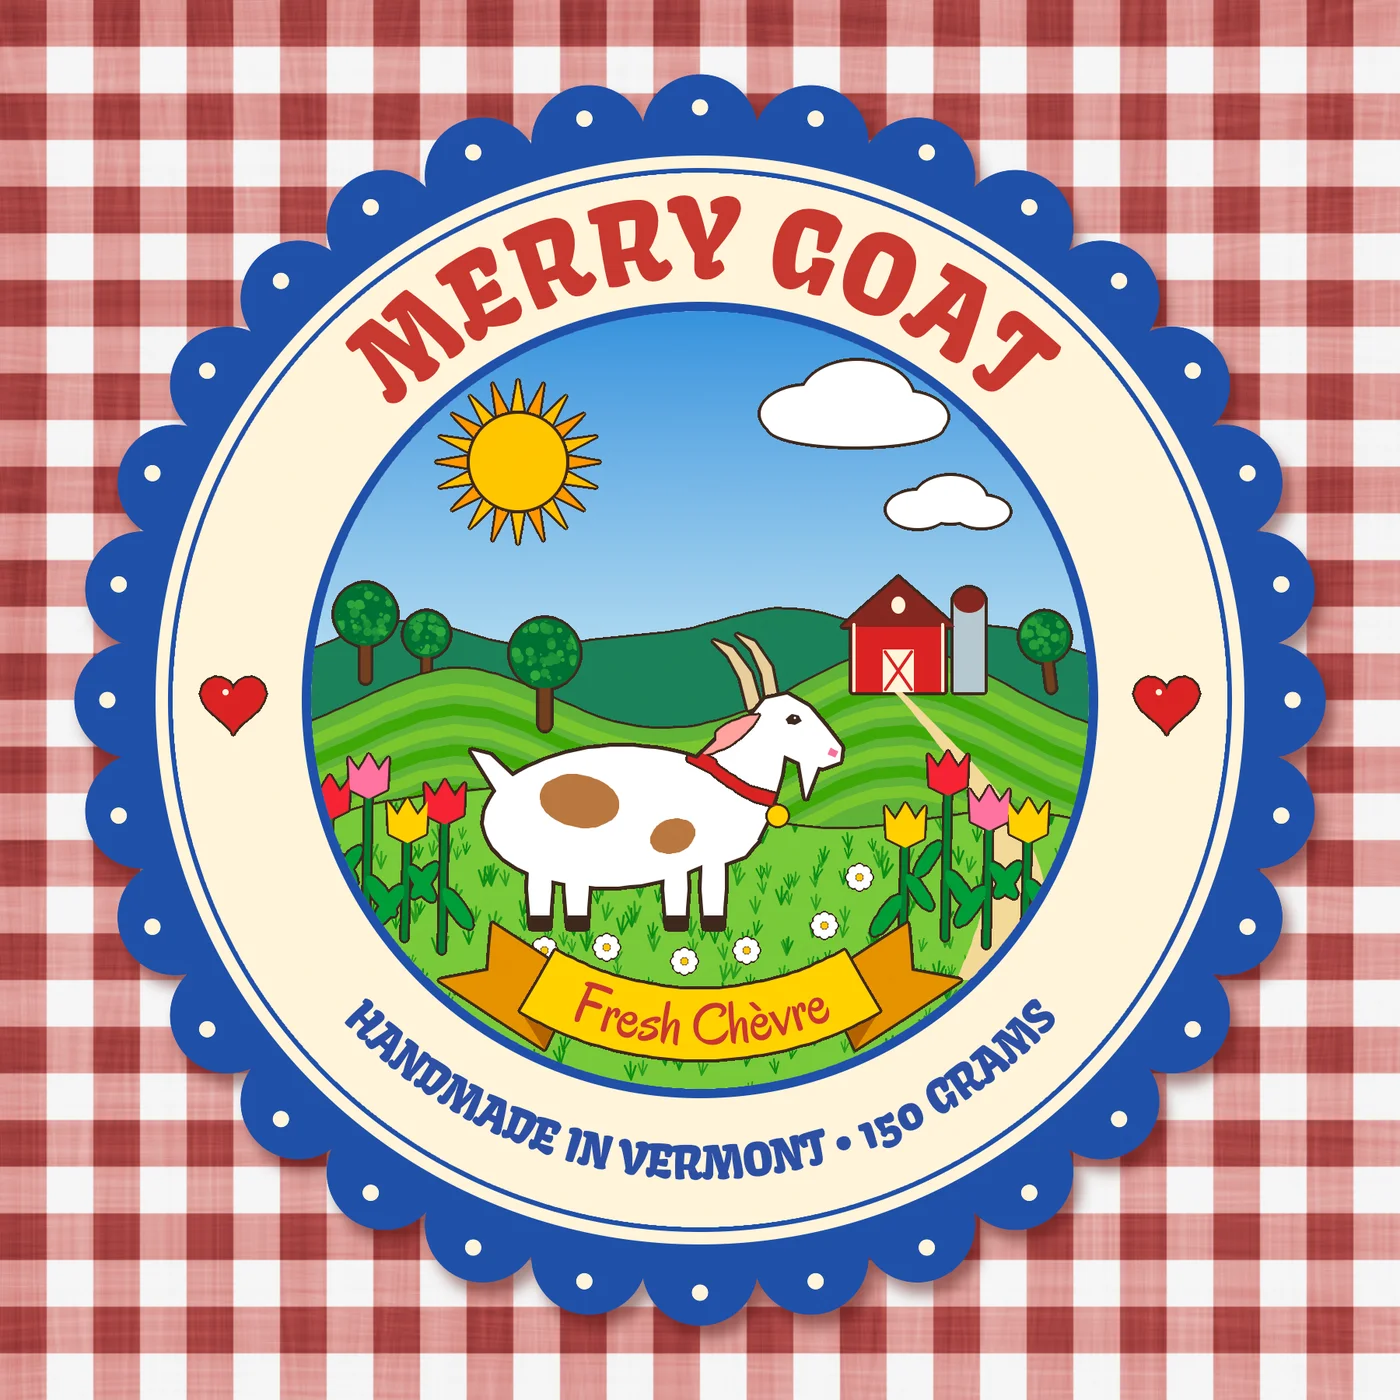
Naive folk painters such as Maud Lewis paint the countryside the way a child remembers it:
- bright flat colours with no shading
- simple rounded shapes, the same dark outline round everything
- tulips, daisies and a cheerful sun wherever there's room
Those rules suit a product label very well, because a label has to read from across a shop. In this tutorial you'll make one for an invented goat-cheese dairy, Merry Goat Creamery. It's a round, scalloped sticker with a painted farm inside, an arched title, a curved ribbon and a little gingham tablecloth to show it on.
Along the way you'll use:
- Define Pattern and Fill with Pattern
- the Brush's Radial Symmetry, plus a custom brush made with Define Brush
- Sunburst, Fibers and Add Noise
- copy, paste, scale and rotate
- a group mask, plus add, subtract and intersect selections
- the Stroke and Drop Shadow effects
- the Pen tool with text on a path
The palette is a set of folk brights on cream:
-
Cobalt
-
Tomato red
-
Cream
-
Sunflower
-
Sky
-
Greens
-
Sun orange
-
Barn roof
-
lane
-
Outline ink
-
Gingham
-
Make a gingham tile
Open Lopsy. In the New Document dialog, set Width and Height to
1800, leave Background on White and click Create.Click the top ruler at
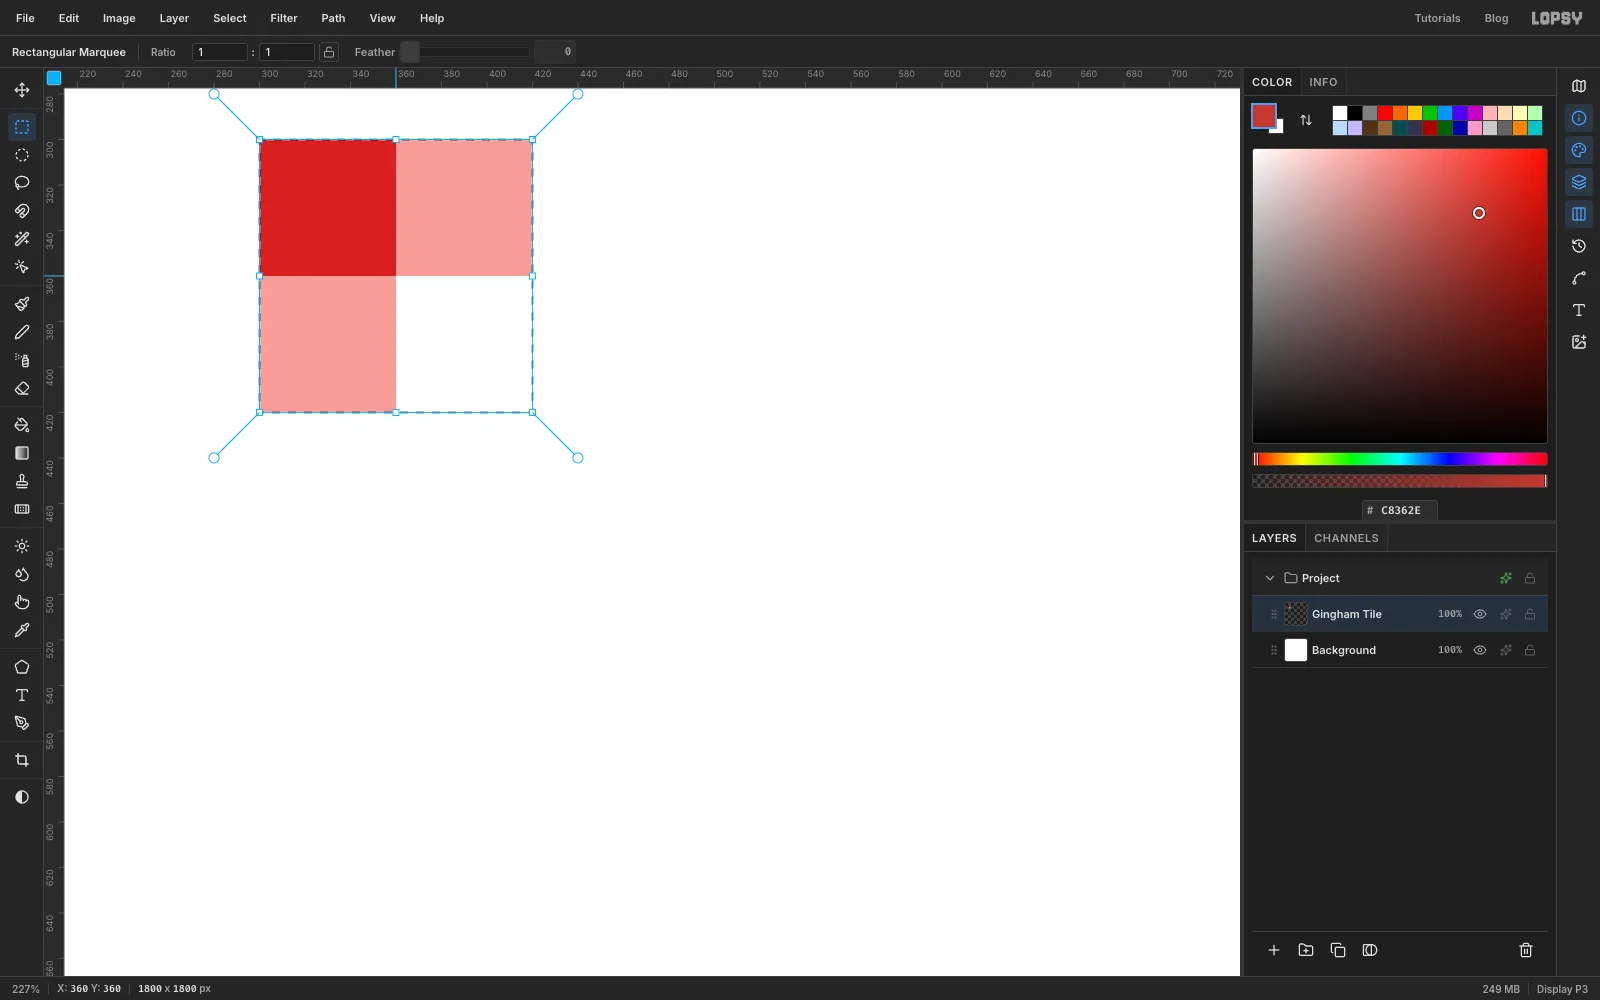
900and the left ruler at900to add a vertical and a horizontal guide through the centre. Then double-click Layer 1 and rename itGingham Tile.Press M for the Rectangular Marquee and click once on the canvas without dragging. A Rectangular Selection dialog opens, so you can type exact corners. Make four selections, filling each one with Edit → Fill after setting the foreground colour in the Color panel's hex field:
- From
300, 300to420, 420: fill white . - From
300, 300to360, 420: fill pale red . - From
300, 300to420, 360: fill pale red again. - From
300, 300to360, 360: fill dark red .
Where the two pale bands cross you get the dark square, just like woven gingham.
- From
-
Turn the tile into a tablecloth
Select the whole tile again (from
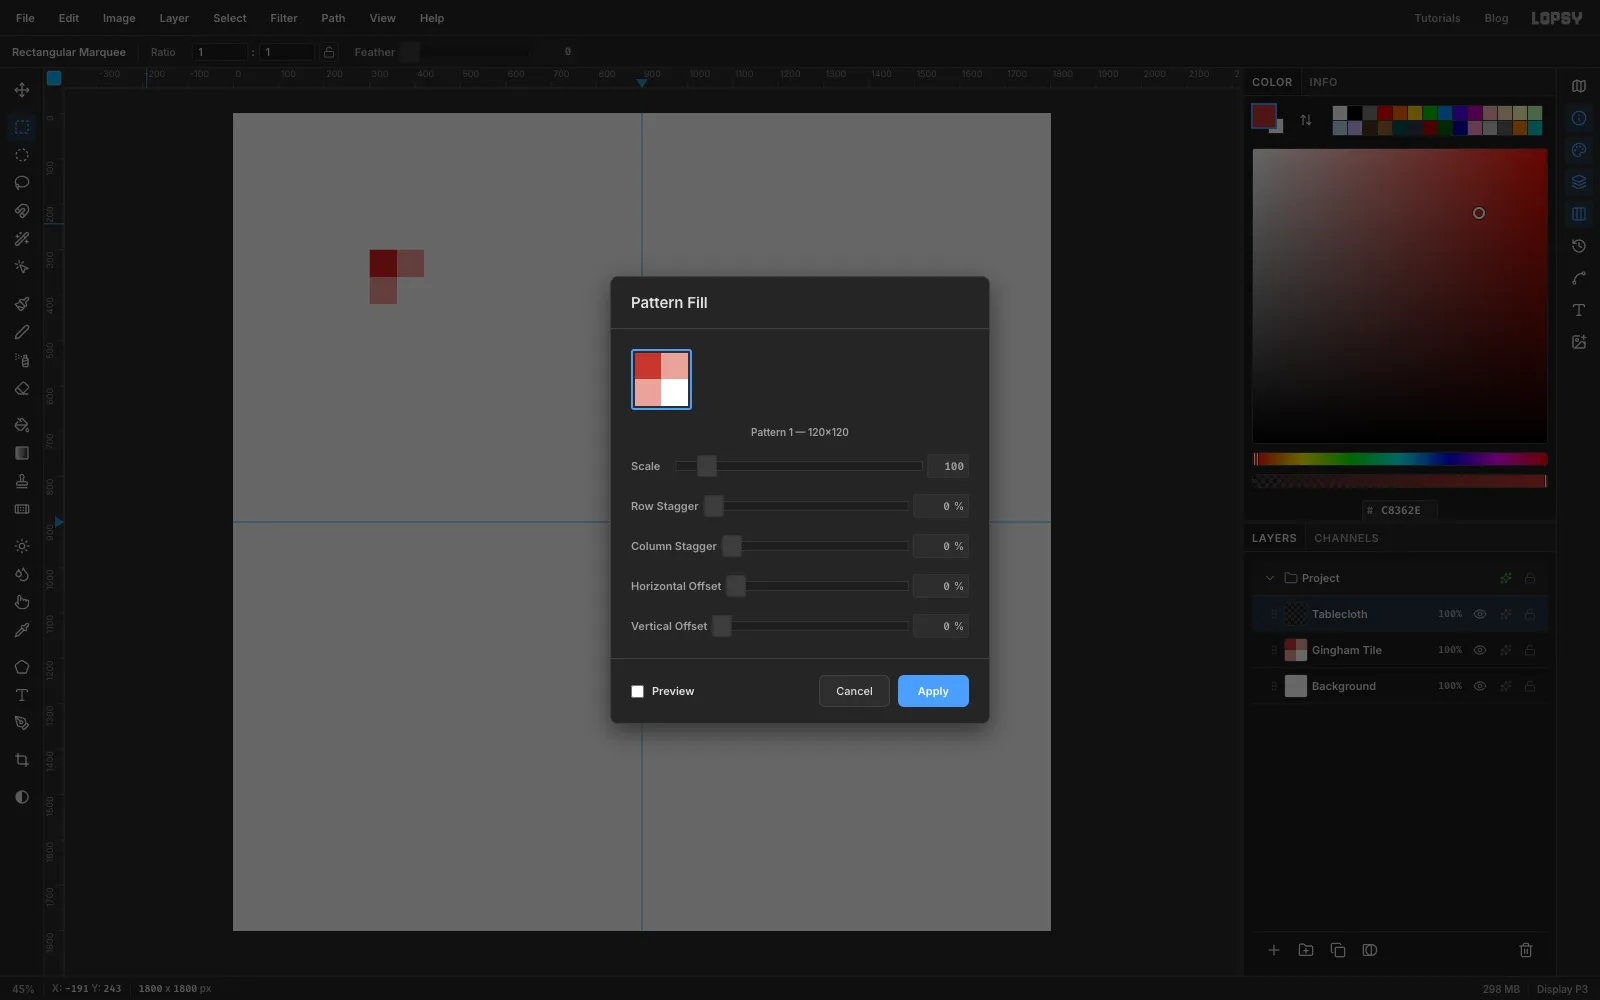
300, 300to420, 420) and choose Edit → Define Pattern.Click Add Layer at the bottom of the Layers panel and rename the new layer
Tablecloth. Press Cmd+D to deselect, then choose Edit → Fill with Pattern…. Your tile is already picked, so leave Scale at100and click Apply.Select the Gingham Tile layer and delete it with the trash button in the Layers panel.
-
Soften the cloth
The cloth is only a backdrop, so it shouldn't shout. Select Tablecloth and:
- Choose Filter → Hue/Saturation…, set Saturation to
-40and click Apply. - Choose Filter → Gaussian Blur…, set Radius to
2, and click Apply. It now reads like a cloth slightly out of focus behind the label.
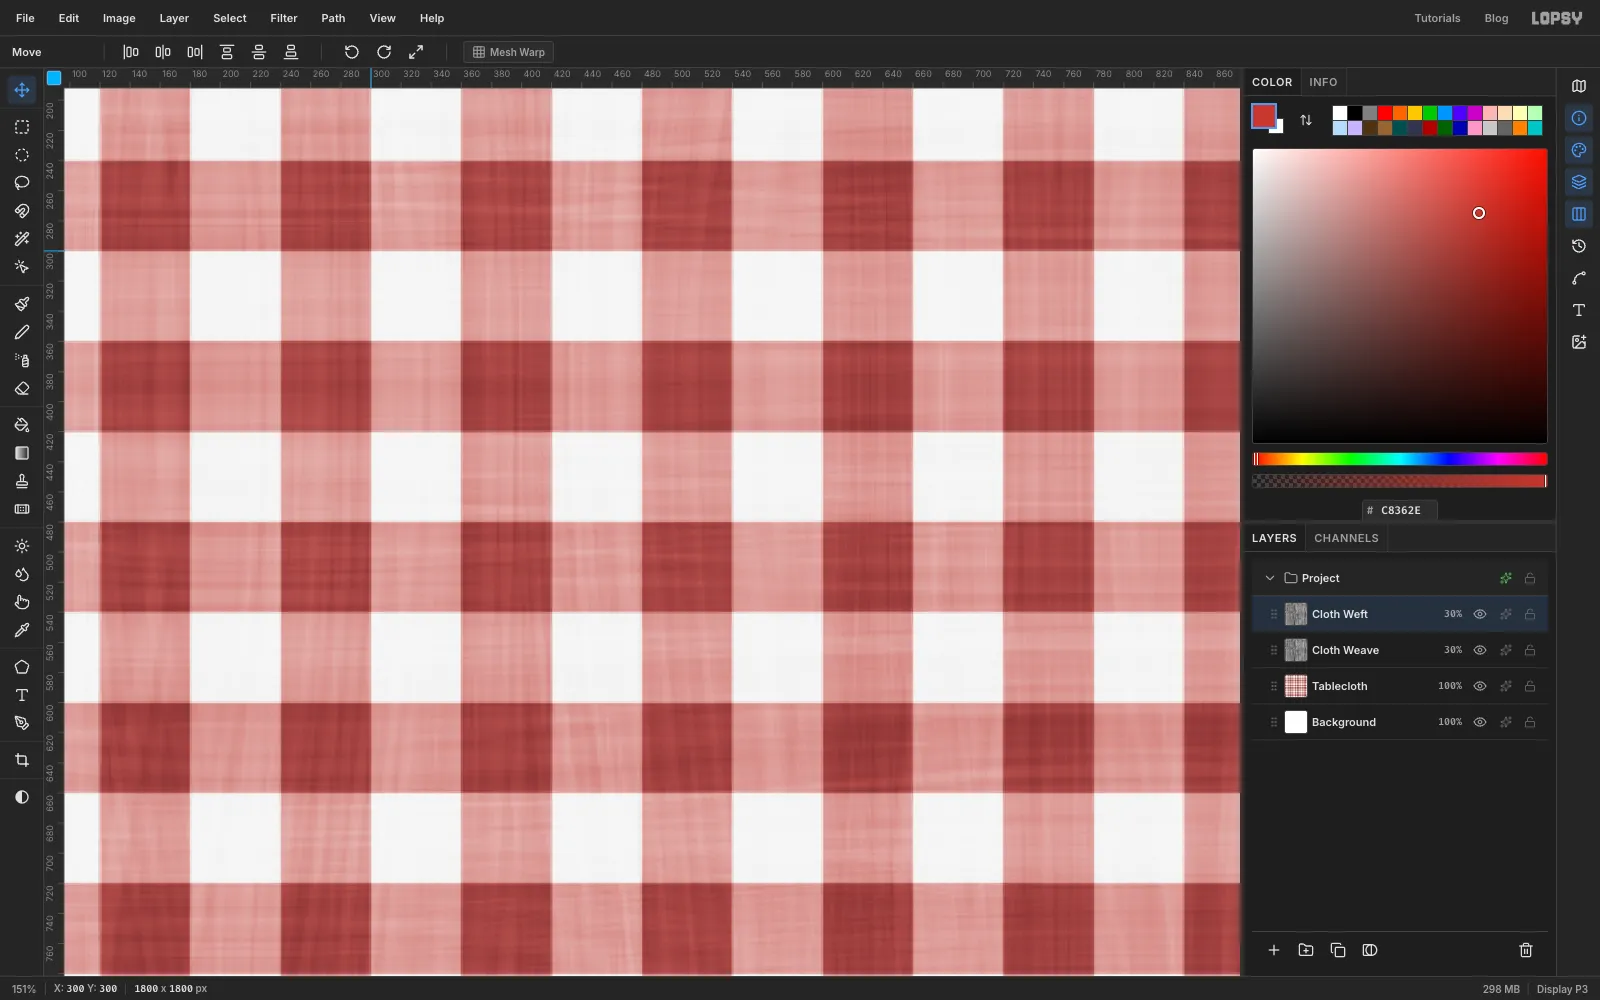
Now add a weave. Add a layer named
Cloth Weaveand choose Filter → Fibers… with Variance20and Strength40. Fibers uses the foreground colour, which is still the dark red. Open the layer's effects drawer with the ✦ button on its row, set Blend to Overlay, and lower the layer's opacity to30%.Fibers only runs one way. To get crossing threads:
- Choose Layer → Duplicate Layer, click the copy's row and rename it
Cloth Weft. - Press V for the Move tool and click Rotate 90° CW in the options bar.
- Choose Filter → Hue/Saturation…, set Saturation to
-
Stamp the scalloped edge
Make sure Cloth Weft is selected, click New Group and rename the group
Label. Add a layer inside it namedLabel Base.Choose the Elliptical Marquee and click once without dragging. In the Elliptical Selection dialog, enter From
170, 170and To1630, 1630. That's a circle of radius 730 around the centre. Fill it with cobalt and deselect.Now for the scallops. Press B for the Brush and set Size
150and Hardness100. Click Radial Symmetry in the options bar and set Segments to32. The symmetry centre starts in the middle of the canvas. Click once on the top edge of the disc, where it meets the vertical guide: one click paints 32 evenly spaced scallops.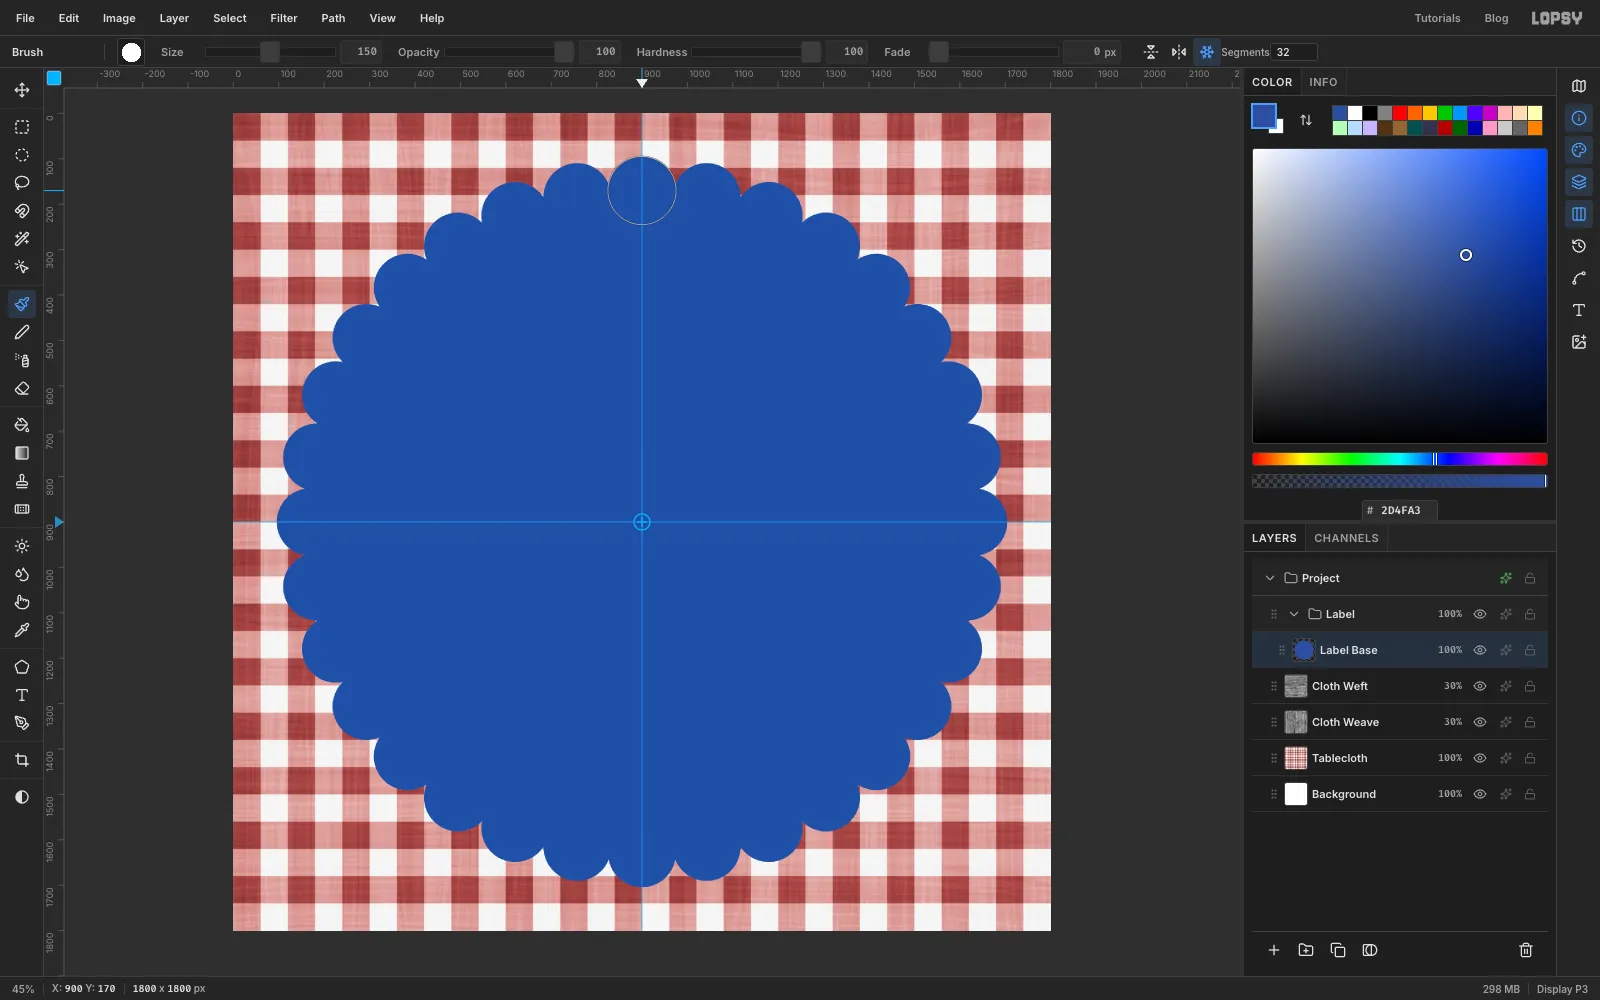
-
Add stitches and the cream ring
Add a layer named
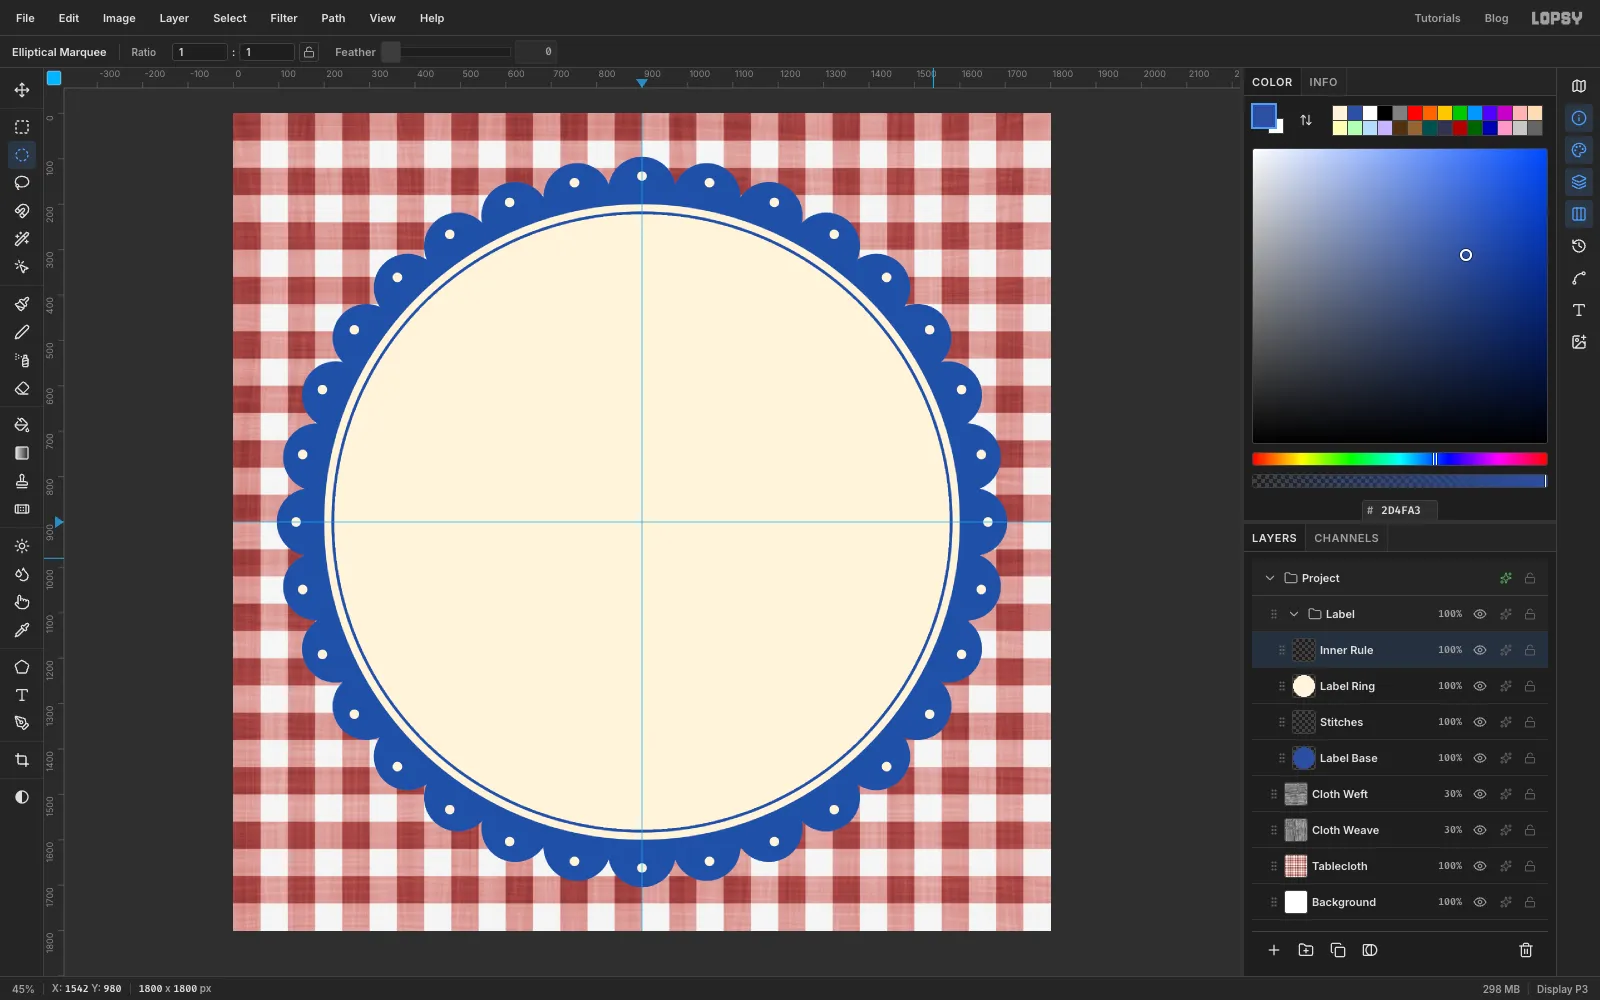
Stitches. Set the foreground to cream , set the brush Size to22and click once in the upper half of the top scallop. The symmetry puts a dot in every scallop. Click Radial Symmetry again to turn it off.Add a layer named
Label Ring. Make an exact elliptical selection from200, 200to1600, 1600and fill it with cream.For the thin rule:
- Add a layer named
Inner Rule. - Make an exact elliptical selection from
216, 216to1584, 1584and fill it with cobalt. - Choose Select → Shrink, enter
6and click Apply. - Press Delete, then Cmd+D.
You're left with a crisp 6 px ring.
- Add a layer named
-
Paint the sky
Collapse the Label group, select its row and click New Group. Rename it
Scene, then add a layer inside namedSky.Make an exact elliptical selection from
394, 394to1406, 1406. Choose the Gradient tool, open Advanced… and set two stops, and . Drag from the top of the circle down to the horizontal guide, then press Cmd+D.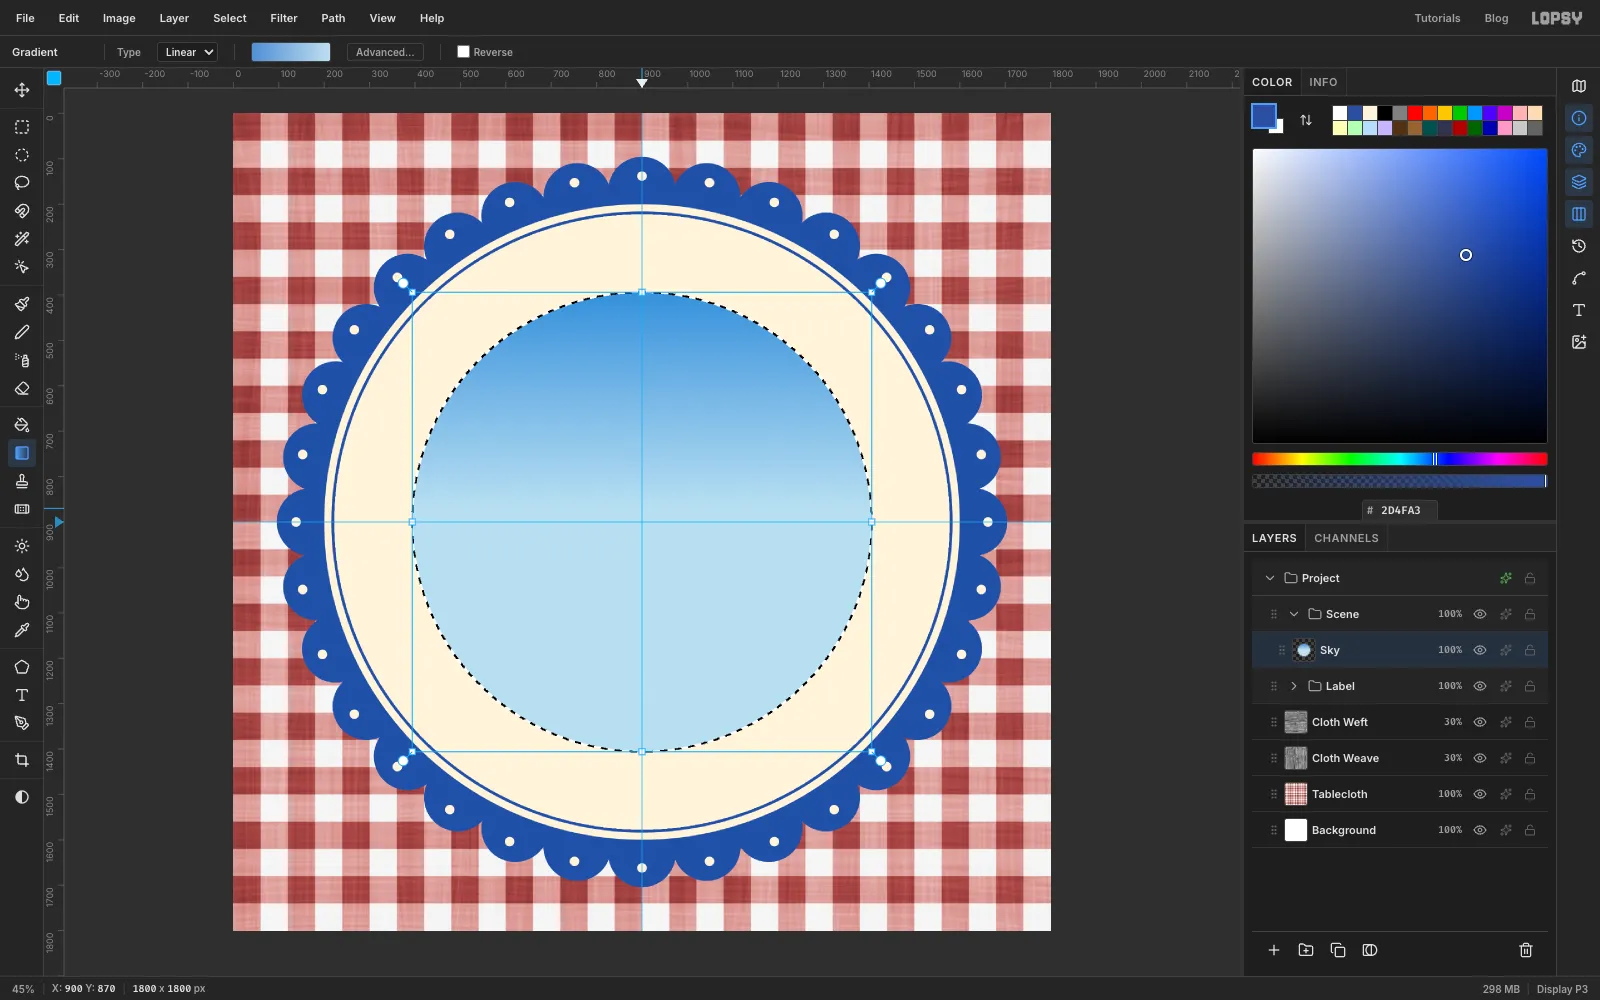
-
Make a folk sun with Sunburst
Add a layer named
Sun Raysand set the foreground to orange . Choose Filter → Sunburst… and set:- Rays
10 - Length
6.5 - Width
55 - Taper
100 - Fade, Softness, Rotation and Jitter all
0 - Center X
37and Center Y33
Click Apply. Then switch the foreground to yellow , open Sunburst again and change only Rotation to
18. The second set of rays lands in the gaps, so the colours alternate.Add a layer named
Sun. Make an exact elliptical selection from604, 532to728, 656and fill it with to cover the middle, then deselect.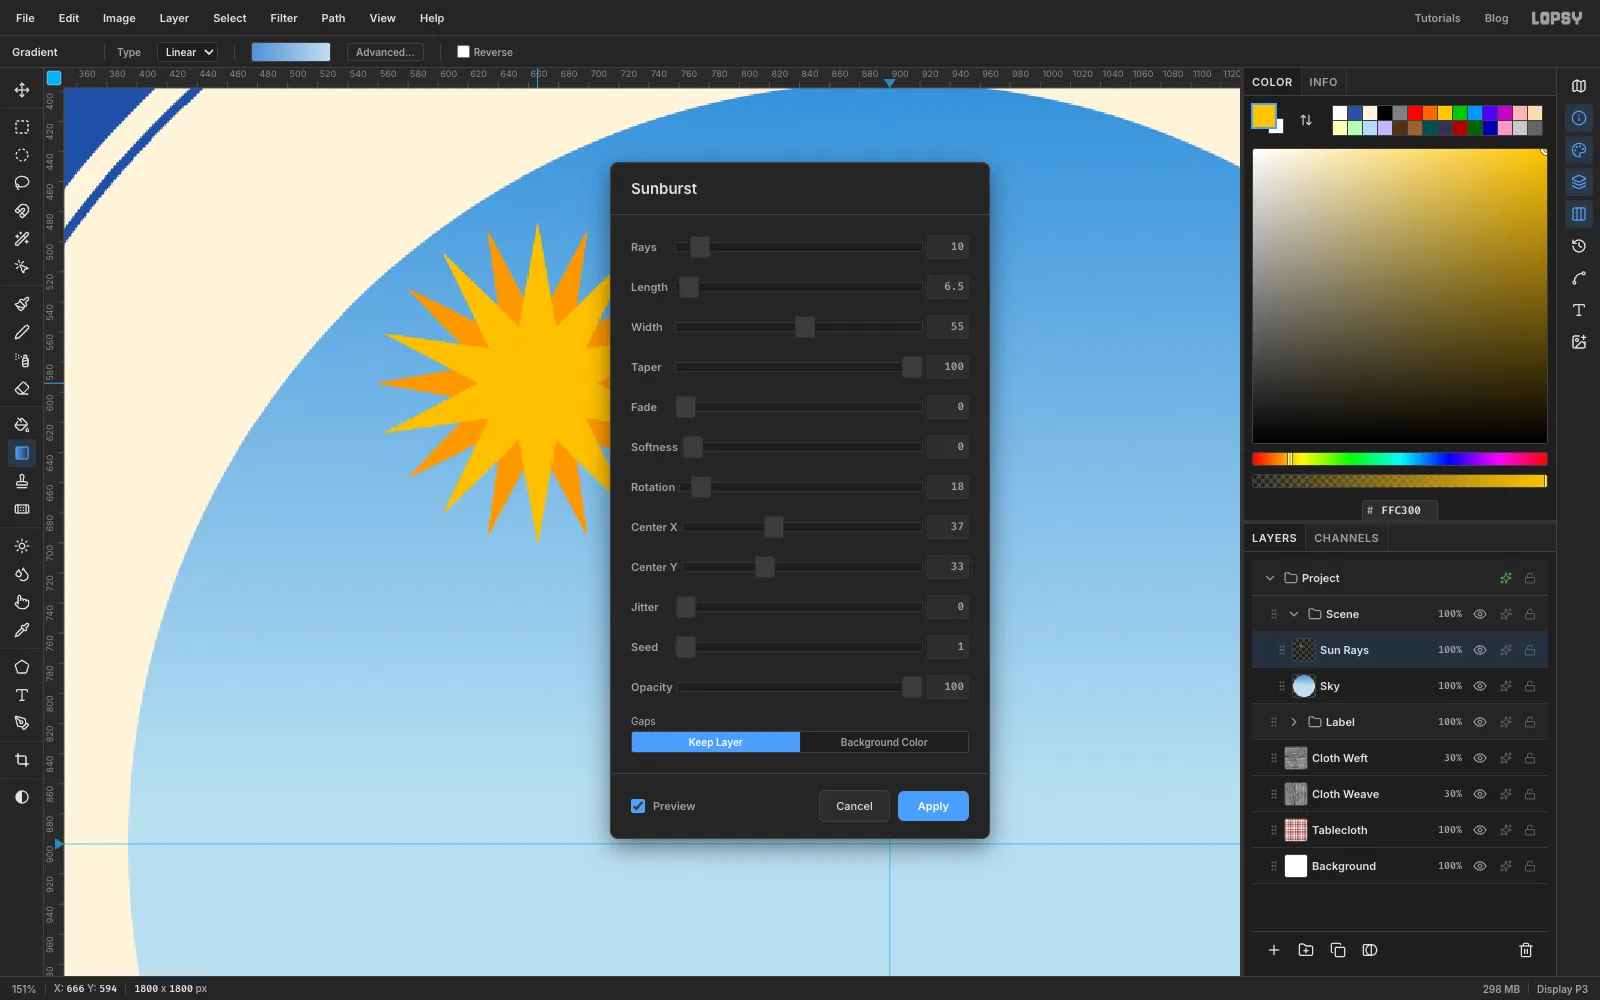
- Rays
-
Build the clouds from ellipses
Add a layer named
Clouds. With the Elliptical Marquee, drag a wide oval for the base of the cloud, then hold Shift and drag three or four rounder ovals across its top to add bumps. Fill the joined selection with white. Make a second, smaller cloud lower down and to the right the same way.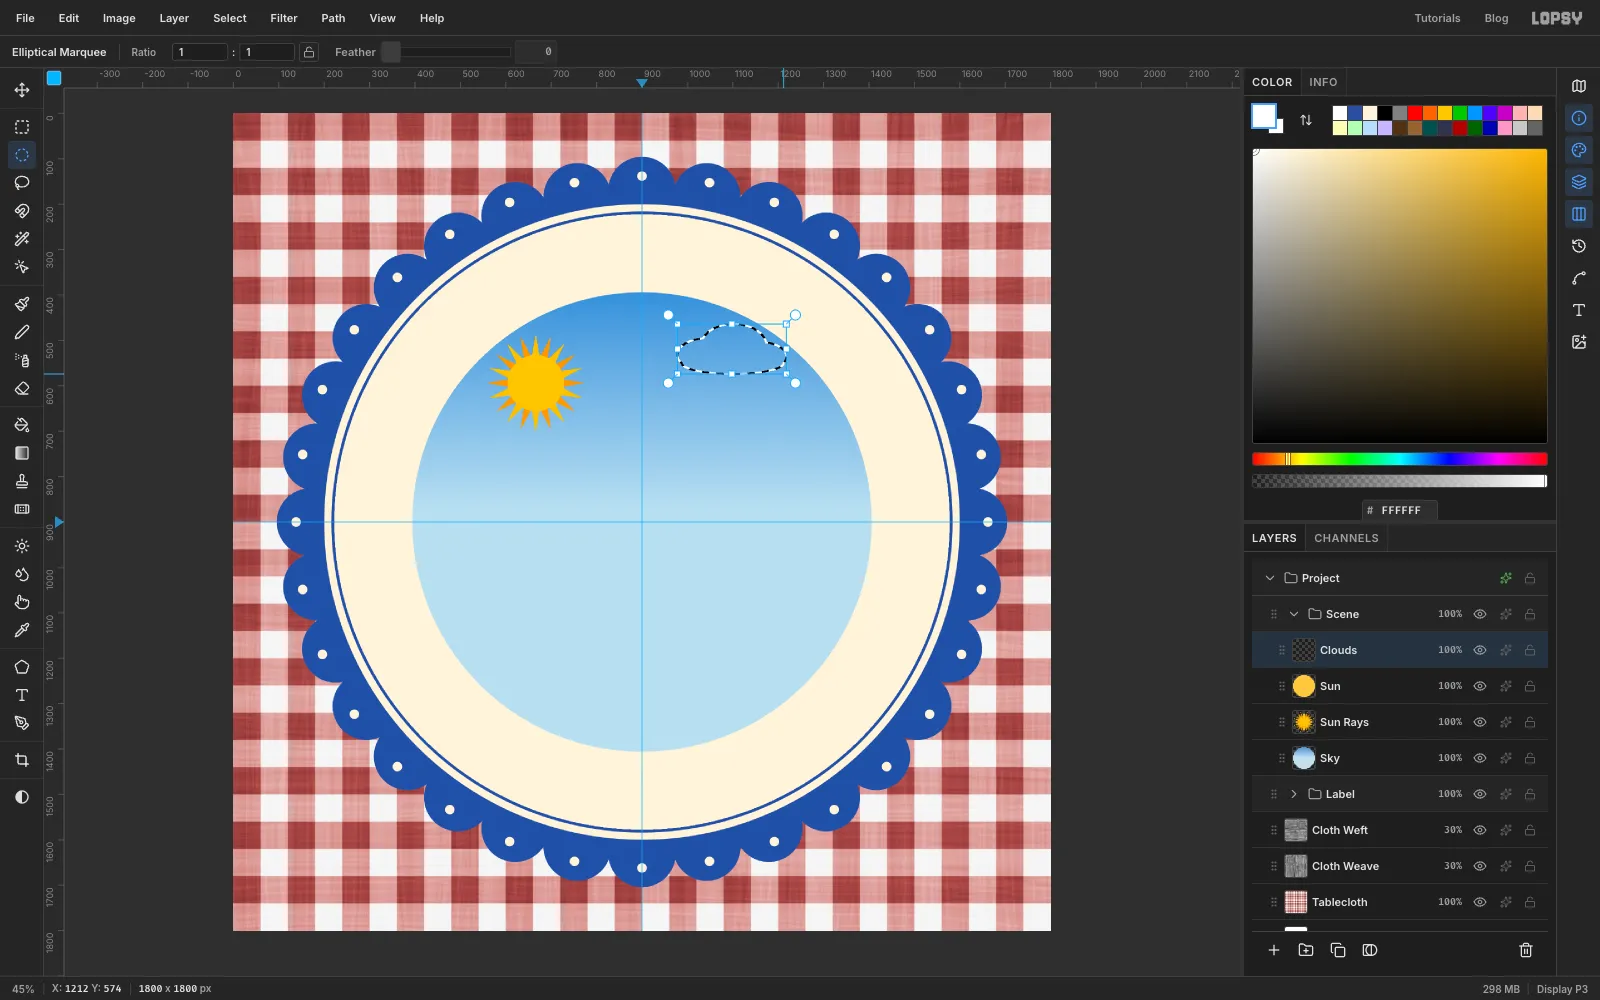
-
Lasso the far hills
Add a layer named
Far Hills. With the Lasso (L), trace a slow rolling ridge across the circle, just above the horizontal guide. Close it well below the guide. Don't worry about the parts outside the circle: the group mask will hide them later. Fill with .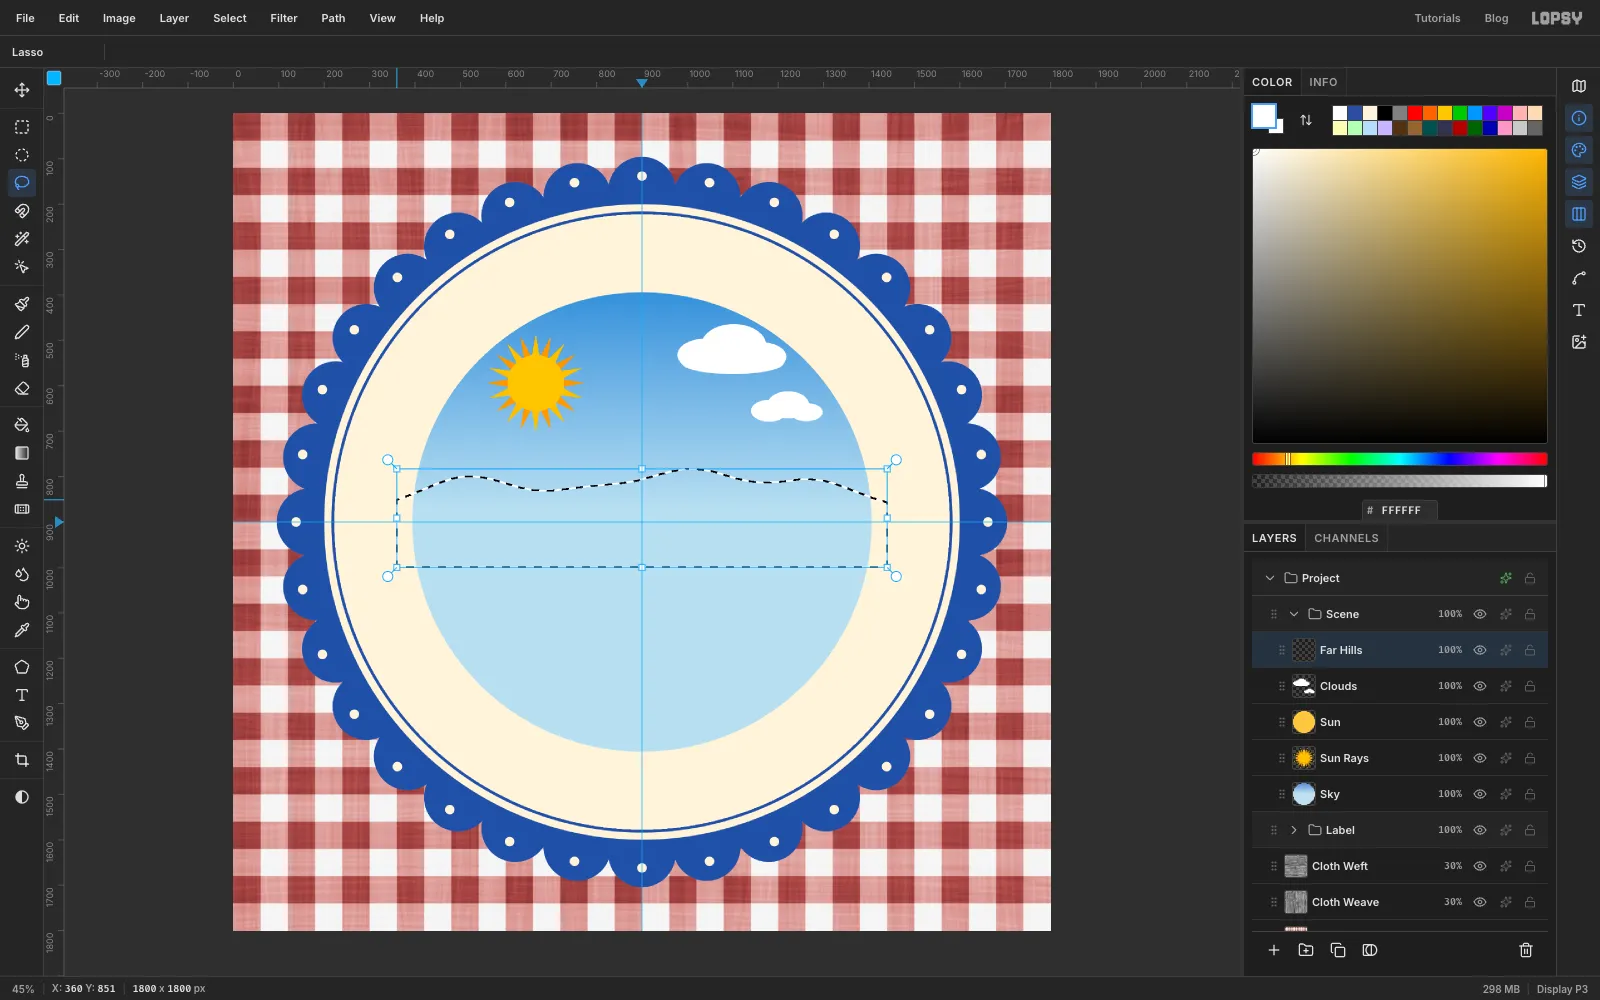
-
Paint one tree, then paste copies
Add a layer named
Tree. On the left of the ridge, draw the trunk with the brush:- Set Size
14and colour . - Click at the top of the trunk, then Shift-click about 70 px below it.
Then select a circle about 80 px across over the top of the trunk and fill it with .
Draw a rectangle round the tree and press Cmd+C, then Cmd+V. The copy is pasted in place on a new layer. Rename it
Tree 2. Draw a marquee tightly round it, switch to the Move tool, and hold Cmd (it keeps the tree's proportions) while you drag the bottom-right handle in, until the tree is about three-quarters of its size. Press Cmd+D, then drag it just right of the first tree and a little lower, so it looks further away.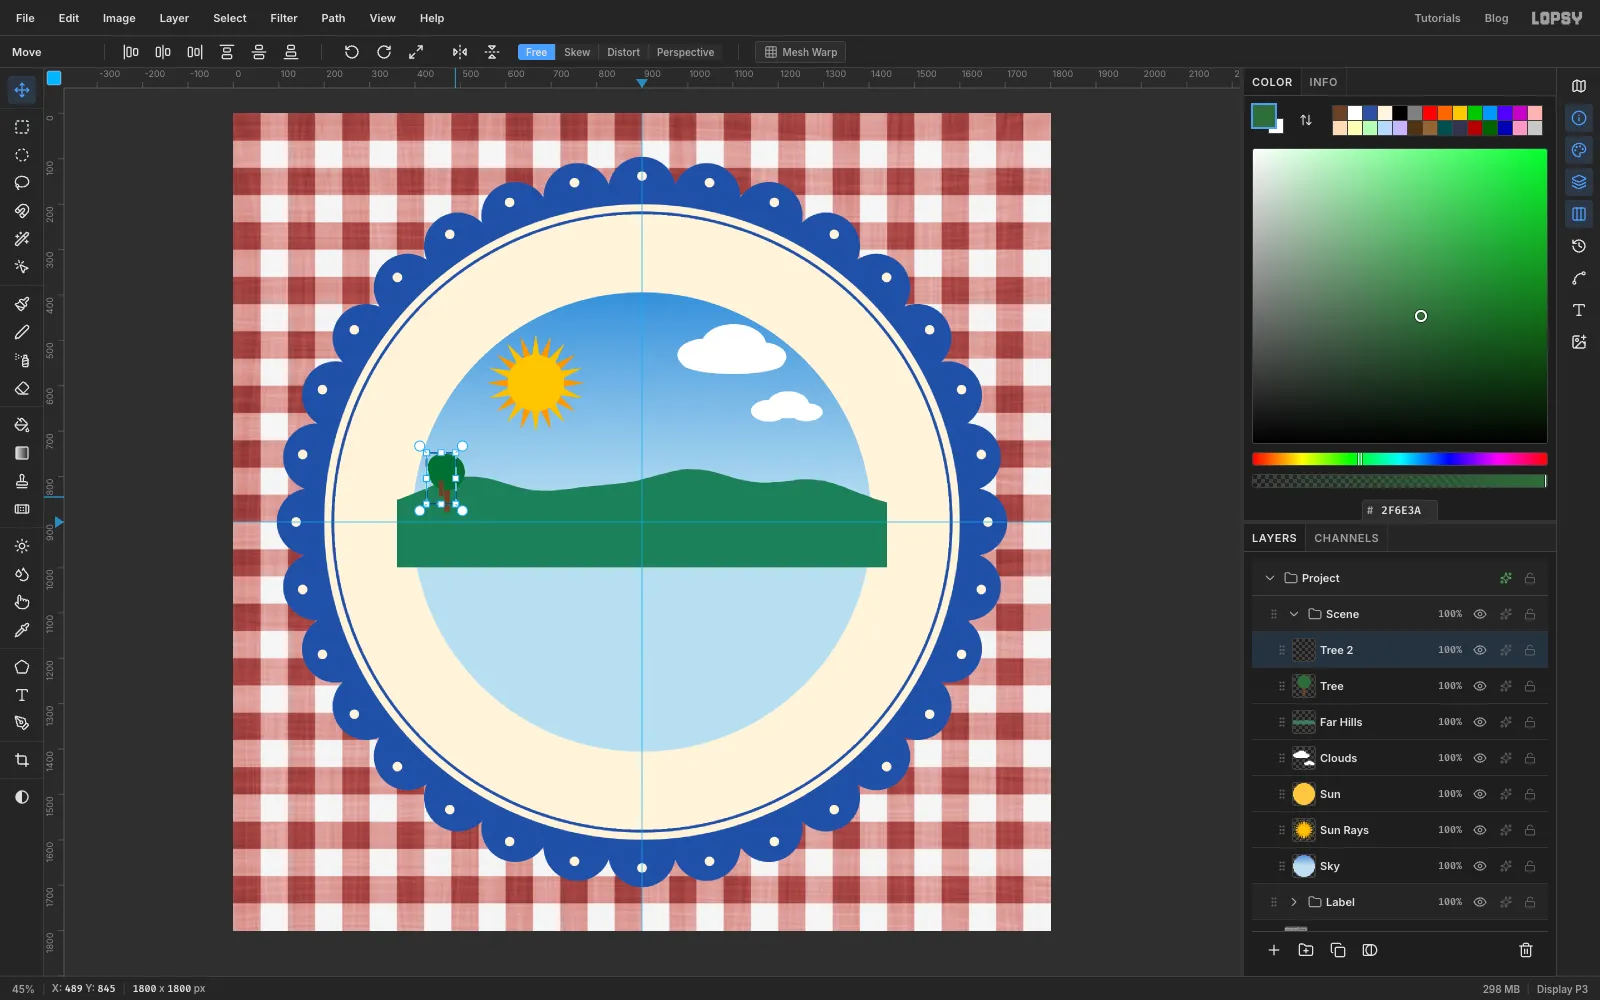
- Set Size
-
Tilt a third tree
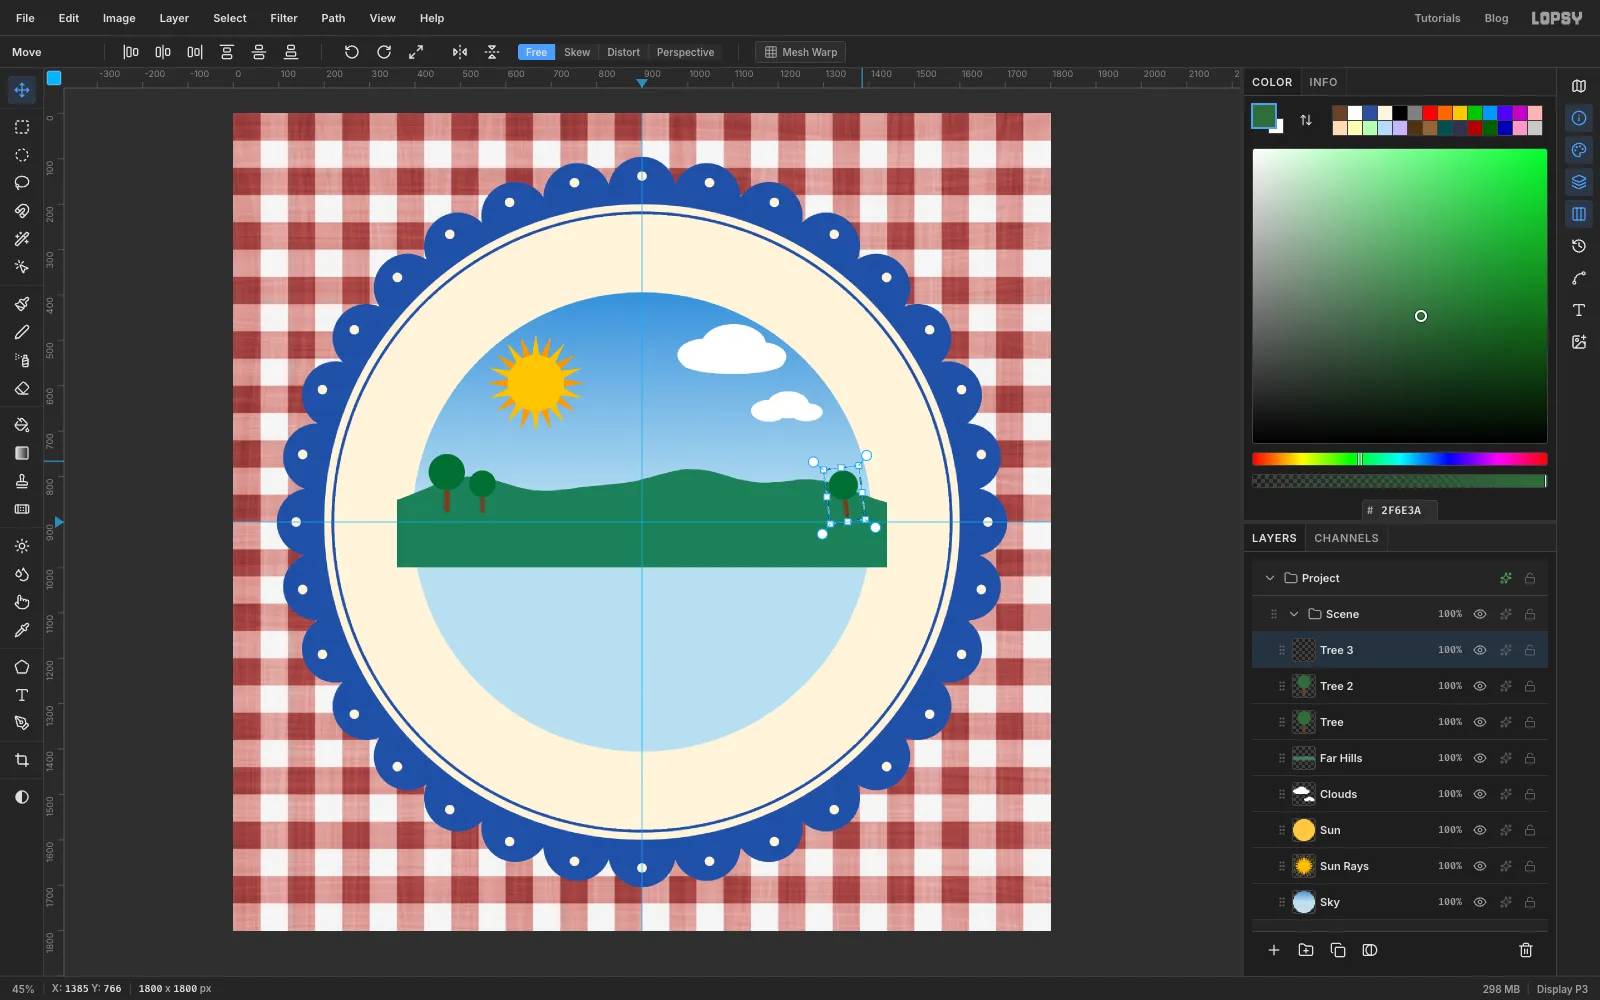
Paste again, rename the layer
Tree 3, scale it to about 80% and drag it to the right end of the ridge. Naive painters rarely stand everything straight, so give it a lean:- Draw a marquee round it.
- With the Move tool, hover just outside the top-right corner until the cursor turns into a curved arrow.
- Drag up a little to rotate it about 7° to the left.
- Press Cmd+D.
-
Plough the fields along the hills
Add a layer named
Mid Hills. Lasso one wide band in front of the ridge whose top rises into two round hills, the right one taller. Fill with .Add a layer named
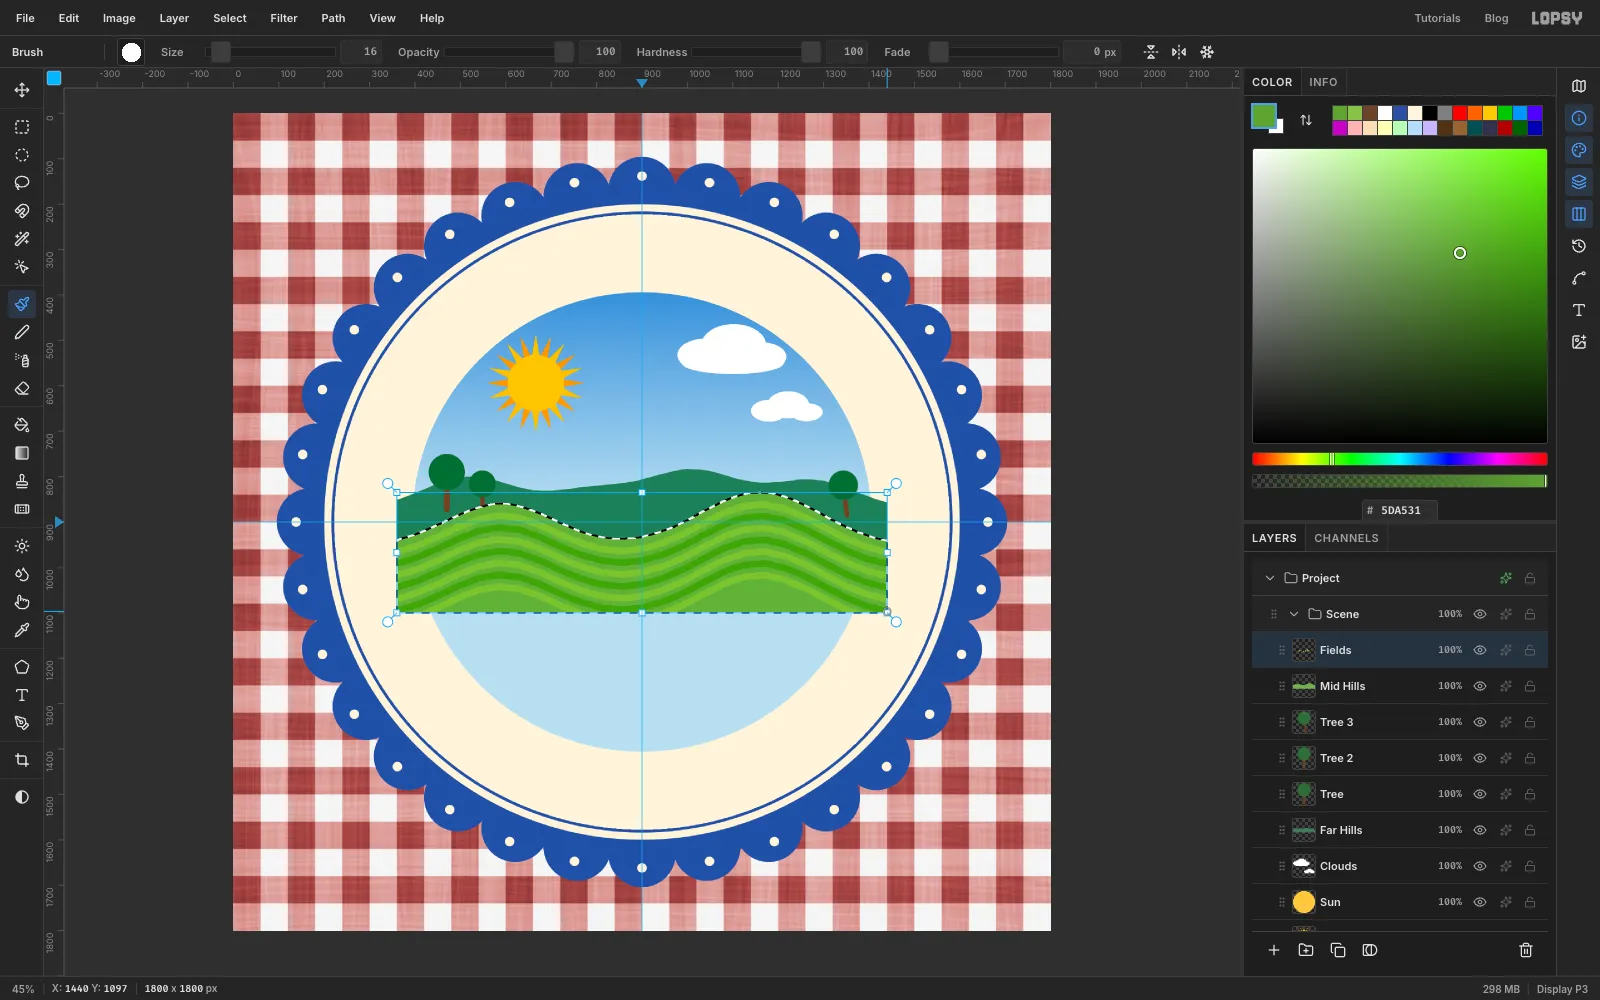
Fields. Cmd-click the Mid Hills thumbnail to select its shape, then click the Fields row. Set the brush Size to16. Paint rows that follow the hill tops:- Drag a wavy line that follows the hilltop, about a brush-width below it, in .
- Paint the next row the same gap lower in .
- Keep alternating the two greens all the way down.
The selection keeps every stroke inside the hills. Press Cmd+D when you're done.
-
Build the barn
Add a layer named
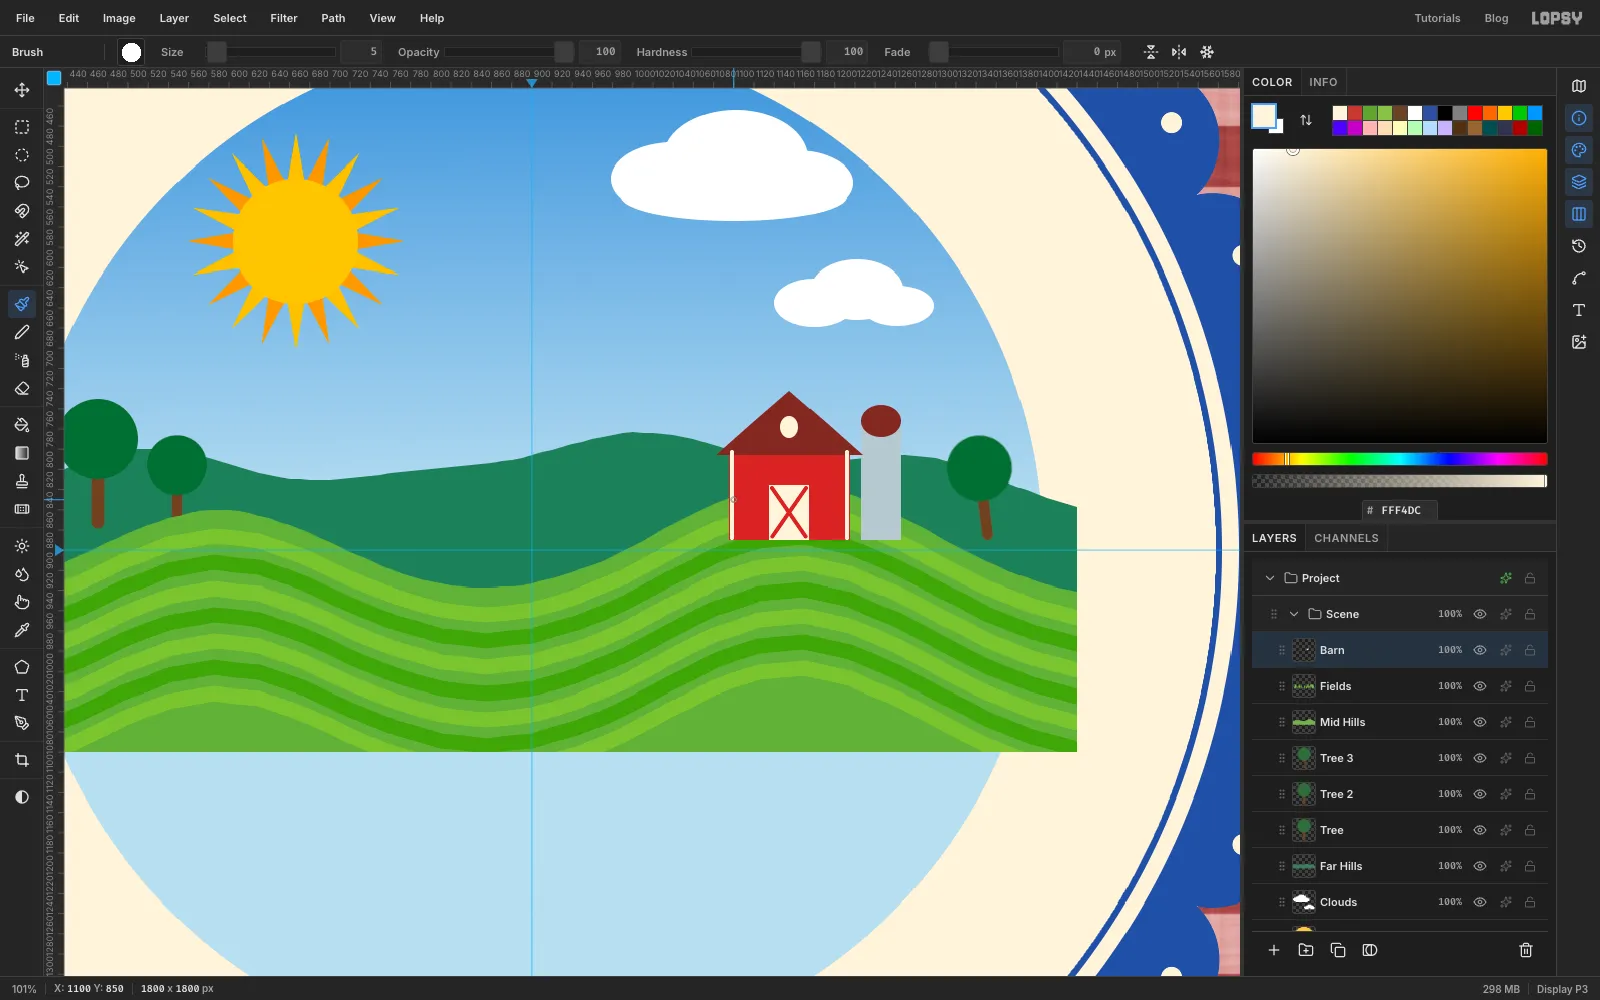
Barnand build it on the right hilltop:- Silo: a rectangle about 40 × 120 px in pale grey , with a dark red oval on top.
- Barn: a rectangle about 120 × 90 px in red beside it.
- Roof: lasso a triangle over the barn and fill it with .
- Door and loft window: a cream rectangle for the door, and a small cream oval in the gable.
- Trim: with a Size
5brush, click one door corner and Shift-click the opposite one, then do the same with the other pair of corners to make a red X. Do the same in cream for a trim line down each side of the barn.
-
Bring a tree to the front
Paste the tree one more time and rename the layer
Tree 4. This one is closest to us, so it should be the biggest tree in the picture. Draw a marquee round it, then with the Move tool Cmd-drag a corner handle outwards until it's a little larger than the first tree. Then place it in front of the left hill, between the far trees and the middle of the scene.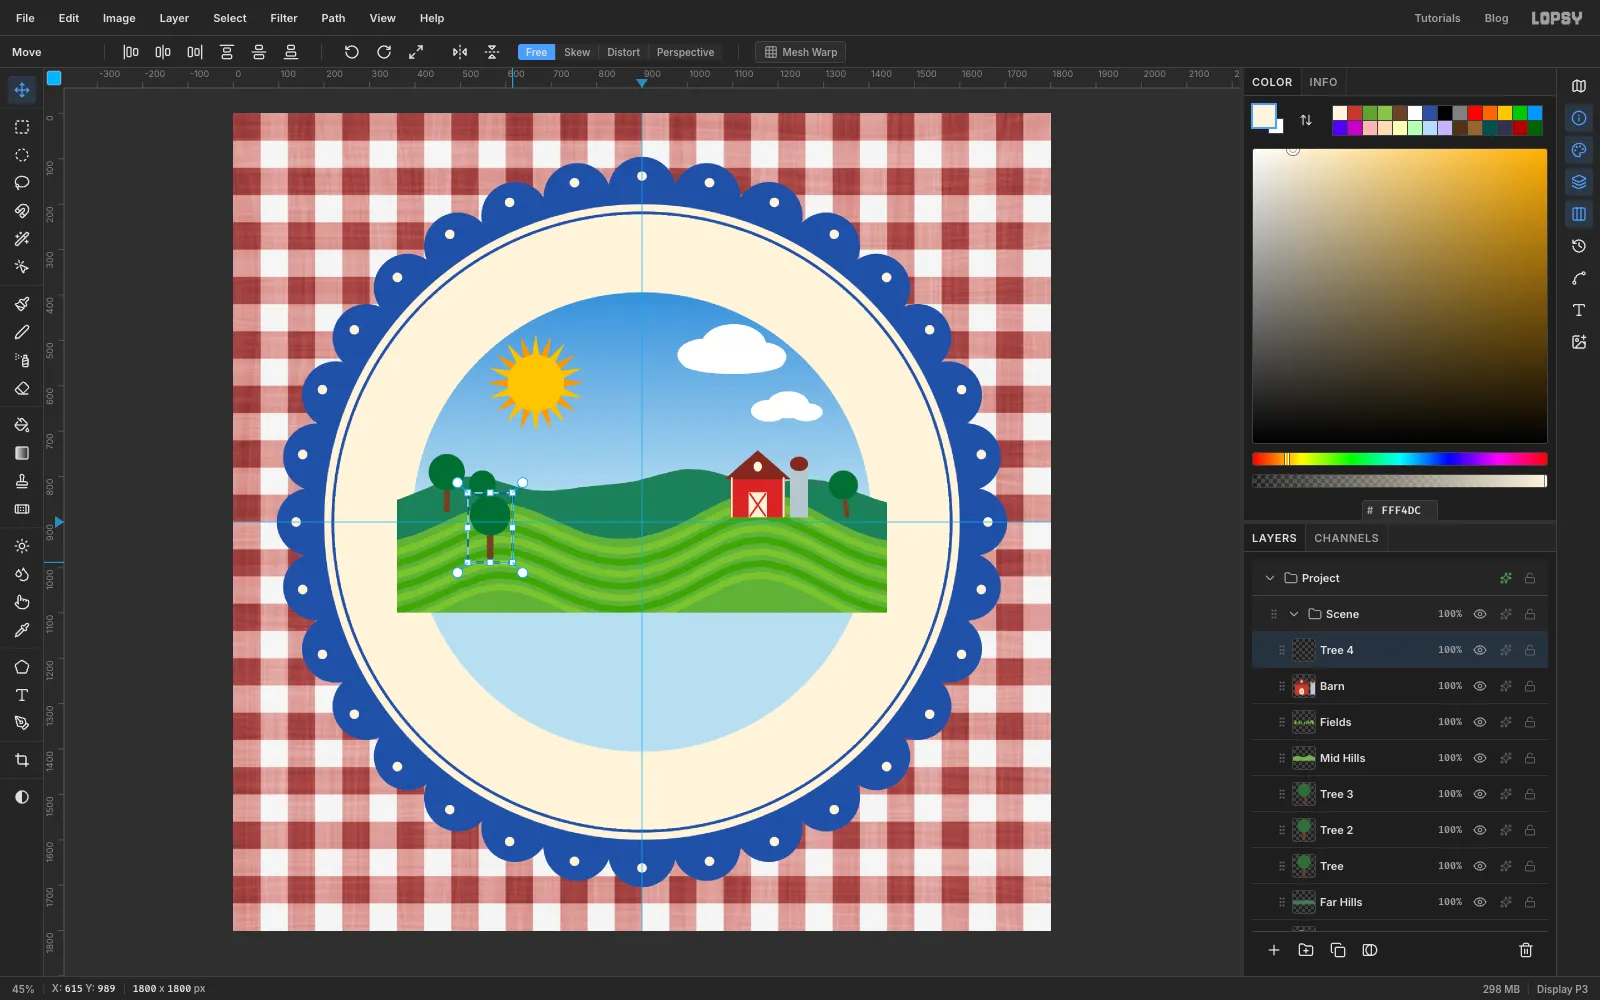
-
Add the meadow and the lane
Add a layer named
Meadow. Lasso a gentle front hill that covers the bottom half of the circle, and fill it with .Add a layer named
Laneabove it. Lasso a path that starts as a thin line at the barn door and widens as it winds down to the lower right, then fill it with pale tan .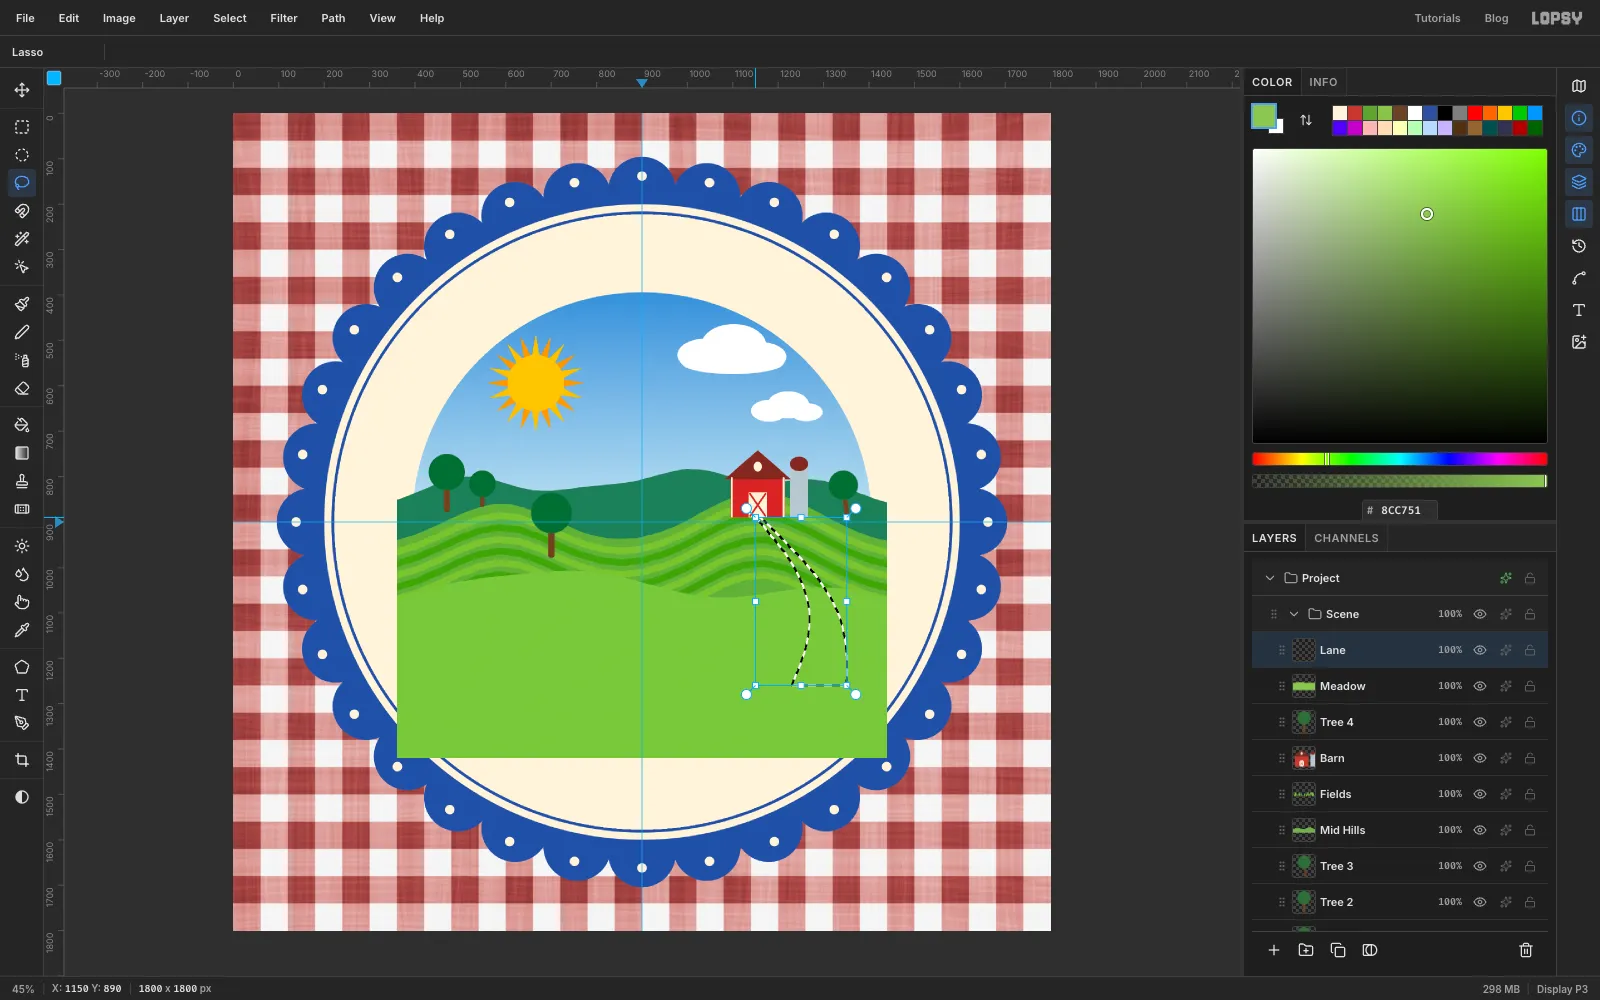
-
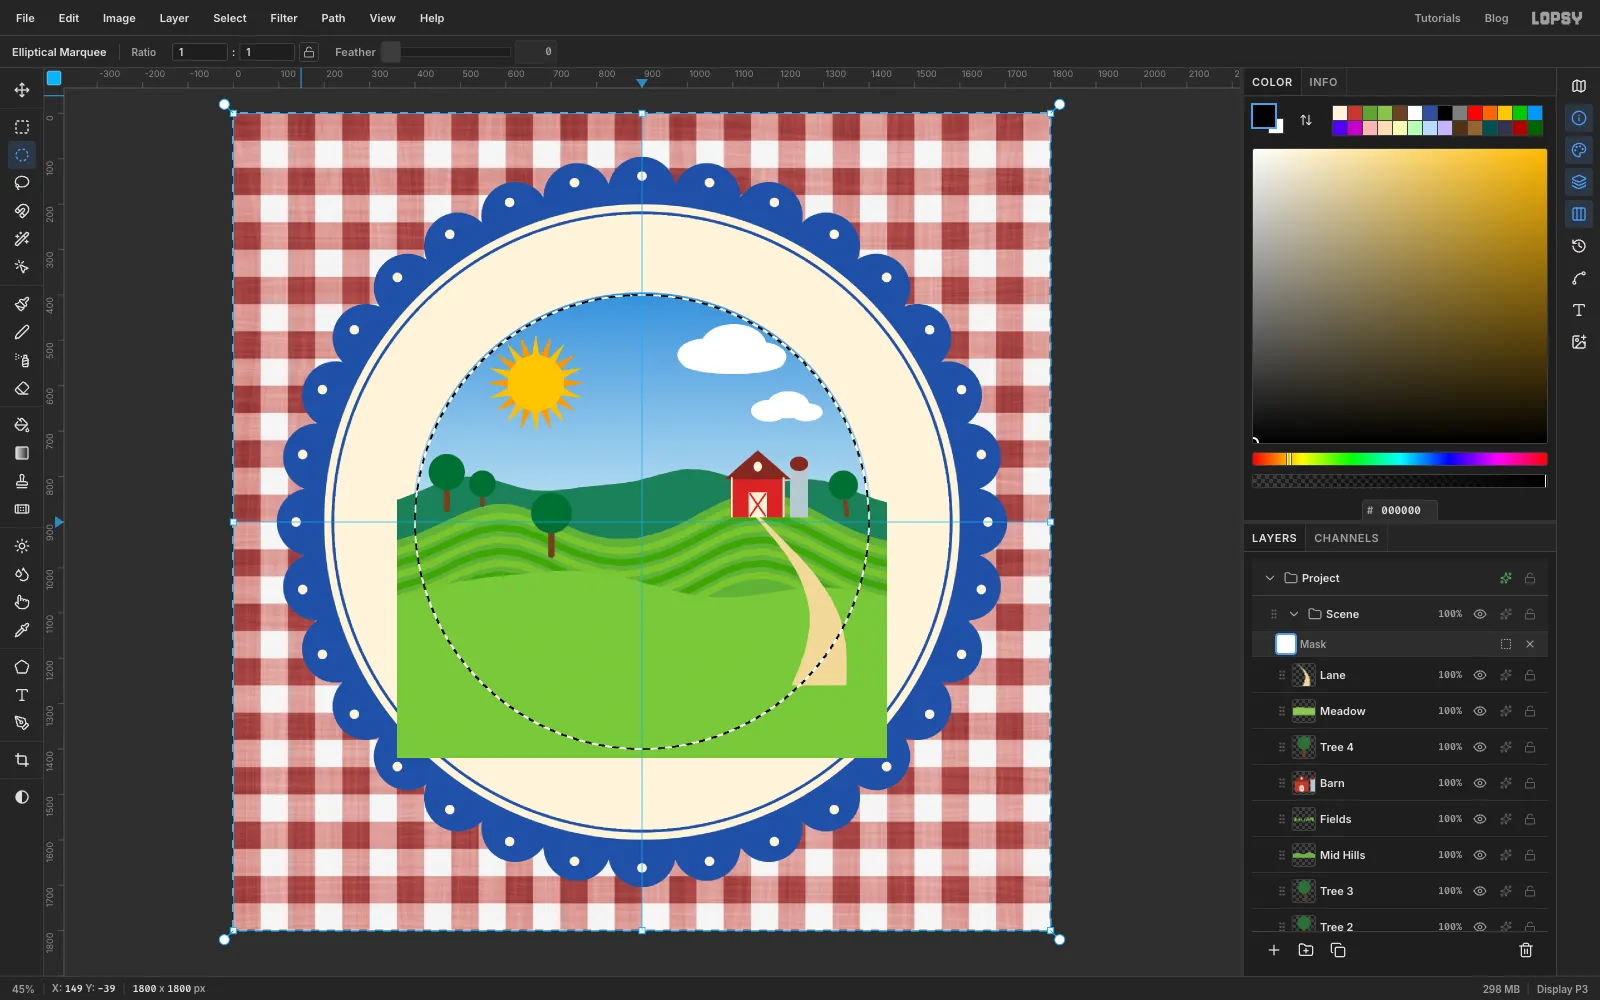
Clip the scene to a circle with a group mask
The hills and sky spill past the circle, so mask the whole group at once:
- Select the Scene group row and click Add Mask.
- Click the new mask thumbnail next to the Scene row to edit the mask.
- Make an exact elliptical selection from
400, 400to1400, 1400, then choose Select → Inverse. - Set the foreground to black and choose Edit → Fill.
- Deselect, then click the Scene row to leave mask editing.
Everything in the group, including layers you add later, is now clipped to a 1000 px circle.
-
Lasso the goat's silhouette
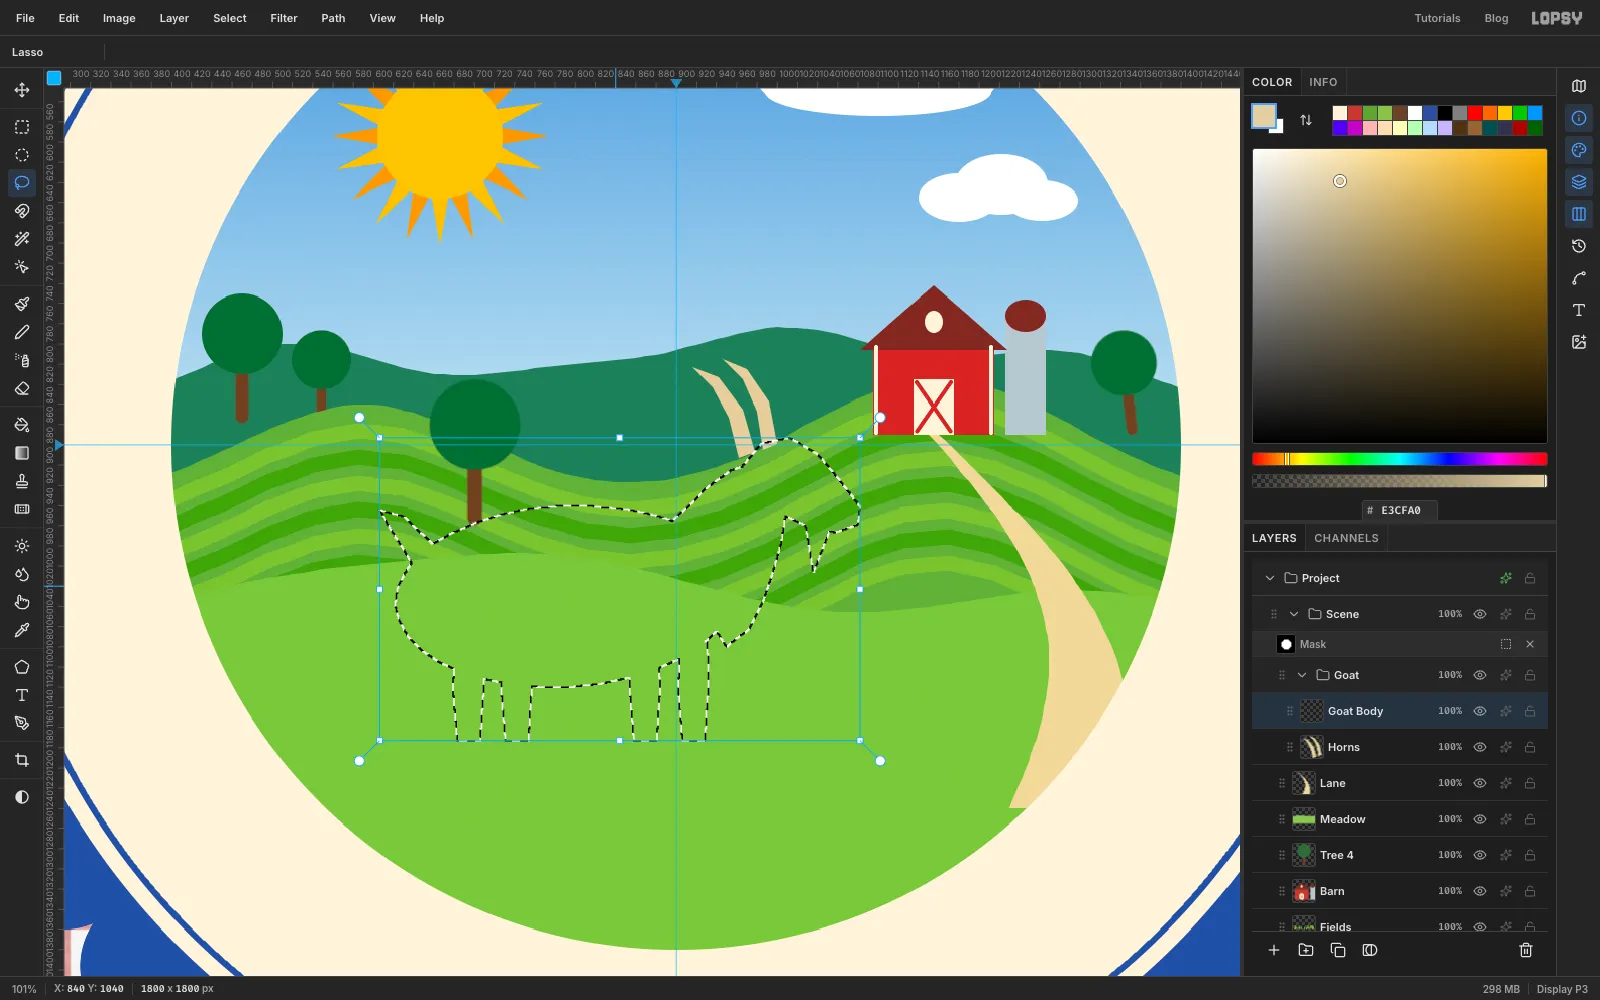
Select the Lane row and click New Group. Rename the group
Goat. Add a layer namedHornsand lasso two long curved horns sweeping back from where the head will be. Fill them with .Add a layer named
Goat Body. Build the white silhouette from simple pieces with the Lasso, holding Shift for each piece after the first so they add together:- a big oval for the body
- a thick neck rising to the right
- a wedge-shaped head pointing down and right
- four straight legs
- a little tuft of tail
- a beard under the chin
Fill with white.
-
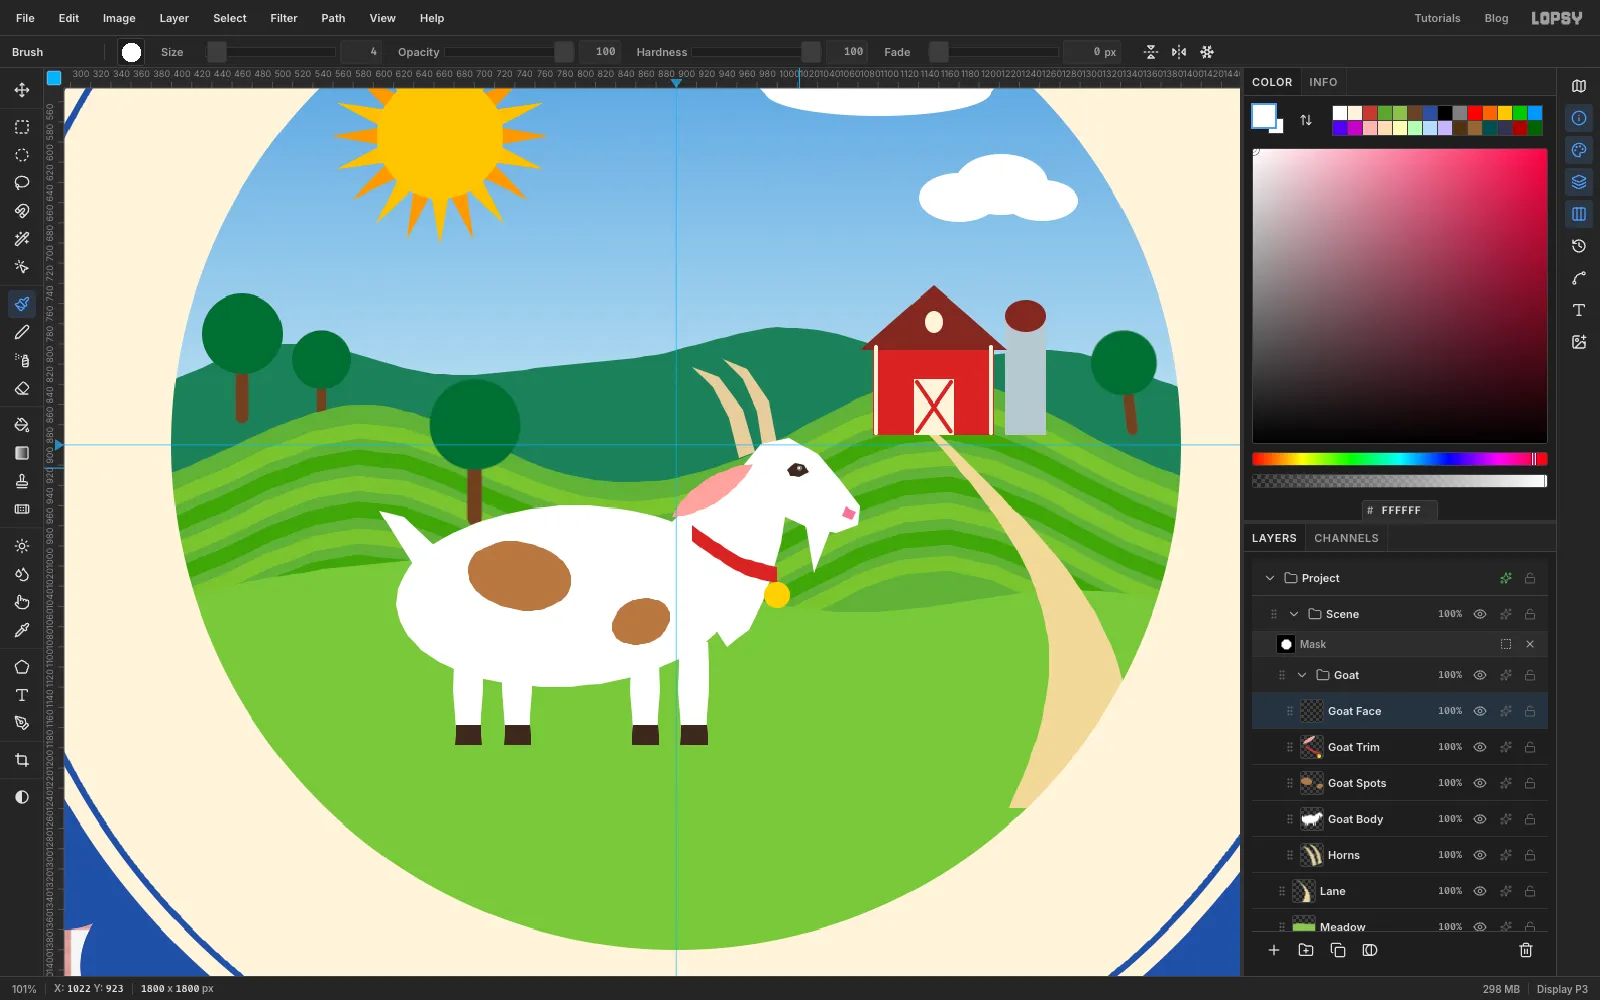
Add spots, ear, collar and face
Add three more layers:
Goat Spots: two soft brown ovals on the body.Goat Trim:- a drooping leaf-shaped ear in pink
- a red collar band across the neck
- a small yellow circle for the bell, hanging at the throat
Goat Face:- an almond eye and four hooves in ink
- a pink nose
- one click of a Size
4white brush for the glint in the eye
If the neck and body leave a notch at the chest, lasso a small wedge on Goat Body and fill it white to smooth it.
-
Trim the collar to the neck
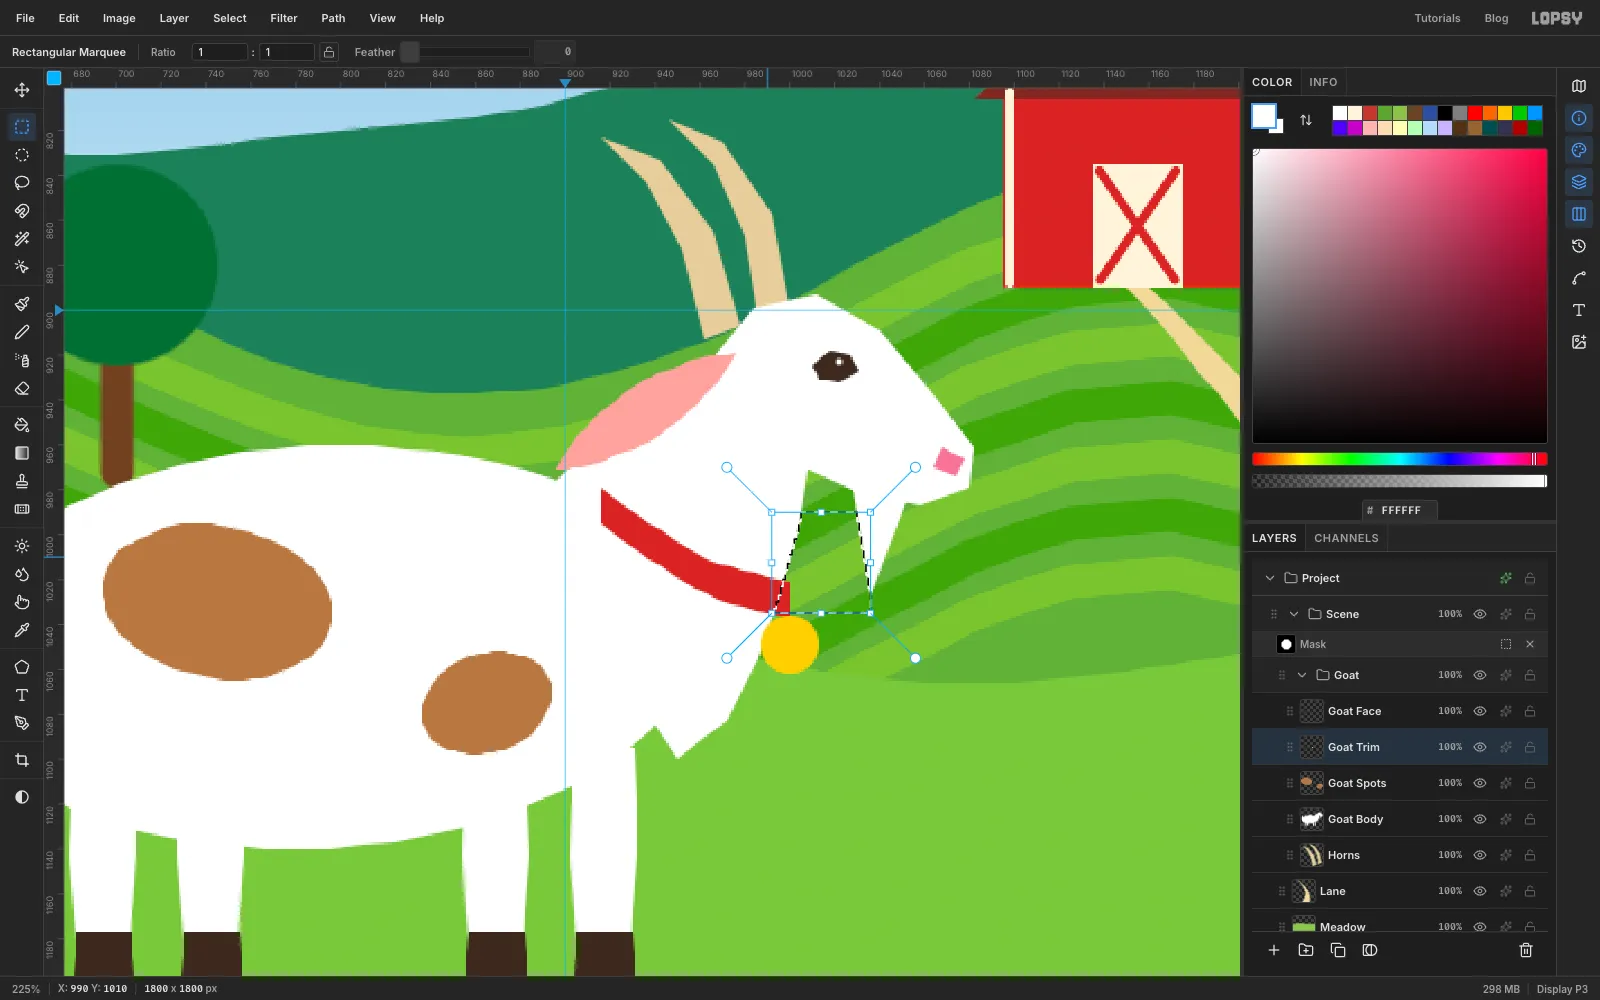
The collar's front end pokes out past the neck. To trim exactly that bit:
- Select Goat Trim and Cmd-click the Goat Body thumbnail.
- Choose Select → Inverse, so everything outside the goat is selected.
- Hold Shift+Alt and drag a rectangle round the front end of the collar. This keeps only where the two selections overlap.
- Press Delete and Cmd+D.
The bell isn't touched because it's outside the rectangle.
-
Plant the tulips
Collapse Goat, select its row and click New Group. Rename the group
Flowers, then add a layer namedTulips Left.For each of four tulips:
- Paint a stem with a Size
9brush in . Click the base, then Shift-click the top. - Lasso two narrow leaves in .
- Lasso a crown-shaped head with three points in red , pink or yellow .
Vary the heights. Then select the Goat group's row, add a
Tulips Rightlayer and plant four more tulips on the other side of the goat. Use different heights and a different colour order, so the clusters don't look mirrored.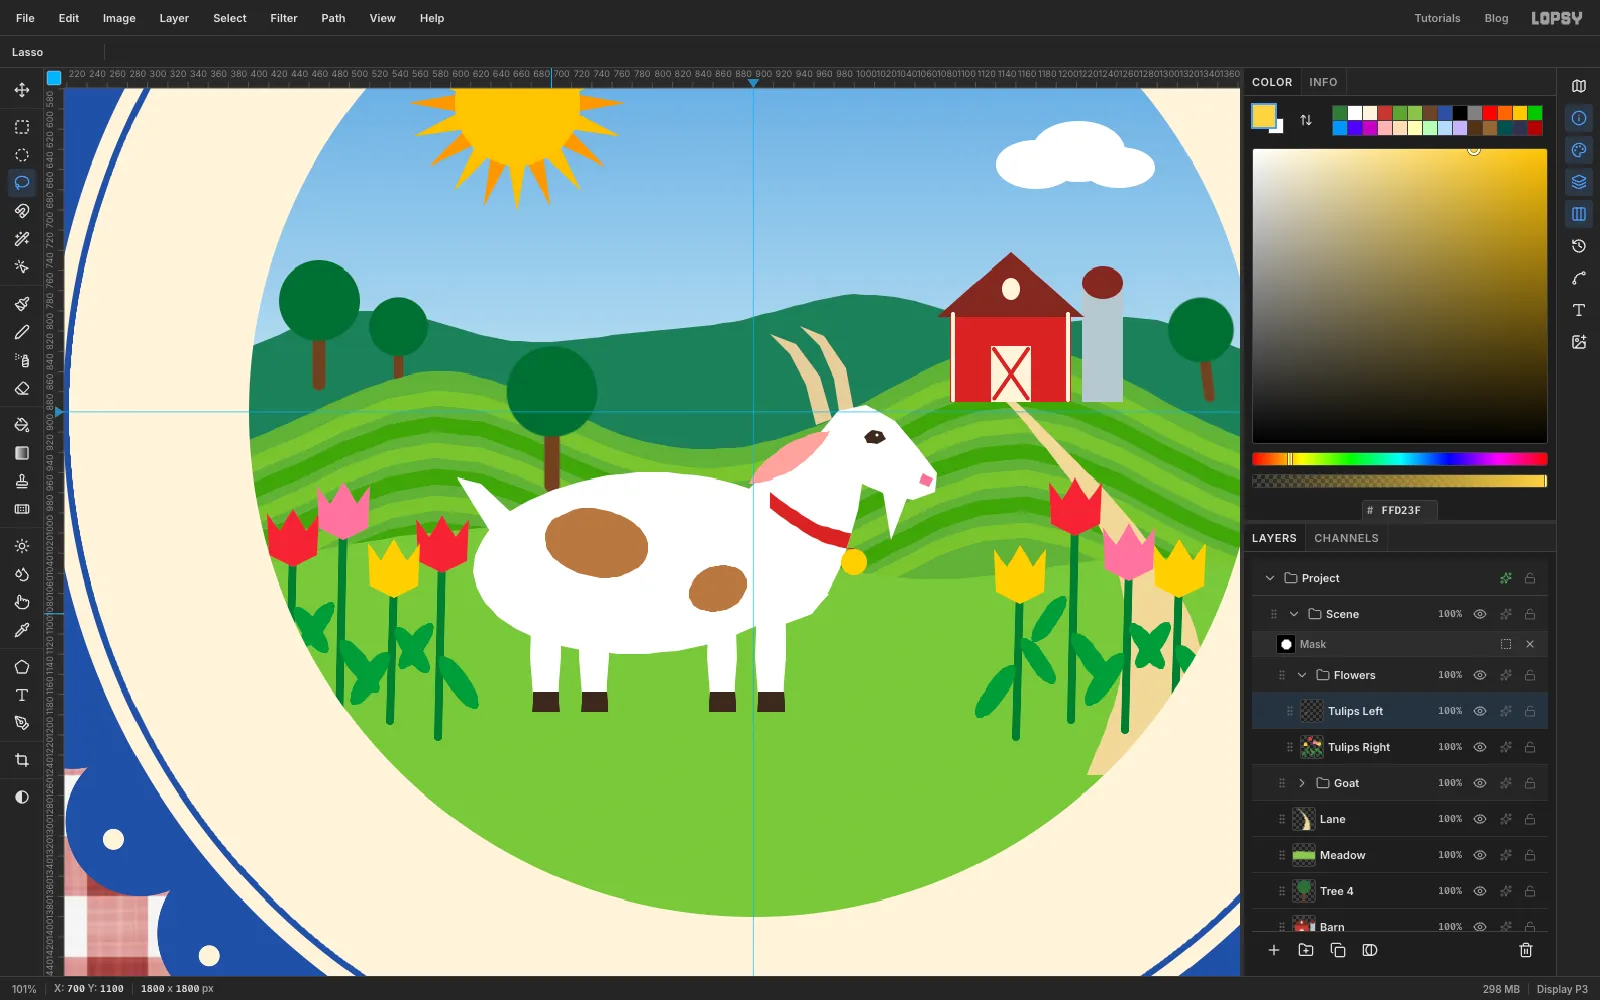
- Paint a stem with a Size
-
Paint daisies with radial symmetry
Add a layer named
Daisies. Set the brush to white at Size13, turn Radial Symmetry back on and set Segments to8.For each daisy:
- Cmd-click where the daisy's centre should be. This moves the symmetry centre there.
- Click once just above it. Eight petals appear.
Make five or six daisies around the goat's legs. Then switch to at Size
10and do the same again, but click right on each centre for the yellow middle. Turn Radial Symmetry off when you're done.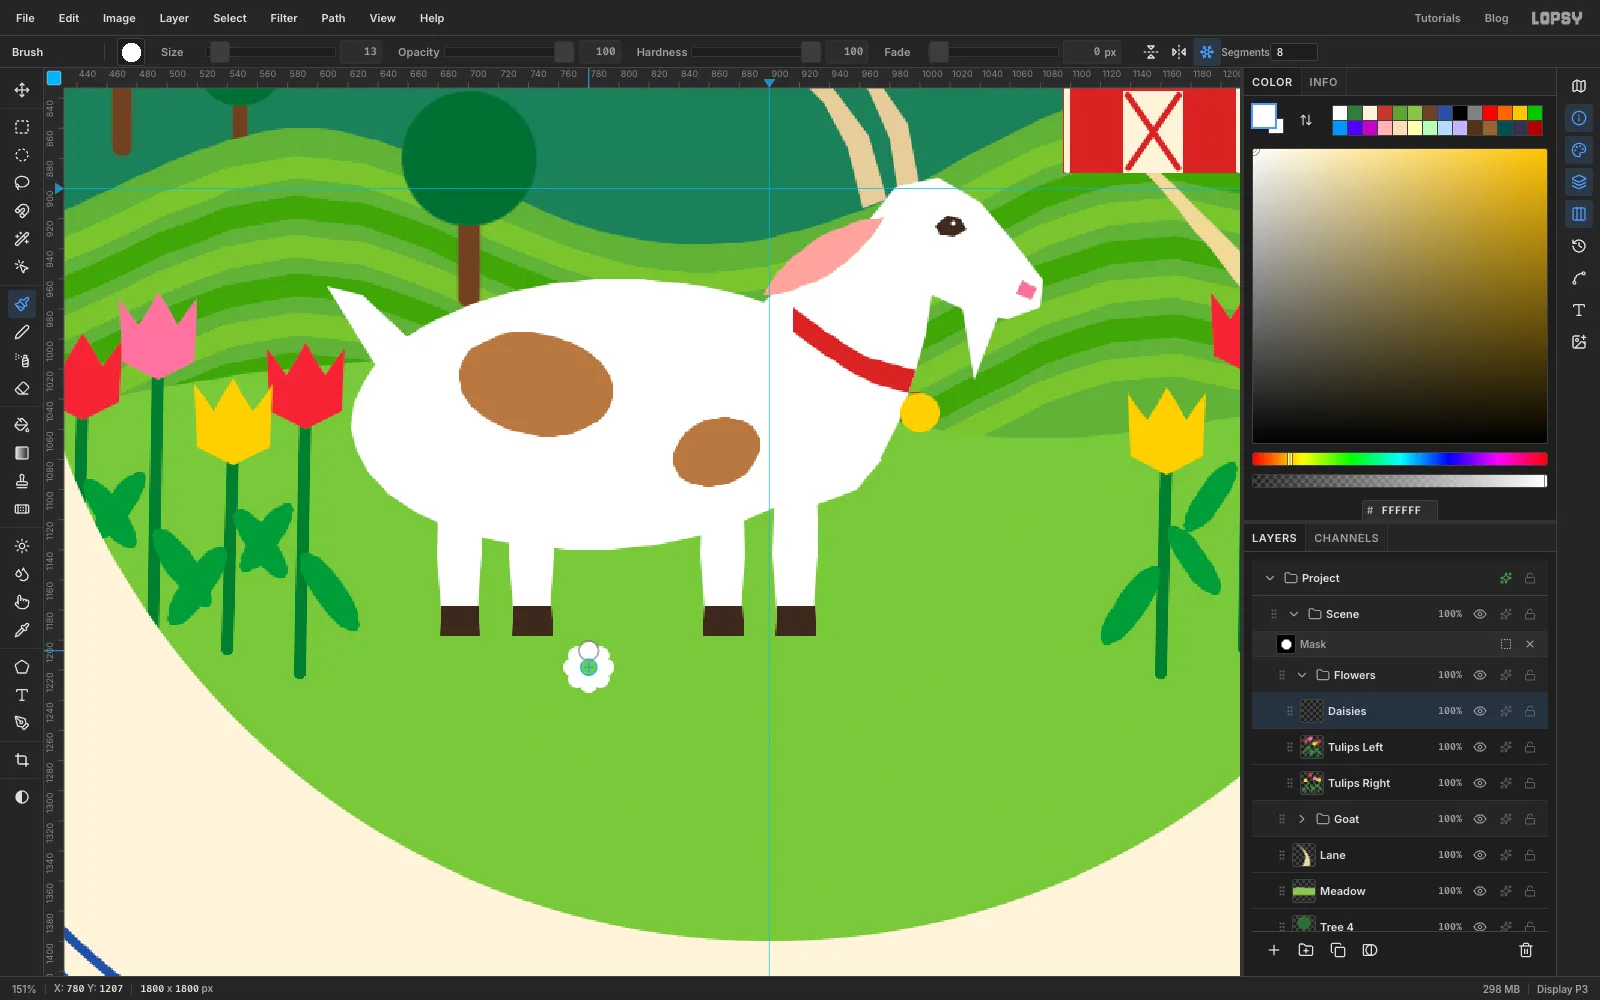
-
Make a grass tuft brush
Grass is the one place a custom brush pays off. Add a temporary layer named
Tuft Tipand find an empty patch of sky:- With a black Size
6brush, click a point. - Shift-click about 35 px above it and a little to the left.
- Click the first point again and Shift-click straight up.
- Repeat once more up and to the right.
You now have a three-blade tuft. Draw a rectangle round it and choose Edit → Define Brush…. Name it
Grass Tuft. The new tip becomes the active brush. Delete the temporary layer.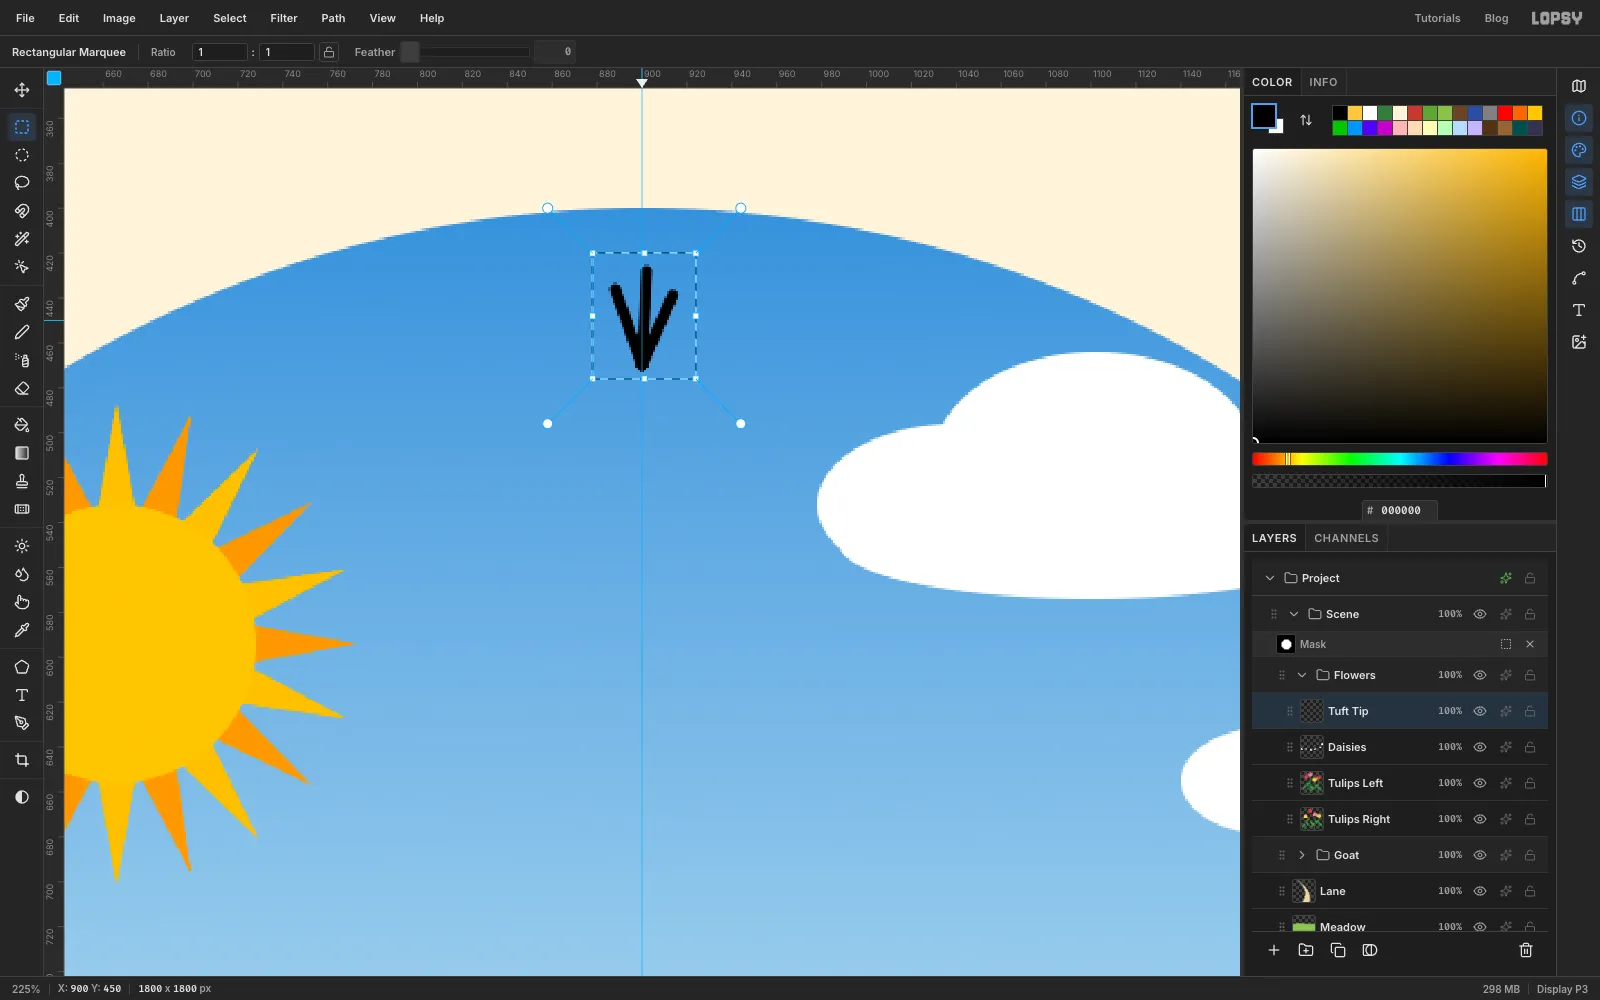
- With a black Size
-
Scatter the tufts
Click the brush-tip thumbnail at the left of the options bar to open the Brushes modal:
- On the Shape tab, set Size
30and Spacing170. - On the Dynamics tab, set Scatter
90, Size Jitter45and Angle Jitter6.
The preview strip at the bottom shows tufts of different sizes, leaning slightly, spread along the stroke. Close the modal.
Now select the Lane row and add a layer named
Grass. It goes between the lane and the goat, so the goat's hooves stand in the grass.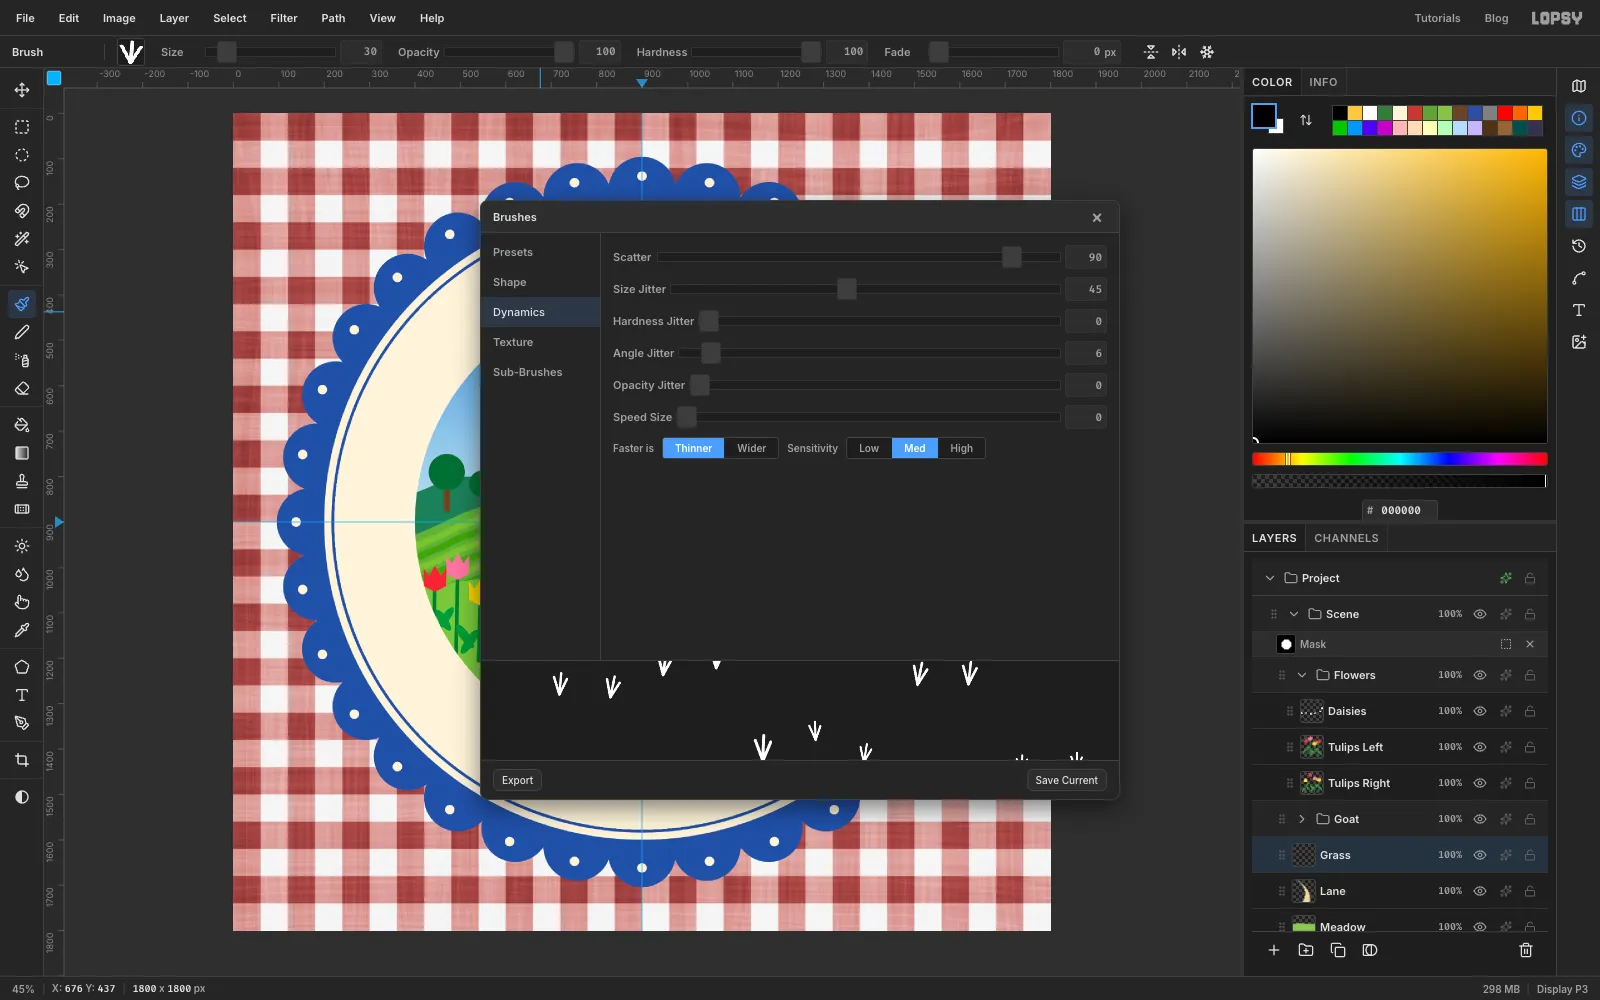
- On the Shape tab, set Size
-
Keep the grass off the lane
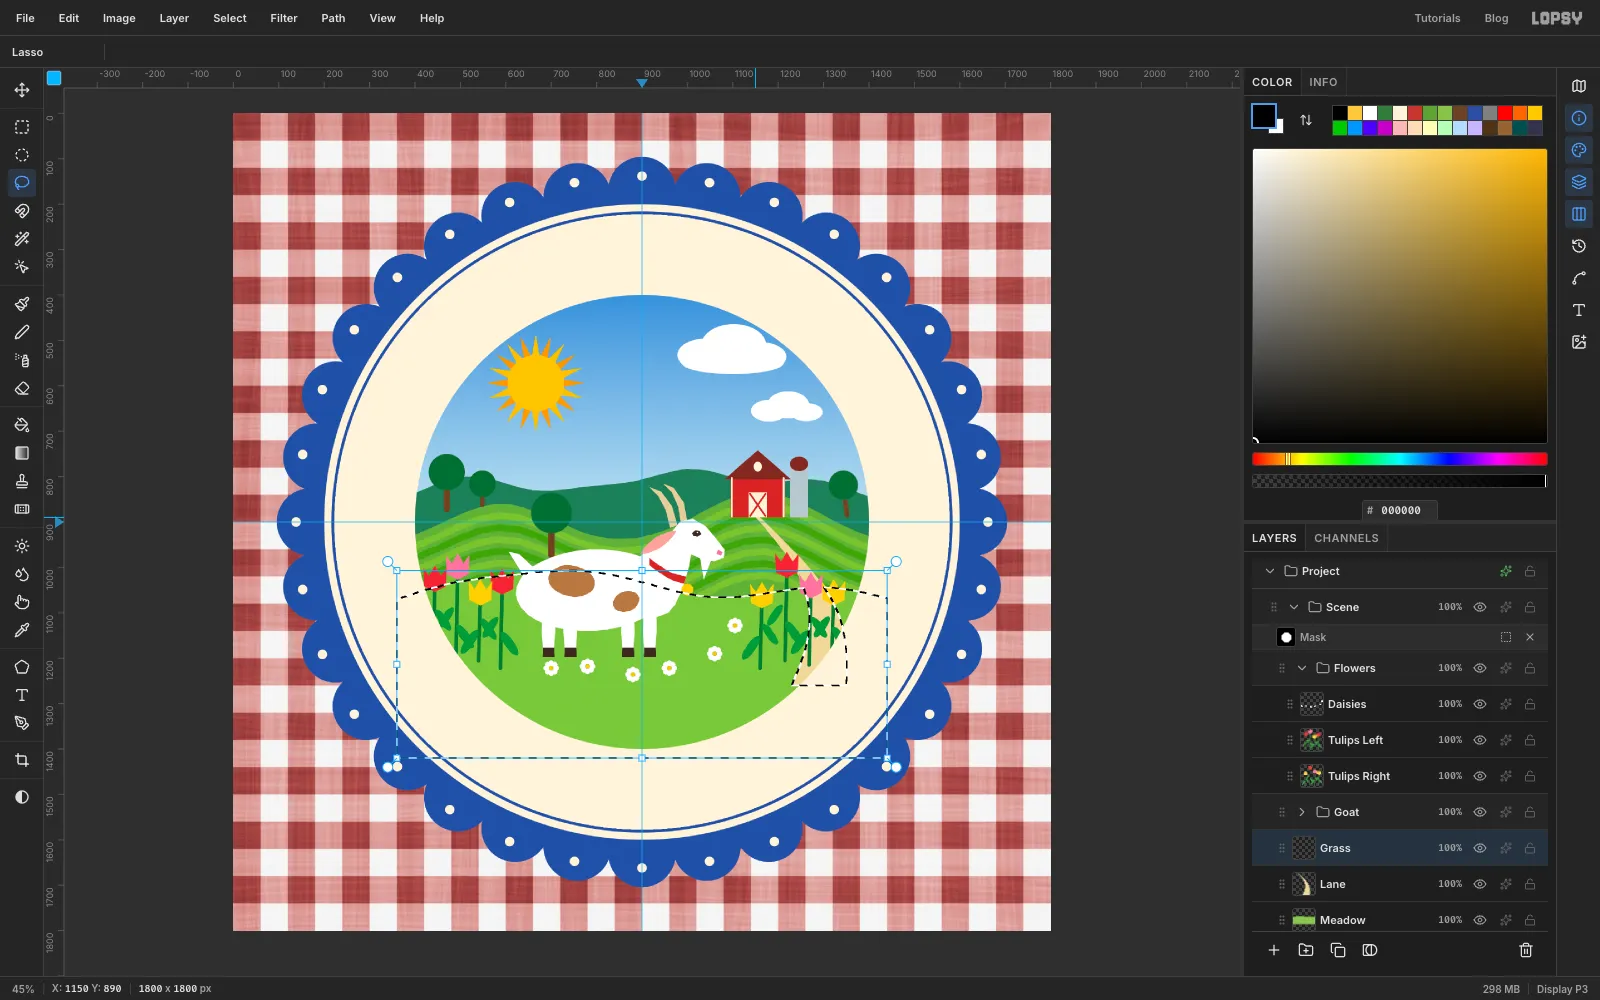
With Grass selected, Cmd-click the Meadow thumbnail, then click the Grass row again. Hold Alt and lasso round the lower part of the lane to subtract it from the selection.
-
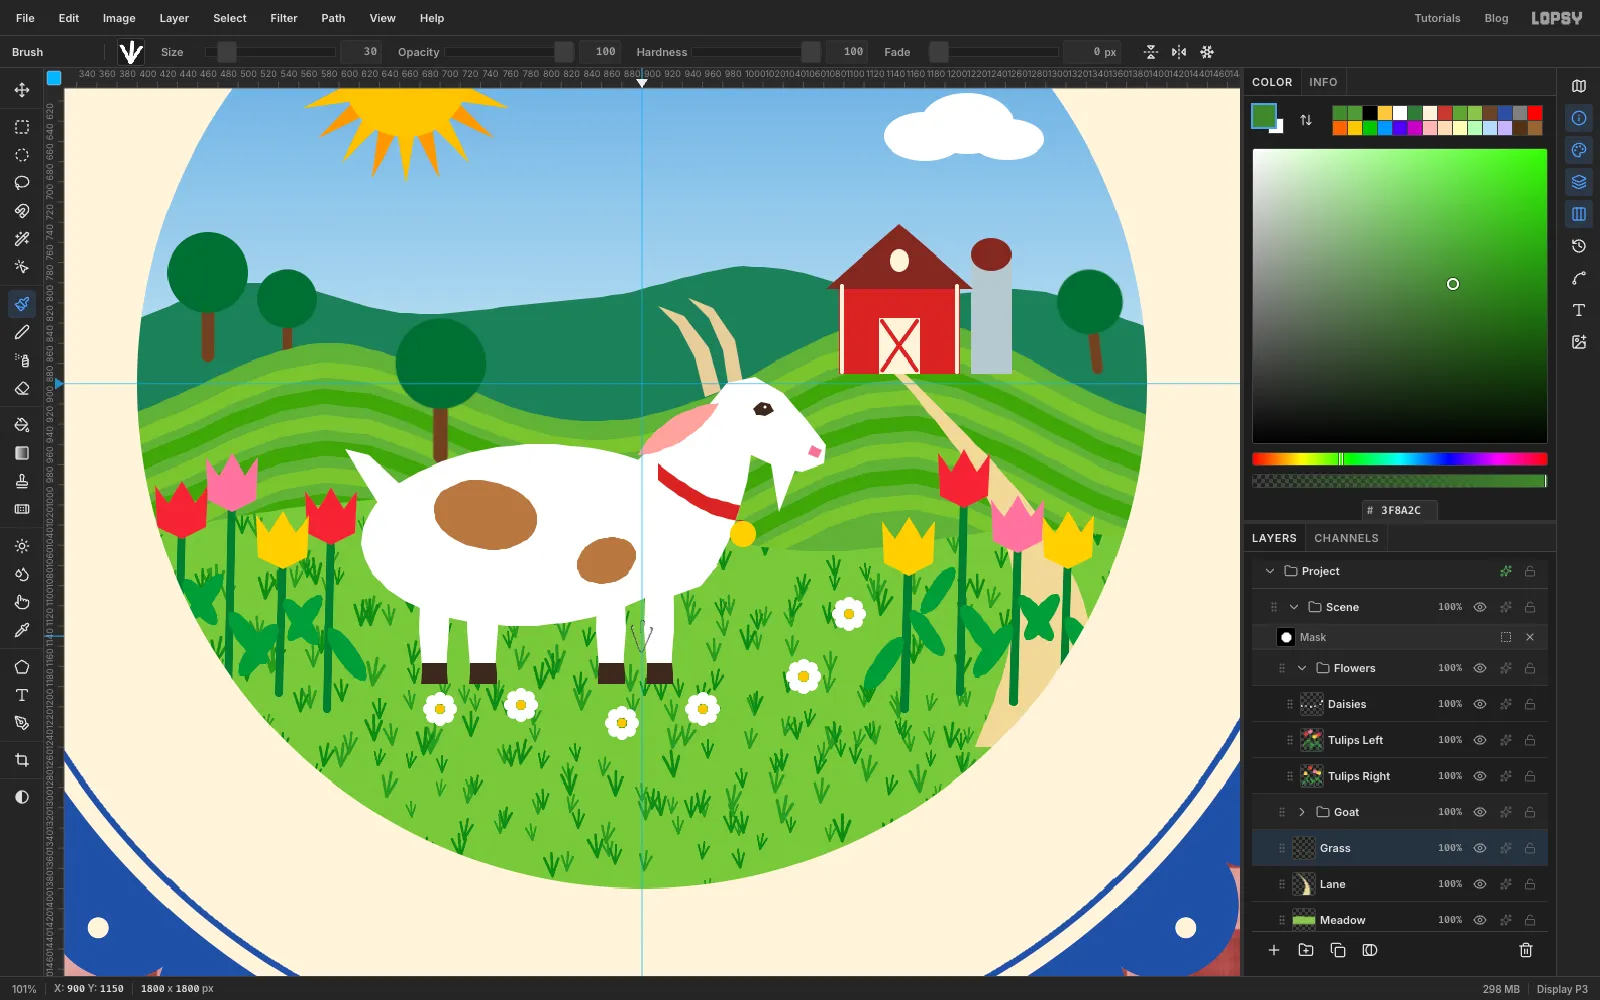
Paint the grass
Set the foreground to and drag slow wavy strokes across the meadow from left to right, a hand's width apart, from the top of the meadow to the bottom. Switch to the darker and do a second set of strokes in between. Press Cmd+D.
-
Spray dots into the tree tops
Spray paints with the Brush's current tip, so switch back first: open the Brushes modal and click Hard Round on the Presets tab.
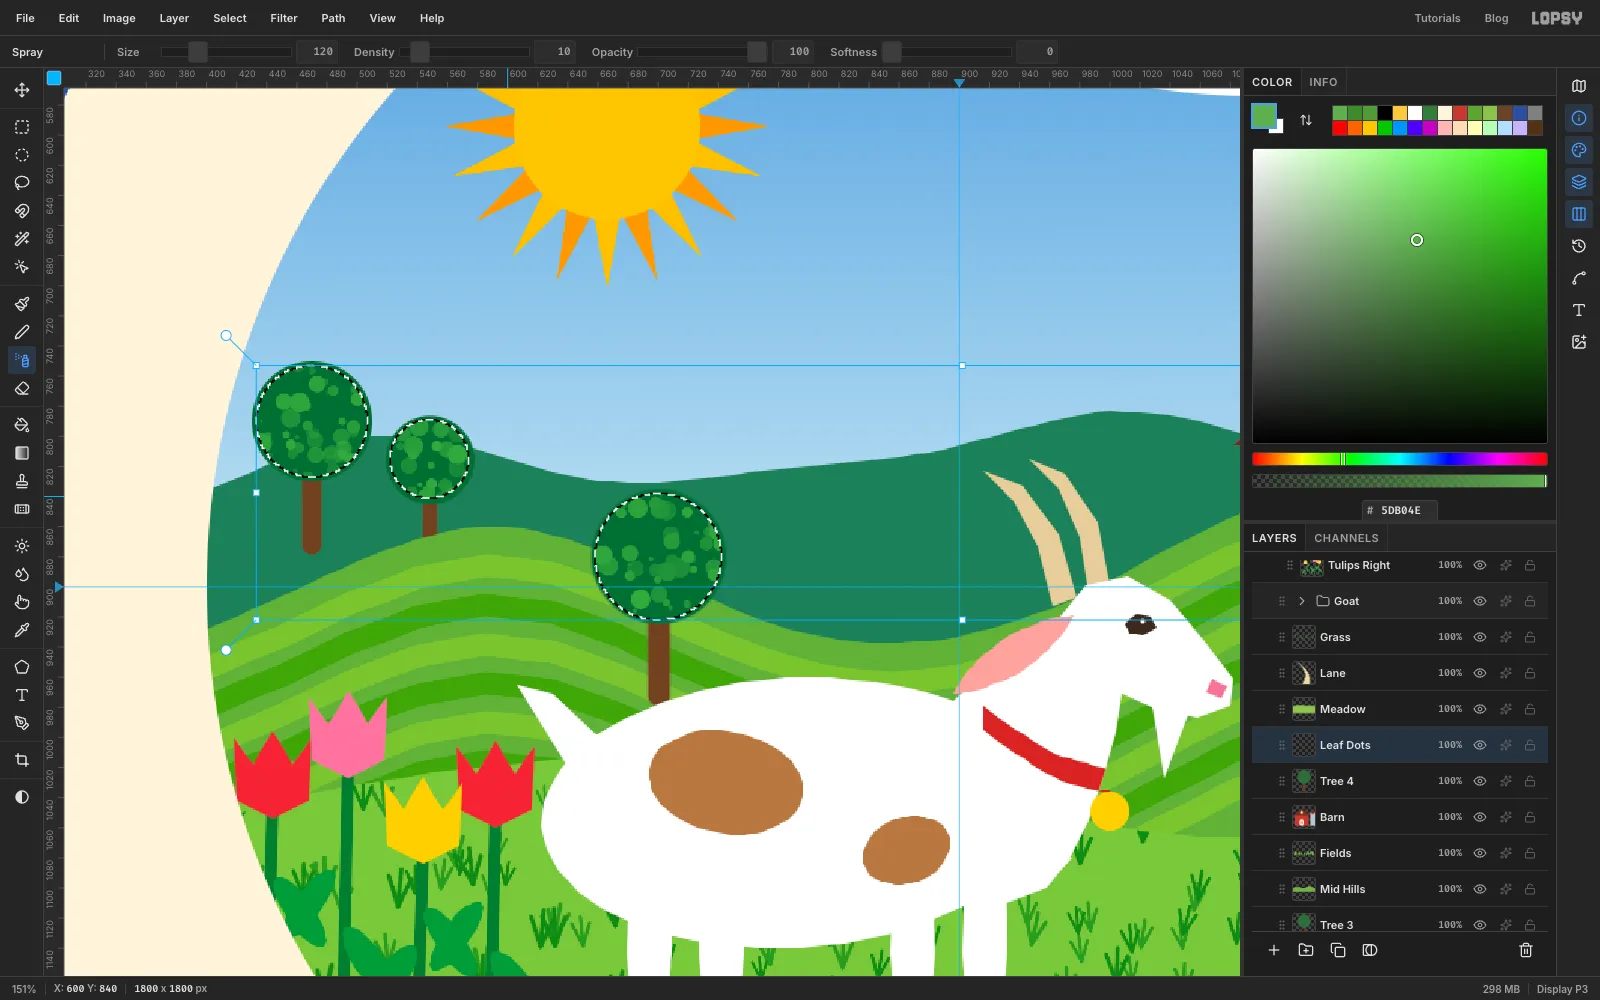
Select Tree 4 and add a layer named
Leaf Dots. Draw an elliptical marquee just inside each canopy, holding Shift after the first to add the rest. Then:- Choose the Spray tool and set Size
120, Density10, Opacity100and Softness0. - Set the foreground to .
- Zig-zag once over each canopy.
The dots look like dabbed foliage, and they stay inside the canopies.
- Choose the Spray tool and set Size
-
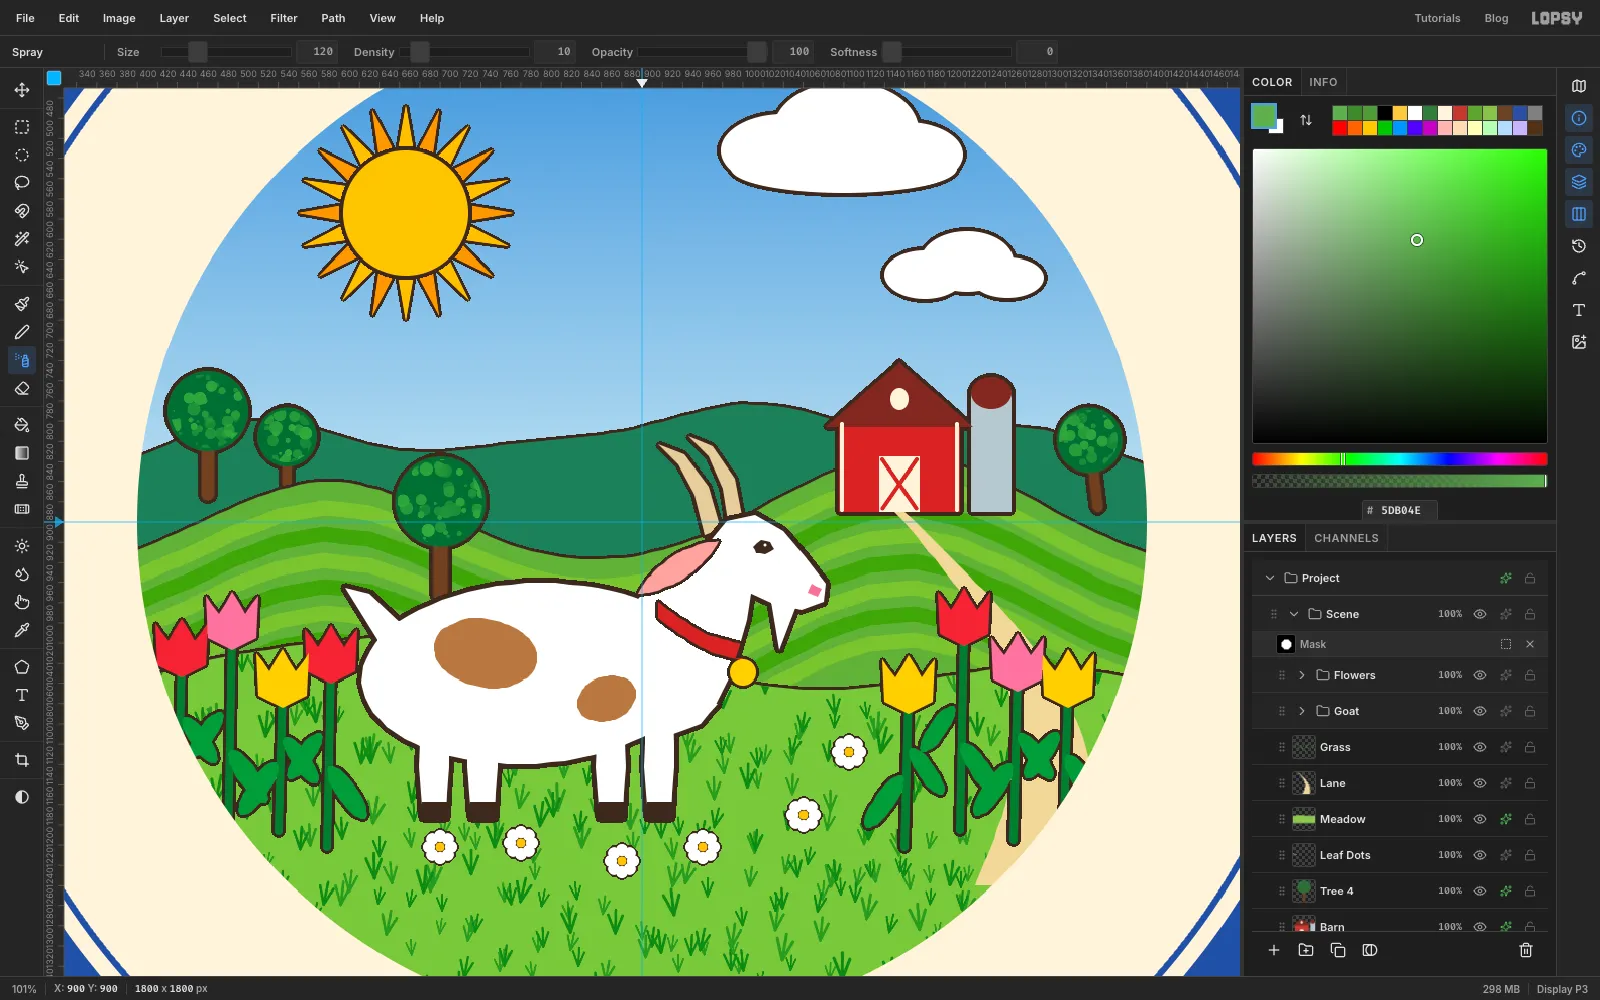
Outline everything
The dark outline is what makes this look like naive folk painting. For each layer below, open its effects drawer with the ✦ button on the layer's row, tick Stroke, set the colour to and set the Width:
5: Goat Body4: Sun, Clouds, the four Tree layers, Barn, Horns3: Sun Rays, Far Hills, Mid Hills, Meadow, Goat Trim, both tulip layers2: Daisies
Leave Sky, Fields, Lane, Grass, Leaf Dots and Goat Spots unoutlined. They're textures and details, not shapes.
-
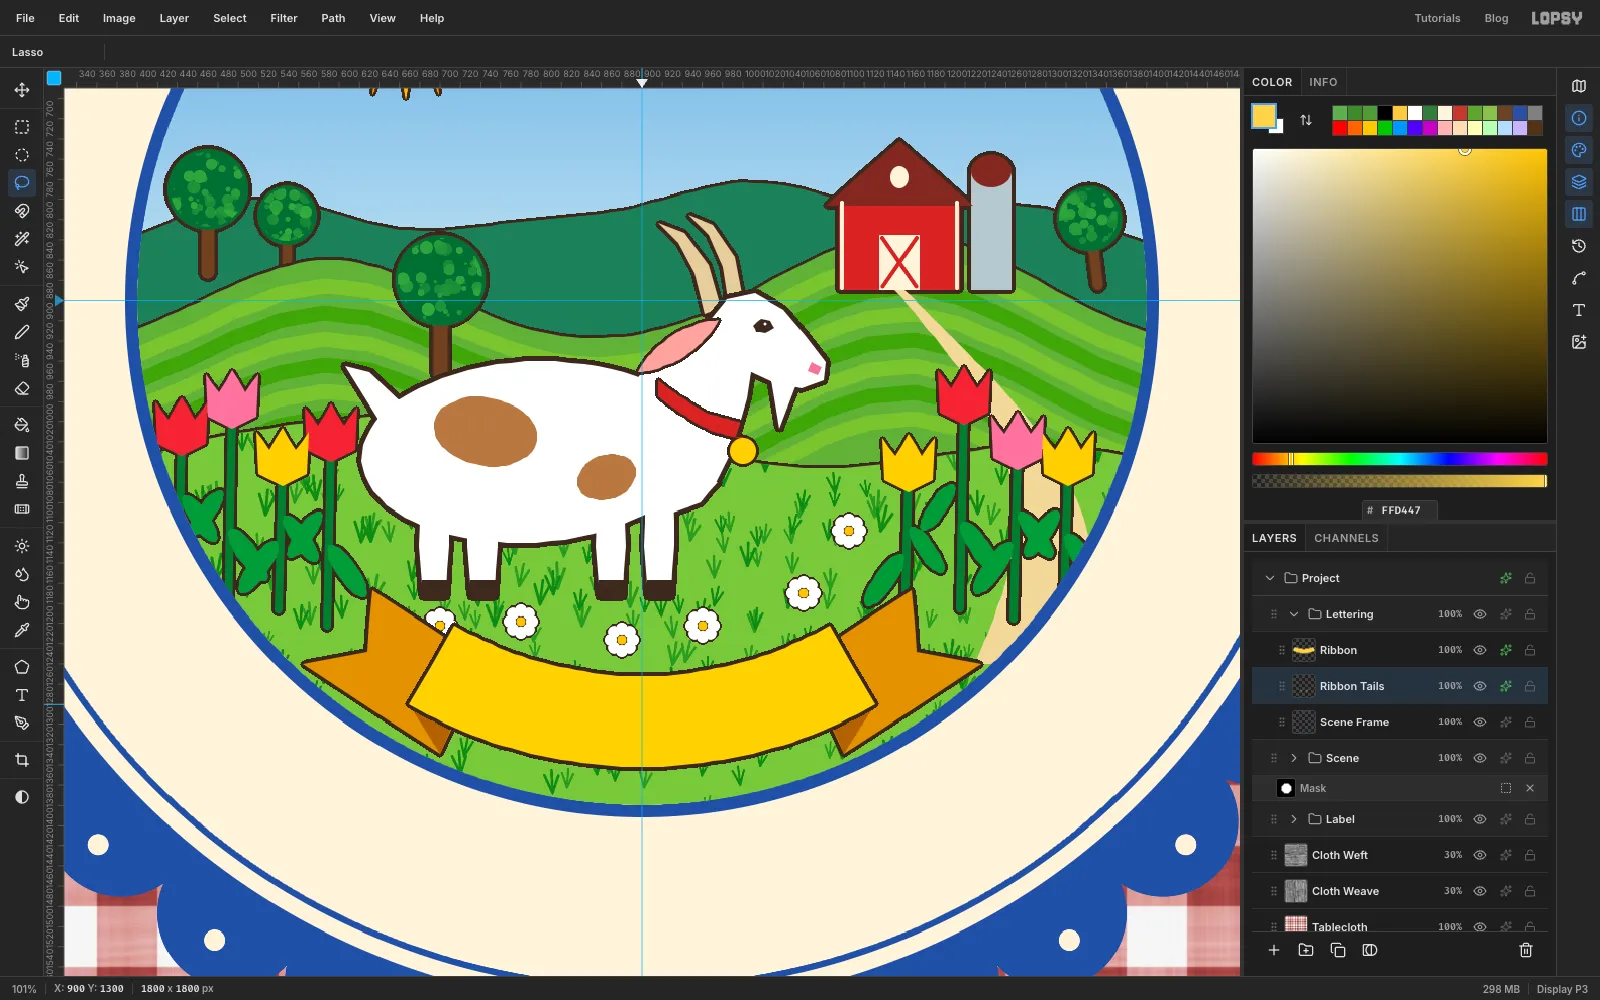
Hang a ribbon across the meadow
Collapse Scene, select its row, click New Group and rename it
Lettering.First add a layer named
Scene Framefor a ring round the picture. Make an exact elliptical selection from388, 388to1412, 1412, fill it with cobalt, choose Select → Shrink with12, press Delete and deselect.Then build the ribbon:
- Add a layer named
Ribbon Tailsand lasso a swallowtail end on each side, reaching out over the cream ring. Fill them with . - Lasso a small triangle on Ribbon Tails at the inner corner of each tail and fill it with , where it folds behind the banner.
- Add a layer named
Ribbonand lasso a curved band that smiles: the ends higher than the middle, following the bottom of the circle. Fill it with . - Give Ribbon and Ribbon Tails a
4px Stroke in .
- Add a layer named
-
Set the ribbon text and draw its path
First set the text straight:
- Select the Ribbon row, a plain picture layer. If a text layer were active, changing the font would restyle that layer instead.
- Press T, choose Oregano at size
78, and set the colour to . - Click in an empty corner of the canvas and type
Fresh Chèvre. - Press Tab to commit, and rename the layer
Ribbon Text.
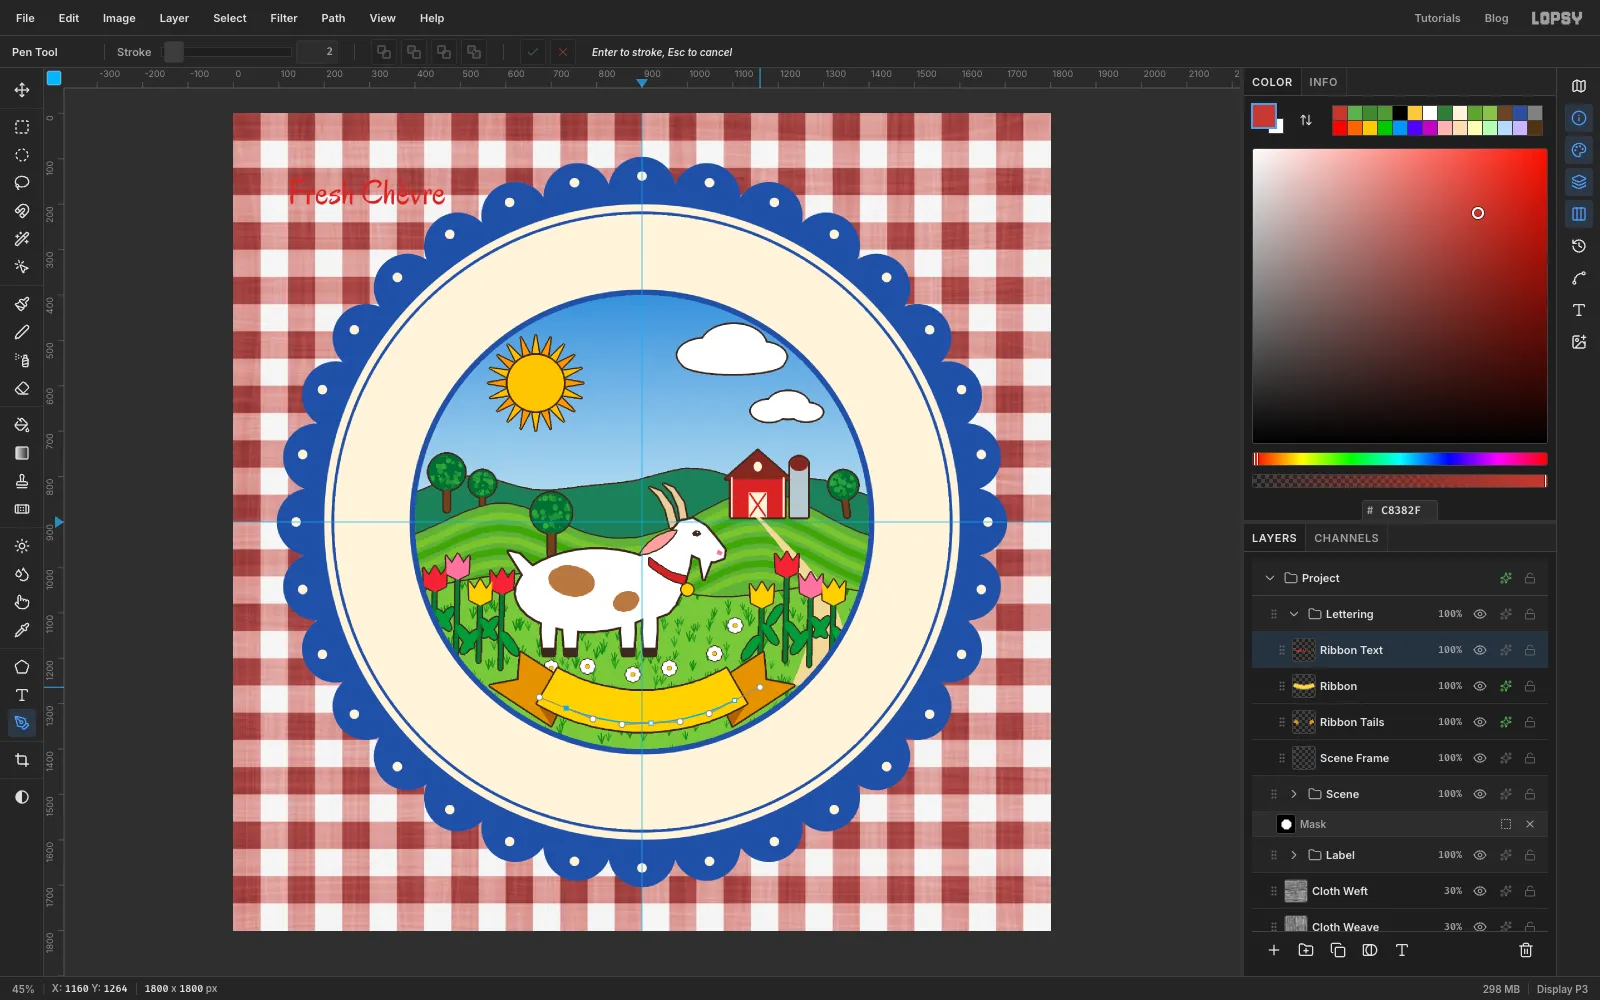
Text on a path starts at the first anchor, so begin the path where you want the first letter. With the Pen tool (P):
- Press a little below the ribbon's centre line (letters sit on top of their path), a little in from its left end, and drag a short handle along the curve.
- Do the same at the middle of the ribbon, dragging along the curve to the right.
- Do the same just past where the text should end.
- Click the ✓ (Commit path) button.
-
Put the text on the path
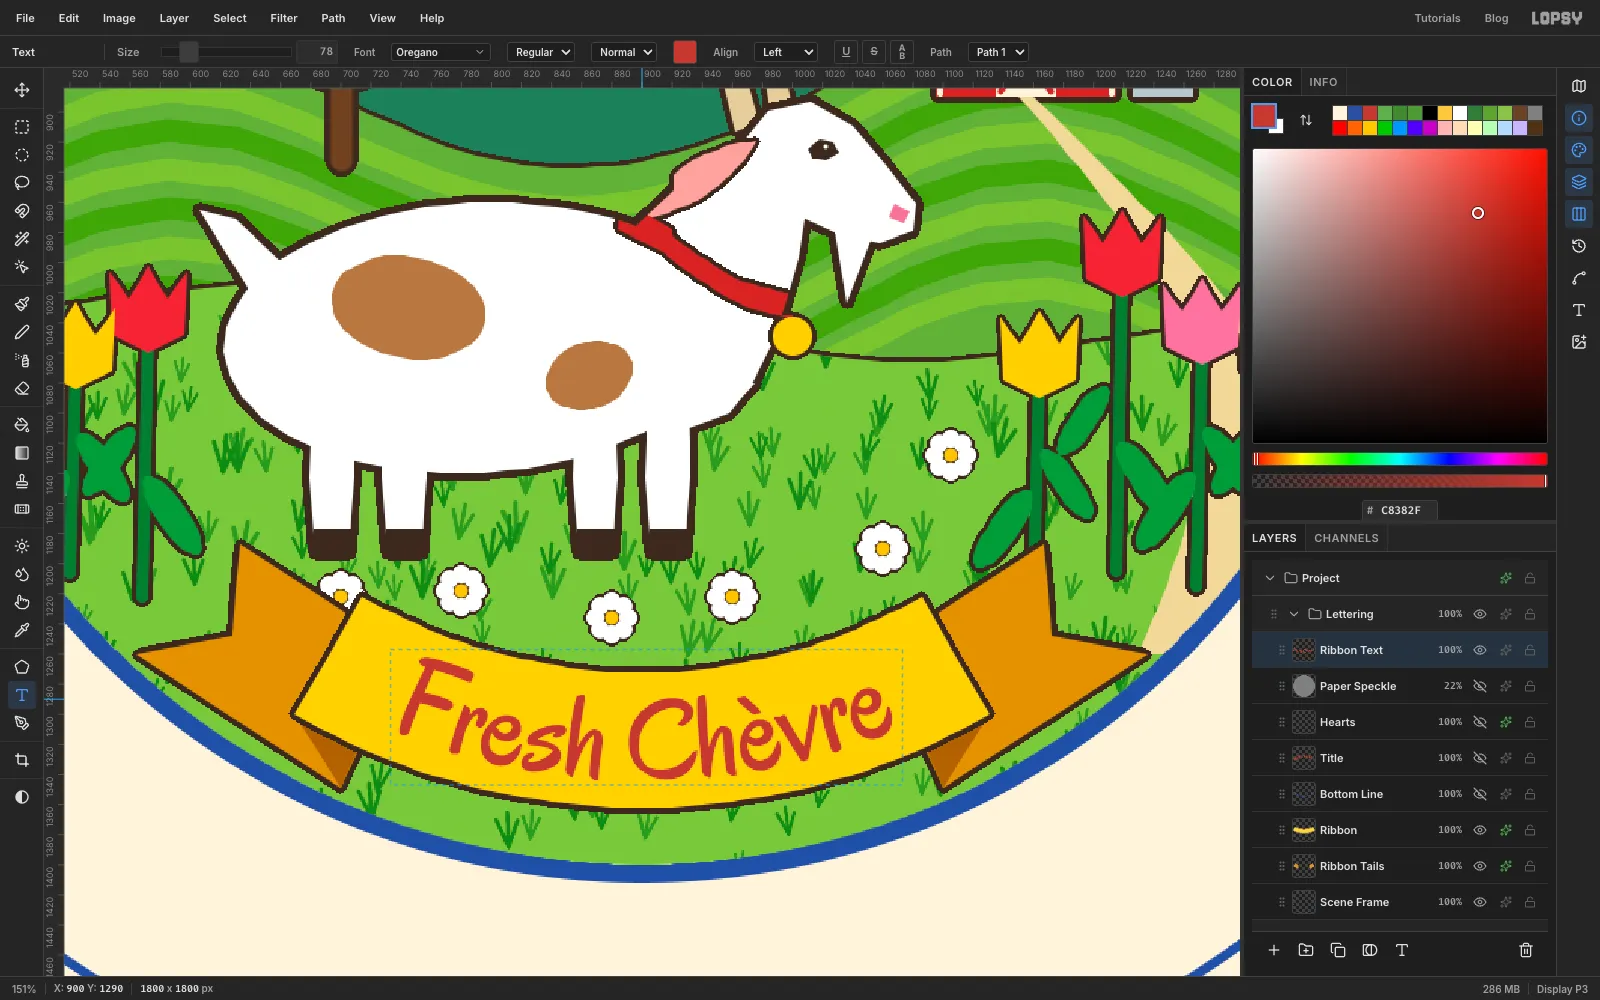
Select Ribbon Text and, with the Text tool active, choose the new path in the Path menu of the options bar. The script bends along the ribbon.
Check it sits in the middle of the band. The tops of the capitals and the baseline should have about the same gap to the ribbon's edges. If they don't, undo and draw the path a little higher or lower.
-
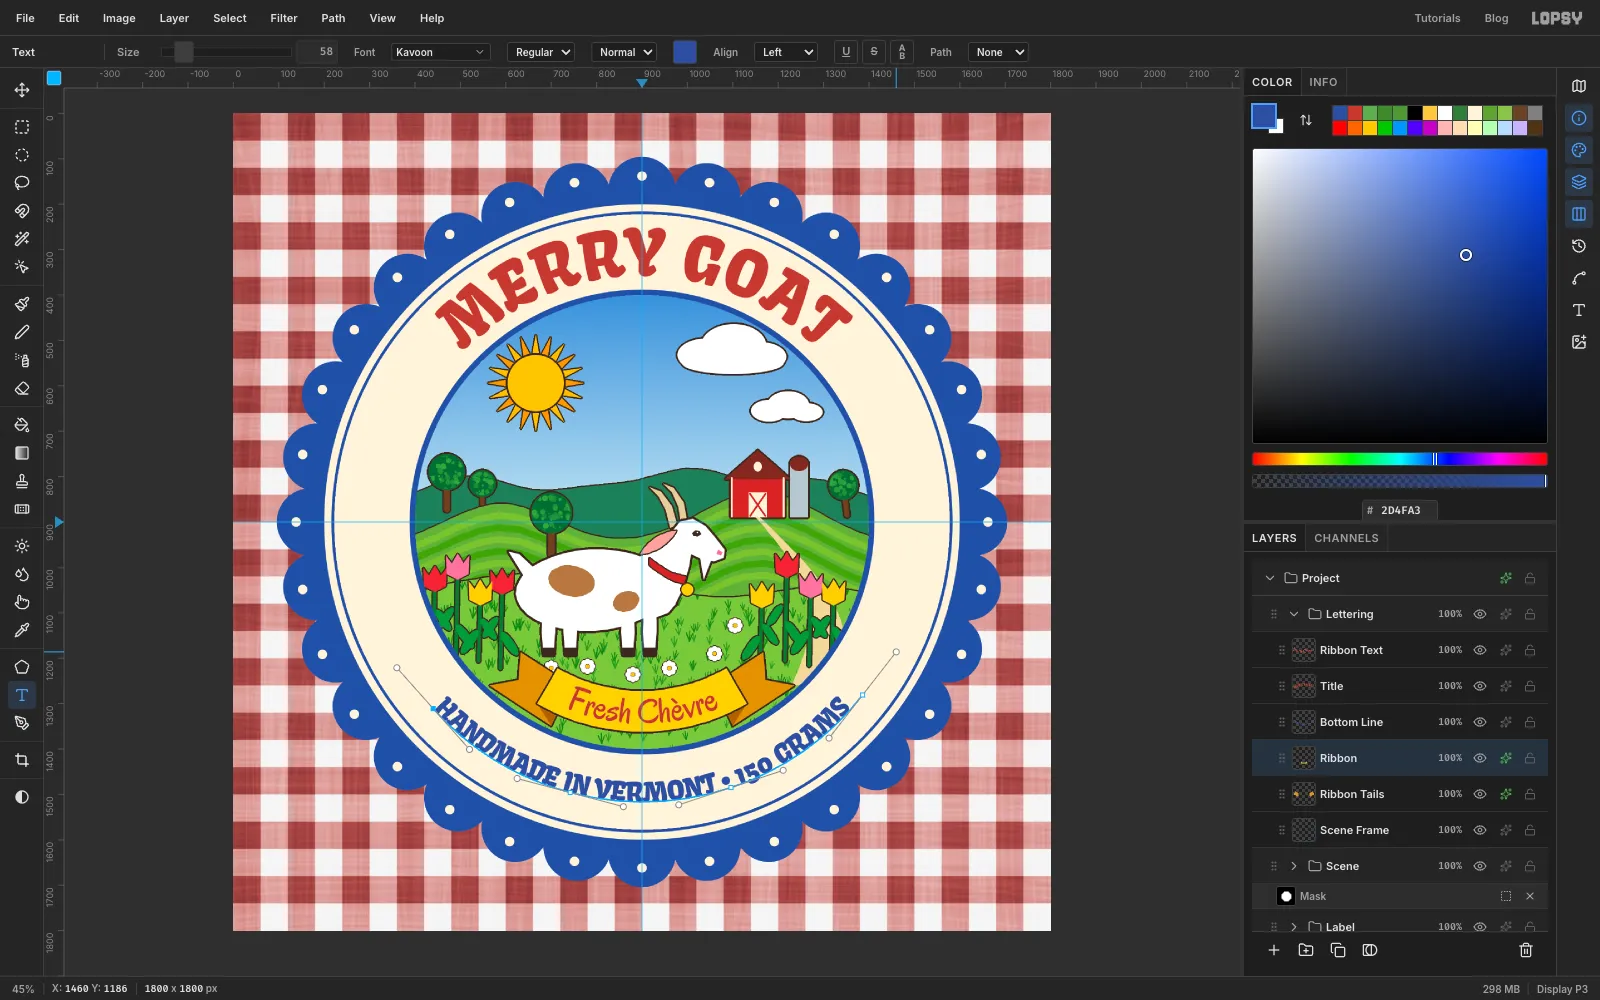
Arch the title
Select the Ribbon row again. Then:
- Set the type to Kavoon at
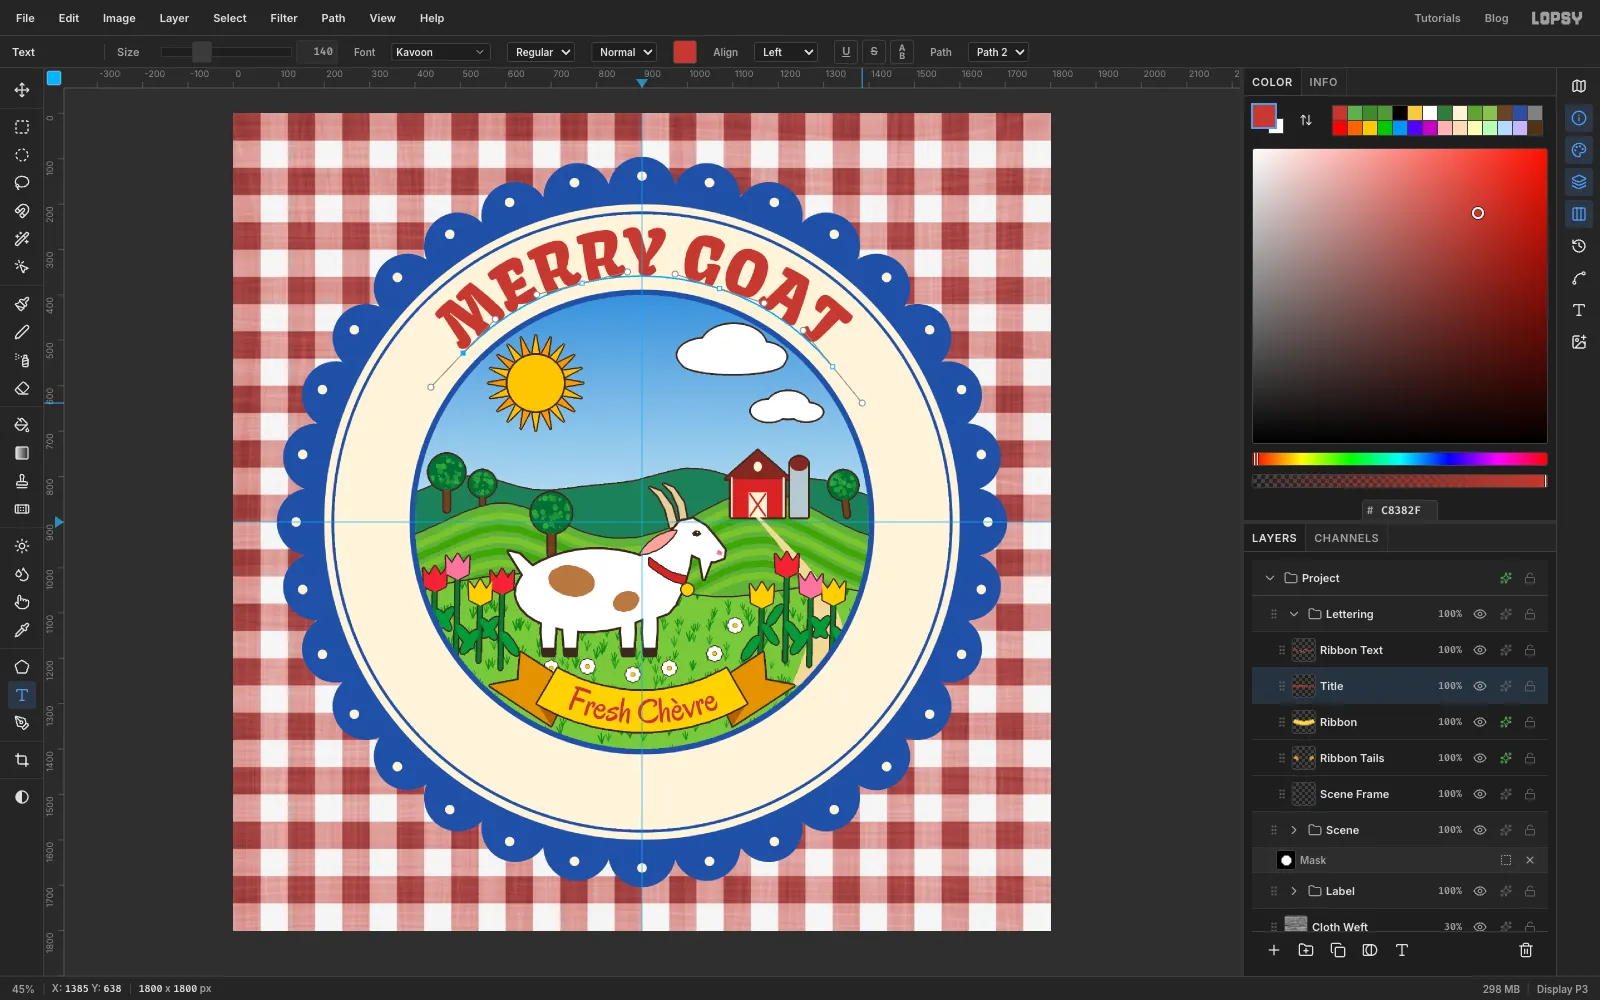
140in , typeMERRY GOATin an empty corner, and rename the layerTitle. - With the Pen tool, draw an arc across the top of the cream ring from left to right, about 30 px outside the blue frame ring. Use four anchors with handles dragged along the curve.
- Commit the path, select Title and pick the path in the Path menu.
Let the arc span about 45° either side of the vertical guide. You'll match that span for the bottom line.
Because the path runs left to right over the top, the letters stand upright, leaning outwards.
- Set the type to Kavoon at
-
Curve the bottom line
Select the Ribbon row again, then do the same for the bottom line, this time in Kavoon
58, cobalt :- Type
HANDMADE IN VERMONT • 150 GRAMSand rename the layerBottom Line. - Draw the arc along the bottom of the cream ring, about 60 px inside the thin cobalt rule (Inner Rule), again from left to right. This way the letters stand upright with their tops towards the centre.
- Bind the text to the new path.
Use the same span as the title, so the two lines balance each other.
- Type
-
Add folk hearts
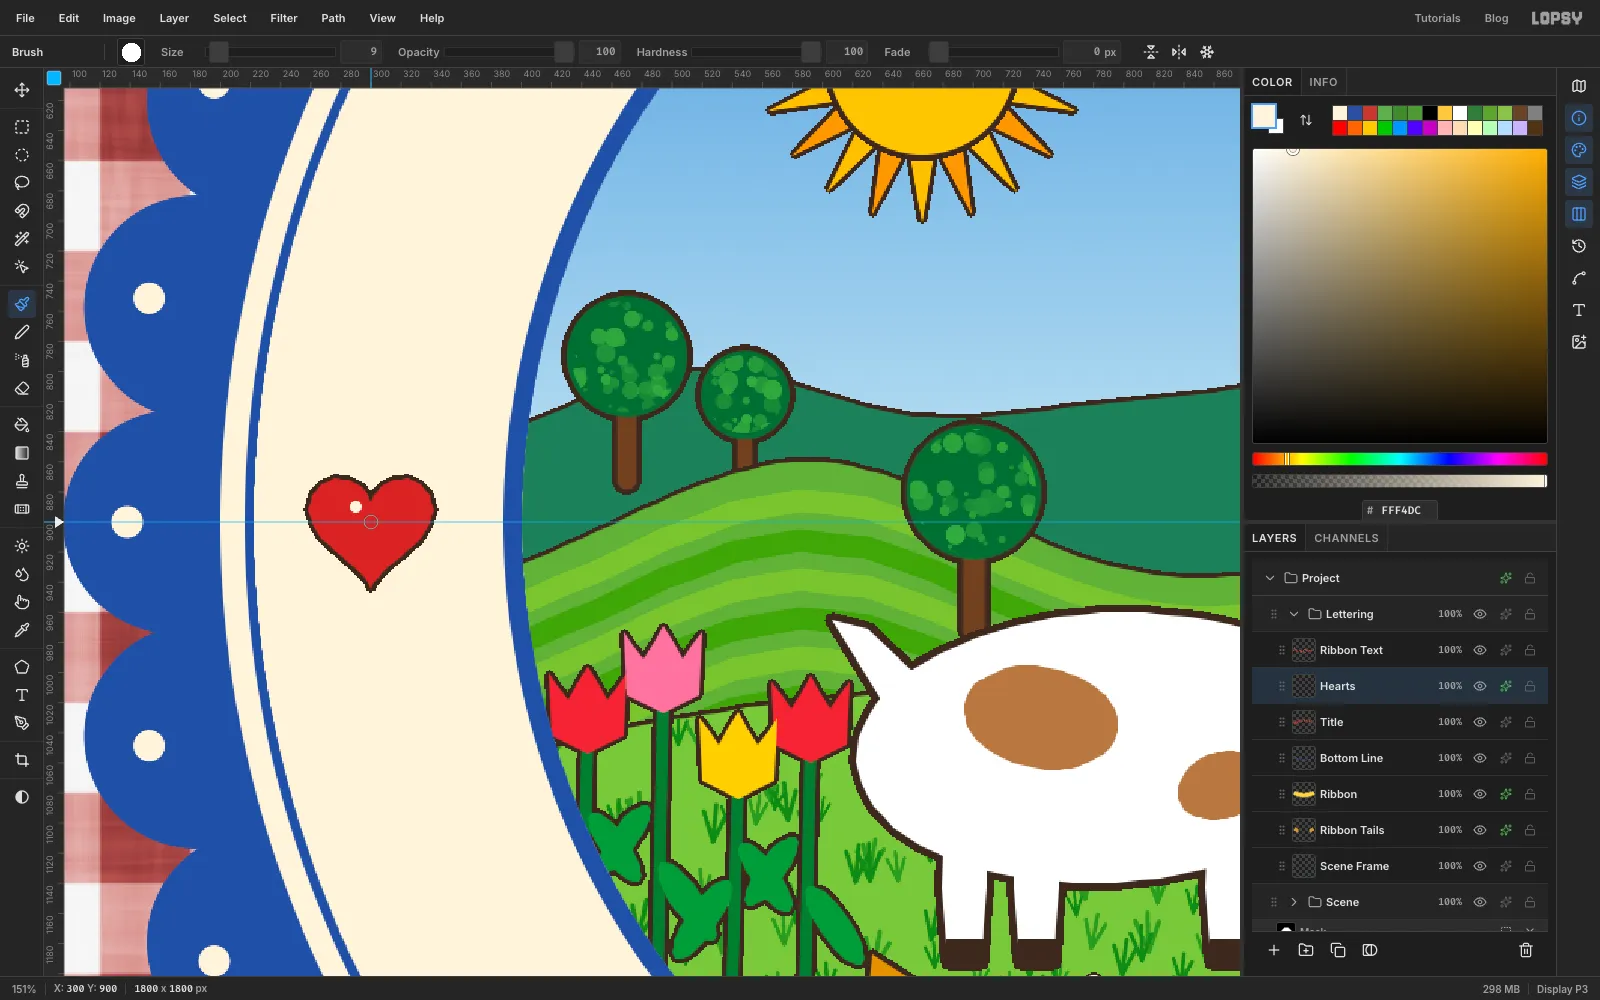
Add a layer named
Hearts. Lasso a heart about 80 px wide on the cream ring at nine o'clock and another at three o'clock, and fill them with . Then:- Click once with a Size
9cream brush near the top left of each heart for a highlight. - Give the layer a
3px Stroke in .
- Click once with a Size
-
Add a printed-paper speckle
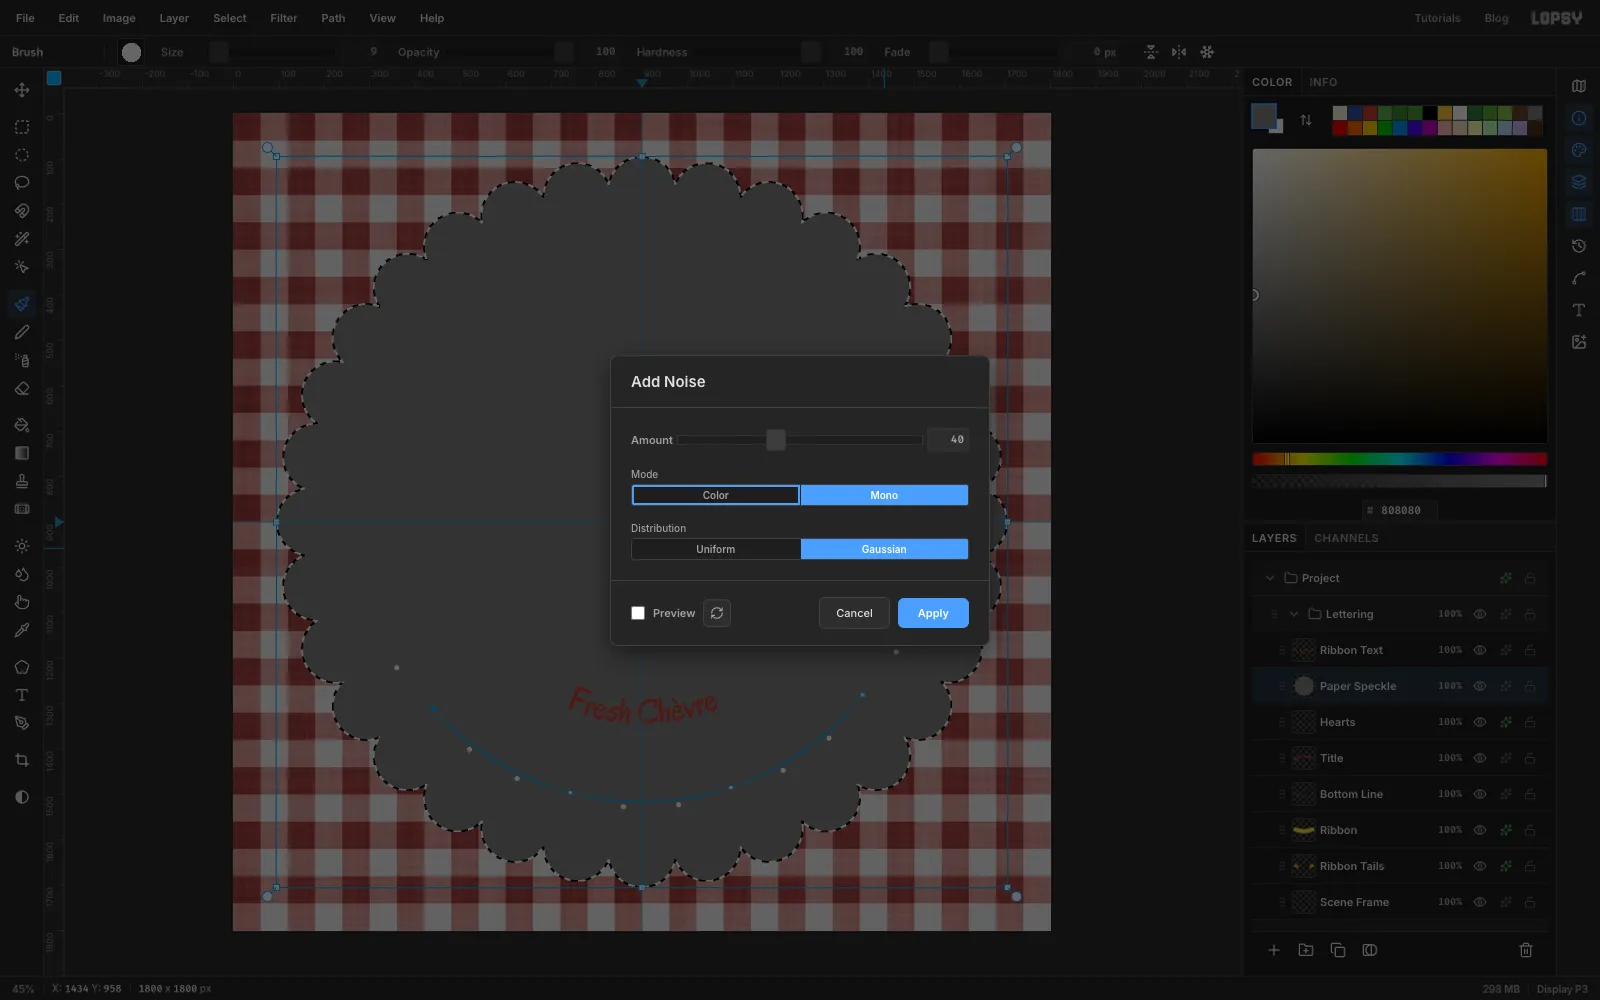
Select Hearts and add a layer above it named
Paper Speckle. Then:- Expand the Label group and Cmd-click the Label Base thumbnail.
- Click the Paper Speckle row and fill the selection with mid grey .
- Choose Filter → Add Noise…, pick Mono and Gaussian, set Amount
40and click Apply. - Choose Filter → Gaussian Blur… with Radius
1. - Deselect, set the layer's Blend to Overlay, and lower its opacity to
22%.
Grey disappears in Overlay, so only a fine, even tooth is left, like ink on paper.
-
Lift the label off the cloth
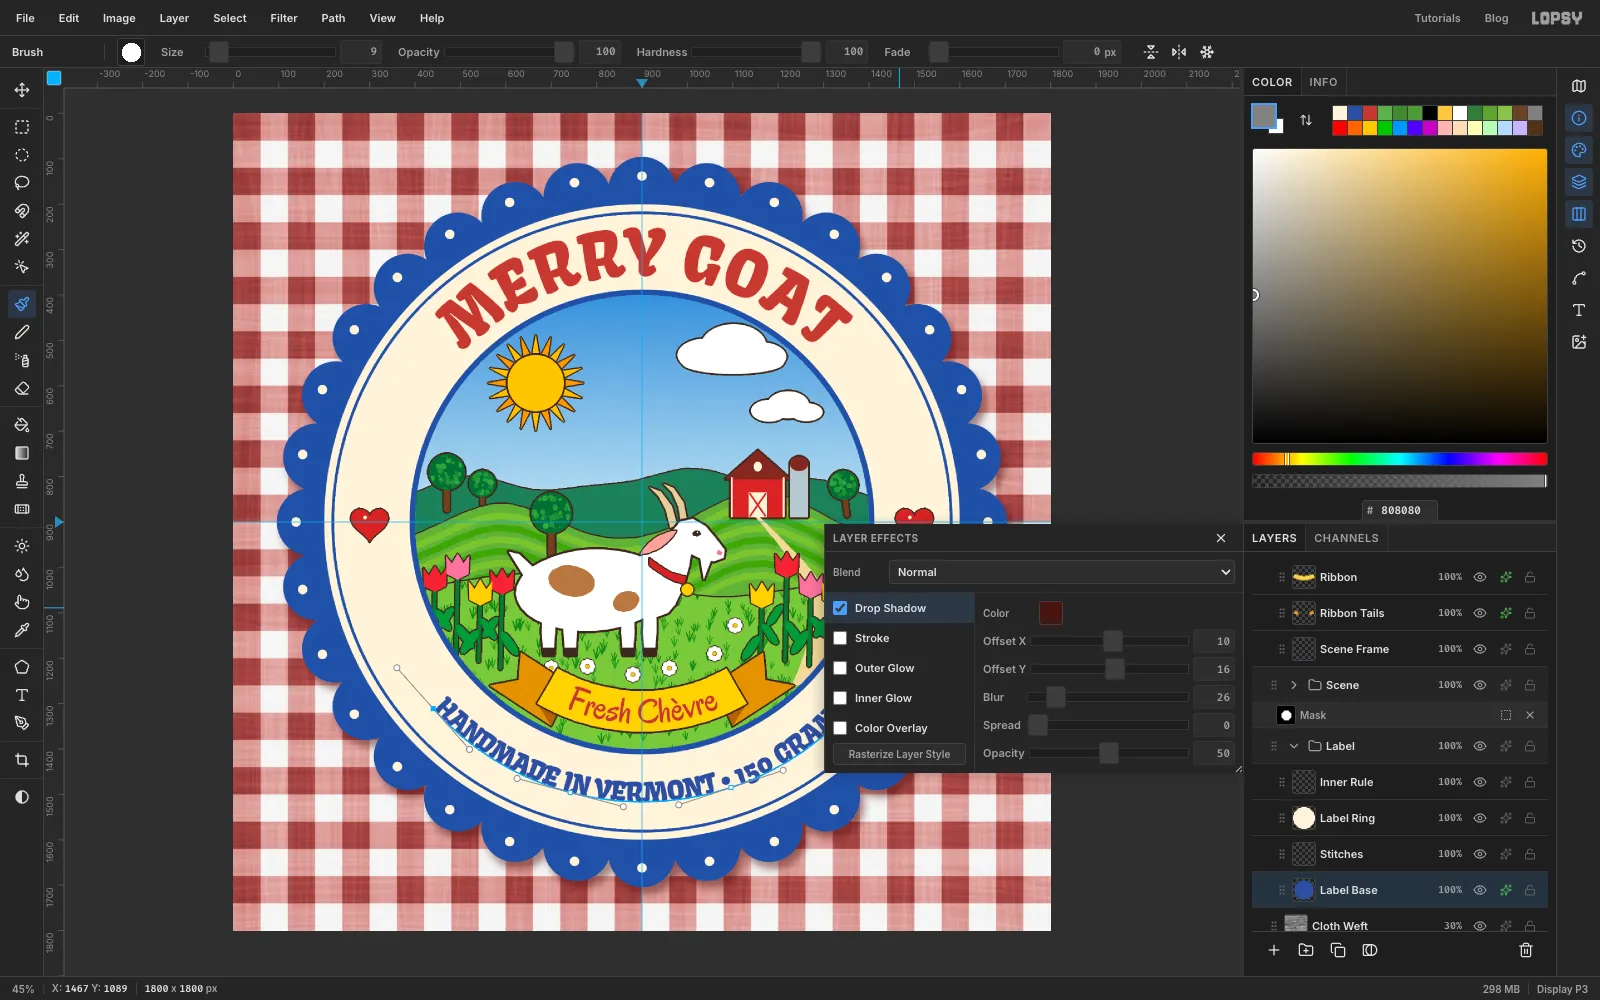
Select Label Base and open its effects drawer. Tick Drop Shadow and set:
- colour
- Offset X
10and Offset Y16 - Blur
26 - Opacity
50
A warm shadow looks better on red cloth than grey or black.
-
Fix the tangencies and export
Zoom in and look for places where two shapes just touch. On a flat, outlined picture they look like mistakes:
- Near tree: if its trunk lands on the goat's back, select Tree 4 with the Move tool and nudge it up with Shift+Up until there's hill between the trunk and the goat. Draw a marquee round its canopy on Leaf Dots and nudge the dots up the same amount.
- Collar: if it stops short of the back of the neck, lasso a short extension on Goat Trim and trim it with the same intersect trick you used on the front.
- Tulips: if a tulip head touches the goat, nudge Tulips Left a couple of Shift+Left presses away.
Choose File → Quick Export PNG for the image and File → Save Project to keep every layer, path and effect editable.
To make a whole range, swap the ribbon text and the tulip colours for each cheese. For example, "Herbed Chèvre" with purple flowers.