Make an Outsider Art Thanksgiving Card on Cardboard
Paint a folk-art Thanksgiving card in Lopsy. A turkey escapes a man with a fork, in flat house paint on corrugated cardboard inside a hand-lettered frame.
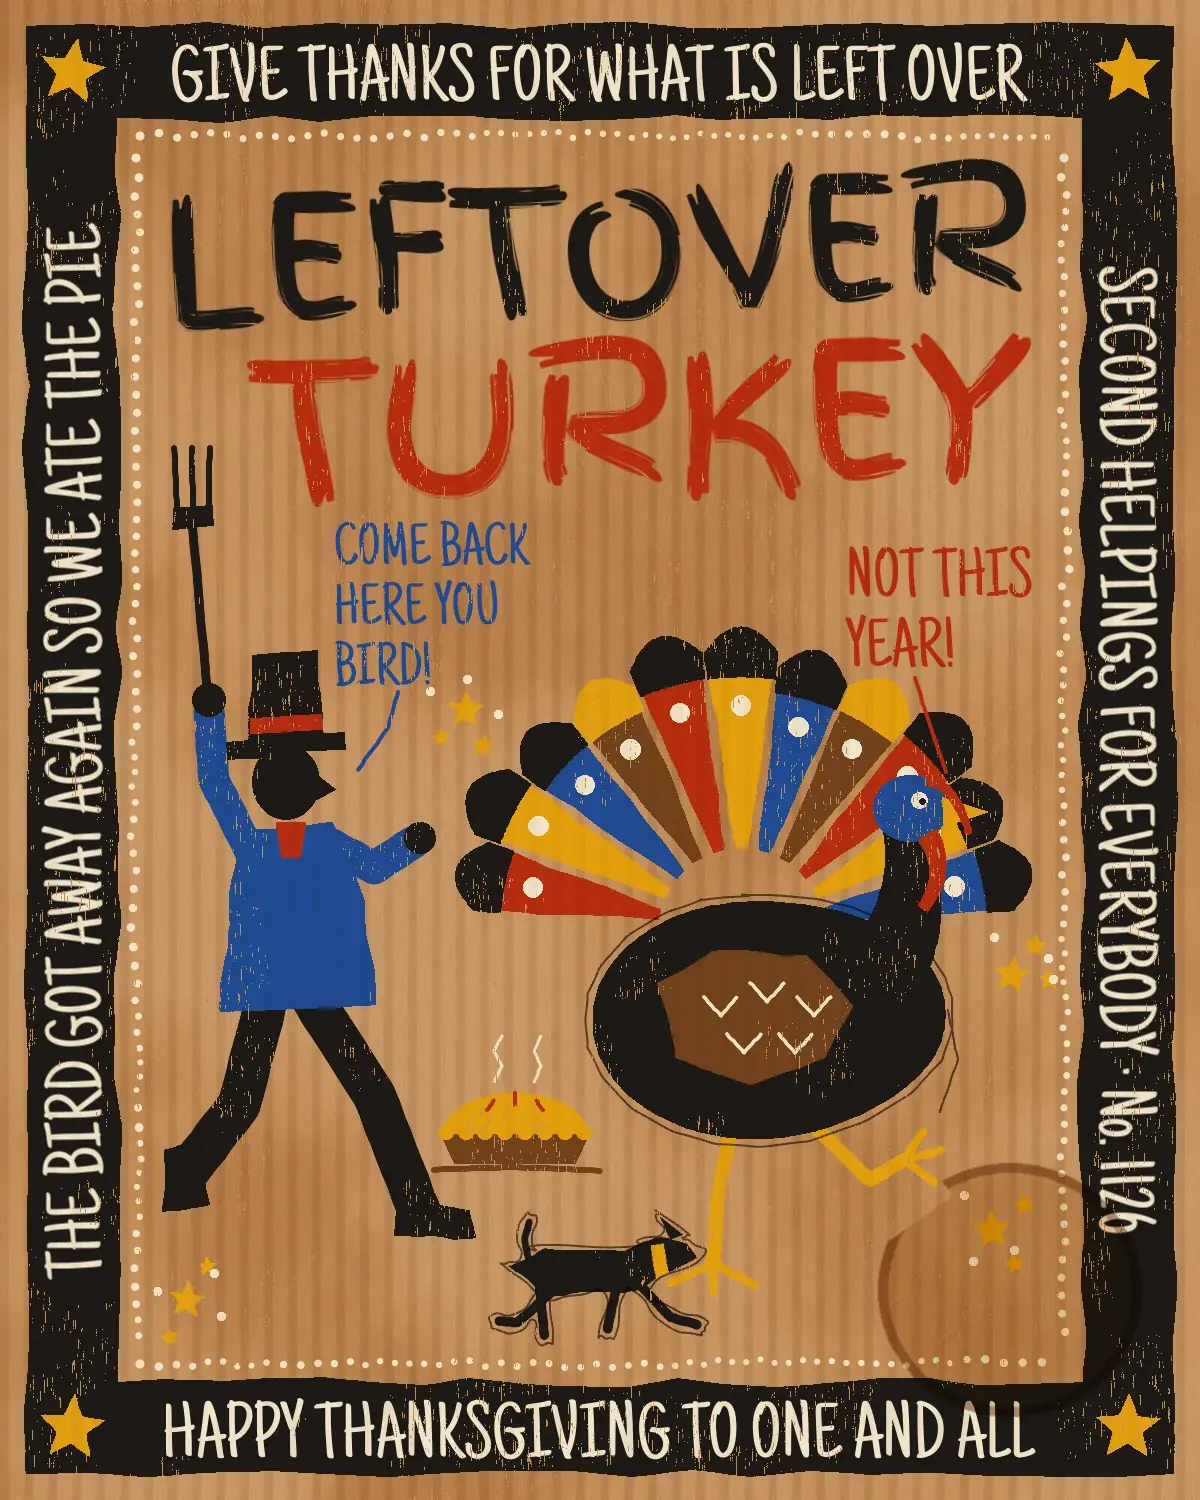
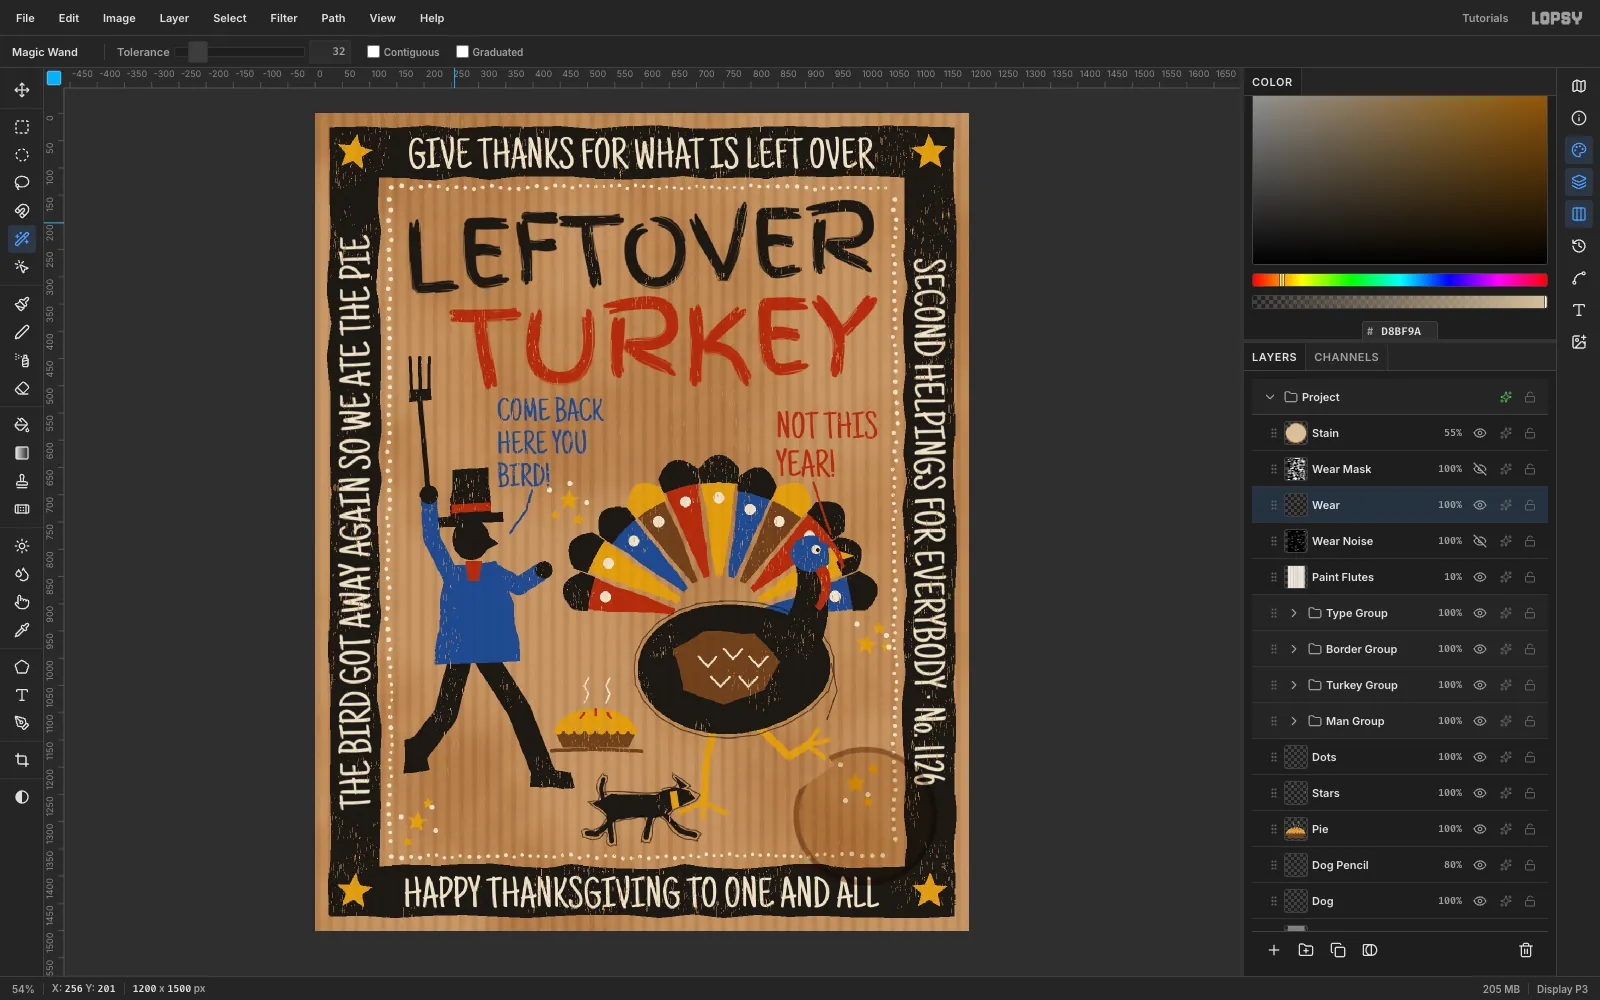
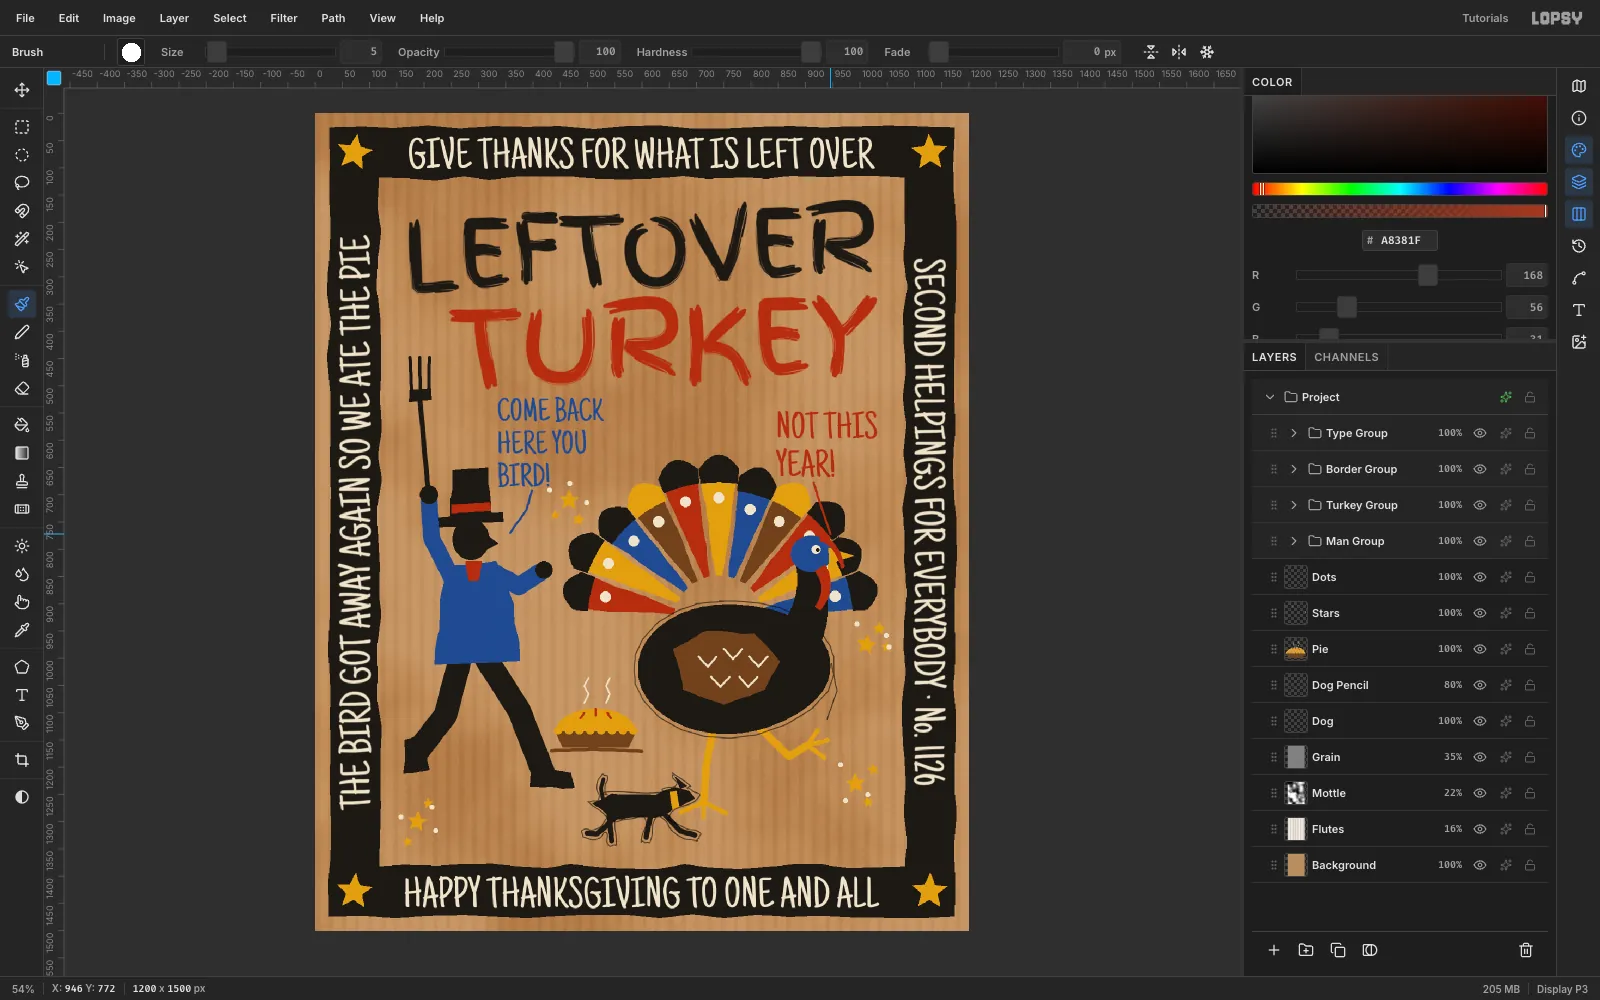
American outsider art is made by painters with no formal training. Bill Traylor drew flat silhouettes in poster paint on scraps of cardboard, with his pencil lines still showing. Howard Finster filled every border with hand-lettered sayings, stars and dots, and numbered each piece. This tutorial borrows from both for Leftover Turkey, a 1200 × 1500 px Thanksgiving card. A man in a top hat chases the dinner, and the turkey isn't having it.
The look depends on three things:
- Flat house paint. Every shape is a Lasso fill or a thick brush stroke in one of six colours, with no gradients and no shading.
- Real cardboard. A corrugated pattern, Clouds mottle and noise grain sit under the paint, and a faint copy of the corrugation sits over it.
- Wear. Dry-brush gaps, a pencil underdrawing and a coffee ring make it look handled.
Along the way you'll also use:
- Define Pattern and Fill with Pattern, Clouds, Add Noise, Motion Blur, Threshold and Gaussian Blur
- groups, a group Move, layer reordering and Duplicate Layer
- the transform handles to scale and rotate, including the Cmd 15° rotation snap
- Select → Grow, Selection → Path and Stroke Path
- the Brushes modal's Spacing, Size Jitter and Scatter
- the Magic Wand with Contiguous off, and Select → Inverse
- text in two Google fonts, rasterized and rotated, with colour-coded speech
The palette is house paint on kraft:
- Cardboard
#B98E5F - Ink black
#1D1915, brick#A8381F, cobalt#2B4A8E - Ochre
#D9A23A, umber#6B4424, chalk#EDE3CC - Graphite pencil
#4A4744
-
Paint the kraft ground
Choose File → New and make a 1200 × 1500 px document with a white background. Select Background, set the foreground to
#B98E5Fand choose Edit → Fill with nothing selected. The whole canvas is now plain brown cardboard.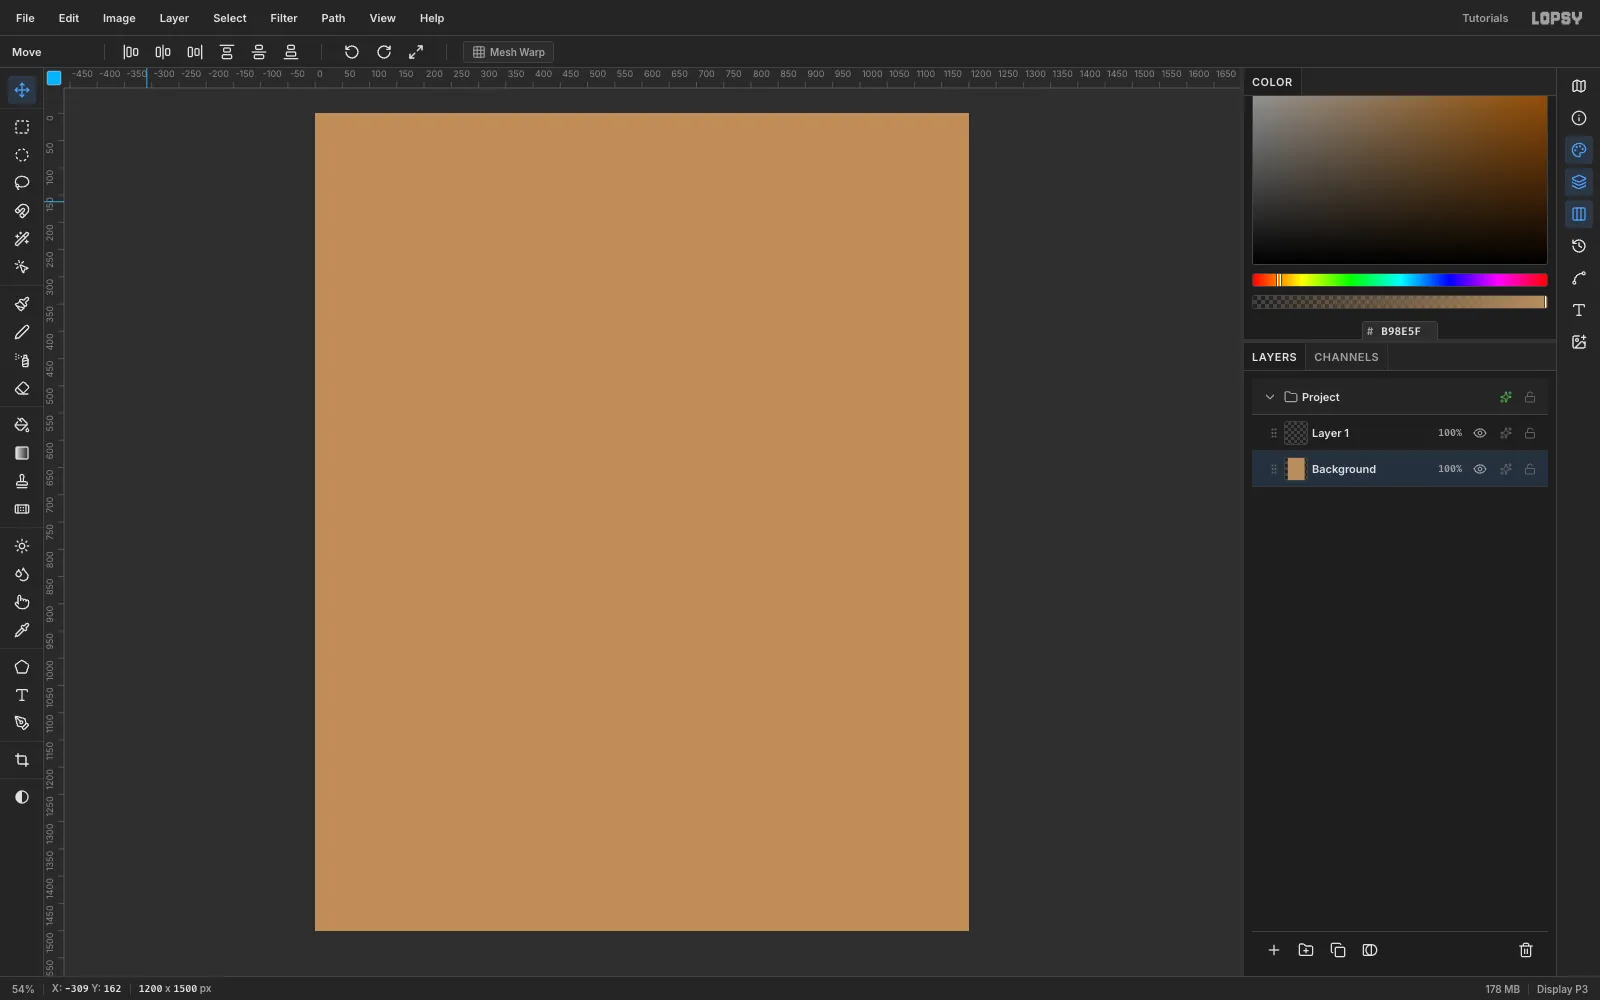
-
Make a corrugation pattern
Corrugated board shows faint ridges where the flutes sit under the face paper. You'll draw one ridge as a tile and repeat it.
- Rename Layer 1 to Flutes. Drag a Rectangular Marquee (M) from (0, 0) to (24, 60) and Edit → Fill it with white.
- Marquee (0, 0) to (9, 60) and fill it with
#B7A48C. That's the ridge. - Marquee the full 24 × 60 tile again and choose Edit → Define Pattern.
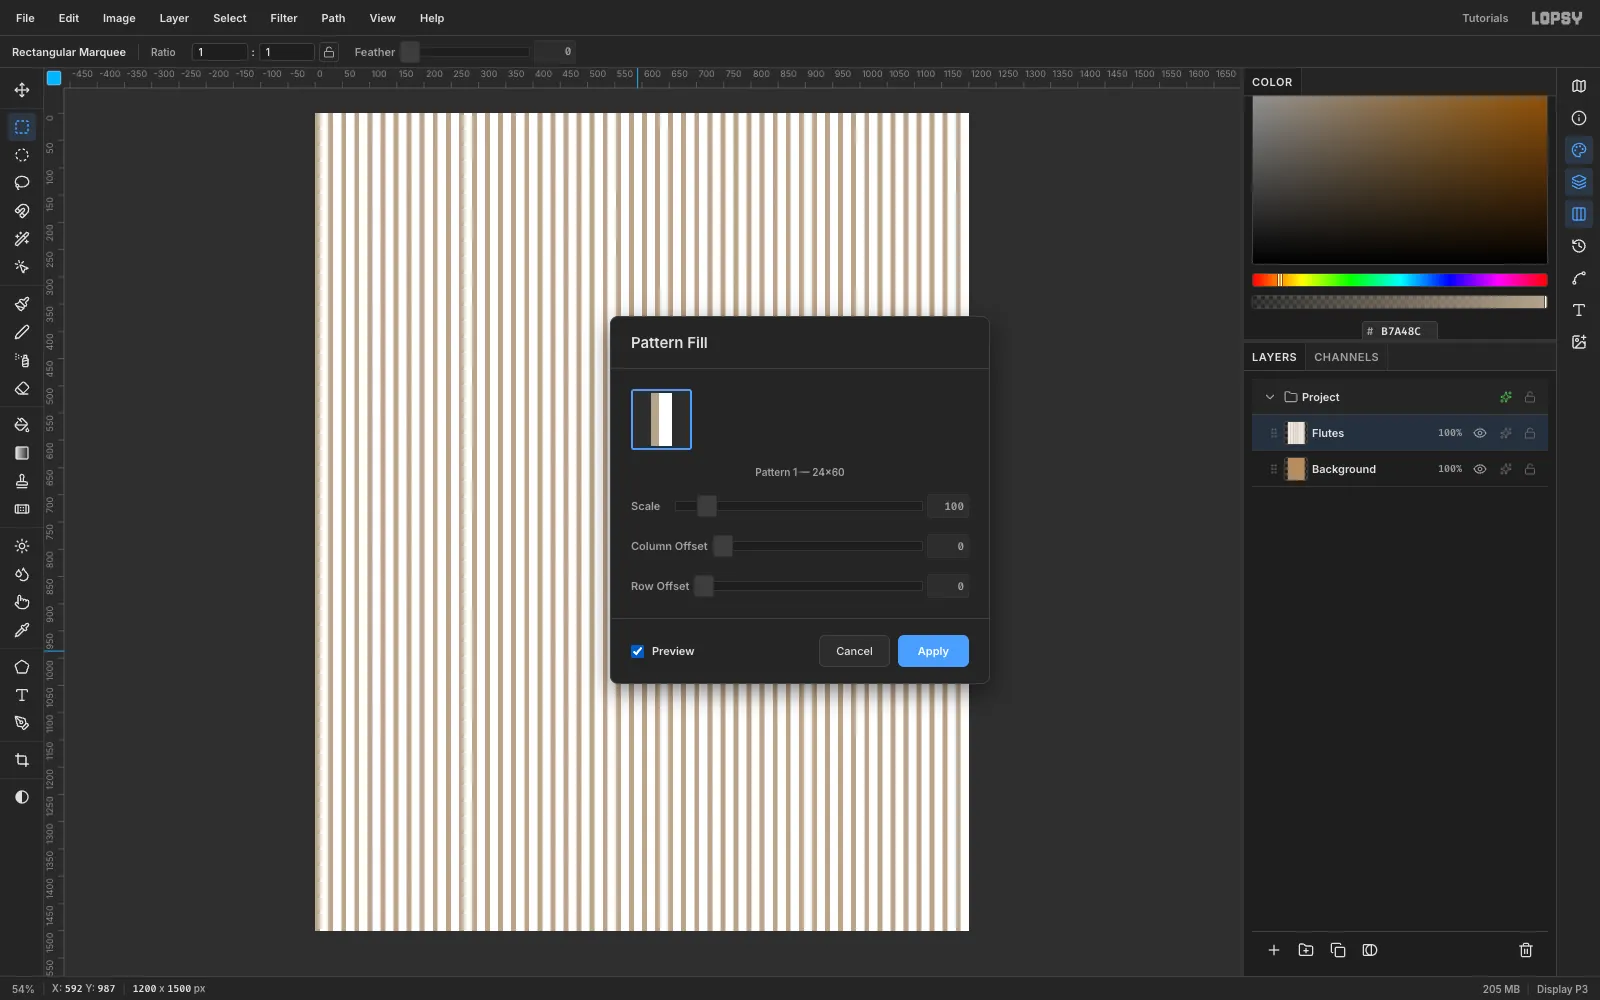
- Press Cmd+D, then choose Edit → Fill with Pattern…. Pick the new 24×60 tile, tick Preview, and click Apply.
The stripes are much too strong for now. The next step softens them.
-
Soften the stripes and add mottle and grain
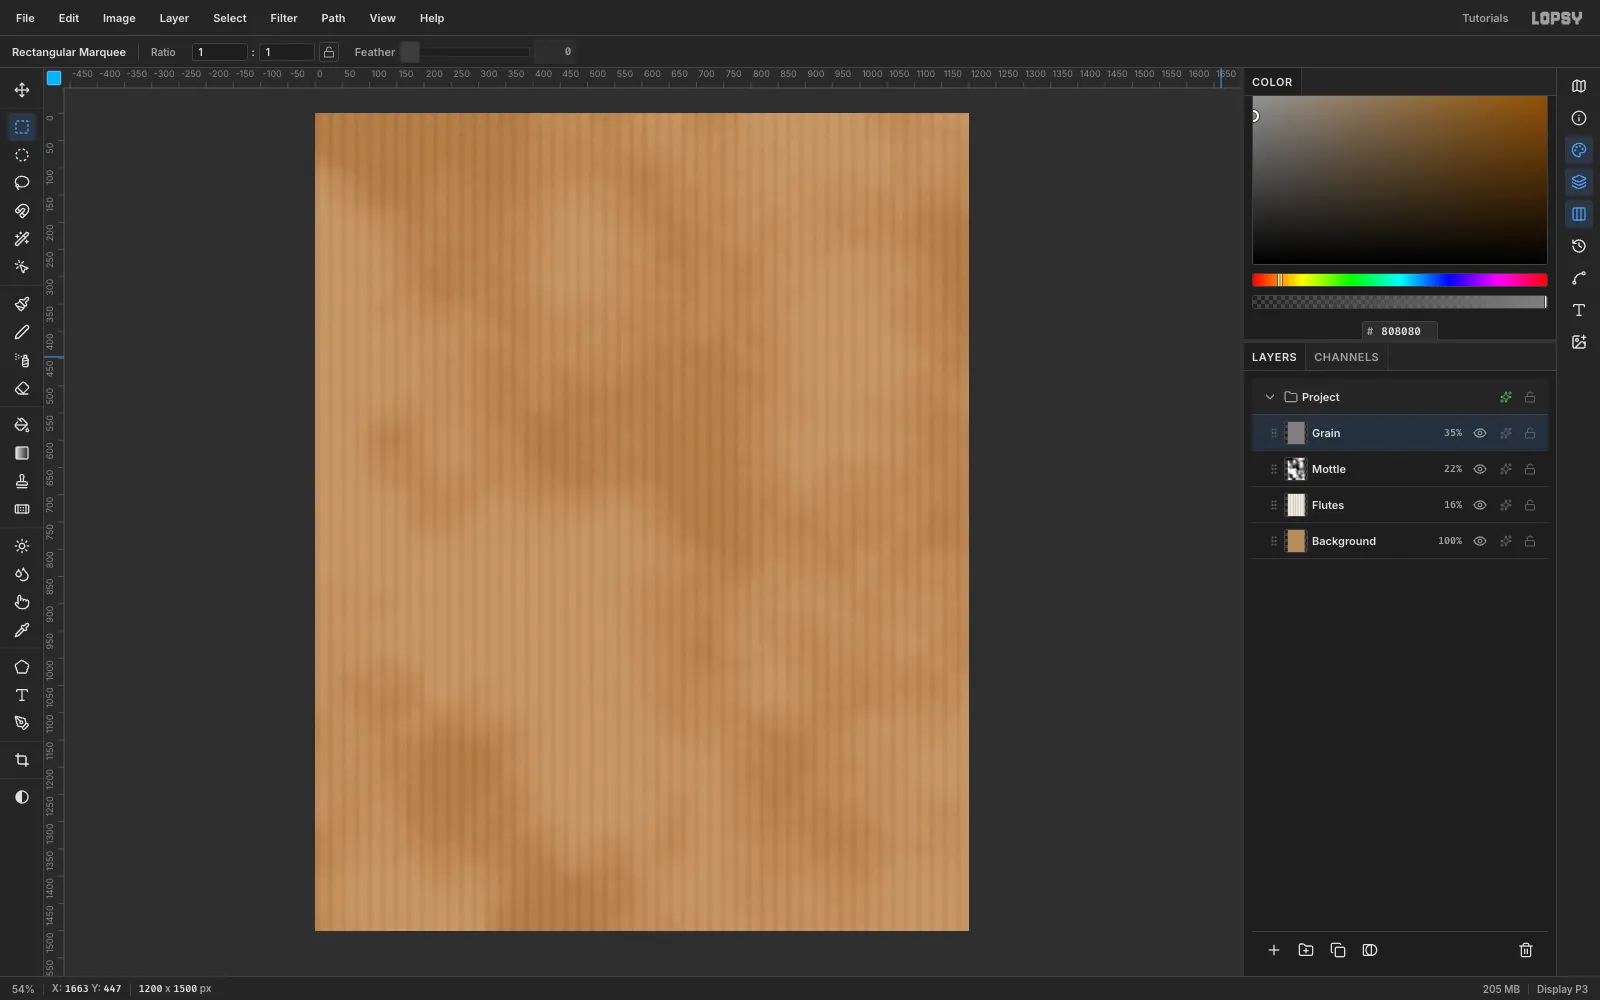
- On Flutes, run Filter → Gaussian Blur… at Radius 3. Set the layer to Multiply at 16%.
- Add a layer called Mottle, run Filter → Clouds…, and set it to Soft Light at 22%. Real cardboard is never one even colour.
- Add Grain, fill it with mid gray
#808080, then run Filter → Add Noise… at Amount 60 with Mono on. Run Filter → Motion Blur… at Angle 90, Distance 10 to pull the noise into fibres. Set it to Overlay at 35%.
-
Paint a Finster frame
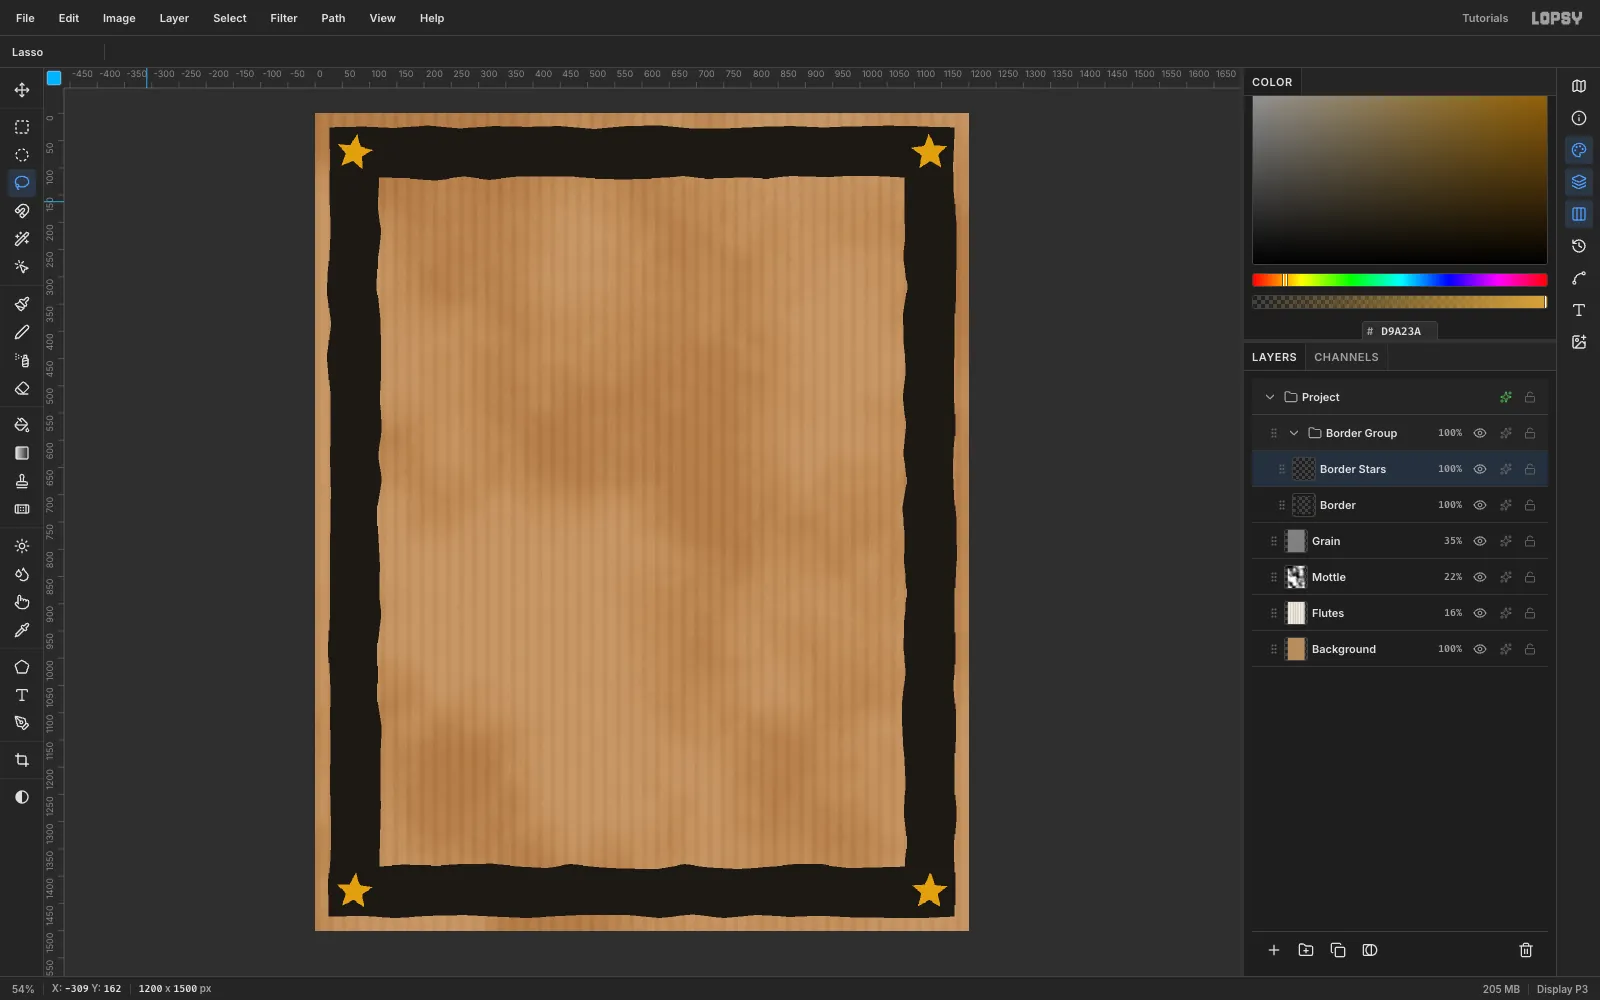
With Grain selected, click New Group and name it Border Group. Add a layer inside it called Border.
- With the Lasso (L), click around a rectangle about 26 px in from the canvas edge. Wiggle each side a little and fill it with ink
#1D1915. - Lasso a second wobbly rectangle about 118 px in from the edge and press Delete. You're left with a black band about 92 px wide.
- Add a Border Stars layer and lasso a five-point star, 68 px across, in the middle of each corner. Fill them with ochre
#D9A23A.
Hand-cut, slightly uneven edges matter more than any other detail here. Perfectly straight lines instantly look digital.
- With the Lasso (L), click around a rectangle about 26 px in from the canvas edge. Wiggle each side a little and fill it with ink
-
Fan out the turkey's tail
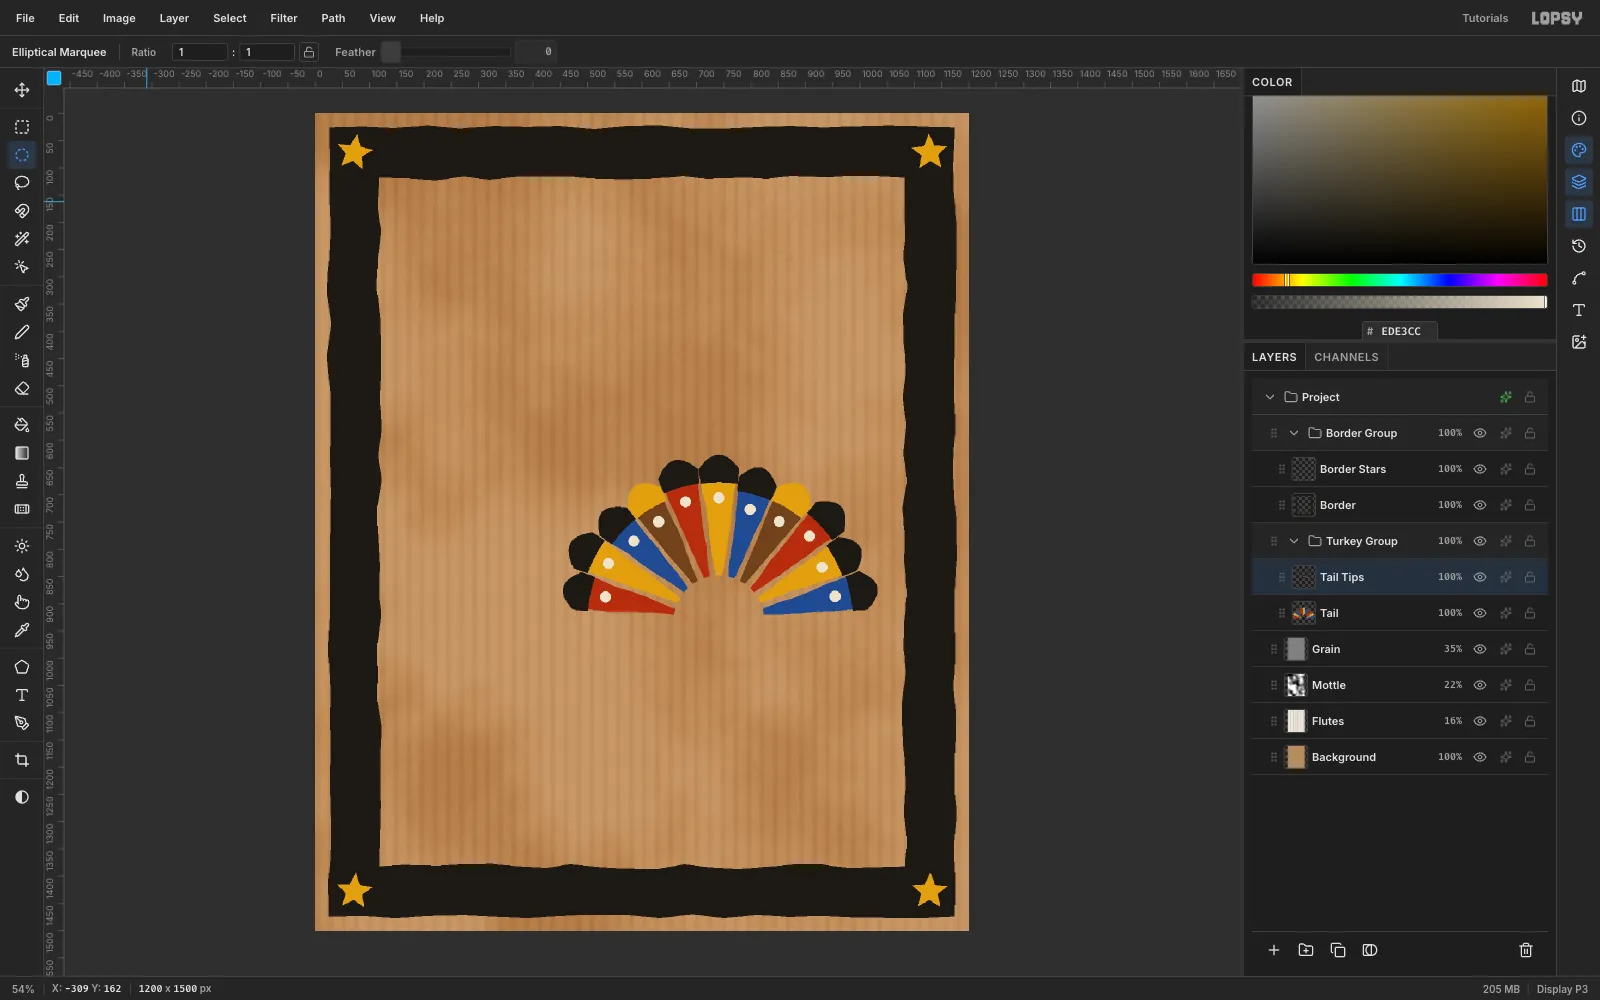
Select Grain again and make a New Group called Turkey Group. Traylor built animals from a few bold, flat shapes, and the fan tail is the biggest.
- Add a Tail layer. Lasso eleven long feathers that radiate from a point near (741, 932). Each one is narrow at the centre, about 295 px long, and rounded at the tip. Spread them from just below the left horizontal to just below the right. Fill them in turn with brick
#A8381F, ochre, cobalt#2B4A8Eand umber#6B4424, and leave a sliver of cardboard between neighbours. - Add Tail Tips. Lasso a rounded cap over the outer 50 px of every feather and fill it with ink. The umber feathers get ochre caps. Make each cap a little wider than its feather, so none of the feather colour peeks around it.
- Drop a chalk
#EDE3CCdot, 20 px across, into each feather just inside its cap, using the Elliptical Marquee and Edit → Fill.
- Add a Tail layer. Lasso eleven long feathers that radiate from a point near (741, 932). Each one is narrow at the centre, about 295 px long, and rounded at the tip. Spread them from just below the left horizontal to just below the right. Fill them in turn with brick
-
Paint the body, wing, legs and head
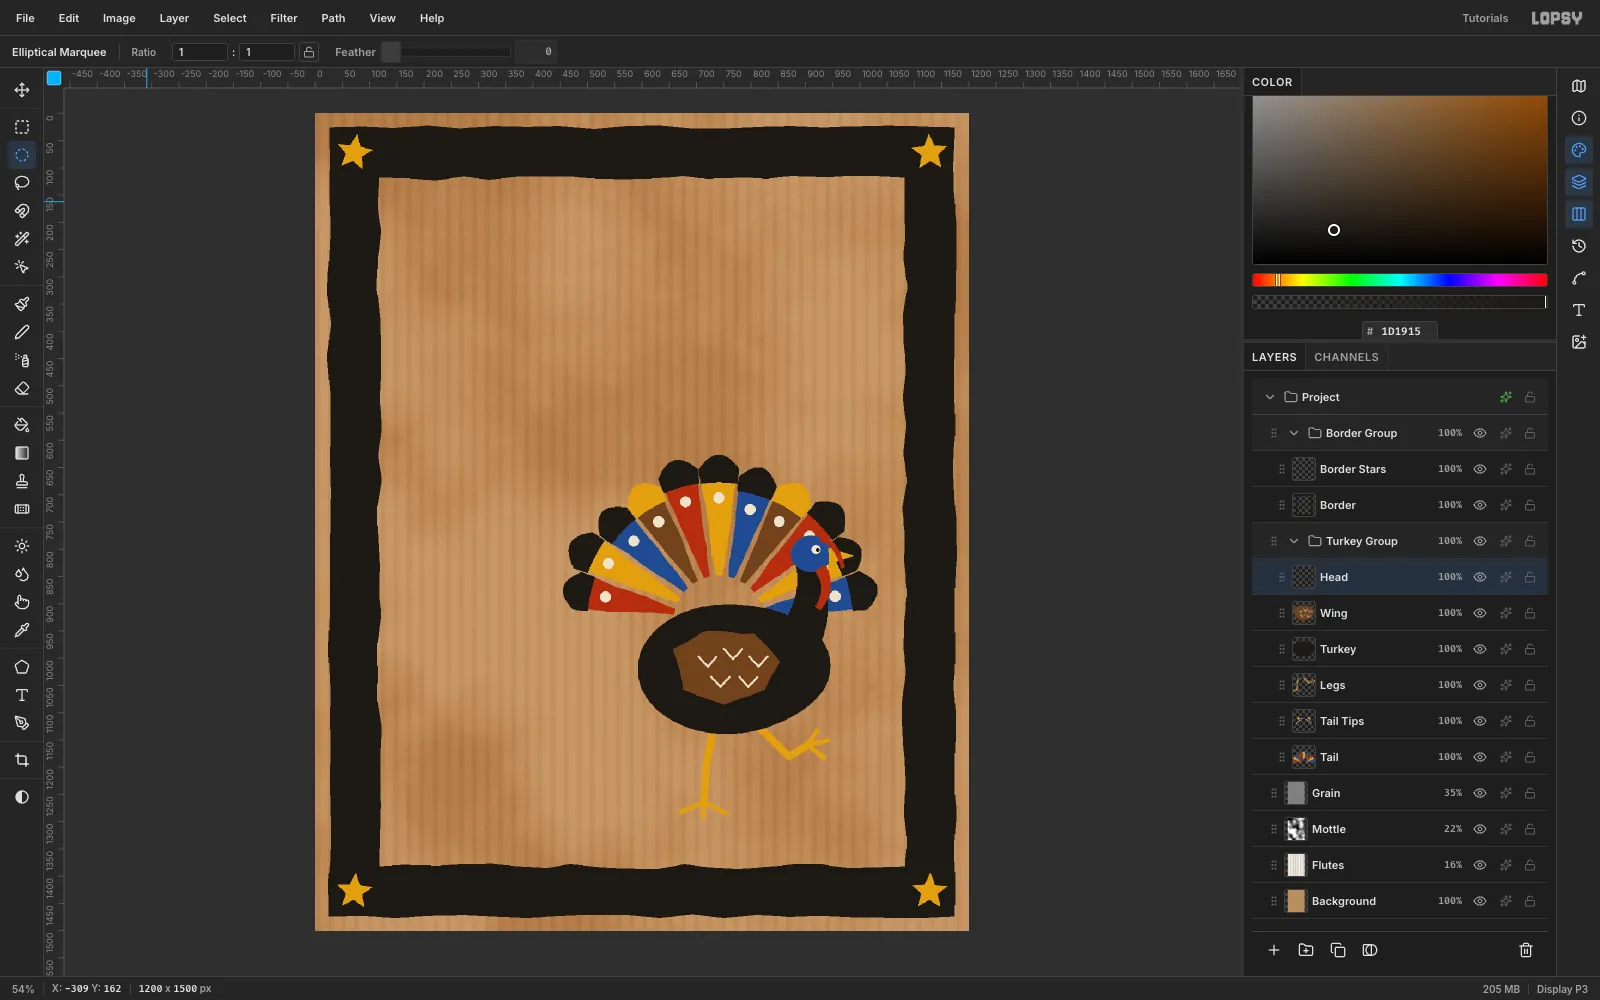
Add each part on its own layer inside Turkey Group, in this order:
- Legs: select the Brush (B) at Size 15, Hardness 100 in ochre. Paint one straight leg down to the ground with three toes. Paint the other leg bent back and raised, so the bird is clearly running.
- Turkey: lasso a big pear-shaped body, about 355 × 240 px, that leans forward to the right. Fill it with ink.
- Wing: lasso an irregular wing on the body and fill it with umber. With the brush at Size 5 in chalk, add five little chevrons for feathers.
- Head: lasso a curved, tapering neck up from the breast in ink. Then add a cobalt head circle about 74 px across, an ochre beak, brick snood and wattle ribbons, and a chalk eye with an ink pupil.
-
Paint the man in the top hat
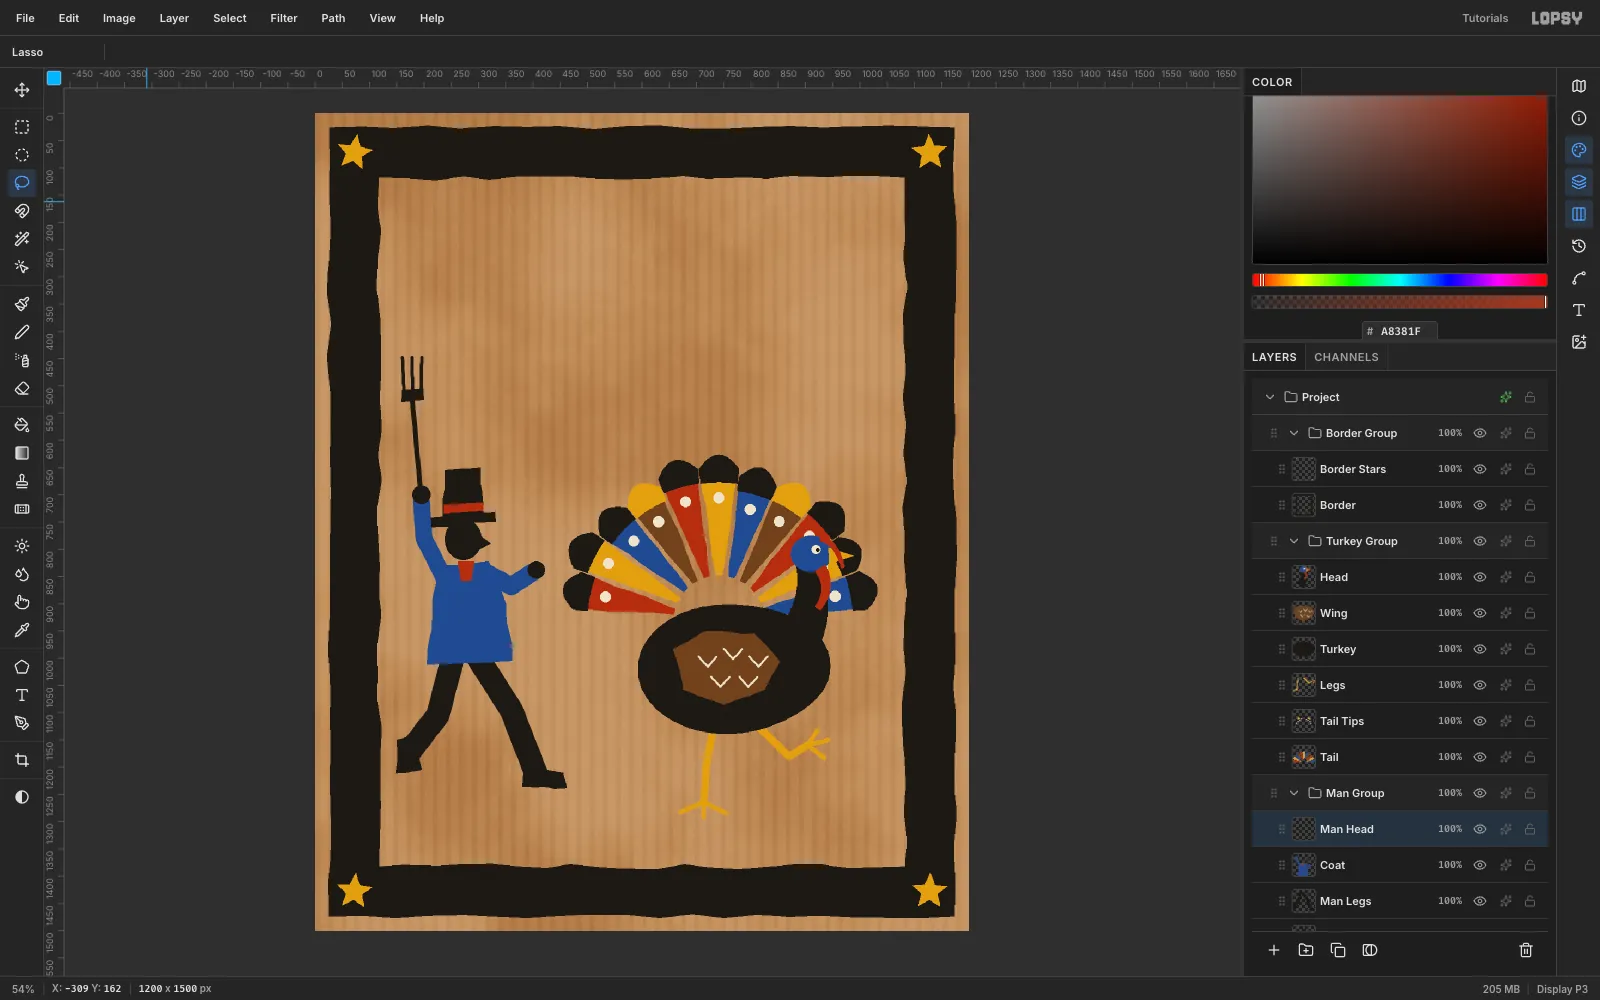
Select Grain and make a third group, Man Group. Build him from the back forward: Fork, Man Legs, Coat, Man Head.
- Fork: brush a 10 px ink handle up from his hand, lasso a crossbar, and brush three 7 px tines.
- Legs: a Size 44 ink brush makes the trousers in two strokes, a long stride forward and one leg kicked back. Lasso a flat shoe on the end of each.
- Coat: lasso a boxy cobalt coat. Brush the arms at Size 34, one reaching forward and one raised to hold the fork. Finish with ink hands and a small brick tie.
- Head: an ink oval with a pointed nose, a lassoed top hat and a brick hat band.
Traylor's people are nearly all profile and silhouette. Resist adding facial features.
-
Add the dog, the pie and star clusters
Select Grain and add these layers above it:
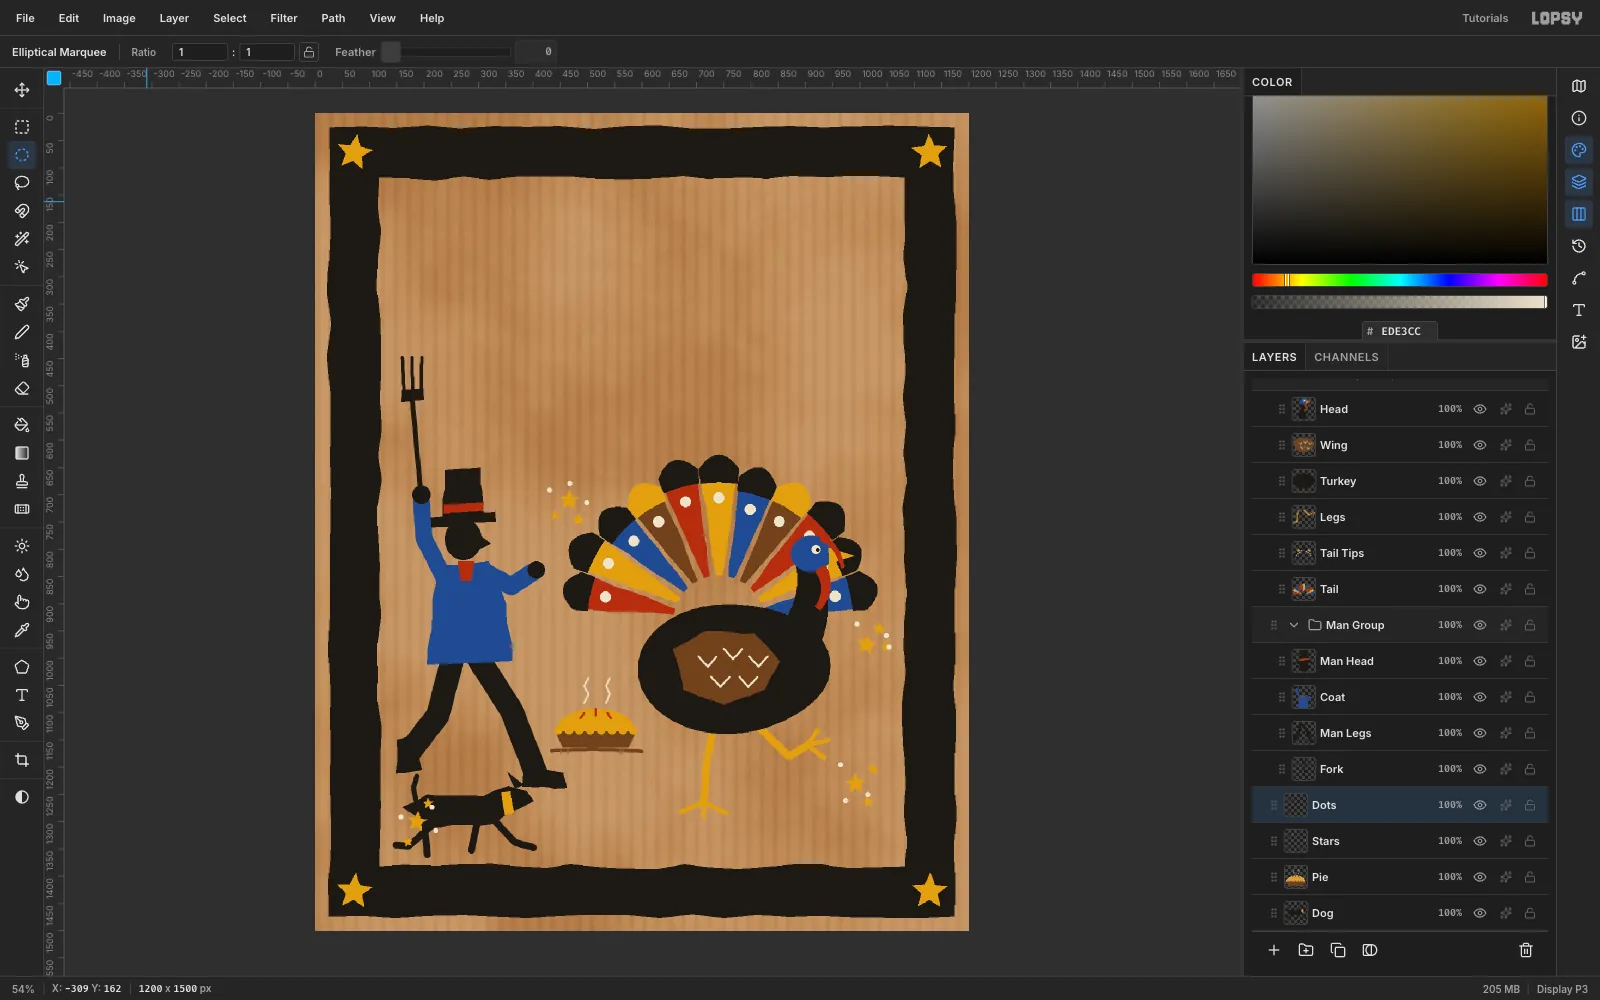
- Dog: lasso a long, low dog running right in the lower left corner, about 265 px long. Brush the four legs and an upright tail, and lasso an ochre collar. It's a little big and in the wrong place for now. You'll fix that with the transform handles next.
- Pie: brush a short umber ground stroke at y 1168. Lasso a pie tin in umber on it and a domed crust in ochre. Add a row of small ochre circles along the rim for the crimp, three brick steam vents and two wavy chalk wisps of steam.
- Stars and Dots: Finster packed his skies. Make four clusters, each one big 38 px ochre star with two small ones and three chalk dots.
-
Scale the dog down
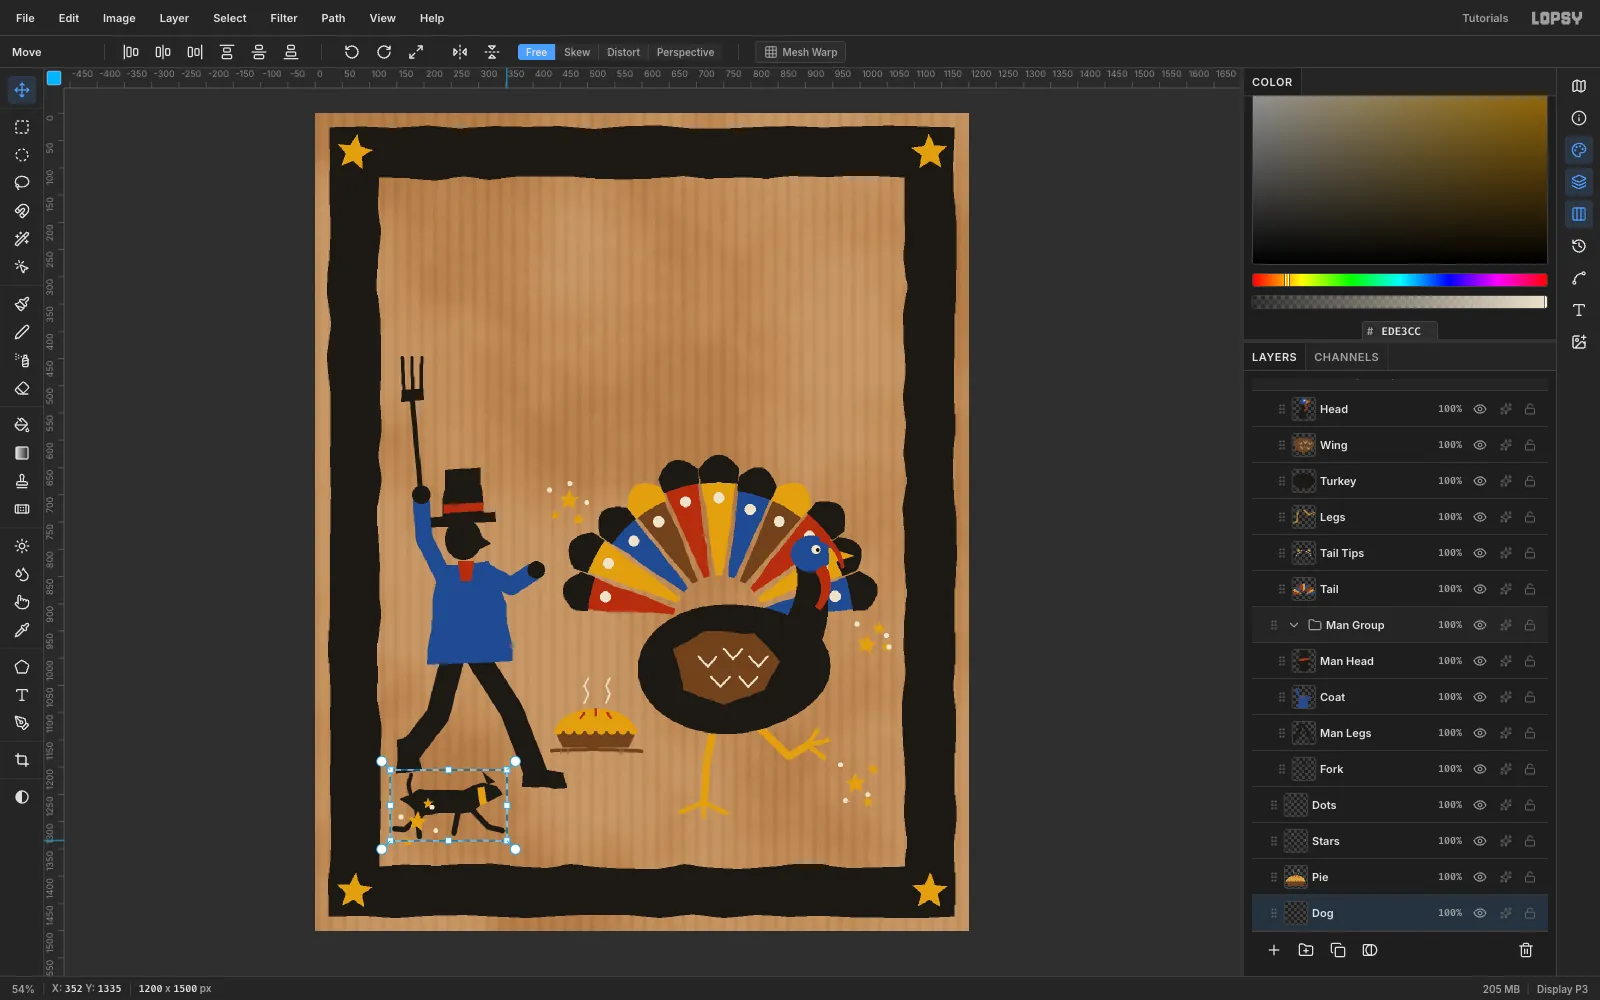
Select Dog and drag a marquee a few pixels bigger than the dog. Switch to the Move tool (V) so the transform handles appear. Hold Cmd and drag the bottom-right corner handle up and to the left until the box is about 78% of its size. Cmd keeps the scale uniform. Press Cmd+D to commit.
-
Move the dog to the turkey's heel
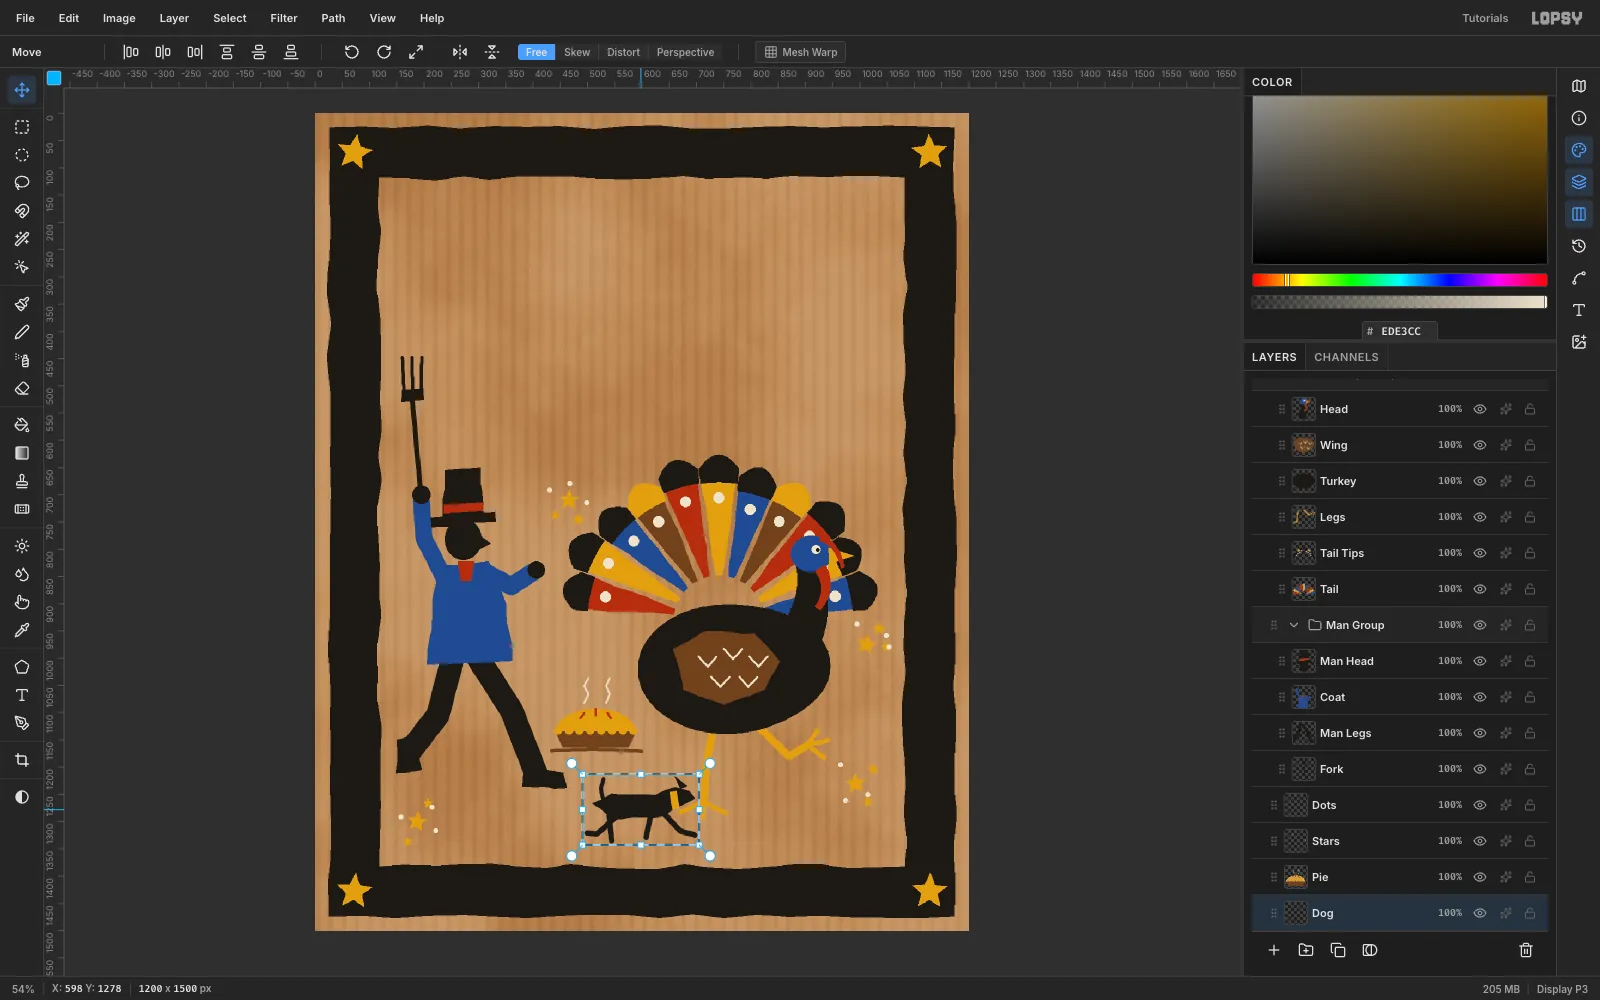
Marquee the smaller dog and drag it with the Move tool until its nose touches the turkey's front toes. The bottom of its paws should sit at about y 1339. Press Cmd+D. The dog now has a job in the story: it's nipping at the escaping bird.
-
Nudge the whole man as a group
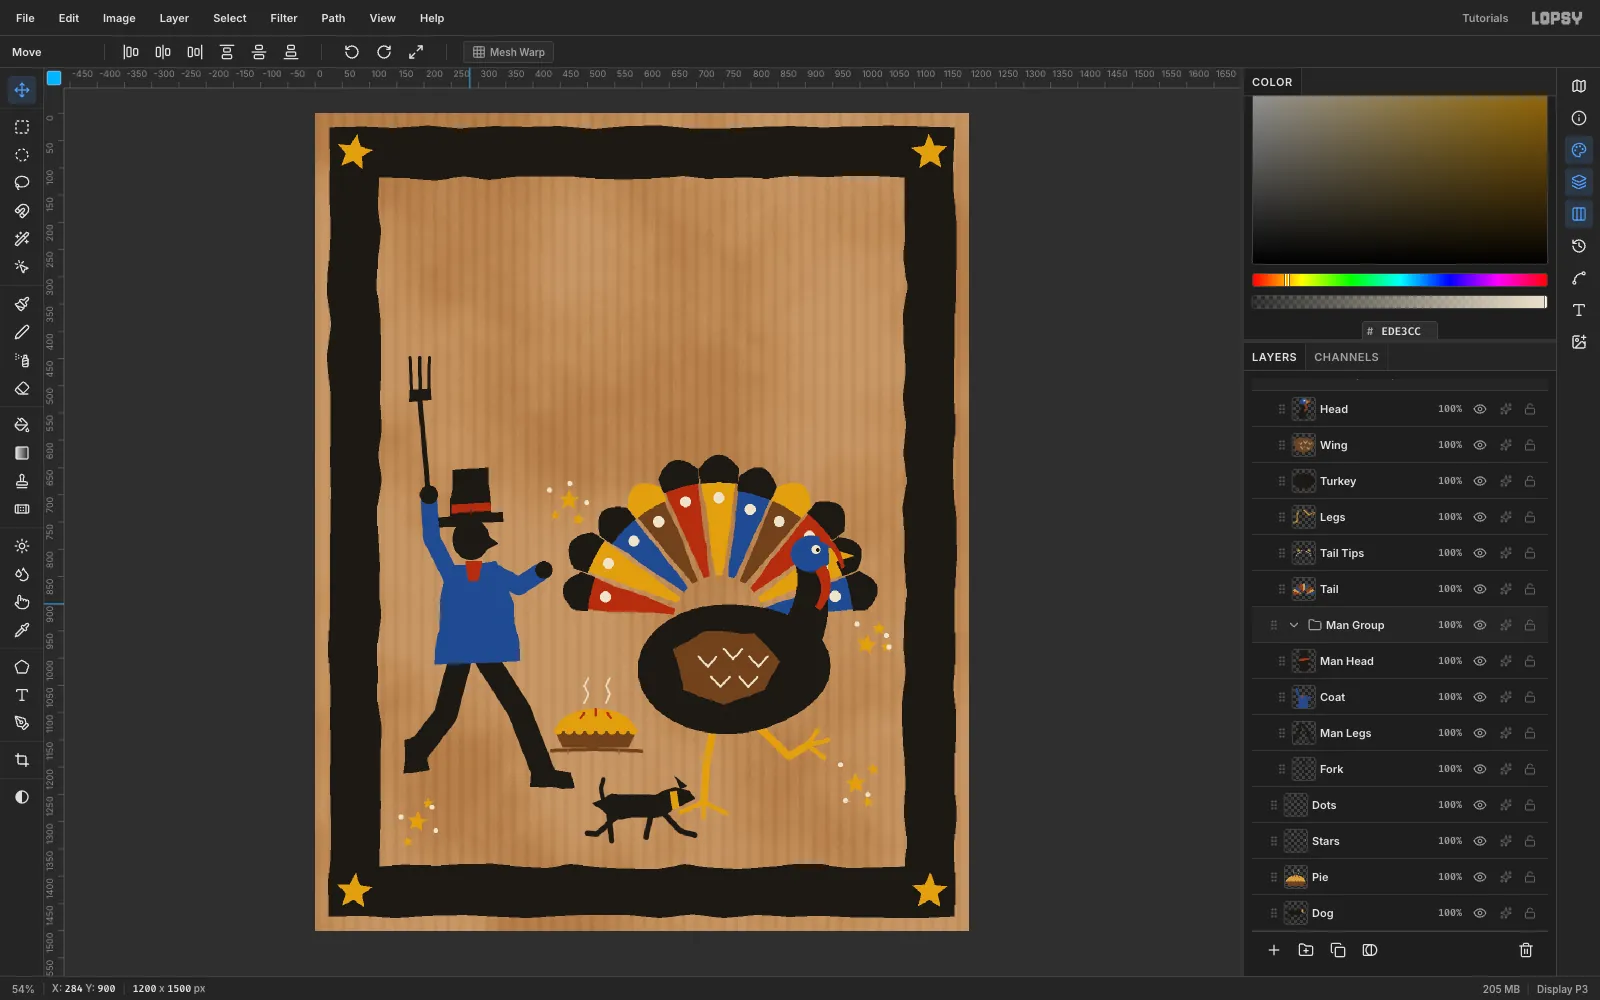
Click the Man Group row and drag anywhere on the canvas with the Move tool. Every layer in the group moves together. Move him about 14 px right, away from the frame, so he has room to run.
-
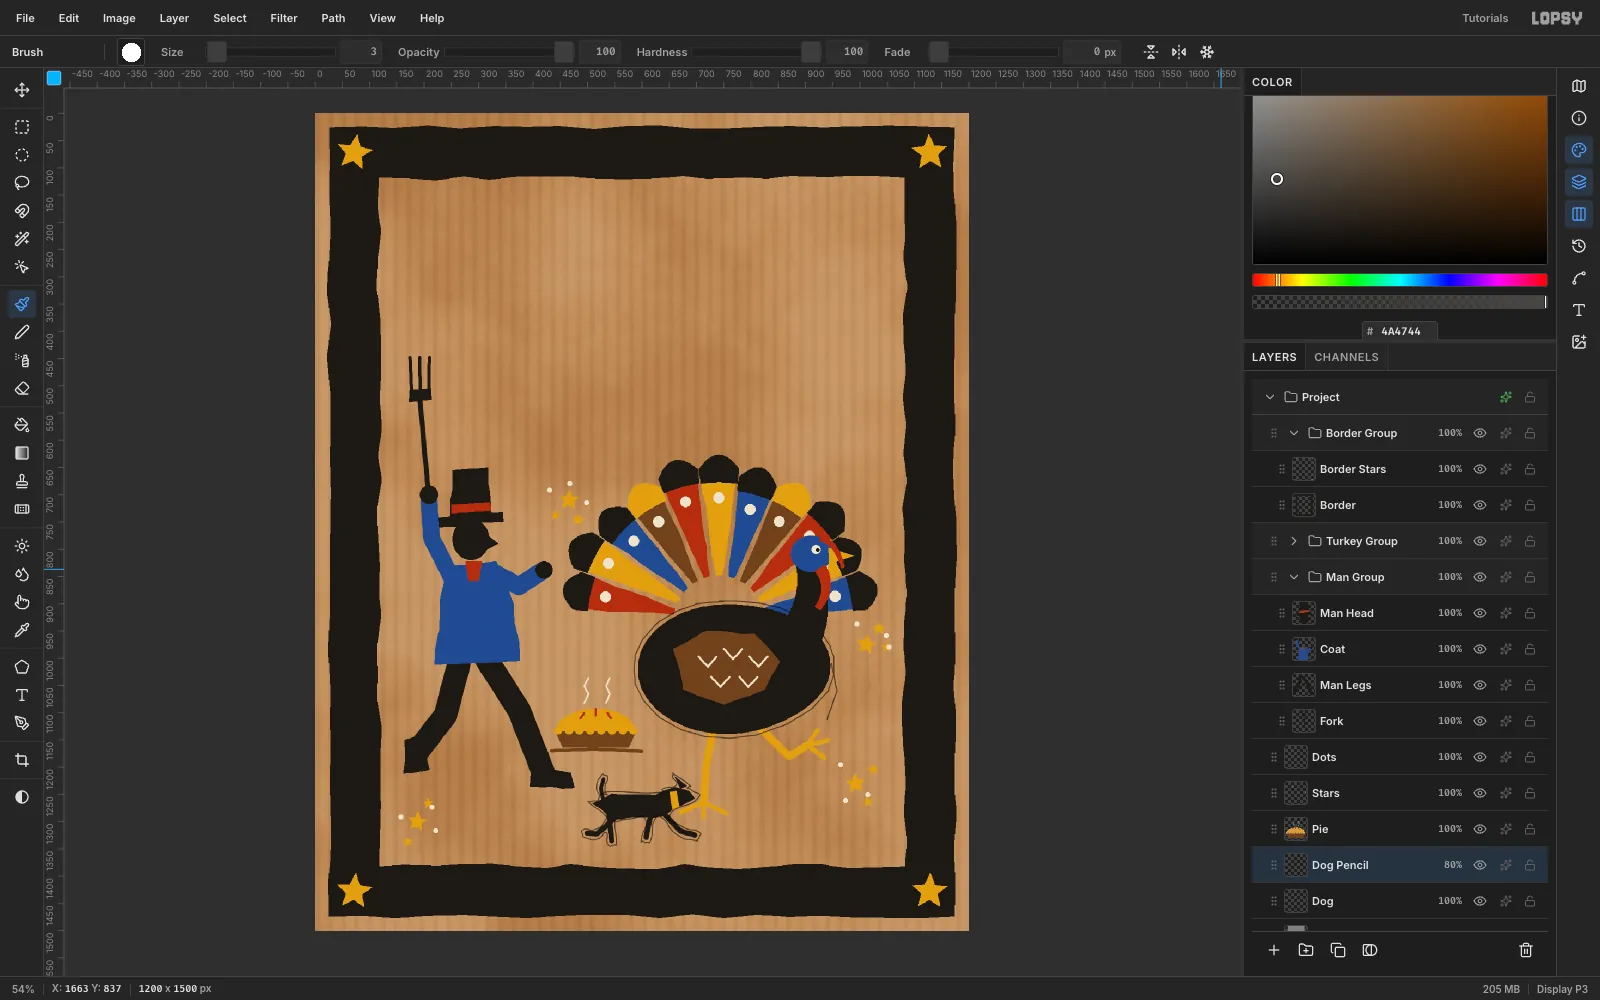
Draw a pencil underdrawing
Traylor pencilled his shapes first, and the lines still show at the edges. You'll turn each silhouette into a path and stroke it.
- In Turkey Group, add a Pencil layer above Head.
- Cmd-click the Turkey thumbnail to load the body as a selection. Choose Select → Grow… at 6 px, then Select → Selection → Path, and press Cmd+D.
- Set the foreground to graphite
#4A4744. In the Paths panel, click the new path, click Stroke Path, set Width 2 and click Stroke. - Brush one short 3 px line along the breast that runs past the body, like a construction line.
- Add a Dog Pencil layer above Dog and repeat steps 2 and 3 with Grow 3.
Set both pencil layers to Multiply at 80%. Delete the paths in the Paths panel, then drag Pencil just below Head, so the neck covers the line where it joins the body.
-
Paint and tilt the title
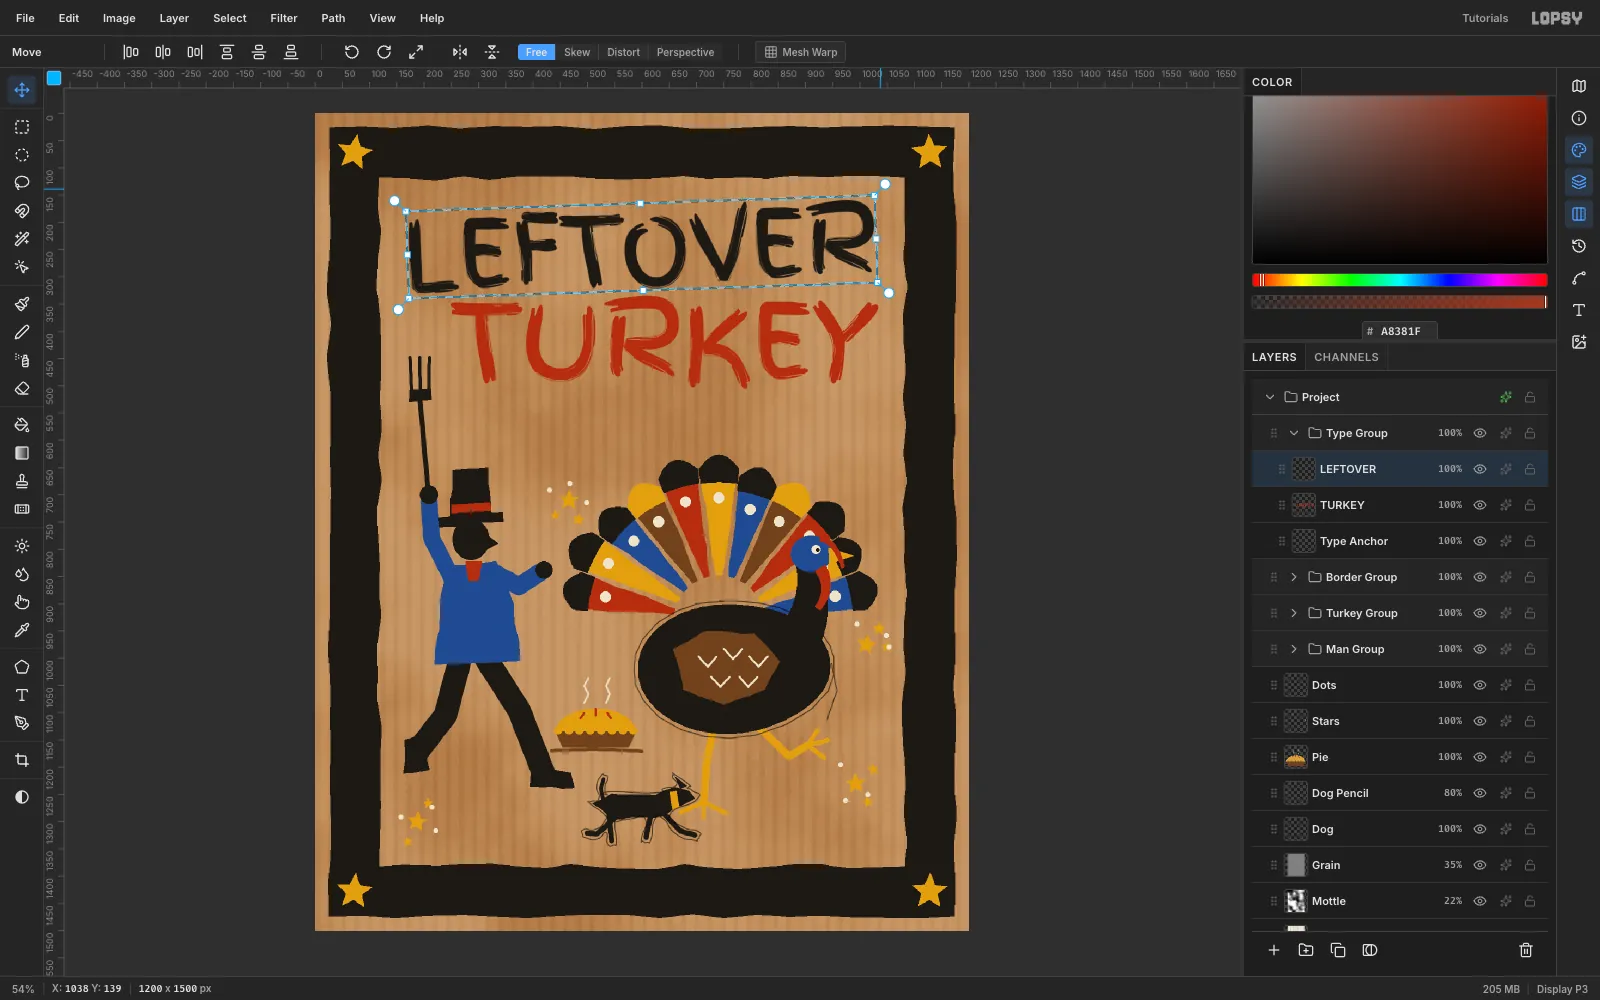
Select Dots and make a New Group called Type Group, then drag it to the top of the Layers panel. Add an empty Type Anchor layer inside it. New type lands just above the active layer, so select Type Anchor before you start each new text layer.
Pick the Text tool (T) and the Google font Finger Paint. Its letters have brush streaks built in, so they look like house paint.
- At Size 172 in ink, click in an empty spot, type
LEFTOVERand press Tab to commit. Move it so its top-left corner sits at (172, 168). - At Size 190 in brick, type
TURKEYand move it so its top-right corner sits at (1033, 334). Pushing one word left and one right looks more hand-made than centring both. - Rasterize before you rotate text. Select LEFTOVER and click Rasterize Layer at the bottom of the Layers panel. Marquee the word with a few pixels to spare, switch to Move, and drag the round rotation handle at the top-right corner a hair upward, to about −2°. Press Cmd+D. Do the same for TURKEY.
A sign painter's 2° tilt is enough. Much more and it starts to look like a mistake.
- At Size 172 in ink, click in an empty spot, type
-
Letter the frame
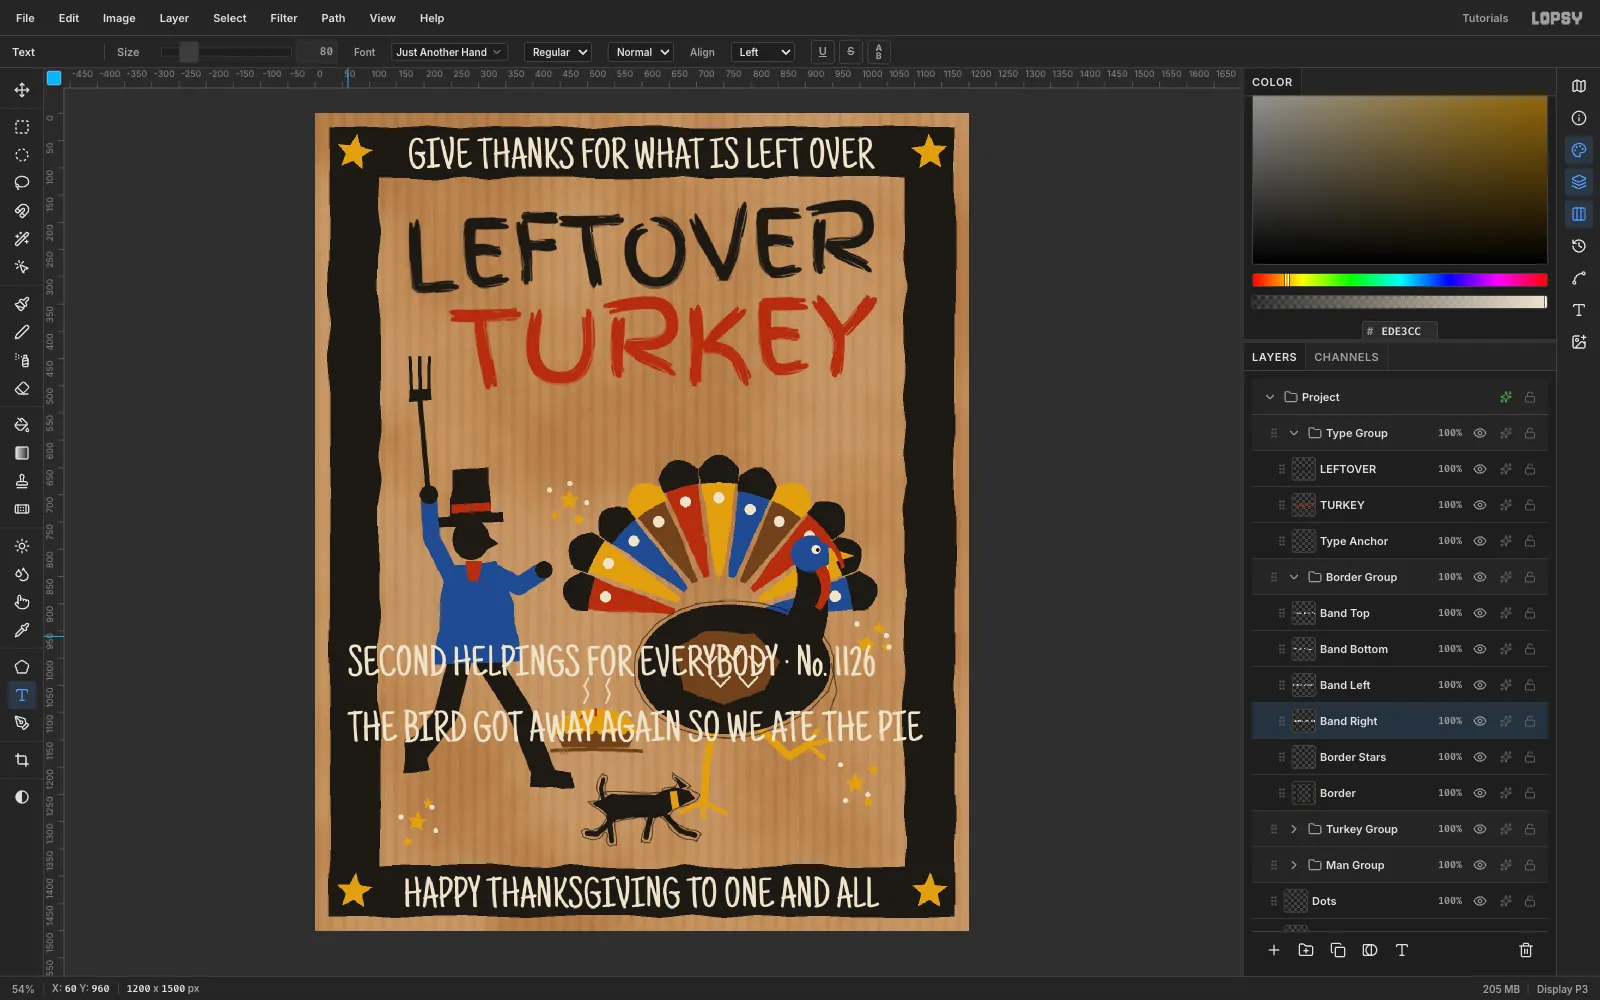
Expand Border Group and select Border Stars, so the new text lands inside the frame's group. Switch the font to Just Another Hand, a tall, narrow hand, at Size 80 in chalk
#EDE3CC.- Type
GIVE THANKS FOR WHAT IS LEFT OVER. Move it so it's centred on x 600 with its caps between y 42 and 102, which is the middle of the 26 – 118 px band. - Type
HAPPY THANKSGIVING TO ONE AND ALLand centre it in the bottom band, with its caps starting at y 1398. - Type the two side lines in empty space for now:
THE BIRD GOT AWAY AGAIN SO WE ATE THE PIEandSECOND HELPINGS FOR EVERYBODY · No. 1126. Paste the middle dot · from the clipboard. The number is a nod to Finster, who numbered every piece.
- Type
-
Turn the side lines to fit the frame
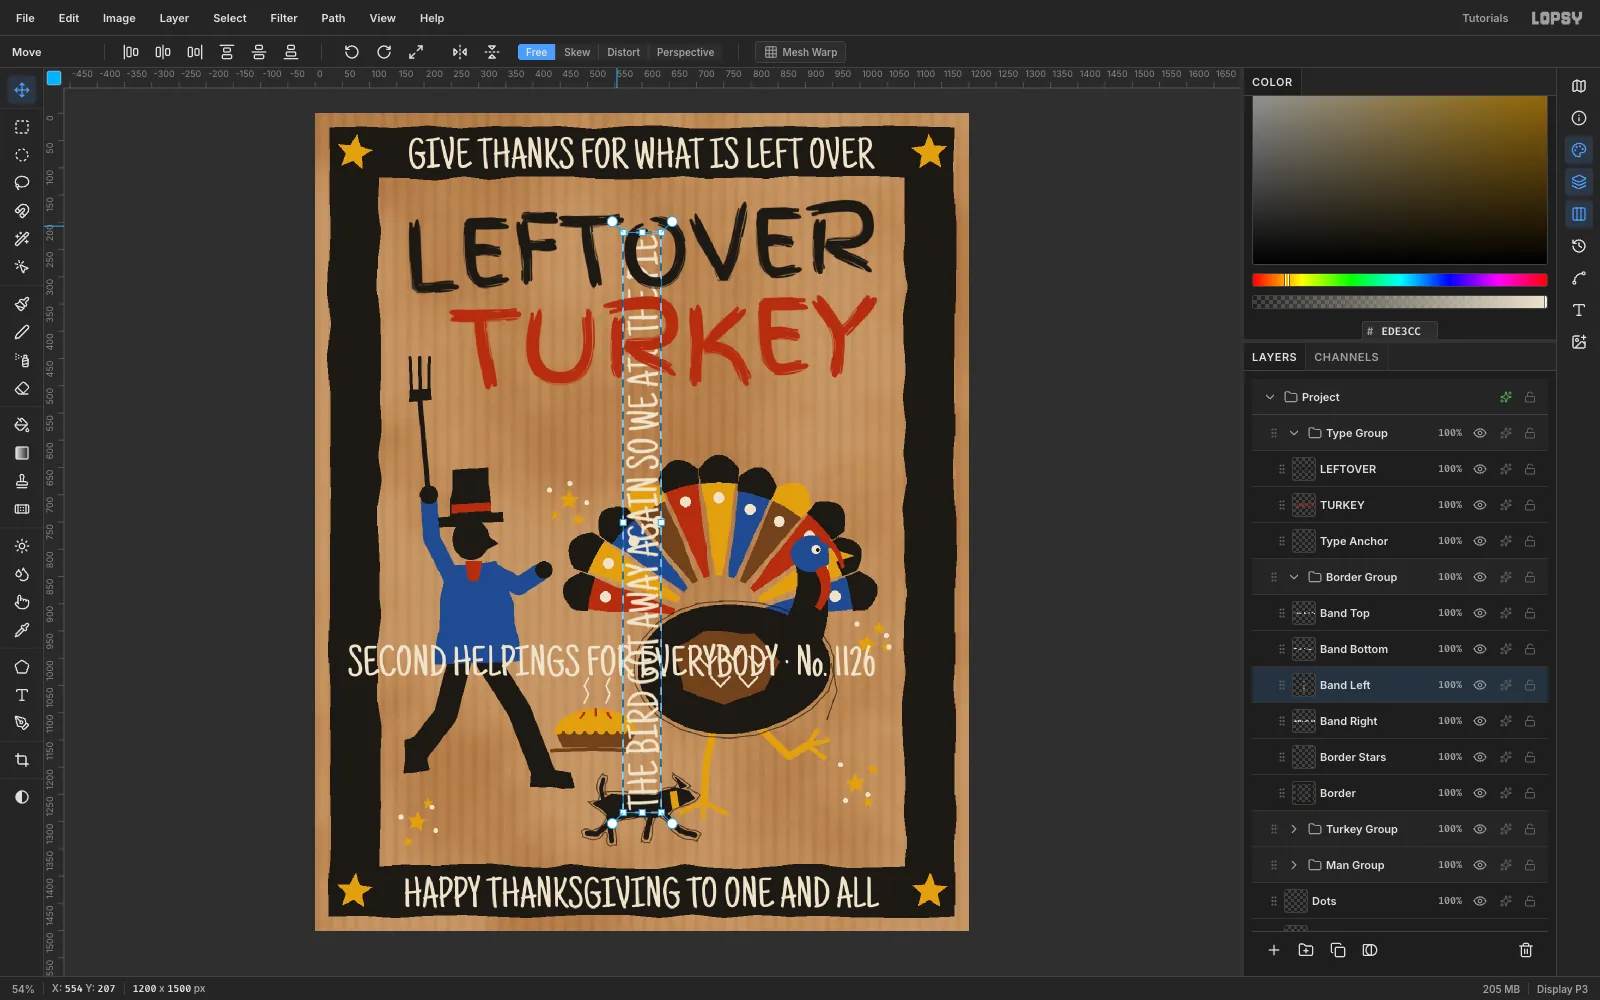
A long line can only rotate cleanly if it stays inside the canvas, so do the turn in the middle of the card:
- Move the left line so its centre is on the canvas centre (600, 750). Click Rasterize Layer.
- Marquee it, switch to Move, and hold Cmd as you drag the rotation handle. Cmd snaps to 15° steps, so stop at exactly −90°. The text now reads from bottom to top. Press Cmd+D.
- Drag it left until it's centred on x 72, in the middle of the left band.
Repeat with the right line, rotating +90° so it reads top to bottom, and centre it on x 1128.
-
Colour-code who's talking
Outsider pictures often talk. Colour tells you who's speaking, with the man in his coat colour and the turkey in its wattle colour.
- Select Type Anchor. At Size 60 in cobalt, type
COME BACK, Enter,HERE YOU, Enter,BIRD!. Open the Text panel and set Line height to 1.0. Move the block to (335, 520), just above the man's hat. - At Size 70 in brick, type
NOT THIS/YEAR!with line height 1.0 and move it to (845, 545), above the turkey's head. - Add a Speech Tails layer. With a Size 5 brush, paint a short curved line from under each block to the speaker's mouth, each in the speaker's colour.
- Select Type Anchor. At Size 60 in cobalt, type
-
Hand-dot the frame
Finster loved rows of dots. A brush with wide spacing makes them, and jitter makes them look hand-dotted rather than stamped.
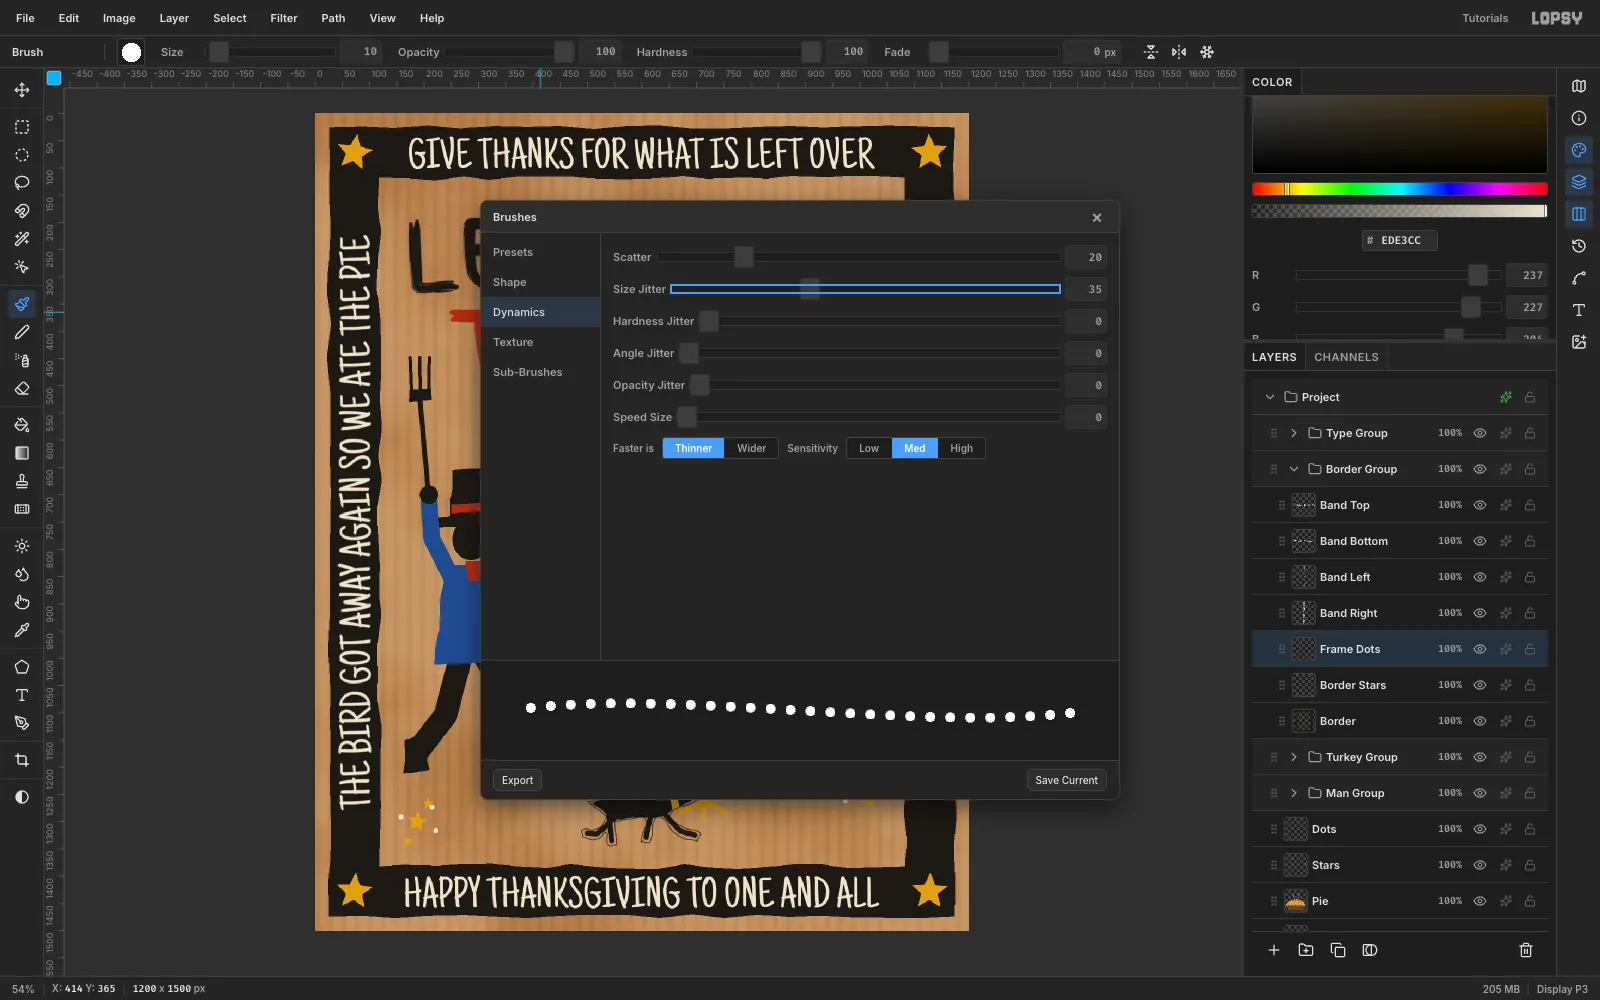
- In Border Group, add a Frame Dots layer above Border Stars. Pick the brush at Size 10, Hardness 100, in chalk.
- Open the Brushes modal. On the Shape tab, set Spacing to 200, which is the maximum. On the Dynamics tab, set Size Jitter to 35 and Scatter to 20.
- Drag four slightly wavy lines about 18 px inside the black band: along y 136 and y 1364, and down x 136 and x 1064.
Set Spacing, Size Jitter and Scatter back to their old values afterwards. The Brushes modal remembers them for every later stroke.
-
See the finished frame
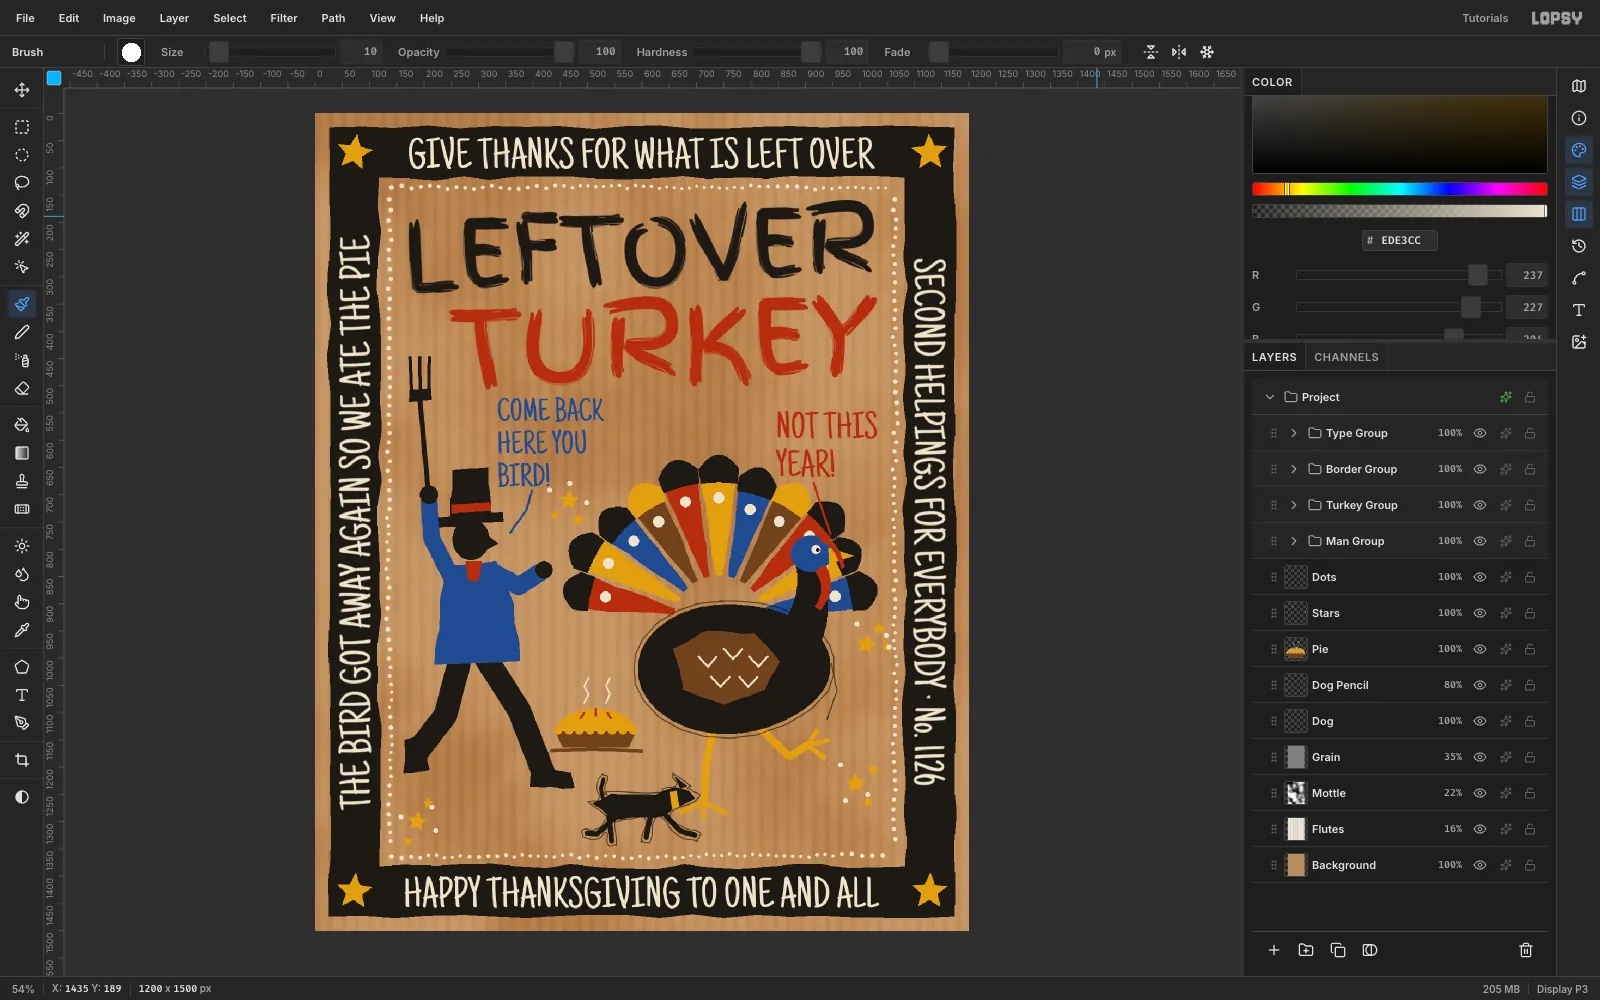
The dots vary in size and wobble off the line, just like Finster's. Check that they clear the title, the star clusters and the turkey's fan tail. If a cluster crowds them, marquee it on the Stars layer and drag it away with the Move tool.
-
Let the corrugation show through the paint
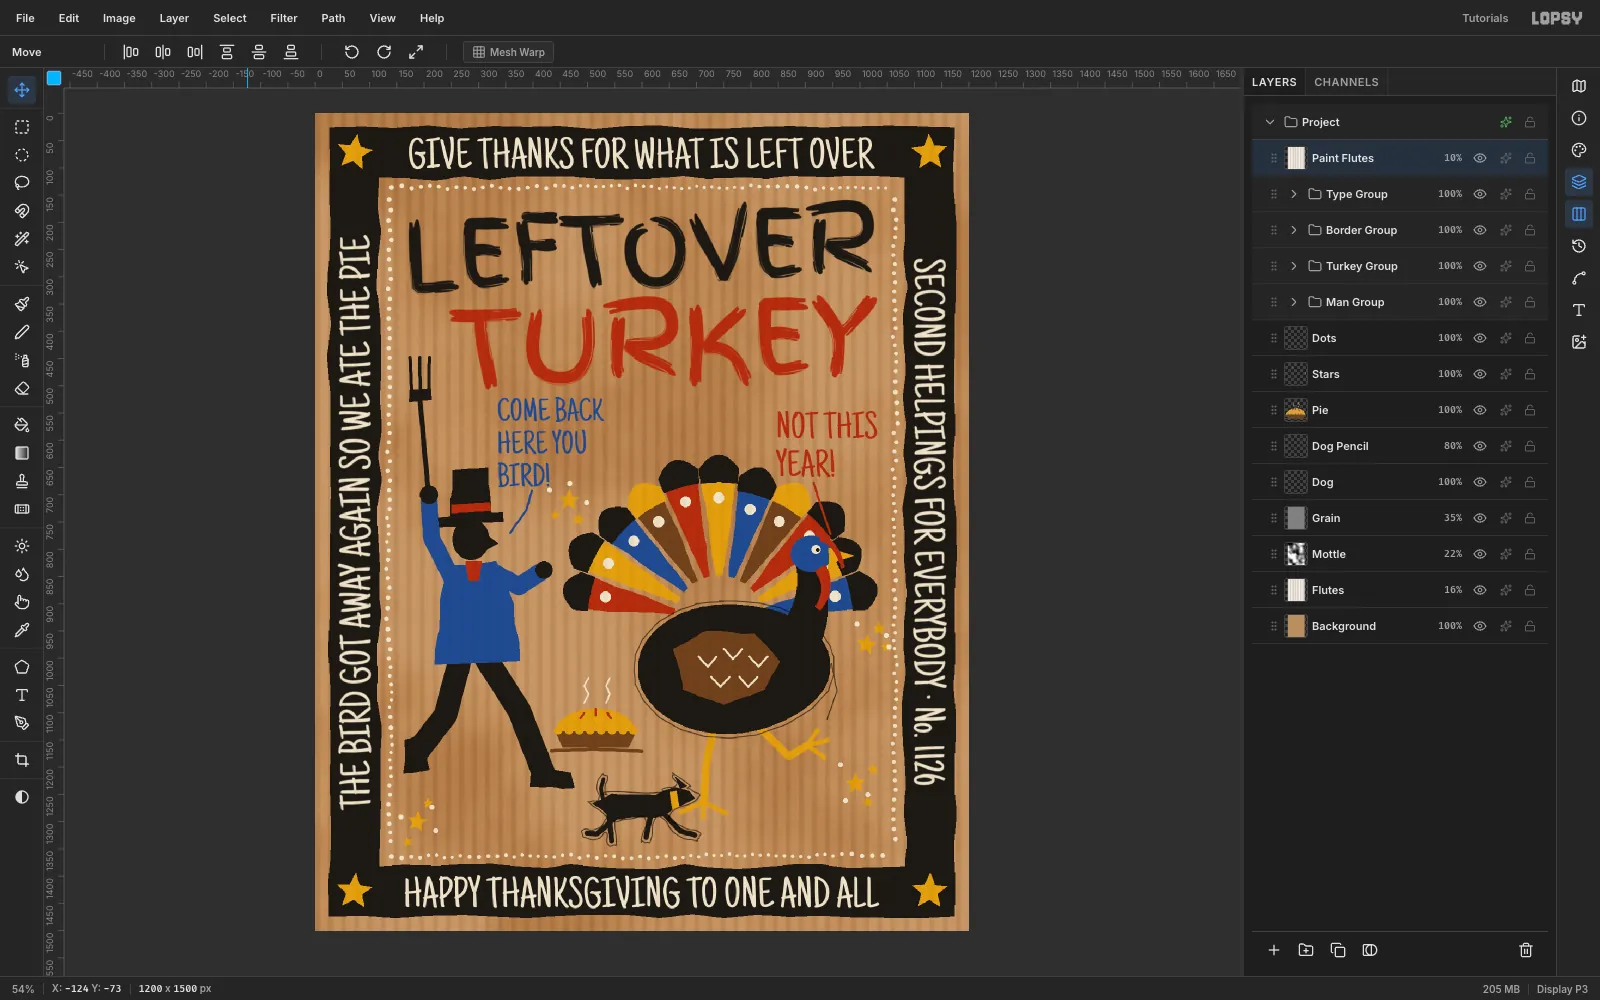
Paint on corrugated board sinks into the ridges too. Select Flutes and choose Layer → Duplicate Layer. Rename the copy Paint Flutes, drag it to the very top of the Layers panel, and set its opacity to 10% (it keeps Multiply). If a long drag won't drop, close the Color and Info panels so the Layers list has room, or drag it up a few groups at a time.
-
Knock back the paint with dry-brush wear
House paint skips over the ridges and leaves little gaps of bare board. You'll make those gaps from noise.
- Add a Wear Noise layer at the top and fill it with
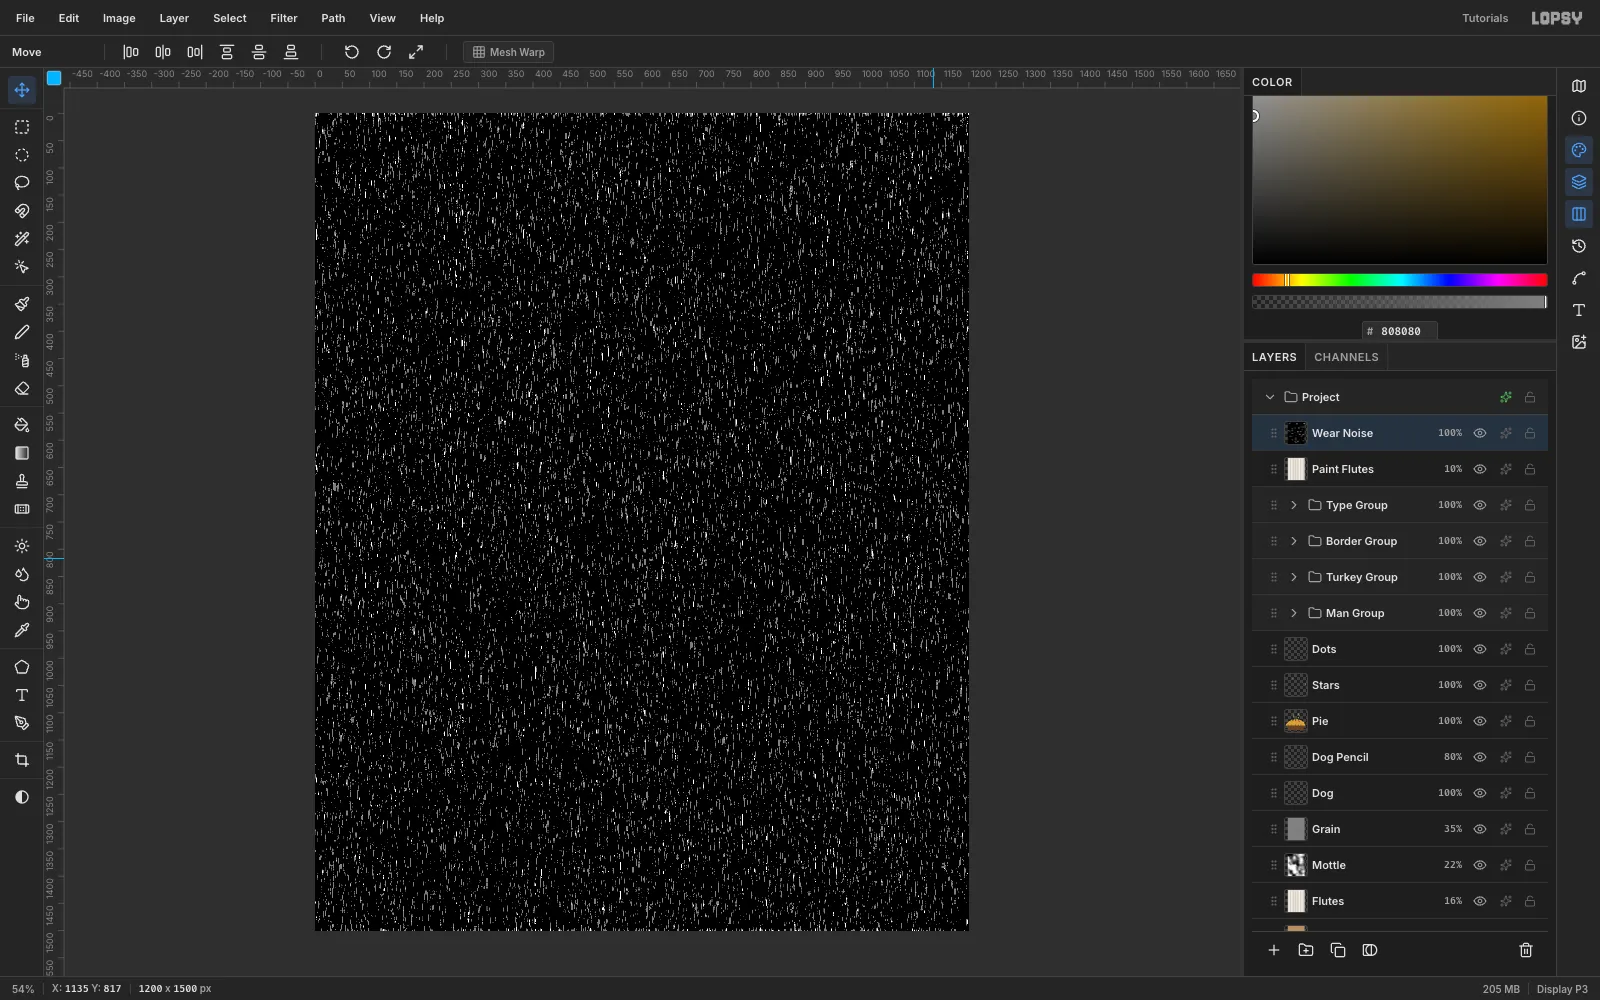
#808080. Run Add Noise at Amount 100, Mono, Gaussian, then Motion Blur at Angle 90, Distance 12. - Run Filter → Threshold… at about 136. Only the brightest 4 – 5% of the streaks stay white.
- Pick the Magic Wand (W) with Contiguous off. Click a solid black area, then choose Select → Inverse. Every white streak is now selected.
- Add a Wear Noise layer at the top and fill it with
-
Fill the wear with cardboard colour
Click Add Layer, name it Wear, and Edit → Fill the selection with the cardboard colour
#B98E5F. Press Cmd+D and hide Wear Noise. On bare cardboard the scuffs disappear. On the paint they read as dry-brush gaps.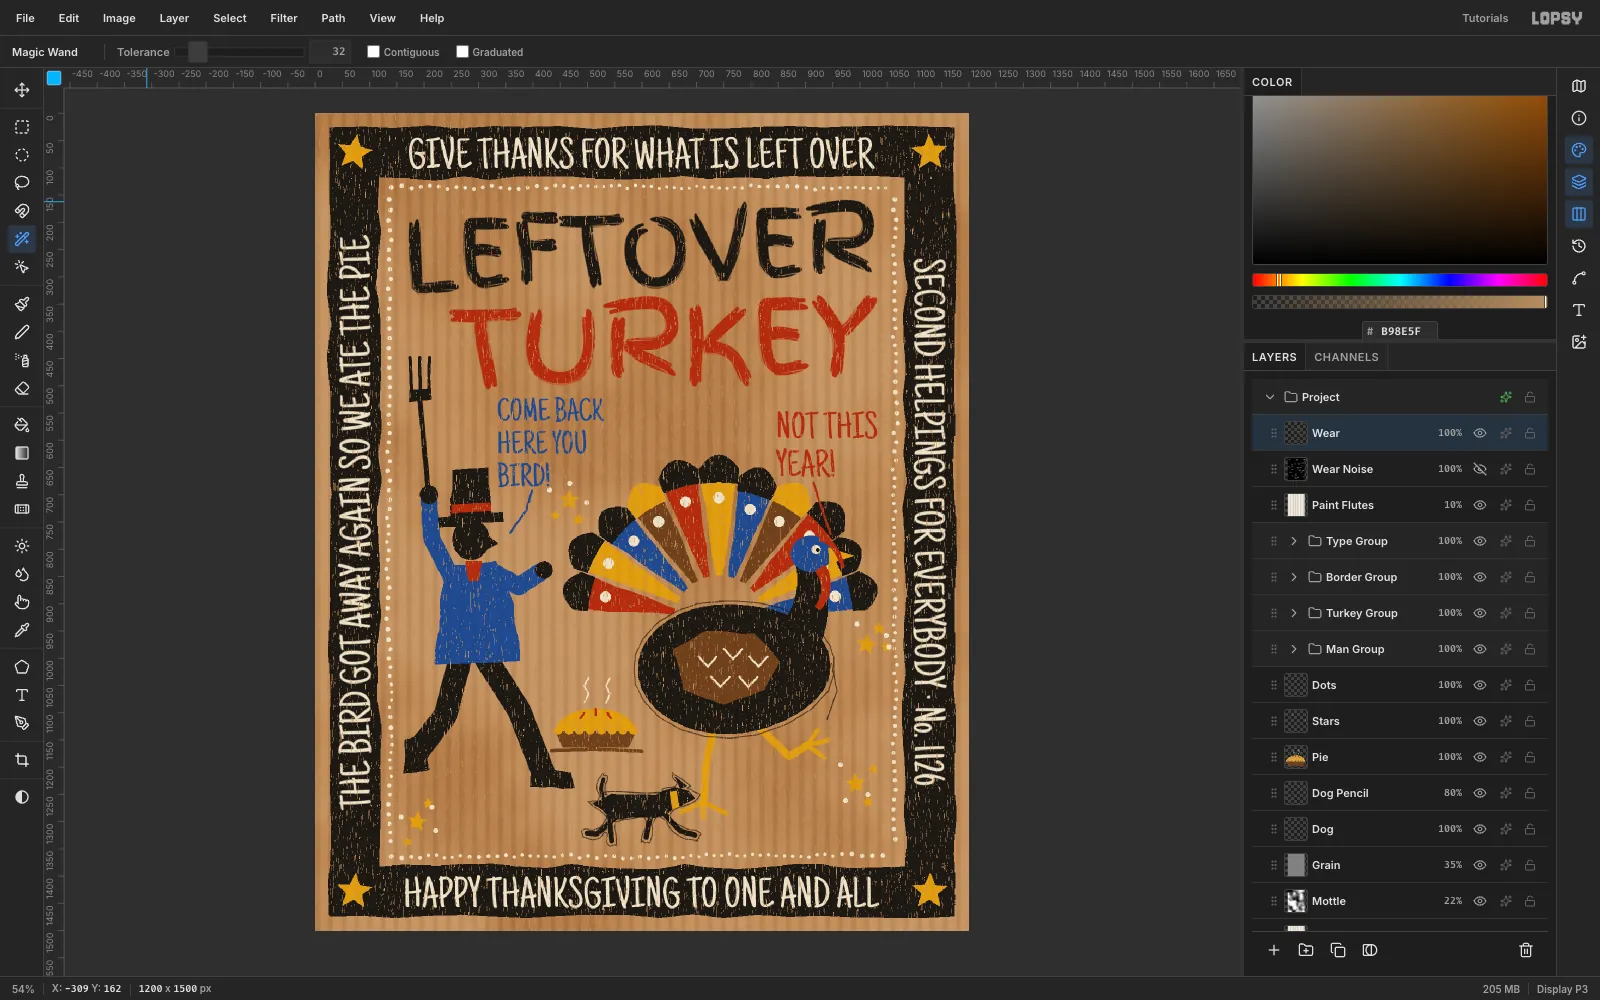
-
Set down a coffee ring
Every card that sat on a kitchen table has one.
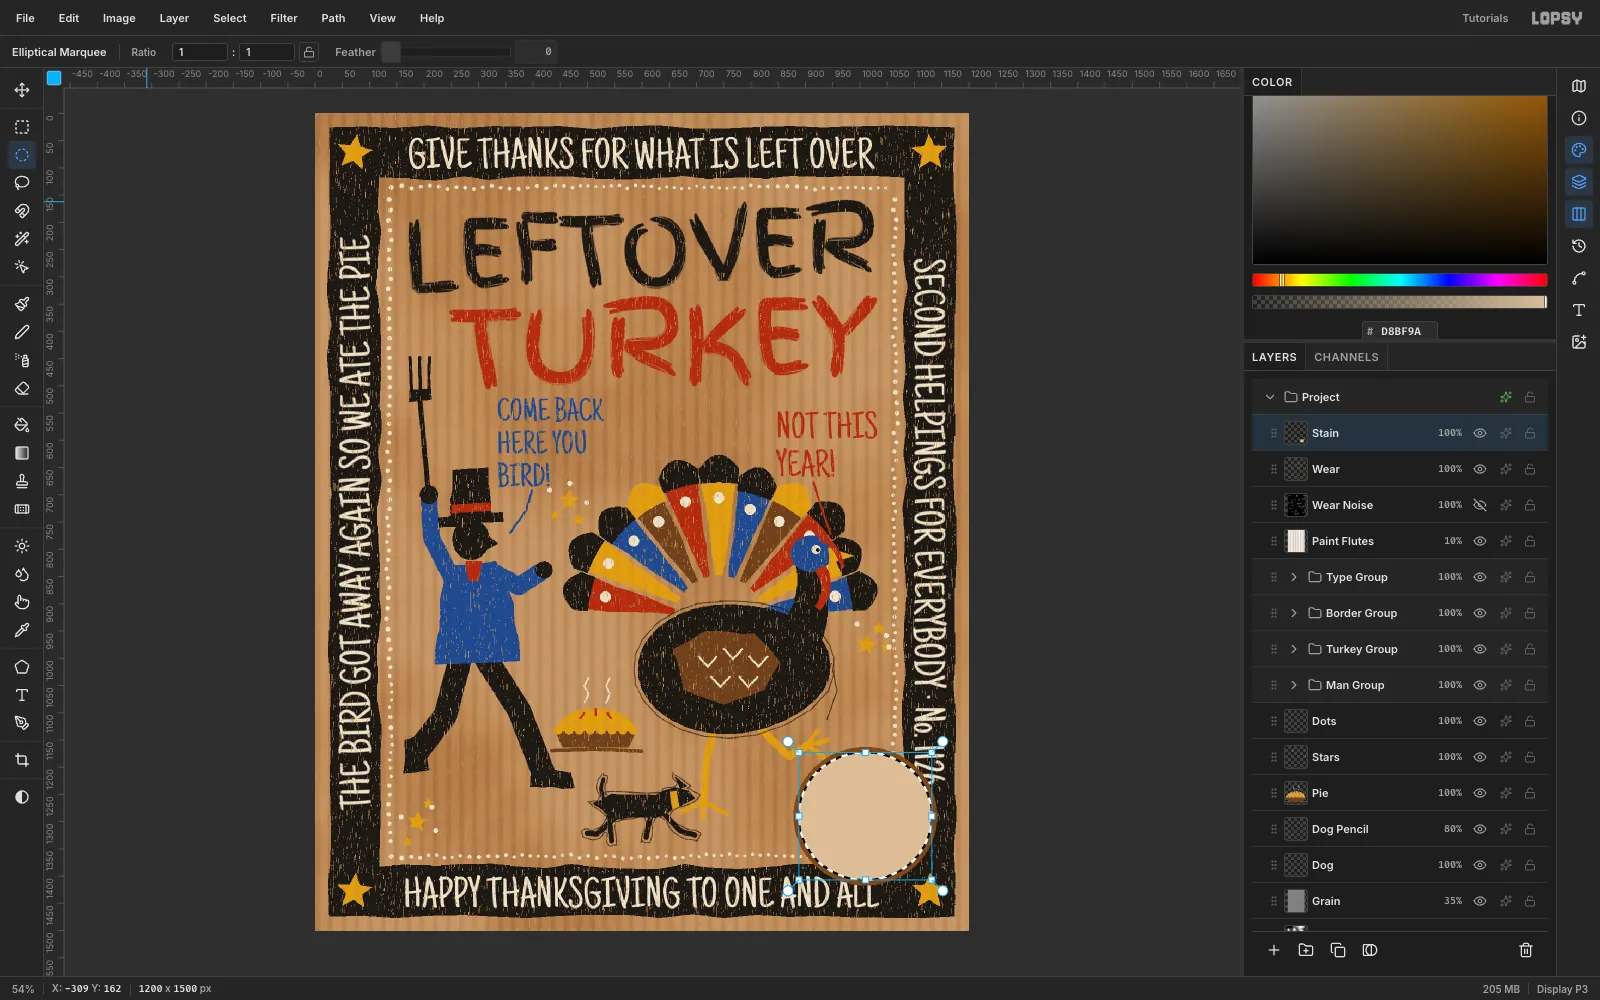
- Add a Stain layer. Drag an Elliptical Marquee 264 × 254 px centred on (1010, 1290), across the frame's corner, and fill it with
#7A4A22. - Choose Select → Shrink… at 9 px and fill the smaller ellipse with a pale
#D8BF9A. That leaves a dark rim with a faint tint inside. - Press Cmd+D, lasso across one part of the rim, and press Delete to break it. Coffee rings are never complete.
- Run Gaussian Blur at Radius 2, then set the layer to Multiply at 55%.
- Add a Stain layer. Drag an Elliptical Marquee 264 × 254 px centred on (1010, 1290), across the frame's corner, and fill it with
-
Cluster the wear
Even wear looks like a filter, and real wear bunches up where hands touch the card. Thin it out with a Clouds mask:
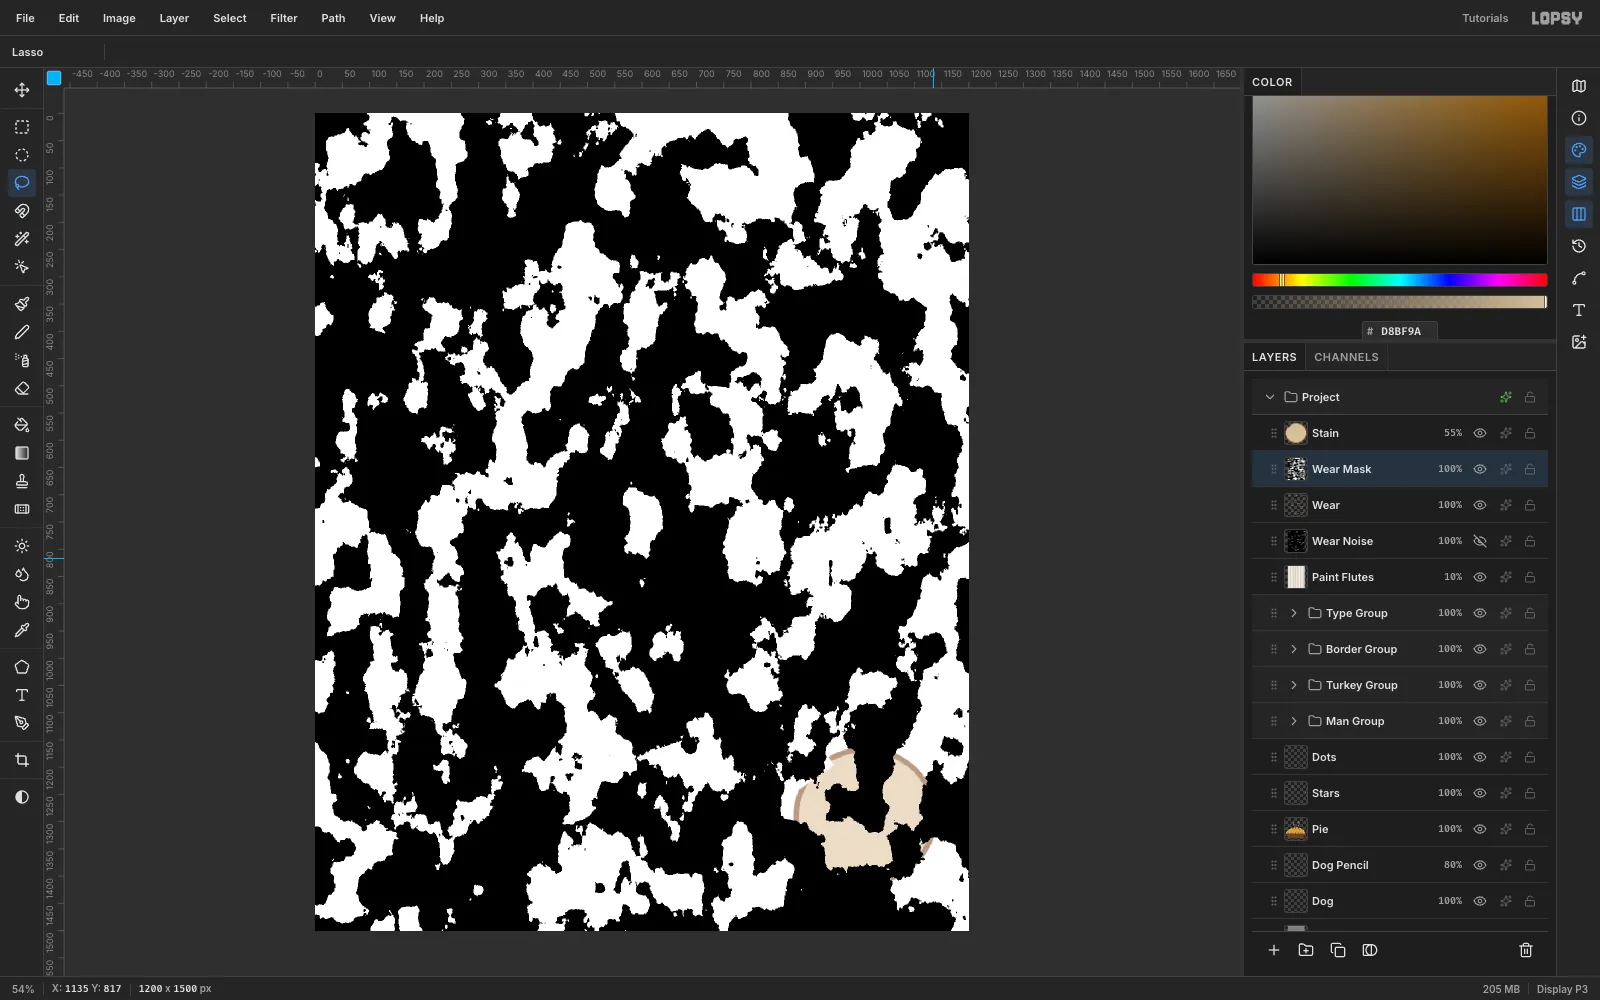
- Add a Wear Mask layer, run Clouds, and Threshold it so about 40% of the canvas is white (around level 154).
- With the Magic Wand (Contiguous off), click a black area.
- Click the Wear row and press Delete. Only the wear under the white blobs survives. Press Cmd+D and hide Wear Mask.
-
Save and export the card
Press Cmd+0 to fit the card and look it over at full size. The wear now gathers in patches along the frame and fades across the middle. Make one last pass over the text: each block needs clear space around it, and the frame lettering should sit in the middle of the band.
Choose File → Save Project to keep a
.lopsywith every layer, then File → Quick Export PNG.