Paint a Hand-Lettered Roadside Menu Board
Make a weathered, sign-painted crawfish shack menu in Lopsy with peeling paint on plywood, shaded lettering, a naive mascot and dot-leader prices.
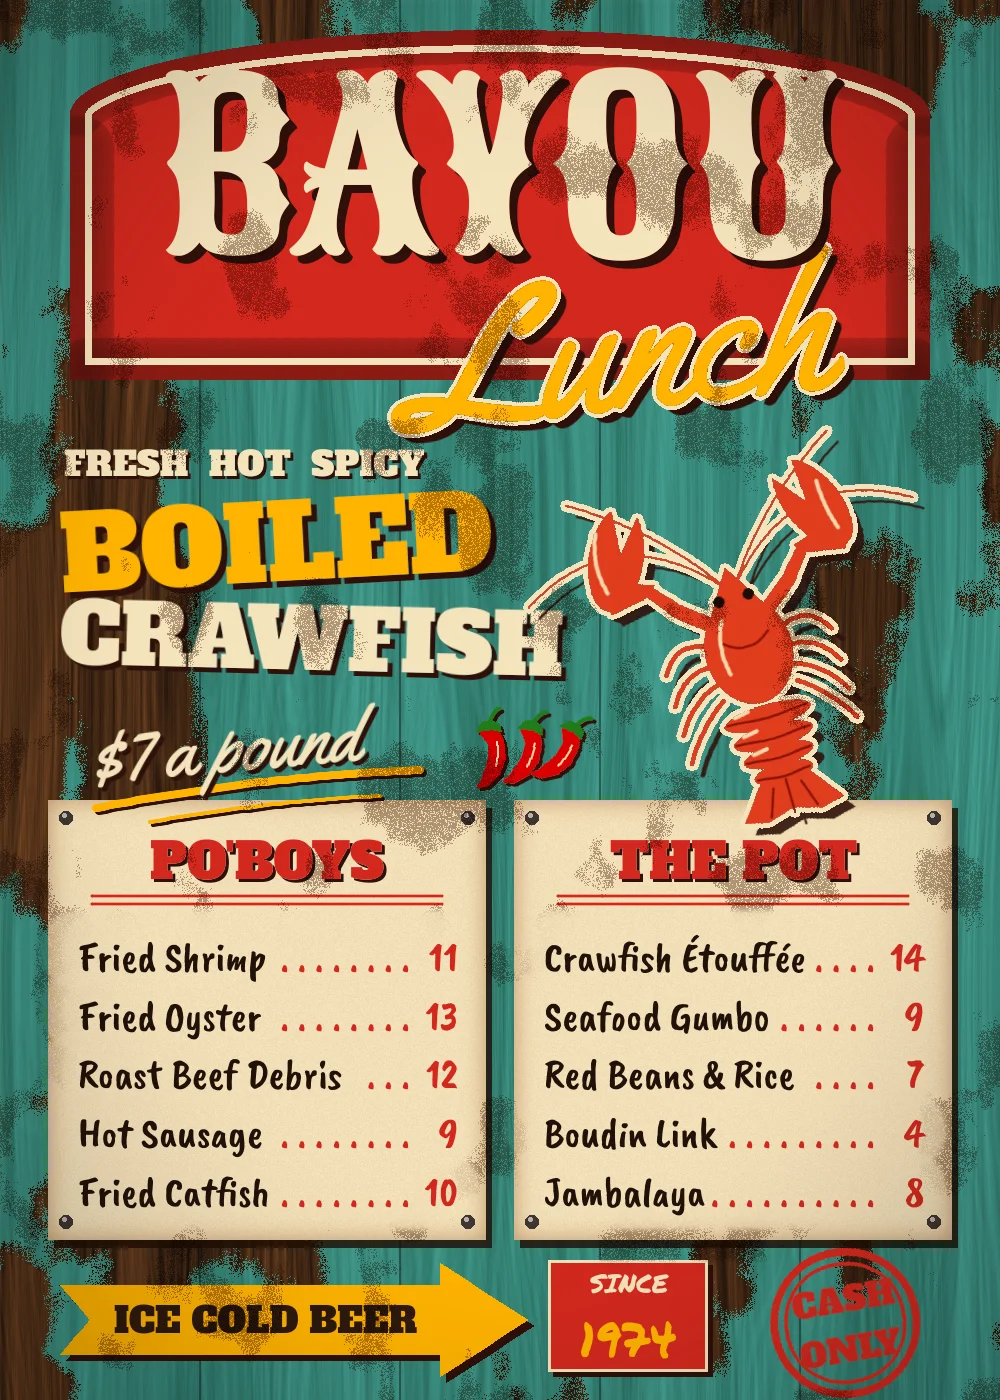
Vernacular design is the everyday lettering of roadside America: shack menus, bait-shop boards and hand-painted arrows, made by sign painters rather than design studios. It looks bold and a little crooked. Every letter carries a hard "shade" block, the colours are plain enamel, and sun and rain have worn the paint back to bare wood.
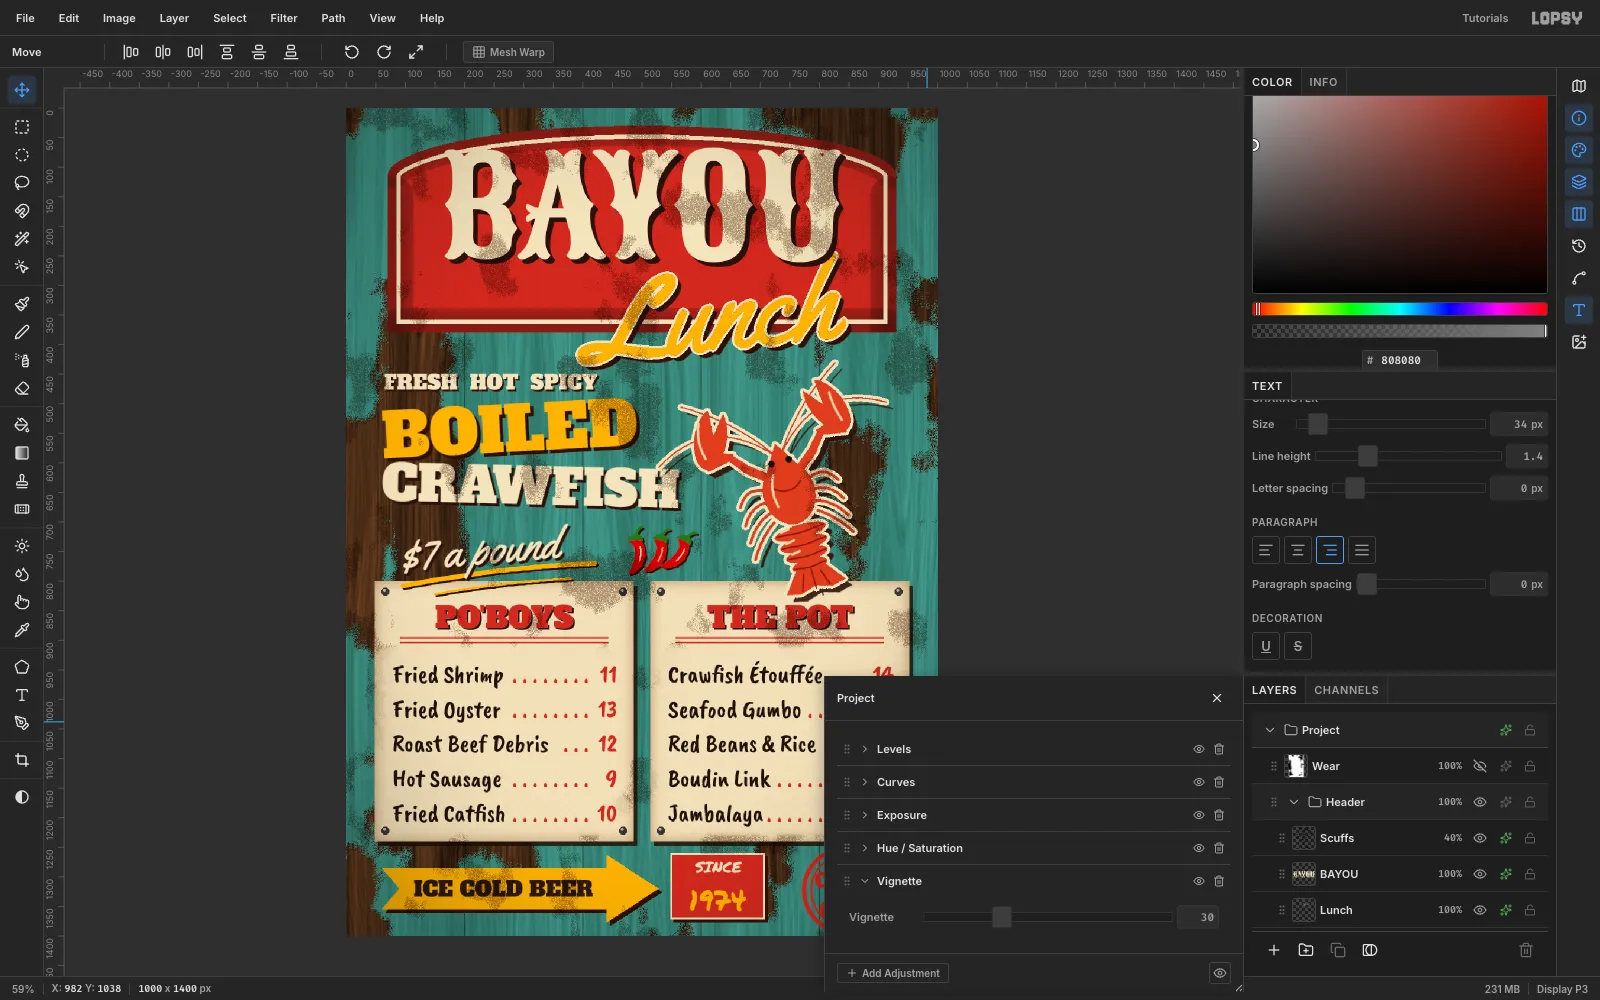
In this tutorial you'll paint a 1000 × 1400 menu board for an imaginary Louisiana crawfish shack, Bayou Lunch. You'll make wood grain from the Fibers filter, peel turquoise paint away with Clouds and Threshold, and letter an arched header sign. Then you'll draw a naive crawfish mascot with the Symmetry brush and set two menu boards with dot-leader prices. On the way you'll use filters, the Magic Wand, Select → Shrink, the Burn tool, copy and paste, transforms, groups, grid snapping, layer effects and a group adjustment.
The palette has six enamel colours:
- Turquoise paint
#3A9C94 - Sign red
#C23A2B - Cream
#F1E4C0 - Mustard
#F4B63A - Crawfish red
#CF4A2E - Shade brown
#2A120C
Fonts: Sancreek for the header, Yellowtail for the scripts, Alfa Slab One for the headings, Caveat Brush for the menu items and Permanent Marker for the plaque.
-
Grow wood grain with Fibers
Choose File → New and make a 1000 × 1400 document with a white background.
- Select the Background layer, set the foreground colour to
#8A5A34and choose Edit → Fill. This is the raw plywood colour. - Rename
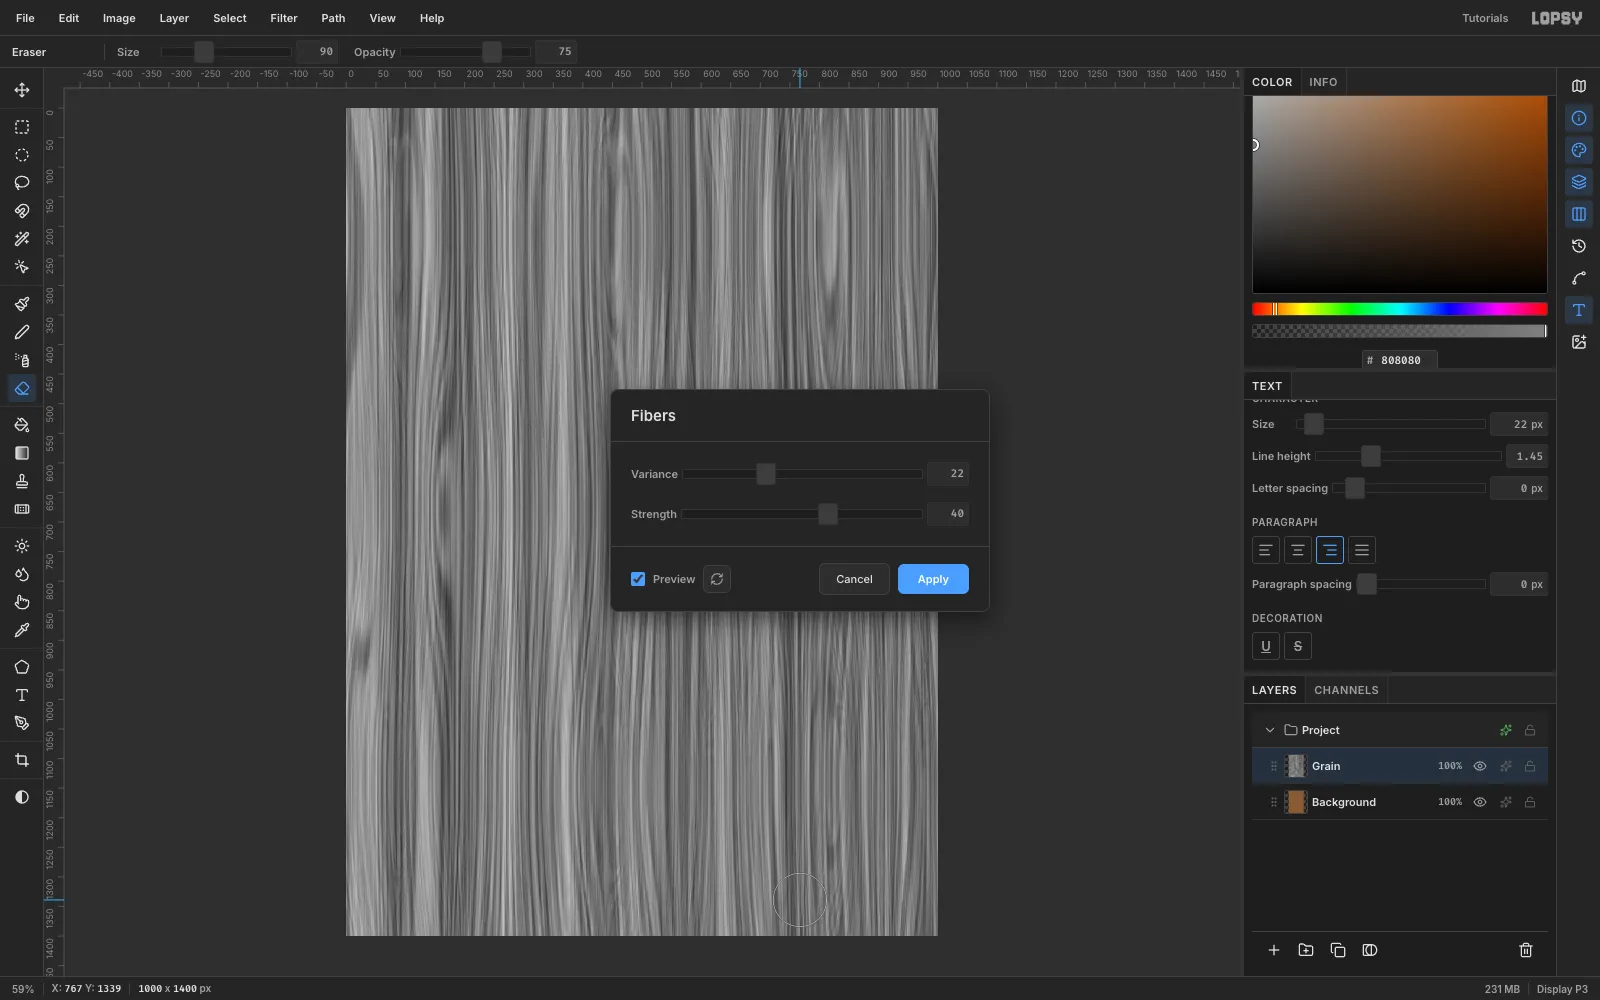
Layer 1to Grain. Fill it with mid grey#808080, then open Filter → Fibers… and set Variance 22 and Strength 40. High Strength keeps the strands long and straight, like sawn boards. - Click Apply. Open the layer's effects (the ✦ button on its row) and set Blend to Multiply. The grey fibers now darken the brown into grain.
- Select the Background layer, set the foreground colour to
-
Mark the plank seams with guides
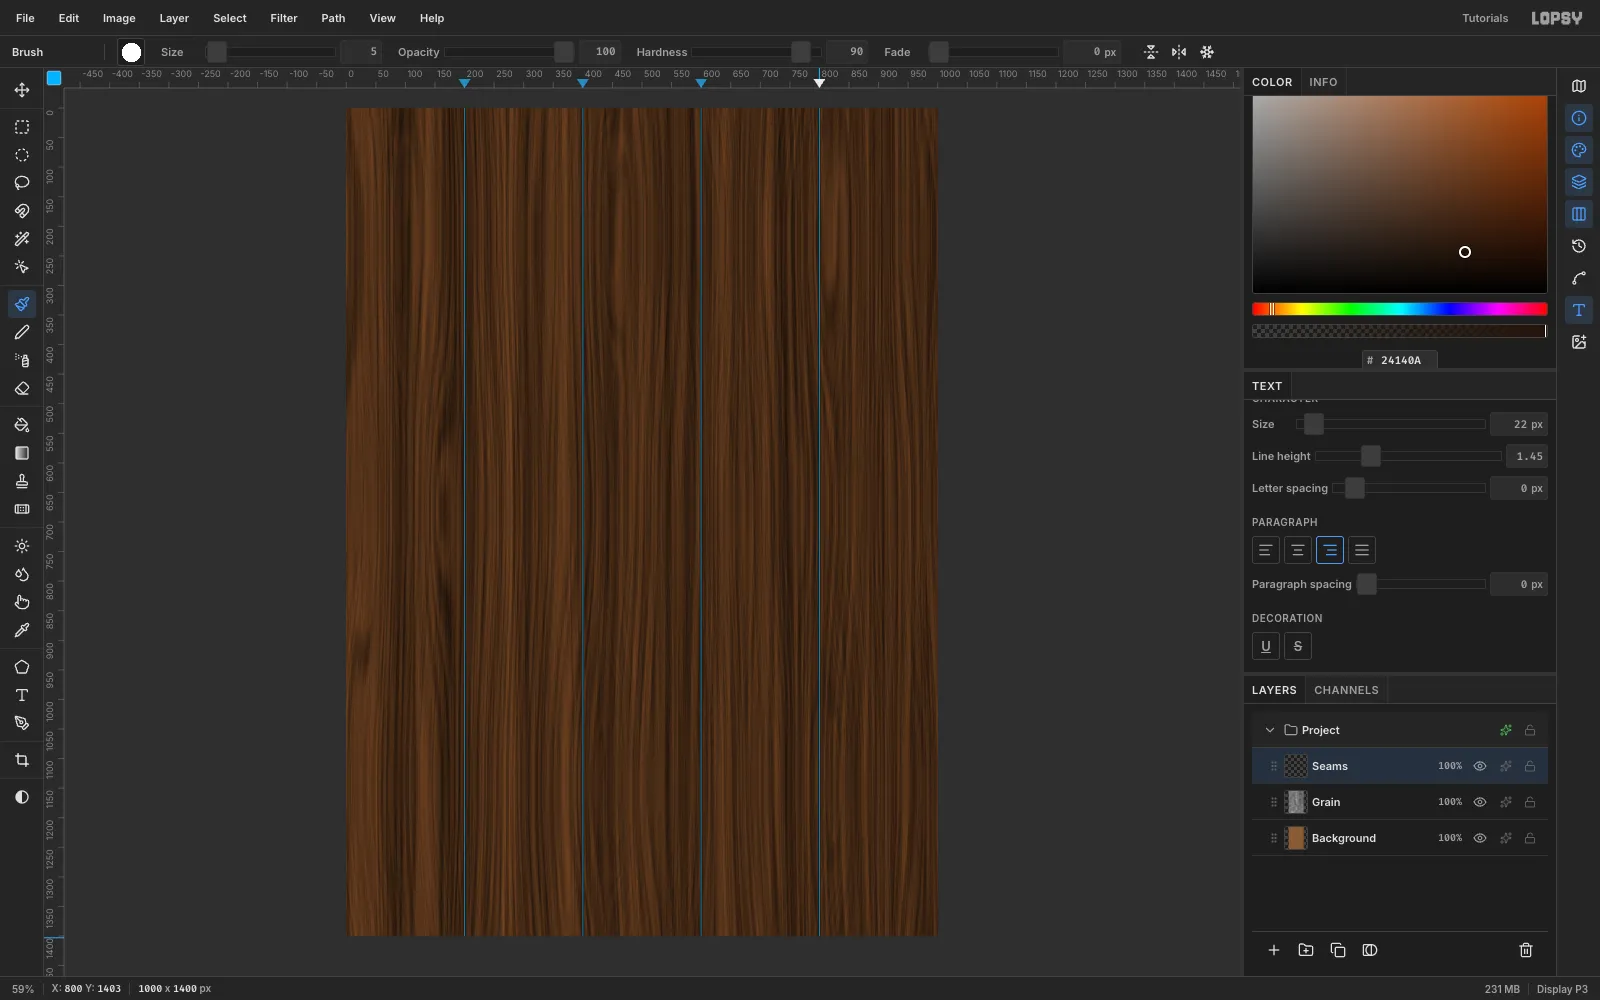
Plywood signs are built from planks. Click the top ruler at 200, 400, 600 and 800 to drop four vertical guides.
Add a layer called Seams and pick the Brush with Size 5, Hardness 90 and colour
#24140A. For each guide, click at the top of the canvas, hold Shift and click at the bottom. Shift-click draws a perfectly straight line between the two points.When the seams are done, turn guides off again with View → Show Guides.
-
Start a paint-wear map with Clouds
Add a layer called Paint and fill it with turquoise
#3A9C94. It covers the wood completely for now.Add another layer above it called Wear and fill it with
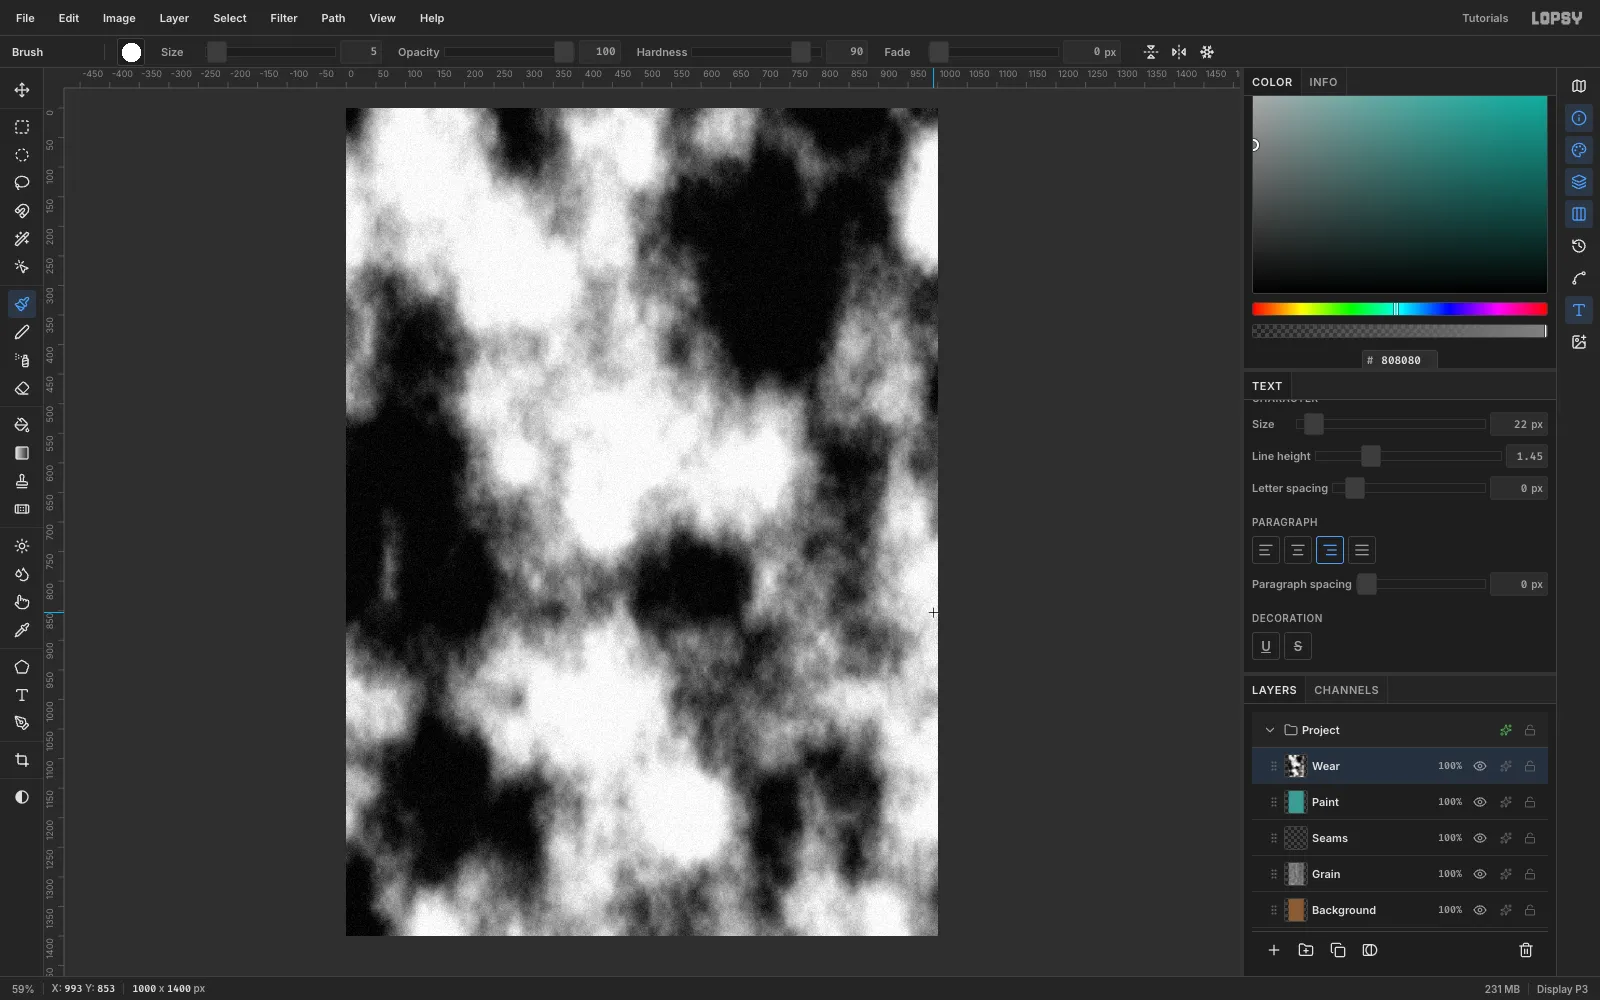
#808080. Then:- Filter → Clouds… with Scale 7, then Apply.
- Filter → Add Noise…, choose Mono, set Amount 45, then Apply. The noise gives the peeled edges a ragged, flaky border.
This greyscale layer is a map. The darkest patches will become places where the paint has flaked off.
-
Protect the middle with a soft white brush
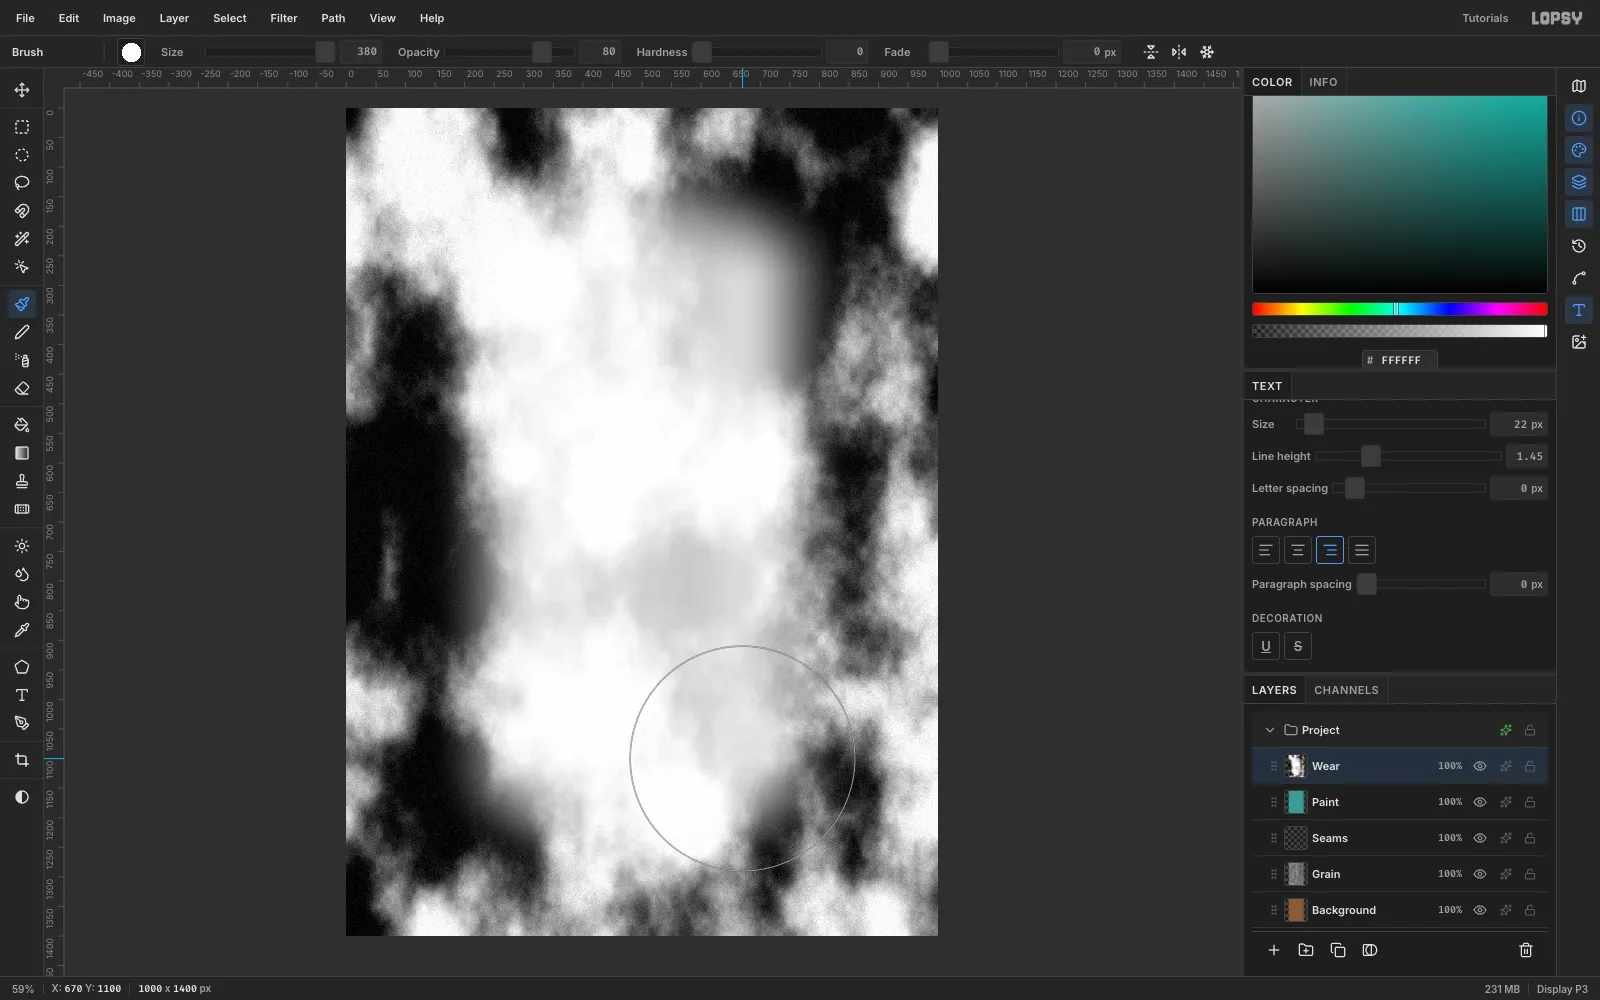
On a real board, paint wears worst at the edges and seams, where the weather gets in. Choose the Brush with colour white, Size 520, Hardness 0 and Opacity 80. Paint one long vertical stroke down the centre. Then set Size 380 and paint one stroke down each side, around x 330 and x 670.
The middle of the map is now light, so it will keep its paint.
-
Threshold the map into hard peel shapes
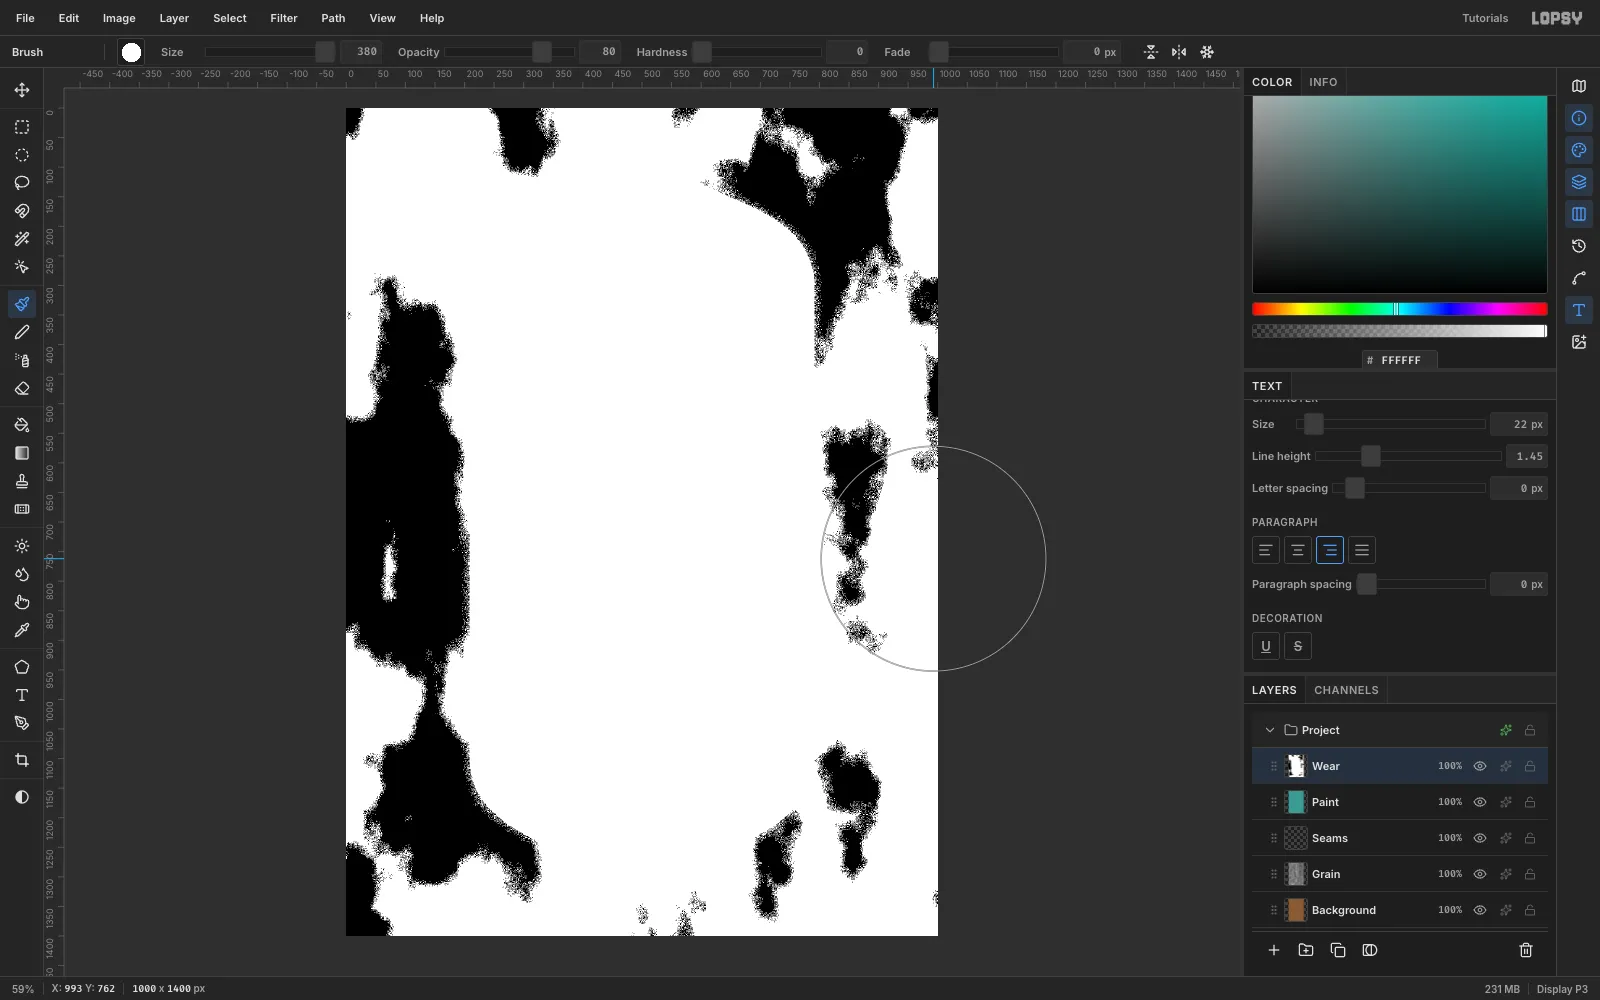
Choose Filter → Threshold…, set Level to 60 and click Apply. Everything darker than the level turns black, and everything else turns white. You now have crisp peel shapes that cluster around the edges.
-
Select the peel with the Magic Wand
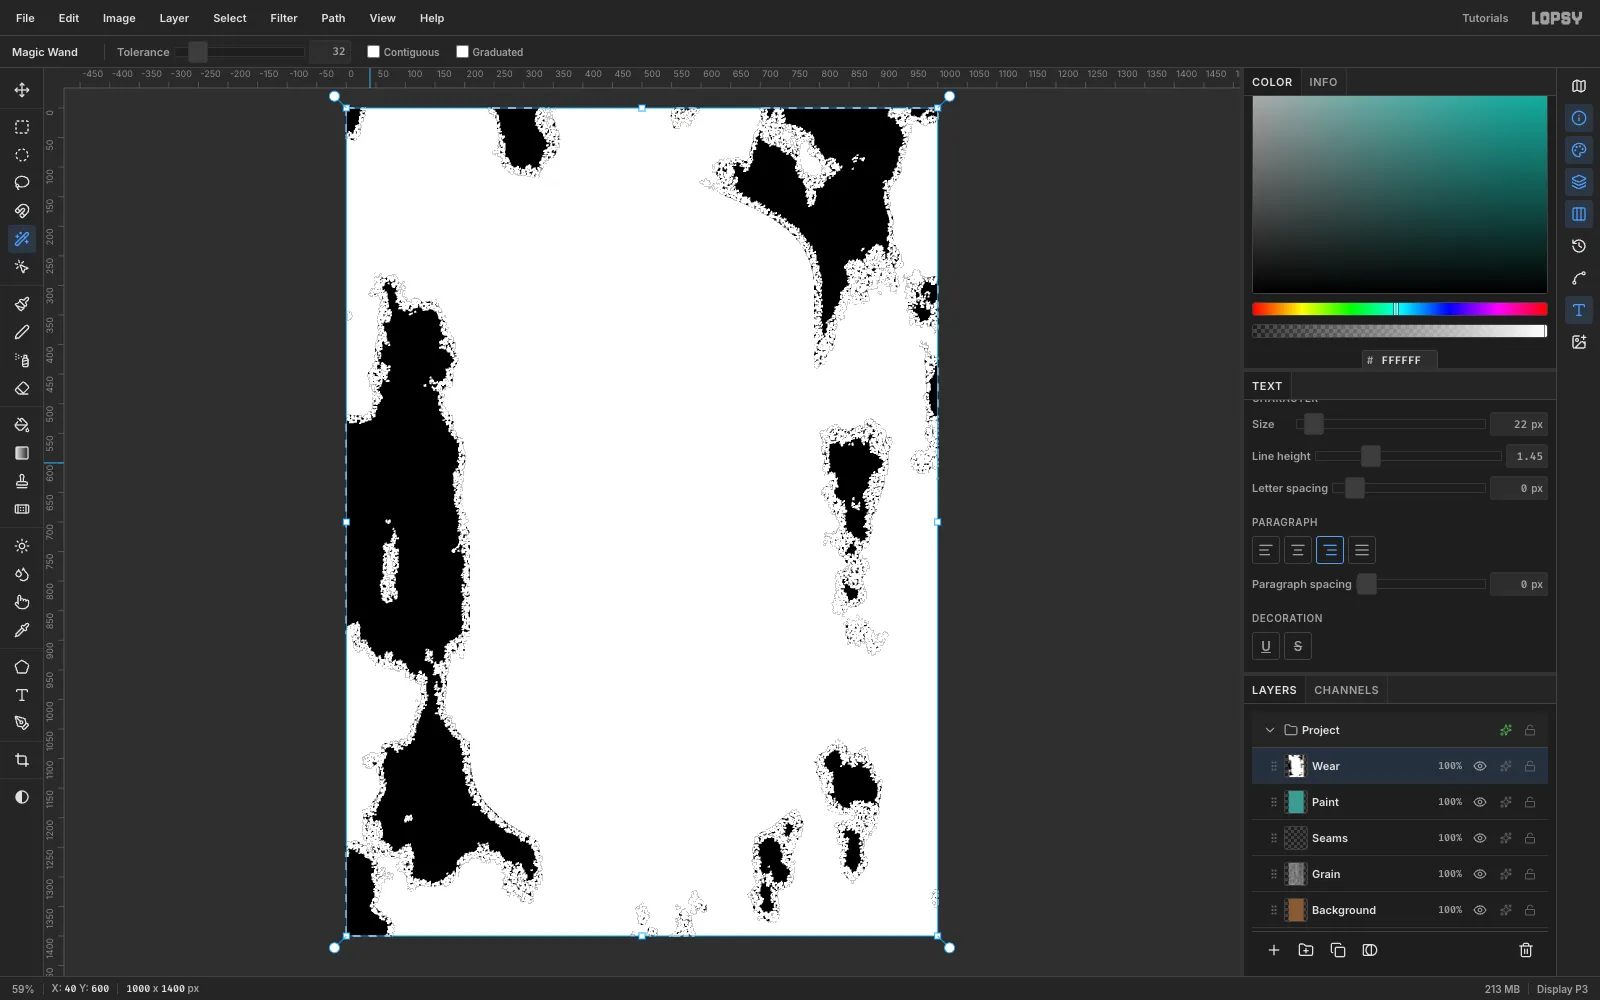
Pick the Magic Wand and untick Contiguous, so one click selects every black patch at once. Click any black area near the left edge.
Hide the Wear layer with its eye icon. Select the Paint layer and press Delete. The turquoise is removed wherever the map was black, and the plywood shows through. Press Cmd+D to deselect.
-
Soften the paint and let the grain through
Freshly filled paint looks like plastic, so age it:
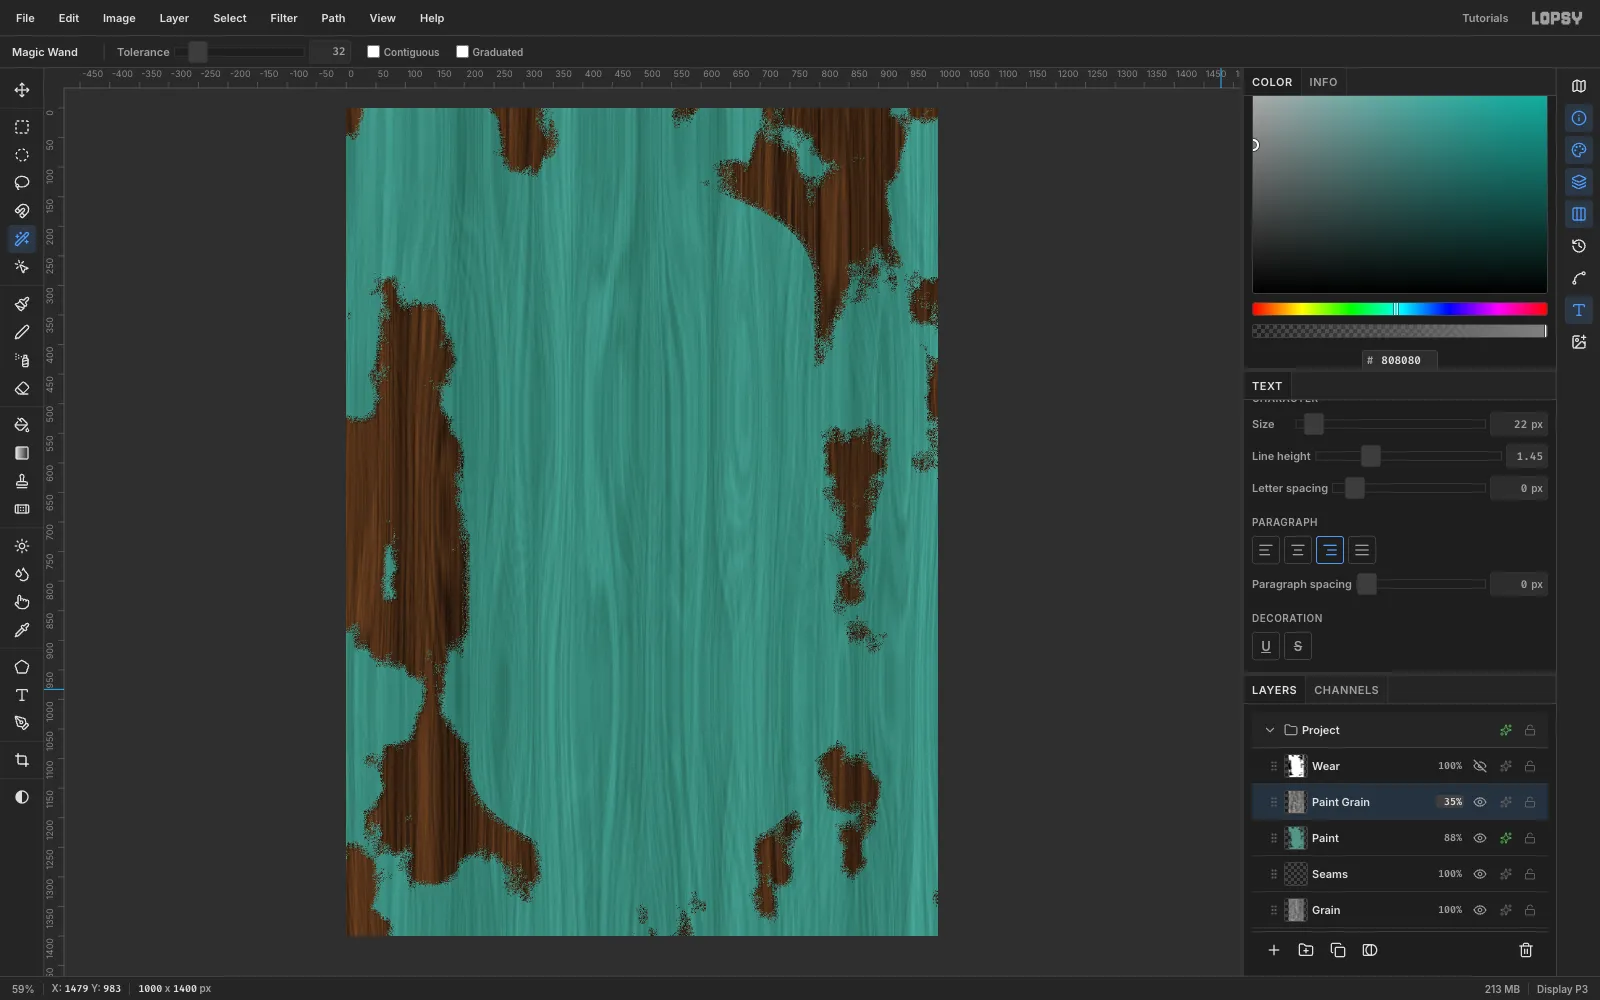
- With Paint selected, choose Filter → Hue/Saturation… and set Hue −6, Saturation −38 and Lightness +4.
- Lower the layer's opacity to 88% so a whisper of wood grain shows through.
- In the layer effects, turn on Drop Shadow with colour
#1A0E06, Offset 3 / 3, Blur 2 and Opacity 70. That tiny shadow gives each peeled edge the thickness of old paint. - Add a layer Paint Grain, fill it with
#808080, run Fibers (Variance 30, Strength 24), set its blend mode to Overlay and its opacity to 35%. Now the paint has brush streaks. - Add a layer Grooves and repeat the four shift-click seam lines with Size 3 and colour
#1E2A26, at 55% opacity. The seams now show through the paint as grooves.
-
Cut the arched header sign
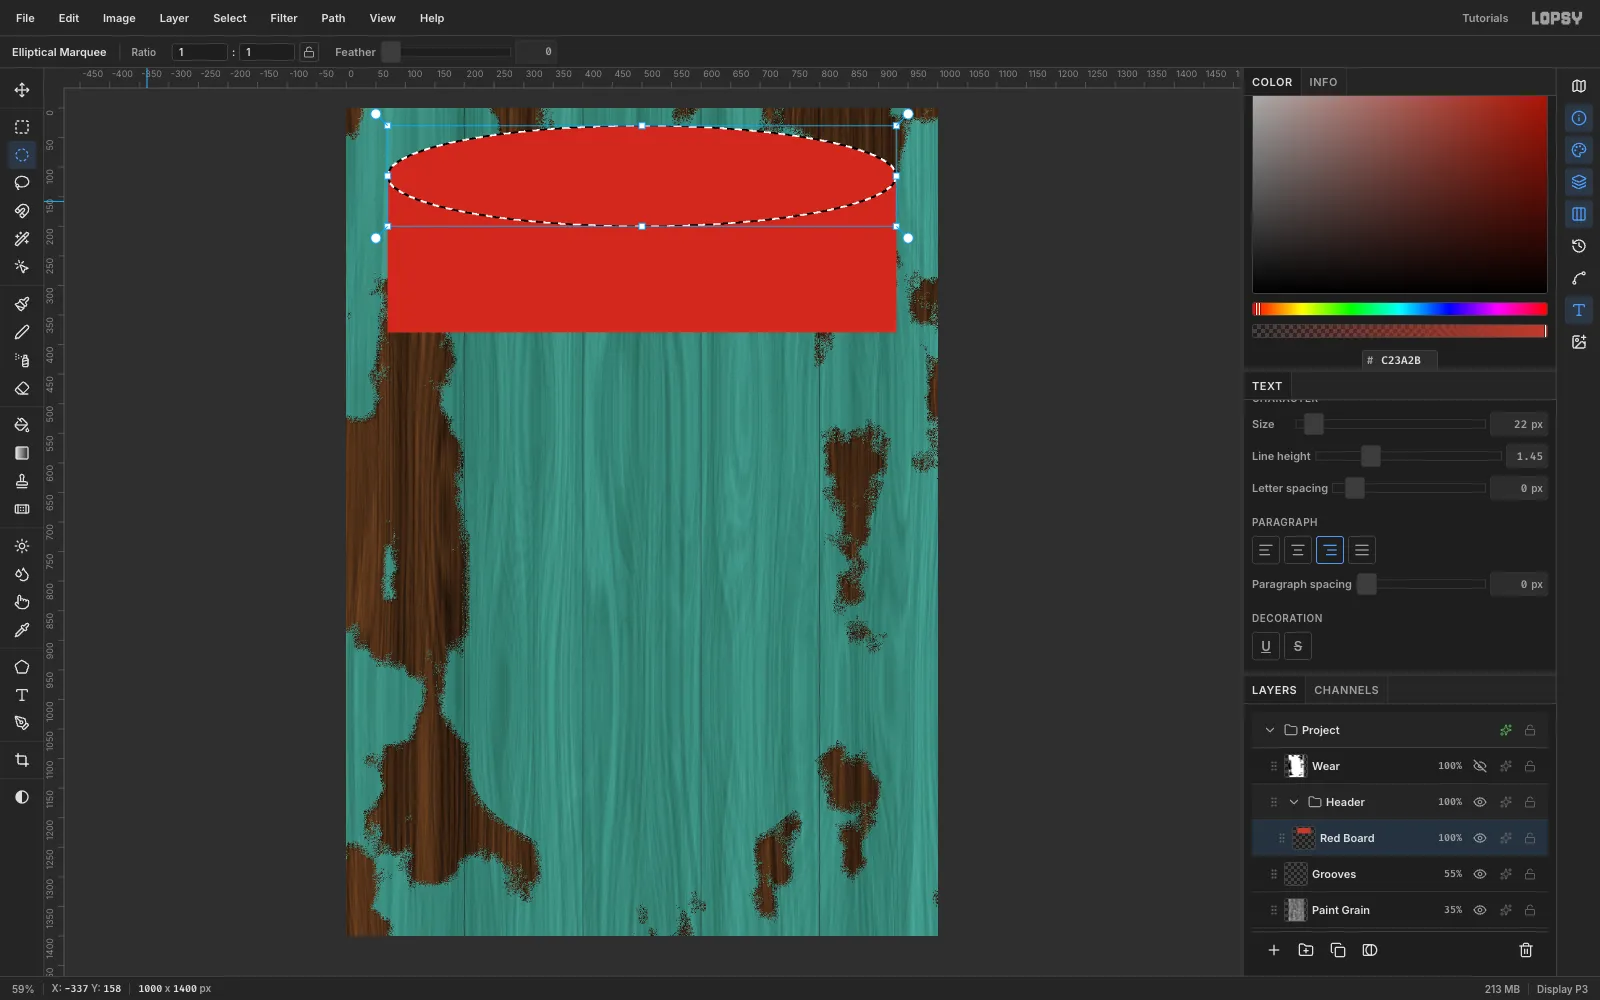
Click New Group in the Layers panel and name it Header. Inside it, add a layer called Red Board and set the foreground to sign red
#C23A2B.- With the Rectangular Marquee, drag from 70, 110 to 930, 380 and choose Edit → Fill.
- With the Elliptical Marquee, drag from 70, 30 to 930, 200 and fill again. The ellipse caps the rectangle with an arch.
-
Paint a pinstripe with Select → Shrink
Sign painters frame every panel with a thin pinstripe. You can build one from the board's own shape:
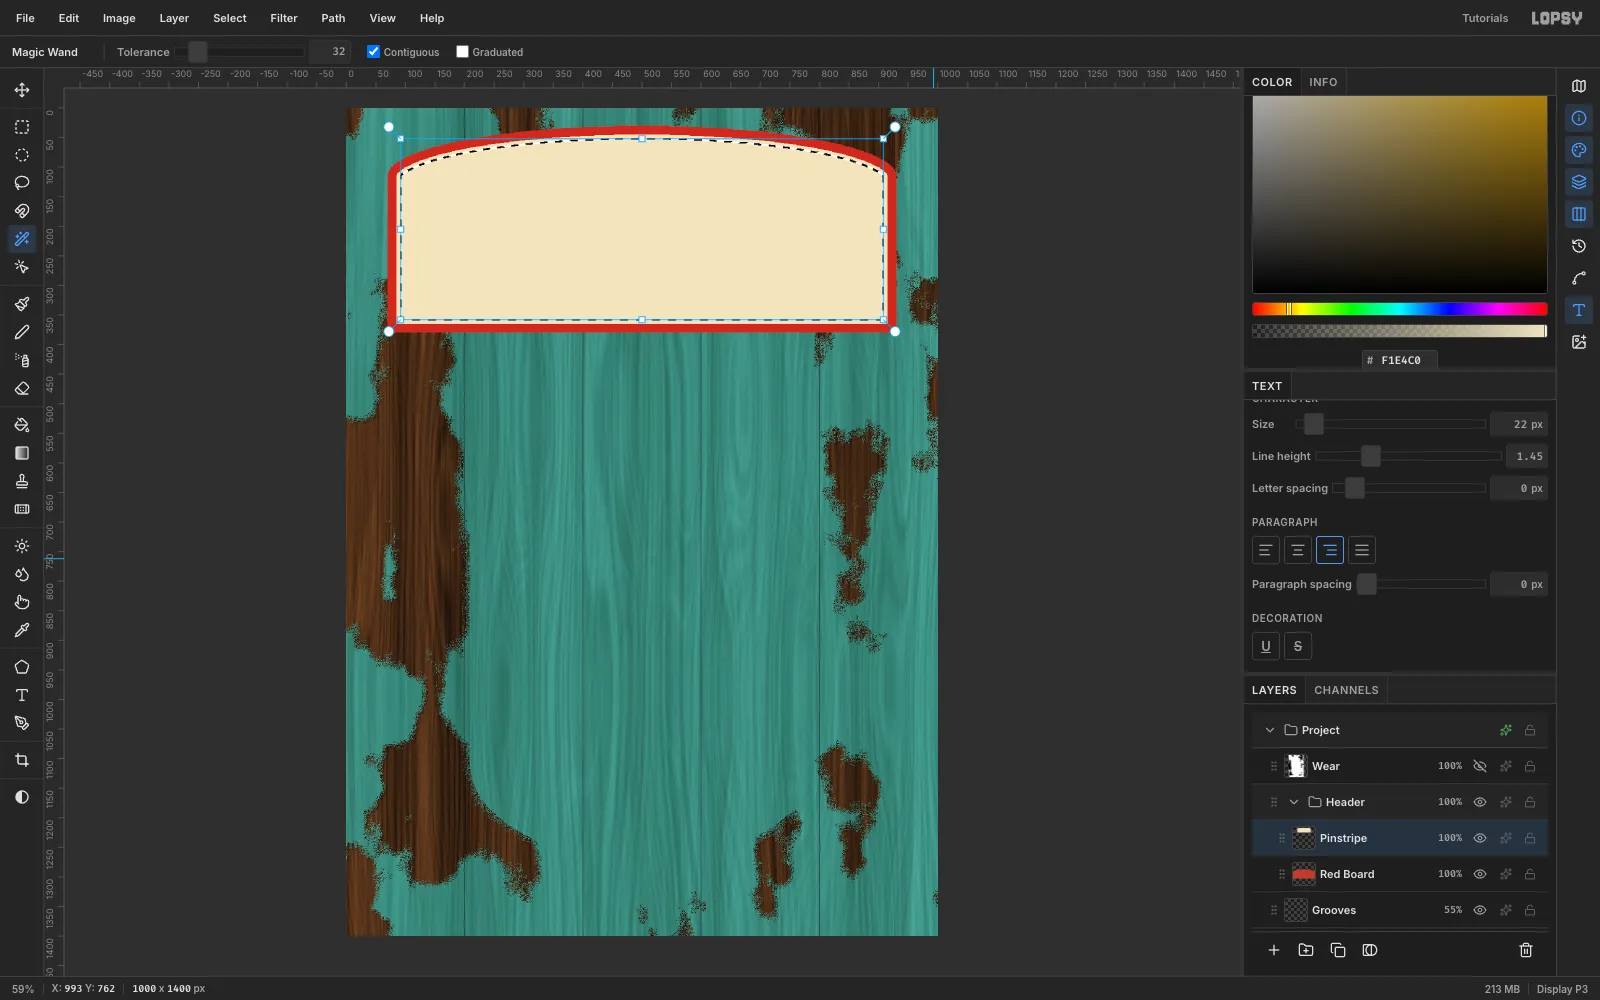
- Pick the Magic Wand, tick Contiguous again, and click inside the red board. This selects the arch shape exactly.
- Choose Select → Shrink… and enter 14 px.
- Add a layer Pinstripe and fill the selection with cream
#F1E4C0. - Choose Select → Shrink… again with 6 px, then press Delete.
Only a 6 px cream ring is left, inset 14 px from the edge.
-
Letter BAYOU with a sign-painter shade
Select the Pinstripe layer first, so the new type isn't styled from another text layer. Pick the Text tool, set Sancreek at 236 px in cream
#F1E4C0, click in the upper left of the board and type BAYOU. Press Tab to commit.Use the Move tool to centre the word on the board. Then open its layer effects and turn on Drop Shadow with colour
#2A120C, Offset 8 / 8, Blur 0, Spread 0 and Opacity 100. A blur of zero makes a hard, solid block, the classic hand-painted "shade".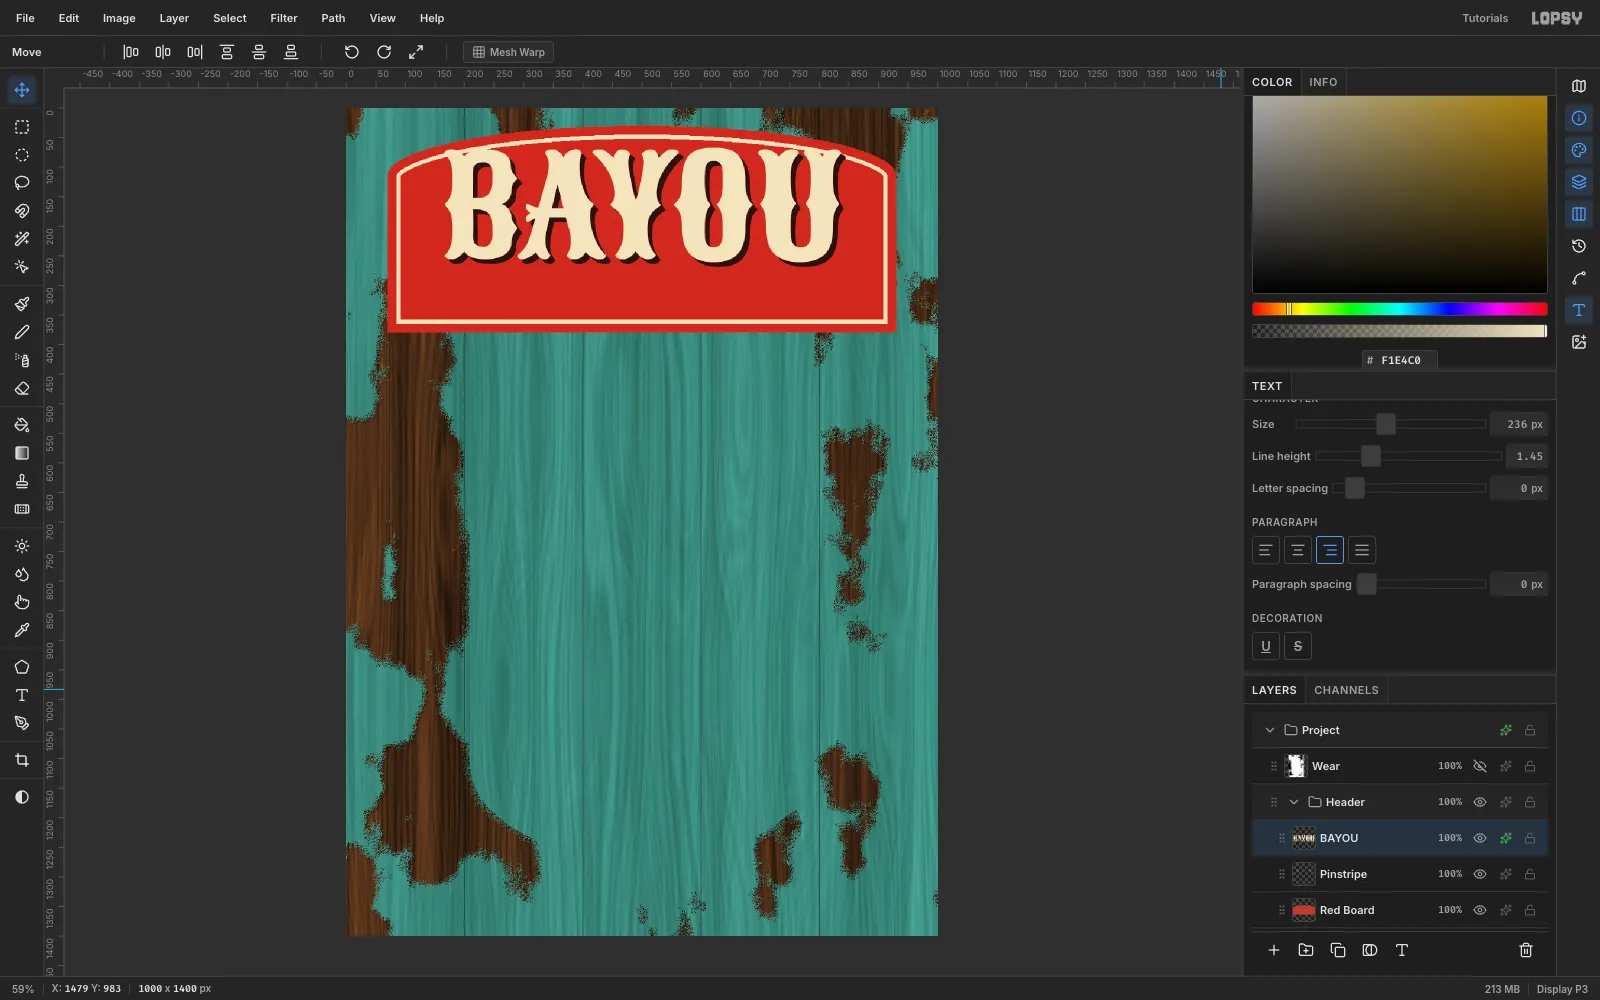
-
Add the Lunch script and rotate it
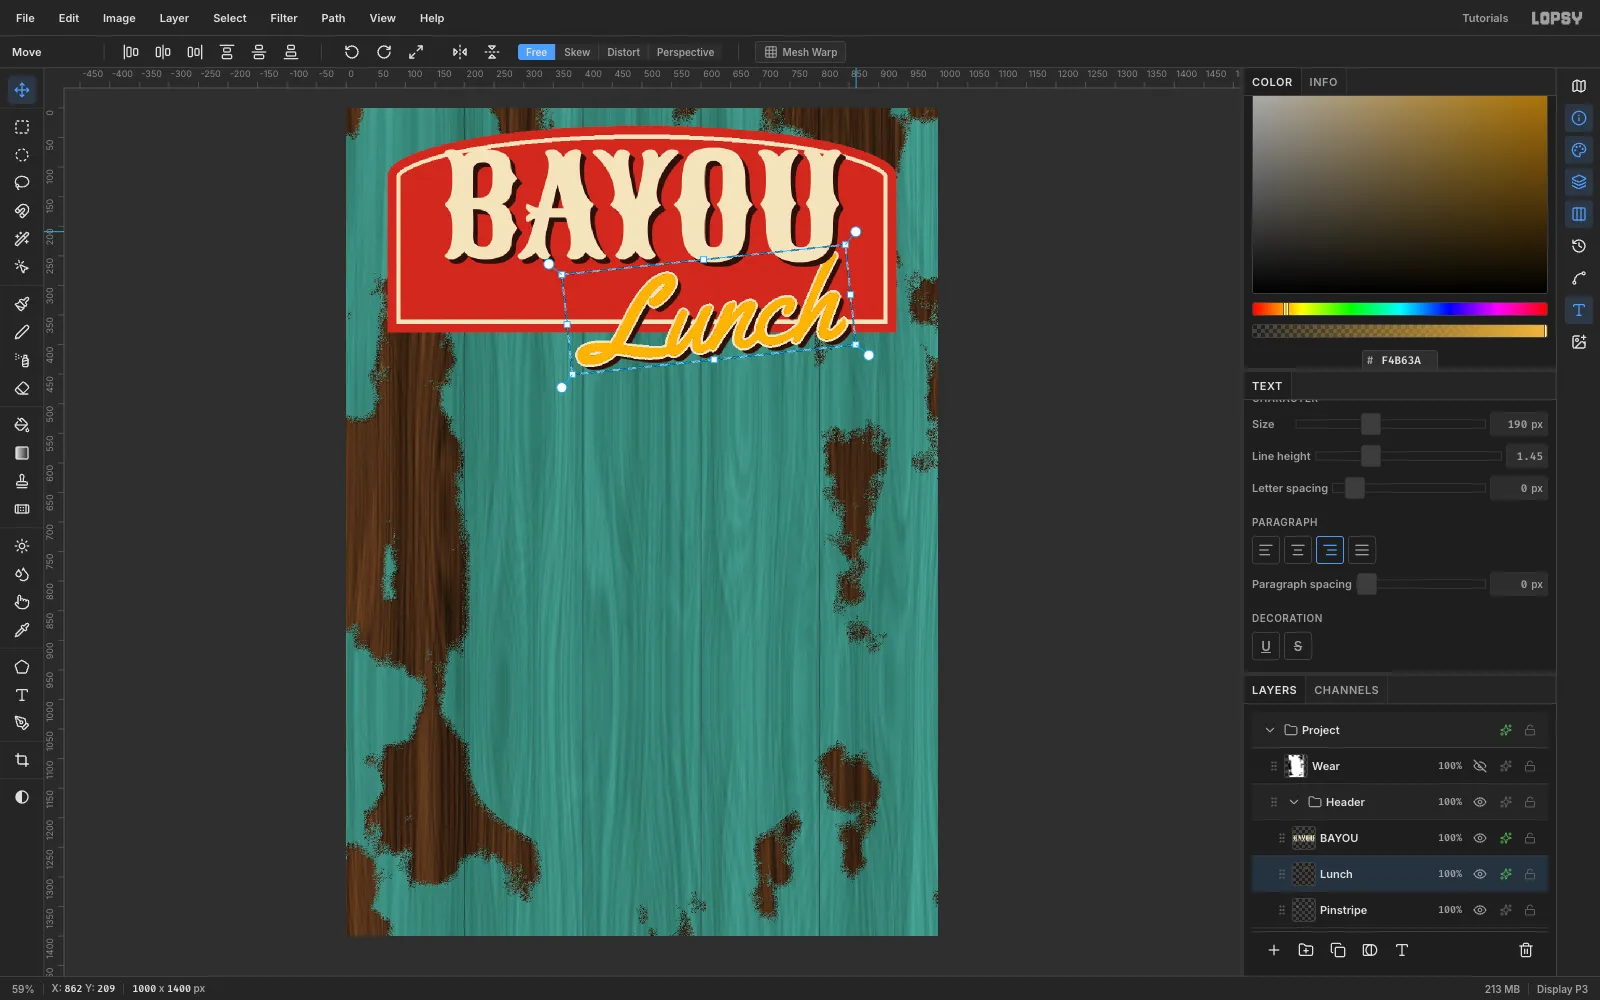
Select Pinstripe again. Set the Text tool to Yellowtail, 190 px, mustard
#F4B63A, click in empty space lower on the canvas, type Lunch and press Tab.Drag it with the Move tool so it overlaps the bottom-right corner of the sign. Let it hang well below the frame so the overlap reads as deliberate. In its effects, add a Stroke of cream
#F1E4C0, Width 4, Outside, plus a Drop Shadow of#2A120Cat 9 / 9, Blur 0. The cream keyline separates the yellow from both the red and the turquoise.To tilt it, drag a Rectangular Marquee around the word and switch to the Move tool. Drag just outside the top-right corner handle to rotate it about −6°, then press Cmd+D to commit.
-
Age the header with the Burn tool
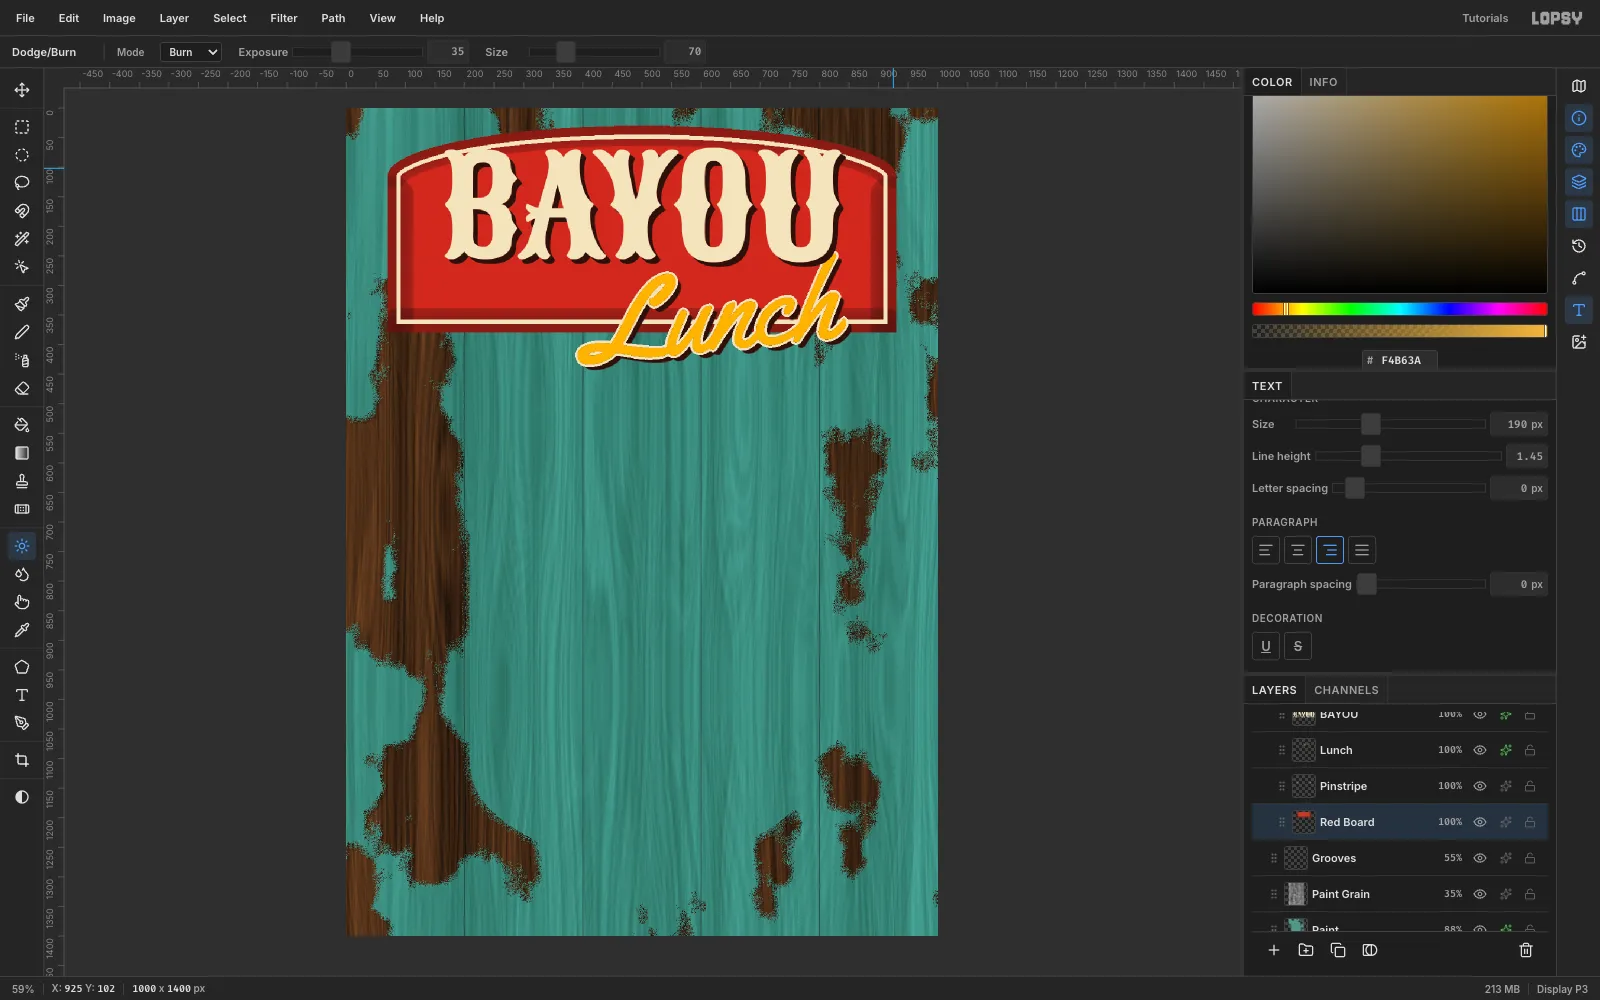
Select Red Board and pick the Dodge/Burn tool. Set Mode to Burn, Exposure 35 and Size 70. Drag along the bottom edge, both sides and the top of the arch. The edges darken the way old enamel does where dirt collects.
-
Block in the crawfish mascot
Hide the Header group for a moment so you can see what you're drawing. Make a new group, Crawfish, below it, add a layer Craw Body, and set the foreground to crawfish red
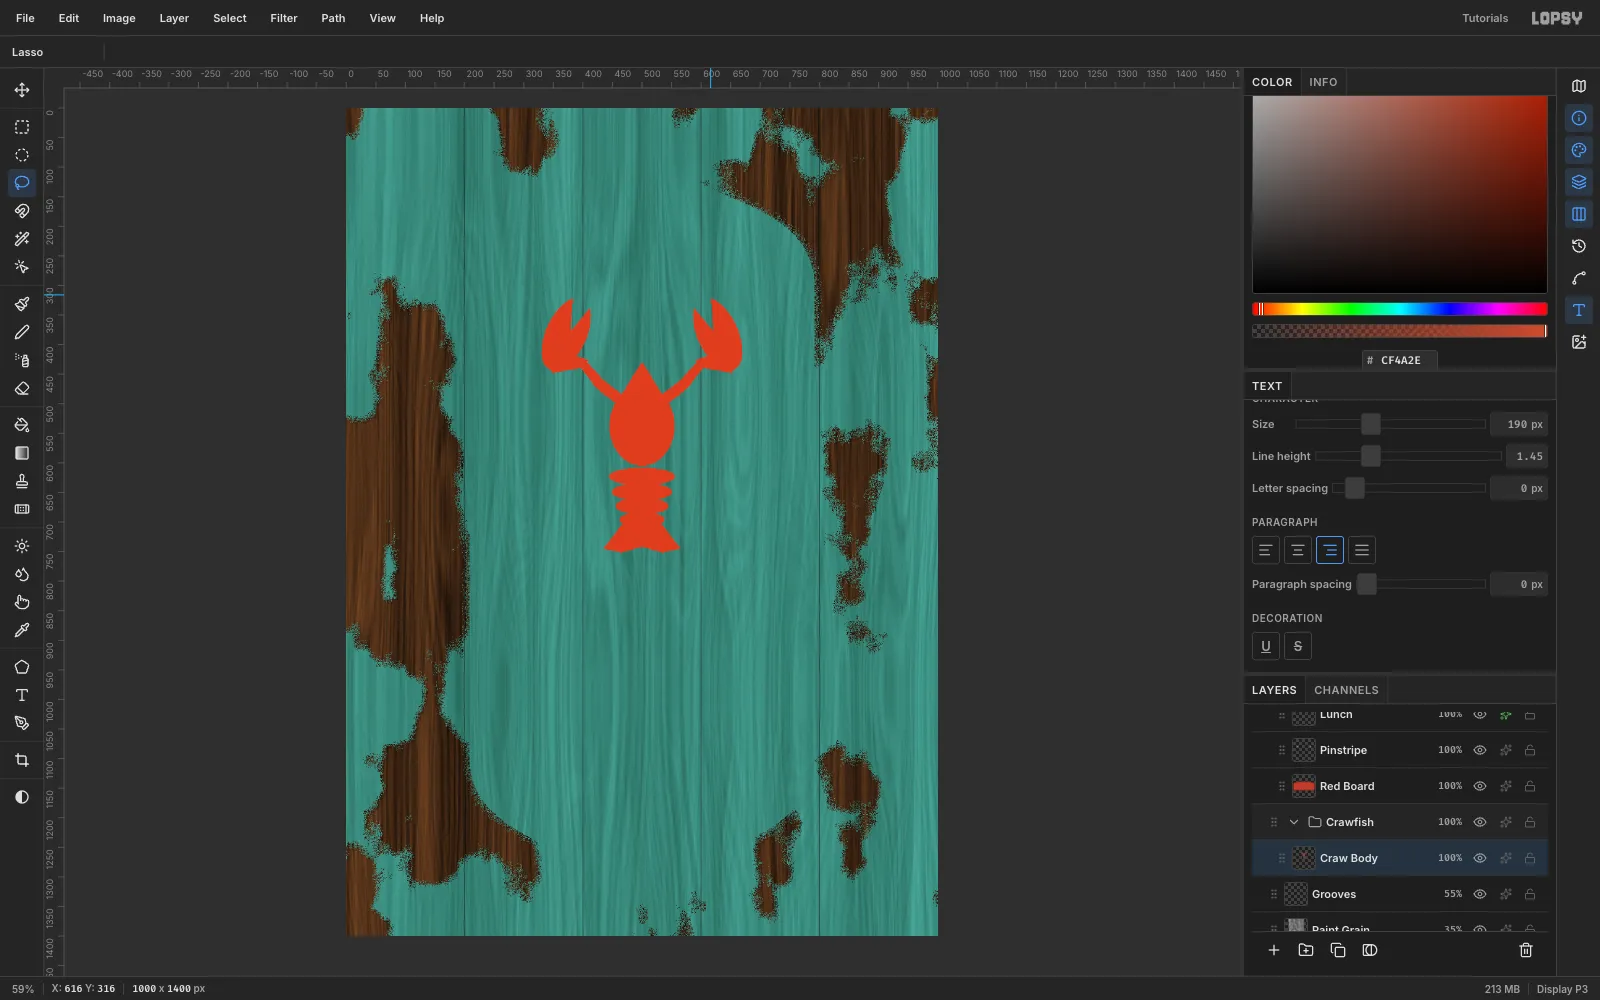
#CF4A2E. Every part is a selection plus Edit → Fill:- Body: an elliptical marquee from 445, 470, 110 wide and 135 tall.
- Head: a lasso triangle pointing up to 500, 430.
- Tail: four ellipses stacked below the body, each a little narrower (112, 102, 90 and 76 px wide), and a lasso fan at the bottom.
- Arms and claws: a lasso arm running up and out to each side, a tilted oval claw at the end, and a small lasso "wrist" joining them.
- Pincers: lasso a thin wedge into the top of each claw and press Delete to split it into two fingers.
-
Add legs and antennae with Symmetry
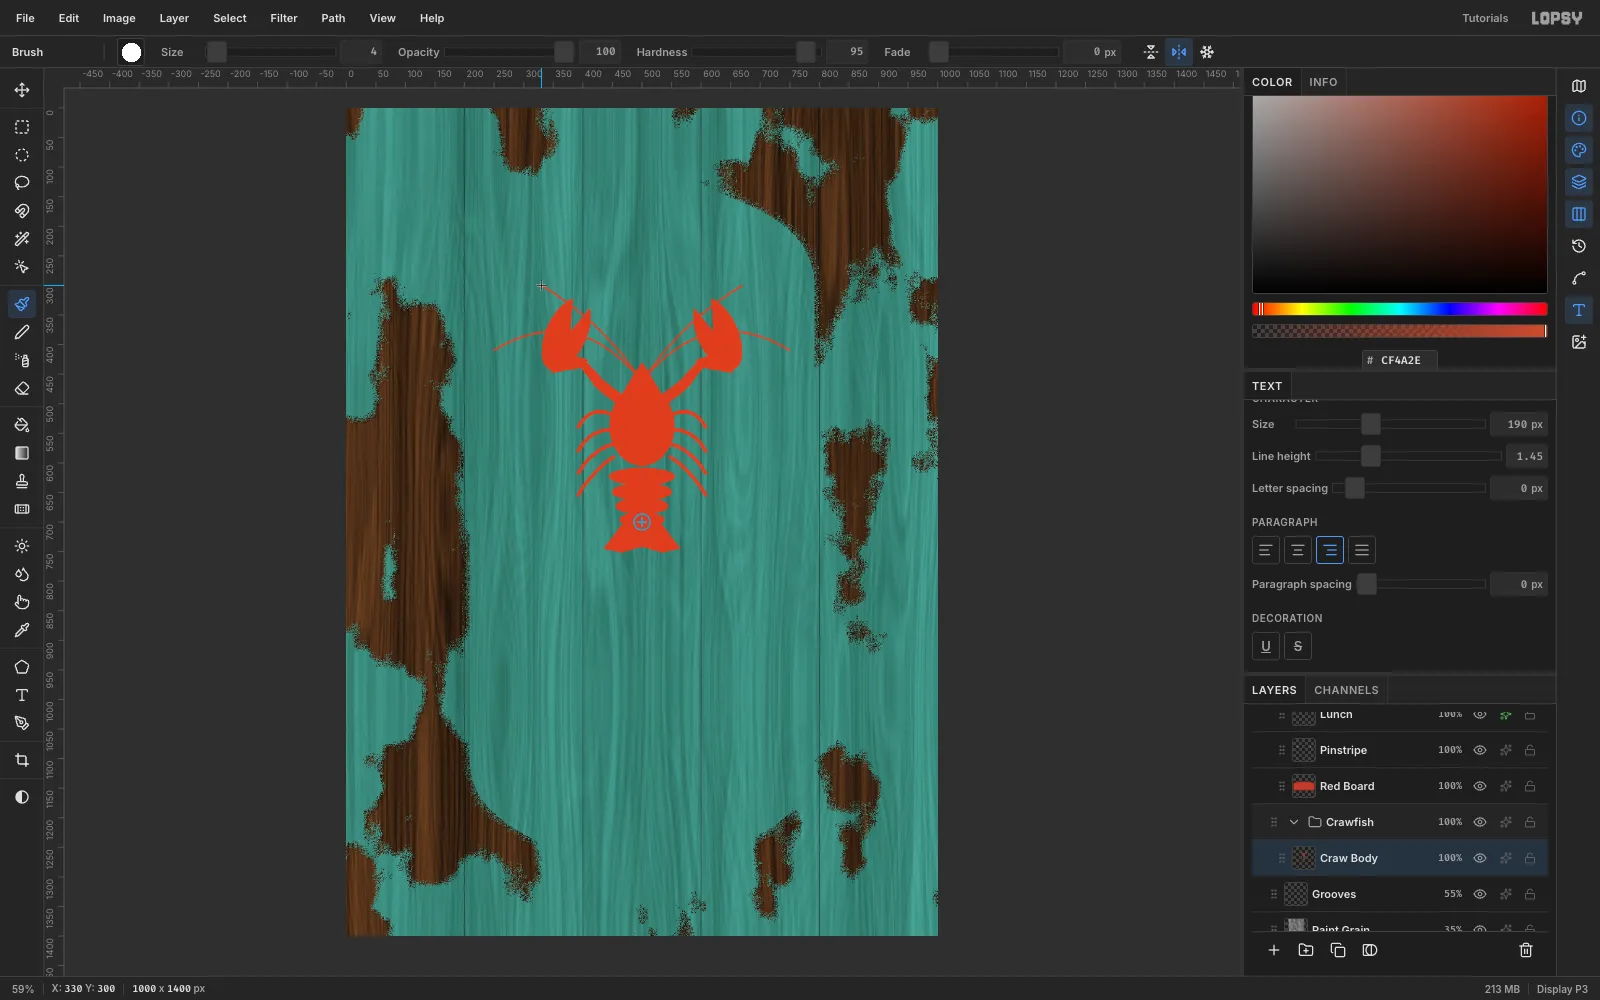
Deselect first, because an active selection clips the brush. Choose the Brush (Size 7, Hardness 95) and switch on Symmetry Vertical in the options bar. It mirrors every stroke left to right around the canvas centre, which is exactly where the crawfish sits.
Draw four curved legs down one side of the body. Then drop to Size 4 and draw two long sweeping antennae from the head. Each stroke appears on both sides at once. Turn Symmetry off when you're done.
-
Give it a face and a shine
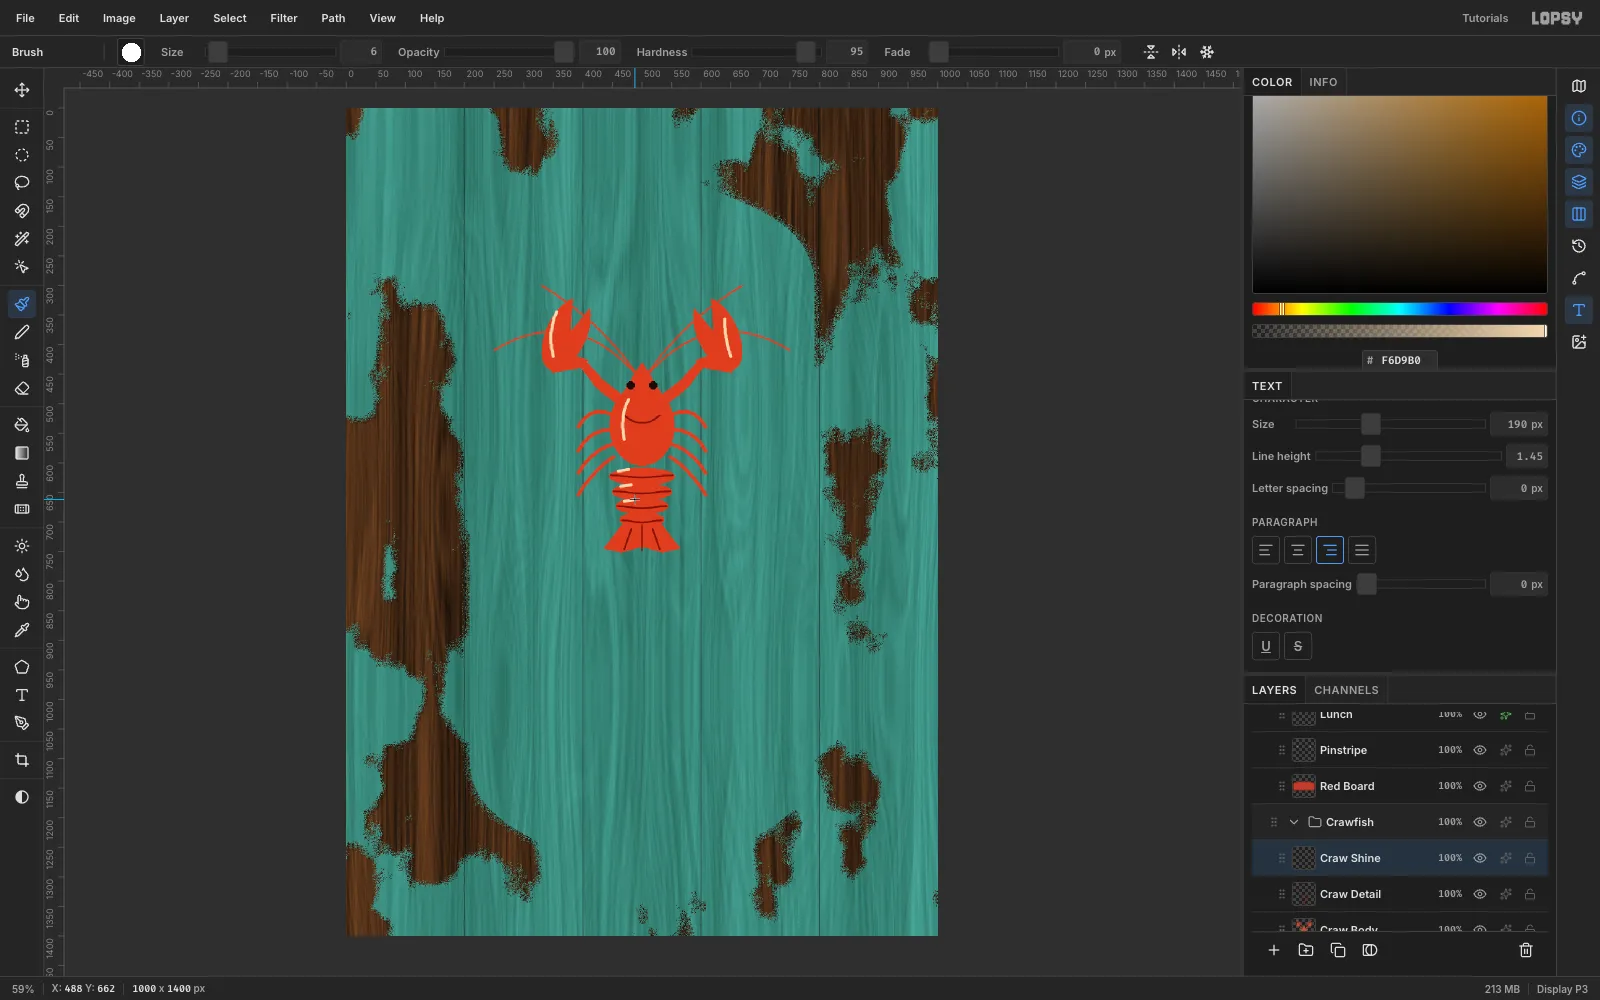
Add a layer Craw Detail. With the Brush at Size 4 in dark red
#7A1E12, draw a curved line across each tail segment, lines on the fan, and a happy smiling mouth. Fill two small 14 px elliptical marquees with#1B0D08for the eyes.Add a layer Craw Shine and paint short cream
#F6D9B0highlight strokes on the body, both claws and the tail at Size 6. Naive sign art always has one glint.Then press Layer → Merge Down twice, from the top, so the whole crawfish is one layer, Craw Body.
-
Scale the crawfish down
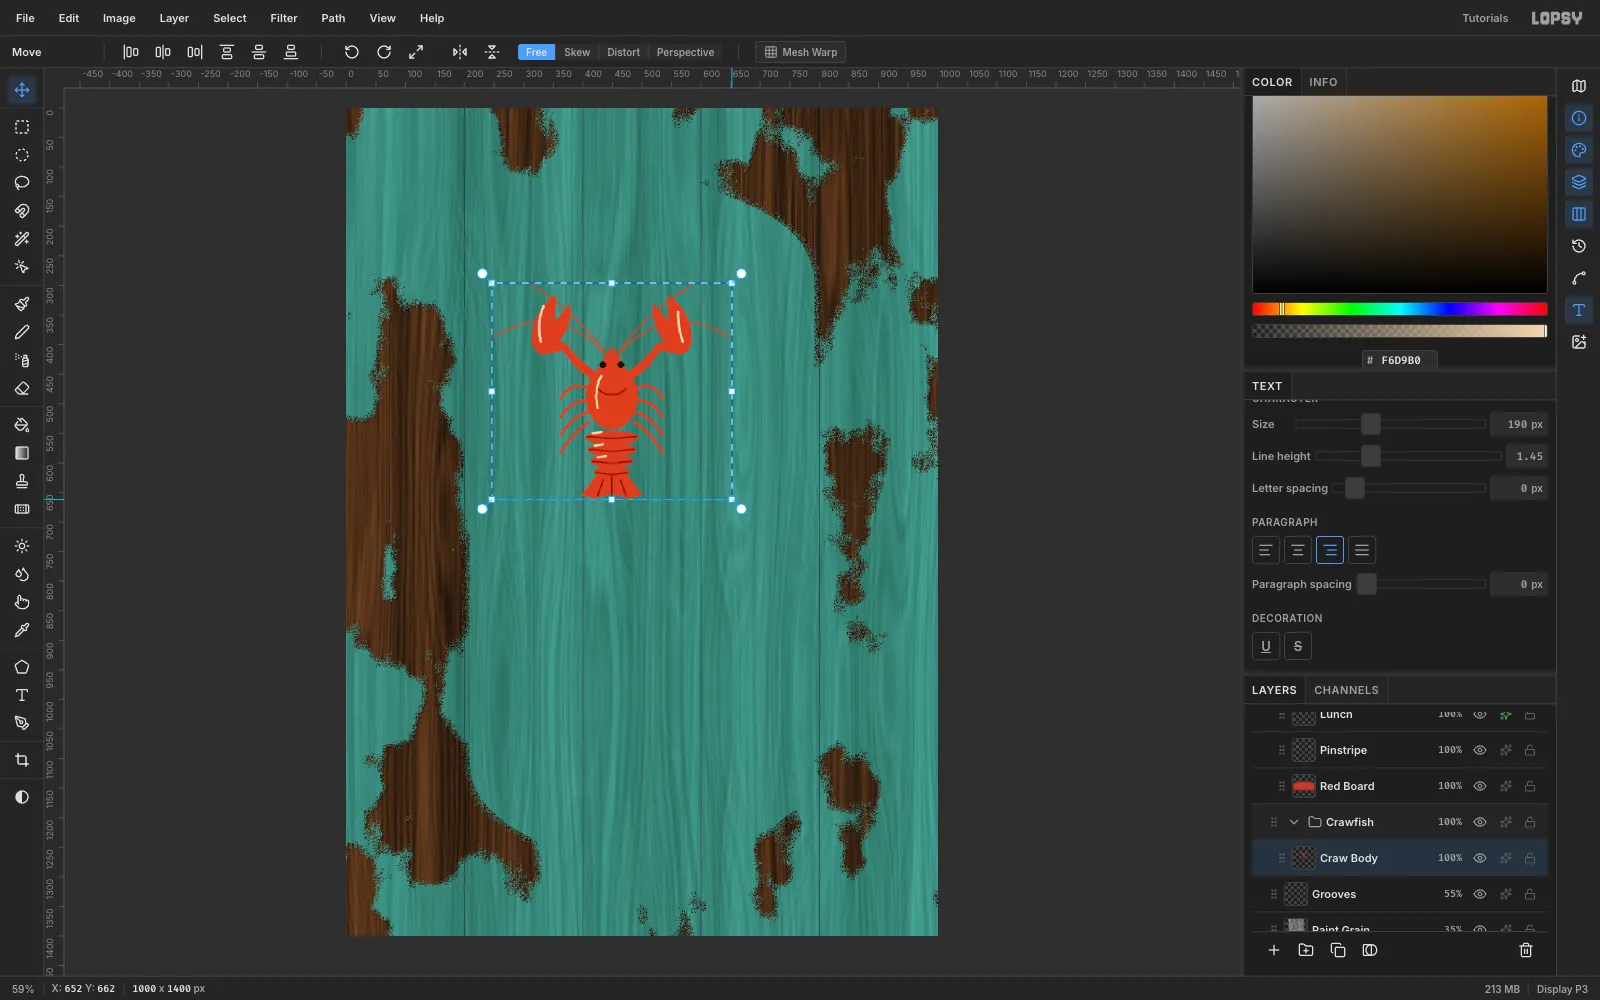
Drag a Rectangular Marquee that fully contains the crawfish, from 246, 296 to 754, 754, and switch to the Move tool. Hold Cmd and drag the bottom-right handle up and in to about 80%. Cmd keeps both axes in proportion. Press Cmd+D to commit the scale.
-
Rotate the crawfish
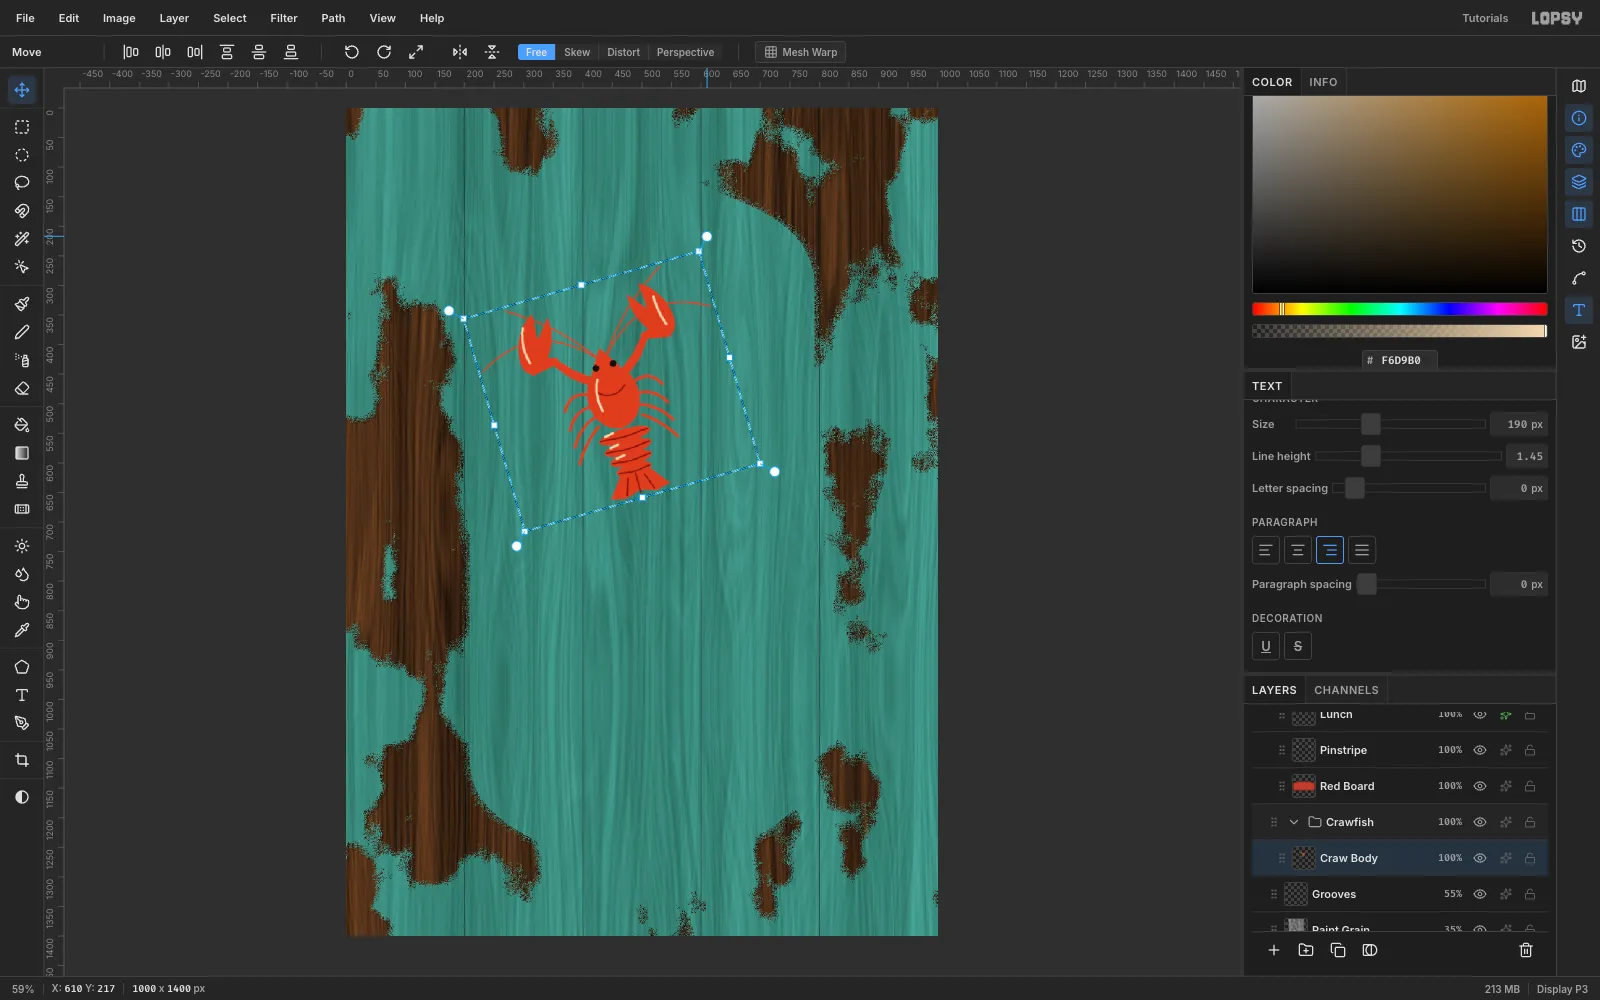
Marquee around the scaled crawfish again, switch to Move, and drag just outside the top-right corner to rotate it about −16°. A tilted mascot looks like it's waving at passing cars. Press Cmd+D.
-
Place it and add a cream keyline
With nothing selected, drag the crawfish with the Move tool to the right side, below the header, so its tail just reaches the top of where the menu boards will go. Show the Header group again.
In its layer effects, add Stroke in cream
#F1E4C0, Width 5, Outside, and a Drop Shadow of#2A120Cat 11 / 11, Blur 0, Opacity 90. Lopsy draws the stroke on top of the shadow, so the shadow offset has to be bigger than the stroke width, or the stroke covers it.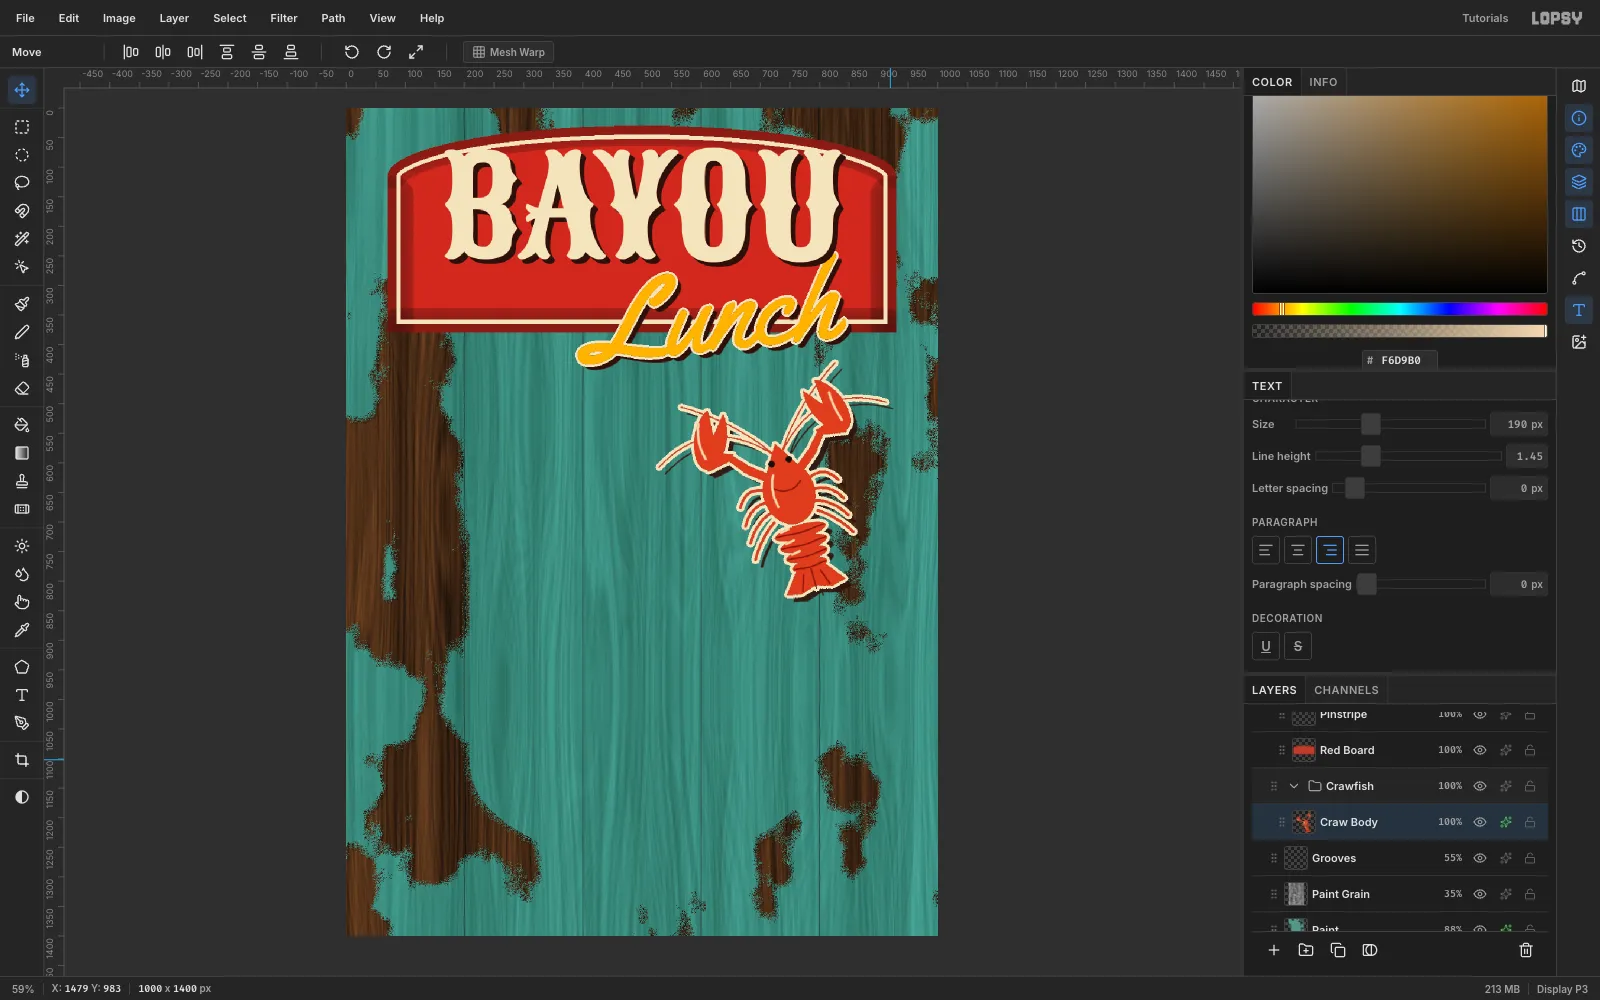
-
Letter the special
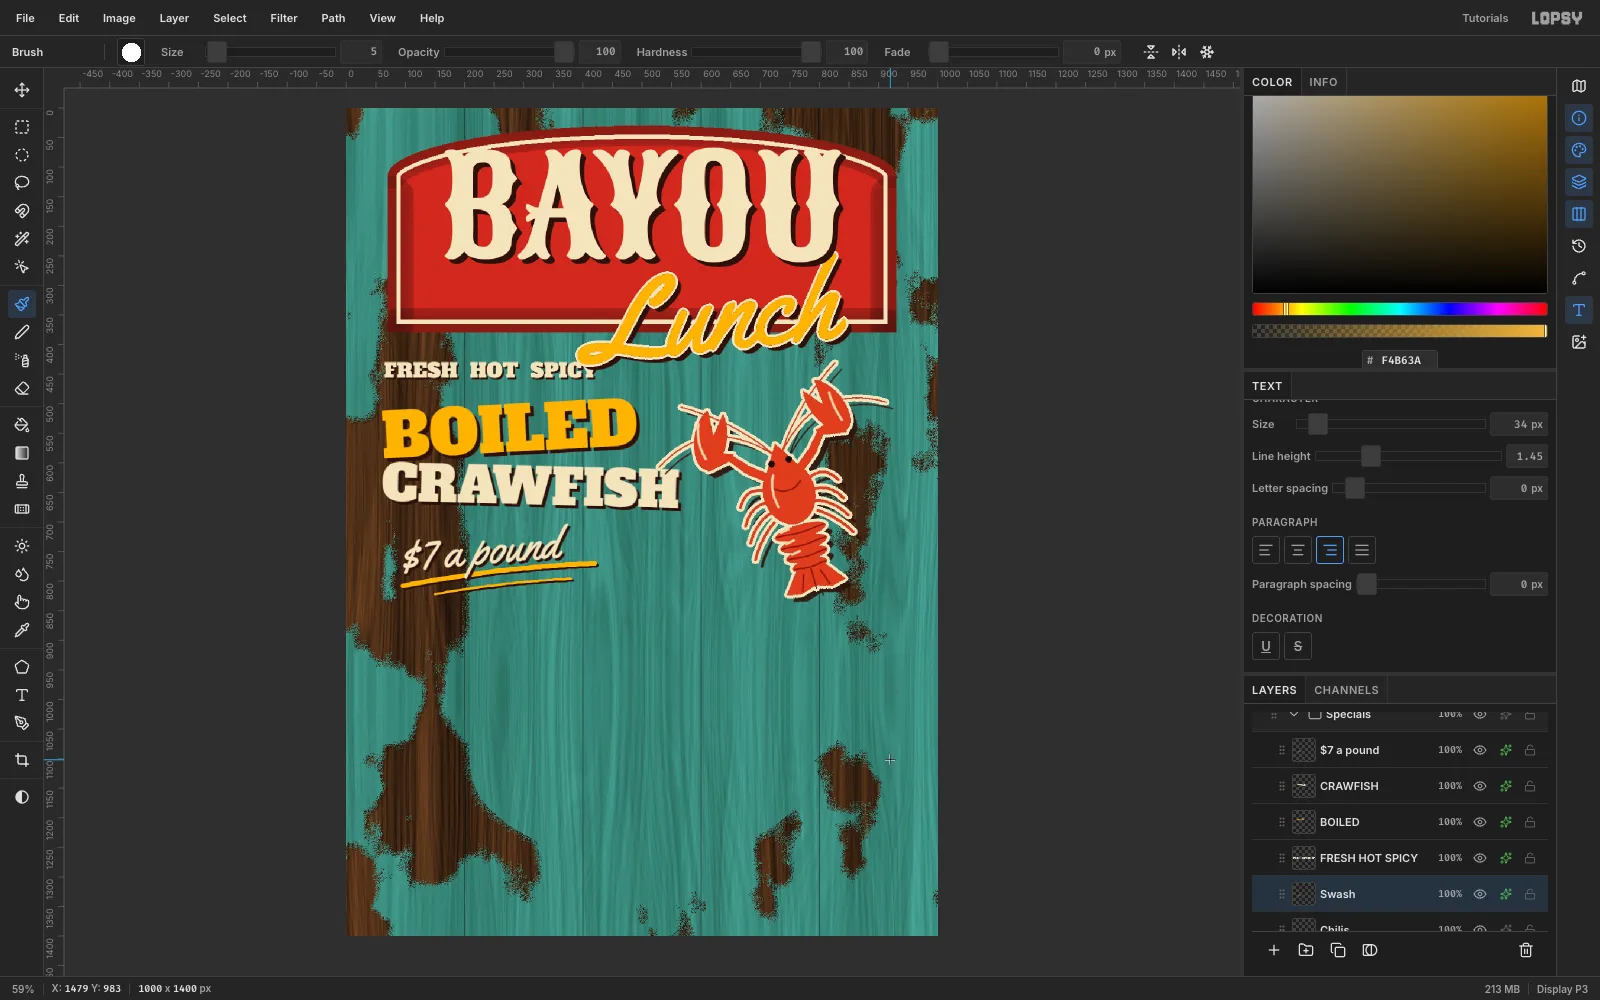
Make a group Specials with a raster layer Chilis inside it, and select Chilis before you create each line of type, so each new line starts from a raster layer. Create the lines from the bottom up. A click inside an existing text layer's box edits that layer instead of starting a new one.
- $7 a pound: Yellowtail, 76 px, cream.
- CRAWFISH: Alfa Slab One, 84 px, cream.
- BOILED: Alfa Slab One, 104 px, mustard
#F4B63A. - FRESH HOT SPICY: Alfa Slab One, 34 px, cream, with two spaces between words.
Give each one a hard
#2A120Cdrop shadow with Blur 0: offset 6 for BOILED, 5 for CRAWFISH, 4 for the price and 3 for the small line.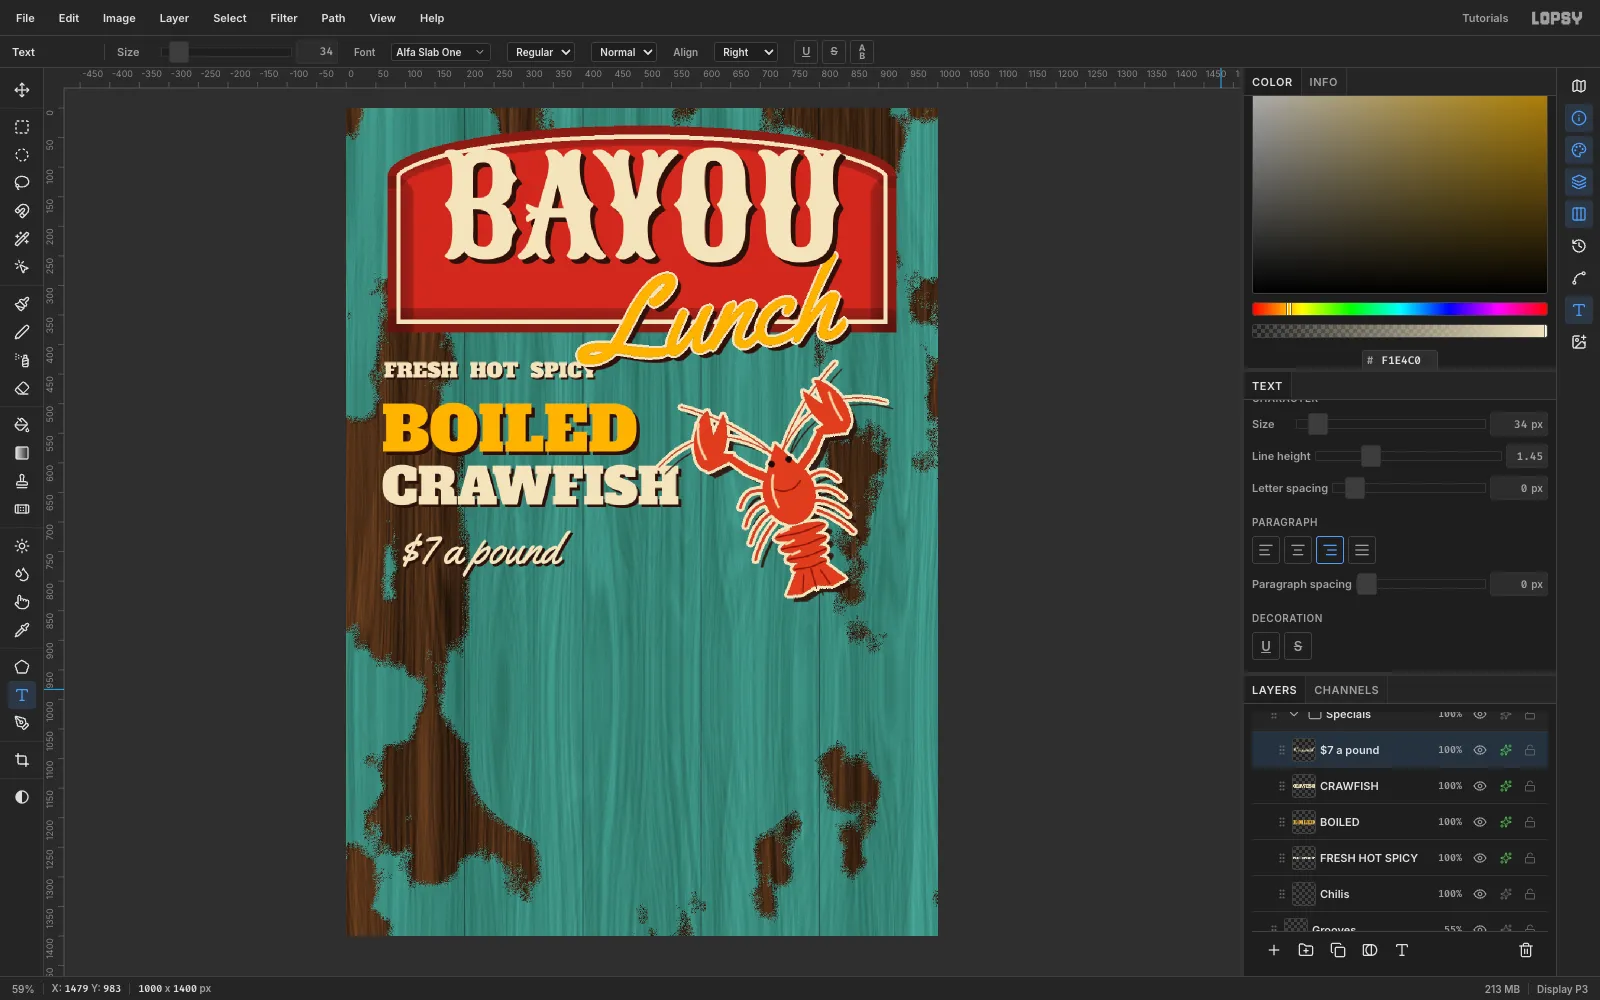
-
Knock the lines off level
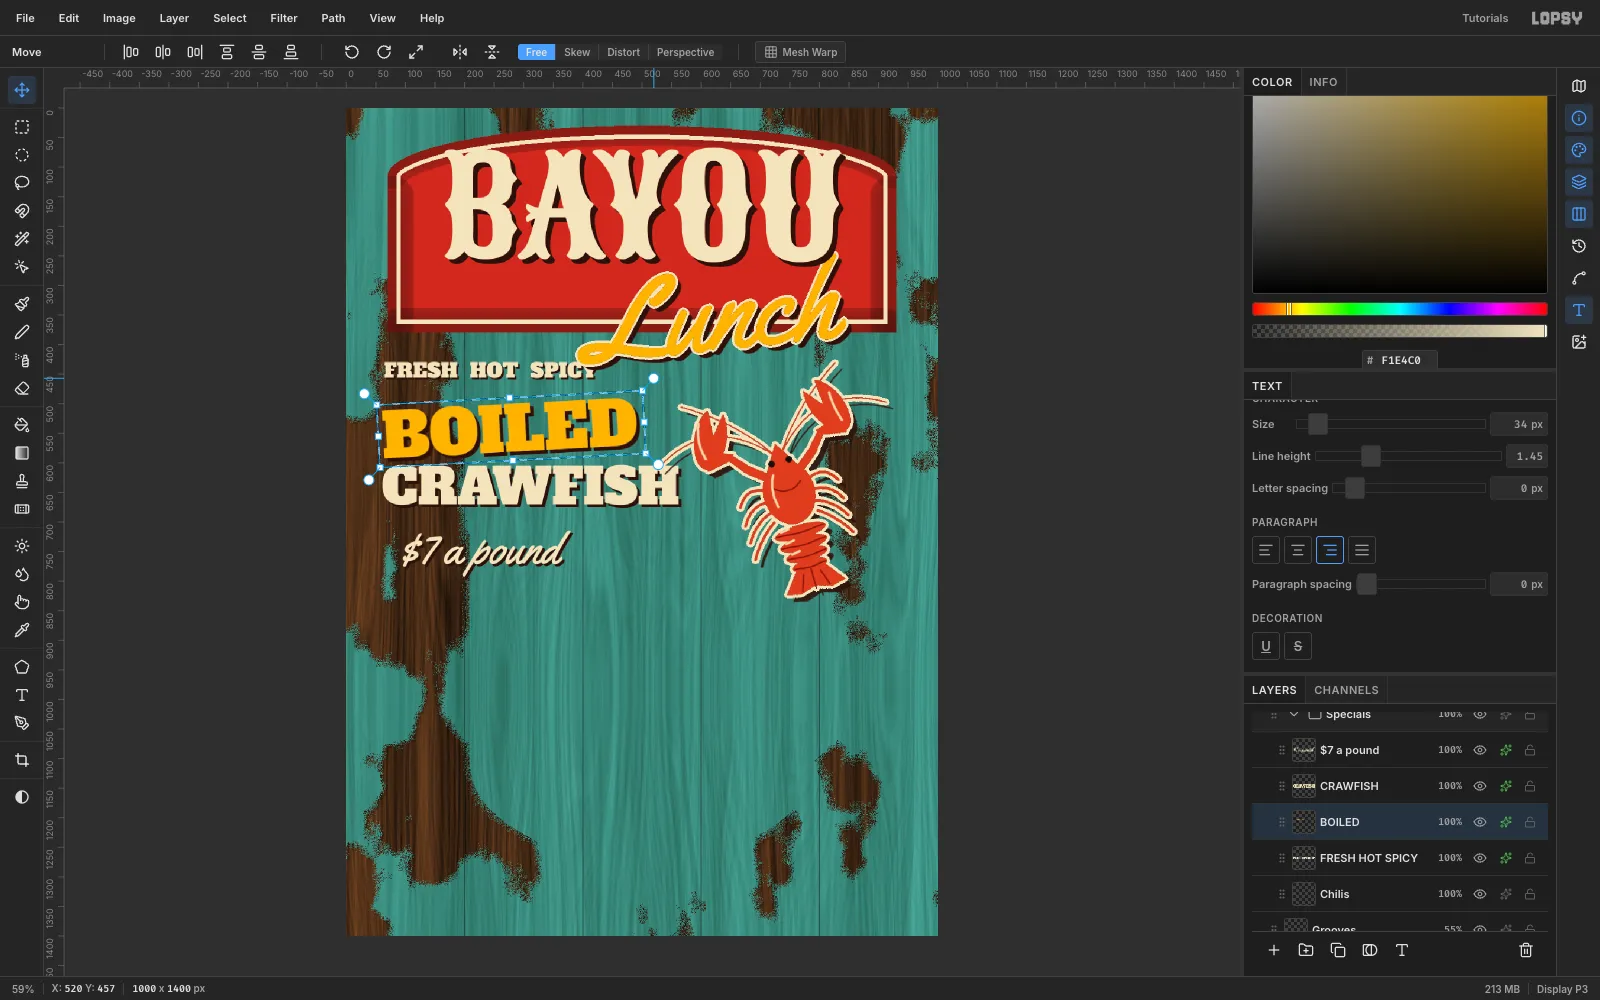
A hand-painted sign is never perfectly level. Marquee each line and rotate it with the Move tool's corner handle, pressing Cmd+D after each one:
- BOILED: about −3°.
- CRAWFISH: about +1.5°.
- $7 a pound: about −5°.
The tilts are tiny, but together they make the stack look hand-painted rather than typeset.
-
Underline the price with a swash
Add a layer Swash above Chilis. With the Brush in mustard at Size 9 and Hardness 100, drag one long, slightly rising curve under $7 a pound. Add a shorter, thinner stroke (Size 5) beneath it, then give the layer a 3 / 3 hard shadow. It's the flourish a sign painter adds without thinking.
-
Draw one chili, then paste two more
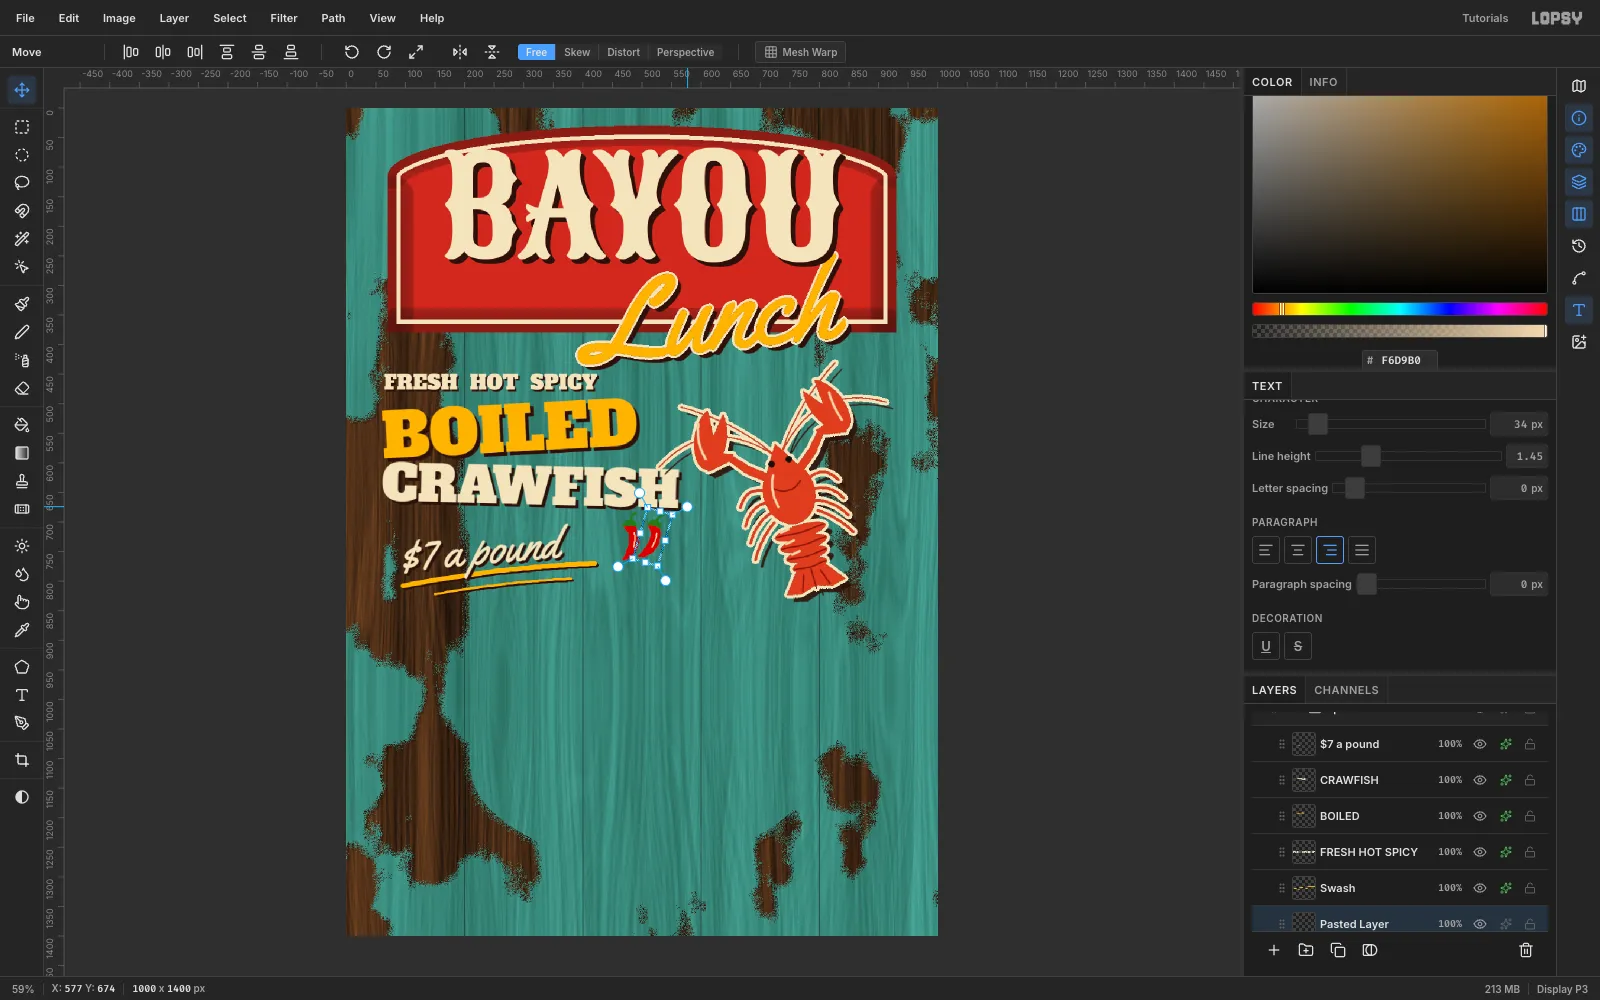
On the Chilis layer, lasso a curved red
#C8261Cchili about 30 × 65 px next to the price, lasso a green#3E7A2Acap, and brush a short stem and one cream highlight.To make a row of three:
- Marquee the chili and press Cmd+C, then Cmd+V. The copy is pasted in place on a new layer.
- With the Move tool, drag it about 36 px to the right and press Cmd+D.
- Marquee the copy and rotate it about 16°. Press Cmd+D.
- Repeat from the original for the third chili, 72 px to the right, rotated about 32°.
Merge the pasted layers down into Chilis and give it a 3 / 3 hard shadow. Three chilis mean "hot" on any menu board.
-
Nail up the menu boards
Make a group Menu and add a layer Boards. With the foreground at
#EFE0BC, fill two rectangular marquees: 48, 800 and 514, 800, each 438 × 440.- Run Filter → Add Noise… (Mono, Amount 10) so the boards aren't flat.
- Add Inner Glow in
#8A5A2E, Size 34, Opacity 55. It browns the edges like old varnished board. - Add a Drop Shadow of
#1A0E06at 6 / 8, Blur 0, Opacity 80.
On a layer Nails, fill a 14 px dark
#3B3632ellipse in each corner and add a 5 px light-grey glint to each one.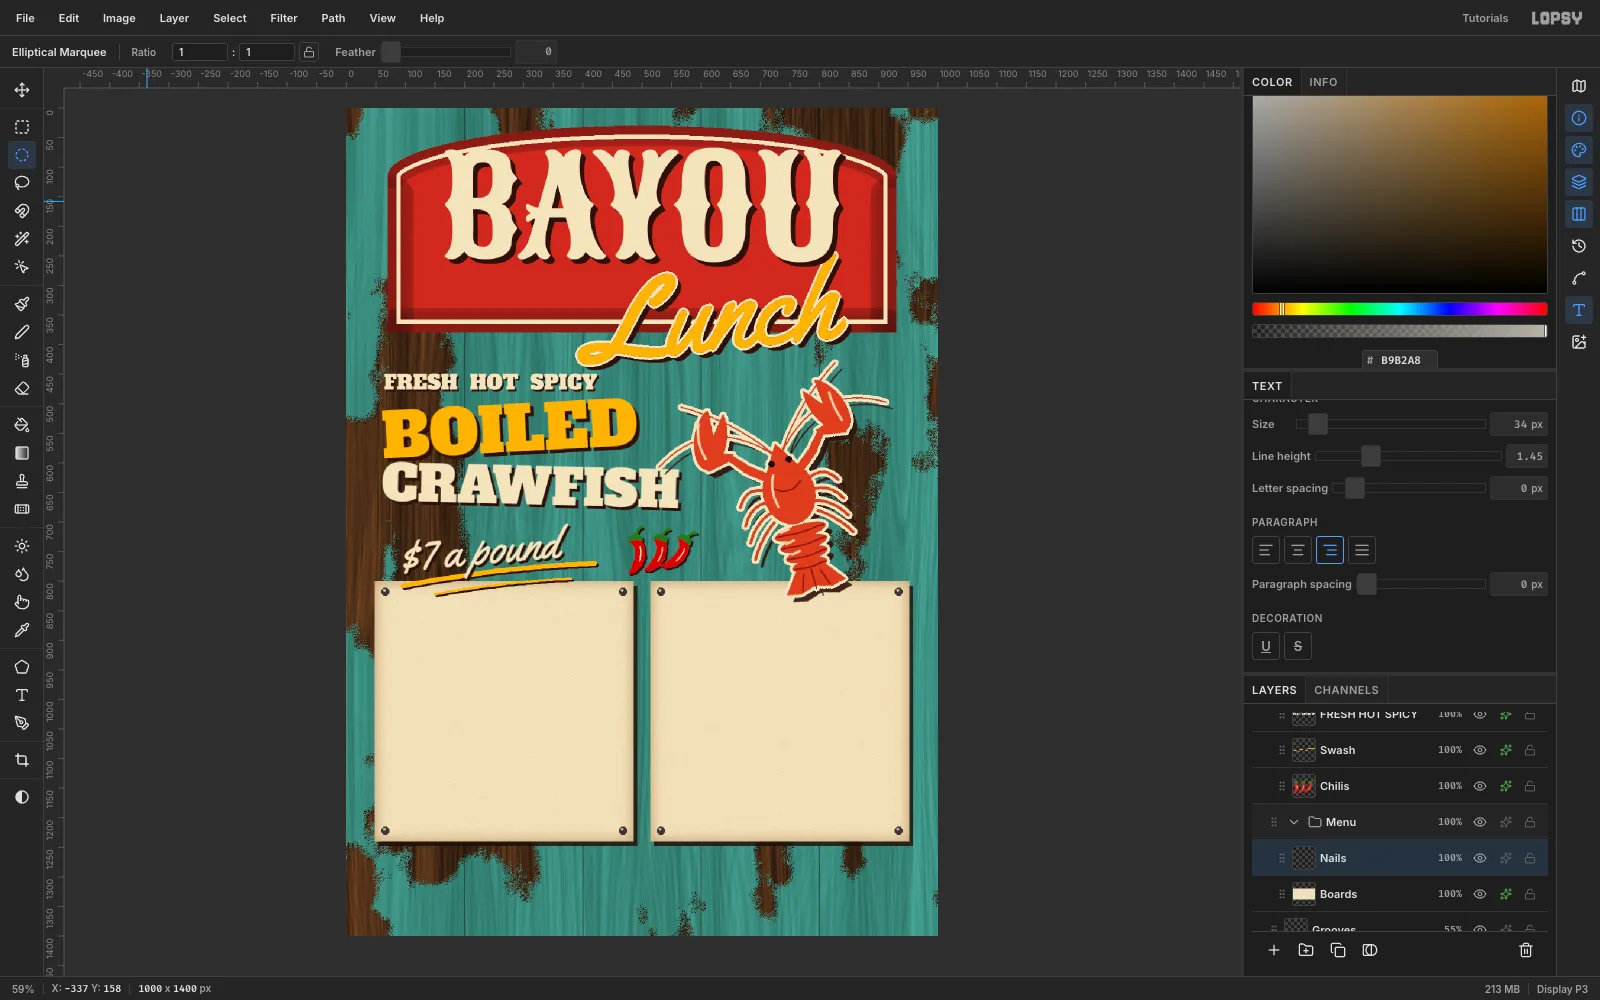
-
Set the items, prices and dot leaders
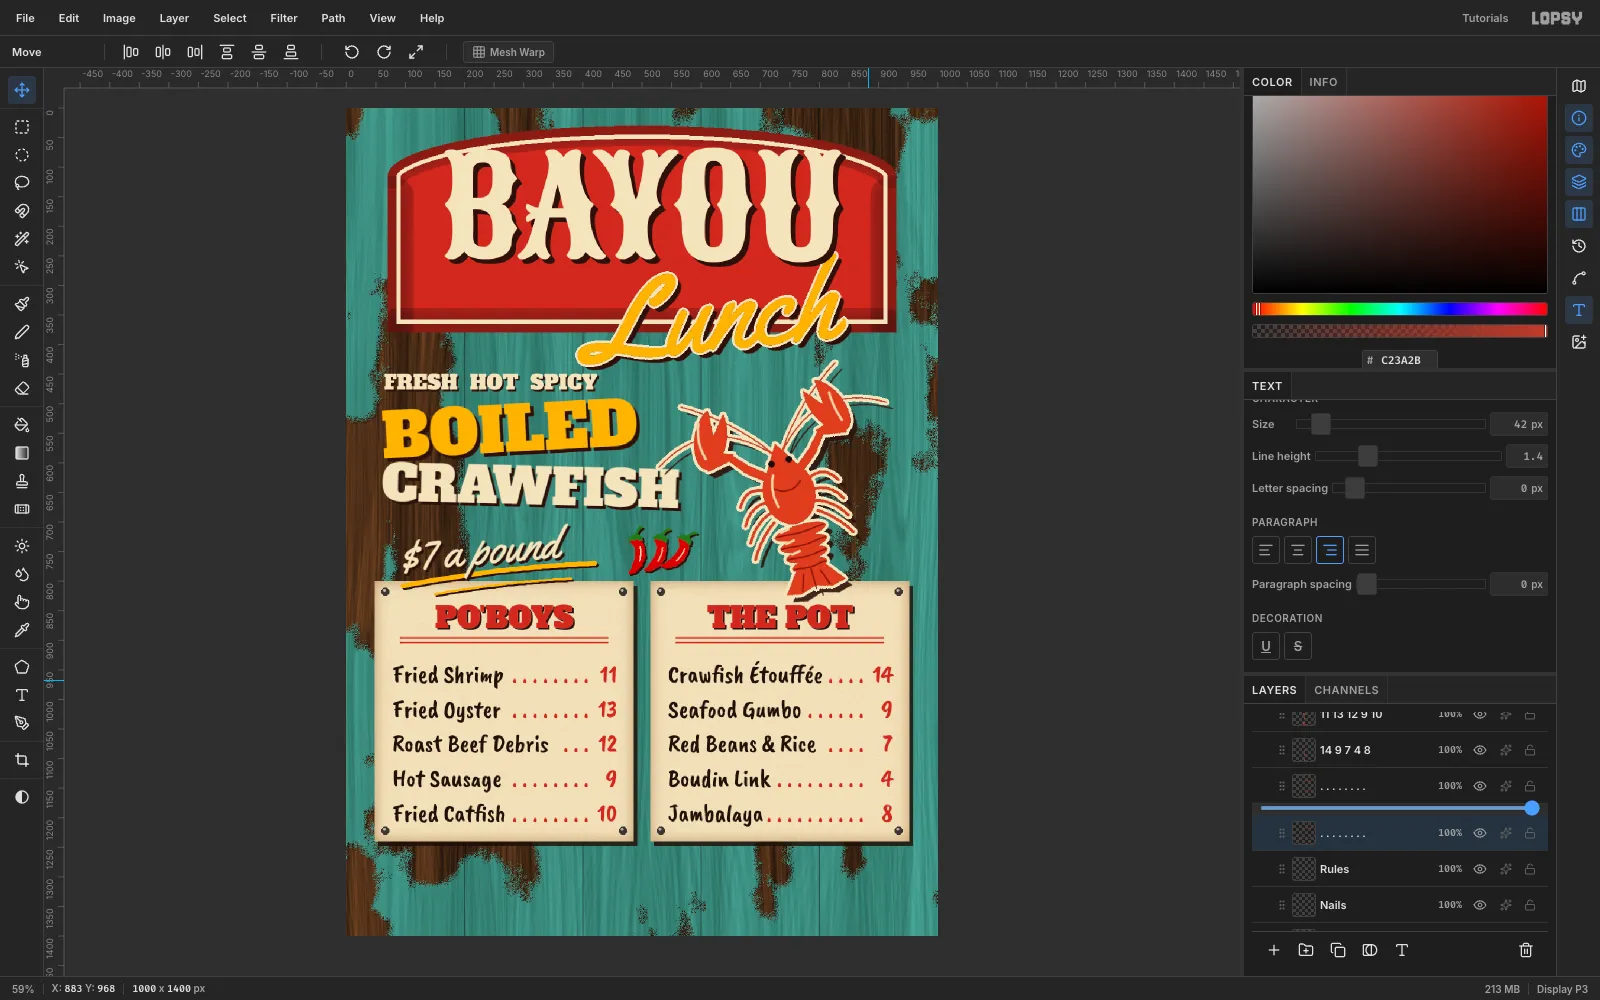
- Headings: Alfa Slab One, 50 px, sign red, PO'BOYS and THE POT, each with a 3 px hard shadow. Under each, draw two red shift-click rules, 8 px apart.
- Dishes: drag with the Text tool to make an area text box on each board. Set Caveat Brush, 42 px, near-black
#1E120A, Line height 1.4 in the Text panel, and paste five dishes, one per line. - Prices: make a narrow area text box at the right edge of each board, set Align right in the Text panel, and type the prices in sign red. Right-aligned area text keeps the numbers flush.
- Leaders: make one more right-aligned area box between the dishes and the prices, in red. Each line is
. . . .with as many dots as fit after that line's dish name.
-
Paint the arrow and snap the plaque to the grid
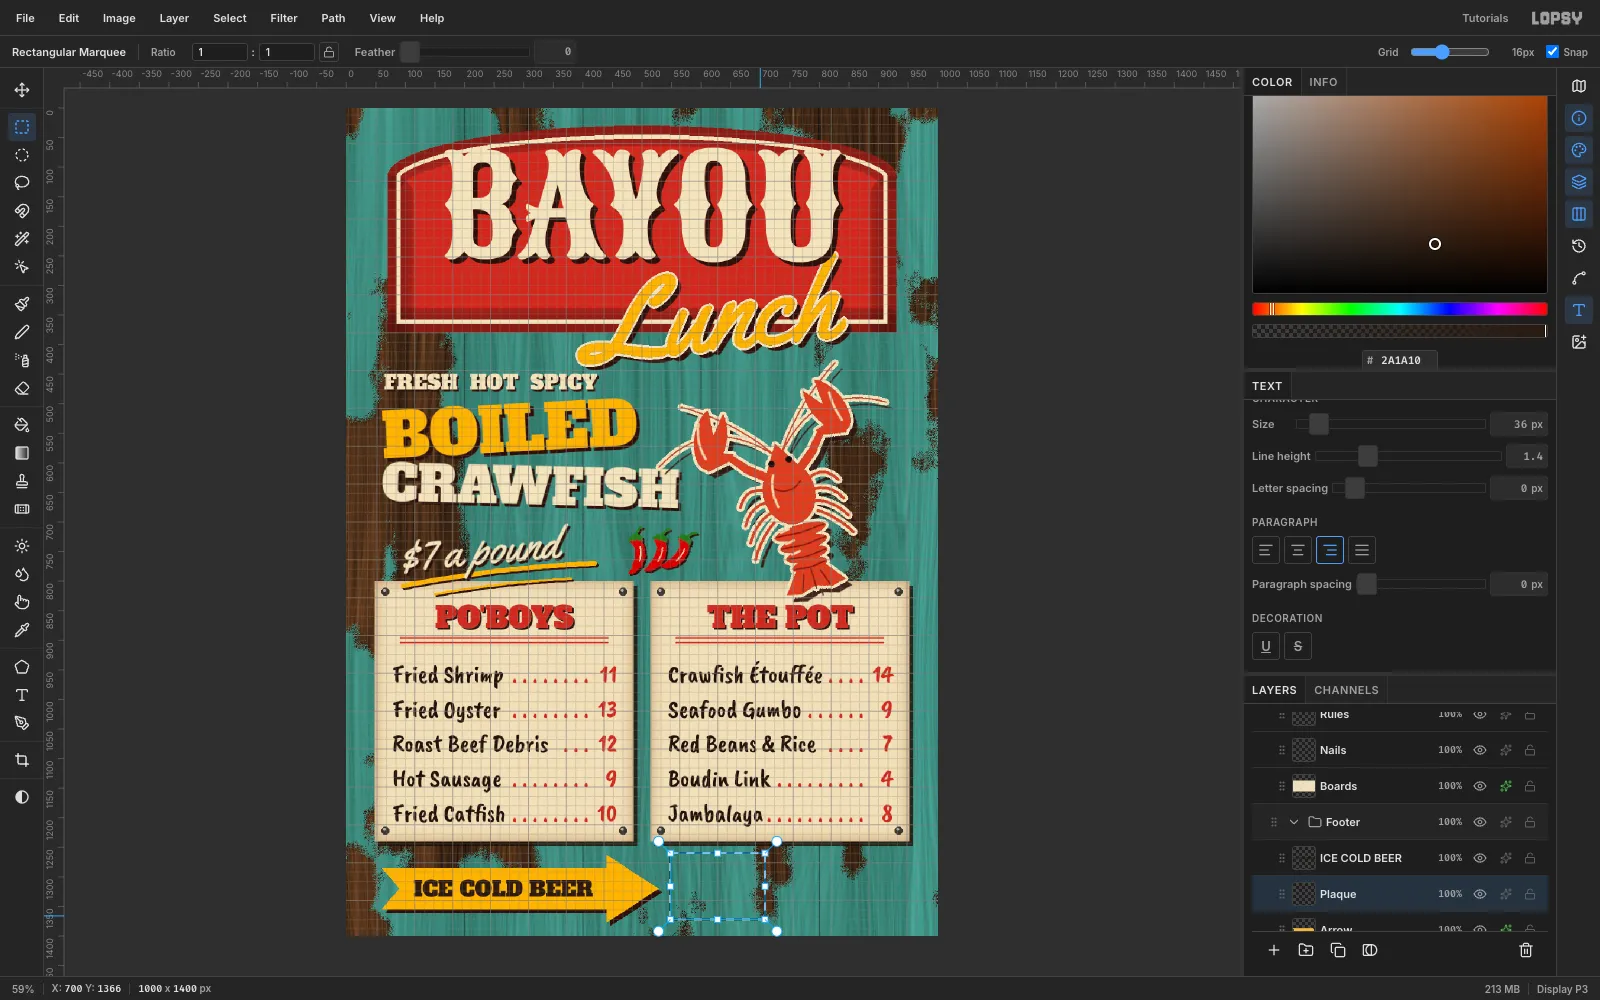
In a group Footer, add a layer Arrow. Lasso a mustard arrow with a notched tail from x 60 to a point at x 528, around y 1320. Give it a hard
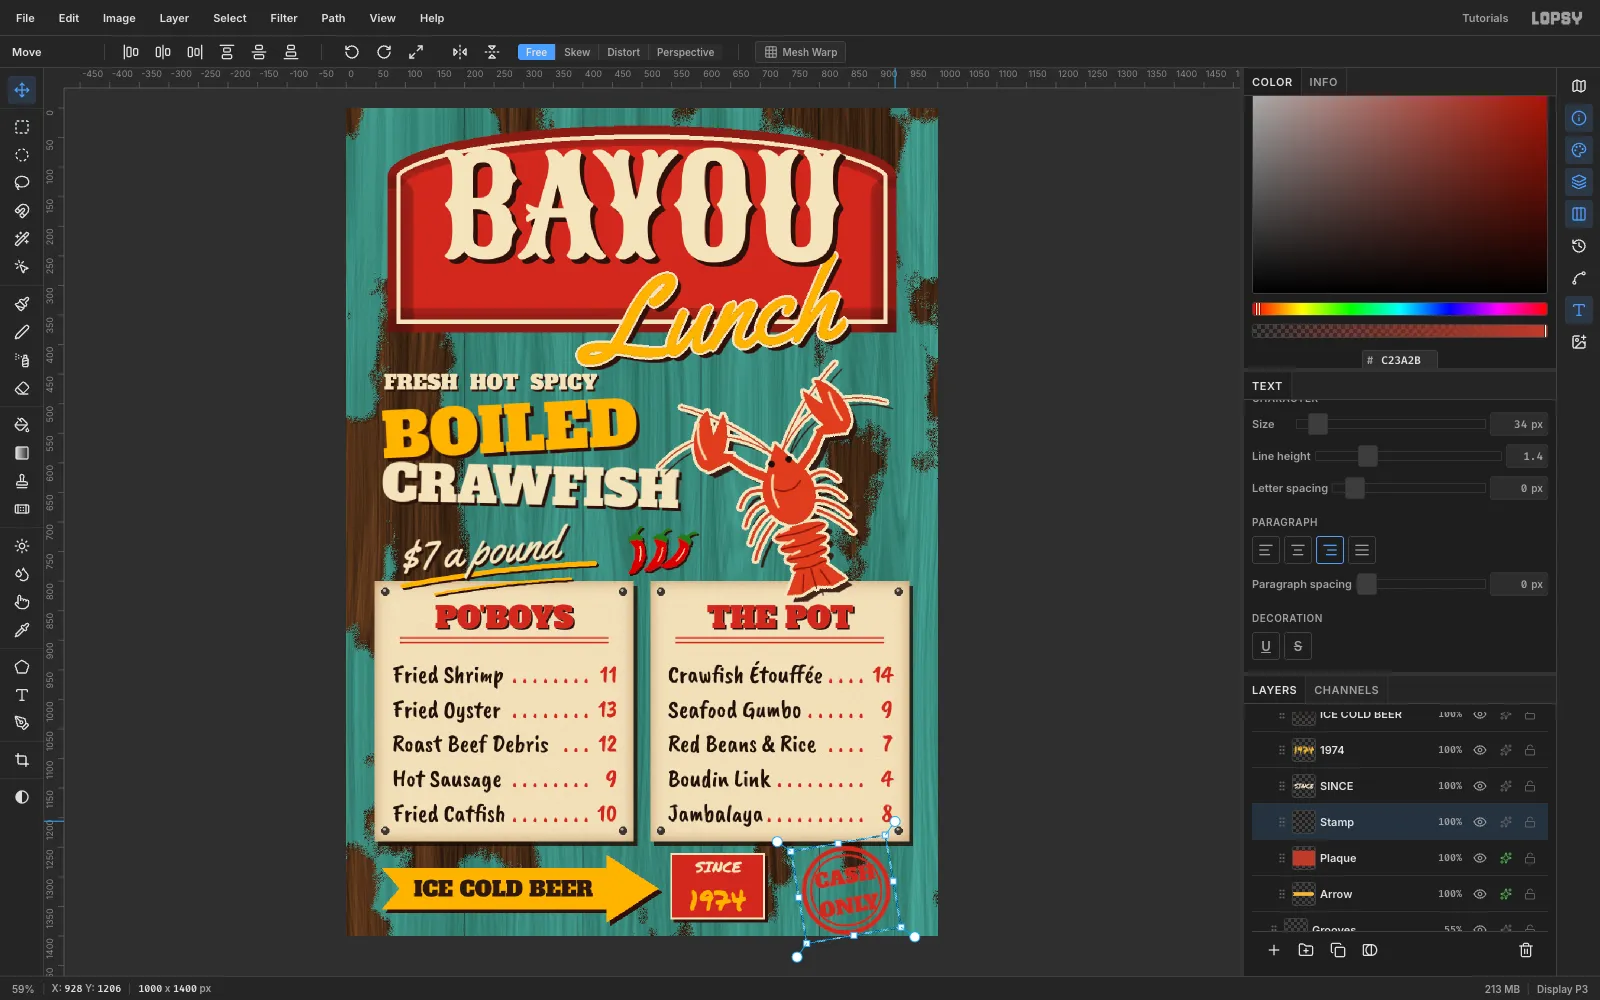
#2A120Cshadow, and letter ICE COLD BEER on it in Alfa Slab One, 36 px,#2A1A10.Add a layer Plaque and choose View → Show Grid. Showing the grid also switches on Snap. Drag a marquee beside the arrow. It snaps to the 16 px grid, here landing at 548, 1260 and 160 × 112. Fill it with sign red, then turn the grid off again. Give the plaque an inside cream Stroke (3 px) and a hard shadow, and letter SINCE (Permanent Marker, 26 px, cream) over 1974 (Permanent Marker, 48 px, mustard).
-
Stamp CASH ONLY
On a layer Stamp, fill a 150 px elliptical marquee in sign red, then use Select → Shrink to cut rings:
- Shrink 7, press Delete.
- Shrink 5, Edit → Fill.
- Shrink 3, press Delete.
That leaves a bold outer ring and a thin inner ring. Letter CASH and ONLY in Alfa Slab One at 34 px. Click Rasterize Layer on both, then Layer → Merge Down them into the stamp. Marquee the stamp and rotate it about −10°, so it looks slapped on in a hurry.
-
Scuff everything with a grime layer
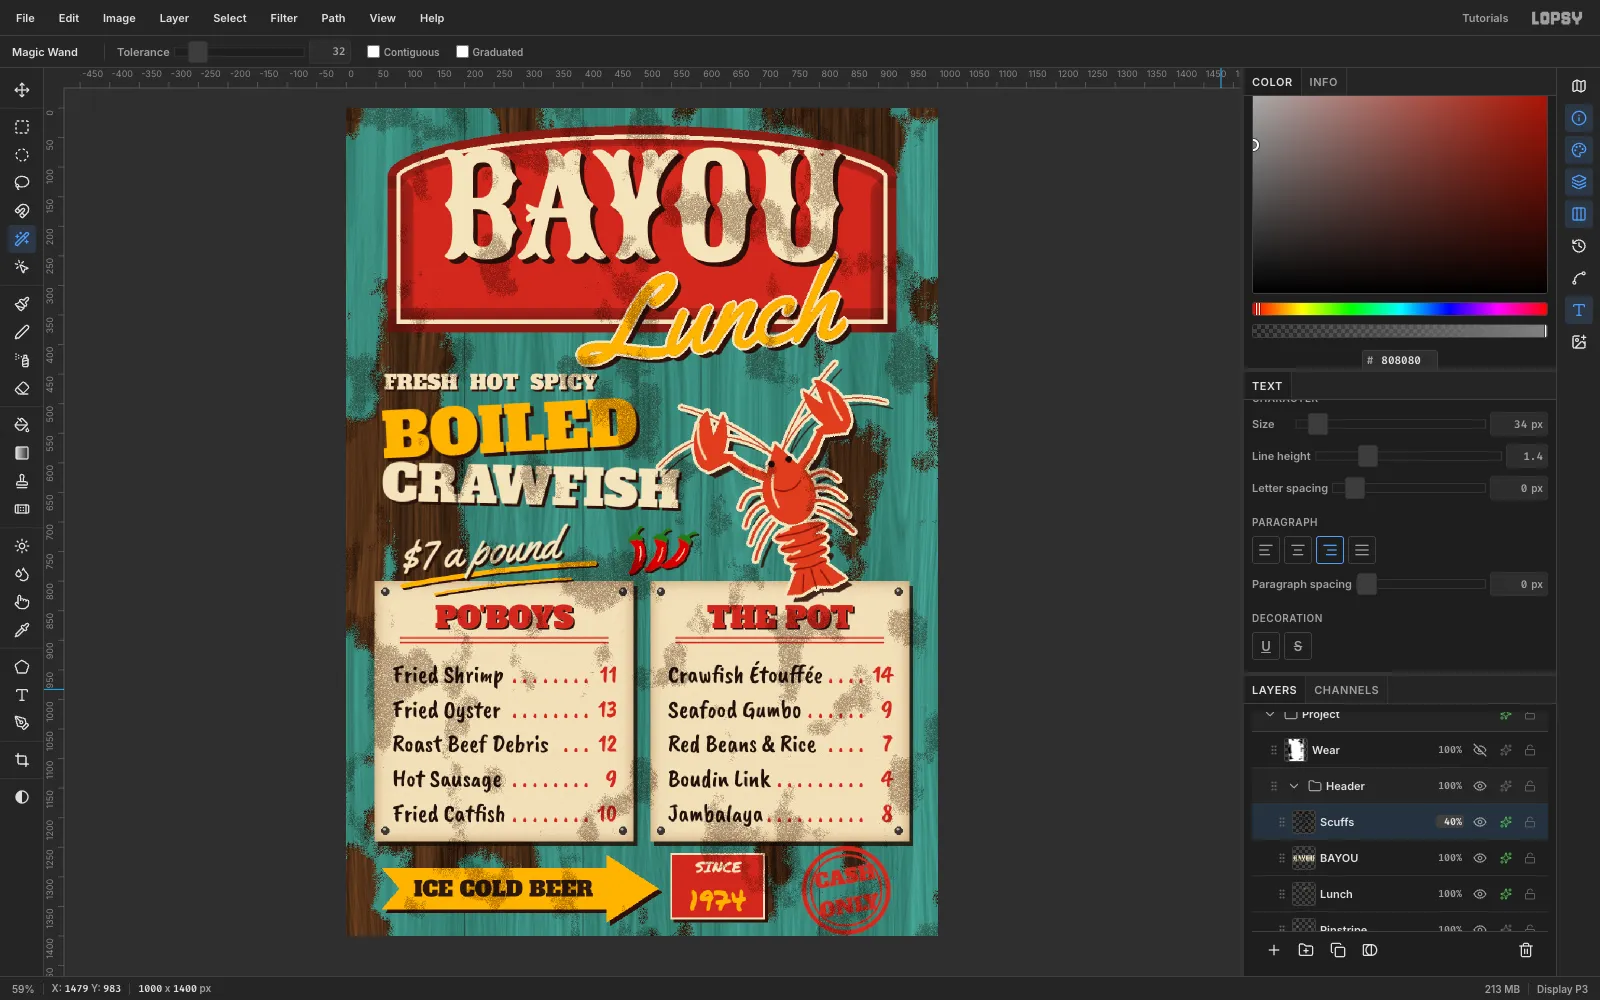
Select BAYOU, the top layer in the Header group, and add a layer Scuffs. It sits above all the artwork.
- Fill it with
#808080. Run Clouds (Scale 16), then Add Noise (Mono, 60), then Threshold at 17. - With the Magic Wand (Contiguous off), click a white area and press Delete, so only the dark speckles are left.
- Add a Color Overlay of
#4A2A16, set the blend mode to Multiply, and drop the layer to 40% opacity.
Now the chips and grime cross every painted surface, the way real weather does.
- Fill it with
-
Erase the grime off what must be read
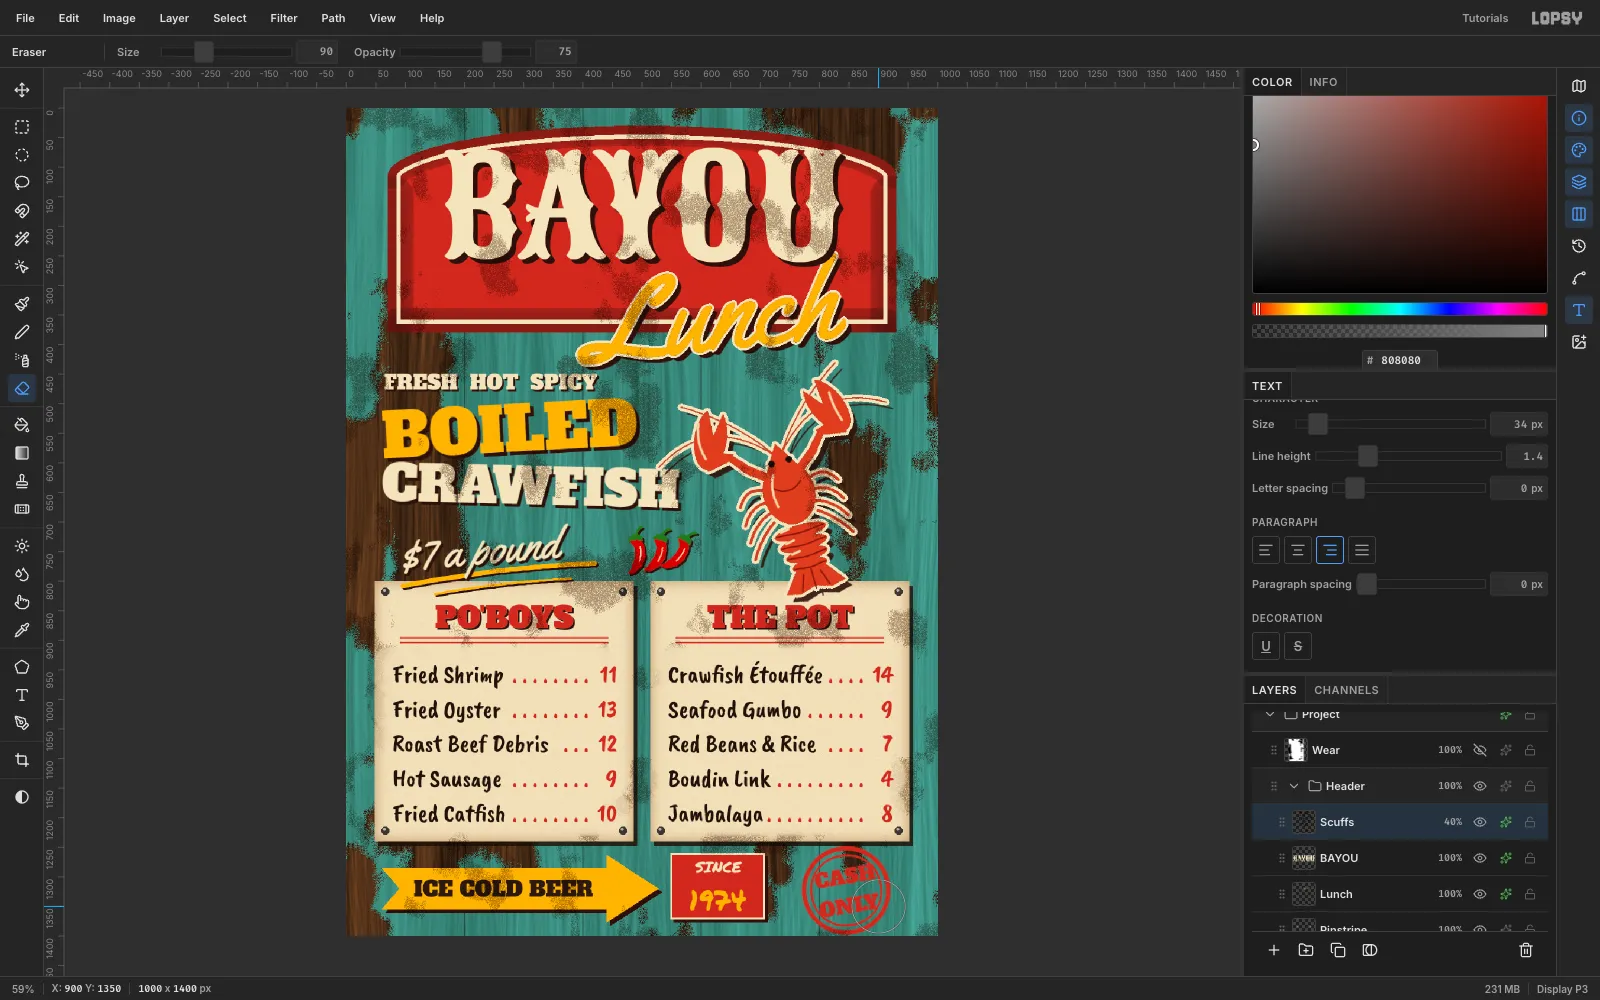
Wear is charming until nobody can read the prices. Pick the Eraser at Size 90 and Opacity 75. With Scuffs selected, sweep across each line of dishes on both boards, then across the plaque and the stamp. The headings and the header keep their grime, and the information stays clean.
-
Finish with a vignette
Click the Project group row and open its effects drawer, then click Add Adjustment → Vignette and set it to 30. The corners darken slightly and pull the eye towards the crawfish and the boards.
-
Export the menu
Choose File → Quick Export PNG to save the image, and File → Save Project to keep every layer editable. A roadside sign usually gets repainted every season, so you'll want the layers when the prices go up.
Where to take it next:
- Swap the turquoise for a faded barn red, or sun-bleached yellow.
- Paint a second arrow sign on its own layer, pointing to Live Bait.
- Duplicate the Menu group's boards for a Daily Specials chalkboard.