Design a Neo-Pop Zine Cover with a Superflat Dandelion
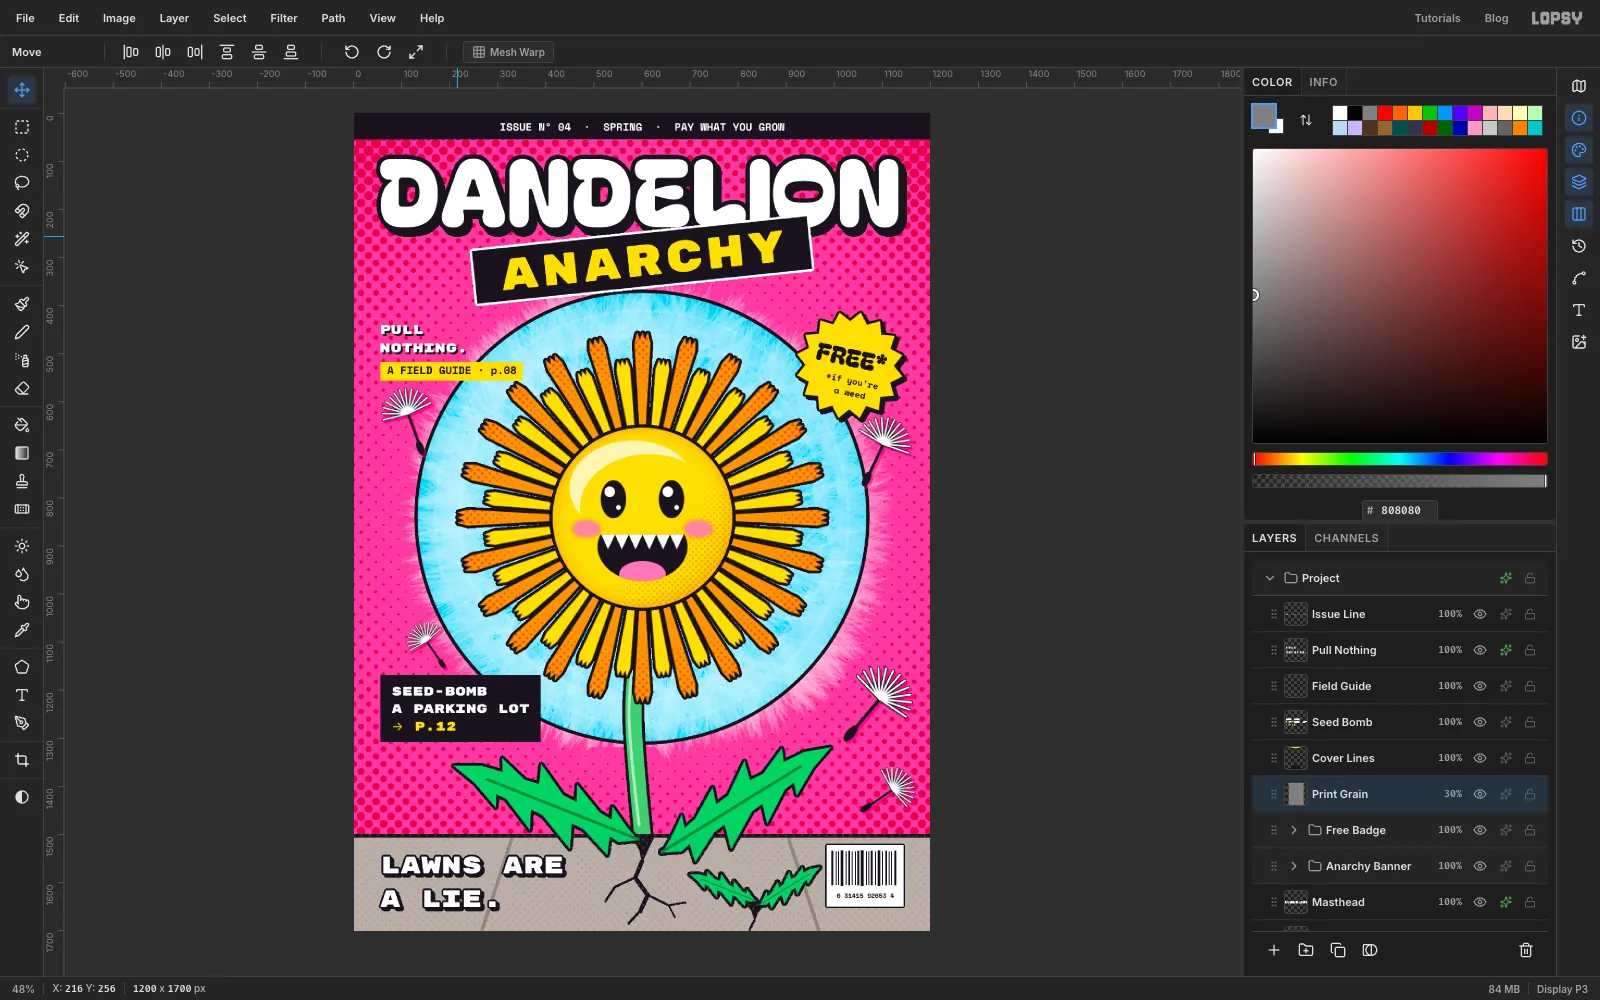
Make a neo-pop zine cover in Lopsy with a grinning superflat dandelion, Ben-Day dots, a photo seed-clock halo, rotated florets and bold cover lines.

Neo-pop took the bright, flat, commercial look of 1960s pop art and gave it a 1990s spin. Takashi Murakami's superflat smiling flowers, Jeff Koons' mirror-glossy balloon animals and the Ben-Day dots borrowed from Roy Lichtenstein's comic panels all belong to it. It's cheerful on the surface and a bit unsettling underneath: Murakami's flowers grin with too many teeth.
In this tutorial you'll use that look for the cover of Dandelion Anarchy, an imaginary guerrilla-gardening zine that sides with the weeds. The hero is a cartoon dandelion with a glossy face and a grin full of lion's teeth (dent de lion, where the name comes from), set in a halo made from a real photo of a dandelion seed head. The cover is 1200 × 1700 px.
Along the way you'll use:
- the Gradient tool and Halftone filter for Ben-Day dots, on the page and on the flower
- a dropped-in photo with Desaturate, Brightness/Contrast, a corner scale and the Screen blend mode
- the Shape tool's click-to-size dialog for rings
- the Pen tool with Path to Selection for florets, teeth, cracks and leaves, and Pen + Enter to stroke a curved stem
- Duplicate Layer, Rotate 90° CW, snapped rotation handles and Merge Down to multiply one floret into a full flower head
- marquee add, subtract and intersect for the eyes, the glossy highlight and the grin
- Group Layers, scaling a whole group, Flip Horizontal, and Cut and Paste to make copies
- text in Bagel Fat One, Rubik Mono One and Space Mono, including a rotated group with live text and recolouring one line of a text layer
- Stroke, Drop Shadow, Inner Glow and Color Overlay effects, guides and the grid
The palette:
-
Hot pink
-
dot magenta
-
seed shadow
-
Sky cyan
-
ring cyan
-
Dandelion yellow
-
marigold
-
dot orange
-
Leaf green
-
vein green
-
cheek pink
-
Pavement
-
joints
-
dot grey
-
Ink
-
white
-
grain grey
You'll also need a photo of a dandelion seed head on a dark background. This cover uses Dandelion seed head before count by Jdparker on Wikimedia Commons, which is in the public domain. Download the 1280 px version.
-
Set up the canvas and centre guides
Choose File → New, enter 1200 × 1700 and click Create. Click the Background row, set the foreground to hot pink and choose Edit → Fill.
Click the top ruler at
600to drop a vertical guide, then the left ruler at840for a horizontal one. The flower will sit where they cross.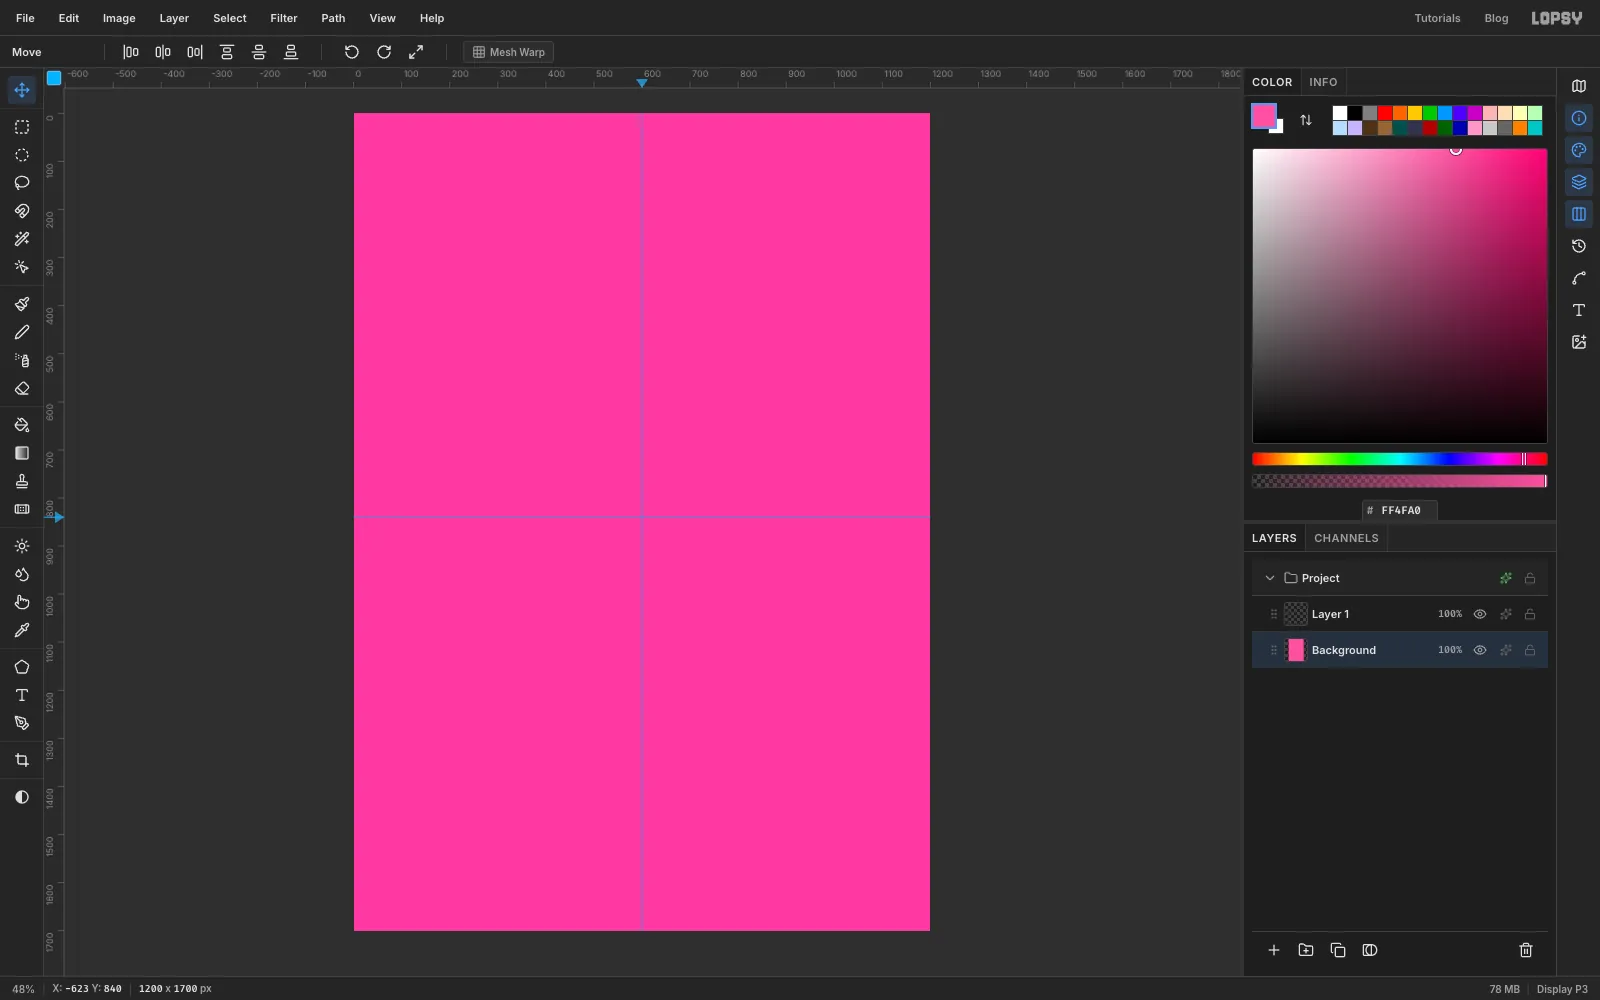
-
Add a Ben-Day dot vignette
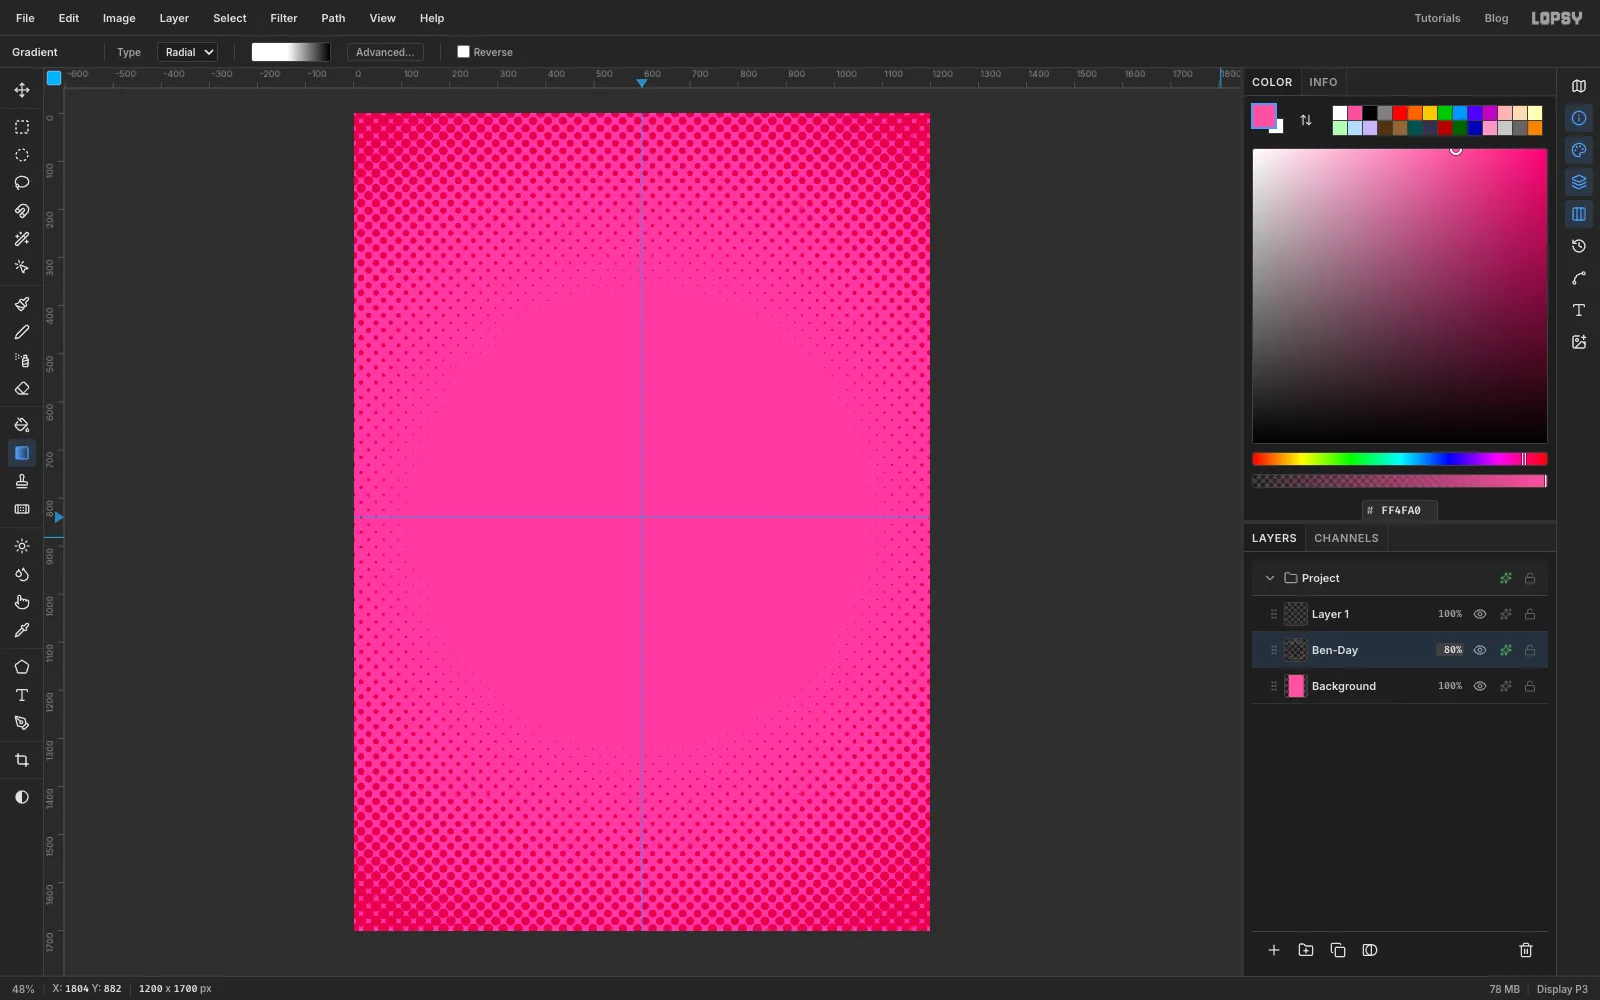
With Background selected, add a layer named Ben-Day. Pick the Gradient tool, set Type to Radial and click Advanced…. Make three stops: white at the left end, white again at about 45%, and black at the right end. Click Done.
Drag from the guide crossing at
600, 840straight out to the right, past the edge of the canvas. Then choose Filter → Halftone… with Dot Size22, Angle45, Density1and Softness0.4. The dark corners turn into big dots, and the white middle stays clear.Give the layer a Color Overlay in dot magenta , set its Blend to Multiply and its opacity to 80%.
-
Draw the sky disc
Click Layer 1 and rename it Sky Disc. With the exact-corners dialog, select a circle from
130, 370to1070, 1310. Fill it with sky cyan and deselect.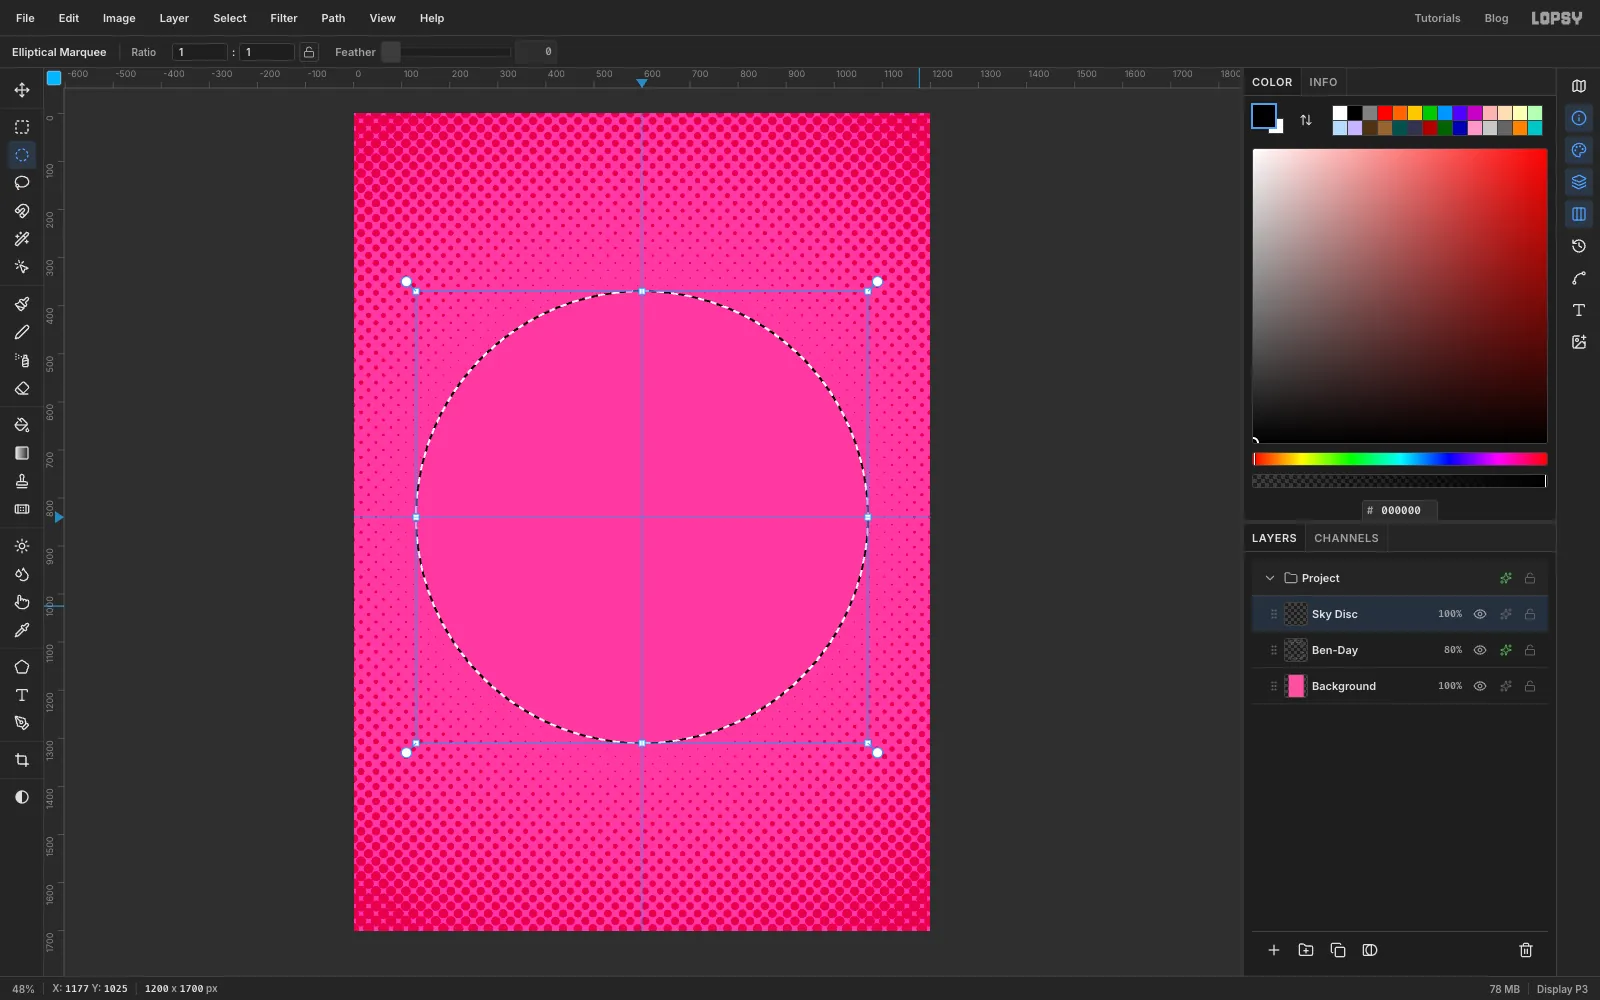
-
Add the faint rings
Add a layer named Disc Rings. Pick the Shape tool, set Shape to Ellipse and Output to Pixels. Click the Fill swatch and choose Remove fill, then set the Stroke to ring cyan with a Width of
6.Click once on the guide crossing. In the Shape Size dialog enter
860 × 860and click Create. Click the crossing again and make a760 × 760ring. Drop the layer's opacity to 30%. The rings should be felt, not seen.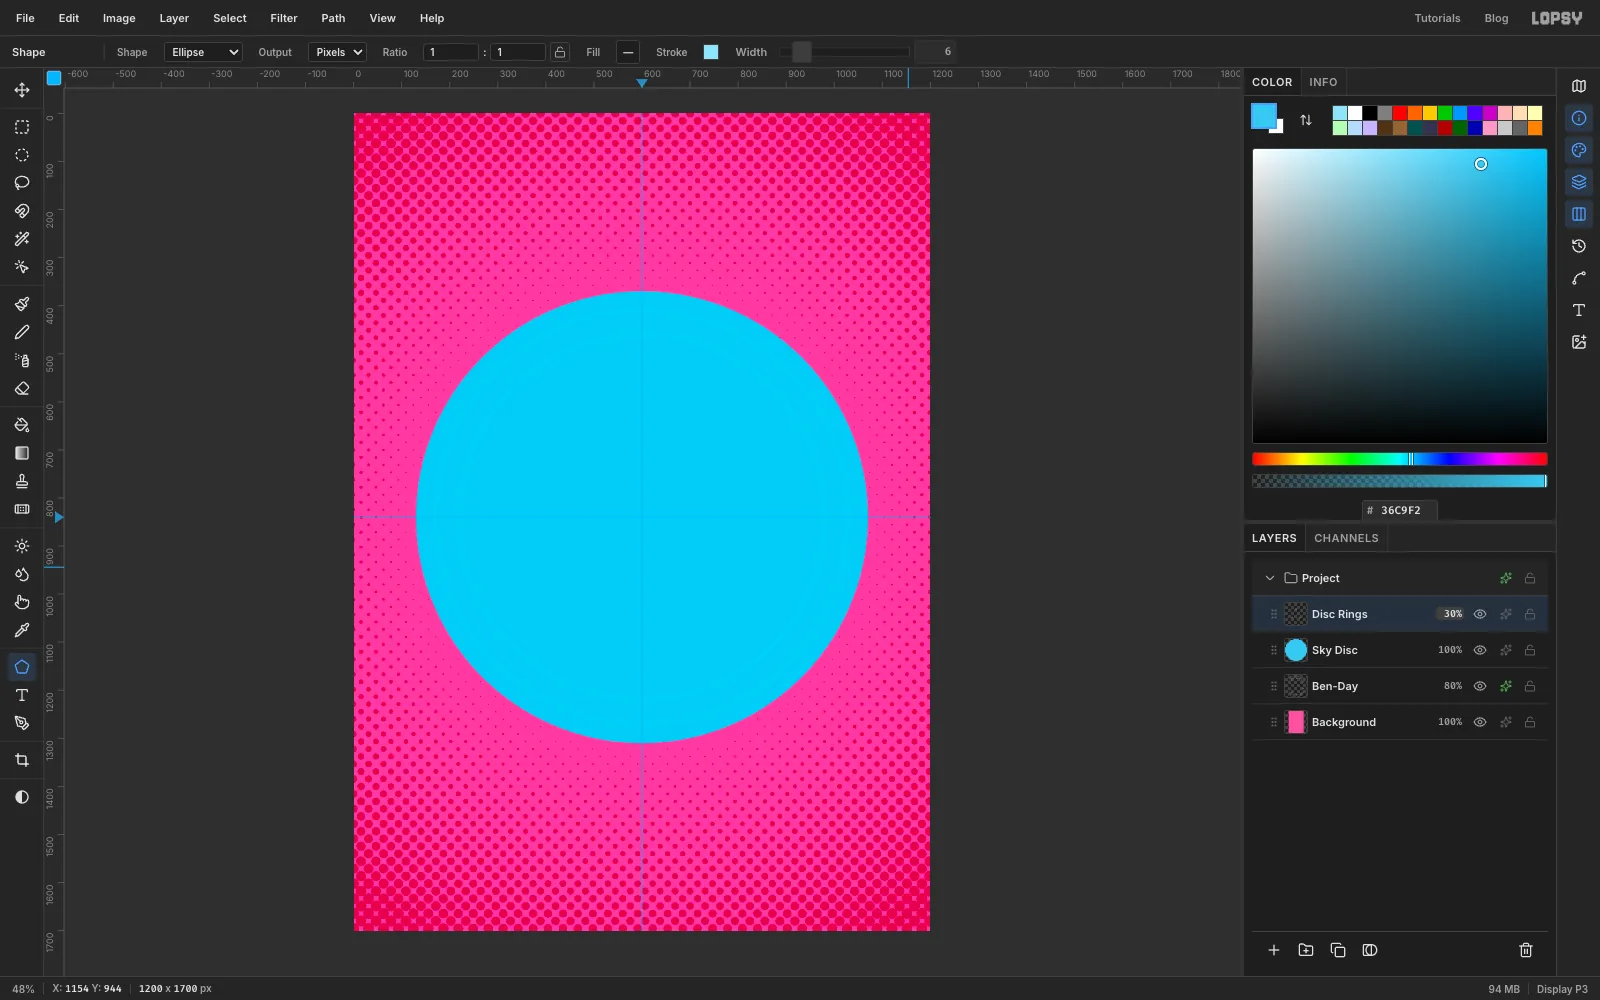
-
Bring in the seed-head photo
Drag the photo file from your computer onto the canvas. It arrives as a new layer called Pasted Layer, scaled to fit the page width. Rename it Seed Clock.
Choose Filter → Desaturate, then Filter → Brightness/Contrast… with Brightness
-10and Contrast45. That leaves white fluff on a solid black background.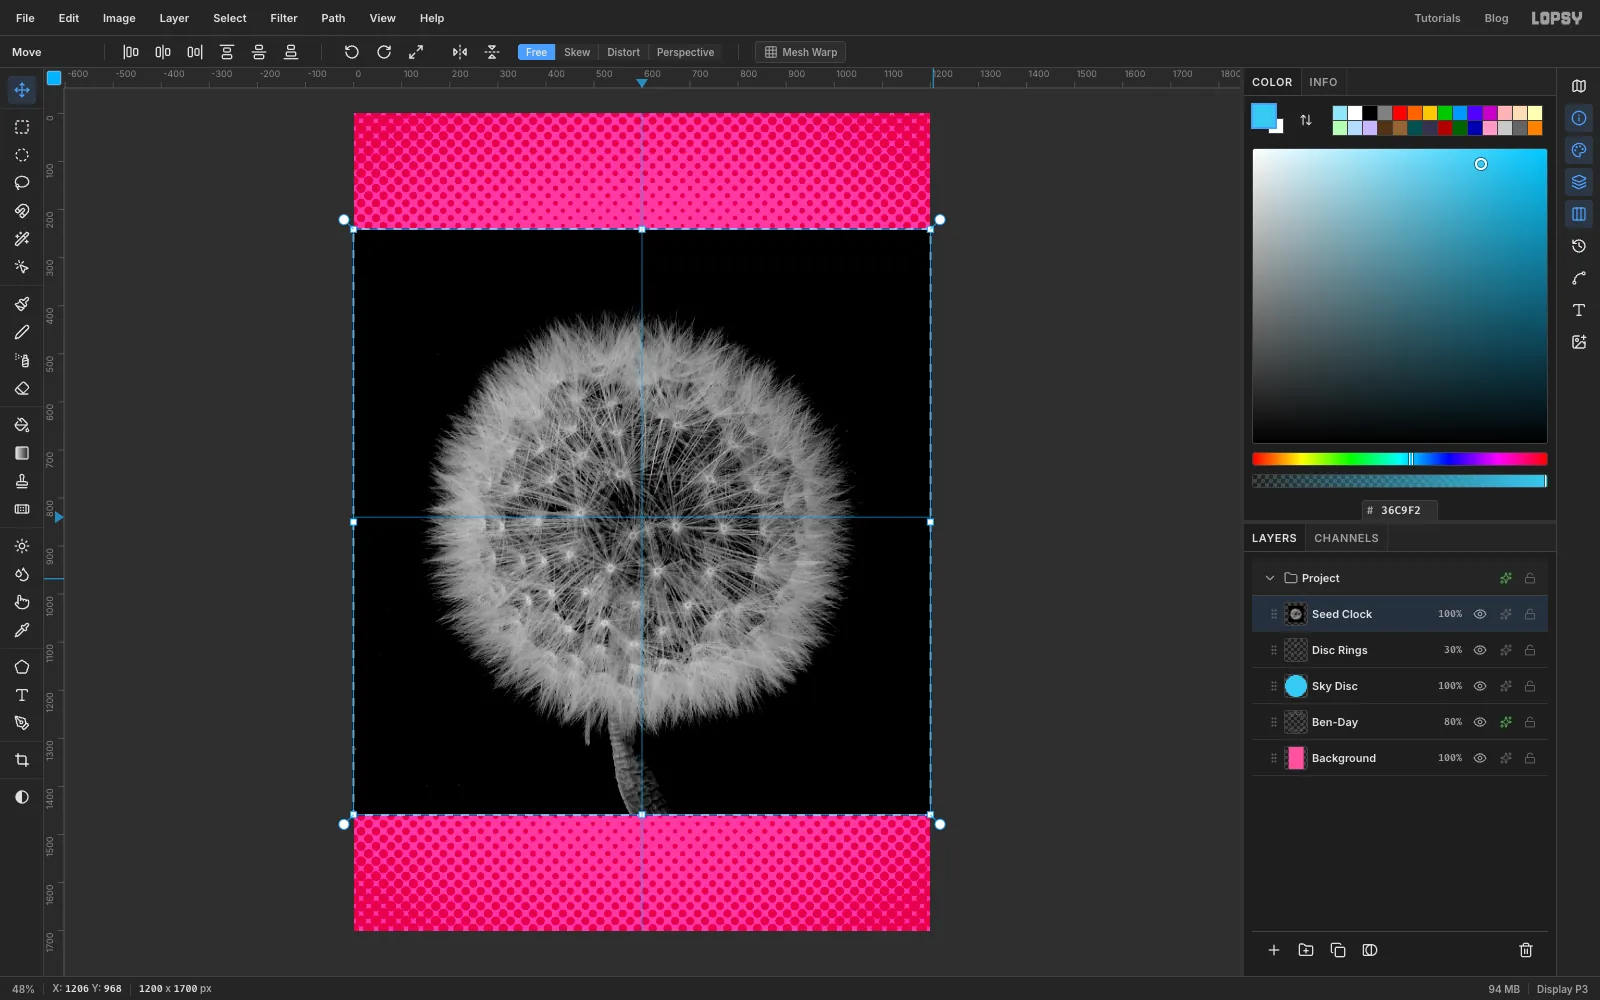
-
Scale the seed head to make a halo
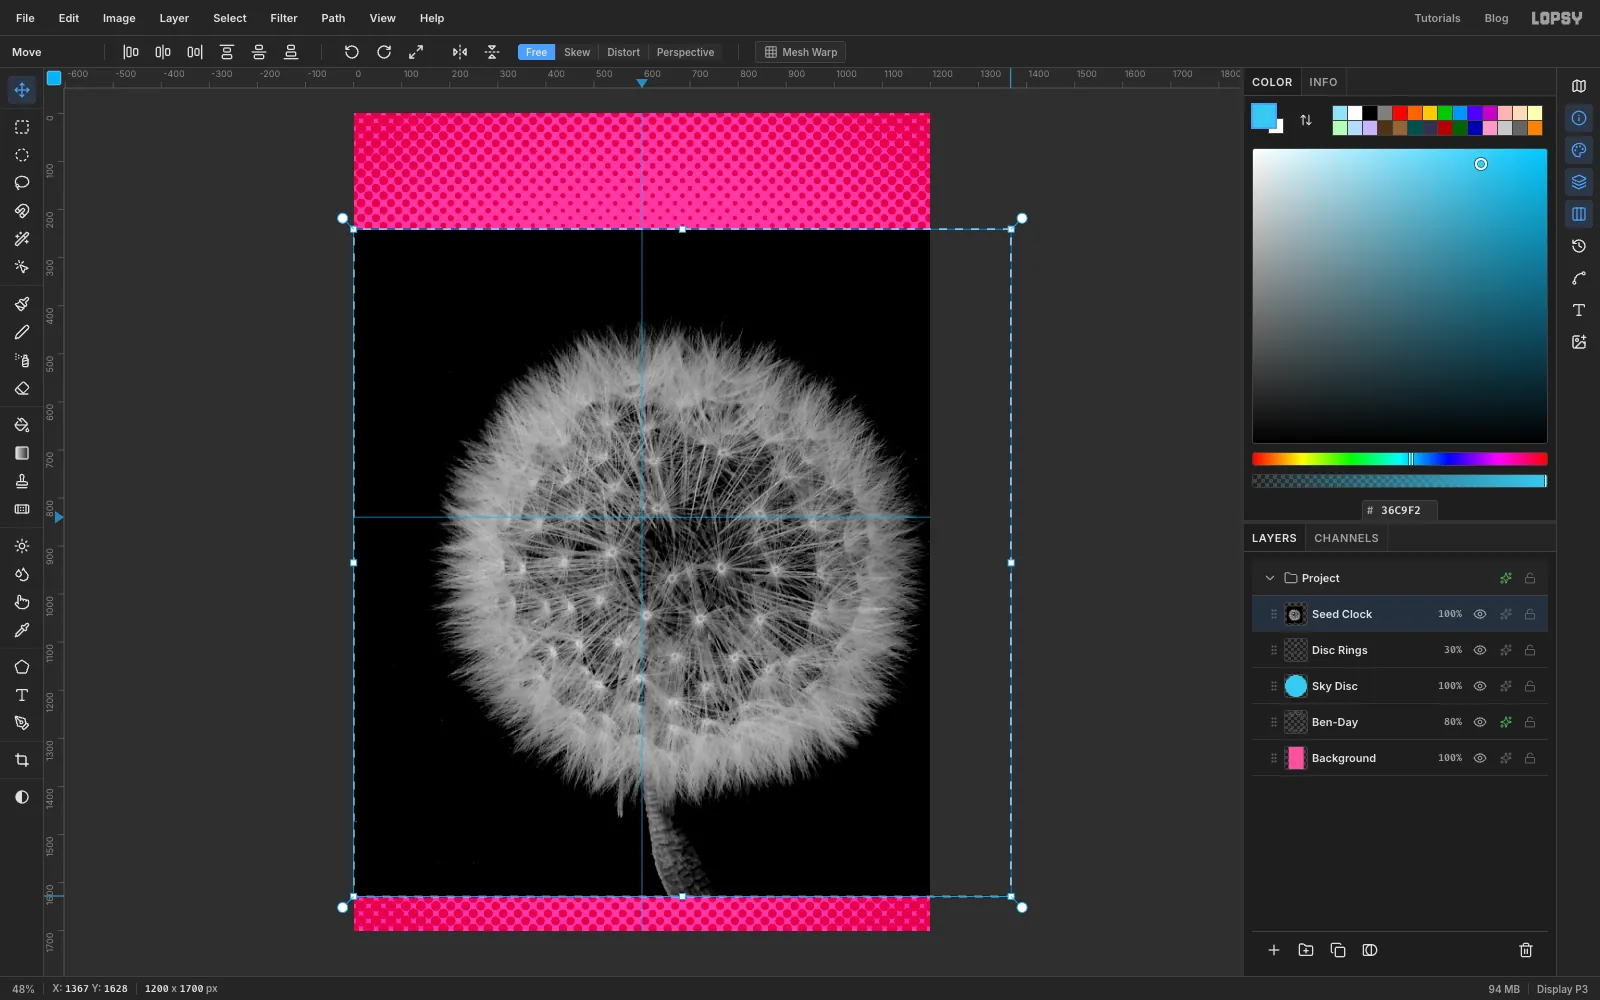
The photo is still selected after the drop. Pick the Move tool, hold Cmd and drag the bottom-right corner handle down and to the right until the fluffy ball is about 960 px across, a little wider than the cyan disc. That's about 114%. Cmd keeps the proportions. Press Cmd+D to commit.
Scaling from a corner pins the opposite corner, so the ball has drifted down and to the right. Use the arrow keys to nudge it back until the ball is centred on the guide crossing (Shift + arrow moves 10 px at a time).
-
Screen it and clear the background
Set the Seed Clock layer's Blend to Screen. Black disappears in Screen mode, so only the fluff shows. It lights up the cyan disc and spills a soft fringe onto the pink.
The rest of the photo is still there, including the bottom of the stem. Select a circle from
55, 295to1145, 1385, choose Select → Inverse, press Delete and deselect.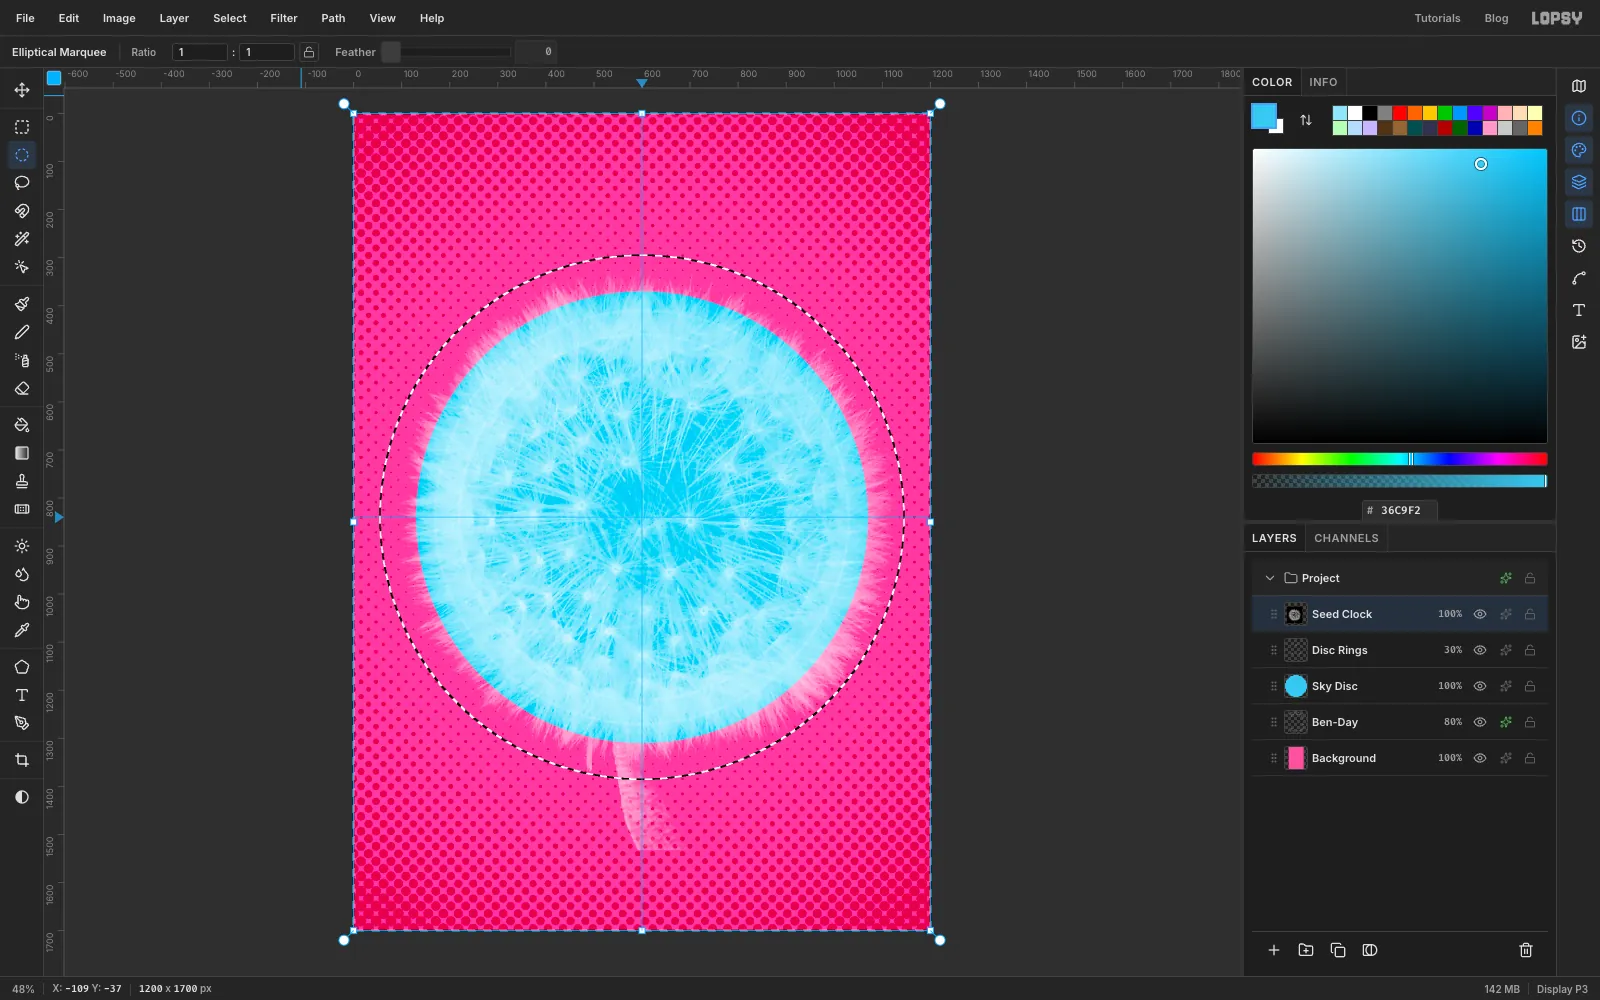
-
Erase the stem stub and add an ink rim
A stub of the photo's stem still pokes out under the disc. Pick the Eraser at size
40and paint a few short strokes across it, between about500, 1336and625, 1396.Add a layer named Disc Rim. With the Shape tool, keep the fill removed, set the Stroke to ink with Width
7, click the guide crossing and make a940 × 940circle. Every shape on this cover gets a dark outline, so the disc needs one too.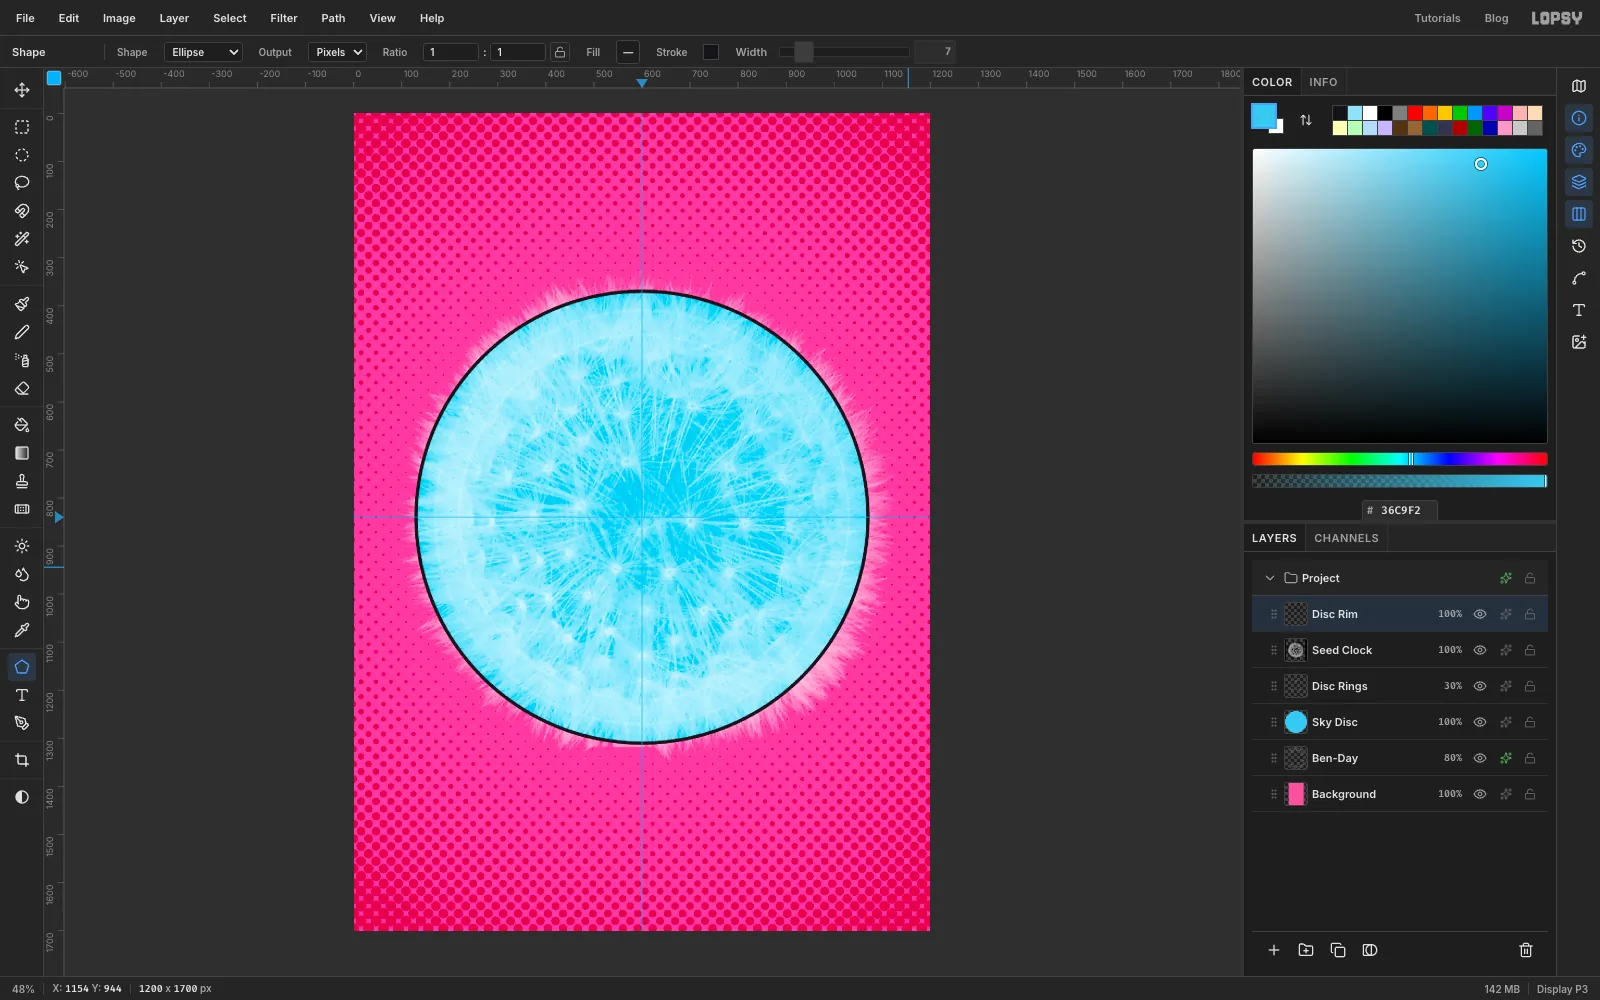
-
Draw one pair of florets with the Pen
A dandelion's "petals" are really tiny strap-shaped florets with notched tips, so you'll draw two of them as one long strap through the centre.
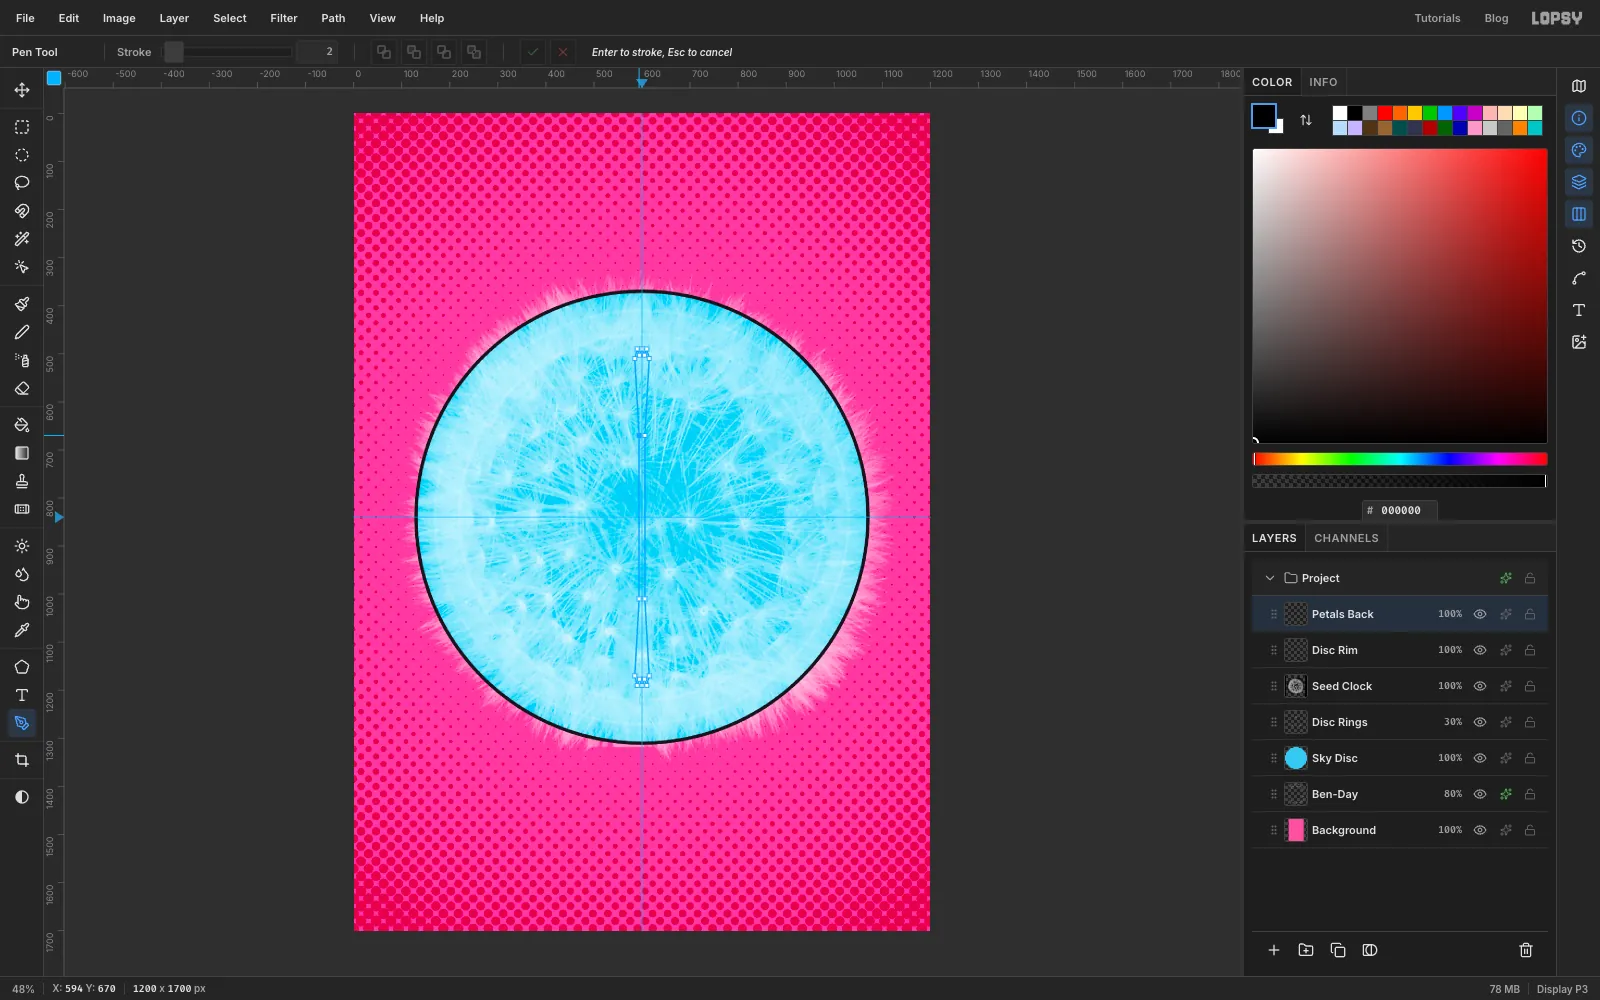
With Disc Rim selected, add a layer named Petals Back. Pick the Pen tool and click these points in order (no dragging), then click the first point again to close the path:
594, 670,585, 510,590, 490,595, 503,600, 490,605, 503,610, 490,615, 510,606, 670606, 1010,615, 1170,610, 1190,605, 1177,600, 1190,595, 1177,590, 1190,585, 1170,594, 1010
The strap is 12 px wide near the middle and flares to 30 px at each end, where three small points make the notched tip. The middle will hide behind the face later.
-
Fill the florets
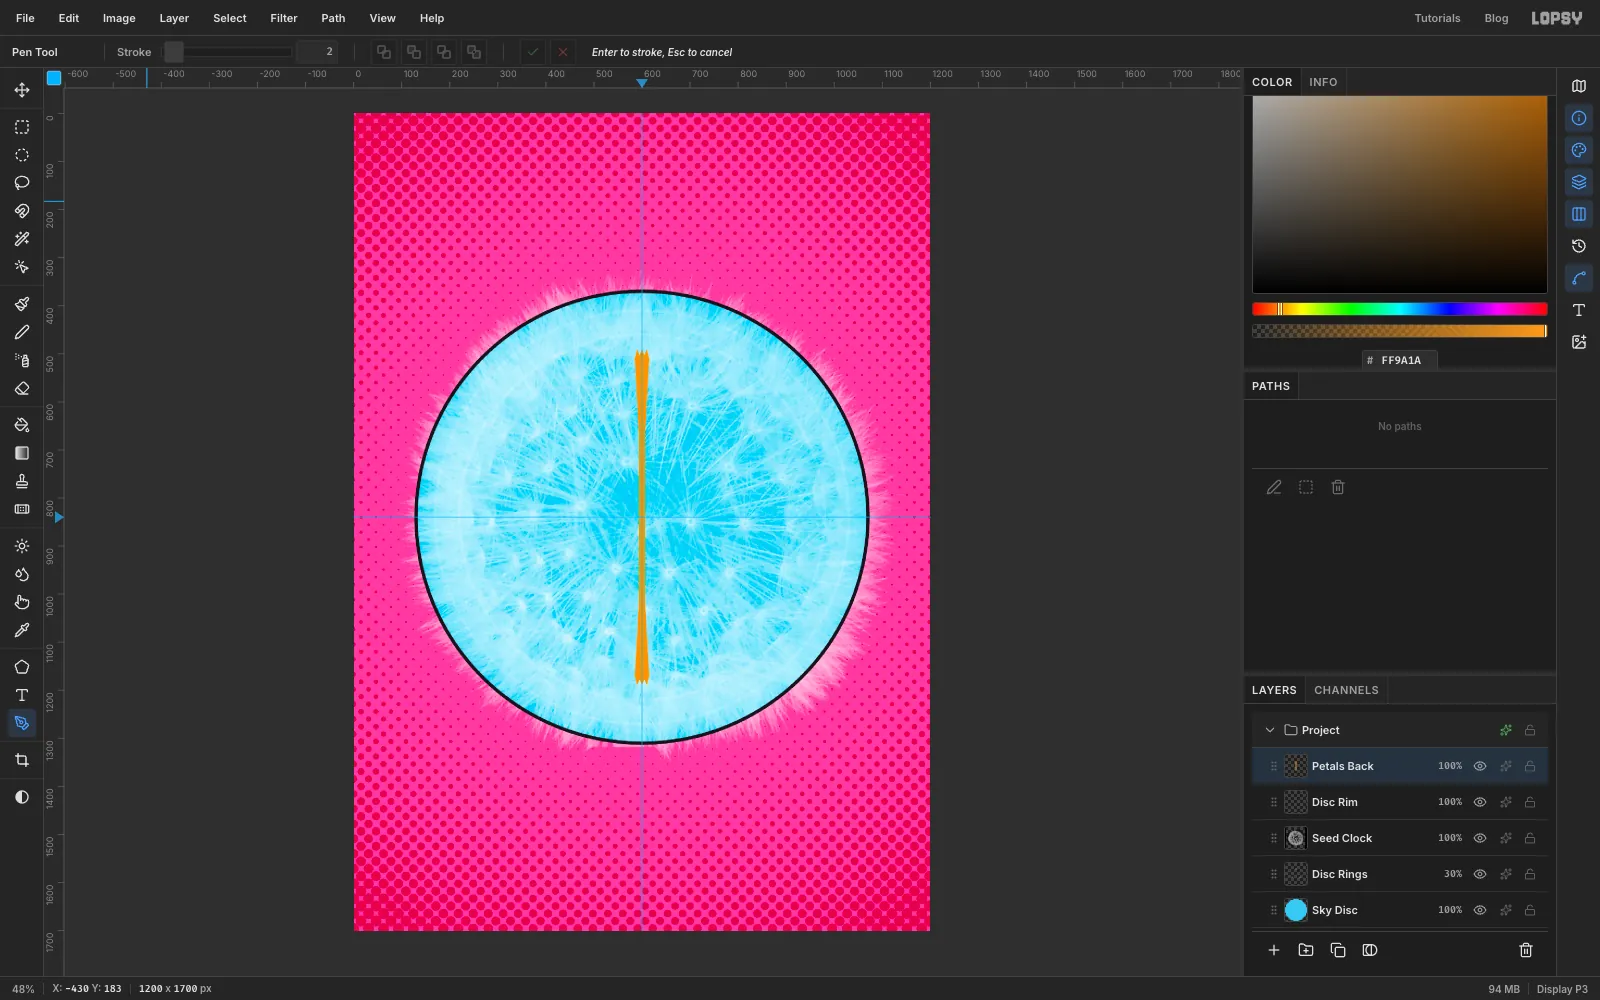
Open the Paths panel and click Path to Selection. Set the foreground to marigold , choose Edit → Fill and deselect. Delete the path with the trash button in the Paths panel, so it doesn't get in the way later.
-
Turn one pair into twelve
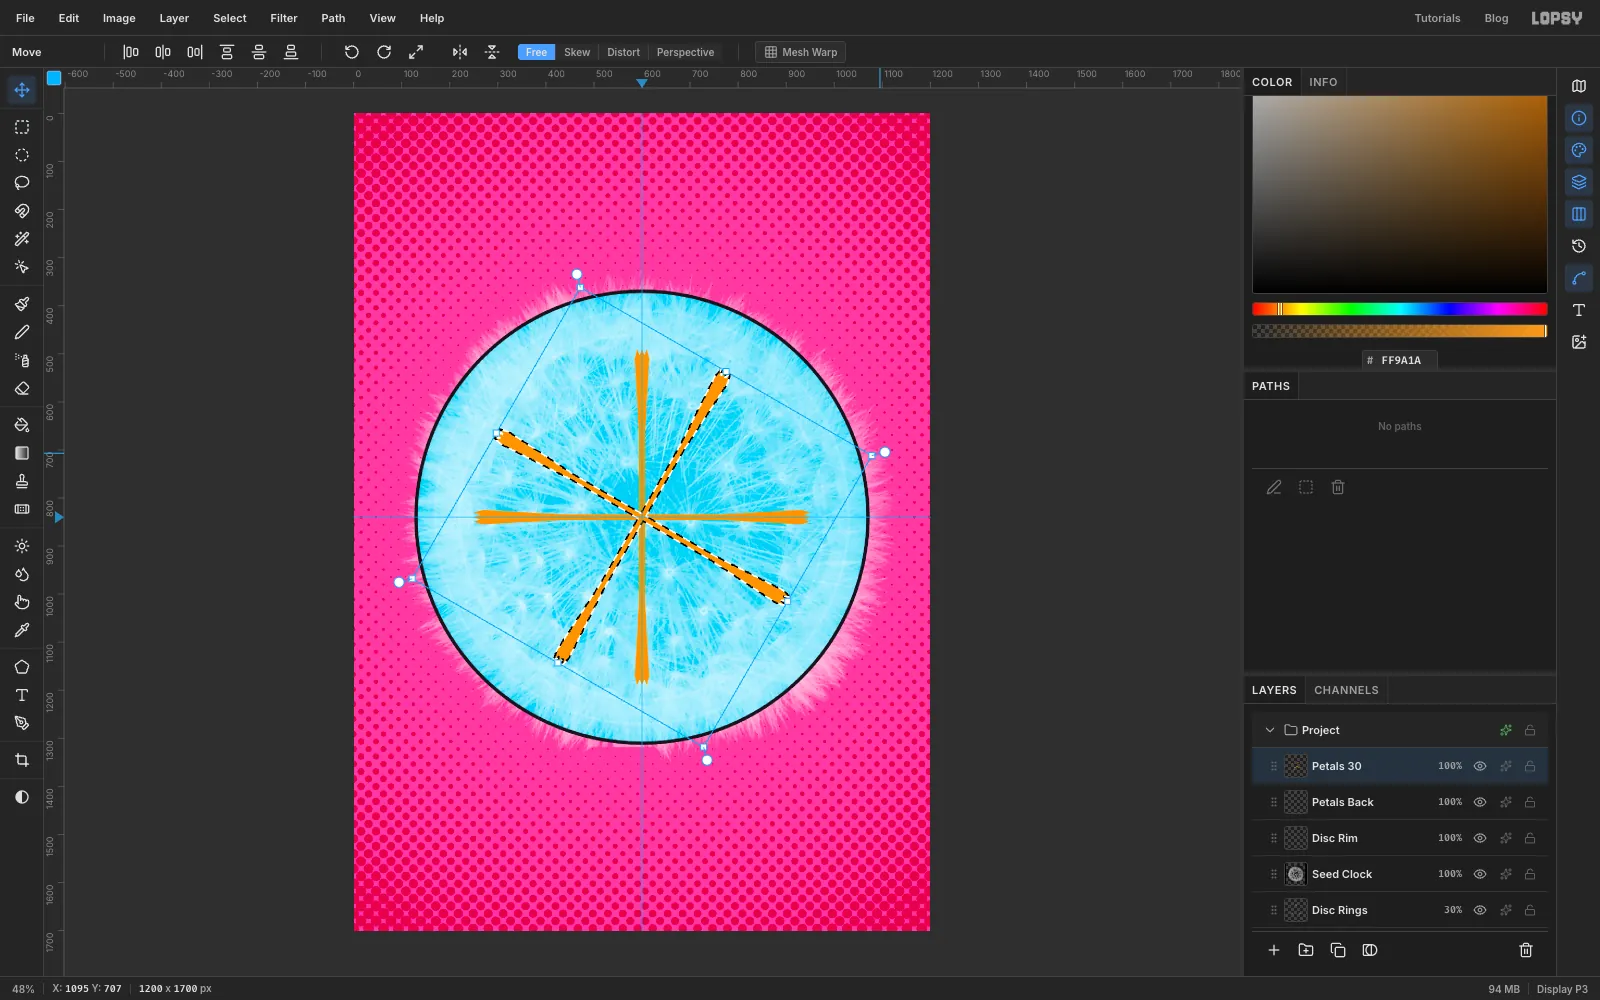
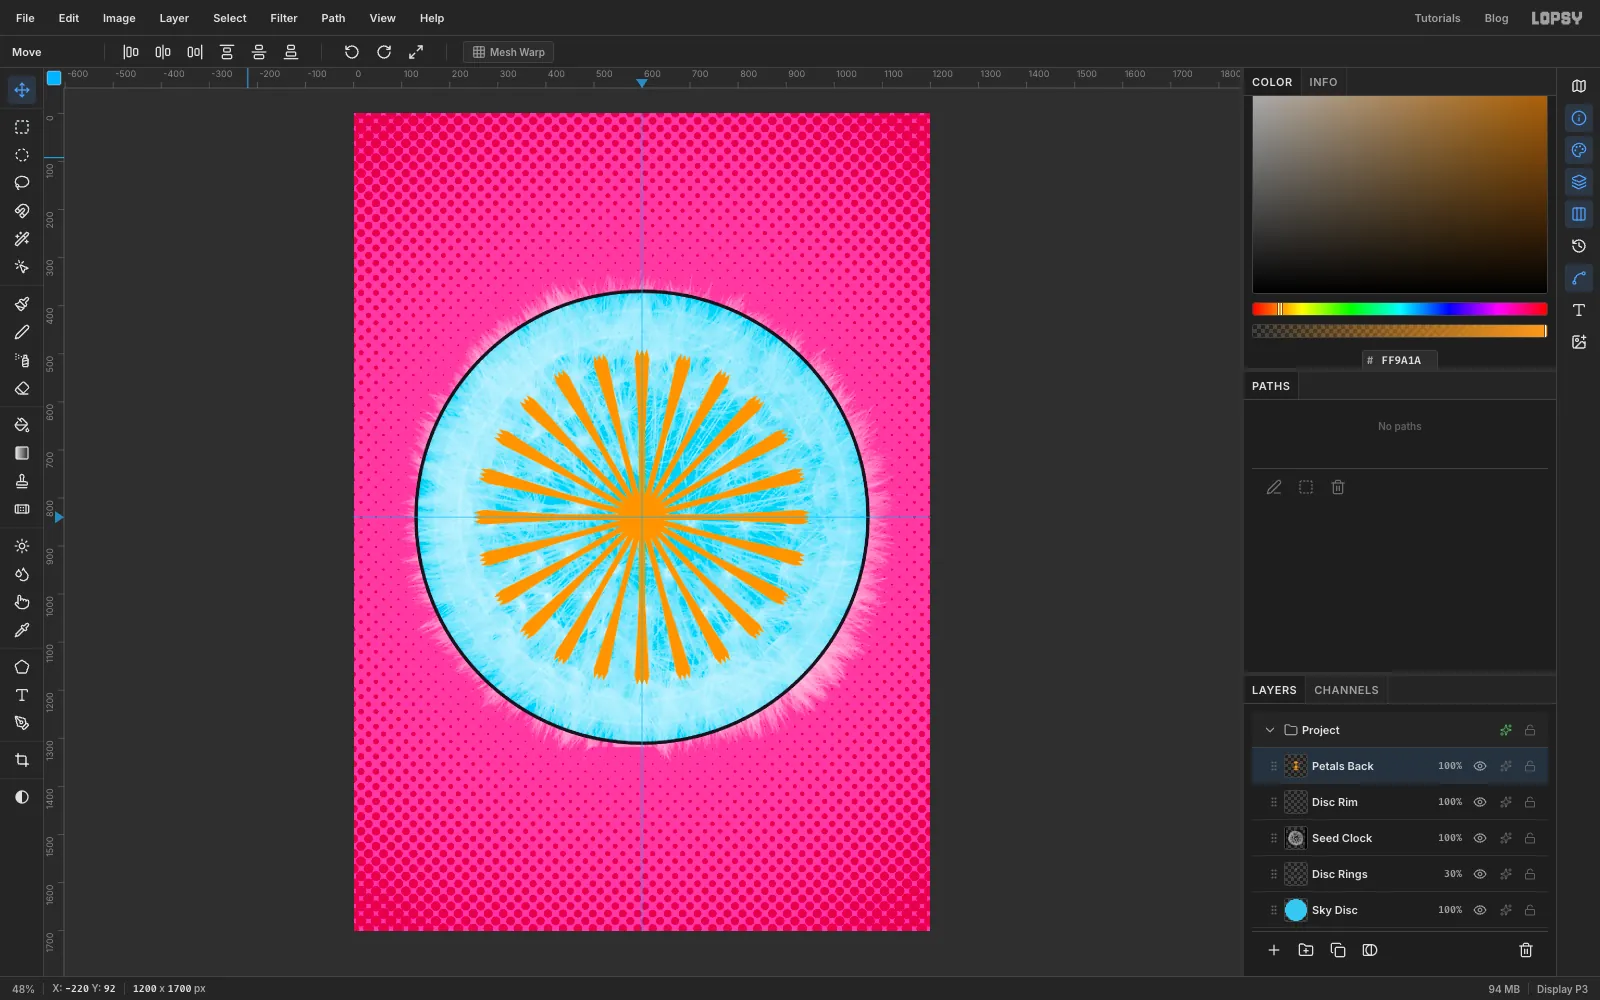
Choose Layer → Duplicate Layer and rename the copy Petals 90. Cmd-click its thumbnail in the Layers panel to select its pixels. Pick the Move tool and click Rotate 90° CW in the options bar. Because the strap is centred on the guides, it turns about the flower's centre. Press Cmd+D, then choose Layer → Merge Down. You now have a cross of four florets.
Click Petals Back, duplicate it again and rename the copy Petals 30. Cmd-click its thumbnail. Hold Cmd and drag the round rotation handle just outside a corner of the box clockwise. With Cmd held it snaps in 15° steps. Stop at 30° and press Cmd+D.
-
Finish the twelve
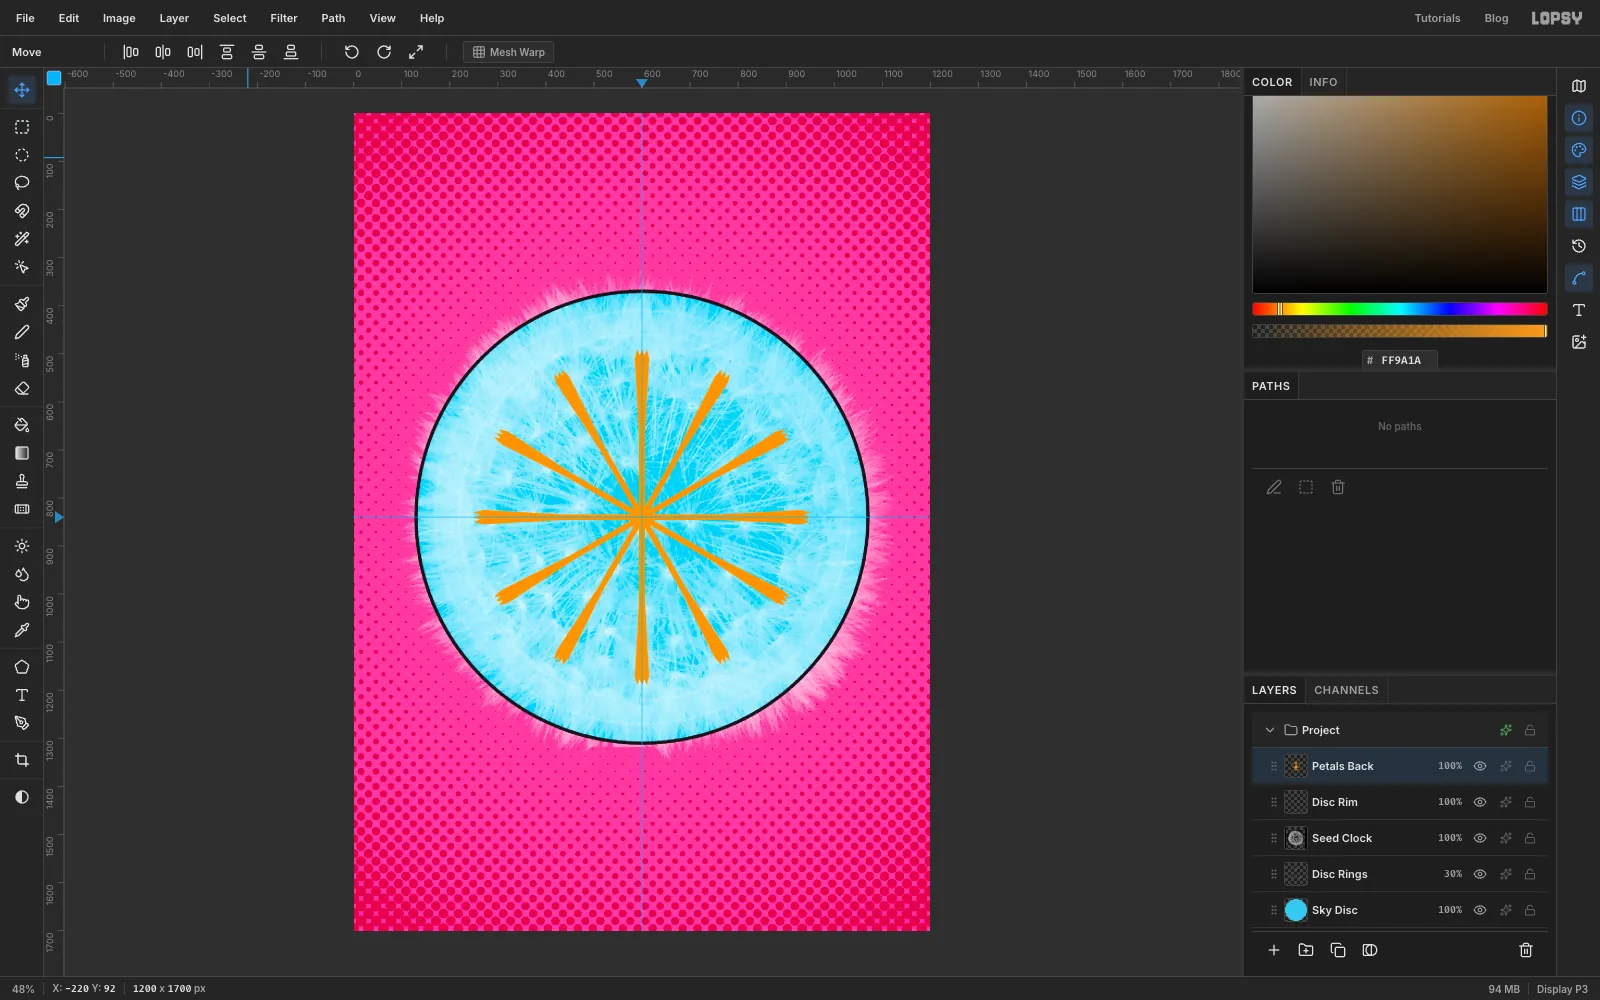
Click Petals Back once more, duplicate it as Petals 60, and rotate that copy 60° the same way. Click Petals 30 and choose Layer → Merge Down twice. The florets now sit every 30°.
-
Double it to twenty-four
Duplicate Petals Back as Petals 15, select its pixels and rotate it 15° with Cmd held. Press Cmd+D and merge it down. That's twenty-four florets in the back ring, and a lot quicker than drawing them one by one.
-
Make the front ring
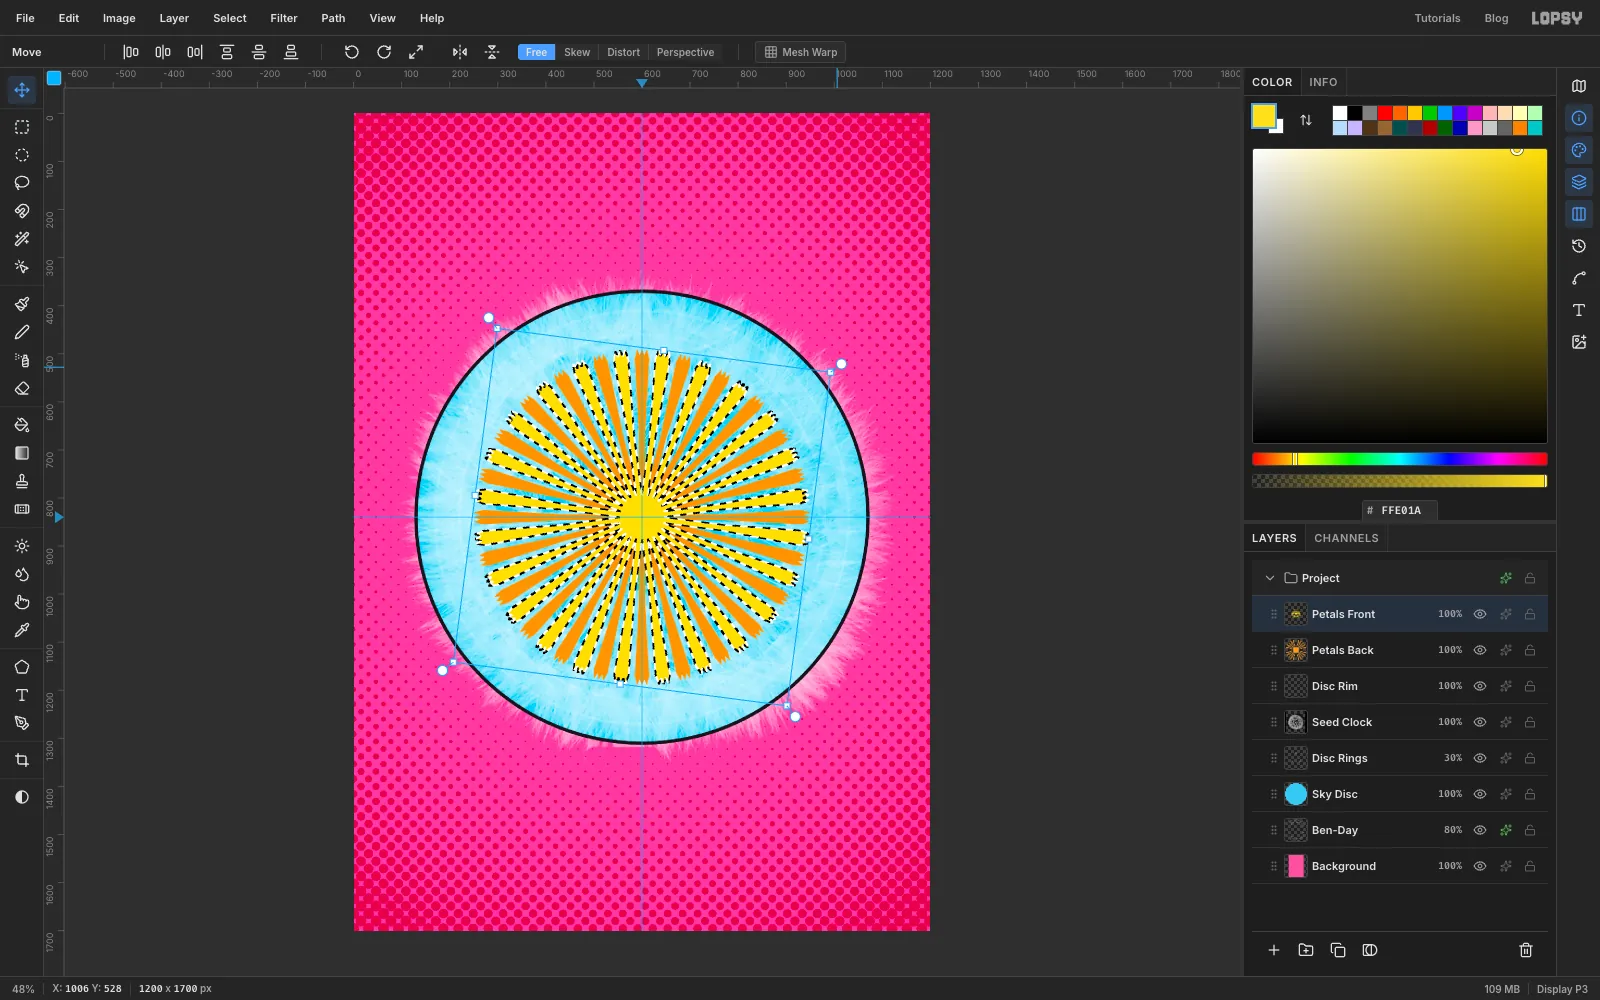
Duplicate Petals Back and rename it Petals Front. Cmd-click its thumbnail, set the foreground to dandelion yellow and choose Edit → Fill. Only the florets turn yellow, because the selection is their shape.
Now drag the rotation handle without Cmd about 7.5°, half of one step, so each yellow floret lands between two orange ones. Press Cmd+D.
-
Shrink the front ring
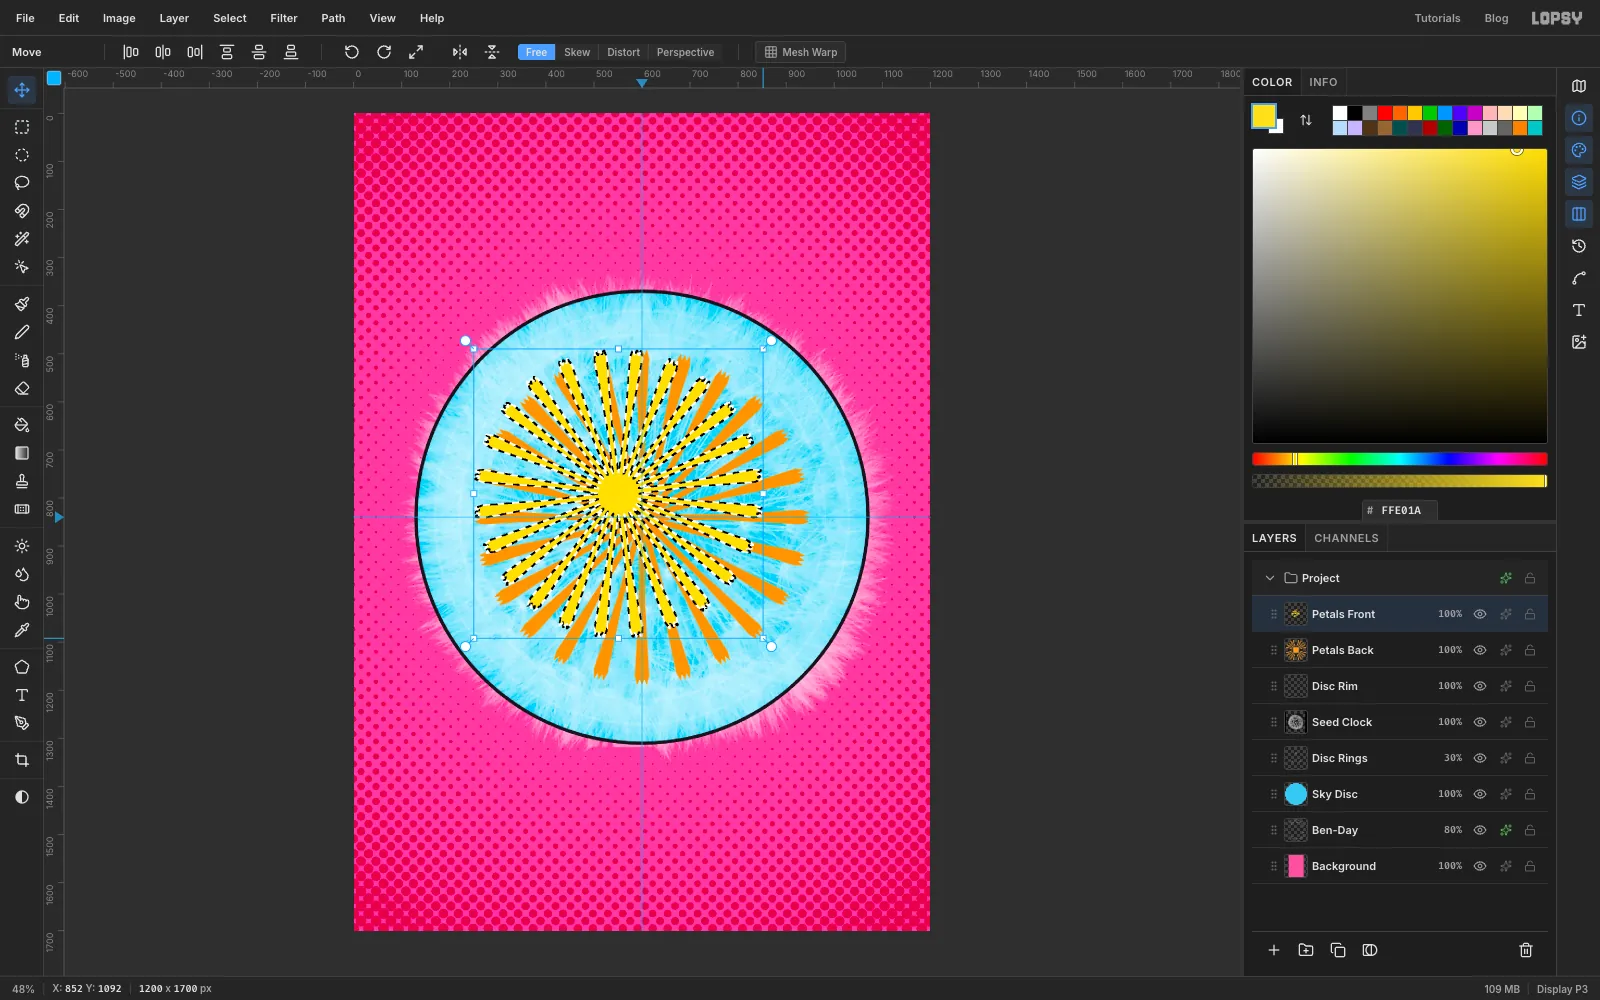
Cmd-click the Petals Front thumbnail again. Hold Cmd and drag the bottom-right corner handle inwards until the ring is about 86% of its size. Press Cmd+D, then nudge the ring with the arrow keys until it's centred on the guides again. The orange tips now peek out past the yellow ones, the way real dandelion heads have several rows of florets.
-
Outline both rings
Give Petals Back a Stroke effect in ink , Width
6. Give Petals Front the same stroke. A single heavy outline weight on every shape is what makes the cover read as pop art rather than illustration.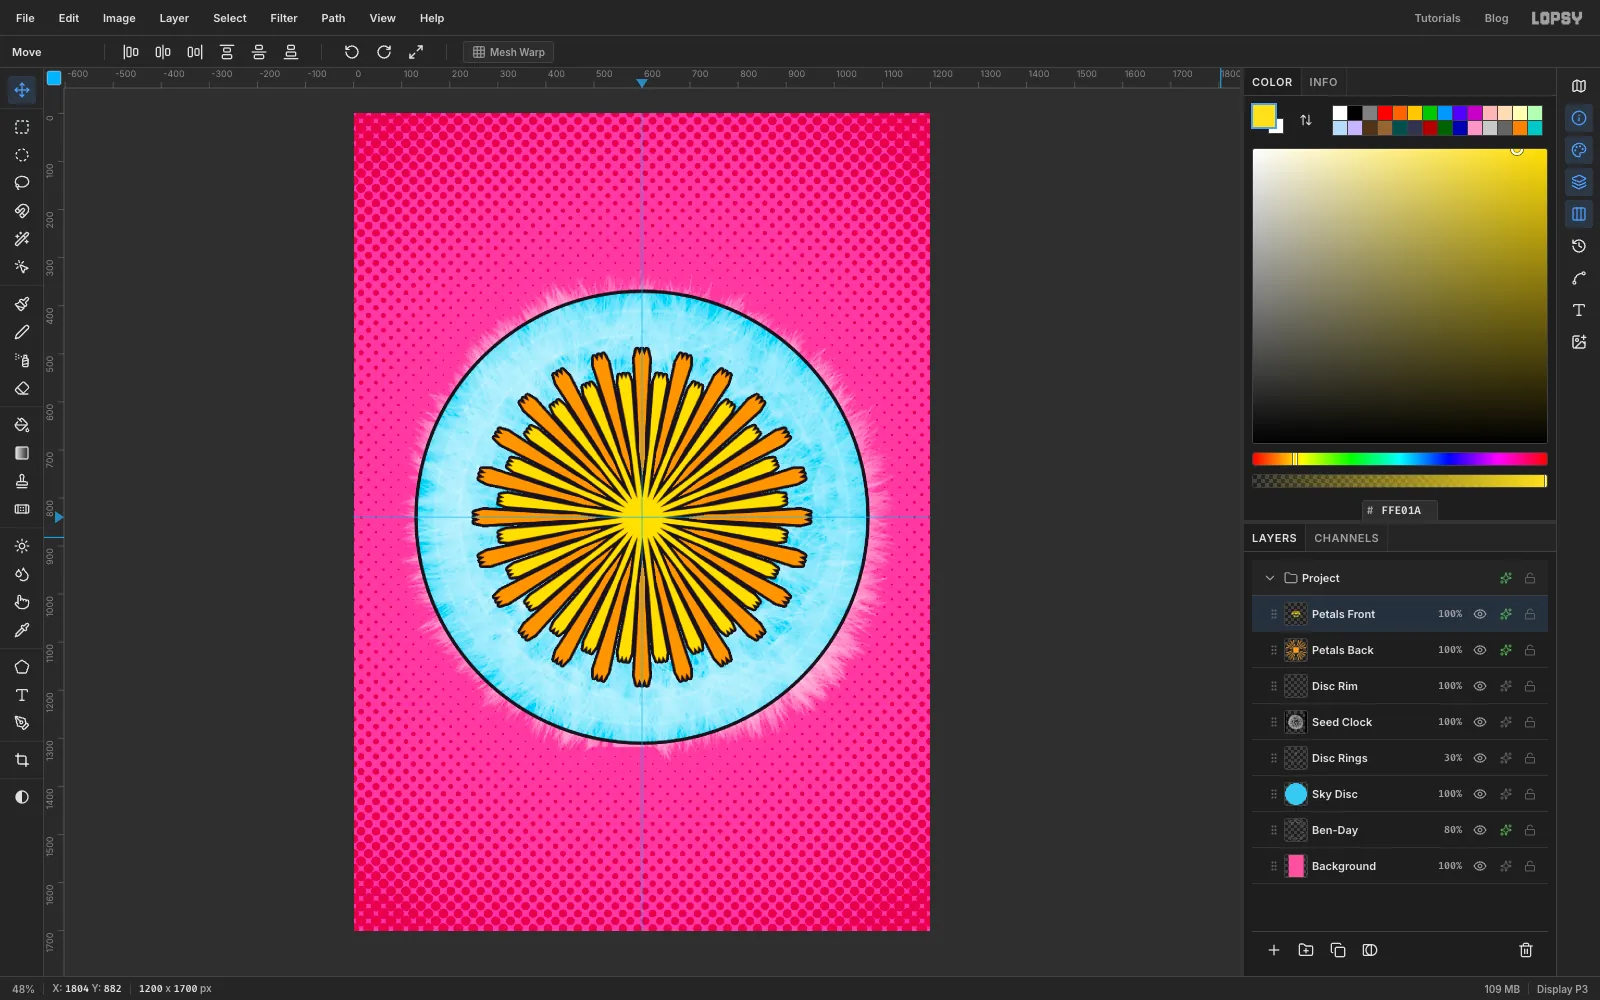
-
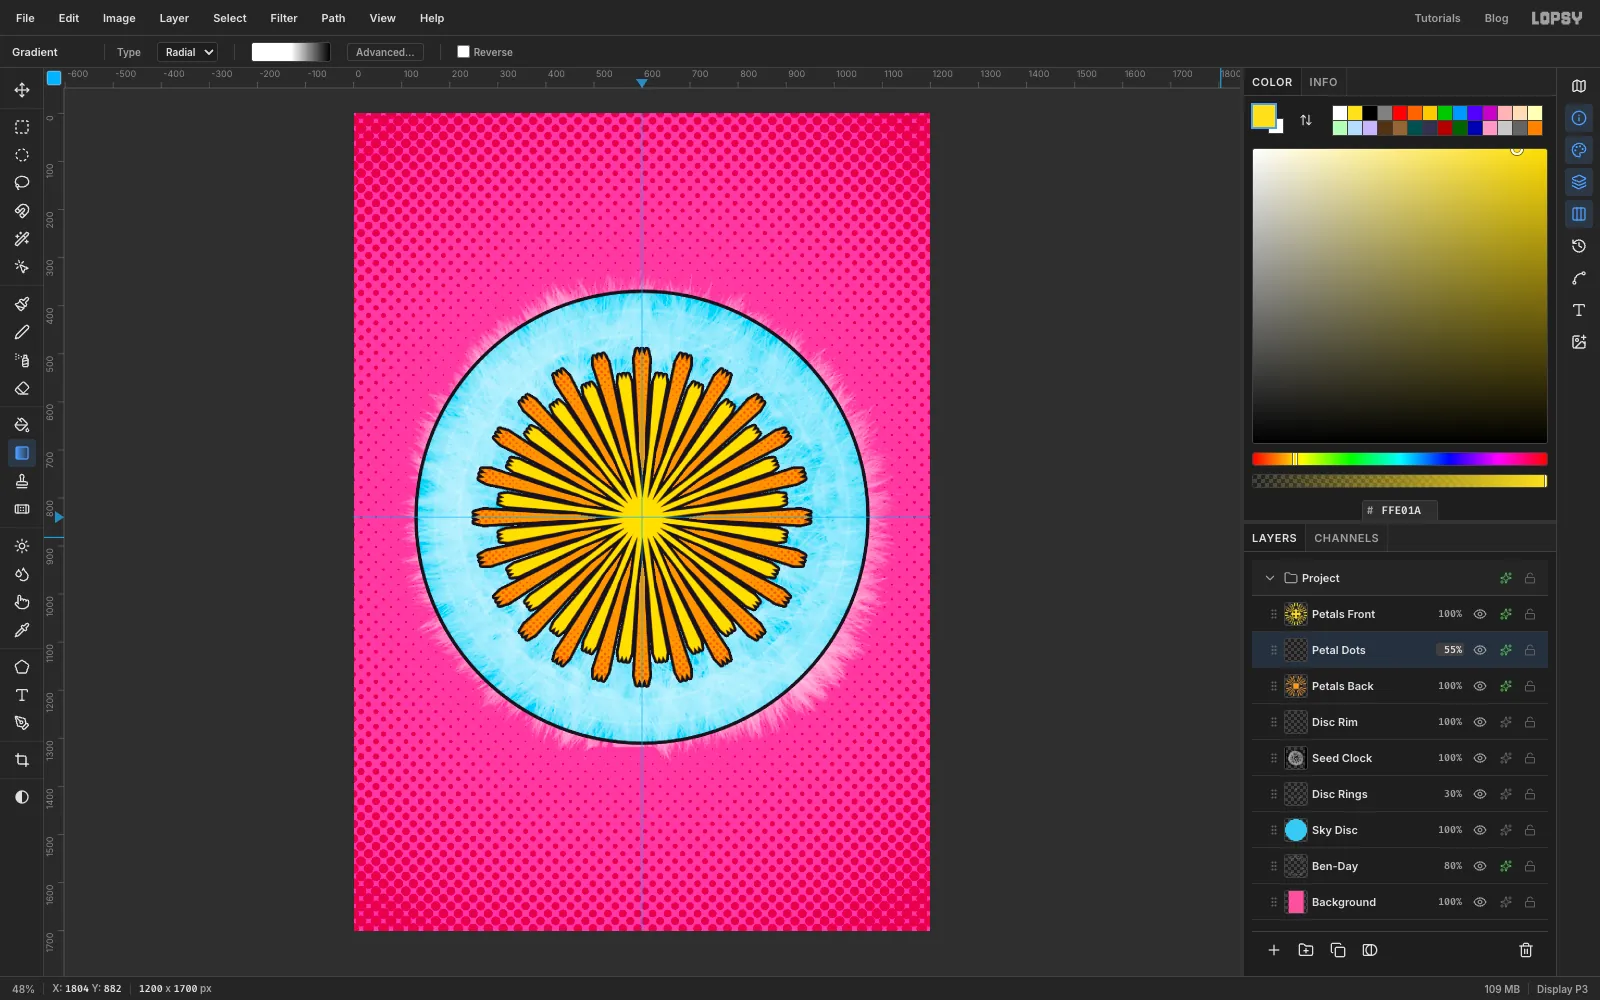
Add Lichtenstein dots to the back florets
Click Petals Back and add a layer named Petal Dots above it. Cmd-click the Petals Back thumbnail to load its shape. On the Gradient tool, open Advanced… again and move the middle white stop from 45% to 50%. Drag from the centre to
1000, 840, then apply Filter → Halftone… with Dot Size10and the other settings as before.Cmd-click the Petals Back thumbnail again, choose Select → Inverse, press Delete and deselect, so the dots stay on the florets. Give the layer a Color Overlay in dot orange , set it to Multiply and 55%. It's the comic-book way of shading: dots instead of a smooth gradient.
-
Draw the face
Click Petals Front so the face goes above both rings, and add a layer named Face. Select a circle from
430, 670to770, 1010and fill it with dandelion yellow. Deselect.Add a Stroke in ink, Width
7, and an Inner Glow in marigold with Size46and Opacity85. The glow rounds the face like a balloon.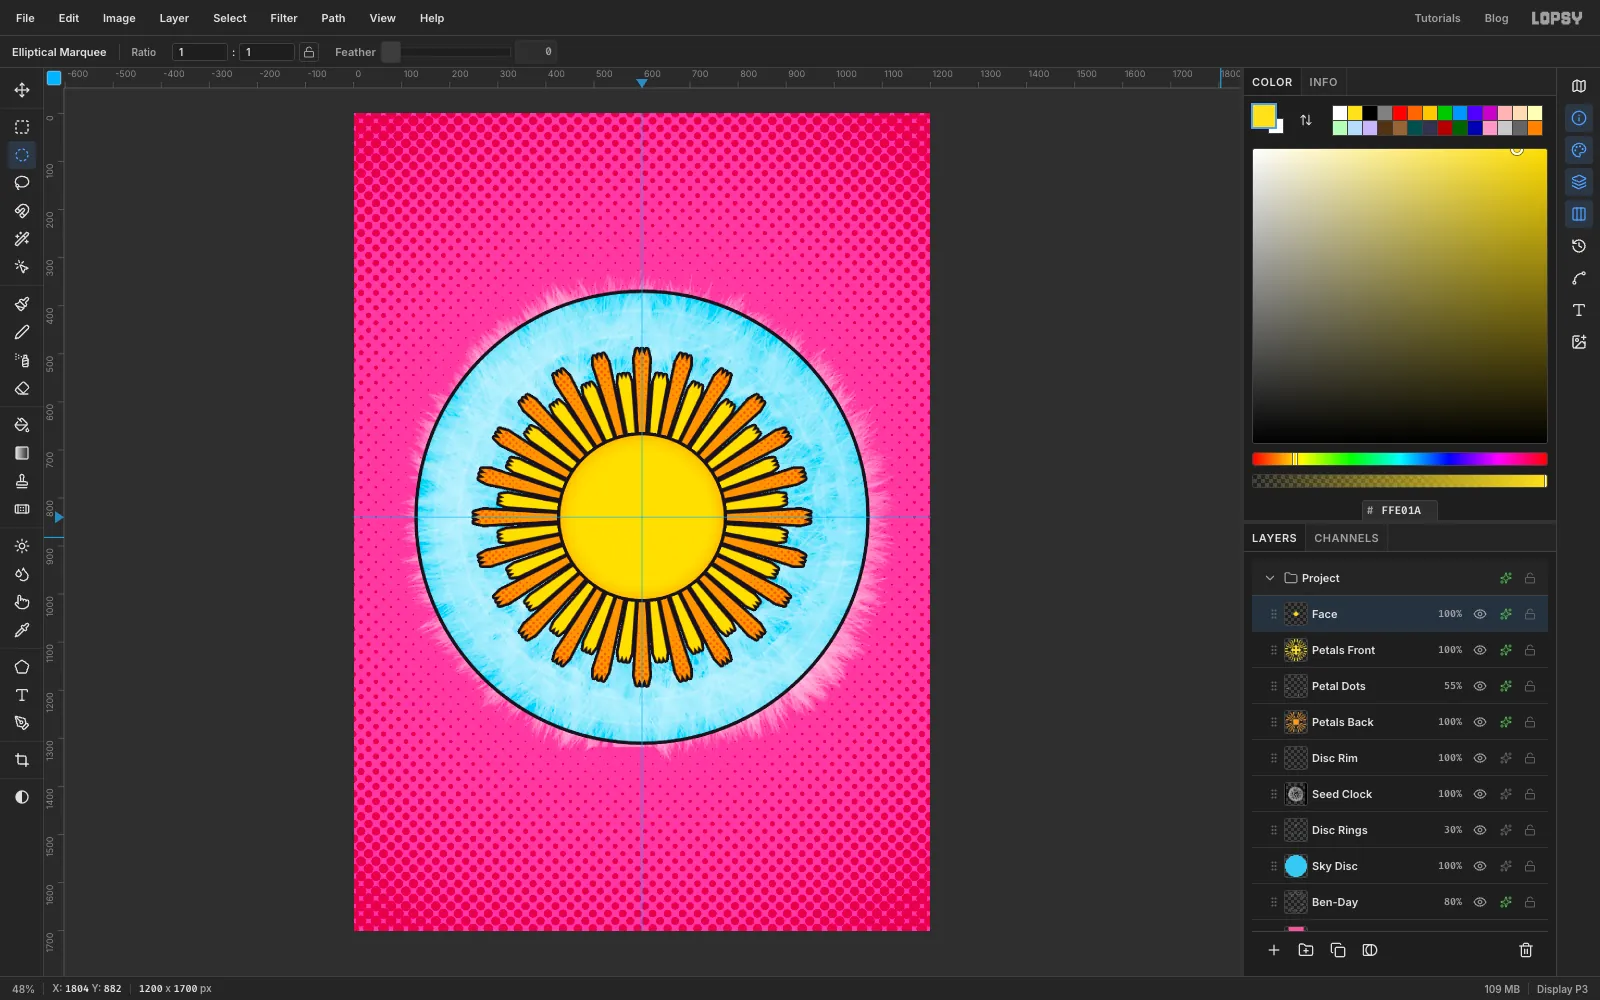
-
Shade the face with dots
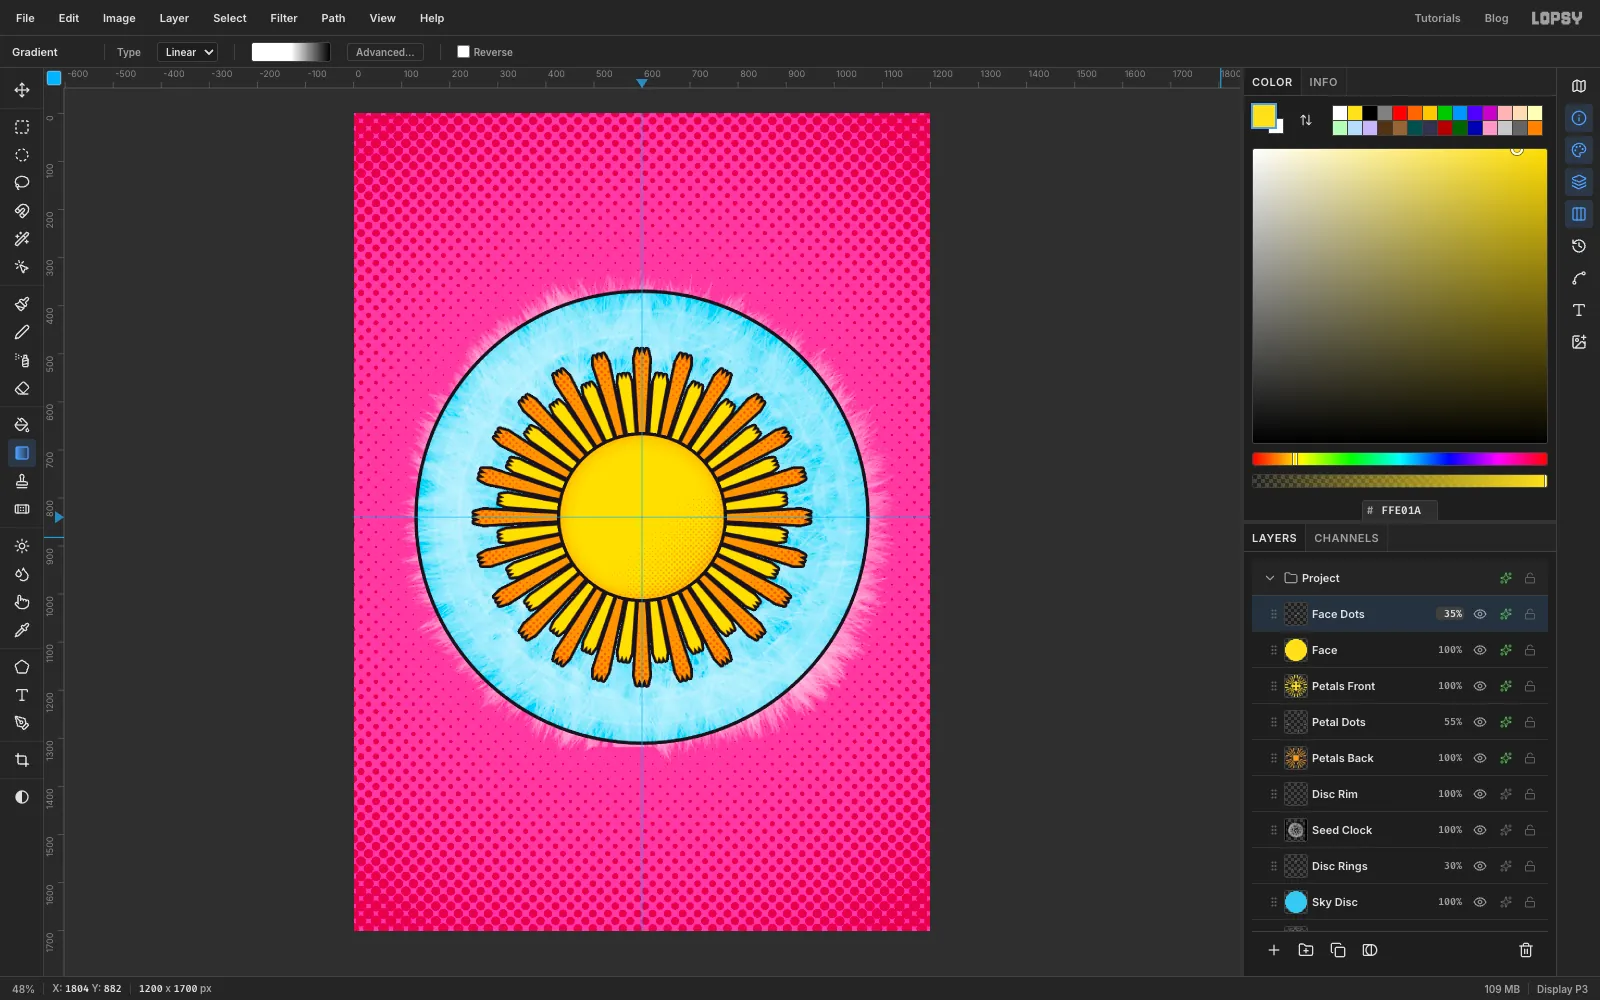
Add a layer named Face Dots. Cmd-click the Face thumbnail. On the Gradient tool, set Type to Linear and drag from
450, 690to750, 990, top left to bottom right. Apply Filter → Halftone… with Dot Size8.Clip it like before: Cmd-click the Face thumbnail, Select → Inverse, Delete, deselect. Add a Color Overlay in dot orange, set it to Multiply and 35%. The dots only appear on the shadow side of the face.
-
Cut a glossy crescent
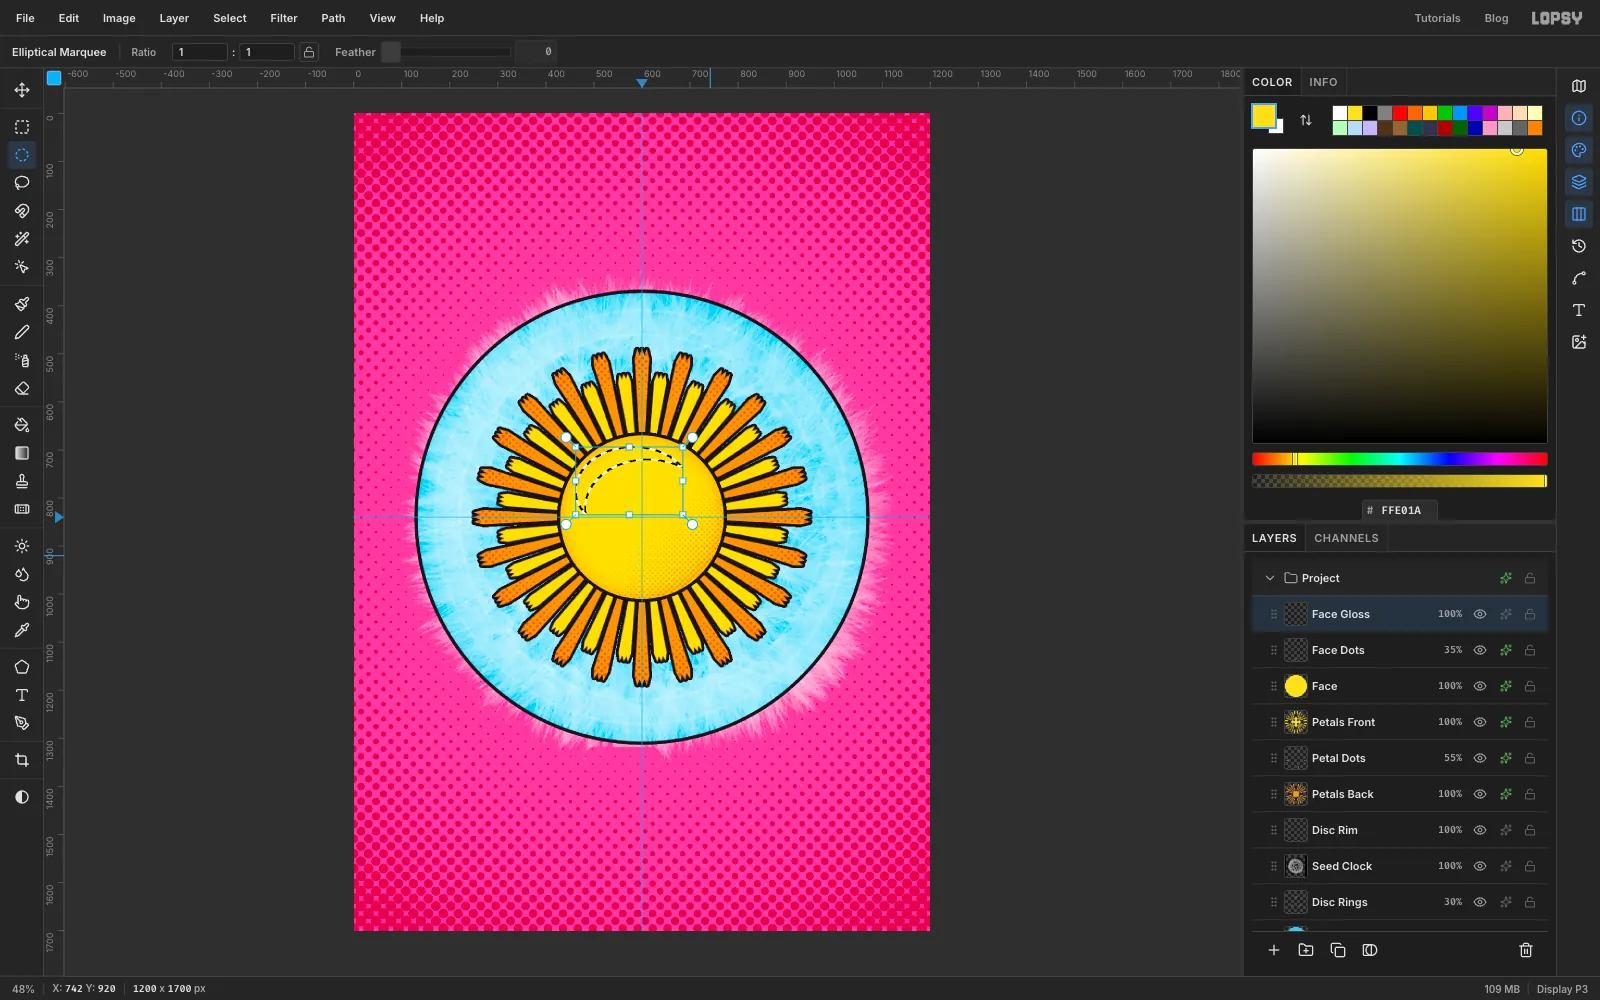
Add a layer named Face Gloss. With the Elliptical Marquee, select an ellipse from
462, 694to702, 874. Then hold Alt and drag a second ellipse from482, 720to742, 920to take a bite out of the first. What's left is a crescent along the top left of the face.Fill it with white, deselect and set the layer's opacity to 70%. This is the Koons part: one hard, bright reflection makes the face look like polished plastic.
-
Give it eyes
Small selections near a guide snap onto it, so choose View → Snap to Guides to turn guide snapping off for the face details.
Add a layer named Eyes. Select an ellipse from
521, 769to569, 841, then hold Shift and drag another from631, 769to679, 841to add the second eye. Fill both with ink.For the catch-lights, select
528, 781to548, 801and Shift-drag638, 781to658, 801, then fill with white. Add two tiny ones the same way,550, 816to559, 825and660, 816to669, 825, and fill them white too. Big round eyes with two highlights are the classic superflat look.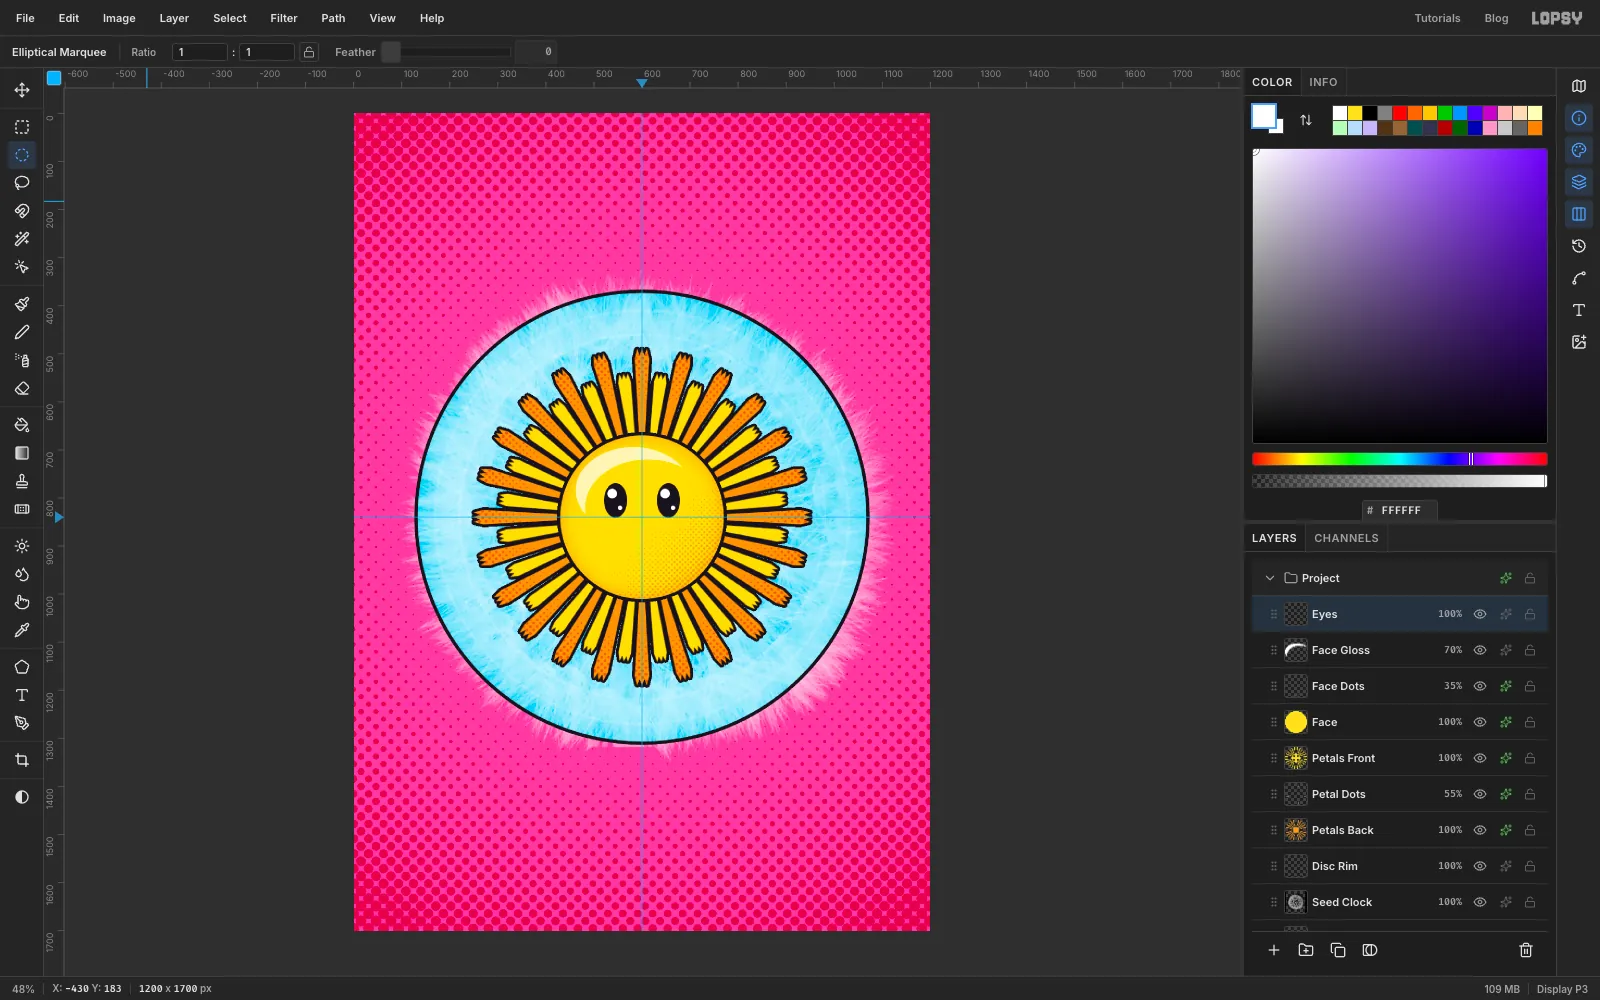
-
Cut the grin
Add a layer named Mouth. With the Elliptical Marquee, select an ellipse from
515, 830to685, 960. Switch to the Rectangular Marquee, hold Shift and Alt together and drag a rectangle from495, 872to705, 975. Shift+Alt keeps only the overlap, which is a wide, flat-topped grin. Fill it with ink.Without deselecting, switch back to the Elliptical Marquee and Shift+Alt-drag a small ellipse from
556, 922to644, 972. That leaves the part of it that's inside the mouth. Fill it with cheek pink for the tongue, then deselect.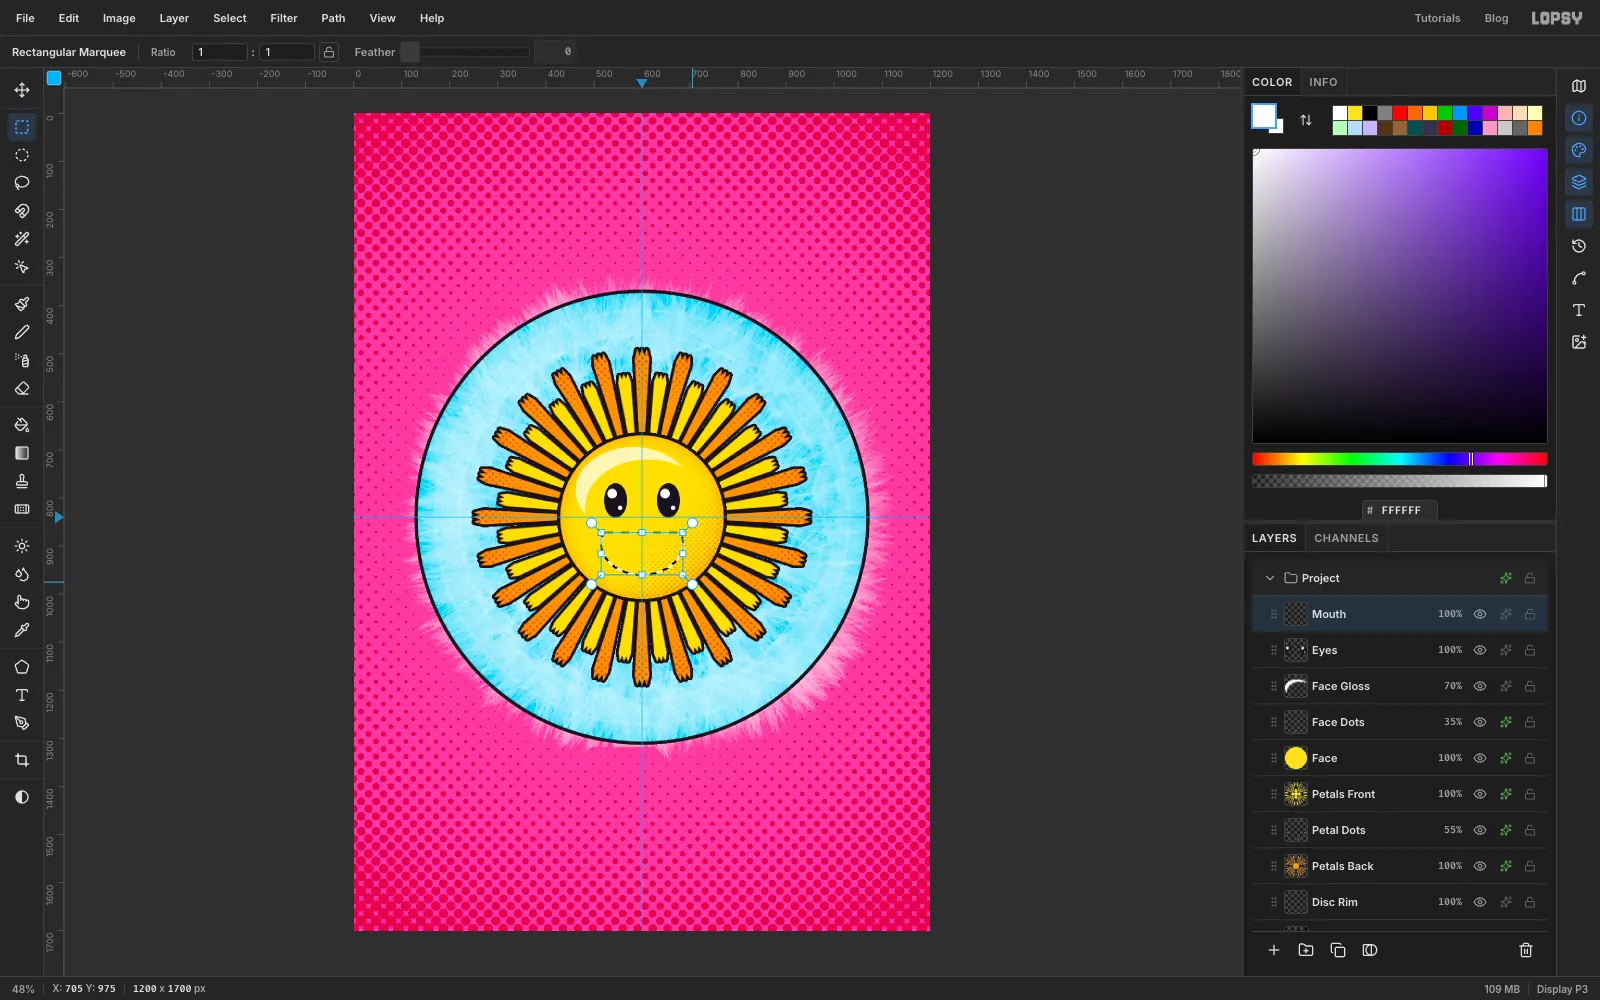
-
Add a row of lion's teeth
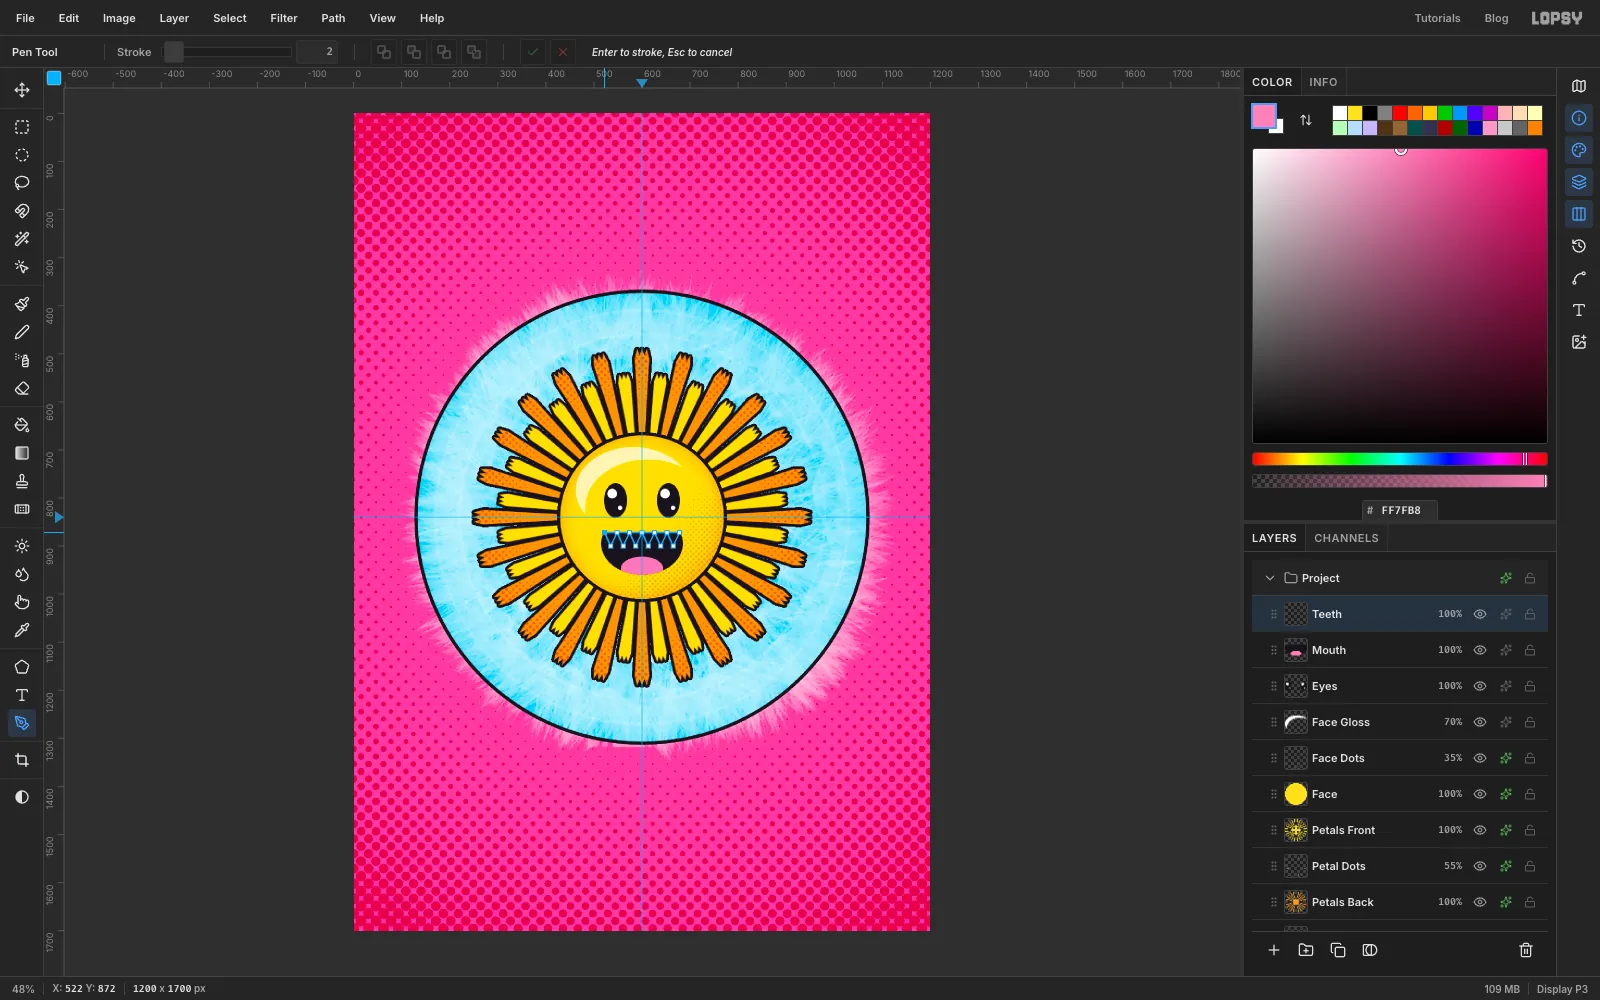
Add a layer named Teeth. With the Pen, start at
522, 872and click a zigzag along the top lip: every 13 px across, alternate between the lip (y 872) and the tooth tips (y 900), ending at678, 872. That's 13 points and six teeth. Click the first point to close the path.Click Path to Selection in the Paths panel, fill with white, deselect and delete the path.
-
Blush the cheeks
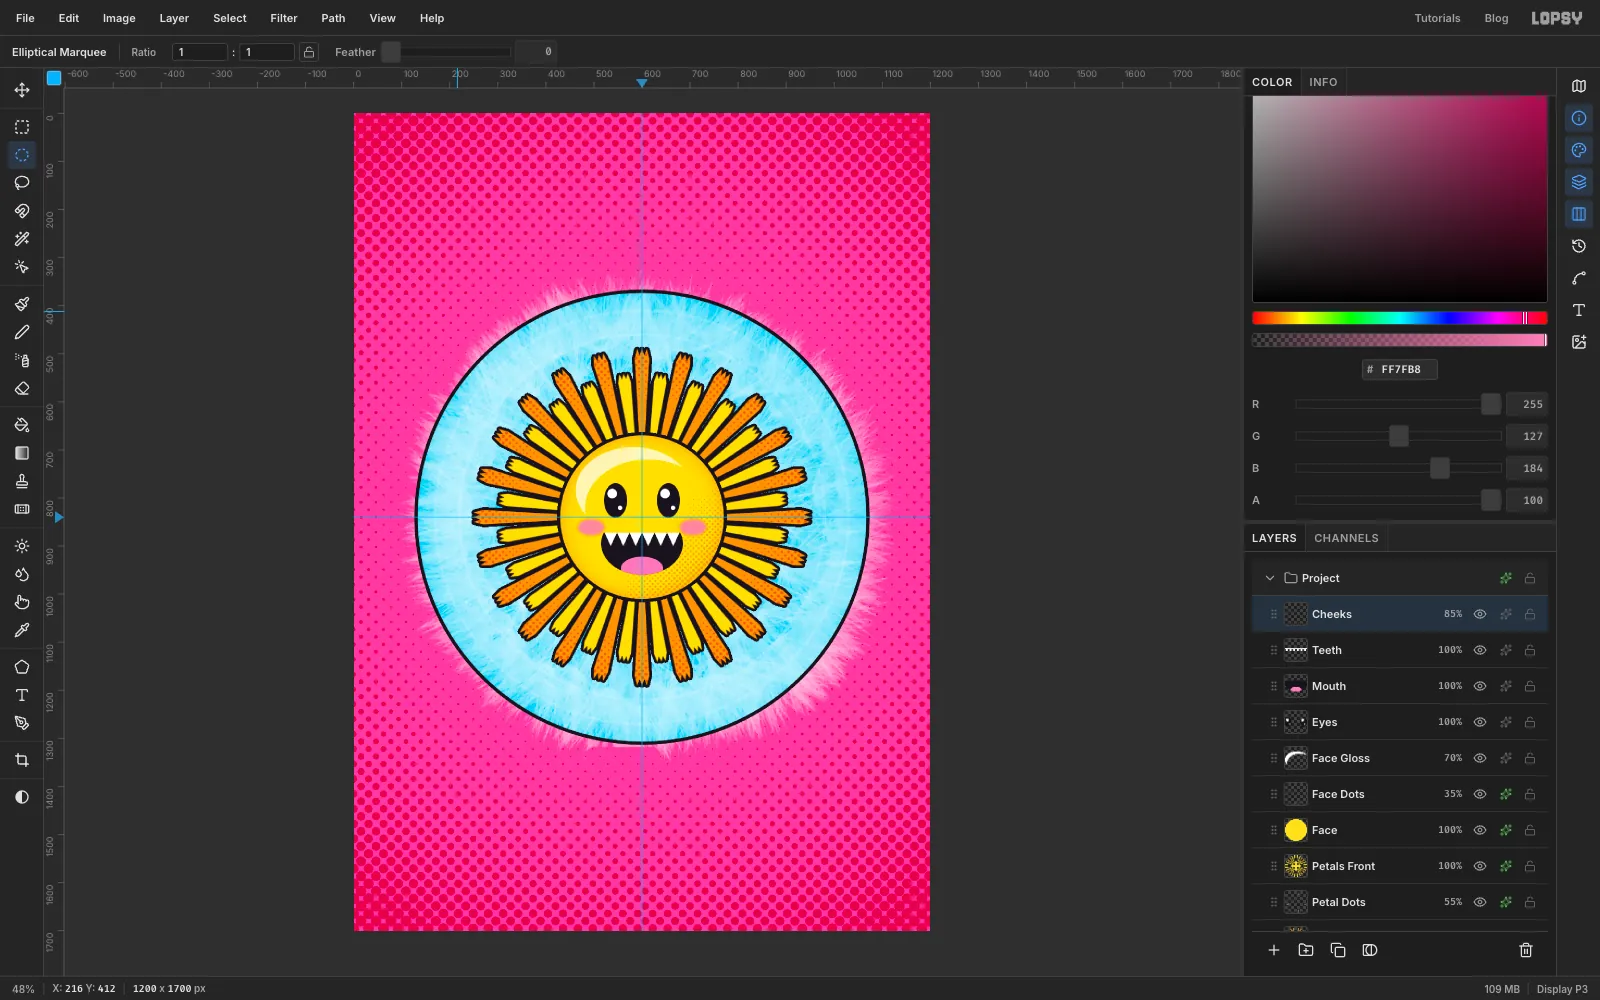
Add a layer named Cheeks. Select an ellipse from
466, 844to522, 878and Shift-drag a second from678, 844to734, 878. Choose Select → Feather…6, fill with cheek pink and deselect. Set the opacity to 85%.Turn View → Snap to Guides back on.
-
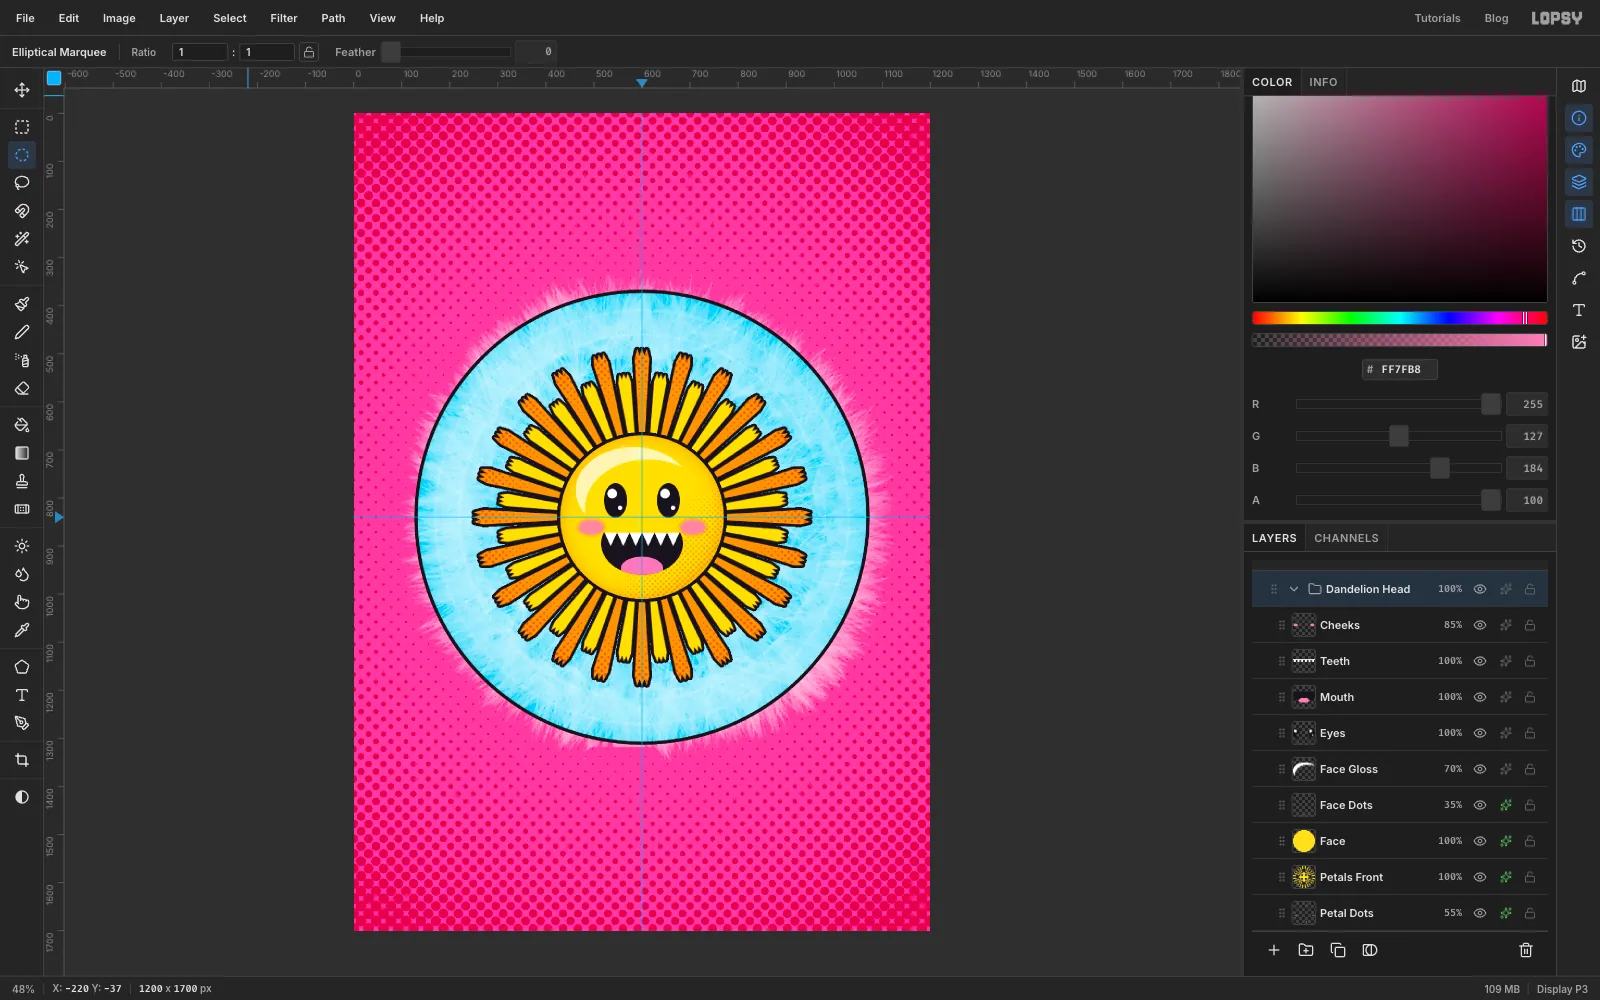
Group the head
Click Cheeks, then Shift-click Petals Back to select every layer from the cheeks down to the back ring. Choose Layer → Group Layers and name the group Dandelion Head.
-
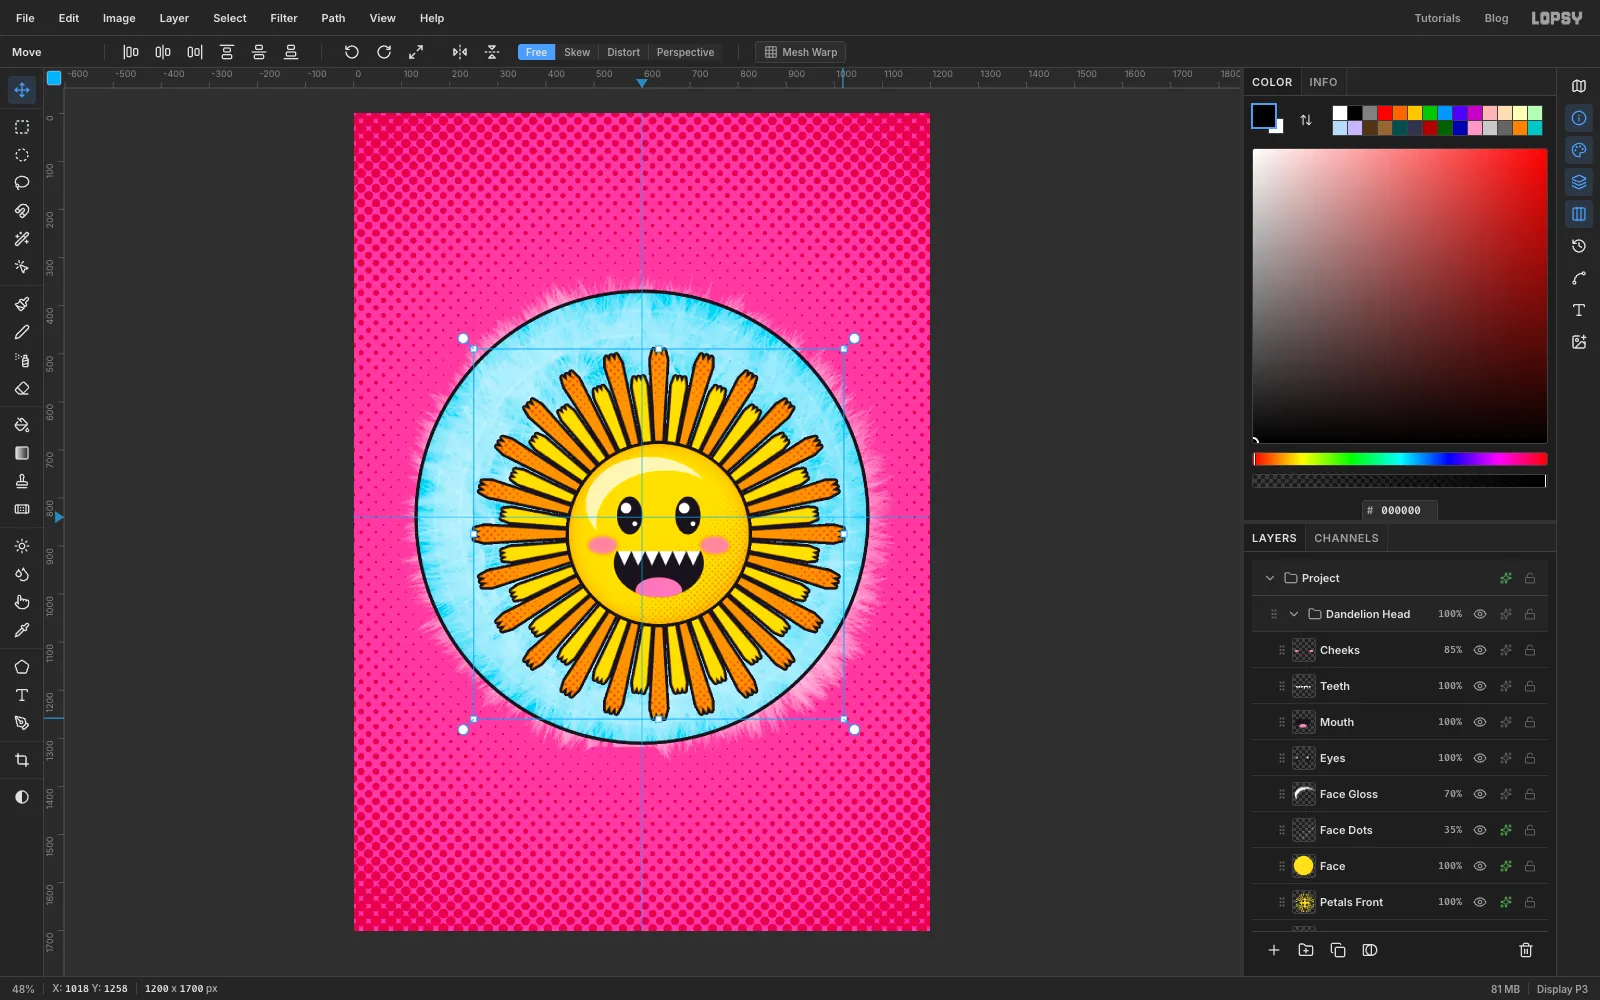
Scale the whole head up
The head is a little small for the halo. With the group selected and nothing else selected, pick the Move tool. The handles frame everything in the group. Cmd-drag the bottom-right corner out to about 110%, press Cmd+D, then nudge the group back onto the guide crossing with the arrow keys.
-
Draw the stem with the Pen
Click Disc Rim so the stem goes behind the head, and add a layer named Stem. Set the foreground to leaf green . Pick the Pen and set its Stroke to
34in the options bar.Click at
600, 1010. At582, 1235press and drag down to about580, 1300to pull out a handle, which bends the line into a gentle S. Click once more at604, 1530. Press Enter to stroke the path with the foreground colour, then delete the path in the Paths panel. Add an ink Stroke effect, Width6.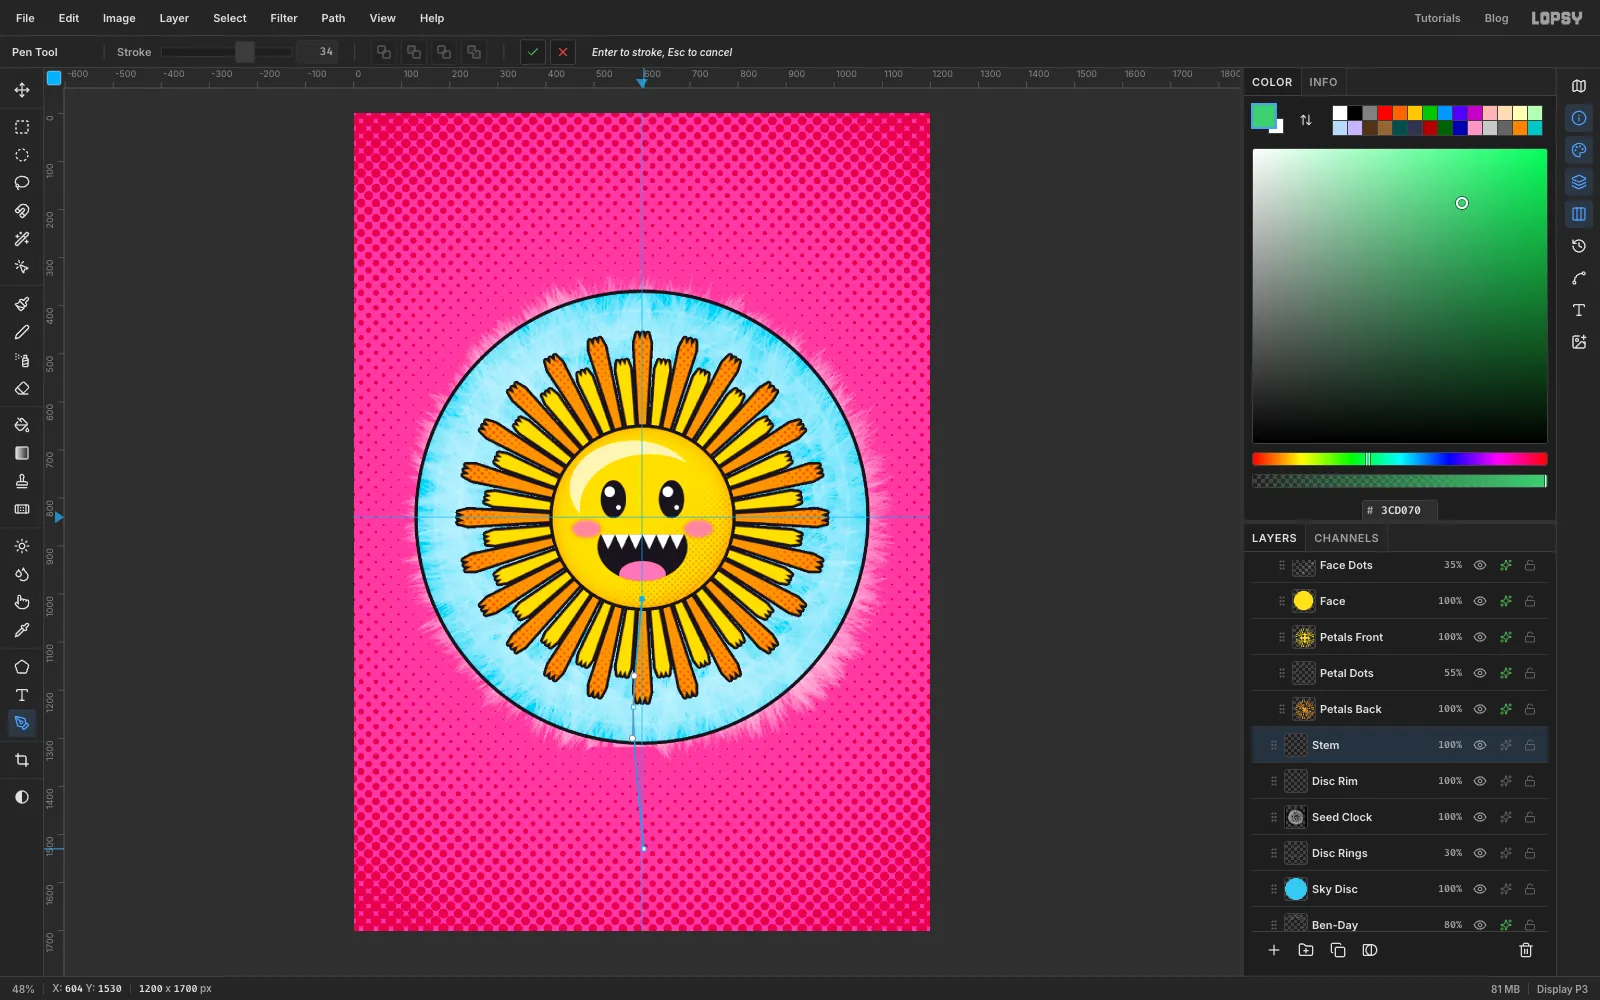
-
Give the stem a highlight
Add a layer named Stem Gloss and set the foreground to white. With the Pen's Stroke at
6, click591, 1040, drag at573, 1235down to571, 1300, and click594, 1480, about 9 px left of the stem's middle. Press Enter, delete the path and set the layer to 55%. The thin reflection ties the stem to the glossy face.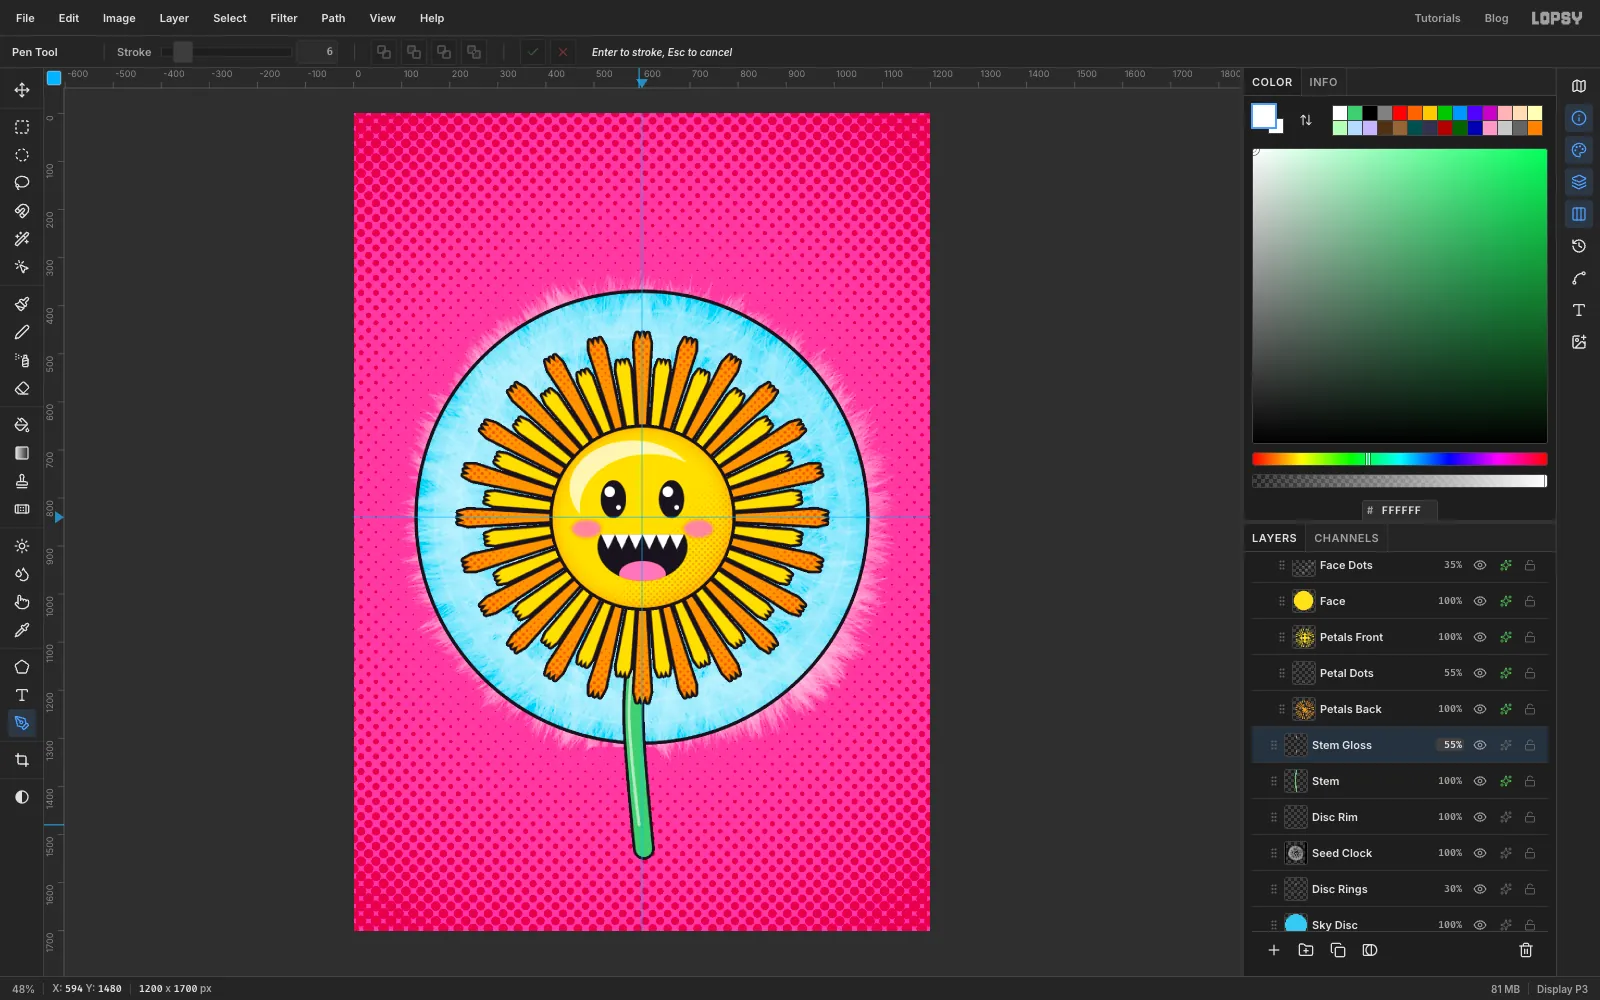
-
Lay the sidewalk
Add a layer named Sidewalk. Select from
0, 1500to1200, 1700, fill it with pavement and apply Filter → Add Noise… with Amount22, Mode Mono and Distribution Gaussian.Keep the selection, add a layer named Pavement Dots, fill it with grey and apply Halftone with Dot Size
12. Deselect, add a Color Overlay in joint grey and set the layer to 30%. The pavement gets its own quiet dot screen to match the rest of the page.Click Sidewalk again. Pick the Pencil at size
6with joint grey. Click at330, 1508and Shift-click at268, 1699for a slab joint, then do the same from905, 1508to968, 1699. Switch to ink at size8and draw the curb from0, 1503to1199, 1503.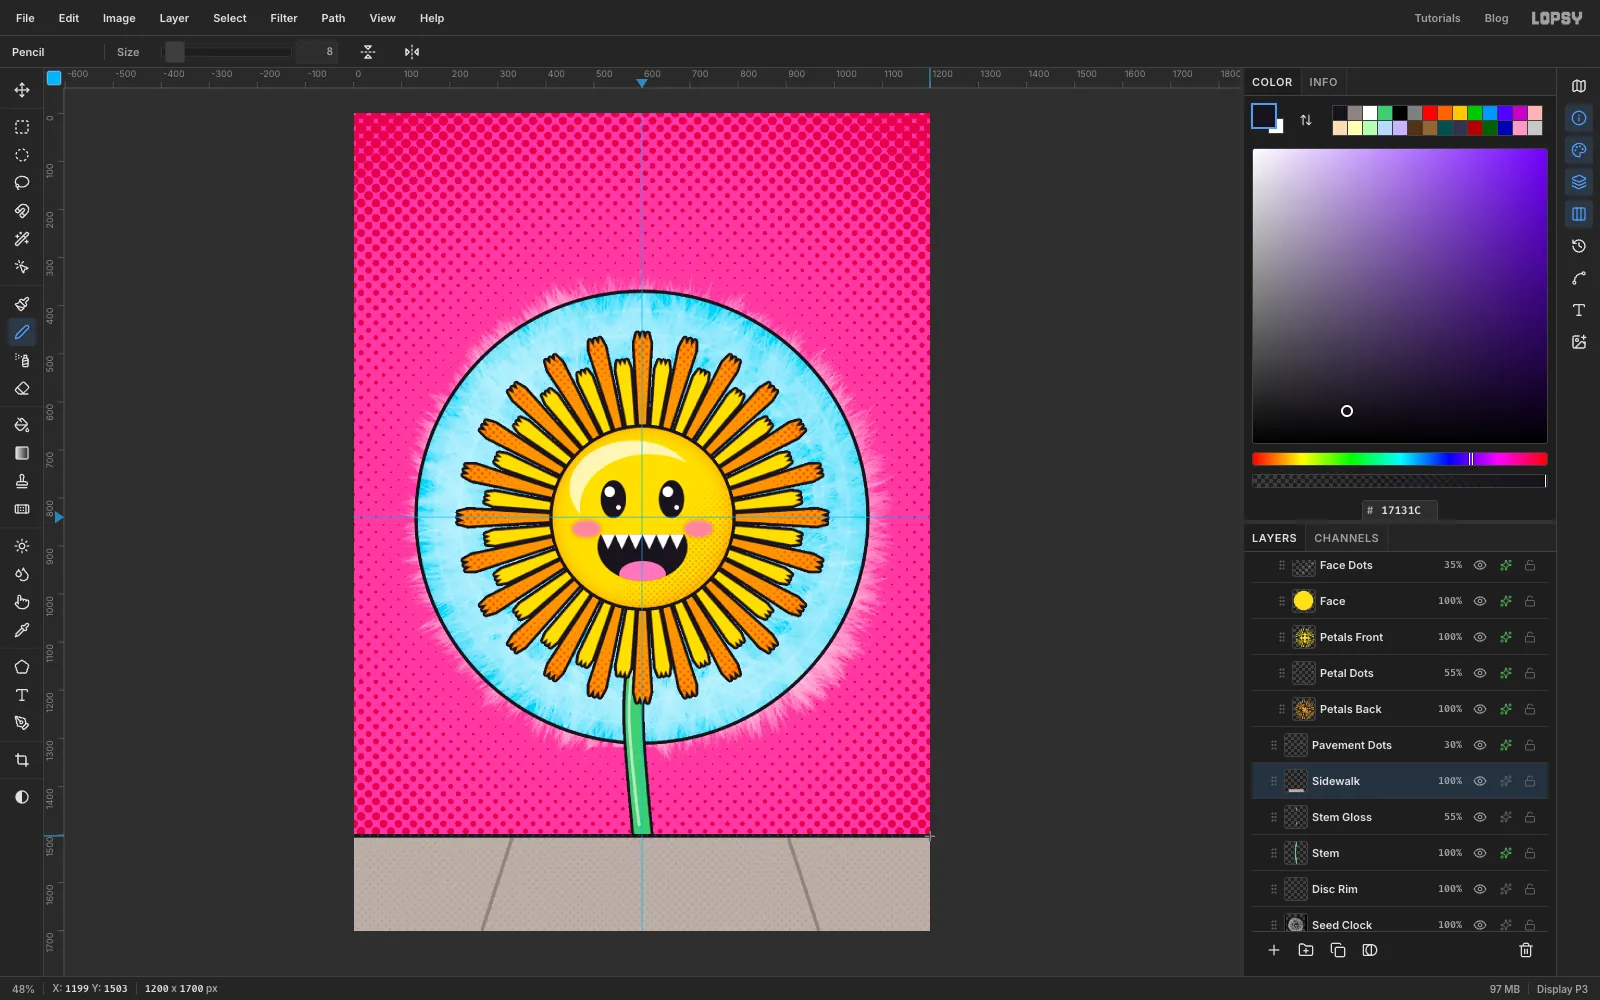
-
Crack the pavement
Add a layer named Crack. With the Pen, click
578, 1505,626, 1505,612, 1534,600, 1560and594, 1532, and close the path. Path to Selection, fill with ink, deselect and delete the path. That's the wedge the stem grows out of.With the Pencil at size
7, click600, 1556and Shift-click586, 1590,612, 1626and596, 1660to zigzag the crack downward. At size4, add a few short branches that wander off to each side.Make a second, smaller wedge for another weed: Pen points
812, 1640,862, 1640,842, 1662,834, 1682and828, 1660, filled with ink, plus a short pencil tail down to the bottom edge.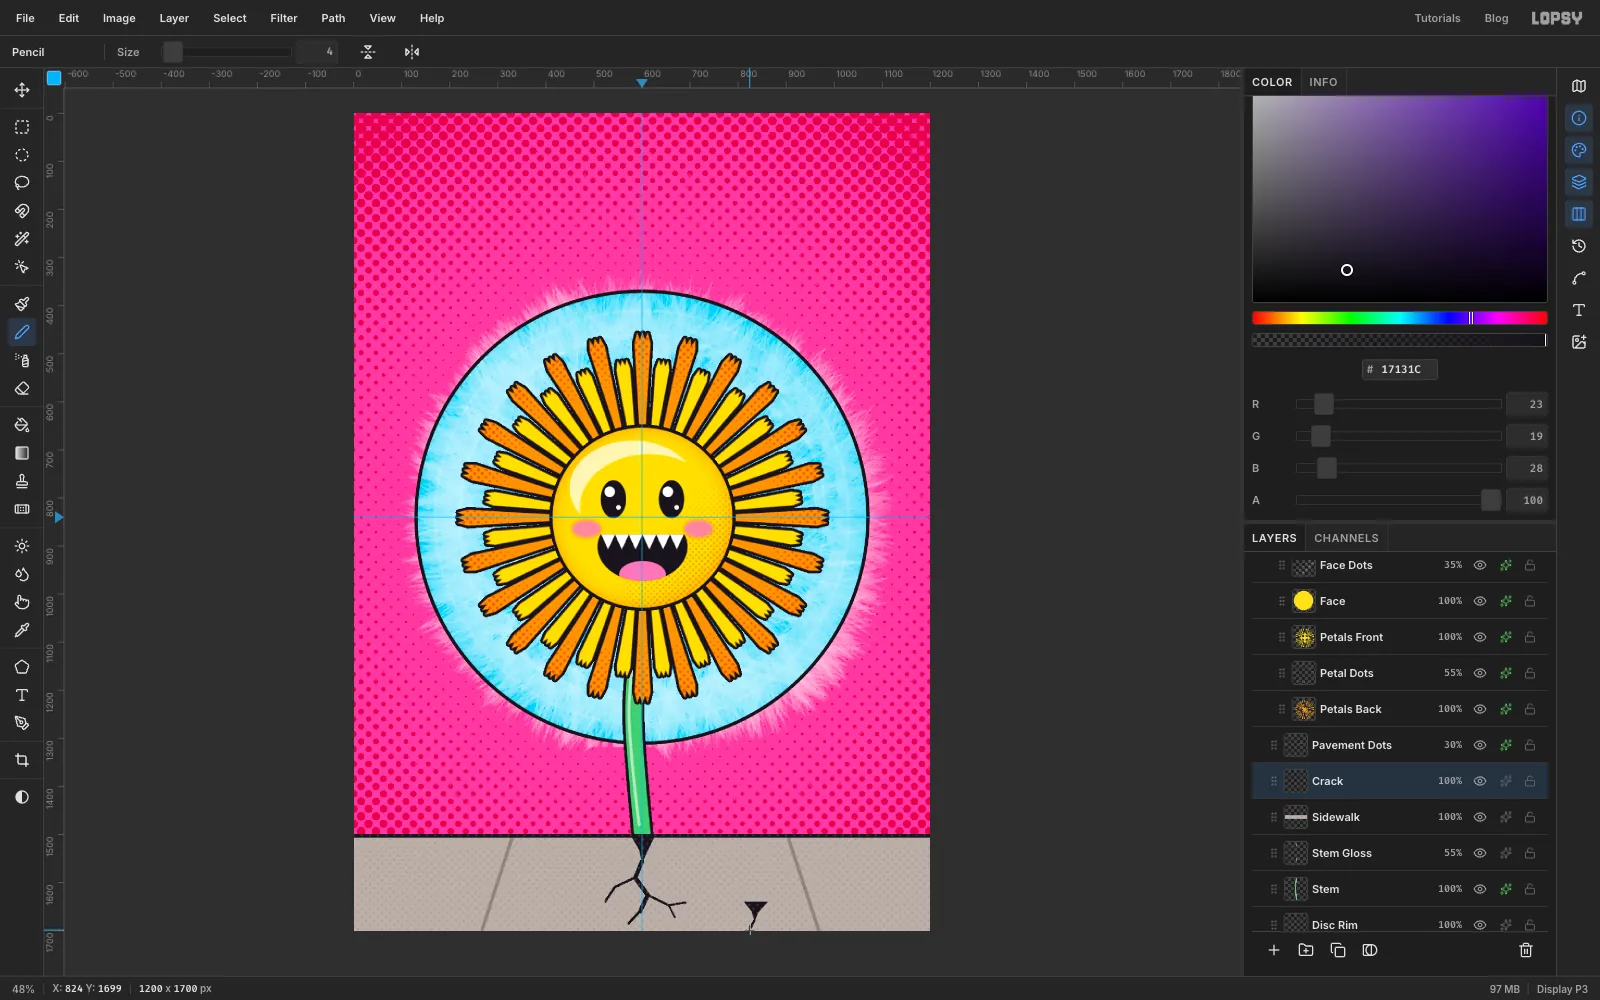
-
Draw a dandelion leaf
Dandelion leaves have deep, hooked teeth that point back towards the stem. Add a layer named Leaf Left and draw one with the Pen:
- Start at the base,
592, 1512, just left of the crack. - The leaf runs up and to the left for about 415 px, ending in a point near
208, 1357. - Along the top edge, click four teeth. Each tooth is three clicks: a notch close to the midline, then a sharp tip 40–60 px out from the midline but a little behind the notch (closer to the base), then the next notch further along. That backward lean is what makes the teeth hook towards the stem.
- Round the tip and come back along the bottom edge with four more teeth, then click the first point to close the path.
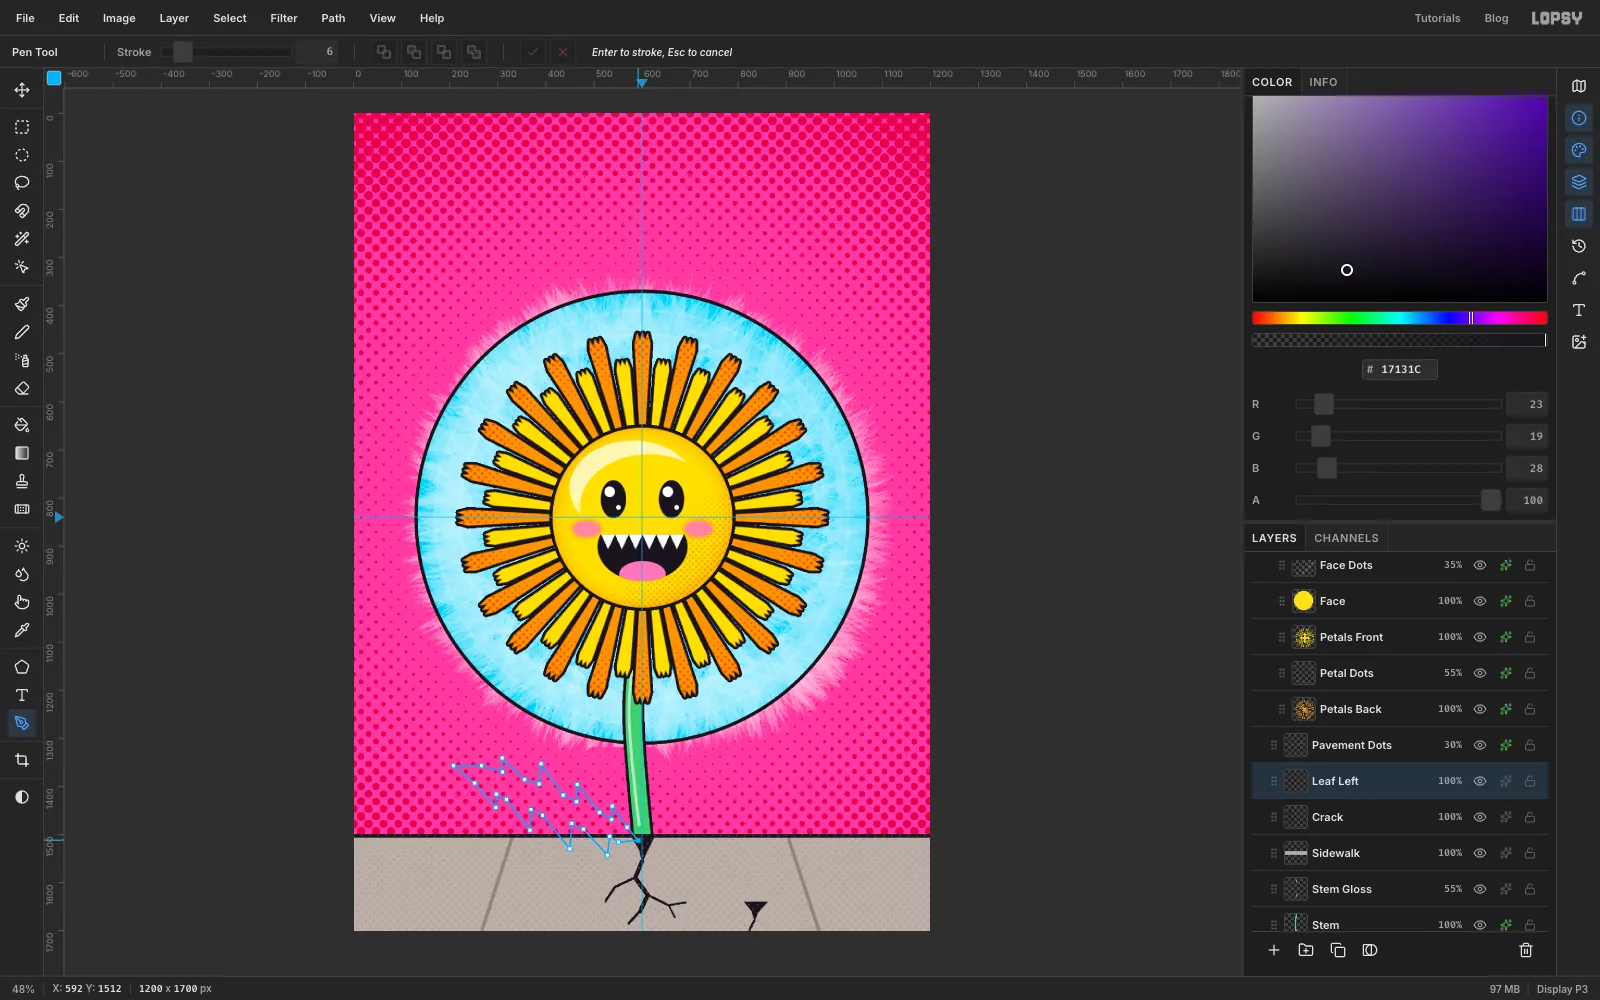
- Start at the base,
-
Fill and vein the leaf
Path to Selection, fill with leaf green, deselect and delete the path. Pick the Pencil at size
5in vein green , click the base of the leaf and Shift-click about four-fifths of the way to the tip for the midrib. Add an ink Stroke effect, Width6.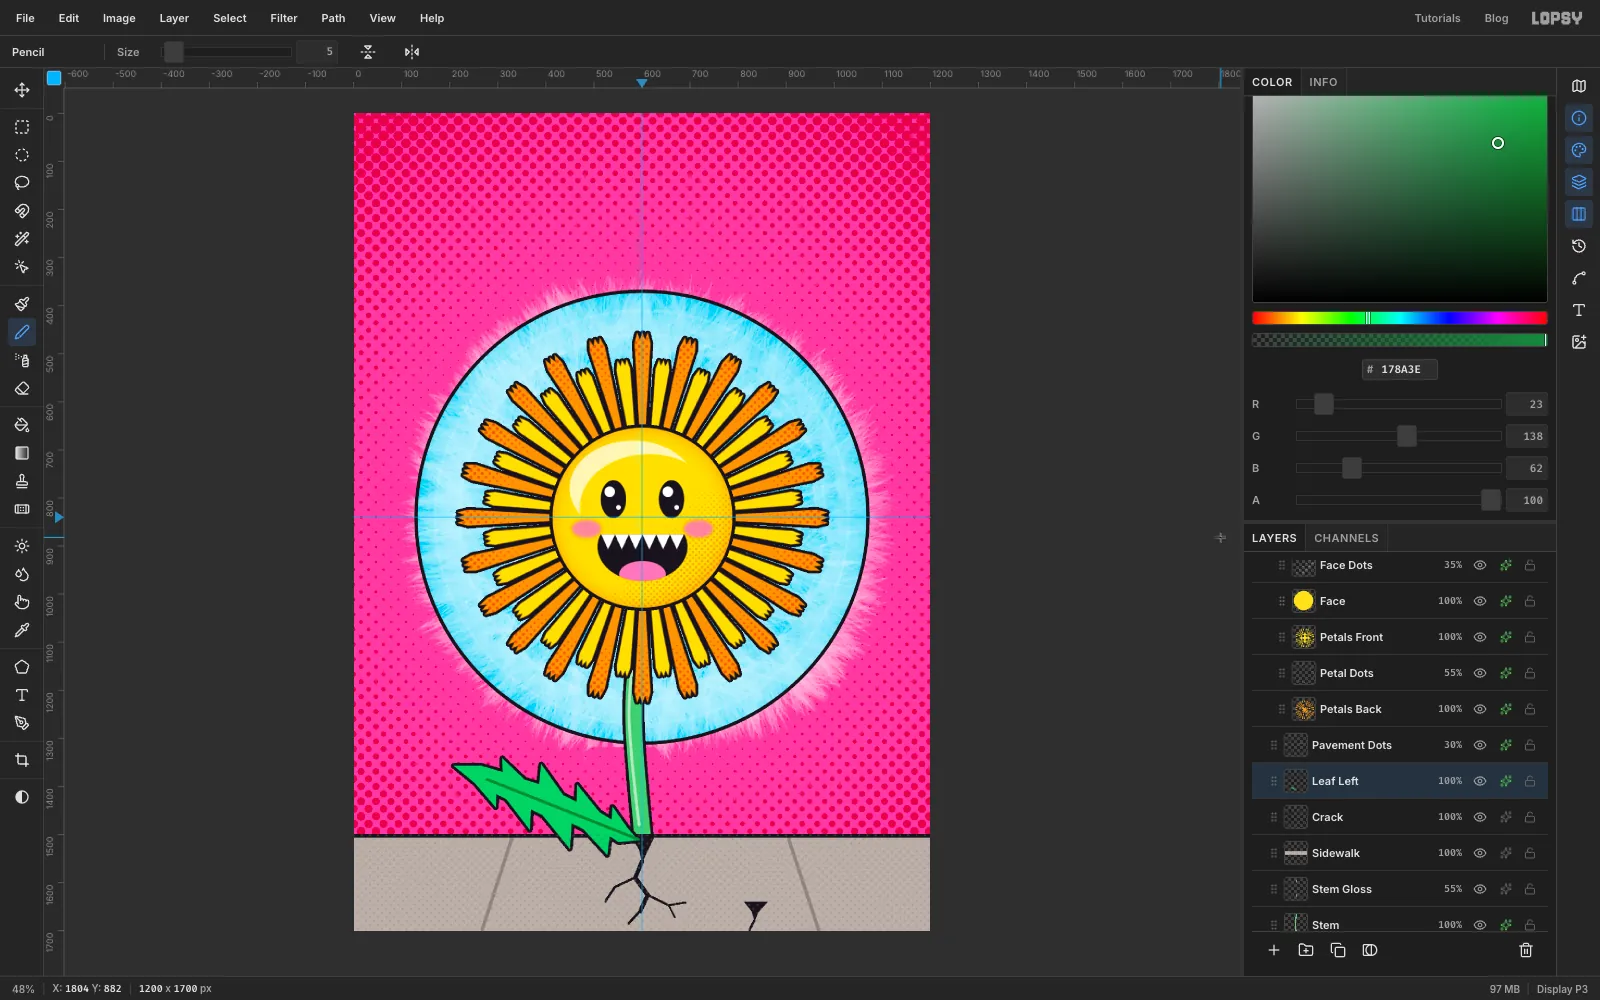
-
Mirror it for the right leaf
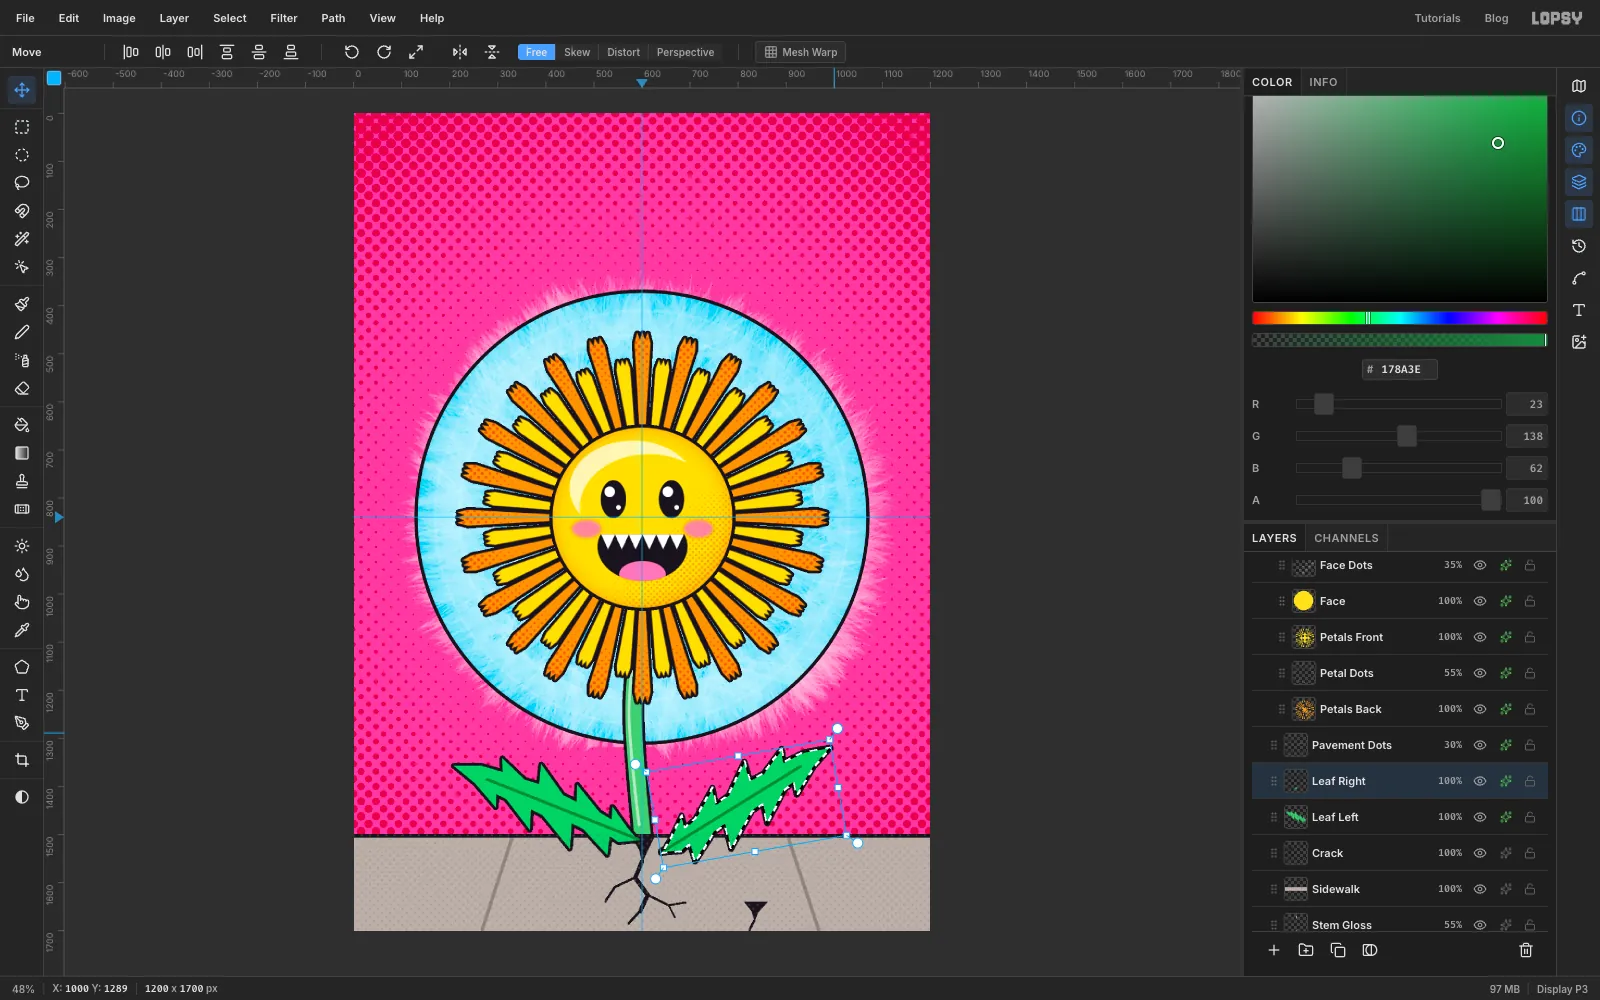
Duplicate Leaf Left and name the copy Leaf Right. Cmd-click its thumbnail, pick the Move tool and click Flip Horizontal in the options bar. Press Cmd+D.
Drag it with the Move tool to the other side of the stem, then use the arrow keys until its base touches the stem a little higher than the left leaf's. Then Cmd-click its thumbnail again and drag the rotation handle about 10° anticlockwise, without Cmd, so the two leaves aren't perfect mirrors. Press Cmd+D.
-
Plant a second weed
Duplicate Leaf Left again as Tuft Left, select its pixels and Cmd-drag a corner handle inwards to about 36%. Press Cmd+D, drag it over with the Move tool and nudge it so its base sits on the small crack at about
835, 1640. Do the same with Leaf Right as Tuft Right. The little weed coming up in the second crack fills the empty pavement and makes the point: they grow everywhere.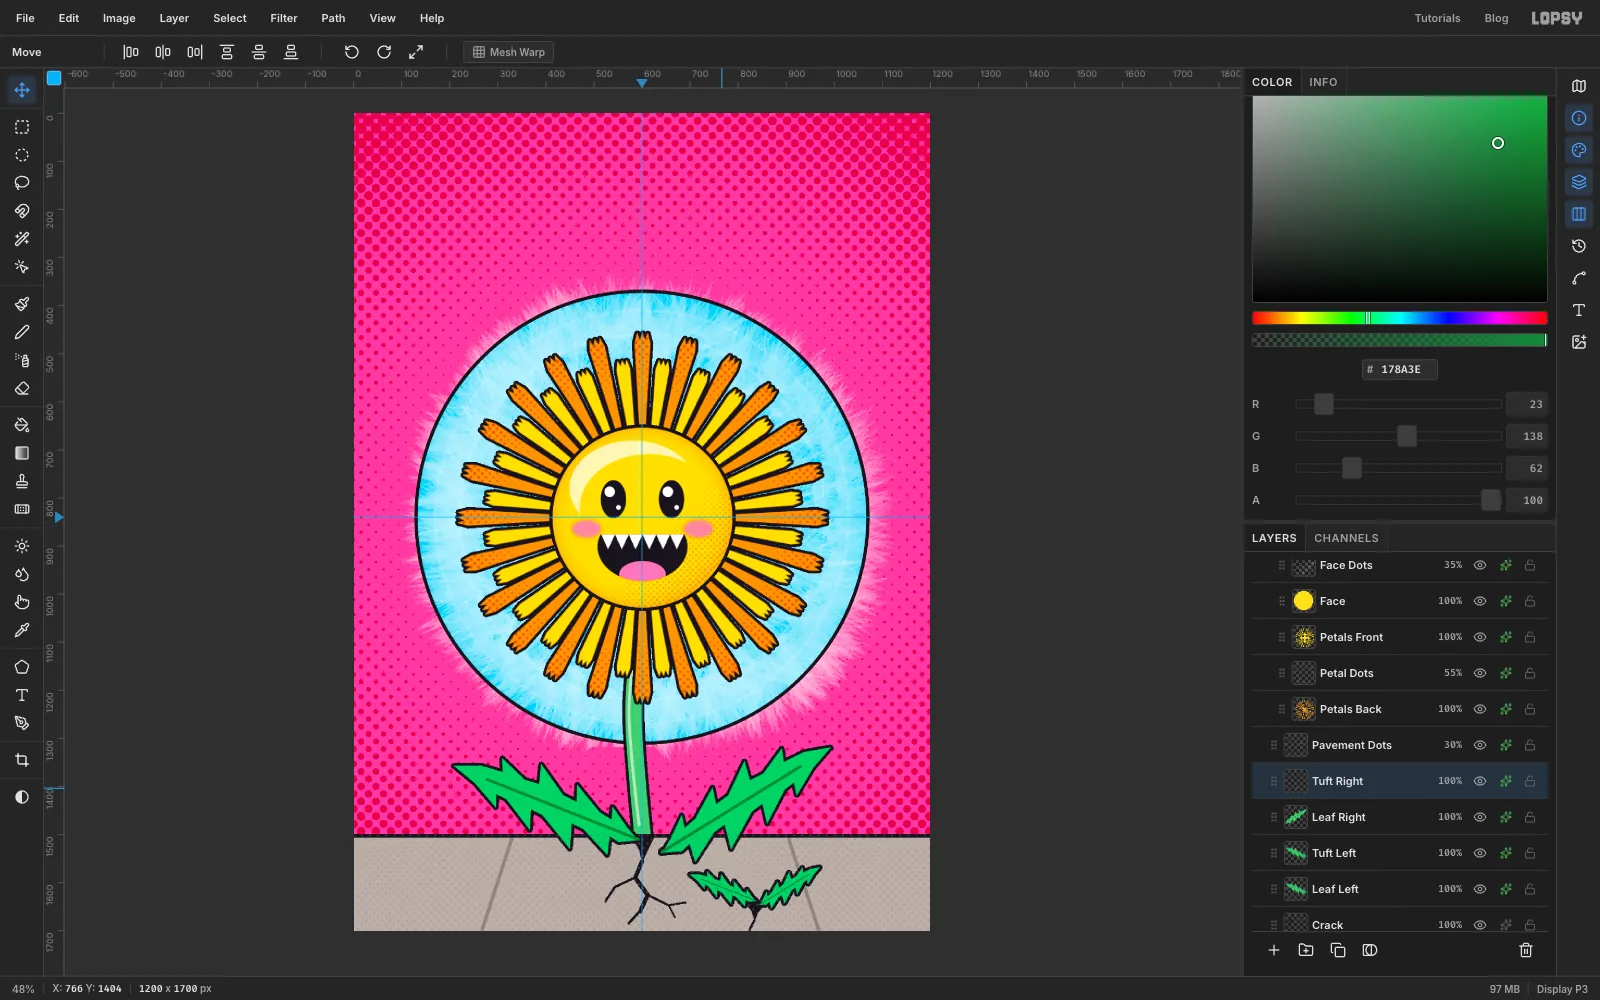
-
Draw one parachute seed
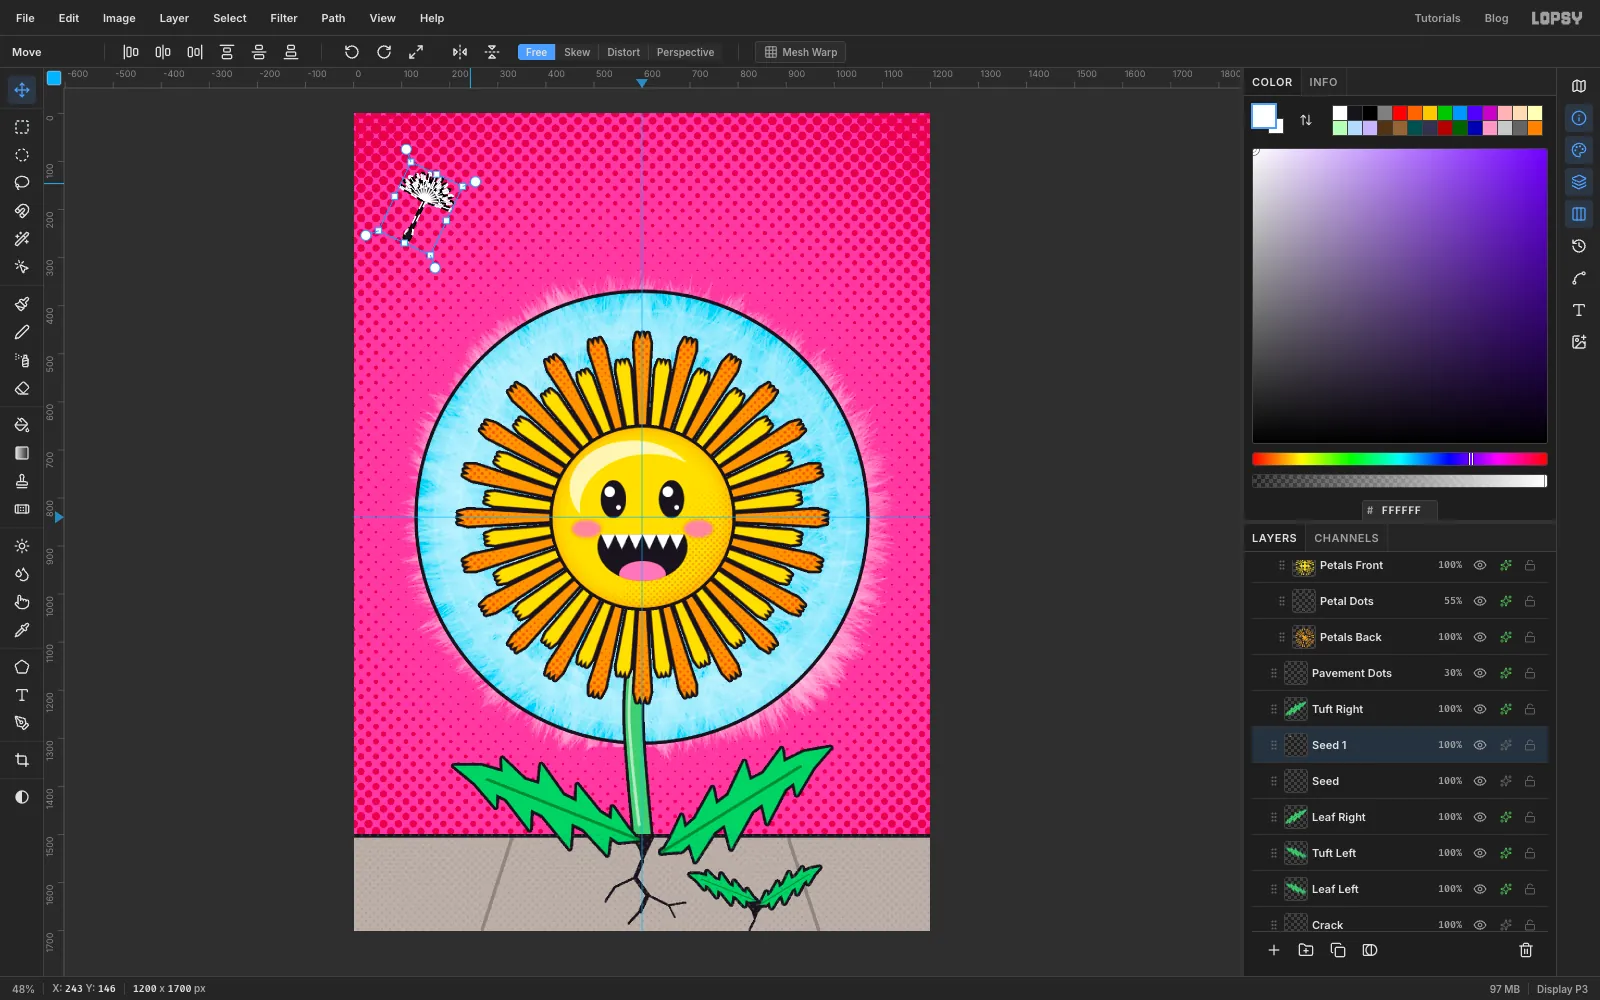
Click Leaf Right and add a layer named Seed. You'll draw it in the empty top-left corner and move copies into place afterwards.
Select an ellipse from
143, 266to157, 302and fill it with ink for the seed. Pick the Pencil at size3, click150, 268and Shift-click150, 190for the stalk.For the parachute, pick the Brush at size
5and set the foreground to white. Click150, 190, then Shift-click a point 66 px away. Repeat for 13 lines about 14° apart, fanning from just above the left horizontal round to just above the right. Add an ink Stroke effect, Width2, then click Rasterize Layer Style in the effects drawer. Pasted copies won't keep effects, so the outline has to be baked into the pixels first.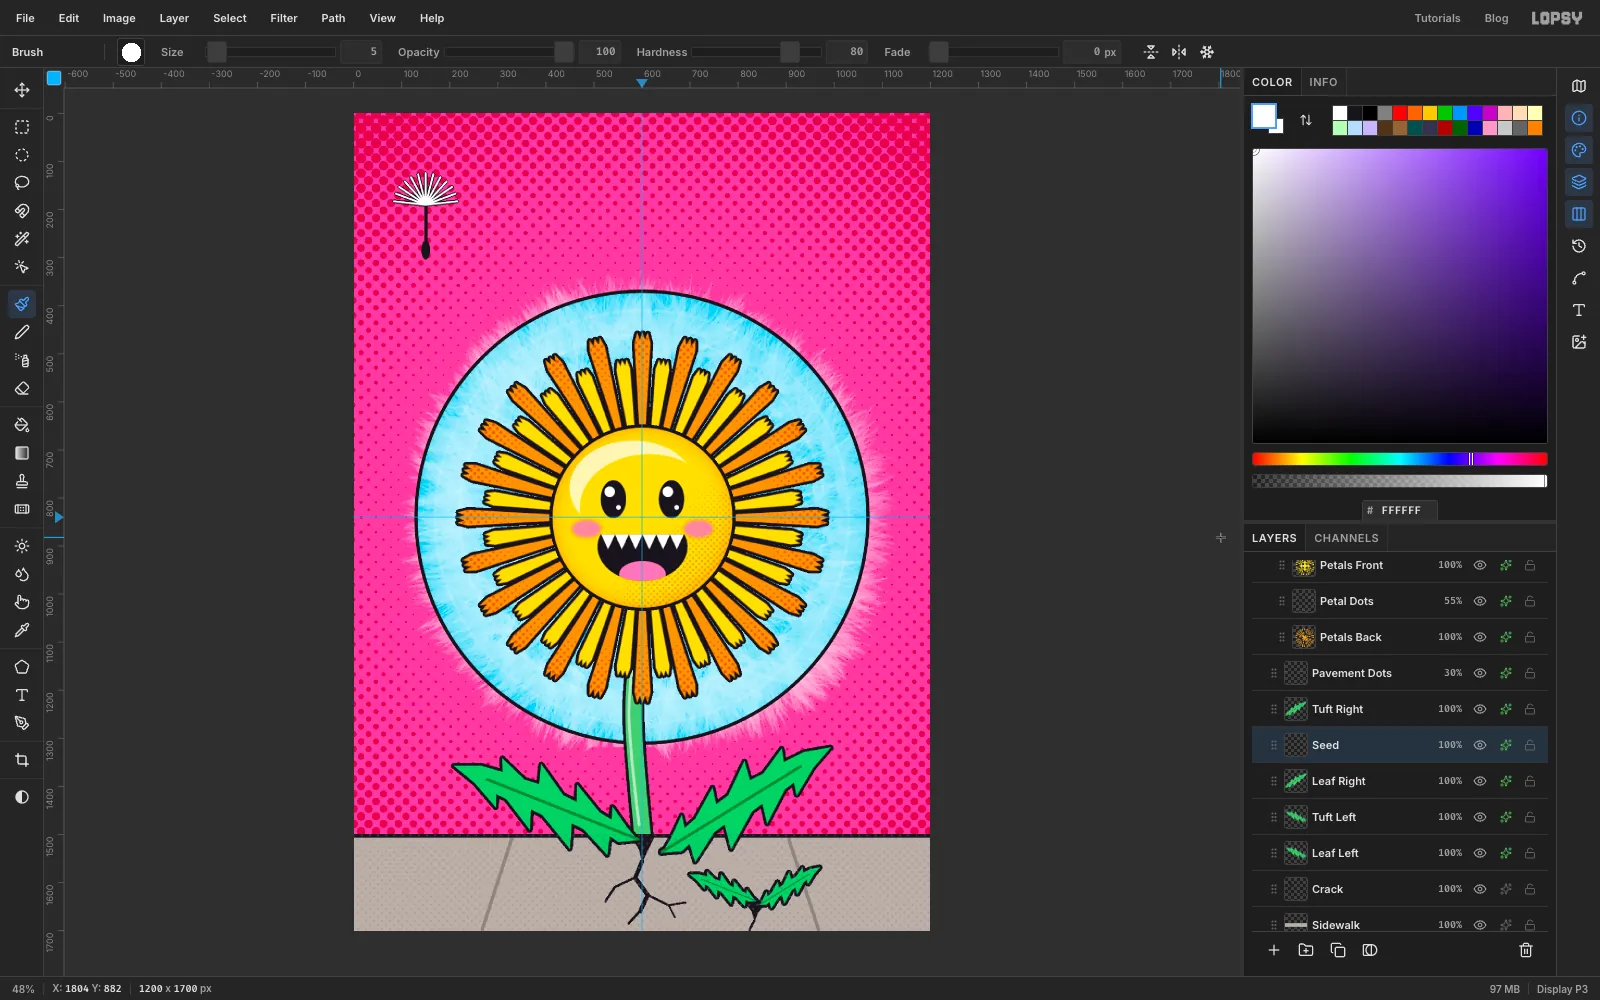
-
Cut the seed out
Select from
70, 110to230, 312, around the whole seed, and choose Edit → Cut.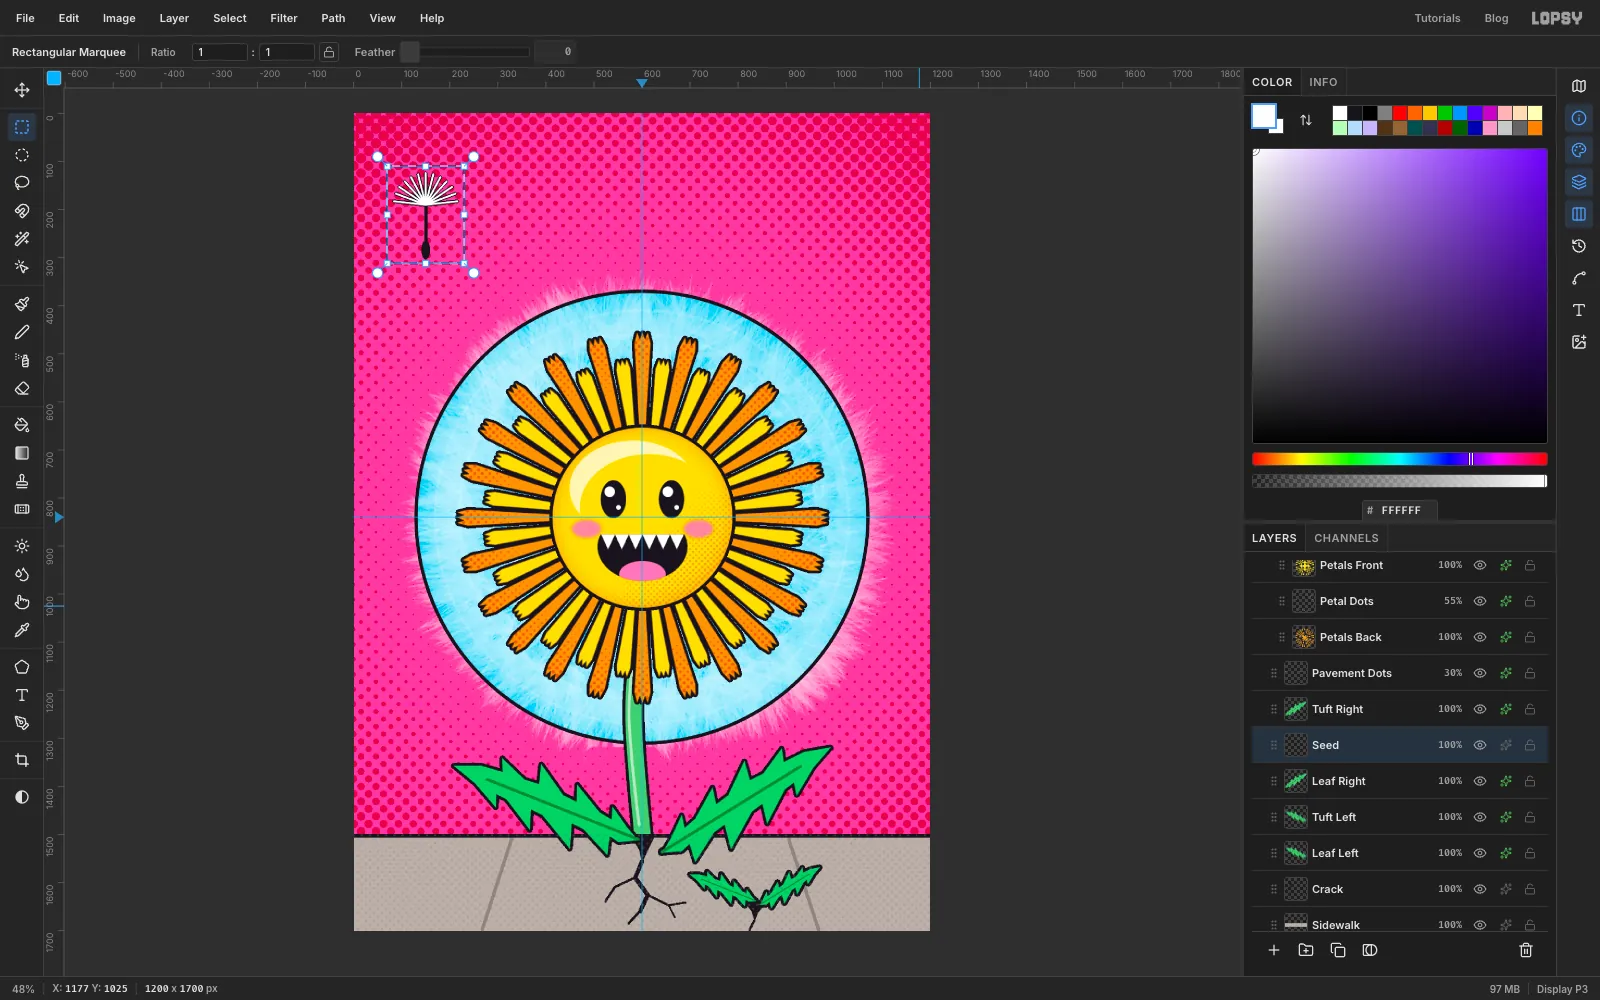
-
Paste, scale and turn five copies
Choose Edit → Paste. The copy lands where the seed was, on a new layer. Rename it Seed 1 and deselect. Cmd-click its thumbnail, Cmd-drag a corner handle to scale it, press Cmd+D, select it again, drag the rotation handle to tilt it, and press Cmd+D. Then drag it with the Move tool to roughly the right spot and fine-tune with the arrow keys. The positions below are the centre of each seed's box.
Paste five copies like this, keeping each one at least a seed's width clear of the disc rim so it reads as drifting:
- Seed 1: 85%, tilted 25° right, at
1105, 702, right of the halo's upper half - Seed 2: full size, 40° right, at
1090, 1228 - Seed 3: 70%, 55° right, at
1110, 1405 - Seed 4: 80%, 20° left, at
110, 640 - Seed 5: 60%, 35° left, at
150, 1105
- Seed 1: 85%, tilted 25° right, at
-
Merge the seeds and add a shadow
Delete the empty Seed layer. Click Seed 5 and choose Layer → Merge Down four times, then rename the result Seeds. Give it a Drop Shadow in seed shadow with Offset X
4, Offset Y5, Blur0and Opacity55. A hard, unblurred shadow is the sticker-like pop-art version of depth.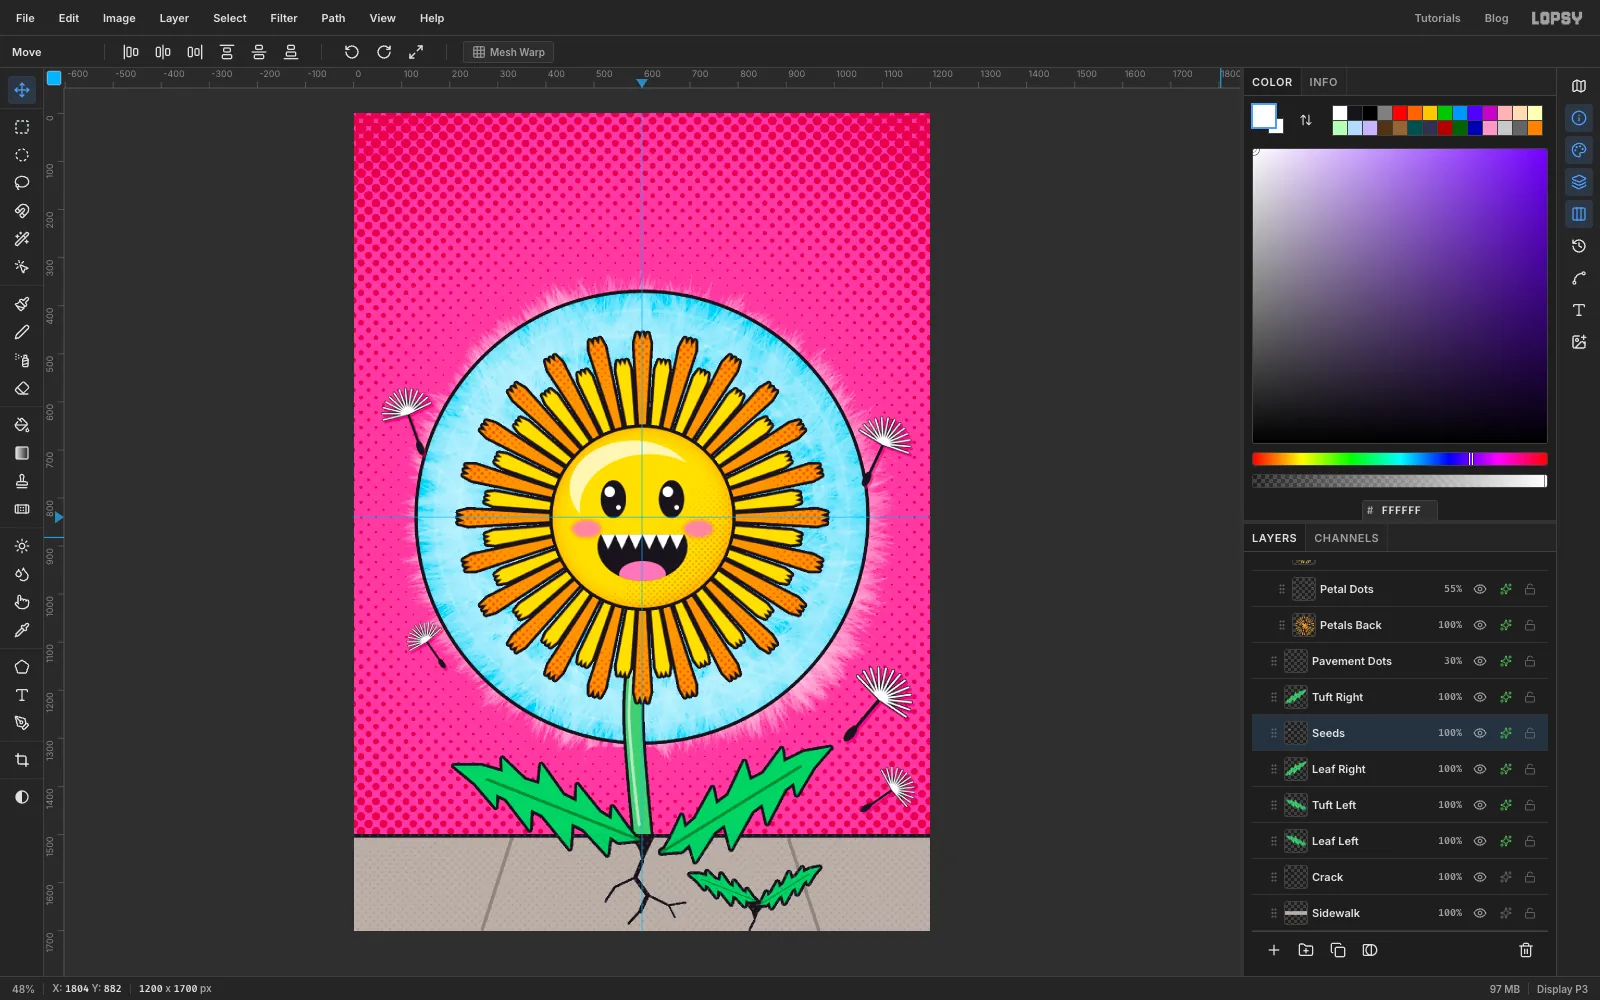
-
Add the issue strip
Collapse the Dandelion Head group with its arrow and click it, so new layers go next to it. Add a layer named Top Strip, select from
0, 0to1200, 54and fill it with ink.Pick the Text tool, choose Space Mono, weight Bold, size
22, and set the foreground to white. Click in the strip and typeISSUE Nº 04 · SPRING · PAY WHAT YOU GROW, with two spaces either side of each dot. Press Tab to commit and rename the layer Issue Line. Nudge it with the Move tool until it's centred in the strip, with equal space above and below.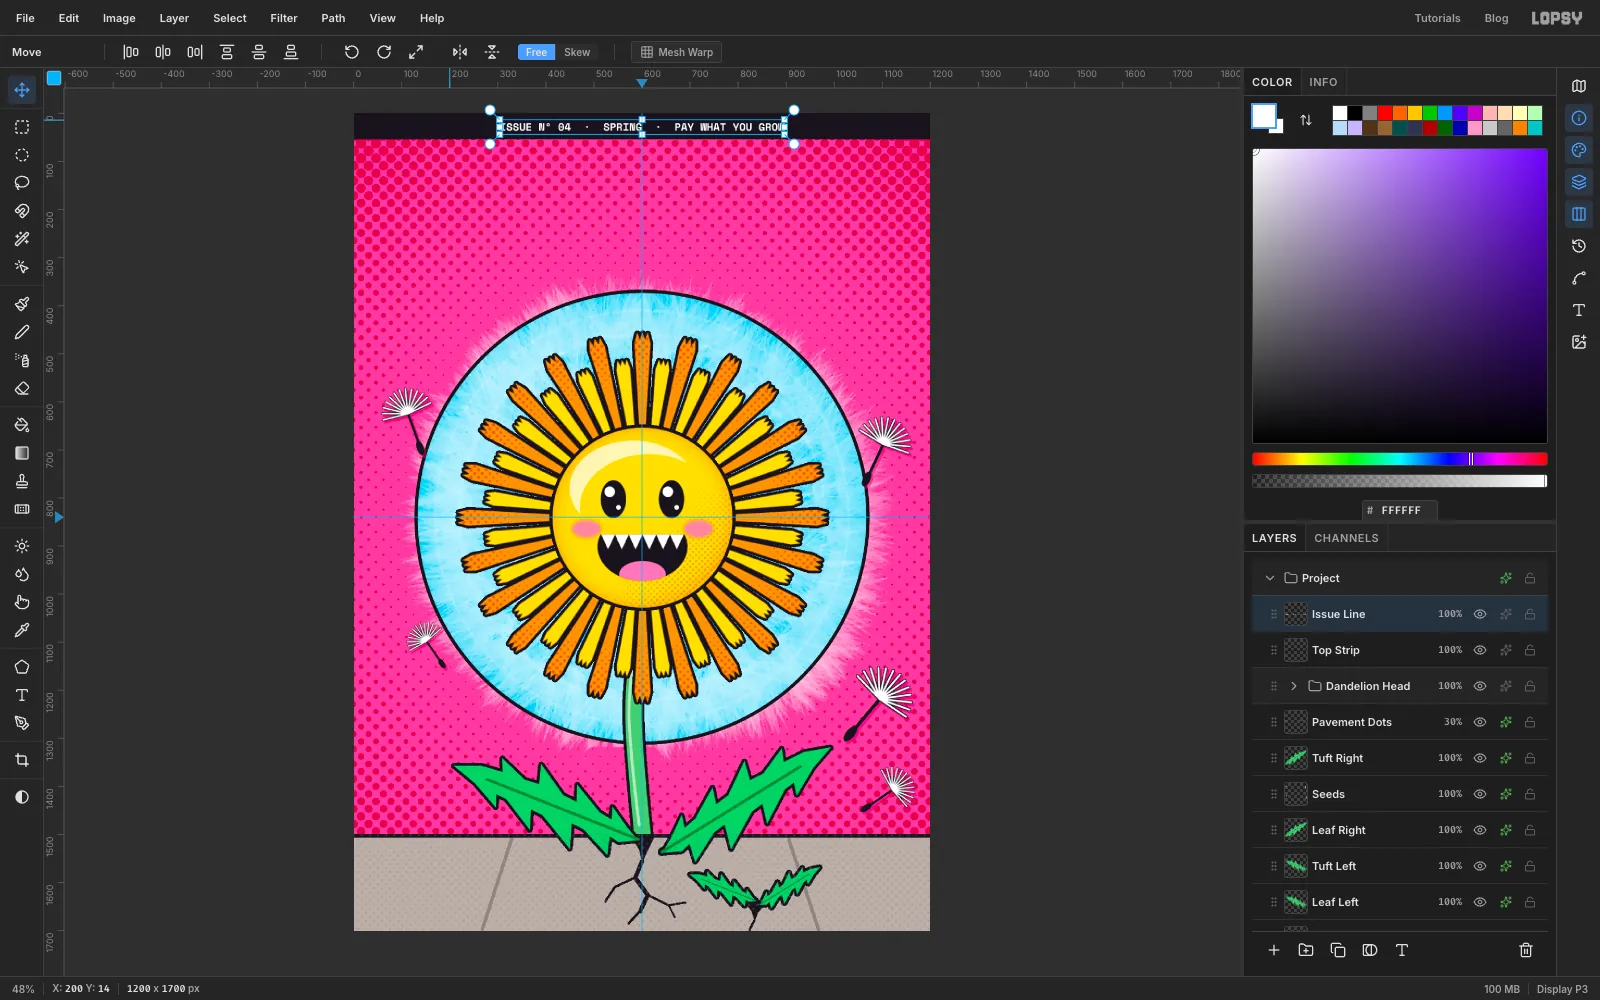
-
Set the masthead
Click Top Strip so the text options don't restyle the issue line. On the Text tool, pick Bagel Fat One at size
195, white. Click near the top left and typeDANDELION, then press Tab and rename the layer Masthead.Move it so the letters run from about
55to1132across and sit centred aroundy 165. That keeps a 55 px margin on the left and leaves room for the shadow on the right. Add a Stroke in ink, Width9, Position Outside, and a Drop Shadow in ink with Offset X9, Offset Y11, Blur0and Opacity100.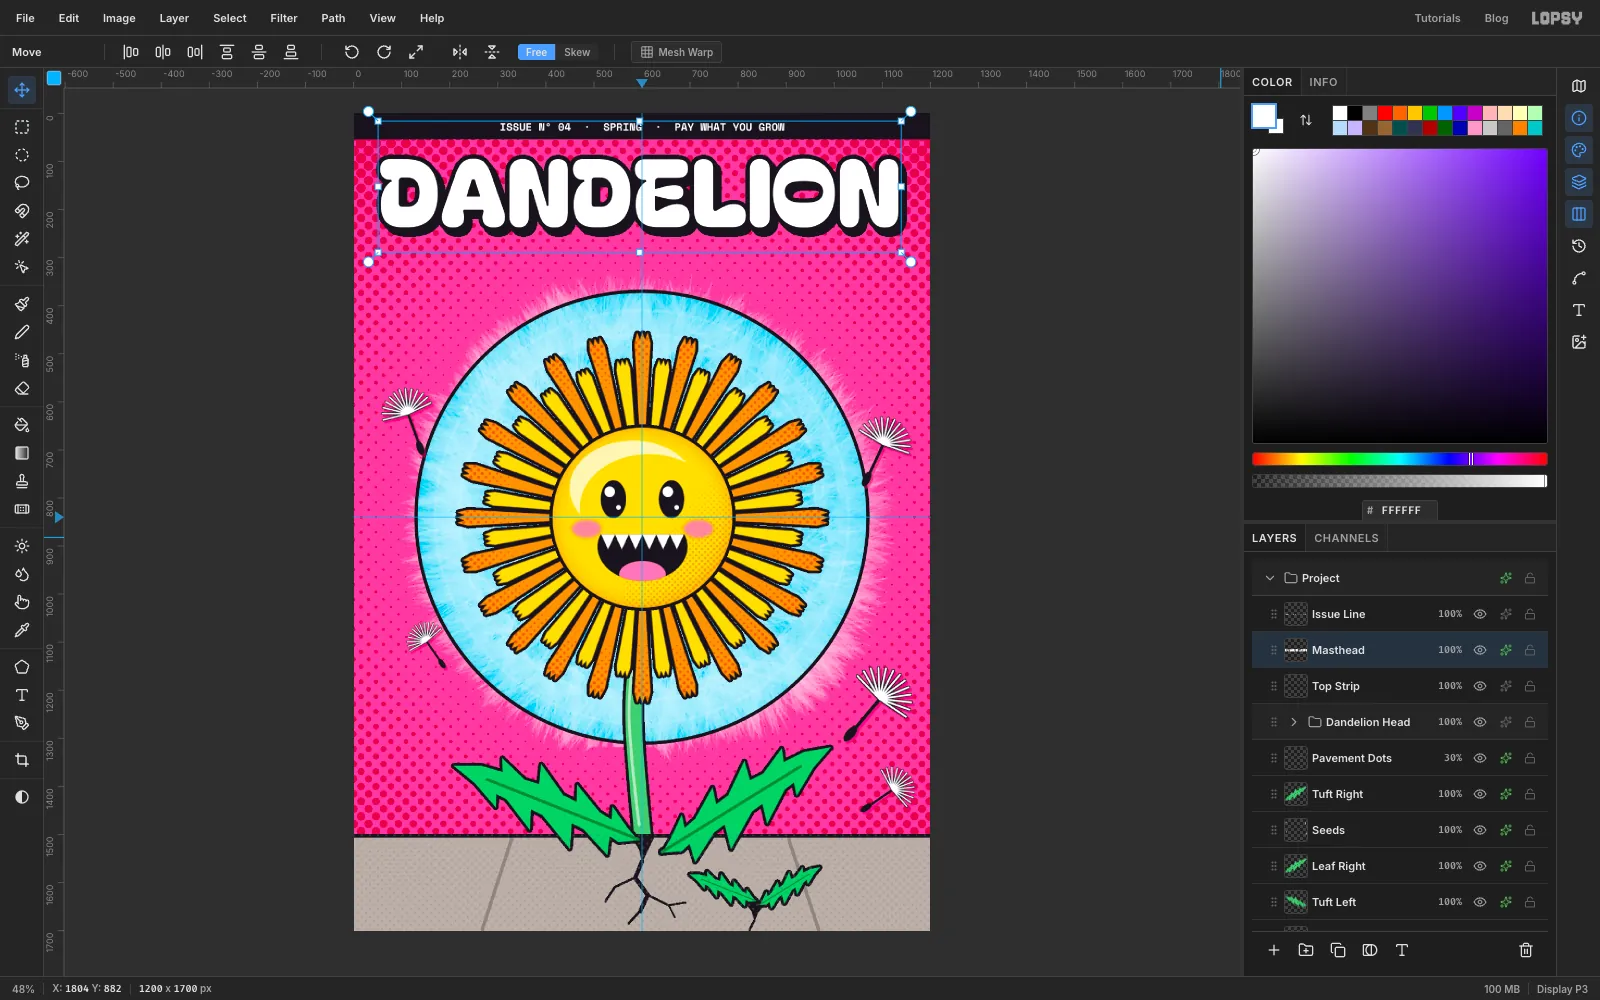
-
Build the ANARCHY banner
Click Masthead, click the New Group button and name the group Anarchy Banner. Inside it, add a layer named Banner Slab, select from
250, 250to950, 360and fill it with ink. Deselect and add a Stroke in white, Width5, Outside.Pick Rubik Mono One in dandelion yellow, type
ANARCHYon the slab, press Tab and rename the layer Anarchy. In the Text panel set Letter spacing to8, then set the size to92so the word is about 600 px wide. Centre it on the slab at600, 305. Rubik Mono One is all capitals, so there are no descenders and the word sits exactly in the middle.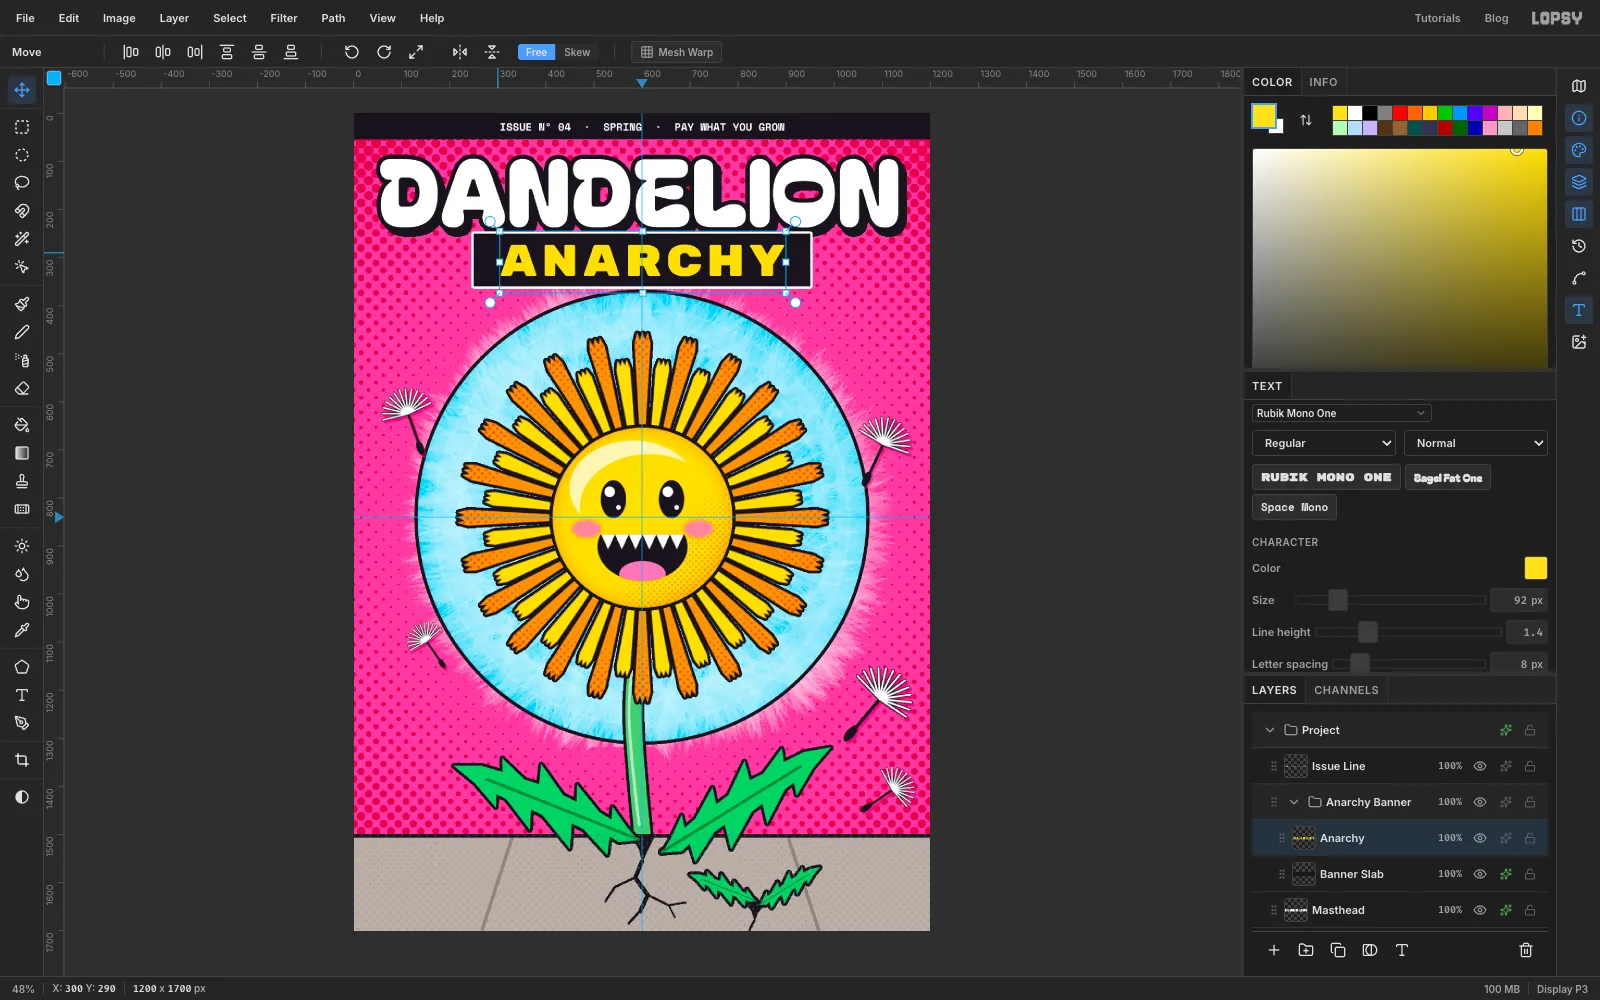
-
Tilt the banner
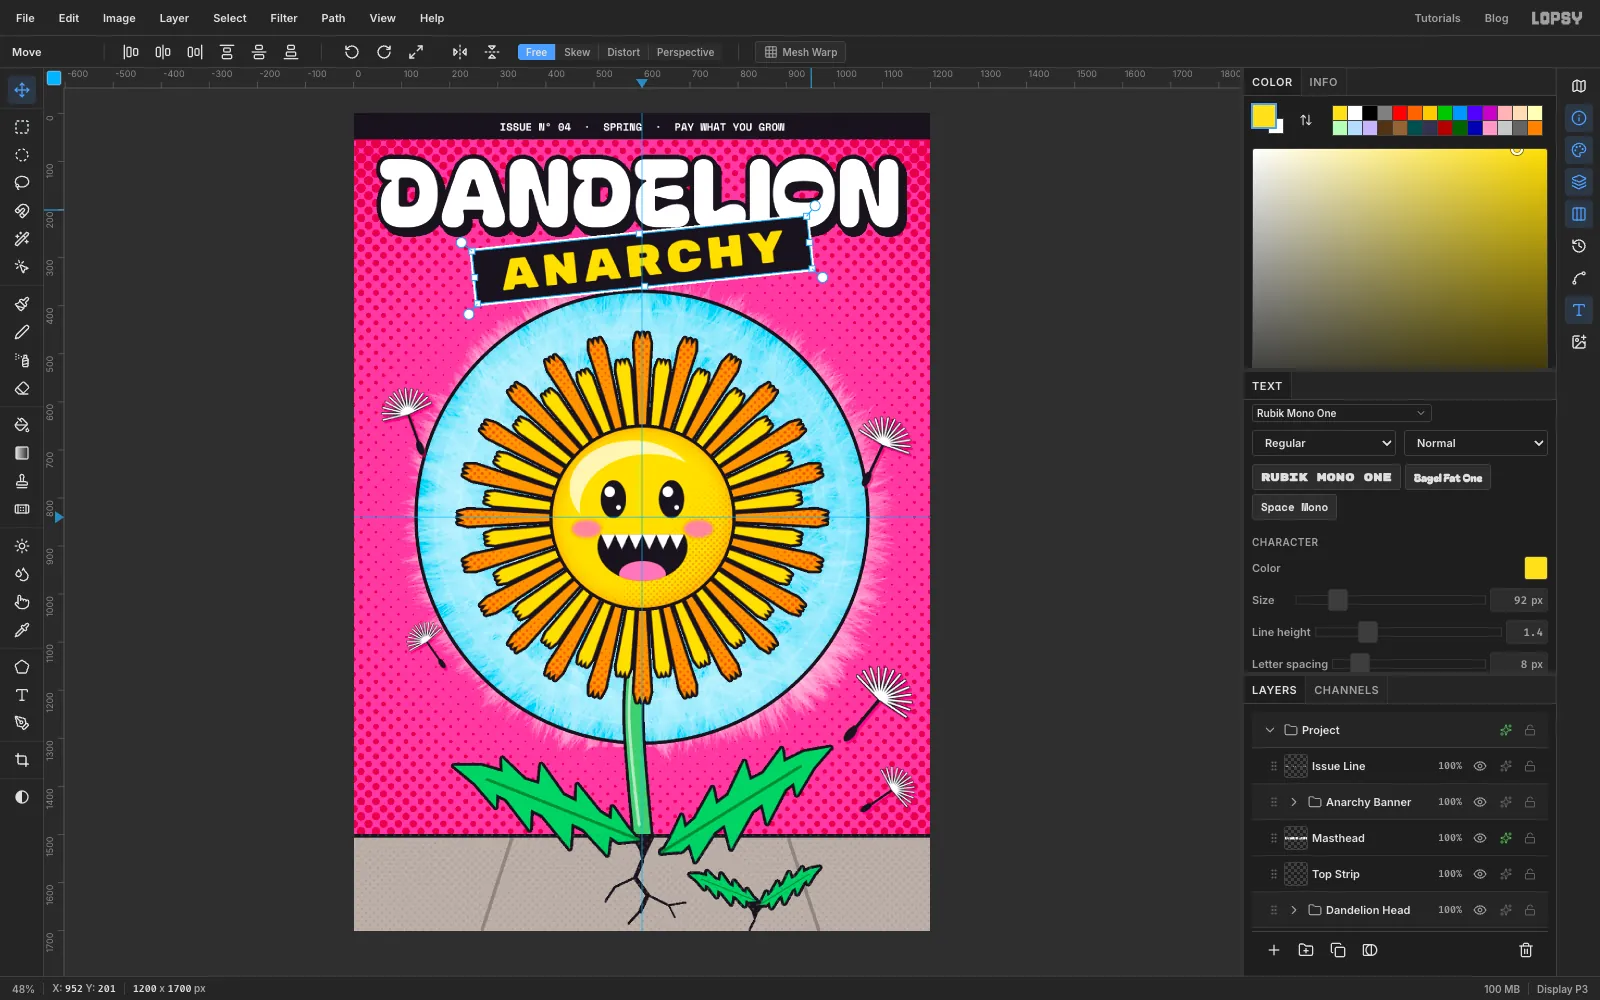
Collapse Anarchy Banner and click the group row. With the Move tool and nothing selected, the handles frame the slab and the text together. Drag the rotation handle about 6° anticlockwise and press Cmd+D. The text turns with the slab and stays editable. The slab's raised end now overlaps the bottom of the masthead's shadow, which looks deliberate.
-
Draw the starburst badge
First add two margin guides: click the top ruler at
56and at1144. Everything on the cover keeps 56 px from the edges.Click the collapsed Anarchy Banner group and make a New Group named Free Badge. Inside it, add a layer named Starburst. With the Pen, click your way round a 16-point star centred on
1032, 524: start at the top tip,1032, 412, then alternate between an inner notch about 92 px from the centre and the next outer tip about 112 px out. The tips don't have to be perfect, but the rightmost one, at1144, 524, should touch the right margin guide. Click the first point to close the path.Path to Selection, fill with dandelion yellow, deselect and delete the path. Add an ink Stroke, Width
5, Outside, and an ink Drop Shadow with offsets6and6and Blur0.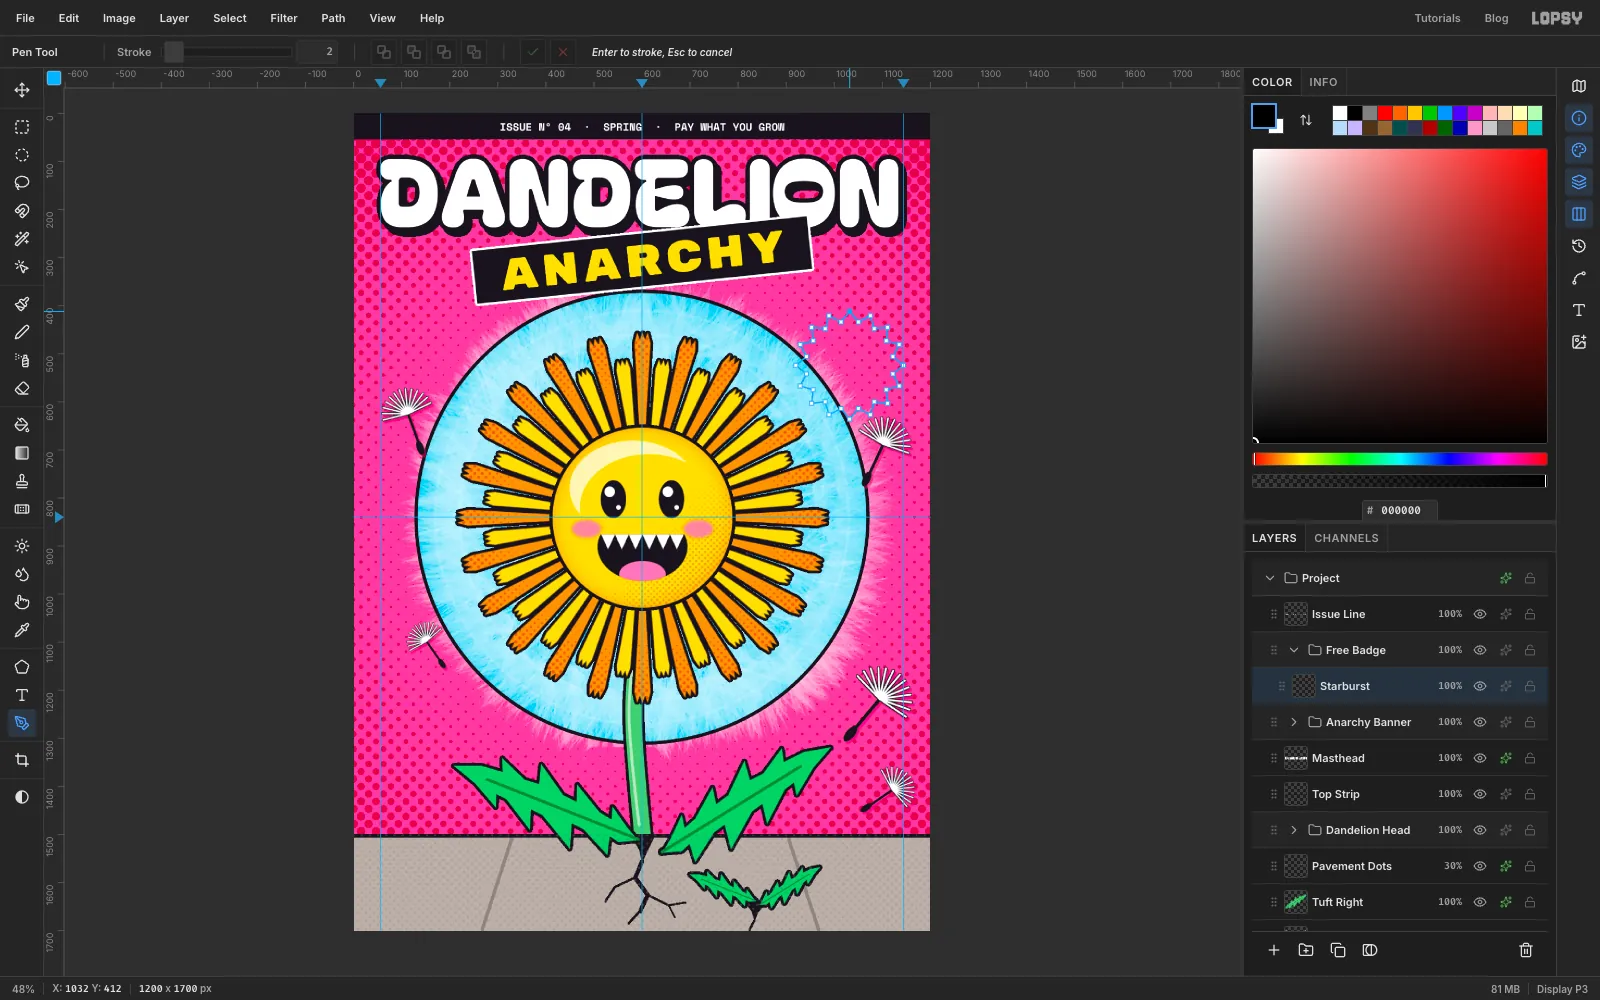
-
Letter and tilt the badge
With Bagel Fat One at
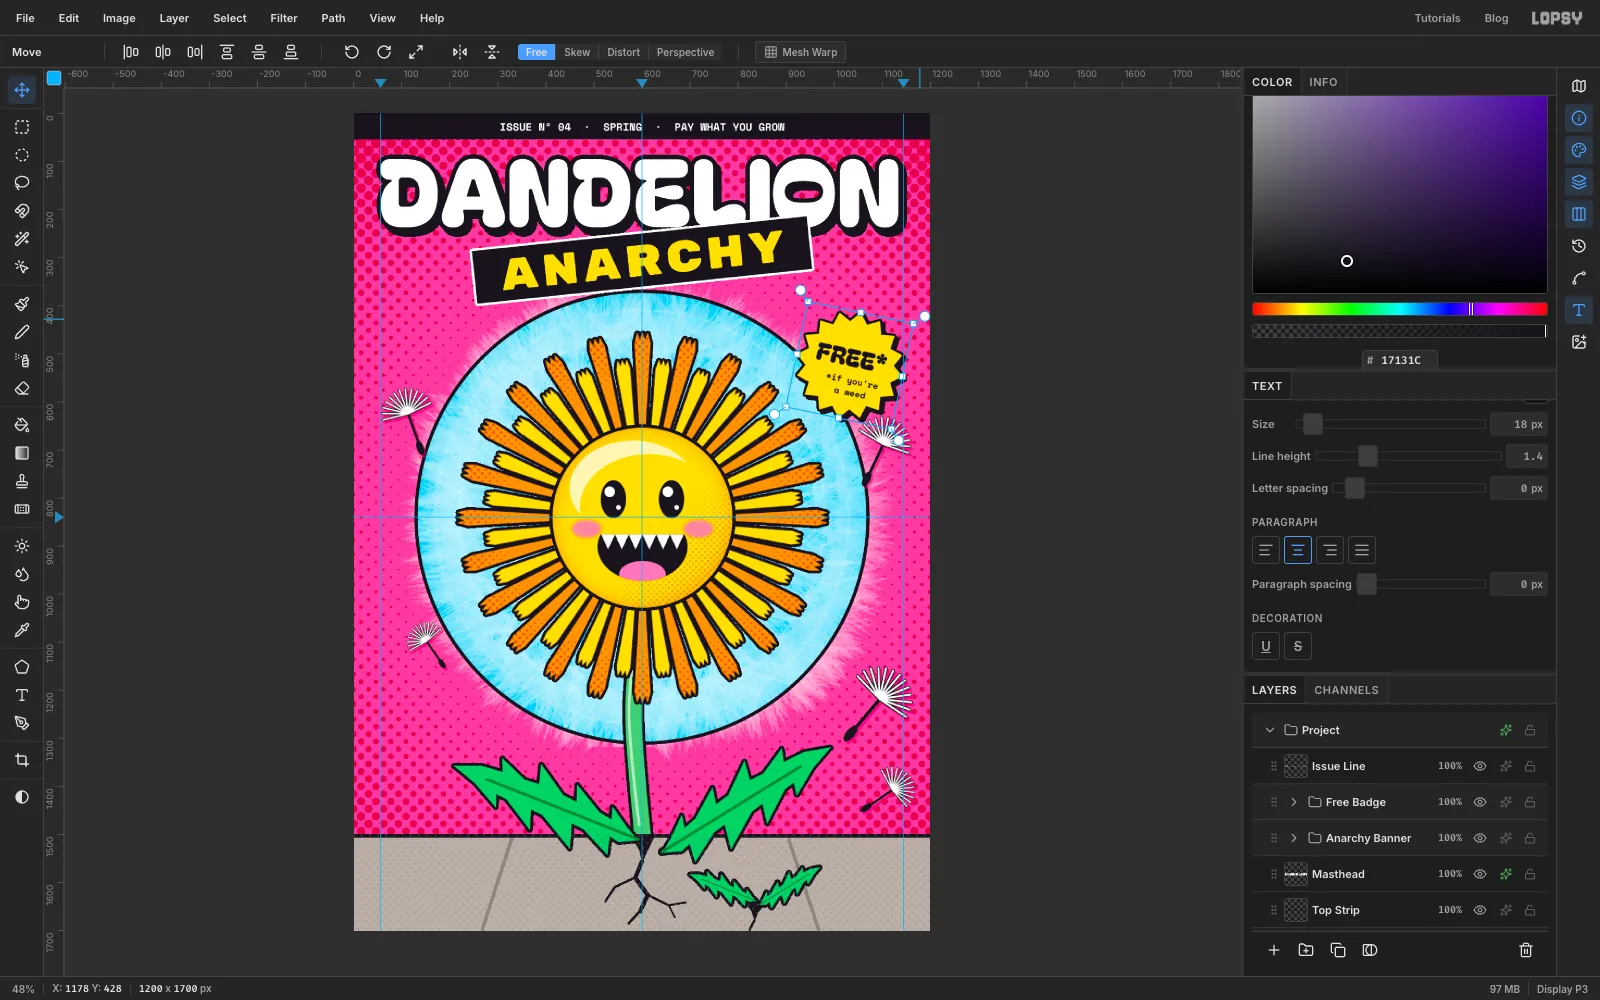
50in ink, typeFREE*, press Tab and rename the layer Free. The letter spacing from ANARCHY carries over to new text, so set Letter spacing back to0in the Text panel. Centre the word just above the middle of the star, at about1032, 506. Click Starburst, switch to Space Mono Bold at18and type*if you're, press Enter, typea weed, press Tab and name the layer Fine Print. In the Text panel click Align center so the two lines centre on each other, then centre the block at about1044, 566. That's 12 px right of the star's centre on purpose: when the badge tilts clockwise in a moment, text below the centre swings to the left, and this offset brings it back to the middle.Collapse Free Badge, click it and rotate the whole group about 12° clockwise with the rotation handle. Press Cmd+D.
-
Add the top cover line
Click Free Badge and add a layer named Cover Lines. In the Text panel click Align left again, since the last text was centred and the setting carries over to new text.
With Rubik Mono One at
27in white, typePULL, press Enter and typeNOTHING., press Tab and rename the layer Pull Nothing. Move it so its left edge sits on the56guide and its top at about440. Give it an ink Drop Shadow, offsets4and4, Blur0.Click Cover Lines and type
A FIELD GUIDE · p.08in Space Mono Bold22in ink (rename it Field Guide), 14 px in from the guide and about 30 px under NOTHING. Then click Cover Lines again, select a rectangle 14 px wider than the text on each side and 9 px taller above and below, and fill it with dandelion yellow. The strip makes the small line readable against the dots and the fluff.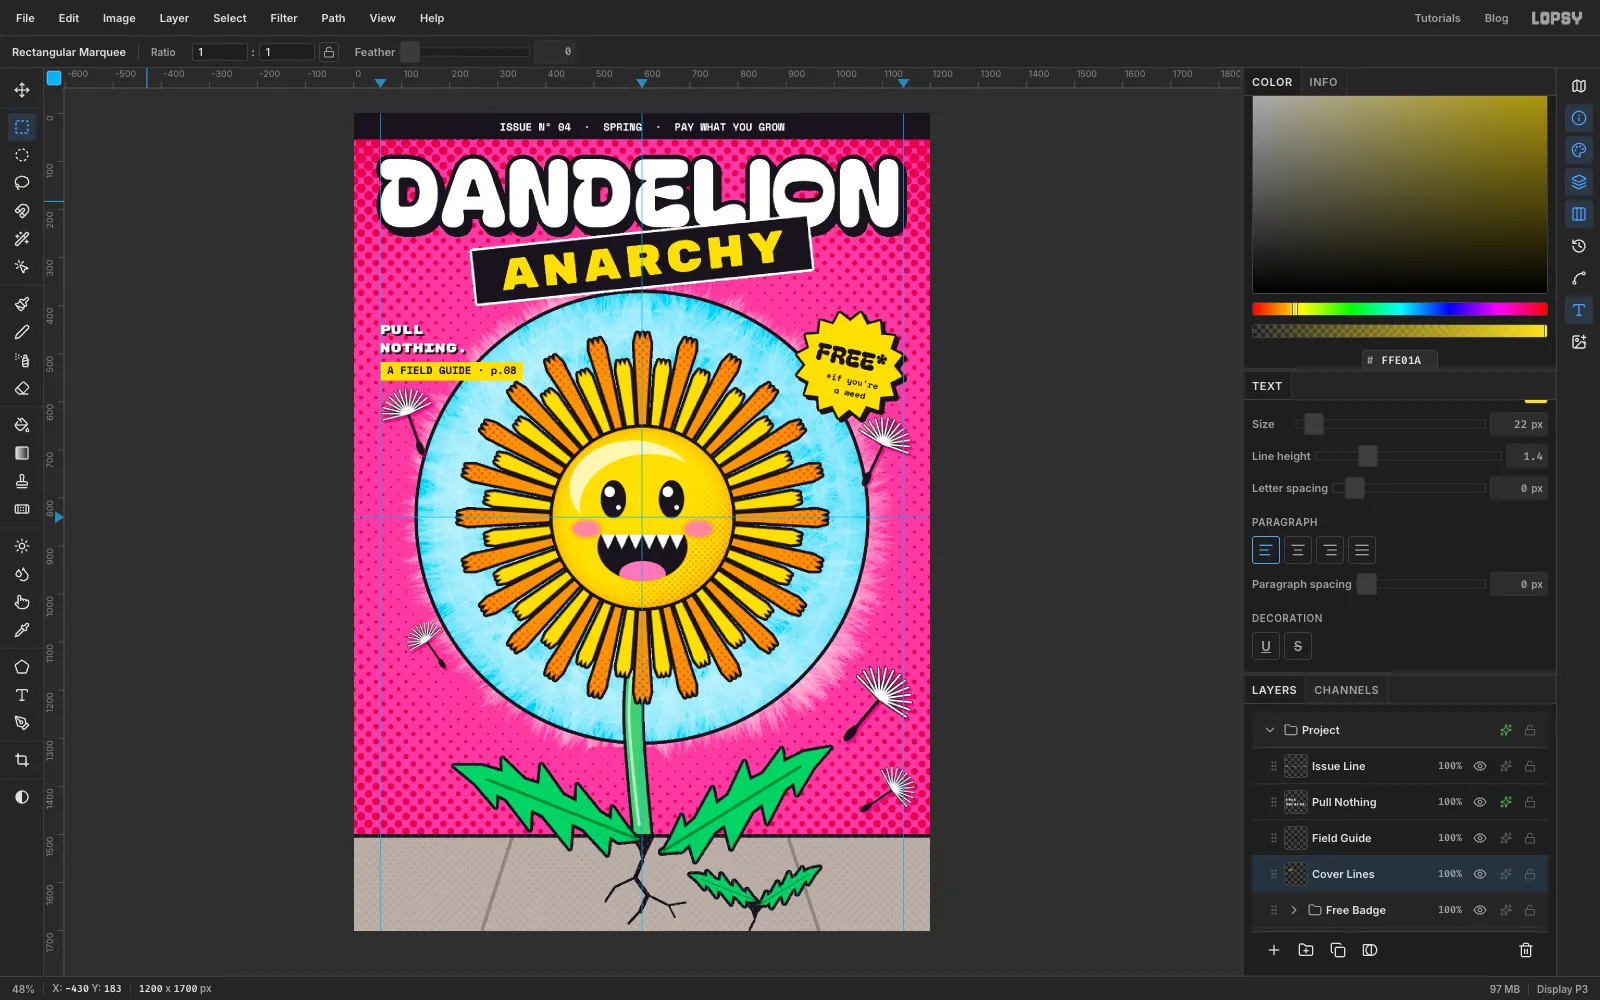
-
Recolour one line of a cover line
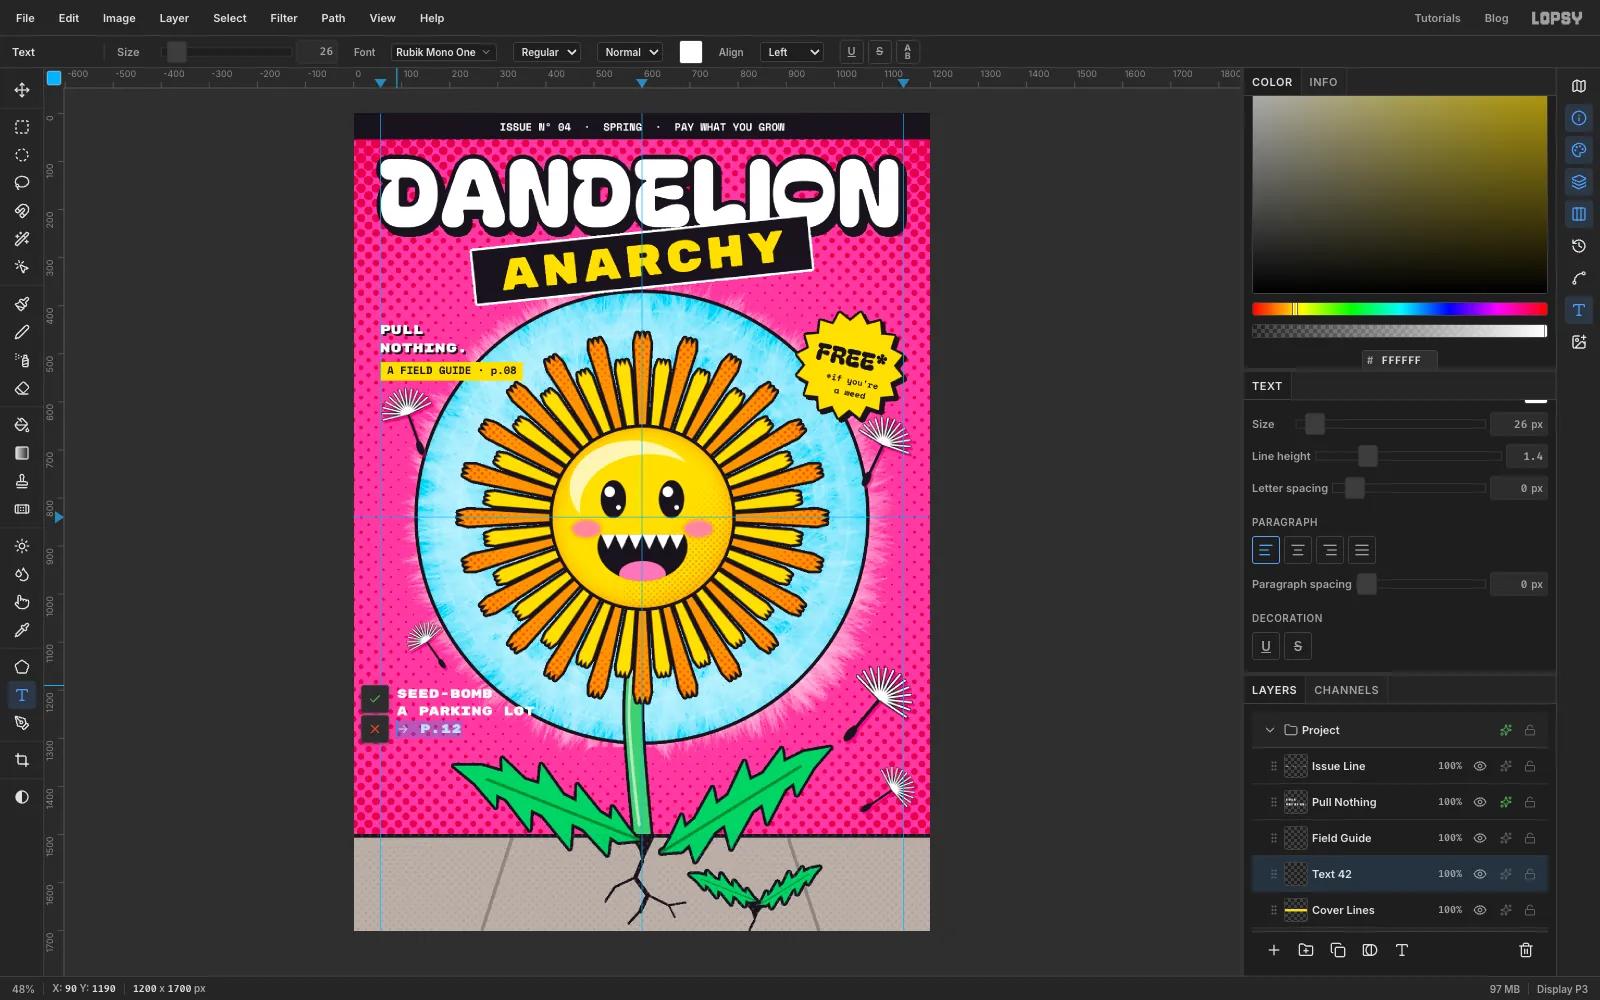
Click Cover Lines. With Rubik Mono One at
26in white, click near90, 1190and typeSEED-BOMB, Enter,A PARKING LOT, Enter and→ p.12. Rubik Mono One has no lowercase, so the page number comes out in capitals.While you're still typing, press Shift+Home to select the last line. Click the Text color swatch in the options bar, enter dandelion yellow and click the swatch again to close it. Only the selected line changes colour. Press Tab to commit and rename the layer Seed Bomb.
-
Put the label behind it
Move the text so it starts 24 px inside the margin, at
80, with its top at about1192. Click Cover Lines, select a rectangle that reaches 24 px beyond the text on every side, fill it with ink and deselect. The label sits on the56guide and clears the nearest floret tip by about 50 px.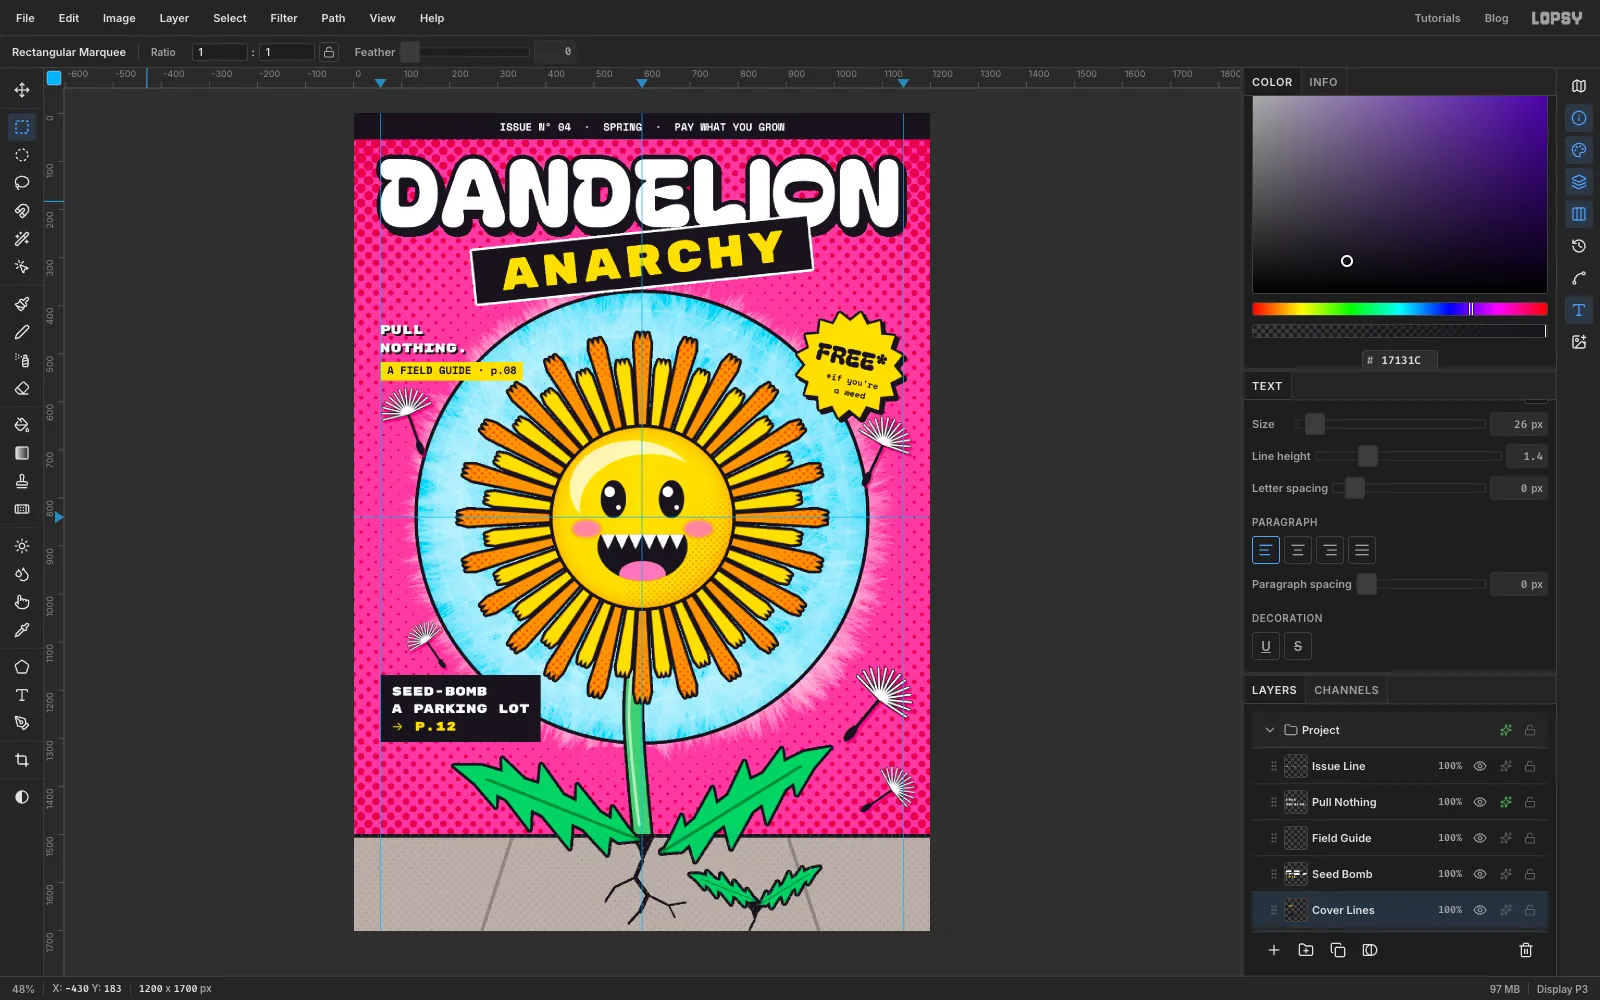
-
Set the slogan and draw a barcode box
Click Pavement Dots. With Rubik Mono One at
50in white, typeLAWNS ARE, Enter,A LIE., commit with Tab and rename the layer Lawns. Move it onto the left guide with its bottom about 50 px above the bottom edge. Add an ink Stroke, Width4, Outside, and an ink Drop Shadow with offsets5and Blur0.Add a layer named Barcode and choose View → Show Grid. Drag a rectangular marquee from about
985, 1523to1144, 1650. With the grid on, the edges snap to the 16 px lattice, giving a box from984, 1522to1144, 1650whose right edge sits on the margin. Hide the grid again, fill the box with white and give it an ink Stroke with Width3.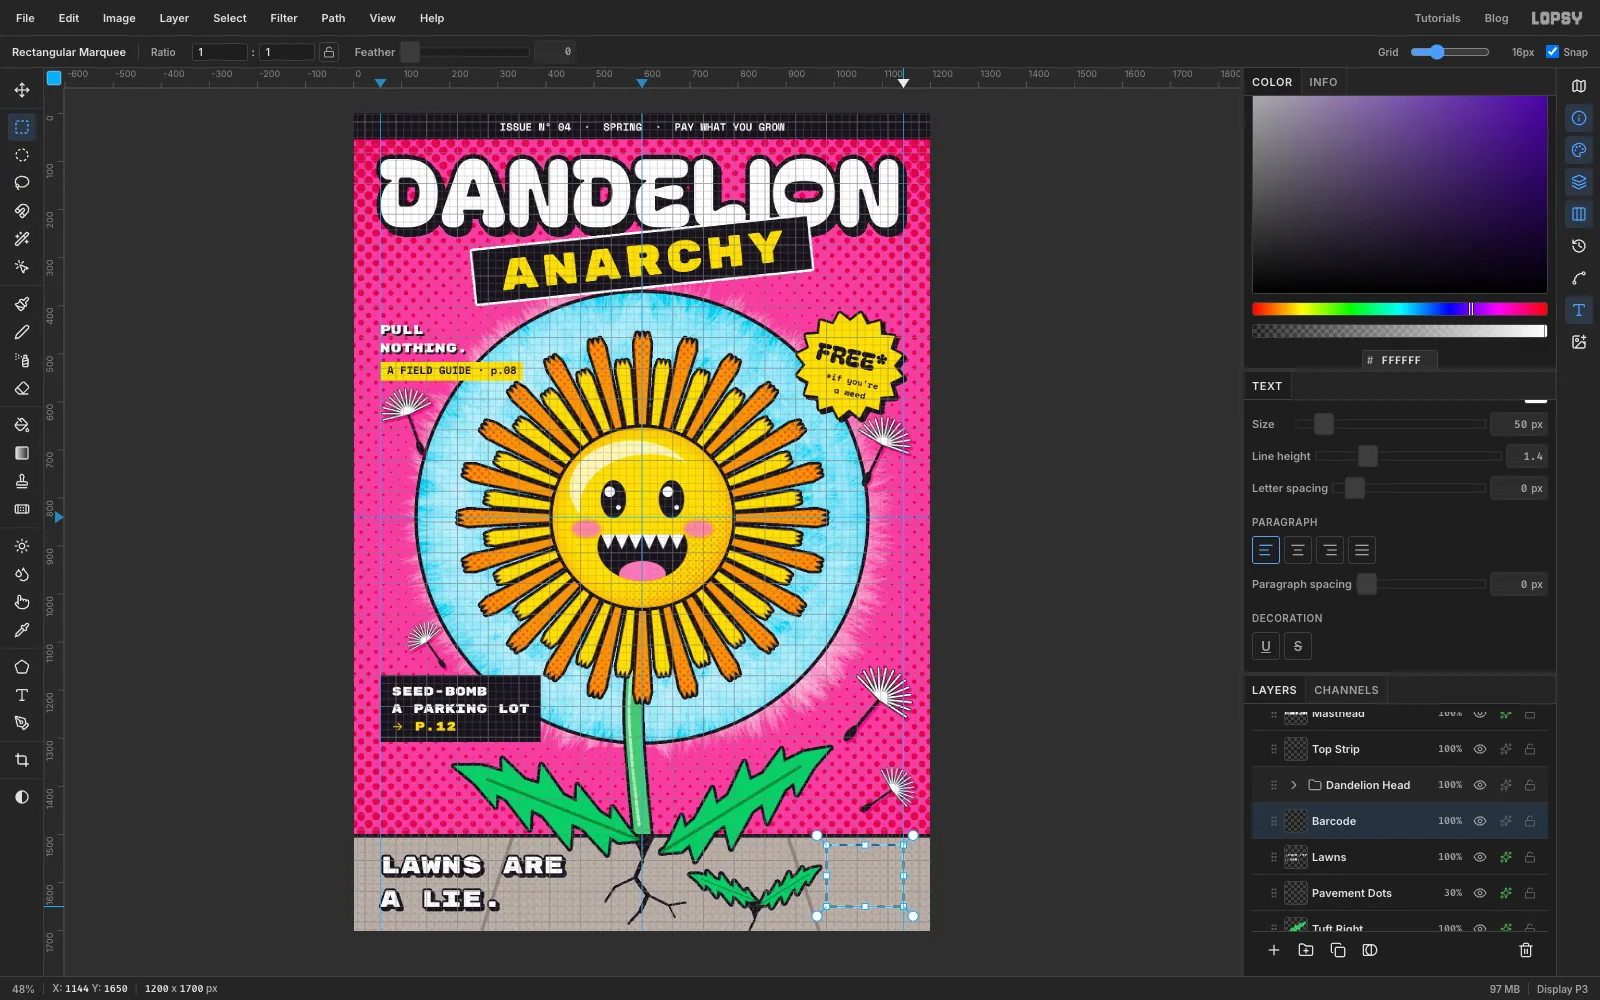
-
Draw the bars
Pick the Pencil in ink. Starting at
x 994, click aty 1536and Shift-click aty 1604to draw a bar. Move right 3–5 px and draw the next one, changing the pencil size between2,4and6as you go, until the bars reach about1134.With Space Mono Bold at
13in ink, type0 31415 92653 4, name the layer Barcode Digits and centre it under the bars at1064, 1627.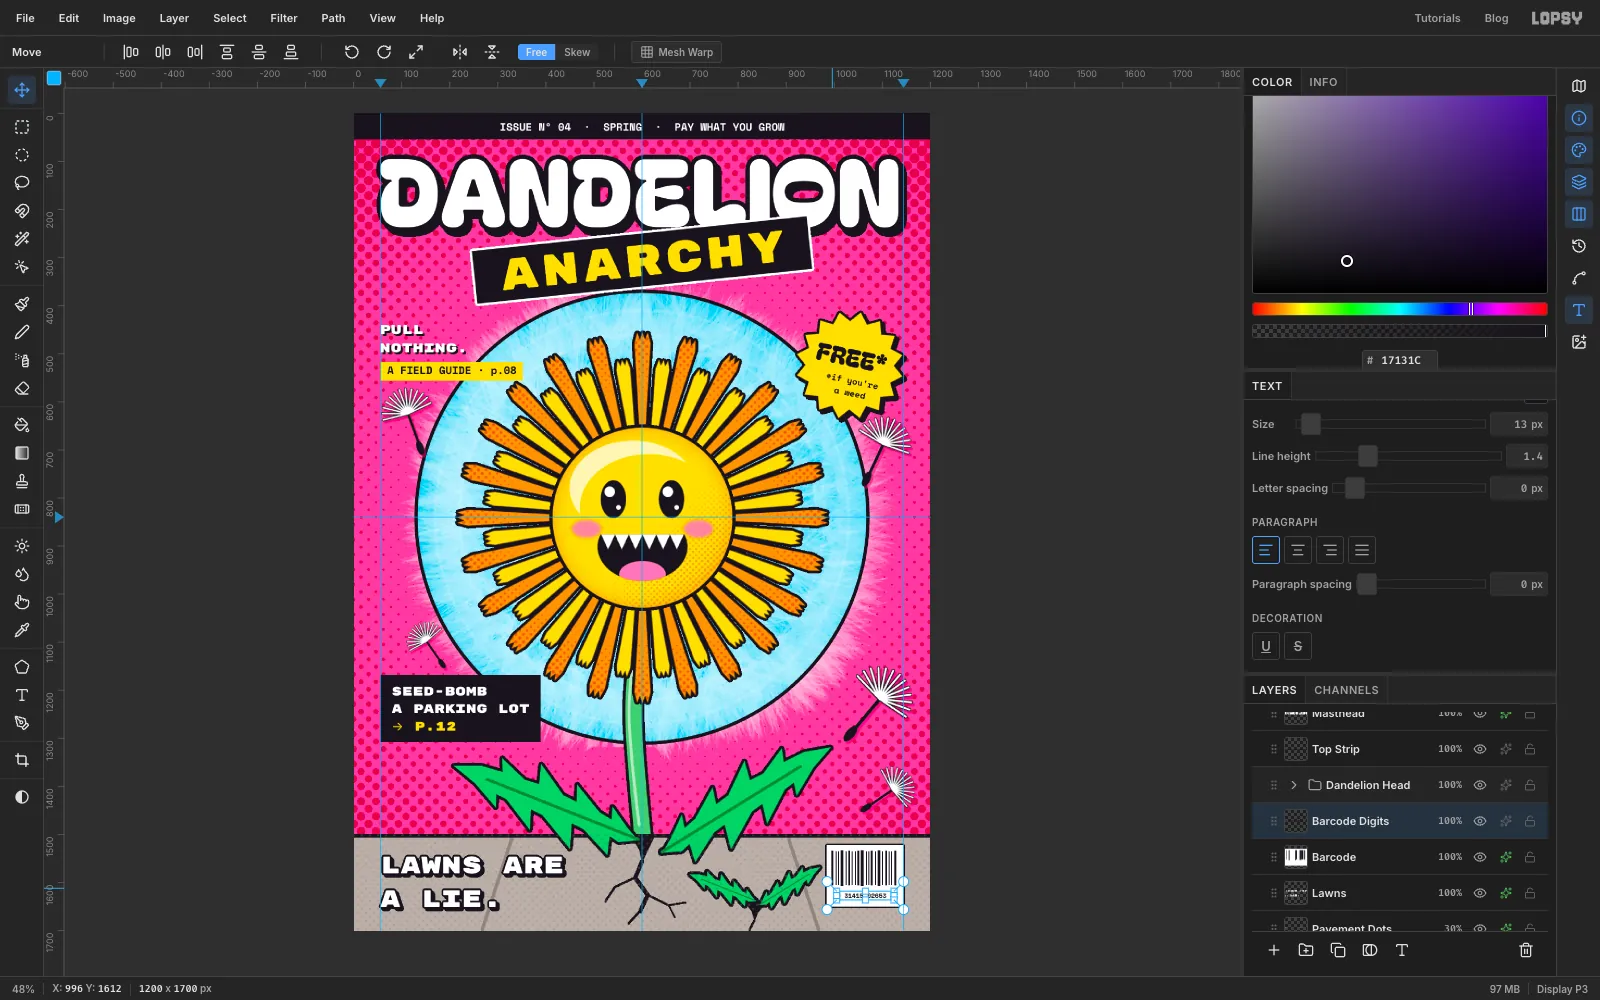
-
Add print grain and export
Click the collapsed Free Badge group and add a layer named Print Grain. Fill it with grey and apply Filter → Add Noise… with Amount
28, Mono and Gaussian. Set its Blend to Overlay and its opacity to 30%. Mid grey vanishes in Overlay, so only the speckle is left, like ink on uncoated zine paper. The cover lines sit above the grain, so the small type stays crisp.Hide the guides with View → Show Guides, export with File → Quick Export PNG, and save the project with File → Save Project for issue 05.