Design an Op-Art Book Cover with a Mirror Vortex
Make a 1960s op-art book cover in Lopsy, with a vortex of turning squares, a Difference ring, a photo silhouette and a cobalt mirror reflection.
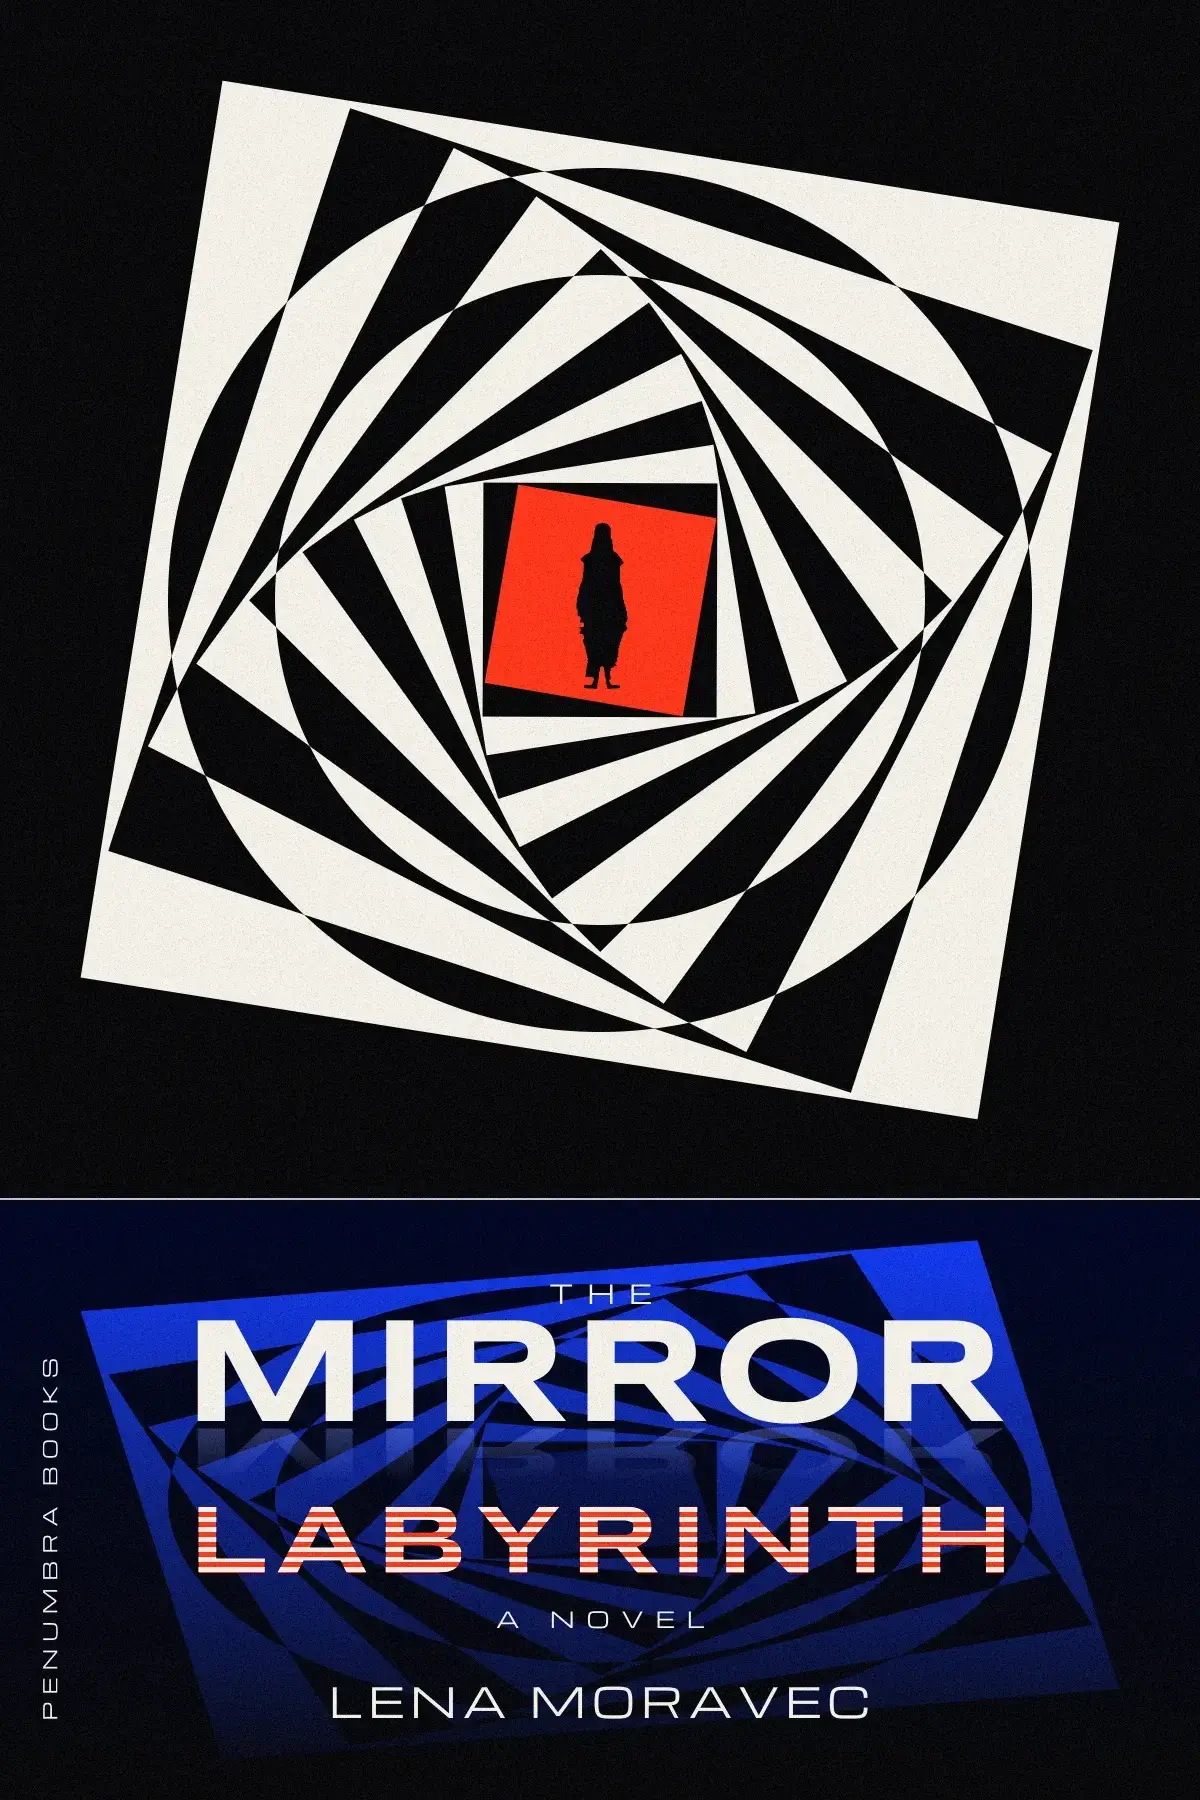
In the 1960s, op art went from the gallery onto paperback covers. Bridget Riley's black-and-white paintings and Victor Vasarely's warped grids seemed to move while you looked at them. Publishers wanted that effect on the shelf, so covers filled up with stripes, checks and spirals.
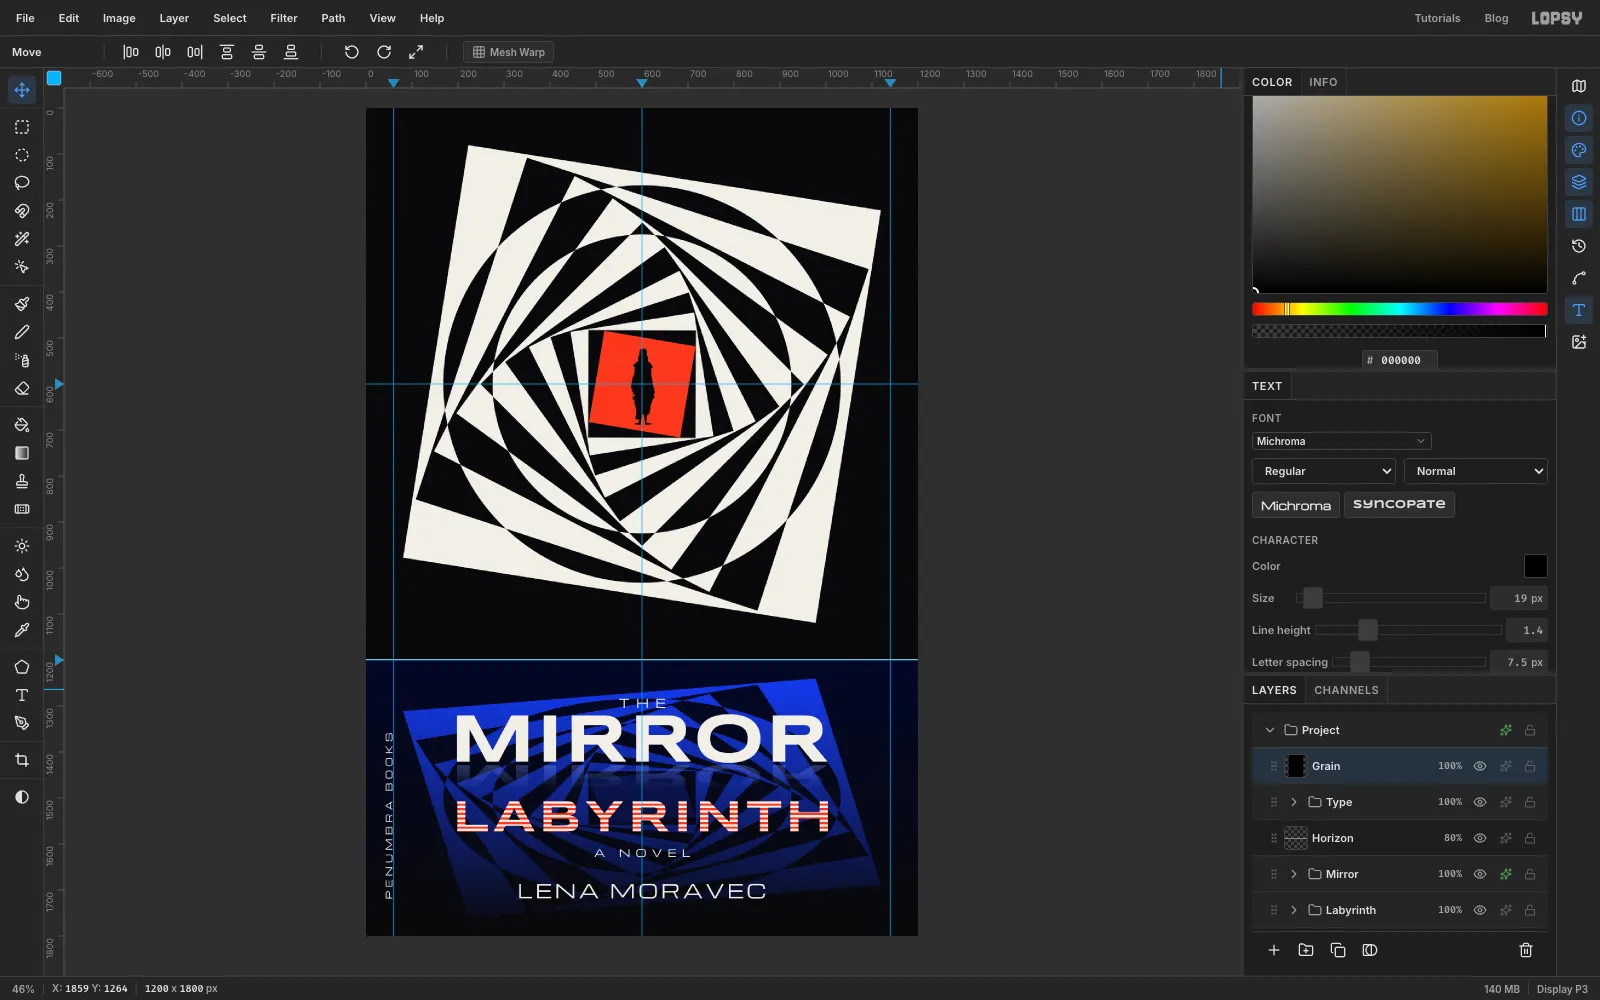
In this tutorial you'll make that kind of cover for The Mirror Labyrinth, a made-up novel by a made-up author, Lena Moravec. The book is about a woman lost in a corridor that keeps folding back on itself. The cover is 1200 × 1800 px. The top two-thirds is a vortex of turning squares with a tiny figure at its heart. The bottom third is a mirror floor that reflects the vortex and holds the title. The figure has no reflection, which is the cover's quiet joke.
The vortex is built from one simple move, repeated: draw a smaller square, turn it a little further than the last one, and alternate black and white. The optical buzz comes from the repetition, not from any single step.
The tools you'll use:
- guides and the Rectangular and Elliptical Marquee's exact-corner dialog
- the Move tool's rotation and scale handles, and Flip Vertical
- Merge Down, groups, and the Difference blend mode
- a dropped photo, Threshold, the Magic Wand, and a Lasso intersect
- Select → Grow and Shrink, the Eraser and Gaussian Blur
- Edit → Copy Merged, a group Gradient Map, and layer masks filled with a gradient
- the Pencil, Define Pattern and Fill with Pattern, and Add Noise
- live text in Syncopate Bold and Michroma, and a Color Overlay effect
The palette:
-
Ink
-
paper
-
Vermilion
-
Ring fill
for the Difference ring
-
Mirror floor
-
Echo tint
-
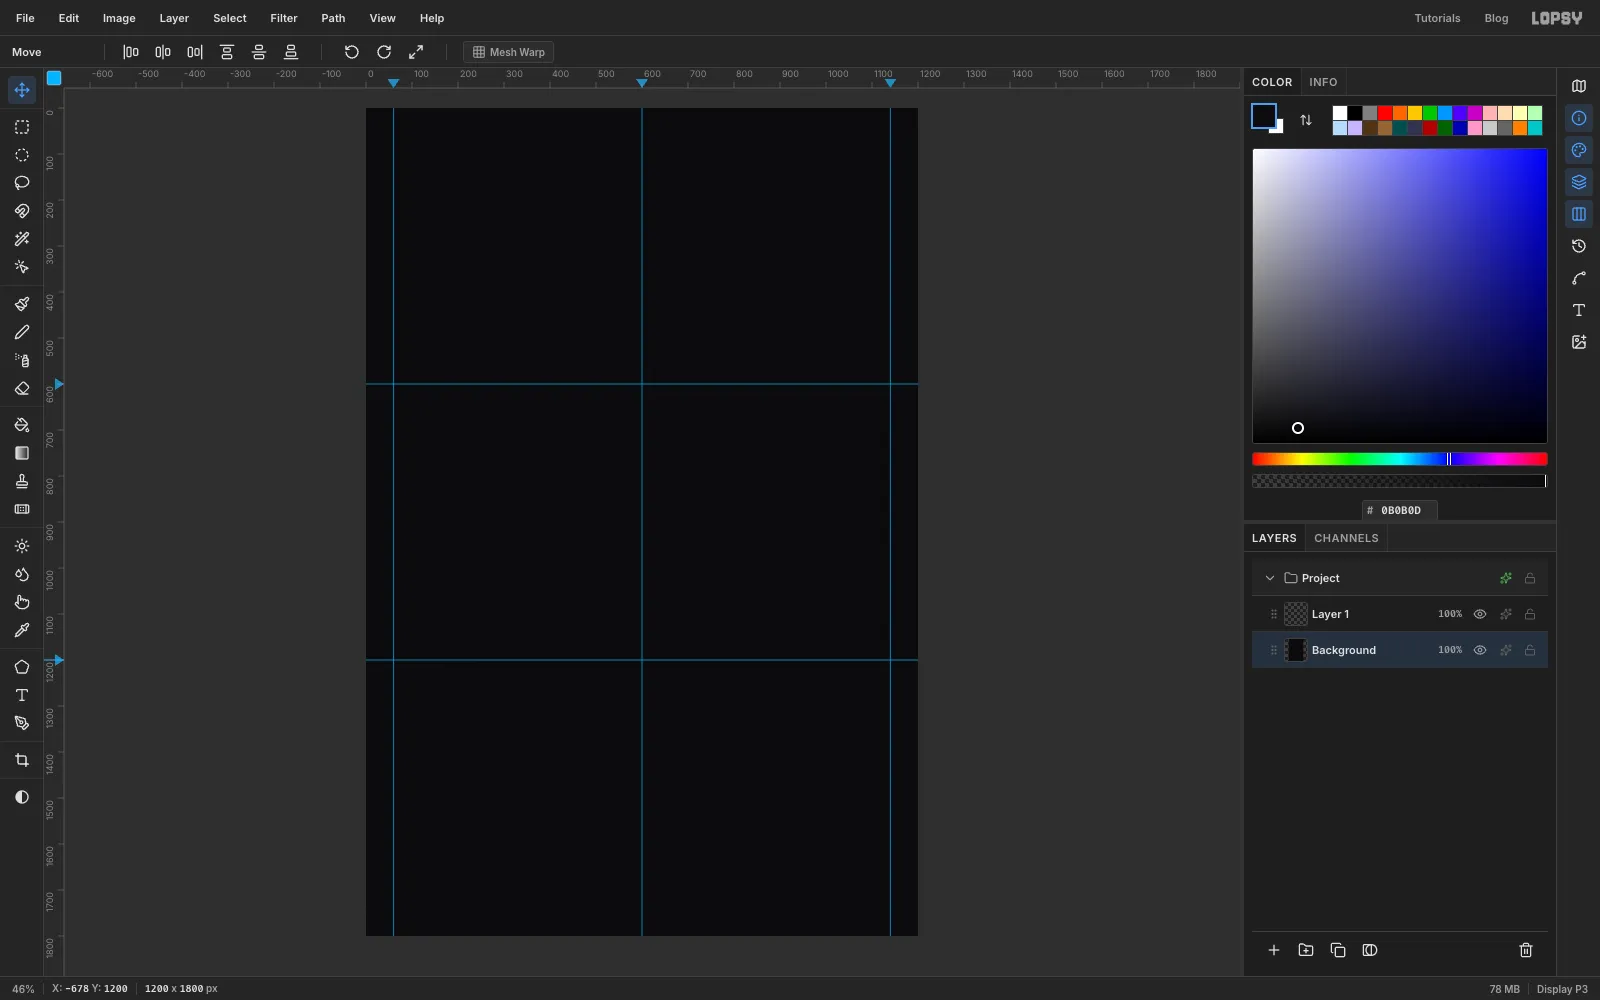
Set up a black page and guides
Choose File → New, keep the units on Pixels, and make the document 1200 wide and 1800 high.
Click Background in the Layers panel, set the foreground colour to and choose Edit → Fill. Op-art covers are hard black and white, so start from black.
Click the top ruler at 60, 600 and 1140 to drop three vertical guides. The outer two mark the side margins, and the middle one is the centre line for the type. Then click the left ruler at 600 and 1200. The guides cross at (600, 600), which will be the centre of the vortex. The line at 1200 is where the mirror starts.
A new document also comes with an empty Layer 1 at the top. Leave it there: it becomes the grain layer at the very end.
-
Draw the first square and turn it
Click New Group at the bottom of the Layers panel and name the group Labyrinth. Click Add Layer and name the new layer Vortex. Every square will be merged into it.
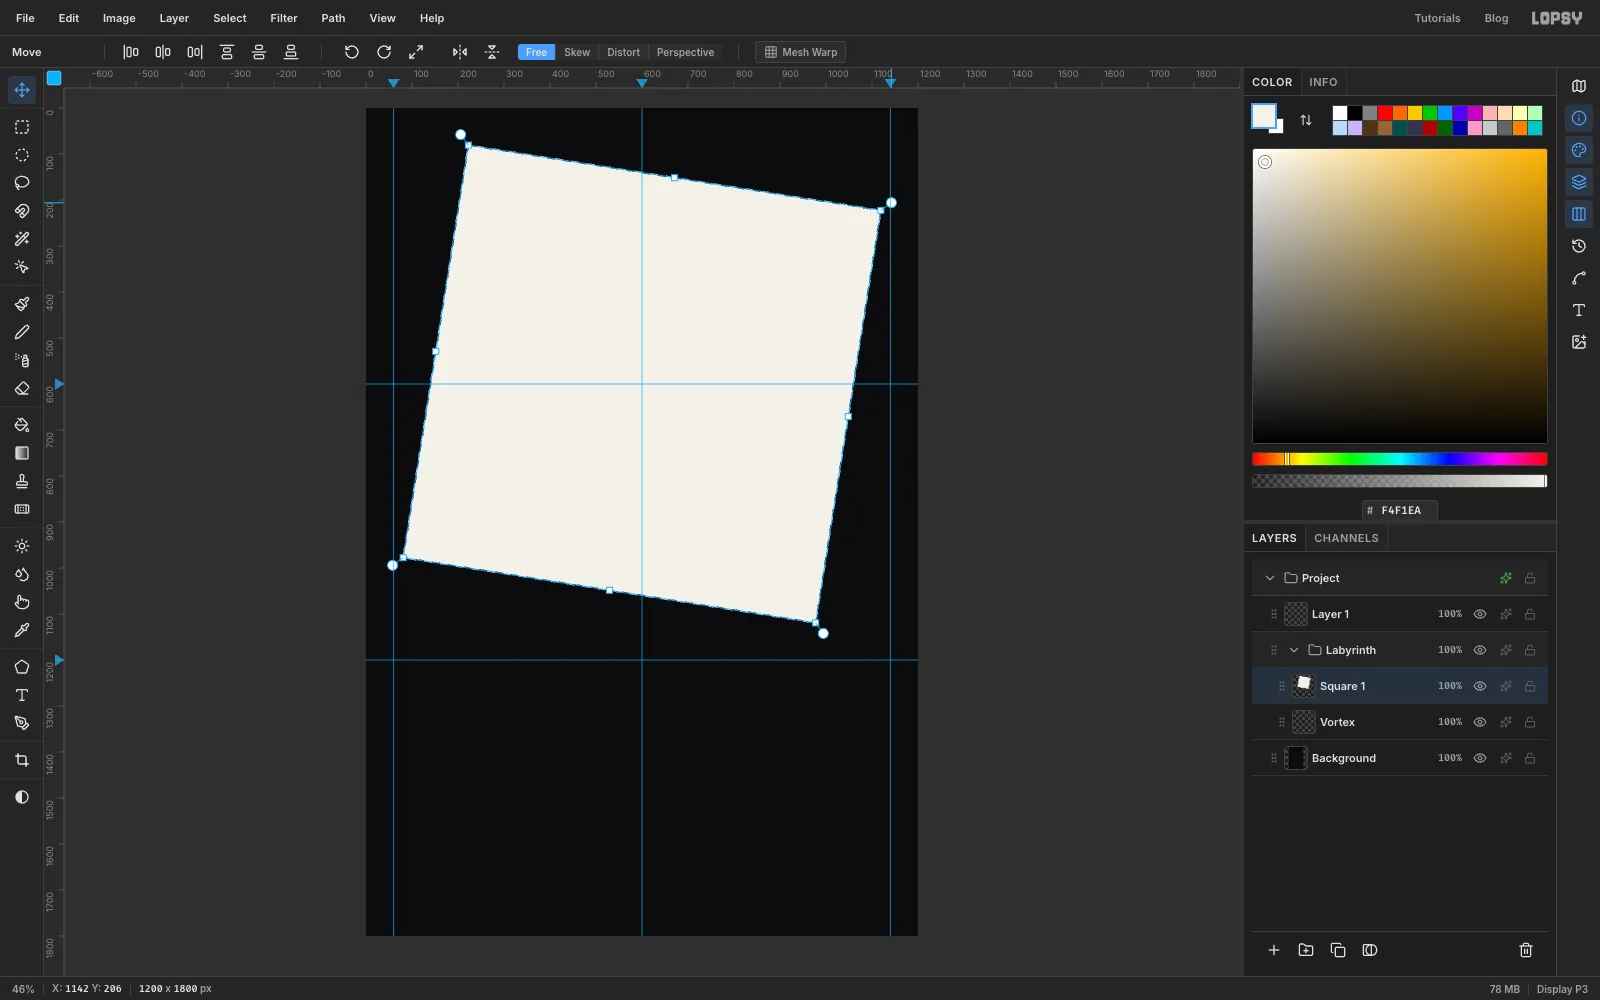
Click Add Layer again for the first square (call it Square 1 if you like; the name disappears when you merge). Pick the Rectangular Marquee (M) and click once on the canvas without dragging. A dialog asks for the corners. Type From 146, 146 and To 1054, 1054, which gives a 908 px square centred on the guides' crossing. Set the foreground to paper and choose Edit → Fill.
Switch to the Move tool (V). Grab the round rotation handle just outside the top-right corner and drag it clockwise by about 9°. Lopsy has no angle readout, so use the pointer position in the status bar instead: stop when the square's top-right corner sits at about x 1120, y 220. The top edge should slope gently down to the right, as in the screenshot. It doesn't need to be exact. The effect only needs each square to turn a little further than the one before. Press Enter to commit, then Cmd+D to deselect.
Choose Layer → Merge Down to fold the square into Vortex.
-
Stack the next square inside it
Repeat the same moves for the second square, in ink this time:
- Add Layer.
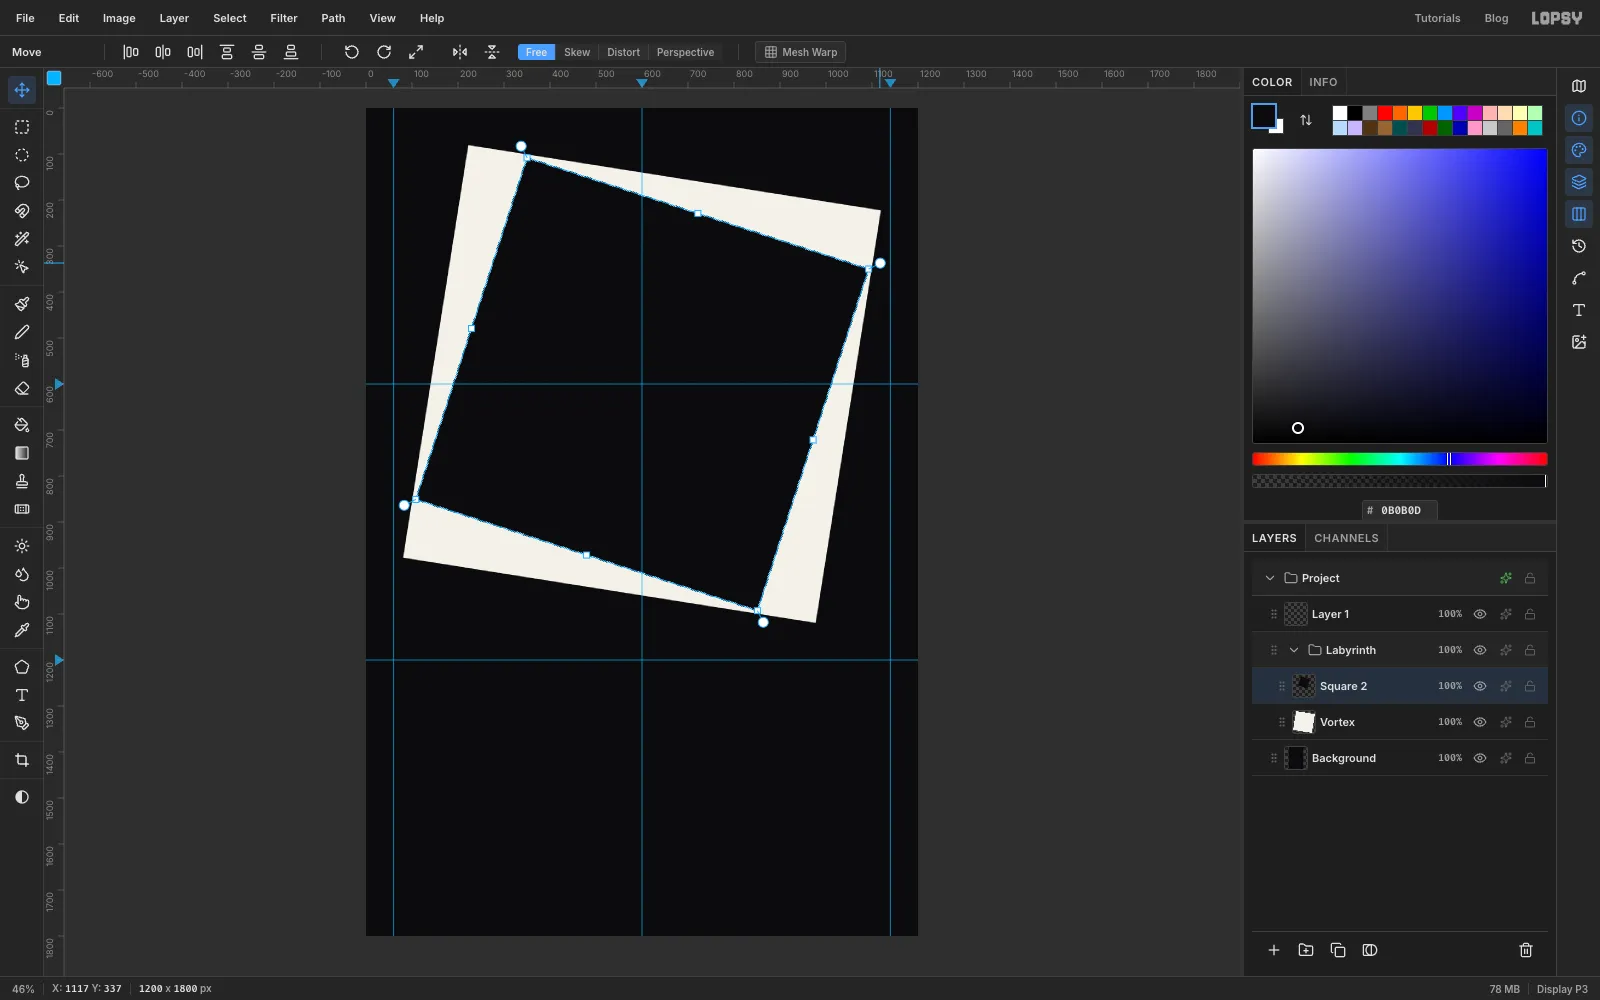
- Rectangular Marquee, click once, From 210, 210 To 991, 991.
- Foreground , Edit → Fill.
- Move tool, drag the rotation handle clockwise about 18°, twice as far as the first. Each corner of the new square should land just inside an edge of the square before it.
- Enter, Cmd+D, Layer → Merge Down.
The white shows only as four thin triangles around the black square. That sliver is what makes the pattern spin. If a corner of the new square pokes outside the one before, turn it back a degree or two.
-
Keep going to ten squares
Keep stacking. Each square is about 14% smaller than the last, turns another 9°, and swaps colour. Past 45° it's easier to turn the other way, because a square looks the same after a quarter turn: 54° clockwise looks exactly like 36° anticlockwise. Here are the marquee corners, the turn and the colour for squares three to ten:
- 3: 264 → 936, 27° clockwise, paper
- 4: 311 → 889, 36° clockwise, ink
- 5: 352 → 849, 45° clockwise (hold Cmd and it snaps there), paper
- 6: 387 → 814, 36° anticlockwise, ink
- 7: 417 → 784, 27° anticlockwise, paper
- 8: 442 → 758, 18° anticlockwise, ink
- 9: 464 → 736, 9° anticlockwise, paper
- 10: 483 → 717, no turn at all, ink
Use the same number for X and Y in both boxes of the dialog. By the tenth square the spiral has come a full quarter turn, so it sits square to the page again. The dialog only opens when nothing is selected, which is why each round ends with Cmd+D.
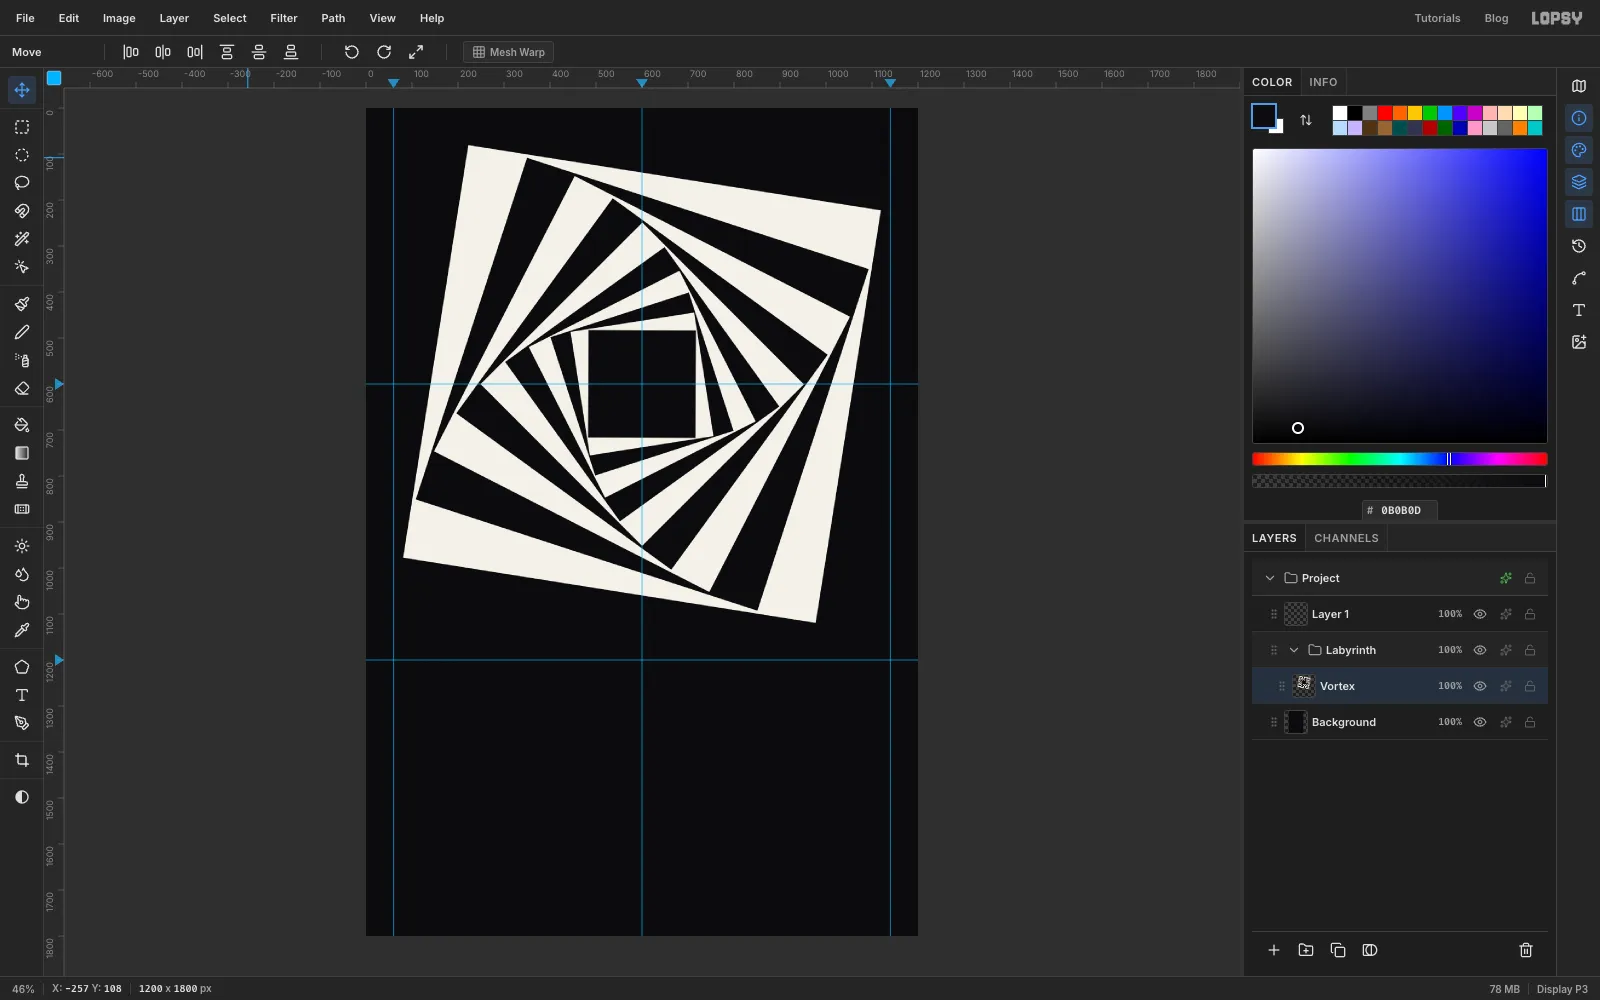
-
Finish with a vermilion core
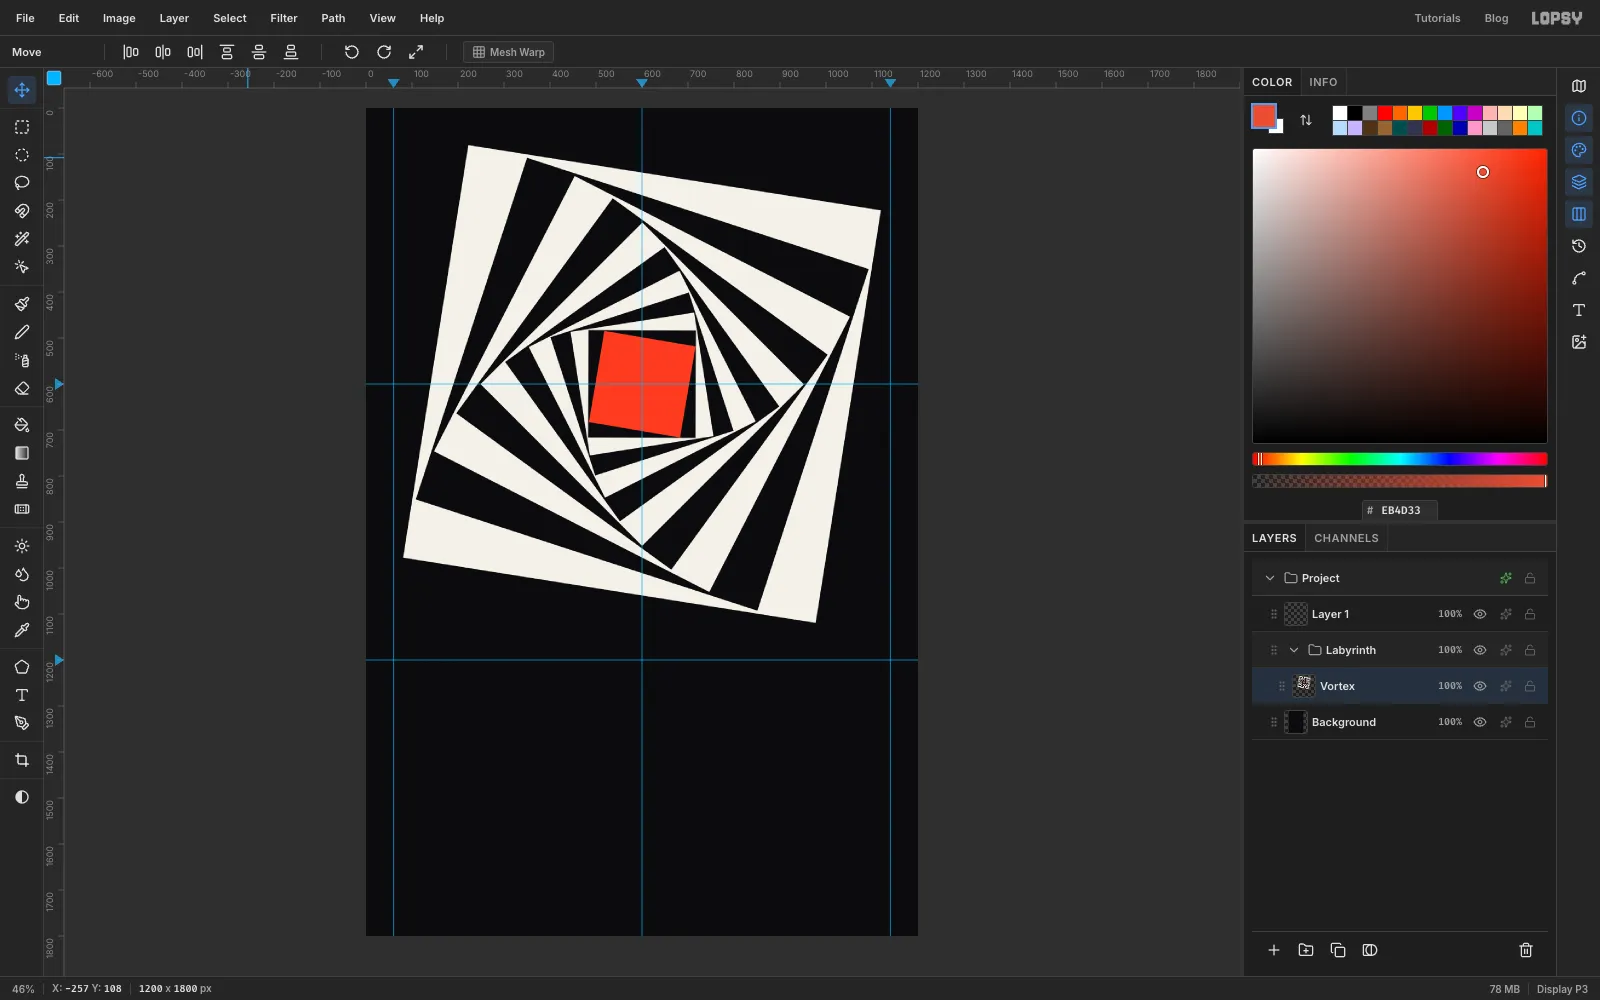
The last square is the light at the end of the corridor. Add a layer, make the square From 500, 500 To 701, 701, fill it with vermilion , turn it just 9° clockwise, the same as the first square, and merge it down.
Look at the whole vortex. Its outer corners clear the page edges and the mirror guide by about 80 px. That gap matters: a corner that almost touches an edge reads as a mistake, so the vortex should float clearly.
-
Drop in a photo for the figure
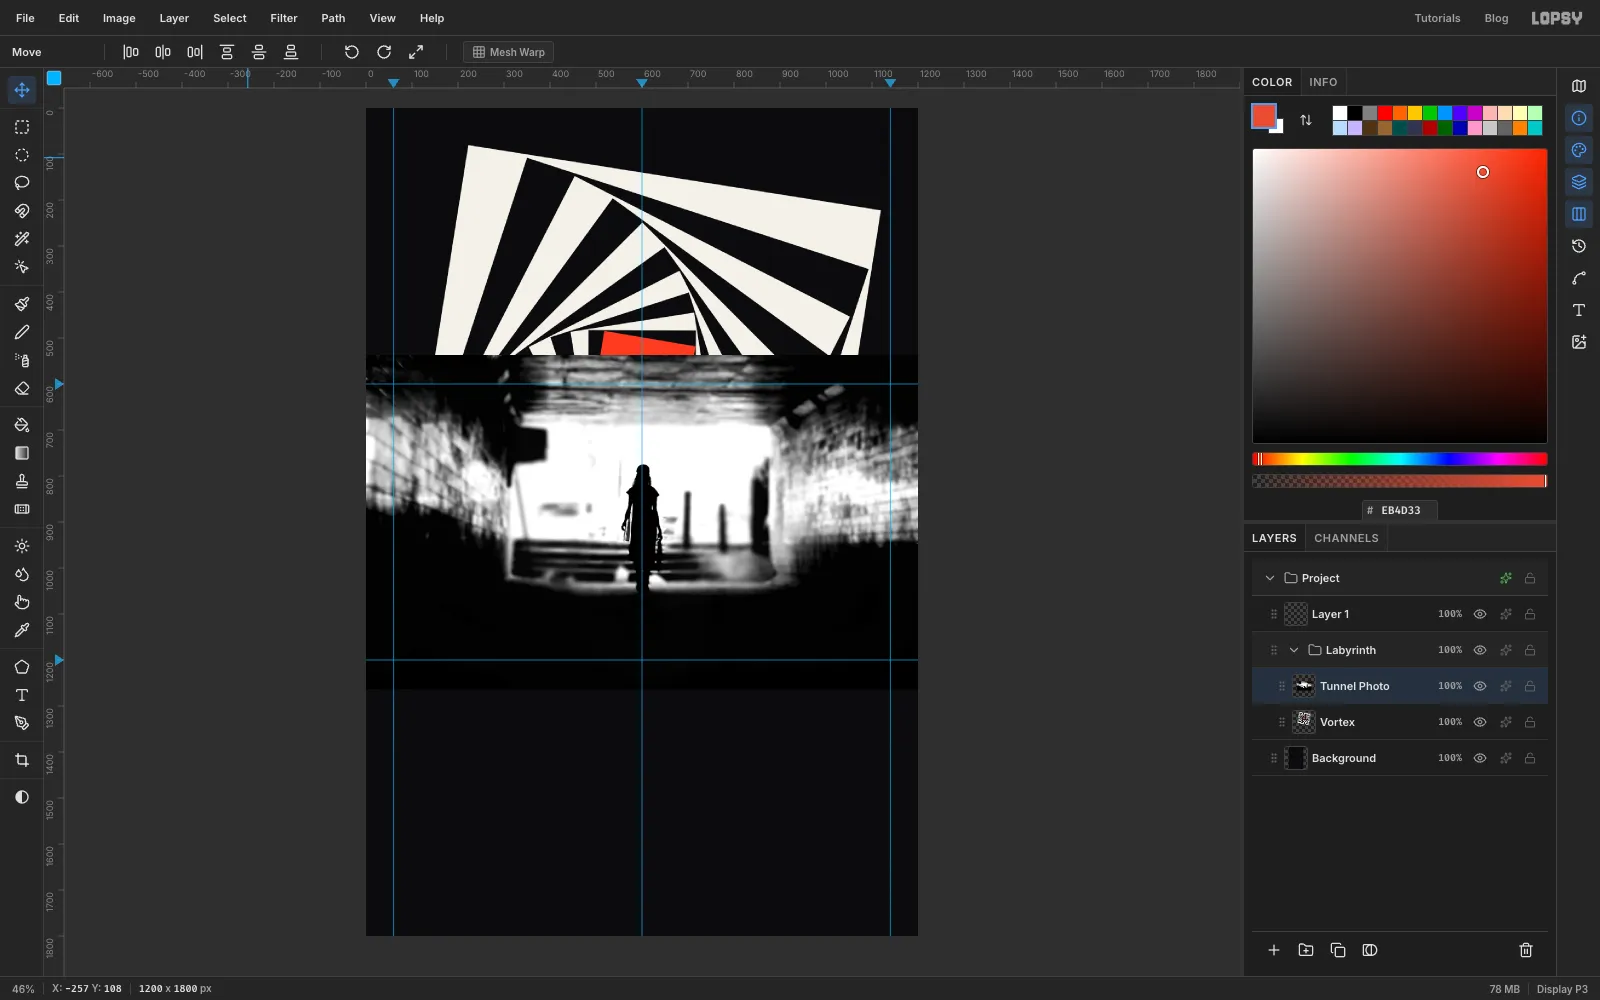
The figure comes from a real photo, so her proportions and gait feel right. This one is Woman in Dadar tunnel.jpg) by Himanshu Singh Gurjar, from Unsplash via Wikimedia Commons, released under CC0. Download a copy at least 1600 px wide. Lopsy only shrinks a dropped image to fit when it's bigger than the page. A backlit figure in a tunnel is already a silhouette, which makes the cut-out easy.
Click Vortex, then drag the photo file from your desktop onto the canvas. Lopsy scales it to the page width and places it in the middle on a new layer. Rename it Tunnel Photo and press Cmd+D.
-
Turn the photo into a silhouette
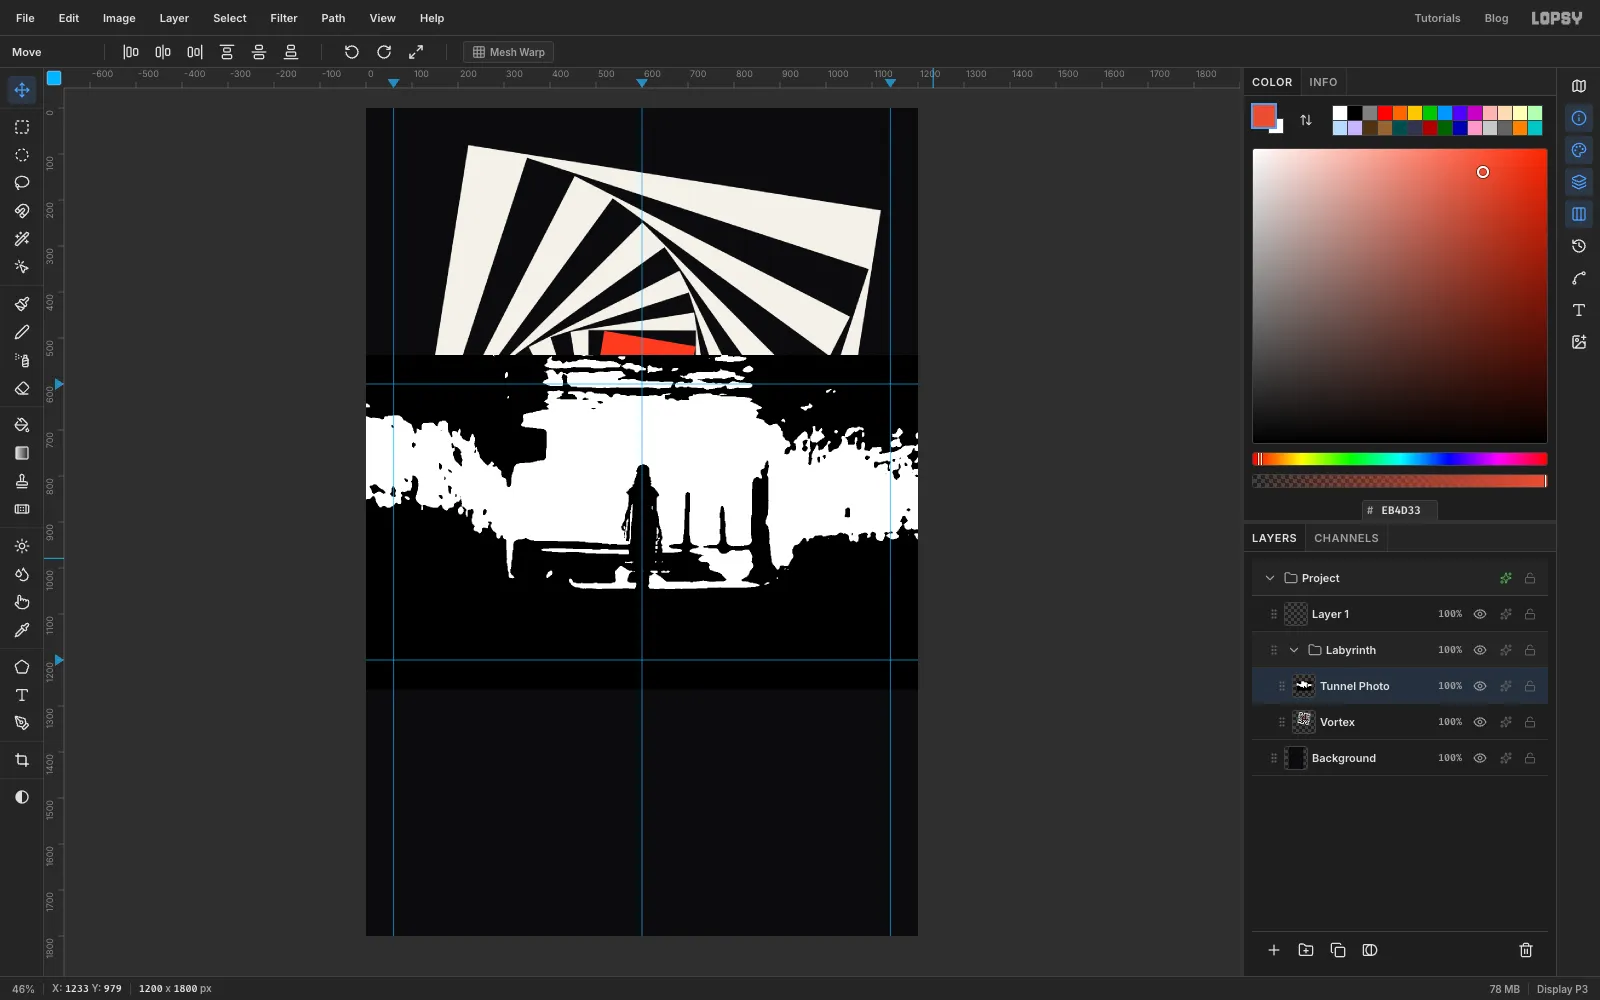
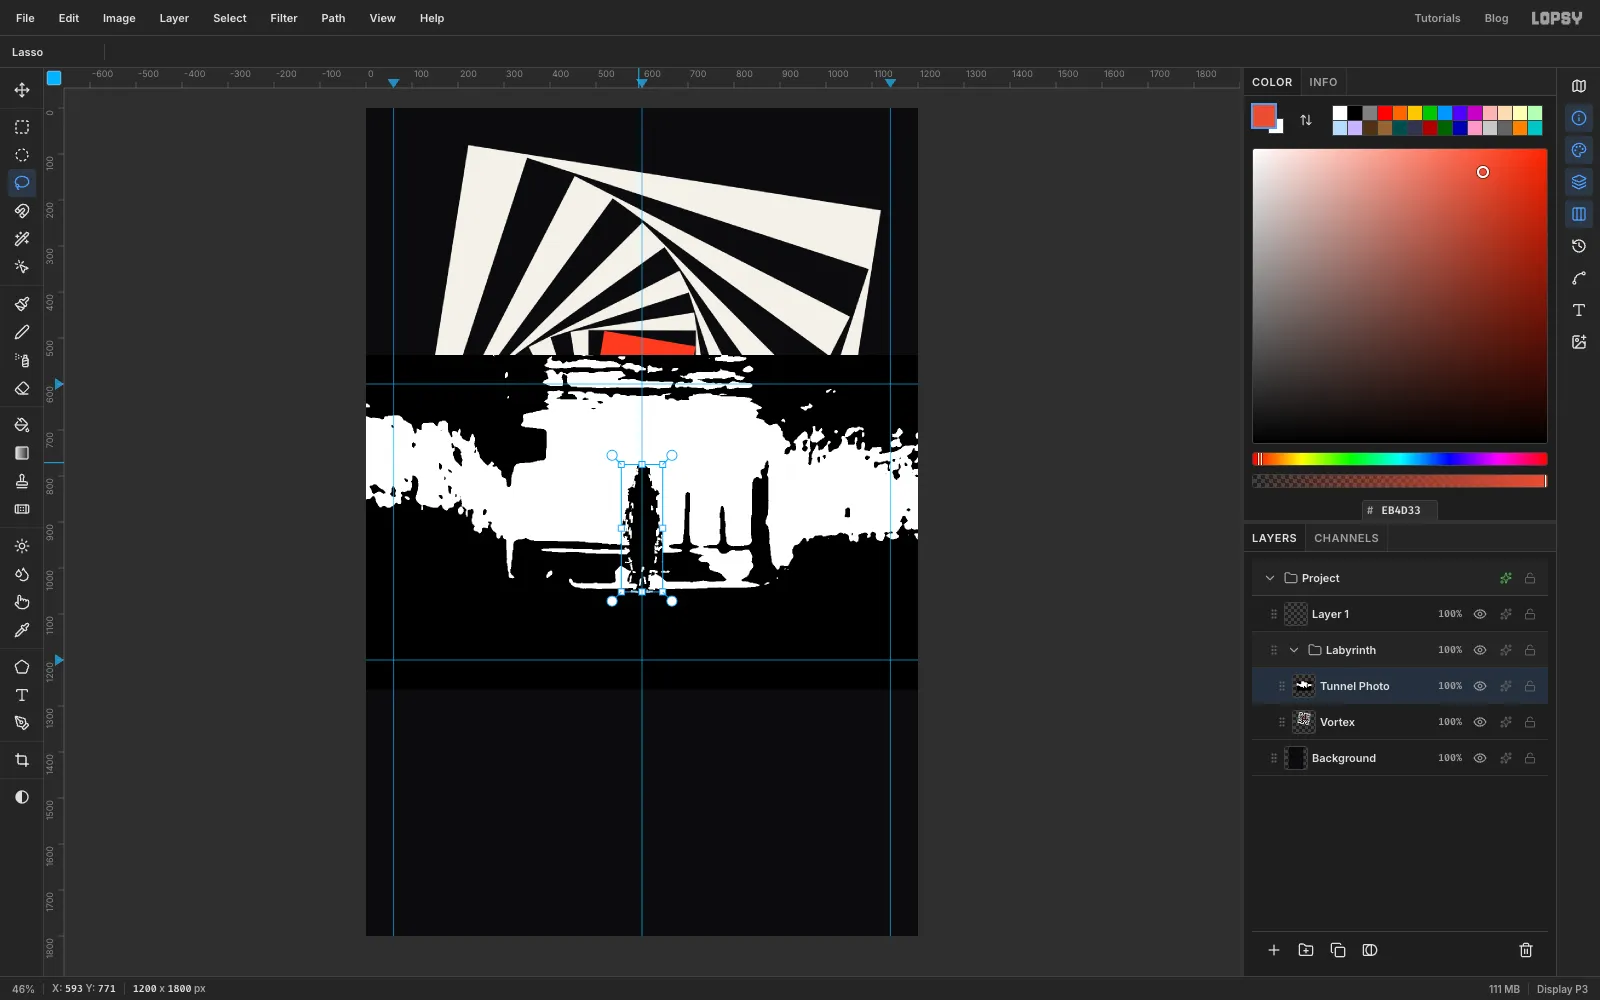
Choose Filter → Threshold… and set Level to 110. Every pixel becomes pure black or pure white. The woman is now a solid black shape against the white tunnel mouth. Her legs still run into the dark floor, which you'll fix with the next selection.
-
Select her with the Magic Wand and a Lasso
Pick the Magic Wand (W). Set Tolerance to 20 and make sure Contiguous is ticked, then click her torso. The selection grabs her and everything dark that touches her, including the floor.
Now trim it. Pick the Lasso (L), hold Shift+Alt and draw around her. Hold Shift+Alt all the way through: that combination intersects the new shape with the wand's selection. Go loosely around her head, shoulders and arms, where the white background already cuts her out. Then go tightly down the outside of each leg, and back up into a narrow V between the legs to separate them. Only the part inside both selections survives.
-
Cut her onto her own layer
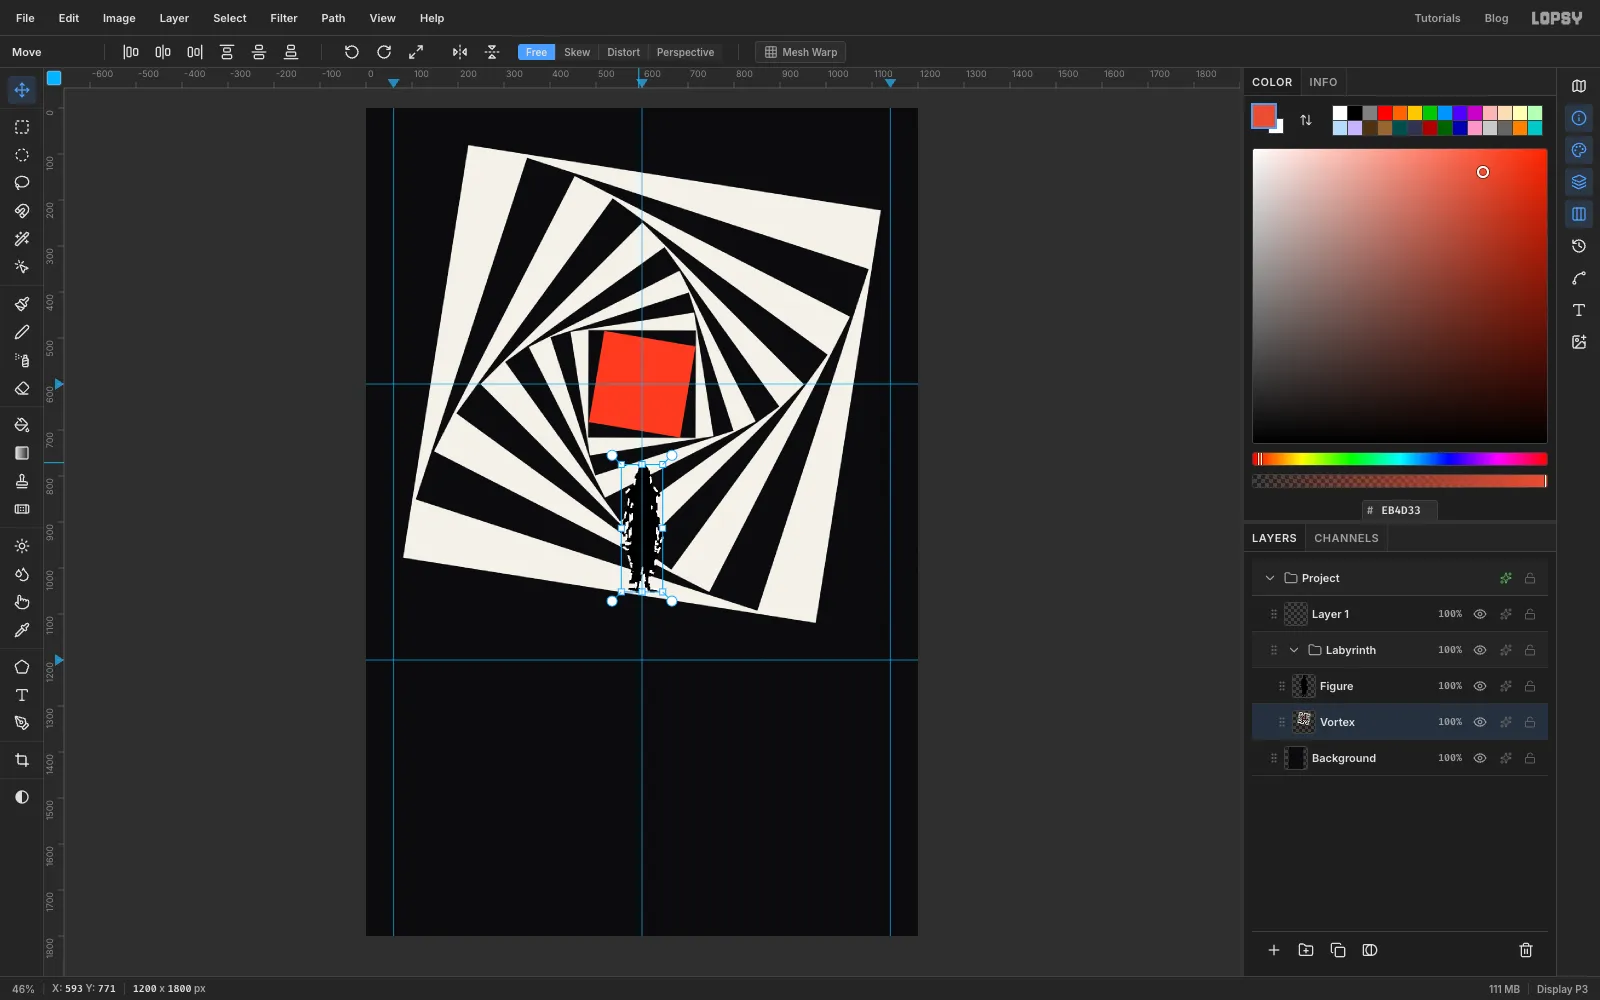
Press Cmd+X and then Cmd+V. The figure pastes back in place on a new layer. Name it Figure. Click Tunnel Photo and click Delete Layer, since its job is done. Lopsy makes the layer below active, so click Figure again before going on.
Threshold leaves a few white specks inside her dress where the scarf caught the light. To close them, Cmd-click the Figure thumbnail to load her shape. Choose Select → Grow… with 3 px, then Select → Shrink… with 3 px. Growing swallows the specks and shrinking brings the outline back. Set the foreground to , choose Edit → Fill, and press Cmd+D.
-
Scale her to fit the core
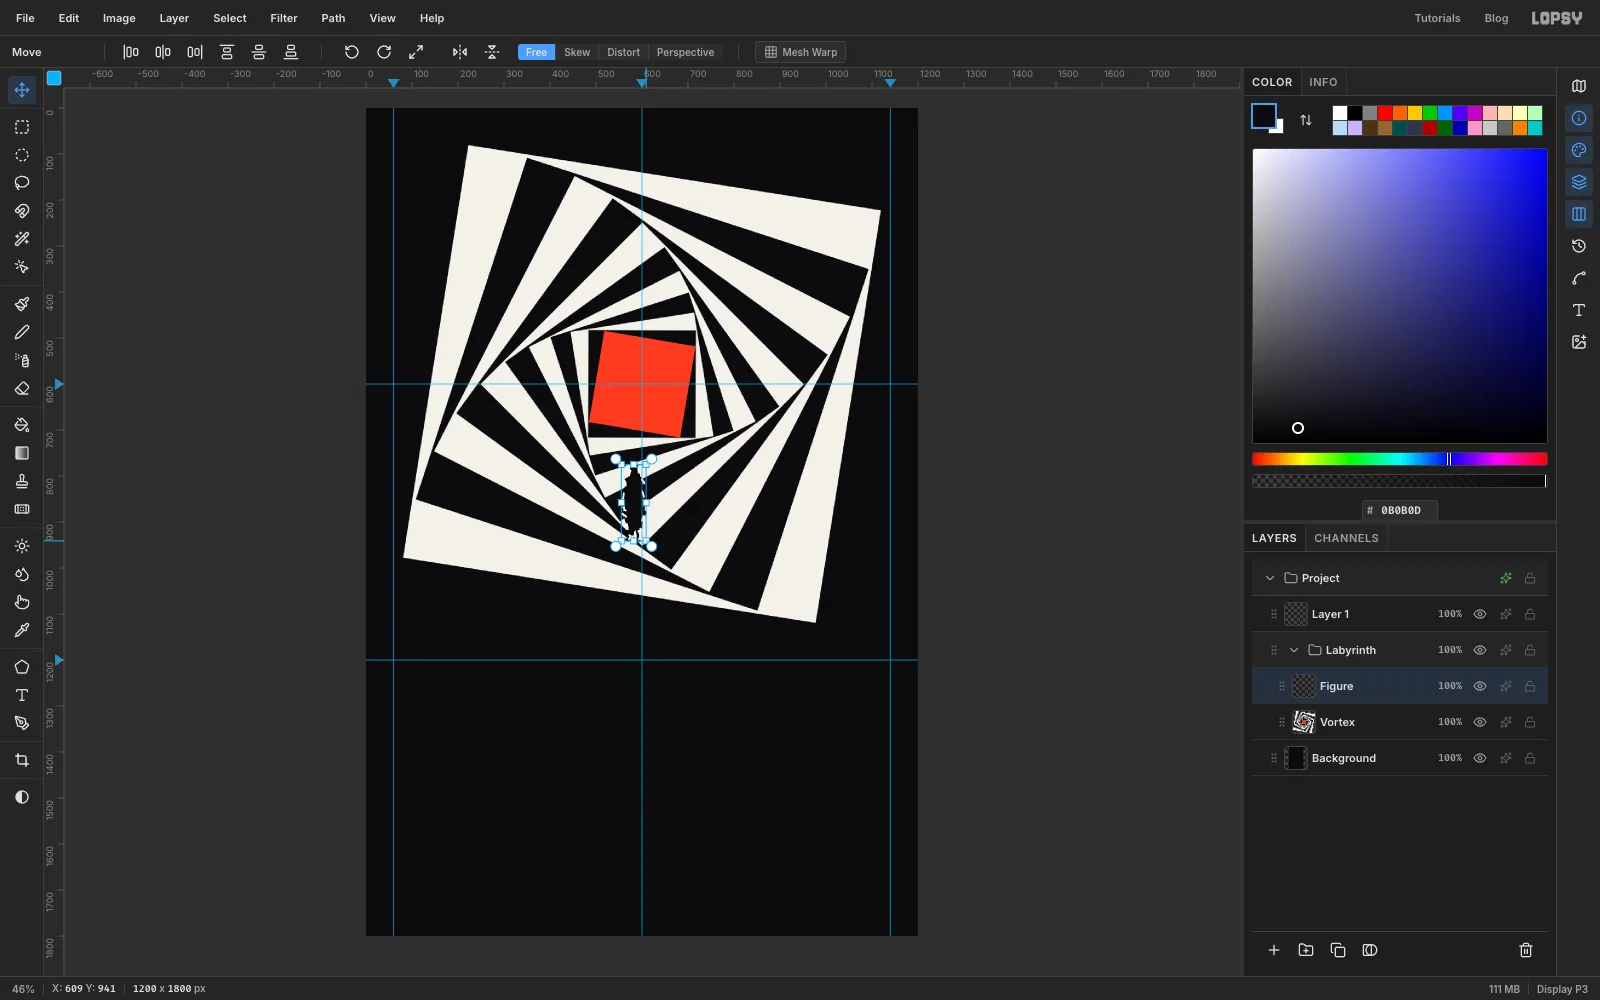
Cmd-click the Figure thumbnail again so the handles hug her. With the Move tool, hold Cmd and drag the bottom-right corner handle in until she is about 60% of her height, roughly 166 px tall. Watch the Y value in the status bar to measure. Cmd keeps the scale uniform. Press Enter and Cmd+D.
-
Centre her in the light
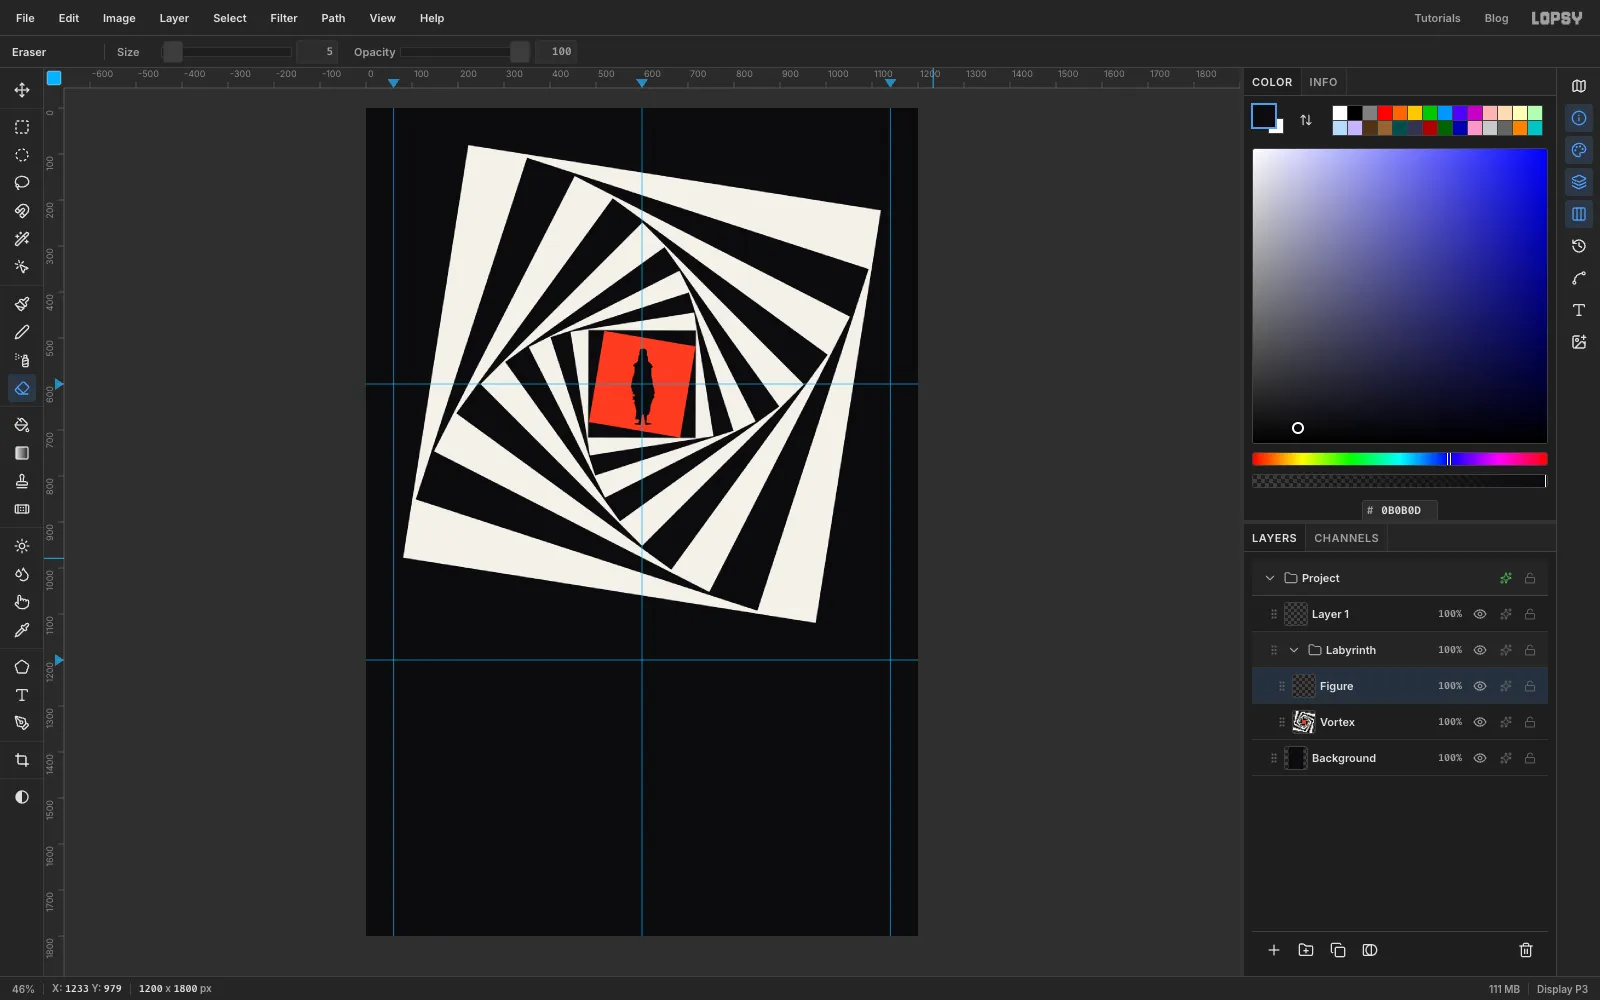
Drag her into the vermilion square, centred on the vertical guide and a few pixels below the horizontal one. Feet slightly low reads as standing on a floor. Nudge with the arrow keys to finish.
Two clean-ups at this size:
- Her left hand and scarf leave a small stub sticking out from her hip. Pick the Eraser (E), set Size to 5, and rub it out with one short stroke.
- Threshold edges are stair-stepped. Choose Filter → Gaussian Blur… with Radius 1 to soften them by a pixel.
-
Cut a ring for the inversion
The classic op-art move is to cut through a pattern with a shape that flips it. Click Vortex, then Add Layer, and name it Mirror Ring. It sits between the vortex and the figure, so it won't touch her.
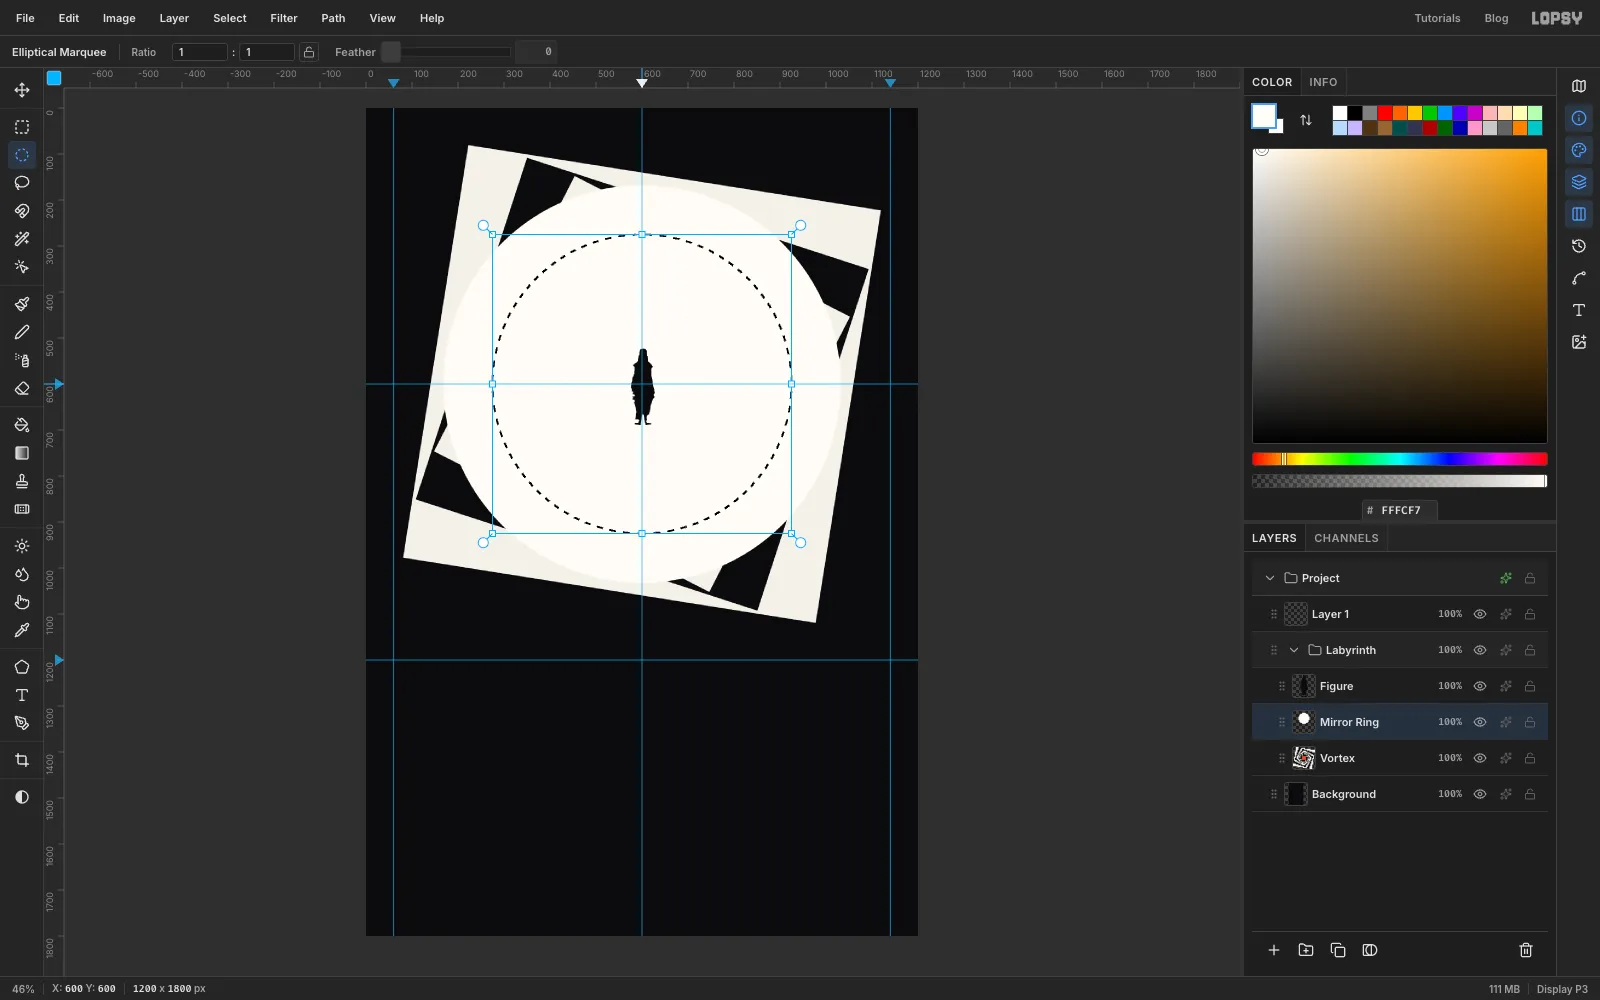
Pick the Elliptical Marquee and click once for its dialog. Type From 168, 168 To 1032, 1032, a circle with a 432 px radius. Set the foreground to and choose Edit → Fill.
Press Cmd+D, click once again, and type From 275, 275 To 925, 925 for the inner circle (radius 325). Press Delete to punch it out, then Cmd+D. Both radii sit in quiet parts of the vortex, so neither arc runs through a corner where squares meet.
-
Set the ring to Difference
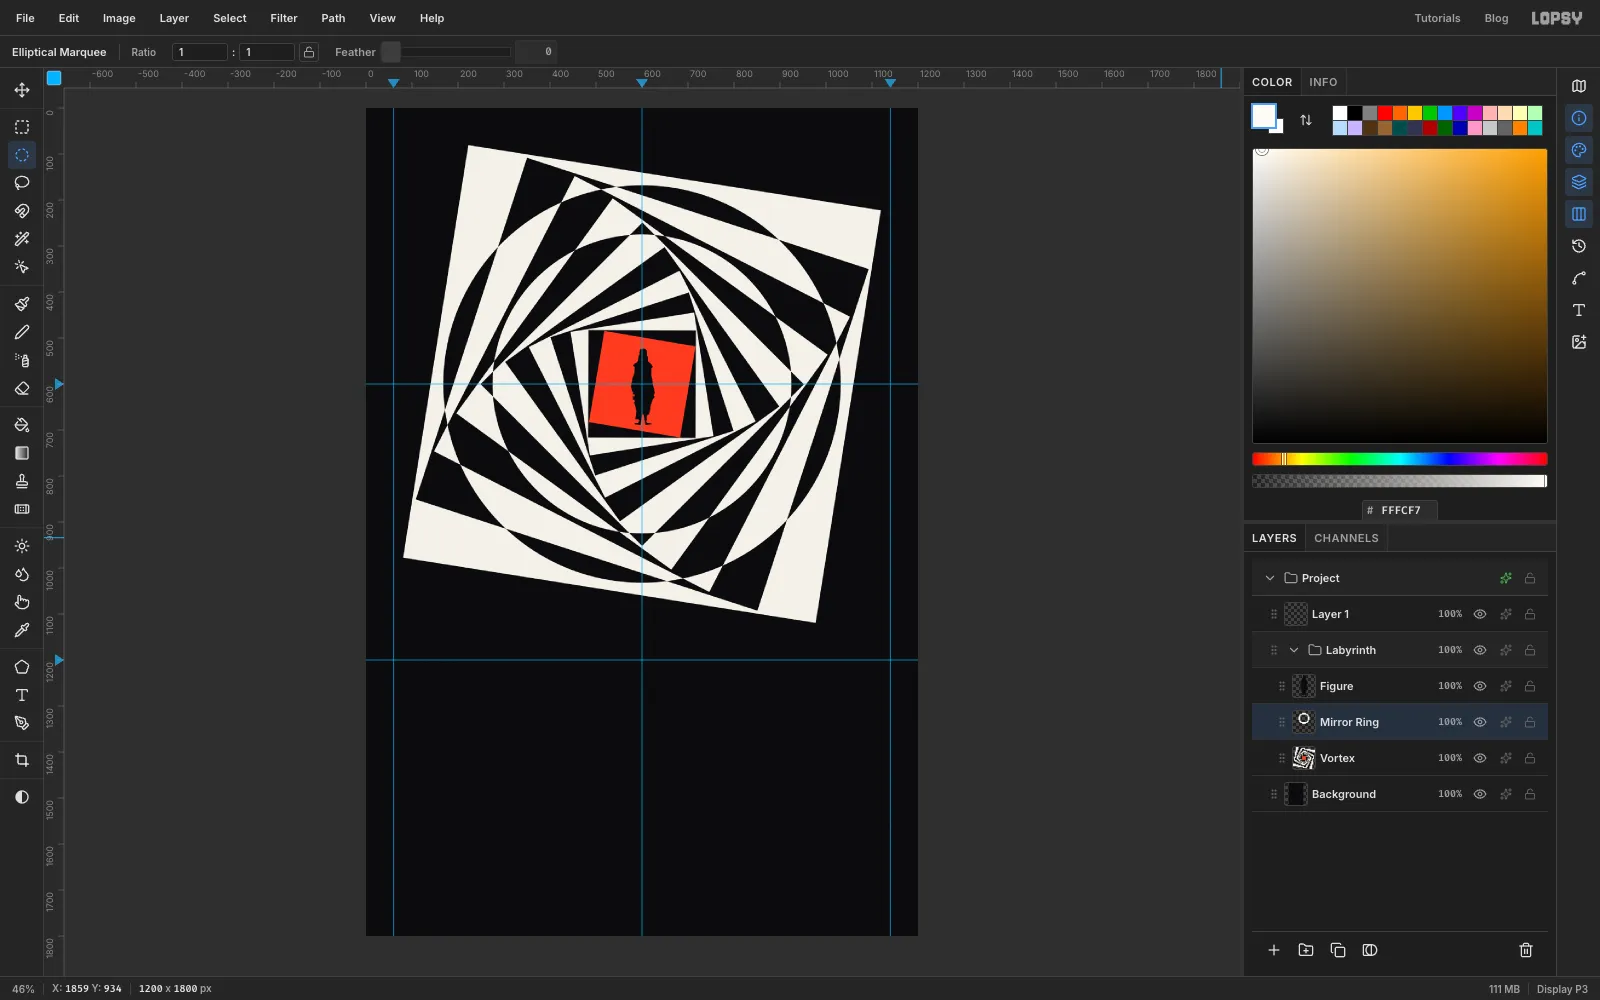
Open the ring's effects (the ✦ button on its row) and set Blend to Difference. Inside the ring, black and white swap places, and the spiral seems to jump forward.
Why and not pure white? Difference subtracts one colour from the other. is the paper and ink colours added together, so over ink it gives exactly paper, and over paper it gives exactly ink. Pure white would turn the inverted bands slightly cooler than the rest of the cover.
-
Copy the vortex for the mirror
Click the eye on Figure to hide her. She won't appear in the mirror.
Collapse the Labyrinth group with its arrow, click its row, and click New Group. Name it Mirror. Because Labyrinth is collapsed, the new group sits beside it instead of inside it.
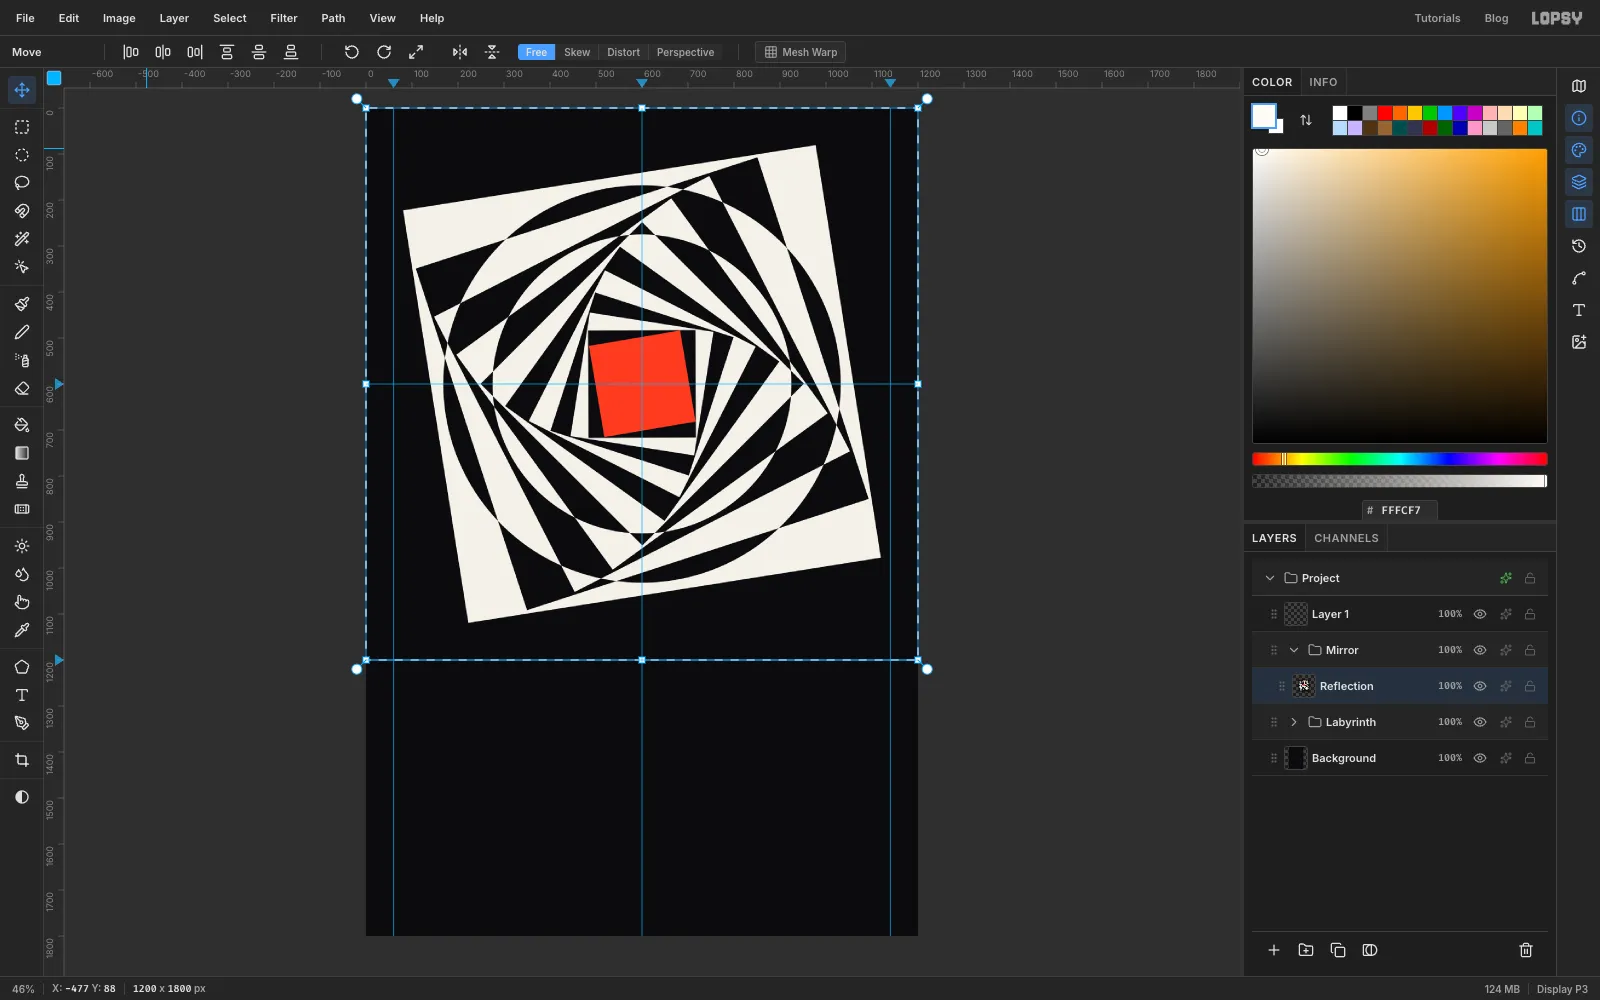
Pick the Rectangular Marquee (M), click once, and type From 0, 0 To 1200, 1200, the whole top part. Choose Edit → Copy Merged, which copies everything you can see rather than one layer. Press Cmd+V and name the pasted layer Reflection. Then, with the Move tool, click Flip Vertical in the options bar.
-
Squash the reflection onto the floor
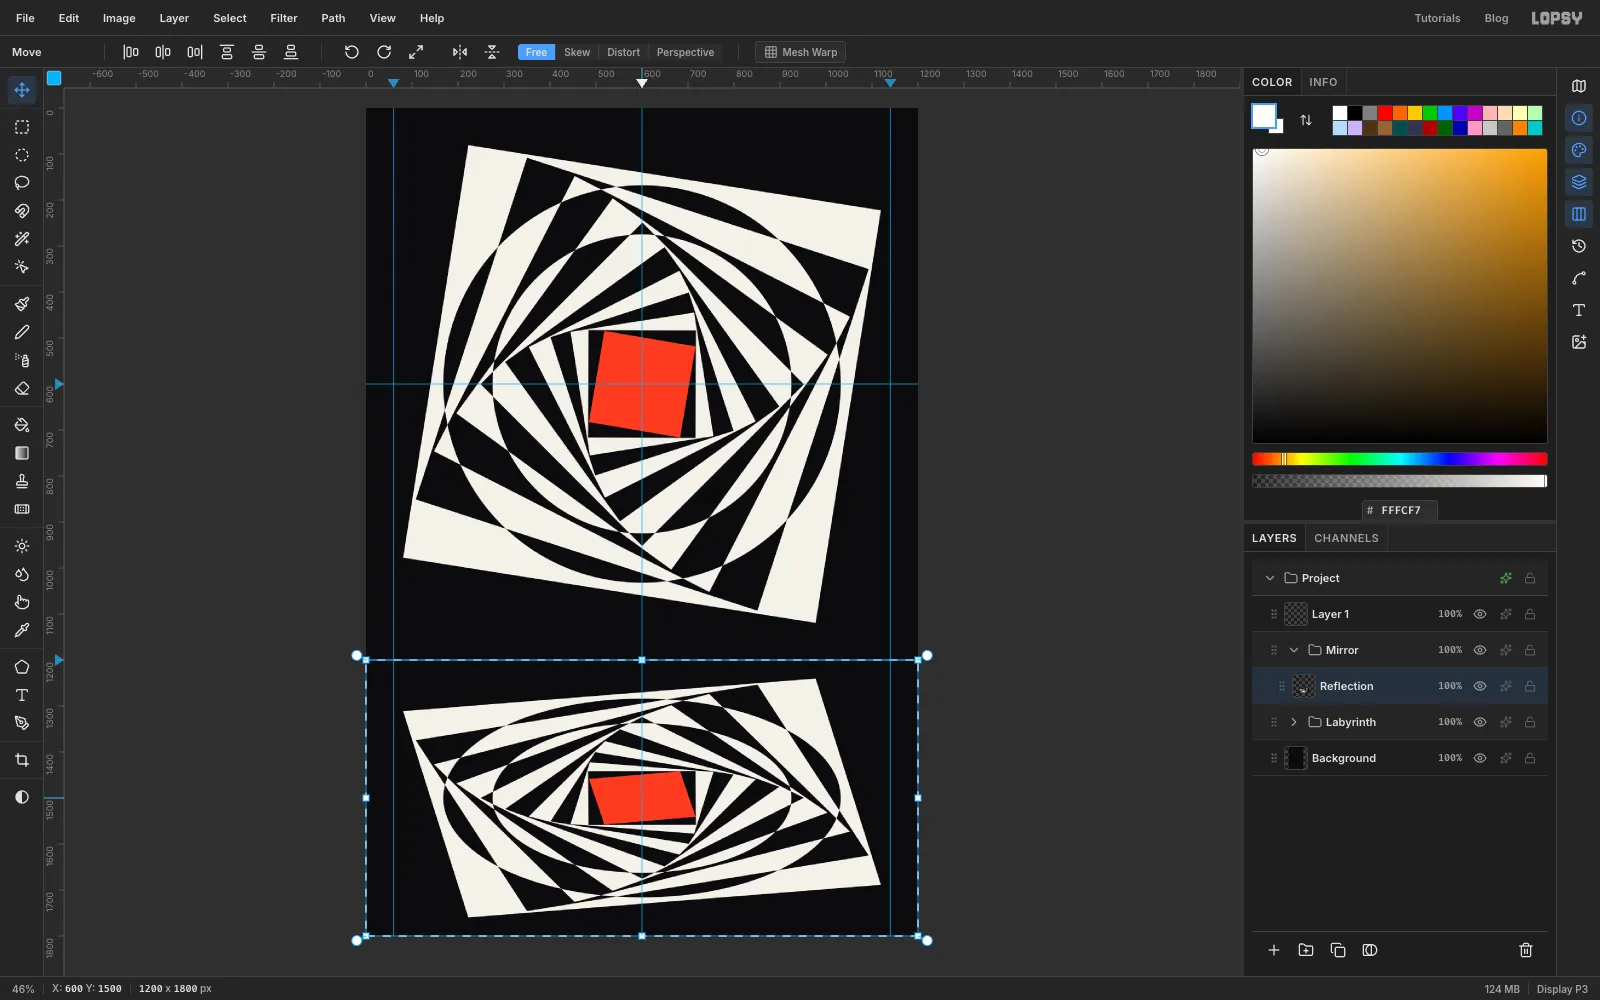
A reflection on a floor looks foreshortened. Drag the transform box's top-middle handle down to the 600 guide. The bottom stays pinned and the vortex squashes to half its height.
Now drag from inside the box straight down until its top sits on the 1200 guide. Press Enter and Cmd+D.
Expand Labyrinth and click the eye on Figure to show her again.
-
Turn the mirror cobalt with a Gradient Map
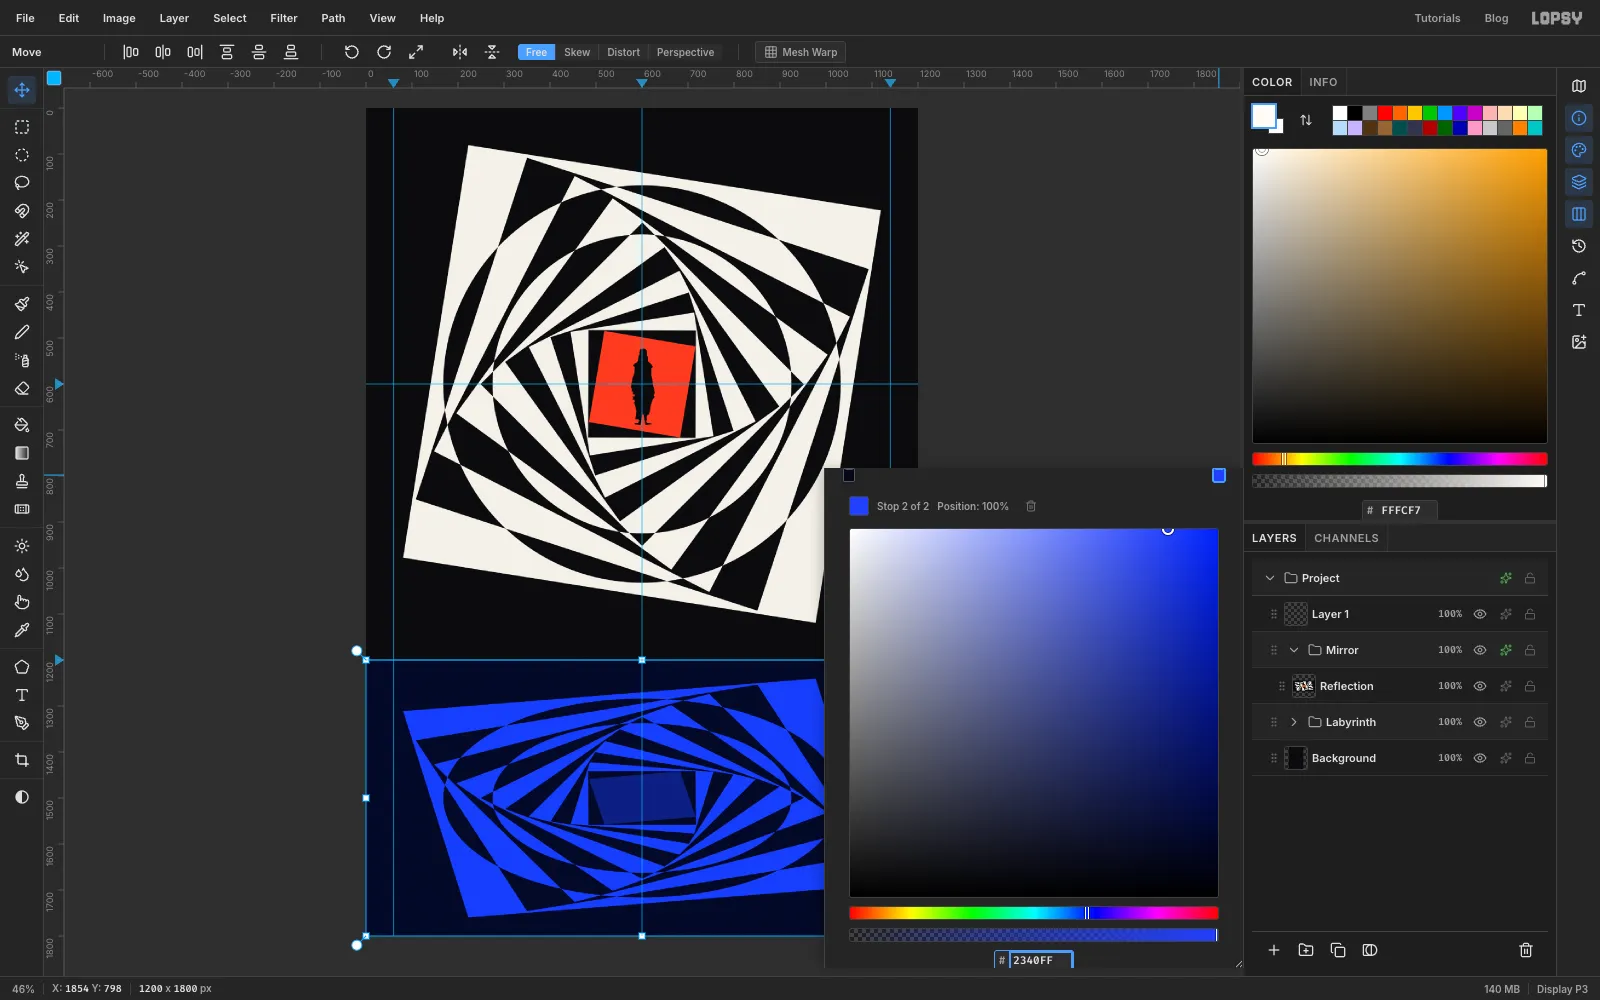
Click the Mirror group row and open its effects with the ✦ button. Groups get an adjustments drawer. Click Add Adjustment → Gradient Map.
Click the left stop and type in the hex box, then click the right stop and type . Black now maps to midnight and white to cobalt. Everything you put in the Mirror group gets the same treatment. Close the drawer.
-
Fade the reflection with a mask
Click Reflection and click Add Mask at the bottom of the Layers panel. Click the new mask thumbnail to paint into the mask.
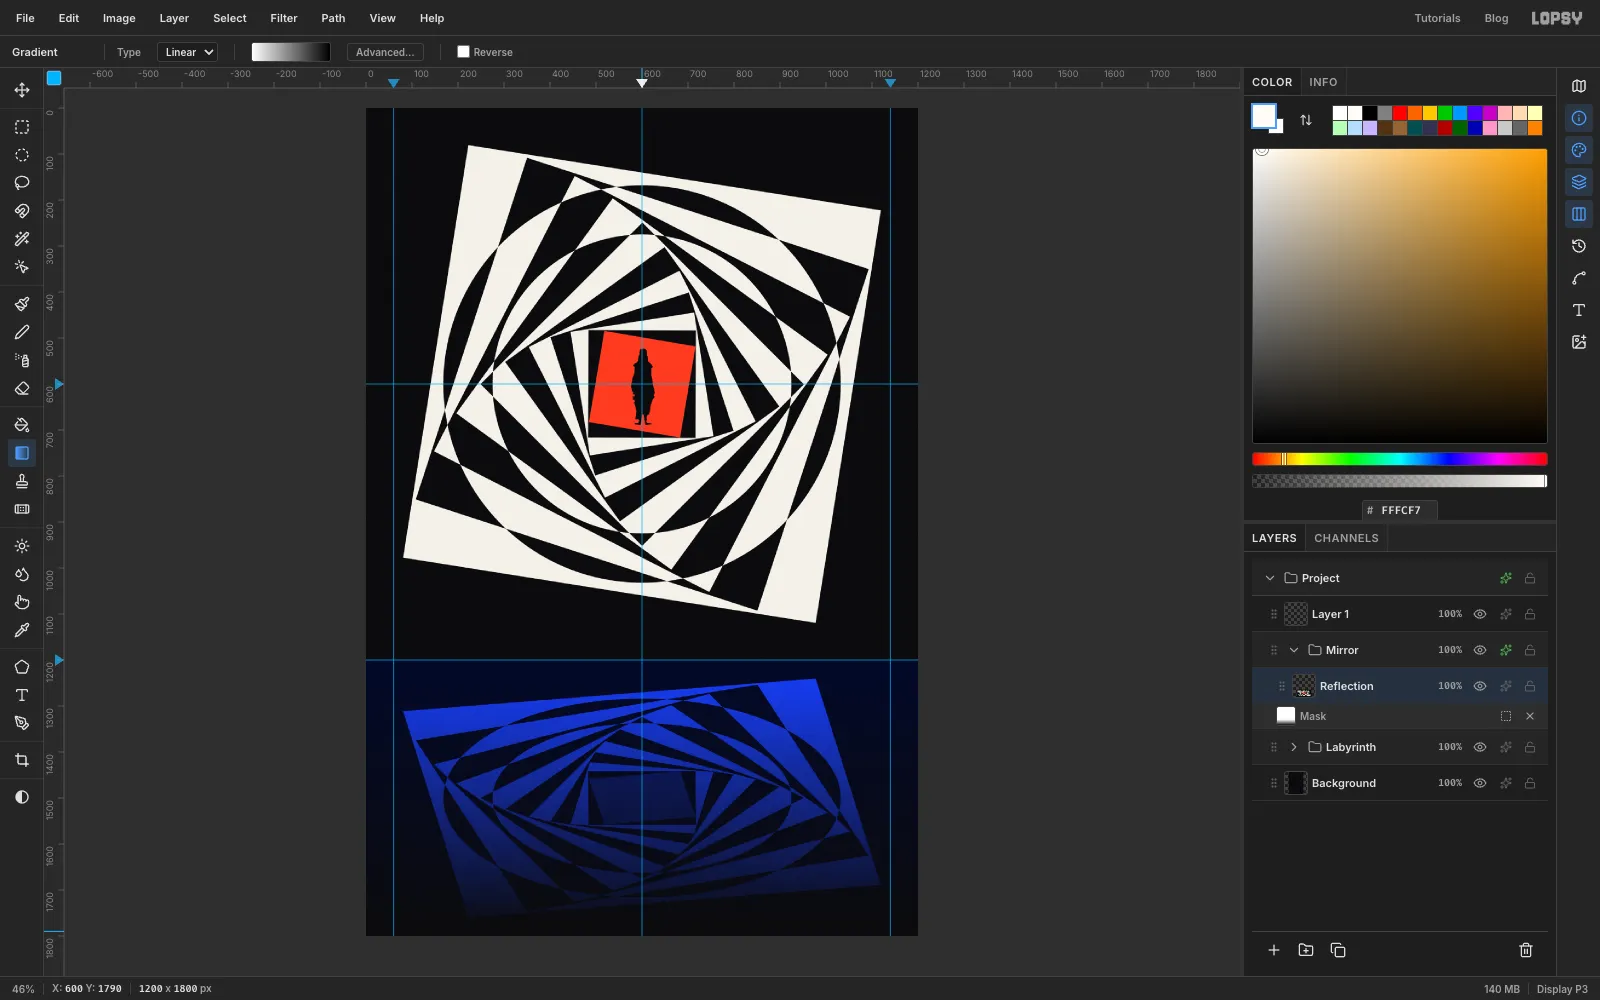
Pick the Gradient tool, set it to Linear, and open Advanced…. Make the left stop white and the right stop black , and click Done. Drag from just below the mirror guide straight down to the bottom edge, keeping the drag vertical. White keeps the reflection and black hides it, so it fades into the dark floor.
While you edit a mask, Lopsy tints the canvas to show it, so the fade can look wrong. Click the layer's name to leave mask editing and see the real result.
-
Draw the horizon line
Collapse Mirror, click its row and click Add Layer. Name the layer Horizon. It sits above the group, so the Gradient Map doesn't turn it blue.
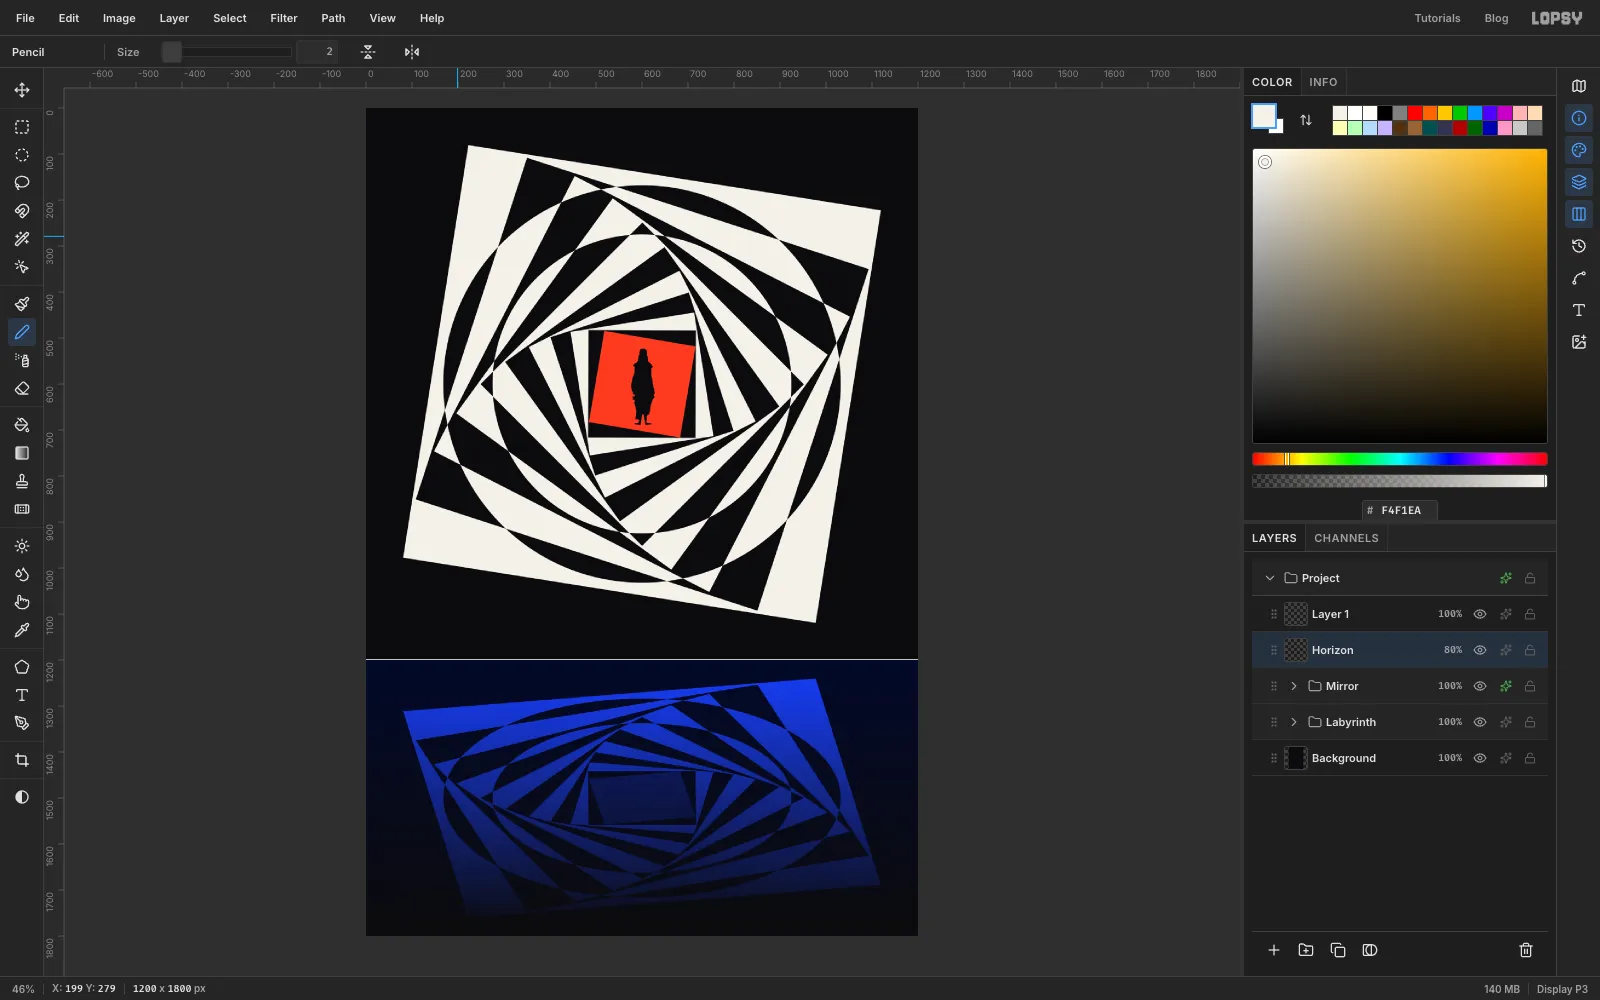
Pick the Pencil (N), set Size to 2 and the foreground to paper . Click just off the left edge on the 1200 guide, then Shift-click just off the right edge. Shift-click draws a straight line between the two clicks. Set the layer's opacity to 80% so the line doesn't shout.
-
Set the title
Double-click Layer 1, the empty layer at the top of the stack, and rename it Grain so it's easy to find at the end.
Click Horizon and click New Group. Name it Type. Then Add Layer inside it and name the layer Type Anchor. Before each new line of text, click Type Anchor. If a text layer is active, the Text tool's font and size controls restyle that layer instead of setting up the new one.
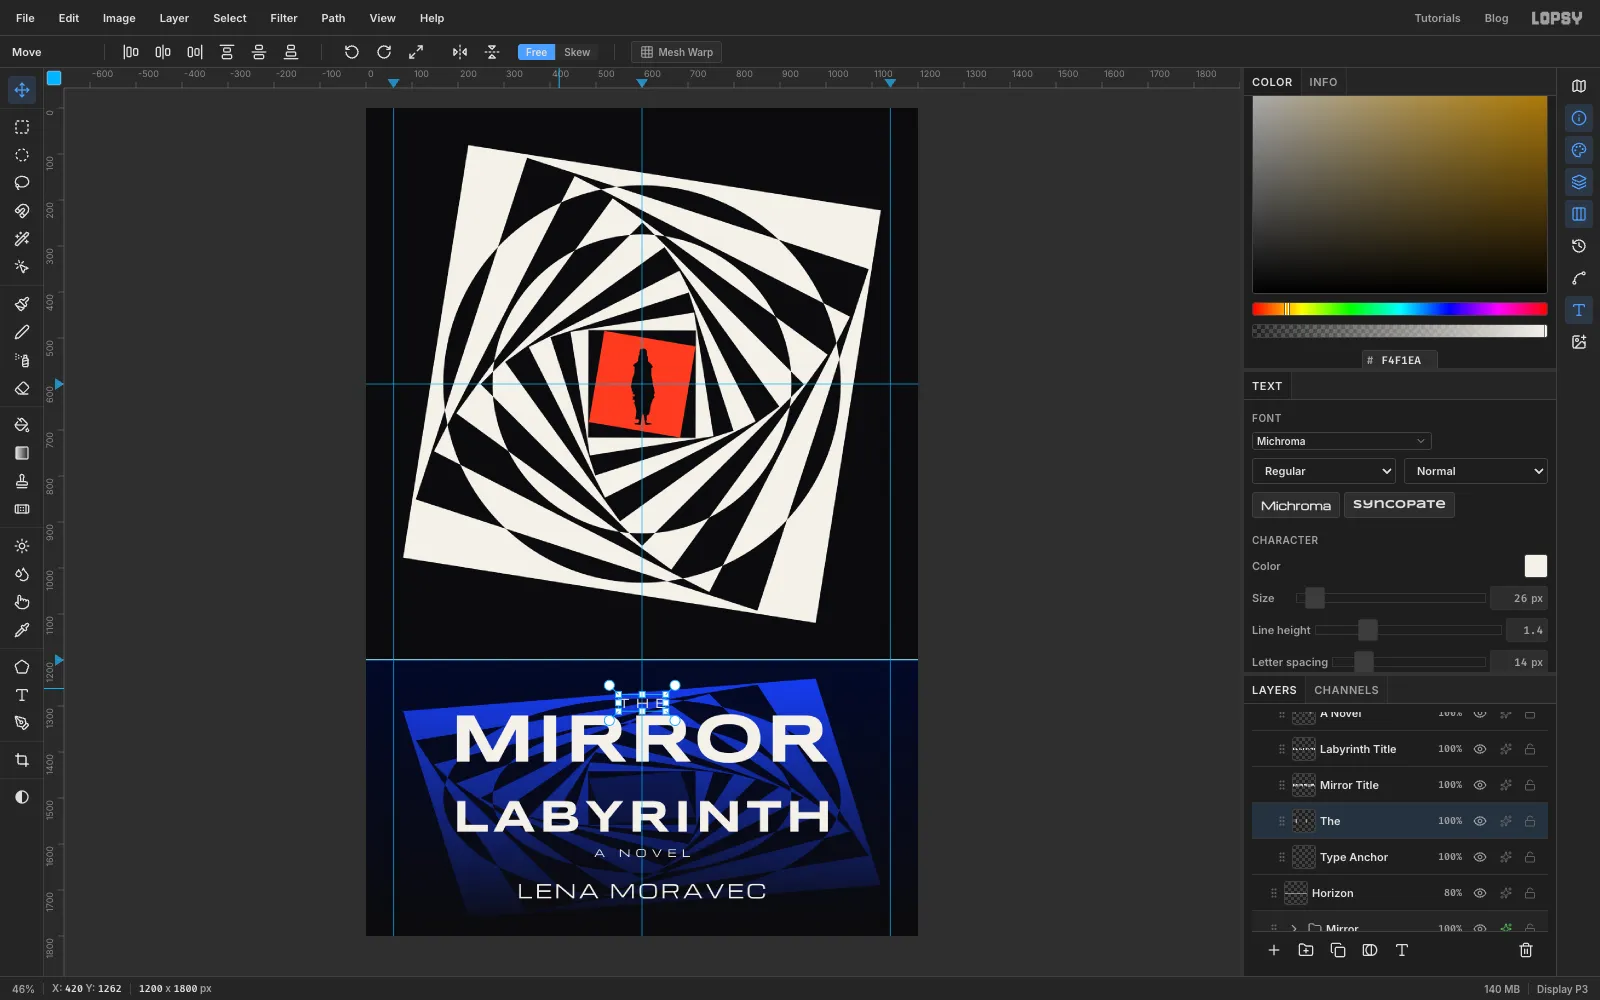
Work from the bottom line up. A click inside an existing line of text edits it, and each text box hangs below the point you click, so clicking above earlier lines keeps them safe. For each line, pick the Text tool (T), set the font, weight and size, and set the colour to paper . Click in empty space, type the text, press Tab, then set Letter spacing in the Text panel. Switch to the Move tool and drag the line until it's centred on the middle guide with the top of its letters at the height given, then fine-tune with the arrow keys.
- LENA MORAVEC: Michroma, size 41, letter spacing 6, top at about y 1687. Name the layer Author.
- A NOVEL: Michroma, size 22, letter spacing 12, top at about y 1611. Name it A Novel.
- LABYRINTH: Syncopate Bold, size 99, letter spacing 8, top at y 1506. Name it Labyrinth Title.
- MIRROR: Syncopate Bold, size 150, letter spacing 2, top at about y 1318. Name it Mirror Title.
- THE: Michroma, size 26, letter spacing 14, top at about y 1284. Name it The.
Leave the gap under MIRROR empty for now. LABYRINTH's spacing makes it exactly as wide as MIRROR, so the two words form one block. Check that no letter touches the slanted outline of the reflection, especially THE and the M of MIRROR. If one does, move the whole block down a little.
-
Mirror the word MIRROR
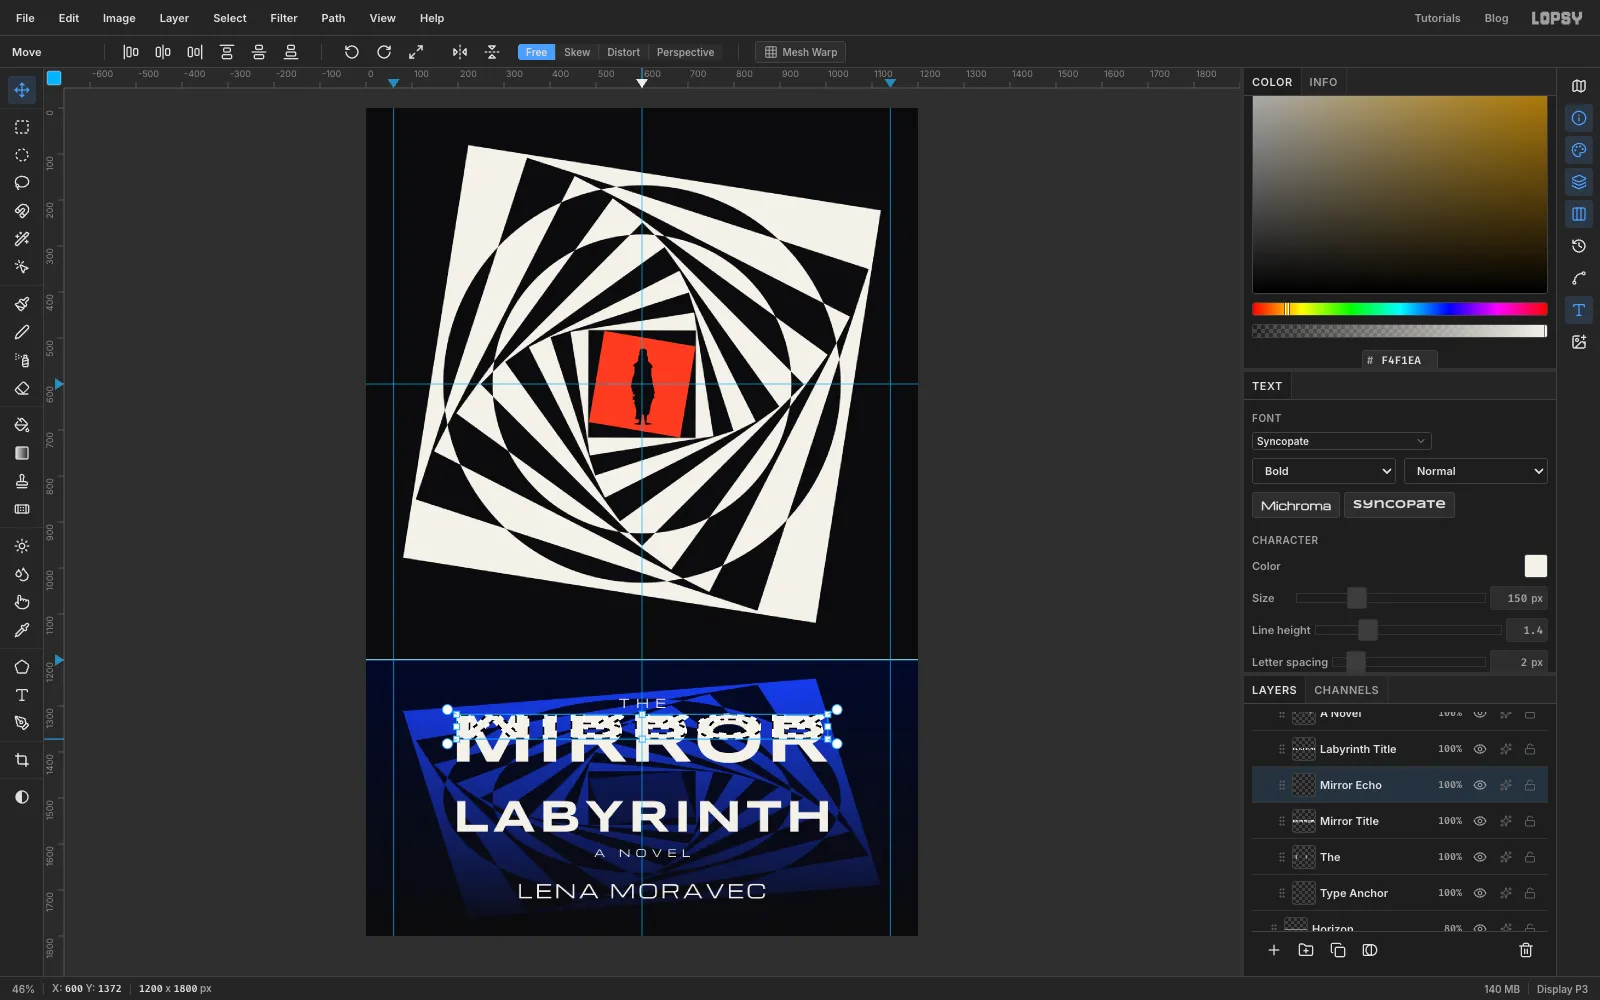
Click Mirror Title and choose Layer → Duplicate Layer. Name the copy Mirror Echo and click Rasterize Layer at the bottom of the Layers panel, since flipping and squashing need pixels.
Pick the Rectangular Marquee and drag a box around the word. Switch to the Move tool (V) and click Flip Vertical in the options bar. Press Cmd+D, then Cmd-click the Mirror Echo thumbnail so the handles hug the letters. Drag the bottom-middle handle up to halve its height, the same squash as the floor. Press Enter and Cmd+D.
The squashed echo now sits over the top half of MIRROR. Drag it straight down until its top is 4 px under MIRROR's baseline (about y 1427), and finish with the arrow keys.
-
Tint and fade the echo
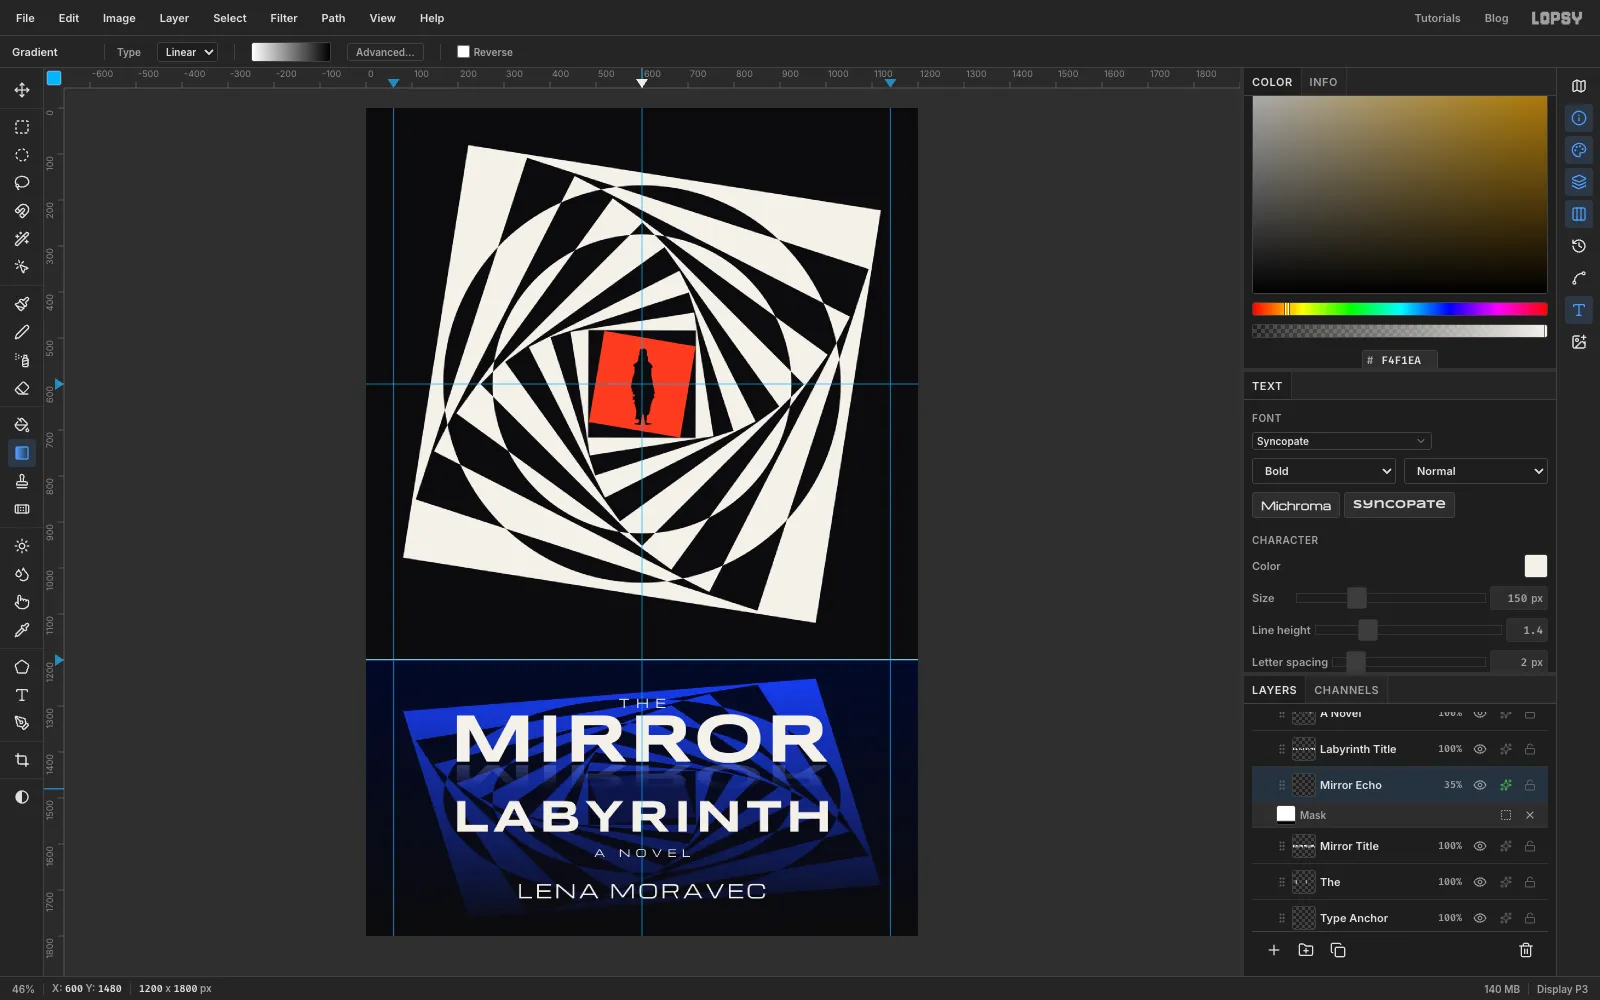
Open the echo's effects and turn on Color Overlay with . That's a lighter blue than the floor, so the echo reads over both its cobalt and its black patches. Set the layer's opacity to 35%.
Click Add Mask and click the mask thumbnail. Pick the Gradient tool again (it keeps the white-to-black stops) and drag from the top of the echo to its bottom. Click the layer name to leave mask editing.
-
Make a stripe pattern
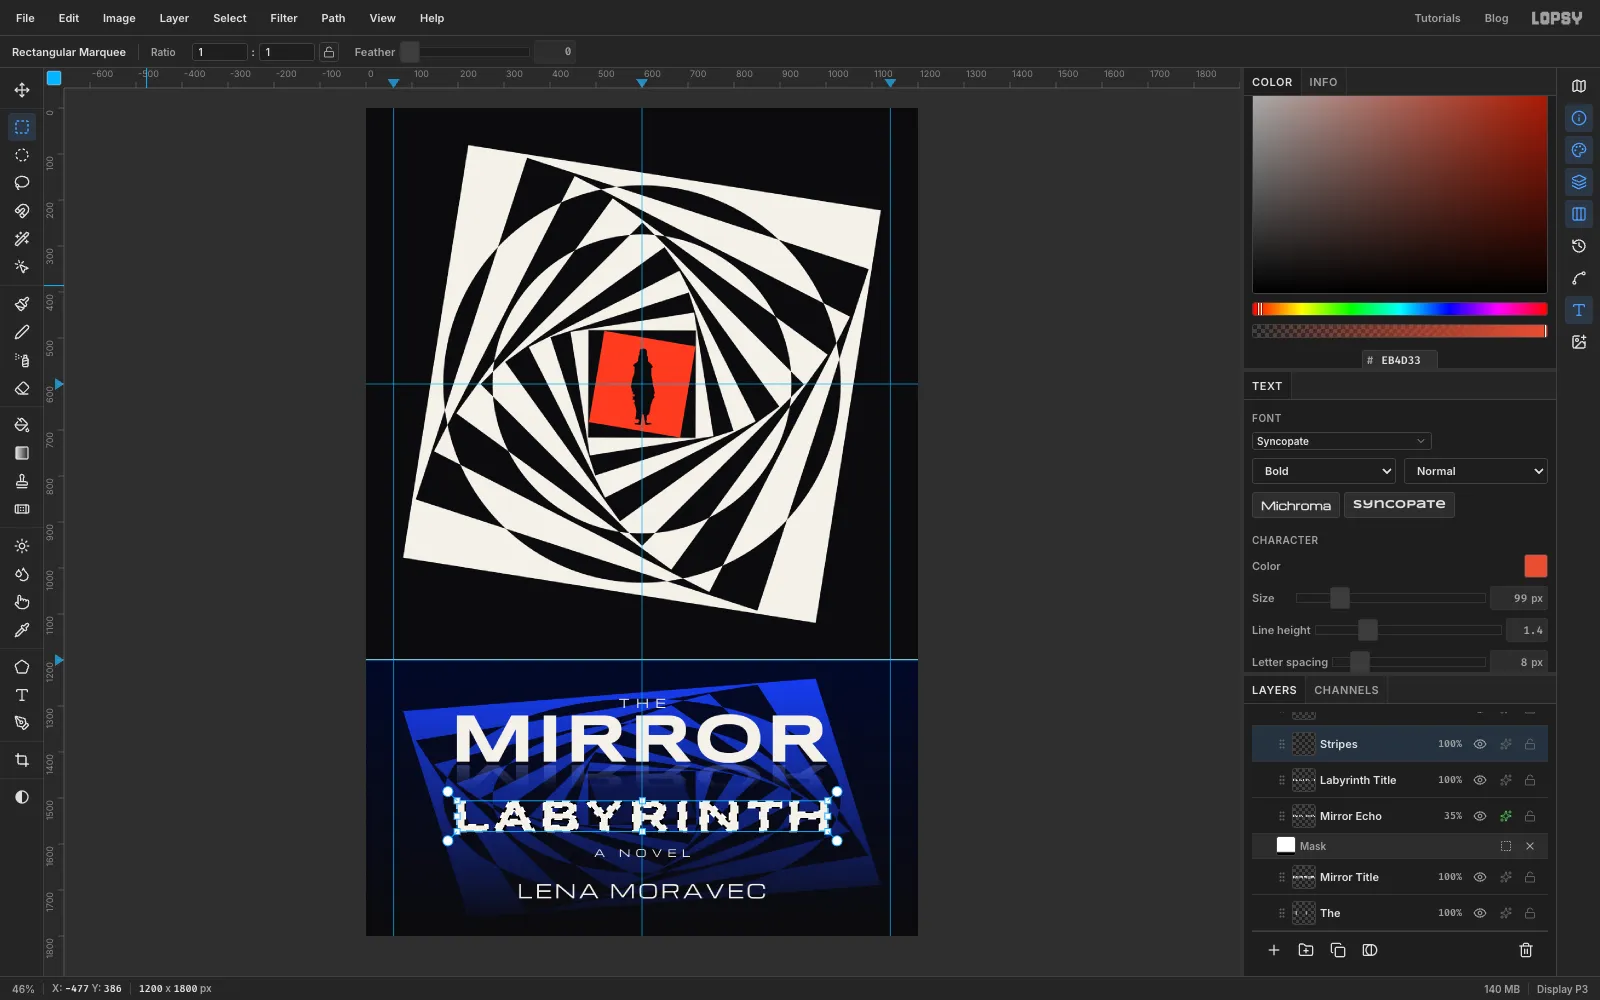
Op-art type is often filled with lines. First make a tiny pattern tile. Click Type Anchor, Add Layer, and name it Stripe Tile. Set the foreground to . Use the Rectangular Marquee's dialog for From 0, 2 To 10, 7 and fill it: that's a red band 5 px tall. Press Cmd+D, then make a From 0, 0 To 10, 10 marquee and choose Edit → Define Pattern. The tile is 10 px tall, half red and half clear. Press Cmd+D and delete the Stripe Tile layer.
Patterns tile from the top-left corner of the page, so where the stripes fall depends on where the word sits. With LABYRINTH's top at 1506, the letters start with a white band. If a red stripe slices the very top of your letters, nudge LABYRINTH up or down a couple of pixels before you fill.
Click Labyrinth Title and click Rasterize Layer. Then Add Layer and name it Stripes. It lands just above the word. Cmd-click the Labyrinth Title thumbnail to load the letters as a selection. Choose Edit → Fill with Pattern…, pick your new stripe pattern, and click Apply. Press Cmd+D.
-
Knock the white out under the stripes
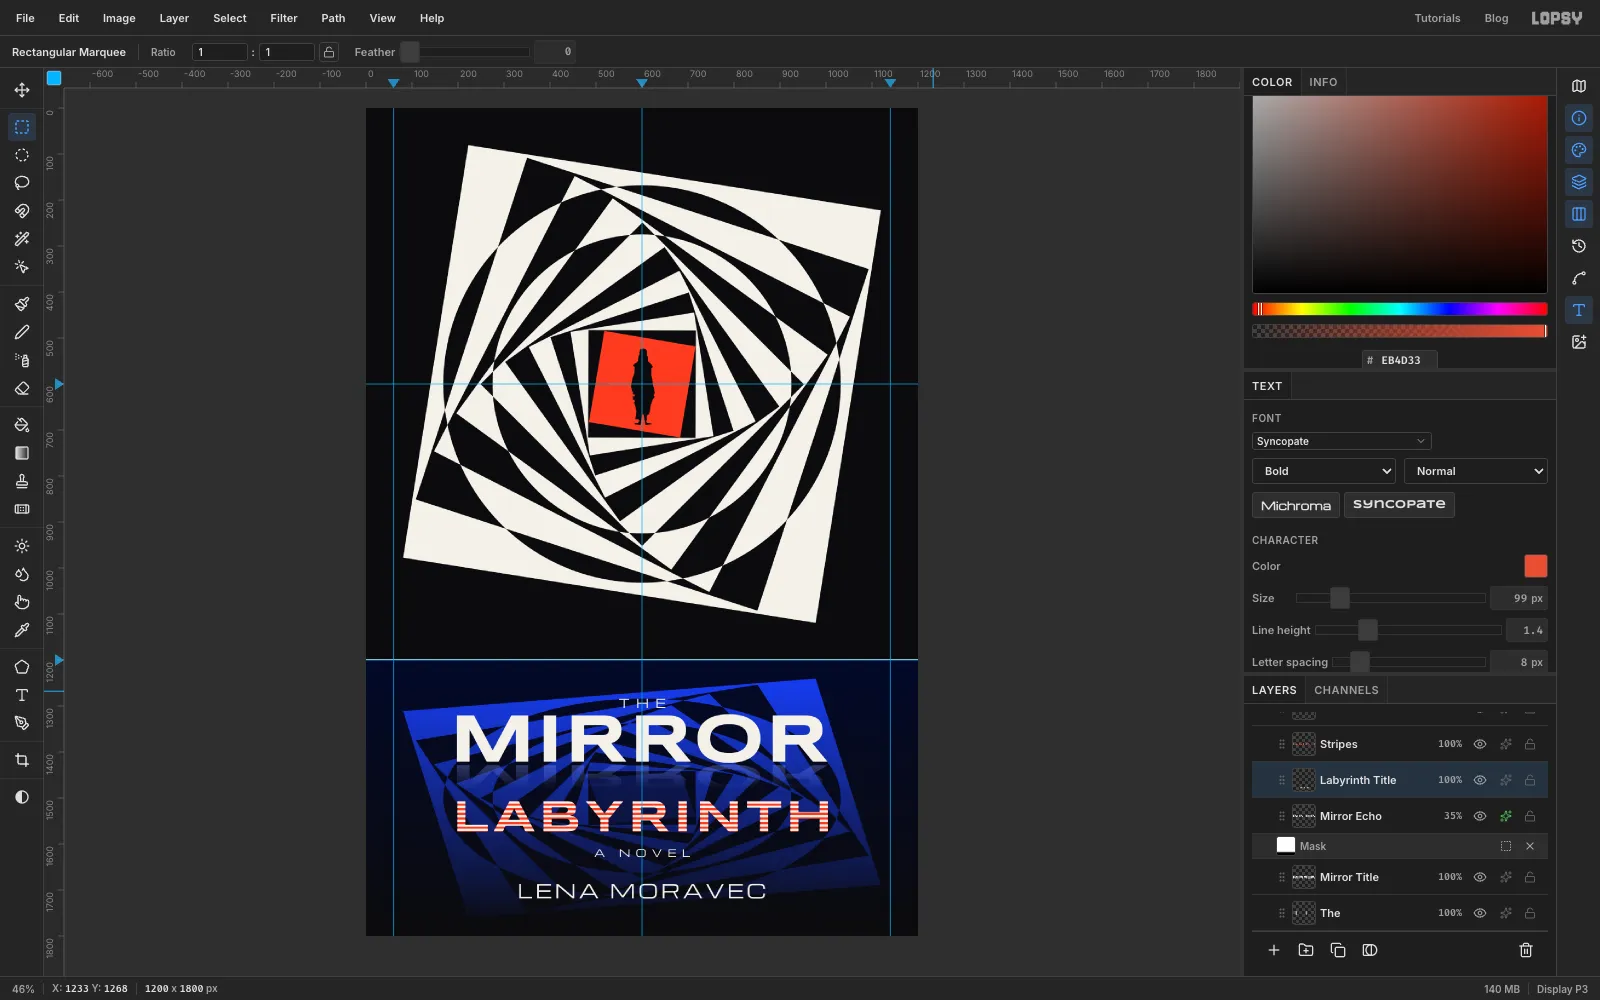
Where a red stripe crosses a letter's soft edge, the white underneath shows through as a pink fringe. To fix it, Cmd-click the Stripes thumbnail to load the stripes. Click Labyrinth Title and press Delete to remove the white under them. Press Cmd+D. The stripe edges are now clean red.
-
Run the imprint up the spine edge
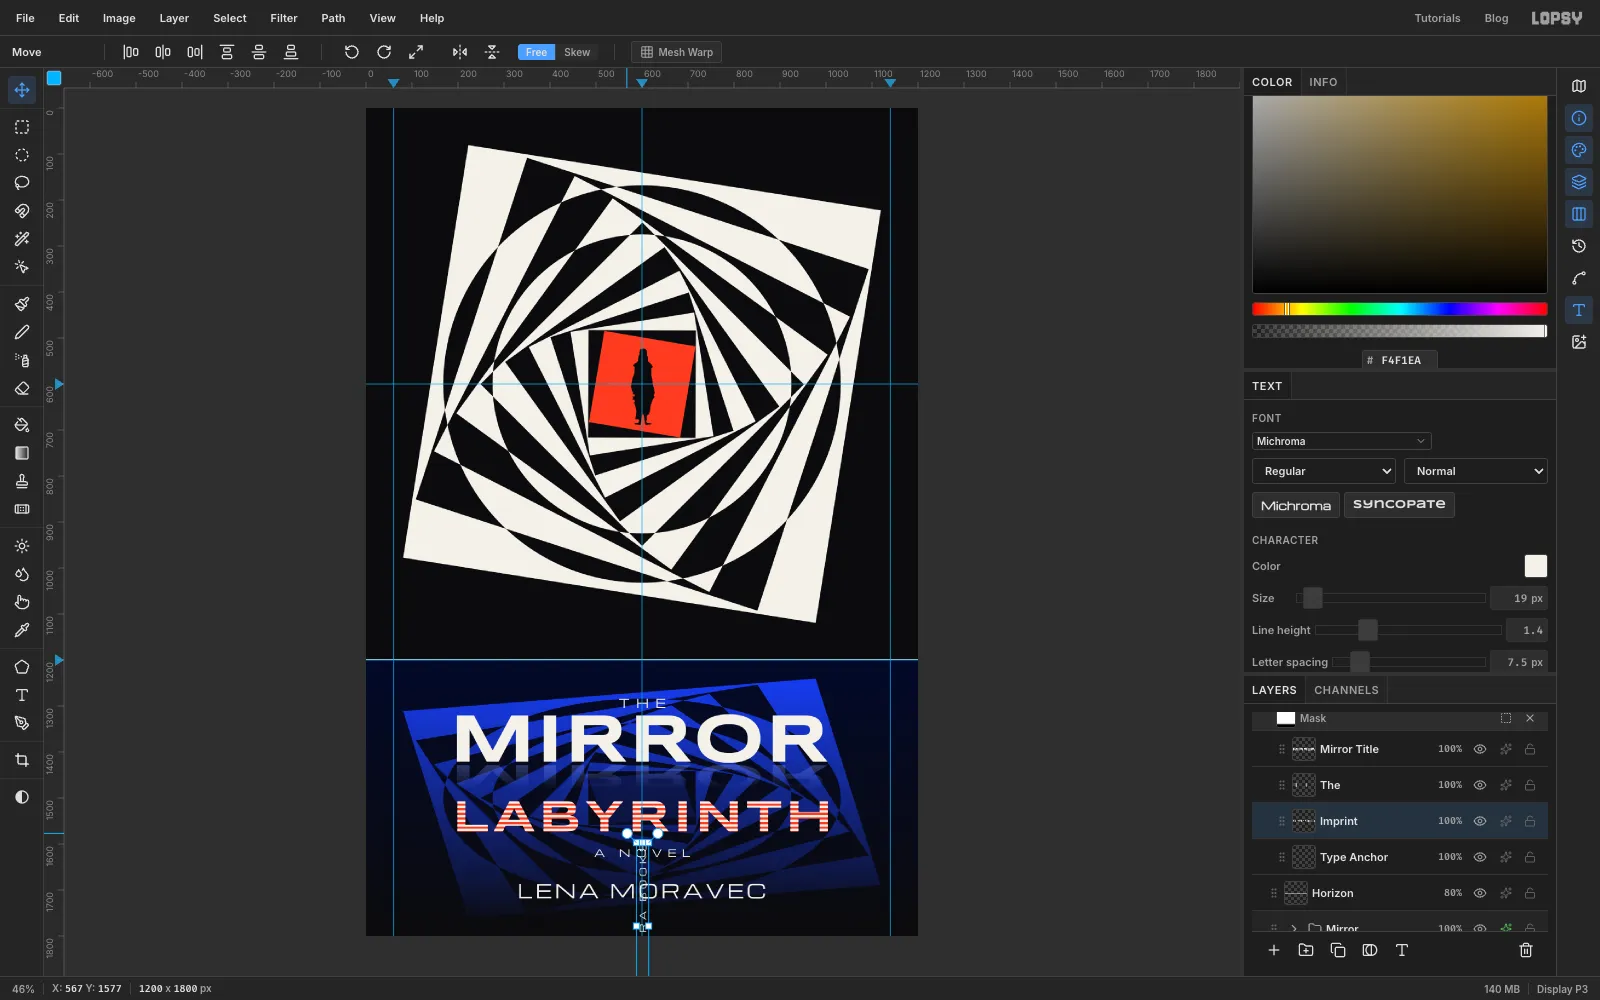
Click Type Anchor. With the Text tool, choose Michroma at size 19 and set the colour back to paper , since the stripes left the foreground red. Click in the empty strip under the author's name, type PENUMBRA BOOKS and press Tab. Name the layer Imprint and set Letter spacing to 7.5.
Switch to the Move tool. Hold Cmd and drag the top-right rotation handle anticlockwise. Cmd snaps rotation to 15° steps, so stop when the text stands upright, a quarter turn, reading bottom to top. Press Enter. (The Rotate 90° CCW button in the options bar does the same in one click.)
-
Seat the imprint in the margin
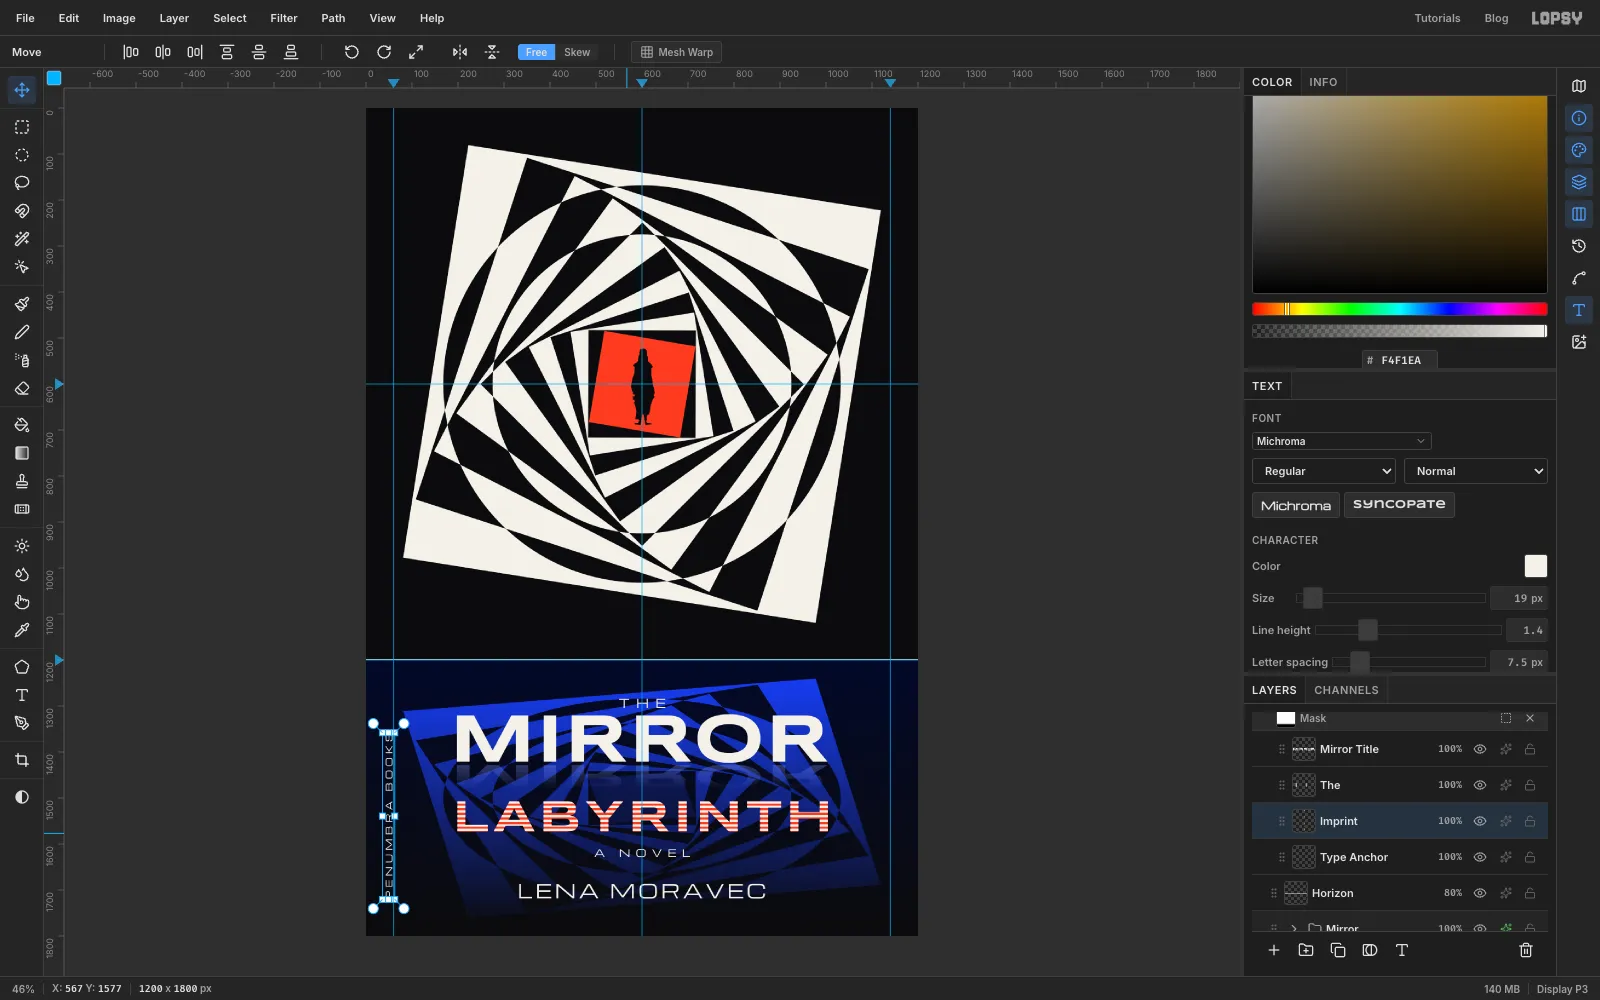
Drag the imprint into the left margin so it sits just left of the 60 guide, centred about 50 px from the edge. Slide it so its lower end lines up with the bottom of LENA MORAVEC. At this spacing it runs from about y 1359 to 1718. That's well inside the trim, and clear of the reflection's left corner.
-
Add print grain
Flat digital black and white looks like vector art, not ink on paper. Click Grain, the empty layer at the very top of the stack. Set the foreground to pure black , choose Edit → Fill, then Filter → Add Noise… with Amount 36, Mono and Gaussian.
Open its effects and set Blend to Difference. Black noise in Difference speckles the blacks and the whites alike. Overlay would leave pure black and pure white untouched, and Normal would hide the cover under a sheet of static.
Choose File → Save Project to keep the layers, then File → Export… for a PNG.