Design an Op-Pop Barber Pole Billboard
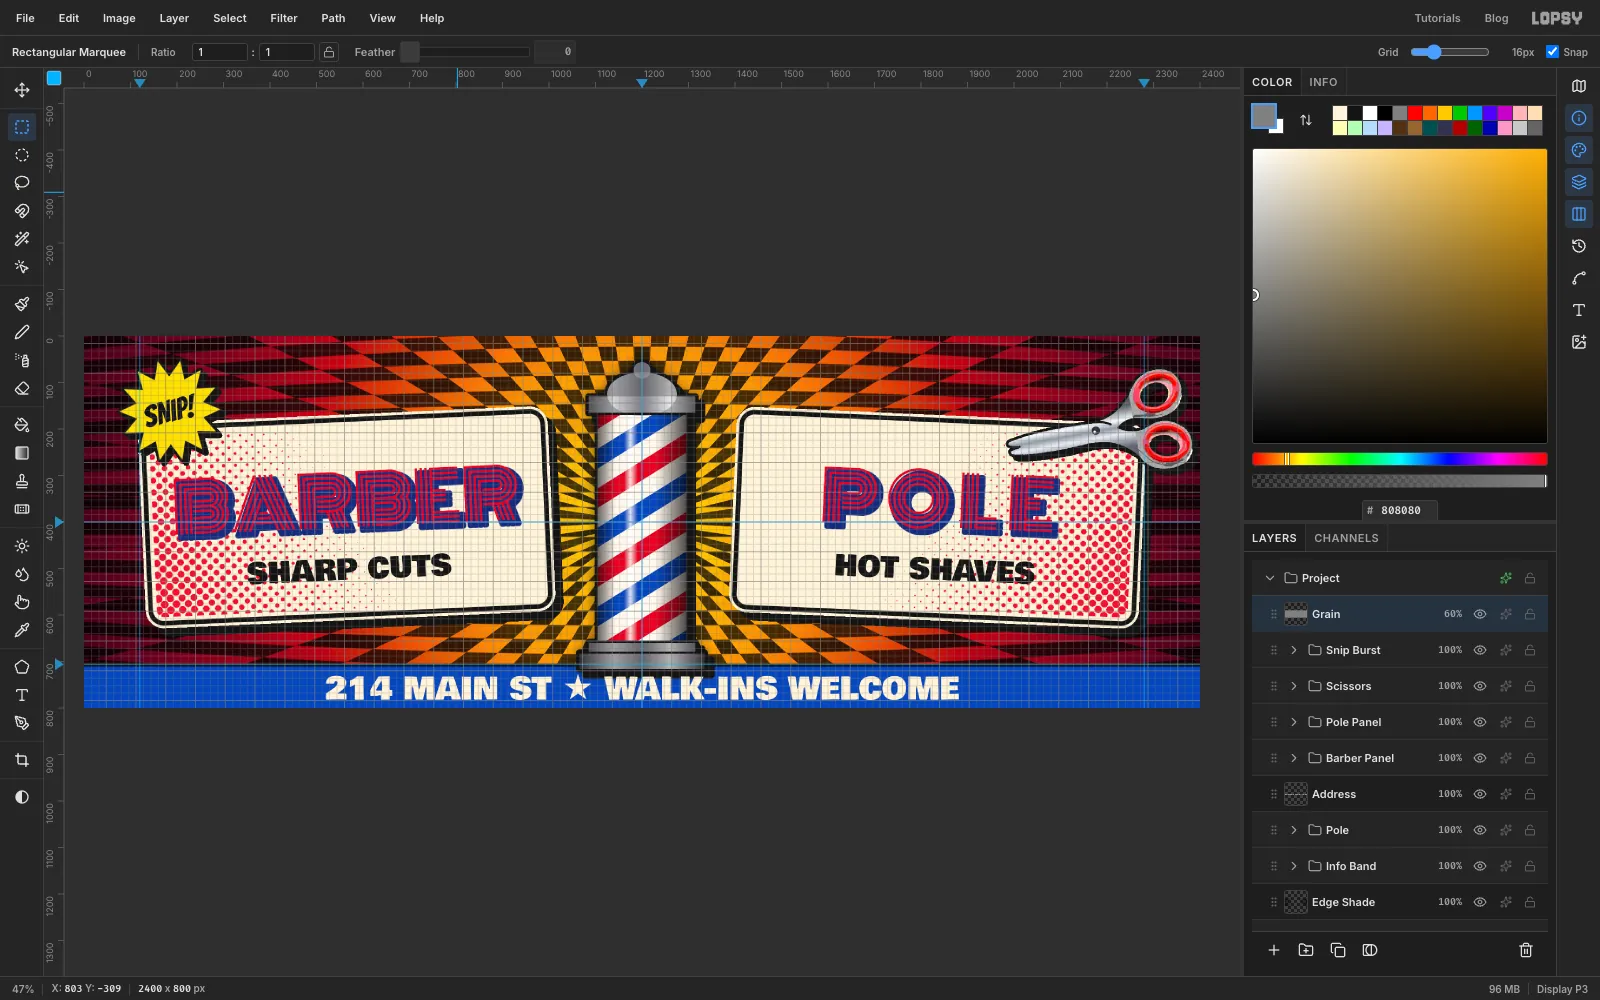
Build a 1960s op-art meets pop-art billboard in Lopsy, with a bulging checker field, a chrome barber pole, comic panels with Ben-Day dots and pop-art scissors.
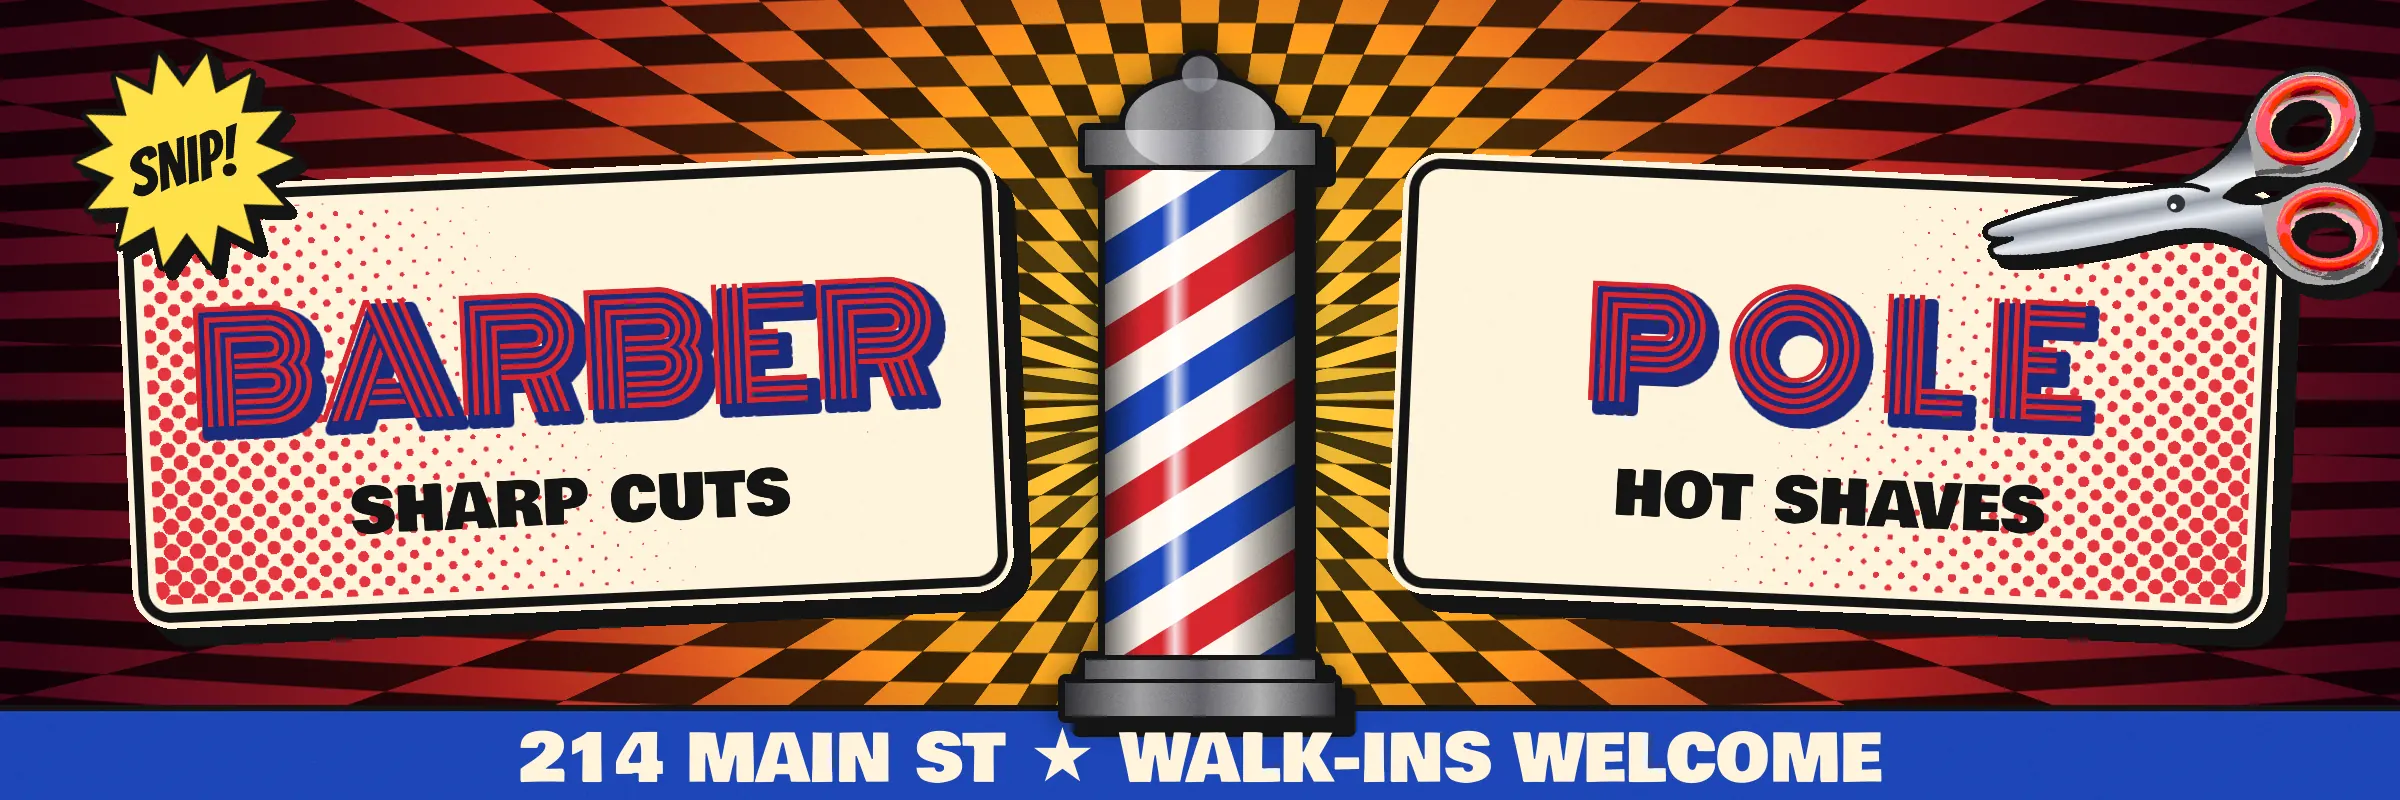
Op art and pop art grew up side by side in the 1960s. Op artists like Victor Vasarely and Bridget Riley used hard black-and-white patterns that seem to bulge and vibrate. Pop artists like Roy Lichtenstein borrowed comic books: flat colour, heavy black outlines and printed Ben-Day dots. Put the two together and you get op-pop: loud, graphic and readable from across the street. That makes it a good fit for a billboard.
In this tutorial you'll make a billboard for Barber Pole, an imaginary barbershop. The name is a rebus: BARBER sits on one comic panel, POLE on the other, and a real chrome-capped barber pole stands between them. Behind everything, an op-art checker radiates out from the pole. You'll build it at 2400 × 800 px, the shape of a standard 48 × 14 ft roadside billboard.
The scissors start as a photo: 2scissors-clean.jpg on Wikimedia Commons, a scan by Modeha cleaned up by Iainf, licensed CC BY 2.5. Credit them if you publish your version. Download the original (840 × 777 px). Any photo of scissors on a white background works the same way.
Along the way you'll use:
- ruler guides, Snap to Guides, the grid and the marquee's exact-size dialog
- radial and linear gradients with alpha stops, Define Pattern and Fill with Pattern
- Lens Distortion, Sunburst, Halftone, Surface Blur, Posterize, Hue/Saturation and Add Noise
- the Difference, Multiply and Overlay blend modes and group opacity
- the Shape tool's exact-size dialog, the Magic Wand, the Lasso and the Pencil
- ⌘-click thumbnail selections with Grow, Shrink, Inverse and Shift+Alt intersect
- Drop Shadow, Stroke, Outer Glow and Color Overlay effects
- text in Monoton, Bowlby One and Bangers, with letter spacing
- copy and paste in place, and scaling and rotating layers and whole groups with the Move tool
The palette:
-
Background ramp
-
Pole red
-
pole blue
-
pole white
-
Chrome
-
Panel cream
-
ink
-
Ben-Day red
-
headline shadow navy
-
SNIP! yellow
-
Set up the canvas and guides
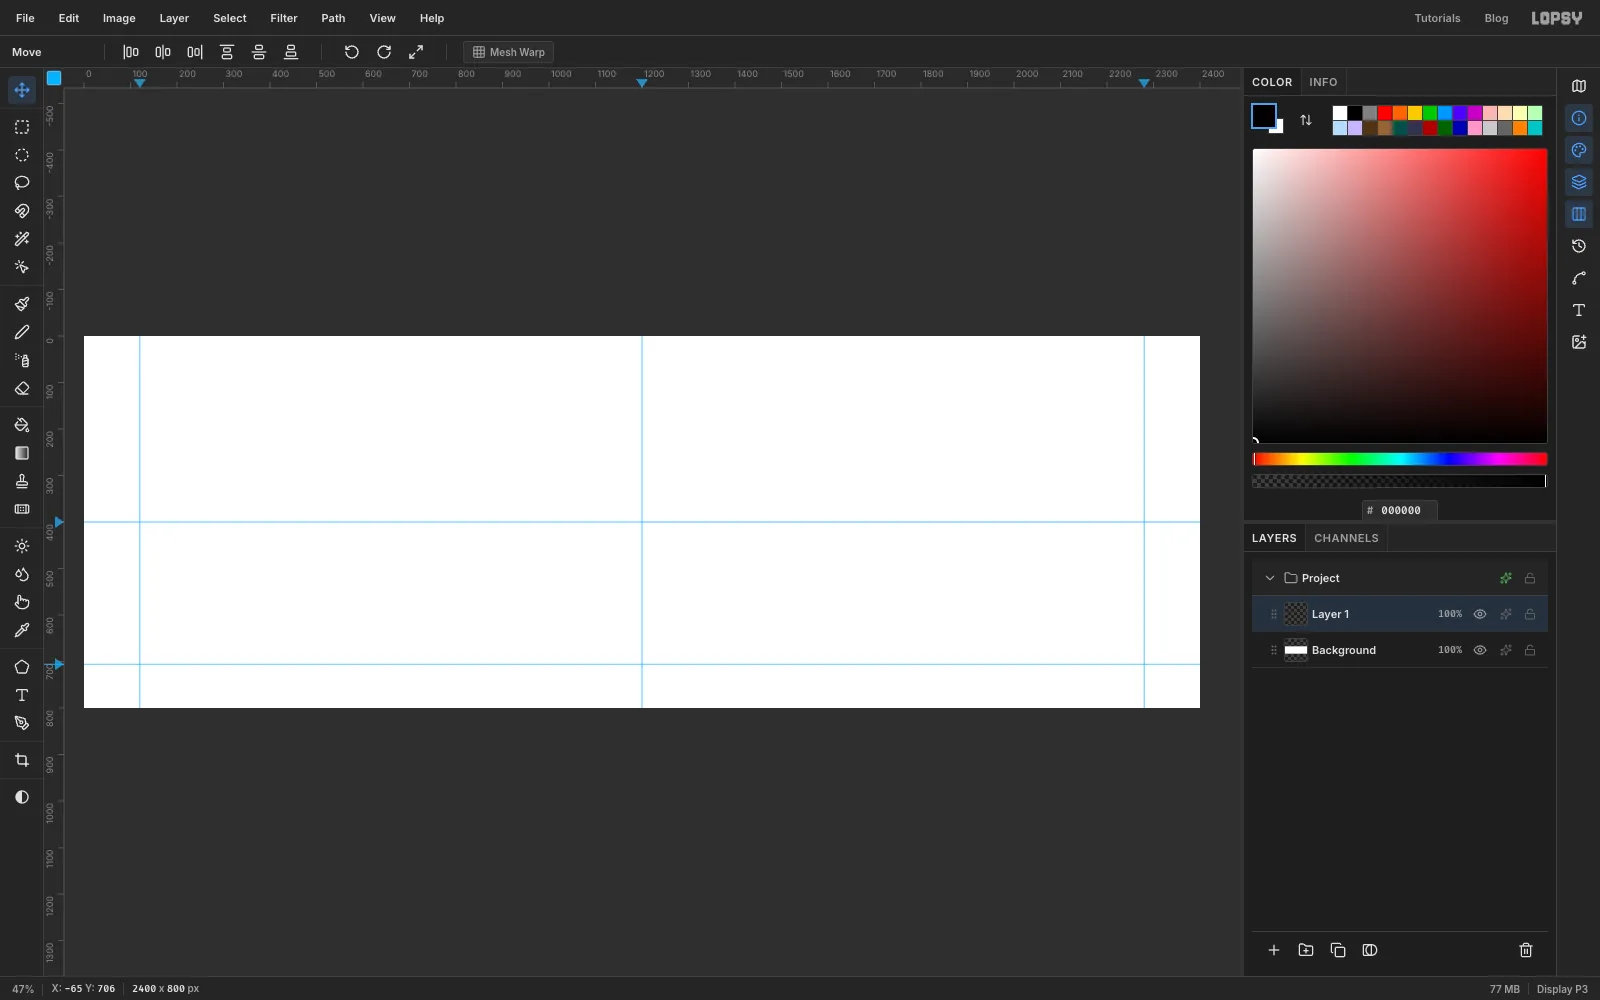
Choose File → New, enter 2400 × 800 pixels and click Create.
Click the top ruler at 120, 1200 and 2280 to drop vertical guides for the left margin, the centre line and the right margin. Click the left ruler at 400 for the middle and at 706 for the top of the address bar you'll add at the end. The pole will stand on the centre guide.
-
Paint the pop background
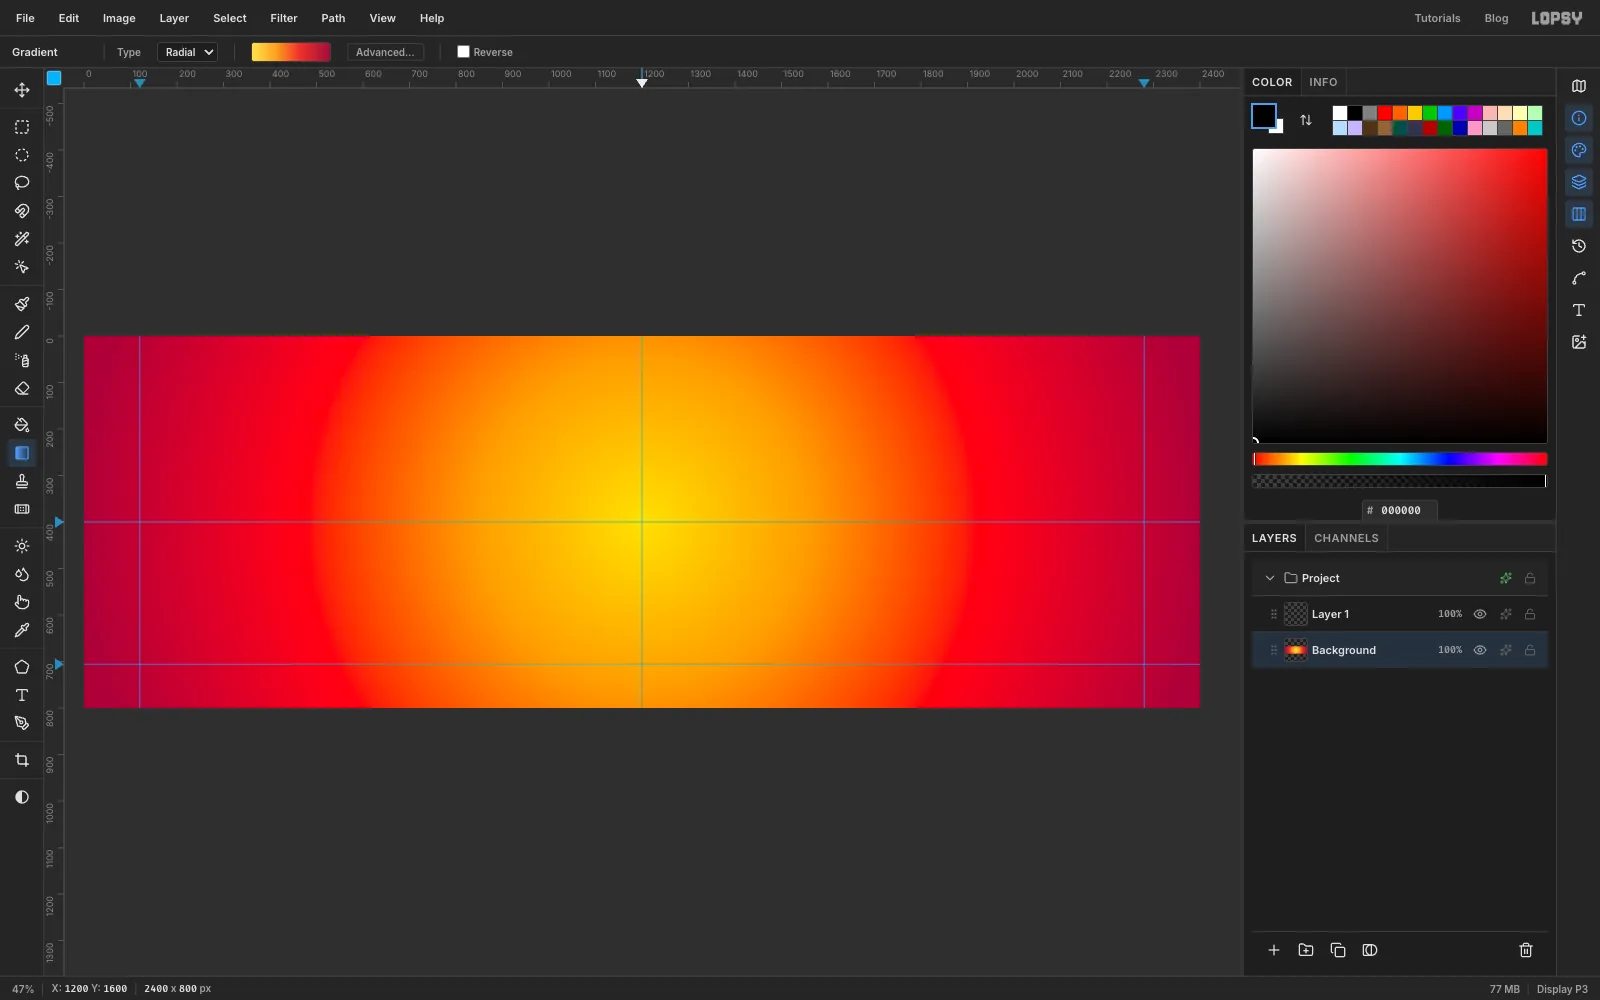
Select the Background layer and pick the Gradient tool. Set the type to Radial and open the gradient editor. Make four stops: at the left end, at about 30 %, at about 62 % and at the right end. Type each colour into the Hex field after you click its stop, and click Done.
Press on the middle of the canvas and drag straight down, well past the bottom edge, about 1,200 px. The yellow core is where the pole will stand.
-
Make a stripe tile
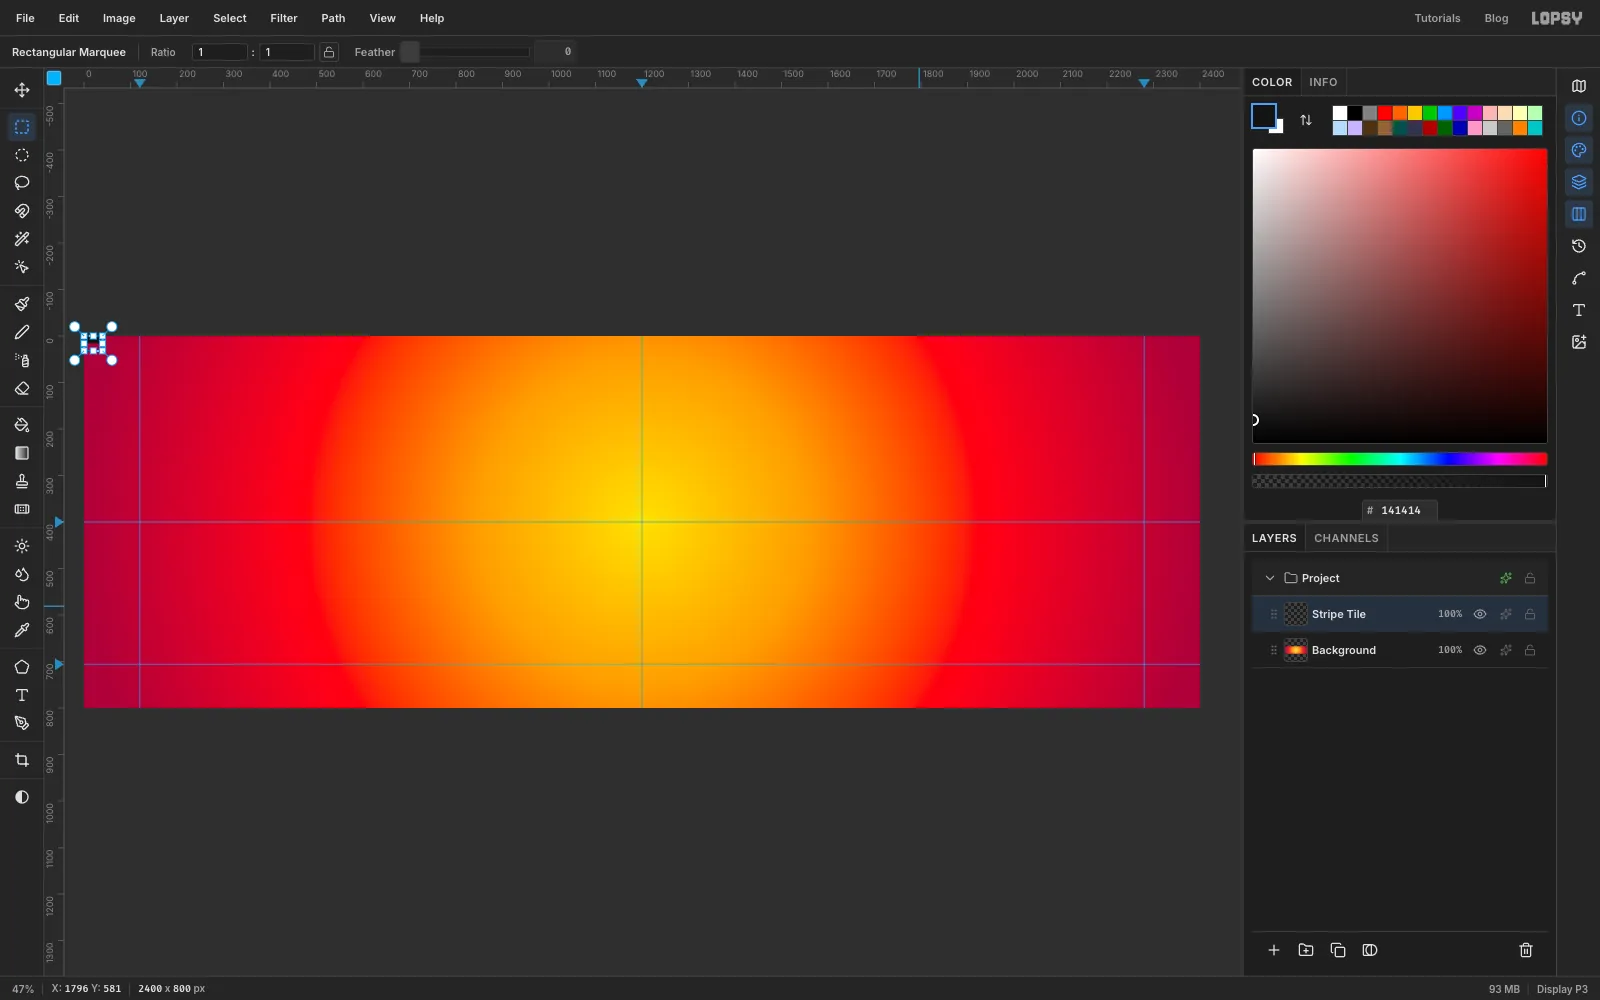
Select Layer 1 and rename it Stripe Tile. Pick the Rectangular Marquee and click once on the canvas without dragging. That opens a dialog where you can type exact corners. Enter From 0, 0 and To 40, 16, click Select, set the foreground to and choose Edit → Fill.
Now make the selection the full tile. Press Cmd+D first: with a selection active, a single marquee click just deselects instead of opening the dialog. Then click again and enter From 0, 0 To 40, 32. That's a black bar on the top half and empty space on the bottom half. Choose Edit → Define Pattern, press Cmd+D to deselect, then delete the Stripe Tile layer with the trash button. The pattern is kept.
-
Fill a layer with stripes
Select Background and click New Group at the bottom of the Layers panel. Double-click the group's name and call it Op Field. Click Add Layer, name the new layer Op Stripes, select the whole canvas with Cmd+A, fill it with white and press Cmd+D.
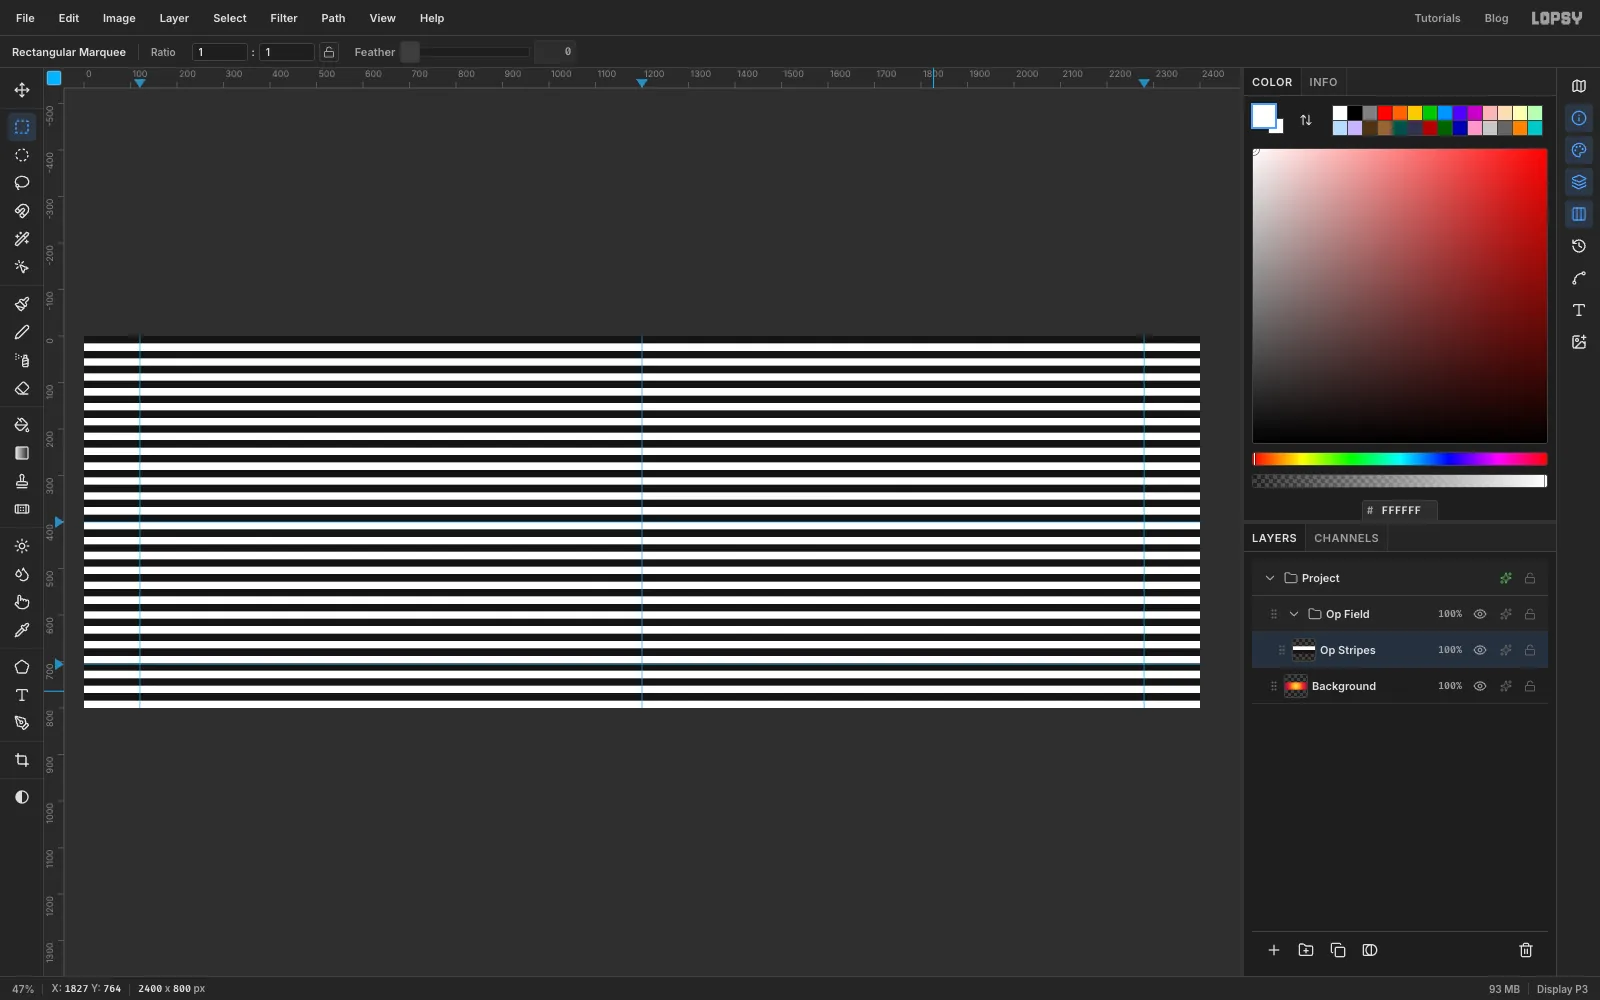
Choose Edit → Fill with Pattern…, click your stripe pattern and click Apply. The tile repeats across the whole layer as even 16 px stripes.
-
Bulge the stripes
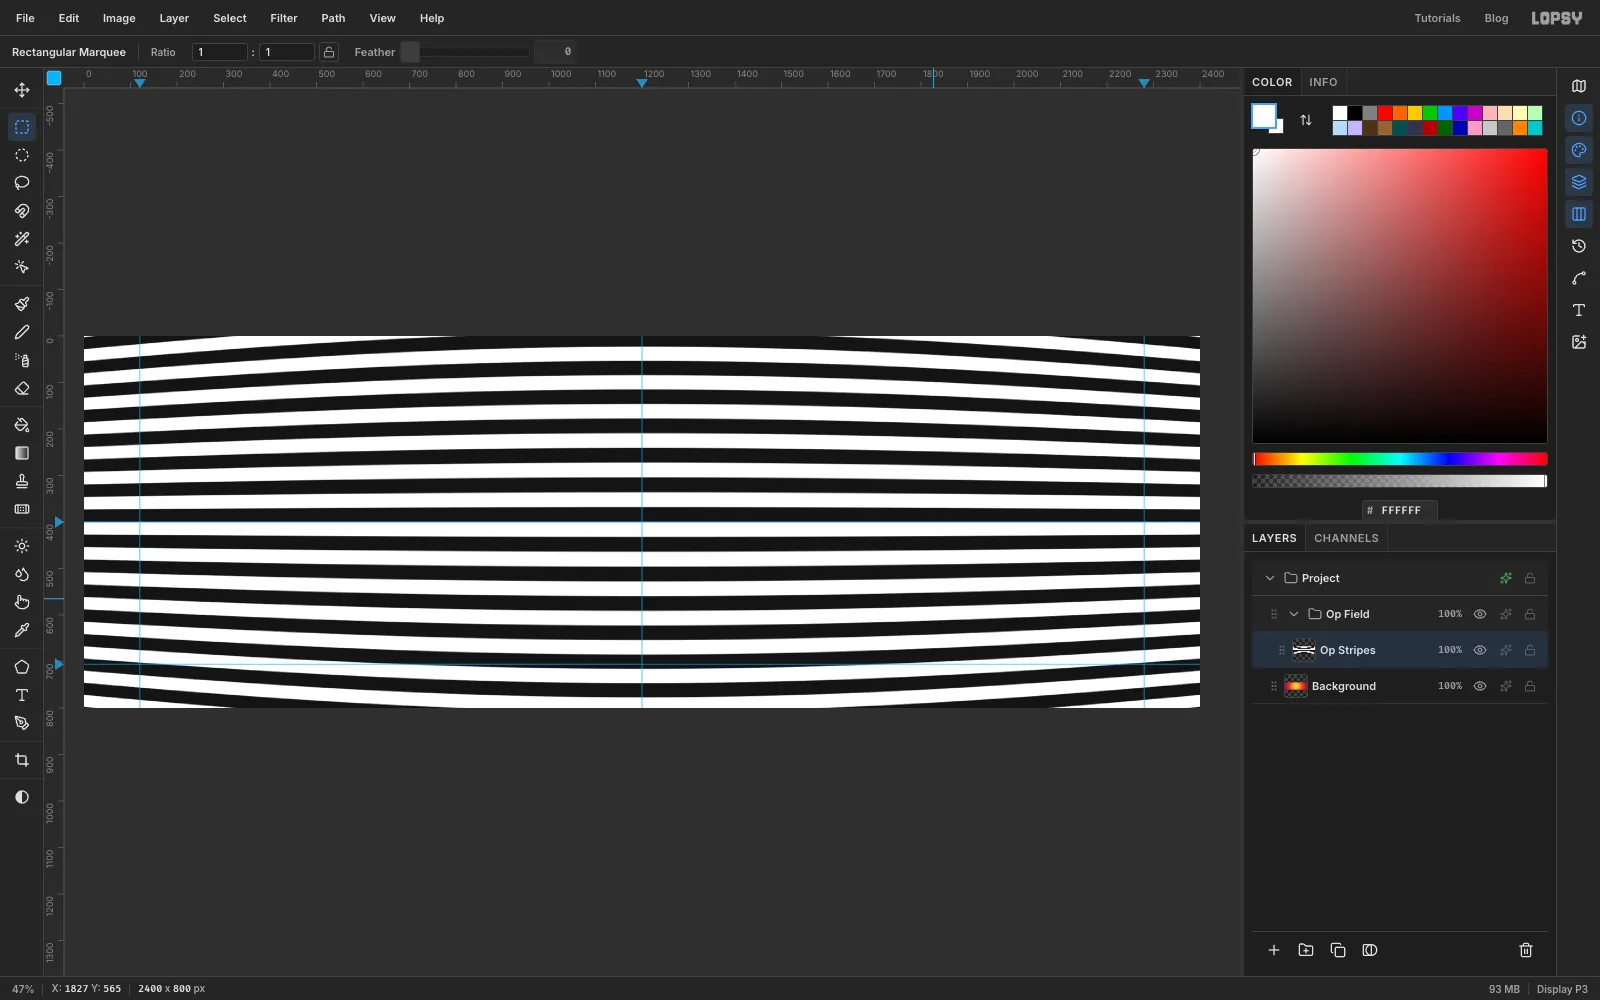
Choose Filter → Lens Distortion…. Set Strength to 100 and Zoom to 200, and click Apply. The stripes swell in the middle and squeeze together at the ends, the same bulge Vasarely used to make a flat pattern look like a sphere.
The zoom matters. A strong barrel distortion pulls the corners of the layer inwards, and Zoom pushes them back out so no empty corners show.
-
Burst rays from the centre
Click Add Layer and name it Op Rays. Select all, fill the layer with black and deselect, then set the foreground colour to white.
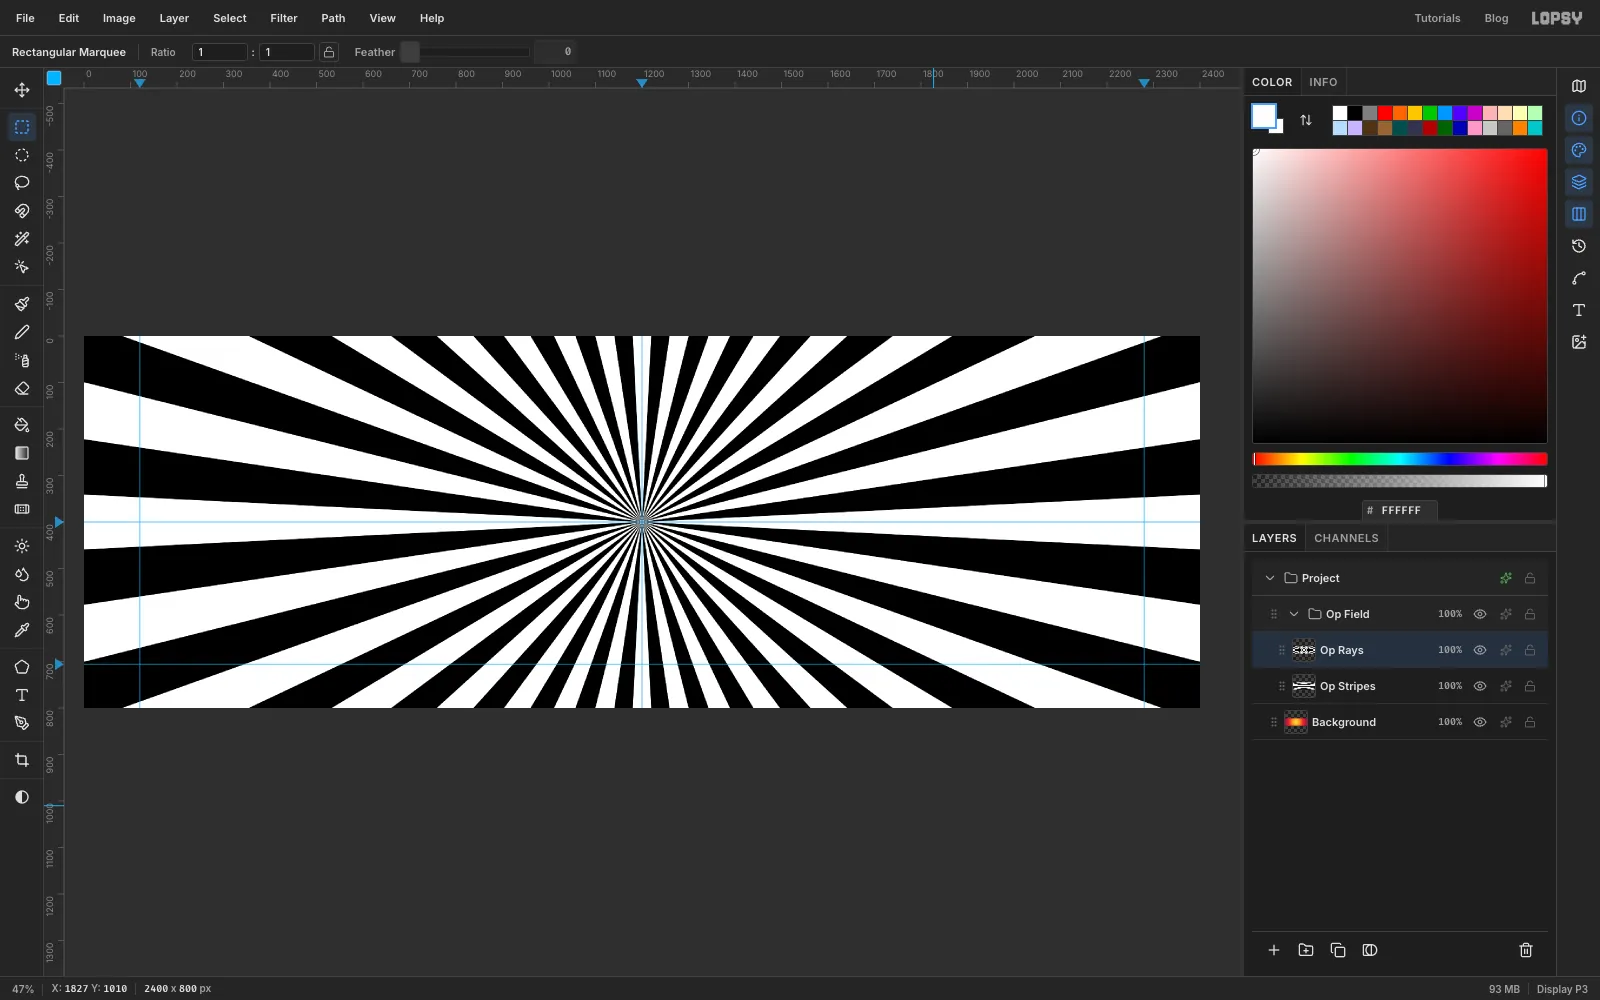
Choose Filter → Sunburst…. Set Rays to 32, Length to 150, Width to 50 and Taper to 0, and leave Center X and Center Y at 50. Click Apply. Sunburst paints its rays in the foreground colour, so you get white wedges on black, all meeting at the centre of the canvas.
-
Turn stripes and rays into a checker
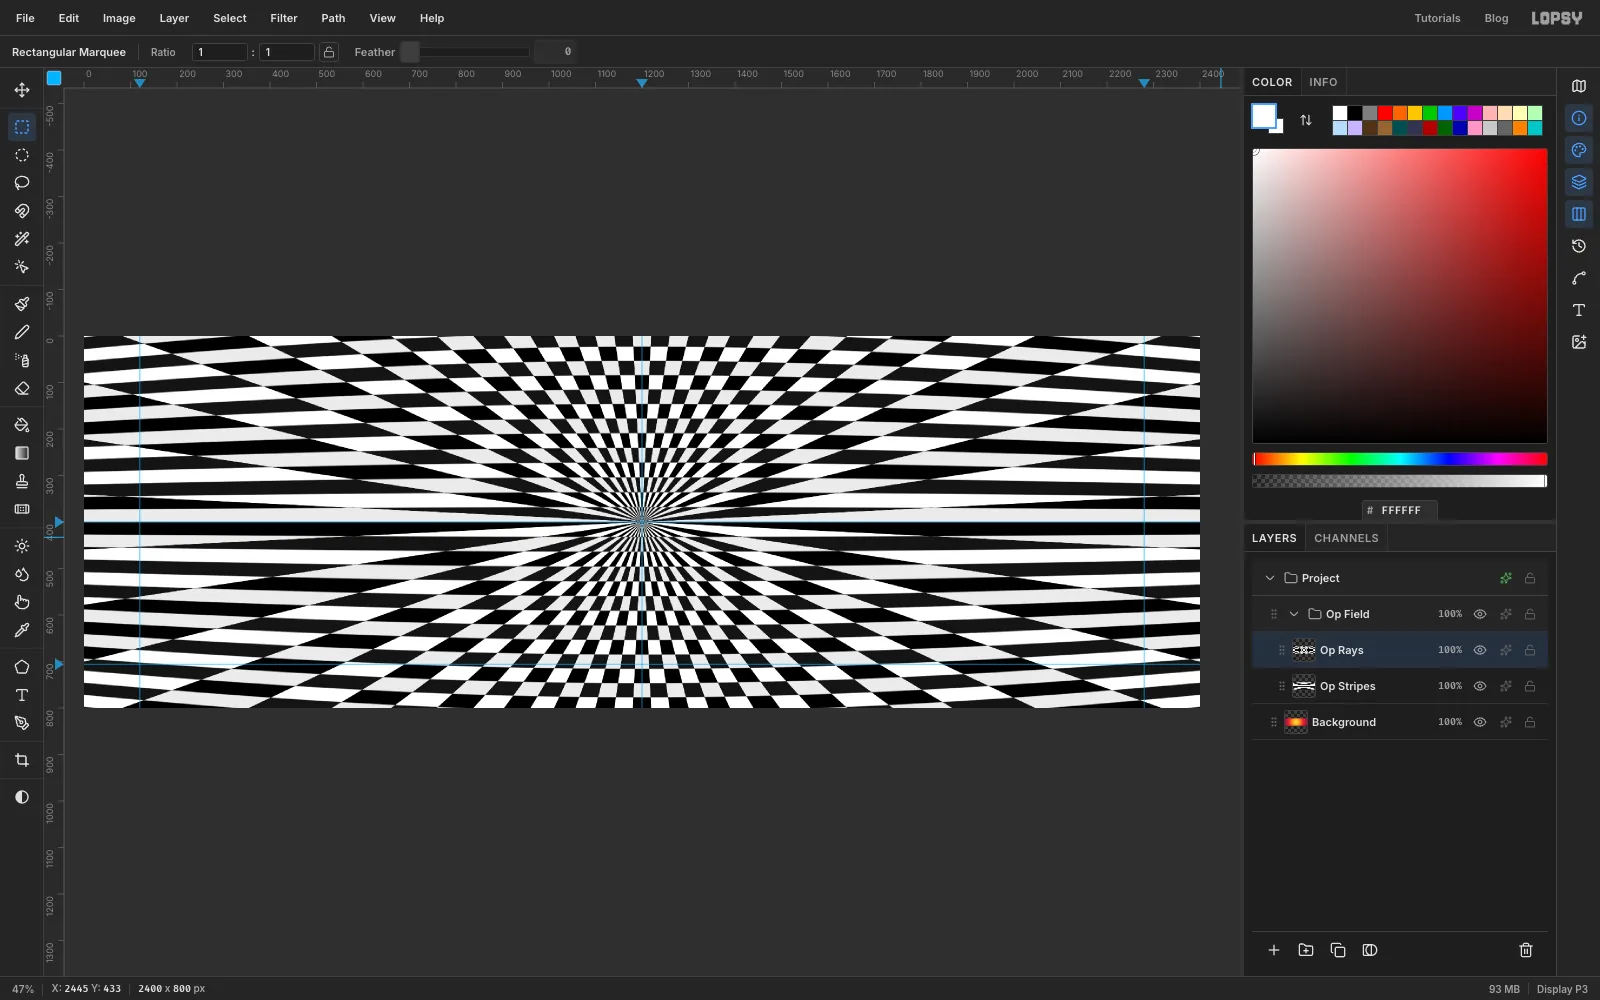
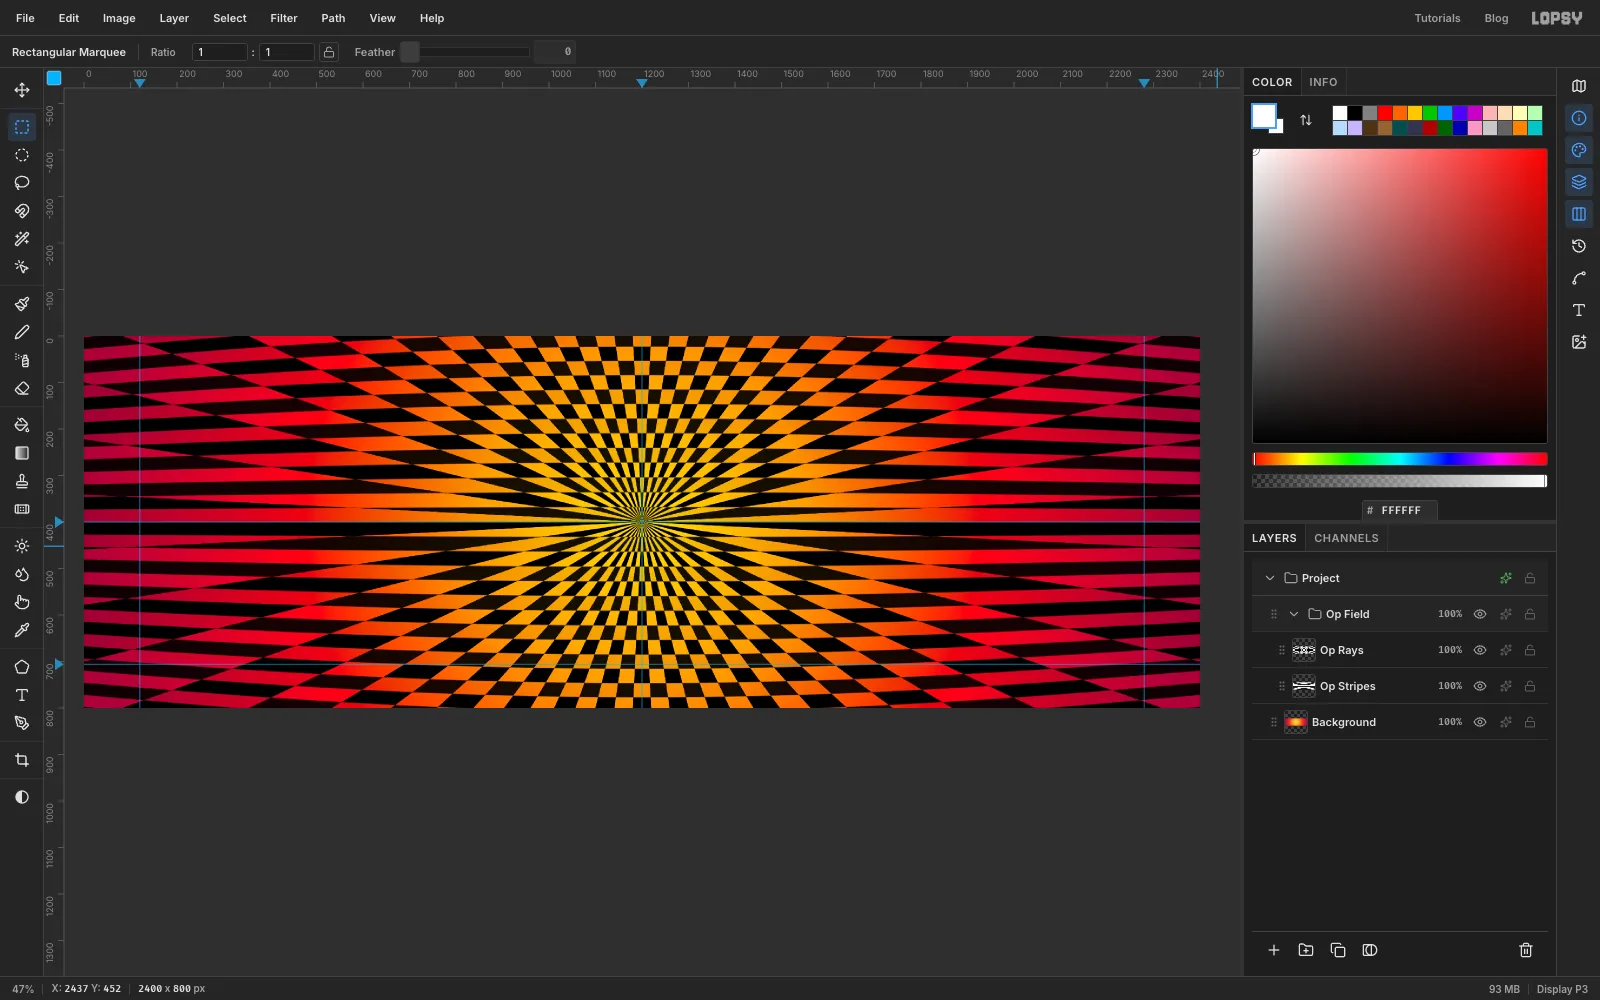
Open the Op Rays layer's effects drawer (the sparkle button on its row) and set Blend to Difference. Wherever a white ray crosses a white stripe the two cancel to black, and wherever it crosses a black stripe it shows white. The result is a checkerboard that fans out from the middle and bends with the bulge. That interference is the heart of op art.
-
Multiply the checker over the colour
Select the Op Field group, open its effects drawer and set its Blend to Multiply. White multiplies to nothing and black stays black. The checker's white squares now show the radial background, and the board turns yellow and orange at the centre and red at the ends.
-
Start the barber pole
Click the arrow beside Op Field to collapse it, select it, and click New Group. Name the group Pole. Add an empty layer called Pole Outline now; you'll fill it at the end of the pole. Then add a layer called Pole Body.
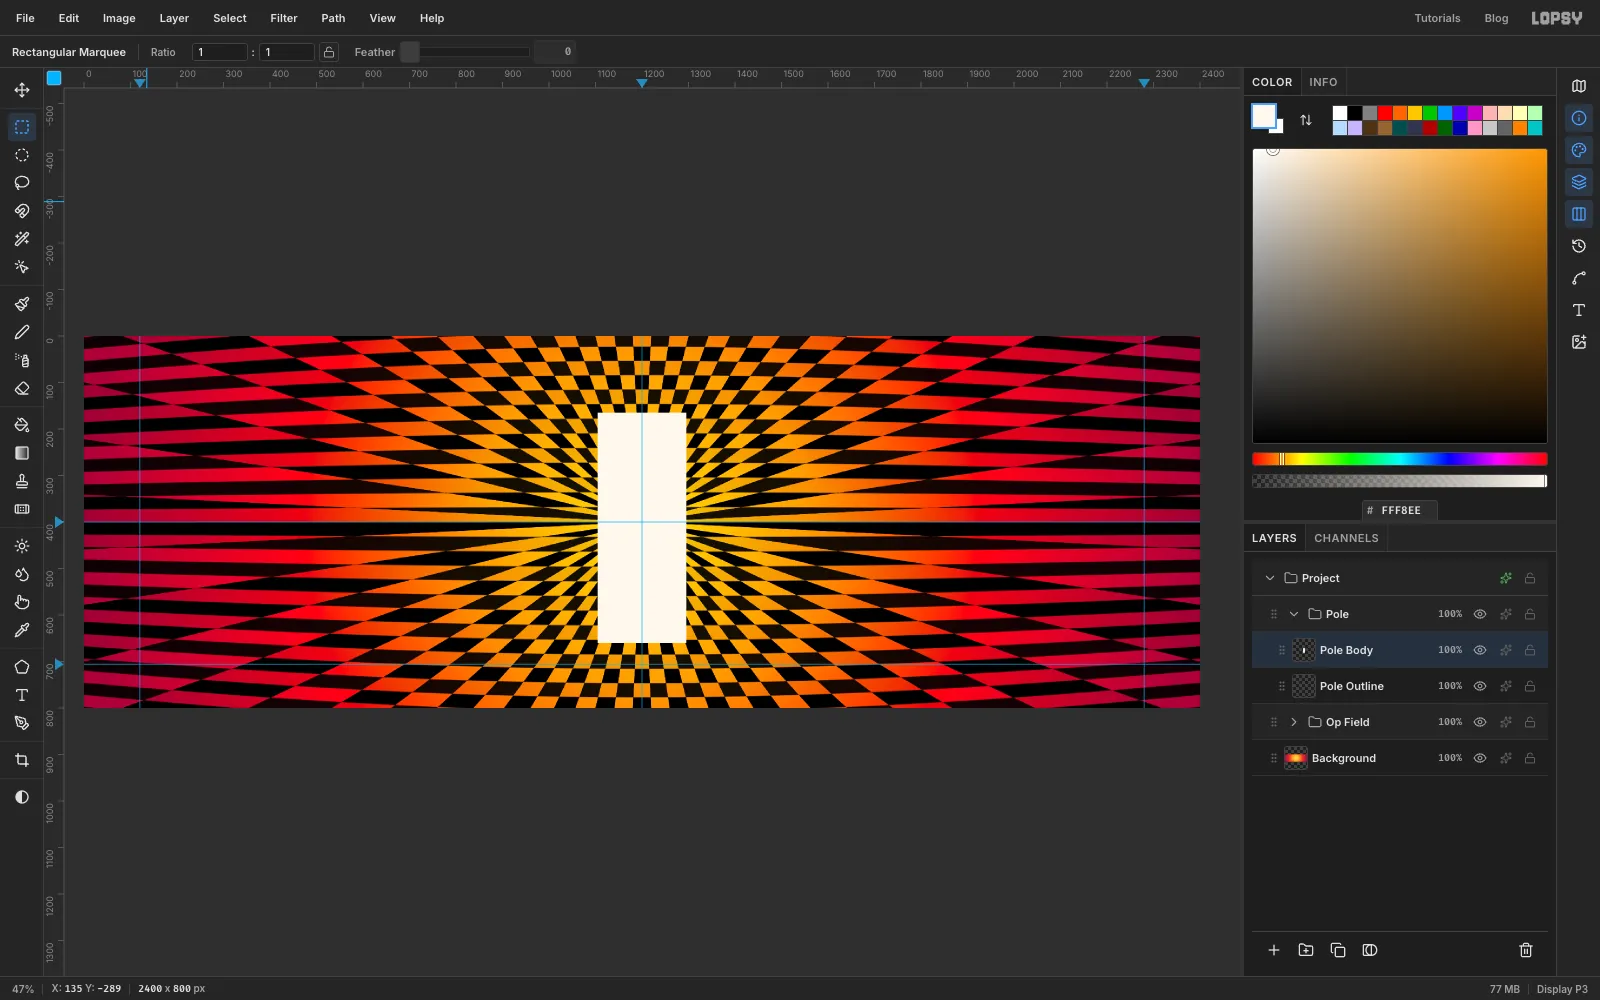
Click once with the Rectangular Marquee and enter From 1105, 165 To 1295, 660. Fill it with , a warm white, and deselect.
-
Fill a band of stripes
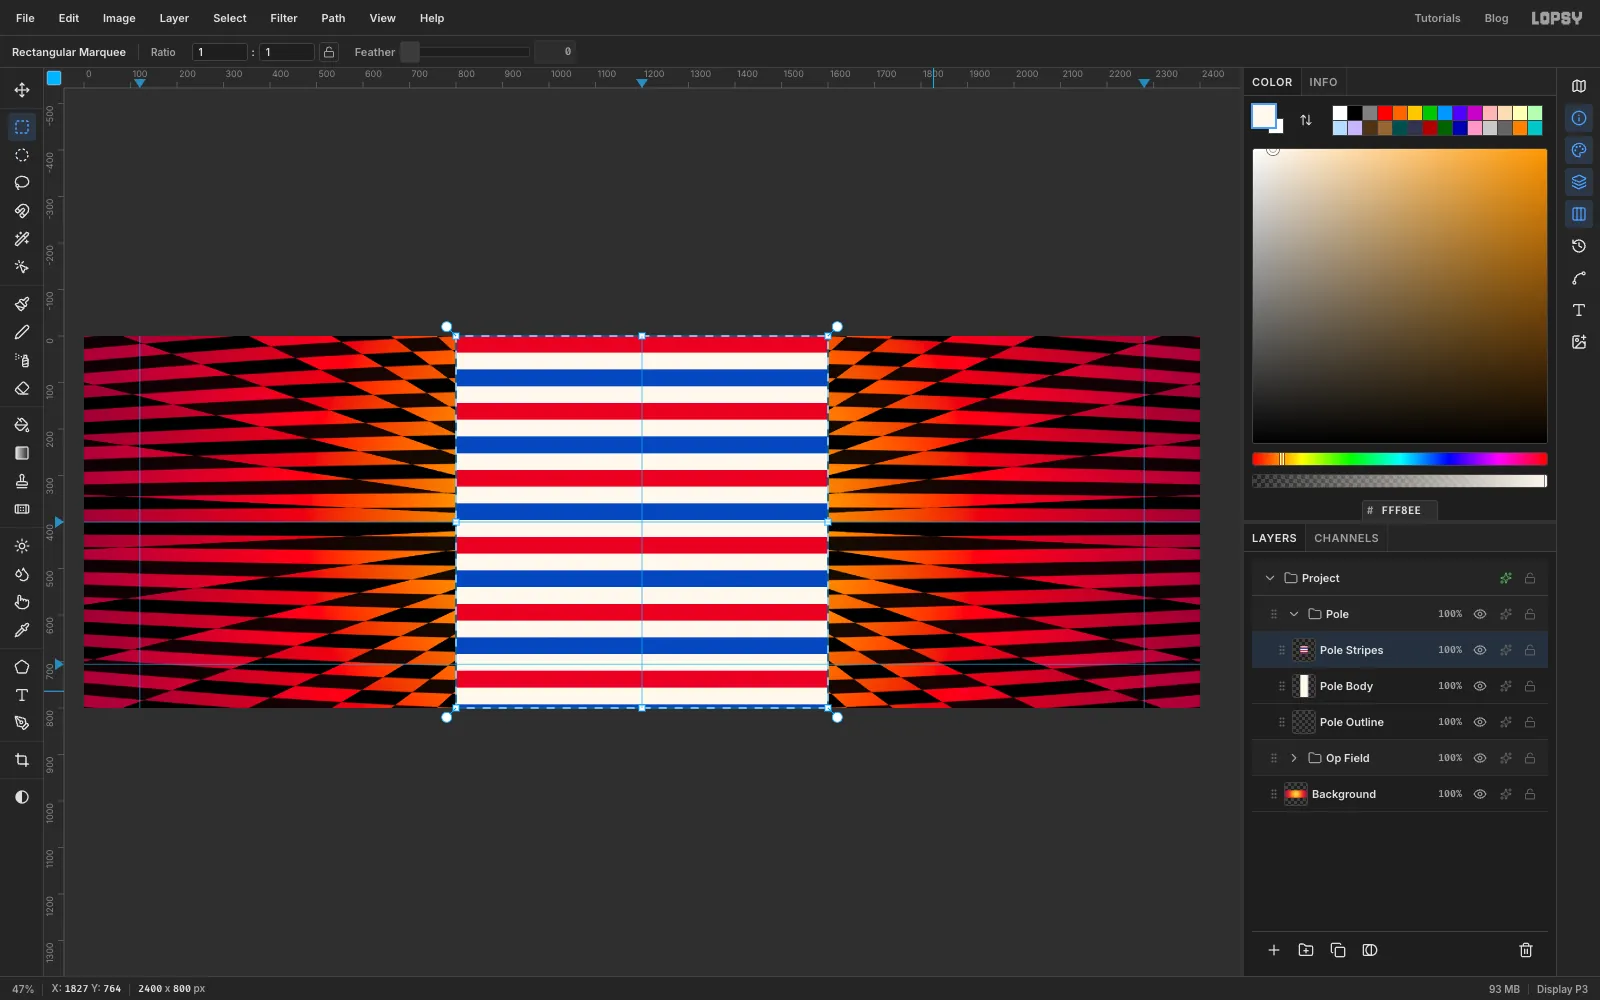
Barber-pole stripes come from a second pattern. Add a temporary layer and make four 20 × 36 px rectangles stacked down the top-left corner. Use the marquee dialog for each one, and deselect after each fill so the next click opens the dialog again: From 0, 0 To 20, 36 filled with red , then 0, 36 → 20, 72 in white , 0, 72 → 20, 108 in blue , and 0, 108 → 20, 144 in white again. Select From 0, 0 To 20, 144, choose Edit → Define Pattern, deselect and delete the temporary layer.
Select Pole Body and add a layer above it called Pole Stripes. Click once with the Rectangular Marquee and enter From 800, 0 To 1600, 800, then choose Edit → Fill with Pattern…, click the new red, white and blue pattern and click Apply.
-
Tilt the bands
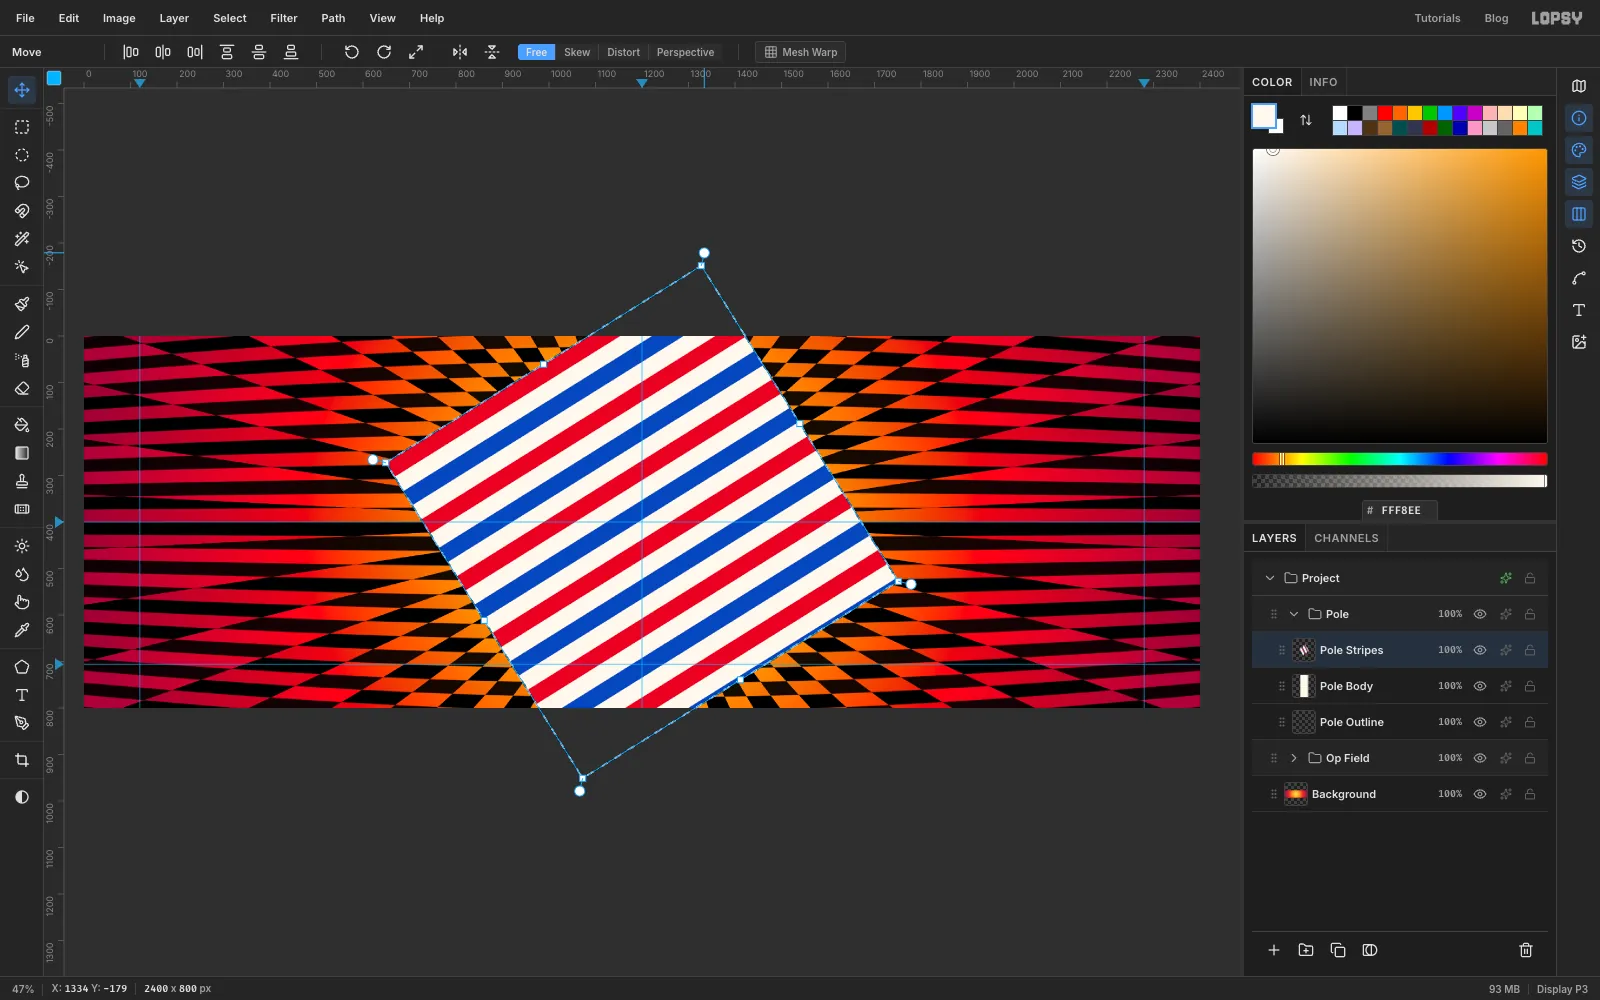
Keep the marquee and pick the Move tool. A transform box appears around the square, with round rotation handles just outside each corner. Drag the top-right rotation handle anticlockwise until the stripes lean about 32°. Press Cmd+D to commit the rotation.
The square is much bigger than the pole, so even after the turn it still covers the pole completely.
-
Clip the stripes to the pole
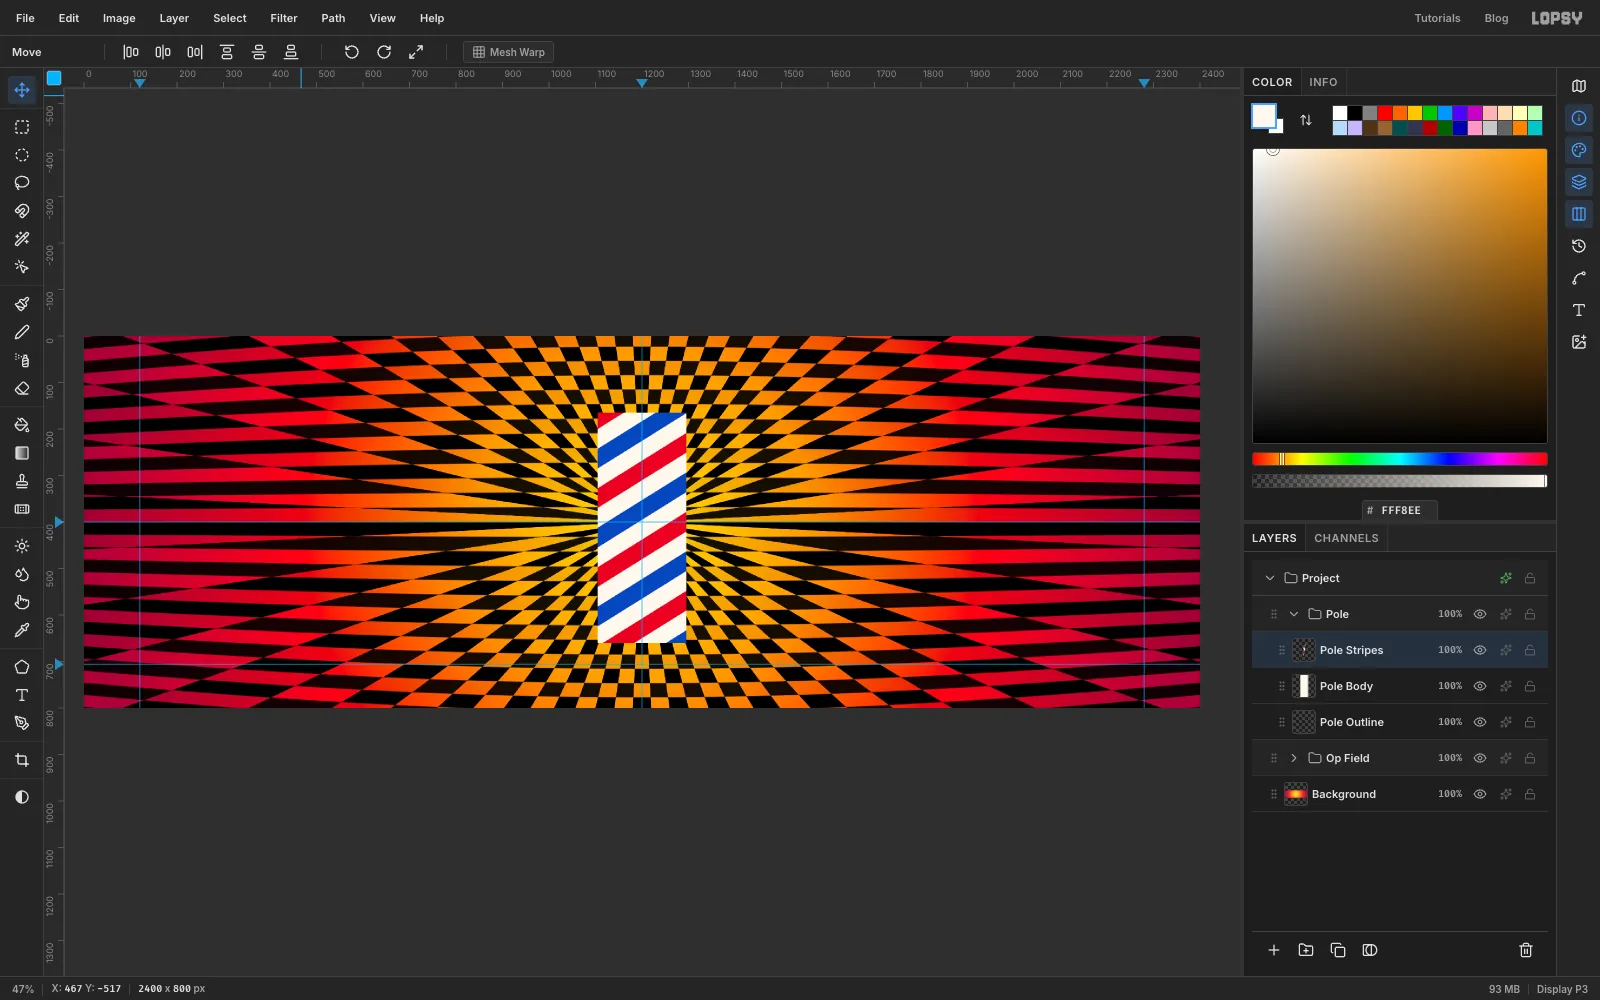
Hold Cmd and click the Pole Body thumbnail in the Layers panel. That selects the pole's shape. Choose Select → Inverse, make sure Pole Stripes is still the active layer, press Delete and deselect. The bands now stop exactly at the pole's edges.
-
Shade the cylinder
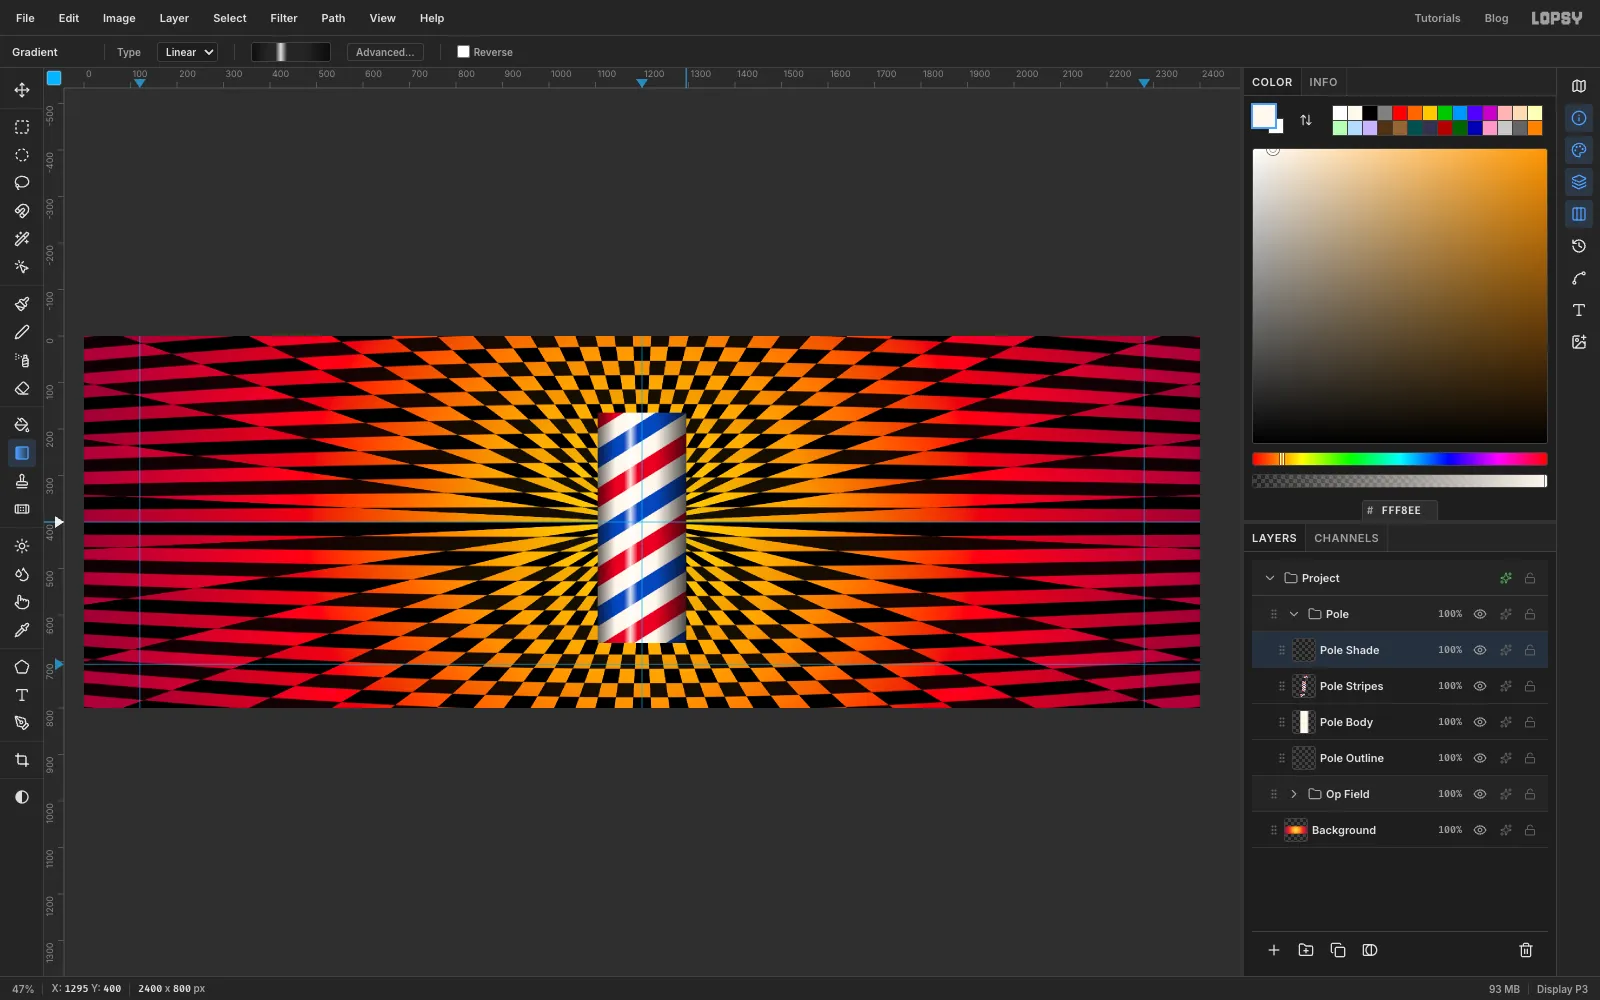
Add a layer called Pole Shade and Cmd-click the Pole Body thumbnail again. With the Gradient tool set to Linear, make a gradient that uses only black, white and opacity:
- black at 60 % opacity at the left end, fading to black at 0 % by 20 %
- white at 0 % at 30 %, rising to white at 85 % at 37 %, and back to 0 % at 45 %
- black at 0 % at 66 %, ending in black at 70 % at the right end
Set each stop's opacity with the editor's opacity strip. Drag from the pole's left edge to its right edge, holding Cmd so the drag snaps level, and deselect. The dark edges and the bright streak make the flat stripes read as a glass tube.
-
Add chrome caps
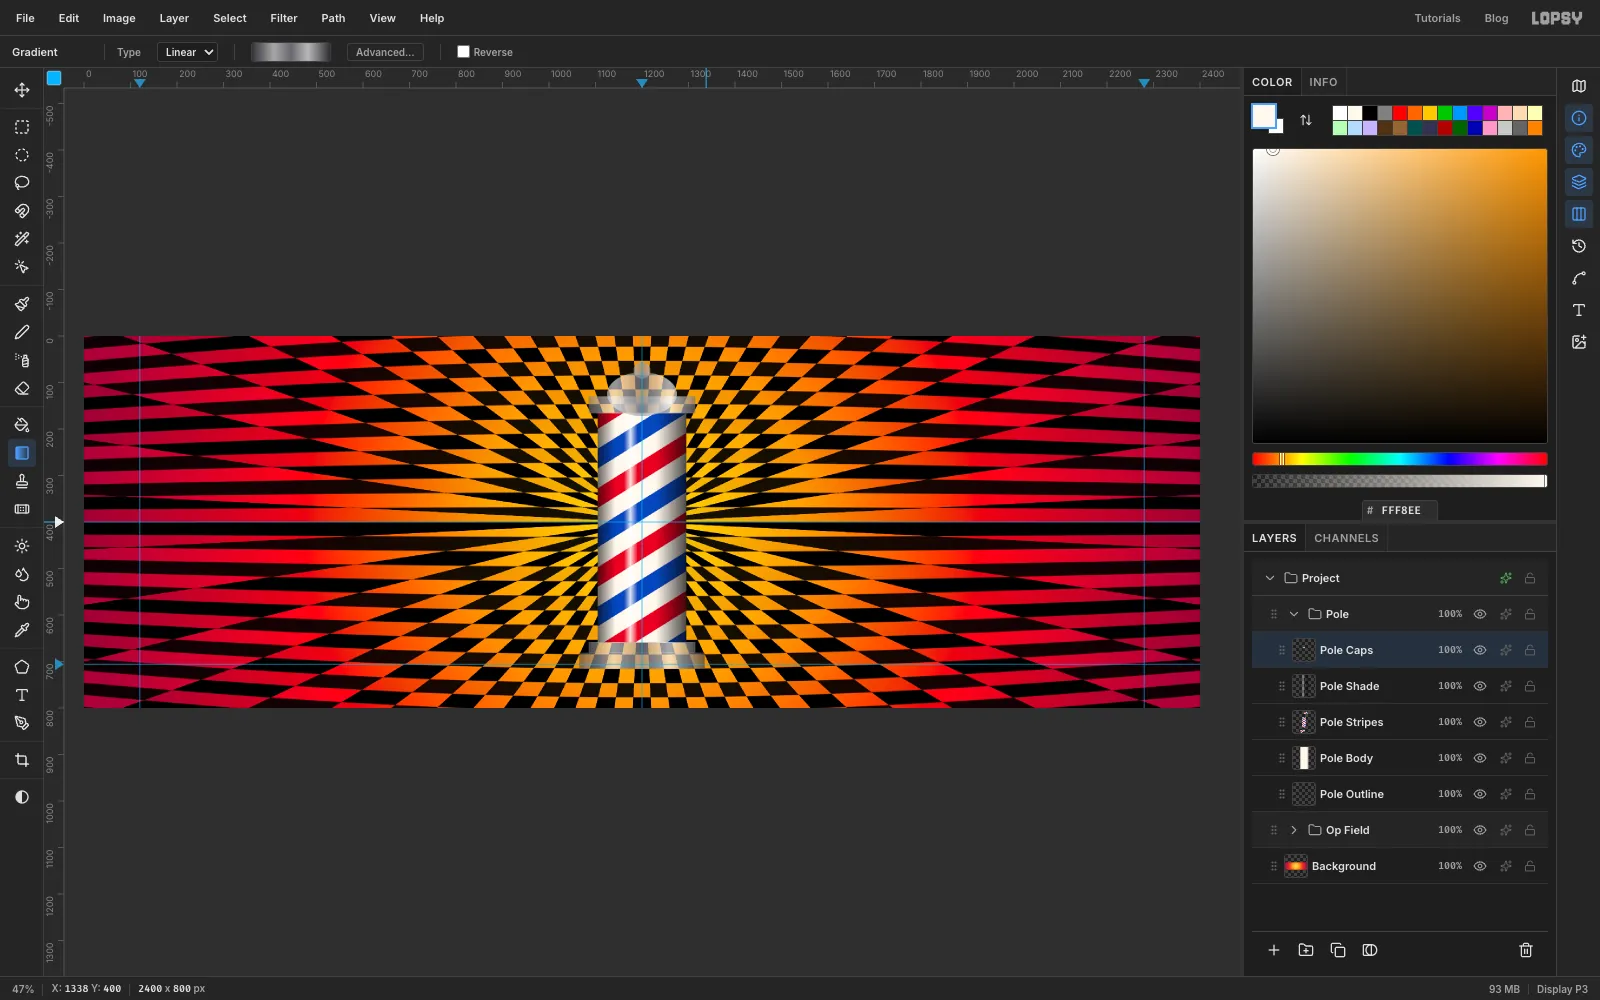
Add a layer called Pole Caps. Set up a linear chrome gradient: , at 28 %, at 50 %, at 72 % and . Then make each piece of the caps with a marquee and fill it by dragging the gradient across the whole pole, from just left of the foot to just right of it, with Cmd held to keep it level. Deselect after each piece:
- the dome: an Elliptical Marquee from 1125, 78 to 1275, 172
- the top cap: a rectangle from 1085, 130 to 1315, 166
- the finial ball: an ellipse from 1182, 56 to 1218, 92
- the collar: a rectangle from 1085, 658 to 1315, 682
- the foot: a rectangle from 1065, 681 to 1335, 716
Use the same drag for every piece so the highlights line up. The bottom of the dome is hidden behind the top cap.
-
Ink the outline
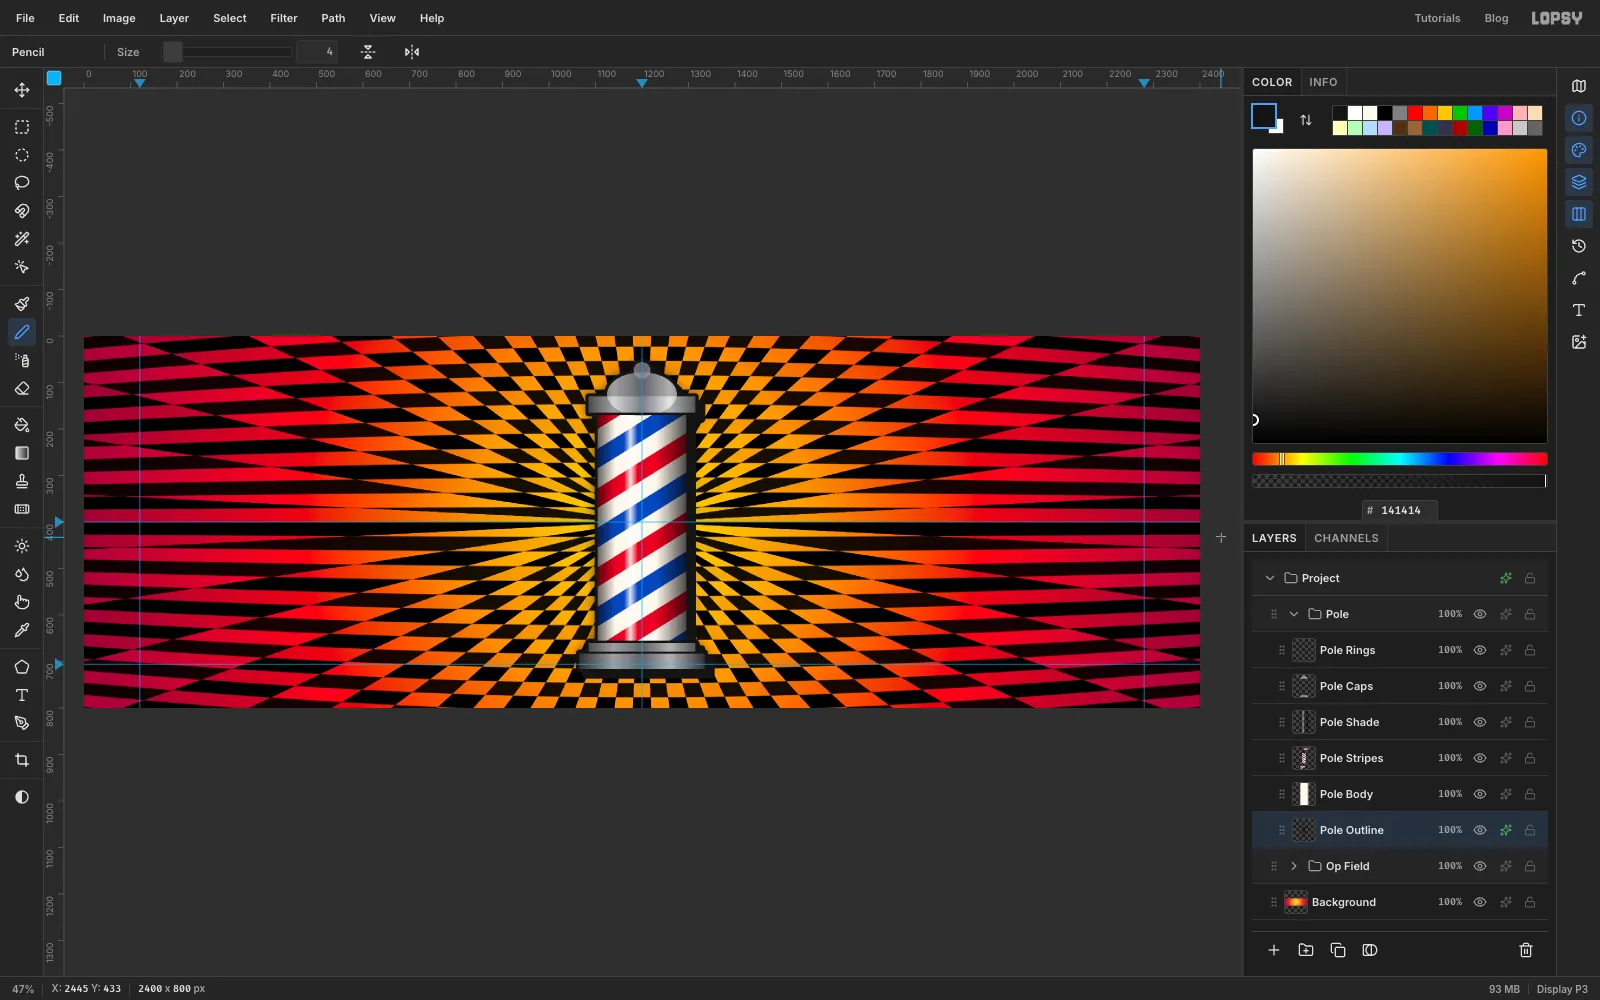
Add a layer called Pole Rings and draw the joins with the Pencil: set Size to 5 and the colour to , click at the left end of the top cap's lower edge and Shift-click at the right end for a straight line. Do the same at the top of the collar, then draw a 4 px line where the collar meets the foot.
Now the outline. Cmd-click the Pole Body thumbnail, then Shift+Cmd-click the Pole Caps thumbnail to add the caps to the selection. Choose Select → Grow…, enter 7 and apply. Select the empty Pole Outline layer at the bottom of the group, fill with and deselect.
Open Pole Outline's effects and turn on Drop Shadow: Offset X and Y 14, Blur 0, Spread 0, Opacity 100, colour . That's the hard offset shadow of a comic panel. Add an Outer Glow in black at Size 40, Spread 0 and Opacity 55 too. It softens the checker right next to the pole so the stripes don't buzz against it.
-
Draw the first comic panel
Collapse Pole, select it and click New Group; name it Barber Panel. Add a layer called Panel L.
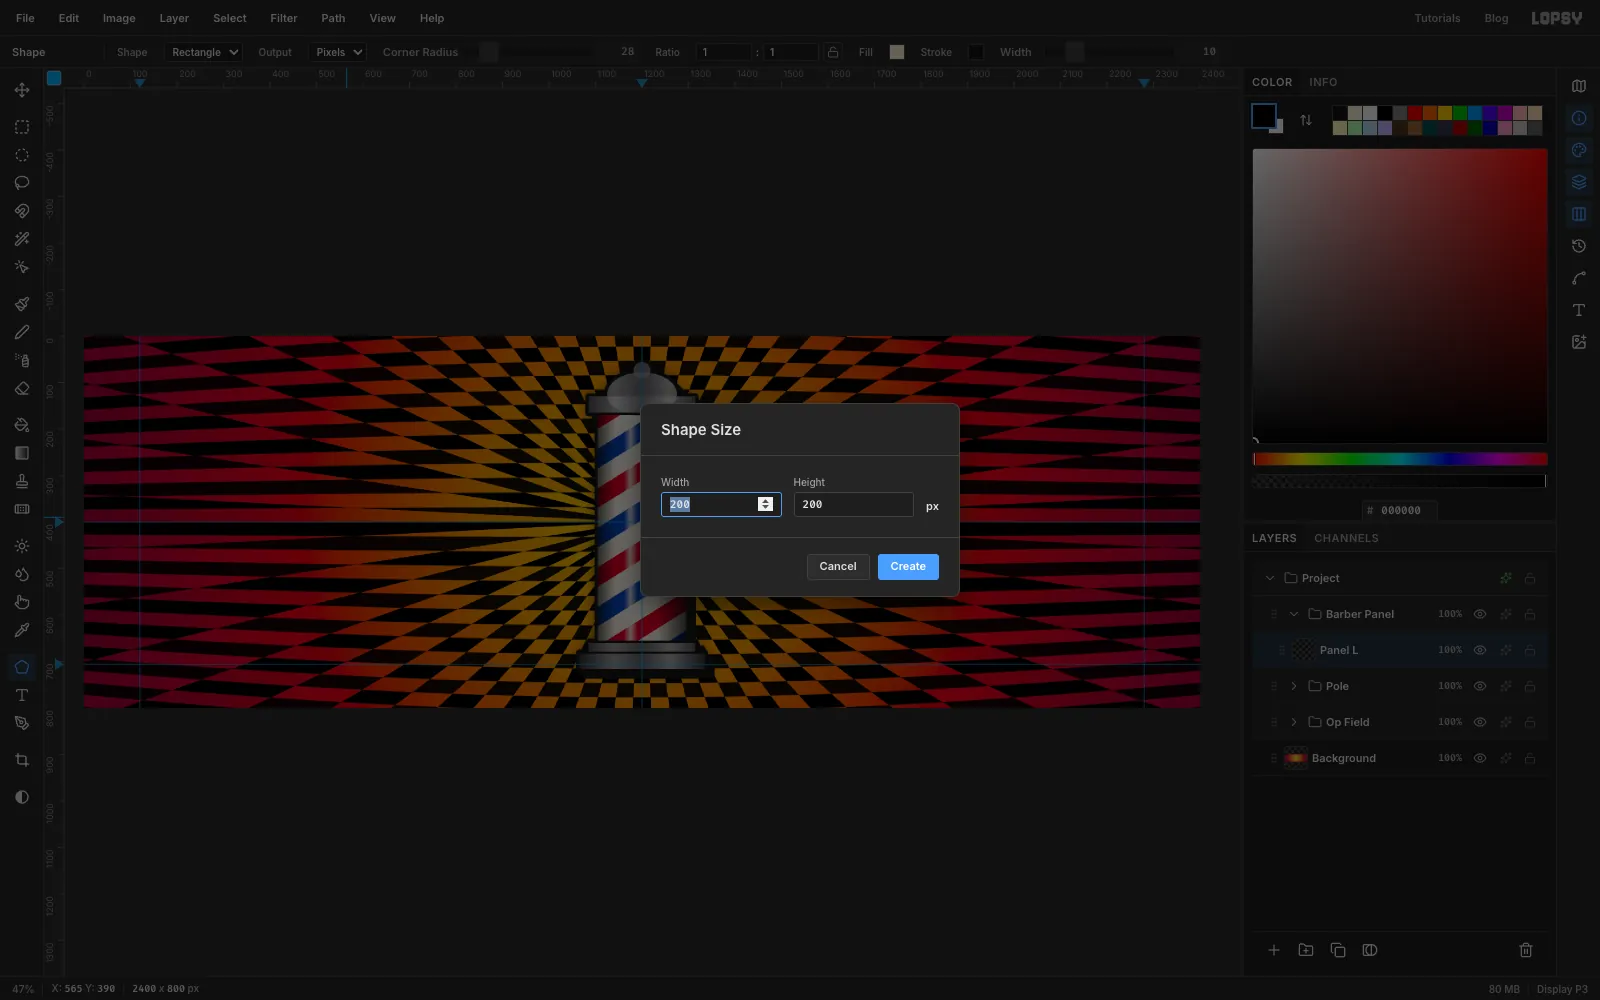
Pick the Shape tool. Set Shape to Rectangle, Output to Pixels and Corner Radius to 28. Click the Fill swatch and enter , then click the Stroke swatch, enter and set the stroke Width to 10.
Click once at about 565 on the top ruler, level with the middle guide. That's the centre of the space between the left margin and the pole. A click without a drag opens the Shape Size dialog. Enter 860 × 420 and click Create. The panel is drawn centred on your click.
-
Give the panel a shadow, keyline and grain
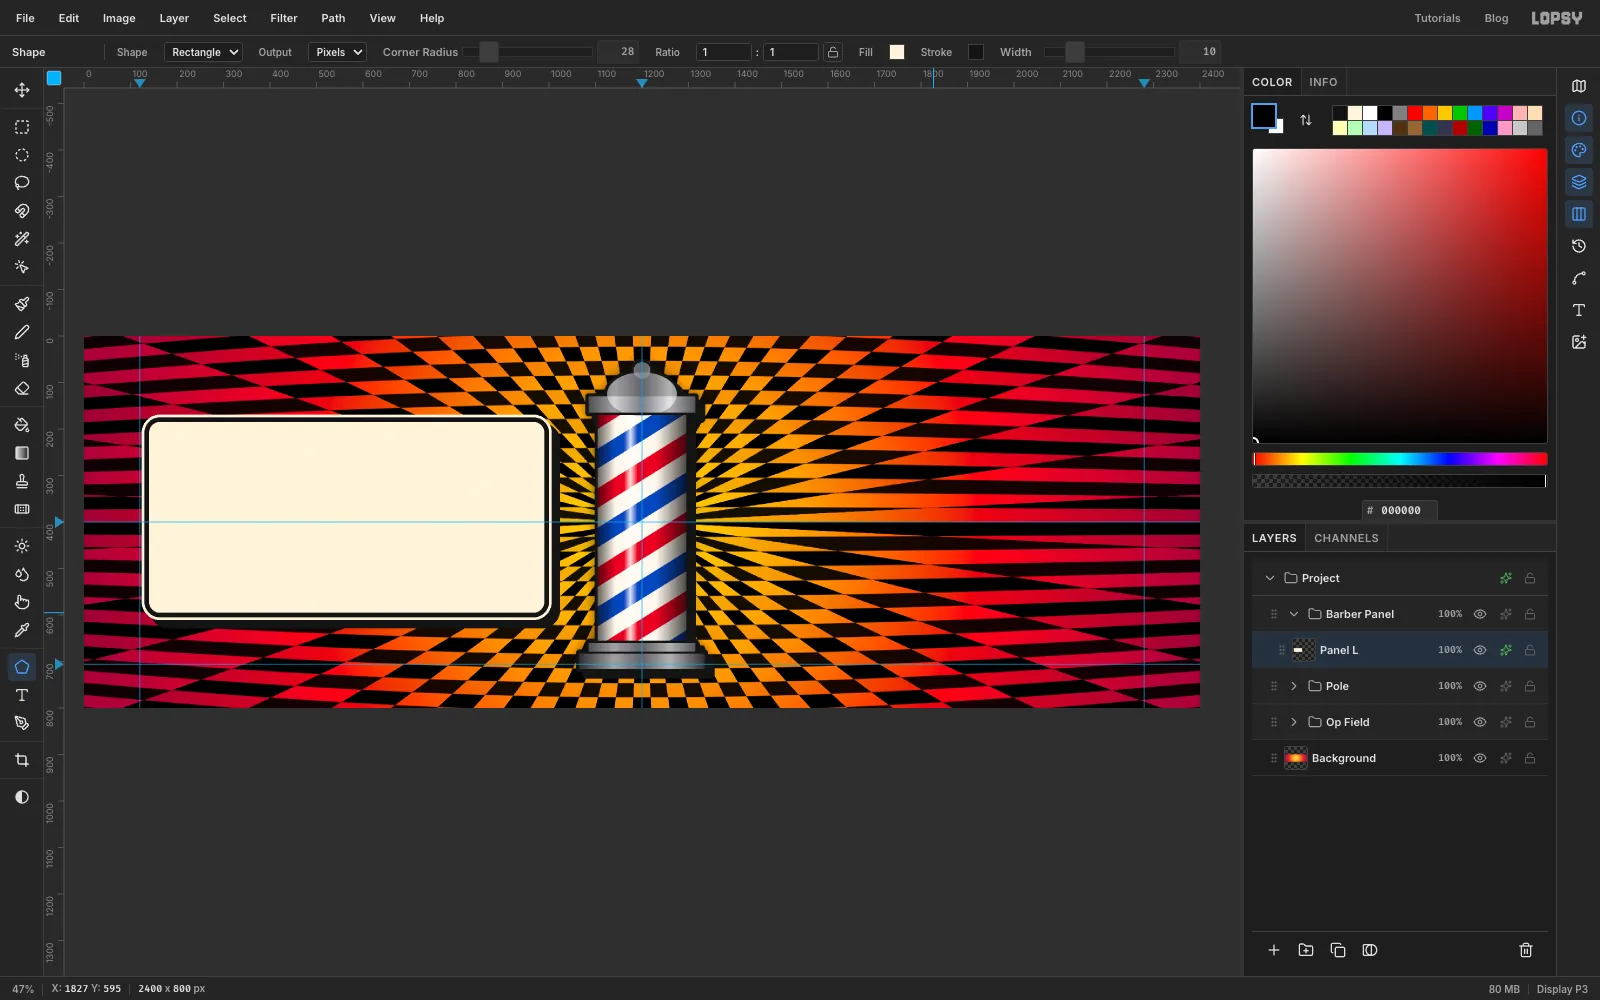
Open Panel L's effects. Turn on Drop Shadow with Offset X and Y at 18, Blur 0, Spread 0, Opacity 100 and colour . Then turn on Stroke: colour , Width 6, position Outside. The thin cream keyline outside the black border keeps the panel from melting into the black squares behind it.
Close the drawer and choose Filter → Add Noise…. Set Amount to 14, pick Mono and Gaussian, and click Apply. It gives the cream a little printed paper tooth.
-
Lay down a gradient for the dots
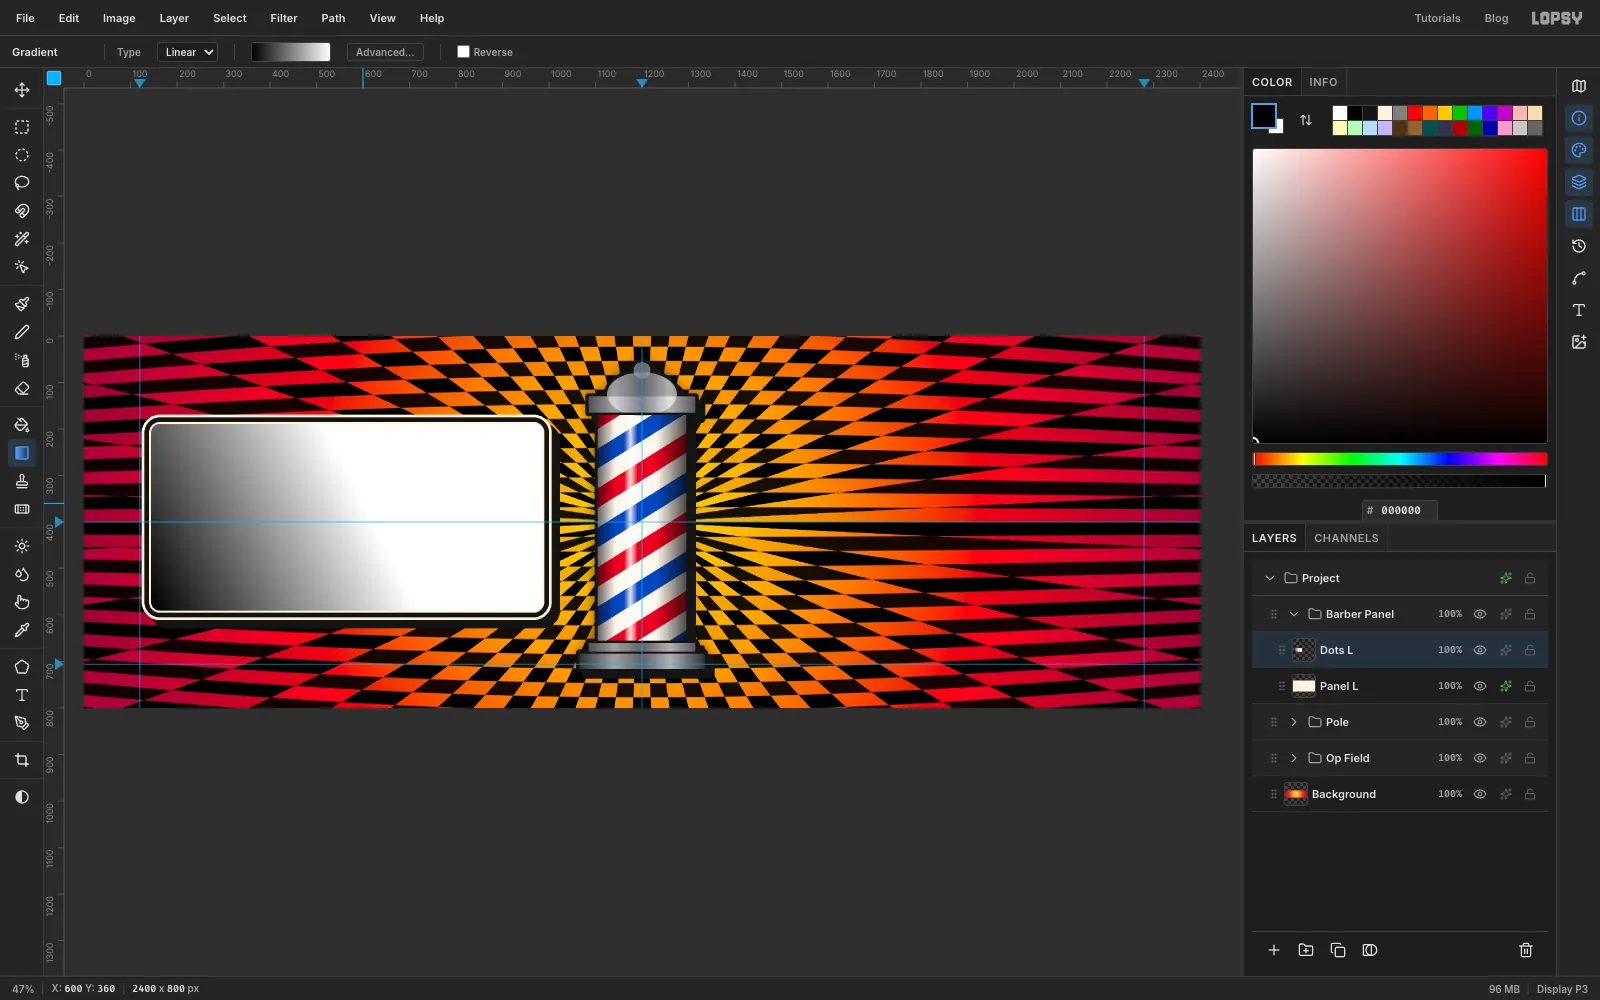
Add a layer called Dots L. Cmd-click the Panel L thumbnail, choose Select → Shrink… and shrink by 14 so the selection sits inside the black border.
Pick the Gradient tool, set it to Linear with a plain black-to-white gradient, and drag from the panel's bottom-left corner up towards the middle of the panel. Deselect. The darkness of this gradient is going to decide how big each dot is.
-
Turn it into Ben-Day dots
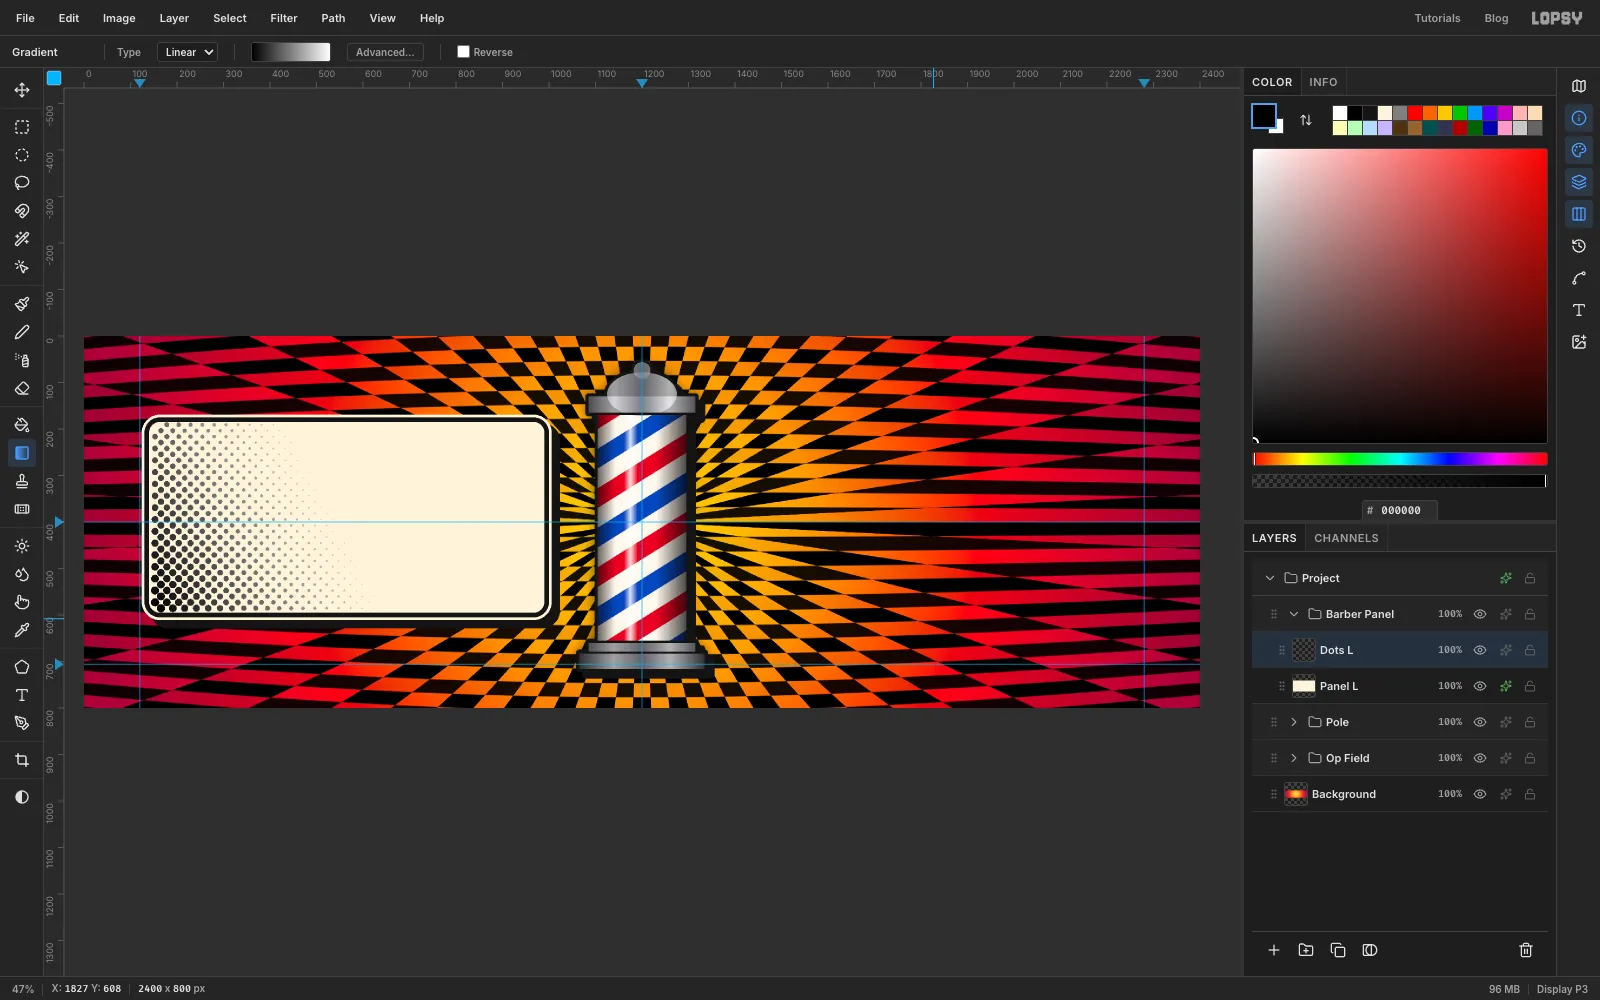
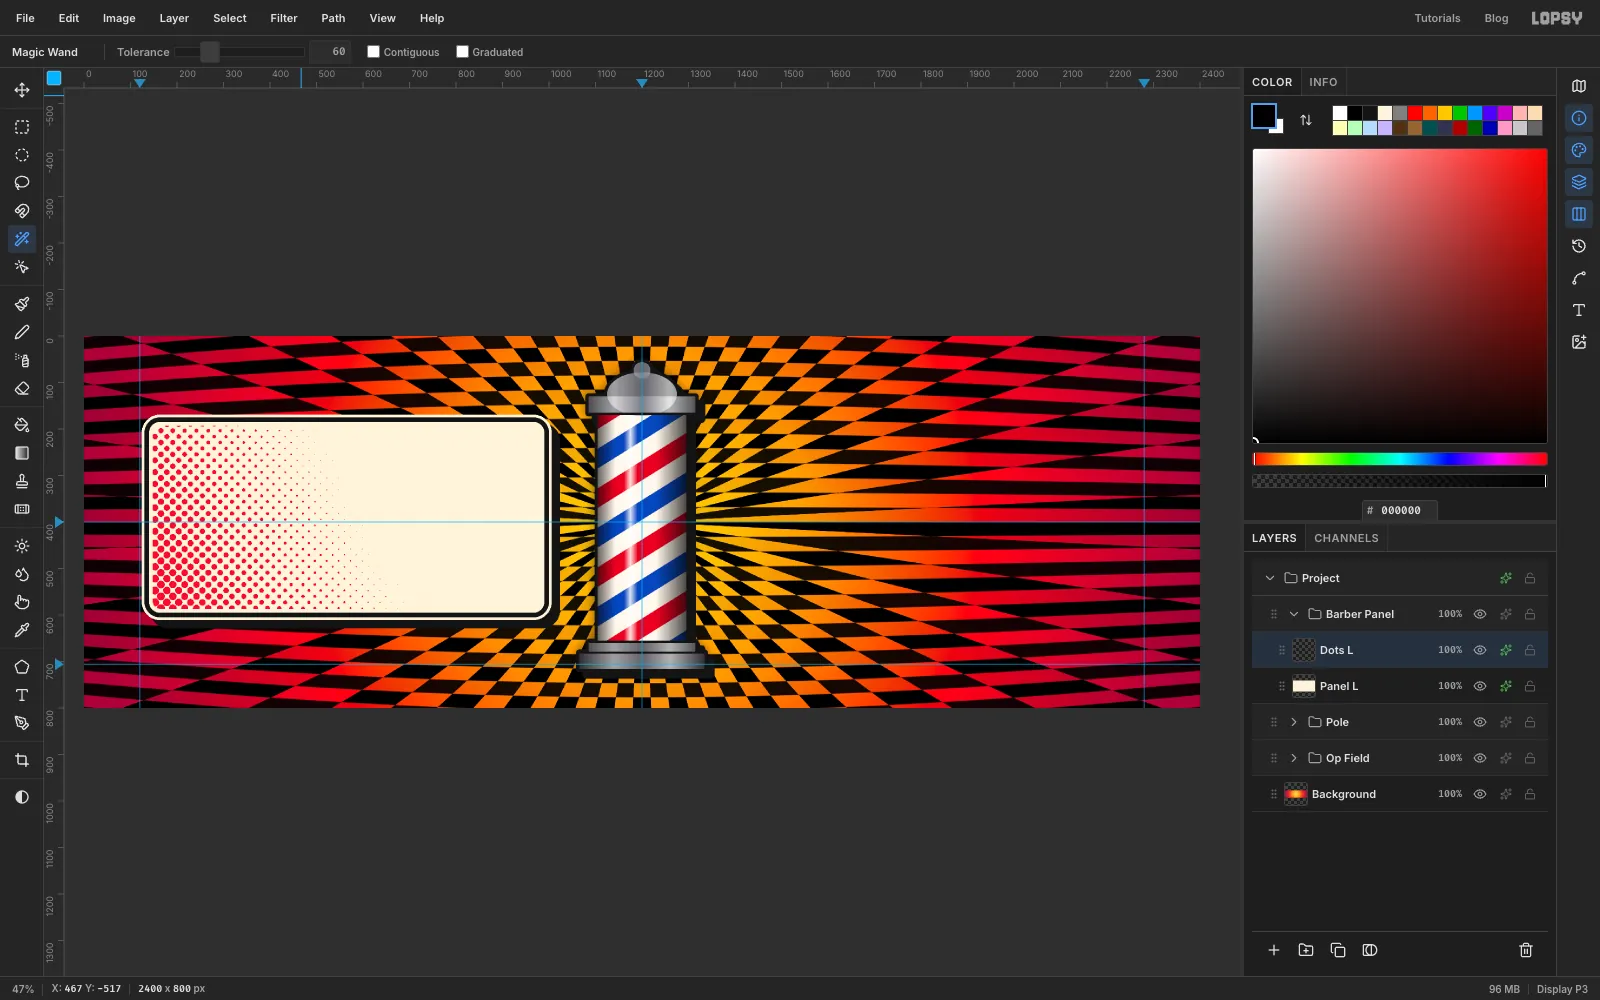
Choose Filter → Halftone…. Set Dot Size to 18, Density to 1, Angle to 45 and Softness to 0, and click Apply. Dark areas become big dots and light areas become small ones, just like a newspaper printing screen.
-
Make the dots red
Pick the Magic Wand, set Tolerance to 60 and untick Contiguous. Click any white spot between the dots and press Delete to clear all the white at once, then deselect.
Open the Dots L effects and turn on Color Overlay with the colour . An overlay recolours every pixel on the layer, including the faint half-transparent dots along the edges, which a plain Fill would leave grey.
The Halftone grid can leave half dots in the panel's rounded corners. To trim them, Cmd-click Panel L, Shrink by 18, choose Select → Inverse, press Delete and deselect.
-
Set the BARBER headline
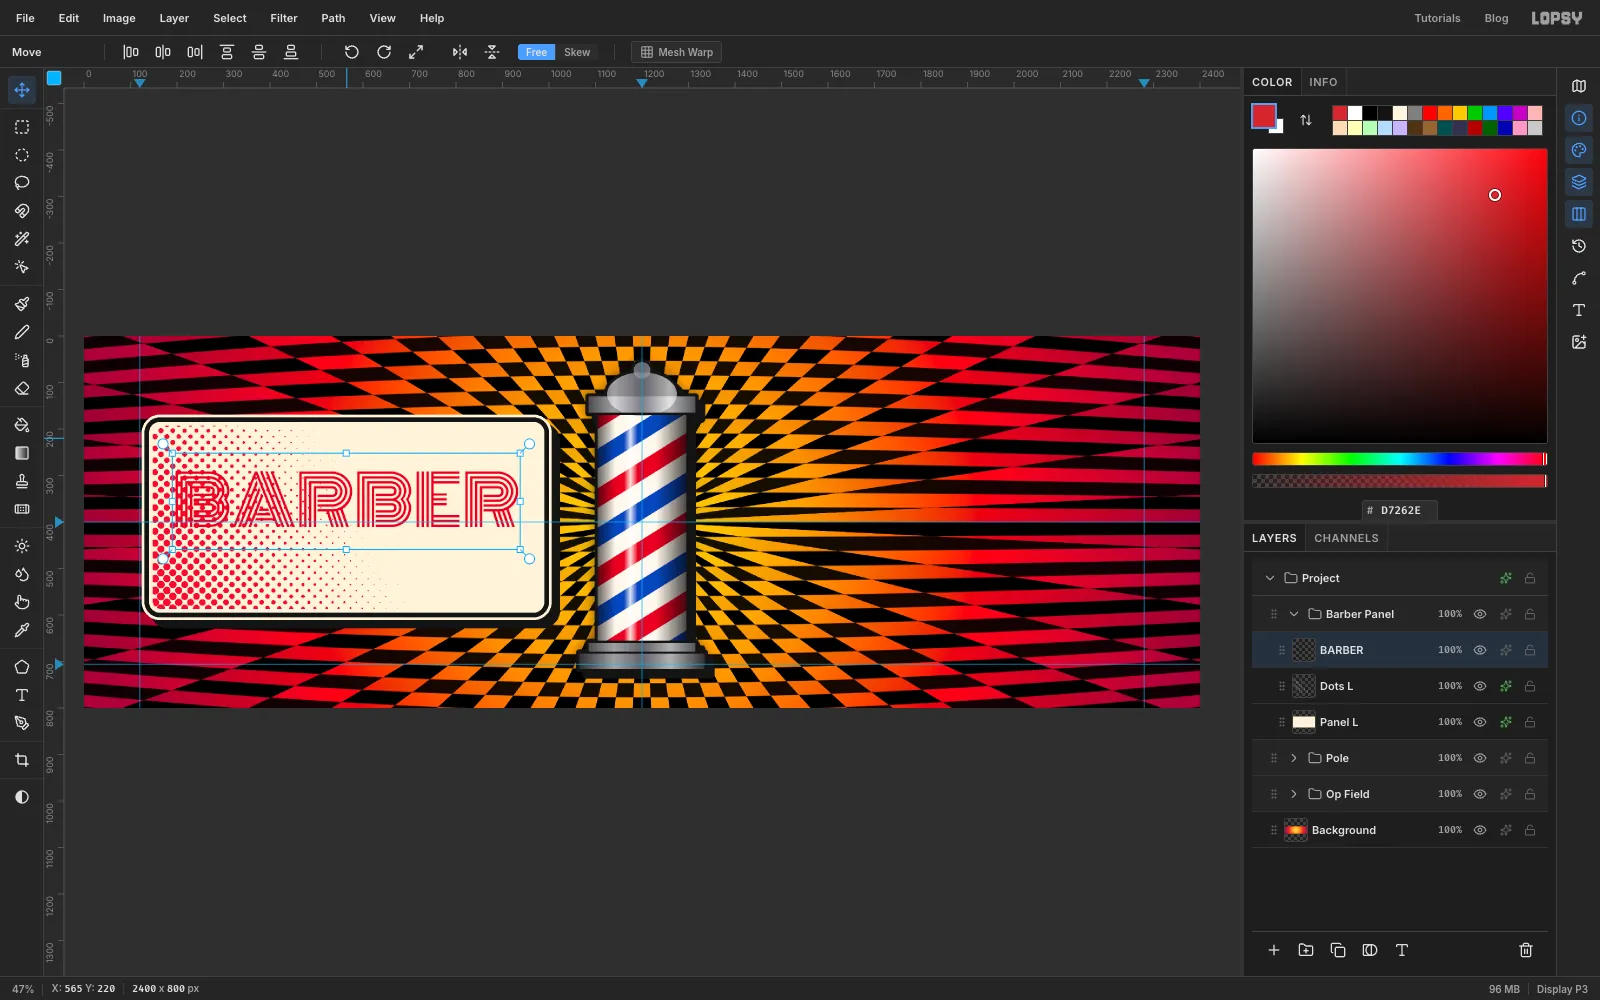
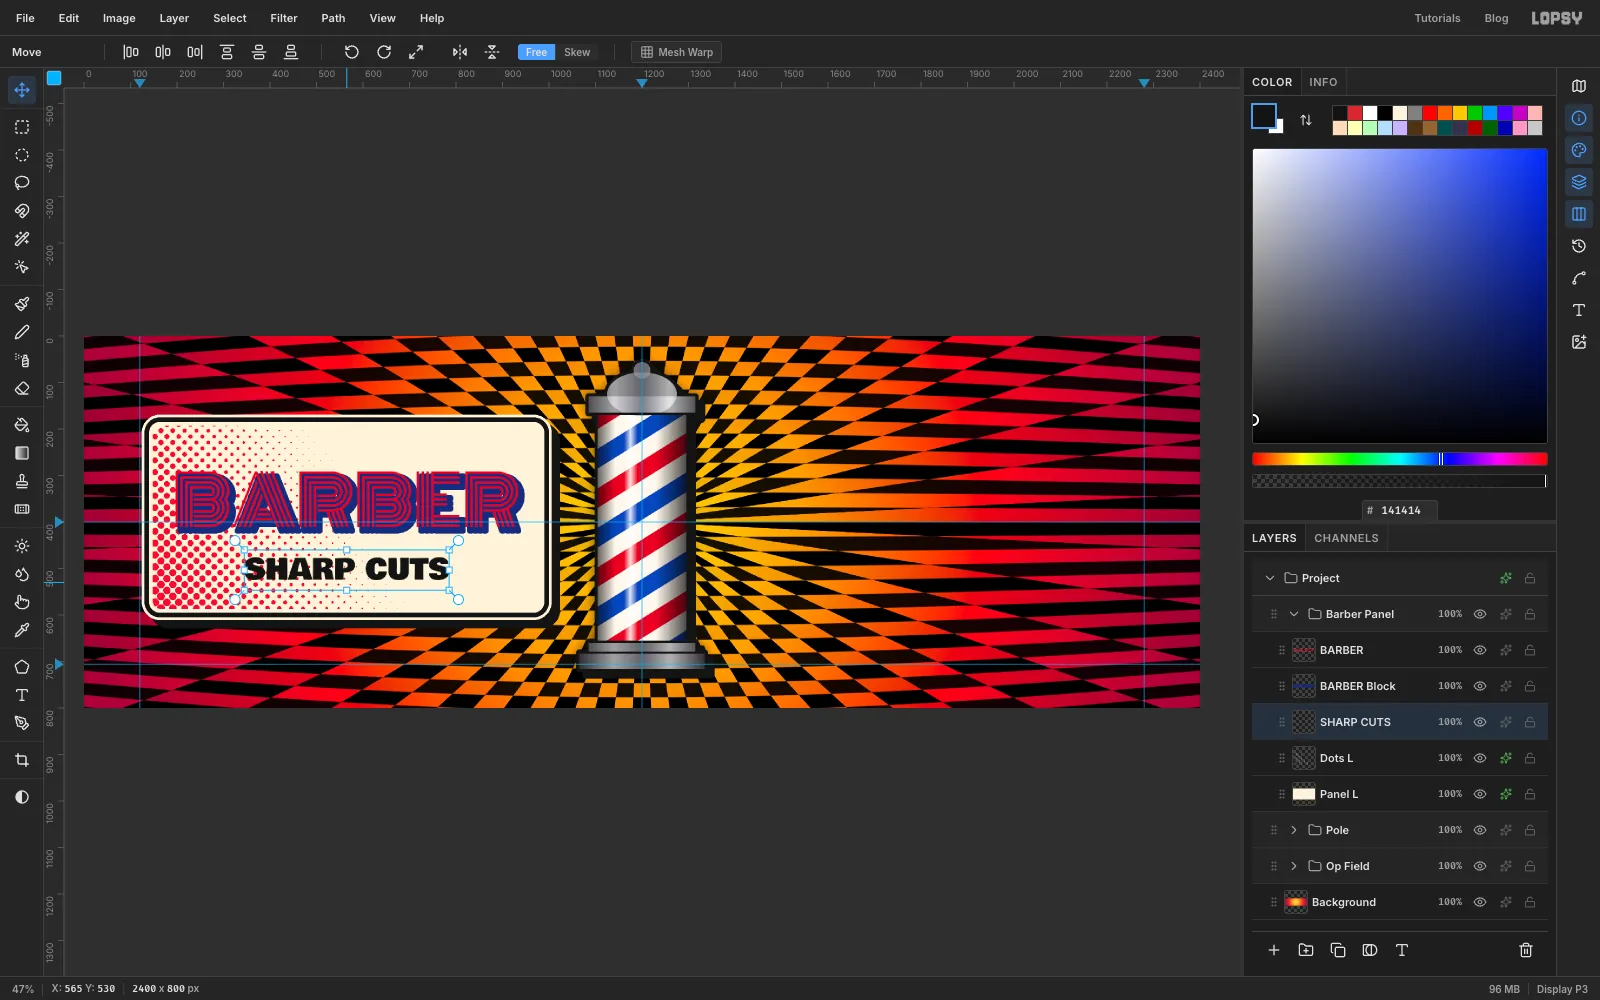
Pick the Text tool. In the options bar choose Monoton, set the size to 148, set the colour to and set Align to Center. Click in empty space above the panel's centre, type BARBER and press Tab to commit. (Escape would cancel a new text layer.)
Switch to the Move tool and nudge the word with the arrow keys (Shift + arrow moves 10 px) until it's centred on the panel and sits a little above the middle. Monoton's letters are built from parallel lines, an op-art idea in type form.
-
Grow a block shadow
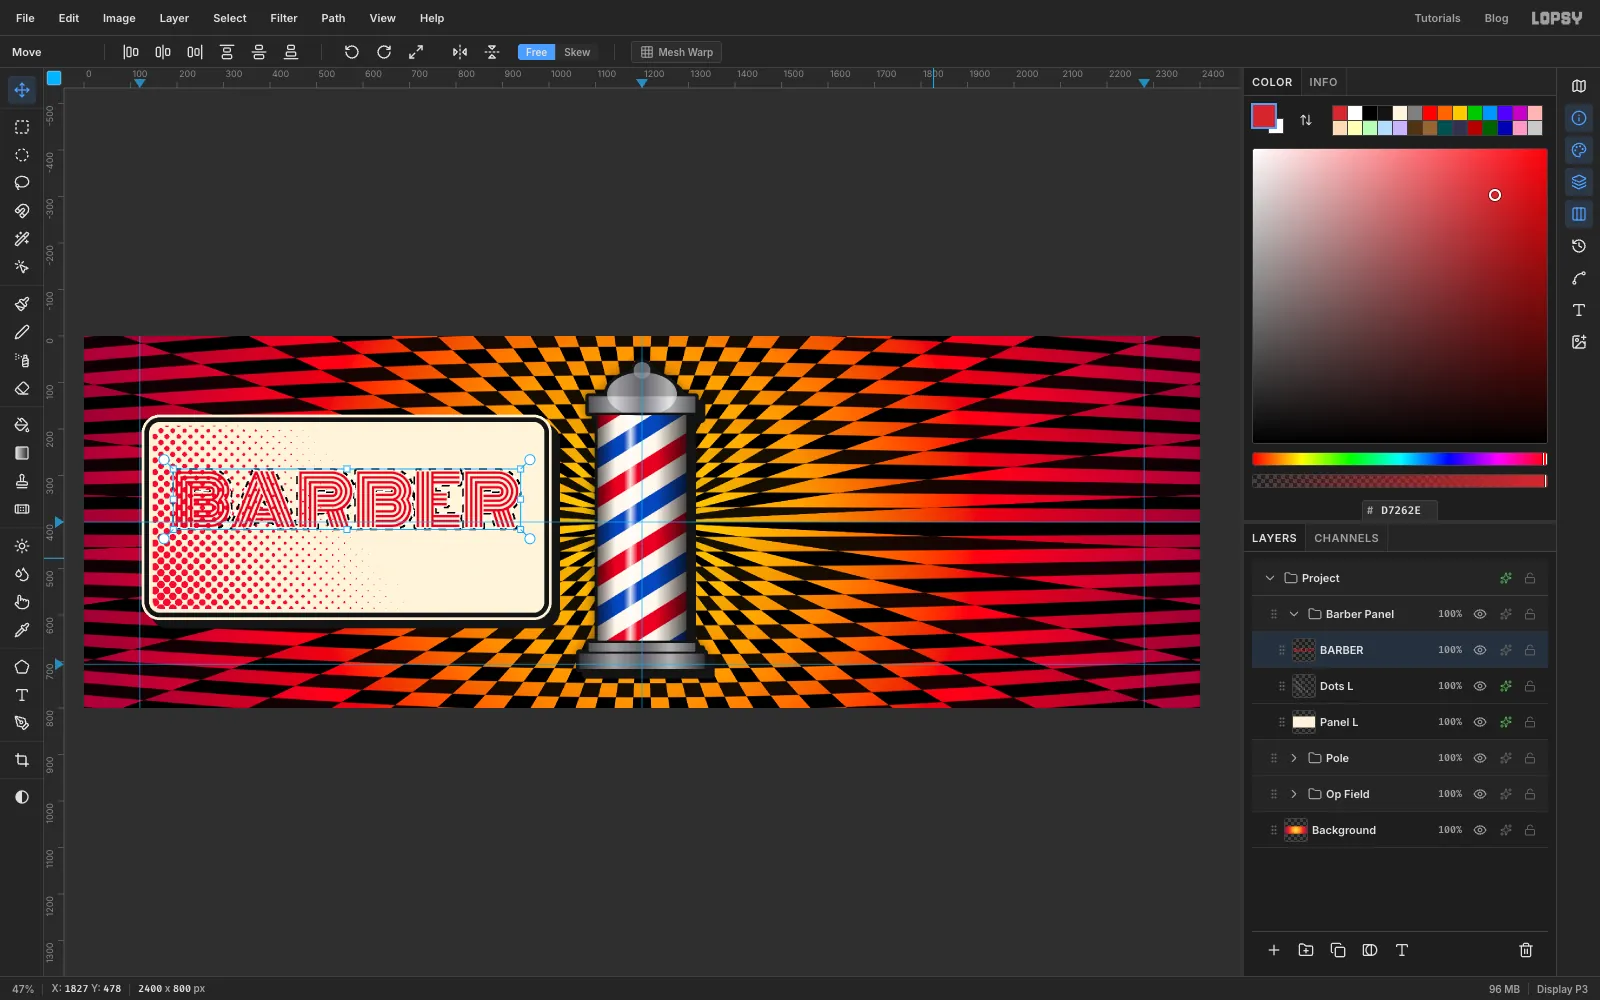
Thin lines on their own look weak from a distance, so the headline needs a solid shadow. Cmd-click the BARBER thumbnail to select its letters. Choose Select → Grow… and grow by 5. The gaps between each letter's lines close up, and the selection becomes a set of solid, fat letter shapes.
-
Fill the shadow in navy
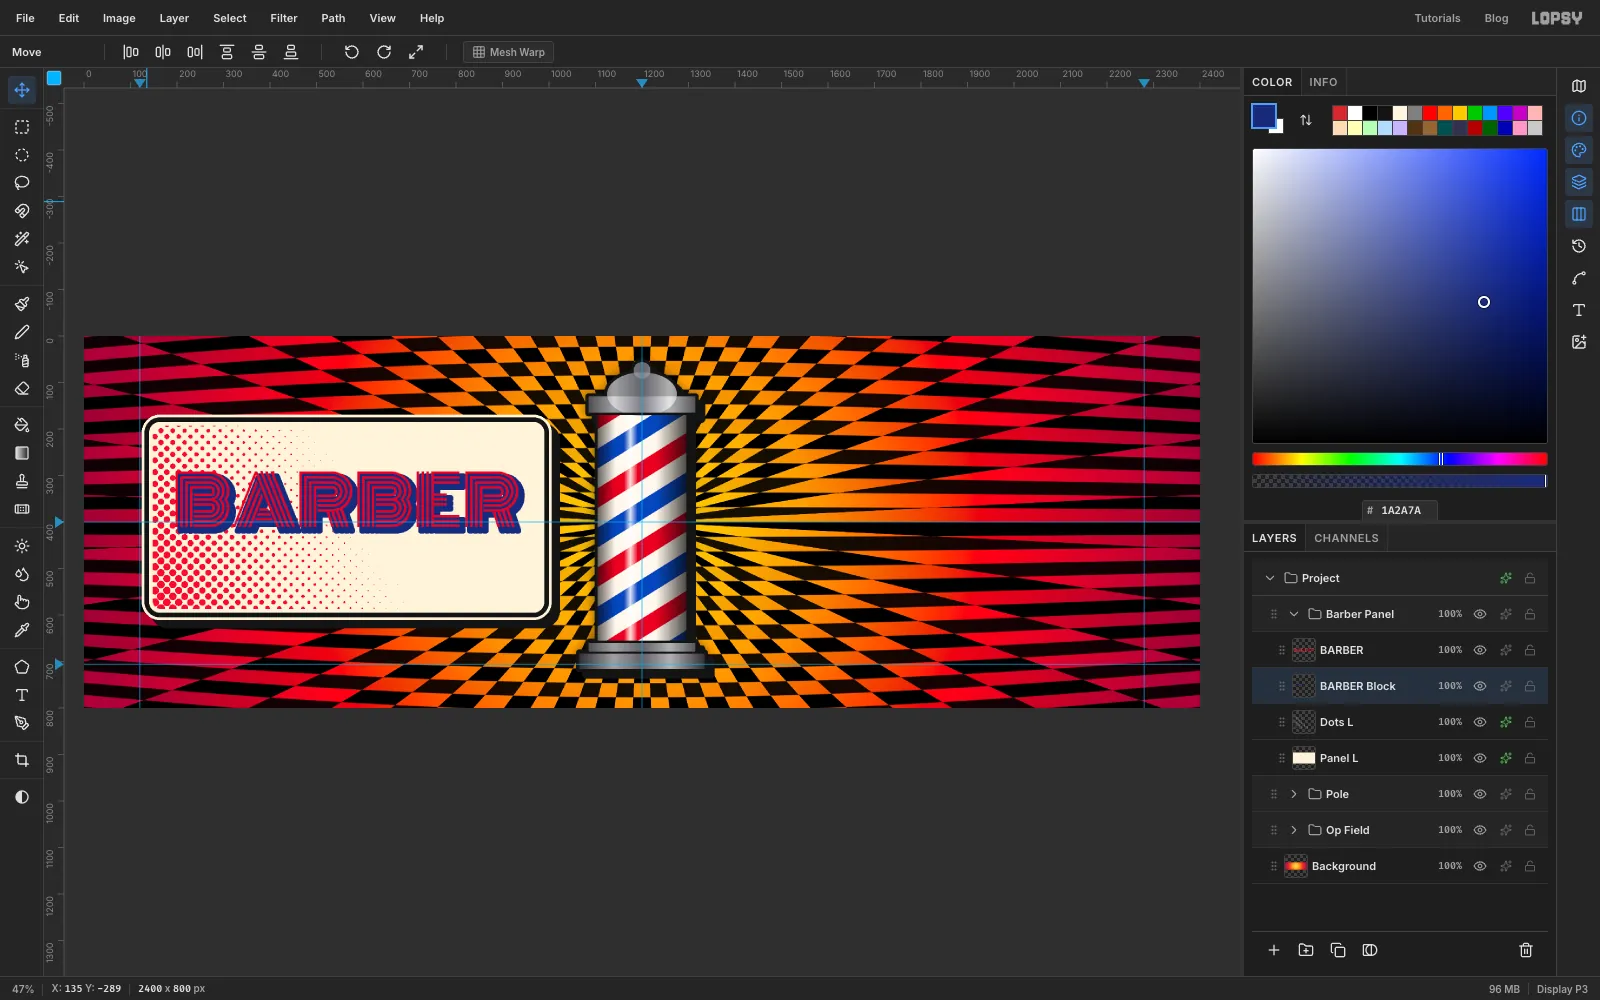
Select Dots L, the layer under the text, and click Add Layer. The new layer lands between the dots and the headline; name it BARBER Block. Fill the selection with navy and deselect. Pick the Move tool and nudge the layer down and to the right with the arrow keys until about 9 px of navy shows below and to the right of the red lines. The solid letters now sit behind the outlines like a printed block.
-
Add the tagline
Select Dots L again, so the new text isn't styled onto the headline. With the Text tool choose Bowlby One at 62, colour , still centred. Click in empty space below the panel, type SHARP CUTS and press Tab. Move it up into the panel, centred under BARBER, with a clear gap below the navy shadow and plenty of room above the panel's bottom edge.
-
Copy the panel
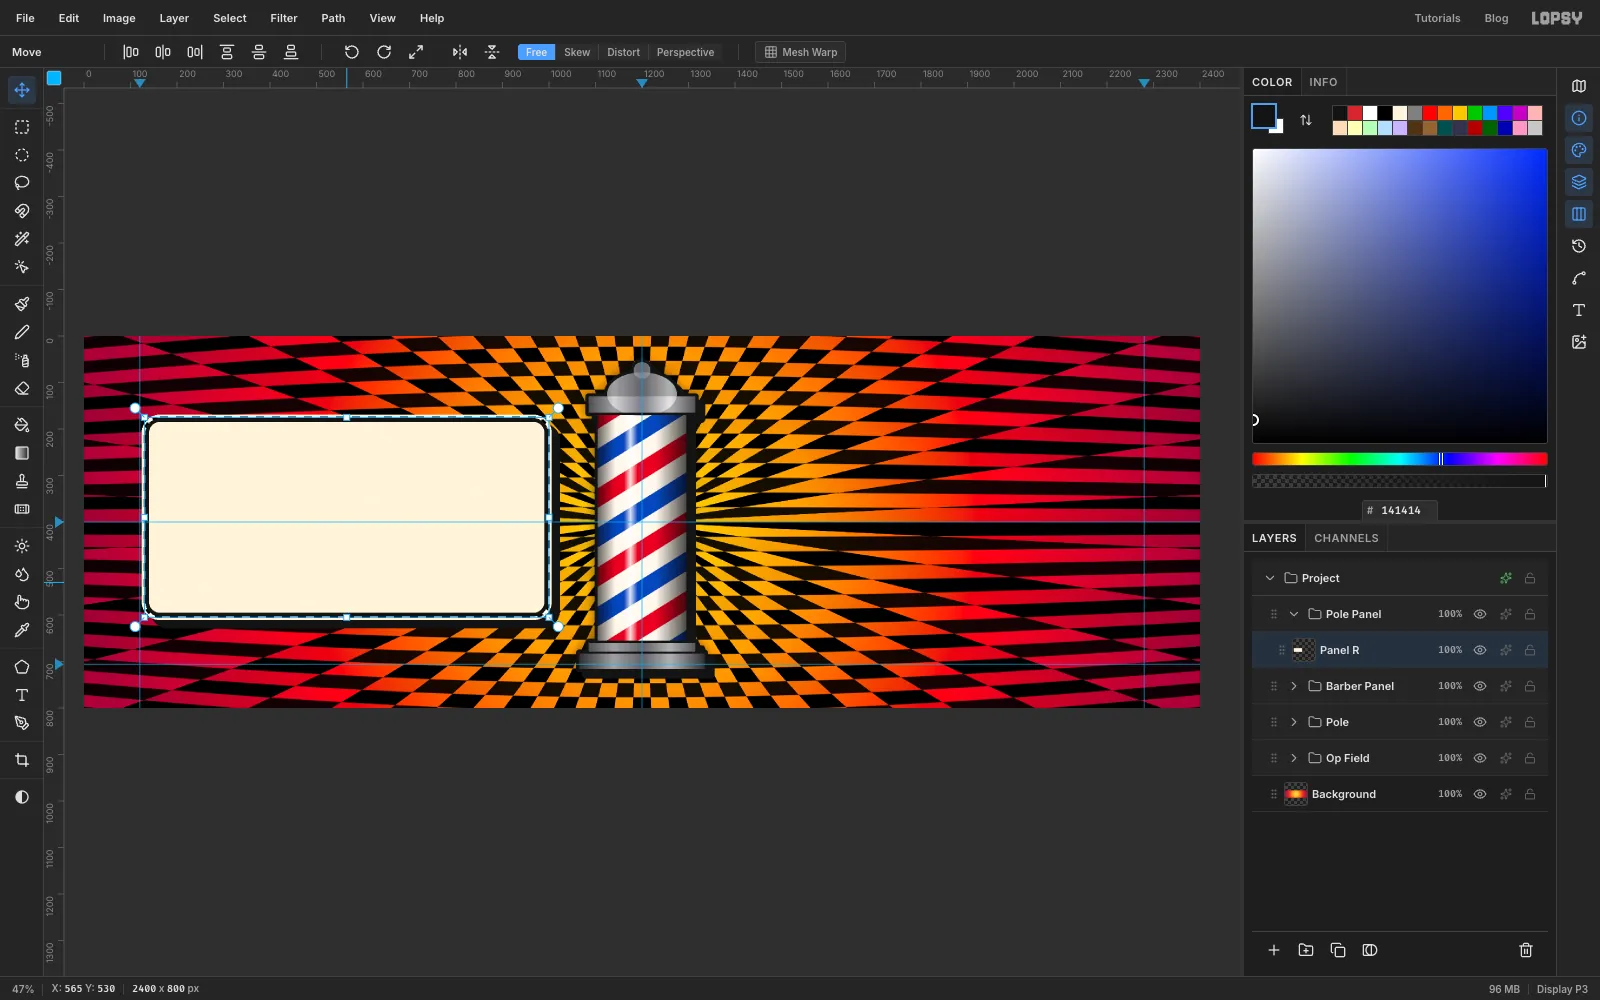
Select Panel L, press Cmd+A and Cmd+C, then Cmd+D. Collapse Barber Panel, select it, click New Group and name the new group Pole Panel. Press Cmd+V. Something copied inside Lopsy pastes in place, so the copy lands exactly on top of the original. Rename it Panel R.
-
Move the copy across
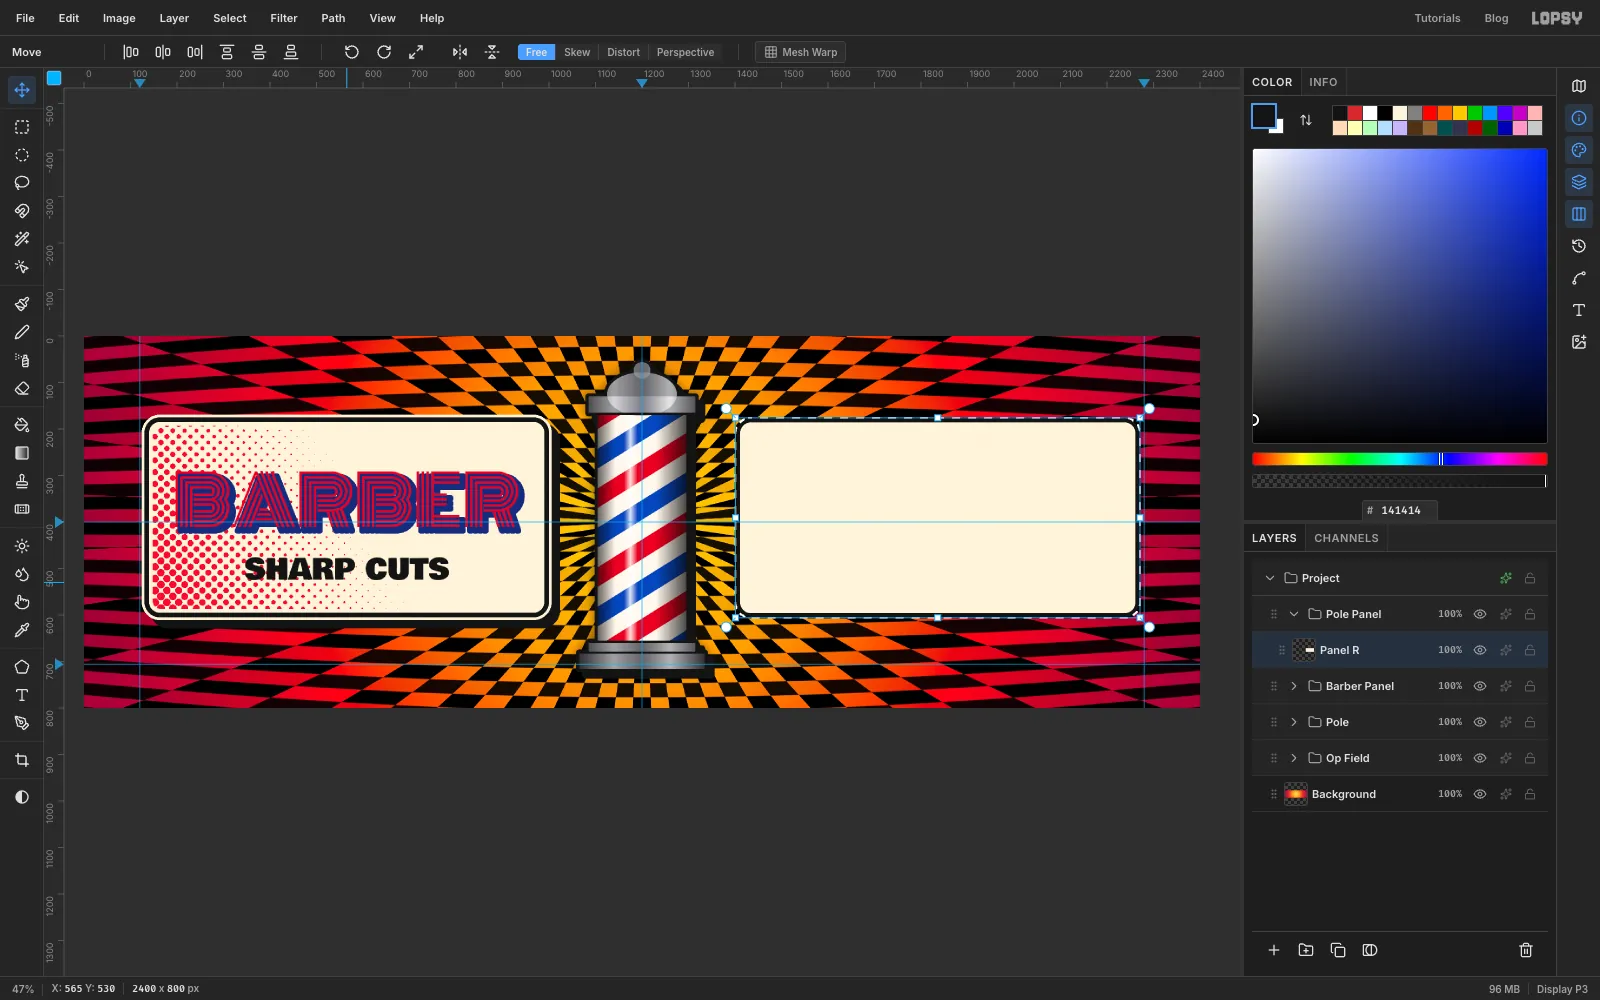
With the Move tool, drag Panel R to the right half of the canvas, then nudge it with the arrow keys until it's centred between the pole and the right margin guide, level with the first panel.
A paste copies pixels only, not effects, so give Panel R the same Drop Shadow and outside cream Stroke as Panel L: offset 18, 18, blur 0, spread 0, opacity 100 and black, and a 6 px stroke. The Add Noise grain was baked into the pixels, so the copy already has it.
-
Add dots to the second panel
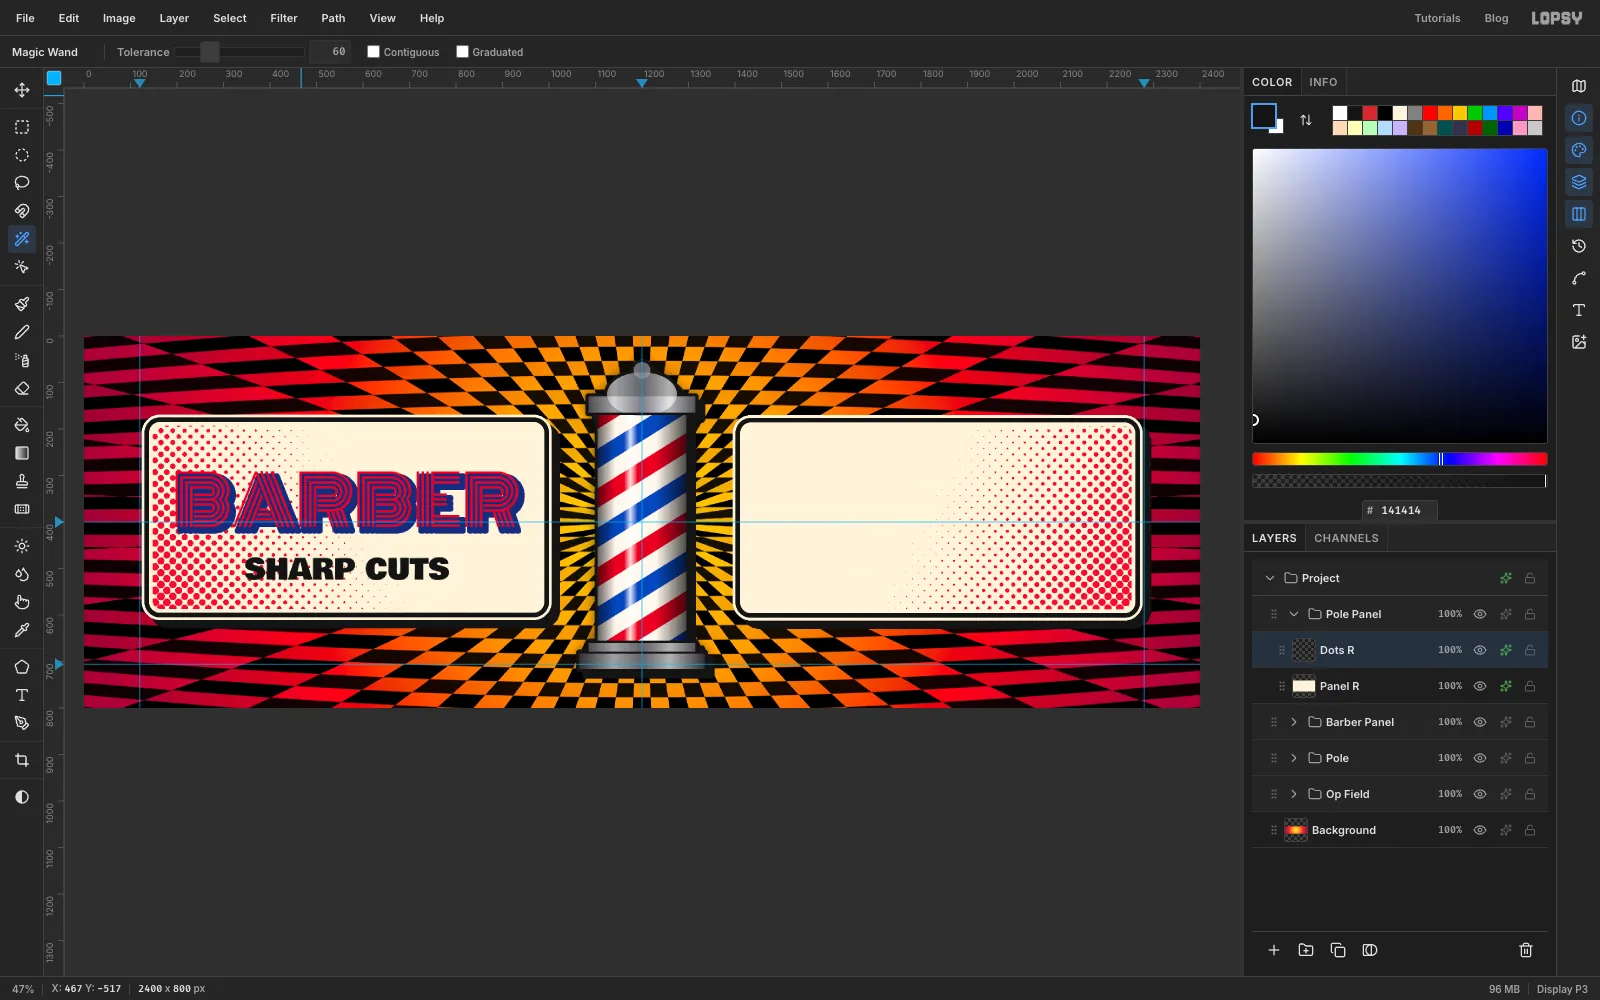
Make the dots for the right panel the same way as the left. Select Panel R and add a layer called Dots R. Cmd-click the Panel R thumbnail and Shrink by 14. Drag the black-to-white gradient from the panel's bottom-right corner up towards the middle, so the dots mirror the left panel, and deselect.
Run Halftone with the same settings, delete the white with the non-contiguous Magic Wand, add the red Color Overlay, and trim the corners with a Shrink 18 → Inverse → Delete.
-
Set the POLE headline
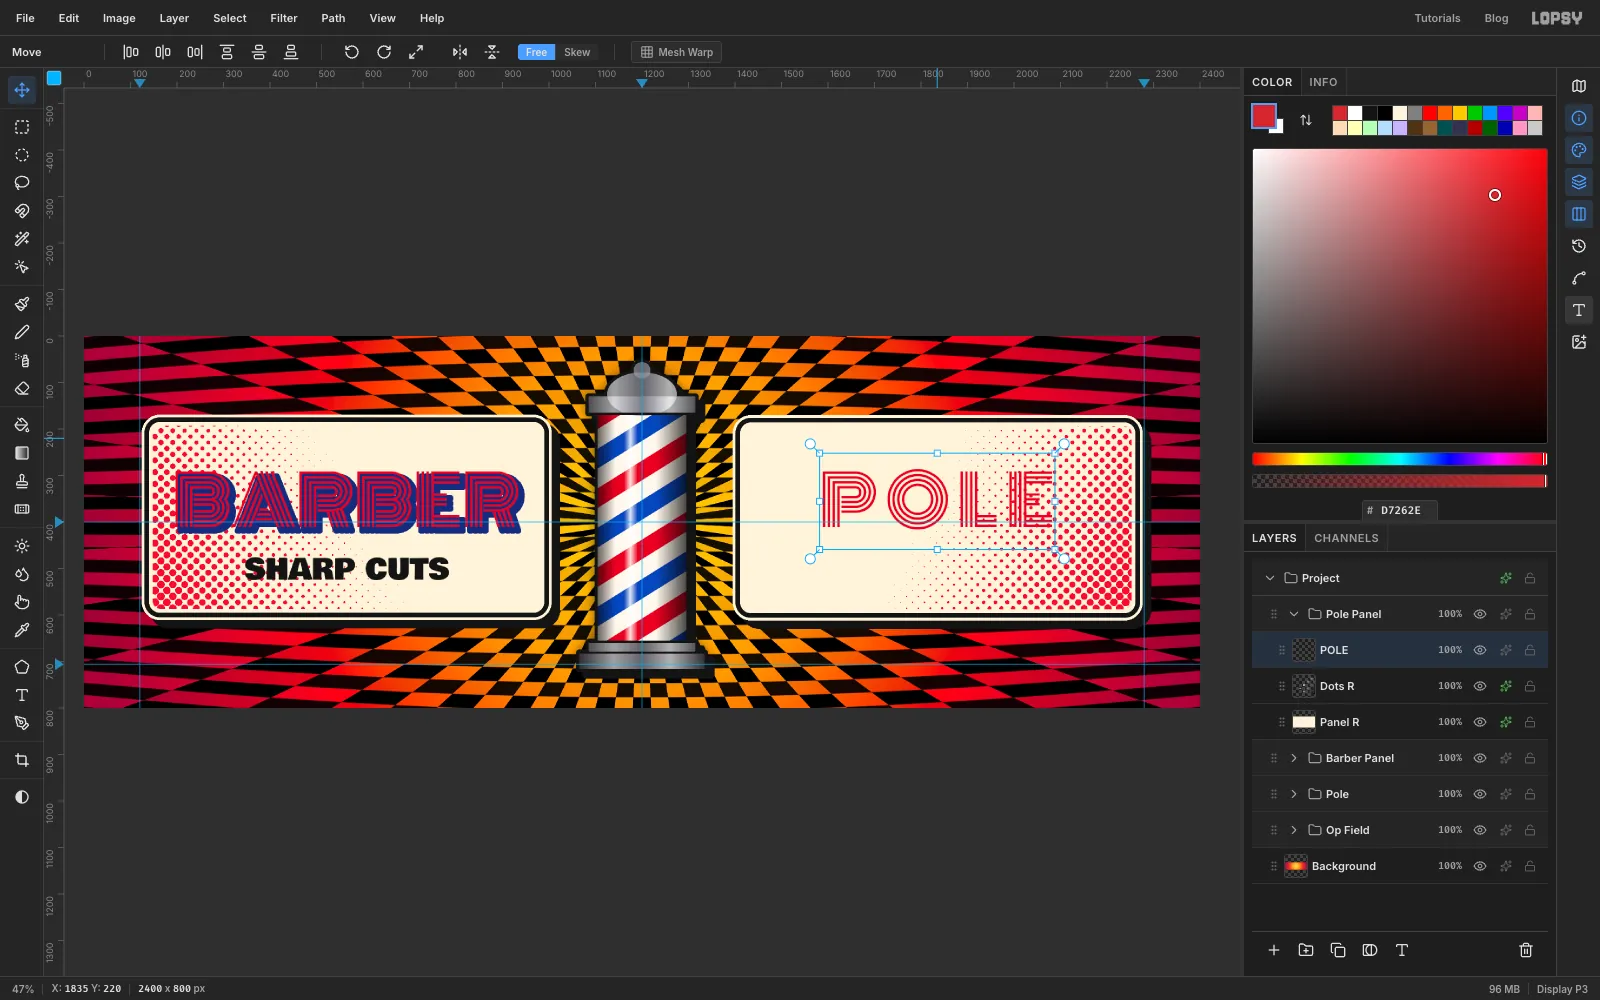
With Dots R selected, pick the Text tool and set it up again, because it still holds the tagline's settings: Monoton, 148, , Center. Click in empty space above the panel, type POLE and press Tab.
POLE is a shorter word than BARBER, so it would look lost in the same-sized panel. With POLE active, open the Text panel from the right-hand toolbar and set Letter spacing to 16. Then centre the word on the panel with the Move tool, at the same height as BARBER.
-
Shadow and tagline for POLE
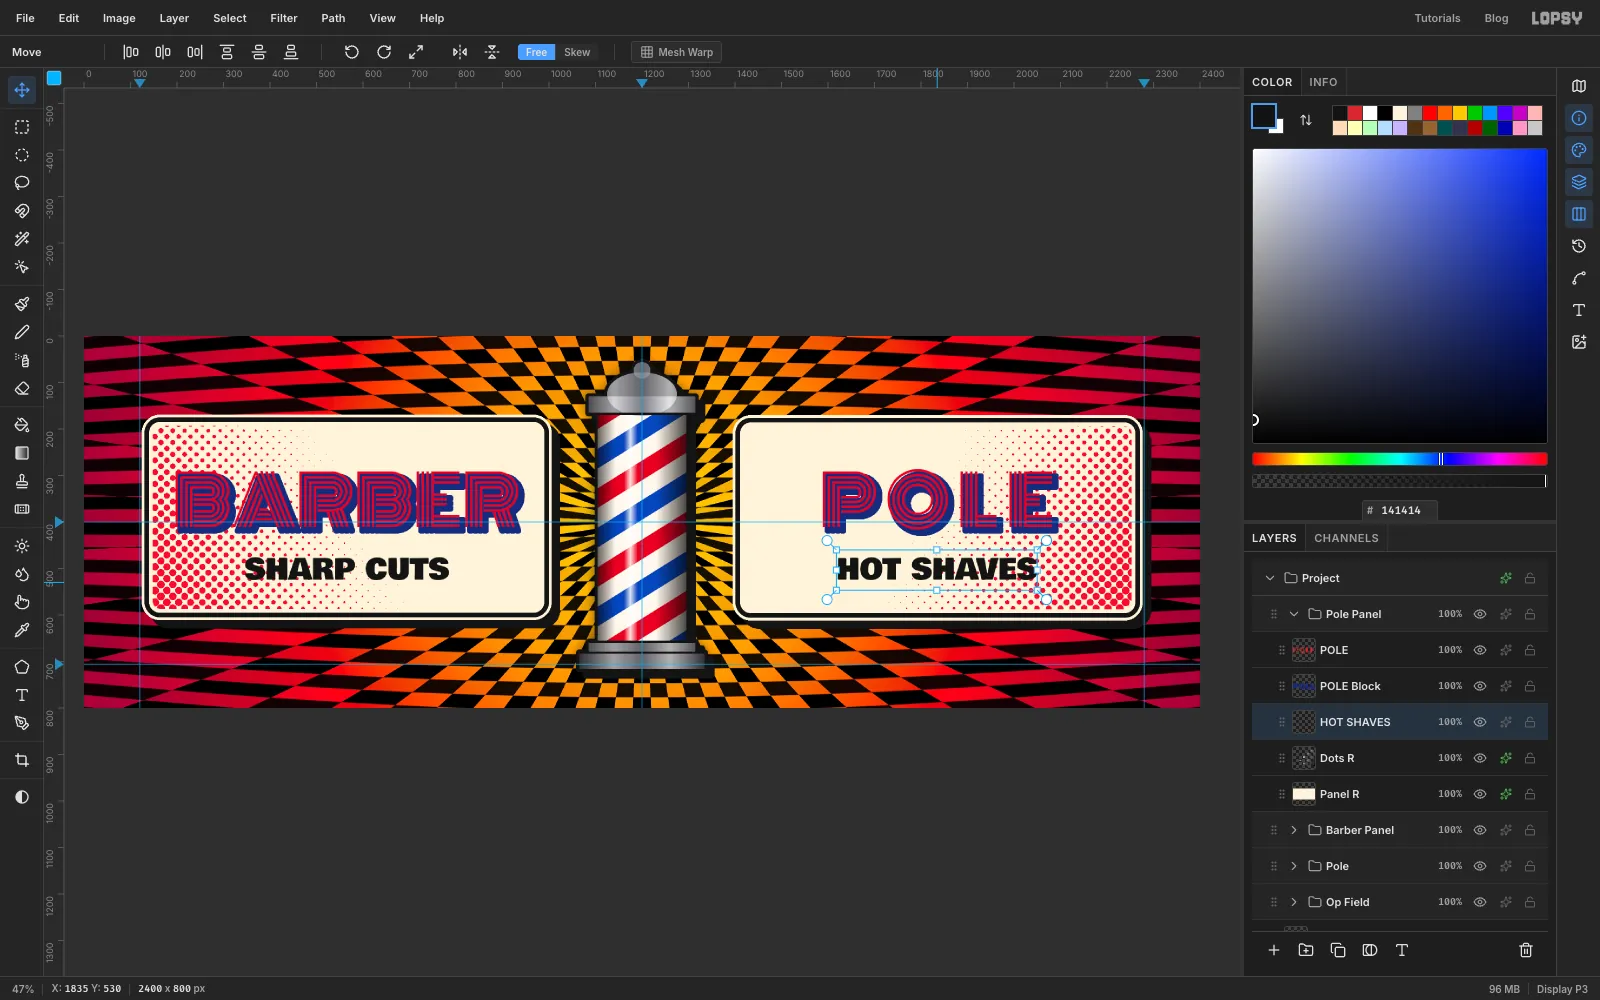
Give POLE its own block shadow exactly as before: Cmd-click its thumbnail, Grow by 5, select Dots R, add a POLE Block layer, fill with , deselect and nudge it down and to the right.
With Dots R still selected, open the Text panel and set Letter spacing back to 0. Changing a Text panel setting also changes the default for the next text you create, so without this the tagline would be spaced out too. Then add HOT SHAVES in Bowlby One at 62, colour , centred under POLE.
-
Paste in the scissors photo
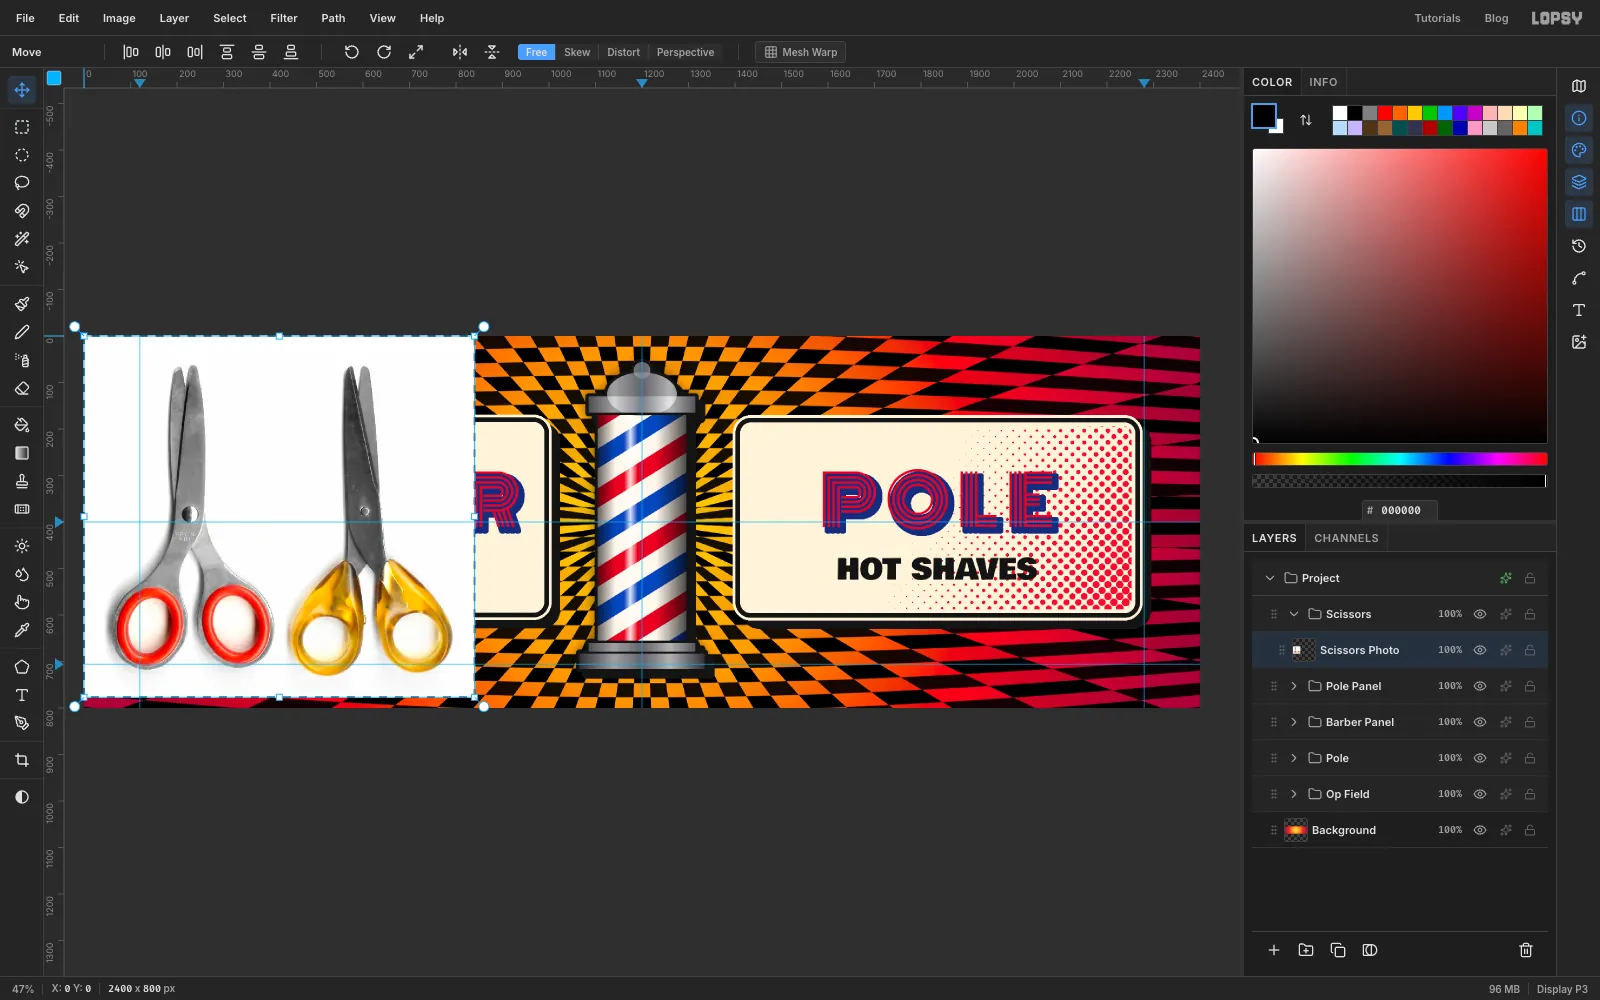
Collapse Pole Panel, select it and make a new group called Scissors. Open the scissors photo in another app, copy it, and press Cmd+V in Lopsy. An image from outside lands in the top-left corner of the canvas. Rename the layer Scissors Photo.
-
Delete the second pair
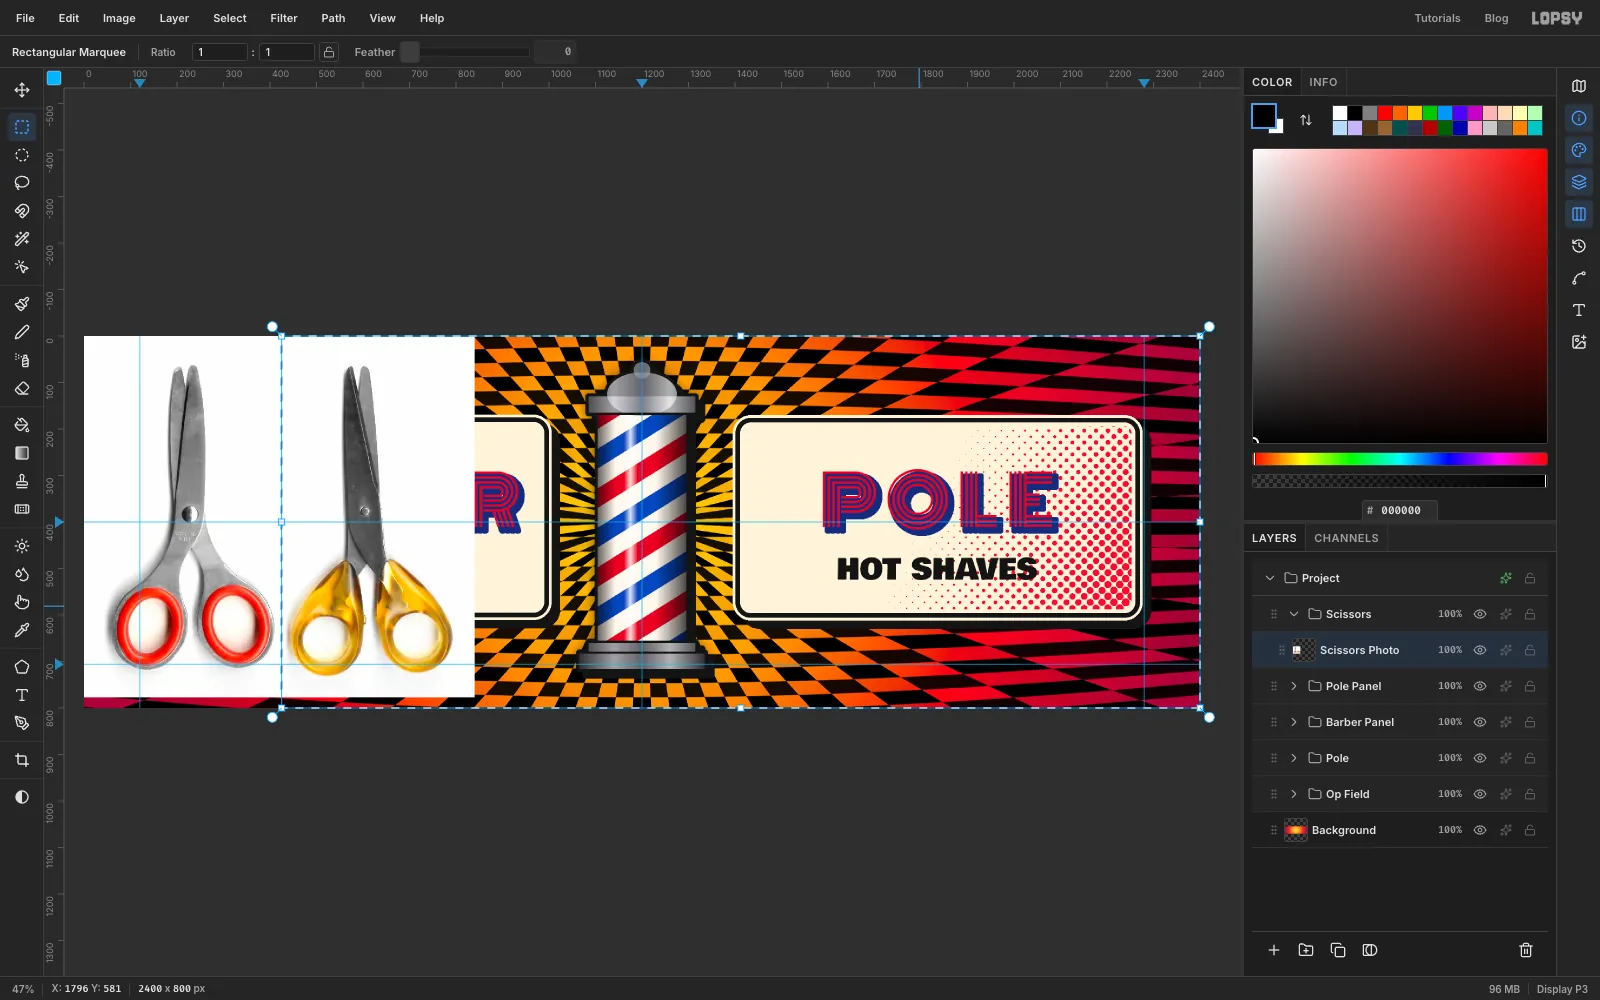
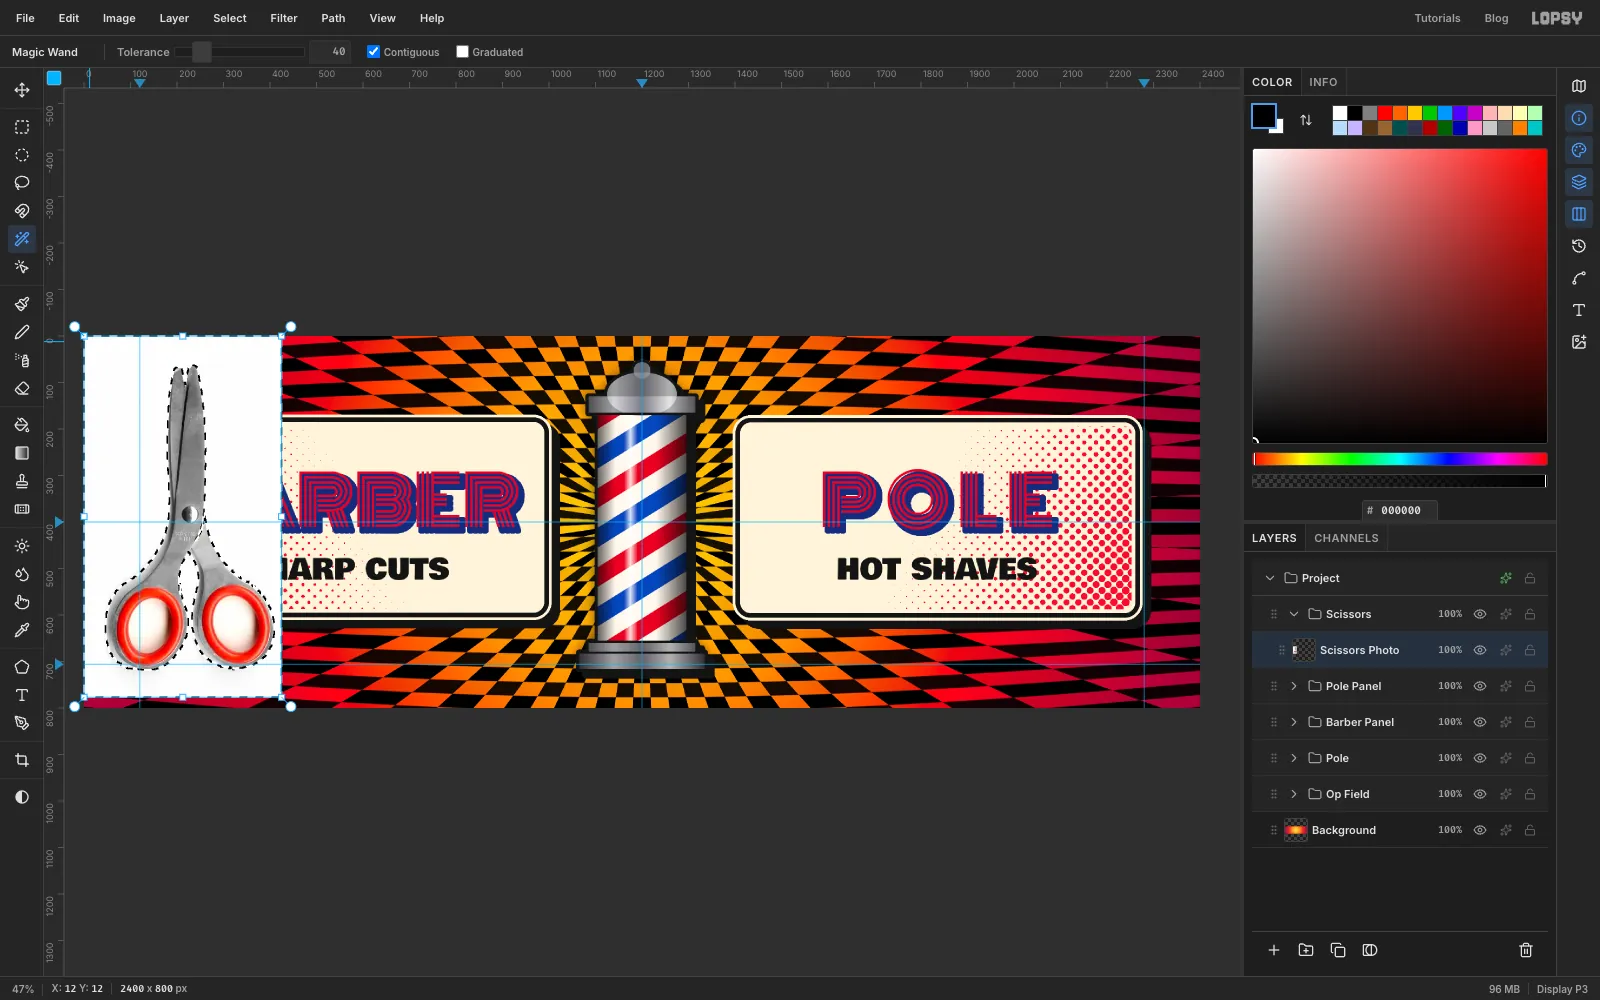
You only need the pair with the red handles. The paste left the whole photo selected, so press Cmd+D first; a drag inside a selection would only move its outline. Then drag a Rectangular Marquee around the right-hand pair, from just right of the gap between them to well past the photo's right edge, and press Delete. Deselect.
-
Select the white background
Pick the Magic Wand, set Tolerance to 40 and tick Contiguous. Click the white background in the photo's corner and press Delete.
-
Clear the finger holes and the fringe
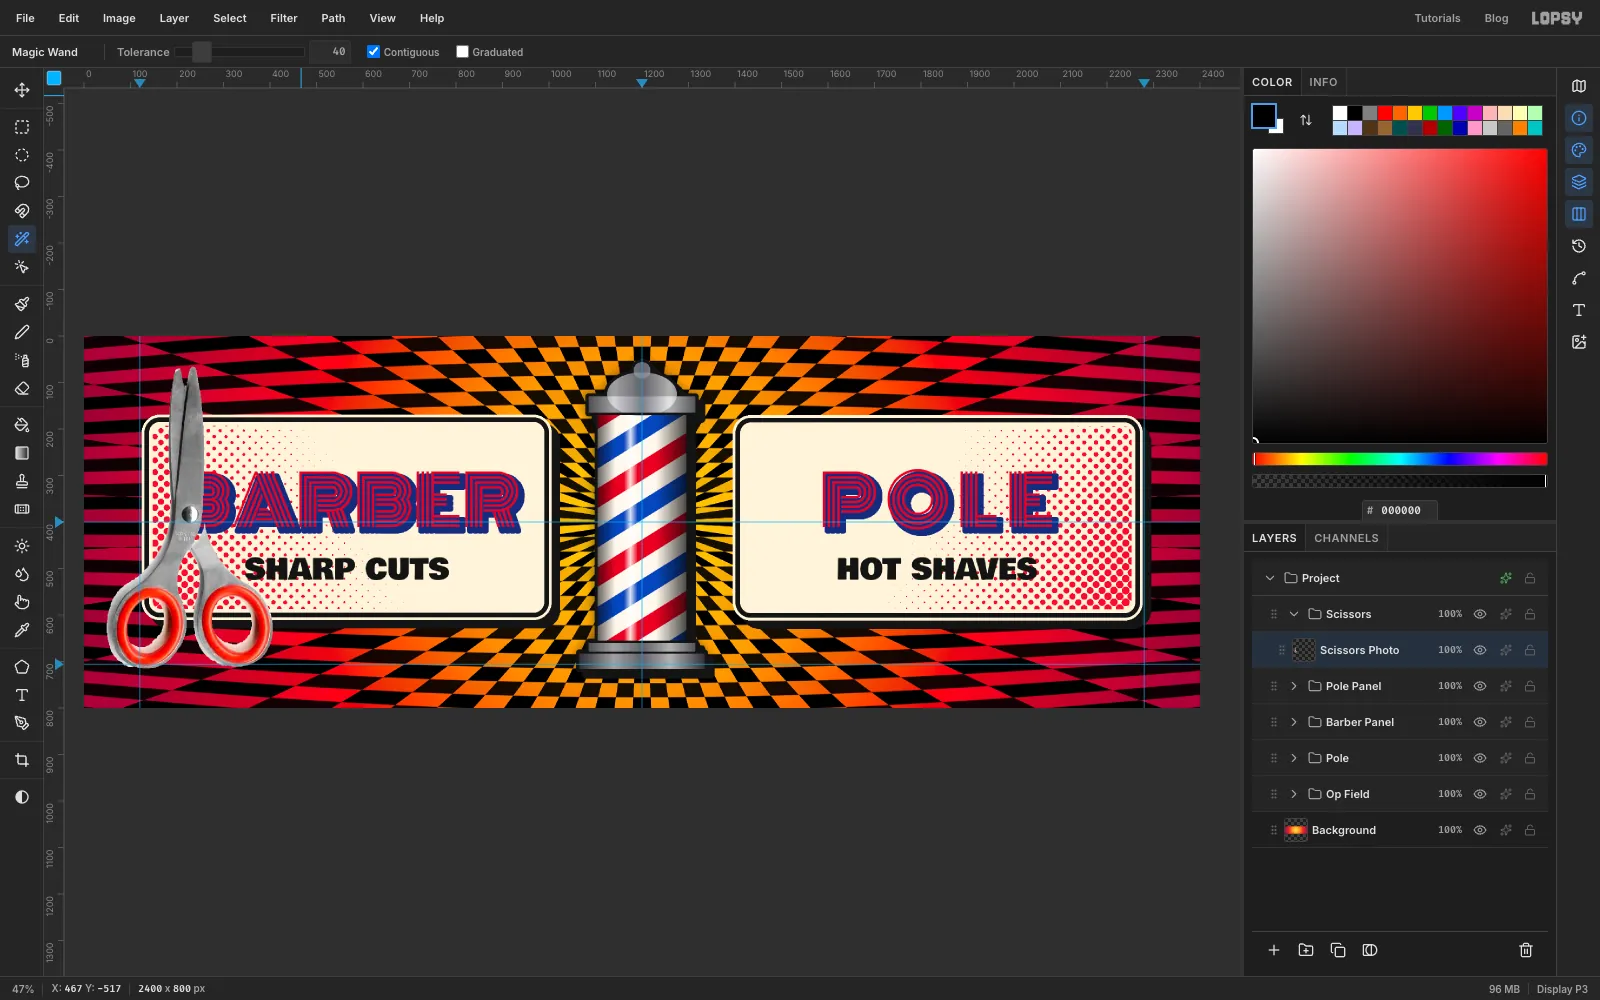
The white inside the two finger holes isn't connected to the rest of the background, so deselect, click inside one hole with the wand, press Delete, and do the same for the other.
A scan always leaves a pale fringe around the edges. To remove it, Cmd-click the Scissors Photo thumbnail, choose Select → Shrink… and shrink by 3. Choose Select → Inverse, press Delete and deselect.
-
Flatten the photo into pop-art colour
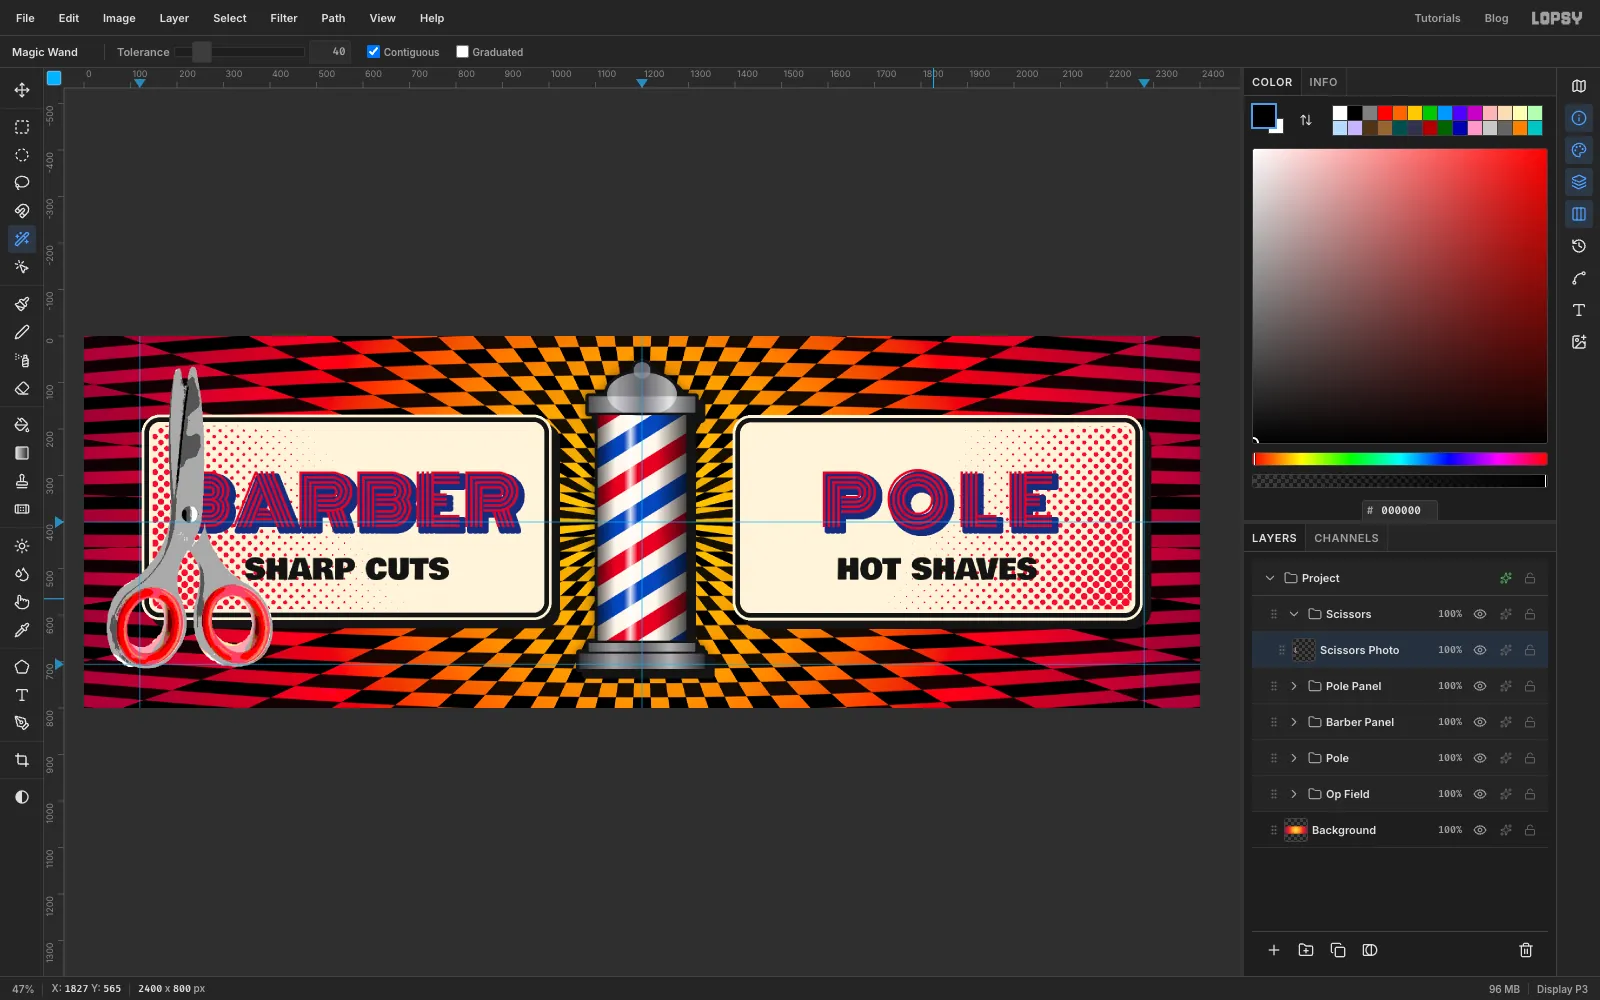
Choose Filter → Surface Blur… with Radius 12 and Threshold 40. It smooths away the grain of the scan but keeps the edges sharp. Then choose Filter → Posterize… with Levels 4. The scissors break into a few flat tones, like a printed comic.
Finally choose Filter → Hue/Saturation…, set Hue to -8 and Saturation to 10. That nudges the orange handles towards the billboard's red.
-
Select just the metal
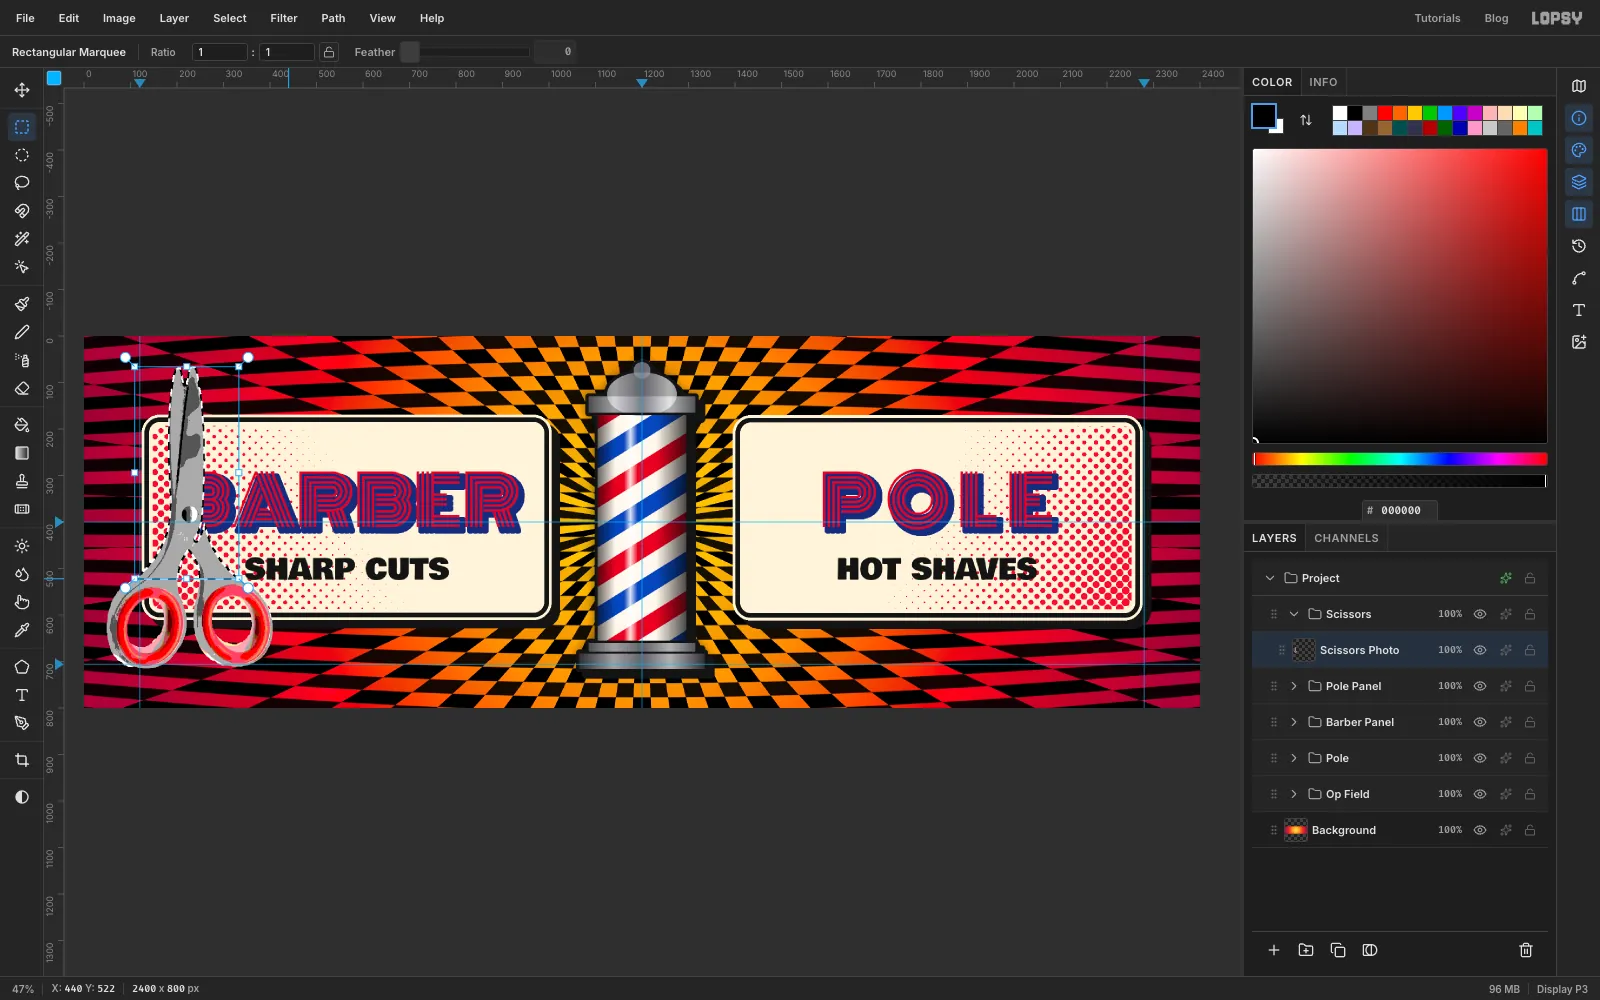
Posterized grey looks blotchy, like dirty metal. Swap it for clean chrome. Cmd-click the Scissors Photo thumbnail to select the whole pair. Then pick the Rectangular Marquee, hold Shift+Alt, and drag a box wider than the scissors, from just above the blade tips down to just above the red rings. Holding both keys keeps only the overlap, so the selection is now the blades and arms.
-
Make the blades chrome
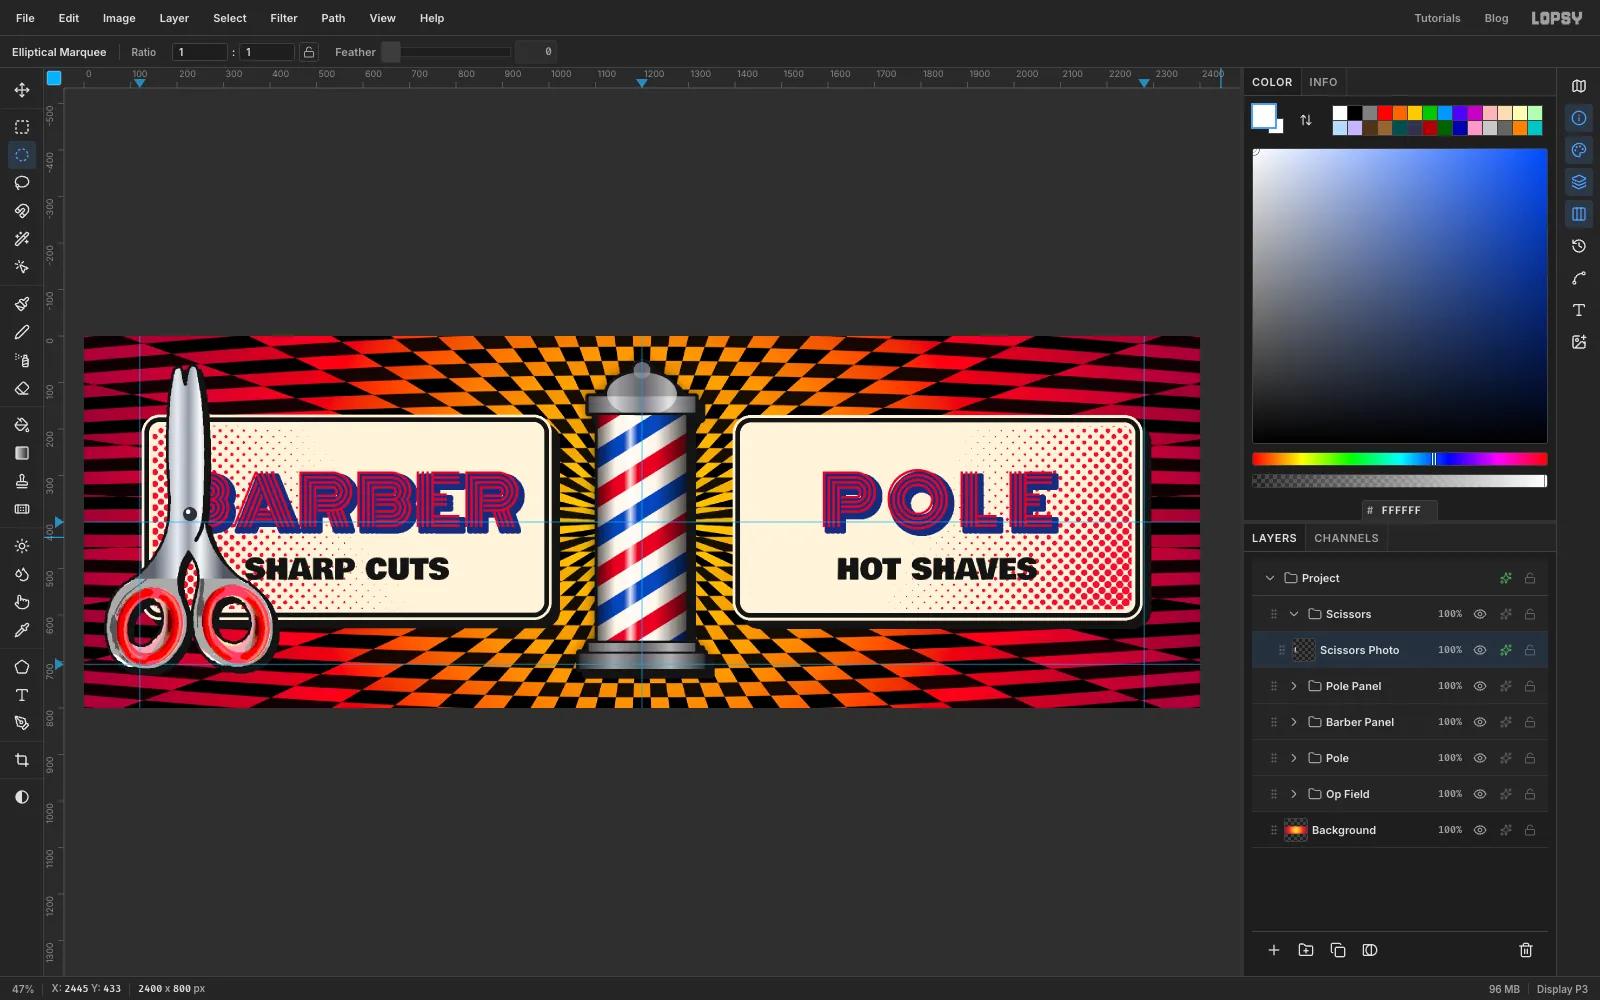
With the Gradient tool, make a linear gradient: , at 34 %, at 50 %, at 66 % and . Drag it across the blades from just left of them to just right, holding Cmd to keep it level. Deselect.
The gradient covered the pivot screw, so paint a new one. Make a small circle over the pivot with the Elliptical Marquee (hold Cmd for a perfect circle) and fill it with . Deselect, then make a much smaller circle near its top-left and fill it with white for a glint.
Open the layer's effects and add a black Stroke (6, Outside) and a Drop Shadow at 9, 9, blur 0, black. The scissors now match the comic panels.
-
Scale the scissors down
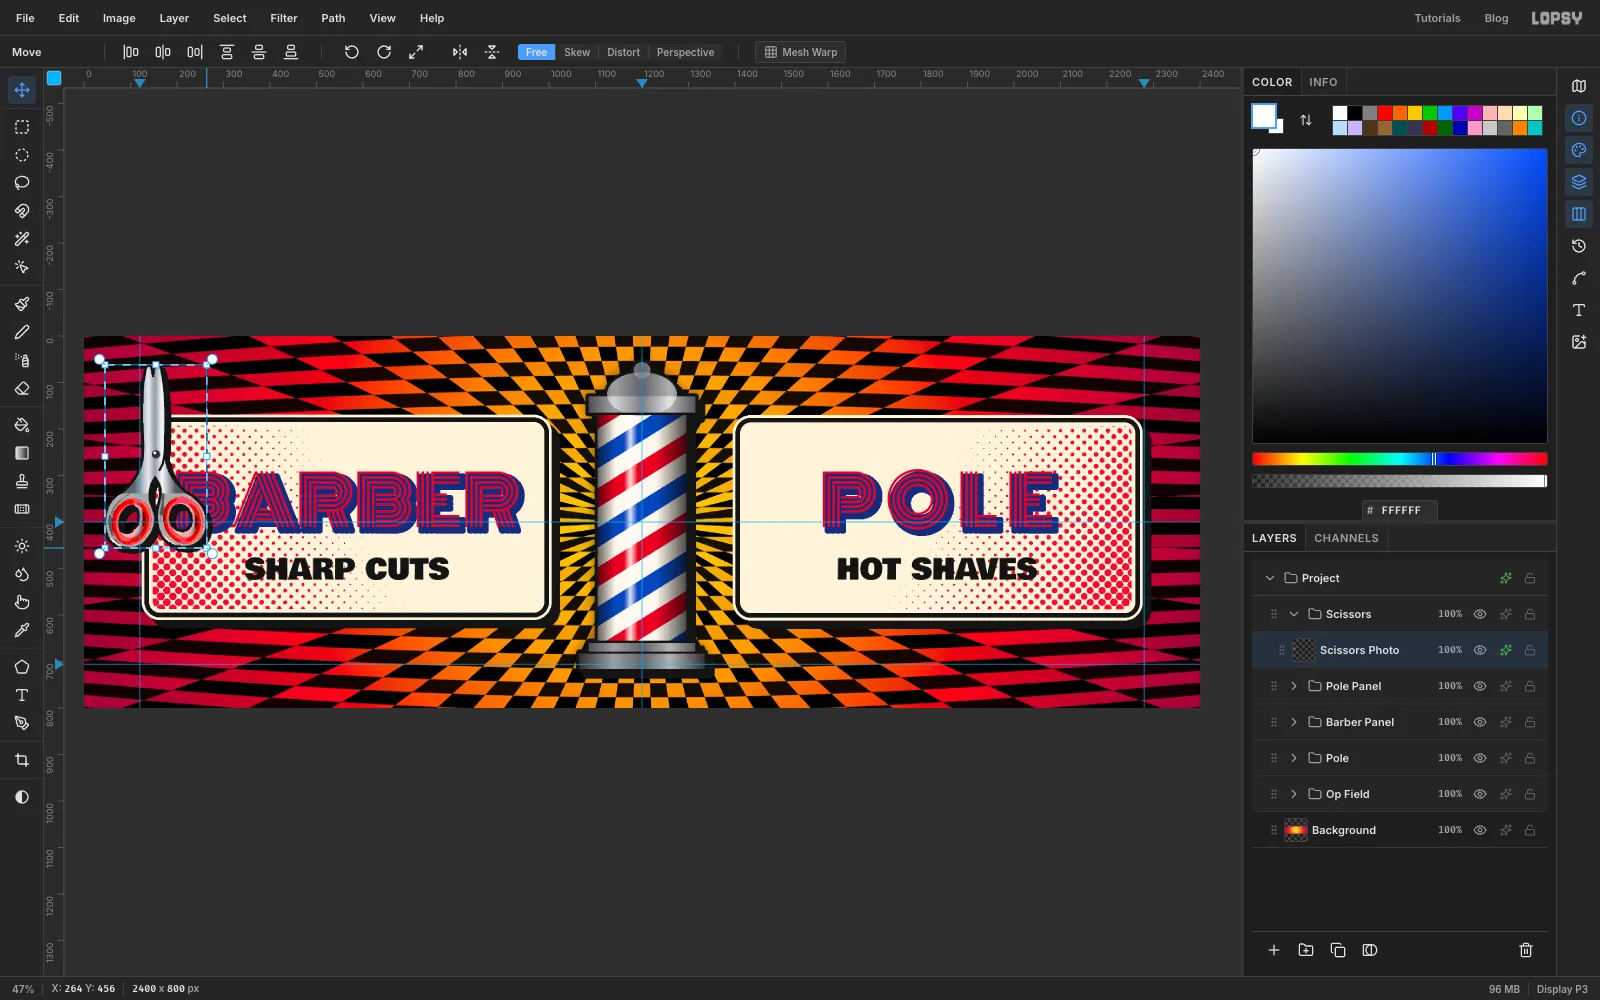
Drag a marquee around the scissors and pick the Move tool. Hold Cmd and drag the bottom-right corner handle in towards the top-left until the scissors are about 60 % of their size. Cmd keeps the proportions.
-
Turn the blades sideways
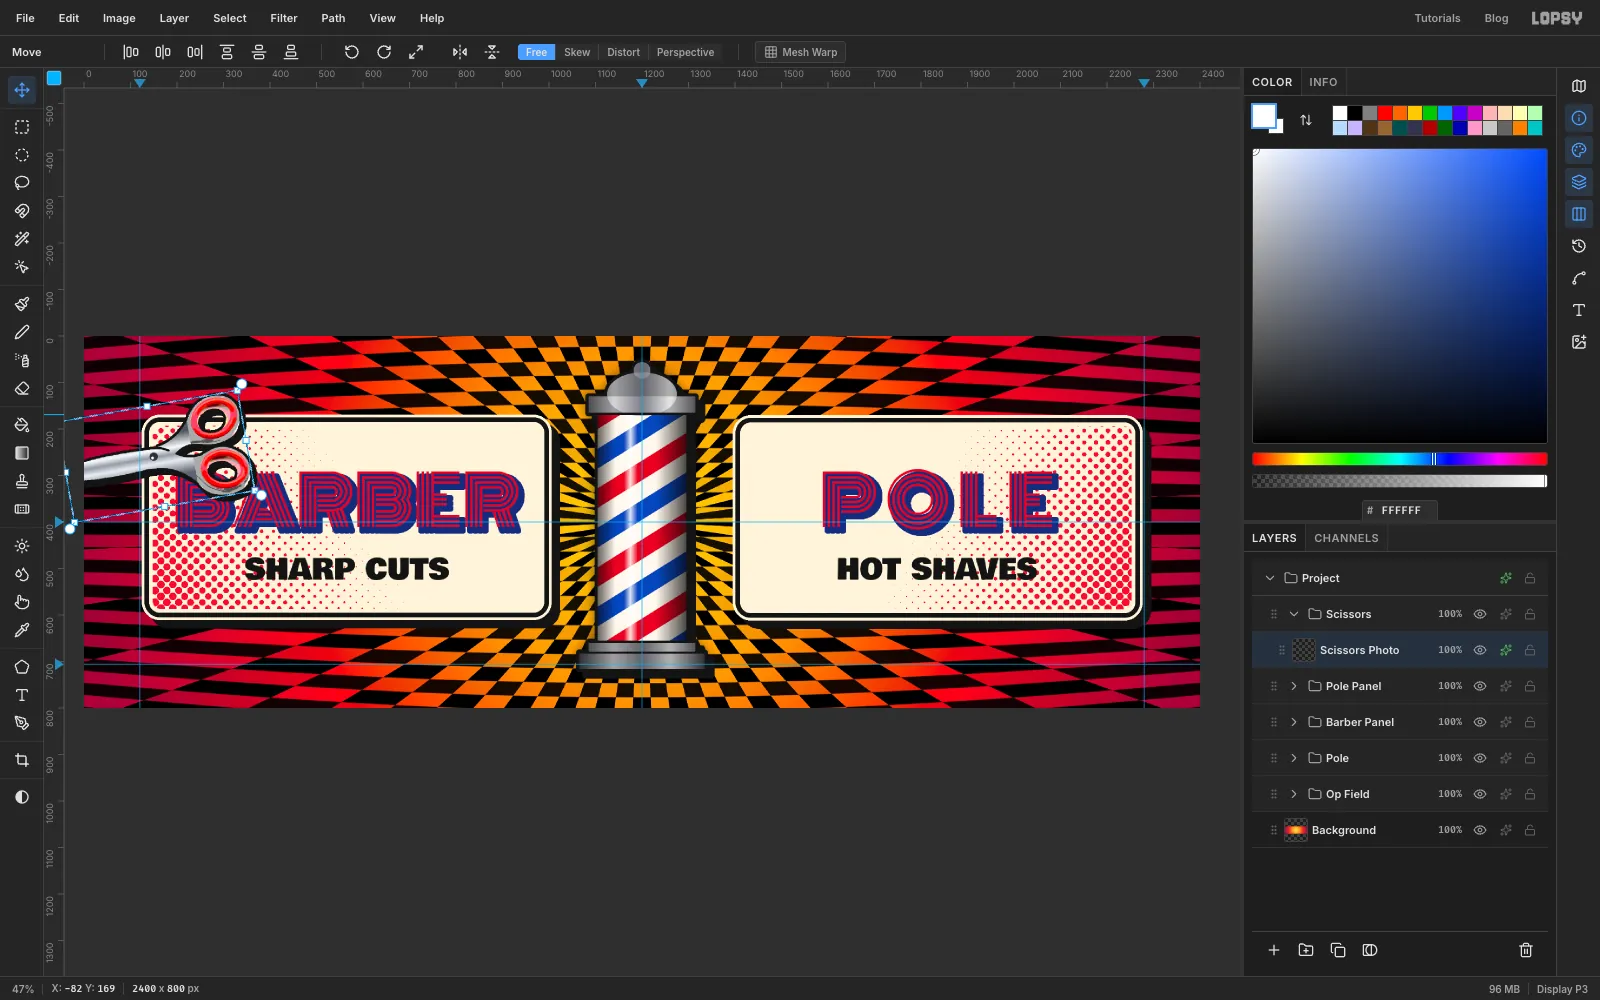
Still in the same transform, drag the top-right rotation handle round anticlockwise until the blades point left and slightly down, about 100°. Press Cmd+D to commit.
-
Place the scissors on the corner
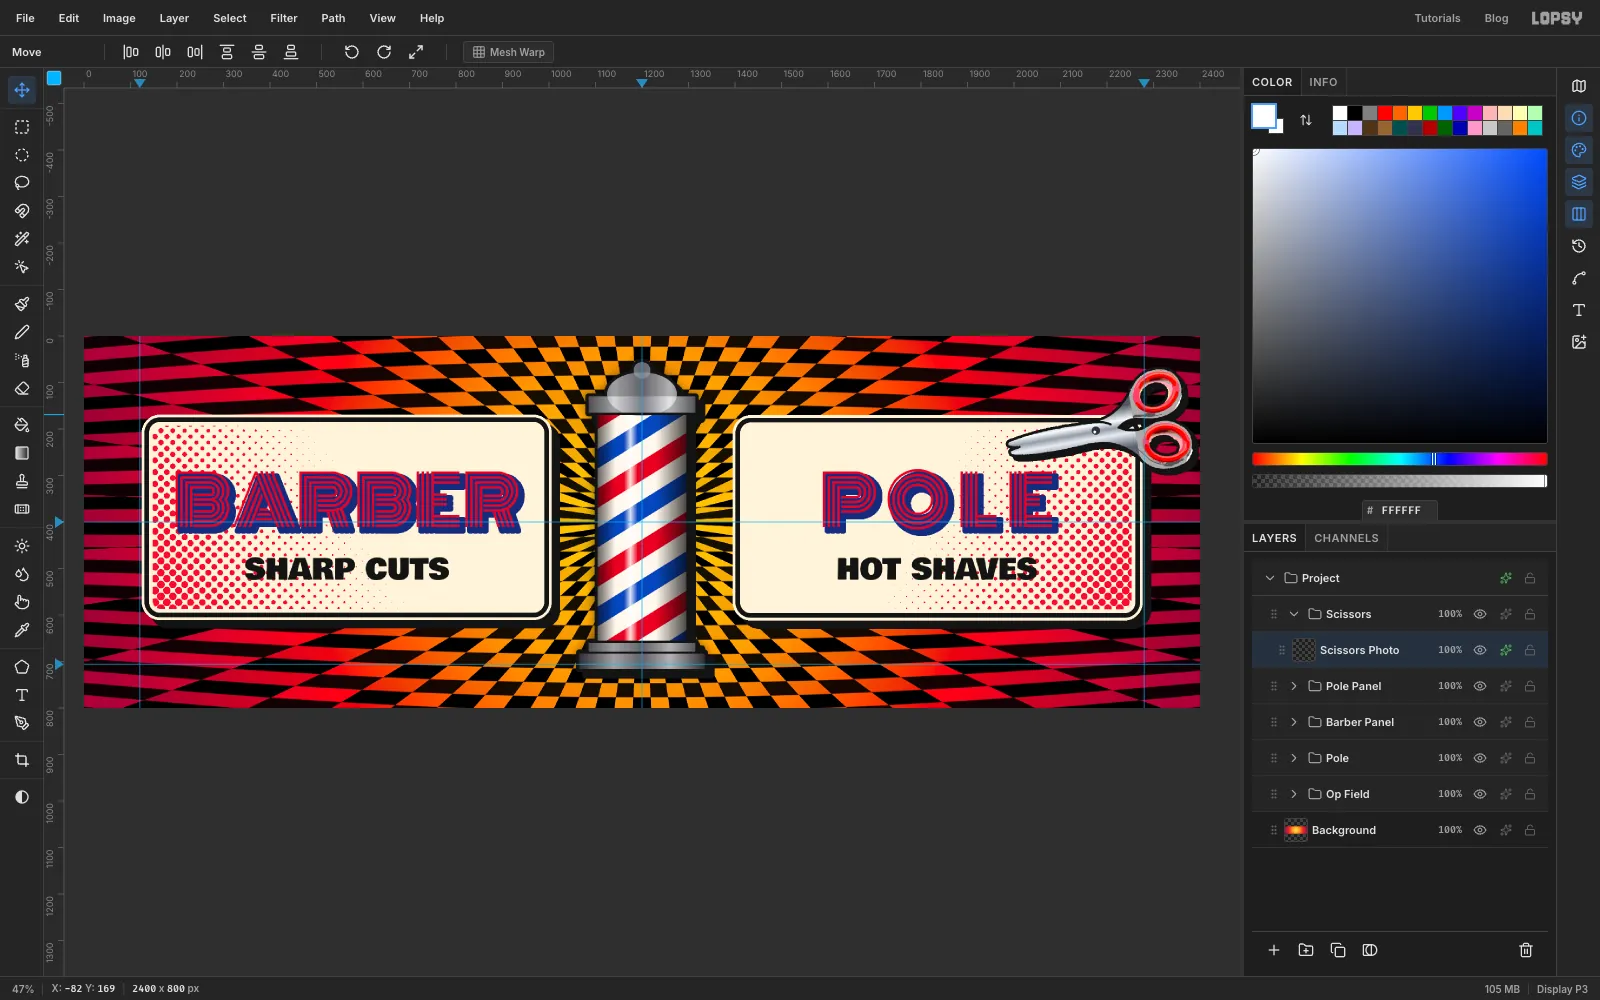
Drag the scissors to the top-right of the canvas so the open blades bite into the POLE panel's top-right corner, as if they're snipping it. Leave some space between the handles and the top and right edges of the billboard.
-
Add a SNIP! burst
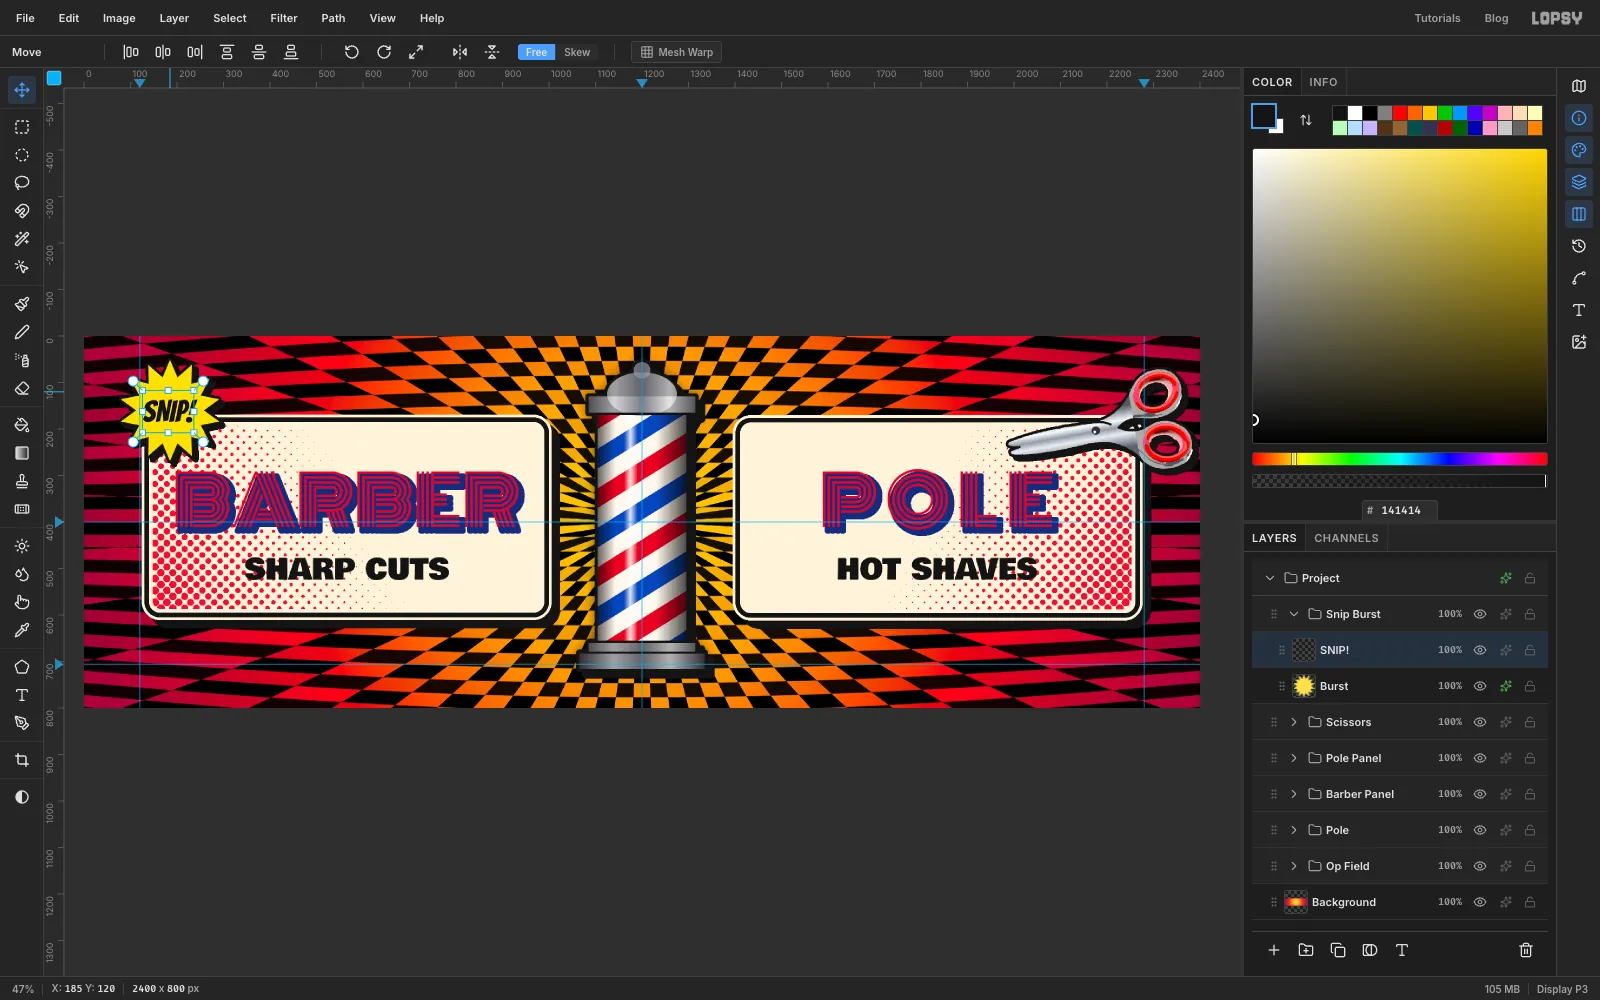
Collapse Scissors, select it and make a group called Snip Burst with a layer called Burst inside. With the Lasso, drag a zig-zag around a point above the left panel's top-left corner, swinging out to a tip about 110 px away and back in again, about 14 times. It doesn't need to be regular. Fill it with and deselect.
Give Burst a black Stroke (6) and the same 9, 9 black Drop Shadow. Then add SNIP! with the Text tool in Bangers at 65, black and centred. Click in empty space, type, press Tab, and move the word into the middle of the star.
-
Tilt the burst
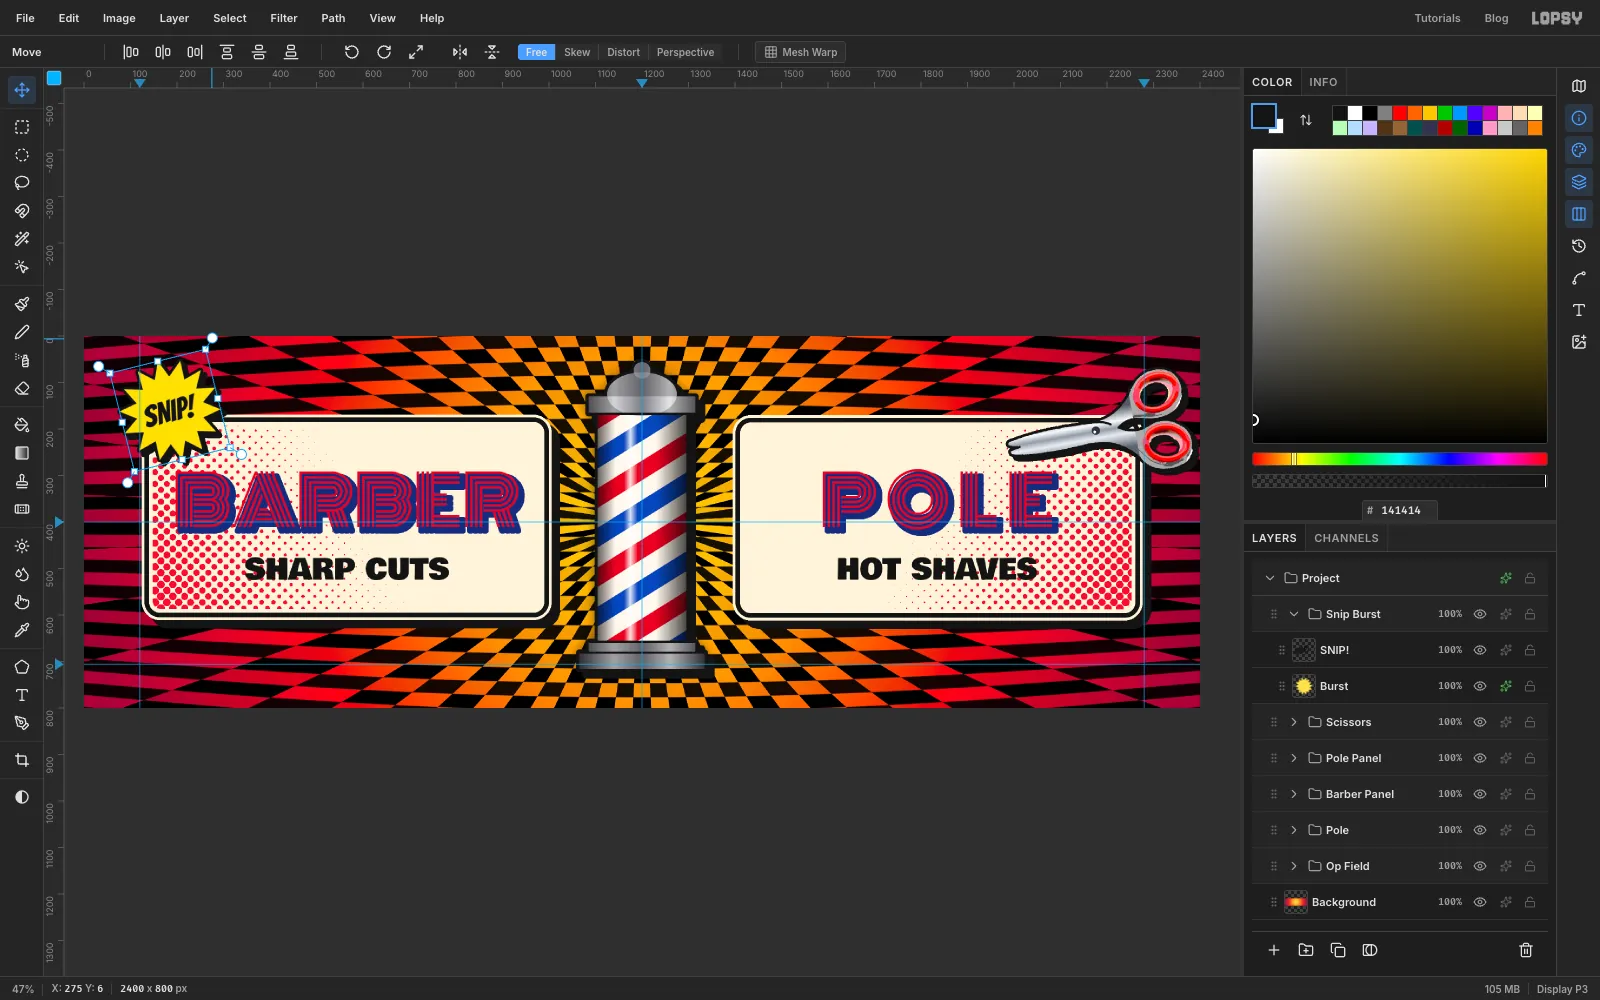
Select the Snip Burst group itself and deselect any marquee. With the Move tool, the transform box now frames everything in the group. Drag the top-right rotation handle anticlockwise about 14°. The star and the live text turn together, and the text stays editable.
-
Tilt both panels
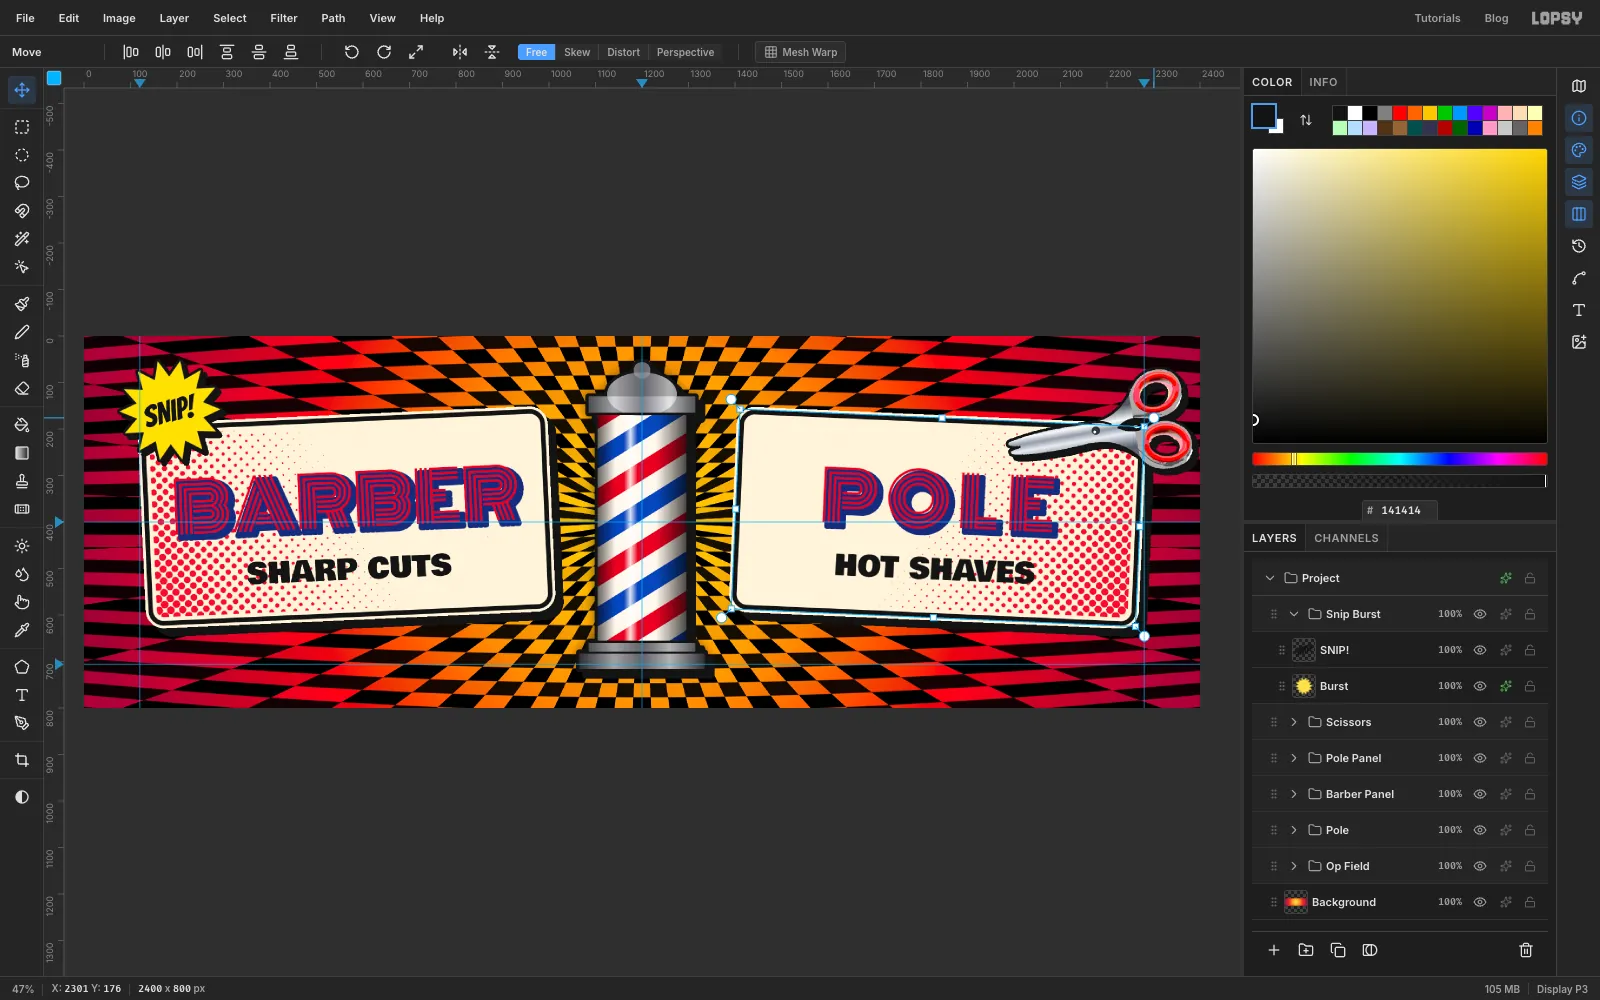
Select the Barber Panel group and rotate it the same way, but only about 2.5° anticlockwise. Then select Pole Panel and rotate it about 2.5° clockwise. The two panels now lean away from the pole like a pair of swinging signs, and everything inside them, text included, tilts as one.
-
Calm the edges
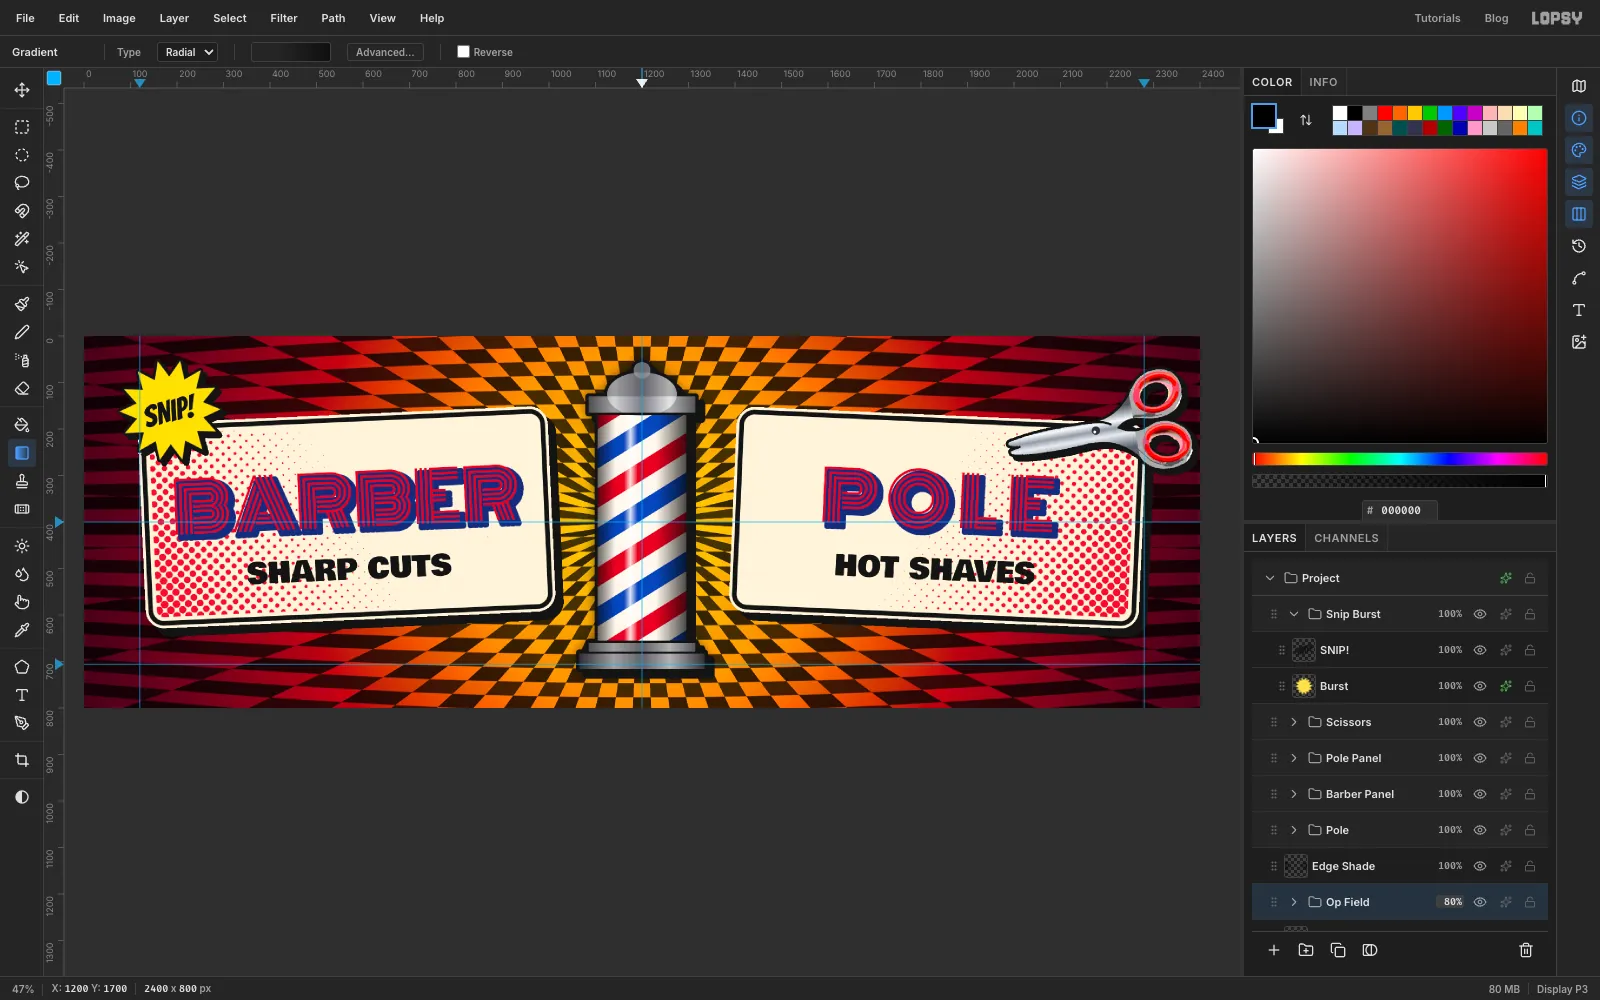
The checker is loud. That's the point, but it shouldn't fight the panels. Select the collapsed Op Field group and click Add Layer; the layer lands just above the group. Name it Edge Shade. Make a Radial gradient that's black at 0 % opacity at the centre, still 0 % at 32 %, and black at 60 % at the end. Drag from the middle of the canvas straight down, about 1,300 px.
Then select Op Field and set its opacity to 80 % with the opacity button on its row.
-
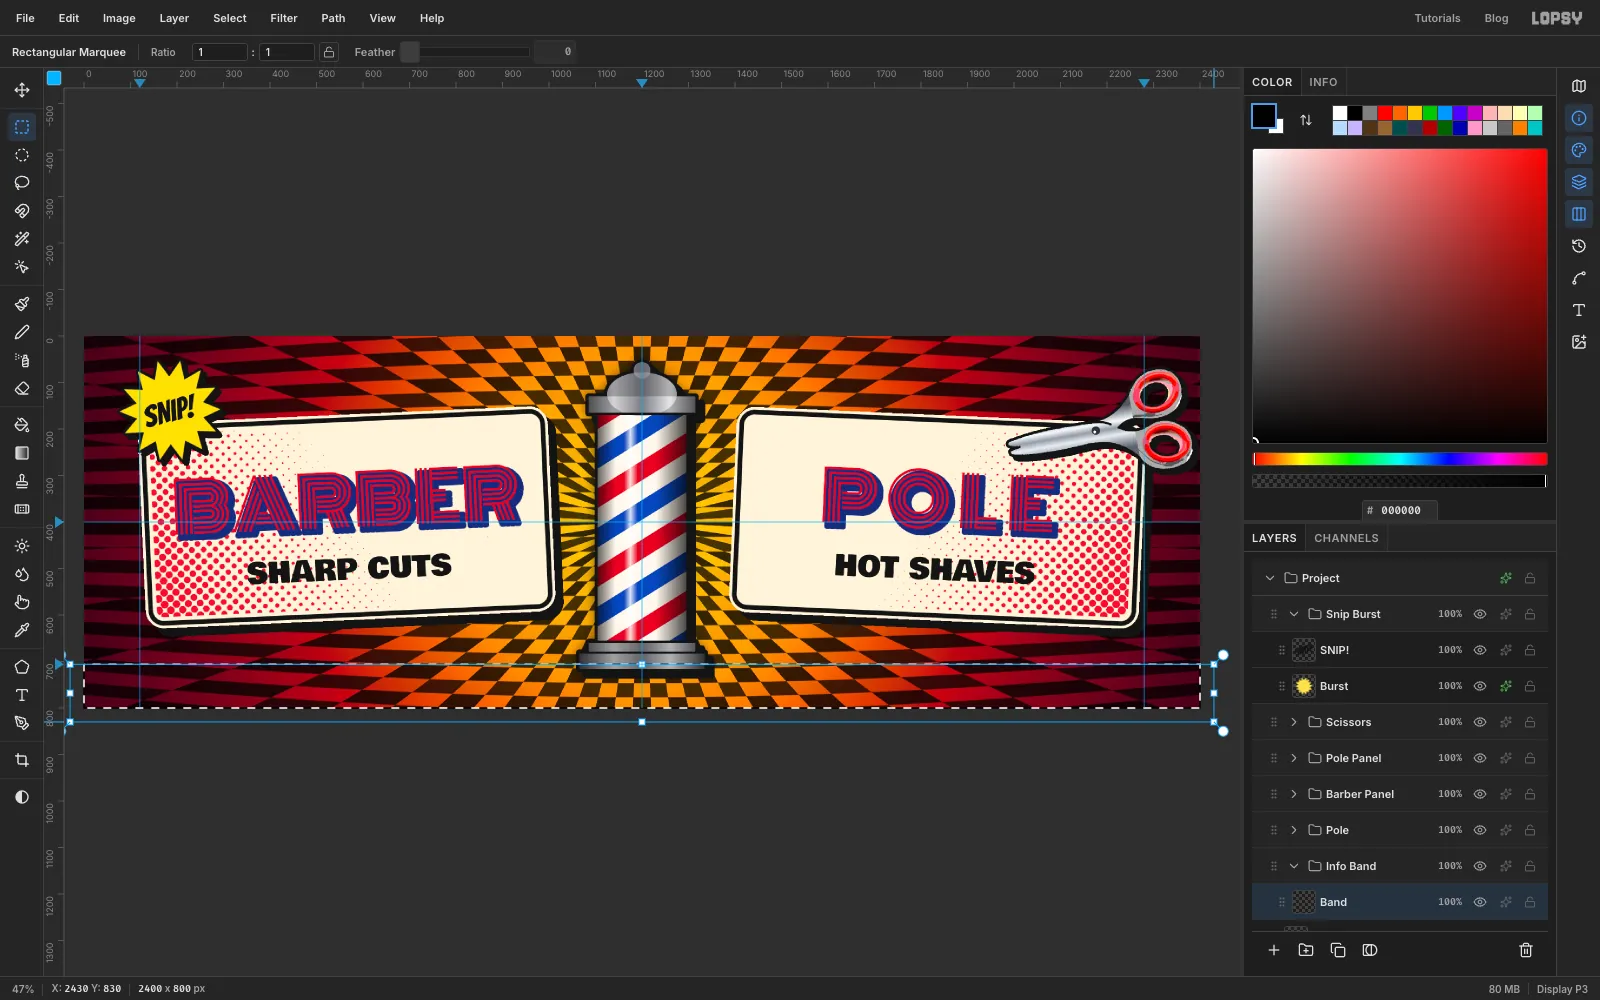
Draw the address bar
Select Edge Shade and make a group called Info Band with a layer called Band in it. It sits under the pole, so the pole's foot will stand on the bar.
With the Rectangular Marquee, drag from a little left of the canvas and just below the lower guide to past the bottom-right corner. Snap to Guides is on by default, so the top edge jumps onto the guide at 706. Fill with and deselect. Then pick the Pencil, set Size to 6 and the foreground to , and draw a line along the bar's top edge: click at the left edge and Shift-click at the right edge.
-
Set the address
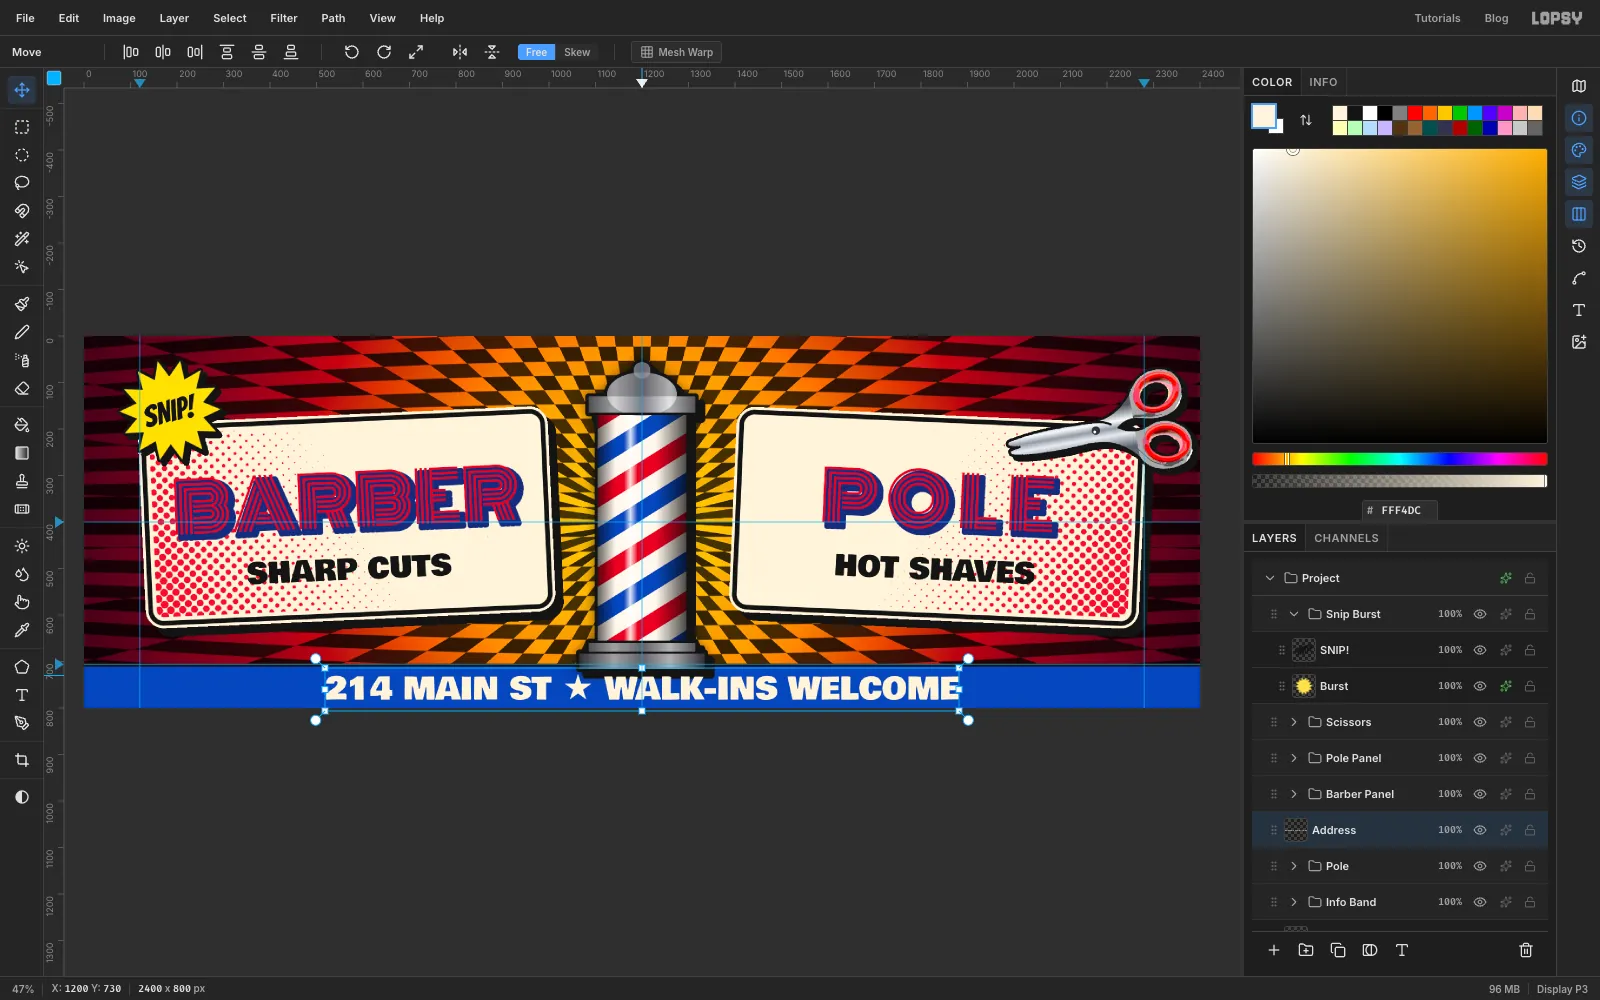
Collapse Info Band and select the Pole group, so the new text goes above the pole and its shadow. With the Text tool, choose Bowlby One at 66, colour , centred. Click in empty space on the blue bar, type 214 MAIN ST ★ WALK-INS WELCOME, press Tab, and rename the layer Address.
Move it until it's centred on the centre guide and sits in the middle of the bar, with the same gap above and below. On a billboard every word costs reading time, so keep this line short.
-
Add print grain
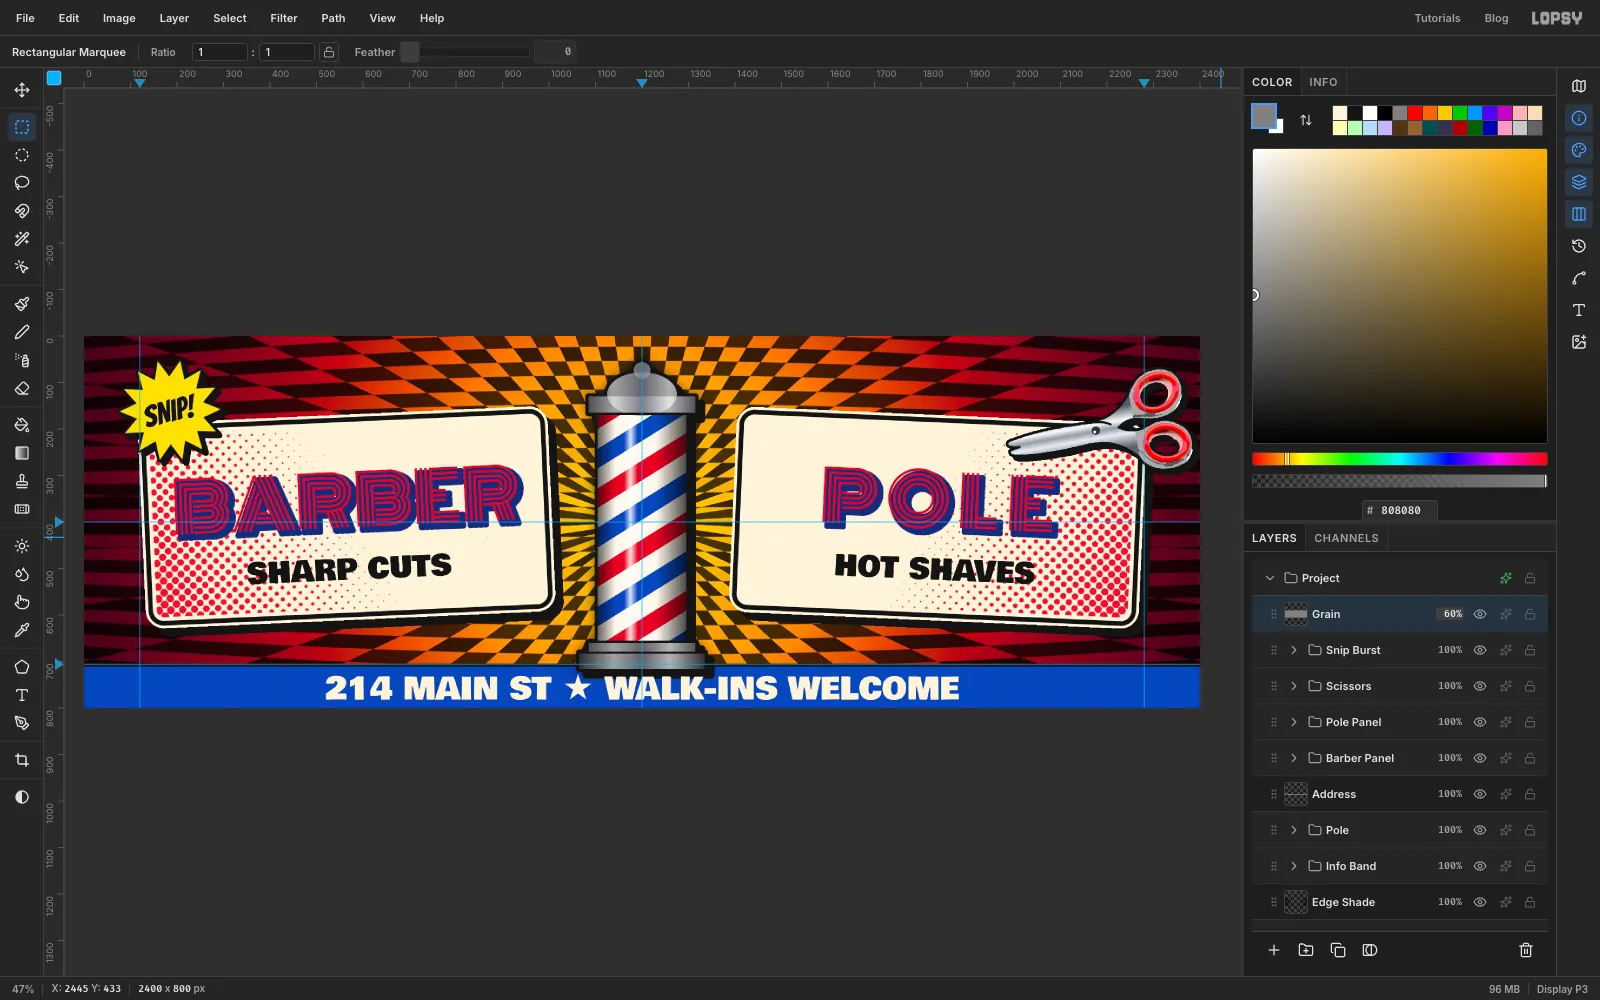
Collapse Snip Burst and select it, then click Add Layer. The layer lands at the top of the stack. Name it Grain. Fill the whole canvas with and choose Filter → Add Noise… with Amount 40, Mono and Gaussian. Set its blend mode to Overlay and its opacity to 60 %. Mid grey disappears in Overlay, so only the speckle is left.
-
Check the layout and export
Turn on View → Show Grid and check the layout. The two panels should mirror each other either side of the pole, the burst and the scissors should balance across the top corners, and the address should sit on the centre line. Turn the grid off again.
Choose File → Quick Export PNG to export the billboard and File → Save Project to keep a
.lopsyyou can come back to.