Paint Pixel Art Movie Concept Art of a Sunken Observatory
Paint a pixel-art film key frame in Lopsy. Dither a sky with noise, mirror a flooded valley, trace a canoe from a photo and snap it all to an 8 px grid.
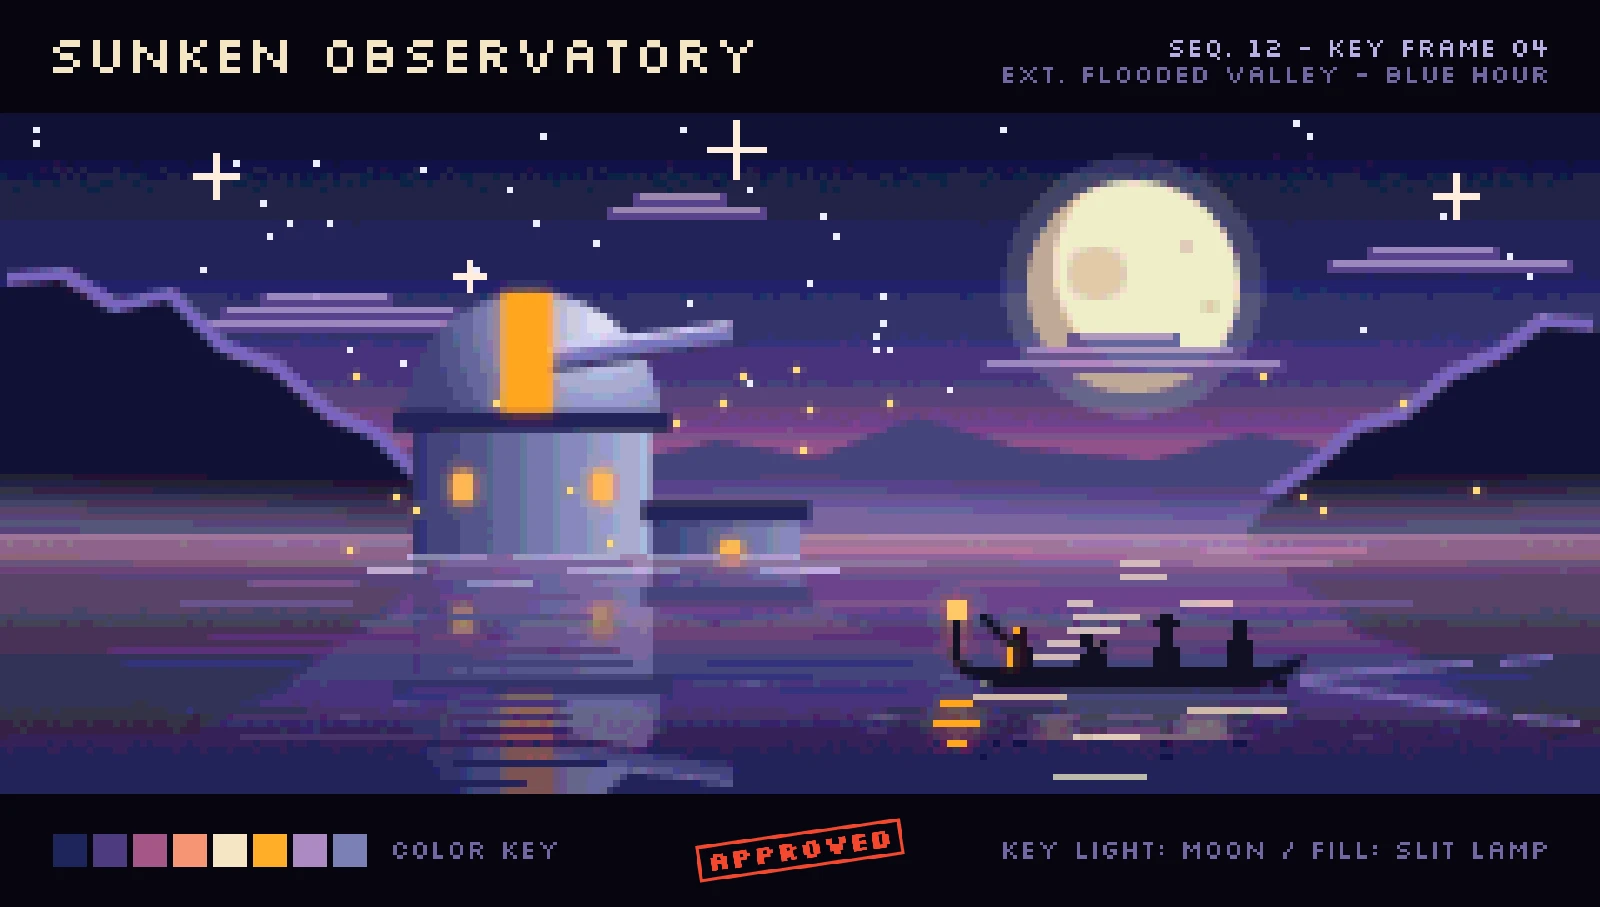
Game and animation studios often plan a film's look with pixel-art key frames. Each one is a single still that fixes the set, the light and the palette, presented letterboxed with a slate line and a strip of colour chips.
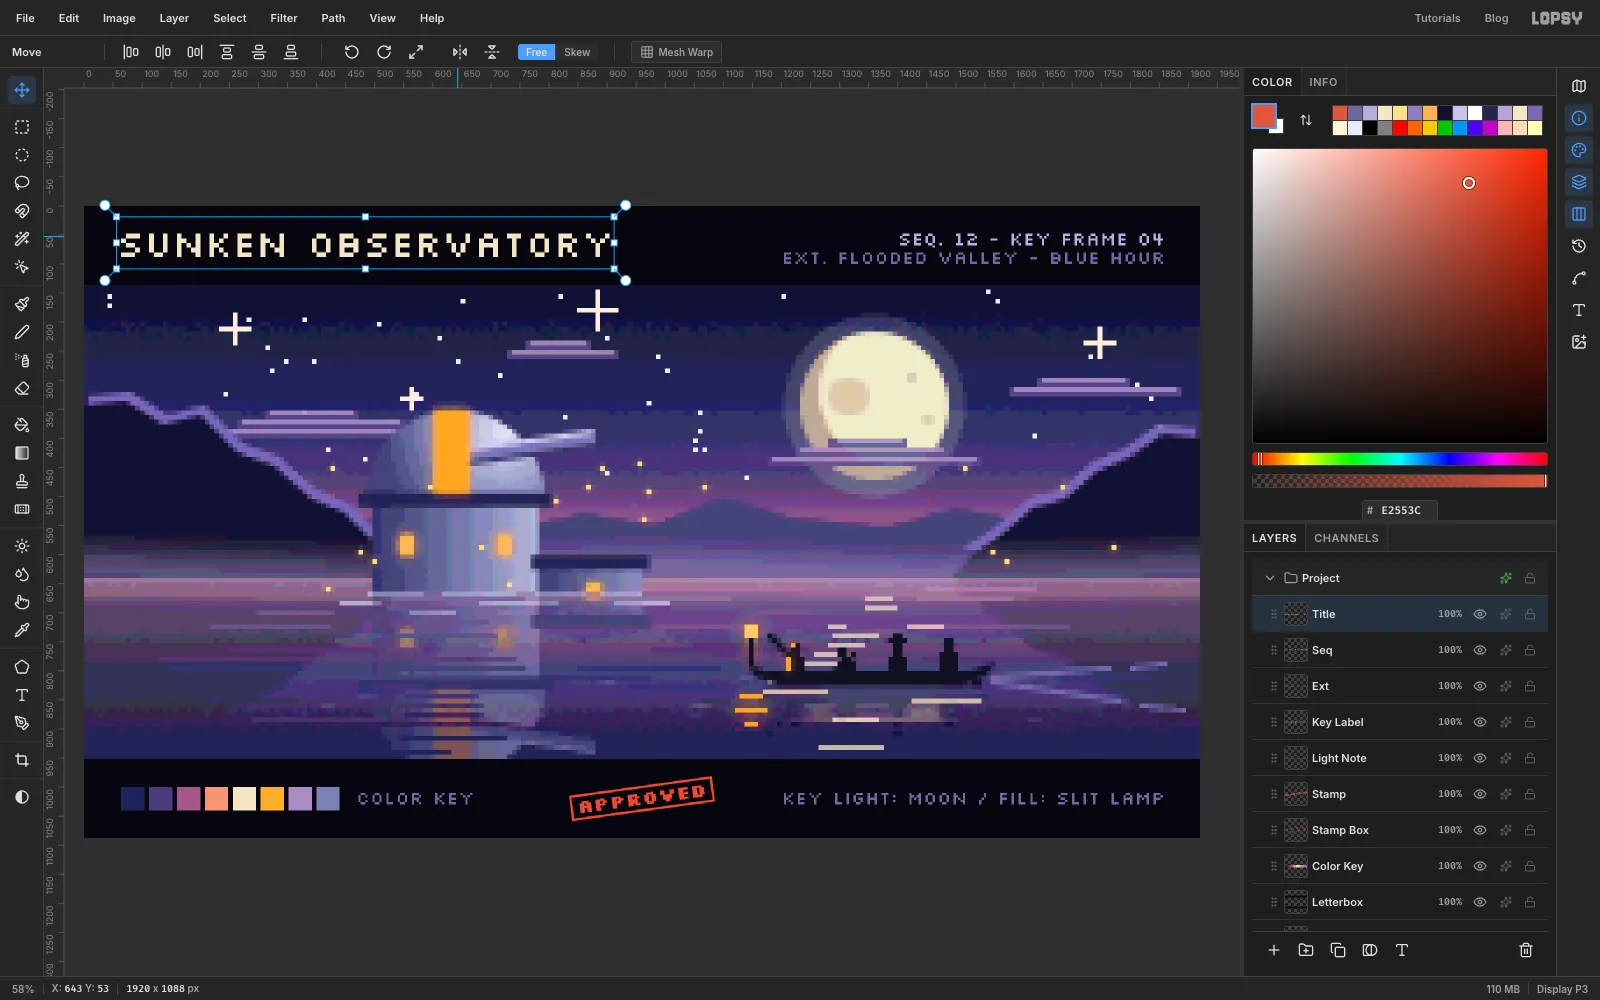
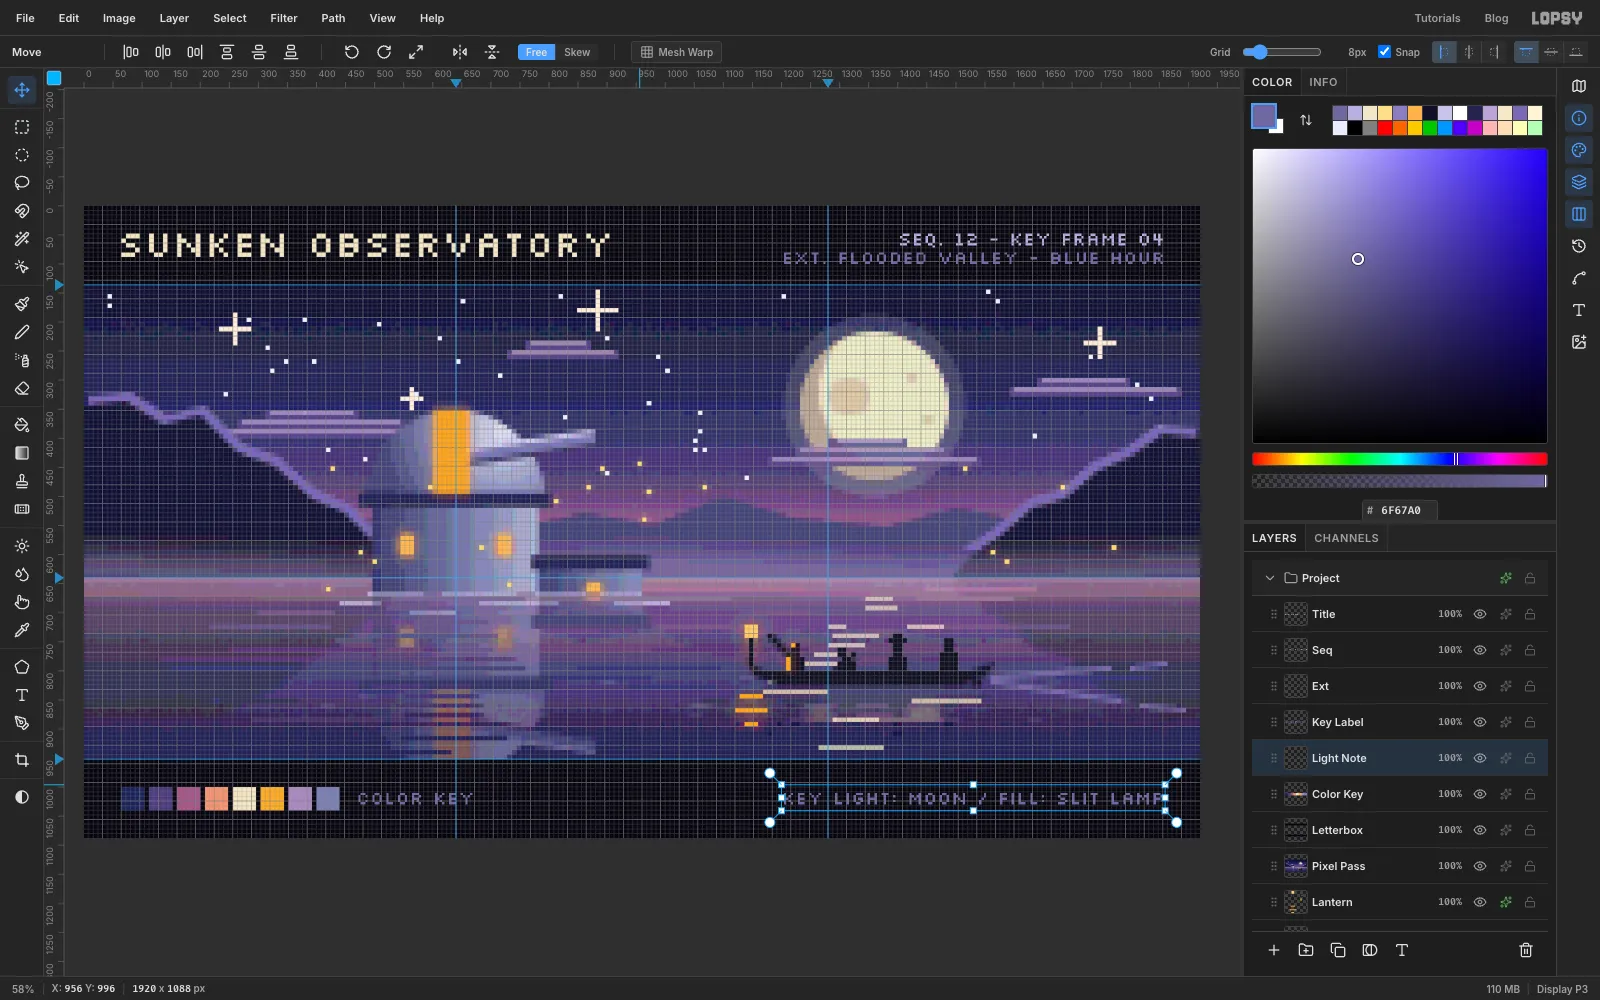
In this tutorial you'll paint Sunken Observatory, key frame 04 of an imaginary film. A domed observatory stands half drowned in a flooded valley at blue hour. Its telescope still points at an enormous moon, and a canoe of four people paddles across the moon's glitter path toward it.
The trick that makes it read as pixel art is that everything sits on one 8 px grid. You'll paint the scene with ordinary gradients, selections and glows. Then you'll stamp the whole picture onto one layer and run Pixelate over it, so every edge, glow and gradient lands on the same blocks. Along the way you'll dither a sky with noise, mirror the valley into the water, and build the observatory in a group, then scale it, cut it at the waterline and reflect it. Last, you'll trace the canoe's crew from a reference photo.
The canoe reference is Getting out to fish at dusk by Khanairobi on Wikimedia Commons (CC BY-SA 4.0). Any side-on photo of people in a small boat will do: you only need it for poses.
The palette:
-
Sky
-
Stars
-
twinkles
-
Moon
-
shade
-
craters
-
Clouds
-
cloud tops
-
Far range
-
cliffs
-
rim light
-
Water
-
Glitter
-
mist
-
ripples
-
Drum
-
annex
-
Dome
-
cornice
-
Telescope
-
highlight
-
shadow
-
Slit
-
windows
-
lamp
-
glow
-
Silhouettes
-
wake
-
fireflies
-
Letterbox
-
slate type
-
stamp
-
Set up the canvas, the 8 px grid and guides
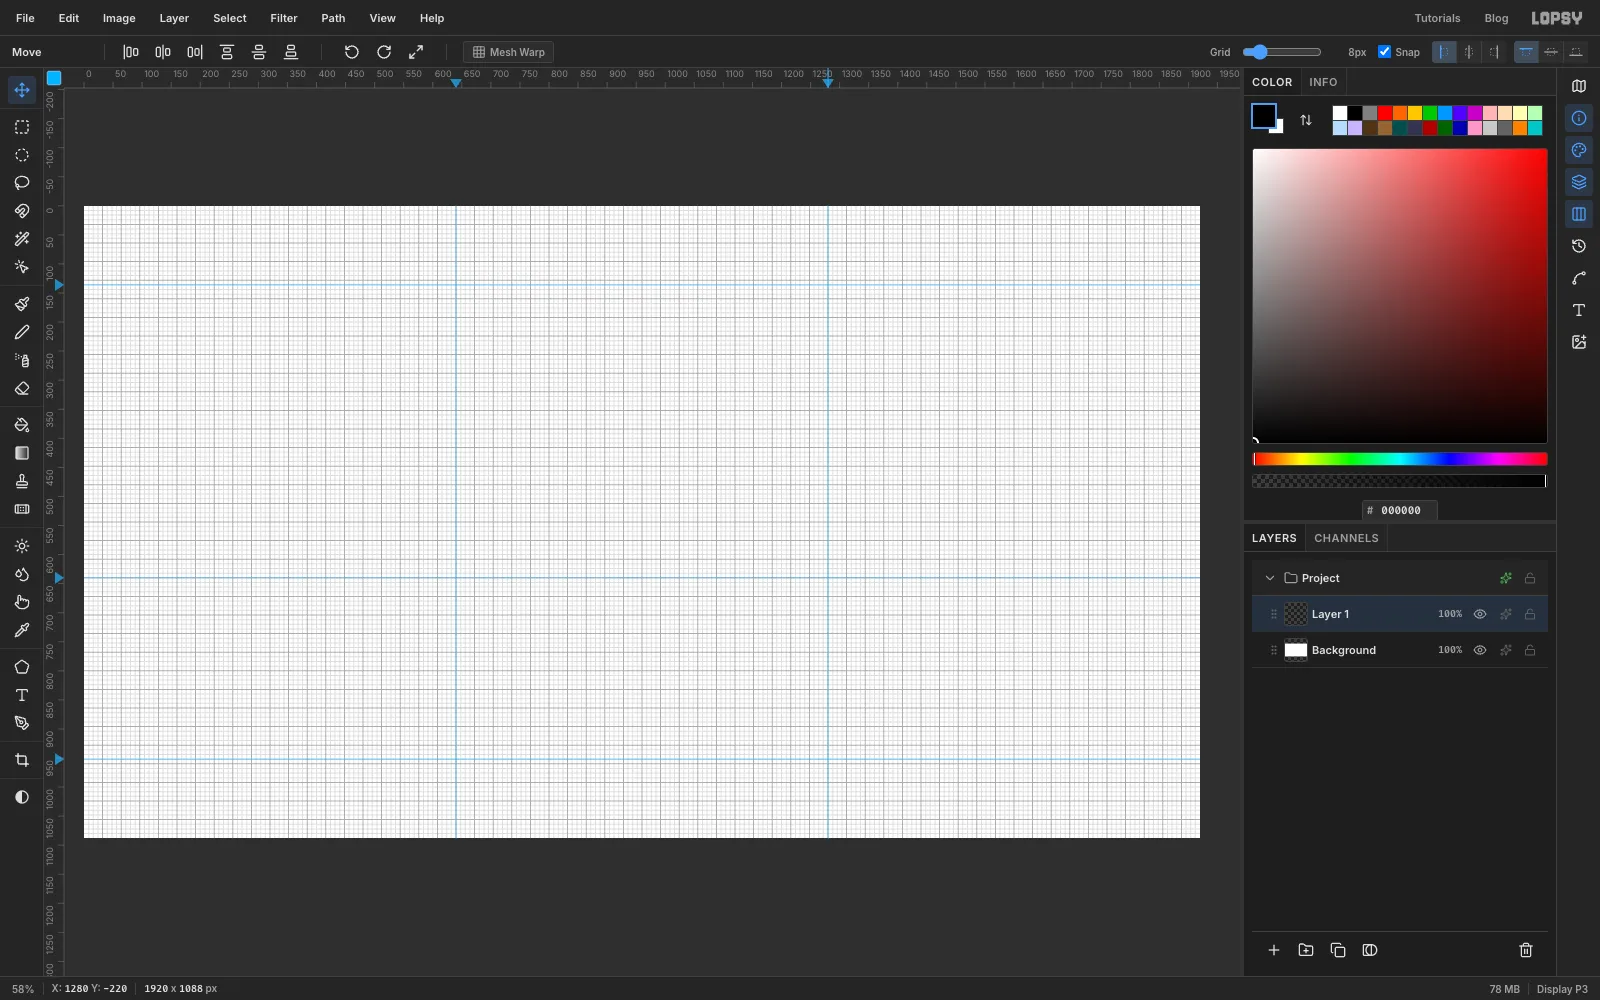
Choose File → New and make a 1920 × 1088 document. That's 8 px taller than full HD on purpose: 1088 is a multiple of 8, and so is half of it, so the grid's lines run cleanly from edge to edge.
Turn on View → Show Grid. In the options bar, drag the Grid slider one step left to 8px and make sure Snap is ticked. Marquees now lock to 8 px blocks, and every arrow-key nudge moves a layer by one block.
Click the left ruler at 136, 640 and 952 for horizontal guides. The first and last mark the letterbox bars, and 640 is the horizon. Click the top ruler at 640 and 1280 to mark the thirds.
-
Dither the sky with noise
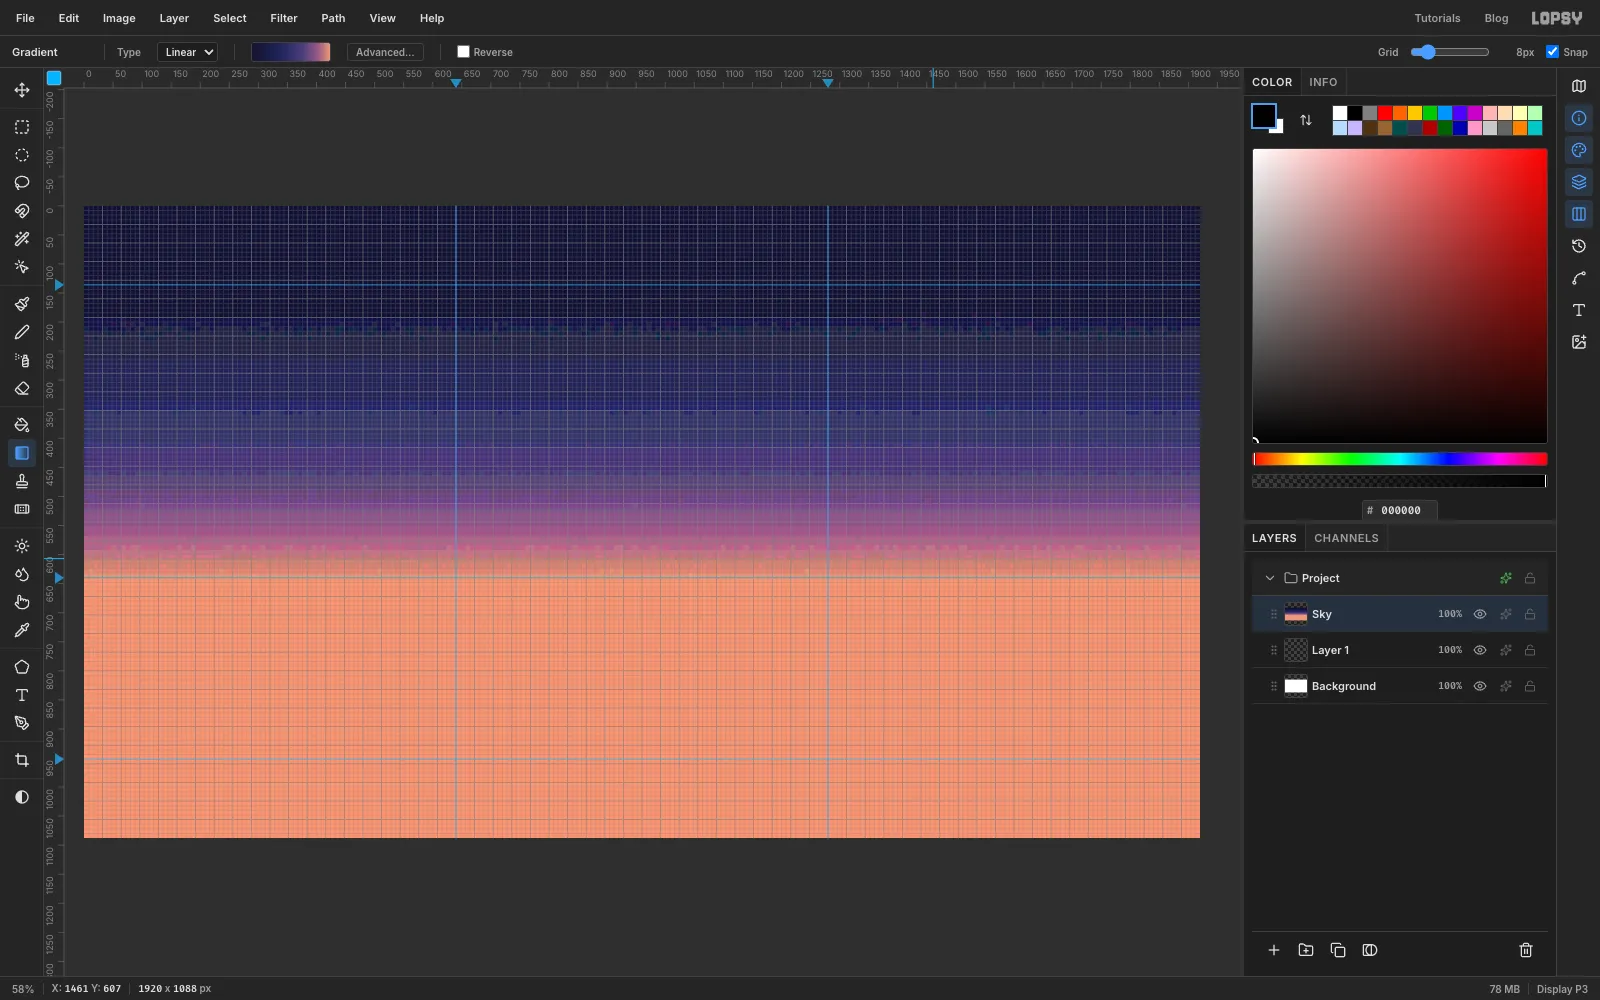
Add a layer called Sky. Pick the Gradient tool, set it to Linear and open Advanced…. Make five stops: at the left, at 35%, at 65%, at 85% and at the right. Drag straight down from the top guide to the horizon guide.
Now turn that smooth gradient into pixel-art bands:
- Filter → Add Noise…: Amount 20, Mono, Gaussian.
- Filter → Pixelate…: Block Size 8.
- Filter → Posterize…: Levels 16.
Pixelate averages the noise into 8 px blocks, and Posterize snaps each block to the nearest band. The blocks near each boundary land on either side of it, which gives you a ragged, dithered edge instead of a smooth blend.
-
Scatter the stars
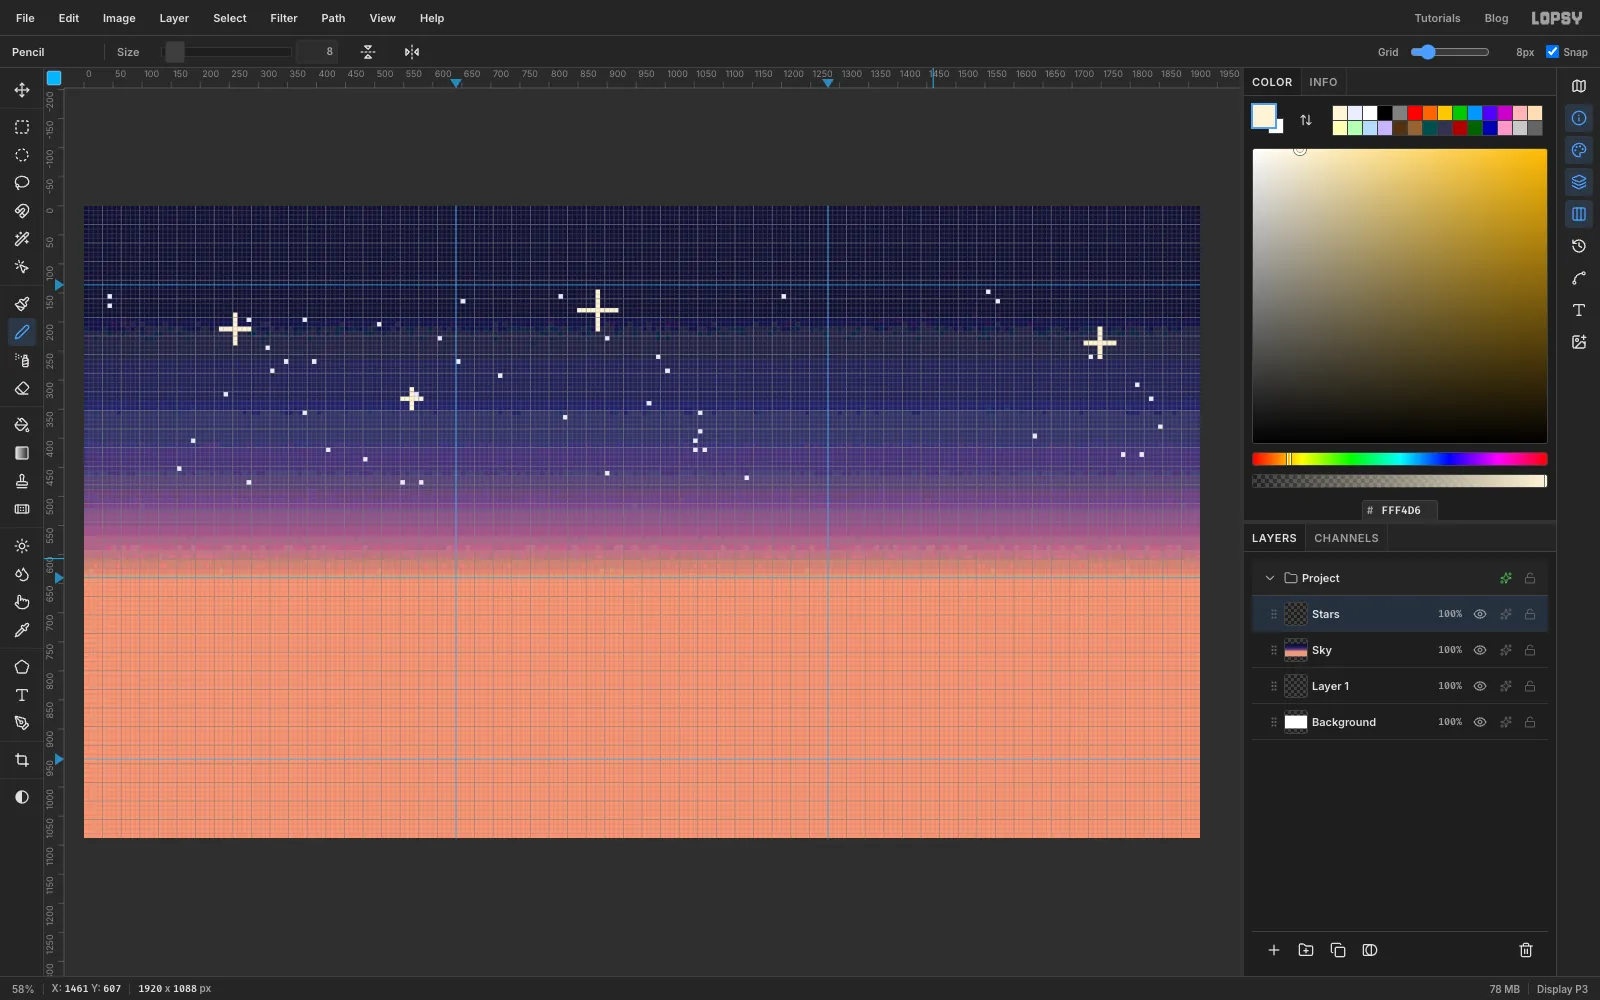
Add a Stars layer. Choose the Pencil, set Size 8 and colour , and click about forty single stars across the sky above the horizon guide. Leave a clear patch on the upper right, where the moon will go.
Switch to for four bigger twinkles. Click a point, then Shift-click 24–32 px to its right to draw a straight line through it. Draw a vertical line the same way, so each twinkle is a small plus.
Run Filter → Pixelate… at 8 so every star is exactly one block.
-
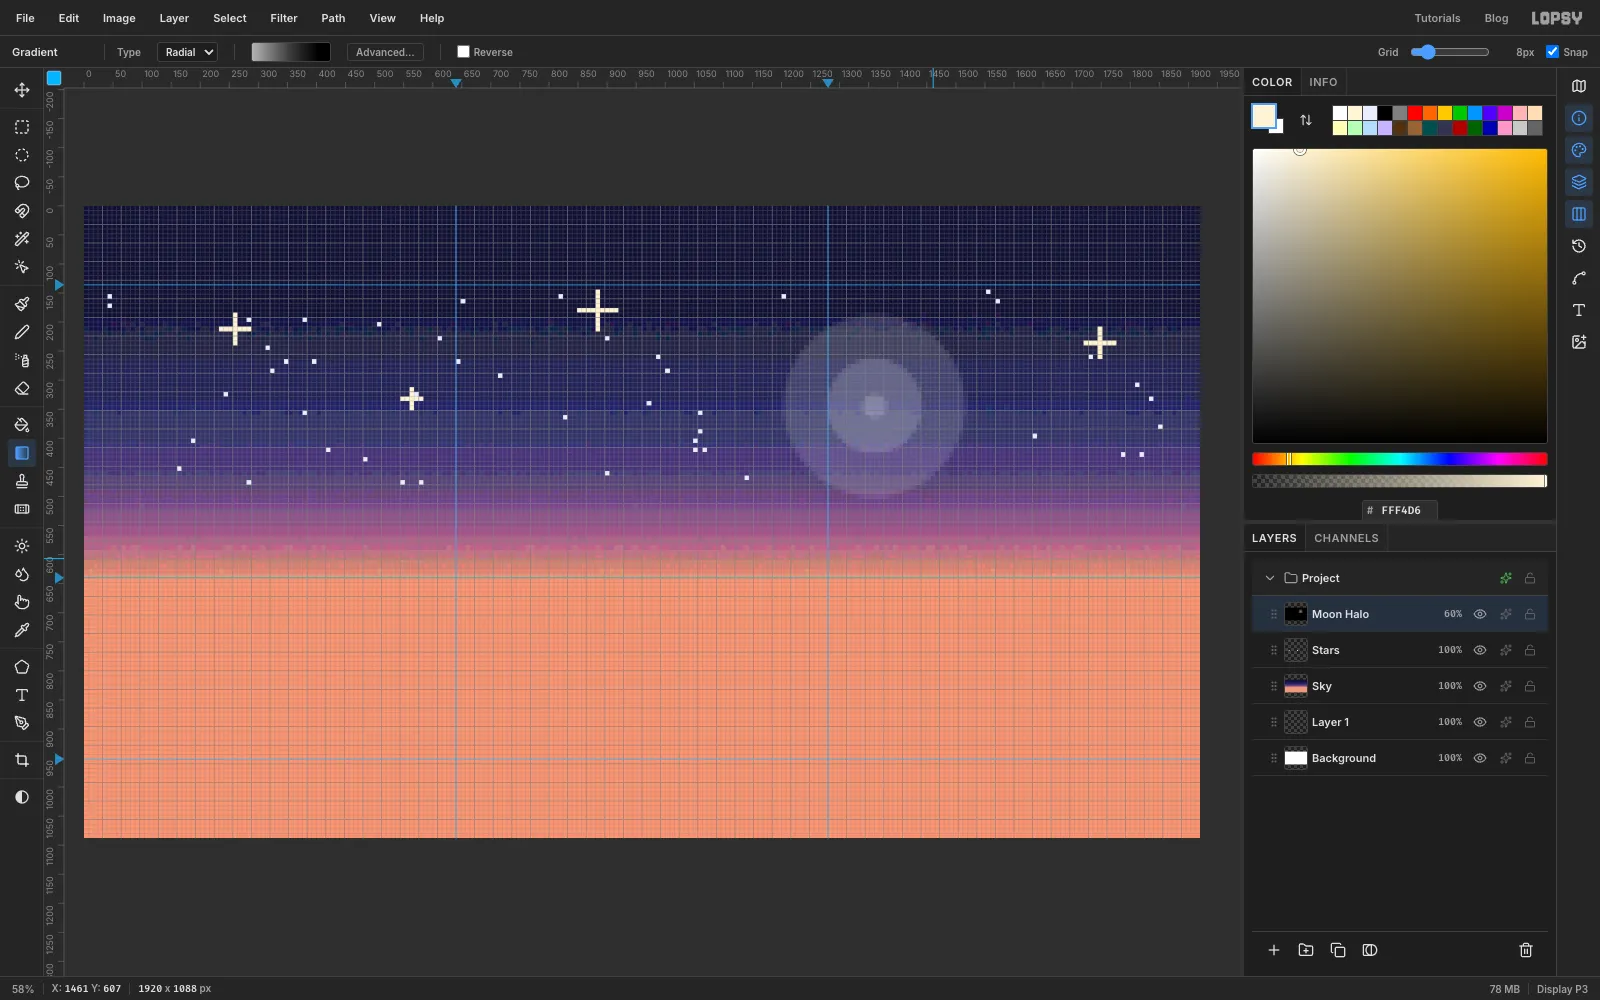
Add a banded moon halo
Add a Moon Halo layer. Give the Gradient tool a Radial gradient with four stops: at the start, at 50%, then black at 85% and at the end. Drag from 1360, 344 (the moon's centre) 240 px to the right.
In the layer's effects drawer, set the Blend mode to Screen. Black then disappears, and the greys lighten the sky. Then:
- Run Posterize at 5 levels to break the glow into rings.
- Run Pixelate at 8.
- Drop the layer to 60% opacity.
Keep the halo's ramp grey on purpose. A coloured ramp posterizes into rainbow rings, because each channel steps at a different radius.
-
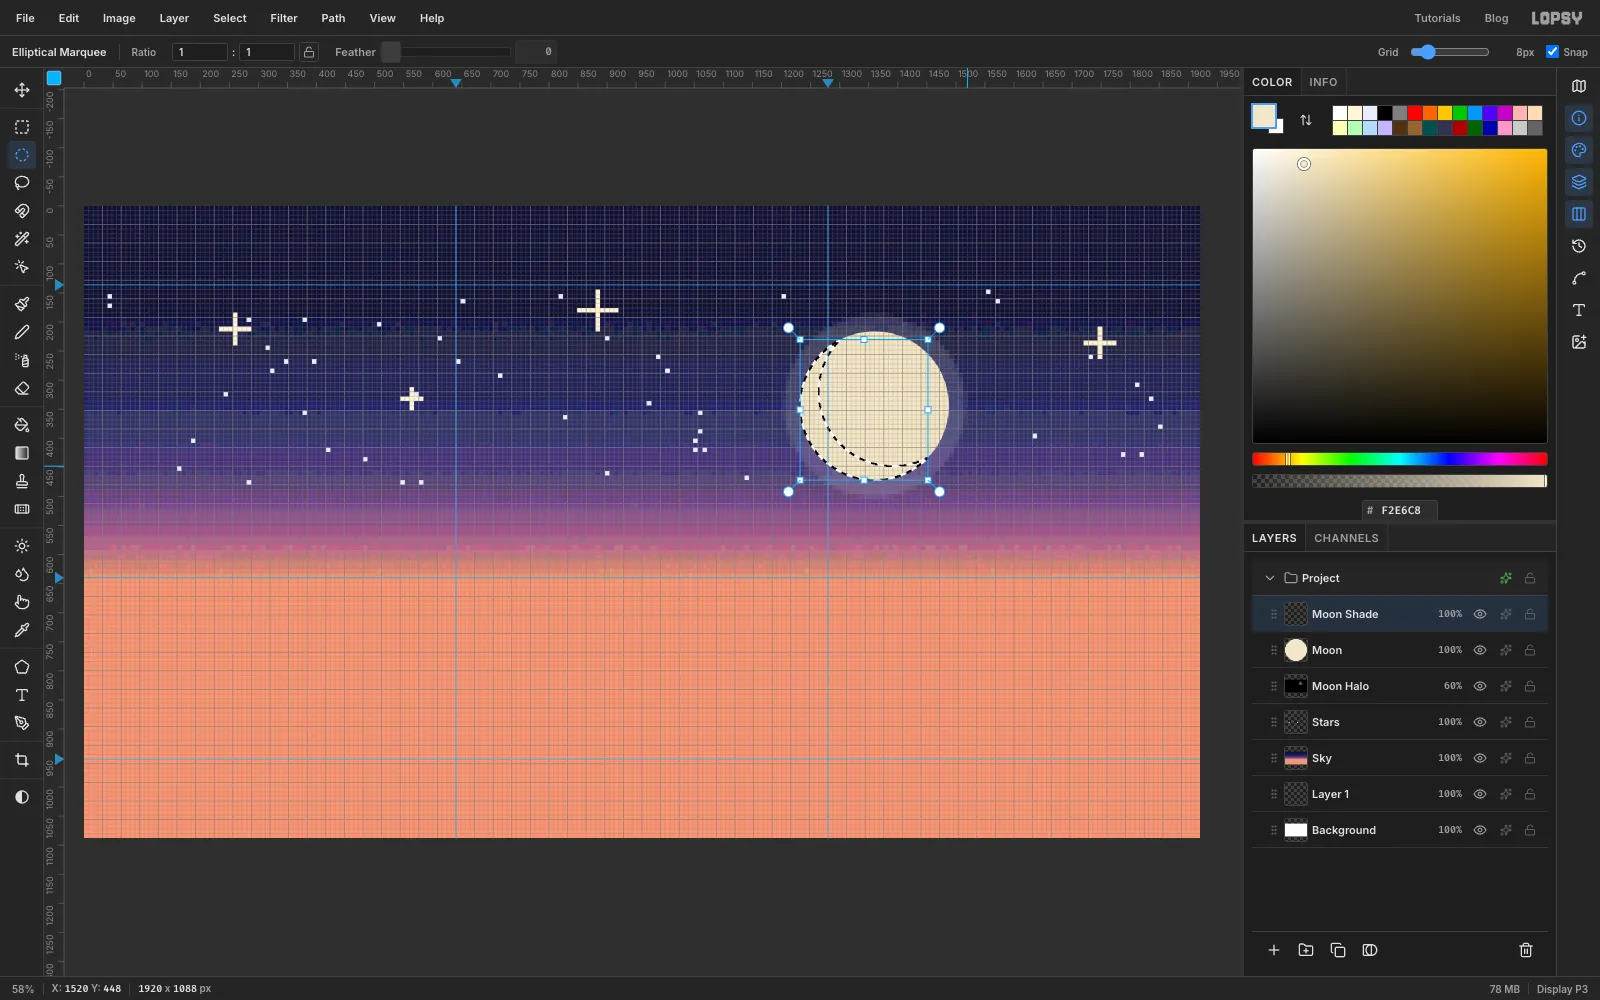
Shape the moon and its shadow
Add a Moon layer. Drag an Elliptical Marquee from 1232, 216 to 1488, 472: a 256 px circle that snaps to the grid. Fill it with (Edit → Fill).
Add a Moon Shade layer above it, then ⌘-click the Moon layer's thumbnail to load the disc as a selection. Hold Alt and drag the same size circle again, about 32 px to the right and 24 px higher. This subtracts it and leaves a thin crescent on the lower left. Fill it with .
-
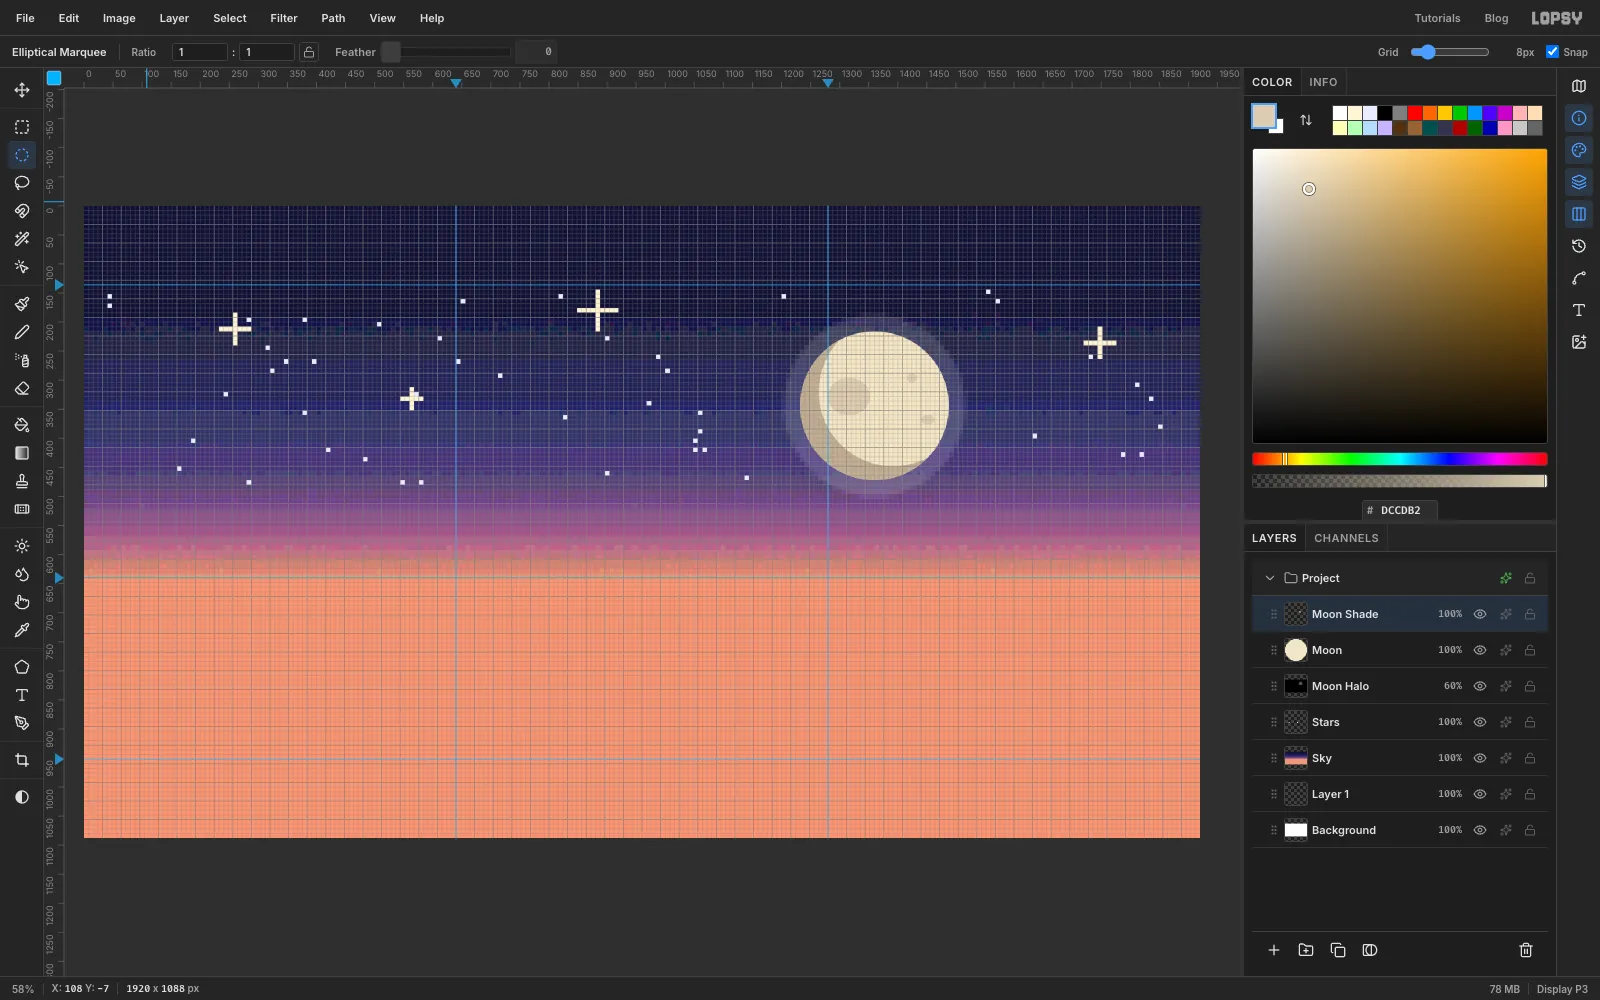
Add the craters
Deselect, stay on Moon Shade and fill three ellipses with :
- one large crater, about 80 × 64, on the upper left of the disc;
- two small ones, 16 to 24 px across, on the right.
Keep them lopsided. Two craters side by side above a third one reads as a face straight away.
-
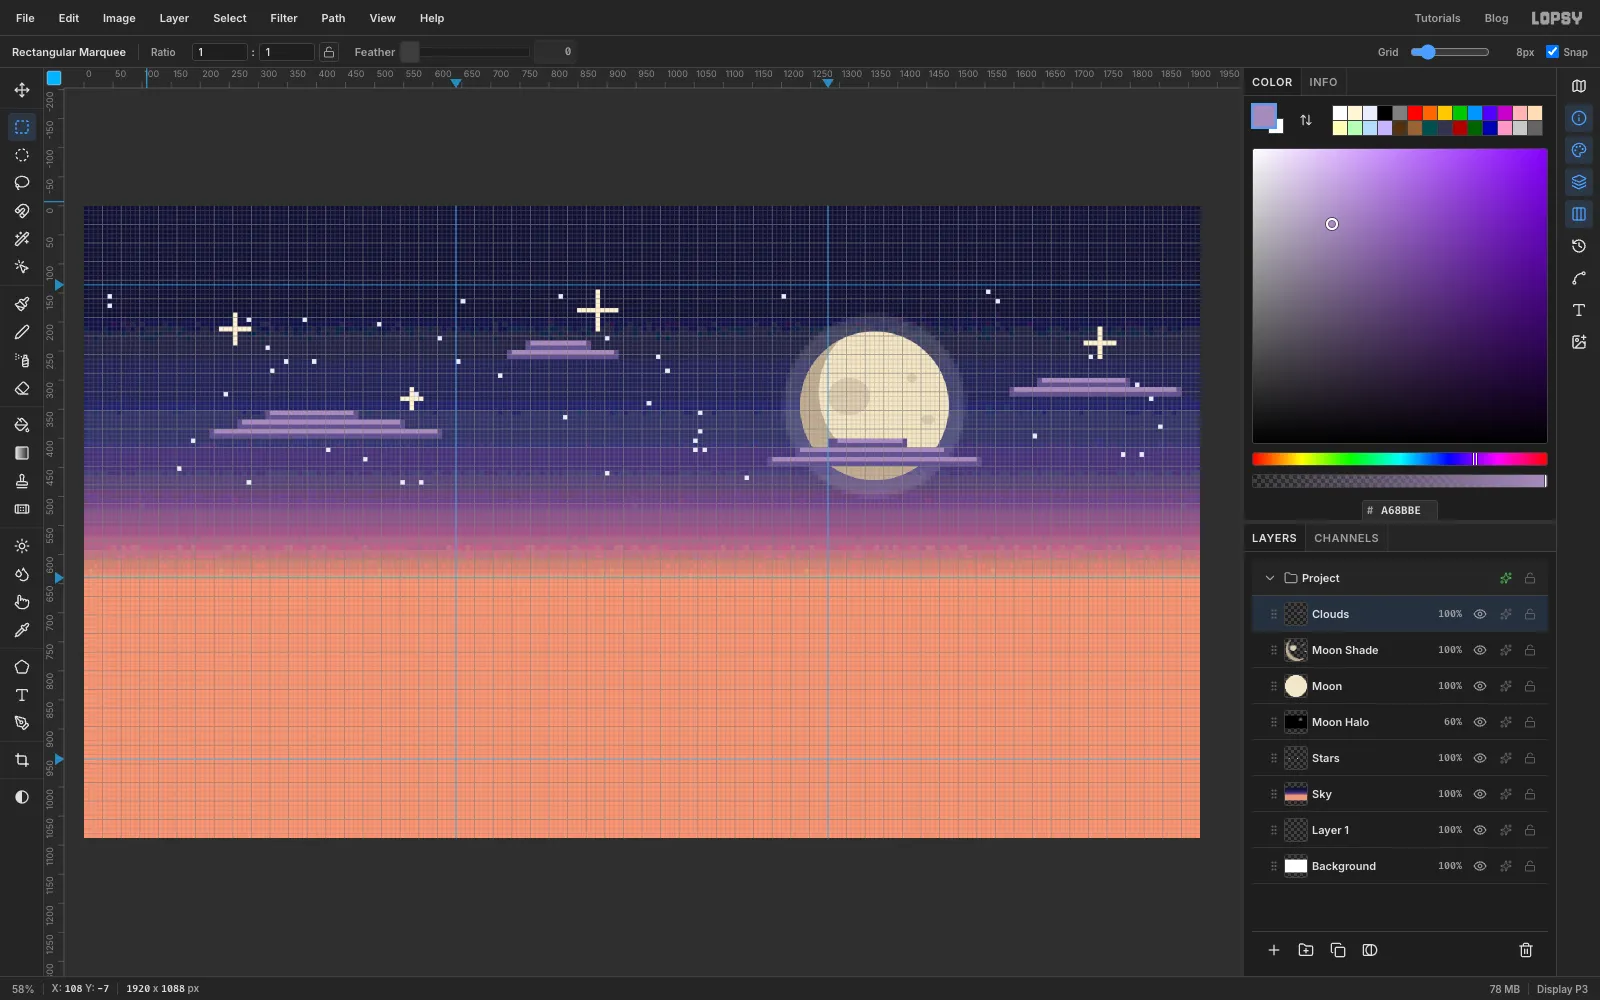
Stack the cloud banks
Pixel clouds are just stacked strips. Add a Clouds layer. For each bank:
- Draw a 16 px-tall Rectangular Marquee and fill it with .
- Draw a narrower strip on top of it, then a narrower one again. Snap keeps them on whole blocks.
- Fill an 8 px strip along the top of each step with , set 8 px in from both ends, for the moonlit edge.
Put one bank across the bottom third of the moon, a long one on the left, a thin one on the far right and a small one high in the middle. Set the layer to 90%.
-
Draw the far range
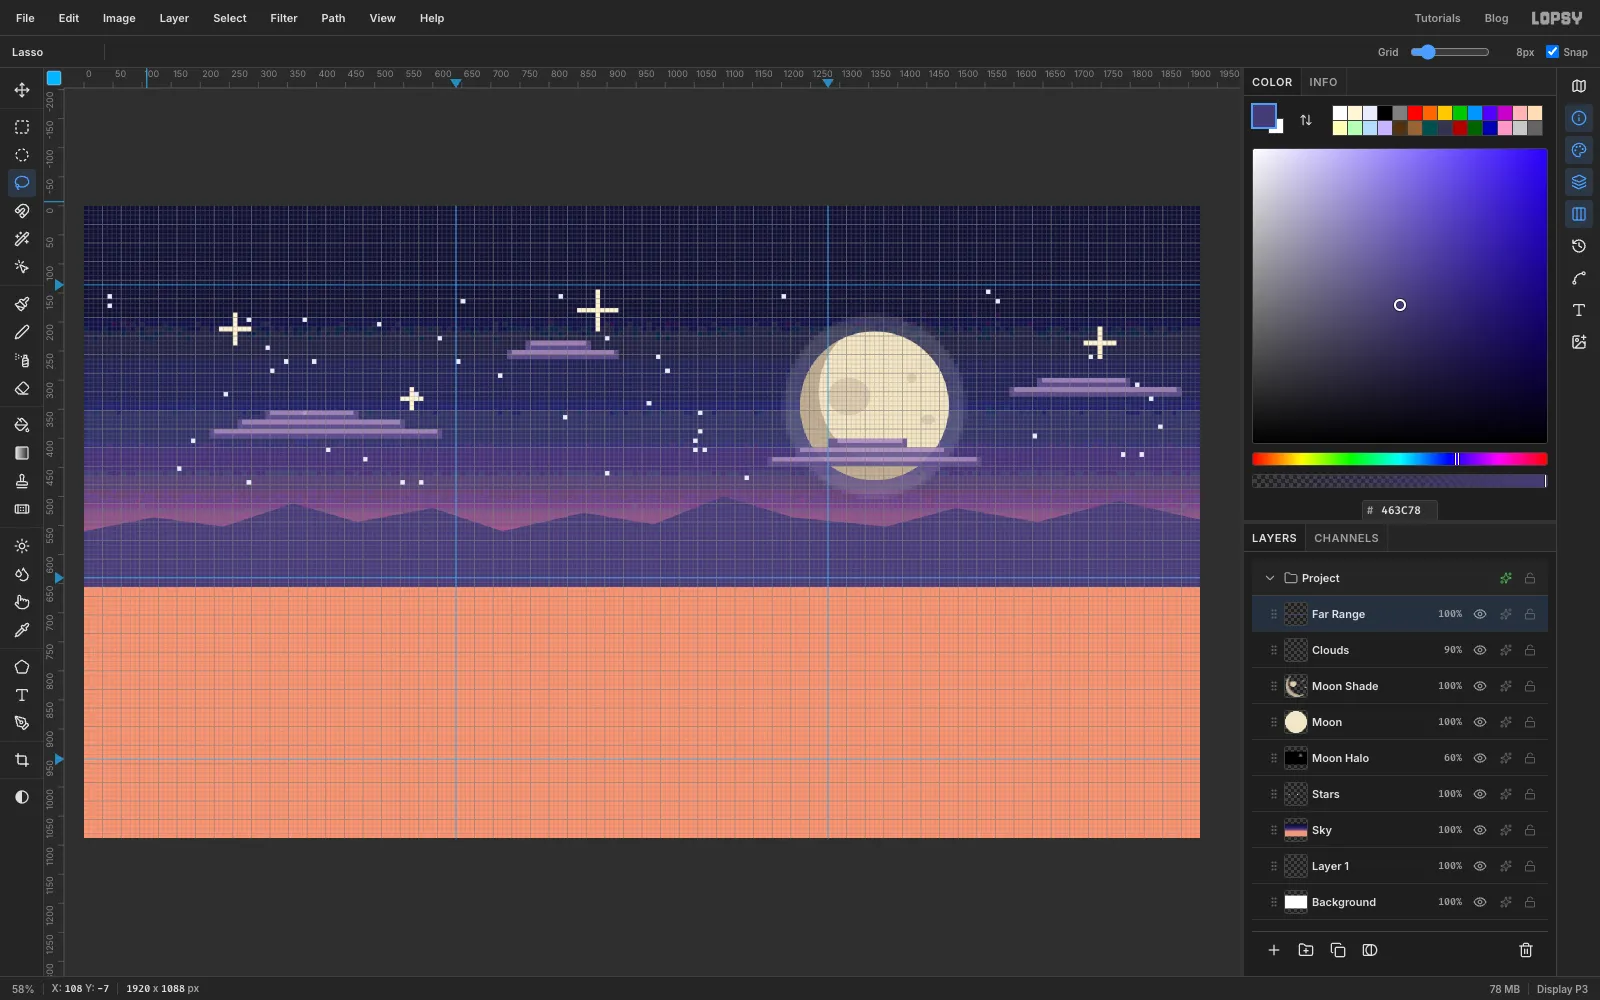
Add a Far Range layer. Use the Lasso to click a zigzag ridge from the left edge to the right edge, with peaks between about y 500 and 560. Then click down below the horizon and back to close the shape. Fill it with . It's a mid-tone, so it sits back in the haze.
-
Frame it with cliffs and rim light
Each cliff gets two layers: a rim layer, with the cliff itself above it.
- Add Cliffs L Rim, then Cliffs L on top of it.
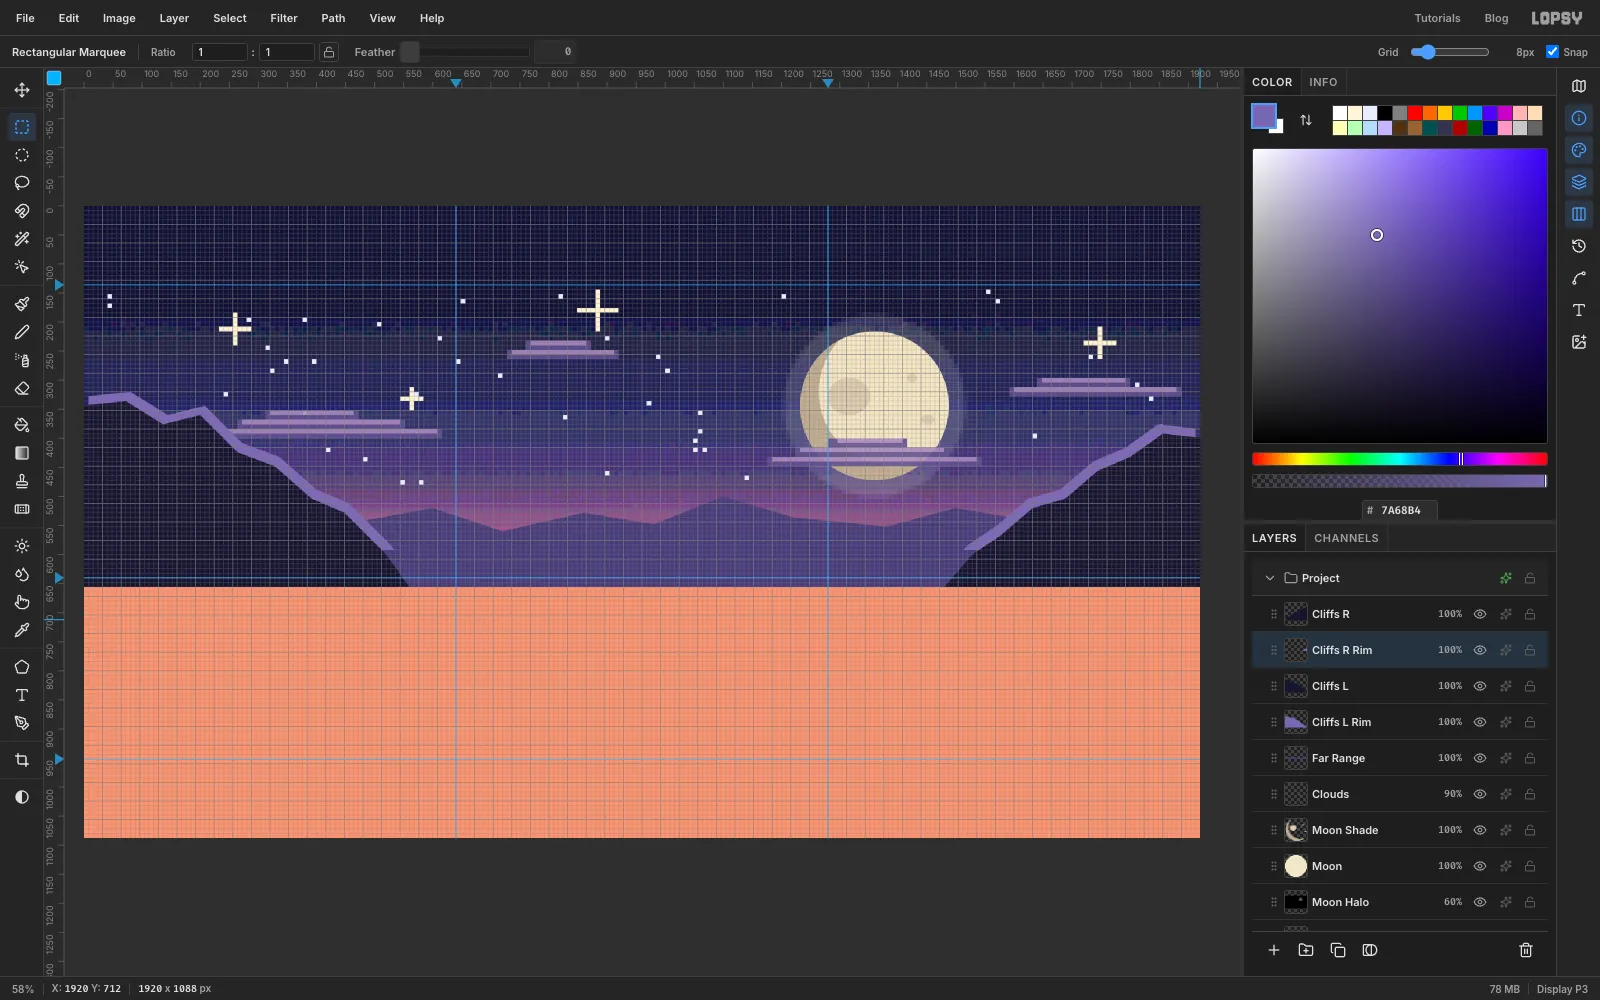
- On Cliffs L, lasso a cliff that climbs from the horizon, just left of the left-third guide, up to the left edge about halfway up the sky. Give it a few ledges on the way. Fill it with .
- Select Cliffs L Rim, ⌘-click the Cliffs L thumbnail and fill the selection with . Deselect.
- With the Move tool, press → once and ↑ twice. With Snap on, each press is one 8 px block, so a lavender edge peeks out along the cliff's top.
Make the right-hand cliff the same way: select Cliffs L first, then add Cliffs R Rim and Cliffs R. Lasso a mirror image of the left cliff by eye, from the horizon past the right-third guide up to the right edge. Nudge its rim ← once and ↑ twice.
Because the rim is shifted up, it also peeks out along the foot of each cliff, just above the water. On each rim layer, marquee everything from y 592 down and press Delete, so the rims stop at the shoreline.
-
Fill the water
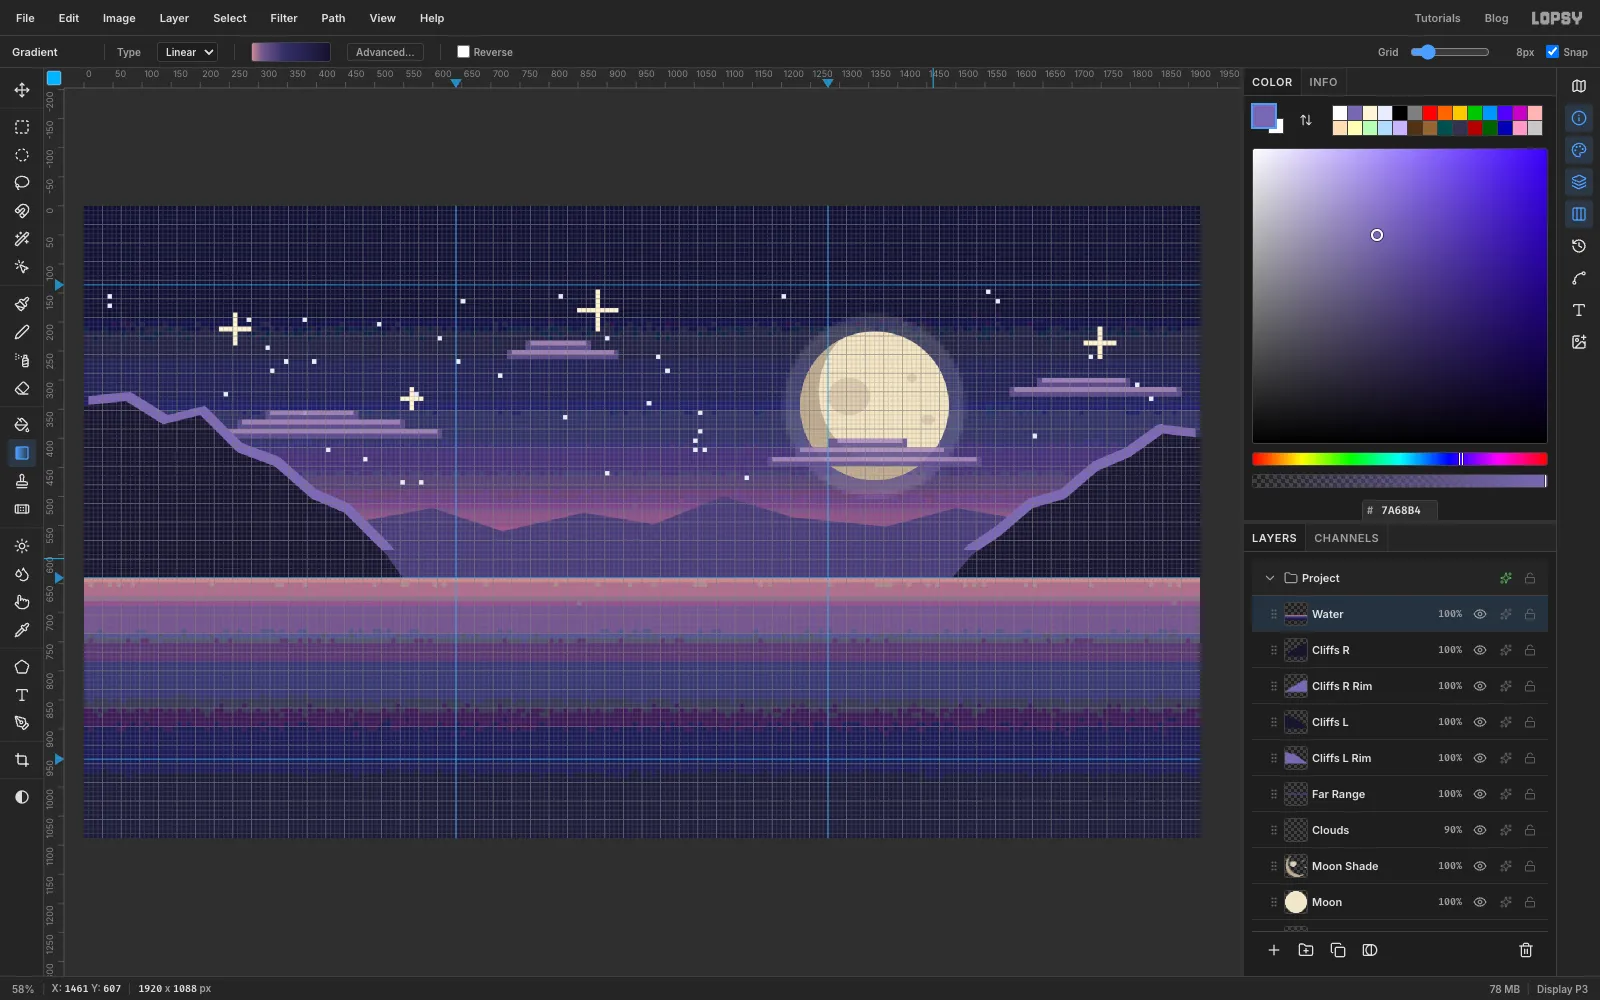
Select Cliffs R, add a Water layer, and marquee from the horizon guide to the bottom of the canvas. Fill the selection with a linear gradient dragged top to bottom, with stops , at 12%, at 40% and .
Give it the same treatment as the sky, but with Add Noise 30, Pixelate 8 and Posterize 10. The coarser bands read as calm water.
-
Mirror the valley into the water
Hide both rim layers with their eye icons first. Bright rim lines mirrored into the water look like spotlight beams.
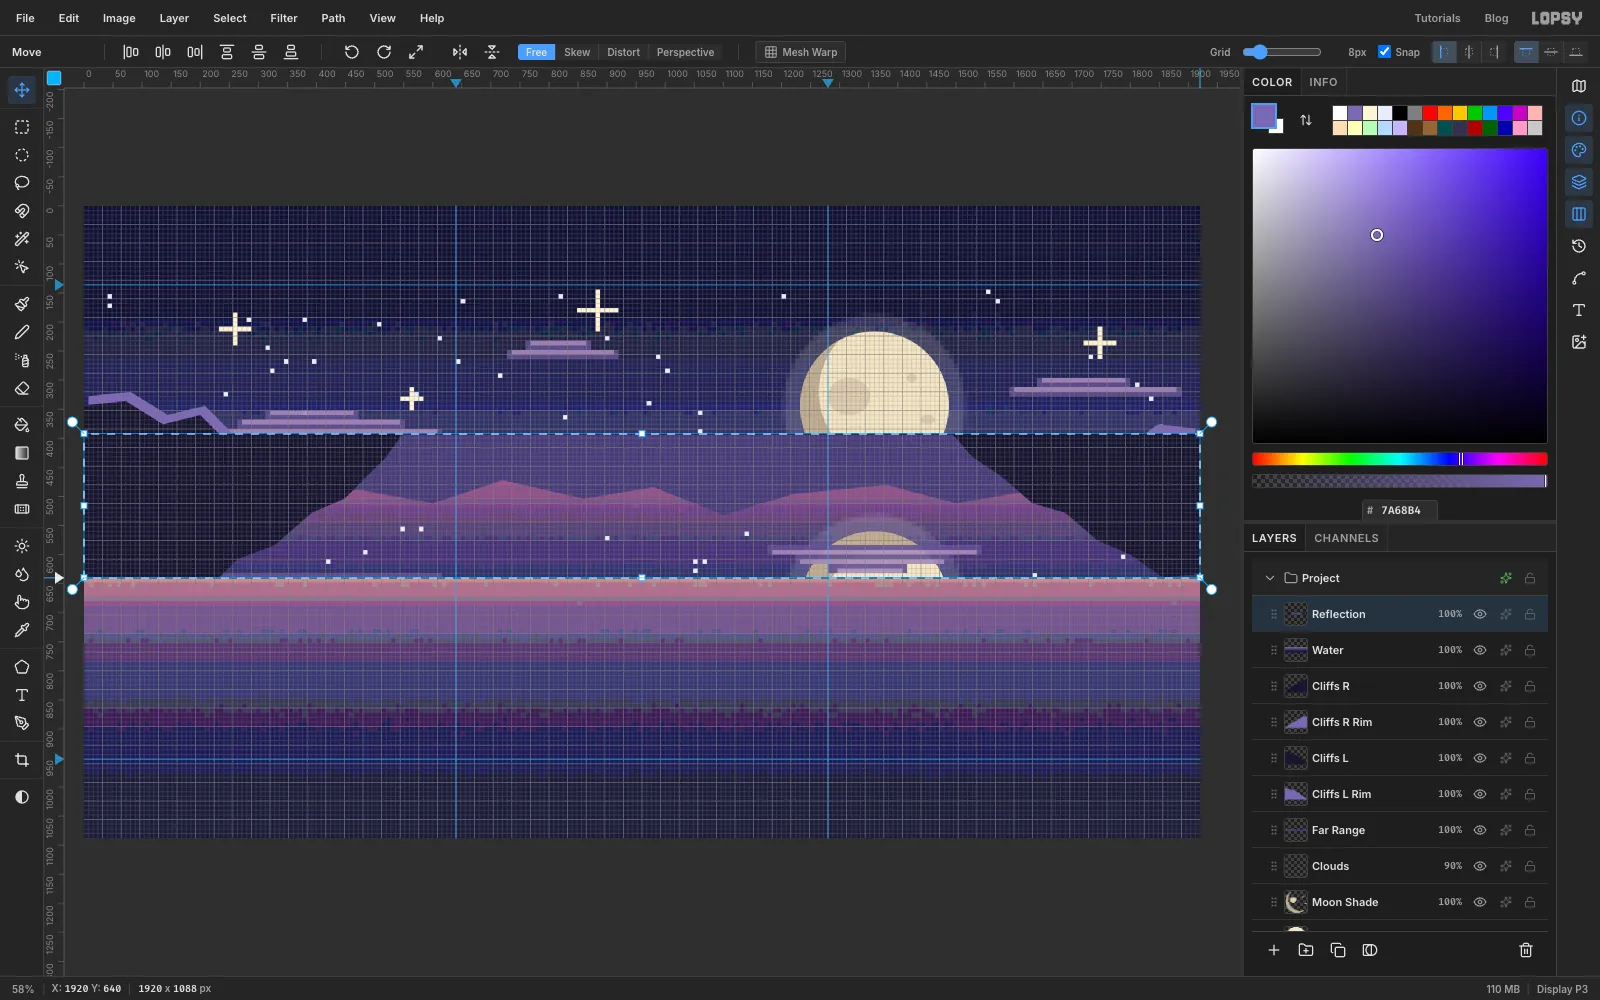
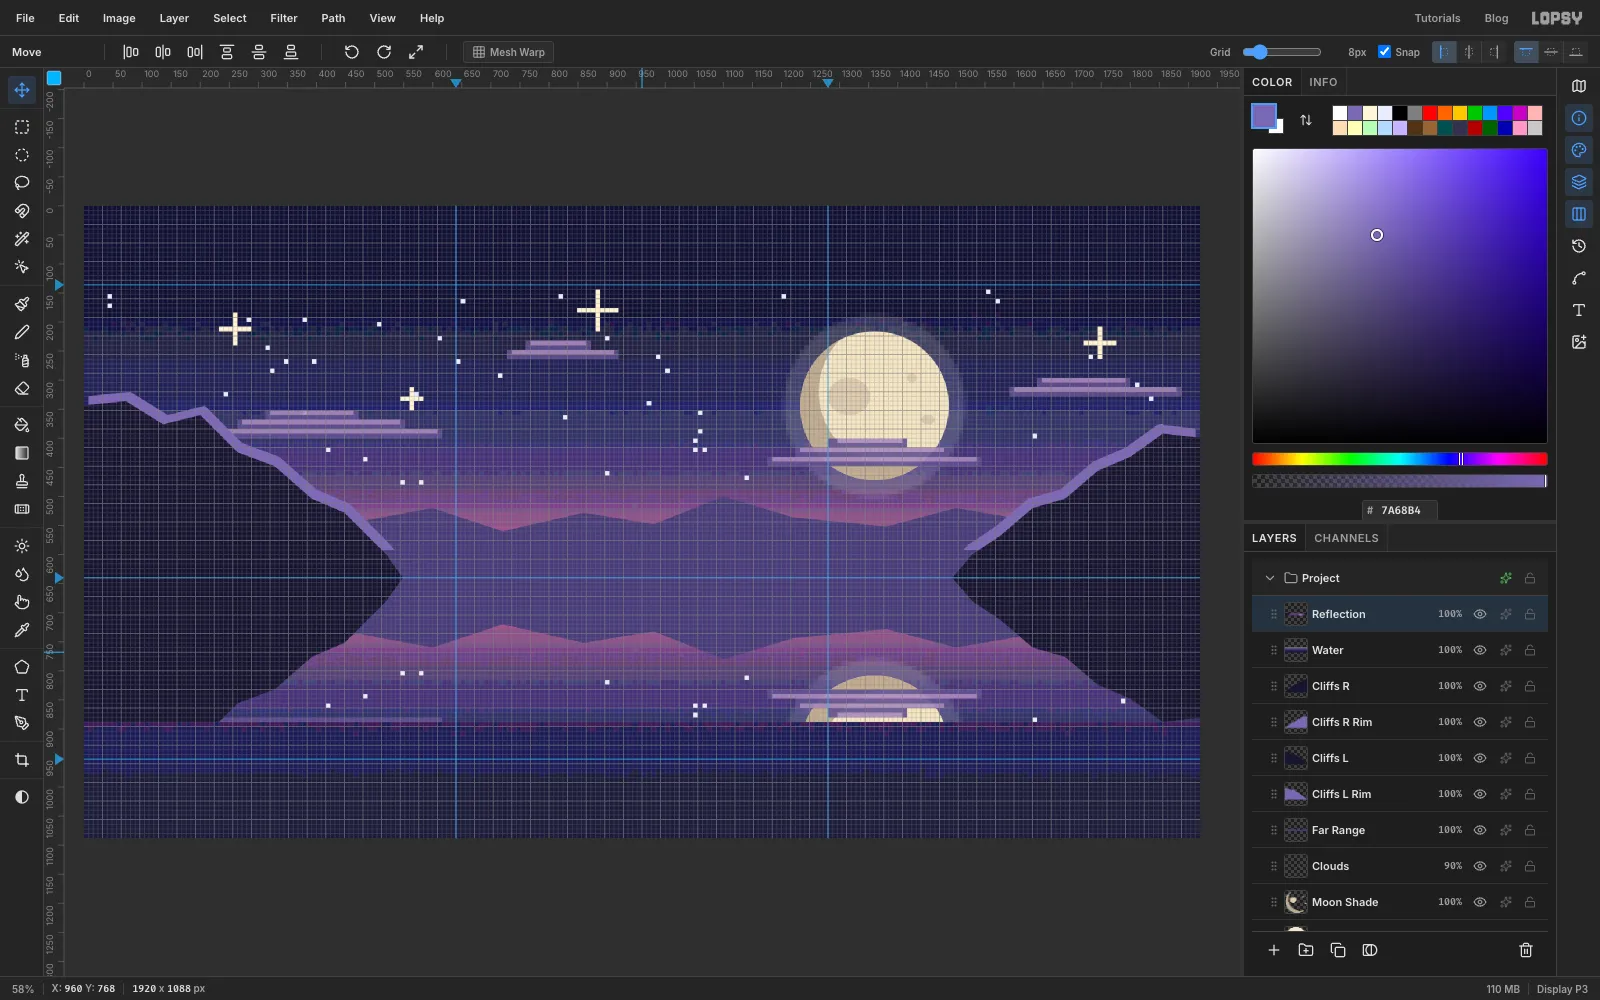
Marquee the full width from y 392 down to the horizon. Choose Edit → Copy Merged, show the rims again, deselect and press ⌘V. The copy lands in place on a new layer. Rename it Reflection.
Marquee the same strip again, switch to the Move tool and click Flip Vertical in the options bar.
-
Hang the reflection under the horizon
Deselect and drag the layer straight down with the Move tool until its top edge sits on the horizon guide (248 px down). Snap catches the guide.
-
Break it into ripples
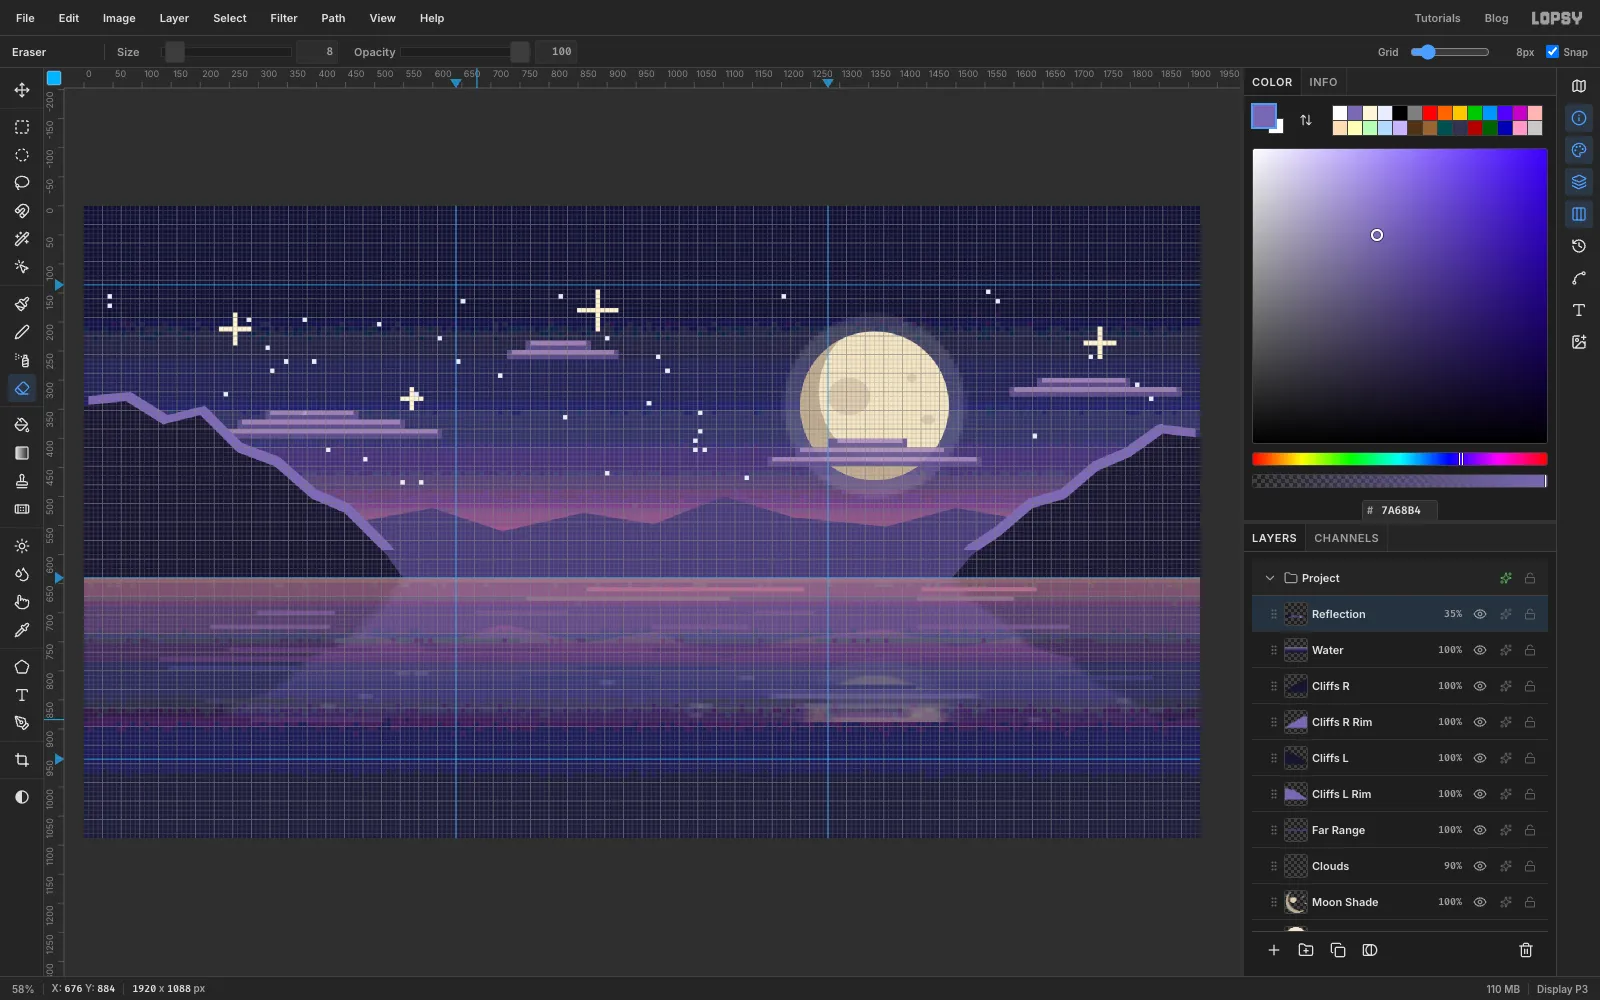
Run Filter → Motion Blur… with Angle 0 and Distance 24, then set the layer to 35%.
Pick the Eraser at Size 8. Click on the reflection and Shift-click further along the same row to erase a straight horizontal gap. Make three or four gaps of different lengths on every second or third row, all the way down. The broken lines are what make it read as water.
-
Lay the moon's glitter path
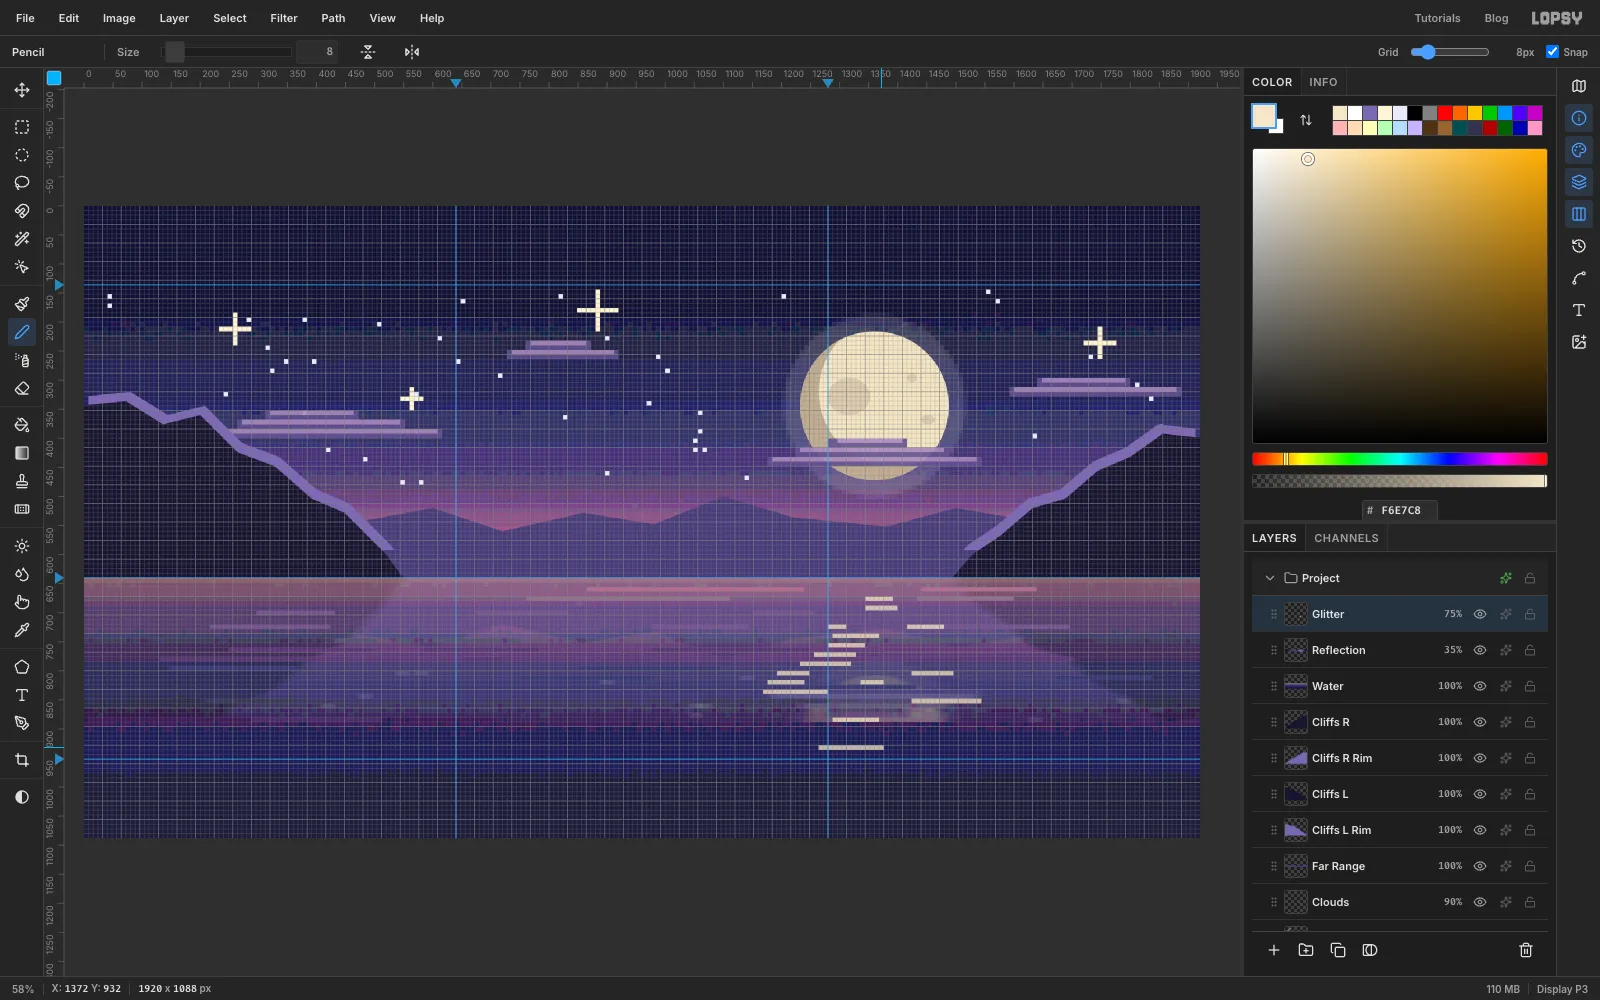
Add a Glitter layer. Use the Pencil at 8 in and draw short horizontal dashes with click and Shift-click, one row every 16 px, in a column under the moon.
Near the horizon, keep each row to one short dash. Further down, make the dashes longer, spread them wider, and sometimes split a row into two dashes. Skip a row now and then. Set the layer to 75%.
-
Add a band of mist
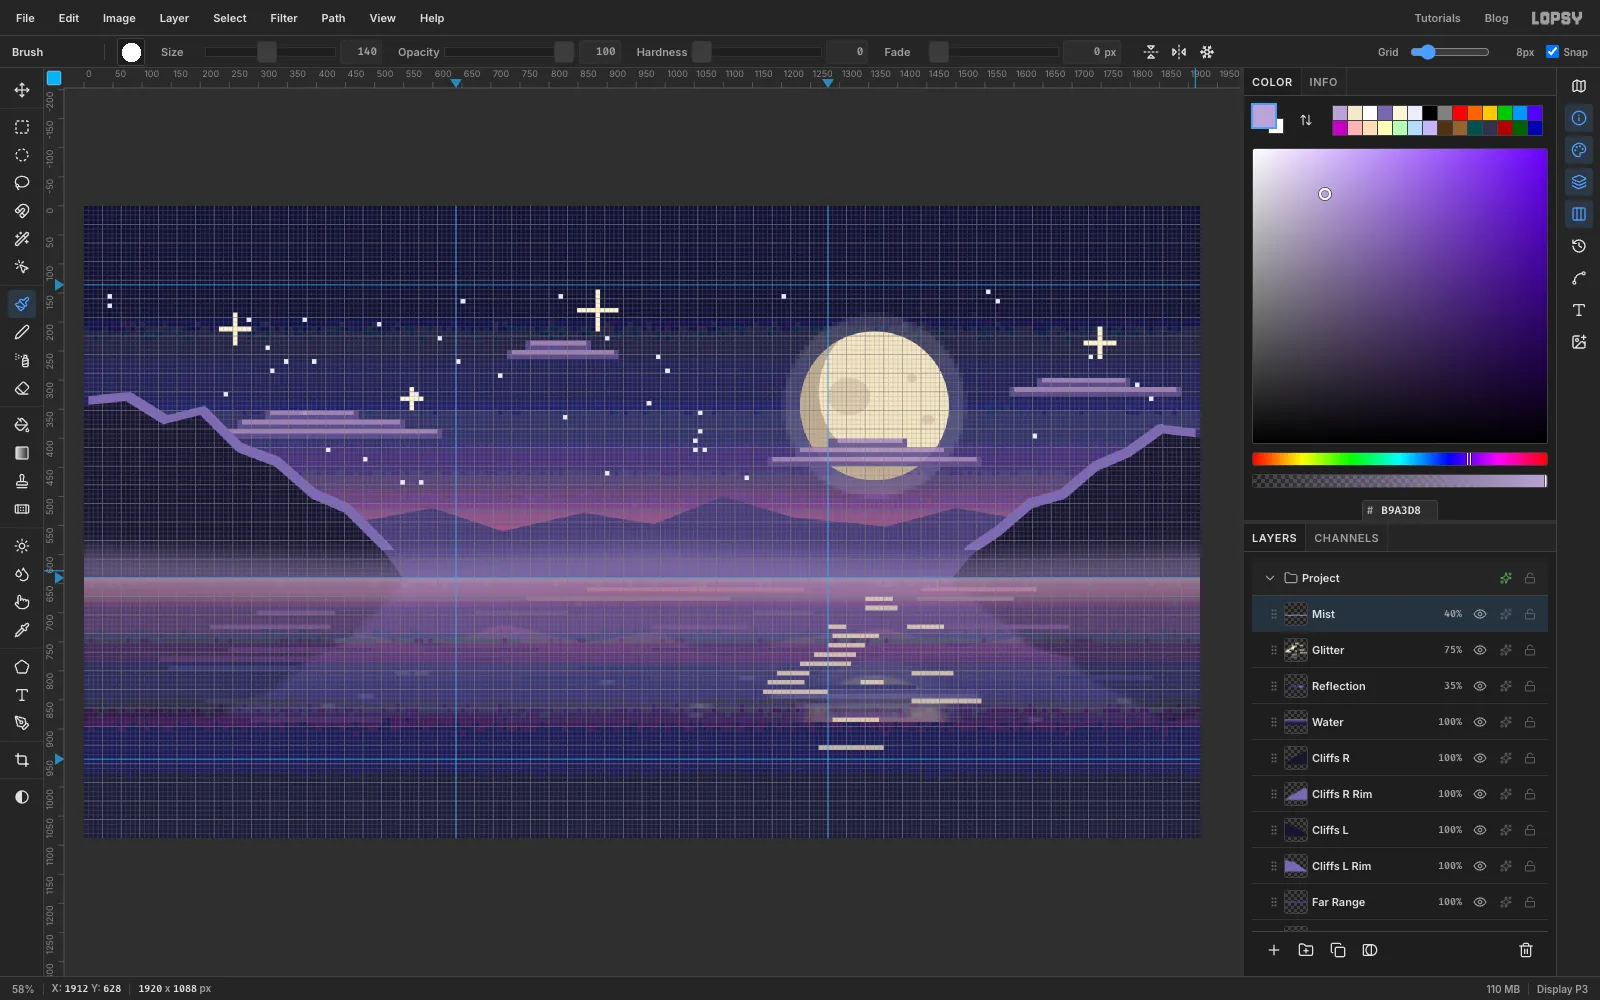
Add a Mist layer. Choose the Brush at Size 140 and Hardness 0, with colour . Drag one gently wavy stroke along the horizon from edge to edge, and set the layer to 40%. You'll pixelate it with everything else at the end.
-
Start the observatory group
With Mist selected, click New Group at the bottom of the Layers panel and name it Observatory. New layers now go inside it.
Build it at a small size first. You'll scale it up as one piece later.
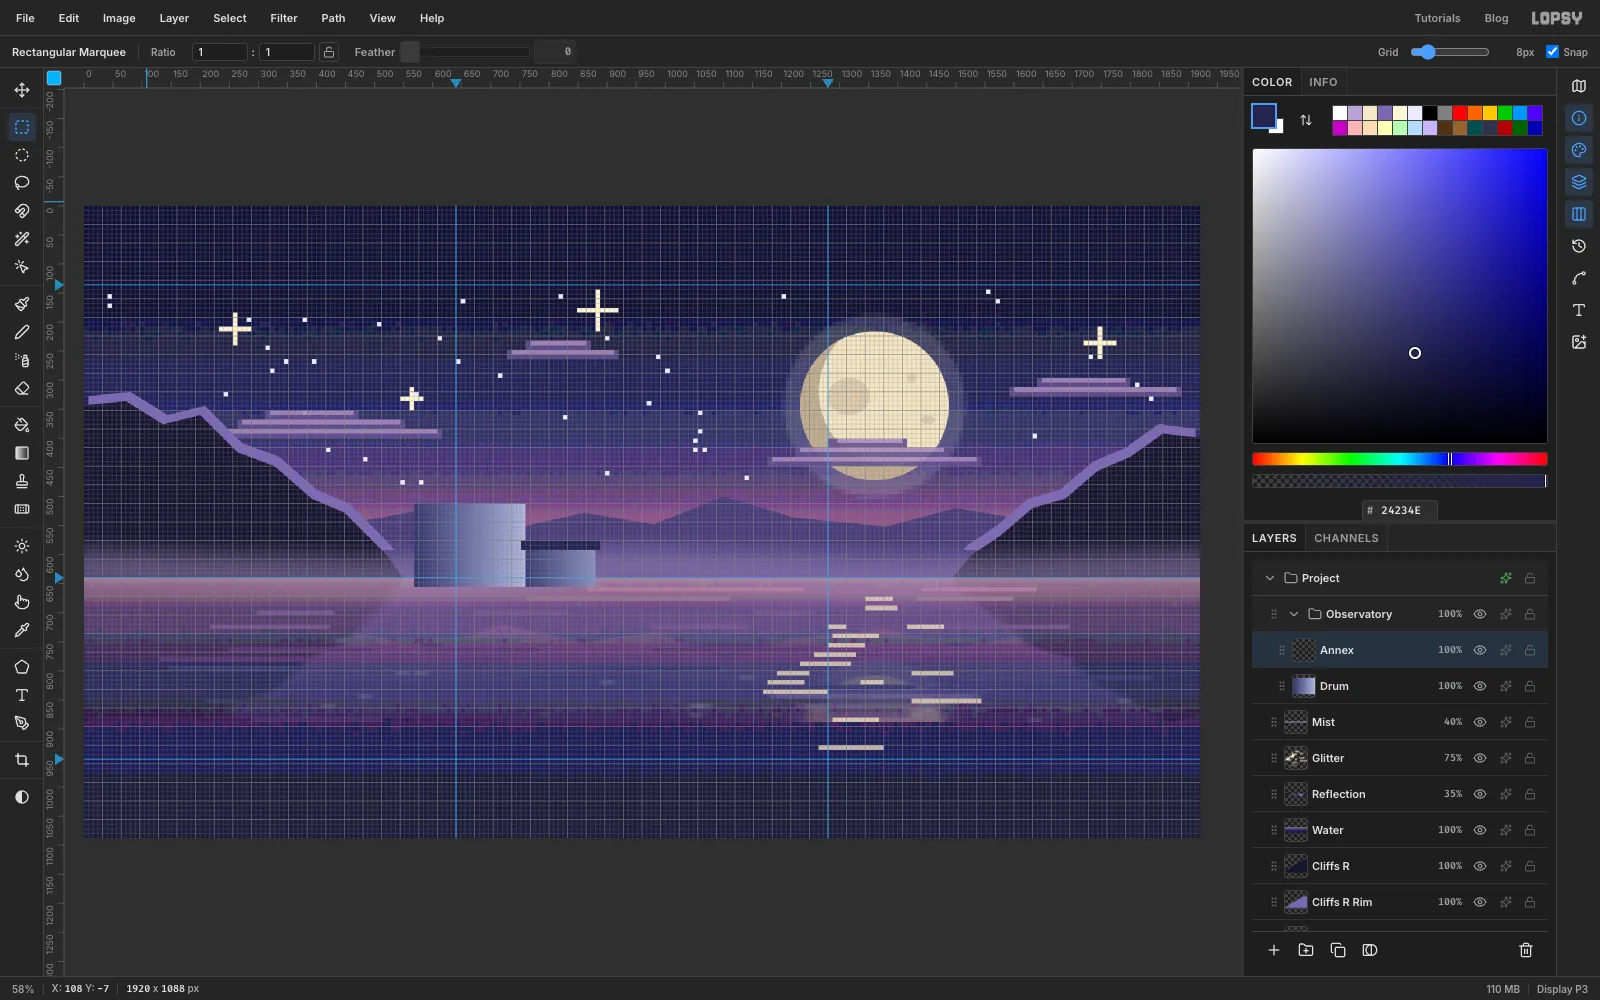
- Drum: add a Drum layer and marquee 568, 512 to 760, 656. Fill it with a linear gradient dragged left to right: , at 60%, . The moon is on the right, so that side is lit.
- Annex: add an Annex layer and marquee 760, 584 to 880, 656. Fill it with → , dragged left to right. Add a 16 px roof strip in that overhangs it by 8 px on each side.
-
Cut the dome from a circle
Add a Dome layer:
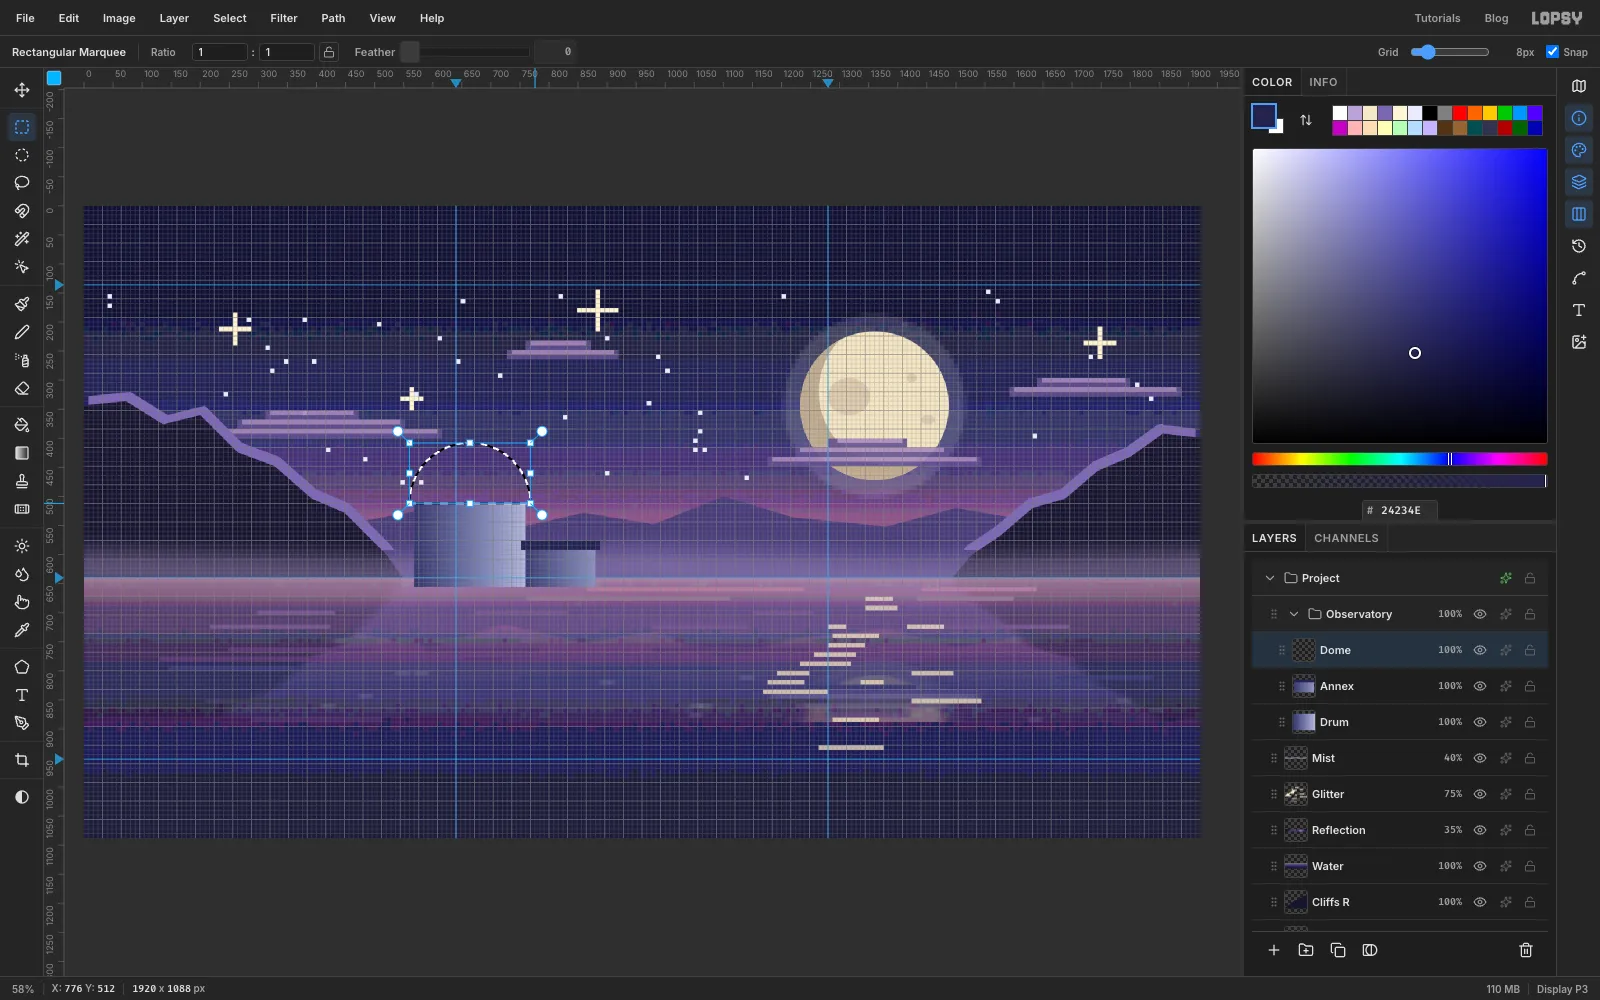
- Drag an Elliptical Marquee for a 208 px circle centred on the top of the drum (664, 512).
- Switch to the Rectangular Marquee. Hold Shift and Alt and drag a box over the top half of the circle, ending on the drum's top edge. That intersects the two selections, so only the dome is left.
- Fill it with a Radial gradient of , at 45% and . Drag from the upper right of the dome toward the lower left.
- Deselect. Fill a 16 px cornice strip in where the dome meets the drum, a little wider than both.
-
Light the slit and windows
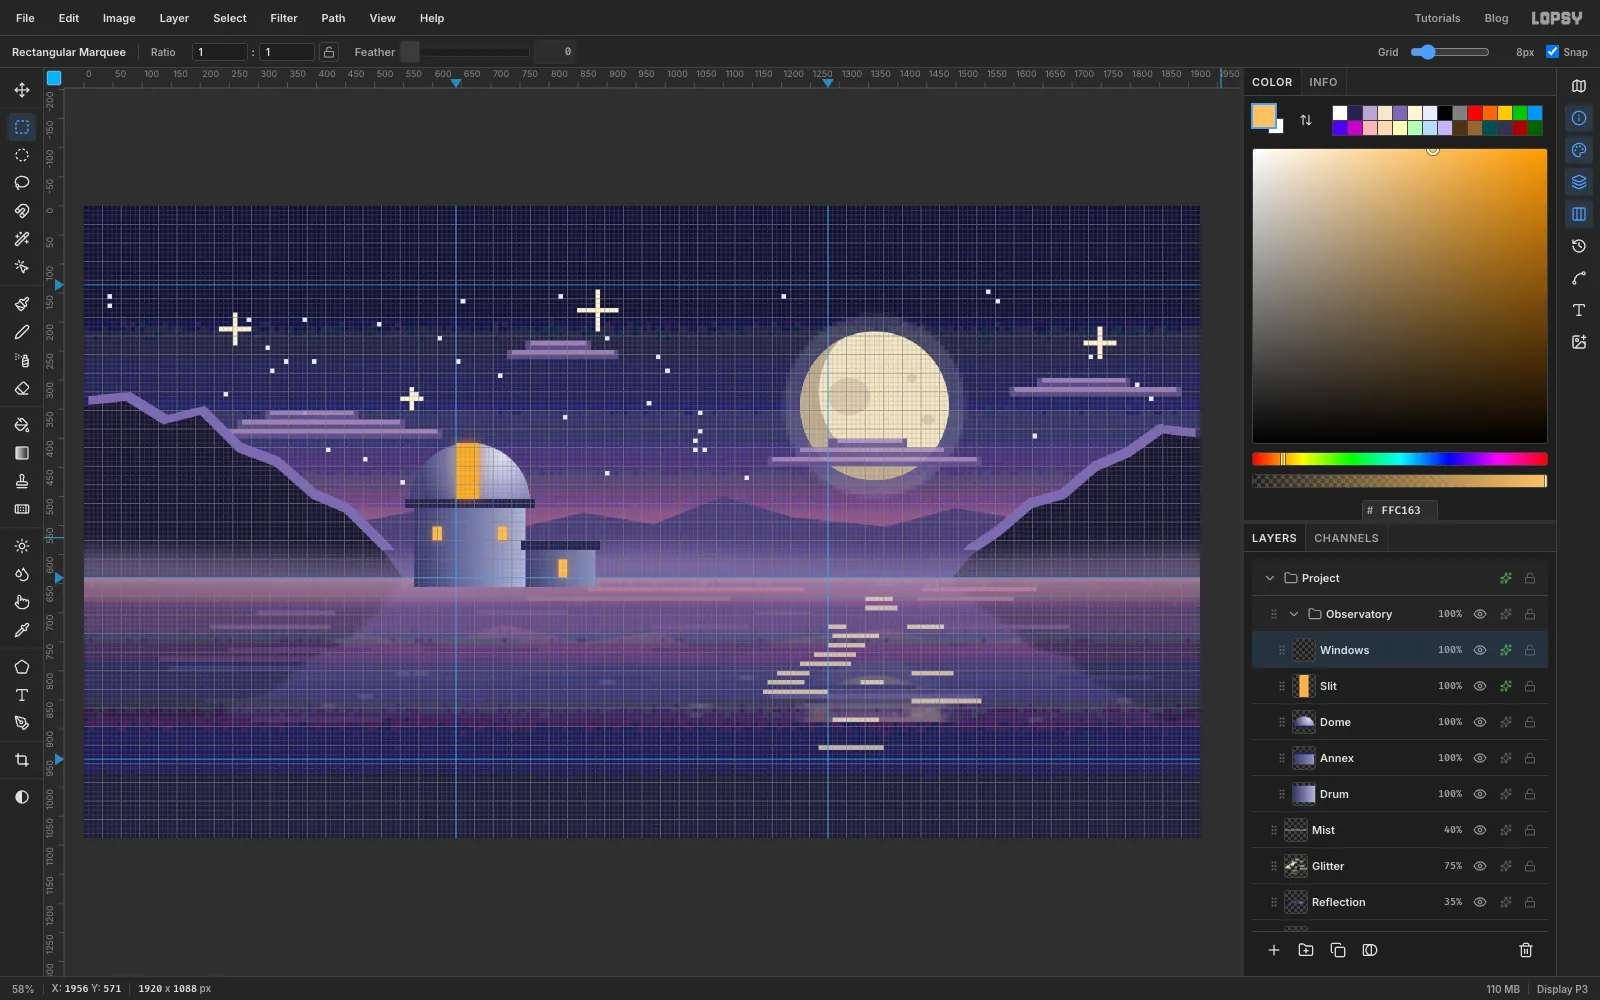
Add a Slit layer and fill a 32 × 96 rectangle down the middle of the dome with . In its effects drawer, turn on Outer Glow with colour , Size 28 and Opacity 70.
Add a Windows layer. Fill three 16 × 24 windows in : two on the drum and one on the annex. Give them an Outer Glow in the same colour at Size 16, Opacity 60.
-
Scale the whole group up
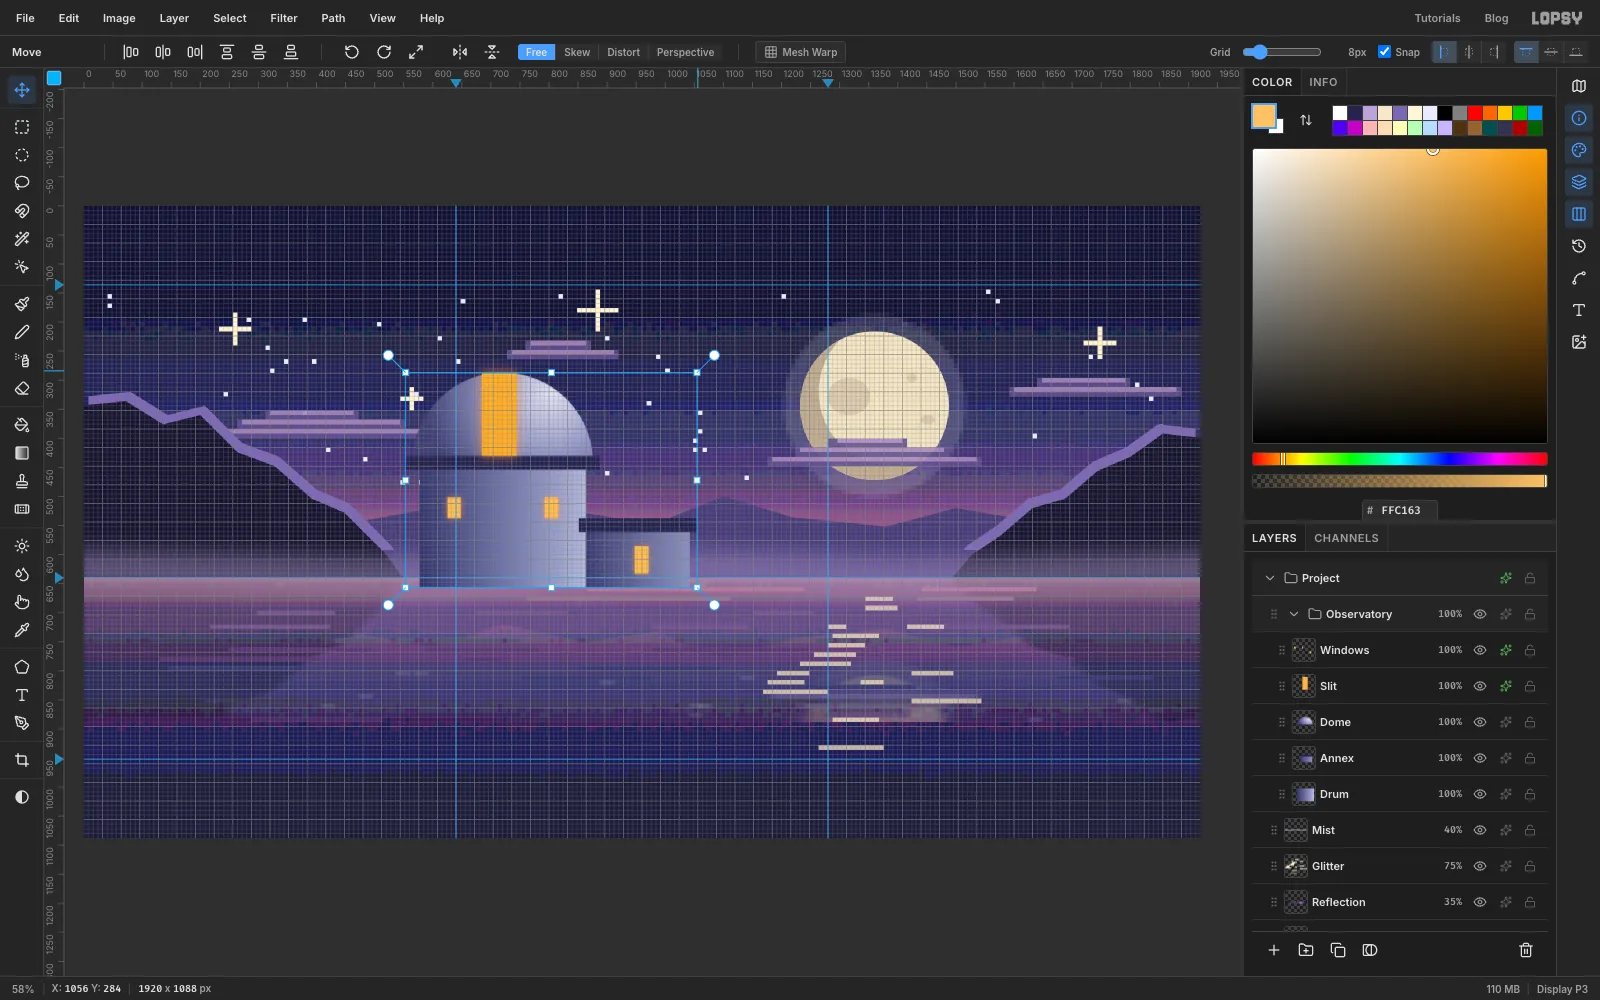
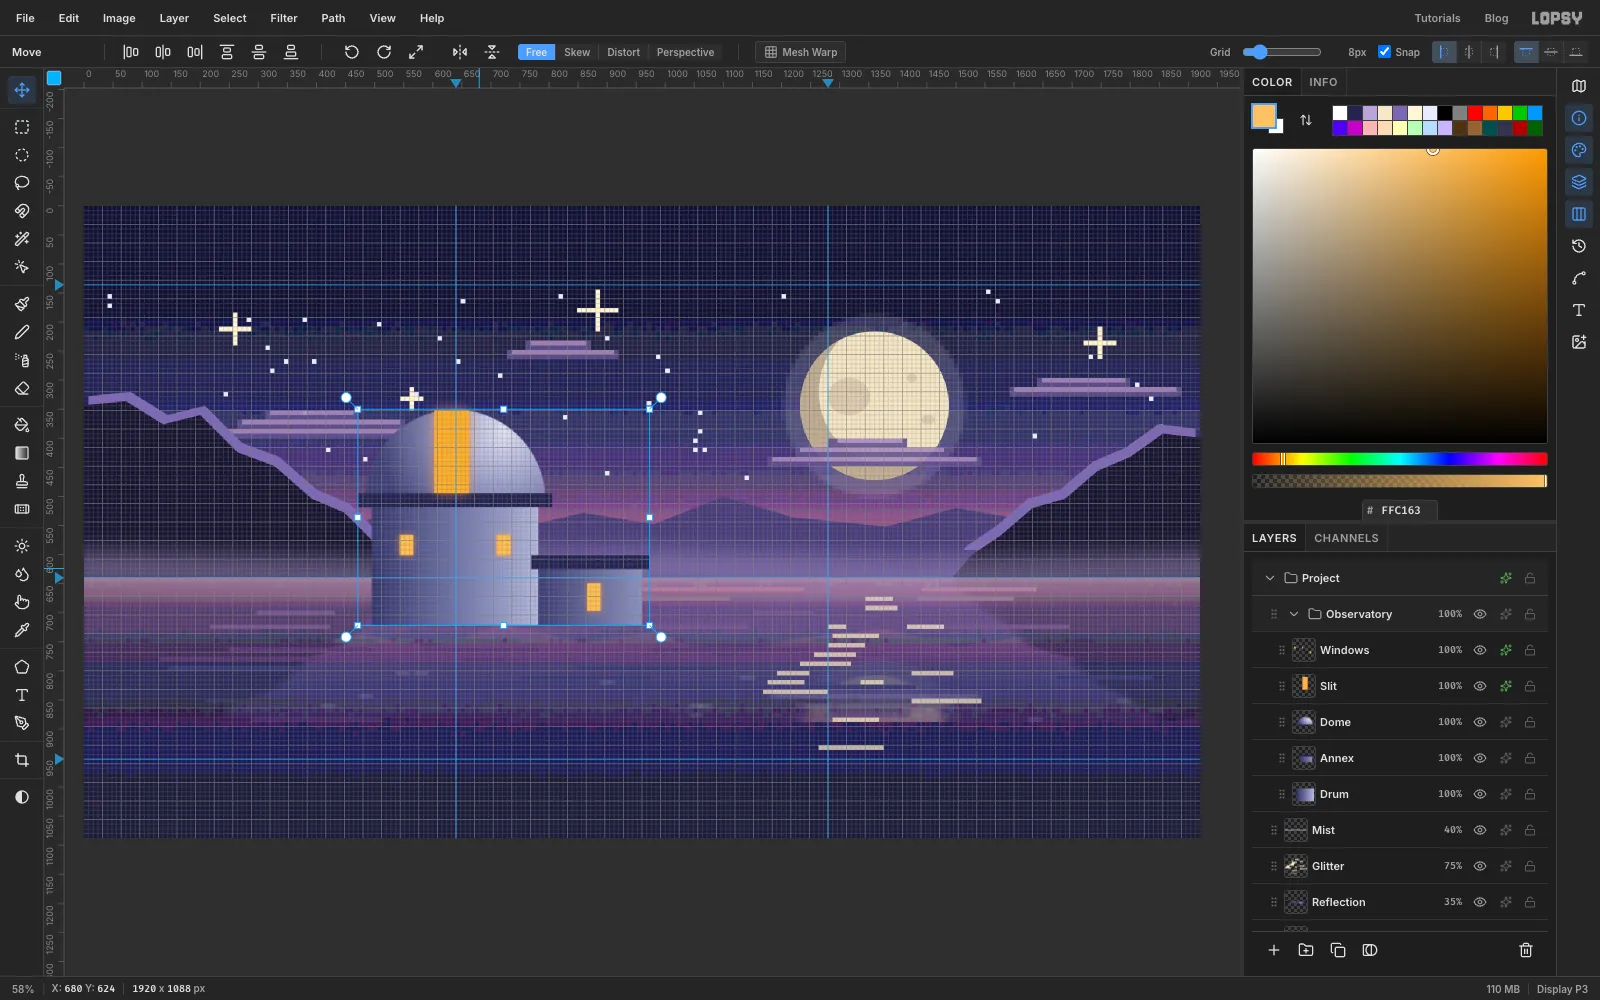
The building is too small to carry the frame. Click the Observatory group's row and switch to the Move tool. With no marquee, the transform box frames every layer in the group.
Hold ⌘ and drag the top-right handle up and out until the box is about 150% as wide. ⌘ keeps the scale uniform, and the opposite corner (bottom left) stays pinned, so the base stays on the horizon. The transform stays live until you press ⌘D to apply it (Enter doesn't).
-
Bring it forward into the water
With the group still selected, press ← ten times and ↓ eight times. With Snap on, each press is one 8 px block, so that's 80 px left and 64 px down. Its base now sits below the horizon, so the building reads as standing in the flood, not on the far shore. The bottom of the walls will be cut away at the waterline in a moment.
-
Aim the telescope at the moon
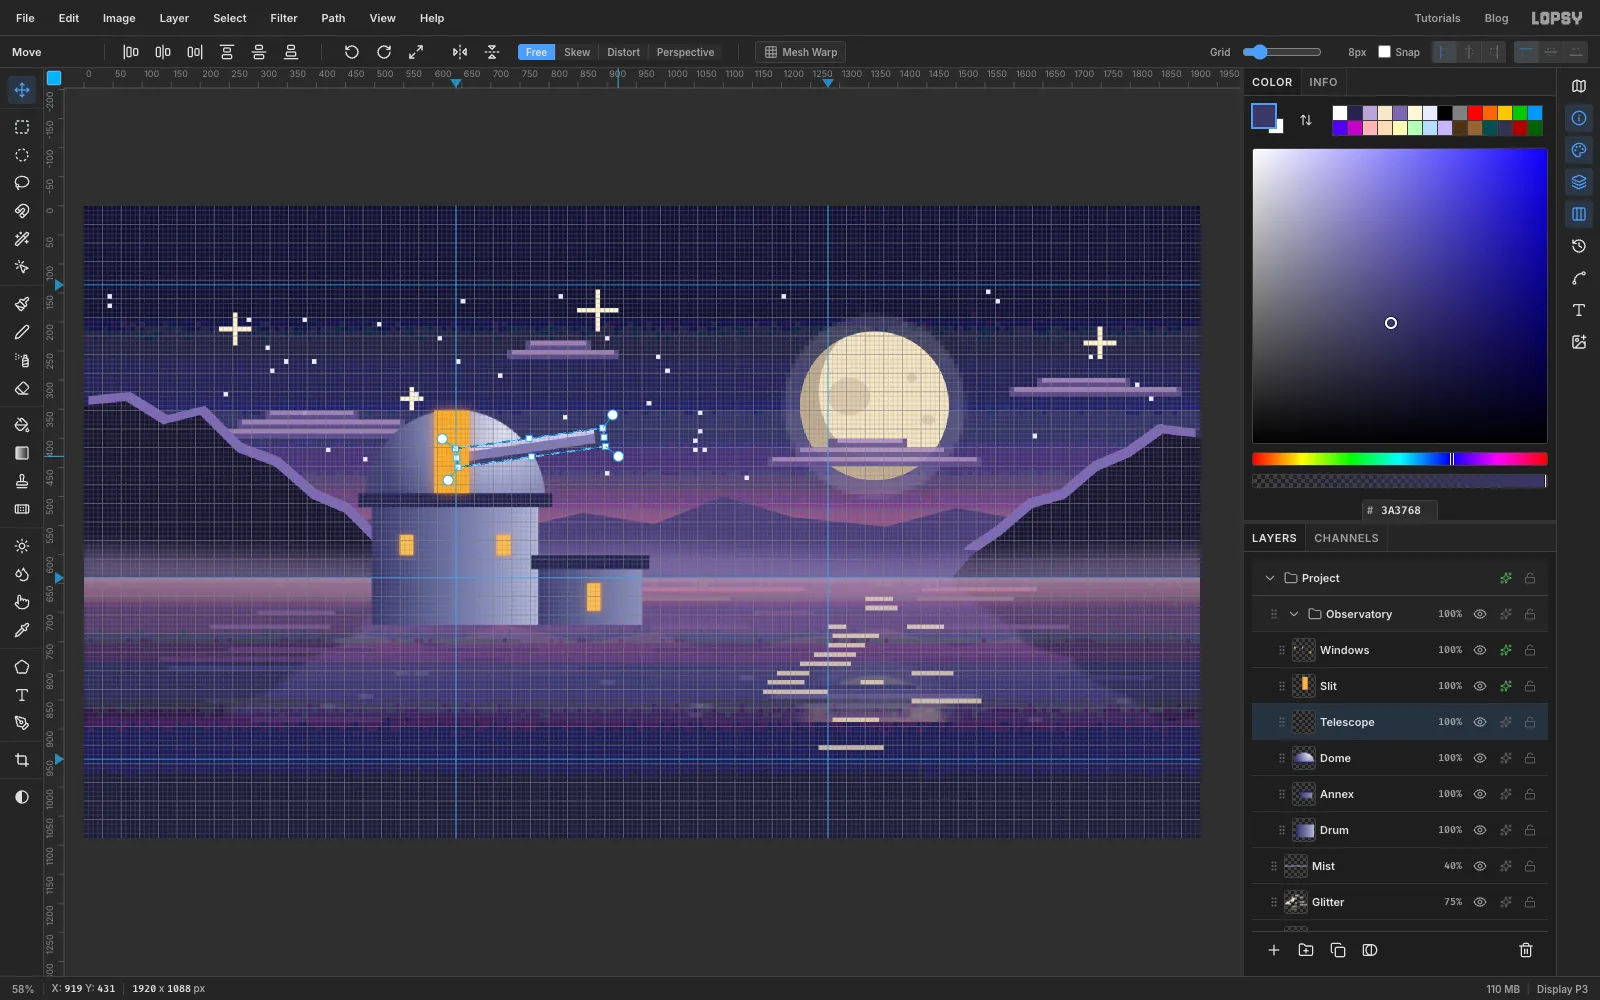
Select Dome, add a Telescope layer, and fill a 32 × 256 upright tube in . Put its middle about 100 px right of the slit, level with the bottom of the slit. When you turn it about its centre, the lower end swings into the slit. Add an 8 px highlight stripe of down its left side and an 8 px shadow stripe of down its right. Add a 16 px cap of across the top.
With the marquee still around the tube, untick Snap. While the grid snaps, rotation locks to 15° steps. Use the Move tool's corner rotation handle to turn the tube about 82° clockwise, until its base sits in the slit and its tip points at the moon. If the base misses, drag inside the box to slide the tube into place. Press ⌘D, then tick Snap again.
Because the telescope sits under the Slit layer, the slit's glow overlaps its base, as if the light is coming from inside.
-
Merge the building into one layer
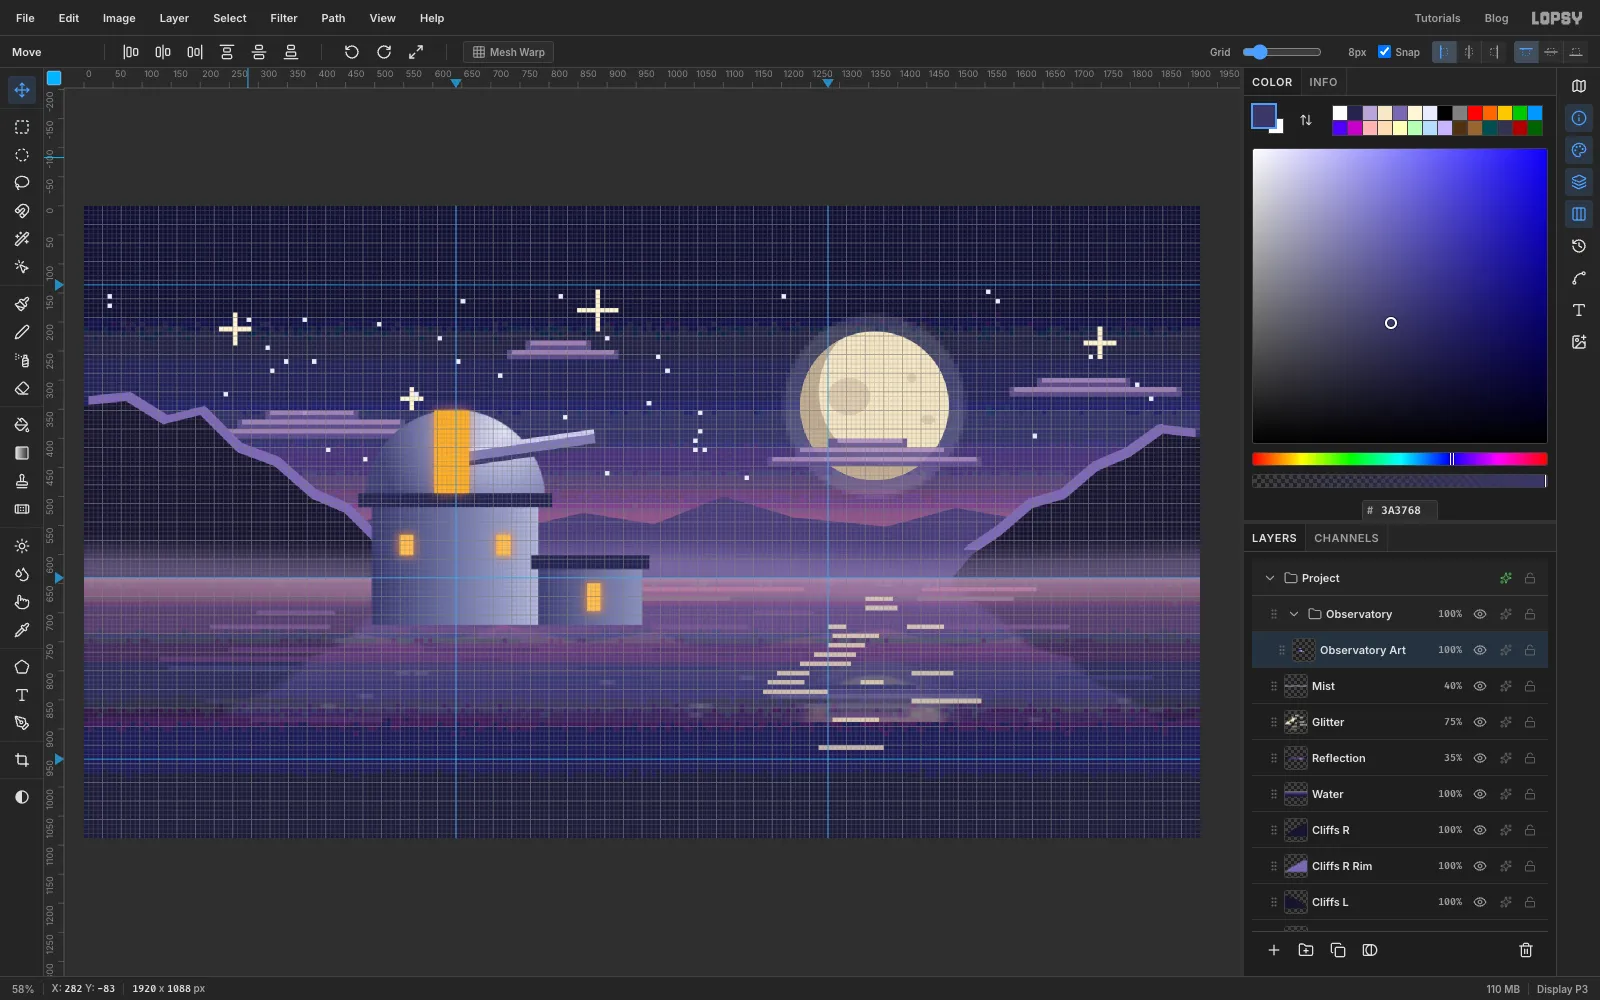
Select Windows, the top layer in the group, and choose Layer → Merge Down (⌘E) until only one layer is left in the group. That's five merges. Rename it Observatory Art.
Merge Down bakes the upper layer's glow into the pixels. The lower layer's effects stay live on the merged result. Merging into the effect-free layers at the bottom of the group is why the telescope doesn't pick up an amber outline.
-
Cut it at the waterline
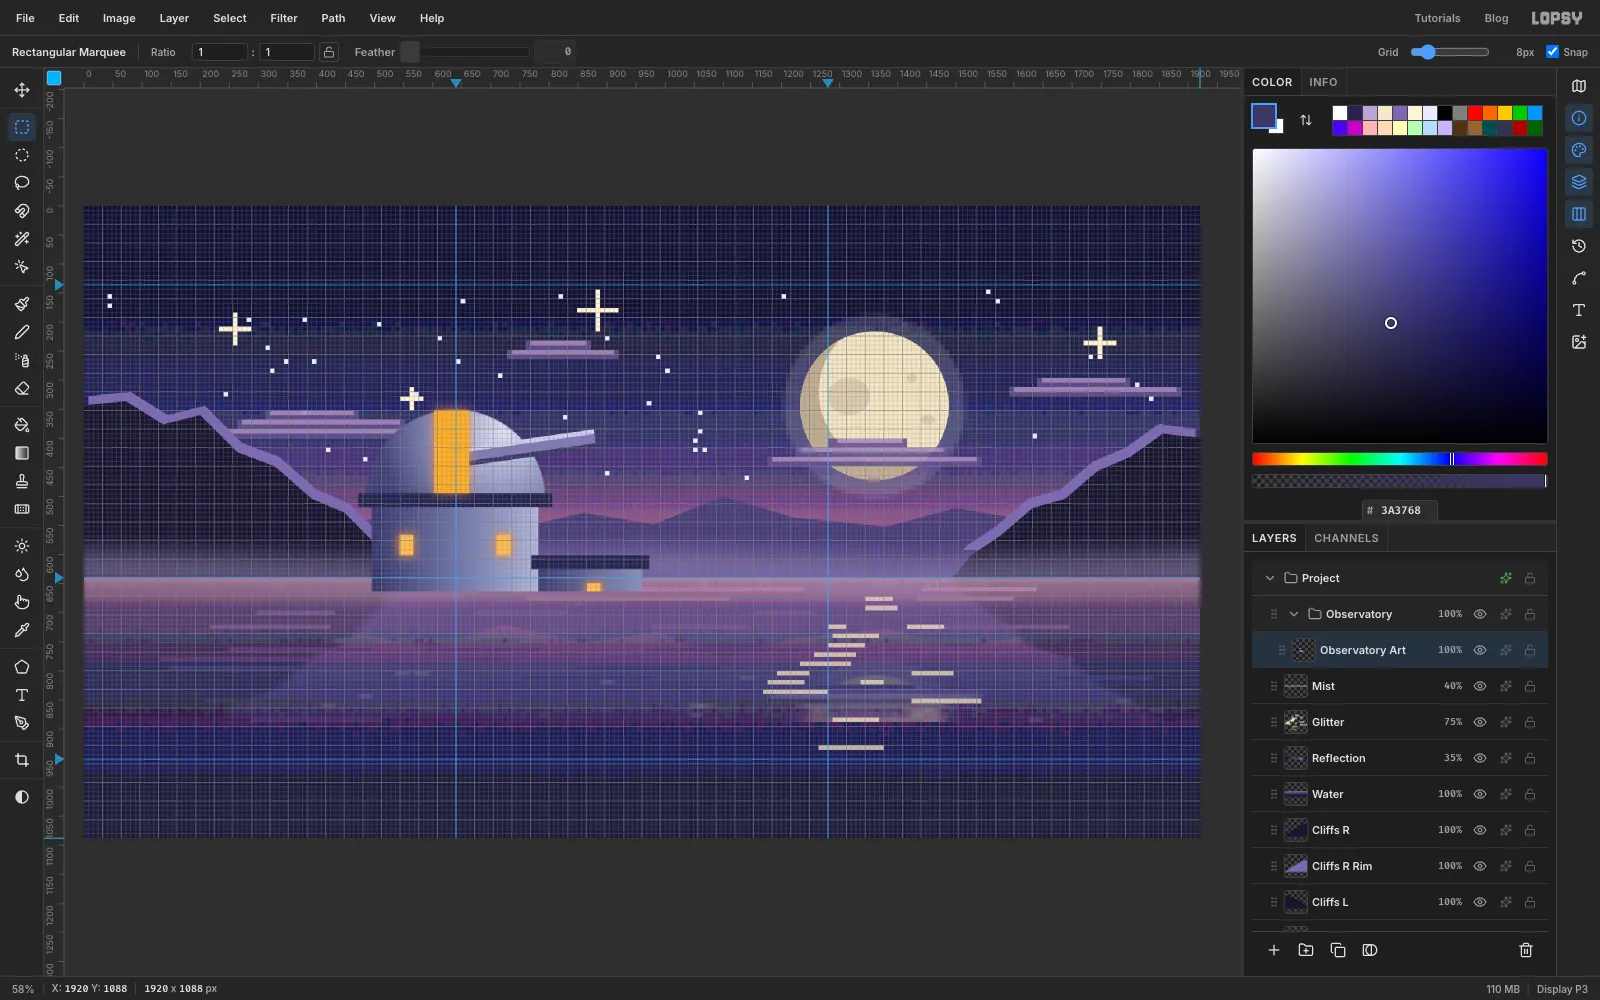
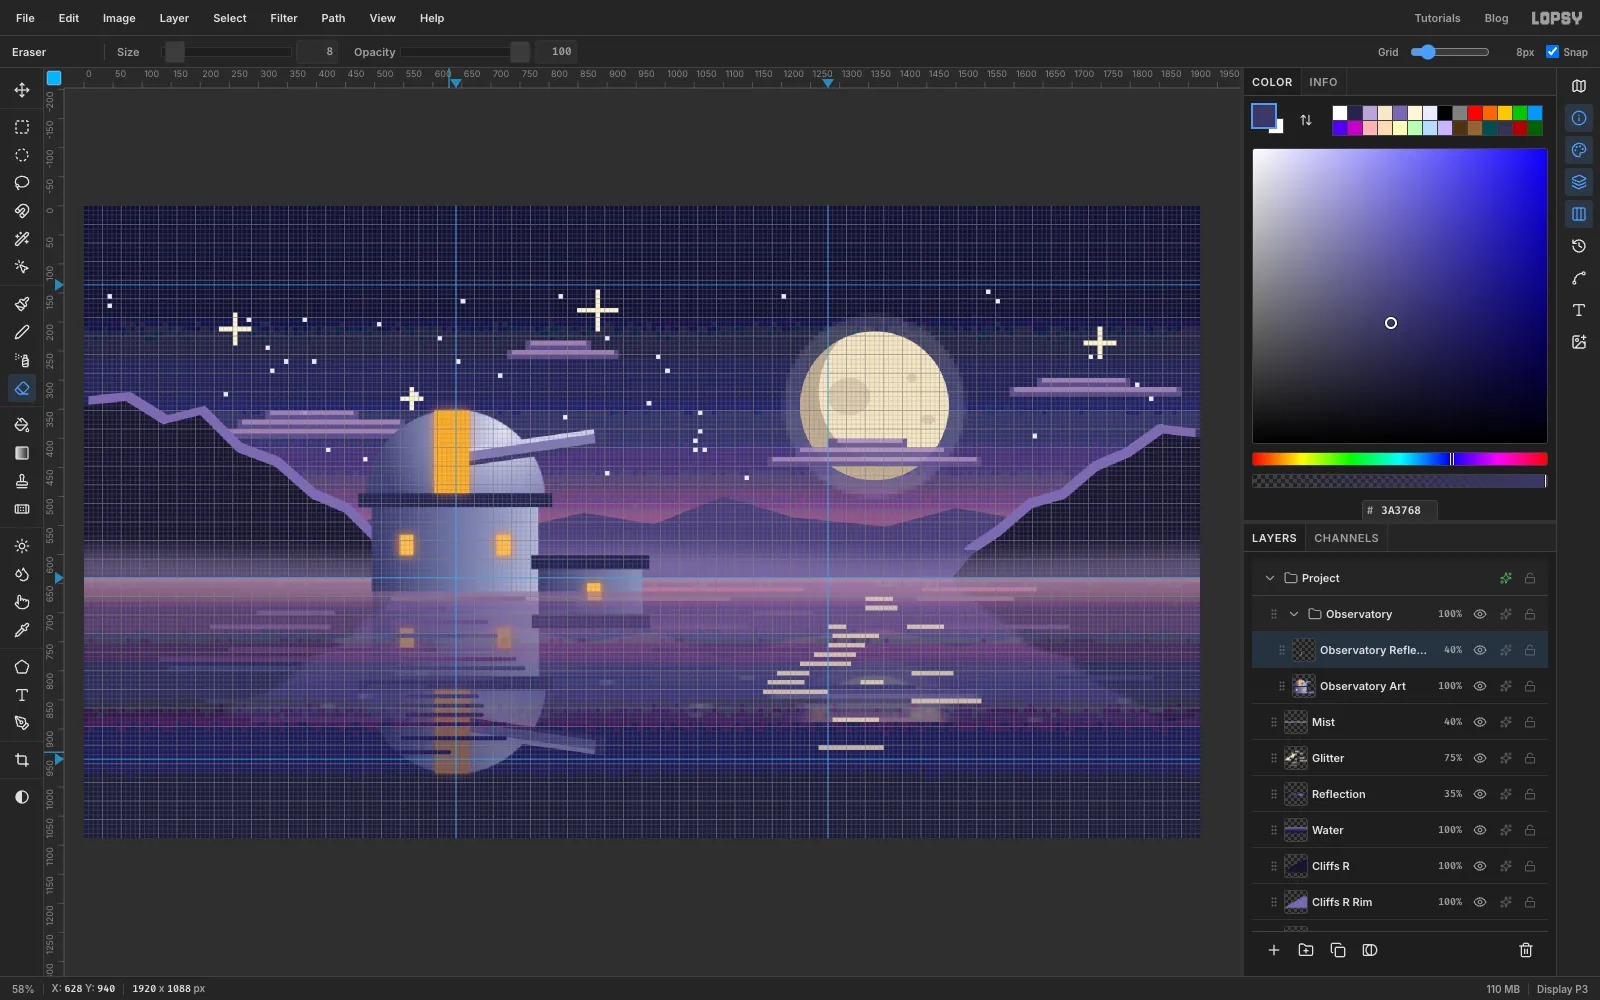
Marquee from y 664 down to the bottom of the canvas, across the full width, and press Delete. The annex window is now half under water, which sells the flood.
-
Reflect the observatory
- Click Duplicate Layer and rename the copy Observatory Reflection.
- ⌘-click its thumbnail, switch to the Move tool and click Flip Vertical.
- Deselect, then drag the copy straight down until the top of the flipped walls touches the cut line, with no gap.
- Set it to 40% and erase ripple gaps with the 8 px Eraser, as you did for the valley.
-
Add ripples at the walls
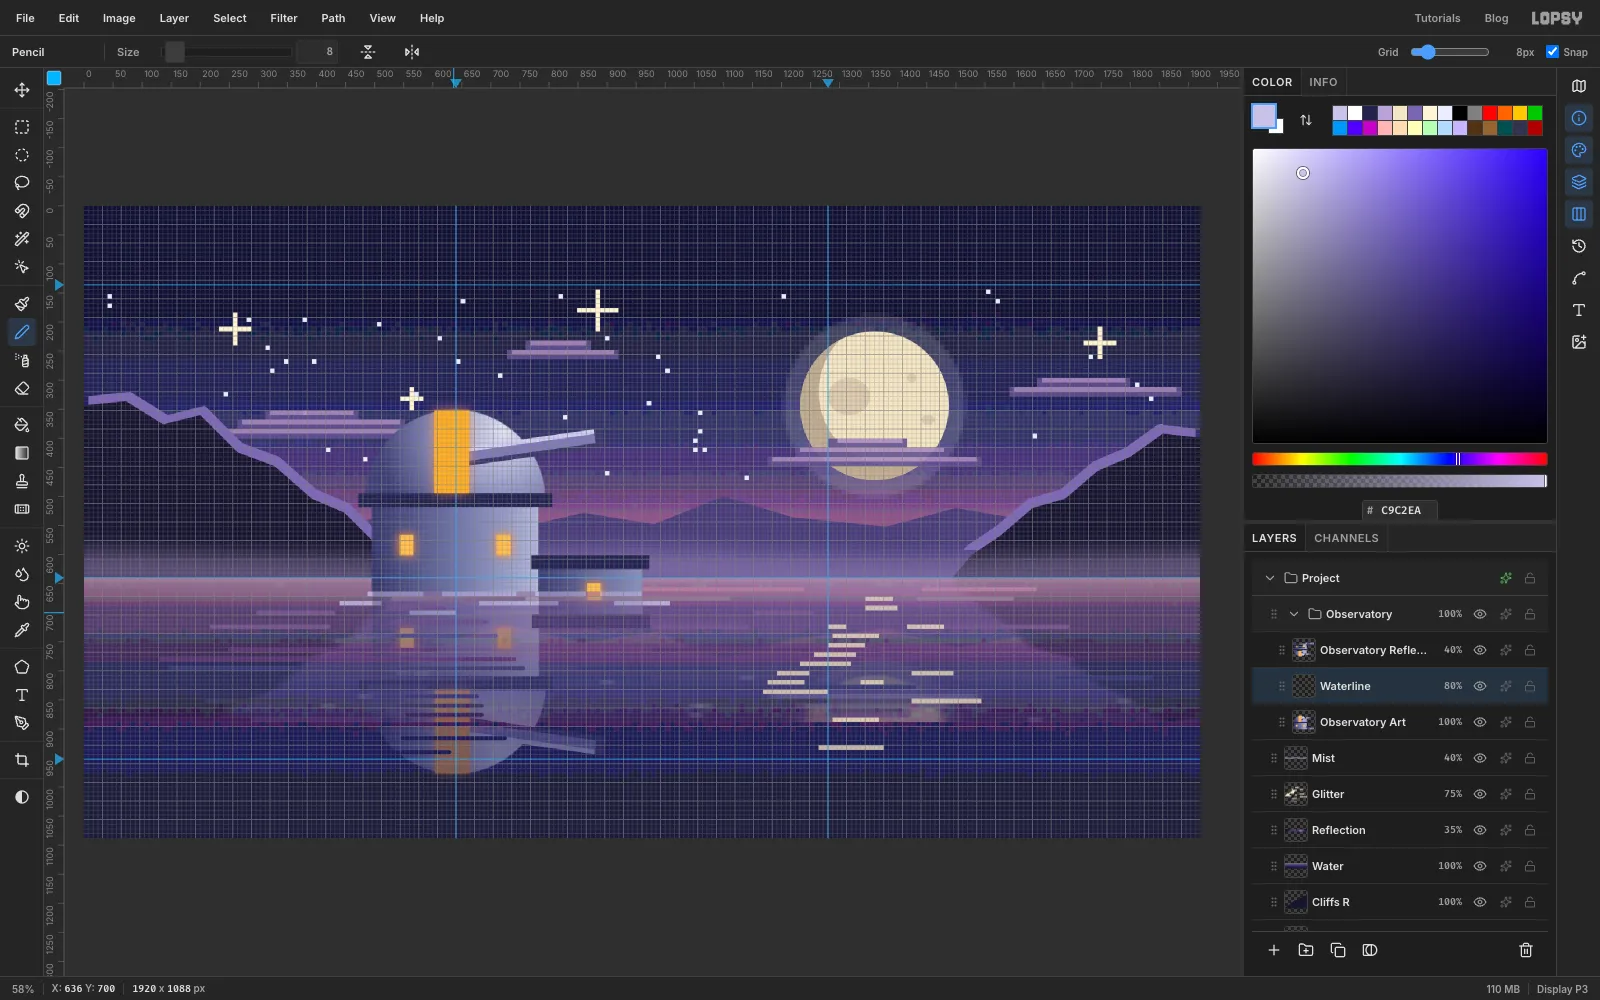
Select Observatory Art and add a Waterline layer. Use the Pencil at 8 in and draw broken dashes along the waterline. Leave gaps in them; a solid line would read as a stone ledge. Add a few shorter dashes 16 px and 32 px below, and set the layer to 80%.
-
Place the canoe reference
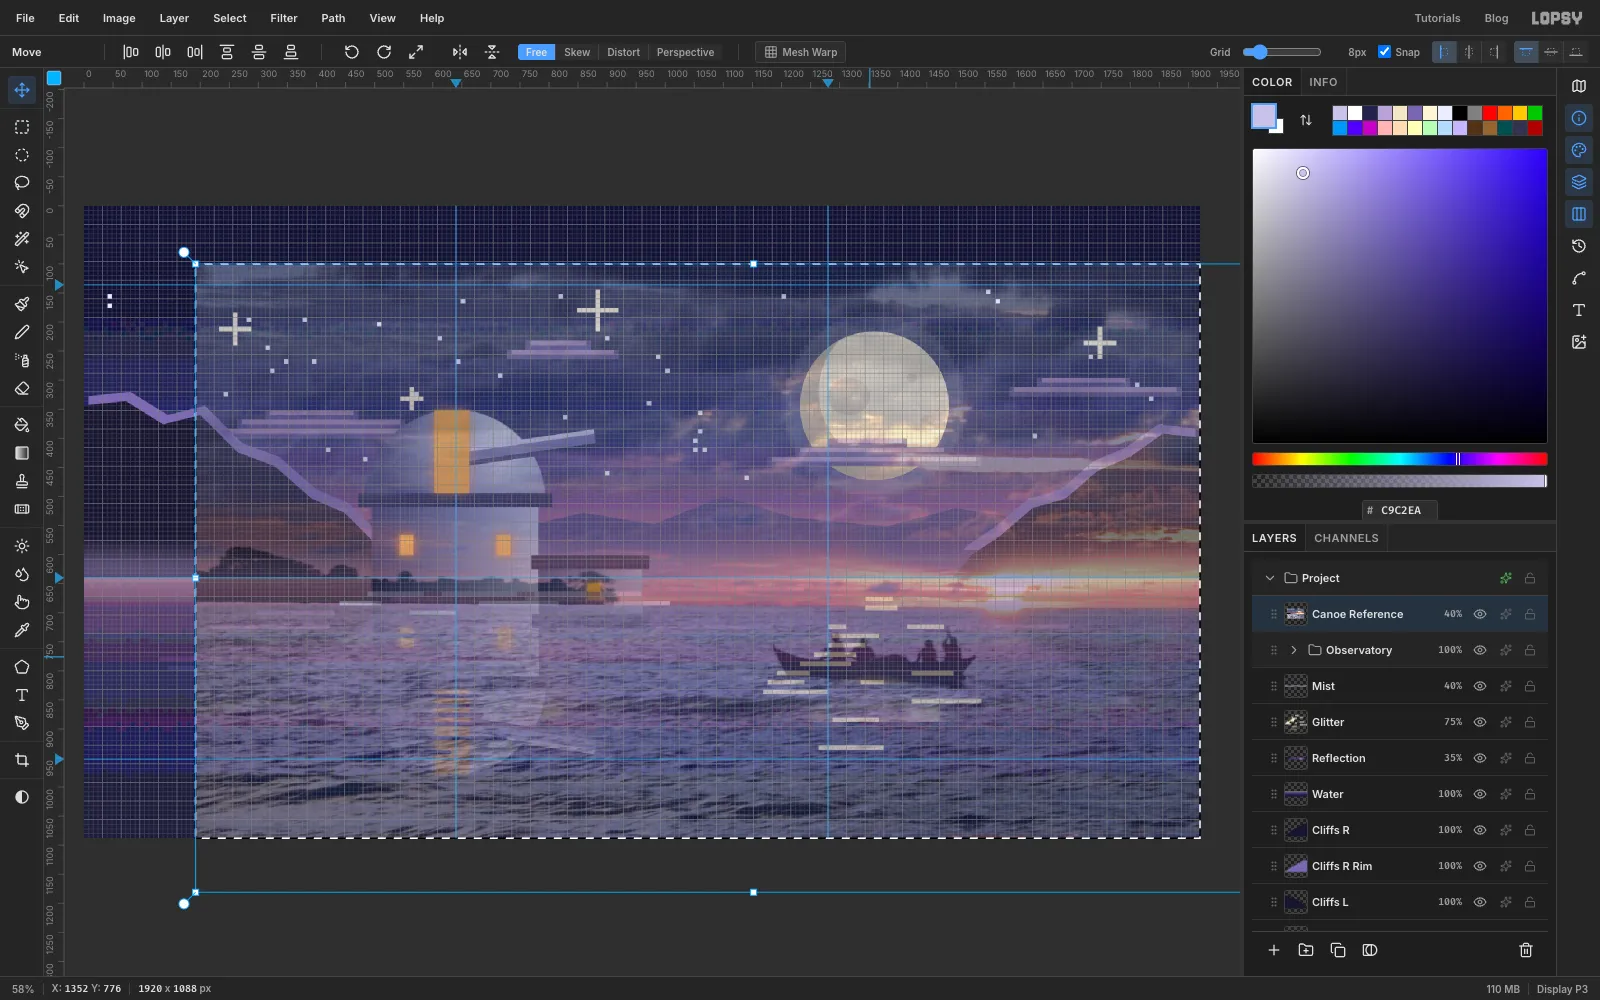
Collapse the Observatory group with its arrow and select its row, so the next layers land above it, not inside it.
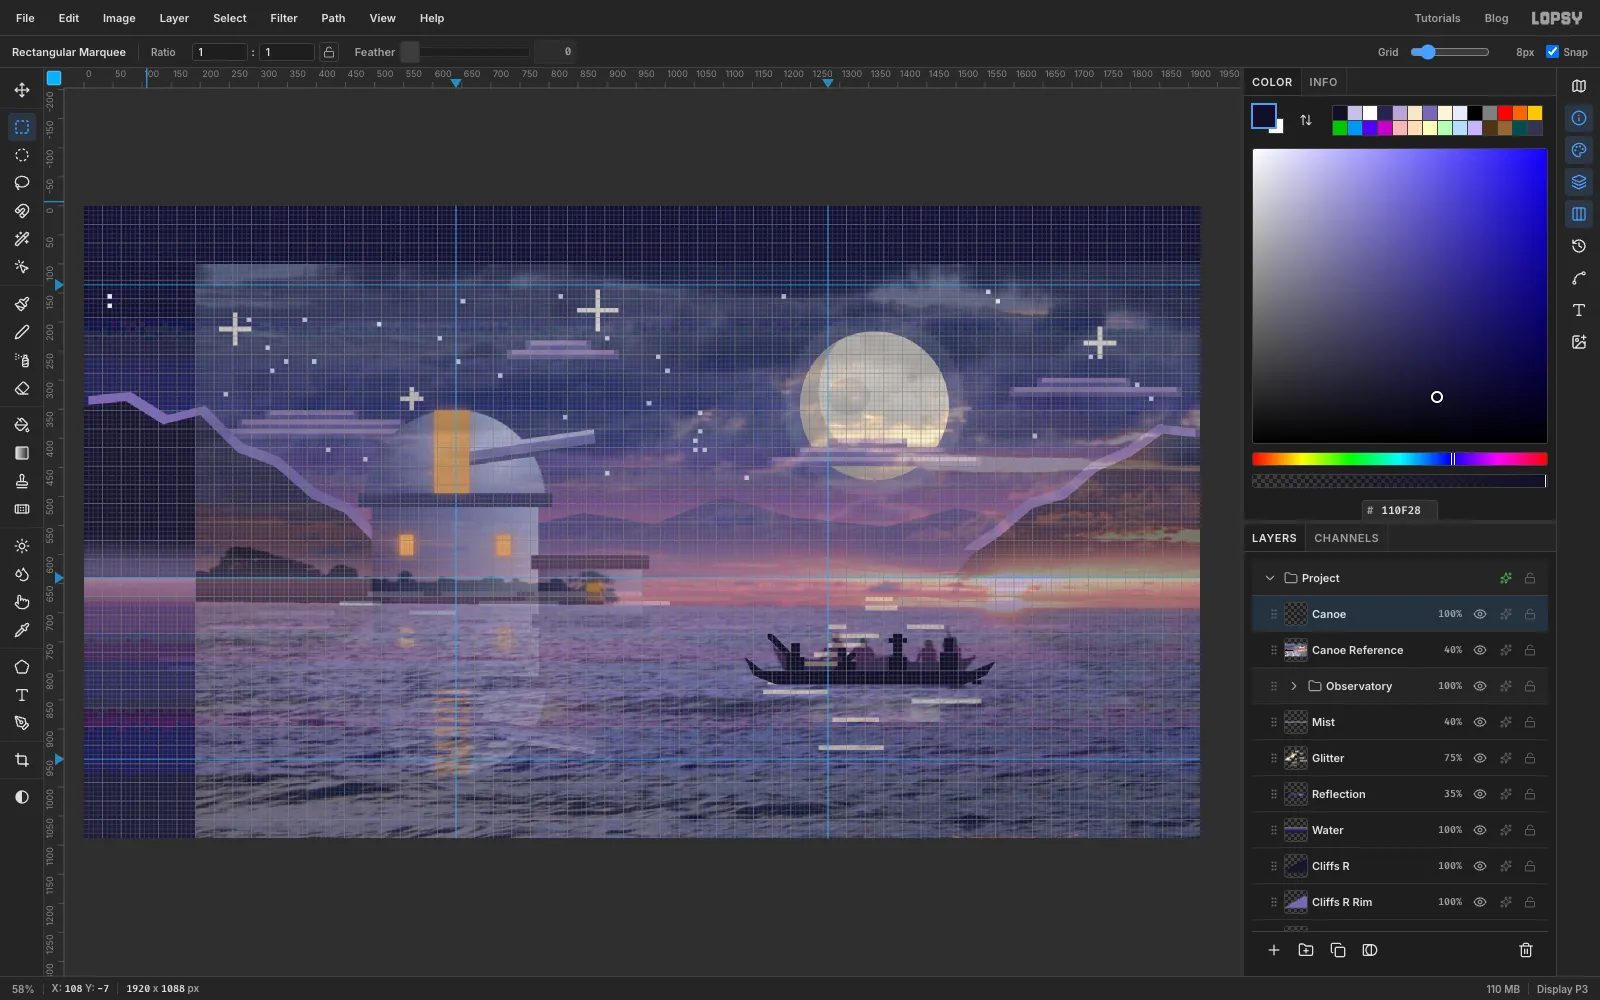
Drag the reference photo onto the canvas and name the layer Canoe Reference. Lopsy fits it to the canvas width, so the boat comes in about 360 px long. That's fine at that size. Set the layer to 40%, then move it so the boat sits on the moon's glitter path, right of centre. You only need it for the boat's shape and the crew's poses.
-
Trace the hull
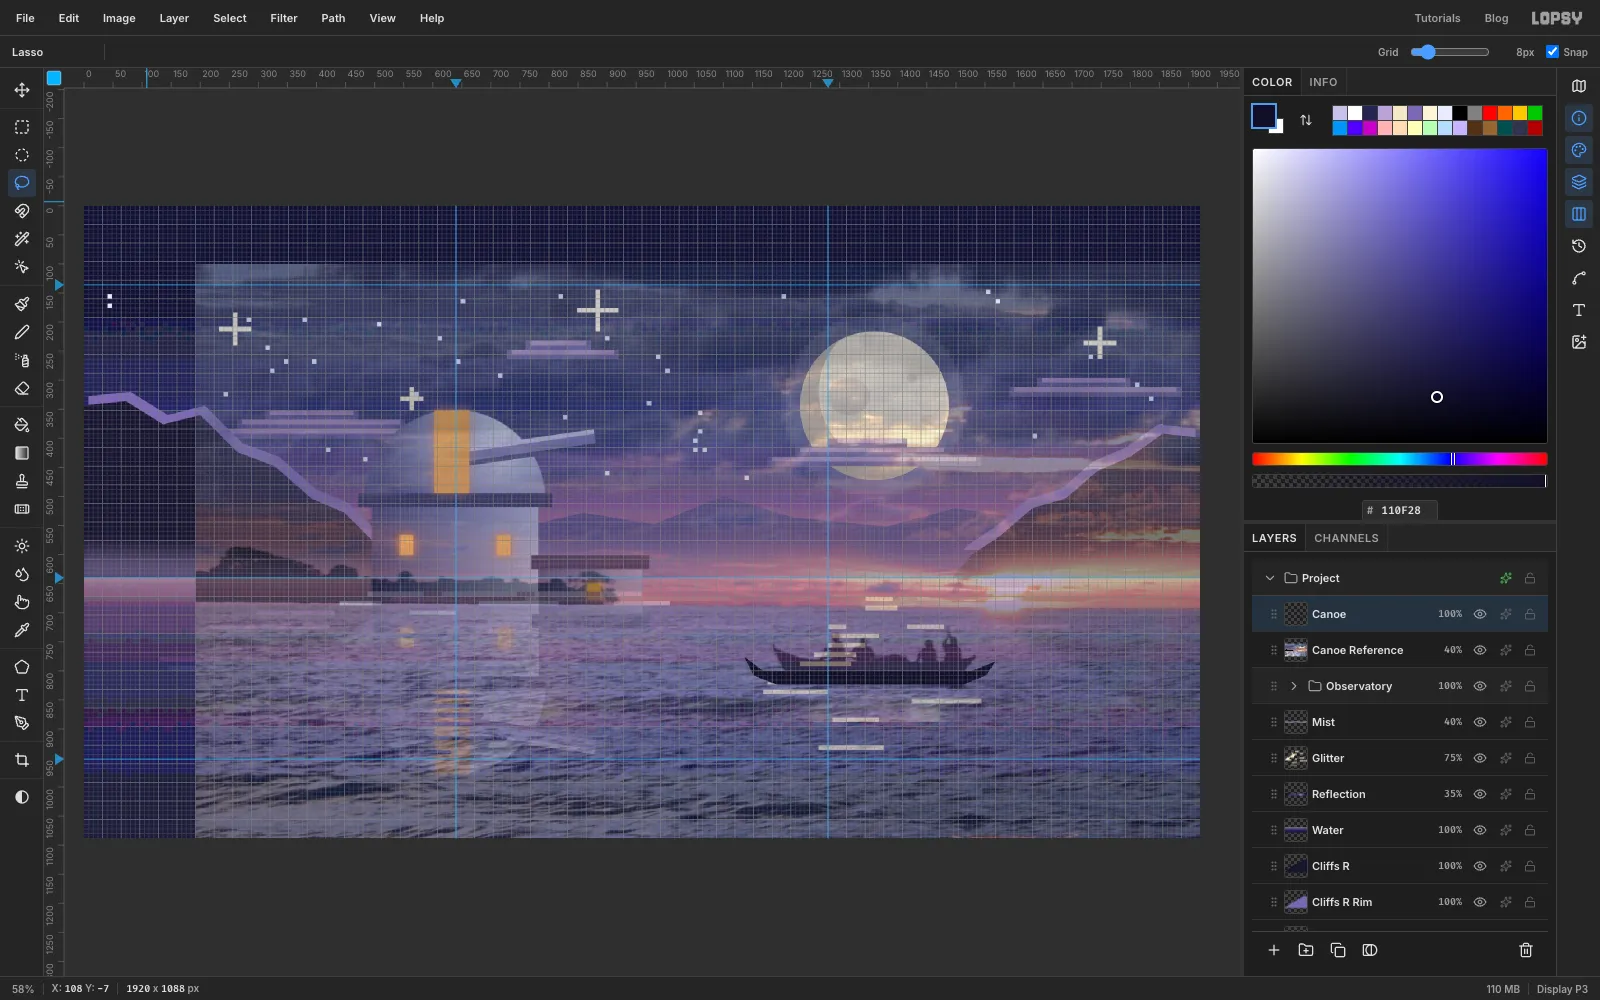
Add a Canoe layer. With the Lasso, click a slim hull over the photo's boat, drawn a little longer than it, about 430 px from bow to stern:
- an upswept bow on the left, pointing toward the observatory;
- a straight gunwale 24 px above the keel;
- a smaller lift at the stern.
Fill it with .
-
Block in the crew
Use rectangular marquees and Edit → Fill in for the four people, using the photo as a guide for spacing. Each one is a torso sitting on the gunwale with a 16 × 16 head on top, about 88 px apart:
- Bow passenger: a 32 × 32 torso.
- Paddler: a shorter 32 × 24 torso, with the head set 8 px forward so he leans in.
- Hat: a 32 × 32 torso, plus a 32 × 8 brim and a 16 × 8 crown on the head.
- Stern paddler: a taller 32 × 40 torso.
Round each torso's shoulders. Marquee its top-left 8 × 8 block and press Delete, then do the same for the top-right block.
Now switch to the Pencil at 8. Give the bow passenger a diagonal arm pointing up at the observatory. Draw the two paddles slanting down to the water from the paddlers' shoulders, and fill a small 16 × 8 blade at the end of each, right at the waterline.
When the crew is done, select Canoe Reference and click Delete Layer.
-
Hang a lantern on the bow
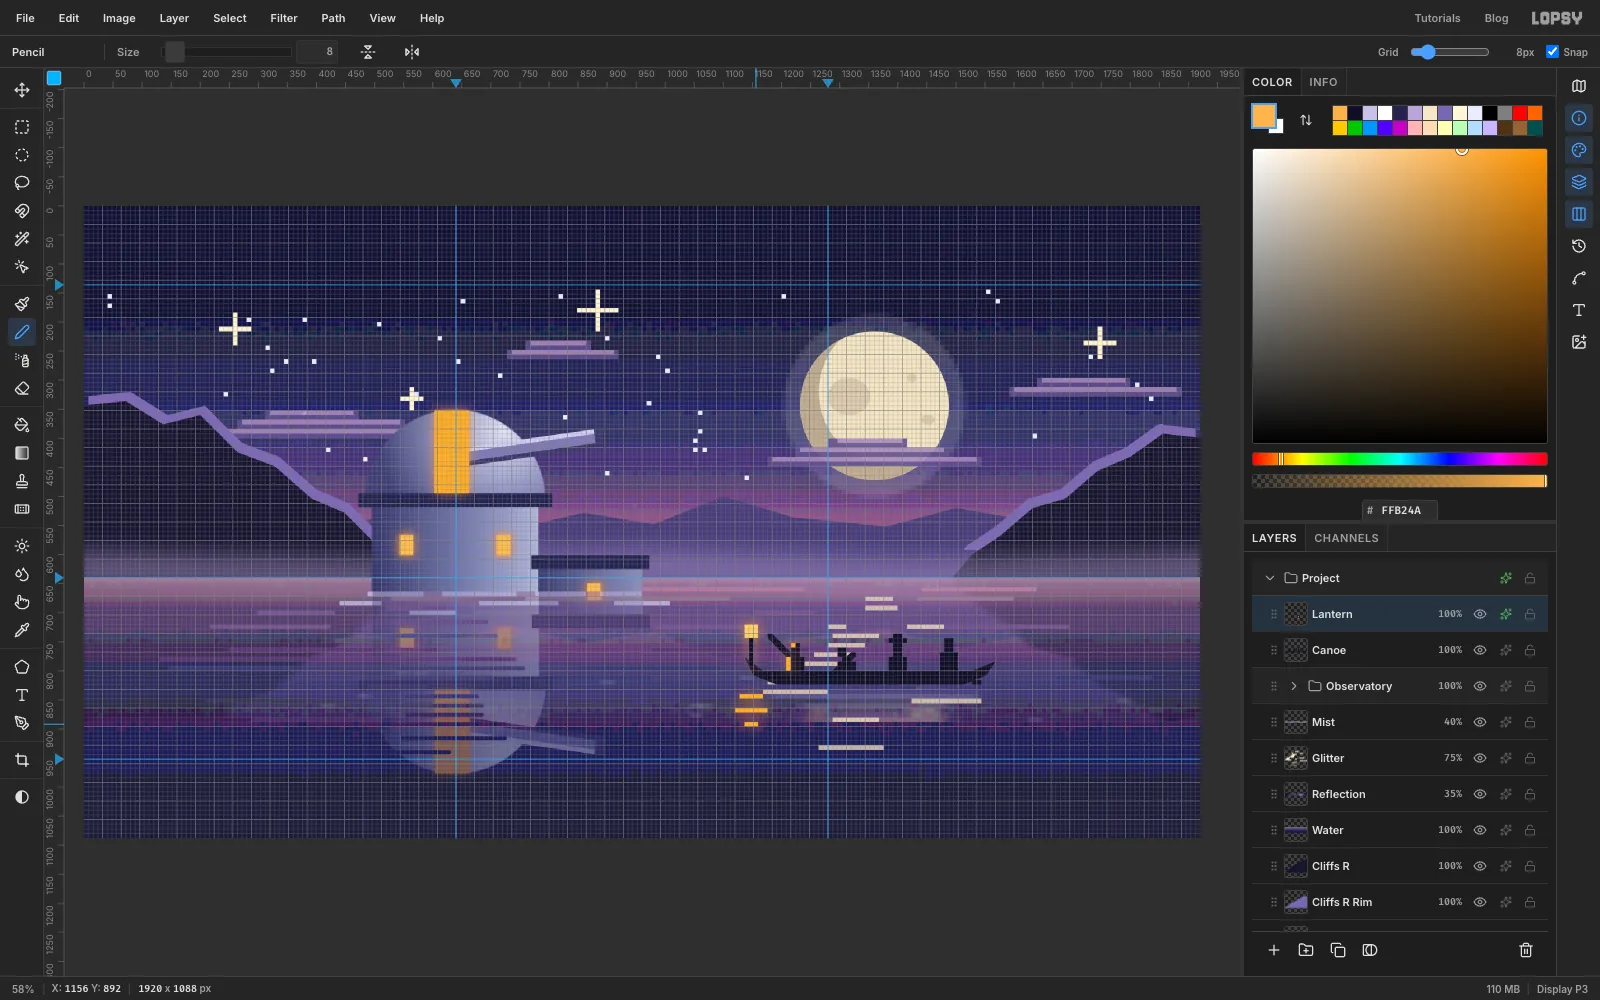
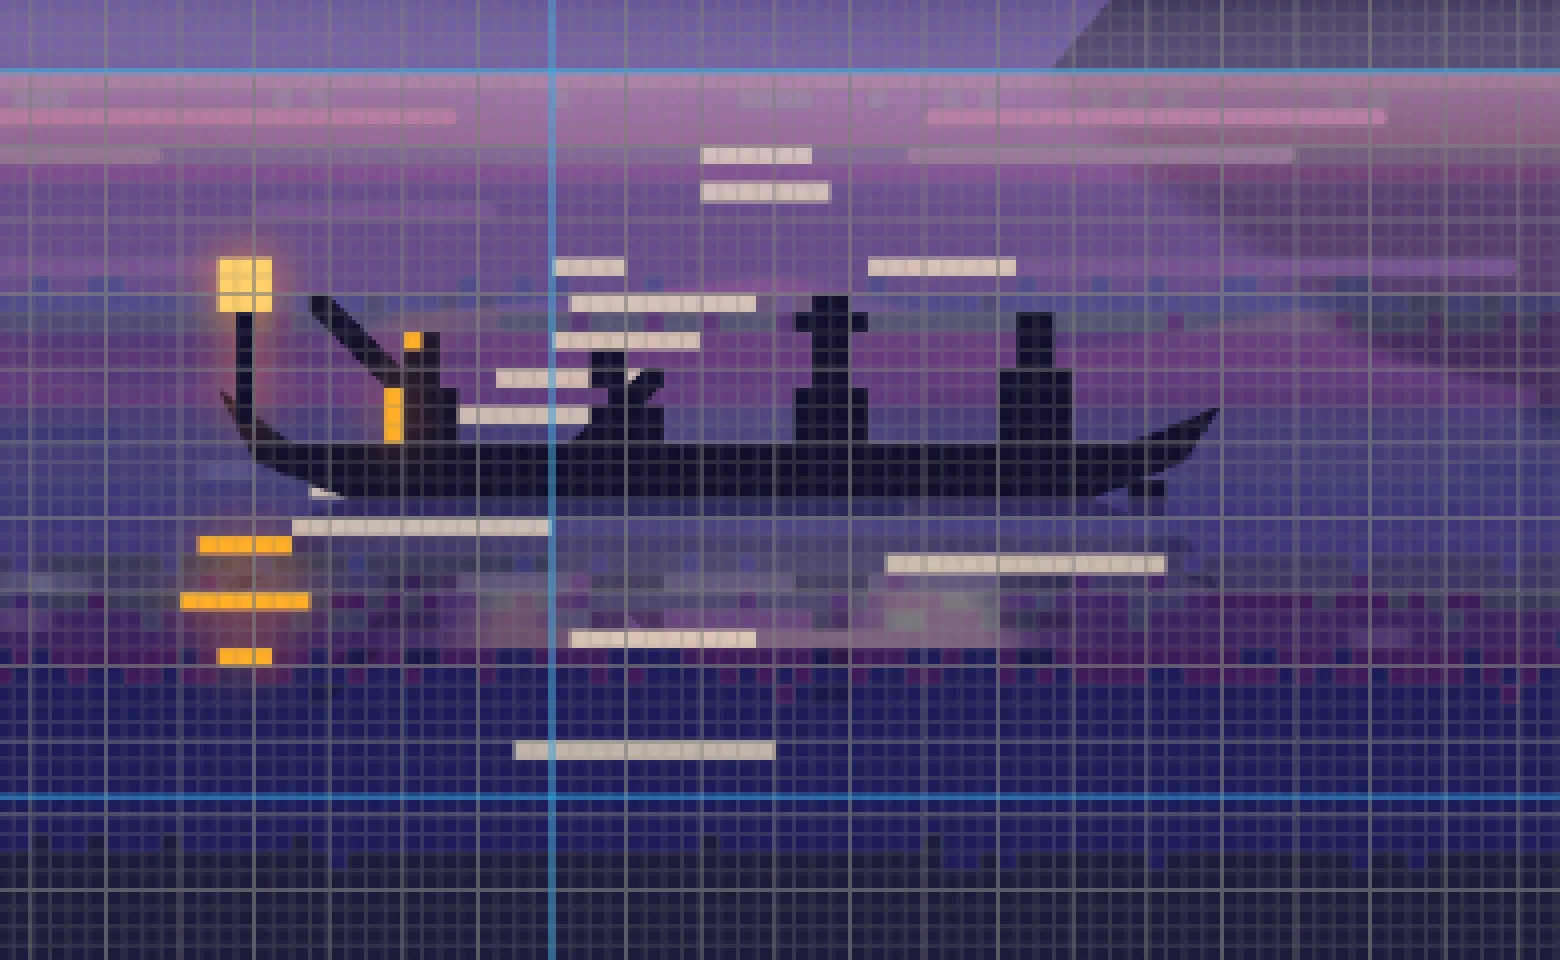
Add a Lantern layer. Draw a short pole up from the bow with the 8 px Pencil in , and fill a 24 × 24 lamp on top in . Give it an Outer Glow in , Size 32, Opacity 80.
The lamp should light something. Switch the Pencil to and add a few blocks of rim light on the bow passenger's front edge and head. Then draw three short dashes in the water under the lamp for its reflection. Both are on the Lantern layer, so they pick up its glow too, which is what you want.
-
Reflect the canoe
Mirror the canoe the same way as the observatory:
- Select Canoe, click Duplicate Layer and name the copy Canoe Reflection.
- ⌘-click its thumbnail and click Flip Vertical.
- Deselect and drag it down until the flipped keel meets the original keel, the hull's bottom edge.
The paddle blades dip below the waterline, so their mirror images land on top of the hull. Marquee everything above the waterline on this layer and press Delete. Then set the layer to 35% and erase a few ripple gaps.
-
Draw the wake
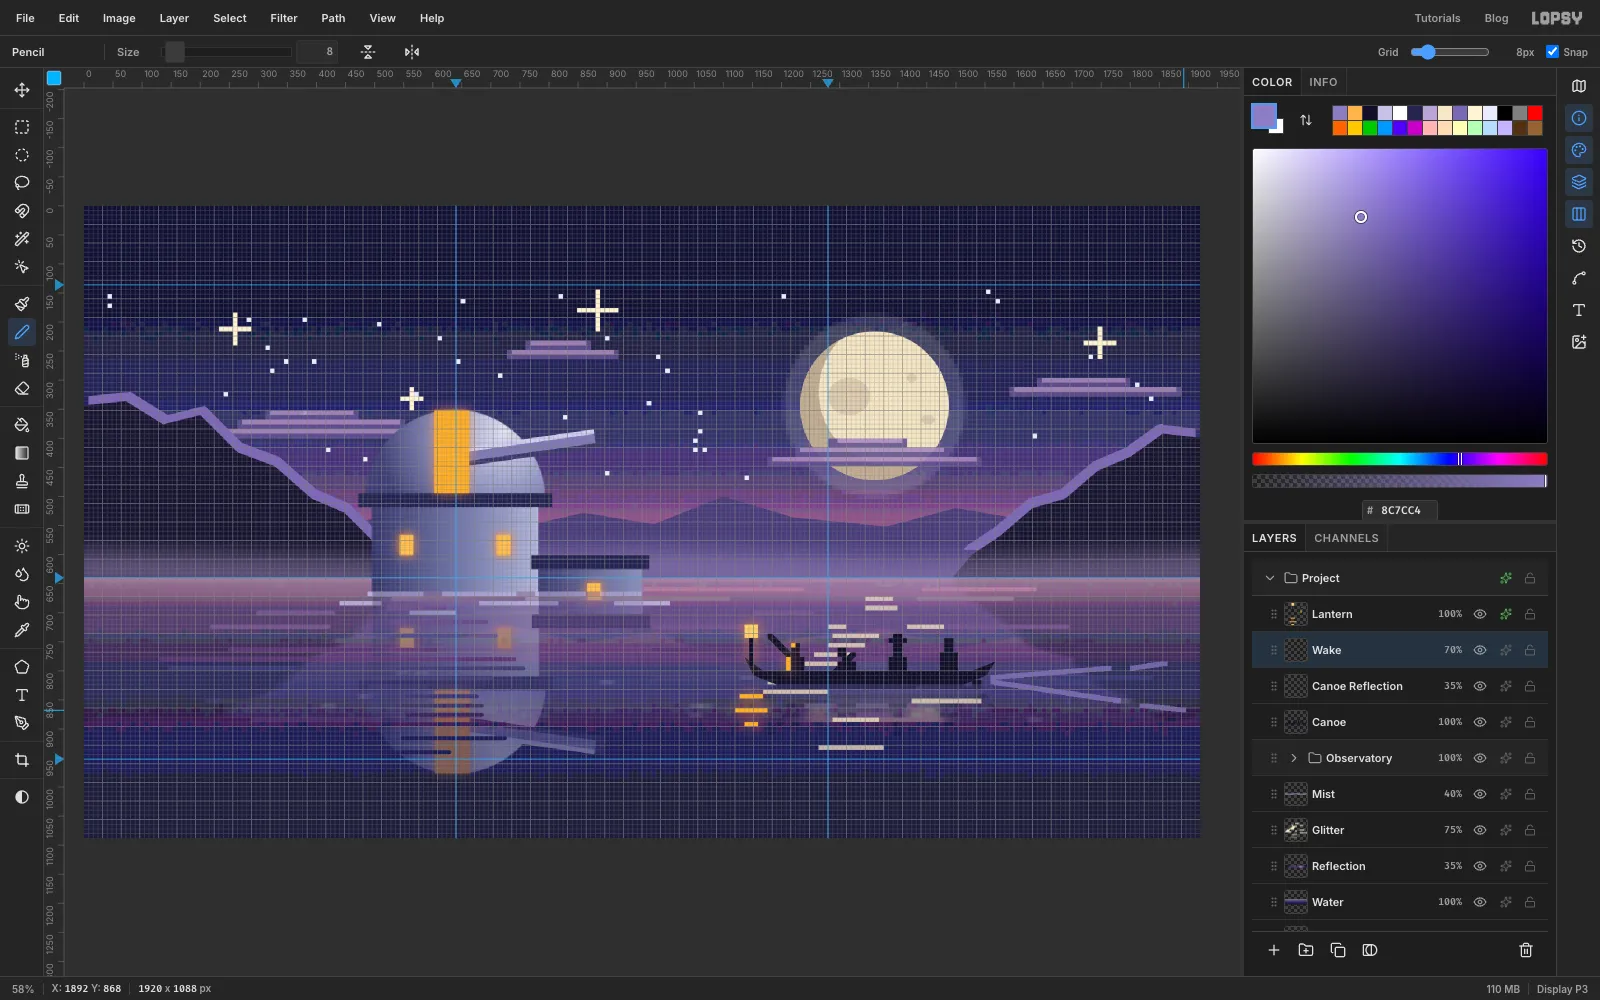
Add a Wake layer. With the Pencil at 8 in , Shift-click two long lines that spread out from the stern. Add two shorter broken pieces past their ends. On an 8 px pencil, gentle slopes come out as neat pixel stair-steps. Set the layer to 70%.
-
Release the fireflies
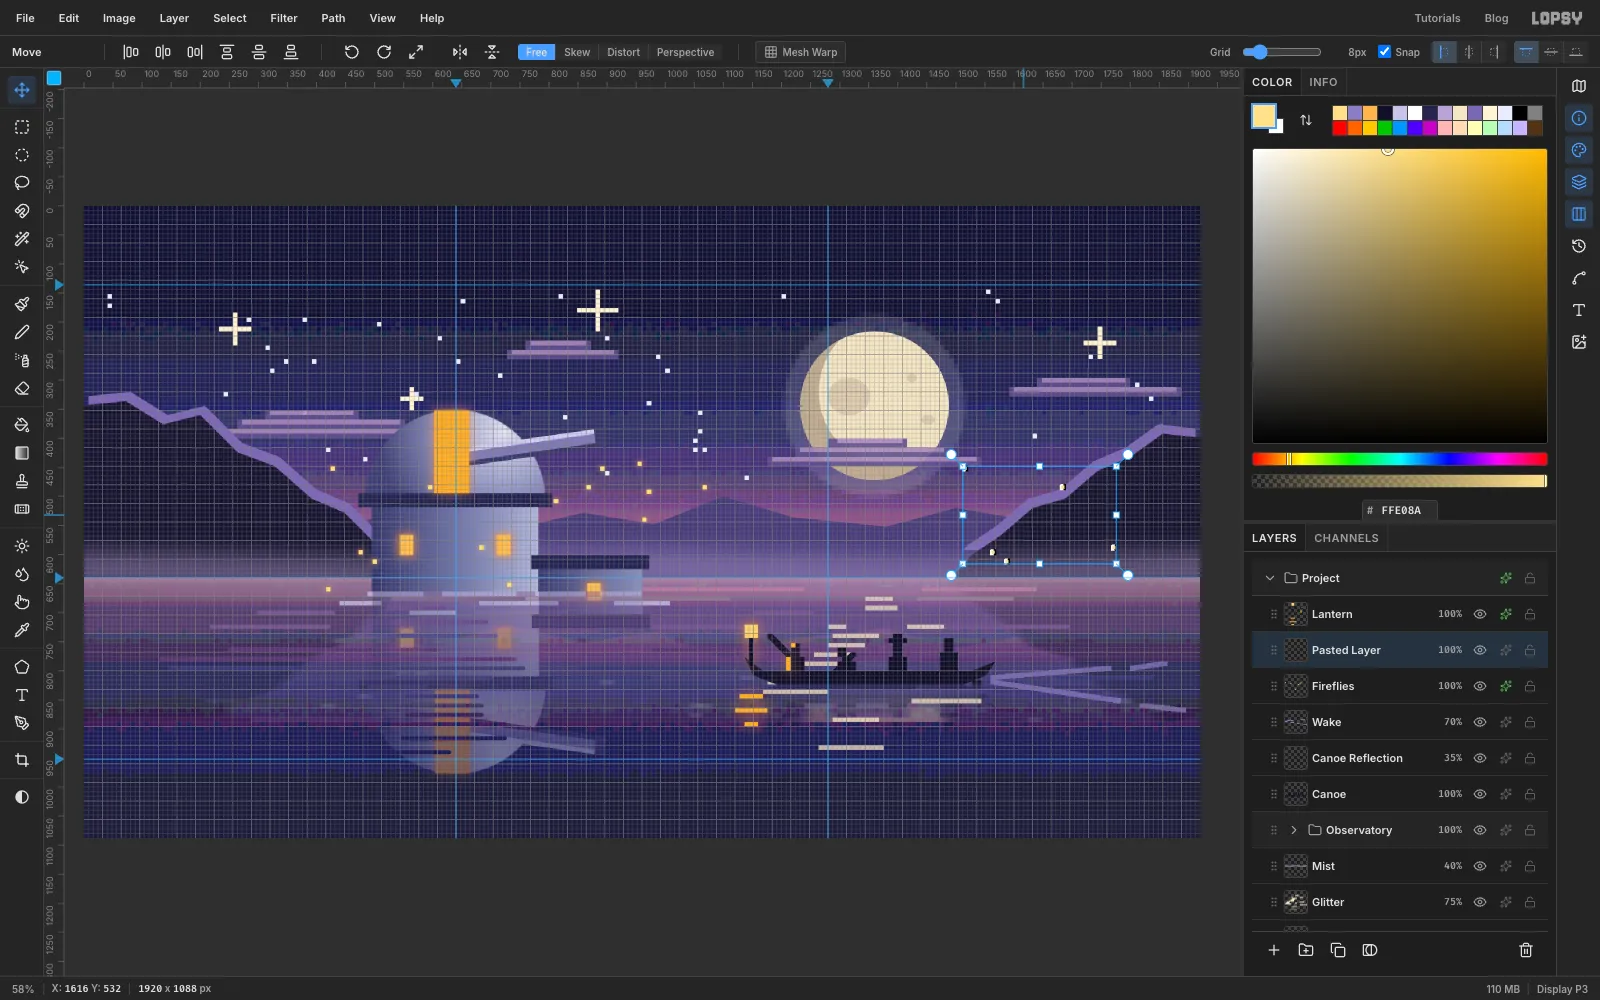
Add a Fireflies layer. With the 8 px Pencil in , click fourteen or so single dots around the observatory, then give the layer an Outer Glow in at Size 14, Opacity 75.
To scatter a second swarm without redrawing it:
- Marquee one cluster and press ⌘C, ⌘D, then ⌘V. The copy pastes in place on a new layer.
- Drag it across to the right-hand shore.
- Choose Layer → Merge Down to fold it back into Fireflies.
-
Run the pixel pass
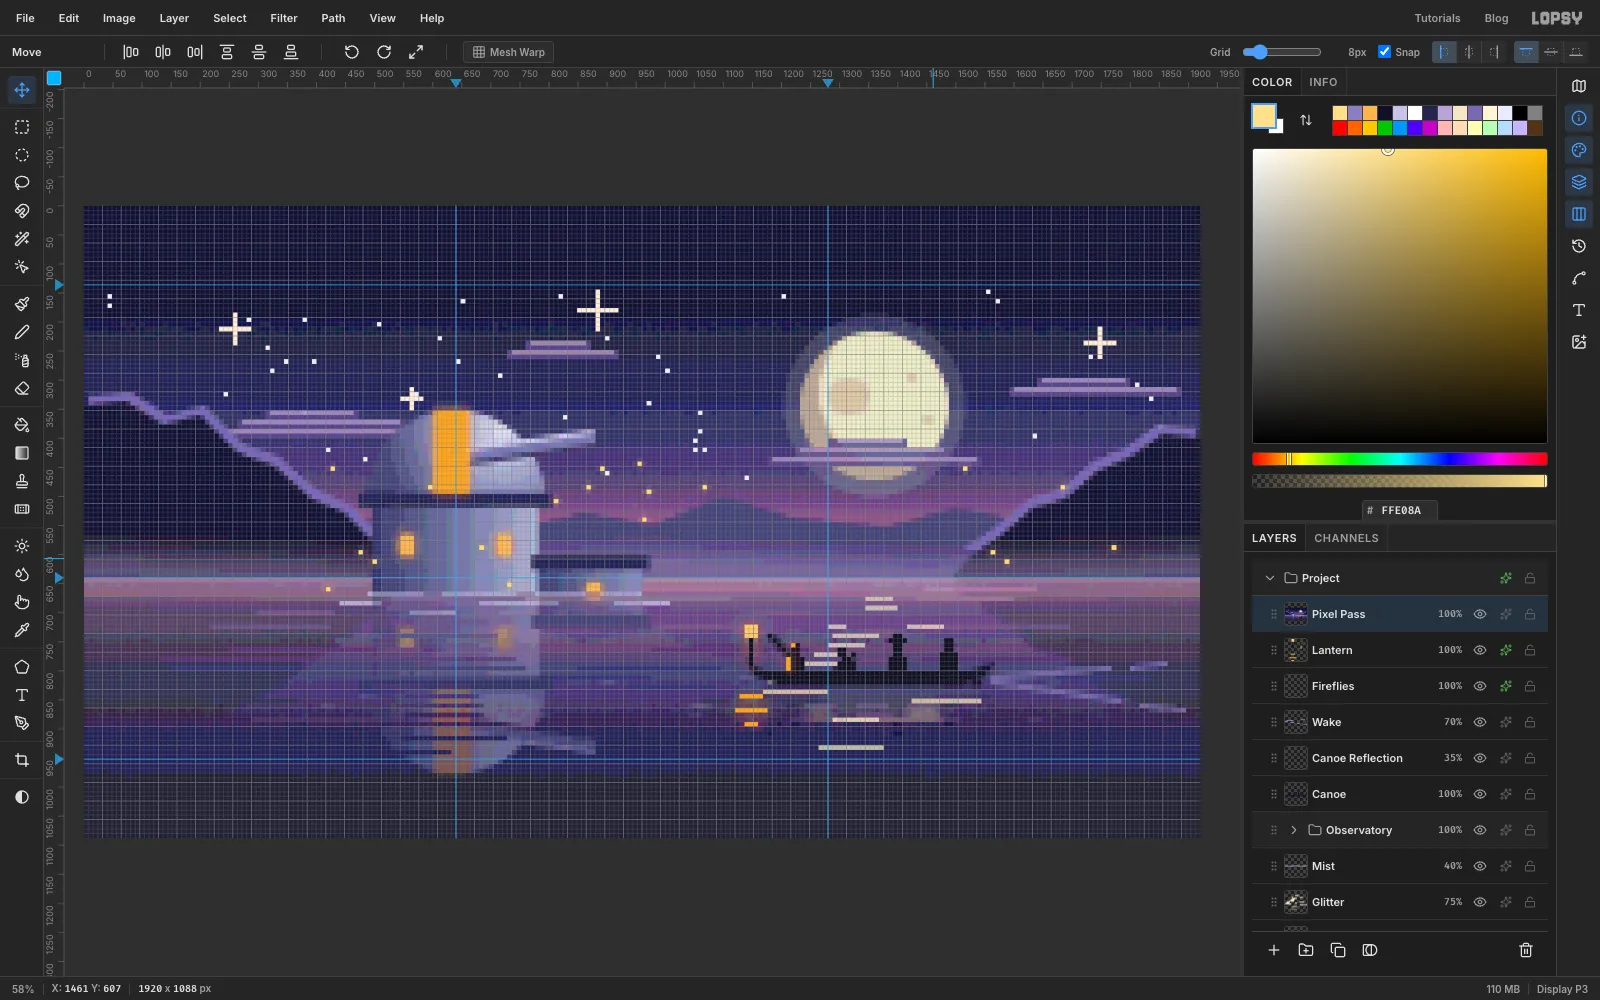
This is the step that makes the painting pixel art.
- Select Lantern, the top layer of the scene, and press ⌘A.
- Choose Edit → Copy Merged, press ⌘D, then ⌘V. Name the new layer Pixel Pass.
- Run Filter → Pixelate… at 8.
- Run Posterize at 16 levels.
The stamp has no transparent pixels, so Pixelate turns all of it into clean 8 × 8 blocks. That includes the soft glows, the mist and the anti-aliased curves. Posterize then puts the dome, the halo and the mist in stepped bands.
The layers underneath stay intact. If you change something, hide the Pixel Pass, fix it, and make a new stamp.
-
Add the letterbox bars
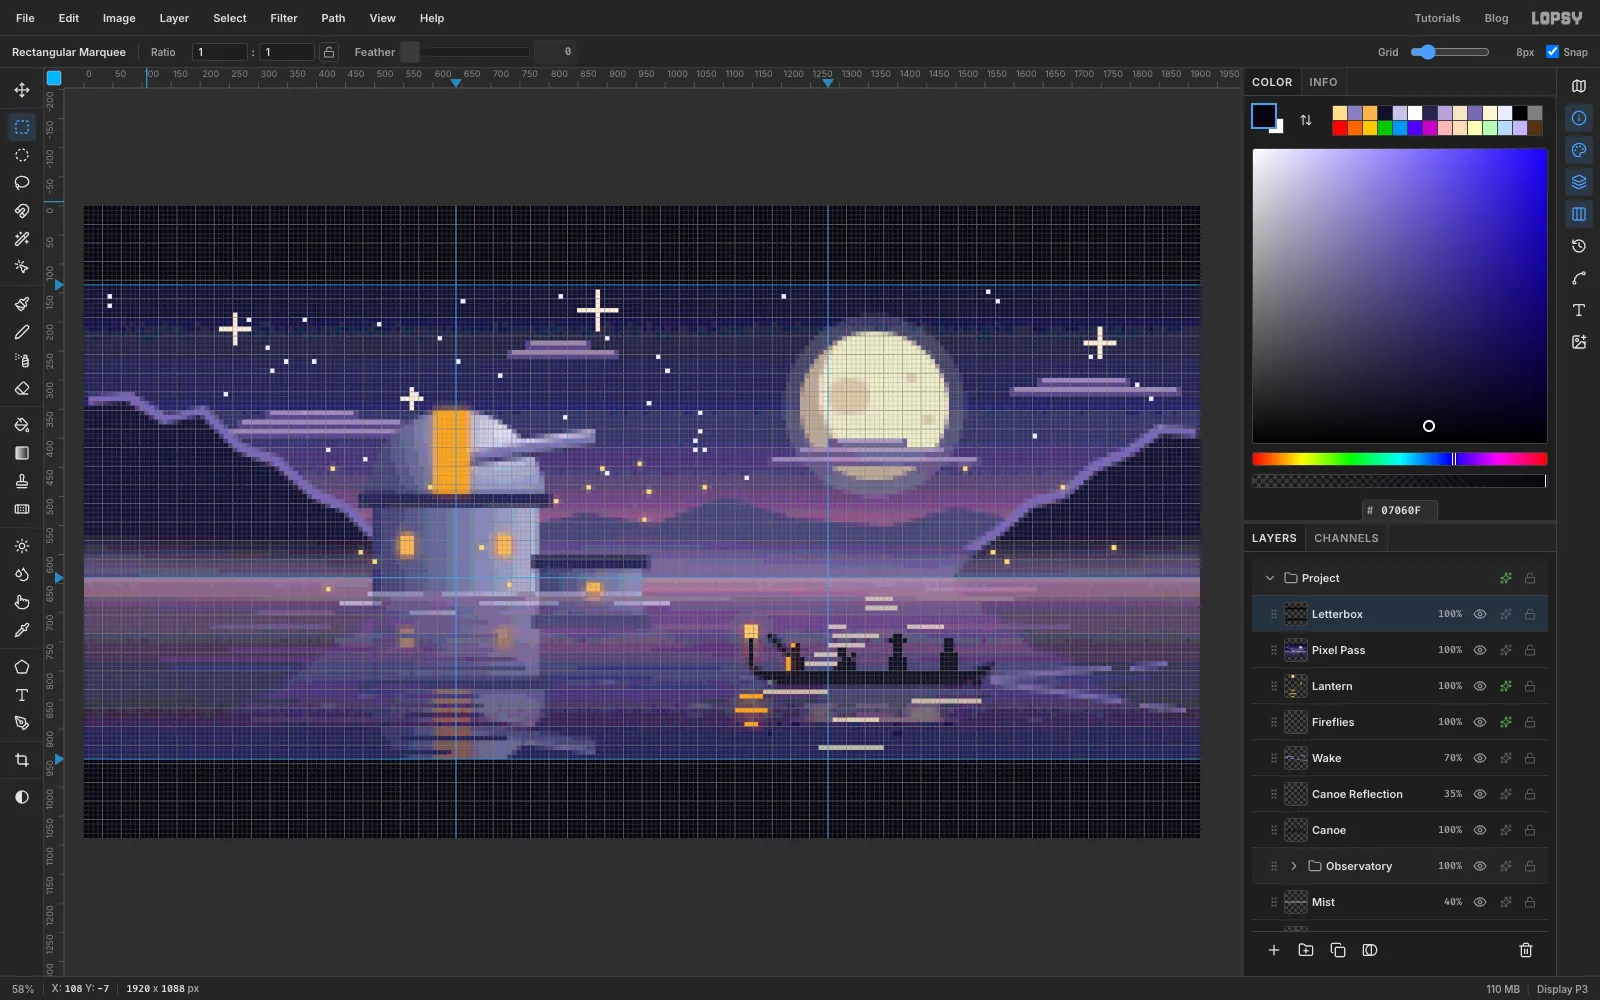
Add a Letterbox layer above the Pixel Pass. Fill the top bar (from the top edge down to the 136 guide) and the bottom bar (from the 952 guide to the bottom edge) with .
-
Set the slate in Silkscreen
Silkscreen is a pixel font drawn on an 8-unit grid. At Size 64, each of its pixels is exactly 8 px, so the title matches the picture. At Size 32, its pixels are half a block, which suits small captions.
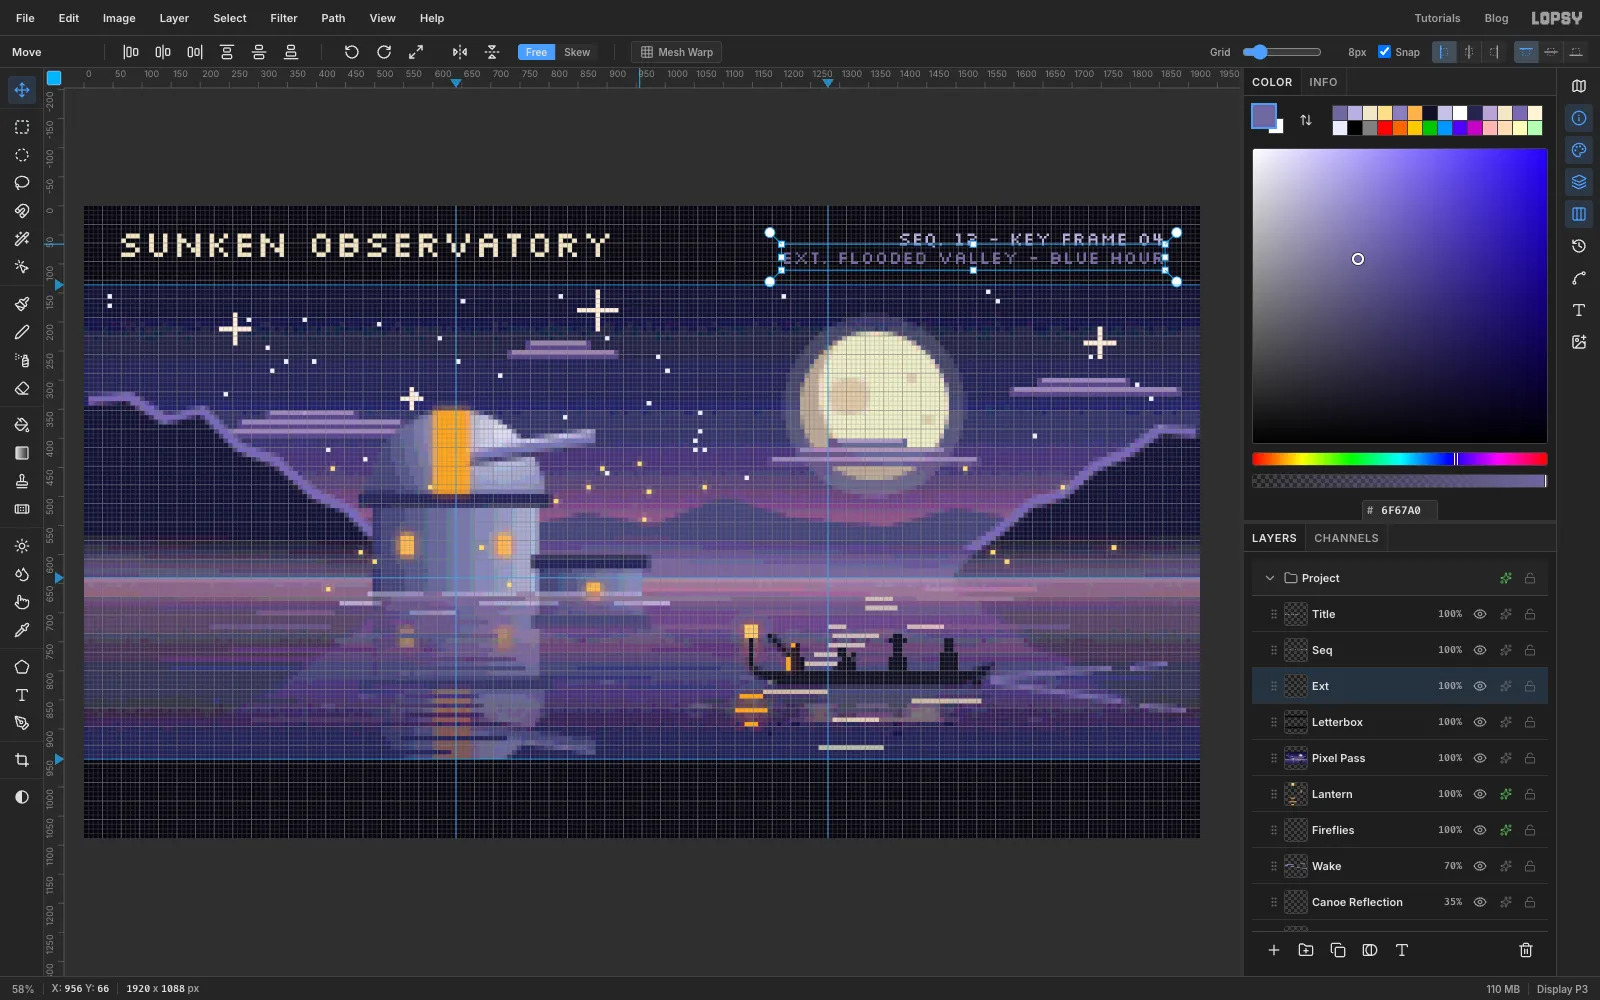
Pick the Text tool and choose Silkscreen in the options bar's font menu. Before each new piece of type, select Letterbox, so the Text tool doesn't restyle the text you just made. Then click in the bar and type. Rename each layer as you go (Title, Seq, Ext). Use the Regular weight for all of these:
- SUNKEN OBSERVATORY: Size 64, .
- SEQ. 12 - KEY FRAME 04: Size 32, .
- EXT. FLOODED VALLEY - BLUE HOUR: Size 32, .
Switch to the Move tool and untick Snap, so the arrow keys move 1 px at a time. Line each one up:
- Title: its left edge on x 64 and the top of its capitals on y 48, so it's centred in the 136 px bar.
- Slate lines: their right edges on x 1856. Put the first line's caps level with the title's at y 48, and the second line at y 80.
-
Lay out the colour key
Tick Snap again and add a Color Key layer. Fill eight 40 × 40 chips at y 1000, the first at x 64 and one every 48 px. Use these colours: , , , , , , and . Leave the near-black colours out, because a chip in them would vanish on the bar.
Add COLOR KEY (Size 32, ) 32 px after the last chip, as a layer named Key Label. Add KEY LIGHT: MOON / FILL: SLIT LAMP in the same style, ending on x 1856, as Light Note. Give both the same vertical centre as the chips.
-
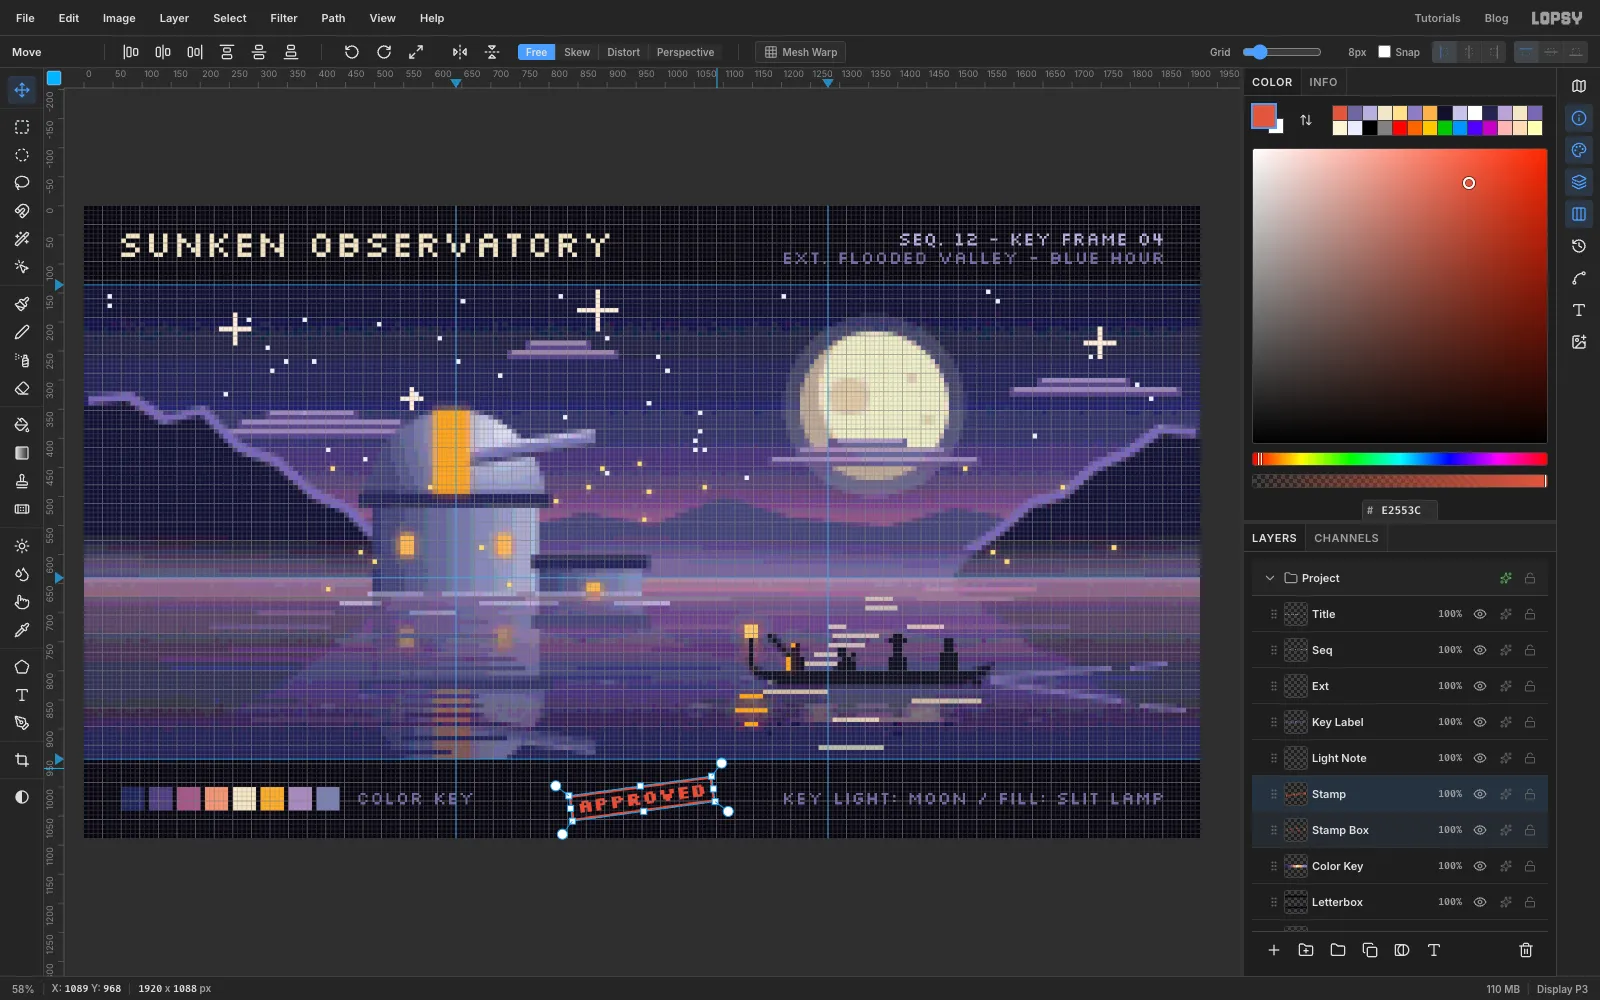
Stamp it approved
- Add APPROVED in Silkscreen at Size 32, , and rename the layer Stamp. Set its Font weight to Bold (700), then nudge it so it's centred on 960, 1020.
- Select Color Key and add a Stamp Box layer, which lands under the word. Fill a rectangle 16 px wider than the word on each side and 12 px taller top and bottom with .
- Marquee the inside, 4 px in from each edge, and press Delete to leave a frame.
- Click Stamp, then Shift-click Stamp Box to select both. Switch to the Move tool, untick Snap, and drag the corner rotation handle about 8° anticlockwise. Both layers turn together about one centre, and the word stays live, editable text.
- Press ⌘D to finish.
-
Save and export
Hide the grid (View → Show Grid) and the guides (View → Show Guides) to look at the frame clean. Then save the layered project with File → Save Project and export with File → Quick Export PNG.