Make a Psychedelic Ukulele Data Visualization Poster
Chart the four open strings of a ukulele as sine waves under a 1960s op-art burst in Lopsy, using Sunburst in Difference mode, the Pen tool and radial symmetry.
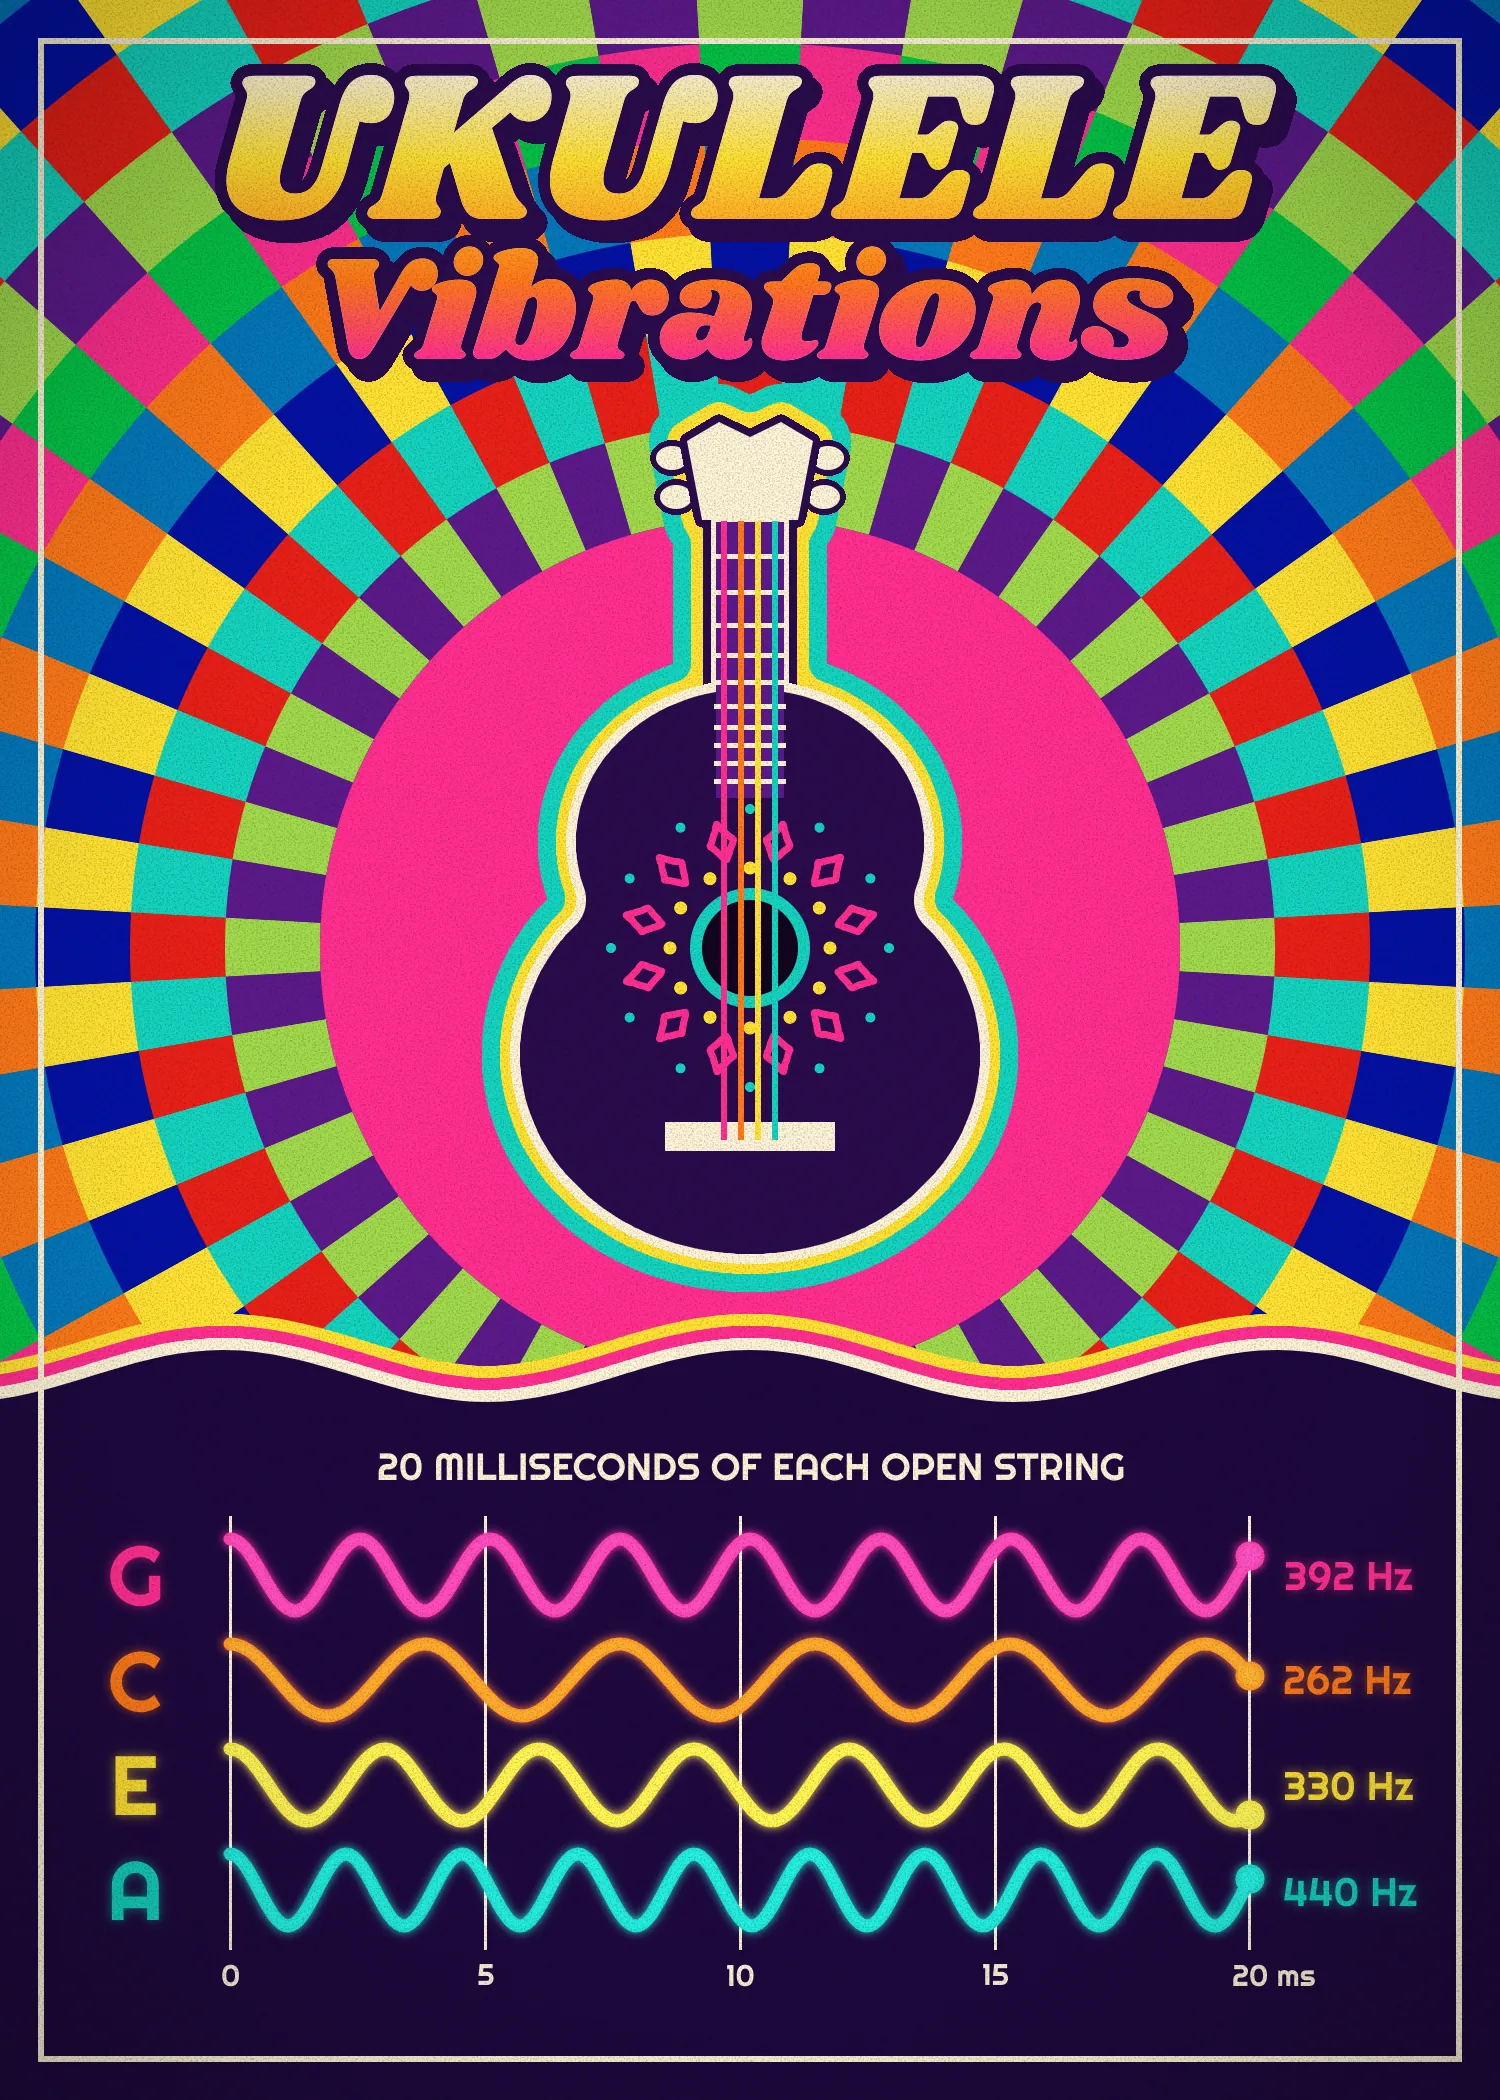
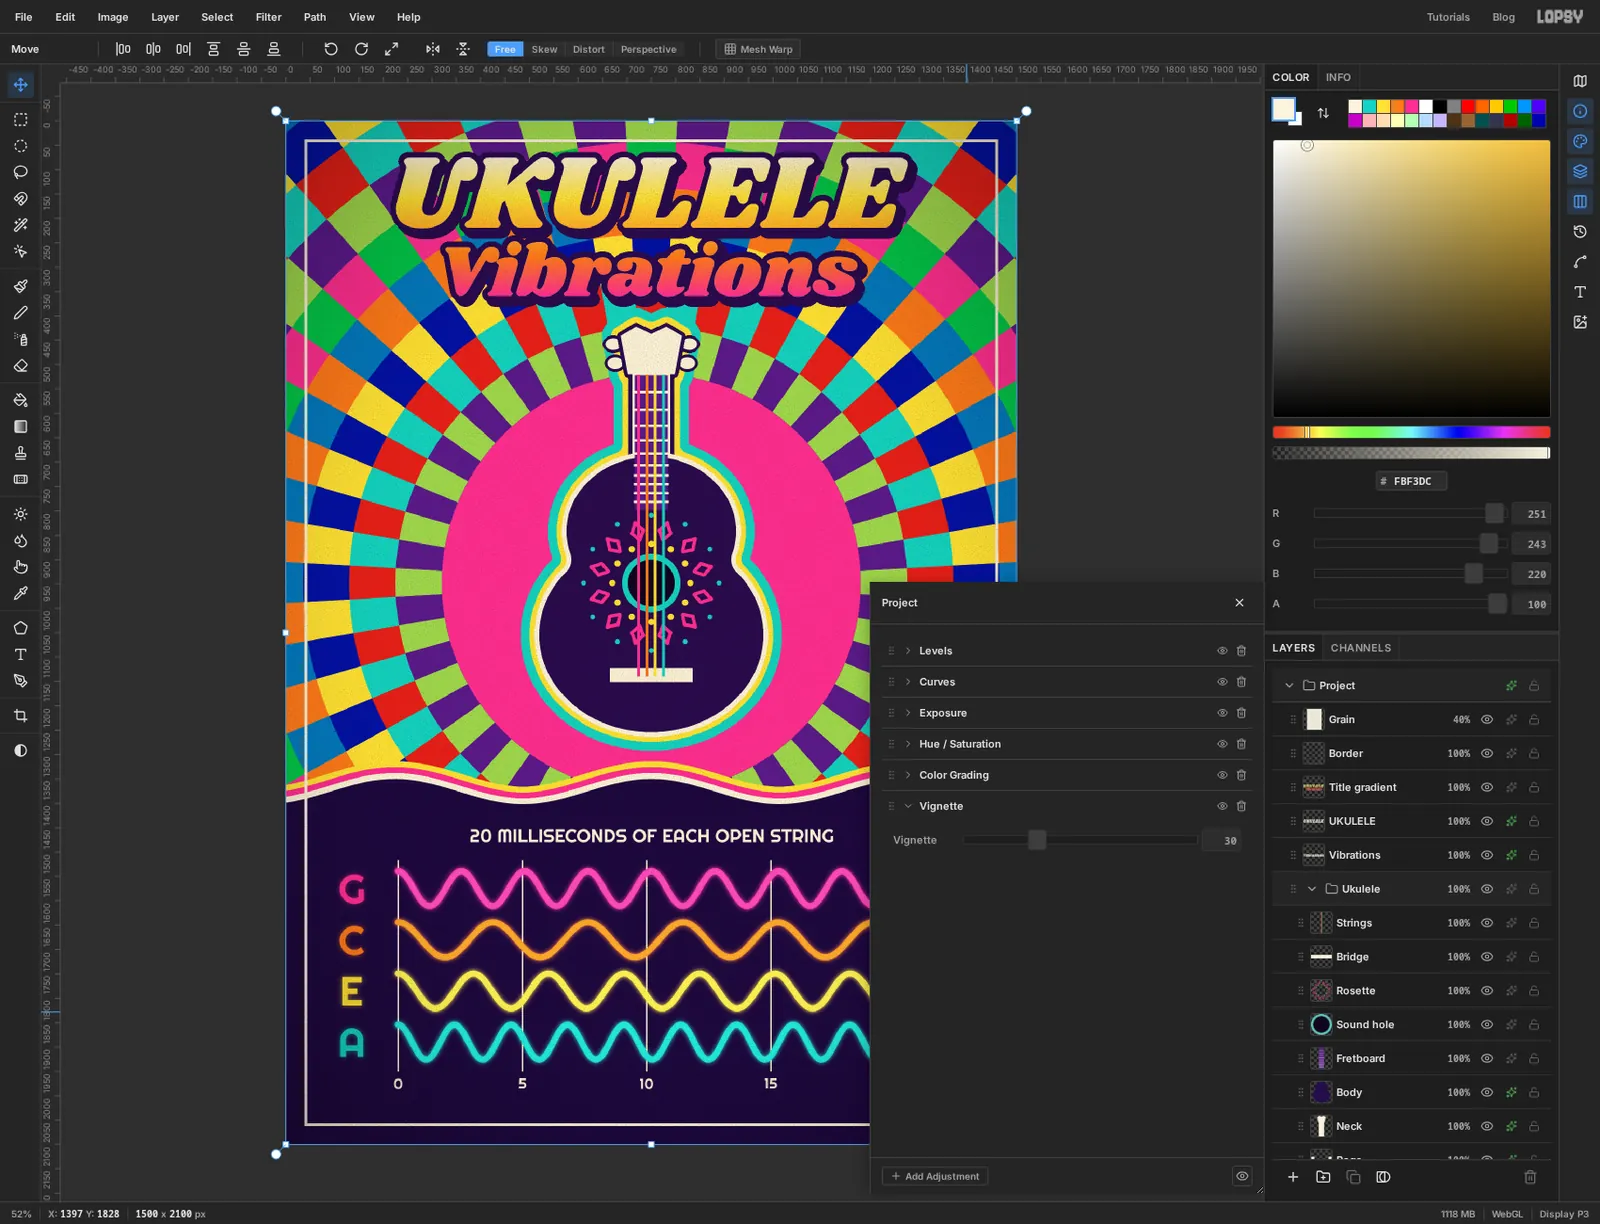
A ukulele's four open strings are tuned G, C, E and A. Pluck the G string and it swings back and forth 392 times a second. The C string is the slowest at 262, then E at 330, and A is the fastest at 440. In this tutorial you'll draw what those four notes look like over the same 20 milliseconds, and wrap the chart in a 1960s psychedelic poster: a rainbow checkerboard burst, fat groovy lettering and a ukulele in the middle of it all.
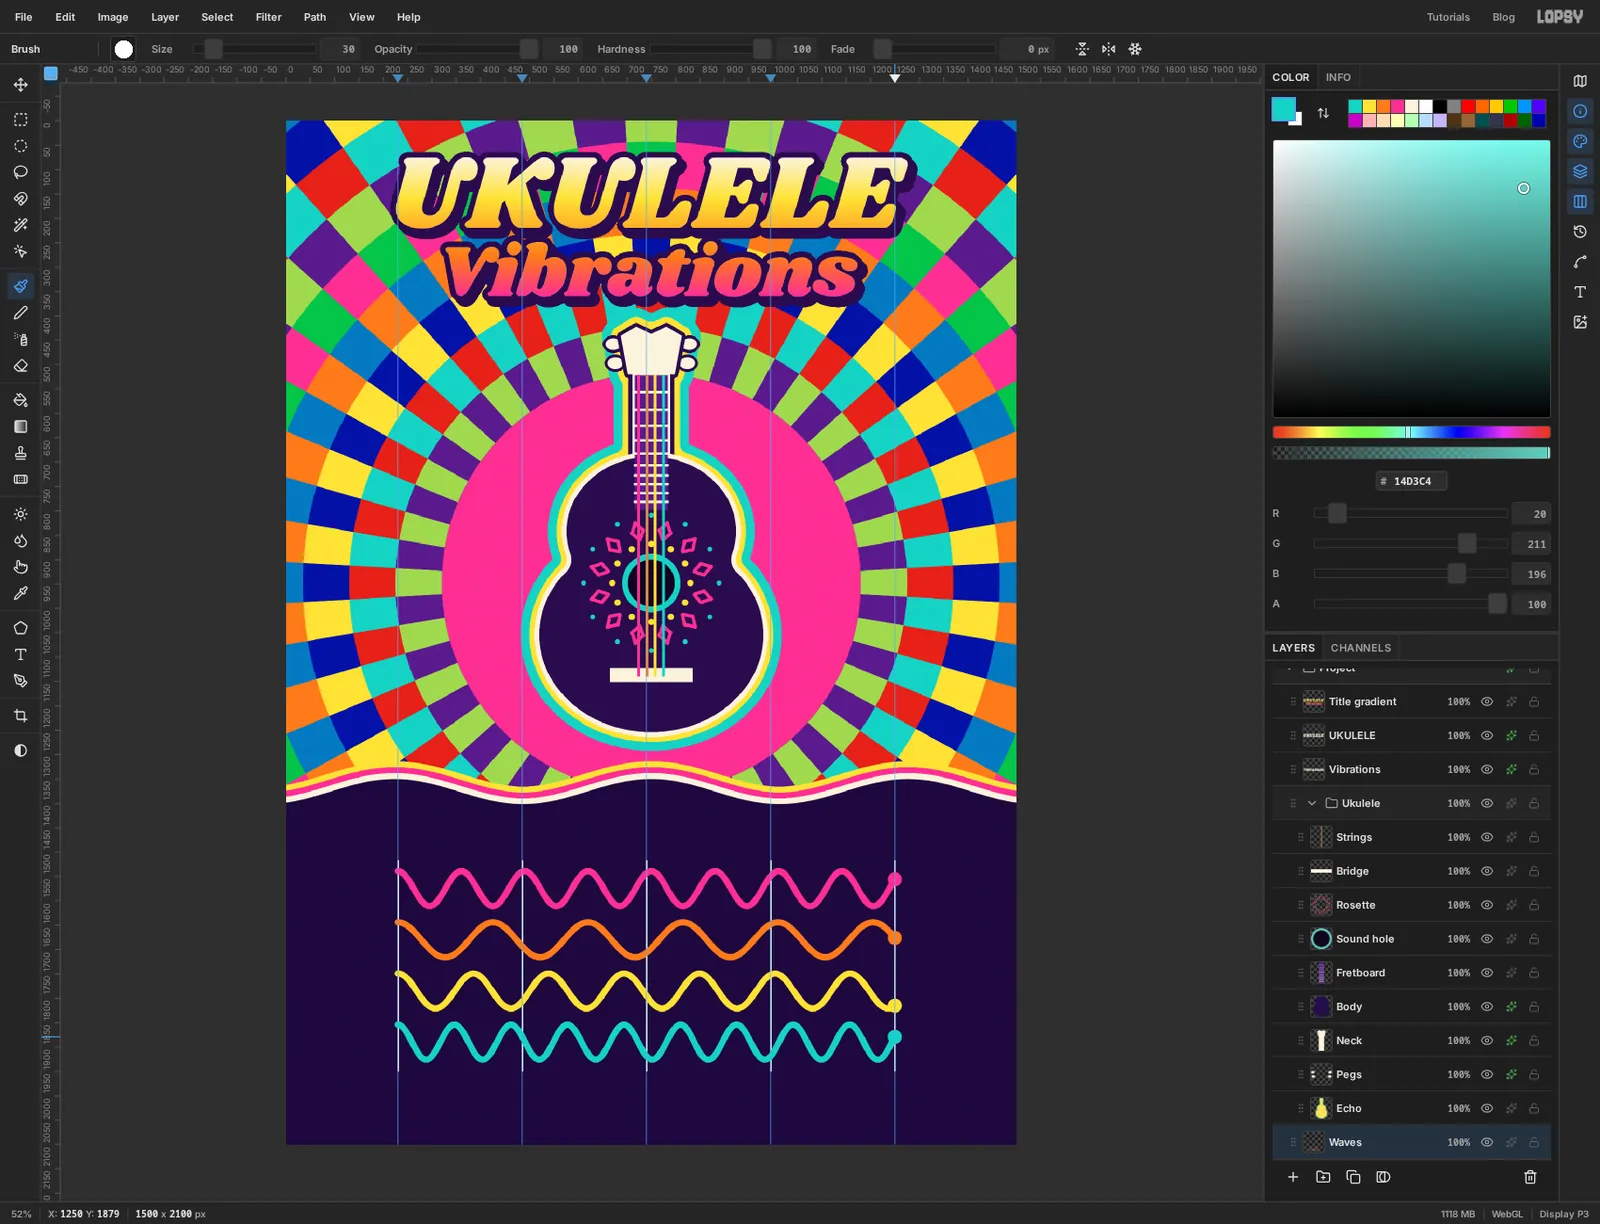
The poster is 1500 × 2100 px. The chart at the bottom is drawn to scale:
- The plot is 1020 px wide and stands for 20 ms, so one millisecond is 51 px.
- In 20 ms the G string completes 7.84 cycles, C 5.23, E 6.59 and A 8.8. You'll draw exactly that many waves for each.
- Each string on the instrument has the same colour as its wave.
Along the way you'll use:
- the Elliptical Marquee with Edit → Fill, including circles bigger than the canvas
- Filter → Sunburst with the Difference blend mode, and a layer mask made from a selection
- Select → Grow, Shrink and Inverse, and selections loaded from layer thumbnails
- the Brush with Radial Symmetry, and the Pencil with Shift-click lines
- copy and paste, Duplicate Layer, Flip Horizontal and Merge Down
- the Pen tool for a wavy edge and for the sine waves, plus Path to Selection
- guides that the marquee snaps to
- text in Shrikhand and Righteous, a gradient poured into the letters, and the Stroke, Drop Shadow and Outer Glow effects
- a group, Gaussian Blur, Texture and a Vignette adjustment
The palette:
-
Violet
-
plum
-
panel
-
sound hole
-
Magenta
the G string
-
Orange
the C string
-
Yellow
the E string
-
Teal
the A string
-
Cream
-
Title
-
Fill the page and drag the biggest circles
Choose File → New, set the size to 1500 × 2100 px and click Create. The document starts with a white
Backgroundand an emptyLayer 1. Leave the background where it is. Double-clickLayer 1in the Layers panel and rename itRings. Set the foreground colour to orange in the Color panel's hex field, press Cmd+A, choose Edit → Fill, then press Cmd+D to deselect.The burst is a stack of filled circles, biggest first. The first three are larger than the page, so you need room around the canvas to drag them. Choose View → Zoom Out until the status bar reads 33%. You need about 450 px of grey on every side of the page, so on a small window go one step further.
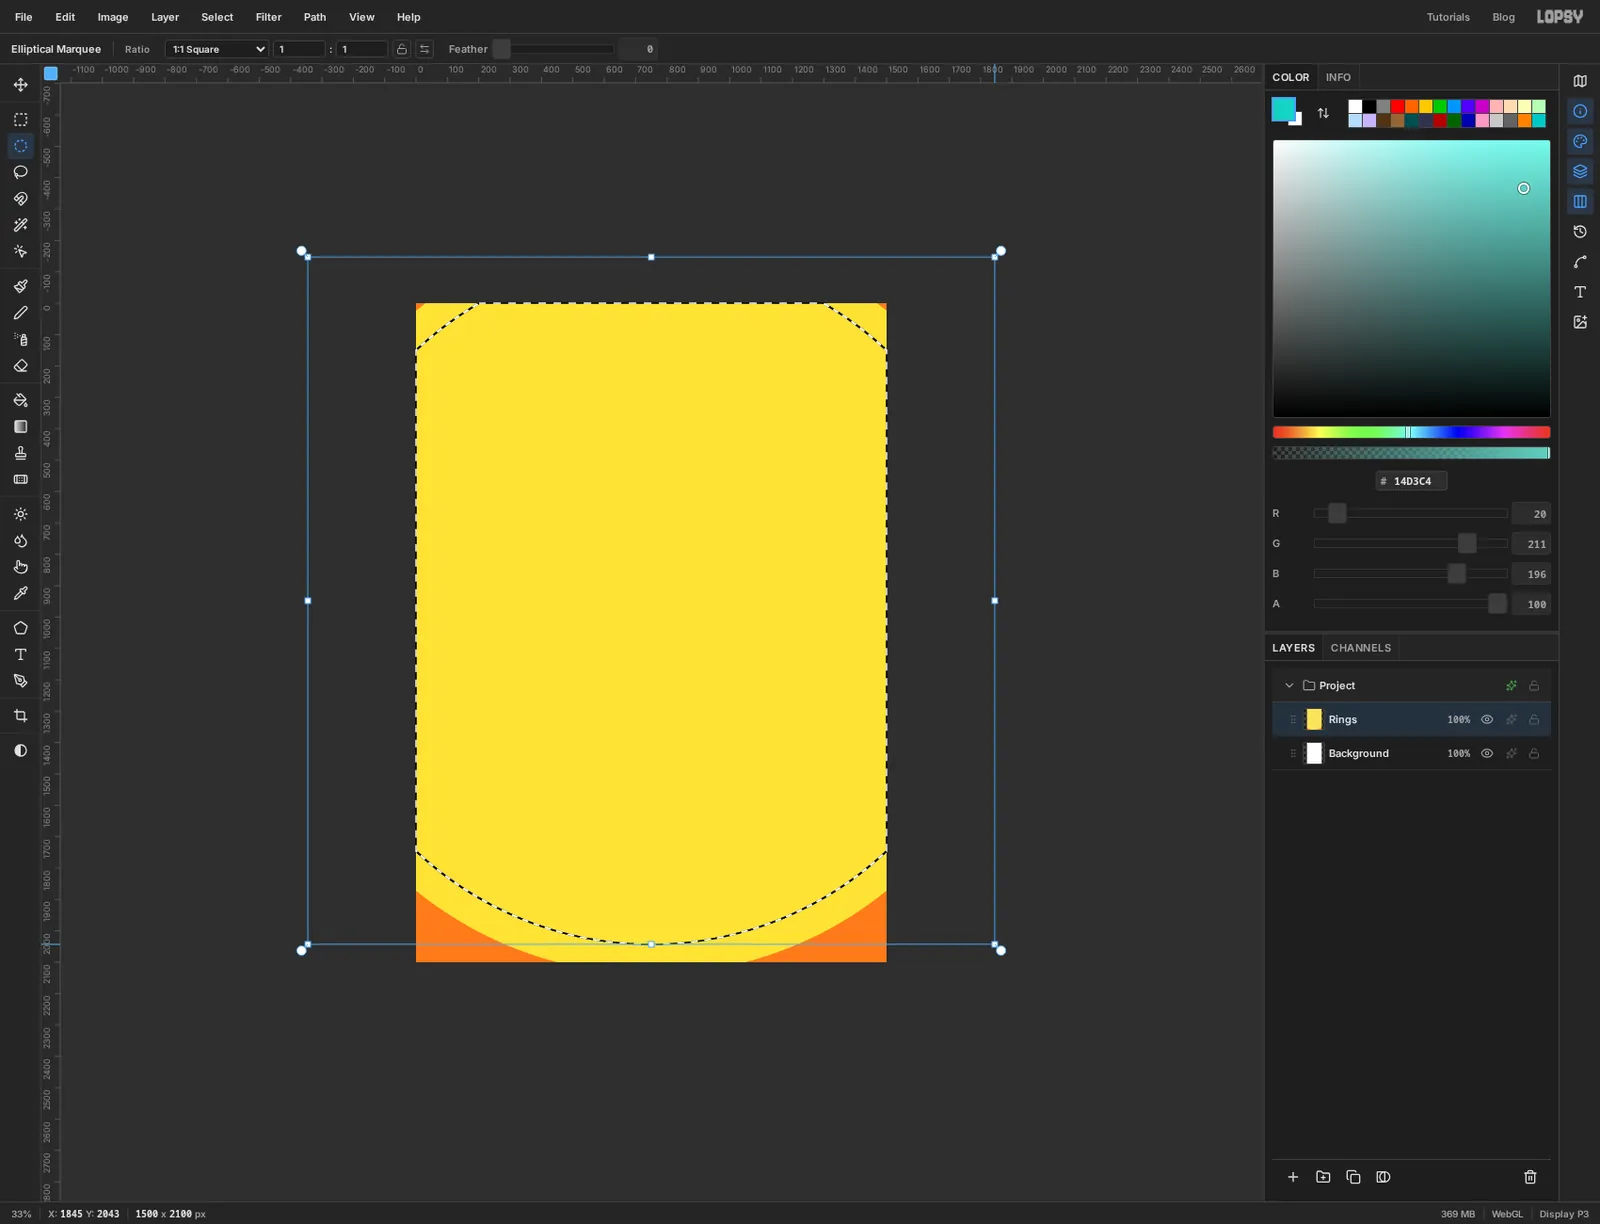
Pick the Elliptical Marquee. A marquee is dragged from one corner of its box to the opposite corner, and both corners can be outside the canvas. For each row below, set the foreground colour, drag the box, choose Edit → Fill and press Cmd+D:
- Yellow , from −440, −242 to 1940, 2138
- Teal , from −345, −147 to 1845, 2043
- Plum , from −250, −52 to 1750, 1948
Always deselect before the next drag. A drag that starts inside an existing selection moves it instead of making a new one.
-
Finish the rings
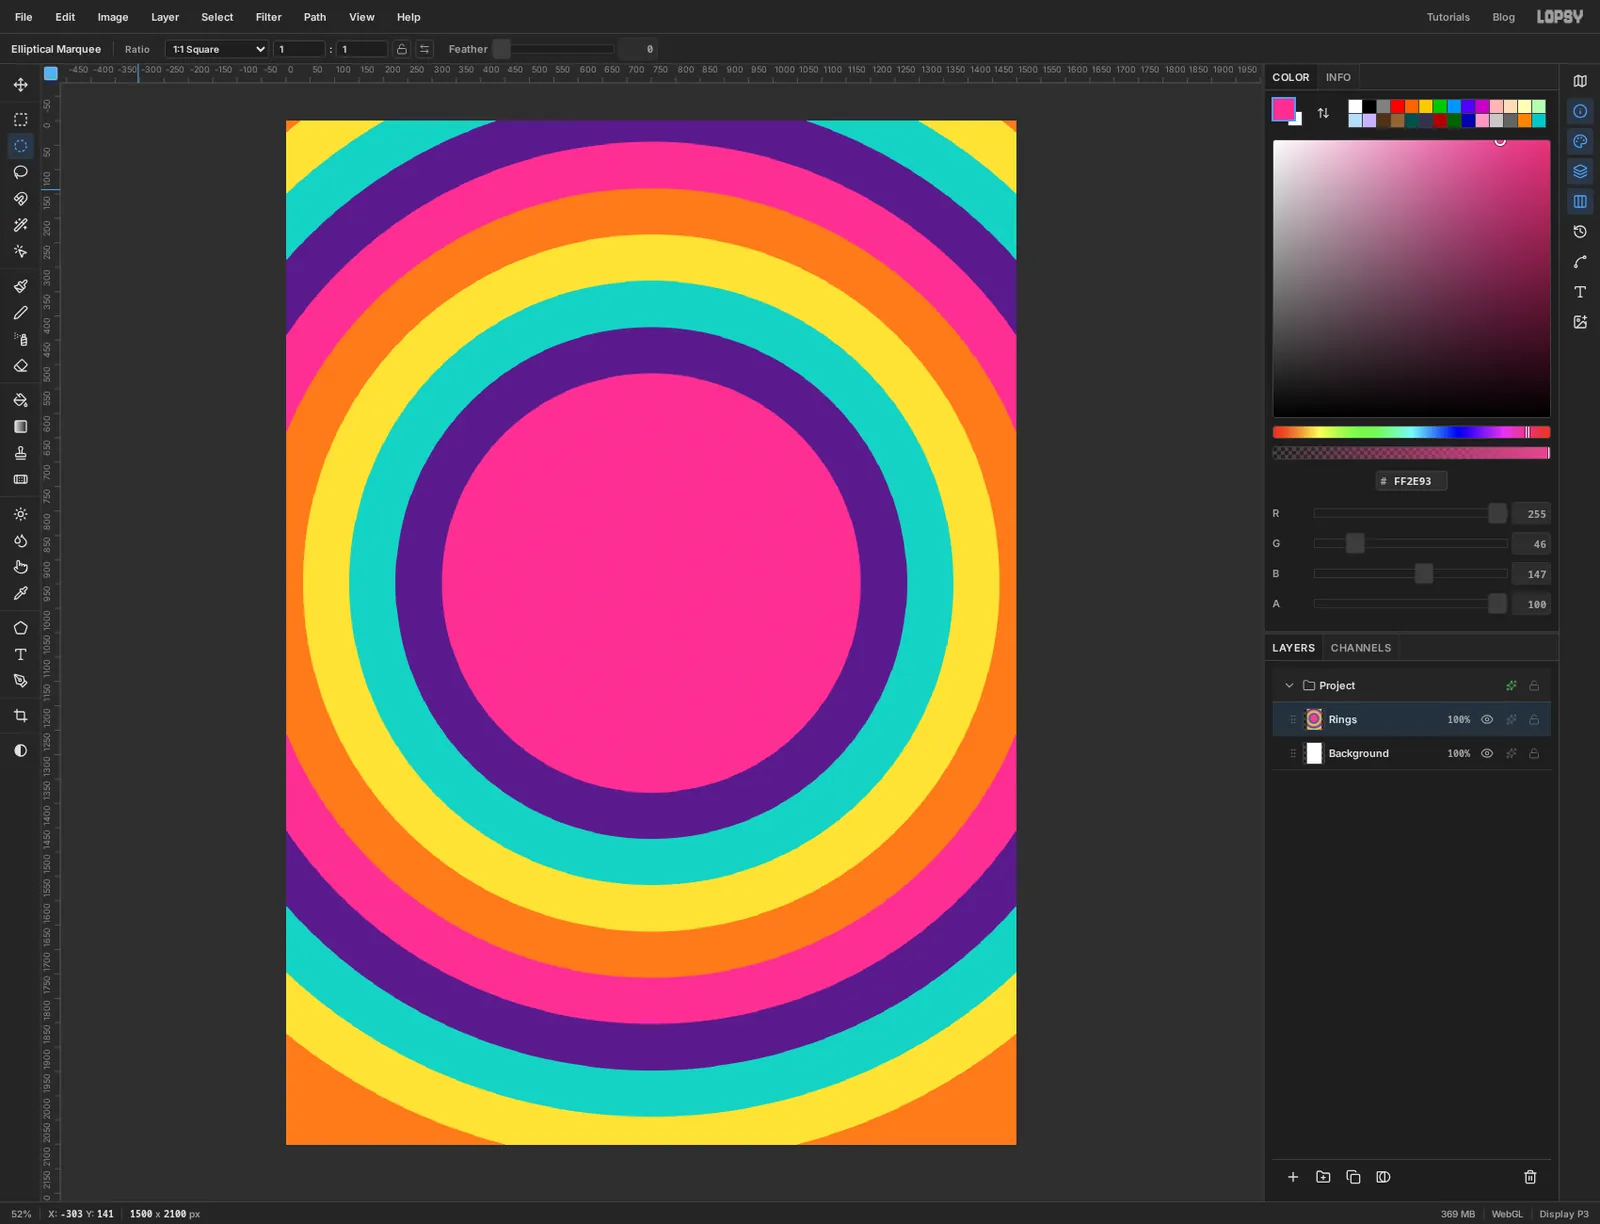
Choose View → Fit to Screen. The rest of the circles fit in the window. Each one is 95 px smaller in radius than the last. Fill them the same way:
- Magenta , from −155, 43 to 1655, 1853
- Orange , from −60, 138 to 1560, 1758
- Yellow , from 35, 233 to 1465, 1663
- Teal , from 130, 328 to 1370, 1568
- Plum , from 225, 423 to 1275, 1473
- Magenta , from 320, 518 to 1180, 1378
The last one is the pink disc the ukulele will stand in.
-
Paint the sunburst rays
Click Add Layer at the bottom of the Layers panel and rename the new layer
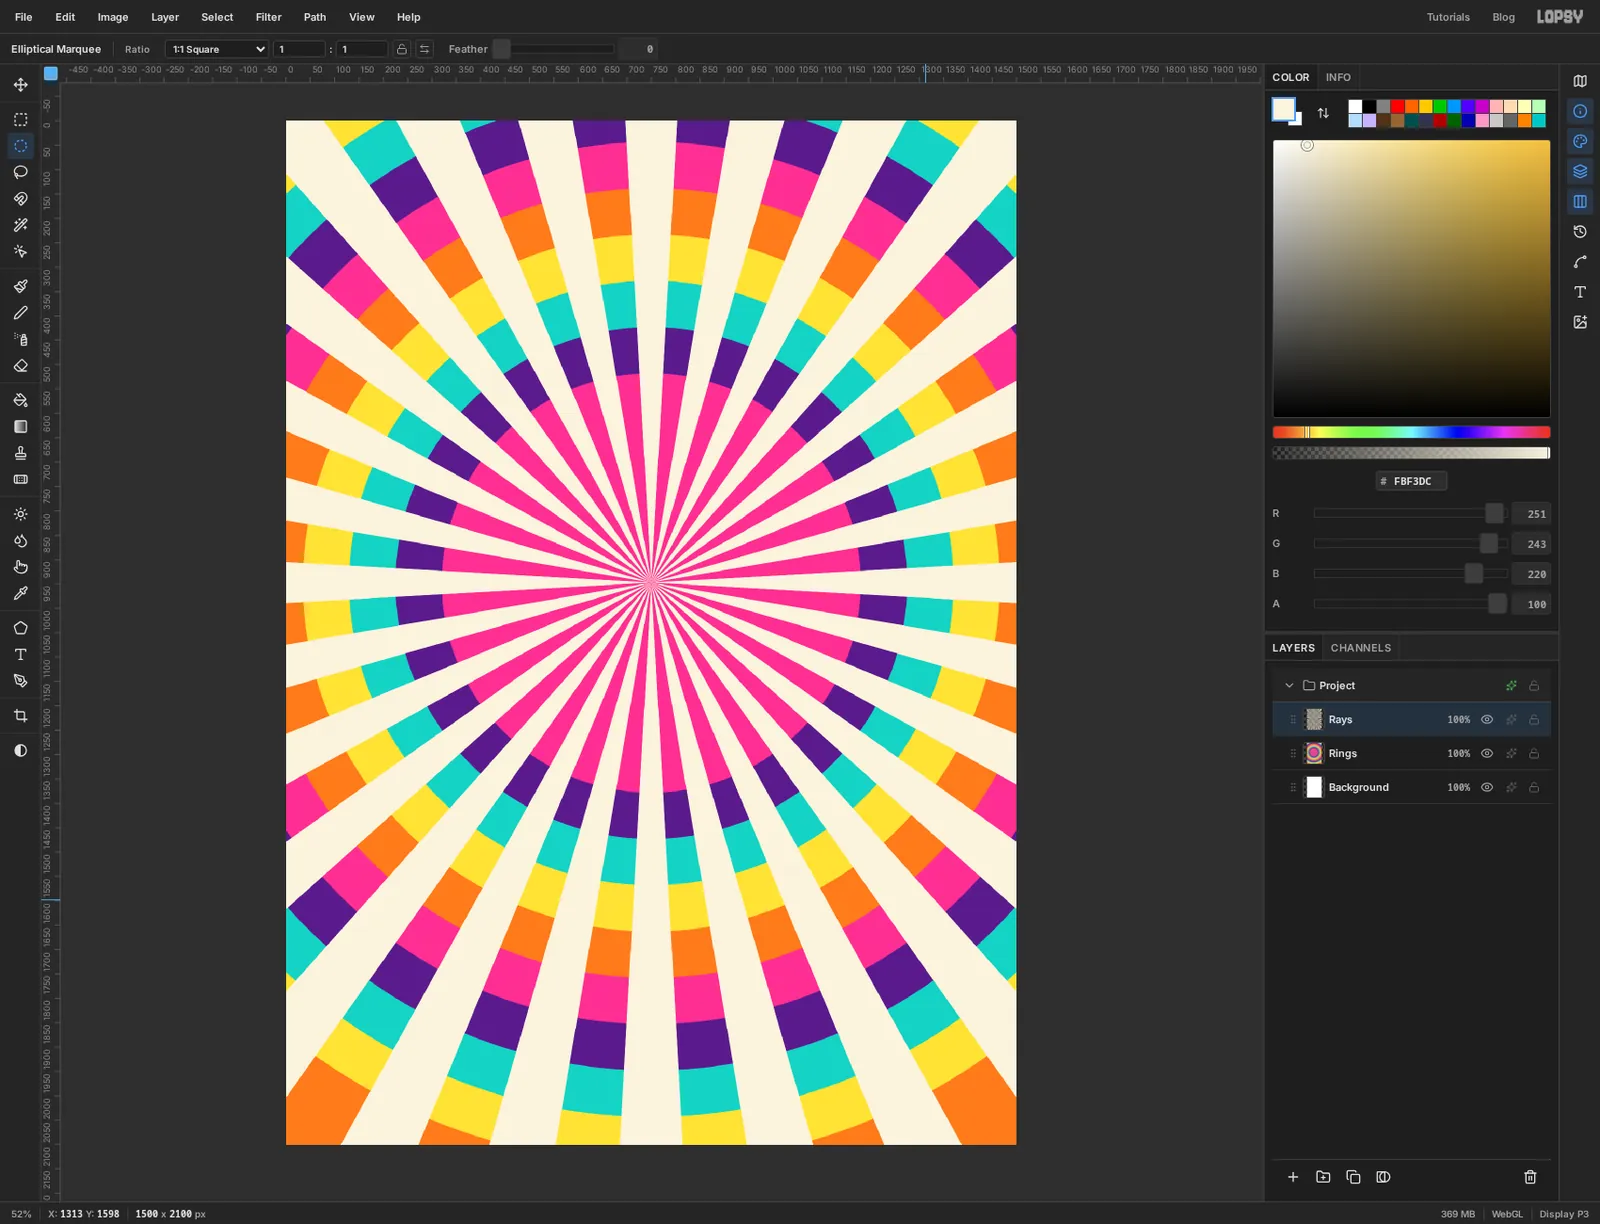
Rays. Set the foreground to cream .Choose Filter → Sunburst. Set Rays to 28, Width to 50 and Center Y to 45.1, and leave everything else alone. Center Y is a percentage of the page height, and 45.1% of 2100 is the sound hole, near enough. Click Apply.
Sunburst paints in the foreground colour onto a transparent layer, so the rings still show between the rays.
-
Switch the rays to Difference
Click the effects button at the right of the
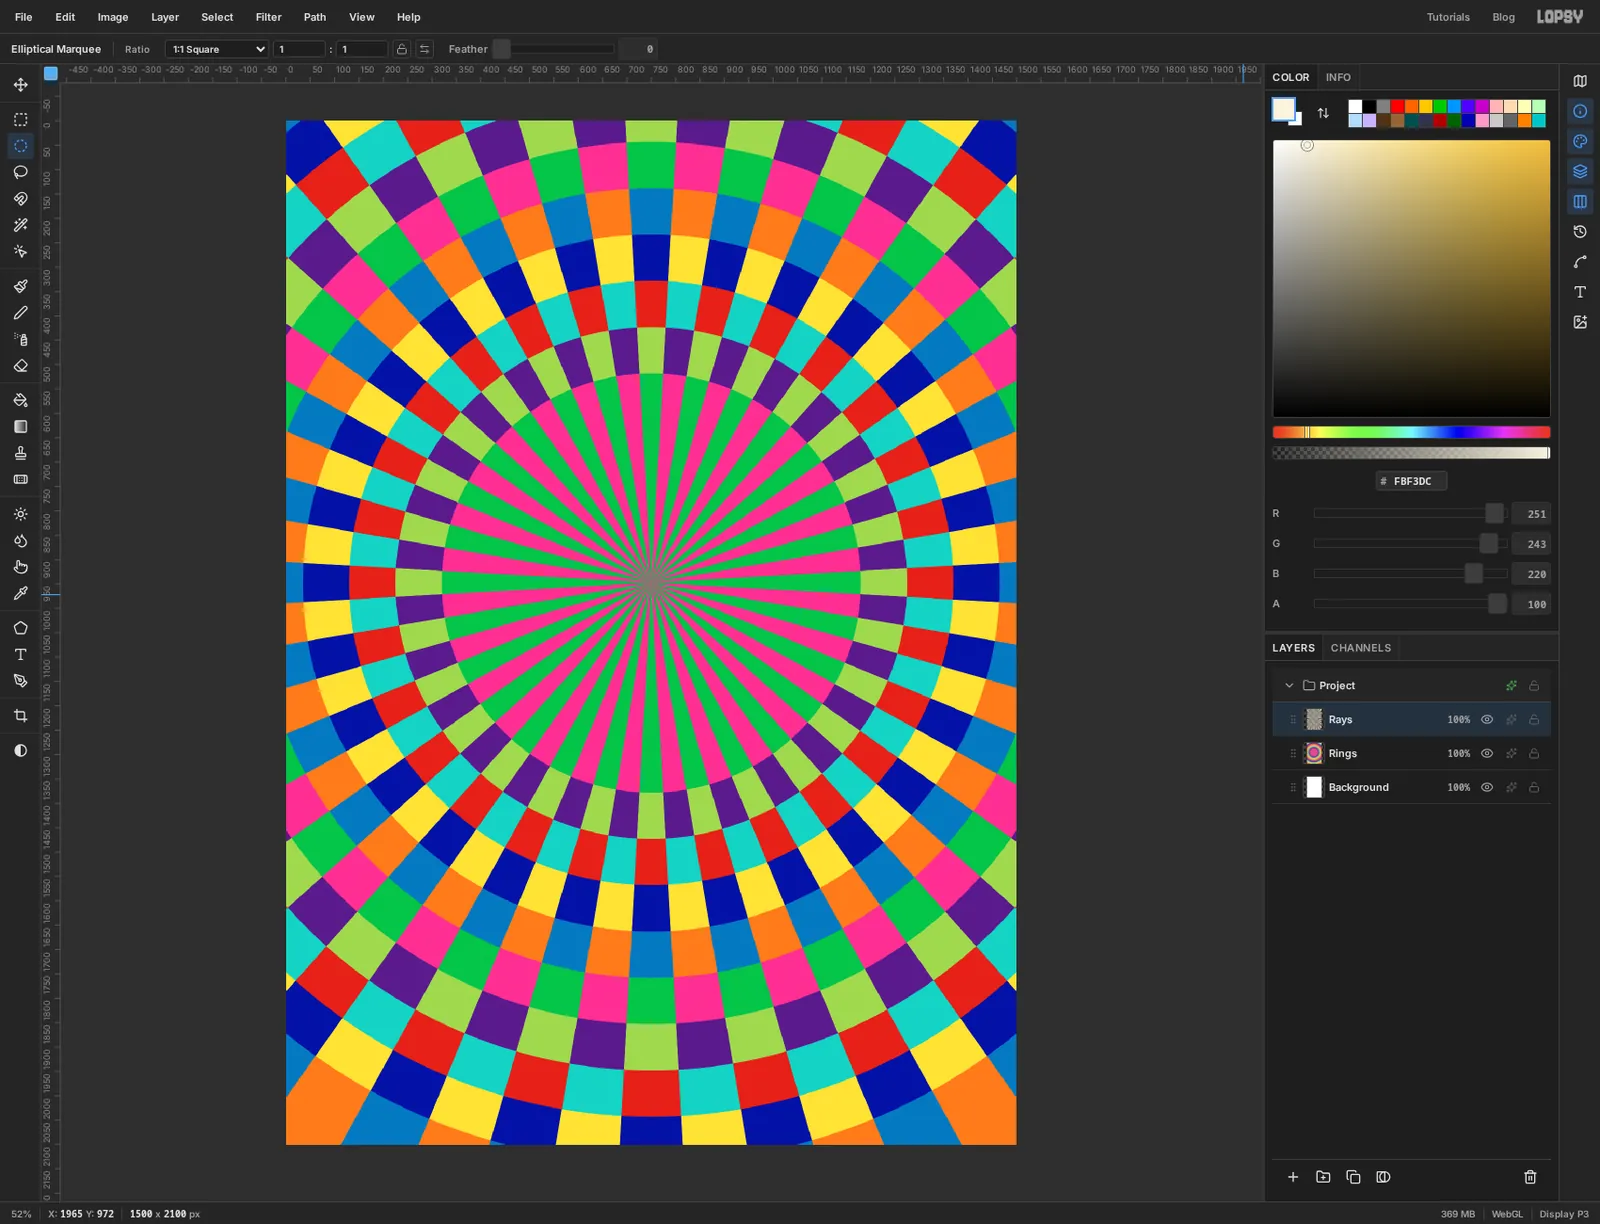
Raysrow to open the effects drawer, and change the blend mode at the top from Normal to Difference. Close the drawer.Difference subtracts the cream from whatever is underneath. Under each ray, magenta turns green, yellow turns blue, teal turns red and plum turns lime, and between the rays the rings stay as they were. Ten rings and 28 rays give you a checkerboard.
-
Select everything outside the centre disc
The ukulele needs a calm place to stand, so the rays should stop at the pink disc. With
Raysstill active, select the disc again. This circle should match the disc exactly, so type it instead of dragging: pick the Elliptical Marquee and click once on the canvas without dragging. In the Elliptical Selection dialog, set From to 320, 518 and To to 1180, 1378, and click Select. Then choose Select → Inverse. Now everything except the disc is selected.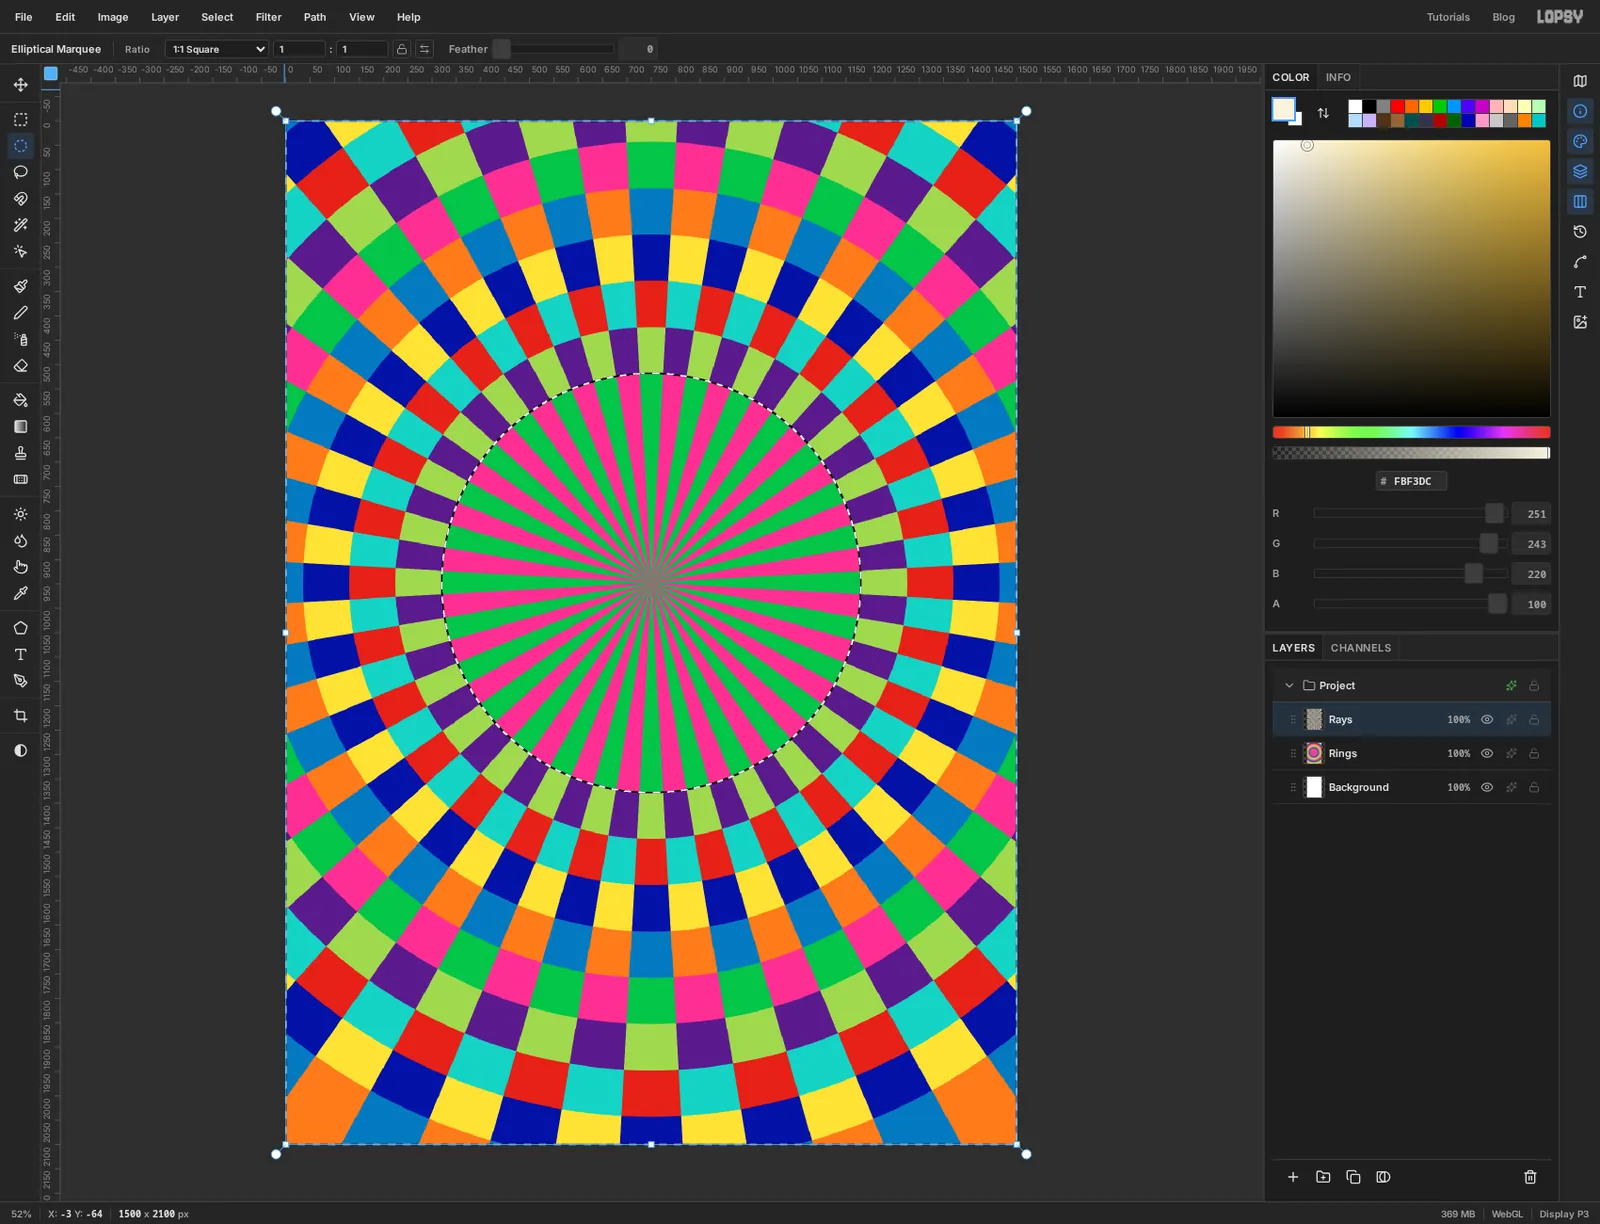
-
Mask the rays
Click Add Mask at the bottom of the Layers panel. When there's a selection, the new mask shows only the selected area, so the rays vanish from the disc and the selection is dropped. Nothing is erased. The rays are still there under the mask if you change your mind.
Adding a mask puts you in mask edit mode. Click the
Raysrow to leave it before you go on.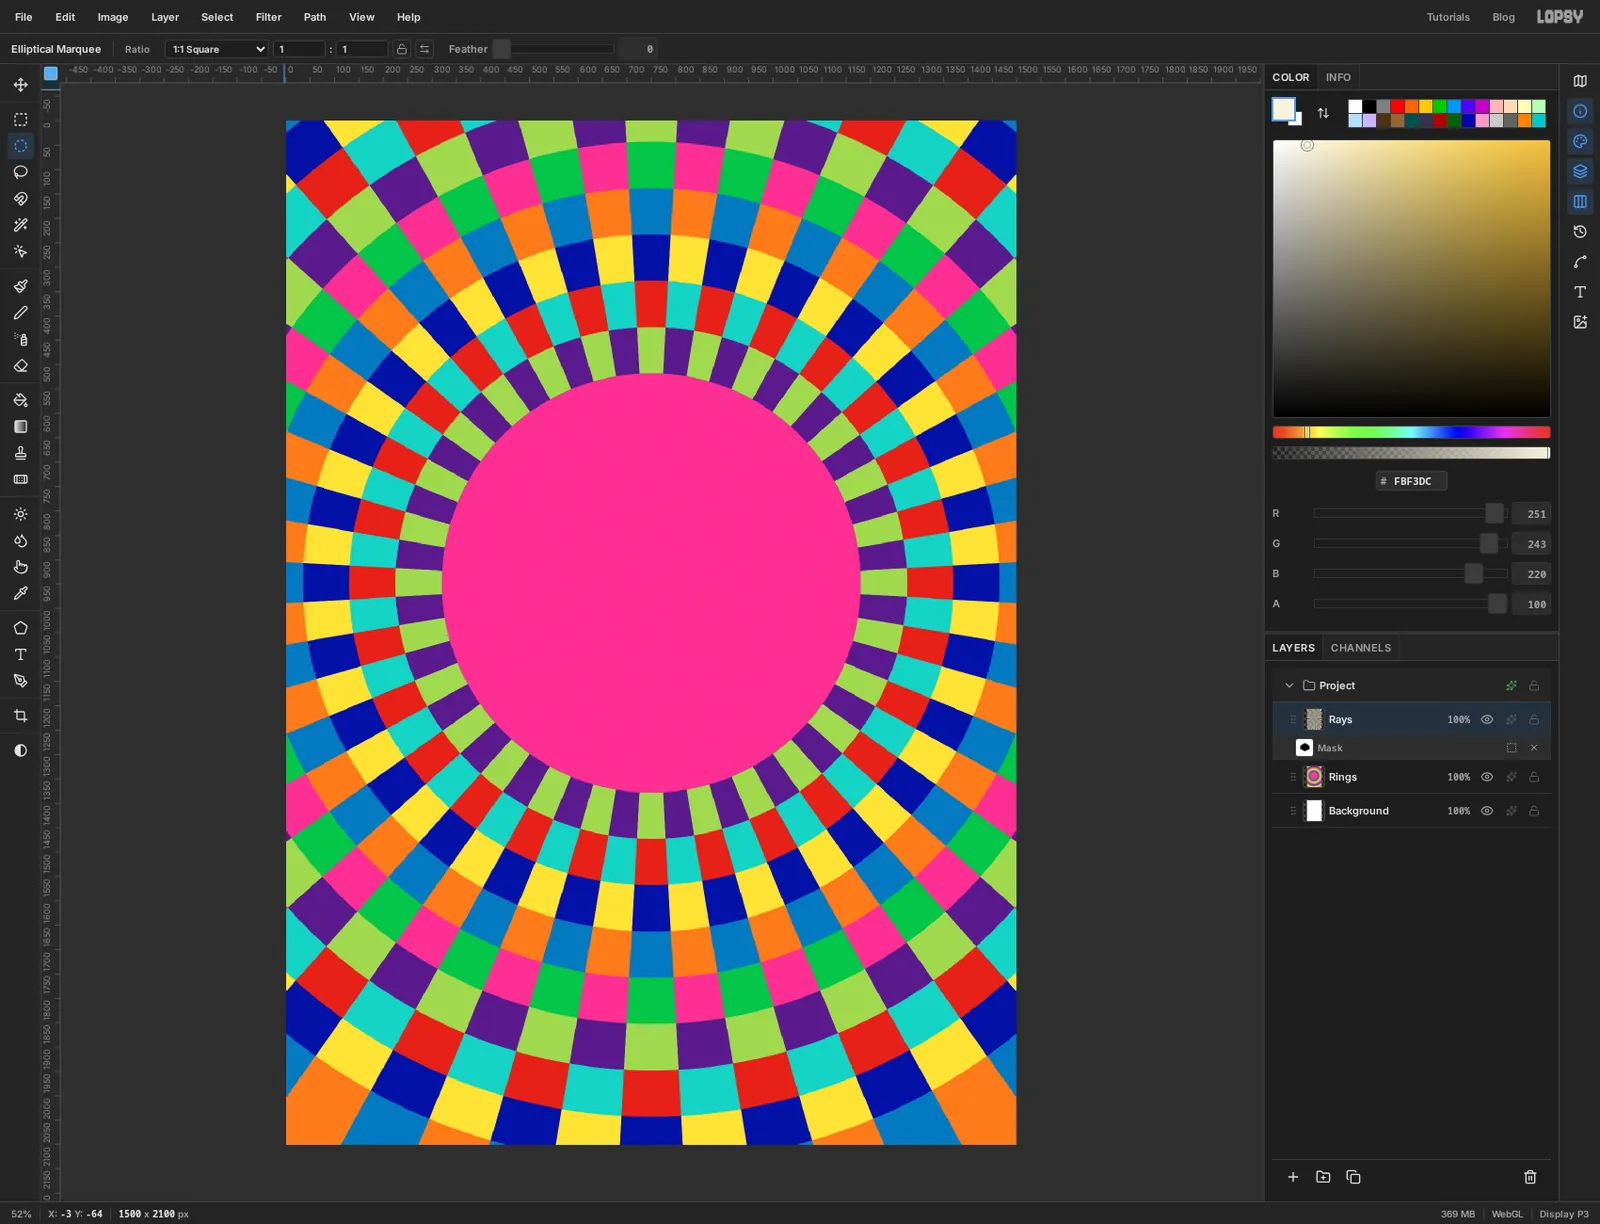
-
Start the body with two ellipses
Click Add Layer and name it
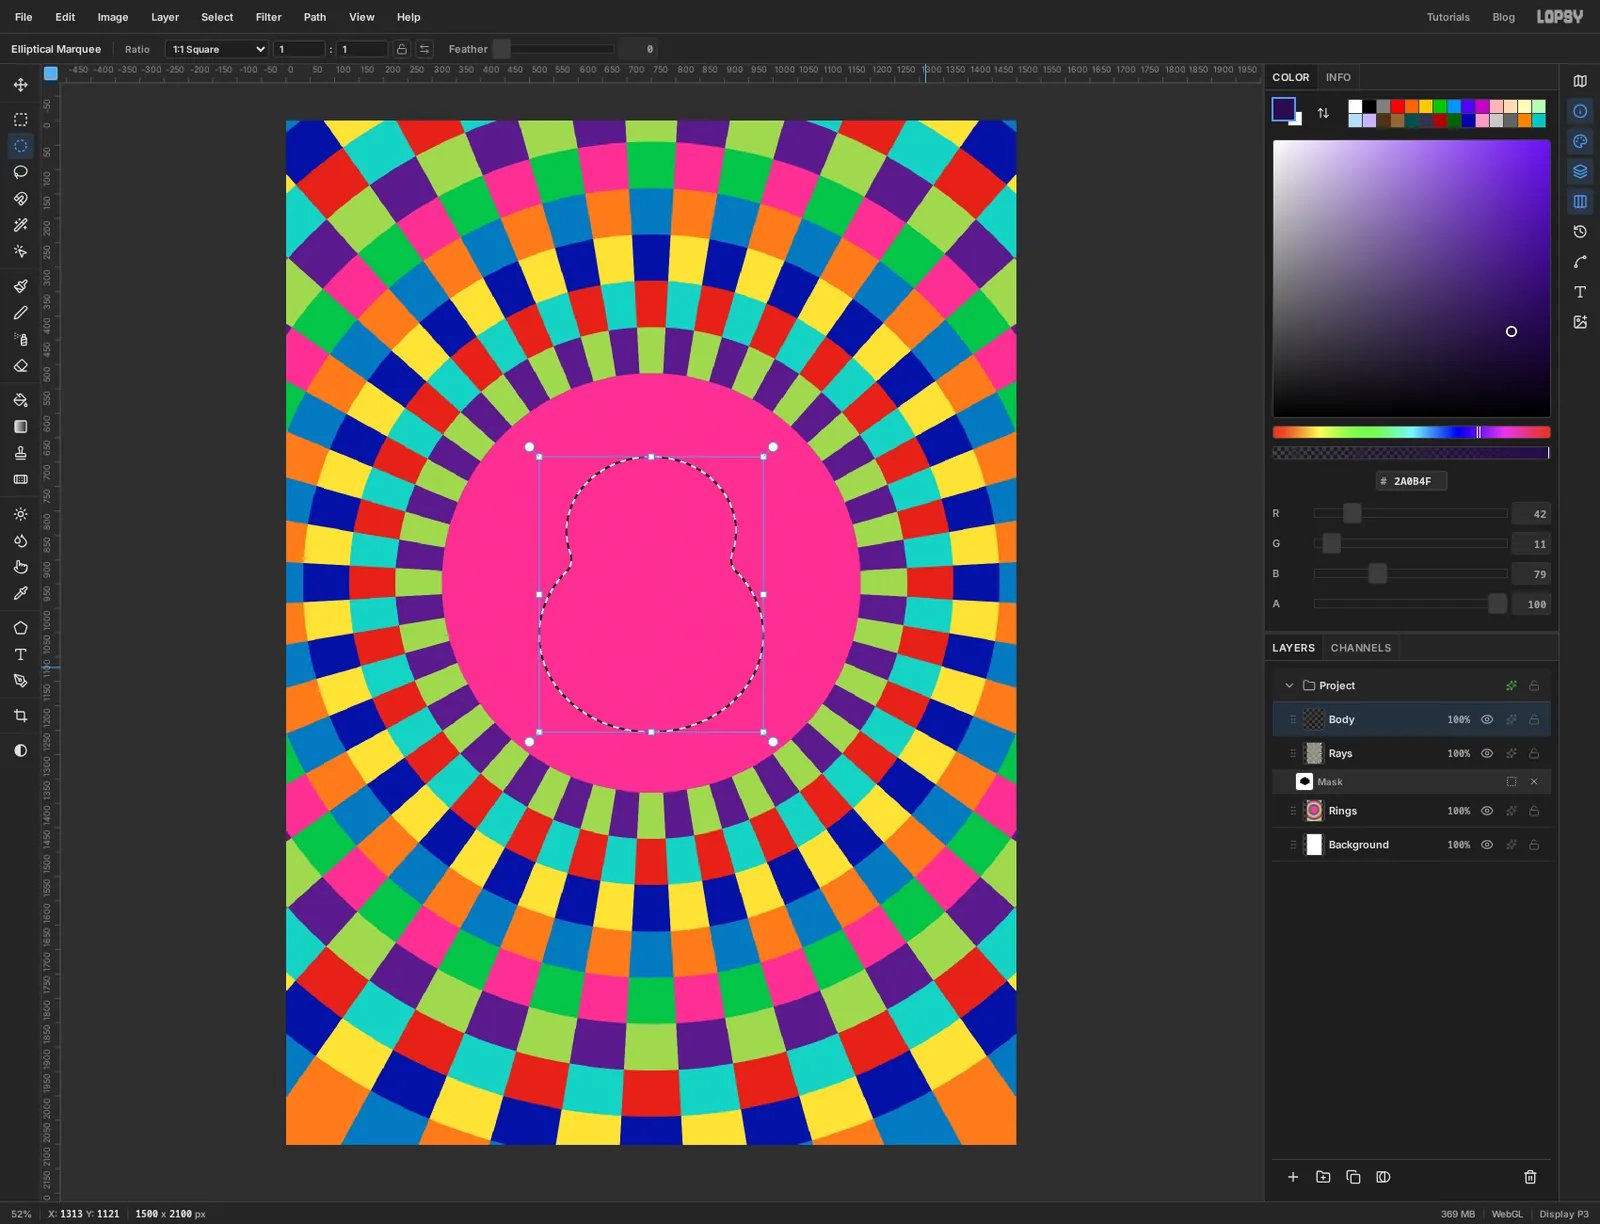
Body. With the Elliptical Marquee, drag the lower bout from 520, 854 to 980, 1254. Then hold Shift and drag the upper bout from 576, 689 to 924, 995. Shift adds the second ellipse to the first, so you get one figure-of-eight selection.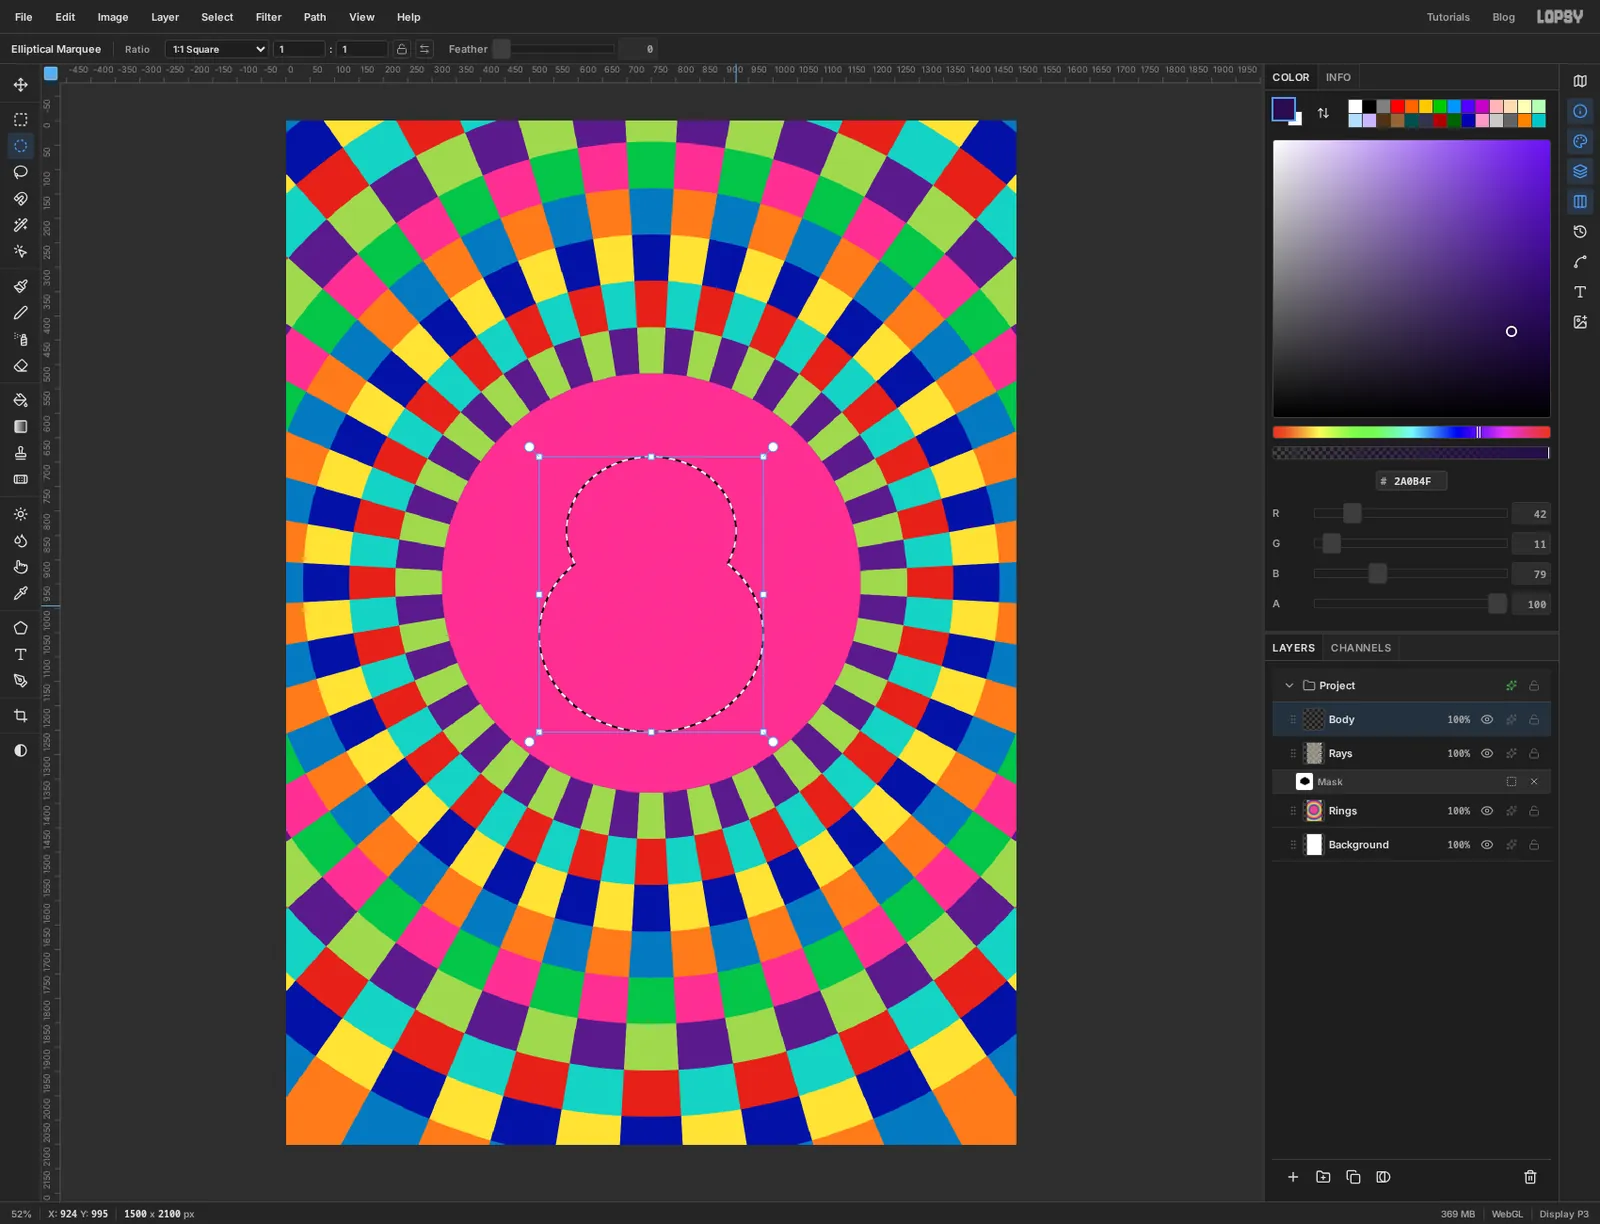
-
Round off the waist
Where the two ellipses meet there are two sharp notches. A real ukulele has a smooth waist. Choose Select → Grow, enter 34 and apply. Then choose Select → Shrink, enter 34 and apply.
Growing fills the notches in. Shrinking by the same amount puts the outside edge back where it was, but the notches stay rounded.
-
Fill and outline the body
Set the foreground to violet , choose Edit → Fill and press Cmd+D.
Open the effects drawer for
Body, tick Stroke, set Width to 10 and the stroke colour to cream . Close the drawer.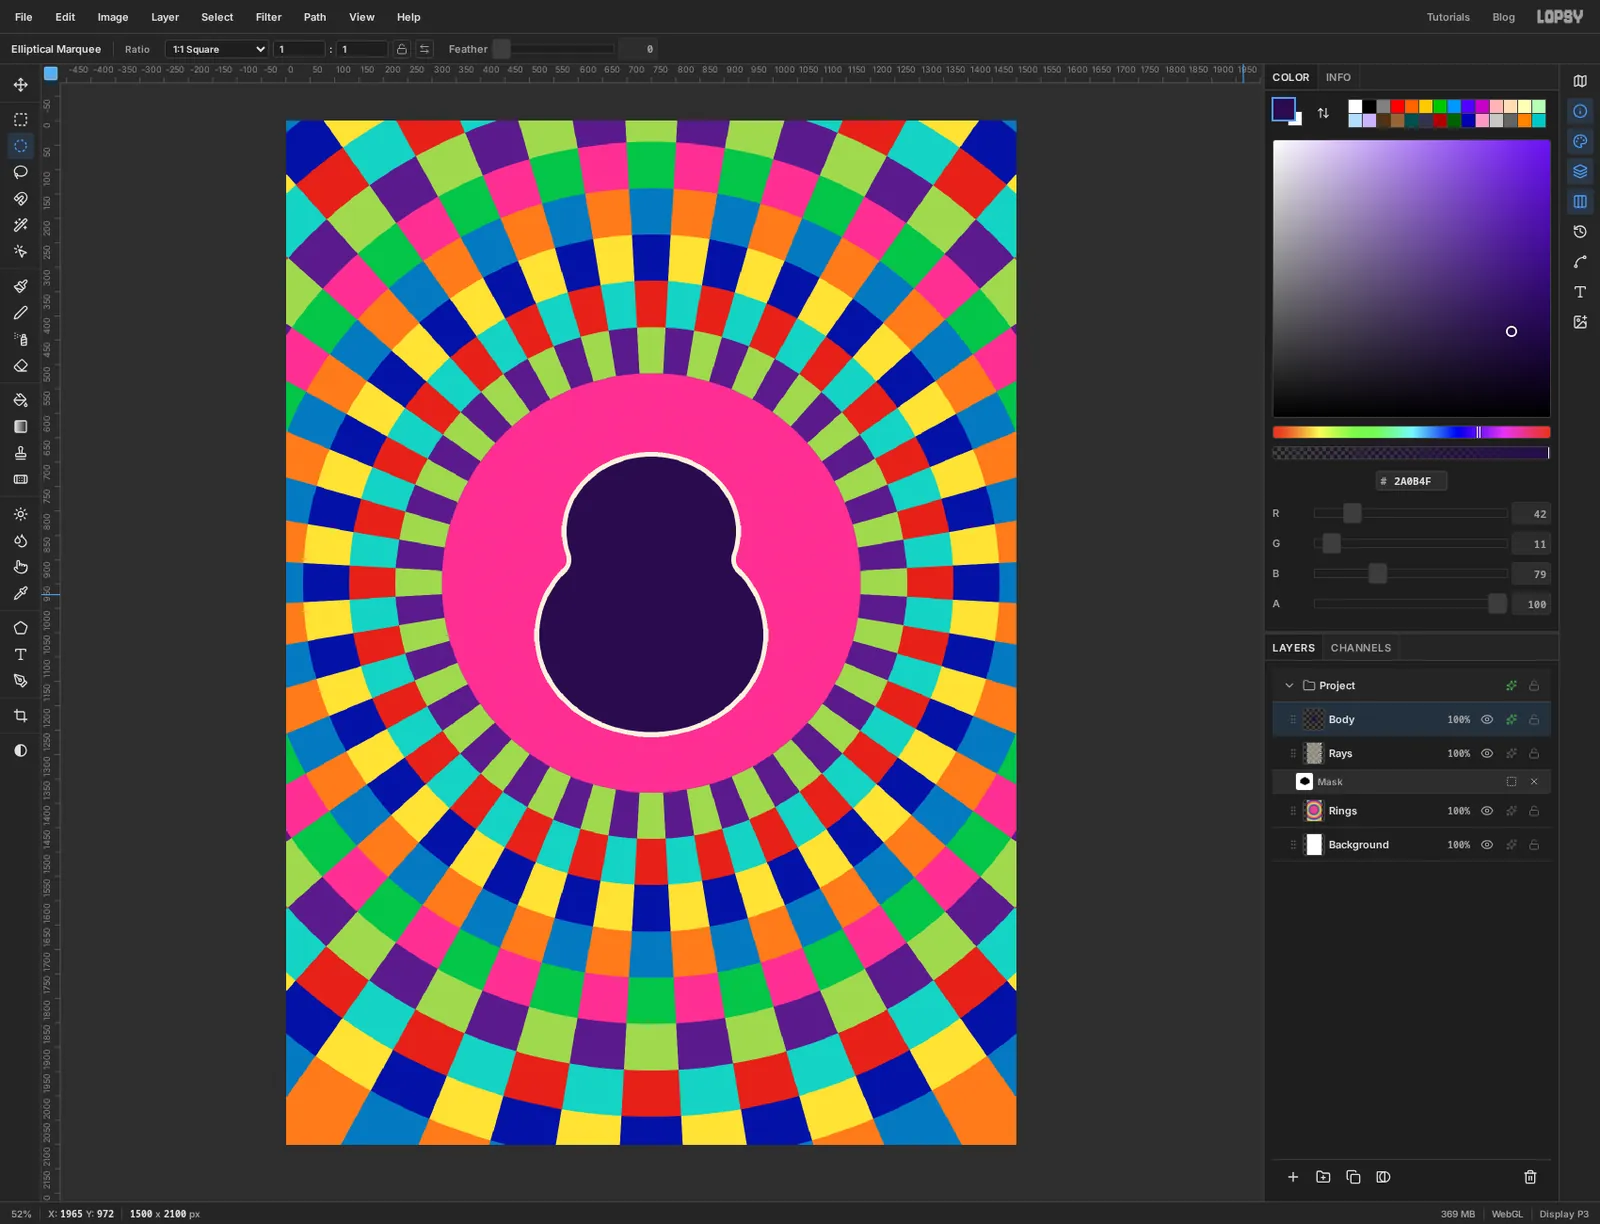
-
Lasso the headstock
The neck goes under the body, so click the
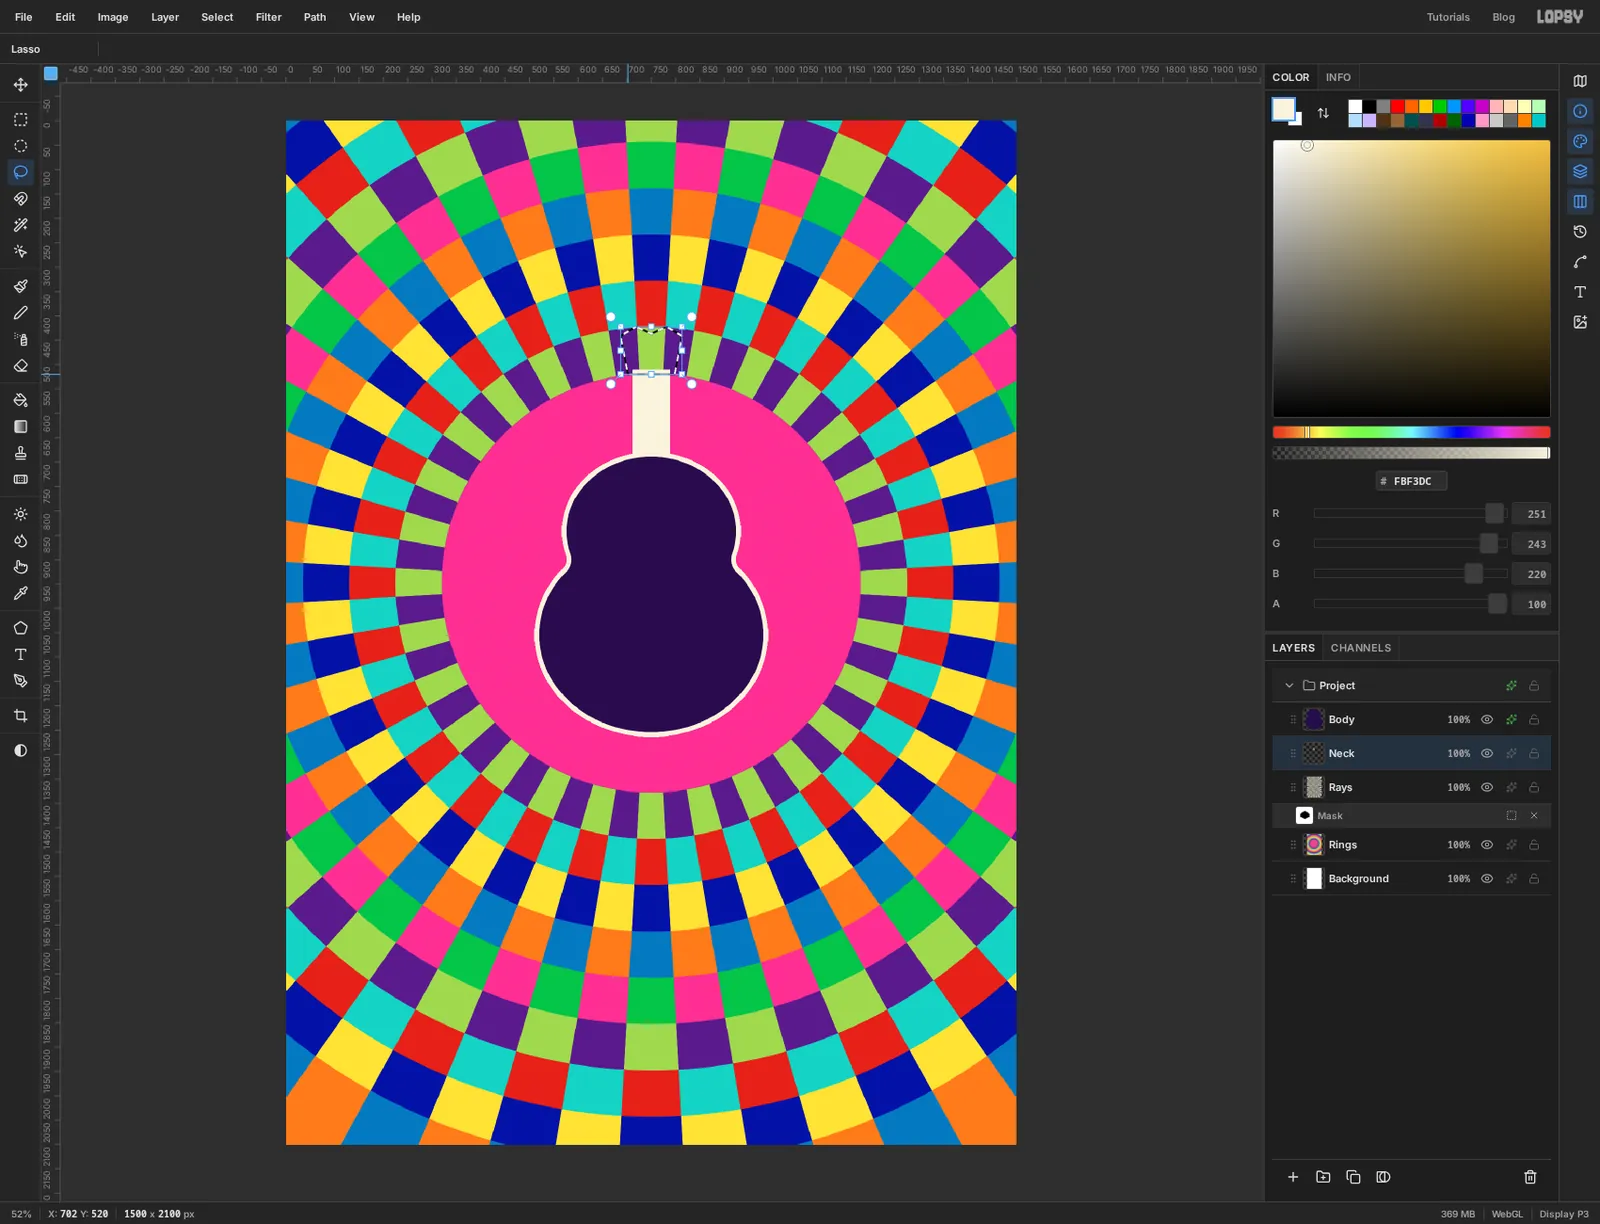
Raysrow first, then Add Layer and name itNeck. A new layer always lands just above the active one.Set the foreground to cream . With the Rectangular Marquee, drag from 711, 510 to 789, 731, choose Edit → Fill and press Cmd+D.
Now pick the Lasso and trace the headstock in one drag. Start at the bottom left at 702, 520, go up and out to 687, 441, in to the left peak at 719, 422, down into the notch at 750, 437, up to the right peak at 781, 422, out to 813, 441 and down to 798, 520, then back to the start. It doesn't need to be exact. A slightly wobbly crown suits the style.
-
Fill the headstock and outline the neck
Choose Edit → Fill and press Cmd+D. Open the effects drawer for
Neck, tick Stroke, set Width to 8 and the colour to violet .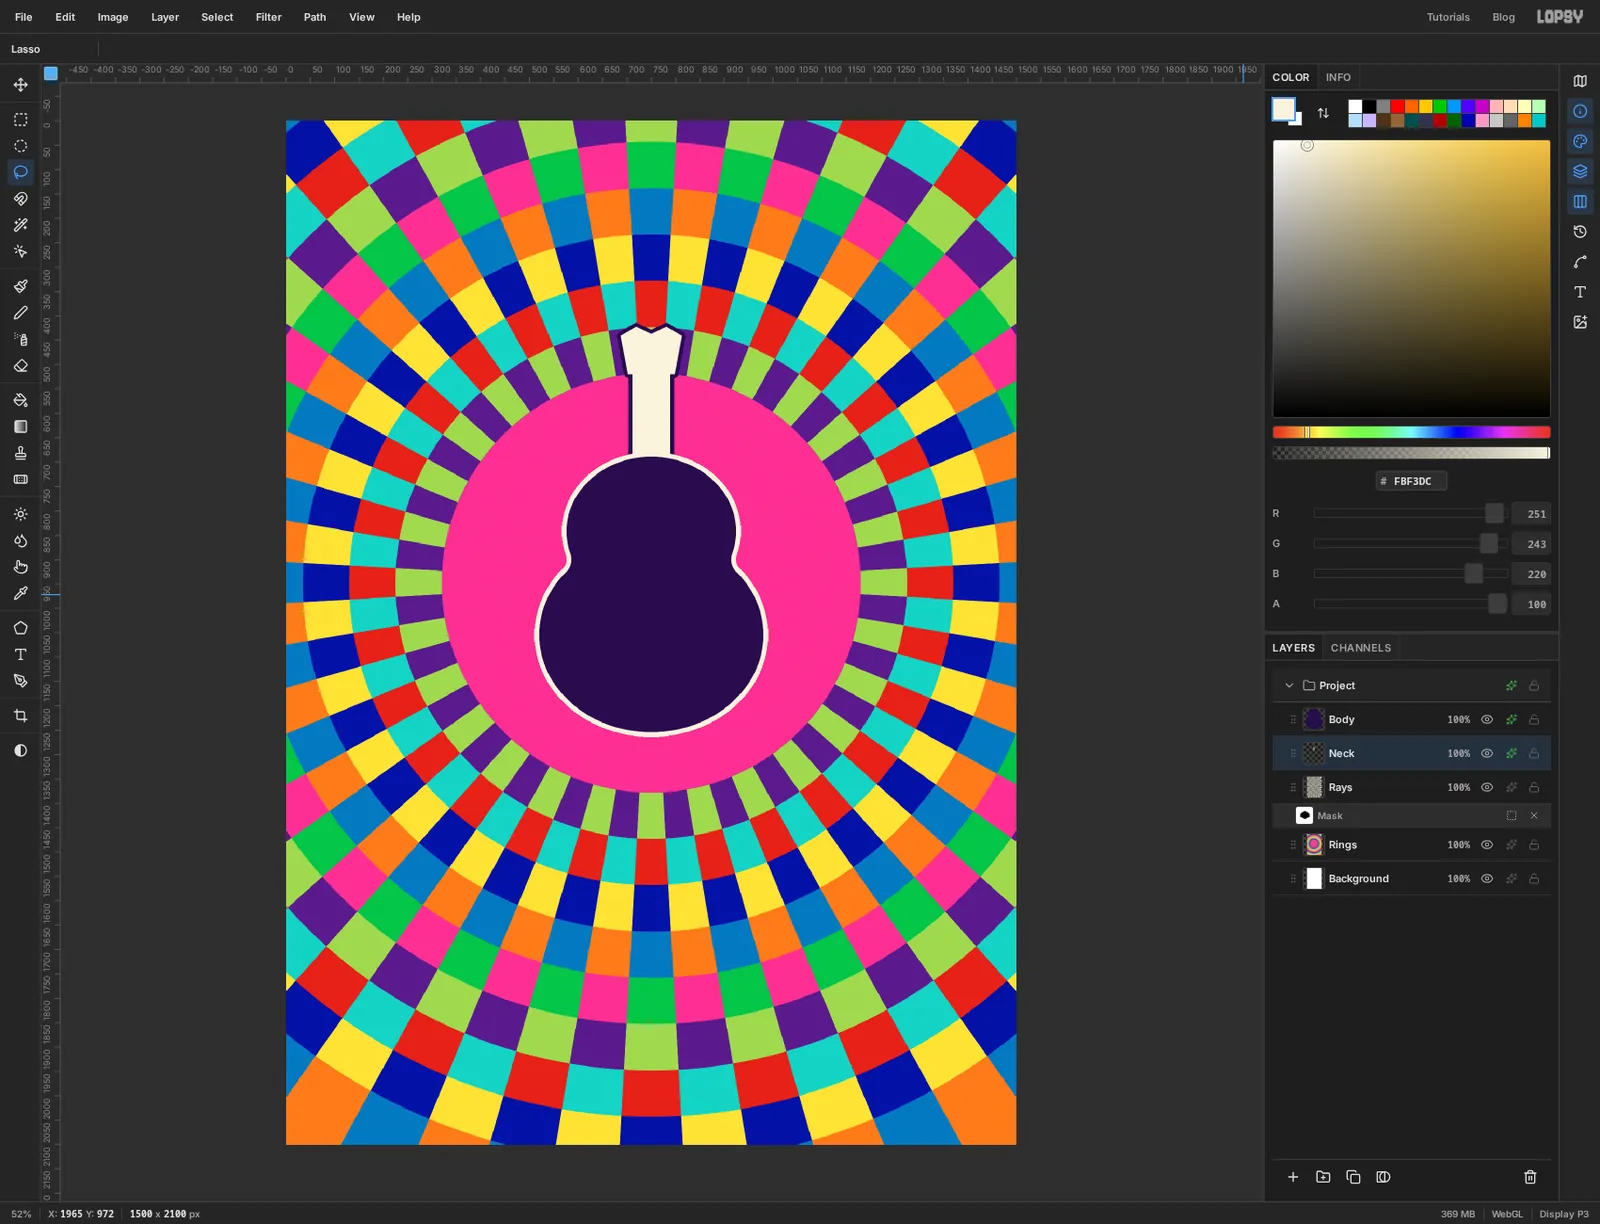
-
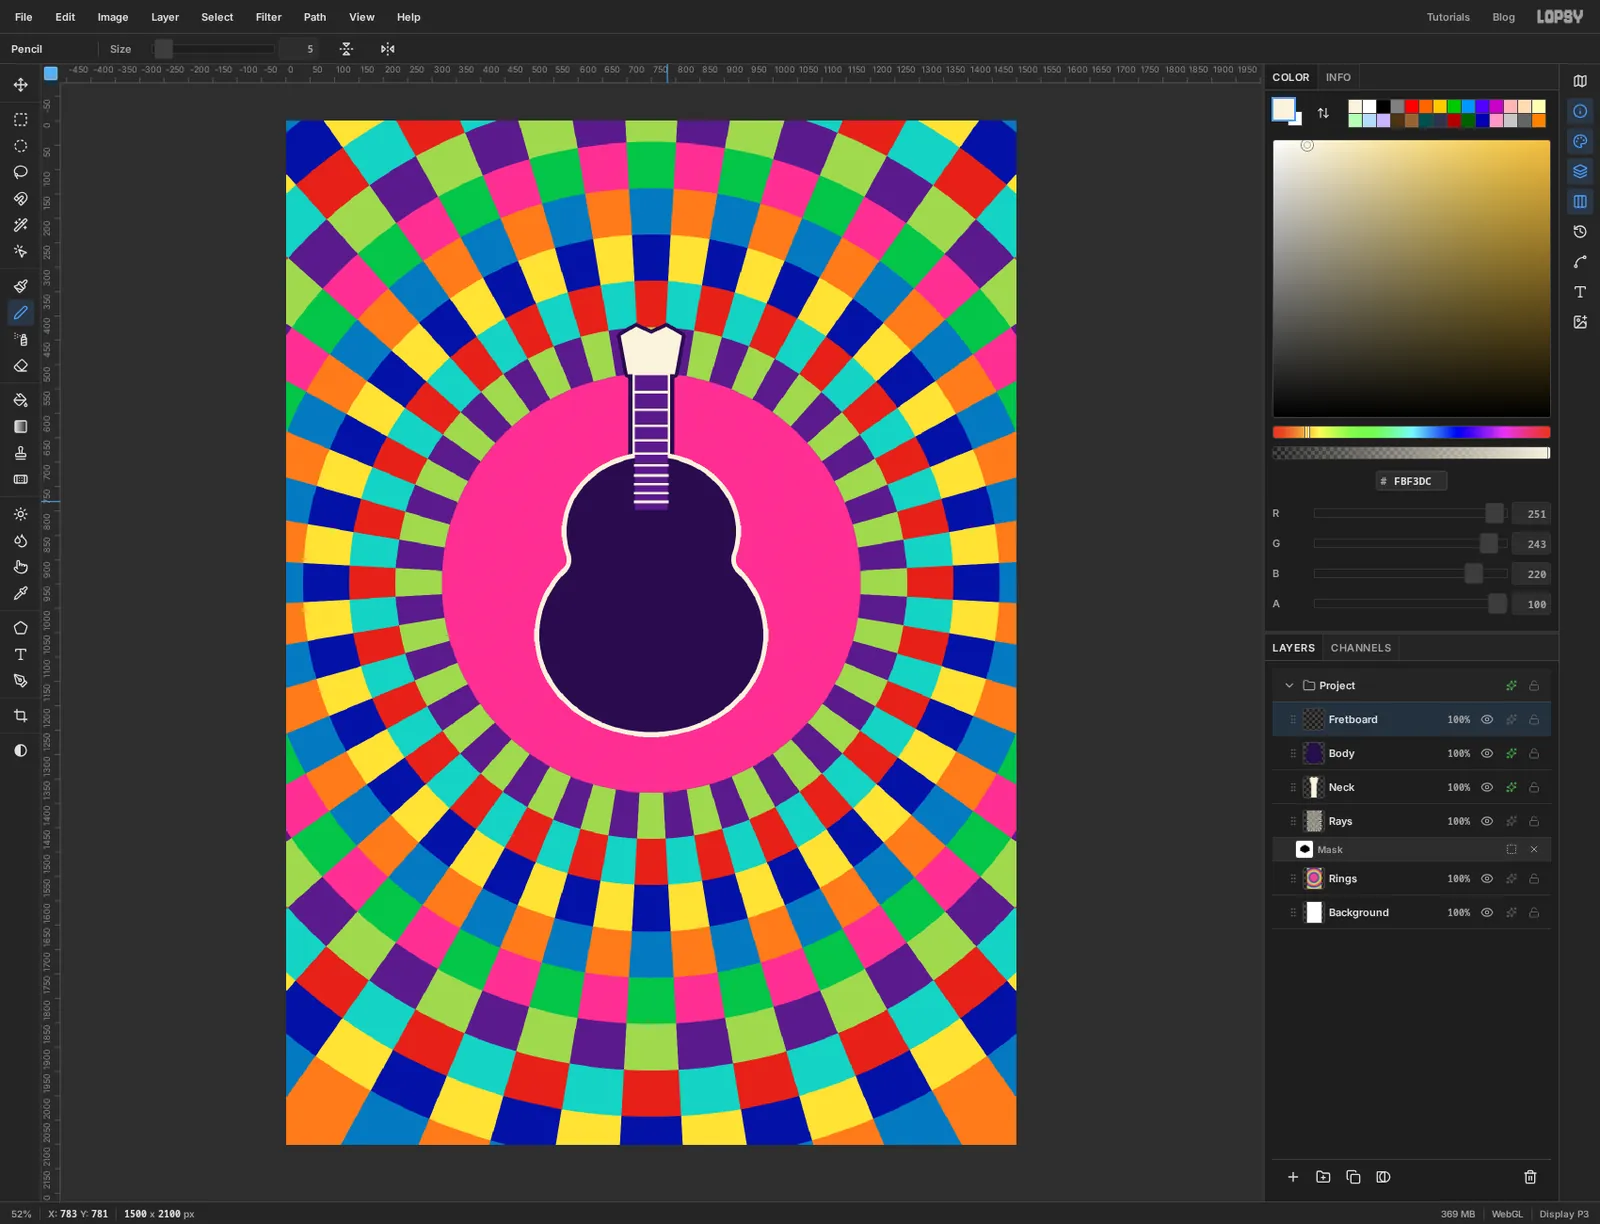
Add the fretboard and frets
Click the
Bodyrow, then Add Layer and name itFretboard. Set the foreground to plum . With the Rectangular Marquee, drag from 716, 522 to 784, 798, fill and deselect.Pick the Pencil, set Size to 5 and the foreground to cream . A fret is a straight line: click once at the left edge of the fretboard, then hold Shift and click at the right edge. Draw ten of them from 717 to 783 across, at these heights: 556, 592, 625, 655, 682, 706, 727, 745, 763 and 781. Frets get closer together towards the body, which is why the gaps shrink as you go down.
-
Add the sound hole, bridge and strings
Add Layer, name it
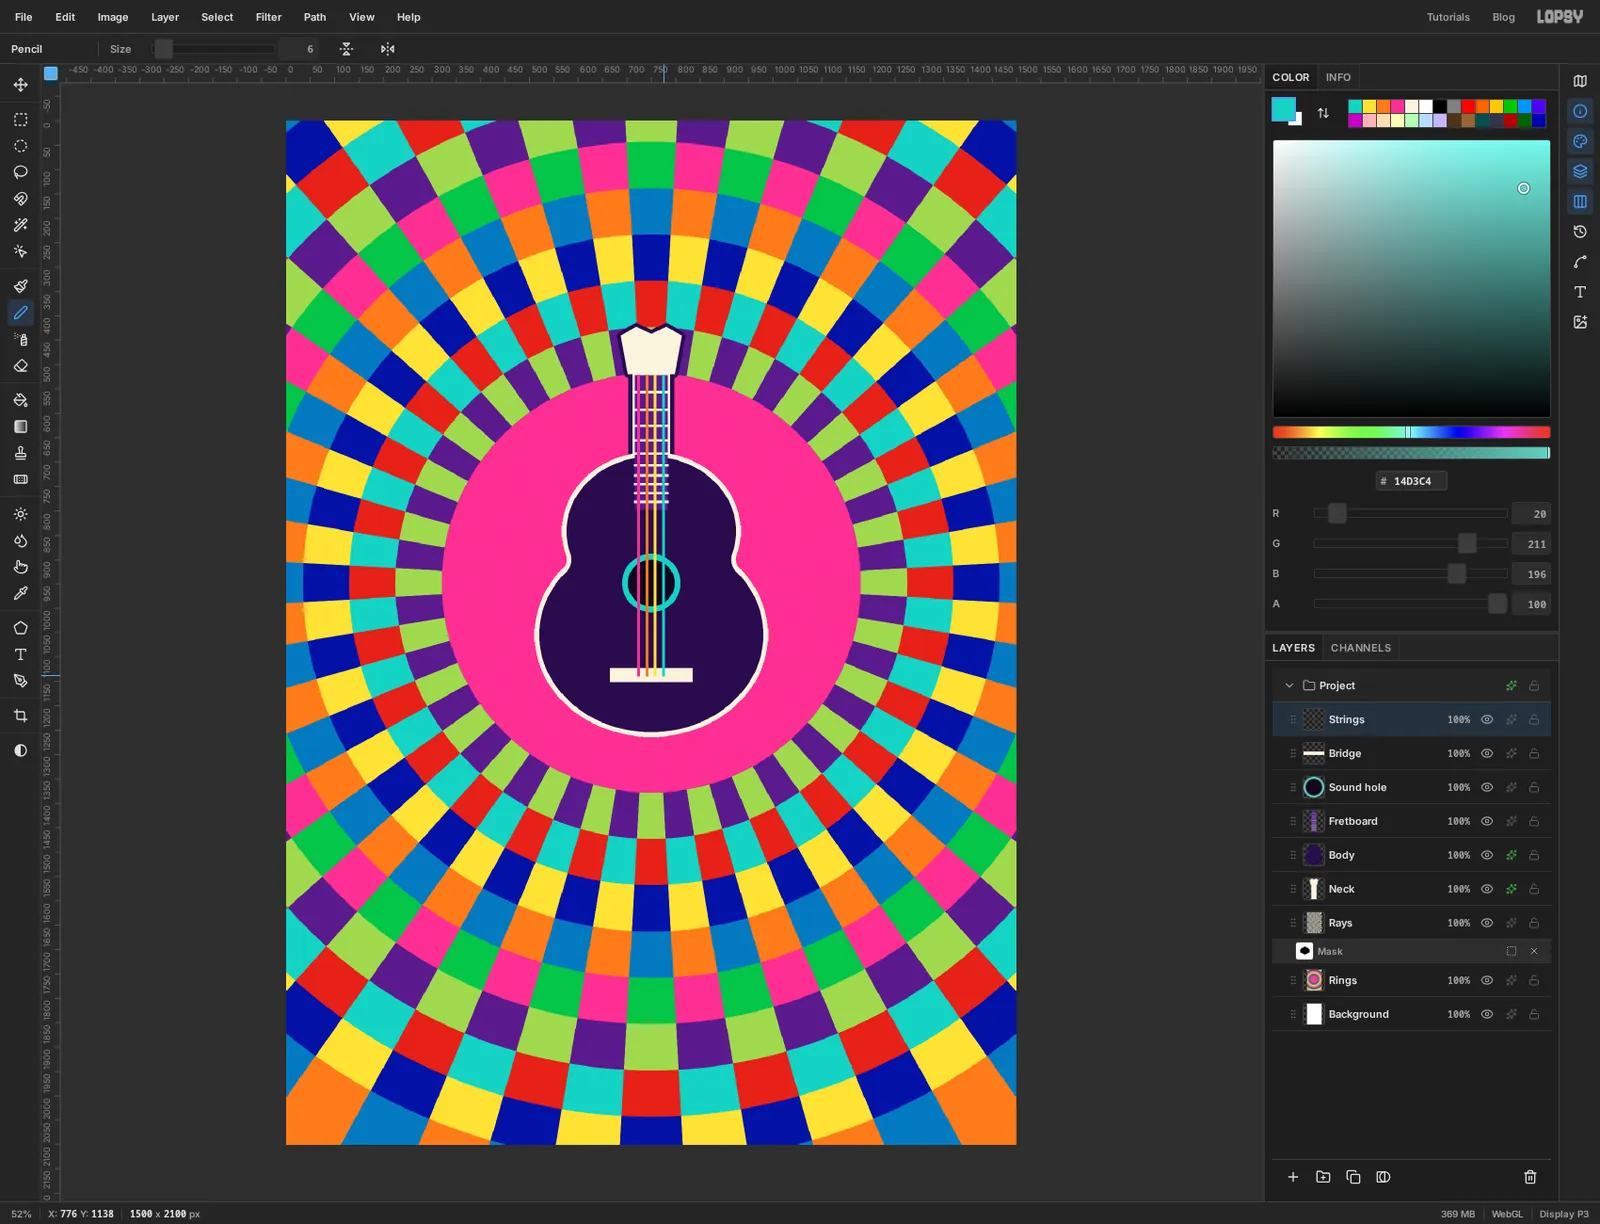
Sound hole. With the Elliptical Marquee, drag from 690, 888 to 810, 1008 and fill it teal . Deselect, drag from 702, 900 to 798, 996 and fill that with the near-black . Deselect.Add Layer, name it
Bridge. With the Rectangular Marquee, drag from 665, 1122 to 835, 1151 and fill it cream . Deselect.Add Layer, name it
Strings. Pick the Pencil and set Size to 6. Each string is a click at the top of the fretboard and a Shift-click on the bridge, from y 524 down to y 1138:- Magenta at x 724 (G)
- Orange at x 741 (C)
- Yellow at x 759 (E)
- Teal at x 776 (A)
These four colours are the key to the chart, so keep the order.
-
Dot the rosette with radial symmetry
Click the
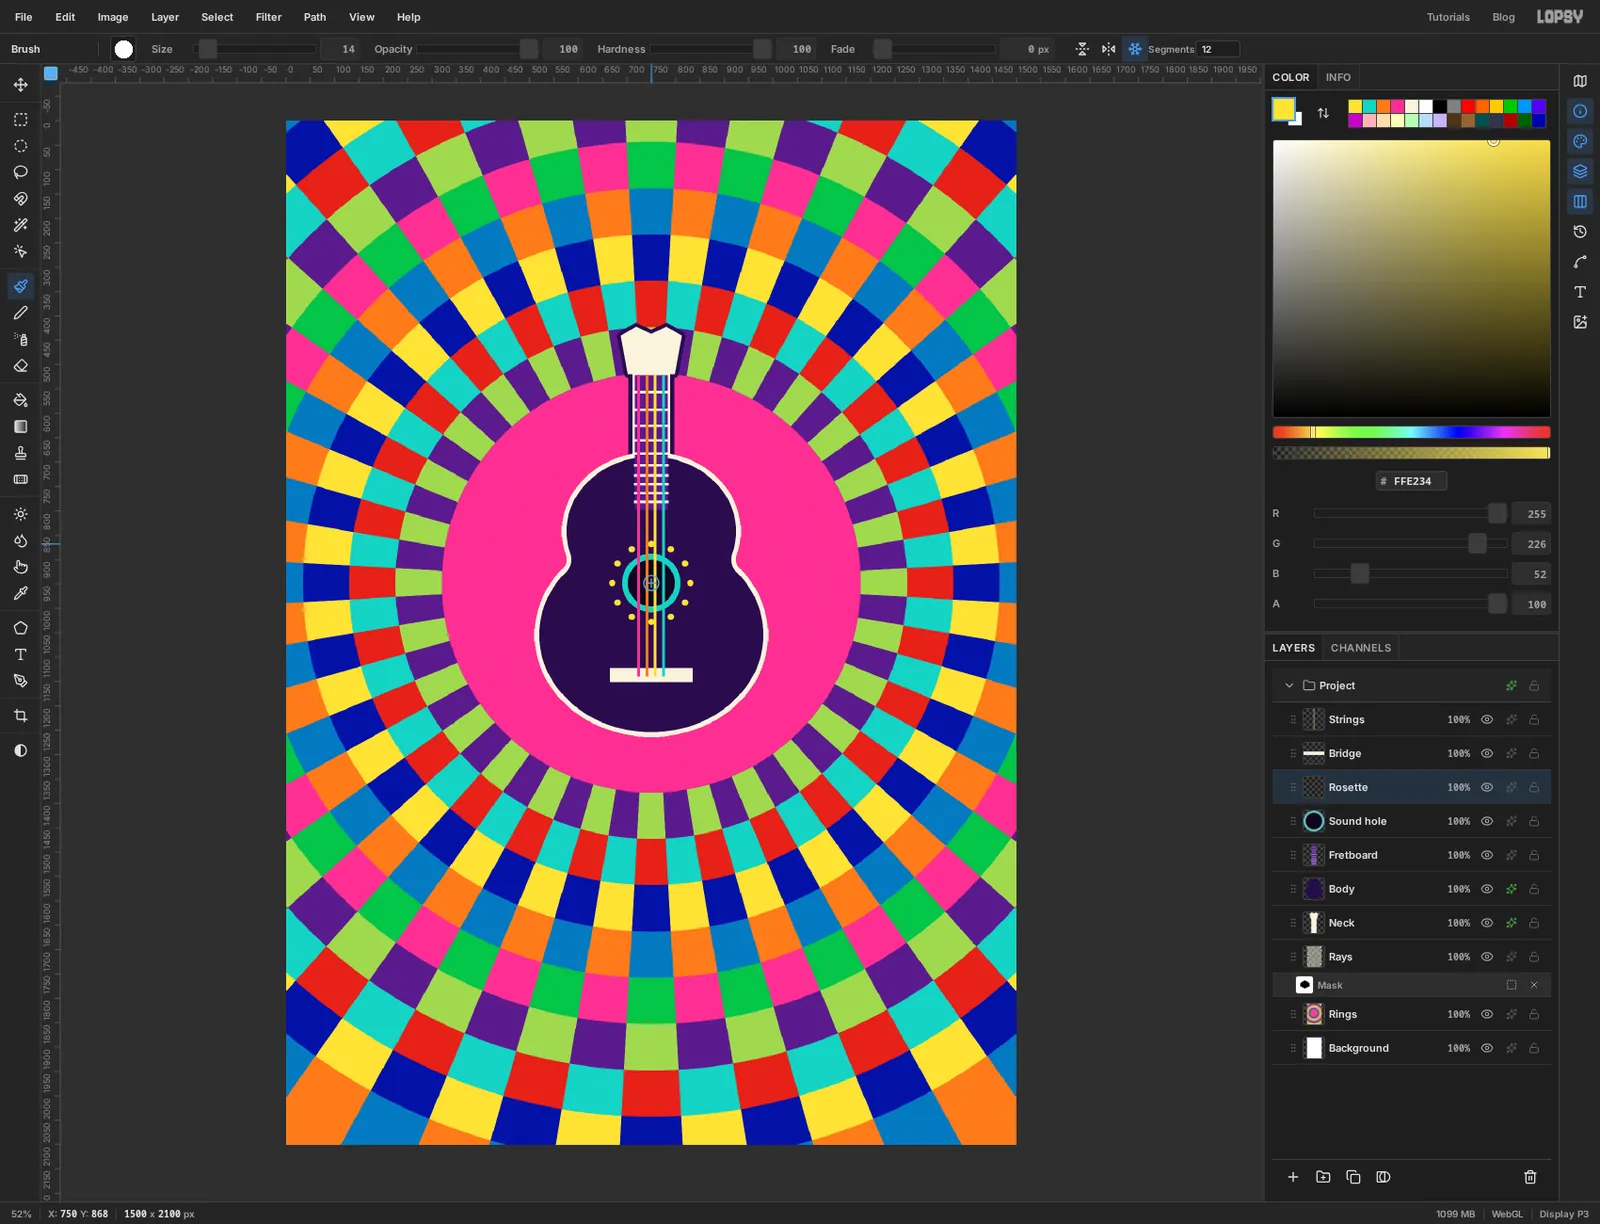
Sound holerow, then Add Layer and name itRosette. It lands under the bridge and strings.Pick the Brush. In the options bar set Hardness to 100 and Size to 14, then click Radial Symmetry. A Segments field appears beside it. Type 12.
The symmetry centre starts in the middle of the canvas. Hold Cmd and click the middle of the sound hole at 750, 948 to move it there. That click doesn't paint.
Set the foreground to yellow and click once at 750, 868, straight above the sound hole. One click makes twelve dots.
-
Draw the petals
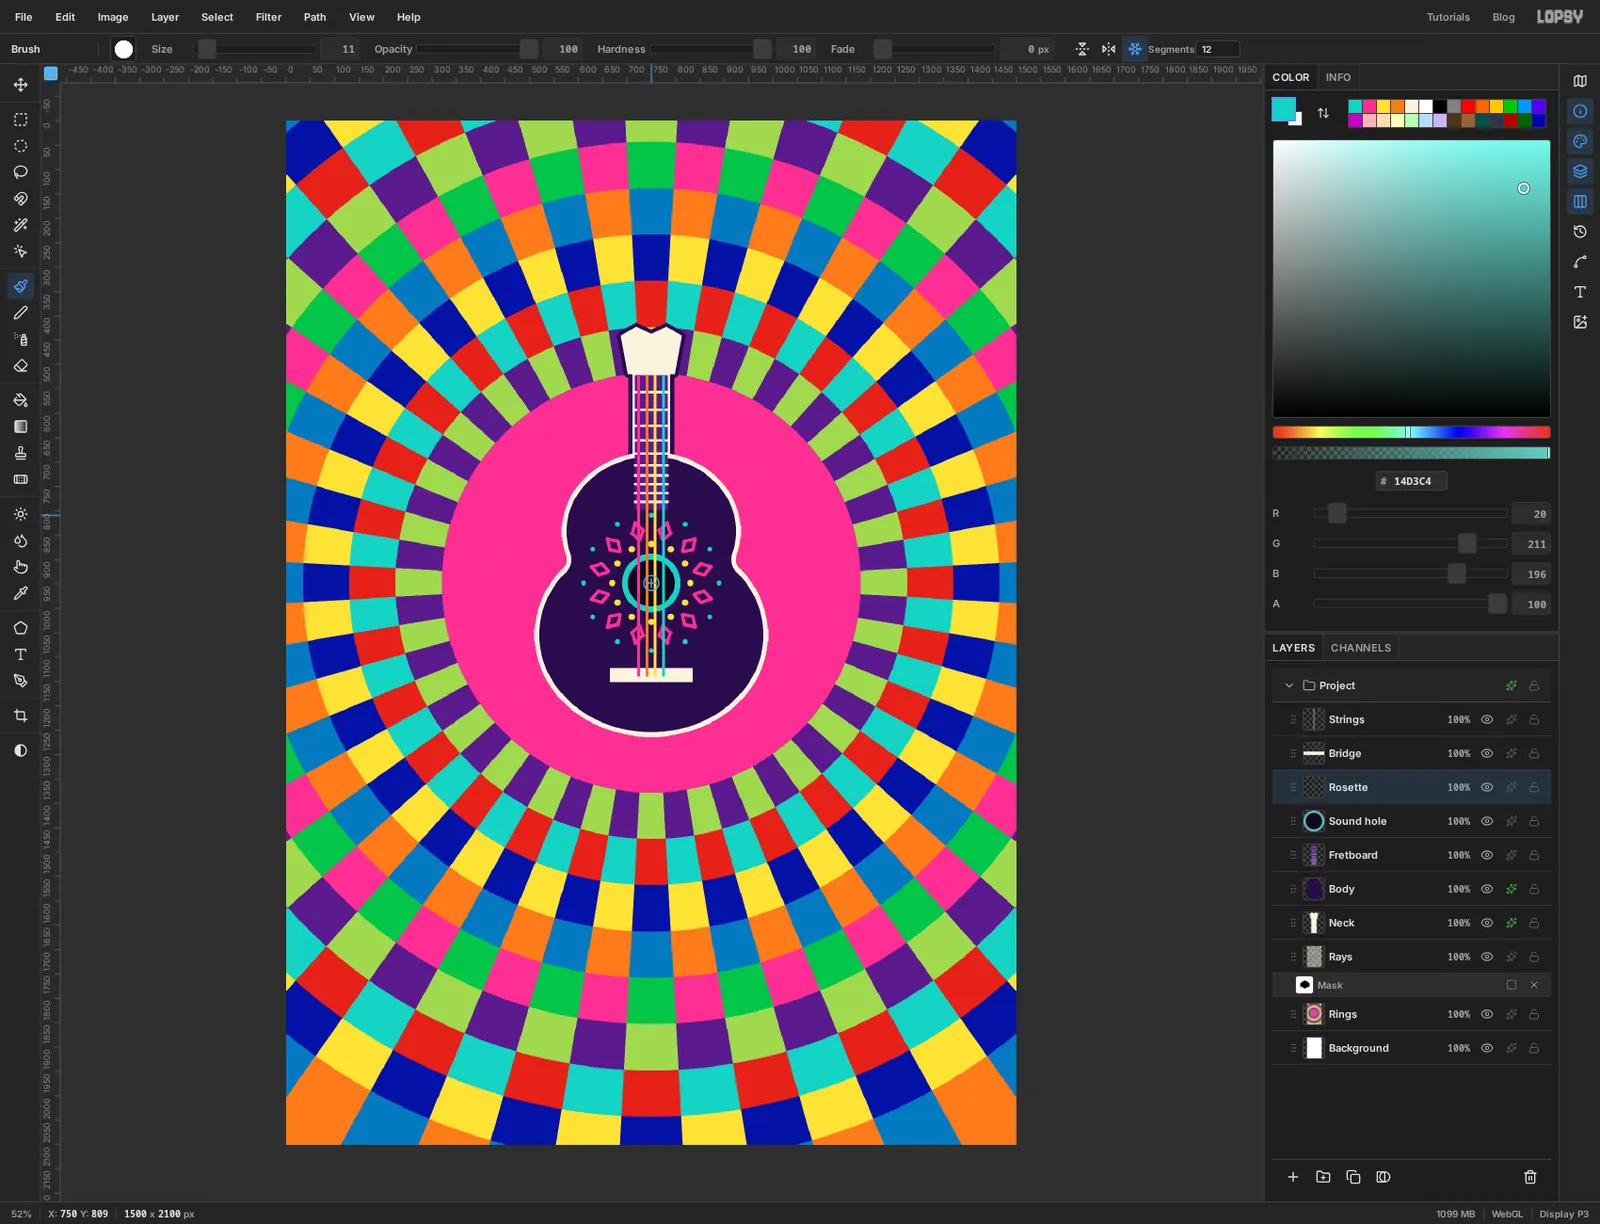
Set the foreground to magenta and Size to 8. Just right of the top dot, draw one small diamond in a single stroke: start at 774, 860, go up and left to 767, 840, up and right to 783, 824, down to 790, 846, and back to the start. The other eleven draw themselves.
Set the foreground to teal , Size to 11, and click once at 750, 809.
Click Radial Symmetry again to turn it off, or everything you paint later will come out twelve times.
-
Copy a tuning peg
Click the
Raysrow, then Add Layer and name itPegs. With the Elliptical Marquee, drag a small oval from 656, 446 to 688, 470 and fill it cream . Deselect.For the second peg, drag a Rectangular Marquee around the first one, press Cmd+C and then Cmd+V. The copy arrives on its own layer, exactly on top of the original. With the Move tool, drag it down and a touch to the right, about 40 px, so it sits beside the lower half of the headstock.
Press Cmd+D, then Cmd+E to merge the pasted layer down into
Pegs.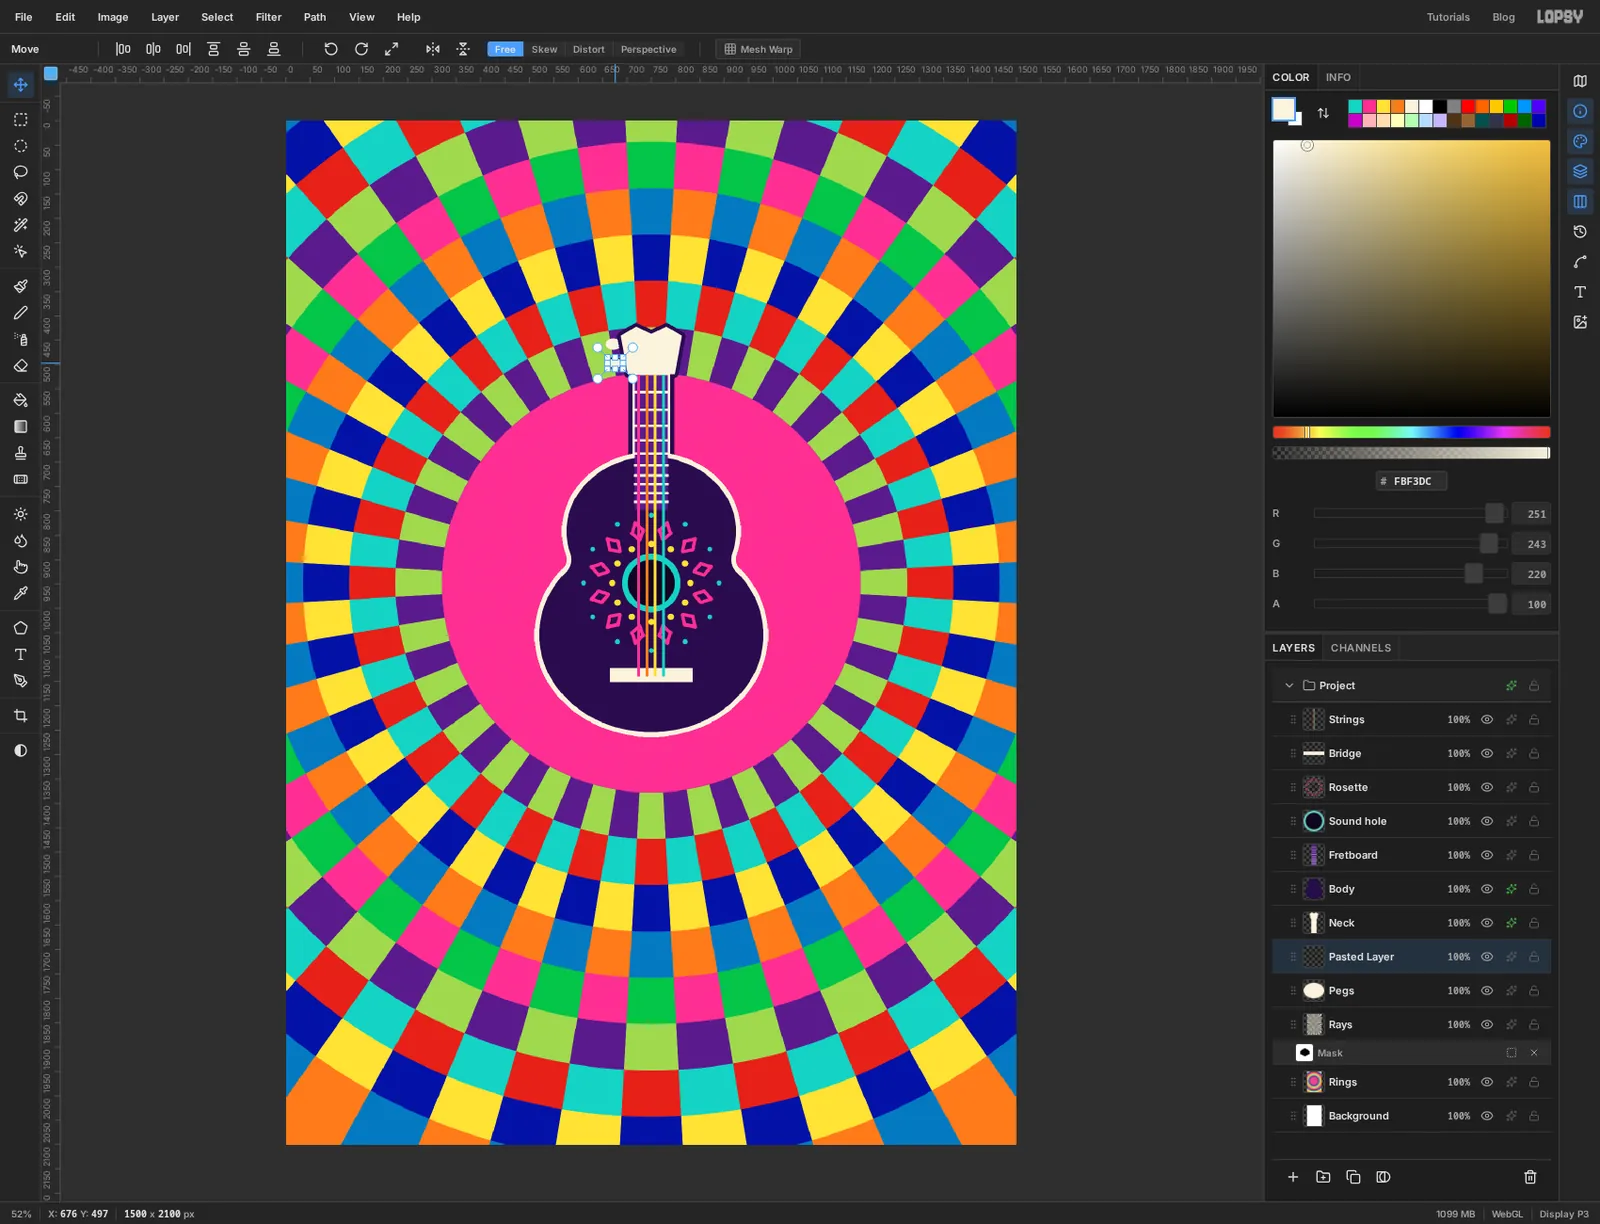
-
Mirror the pegs
Choose Layer → Duplicate Layer. Press Cmd+A, pick the Move tool and click Flip Horizontal in the options bar. With the whole canvas selected, the flip happens about the centre line of the page, and the ukulele stands on that line, so the copies land on the right side of the headstock.
Press Cmd+D and Cmd+E to merge the copy back into
Pegs. Open the effects drawer, tick Stroke, and set Width to 6 in violet .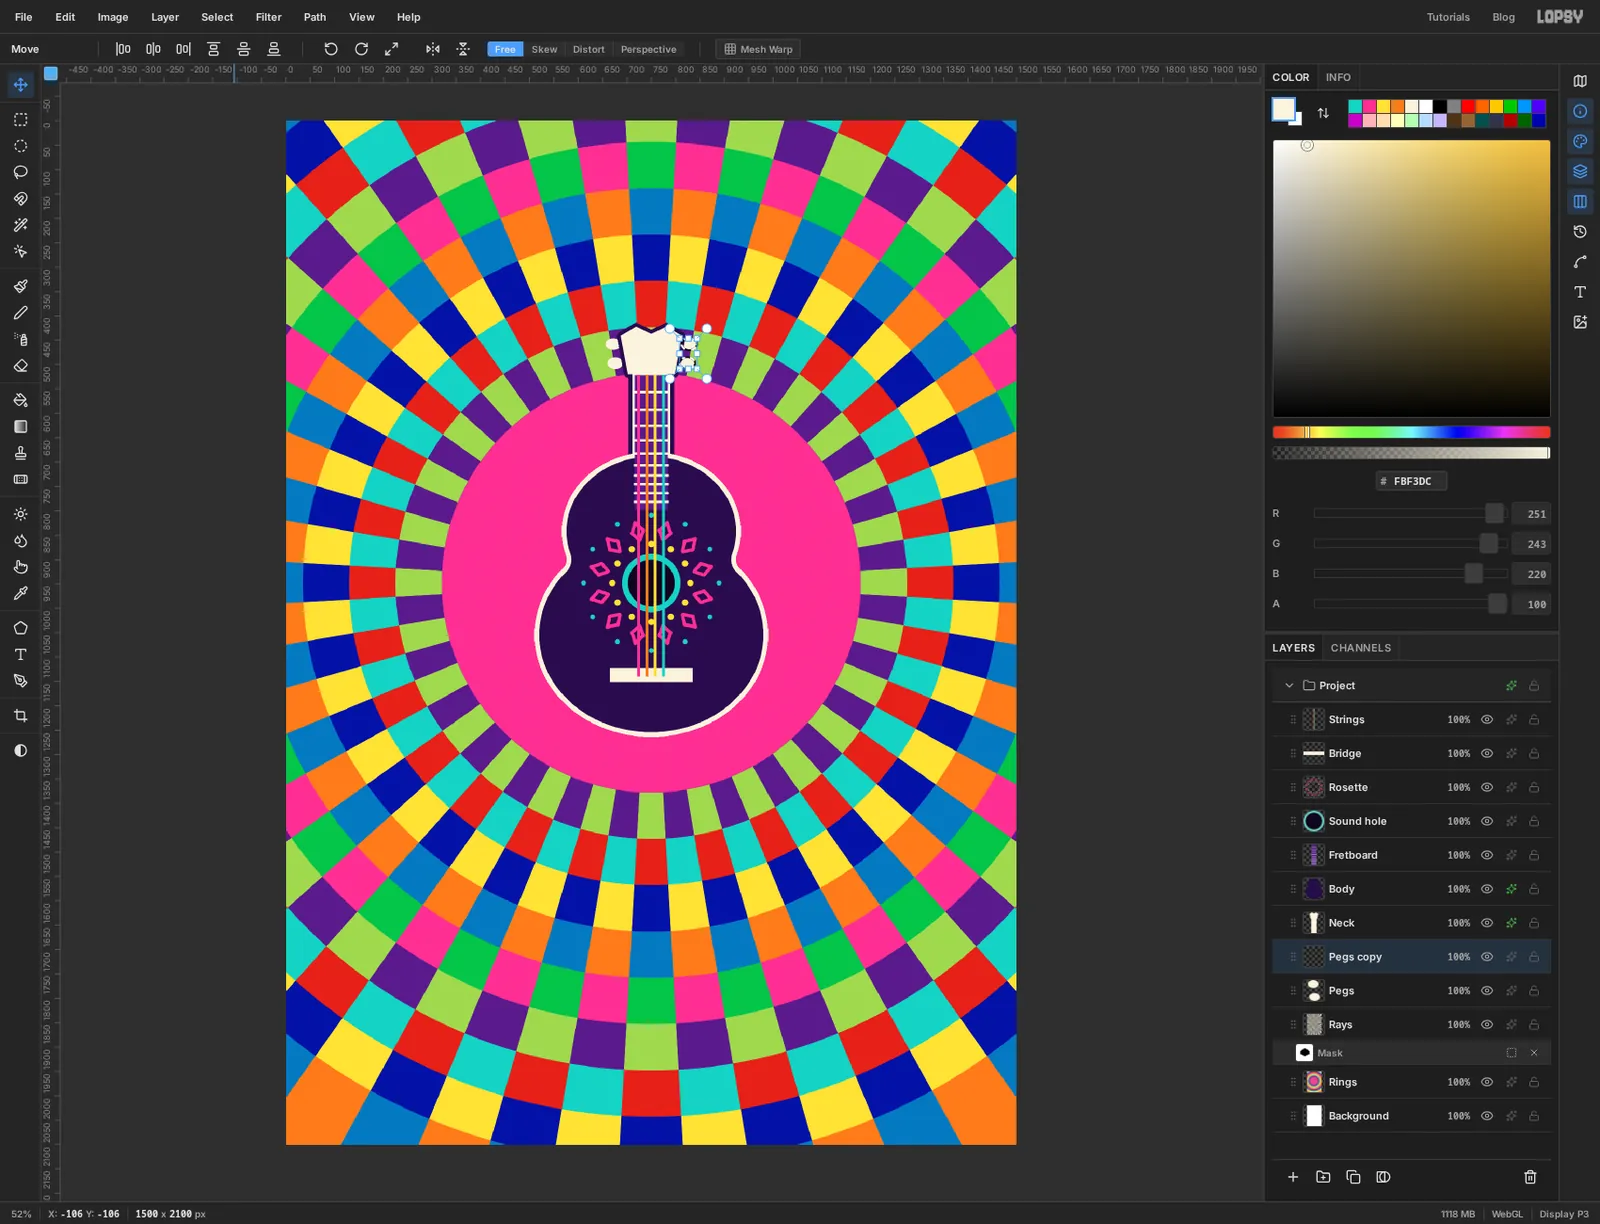
-
Select the whole silhouette
1960s posters love an outline around an outline. Click the
Raysrow, then Add Layer and name itEcho.Hold Cmd and click the thumbnail of the
Bodylayer. That loads its shape as a selection. Then hold Cmd+Shift and click theNeckthumbnail to add the neck and headstock.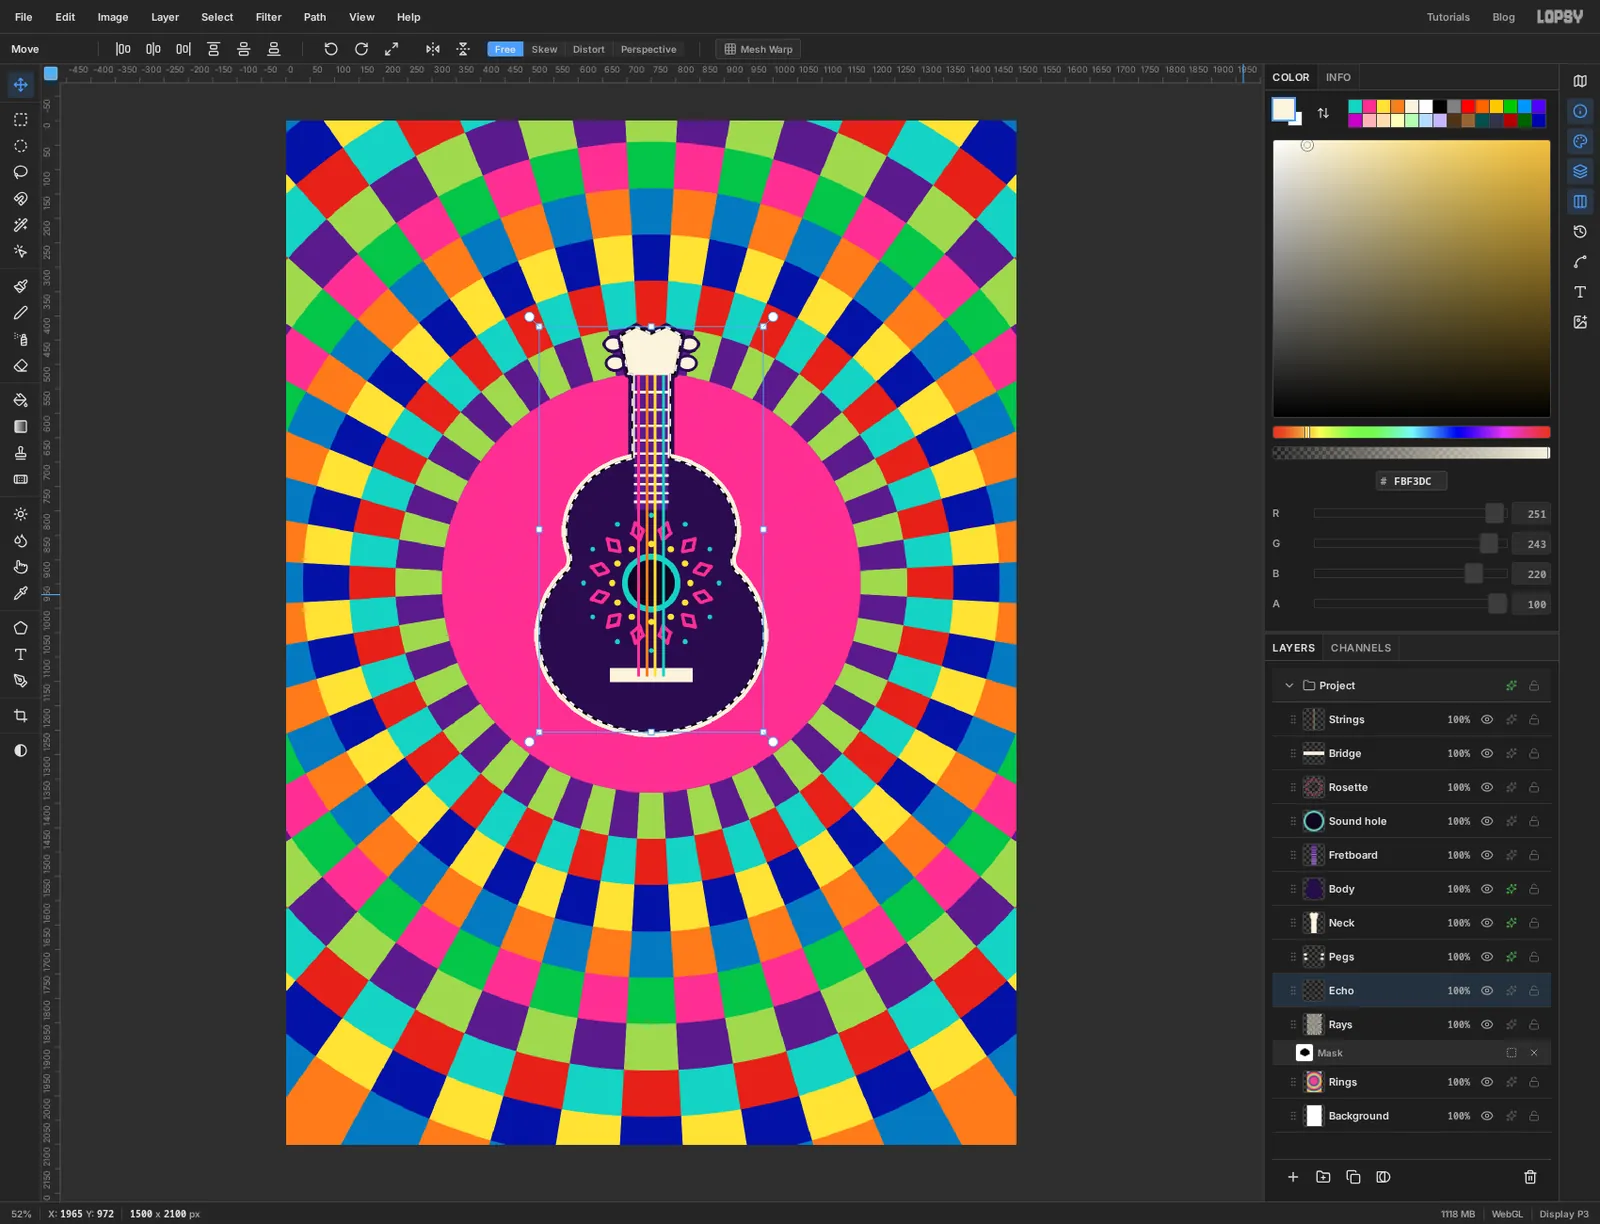
-
Fill the echo outlines
Choose Select → Grow, enter 38 and apply. Set the foreground to teal and choose Edit → Fill.
Without deselecting, choose Select → Shrink, enter 18 and apply. Set the foreground to yellow and fill again. Press Cmd+D.
Because
Echois under the instrument, only the bands outside it show.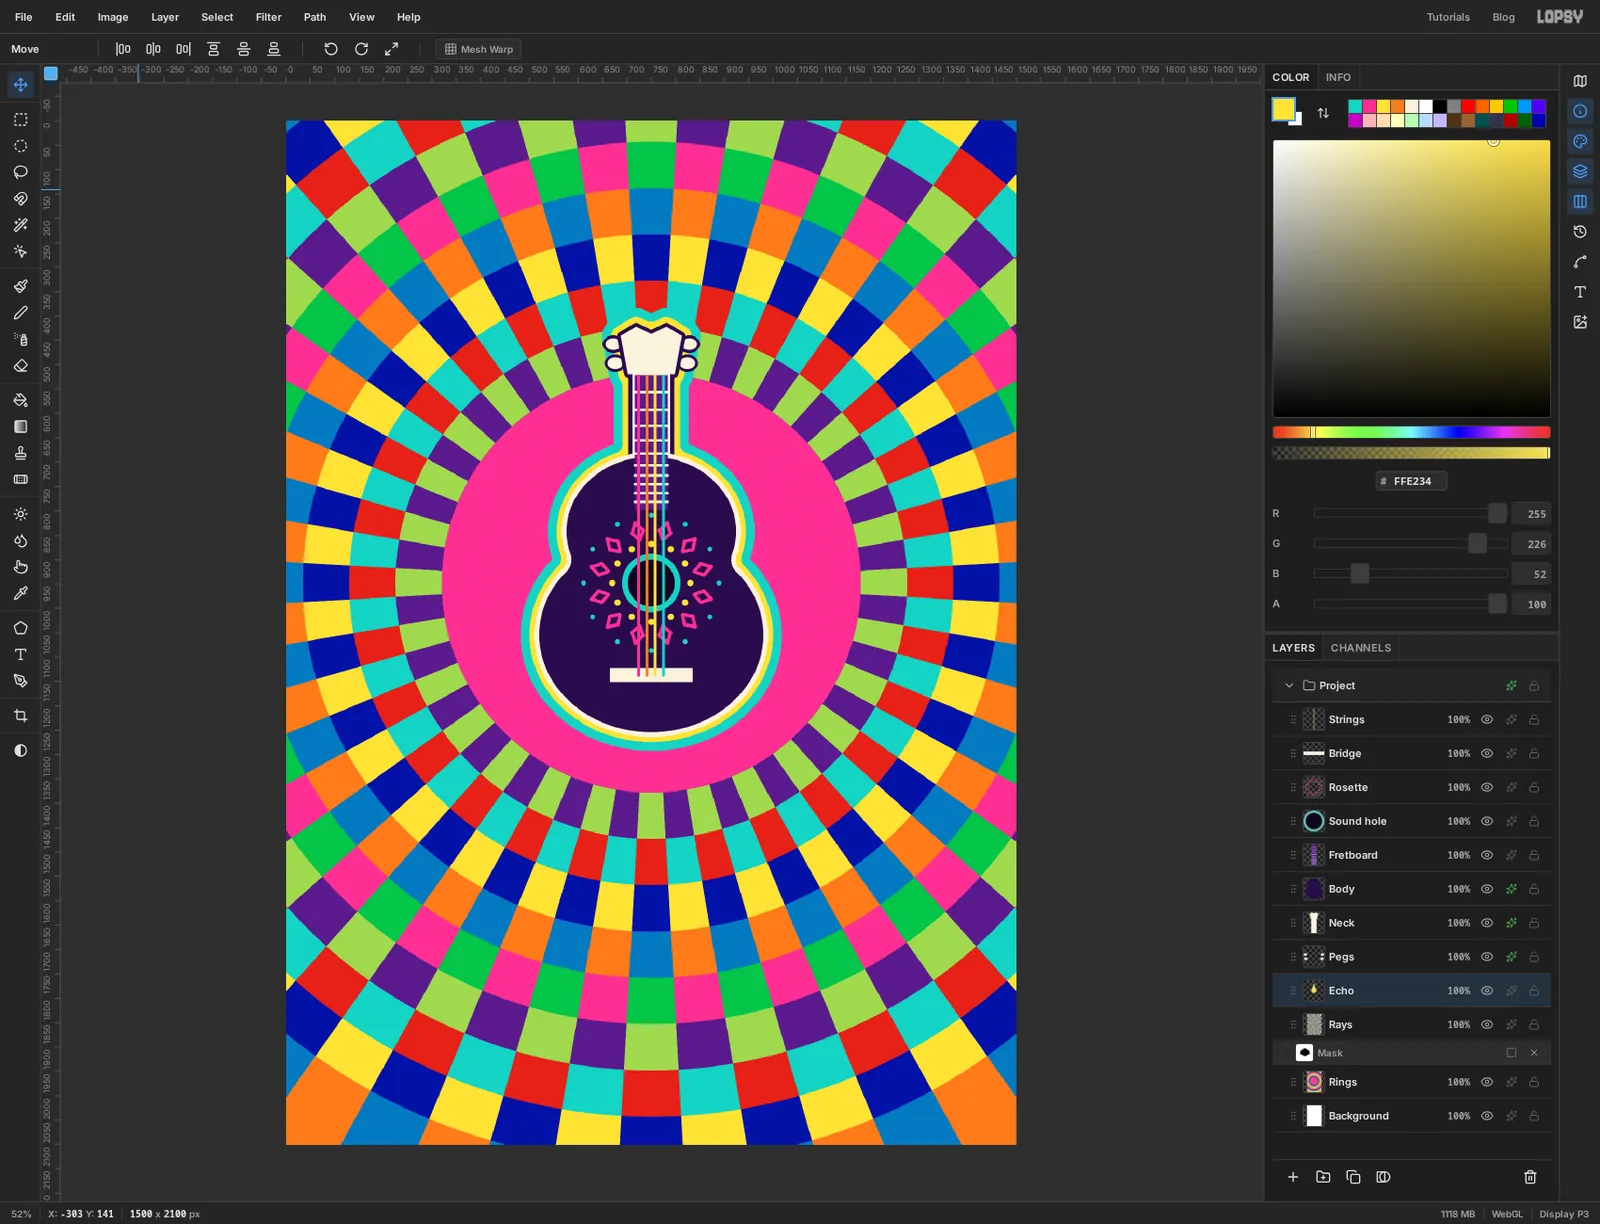
-
Set the title
Click the
Stringsrow so the title lands above the instrument. Set the foreground to cream . Pick the Text tool, set Size to 215, open the font list, search for Shrikhand and pick it.Click an empty part of the canvas, type
UKULELEand press Tab to commit. With the Move tool, drag the word to the top of the page, centred, with the tops of the letters about 74 px down. The letters run from about x 226 to x 1275.Click the
Stringsrow again before the second word. While a text layer is active, changing the size or font in the options bar restyles that layer, and you'd shrink UKULELE.Pick the Text tool, set Size to 150, click an empty spot, type
Vibrationsand press Tab. Drag it under the first word, centred, with the tops of its tall letters at about y 246. It should tuck up close, about 26 px below the bottom of UKULELE.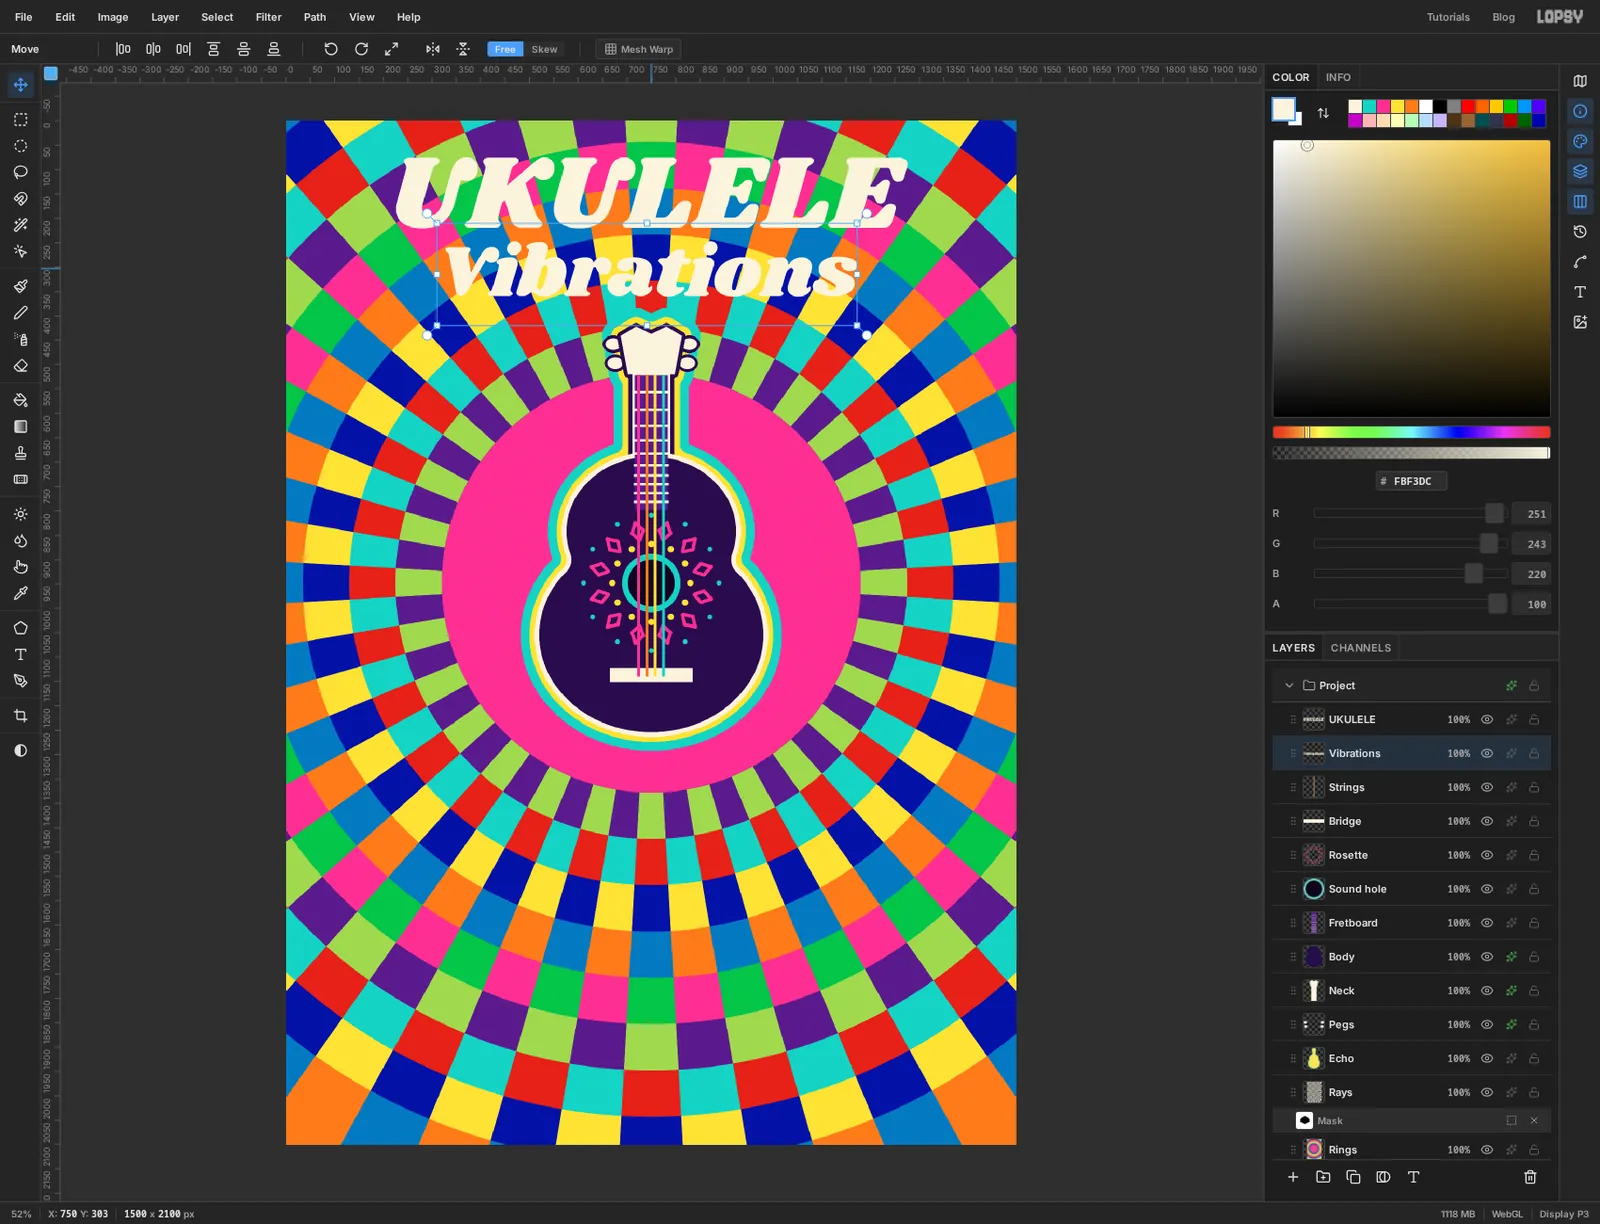
-
Outline the letters and give them a shadow
Open the effects drawer for
UKULELE. Tick Stroke, set Width to 12 and the colour to violet . Tick Drop Shadow and set Offset X to 9, Offset Y to 11, Blur to 0 and Opacity to 100, in the same violet. With no blur, the shadow is a solid slab, which is what makes the letters look cut out and stacked.Do exactly the same for
Vibrations.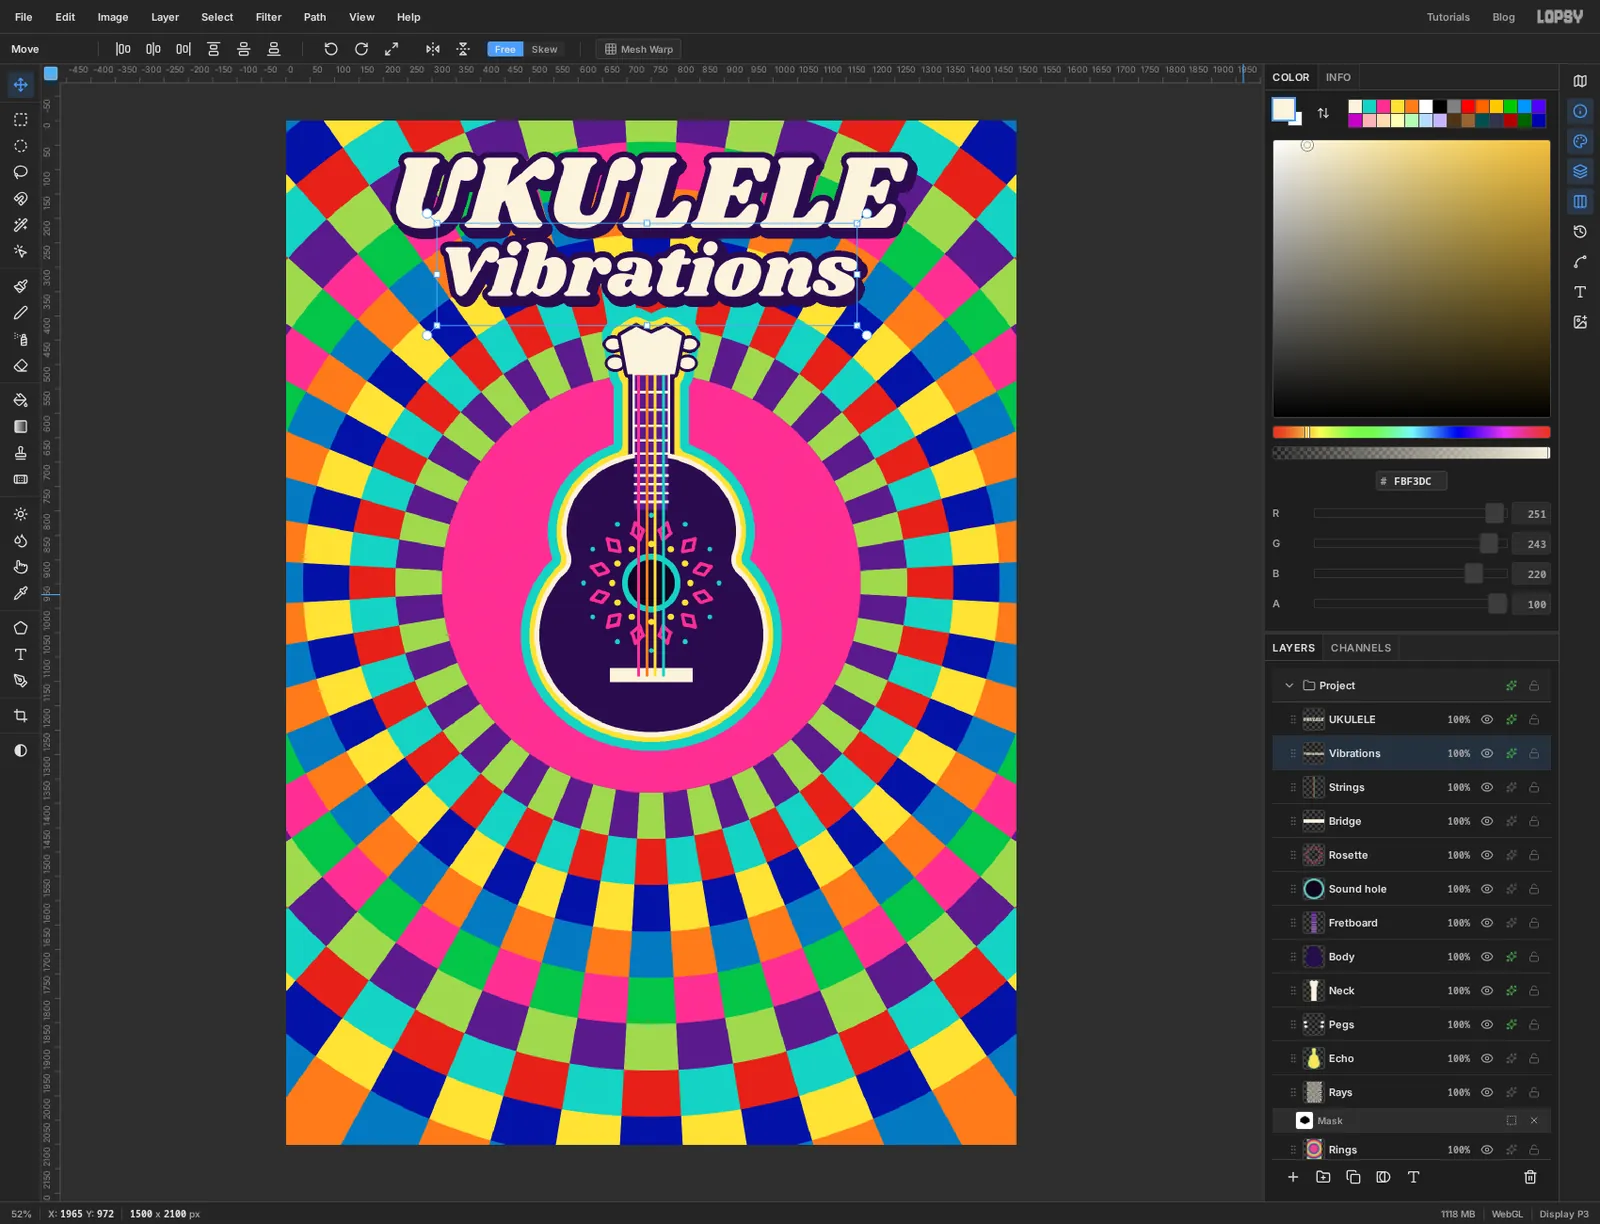
-
Load the letters as a selection
Click the
UKULELErow, then Add Layer and name itTitle gradient. Hold Cmd and click theUKULELEthumbnail, then hold Cmd+Shift and click theVibrationsthumbnail. Both words are now selected, and the active layer is still the empty one above them.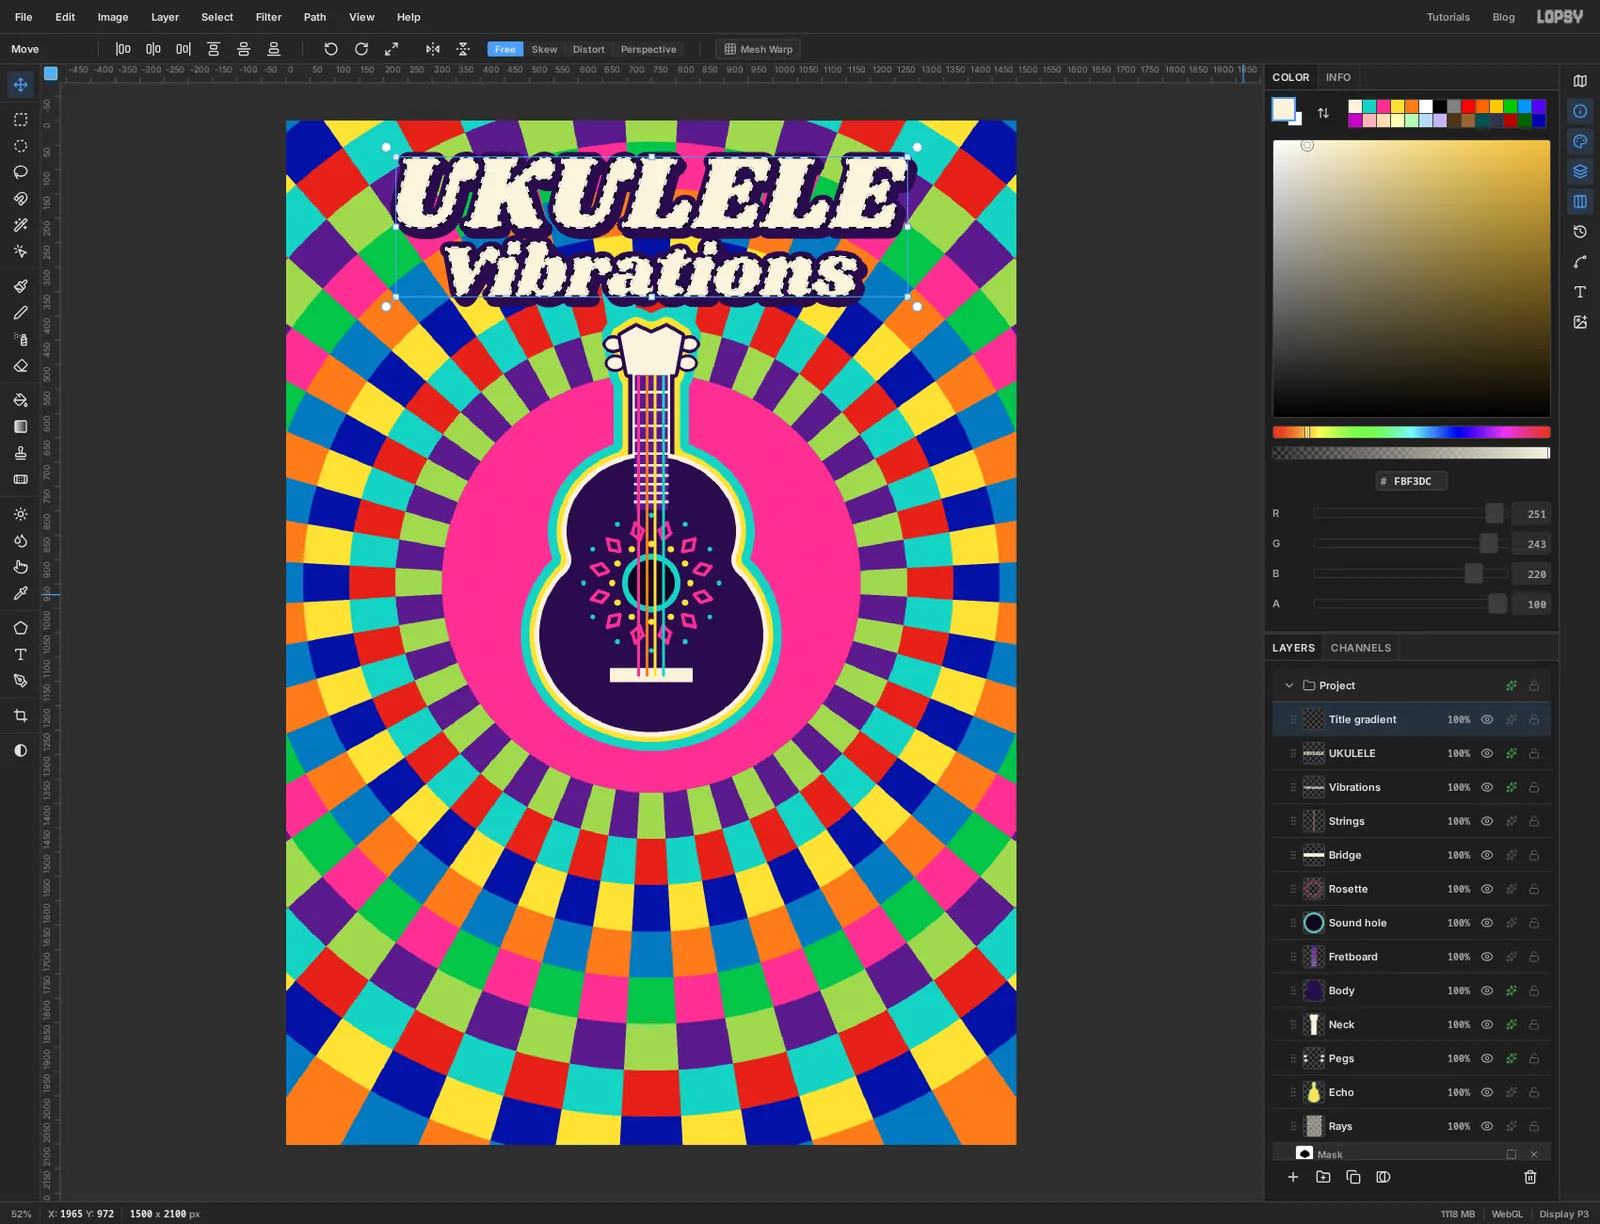
-
Pour a gradient into the title
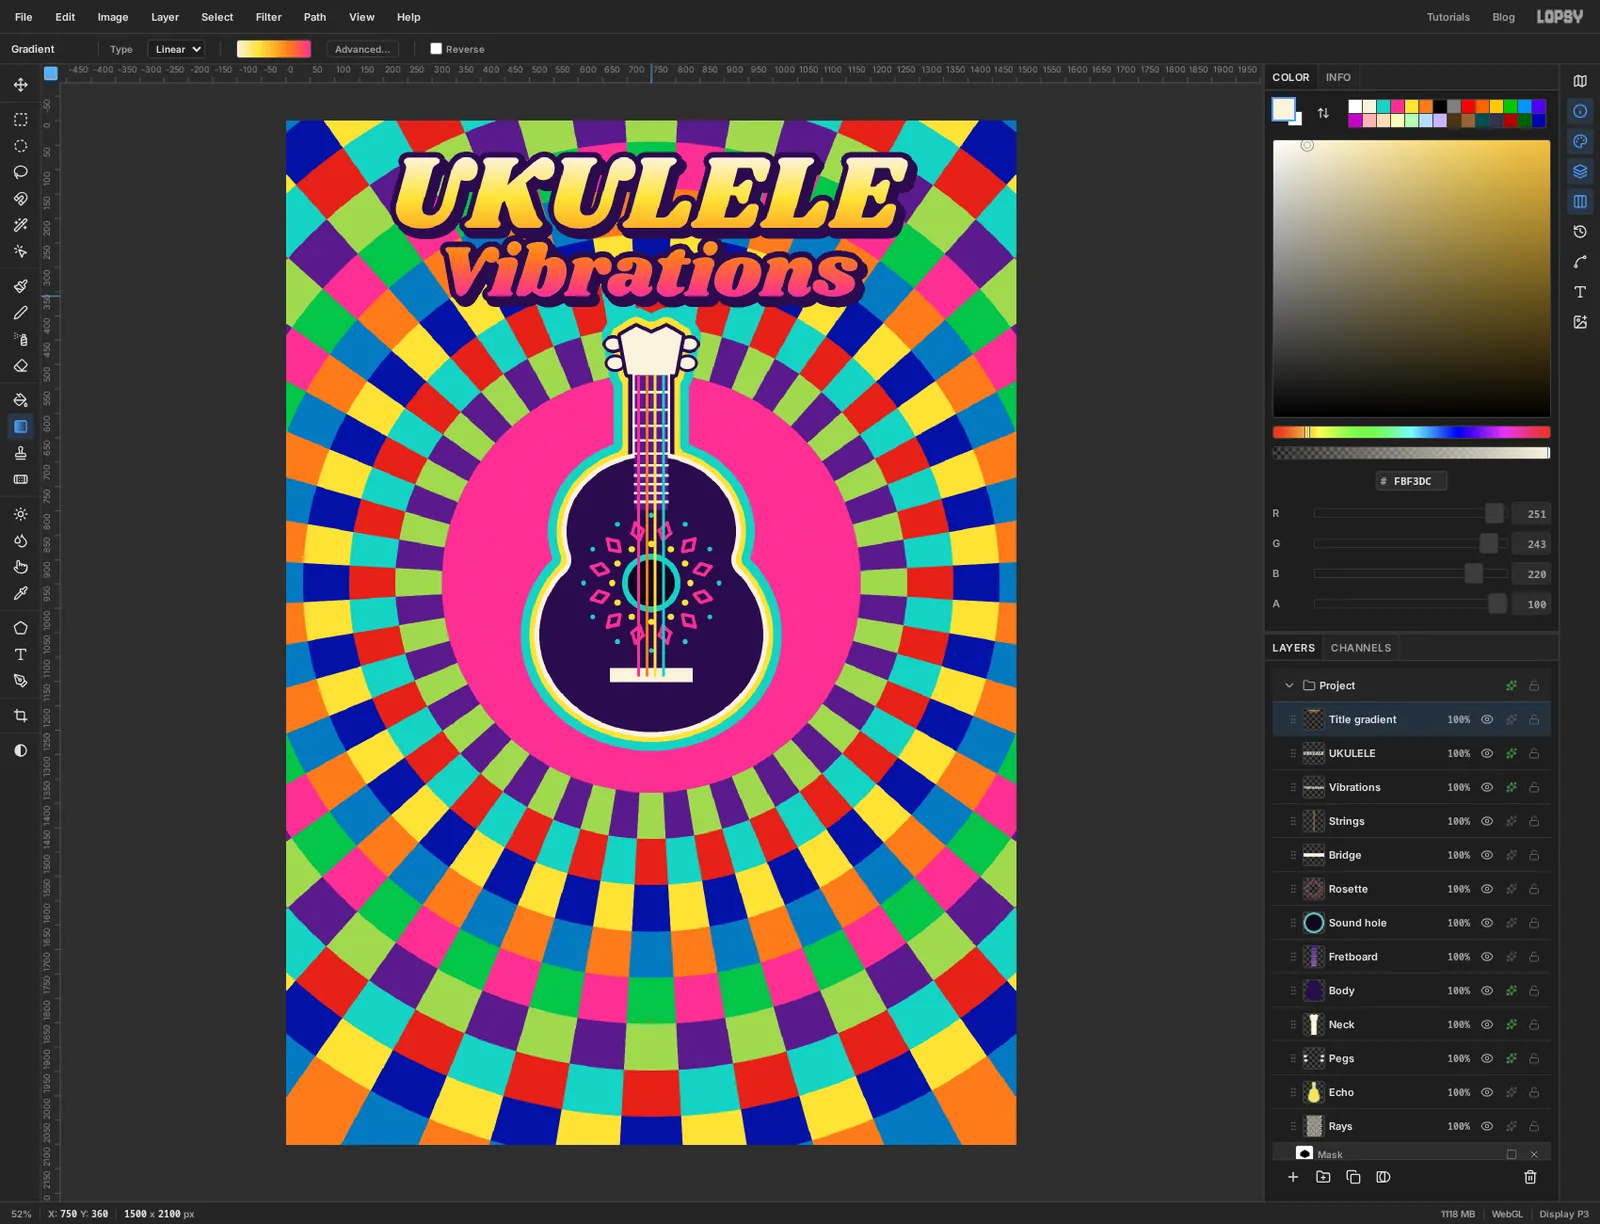
Pick the Gradient tool and set its type to Linear. Open the gradient editor from the options bar. Click the left stop and type in the hex field, then click the right stop and type . Click the gradient bar about 30% of the way along to add a stop and make it yellow , and click again at about 72% for orange . Click Done.
Drag straight down from the top of UKULELE at 750, 74 to the bottom of Vibrations at 750, 360. The gradient only lands inside the selection, so the two words share one sweep of colour and read as one title. Press Cmd+D.
The outline and shadow still come from the text layers underneath.
-
Group the ukulele
Click the
Stringsrow, then hold Shift and click theEchorow. All nine instrument layers are selected. Choose Layer → Group Layers, then double-click the new group's name and call itUkulele.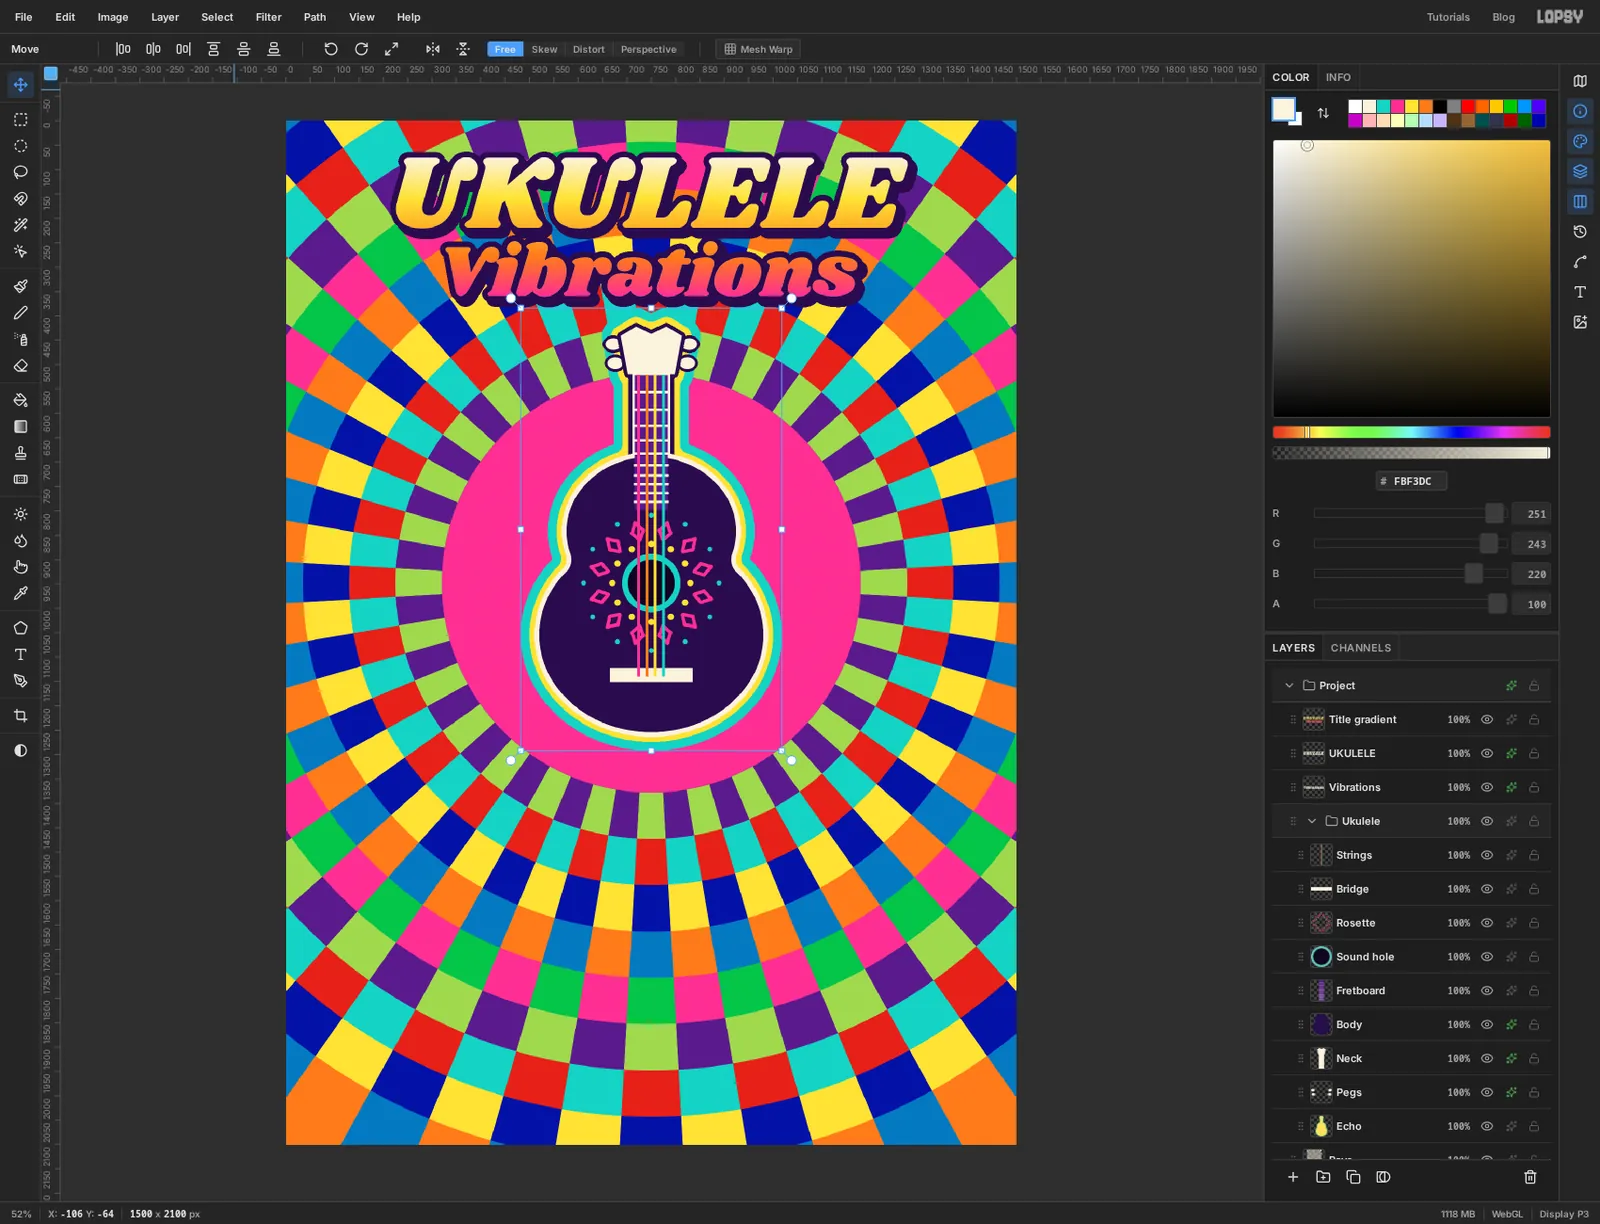
-
Draw a wavy edge with the Pen
The chart sits on a dark panel with a wavy top. Click the
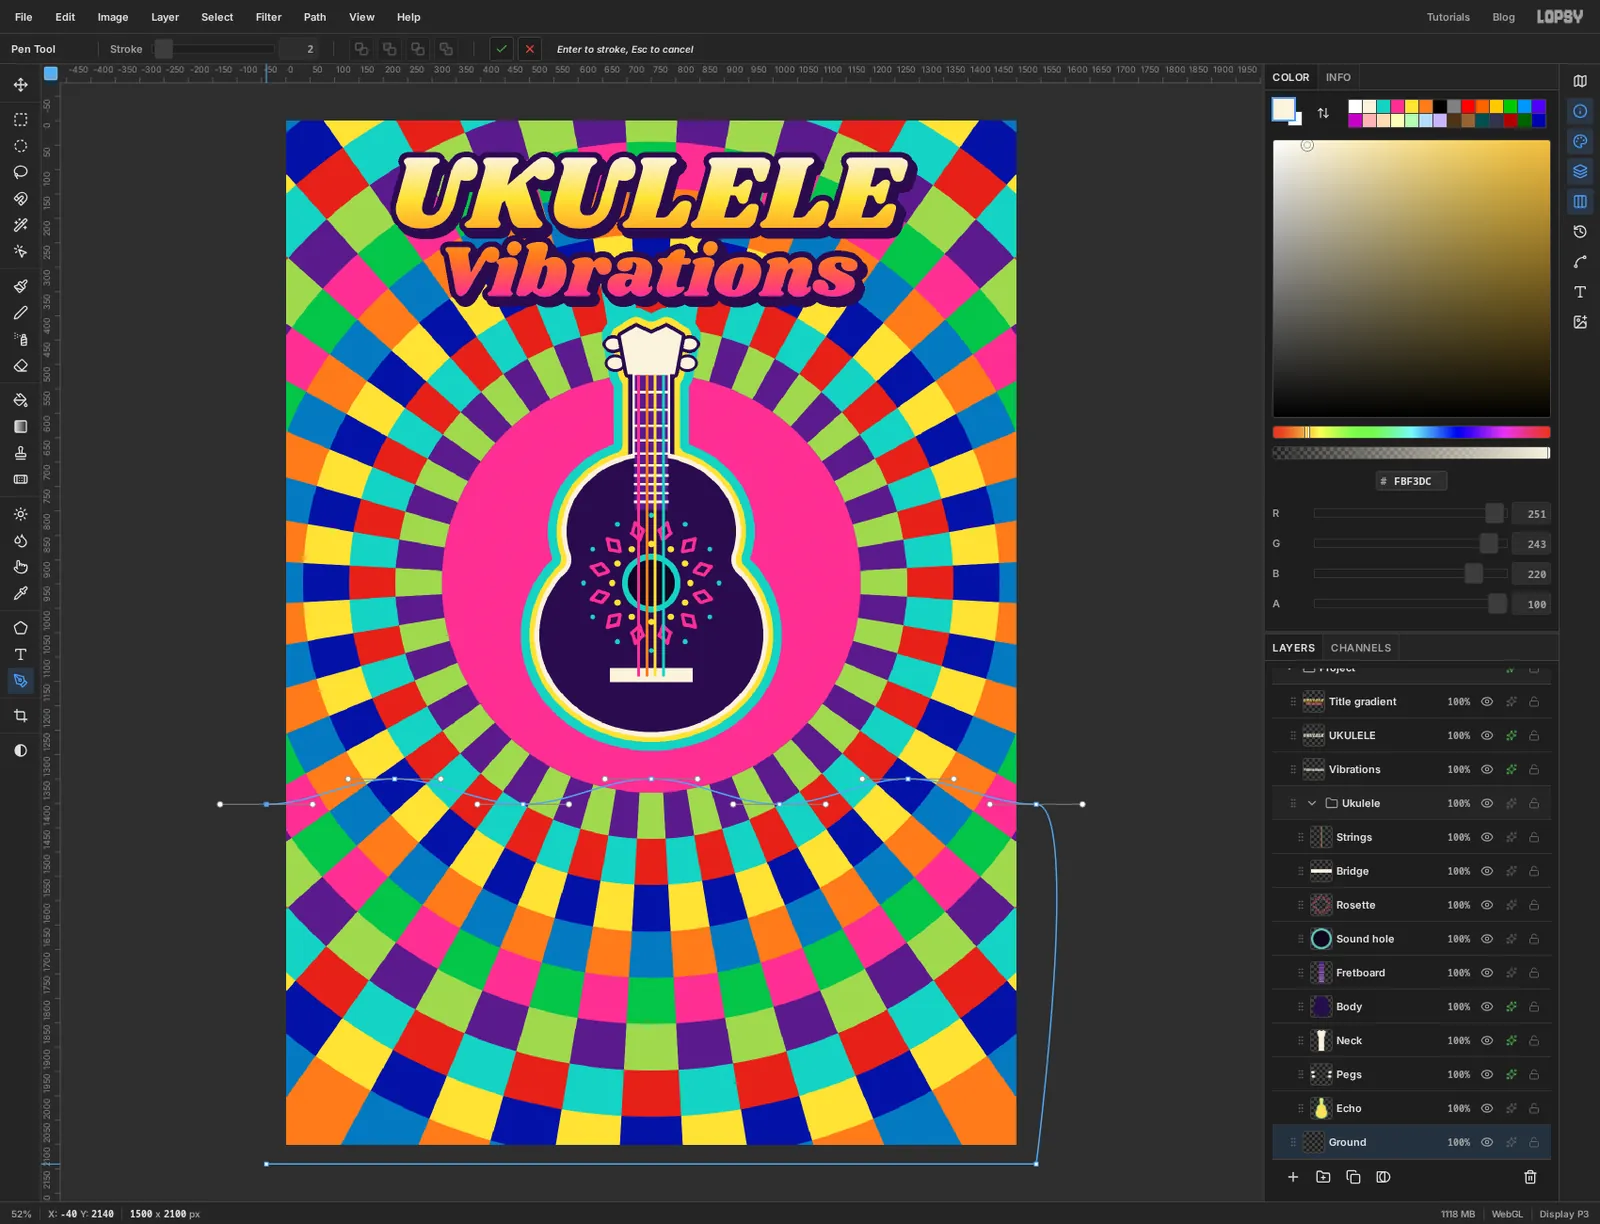
Raysrow, then Add Layer and name itGround.Pick the Pen tool. A plain click makes a corner. Pressing and dragging makes a smooth curve, and the further you drag, the rounder it is. Start in the grey area just left of the canvas. For each of these seven points, press, drag about 95 px straight to the right, and release:
- −40, 1402
- 223, 1350
- 487, 1402
- 750, 1350
- 1013, 1402
- 1277, 1350
- 1540, 1402
Then click once (no drag) below the bottom right corner at 1540, 2140, once below the bottom left at −40, 2140, and finally click the first point again to close the shape. If a new point appears instead, you missed the first one: zoom in and click right on it. Don't press Enter here. That would stroke the outline.
-
Turn the path into a selection and grow it
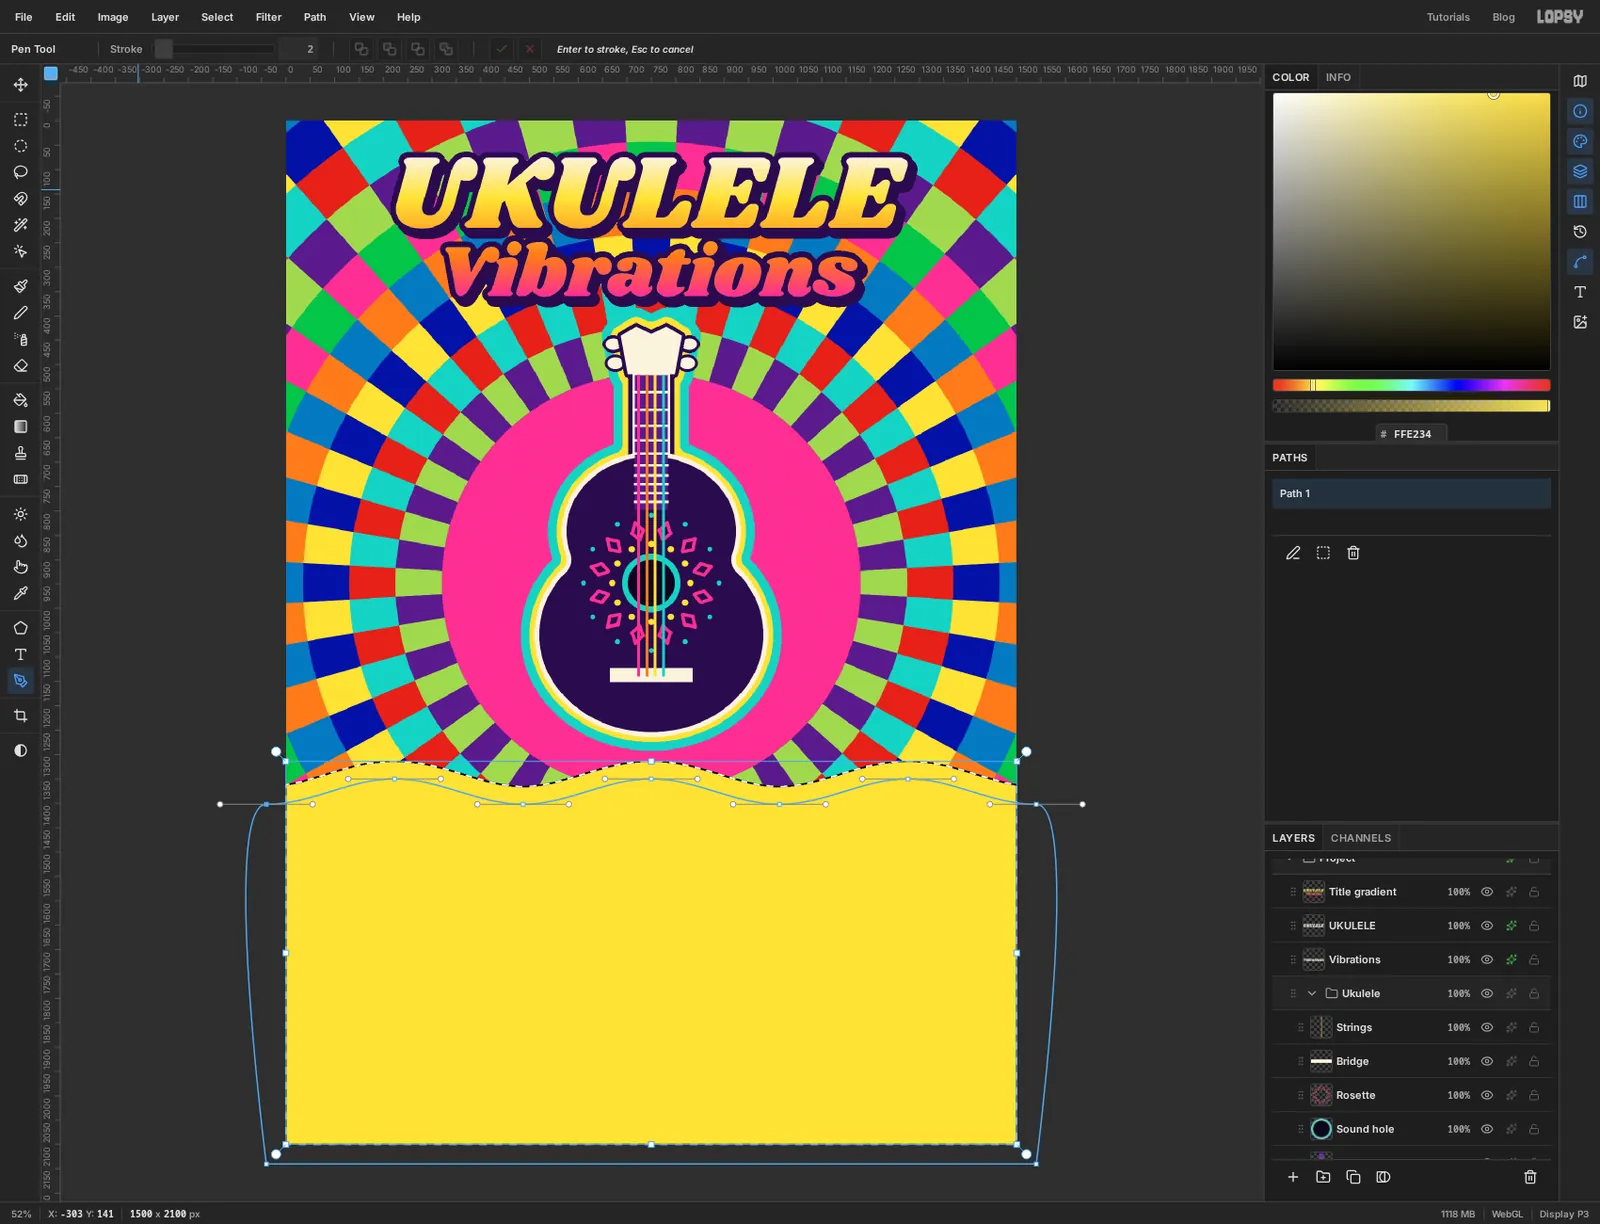
Open the Paths panel from the panel buttons on the far right. Your path is listed there. Click its row if it isn't highlighted, then click Path to Selection.
Choose Select → Grow, enter 36 and apply. Set the foreground to yellow and choose Edit → Fill.
-
Stack the bands
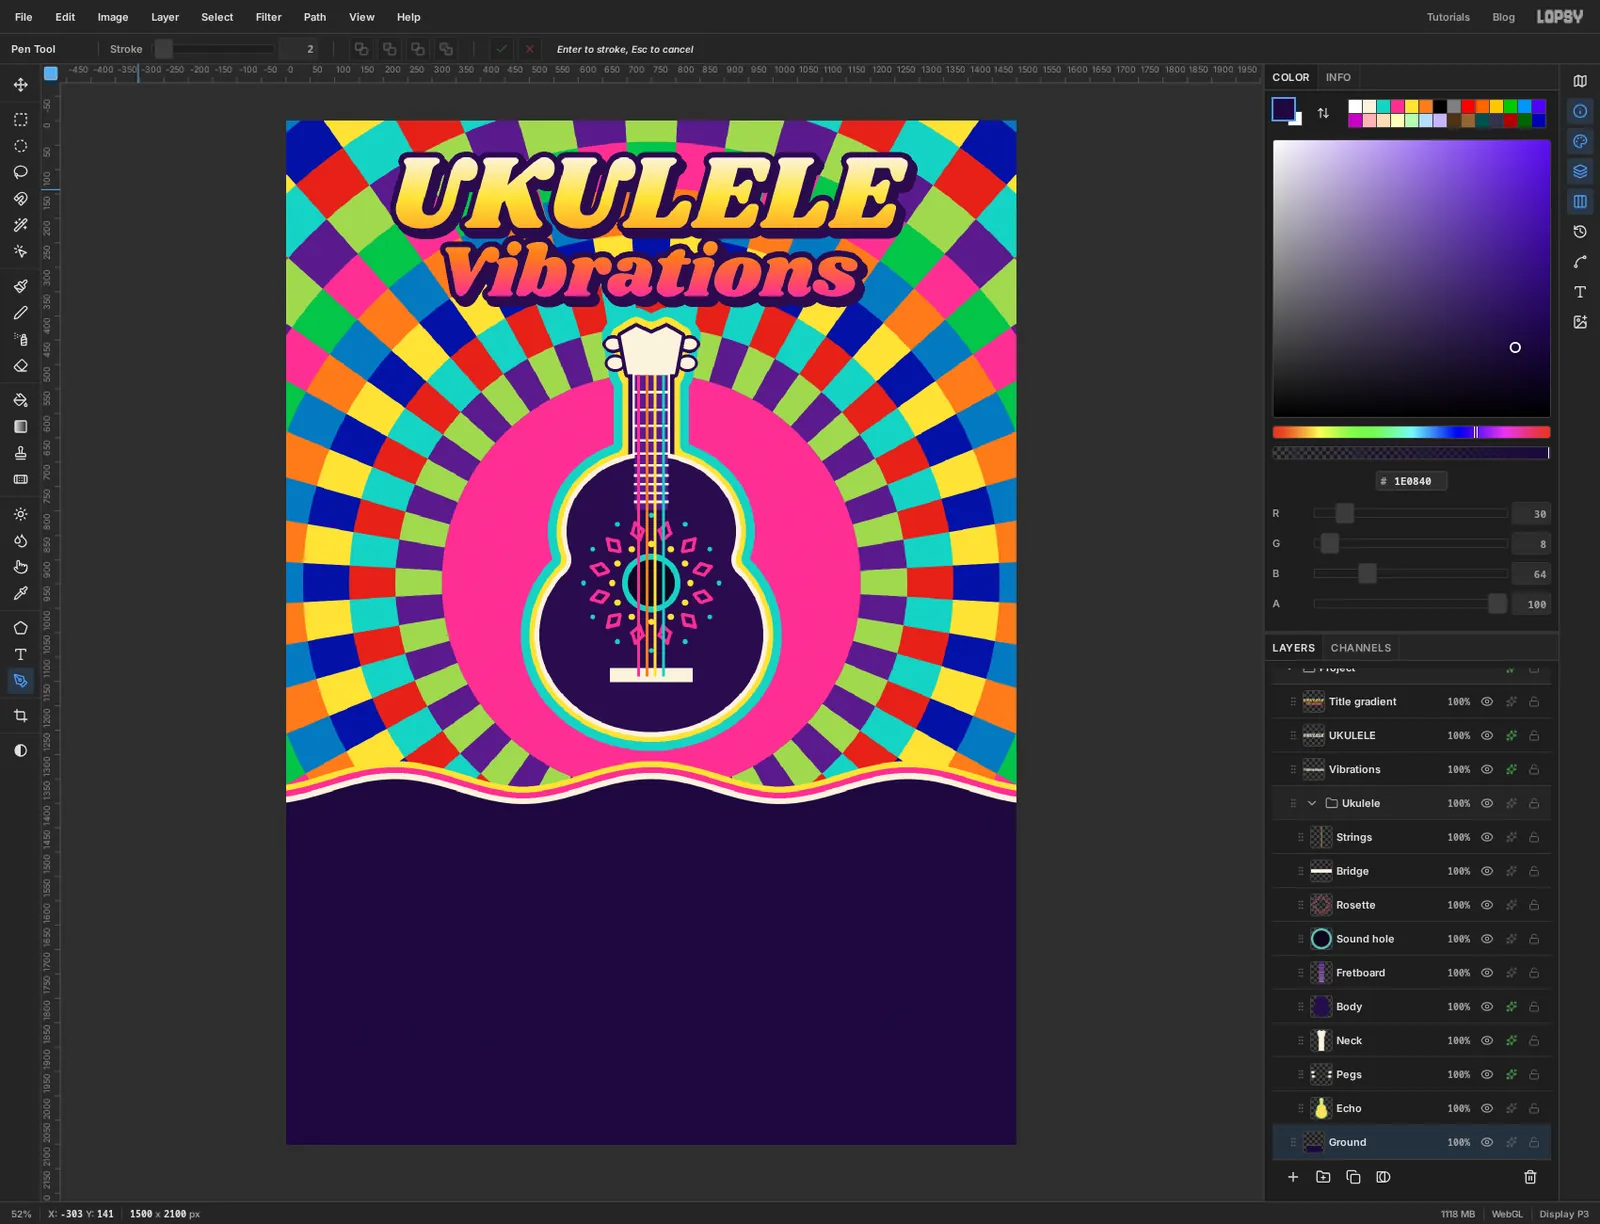
Repeat that three more times. Each time, click Path to Selection again to get the original shape back, grow it by less, and fill:
- Grow 24, fill magenta
- Grow 12, fill cream
- No grow, fill the panel colour
Press Cmd+D. In the Paths panel, click the path's row and then Delete Path so its blue outline doesn't sit over your work, and close the panel.
-
Drop guides and rule the time axis
The plot runs from x 230 to x 1250. Click the ruler along the top of the canvas at 230, 485, 740, 995 and 1250. Each click drops a vertical guide. They mark 0, 5, 10, 15 and 20 ms.
With
Groundactive, Add Layer and name itGrid. Pick the Pencil, set Size to 3 and the foreground to cream . On each guide, click at y 1517 and Shift-click at y 1948.Click the
100%on theGridrow and drag the slider down to about 35%, so the lines sit behind the data.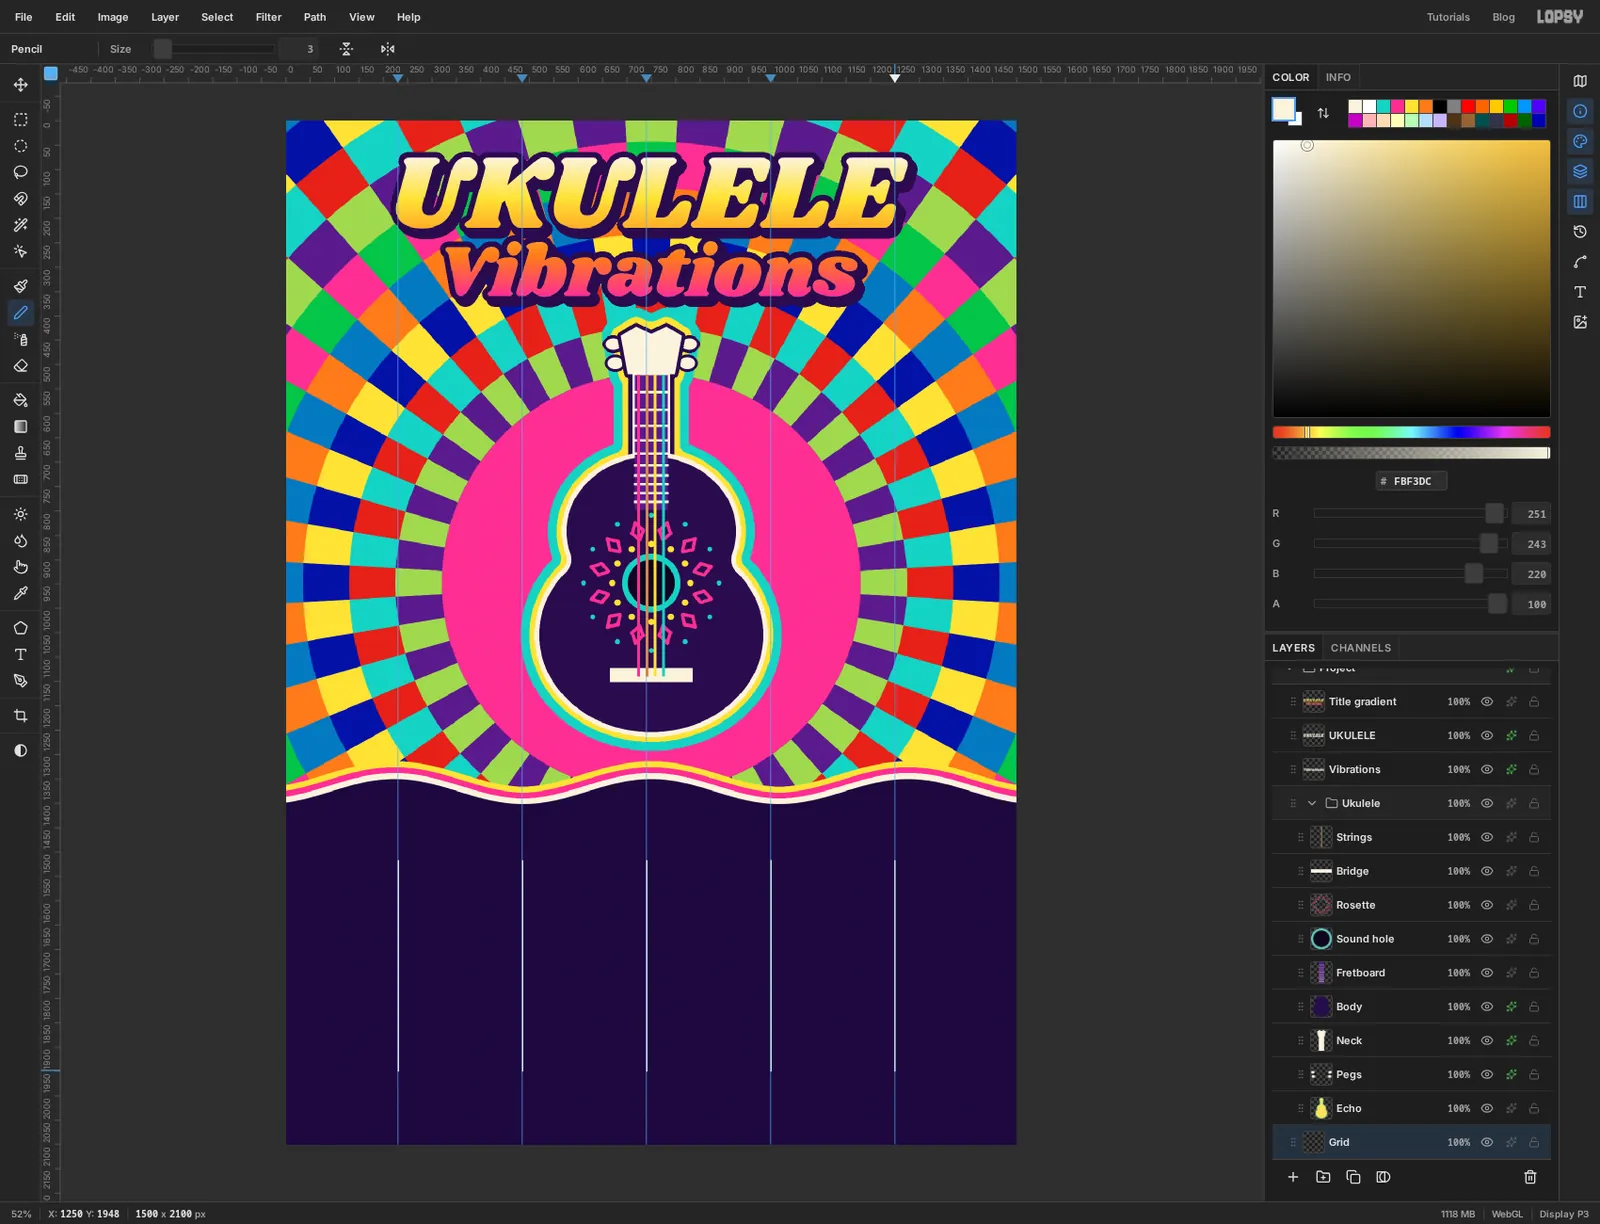
-
Draw the G wave with the Pen
Add Layer and name it
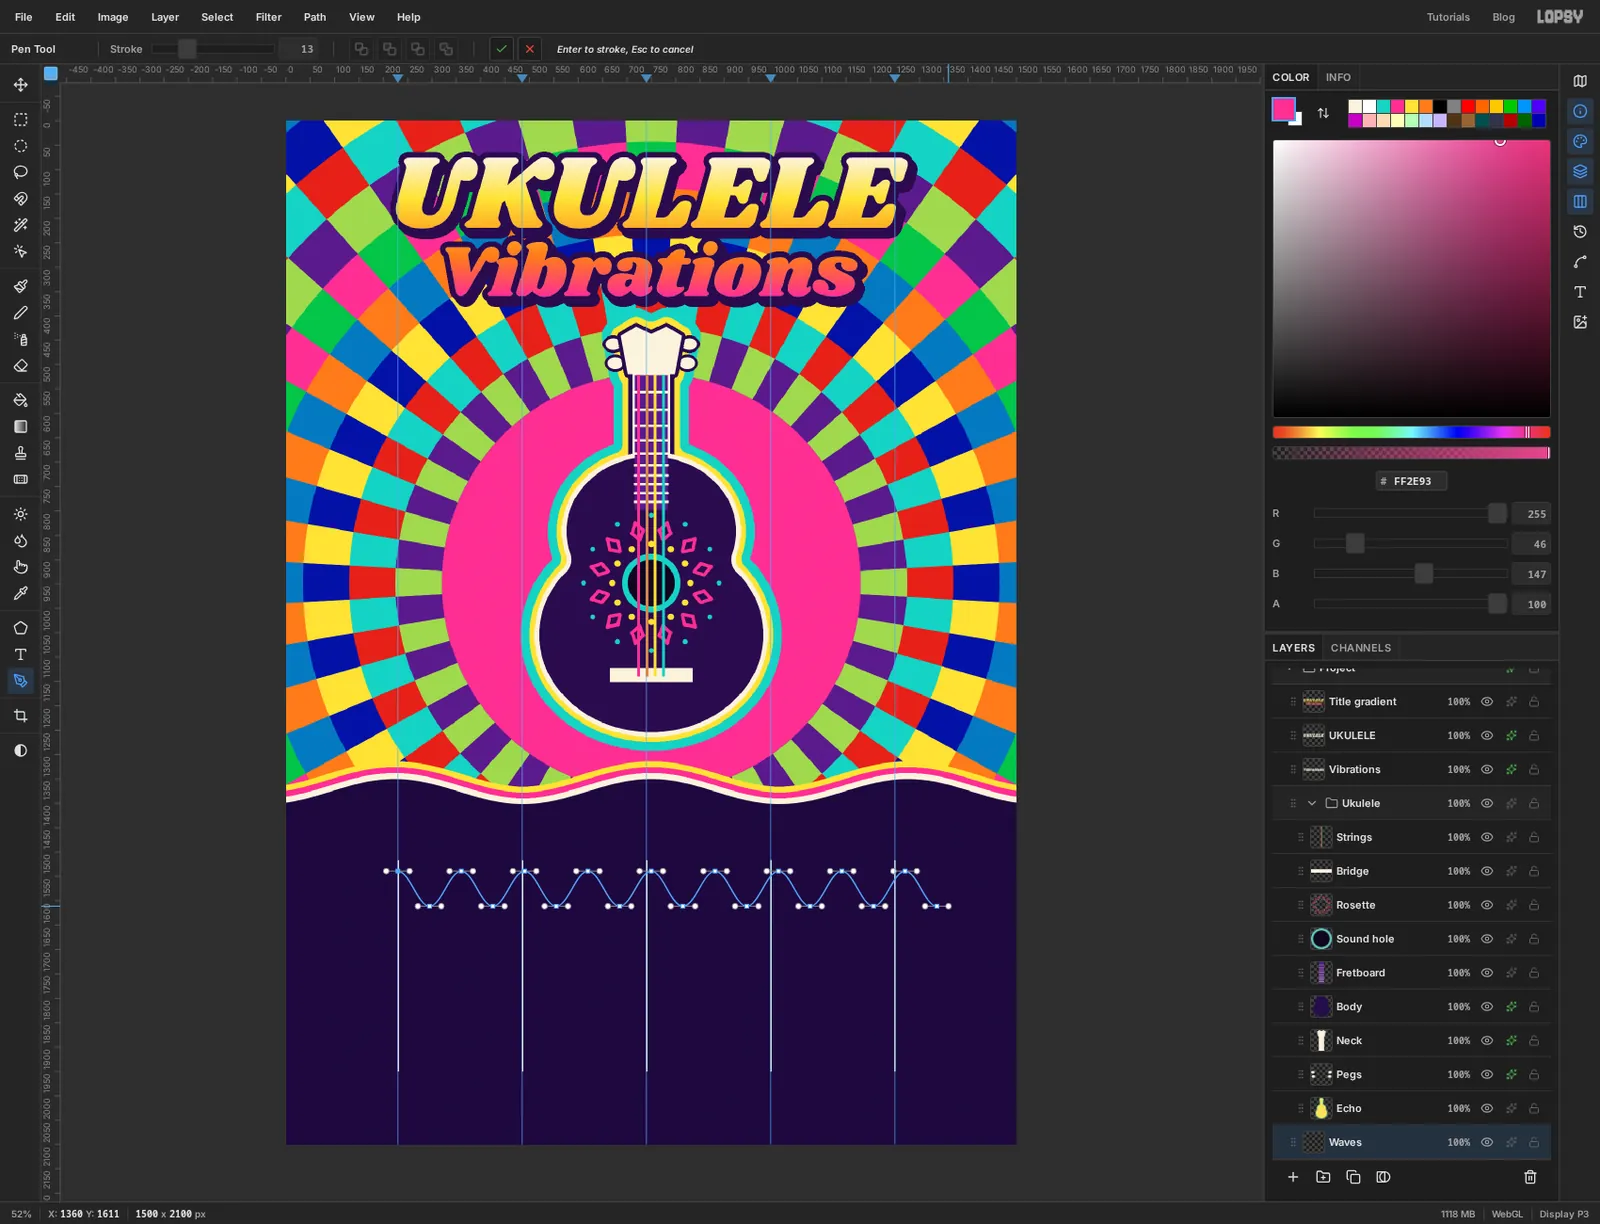
Waves. Pick the Pen tool and set Stroke in the options bar to 13. Set the foreground to magenta .A sine wave is easy with the Pen: put a smooth anchor on every crest and every trough, and the curve between them takes care of itself. The G wave is centred on y 1575 and swings 36 px either way, so its crests are at y 1539 and its troughs at y 1611.
At 392 Hz one cycle lasts 2.55 ms, which is 130 px here, so a crest and the next trough are 65 px apart. Start on the first guide with a crest at 230, 1539: press, drag 24 px to the right, release. Then a trough 65 px along at 295, 1611, a crest at 360, 1539, then another trough, each with the same short drag to the right. Keep going until you're one anchor past the last guide at 1250. That's 17 anchors, and the last is a crest near 1270, 1539. You'll trim the extra in a moment.
Press Enter. The path is stroked in the foreground colour at the width you set.
-
Draw the other three waves
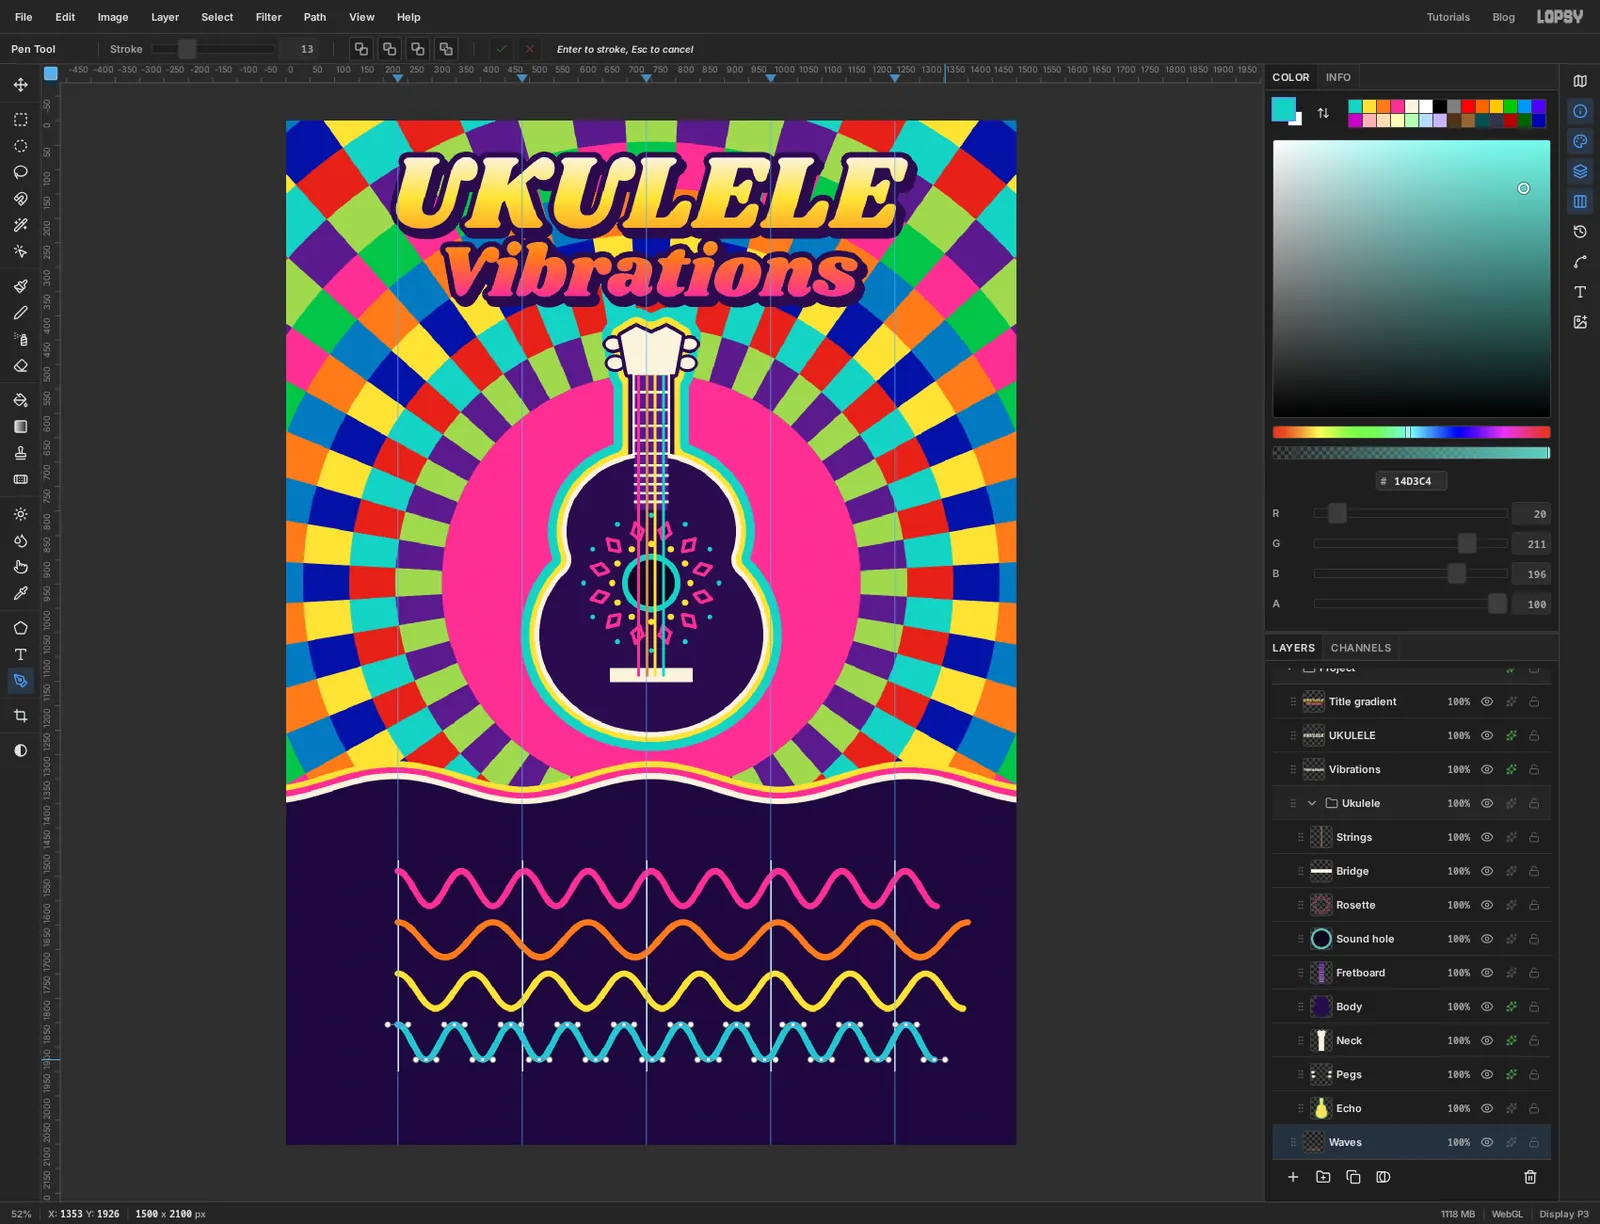
Do the same for the other strings, on the same layer. Every wave starts with a crest on the first guide at x 230. Only the colour, the height and the spacing change:
- C, orange : crests at y 1644, troughs at y 1716, anchors 97 px apart, drag 36 px
- E, yellow : crests at y 1749, troughs at y 1821, anchors 77 px apart, drag 29 px
- A, teal : crests at y 1854, troughs at y 1926, anchors 58 px apart, drag 21 px
C takes 12 anchors, E takes 15 and A takes 19, each ending one anchor past the last guide. Press Enter after each wave. The drag is always a little over a third of the anchor spacing. Shorter and the wave turns into a zigzag, longer and the crests go flat.
-
Trim the waves at 20 ms
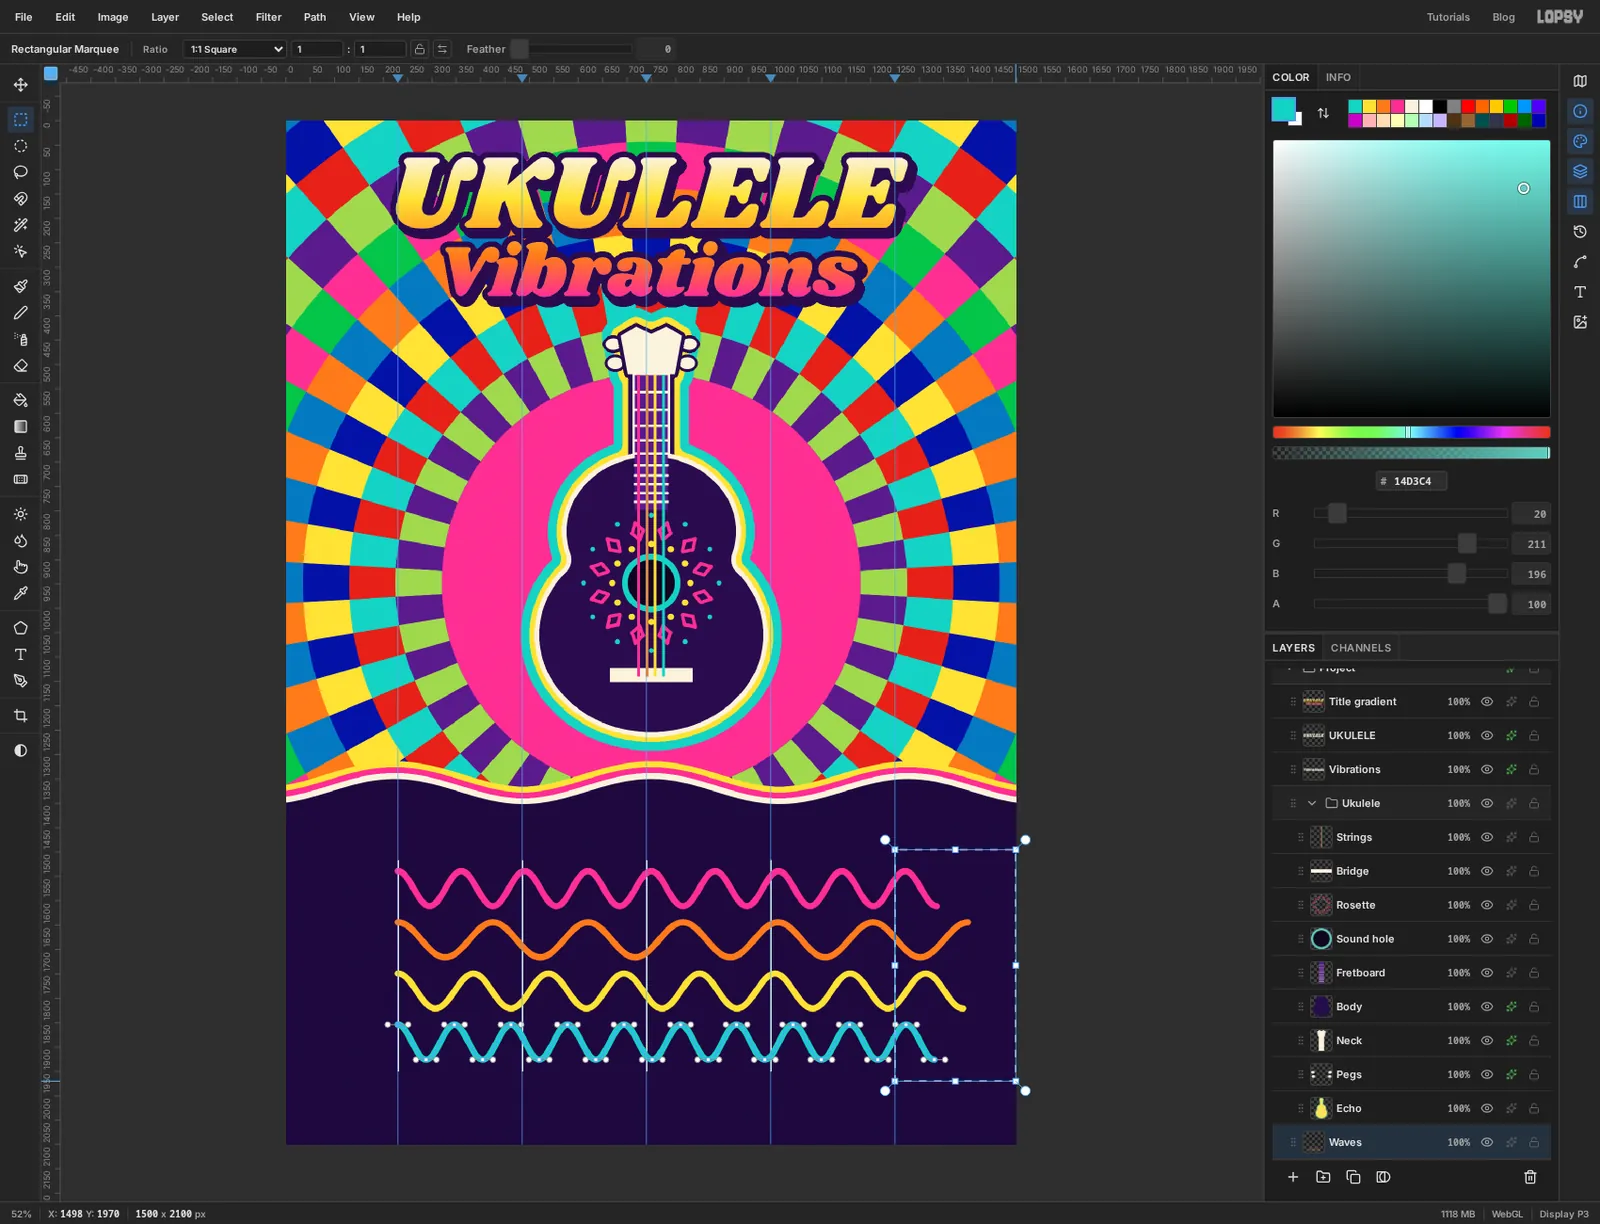
Pick the Rectangular Marquee. Start just to the right of the last guide, at about 1255, 1495, and drag to the right edge of the canvas at about 1498, 1970. The left edge of the marquee snaps onto the guide at 1250, so the cut lands exactly on 20 ms.
Press Delete, then Cmd+D. Open the Paths panel. Click each path's row in turn and click Delete Path, then close the panel.
-
Cap each wave with a dot
The cut leaves a flat end. A dot hides it and marks where each note has got to at 20 ms. Pick the Brush, set Size to 30 and Hardness to 100, and click once on the end of each wave in its own colour:
- Magenta at 1250, 1556
- Orange at 1250, 1676
- Yellow at 1250, 1815
- Teal at 1250, 1879
If your wave ends a few pixels higher or lower, click where it actually ends.
-
Make the waves glow
With
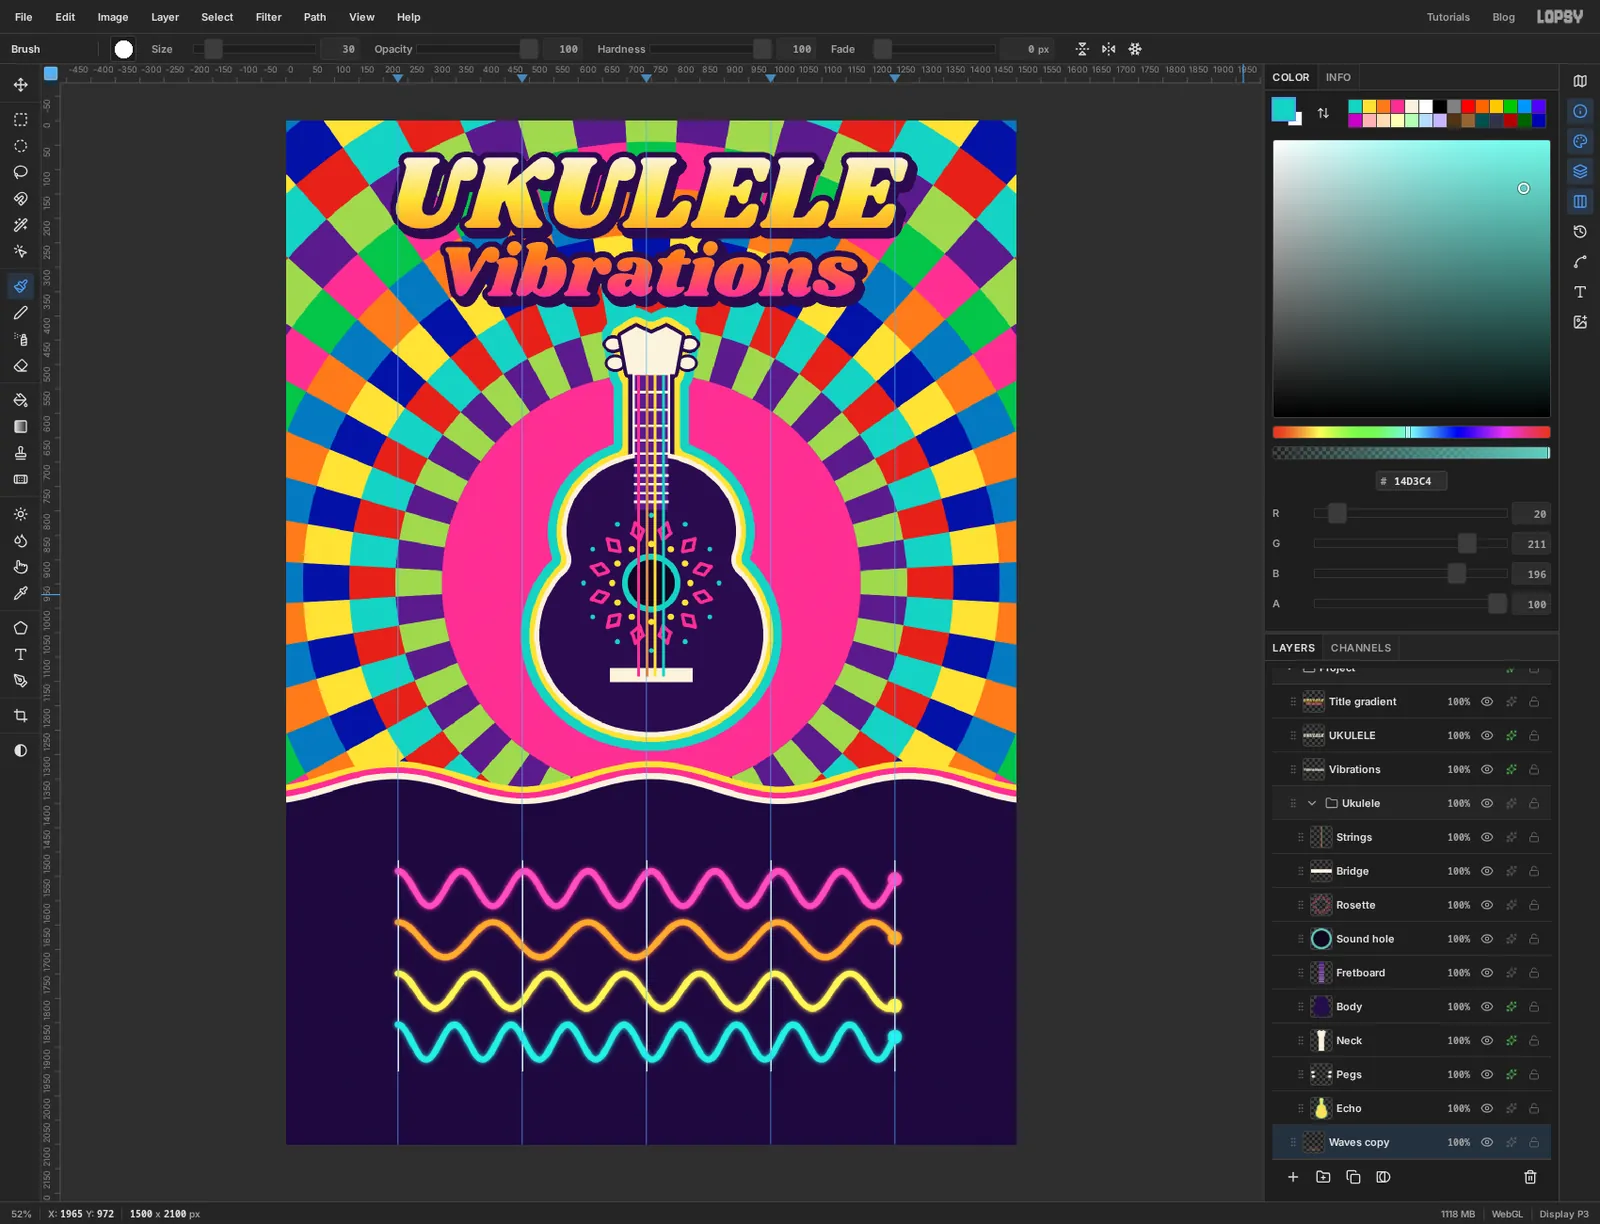
Wavesactive, choose Layer → Duplicate Layer. On the copy, choose Filter → Gaussian Blur, set Radius to 14 and apply. Open the copy's effects drawer and change its blend mode to Screen.The blurred copy lights up the panel around each line in that line's own colour, which a single Outer Glow effect couldn't do for four colours at once.
Choose View → Show Guides to hide the guides. You're done with them.
-
Add the chart heading
Click the
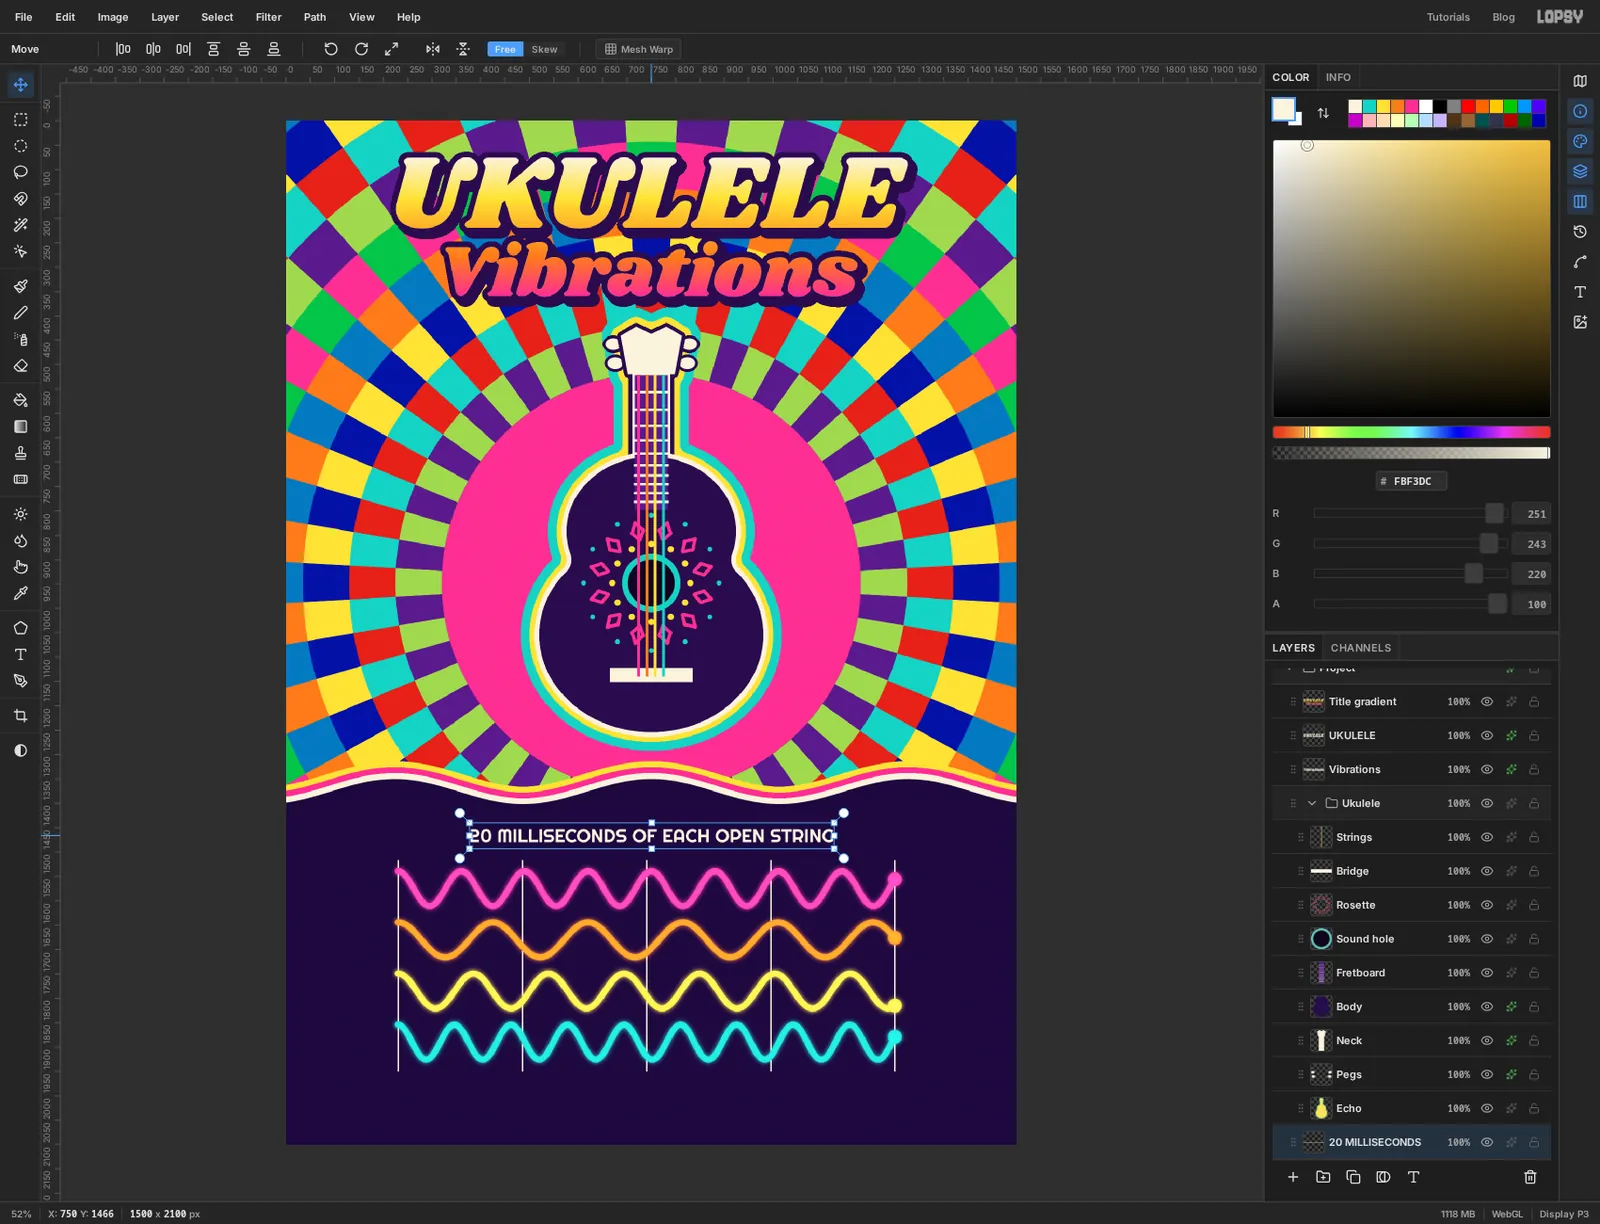
Waves copyrow. Set the foreground to cream . Pick the Text tool, set Size to 38 and the font to Righteous. Click an empty part of the panel, type20 MILLISECONDS OF EACH OPEN STRINGand press Tab.With the Move tool, centre it over the plot with the tops of the letters at about y 1452. That leaves roughly the same gap above it, to the wavy edge, as below it, to the grid.
-
Label each wave
Each wave gets its note name on the left and its frequency on the right, both in the wave's colour. That's eight small text layers, all made the same way:
- Click the
Waves copyrow, so you don't restyle the label you just made. - Set the foreground to the wave's colour.
- Pick the Text tool and click a bare patch of the panel, well away from the other labels. A click inside an existing label's box would edit that label instead.
- Type the label and press Tab.
- Drag it into place with the Move tool.
The note names are Righteous at Size 84. Centre each one on x 135 in the left margin, level with the middle of its wave:
Gin magenta, at y 1575Cin orange, at y 1680Ein yellow, at y 1785Ain teal, at y 1890
The frequencies are Righteous at Size 40, in the same colours and at the same four heights:
392 Hz,262 Hz,330 Hzand440 Hz. Line up their left edges at about x 1284, a little clear of the end dots.To finish, open the effects drawer for the
Glayer, tick Outer Glow, set Size to 16 and Opacity to 55, and set the glow colour to the same magenta as the letter. Repeat for the other seven labels, each with its own colour.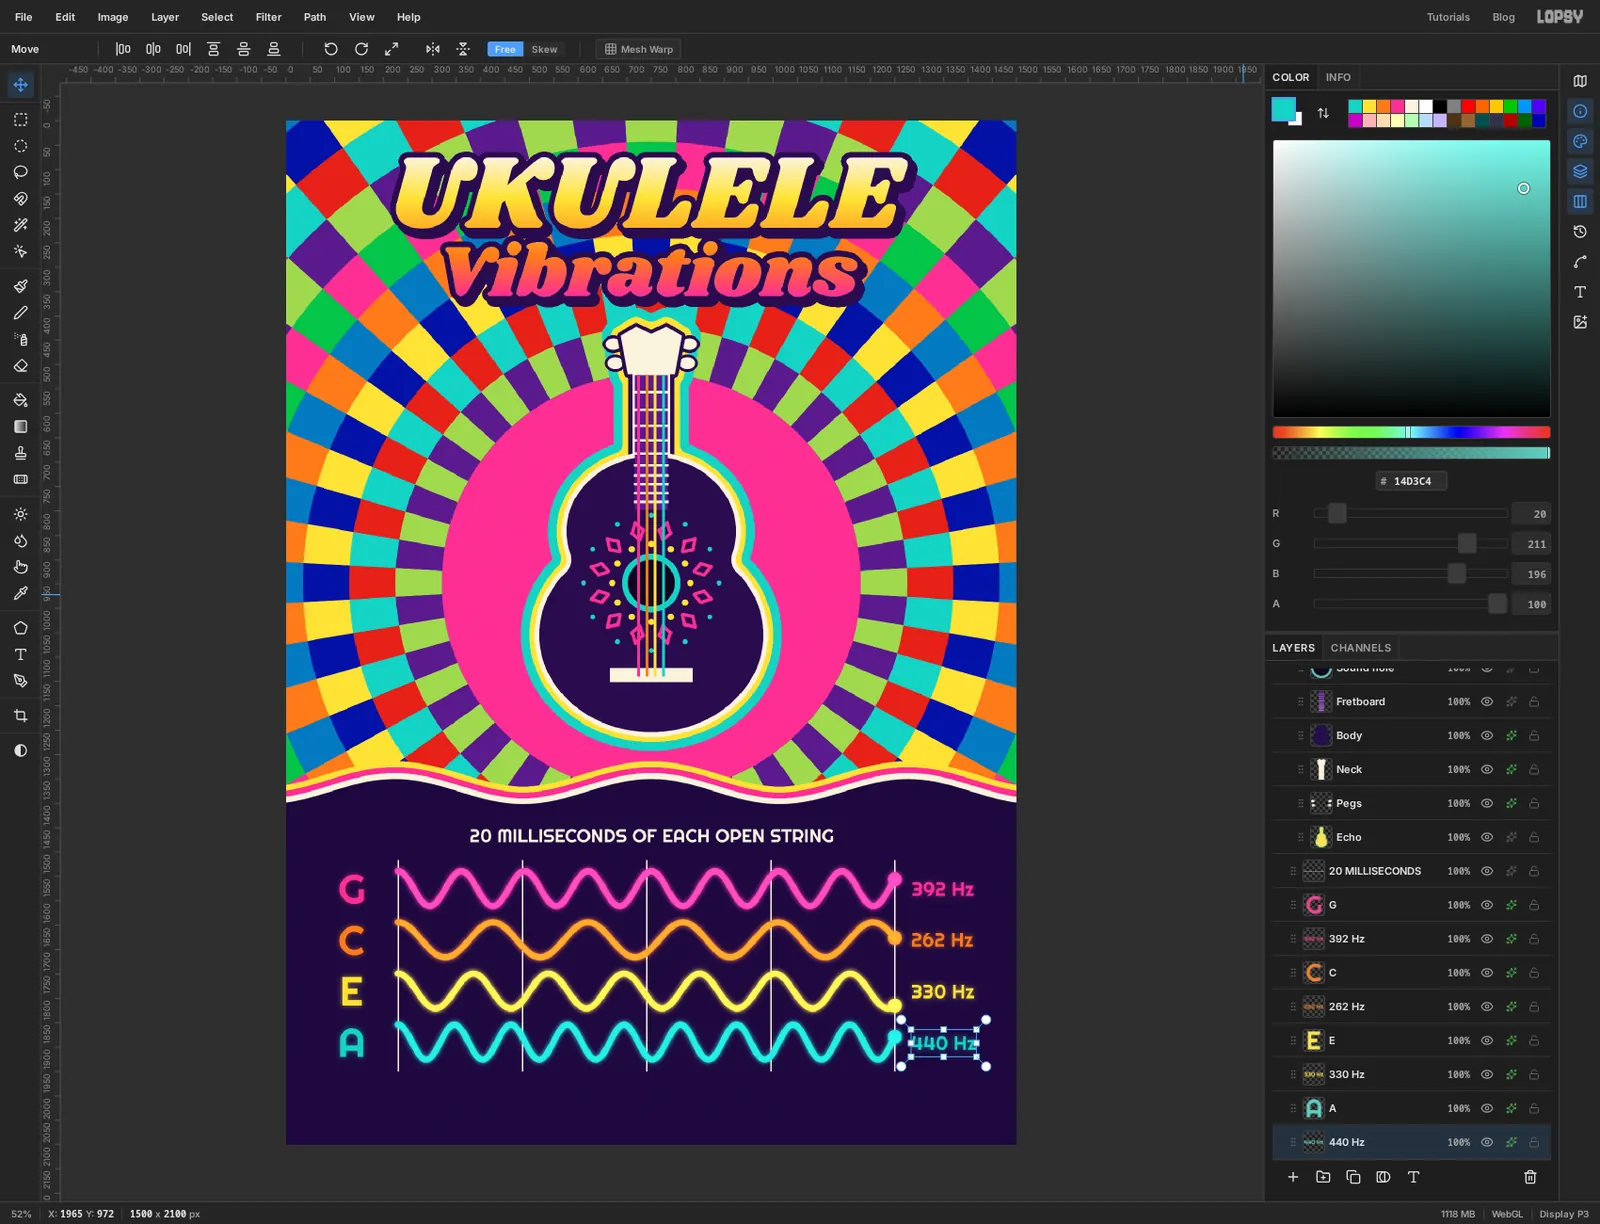
- Click the
-
Number the time axis
Still in Righteous, set Size to 30 and the foreground to cream. Make five labels the same way:
0,5,10,15and20 ms.Drag each one under its grid line with the tops of the digits at about y 1964. Centre the first four on their lines. For the last one, centre the
20on the line and let themshang out to the right.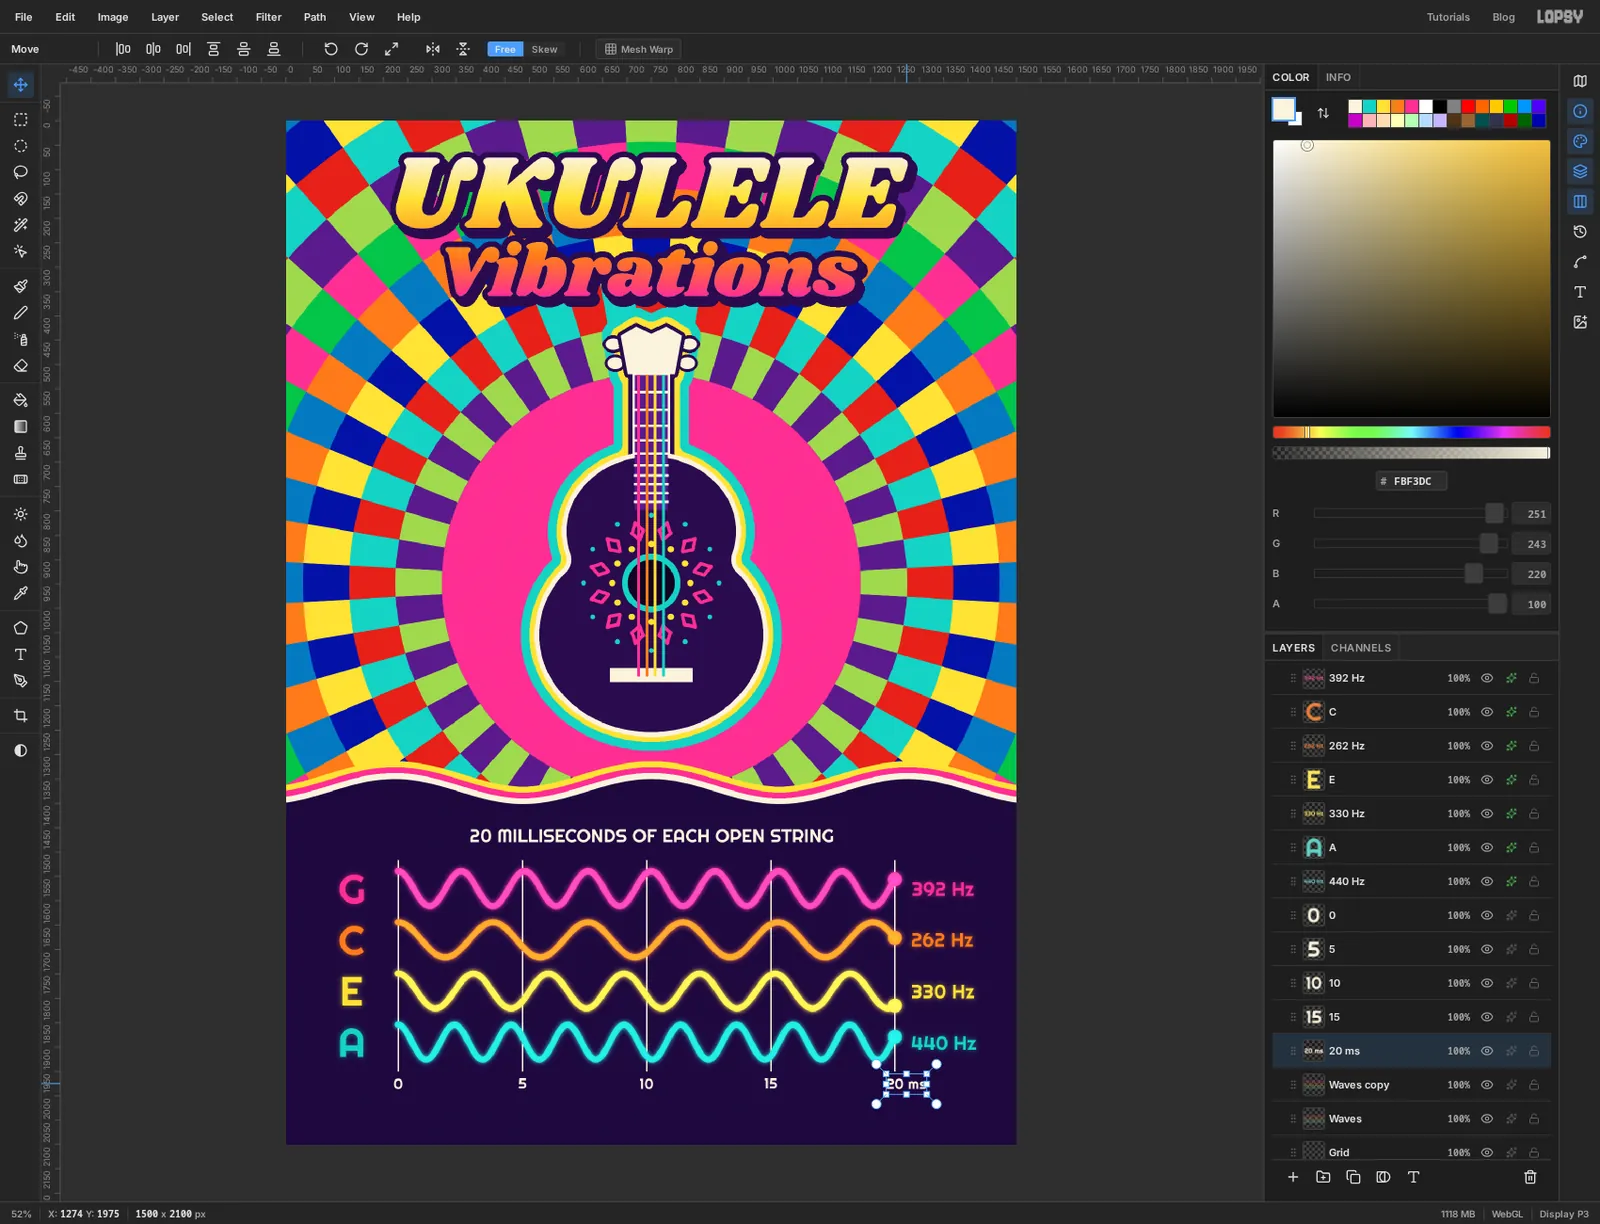
-
Mark out a border
Click the
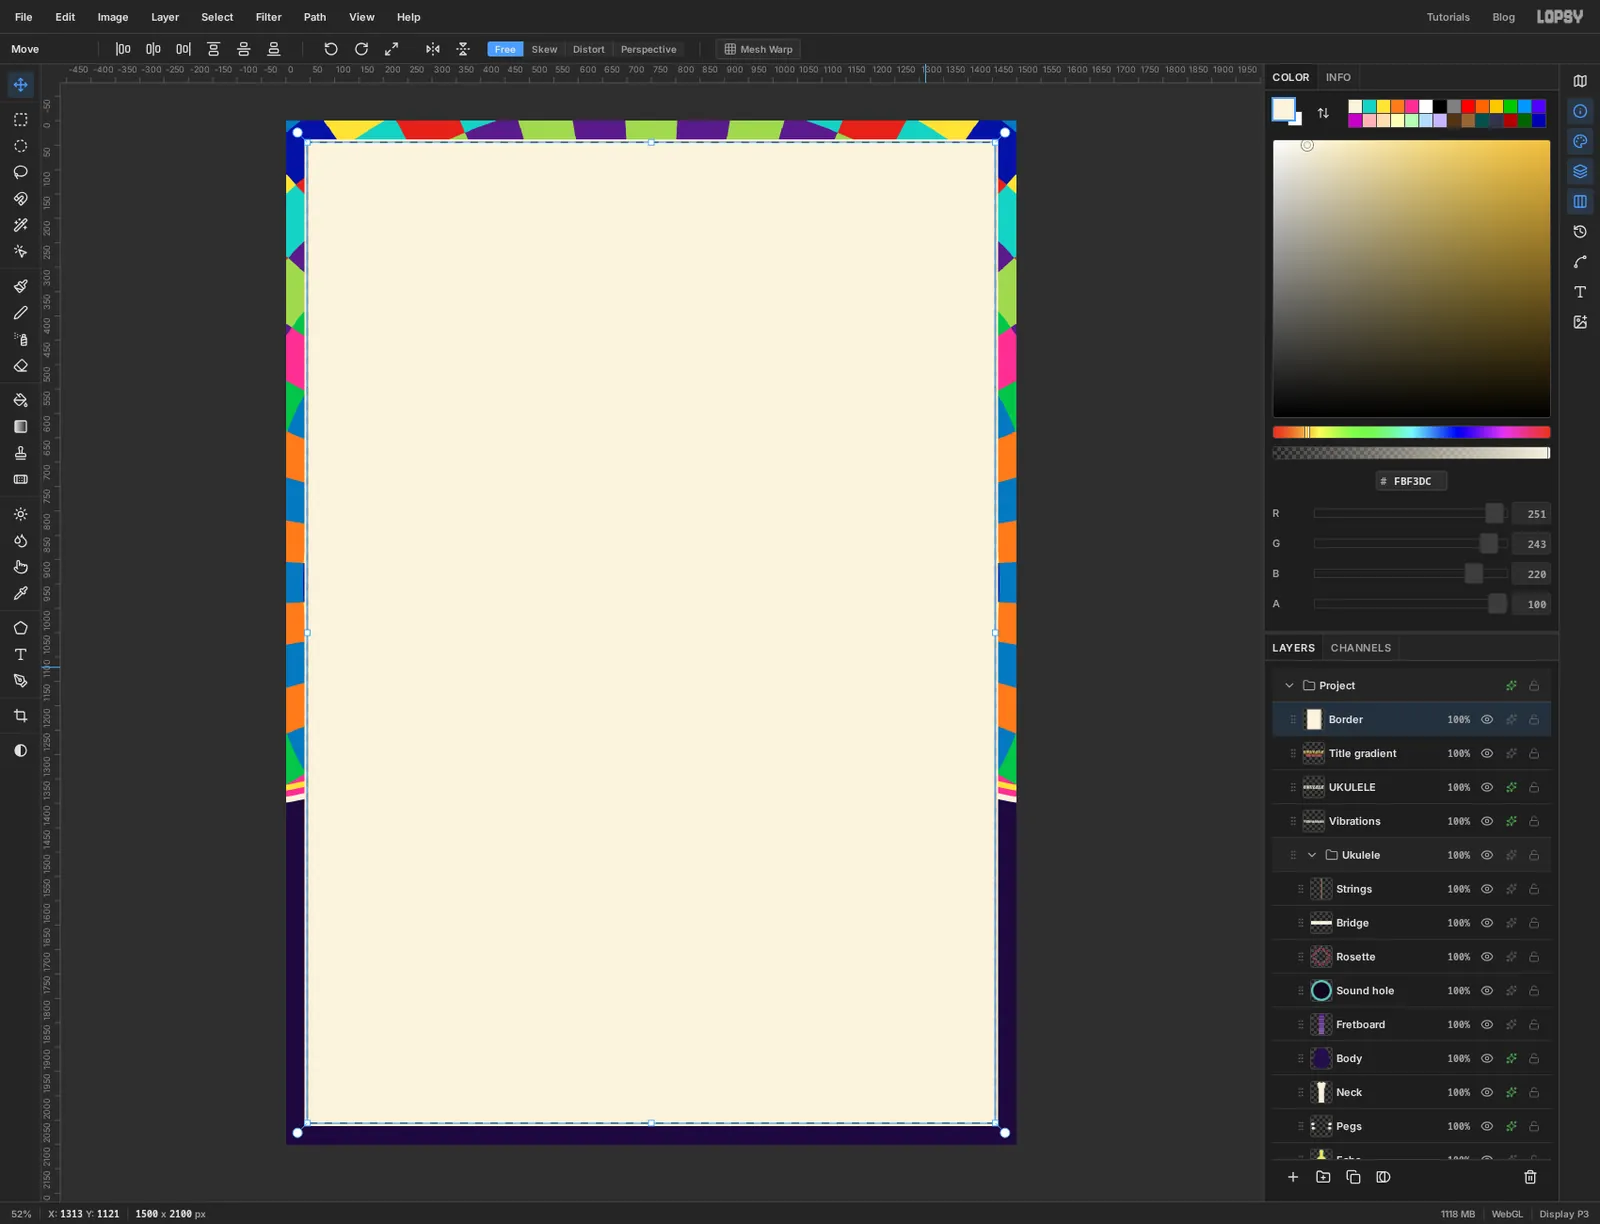
Title gradientrow at the top of the stack, then Add Layer and name itBorder. Press Cmd+A, choose Select → Shrink and enter 38. Set the foreground to cream and choose Edit → Fill. The whole poster disappears under cream for a moment.Choose Select → Shrink again and enter 6.
-
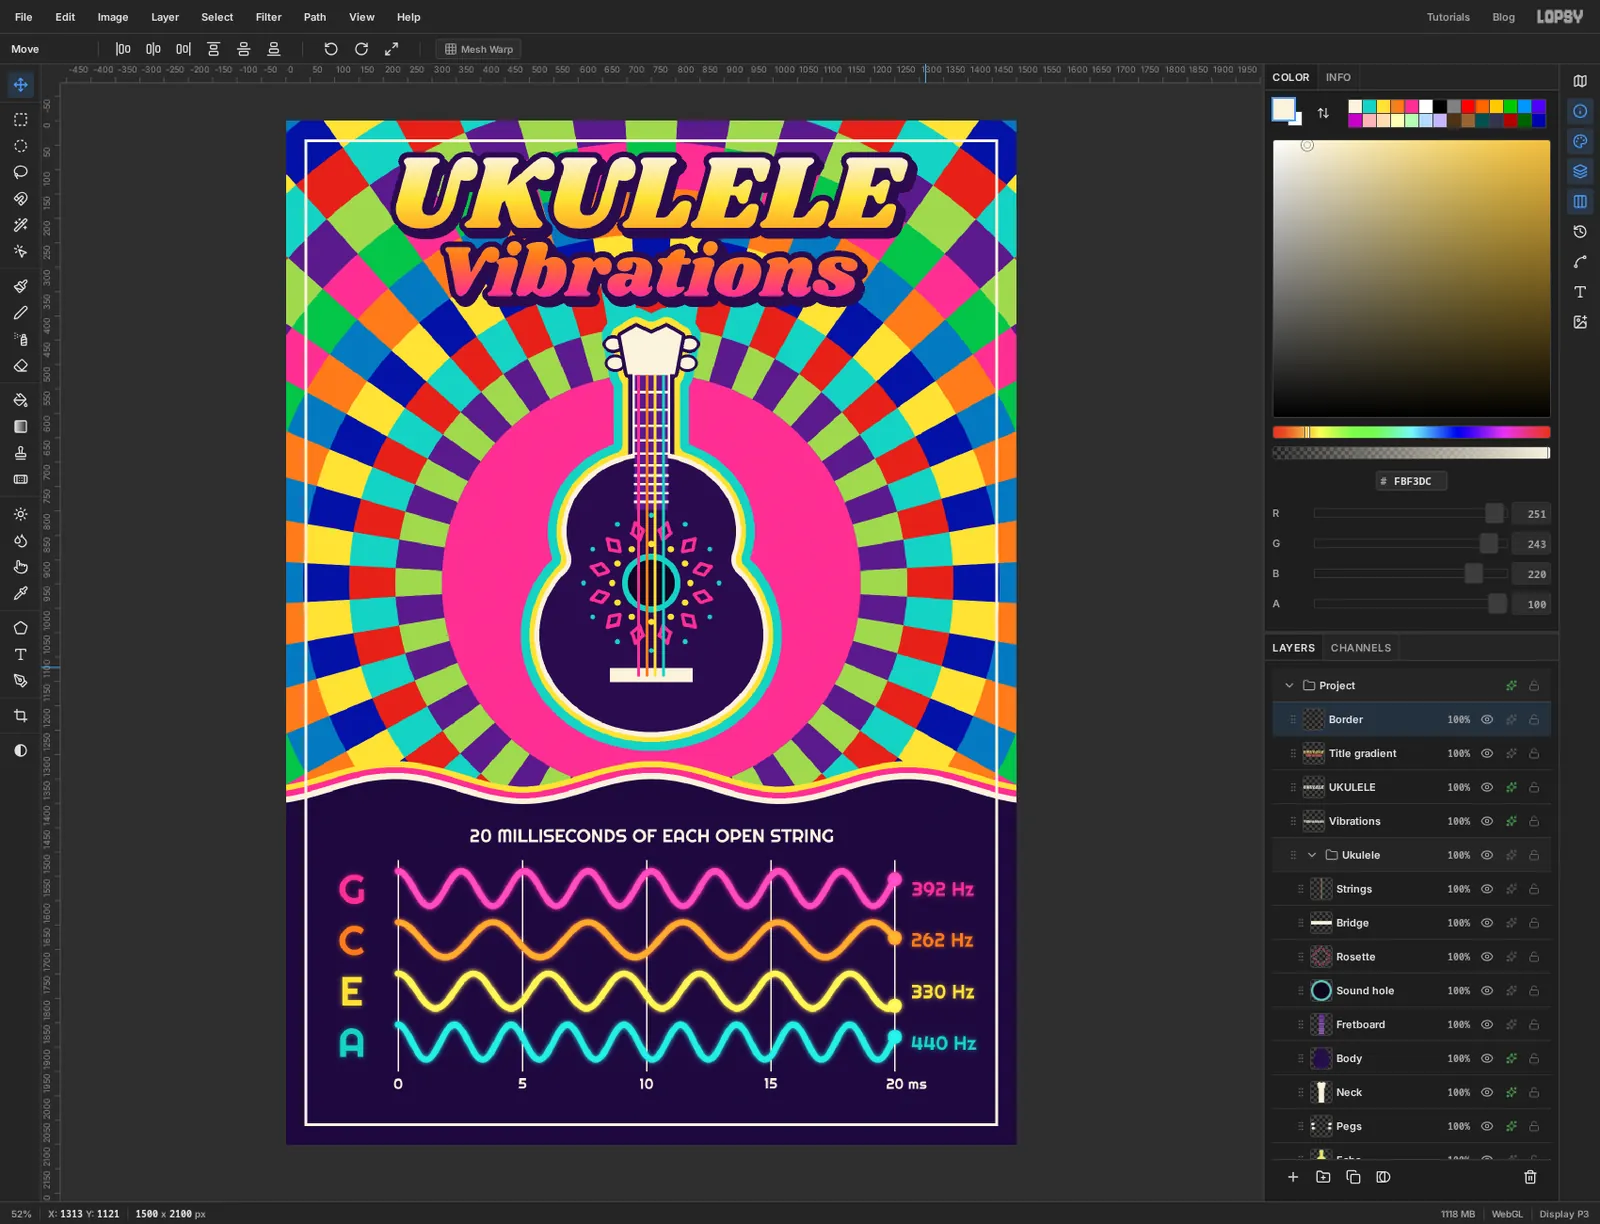
Cut the border down to a keyline
Press Delete, then Cmd+D. All that's left of the cream is the 6 px ring between the two selections.
-
Add paper grain
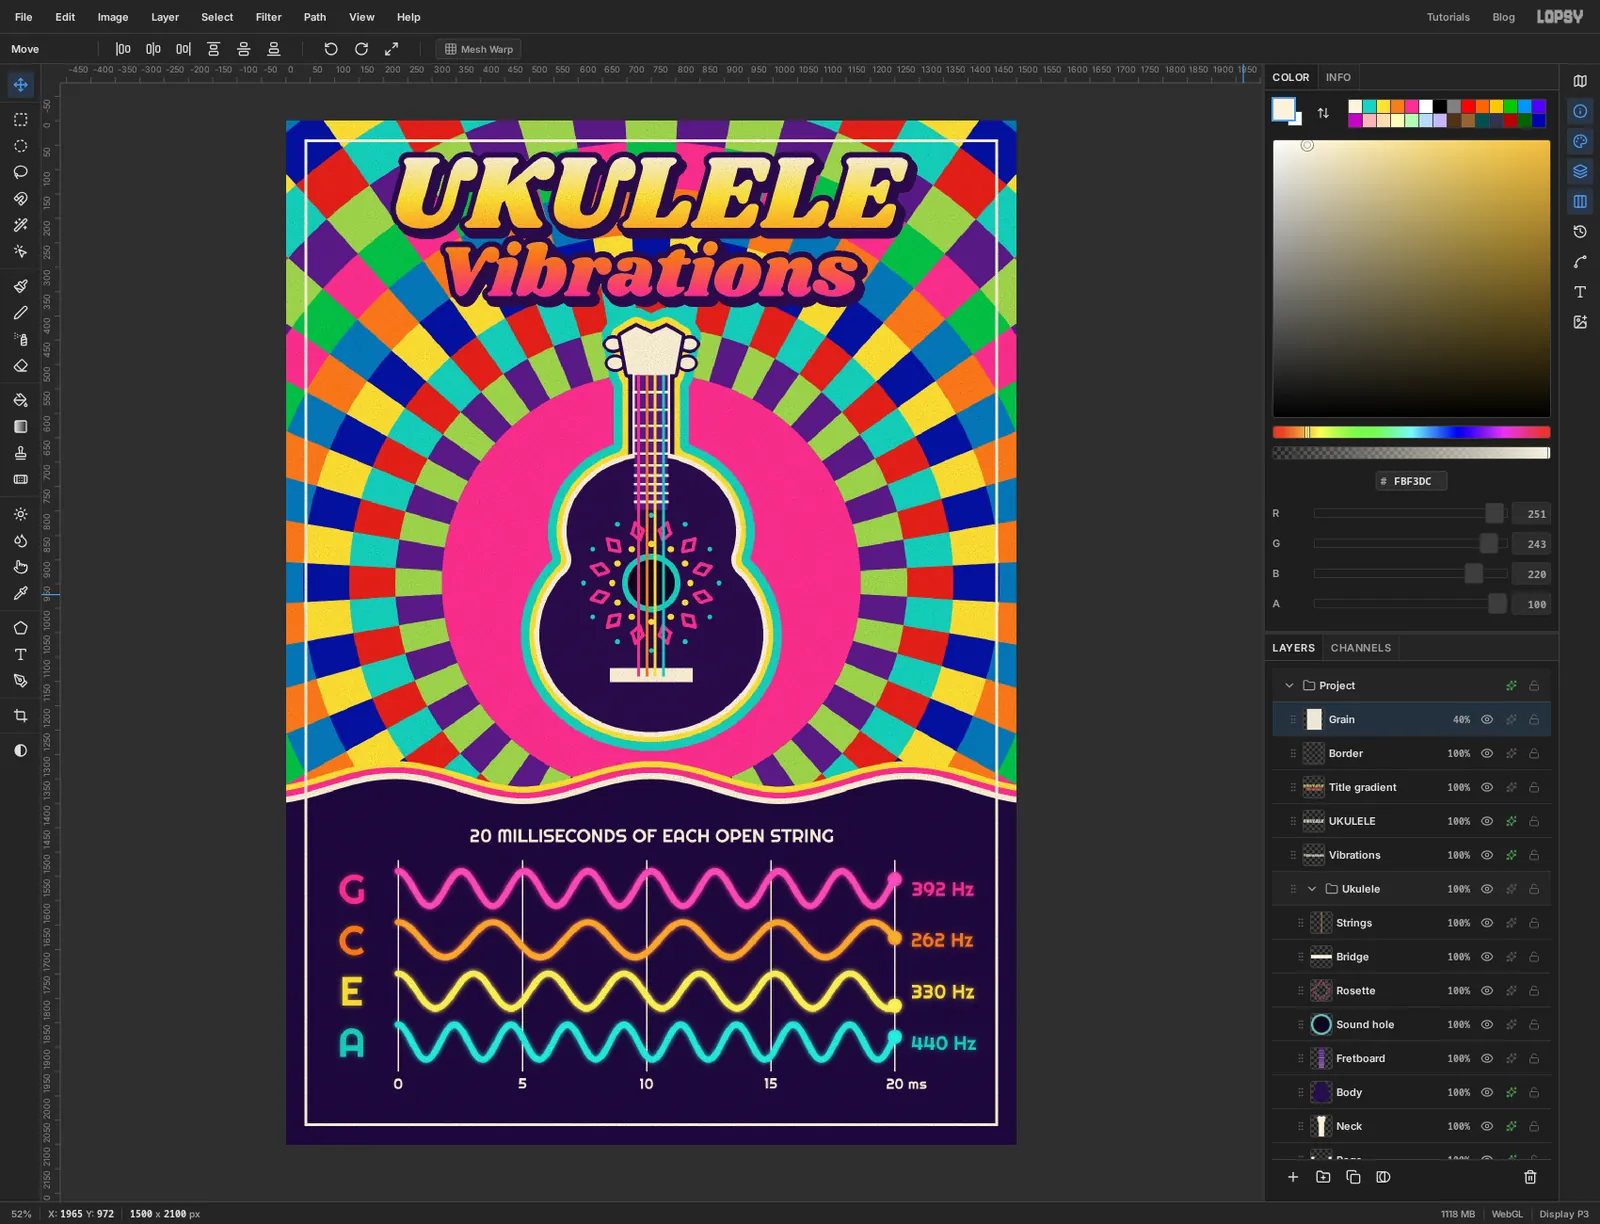
Flat screen colours look too clean for a 1960s print. Add Layer and name it
Grain. Press Cmd+A, fill it with cream and deselect.Choose Filter → Texture. Pick Grain and Mono, set Amount to 60 and Size to 2, and apply. Open the layer's effects drawer and change the blend mode to Multiply, then click the
100%on theGrainrow and bring the opacity down to about 40%.Multiply only darkens, so the grain shows as fine dark speckle and the cream takes a little glare off the brightest tiles.
-
Darken the corners with a vignette
Choose Layer → Adjustment Layer…. Adjustments in Lopsy live on a group, and this opens the drawer for the top-level
Projectgroup, which holds the whole poster. Close the note that explains this if it appears. The drawer already lists a few adjustments that do nothing until you change them. Click Add Adjustment, choose Vignette, and set the new slider at the bottom of the list to 30. Close the drawer.The darker corners push your eye back to the middle. Choose File → Quick Export PNG to save the poster, and File → Save Project if you'd like to come back and retune it.