Design a Neon Data Visualization Poster
Build a neon infographic poster in Lopsy with glowing tube type, a to-scale bubble chart, a neon bar chart, a Bloom glow pass and a mosaic tile wall.
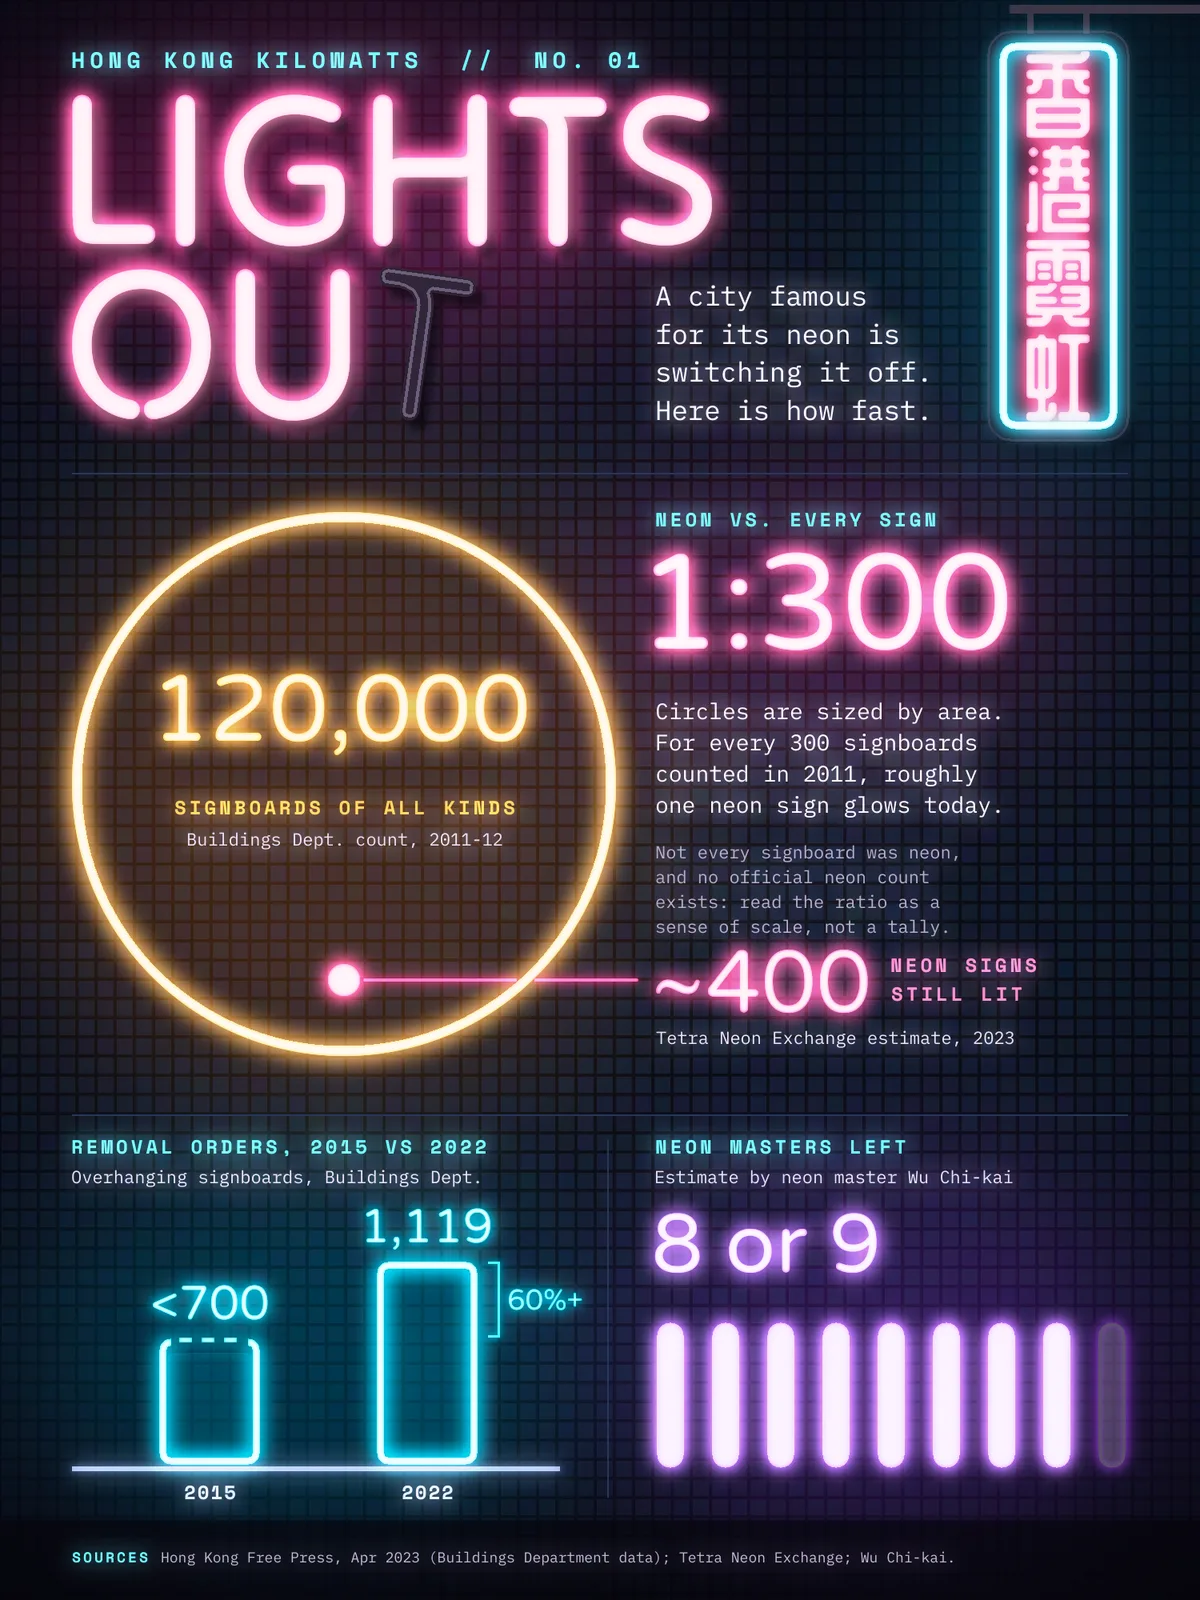
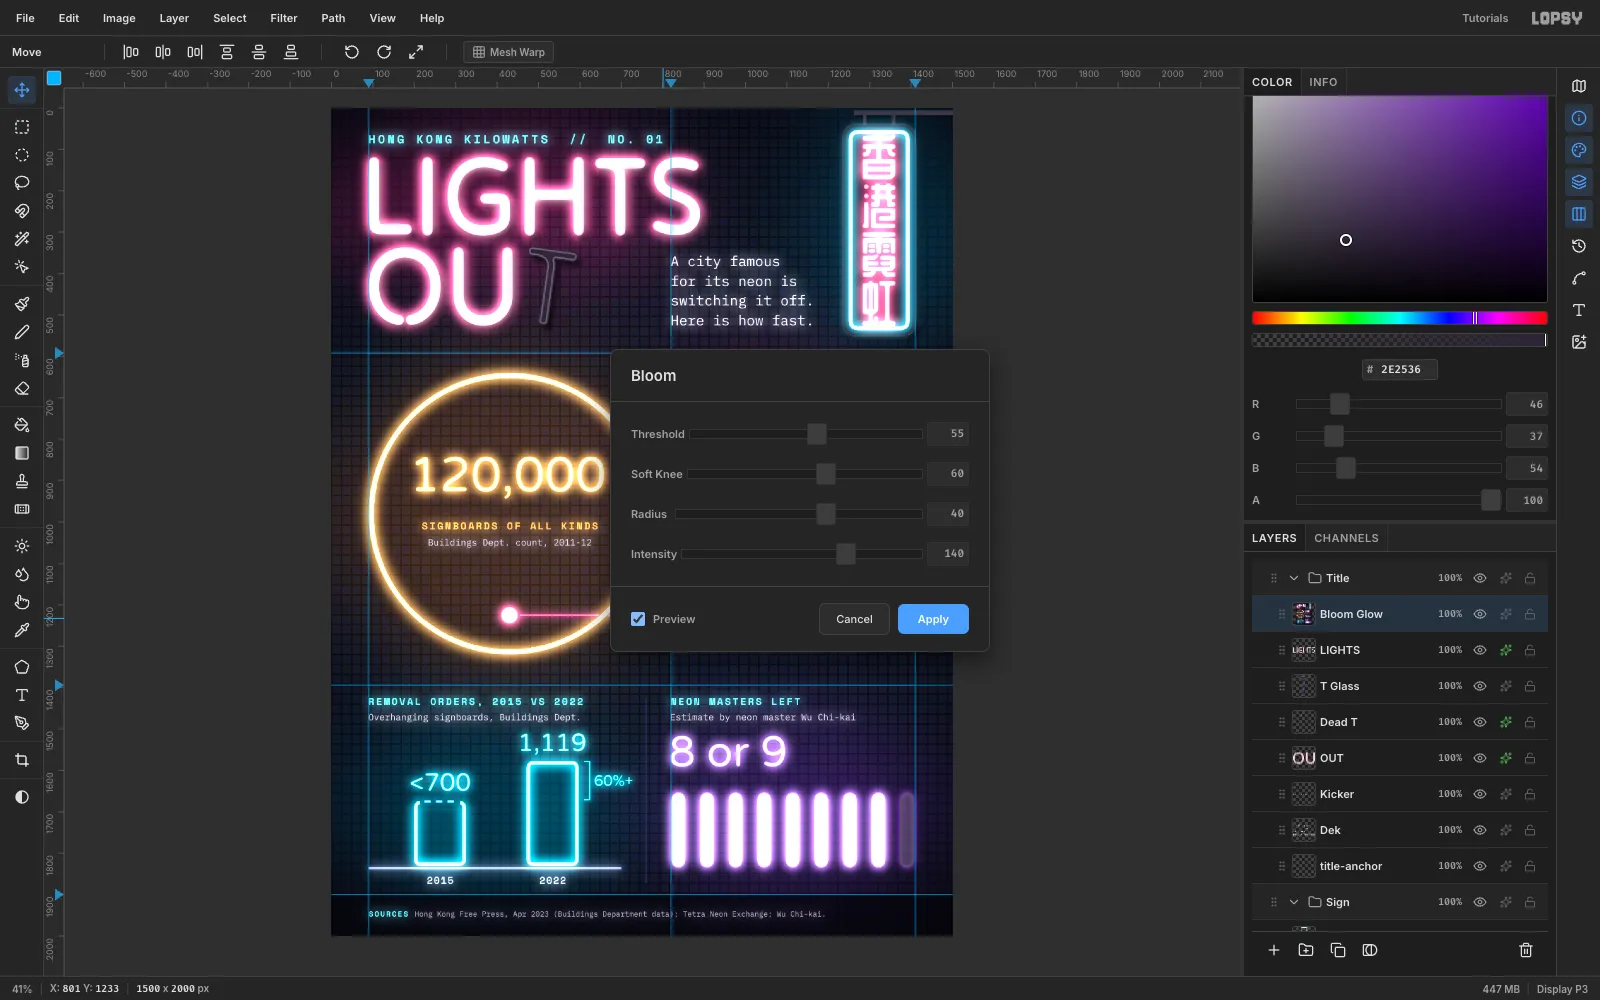
Hong Kong's neon signs used to be part of how people pictured the city at night, and most of them are gone. This tutorial turns that story into a data poster made of the thing it's about. The charts are drawn as neon tubes, the headline has a burnt-out letter, and the whole sheet hangs on a wall of the small square mosaic tiles you see on Hong Kong tenements.
The numbers come from a Hong Kong Free Press report (April 2023):
- About 120,000 signboards were counted by the Buildings Department in 2011.
- About 400 neon signs are left, according to the Tetra Neon Exchange's estimate.
- Removal orders for overhanging signboards rose from under 700 in 2015 to 1,119 in 2022.
- Master Wu Chi-kai estimates that eight or nine neon masters are left.
Each dataset gets one colour: amber for all signboards, pink for surviving neon, cyan for removals and violet for the craftspeople. Every neon element uses the same recipe. Fill the shape with a very pale tint of its colour, add an Inner Glow in the full colour so the tube has a white-hot core, then add an Outer Glow for the halo.
-
Tile a mosaic wall with a pattern
Create a 1500 × 2000 document and fill
Backgroundwith#0A0913. On a new layer, make one tile at the top-left corner:- Marquee 0, 0 → 24, 24 and fill it with the grout colour
#0B0D15. - Marquee 2, 2 → 22, 22 and fill it with the tile face colour
#172033. - Marquee the full 24 × 24 square again and choose Edit → Define Pattern.
Clear the tile, choose Edit → Fill with Pattern…, tick Preview, and click Apply. Rename the layer
Mosaic.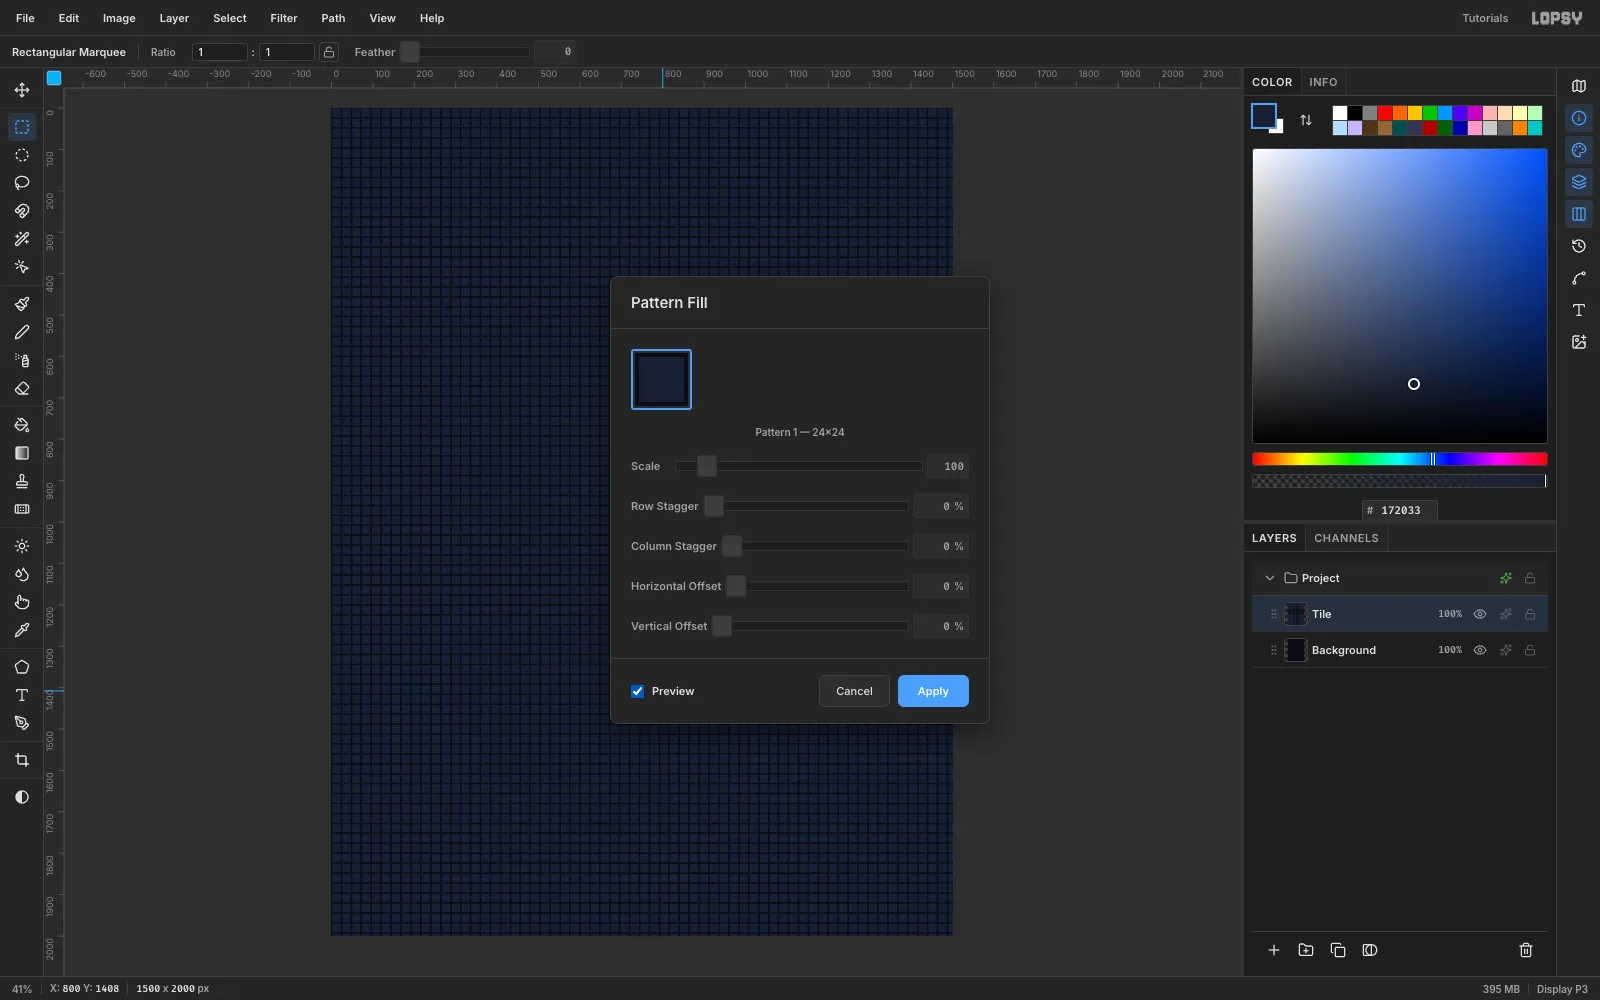
- Marquee 0, 0 → 24, 24 and fill it with the grout colour
-
Give every tile its own tone
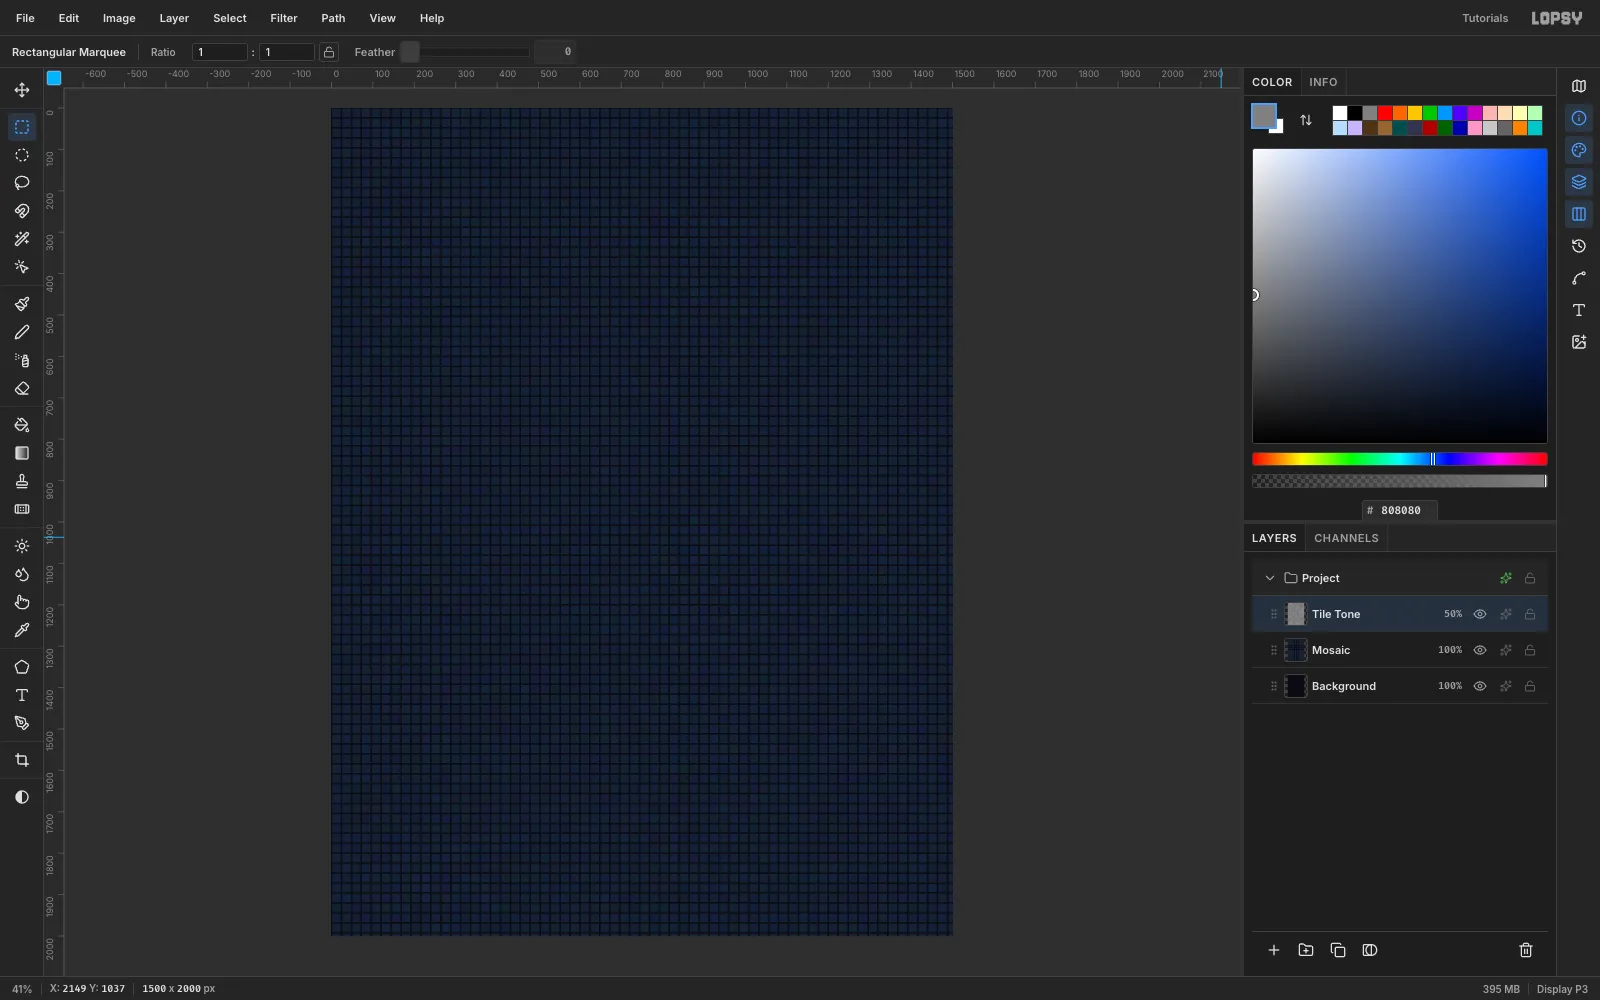
Real mosaic walls are never one flat colour. Add a
Tile Tonelayer, fill it with#808080, and run Filter → Add Noise… with Amount 90 in Color mode. Then run Filter → Pixelate with Block Size 24.Pixelate's blocks start at the document origin, just like the pattern tiles, so each block sits exactly on one tile. Set the layer to Overlay at 50%, and every tile picks up its own slight shift in hue and brightness.
-
Darken the edges and set up guides
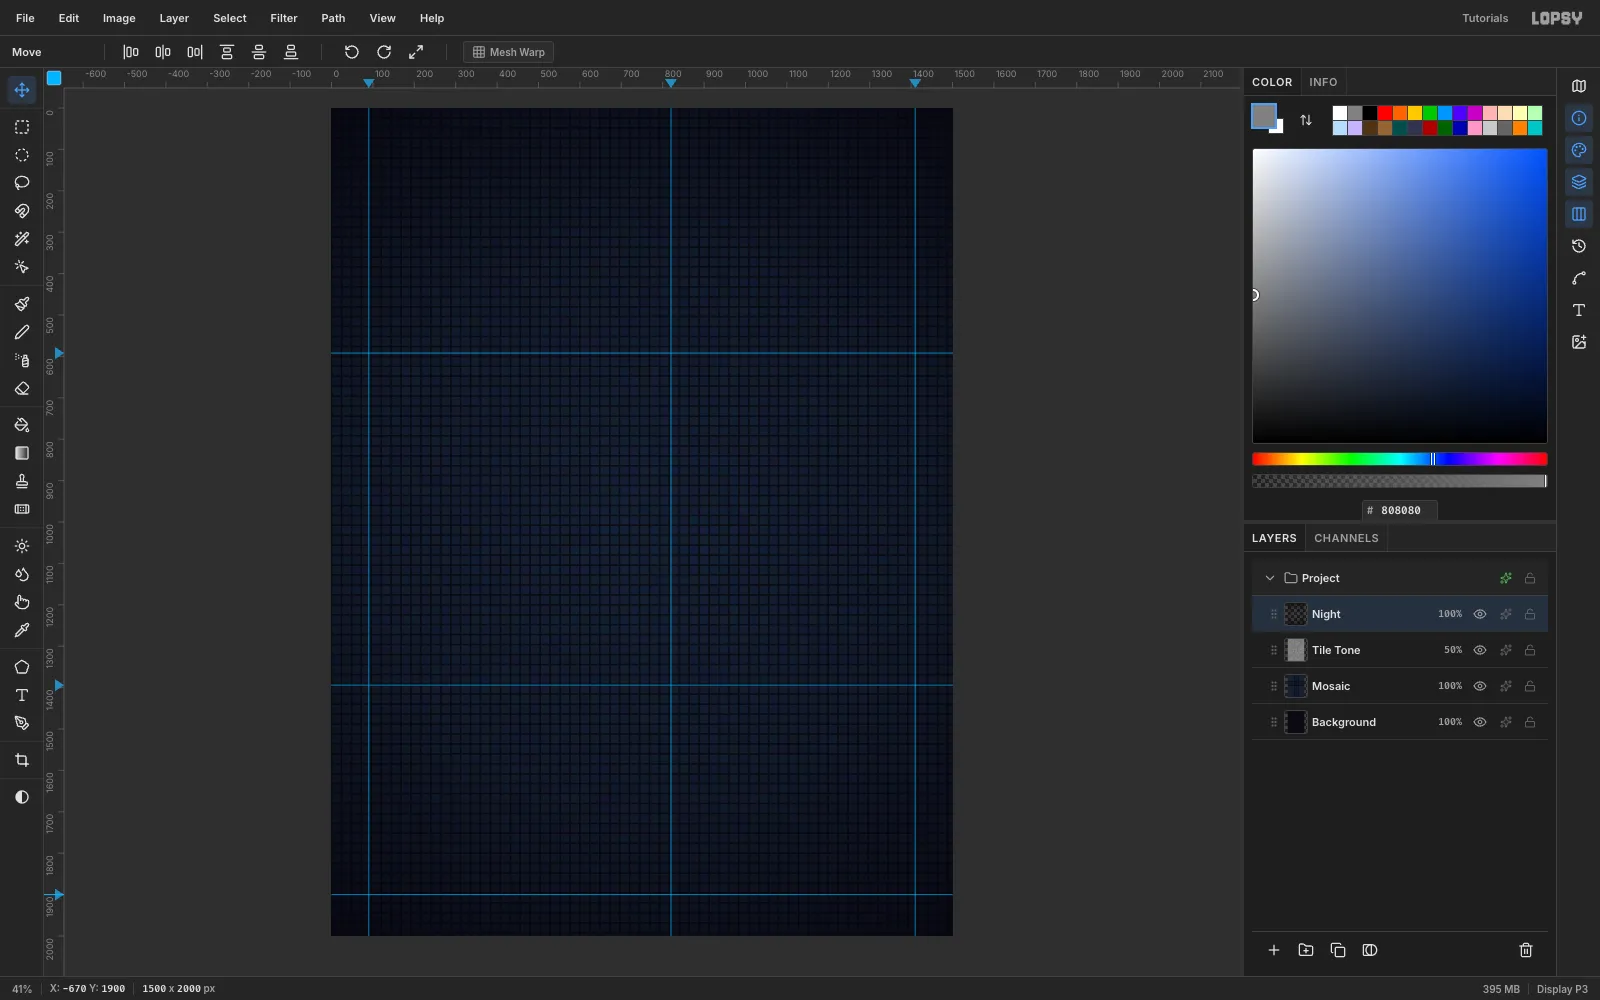
On a
Nightlayer, pick the Gradient tool with Type: Radial. In Advanced…, set three stops, all#05040A:- 0% opacity at the start.
- 25% opacity at the midpoint.
- 95% opacity at the end.
Drag from the centre (750, 1000) out to (1750, 1900).
Now click the top ruler at x 90, 820 and 1410, and the left ruler at y 592, 1394 and 1900:
- x 90 is the left margin for everything.
- x 820 is where the right-hand column starts.
- x 1410 is the right margin.
- y 592 / 1394 separate the three bands, and y 1900 marks the footer.
-
Set the headline in neon tubes
Click New Group in the Layers panel and name it
Title. Tilt Neon is drawn like bent glass tubing, which suits this poster well. TypeLIGHTSandOUTas two separate layers in Tilt Neon at 270 px, in the pale pink#FFD3E6. Move their top-left corners to (90, 118) and (90, 336). Give both layers the same effects:- Inner Glow
#FF2E88: Size 9, Spread 20, Opacity 100. - Outer Glow
#FF2E88: Size 40, Spread 10, Opacity 95. - Drop Shadow
#020106: offset 10 / 14, Blur 12, Opacity 70.
Above the headline, type the kicker
HONG KONG KILOWATTS // NO. 01in Space Mono Bold at 28 px, with Letter spacing 6 set in the Text panel, at (90, 62). For the intro, type four short lines in IBM Plex Mono at 34 px, starting at x 820. Sit the last line's baseline level with the bottom of OUT (y 525).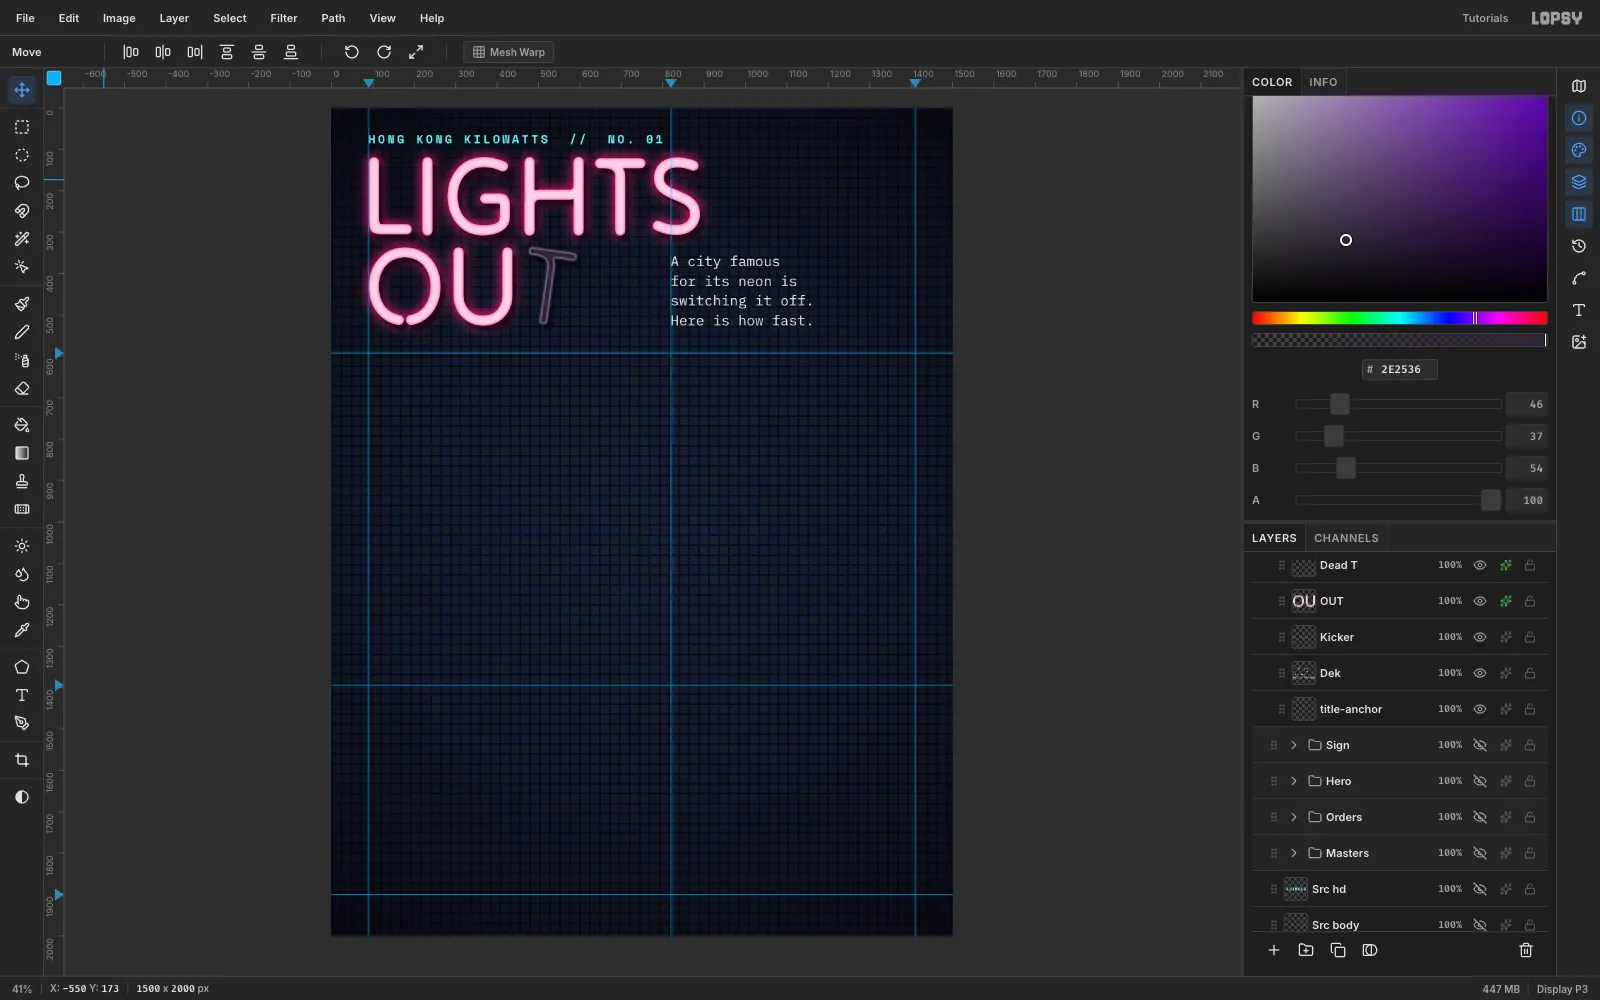
- Inner Glow
-
Burn out the T
Select
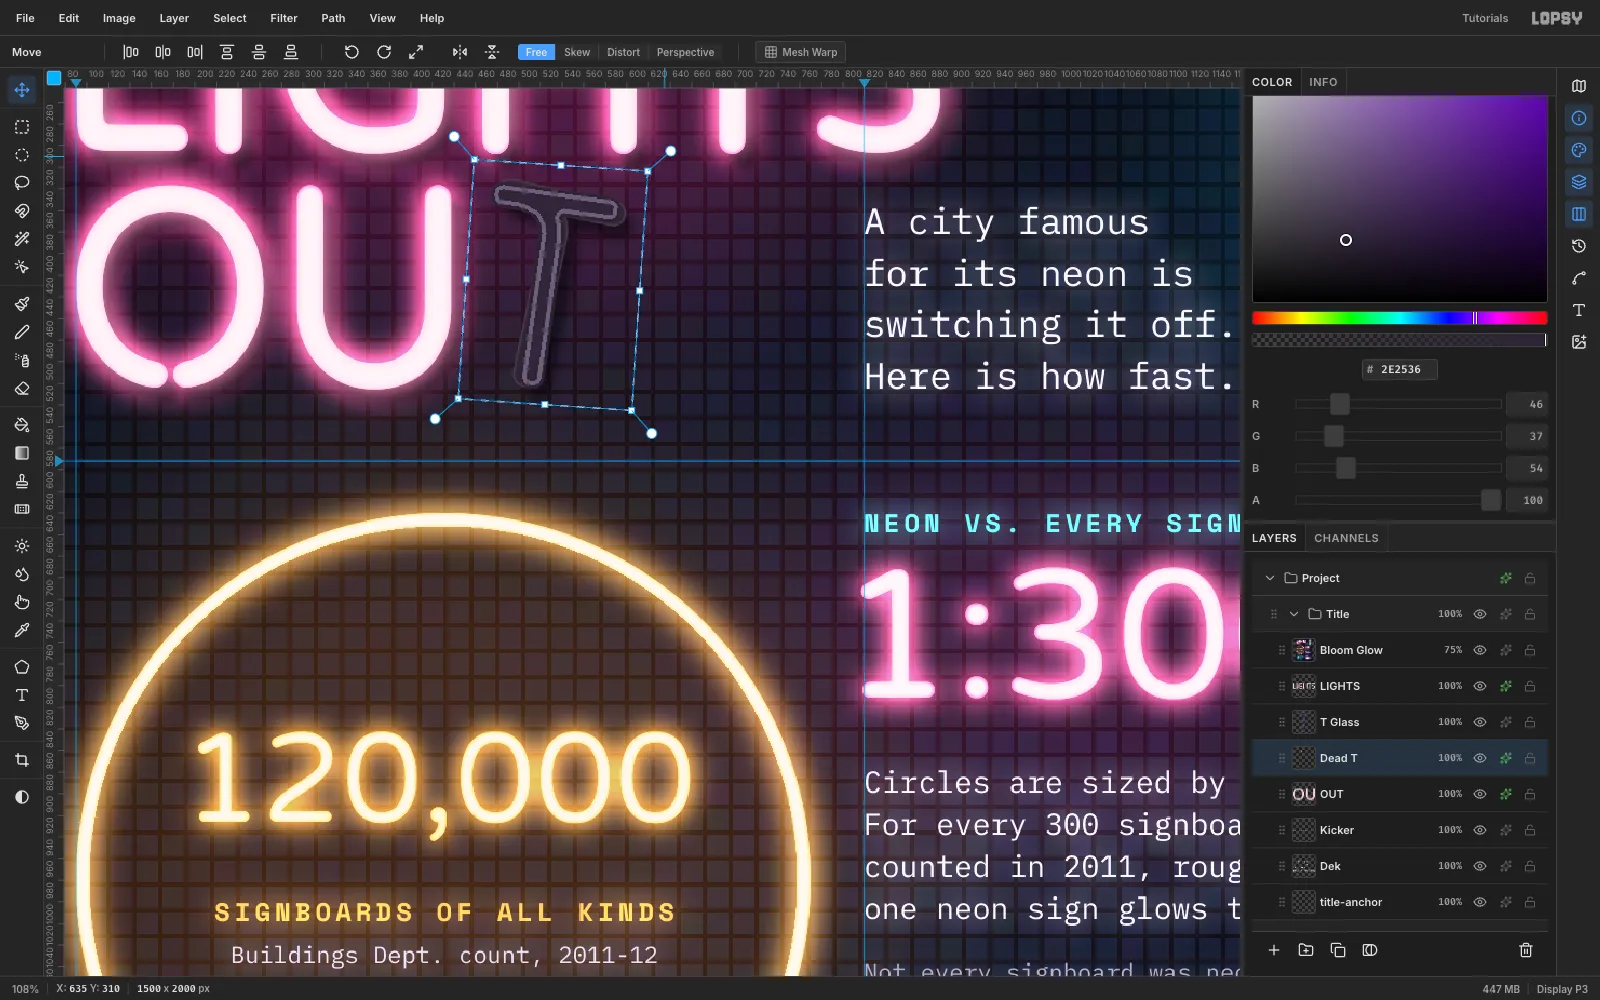
OUTand click Rasterize Layer at the bottom of the Layers panel. Marquee just the T (its left edge sits in the gap after the U), press Cmd+X, wait a moment, then press Cmd+V. The T comes back in place on its own layer, which is now free of OUT's glow effects. Rename itDead Tand give it these effects:- Color Overlay
#2E2533, so it looks like unlit glass. - Inner Glow
#9A90A8at Size 3 and Opacity 80, for a faint rim. - A softer Drop Shadow: offset 10 / 14, Blur 16, Opacity 60.
To give it some glass depth, add a
T Glasslayer and Cmd-click theDead Tthumbnail to select its shape. Then build the tube in three fills:- Fill with
#2A2230. - Select → Shrink… by 3 and fill with
#6A5E78. - Shrink by 3 again and fill with
#2E2536.
That leaves a thin light line inside each edge. Finish with Gaussian Blur at radius 1.
Finally, marquee the T, switch to the Move tool and drag the rotation handle about 8° clockwise, so the dead letter hangs loose. Press Cmd+D to commit.
- Color Overlay
-
Hang a vertical sign
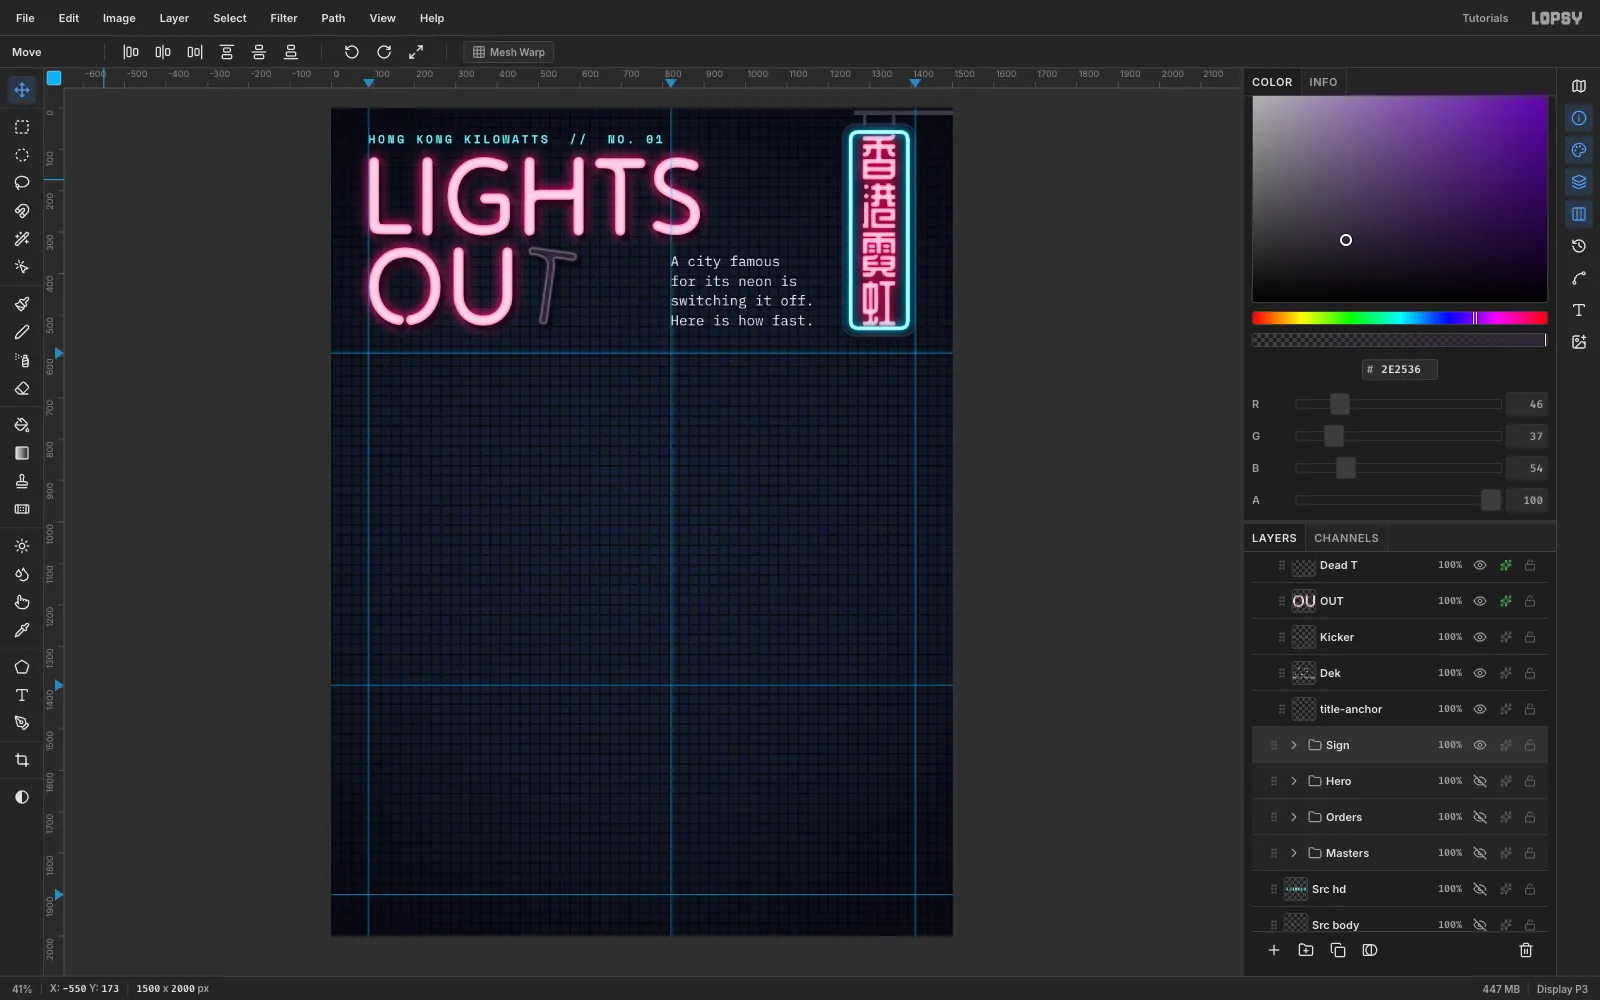
Hong Kong signs hang out over the street and read top to bottom. In a
Signgroup:- Rounded plate. Marquee 1236, 40 → 1410, 550, then run Select → Shrink… 26 followed by Select → Grow… 26. Shrinking and then growing rounds off the corners. Fill the selection with
#140F1E, and add a Stroke of 3 px in#2E2838and a soft Drop Shadow (Blur 30, 55%). - Frame. Repeat the rounded selection on a new layer at 1248, 52 → 1398, 538 with radius 20. Fill it
#D2F8FF, Shrink by 9 and press Delete to hollow it out. Soften it with Gaussian Blur 1.5 and apply the neon recipe in cyan#19D8FF. - Arm. Fill a
#3B3746bar at 1262, 6 → 1400, 17 and two short rods down to the plate. Marquee the bar and use the Move tool to drag its right edge past the edge of the canvas, so the arm runs out of frame as if it's fixed to a wall. - Characters. Pick the Text tool, turn on Toggle vertical text, choose ZCOOL QingKe HuangYou at 118 px, and paste
香港霓虹(Hong Kong neon). Centre it on the plate at (1323, 295) and give it the neon recipe in#FF2E6E.
- Rounded plate. Marquee 1236, 40 → 1410, 550, then run Select → Shrink… 26 followed by Select → Grow… 26. Shrinking and then growing rounds off the corners. Fill the selection with
-
Draw the ring to scale
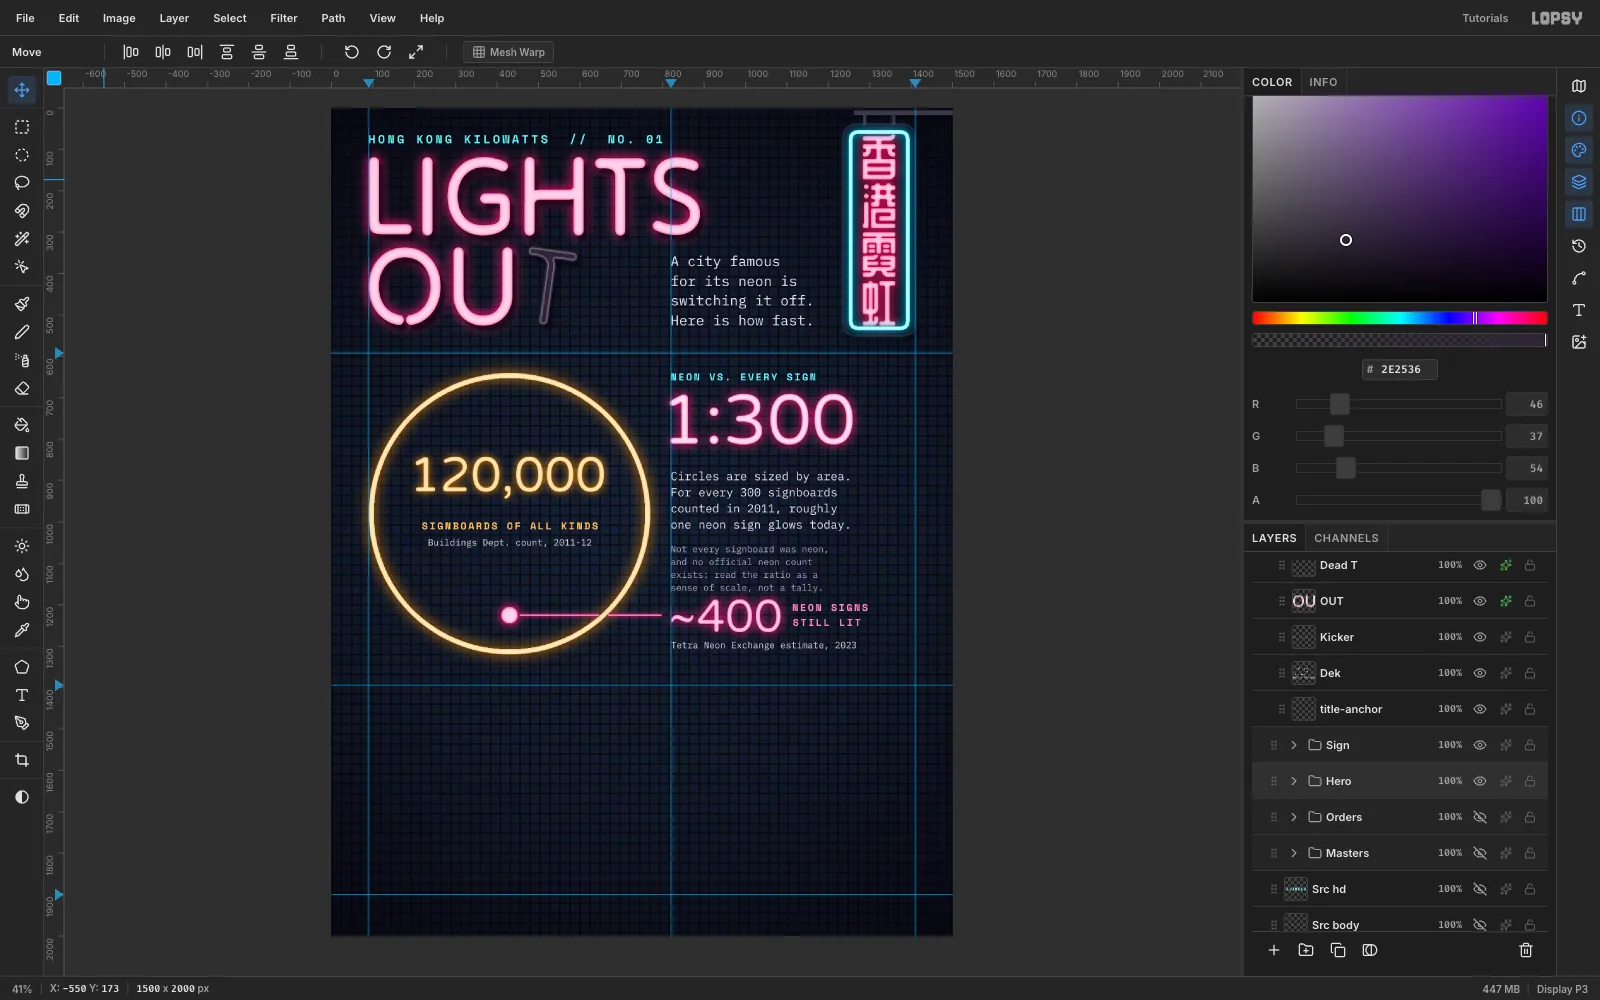
The hero chart compares two numbers by area, so compute the sizes instead of guessing them. With a large ring of radius 340, the 400 neon signs get a dot of radius 340 ÷ √(120,000 ÷ 400) ≈ 20 px.
In a
Herogroup, on aBig Ringlayer:- Draw an elliptical marquee centred on (430, 980) with a 340 px radius and fill it with
#FFEBC8. - Choose Select → Shrink… 12 and press Delete, leaving a 12 px tube.
- Run Gaussian Blur 1.5 so the edges aren't jagged, then apply the neon recipe in amber
#FFA41C(Outer Glow Size 44).
On a
Small Dotlayer, fill a 20 px radius disc at (430, 1225) and give it the pink neon. Keep it well inside the ring, so a dark gap shows between the two glows.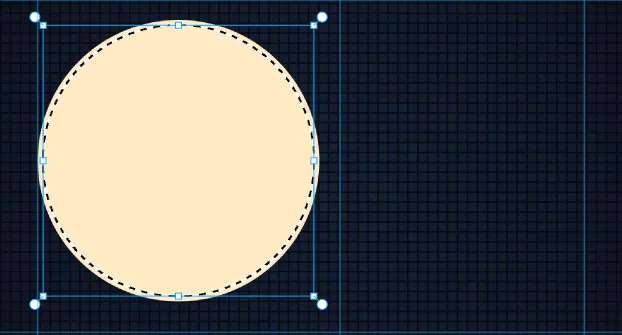
- Draw an elliptical marquee centred on (430, 980) with a 340 px radius and fill it with
-
Label the gap with a leader line
Add a
Leaderlayer and pick the Pen tool. Click (456, 1225) and (796, 1225), then click Commit path. Set the foreground to#FF7AB8, open the Paths panel and click Stroke Path with Width 4. Where the line crosses the ring, marquee a 20 px gap and press Delete, so the two glows don't merge.Varela Round keeps the tube feel but has closed zeros, which makes the numbers easier to read. Set the text layers:
120,000at 118 px, centred in the ring, with an amber glow. Under it,SIGNBOARDS OF ALL KINDSin Space Mono Bold and the source in IBM Plex Mono.- The right column, all starting at x 820:
- A cyan header,
NEON VS. EVERY SIGN. 1:300at 170 px in pink neon.- Four lines of explanation.
- A dimmer caveat saying that not every signboard was neon.
~400at 110 px, centred on the leader line at y 1225, withNEON SIGNS / STILL LITbeside it.
-
Snap the bars to a grid
Make an
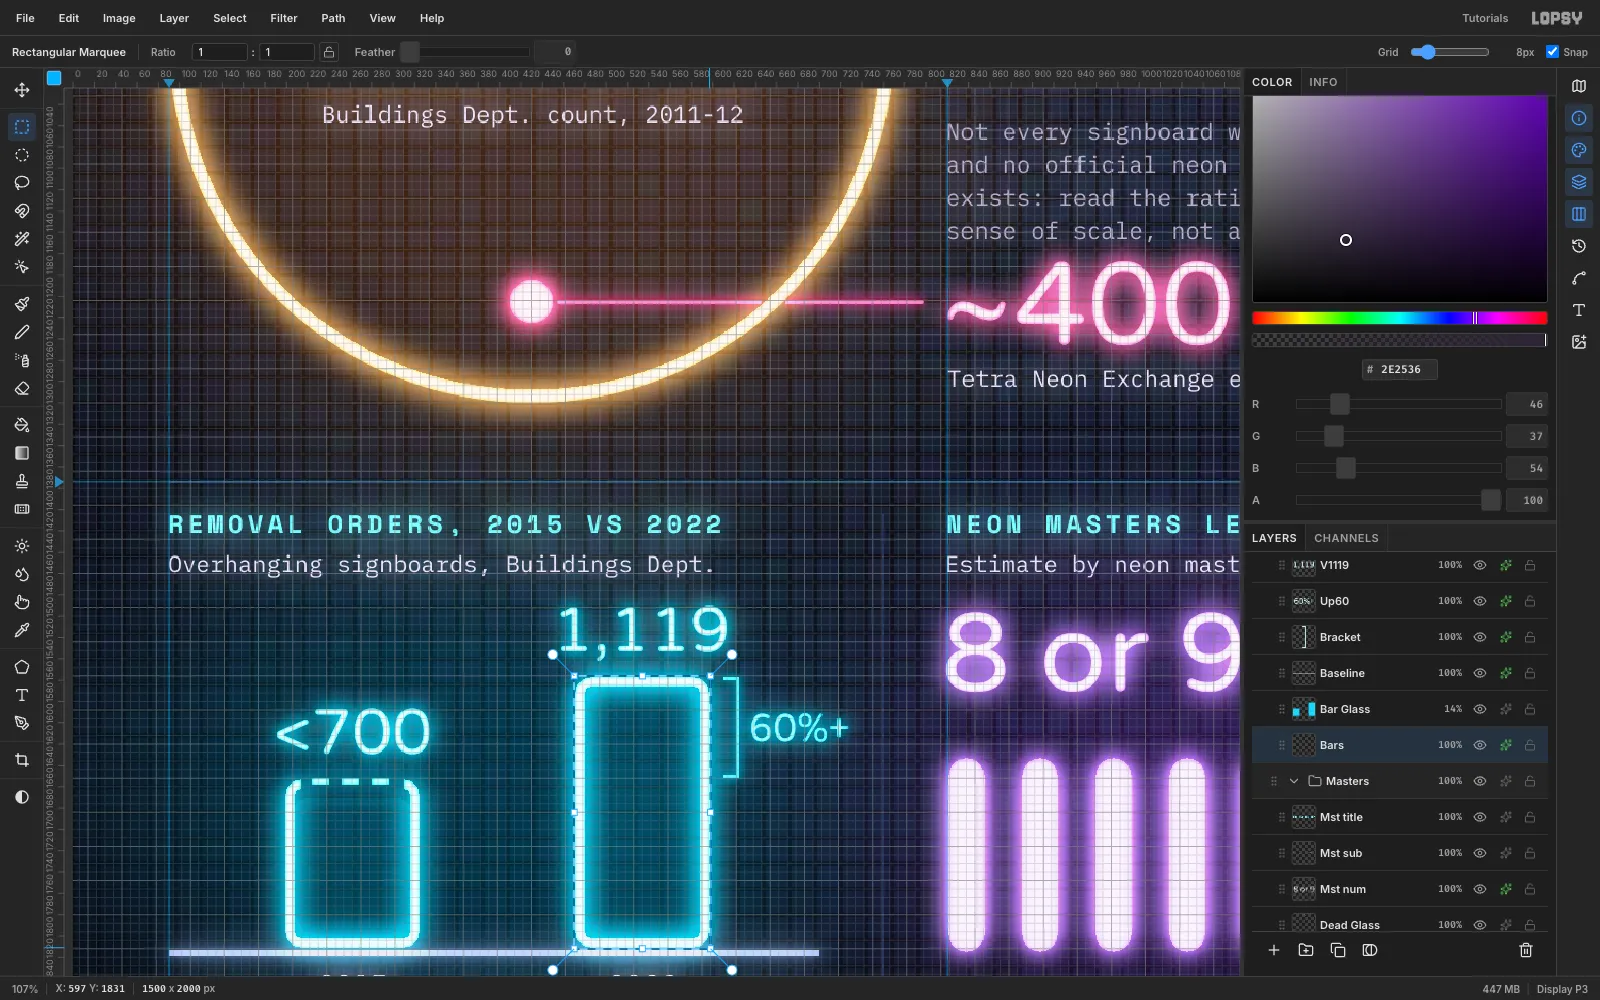
Ordersgroup with aBarslayer. Turn on View → Show Grid, set the grid to 8 px and tick Snap. Scale the bars so that 1,119 orders is 255 px tall. Under 700 then works out at 160 px, and 255 ÷ 160 matches 1,119 ÷ 700.Draw each bar as a rounded 8 px ring:
- 2015: marquee 199, 1673 → 325, 1831.
- 2022: marquee 471, 1577 → 597, 1831.
For each one, run Shrink 14 then Grow 14 to round the corners, fill with
#D2F8FF, then Shrink 8 and Delete. Snap tidies the corners onto the grid.The 2015 figure is only an upper bound ("below 700"), so don't draw a solid top on that bar. Marquee across the top edge between the corners and press Delete. Then untick Snap and fill three 16 × 6 px dashes where the top edge was. Blur by 1.5 and use the neon recipe in cyan.
-
Label the bars and bracket the change
Add these layers:
Bar Glassat 14% opacity, with a cyan fill inside each bar.- A
Baseline: a 6 px pale line from x 90 to 700. - The header
REMOVAL ORDERS, 2015 VS 2022, starting at x 90.
Centre
<700and1,119(Varela Round, 60 px) over their bars and the years underneath.To show the change, add a
Bracketlayer. Draw a 3 px line from the top of the 2022 bar down to the height of the 2015 bar, with short ticks at each end. Put60%+beside it, centred on the bracket. Use "60%+" rather than "+60%": the 2015 number is an upper bound, so the real rise is at least 60%.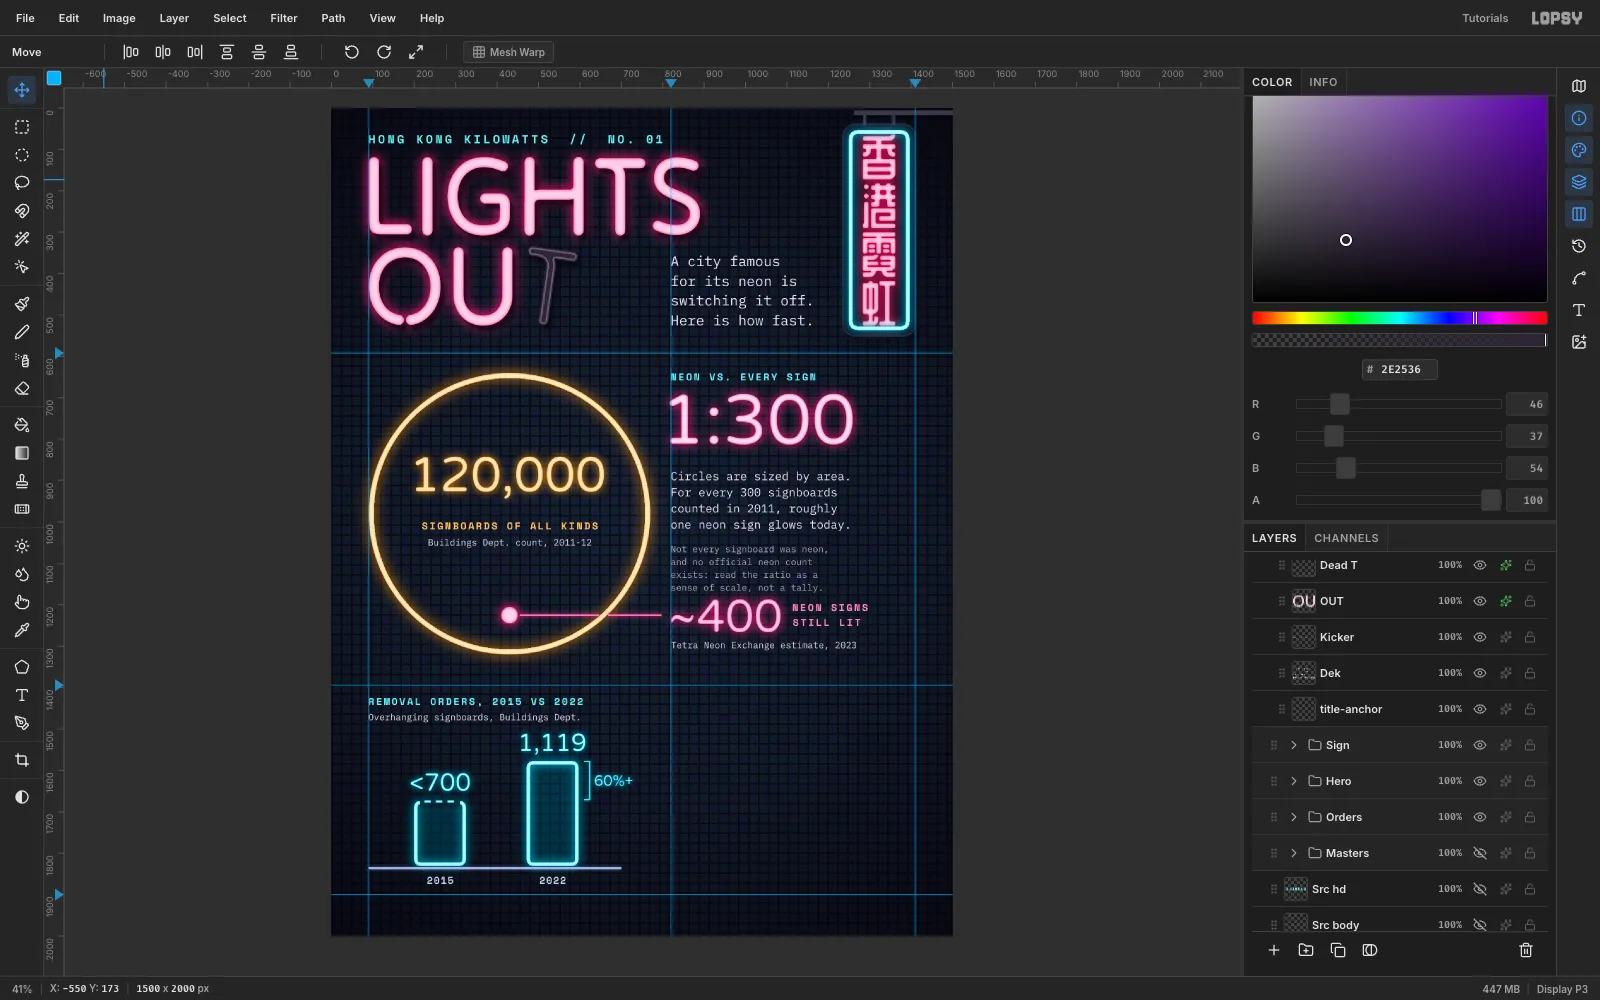
-
Count the neon masters in tubes
In a
Mastersgroup, fill eight 36 px wide rounded tubes from y 1652 to 1836, at x = 820 + 69 × n. Use#E7CCFFand Shrink/Grow 16 to round the ends. Blur them by 1.2 and apply the neon recipe in violet#A64DFF(Inner Glow Size 11).The ninth tube stands for the "or 9". Put it on its own layer at 25% opacity, and add a thin grey glass outline (fill
#5A5068, Shrink 3, Delete) so it reads as a tube that's only flickering. Above the tubes, set8 or 9in Varela Round at 104 px with the same violet glow.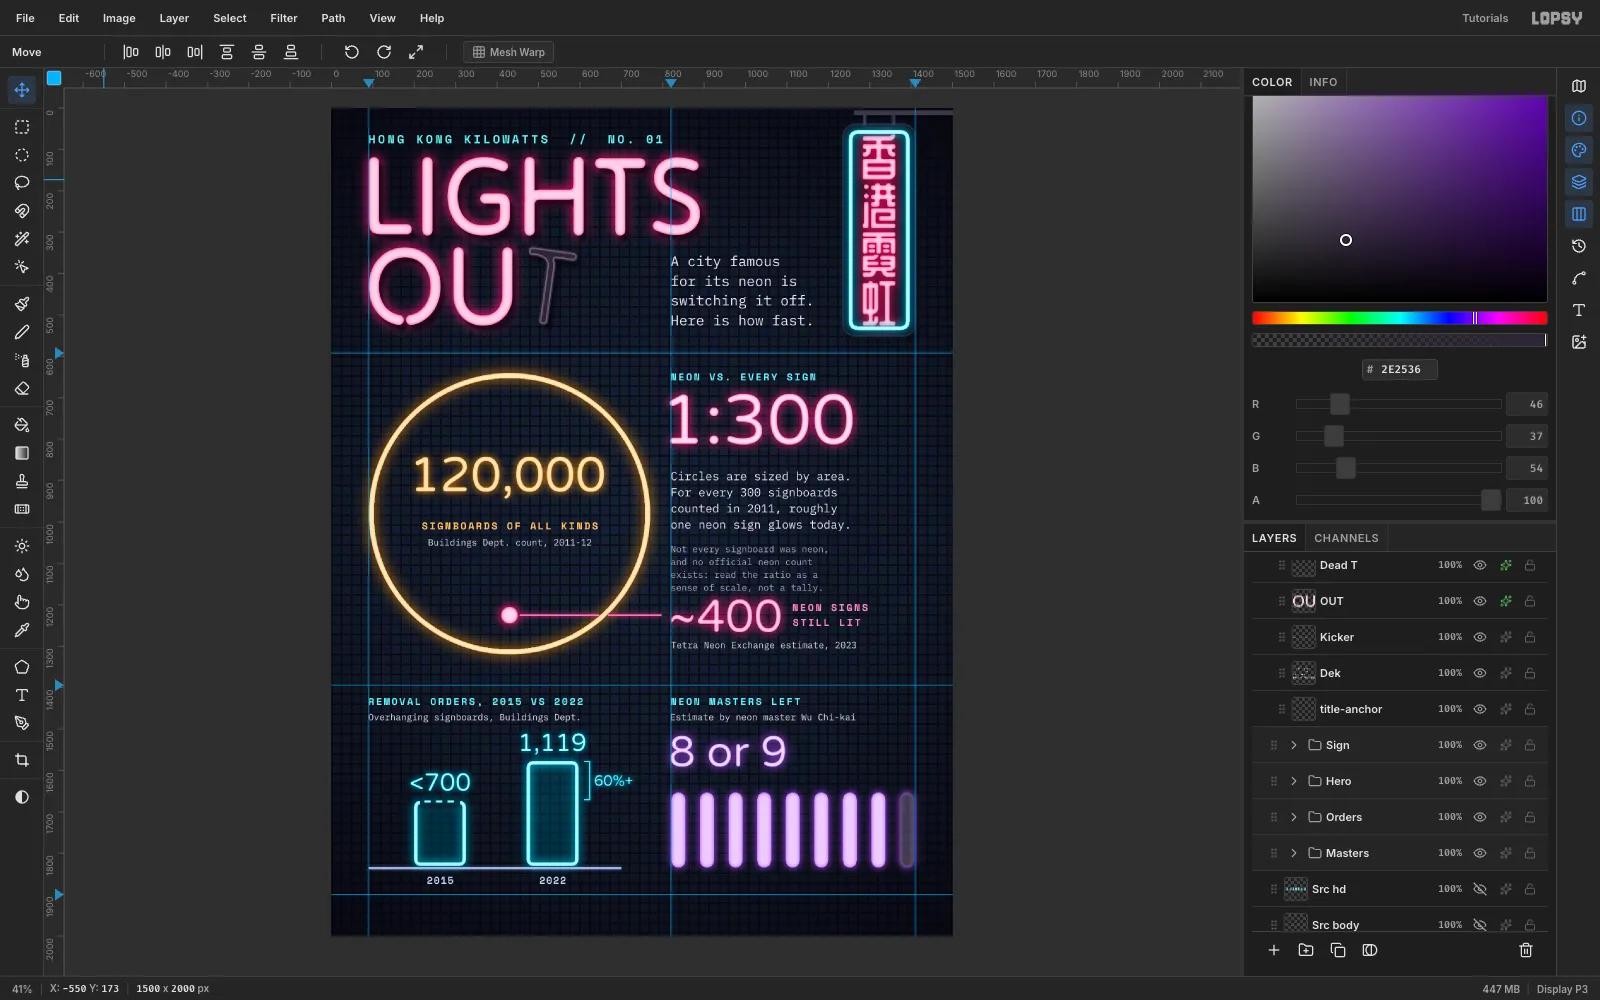
-
Add light spill, rules and a footer
Neon lights up the wall behind it:
- Add a
Spilllayer just aboveNightand fill it black. - Draw a feathered (60 px) ellipse behind each glowing element and fill it with a dark tint of that element's colour, such as
#5A1033behind the title and#4A2606behind the ring. - Blur the layer by 90, then set it to Screen at 70%.
Starting from a black fill keeps the blur from leaving grey halos.
Draw 2 px rules in
#2B3658along the band guides, plus a vertical rule at x 760 between the two bottom charts. Add aFooter Scrimover y 1900 → 2000 (#05040A, 70%) so the small source text stays readable over the tiles. Then setSOURCESin cyan Space Mono Bold, followed by the sources in IBM Plex Mono at 18 px.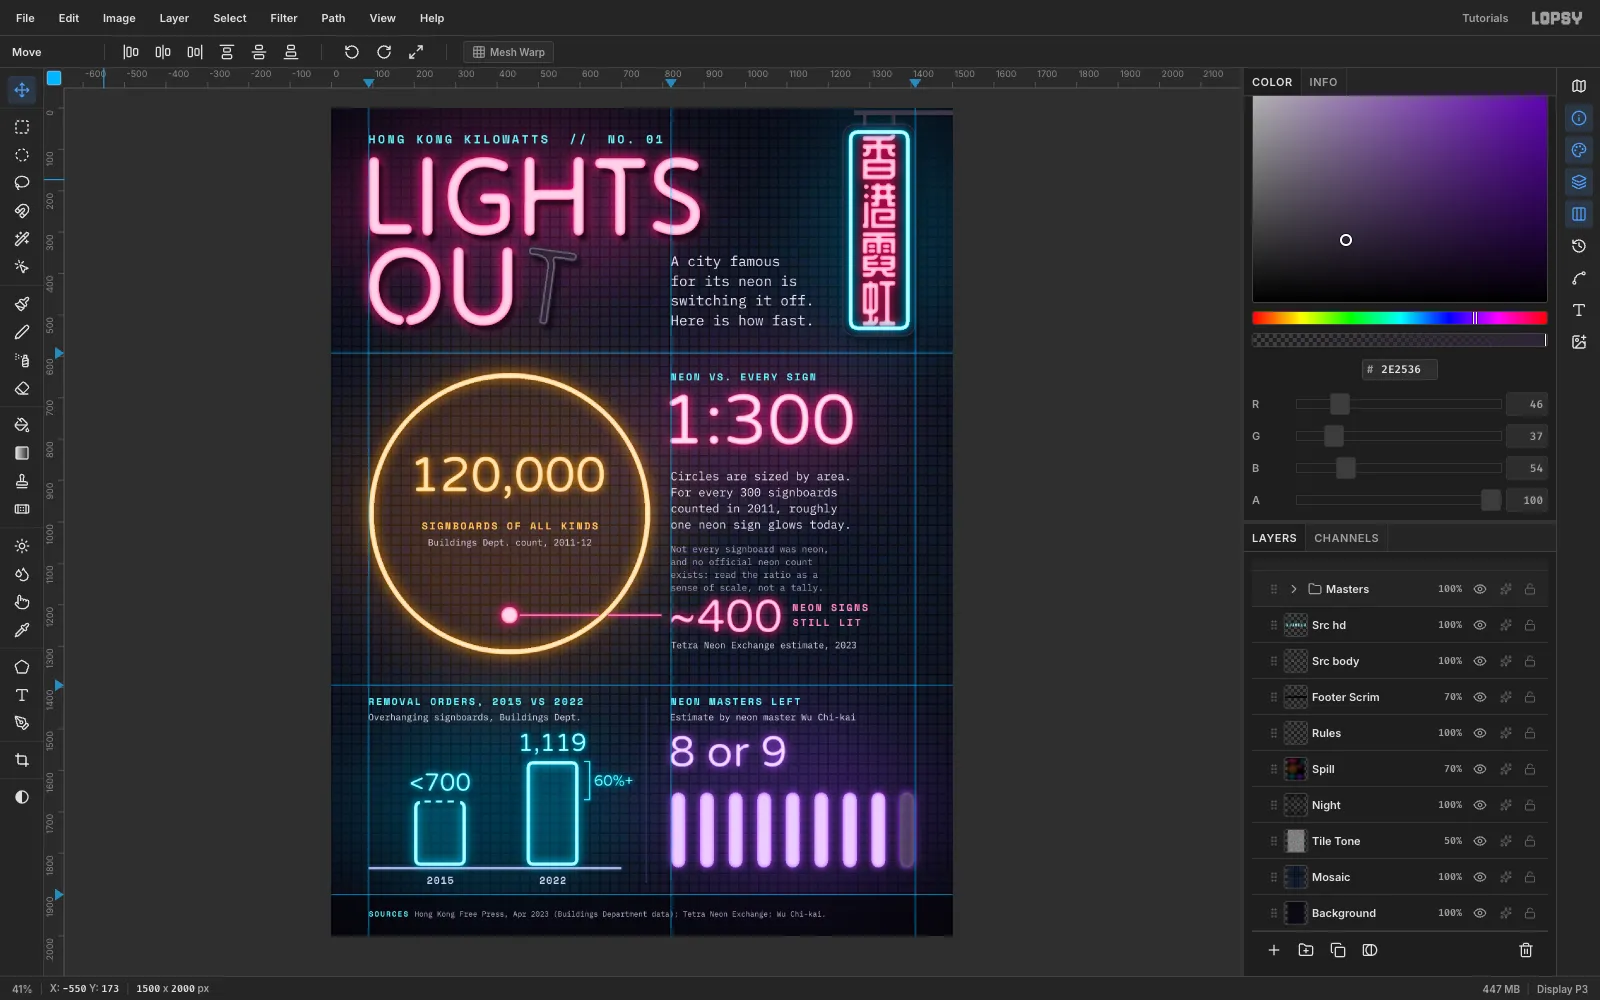
- Add a
-
Finish with a Bloom pass
Select the
Titlegroup and choose Edit → Copy Merged. Wait a second, then press Cmd+V: a flattened copy lands at the top of the group. Rename itBloom Glowand run Filter → Bloom with:- Threshold 55
- Soft Knee 60
- Radius 40
- Intensity 140
Set the layer to Lighten at 75%. The bright tubes now bleed light into each other the way real neon does, while the dark wall stays dark.
The glow is baked into that copy. If you change anything underneath it later, delete
Bloom Glowand redo this step. Export with File → Quick Export PNG.