Paint a Retro-Futurist Space Resort Under Jupiter
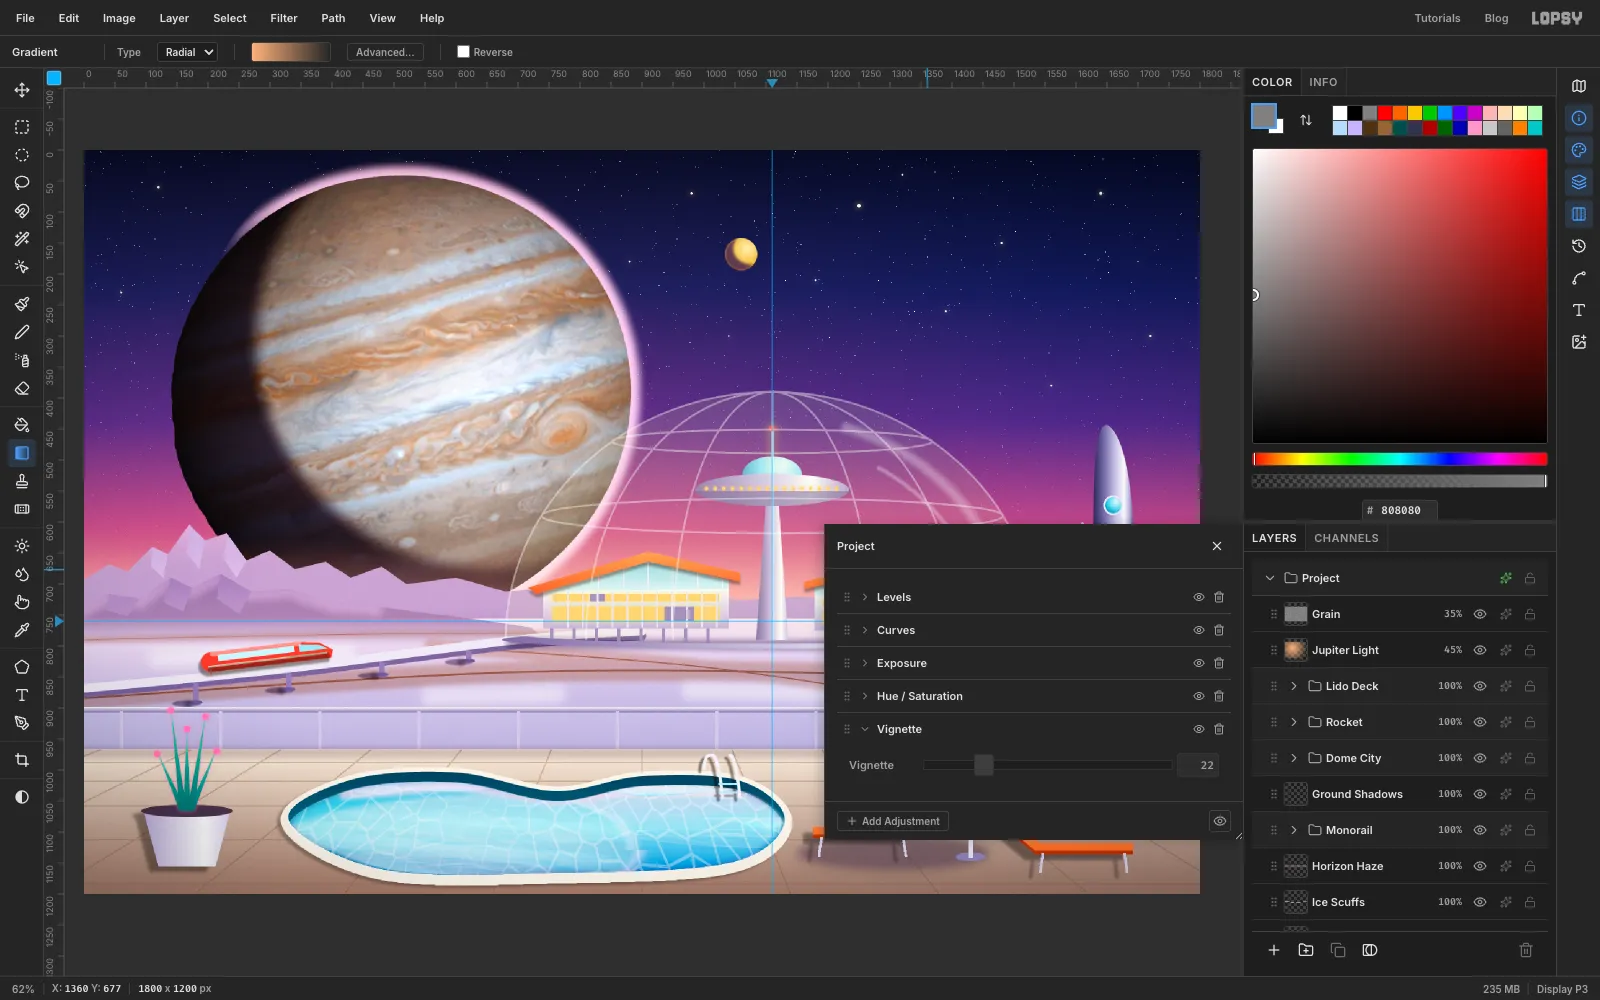
Paint a 1960s space-age pool deck on Europa in Lopsy, with a NASA photo of Jupiter, a glass dome city, a monorail, a rocket and a kidney pool with caustics.
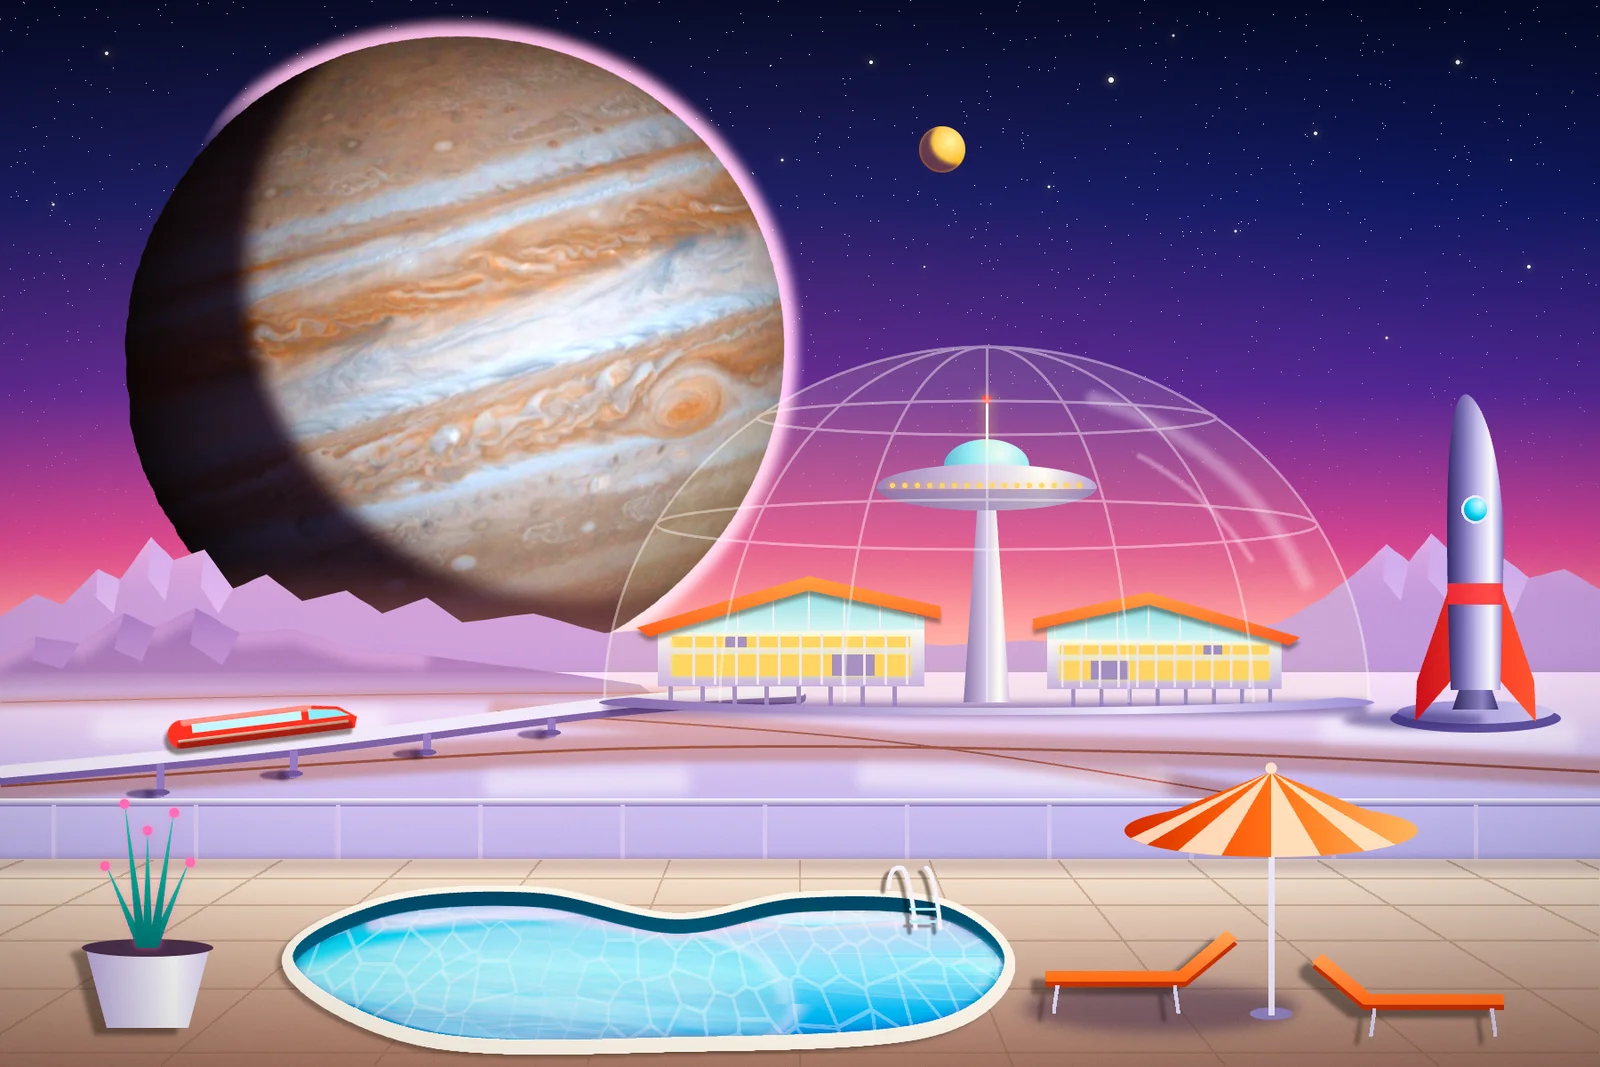
In the early 1960s, illustrators like Klaus Bürgle and Chesley Bonestell painted the future for magazines and children's annuals. Their scenes showed families on holiday on other worlds: glass domes, saucer-topped towers and swooping "Googie" roofs, with a giant planet filling the sky. The look is called retro-futurism, and it's a lot of fun to paint.
In this tutorial you'll paint Jovian Lido: a space-age resort on Europa, Jupiter's icy moon. The planet itself is a real NASA photograph. Everything else is painted with selections, gradients and soft brushes. You'll use a wide range of Lopsy's tools:
- Photo compositing. You'll drop in an image, clear its background with the Magic Wand, then scale and rotate it with the Move tool's handles.
- The Healing Brush, to paint out a blemish in the photo.
- Selections. You'll combine marquees with Shift (add), Alt (subtract) and Shift+Alt (intersect). You'll also use Grow, Shrink, Feather and Inverse, and load selections from layer thumbnails.
- The Pen tool, both for precise shapes (Path to Selection) and for curved strokes (press Enter to stroke a path).
- Gradients, including gradients painted into layer masks.
- Filters: Add Noise, Threshold, Gaussian Blur, Motion Blur, Pixel Stretch, Clouds, Voronoi, Find Edges and Hue/Saturation.
- Effects: Outer Glow, Inner Glow, Drop Shadow, Stroke, Color Overlay and Rasterize Layer Style.
- Groups, which you'll duplicate, flip, scale and move as a unit, plus a Perspective transform.
- Group adjustments on the root group: Vignette and Saturation.
You'll need one photo. Download NASA's Cassini true-colour portrait of Jupiter, PIA02873. It's public domain, 1080 × 1020 px, and shows the planet on a black background.
The light comes from the right in this painting, because that's where the photo is lit. Keep that in mind for every highlight and shadow.
The palette:
-
Night sky
-
Jupiter shadow
-
limb glow
-
Jupiter light
-
Io
-
Io shadow
-
Far ice
-
lit facets
-
Near ridge
-
crest light
-
Ice plain
-
Cracks
-
Chrome
-
ring chrome
-
Saucer underside
-
ground shadows
-
Glass
-
Window gold
-
beacon
-
Roof tangerine
-
gable glass
-
Rocket red
-
fins
-
Deck
-
tile lines
-
Pool
-
far wall
-
coping
-
Water glint
-
sky tint
-
Parasol
-
gores
-
Plant
-
blossoms
-
Set up the canvas and paint the night sky
Open Lopsy. In the New Document dialog, set Width to
1800and Height to1200, choose a white background and click Create.Add two guides:
- Click the left ruler at about
760for the horizon. - Click the top ruler at about
1110for the centre of the dome you'll build later.
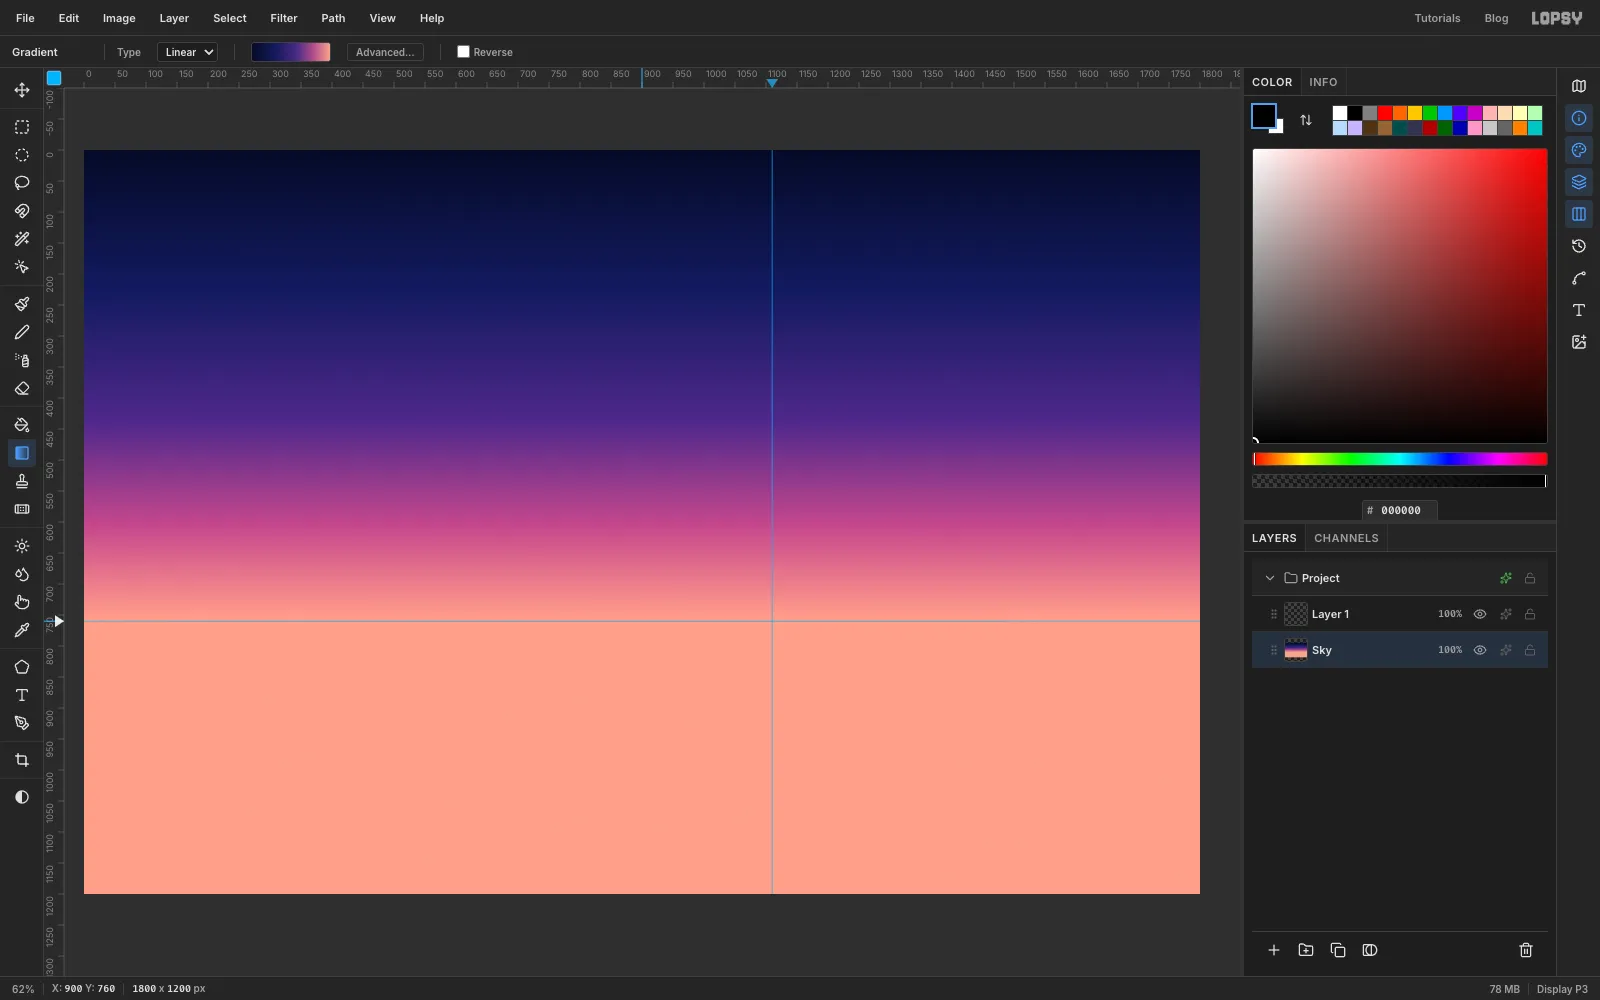
Rename Background to Sky by double-clicking its name. Pick the Gradient tool, set Type to Linear and click Advanced…. Click the gradient bar to add stops until there are five, and type the night-sky colours into the Hex field for each one, at about 0, 30, 58, 80 and 100%. Then drag from the top edge straight down to the horizon guide. Everything below the horizon stays peach, but it will be covered by ice.
- Click the left ruler at about
-
Make a starfield from noise
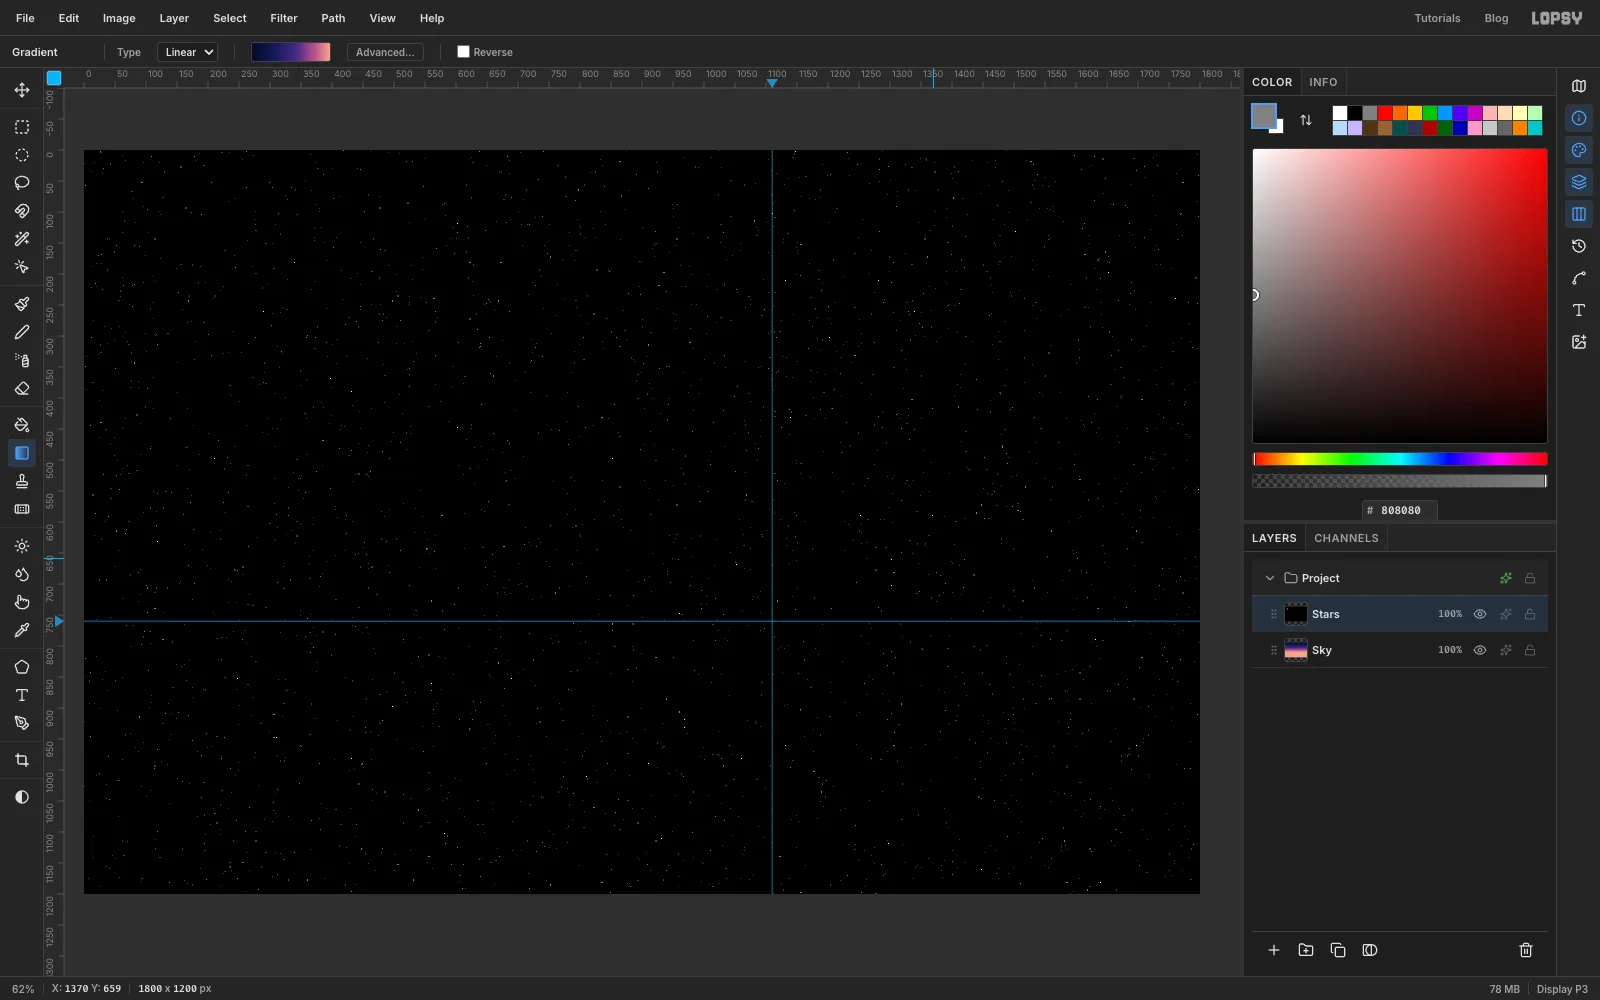
Select Layer 1 and rename it Stars. Set the foreground colour to and choose Edit → Fill. Then:
- Run Filter → Add Noise… with Amount
100, Mono and Gaussian. - Run Filter → Threshold… at
178.
Gaussian noise piles most pixels up around mid-grey, so only a few rare specks are bright enough to survive the threshold. Those specks are your stars.
- Run Filter → Add Noise… with Amount
-
Fade the stars out toward the horizon
Open the layer's effects drawer (the ✦ button on its row) and set the blend mode to Screen, so the black disappears.
Click Add Mask at the bottom of the Layers panel, then click Edit mask on the new mask row. Set the gradient to two stops, white → black, and drag from about y
260down to about y700. The stars now thin out as they reach the bright part of the sky, where real stars would be washed out.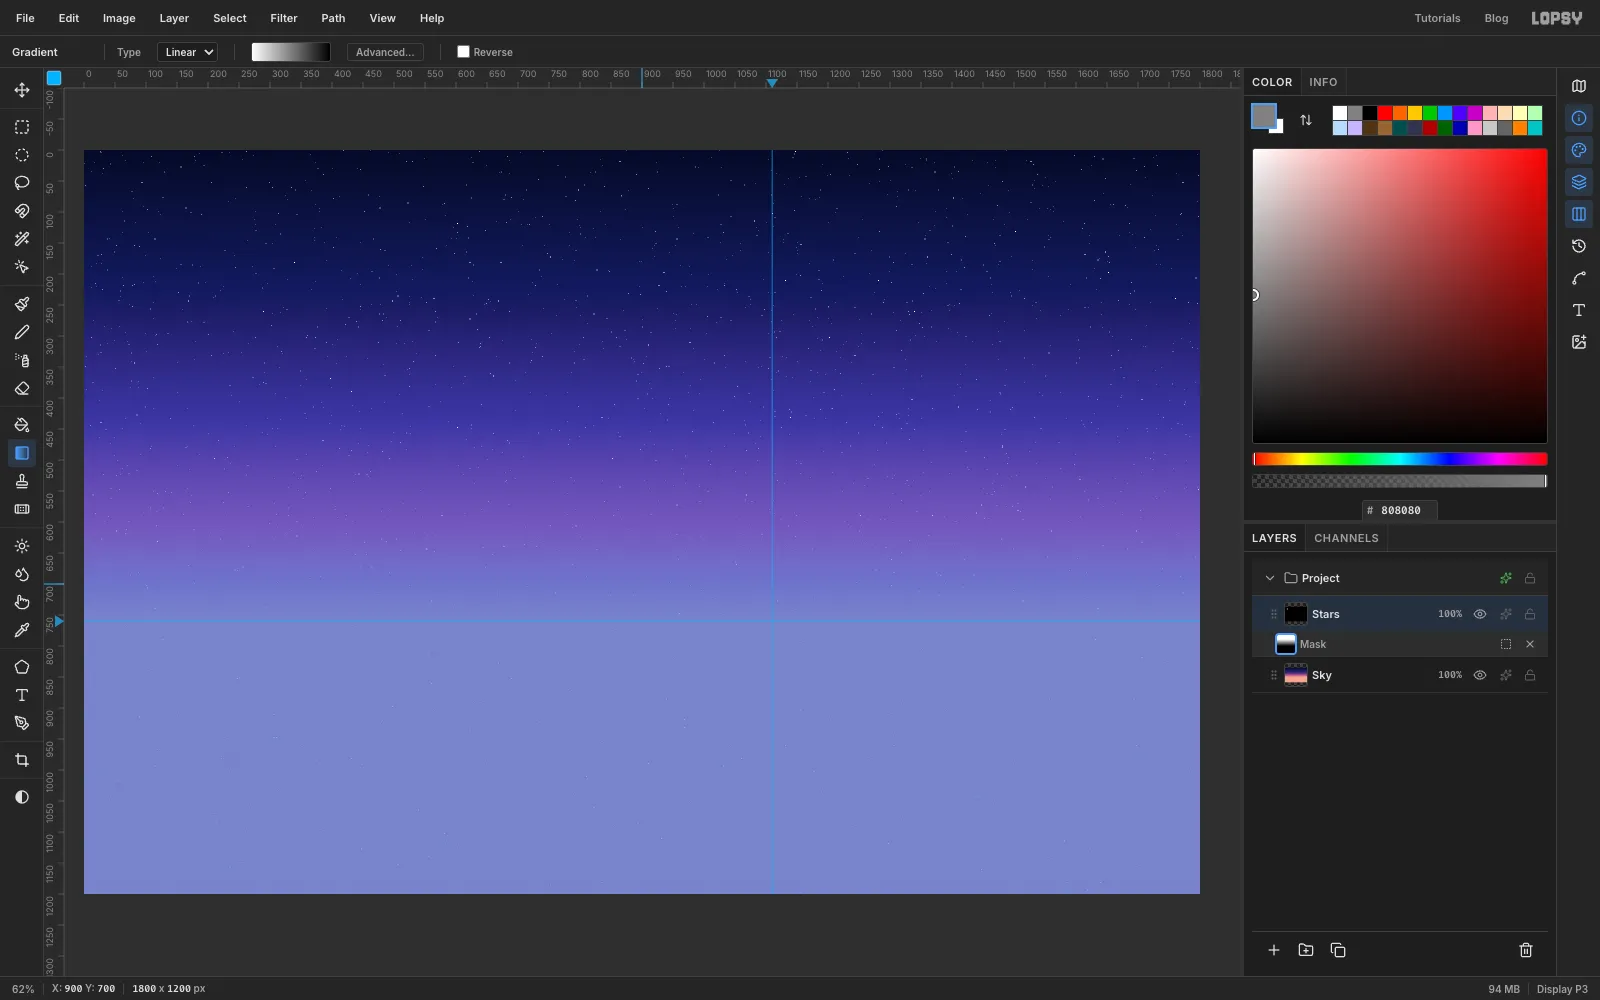
-
Add a few bright stars
Click Add Layer and name the new layer Bright Stars. Choose the Brush with Hardness
100and white paint. Click a dozen single dots across the upper sky, changing Size between3and7as you go. Keep them away from the upper left, where Jupiter will go.In the effects drawer, turn on Outer Glow with Size
14and Opacity80. Each dot now twinkles a little.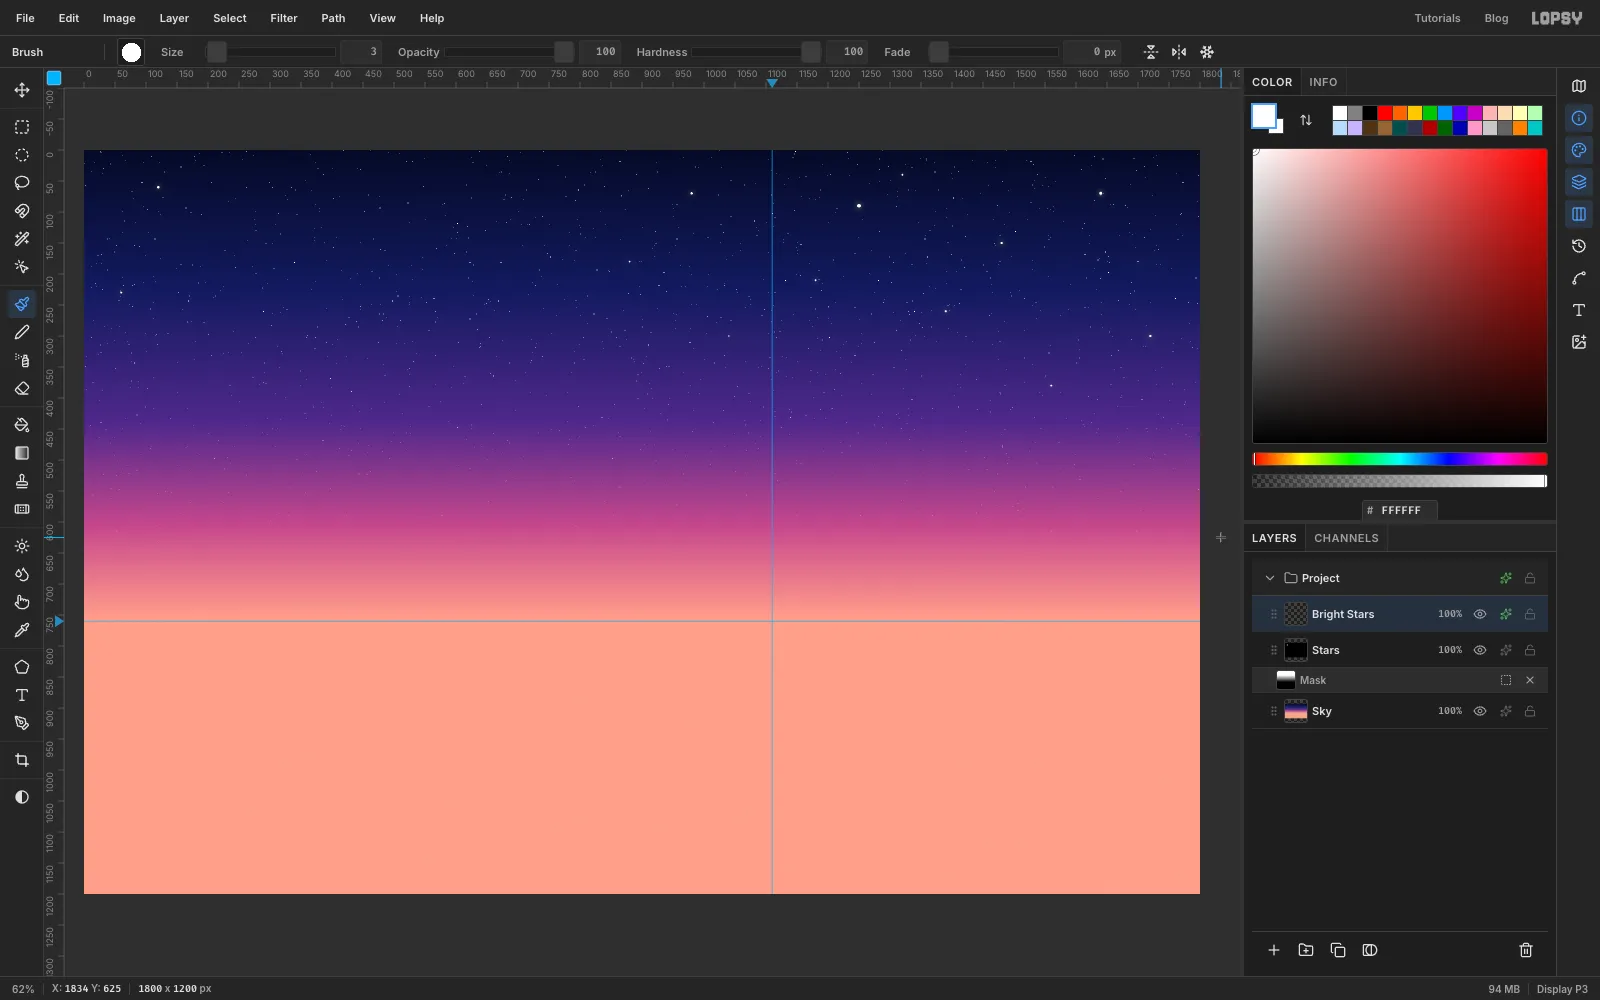
-
Drop in the Jupiter photo
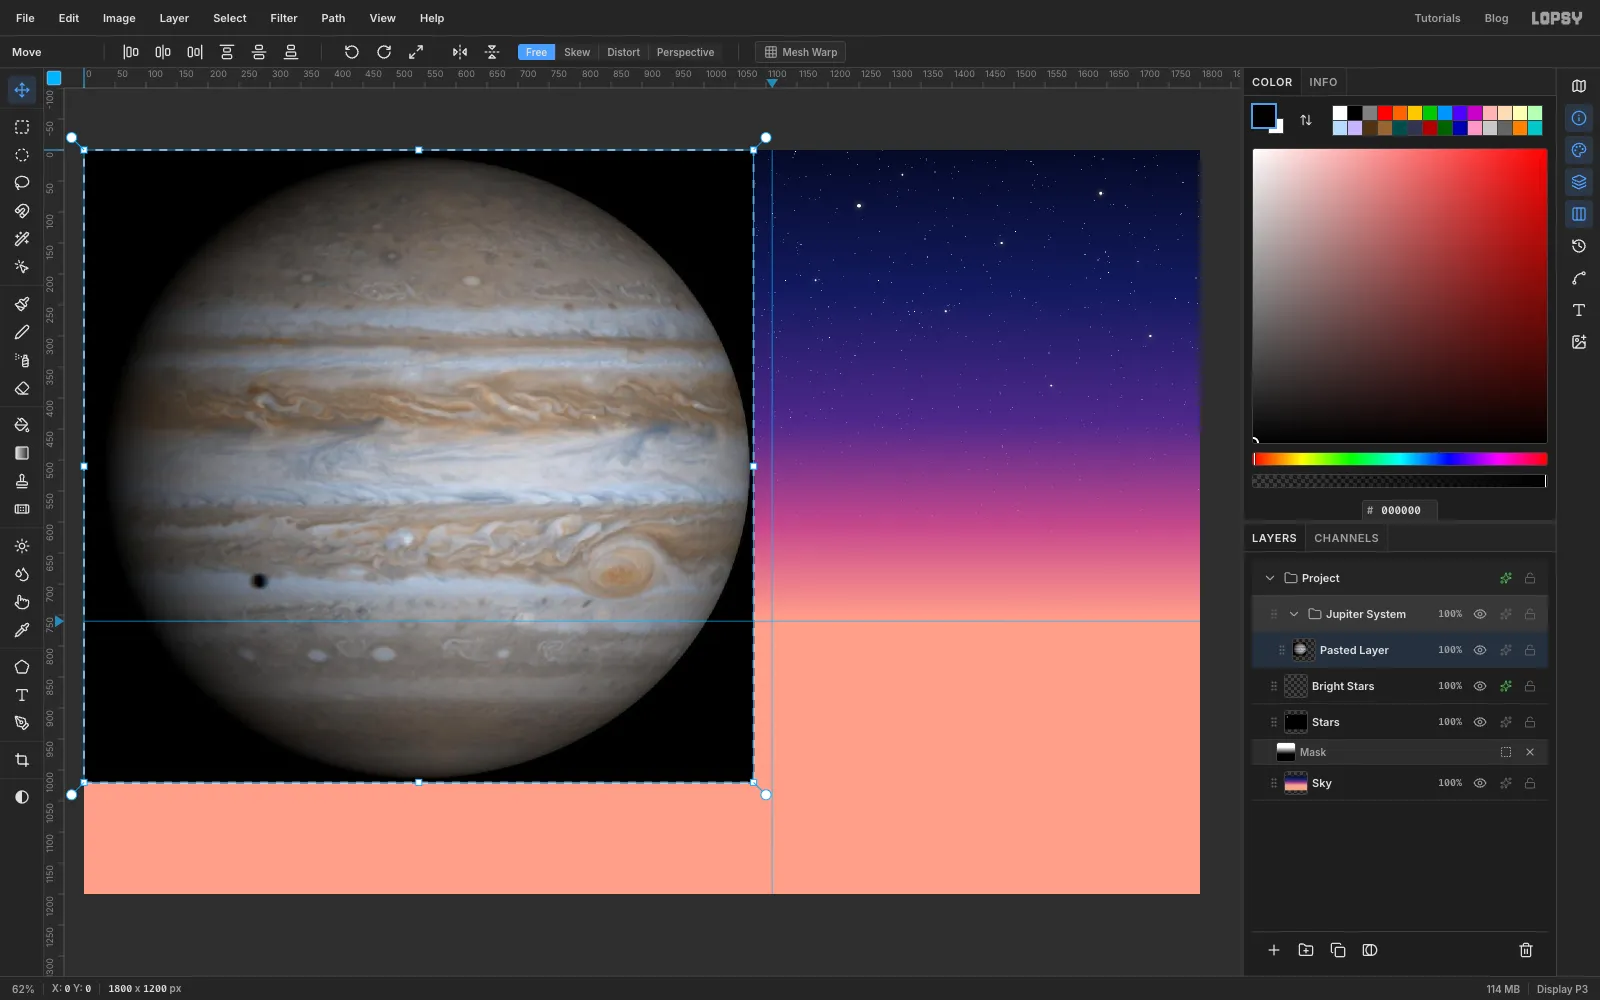
Click New Group and name it Jupiter System. Then drag the downloaded photo from your desktop onto the canvas. Lopsy adds it as a new layer at the top-left corner, inside the group. Rename it Jupiter.
-
Select the black of space with the Magic Wand
Pick the Magic Wand and set Tolerance to
12with Contiguous ticked. Click the black corner of the photo. The low tolerance stops the wand before it reaches the planet's dark edge. Press Delete to clear the black, then Cmd+D to deselect.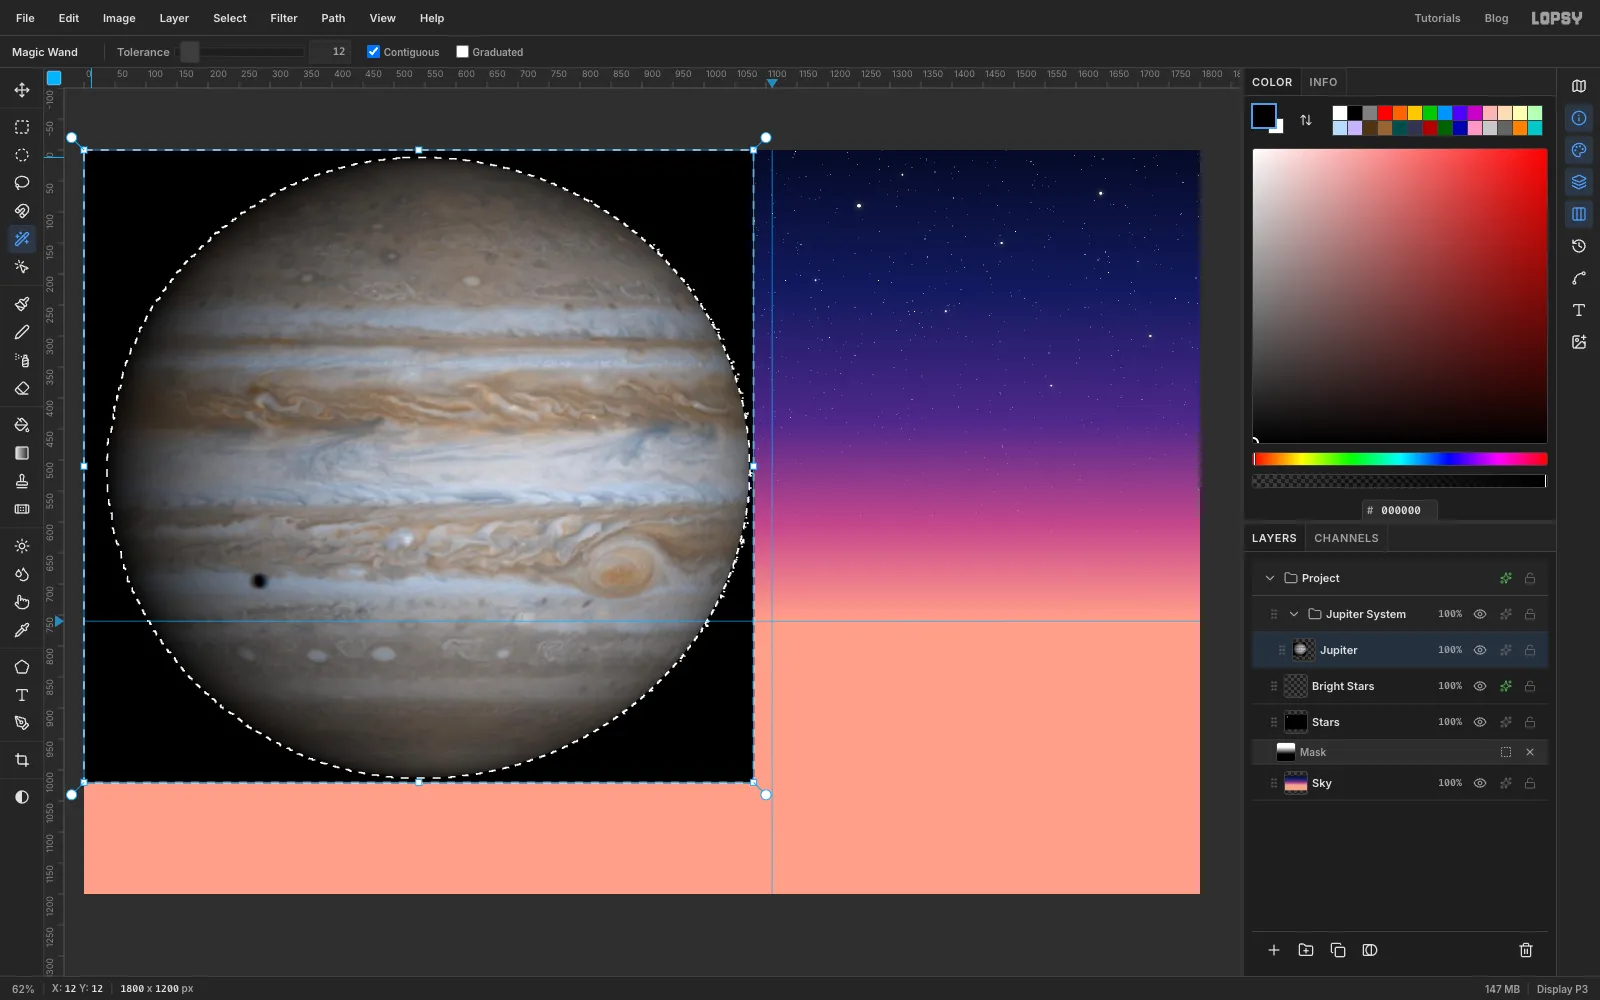
-
Trim the dark rim
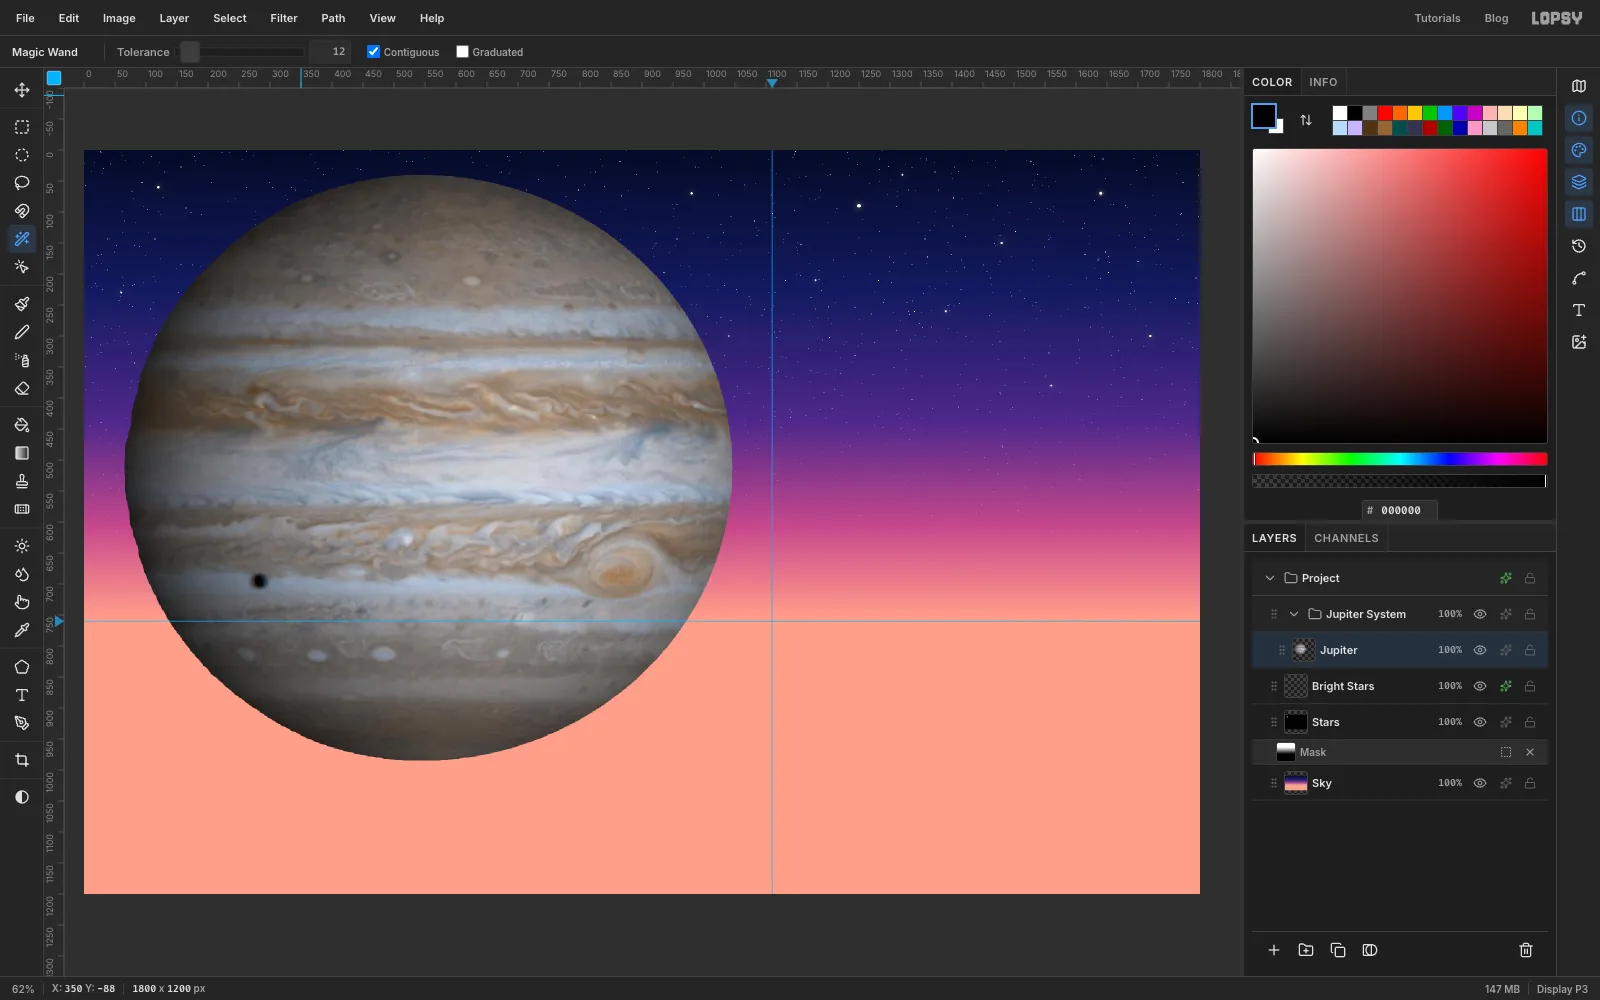
The photo's edge fades into a dark, soft ring that would look like an outline over the violet sky. To remove it:
- Cmd-click the Jupiter thumbnail to select the planet.
- Choose Select → Shrink… and enter
28. - Choose Select → Inverse and press Delete.
- Press Cmd+D to deselect.
-
Scale the planet down
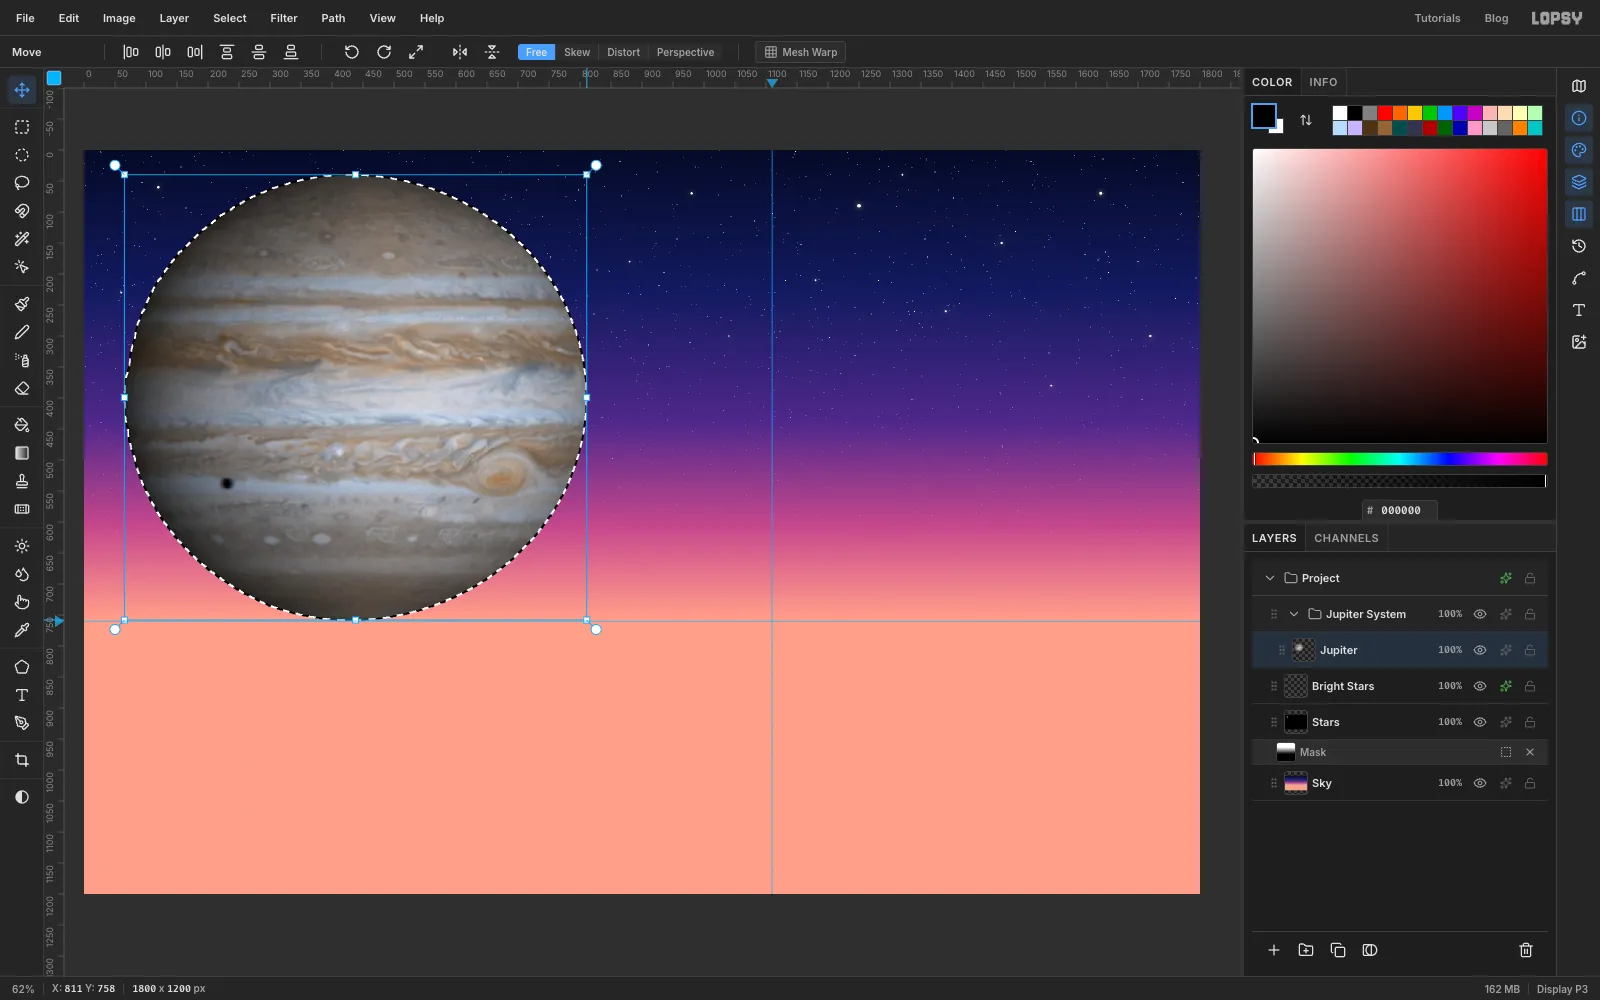
Cmd-click the thumbnail again to load the planet as a selection, so you can transform it. Pick the Move tool, hold Cmd and drag the bottom-right corner handle up and to the left until the planet is about three quarters of its size, roughly 740 px across. Holding Cmd keeps the circle from squashing.
-
Tilt the planet
Drag the round rotation handle just outside the top-right corner about 16° anticlockwise. The cloud bands now run diagonally, which feels more dynamic than flat stripes. Press Cmd+D to commit the transform.
Then drag the planet with the Move tool, or nudge it with the arrow keys, so its centre sits at about
510, 400. Its lower edge should dip just below the horizon.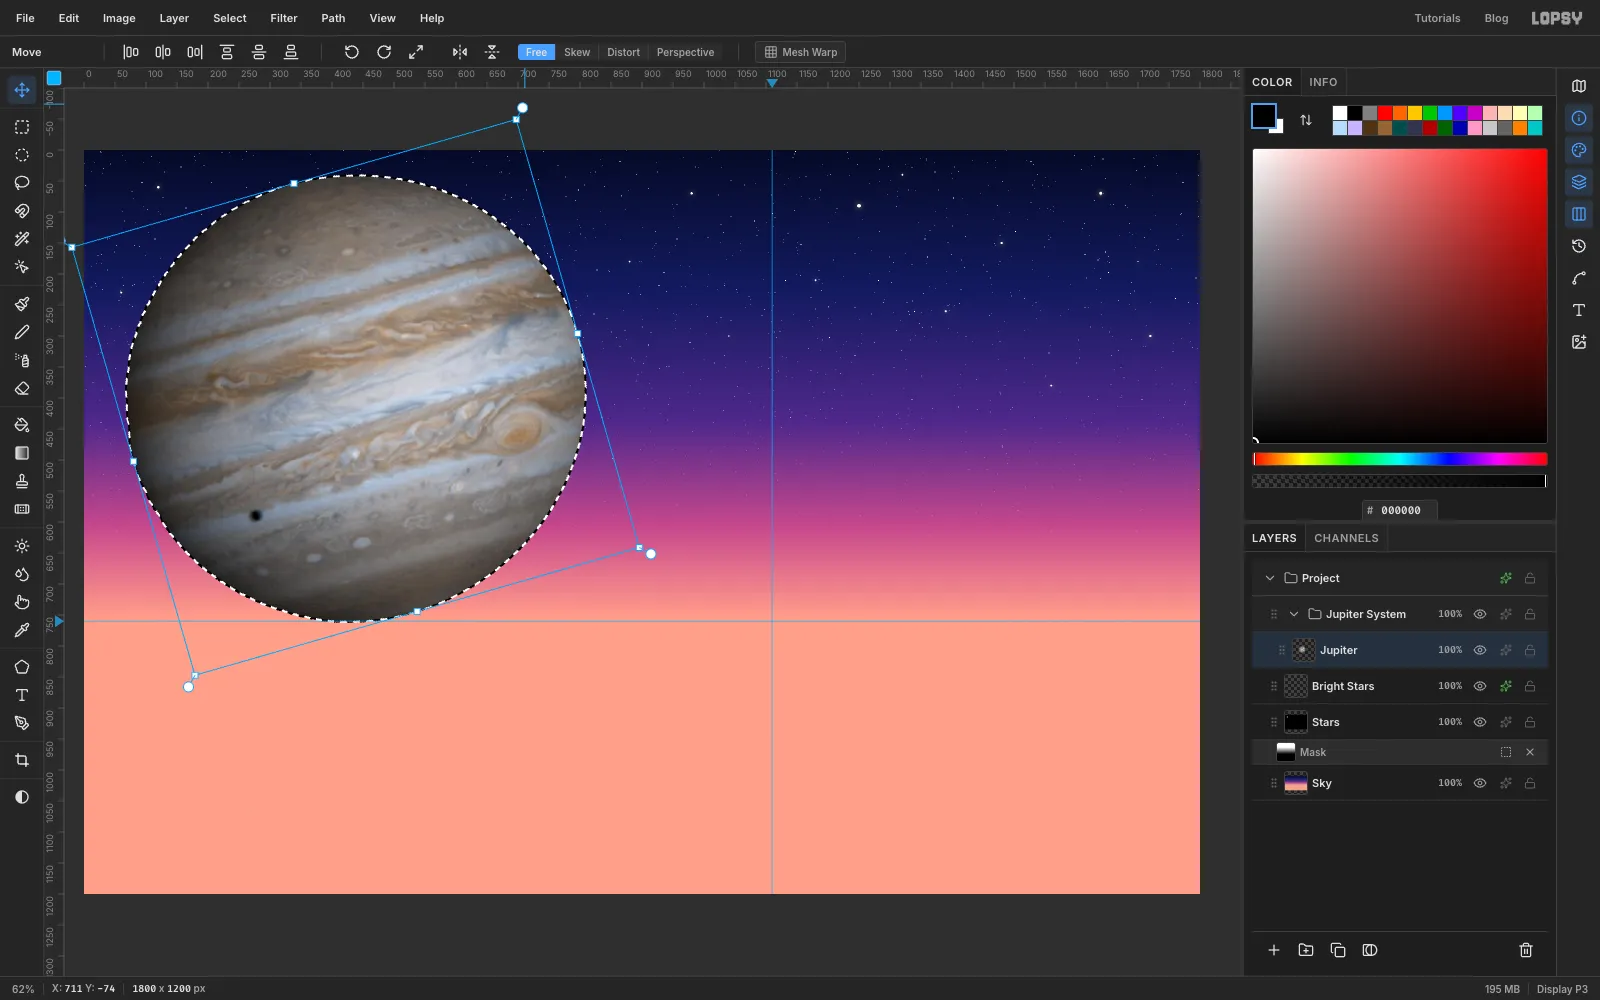
-
Heal away the moon's shadow
The photo shows a small black dot on the planet: the shadow of a moon. It will end up in the planet's night side, where it makes no sense, so remove it.
Zoom in on the dot. Choose the Healing Brush and set Size to
30. Alt-click a patch of cloud a little to the right of the dot, along the same band, to set the source. Then paint a short stroke over the dot. The Healing Brush borrows the texture from the source but matches the colour of the spot you paint, so the repair is invisible.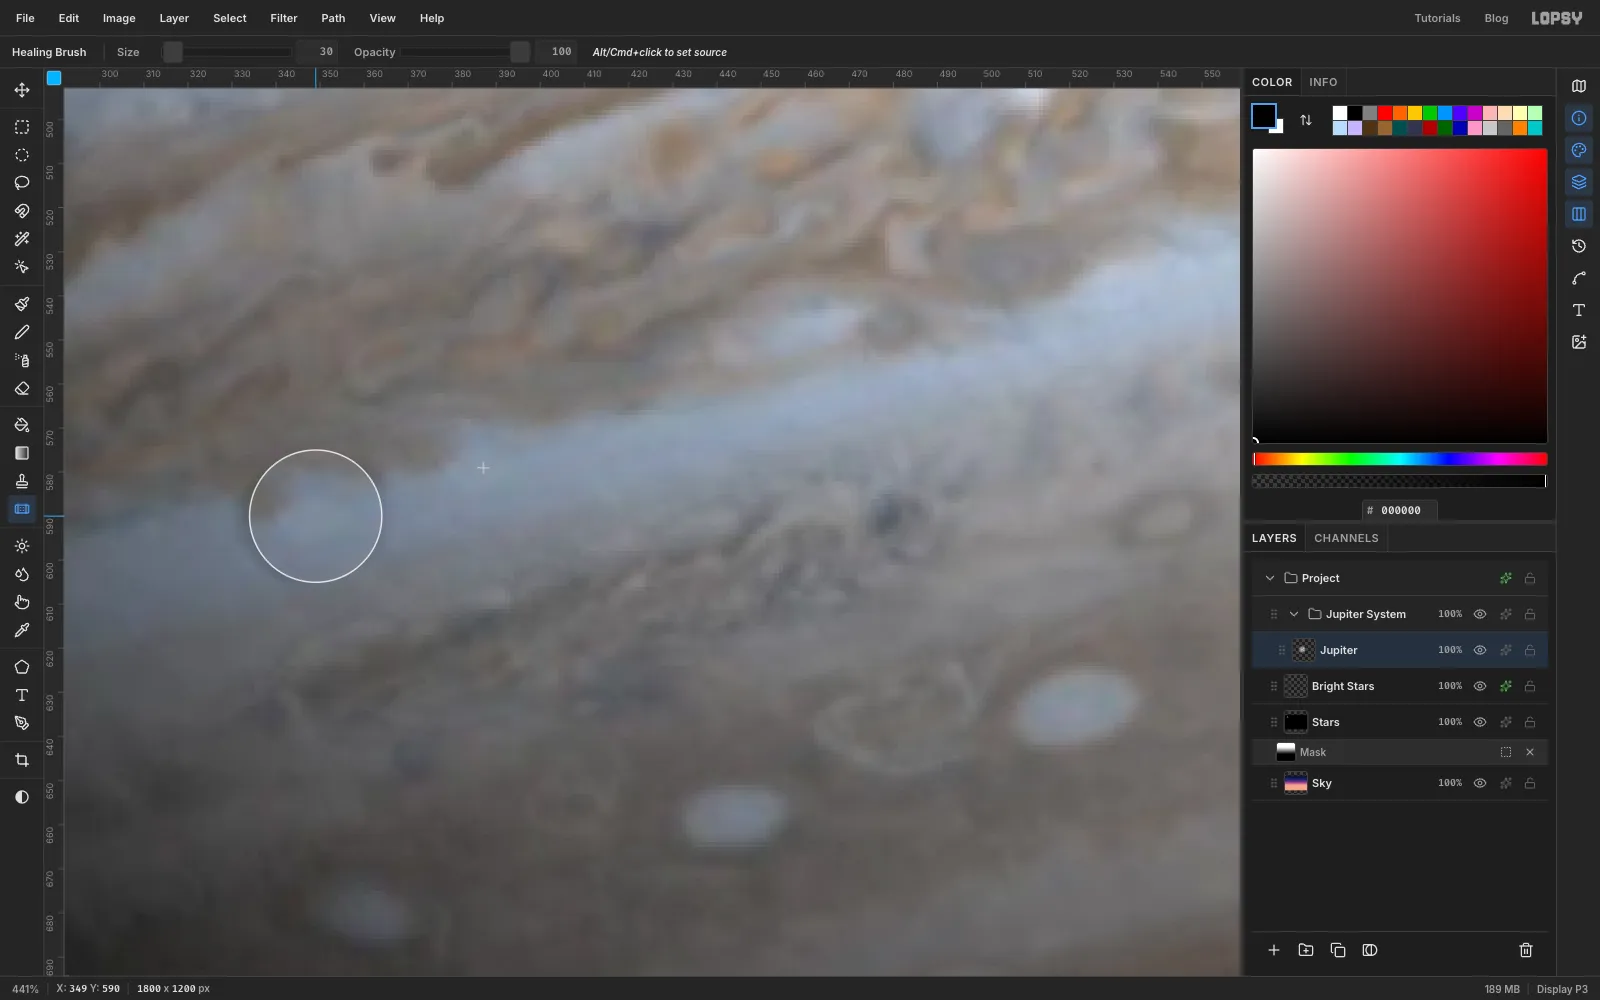
-
Warm up the photo
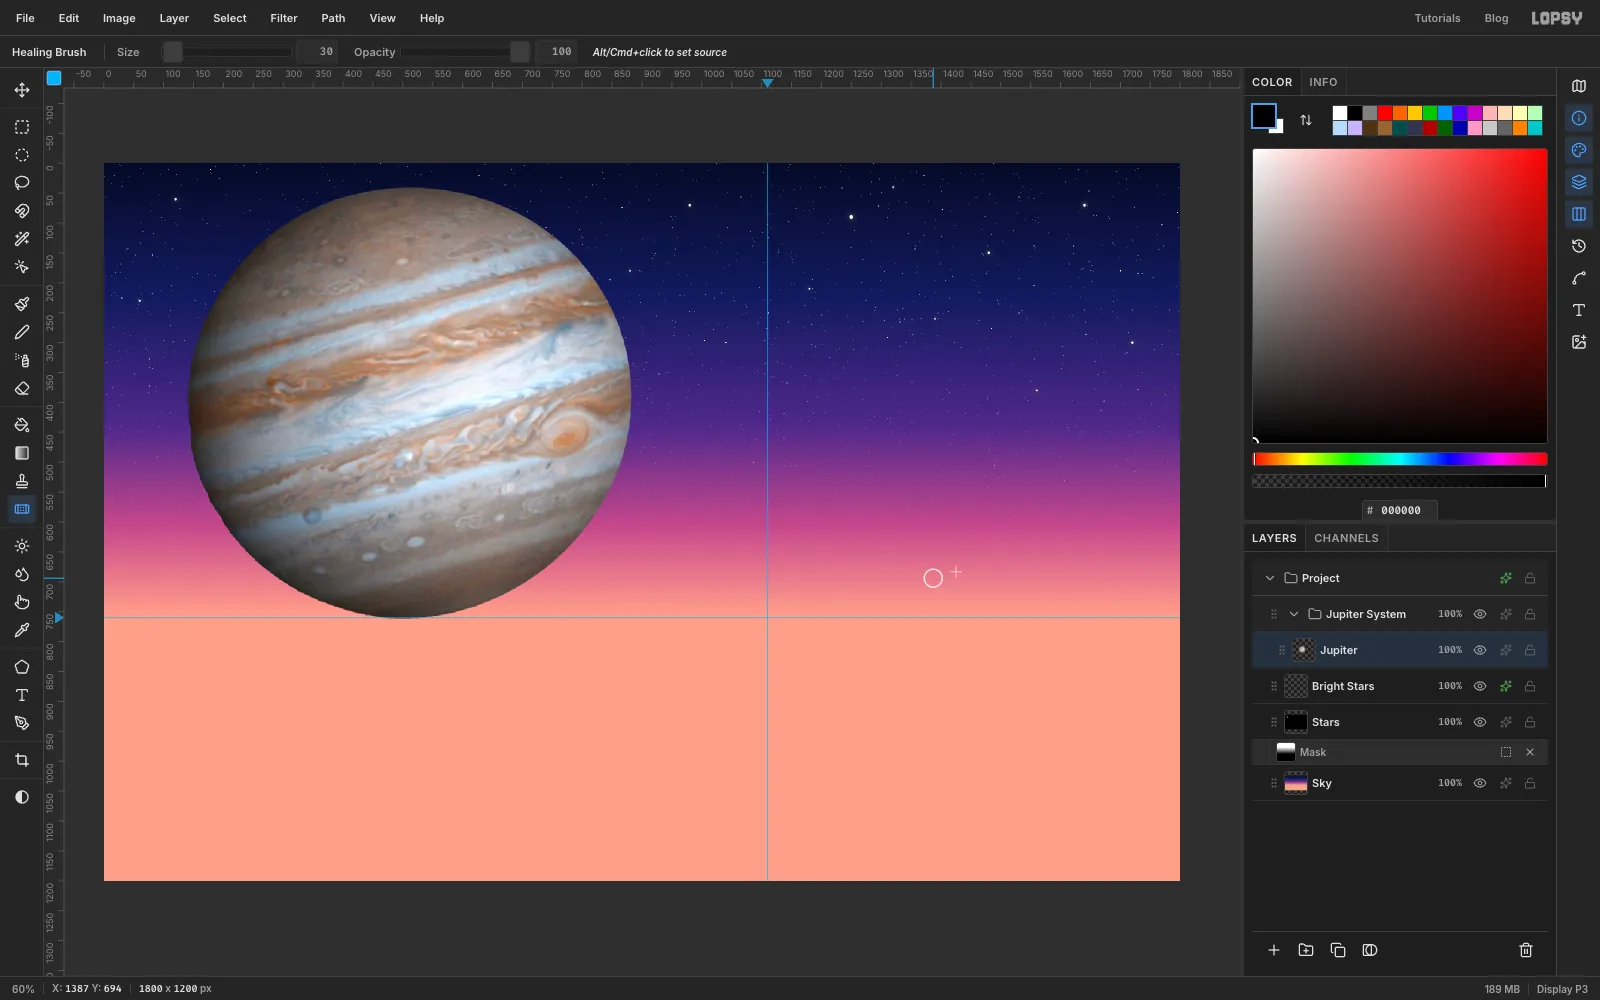
Space-age paintings exaggerate colour. With Jupiter selected:
- Run Filter → Hue/Saturation… with Hue
-6, Saturation38and Lightness4. - Run Filter → Brightness/Contrast… with Brightness
4and Contrast18.
- Run Filter → Hue/Saturation… with Hue
-
Select the night side
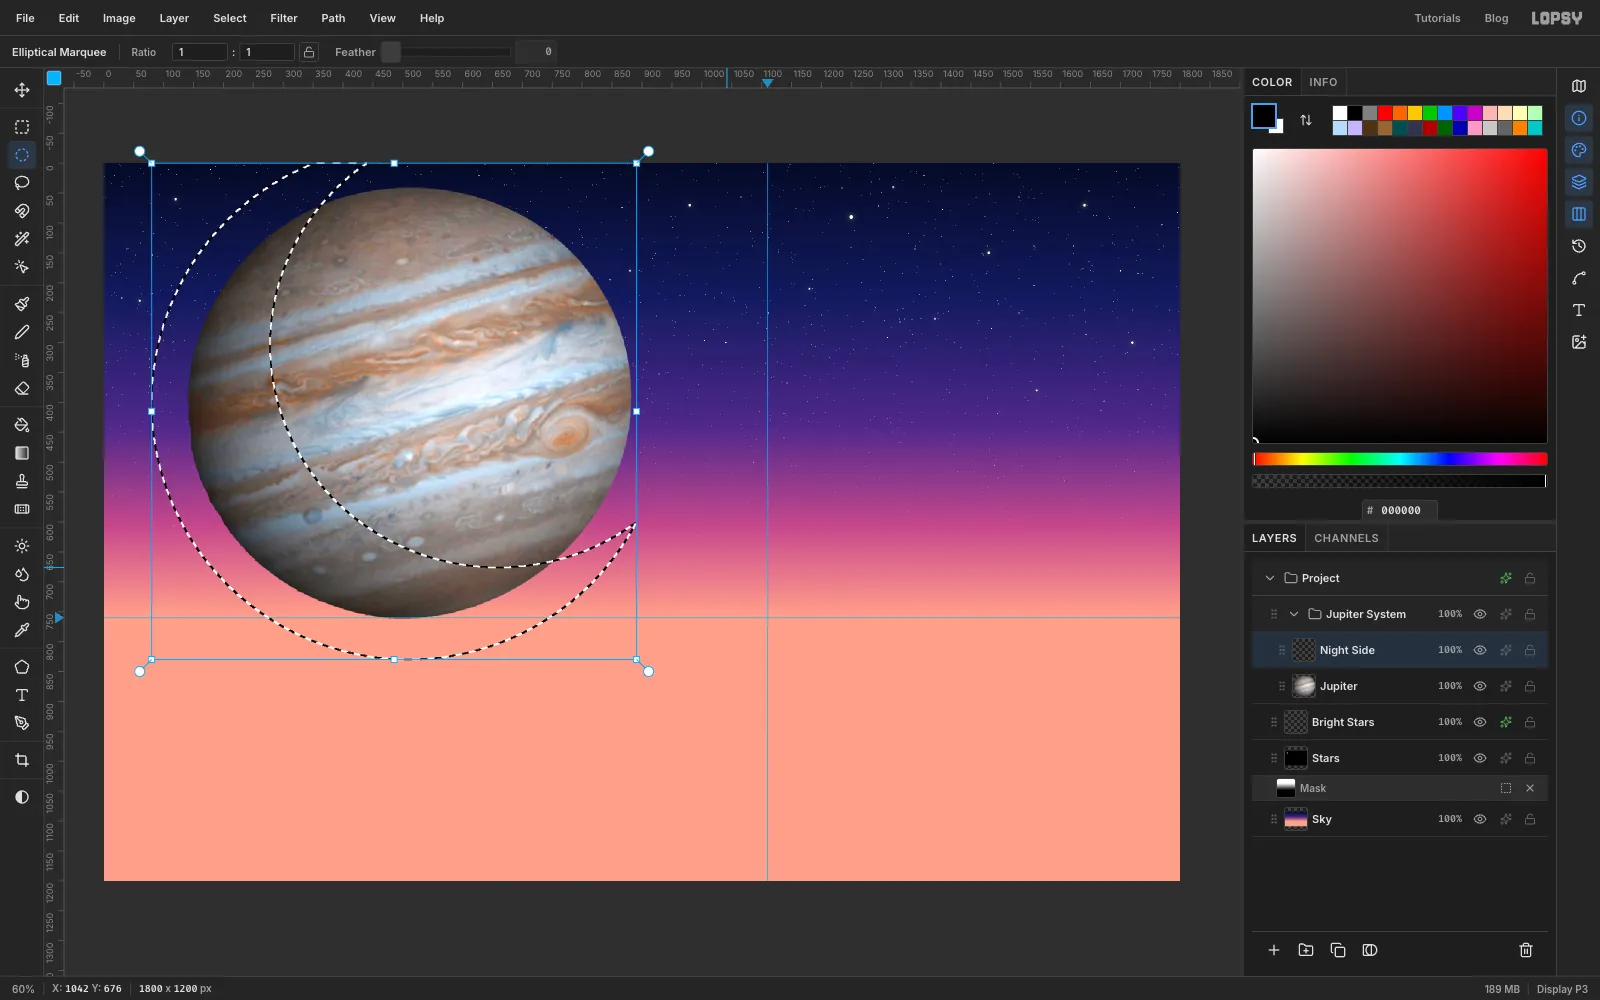
Add a layer called Night Side inside the group. Pick the Elliptical Marquee and, with nothing selected, click once on the canvas. In the Elliptical Selection dialog, enter a circle about 70 px larger than the planet all round: From
80, -30and To940, 830.Now hold Alt and drag a second circle the size of the planet, shifted about 150 px to the right and 96 px up. That subtracts it, leaving a crescent on the left. This is the part of the planet facing away from the sun.
-
Fill the night side
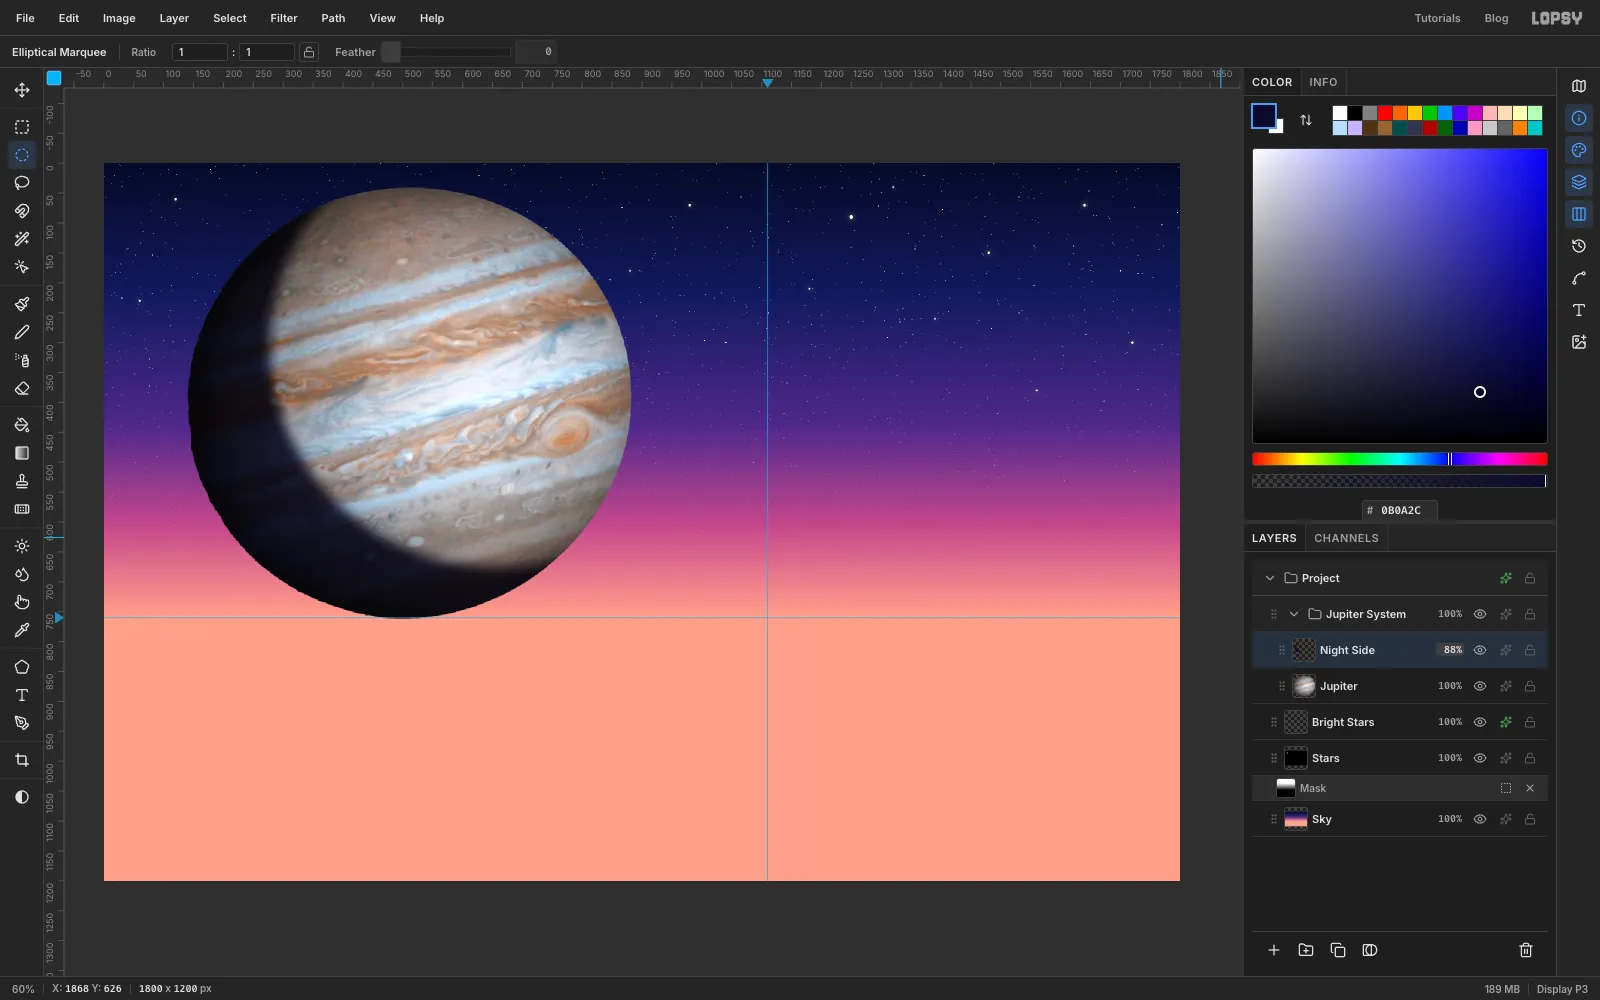
- Choose Select → Feather… with
20, which softens the terminator (the line between day and night). - Fill with (Edit → Fill).
- Cmd-click the Jupiter thumbnail, choose Select → Inverse and press Delete. This trims the shadow crisply to the planet's edge, so the night side is darkest right at the limb.
- Deselect, then set the layer to Multiply at
88%.
- Choose Select → Feather… with
-
Add a glow on the sunlit edge
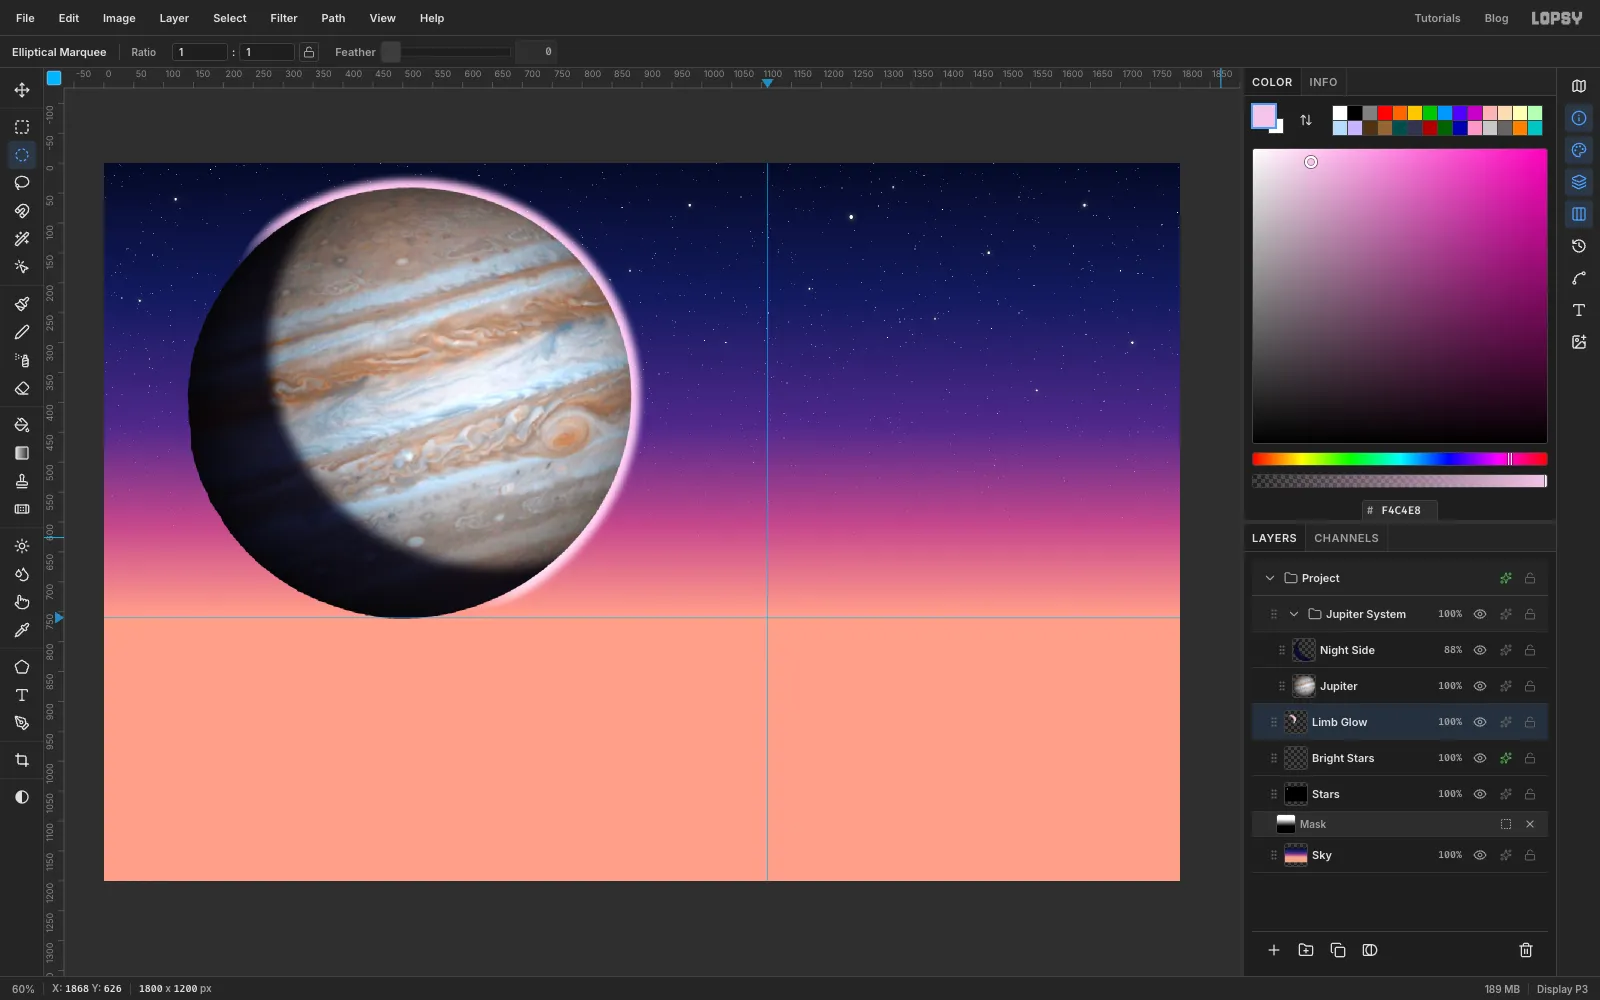
Select Bright Stars and add a layer called Limb Glow. It sits below the Jupiter group, so the planet covers its middle.
- Cmd-click the Jupiter thumbnail. Run Select → Grow…
14, then Select → Feather…12. - Fill with .
- Press Cmd+D. With the Elliptical Marquee, click the canvas and make an exact circle from
-50, 120to730, 900. That's the planet's size plus a little, shifted down and left toward the dark side. Feather it by40and press Delete. The glow now fades away around the shadowed side. - Set Limb Glow to Screen.
- Cmd-click the Jupiter thumbnail. Run Select → Grow…
-
Paint Io
Press Cmd+D, then, with Limb Glow still selected, add an Io layer. Make an exact circle from
1034, 142to1086, 194. Pick the Gradient tool, set Type to Radial, and give it three stops: , and . Drag from just up-right of the centre out to the lower-left edge.For the shadow side, Alt-drag a circle of the same size about 13 px right and 9 px up. That leaves a crescent on the lower left. Feather it by
4and fill it with at 80% opacity (set A to80in the Color panel). The moon now matches Jupiter's lighting.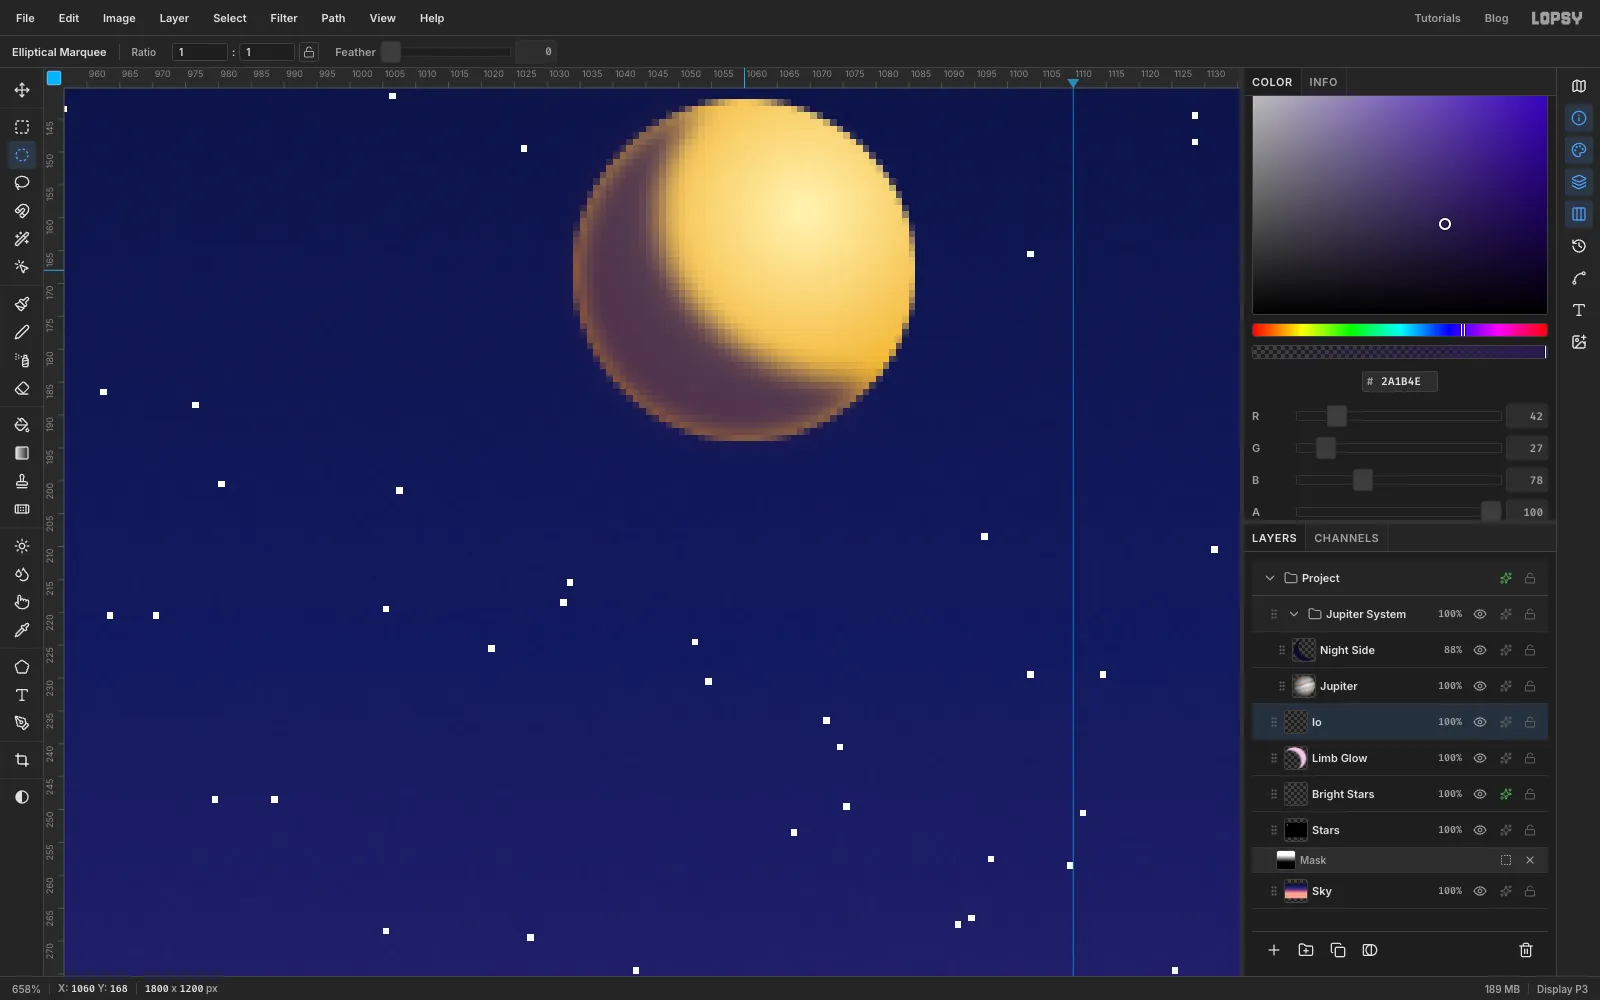
-
Lasso a range of ice spires
Click the Jupiter System group row and collapse it with its arrow. A new layer then lands beside the group instead of inside it. Add a layer called Far Ridge.
With the Lasso, drag a jagged skyline from the left edge to the right edge. Put tall, sharp spires at both ends, reaching up to about y
600, and keep the middle low, around y720. Close the shape below the horizon.Fill it with a linear gradient from to , dragged from about y
600down to y770. The peaks fade toward the sky colour, as distant mountains do.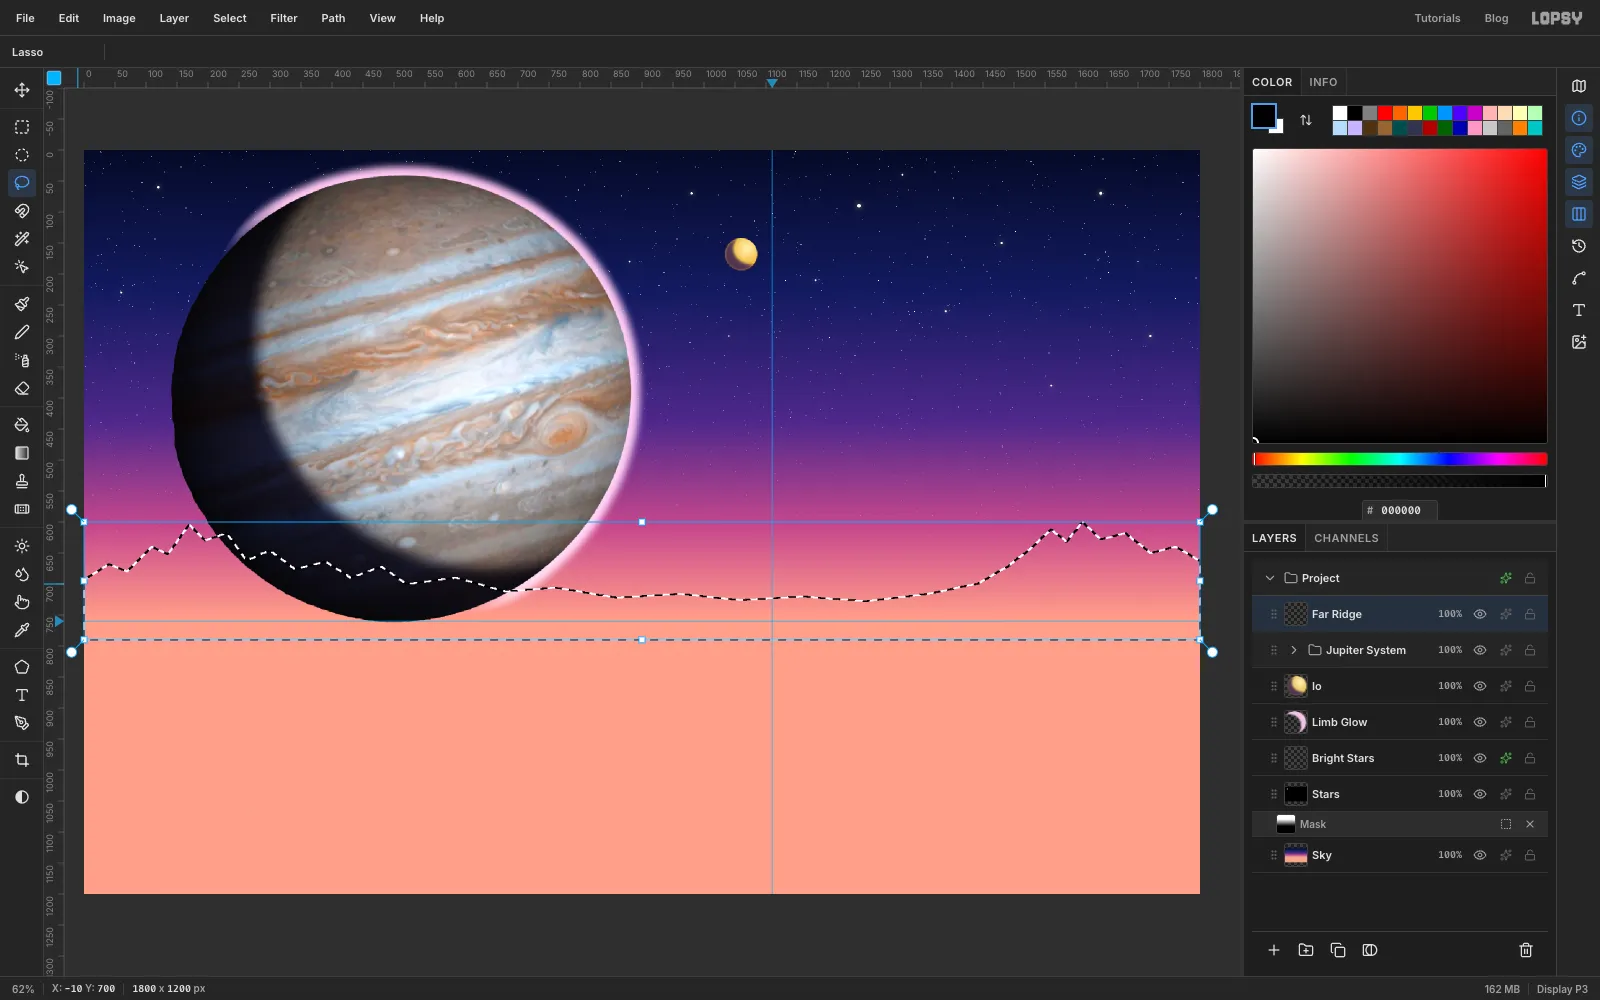
-
Light the spires' right-hand faces
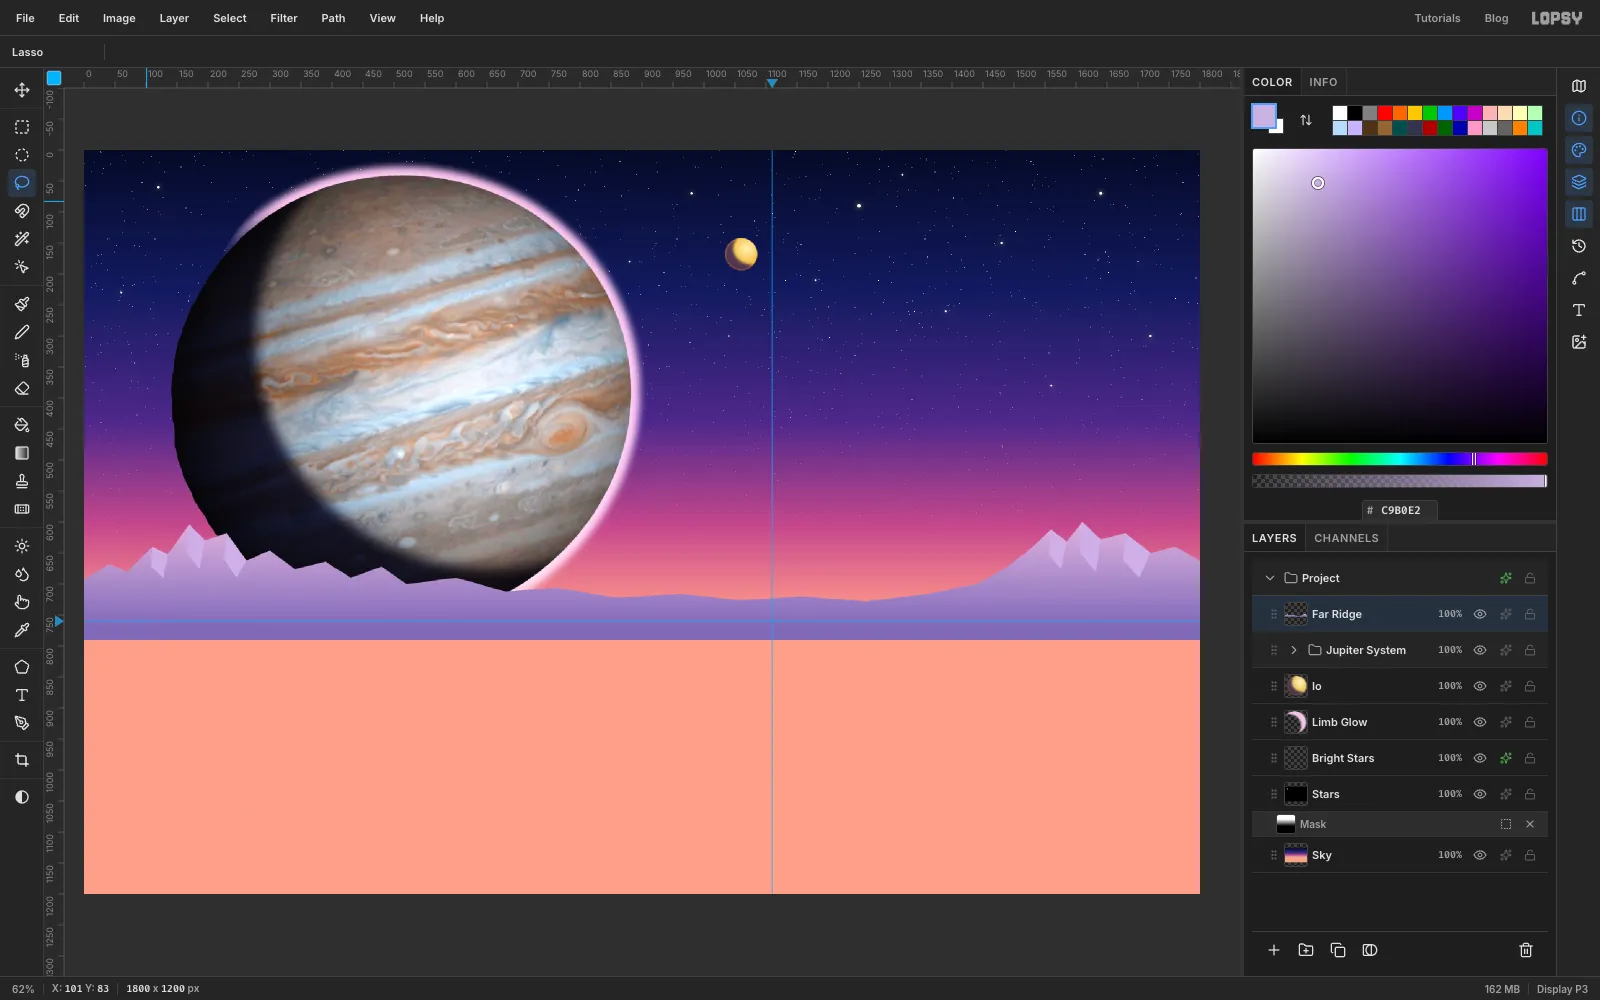
Bonestell's mountains always had crisp lit planes. For each tall spire, lasso a narrow sliver down its right-hand slope, from the peak to partway down, and fill it with . Right-hand faces catch the light because the sun is on the right.
-
Lay down the ice plain
Press Cmd+D and add an Ice Plain layer above the ridge. Use the Rectangular Marquee's exact dialog to select from
0, 756to1800, 1200. Fill it with a three-stop gradient, → → , dragged from the horizon to the bottom edge.While the selection is active, run Add Noise… at
6, Mono, Gaussian for a faint frosty grain.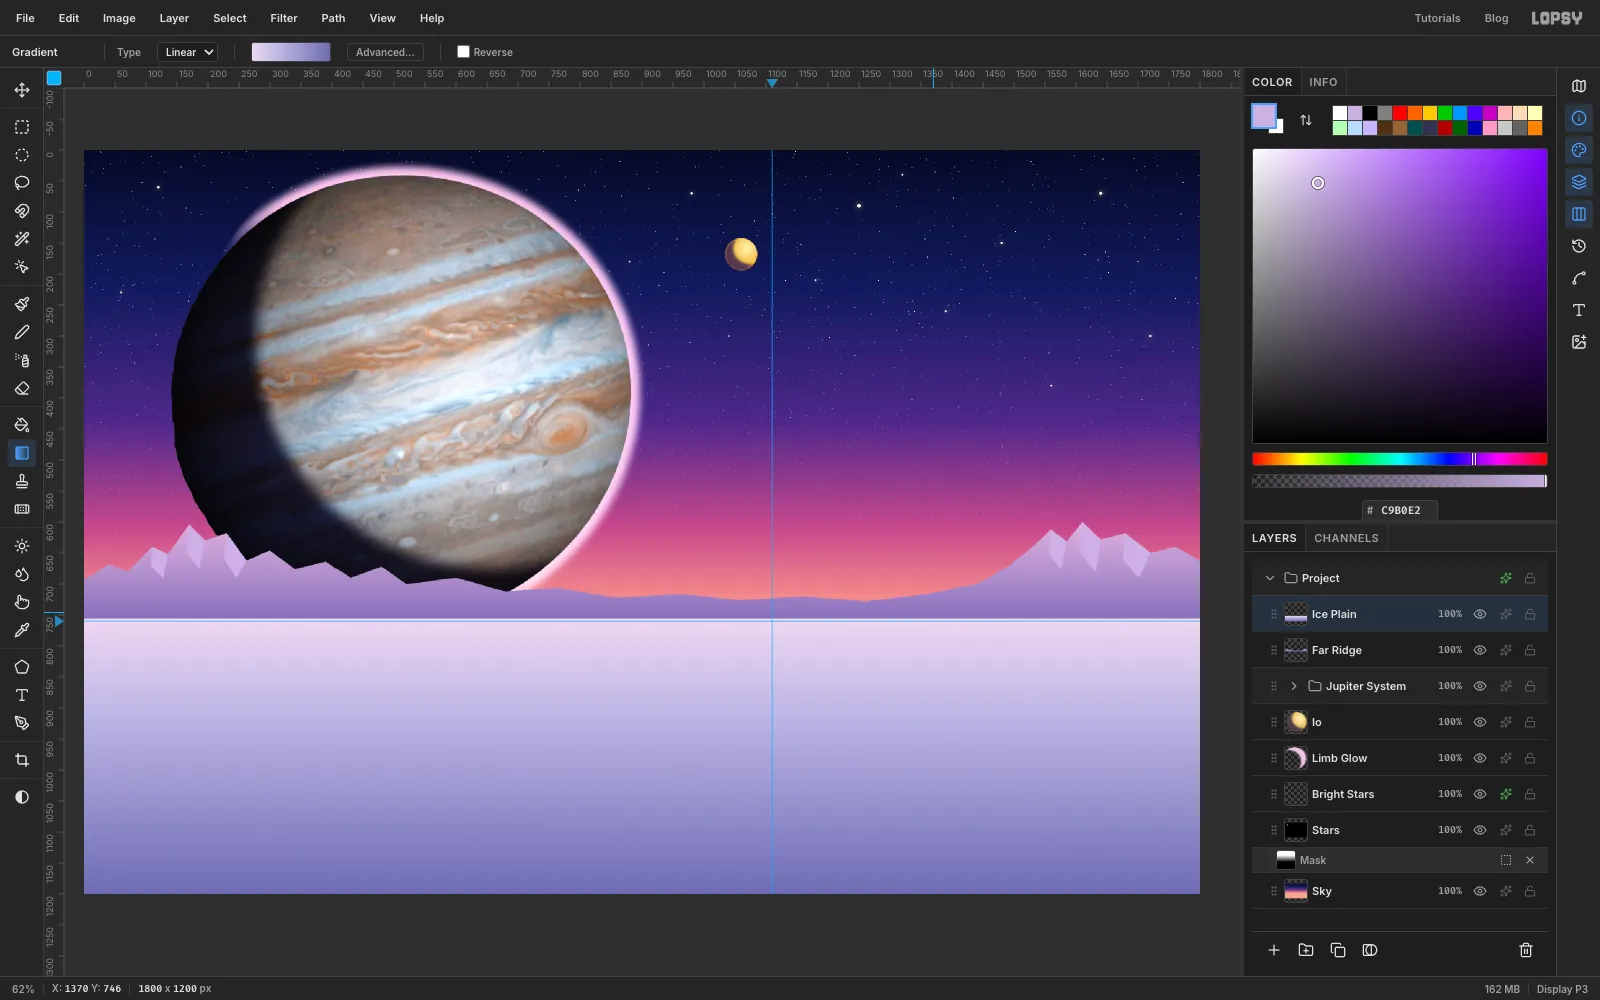
-
Add a darker shelf in front
Add a Near Ridge layer. Lasso a lower, darker shelf along the left half of the horizon, ending just under the dome's left edge, and fill it with .
Keep the selection, pick a soft Brush (Size
46, Hardness0, Opacity55) and paint along the crest. The selection keeps the paint on the rock. Lasso two or three lit facets and fill them with .The shelf's flat bottom would look pasted on. To blend it in, click Add Mask and then Edit mask. Drag a white → black gradient from y
752down to y800, so the shelf melts into the ice.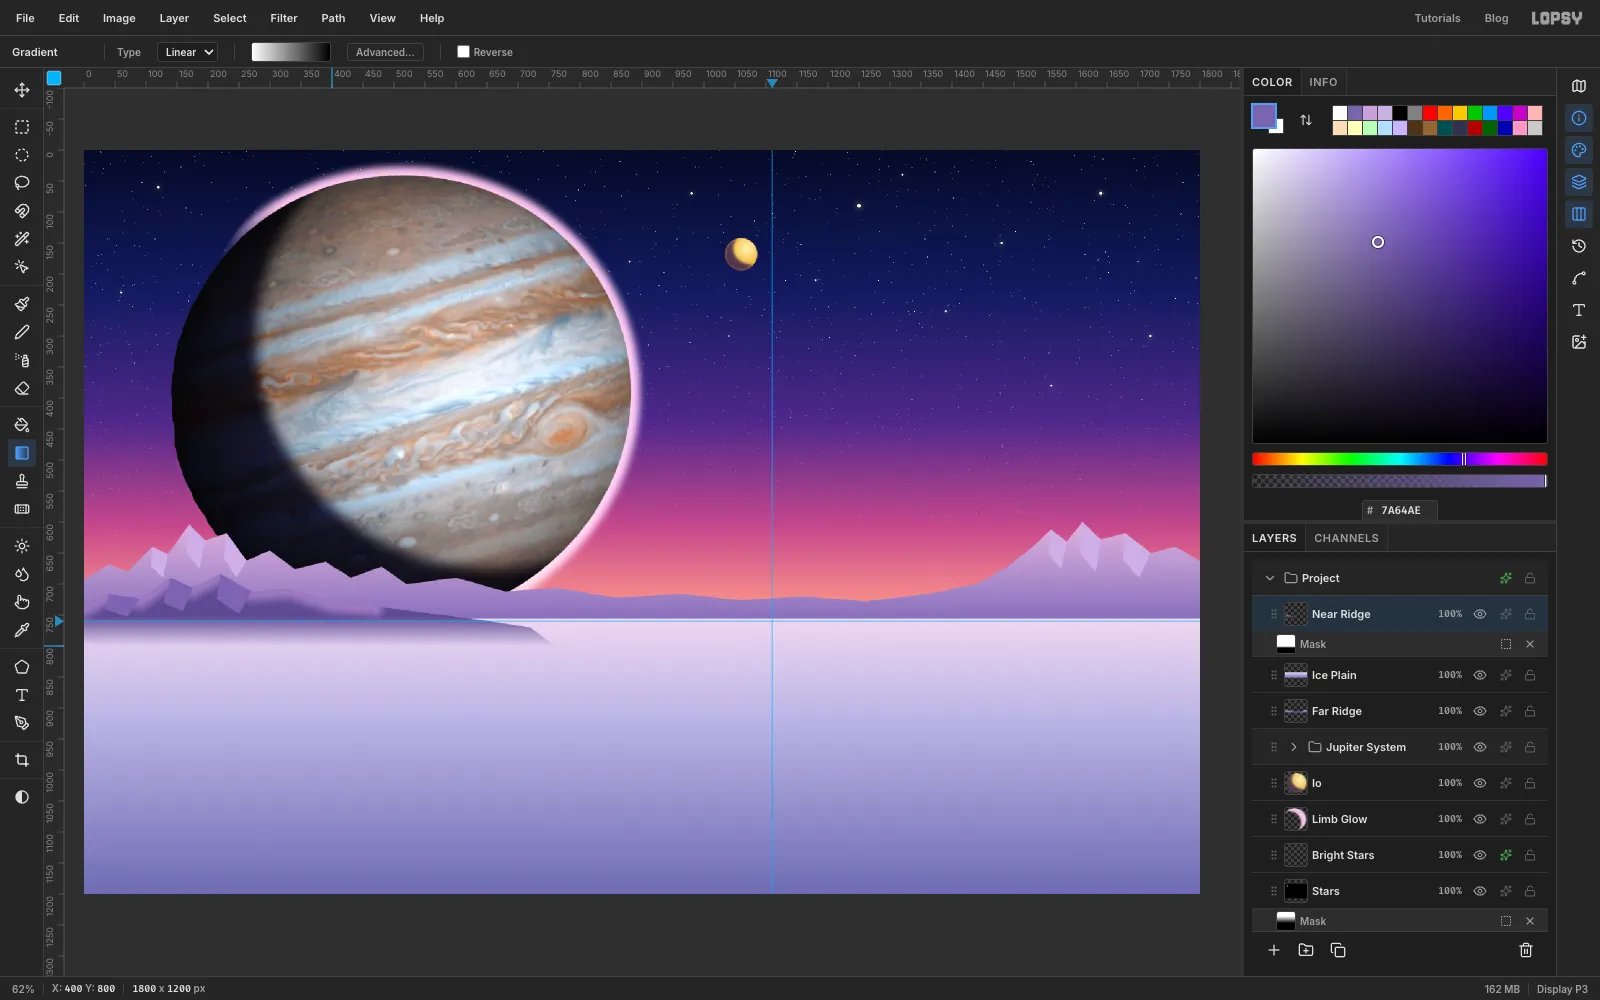
-
Crack the ice
Europa is famous for its reddish-brown cracks, called lineae. Add a Lineae layer and pick the Pen tool. Set the foreground to , then draw three gentle curves across the plain:
- A far one near the horizon, with Stroke set to
10. - A wide near one sweeping across the whole plain, with Stroke
34. - A middle one that crosses the near one, with Stroke
24.
Click-drag to make smooth points, and press Enter after each curve to stroke it.
Run Gaussian Blur… at
10and set the layer to Multiply at40%. Add a Cracks layer and trace the same three curves again in , this time with Stroke1,3and2. Set that layer to 75%. Now each band has a sharp fracture down its middle.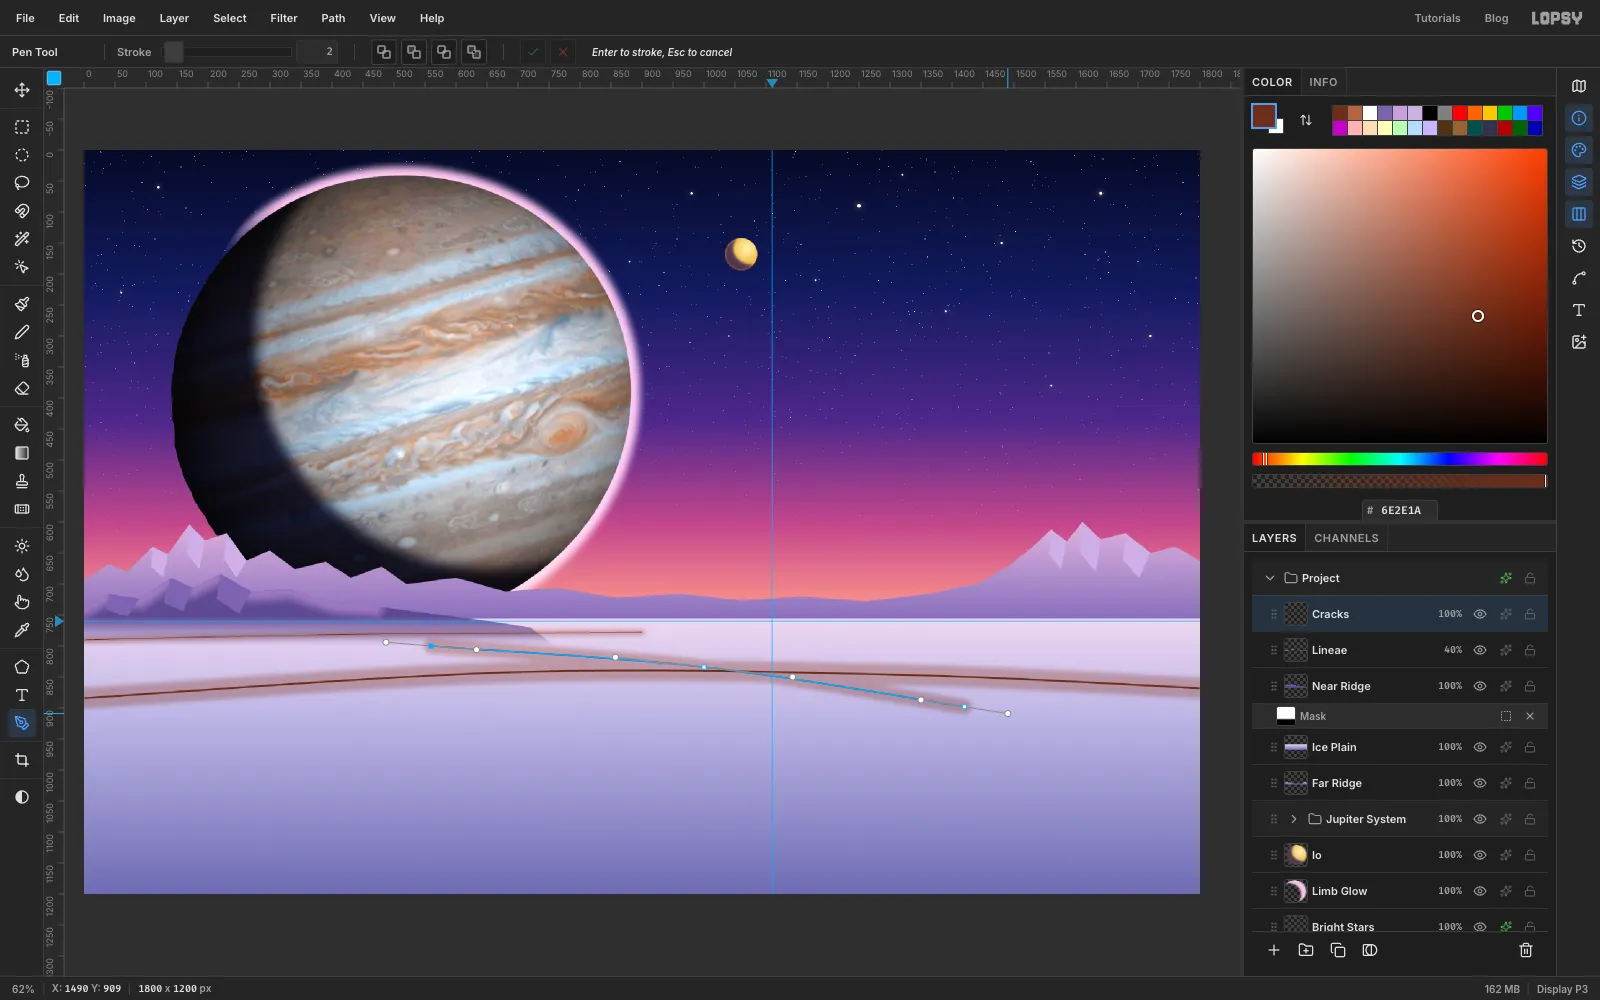
- A far one near the horizon, with Stroke set to
-
Scuff the ice and haze the horizon
Add an Ice Scuffs layer. Paint four or five short, soft strokes of across the plain (Size
60, Hardness0, Opacity50) and set the layer to Overlay.Add a Horizon Haze layer. Paint one long stroke of along the horizon from edge to edge, with a huge soft brush (Size
260, Opacity40). Set the layer to Screen. The haze separates the far ridges from the plain.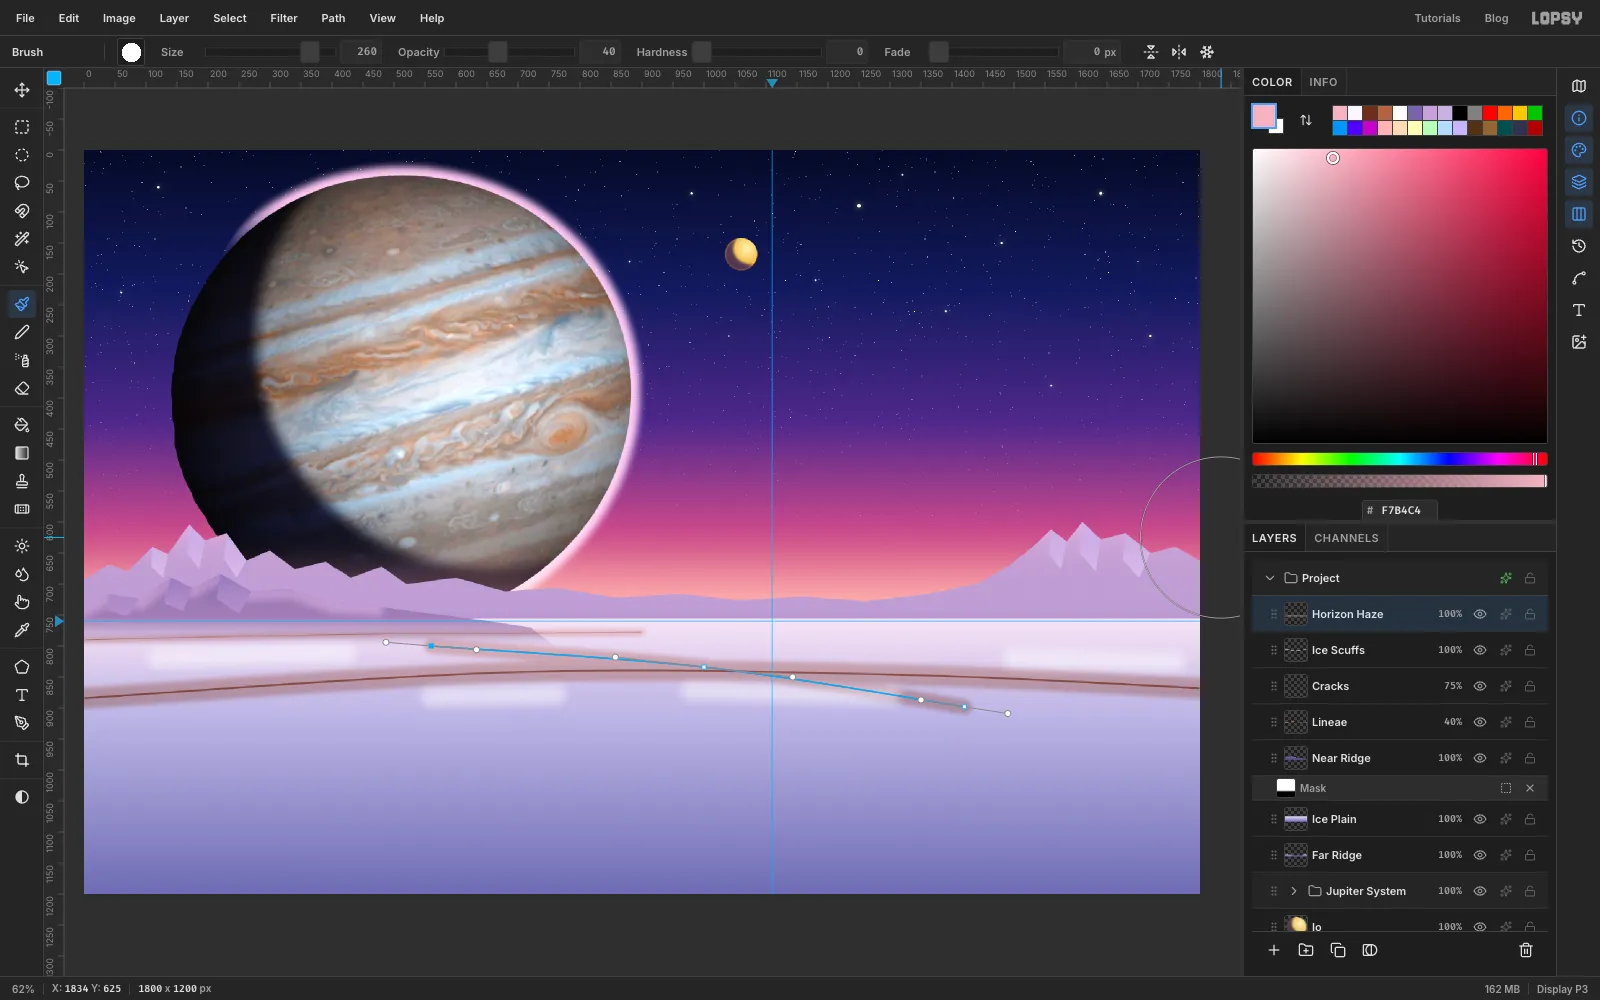
-
Draw the tower with the Pen tool
Add a Ground Shadows layer first. With a soft brush (Size
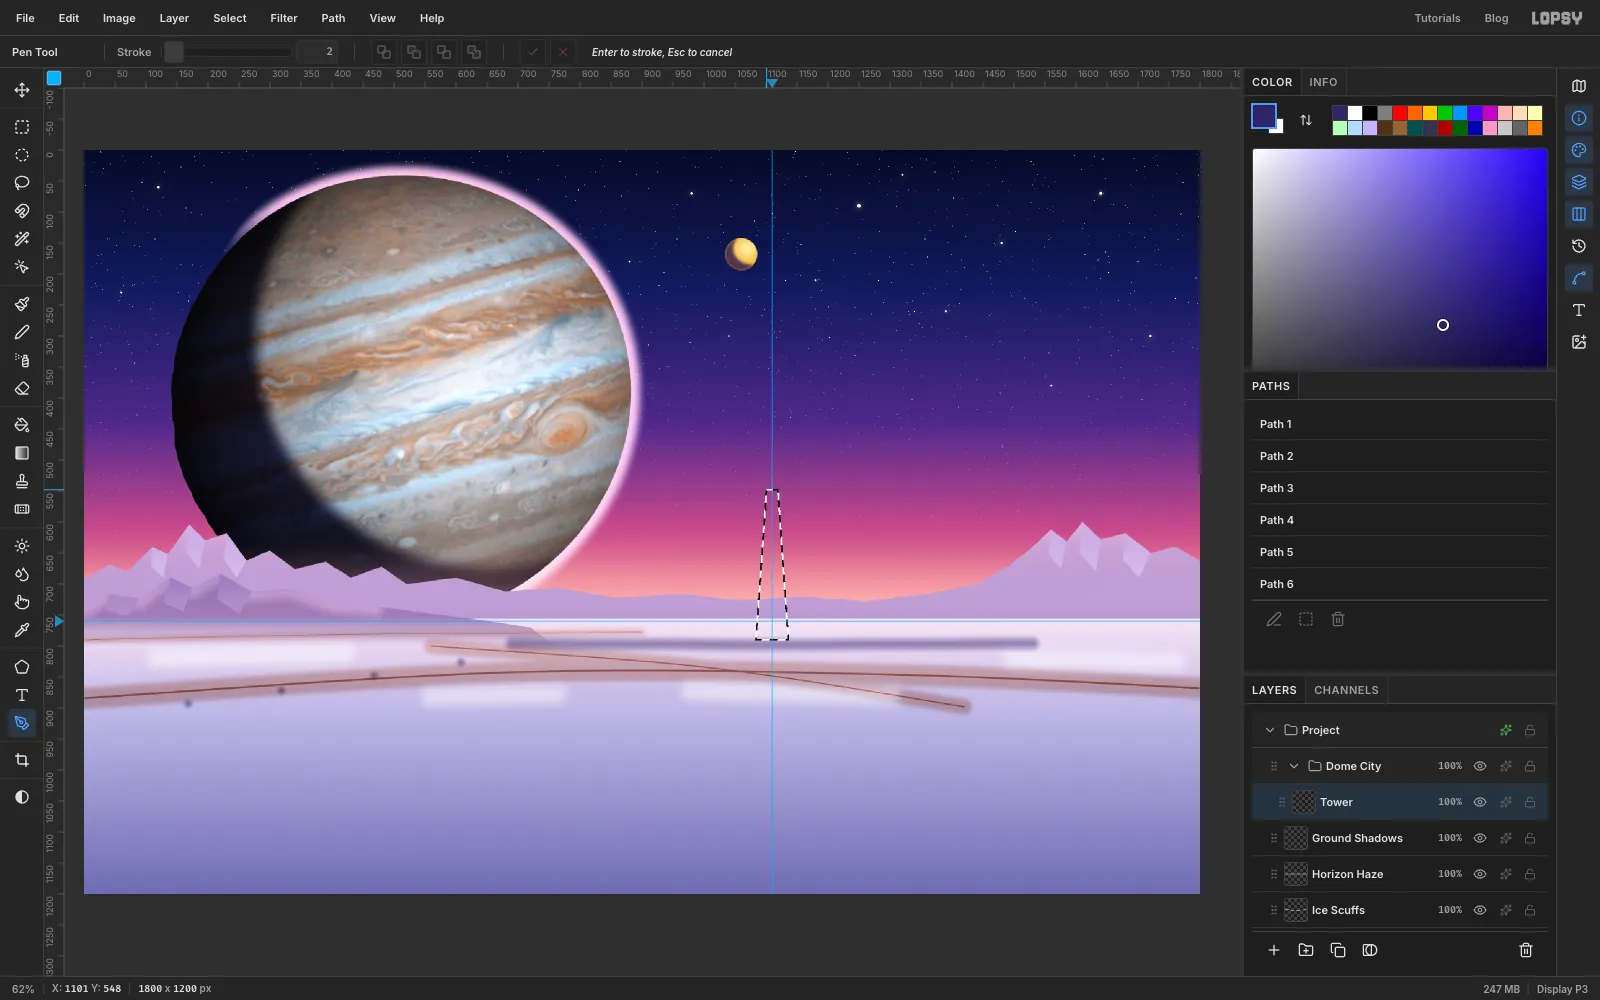
34, Opacity45) and , paint a long line along y796from x690to1530, where the dome's base will sit. At Size22, also click four dabs where the monorail's pylons will stand later: at about x170,320,470and610, between y825and895, lower toward the left. Set the layer to Multiply. Every building you add will now sit on something.Click New Group and name it Dome City. Inside it, add a Tower layer. Pick the Pen tool and click four corners around the dome guide:
- The top, from x
1101to1119at y548. - The base, from x
1084to1136at y790.
Click the first point again to close the path. In the Paths panel, click Path to Selection, then Delete Path.
Fill the selection with a horizontal linear gradient, → → → , with the white at about 78% so the brightest edge faces the sun. Drag it straight across the tower's base.
- The top, from x
-
Add the glass cap and the saucer
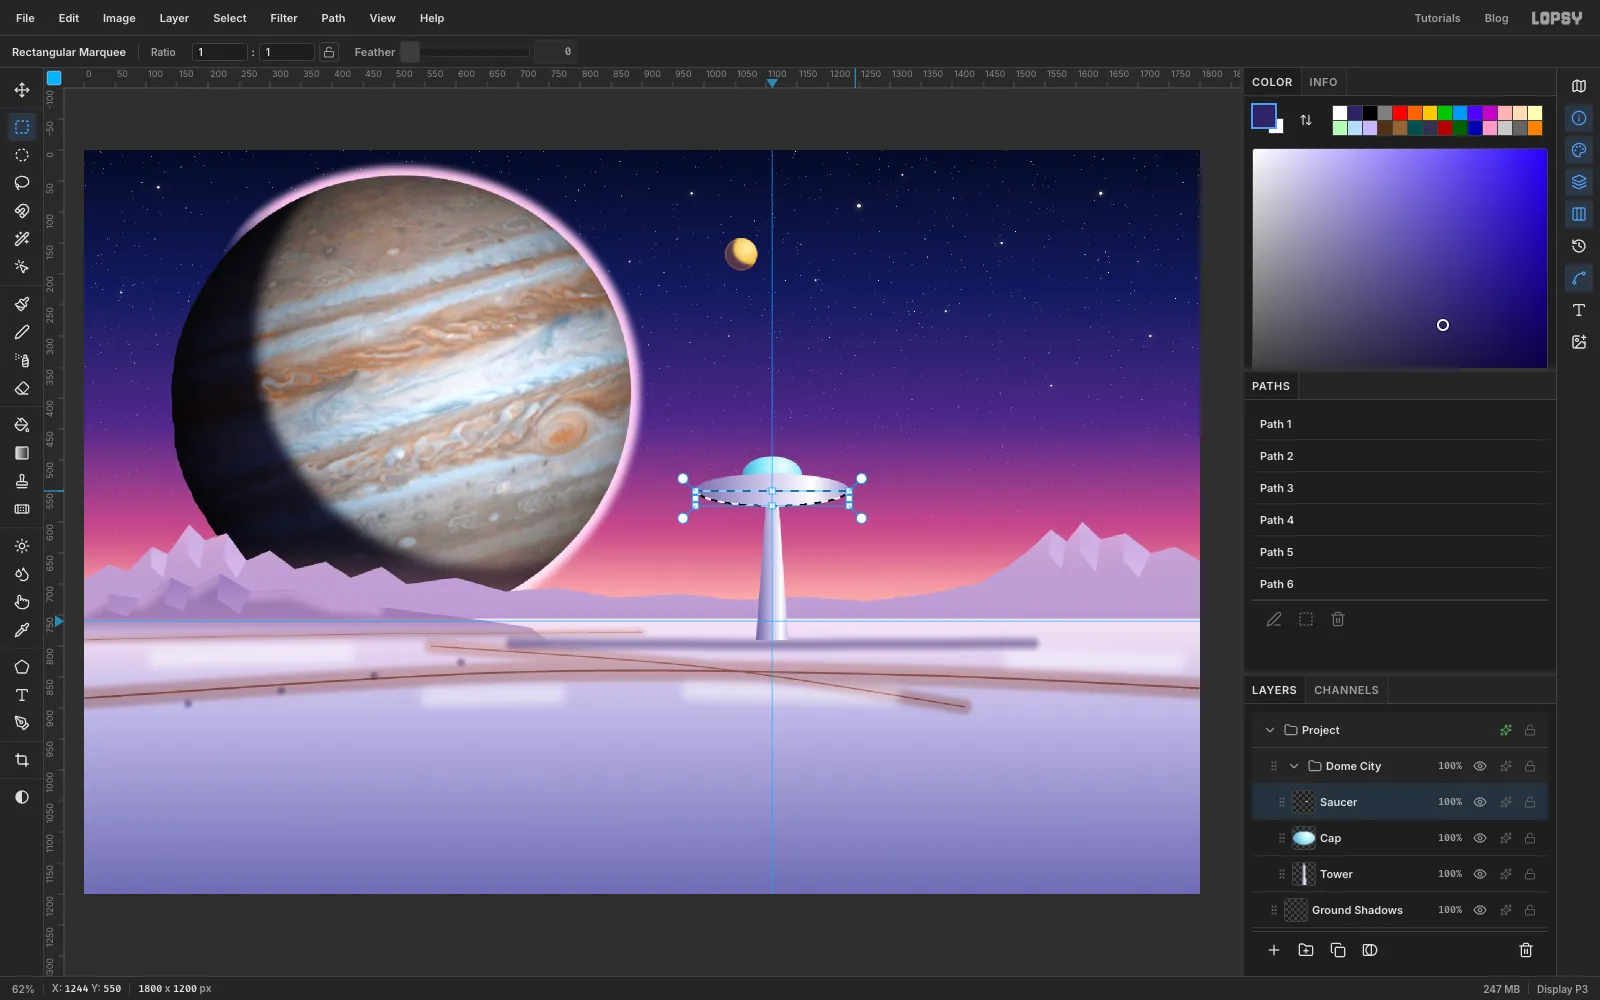
The glass cap. Add a Cap layer and select an exact ellipse from
1062, 494to1158, 554. Fill it with a radial gradient, → → , dragged from the upper right of the ellipse to its lower-left edge.The saucer. Add a Saucer layer above Cap, and select an ellipse from
986, 522to1234, 574. Fill it with a four-stop chrome gradient dragged across its width, with the white at about 76%.To shade the underside, Alt-drag a rectangle over the saucer's top half. That leaves only the lower half selected. Fill it with at 55% opacity.
-
Light the saucer and add a beacon
Add a Saucer Lights layer. Choose a hard Brush at Size
7. Open the brush presets, set Spacing to200on the Shape tab, and paint with . Click near the left end of the saucer's rim, then Shift-click near the right end. Spacing 200 turns the straight line into a neat row of separate dots. Give the layer an Outer Glow with Size10, Opacity85and colour . Then set Spacing back to25.Add an Antenna layer. Draw a 3 px white Pencil line up from the cap: click, then Shift-click. Click one dot of at the top with an 11 px brush, and give the layer an Outer Glow with Size
22and Opacity90.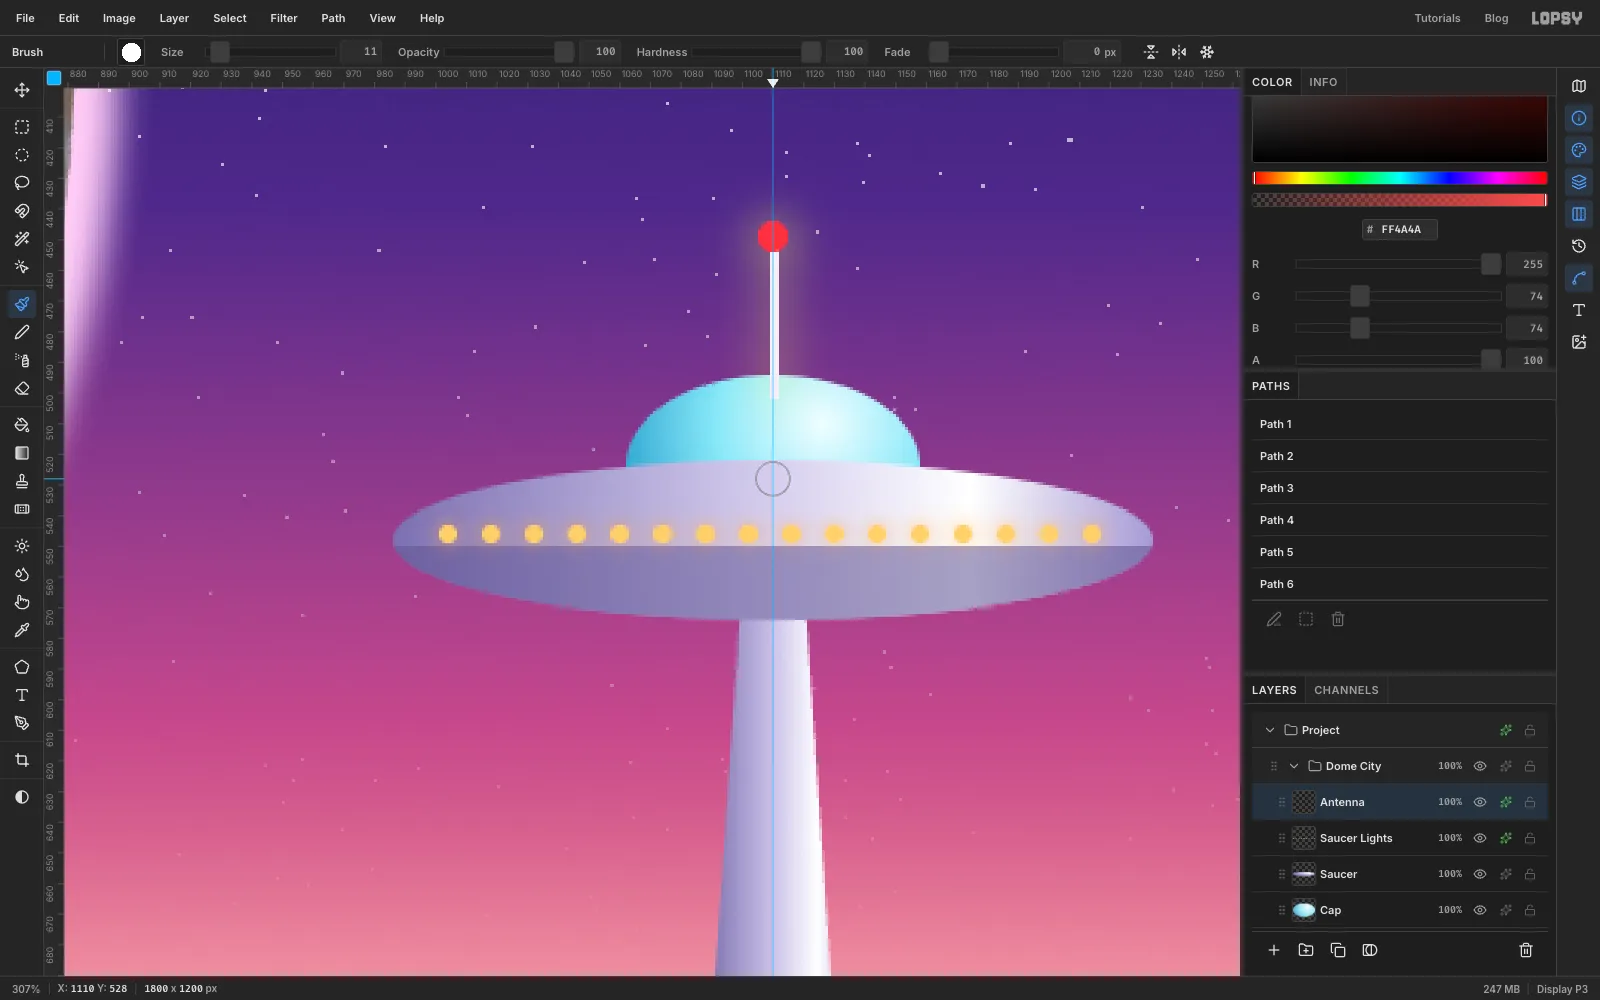
-
Build the west hotel wing
Select Tower and click New Group. Name it Hotel West. Inside it, build the wing from the bottom up, one layer per part. Zoom in to 200% or more for the small parts.
- Stilts. Add a Stilts layer. Draw short vertical Pencil lines (Size
5, ) every 36 px between x754and1030, from y770down to the ground at y792. - Block. Add a Block layer. Select from
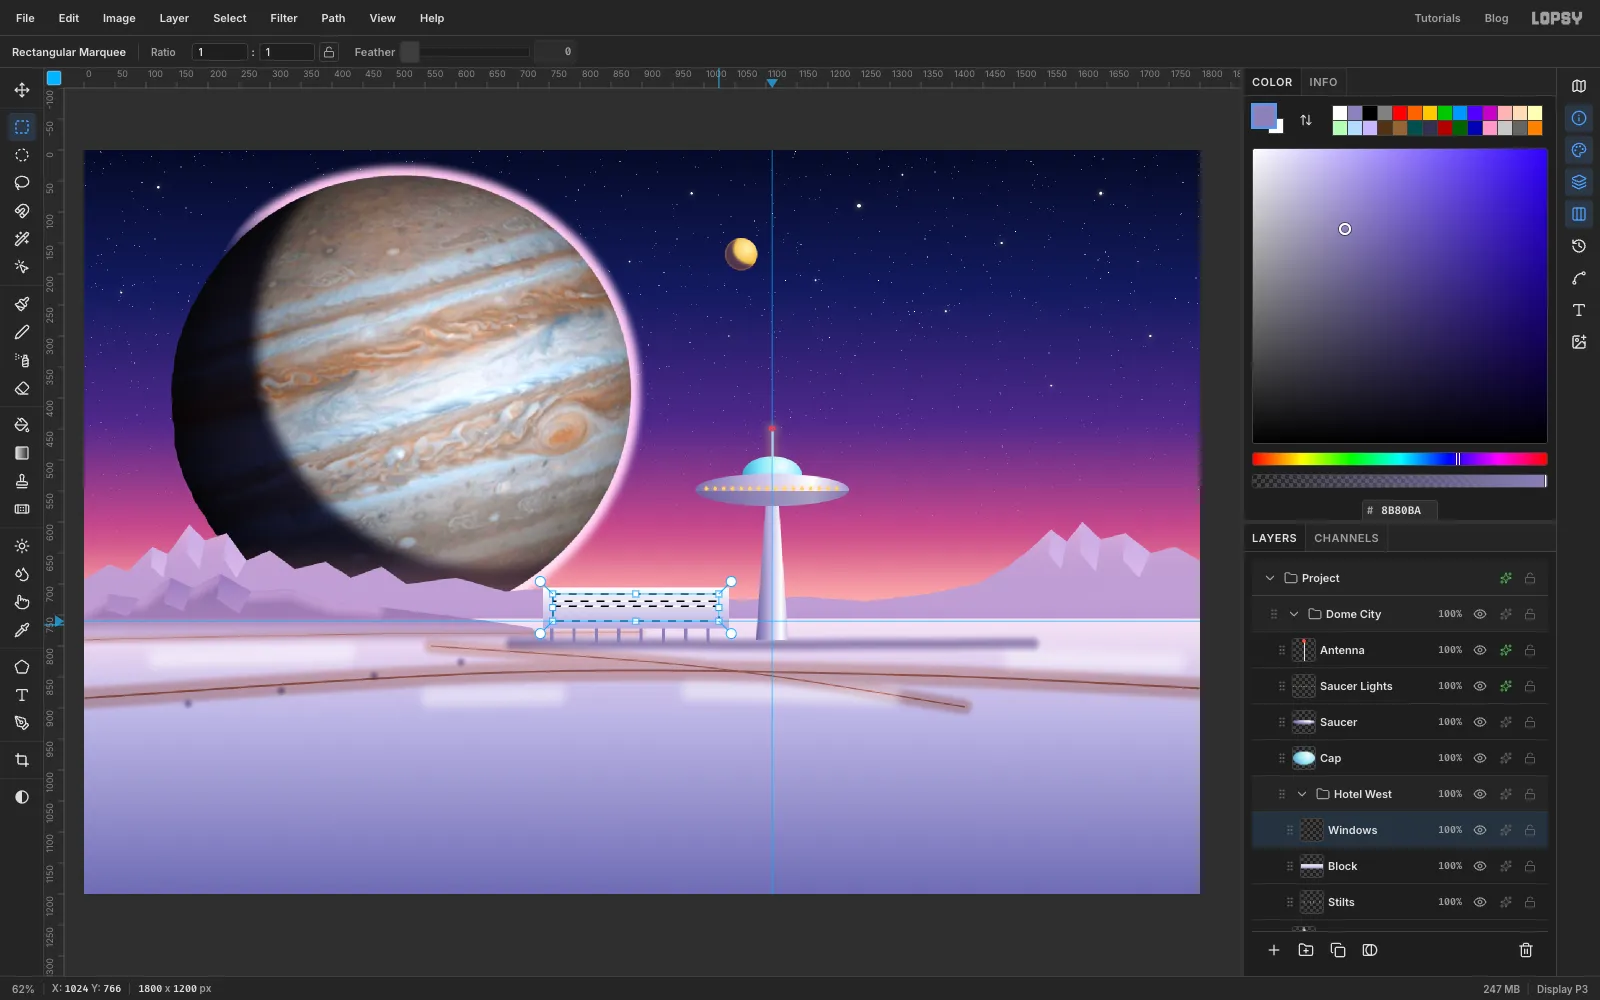
740, 706to1040, 772with the exact dialog. Fill it with a vertical gradient, white at the top to at the bottom. - Windows. Add a Windows layer. Select the first ribbon with the exact dialog, from
756, 716to1024, 728. Then Shift-drag two more ribbons of the same width below it, each about 12 px tall with an 8 px gap, to add them to the selection. Fill with and add an Outer Glow with Size9and Opacity70.
- Stilts. Add a Stilts layer. Draw short vertical Pencil lines (Size
-
Glaze the gable and add the swept roof
- Mullions. Add a Mullions layer. Fill three small rectangles in the window strips with as unlit rooms. Then draw thin vertical Pencil lines in every 24 px across the windows.
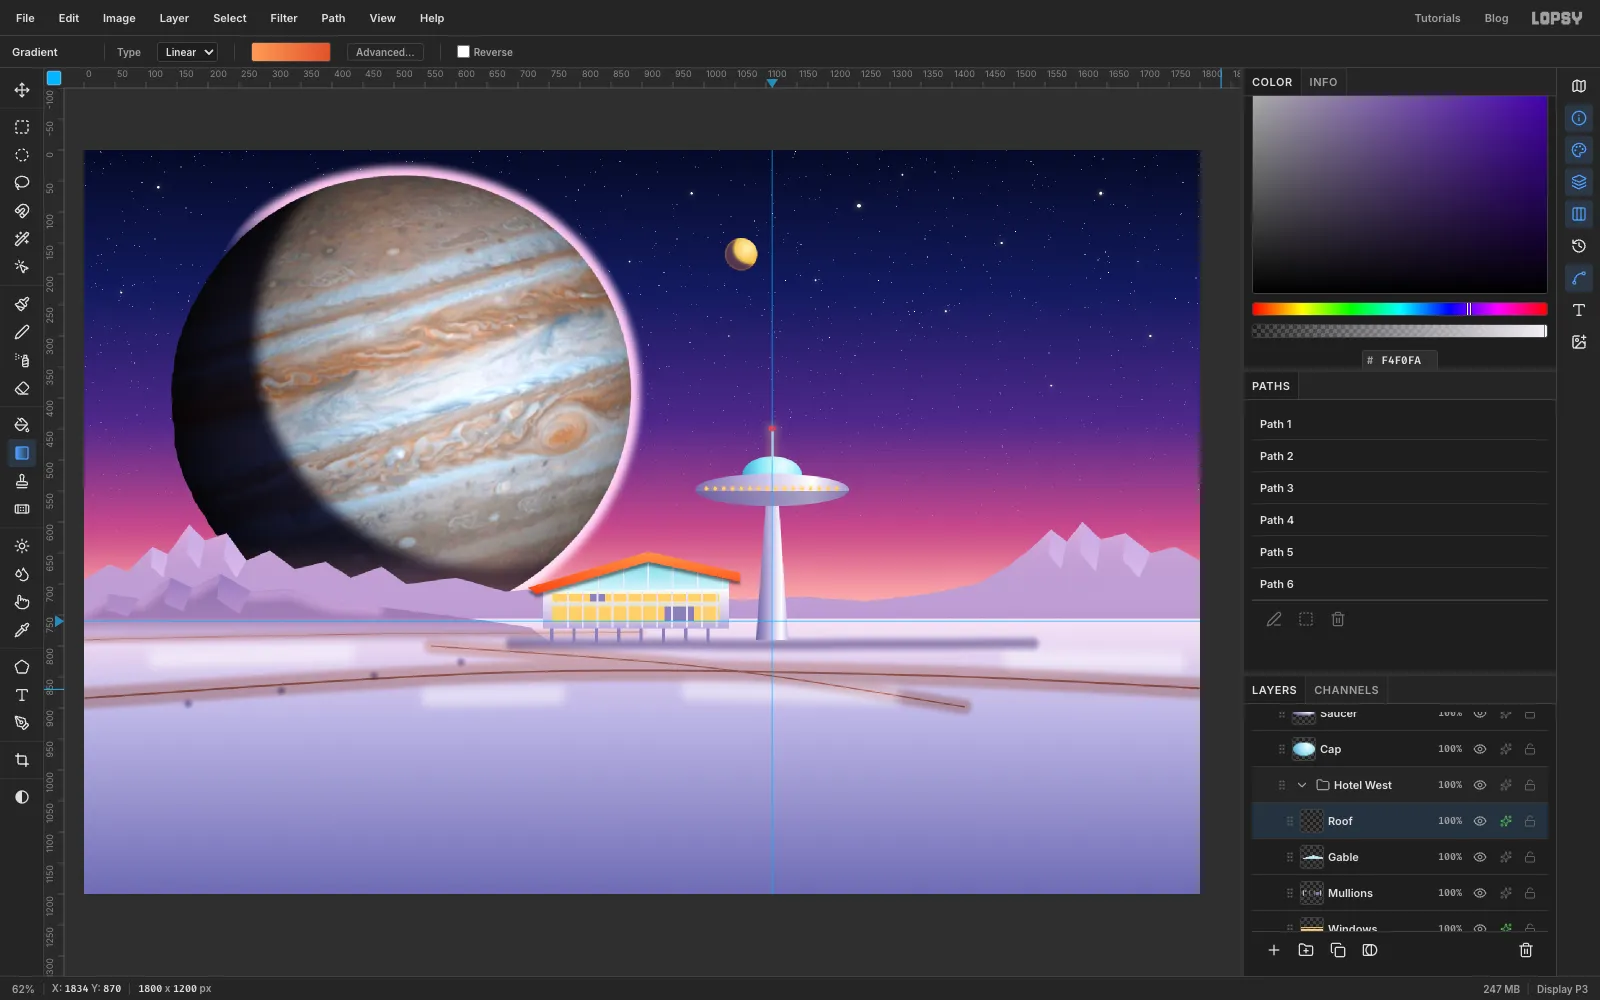
- Gable. Add a Gable layer. With the Pen tool, trace the triangle between the top of the block and where the roof will go: a low point at the left, a peak at about
910, 662, and the top-right corner of the block. Use Path to Selection and fill it with → . Add a few vertical mullion lines. - Roof. Add a Roof layer. Pen a thin boomerang chevron that overhangs the block: from
716, 706up to a peak at910, 648, down to1058, 682, and back along a parallel underside 16 px lower. Fill it with → , top to bottom, and add a Drop Shadow with Offset X0, Offset Y6, Blur6and Opacity45.
-
Duplicate and flip the wing
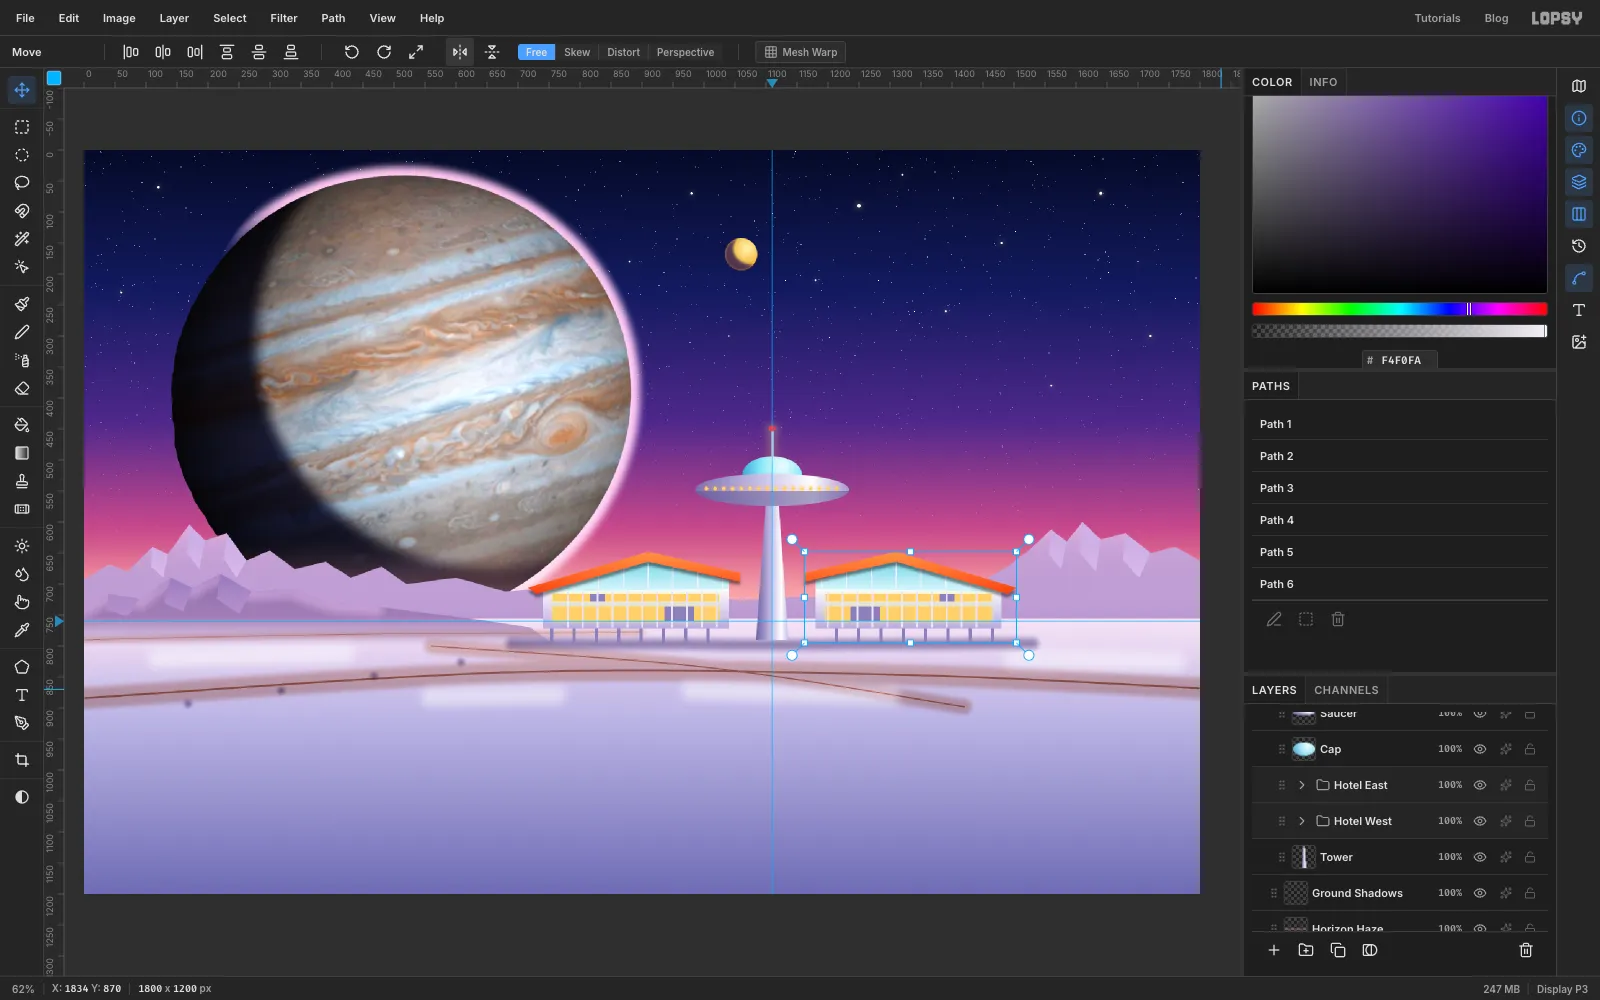
Collapse the Hotel West group, keep its row selected, and click Duplicate Layer. The whole group is copied. Rename the copy Hotel East.
With the Move tool and nothing selected, click Flip Horizontal in the options bar. The group mirrors in place. Then drag the group straight to the right with the Move tool. Stop when its roof peak sits as far right of the tower as the west peak sits left of it, about 446 px. The Info panel shows how far you've moved. Use the arrow keys for the last few pixels.
-
Make the east wing a little smaller
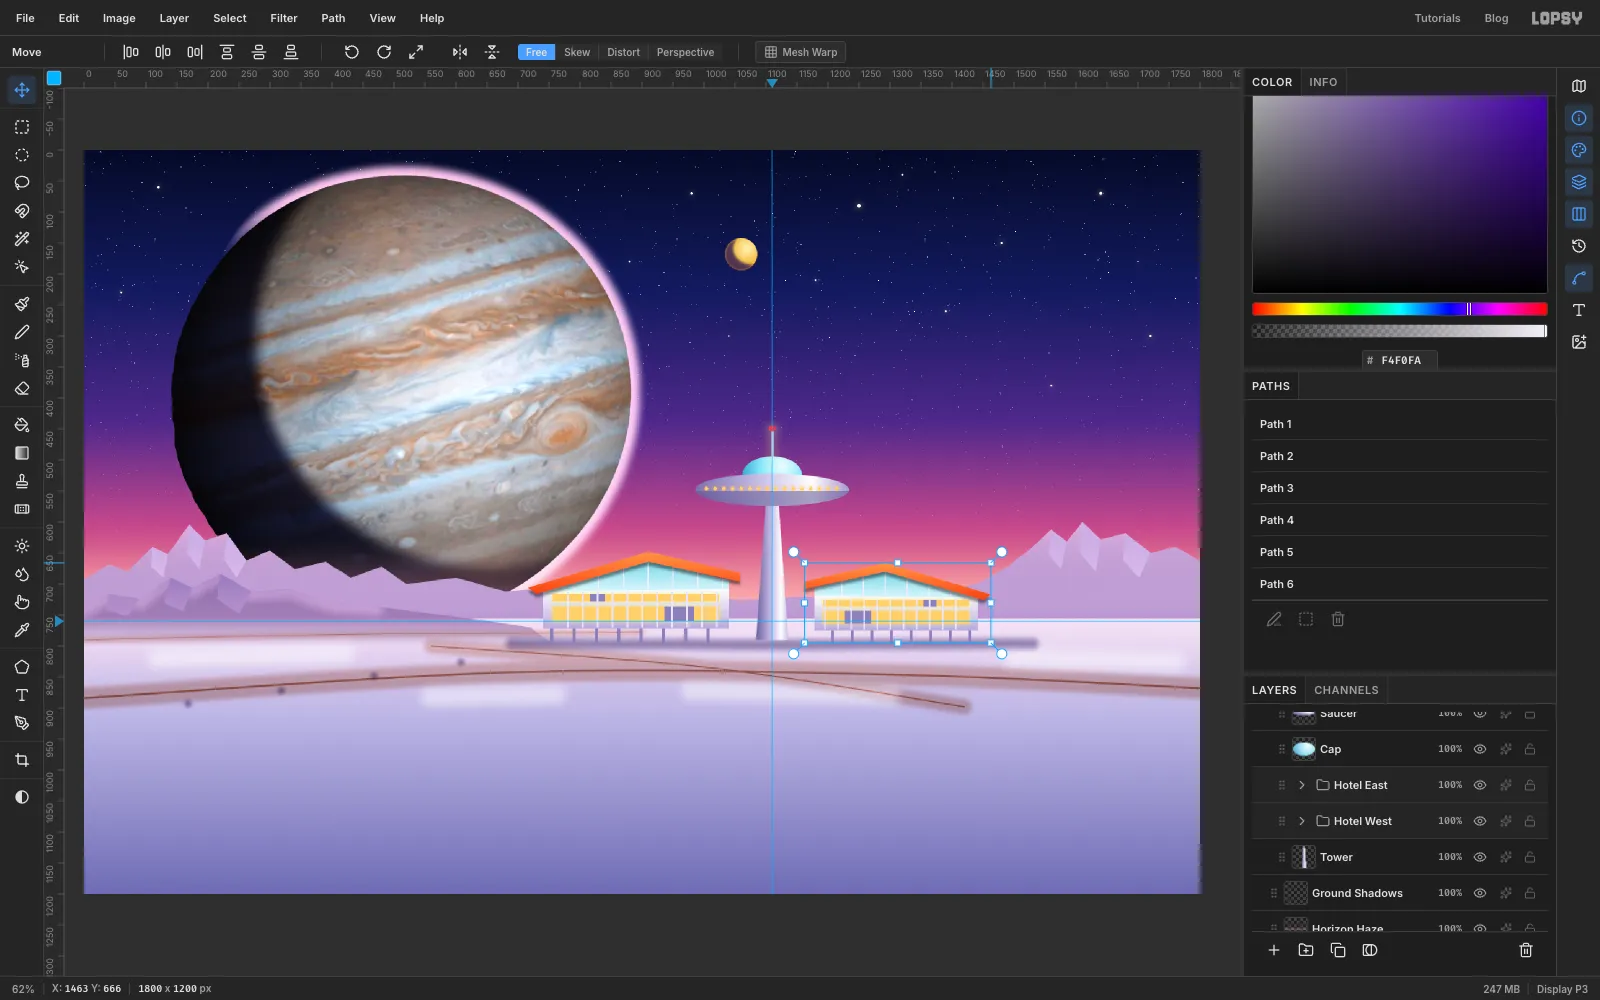
Two identical wings look static. With Hotel East still selected, hold Cmd and drag the box's top-right corner handle in and down by about an eighth. The bottom-left corner stays pinned, so the stilts still stand on the ground, and the smaller wing reads as slightly farther away. Press Cmd+D to commit.
-
Select the glass dome
Select the top layer in Dome City (Antenna) and add a Dome Glass layer. Make an exact ellipse from
680, 390to1540, 1190, centred on the dome guide. Then Alt-drag a rectangle over its lower half, from the base line at y790down past the bottom, to keep only the hemisphere.Fill it with at only 8% opacity. Then add an Inner Glow with Size
22and Opacity70. The edges of the glass, where you look through more of it, catch more light, just like a real glass dome.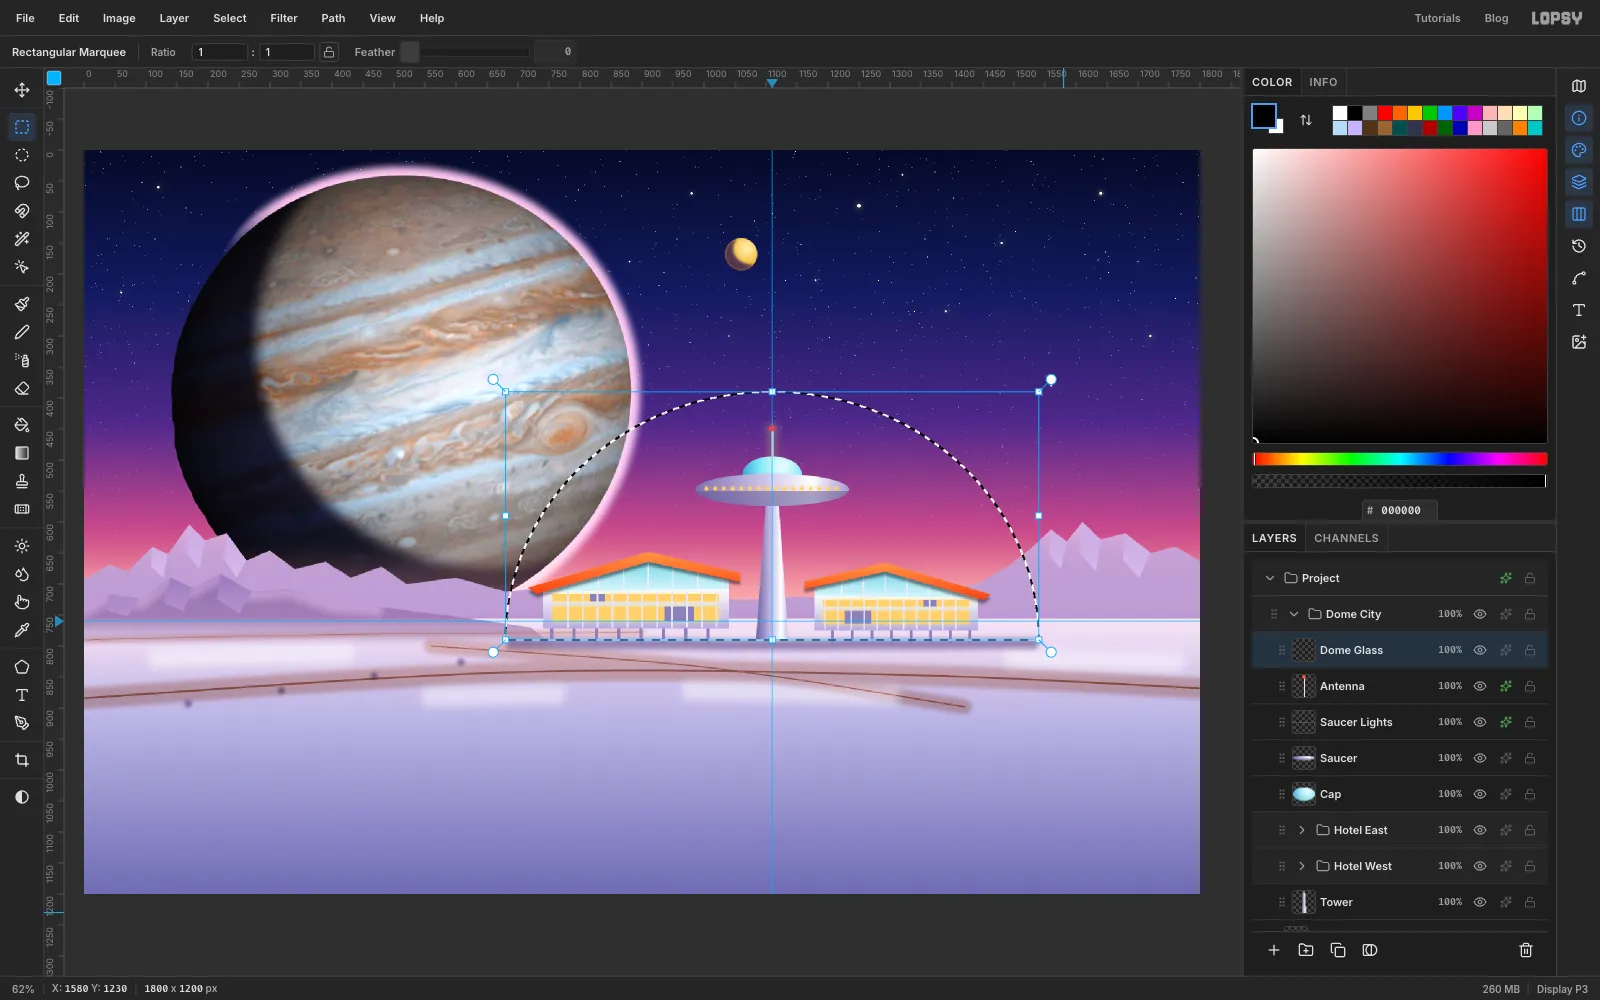
-
Add the dome's ribs
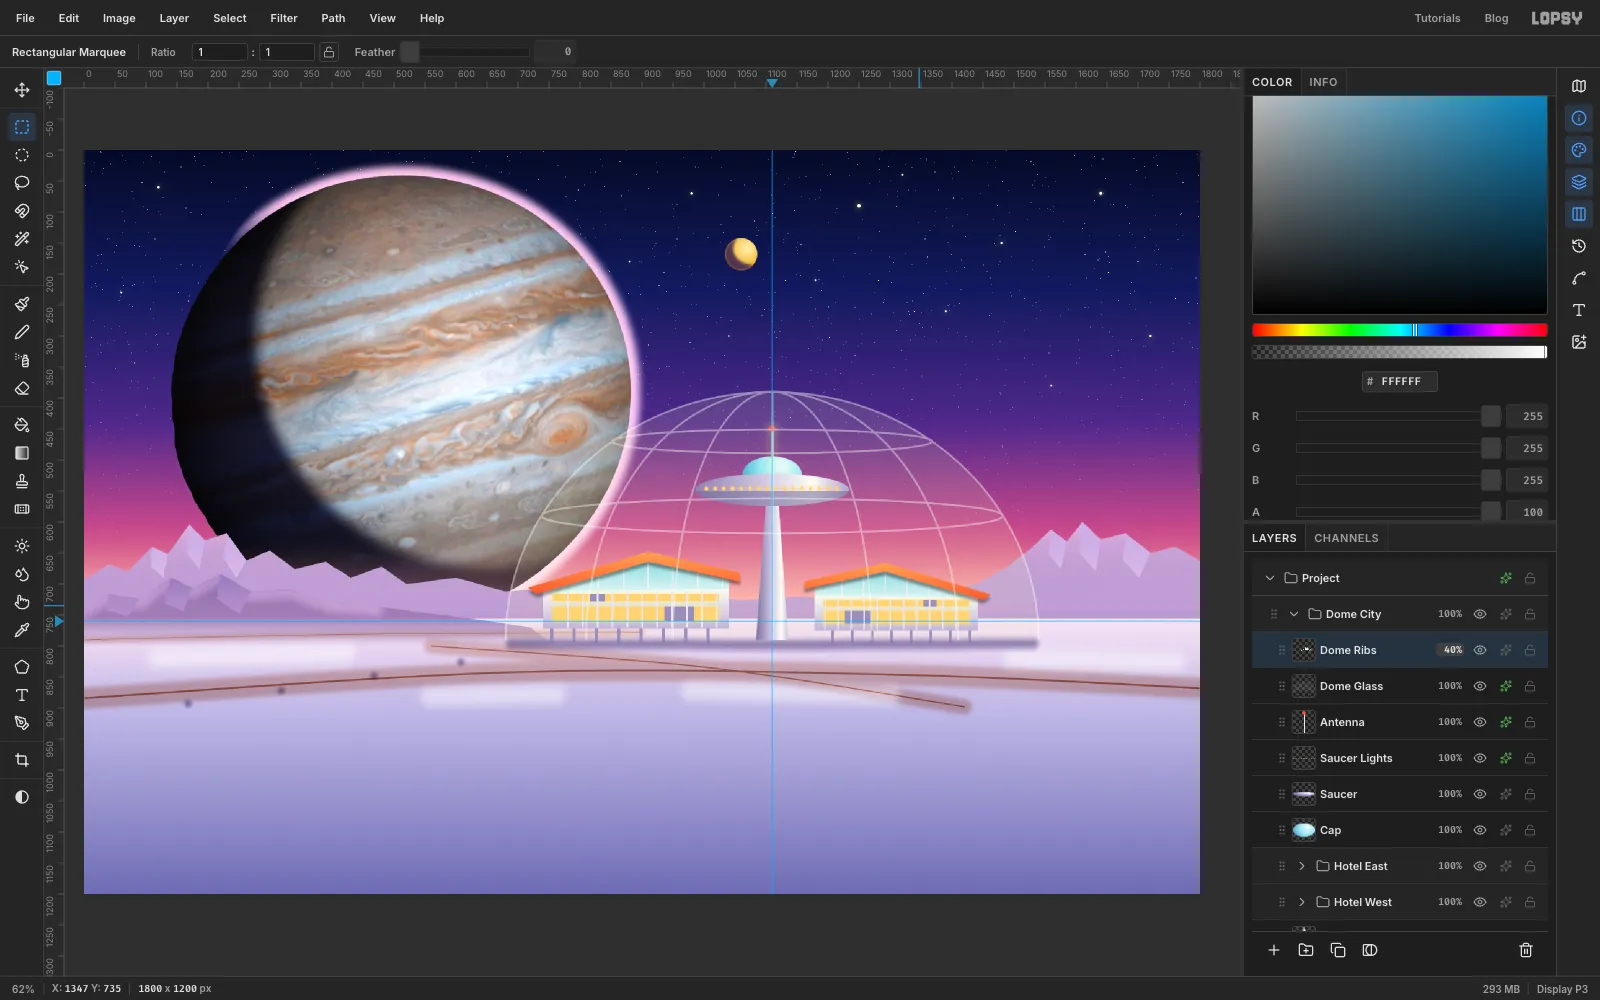
Add a Dome Ribs layer. Pick the Shape tool, set Shape to Ellipse, click the fill swatch and choose Remove fill, then set the stroke to white with Width
3.Click on the dome's centre at
1110, 790, just below where the guides cross, to open the Shape Size dialog. Make three ellipses of the same height (800) but different widths (860,600and320). These are the meridians. Add two flat rings for latitude lines:- Lower ring:
744 × 56, centred at y590. - Upper ring:
516 × 38, centred at y470.
Draw a vertical Pencil line down the middle. Then select everything below the base line and press Delete to remove the lower halves. Set the layer to 40%.
- Lower ring:
-
Seat the dome on a ring and add highlights
Highlights. Add a Dome Shine layer. With a soft white brush (Size
30, Opacity70), paint a curved stroke that follows the dome's right shoulder. Add a thinner one (Size12) just inside it. Set the layer to Screen at45%. The highlights go on the right only, facing the sun.Foundation ring. Add a Dome Ring layer. Make an exact ellipse from
674, 776to1546, 804. Alt-drag a slightly narrower ellipse shifted up by 8 px, leaving a thin crescent along the front. Fill it with a chrome gradient, → → , dragged across its width.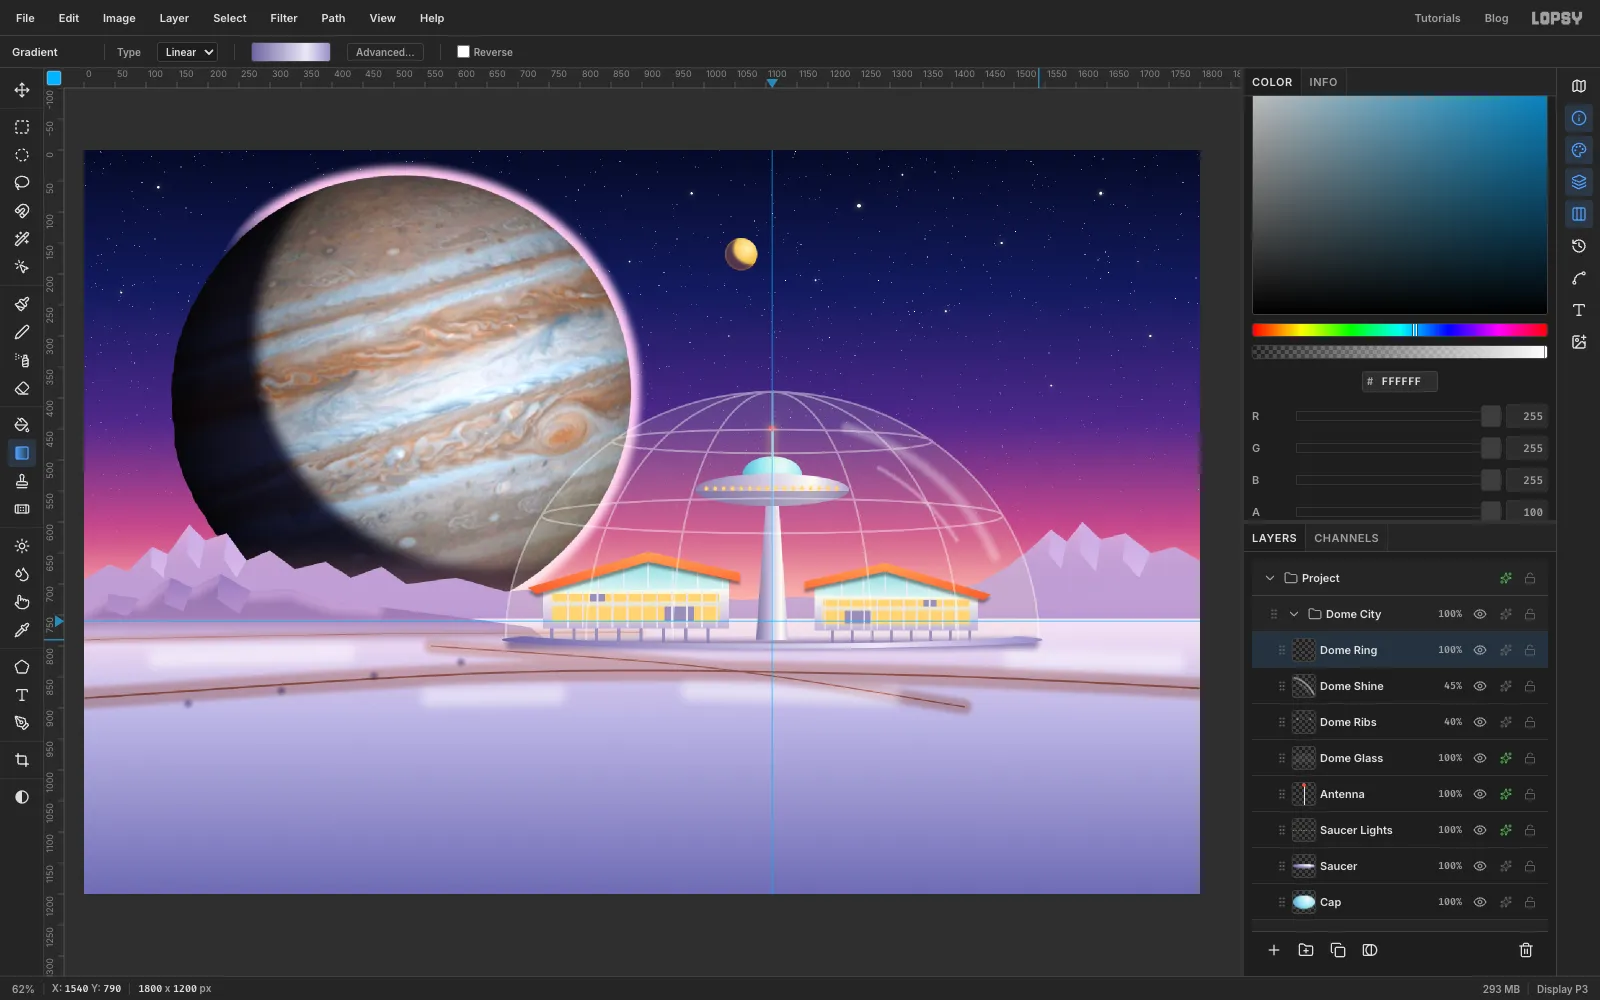
-
Run a monorail in from the left
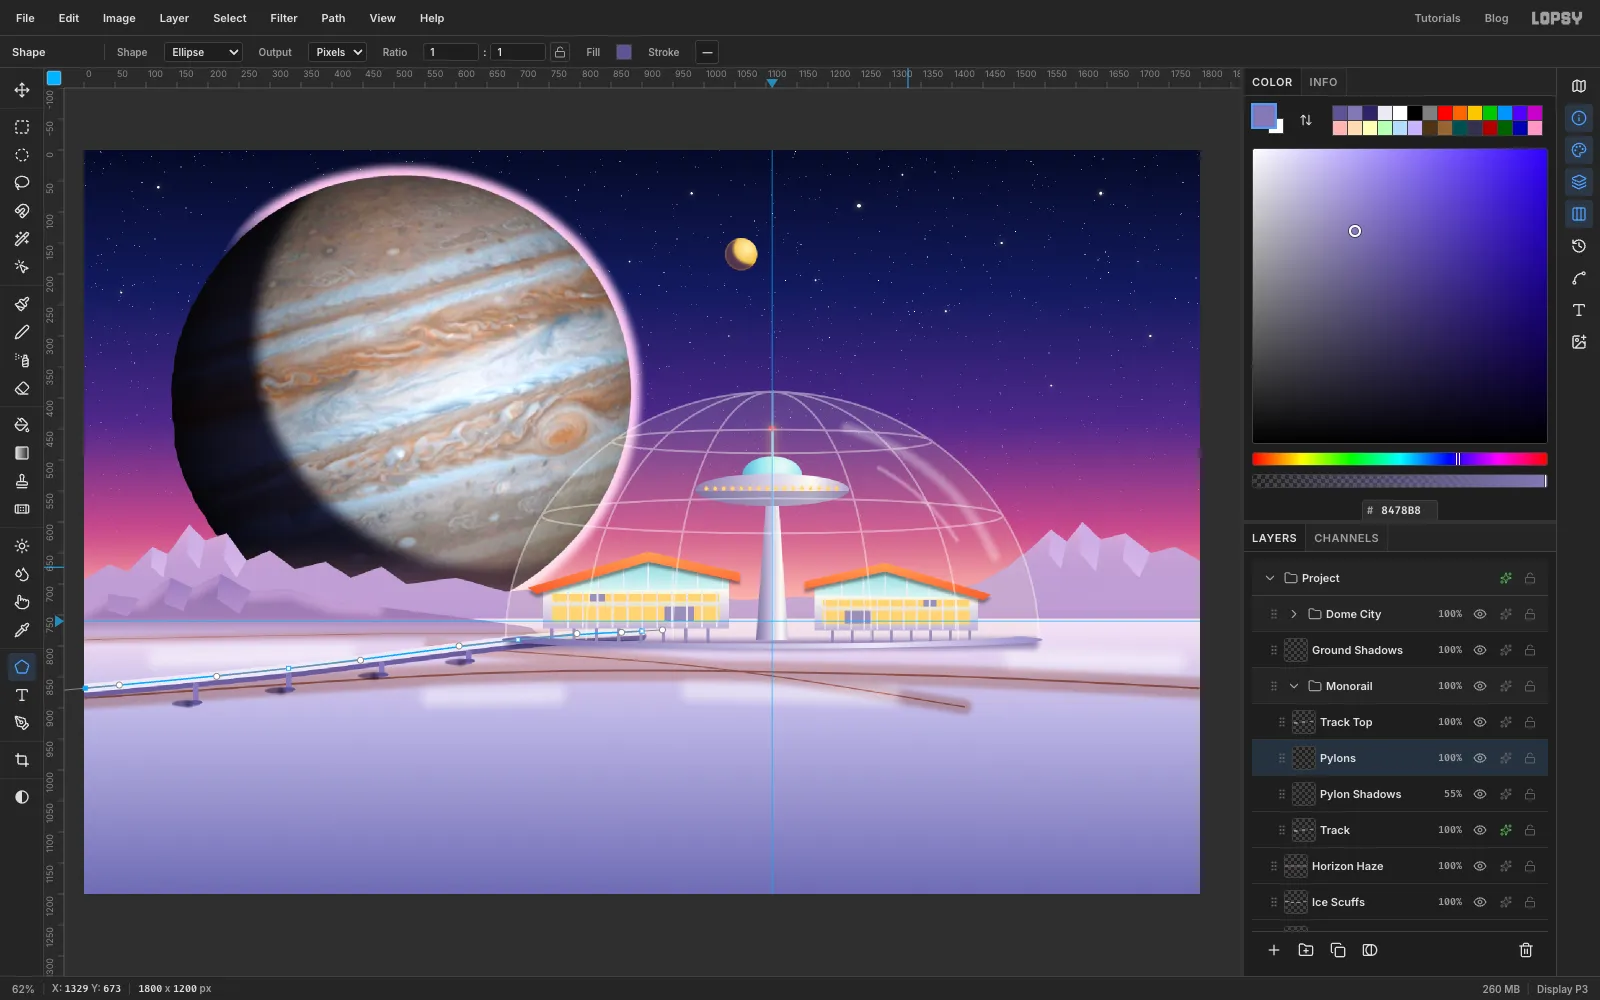
Collapse Dome City, select Horizon Haze and click New Group. Name it Monorail. Putting it below the dome group means the dome's glass covers the end of the track.
- Track. Add a Track layer. With the Pen tool, set Stroke to
14and the colour to . Click-drag a gentle curve from the left edge at y868up into the dome at about900, 776, and press Enter. - Underside. Duplicate the layer and name the copy Track Top. Select the original Track, give it a Color Overlay of , and nudge it down 8 px with the arrow keys. It becomes the beam's shadowed underside.
- Pylons. On a Pylon Shadows layer, make small
44 × 10ellipses of just left of where each pylon will land. Blur them with Gaussian Blur3and set the layer to Multiply at 55%. On a Pylons layer above it, draw four Pencil lines (Size9, ) from the track down to the ice. Make the lines longer toward the viewer. Finish each one with a small ellipse foot pad (22 × 7).
- Track. Add a Track layer. With the Pen tool, set Stroke to
-
Draw the train
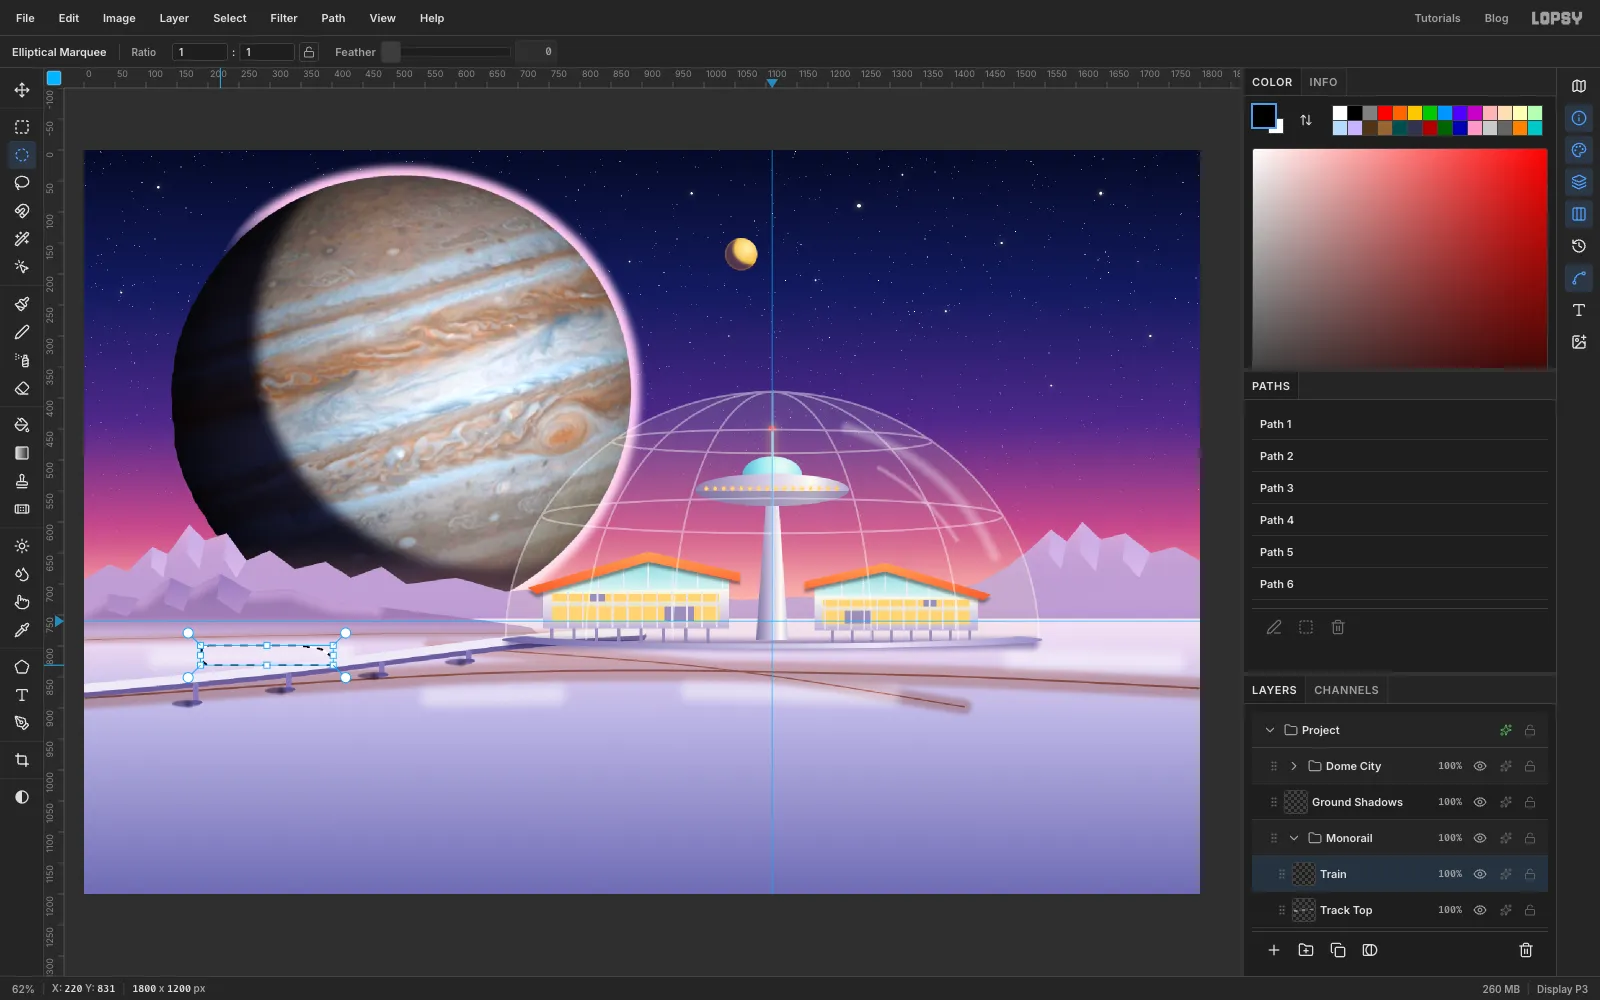
Select Track Top and add a Train layer. With the Pen tool, outline the body on the track at about
300, 812: about 200 px long, with a flat top and bottom 32 px apart and a slanted bullet nose that points up the track. Use Path to Selection. Then Shift-drag a small ellipse over the back end to round off the tail. Fill it with .Pen a small windscreen on the nose and fill it with . Select a long window band along the side and fill it with . Finally, draw a thin Pencil belt line below the windows.
-
Shade and tilt the train
Choose Dodge / Burn. Set Mode to Burn with Exposure
45and Size16, and stroke along the train's underside. Then switch to Dodge at Size10and stroke along the roof.Cmd-click the Train thumbnail, pick the Move tool, and drag the rotation handle about 7° anticlockwise to match the slope of the track. Press Cmd+D. Add a Drop Shadow (Offset X
-4, Offset Y7, Blur4, Opacity45) so the train sits on the beam.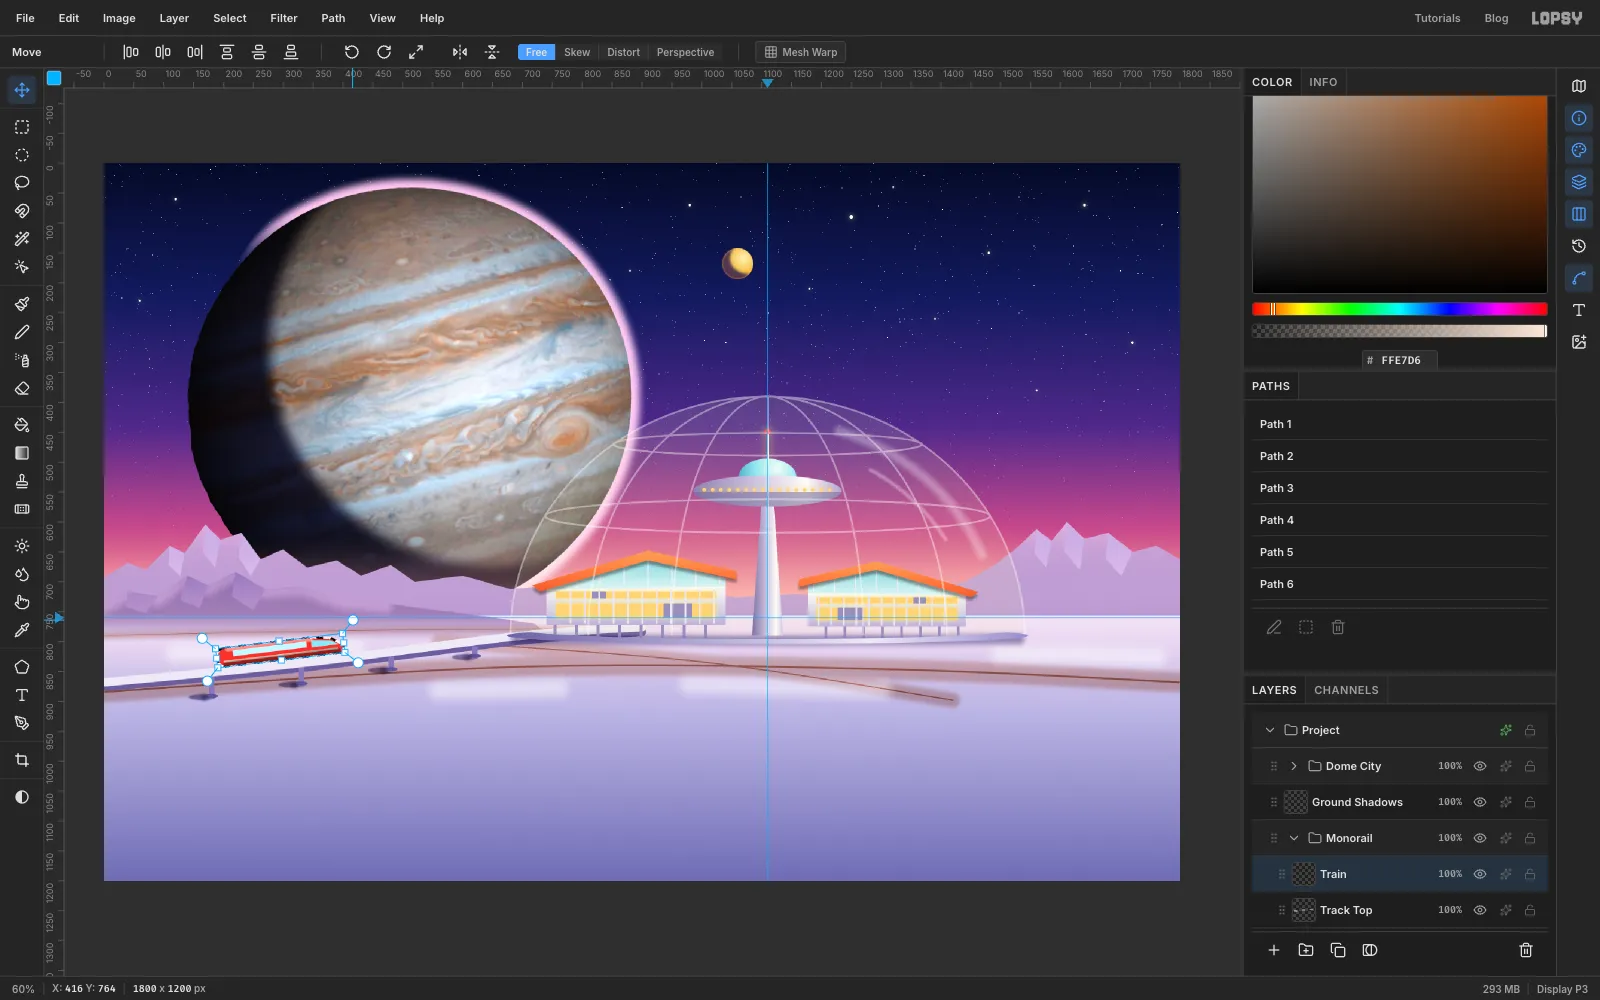
-
Shape the rocket's hull
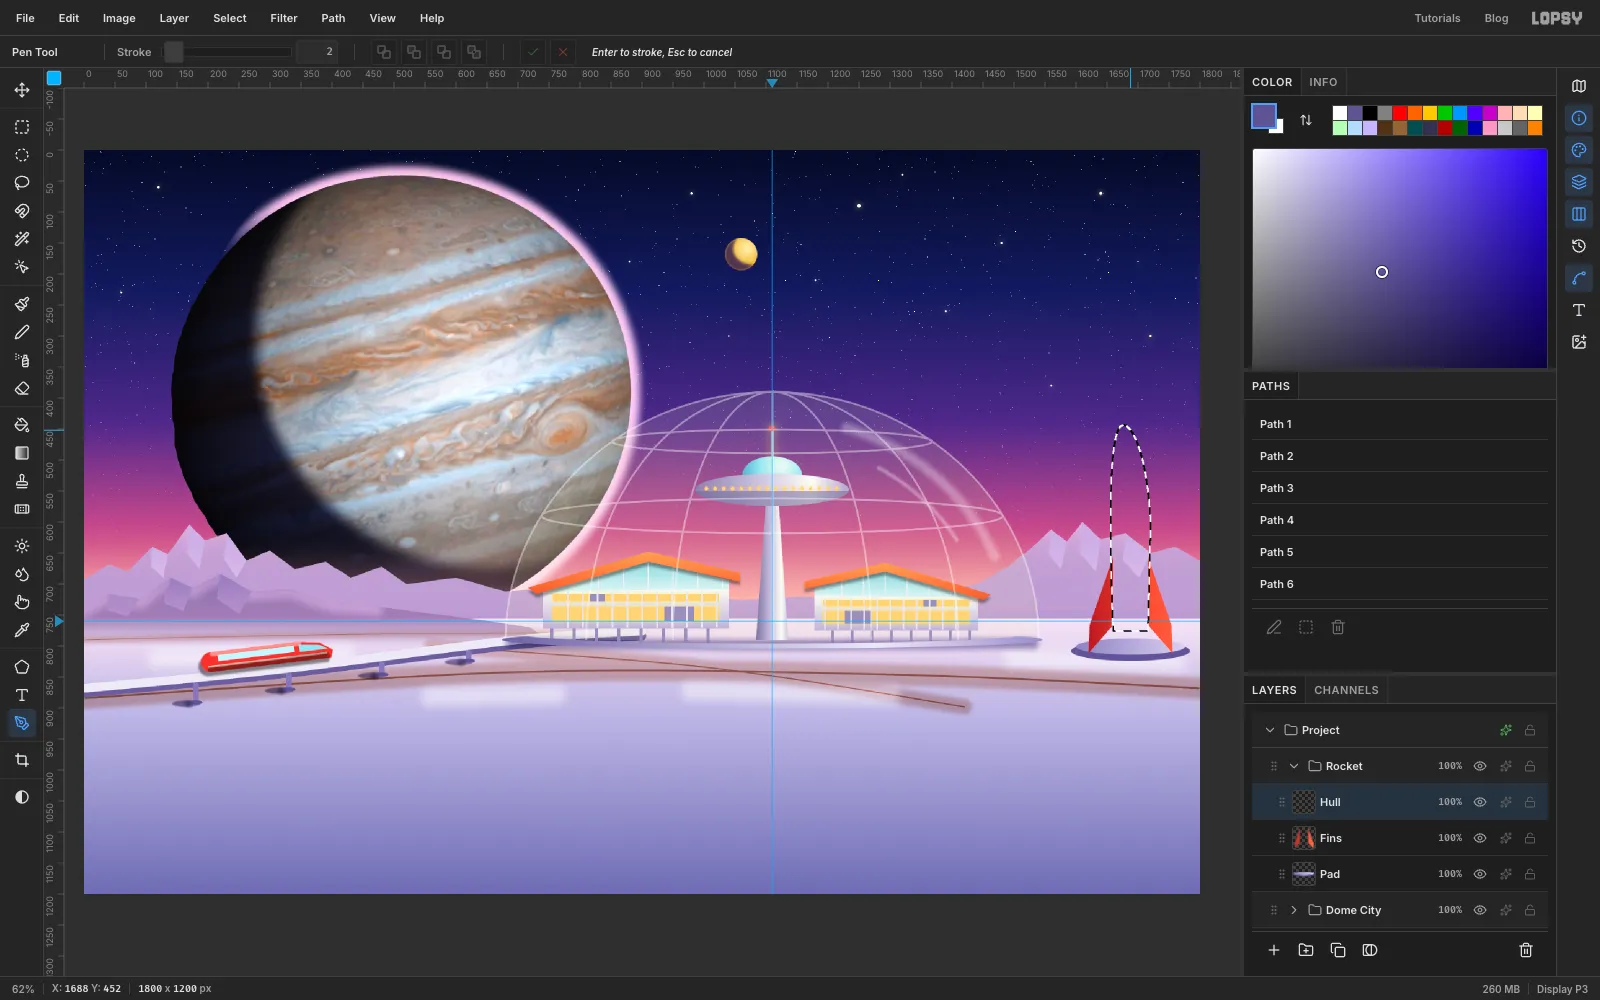
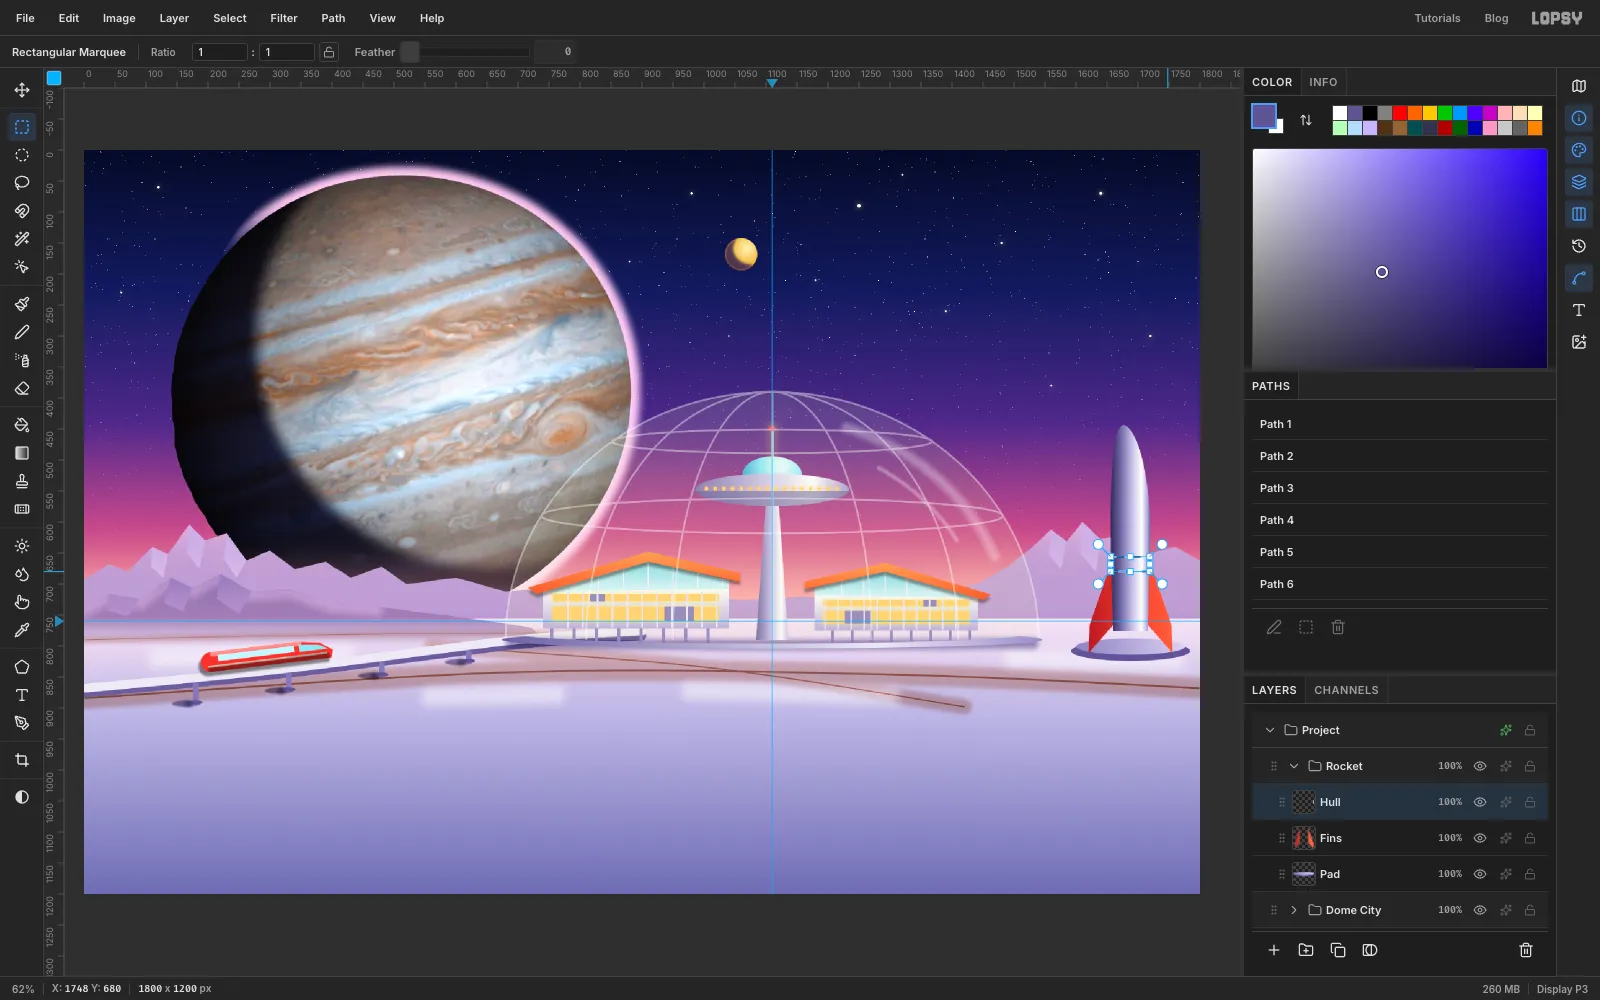
Collapse Monorail and Dome City, select the Dome City row and click New Group. Name it Rocket. The rocket stands to the right of the dome, centred on x
1688, with its base at y806and its nose at y452. Build it from the bottom up:- Pad. Add a Pad layer. Fill an exact ellipse from
1592, 792to1784, 824with . Then fill a slightly smaller ellipse a few pixels higher with a lighter violet gradient. - Fins. Add a Fins layer. Pen two swept fins that start on the body about 150 px above the base and flare out about 36 px on each side down to the pad. Fill them with → .
- Hull. Add a Hull layer. Pen the hull: a body 64 px wide from y
776up to y600, closing in a pointed nose made from two smooth points.
Fill the hull with a six-stop horizontal chrome gradient, from dark violet on the left to white at about 78% and back to violet at the right edge. That puts the shine on the sunlit side.
- Pad. Add a Pad layer. Fill an exact ellipse from
-
Paint a red band with an intersection
Keep the hull selected. Hold Shift+Alt and drag a rectangle across the hull just above the fins. That intersects the two shapes, leaving a band that follows the hull's outline exactly. Fill it with at 85%, so a little of the chrome sheen shows through.
-
Finish the rocket
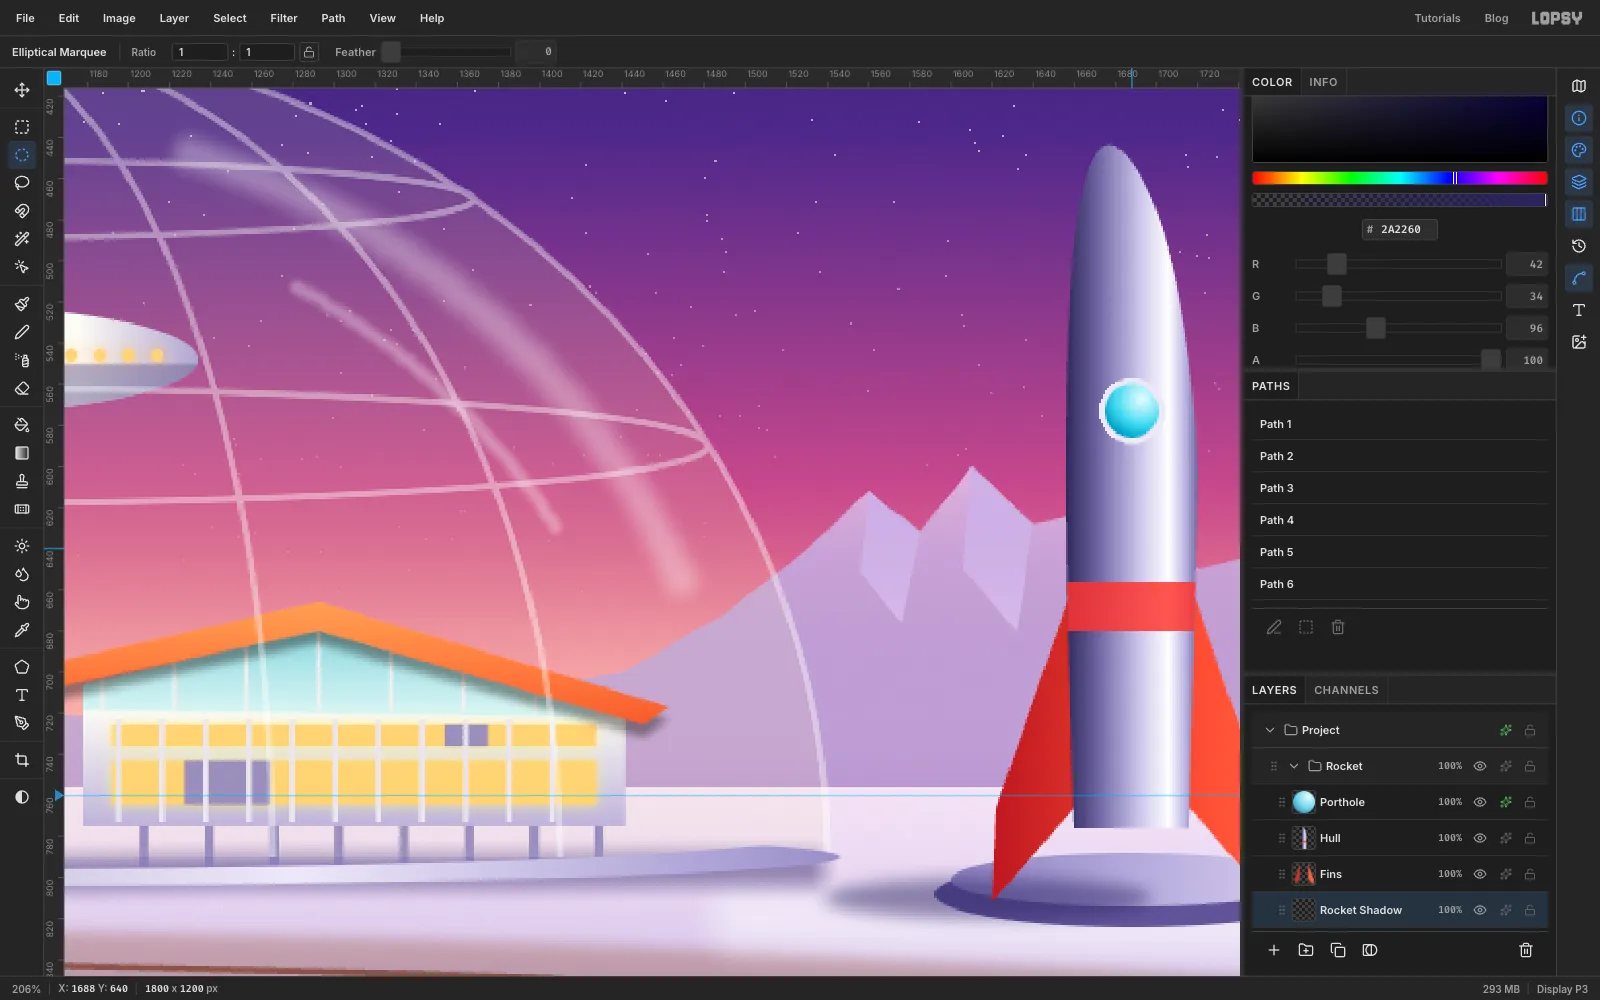
- Porthole. Make a small ellipse and fill it with a radial gradient, → → . Add a Stroke effect, Width
3, in . - Engine bell. Pen a short trapezoid under the hull and fill it with a dark-to-light-to-dark gradient.
- Shadow. On a Rocket Shadow layer above Pad, make a wide ellipse reaching left of the pad. Feather it by
8and fill it with at 50%. The shadow falls left, away from the sun.
- Porthole. Make a small ellipse and fill it with a radial gradient, → → . Add a Stroke effect, Width
-
Build the glass railing and the tiled deck
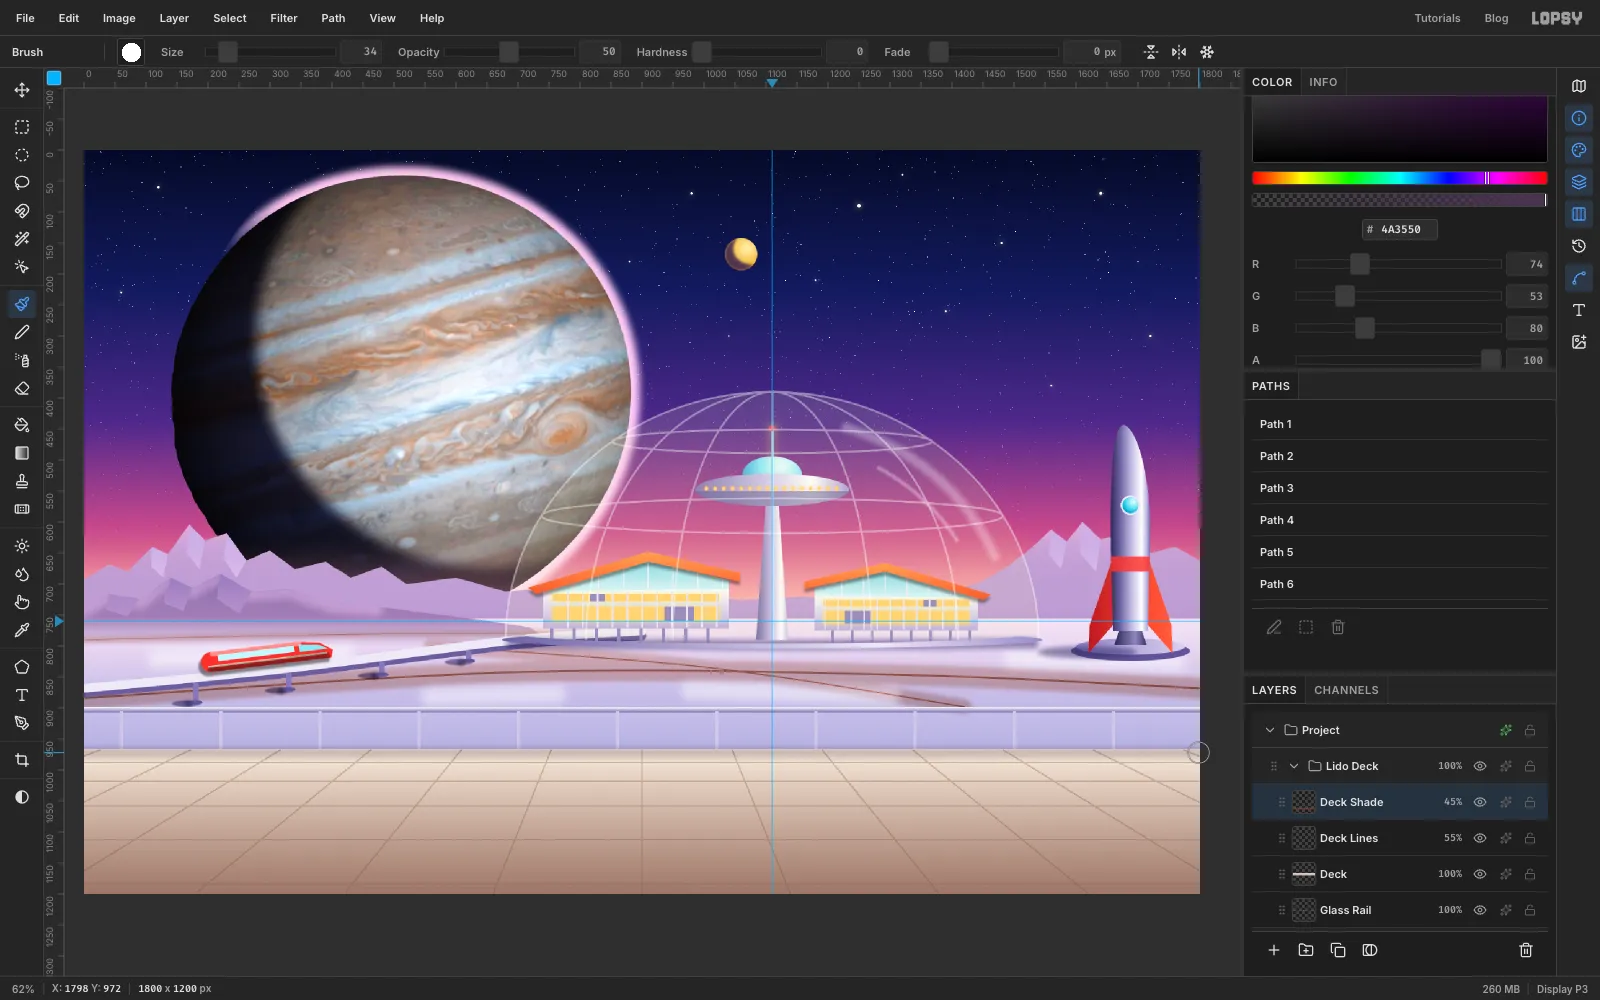
Collapse Rocket, keep it selected and click New Group. Name it Lido Deck.
- Glass rail. Add a Glass Rail layer. Fill a band from y
904to y966with at 12%. Above it, fill a thin chrome rail from y898to907with a white → gradient. Draw Pencil posts (Size5, ) every 160 px. - Deck. Add a Deck layer. Fill from y
966to the bottom with → , and run Add Noise5, Mono, Gaussian. - Tiles. Add a Deck Lines layer. With a 2 px Pencil in , draw five horizontal tile rows, closer together near the rail. Then draw lines that all aim at a vanishing point above the centre of the deck, about
900, 610, each with a click and a Shift-click. Set the layer to 55%. - Shade. Add a Deck Shade layer. Add a gradient from transparent to , top to bottom, on Multiply at 45%. Paint a soft dark stroke along the deck's far edge for the railing's shadow.
- Glass rail. Add a Glass Rail layer. Fill a band from y
-
Dig the kidney pool
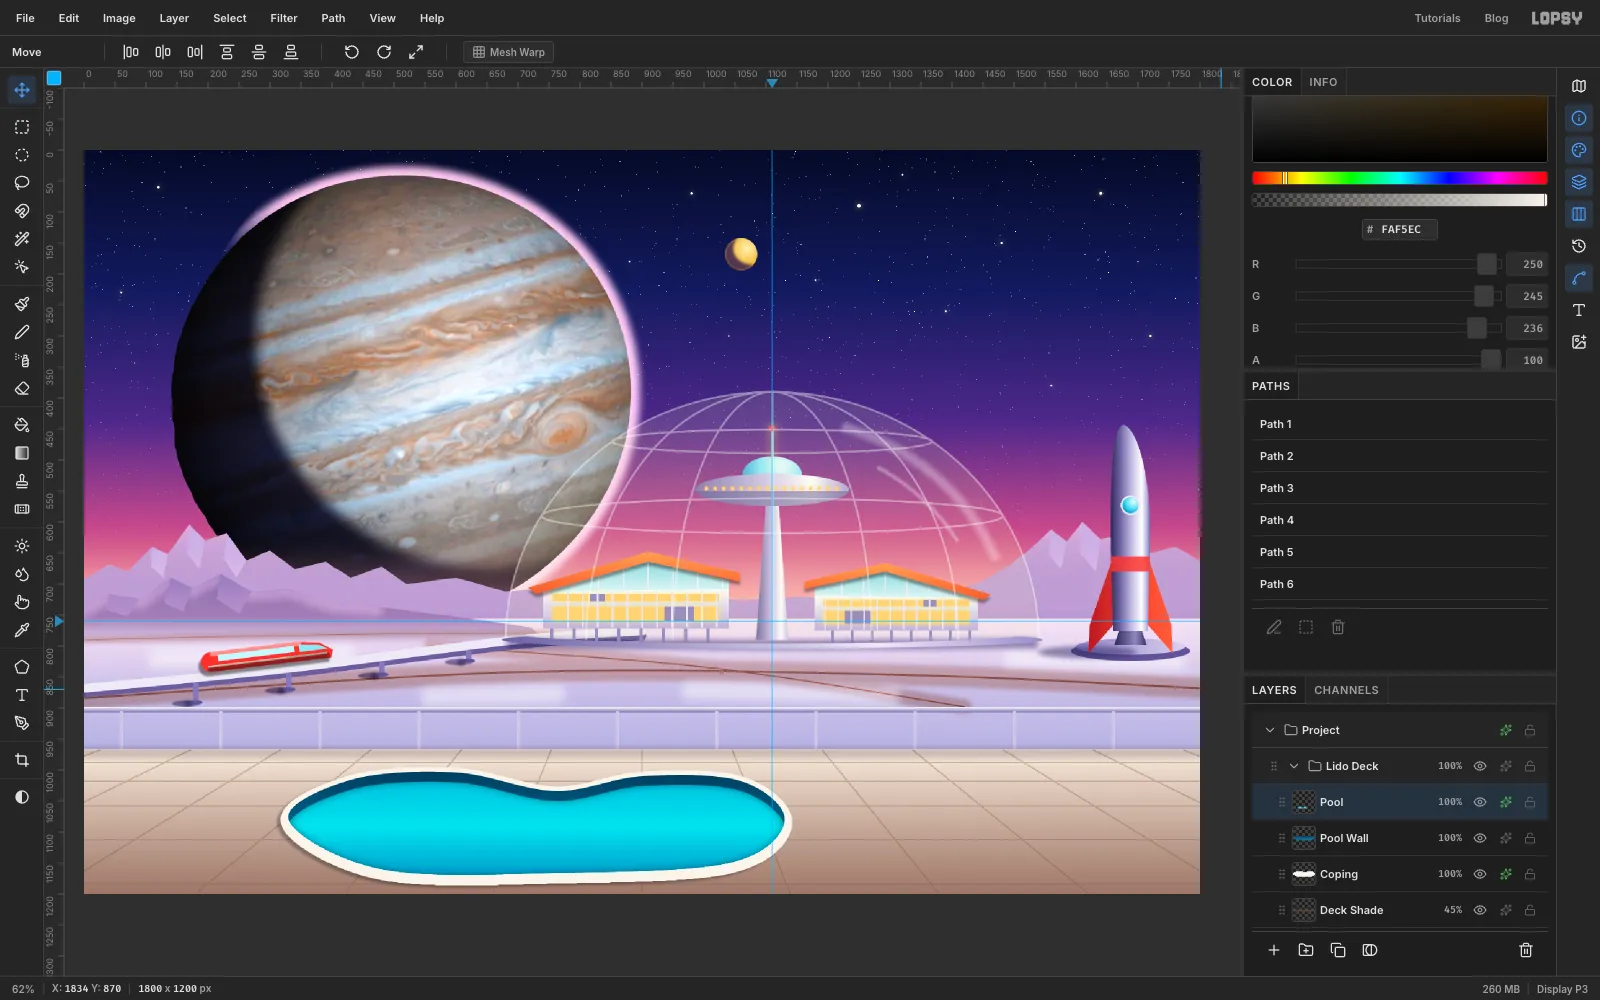
The pool is three layers built from one Pen shape. Draw a kidney from about x
330to1130and y1004to1166, with about ten smooth click-drag points, pinched in along the top edge. Each time you need the shape again, use Path to Selection.- Coping. Add a Coping layer. Select the kidney, Grow it by
12, and fill it with . Nudge the layer down 5 px. The rim is now thinner at the back and thicker at the front, as it would be in perspective. Add a soft Drop Shadow to the left. - Pool Wall. Add a Pool Wall layer. Fill the kidney with → , top to bottom.
- Pool. Add a Pool layer. Fill the kidney with a three-stop water gradient, → → . Nudge it down 16 px. Then Cmd-click the Pool Wall thumbnail, Inverse, and Delete. The water now sits inside the basin, with a band of dark wall showing along the far edge. Give the water an Inner Glow in (Size
18, Opacity55).
- Coping. Add a Coping layer. Select the kidney, Grow it by
-
Reflect Jupiter in the water
Select a big rectangle around Jupiter and the dome, from
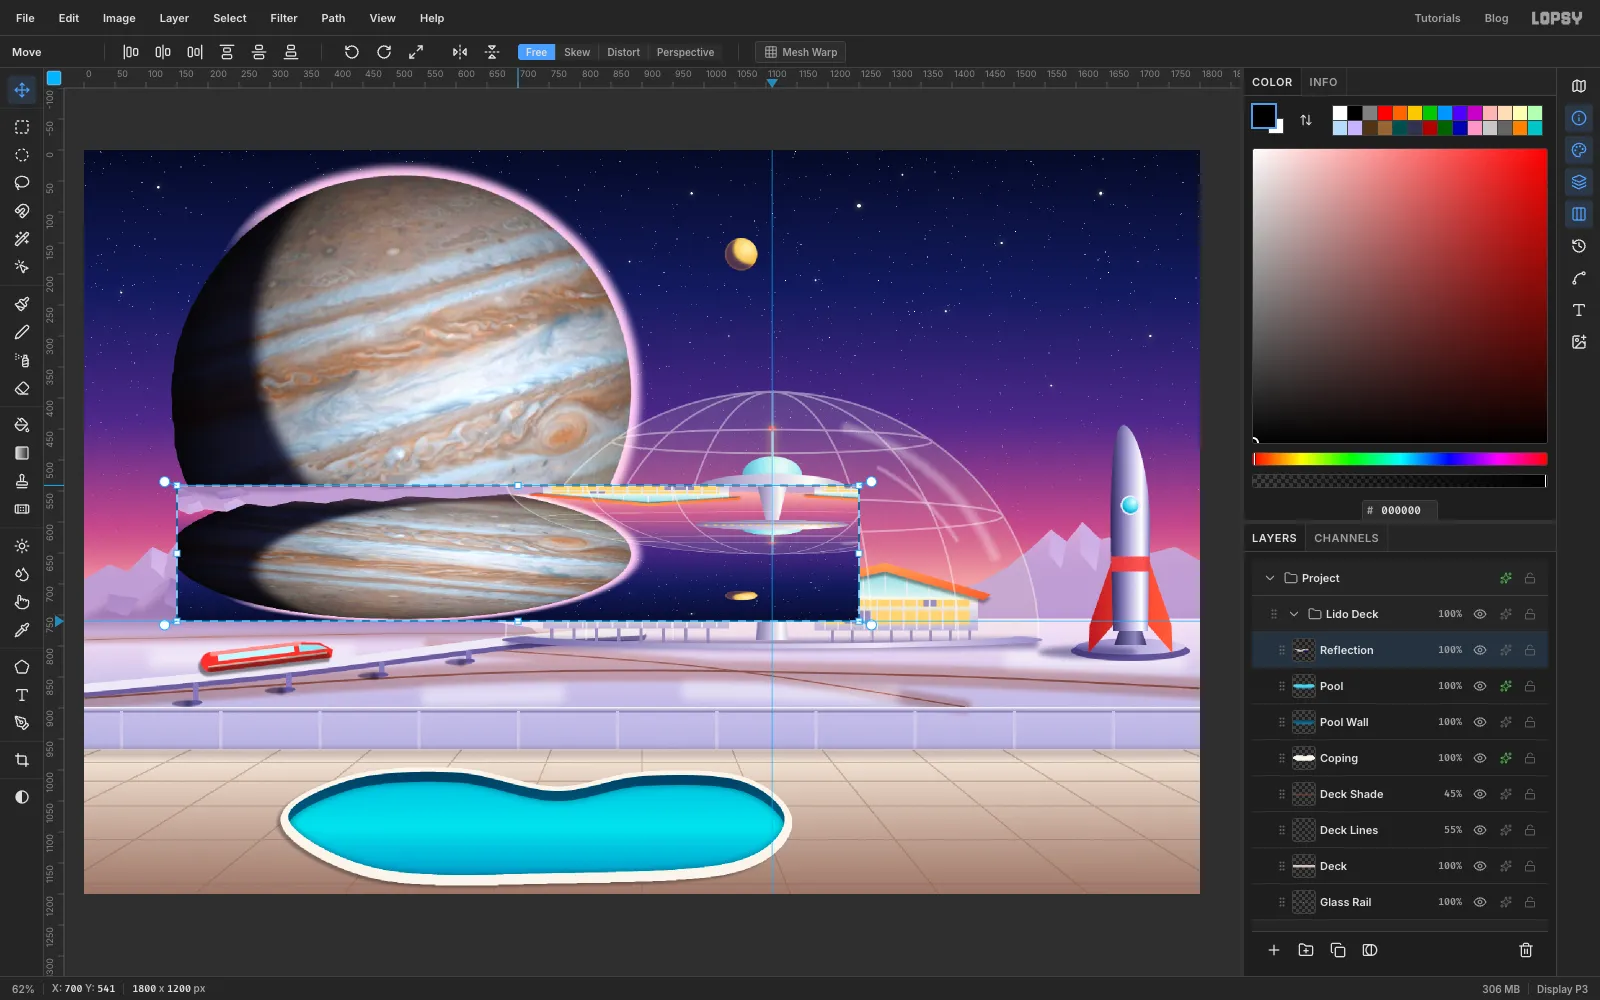
150, 30to1250, 760. Choose Edit → Copy Merged, which copies what you see, not a single layer, then Edit → Paste. The paste lands in place on a new layer. Name it Reflection.With the Move tool, click Flip Vertical. Drag the top-middle handle down until the copy is about a third of its height, and press Cmd+D. Drag it down with the Move tool until its top lines up with the top of the water.
Then trim and soften it:
- Cmd-click the Pool thumbnail, choose Inverse and press Delete.
- Run Motion Blur… (Angle
0, Distance16). - Run Pixel Stretch… (Amount
14, Bands40, Seed7, RGB Split0). This adds ripple bands. - Set the layer to Screen at 70%.
-
Tint the water and start the caustics
First, tint the water with the sky:
- Add a Sky Glint layer and brush a soft stroke (Size
26, Opacity70) along the far wall. Trim it to the water: Cmd-click the Pool thumbnail, choose Inverse and press Delete. Set it to Screen at 85%. - Add a Sky Tint layer. Cmd-click the Pool thumbnail and fill the selection with a gradient from to , top to bottom. Set it to Overlay at 40%.
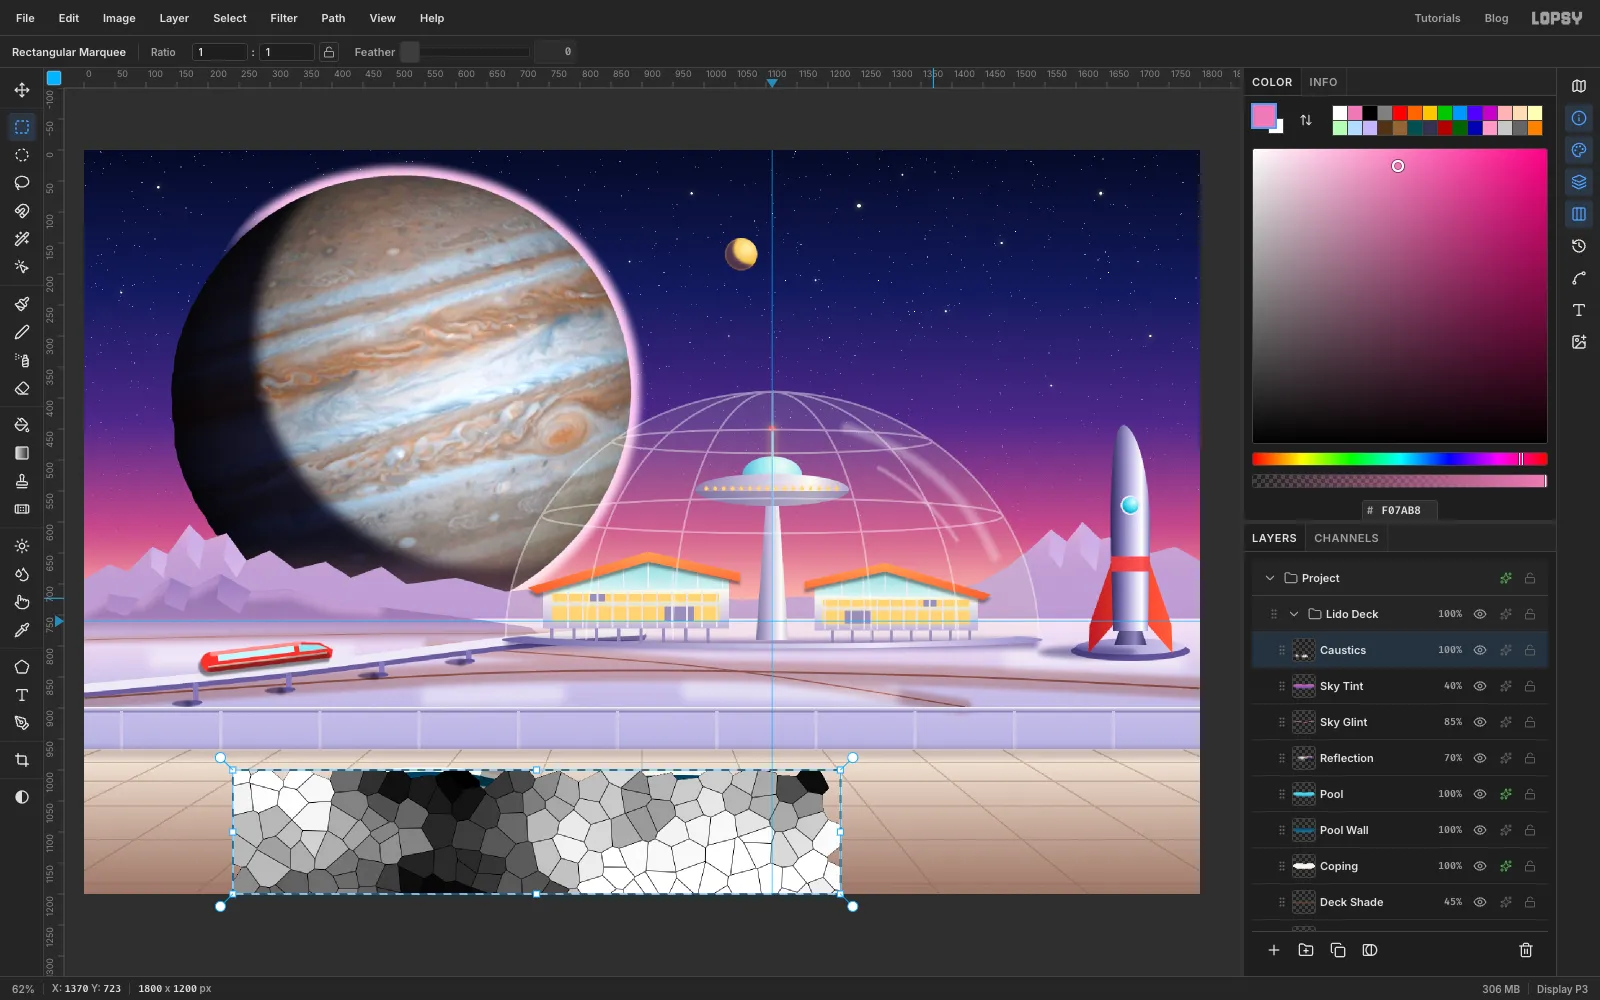
For the caustics, deselect, add a Caustics layer and select a rectangle a little wider than the pool, from
240, 1000to1220, 1200. Run these three filters in order:- Filter → Clouds… with Scale
6. - Filter → Voronoi… with Cells
30, Edge Width2and Seed11. - Filter → Find Edges.
Find Edges turns the cell borders into a bright net on black, like light dancing on a pool floor.
- Add a Sky Glint layer and brush a soft stroke (Size
-
Foreshorten the net with Perspective
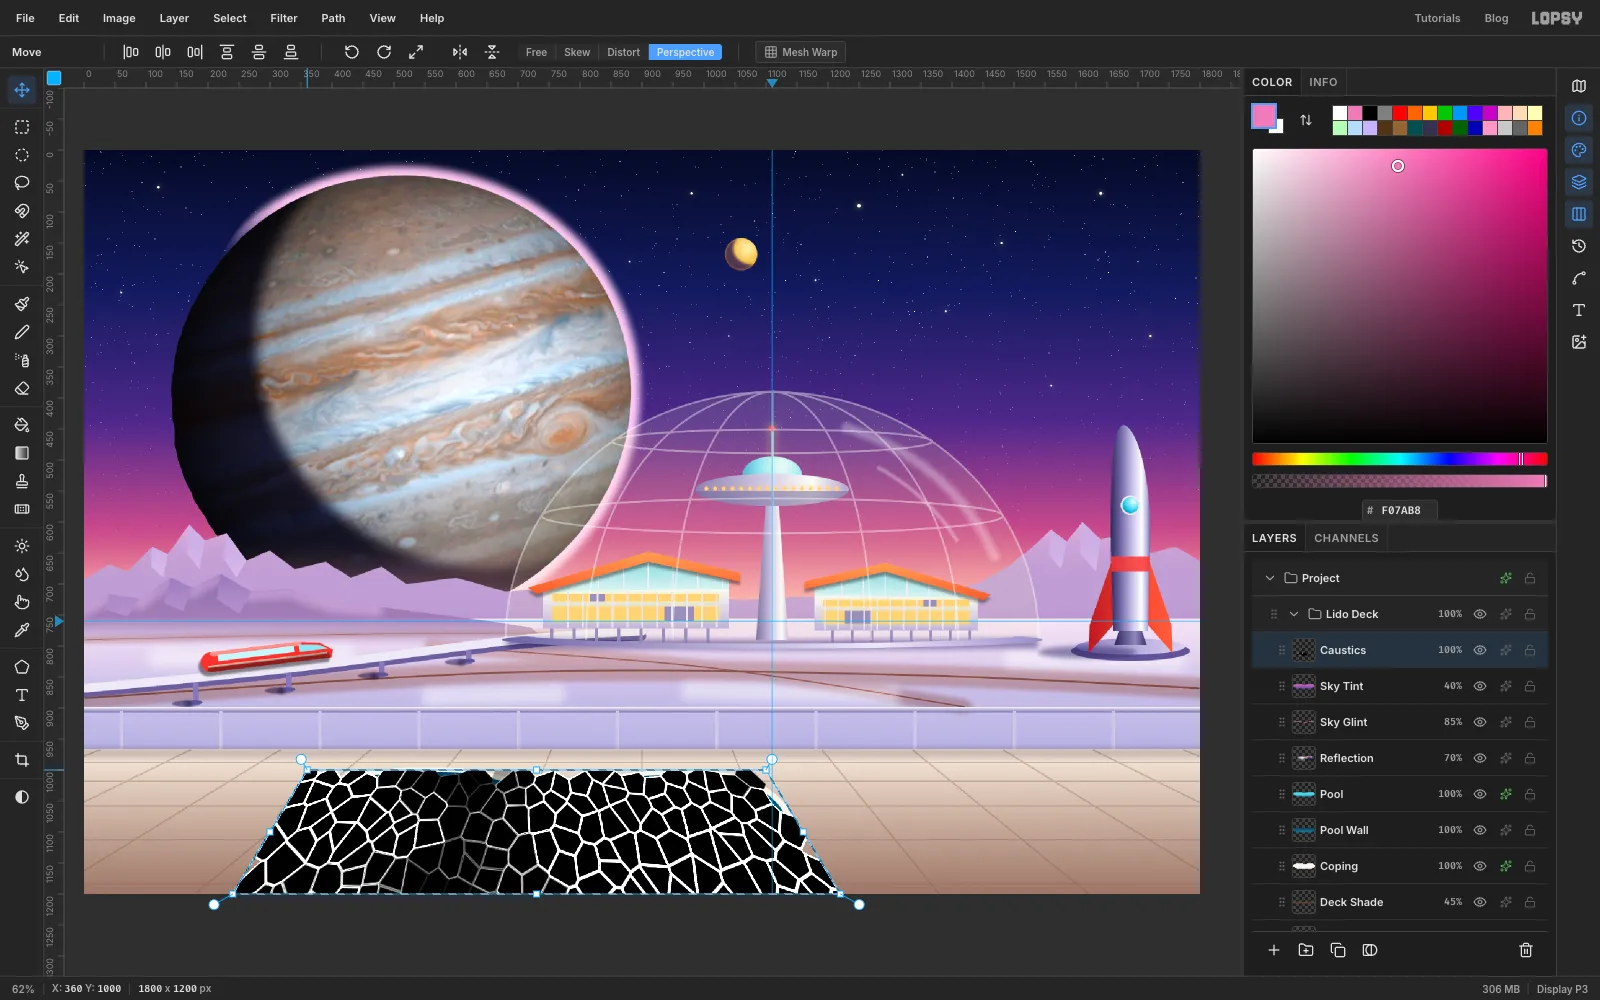
The cells should get smaller toward the far side of the pool. With the rectangle still selected, pick the Move tool and click Perspective in the options bar. Drag the top-left corner handle inward about 120 px. The top-right corner mirrors it, making a trapezoid. Press Cmd+D to commit.
-
Clip the caustics into the water
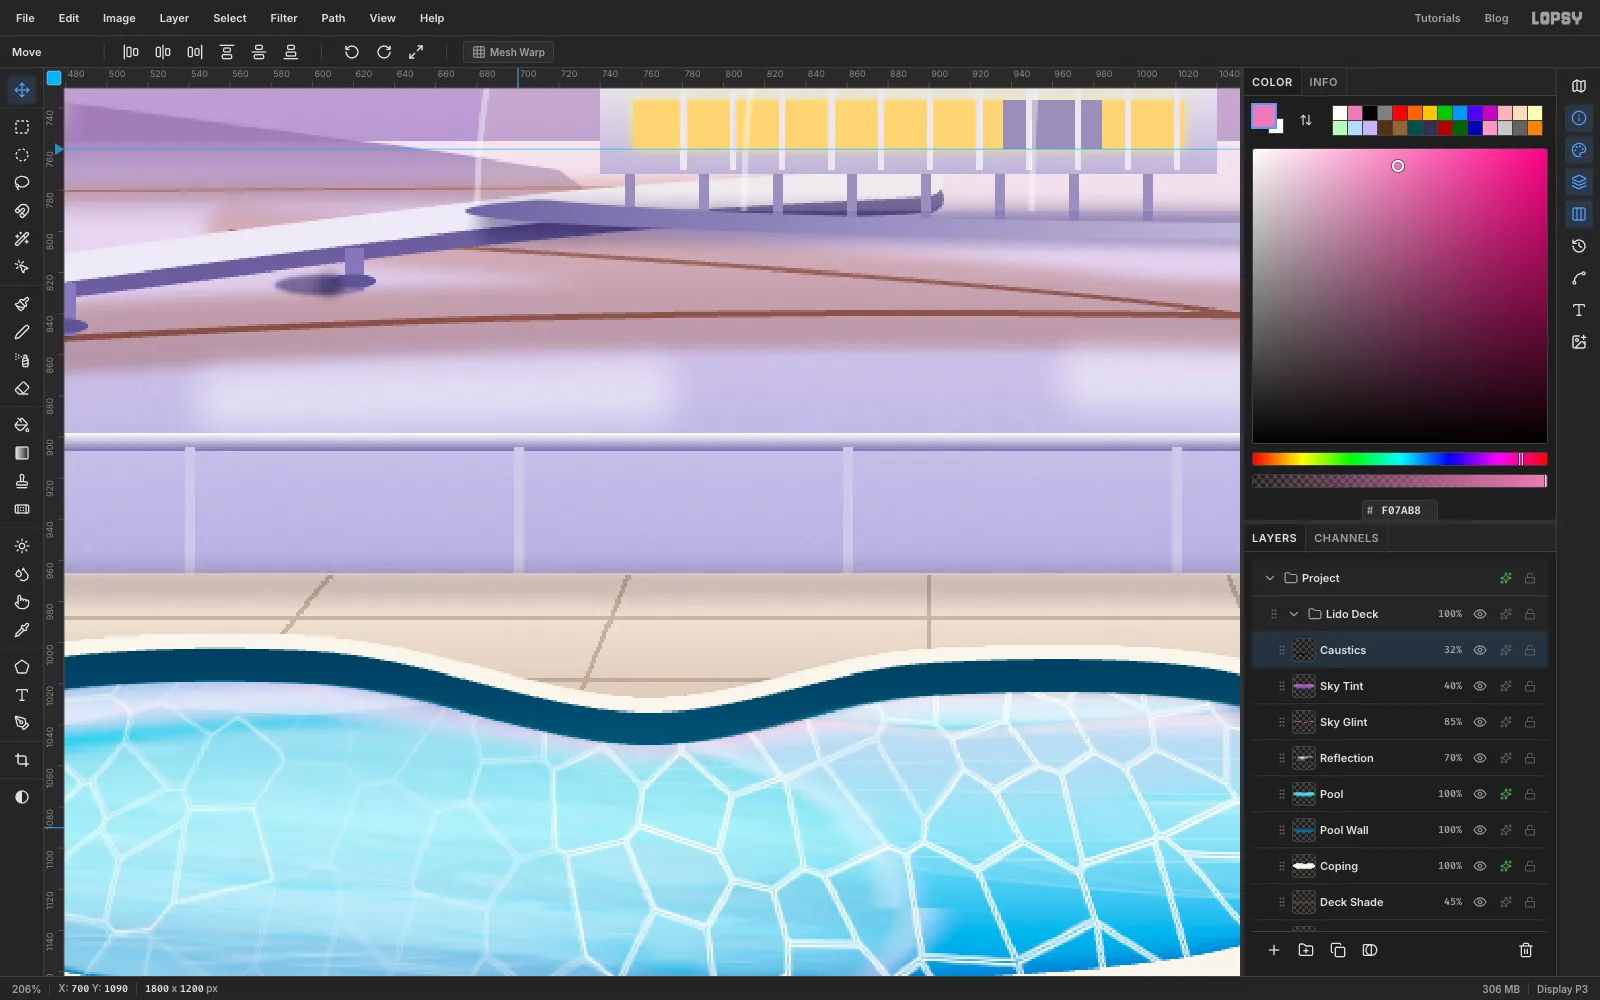
Cmd-click the Pool thumbnail, choose Inverse and press Delete. Set Caustics to Screen at 32%. The water now has depth: a dark wall at the back, a pink sky glint, a streaked reflection, and a shimmering net that recedes.
-
Add a chrome ladder
Add a Ladder layer. With the Pen tool (Stroke
5, ), draw a hand-rail with three points:- Click-drag upward from a point on the deck just behind the far coping.
- Click-drag sideways at the top of the arch.
- Click once down in the water.
Press Enter. Draw a second rail 28 px to the right. Add two short Pencil rungs underwater in , and a Drop Shadow (Offset X
-7, Offset Y5, Blur3, Opacity45).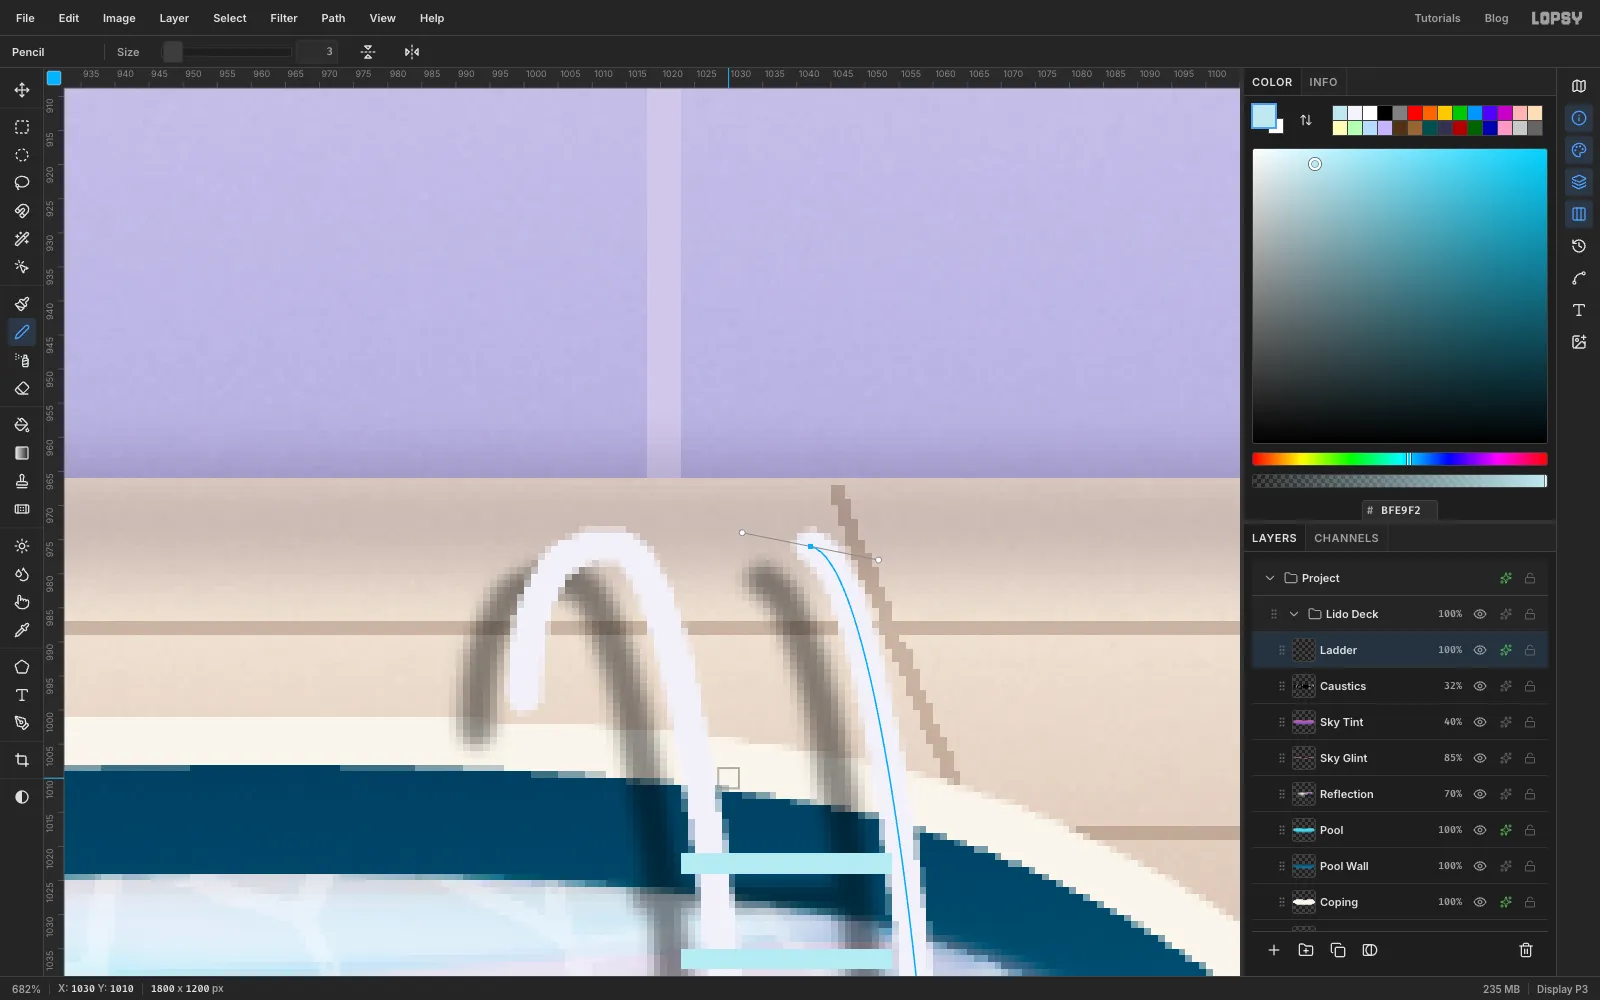
-
Make a lounger with thickness
Add a Parasol Shadow layer first: a wide, feathered ellipse of at 50%, to the left of where the parasol will stand.
Then add a Lounger layer and Pen a lounger in side view, to the right of the pool: a flat seat about 150 px long at y
1092(from x1176), with a back that rises about 50 px on the right. Fill it with → . To give it thickness:- Duplicate Layer and name the copy Lounger Top.
- Select the original Lounger. Give it a Color Overlay of and nudge it down 6 px.
- Click Rasterize Layer Style in its effects drawer to bake the overlay into the pixels. Merge Down keeps the lower layer's effects live, so a live overlay would tint the whole merged lounger.
Draw two chrome legs under the seat with a 4 px Pencil. Then select Lounger Top, choose Layer → Merge Down, and add a Drop Shadow with Offset X
-16, Offset Y9, Blur7and Opacity40.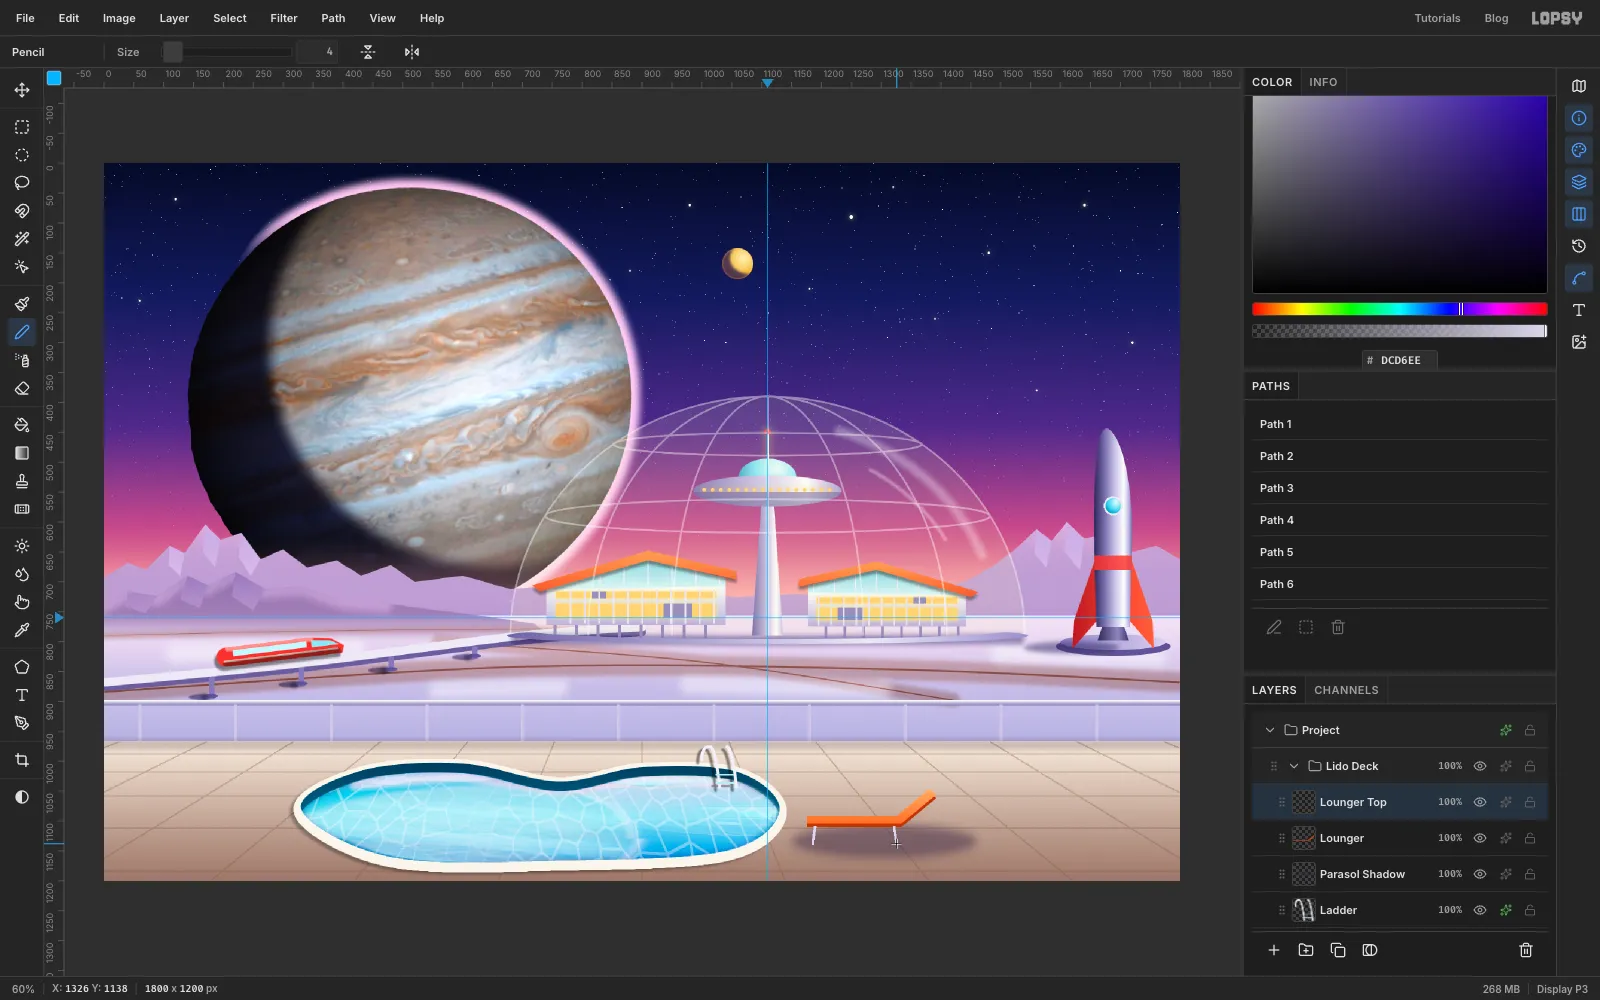
-
Copy, paste and flip a second lounger
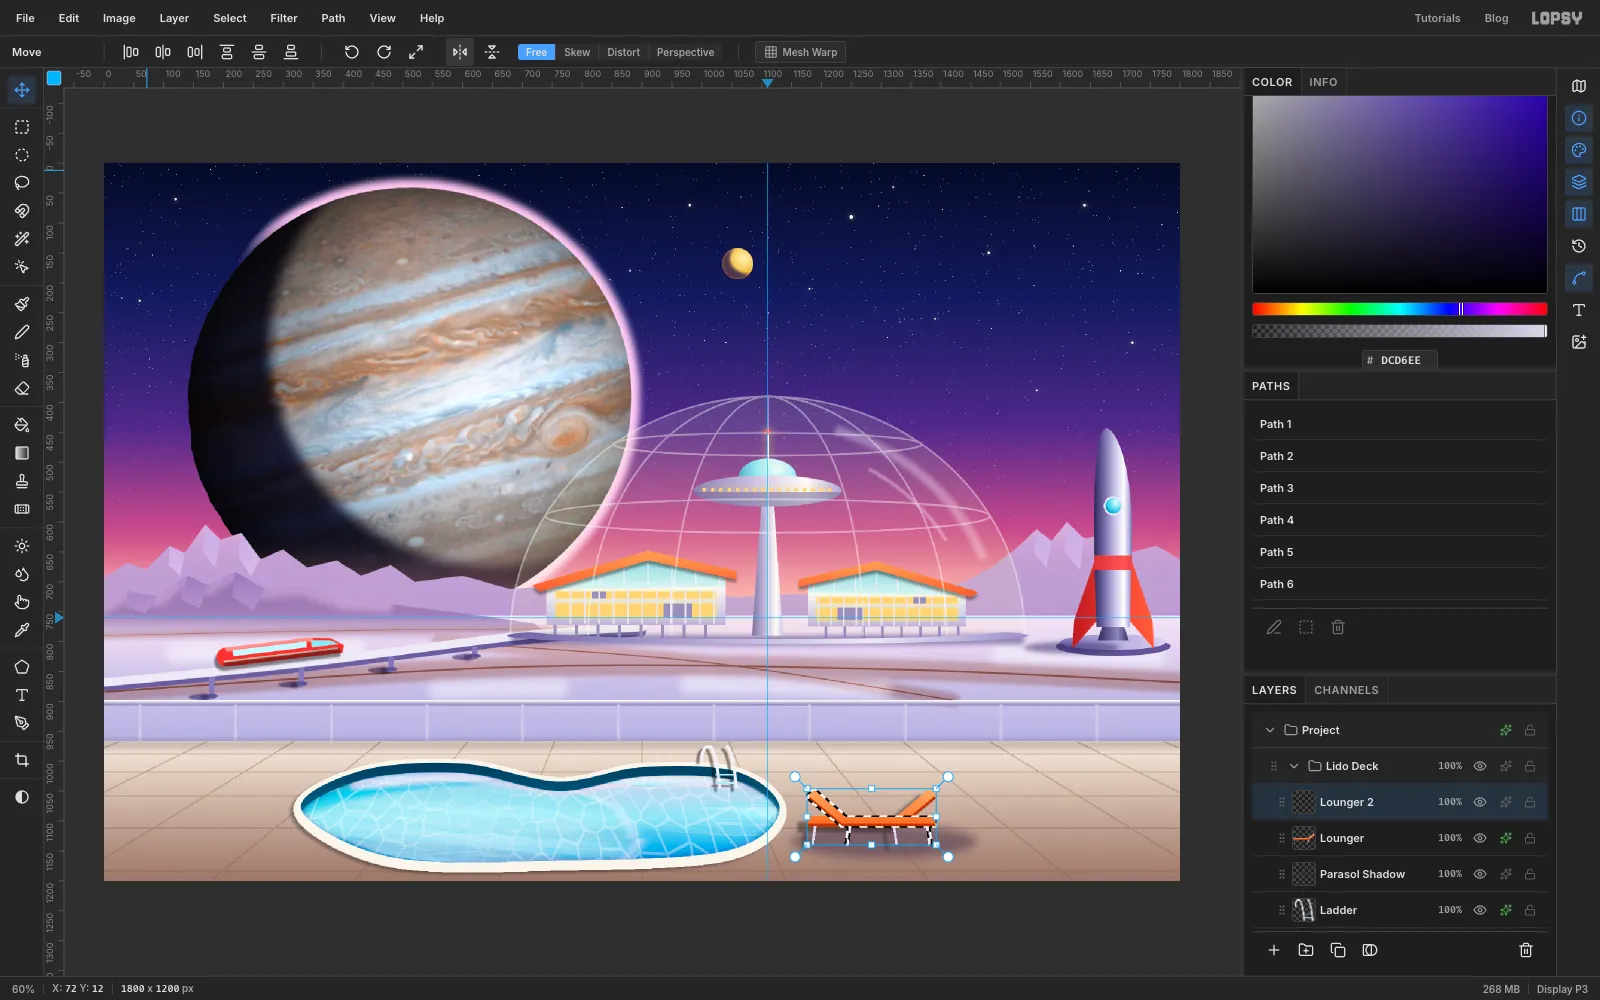
Select a rectangle around the lounger, Edit → Copy, then Edit → Paste, and name the new layer Lounger 2. While the pasted selection is still active, click Flip Horizontal in the Move tool's options bar so the twin faces the other way.
Deselect, then drag it with the Move tool about 300 px right and a little down, onto the other side of where the parasol will go. Give it the same Drop Shadow.
-
Raise a striped parasol
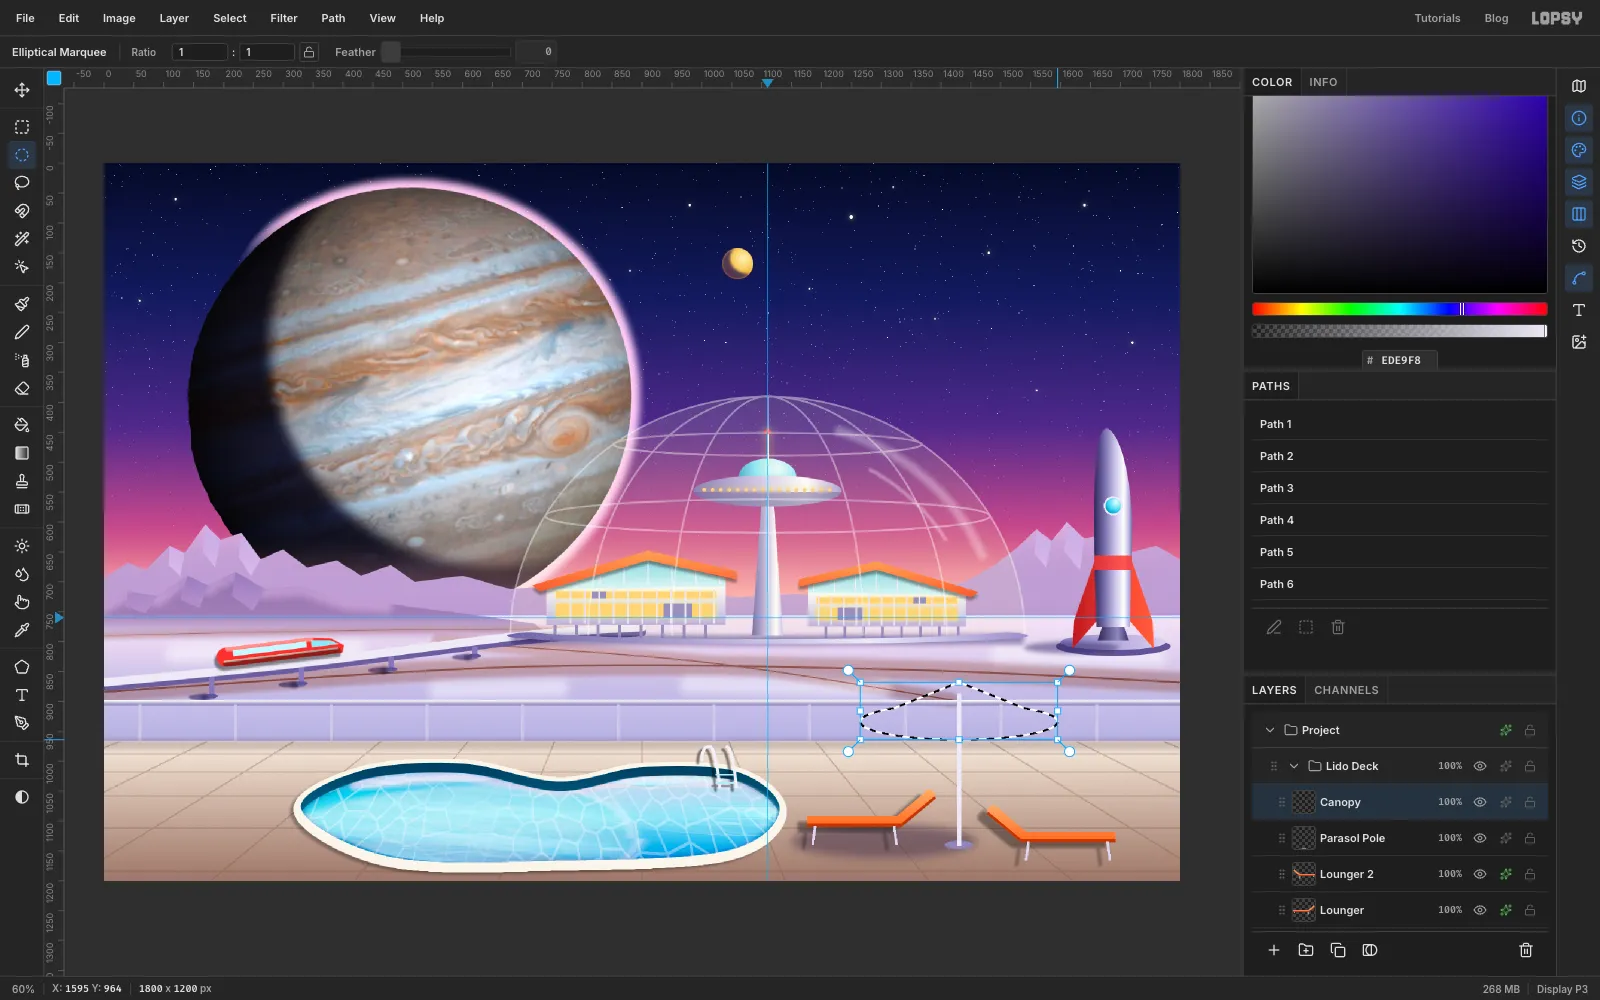
Add a Parasol Pole layer. Fill a small ellipse on the deck at about
1430, 1140for the base. Then draw a 7 px pale Pencil pole up from it to about y890, between the two loungers.Add a Canopy layer. With the Pen tool, click an apex above the pole and two corners about 165 px either side, and use Path to Selection. Then Shift-drag an ellipse across the bottom to round the hem. Fill it with → → , left to right, so the right side is lit.
-
Stripe the parasol
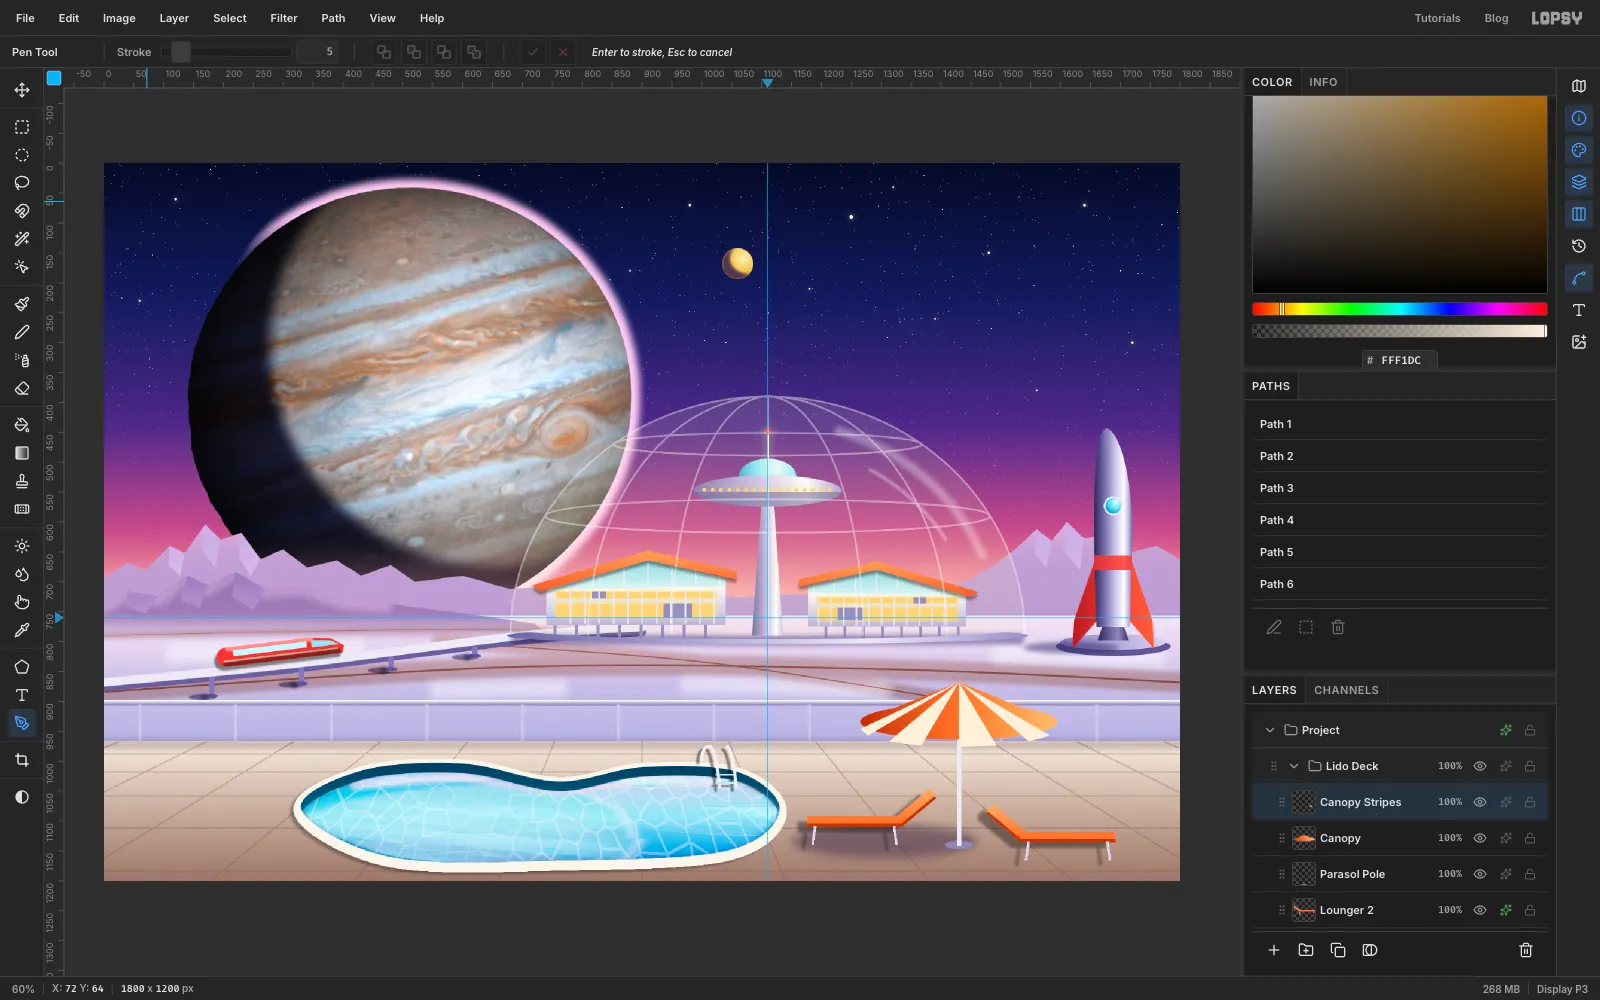
Add a Canopy Stripes layer. Pen four wedges from the apex down to the hem, skipping every other gore, and fill each one with . Let them overshoot the hem: Cmd-click the Canopy thumbnail, Inverse, and Delete trims them all at once.
Set the layer to 85% and click a cream dot on the apex for the finial.
-
Plant an alien planter in the corner
The lower-left corner is empty, so fill it. Add a Planter layer:
- Pen a tapered pot, about 140 px wide at the top (y
1066) and 90 px wide at the bottom (y1156), near the left edge. Fill it with a pale chrome gradient. - Fill an ellipse across its top with for the soil.
- Add a Drop Shadow to the left.
Add an Alien Plant layer. Pen five long, thin leaves rising from the soil, fanning out to about y
900. Fill each one with → , dark at the base. Click a pink dot at each tip and give the layer an Outer Glow in the same pink. The leaves overlap the glass rail, which pushes the planter forward.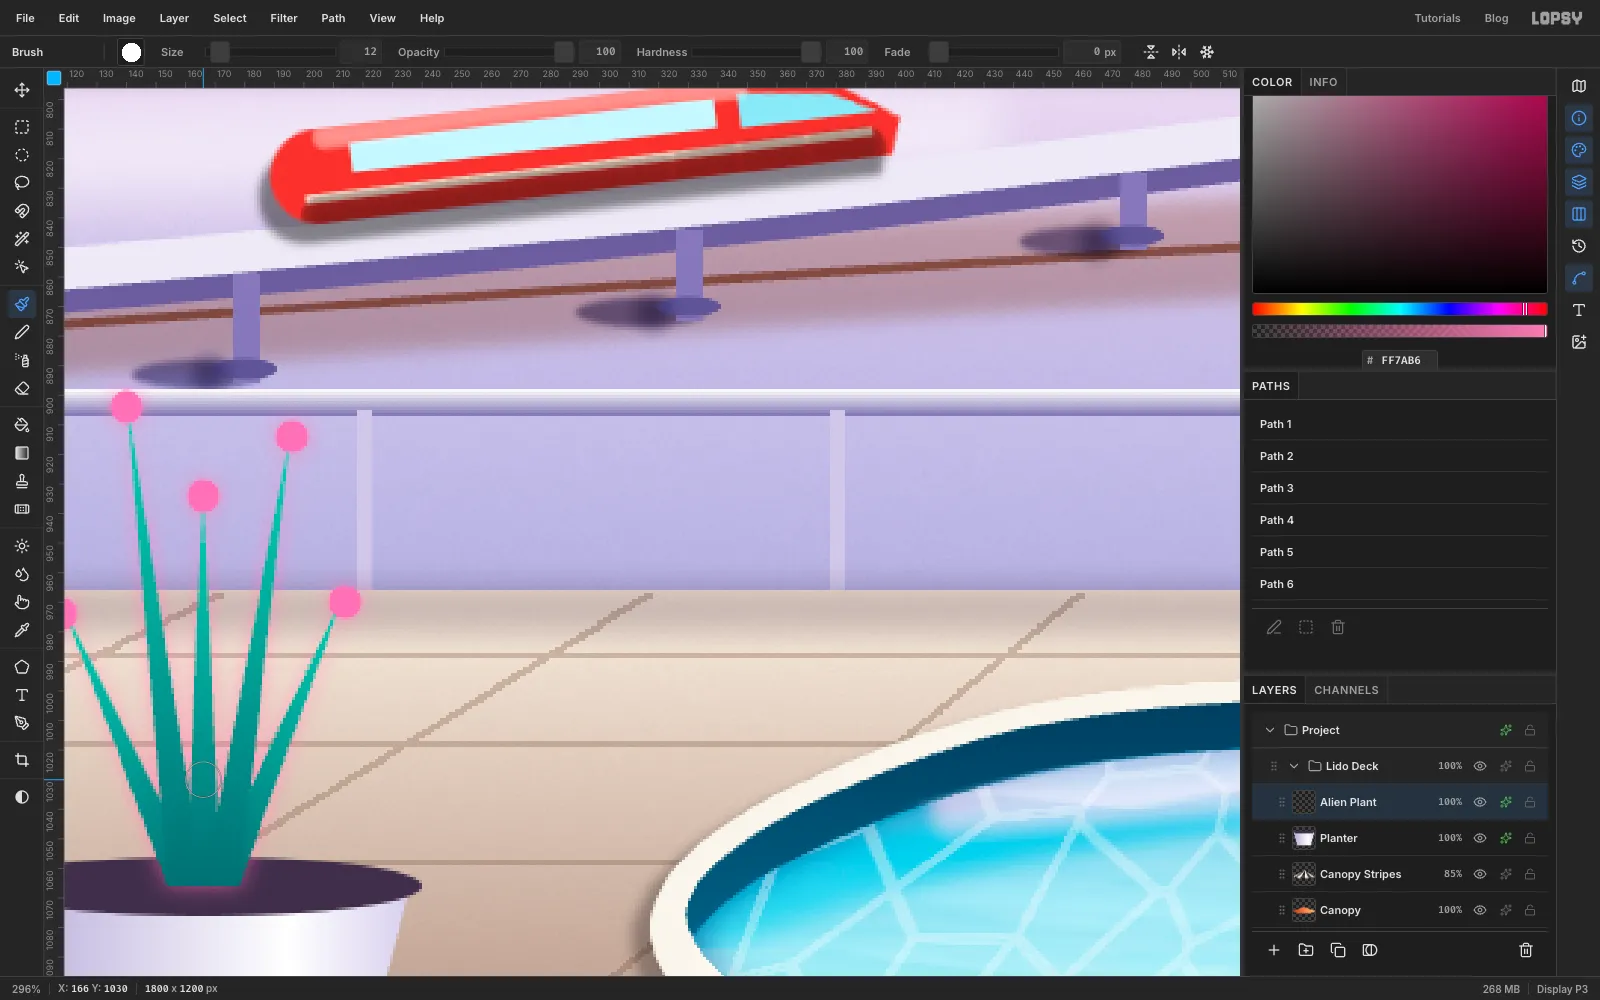
- Pen a tapered pot, about 140 px wide at the top (y
-
Nudge the rocket group in from the edge
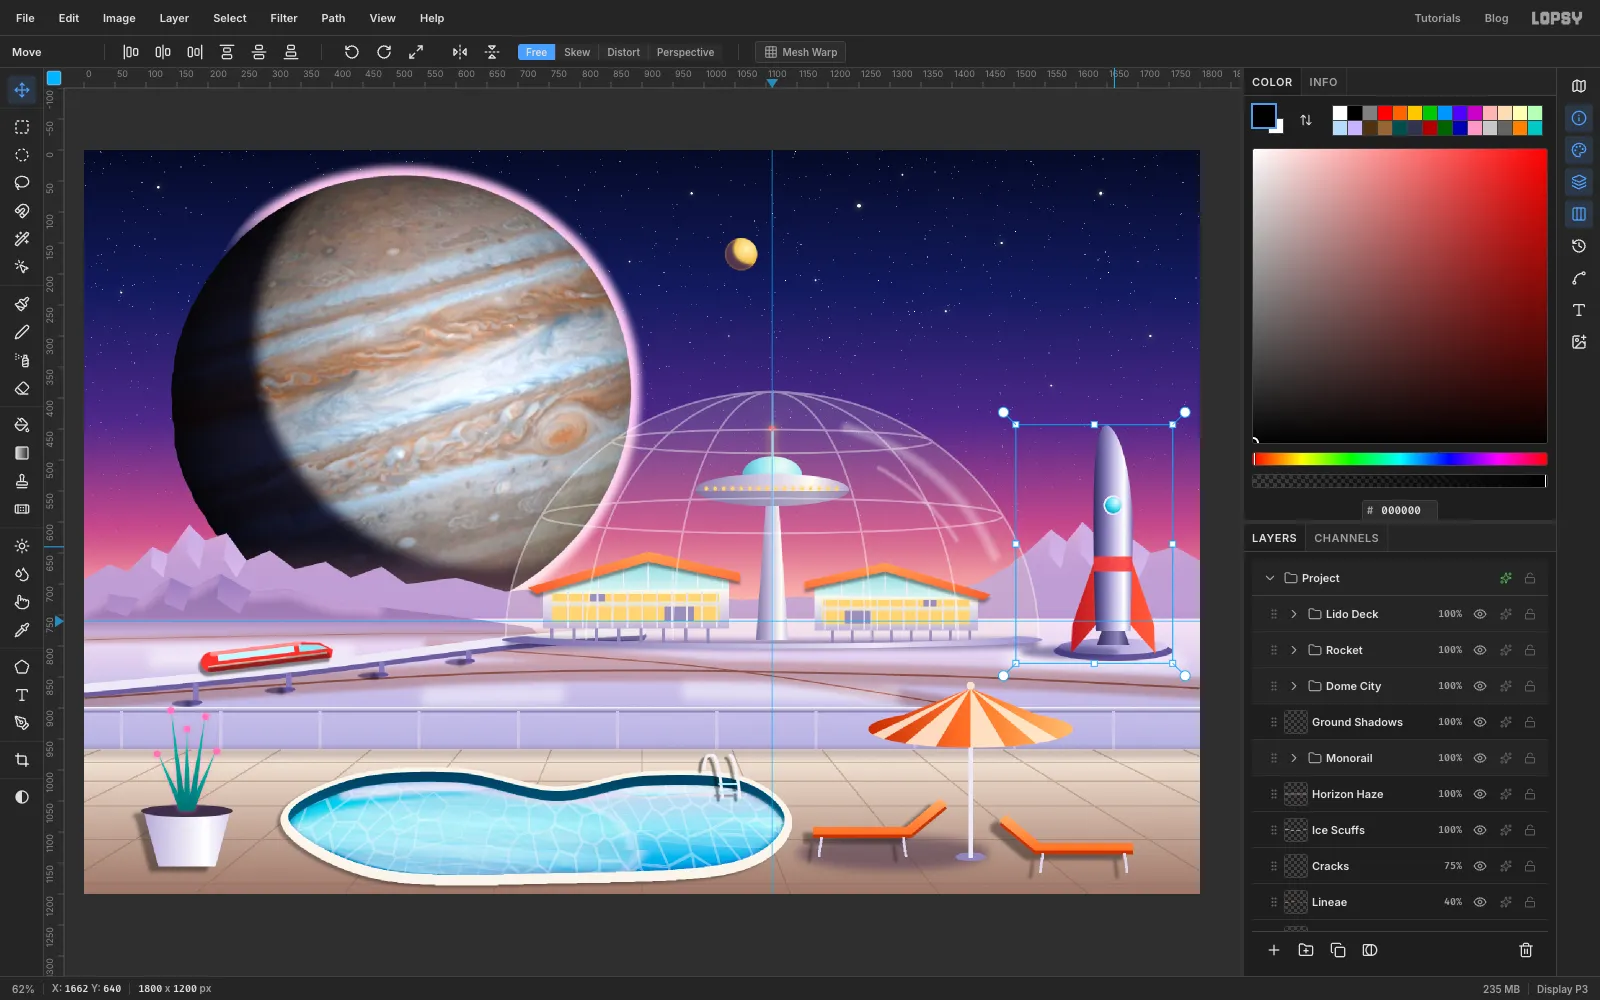
Step back and check the balance. The rocket's fins crowd the right edge a little, and groups make that easy to fix. Collapse Lido Deck, then click the Rocket group row. With the Move tool and nothing selected, drag the rocket about 28 px to the left. Every layer in the group moves together: pad, shadow, fins, hull, band and porthole.
-
Wash the scene with Jupiter's light and add grain
Add a Jupiter Light layer at the top. Drag a radial gradient from (opaque) to the same colour at 0% opacity, starting at Jupiter's centre and ending at about
1500, 900. Set it to Soft Light at 45%.Add a Grain layer, fill it with , run Add Noise… at
40(Mono, Gaussian), and set it to Overlay at 35%. The grain gives the photo and the painted shapes the same surface.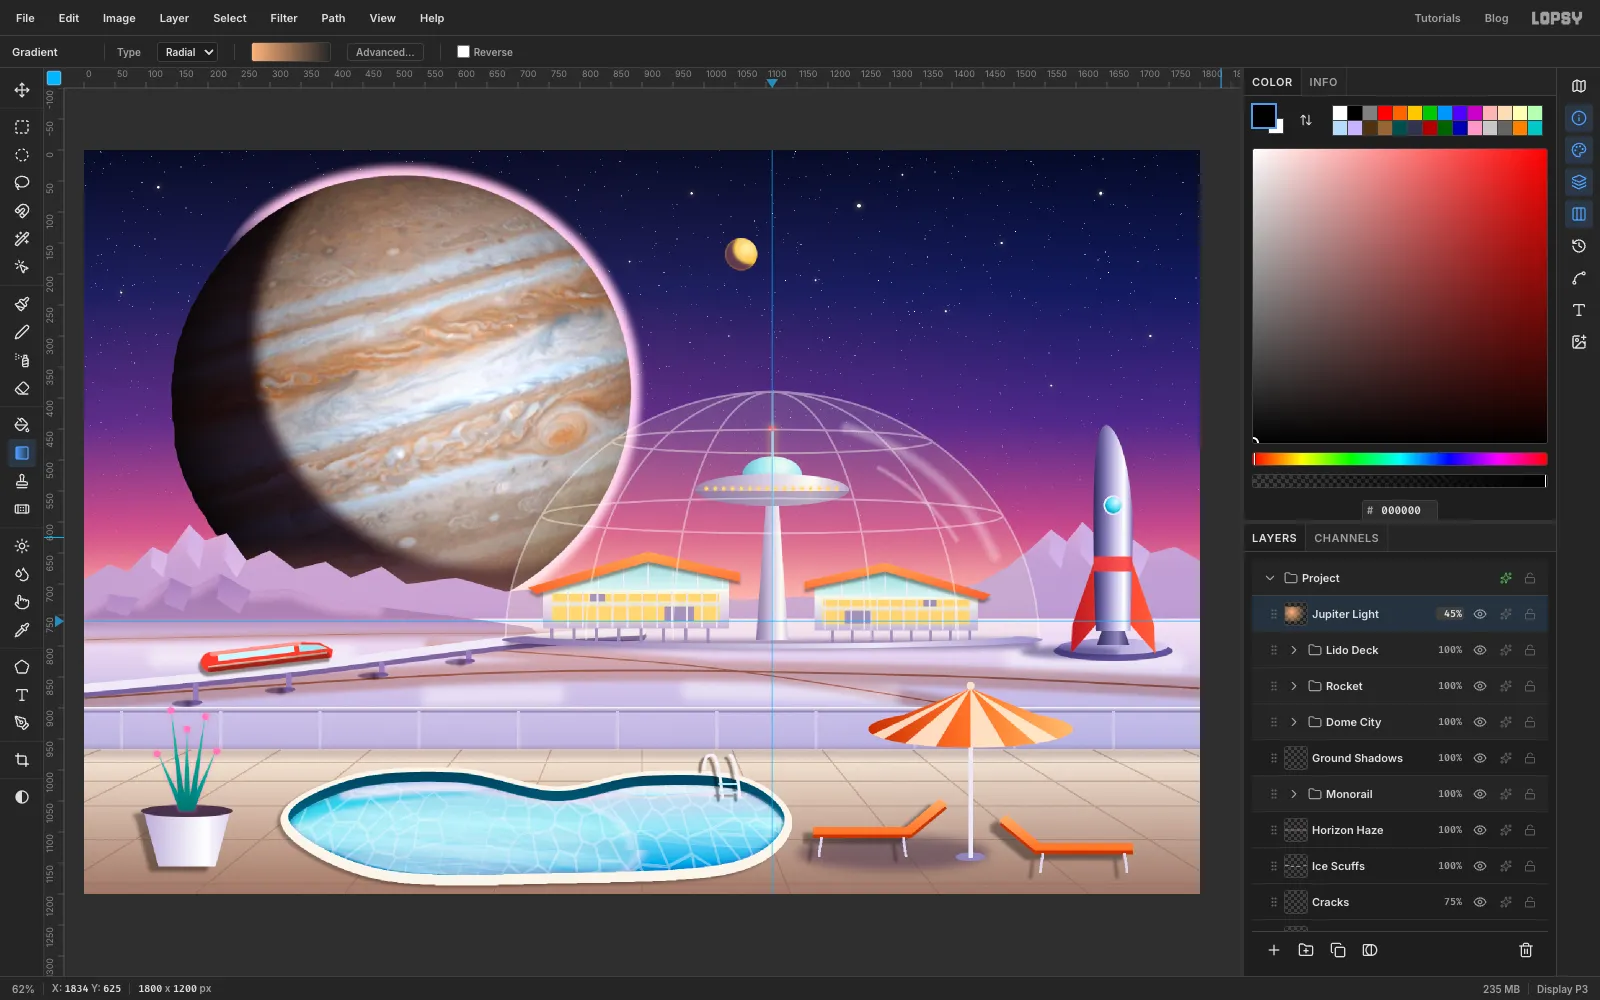
-
Finish with a vignette
Open the effects drawer of the root Project group. Click Add Adjustment, choose Vignette and set it to
22. Then add Saturation & Vibrance with Saturation6and Vibrance14. These adjust the whole painting without touching any layer.Choose File → Quick Export PNG to save the painting, and File → Save Project to keep a
.lopsywith every layer, group, mask and effect still editable. Want a different holiday? Swap Jupiter for a photo of Saturn, change the parasol to teal, or light the hotel windows pink.