Design a Retro-Futurist Space Age App Mockup in Lopsy
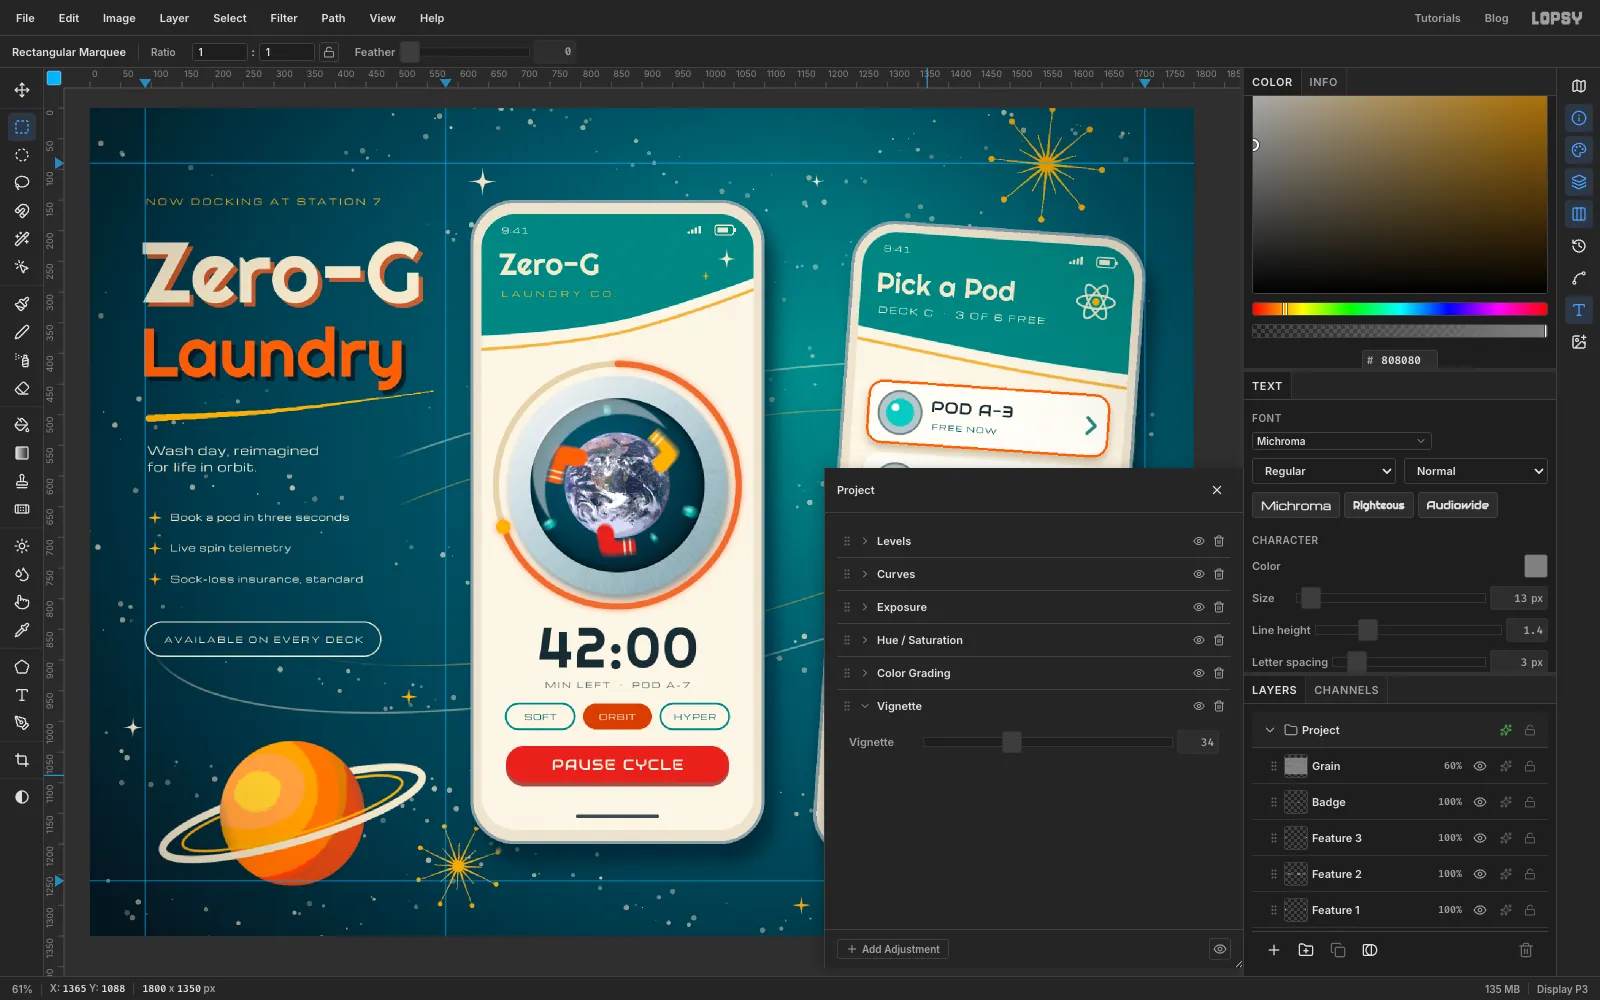
Build a 1960s Space Age app mockup in Lopsy, with a chrome washing-machine porthole around a NASA Earth photo, Googie starbursts and two tilted phones.
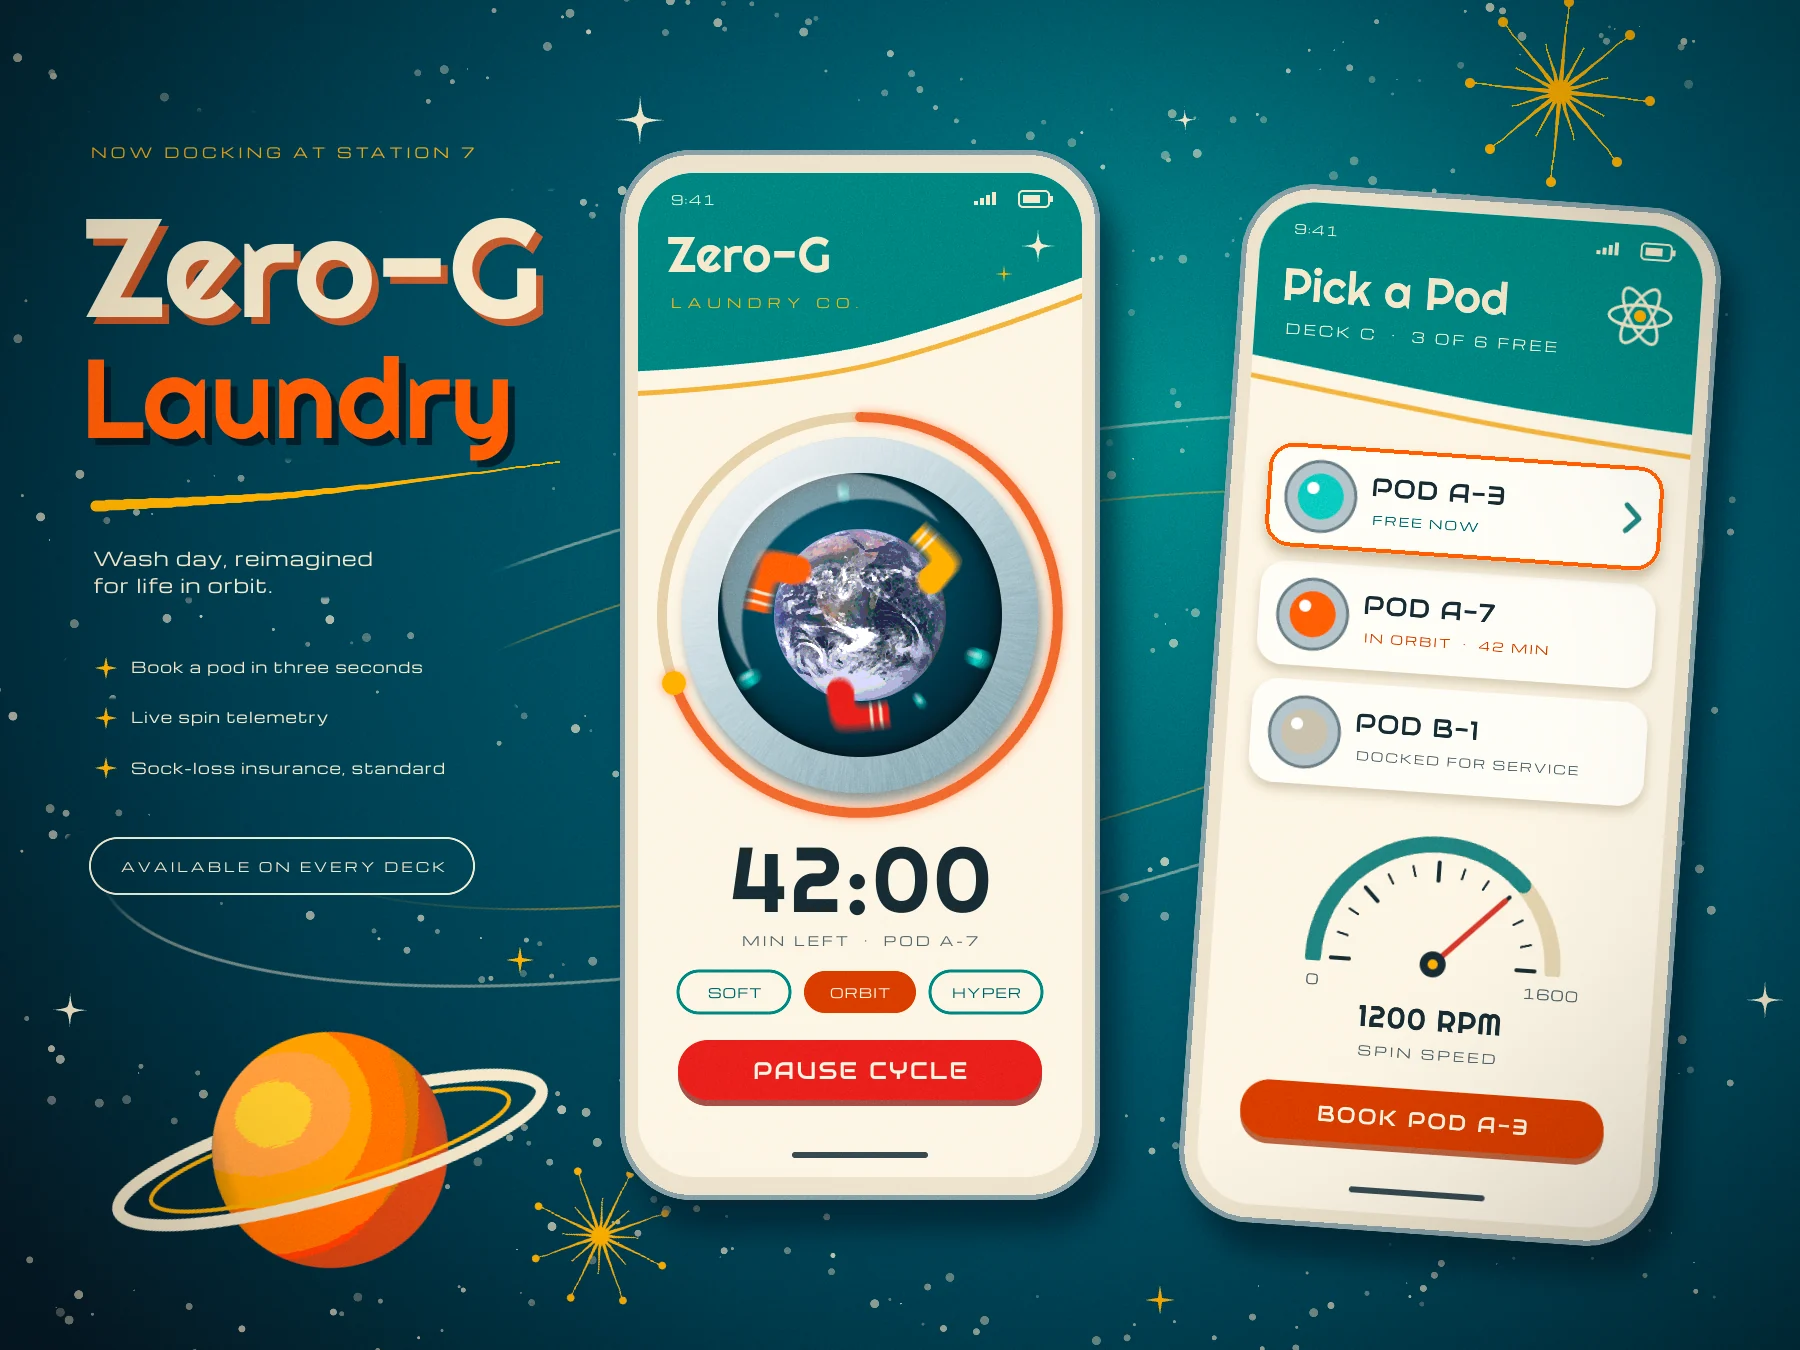
In the early 1960s the future looked like a diner sign. Space Age design, also called Googie or atomic age, drew rockets, satellites and atoms onto everything from coffee shops to toasters. The look has a few signature moves:
- starbursts: thin spokes radiating from a hub, often tipped with little balls
- boomerangs and swoops: shapes that tilt and curve as if they're moving fast
- orbits: ellipses and atom diagrams drawn as thin rings
- chrome and cream: appliance-white plastic, polished metal, and warm teals and oranges
In this tutorial you'll use that language for a modern product: an app mockup for Zero-G Laundry, a laundromat on an orbiting space station. One phone shows a cycle in progress through a washing-machine porthole. The Earth is visible through the glass, with socks floating around it. A second, tilted phone lets you book a pod. The board is 1800 × 1350 px.
You'll need one photo: The Earth seen from Apollo 17.jpg on Wikimedia Commons, taken by the Apollo 17 crew in 1972. It's a NASA photo, so it's in the public domain. Download the 1280 px version.
The tools you'll use:
- the Shape tool for rounded rectangles, pills and outlined ellipses
- the Pen tool for Googie swoops, sparkles, socks, arcs and a gauge needle
- the Gradient, Spray, Brush (with Taper and Radial Symmetry) and Eraser tools
- Add Noise, Motion Blur, Radial Blur, Oil Paint, Posterize, Hue/Saturation and Gaussian Blur
- marquees with Alt to subtract, Select → Inverse / Feather, and Cmd-click on a layer thumbnail
- copy and paste, Merge Down, a layer mask, and scaling and rotating with the Move tool's handles
- groups that you move and rotate as one piece, with live text inside
- layer effects: Drop Shadow, Stroke, Inner Glow and Outer Glow, plus the Overlay and Screen blend modes
- a non-destructive Vignette on the root group
The palette is cream plastic and polished chrome against a teal night sky, with atomic orange and mustard for accents:
-
Sky
-
Cream
-
phone shell
-
screen ivory
-
Teal
-
deep teal
-
aqua
-
Atomic orange
-
burnt orange
-
mustard
-
rocket red
-
Chrome
-
track beige
-
ink
The type is three Google fonts: Righteous for headings and numbers, Michroma for small wide labels, and Audiowide for buttons and pod names.
-
Paint a radial night sky
Choose File → New and make a document 1800 wide and 1350 high. Drop guides by clicking the rulers: on the top ruler at 90, 580 and 1720, and on the left ruler at 90 and 1260. The left column of type will sit between the first two vertical guides.
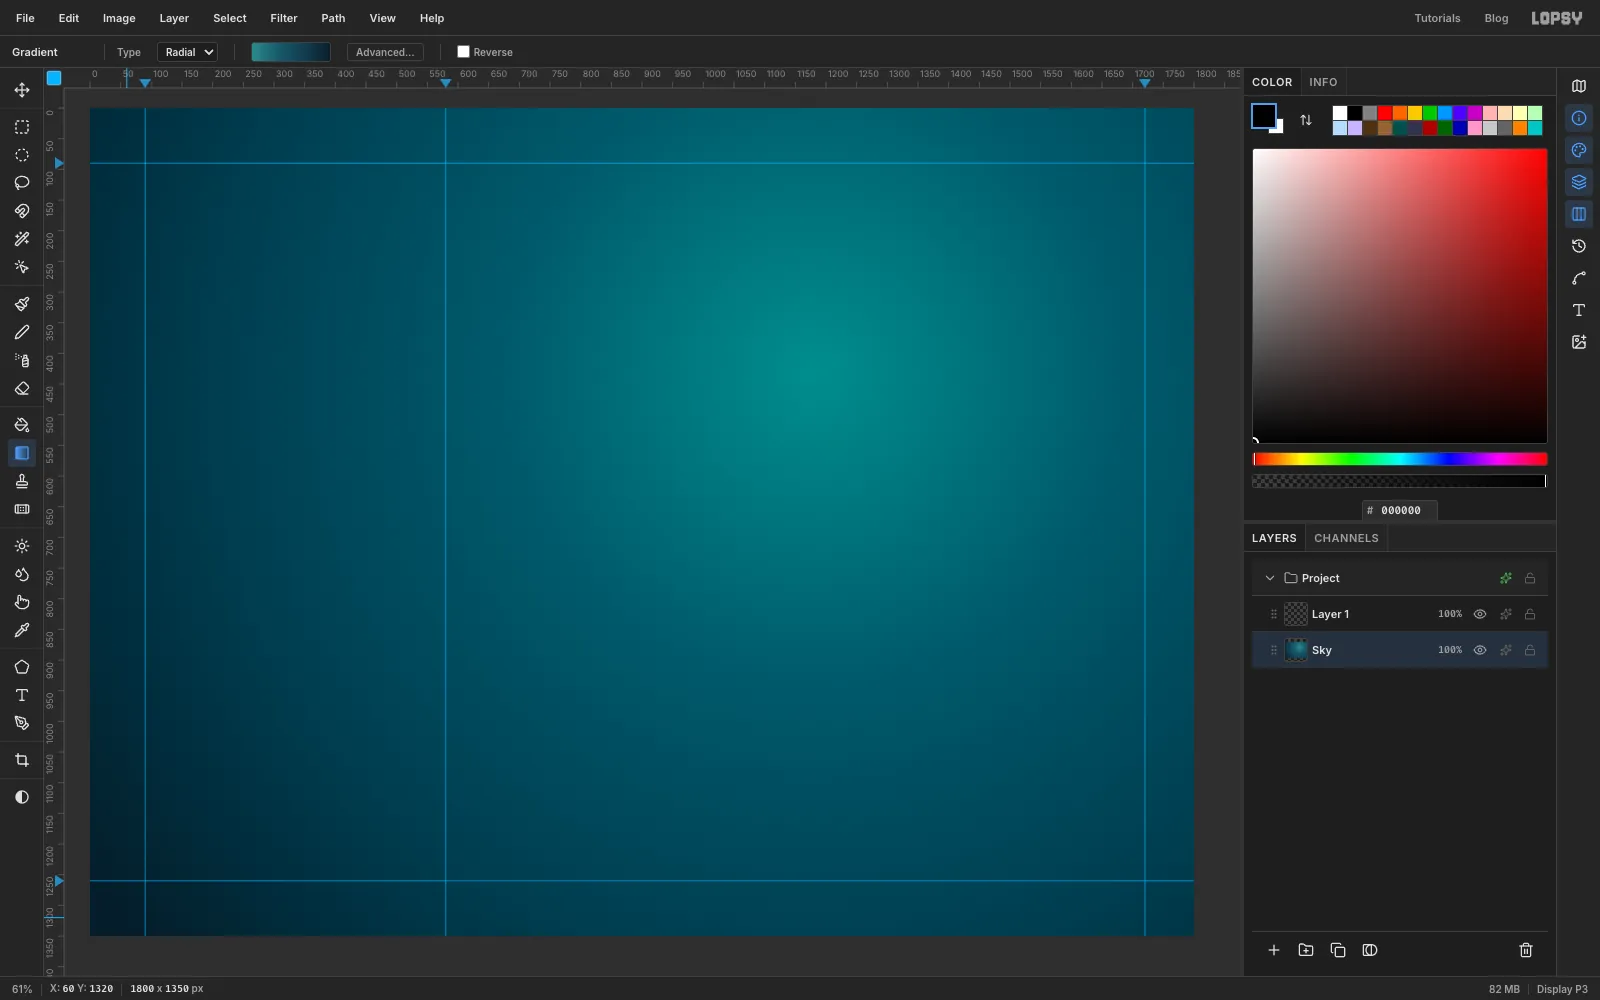
Click the Background layer and rename it Sky. Pick the Gradient tool, set Type to Radial, and click Advanced…. Give it four stops: at the left end, at 35%, at 70% and at the right end. Click Done.
Drag from a point up and right of the middle (about x 1180, y 430) down to the bottom-left corner. The brightest spot sits behind where the phones will go, and the corners fall into darkness.
-
Spray a star field
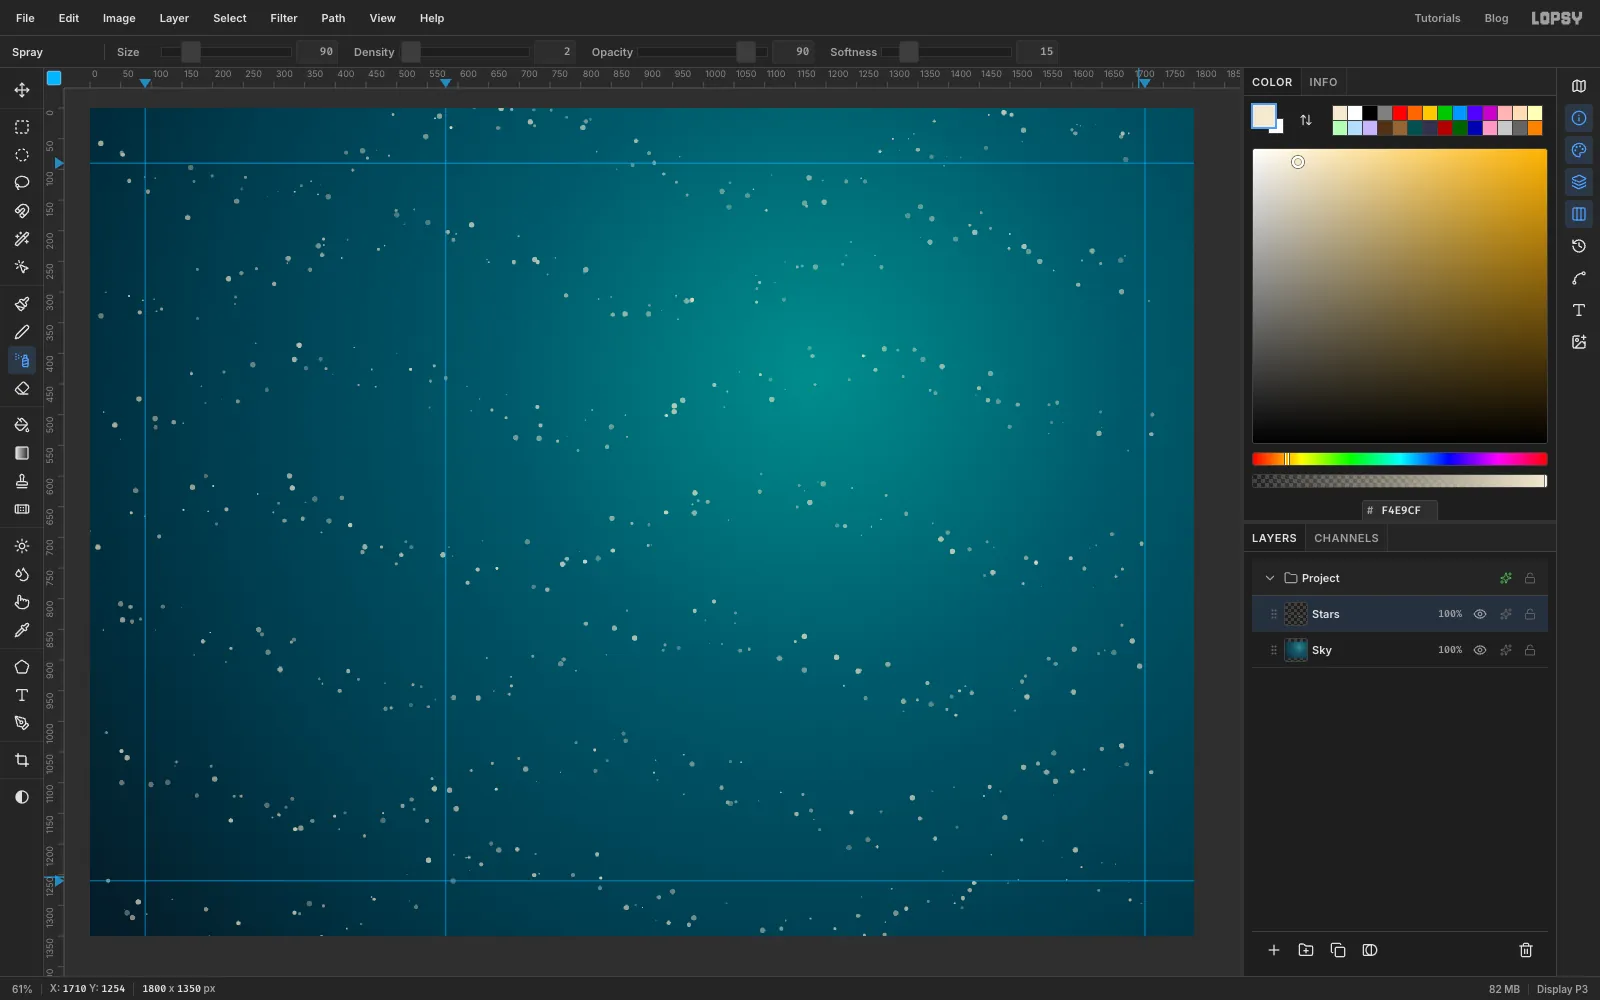
Click the empty Layer 1 and rename it Stars. Set the foreground to cream .
Pick the Spray tool and set Size 90, Density 2, Opacity 90 and Softness 15. Density is the number of dots in each puff, so a low number keeps the stars sparse. Make seven long, gently wavy sweeps across the whole canvas, from top to bottom, alternating left-to-right and right-to-left. Keep moving. The Spray keeps puffing about six times a second wherever the cursor lingers, so a slow or paused drag makes clumps.
-
Draw two orbit rings and tilt them
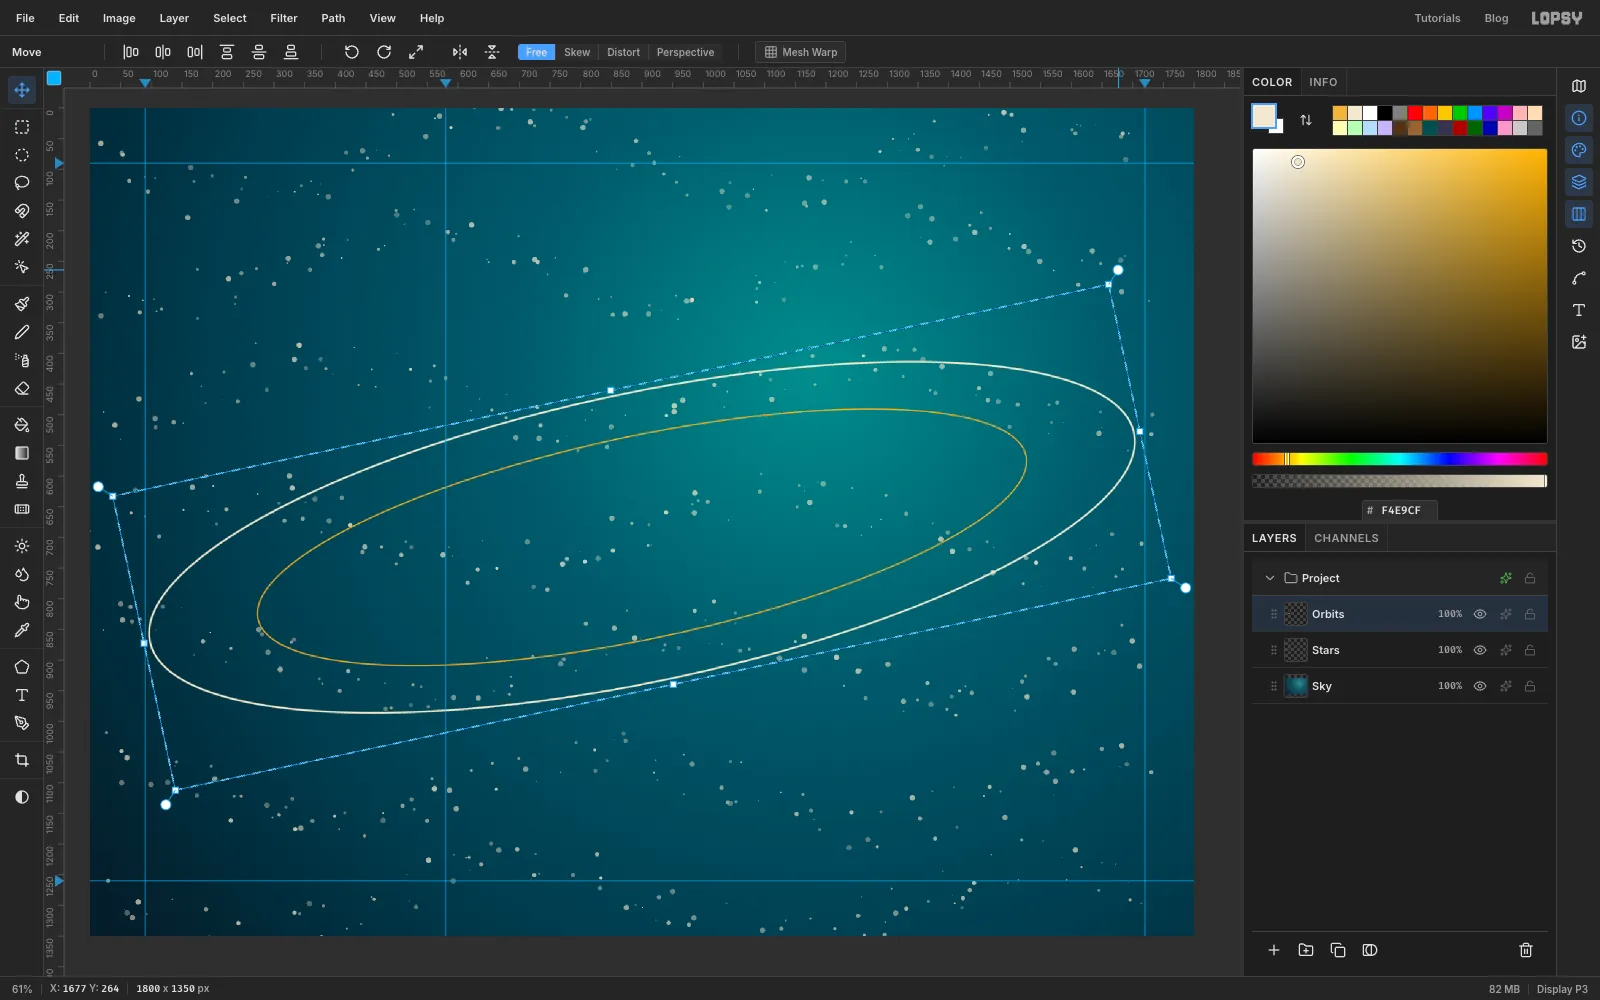
Click Add Layer and name it Orbits. Pick the Shape tool, set Shape to Ellipse and Output to Pixels. Remove the fill (click the Fill swatch, then Remove fill), set the stroke to cream and the Width to 3.
Shapes grow from where you press. Press at the middle of the canvas, slightly low (about x 900, y 700), and drag out until the ellipse is about 1640 × 470. Then switch the stroke to mustard , Width 2, and draw a smaller one from the same centre, about 1280 × 330.
Draw a Rectangular Marquee around both rings. Switch to the Move tool, grab the round rotate handle just outside a corner, and turn the rings about 12° anticlockwise. Press Enter to commit and Cmd+D to deselect. Click the layer's opacity and set it to 45%, so the rings sit back behind everything.
-
Draw a Googie starburst
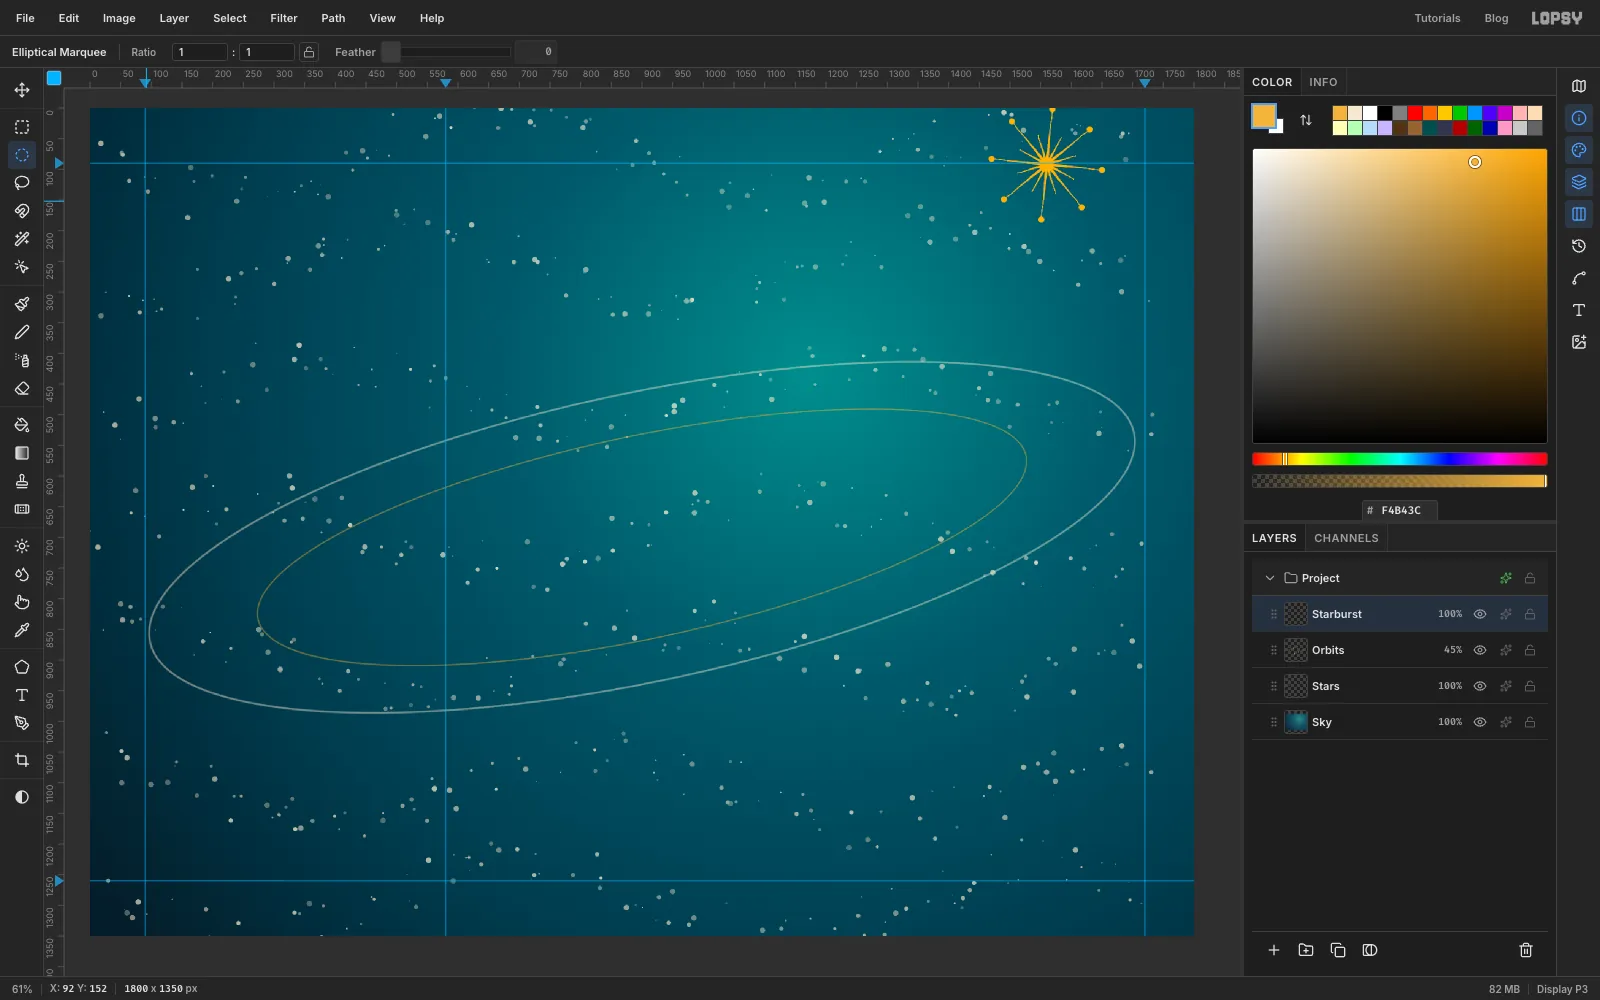
Add a layer called Starburst and set the foreground to mustard . The burst sits just above where the right-hand phone's top edge will be, centred at about x 1560, y 92.
Pick the Brush and open the Brushes panel from the options bar. On its Shape tab choose a hard round tip: Size 6, Hardness 100, Spacing 2. Taper lives on the same tab. It makes the stroke thinner as it goes, starting from where you press, so set it to about the spoke's length and each spoke thins to a point at its tip.
Draw 16 spokes, always dragging from the hub outwards, spaced evenly like the marks on a clock face but sixteen of them. Do the eight long ones first, then the eight short ones in the gaps, so you only change Taper once:
- long spokes are about 86 px with Taper 90
- short spokes are about 50 px with Taper 52
Finish each long spoke with a ball. Draw a 10 px circle just past its tip with the Elliptical Marquee (hold Cmd to keep it round) and choose Edit → Fill. Press Cmd+D when you're done.
-
Copy, shrink and turn a second burst
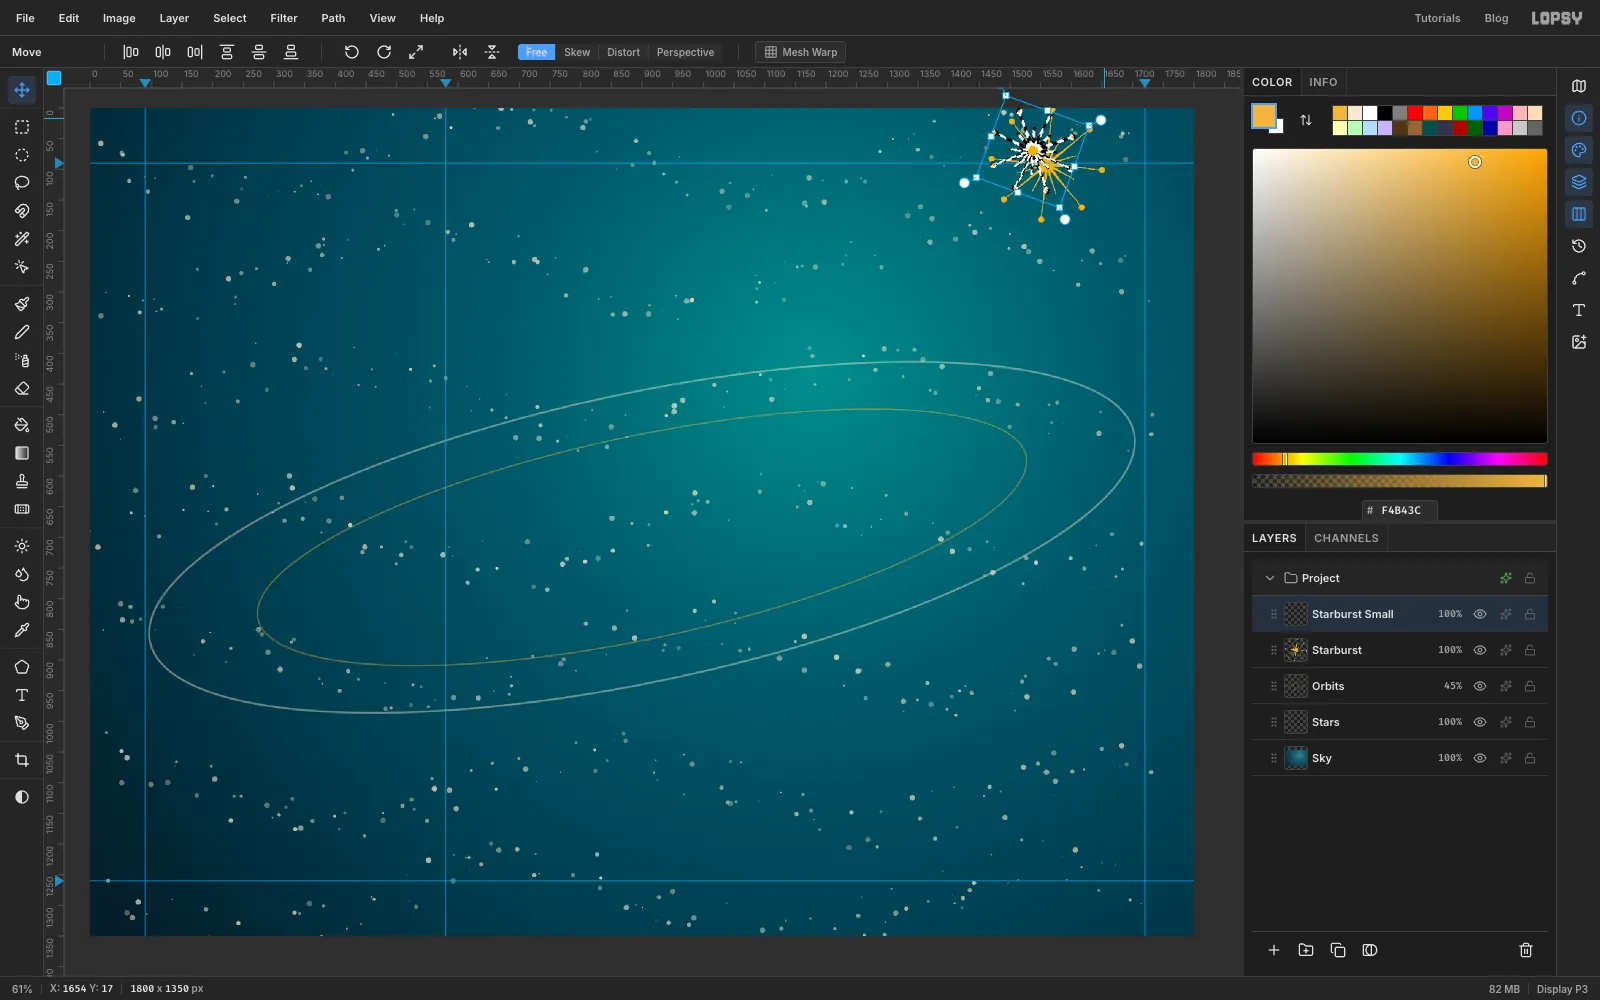
Draw a marquee around the starburst, then press Cmd+C and Cmd+V. A copy made inside Lopsy pastes back in place, on its own layer. Rename it Starburst Small.
With the Move tool, hold Cmd and drag the bottom-right corner handle in until the copy is about three quarters of its size. Then grab the rotate handle and turn it about 20°, so its spokes don't line up with the first burst. Press Enter and Cmd+D.
Drag the copy down to the bottom of the canvas, just right of the left column's guide (around x 600, y 1235). It will peek out from under the first phone.
-
Scatter four-point sparkles
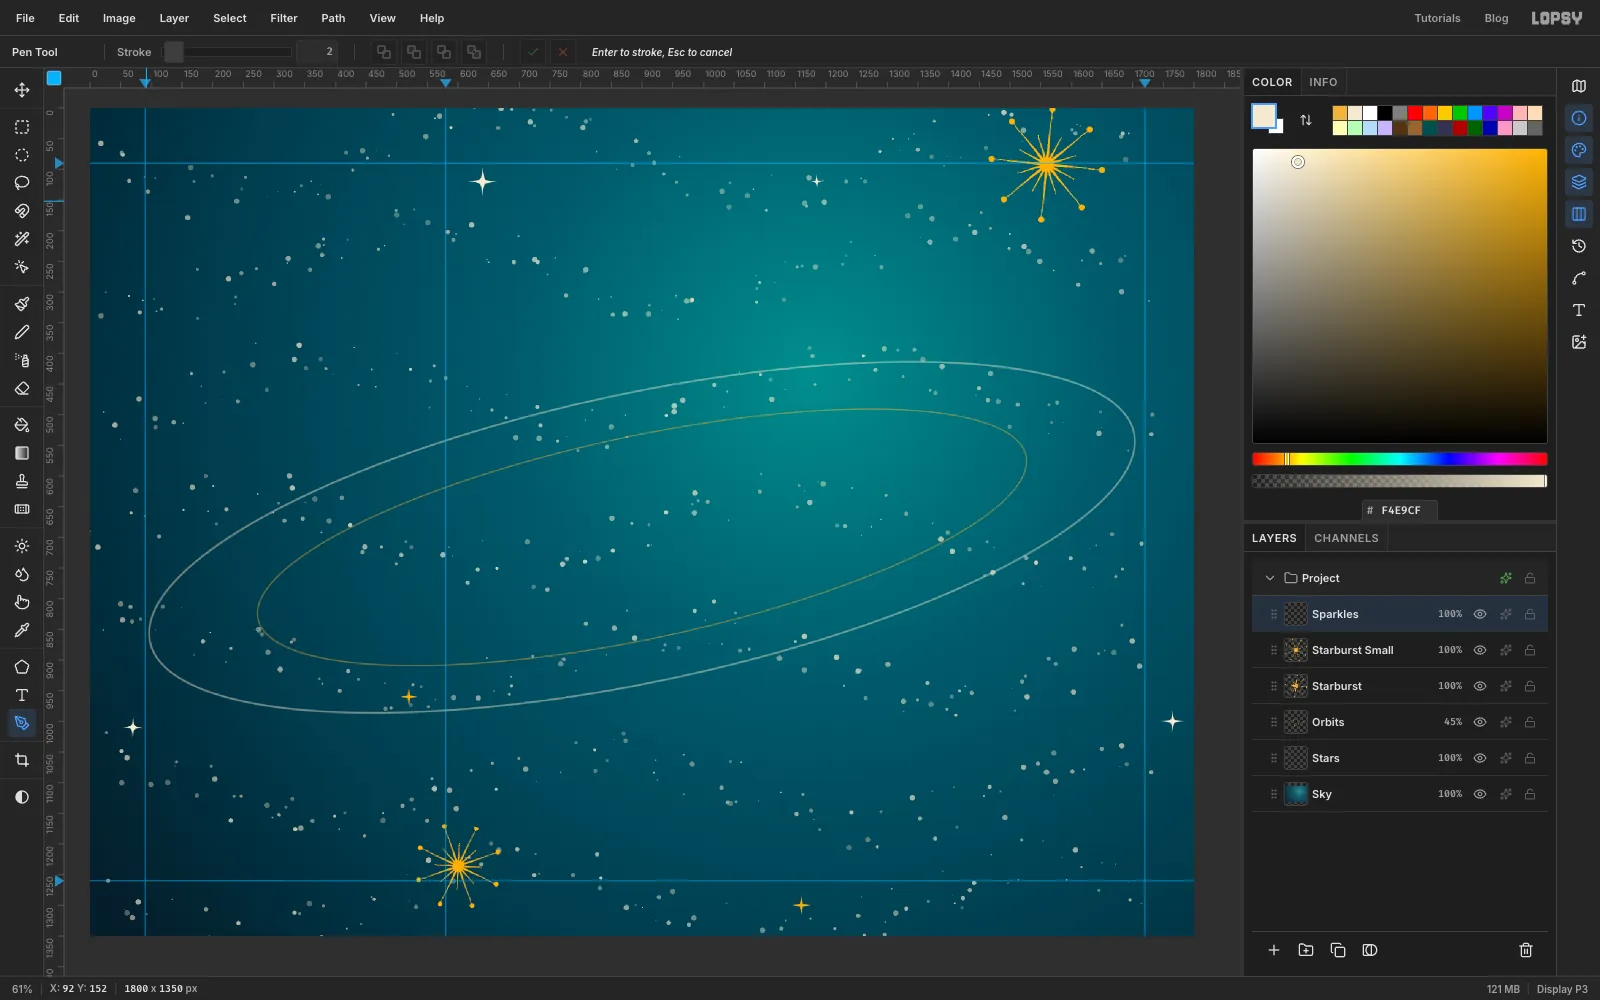
Add a layer called Sparkles. The classic Space Age sparkle is a four-pointed star with pinched, curved sides. The Pen tool draws it in eight clicks:
- Click (don't drag) the left tip.
- Halfway between the left and top tips, but close to the centre (about a fifth of the way out), press and drag a short way towards the top tip, about a fifth of the sparkle's radius. That point is the pinched "waist", and dragging gives it a curve.
- Click the top tip, drag the next waist towards the right tip, click the right tip, drag the next waist towards the bottom tip, click the bottom tip, then drag the last waist towards the left tip.
- Click the first anchor again to close the shape.
Open the Paths panel and click Path to Selection, then Delete Path. Fill the selection with cream or mustard and deselect.
Make six sparkles with radii from about 9 to 26 px. Put a big cream one at about x 640, y 120 and a small cream one at about x 1185, y 120. Add one near each side edge, around x 70, y 1010 and x 1765, y 1000. Finish with two small mustard ones low down, near x 520, y 960 and x 1160, y 1300.
-
Paint a banded planet
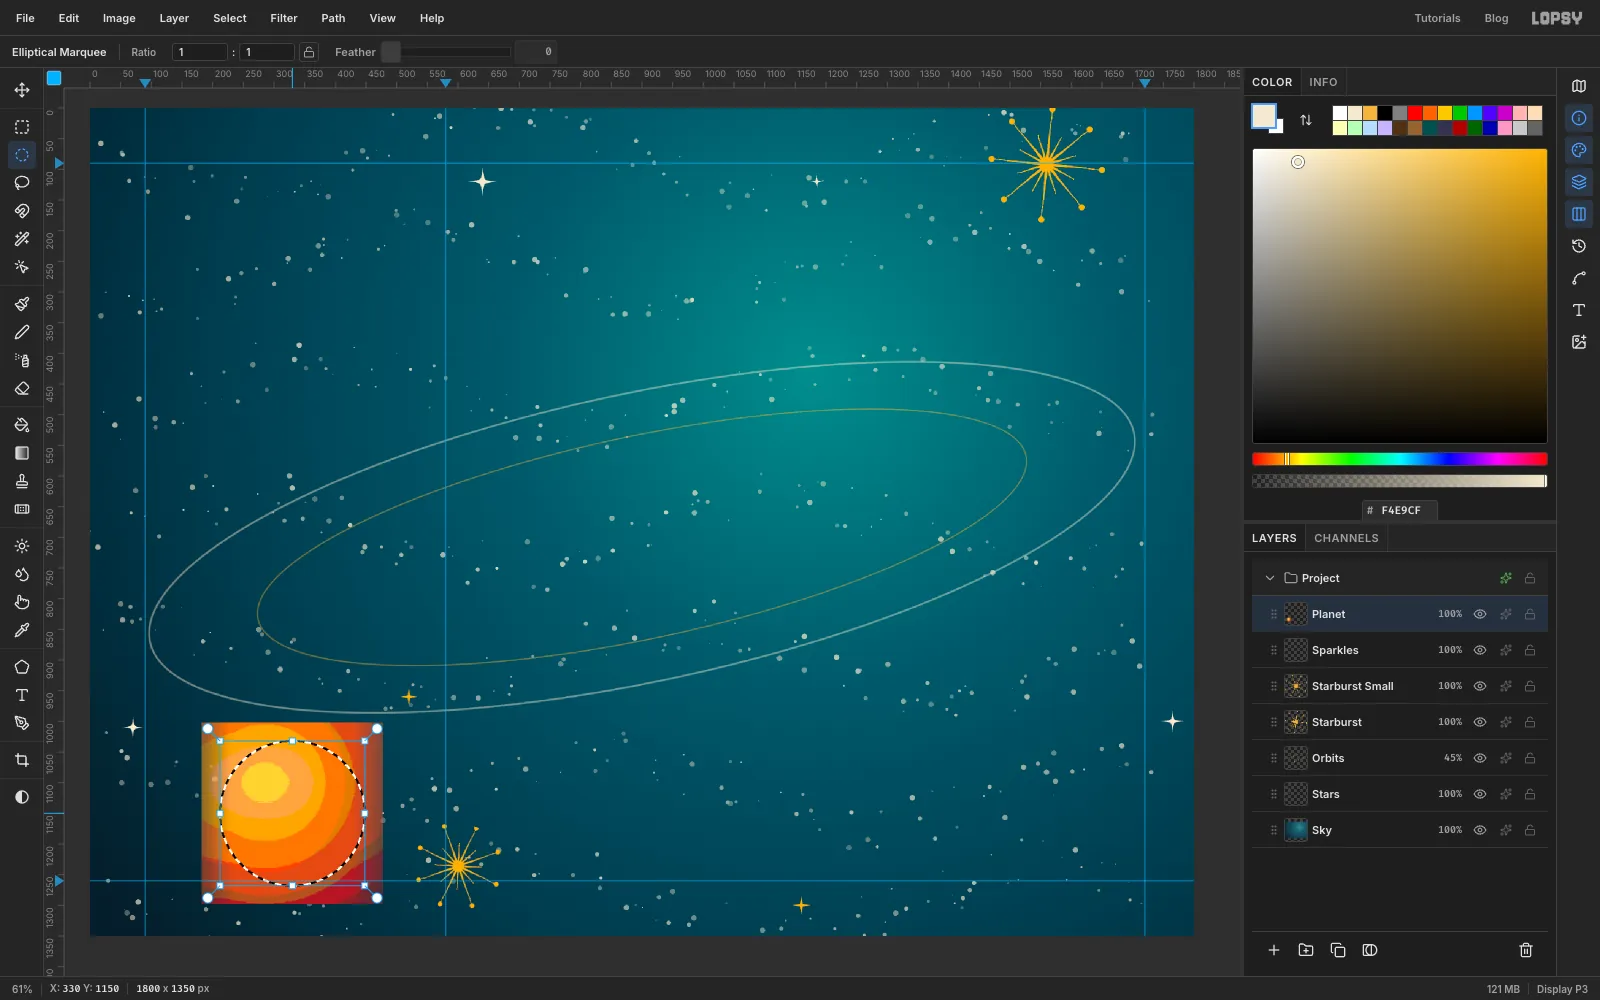
Add a layer called Planet. Draw a square marquee about 300 px across in the bottom-left corner, centred around x 330, y 1150.
Set the Gradient to Radial with four stops: at the left end, at 30%, at 62% and at the right end. Drag from just up and left of the block's centre to past its bottom-right corner, which puts a highlight on the upper left.
Now turn the smooth gradient into gas bands:
- Filter → Add Noise…: Mono, Amount 14.
- Filter → Motion Blur…: Angle 0, Distance 100. The noise smears into horizontal streaks.
- Filter → Posterize…: Levels 7. The soft shading snaps into flat, screen-printed bands.
Why a square block and not a circle? The blur pulls transparency in at the edges, and a circle would end up with a see-through rim. Instead, draw a round Elliptical Marquee 236 px across, centred on the block. Choose Select → Inverse, press Delete, then deselect. The planet has a crisp edge.
-
Tuck the ring behind the planet
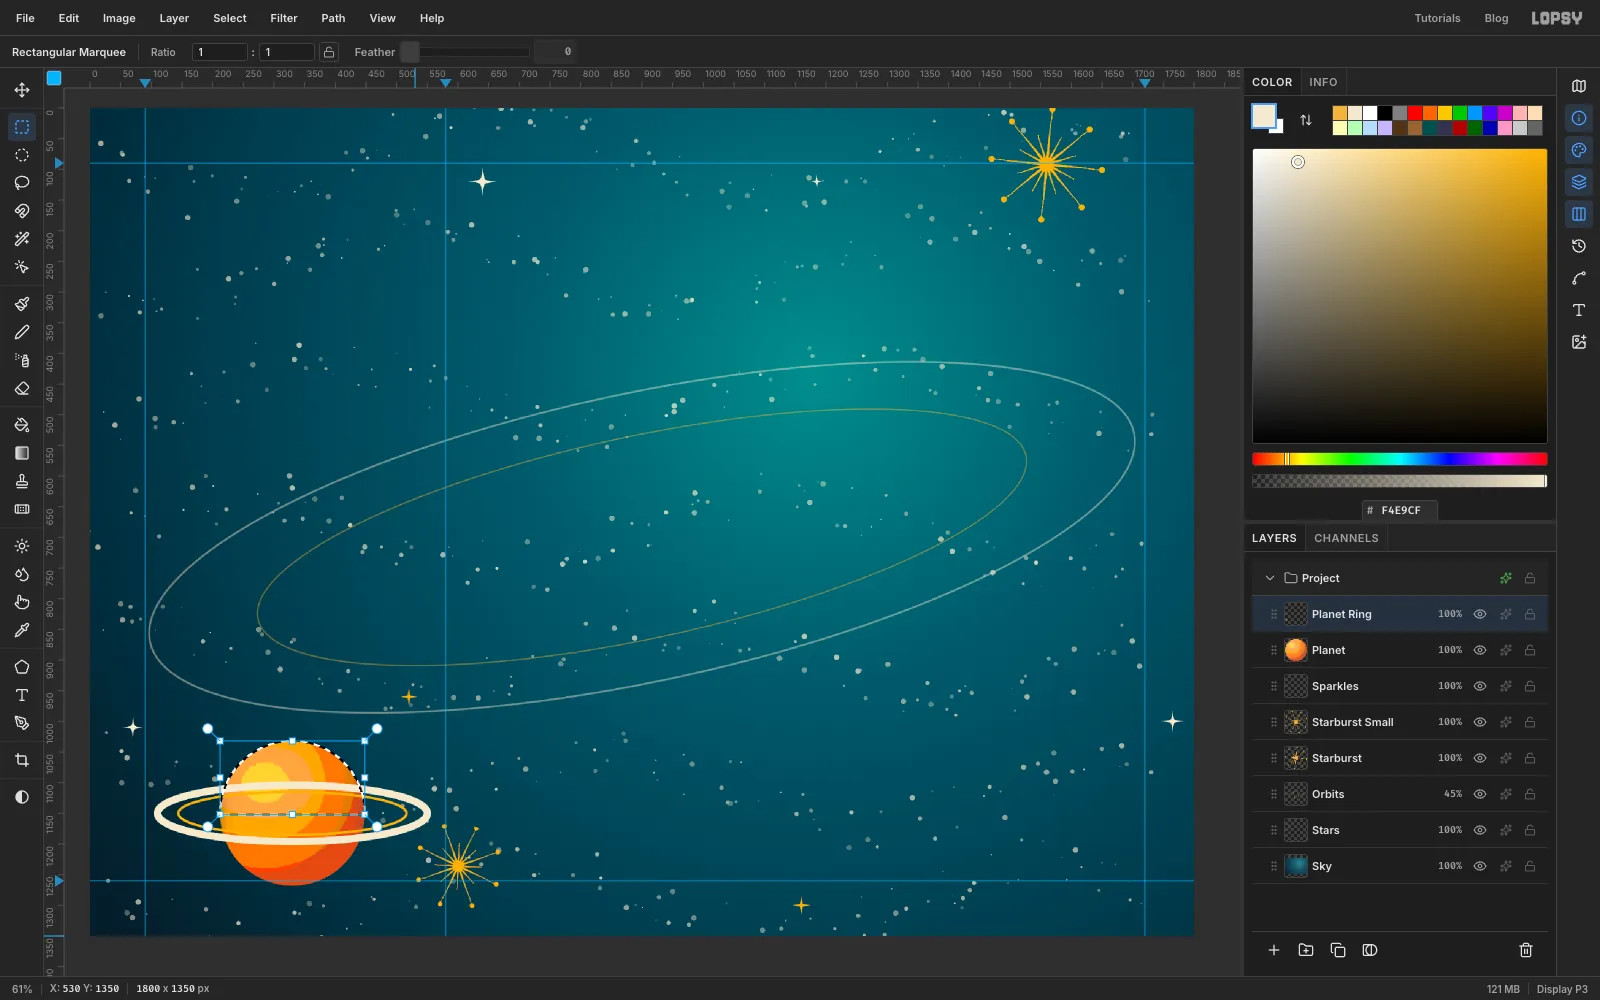
Add a layer called Planet Ring. With the Shape tool still on Ellipse with no fill, draw two flat rings centred on the planet:
- a cream ring about 440 × 92 with a 12 px stroke
- a mustard ring about 372 × 70 inside it, with a 4 px stroke
The back of the ring has to disappear behind the planet. Draw a circle marquee over the planet: start at its top-left and hold Cmd to keep it round. Then hold Alt and drag a rectangle over the lower half of the planet. Alt subtracts, so only the top half of the disc stays selected. Press Delete, then deselect. The ring now passes in front of the planet at the bottom and behind it at the top.
-
Tilt the planet and its ring together
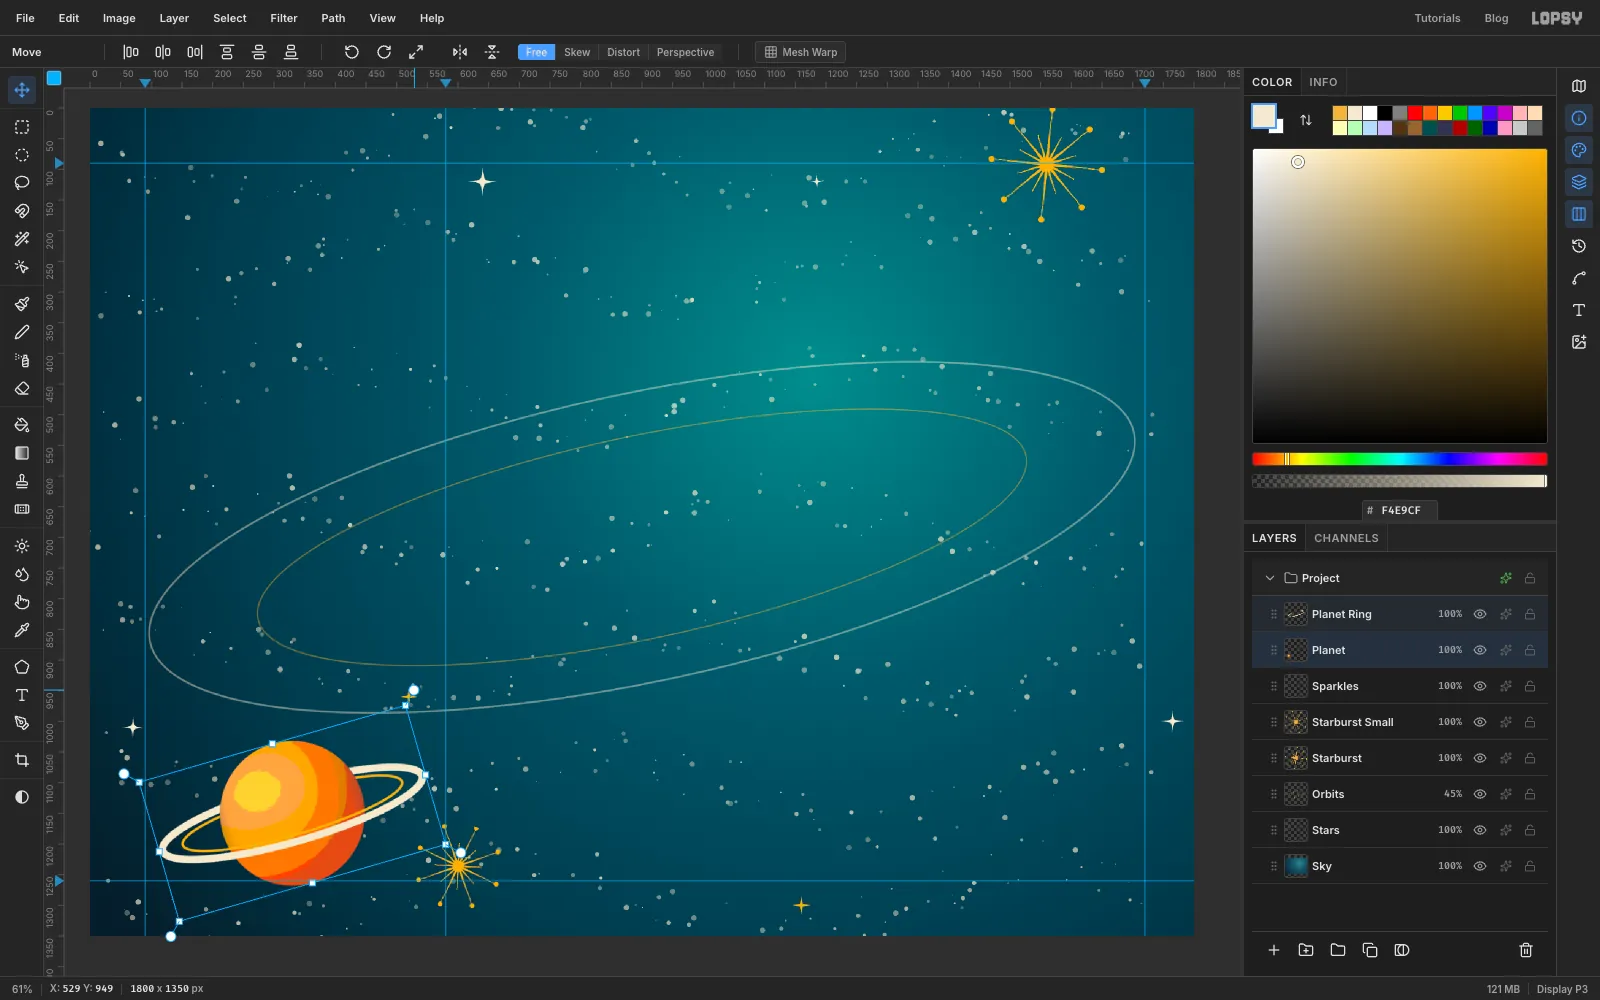
In the Layers panel, click Planet, then Shift-click Planet Ring so both are selected. With the Move tool and no marquee, the handles frame both layers together. Drag a rotate handle about 16° anticlockwise and press Enter.
-
Build the first phone's body and screen
Click Planet Ring, then click New Group at the bottom of the Layers panel and name the group Phone A. With the group active, click Add Layer: the new layer goes inside the group. Name it Body A.
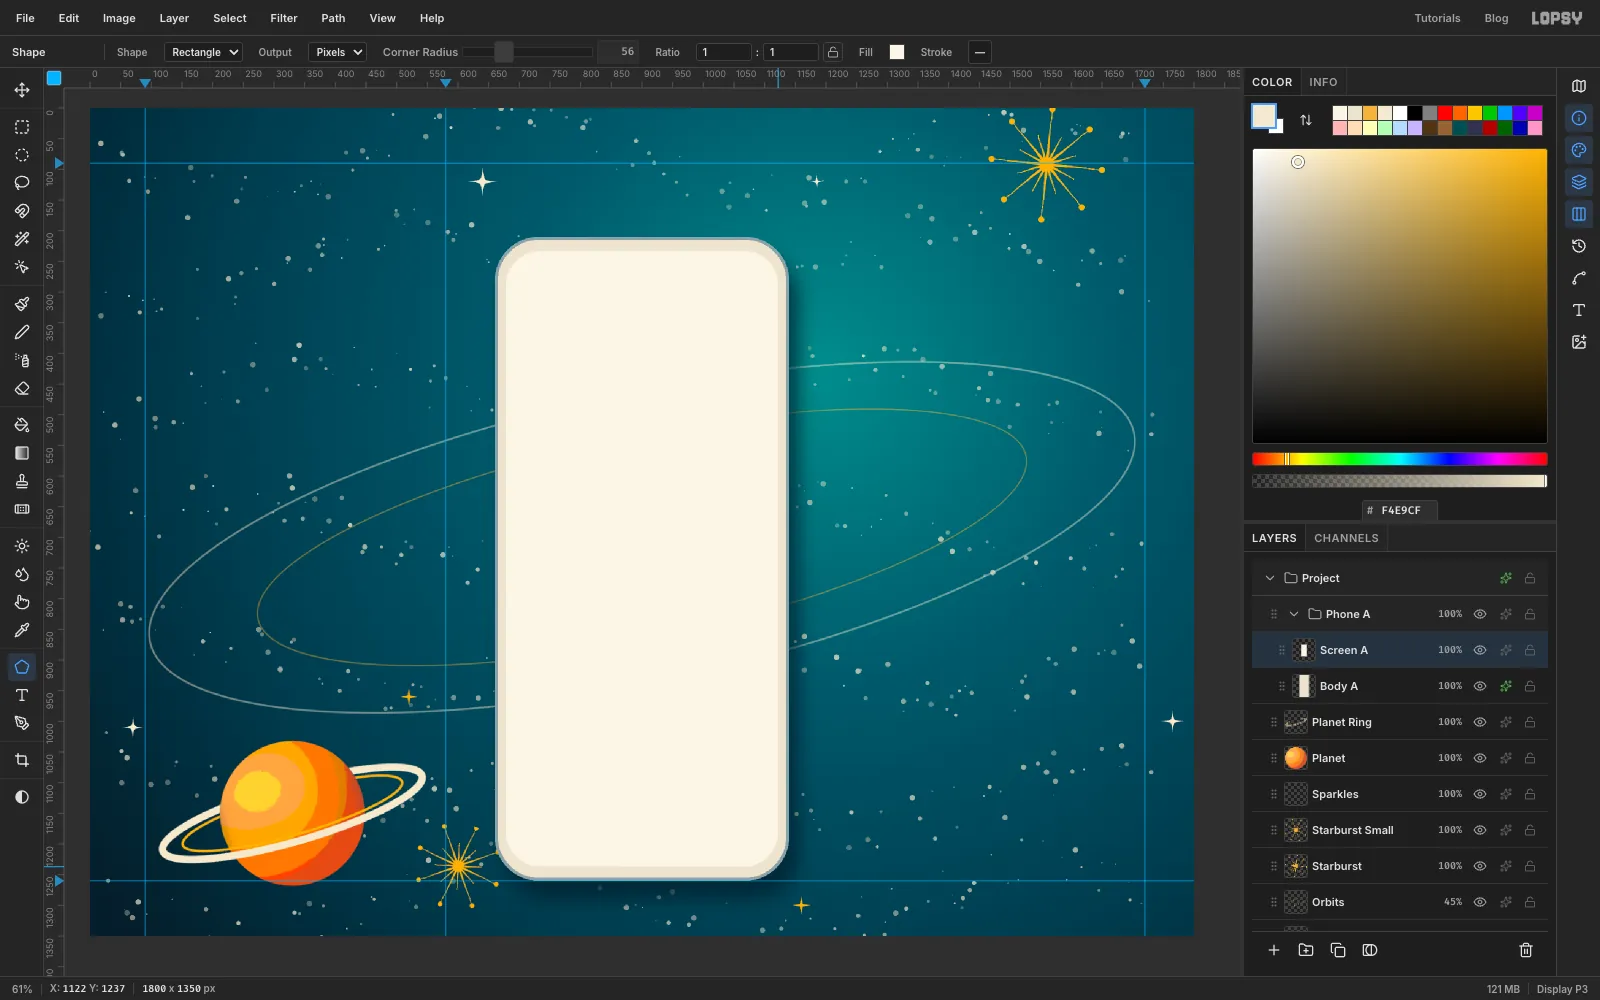
Pick the Shape tool, set Shape to Rectangle, Corner Radius 72, fill and no stroke. Press at x 900, y 735 and drag out to a 480 × 1040 phone. It's 60 px lower than it will end up. You'll move the whole phone up at the end, after the porthole has been centred on the canvas.
Open the layer's effects (the sparkle button on its row):
- Drop Shadow: colour , Offset X 16, Offset Y 30, Blur 44, Spread 0, Opacity 70
- Stroke: colour , Width 5, position inside. It reads as a chrome rim.
Add a layer called Screen A and draw a second rounded rectangle from the same centre: 444 × 1004, Corner Radius 56, fill ivory .
-
Draw the Googie header swoop with the Pen
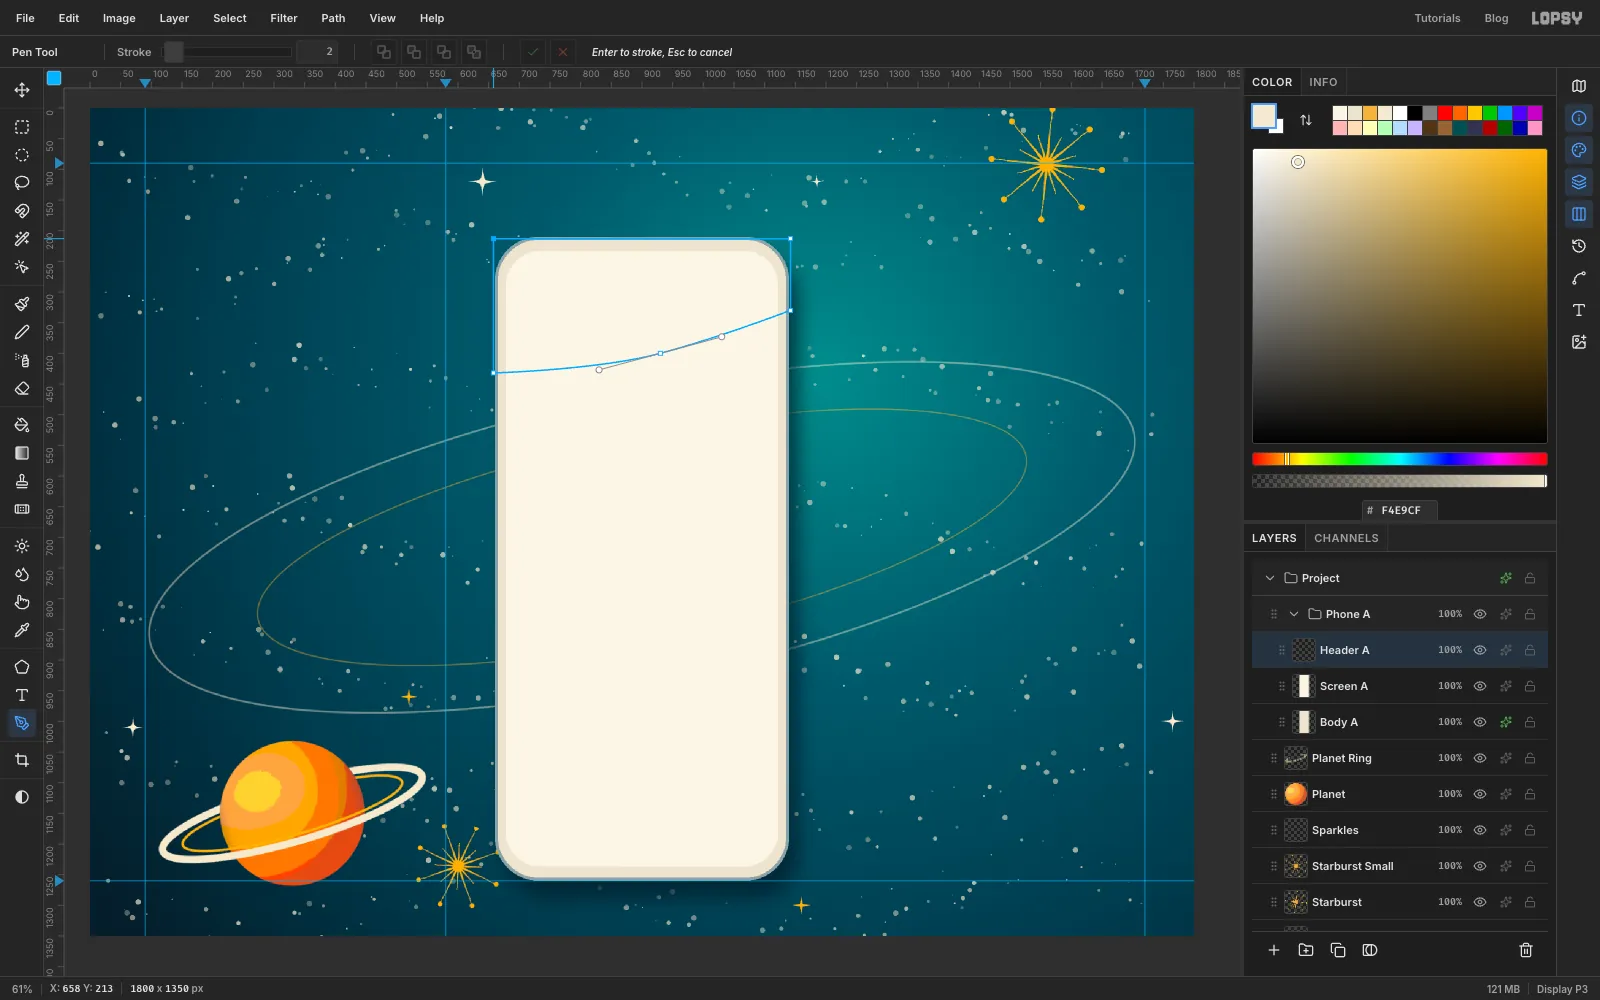
Add a layer called Header A. The header's bottom edge should sweep up from left to right, like the roof of a 1950s drive-in. Draw it with the Pen:
- Click outside the screen's top-left corner, then outside its top-right corner.
- Click on the right edge, about a third of the way down the header (y 330).
- Just right of the screen's middle, at about y 400, press and drag about 100 px to the left, angling slightly down. This makes a smooth point, and dragging along the direction you're travelling bends the edge into a long, sagging curve.
- Click outside the screen's left edge, lower down (y 432).
- Click the first anchor to close the path.
Don't worry that the path sticks out past the screen's rounded corners. You'll trim it next.
-
Fill the header, add a pinstripe, and trim both
In the Paths panel click Path to Selection and Delete Path. Fill with teal and deselect.
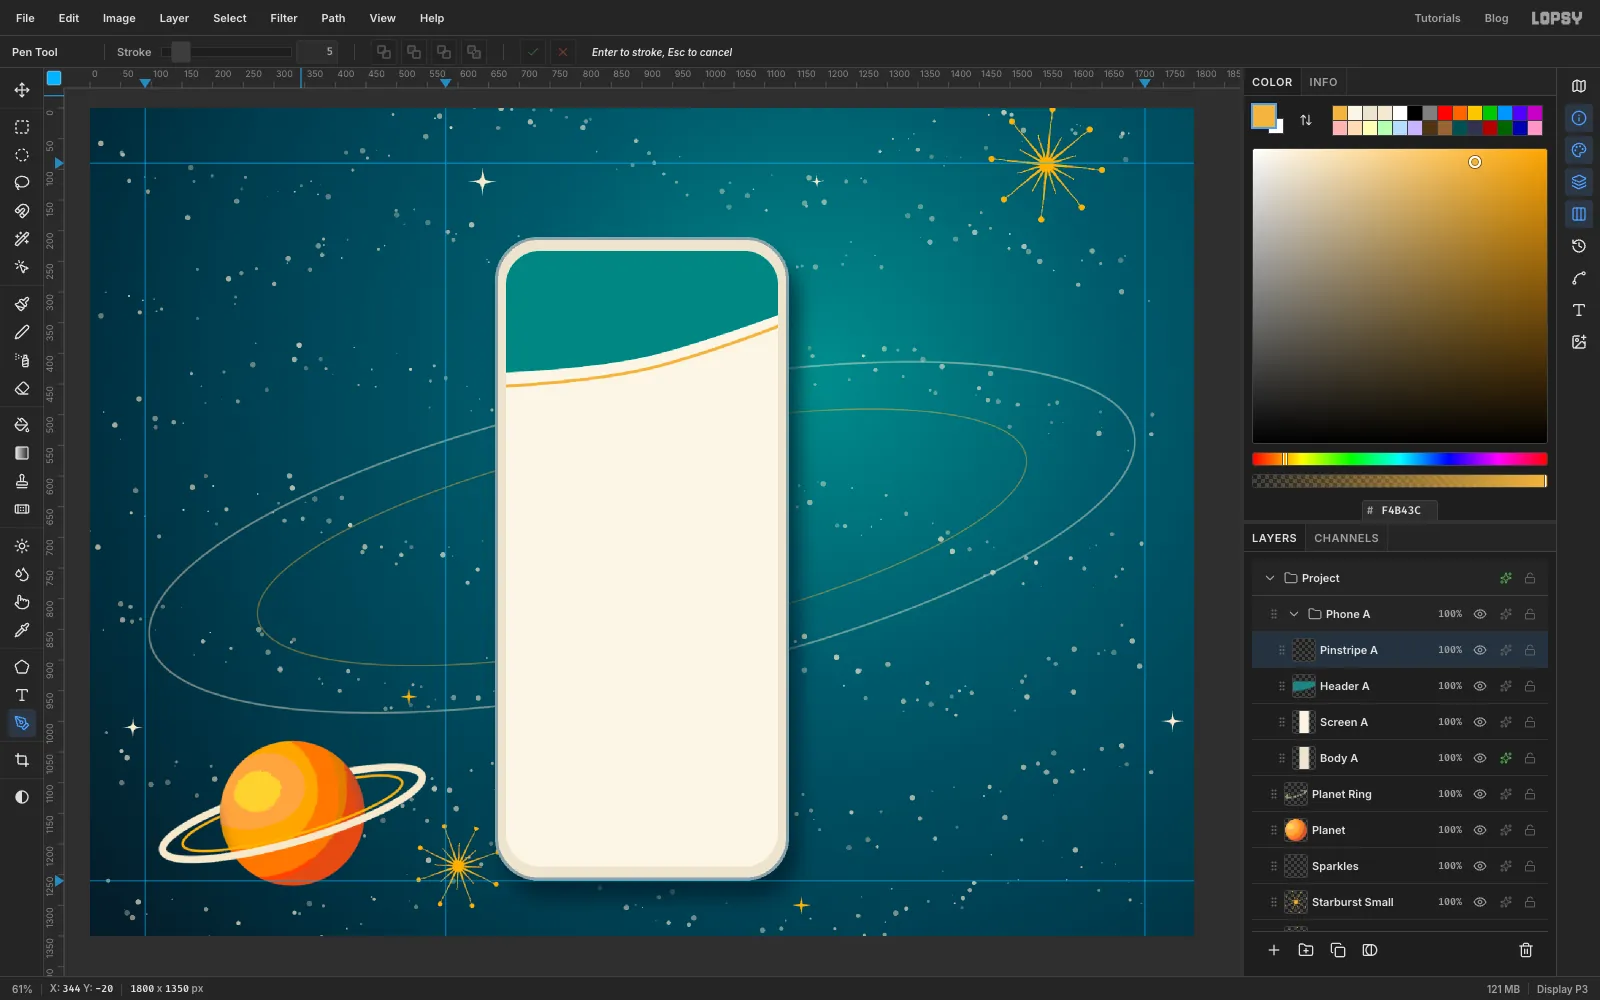
Add a layer called Pinstripe A and set the foreground to mustard. Set the Pen's Stroke to 5. Draw an open path about 20 px under the header's edge. Click just outside the left edge at about y 454. Then press just right of the middle at about y 420 and drag about 100 px to the right, angling slightly up, so it bends the same way as the header. Finally click just outside the right edge at about y 352. Press Enter to stroke it, then delete the path.
To trim both layers to the screen, click Header A, Cmd-click the Screen A thumbnail to load the screen's shape as a selection, choose Select → Inverse and press Delete. Do the same on Pinstripe A.
-
Spin a brushed chrome ring
The porthole sits exactly on the canvas centre (x 900, y 675). That matters, because Radial Blur always streaks pixels towards the canvas centre, whatever layer you run it on.
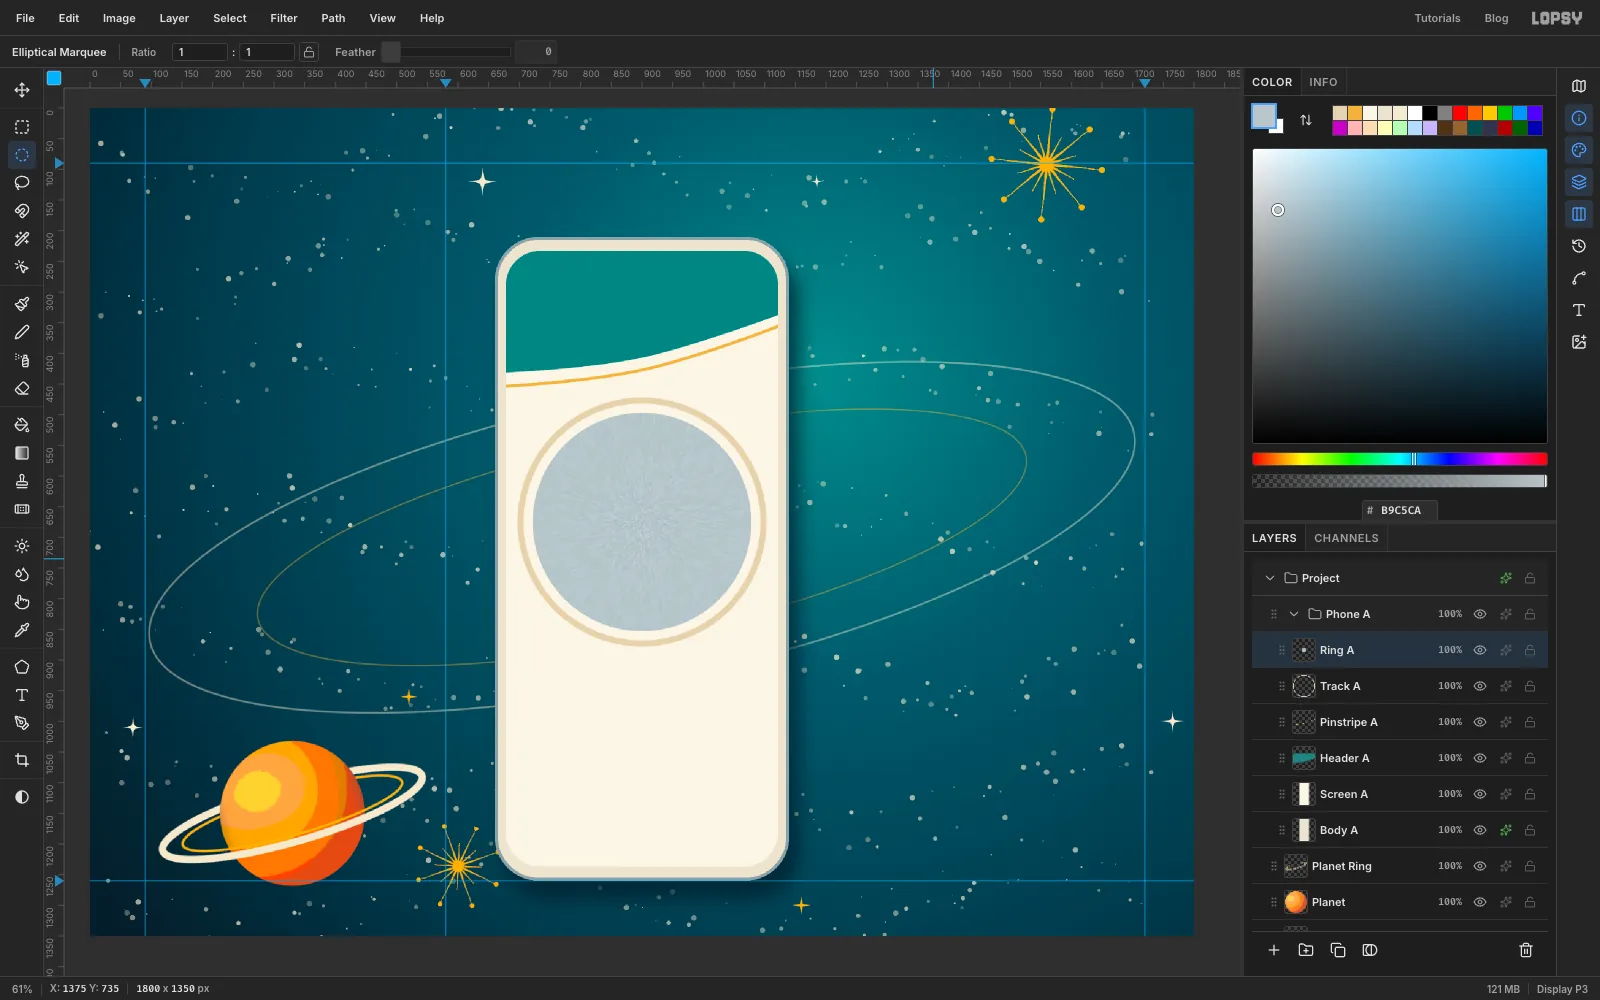
First, add a layer called Track A. With the Shape tool on Ellipse, no fill, a beige stroke at Width 10, draw a 396 px circle from the canvas centre. It becomes the groove for a progress bar.
Add a layer called Ring A. Draw a 356 px circle marquee on the canvas centre and fill it with chrome . In the Elliptical Marquee's click dialog, that's From 722, 497 To 1078, 853. Then:
- Filter → Add Noise…: Mono, Amount 45.
- Filter → Radial Blur…: Amount 40.
The speckle stretches into fine radial streaks, like a spun metal dish.
-
Cut out the ring's middle and add shine
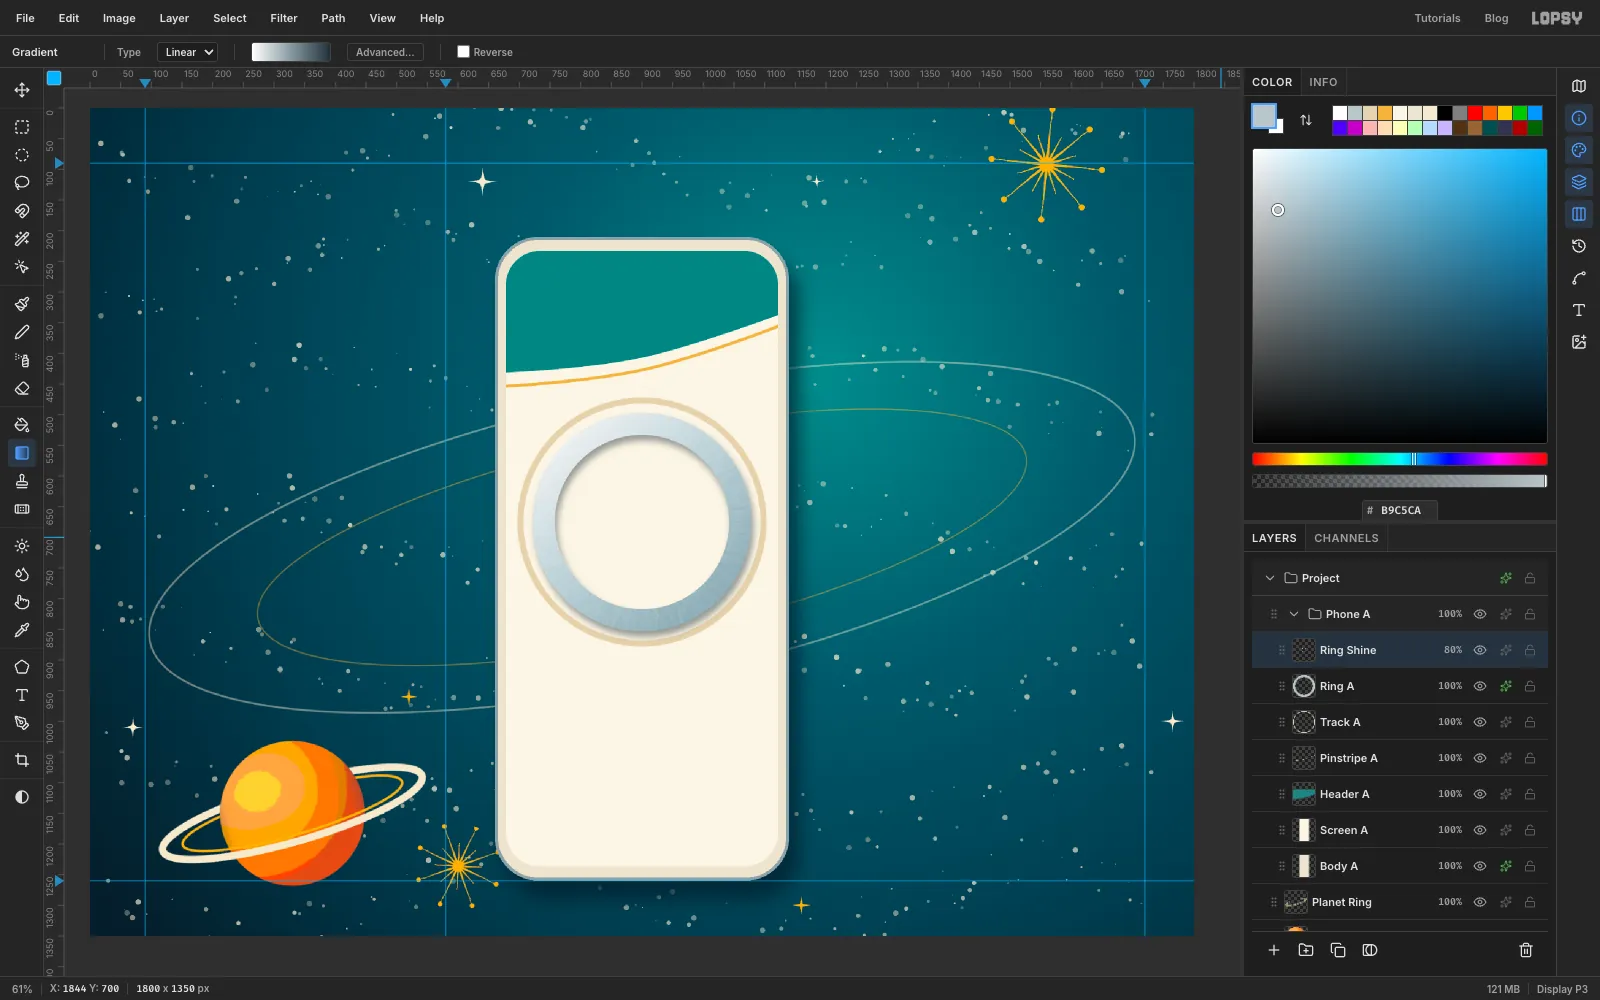
Deselect, then draw a 284 px circle marquee on the same centre (From 758, 533 To 1042, 817) and press Delete. You're left with a thick ring. Give Ring A a Drop Shadow: colour , Offset X 4, Offset Y 9, Blur 16, Opacity 45.
Cmd-click the Ring A thumbnail and add a layer called Ring Shine. Make a Linear gradient of white → → and drag it from the ring's top-left to its bottom-right. Set the layer's blend mode to Overlay at 80%. The top-left of the ring catches the light and the bottom-right falls into shade, so it reads as curved metal.
-
Add the glass and drop in the Earth
Add a layer called Glass A. Draw a 284 px circle marquee on the centre and make a Radial gradient: → at 60% → . Drag it from just up and left of the centre towards the bottom right. Deselect and add an Inner Glow: black, Size 26, Opacity 80. The glass looks deep and dark at its rim.
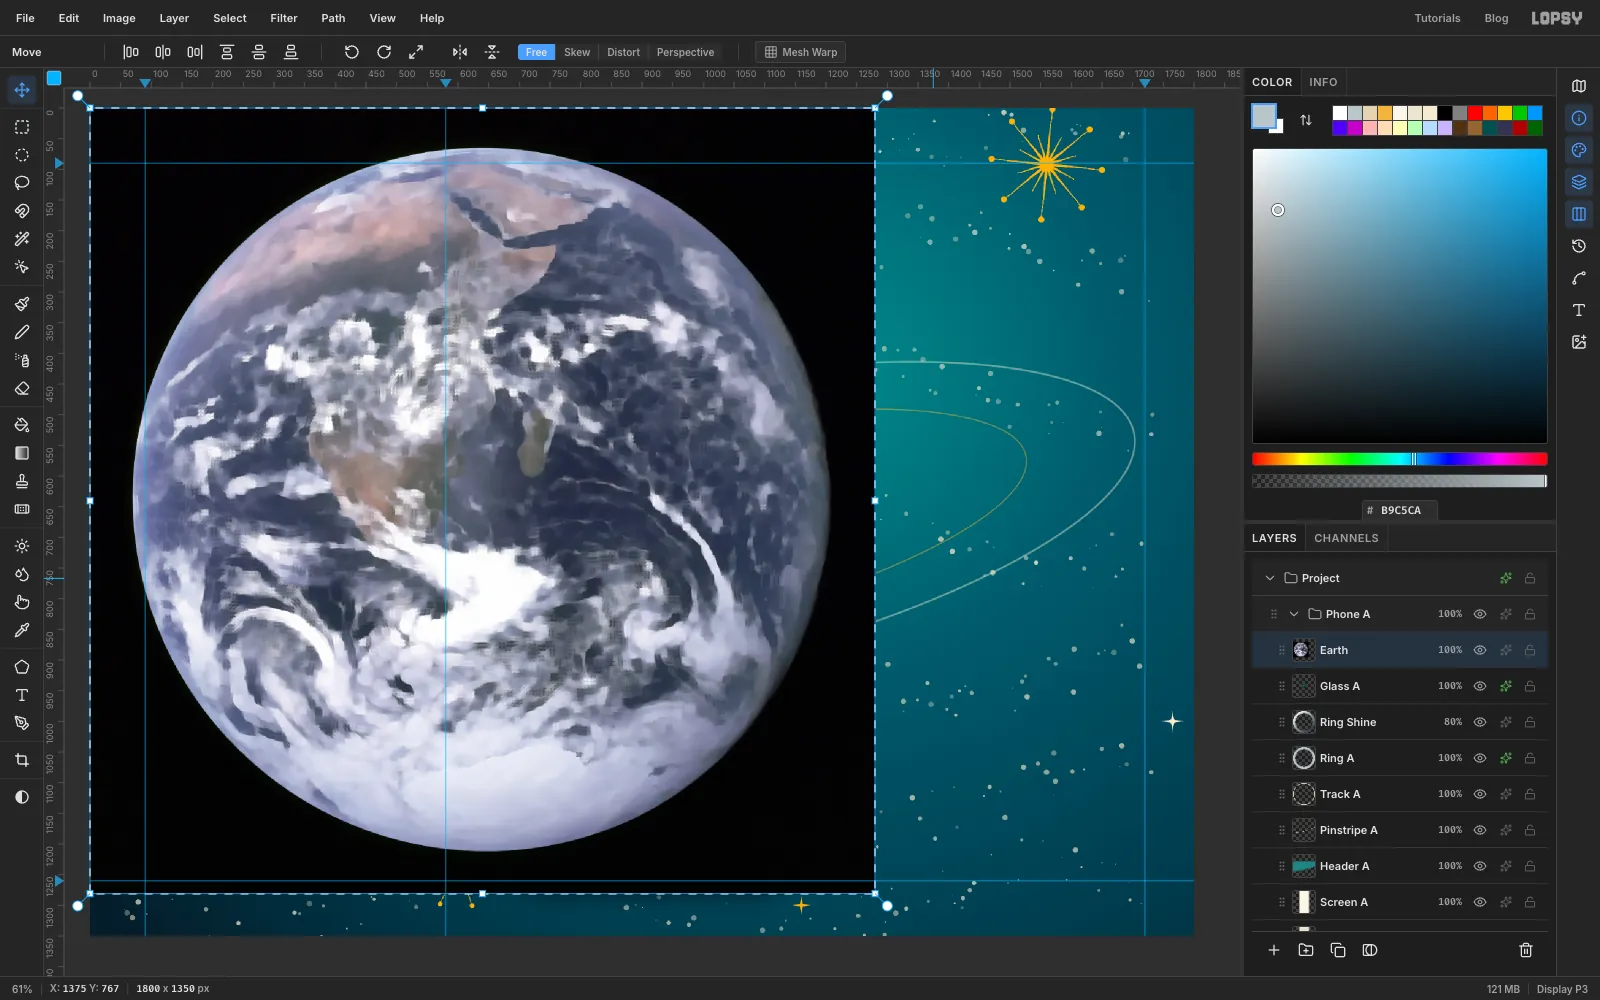
Drag the Earth photo from your desktop onto the canvas. It lands at the top-left as a new layer, already selected. Rename it Earth.
Before you shrink it, choose Filter → Oil Paint… with Radius 6 and Sharpness 1.5. Oil Paint smooths clouds and oceans into soft painted patches. Doing it at full size, rather than after scaling down, keeps the continents recognisable.
-
Shrink the Earth to fit the porthole
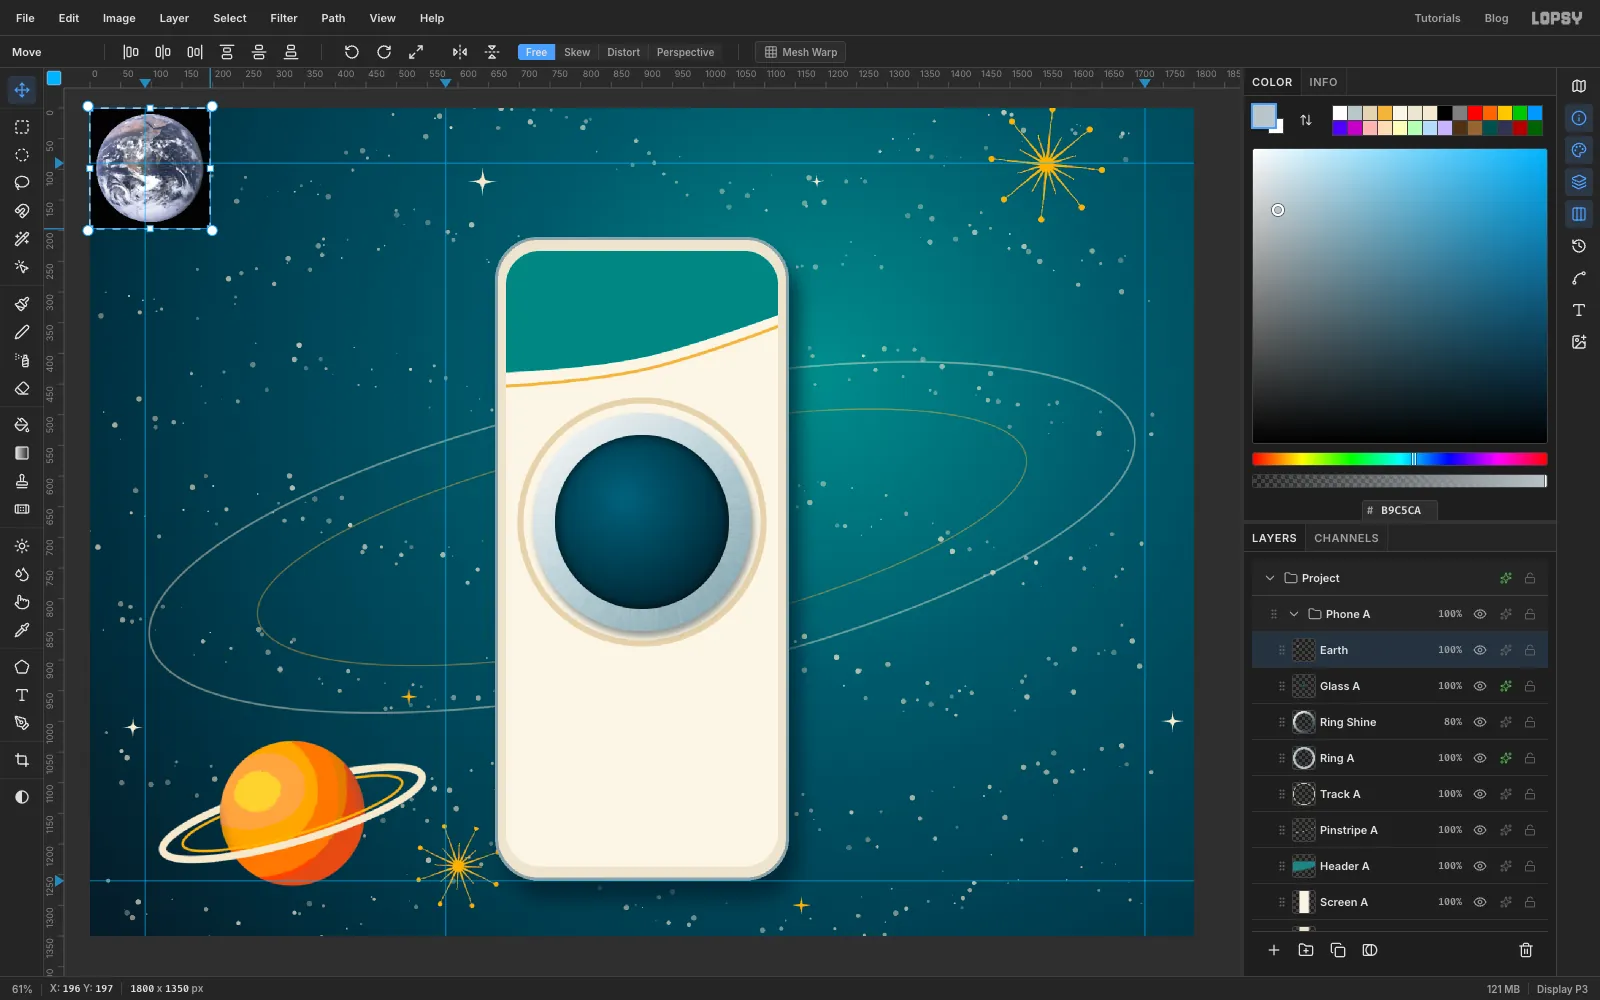
With the Move tool, hold Cmd and drag the photo's bottom-right corner handle up and to the left until it's about 196 px square. Press Enter and Cmd+D.
-
Trim and flatten the Earth
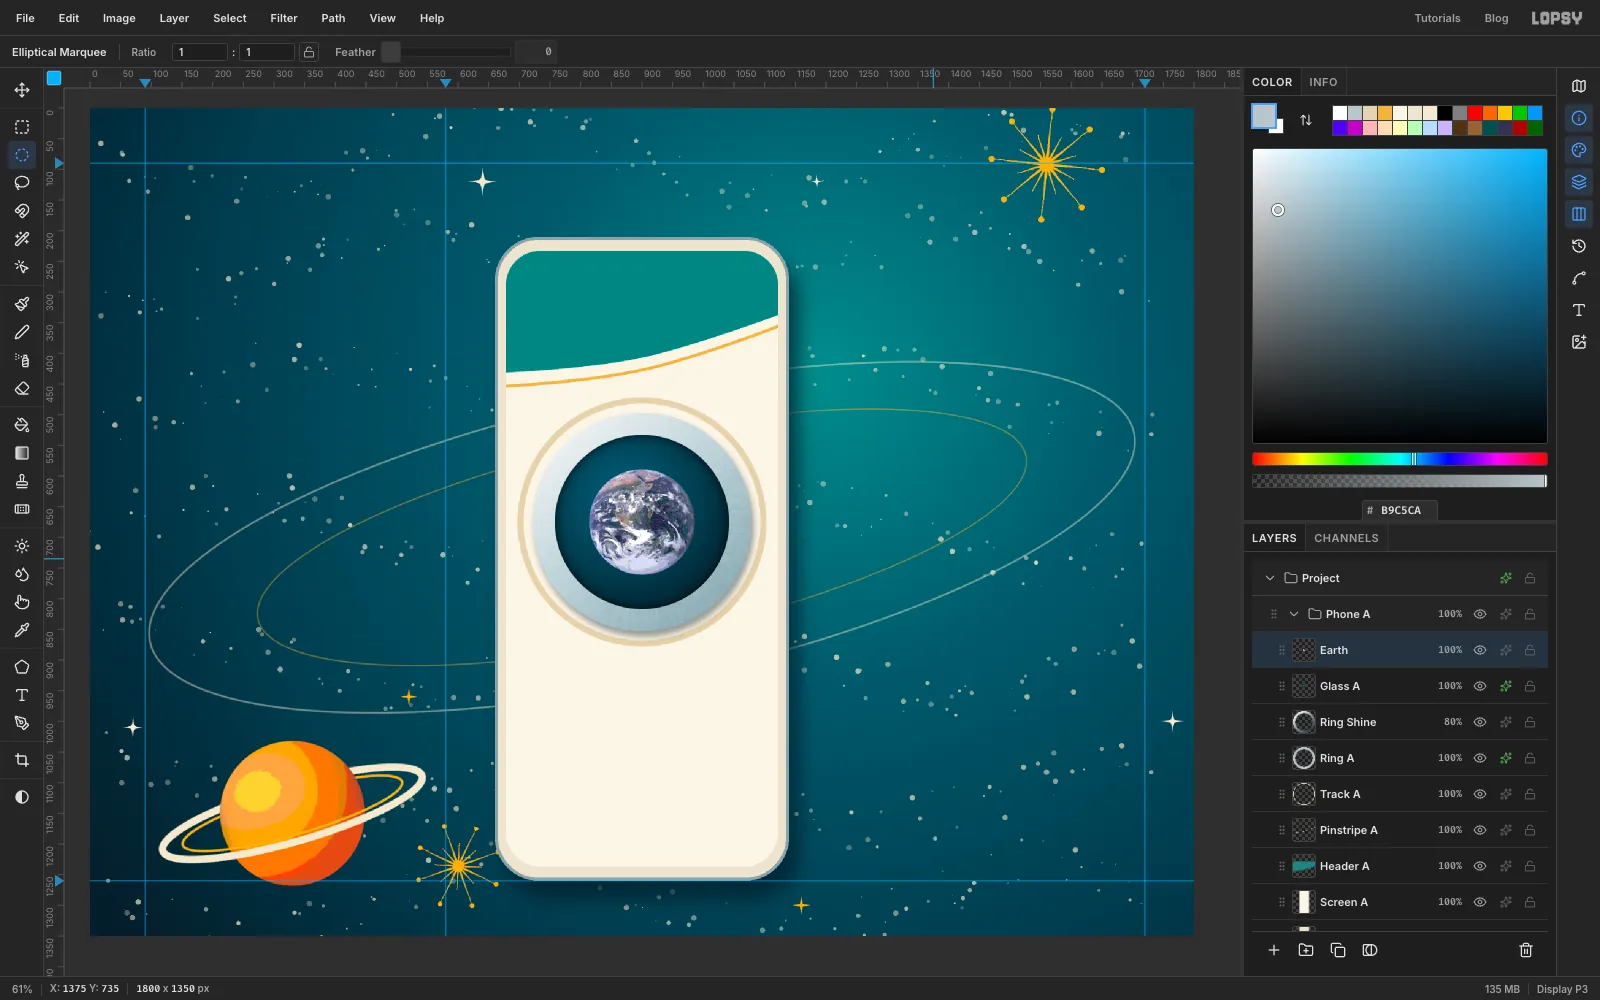
Drag the Earth to the middle of the porthole, and use the arrow keys for the last few pixels. Draw a 172 px circle marquee on the canvas centre (From 814, 589 To 986, 761), choose Select → Inverse and press Delete. That removes the black space around the planet. Deselect.
Then make it match the illustration:
- Filter → Hue/Saturation…: Saturation +25.
- Filter → Posterize…: Levels 8.
The photo flattens into a handful of flat blues and creams, like a printed postcard.
-
Float socks and droplets around the Earth
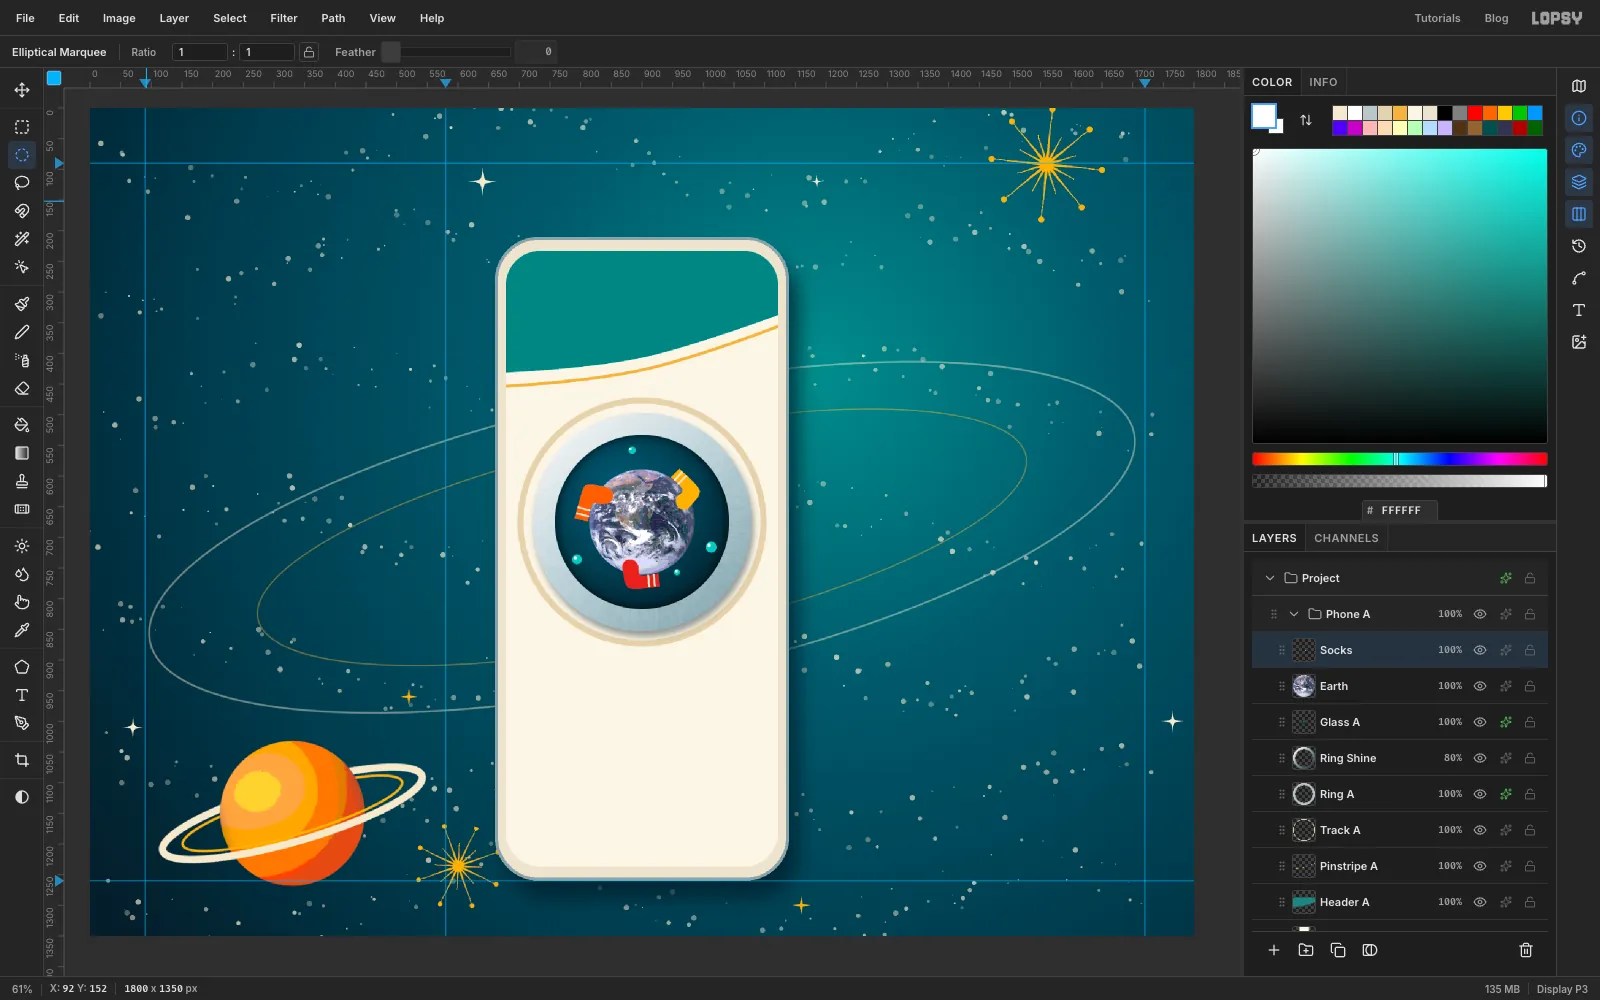
Add a layer called Socks. In zero gravity, the laundry doesn't tumble at the bottom of the drum. It floats. Draw three L-shaped socks around the Earth with the Pen, each about 55 px from cuff to toe:
- Click the two corners of the open cuff, about 22 px apart.
- Press and drag a short way along the back of the leg, about 40 px down from the cuff.
- Drag round the heel, then along the sole.
- Drag round the toe, then back along the top of the foot.
- Drag at the instep, where the foot meets the leg.
- Click the first anchor to close the shape.
Turn each sock so it lies along the circle around the Earth, as if it's orbiting.
For each sock, use Path to Selection, fill it (orange , mustard , red ), and delete the path. Then, with a hard 4 px cream brush, drag two short stripes across each cuff. Set Taper back to 0 in the Brushes panel first, or the stripes come out as wedges.
Scatter four droplets between the socks: aqua circles of 10 to 18 px, each with a small white highlight circle near its top-left.
-
Fling the socks with Radial Blur
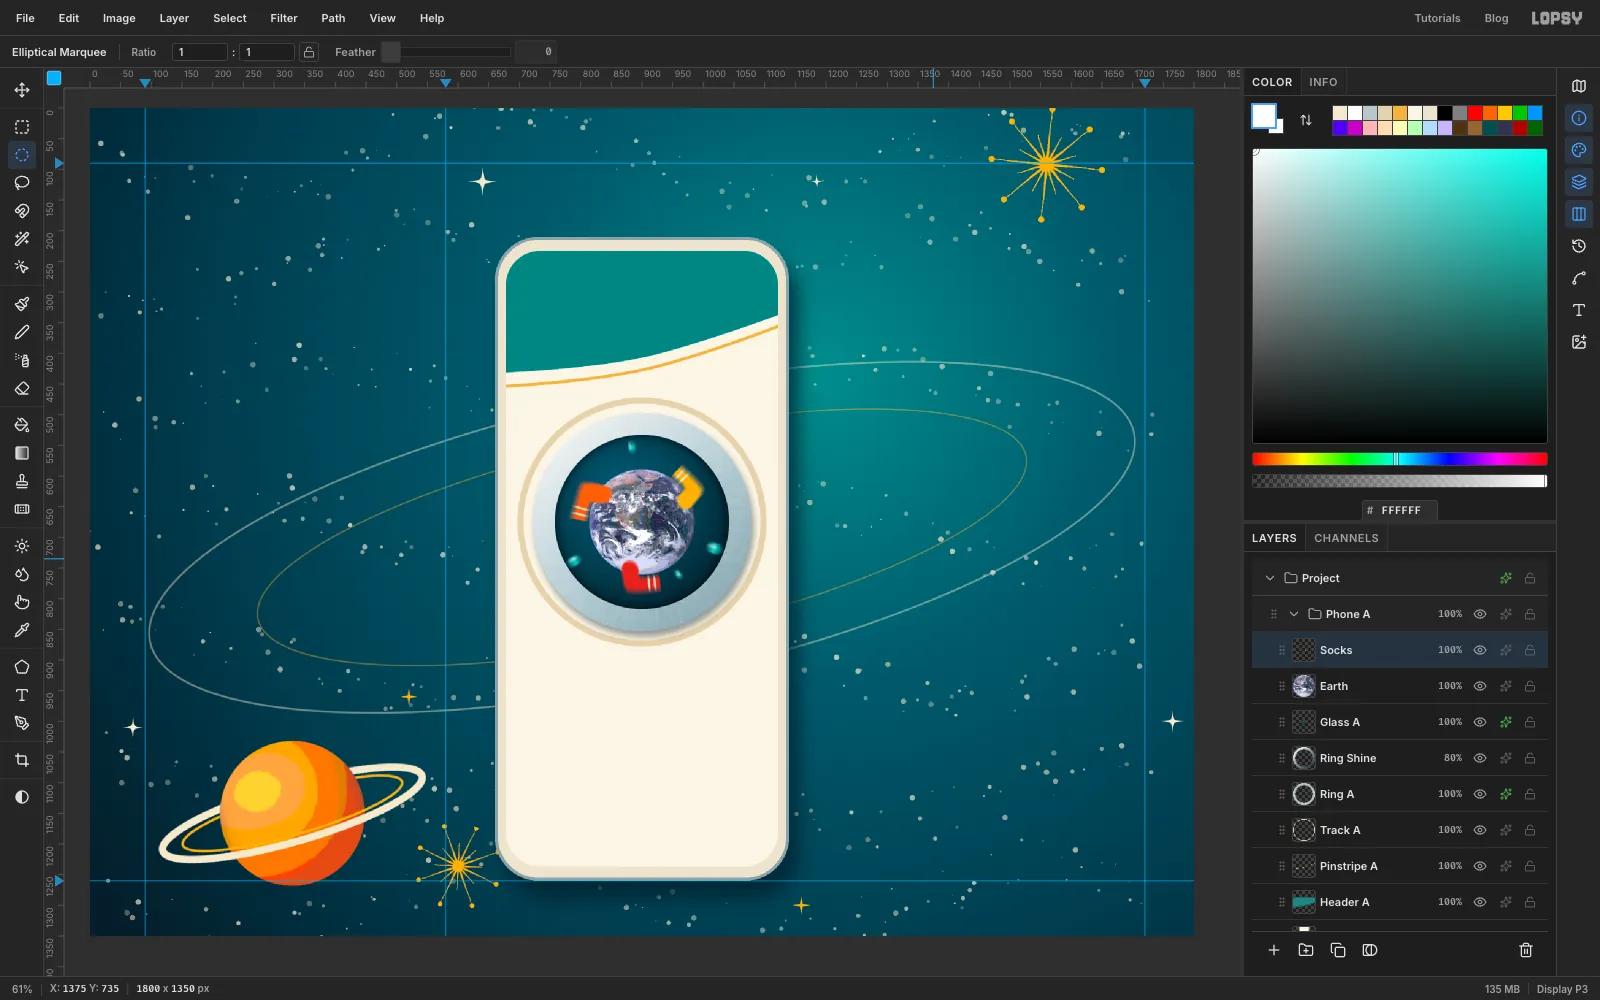
Choose Filter → Radial Blur… with Amount 5. Radial Blur is a zoom blur. It smears every pixel along the line towards the canvas centre, and the porthole sits right on that centre. So the socks streak straight out from the Earth, as if the spin is flinging them against the drum. A low Amount keeps them readable.
-
Add glass shine and a progress arc
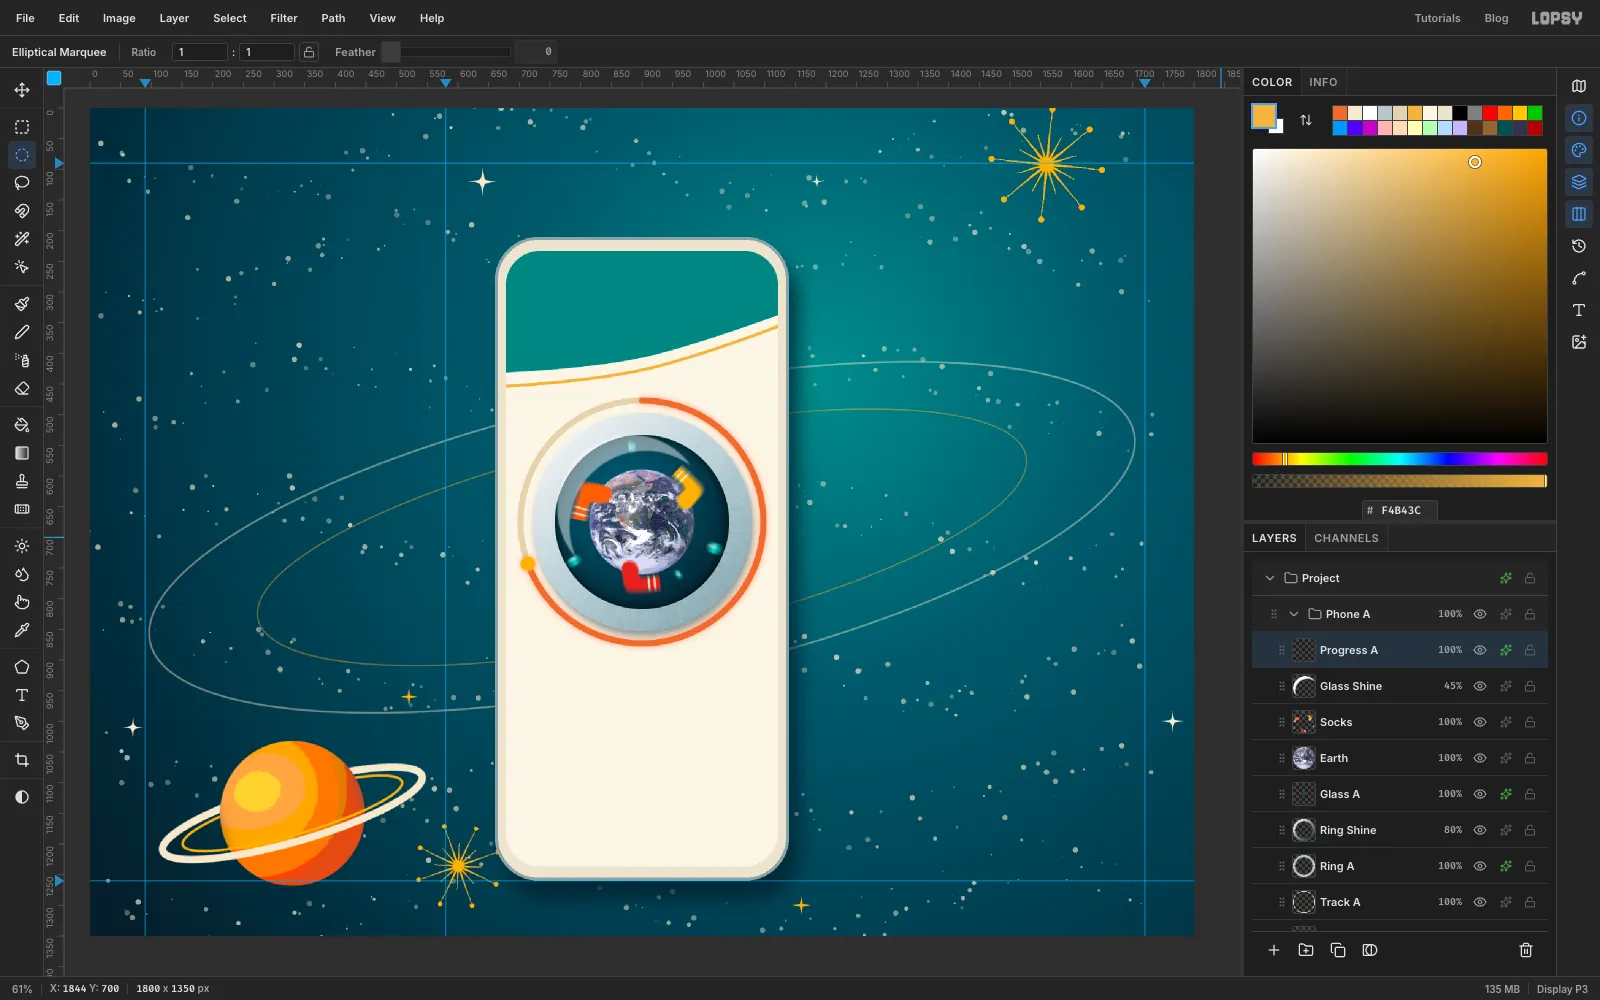
Glass shine. Add a layer called Glass Shine. Draw a 240 px circle marquee centred 18 px left of and 22 px above the porthole's centre (From 762, 533 To 1002, 773) and fill it white. Deselect, then draw a 248 px circle centred 6 px right of and 8 px below the centre (From 782, 559 To 1030, 807) and press Delete. A thin crescent is left at the upper-left. Deselect, run Gaussian Blur with Radius 3, and set the layer to Screen at 45%.
Progress arc. Add a layer called Progress A and set the foreground to atomic orange. Set the Pen's Stroke to 10. Start at the top of the beige track and work clockwise around it to about eight o'clock. At each step, press on the track and drag a little along it, so the curve hugs the circle. Six points is plenty. Press Enter to stroke the path, then delete it.
Draw a 24 px mustard dot at the end of the arc. Give the layer an Outer Glow: orange, Size 14, Opacity 60.
-
Add the controls, status bar and home indicator
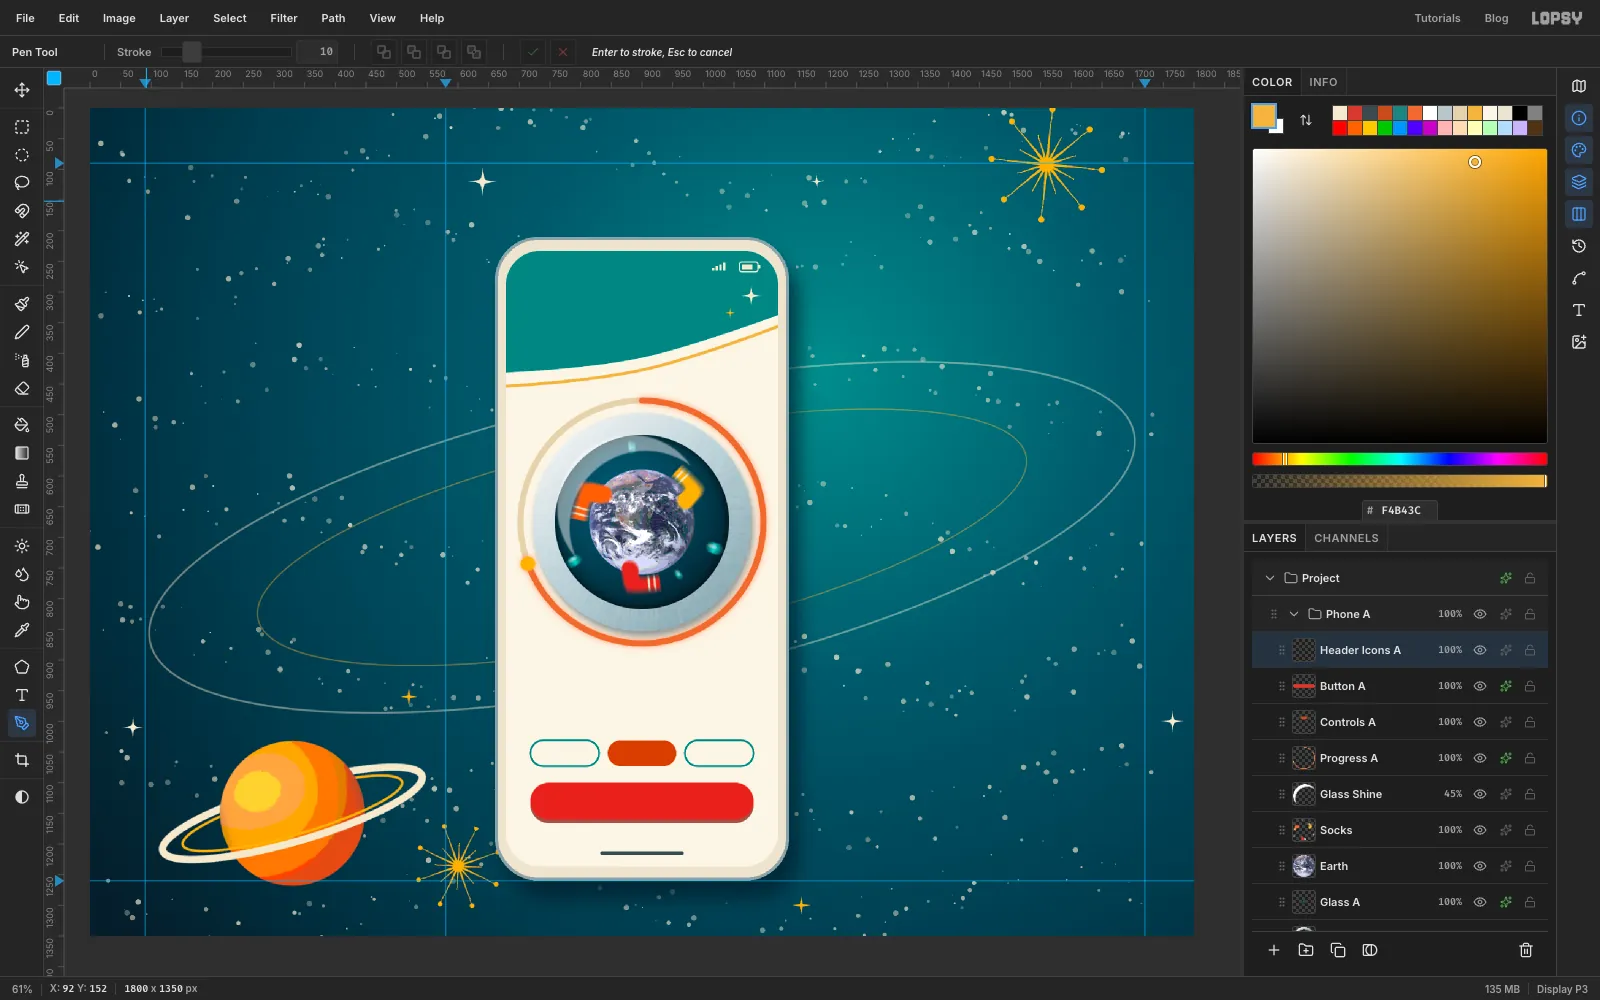
Add a layer called Controls A. With the Shape tool on Rectangle, Corner Radius 21:
- two outlined chips, 112 × 42, with no fill and a teal 3 px stroke, centred at x 774 and x 1026 (y 1052)
- a filled chip between them, burnt orange with no stroke
The chips span the same width as the button below, so the screen keeps one left and right margin.
On the same layer, draw a 136 × 6 pill in near the bottom of the screen. That's the home indicator.
Add a layer called Button A: a 364 × 60 pill, Corner Radius 30, rocket red , centred at y 1130. Give it a hard Drop Shadow: , Offset Y 6, Blur 0, Opacity 75. It looks like a chunky push-button.
Add a layer called Header Icons A for the status bar's right-hand side, all in cream:
- Signal bars: four tiny rectangle marquees getting taller, each filled.
- Battery: a 30 × 15 outlined rectangle (stroke 2, radius 4), with a fill bar and a nub.
- Sparkles: two small Pen sparkles in the header, one cream and one mustard.
-
Set the first screen's type
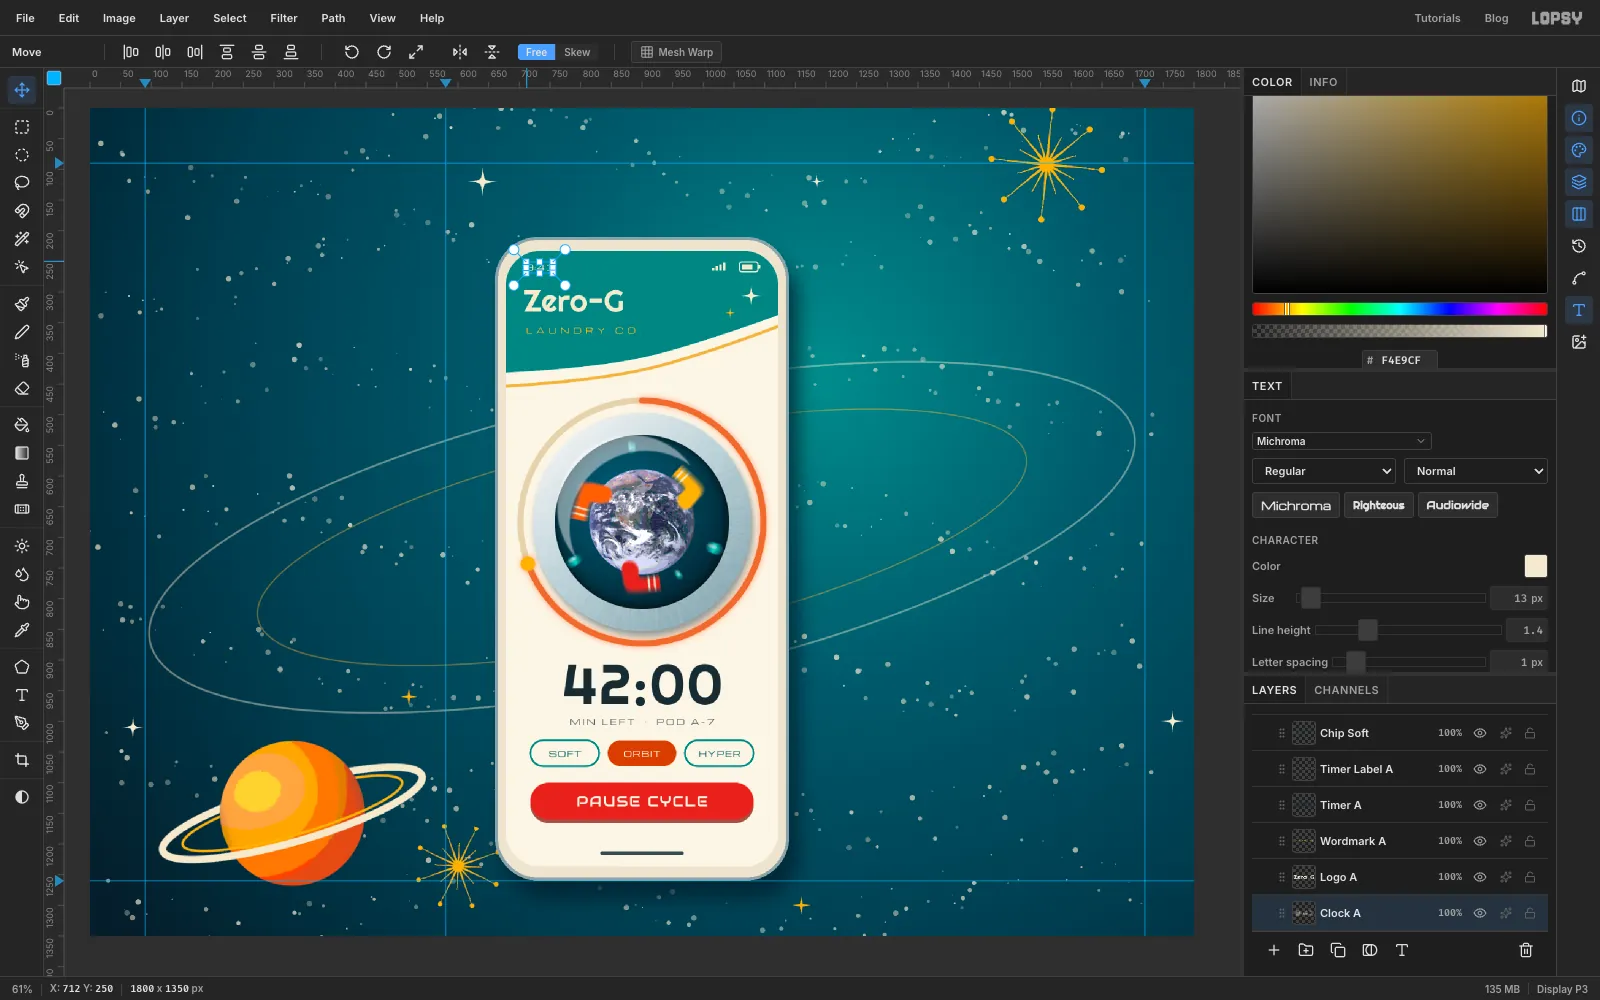
Click Header Icons A first. New text then lands above it, inside the group. It also means changing the font won't restyle a text layer you've already made, because a raster layer is active. Pick the Text tool and click roughly where each line goes. Then switch to the Move tool and nudge it into its slot with the arrow keys:
- 9:41: Michroma 13, cream, left side of the status bar
- Zero-G: Righteous 50, cream, top-left of the header
- LAUNDRY CO.: Michroma 13, mustard, Letter spacing 6, under the logo
- 42:00: Righteous 92, ink , Letter spacing 2, centred under the porthole
- MIN LEFT · POD A-7: Michroma 13, , Letter spacing 3, centred under the timer
- SOFT, ORBIT, HYPER: Michroma 13, centred in each chip. Use deep teal on the outlined chips and ivory on the filled one.
- PAUSE CYCLE: Audiowide 24, ivory, Letter spacing 2, centred on the button
Work from the bottom of the screen up. A text-tool click inside an existing line of text edits that text instead of starting a new one, and starting at the bottom keeps your clicks clear of the lines you've already set.
Check each label's centring by eye against its pill. Caps have no descenders, so centre the cap height, not the line box.
-
Move the whole phone into place
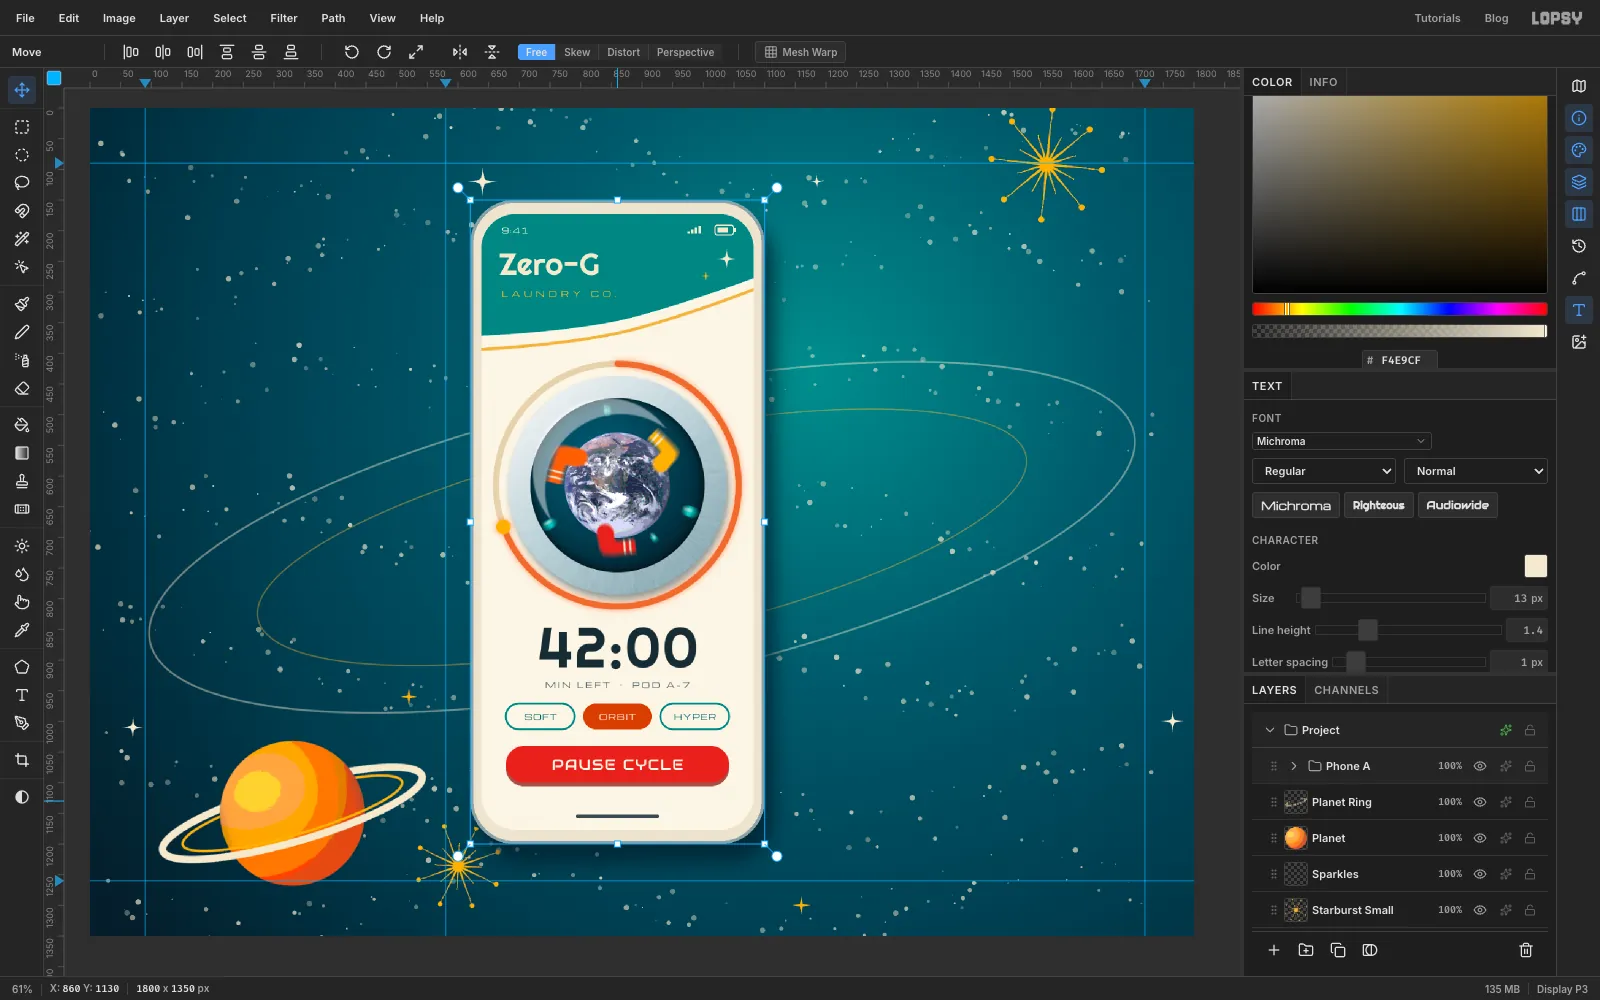
Collapse the Phone A group and click its row. With the Move tool and no marquee, drag anywhere on the phone 60 px up and 40 px left. For an exact move, use the arrow keys instead: Shift+Up six times and Shift+Left four times, 10 px per press. Every layer inside moves together, live text and effects included. The porthole now sits a little above the screen's middle, which leaves the controls breathing room at the bottom.
-
Start the second phone
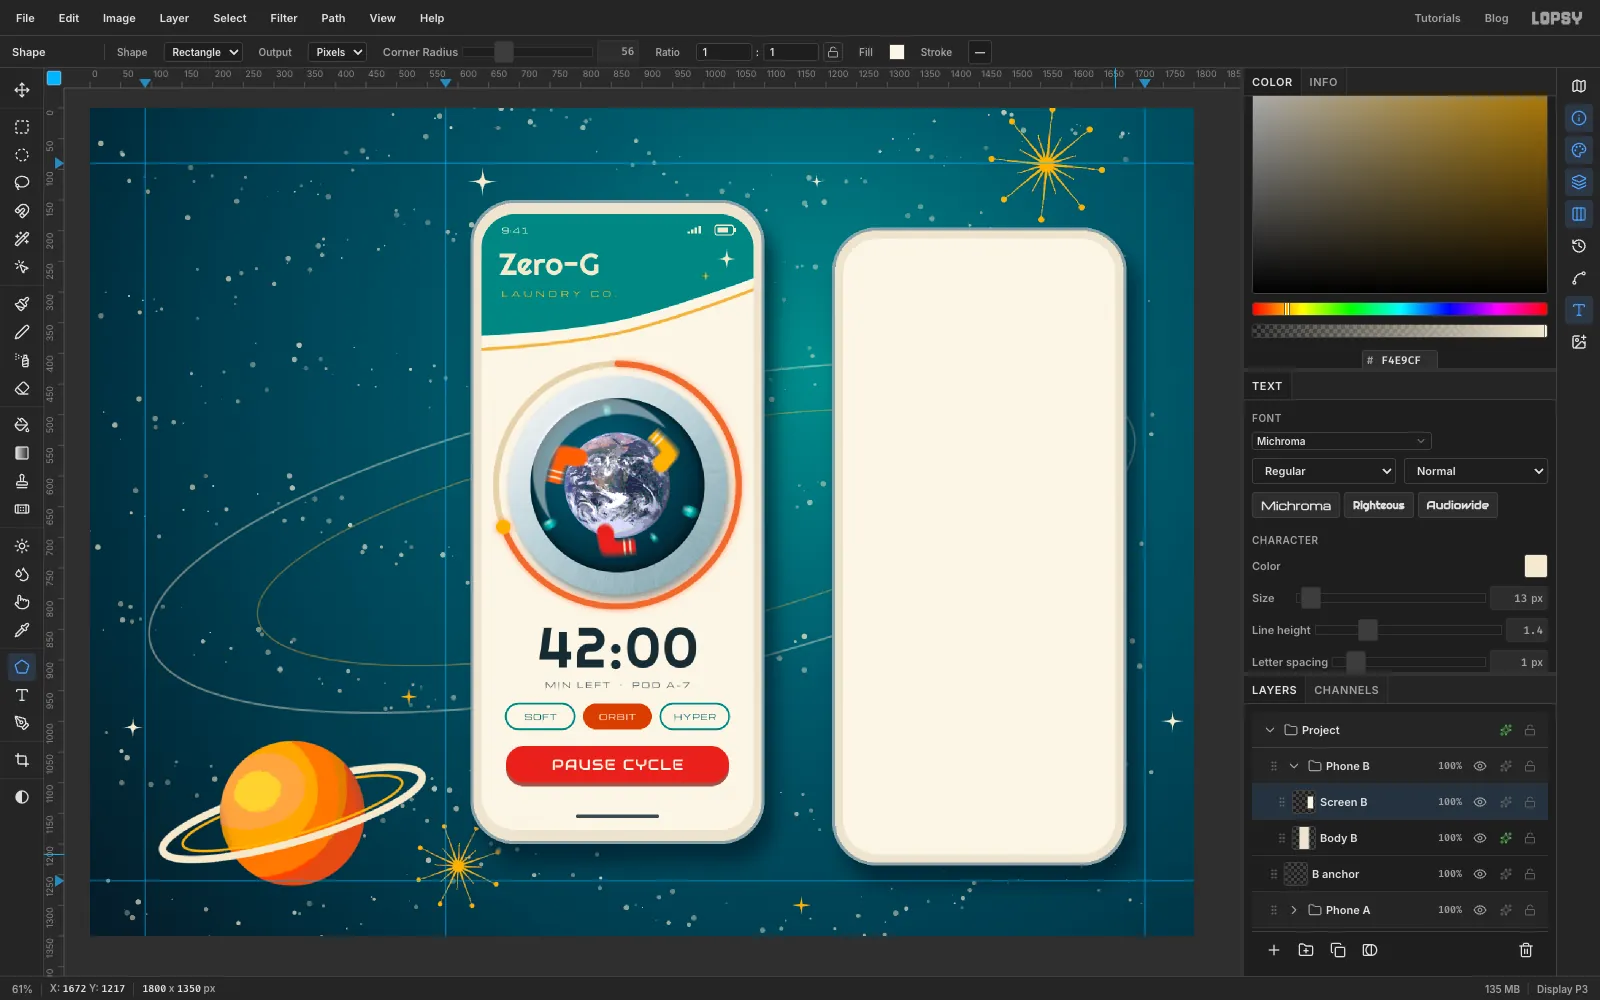
With the collapsed Phone A row active, click Add Layer. A collapsed group as the active row puts the new layer beside it, not inside it. With that spare layer active, click New Group and name it Phone B. The group lands on the top level next to Phone A. You'll delete the spare layer at the end.
Inside the new group, build the same body and screen as before, centred at x 1450, y 715: Body B with the same Drop Shadow and Stroke, and Screen B.
-
Mirror the header swoop
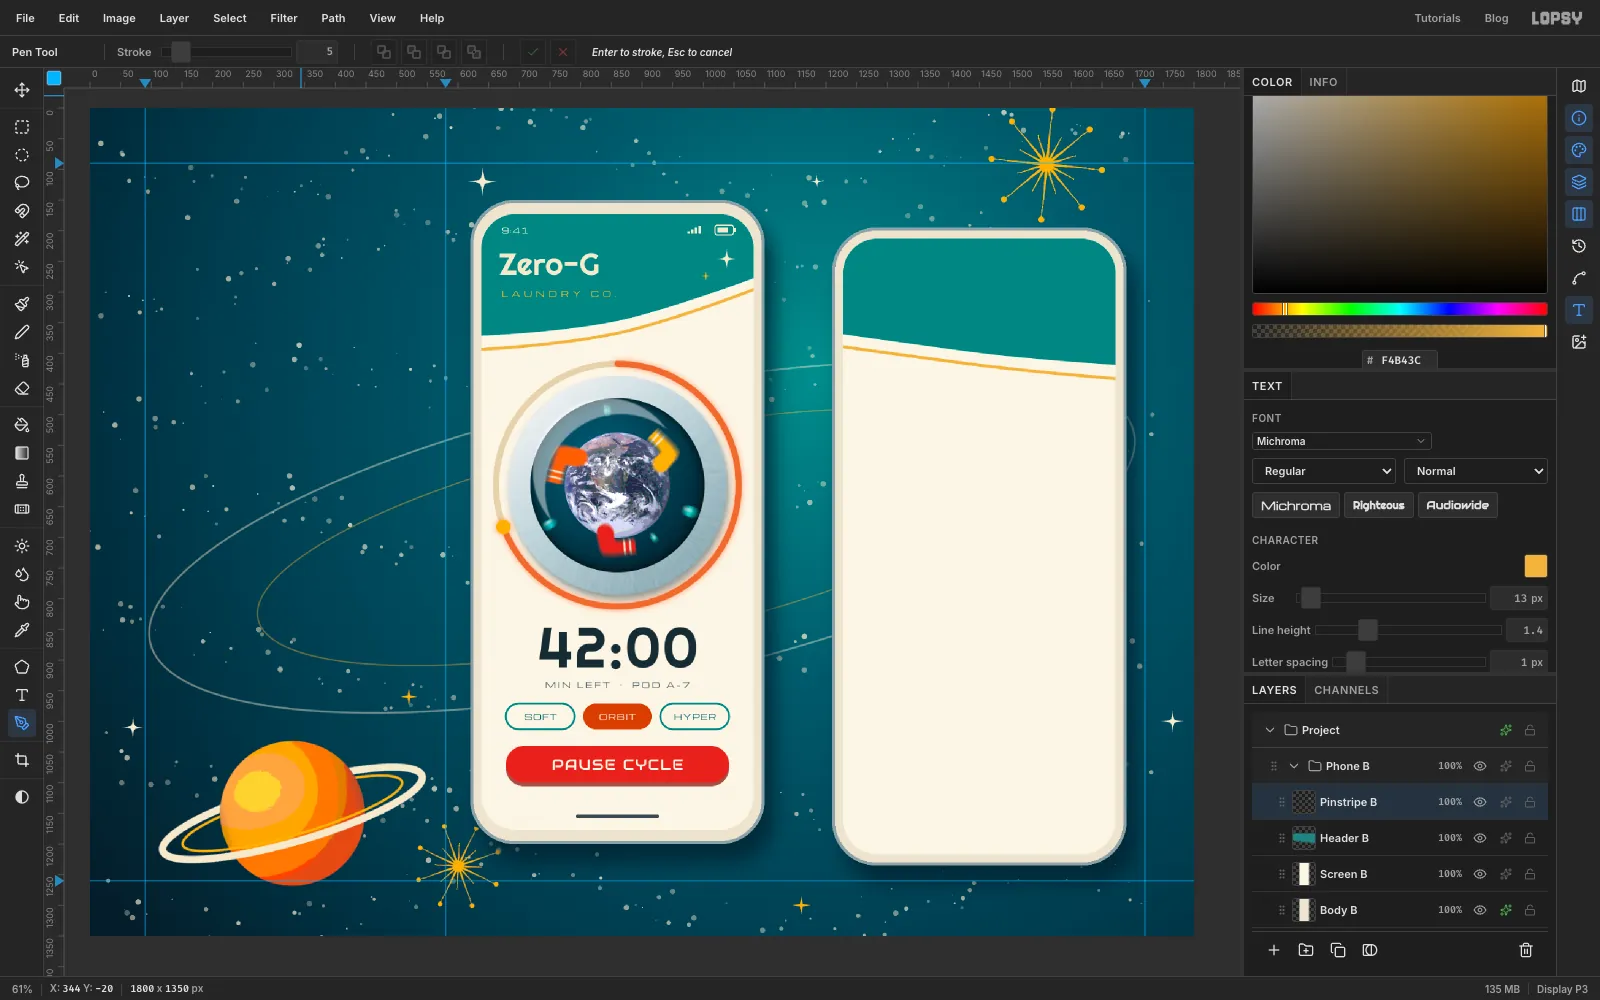
Draw Header B and Pinstripe B the same way as the first phone, but mirror the swoop: high on the left (about y 366), low on the right (about y 420). The two screens then lean towards each other like a pair of wings. Trim both to Screen B with Cmd-click, Inverse and Delete.
-
Build an atom icon from one ellipse
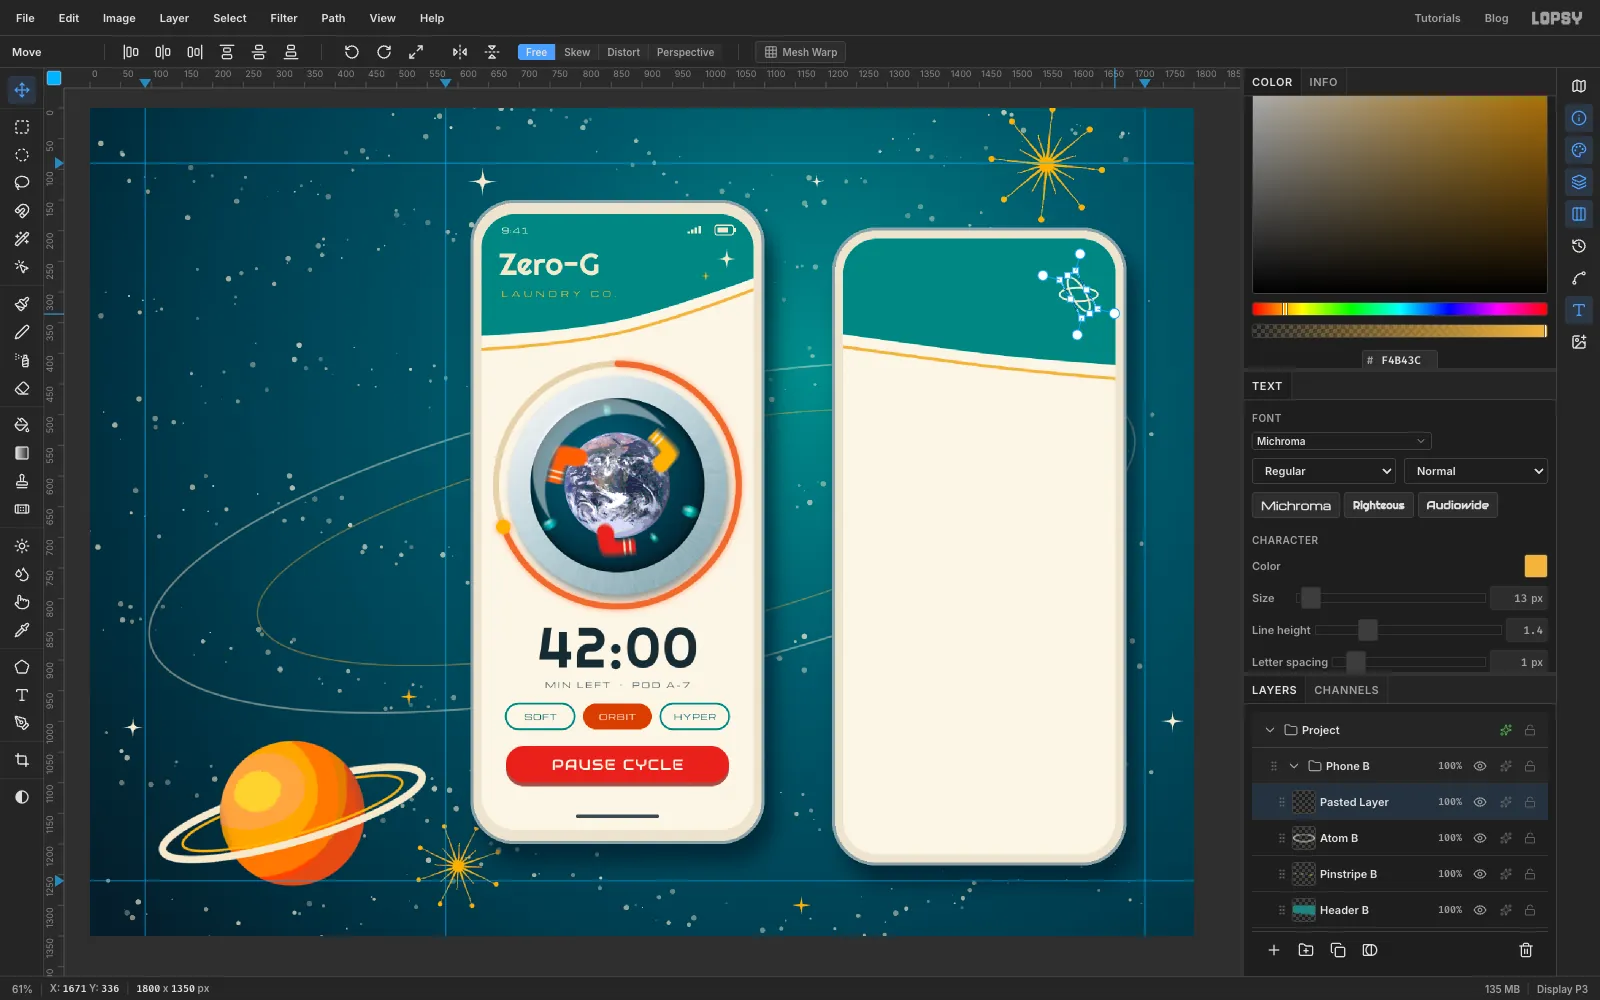
Add a layer called Atom B. Draw one cream outlined ellipse, 62 × 22 with a 3 px stroke, on the right of the header (about x 1612, y 304).
Draw a marquee around it and press Cmd+C, then Cmd+V. The copy pastes in place on a new layer, selected and with the Move tool active. Drag a rotate handle to turn it 60°, press Enter, deselect, and choose Layer → Merge Down. Press Cmd+V again: the clipboard still holds the flat ellipse. Turn this copy −60°, commit, deselect and merge down. Three crossed orbits make the classic atom. Finish with a 12 px mustard dot in the middle.
-
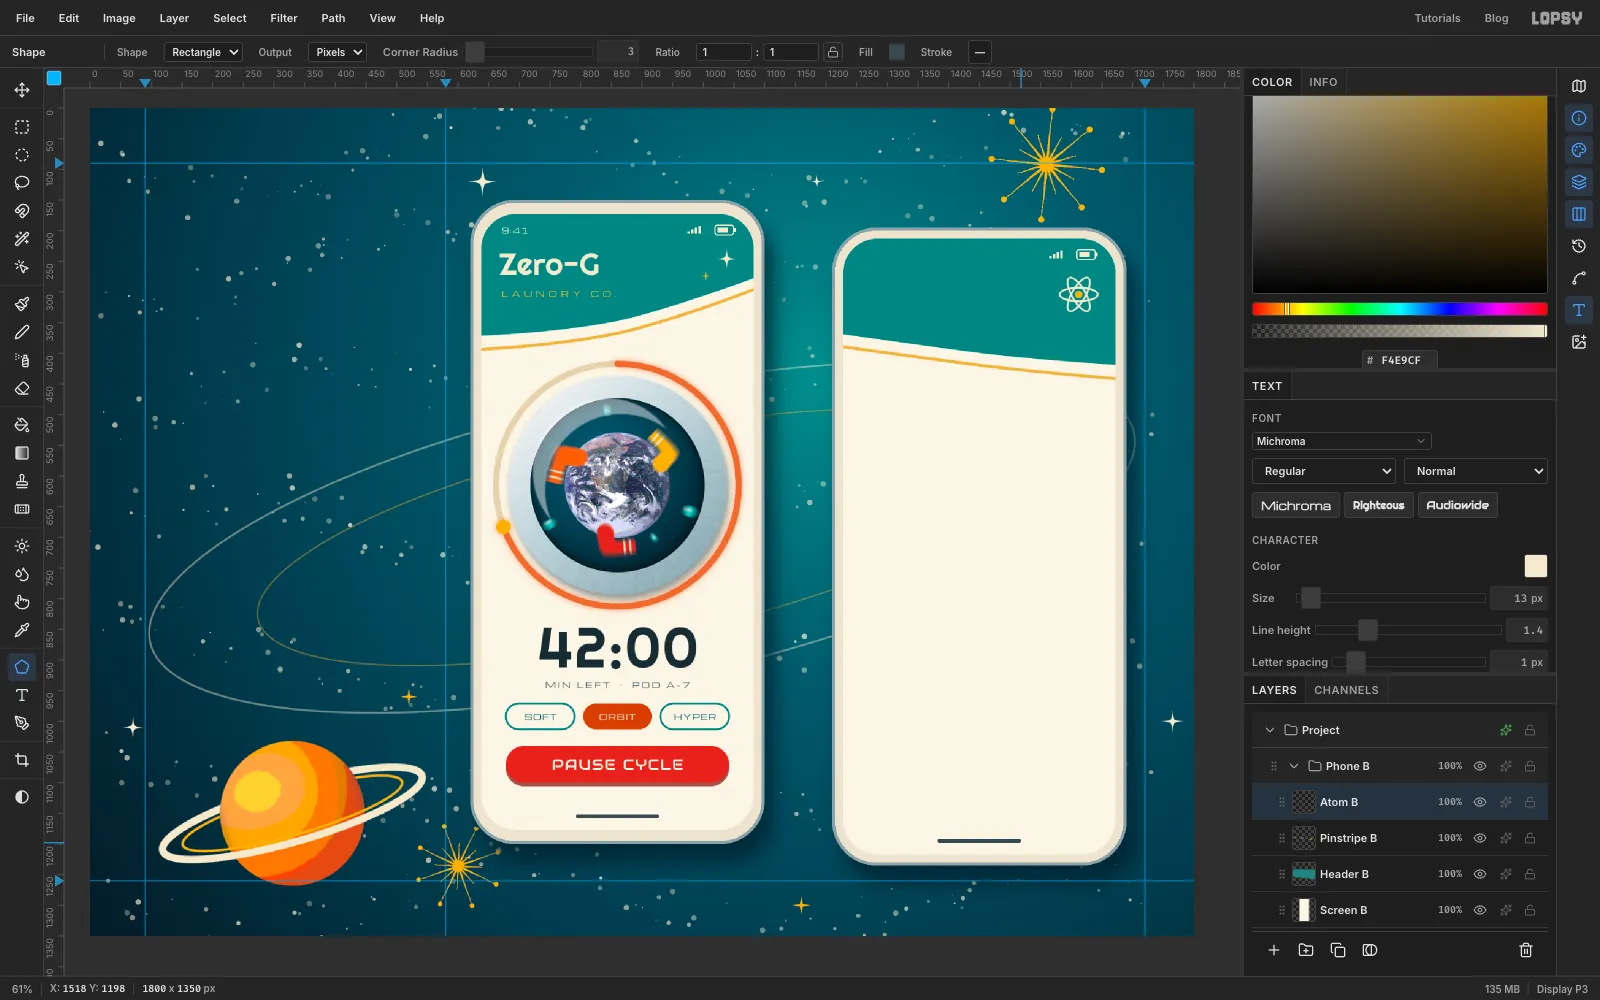
Add the status bar to the second phone
On the same Atom B layer, draw the signal bars, battery and home indicator the same way you did for the first phone.
-
Lay out the pod cards
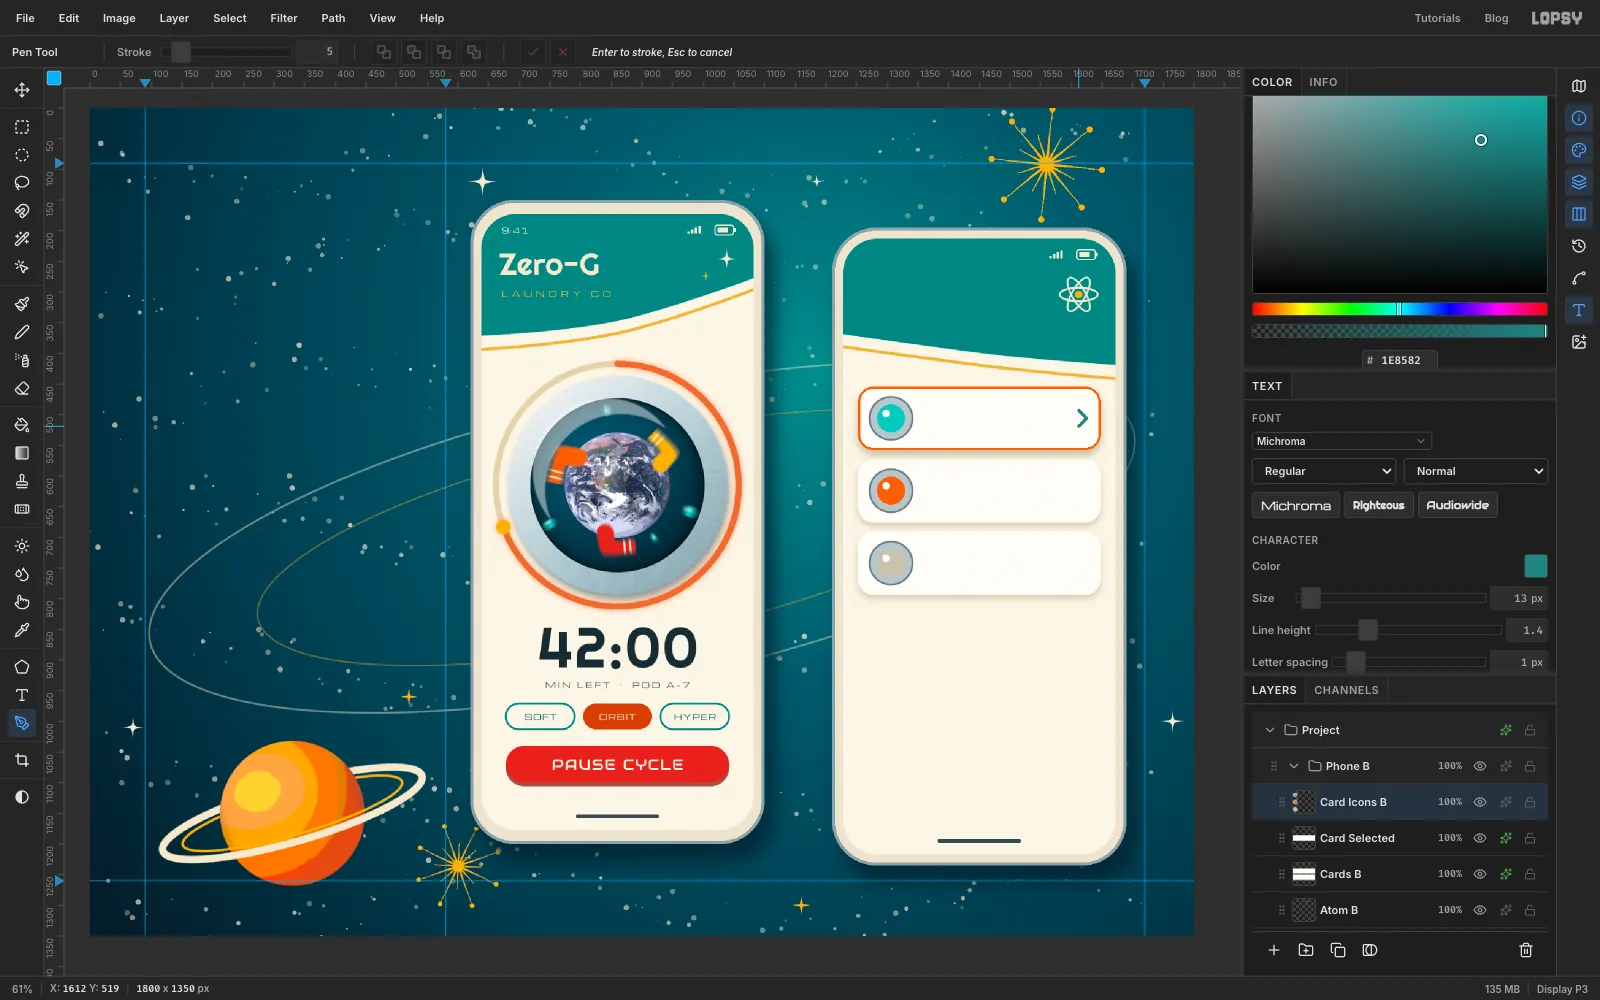
Add a layer called Cards B. Draw two rounded rectangles, 396 × 104, Corner Radius 26, fill , centred at y 624 and y 742. Give the layer a soft Drop Shadow: , Offset Y 6, Blur 16, Opacity 35.
The selected card goes on its own layer, Card Selected, at y 506, so it can have its own effects. Use the same shadow, slightly stronger (Offset Y 8, Blur 18, Opacity 45), plus an orange Stroke of 4 px, position inside.
Add a layer called Card Icons B. On the left of each card draw a mini porthole:
- a 70 px chrome circle with a steel 3 px stroke
- a 46 px coloured glass on top: aqua for free, orange for busy, warm grey for out of service
- a 12 px white highlight near the top-left
Draw a teal chevron on the selected card with the Pen: three clicks and Enter at Stroke 5.
-
Draw the gauge arcs
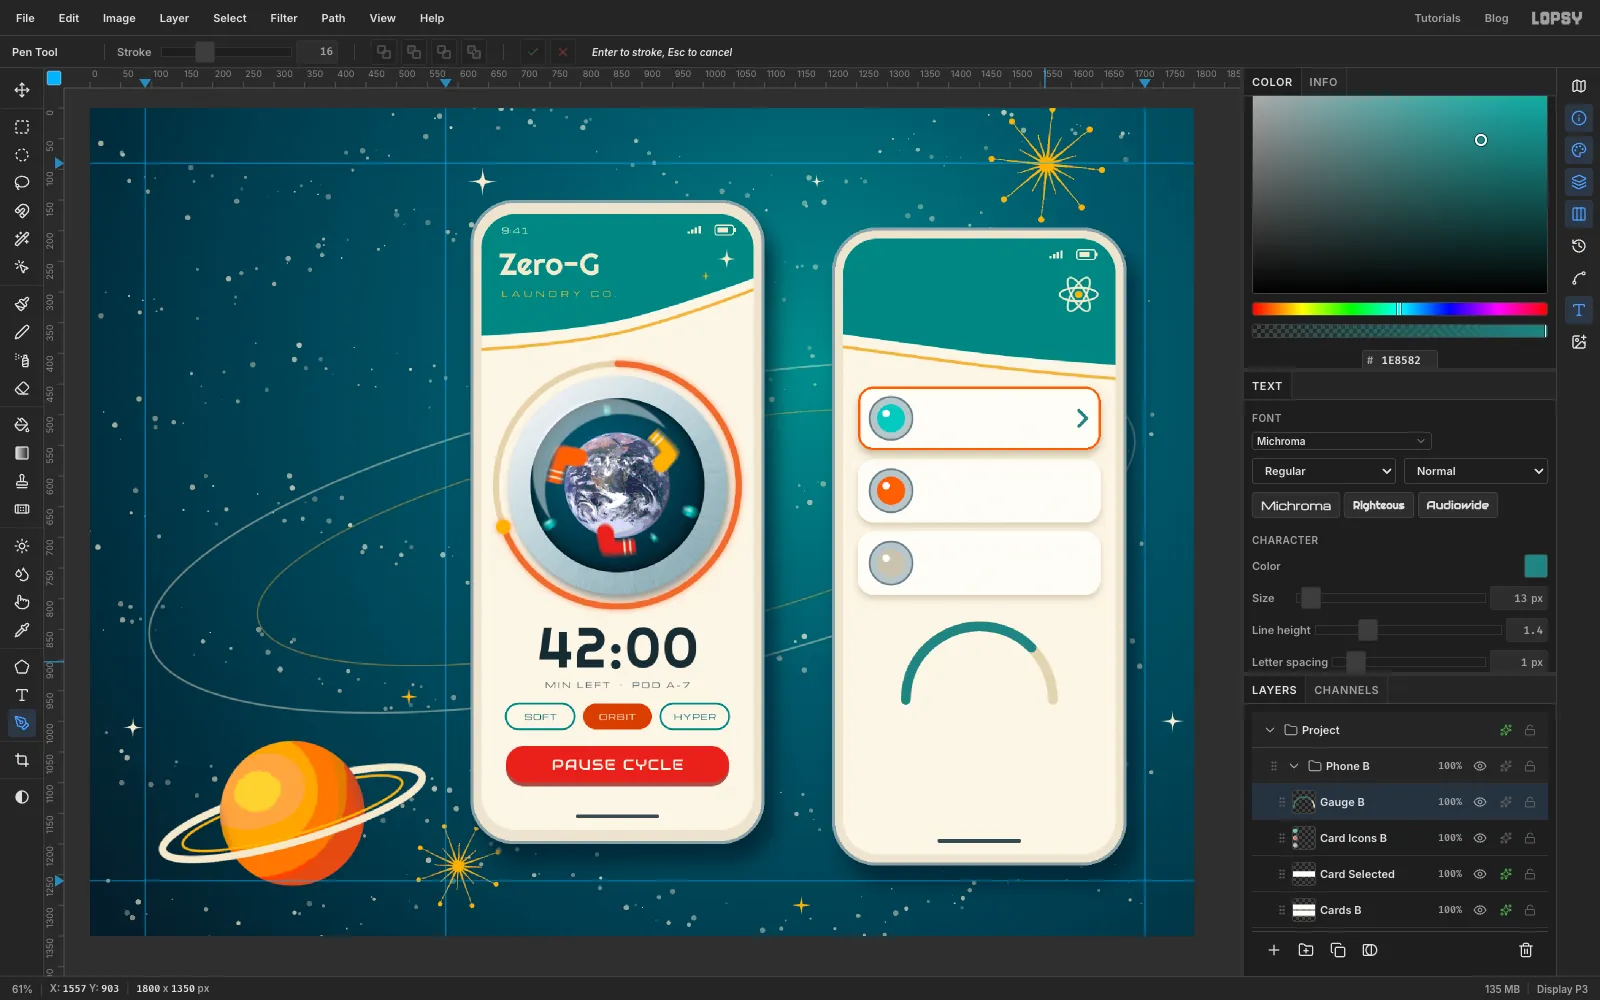
Add a layer called Gauge B. The dial's hub sits at x 1450, y 965, and its radius is 120.
Set the Pen's Stroke to 16 and the foreground to track beige. Draw the top half of a circle with three anchors:
- At the left end (x 1330, y 965), press and drag straight up about 66 px.
- At the top (x 1450, y 845), press and drag about 66 px to the right.
- At the right end (x 1570, y 965), press and drag straight down about 66 px.
Press Enter.
Switch to teal and draw a second arc over it, from the left end round to about half past one: three quarters of the half-circle, or 1200 out of 1600. Use four anchors this time, dragging each one a little along the curve. That's the current spin speed.
-
Tick the dial with Radial Symmetry
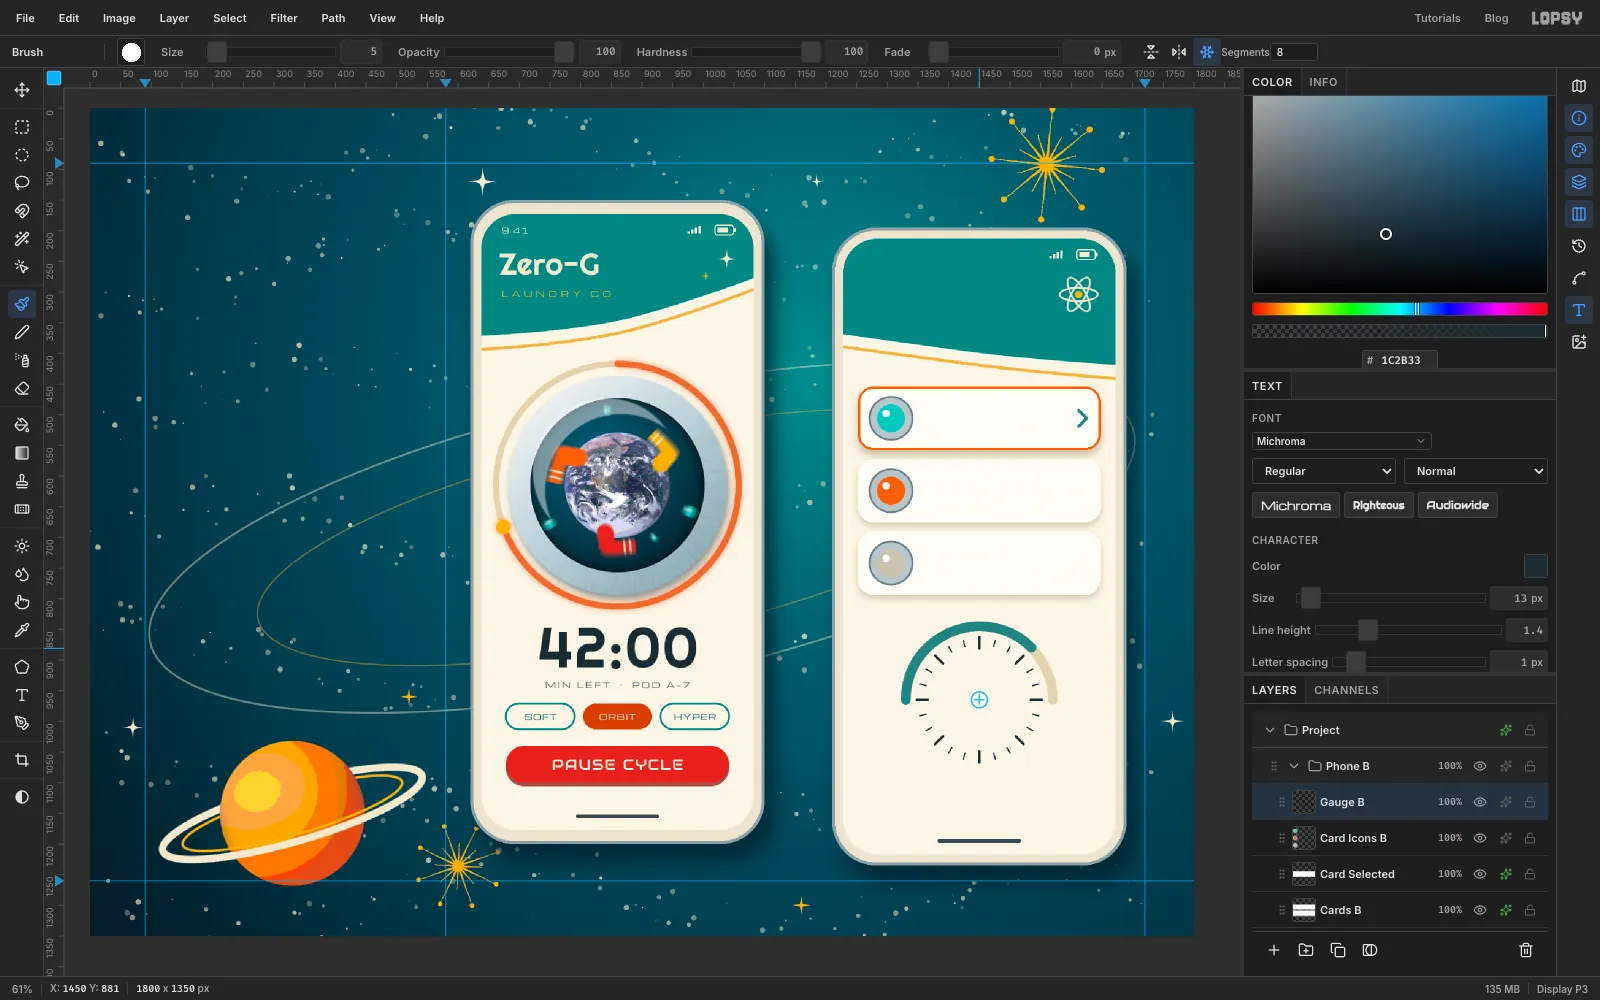
Set the foreground to ink and pick the Brush: hard, Size 3, with Taper 0 in the Brushes panel. In the options bar click Radial Symmetry. It switches on at 8 segments, so type 24 into Segments. Cmd-click the dial's hub to move the symmetry centre there.
Drag one 10 px tick straight down from just inside the top of the arc, from about 100 px above the hub to 90 px above it. Lopsy repeats it 24 times around the hub. Set Segments to 8 and the brush to Size 5, then drag one longer 18 px tick at the top. The symmetry centre stays on the hub. You get eight major ticks.
Turn Radial Symmetry off when you're done. Otherwise it keeps taking every Cmd-click.
-
Trim the ticks and add the needle
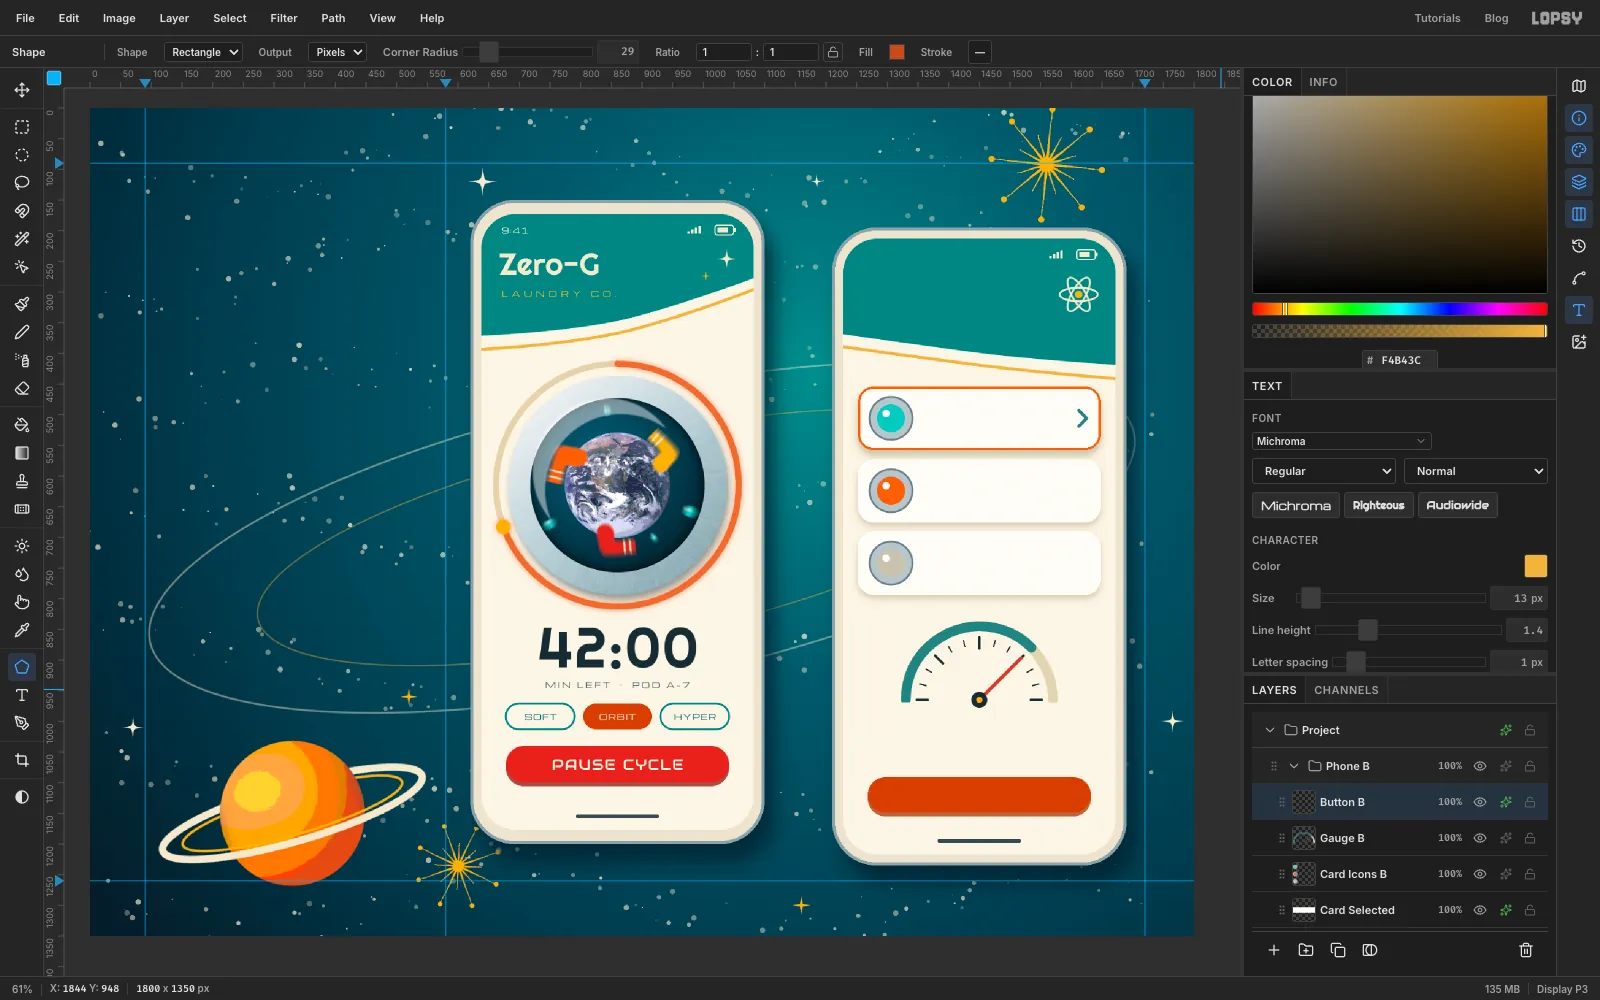
Draw a Rectangular Marquee over everything below the hub's centre line and press Delete. Only the top half of the ticks remains.
Draw the needle with the Pen at Stroke 6 in rocket red. Click the hub, then click about 96 px out from the hub towards the end of the teal arc, stopping just inside the ticks. Press Enter. Finish with a 26 px ink circle on the hub and a 10 px mustard dot in it.
On a new layer, Button B, draw a 364 × 58 burnt-orange pill near the bottom of the screen, with a hard Drop Shadow in .
-
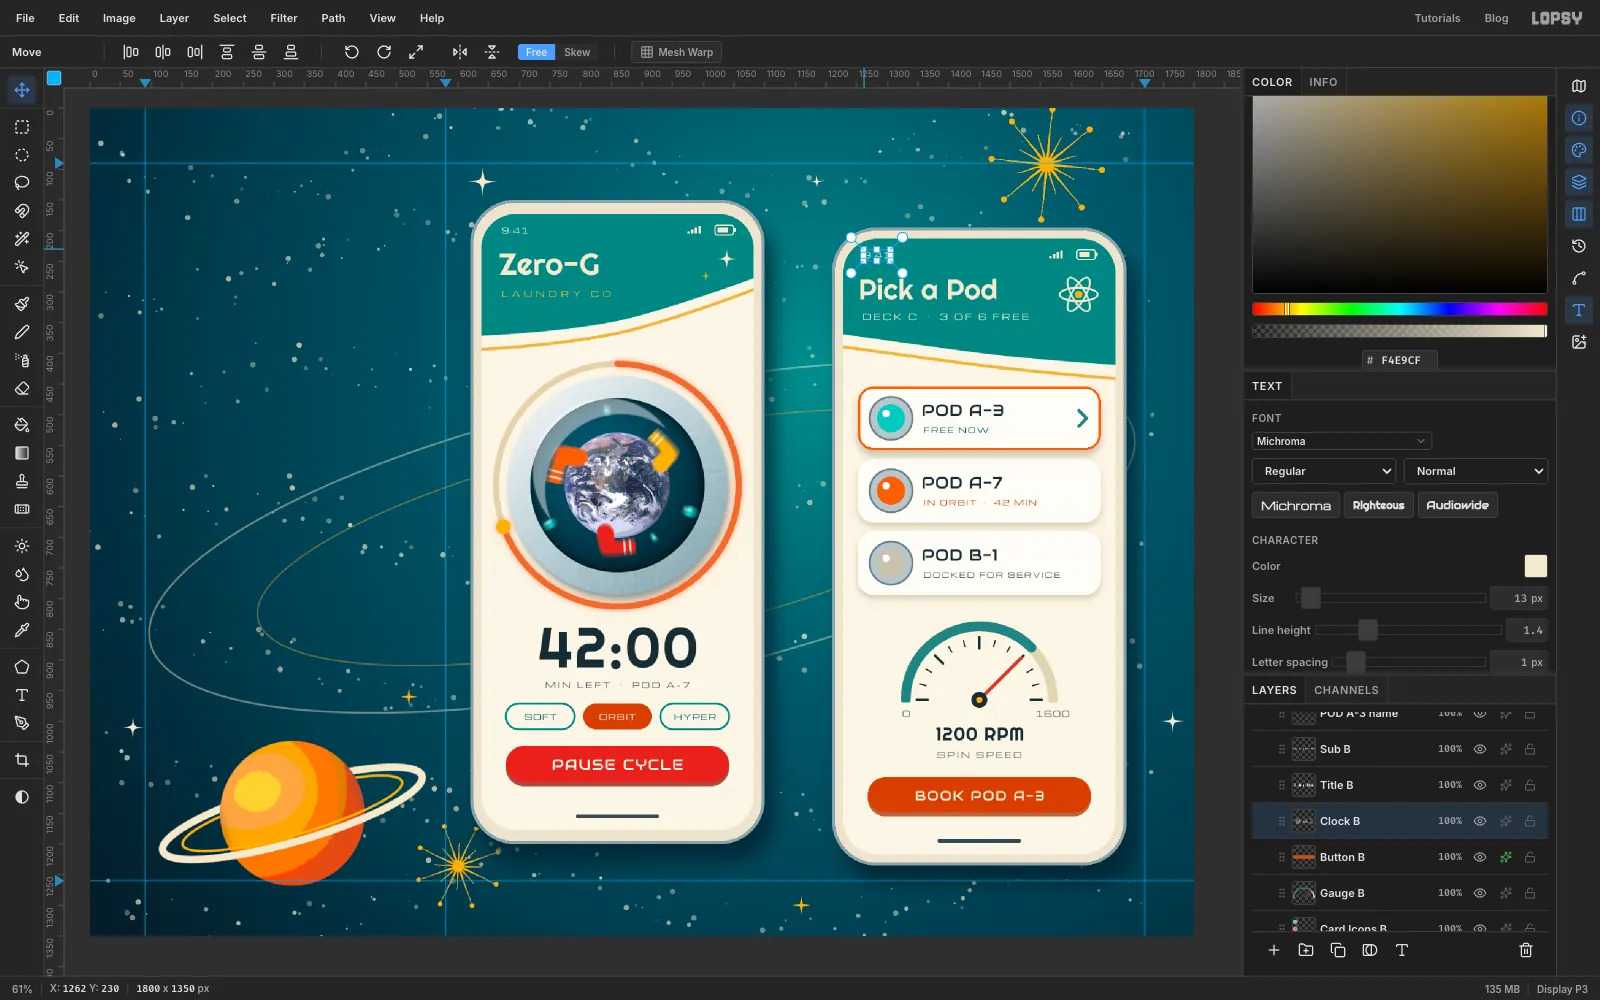
Set the second screen's type
Click Button B and set the type from the bottom of the screen up, nudging each line into place:
- BOOK POD A-3: Audiowide 22, ivory, Letter spacing 2, centred on the button
- SPIN SPEED: Michroma 13, , Letter spacing 3
- 1200 RPM: Righteous 30, ink. Leave clear space between it and the hub.
- 0 and 1600: Michroma 14, , centred under each end of the arc
- The status lines, Michroma 12 with Letter spacing 2, lined up under the pod names: FREE NOW in deep teal, IN ORBIT · 42 MIN in , DOCKED FOR SERVICE in
- POD A-3, POD A-7, POD B-1: Audiowide 26, ink, just right of each porthole
- DECK C · 3 OF 6 FREE: Michroma 14, cream, Letter spacing 3
- Pick a Pod: Righteous 46, cream
- 9:41: Michroma 13, cream
Line the pod names and status lines up on one left edge. The cards then read as a list.
-
Tilt the second phone
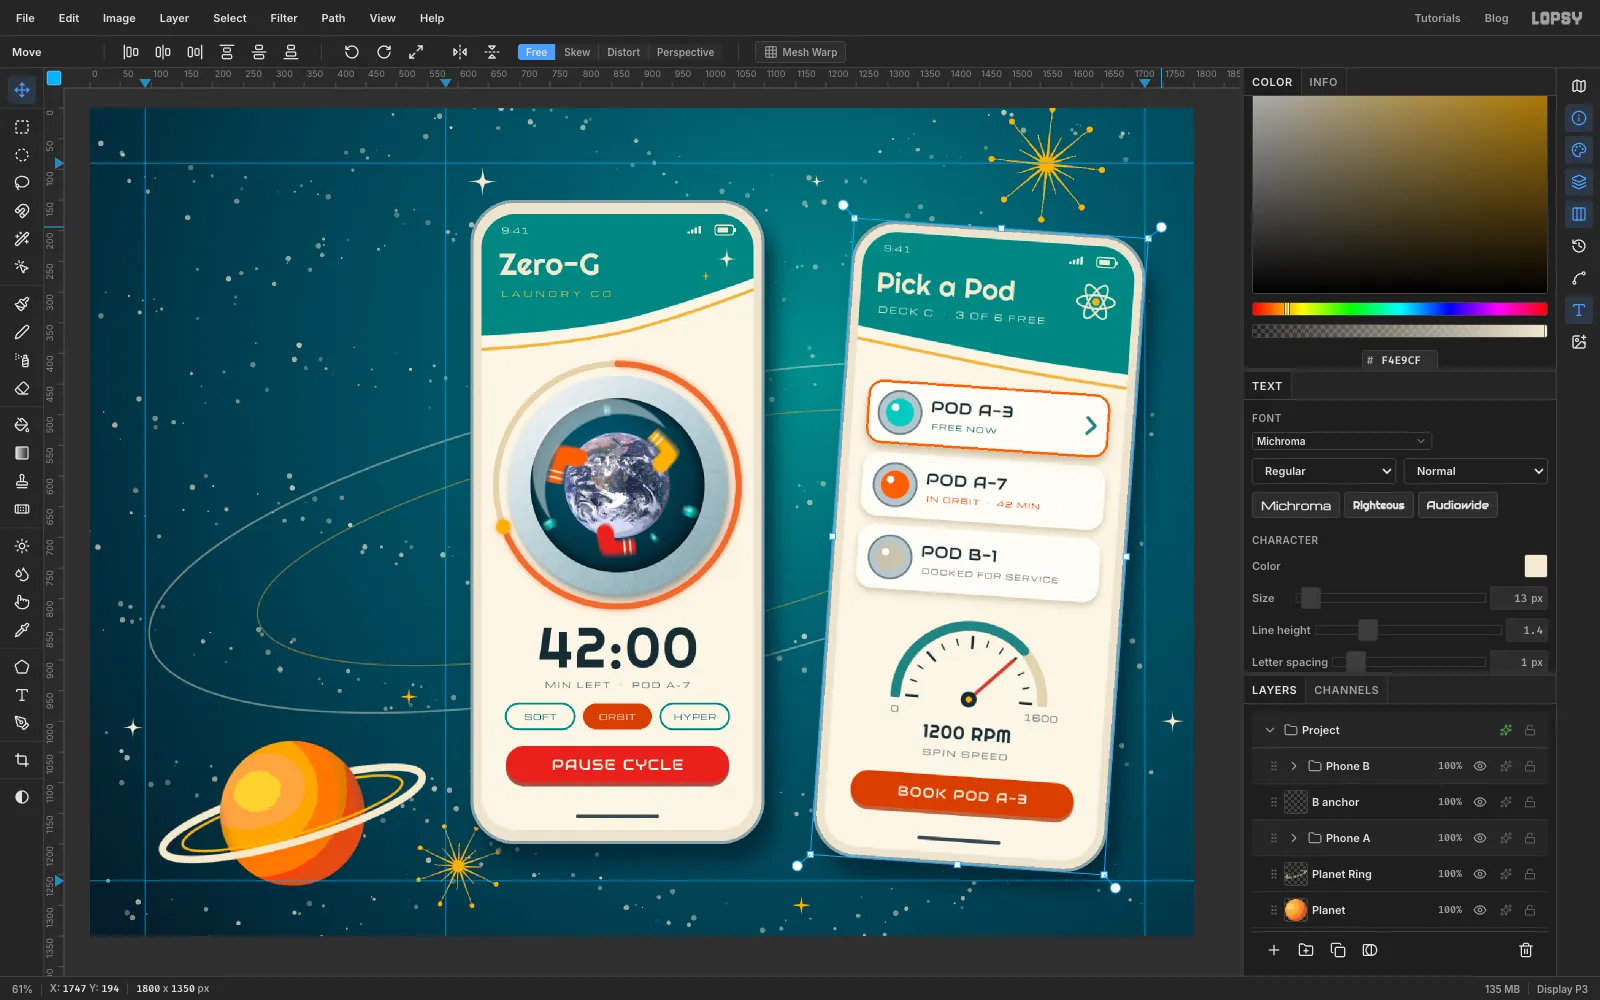
Collapse Phone B and click its row. With the Move tool and no marquee, drag a rotate handle about 4° clockwise and press Enter. The whole phone turns as one piece: shadows, strokes, live text and the dial. The small tilt makes the second phone feel like it's been tossed onto the table, and keeps the layout from looking like a spreadsheet.
-
Draw the left column's graphics
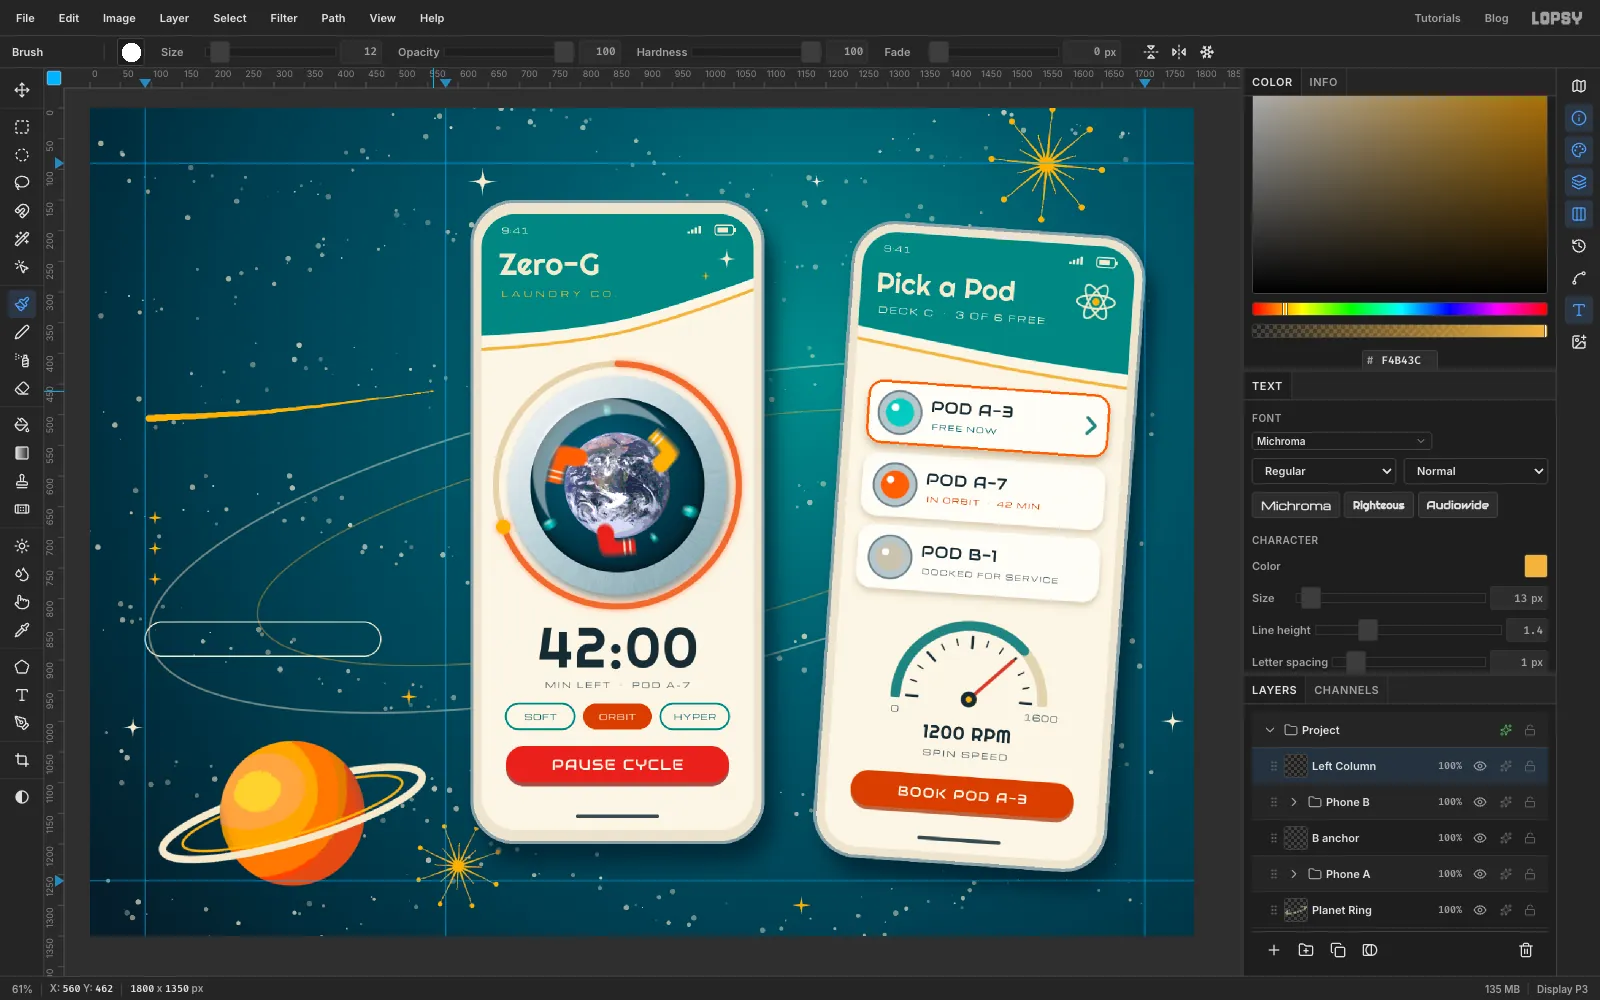
Click Phone B (still collapsed) and add a layer called Left Column. On it:
- three small mustard Pen sparkles as bullets, one above another at x 106, about 50 px apart
- an outlined pill with the Shape tool: 384 × 56, Corner Radius 28, no fill, cream 2 px stroke, under the bullets
- a speed swoosh: a hard mustard Brush at Size 12, with Taper 520 in the Brushes panel. Drag it once from the left margin to the column guide, rising gently to the right. It's thick where you start and thins to a point.
-
Set the headline and copy
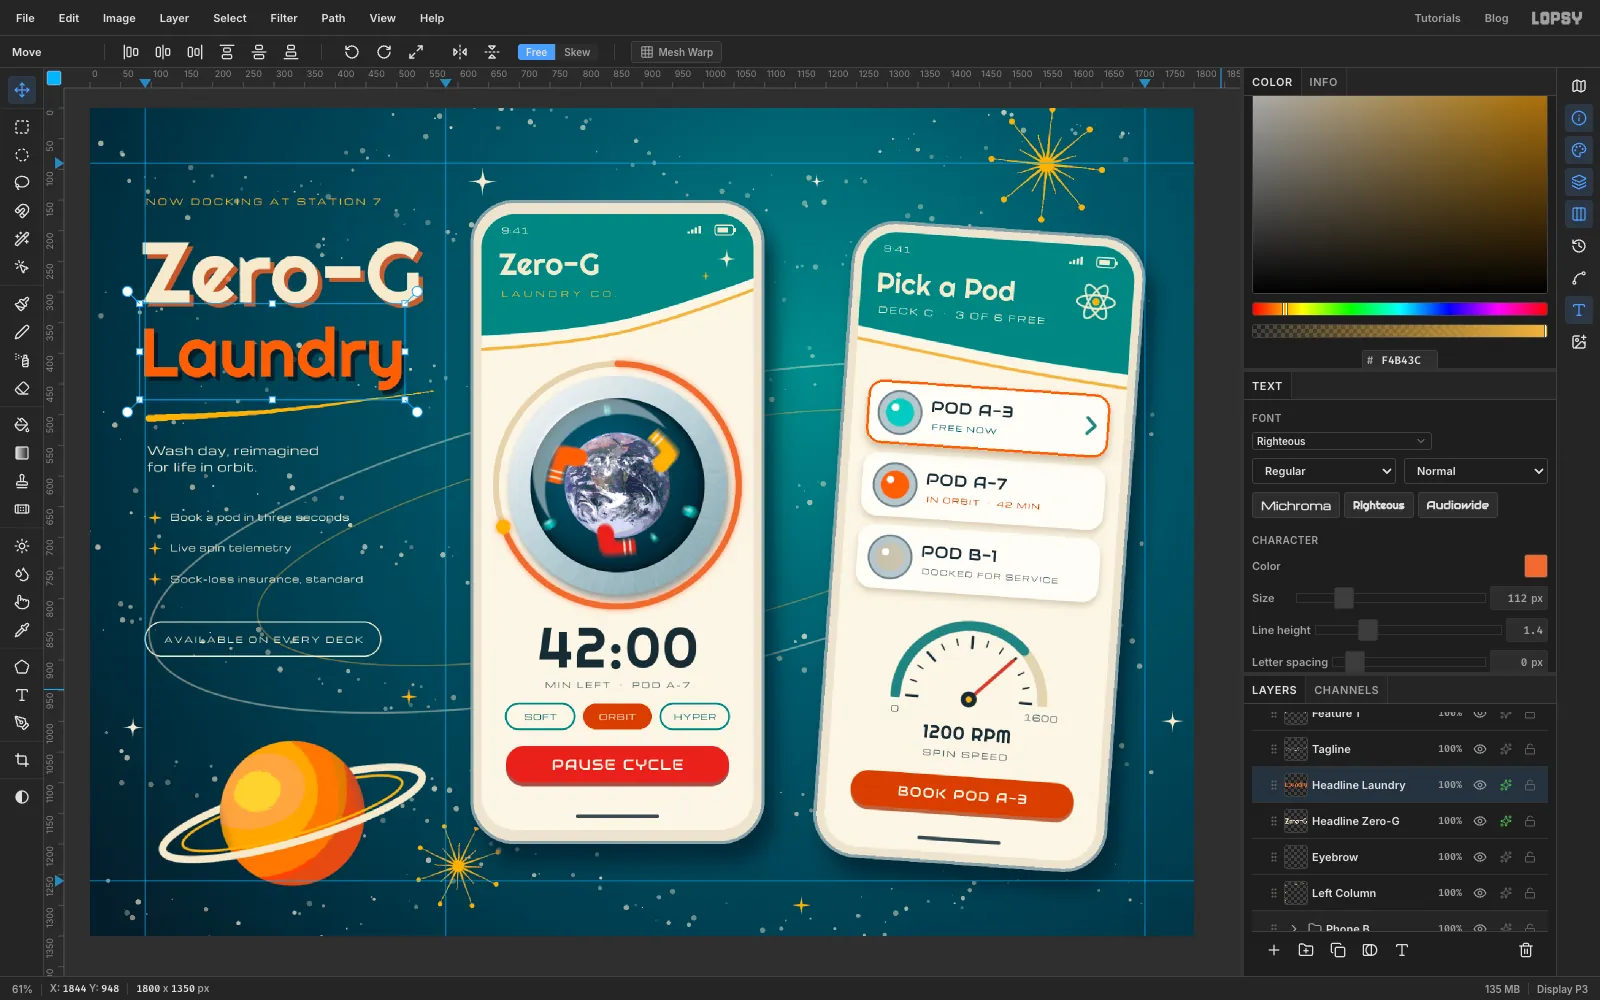
With Left Column active, set the type, again from the bottom up:
- AVAILABLE ON EVERY DECK: Michroma 13, cream, Letter spacing 3, centred in the pill
- the three bullet points: Michroma 15, cream, Letter spacing 1, just right of each sparkle. Use Book a pod in three seconds, Live spin telemetry and Sock-loss insurance, standard.
- the tagline Wash day, reimagined / for life in orbit.: Michroma 19, cream, two lines
- Laundry: Righteous 112, atomic orange
- Zero-G: Righteous 140, cream
- NOW DOCKING AT STATION 7: Michroma 14, mustard, Letter spacing 4
Line everything up on the left margin guide.
Give the two headline words a hard offset shadow, the way a sign painter would. Drop Shadow with Offset X 7, Offset Y 7, Blur 0, Opacity 75: orange on Zero-G, near-black on Laundry.
-
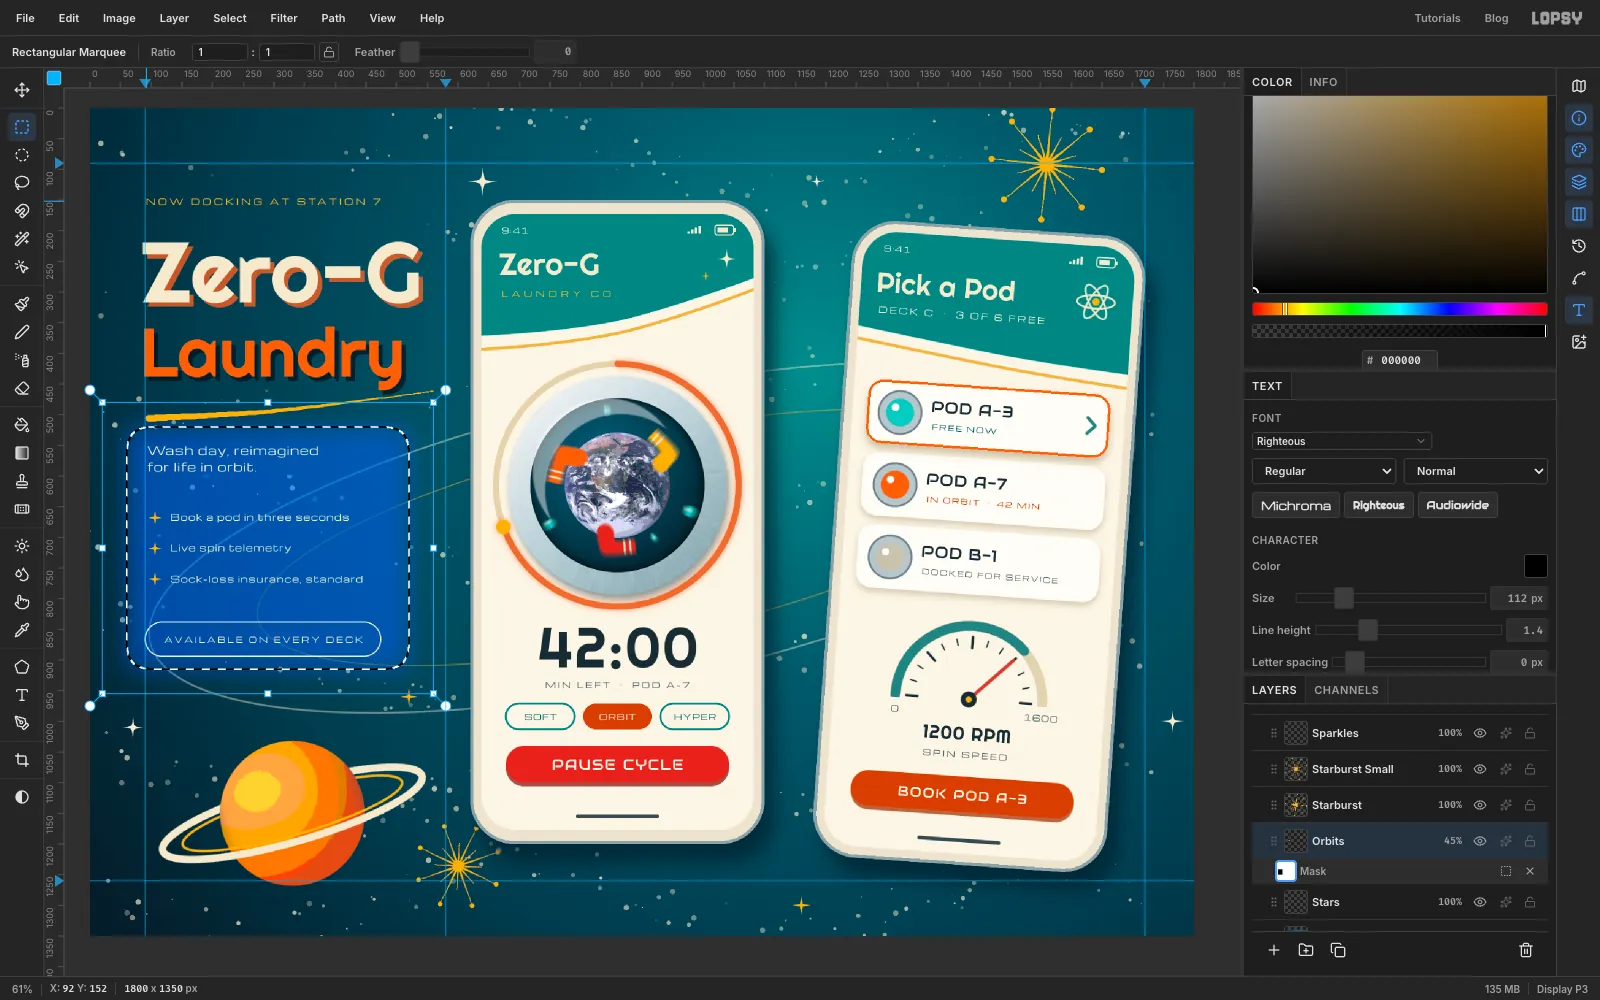
Clean the sky behind the copy
Stars and orbit lines running through small type make it hard to read. Clean them out:
- Stars. Click Stars and pick the Eraser at Size 44. Drag along each line of copy and across the pill. Then use Size 90 for one pass each across the eyebrow and the two headline words.
- Orbits. Click Orbits, then Add Mask at the bottom of the Layers panel. Click the new mask thumbnail to edit the mask.
- Draw a marquee over the left column, from just above the tagline to just below the pill. Choose Select → Feather… with 40, set the foreground to black, and choose Edit → Fill.
The rings now fade out behind the text and pick up again past it. Deselect, and click the layer's name to leave mask editing.
-
Add film grain
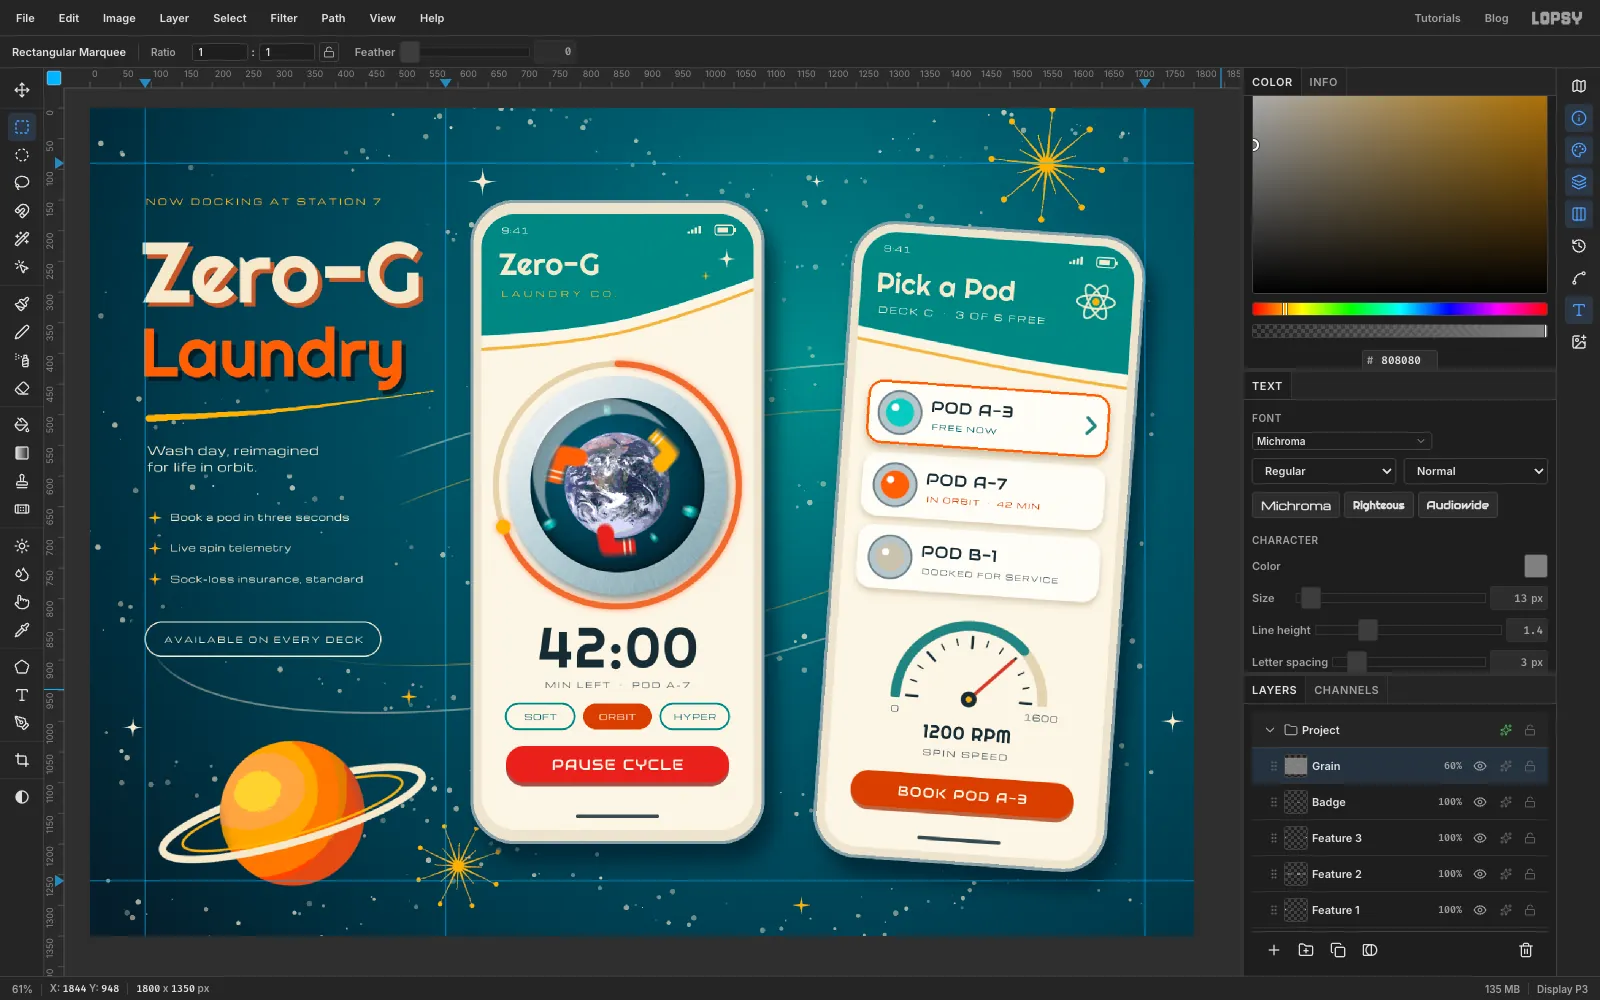
First tidy up. Click the spare empty layer next to Phone B and click Delete Layer. Then click the top row in the Layers panel and add a layer called Grain. Select all, fill it with mid-grey and deselect. Choose Filter → Add Noise… with Mono, Gaussian and Amount 40.
Set the blend mode to Overlay and the opacity to 60%. On Overlay, mid-grey disappears, so only the speckle remains. It takes the edge off the clean vector shapes and makes the board look printed.
-
Darken the corners with a Vignette
Click the Project group at the top of the Layers panel and open its effects with the sparkle button. Because it's a group, the drawer shows adjustments. The root group already lists a few default nodes: Levels, Curves, Exposure, Hue/Saturation and Color Grading. They're neutral until you change them. Click Add Adjustment → Vignette and set Vignette to 34. The corners darken and pull the eye into the phones.
Close the drawer. Choose File → Save Project to keep an editable copy, and File → Quick Export PNG for the finished image.