Make a Retro-Futurist Robot Birthday Card
Design a 1950s "home of tomorrow" birthday card in Lopsy, with a robot built from shapes, halftone shading, a perspective checkerboard and script type.
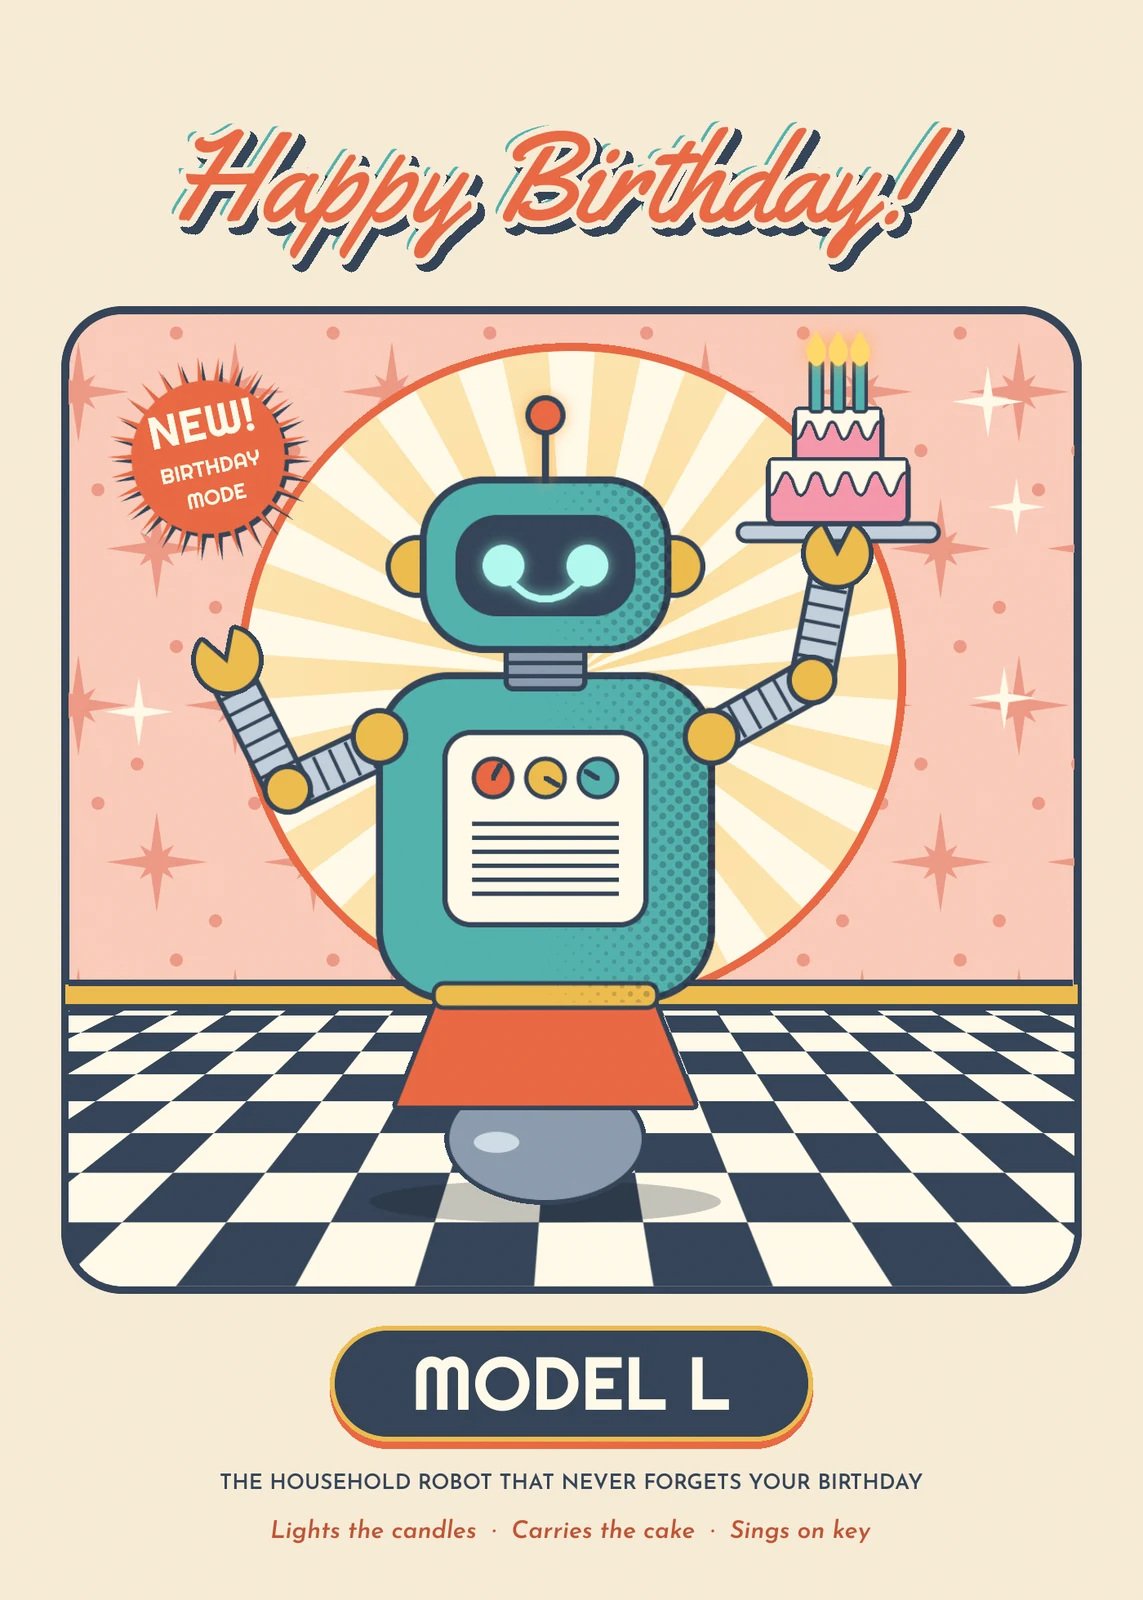
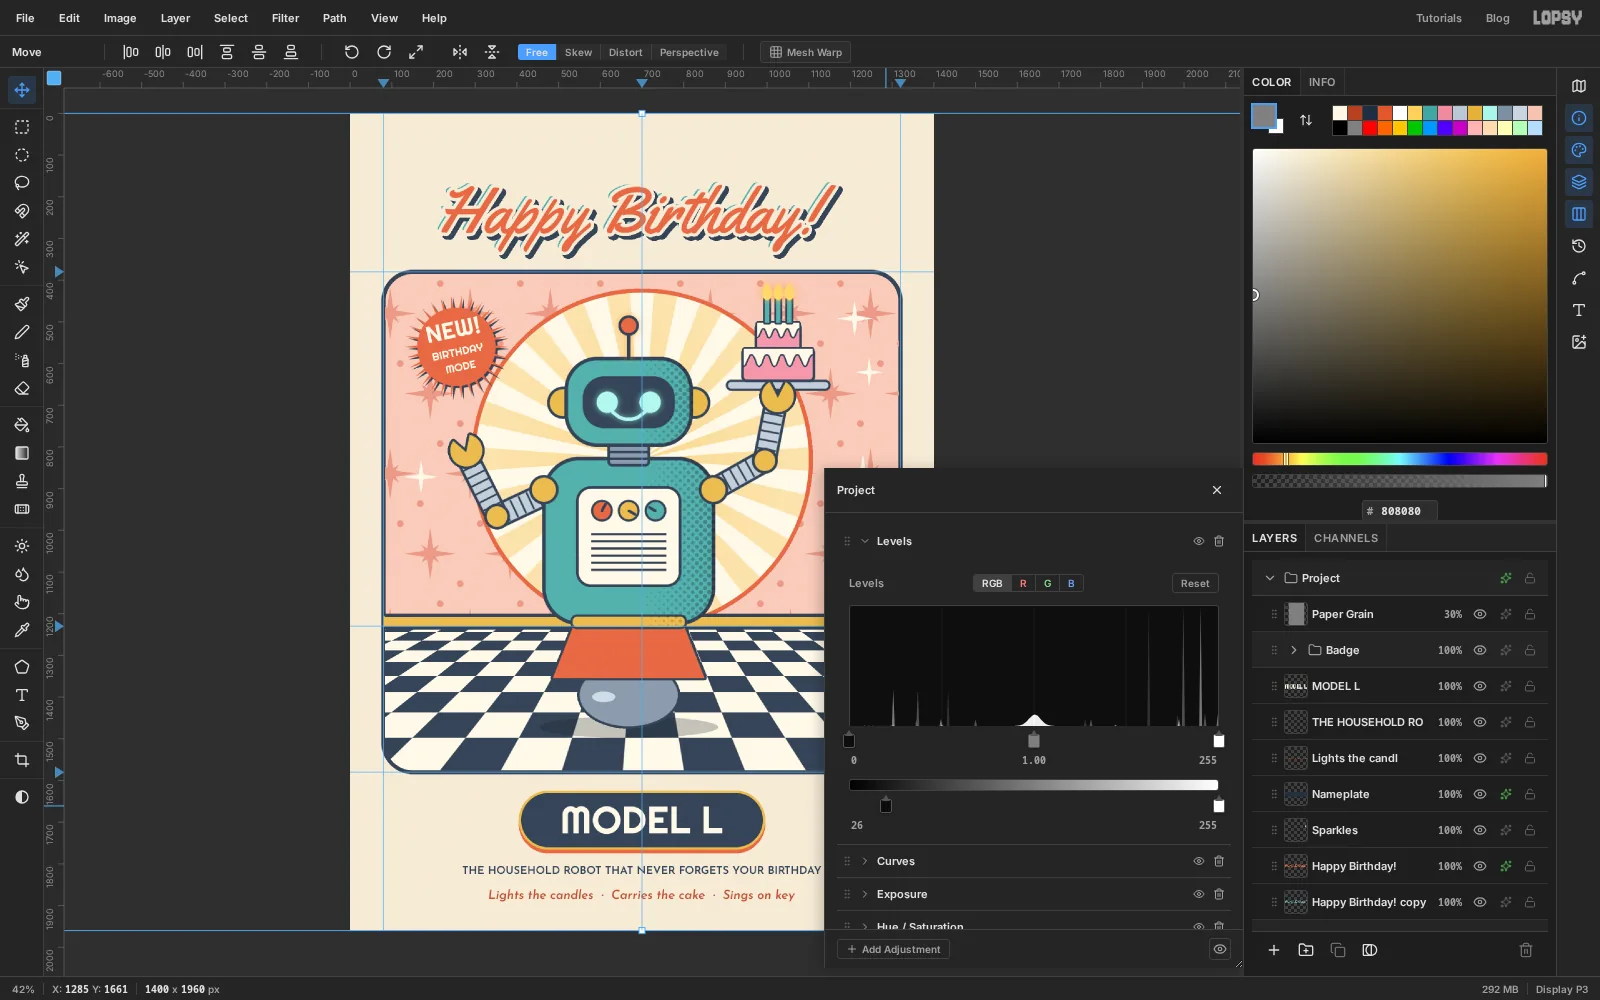
This tutorial builds a birthday card that looks like a 1950s magazine advert for the "home of tomorrow". Model L is a friendly household robot with one job: wheeling a lit birthday cake across an atomic-age kitchen. Everything is drawn in Lopsy from shapes, selections, patterns and type on a 1400 × 1960 px canvas. That's a 5 × 7 card at 280 dpi.
Mid-century advertising art has a recognisable recipe, and most of it maps directly onto Lopsy tools:
- Flat colour with a dark keyline. Every part of the robot is a Shape-tool rectangle or ellipse with a navy stroke. The outline does the drawing; the fill only adds colour.
- Halftone instead of soft shading. Old print couldn't do smooth gradients, so shadows were printed as dots. A gradient run through the Halftone filter gives you exactly that.
- Starbursts, boomerangs and checkerboards. Repeating motifs are perfect for Define Pattern and Fill with Pattern.
- A slightly imperfect print. A misregistered second colour behind the title and some paper grain make it feel printed rather than vector-clean.
Along the way you'll use:
- Guides, the grid and snapping
- the Shape tool (rectangles with corner radius, ellipses, fill and stroke)
- Define Pattern, Fill with Pattern with row stagger, and the Perspective transform
- selections: Cmd-clicking a thumbnail, Shift to add, Alt to subtract, Shrink and Inverse
- rotating and scaling pixels, live text and whole groups with the Move tool's handles
- Sunburst, Halftone, Add Noise and Gaussian Blur
- Stroke, Drop Shadow and Outer Glow effects, plus Multiply and Overlay
- Copy, Paste, Merge Down, Duplicate Layer and arrow-key nudges
- the Text tool with Google Fonts (Yellowtail, Righteous and Josefin Sans), and the Levels adjustment on the Project group
The palette:
-
Paper
-
cream
-
Wallpaper
-
wallpaper stars
-
Robot teal
-
chrome
-
wheel
-
Mustard
-
coral
-
deep coral
-
Navy ink
-
Cake pink
-
flame
-
flame glow
-
Eyes
-
eye glow
-
Sunburst rays
-
Set up the card and the scene panel
Create a new document
1400×1960px with a white background. Rulers are on by default. Click the top ruler at x80and1320to drop the side margins, then Cmd-click it near the middle: Cmd-click snaps a guide to the nearest half, so it lands exactly on700. Click the left ruler at y380(top of the scene),1230(where wall meets floor) and1580(bottom of the scene).- Double-click
Backgroundand rename itPaper. Press Cmd+A, fill with and press Cmd+D. - Rename
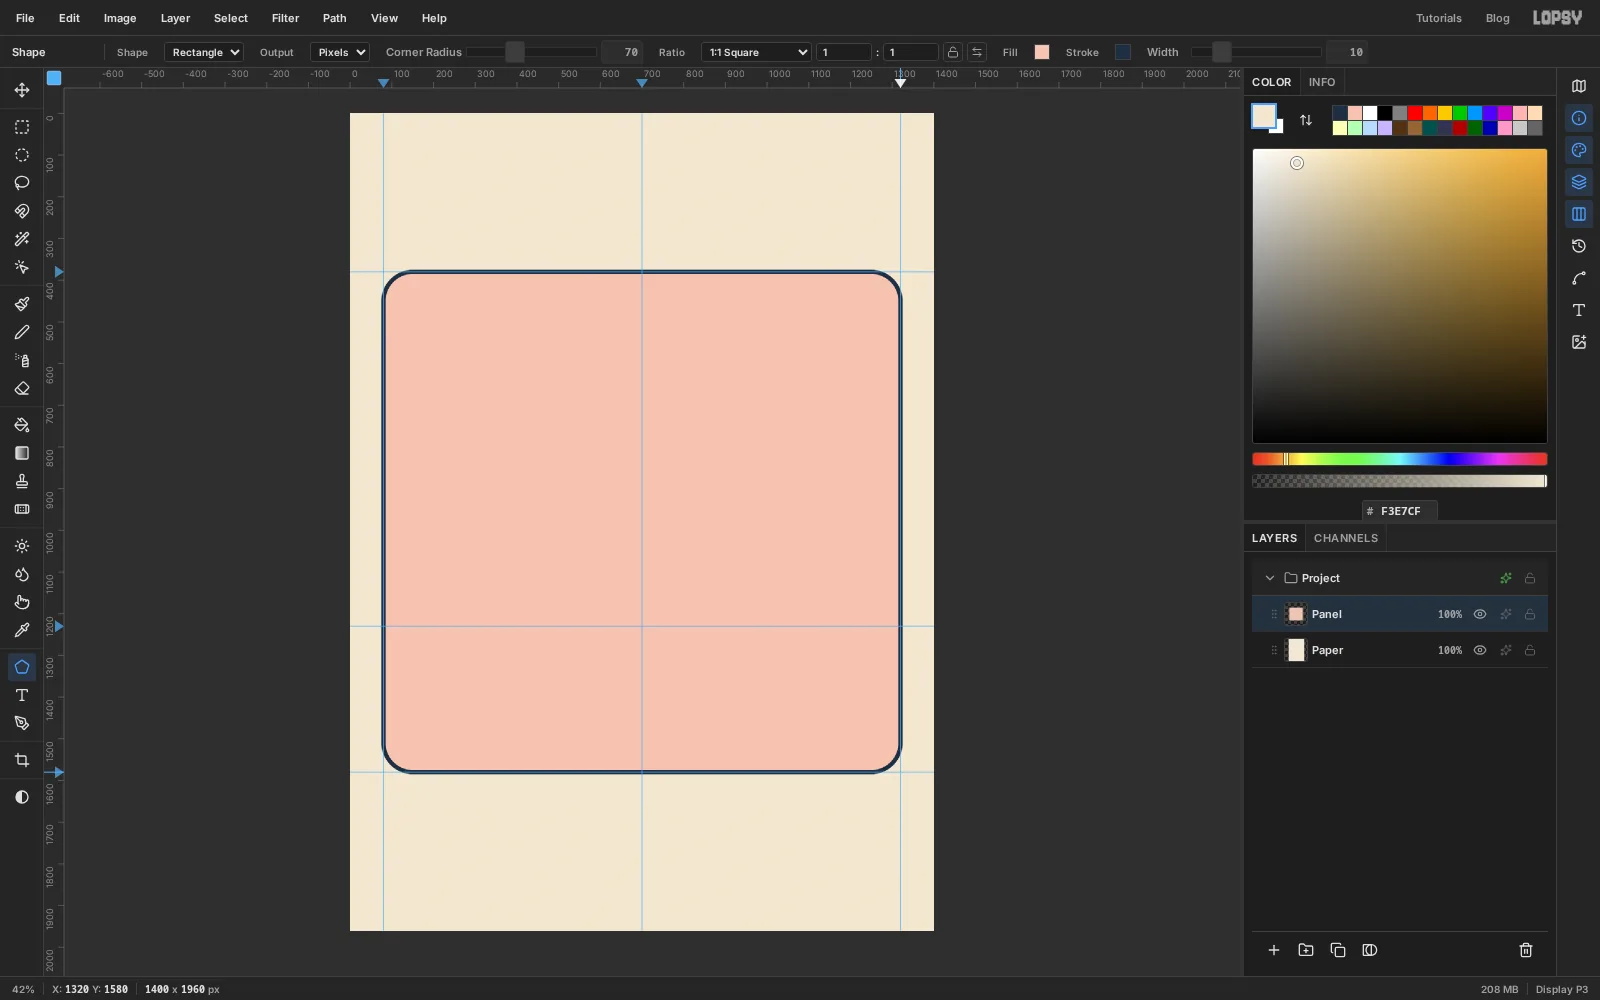
Layer 1toPanel. Pick the Shape tool (U), set Shape to Rectangle, Corner Radius70, Fill , Stroke and Width10. - Press on the centre guide at
700, 980and drag to where the right and bottom guides cross,1320, 1580. The rounded rectangle snaps to the guides.
This panel is the "photo" in the advert. The space above it holds the title and the space below holds the nameplate and copy.
- Double-click
-
Make a checkerboard tile
Turn on View → Show Grid. It shows 16 px cells and turns snapping on, which makes exact squares easy.
- Click Add Layer and name it
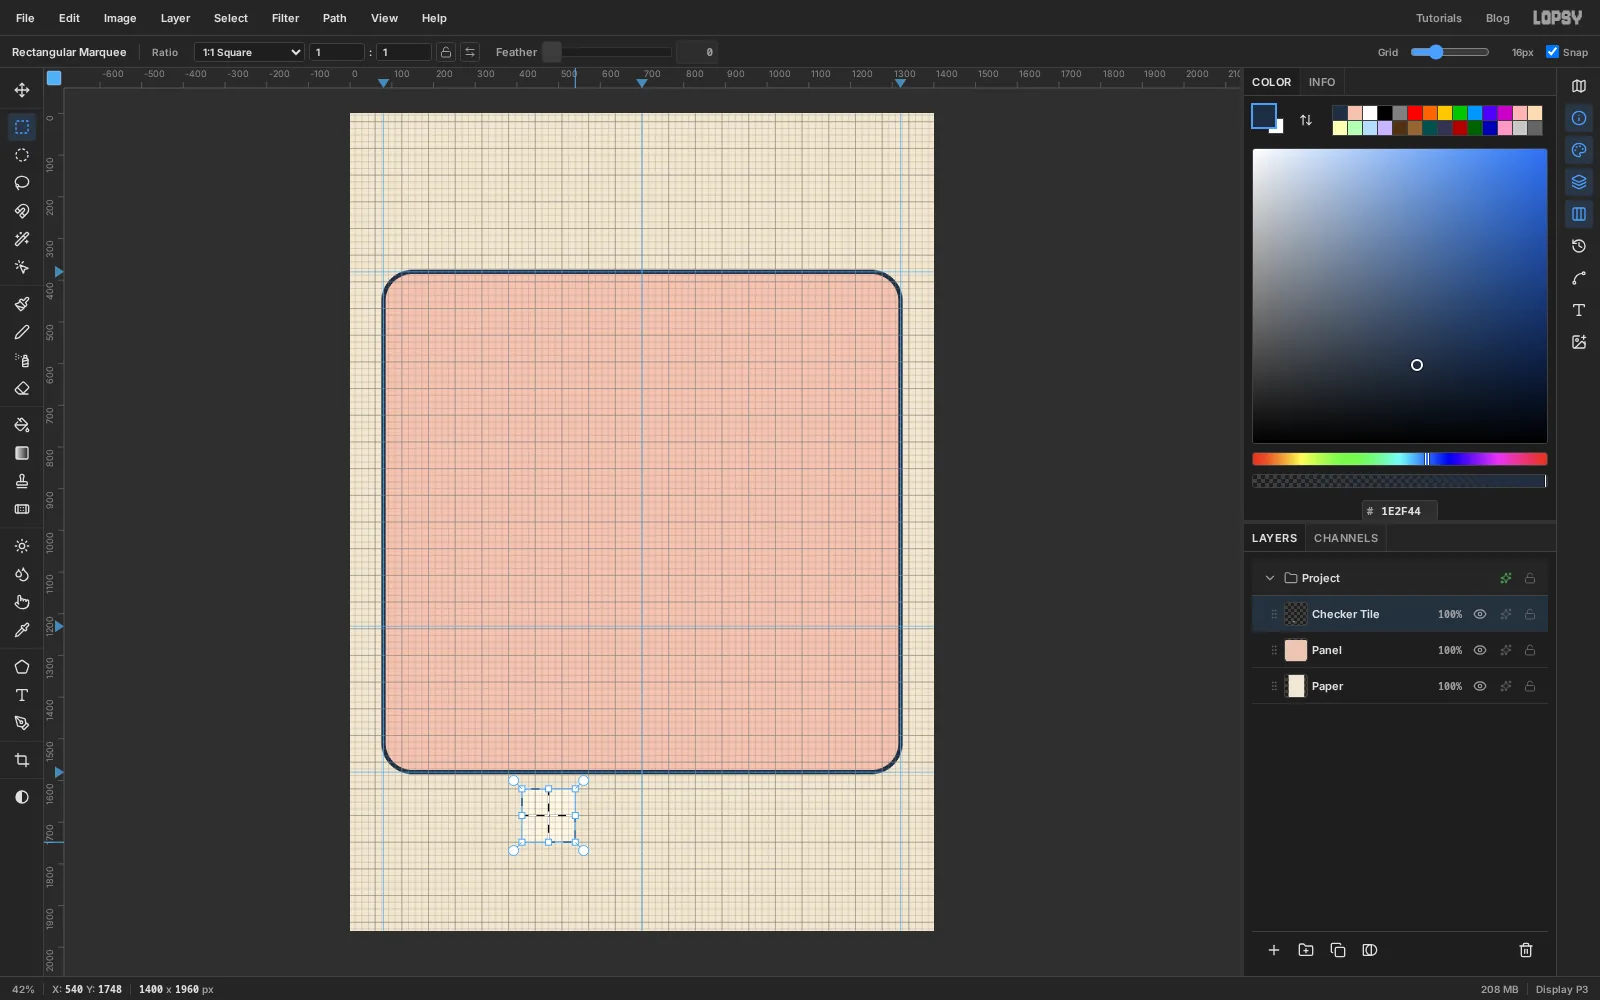
Checker Tile. Fill a 128 × 128 square anywhere in the empty paper below the panel with . - With the Rectangular Marquee (M), drag a 64 × 64 square over the tile's top-left quarter. Hold Shift and drag another over the bottom-right quarter to add it.
- Fill with , then press Cmd+D.
- Marquee the whole 128 × 128 tile and choose Edit → Define Pattern.
- Press Cmd+D and click Delete Layer. The pattern is saved, so you don't need the tile any more.
- Click Add Layer and name it
-
Fill the floor with the pattern
Click
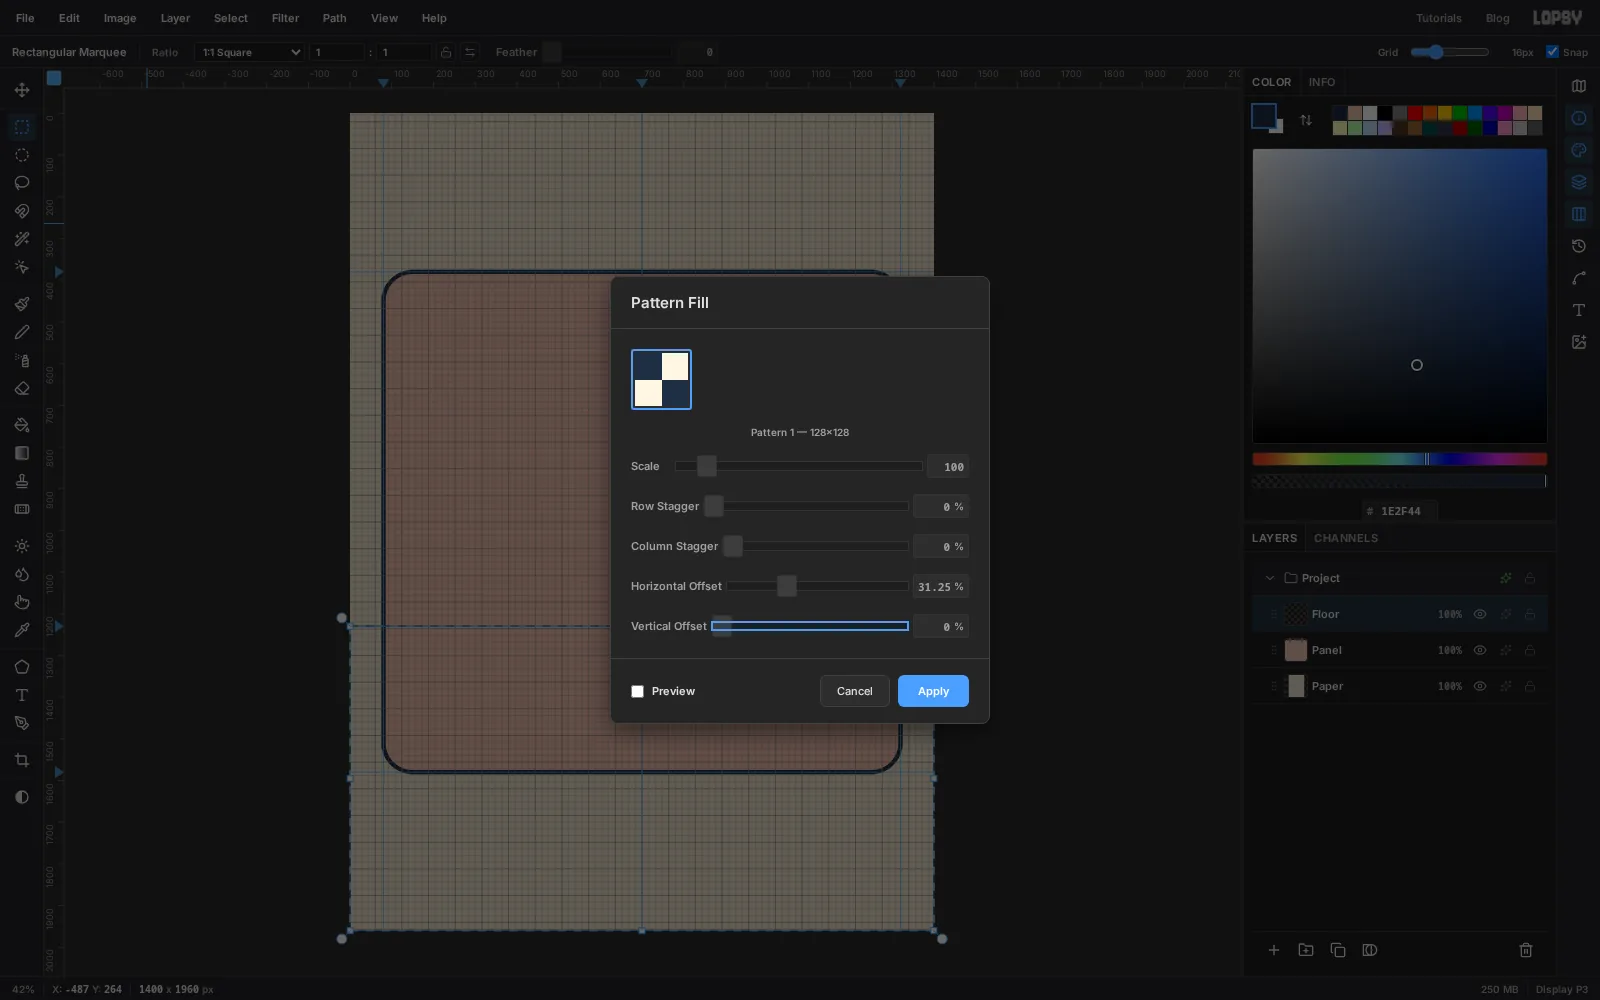
Panel, click Add Layer and name itFloor. Marquee from the left edge of the canvas, starting a couple of pixels above the horizon guide (0, 1228), to the bottom-right corner. Starting just above the guide means no sliver of wall shows between the floor and the baseboard later. Choose Edit → Fill with Pattern…, pick the checker pattern and set Horizontal Offset to31.25%. Click Apply.The tiles start from the left edge of the canvas. The offset shifts them sideways so a seam between two tiles lands exactly on the centre guide. That matters in the next step, where the floor converges towards the centre.
-
Put the floor in perspective
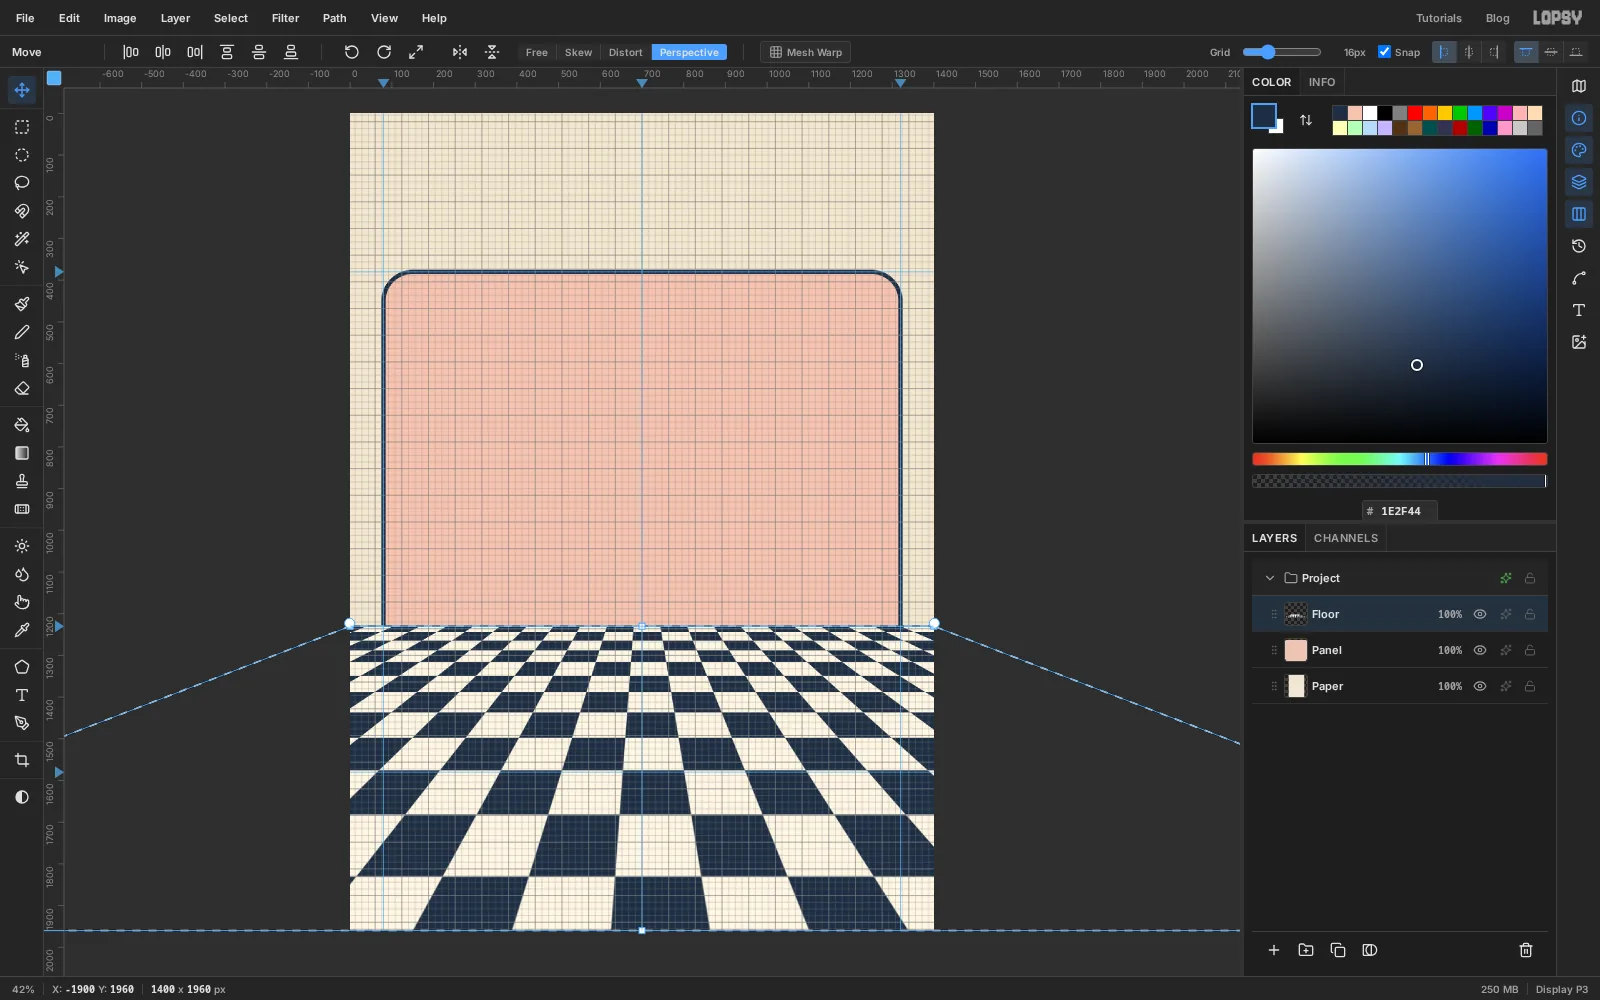
Press Cmd+D, pick the Move tool (V) and click Perspective in the options bar. Handles appear around the floor. Drag the bottom-left corner handle a long way out to the left, almost 2000 px past the canvas edge, deep into the grey workspace. In Perspective mode the bottom-right corner mirrors it.
Pull it further than feels natural. A gentle drag gives you a floor that tilts. A big one makes the far rows tiny and the near rows tall, and that strong foreshortening is what reads as a floor stretching away.
-
Trim the floor to the panel
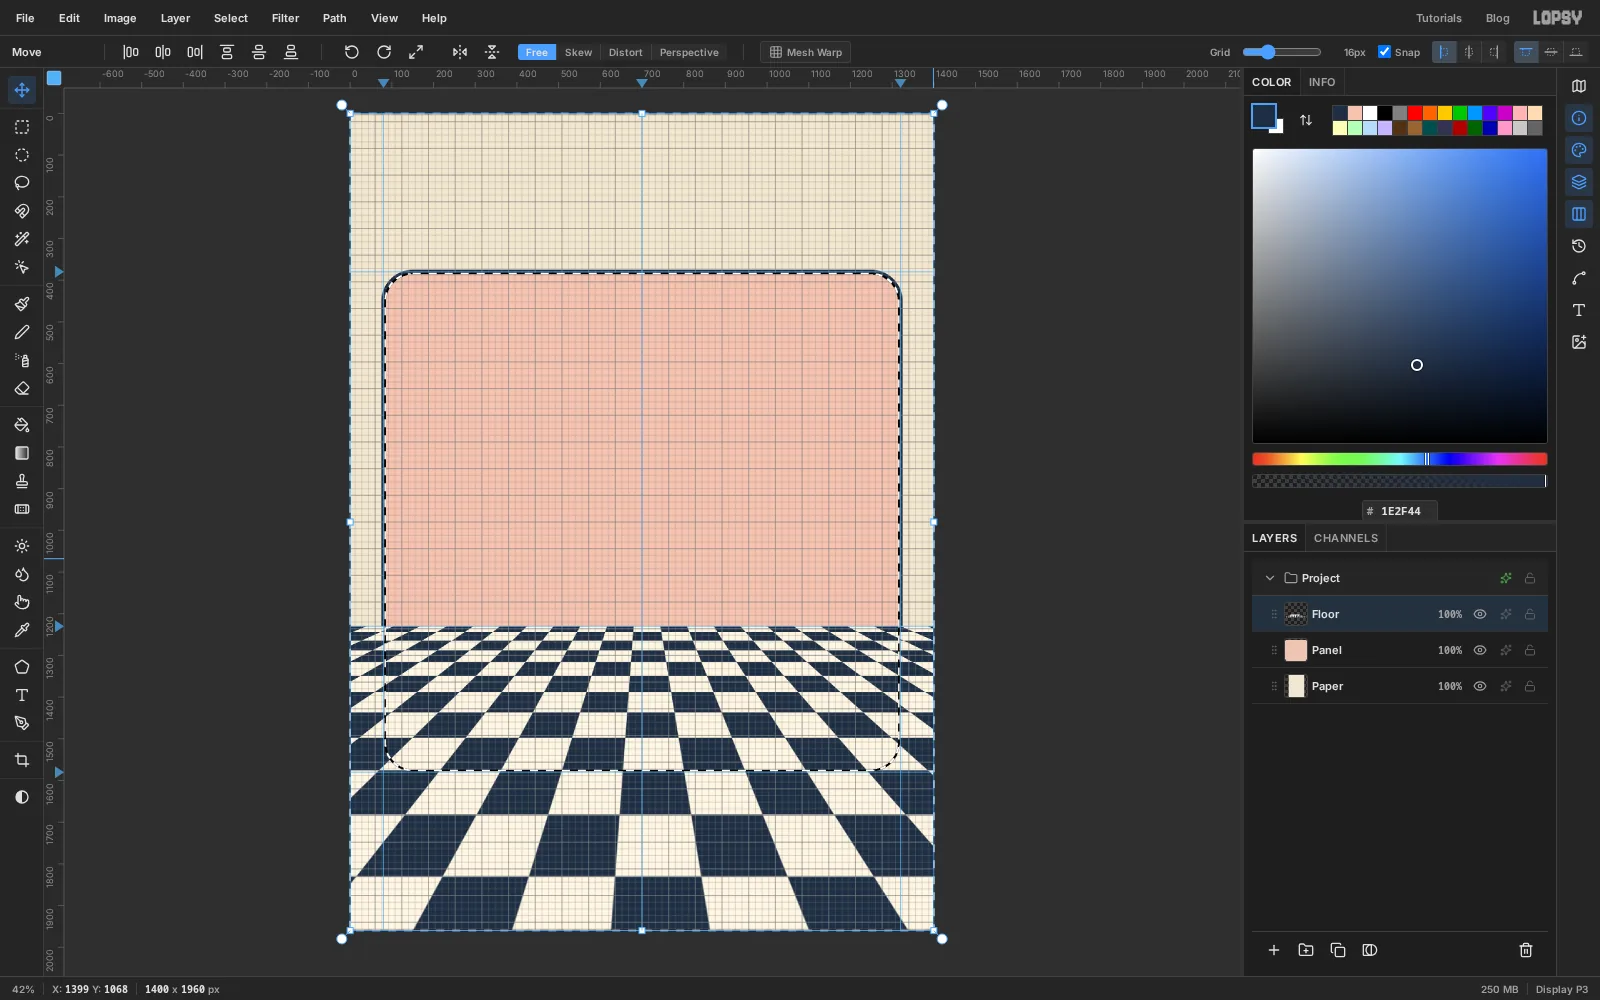
The floor now spills out over the paper. Clip it to the panel:
- Press Cmd+D to commit the transform.
- Cmd-click the
Panellayer's thumbnail to select its pixels. - Choose Select → Shrink… and enter
9, so the selection sits just inside the navy outline. - Click the
Floorrow, press Cmd+Shift+I to invert the selection, then press Delete.
You'll use this same trick for the wallpaper and anything else that needs to stay inside the panel.
-
Draw an atomic star tile
Atomic-age wallpaper is all four-point sparkles and little dots. Make one tile of it:
- Click Add Layer and name it
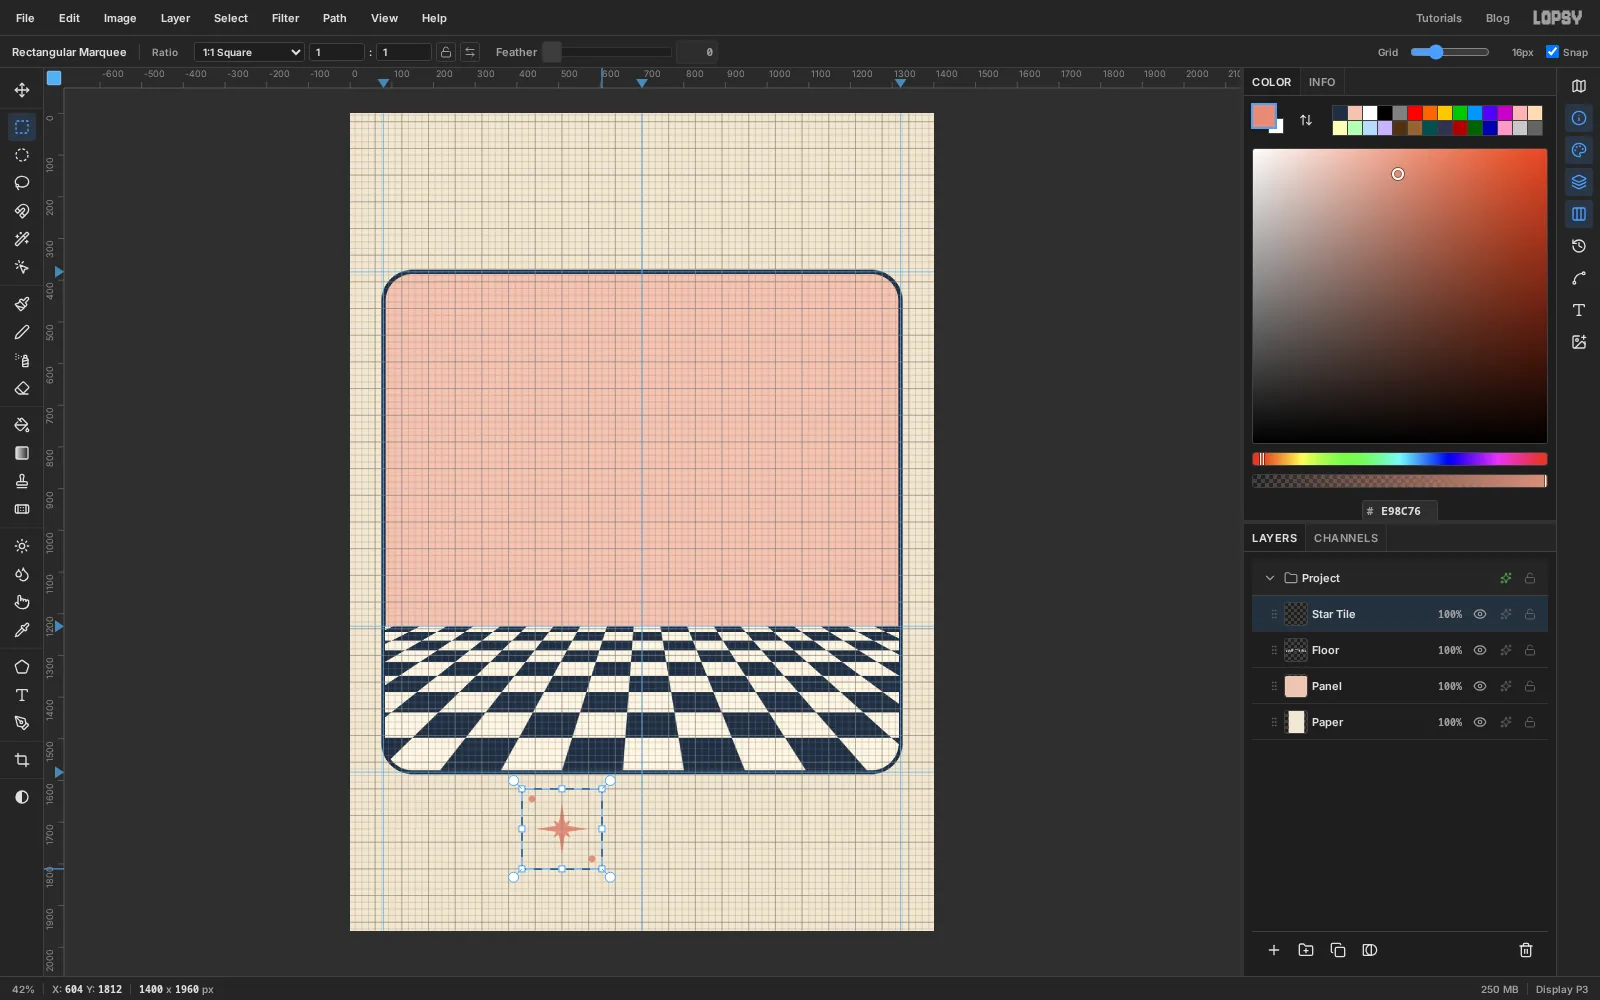
Star Tile. Set the foreground to . - Pick a centre point in the empty paper below the panel. With the Lasso (L), click eight points around it: a tip 62 px straight up, a waist point 8 px up and 8 px right, a tip 62 px to the right, a waist point 8 px down and right, then the same again for the bottom and left tips, and close the shape. You get a slim four-point sparkle 124 px from tip to tip. Fill it.
- On the same centre, lasso a smaller sparkle turned 45°: tips about 21 px out on each diagonal, waist points 9 px out straight up, down, left and right. Fill it too. The two merge into one eight-pointed atomic star.
- With the Elliptical Marquee, add two dots: an 18 px dot about 70 px up and to the left of the star, and a 12 px dot about 70 px down and to the right. Fill both.
- Marquee a 192 × 192 square with the star in the middle and choose Edit → Define Pattern. Then press Cmd+D and delete the
Star Tilelayer.
- Click Add Layer and name it
-
Paper the wall
Click
Panel, then Add Layer, and name itWallpaper. Press Cmd+A and choose Edit → Fill with Pattern…. Pick the star pattern and set Row Stagger to50%, which shifts every second row by half a tile like a real wallpaper print. Apply it.Clip it the same way as the floor: Cmd-click the
Panelthumbnail, Shrink by9, clickWallpaper, Cmd+Shift+I and Delete. The floor covers the stars below the horizon, so you only see them on the wall. Turn the grid off with View → Show Grid now. Snapping to it would fight the shapes coming next.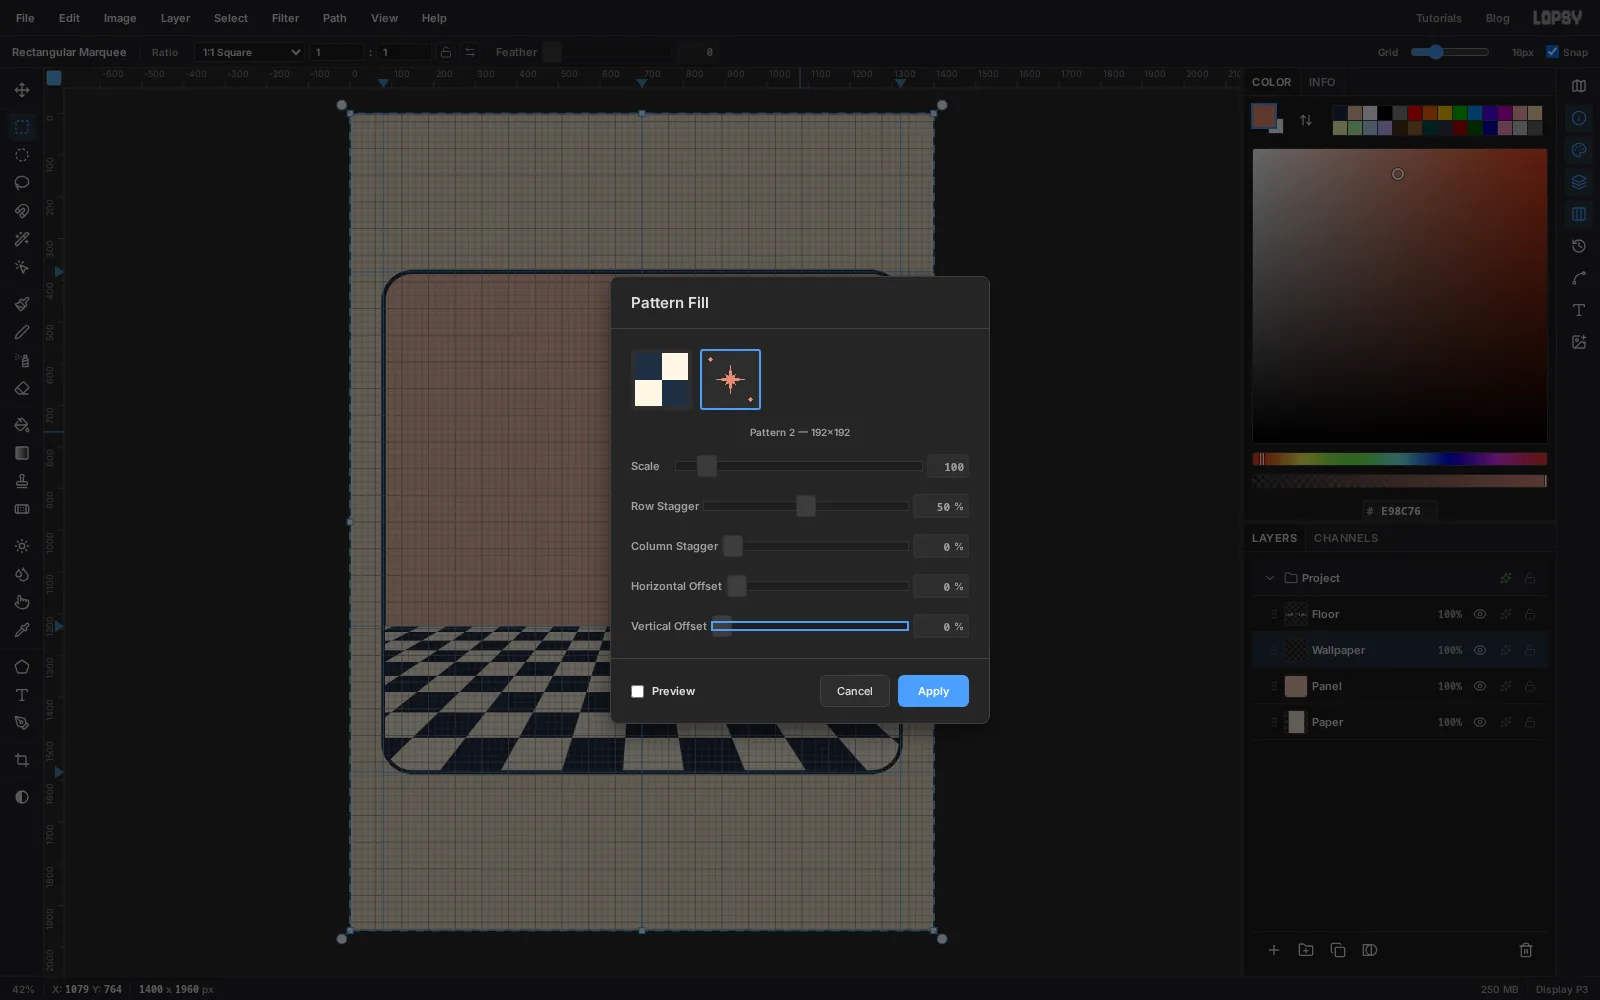
-
Add the sunburst spotlight
Ad illustrators loved putting the product in front of a burst of rays.
- With
Wallpaperactive, click Add Layer and name itSpotlight. - With the Elliptical Marquee, hold Cmd to keep a circle and drag from
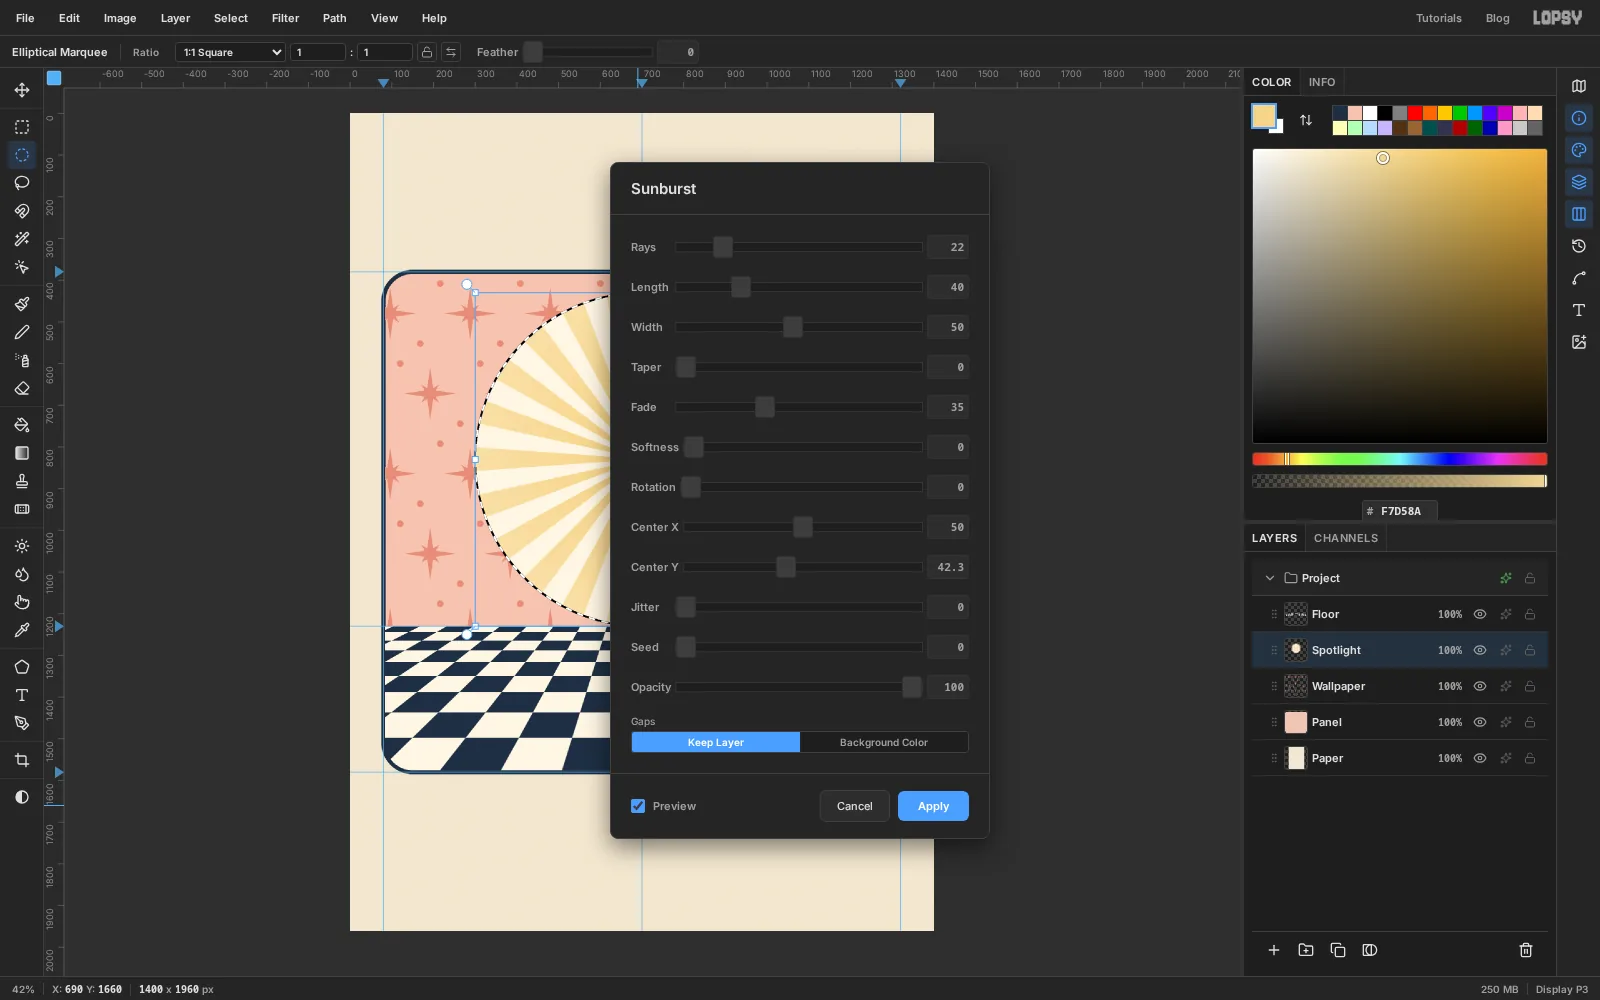
300, 430to1100, 1230. That's an 800 px circle on the centre guide whose bottom just touches the horizon. Fill it with . - Keep the selection, set the foreground to and choose Filter → Sunburst…. Set Rays
22, Length40, Width50, Taper0, Fade35and Softness0. Set Center X50and Center Y42.3so the rays start from the middle of the circle (830 is 42.3% of 1960). Click Apply. - Press Cmd+D and open the layer's effects drawer. Turn on Stroke, Width
10, colour .
The rays stay inside the circle because the selection was active. The fade makes them dissolve towards the centre, so the robot's head will sit on a calm patch.
- With
-
Add a baseboard and group the room
Click
Floor, add a layer namedBaseboardand marquee a 26 px strip that sits on the horizon guide, from the panel's inner left edge to its inner right edge (89, 1206to1311, 1232). Fill it with . Then pick the Pencil (N), Size8, colour . Click at the left end of the strip's top edge and Shift-click at the right end to draw a straight line. Do the same along the bottom edge.Now tidy up: click
Baseboard, Shift-clickPanel, and choose Layer → Group Layers. Name the groupRoom.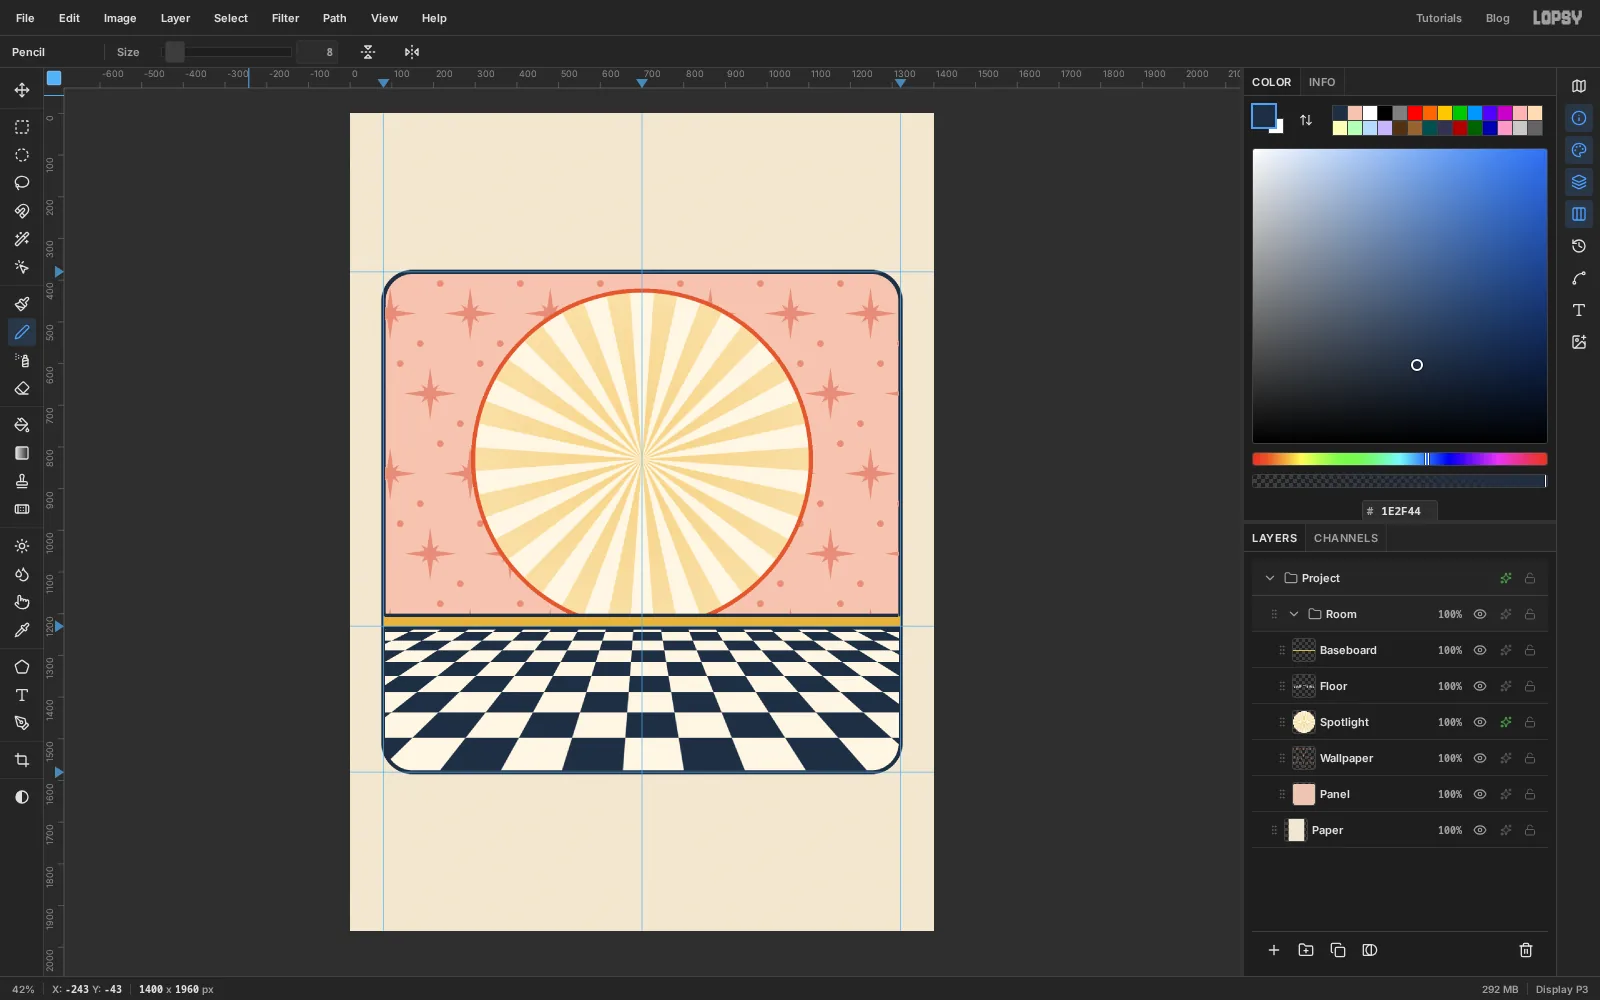
-
Build the robot's body
Click
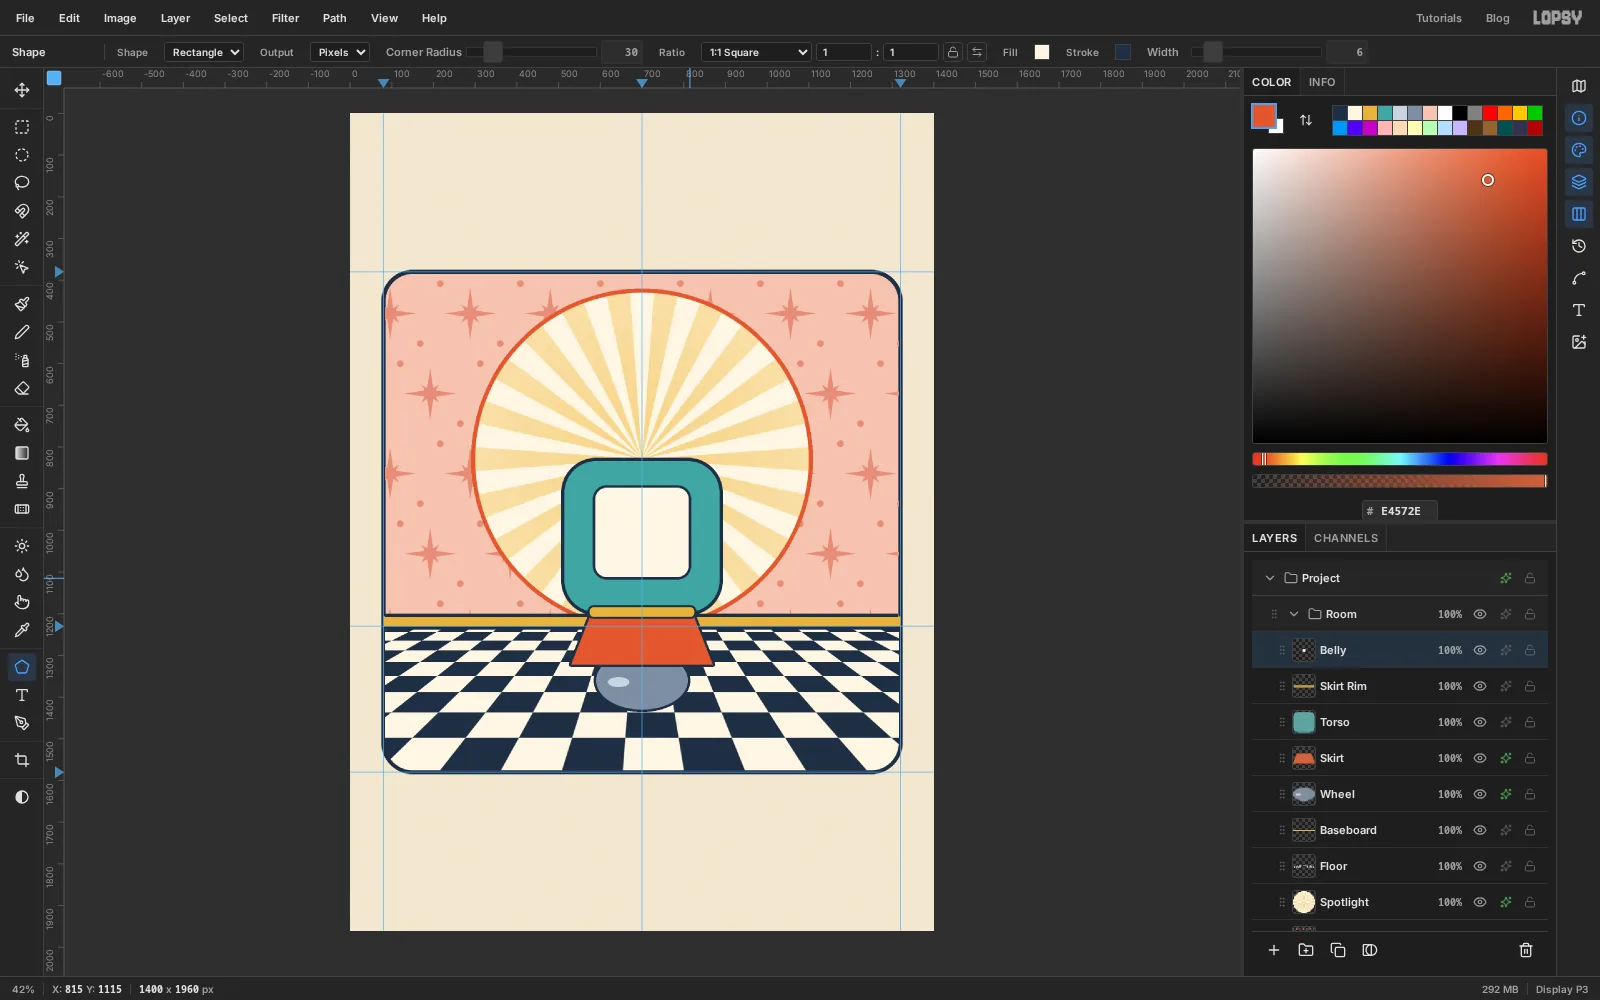
Baseboardso the robot's layers stack above it. For each part below, click Add Layer, name it, then draw it. The list runs bottom to top, so each new layer lands above the last.Wheel: Ellipse, fill , no stroke, from590, 1290to810, 1430. On the same layer, draw a small ellipse about 52 × 24 px in the upper left of the ball for a highlight. Then give the layer a Stroke effect, Width6, . Using an effect instead of the Shape tool's stroke means the highlight doesn't get its own outline.Skirt: with the Lasso, click a trapezoid from590, 1170to810, 1170across the top, flaring out to870, 1322and530, 1322. Fill with and add the same navy Stroke effect.Torso: Rectangle, Corner Radius80, fill , stroke , Width8, from510, 830to890, 1200.Skirt Rim: Rectangle, radius12, fill , stroke width5, from572, 1182to828, 1210. This little band ties the skirt to the body.Belly: Rectangle, radius30, fill , stroke width6, from585, 895to815, 1115.
Use the same navy for every outline. A consistent keyline is what makes separate shapes read as one illustration.
-
Give it a head
Keep adding layers upwards from
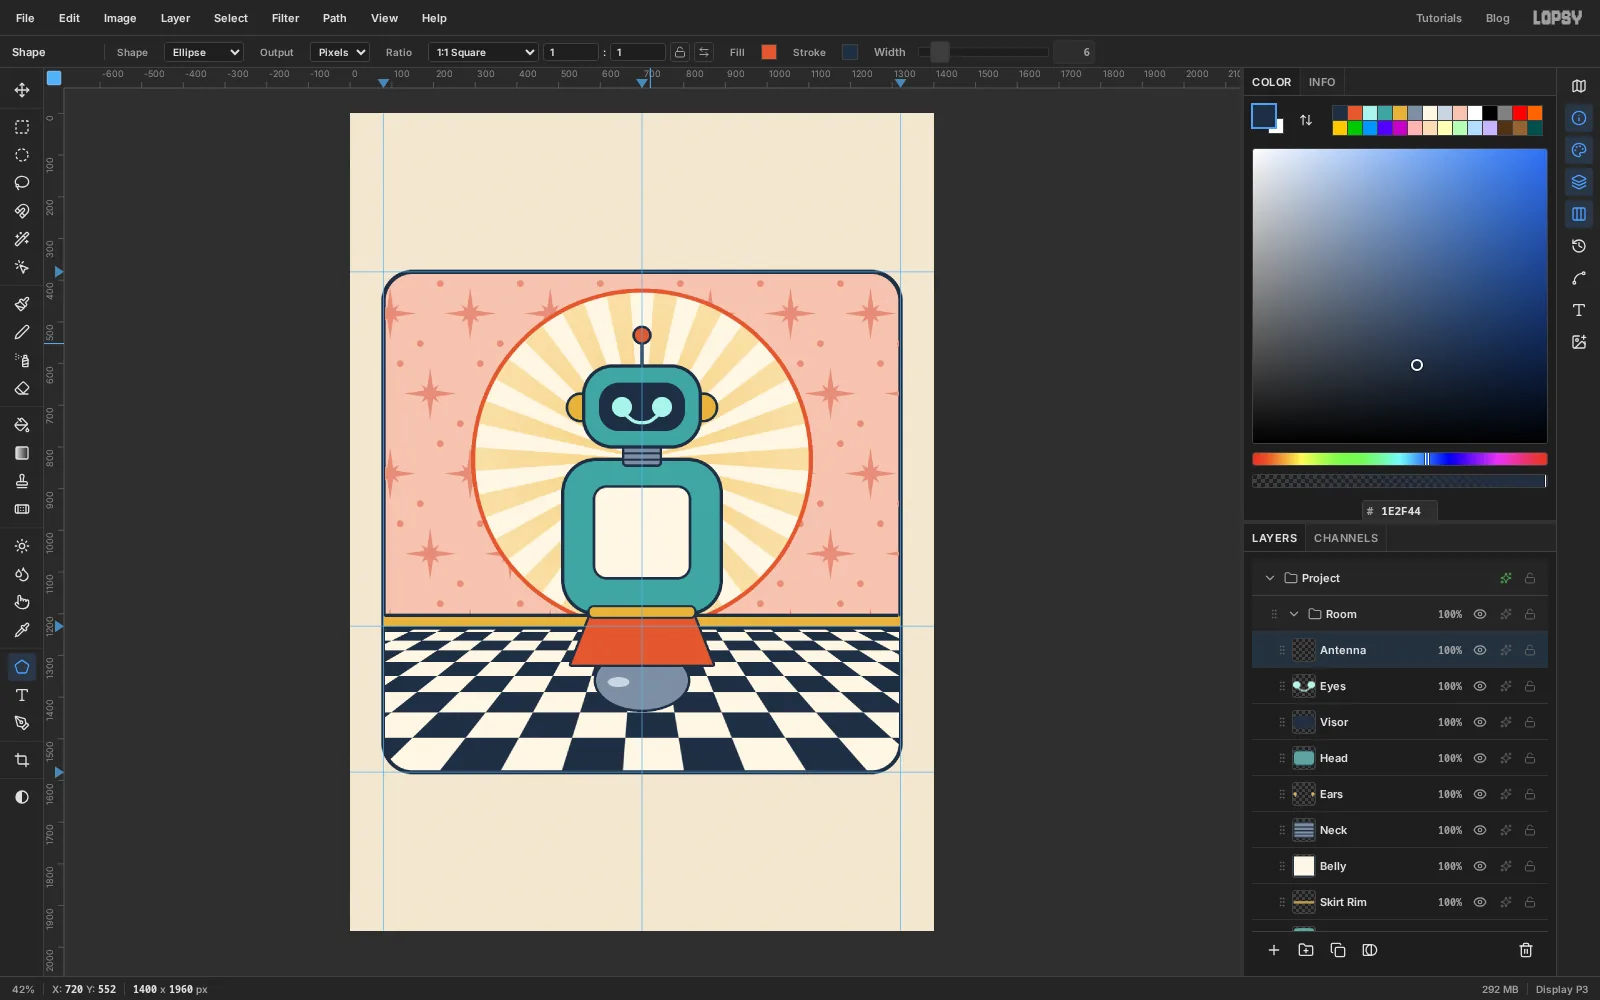
Belly:Neck: rectangle, fill , stroke width6, radius8, from655, 780to745, 845. With the Pencil at size5, draw three navy ribs across it with click and Shift-click.Ears: two circles, 66 px across, centred on553, 705and847, 705, with a navy stroke of6.Head: rectangle, radius70, fill , stroke width8, from560, 605to840, 800. It covers the inner halves of the ears.Visor: rectangle, radius48, fill and no stroke, from597, 645to803, 762.Eyes: two circles, 48 px across, at652, 704and748, 704. Then set the foreground to the same , pick the Brush (B), Size9, Hardness100, and drag a small smile arc under them.Antenna: a navy pencil line (size8) straight up from the top of the head at700, 606to700, 540, topped with a 40 px ball with a navy stroke.
-
Make the arms from rotated segments
Each arm is two segments: a rounded pill with ribs, drawn level and then rotated into place. Click
Wheelfirst, so the arms tuck behind the torso.For each segment:
- Click Add Layer and name it.
- Draw a level Rectangle 48 px tall with Corner Radius
24, fill , navy stroke width6, using the length and centre from the table below. - With the Pencil at size
4, add ribs across it every 20 px with click and Shift-click. - Marquee around the pill, switch to the Move tool and drag the round rotation handle just outside a corner until the pill reaches the angle in the table. Press Cmd+D to commit.
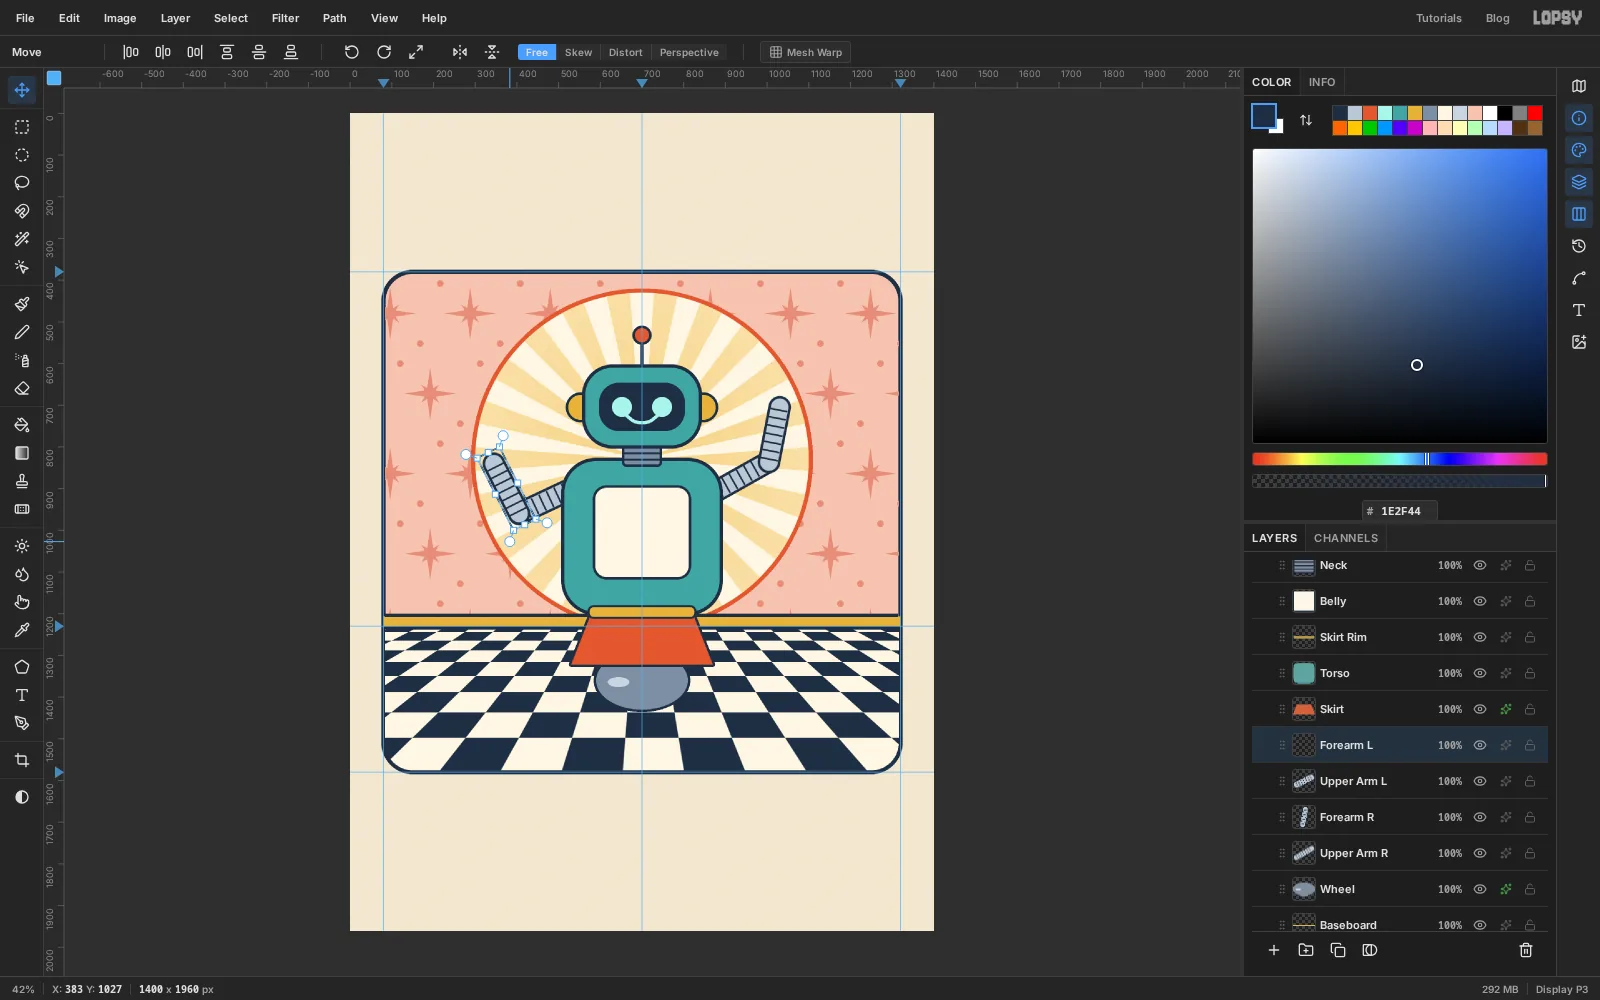
Upper Arm R: 190 px long, centred on942, 870. Rotate about 29° anticlockwise, so it rises from the right shoulder to the elbow at1005, 835.Forearm R: 180 px long, centred on1018, 770. Rotate about 79° anticlockwise, so it stands almost upright from the elbow to the hand at1030, 705.Upper Arm L: 175 px long, centred on462, 932. Rotate about 26° anticlockwise, so it drops from the left shoulder to the elbow at405, 960.Forearm L: 182 px long, centred on375, 900. Rotate about 63° clockwise, so it rises from the elbow to the hand at345, 840.
Each pill is 48 px longer than the gap between its joints, so its rounded ends tuck under the joints you'll add next. It's fine to overshoot and drag back. The box shows the angle as you go.
-
Add joints, dials and a claw
Click
Bellyand add these layers in order:Dials: three 44 px circles in a row at y947, centred at x640,700and760, filled , and with a navy stroke of5. With the Pencil at size5, click each centre and Shift-click out at a different angle to draw the needles. Then draw six grille lines across the belly from y1000to1080, 16 px apart.Joints: mustard circles with a navy stroke of6, 60 px across at the shoulders (510, 900and890, 900) and 52 px across at the elbows (405, 960and1005, 835). They hide the ends of the arm segments.Hand L: the waving claw. With the Elliptical Marquee, drag a 72 px circle from300, 776to372, 848, just past the tip of the left forearm. Then pick the Lasso, hold Alt, and click a narrow triangle with its point at the centre of the circle, opening up and to the left. Alt subtracts it from the circle, leaving a claw.
Fill the claw with , press Cmd+D and give
Hand La navy Stroke effect of6.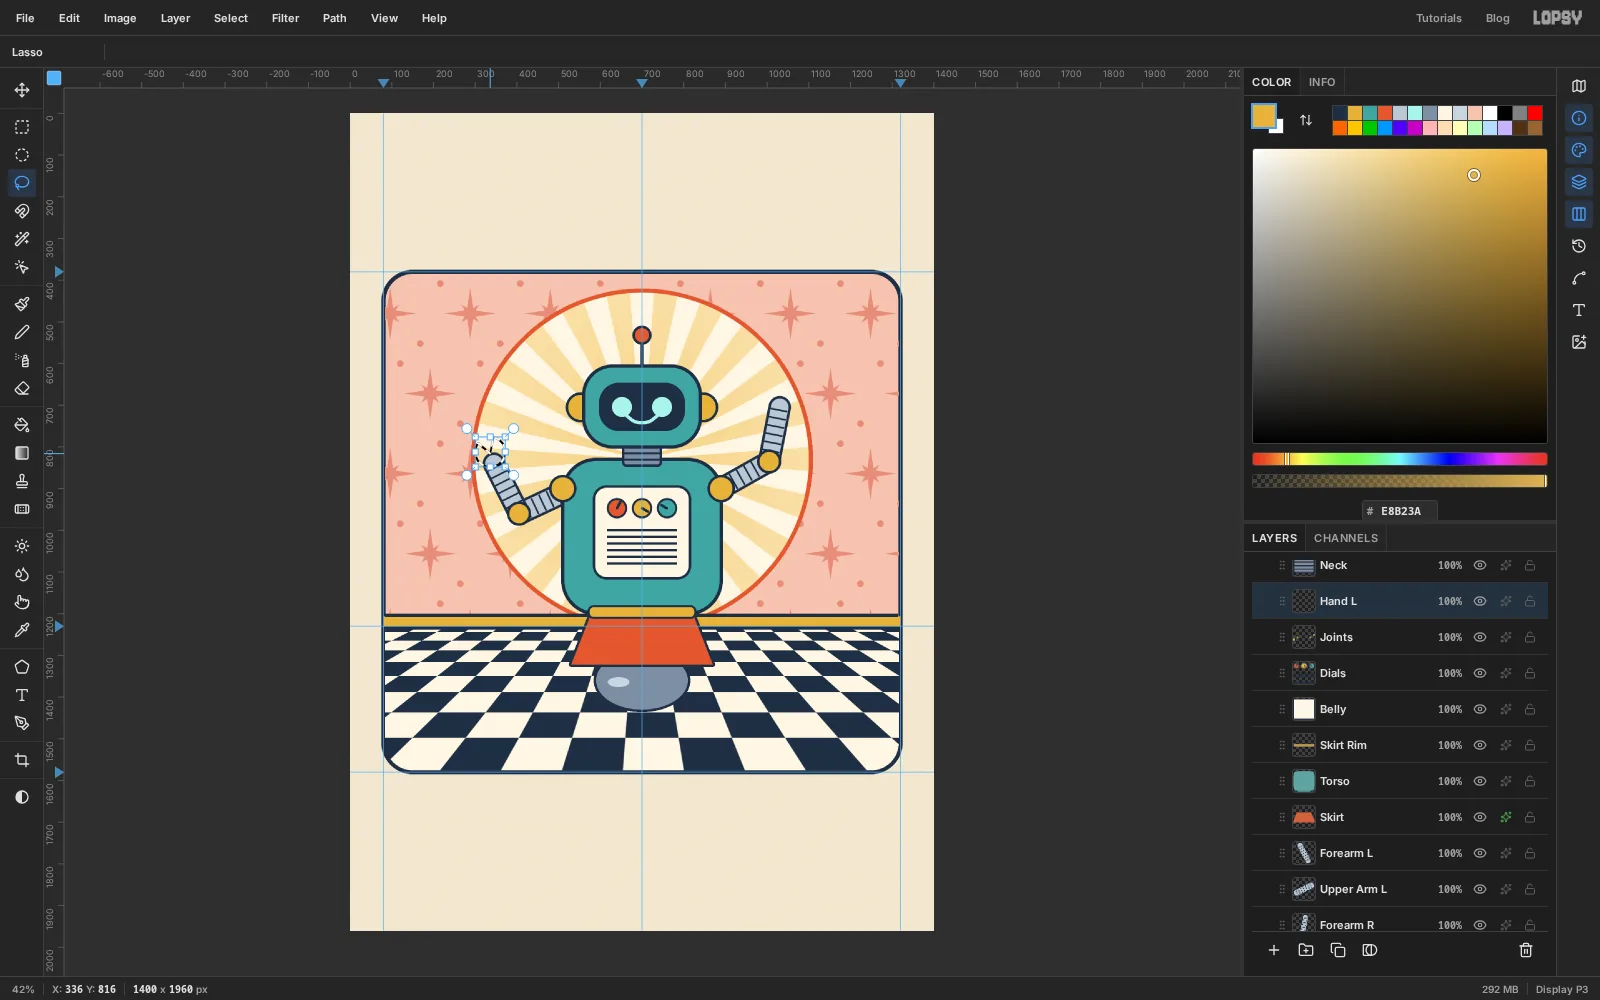
-
Bake the cake
Click
Antennaso the cake goes on top of the robot, and build it from the bottom up, one layer per part:Tray: a rectangle, radius10, fill , navy stroke5, from920, 656to1150, 676.Hand R: a 72 px mustard claw (marquee from998, 654to1070, 726, just past the right forearm's tip) with the wedge cut out of the top, the same way as the left hand. The tray rests in the gap, so it looks gripped. Add the navy Stroke effect.Tier 1andTier 2: rectangles filled with a navy stroke of6and radius10:955, 585to1115, 656, then985, 527to1085, 590.Frosting: with the Lasso, click a wavy band across the top of each tier, with four or five rounded drips hanging down. Fill with and add a navy Stroke effect of4.Candles: three 14 × 58 px teal rectangles standing on the top tier at x1010,1035and1060, with a navy stroke of4.Flames: lasso a small teardrop over each candle and fill with . Add Outer Glow: Size34, Opacity85, colour .
Select
Flames, Shift-clickTray, and choose Layer → Group Layers. Name itCake.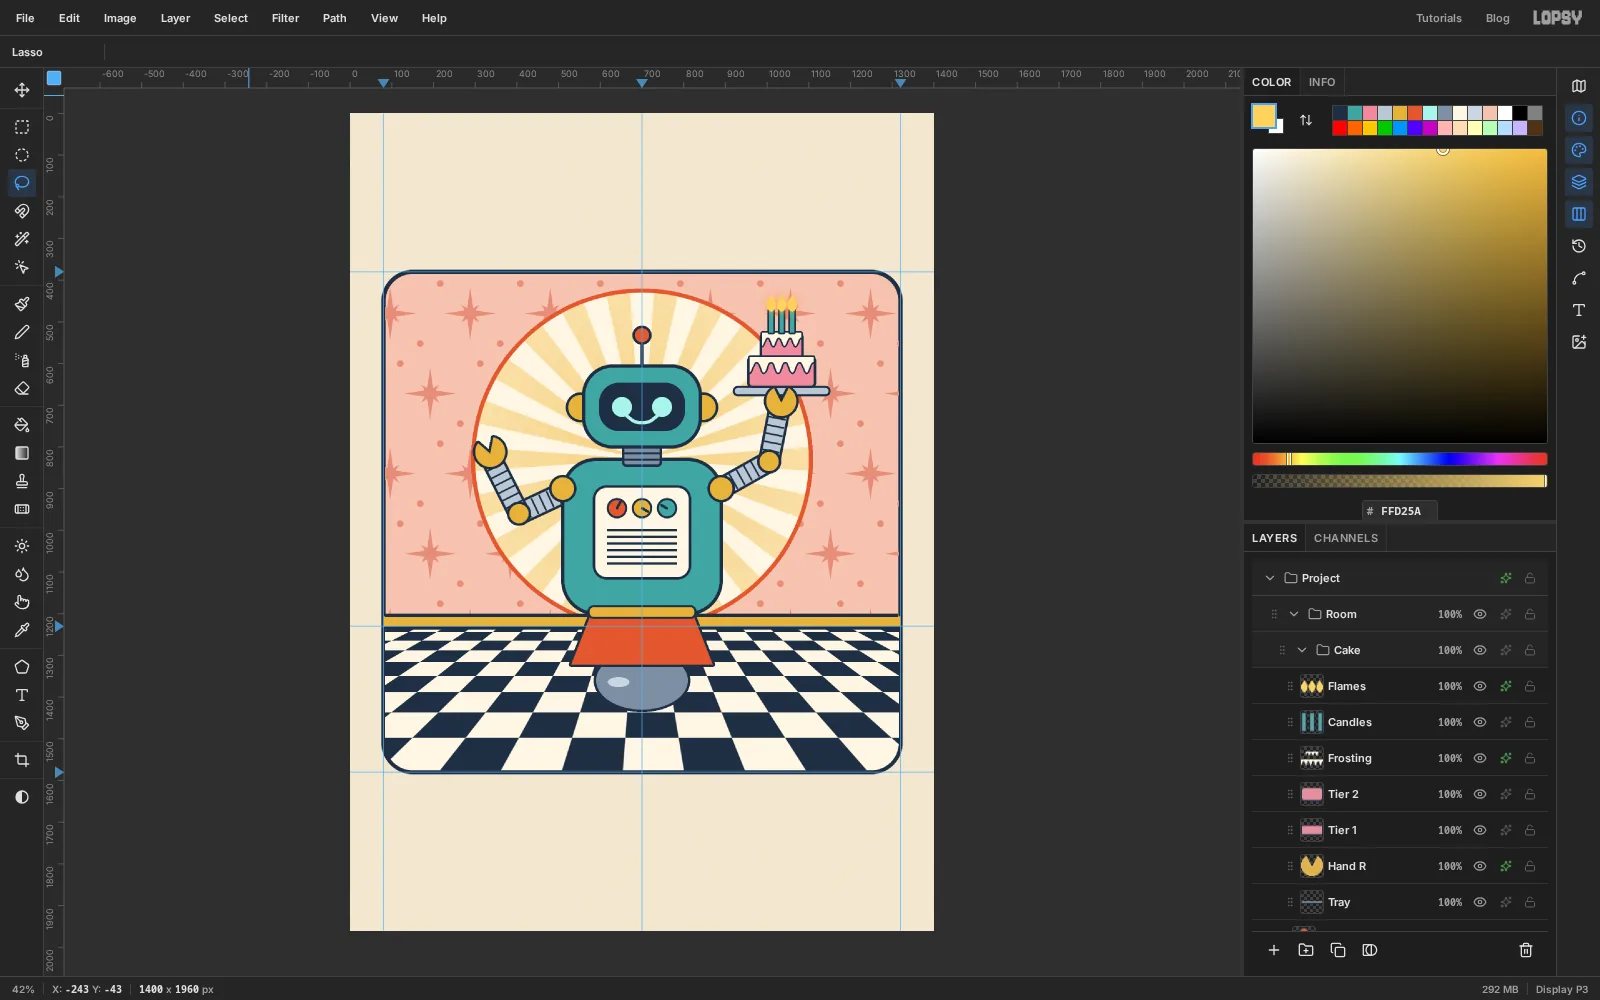
-
Group the robot and lift it out
Collapse
Cake. Click it, then Shift-clickWheelto select every robot layer, and choose Layer → Group Layers. Name the groupRobot.Because the robot was built inside
Room, the new group is still inside it. CollapseRobot, grab its grip (⋮⋮) and drag it up until the blue line sits aboveRoom. Let go, andRobotsits at the top level, above the whole room.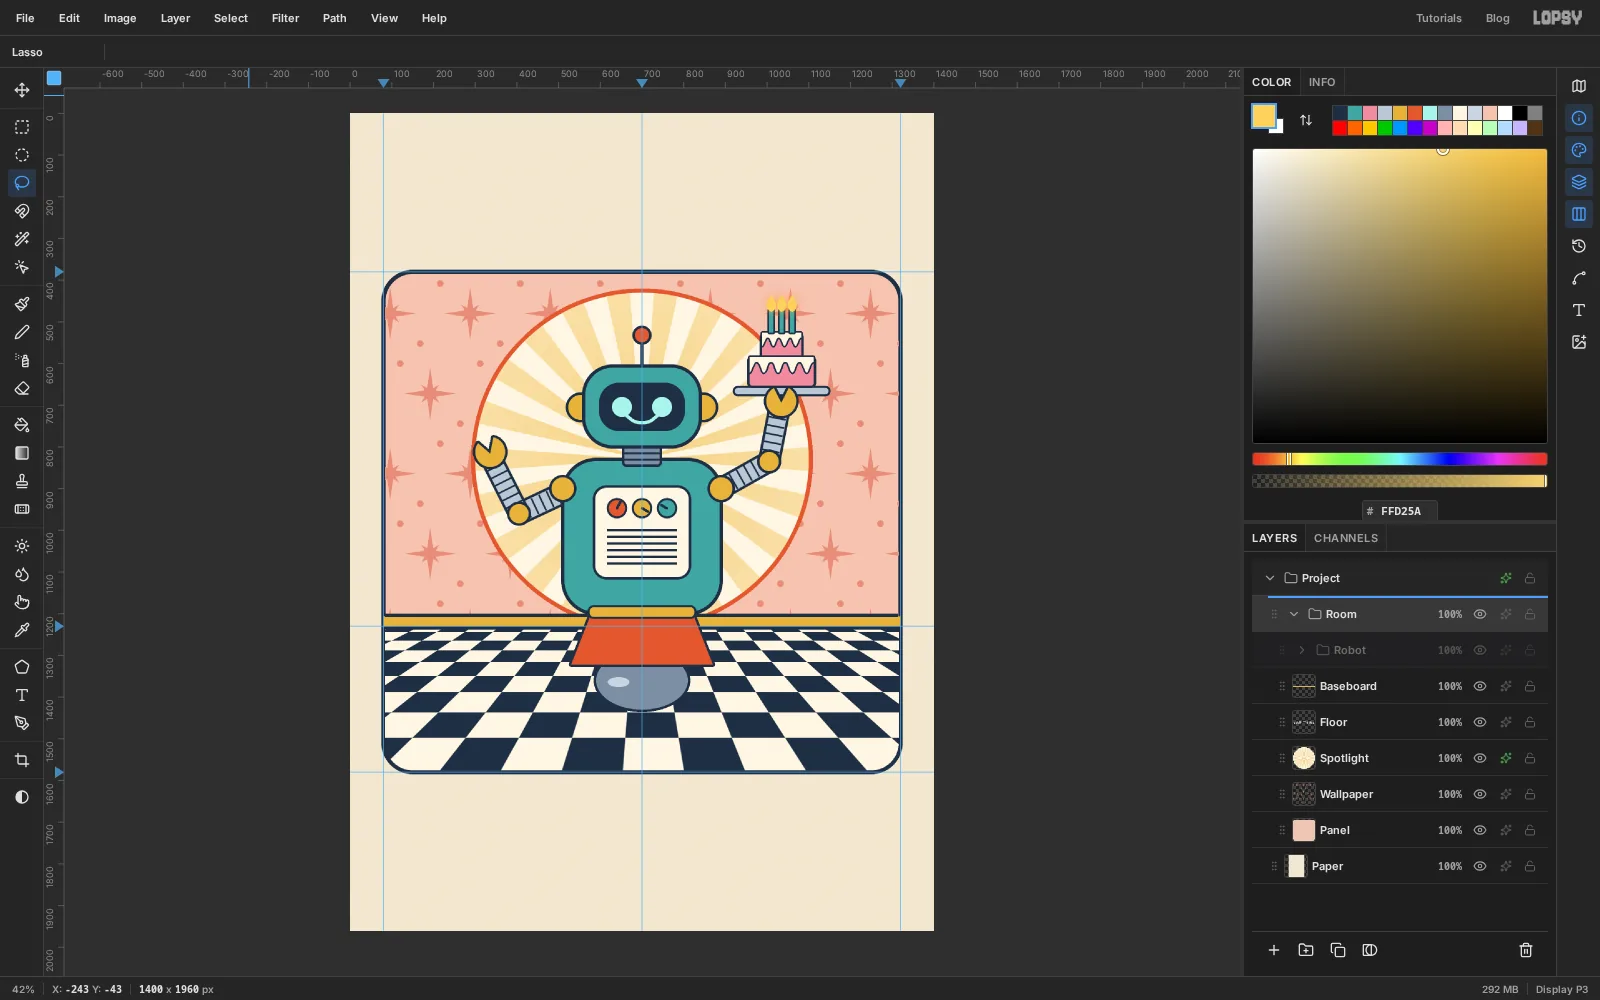
-
Scale and place the whole robot
Click the
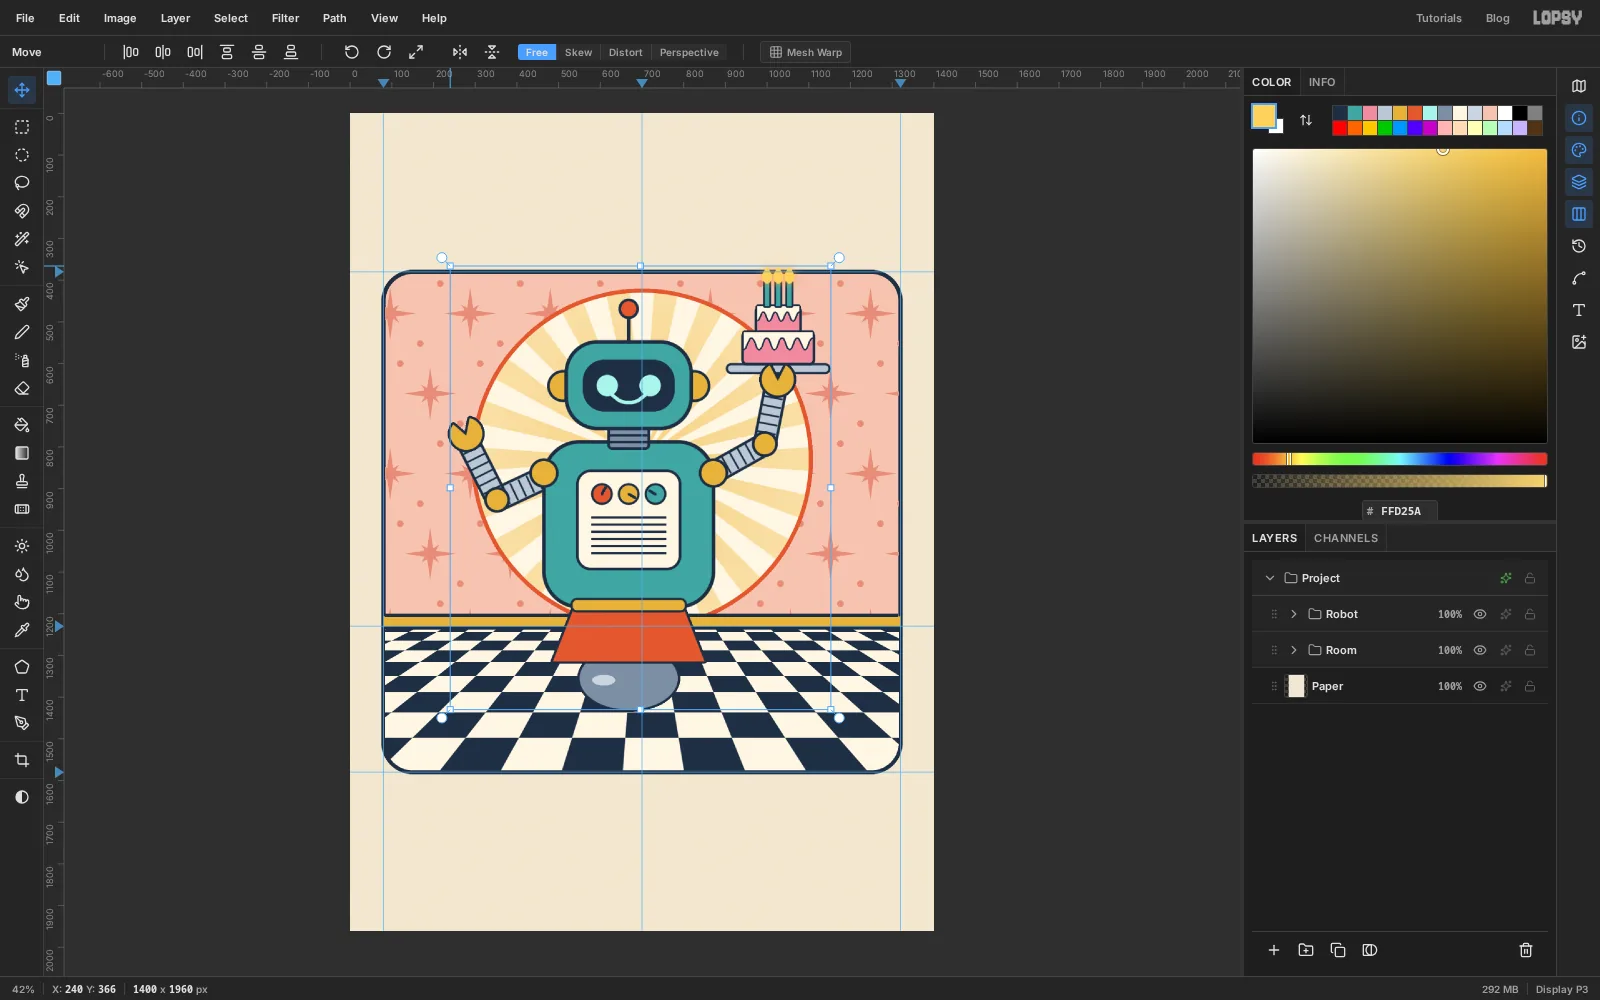
Robotrow, press Cmd+D to be sure nothing is selected and pick the Move tool. Handles appear around every layer in the group.- Hold Cmd (to keep the proportions) and drag the top-left corner handle up and out by about 60 px, so the robot grows by roughly 7%. Press Cmd+D.
- Drag the robot down about 40 px so the wheel sits properly on the floor, a little below the horizon.
If the scale or move goes wrong, Cmd+Z undoes the whole group transform in one step.
-
Select the torso without the belly
Mid-century print shading is a band of dots on the side away from the light. Start by selecting where the dots can go.
- Expand
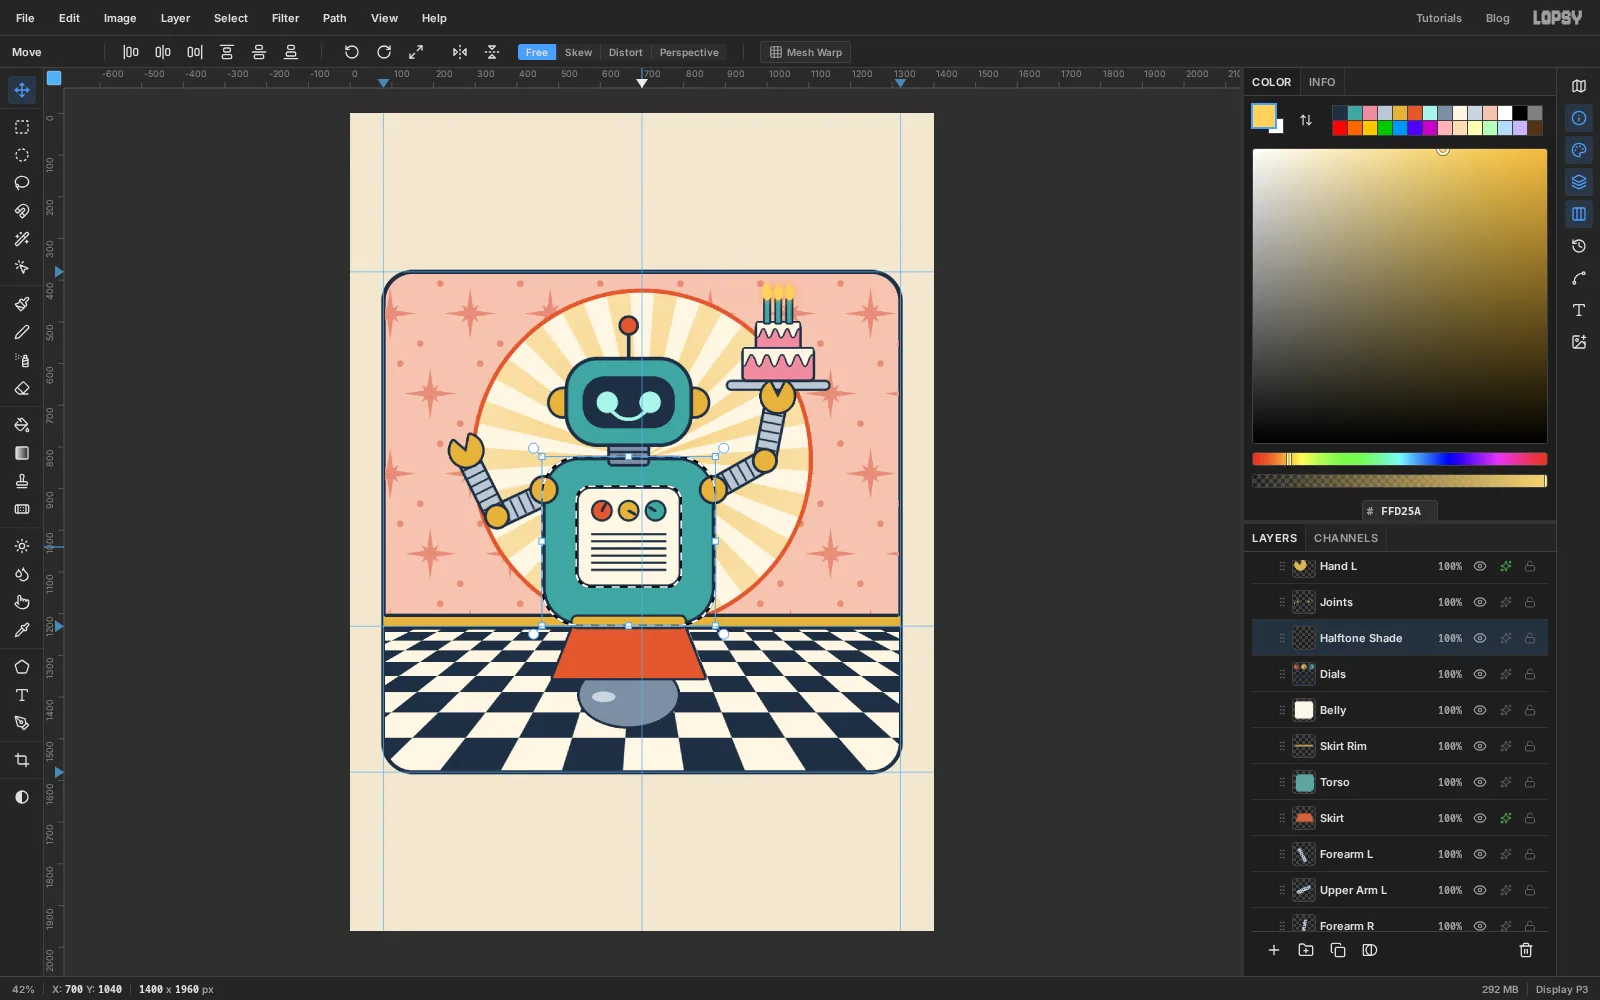
Robot. Cmd-click theTorsothumbnail. - Hold Cmd+Alt and click the
Bellythumbnail. That subtracts the belly, so the dots won't land on the cream panel. - Click
Dialsand Add Layer. Name itHalftone Shade.
- Expand
-
Shade it with halftone dots
Keep the selection. Pick the Gradient tool, set Type to Linear and click Advanced… in the options bar to open the Gradient Editor. The gradient uses its own stops, not the foreground colour. Click a stop to set its colour, and click under the bar to add one. Set white at 0%, white again at 40% and navy at 100%, then click Done. Shift-drag across the torso from its left edge to its right edge. The gradient only lands inside the selection.
Now choose Filter → Halftone… and set Dot Size
14, Angle45and Softness0.5. White prints no dots, so the left side stays clean and the dots grow towards the right. Press Cmd+D.Do the same for the head on a
Head Shadelayer aboveHead: Cmd-click theHeadthumbnail, drag the same gradient across it and run the same Halftone.Finally set both shade layers to Multiply in the effects drawer and drop their opacity to
40%. Multiply keeps the navy dots and lets the white between them disappear.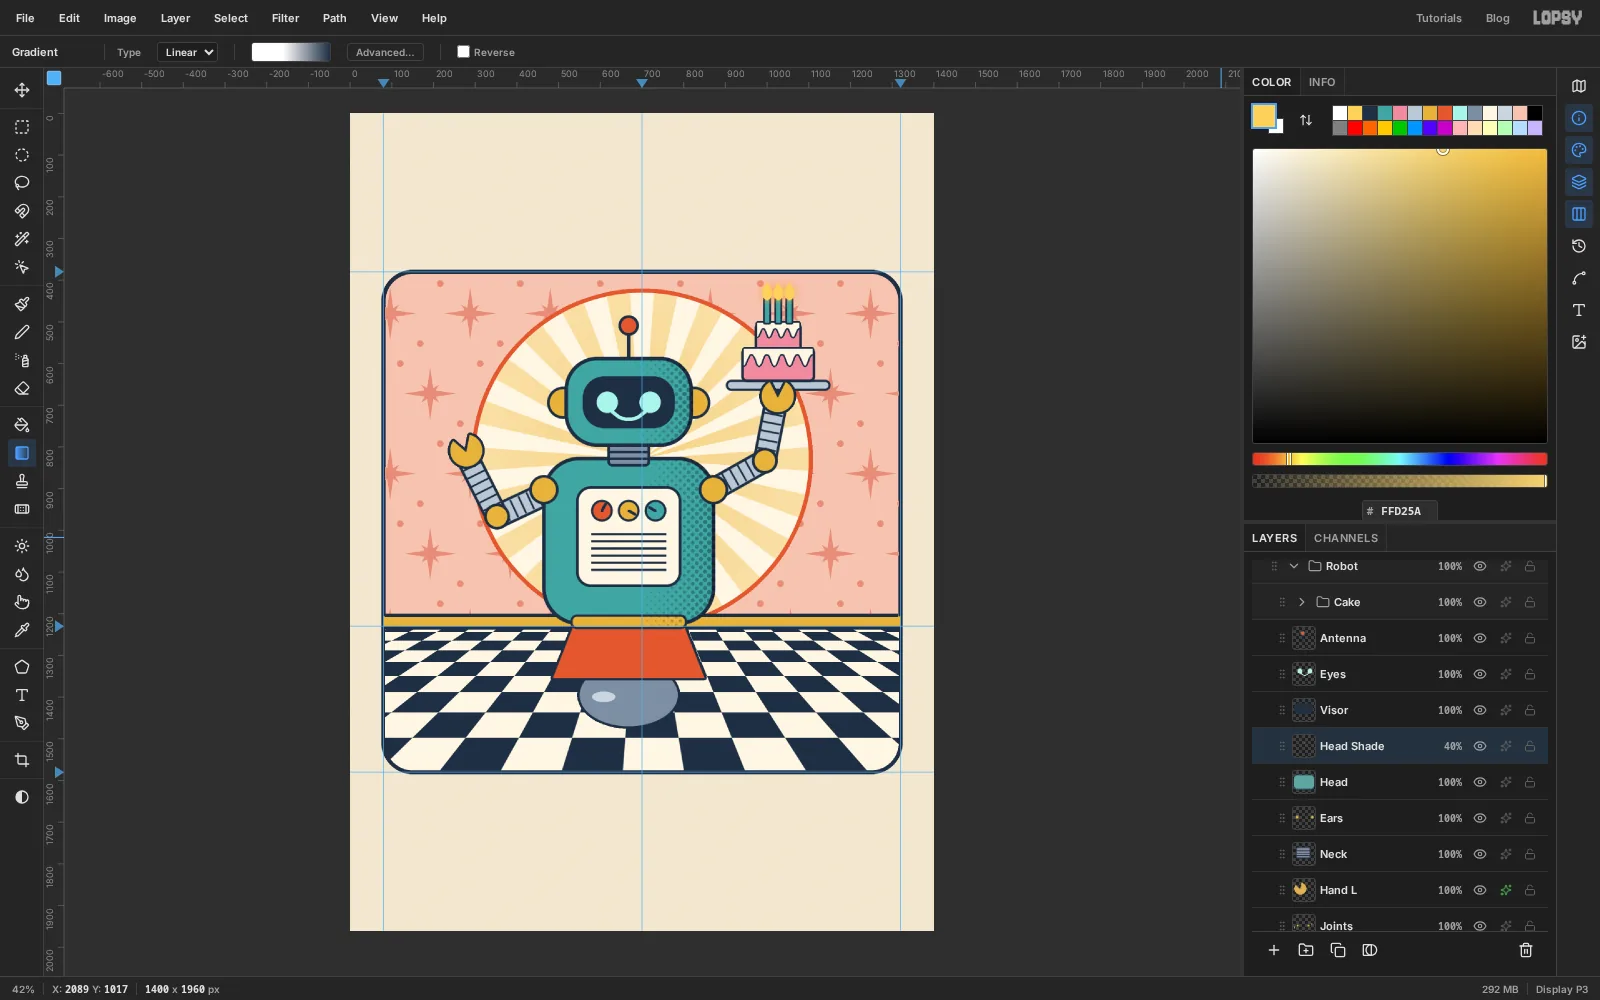
-
Ground it with a shadow and glows
- Click
Wheeland add a layer namedFloor Shadow. Fill a flat ellipse about 430 × 52 px centred just below the ball with . Set it to Multiply at30%, then dragWheelback above it so the ball sits on its shadow. - On
Eyes, add Outer Glow: Size22, Opacity70, colour . - On
Antenna, add Outer Glow: Size26, Opacity75, colour .
A flat, translucent shadow fits the style. A big blurry one would look like a photo pasted into a cartoon. Collapse
Robotwhen you're done.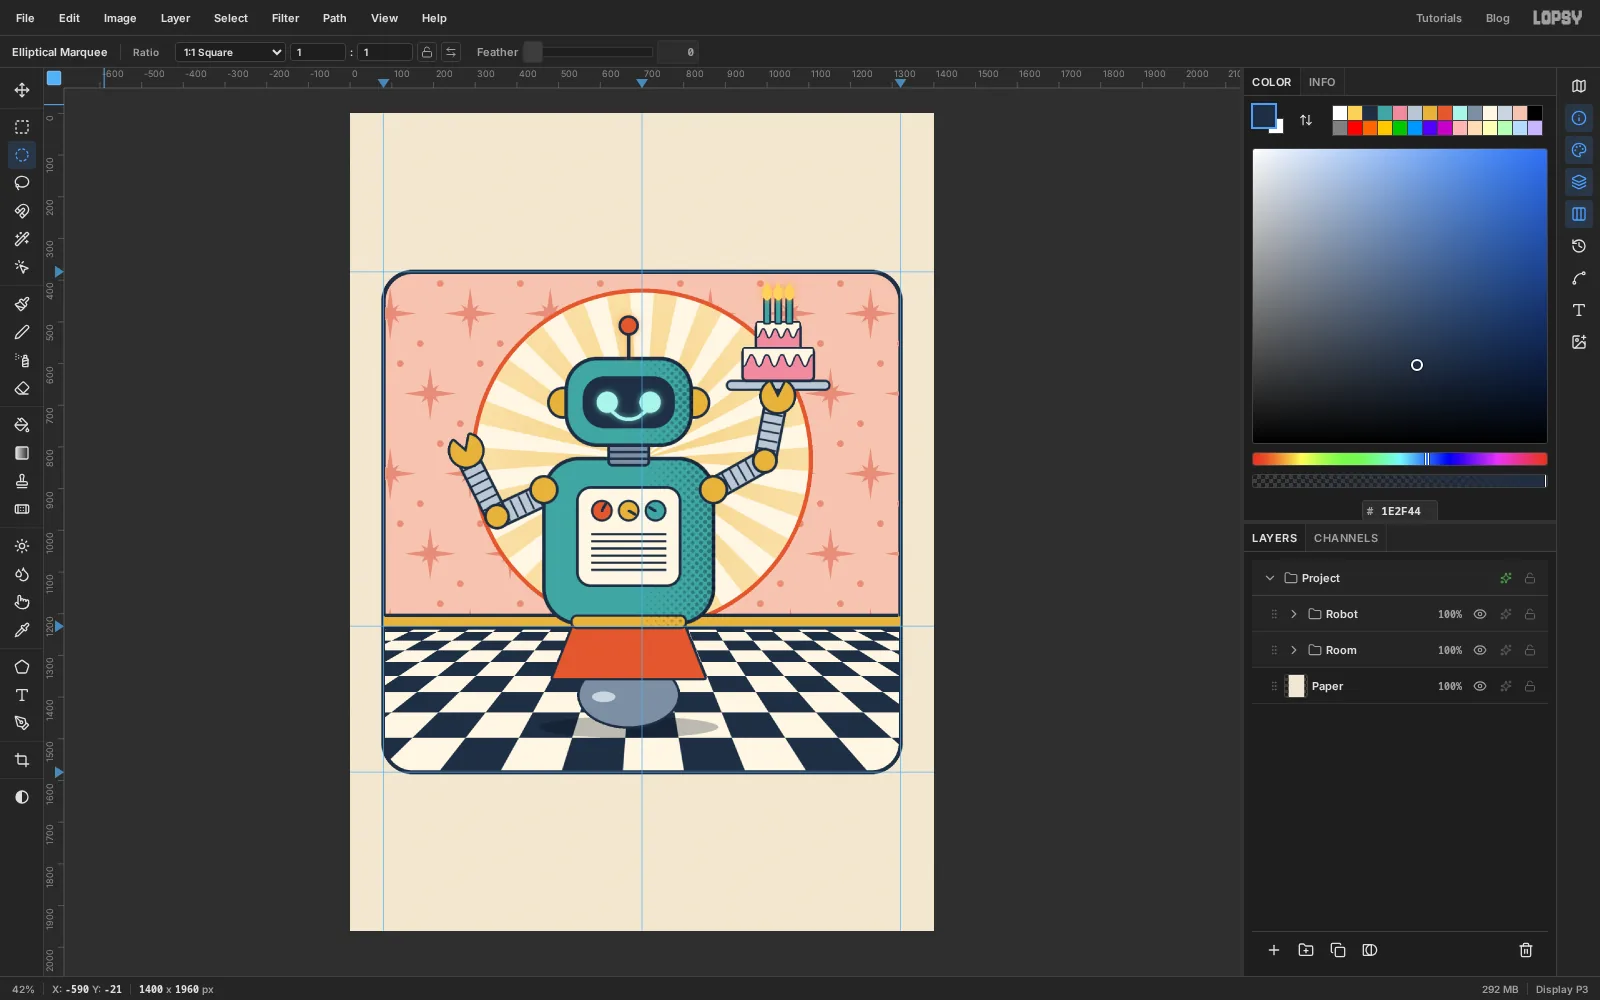
- Click
-
Set the script title
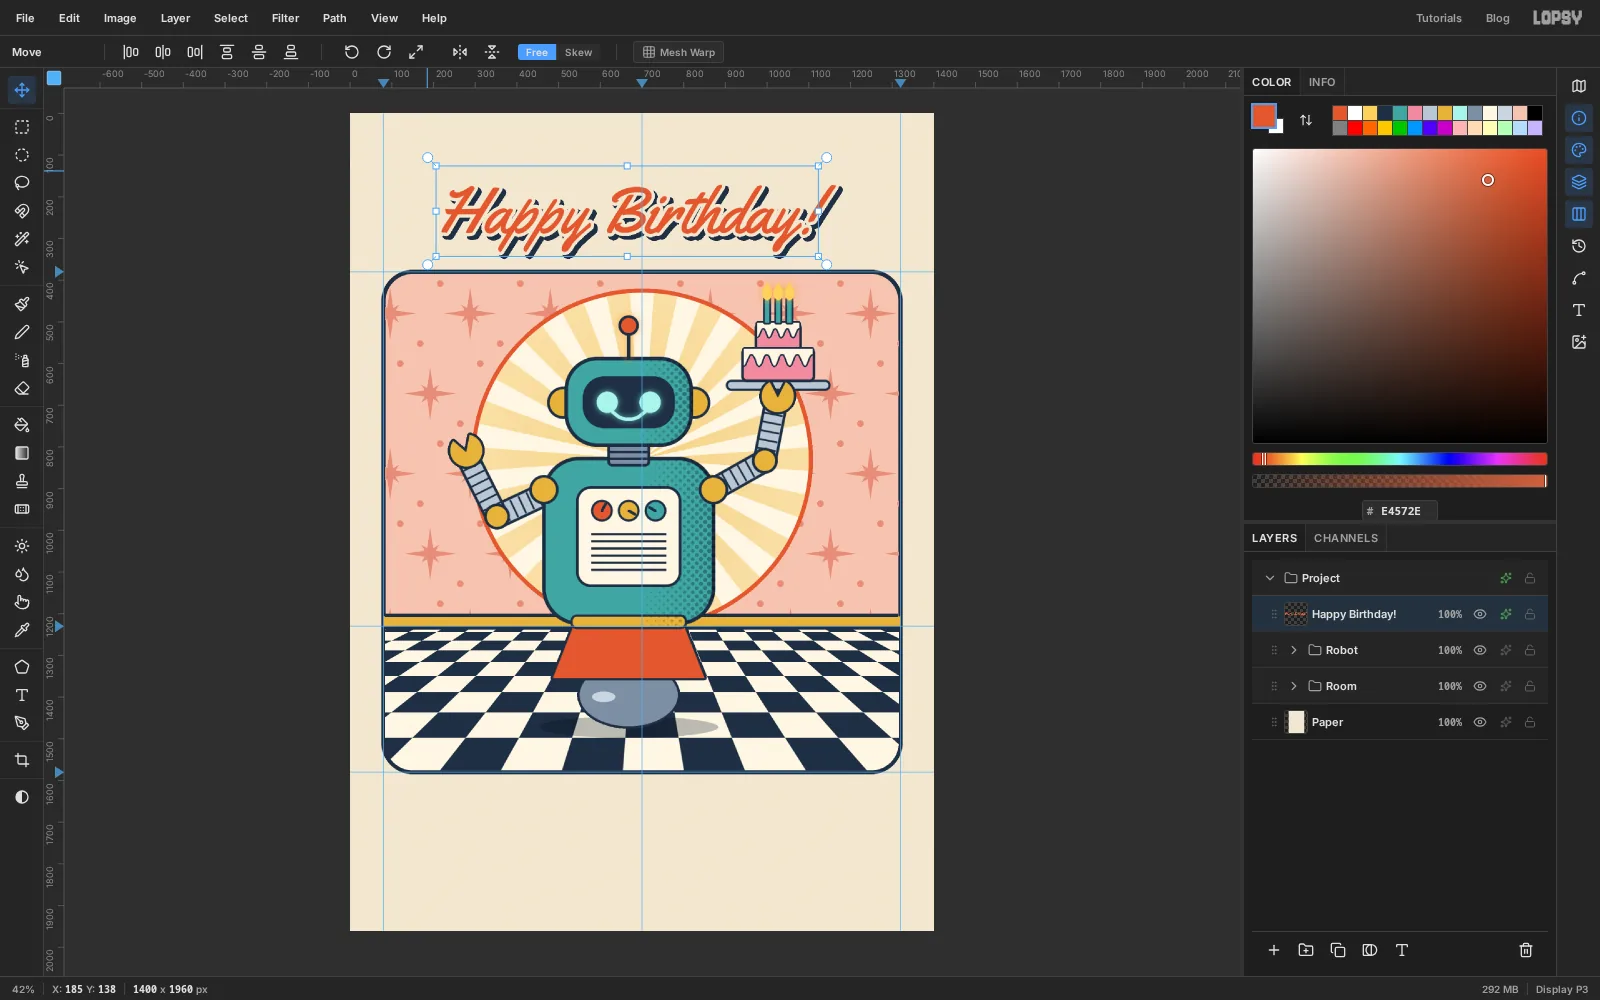
Set the foreground to . Pick the Text tool (T), choose Yellowtail in the font menu and set Size to
155before you click. Click in the empty paper above the panel and typeHappy Birthday!. Press Tab to commit.- Pick the Move tool and click Align center horizontally.
- Add two effects: Stroke, Width
8, colour (the paper colour, so the letters seem cut out), and Drop Shadow, Offset X9, Offset Y9, Blur0, Opacity100, colour . A zero blur gives the hard "sign-painter" shadow. - Drag the rotation handle just outside the top-left corner of the text's box to tilt it about 4° up to the right. Press Esc to commit. The text stays editable.
Drag the title so the bottoms of the "p"s and "y"s clear the panel's top edge by about 40 px. Script descenders hang a long way down, so judge the gap by those, not by the baseline.
-
Fake a misprinted second colour
Cheap colour printing often landed the second ink a little out of line. It's an easy detail to fake:
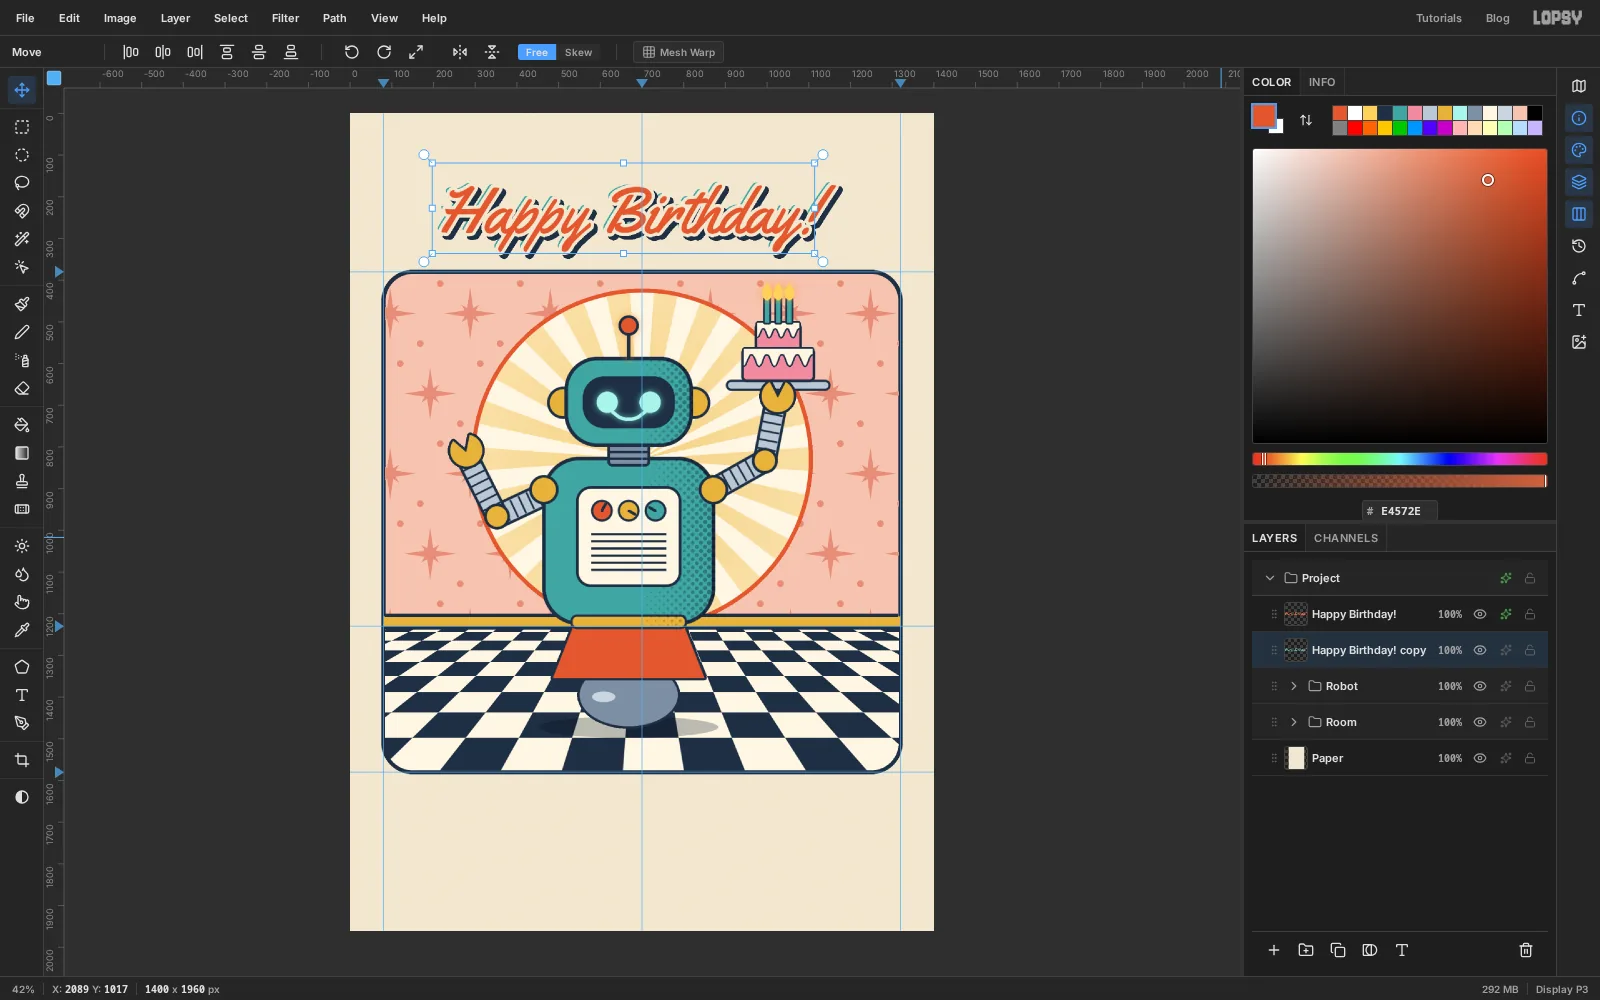
- With the title selected, choose Layer → Duplicate Layer.
- Pick the Text tool, click the Text color swatch in the options bar and set it to . With the layer selected (not being edited), that recolours the whole copy.
- In the copy's effects drawer, untick Stroke and Drop Shadow.
- Drag the original
Happy Birthday!row back above the copy, so the copy is underneath. - Click the copy, pick the Move tool and nudge it with the arrow keys. Each press moves it 1 px: press ← nine times and ↑ seven times.
A sliver of teal now peeks out along the top-left edges of every letter.
-
Seat the nameplate
Click
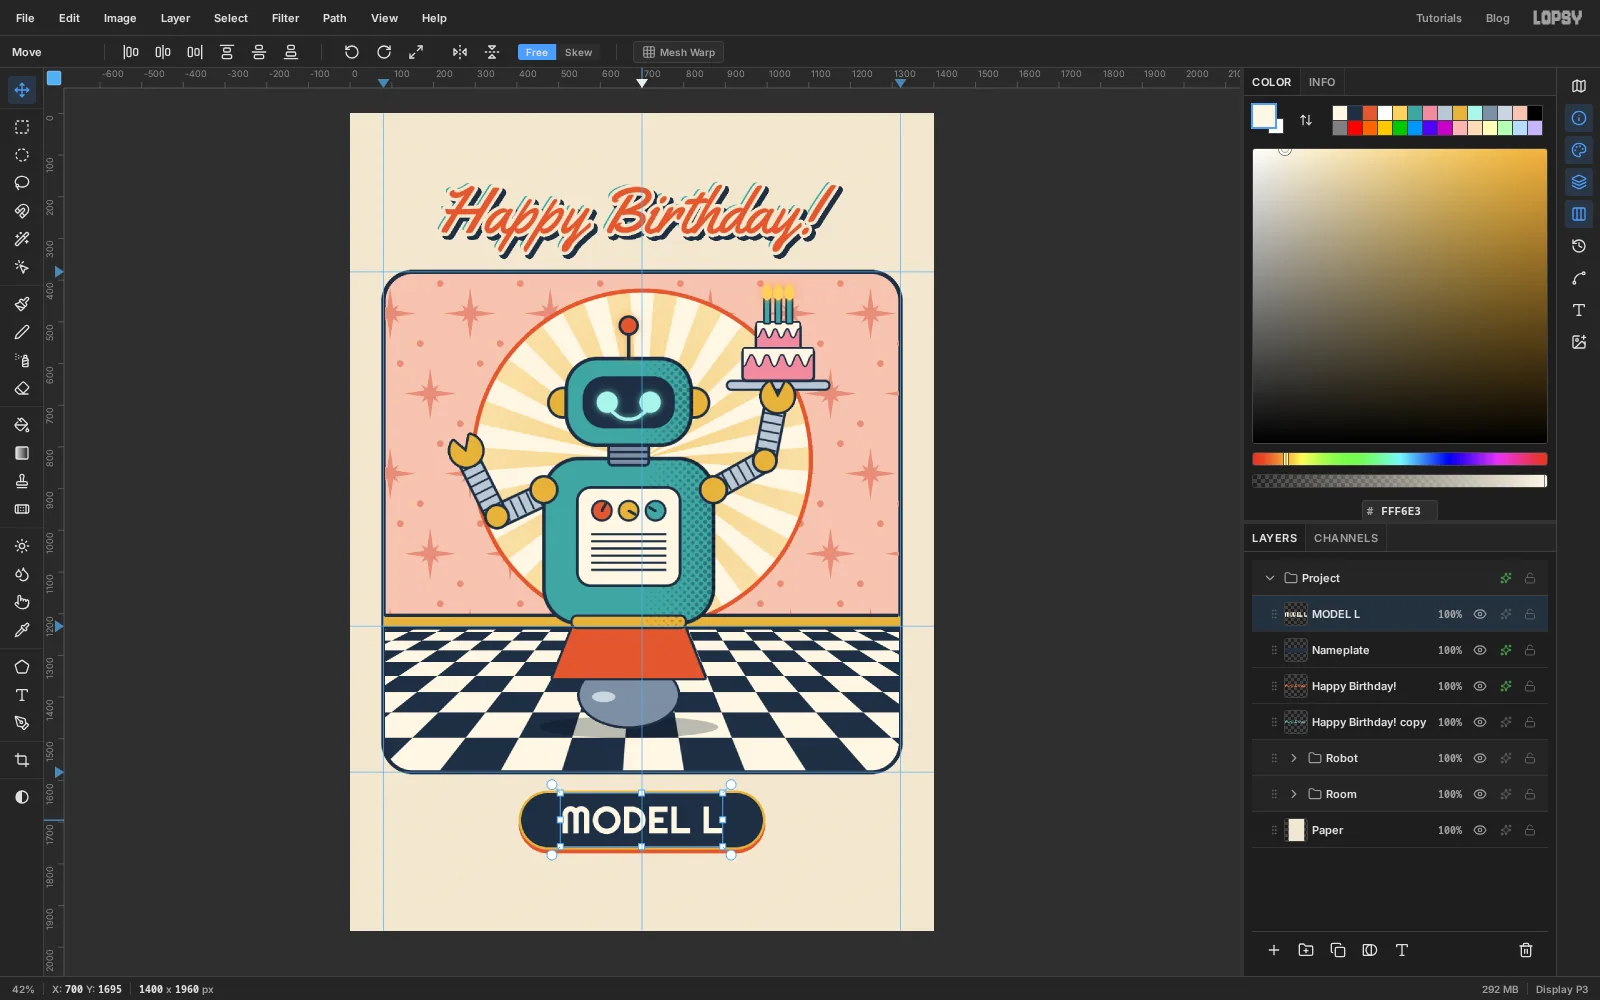
Happy Birthday!and add a layer namedNameplate. With the Shape tool, draw a rectangle with Corner Radius65, fill and no stroke, from410, 1630to990, 1760(press at700, 1695). Add a Stroke effect, Width6, , and a Drop Shadow with Offset X0, Offset Y9, Blur0, Opacity100, colour . That gives it a printed coral underline.Set the foreground to , choose Righteous at Size
92and click in empty paper below the pill to typeMODEL L. Press Tab, pick the Move tool and drag the text into the pill.Centre capitals by their ink, not their box. Text boxes leave extra room for accents above and descenders below, so a box centred in the pill leaves the letters sitting high. Leave the same gap above the cap tops as below the baseline (about 33 px each) and the same space at both ends.
-
Add the advertising copy
Click
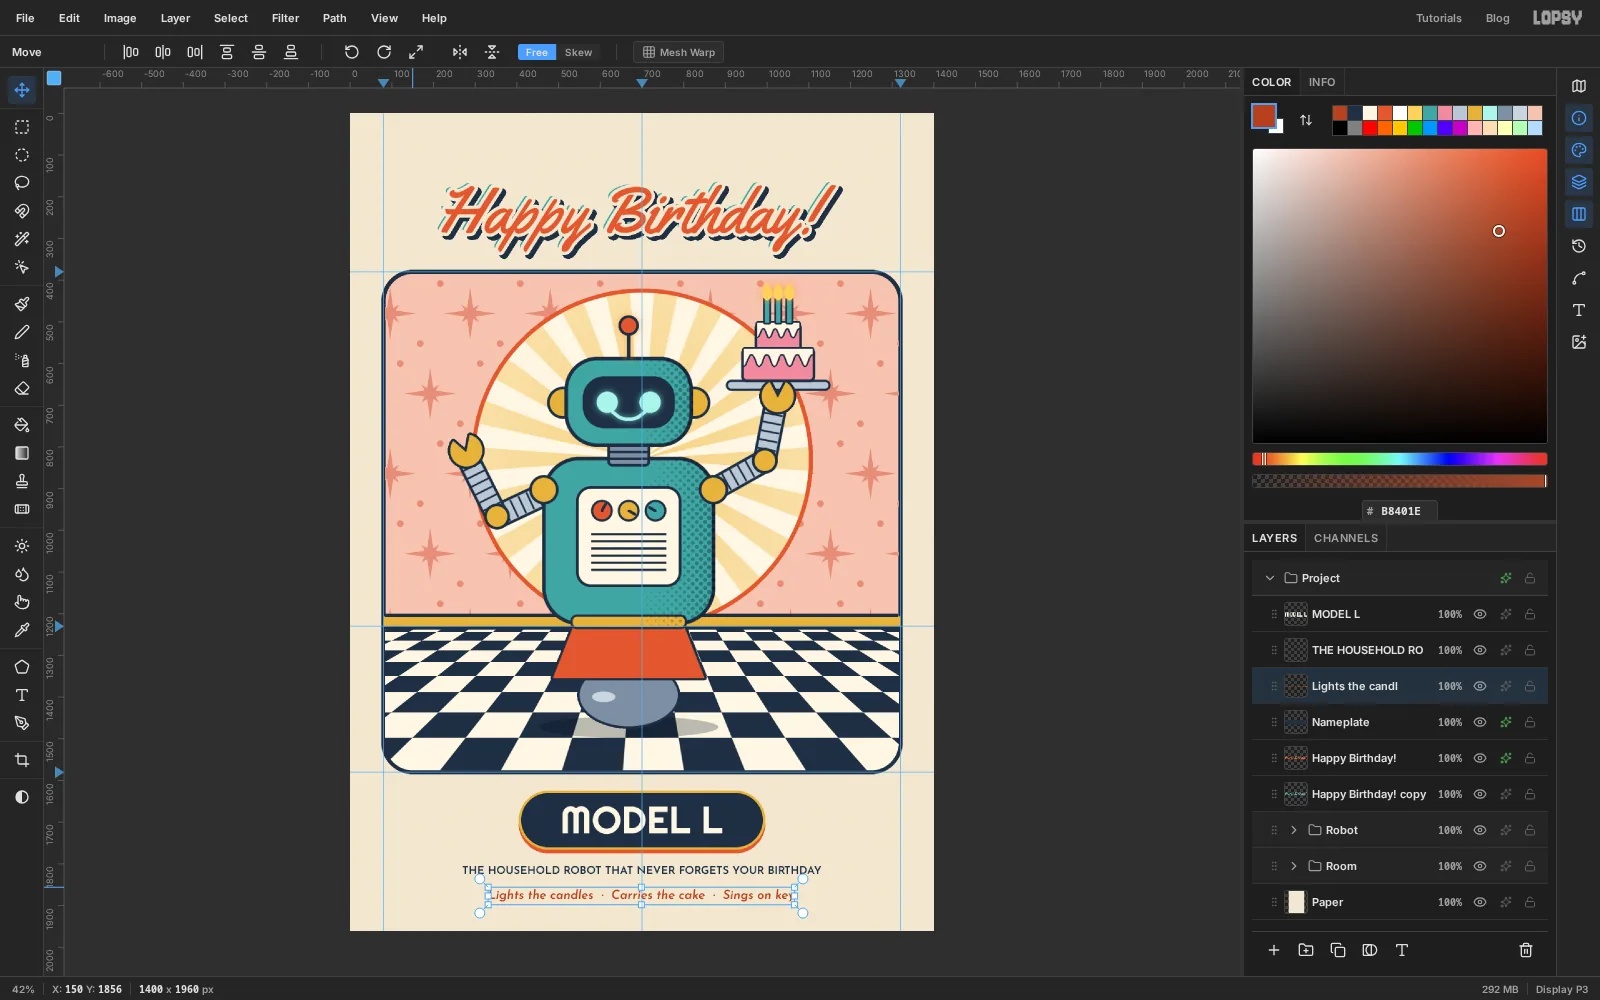
Nameplatefirst, so a text click in empty space starts a new layer instead of editingMODEL L.- Set the foreground to , choose Josefin Sans, Size
26, and click below the pill. TypeTHE HOUSEHOLD ROBOT THAT NEVER FORGETS YOUR BIRTHDAYand press Tab. Set the weight to SemiBold. - Click
Nameplateagain. Set the foreground to , keep Josefin Sans, Size30, and typeLights the candles · Carries the cake · Sings on keyon a line about 55 px below the first. The middle dot is Option+Shift+9 on a Mac (Alt+0183 on Windows), with two spaces either side. Set the style to Italic. - Centre each one with the Move tool's Align center horizontally.
The deep coral is darker than the title coral on purpose. The lighter one is hard to read at small sizes on cream.
- Set the foreground to , choose Josefin Sans, Size
-
Stamp a "New!" seal
Click
MODEL L, press Cmd+D and add a layer namedSeal. Set the foreground to and open Filter → Sunburst… again, this time to make a badge rather than rays:- Rays
30, Length6.8, Width100, Taper100, Fade0, Softness0 - Center X
18.21and Center Y28.57, which puts the centre at255, 560
At full width and taper, the rays overlap into a spiky star. To give it a big solid middle for the text, marquee a circle from
161, 466to349, 654with the Elliptical Marquee (188 px, on the same centre), fill it with and press Cmd+D. Then add a Drop Shadow: Offset5/5, Blur0, Opacity100, .Now the text. Set the foreground to and pick the Text tool with Righteous and Center alignment.
- Click the
Sealrow, set Size56, click in empty canvas away from the seal and typeNEW!. Press Tab. - Click the
Sealrow again, set Size26, click in empty canvas and typeBIRTHDAY, press Enter, and typeMODE. Press Tab. - With the Move tool, drag each one onto the seal so both are centred on x
255, withNEW!above.
Clicking
Sealfirst each time puts both text layers directly above it, in the orderNEW!,BIRTHDAY MODE,Seal.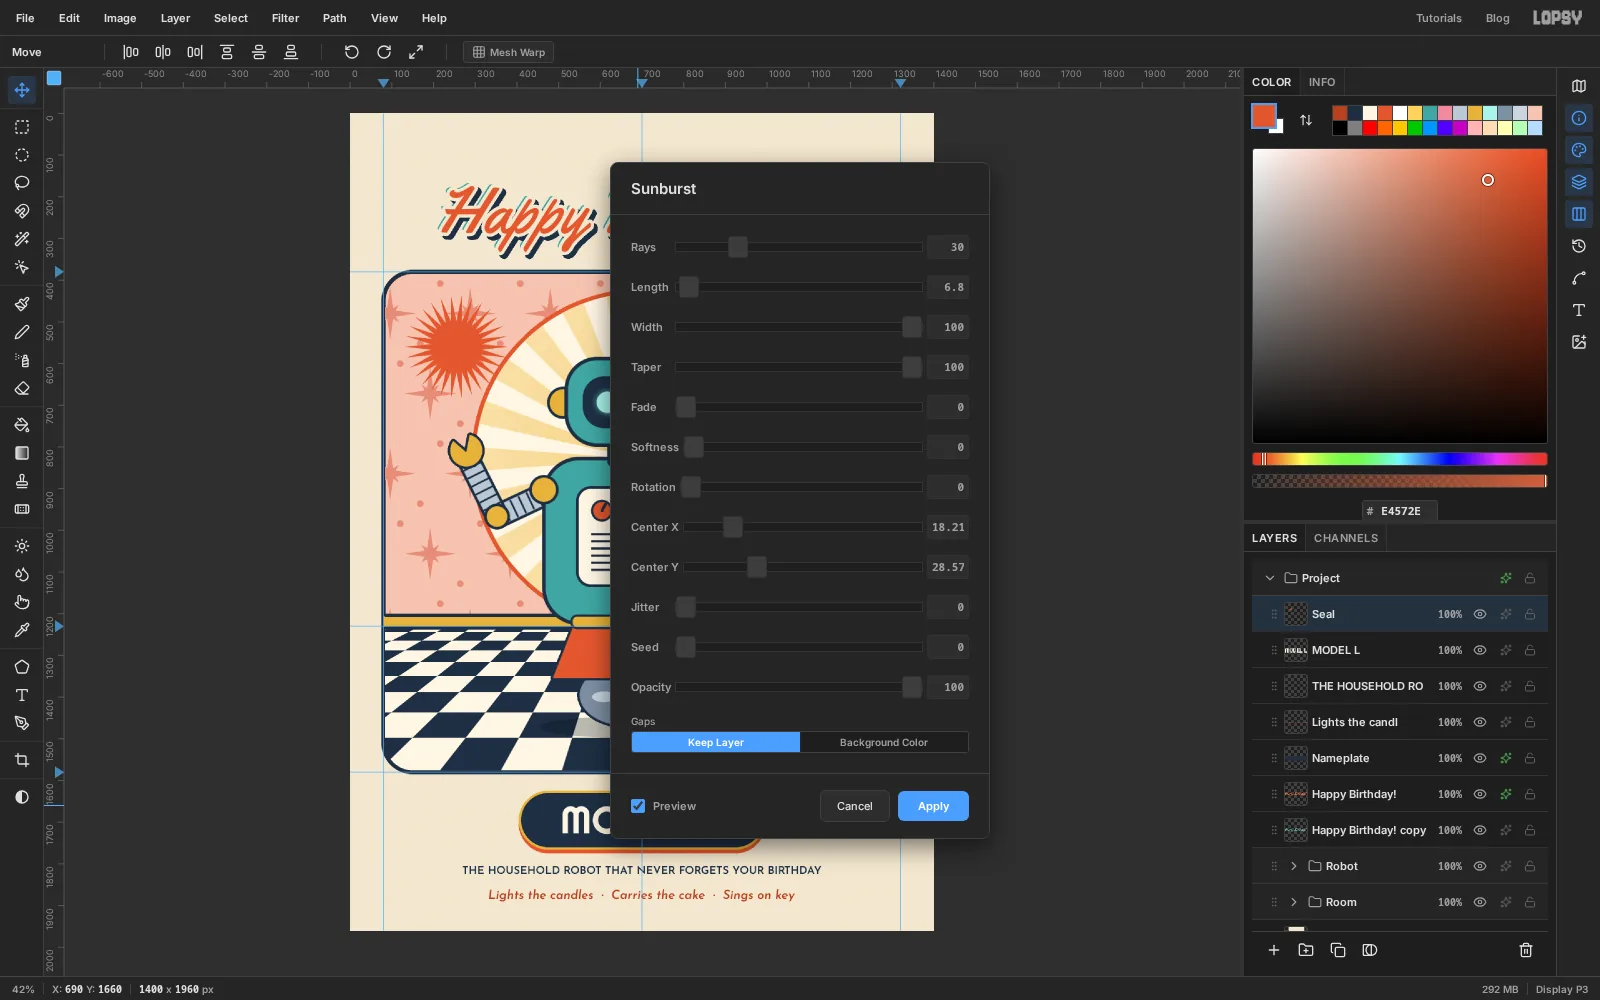
- Rays
-
Group and tilt the badge
Click
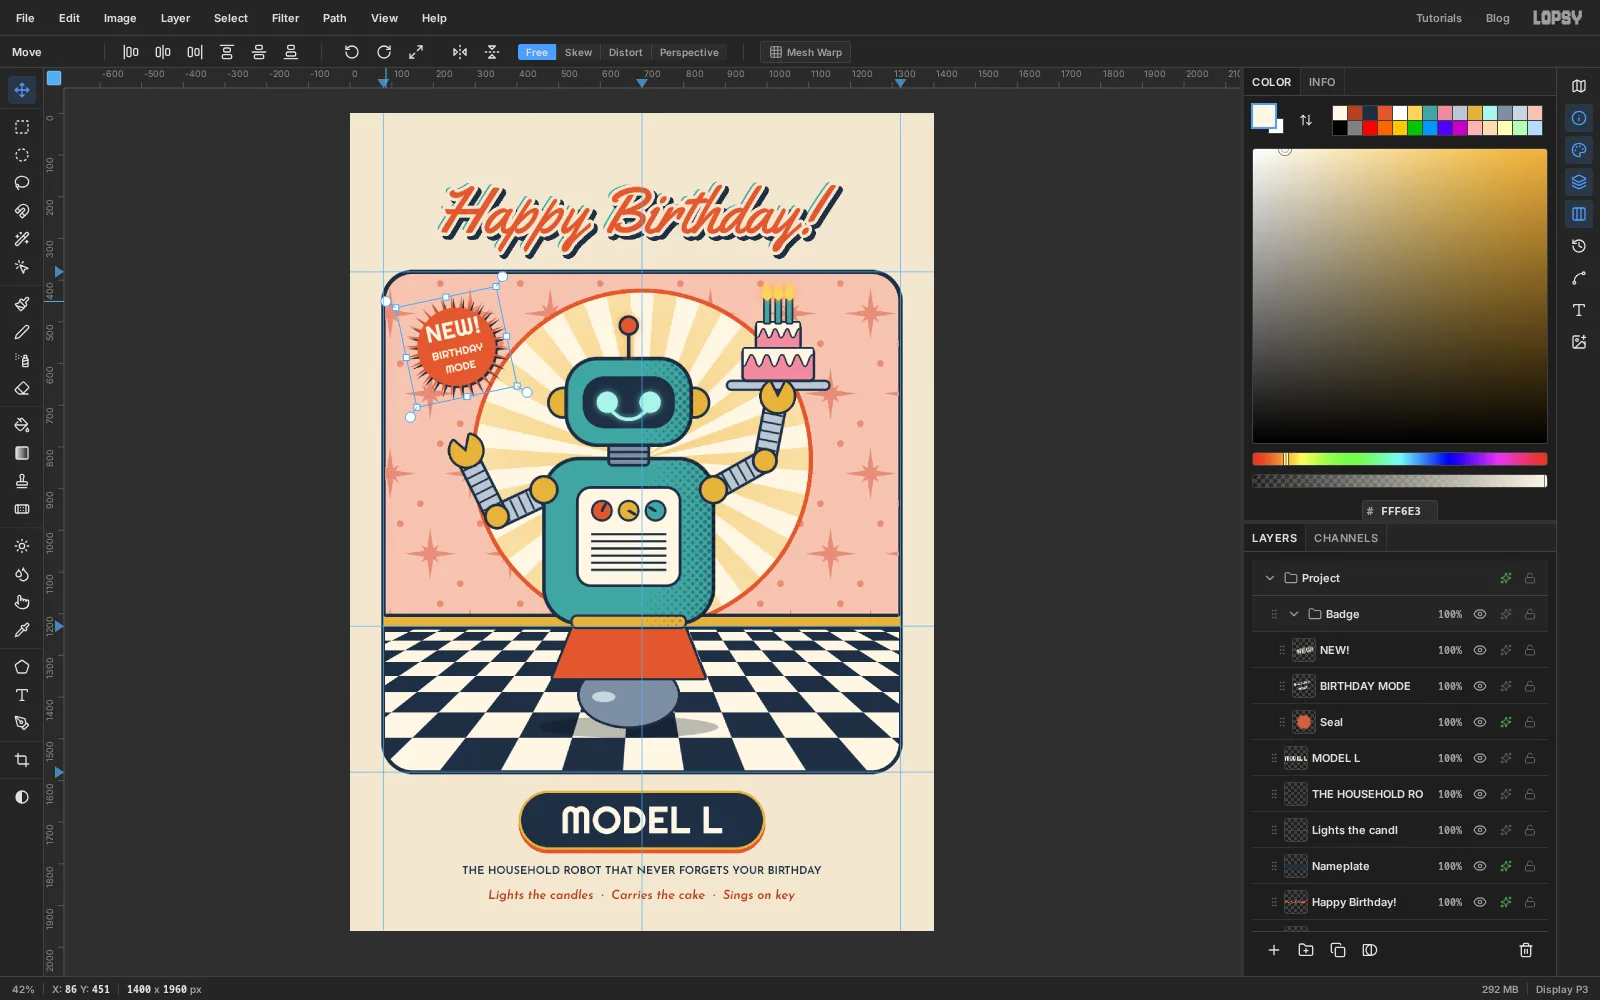
NEW!, Shift-clickSealto select all three, and choose Layer → Group Layers. Name itBadge.Press Cmd+D, pick the Move tool, and drag the rotation handle anticlockwise about 12°. All three layers turn together around the badge's centre, and both text layers stay editable. A tilted seal looks slapped on, which is exactly the energy an advert badge needs.
-
Scatter cream sparkles
Click
Happy Birthday!and add a layer namedSparkles. Lasso a slim four-point star about 88 px tall at1210, 492, in the top-right of the wall, and fill it with . Then duplicate it with the clipboard:- Marquee around the sparkle and press Cmd+C.
- Press Cmd+V. The copy pastes in place on a new layer, selected and with the Move tool picked.
- Drag it to a new spot, then Cmd-drag a corner handle inwards to shrink it.
- Press Cmd+D, then Cmd+E to merge it down into
Sparkles.
Paste three copies at different sizes: two down the right side of the wall and one on the left at about
168, 870. Uneven sizes and spacing look more natural than a neat row.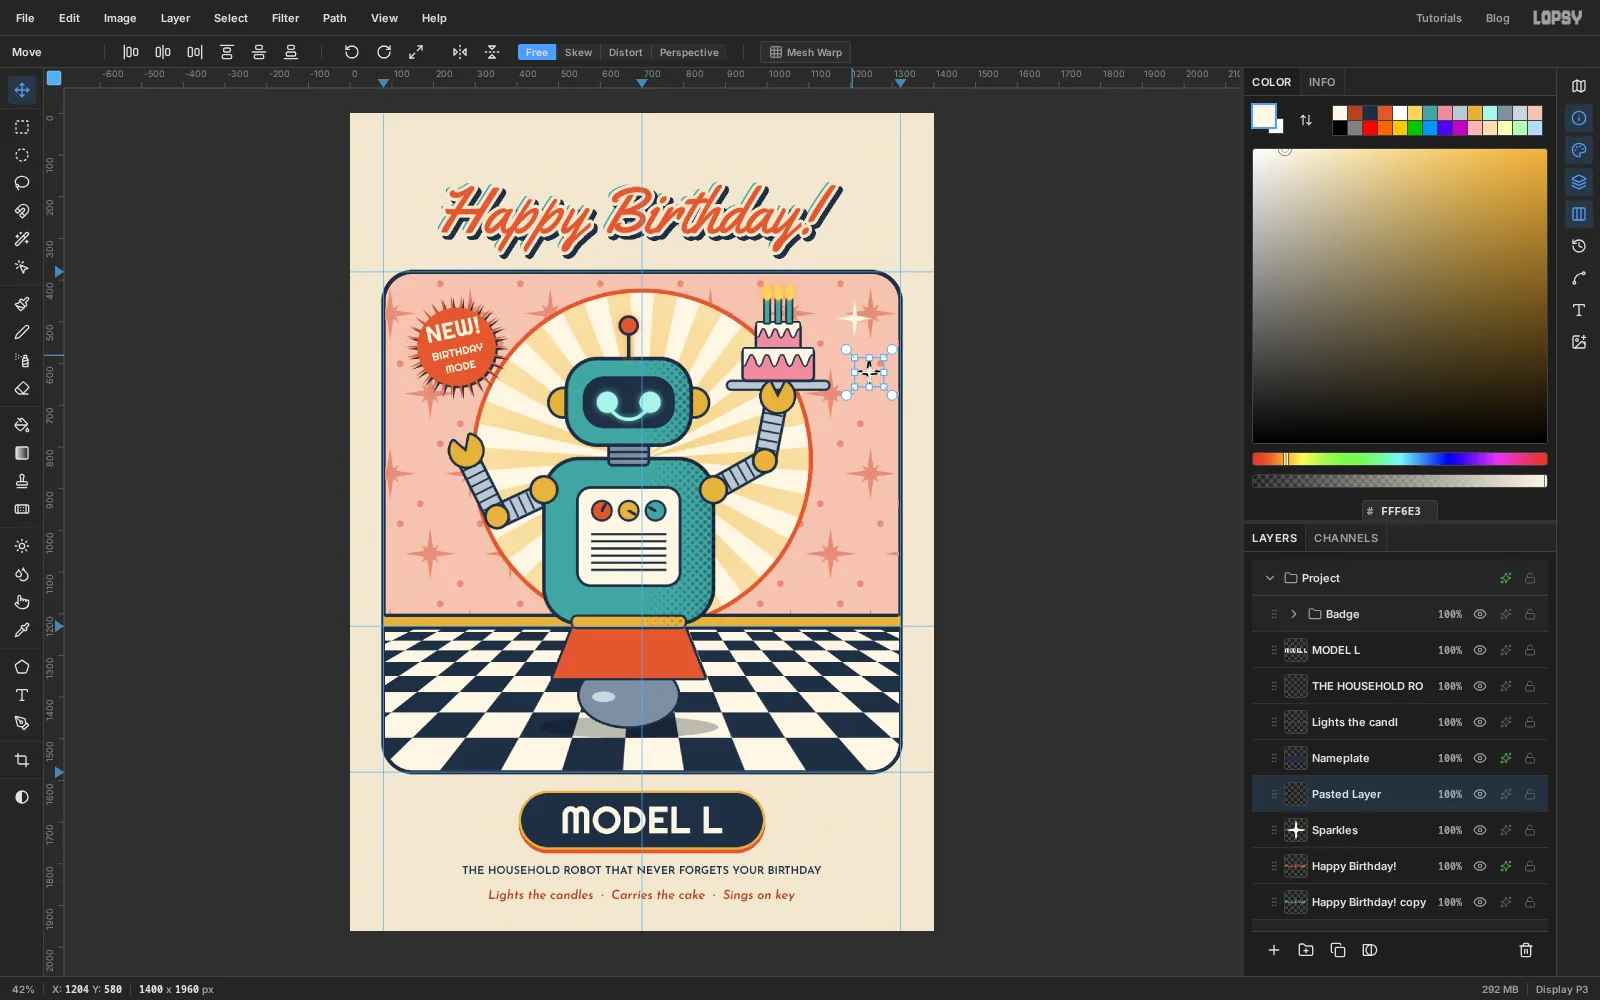
-
Add paper grain
Collapse
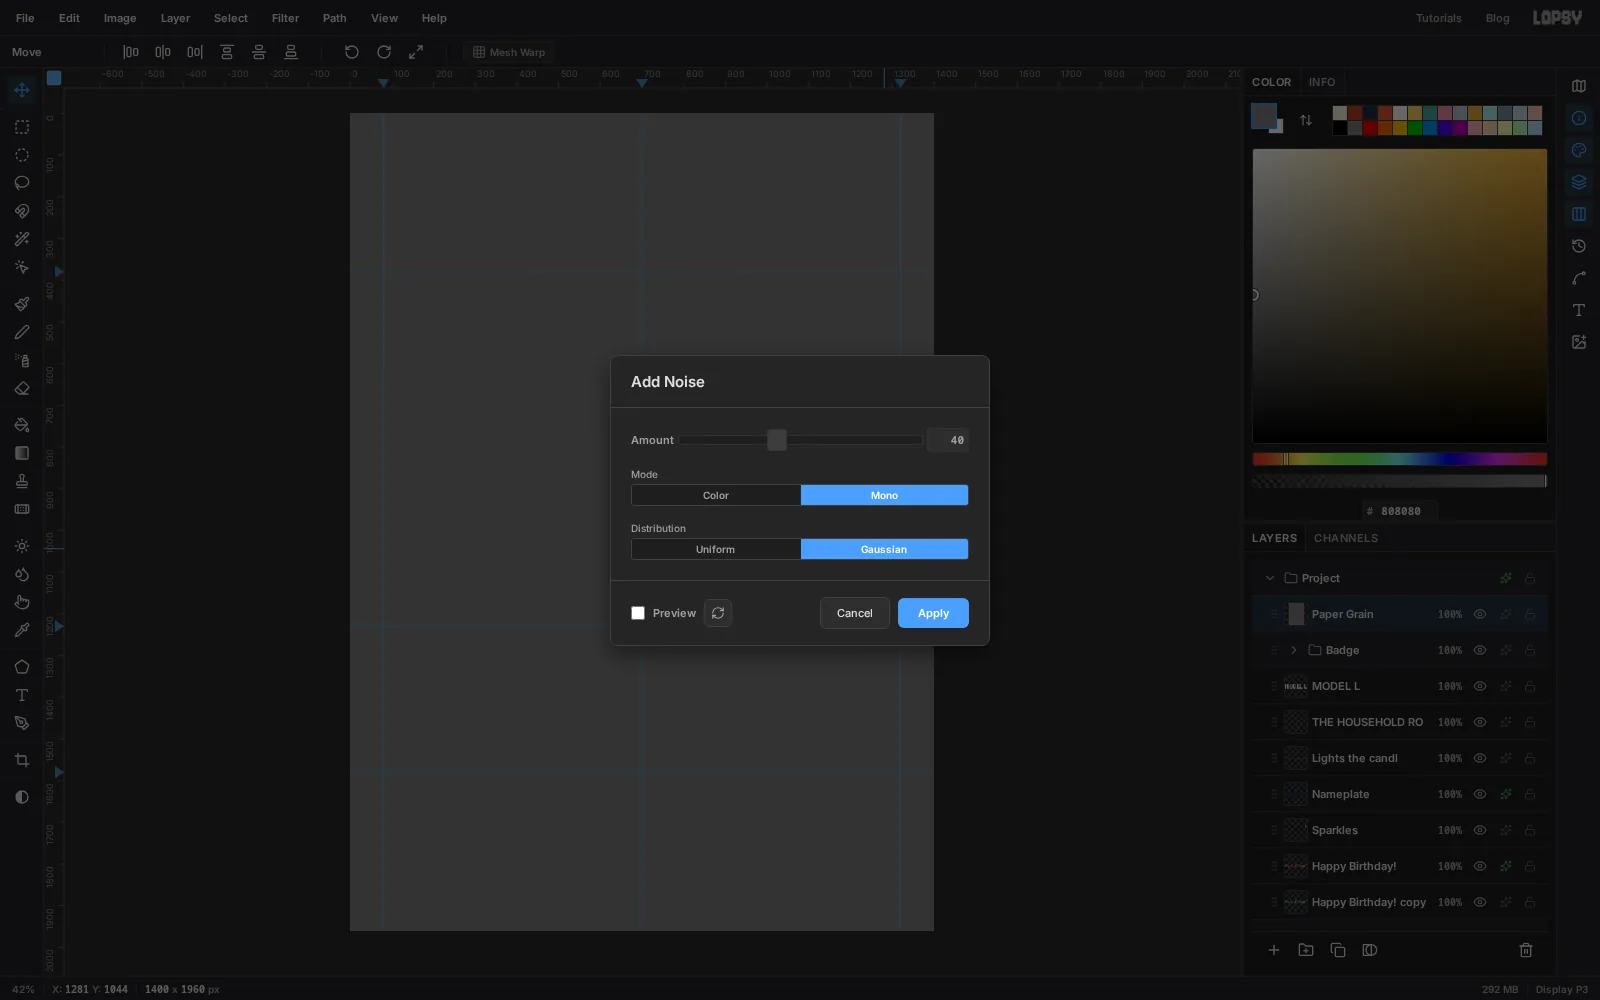
Badgeand clickMODEL L(just below it), then click Add Layer and name itPaper Grain. Drag it by its grip aboveBadge, so it's the top row inside Project and sits over everything. Press Cmd+A and fill the whole canvas with , then press Cmd+D.- Run Filter → Add Noise… with Amount
40, Mono and Gaussian. - Run Filter → Gaussian Blur… with Radius
1to soften the speckle into grain. - Set the layer to Overlay at
30%.
Overlay ignores 50% grey, so only the speckle shows, lightening and darkening the colours beneath. It's subtle at fit-to-screen zoom and shows up when the card is printed or viewed full size.
- Run Filter → Add Noise… with Amount
-
Fade the ink with Levels
Pure navy looks too crisp for old printing, where the darkest ink never quite hit black. Choose Layer → Adjustment Layer…. Lopsy applies adjustments to the Project group, and the panel opens beside the canvas.
Expand Levels and drag the lower output black slider from
0to about26. Every dark lifts slightly, as if the ink had faded on cream stock.Close the panel, save with File → Save Project, and export with File → Quick Export PNG.