Make a Film Noir Birthday Card with Venetian-Blind Light
Build a film noir birthday card in Lopsy from two photos, with venetian-blind light, rain in the light, a lone candle flame, a case tag and a red rubber stamp.
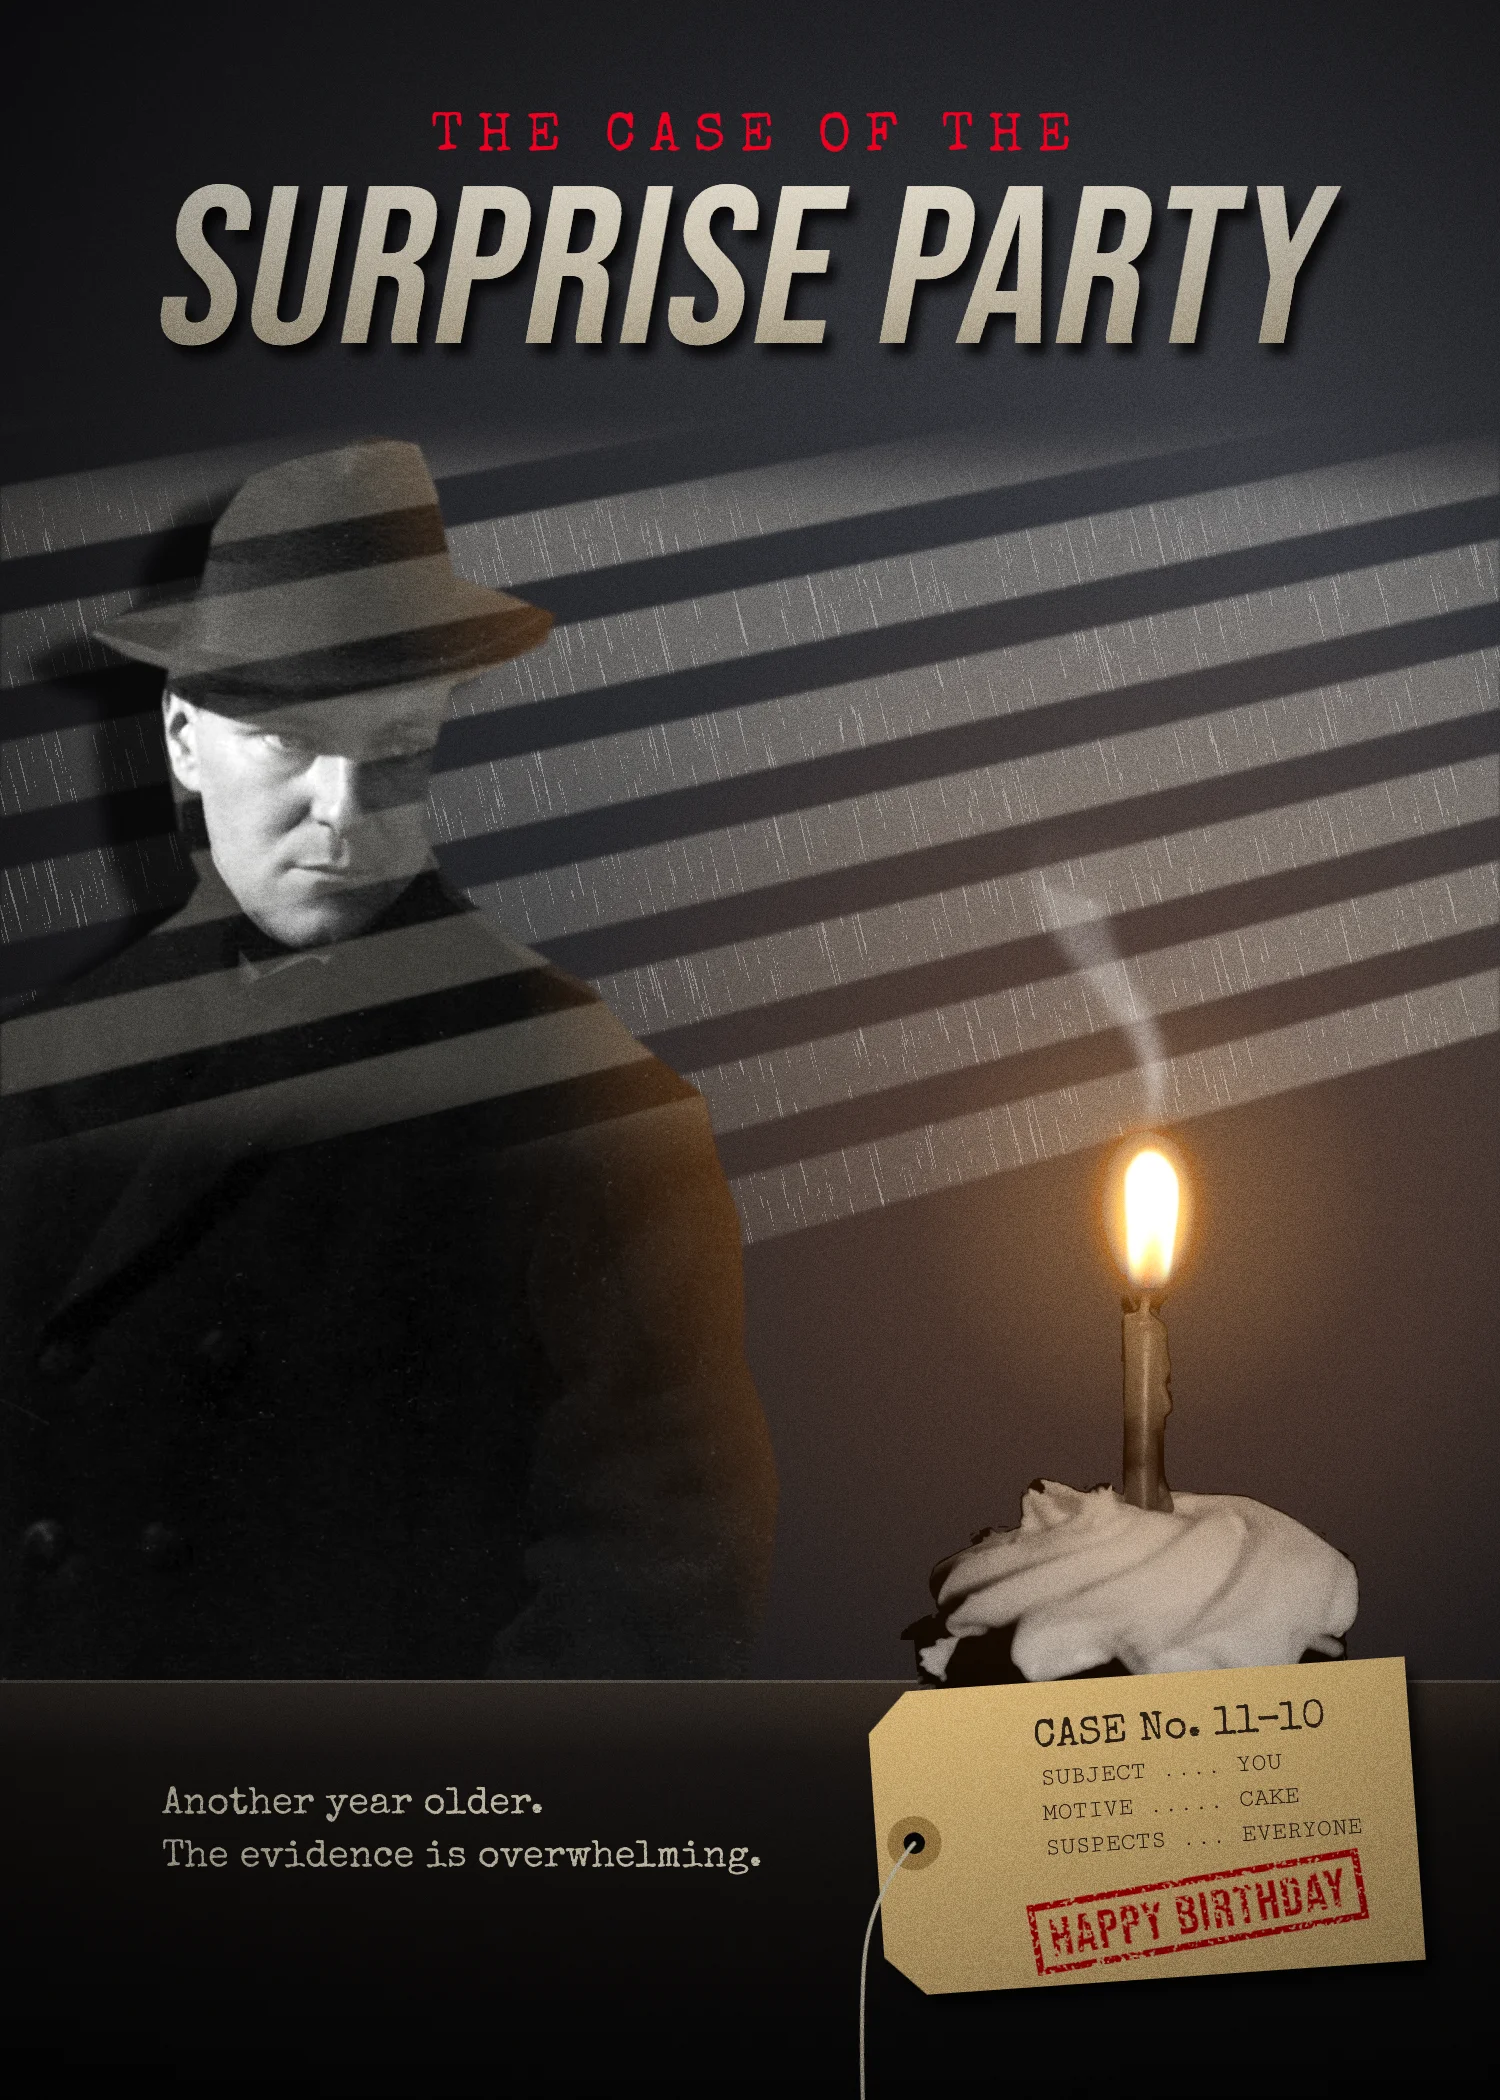
Film noir is the look of 1940s crime films: hard light, deep shadow, rain on the windows and a detective who has seen too much. Its most famous shot is the light that falls through venetian blinds and lays stripes across the wall and the people in the room. Noir posters added a single spot of colour, a red title or a lit match, to an otherwise black-and-white world.
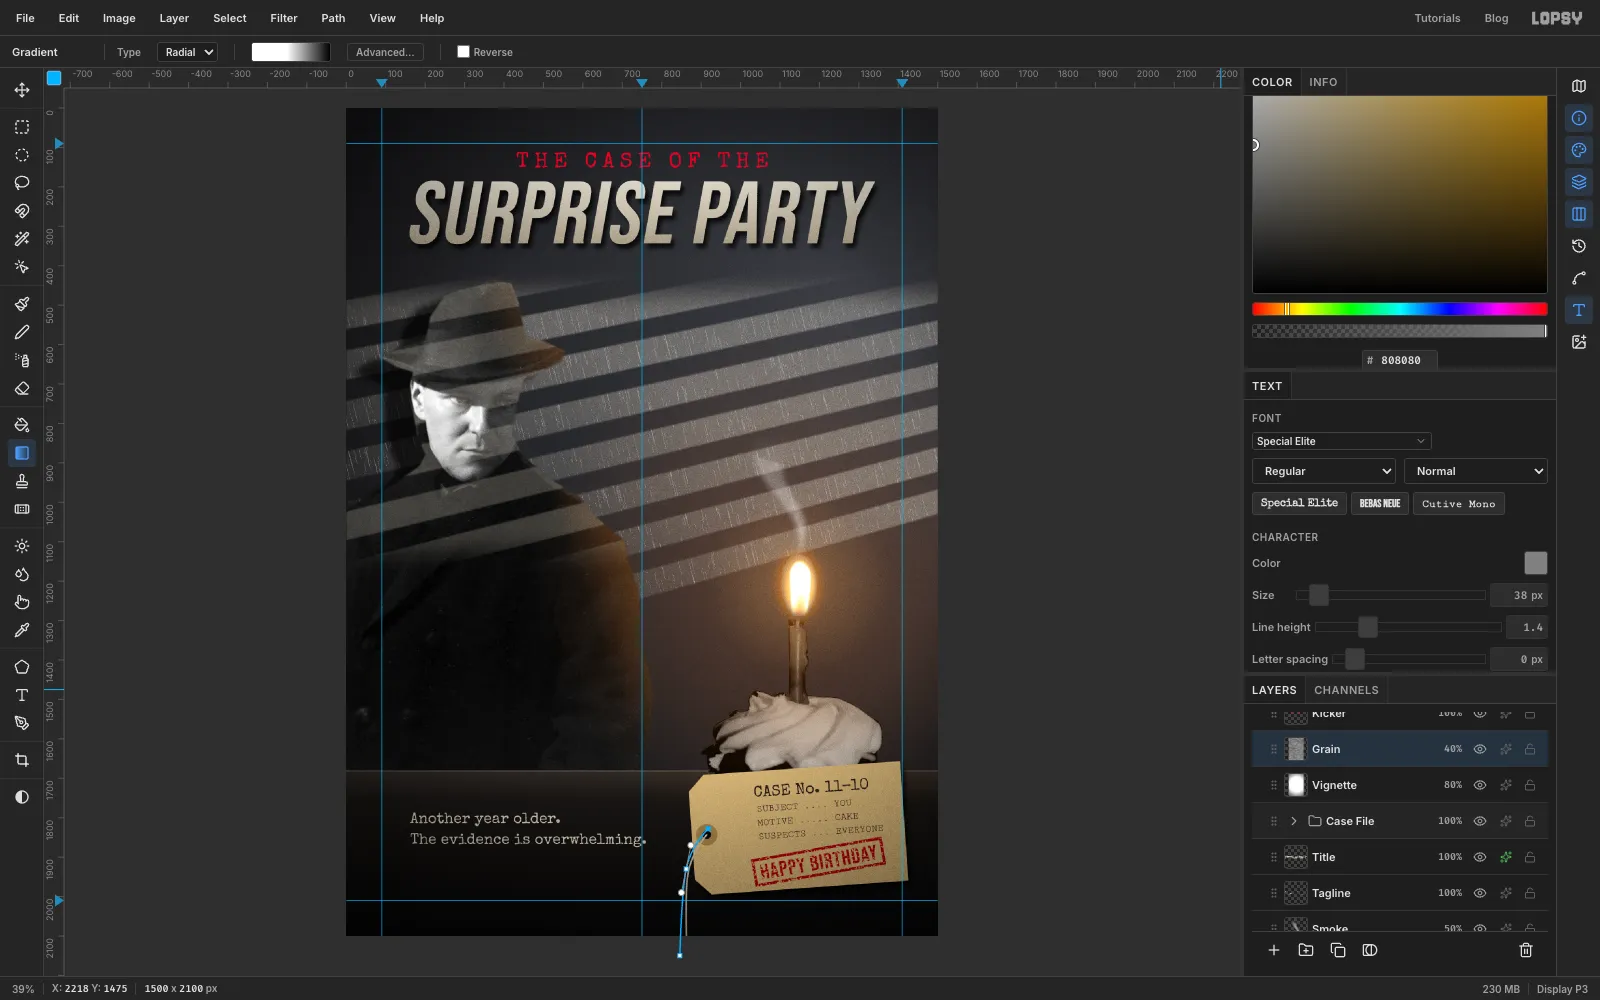
In this tutorial you'll turn that look into a birthday card: The Case of the Surprise Party, a 1500 × 2100 px card (5 × 7 in at 300 dpi). A detective in a fedora watches from the shadows, slatted light with rain in it falls across the wall, and the only warm thing in the room is the candle on a birthday cupcake. A manila case tag on the desk spells out the joke, and a red rubber stamp closes the case.
You'll work from two photos:
- Mr. Cermák from Kolín, a 1920s portrait by Jaromír Funke from the Getty Museum's Open Content programme (CC0), via rawpixel. Download the 772 × 1024 px version.
- Birthday Cupcake 3 by megforce1 on Flickr (CC0), a cupcake with one candle, already cut out onto black. Download the 820 × 1024 px size.
The tools you'll use:
- guides, the Pen tool, Path to Selection, the Rectangular and Elliptical Marquee, the Lasso, the Magic Wand, and Select → Feather / Shrink / Inverse
- a Levels and a Saturation & Vibrance adjustment on a group
- the Skew and Distort transform modes, the scale and rotation handles, and rotating a whole group
- the Gradient tool, a layer mask, Add Noise, Motion Blur, Threshold, Gaussian Blur, Desaturate, Brightness/Contrast and the Smoke render filter
- the Screen, Multiply and Overlay blend modes, Outer Glow and Drop Shadow
- Cut and Paste, the Pencil, the Eraser, Merge Down, and live text in Bebas Neue, Special Elite and Cutive Mono
The palette:
-
Wall ink
-
Blind light
-
rain grey
-
Desk
-
desk edge
-
Candle glow
-
warm light
-
frosting spill
-
rim
-
Title
-
tagline
-
Manila
-
eyelet
-
string
-
tag ink
-
Stamp red
-
kicker red
-
Set up the card and the wall
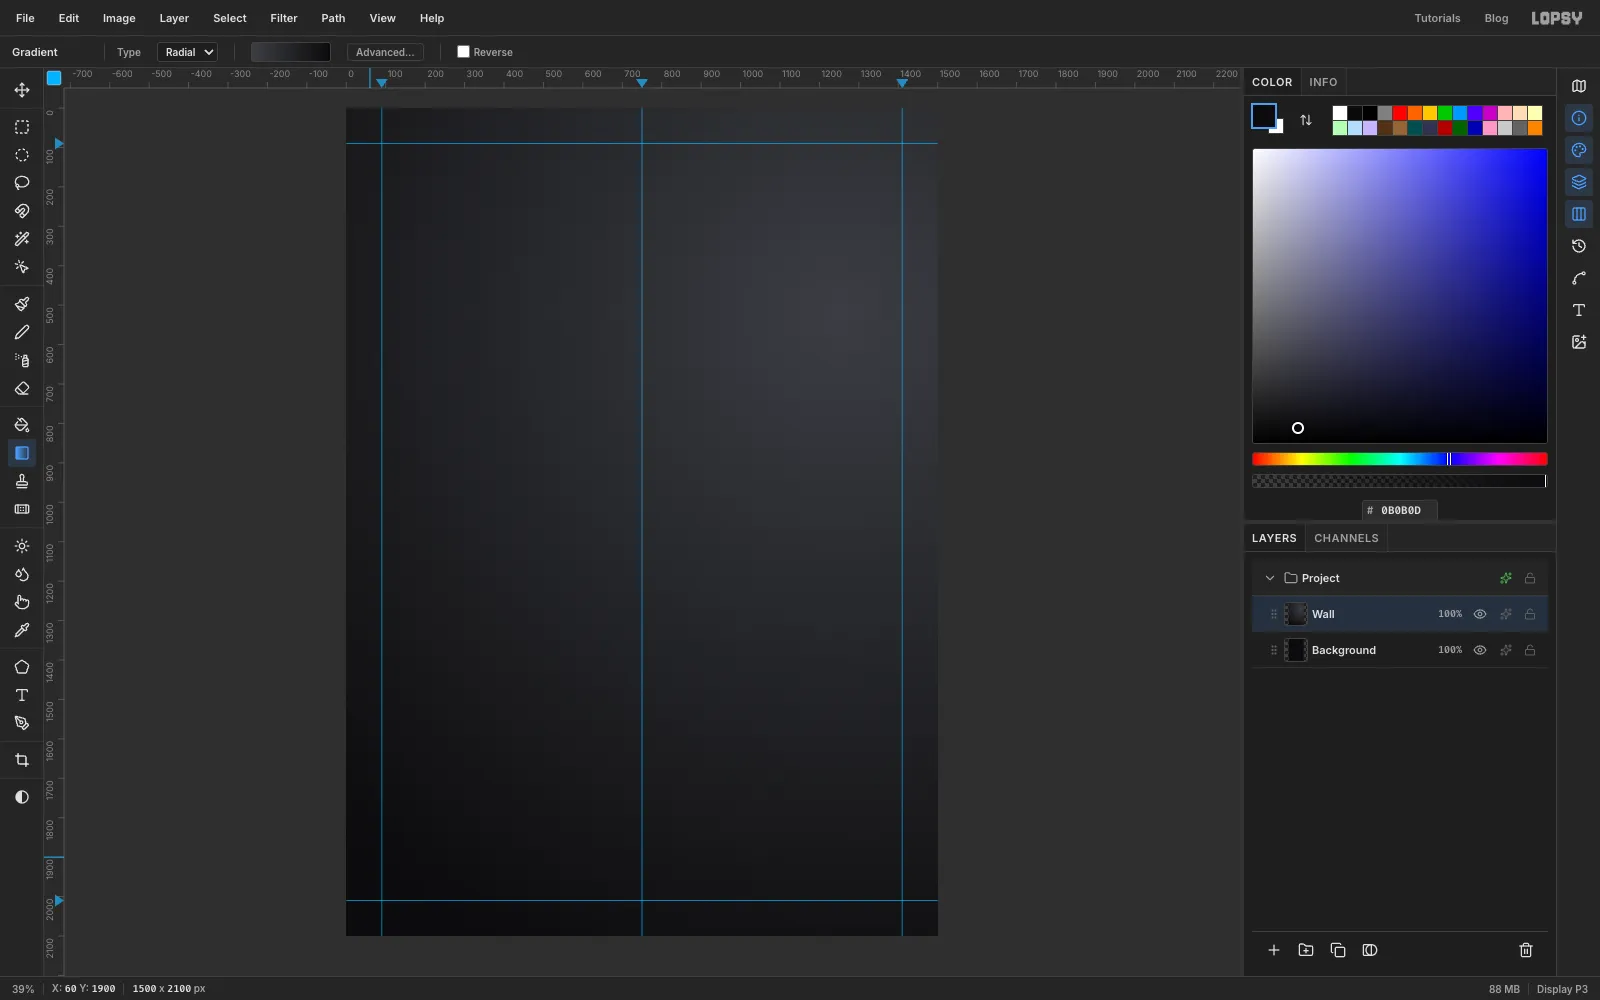
Choose File → New, keep the units on Pixels, and make the document 1500 wide and 2100 high. Click Background, set the foreground colour to and choose Edit → Fill.
Add guides for the margins and the centre line: click the top ruler at 90, 750 and 1410, and the left ruler at 90 and 2010.
Double-click Layer 1 and rename it Wall. Pick the Gradient tool (G), set it to Radial, open Advanced… and make a two-stop gradient from to . Drag from the upper right of the card (about x 1250, y 520) down to the bottom left corner. The wall is now faintly lit from the side where the window will be.
-
Drop in the detective photo inside a group
With Wall selected, click New Group at the bottom of the Layers panel and name the group Detective. Anything you add while the group is open goes inside it.
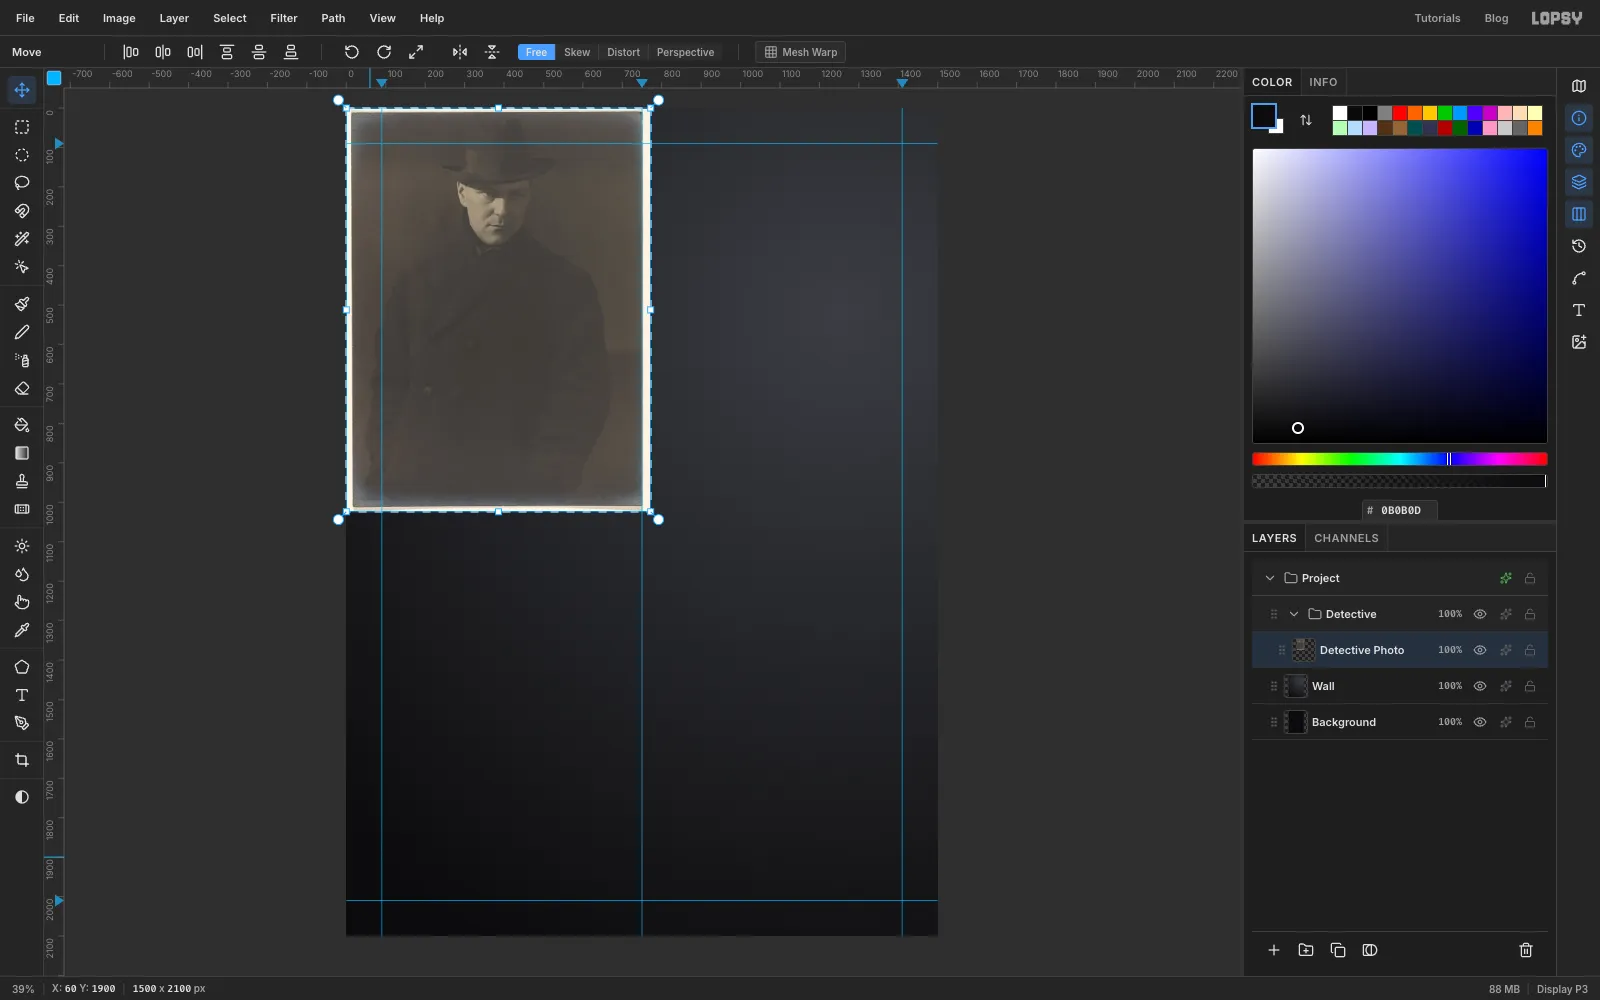
Drag the Funke portrait from your desktop onto the canvas. It lands in the top left corner as Pasted Layer. Rename it Detective Photo.
The photo has a pale paper mount around it. Pick the Rectangular Marquee (M) and click once on the canvas without dragging. This opens a dialog where you can type exact corners. Enter From 24, 24 and To 748, 1000, which is just inside the mount. Choose Select → Inverse and press Delete, then Cmd+D.
-
Trace him with the Pen
The background behind him is only a little lighter than his coat, so the Magic Wand can't separate them. Trace him by hand instead.
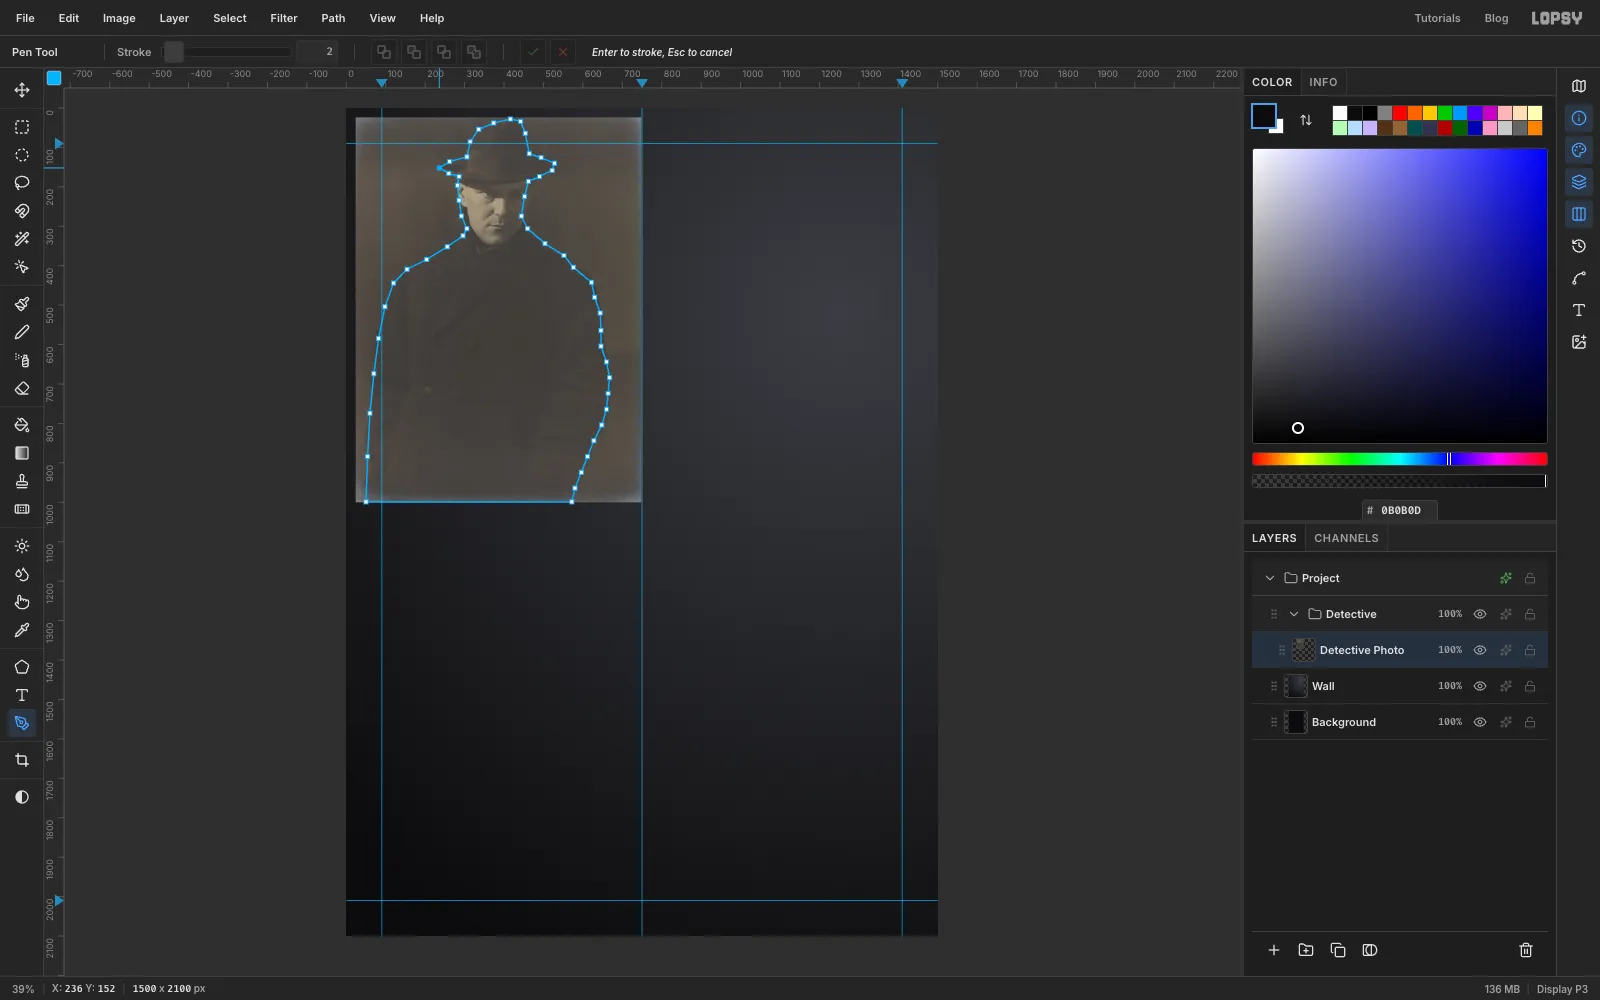
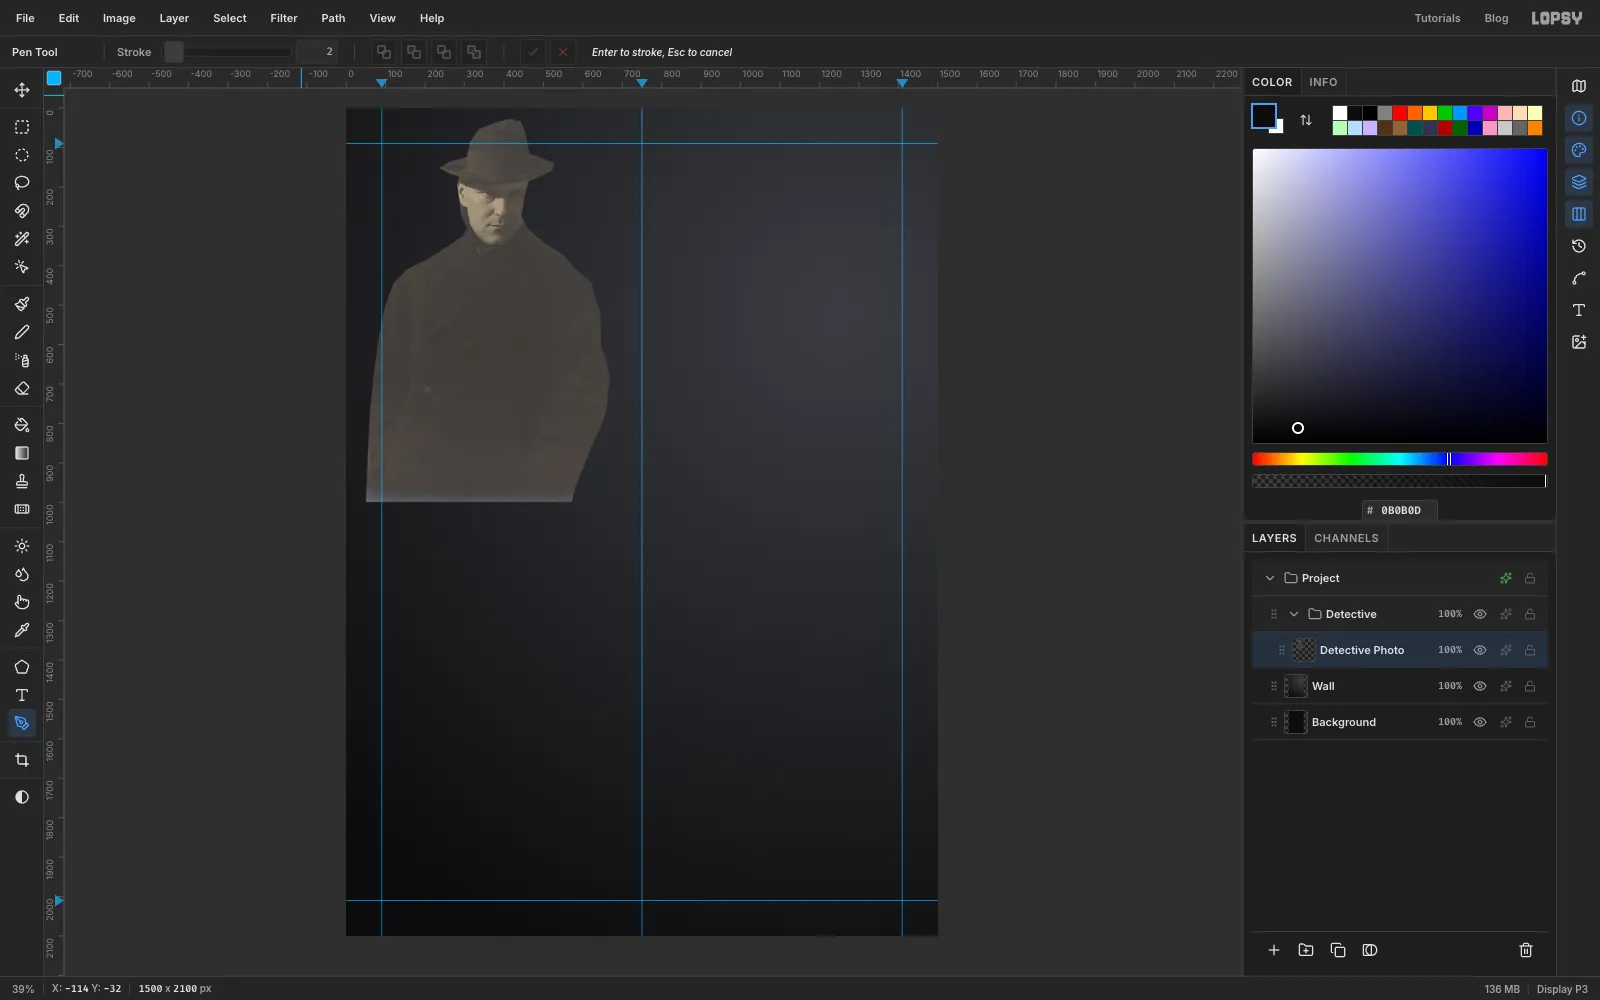
Pick the Pen tool (P) and click your way around him, one corner point at a time. Start at the left tip of the hat brim. Go up over the crown and down to the other tip of the brim. Then go in under the brim, down the side of his face and collar that's on the right of the picture, out along the shoulder on that side and down the coat to the bottom of the photo. Come back along the bottom and up the coat on the left of the picture to the other shoulder, then up the face to the brim. About 40 points is plenty.
Stay a few pixels inside the coat edges, where the dark coat meets the lighter wall. Any wall you leave inside the path will show up later as a pale fringe. Click the first point again to close the path.
-
Cut away the background
Open the Paths panel and click Path to Selection, then Delete Path. Choose Select → Feather… with 2 so the edge isn't razor sharp. Then choose Select → Inverse, press Delete and press Cmd+D.
-
Scale him up and place him on the left
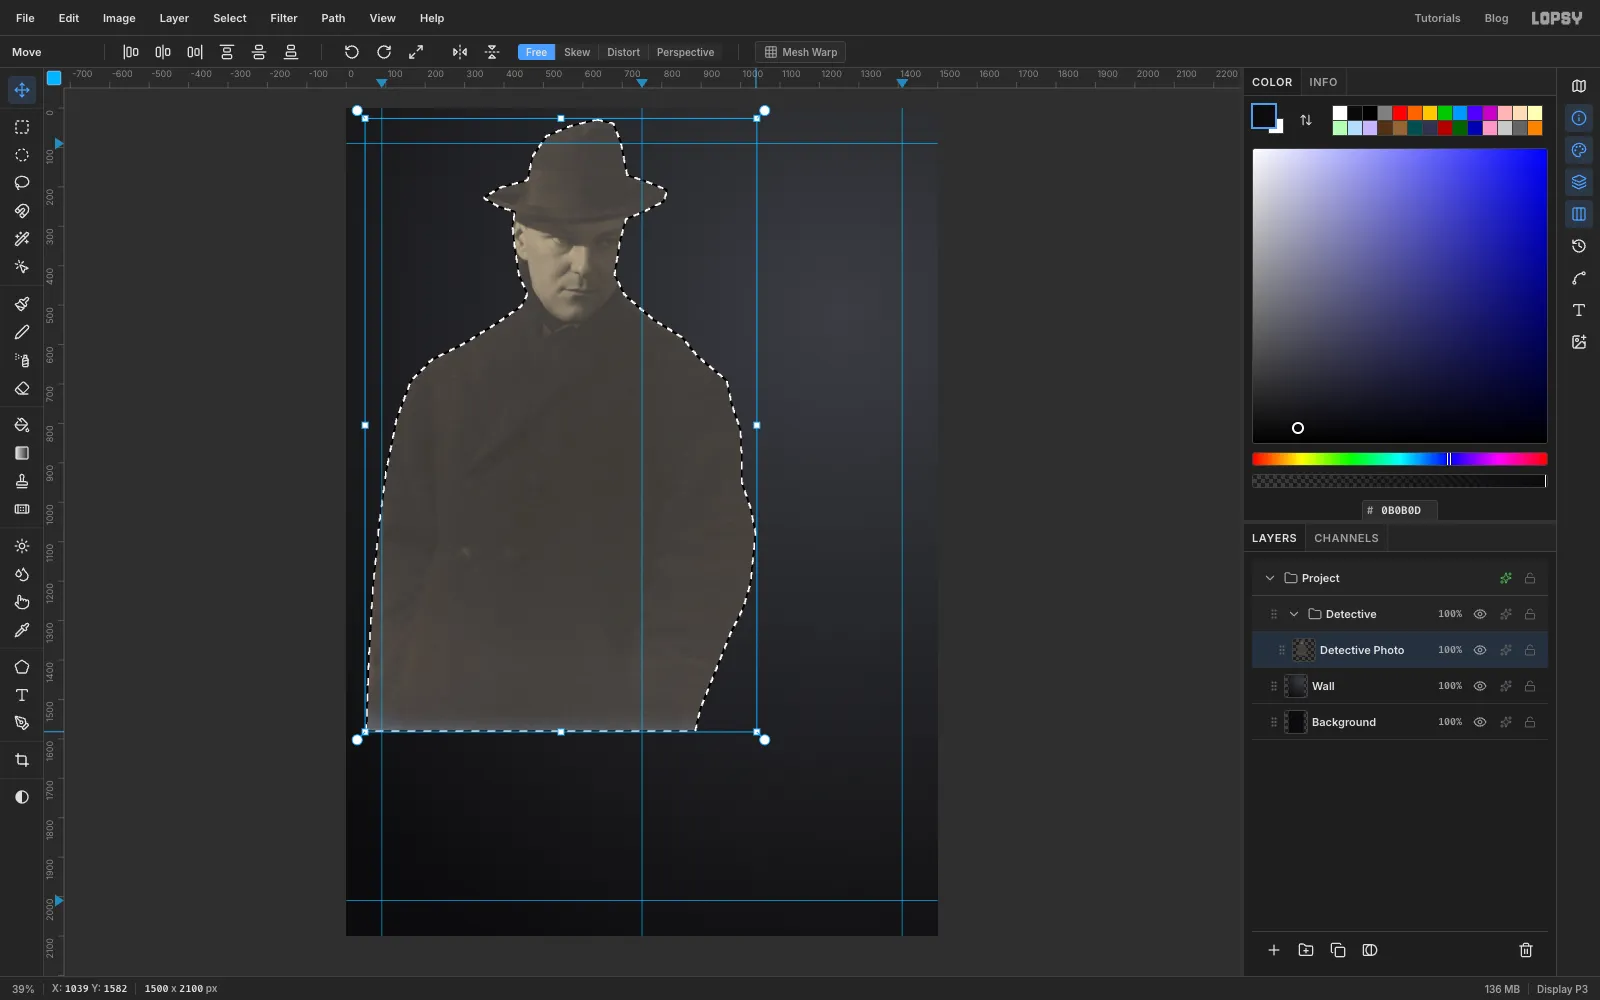
Cmd-click the Detective Photo thumbnail to load his outline as a selection. Pick the Move tool (V), hold Cmd and drag the bottom-right corner handle outward until he's about 160% of his size. That's roughly 990 px wide. Press Enter, then Cmd+D.
Now drag him down and to the left. The top of his hat should sit at about y 436, and the shoulder on the left of the picture should run off the left edge of the card by about 200 px. His face ends up about a fifth of the way across the card.
-
Grade him with Levels
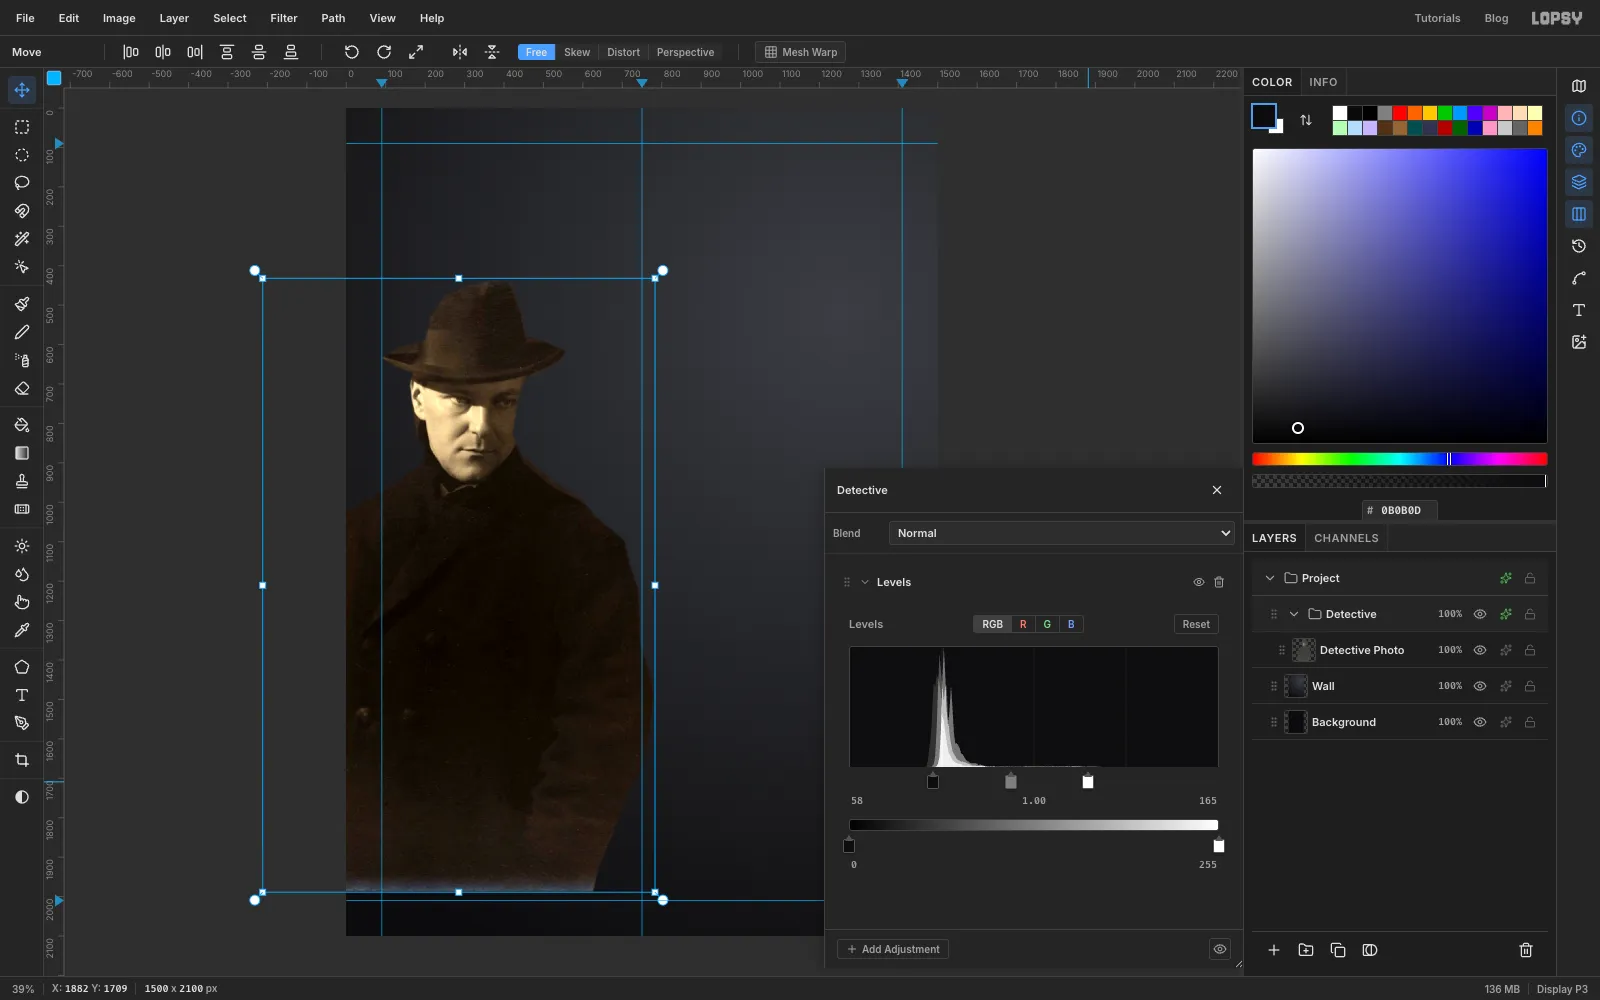
The old print is soft and brown, with almost everything between grey 60 and grey 160. Noir needs black coats and a bright face.
Click the Detective group row, then the effects button on its row. For a group, the drawer shows adjustments. Click Add Adjustment → Levels. Drag the black input handle under the histogram right until the readout says 58, and the white handle left to 165. The coat drops to black and the face lights up.
-
Take out the sepia
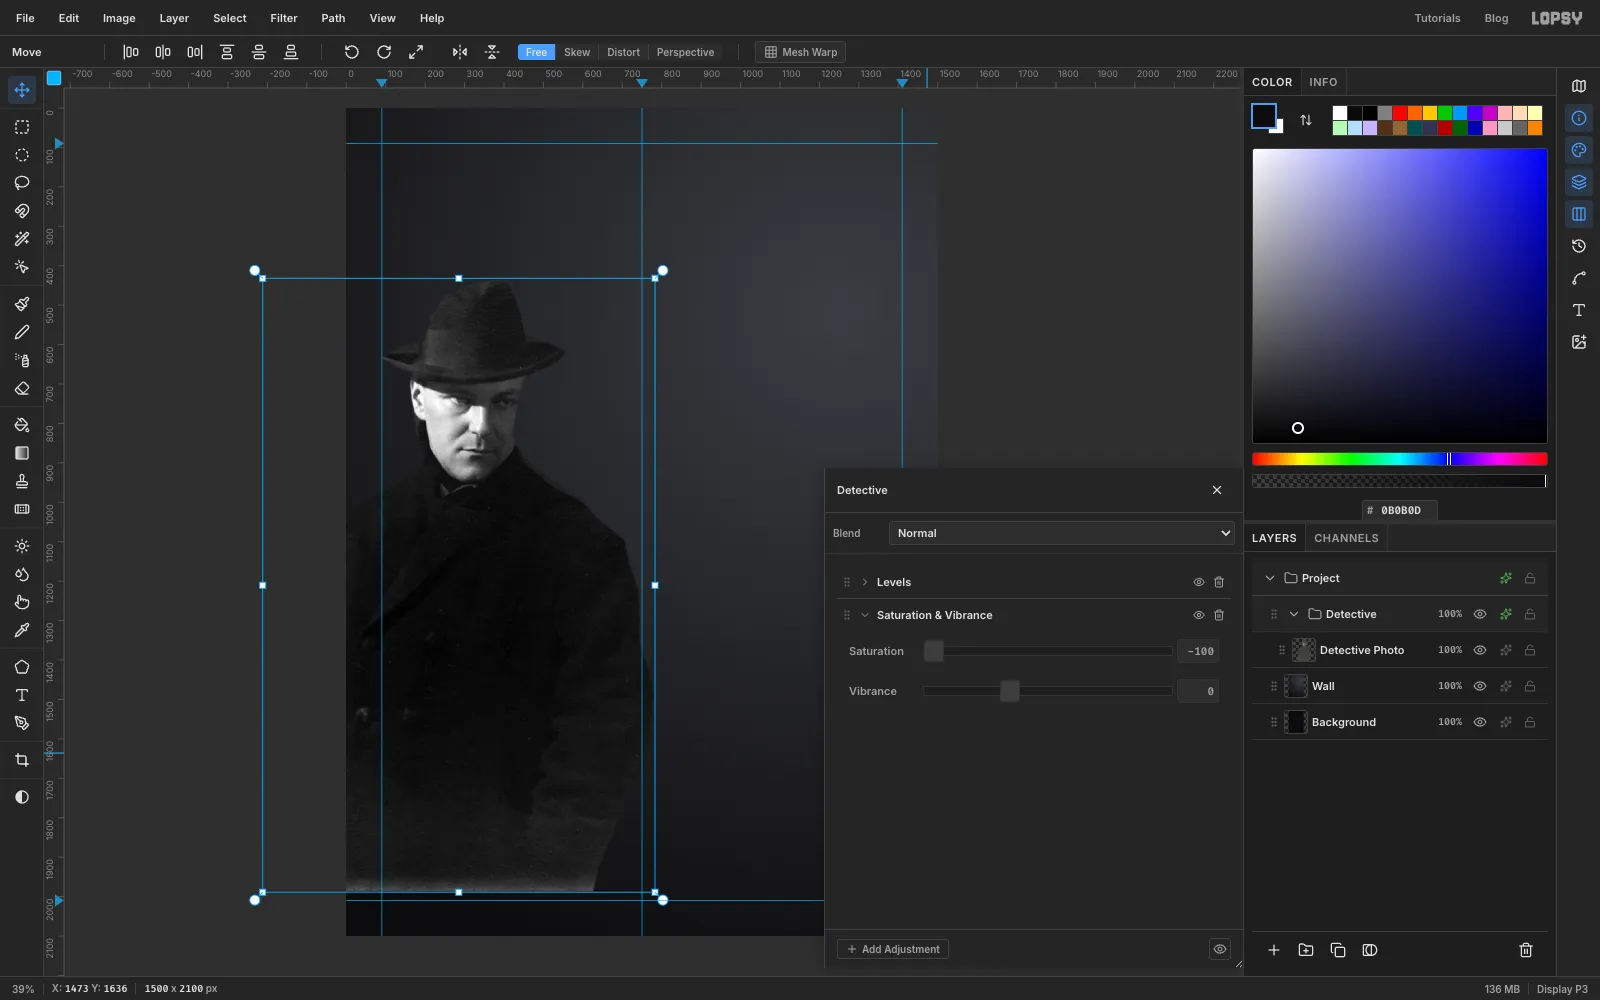
Still in the Detective drawer, click Add Adjustment → Saturation & Vibrance and set Saturation to -100. The brown tint goes and he's a neutral black-and-white photo.
Close the drawer and click the arrow on the Detective row to collapse the group. A collapsed group won't swallow the layers you add next.
-
Marquee the window slats
Click Wall and click Add Layer. Name the new layer Blind Light. It sits between the wall and the detective, so the light falls on the wall behind him.
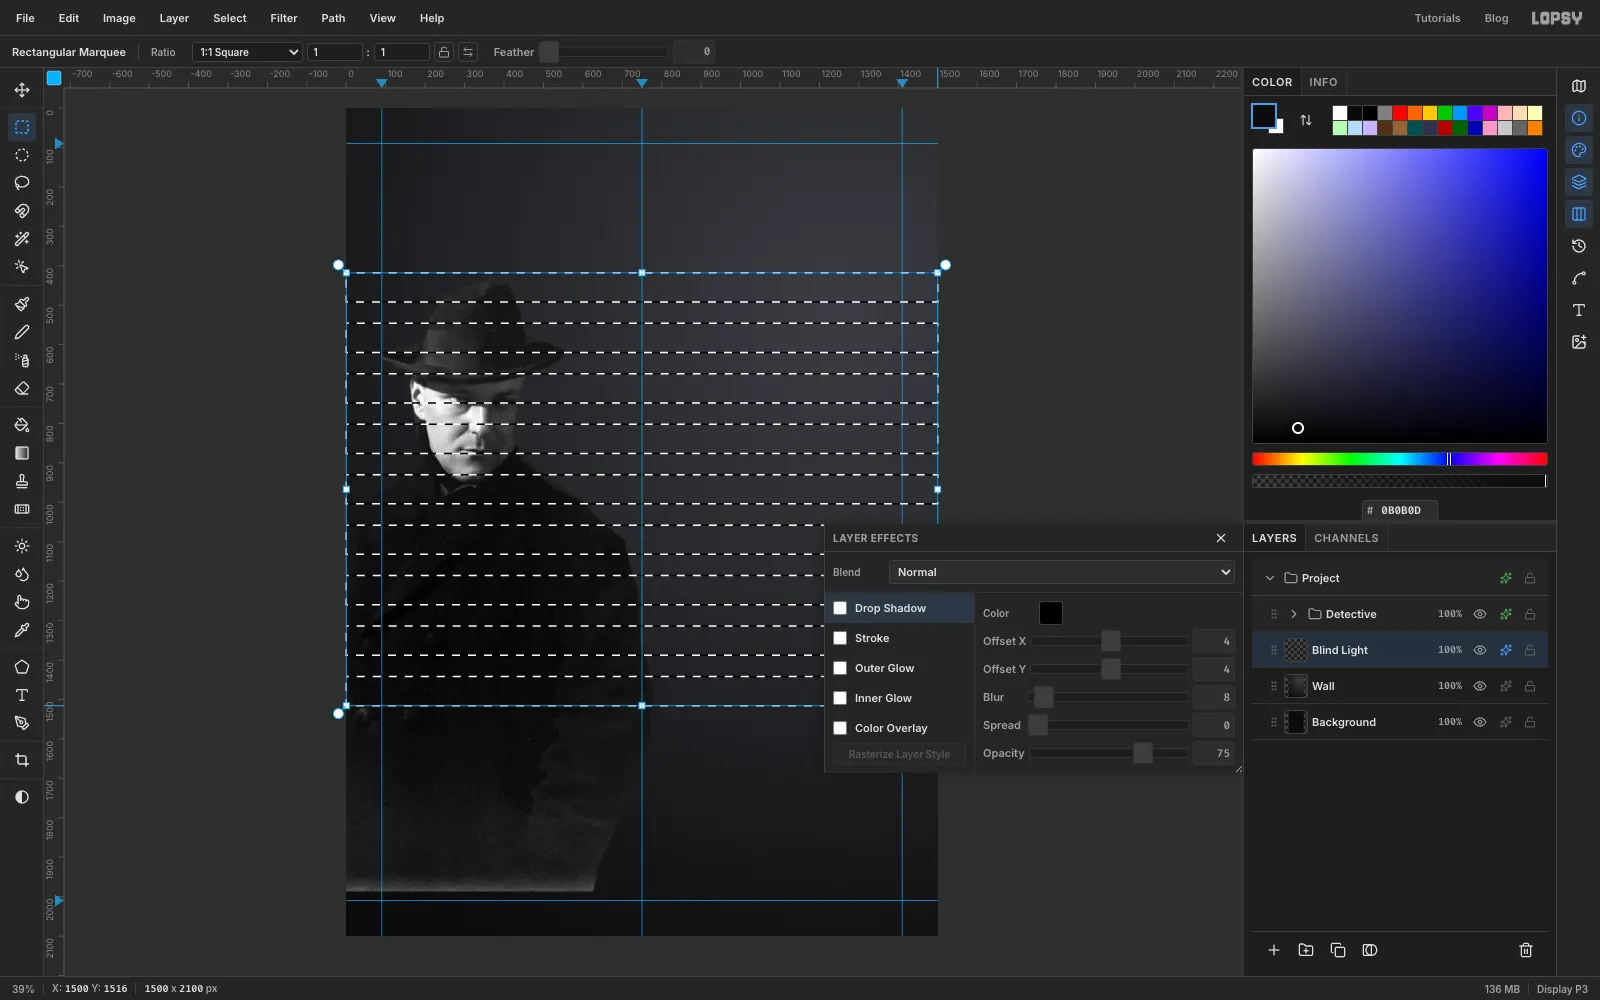
Now make the slats of light. With the Rectangular Marquee, drag a band right across the card from y 418 to y 492. Hold Shift and drag another from y 546 to y 620. Keep going down the card with Shift held, making each band 74 px tall and starting 128 px below the last. The ninth band runs from y 1442 to y 1516. (If the layer effects drawer is still open from earlier, you can leave it or close it.)
-
Fill the slats
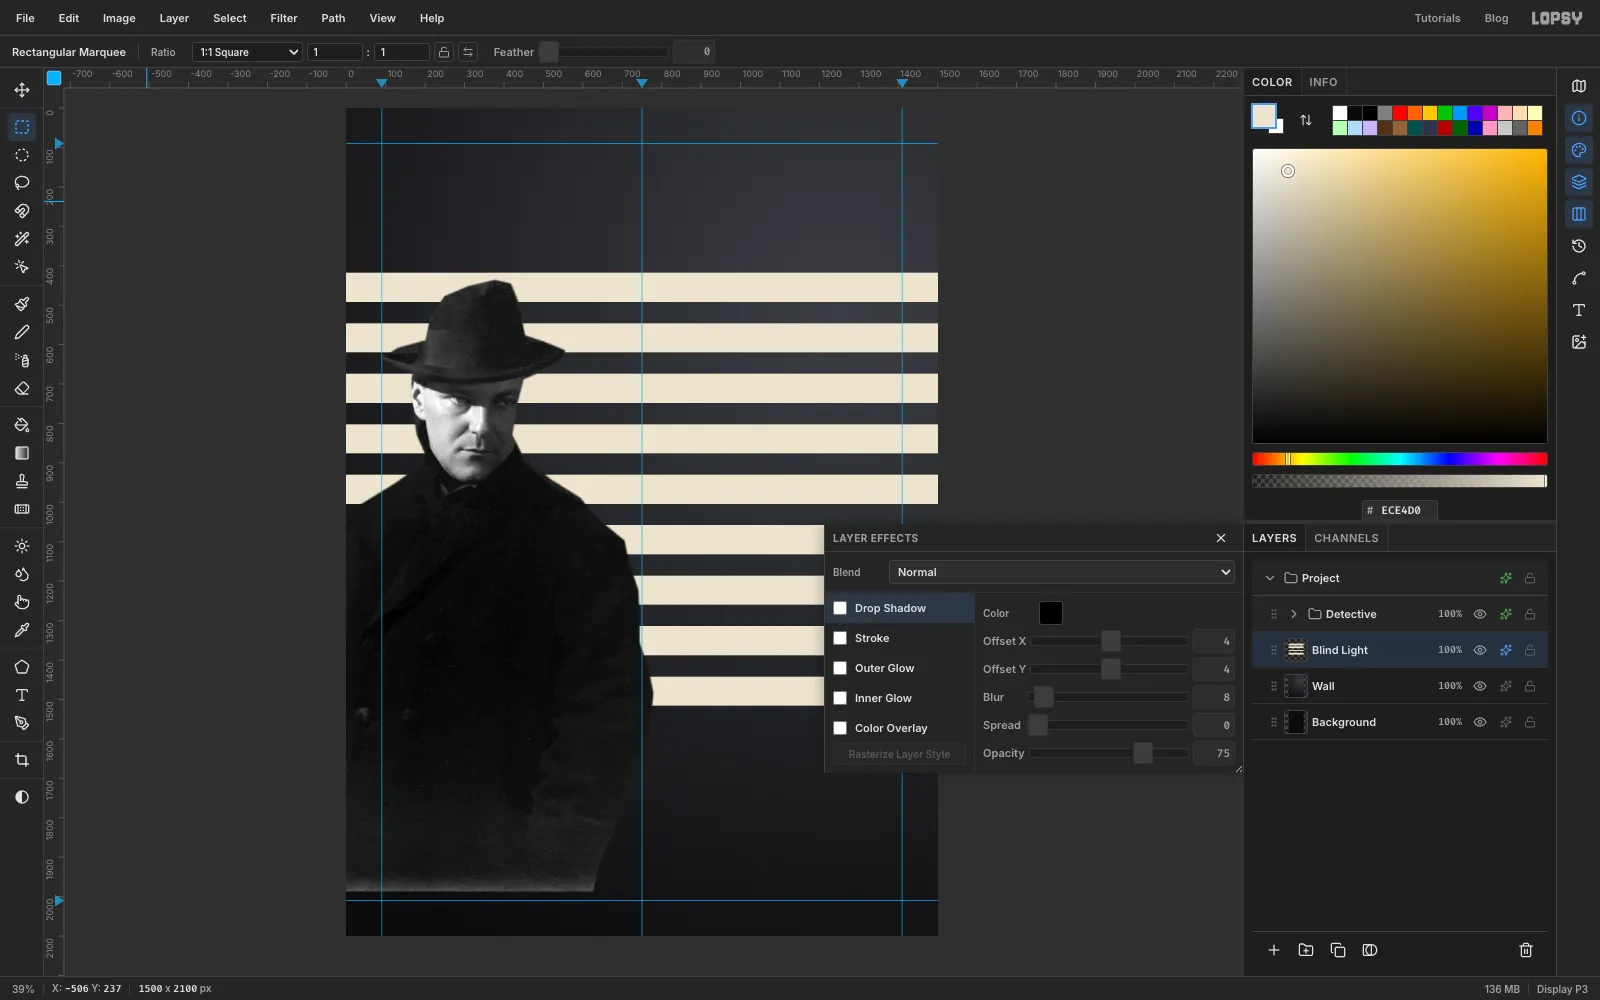
Set the foreground colour to blind light , choose Edit → Fill and press Cmd+D.
-
Skew the slats toward the window
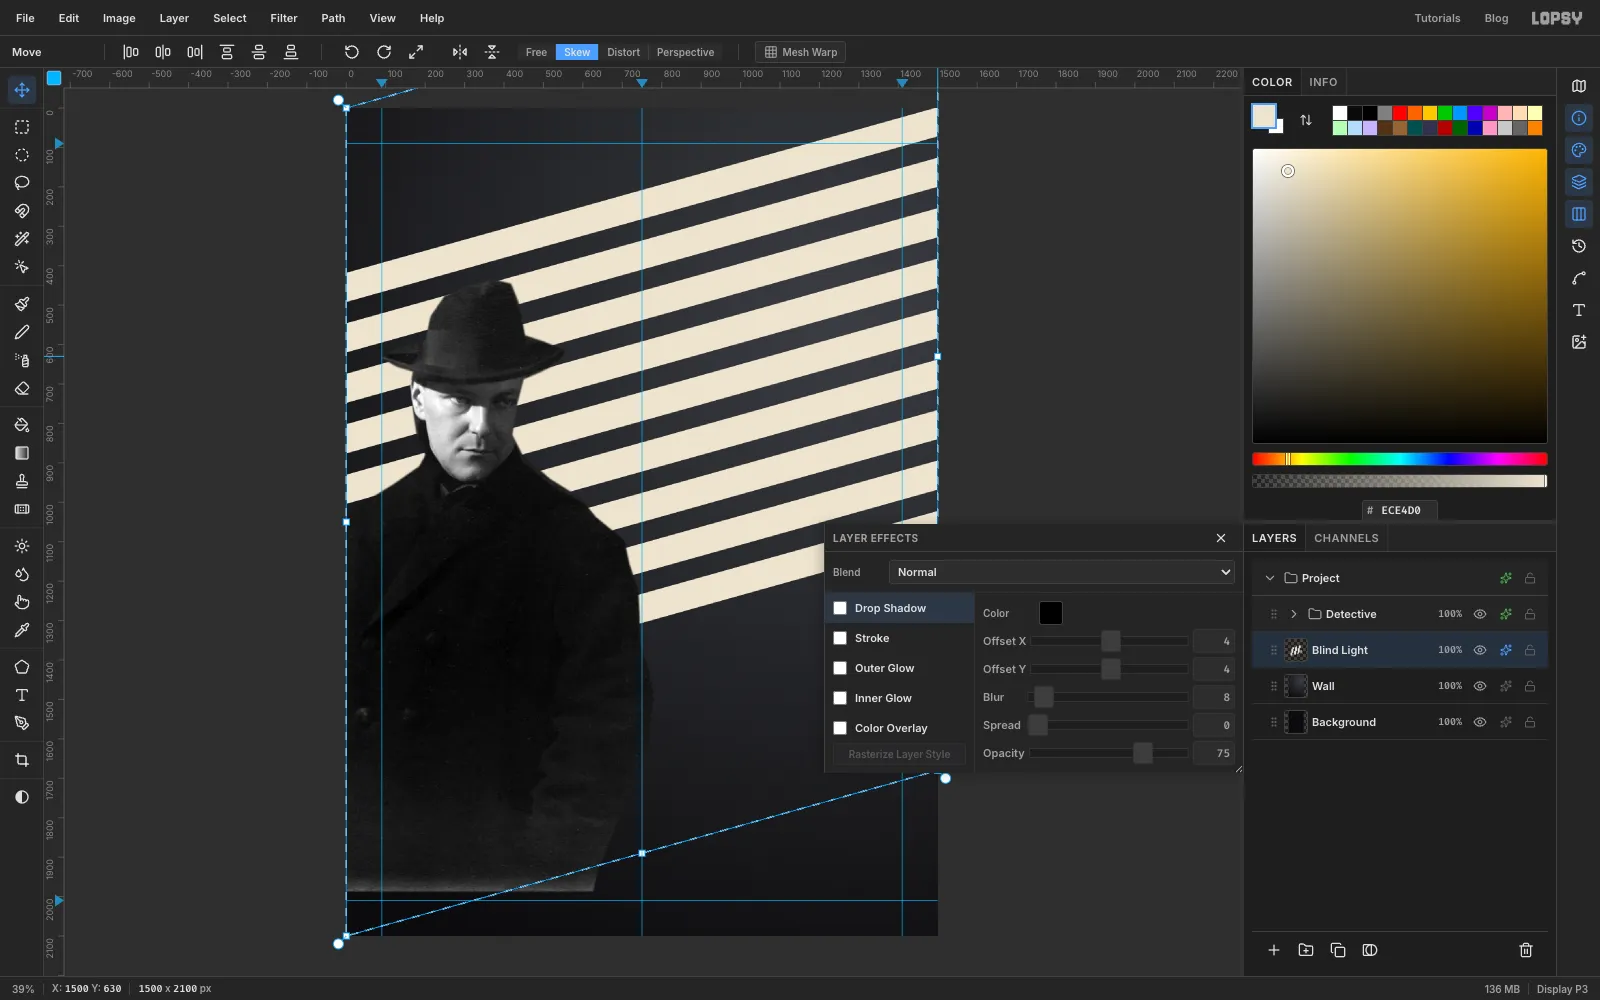
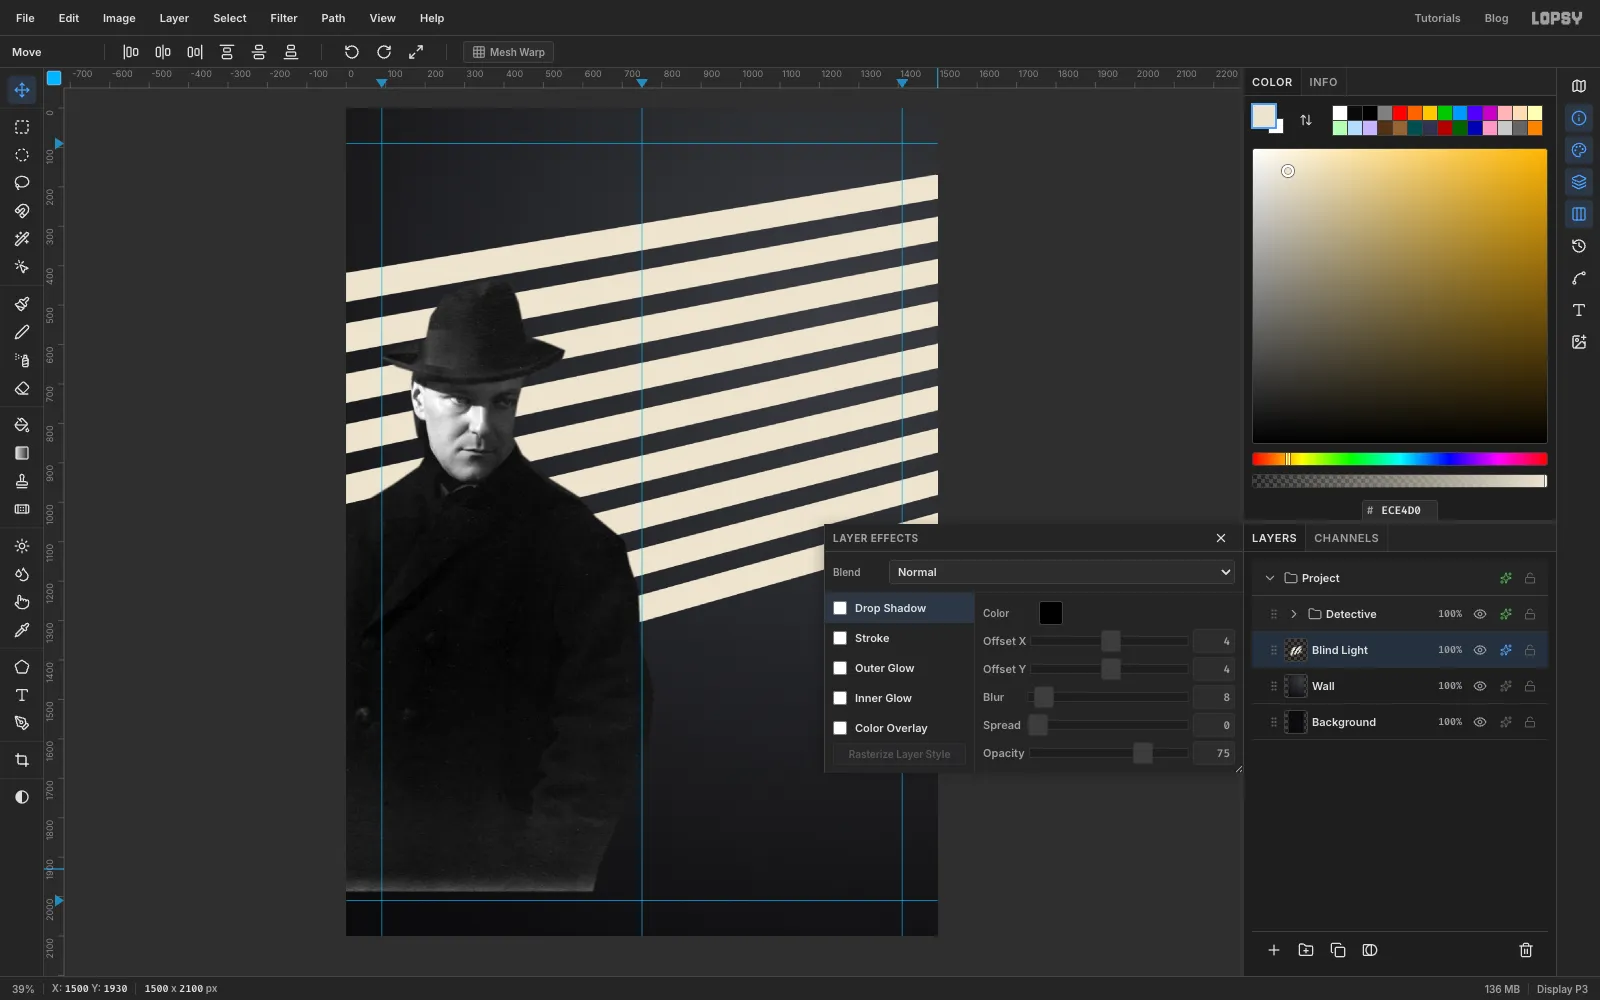
Light through a window high on the right lands as slanted bands. Choose Select → All, pick the Move tool and click Skew in the options bar. Drag the handle in the middle of the right edge straight up by about 420 px. The bands now rise toward the upper right, and their left ends stay put.
-
Fan them out with Distort
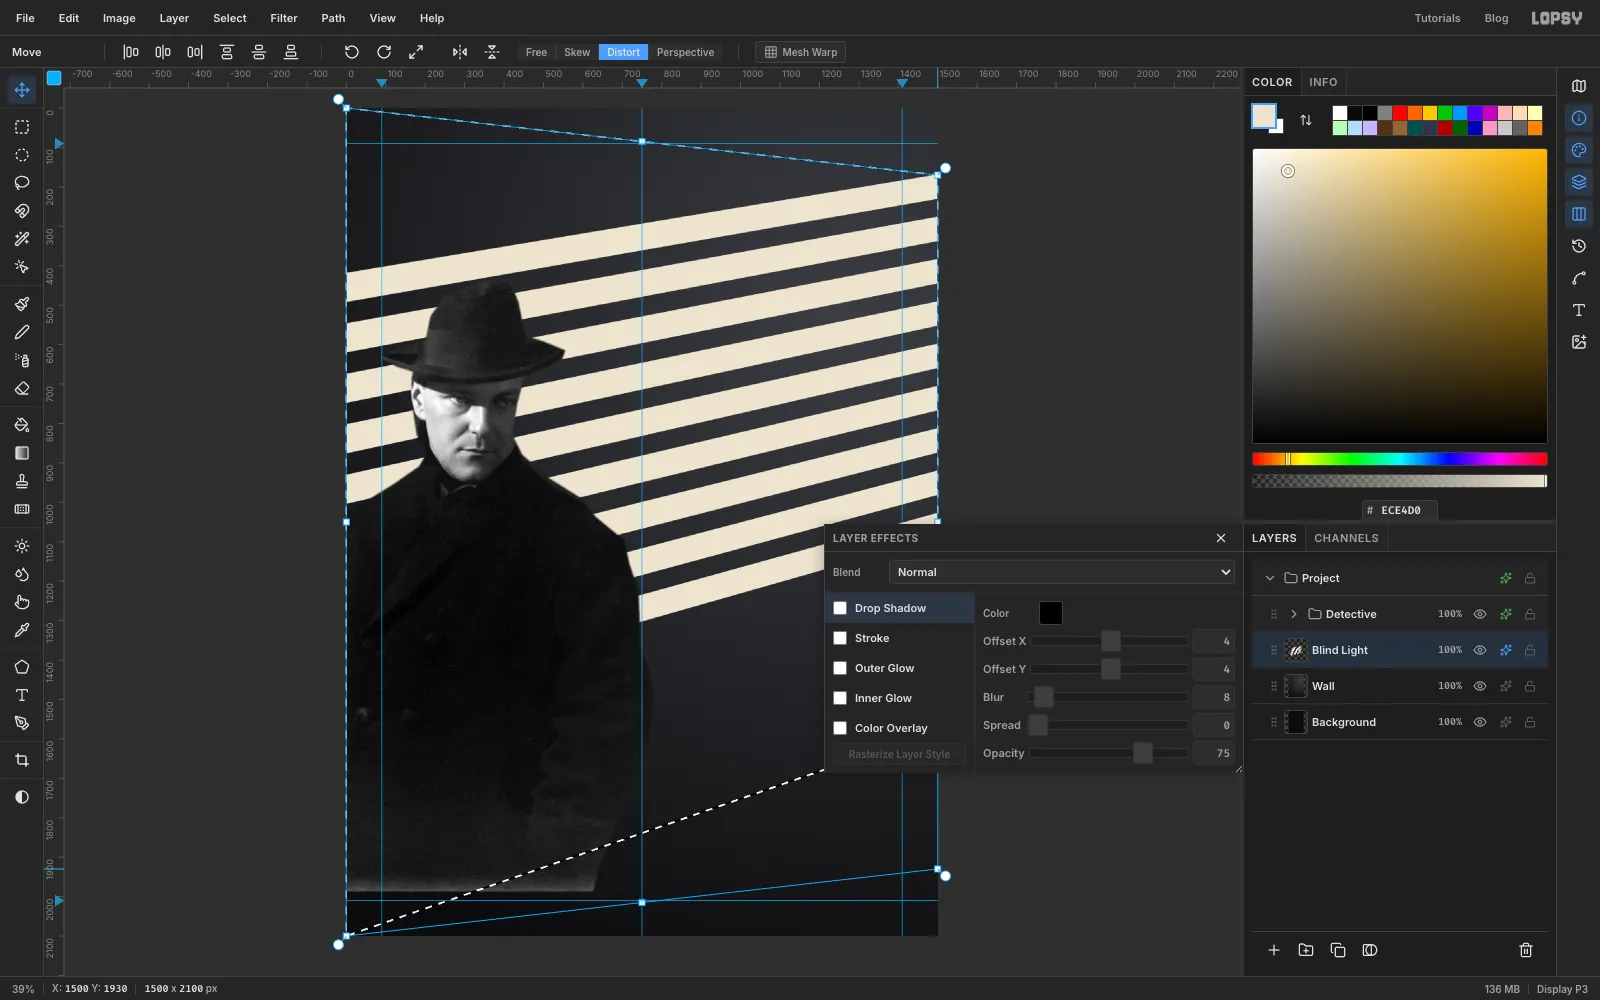
Click Distort in the options bar. Switching modes applies the skew and gives you a fresh box. Drag the top-right corner handle down by about 170 px, then the bottom-right corner up by about 170 px.
Now the bands are packed tighter at the right, near the window, and spread out as they cross the room. That's how real slatted light behaves.
-
Apply the transform
Press Enter to apply the transform, then Cmd+D. Click Free in the options bar so the Move tool is back to normal for later.
-
Soften the light and fade it with a mask
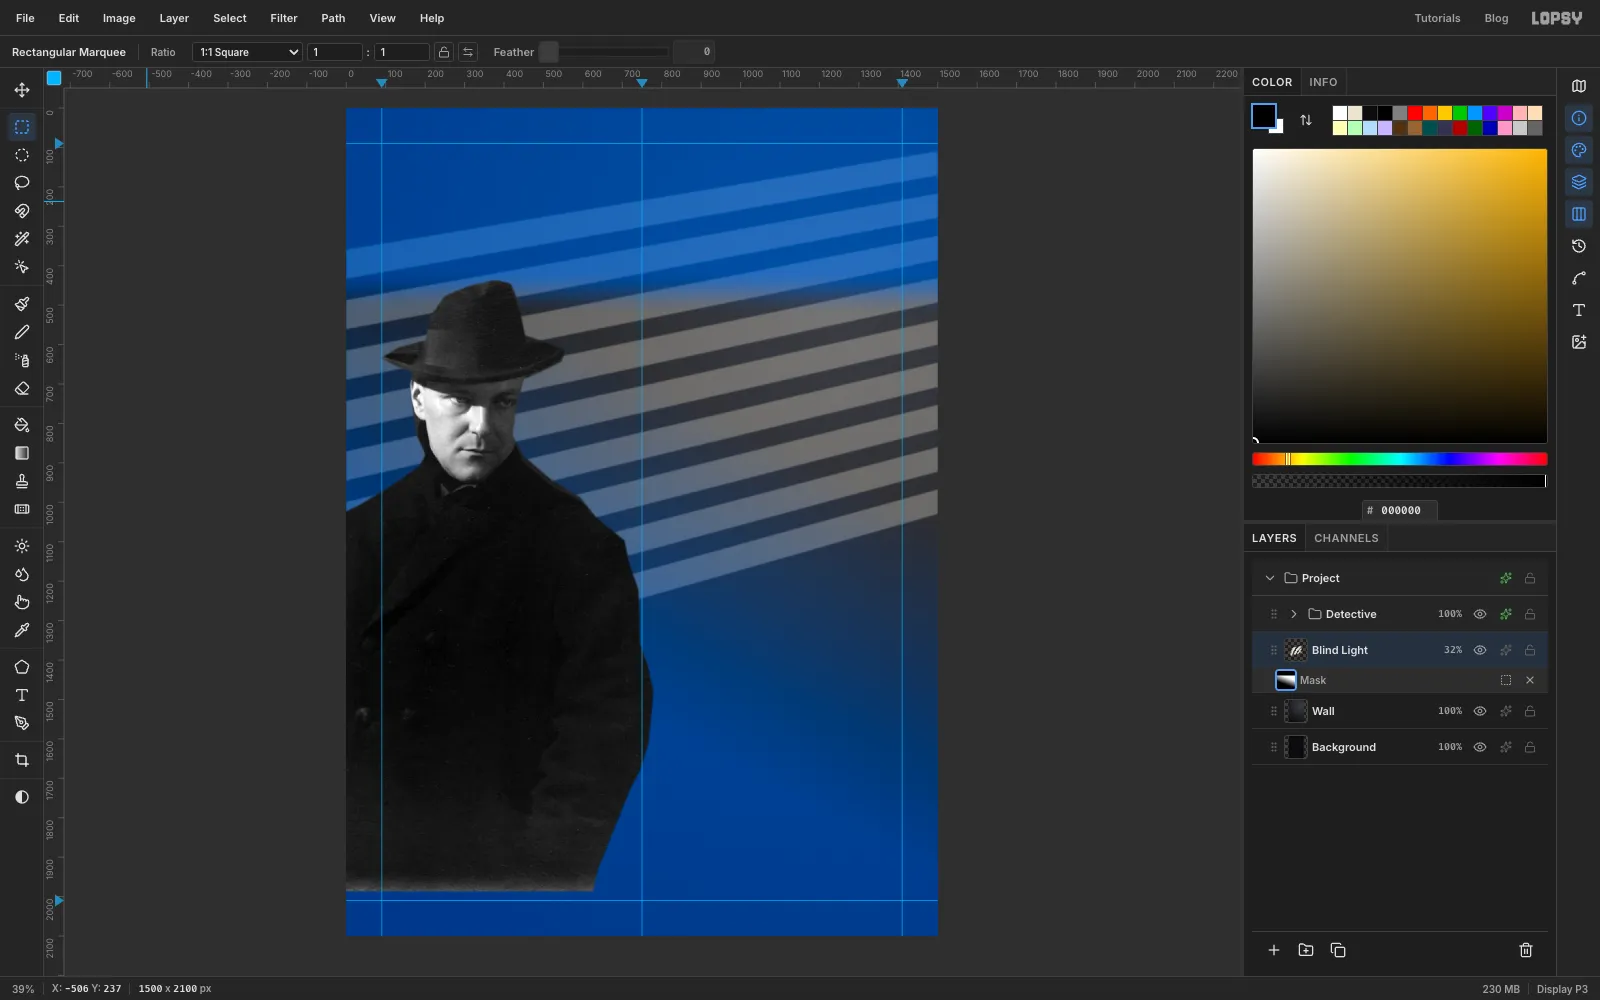
Real shadows from blinds have soft edges. Choose Filter → Gaussian Blur… with Radius 5.
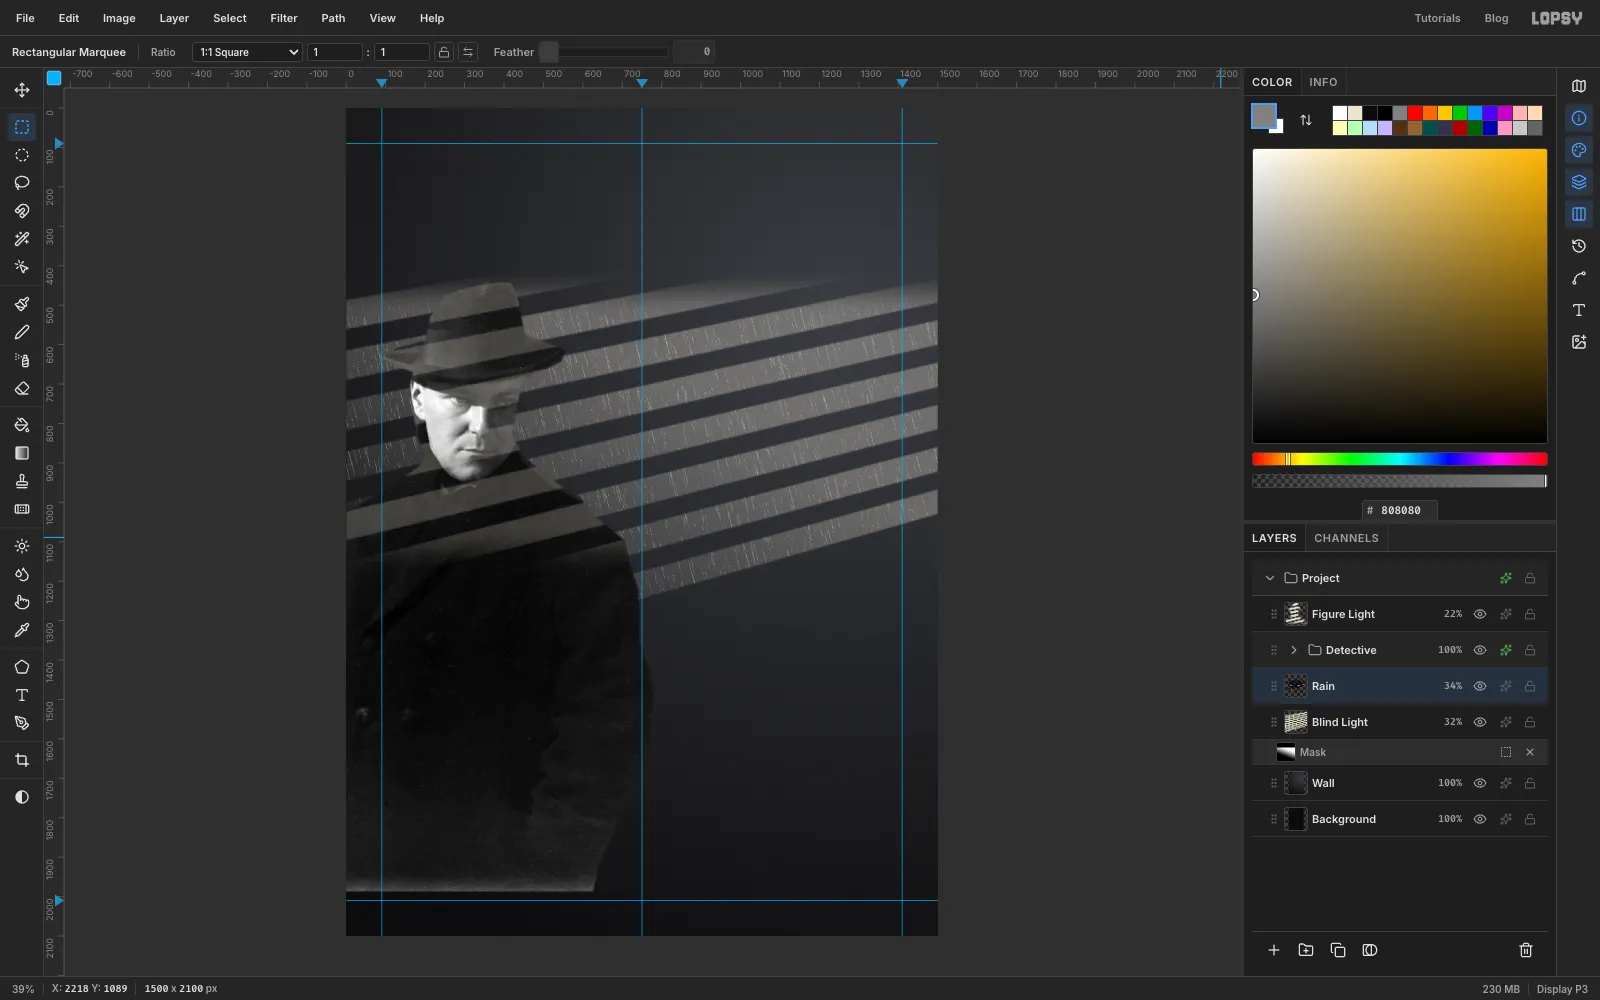
Next, put a band of light across his eyes. It's the classic noir shot. With the Move tool, tap ↑ (Shift moves 10 px at a time) until one of the bright bands crosses his eyes, just under the hat brim. Here that was about 60 px up. Open the layer's effects, set the Blend to Screen and set the layer's opacity to 32%.
Now fade the light out with a layer mask:
- Click Add Mask at the bottom of the Layers panel, then the mask thumbnail on the row to edit the mask.
- Pick the Gradient tool, set it to Linear, and make a gradient from black to white . Drag from the lower middle of the card (about x 640, y 1500) up toward the upper right (about x 1000, y 800). The bottom bands now fade out instead of stopping hard.
- The title will go at the top, so clear the light from there too. Drag a Rectangular Marquee across the full width of the card from the top down to y 470. Choose Select → Feather… with 60, set the foreground colour to black and choose Edit → Fill. Press Cmd+D.
-
Give the detective his own light
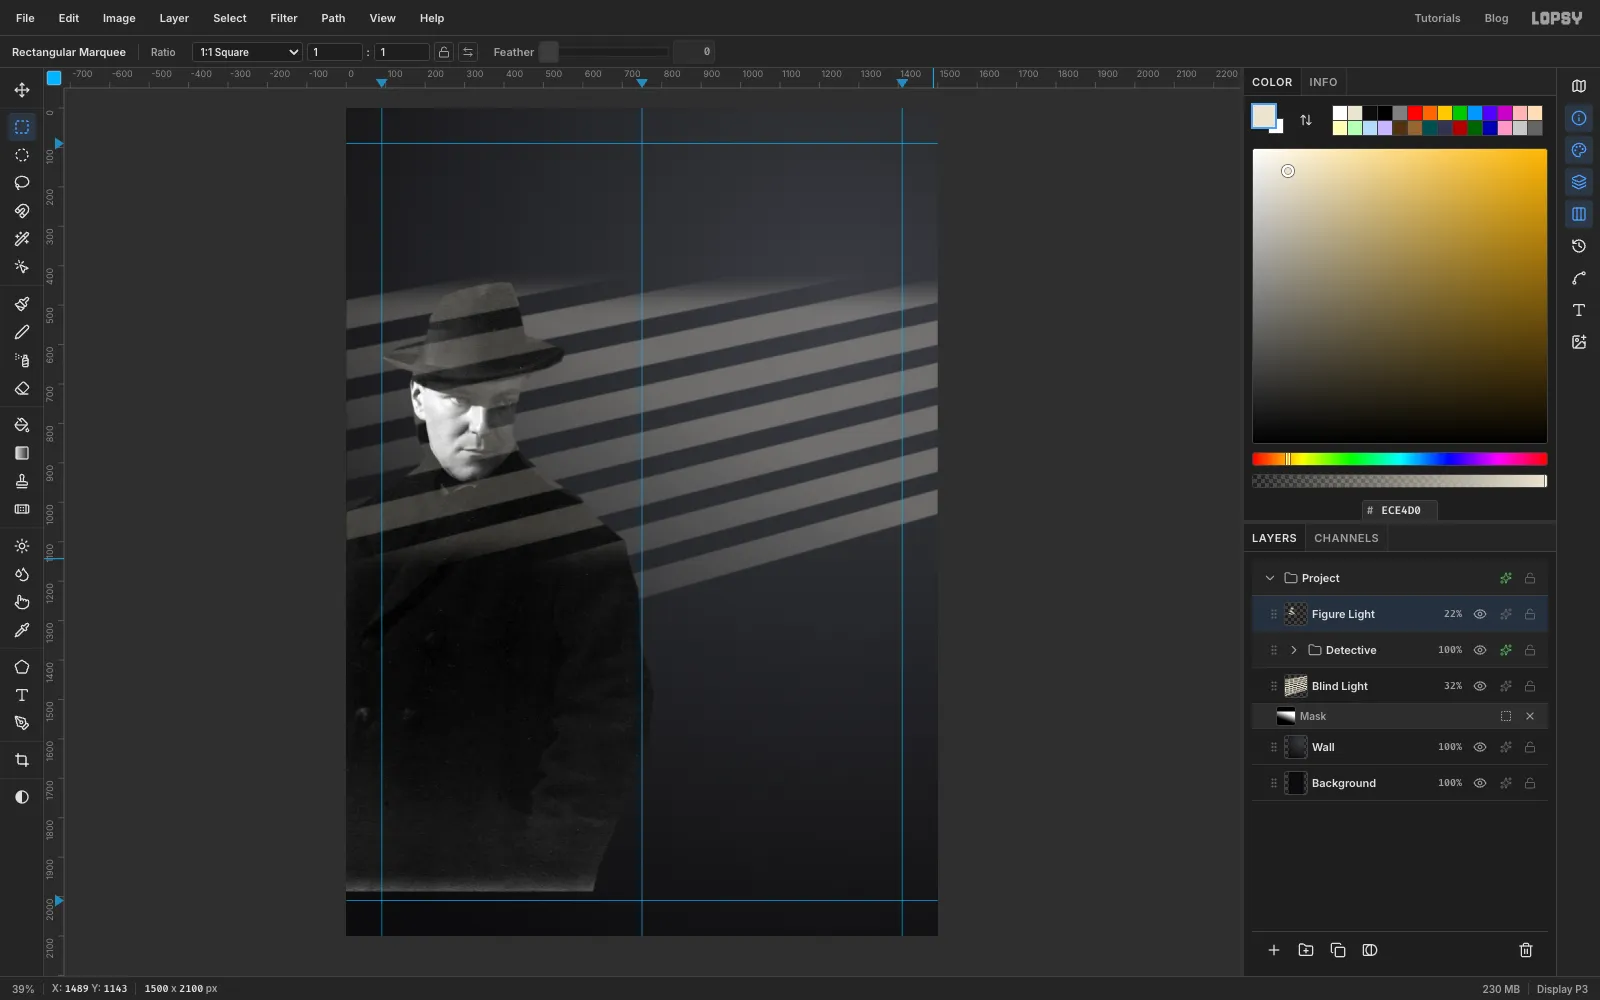
The wall's bands stop at his outline, so he now reads as a dark cut-out. Give him his own, weaker copy of the light. On a person the bands shift slightly, because he stands in front of the wall.
- Click the collapsed Detective group and click Add Layer. Name the layer Figure Light. It lands above the group.
- Cmd-click the Blind Light thumbnail to select the bands. Fill with and press Cmd+D.
- With the Move tool, press Shift+↓ twice and ↓ four times to nudge the bands down 24 px.
- Expand the Detective group, Cmd-click the Detective Photo thumbnail, then collapse the group again. Choose Select → Inverse, click Figure Light and press Delete. Only the bands on him are left.
- Only the top two or three bands should cross him. Drag a marquee across the full width of the card from about y 1120 down to the bottom. Feather it by 100, press Delete, then press Cmd+D.
- Set Blend to Screen and the opacity to 22%.
-
Start the rain with noise and Motion Blur
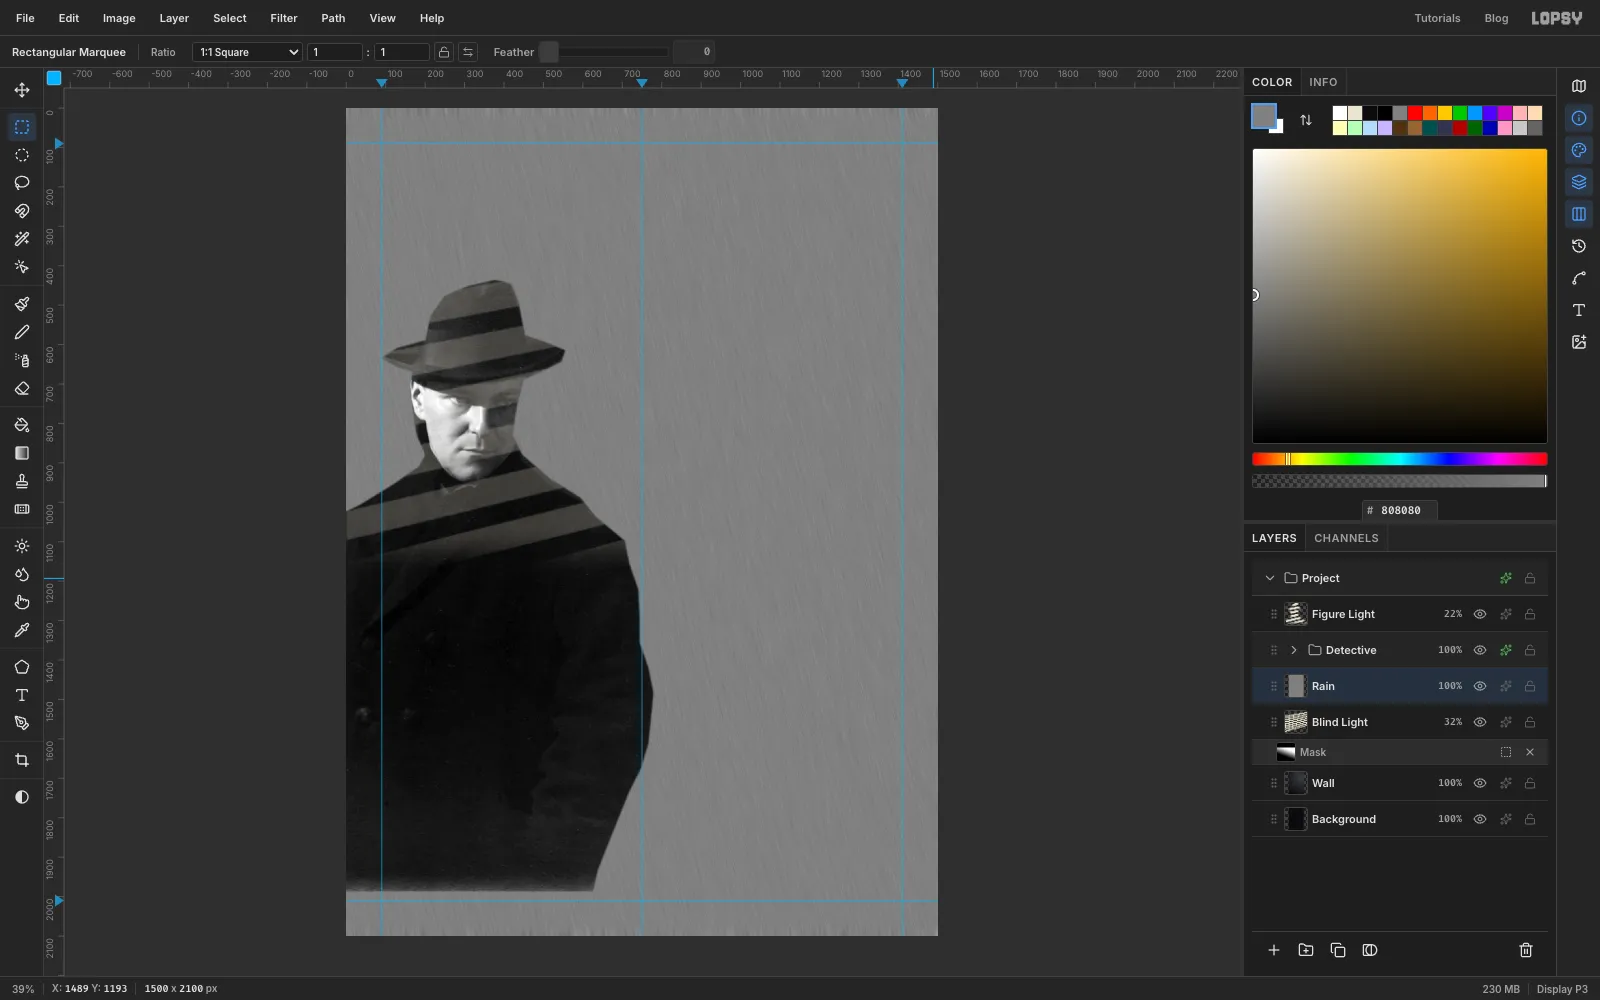
In noir, rain on the window shows up as streaks inside the light. Click Blind Light, then Add Layer, and name the layer Rain.
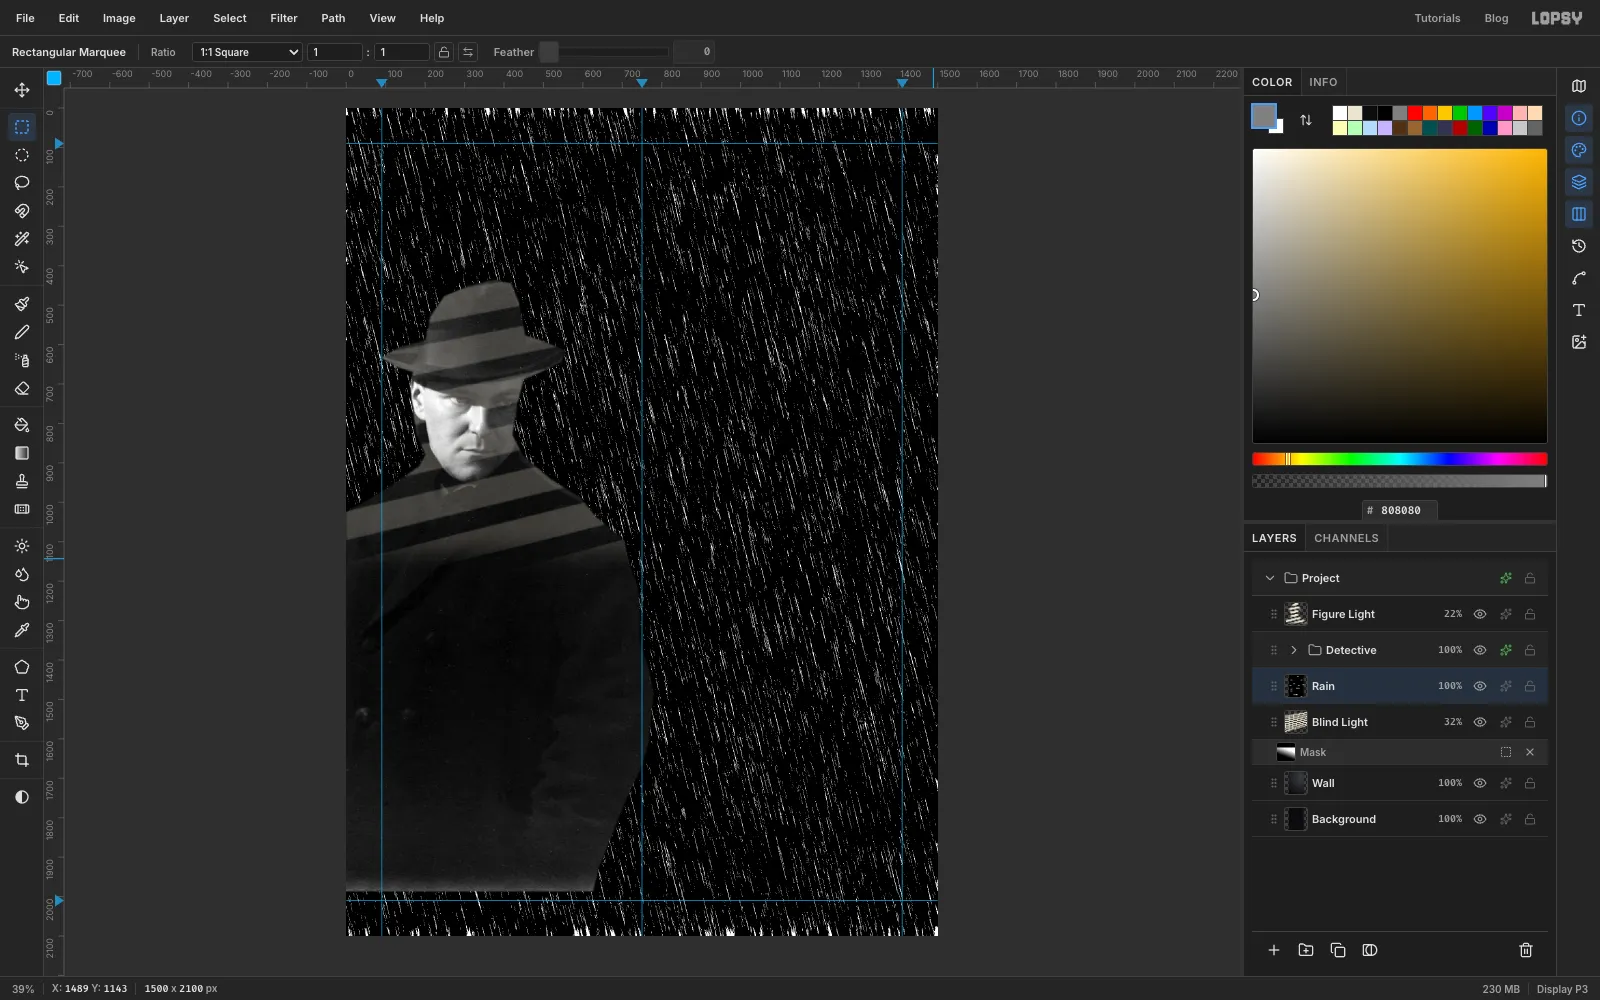
Fill it with grey . Choose Filter → Add Noise…, set Amount 100 and click Mono. Then choose Filter → Motion Blur… with Angle 76 and Distance 60. The speckles smear into fine, nearly vertical streaks.
-
Pull out the streaks with Threshold
Choose Filter → Threshold… and raise the Level until only a scattering of fine streaks stays white. Around 133 works. Then run Filter → Gaussian Blur… with Radius 1 to take the hard edge off.
-
Keep the rain inside the light
Cmd-click the Blind Light thumbnail. Choose Select → Inverse, click Rain and press Delete. The streaks are now only where the light is.
The bands under the title are masked off, but the rain isn't, so drag a marquee from the top of the card down to y 500. Feather it by 60 and press Delete, then Cmd+D.
Set the Rain layer's Blend to Screen and its opacity to 34%.
-
Cast his shadow on the wall
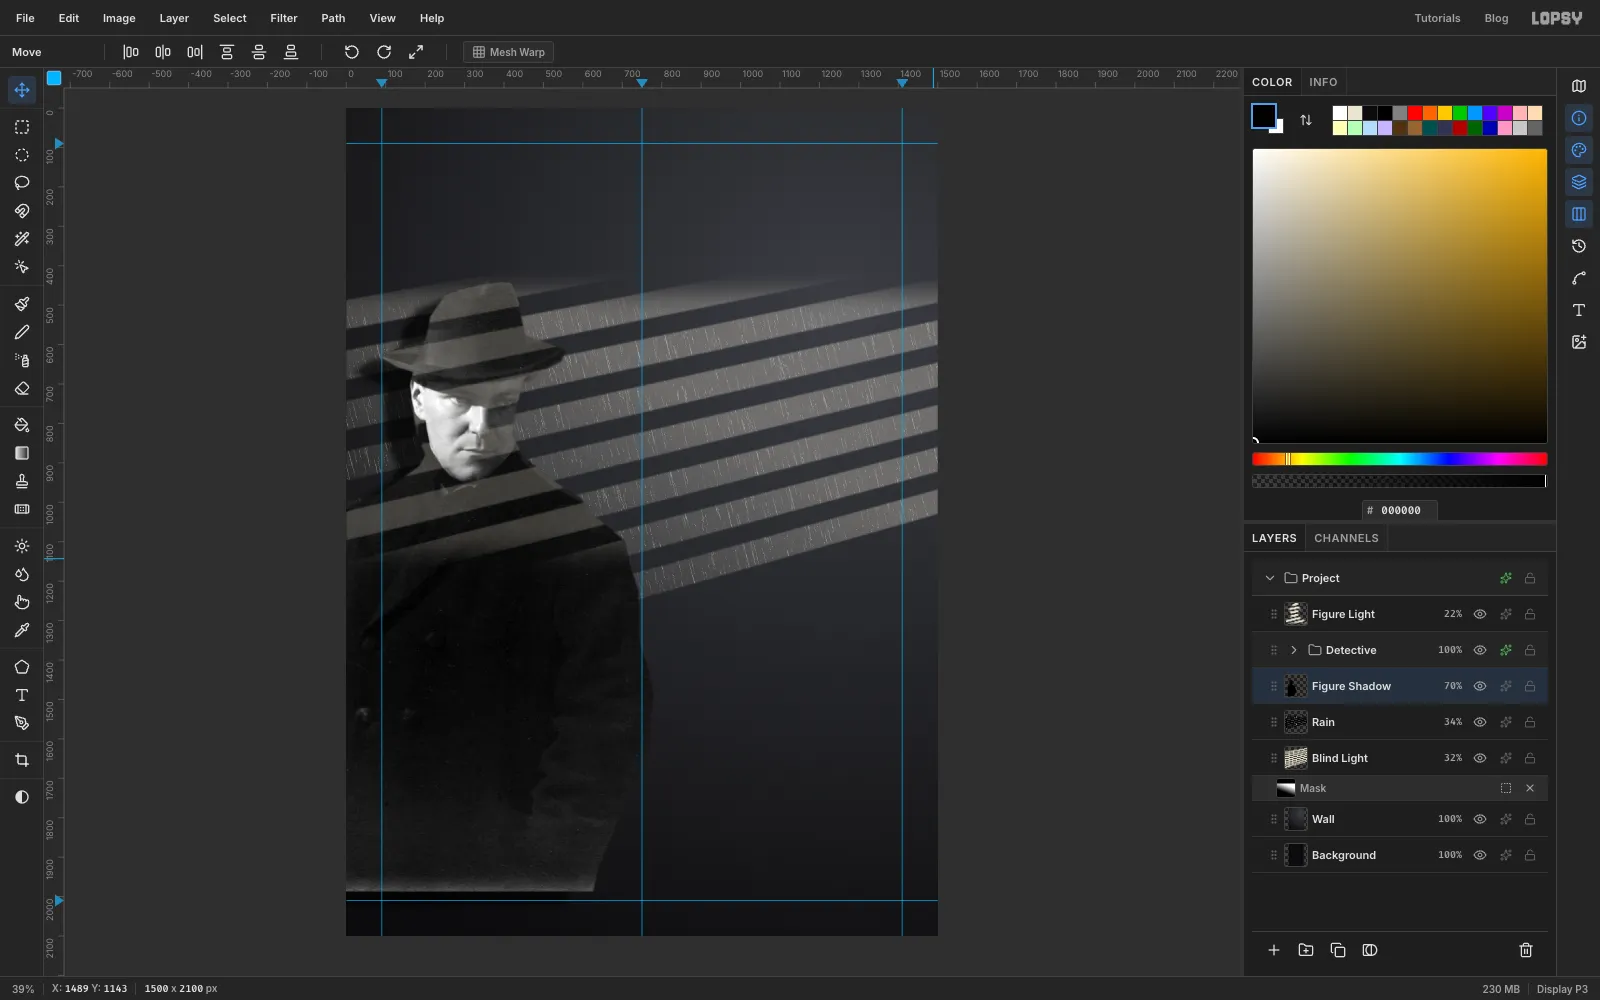
The light comes from the right, so his shadow falls to the left behind him. With Rain selected, click Add Layer and name the layer Figure Shadow. It sits under the detective.
Load his outline again (expand the group, Cmd-click Detective Photo, collapse the group). Click Figure Shadow, set the foreground colour to black , choose Edit → Fill and press Cmd+D. With the Move tool, drag the layer about 70 px left and 34 px down. Blur it with Gaussian Blur at Radius 22 and set the opacity to 70%. It's subtle: you'll see it as a darker gap in the light bands just left of his hat and shoulder.
-
Build the desk
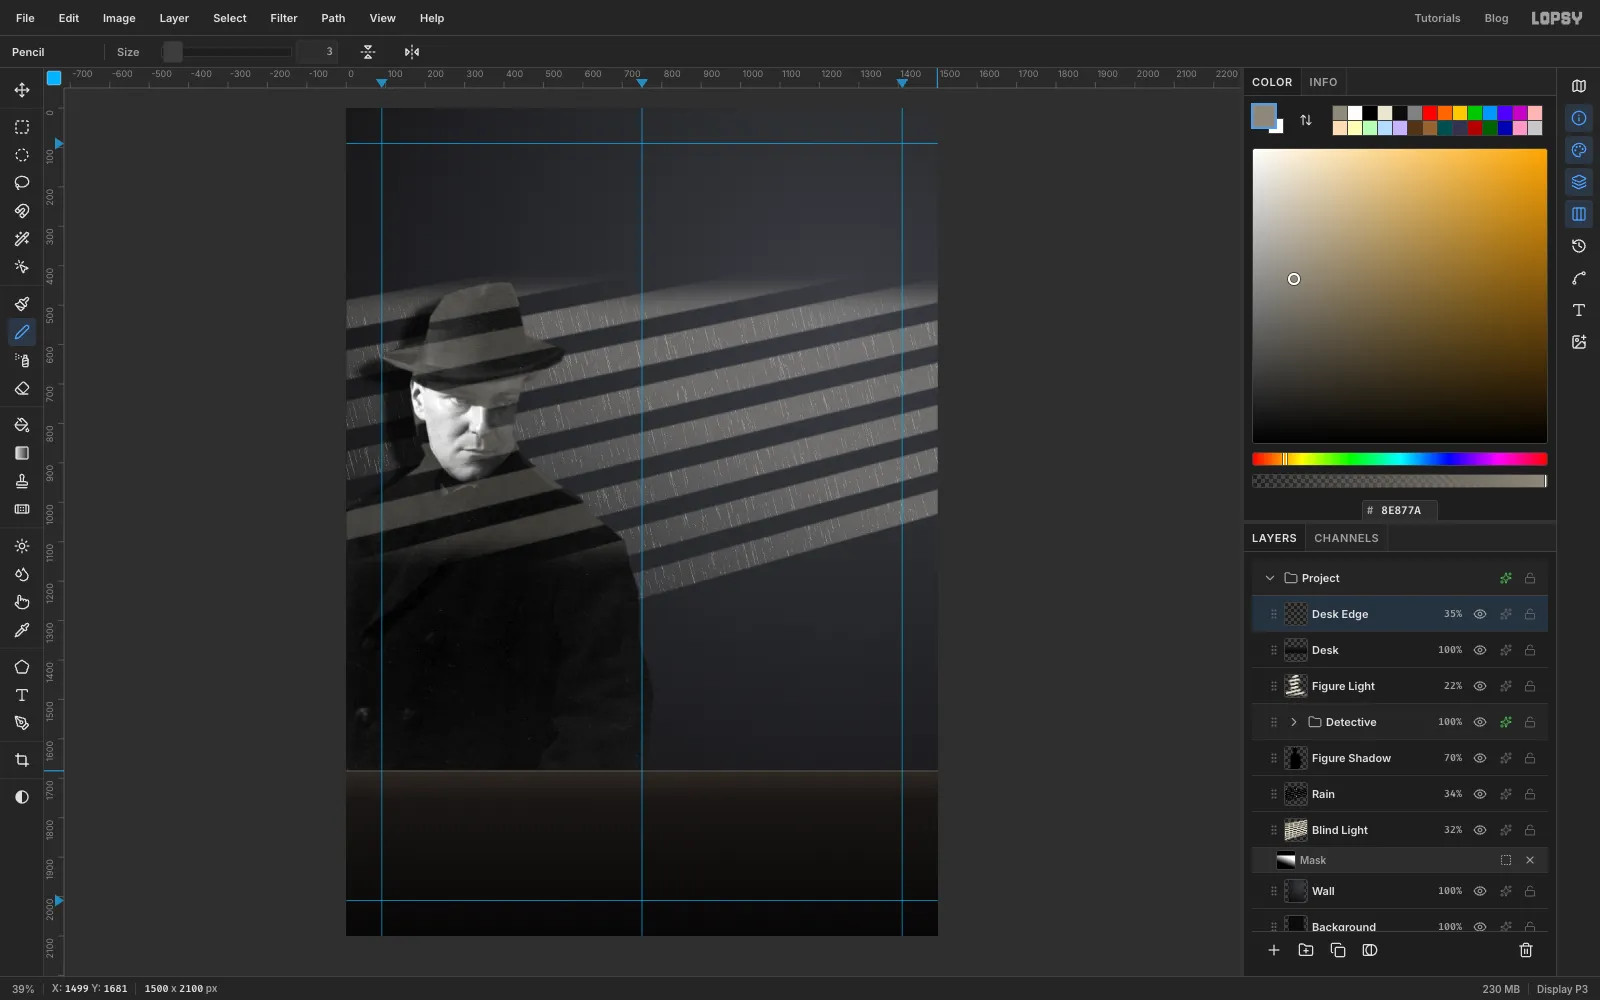
Click Figure Light and Add Layer. Name the layer Desk. It goes above the detective, so the desk hides the bottom of his coat.
Drag a Rectangular Marquee right across the card from y 1680 to the bottom edge. With the Gradient tool on Linear, make three stops: as the first stop, at about 18% and as the last stop. Drag straight down from the top of the selection to the bottom of the card. Press Cmd+D.
For the front edge of the desk, Add Layer and name it Desk Edge. Pick the Pencil (N) at Size 3 with colour . Click at the left edge of the card at y 1681, then Shift-click at the right edge for a straight line. Set the layer's opacity to 35% so it reads as a soft highlight rather than a rule.
-
Drop in the cupcake and remove the black
With Desk Edge selected, drag the cupcake photo onto the canvas and rename the layer Cupcake.
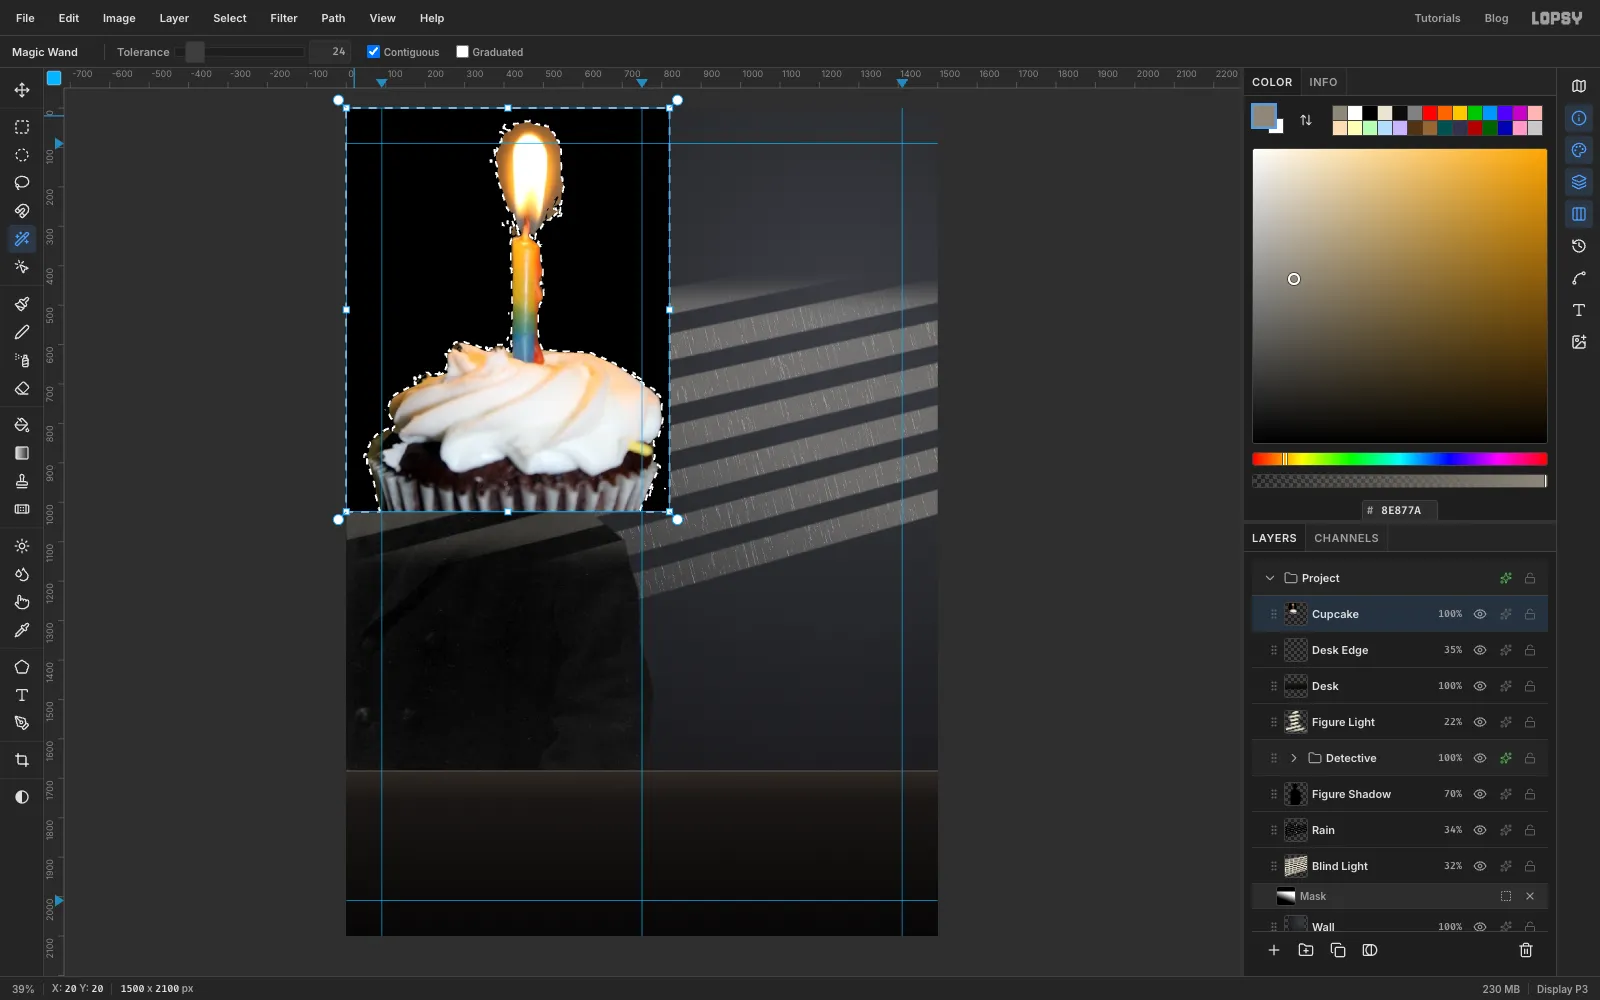
Pick the Magic Wand (W), set Tolerance to 24, keep Contiguous on, and click the black background. Press Delete.
The wand leaves a thin dark fringe. Clean it up: Cmd-click the Cupcake thumbnail, choose Select → Shrink… with 1, then Feather… with 1. Choose Select → Inverse, press Delete and press Cmd+D.
-
Soften the ragged halo round the flame
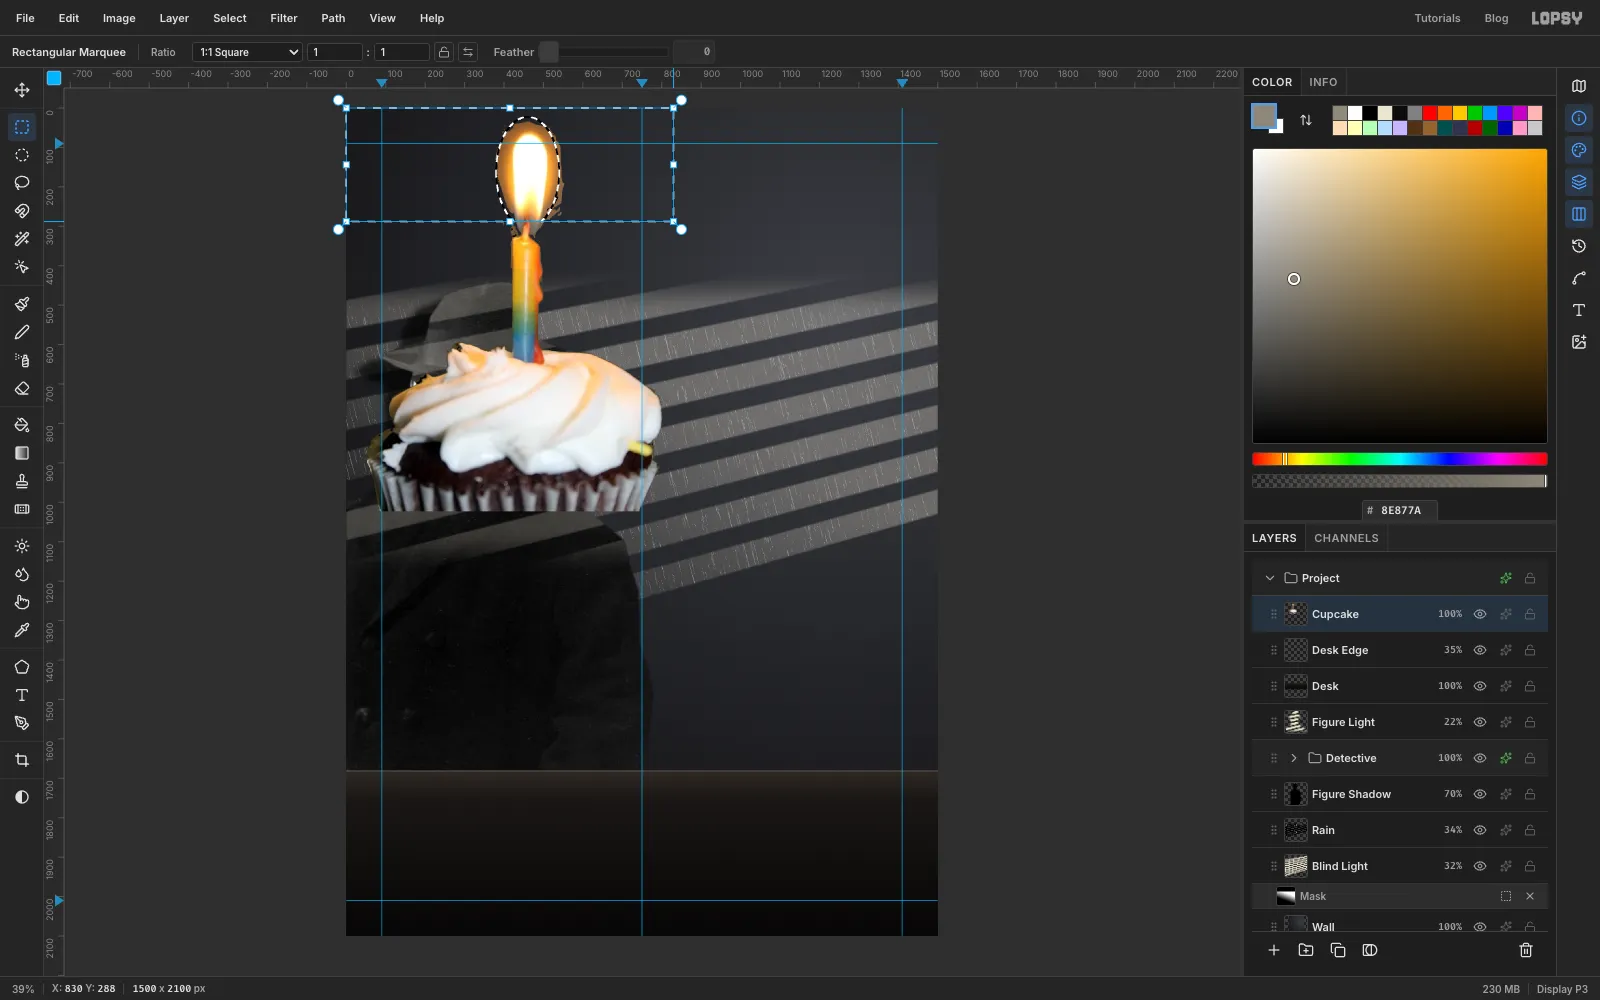
Whoever cut out this photo left a ragged brown halo around the flame. Use a feathered ellipse to trim it:
- Drag an Elliptical Marquee about 160 px wide and 280 px tall around the flame, centred on it.
- Select → Feather… with 18, then Select → Inverse.
- Hold Shift+Option and drag a Rectangular Marquee over the top of the photo, down to just above the candle (about y 288). Shift+Option intersects, so only the area outside the ellipse and above the candle stays selected.
- Press Delete, then Cmd+D.
-
Turn the cupcake grey but keep the flame
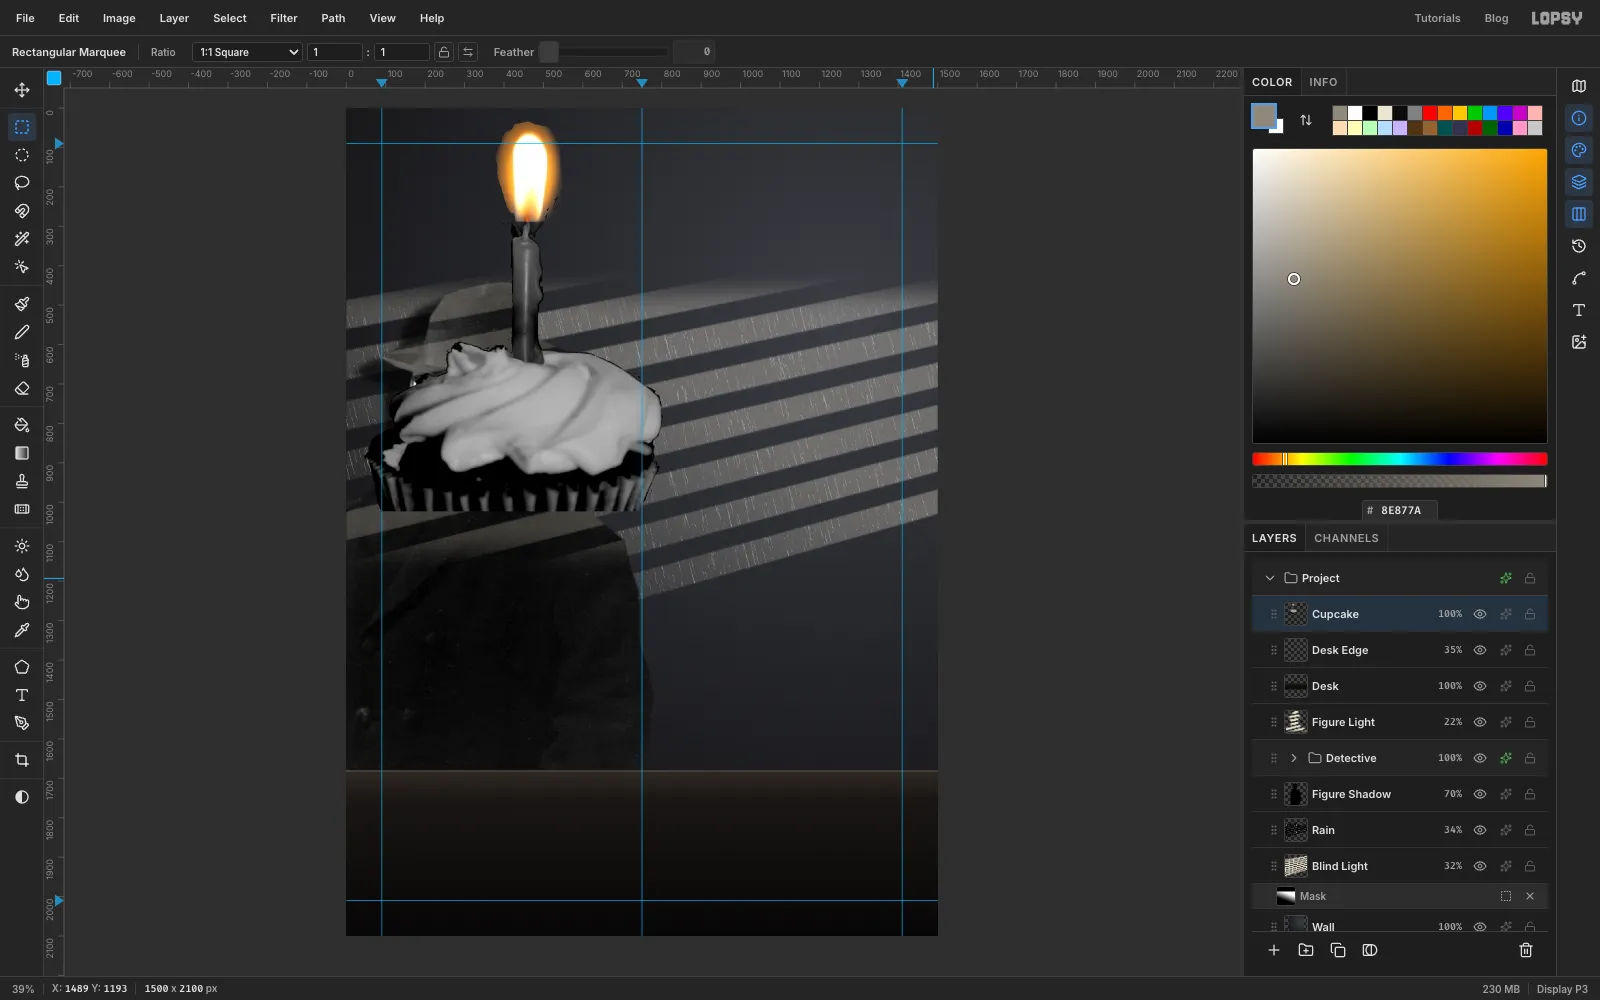
Only the flame keeps its colour. Drag a Rectangular Marquee from just under the flame (about y 288) to below the bottom of the photo, across its full width. Choose Filter → Desaturate.
With the marquee still active, choose Filter → Brightness/Contrast… with Brightness -14 and Contrast 25 to give the grey some snap. Then run it again with Brightness -18 and Contrast -12. The second pass pulls the pure white frosting down to a soft grey, so it no longer outshines the flame. Press Cmd+D.
-
Scale the cupcake and set it on the desk
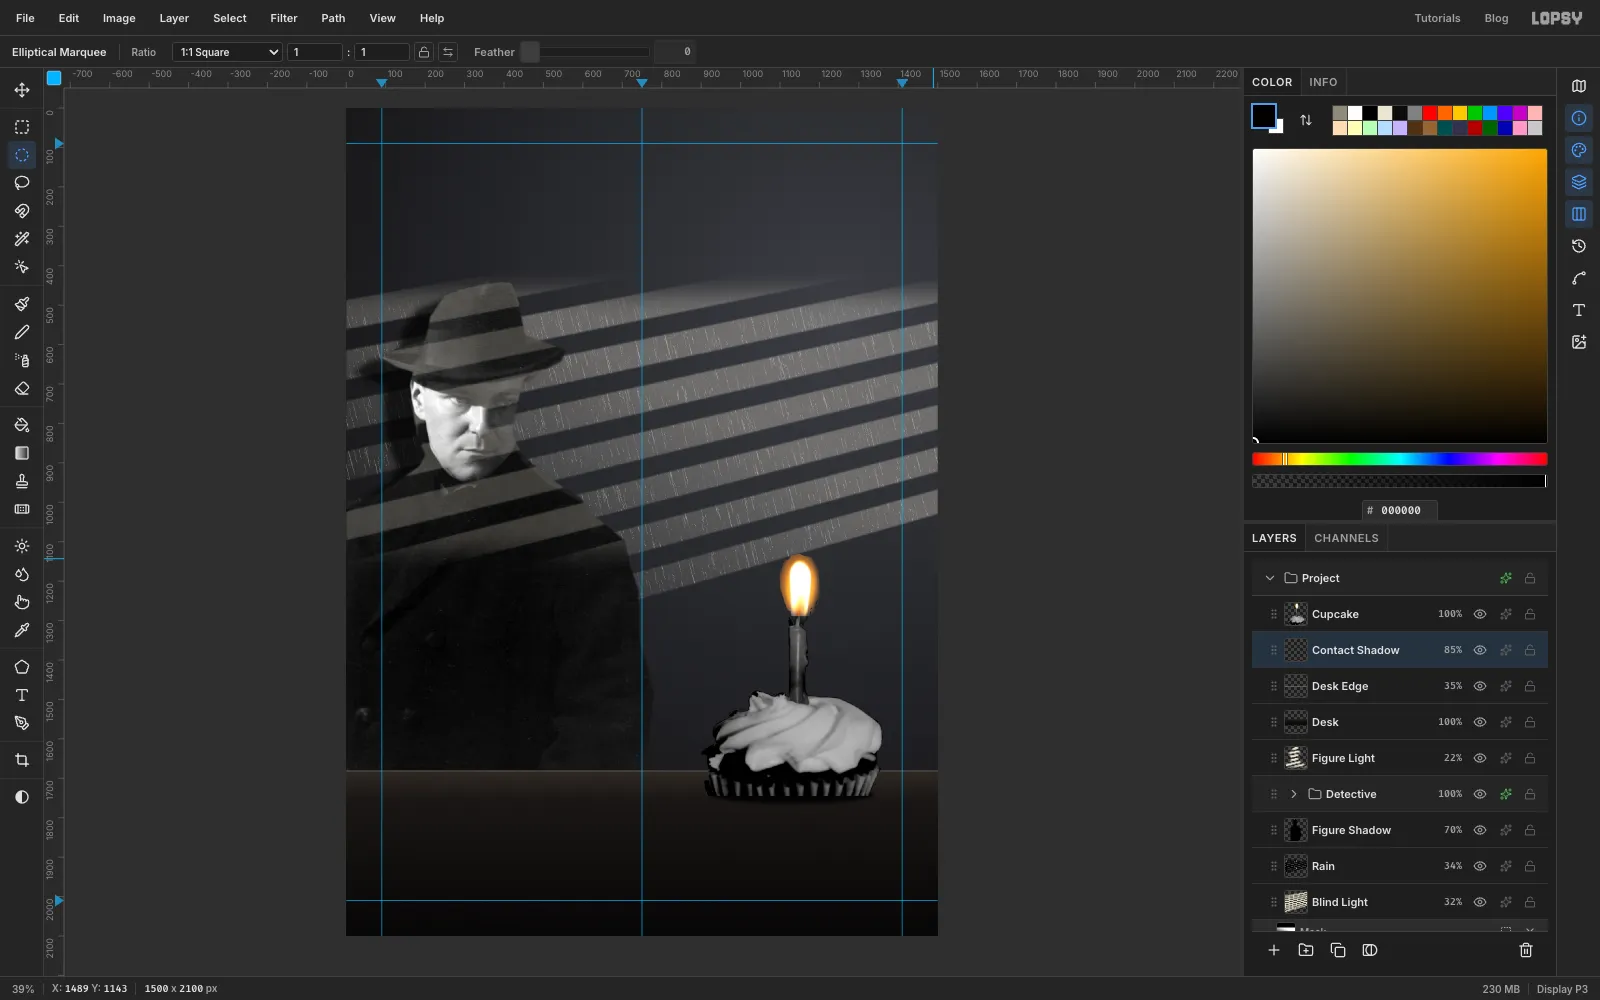
Cmd-click the Cupcake thumbnail. With the Move tool, hold Cmd and drag the bottom-right corner handle inward until the cupcake is about 62% of its size. Press Enter and Cmd+D. Drag it to the right of the card so its centre is near x 1125 and the bottom of the wrapper sits at about y 1745, on the desk.
There's a scrap of torn wrapper on the cake's left side. Lasso round it and press Delete.
To seat it on the desk, click Desk Edge, Add Layer and name the layer Contact Shadow. Drag an Elliptical Marquee under the cupcake, a little narrower than the wrapper and about 46 px tall, from y 1718 to y 1764. Fill with black, press Cmd+D, blur with Gaussian Blur at Radius 12 and set the opacity to 85%.
-
Lift the flame onto its own layer
The flame needs a glow, and the cupcake shouldn't get one. So move the flame onto its own layer.
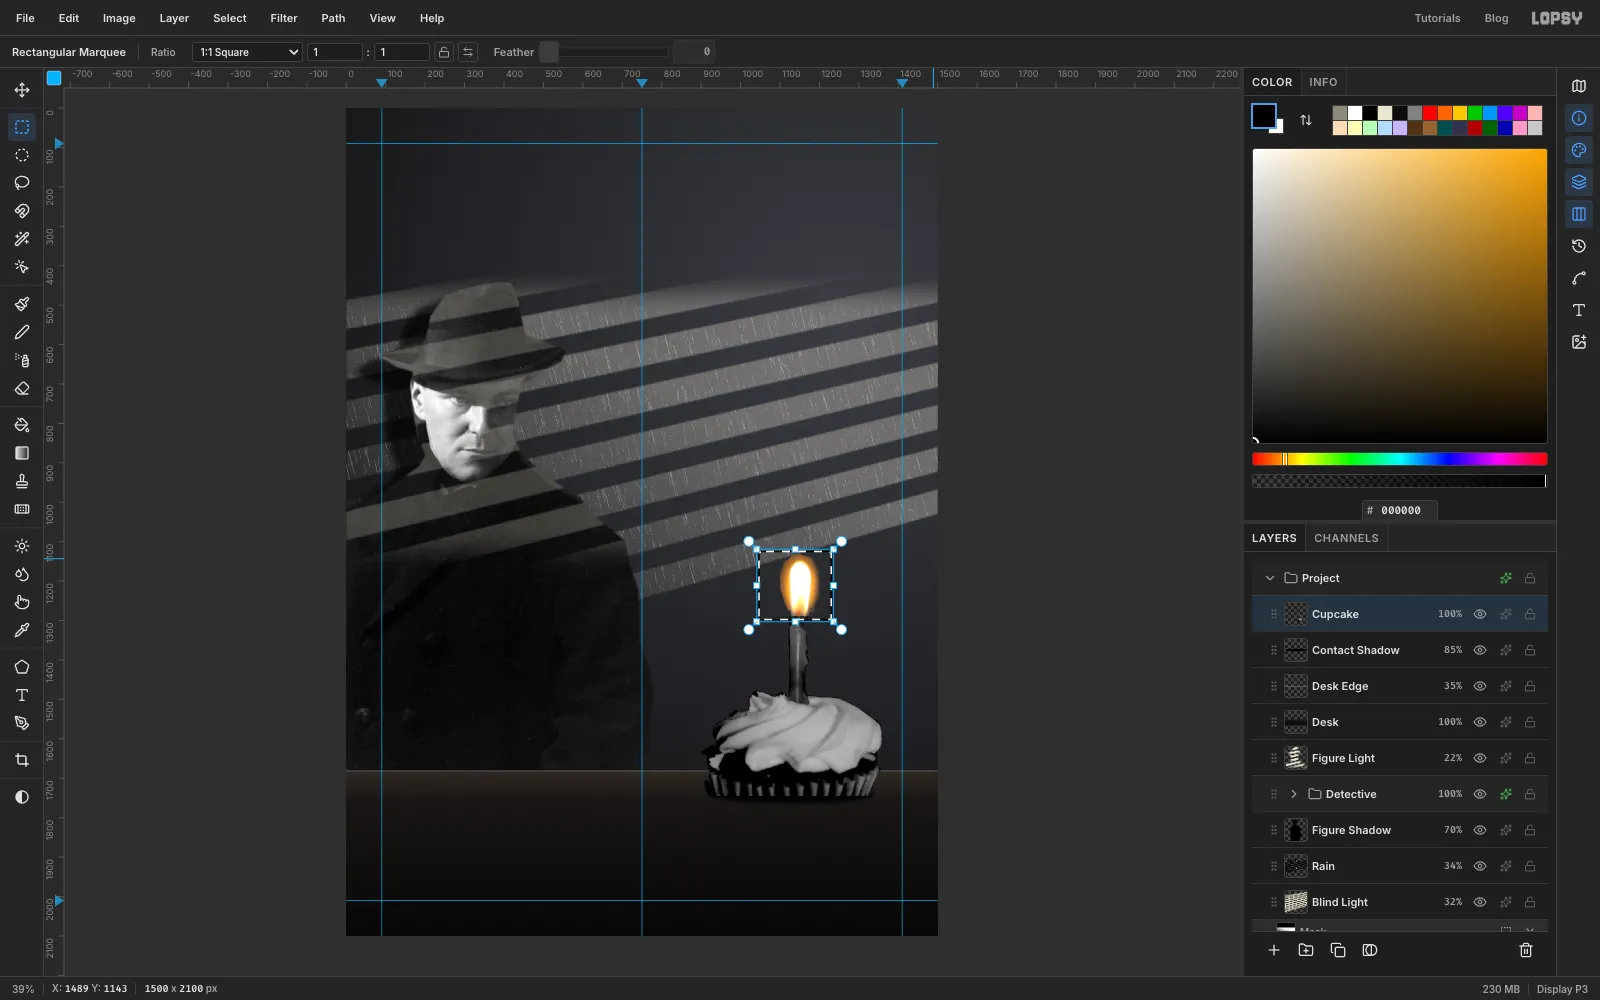
Click Cupcake and drag a Rectangular Marquee around the flame, from just above its tip down to the wick. Feather it by 6 so there's no hard line at the wick. Press Cmd+X to cut, then Cmd+V. The paste lands in place on a new layer. Rename it Flame and press Cmd+D.
The cut picked up a faint rectangle of dark pixels around the flame. Drag an Elliptical Marquee snugly around the flame (about 96 px wide). Feather it by 14, choose Select → Inverse, press Delete and Cmd+D.
-
Make the flame glow and light the room
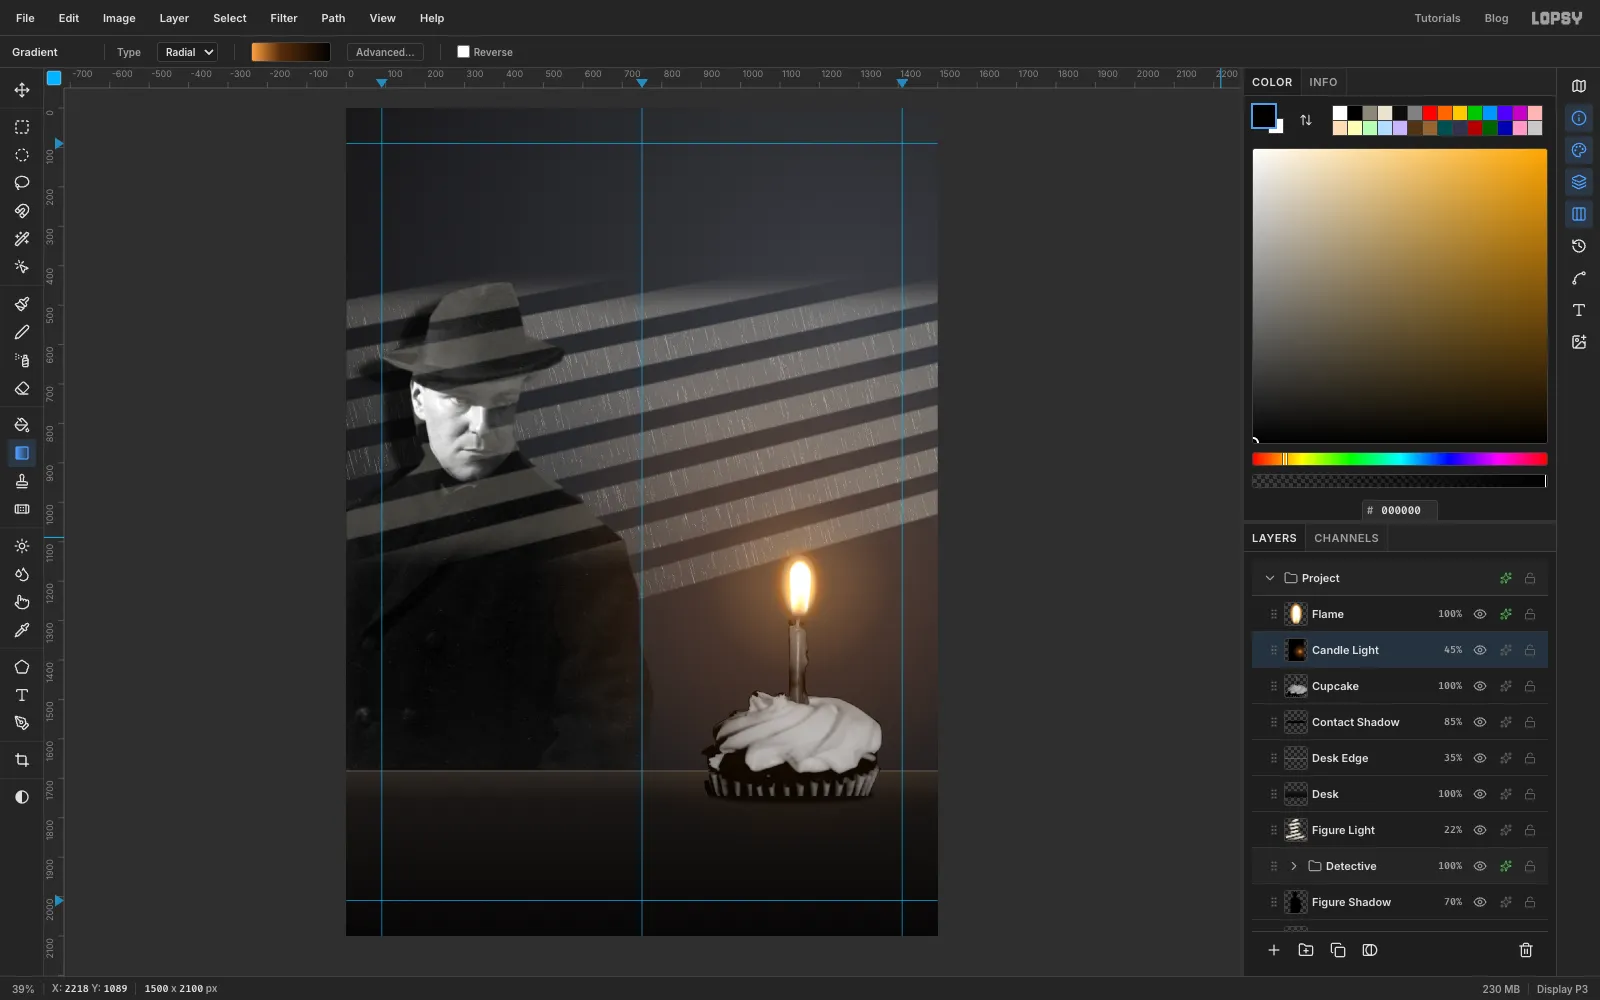
Open the effects for Flame and set its Blend to Screen, so any dark pixels left round it drop out. Turn on Outer Glow with colour , Size 46, Spread 4 and Opacity 85.
Now let the candle light the room. Click Cupcake, Add Layer and name the layer Candle Light. Make a Radial gradient with three stops: at the left, at about 35% and black at the right. Drag from the middle of the flame about 670 px out toward the lower left. Set the layer's Blend to Screen, where black does nothing, and its opacity to 45%.
-
Warm the frosting and the detective's near side
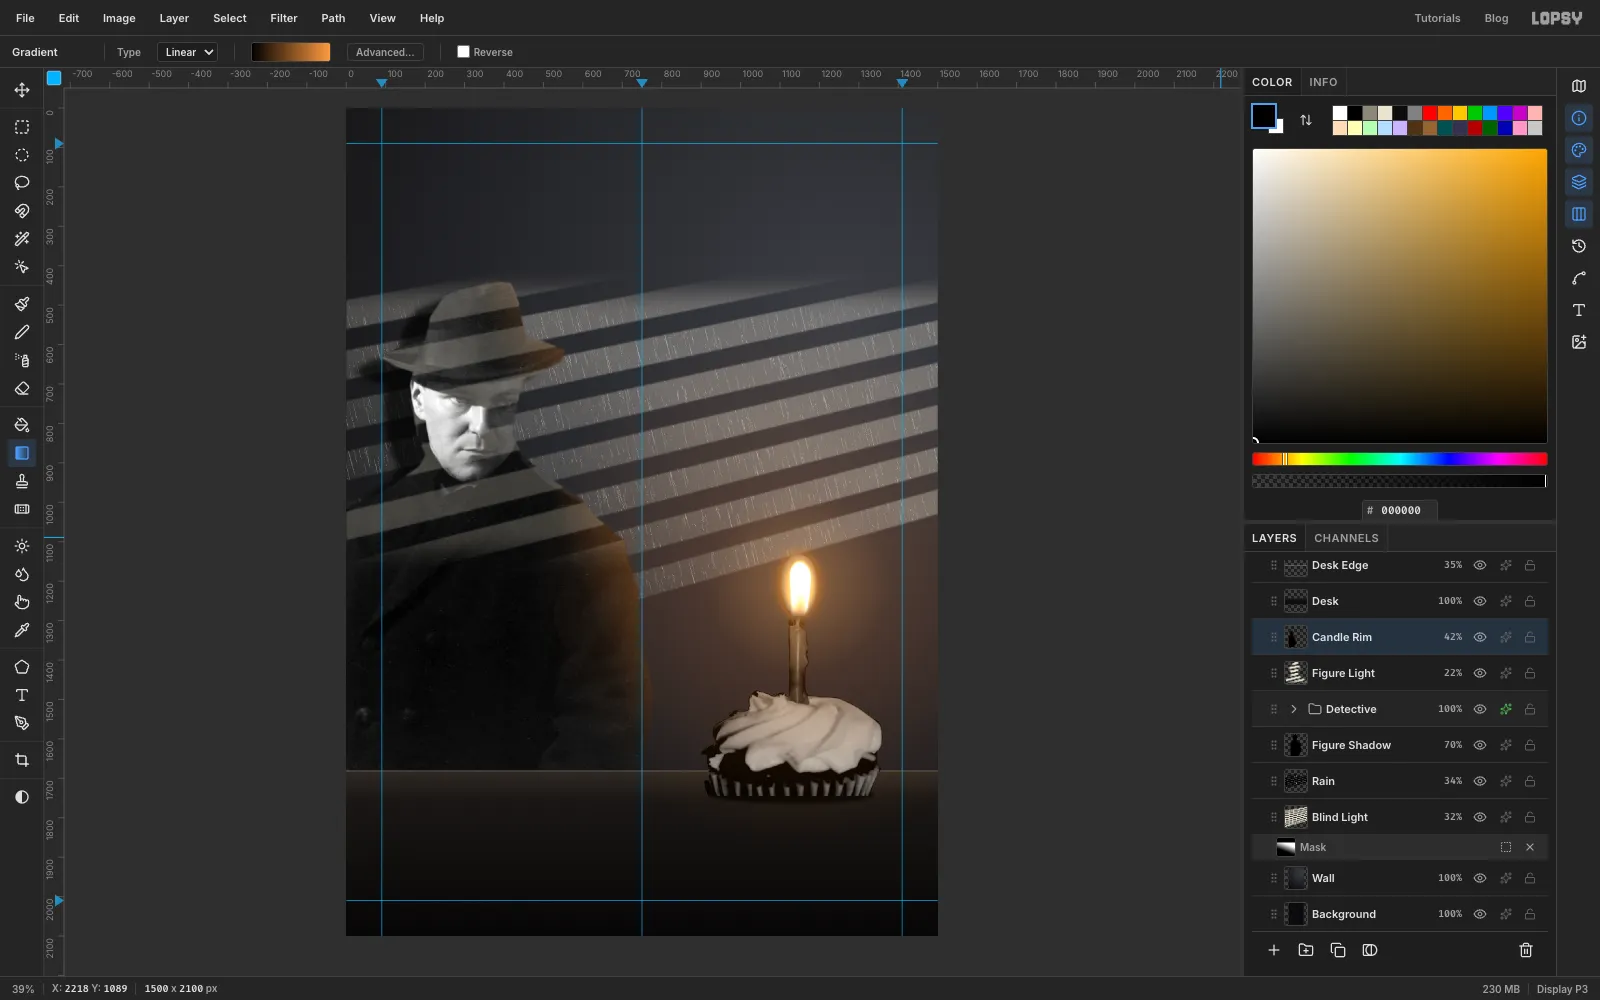
White frosting doesn't pick up warmth in Screen mode, so tint it with Multiply instead. Click Cupcake, Add Layer and name the layer Warm Spill. Make a Radial gradient from to white and drag it from the flame about 600 px outward. Cmd-click the Cupcake thumbnail, choose Select → Inverse, click Warm Spill and press Delete, then Cmd+D. Set Blend to Multiply and the opacity to 75%.
The candle should also catch the side of the detective that faces it. Click Figure Light, Add Layer and name the layer Candle Rim. Load his outline (expand the group, Cmd-click Detective Photo, collapse the group) and click Candle Rim. Make a Linear gradient from black to . Drag it from the middle of his coat toward the shoulder nearest the candle, about x 520 to x 800. Press Cmd+D, set Blend to Screen and the opacity to 42%.
-
Add a curl of smoke
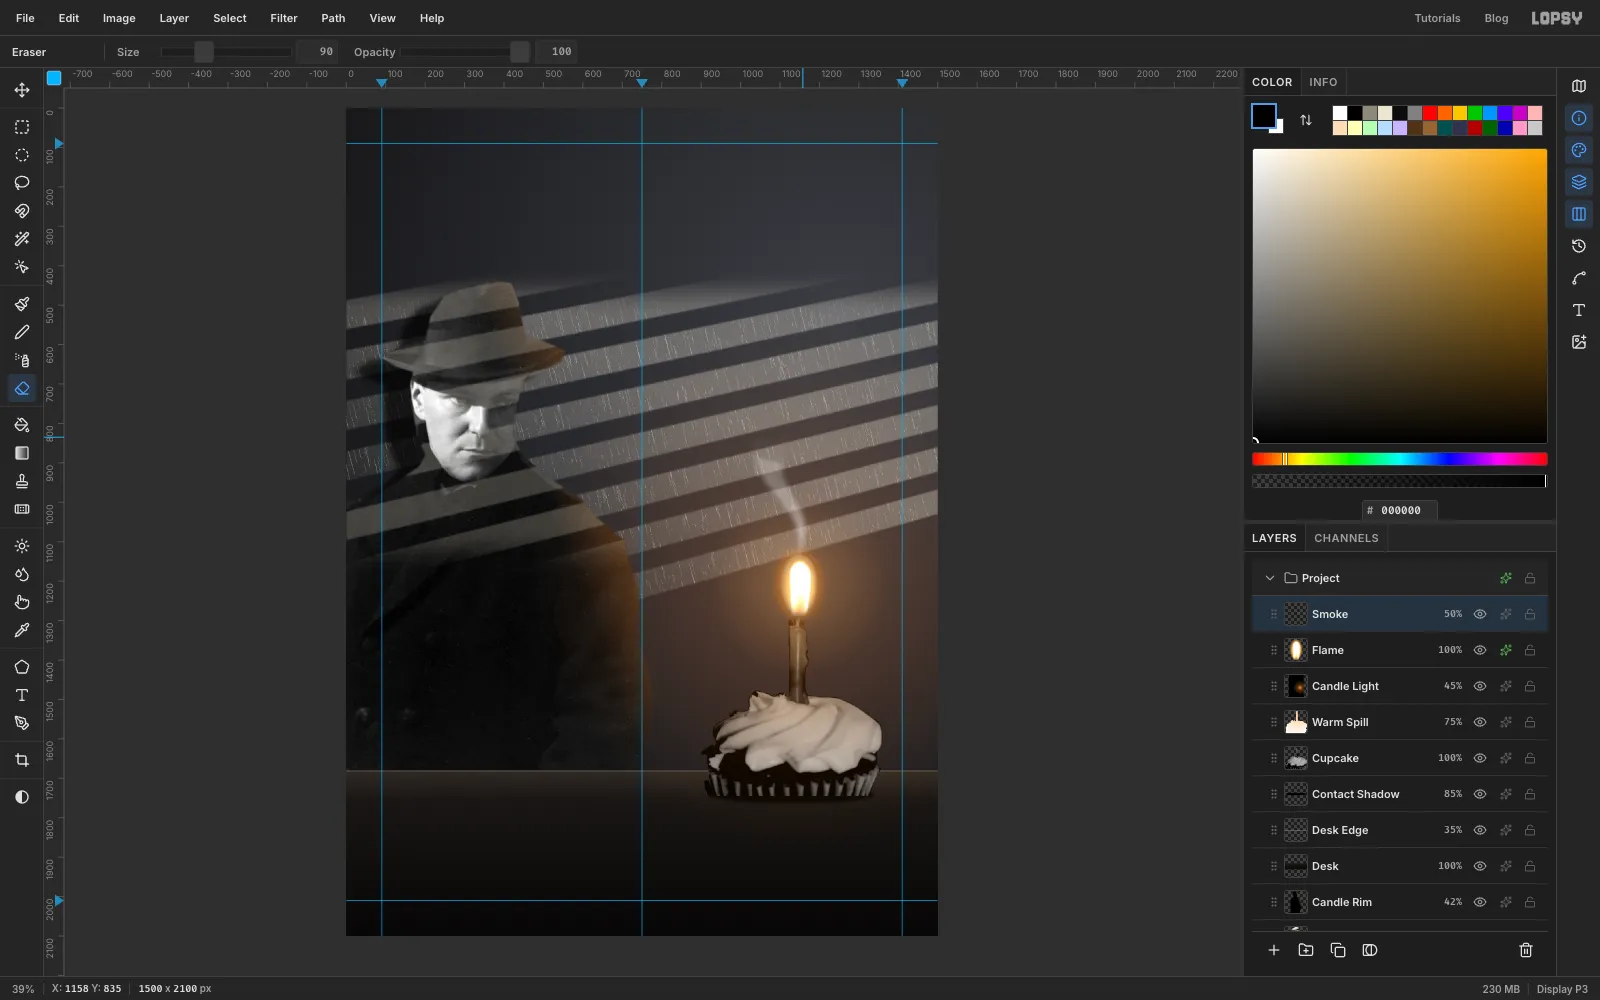
Click Flame, Add Layer and name the layer Smoke. With the Lasso (L), draw a narrow plume about 300 px tall. Start at the tip of the flame, curve it slightly as it rises, drift it a little to the left and let it widen toward the top. Feather the selection by 16.
Choose Filter → Smoke… with Scale 5 and Turbulence 80. This fills the plume with wispy smoke. Press Cmd+D, set Blend to Screen and the opacity to 50%.
To make the top fade away, pick the Eraser (E) at Size 90 and Opacity 40%, and brush once across the top of the wisp. Set the Eraser's opacity back to 100% afterwards.
-
Set the kicker line
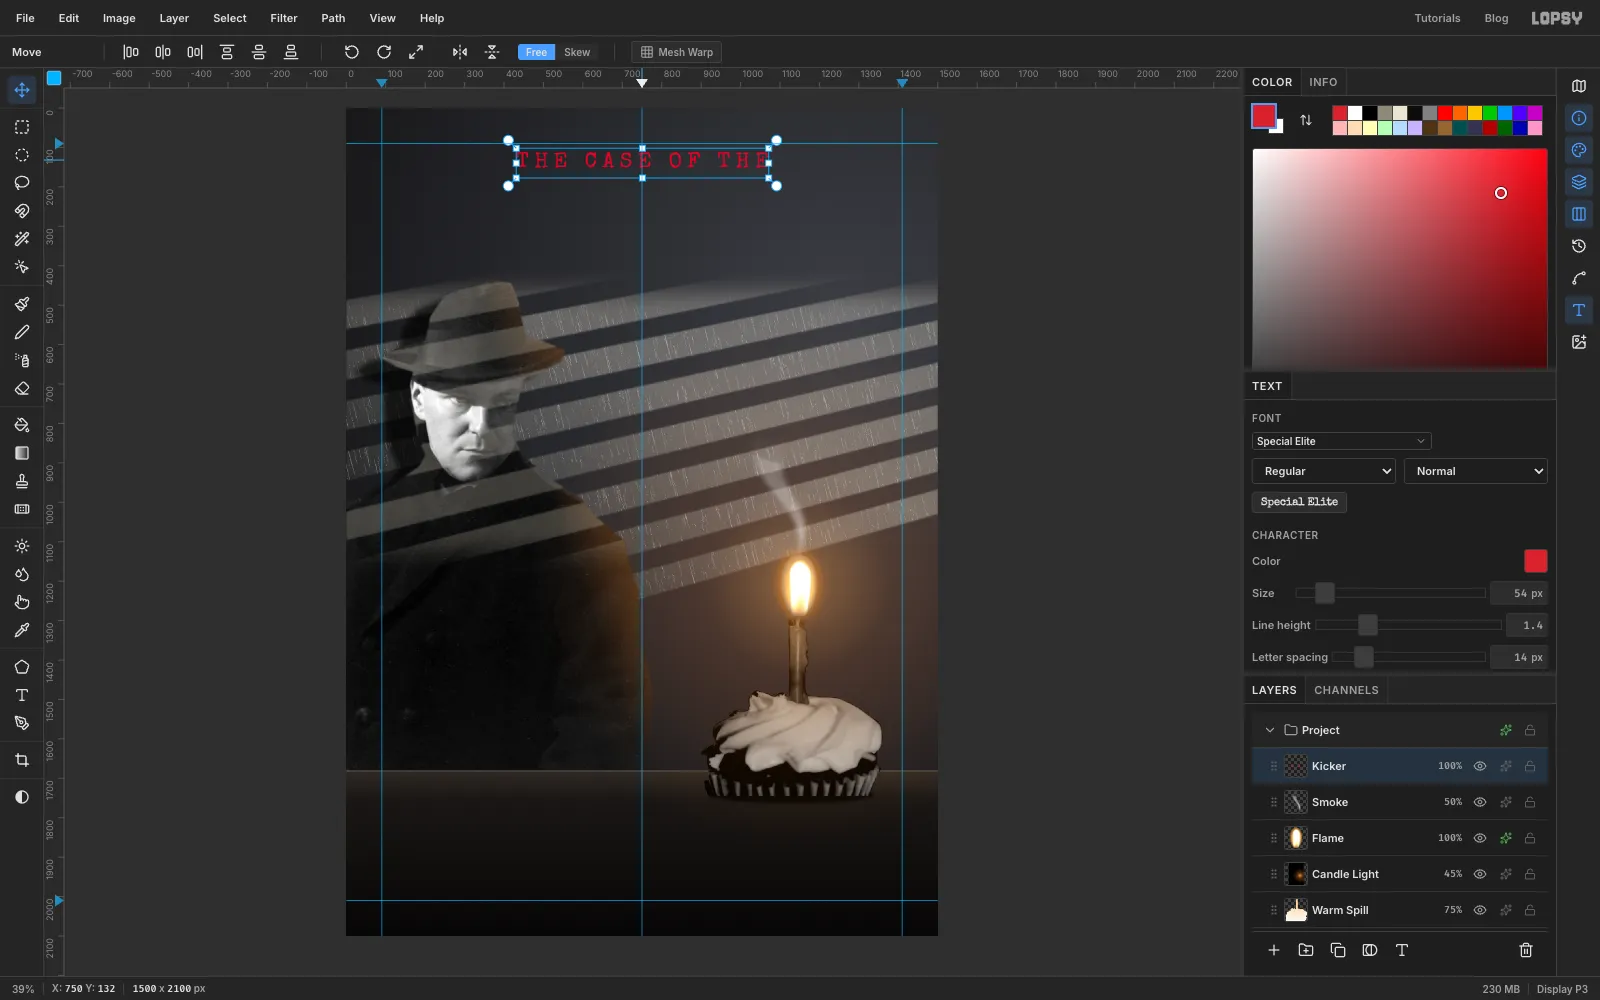
With Smoke selected, pick the Text tool (T). In the options bar choose Special Elite at Size 54, and set the colour to . Click anywhere in empty canvas, type THE CASE OF THE and press Tab to commit. In the Text panel set Letter spacing to 14. Rename the layer Kicker.
With the Move tool, drag it to the top of the card. Its letters should start at about y 112 and it should be centred on the middle guide at x 750.
-
Set the title
Click Smoke again first. If the Kicker is still active when you change the font, the change restyles the kicker.
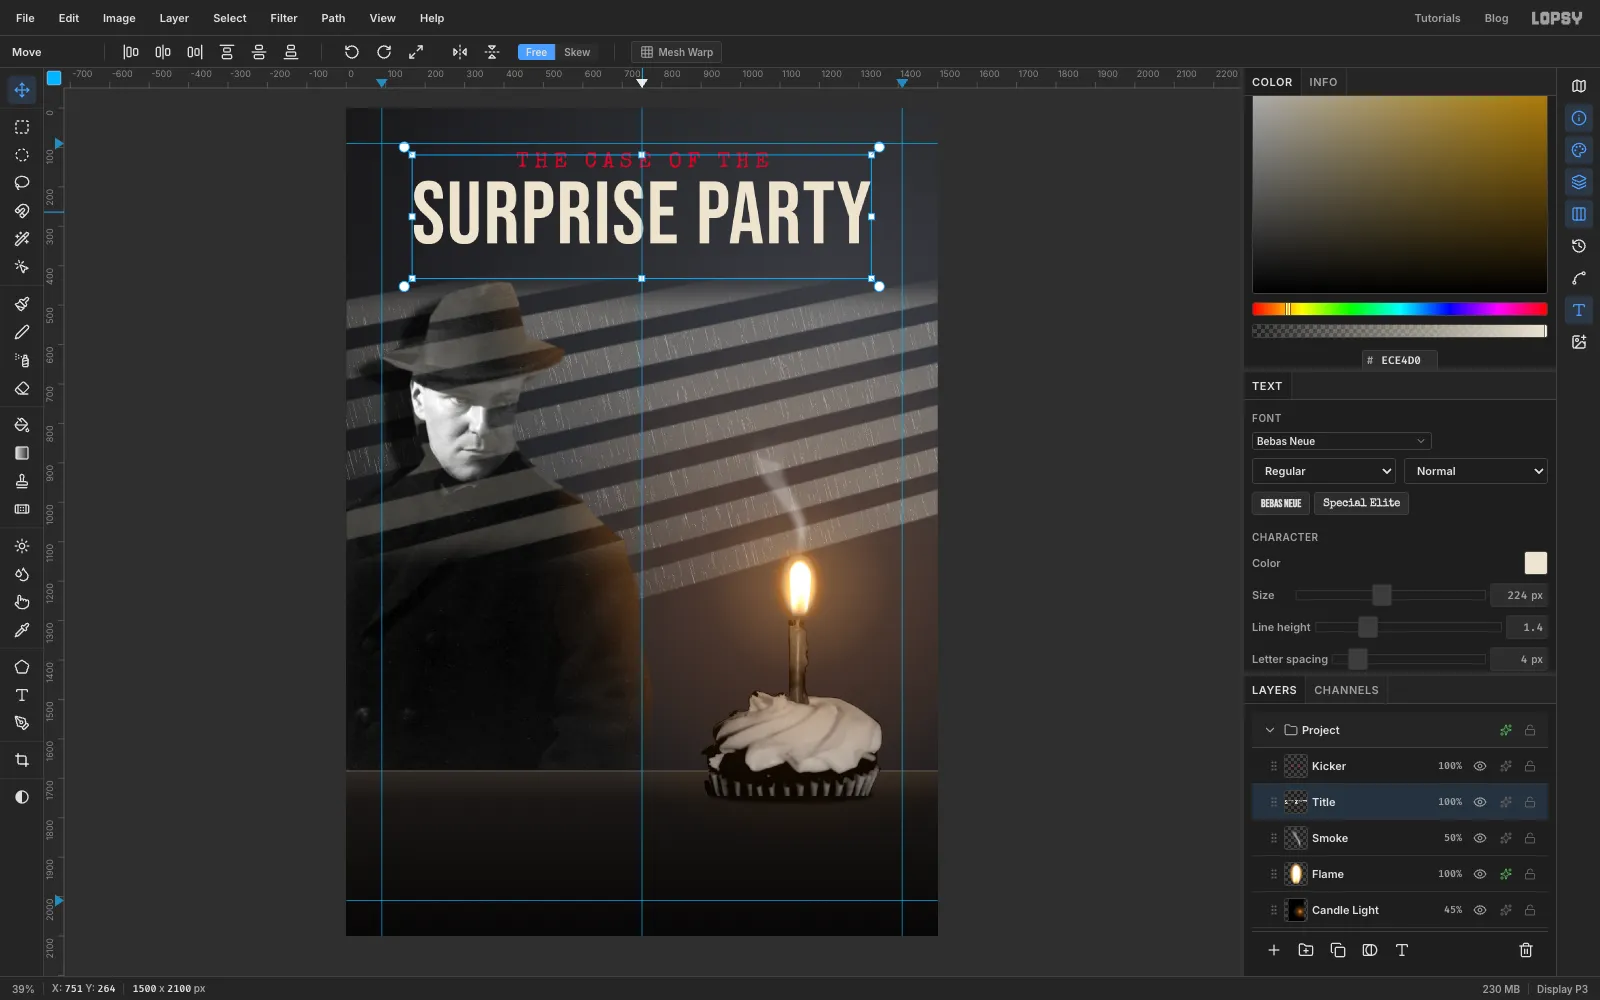
With the Text tool, choose Bebas Neue at Size 224 with colour . Click in empty canvas lower down, type SURPRISE PARTY and press Tab. In the Text panel set Letter spacing to 4, since a new text layer starts with the last spacing you used. Rename the layer Title. Move it so the tops of the letters sit at about y 184, centred on x 750. That leaves a gap of about 35 px under the kicker.
-
Slant the title
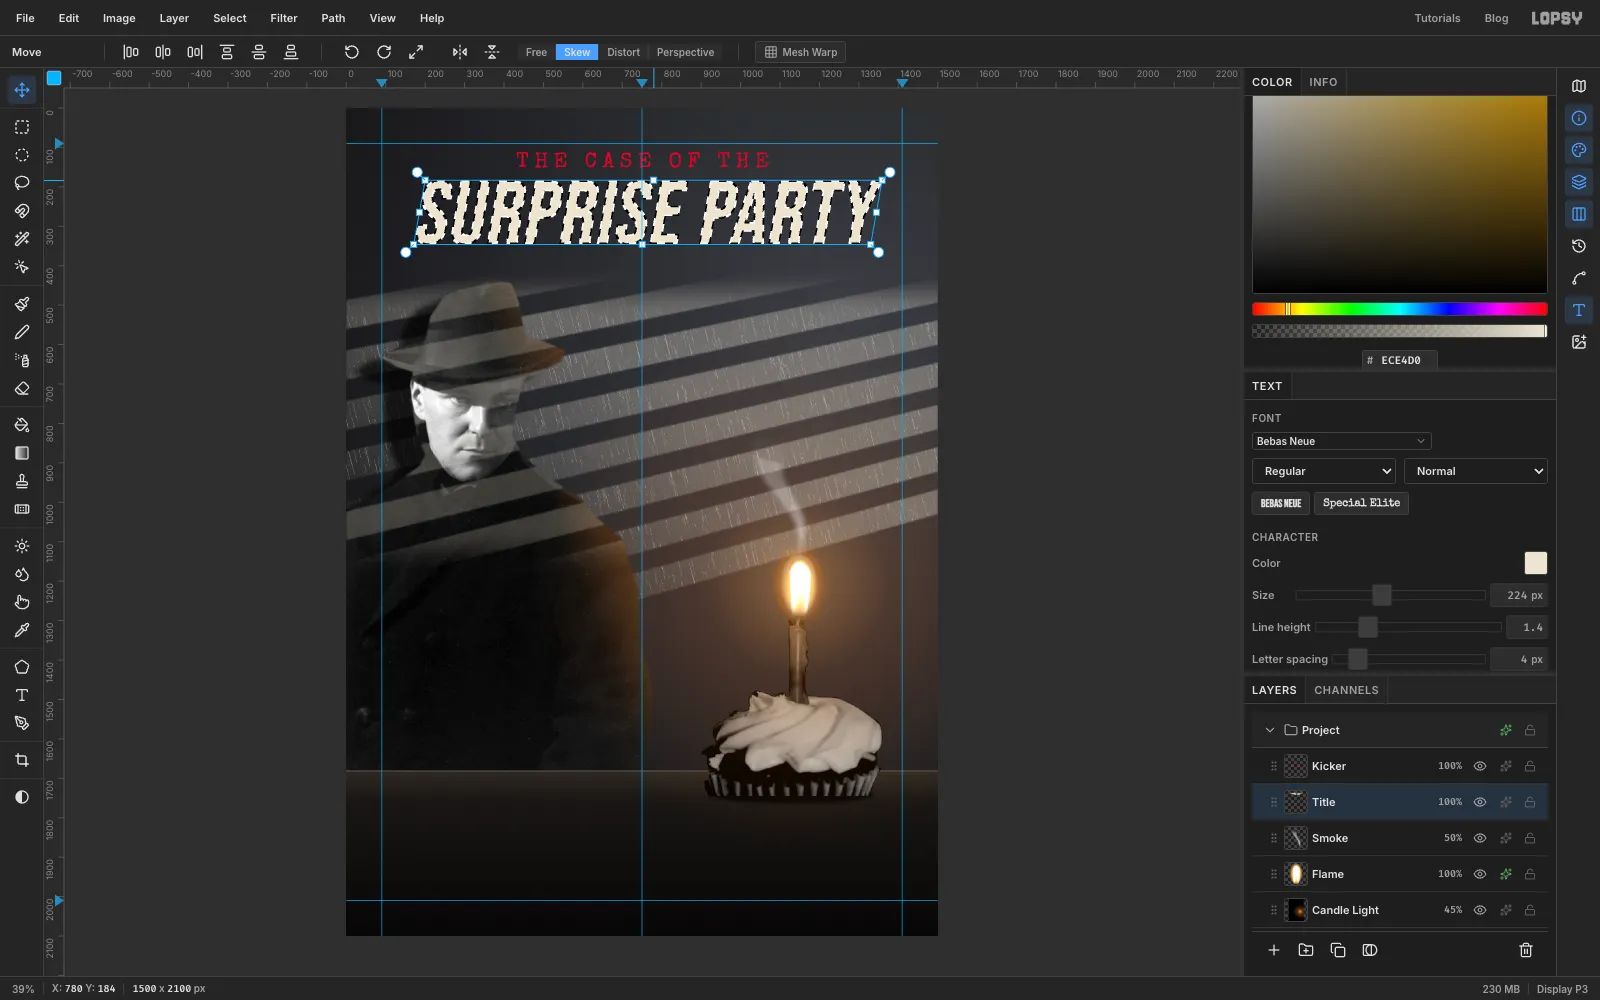
Pulp titles lean forward. Click Rasterize Layer at the bottom of the Layers panel, then Cmd-click the Title thumbnail. With the Move tool, click Skew and drag the handle in the middle of the top edge about 30 px to the right. Every letter leans by the same amount. Press Enter and Cmd+D, click Free, and nudge the title back so it's centred on x 750 again.
-
Give the title a metal gradient and a shadow
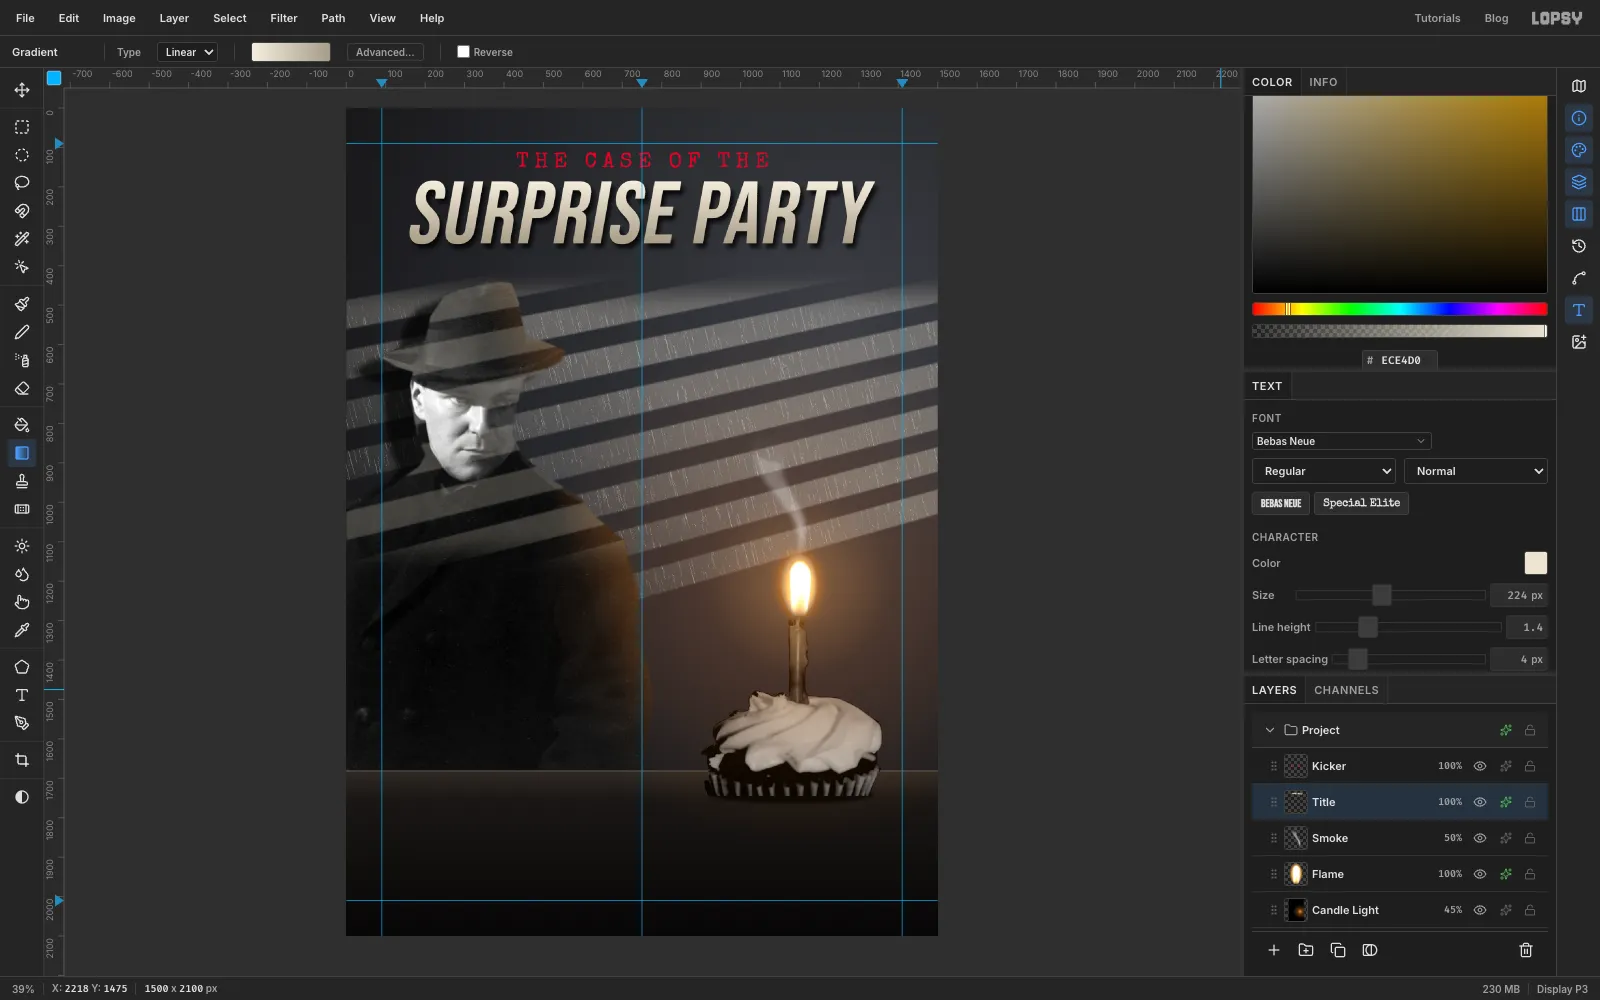
Cmd-click the Title thumbnail again. Make a Linear gradient from to and drag it straight down from the top of the letters to their baseline. Press Cmd+D.
In the layer's effects, turn on Drop Shadow: colour black, Offset X 8, Offset Y 12, Blur 16, Opacity 80.
-
Cut the case-file tag
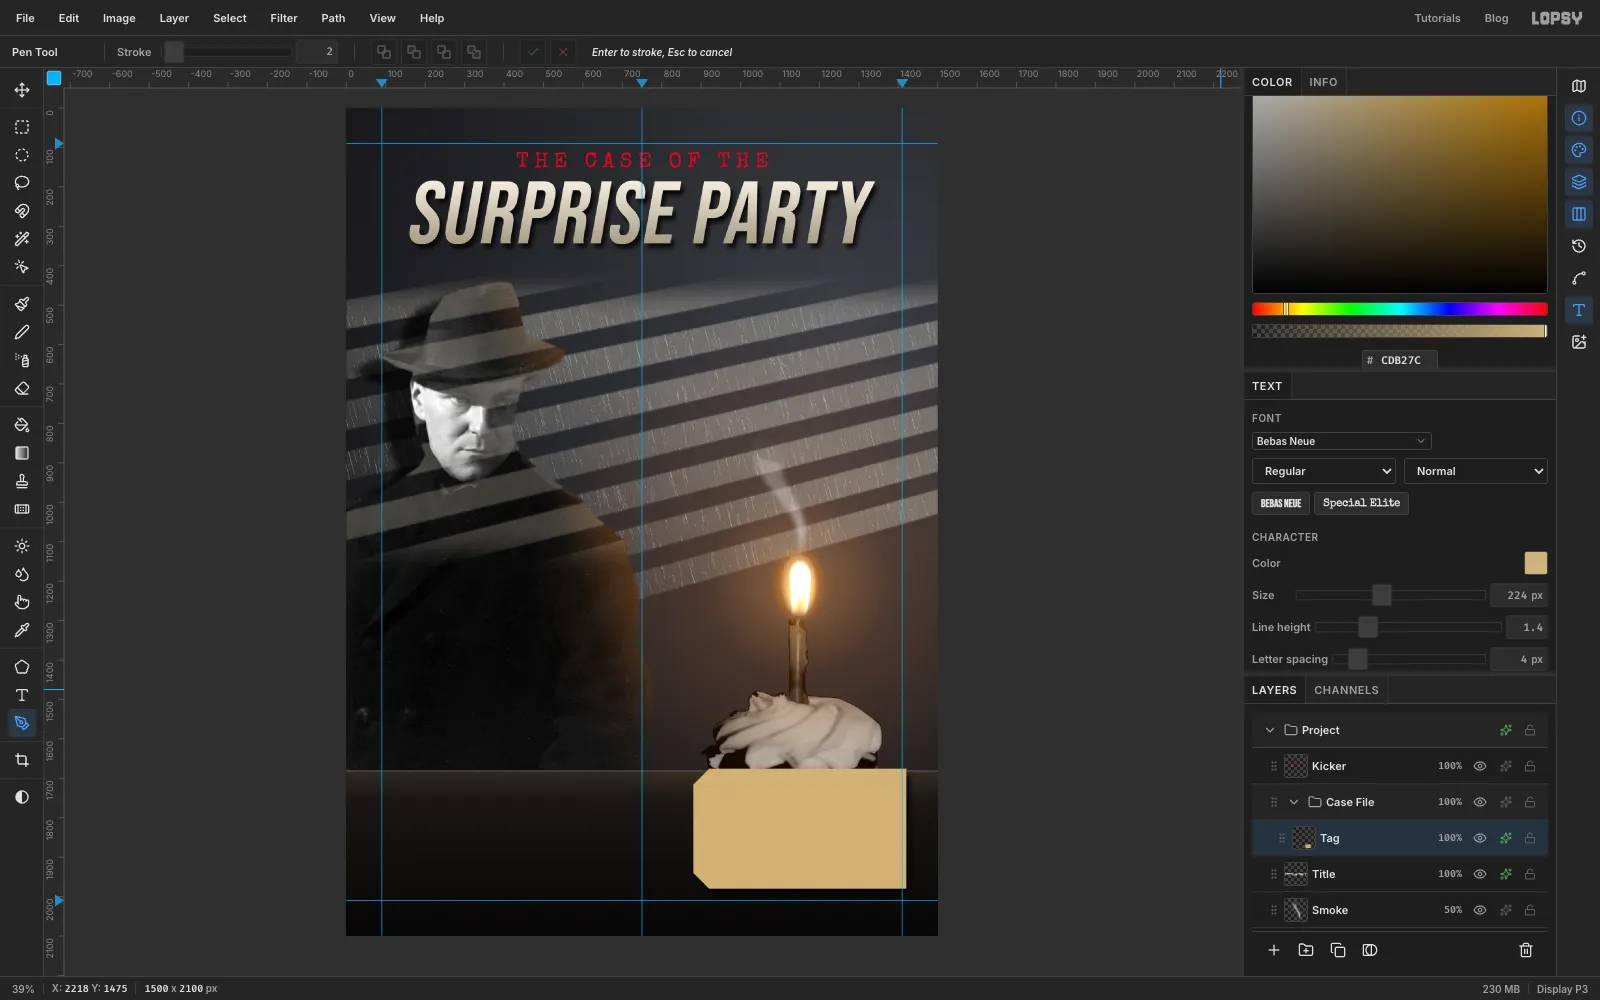
The tag and everything on it go in a group, so you can turn the whole thing at the end. With Title selected, click New Group and name it Case File. Then click Add Layer and name the layer Tag. It goes inside the group.
With the Pen tool, click out a classic shipping-tag shape on the desk, overlapping the bottom of the cupcake: a 540 × 304 px rectangle with its two left corners clipped off at 45°. Mine runs from x 880 to x 1420 and y 1676 to y 1980, with 40 px clipped corners, so the six points are (920, 1676), (1420, 1676), (1420, 1980), (920, 1980), (880, 1940) and (880, 1716). Click the first point again to close it.
In the Paths panel, click Path to Selection and Delete Path. Fill with manila . For a little paper texture, run Add Noise at Amount 10 with Mono. Press Cmd+D and give the layer a Drop Shadow: black, Offset X 10, Offset Y 14, Blur 22, Opacity 75.
-
Punch the eyelet and tie the string
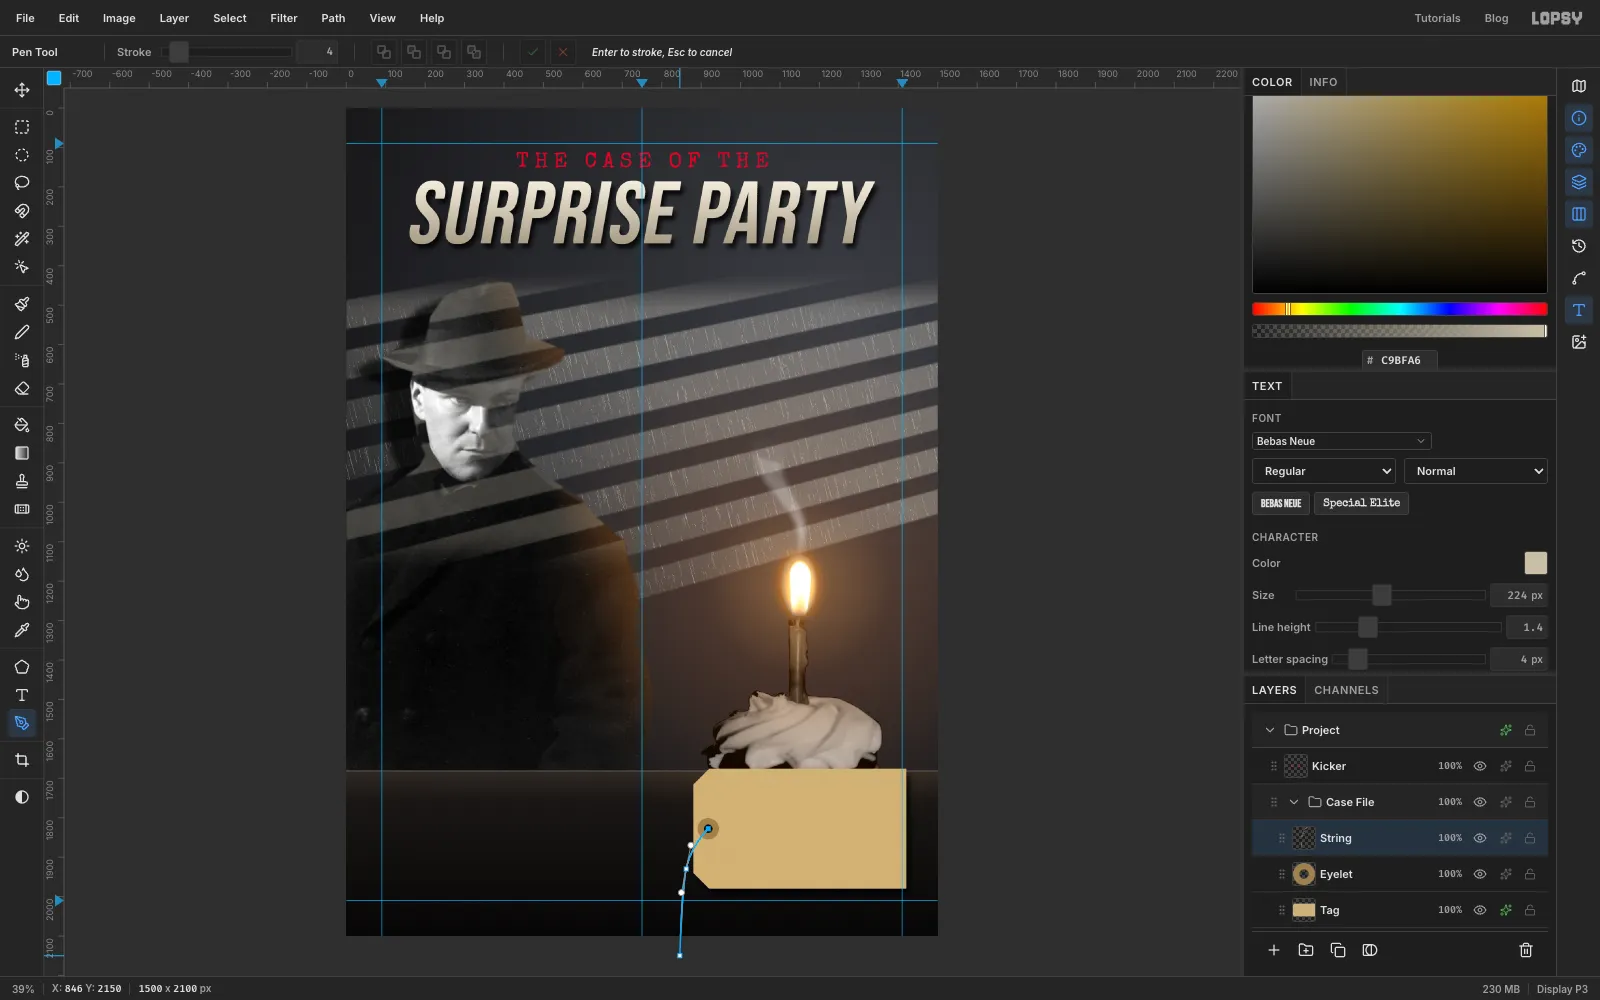
Add Layer and name the layer Eyelet. Drag an Elliptical Marquee from x 891, y 1801 to x 945, y 1855, a 54 px circle near the tag's left end, and fill it with . Then drag a smaller circle in the middle of it, from x 907, y 1817 to x 929, y 1839, and press Delete. Then click Tag and press Delete again, so the hole goes through the tag. Press Cmd+D.
Click Eyelet, Add Layer and name the layer String. Set the foreground colour to . With the Pen tool, set Stroke to 4 in the options bar. Click in the middle of the hole. Press at about x 862, y 1930 and drag a little down to curve the string. Then click just below the bottom of the card. Press Enter to stroke the path. The string drops off the bottom of the card and stays well clear of the tagline.
-
Type the case notes
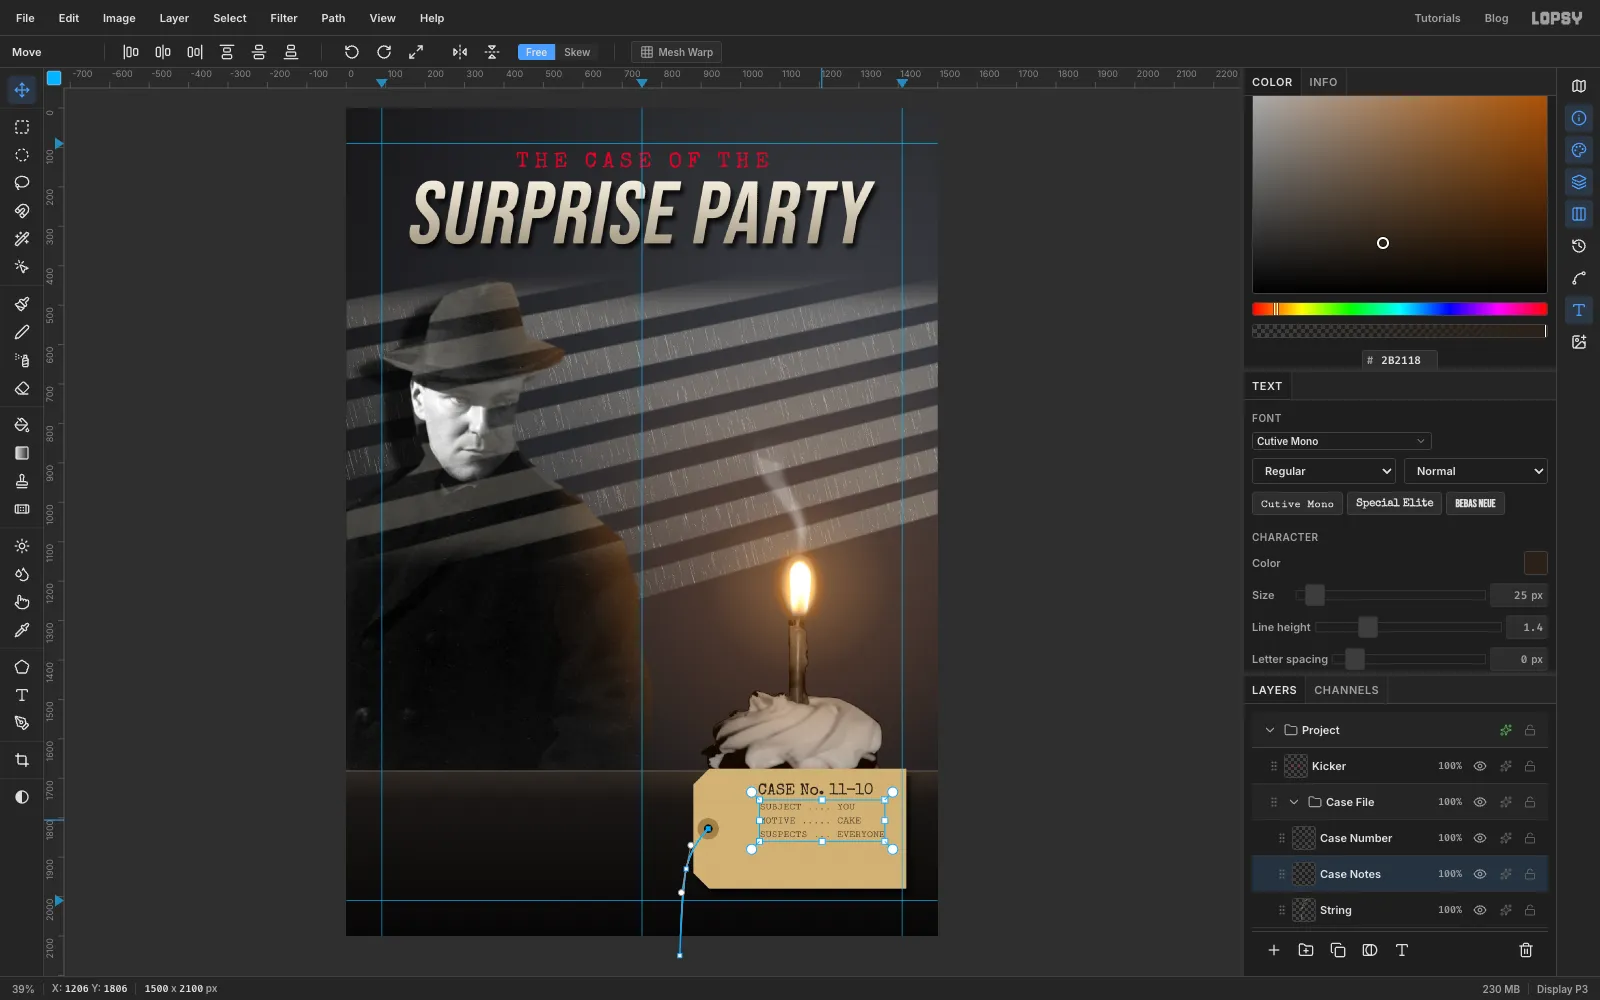
With String selected, pick the Text tool. Choose Special Elite at Size 40 with colour , and set Letter spacing back to 0. Type CASE No. 11-10 in empty canvas, press Tab and rename the layer Case Number. Move it onto the tag at about x 1046, y 1712.
Click String again. For the notes, switch to Cutive Mono at Size 25. It's a monospaced typewriter face, so the dot leaders line up. Type these three lines, pressing Enter between them:
SUBJECT .... YOUMOTIVE ..... CAKESUSPECTS ... EVERYONE
Press Tab, rename the layer Case Notes and move it under the case number at about x 1048, y 1764. Both blocks now share a left edge, about 90 px in from the eyelet.
-
Set the rubber stamp
With Case Notes selected, click Add Layer and name the layer Stamp. The empty raster layer keeps the next text from restyling the notes.
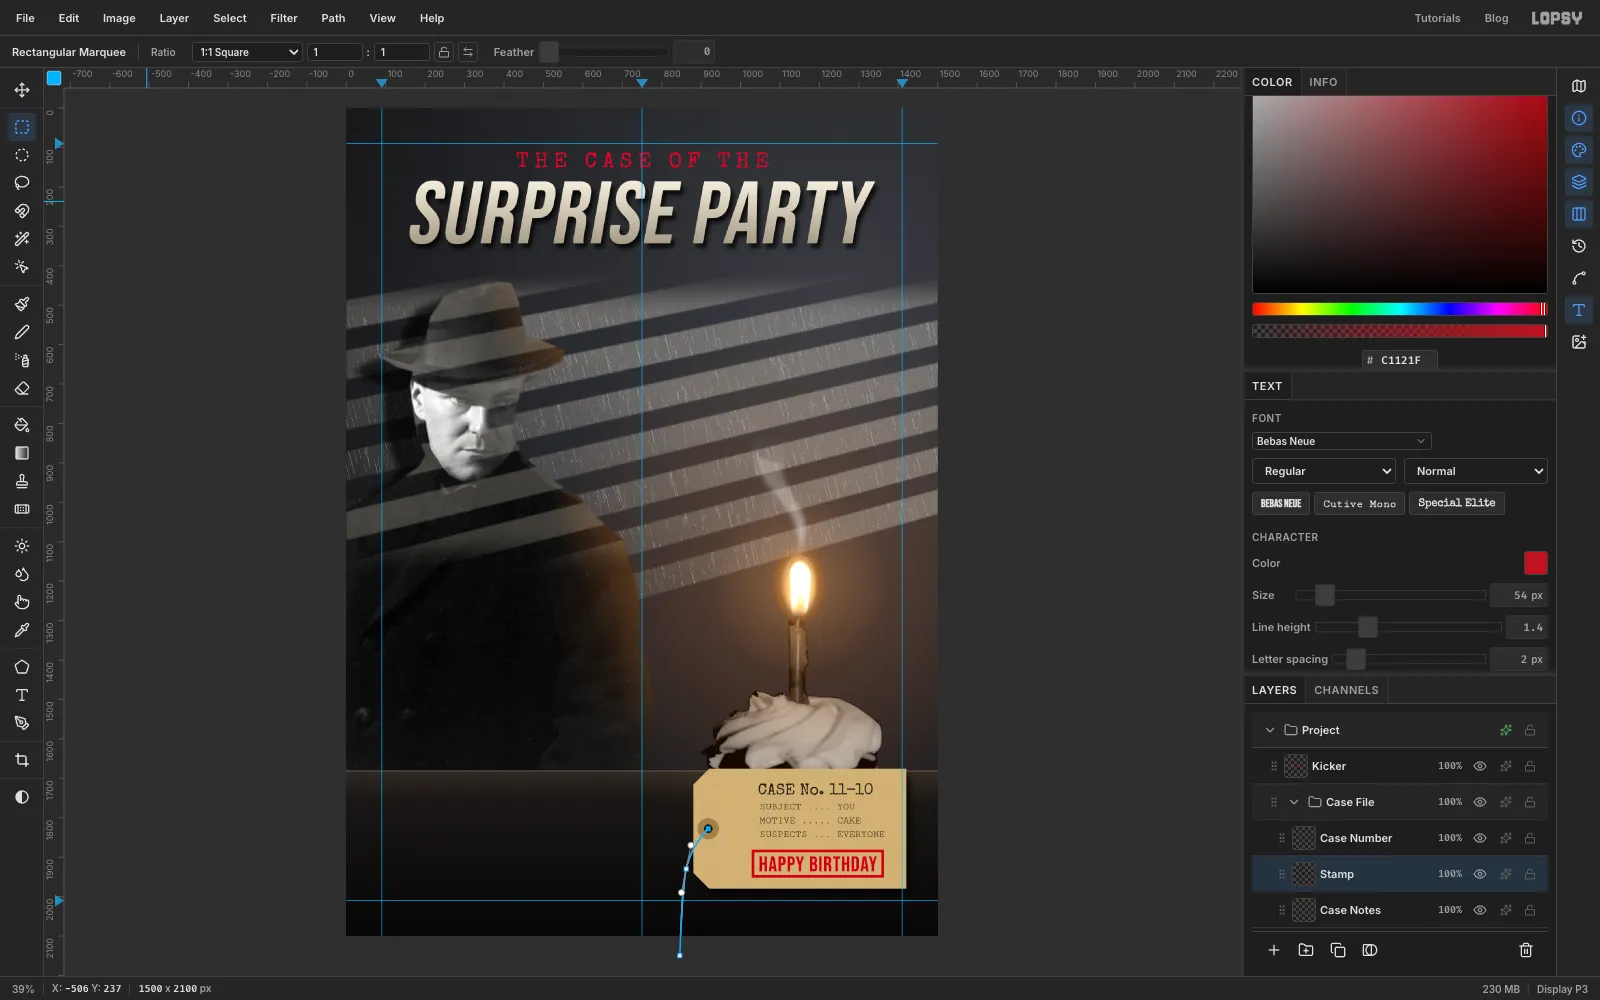
With the Text tool, choose Bebas Neue at Size 54 with colour and Letter spacing 2. Type HAPPY BIRTHDAY and press Tab. Click Rasterize Layer, then move the words onto the tag so they're centred at about x 1196, with their tops at y 1898. Choose Layer → Merge Down to merge them into Stamp.
For the frame, drag a Rectangular Marquee around the words with a little room to spare, from about x 1028, y 1881 to x 1364, y 1952. Then hold Option and drag a second marquee just inside it, from x 1035, y 1888 to x 1357, y 1945. The Option drag cuts it out of the first, leaving a thin ring. Choose Edit → Fill with the stamp red and press Cmd+D.
-
Wear the stamp down
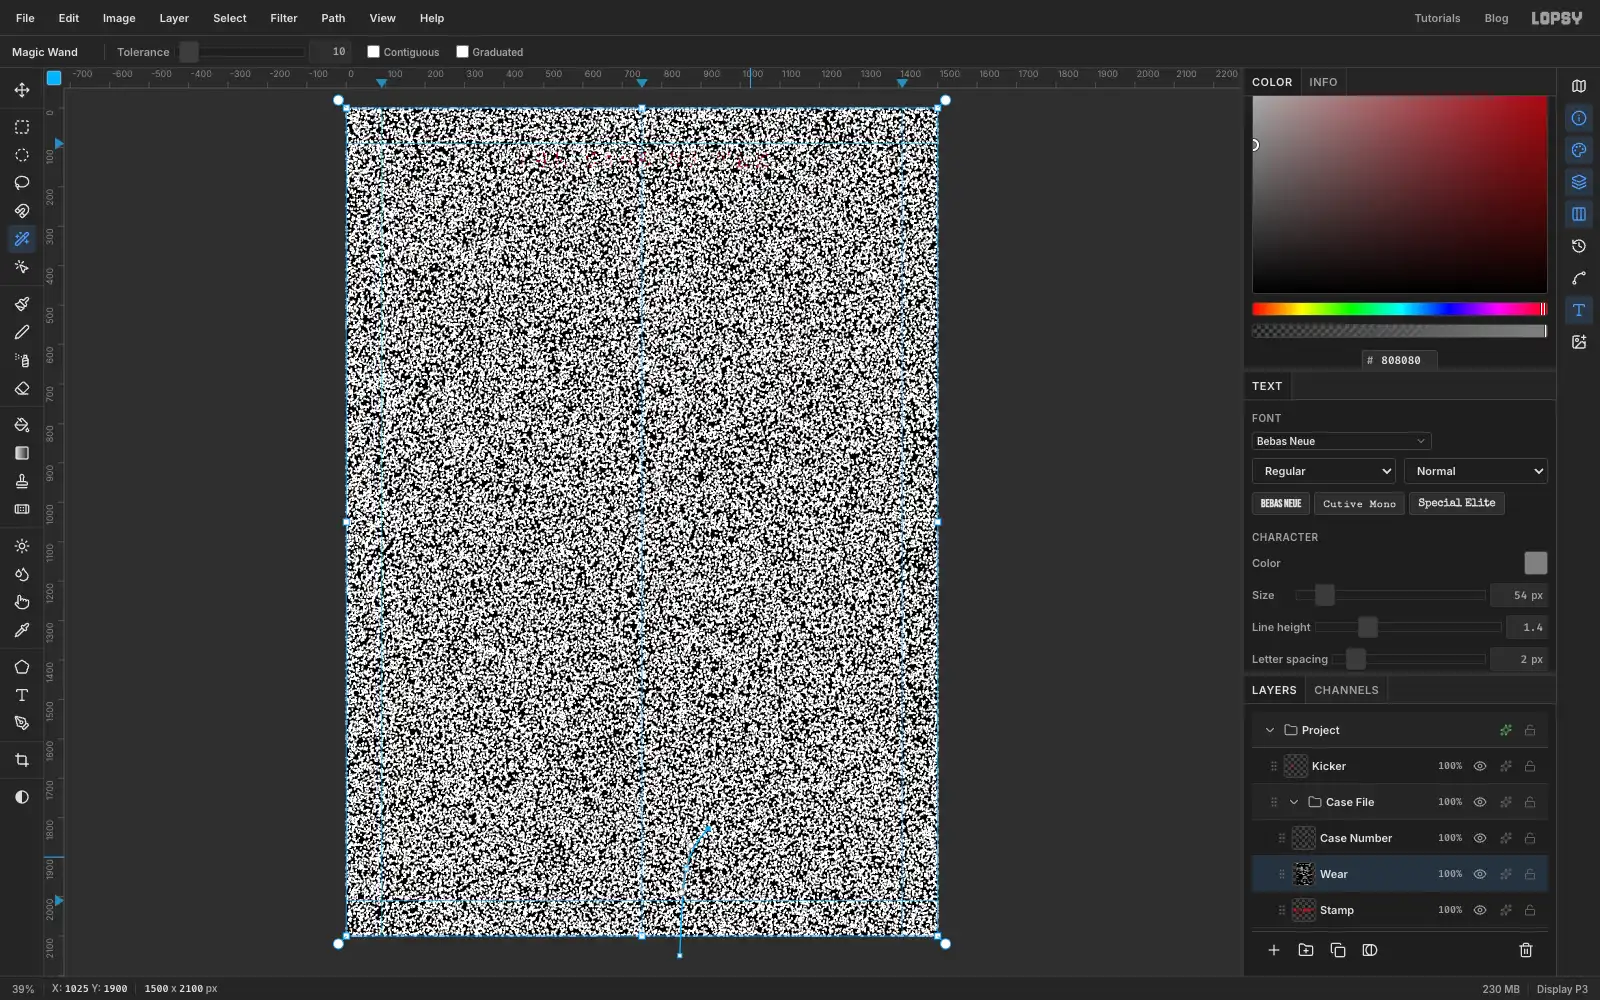
A rubber stamp never prints evenly. Add Layer and name the layer Wear. Fill it with , run Add Noise at Amount 100 with Mono, then Gaussian Blur at Radius 3. Finish with Threshold. Pick a level that leaves the white specks as small separate blots rather than one big web. 135 works.
Pick the Magic Wand at Tolerance 10, untick Contiguous, and click any white speck. Every white speck is now selected. Click Stamp and press Delete, then Cmd+D. Delete the Wear layer, and tick Contiguous again for next time.
-
Rotate the stamp and keep it on the tag
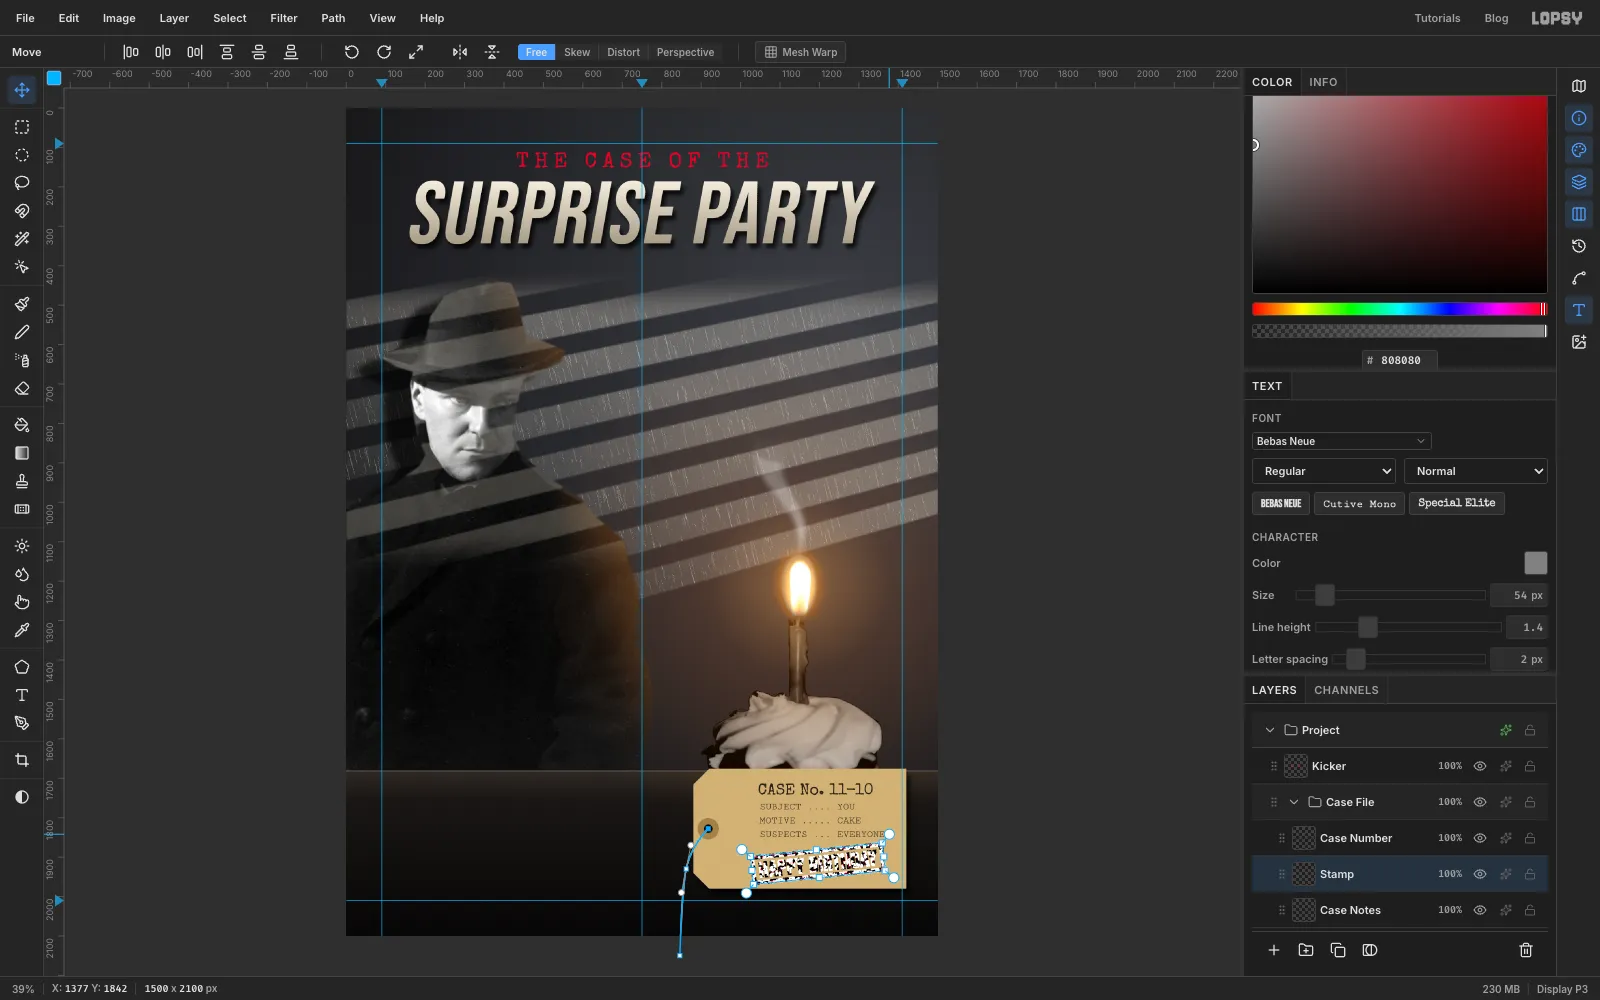
Cmd-click the Stamp thumbnail, pick the Move tool and drag a corner rotation handle until the stamp tilts up about 6° to the right. Press Enter and Cmd+D.
Rubber stamps don't print past the edge of the paper. Cmd-click the Tag thumbnail, choose Select → Inverse, click Stamp and press Delete. Press Cmd+D. Set the stamp's Blend to Multiply so the paper grain shows through the ink.
-
Turn the whole tag
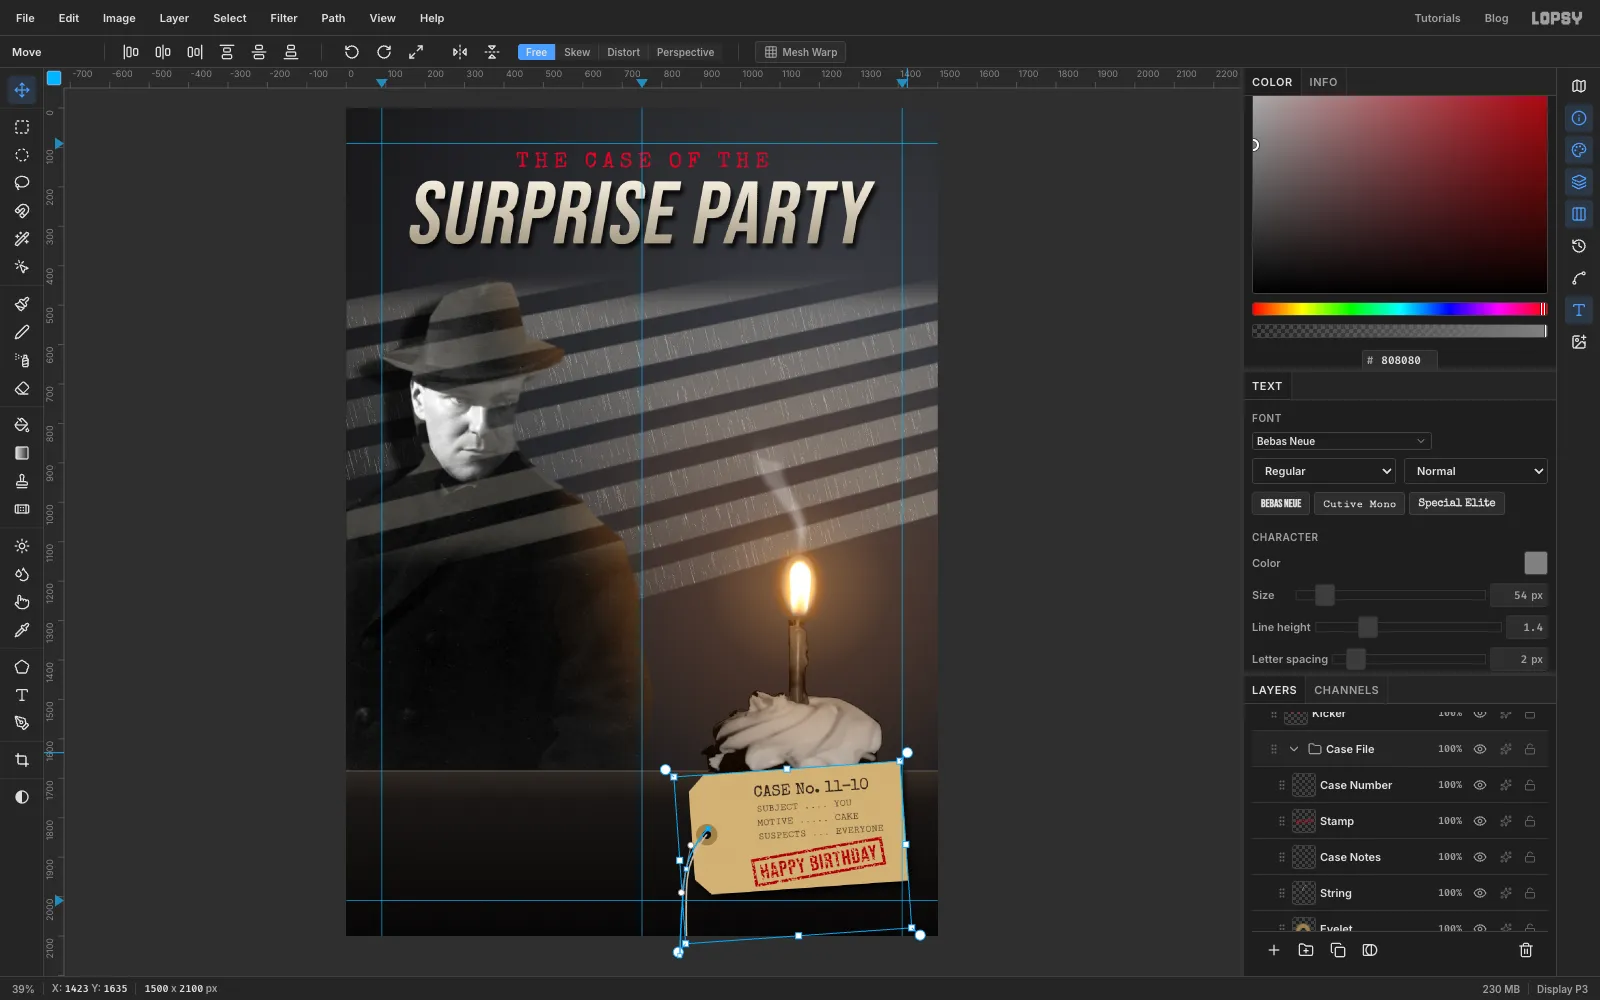
Click the Case File group row and press Cmd+D so nothing is selected. With the Move tool, the handles frame everything in the group. Drag a rotation handle so the tag turns about 4° counter-clockwise, as if it had been dropped on the desk. Press Enter. The tag, eyelet, string, notes and stamp all turn together.
-
Add the tagline
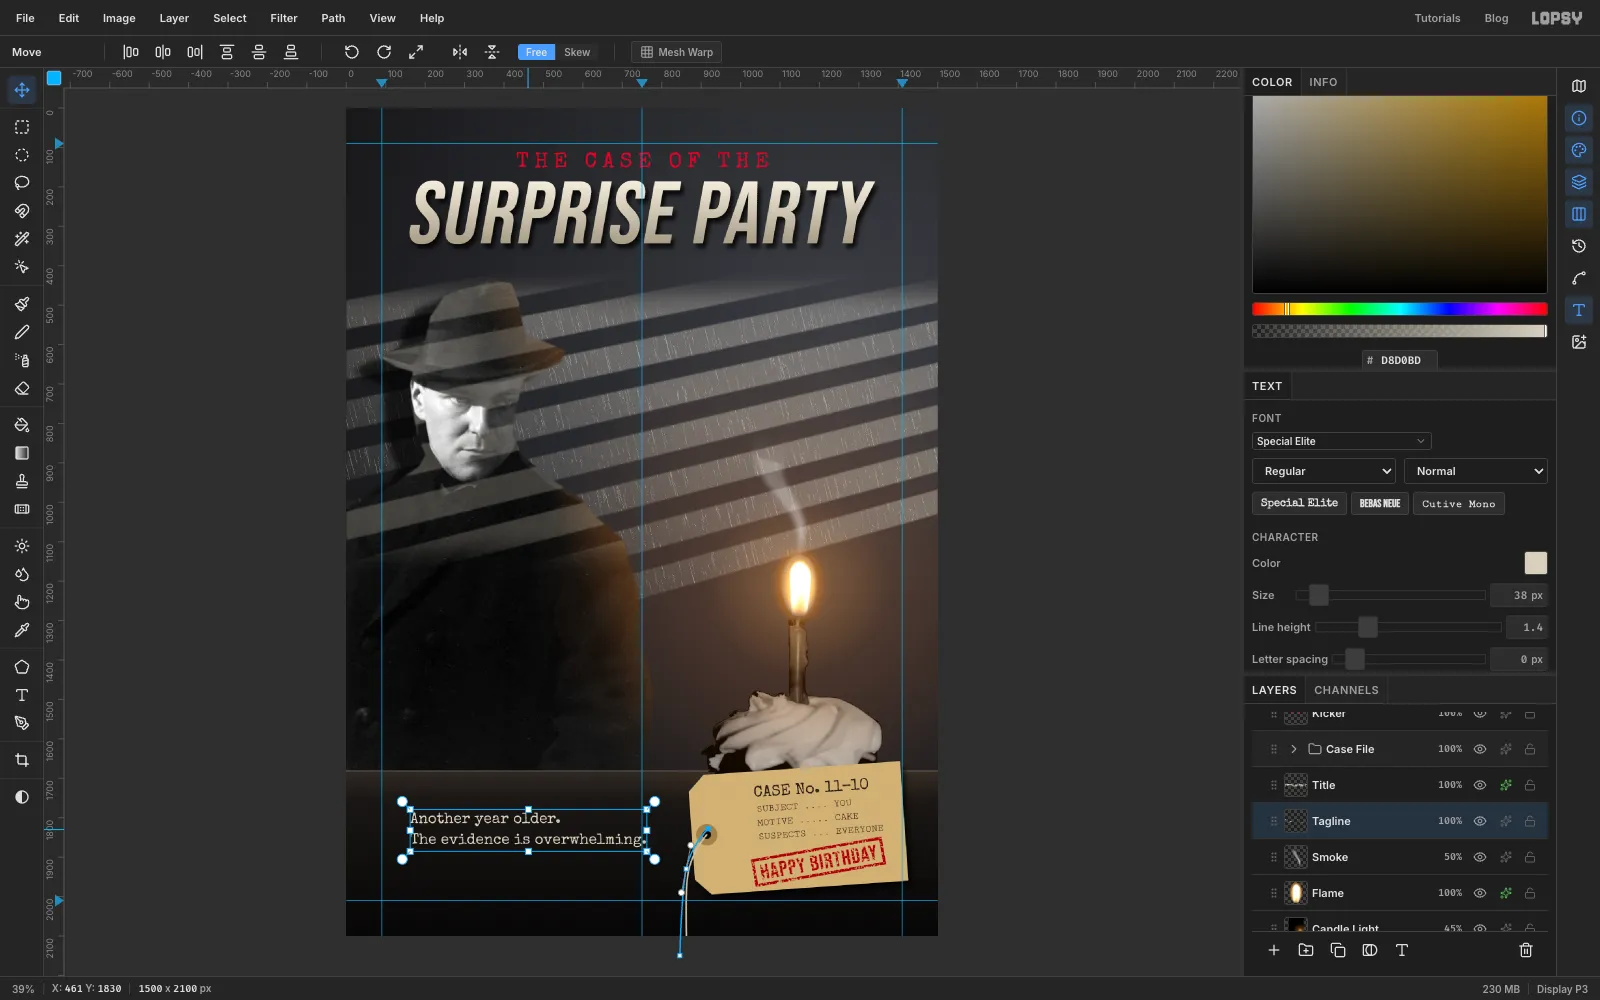
Collapse the Case File group and click Smoke. With the Text tool, choose Special Elite at Size 38 with colour and Letter spacing 0. Type Another year older., press Enter, type The evidence is overwhelming. and press Tab. Rename it Tagline.
Move it onto the desk so it starts at x 162, lined up with the left end of the title, with its top at about y 1786. That puts the middle of the two lines level with the middle of the tag.
-
Finish with a vignette and film grain
Click the collapsed Case File group and Add Layer twice, naming the layers Vignette and Grain. They land above the group but under the Kicker, which keeps the small red type crisp and grain-free.
- On Vignette, make a Radial gradient with white at the left, white again at about 45% and black at the right. Drag from just right of the middle of the card (about x 820, y 1000) out past the bottom-left corner. Set Blend to Multiply, where white does nothing, and the opacity to 80%.
- On Grain, fill with , run Add Noise at Amount 100 with Mono, set Blend to Overlay and the opacity to 40%.
The grey grain disappears in Overlay except as a fine film texture. Save with File → Save Project and export with File → Quick Export PNG.