Design a Risograph Kombucha Bottle Label
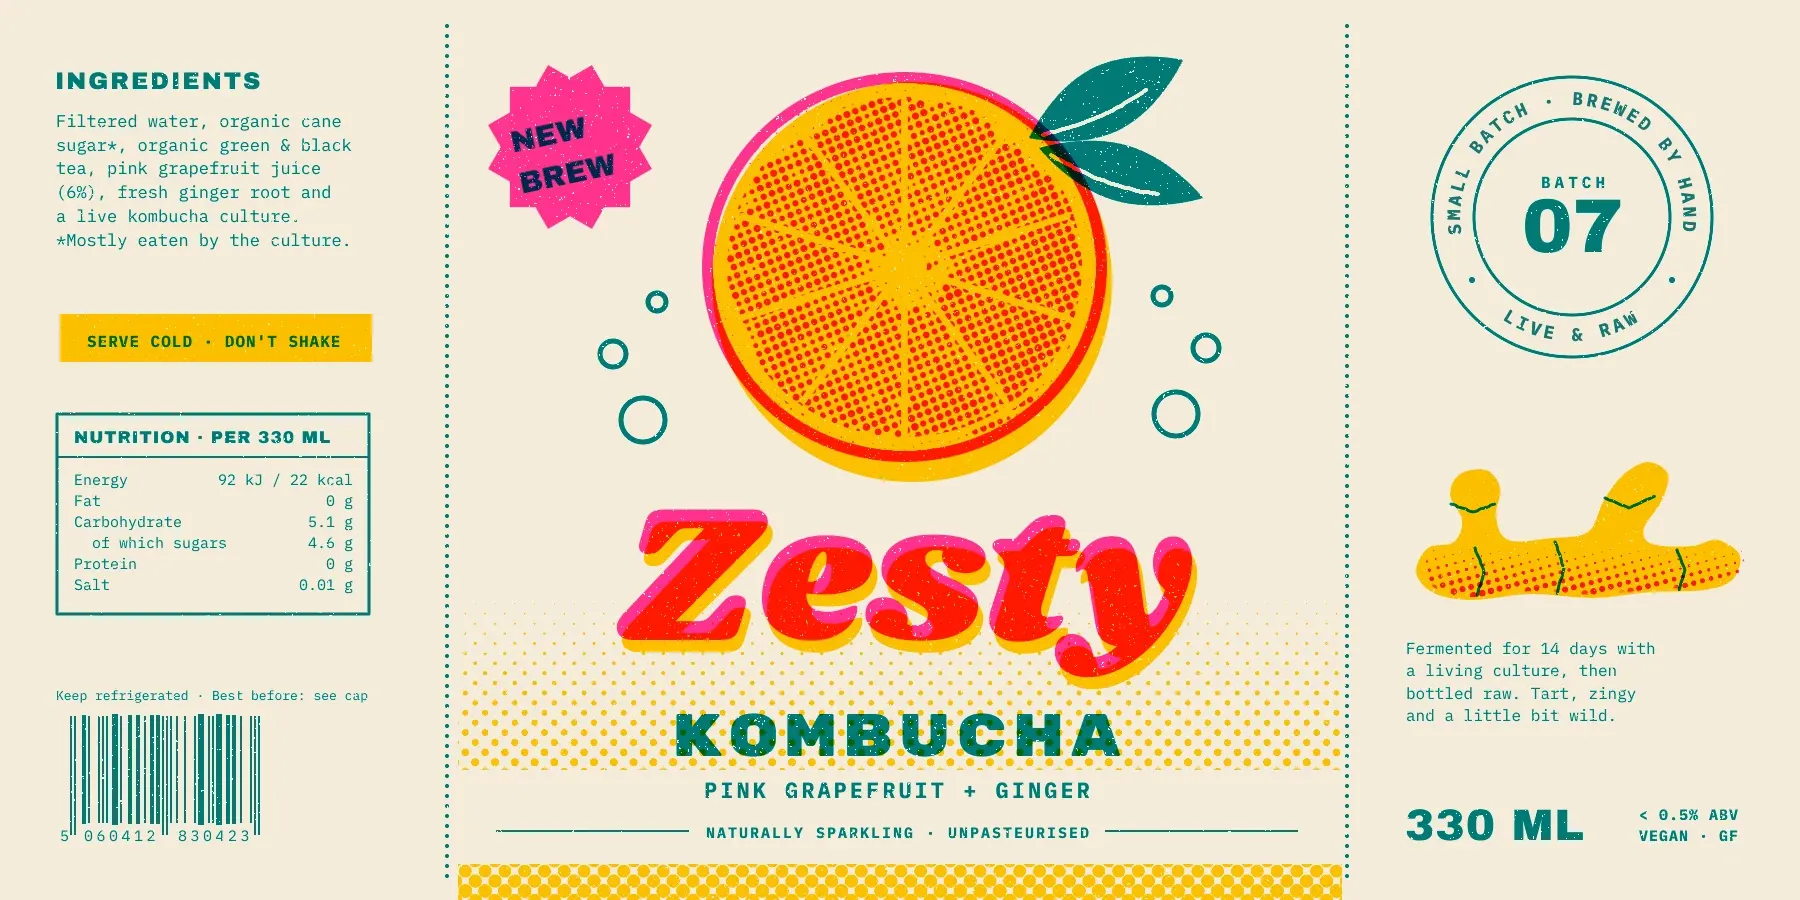
Design a three-ink risograph wrap label for a kombucha bottle in Lopsy, with a halftoned grapefruit photo, overprinting Multiply groups and ink dropouts.
A risograph is a fast, cheap stencil printer that prints one ink at a time from a drum. Designers love it for the same quirks that make it cheap:
- only a few spot colours, like fluorescent pink, yellow and teal
- inks that overprint, so pink on yellow makes a red-orange and teal on yellow makes green
- halftone dots for any shade lighter than solid ink
- drums that never quite line up, so every colour sits a few pixels off the others
- small white flecks where the ink didn't take
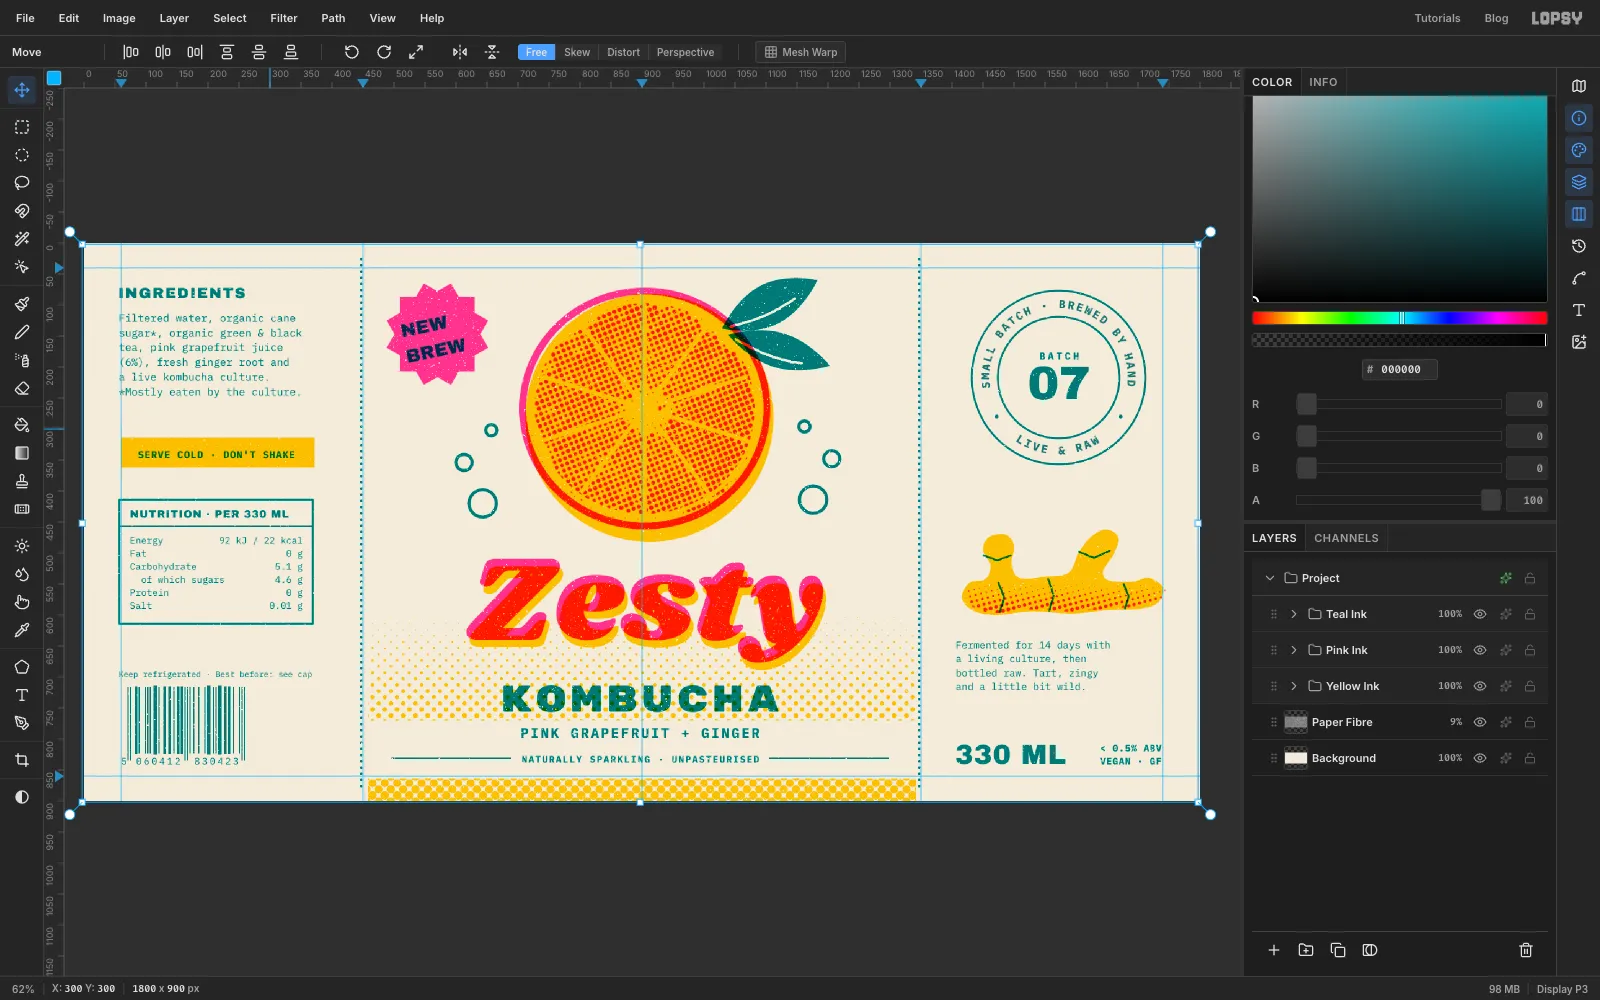
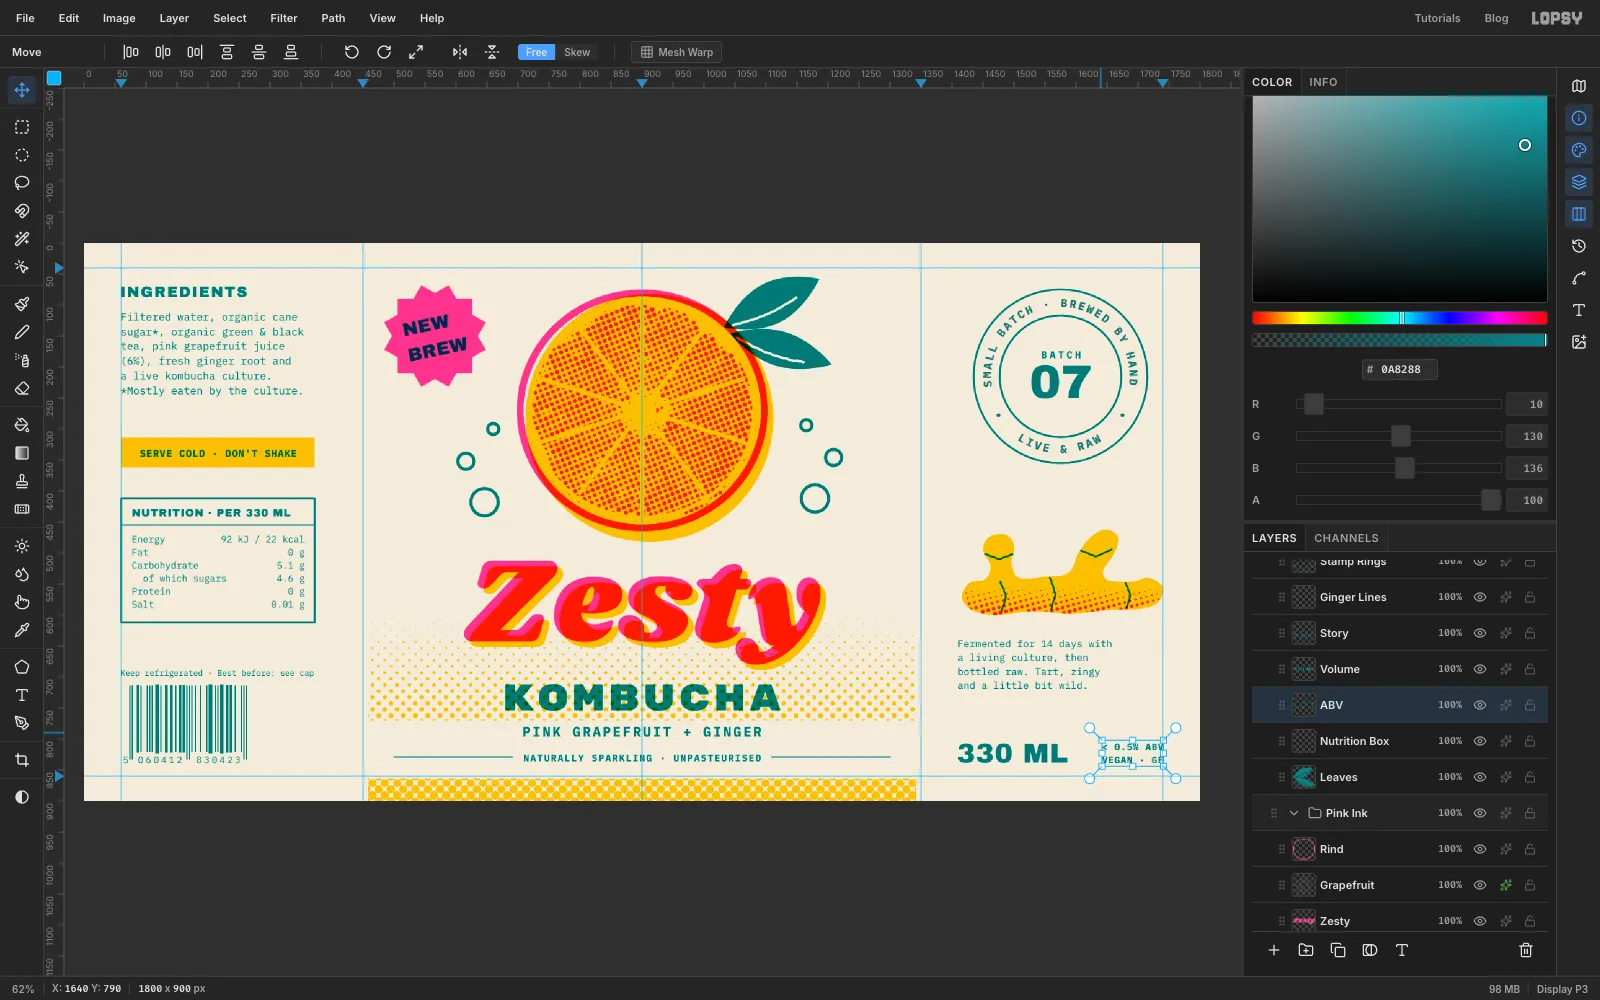
In this tutorial you'll design a wrap-around label for an imaginary craft kombucha, Zesty Kombucha — Pink Grapefruit + Ginger, and fake all of those quirks on purpose. The label is 1800 × 900 px, split into three panels by fold lines:
- a left panel with ingredients, a nutrition table and a barcode
- a front panel with a halftoned grapefruit, a starburst badge and the brand name
- a right panel with a batch stamp, a ginger root, a few lines of story and the volume
Each ink lives in its own group set to Multiply, just like a separate drum. Anything you put in the Pink Ink group prints pink, and where it overlaps the Yellow Ink group the two multiply into a red-orange, the way real ink does.
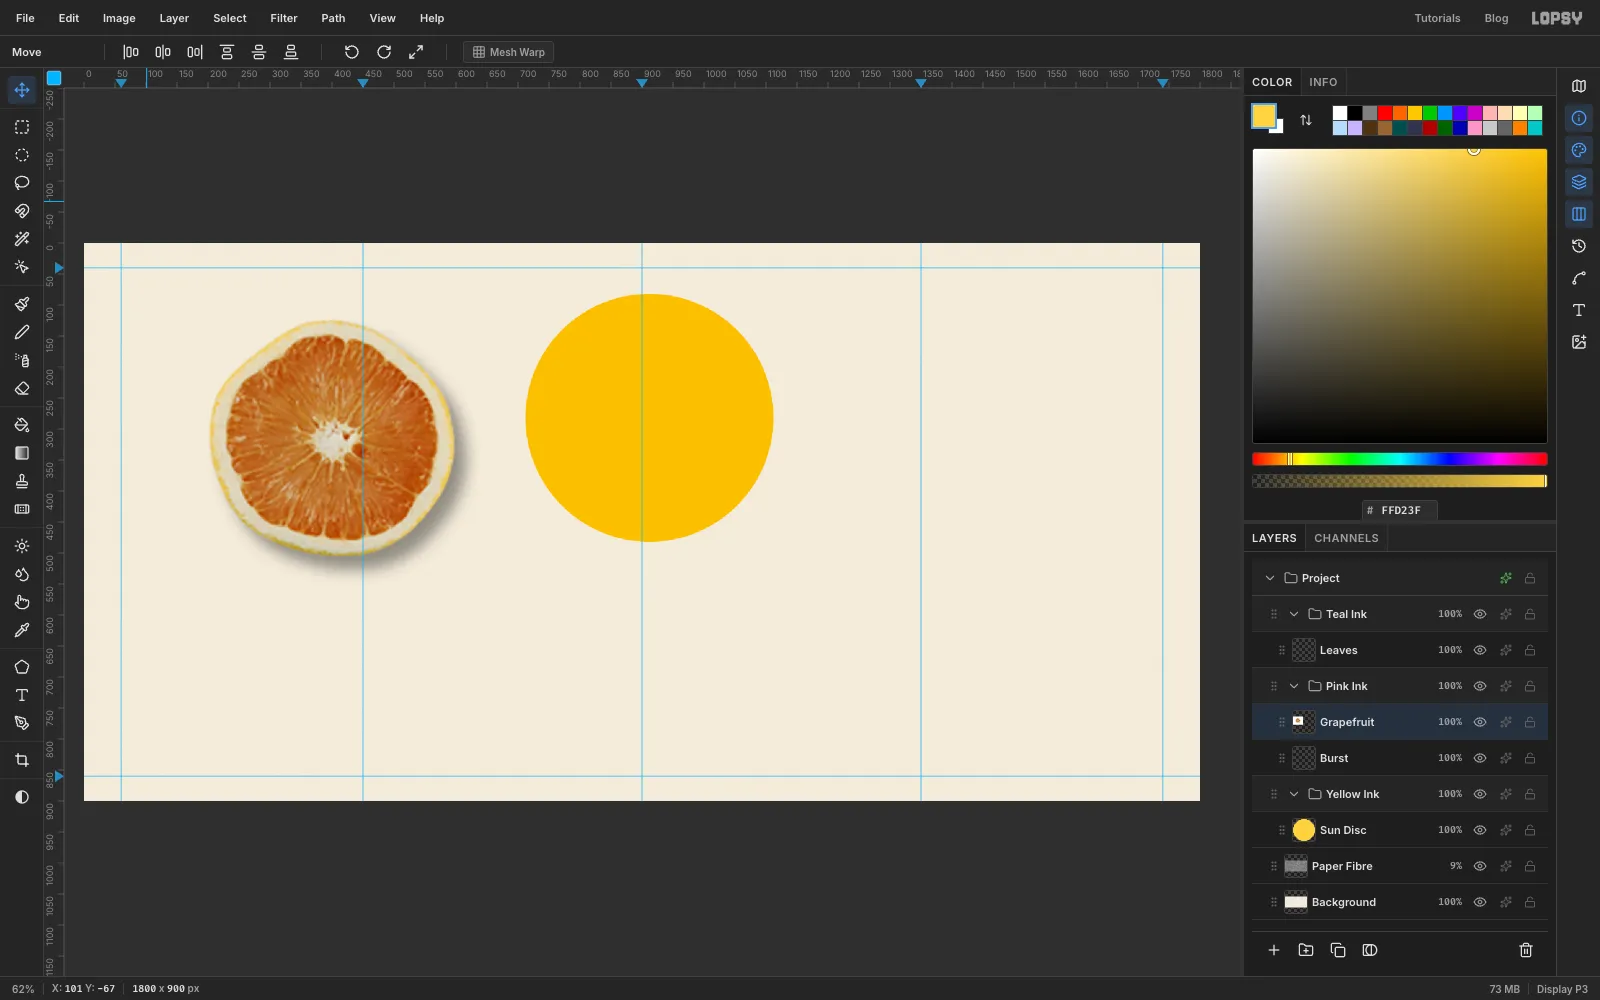
You'll need one photo: USDA Eat Healthy Food Group Gallery serving size half medium grapefruit.jpg from Wikimedia Commons. It's a US Department of Agriculture photo in the public domain. It shows a grapefruit half from above on a white background. Download the original 800 × 650 px file.
The tools you'll use:
- the Elliptical and Rectangular Marquee (with their exact-size dialogs), Select → Inverse / Shrink, and the Magic Wand
- the Move tool's scale and rotate handles, Copy, Paste, Flip Horizontal and Merge Down
- the Shape tool (Polygon, Ellipse and Rectangle), the Pen, the Pencil, the Brush and the Eraser
- Desaturate, Brightness/Contrast, Halftone, Add Noise, Gaussian Blur, Motion Blur and Threshold
- the Gradient tool, the Color Overlay layer effect, and the Multiply and Overlay blend modes
- live text in four Google fonts: Shrikhand, Rubik Mono One, Archivo Black and IBM Plex Mono, including text on a path
- guides, the grid with Snap to Grid, and groups nudged with the arrow keys
The palette is cream paper and three riso inks:
-
Paper
-
Yellow ink
-
Fluorescent pink ink
-
Teal ink
-
Grain grey
a texture layer, not an ink
-
Set up the label, fold guides and paper grain
Choose File → New, keep the units on Pixels, and make the document 1800 wide and 900 high.
Click the top ruler to drop vertical guides at 60, 450, 900, 1350 and 1740. The guides at 450 and 1350 are the folds where the label wraps around the bottle, 900 is the centre of the front, and 60 and 1740 are the side margins. Click the left ruler for horizontal guides at 40 and 860.
Select the Background layer, set the foreground to paper in the Color panel's hex field, and choose Edit → Fill.
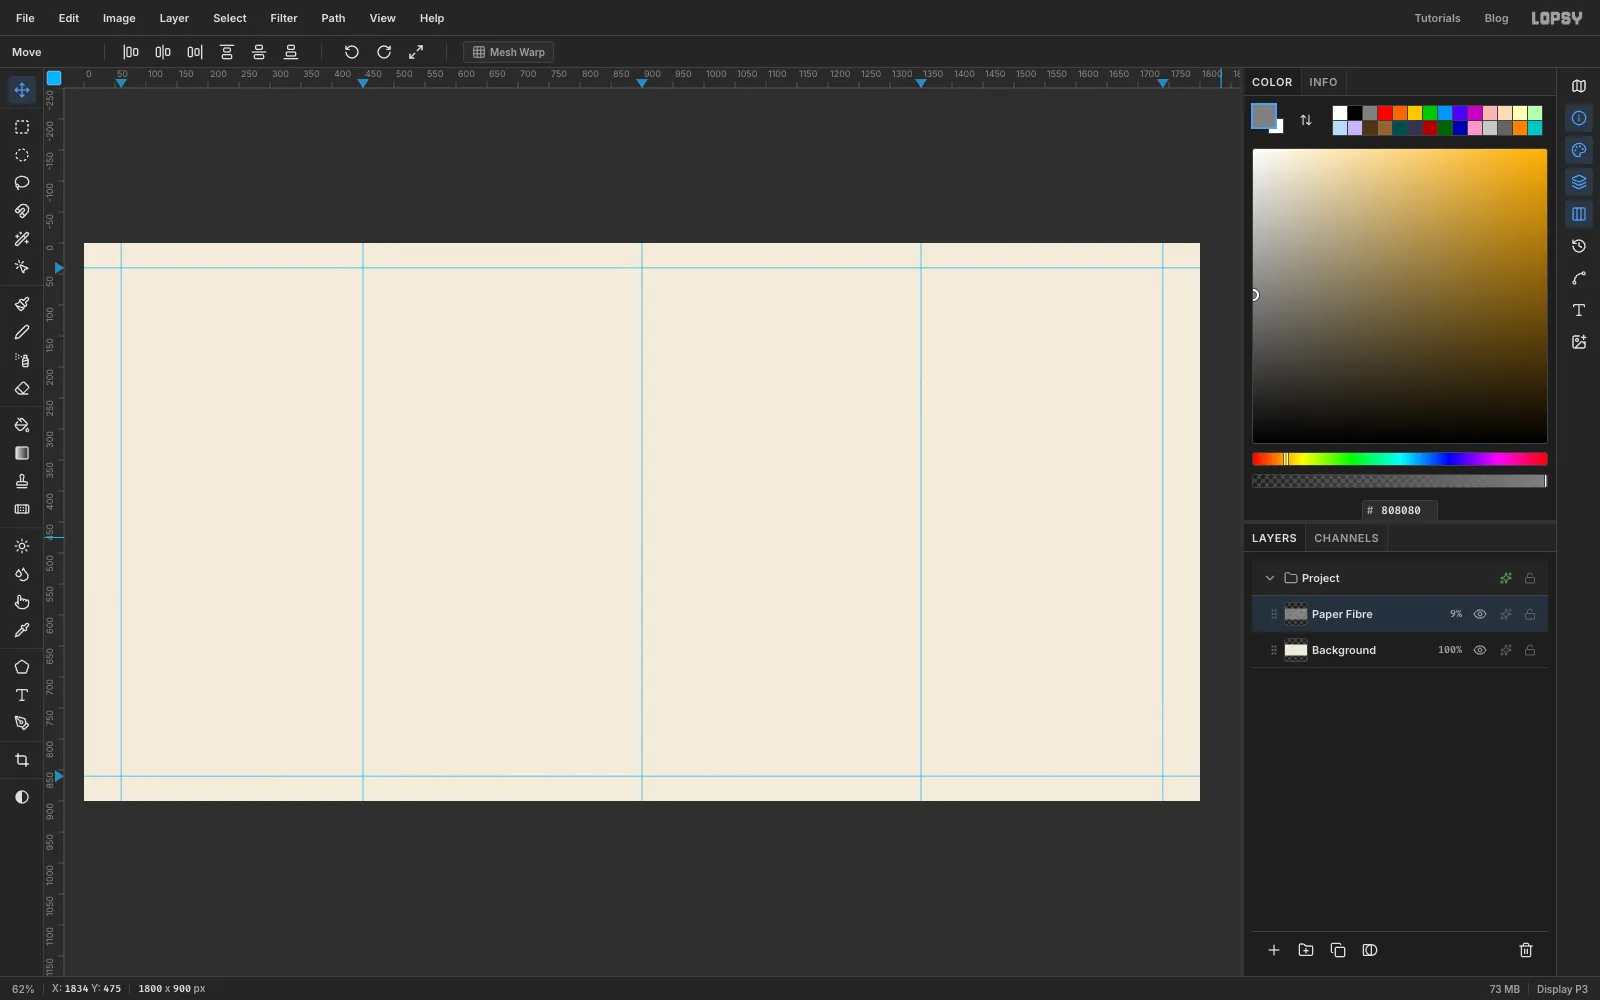
Now the paper grain. Select Layer 1 and double-click its name to rename it Paper Fibre. Set the foreground to and choose Edit → Fill again. Then run these filters:
- Filter → Add Noise…: Amount 100, Mono, Gaussian.
- Filter → Motion Blur…: Angle 20, Distance 5. This smears the specks into short fibres.
- Filter → Brightness/Contrast…: Brightness 0, Contrast 70.
Click the layer's effects button (the ✦ icon on its row), set Blend to Overlay, and close the drawer. Click the layer's opacity readout to open its slider and drag it down to about 9%. The paper is now faintly grainy instead of flat.
-
Make one group per ink
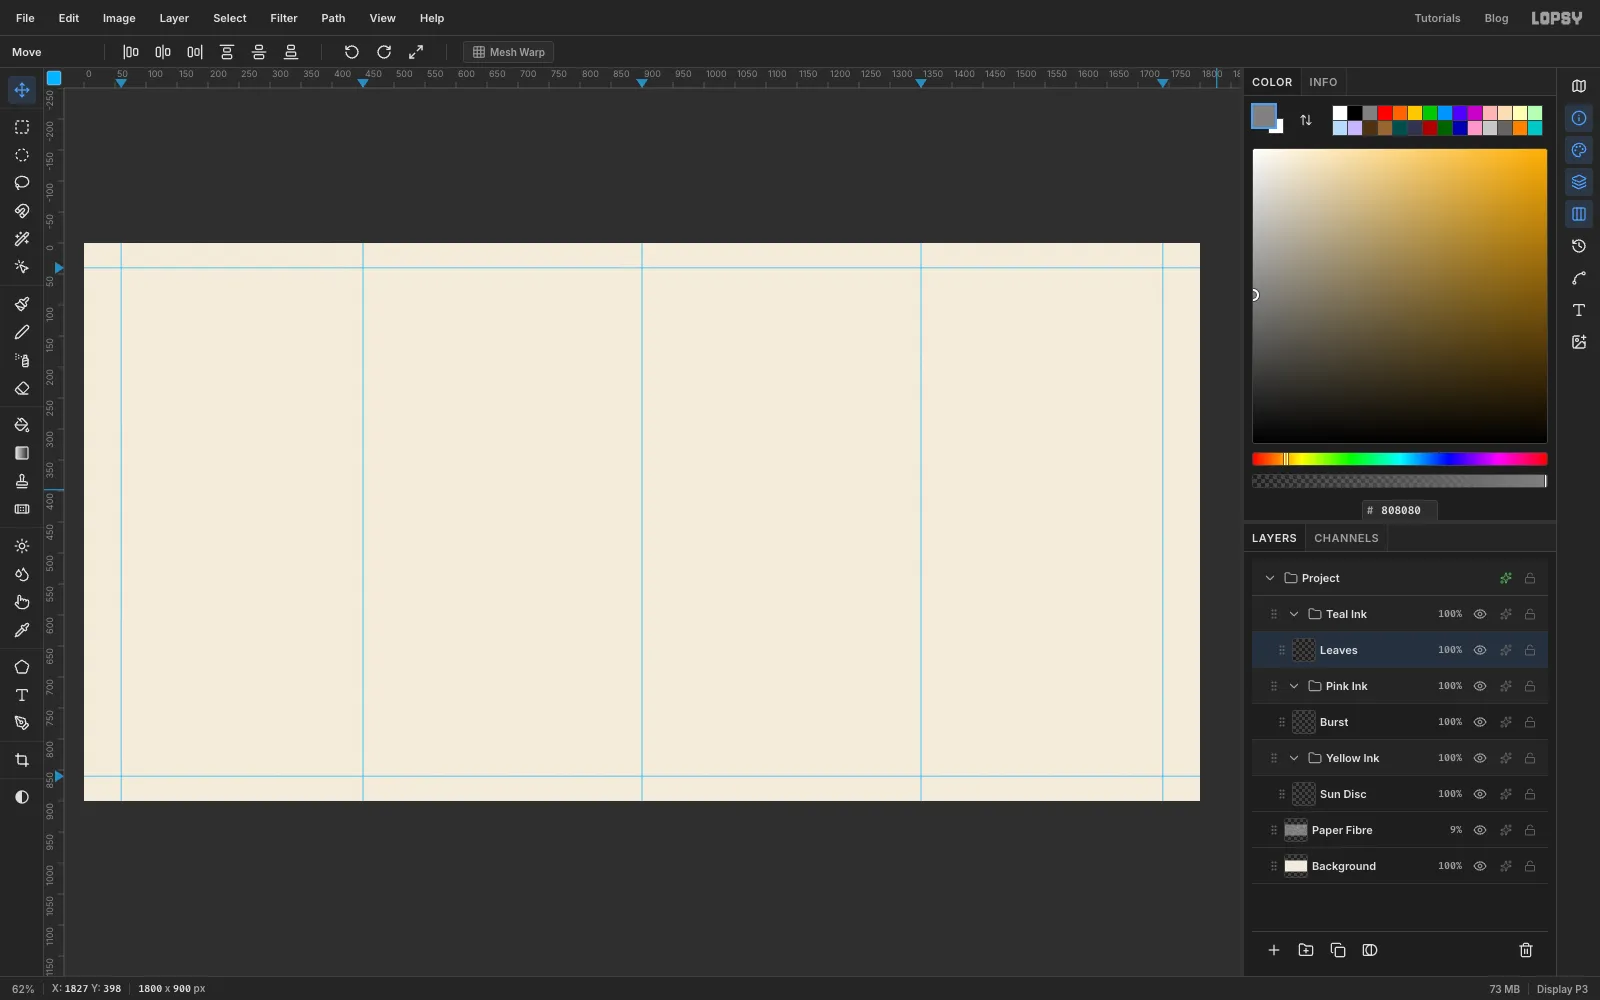
With Paper Fibre selected, click New Group at the bottom of the Layers panel. Rename the group Yellow Ink, open its effects button and set Blend to Multiply. Click Add Layer while the group is selected and rename the new layer Sun Disc. It lands inside the group.
Collapse Yellow Ink with its arrow and click its row. Click New Group again: the new group appears above it. Name it Pink Ink, set it to Multiply, and add a layer inside it called Burst.
Collapse Pink Ink, click its row, and make a third group, Teal Ink, also on Multiply, with a layer inside called Leaves.
From now on, the rule is simple. To print in an ink, click a layer inside that ink's group before you add anything. New layers and new text always land just above the selected layer.
-
Print a yellow sun behind the fruit
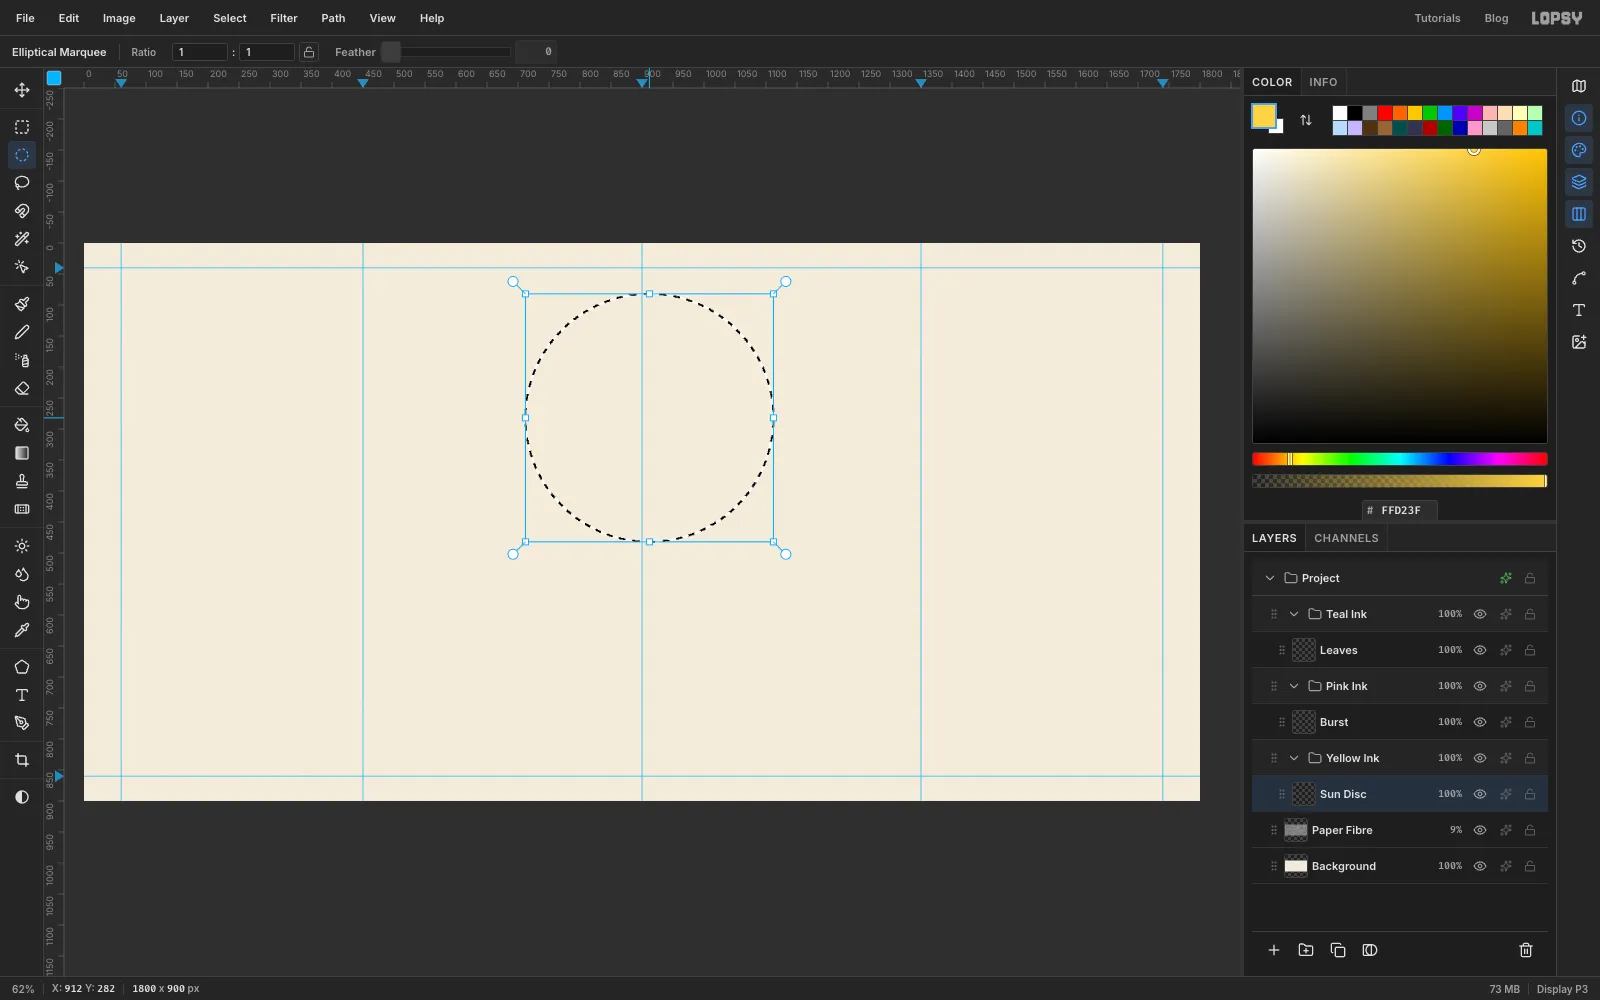
Expand the groups again and select Sun Disc. Choose the Elliptical Marquee (M cycles the marquees) and click once on the canvas without dragging. In the dialog that opens, enter From 712, 82 and To 1112, 482. That's a 400 px circle centred at 912, 282.
Set the foreground to yellow , choose Edit → Fill, then press Cmd+D to deselect.
The fruit will sit 12 px left of and 12 px above this disc. The sliver of yellow that peeks out at the lower right is your first piece of "misregistration".
-
Drop in the grapefruit photo
Select the Burst layer in the Pink Ink group, then drag the downloaded grapefruit JPEG from your Finder onto the canvas. It lands as a new layer at the top-left corner of the document, inside Pink Ink. Rename it Grapefruit, and press Cmd+D if it arrives selected.
The photo still has its white background and a soft grey shadow. You'll cut the fruit out with a circle rather than the Magic Wand, because the shadow would leave a grey fringe.
-
Cut the fruit out with a circle
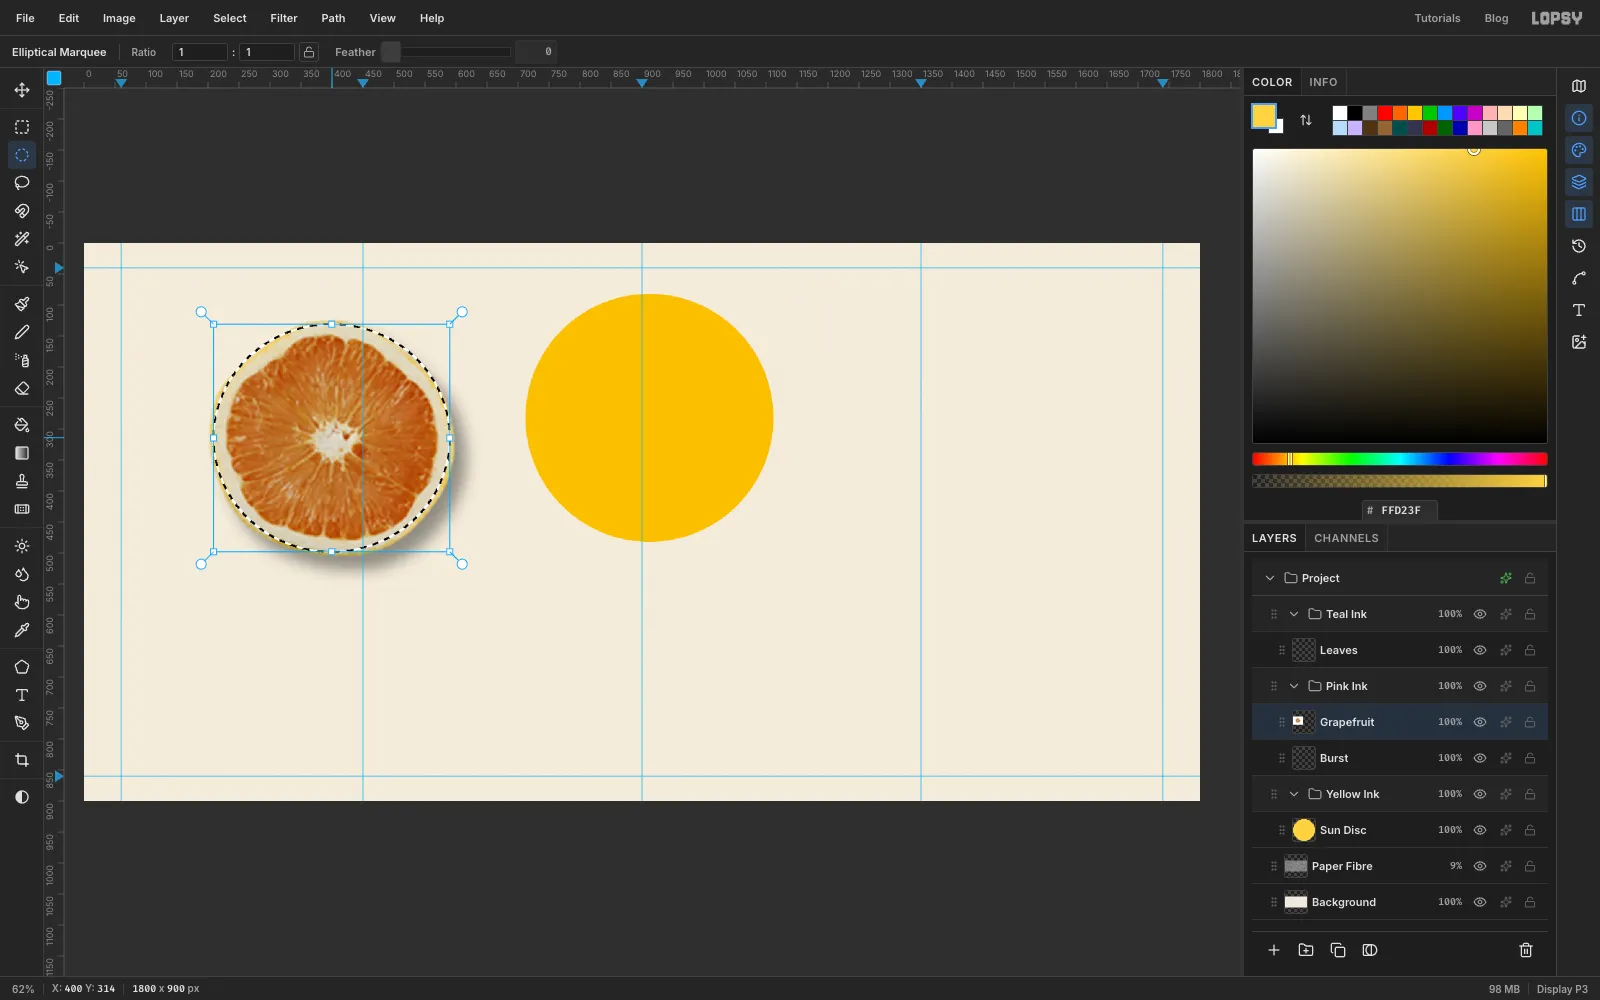
With the Elliptical Marquee, click once on the canvas and enter From 209, 131 and To 590, 498. The ellipse should sit just inside the yellow edge of the rind.
Choose Select → Inverse, press Delete to clear the background and shadow, then press Cmd+D. Only the fruit is left.
-
Move the fruit onto the sun and scale it up
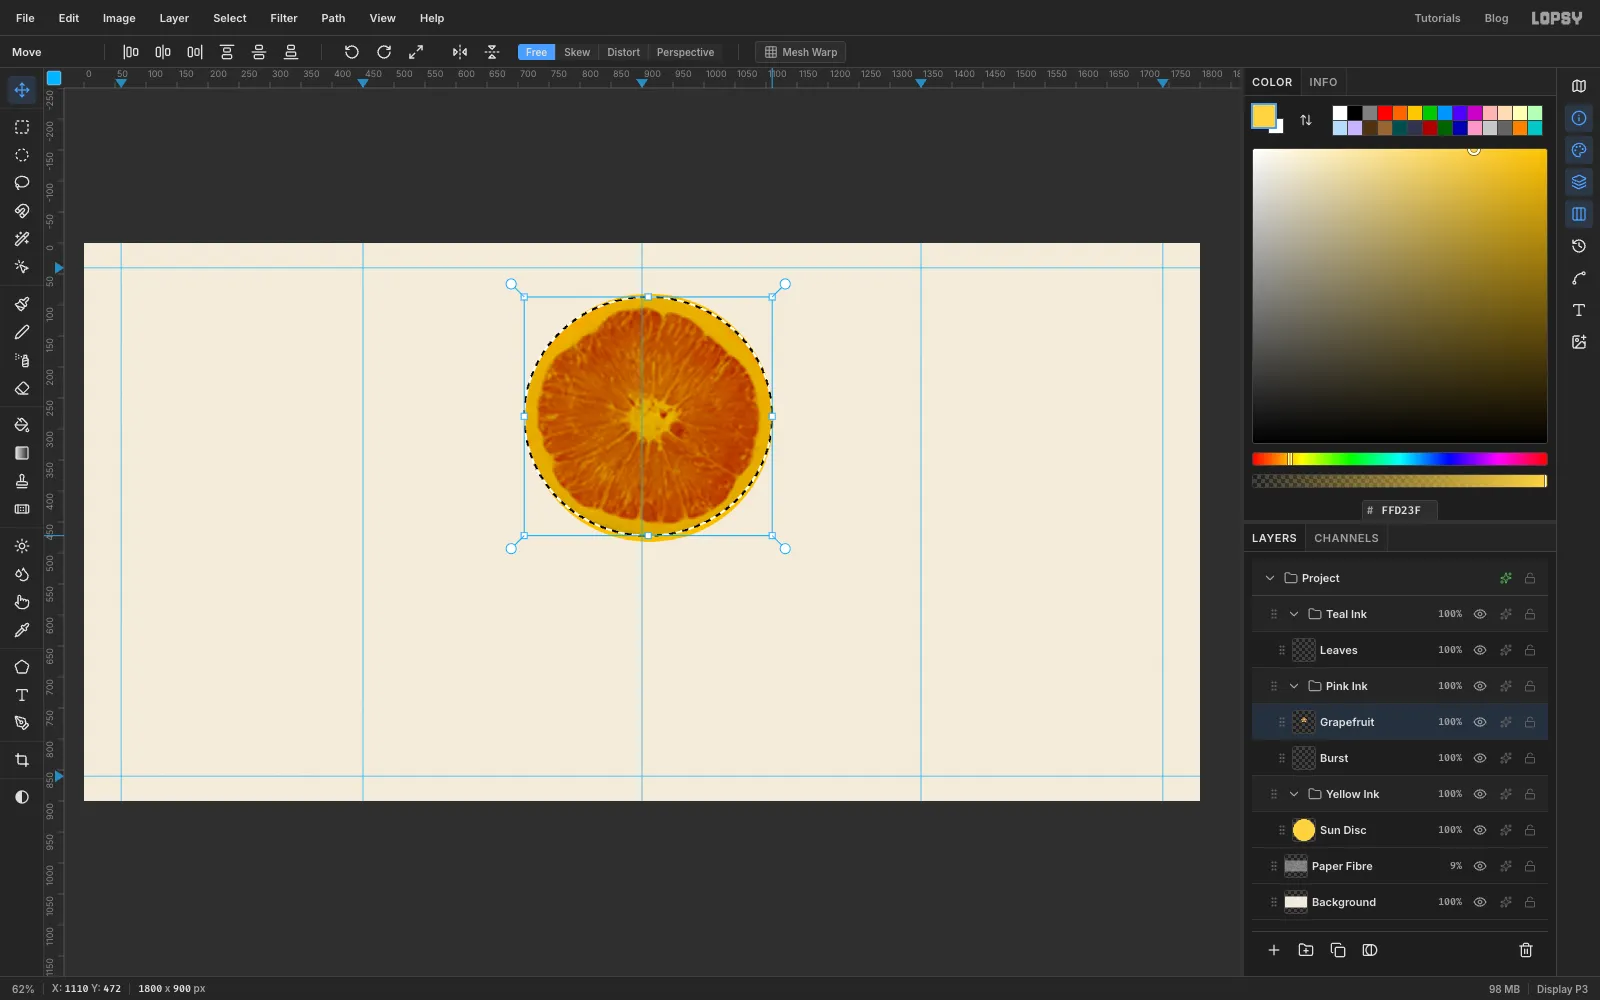
Cmd-click the Grapefruit thumbnail to load the fruit's outline as a selection. Switch to the Move tool (V) and drag from the middle of the fruit until it's centred on the 900 guide, with its centre at about y 270. Press Enter and then Cmd+D.
Cmd-click the thumbnail again to bring the transform handles back. Hold Cmd for a uniform scale and drag the bottom-right corner handle outward a little until the fruit is about 400 px wide, roughly 5% bigger. Press Enter, then Cmd+D. If the fruit drifted while scaling, nudge it back with the arrow keys until it's centred on the 900 guide. Shift+arrow moves 10 px at a time.
-
Turn the fruit into a grey separation
A riso drum only knows "ink" or "no ink", so the photo has to become a greyscale image first. With Grapefruit selected:
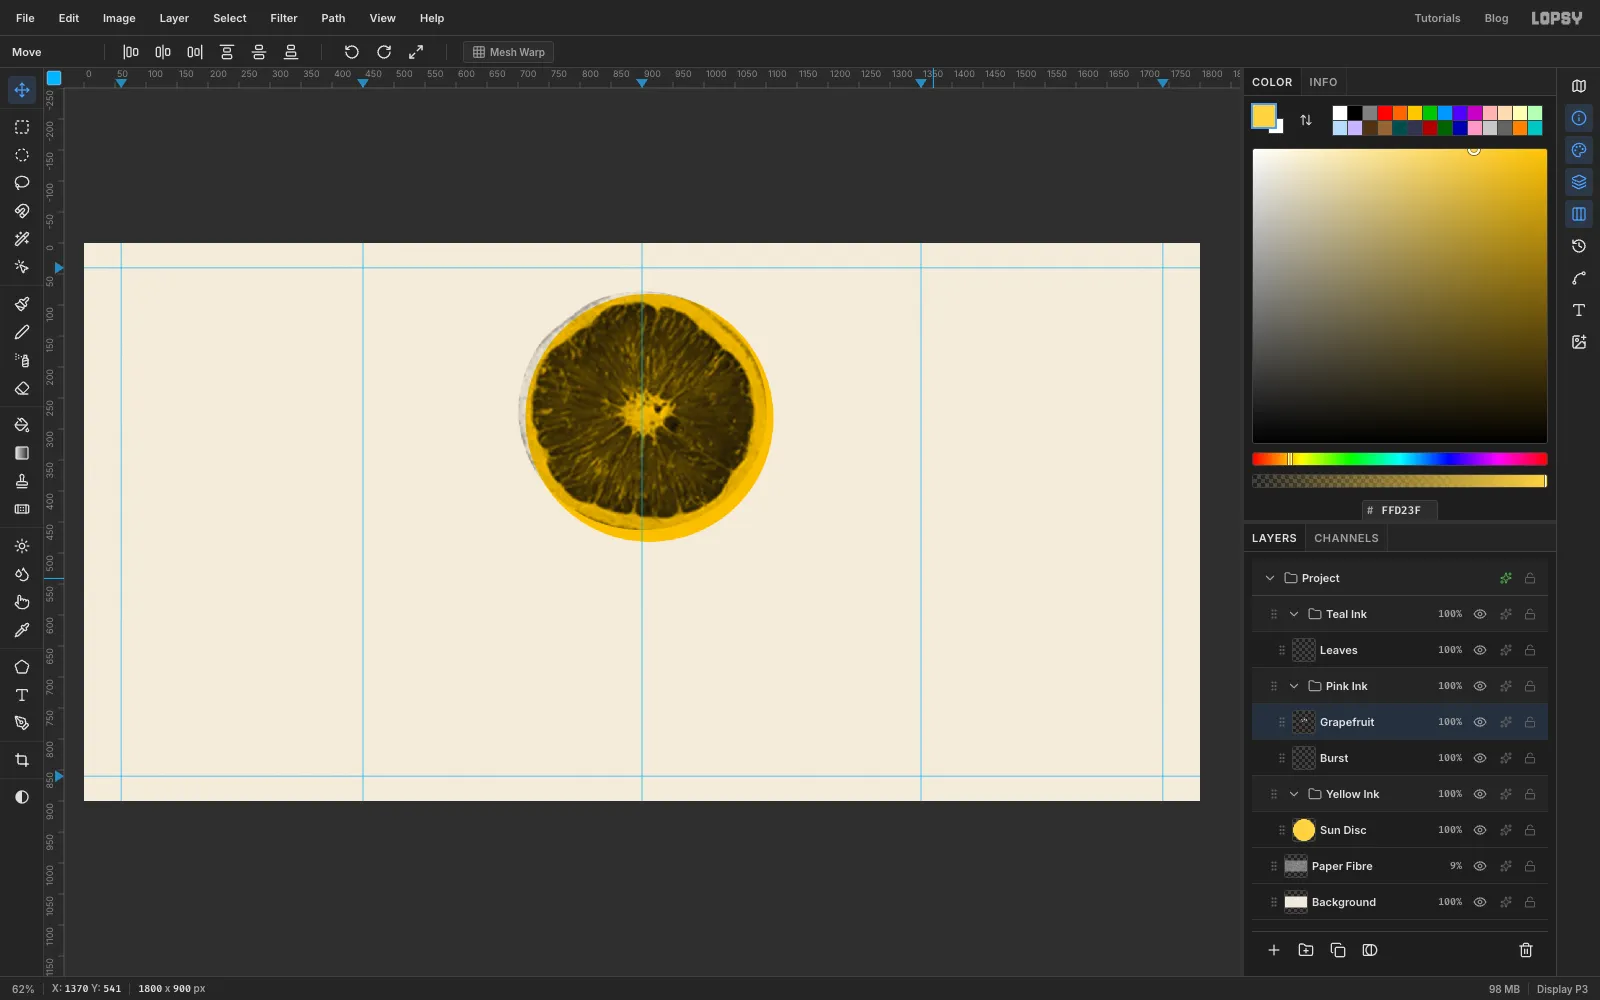
- Choose Filter → Desaturate.
- Choose Filter → Brightness/Contrast… and set Brightness −20, Contrast 60.
The fruit looks olive because the grey multiplies over the yellow disc in the group below. That's expected: you're seeing both "plates" at once.
-
Screen the fruit into halftone dots
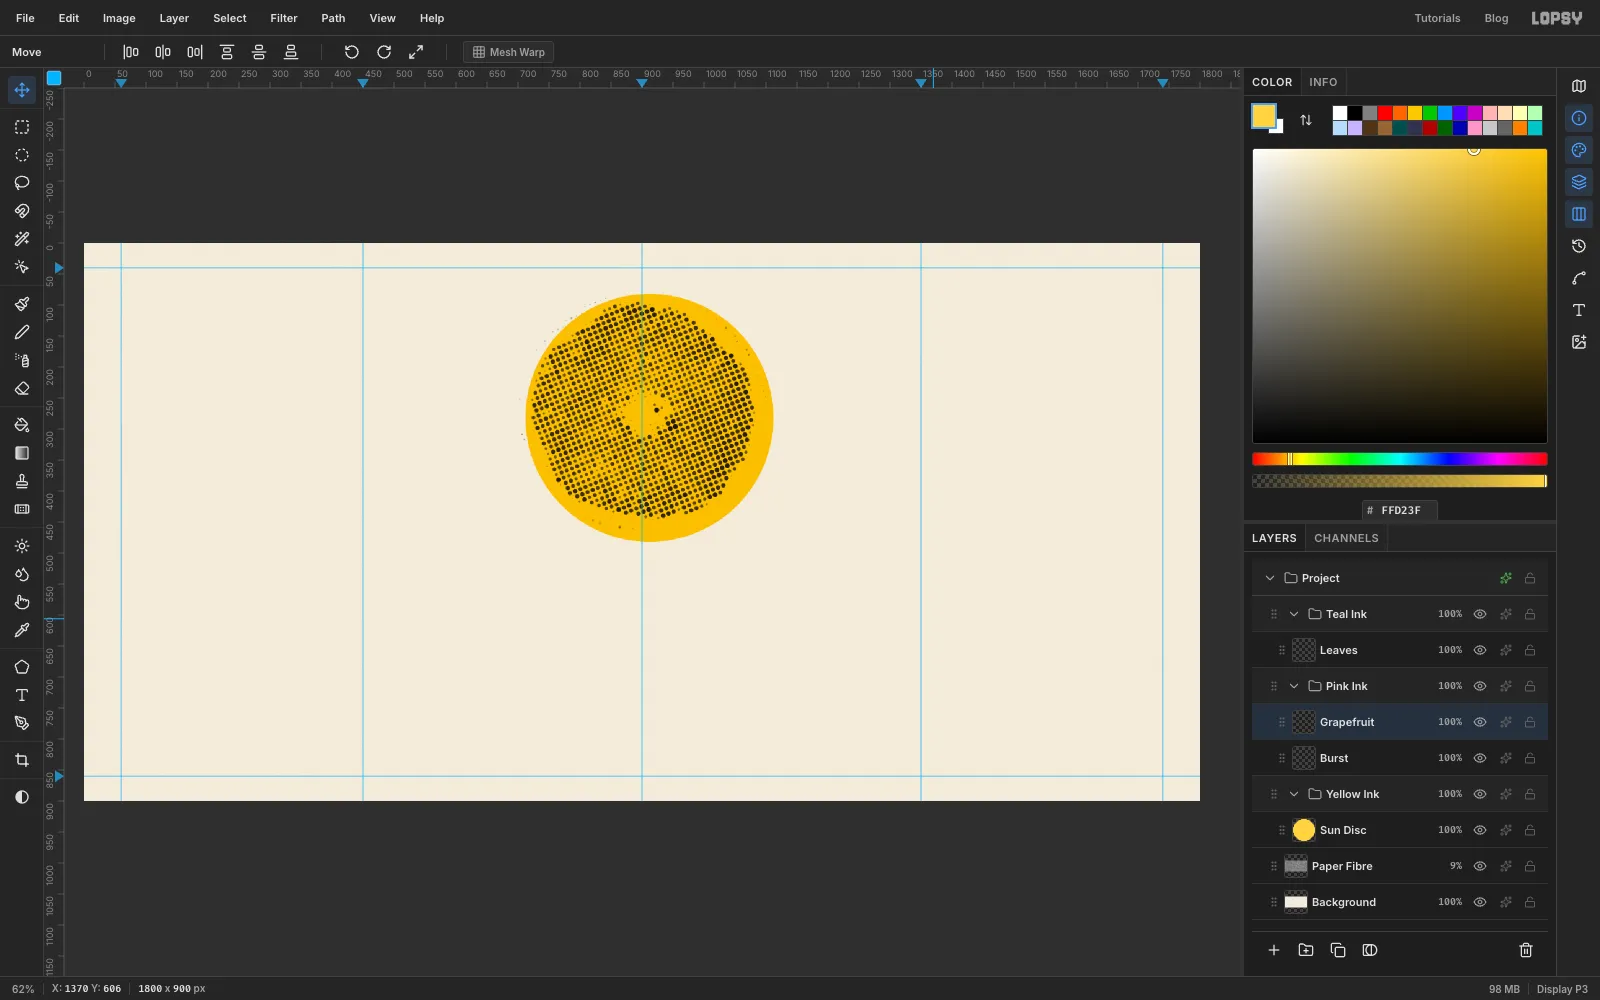
Choose Filter → Halftone… and set Dot Size 9, Density 1, Angle 22, Softness 0.6. Click Apply.
Dark areas of the flesh become big dots and the pale membranes become small ones. White parts print nothing at all.
Now give the dots their ink. Click the layer's effects button, tick Color Overlay, and set its colour to pink . Close the drawer. The dots turn red-orange where they sit on the yellow disc, and pink where they hang over the paper.
-
Cut the segment lines with the Eraser
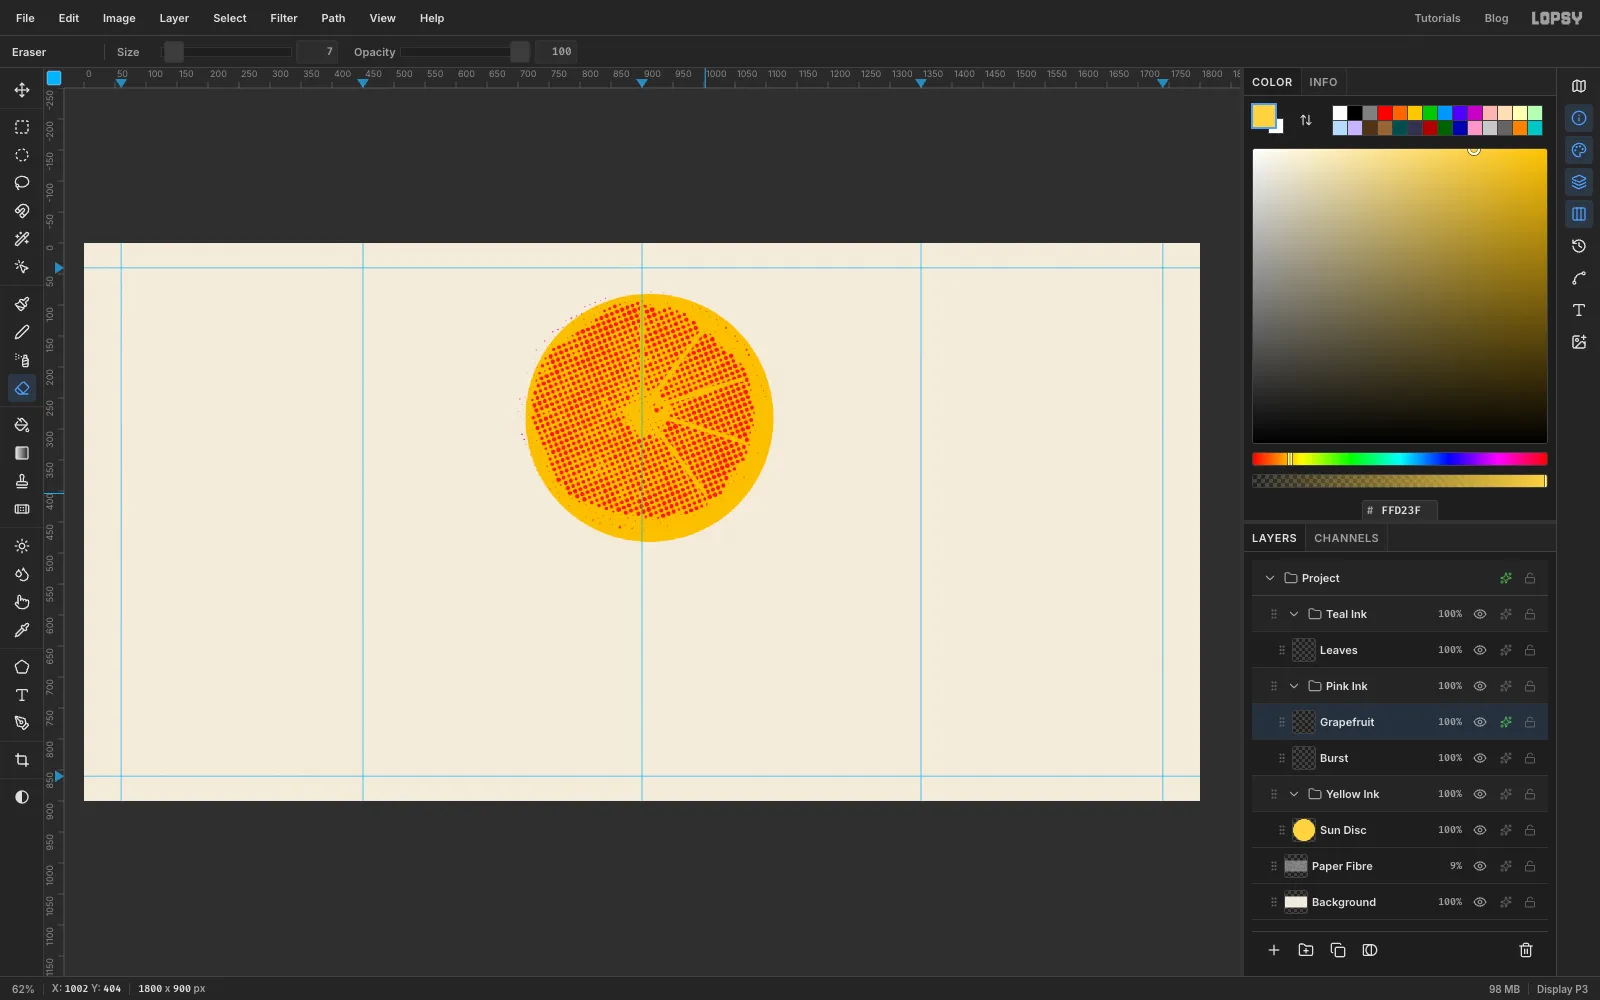
Real grapefruit has pale walls between its segments. Choose the Eraser (E) and set Size to 7.
The fruit's centre is at about 900, 270. Click once about 24 px from the centre, then Shift-click near the rind, about 170 px out, to erase a straight line. Repeat for ten evenly spaced spokes, one every 36°, like slicing a pie into ten. Start straight up; the second spoke points just past 1 o'clock.
Then use the Elliptical Marquee dialog to select a 44 px circle in the middle (From 878, 248 To 922, 292) and press Delete to clear the core, then Cmd+D. The marquee only opens its exact-size dialog when nothing is selected.
-
Add a thin pith line inside the rind
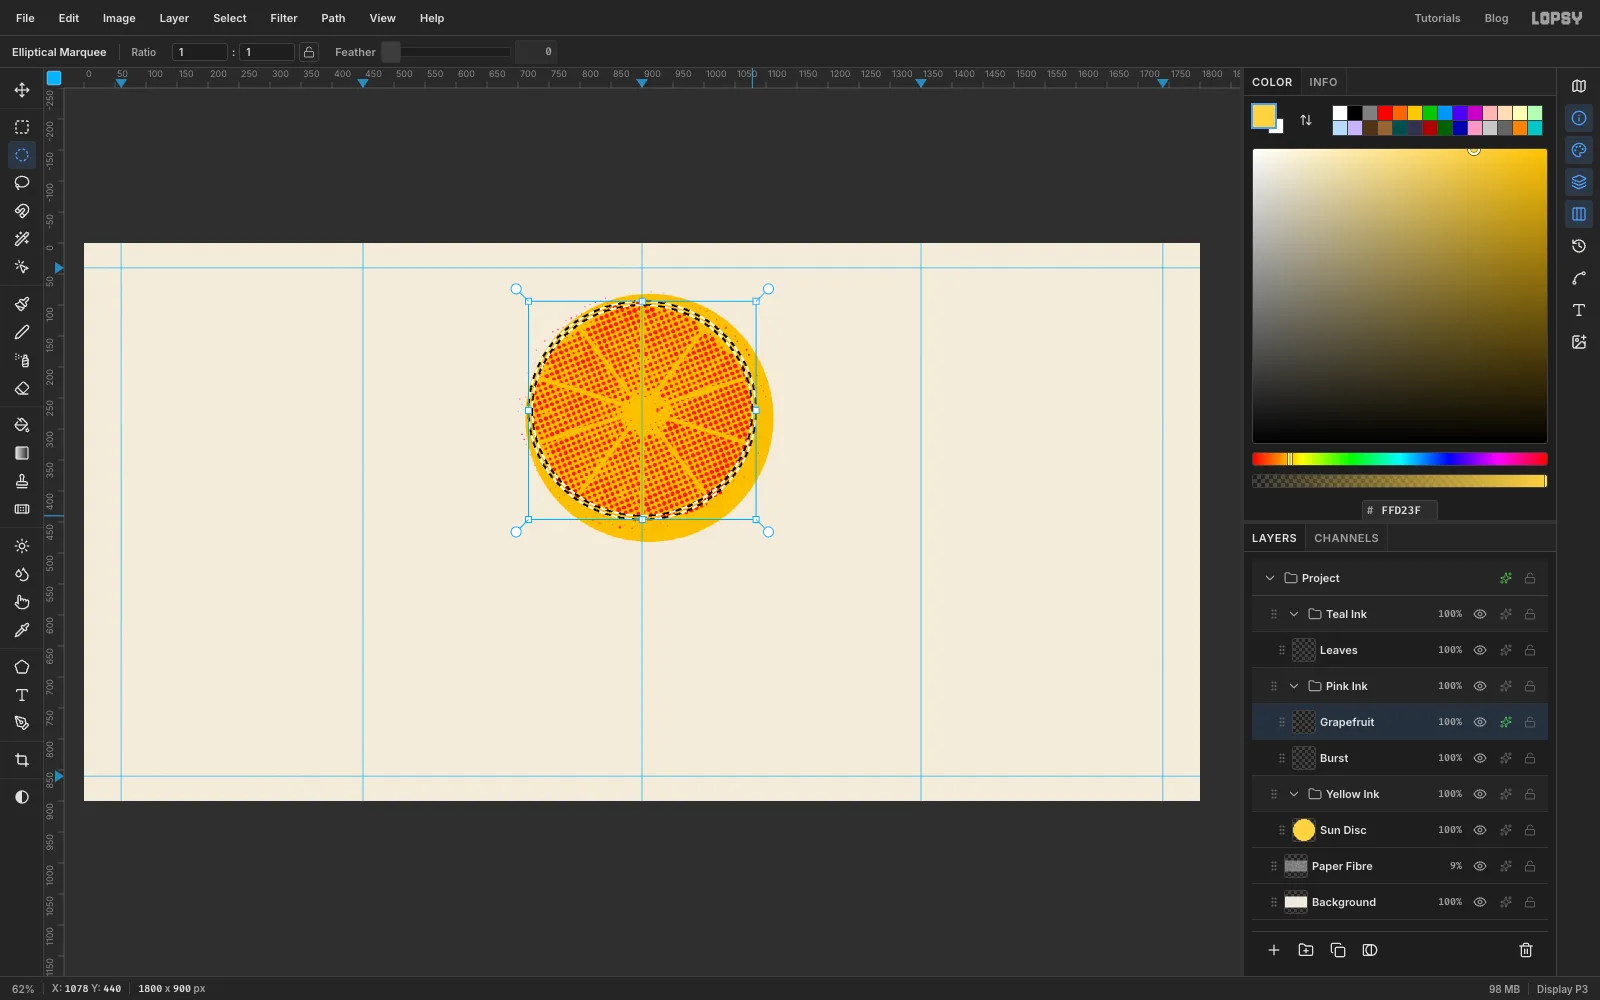
The fruit needs a pale band between the flesh and the rind. Still on Grapefruit, open the Elliptical Marquee dialog and select From 716, 94 To 1084, 446. That's an ellipse 16 px inside the edge of the dots.
Zoom in so you can place the next drag accurately. Hold Alt and drag a second ellipse from about 722, 100 to 1078, 440, watching the X and Y in the status bar. Alt subtracts it, leaving a thin ring of marching ants about 6 px wide. (The exact-size dialog can't subtract, so this one is a drag.)
Press Delete, then Cmd+D. A thin paper-coloured line now circles the flesh, just like the white pith of a real grapefruit.
-
Draw a solid pink rind
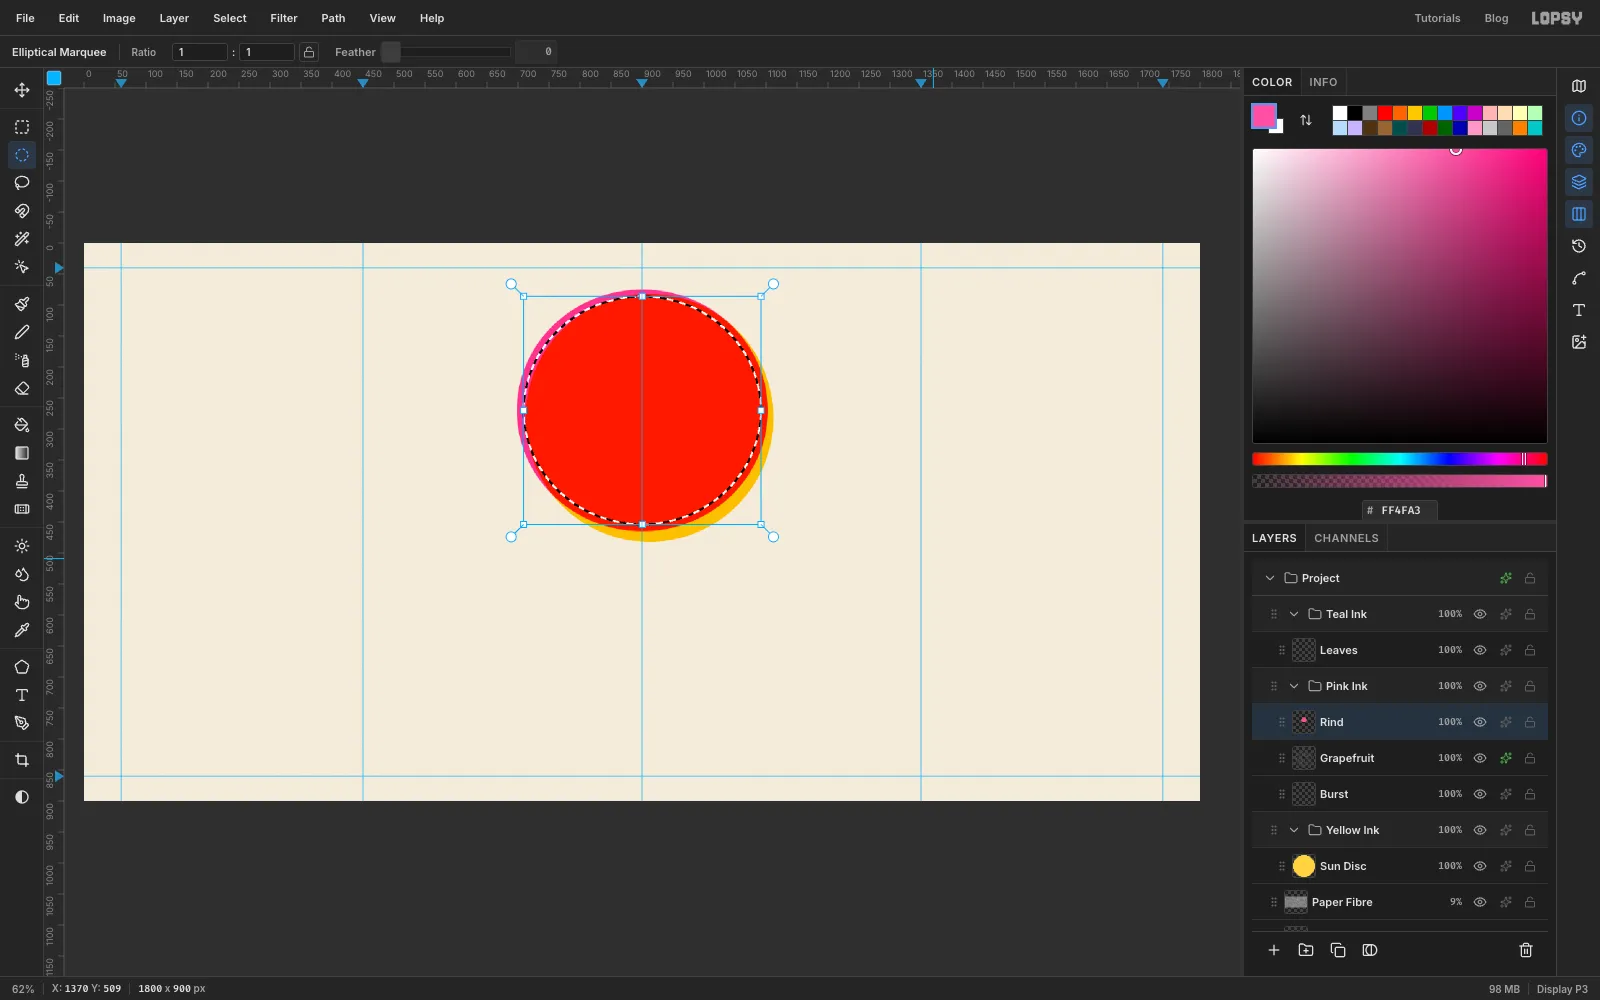
The halftone edge is soft, so a solid rind holds the shape together. Click Add Layer (it lands above Grapefruit, inside Pink Ink) and name it Rind.
Open the Elliptical Marquee dialog and select From 698, 75 To 1103, 465, just outside the dots. Set the foreground to pink and choose Edit → Fill.
Choose Select → Shrink…, enter 11 and apply. Press Delete and then Cmd+D. You're left with an 11 px pink ring. Where it crosses the yellow disc it turns red.
-
Start the starburst badge from a square
Select the Burst layer. Choose the Shape tool (U) and in the options bar set Shape to Polygon, Sides to 4 and Corner Radius to 0. Set the Fill swatch to and remove the Stroke.
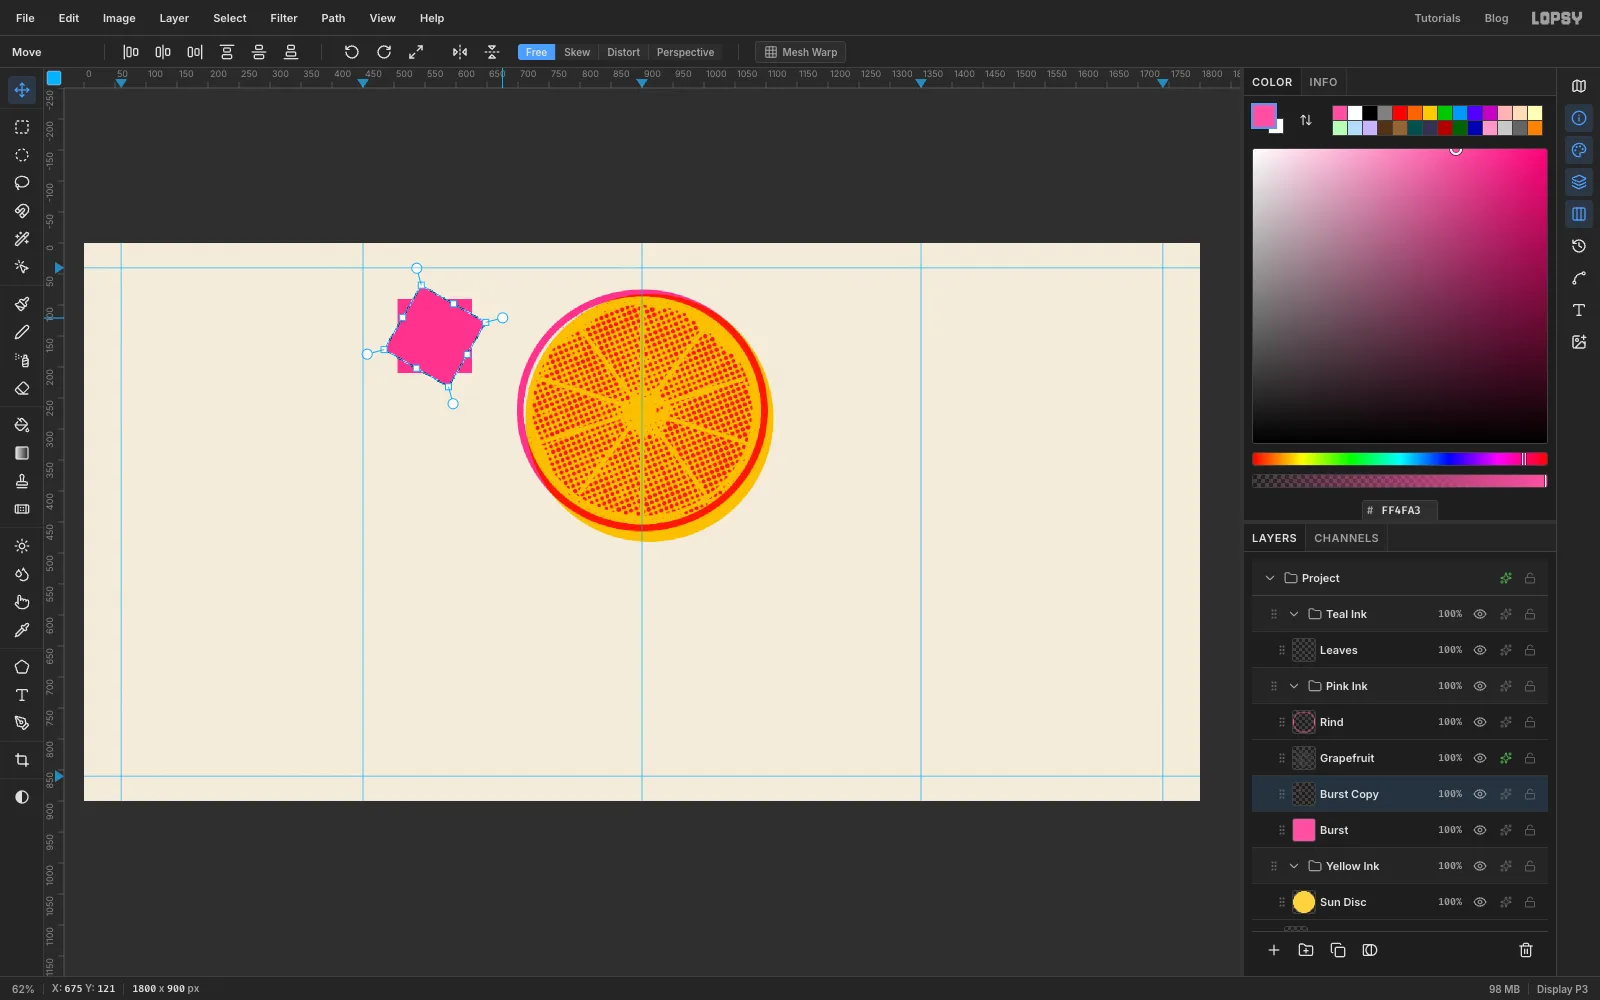
Shapes grow from the point you press. Press at 566, 150 and drag 60 px down and right, so you get a 120 px square.
Now turn it into a star by stacking turned copies:
- Cmd-click the Burst thumbnail, press Cmd+C then Cmd+V. The copy is pasted in place, already selected.
- Grab one of the round rotate handles just outside a corner of the box. Hold Cmd while you drag, so the angle snaps in 15° steps, and turn it 30°.
- Press Enter, press Cmd+D, and choose Layer → Merge Down.
-
Finish the twelve-point star
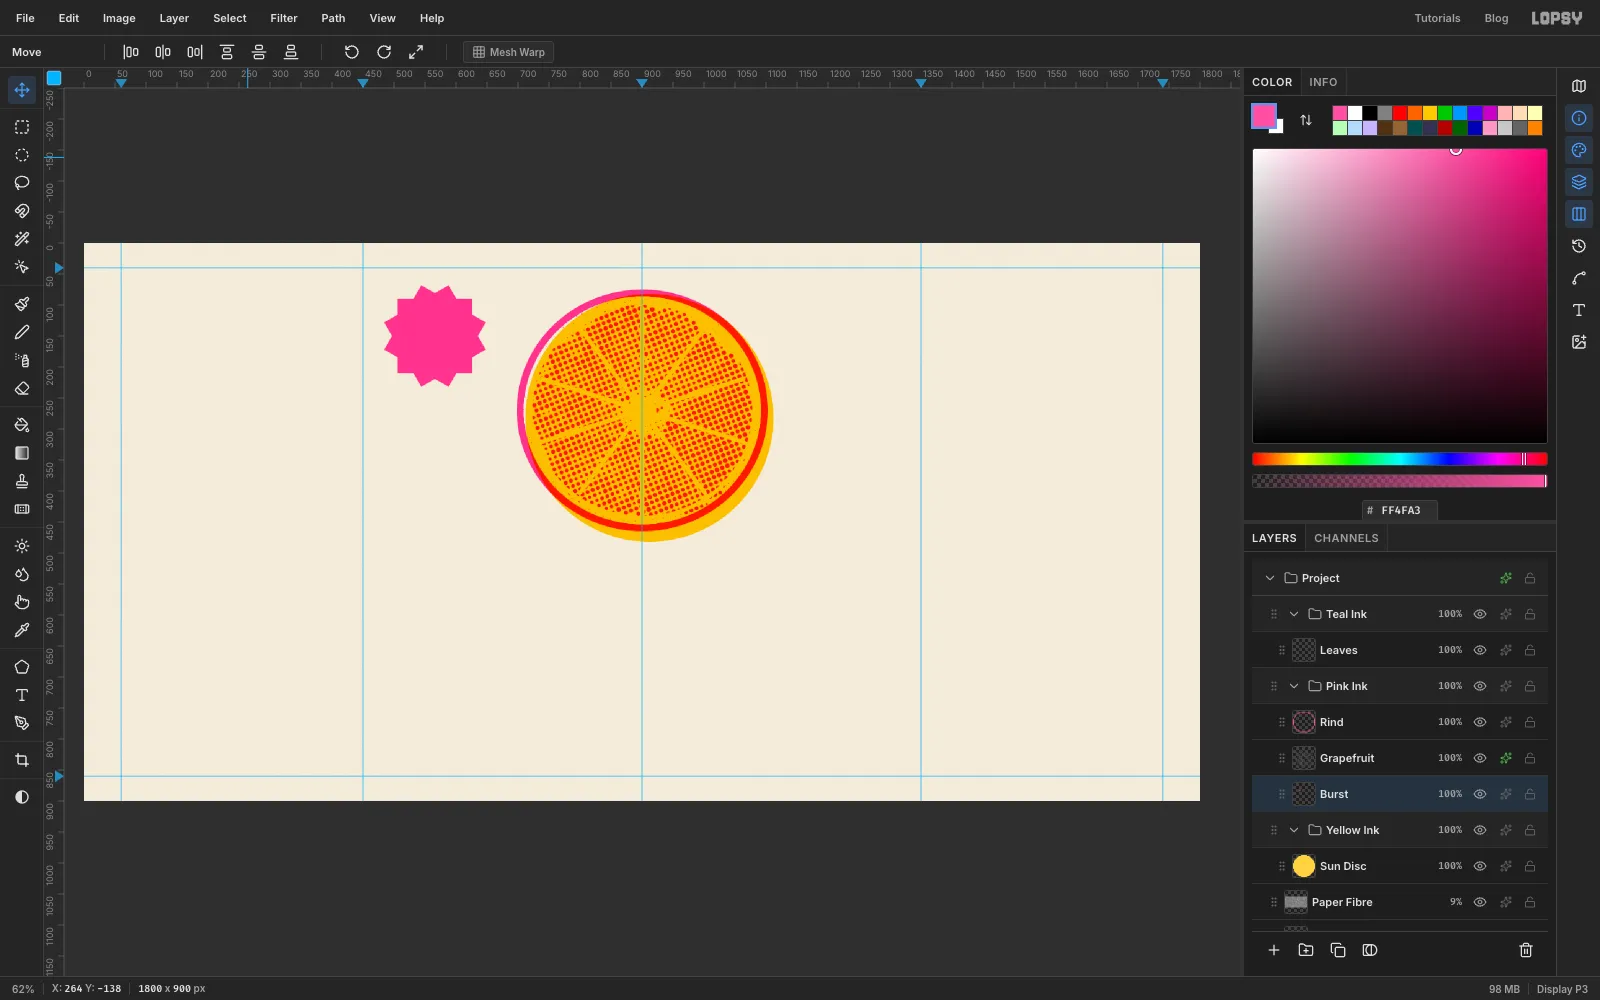
Repeat the same three steps on the merged shape, but turn the copy 60° this time. A square, plus a copy at 30° and copies at 60° and 90°, gives a neat twelve-point star.
-
Set and tilt the badge type
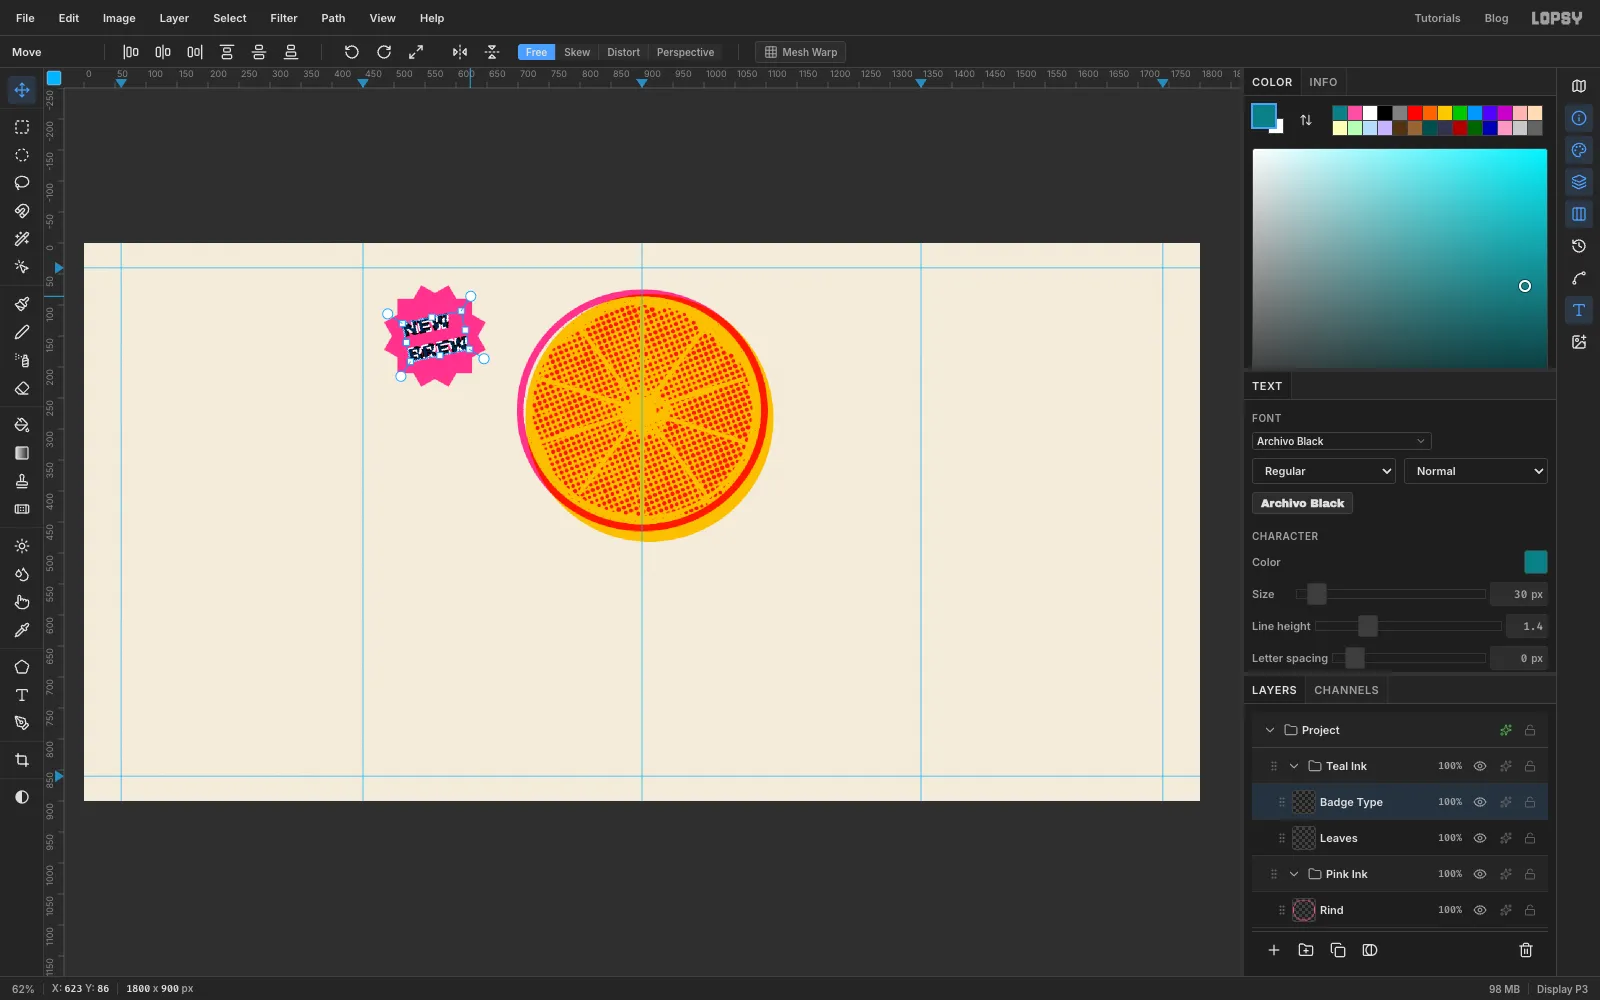
Select the Leaves layer, so the type prints in teal. Choose the Text tool (T) and set the options bar to Archivo Black, Size 30, Align: Center, colour teal .
Click above the middle of the star and type NEW, press Enter, then type BREW. Press Tab to commit. Rename the layer Badge Type. Use the Move tool and arrow keys to centre it on the star.
To tilt it, click Rasterize Layer at the bottom of the Layers panel. Cmd-click its thumbnail, drag a rotate handle 12° anticlockwise, press Enter and then Cmd+D. Teal over pink prints as a deep navy.
Before you set any more type, change Align back to Left with a non-text layer selected. Otherwise it carries over to the next text you make.
-
Draw a leaf with the Pen
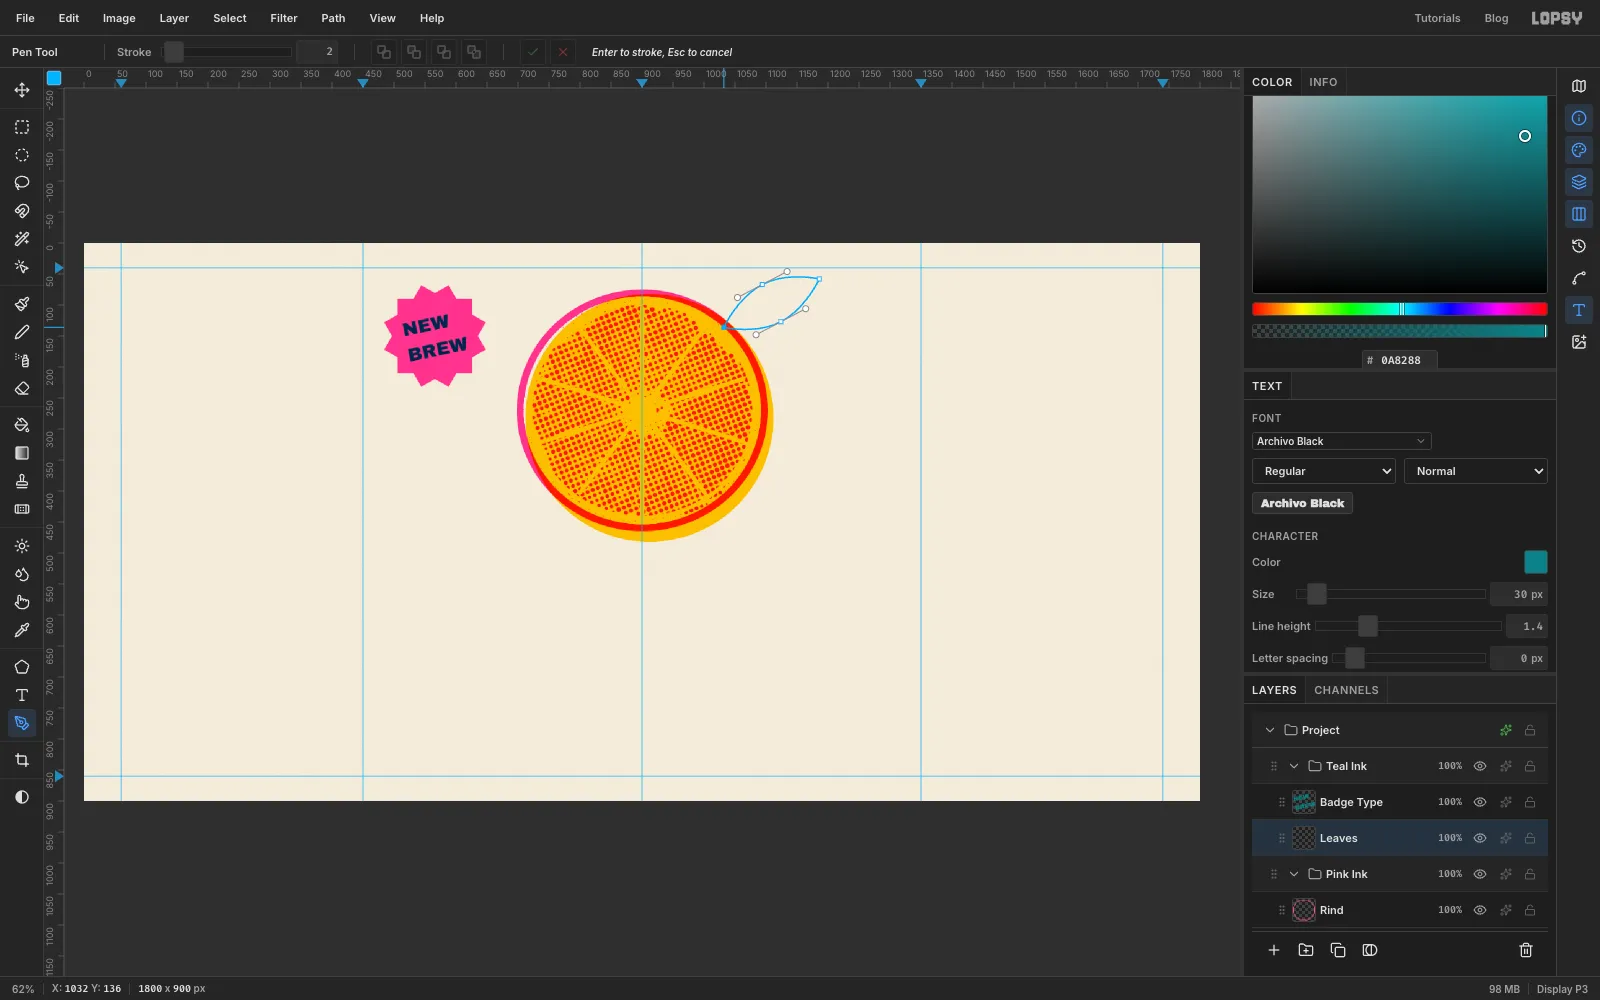
Select Leaves and set the foreground to teal . Choose the Pen tool (P). Each leaf is four anchors: a corner where it joins the fruit, a smooth anchor on each side, and a corner at the tip.
For the upper leaf:
- Click at 1032, 136 on the rind, for the stem end.
- Press above the middle of the leaf, at about 1094, 66, and drag about 40 px towards the tip so a smooth curve forms.
- Click at 1186, 58 for the tip.
- Press below the middle, at about 1124, 128, and drag about 40 px back towards the stem.
- Click the first anchor again to close the path.
In the Paths panel click Path to Selection, then Delete Path. Choose Edit → Fill and press Cmd+D.
Draw a slimmer second leaf the same way, from 1042, 146 to a tip at 1206, 196, and fill it too.
-
Erase curved veins into the leaves
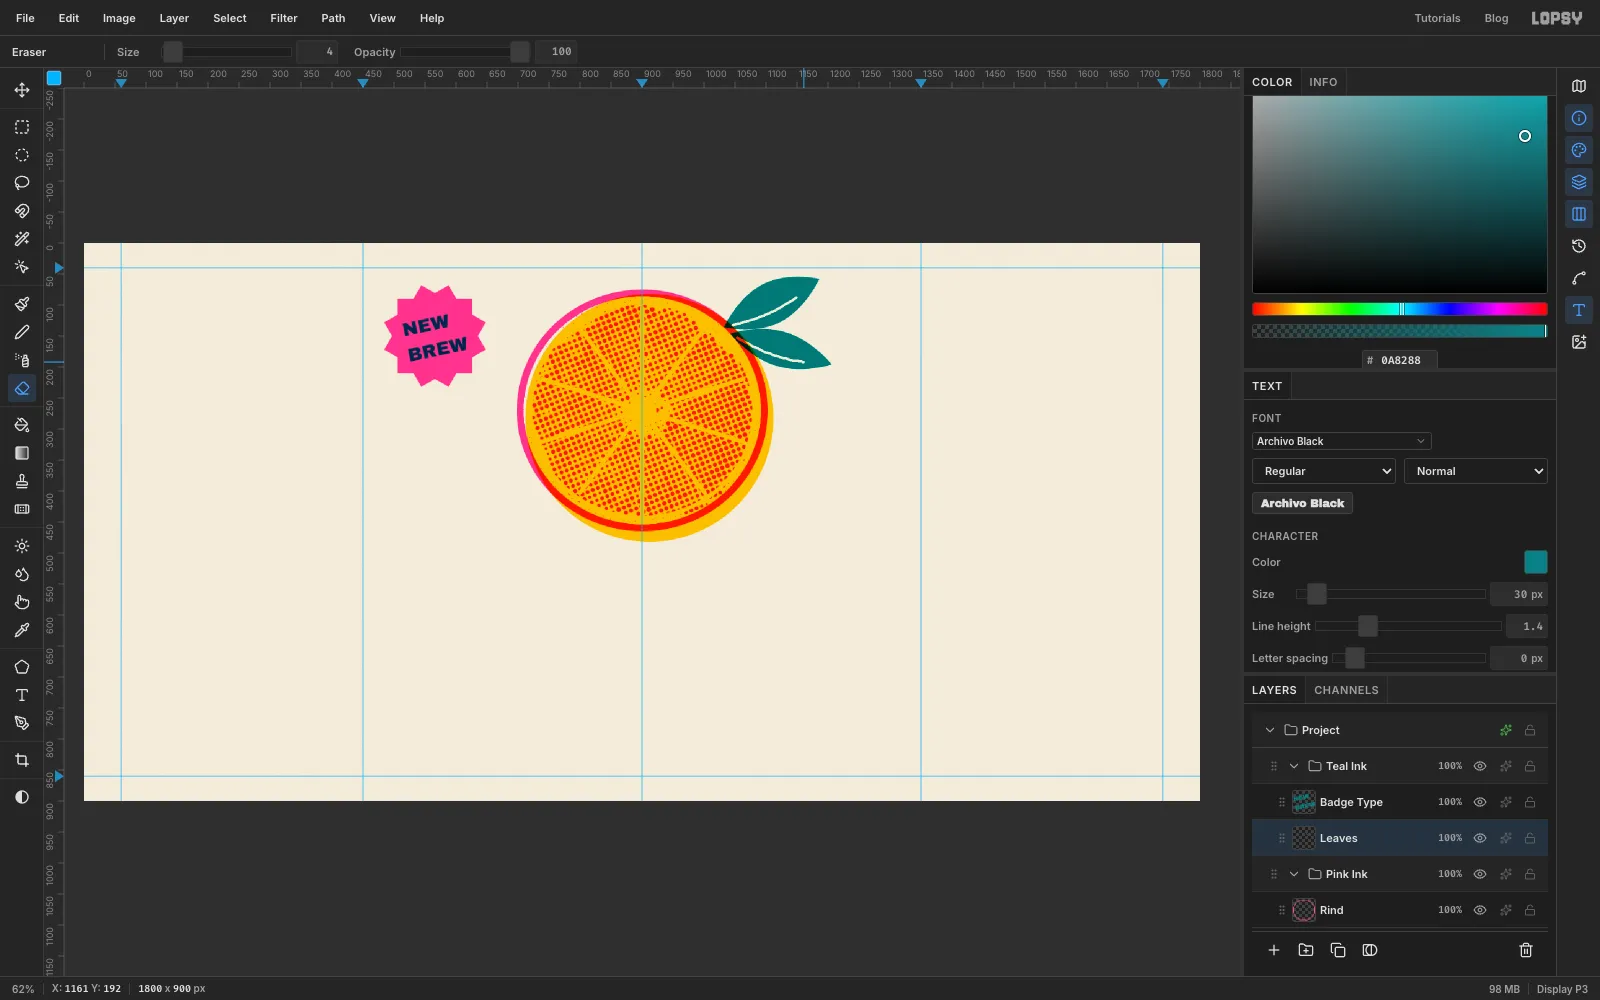
Choose the Eraser with Size 4. In each leaf, drag one gently curved stroke from near the stem to about four-fifths of the way to the tip. Bow it slightly to one side so it reads like a midrib, not a ruler line. The paper shows through, which is how riso shows a white line.
-
Draw bubble rings with the Shape tool
Kombucha is fizzy, so add some bubbles. With Leaves selected, click Add Layer and name it Bubbles.
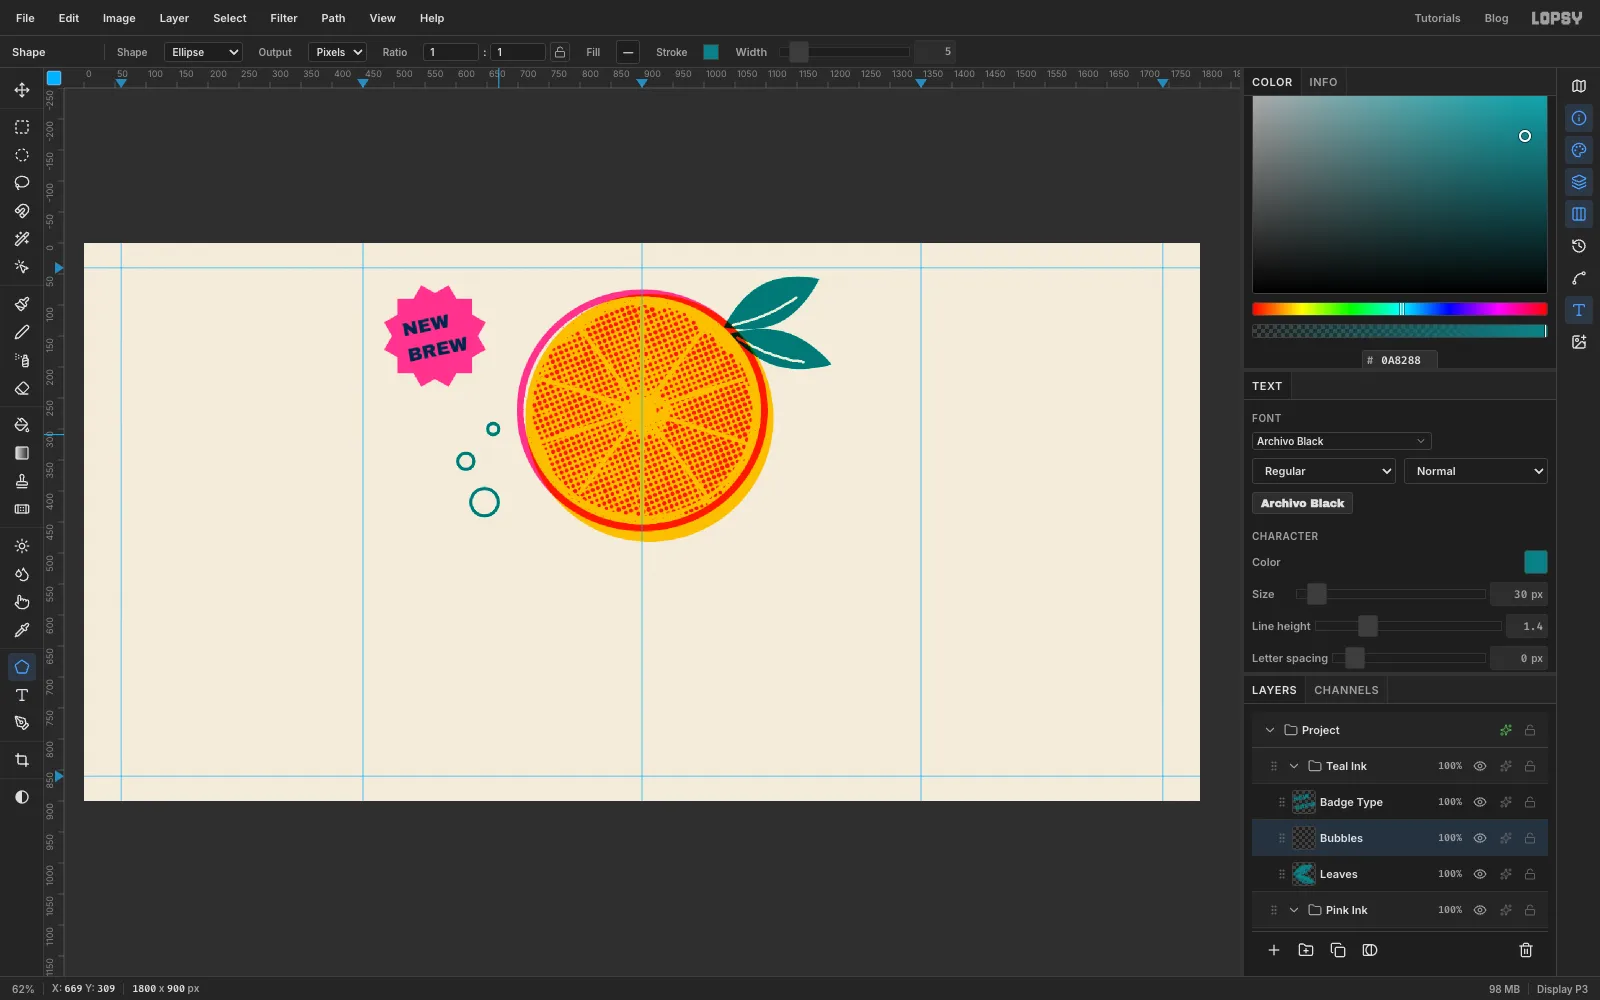
Choose the Shape tool, set Shape to Ellipse, remove the Fill, and set the Stroke to teal with Width 5. Press Cmd while you drag to keep each one a circle. Draw three rings rising up the left of the fruit:
- a large one centred at 646, 418, dragged out 22 px
- a medium one at 616, 352, dragged out 13 px
- a small one at 660, 300, dragged out 9 px
-
Copy, flip and move the bubbles to the other side
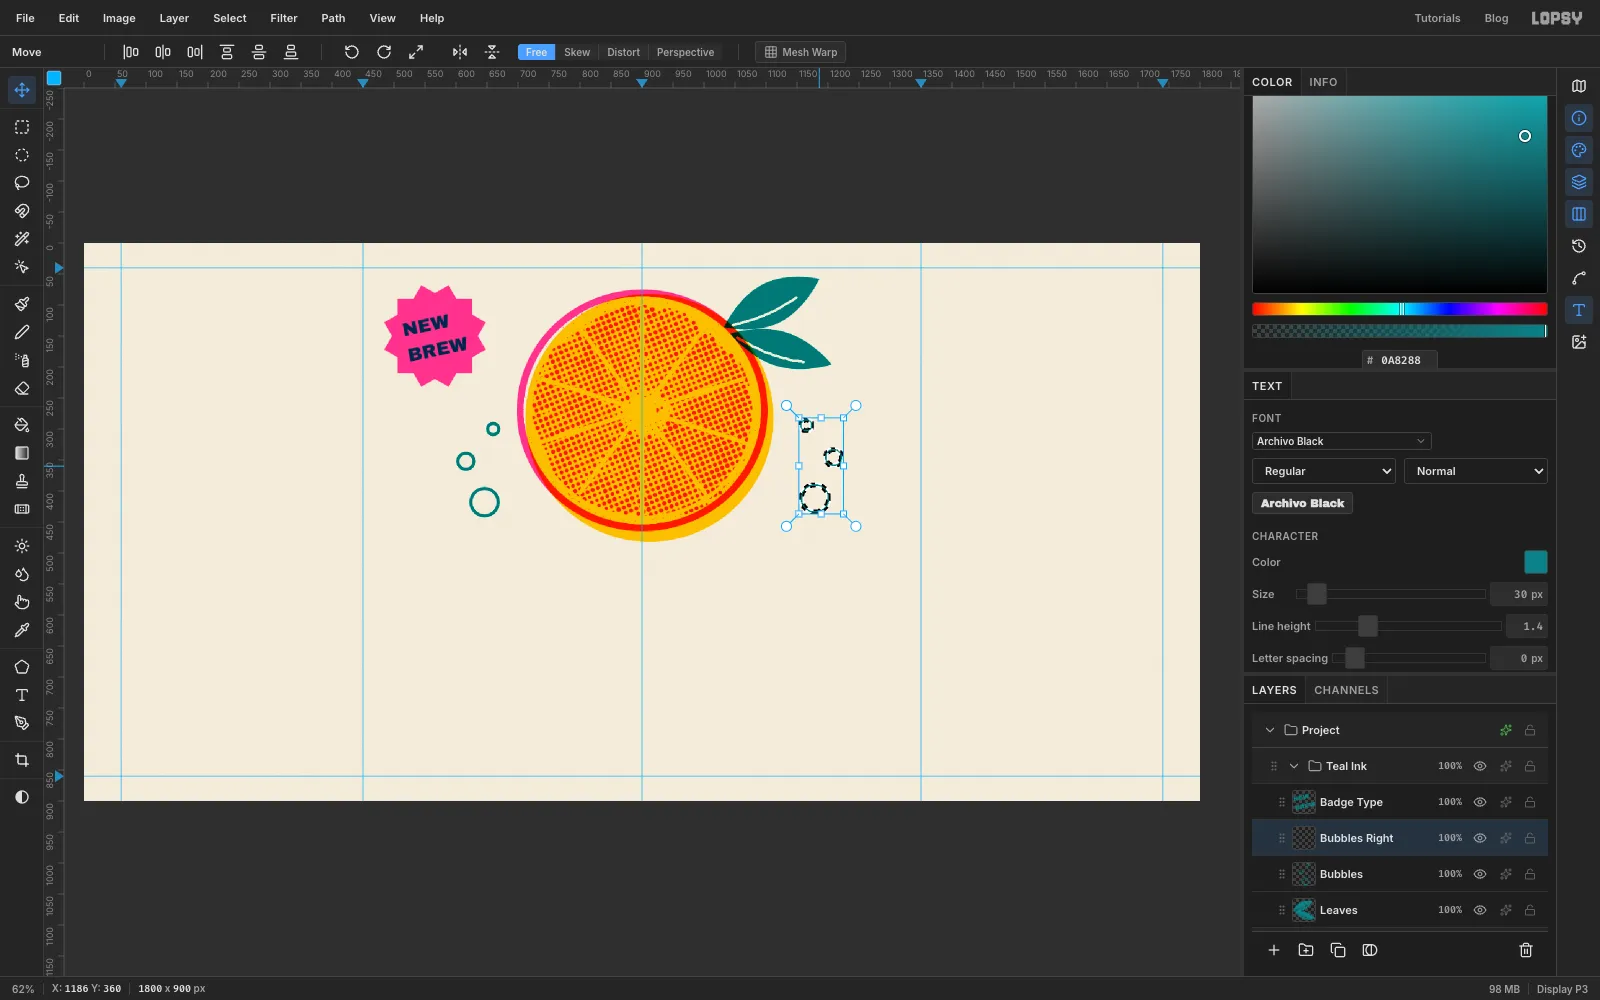
Press Cmd+D, then use the Rectangular Marquee dialog to select the three bubbles: From 590, 284 To 676, 448. Press Cmd+C then Cmd+V. The copy is pasted in place, selected.
With the Move tool active, click Flip Horizontal in the options bar. Then drag the copy about 553 px to the right, until the cluster sits right of the fruit and clear of the leaves. Press Enter, Cmd+D, and Layer → Merge Down to put all six rings on the Bubbles layer.
-
Set "Zesty" with a misregistered shadow
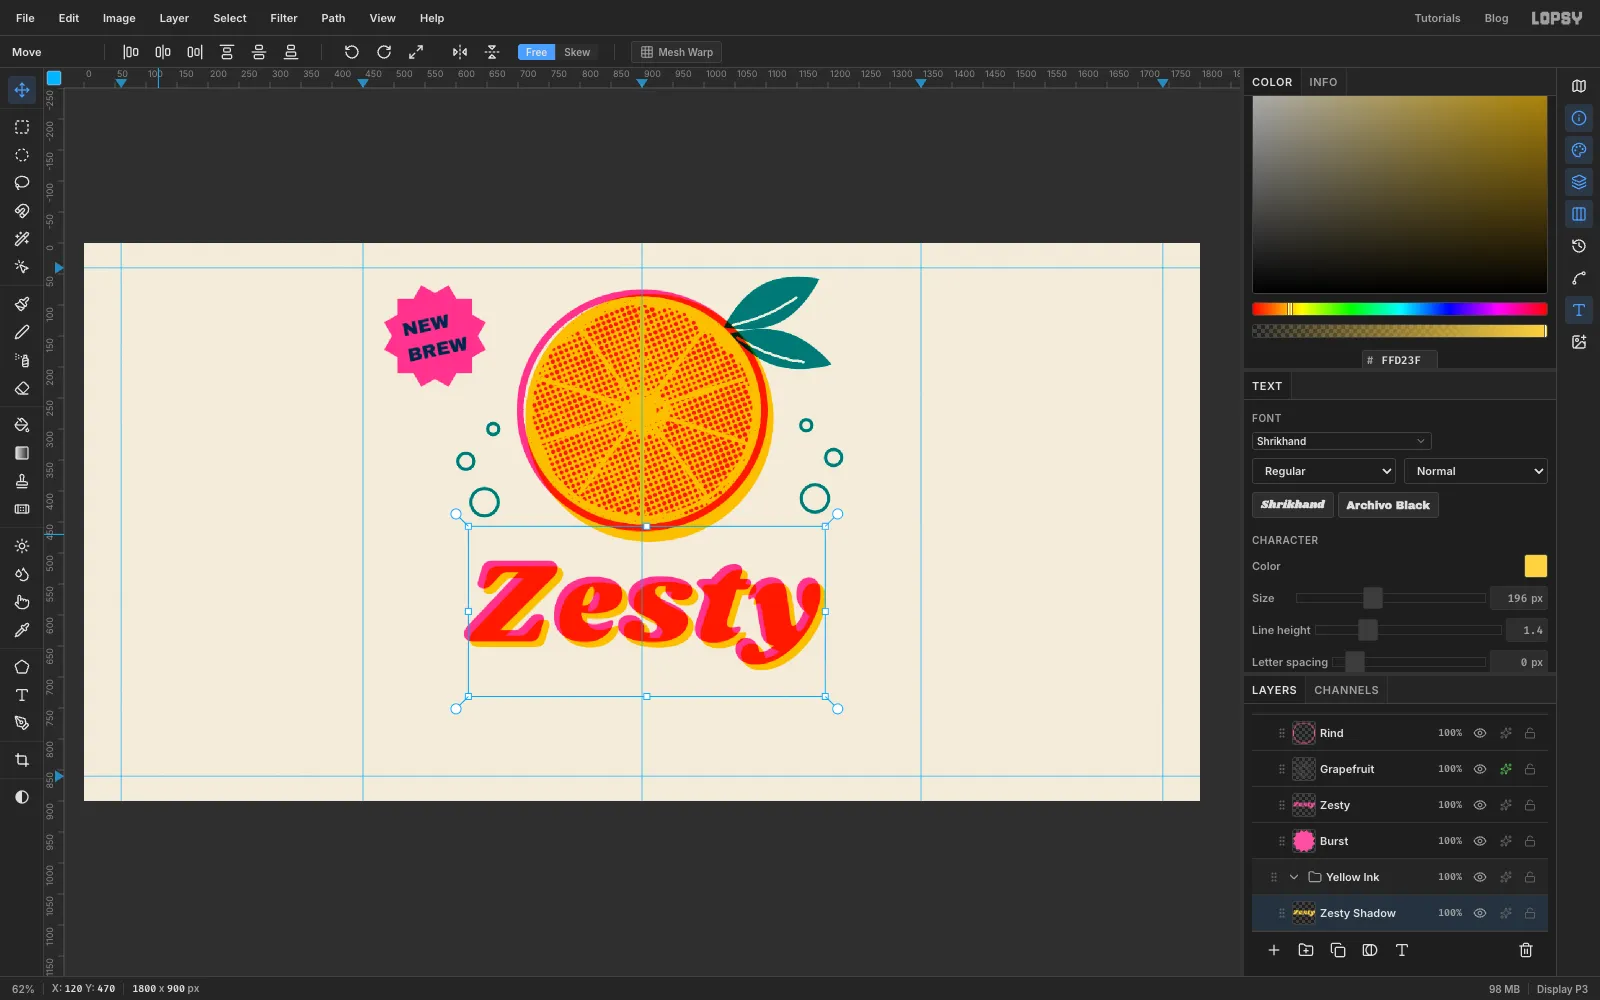
Select Burst so the type prints pink. Choose the Text tool, pick Shrikhand at Size 196, colour pink . Click in the empty space under the fruit, type Zesty and press Tab. Rename the layer Zesty.
Switch to the Move tool and use the arrow keys to centre the word on the 900 guide, with the top of the Z about 30 px below the yellow disc.
Now the yellow drum. Select Sun Disc and make the same text: Zesty, Shrikhand, 196, but in yellow . Click somewhere empty on the left panel so you don't click into the pink word, and rename the layer Zesty Shadow. With the Move tool, drag it over the pink word until the two line up exactly, then press Right nine times and Down nine times. Where the two overlap they print red. The pink edge shows at the top left and the yellow at the bottom right.
-
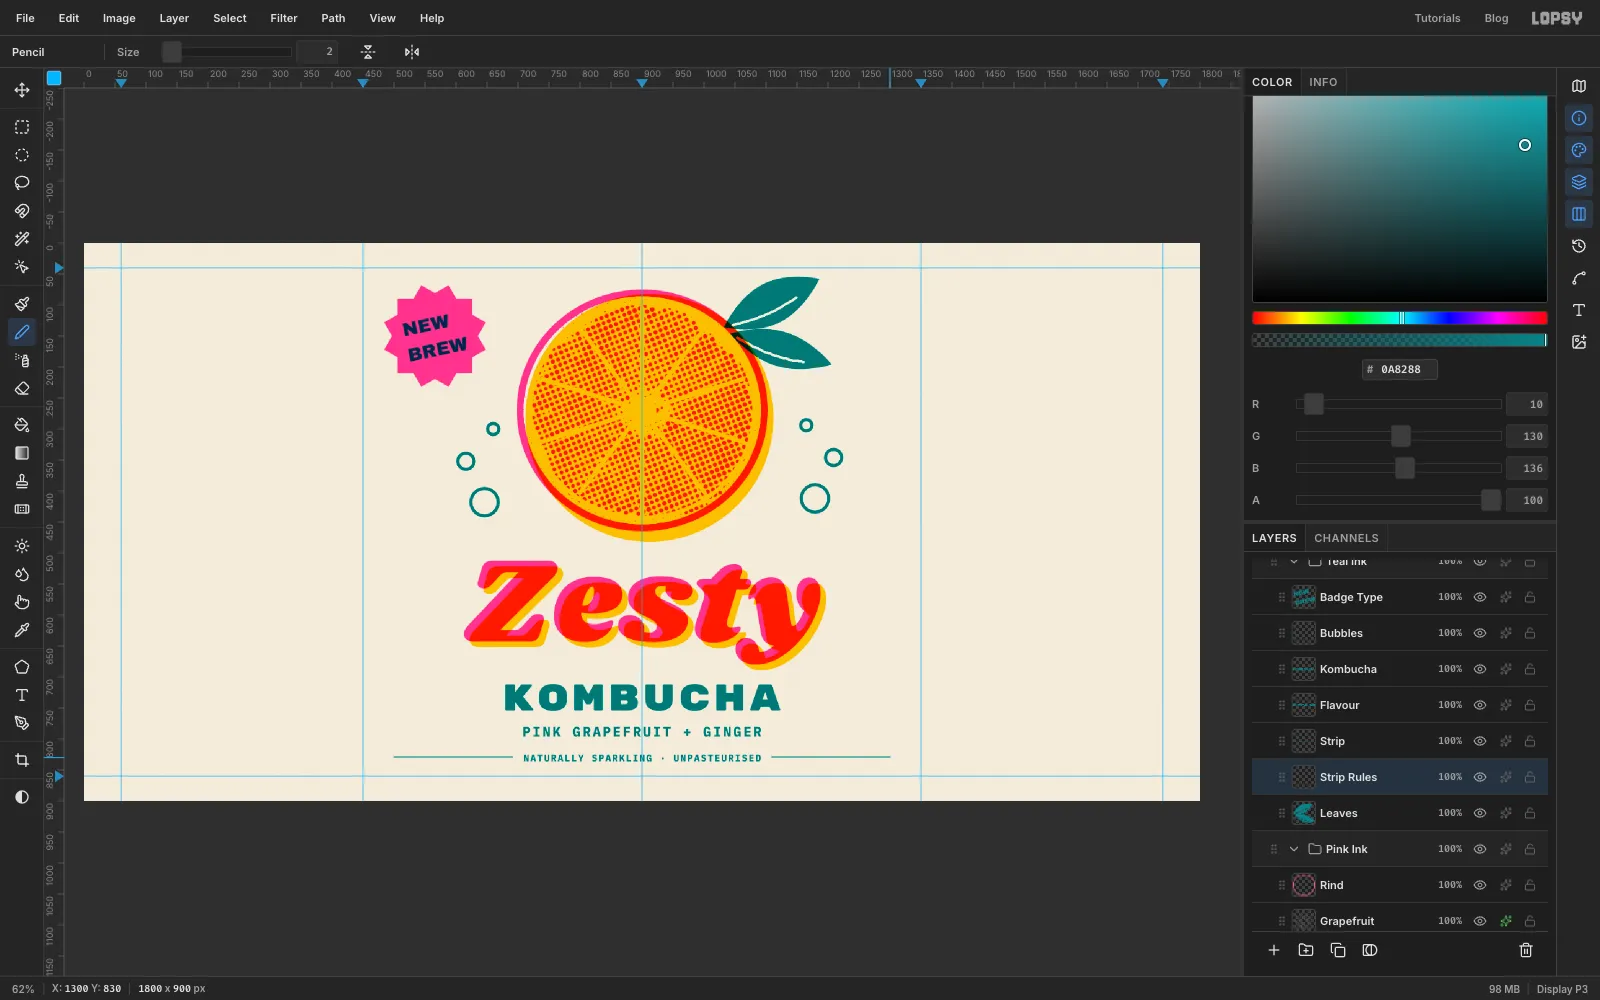
Add KOMBUCHA, the flavour line and a bottom strip
Select Leaves so the type prints teal. Set KOMBUCHA (rename the layer Kombucha) in Rubik Mono One at Size 60. In the Text panel, set Letter spacing to 6. Centre it on the 900 guide, leaving about 32 px between the bottom of the "y" in Zesty and the top of the capitals.
Select Leaves again and set PINK GRAPEFRUIT + GINGER in IBM Plex Mono, weight Bold, Size 22, Letter spacing 3. Centre it about 26 px below KOMBUCHA and name it Flavour.
Then set NATURALLY SPARKLING · UNPASTEURISED in IBM Plex Mono Bold, Size 15, Letter spacing 2, centred at y 830. Name it Strip.
Finally, rule lines either side of the strip. Select Leaves, add a layer called Strip Rules, choose the Pencil (N) at Size 2, and with teal as the foreground click at 500, 830 and Shift-click about 18 px before the start of the text. Do the same from 18 px after the text to 1300, 830.
-
Draw a gradient for the yellow dot field
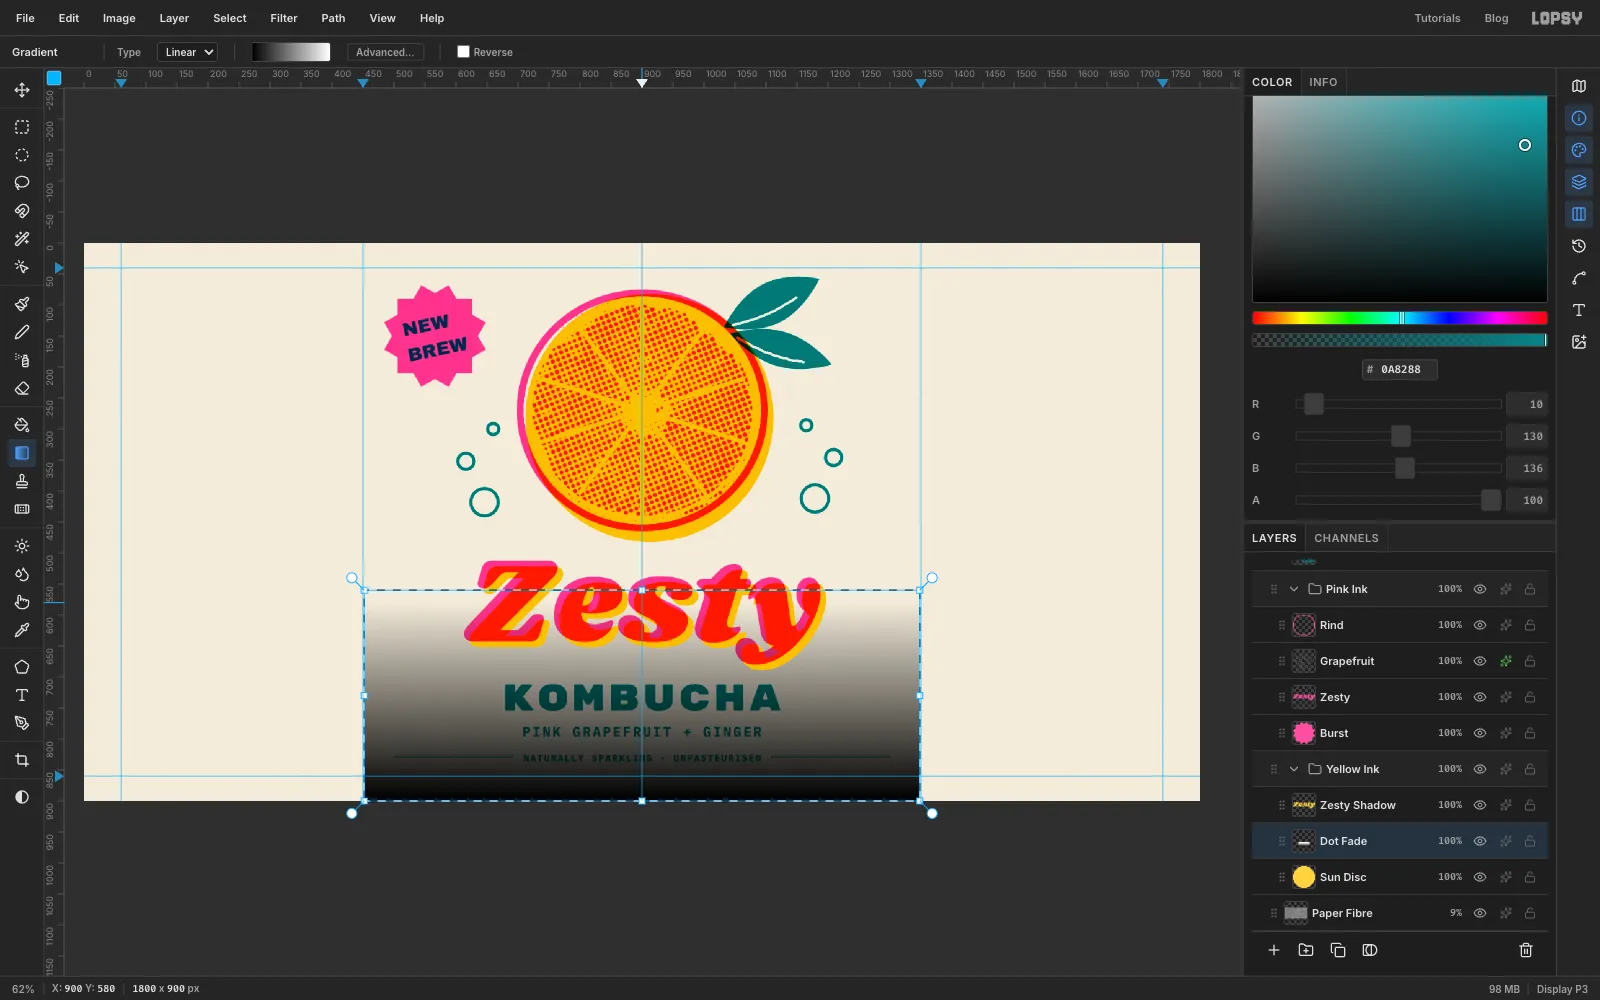
Select Sun Disc and click Add Layer. Name it Dot Fade. It lands in the Yellow Ink group.
Press Cmd+D if anything is selected, then use the Rectangular Marquee dialog to select From 452, 560 To 1348, 900. Choose the Gradient tool from the toolbox, set Type to Linear, and click Advanced… to set the two stops to black on the left and white on the right.
Drag from the bottom edge of the selection straight up to about y 580. You get black at the bottom fading to white near the top. Press Cmd+D.
-
Screen it and clear a band for the small type
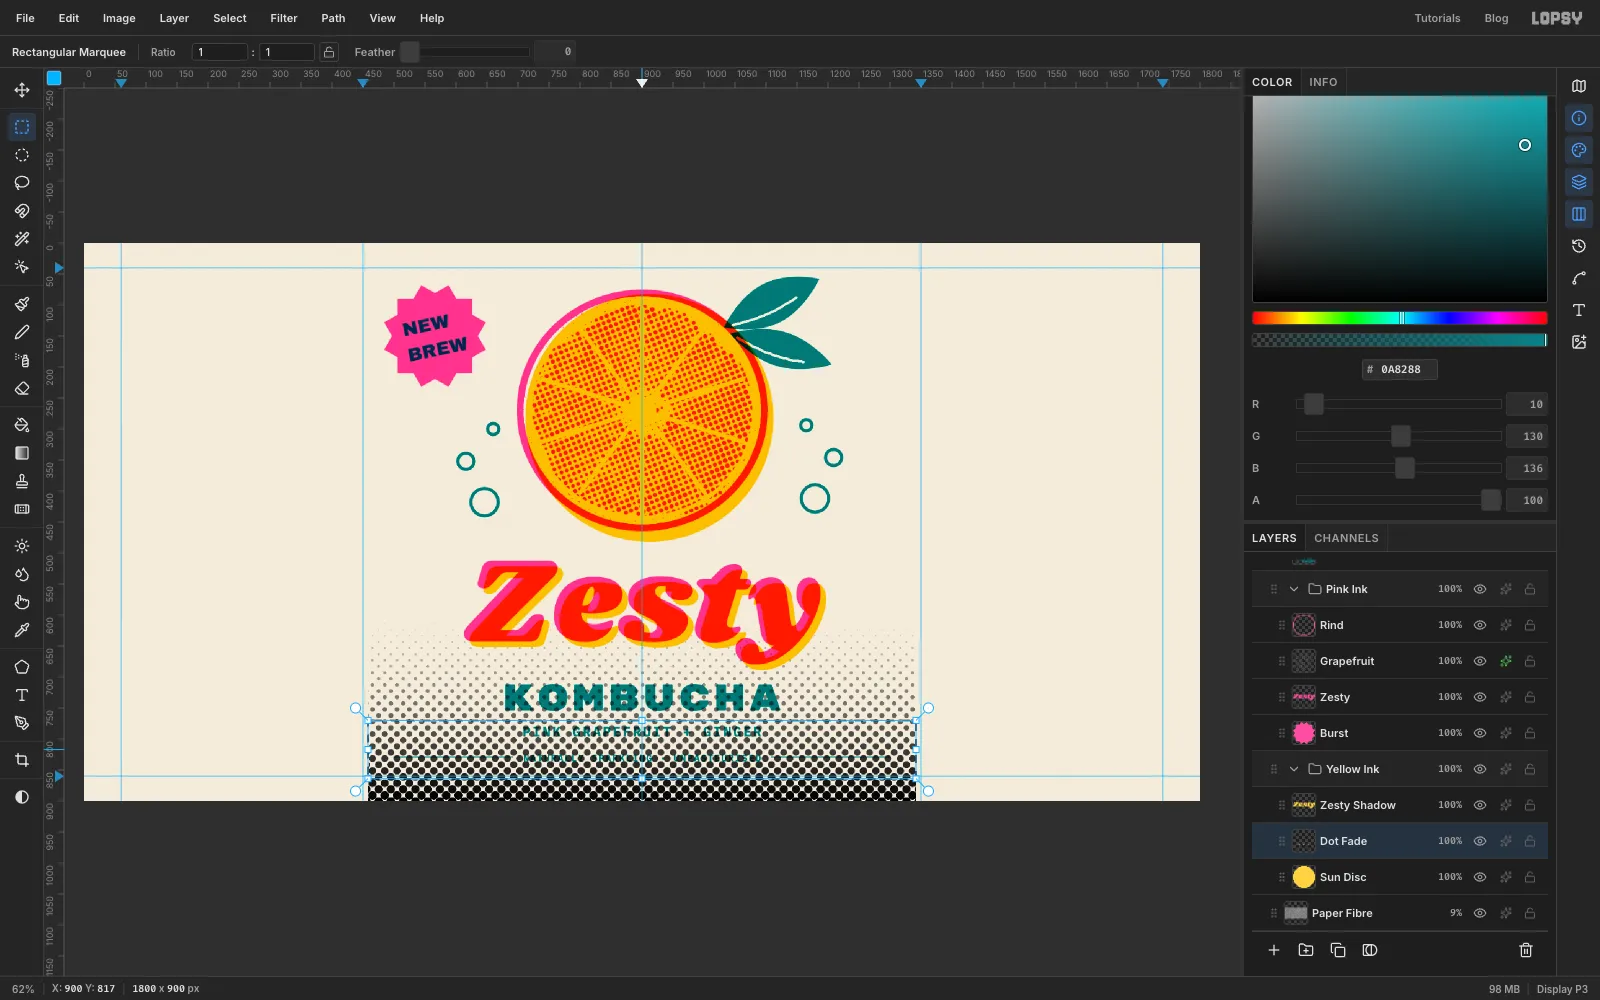
Choose Filter → Halftone… with Dot Size 14, Density 1, Angle 45, Softness 0.4. Black becomes big touching dots at the bottom, and white prints nothing at the top.
The dots on the edges spill a few pixels past the folds. Select From 458, 0 To 1342, 900, choose Select → Inverse and press Delete.
Then give the small type a clean band of paper. Press Cmd+D first, so the next click opens the dialog, and select From 458, 770 To 1342, 864, press Delete and Cmd+D.
-
Ink the dots yellow
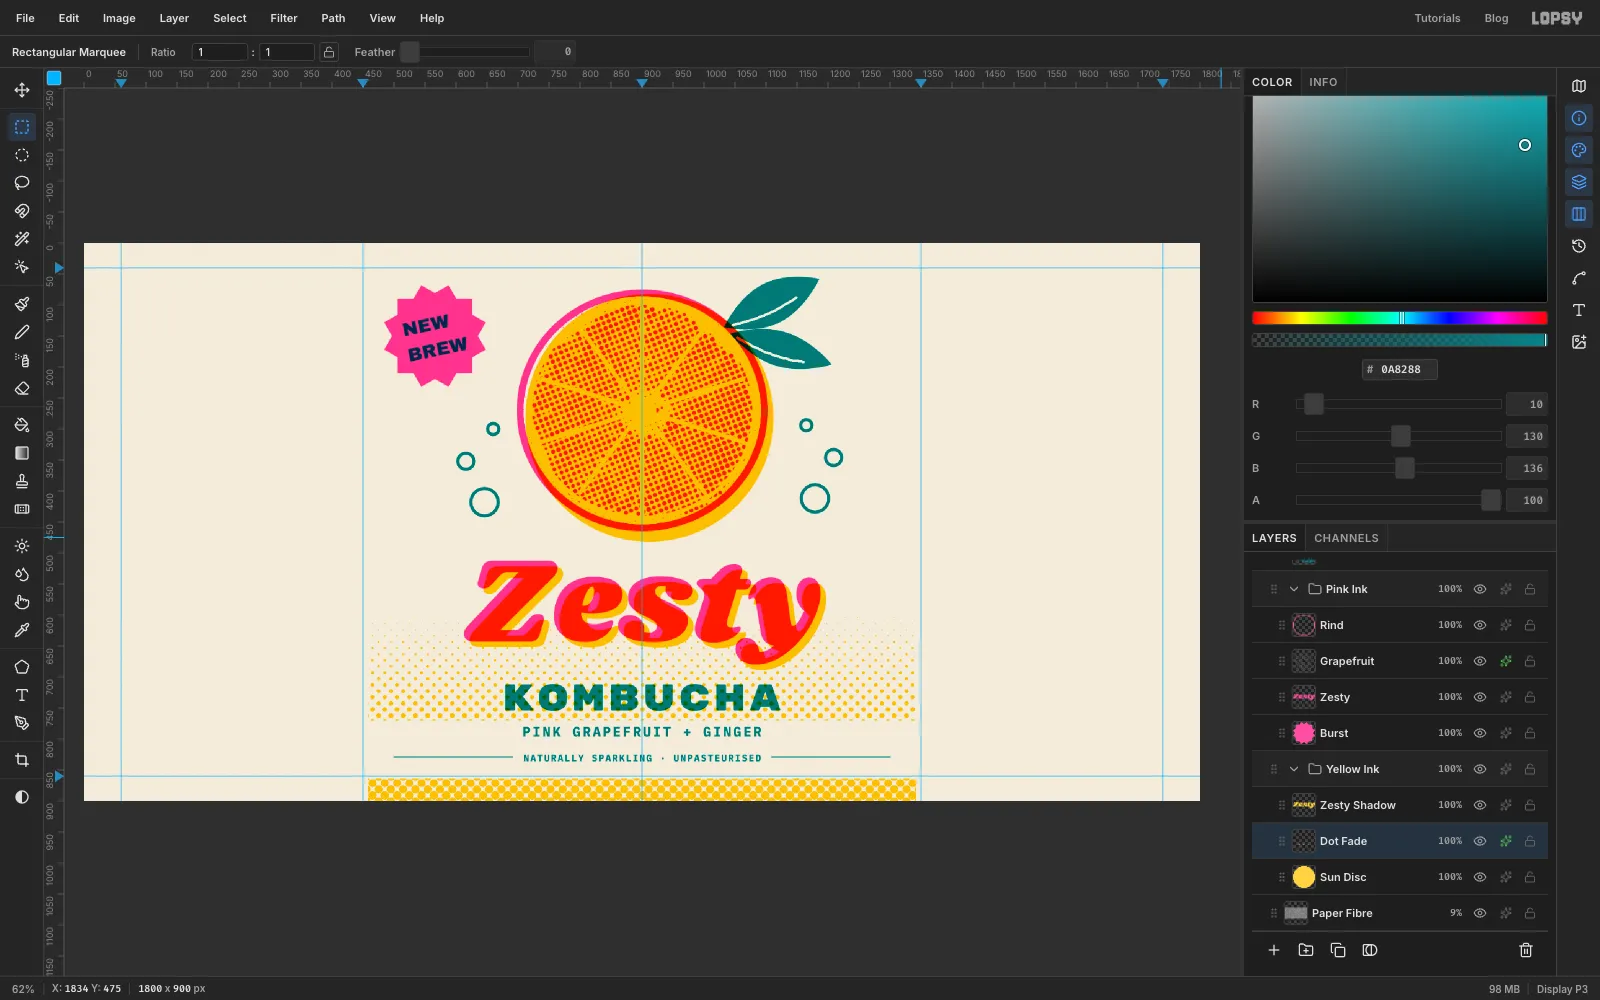
Open the Dot Fade effects button, tick Color Overlay and set it to yellow . Close the drawer.
The dots fade up behind Zesty and KOMBUCHA, overprinting red under the pink and green under the teal. Below the clear band, the densest dots make a chequered strip along the bottom edge.
-
Snap a yellow band to the grid
First, the left panel's text. Select Leaves and set INGREDIENTS in Archivo Black, Size 24, Letter spacing 2, with its left edge on the 60 guide and its top at about y 70.
Then select Leaves again and set the list below in IBM Plex Mono, Regular, Size 17, Letter spacing 0, also on the 60 guide. Press Enter at the end of each line:
- Filtered water, organic cane
- sugar\*, organic green & black
- tea, pink grapefruit juice
- (6%), fresh ginger root and
- a live kombucha culture.
- \*Mostly eaten by the culture.
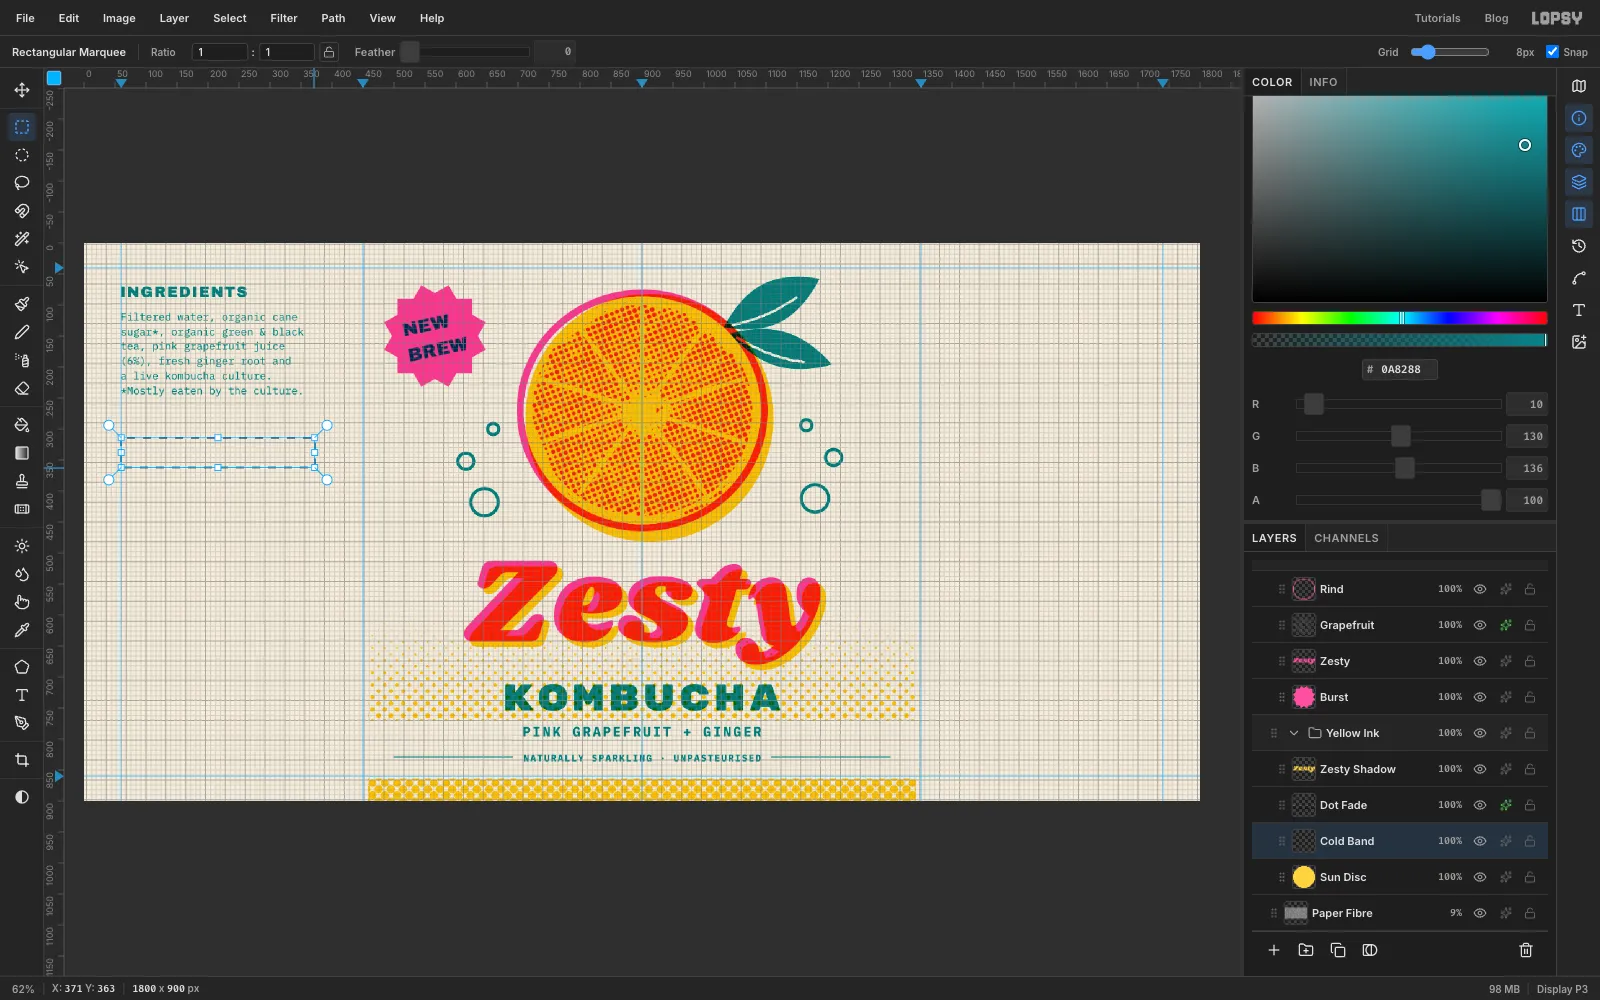
Now the yellow band. Select Sun Disc, add a layer and name it Cold Band. Turn on View → Show Grid, drag the Grid slider at the right of the options bar to 8px (it only appears while the grid is showing), and turn on View → Snap to Grid. Turn View → Snap to Guides off so the margin guide doesn't pull the edge.
With the Rectangular Marquee, drag from about 61, 313 to 371, 363. The corners snap to grid lines, giving a band from 60, 314 to 372, 362. Set the foreground to yellow and choose Edit → Fill, press Cmd+D, and turn the grid and grid snapping off again.
-
Box the nutrition table
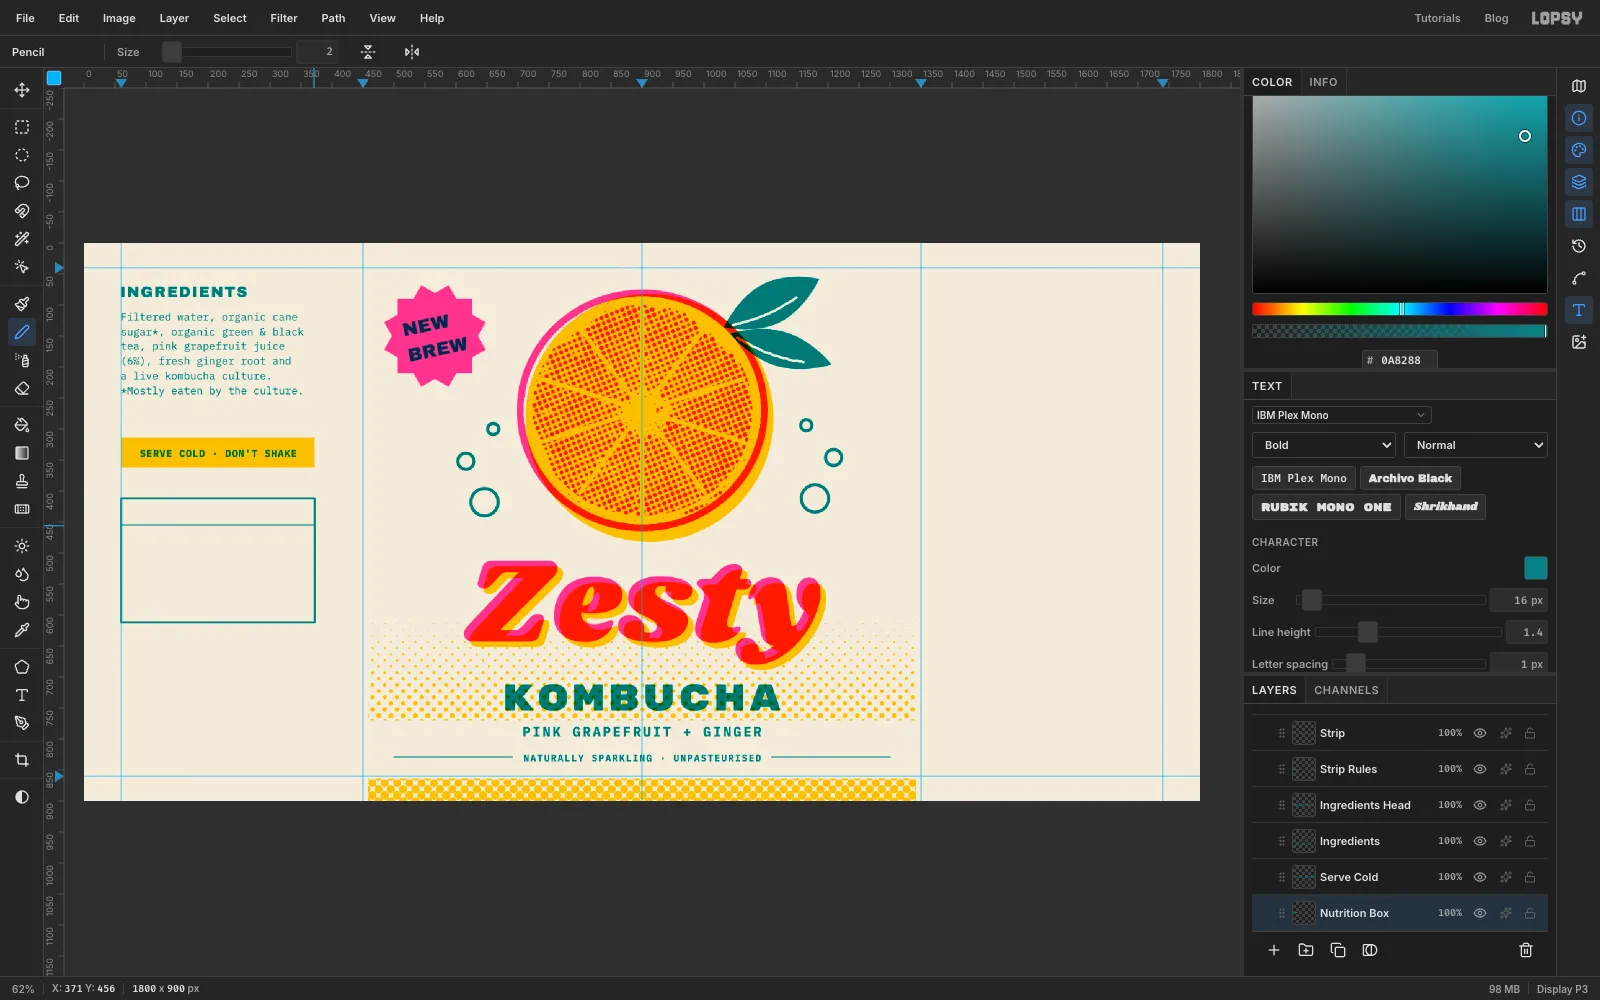
Select Leaves and set SERVE COLD · DON'T SHAKE in IBM Plex Mono Bold, Size 16, Letter spacing 1. Centre it on the band. Teal over yellow prints a dark green.
Select Leaves, add a layer called Nutrition Box and choose the Shape tool. Set Shape to Rectangle, Corner Radius 0, no Fill, and a teal Stroke at Width 3. Press at 216, 512 and drag to 372, 612. The rectangle grows from the press point, so the box runs from 60 to 372 across and 412 to 612 down.
Choose the Pencil at Size 2. Click at 61, 456 and Shift-click at 371, 456 to rule off the header.
-
Fill in the nutrition table
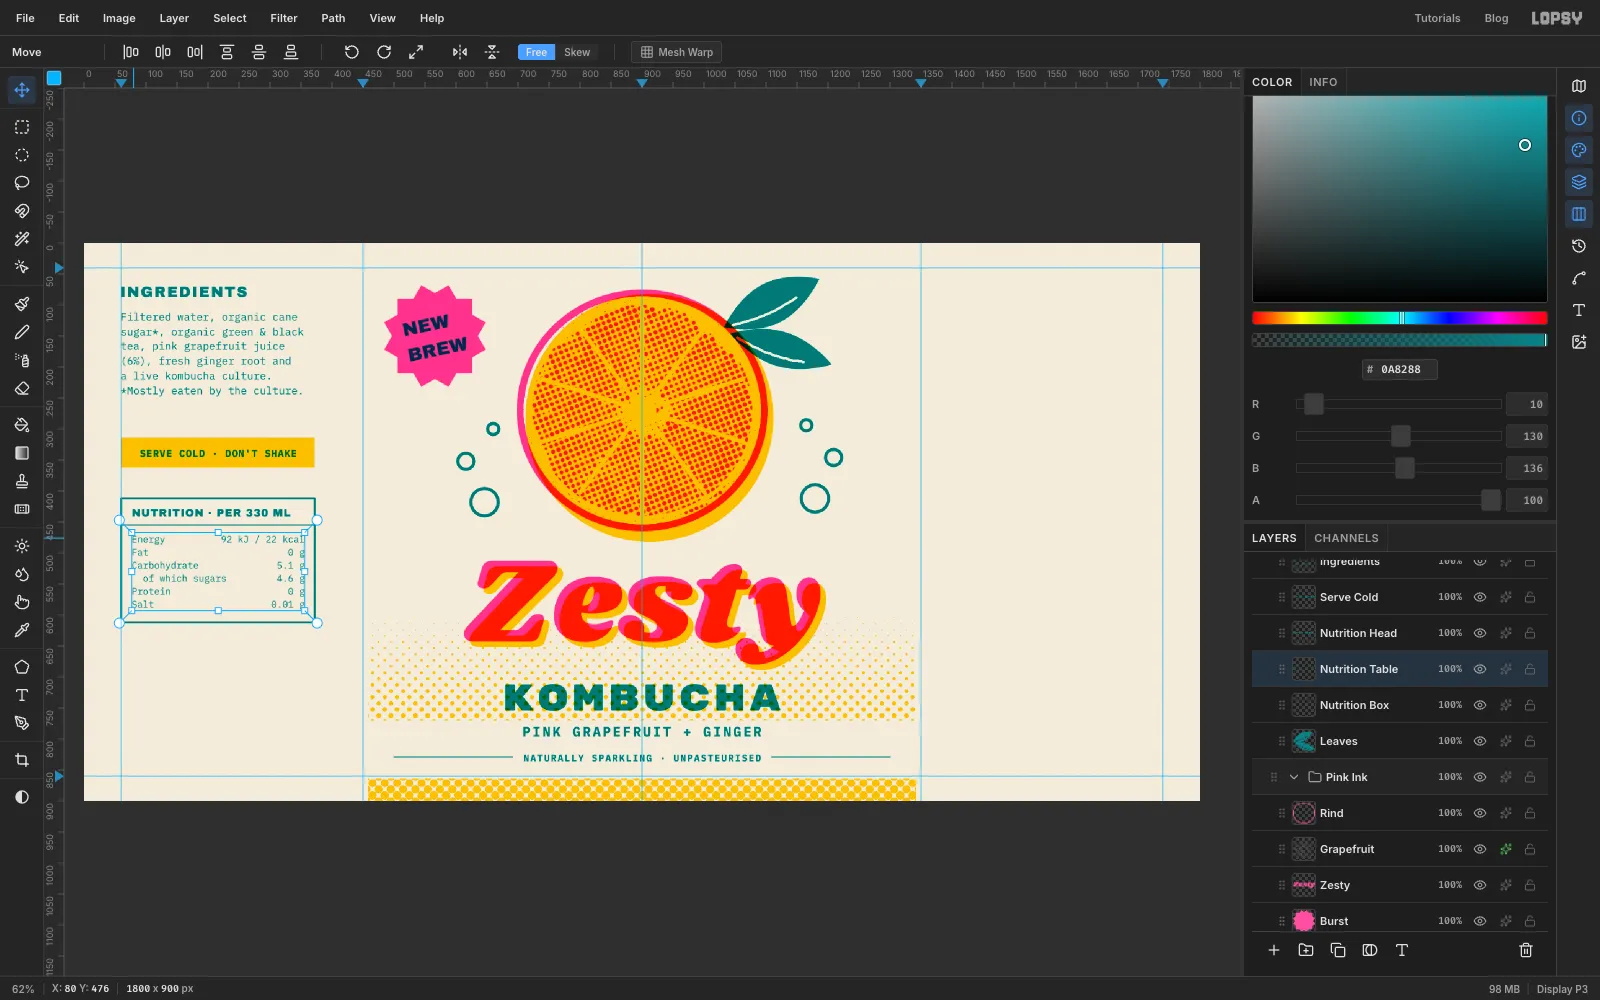
Select Nutrition Box and set NUTRITION · PER 330 ML in Archivo Black, Size 17, Letter spacing 1. Place it 18 px inside the box's left edge, centred in the header strip.
Select Nutrition Box again and set the table in IBM Plex Mono, Regular, Size 15, Letter spacing 0, with its top at about y 472. Because every character in a monospaced font is the same width, you can line the numbers up on the right just by typing spaces:
Energy 92 kJ / 22 kcalFat 0 gCarbohydrate 5.1 gof which sugars 4.6 gProtein 0 gSalt 0.01 g
Check that the gaps inside the box are equal on the left and right.
-
Draw a real EAN-13 barcode with the Pencil
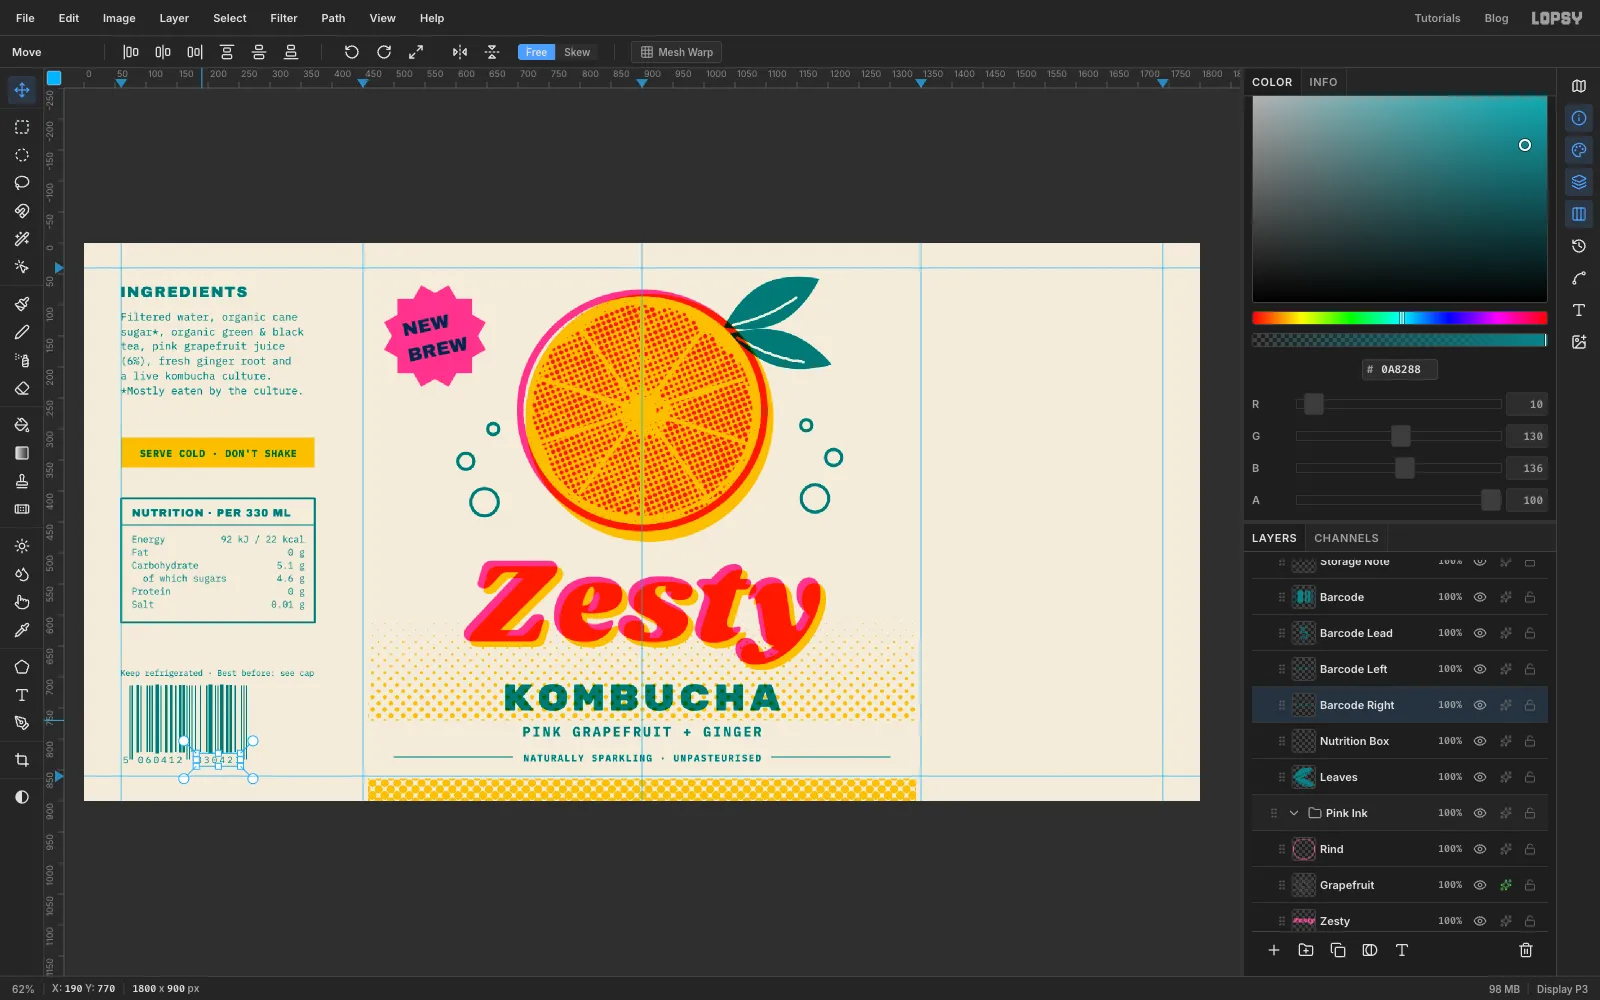
Select Nutrition Box and set Keep refrigerated · Best before: see cap in IBM Plex Mono, Size 13, on the 60 guide at y 688.
Then add a layer called Barcode. In real life your printer or barcode service supplies this artwork; draw it here if you want the practice, or skip to the digits. The barcode is a real EAN-13 for the number 5 060412 830423. Each of its 95 thin "modules" is 2 px wide, starting at x 74. Choose the Pencil with teal as the foreground. For each bar, click at y 716 and Shift-click at y 820 at these x positions:
- Size 2: 75, 79, 93, 103, 107, 111, 125, 149, 167, 171, 175, 181, 189, 199, 213, 217, 245, 255, 259, 263
- Size 4: 88, 134, 142, 156, 162, 232, 238
- Size 6: 119, 205, 223
The six bars at 75, 79, 167, 171, 259 and 263 are the guard bars. Run those down to y 832 instead.
For the digits, use IBM Plex Mono at Size 15. Put 5 just left of the bars. Set 060412 (Letter spacing 3.5) centred under the left half and 830423 under the right half, with their bottoms at y 838, between the guard bars.
-
Make the batch stamp's rings and arcs
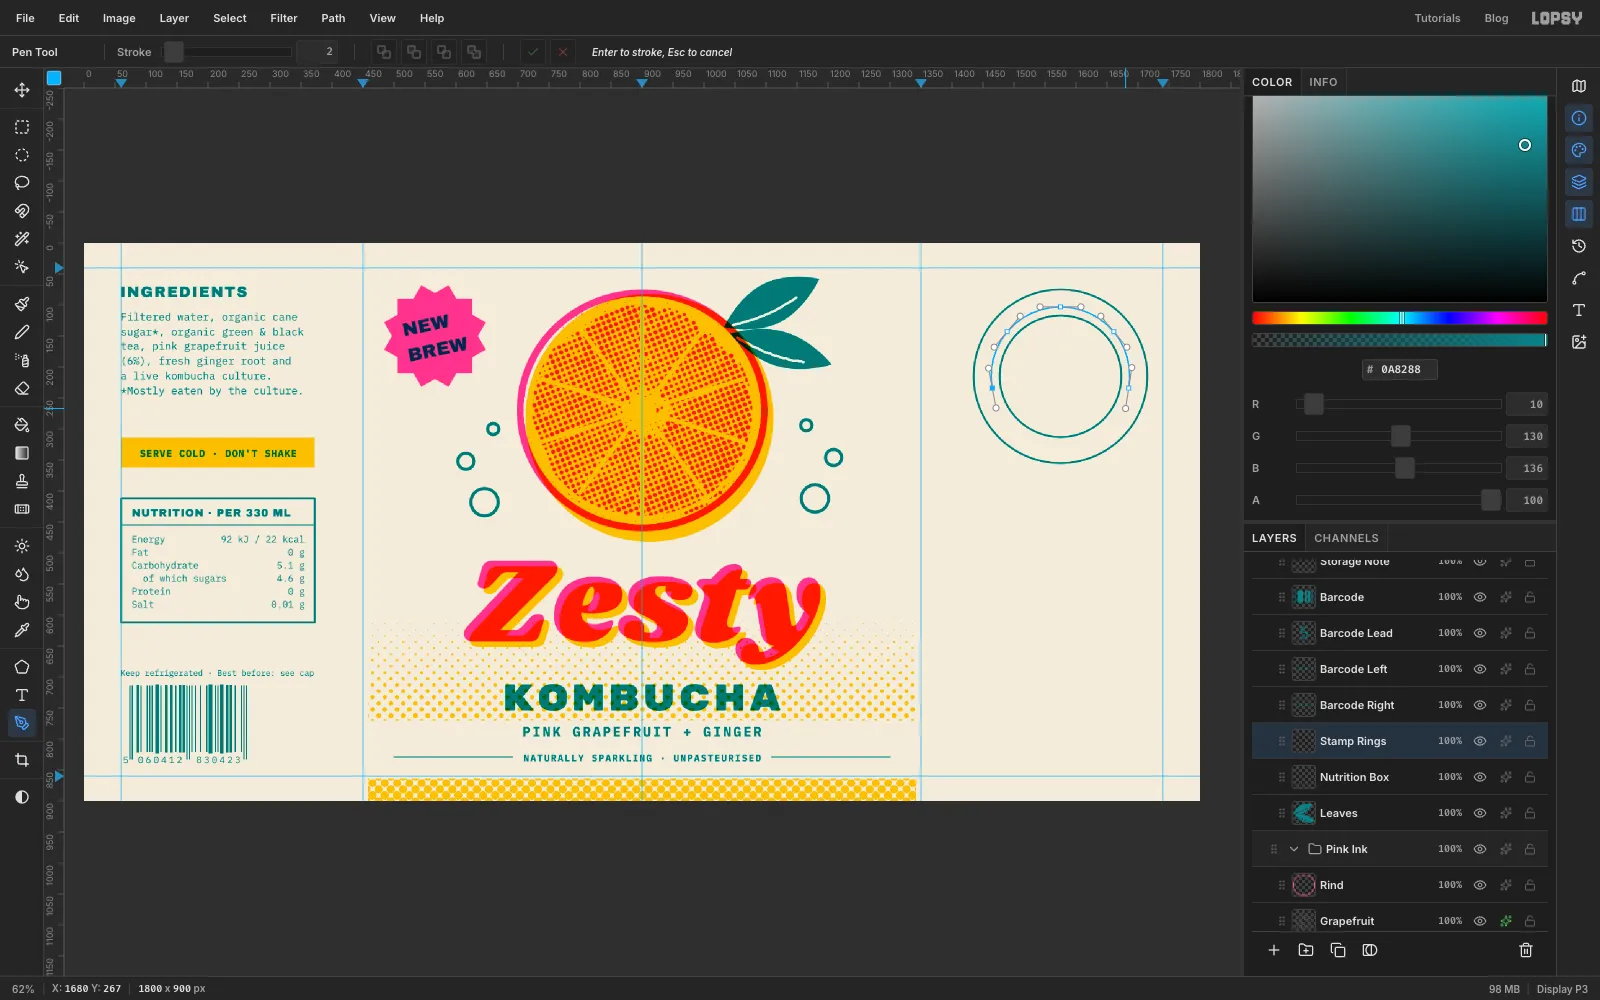
Select Nutrition Box, add a layer called Stamp Rings, and choose the Shape tool: Ellipse, no fill, teal stroke, Width 3. Holding Cmd, press at 1575, 215 and drag out 140 px for the outer ring, then press there again and drag out 98 px for the inner ring.
Type on a path follows the direction you draw it, so draw two separate arcs. That way both lines of text read upright.
- Top arc: with the Pen, draw a curve 112 px from the centre, from the left side (about 1465, 234), up over the top (1575, 103), and down to the right side (1685, 234). Drag a smooth handle at each anchor so it follows the circle. Click Commit path (✓) in the options bar rather than closing it.
- Bottom arc: draw a second curve 124 px from the centre, starting at the lower left (about 1468, 277), dipping through the bottom (1575, 339) and ending at the lower right (1682, 277). Commit it with ✓.
-
Wrap the stamp text round the arcs
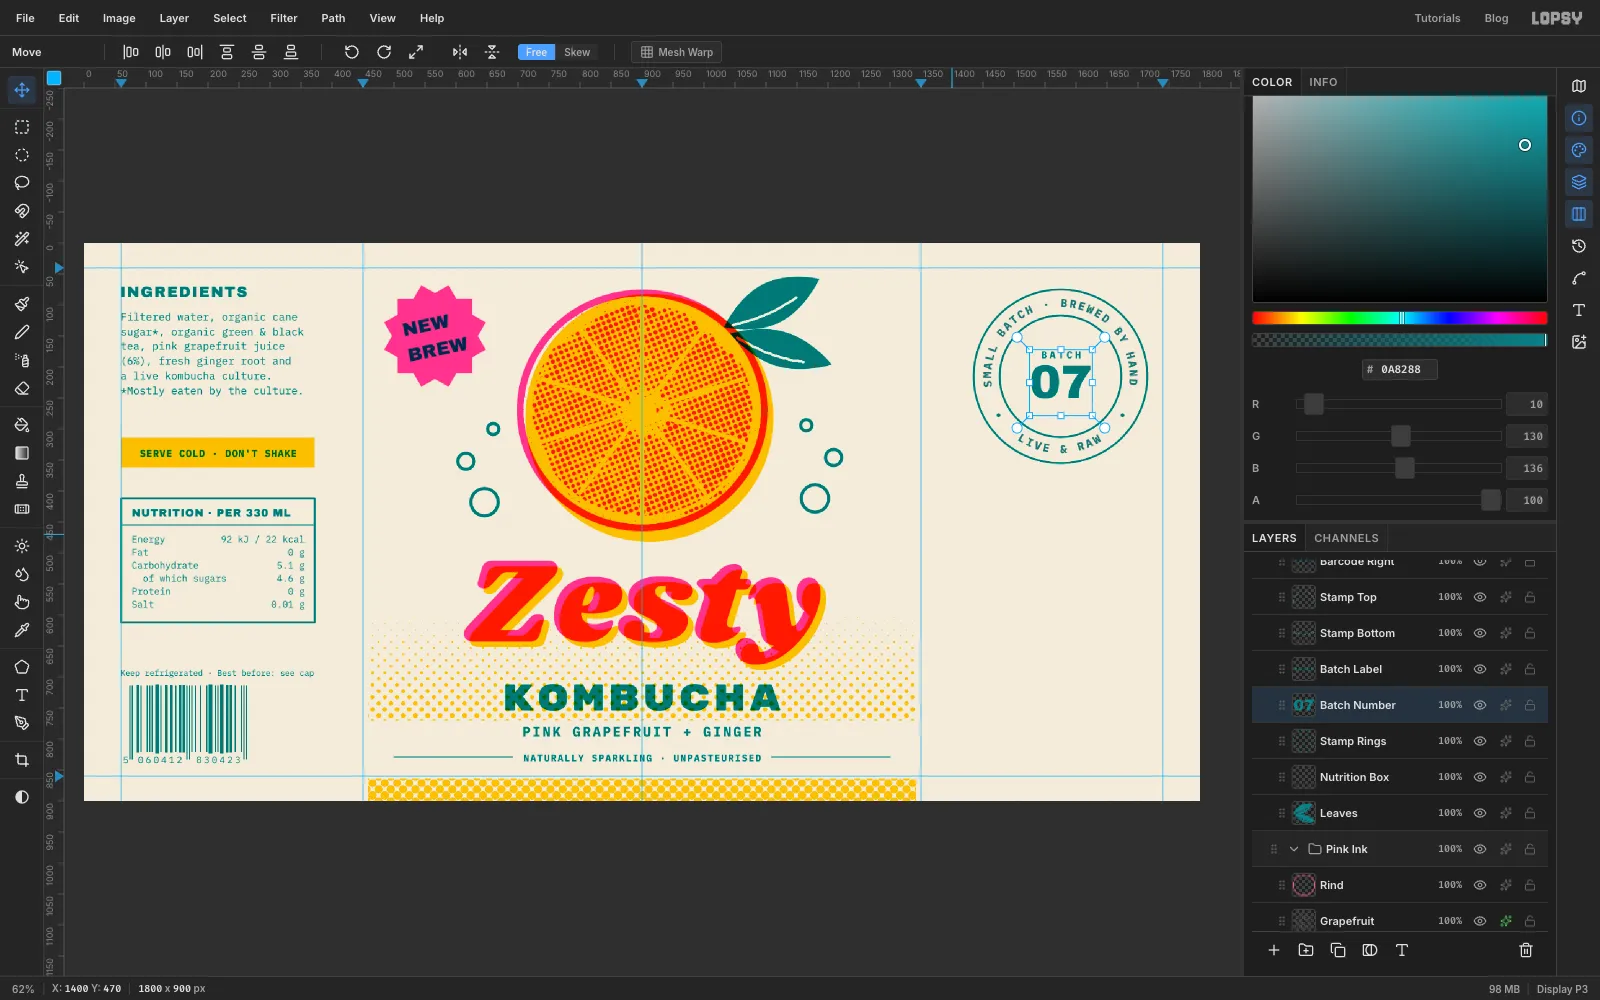
Select Stamp Rings and set SMALL BATCH · BREWED BY HAND in IBM Plex Mono Bold, Size 18, Letter spacing 3. Click in empty canvas below the stamp, type it and press Tab. With the layer still selected, open the Path dropdown on the Text options bar (not the Path menu at the top of the window). Your two arcs are the last two entries; the first of them is the top arc. Pick it, then set Align to Center. The text jumps onto the arc.
Select Stamp Rings again and do the same with LIVE & RAW, Letter spacing 4, on the bottom arc (the last entry), also centred. Hide the path outline by clicking the selected path in the Paths panel. Don't delete the paths, because that unbinds the text.
Brush two 7 px teal dots in the gaps between the two lines. Then set BATCH (IBM Plex Mono Bold, 16, spacing 4) and 07 (Archivo Black, 76) centred inside the inner ring.
-
Draw a branching ginger root
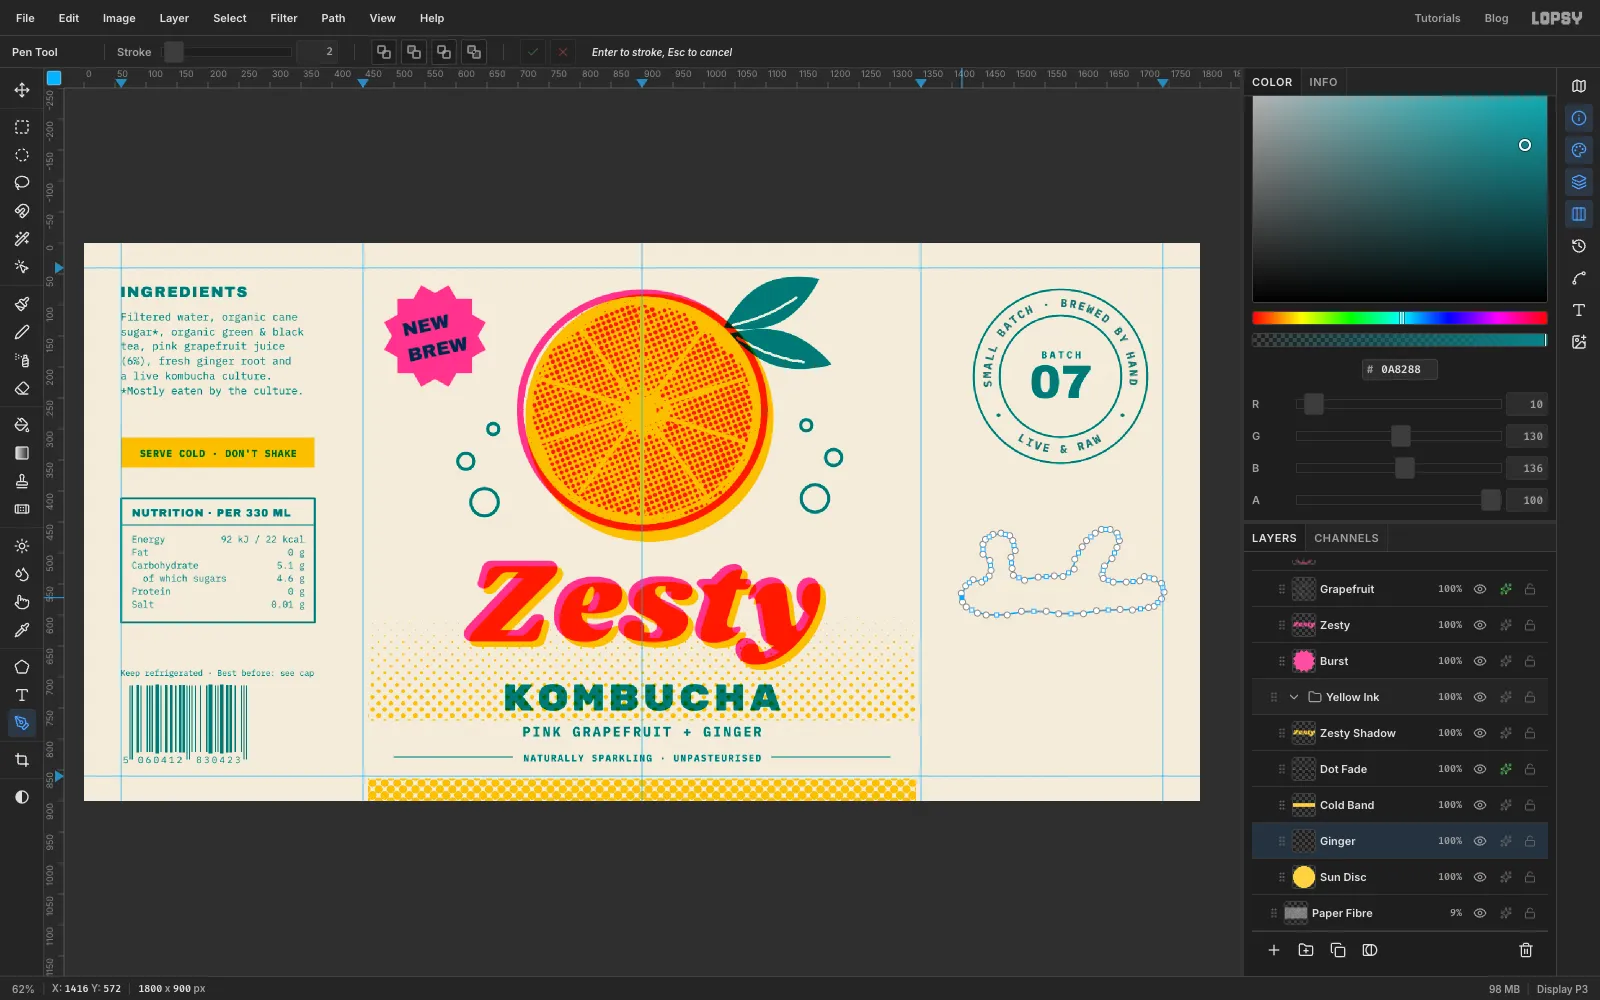
Select Sun Disc, add a layer called Ginger, and set the foreground to yellow.
With the Pen, draw one closed outline round a ginger root. It's a fat horizontal body from about x 1416 to 1740, between y 540 and 600. A short branch goes up and left to a knuckle near 1475, 470, and a longer branch goes up and right to a knuckle near 1650, 462. Press and drag a short handle at each anchor so the outline stays rounded and lumpy. Keep anchors at least 20 px apart, because clicking near the first anchor closes the path early.
Click the first anchor to close it. Then Path to Selection, Delete Path, Edit → Fill and Cmd+D.
-
Shade the ginger with pink dots
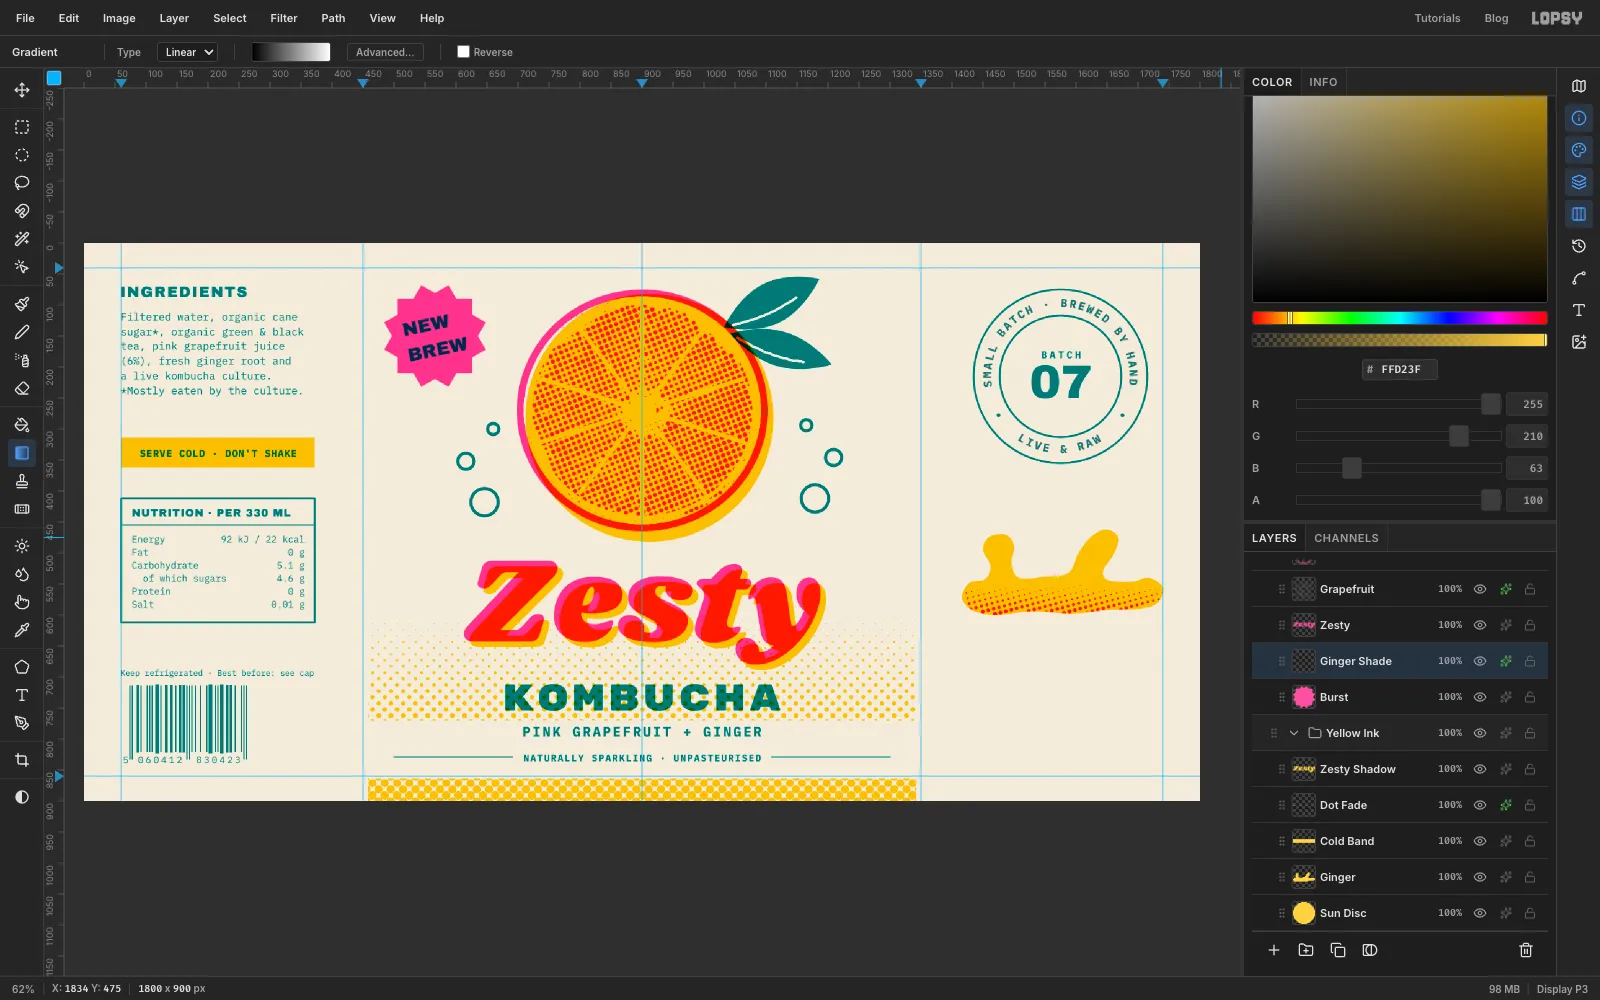
Select Burst, add a layer called Ginger Shade (it's in Pink Ink), and Cmd-click the Ginger thumbnail to load the root's shape.
With the Gradient tool (black to white, as before), drag from y 612 up to y 548, then press Cmd+D. Apply Halftone with Dot Size 9, Density 1, Angle 15, Softness 0.4.
Cmd-click the Ginger thumbnail again, choose Select → Inverse, press Delete to trim dots that poke past the edge, and Cmd+D. Finally add a pink Color Overlay. The dots print orange on the yellow root.
-
Add growth rings, story copy and volume
Select Nutrition Box, add a layer called Ginger Lines, and choose the Brush (B) at Size 4, Hardness 100, teal. Drag short curved strokes that wrap round the root: three across the body, bowing slightly, and one across each branch.
Then set the copy, each time with Nutrition Box selected first. The Text tool still remembers Bold, Center and wide spacing from the stamp, so reset them:
- the story in IBM Plex Mono Regular, Size 16, Letter spacing 0, Align Left, left edge at x 1410, top at y 640: "Fermented for 14 days with / a living culture, then / bottled raw. Tart, zingy / and a little bit wild."
- 330 ML in Archivo Black, Size 44, Letter spacing 1, Align Left, at x 1410, with its baseline at y 838, level with the barcode digits
- < 0.5% ABV and VEGAN · GF on two lines, IBM Plex Mono Bold, Size 15, Letter spacing 1, Align Right, right edge on the 1740 guide, same baseline
-
Add dotted fold marks
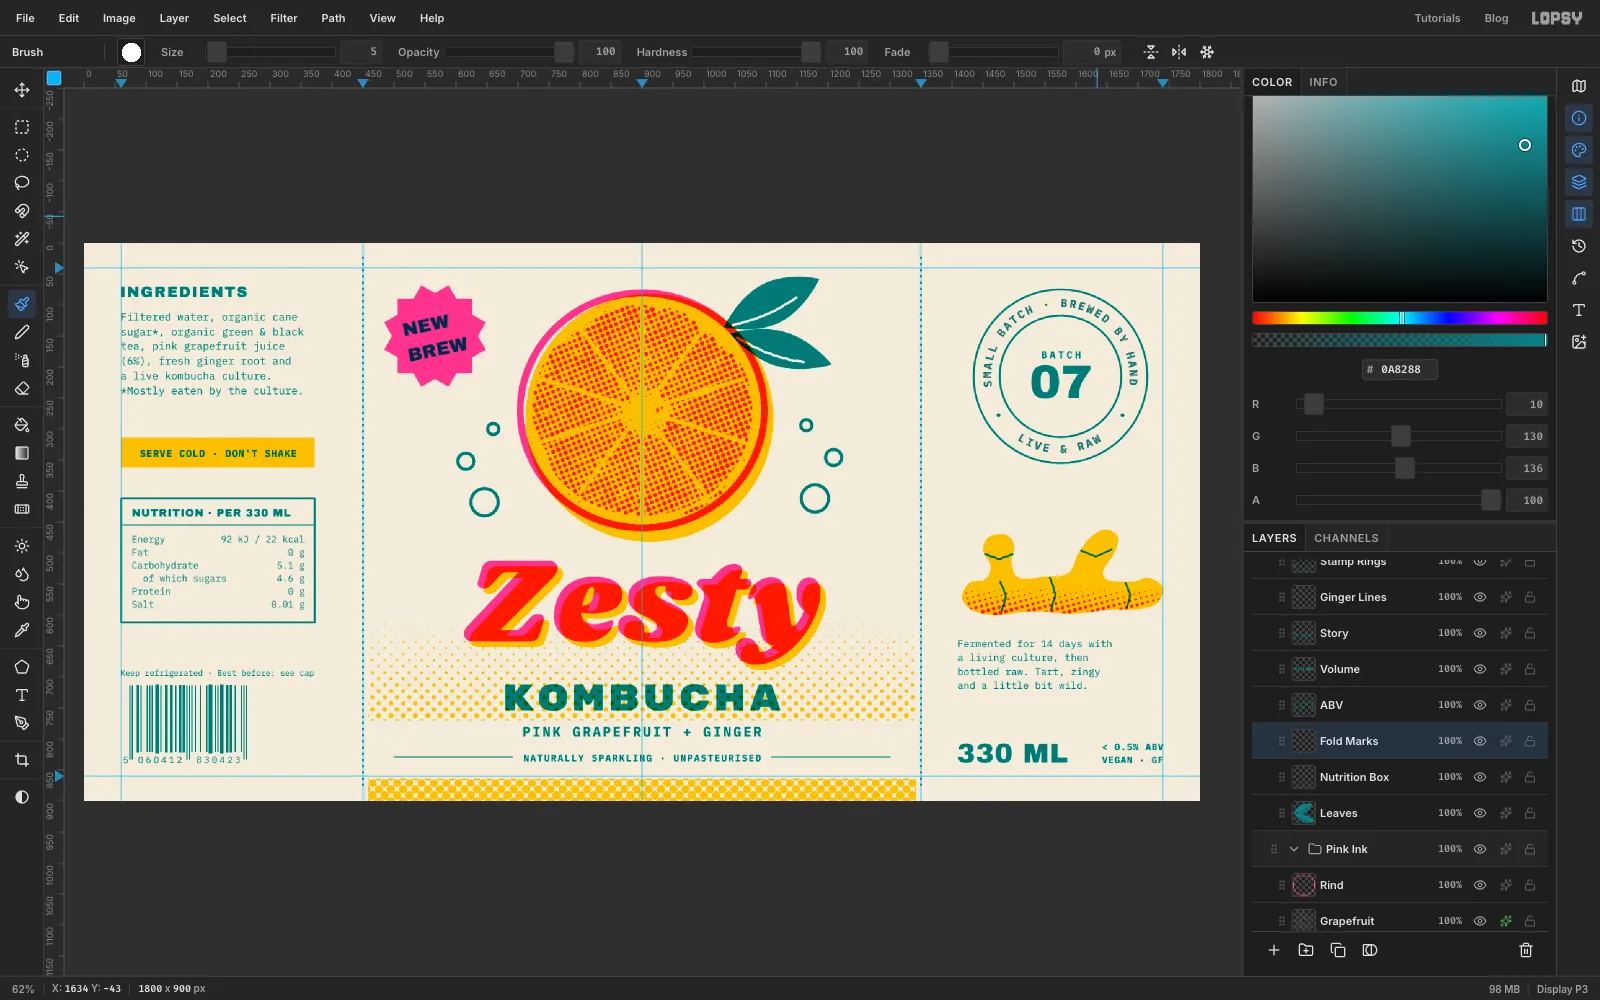
Select Nutrition Box, add a layer called Fold Marks, and choose the Brush at Size 5. Click the brush tip swatch at the left of the Brush options bar to open the Brushes panel, and set Spacing to 200%, so each dab sits apart from the next.
Click at 450, 24 and Shift-click at 450, 876, then do the same at x 1350. You get dotted fold lines. Set Spacing back to where it was afterwards.
-
Make ink dropouts for each drum
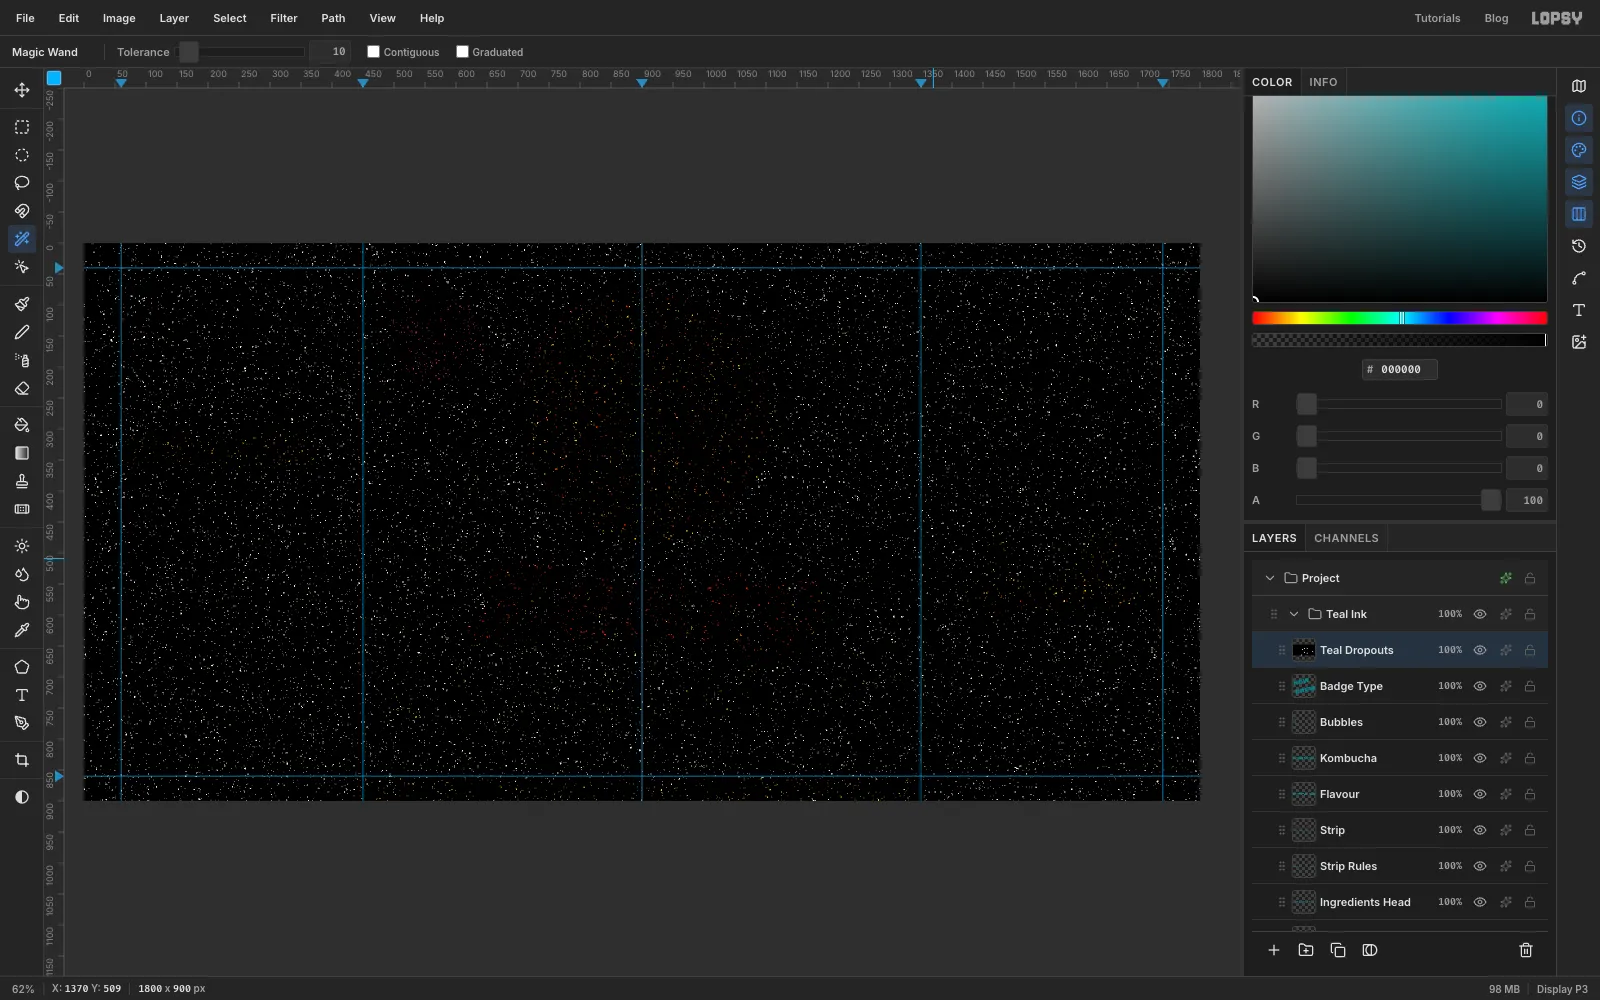
Real riso ink misses the paper in small clumps. You'll make a fresh speckle layer at the top of each ink group: Yellow, then Pink, then Teal. The screenshot shows the last one, Teal Dropouts, straight after Threshold. Here's the recipe for Yellow Ink:
- Select the top layer inside Yellow Ink, click Add Layer, and name it Yellow Dropouts.
- Set the foreground to black and choose Edit → Fill. The whole label goes black for a moment, because black multiplies over everything below.
- Add Noise…: Amount 100, Mono, Gaussian.
- Gaussian Blur…: Radius 2. This clumps the noise.
- Threshold…: start the Level at about 24 and lower it until only a light scatter of white flecks is left. Aim for 1–2% of the area. Blurred noise is dim, so the right level is low, often around 20.
-
Keep only the flecks
Choose the Magic Wand (W), set Tolerance to 10 and untick Contiguous. Click any black spot, press Delete and Cmd+D. Only the white flecks are left.
Inside a Multiply group, white does nothing to the paper but knocks holes in that group's ink, which is exactly what a dropout looks like.
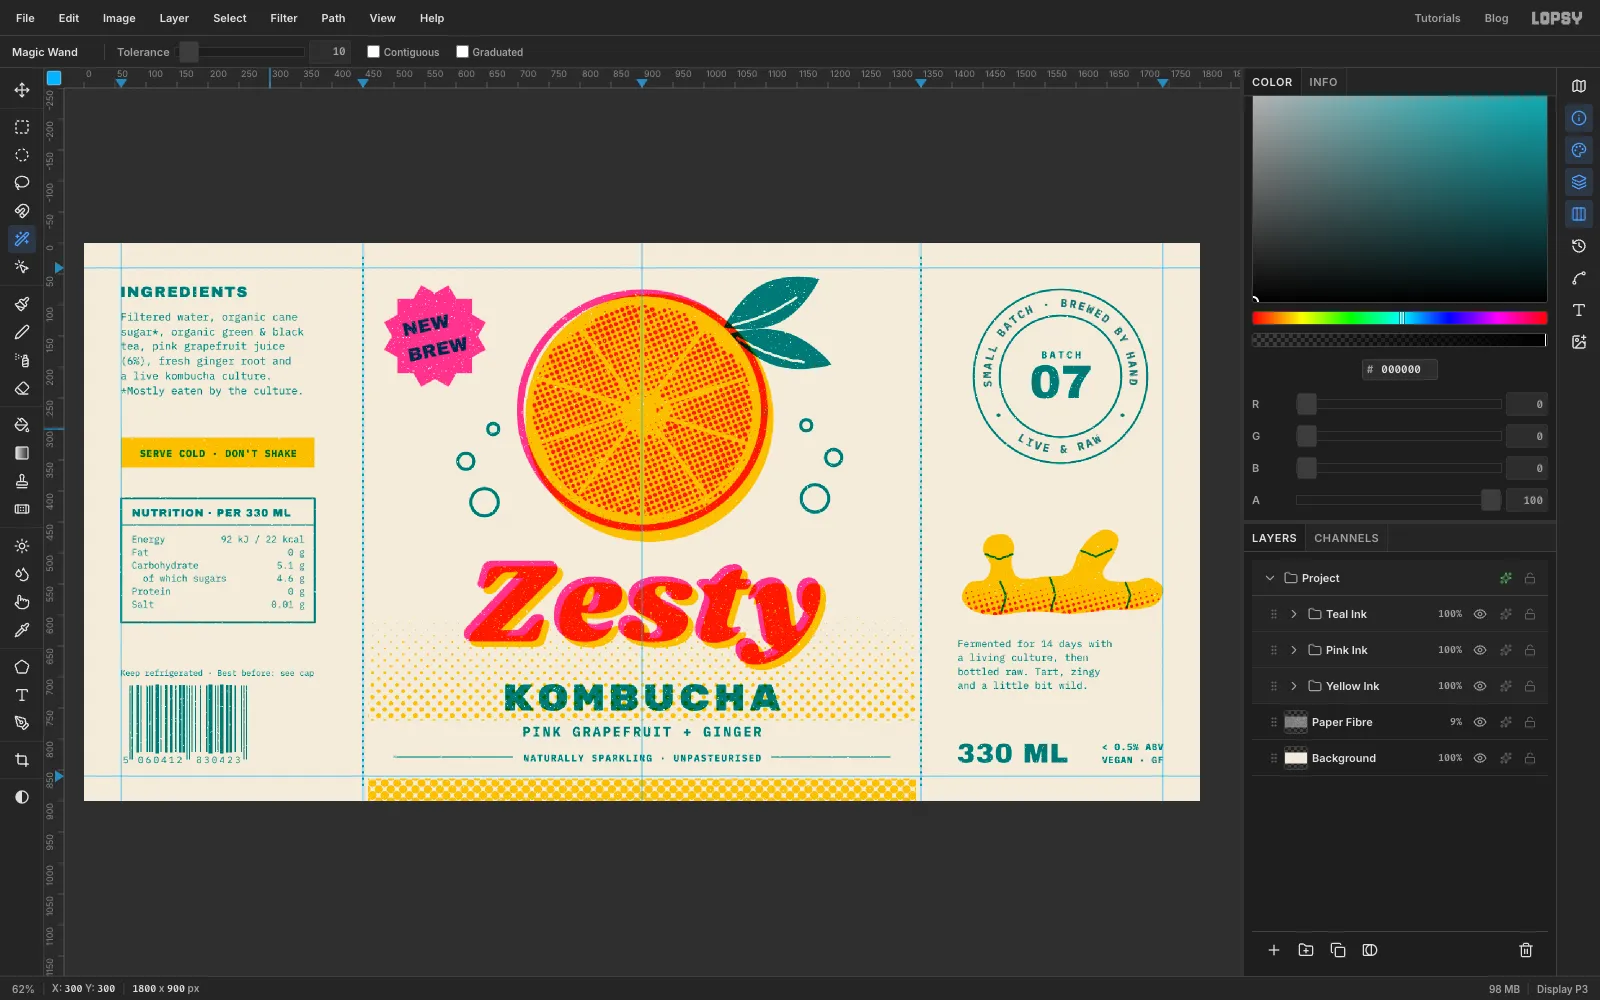
Repeat for Pink Ink (Pink Dropouts) and Teal Ink (Teal Dropouts). Each time you run Add Noise you get a new pattern, so the flecks differ from ink to ink. Use a slightly lower Threshold for teal, since dropouts show most in big flat areas of dark ink.
-
Knock the drums out of register
Last of all, the misregistration. Collapse Pink Ink, click its row to select the whole group, switch to the Move tool, and press Right four times and Up three times. Collapse Teal Ink, select it, and press Left three times and Down twice.
Every pink element moves together, and so does every teal one. Leaf edges, letters and rings now sit a few pixels off the yellow, like a real riso print. If you go too far, Cmd+Z steps back one nudge at a time.
Save with File → Save Project, then File → Quick Export PNG for the finished label.