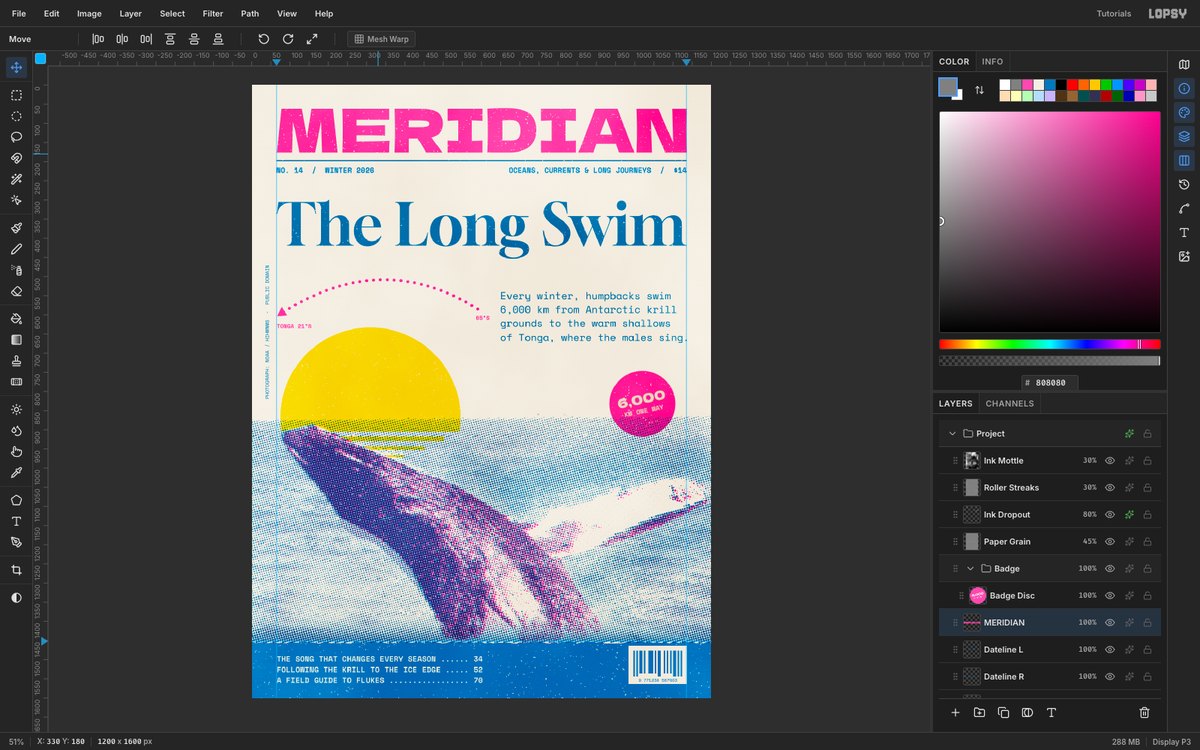
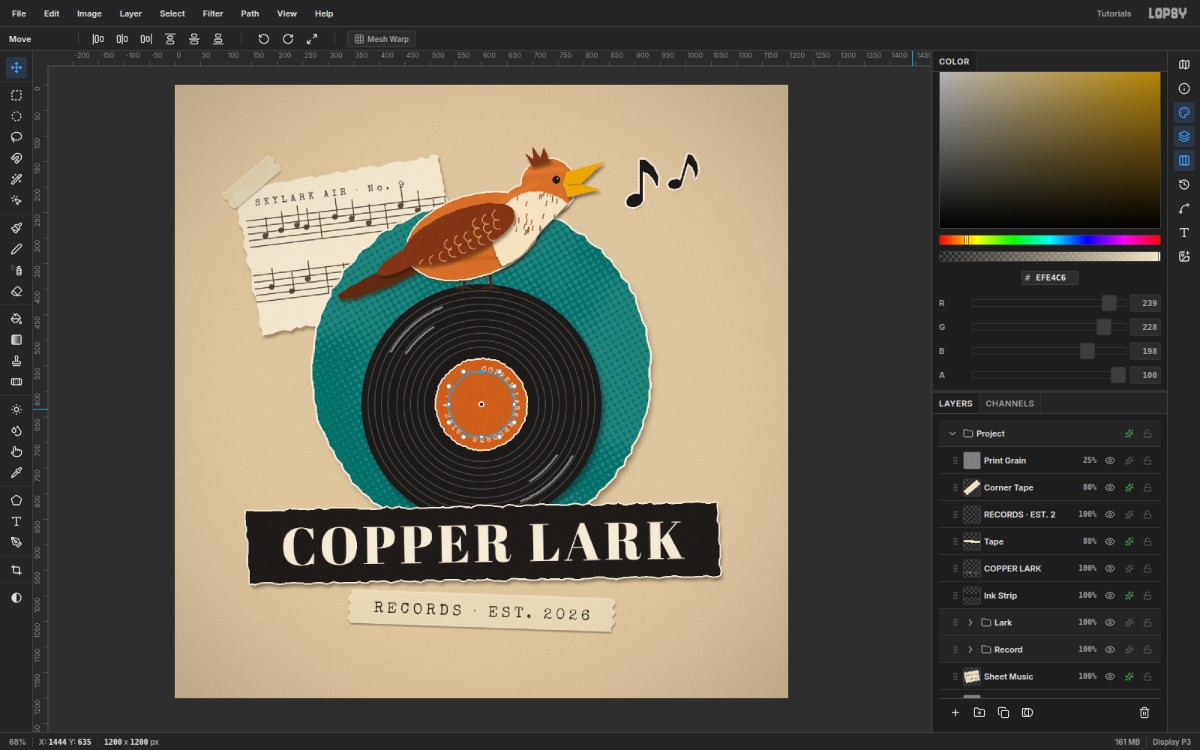
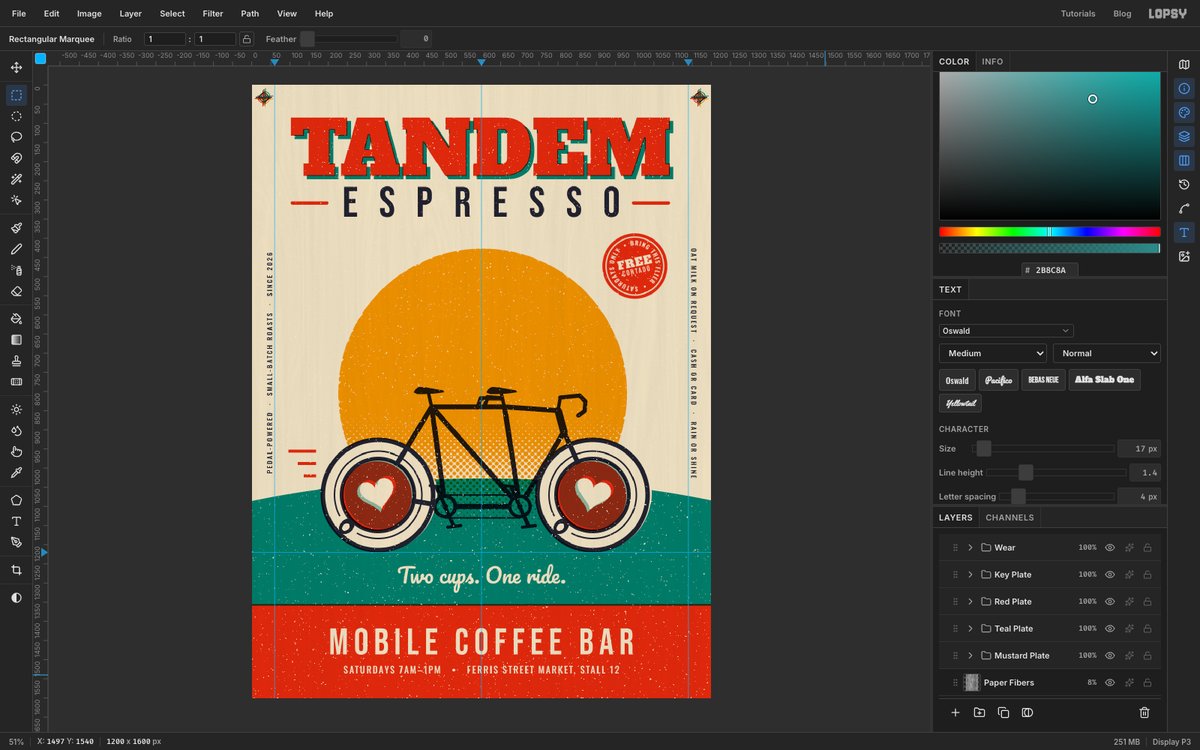
Design a Two-Colour Risograph Logo for a Bike Shop
Build a teal-and-orange risograph brand mark in Lopsy with Multiply plate groups, knockout type, a halftone sunset, misregistration and ink dropouts.
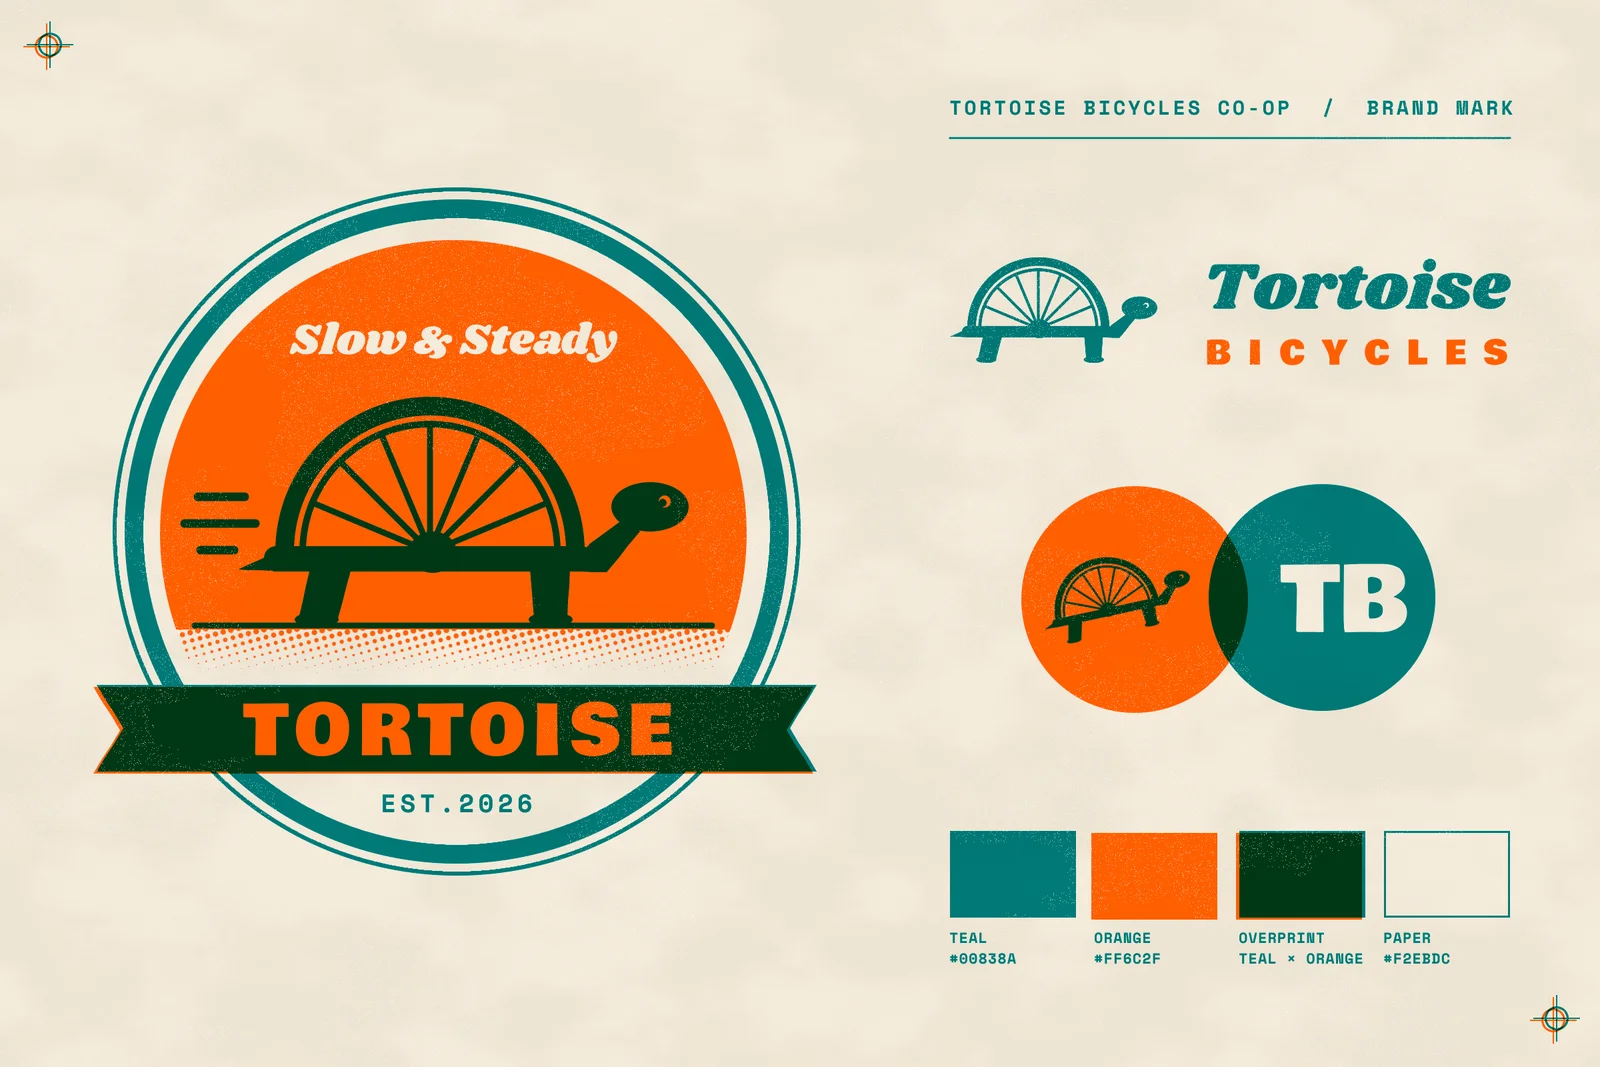
A risograph prints one ink at a time through a stencil drum. That gives riso prints a recognisable look:
- The translucent inks overprint each other to make a third colour.
- Type is often knocked out, cut out of one ink so another ink or the paper shows through.
- Each colour lands a few pixels away from the others.
- Some ink fails to take, leaving small specks of bare paper.
In this tutorial you'll design a riso-style brand mark for a made-up bike repair co-op, Tortoise Bicycles, whose motto is "Slow & Steady". The tortoise's shell is half a bicycle wheel. You'll build a badge, a horizontal lockup, a sticker with a monogram, and the ink chips you'd hand to a printer.
The trick is to work like a riso printer. Everything orange goes in an Orange Plate group and everything teal goes in a Teal Plate group. The Teal Plate group is set to Multiply, so wherever it crosses orange, the two inks mix into a dark green-black, just as real ink does.
Along the way you'll use:
- Intersect selections (Shift+Alt) for half circles, and Select → Shrink for rings.
- The Gradient tool and Filter → Halftone for a dotted sunset.
- Knockout type: ⌘-click a text layer's thumbnail, then Delete from another layer.
- Copy, paste, scale and rotate to reuse the tortoise at smaller sizes.
- Group nudges for misregistration.
- Add Noise, Threshold and Clouds on a layer mask for clumpy ink dropouts.
The fonts are free Google Fonts:
- Bowlby One for the heavy capitals
- Shrikhand for the script
- Space Mono Bold for the small print
The palette is two inks and one paper:
-
Paper
-
Riso teal
-
Riso orange
-
Overprint
teal over orange, never mixed by hand
-
Set up the paper and the two plates
- Create a 2400 × 1600 px document with a White background.
- Set the foreground colour to the paper colour , select the Background layer and choose Edit → Fill.
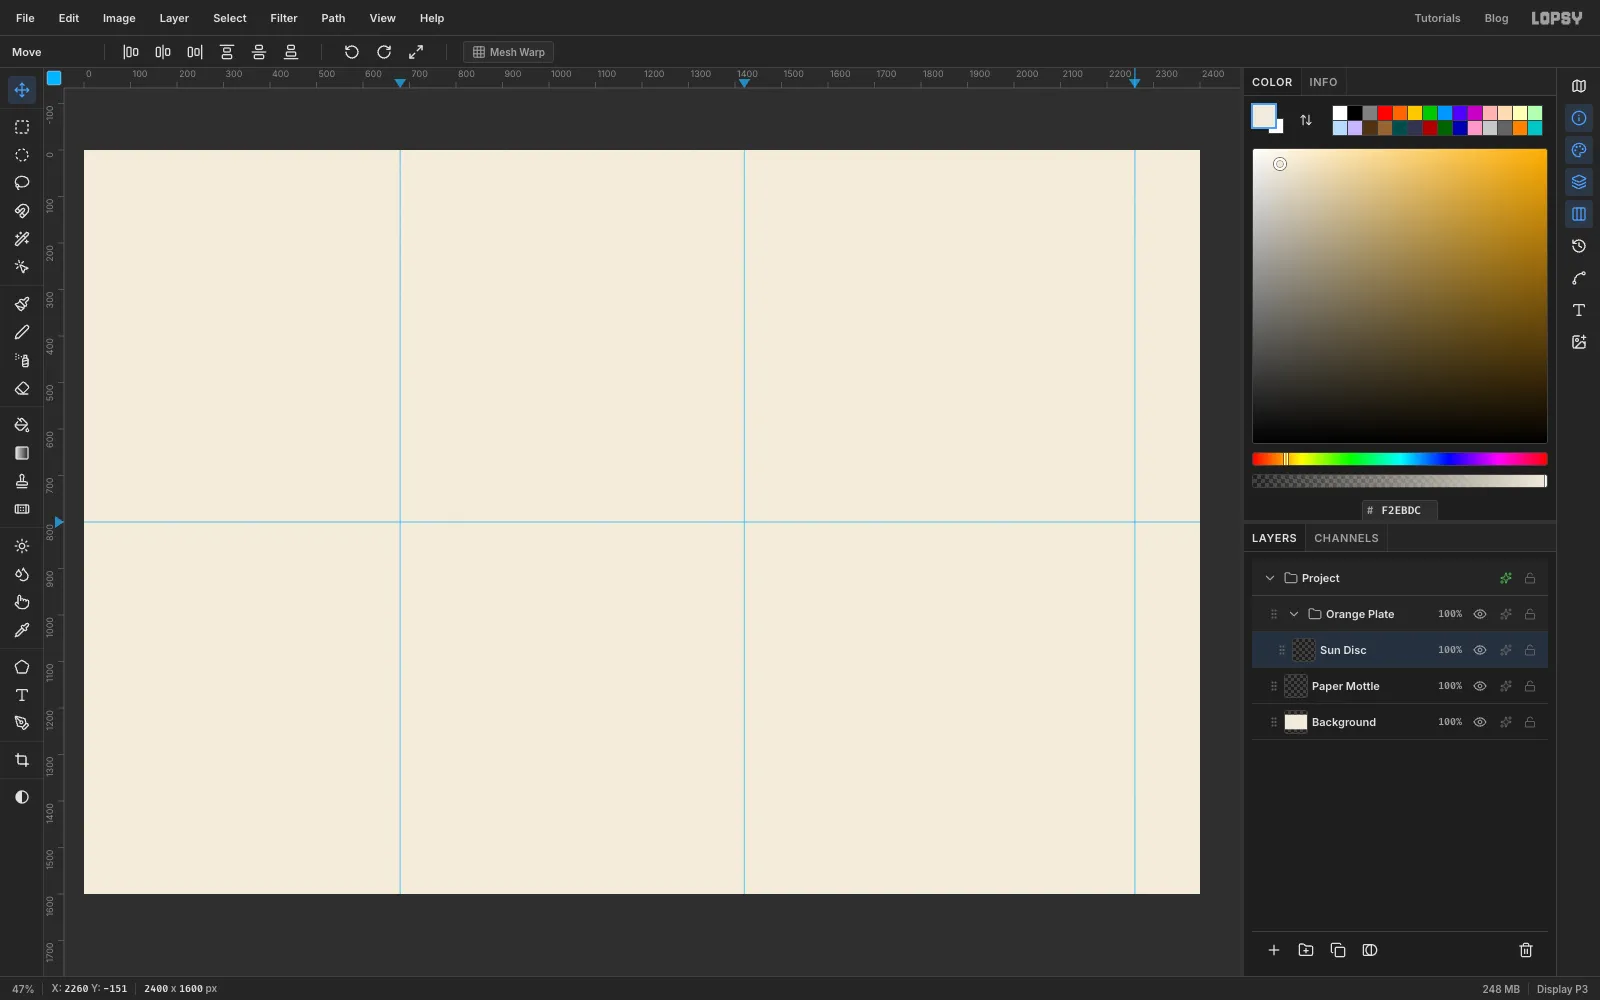
- Click the top ruler to add vertical guides at 680 (the badge's centre), 1420 and 2260 (the edges of the right-hand column). Click the left ruler to add a horizontal guide at 800.
- Rename Layer 1 to
Paper Mottle. You'll use it at the very end. - With
Paper Mottleselected, click New Group at the bottom of the Layers panel and name itOrange Plate. Then click Add Layer to add a layer inside it, and name that layerSun Disc.
-
Draw the sun setting on the horizon
The sun is a big orange circle, sliced flat where it meets the ground.
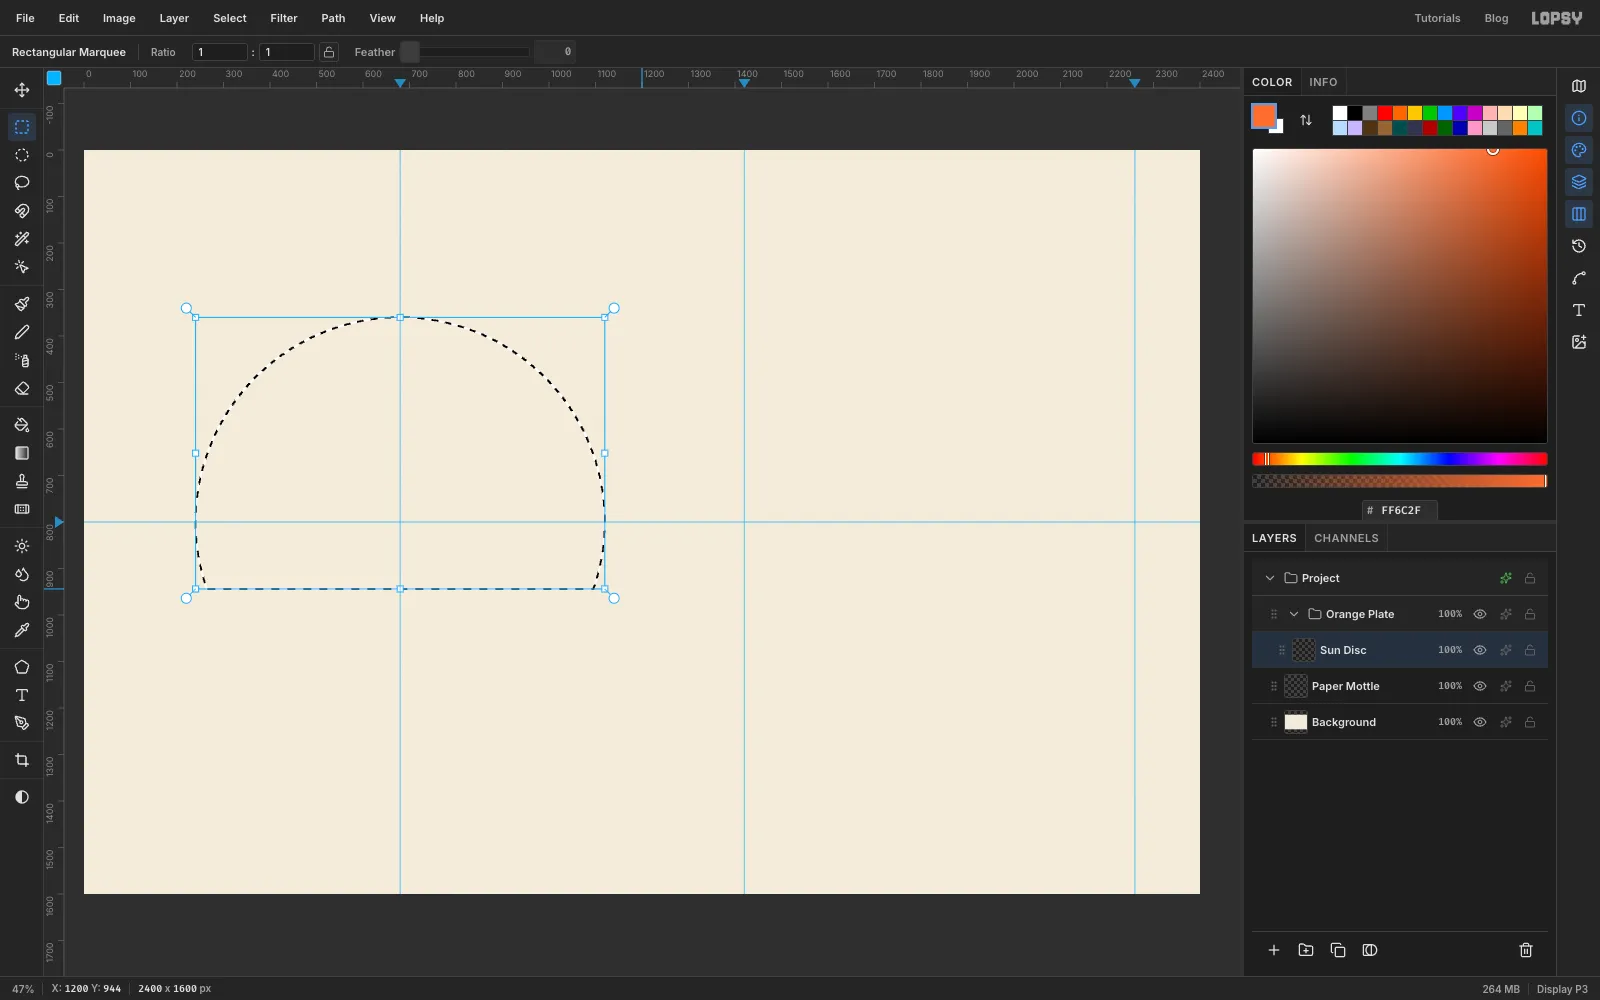
- Pick the Elliptical Marquee. Hold Cmd to keep it round, and drag an 880 px circle centred where the guides cross. It runs from about (240, 360) to (1120, 1240).
- Switch to the Rectangular Marquee. Hold Shift+Alt and drag a rectangle over the top of the circle, stopping about 140 px below the horizontal guide (y 944). Shift+Alt keeps only the overlap. That leaves most of the circle, cut flat at the horizon.
- Set the foreground colour to orange and choose Edit → Fill. Press Cmd+D to deselect.
-
Lay down a short gradient for the halftone
Under the horizon, the sun breaks up into dots that fade out. Halftone turns dark tones into big dots and light tones into small ones. So you'll make a gradient first.
- Click Add Layer and name the new layer
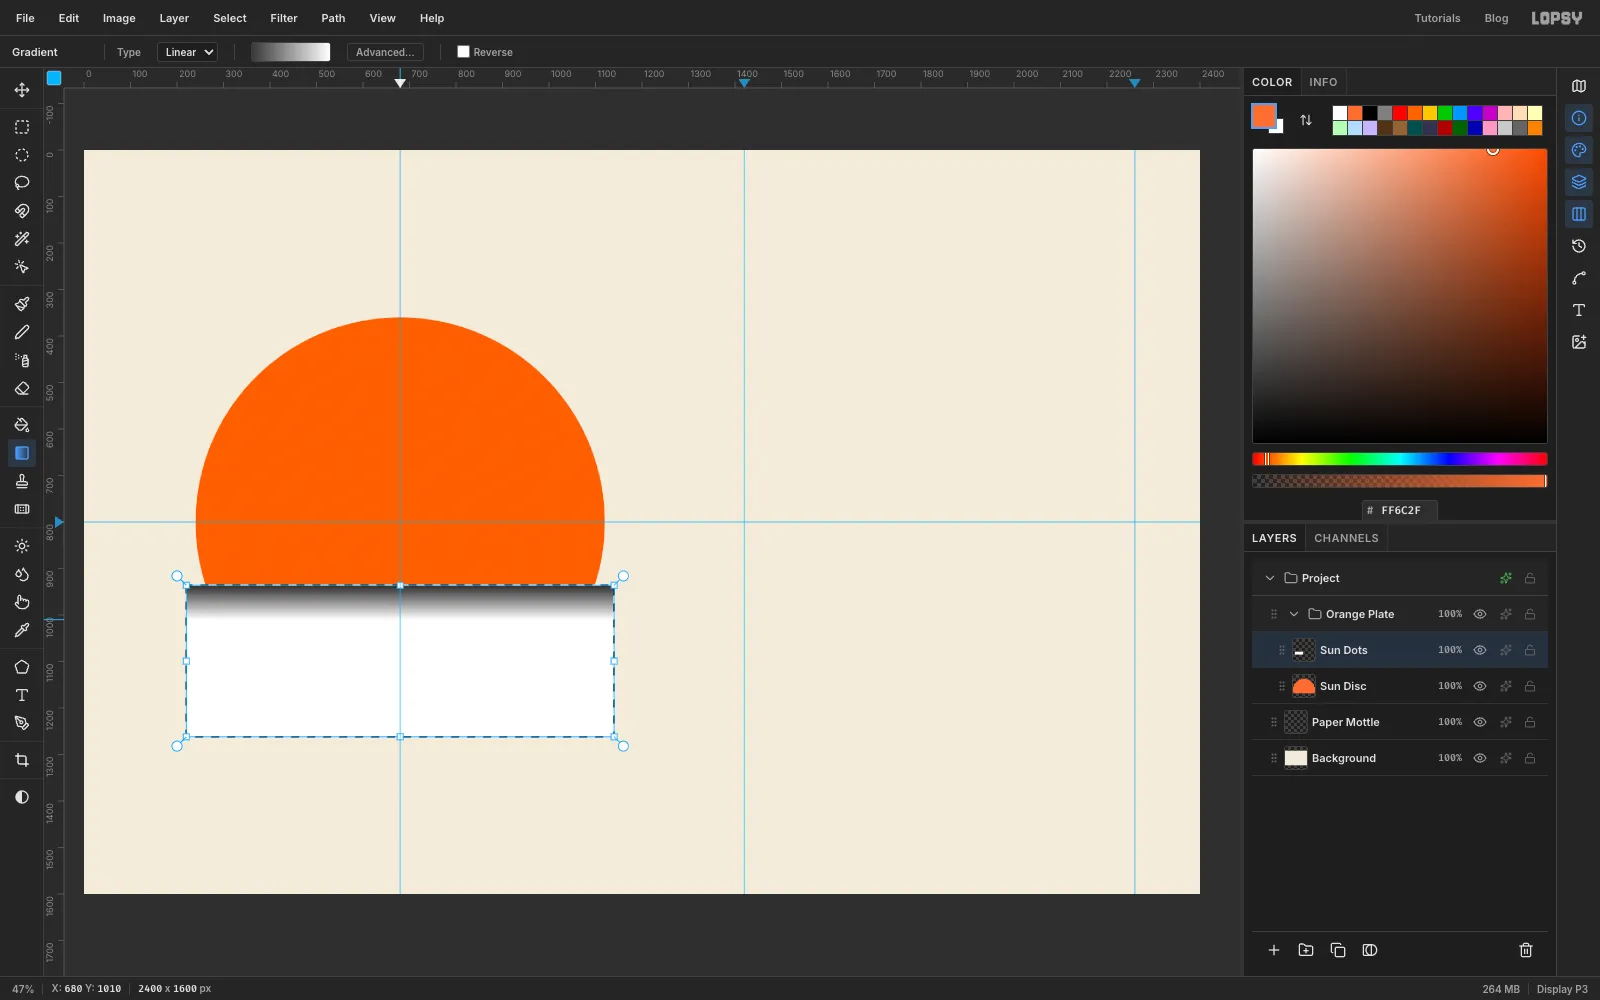
Sun Dots. - Drag a rectangular marquee from a few pixels above the flat bottom of the sun (so there's no gap) down past the bottom of the circle. Make it a little wider than the circle on both sides.
- Pick the Gradient tool, click Advanced… and set the two stops to dark grey and white .
- Drag a short gradient straight down, from the horizon (y 940) to about y 1010. Below that point the rectangle is pure white, and white prints no dots.
- Click Add Layer and name the new layer
-
Halftone the band, then trim it to the circle
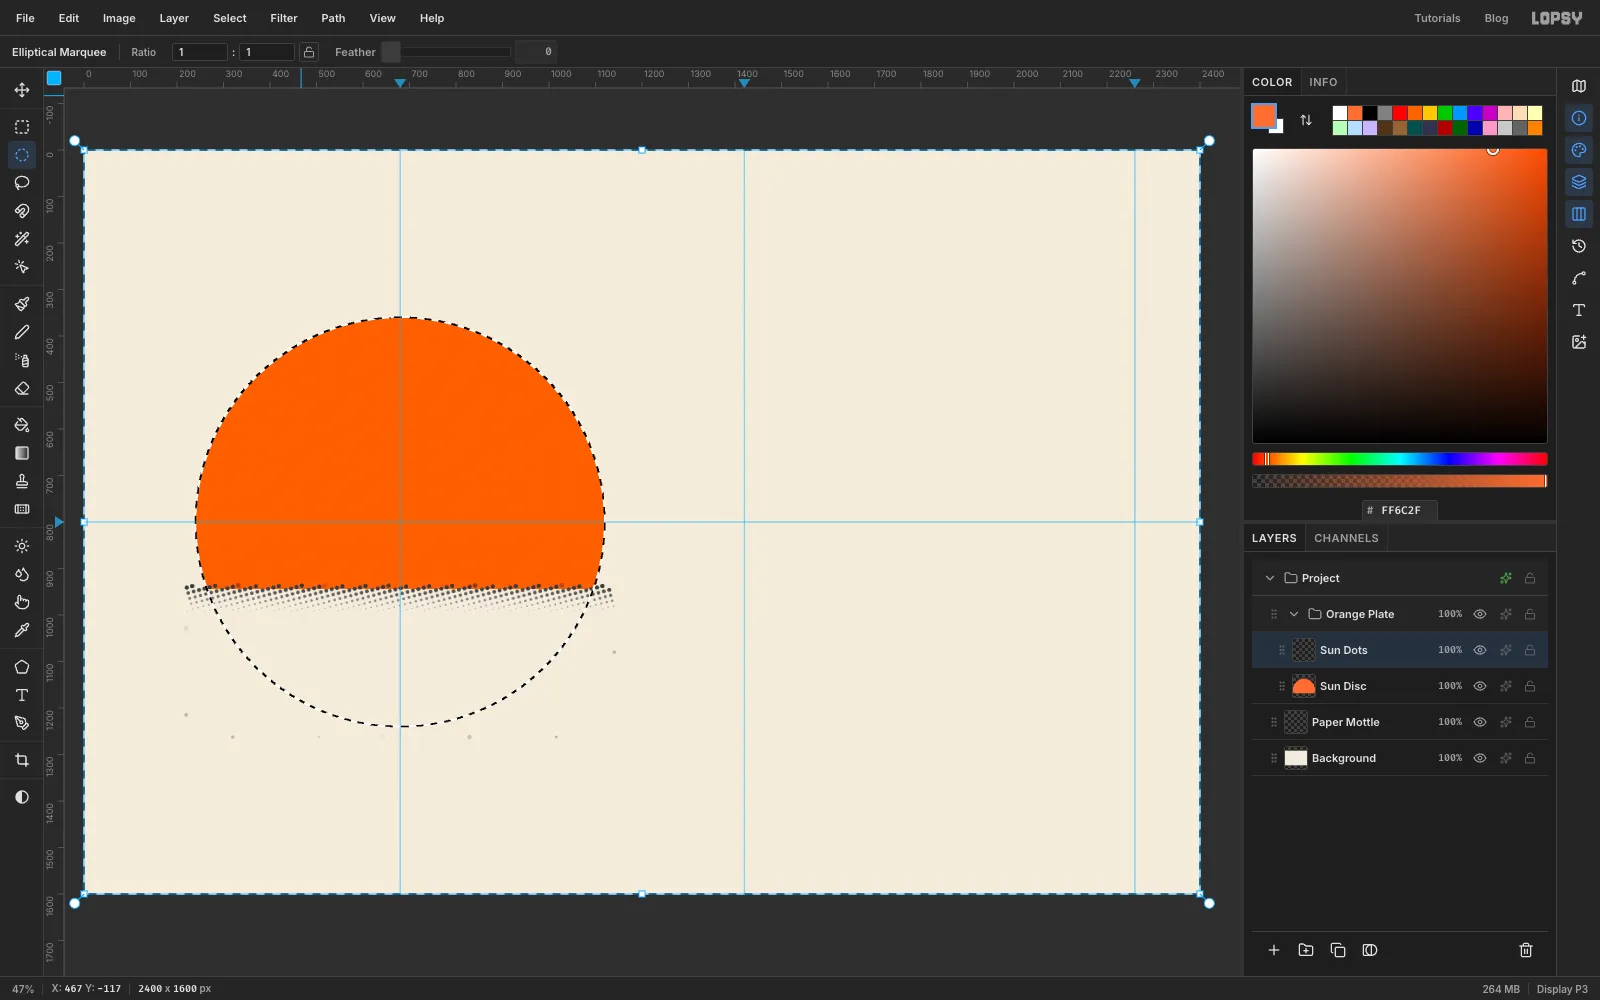
- Press Cmd+D to deselect, then choose Filter → Halftone. Set Dot Size to
12, Angle to15and Softness to1, and click Apply. - Reselect the 880 px circle with the Elliptical Marquee, exactly as before.
- Choose Select → Inverse and press Delete. Now the dots stop at the edge of the sun.
- Press Cmd+D to deselect, then choose Filter → Halftone. Set Dot Size to
-
Recolour the dots orange
The dots are grey. Press Cmd+D, open the Layer effects (✦) for
Sun Dotsand turn on Color Overlay with the same orange . Now the band reads as the sun dissolving into the ground.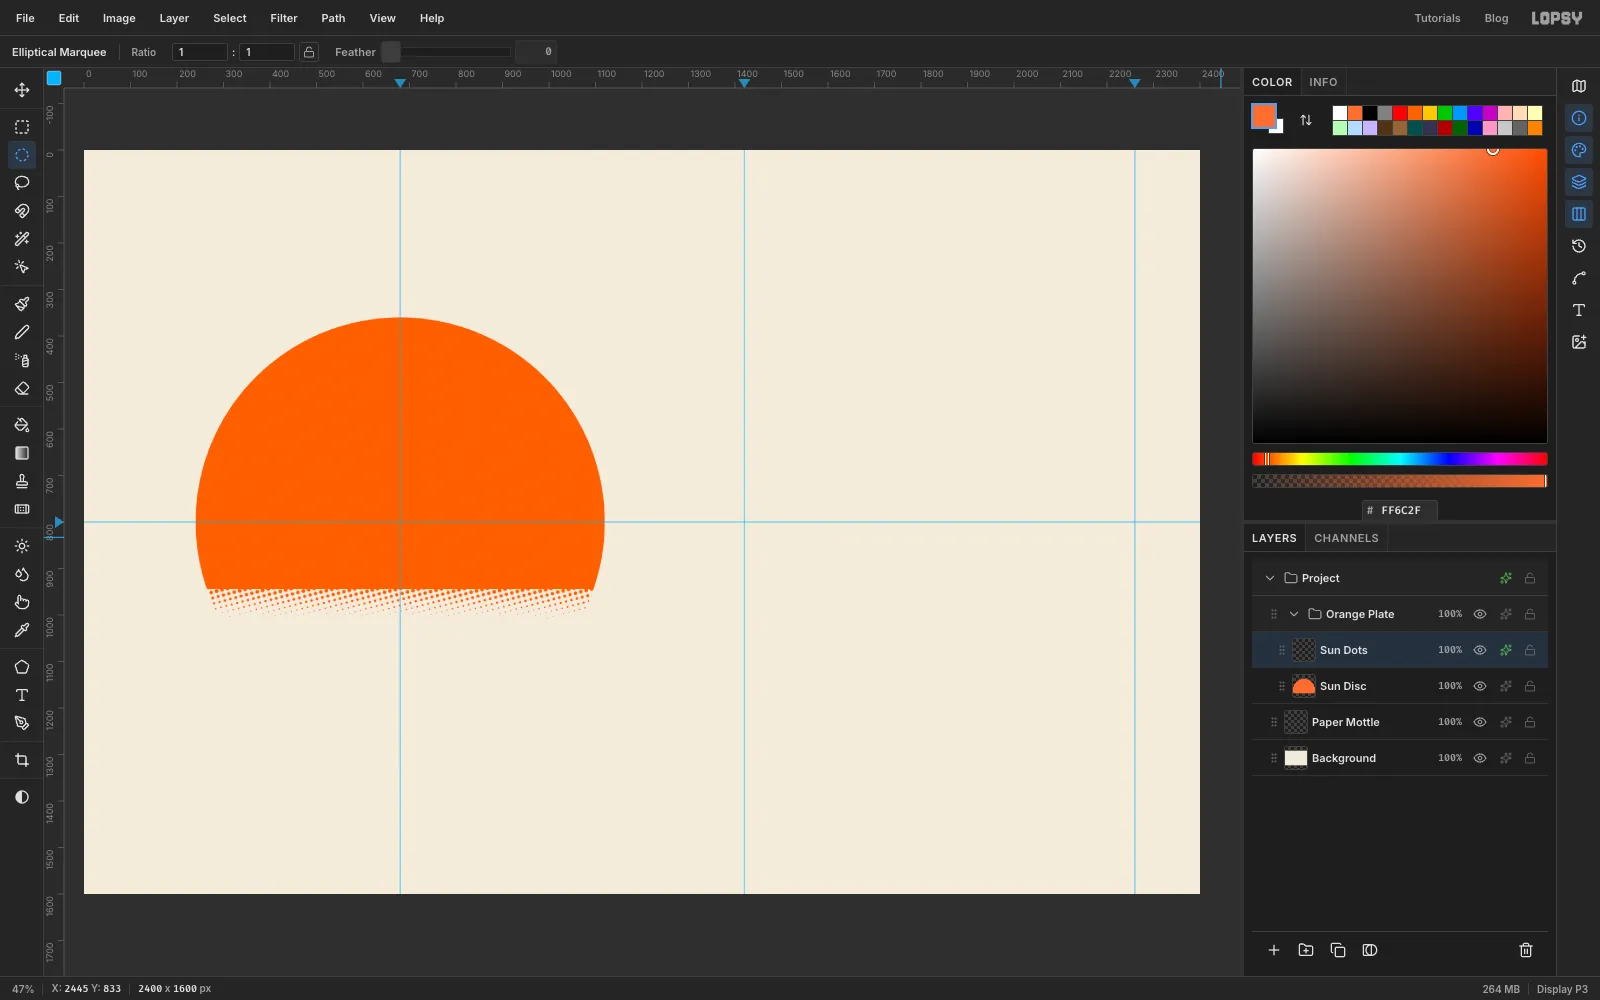
-
Make the teal plate overprint
- Collapse the
Orange Plategroup and select its row. - Click New Group and name it
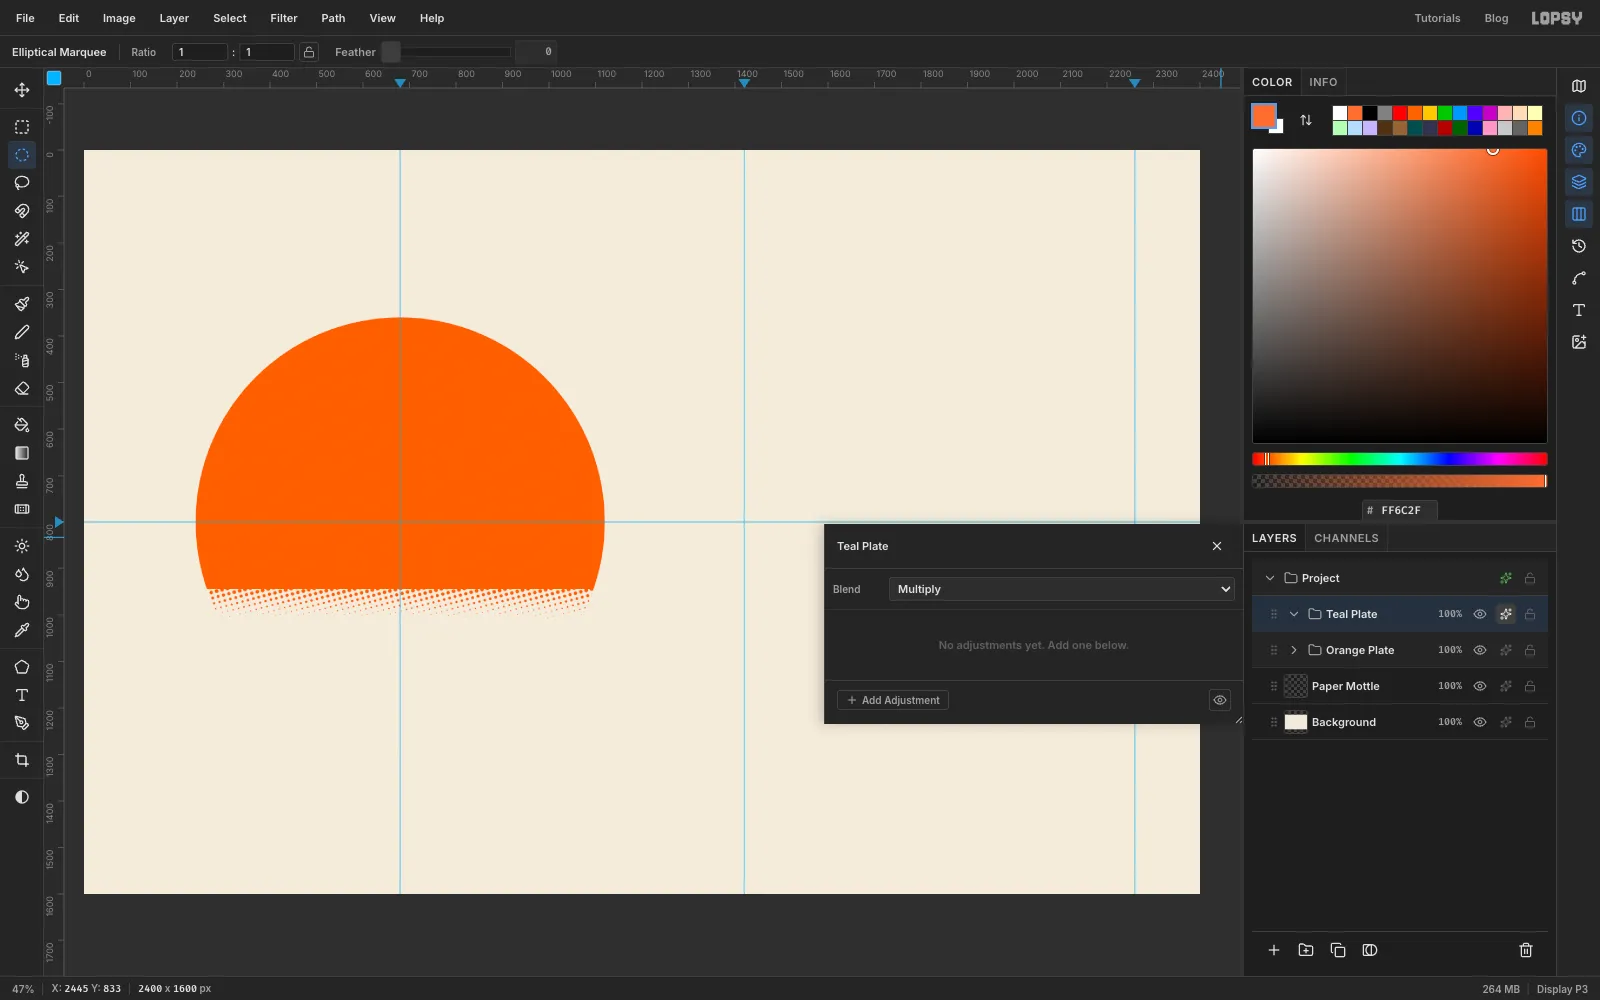
Teal Plate. Because the collapsed group was selected, the new group lands above it, not inside it. - Click the group's Group effects button and set Blend to Multiply.
Everything you put in this group now multiplies over the orange plate, like a second pass through the printer.
- Collapse the
-
Draw the double ring
Click Add Layer inside
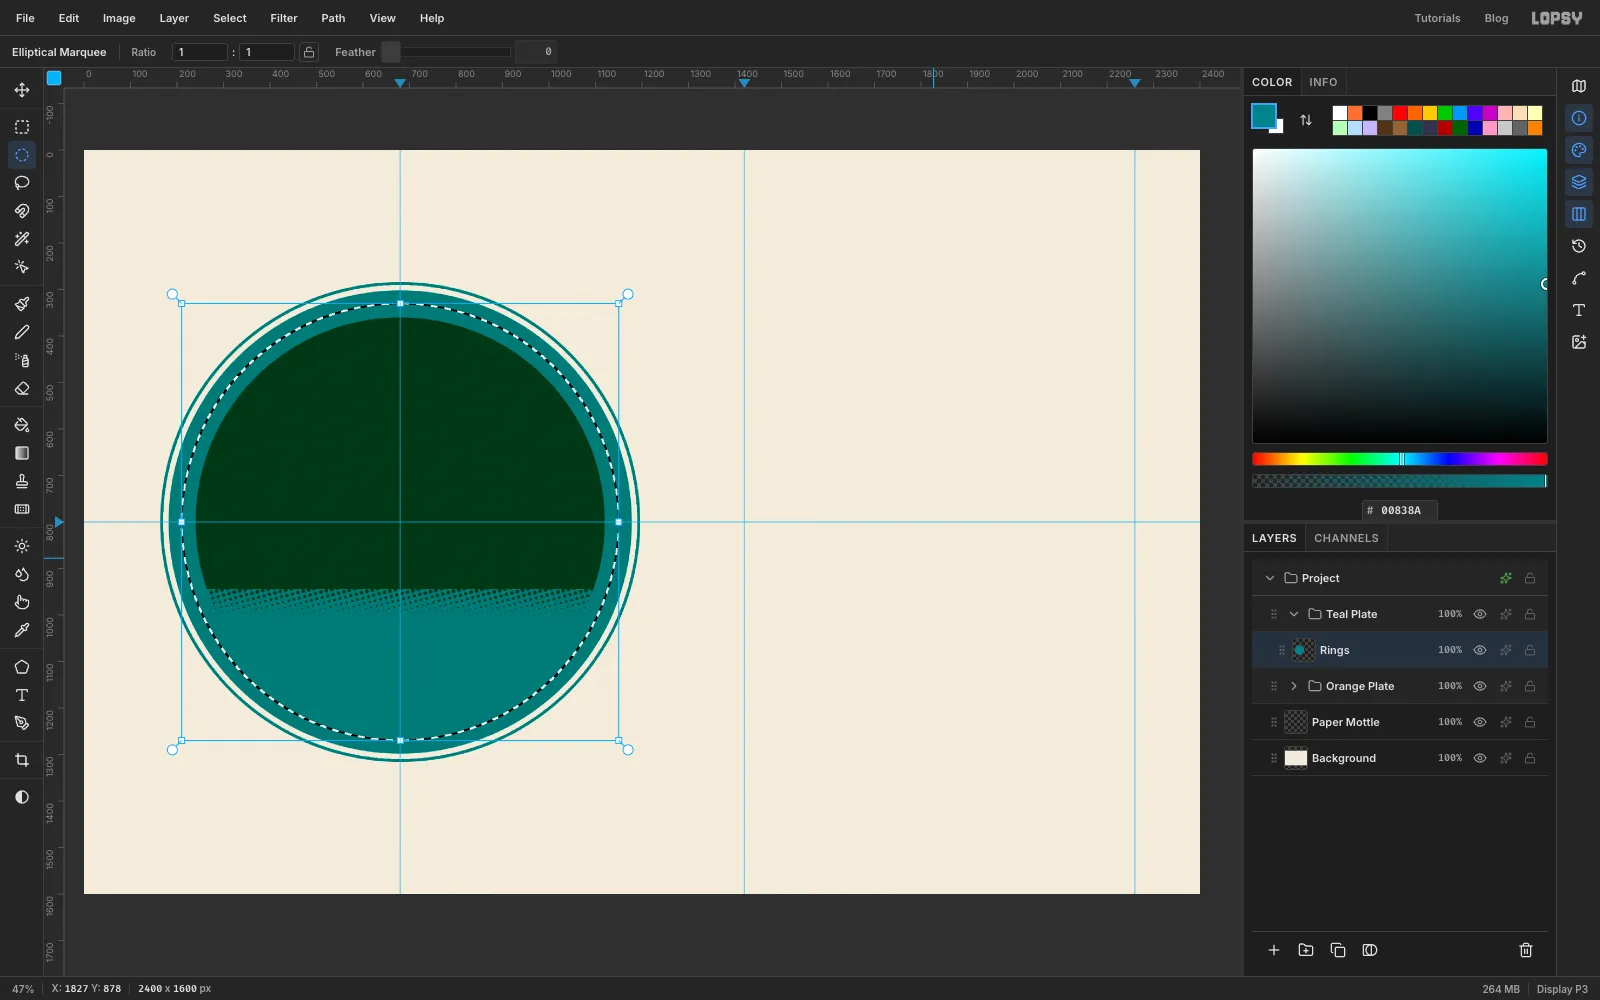
Teal Plate, name itRings, and set the foreground to teal .- Drag a 1032 px circle centred on the guides, choose Edit → Fill, then Select → Shrink by
6and press Delete. That leaves a thin outer ring. - Drag a 996 px circle centred on the guides, Edit → Fill, Select → Shrink by
28, then Delete. That leaves the thick inner ring.
Press Cmd+D when you're done. The rings sit on cream paper, so they print pure teal.
- Drag a 1032 px circle centred on the guides, choose Edit → Fill, then Select → Shrink by
-
Start the shell as a half circle
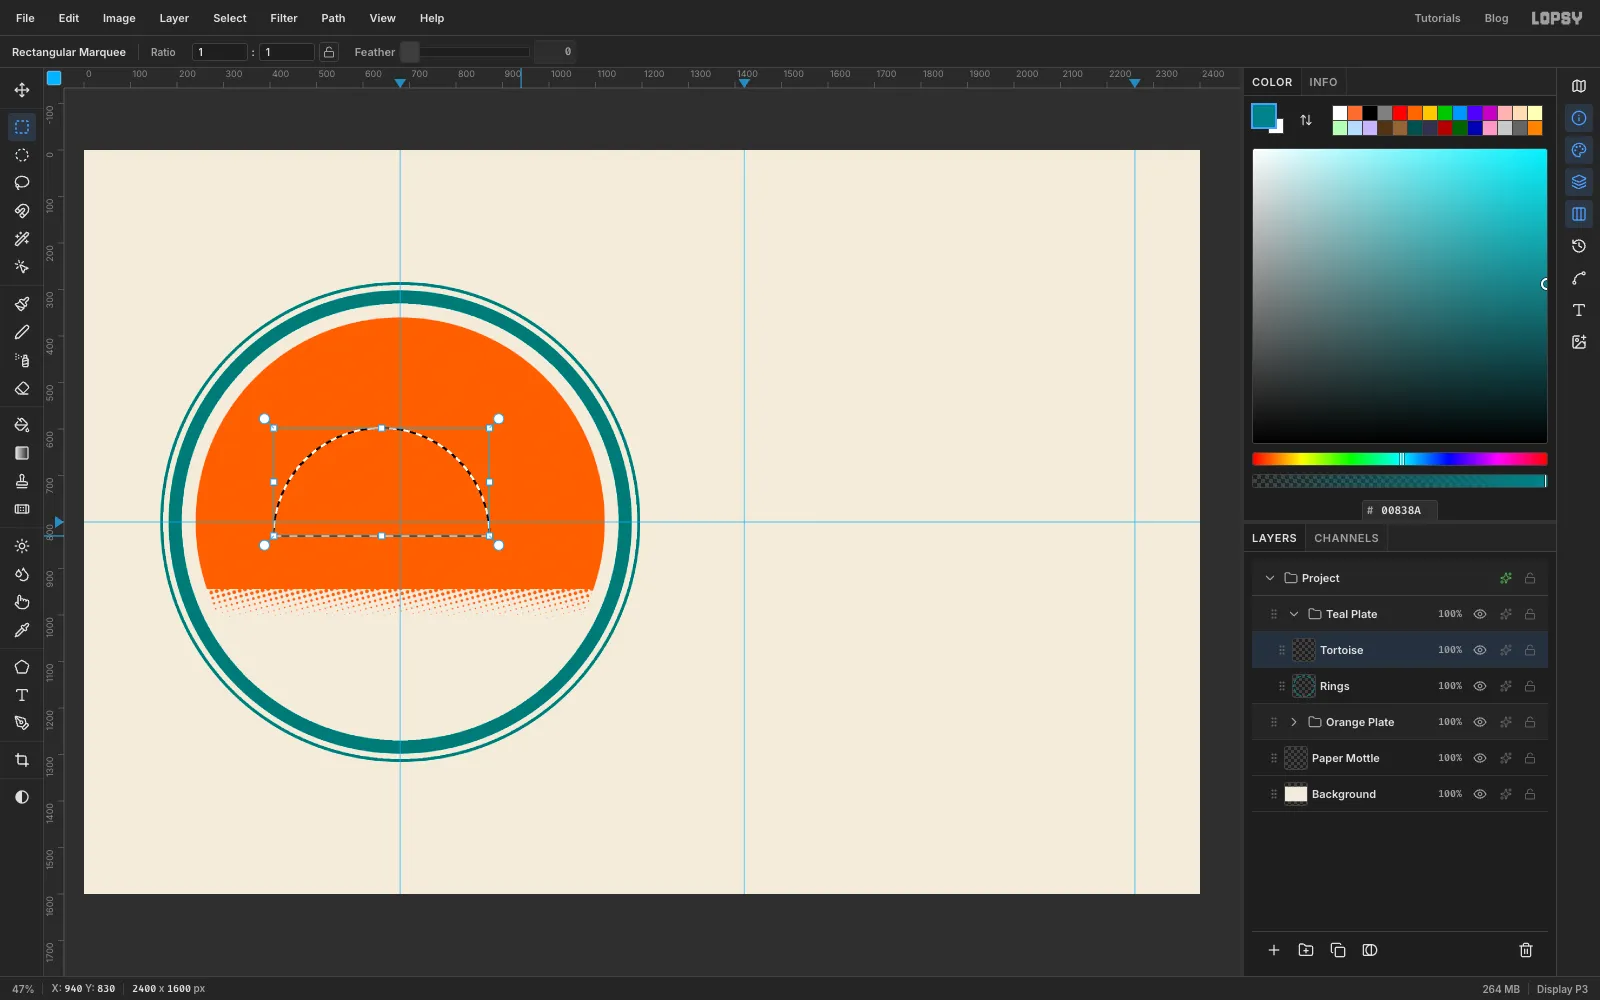
The tortoise's shell is the top half of a bicycle wheel. Its hub sits at (640, 830), a little left of centre, so the head has room on the right.
- Click Add Layer and name the new layer
Tortoise. - Drag a 464 px circle centred on (640, 830).
- With the Rectangular Marquee, hold Shift+Alt and drag over the top half, stopping exactly at y 830. That gives a half circle.
- Fill it with teal. Where the teal crosses the orange sun it prints dark green.
- Click Add Layer and name the new layer
-
Hollow it into a tyre and a rim
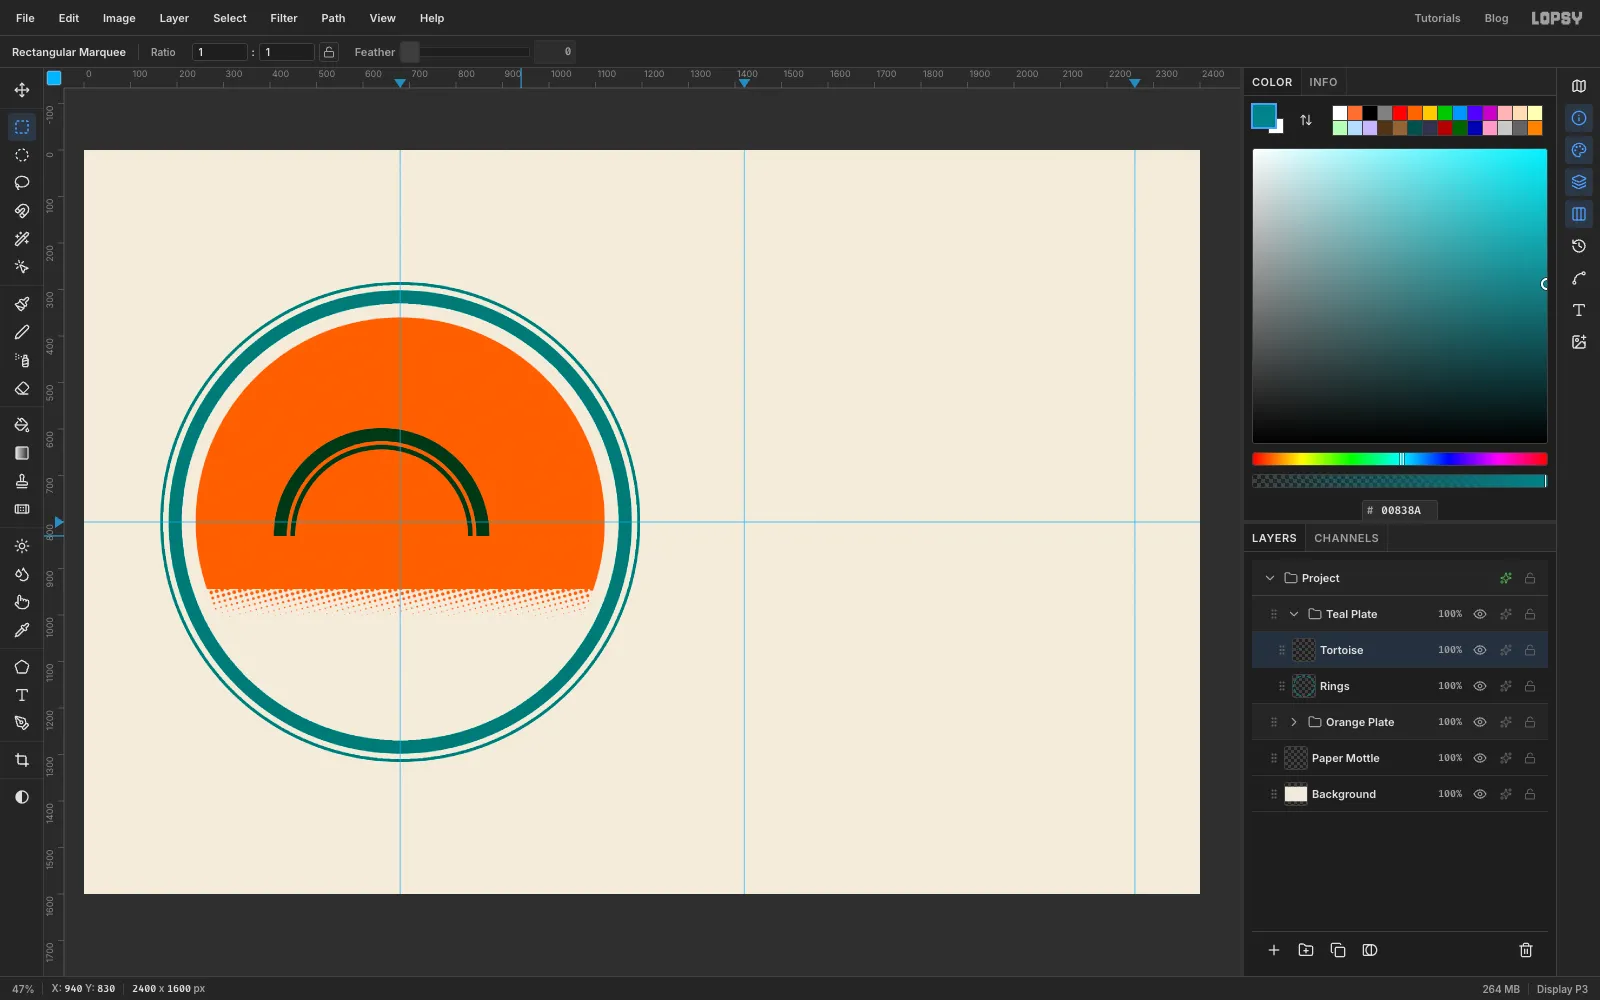
Repeat the same half-circle trick three more times, all centred on (640, 830):
- 408 px half circle → Delete. That hollows out the tyre.
- 392 px half circle → Edit → Fill. That adds the rim.
- 372 px half circle → Delete. That hollows out the rim.
You now have a thick tyre and a thin rim, with the sun showing through. Press Cmd+D.
-
Add spokes and a hub
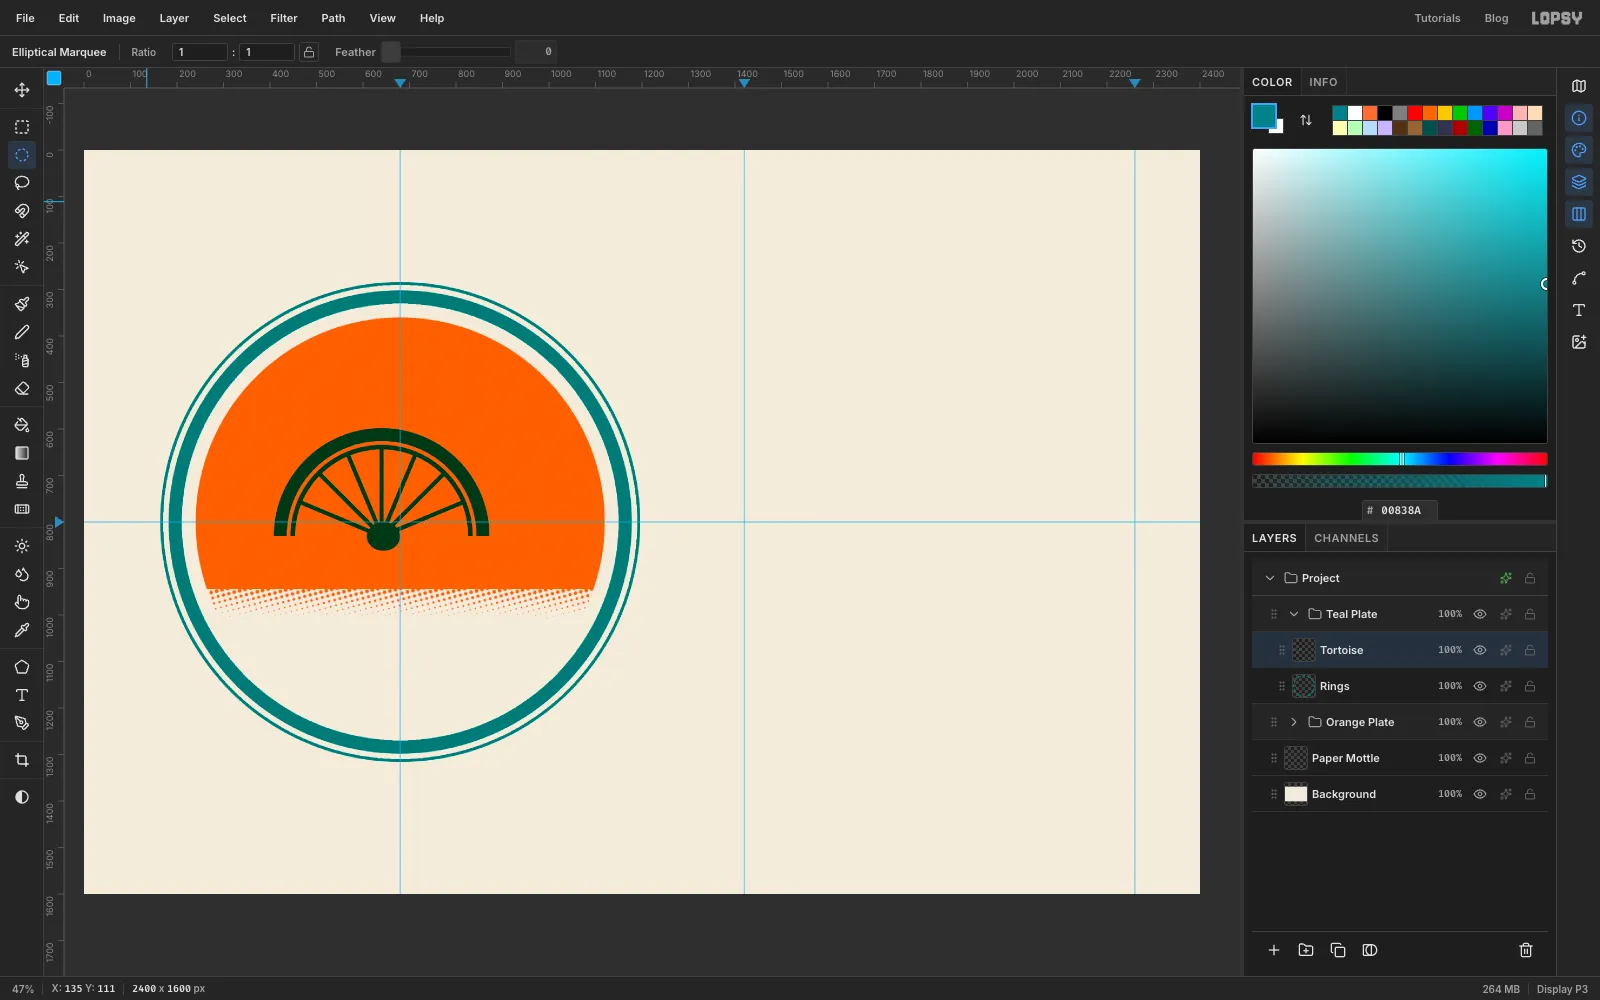
- Press Cmd+D. Pick the Brush, set Size to
10and Hardness to100. - For each spoke, click just outside the hub, then Shift-click at the rim. Shift-click draws a straight line from your last click. Space seven spokes evenly, roughly every 22.5° from left to right.
- Drag a 64 px circle on the hub, fill it and press Cmd+D.
- Press Cmd+D. Pick the Brush, set Size to
-
Give the shell a base
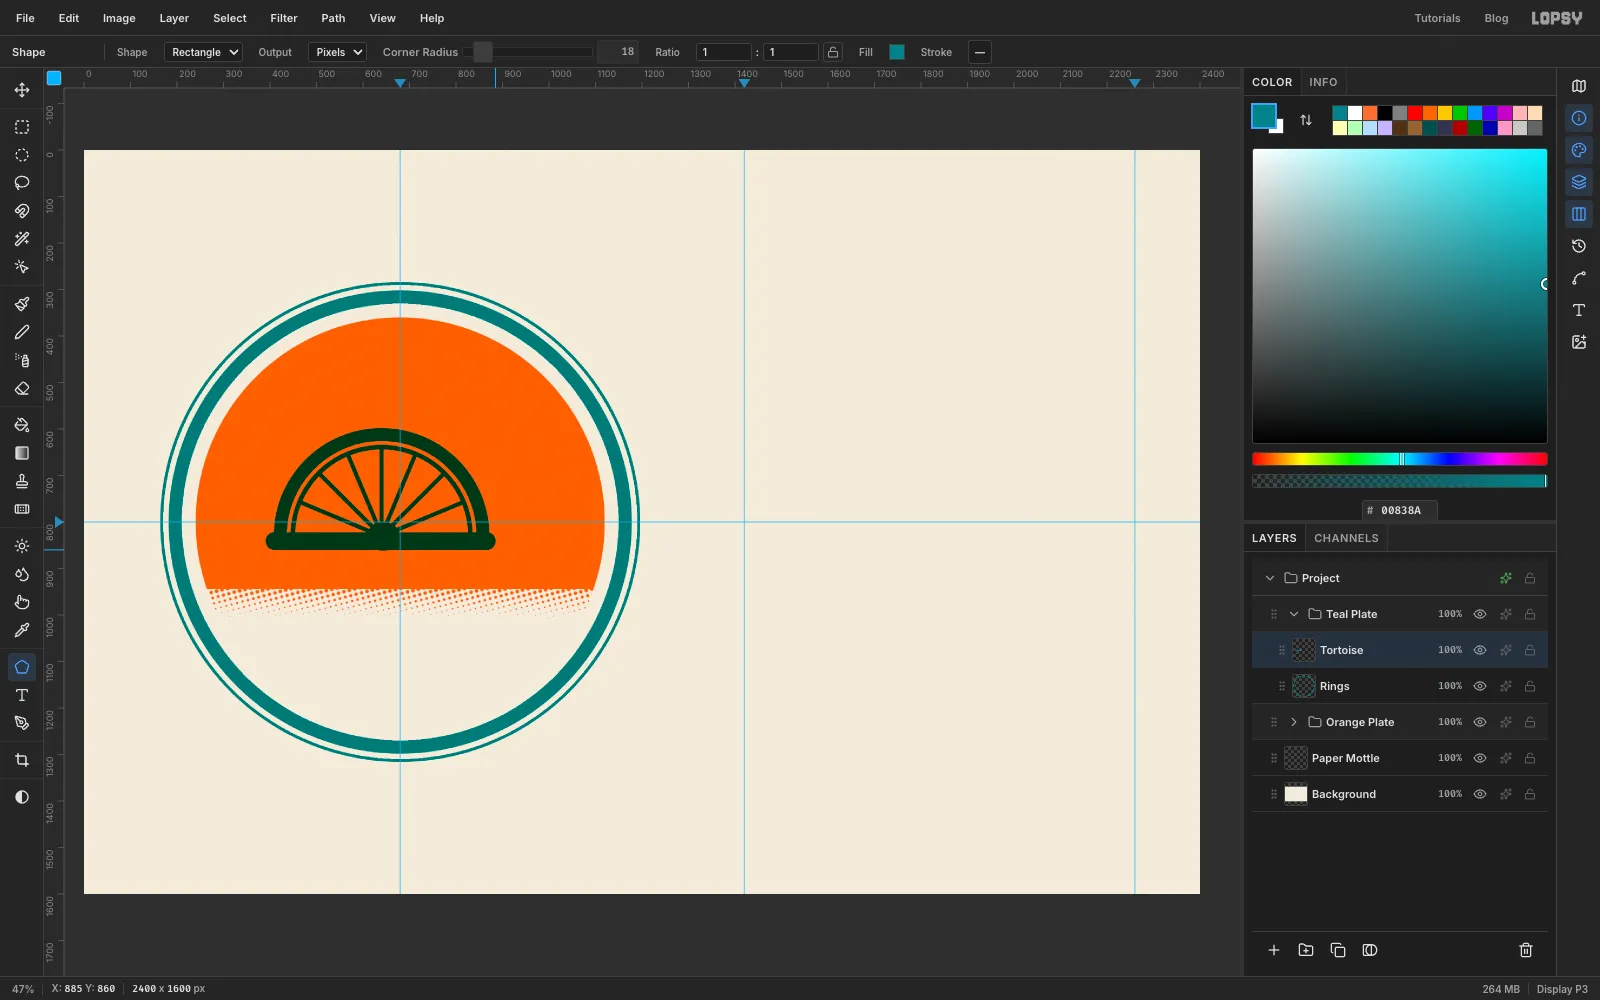
- Pick the Shape tool and set it to Rectangle. Set Corner Radius to
18and the fill colour to teal. - Shapes grow out from where you press. Press just under the hub and drag out a pill about 38 px tall that runs a little past both ends of the wheel.
- Pick the Shape tool and set it to Rectangle. Set Corner Radius to
-
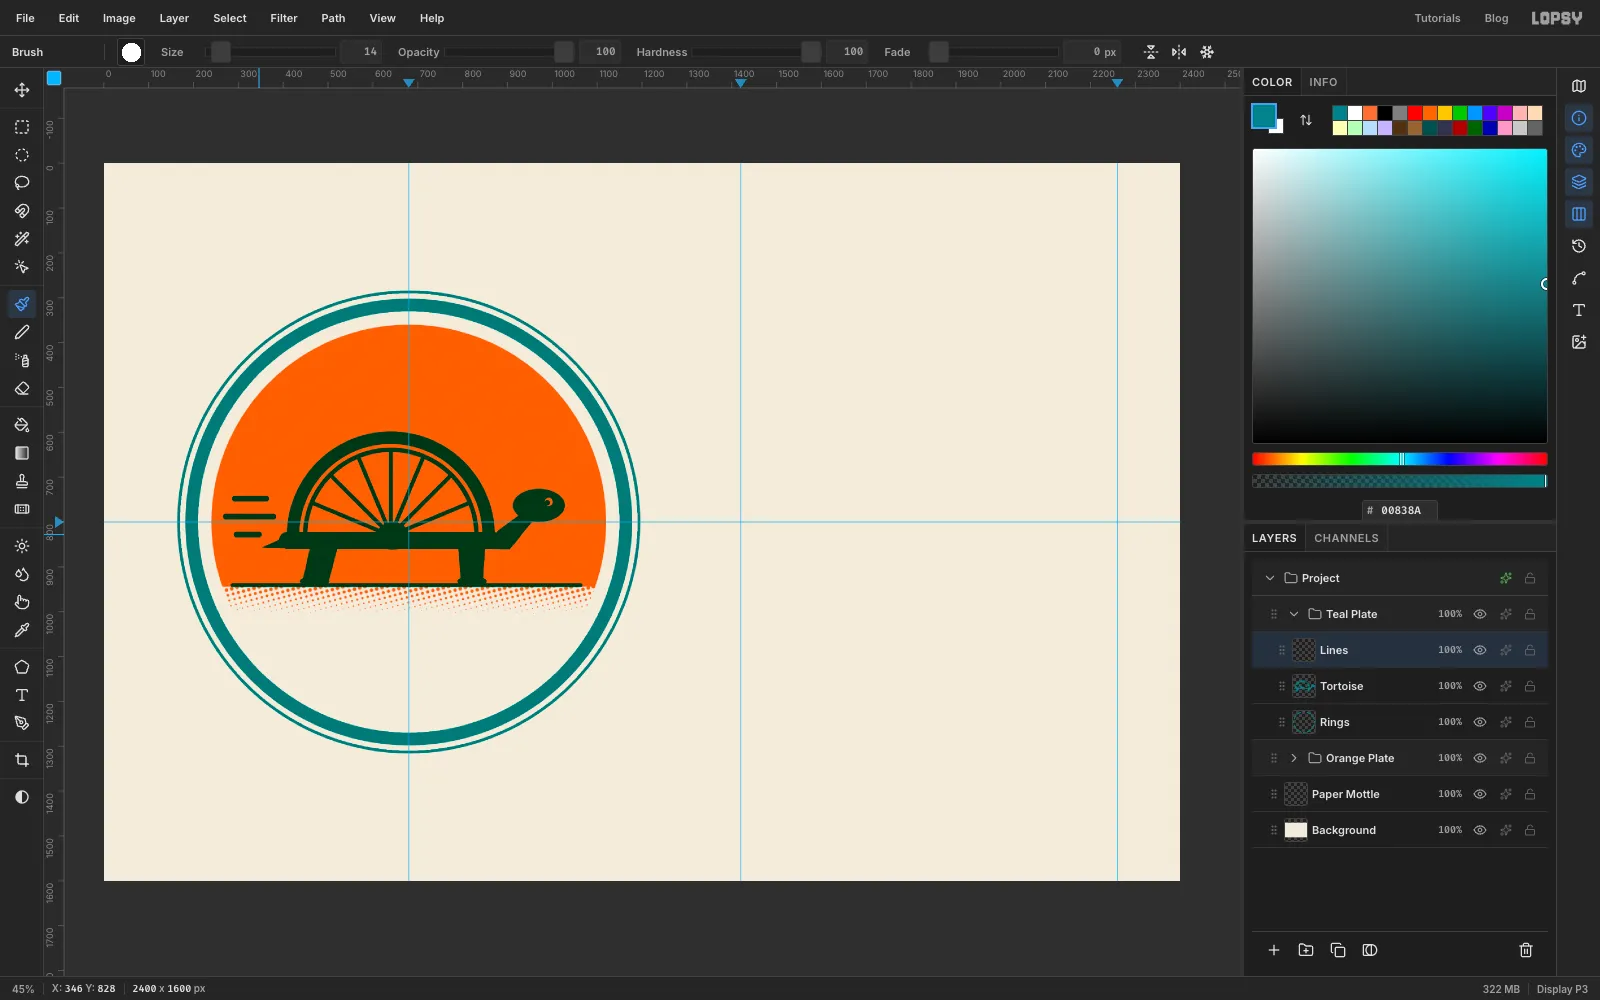
Draw the head, legs and tail
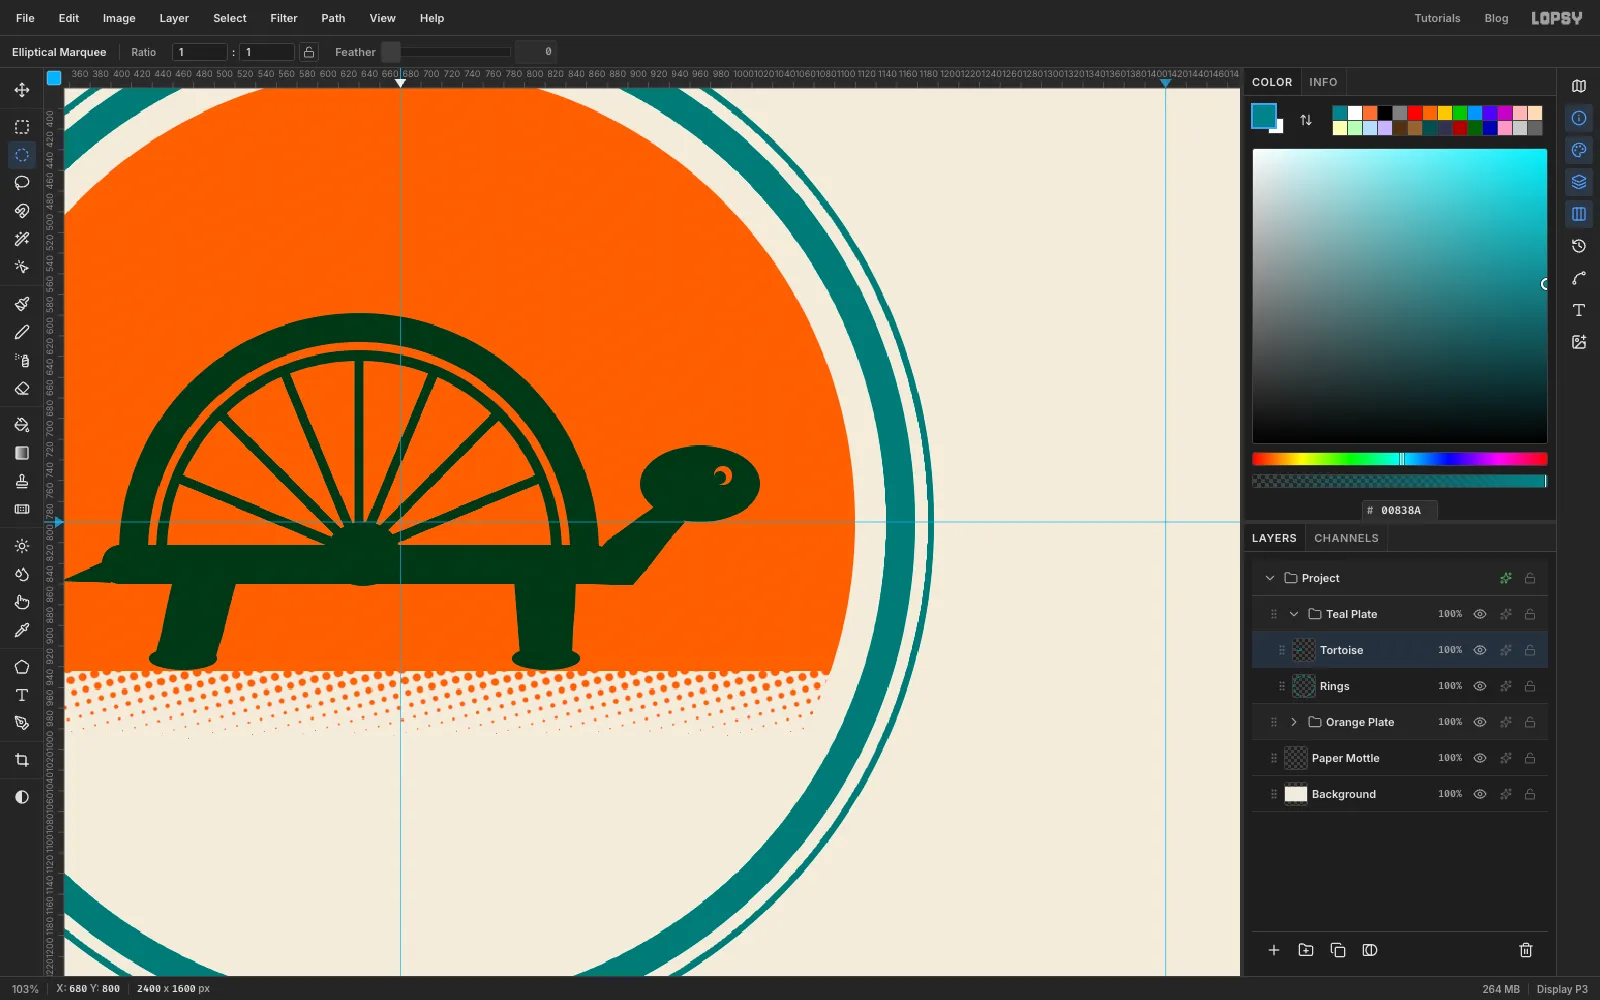
Keep working on the
Tortoiselayer with teal, and fill each selection as you make it.- Neck: With the Lasso, draw a tapered shape from the front of the base up and to the right. Make it about 60 px wide where it meets the shell and about 30 px wide at the head.
- Head: Drag an oval marquee about 116 × 84 px over the top of the neck, a little higher than the shell's halfway point, and fill it.
- Eye: Drag an 18 px circle near the front of the head and press Delete, so the orange shows through. Then fill a 12 px circle slightly behind its centre. A crescent of orange is left as a catch-light.
- Tail: Lasso a small triangle pointing back from the left end of the base.
- Legs: Lasso two tapered legs, about 60 px wide at the top and 50 px at the foot, running from the base down to just above the flat bottom of the sun. Angle the back leg backwards and keep the front leg straight, so it looks like a stride. Under each one, fill a flat 66 × 22 px ellipse for a foot.
Press Cmd+D when the tortoise is done. Otherwise the next brush strokes are clipped to the last selection.
-
Add the ground and speed lines
- Click Add Layer and name it
Lines. - With the Brush at Size
10, click about 25 px inside the sun's left edge, level with the soles of the feet. Shift-click the same distance inside the right edge. - Change the Size to
14and draw three short horizontal speed lines behind the tail. Keep them inside the sun, and make the middle one the longest. It's a tortoise, so the joke only works if they're short.
- Click Add Layer and name it
-
Draw the ribbon banner
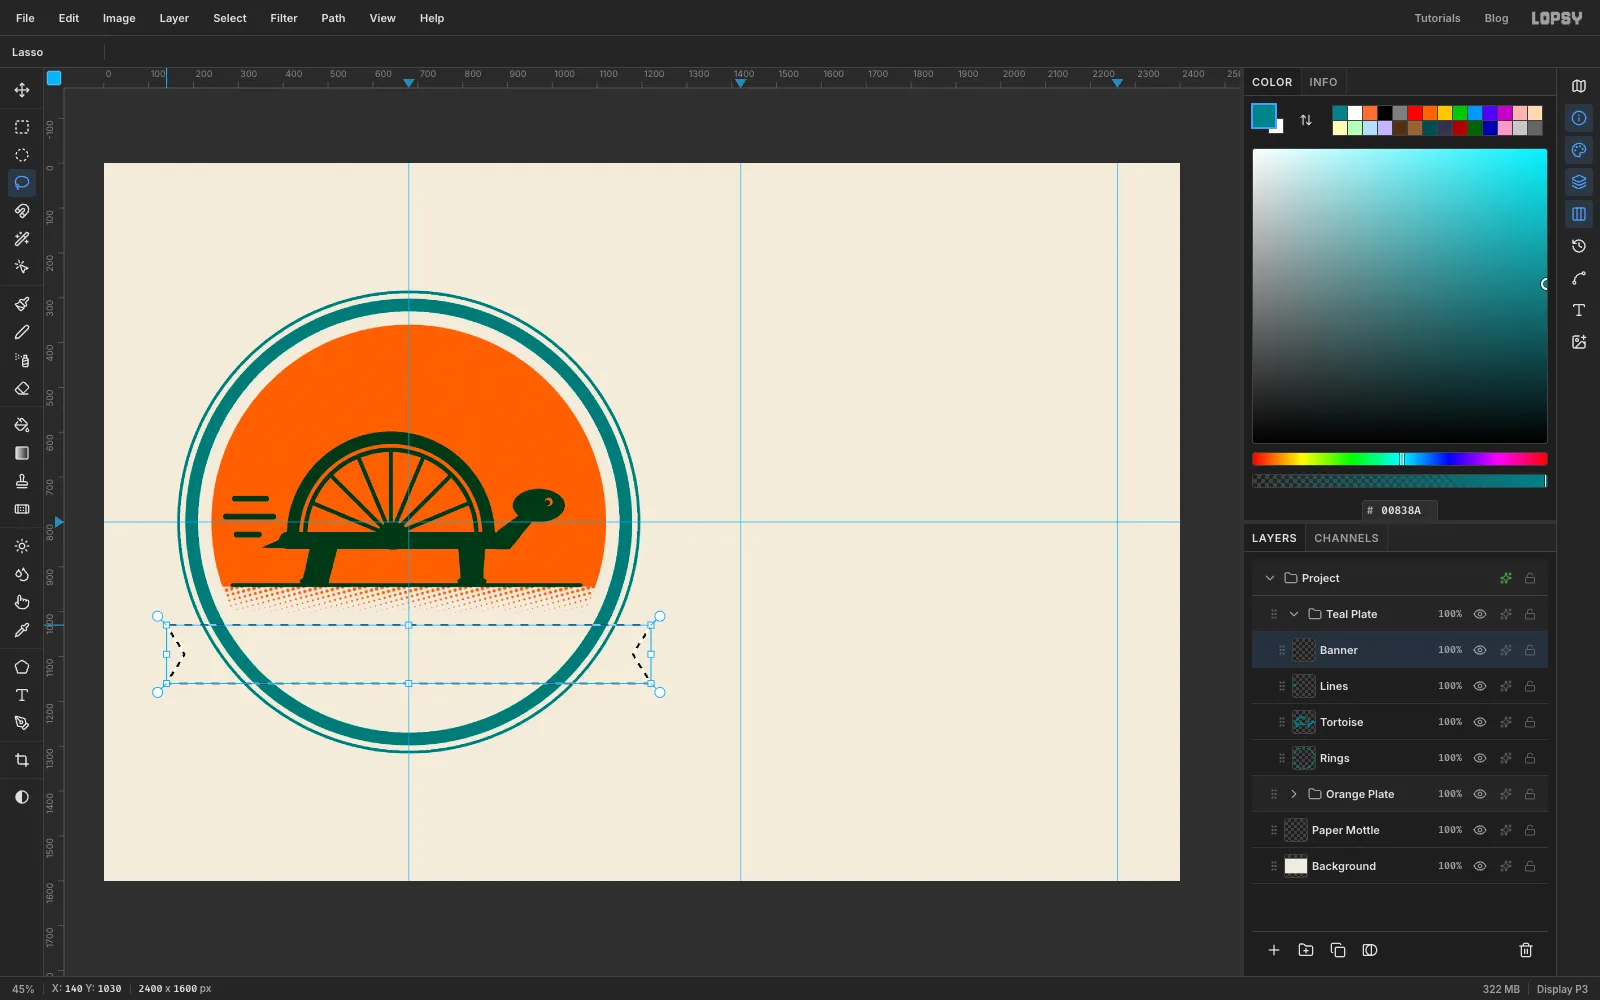
- Click Add Layer and name it
Banner. - Drag a rectangular marquee 130 px tall, from (140, 1030) to (1220, 1160). It's longer than the rings on both sides.
- Switch to the Lasso. Hold Alt and draw a small triangle over each end, about 40 px deep, to cut a V-notch. Alt subtracts from the selection.
- Fill it with teal and press Cmd+D. Where it crosses the rings and the paper, it prints teal.
- Click Add Layer and name it
-
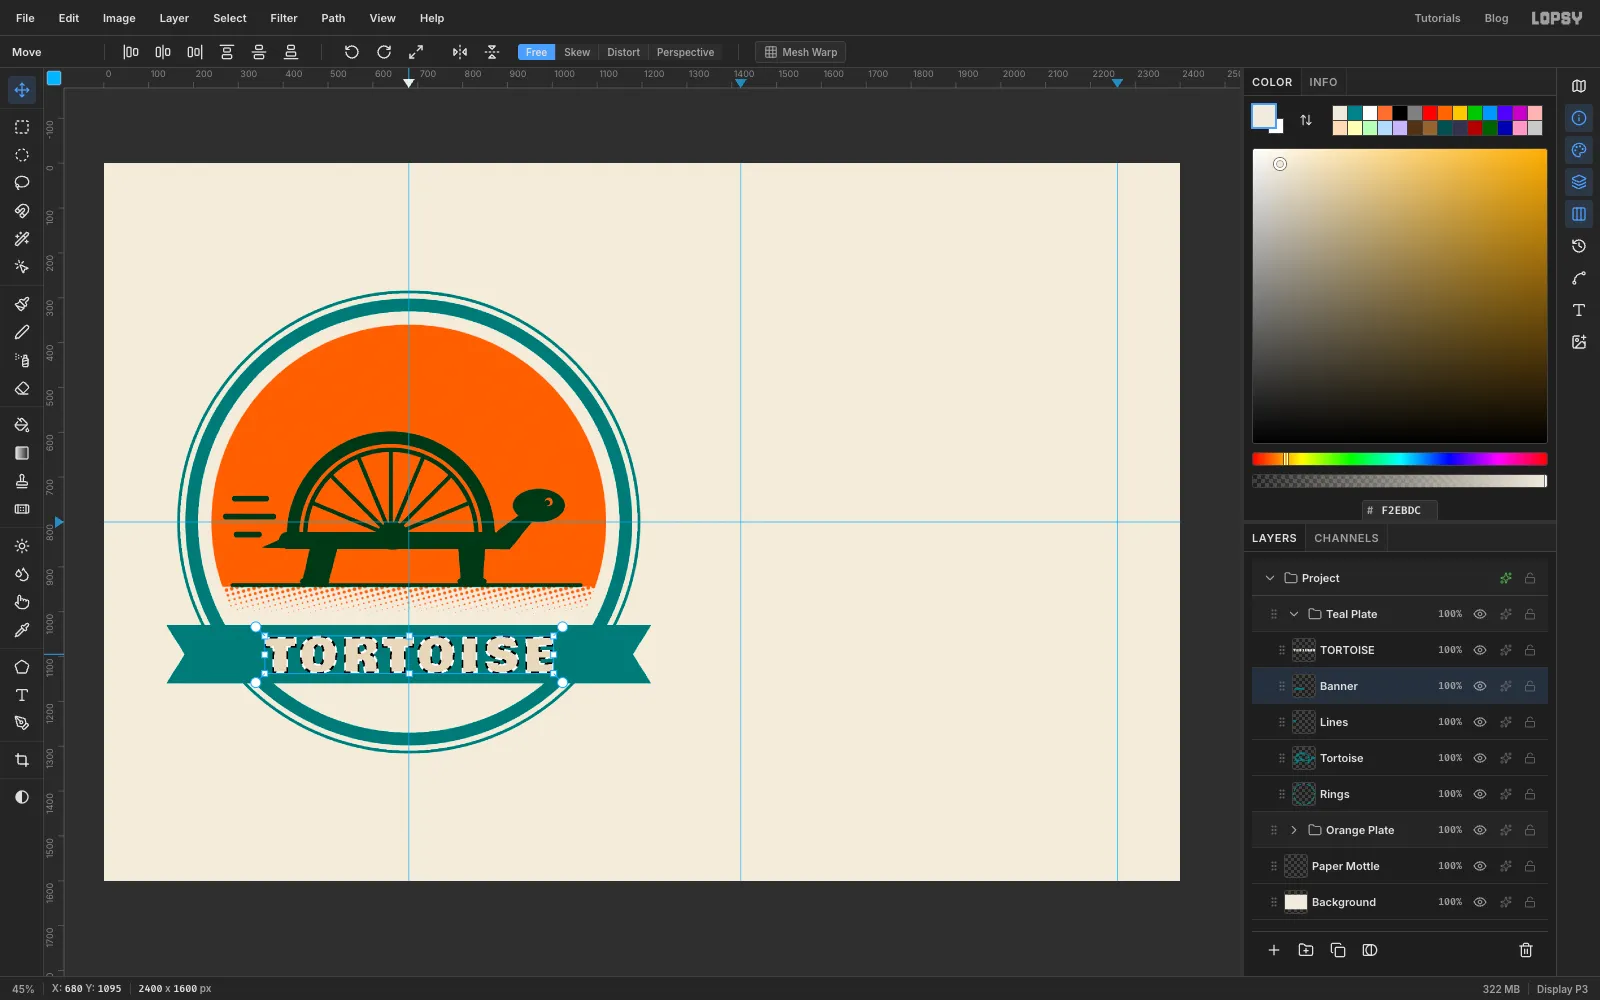
Knock TORTOISE out of the banner
A knockout is a hole cut in one ink so the next ink shows through.
- Pick the Text tool and choose Bowlby One at 104 px. The colour doesn't matter, because this layer is only a stencil. Click in an empty corner of the canvas, type
TORTOISEand press Tab to finish. - In the Text panel, set Letter spacing to
12. - Use the Move tool to centre the word on the banner.
- Cmd-click the text layer's thumbnail to load the letters as a selection. Click the
Bannerrow, press Delete, then Cmd+D. - Hide the
TORTOISEtext layer with its eye icon. The letters are now holes in the banner.
- Pick the Text tool and choose Bowlby One at 104 px. The colour doesn't matter, because this layer is only a stencil. Click in an empty corner of the canvas, type
-
Print the letters in orange
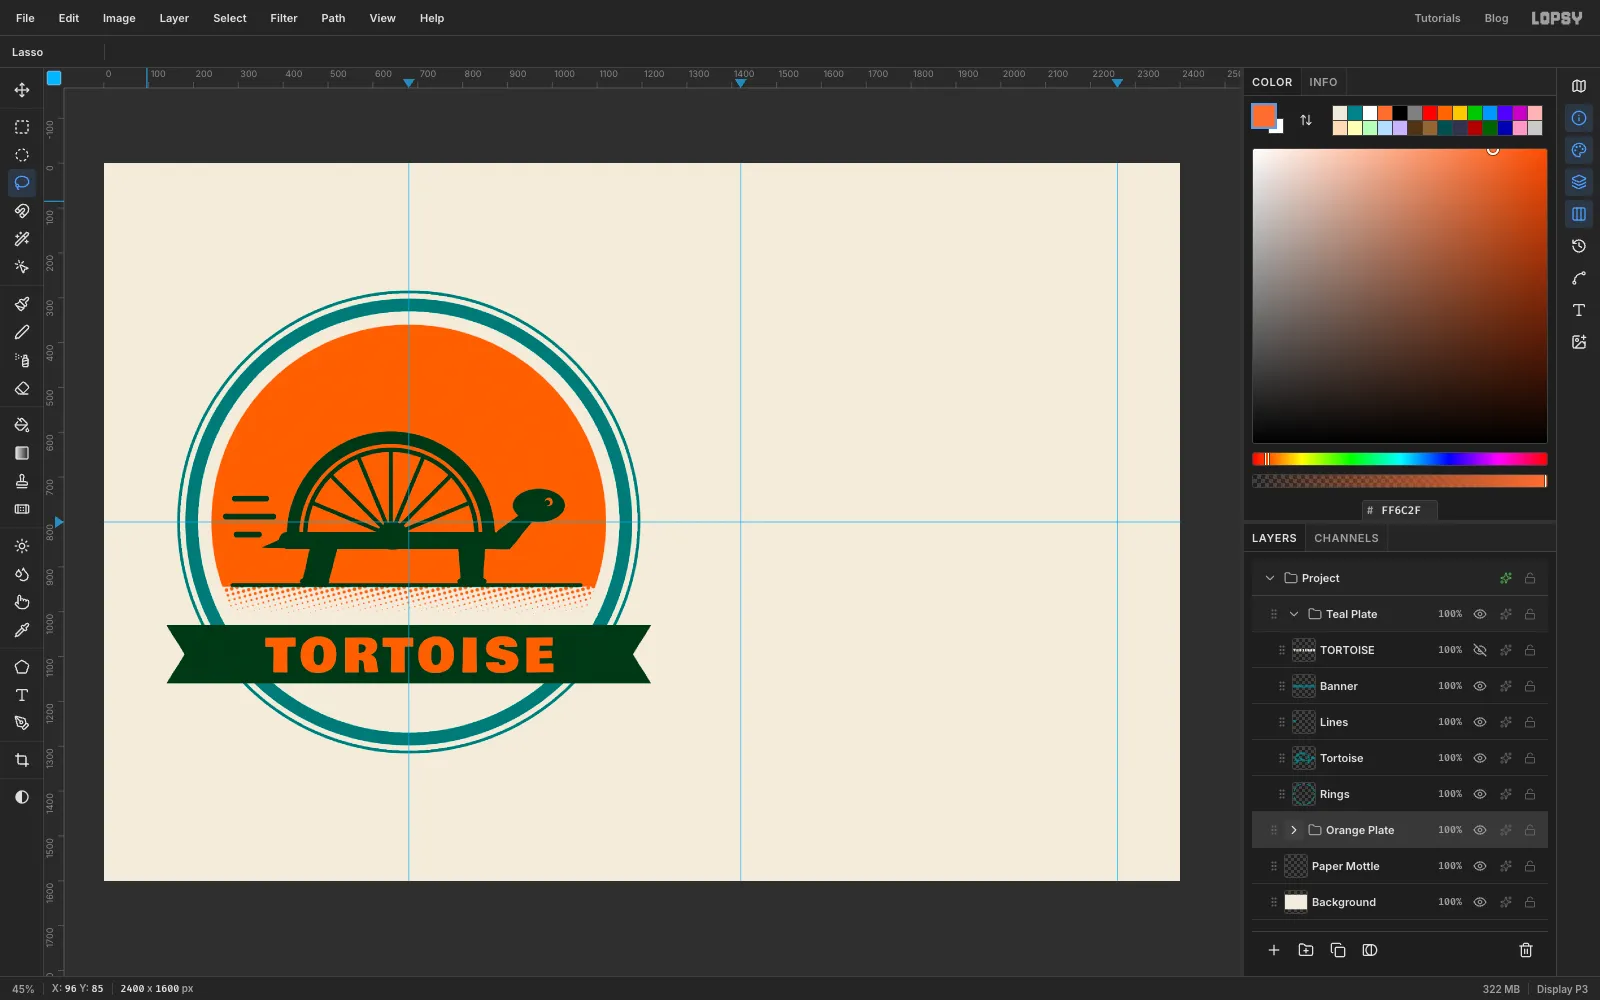
Through the holes you can see bare paper. Give the letters their own ink:
- Expand
Orange Plate, selectSun Dotsand click Add Layer. Name the new layerBanner Ink. - Make the same notched ribbon selection again: the same rectangle, then Alt-lasso the two notches. Fill it with orange and press Cmd+D.
Now the banner prints dark green where the two inks overlap, and TORTOISE prints in pure orange.
- Expand
-
Set the motto and the date
Both lines go on the teal plate, so collapse
Orange Plateand select theBannerrow before each one.- Motto: Set Shrikhand at 66 px, with Letter spacing back at
0. TypeSlow & Steadyin an empty area and press Tab. Like TORTOISE, this layer will only be a stencil, so any colour works. With the Move tool, centre it on the badge about 60 px below the top of the sun, leaving at least 50 px of orange on either side. - Date: Set Space Mono Bold at 38 px, with Letter spacing
6, and the colour to teal. TypeEST.2026, press Tab, and centre it in the cream space between the banner and the ring.
Typing
EST.2026without a space works because Space Mono gives the full stop a whole character cell, so it already looks spaced.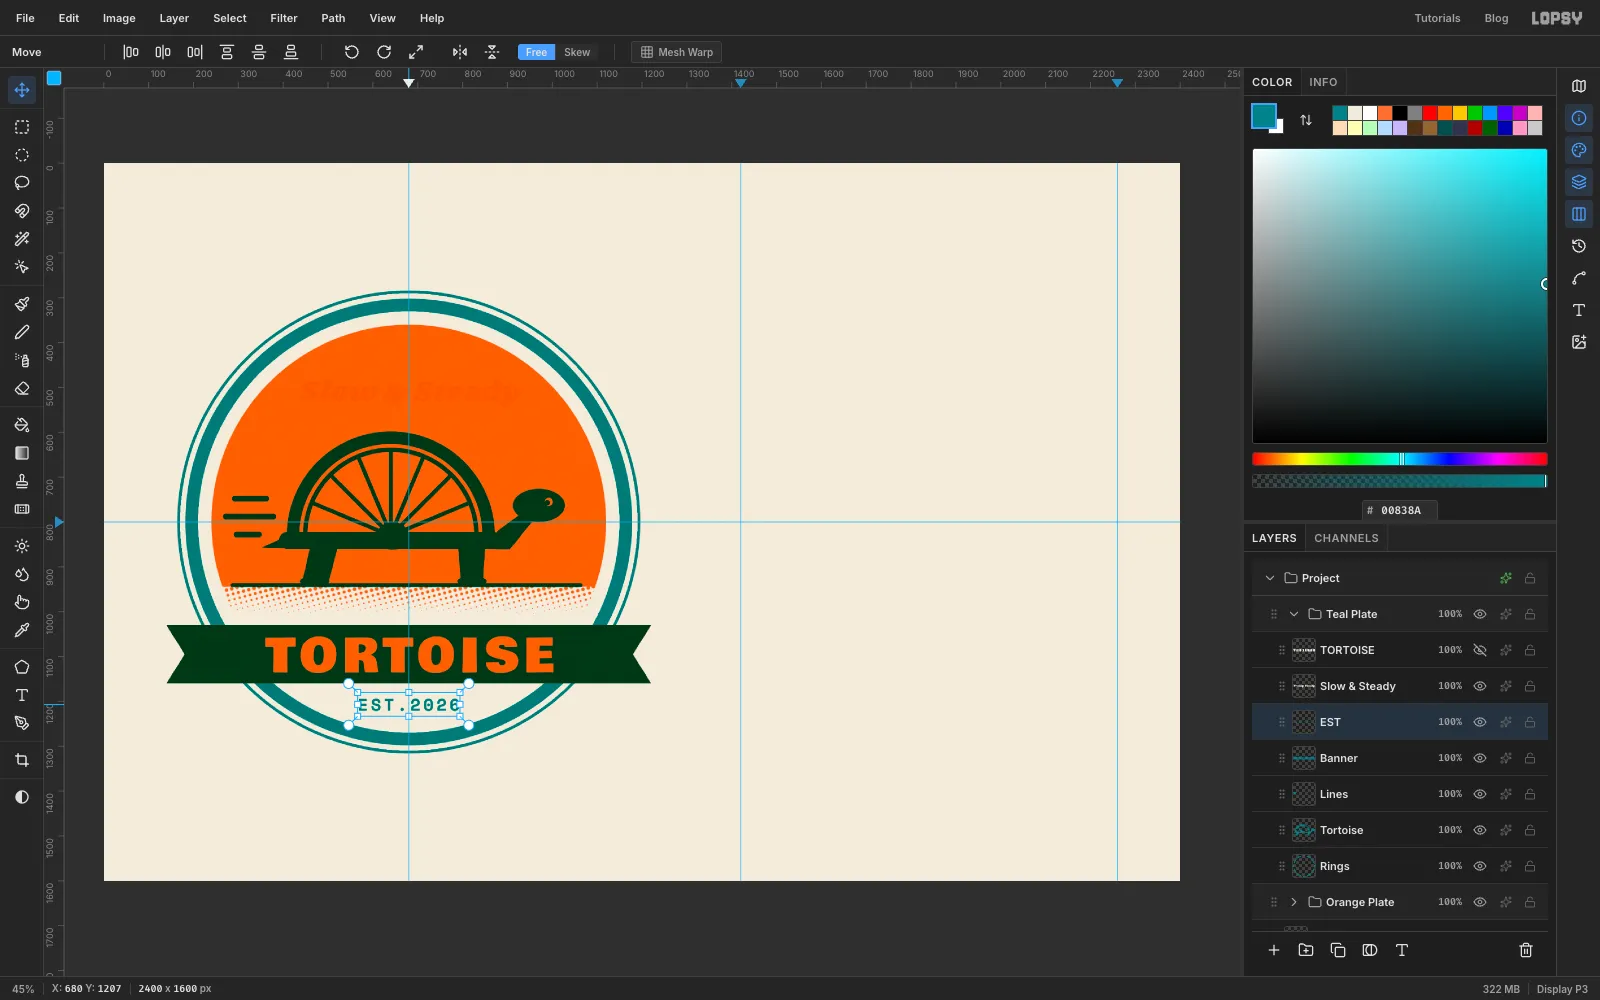
- Motto: Set Shrikhand at 66 px, with Letter spacing back at
-
Reverse the motto out of the sun
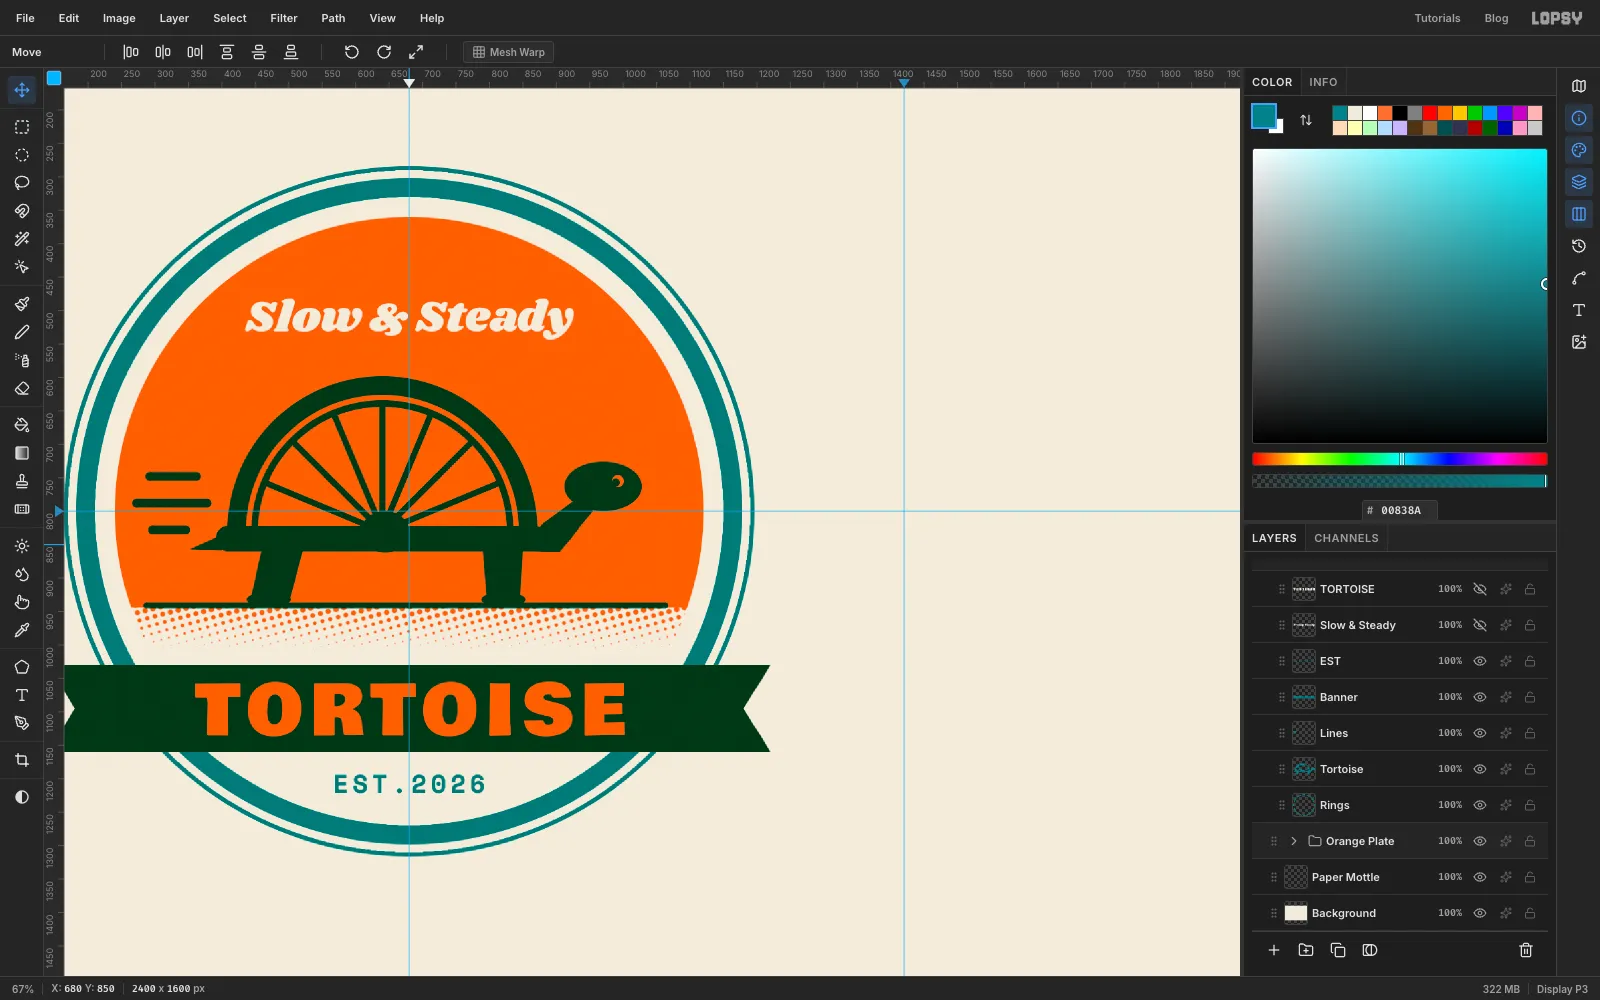
- Cmd-click the
Slow & Steadythumbnail to load its letters. - Expand
Orange Plate, clickSun Disc, press Delete, then press Cmd+D. - Hide the
Slow & Steadytext layer.
The motto now prints as bare paper, cut out of the orange. The teal ink never touches it, so it stays crisp even after you knock the plates out of register later.
- Cmd-click the
-
Start the brand sheet column
The right half of the sheet shows the mark in other forms. It sits between the 1420 and 2260 guides.
- Select
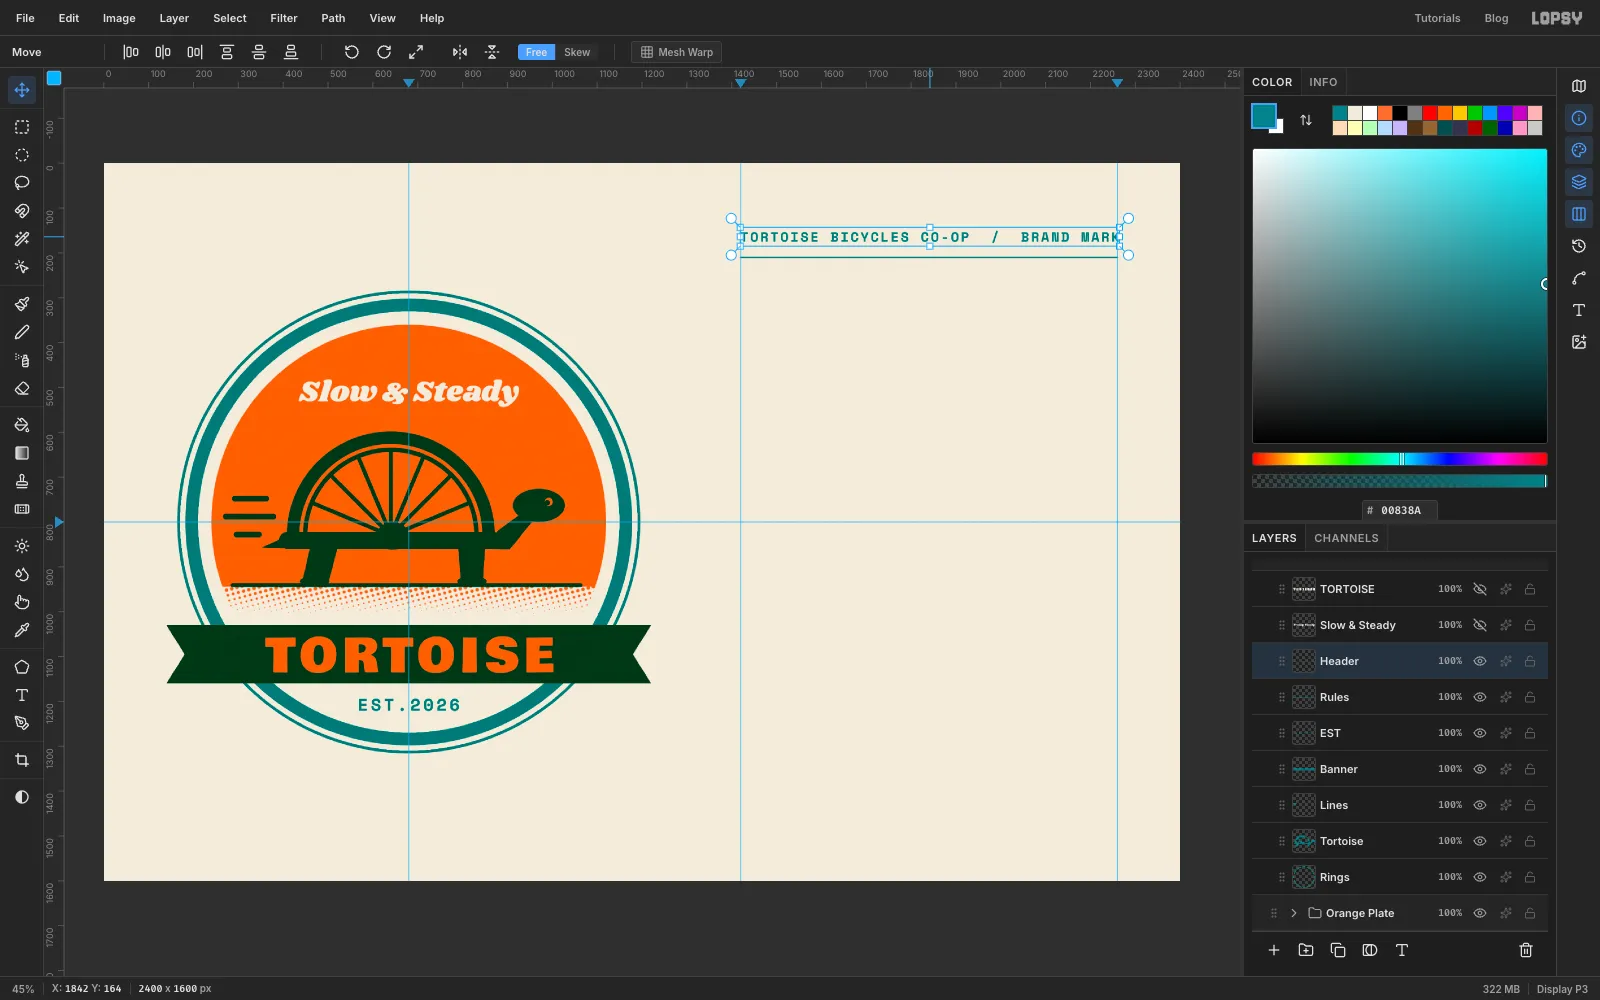
EST, click Add Layer and name the new layerRules. - With a 4 px Brush, click on the 1420 guide at y 210 and Shift-click on the 2260 guide.
- Select
Rulesand typeTORTOISE BICYCLES CO-OP / BRAND MARKin teal Space Mono Bold at 30 px, with Letter spacing4. Press Tab and rename the layerHeader. With the Move tool, place it so it starts at the left guide, about 60 px above the rule. Its right end should line up with the end of the rule.
- Select
-
Reuse the tortoise as an icon
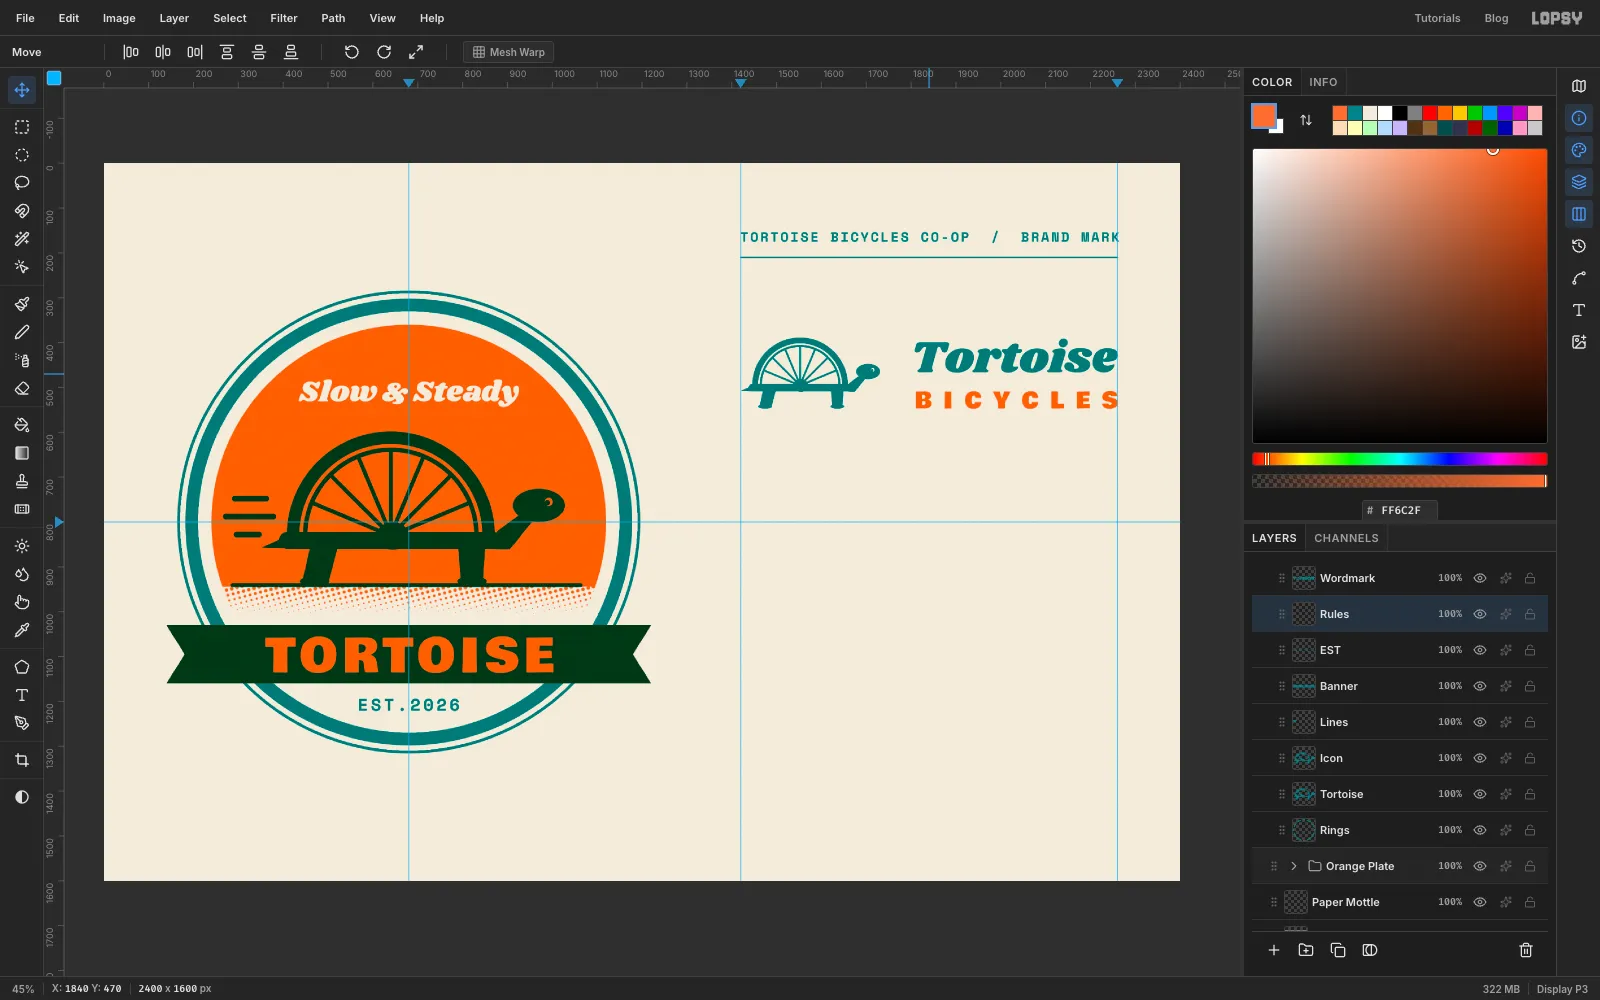
- On the
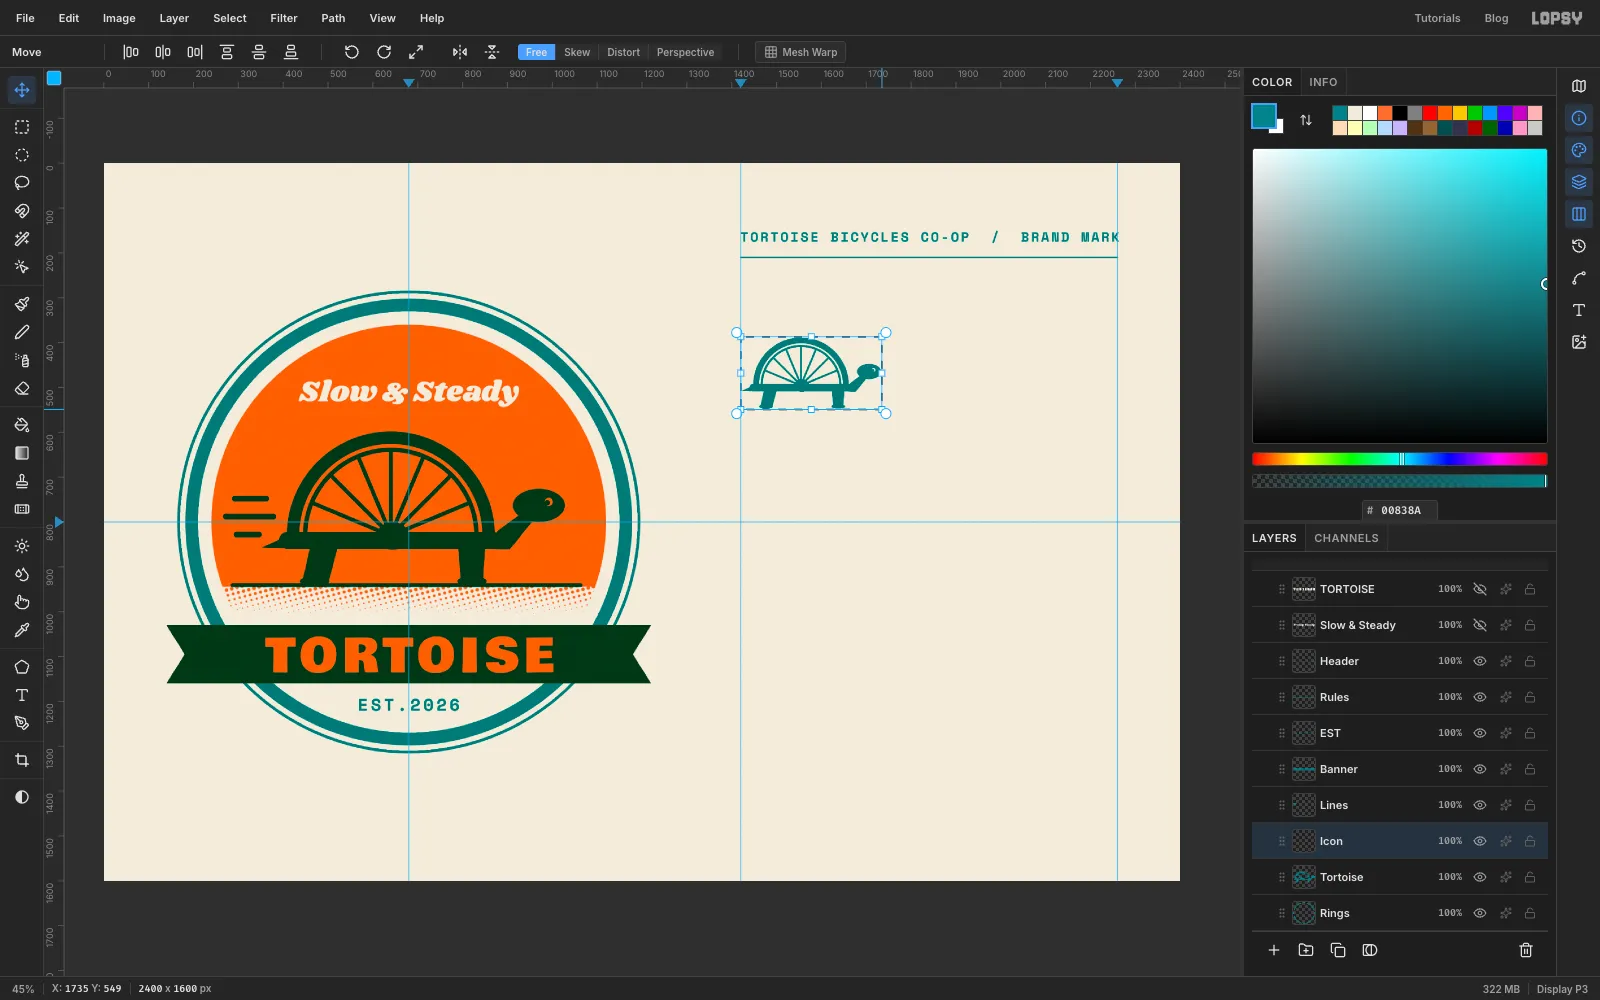
Tortoiselayer, drag a rectangular marquee around the whole tortoise. Press Cmd+C, then Cmd+V. - Rename the pasted layer
Icon. With the Move tool, drag it to the left guide of the column, about 180 px below the rule. - Drag a rectangular marquee tightly around it, then switch back to the Move tool. With the Marquee still active, its handles would only resize the selection outline.
- Hold Cmd and drag the bottom-right handle in until the icon is about 46 % of its size, roughly 310 px wide.
- Press Cmd+D to commit the scale.
Off the orange disc, it prints as a clean teal line drawing.
- On the
-
Set the wordmark lockup
- Select
Rulesand typeTortoisein Shrikhand at 100 px in teal. Press Tab and rename the layerWordmark. Place it so its right edge sits on the 2260 guide and its top lines up with the top of the icon. - Expand
Orange Plate, selectBanner Ink, and typeBICYCLESin Bowlby One at 50 px in orange. It goes on the orange plate. - Raise its Letter spacing until it's the same width as
Tortoise. That's about26. Then move it so its baseline lines up with the bottom of the icon's feet and its right edge sits on the guide.
- Select
-
Make the sticker and the monogram
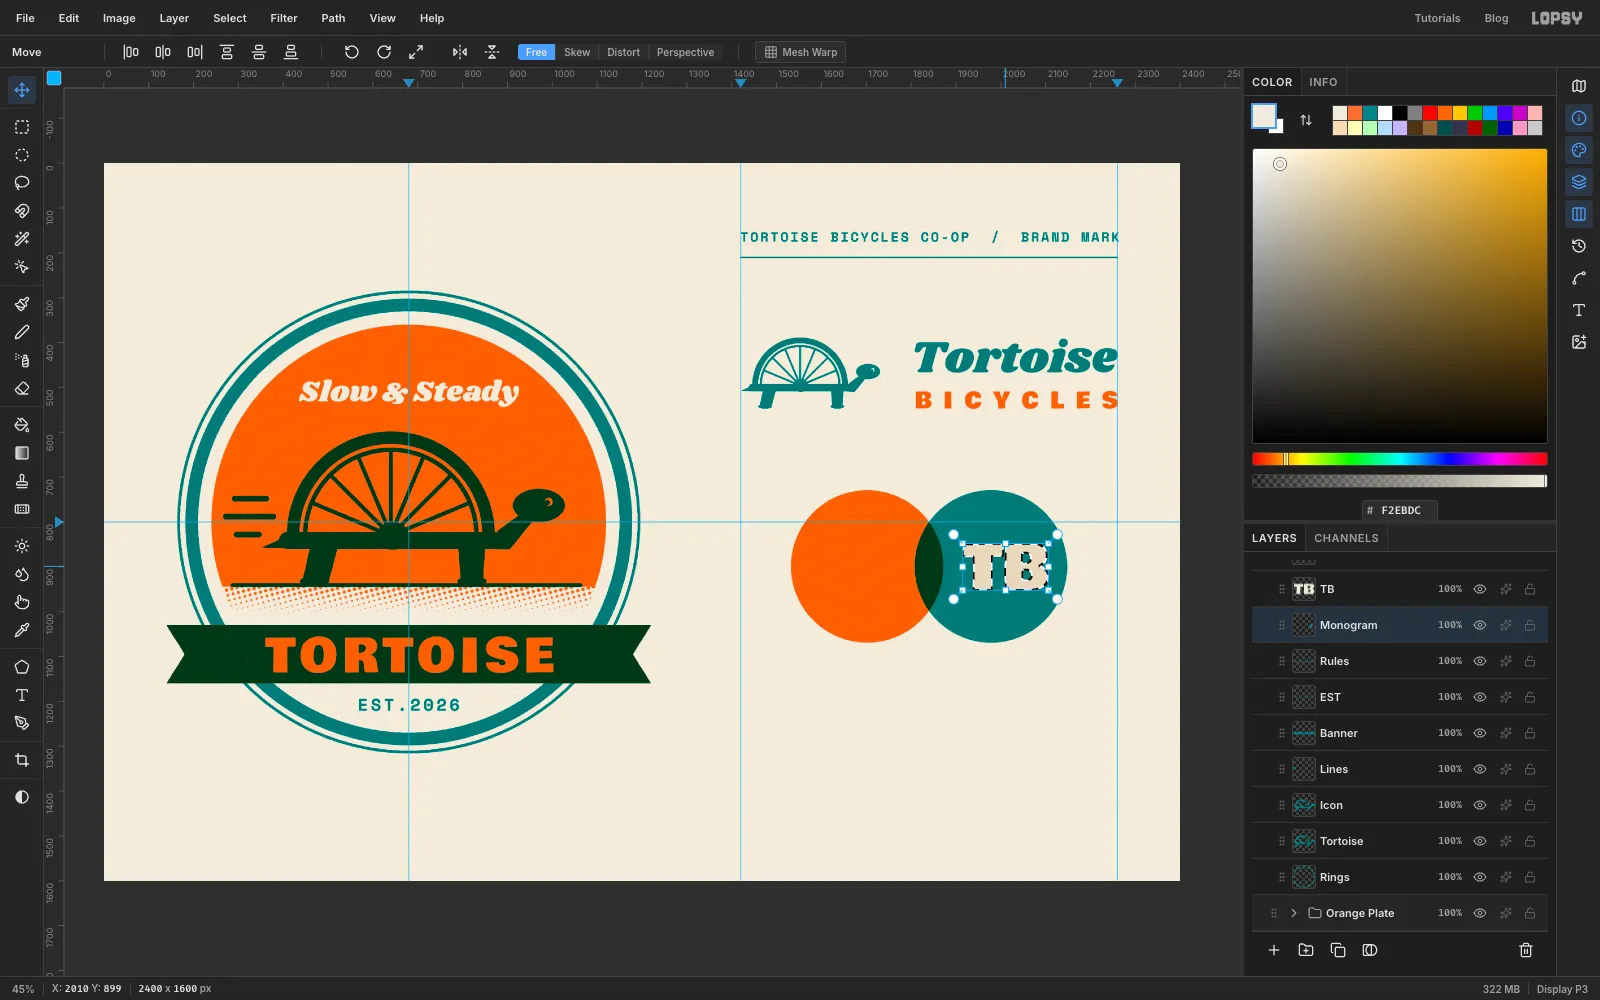
Two overlapping circles show off the overprint.
- On the orange plate, select
Banner Ink, add a layer calledSticker, and fill a 340 px orange circle in the middle of the column, about 350 px below the lockup. - On the teal plate, select
Rules, add a layer calledMonogram, and fill a 340 px teal circle level with it. Overlap the two by about a fifth of their width, and centre the pair on the column. The lens where they overlap prints dark green. - Press Cmd+D. Type
TBin Bowlby One at 136 px, press Tab, and centre it on the plain teal part of the right-hand circle, to the right of the dark lens. - Cmd-click its thumbnail, select
Monogram, press Delete and Cmd+D, and hide the text.
- On the orange plate, select
-
Put a small tortoise on the sticker
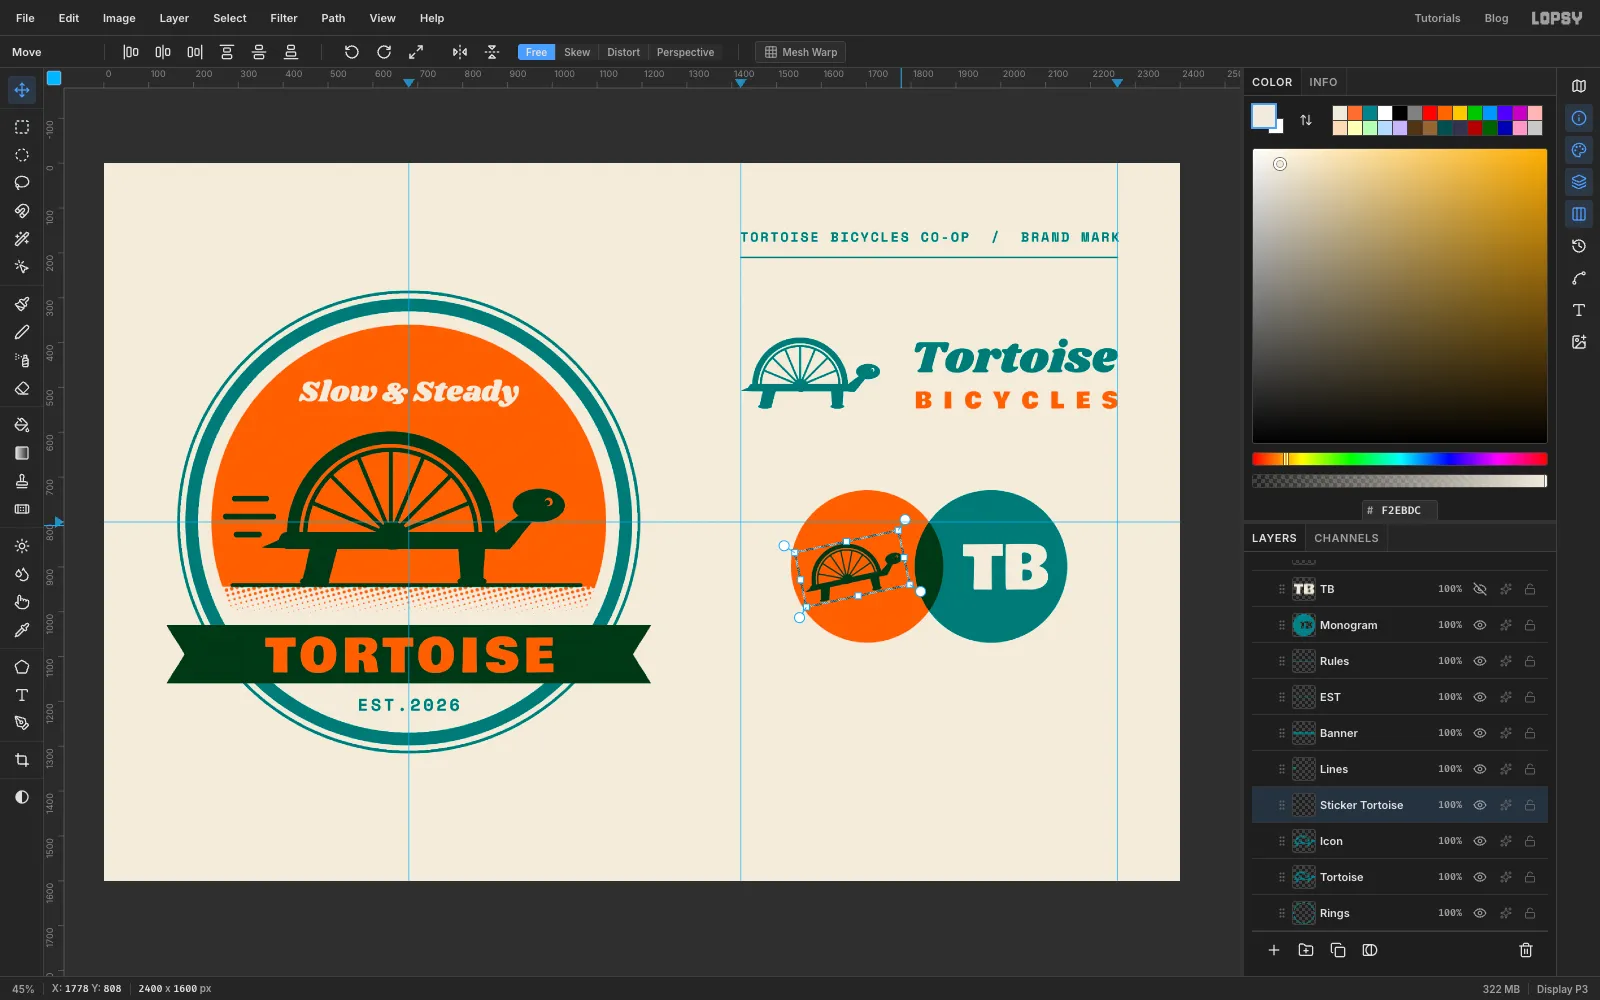
- Select
Iconand choose Layer → Duplicate Layer. Rename the copySticker Tortoise. - Move it into the orange circle. Marquee it, switch to the Move tool, and Cmd-drag a corner to scale it to about 74 %. Press Cmd+D.
- Marquee it again and switch to the Move tool. Hover just outside a corner until the cursor turns into a rotate arrow, and drag about 12° anticlockwise so it climbs uphill. Press Cmd+D.
- Nudge it with the arrow keys until it sits in the middle of the plain orange part of the circle, clear of the dark lens.
- Select
-
Add ink chips for the printer
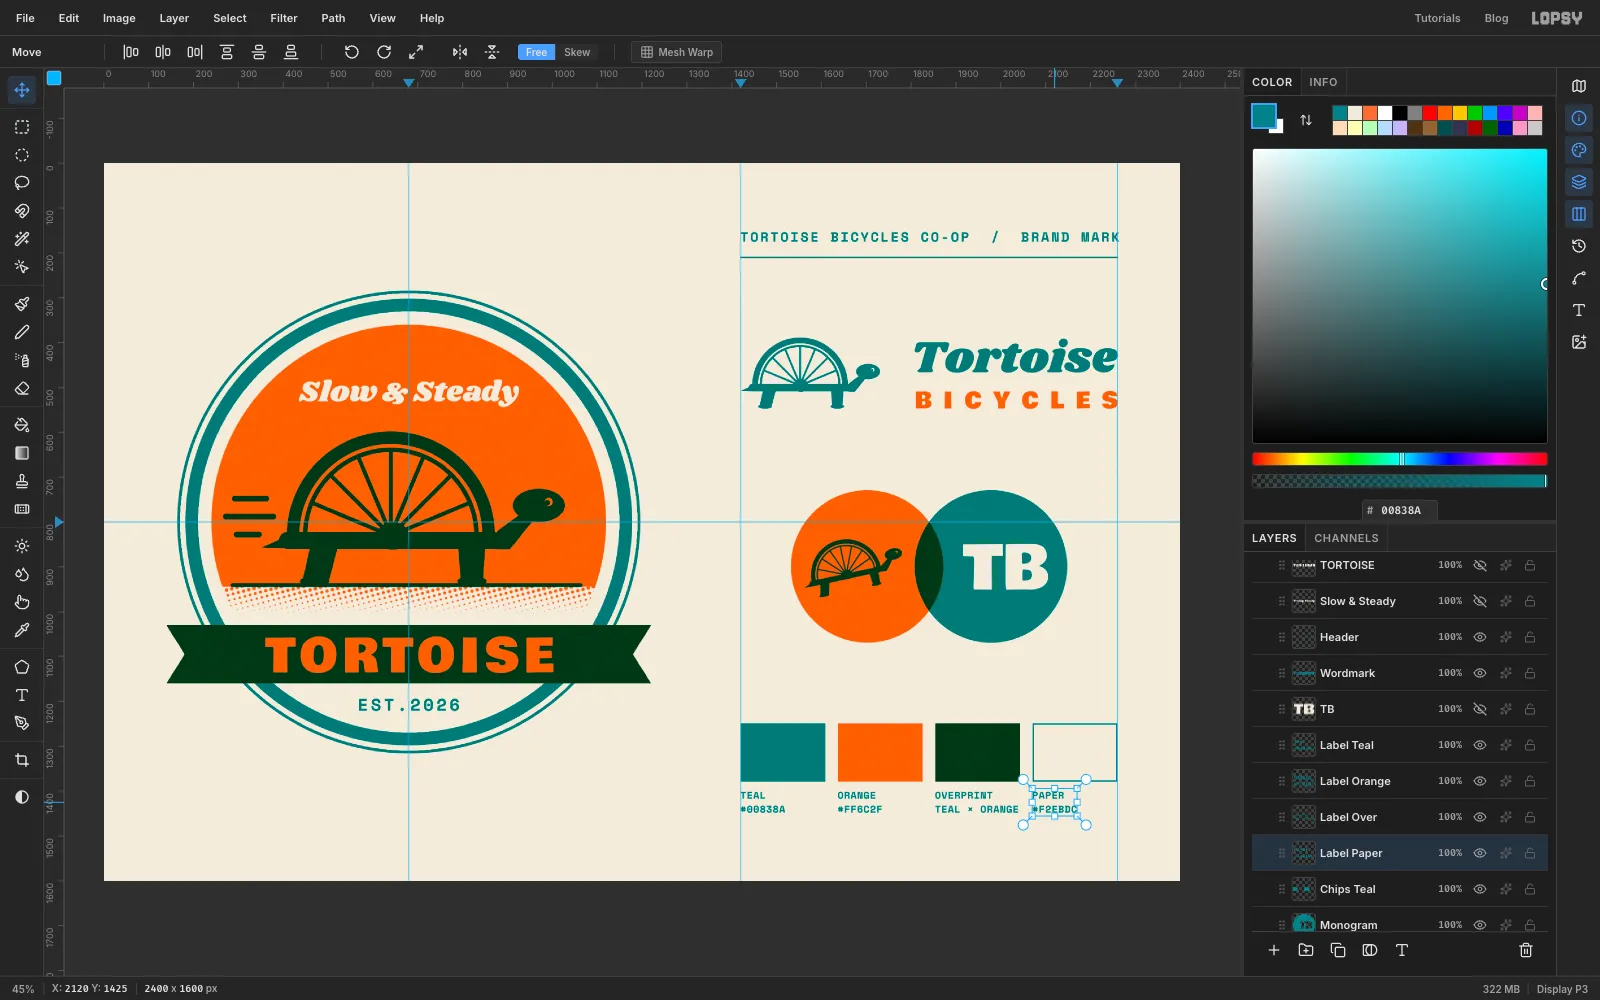
The four chips are 189 × 130 px with 28 px gaps, so they start at x 1420, 1637, 1854 and 2071. Their tops sit at about y 1250.
- On the teal plate, add a layer called
Chips Teal. Drag the first chip's rectangle, hold Shift and add the third chip's rectangle, then fill both with teal. - Drag the fourth chip's rectangle, fill it, choose Select → Shrink by
3, and press Delete. That leaves a teal outline for the paper chip. - On the orange plate, select
Stickerand addChips Orange. Select the second and third chips the same way and fill them with orange. The third chip now shows the overprint. Press Cmd+D. - Under each chip, type a two-line label in teal Space Mono Bold at 22 px:
TEAL / #00838A,ORANGE / #FF6C2F,OVERPRINT / TEAL × ORANGEandPAPER / #F2EBDC, with the line break where the slash is.
- On the teal plate, add a layer called
-
Knock the plates out of register
- Add a
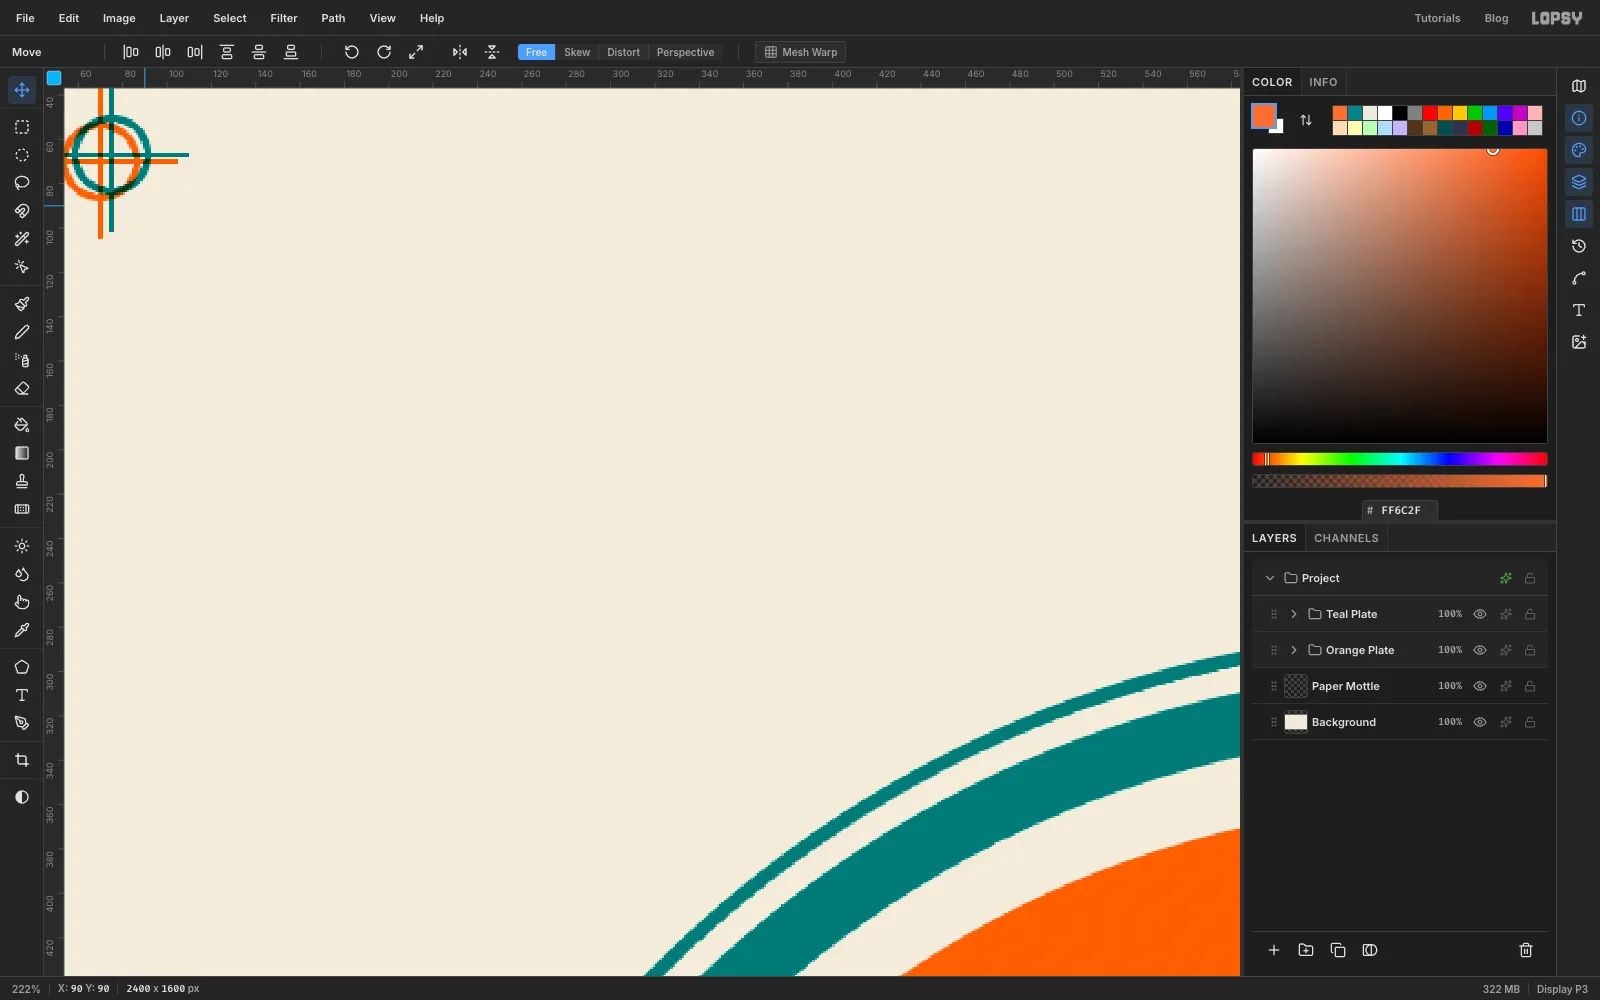
Reg Marks Teallayer inTeal Plateand aReg Marks Orangelayer inOrange Plate. On each, draw the same mark in the top-left corner, about 70 px in from each edge, and in the bottom-right corner. - For each ring, fill a 36 px circle, Shrink it by
3, press Delete, then Cmd+D. Draw a 3 px Brush crosshair through it with two Shift-click lines. - Collapse
Teal Plateand click its row. Press Cmd+D so nothing is selected. With the Move tool, press ArrowRight 5 times and ArrowUp 3 times.
The whole teal plate shifts as one piece. The marks show the offset, the knockouts gain a thin edge, and the sheet looks printed rather than drawn.
- Add a
-
Add ink dropouts
Riso ink often fails to take in tiny spots.
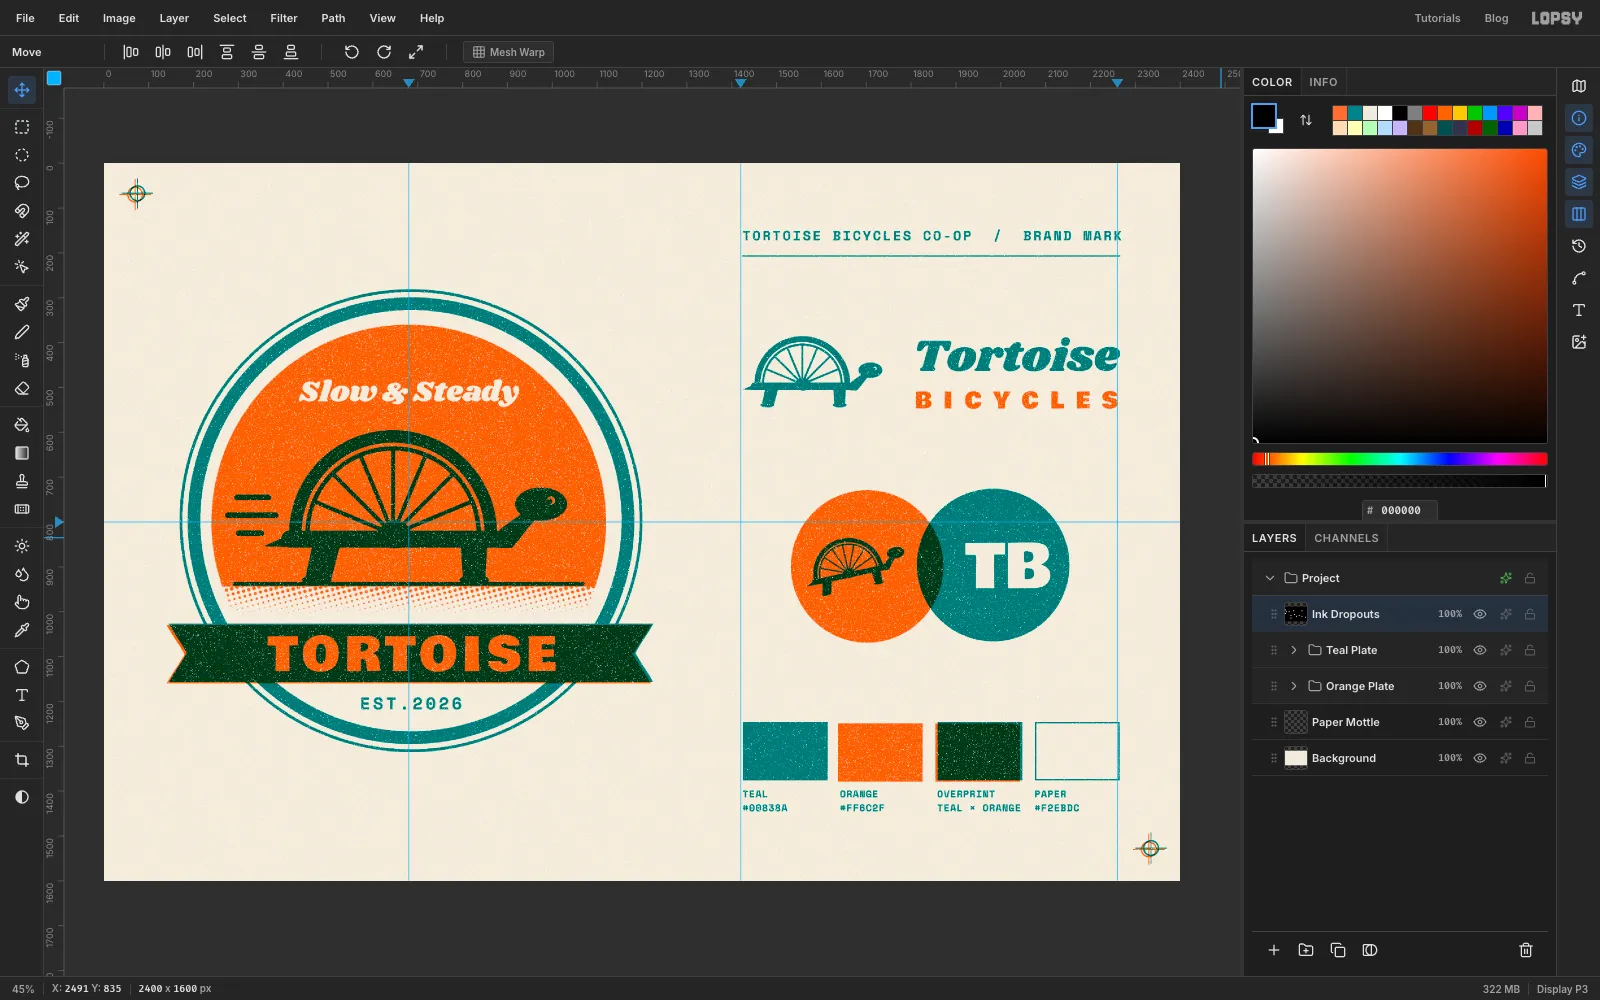
- With
Teal Plateselected, click Add Layer and name itInk Dropouts. It lands at the top of the stack, outside both plates. - Set the foreground colour to black and choose Edit → Fill.
- Run Filter → Add Noise: Amount
100, Mono, Uniform. - Run Filter → Gaussian Blur at
1.5, then Filter → Threshold at Level45. You're left with sparse white specks on black. - Set the layer's blend mode to Lighten. The black disappears and only the specks show.
- With
-
Make the dropouts clump
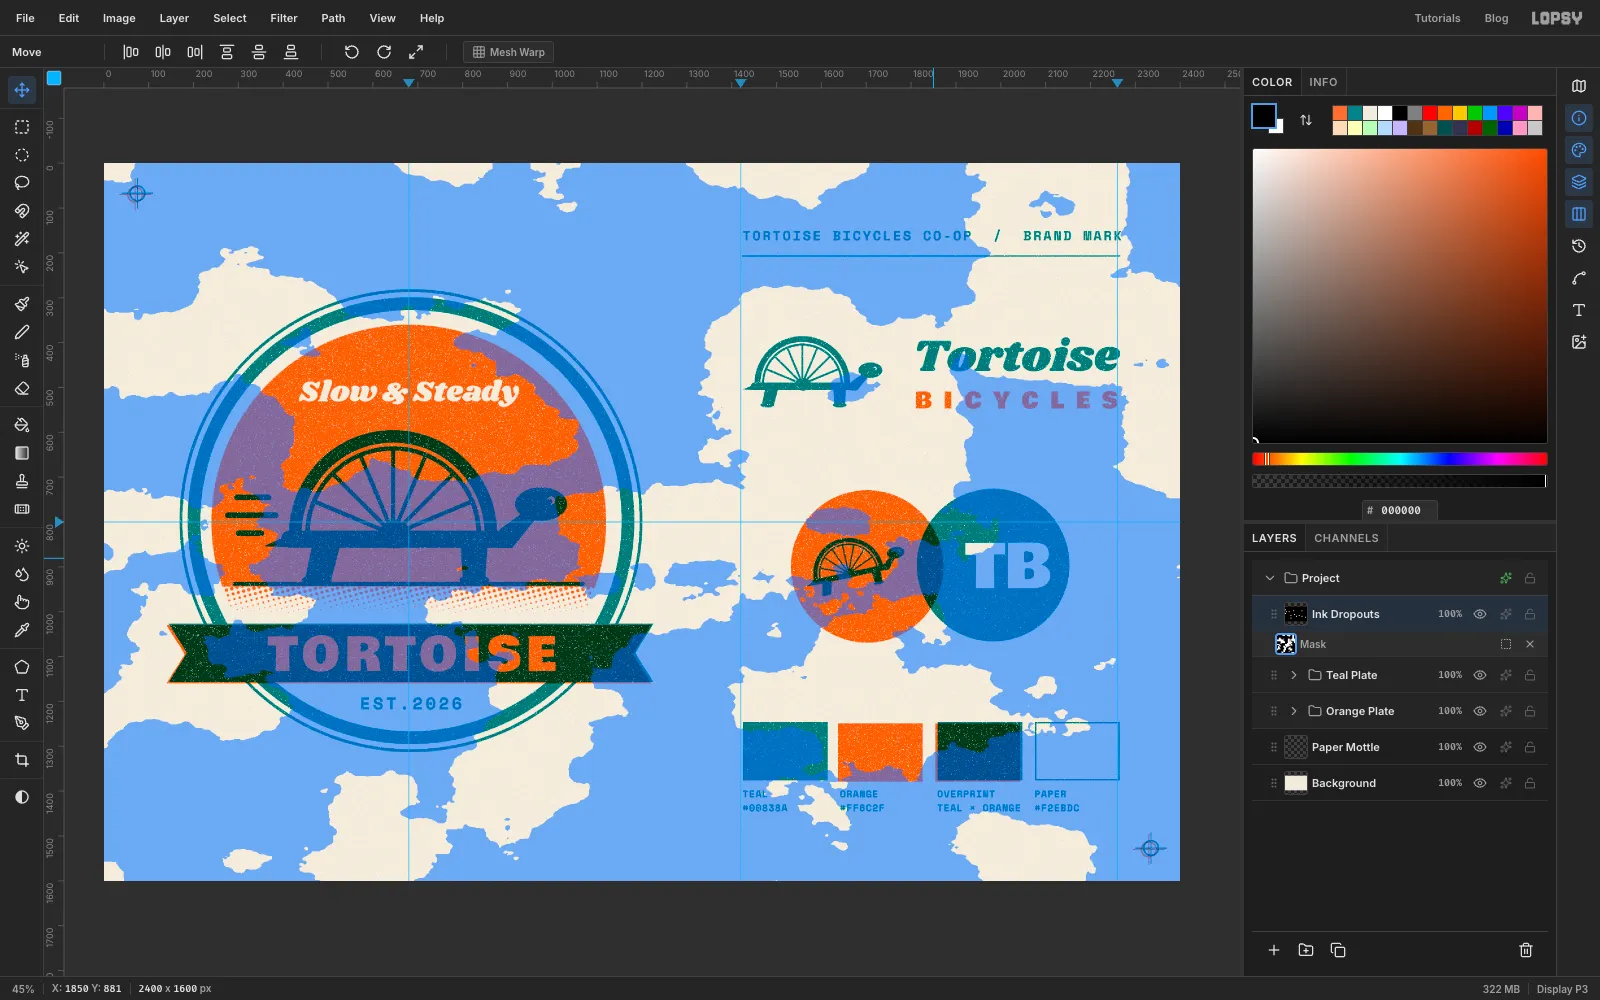
Real dropouts gather in patches, so you'll hide the specks in some places with a mask.
- Click Add Mask, then click the mask thumbnail to edit it.
- Run Filter → Clouds at Scale
8, then Filter → Threshold at128. In mask edit mode these filters change the mask, not the specks. - Click the layer row to stop editing the mask, and set the layer's opacity to 55 %.
-
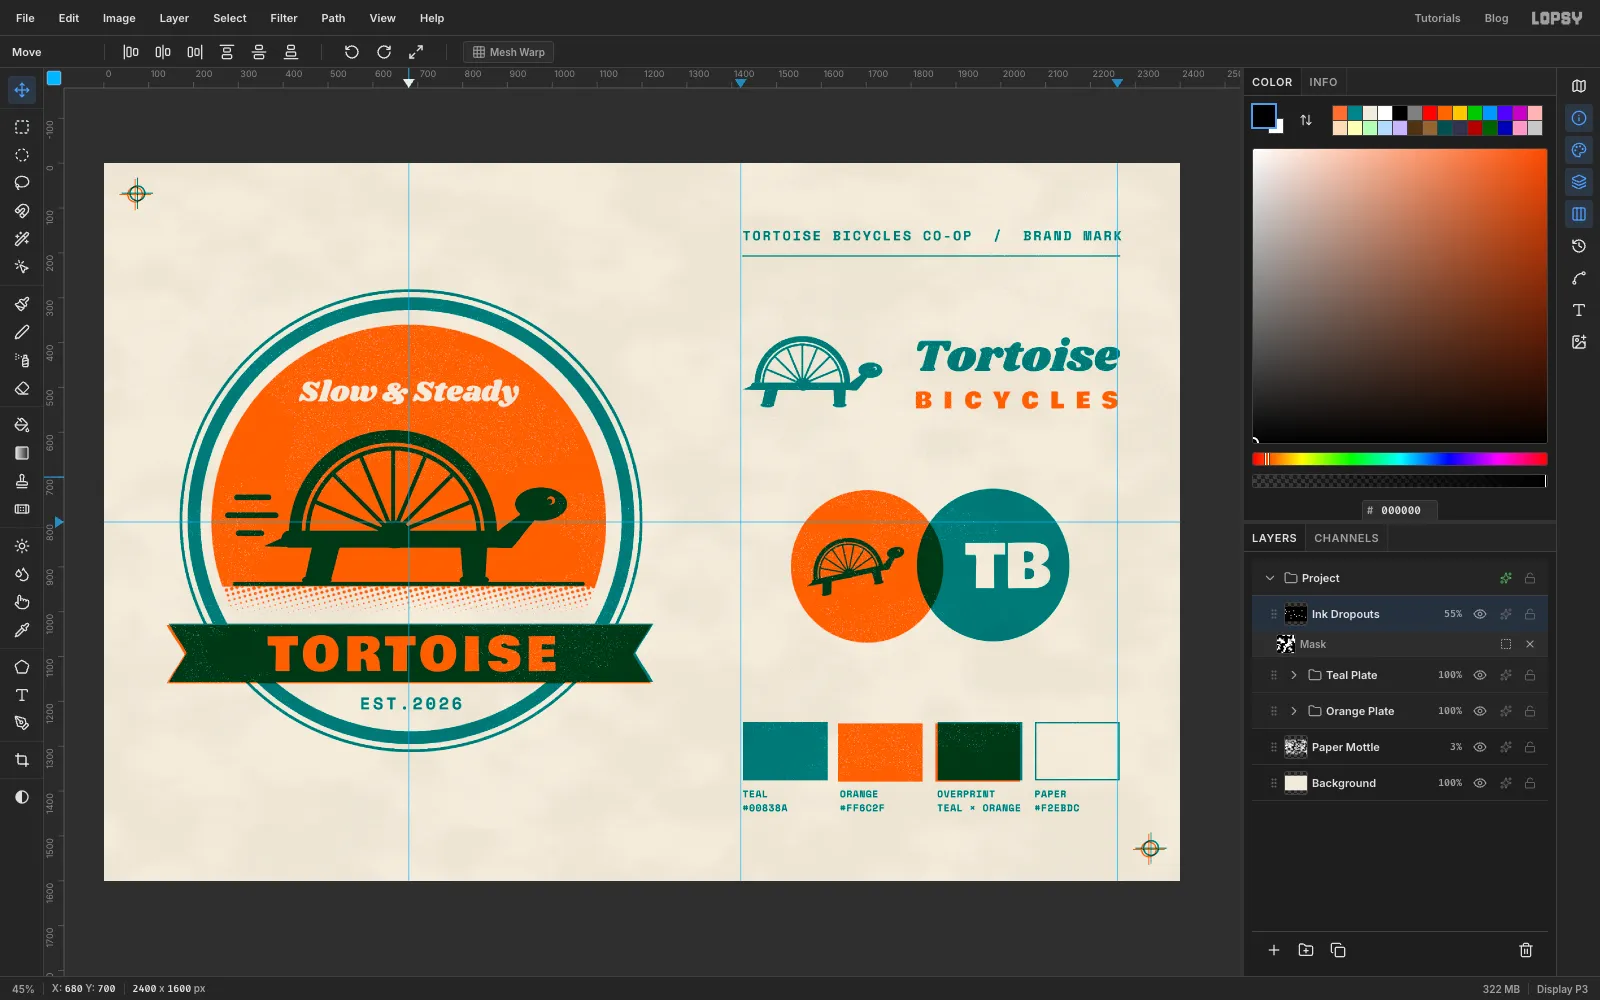
Finish the paper
- Select
Backgroundand run Filter → Add Noise: Amount8, Mono, Gaussian. - Select
Paper Mottleand run Filter → Clouds at Scale18. - Set
Paper Mottleto Multiply at 3 % opacity. That's just enough to make the paper look less flat.
Export with File → Quick Export PNG and save the project with File → Save Project. Because every element sits on its plate, you can hide one plate to check that ink on its own, just like proofing a single drum.
- Select