Paint a Surrealist Keyhole Scene in the Style of Magritte
Paint a surrealist night piazza in Lopsy, where a brick wall's keyhole opens onto a daytime sky. Uses pattern fills, Distort, Perspective and masks.
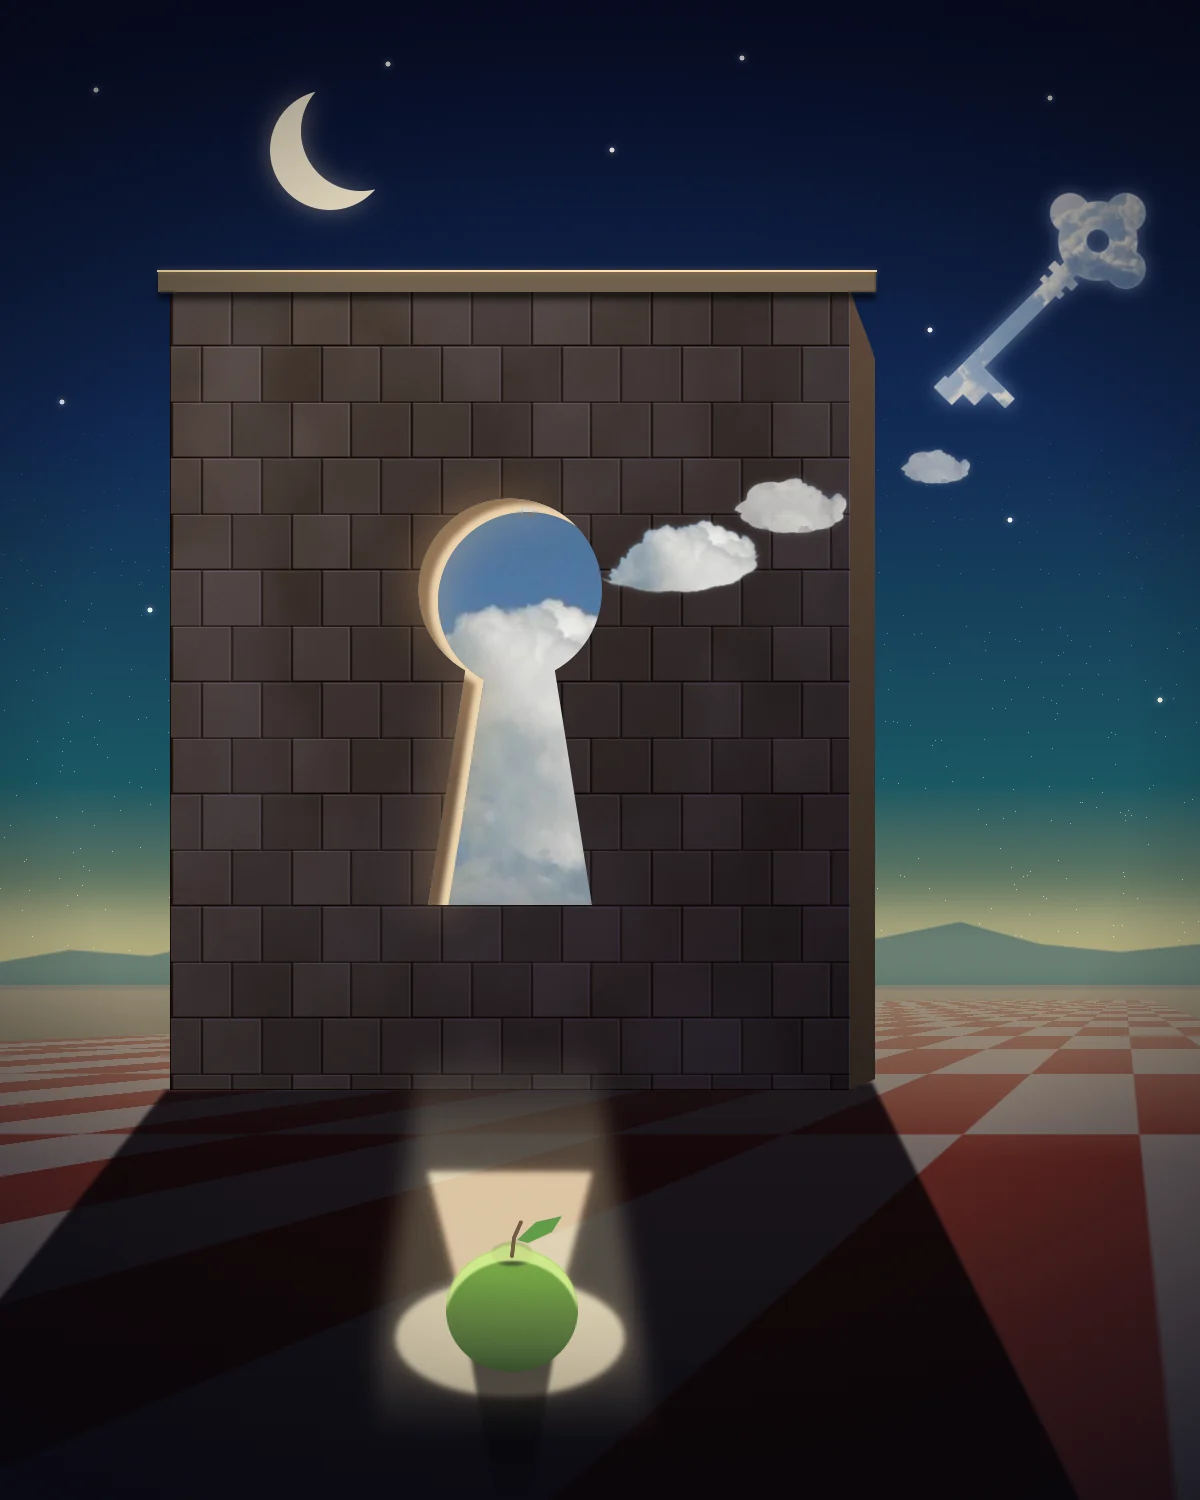
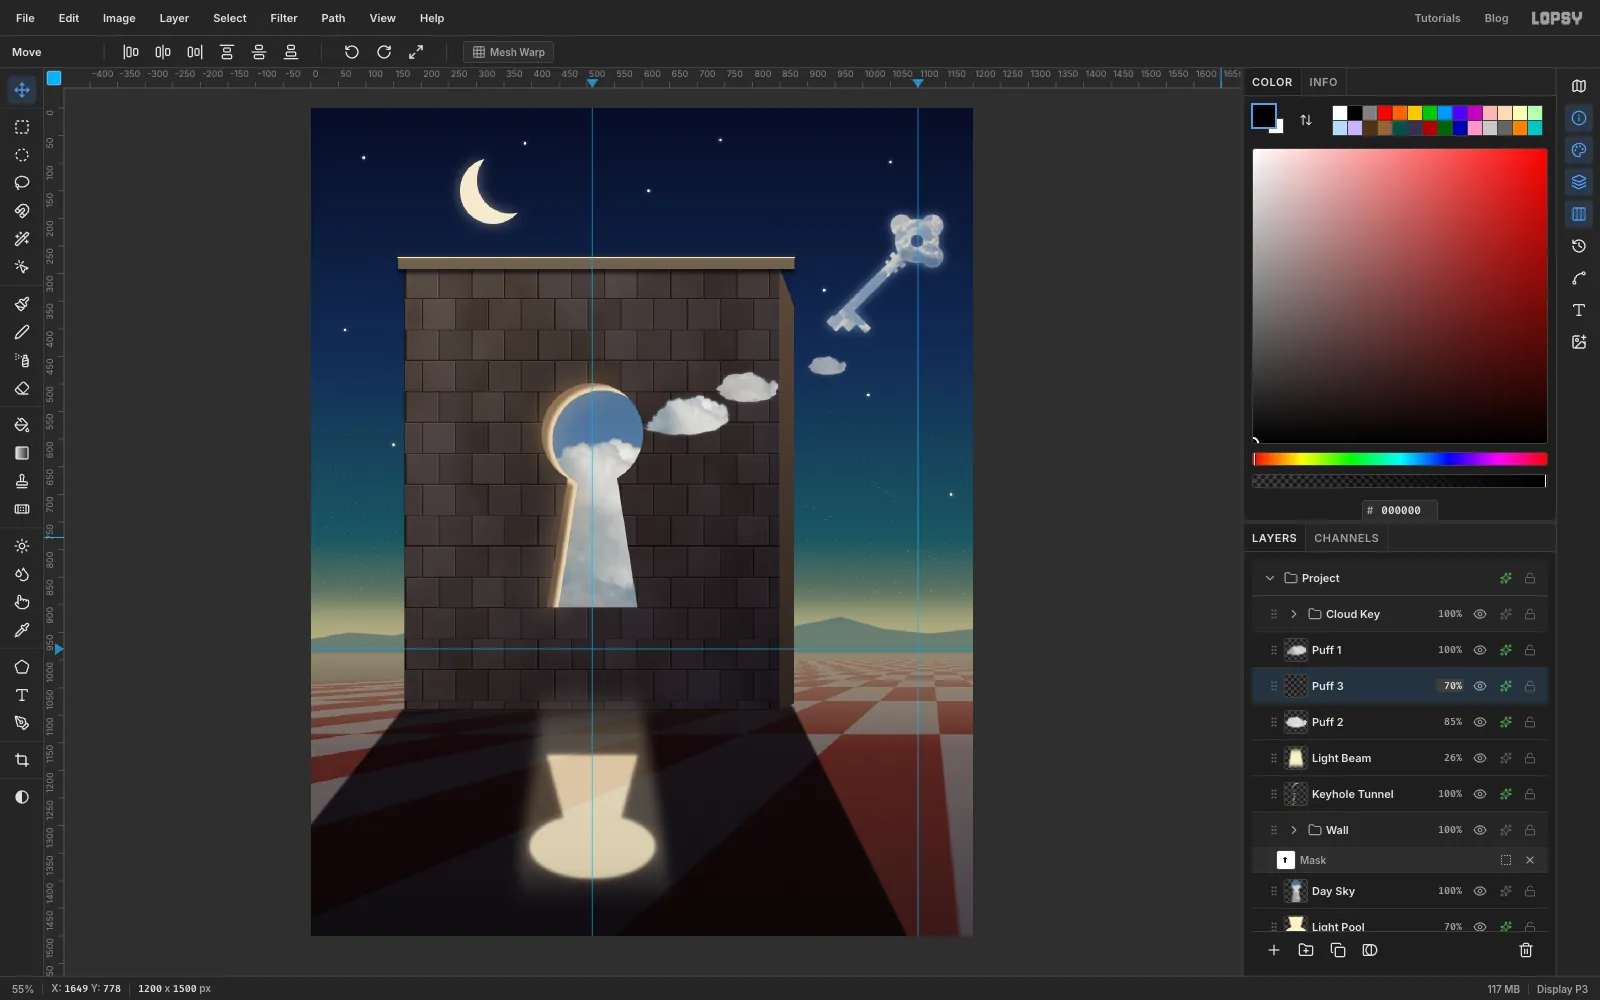
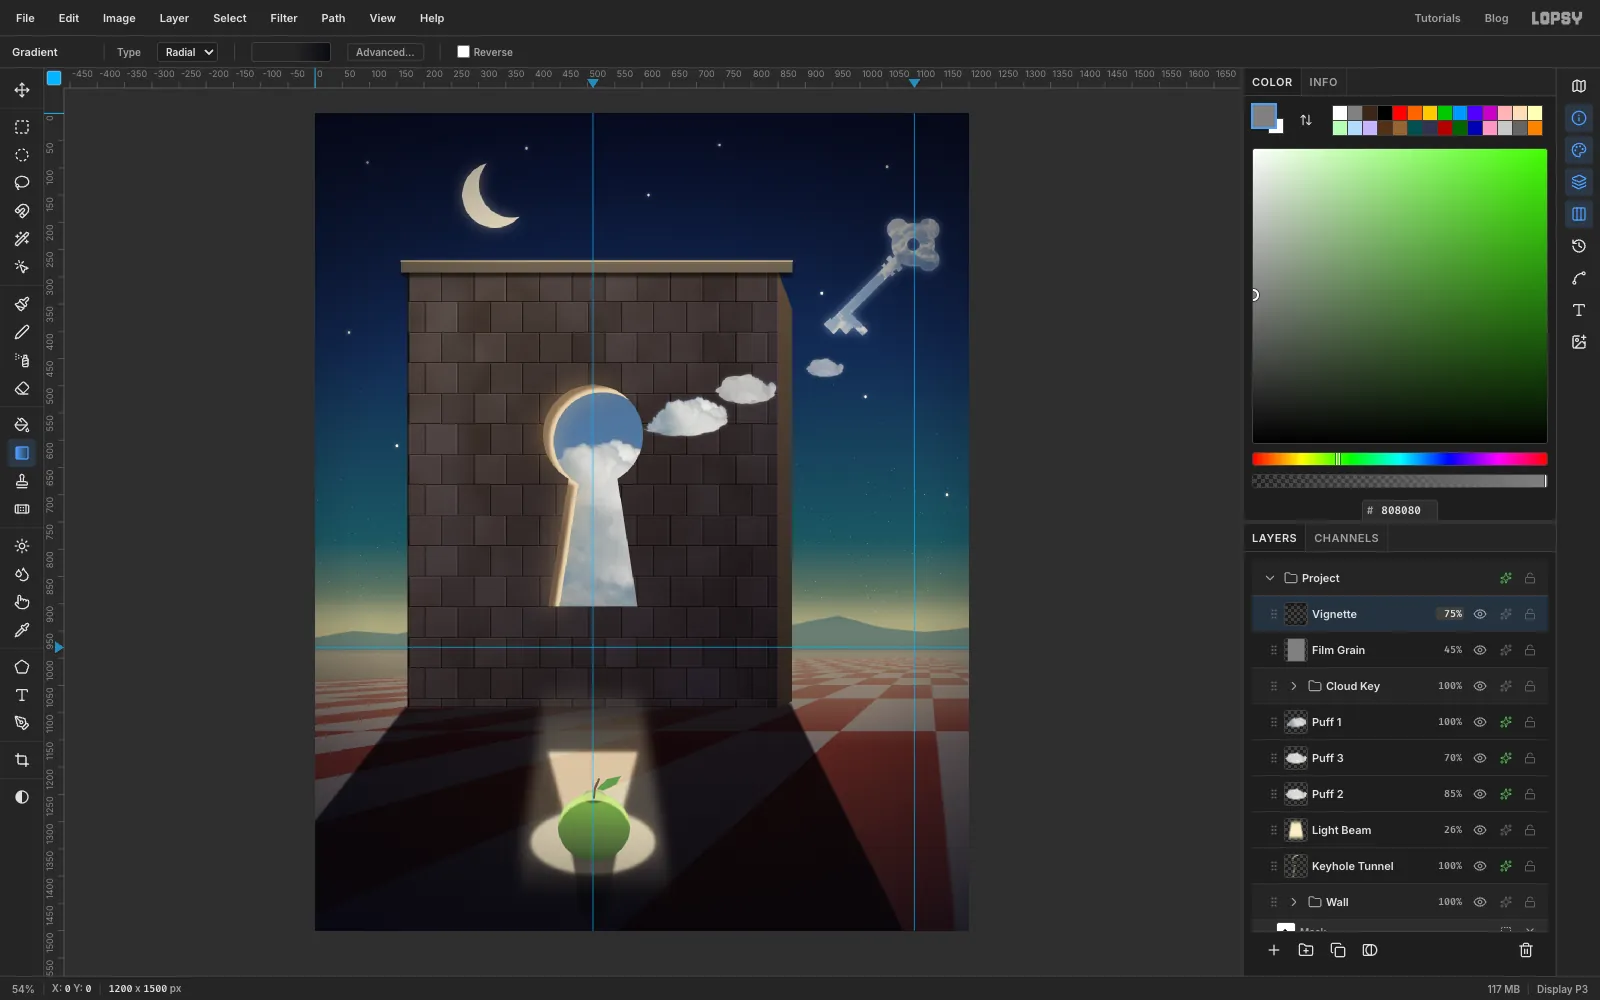
René Magritte's Empire of Light paintings show a street at night under a bright daytime sky. Giorgio de Chirico painted empty piazzas, long raking shadows and greenish dusk skies. This tutorial combines the two in one picture, Umbral Keyhole. It's night on a checkerboard piazza, but a keyhole in a brick wall opens onto a summer afternoon. Daylight spills through the keyhole onto the floor, and a few clouds drift out toward a key made of cloud.
You'll paint it from scratch. Gradients, pattern fills and filters do most of the work, plus two public-domain cloud photos. The techniques to watch:
- Distort lays a flat checkerboard down in perspective.
- A mask on a whole group cuts the keyhole through every wall layer at once.
- Flip Vertical, a squash and the Perspective mode turn the keyhole into the light on the floor.
- Copy and paste with scaling makes the drifting clouds.
Some steps give positions in document pixels. Hover over the canvas and read X and Y at the bottom left of the window. You don't need to hit them exactly. Most selections that need precise shapes use the marquee's exact-size dialog: click once with the marquee without dragging, type the From and To corners, and press Select.
Hold Shift while you drag a marquee or lasso to add to the selection, and Alt to subtract from it. For small shapes that need exact corners, zoom in and watch the X/Y readout while you drag. The Lasso is freehand: to make straight edges, hold the mouse button and drag in straight lines from point to point. After a transform, press Cmd+D to commit it and deselect.
The cloud photos are both free to use:
- Clouds in blue sky by Rosendahl, public domain.
- Cumulus clouds in the sky, CC0.
Palette:
-
Night sky
-
Moon
-
star glow
-
Floor tiles
-
floor night
-
Bricks
-
mortar
-
Wall shade
-
coping
-
Daylight
-
tunnel
-
Shadow
-
Apple
-
rim light
-
leaf
-
Set the horizon and the vanishing point
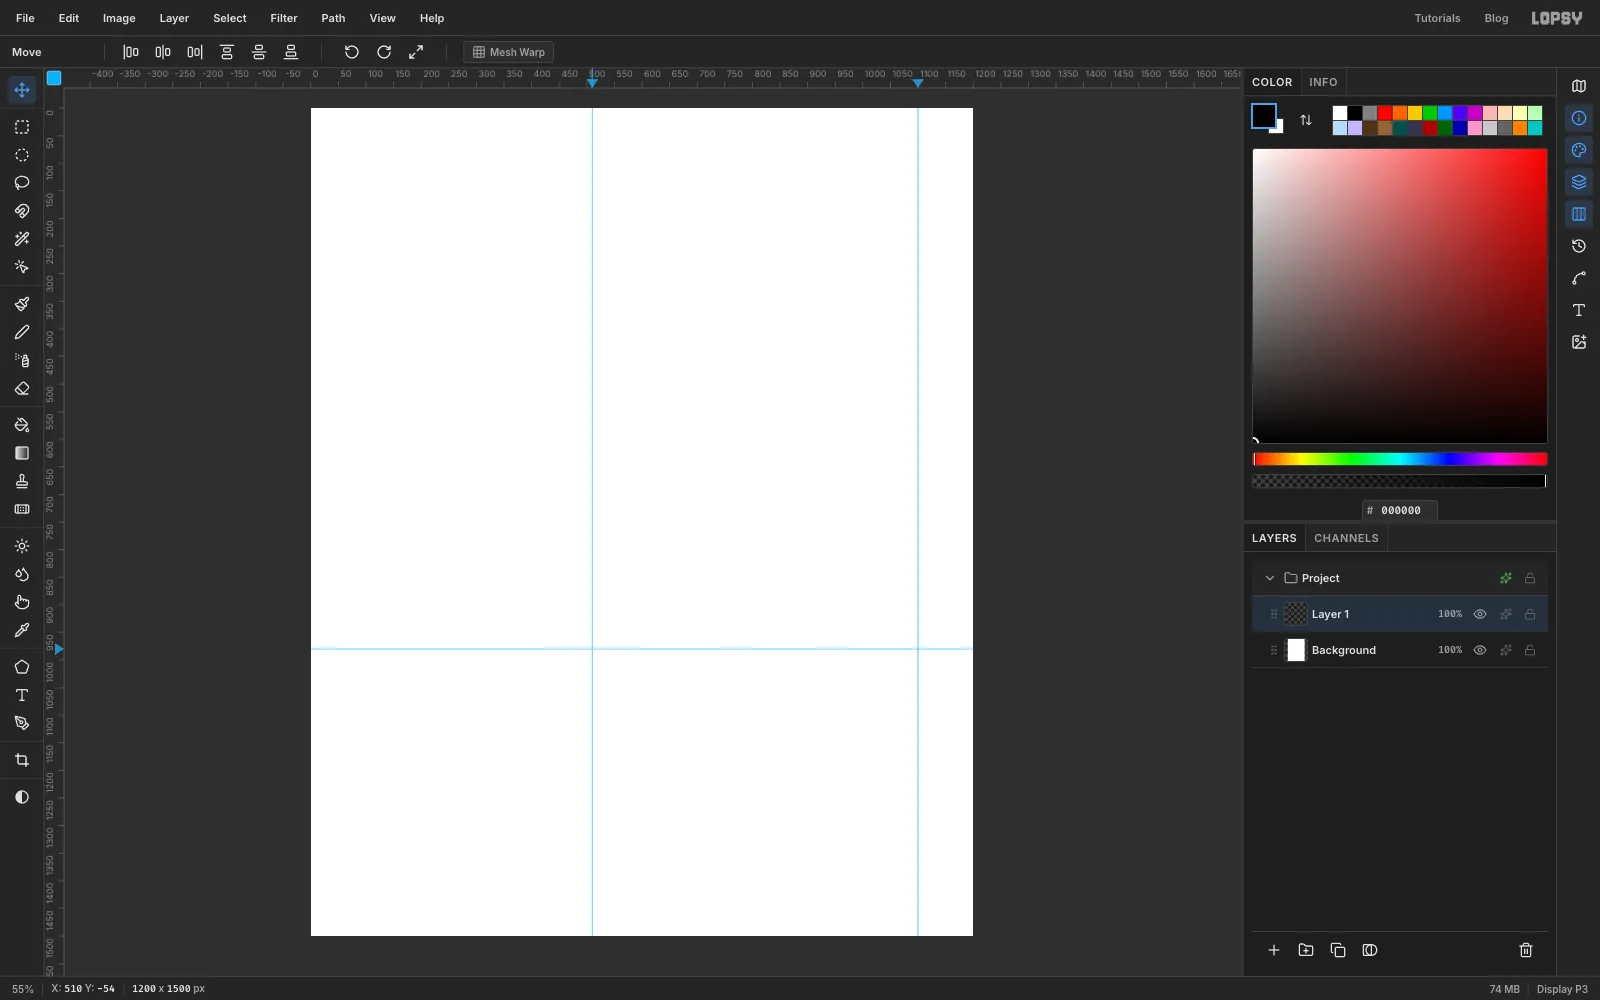
- Create a 1200 × 1500 px document with a white background.
- Click the left ruler at y 980 to drop the horizon guide.
- Click the top ruler at x 1100. Where this guide crosses the horizon is the vanishing point. Every receding edge in the picture points at it.
- Click the top ruler at x 510 for the keyhole's centre line.
A vanishing point far to the right gives the view the off-centre, slightly uneasy angle of de Chirico's squares.
-
Paint the night sky
- Select Background and rename it
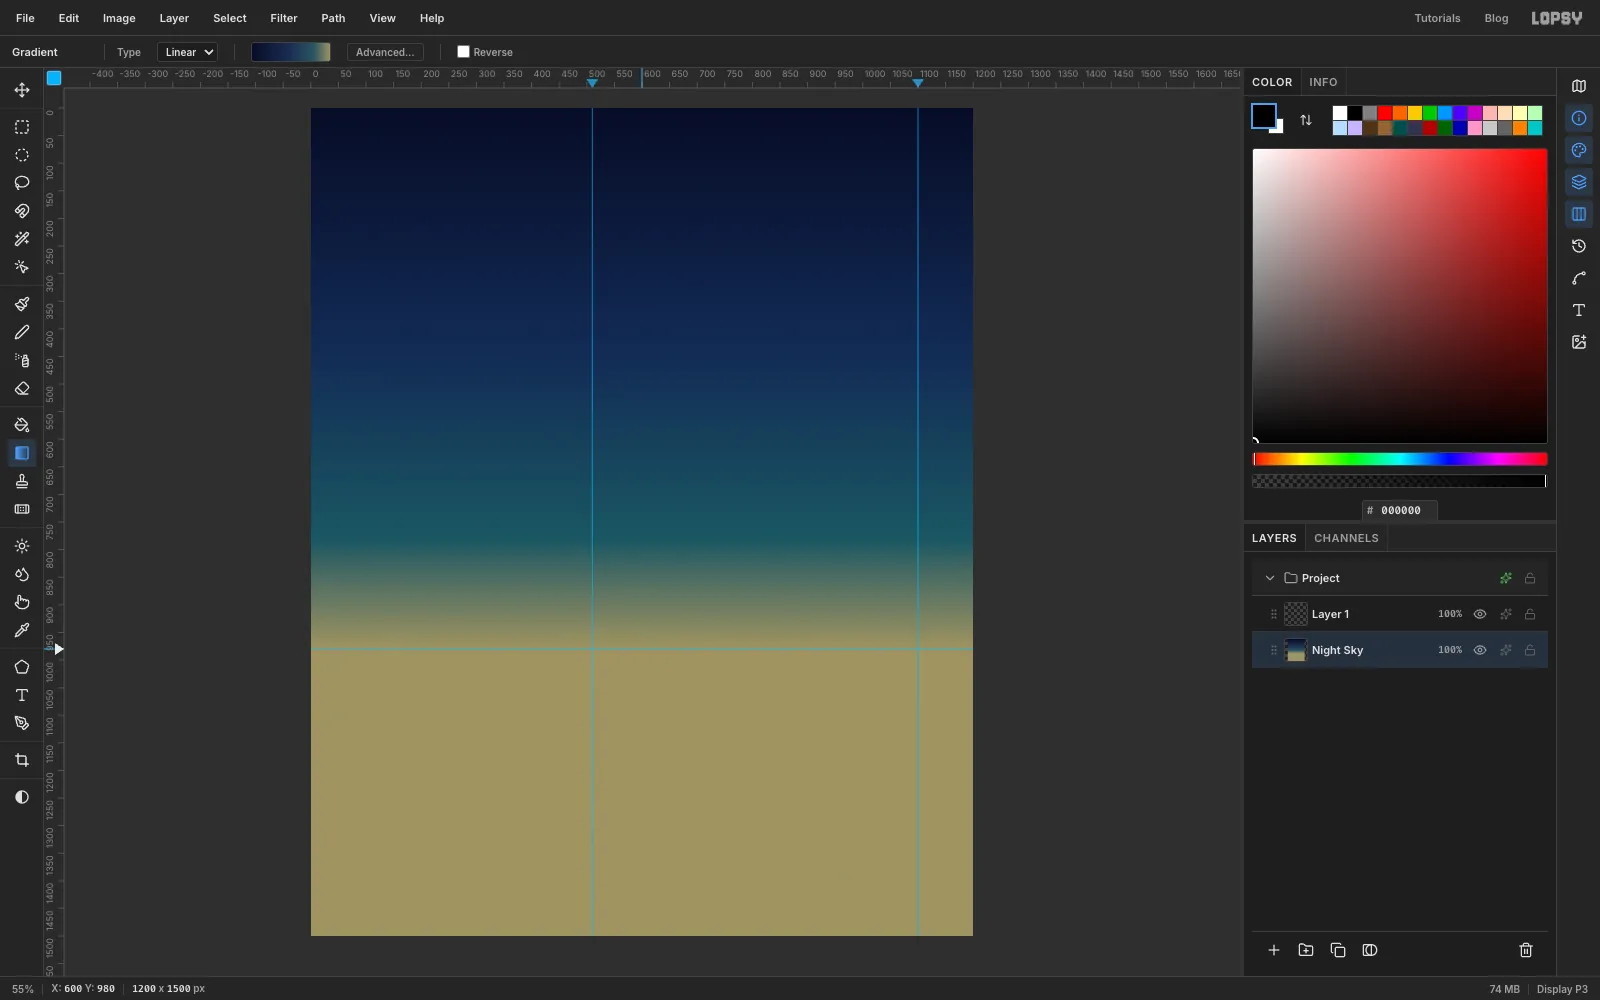
Night Sky. - Pick the Gradient tool, set Type to Linear and open Advanced…. Set four stops:
- at the start
- at 45%
- at 80%
- at the end
- Drag from the top of the canvas straight down to the horizon guide.
The olive-green glow along the horizon is de Chirico's colour. It makes the night feel strange rather than just dark.
- Select Background and rename it
-
Make a star field from noise
- Rename
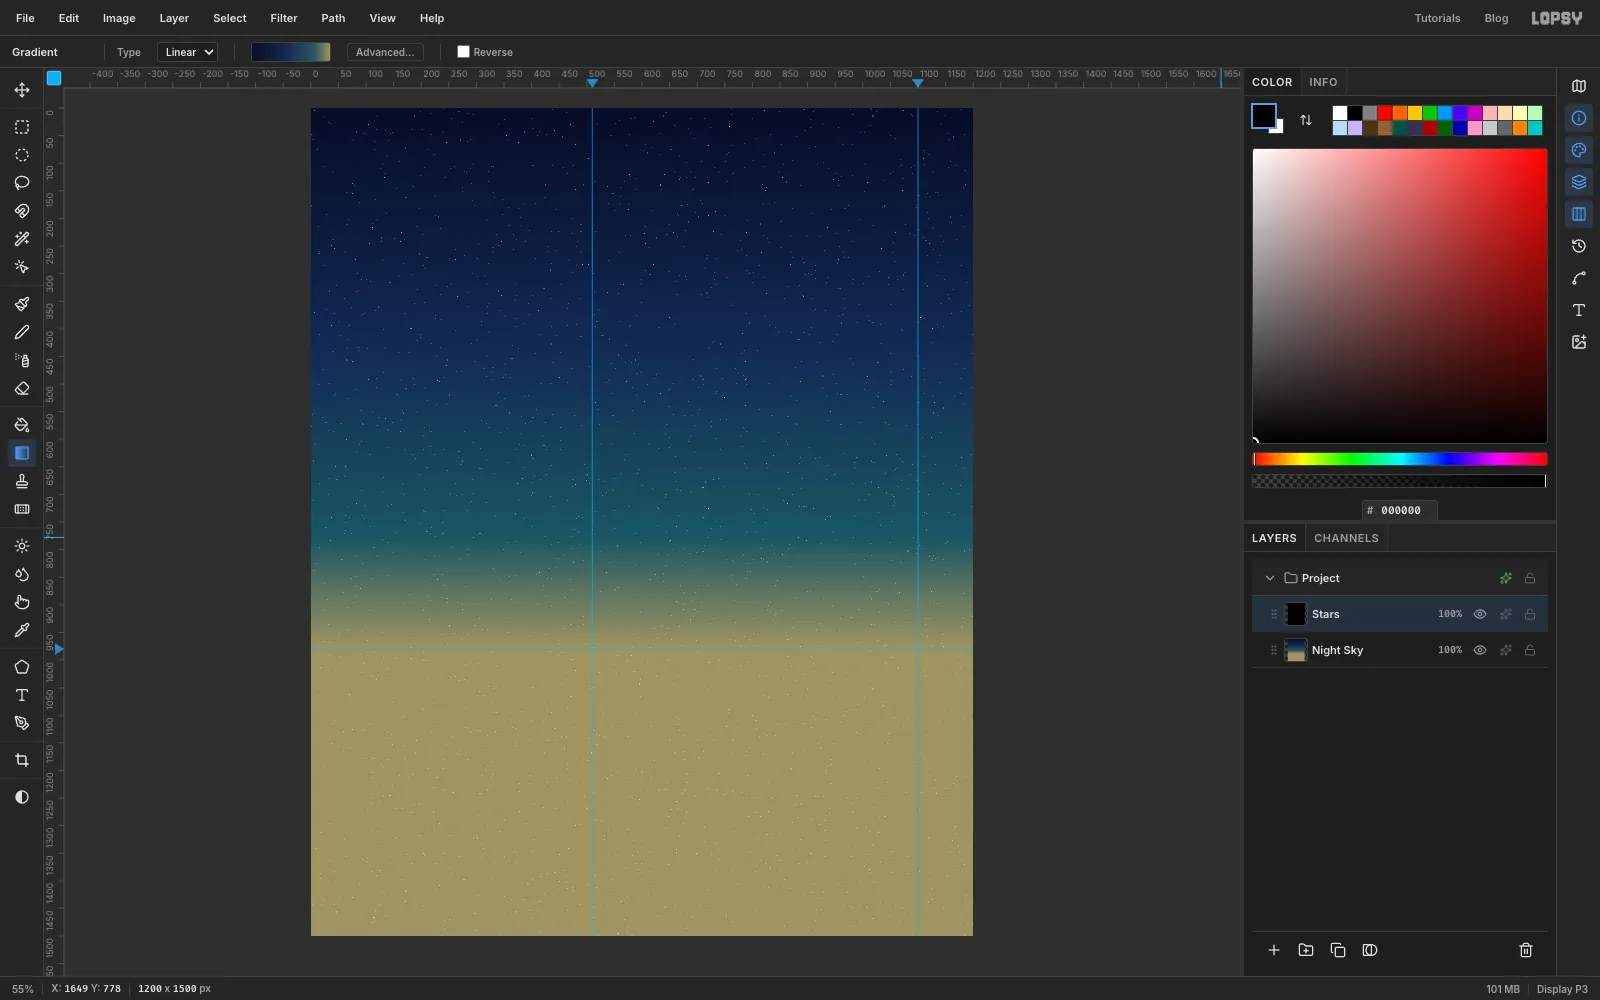
Layer 1toStars. Set the foreground to black and choose Edit → Fill. - Choose Filter → Add Noise… with Amount 100, Mode Mono and Distribution Gaussian.
- Choose Filter → Threshold… with Level 50. Only the brightest grains survive, as single-pixel stars.
- Open the layer's effects drawer and set the blend mode to Screen. The black disappears and the stars sit on the sky.
- Rename
-
Fade the stars toward the horizon
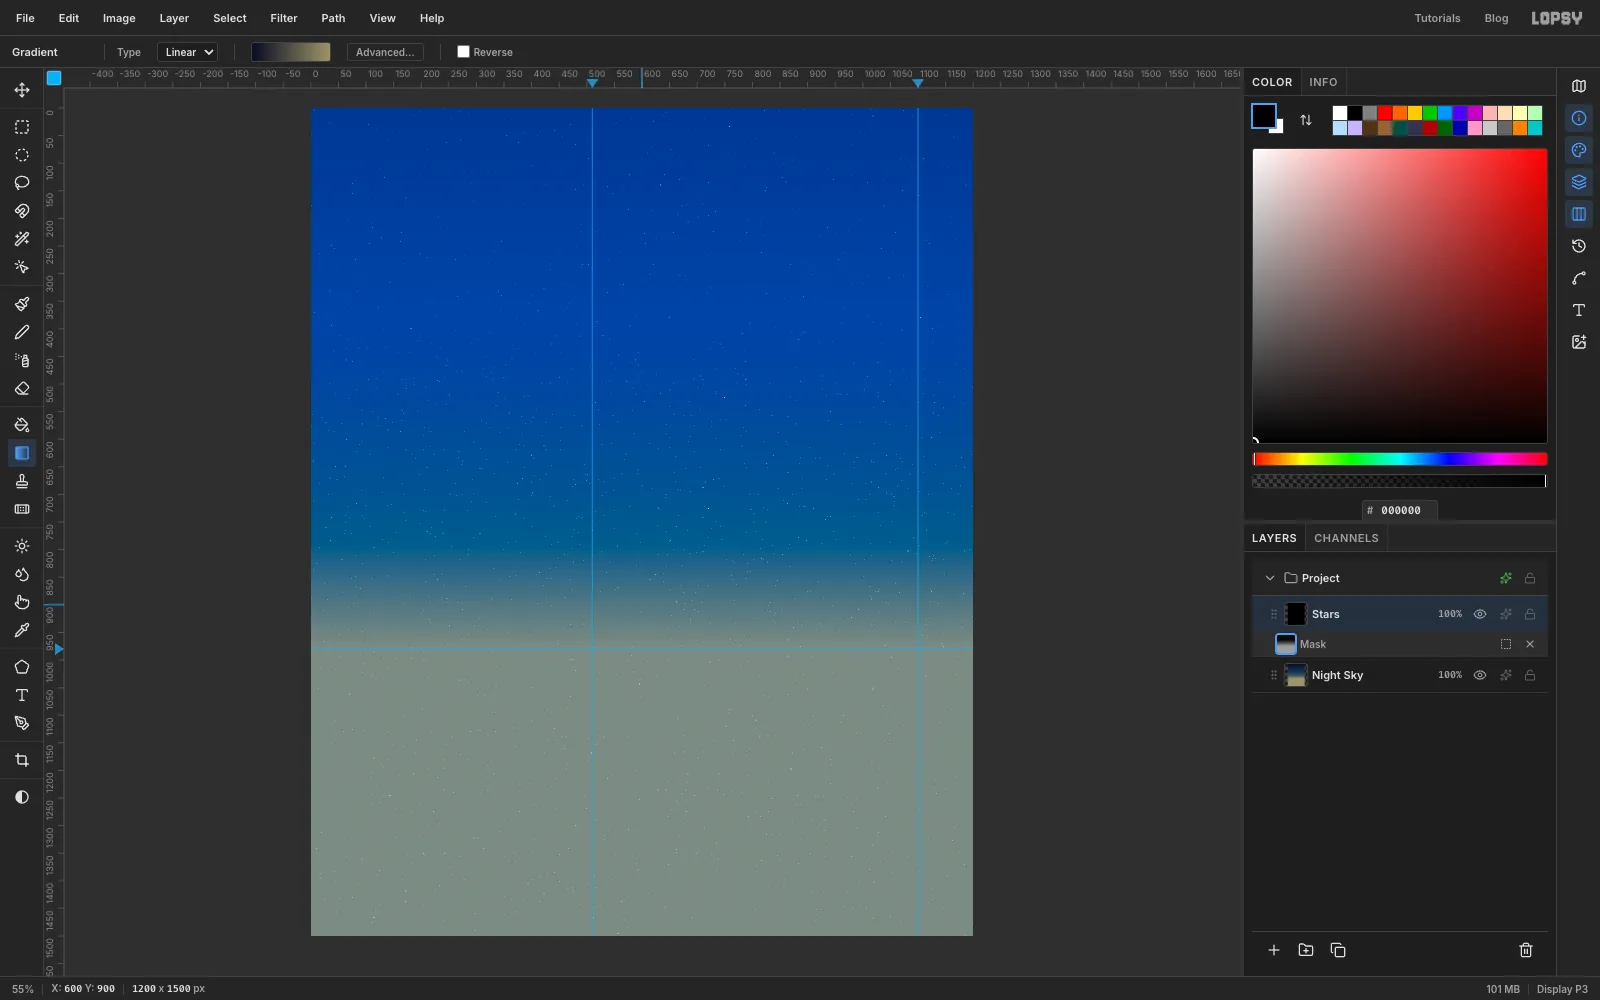
Stars disappear into the glow near the horizon, so fade them out.
- With Stars selected, click Add Mask at the bottom of the Layers panel, then click the mask thumbnail to edit the mask.
- In the Gradient tool's Advanced… editor, set the stops to white then black.
- Drag from y 380 down to y 900.
The blue tint is the mask-editing overlay. Click the Stars layer name to leave mask editing.
-
Add a few bright stars
- Add a layer named
Bright Stars. - Pick the Brush. In the brush settings, set Size 6, Hardness 90 and Spacing 10.
- Set the foreground to and click a dozen single dots around the sky. Keep them off the wall area and spread them unevenly.
- Add an Outer Glow with Size 10, Opacity 70 and colour .
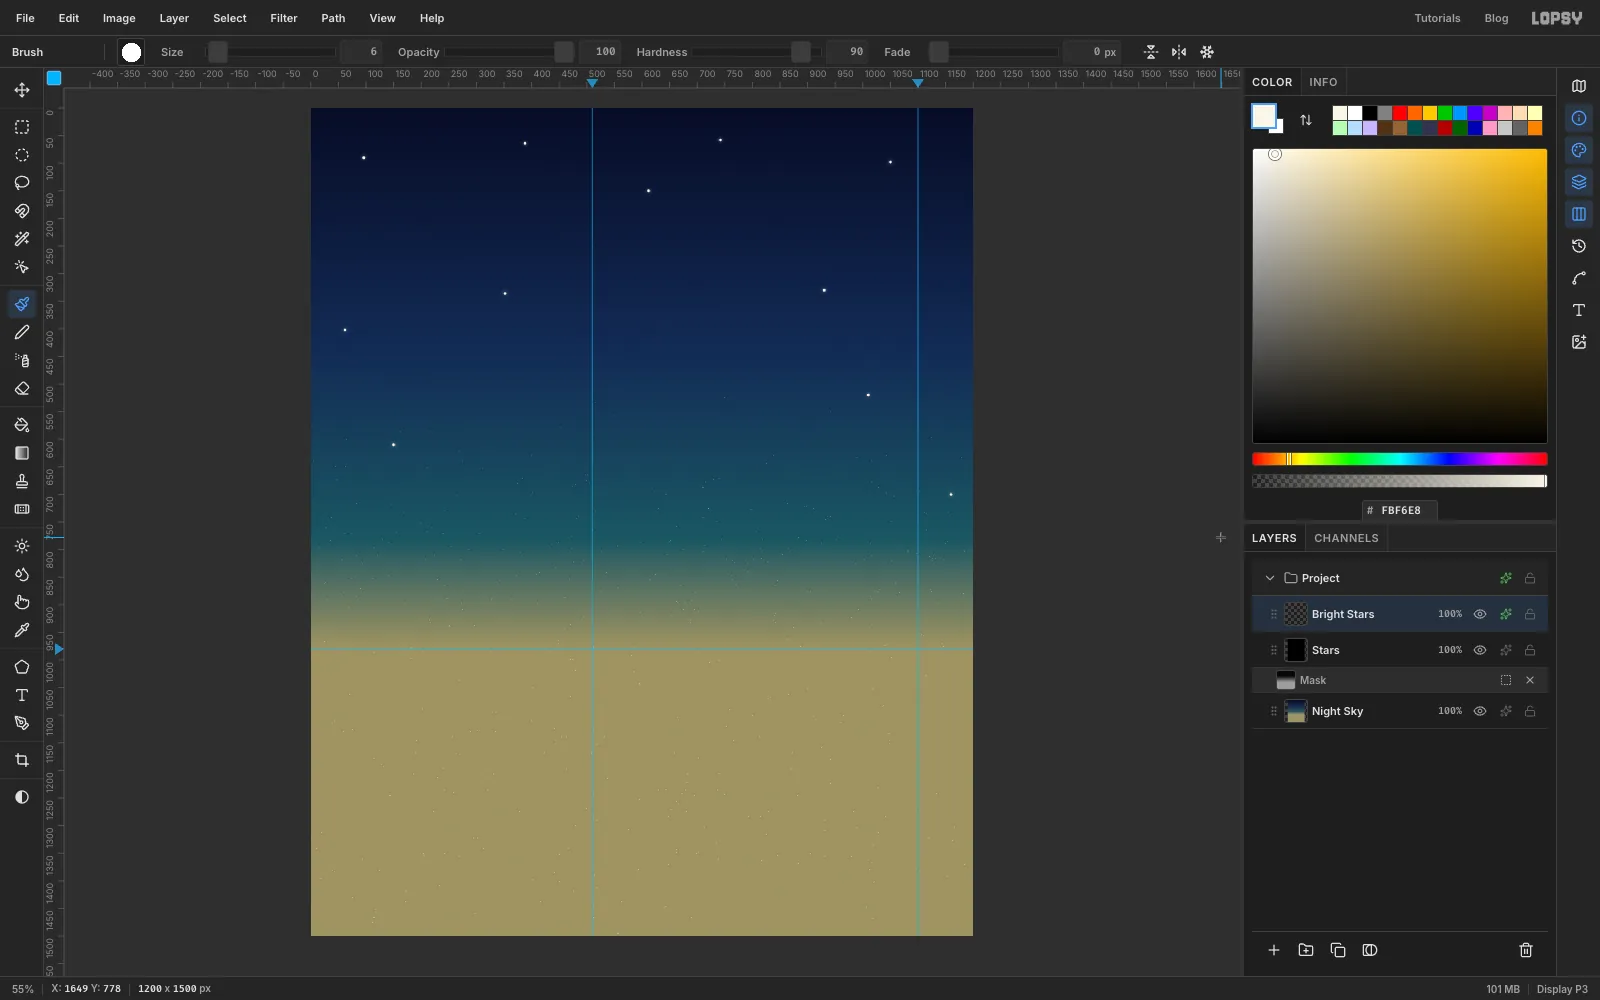
- Add a layer named
-
Cut a crescent moon
- Add a layer named
Moonand pick the Elliptical Marquee. - Click once (no drag) and enter From (270, 90) and To (390, 210) for a 120 px circle.
- Zoom in, hold Alt and drag a second circle of the same size from (301, 71) to (421, 191). It's shifted up and to the right, so it bites a crescent out of the first.
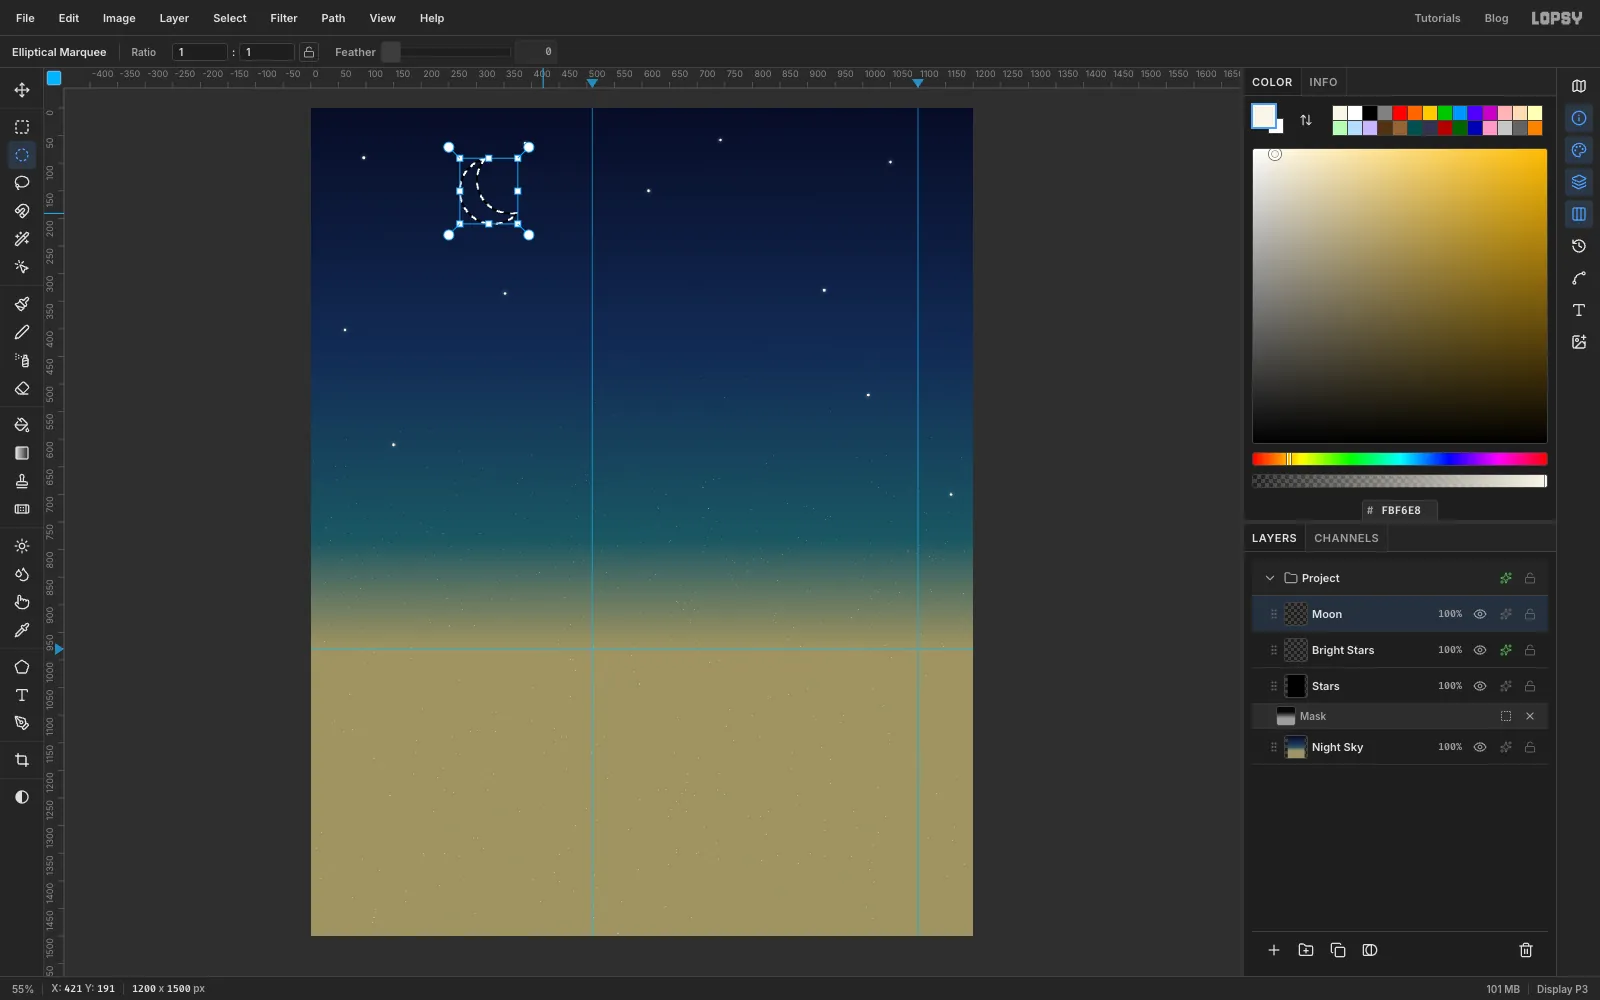
- Add a layer named
-
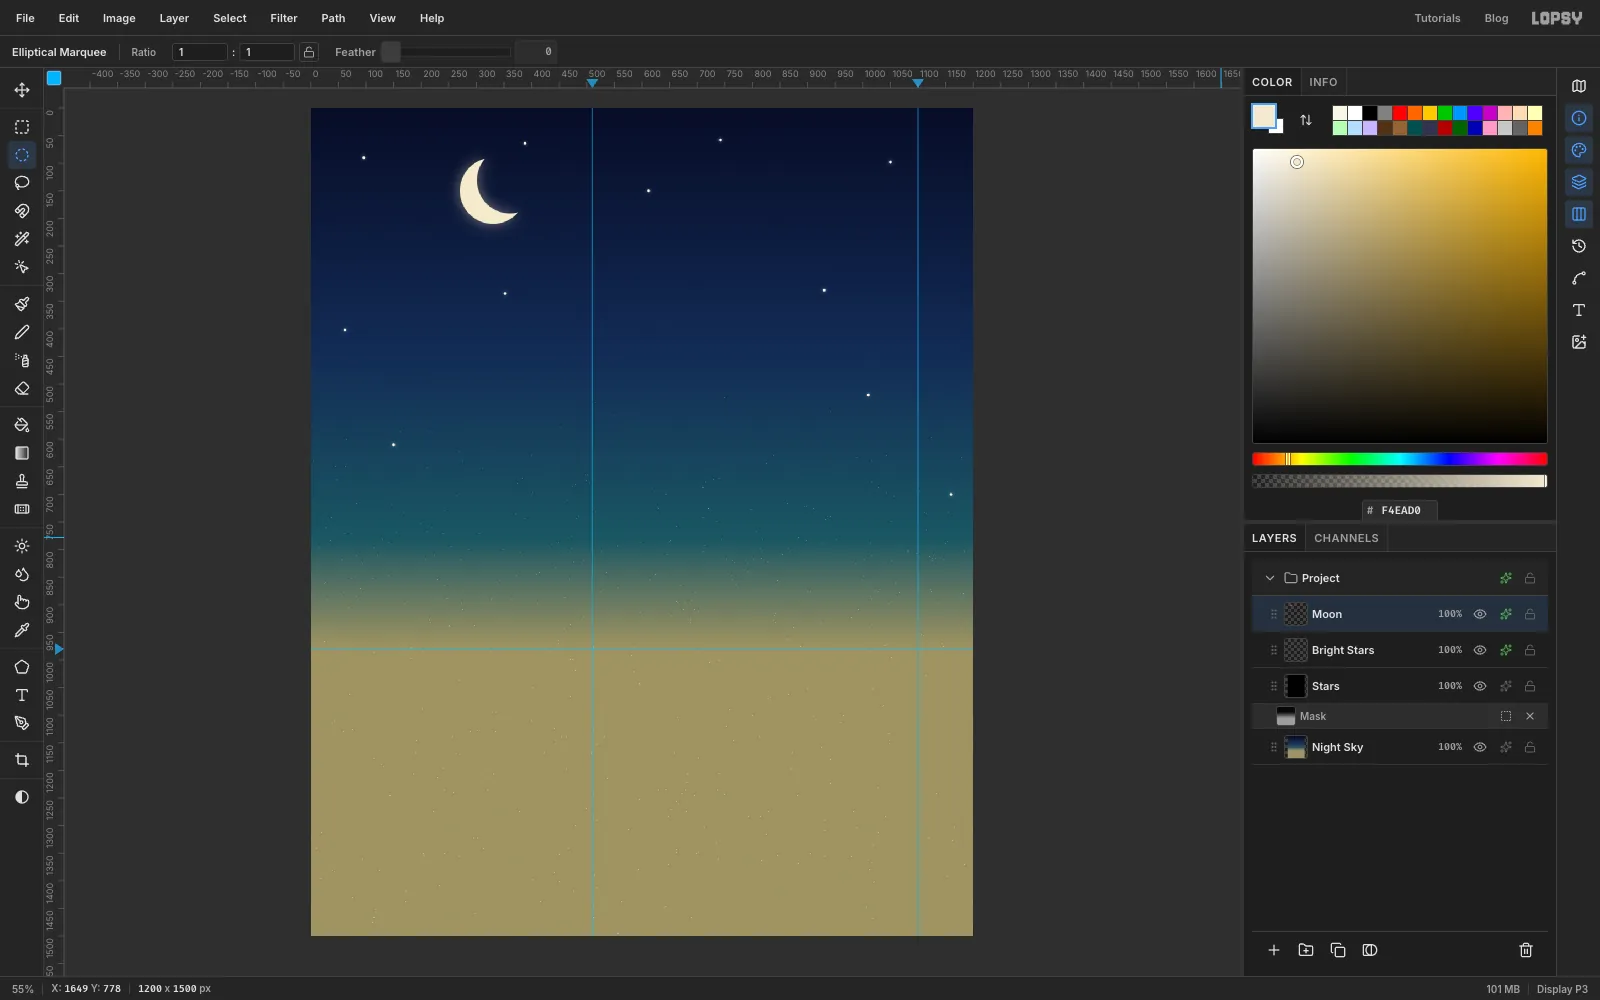
Fill and glow the moon
- Set the foreground to , choose Edit → Fill, and deselect.
- Add an Outer Glow with Size 36, Opacity 45 and colour .
The moon sits well clear of where the wall's top edge will go. If they touch, the moon looks like it is resting on the wall.
-
Lay in the distant hills
- Add a layer named
Far Hills. - With the Lasso, draw a gentle, uneven hill line between about y 920 and y 965. Bring it down below the horizon and back to the start.
- Fill it with and deselect.
- Run Filter → Gaussian Blur… at Radius 2 so the hills sit back in the distance.
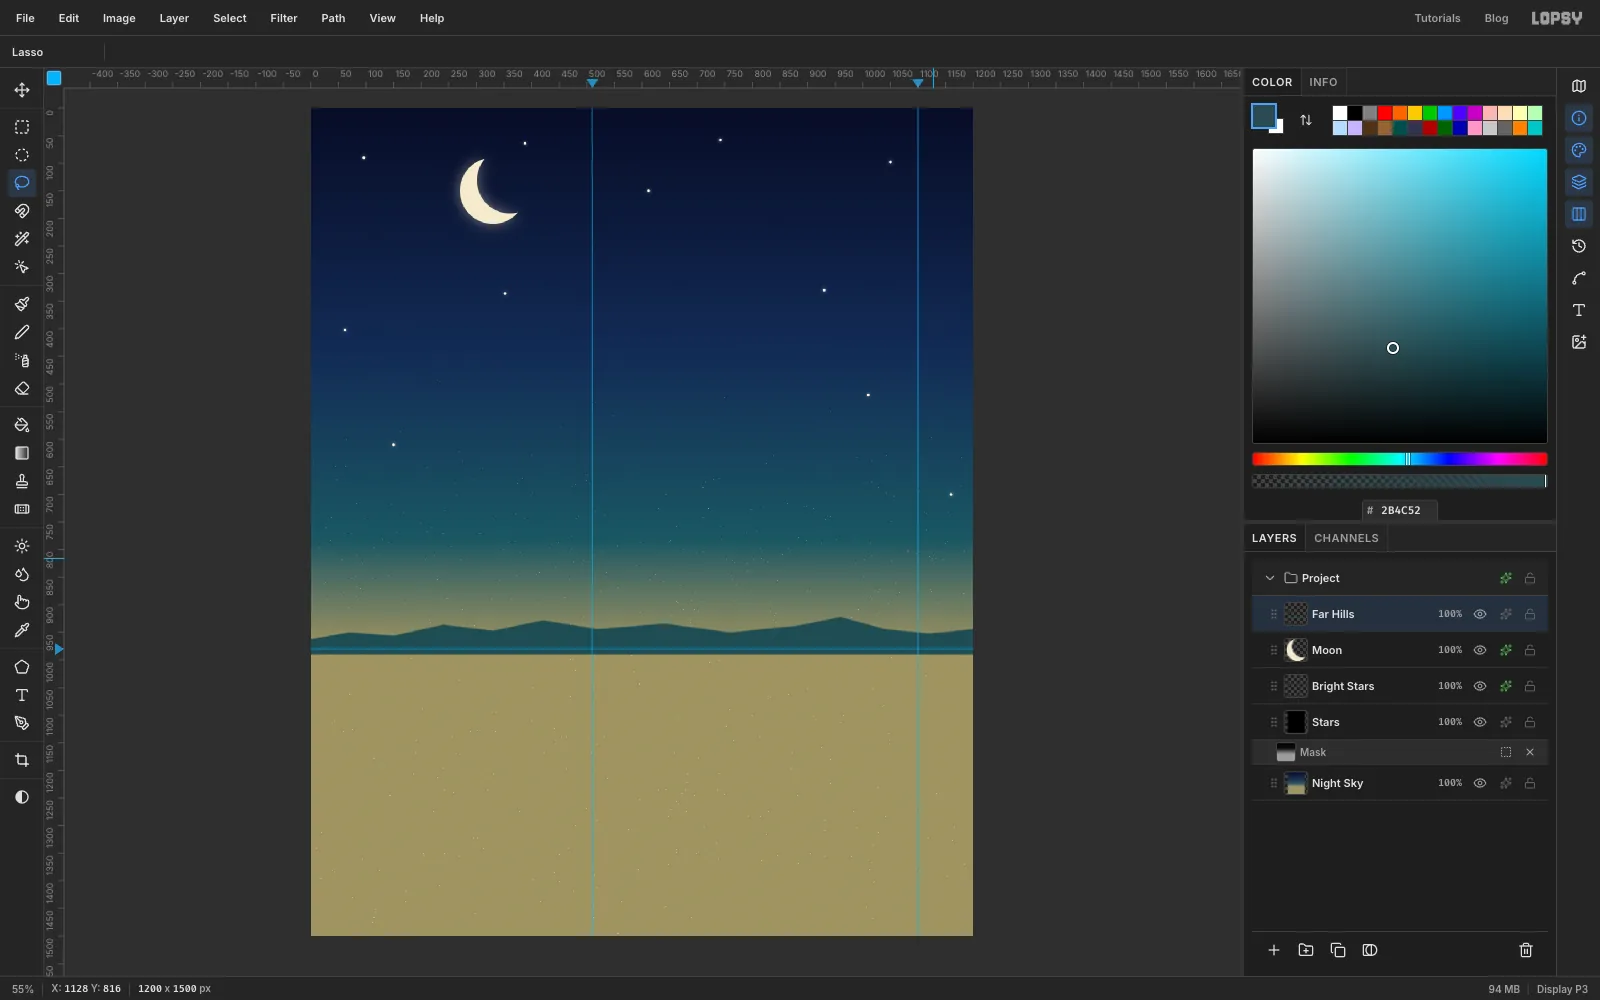
- Add a layer named
-
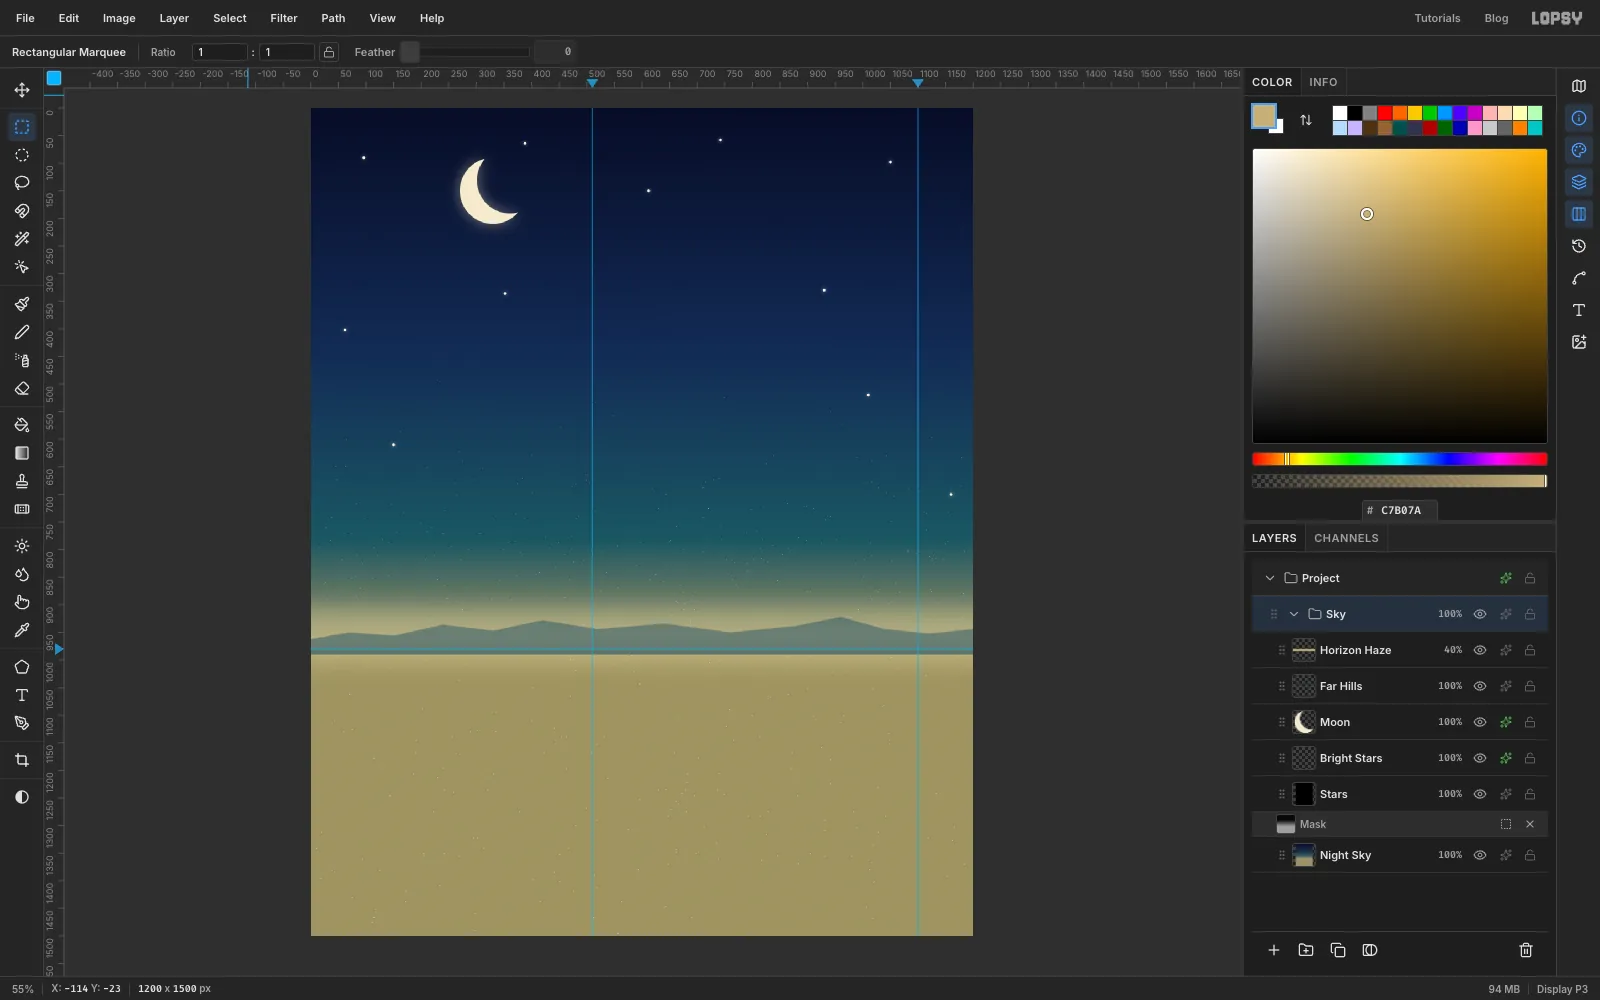
Add horizon haze and group the sky
- Add a layer named
Horizon Haze. Select the rectangle from (0, 905) to (1200, 1005). - Choose Select → Feather… with 40 px. Fill with .
- Set the layer to Screen at 40% opacity.
- Click Night Sky, then Shift-click Horizon Haze to select all the sky layers.
- Choose Layer → Group Layers and rename the group
Sky. - Collapse the group with its arrow. A collapsed group that's selected makes new layers go above it, not inside it.
- Add a layer named
-
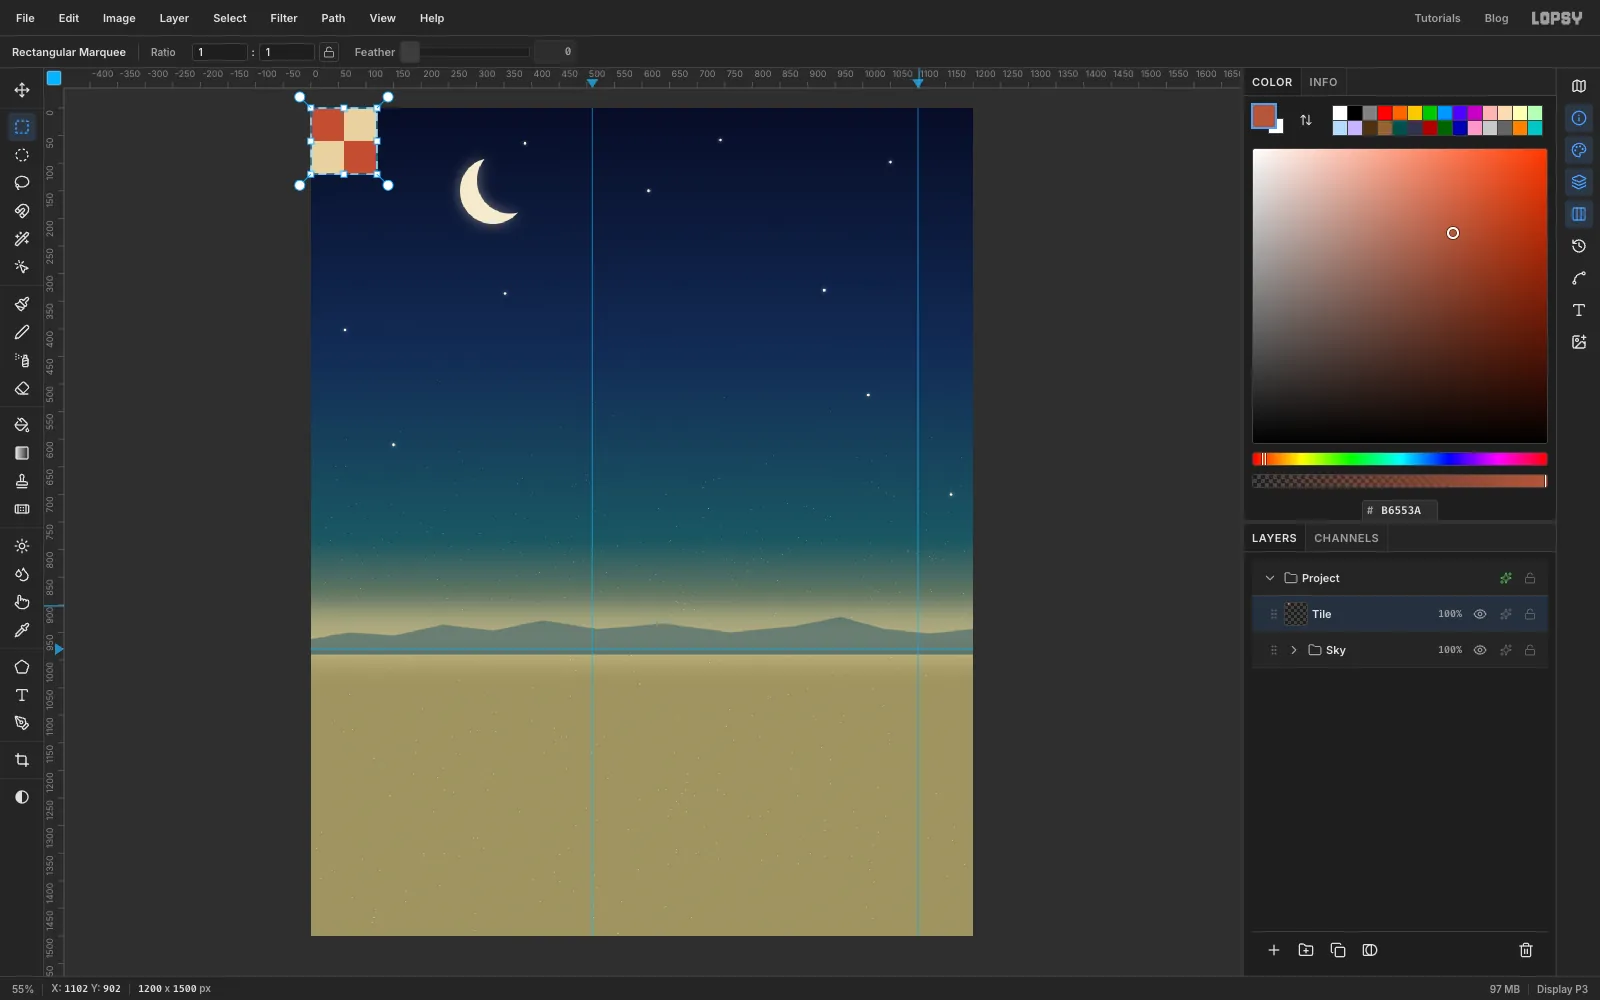
Draw a checkerboard tile
- With the Sky group selected, add a layer named
Tile. - Select (0, 0) to (120, 120) and fill it with .
- Select (0, 0) to (60, 60). Zoom in, hold Shift and drag a second square from (60, 60) to (120, 120). Fill both with .
- Select the whole tile, (0, 0) to (120, 120), and choose Edit → Define Pattern.
- Delete the Tile layer. The pattern is saved and you don't need the layer any more.
- With the Sky group selected, add a layer named
-
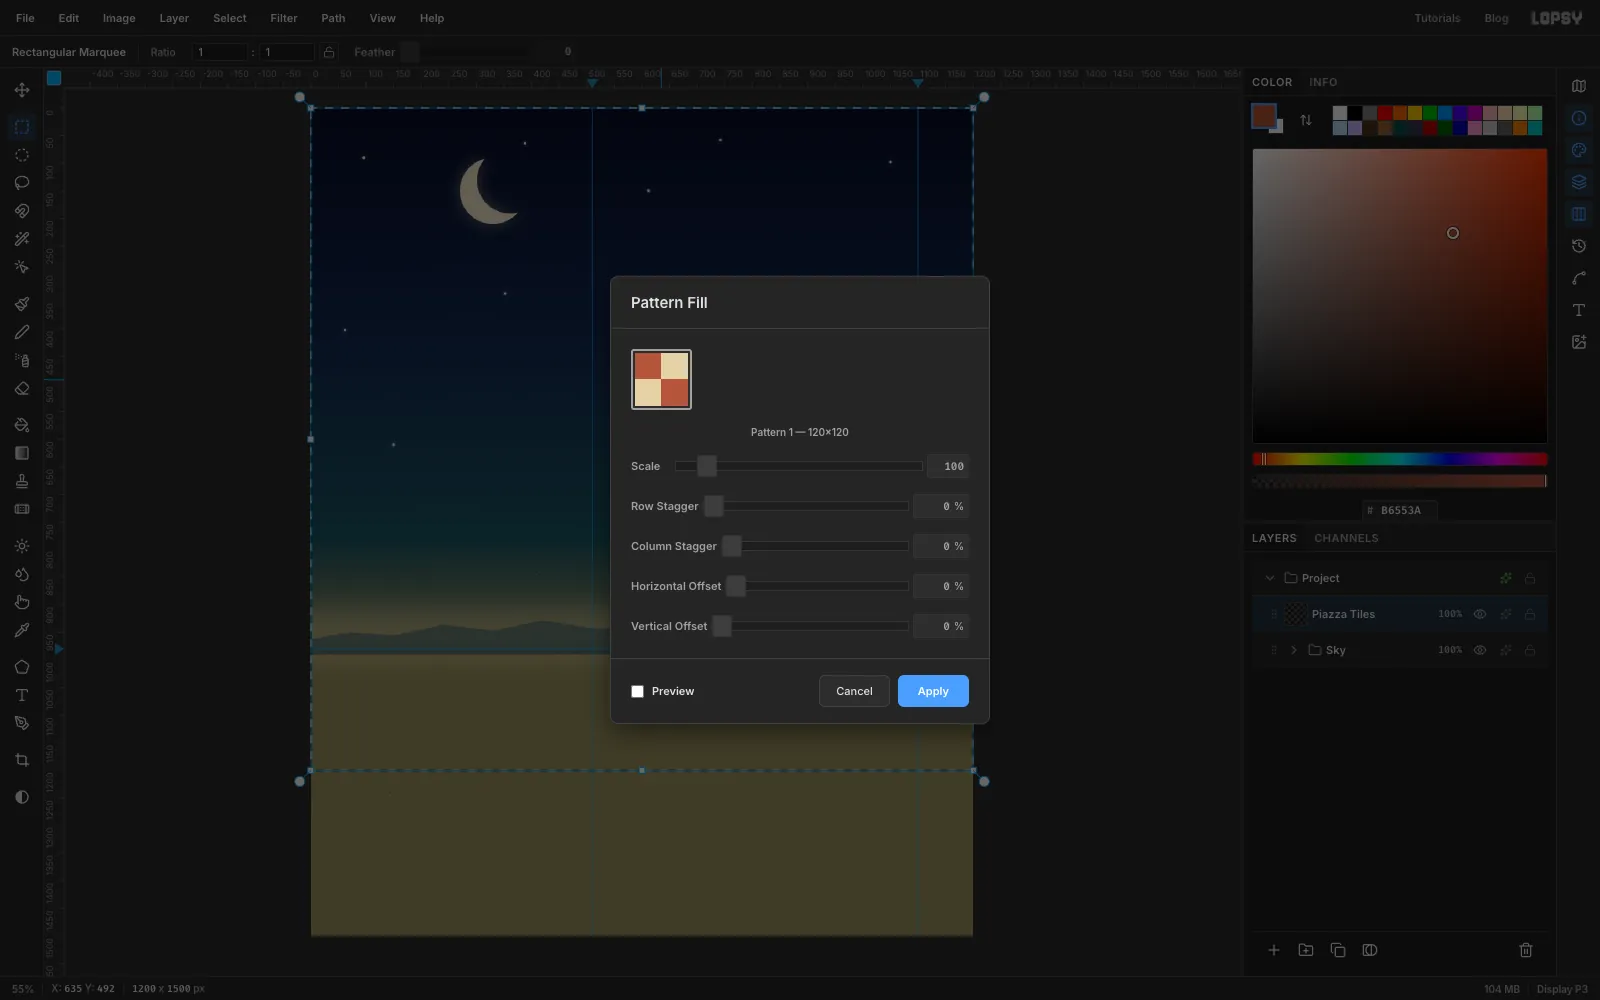
Fill a square with the pattern
- Click the Sky group again, add a layer named
Piazza Tilesand select (0, 0) to (1200, 1200). It's a square of floor, laid out flat. - Choose Edit → Fill with Pattern…, pick the checker and click Apply.
The checkerboard covers the sky for now. You'll lay it down on the ground next.
- Click the Sky group again, add a layer named
-
Distort the far edge onto the horizon
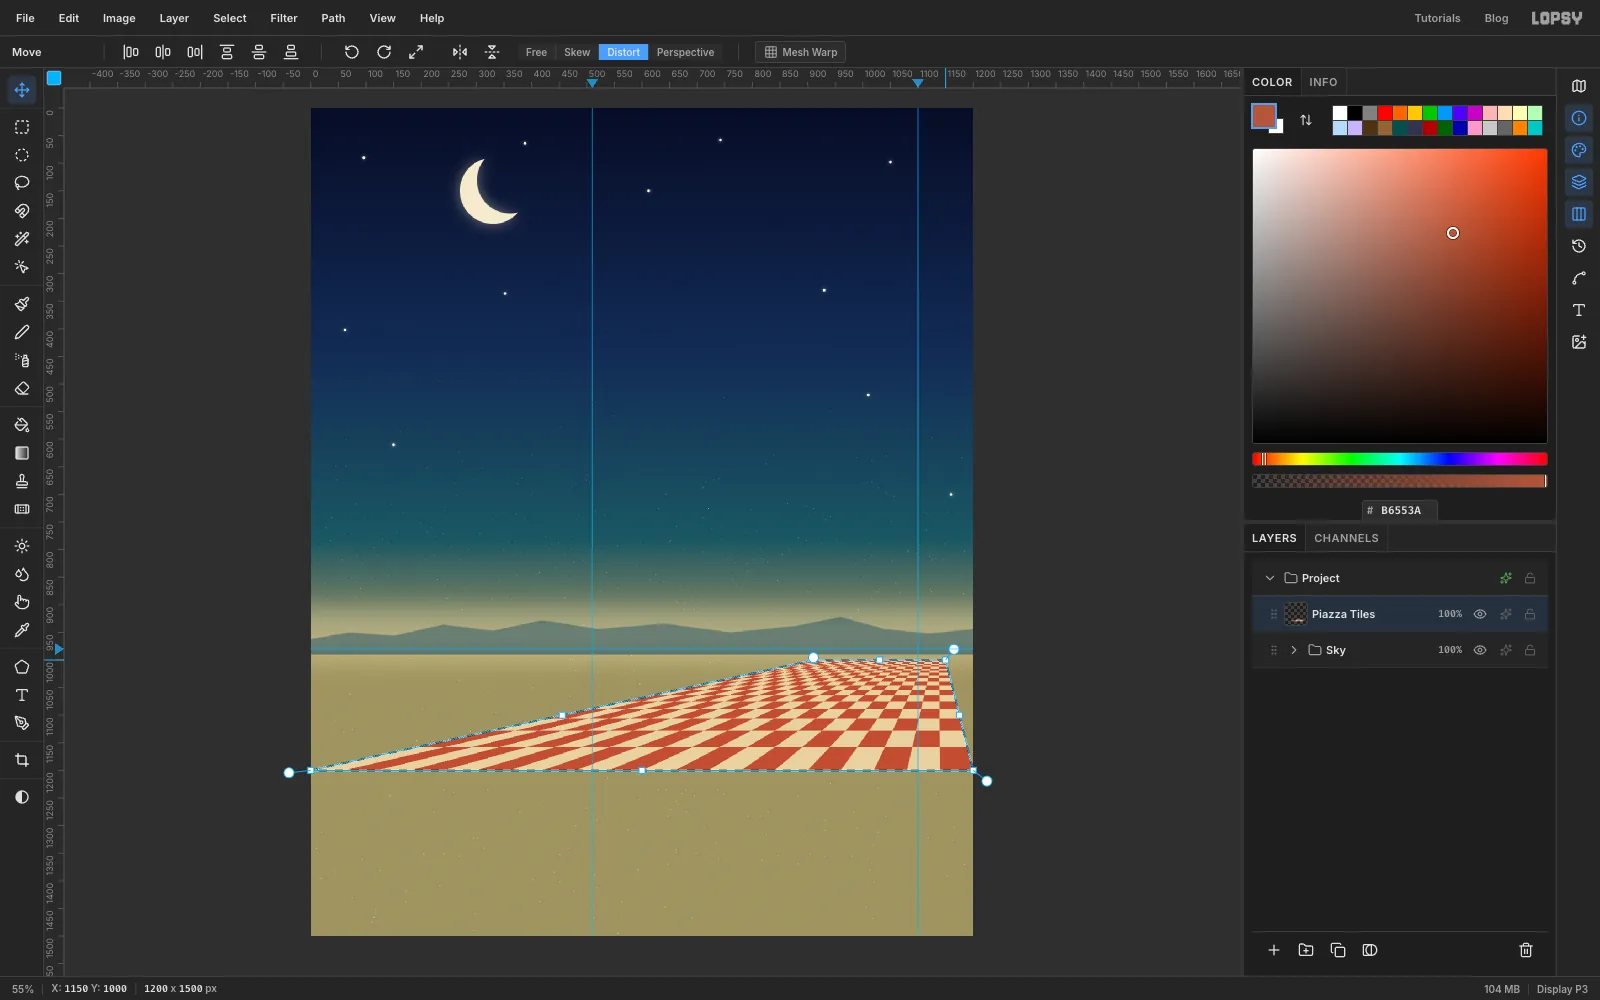
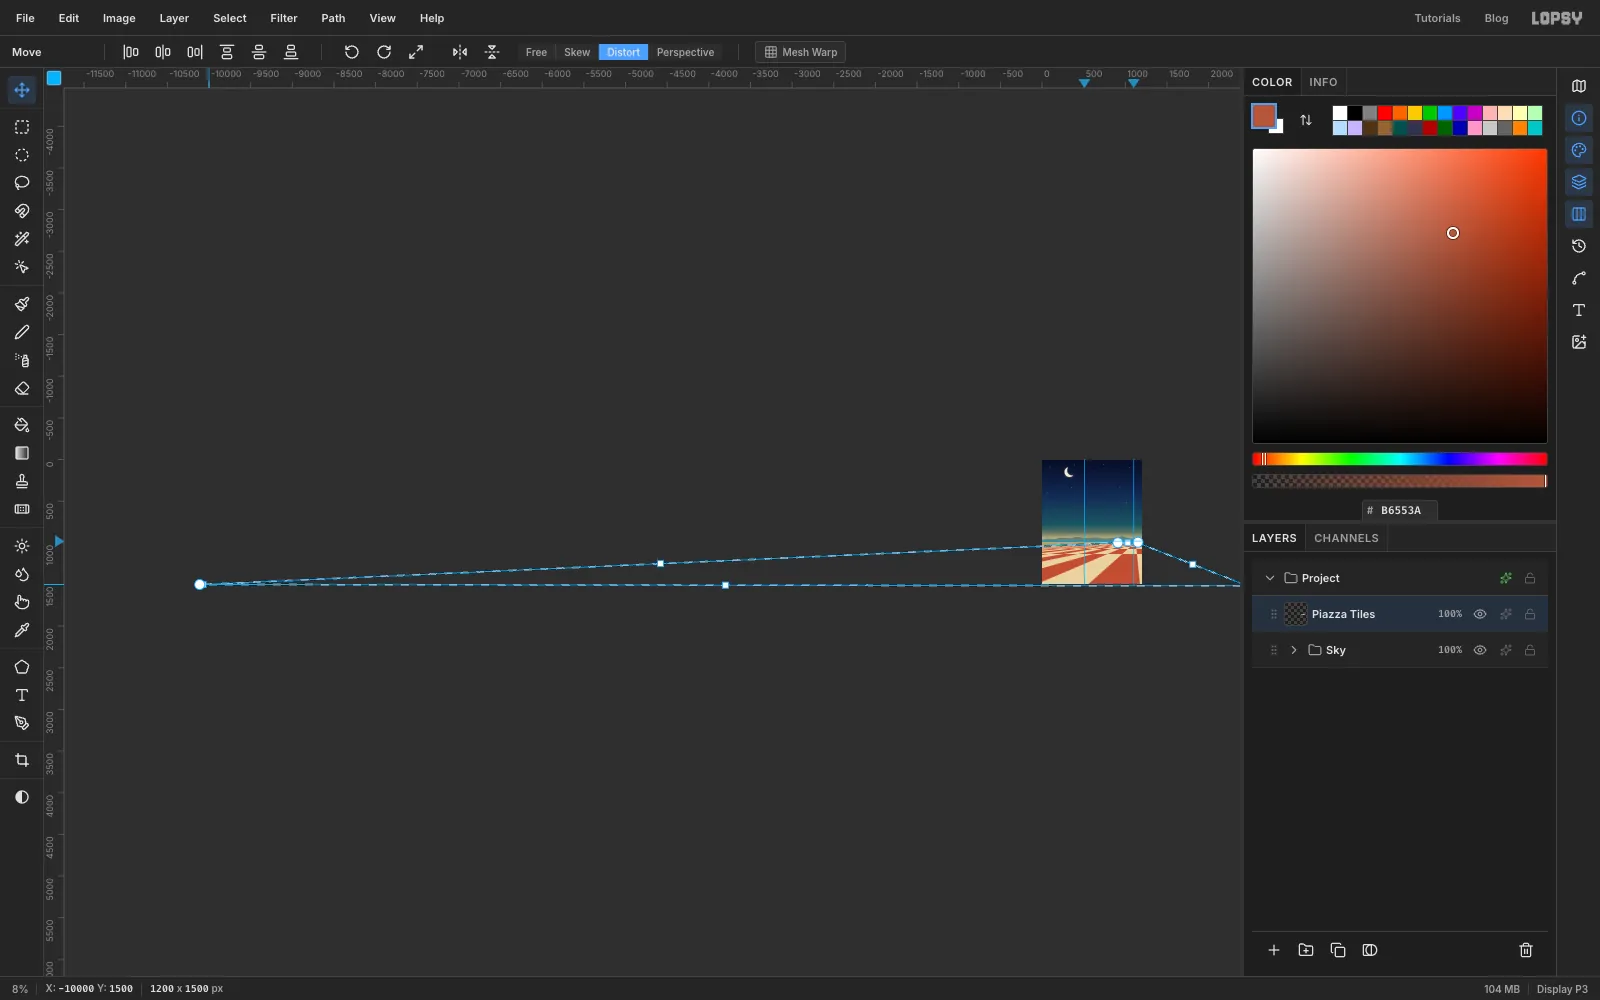
- Keep the selection and pick the Move tool. Choose Distort in the options bar.
- Drag the top-left corner handle to (911, 1000), just below the horizon and left of the vanishing point.
- Drag the top-right handle to (1150, 1000).
The far edge of the floor is now a short line near the vanishing point.
-
Pull the near corners out wide
The near corners have to go far beyond the canvas edges, or the floor stops short on the left.
- Press Cmd+- until the zoom readout at the bottom left shows about 8%.
- Drag the bottom-right handle to about (2400, 1500): right of the canvas, level with the bottom edge.
- Hold Space and drag the view to the right to make room on the left.
- Drag the bottom-left handle a very long way left, to about x −10000, level with the bottom edge. Watch the board's left edge. It should still point at the vanishing point, and it should leave the canvas just below the horizon.
- Press Cmd+D to commit, then Cmd+0 to fit the canvas back on screen.
Distort is a true perspective transform, so the rows of tiles shrink as they recede.
-
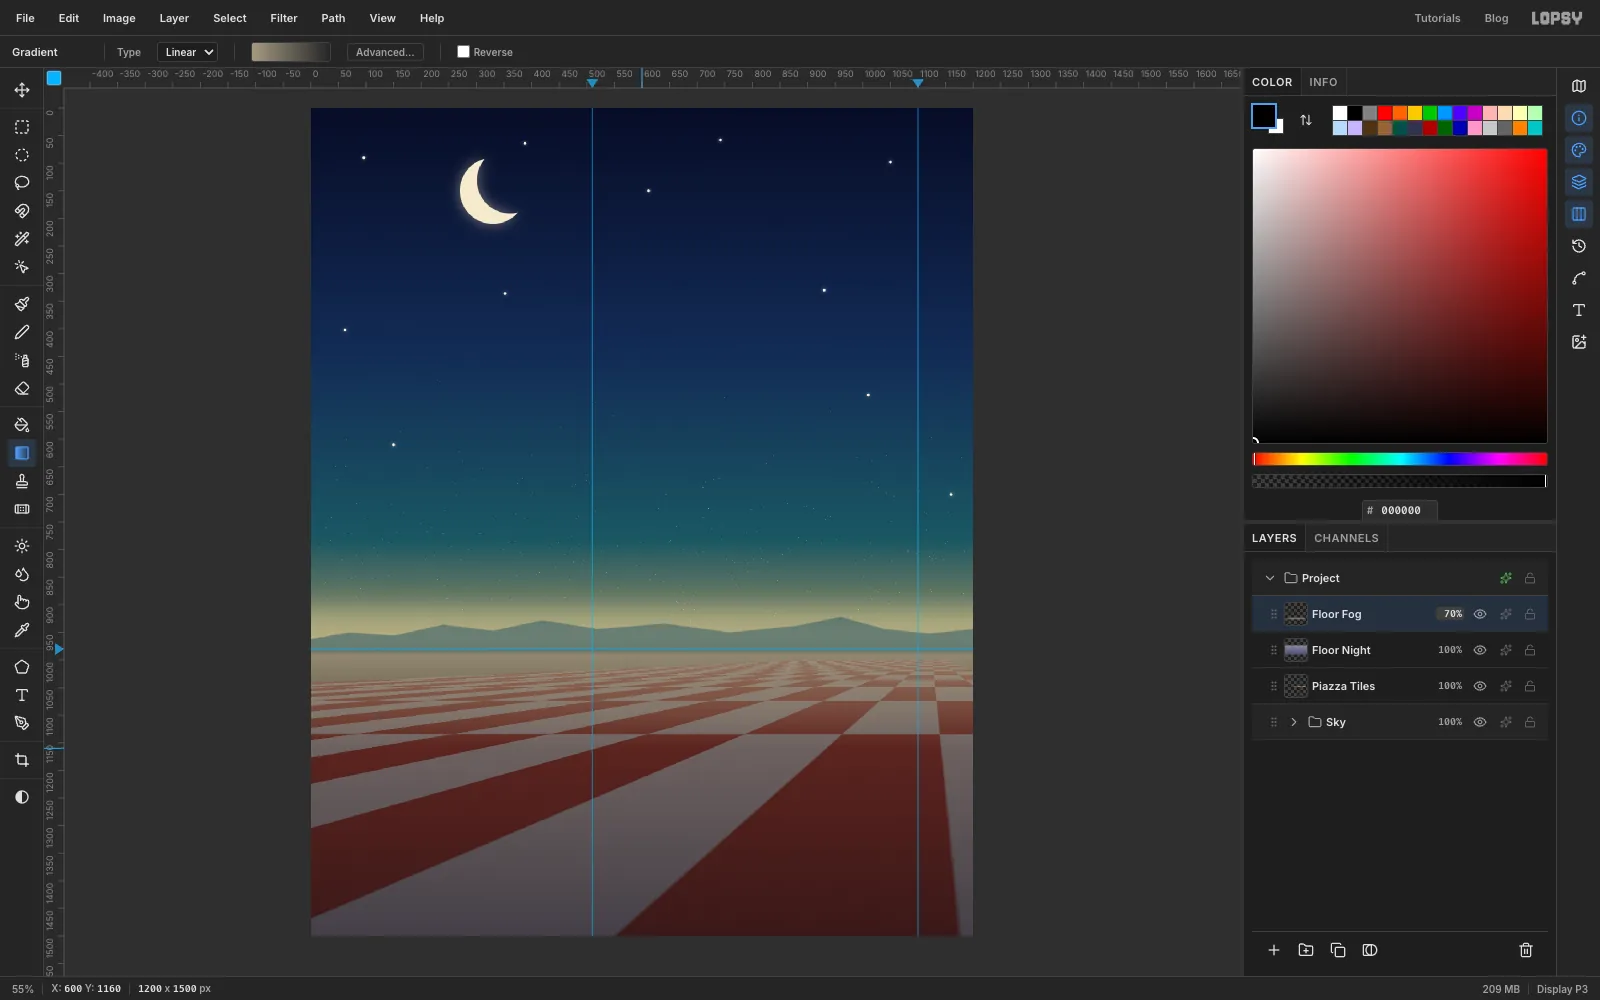
Darken the floor and add distance fog
- Add a layer named
Floor Nightand select (0, 985) to (1200, 1500). - Set the gradient stops to and . Drag from just under the horizon down to the bottom of the canvas.
- Set the layer to Multiply.
- Add a layer named
Floor Fog. With the same selection, set both gradient stops to . Give the second stop 0% opacity. - Drag from y 990 down to y 1160, then deselect and set the layer to 70% opacity.
- Group Piazza Tiles, Floor Night and Floor Fog as
Piazza, then collapse the group.
Limit the fog to the floor with the selection. Without it, the gradient's solid start colour floods the whole sky.
- Add a layer named
-
Drop in the daytime sky
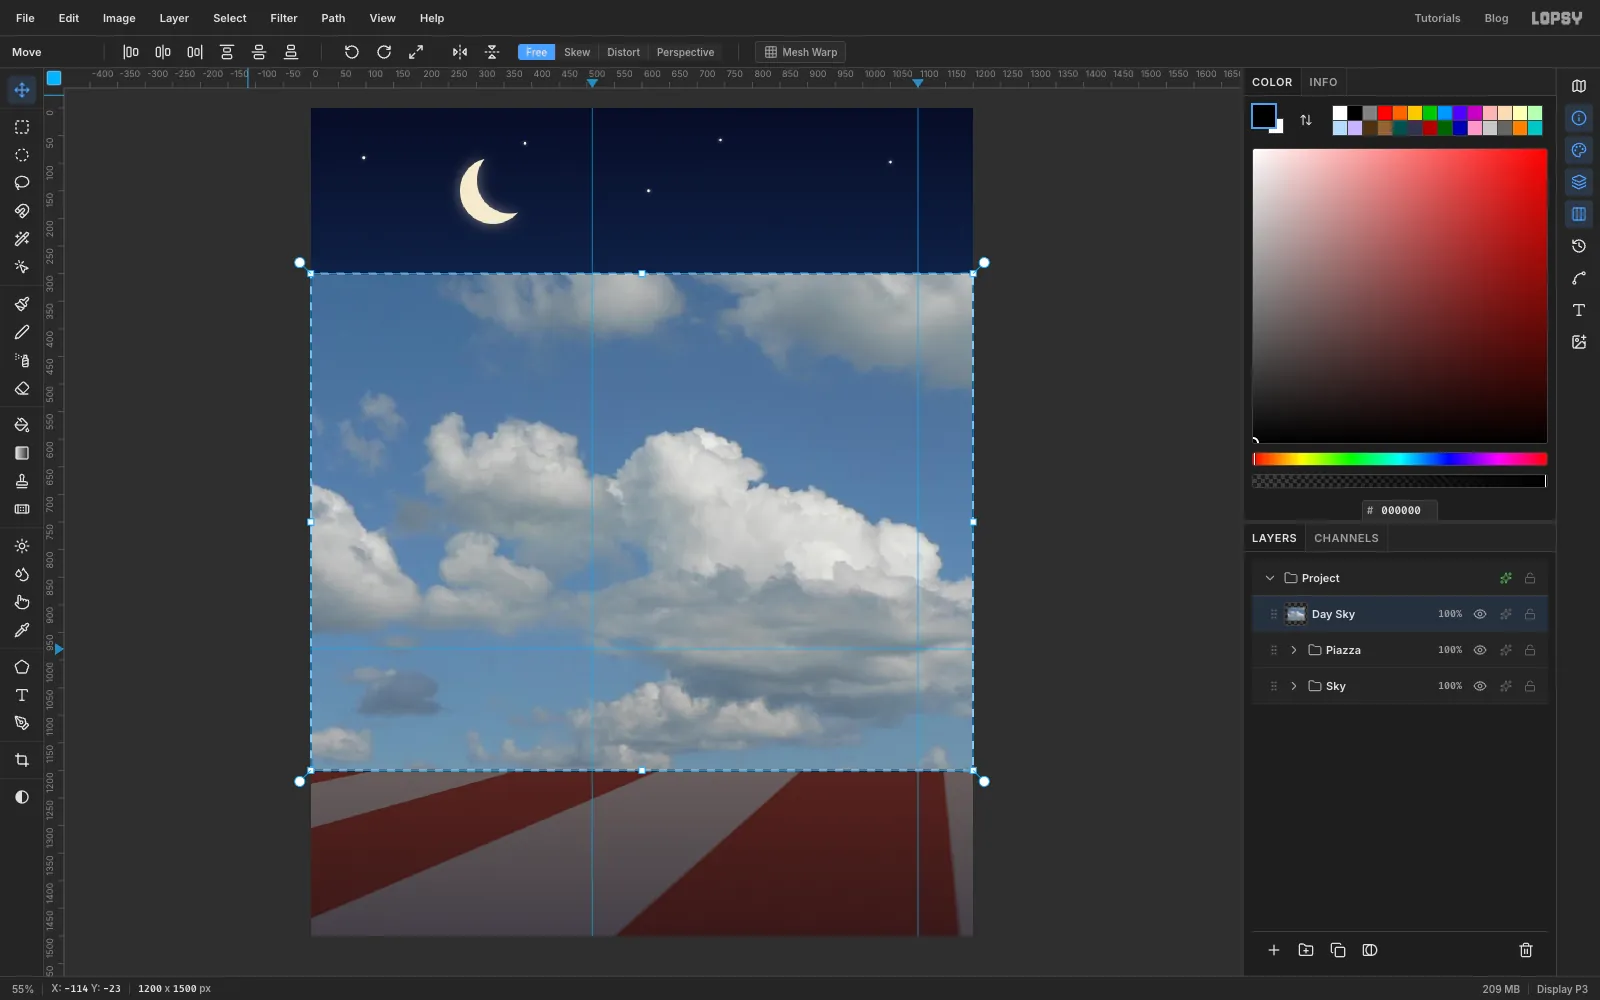
- With Piazza selected, drag the Clouds in blue sky photo from your desktop onto the canvas. It arrives as a new layer, fitted to the canvas width.
- Rename the layer
Day Sky. - Drag it about 150 px left and 20 px down, so the big cloud bank sits around the keyhole's centre line. Press Cmd+D.
You'll trim it to the keyhole later.
-
Draw a brick tile
- Click New Group at the bottom of the Layers panel and name it
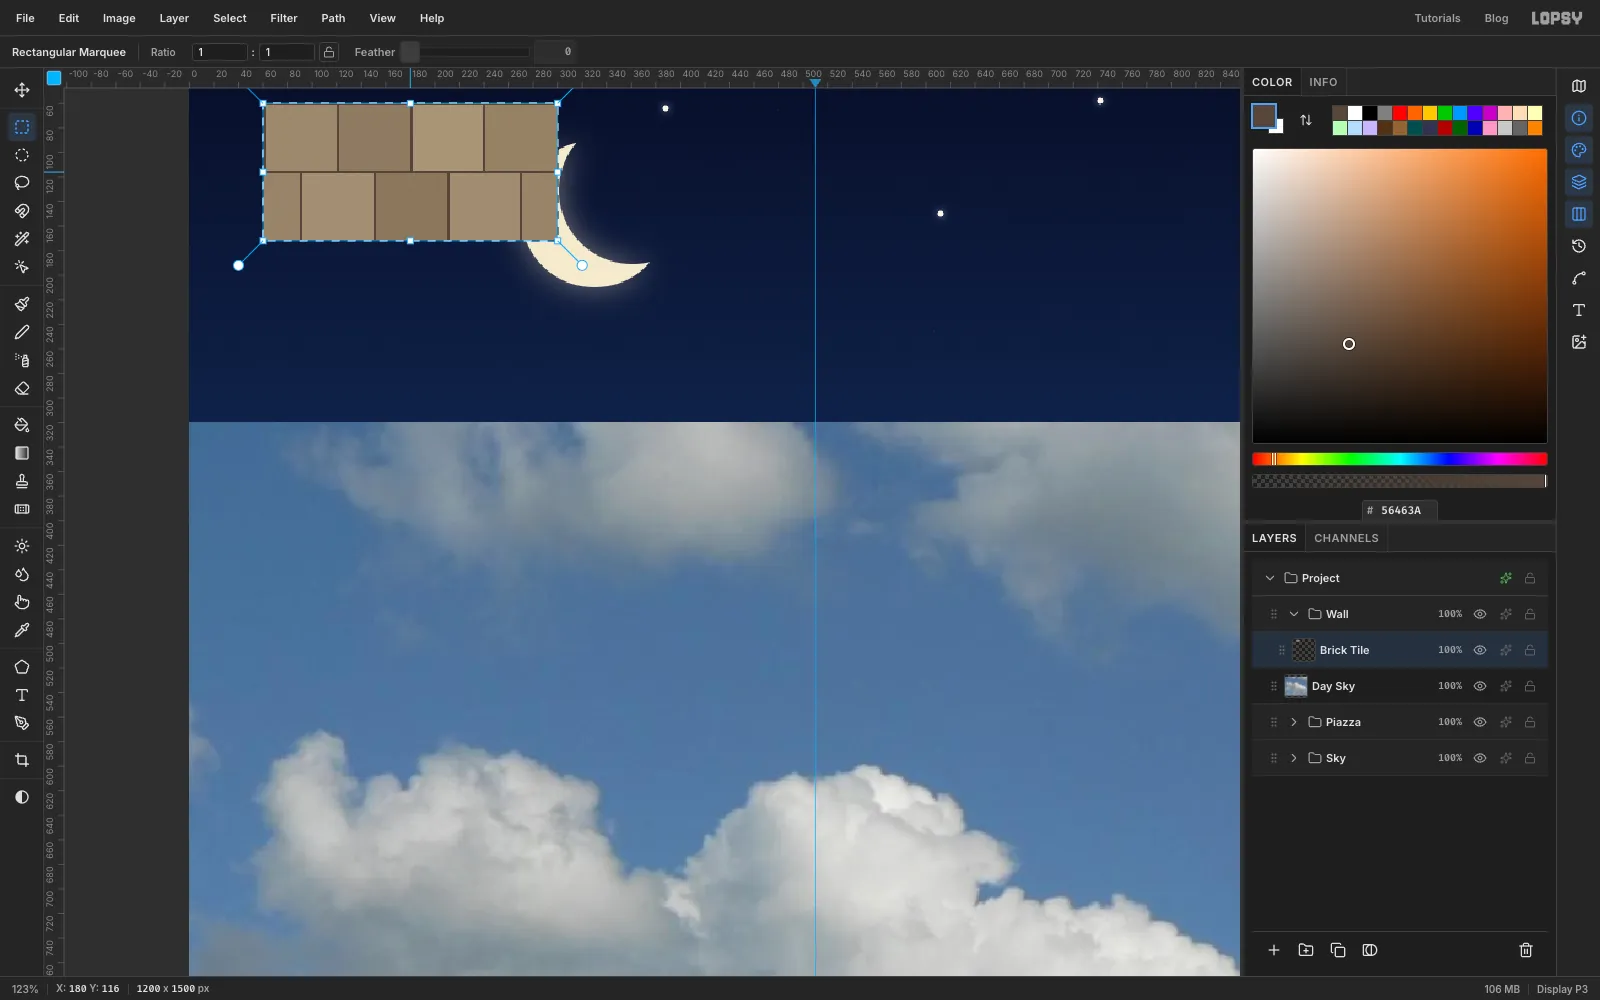
Wall. Add a layer inside it namedBrick Tile. - Build two courses of 60 × 56 px bricks with the exact-size marquee dialog, filling each rectangle as you go:
- Top course (y 60 to 116): four bricks from x 60 to 300, each 60 px wide. Give each its own tone: , , , .
- Bottom course (y 116 to 172): shifted by half a brick. Fill x 90–150, 150–210 and 210–270 with , and . Then select the half brick at x 60–90, Shift-add the one at x 270–300, and fill both with . They share a colour because they join into one brick when the pattern repeats.
- Select the whole tile, (60, 60) to (300, 172), and add Add Noise at Amount 8, Mono, Gaussian.
- Pick the Pencil at size 2 with . Click and Shift-click to draw straight mortar lines:
- across the top of each course
- down the left edge of each top-course brick, at x 60, 120, 180 and 240
- down the bottom course at x 90, 150, 210 and 270
- Keep the tile selected. Choose Edit → Define Pattern, then delete the Brick Tile layer.
Eight bricks in eight tones keep the wall from looking like bathroom tiles.
- Click New Group at the bottom of the Layers panel and name it
-
Fill the wall face with bricks
- Add a layer named
Wall Face. Select the wall rectangle from (170, 290) to (850, 1090). - Choose Edit → Fill with Pattern… and pick the brick pattern.
- Set Horizontal Offset 71% and Vertical Offset 59%. This lines up a mortar joint with the top-left corner of the wall.
- Click Apply.
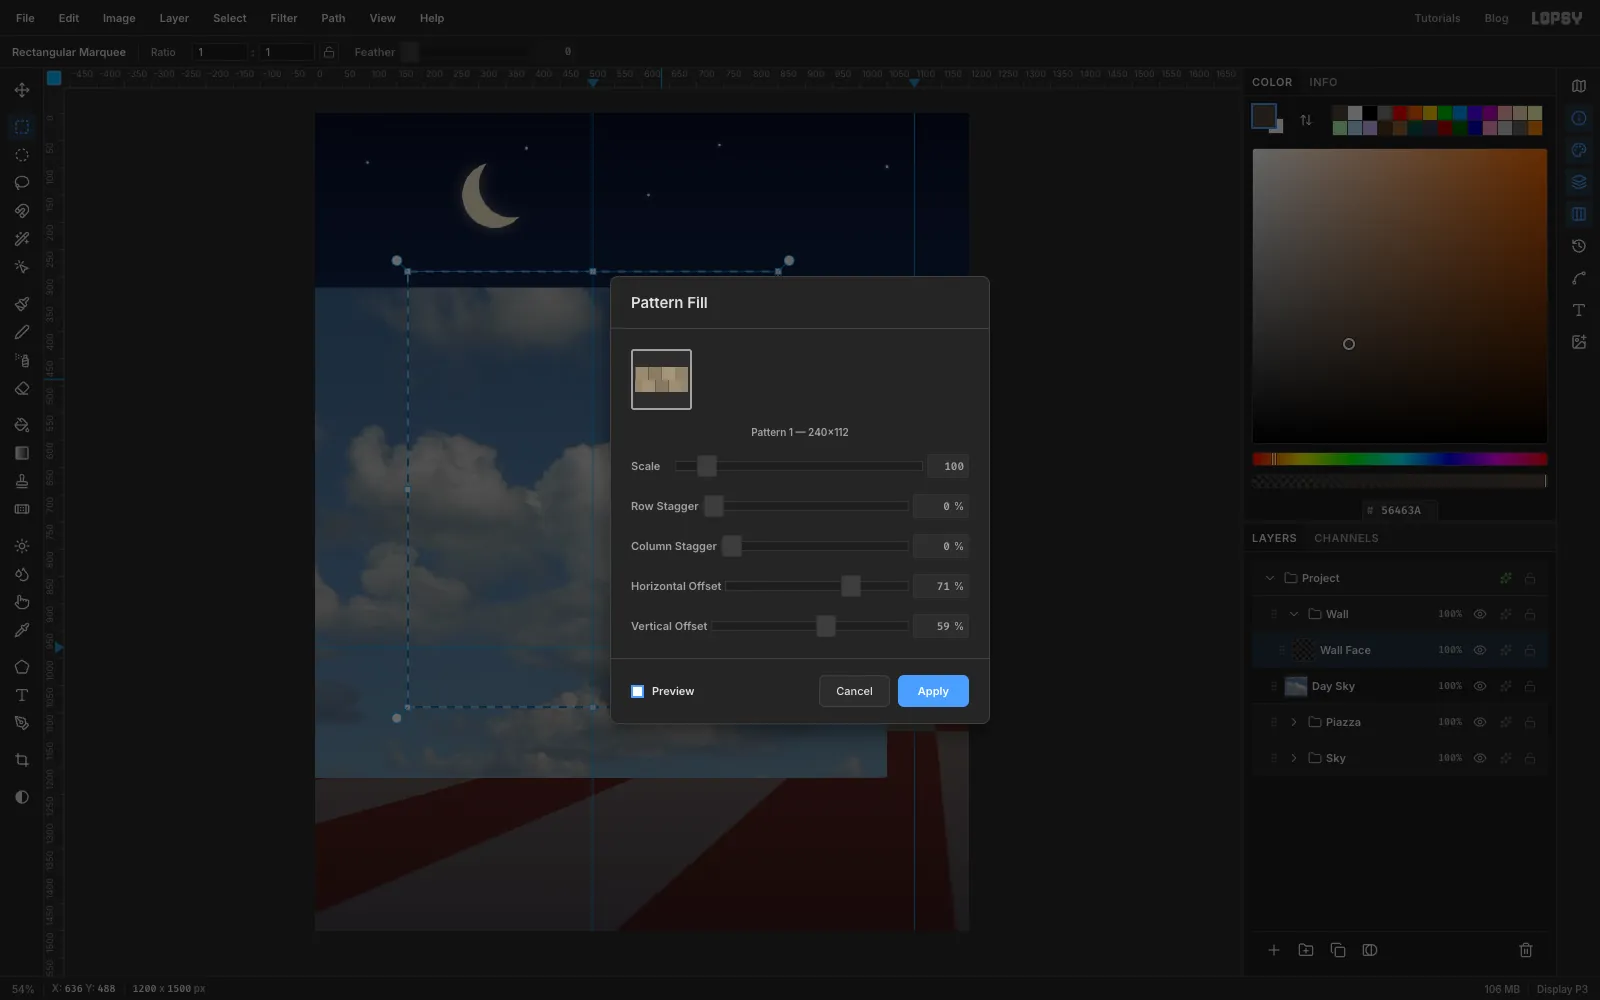
- Add a layer named
-
Weather the bricks
- Keep the wall selection. Add a layer named
Weatheringand run Filter → Clouds… with Scale 10. - Set the layer to Soft Light at 22%.
- Deselect, select Wall Face and run Filter → Emboss… with Angle 135 and Strength 8. Lopsy's Emboss adds a highlight and a shadow to the existing colours, so a low strength is enough.
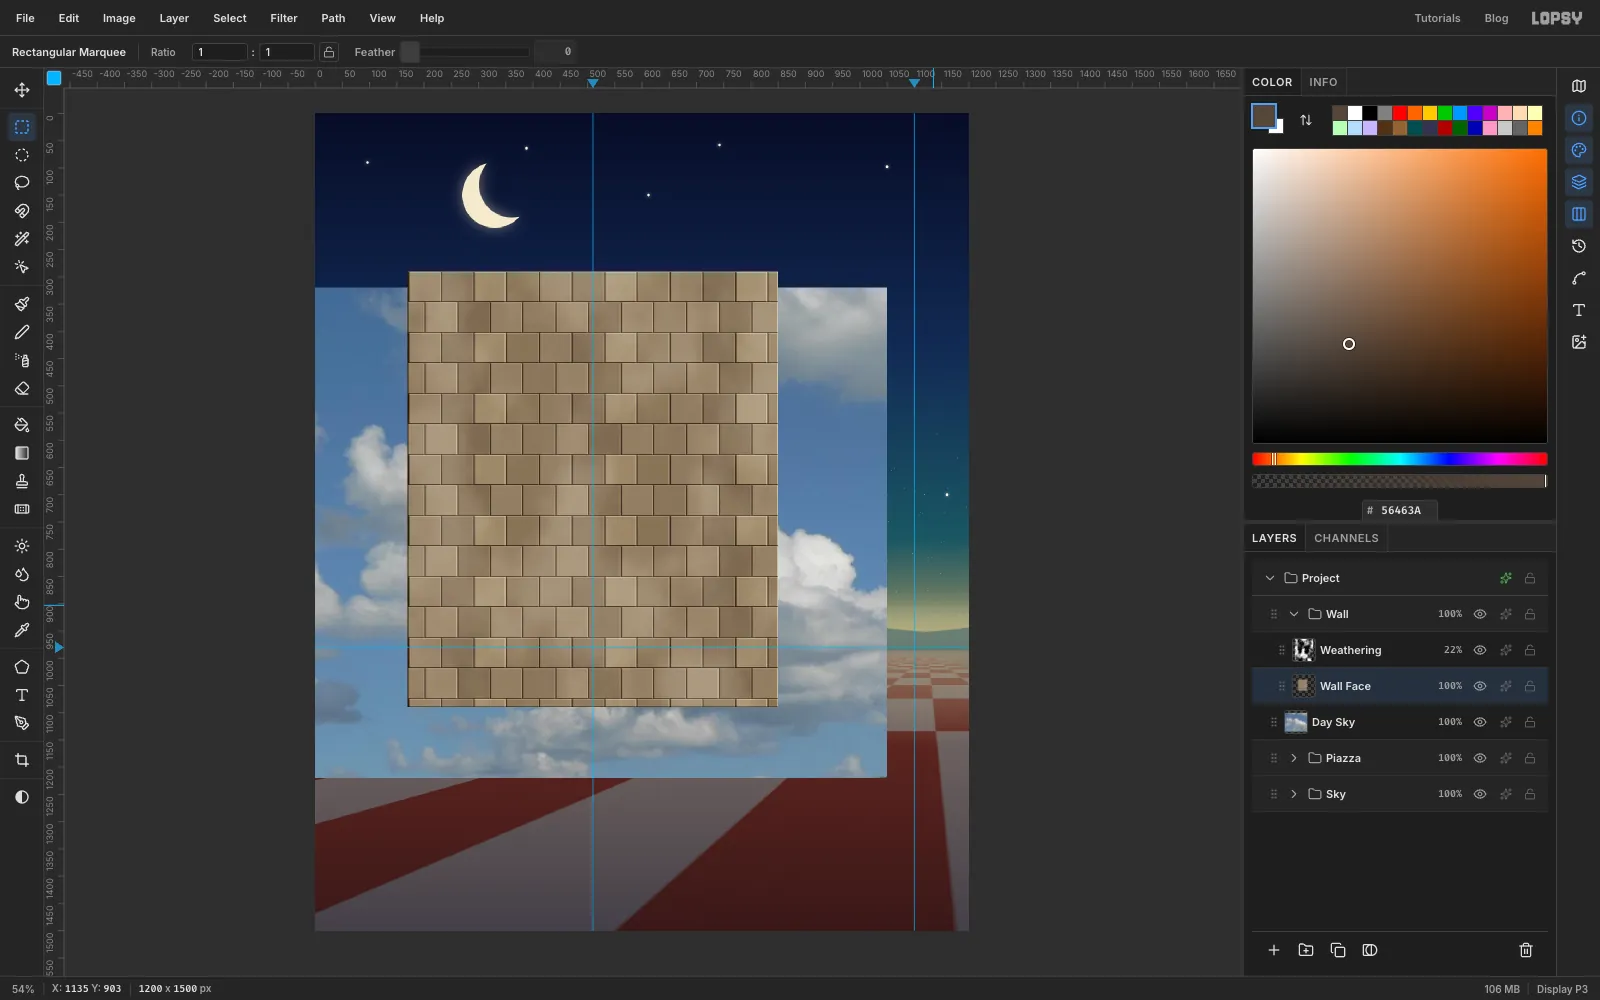
- Keep the wall selection. Add a layer named
-
Shade the backlit wall
The daylight is behind the wall, so the face you see is in shade. Only a little moonlight reaches it.
- Select Weathering and add a layer named
Wall Shadeabove it. - Select the wall rectangle again.
- Set the gradient stops to and . Drag from the wall's top-left corner to its bottom-right corner.
- Deselect and set the layer to Multiply.
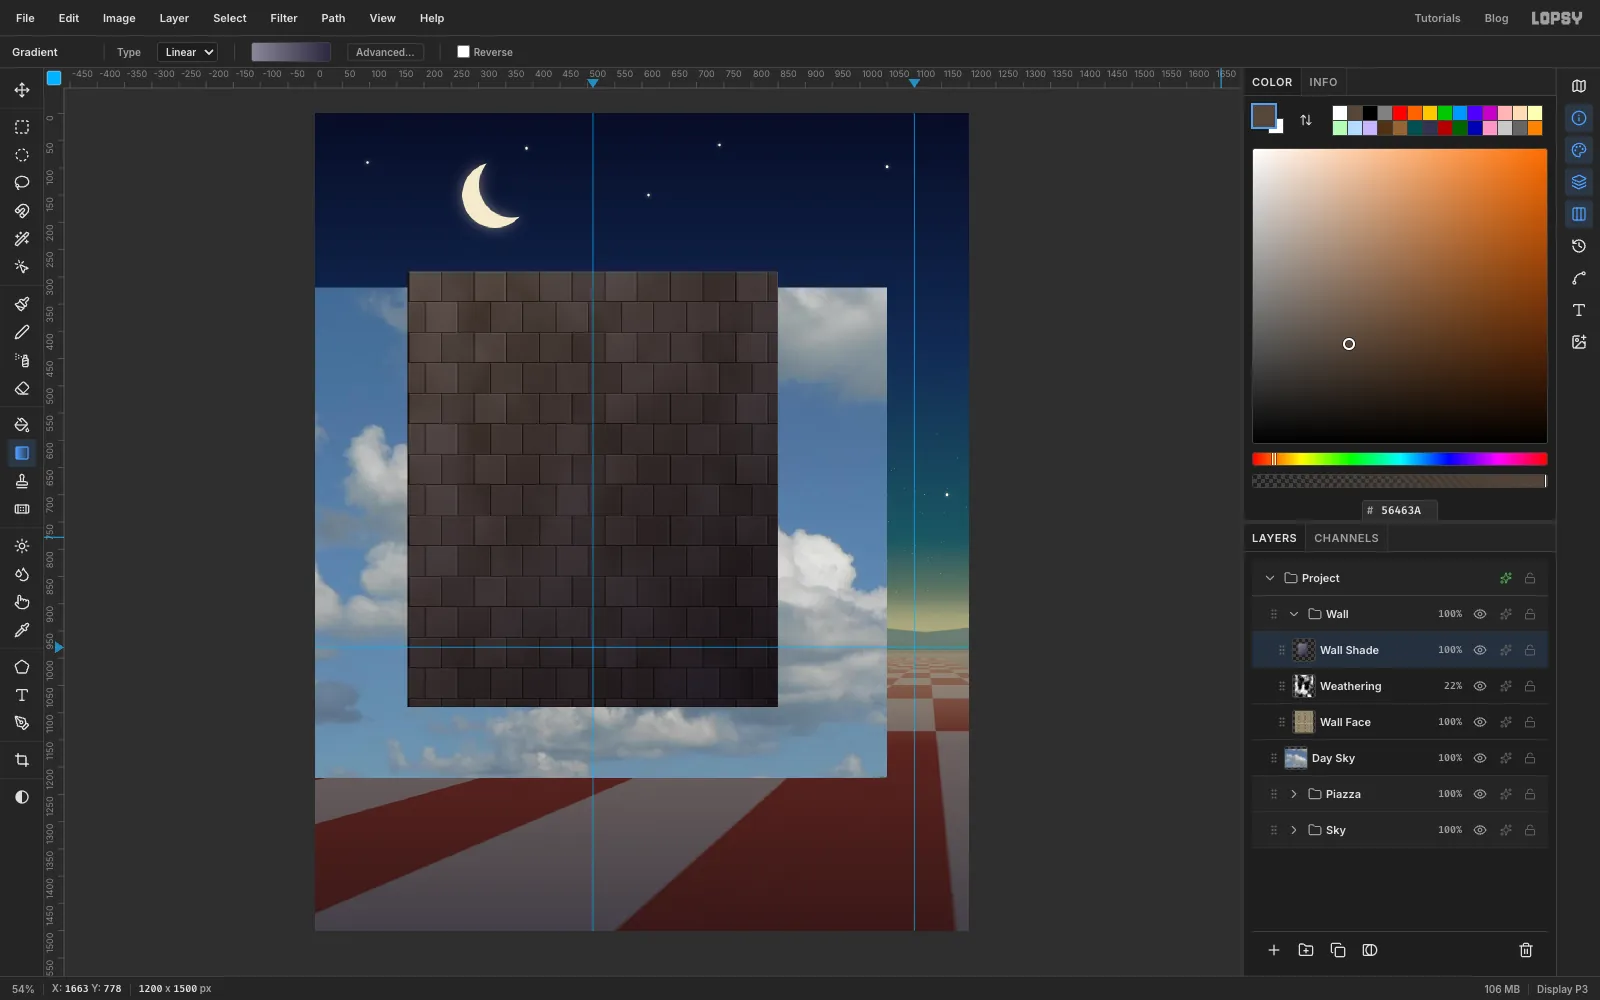
- Select Weathering and add a layer named
-
Add the side face and the coping
- Add a layer named
Wall Side. With the Lasso, select the side face, from the wall's top-right corner (850, 290) to (875, 359), down to (875, 1079), and back to the bottom corner (850, 1090). The slanted top edge points at the vanishing point. - Fill it with a top-to-bottom gradient from to .
- Add a layer named
Copingand select the cap stone from (158, 270) to (876, 292). - Fill with and deselect.
- Add a Drop Shadow: Offset X 0, Offset Y 8, Blur 10, Opacity 60.
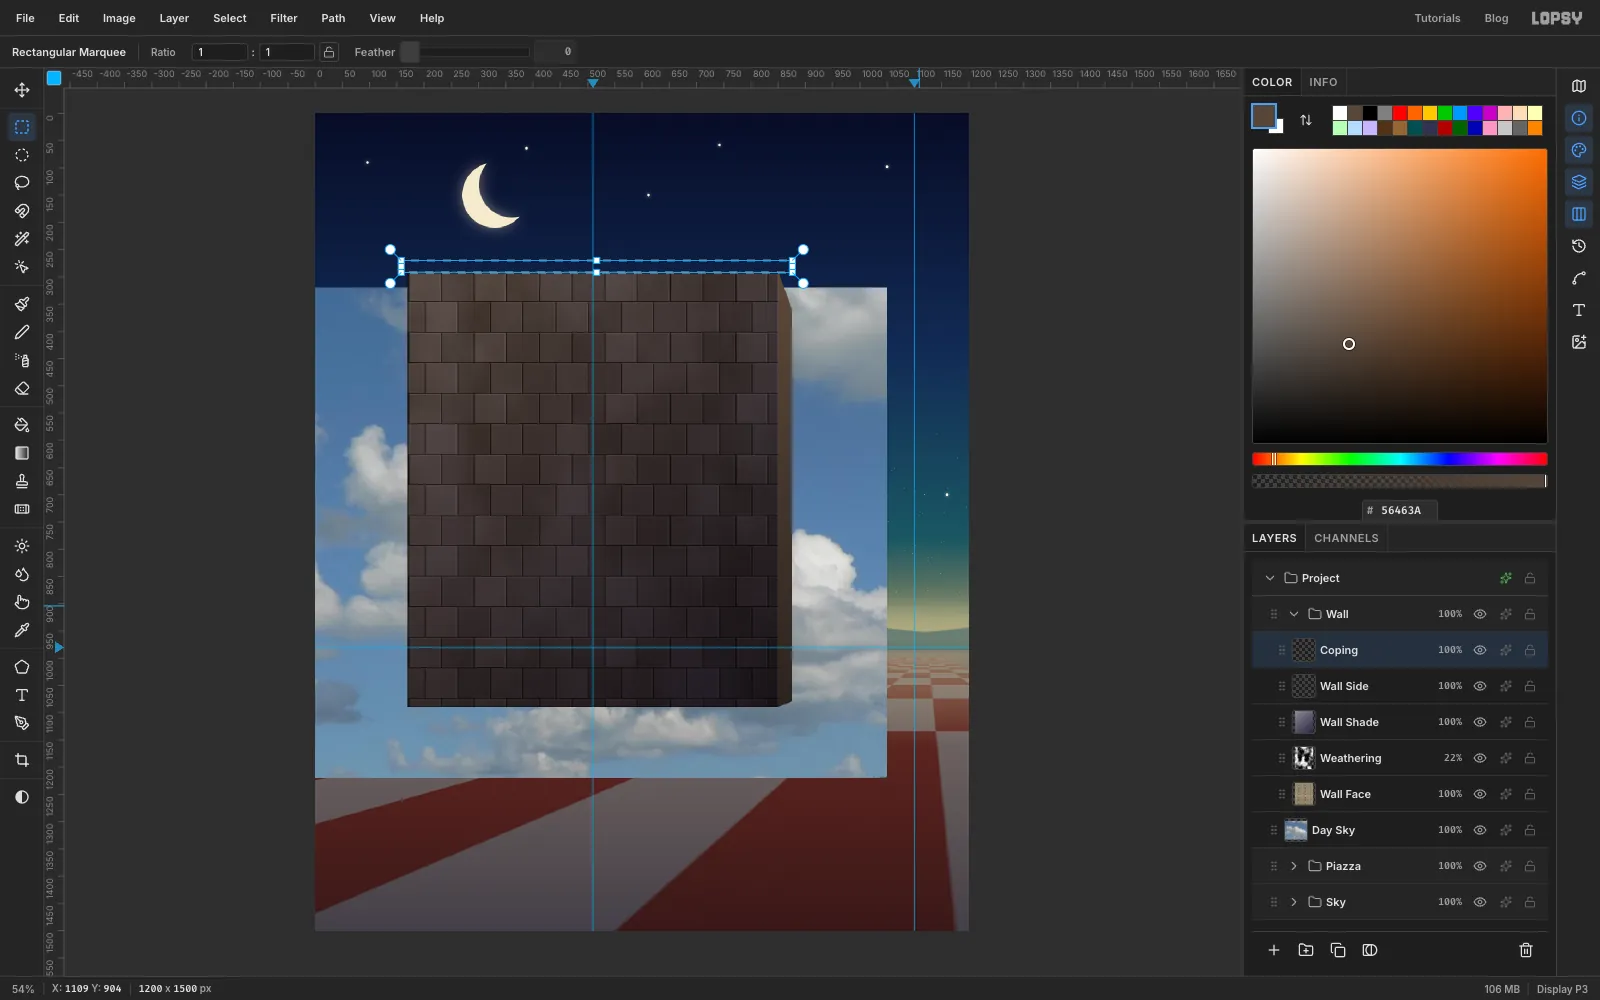
- Add a layer named
-
Catch the daylight on the top edge
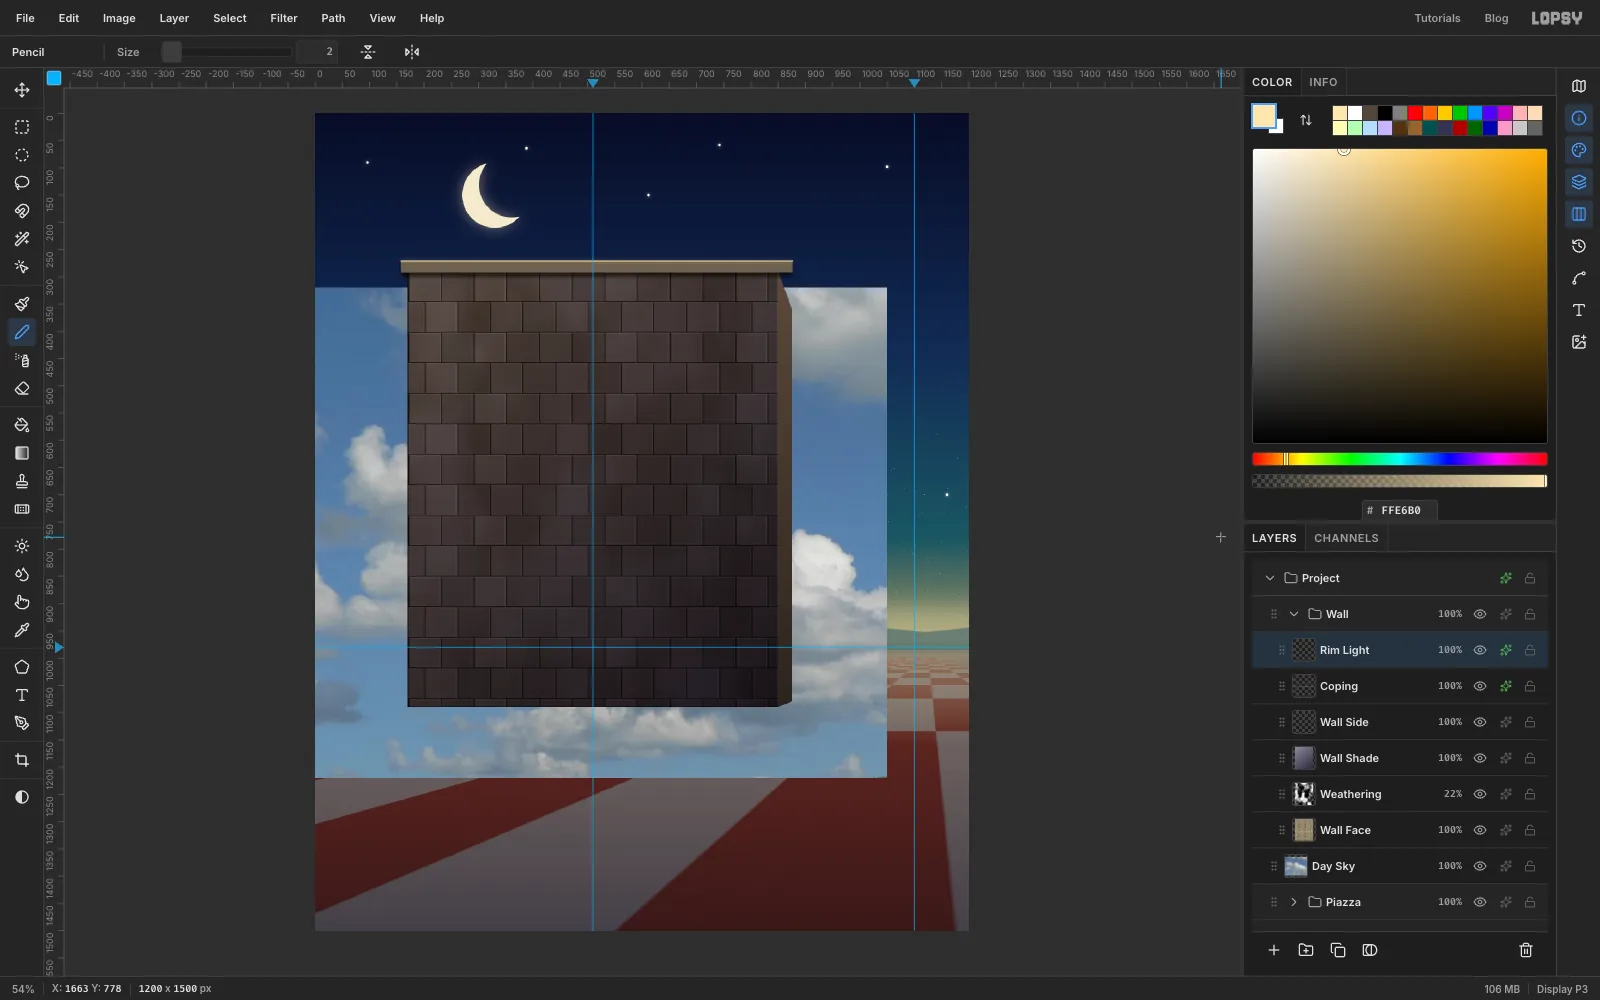
- Add a layer named
Rim Light. Pick the Pencil at size 2 with . - Click the coping's top-left corner and Shift-click its top-right corner.
- Add an Outer Glow: Size 10, Opacity 40, colour .
A hair of light along the top is the only hint, before the keyhole is cut, that the sun is behind the wall.
- Add a layer named
-
Select the keyhole on the group mask
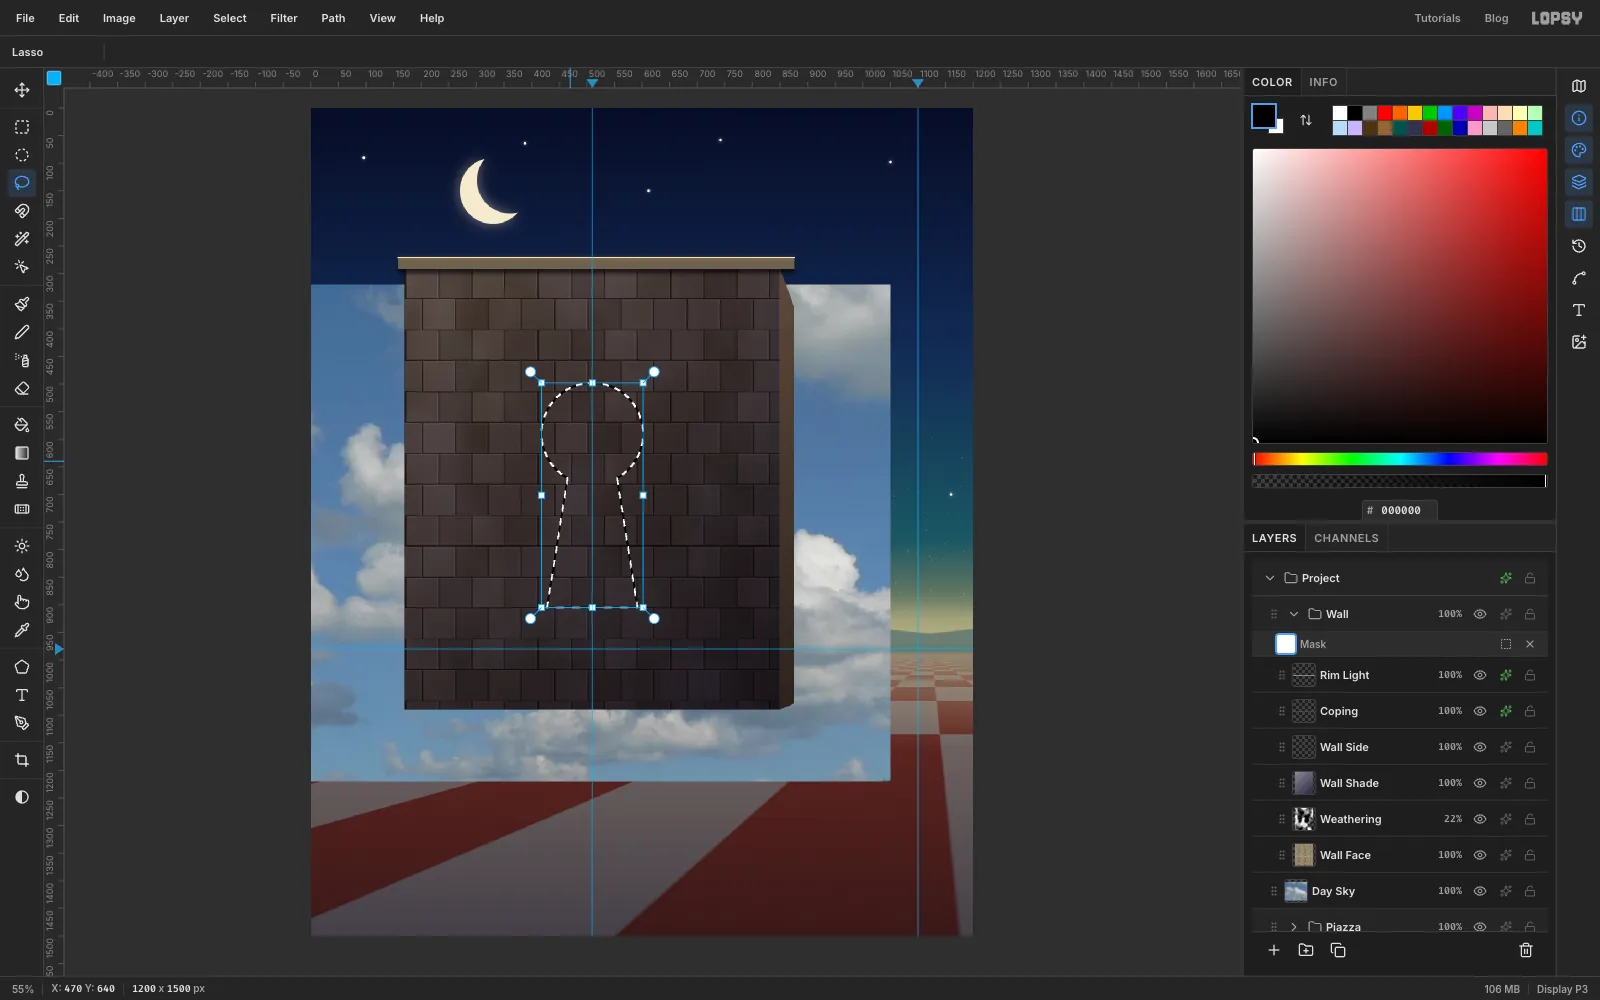
Cut the keyhole through the whole Wall group with a group mask. You don't have to erase it from every layer, and the cut stays editable.
- Click the Wall group row and click Add Mask. Then click the mask thumbnail to edit it.
- With the Elliptical Marquee, select the circle from (418, 498) to (602, 682).
- Pick the Lasso, hold Shift, and drag in straight lines around the slot to add it:
- start at (470, 640) inside the circle
- (550, 640)
- (592, 905)
- (428, 905)
- back to the start
-
Cut the keyhole
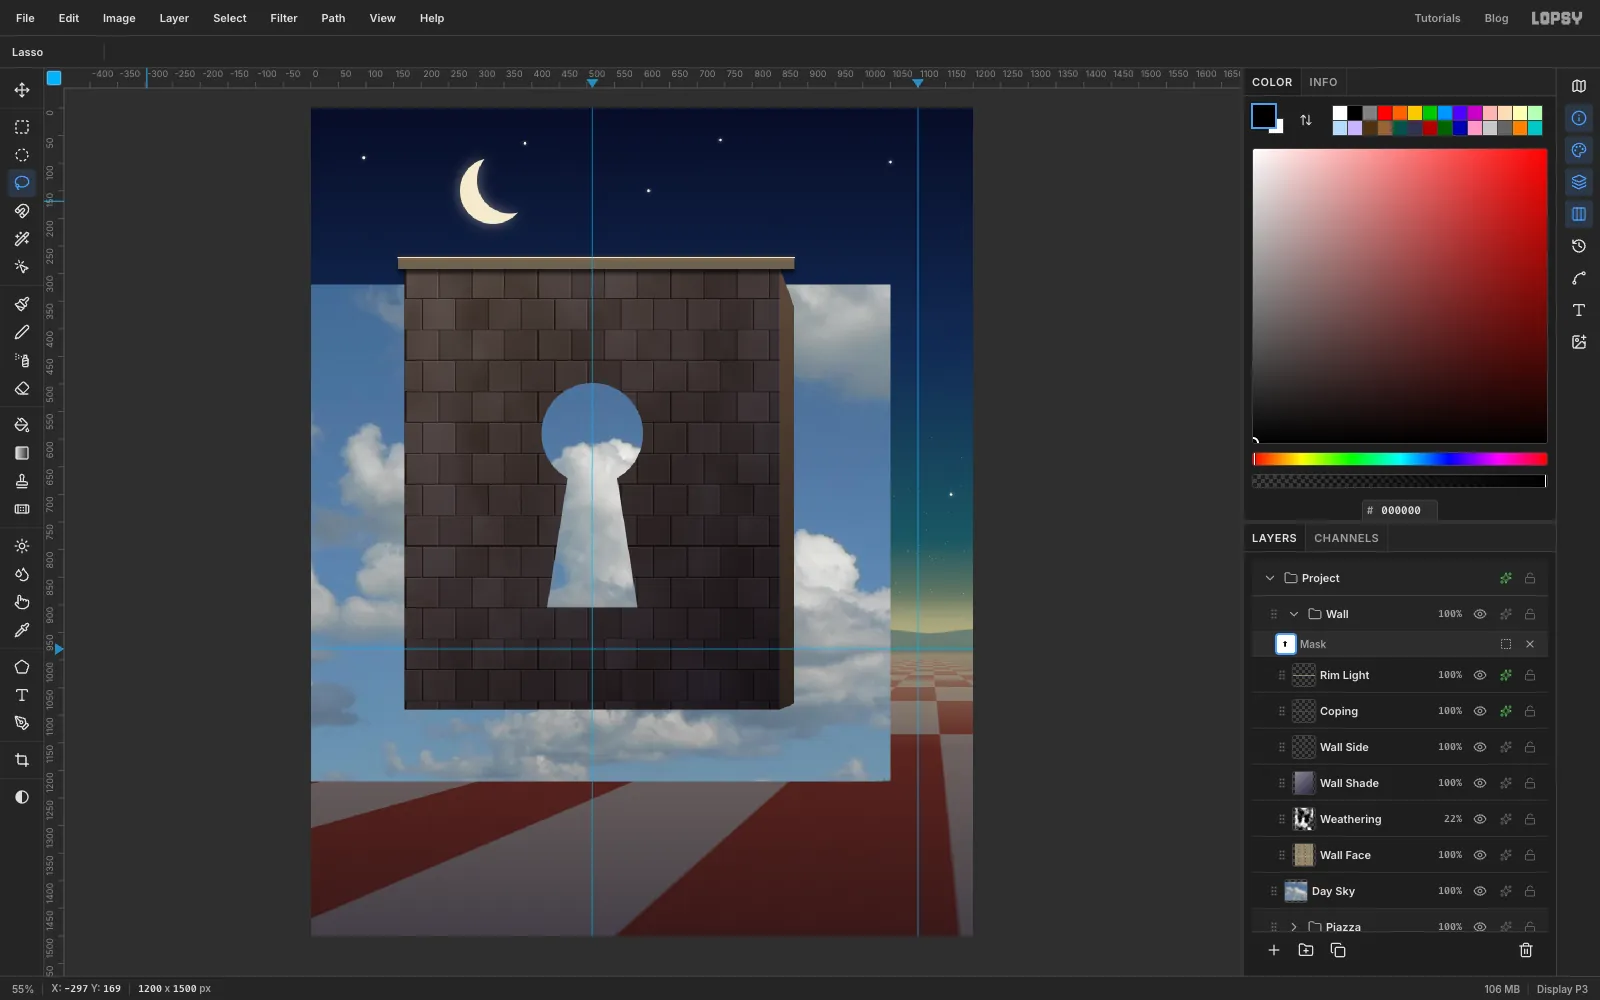
Set the foreground to black and choose Edit → Fill, then deselect. In mask edit mode, Fill paints the mask, and black hides the wall. The photo underneath shows through.
-
Build the tunnel walls
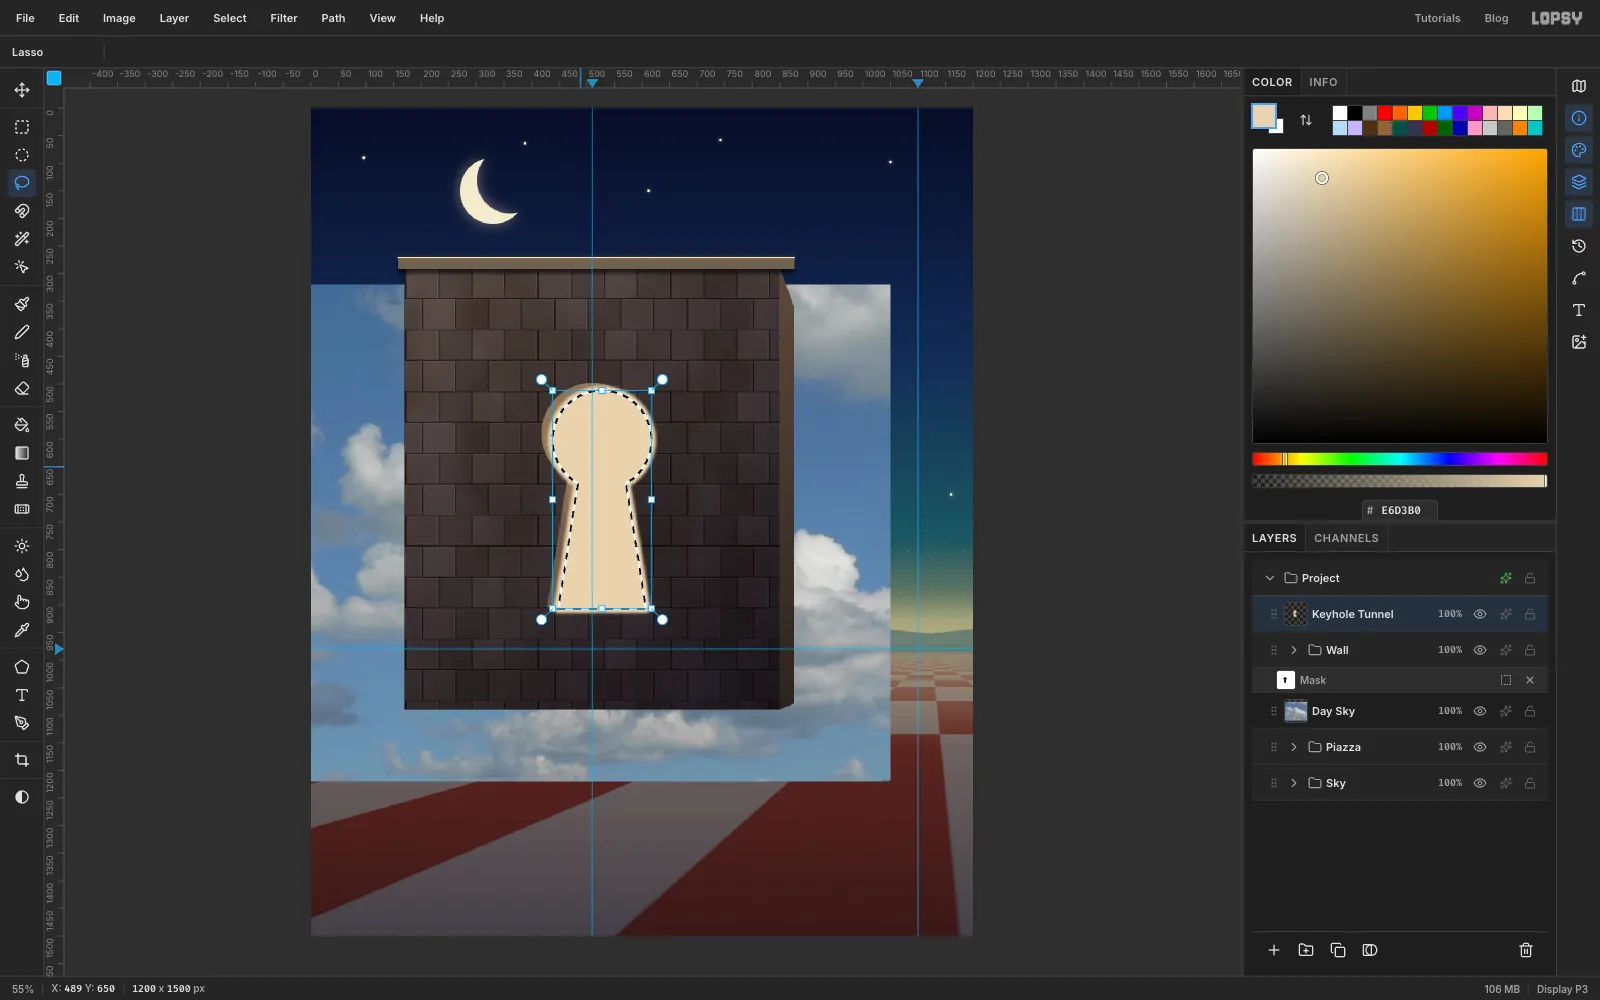
The wall has thickness, so you see the inside of the keyhole as well as the hole.
- Collapse the Wall group, select it, and add a layer named
Keyhole Tunnelabove it. - Make the keyhole selection again: the circle, then Shift and the slot.
- Pick a Radial gradient from to . Drag from about (528, 602), a little right of and below the keyhole circle's centre, about 185 px up and to the left to (378, 492).
- Add a little Add Noise (6, Mono) for stone grain.
- Select the back opening. It's the same keyhole shifted about 18 px toward the vanishing point:
- circle from (438, 512) to (617, 691)
- Shift-lasso slot (489, 650), (567, 650), (607, 907), (448, 907)
- Use Select → Grow… 8 px and Feather… 5 px, then fill with . This is daylight grazing the tunnel walls.
- Make the back opening selection again and press Delete.
- Make the front keyhole selection, choose Select → Inverse and press Delete to tidy anything outside the hole.
- Deselect and add an Outer Glow: Size 60, Opacity 45, colour .
- Collapse the Wall group, select it, and add a layer named
-
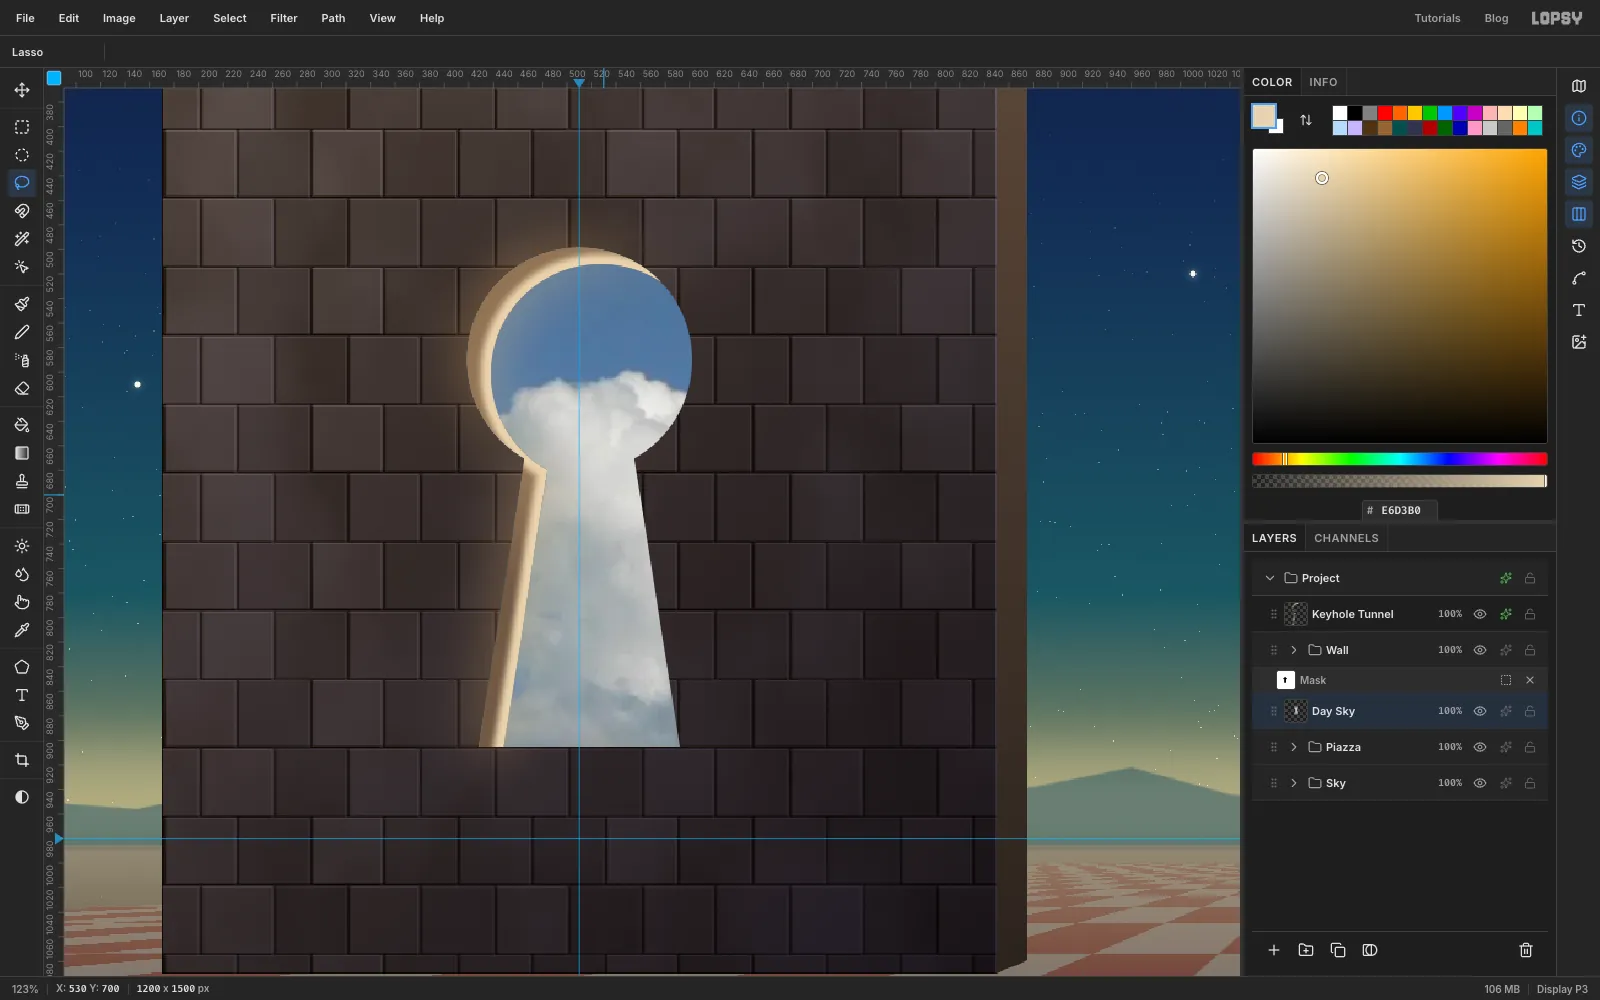
Trim the day sky to the keyhole
The photo still covers the whole canvas behind the wall.
- Select the Day Sky layer and make the back opening selection.
- Choose Select → Inverse and press Delete.
Now the only daylight in the picture is inside the keyhole.
-
Cast the wall's long shadow
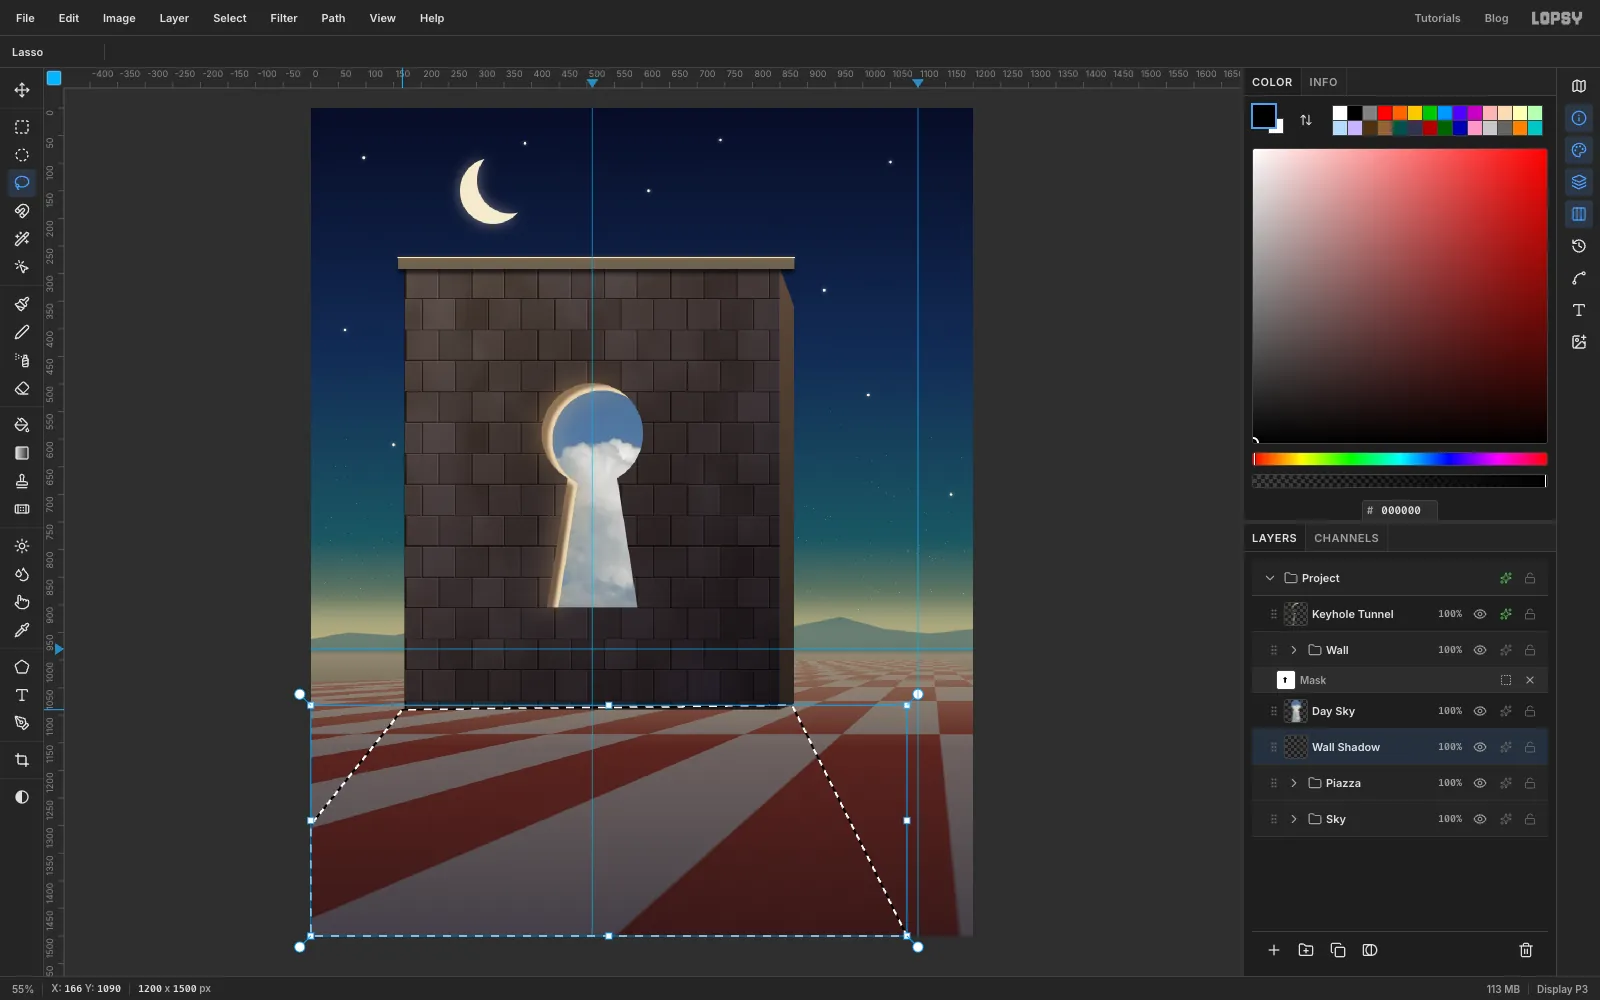
- Select the Piazza group and add a layer named
Wall Shadow. - With the Lasso, drag in straight lines from the wall's bottom-left corner (166, 1090) to the bottom of the side face (872, 1082). Continue to the bottom edge of the canvas at about x 1080, then to x −160 on the same edge, just off the left side. The shadow widens as it comes toward you.
- Fill with , deselect and run Gaussian Blur at 5.
- Set the layer to Multiply at 85%.
- Select the Piazza group and add a layer named
-
Turn the keyhole into a pool of light
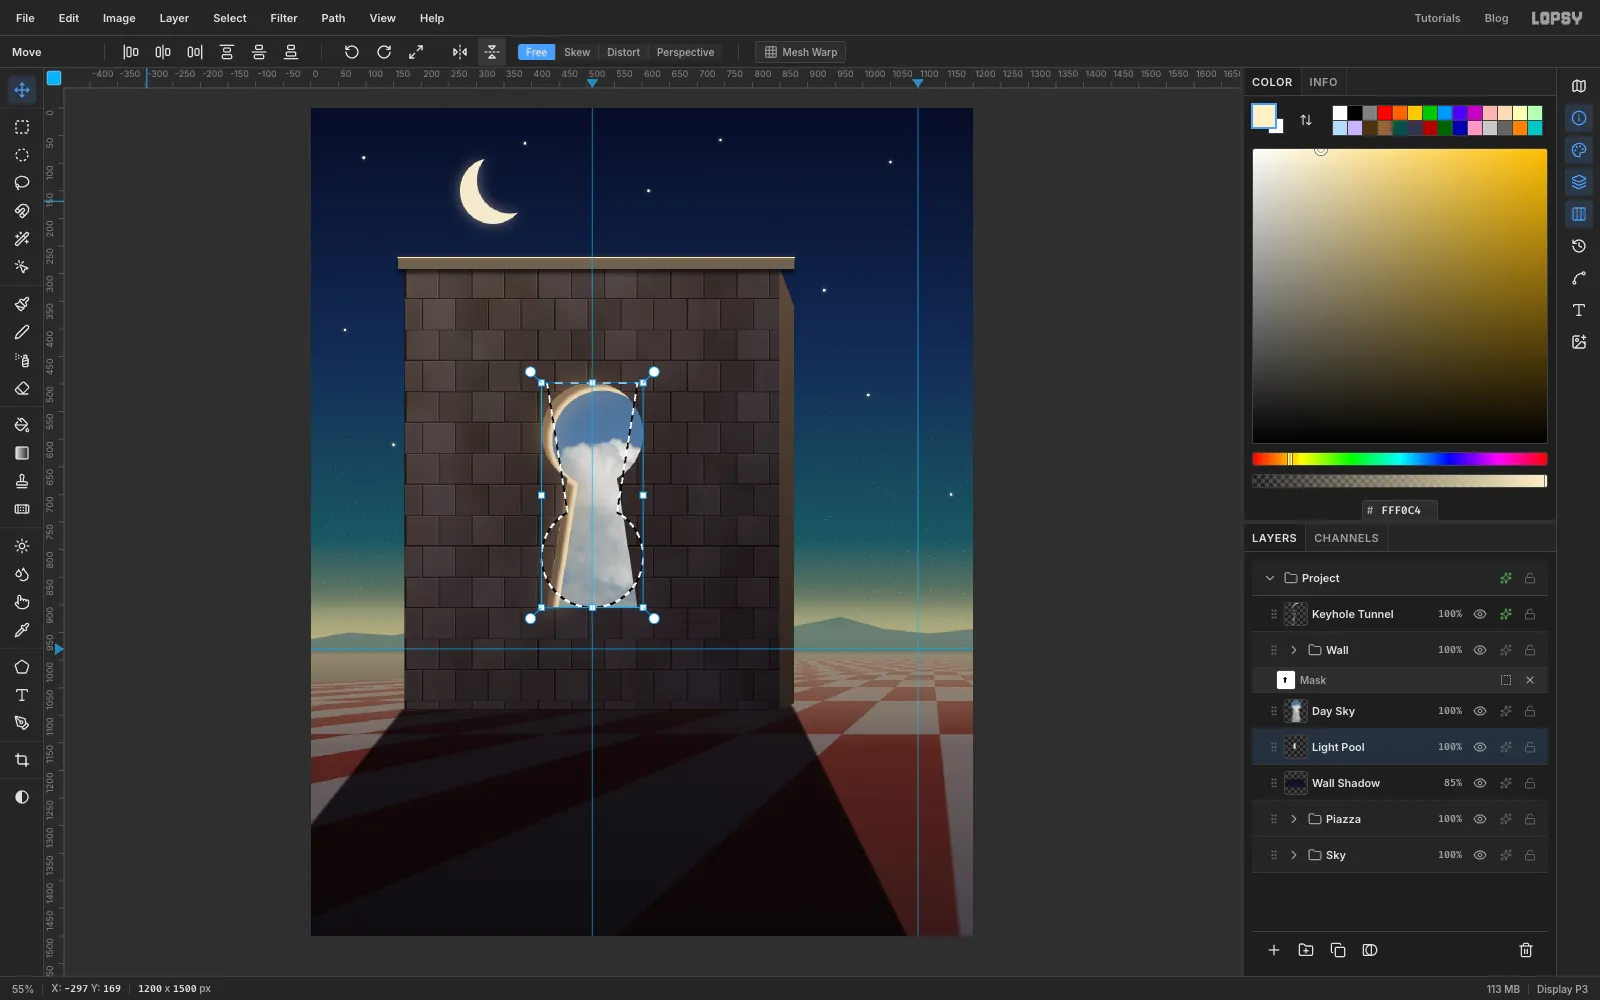
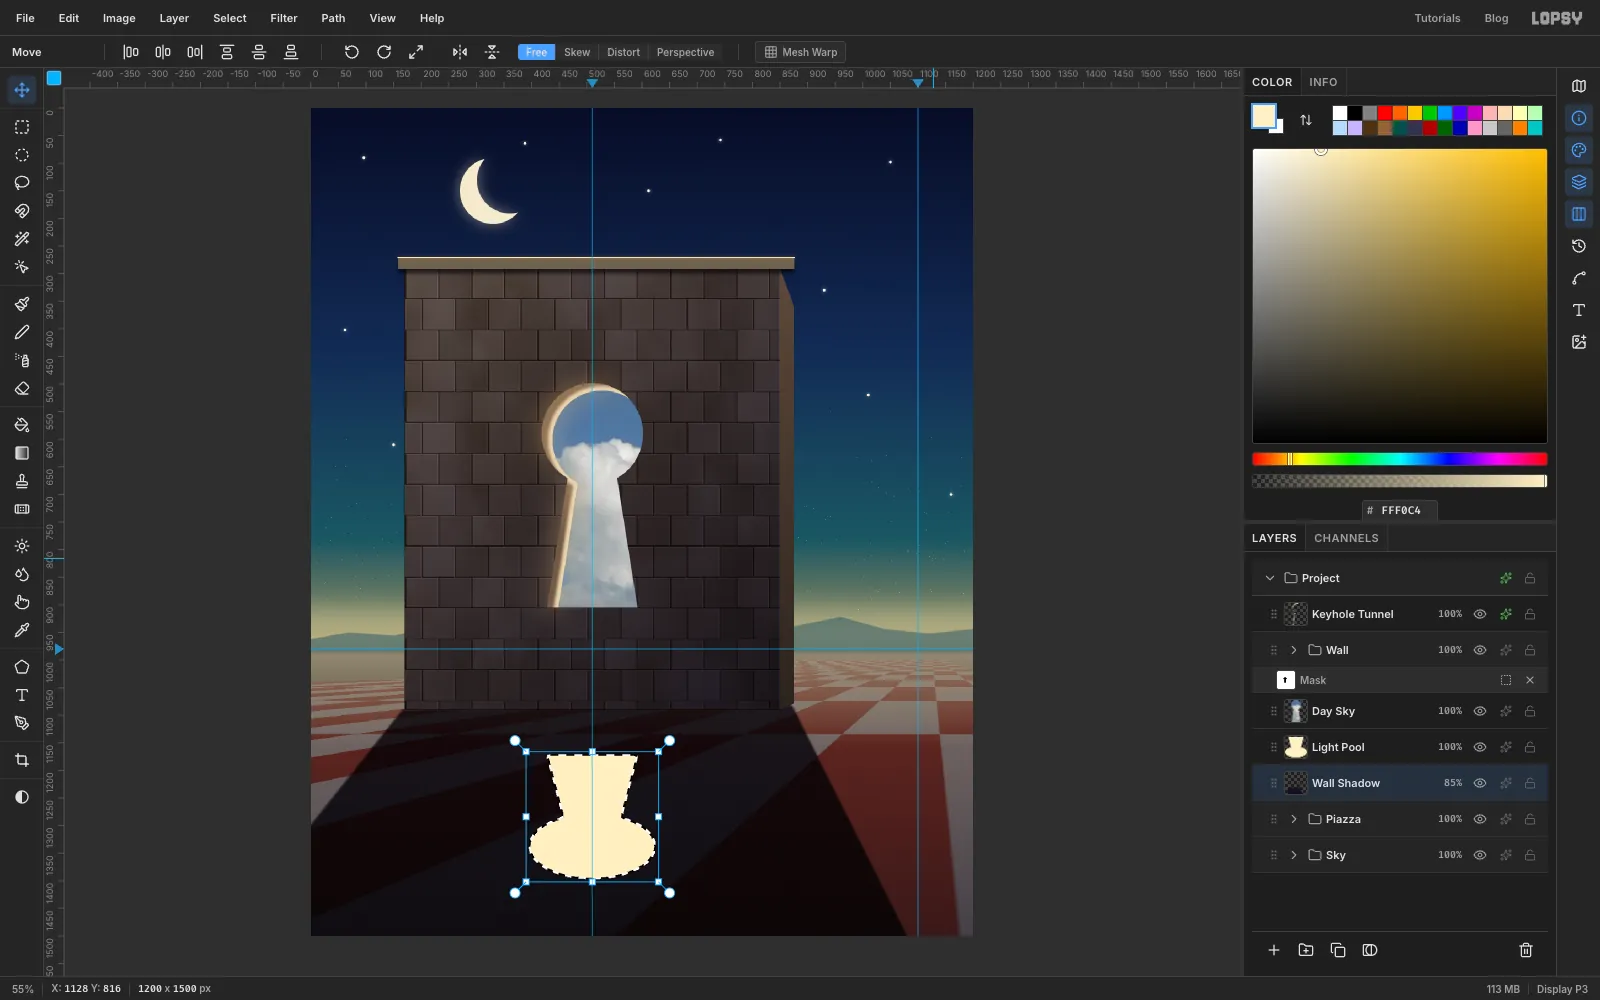
Daylight from behind the wall passes through the keyhole and lands on the floor in front. The patch it makes is the keyhole flipped upside down and flattened.
- Add a layer named
Light Pool, make the keyhole selection again and fill it with . Deselect. - Cmd-click the Light Pool thumbnail to select its pixels.
- Pick the Move tool and click Flip Vertical in the options bar.
The Light Pool layer sits under the wall, so for now you only see the selection outline flip. The fill shows up once you move it onto the floor in a later step.
- Add a layer named
-
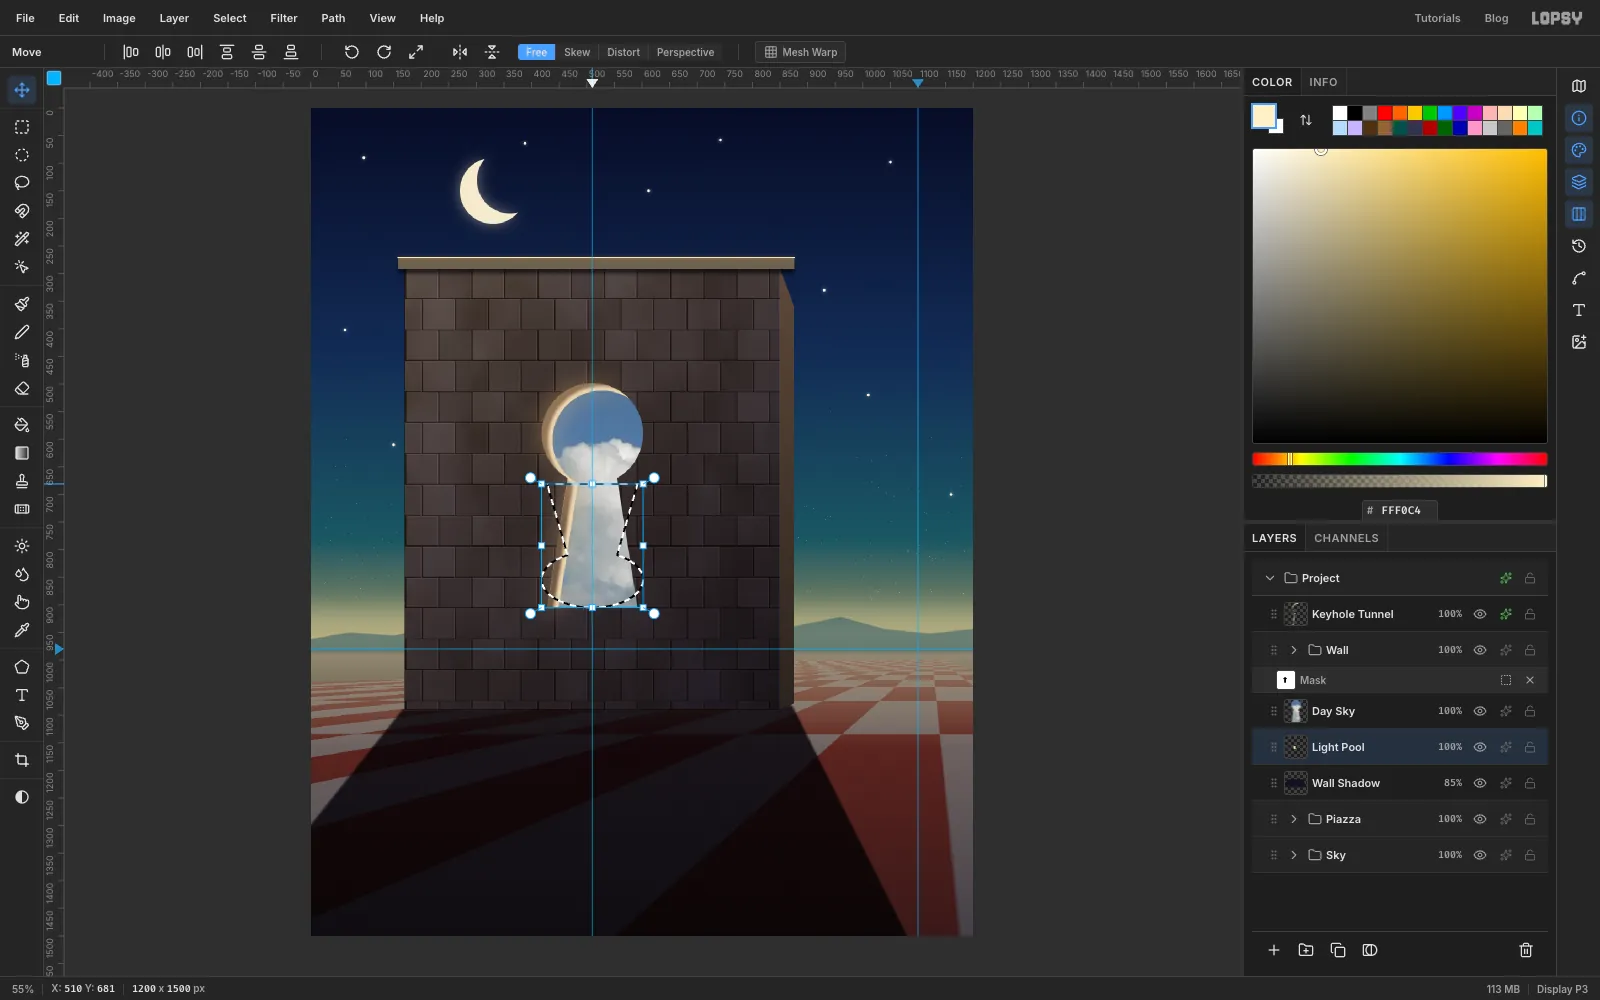
Flatten it onto the floor
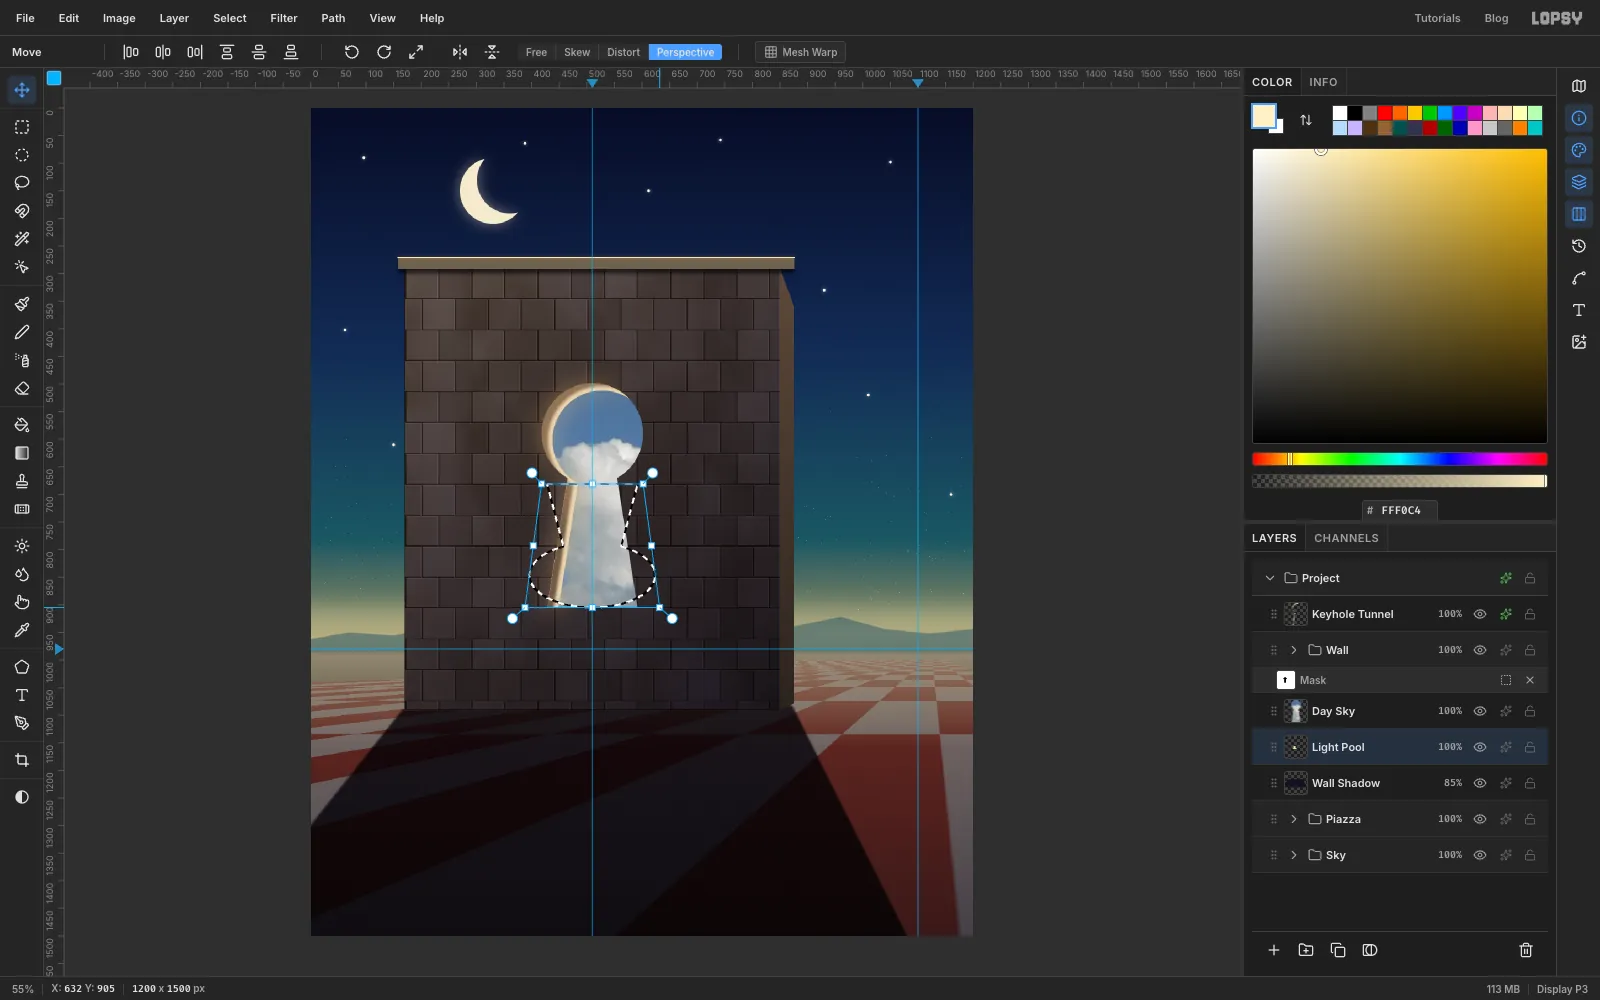
Drag the top middle handle down until the shape is a little over half its height, about 225 px tall. A patch of light on the ground looks flattened because you see the ground at an angle.
-
Widen the near end with Perspective
- Choose Perspective in the options bar.
- Drag the bottom-right corner about 30 px to the right. The bottom-left corner mirrors it, so the end nearest you gets wider.
- Press Cmd+D.
- Drag the pool down onto the floor. Its slot end should sit about 80 px in front of the wall's base and line up under the keyhole.
-
Knock the pool out of the shadow
Where the daylight lands there is no shadow.
- Cmd-click the Light Pool thumbnail, then use Select → Feather… 6 px.
- Click the Wall Shadow layer and press Delete.
-
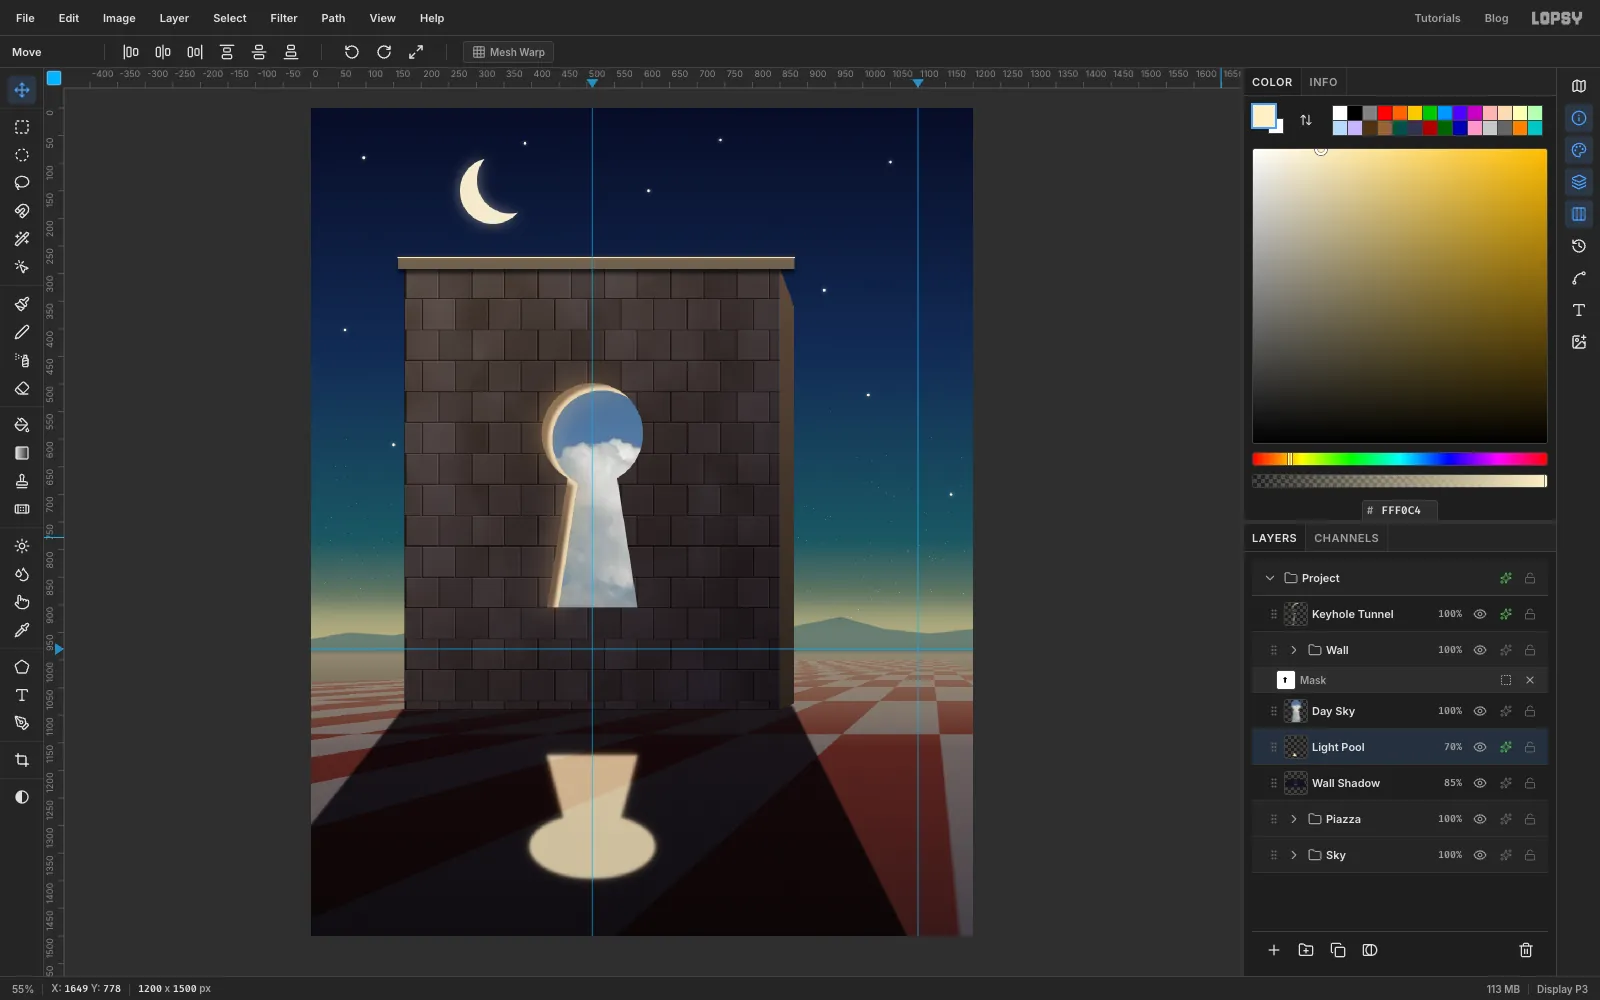
Soften the pool
Deselect. Select Light Pool and run Gaussian Blur at 8, so every edge is equally soft. Set the layer to 70% opacity, and add an Outer Glow with Size 24, Opacity 35 and colour .
-
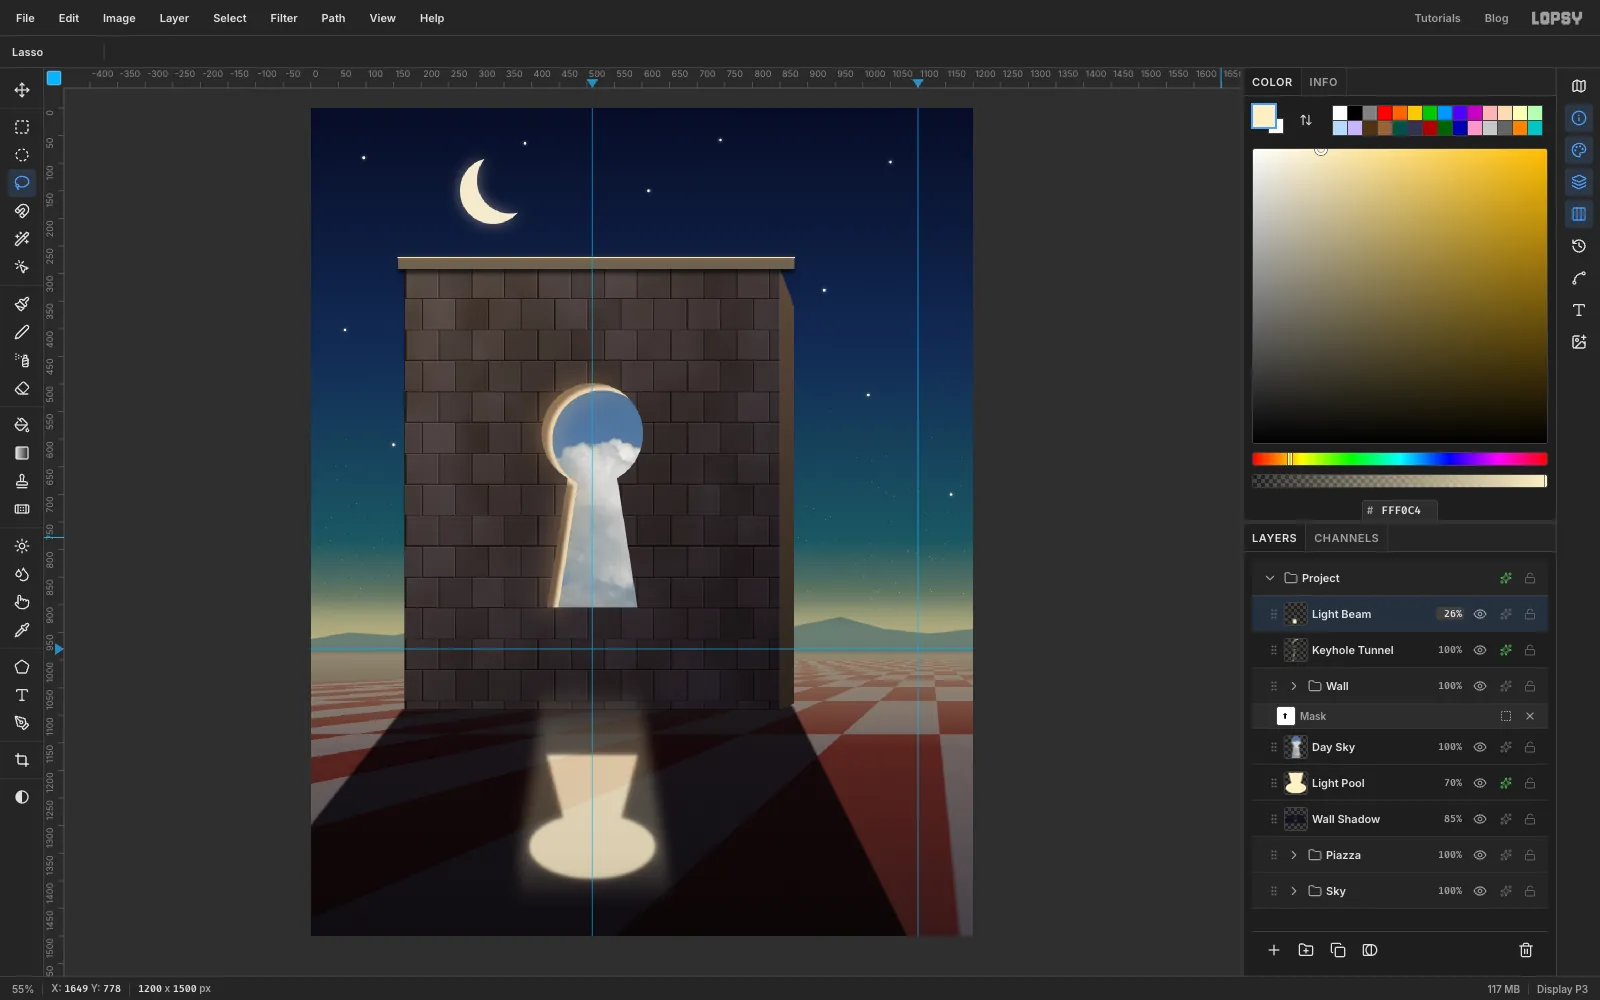
Add dust in the light
- Select Keyhole Tunnel and add a layer named
Light Beamabove it. - Lasso a wedge from the wall's base under the keyhole to the near, round end of the pool:
- (420, 1092)
- (600, 1092)
- (650, 1392)
- (372, 1392)
- Feather it 20 px and fill with .
- Add Add Noise (60, Mono, Gaussian) and deselect.
- Run Filter → Motion Blur… with Angle 86 and Distance 90. The noise turns into rising streaks.
- Set the layer to Screen at 26%.
- Select Keyhole Tunnel and add a layer named
-
Build the key from marquees
- Click New Group, name it
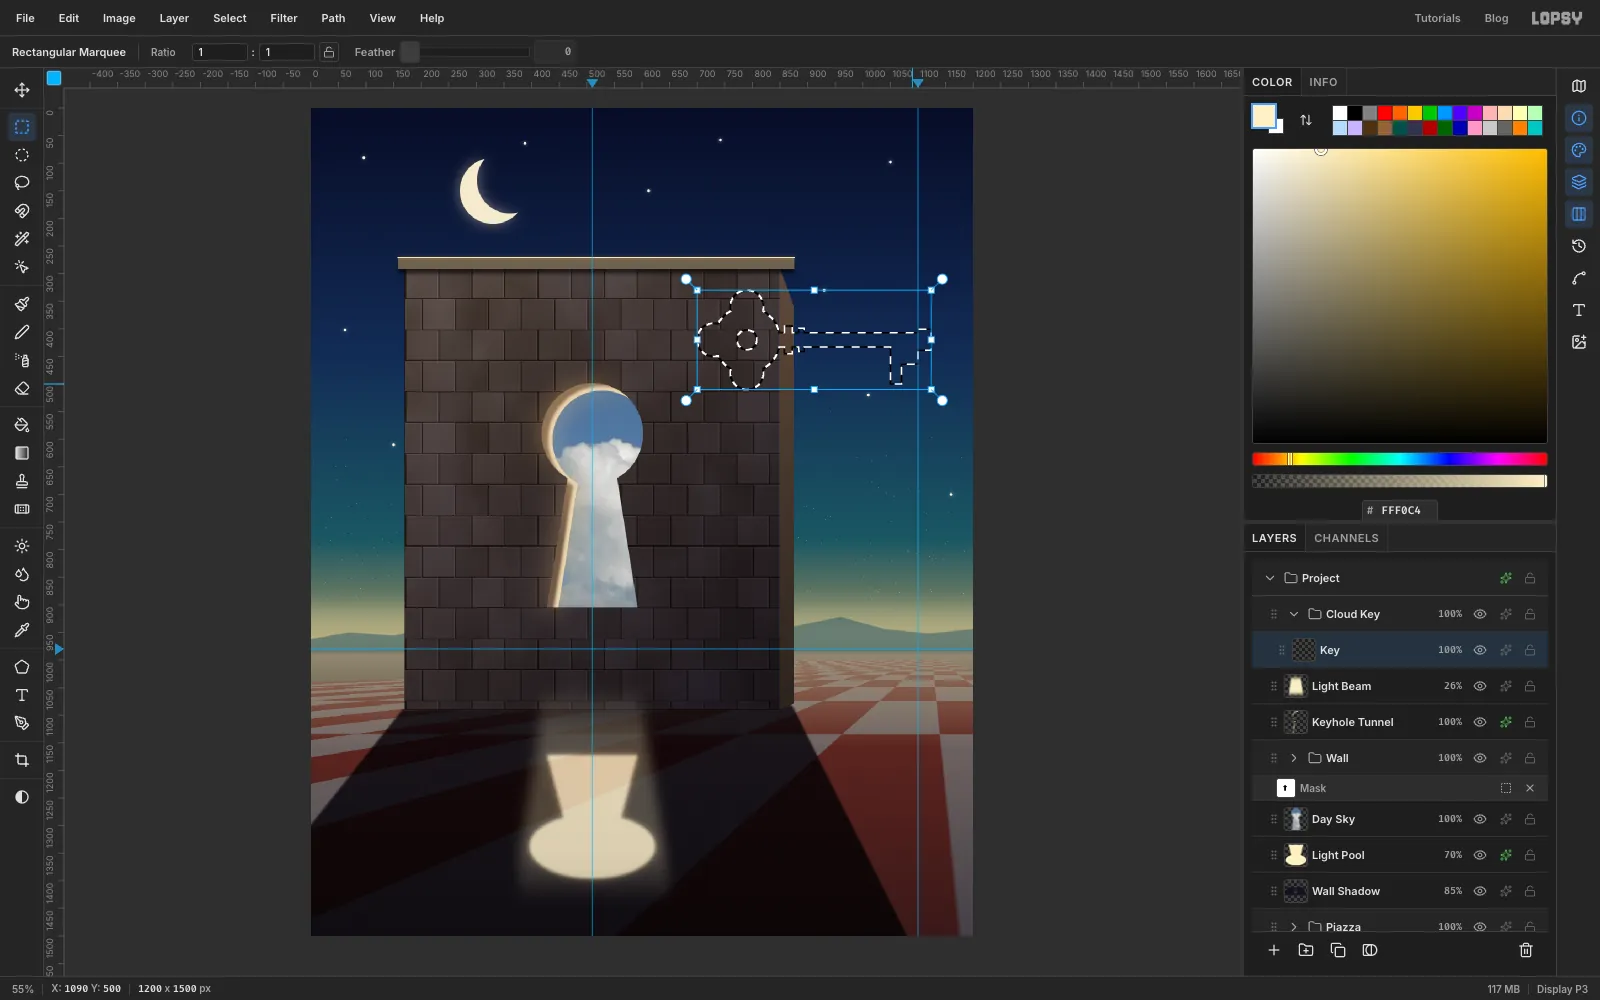
Cloud Key, and add a layer inside it namedKey. Draw the key lying flat, left of and below where it will finally float. Turn off View → Snap to Guides for this step. The bit sits close to the x 1100 guide and would snap to it. Zoom in for the small collars and notches. - Bow: with the Elliptical Marquee, select a circle from (730, 360) to (850, 480). Hold Shift and add three smaller circles:
- (700, 390) to (760, 450)
- (760, 330) to (820, 390)
- (760, 450) to (820, 510)
- Shaft and collars: switch to the Rectangular Marquee and Shift-add:
- the shaft, (840, 407) to (1120, 433)
- two collars, (858, 395) to (872, 445) and (884, 399) to (894, 441)
- Bit: Shift-add (1050, 433) to (1112, 500), and the tip (1108, 401) to (1124, 439).
- Holes: hold Alt and take away a circle from (772, 402) to (808, 438) for the hole in the bow, and a notch from (1070, 464) to (1090, 500) in the bit.
- Fill with and deselect.
- Click New Group, name it
-
Scale a cloud photo over the key
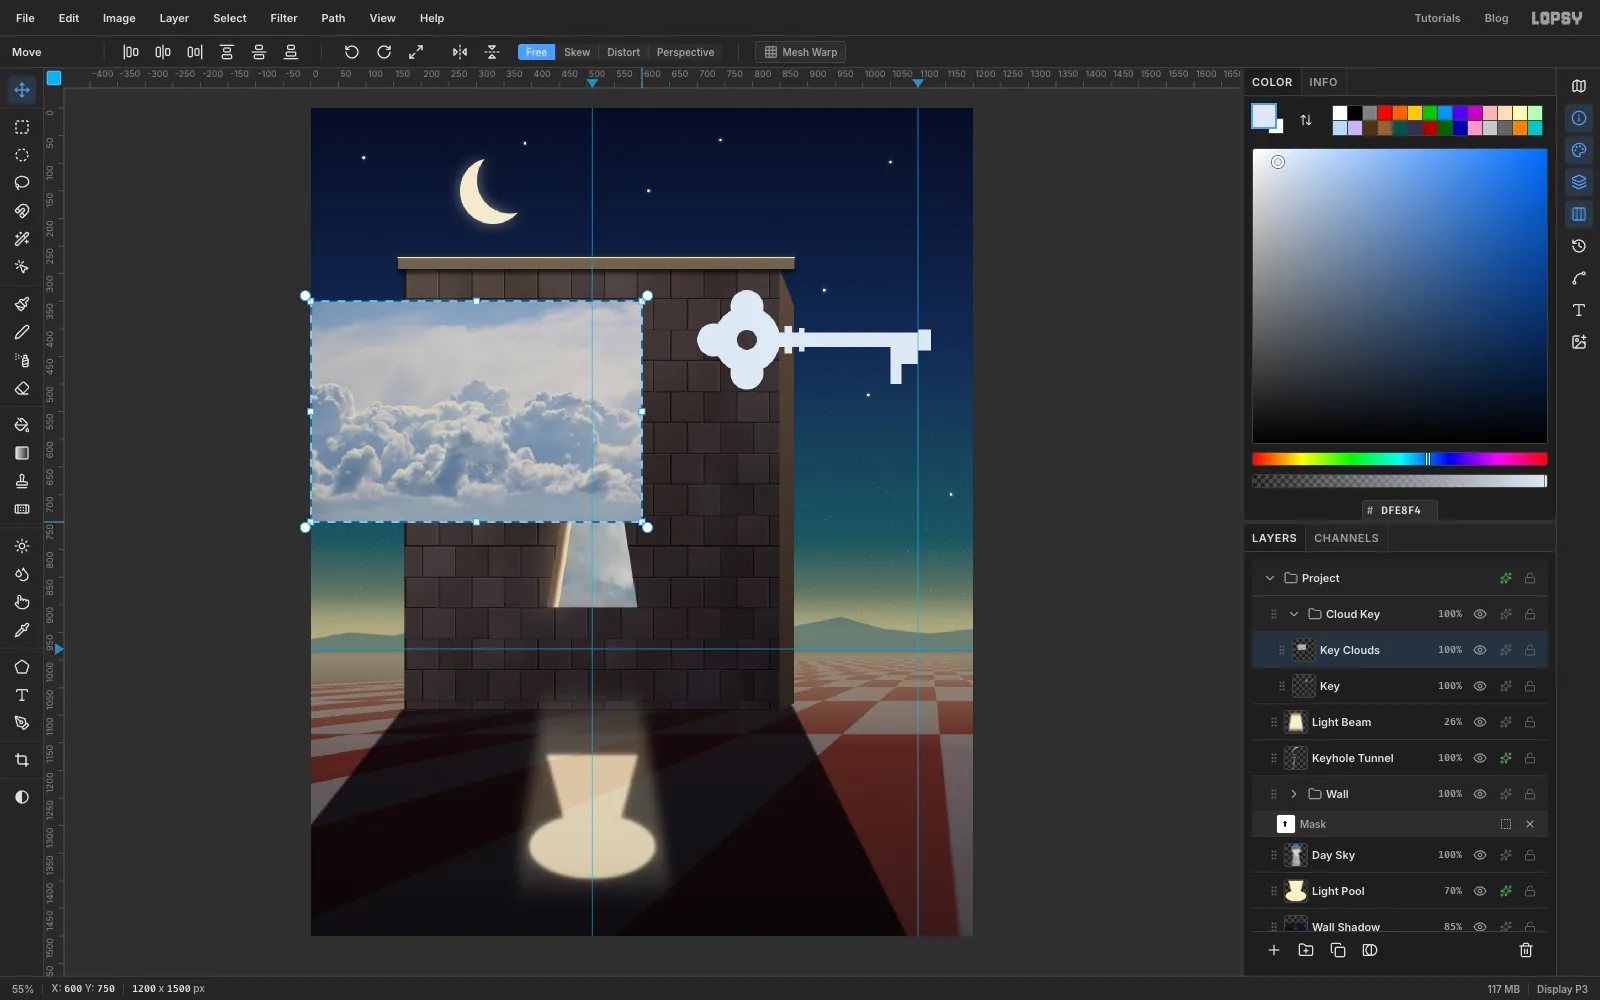
- Drag the Cumulus clouds in the sky photo onto the canvas and rename the layer
Key Clouds. - Hold Cmd and drag its bottom-right handle up and in until the photo is half its size.
- Drag the photo up and to the right until its puffiest clouds cover the key. Keep the whole photo on the canvas. Anything hanging off the edge is not removed by the trim in the next step, and would show up again when you flip the key.
- Press Cmd+D.
- Drag the Cumulus clouds in the sky photo onto the canvas and rename the layer
-
Trim the clouds to the key
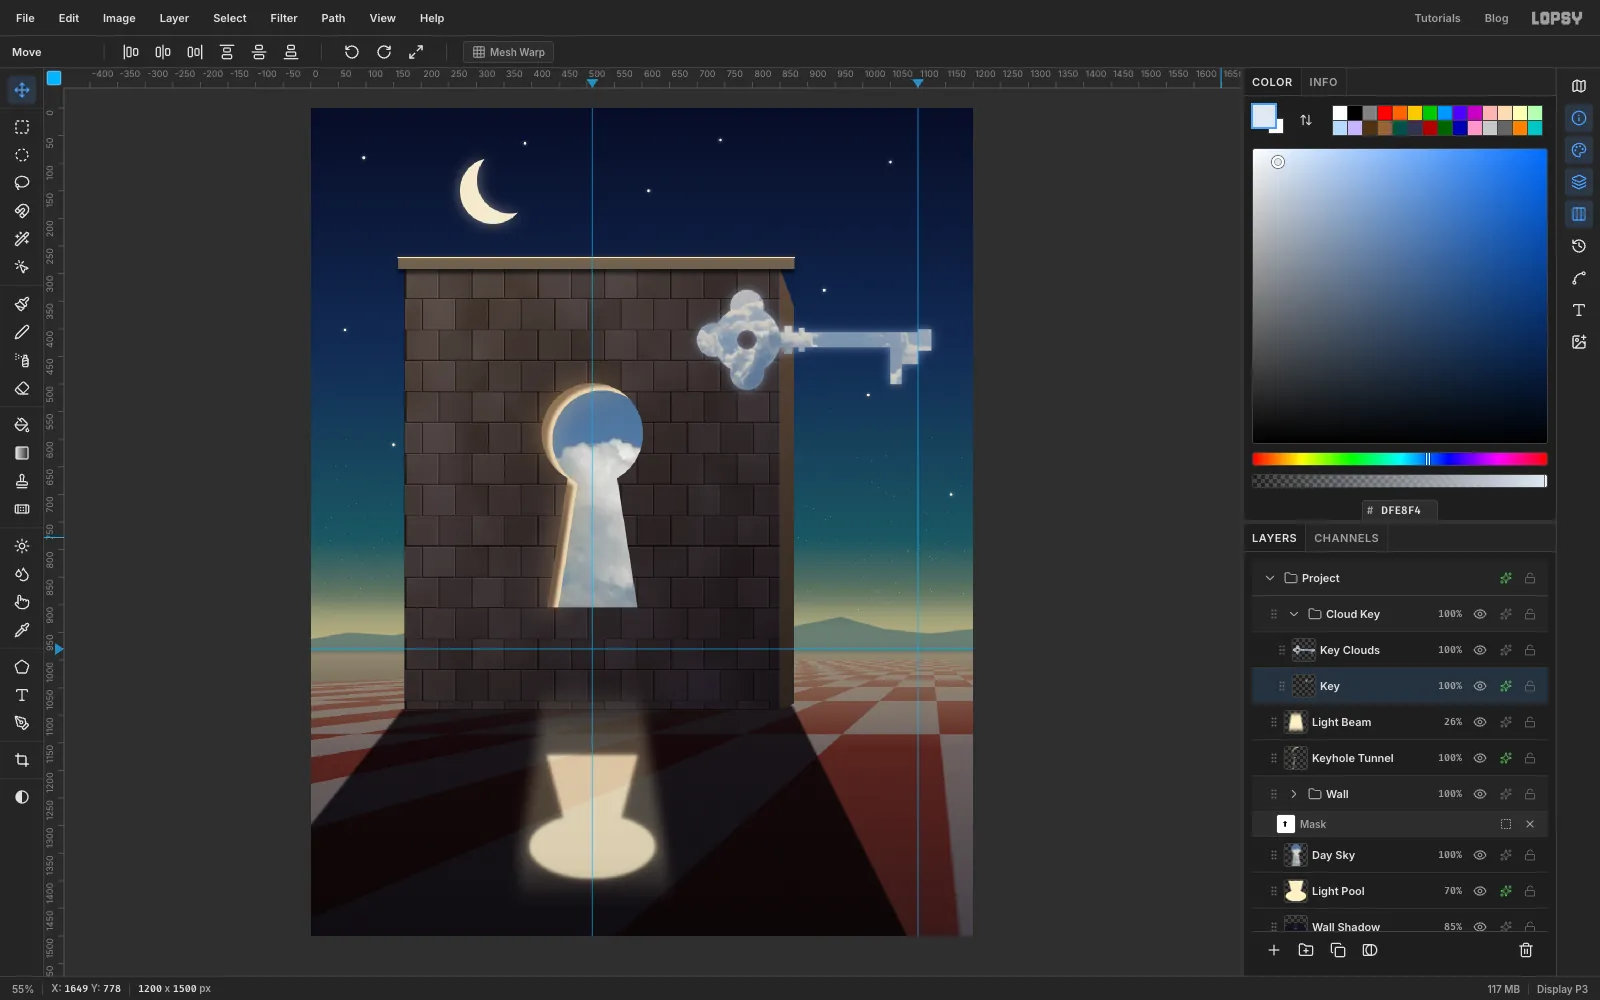
- Cmd-click the Key thumbnail and choose Select → Inverse.
- Click Key Clouds, press Delete and deselect.
- Run Gaussian Blur at 2 on Key Clouds and again on Key, so the key's edge is soft like cloud.
- Give Key an Outer Glow: Size 26, Opacity 55, colour .
-
Flip and rotate the whole group
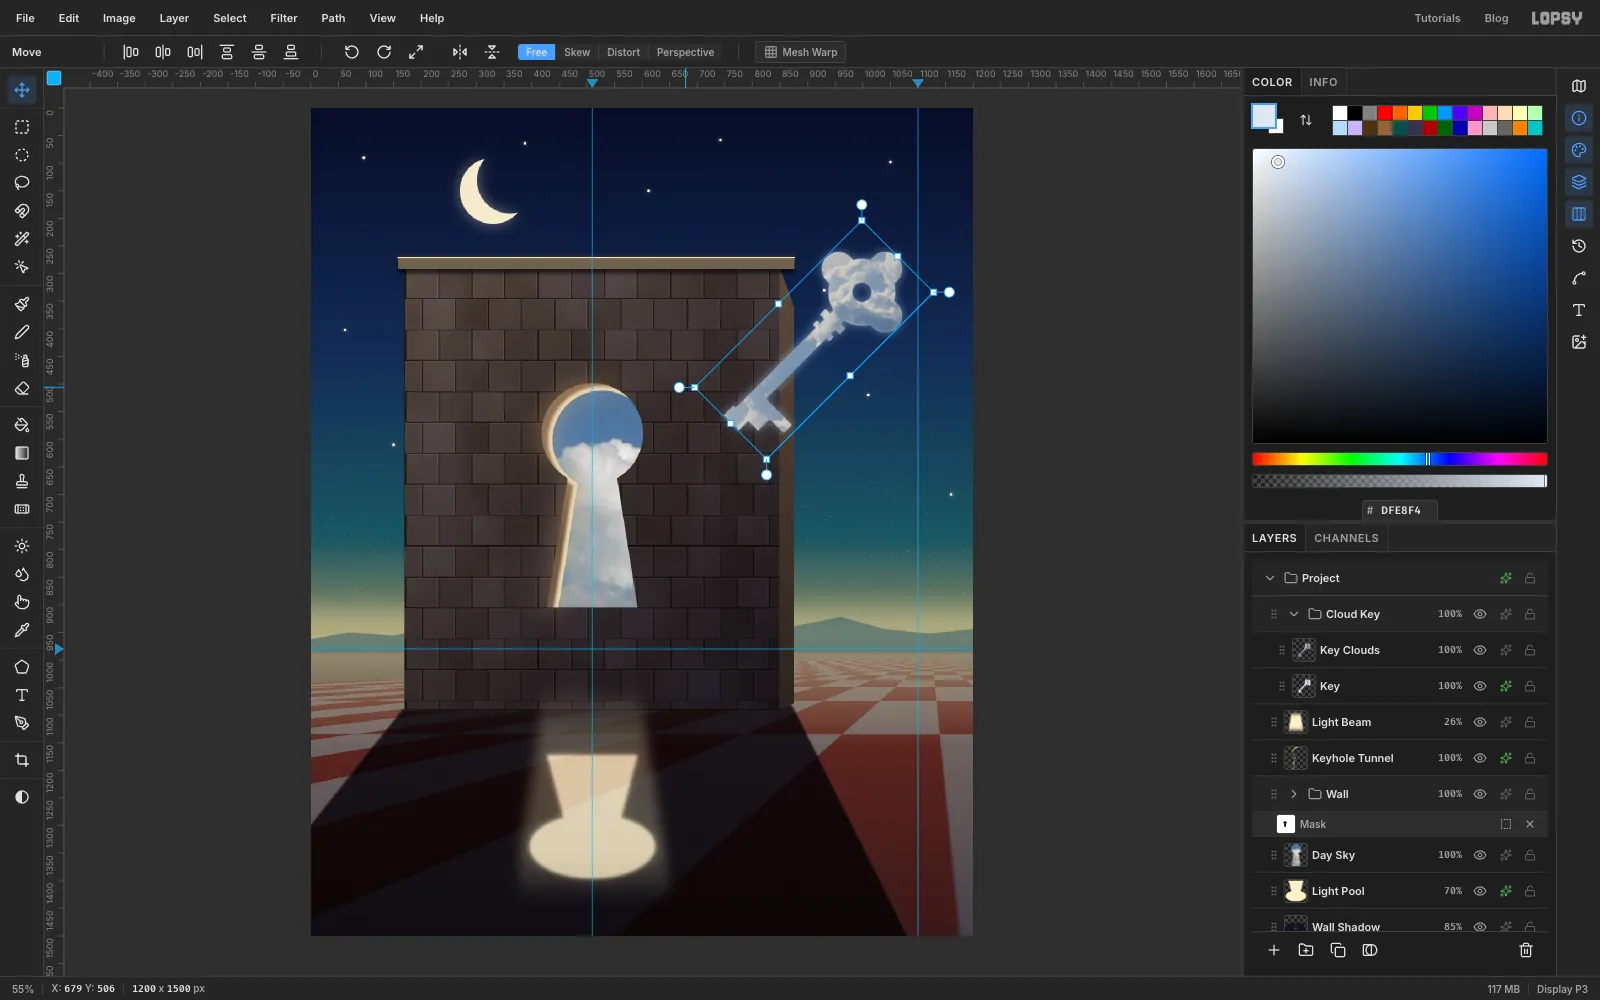
- Click the Cloud Key group row and pick the Move tool. With a group selected and nothing marqueed, the handles frame the whole group.
- Click Flip Horizontal, so the bow is on the right.
- Hold Cmd and drag the top-left rotation handle counter-clockwise. Cmd snaps to 15° steps. Stop at 45°, so the bit points down toward the keyhole.
- Press Cmd+D.
Flip first, then rotate. Here the order matters.
-
Scale the key and float it into place
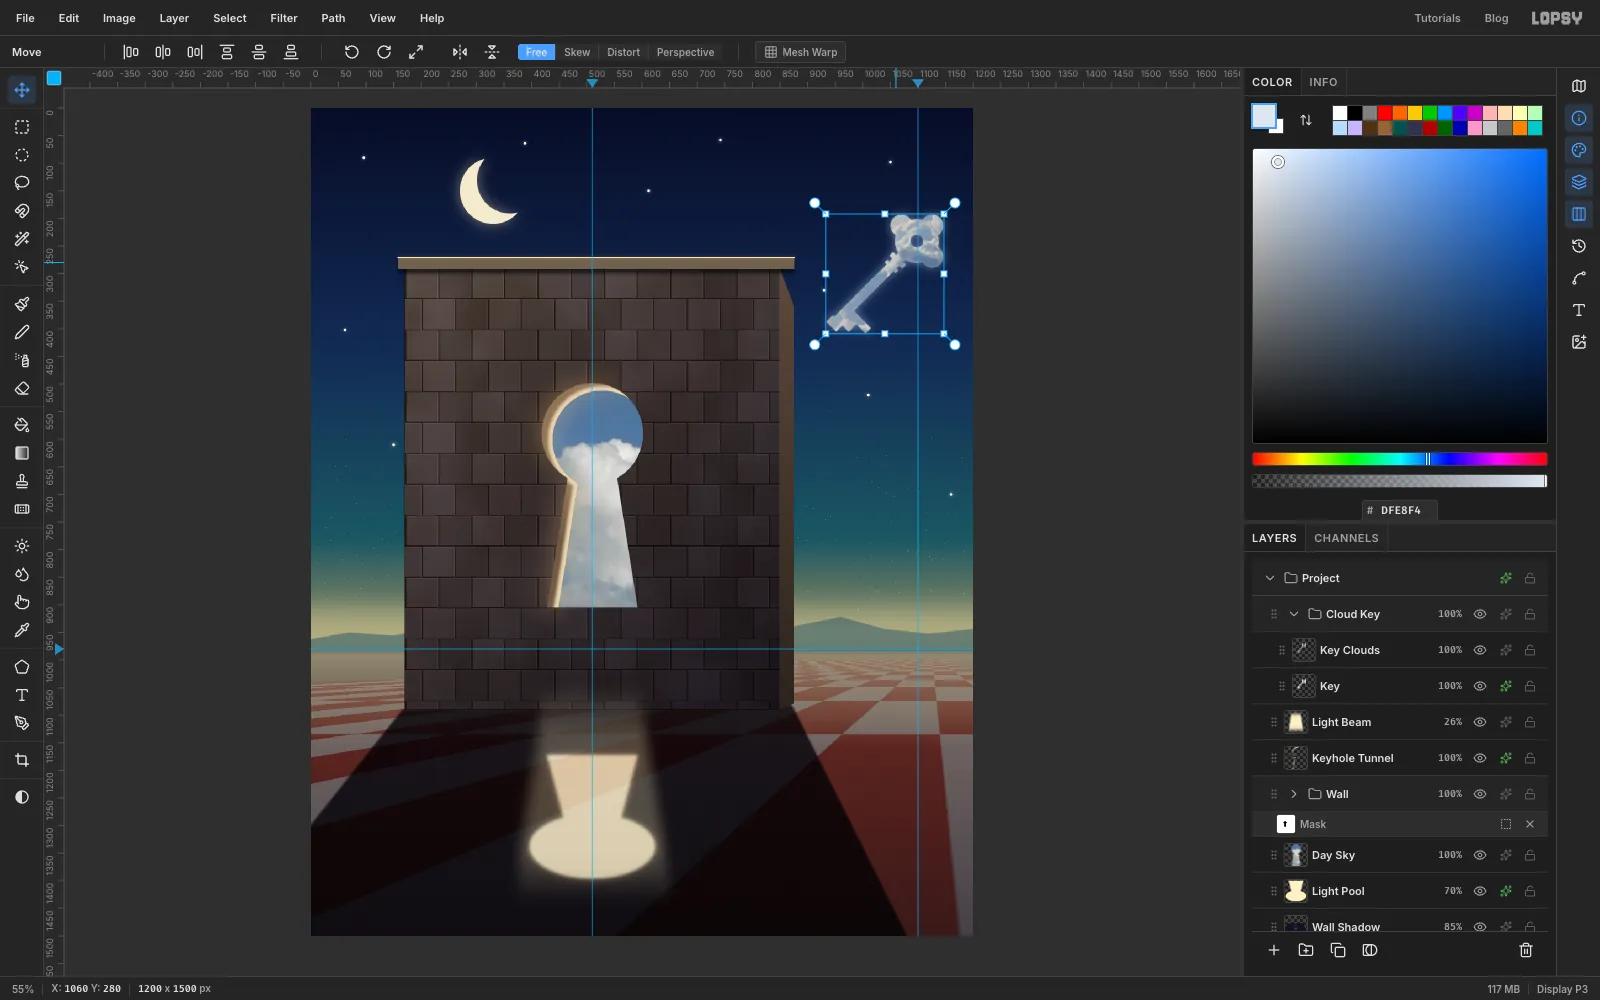
- Select the group again. Hold Cmd and drag the bottom-right handle in until the key is about two-thirds the size. Press Cmd+D.
- Drag the group to the upper right, centred around (1040, 300). Leave at least 50 px between the key and the canvas edge, and more between the key and the wall. Press Cmd+D.
-
Cut the clouds out of the blue
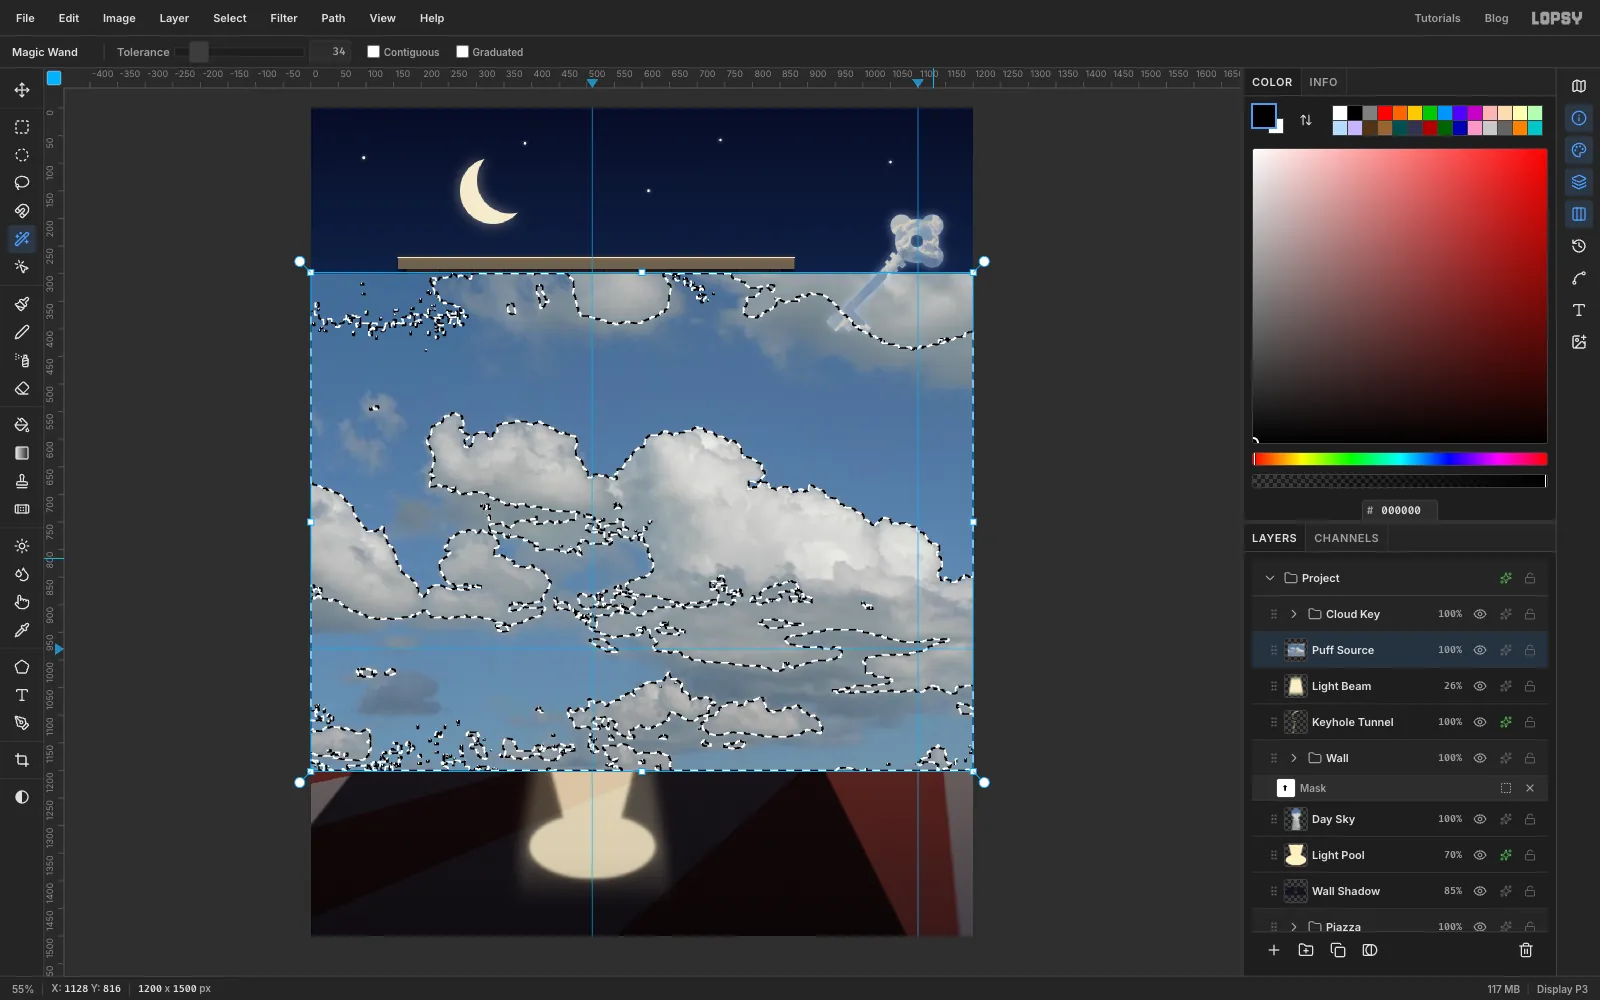
- Collapse Cloud Key, select Light Beam, and drag the Clouds in blue sky photo in again. Rename it
Puff Sourceand press Cmd+D. - Pick the Magic Wand, set Tolerance to 34 and turn off Contiguous.
- Click a patch of blue sky. Every blue pixel in the photo is selected.
- Feather 2 px and press Delete. Only the clouds are left.
- Collapse Cloud Key, select Light Beam, and drag the Clouds in blue sky photo in again. Rename it
-
Lasso a puffy cloud
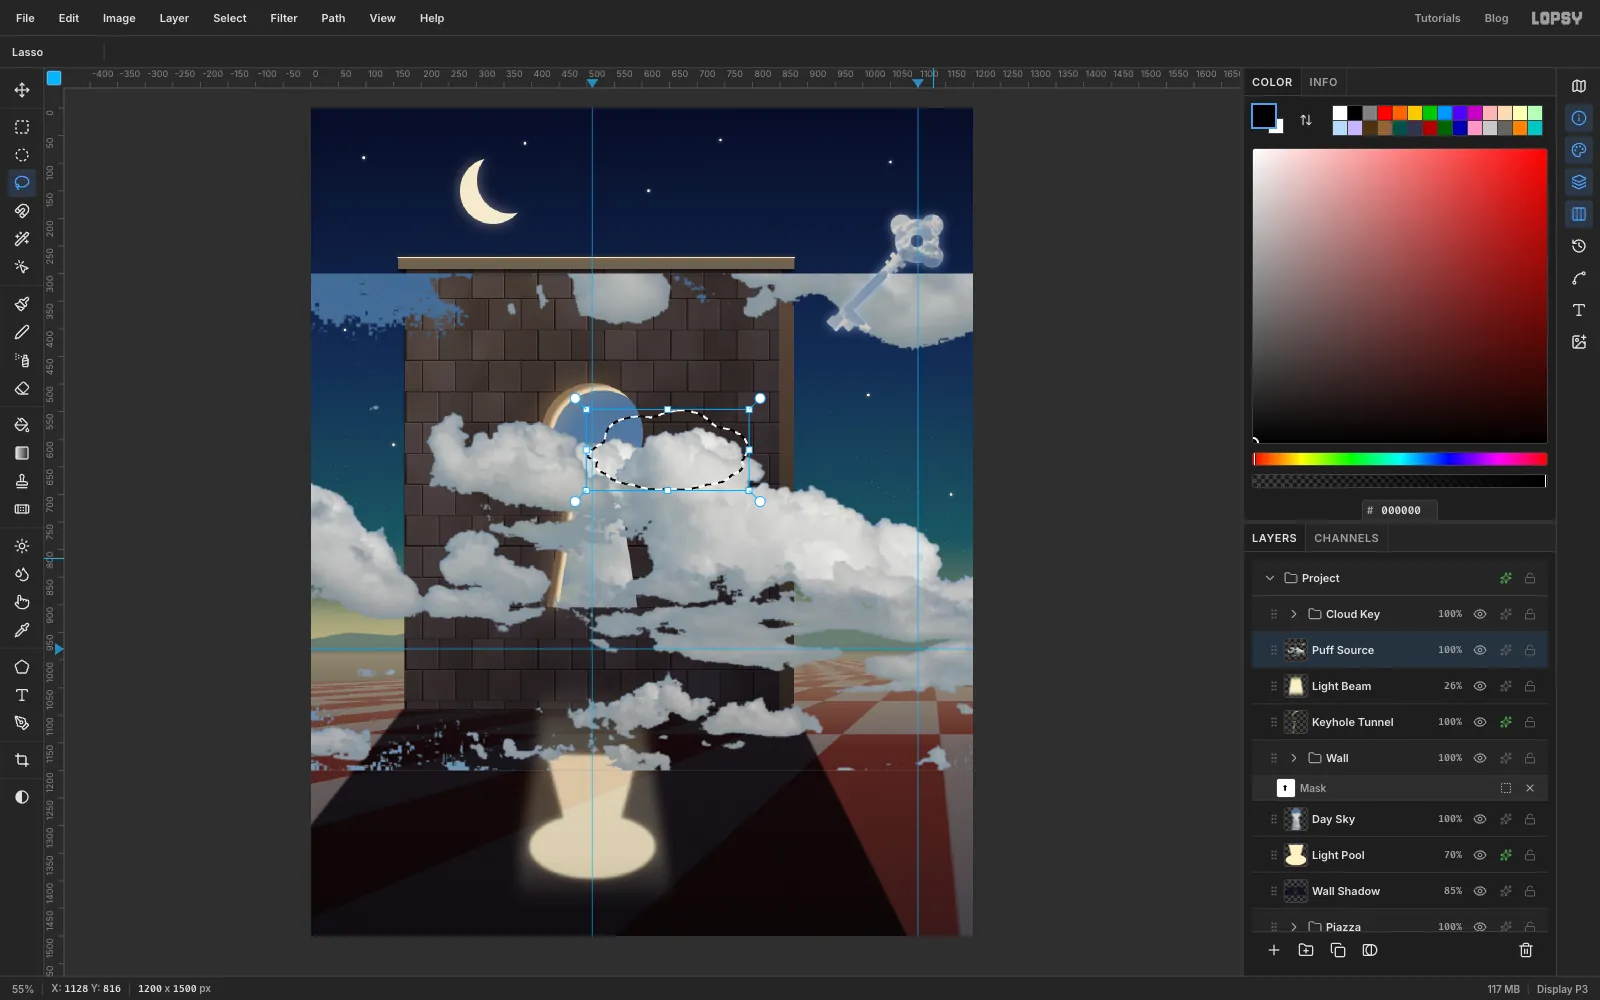
With the Lasso, draw a cartoon cumulus outline around a dense, white part of the big cloud bank. Give it a bumpy top and a flatter base, about 260 × 130 px. Feather it 2 px.
A cloud-shaped outline gives you a clean puff, even where the photo's clouds run together.
-
Copy, paste and shrink it
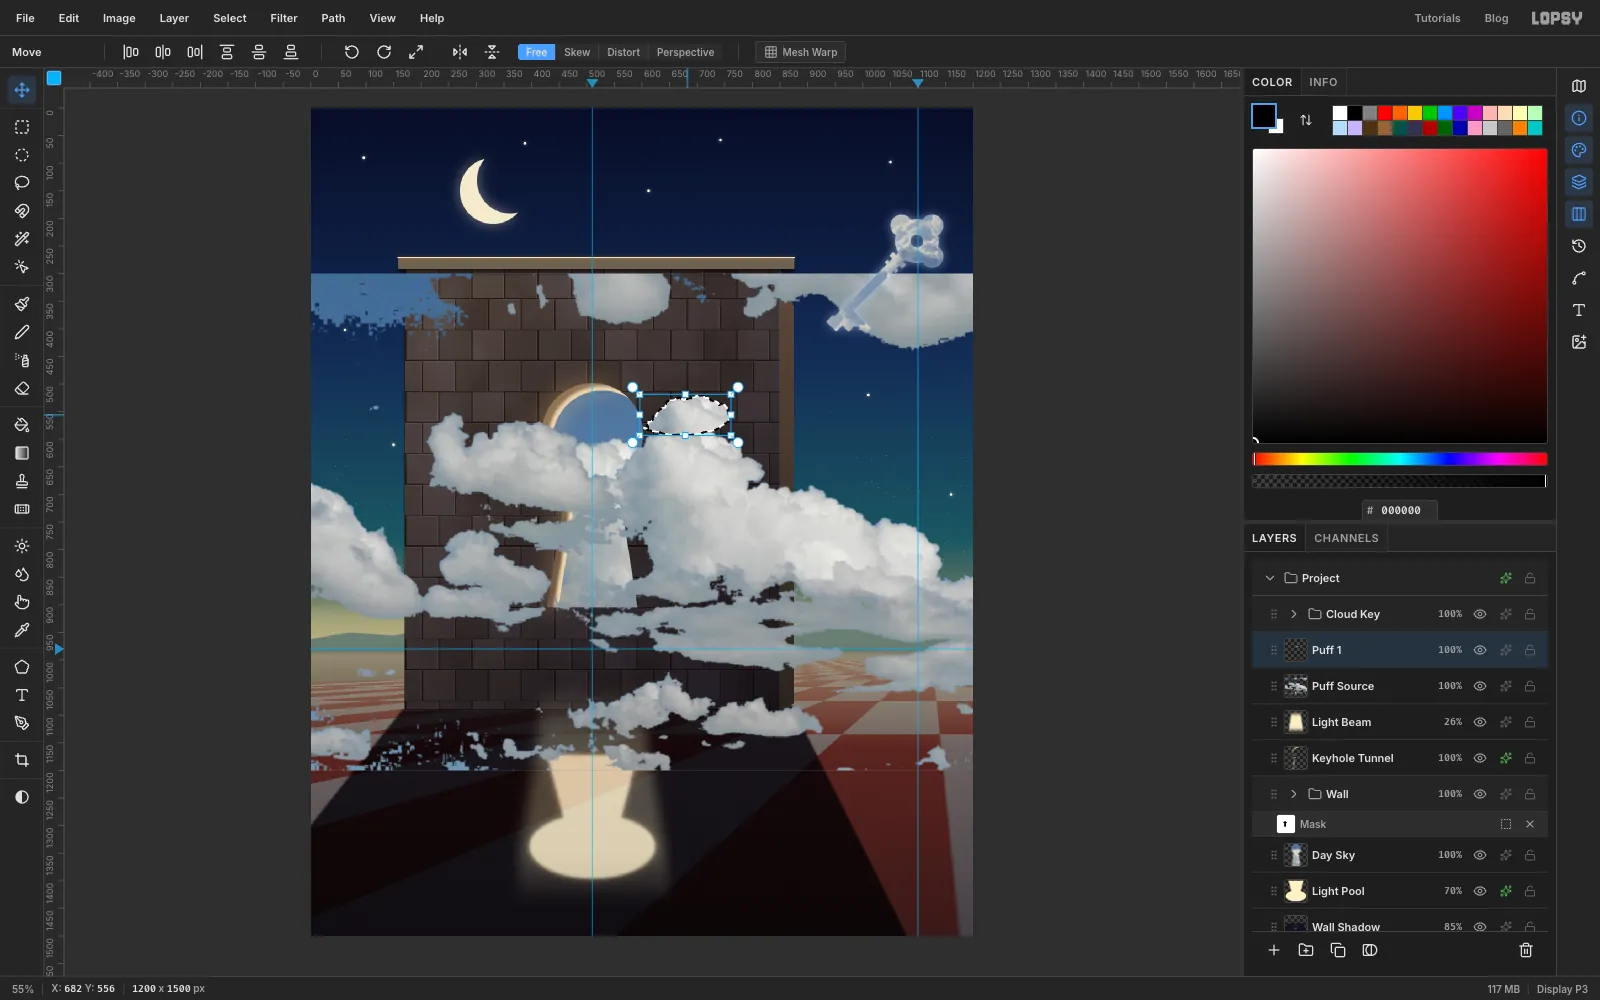
- Press Cmd+C then Cmd+V. The puff pastes in place on its own layer, already selected with the Move tool.
- Rename the layer
Puff 1. - Hold Cmd and drag the corner handle in to about 60%.
- Drag the puff so it's just leaving the keyhole's right edge, around (680, 555). Press Cmd+D.
-
Make the cloud trail
- Select Puff Source again and lasso a second puff from the right-hand cloud bank. Copy, paste and rename it
Puff 2. - Scale it to about 40% and place it higher up, around (790, 505). Keep it on the wall face, clear of the edge.
- Click Duplicate Layer and rename the copy
Puff 3. Cmd-click its thumbnail, scale it to 60%, and move it into the open sky below the key's bit, around (935, 466). Press Cmd+D. - Delete Puff Source.
- Give each puff an Outer Glow: Size 10, Opacity 25, colour .
- Set Puff 2 to 85% opacity and Puff 3 to 70%.
The trail climbs steadily and fades as it goes. That leads the eye from the keyhole to the key.
- Select Puff Source again and lasso a second puff from the right-hand cloud bank. Copy, paste and rename it
-
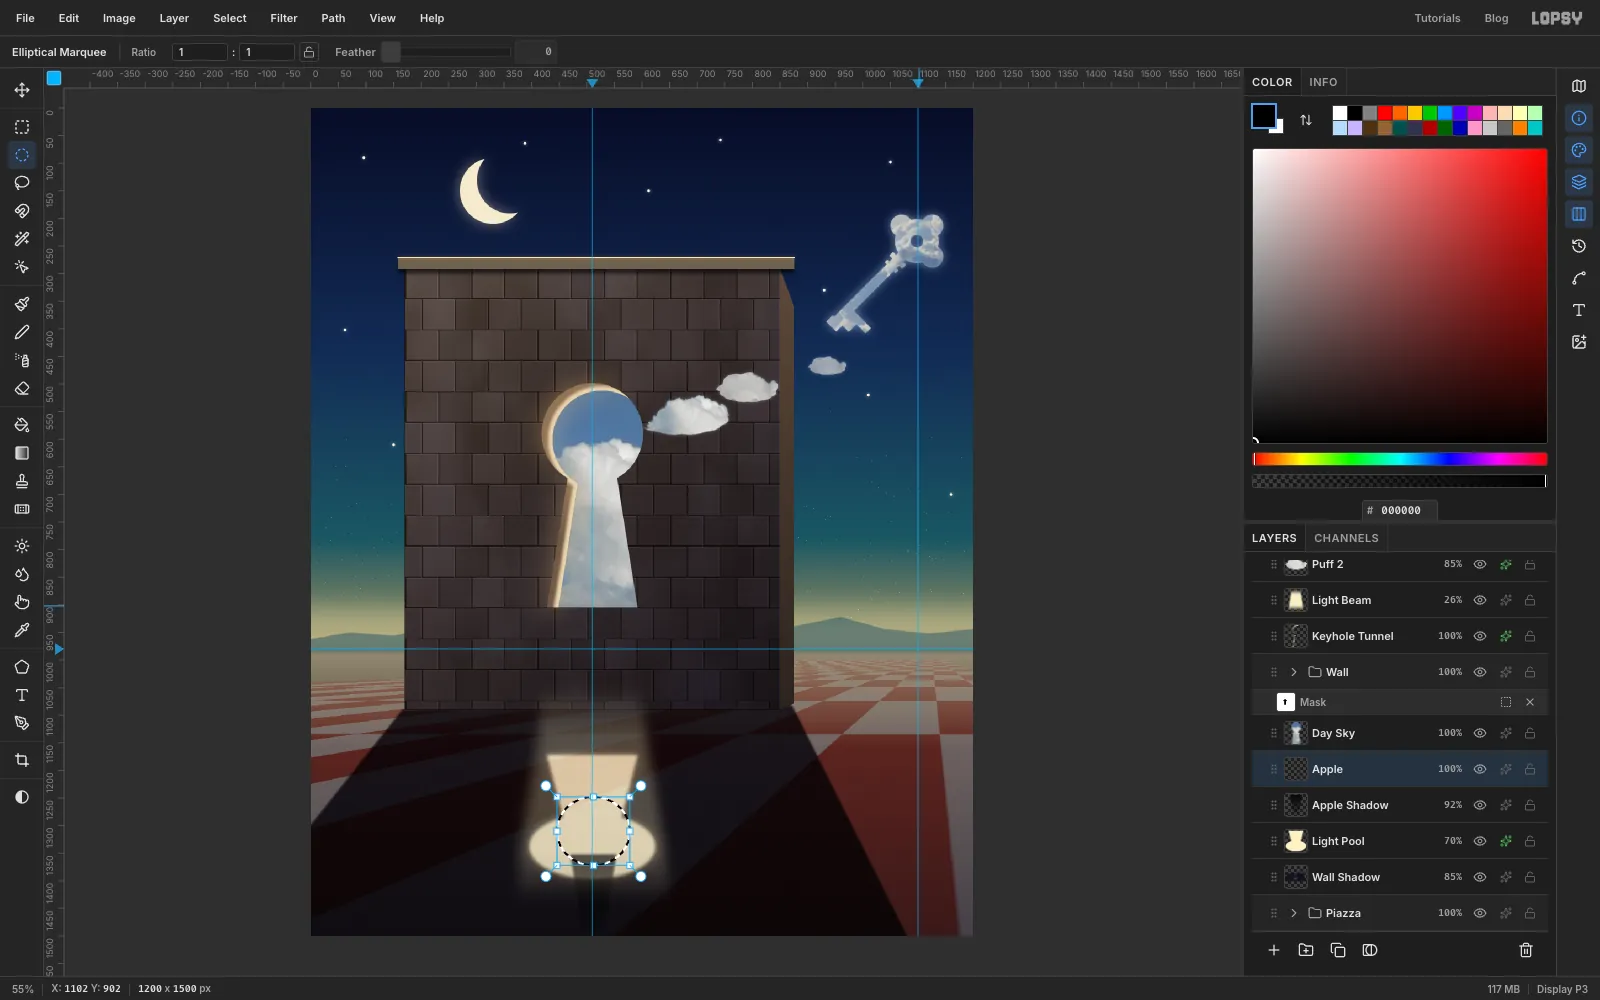
Shape the apple
- Select Light Pool and add a layer named
Apple Shadow. - Lasso a long, tapering shape from under the apple toward you:
- (470, 1352)
- (554, 1352)
- (530, 1495)
- (494, 1495)
- Fill it with a linear gradient of , running from fully opaque at the top to 15% opacity at the bottom. Deselect.
- Run Gaussian Blur at 6 and set the layer to Multiply at 92%.
- Add a layer named
Appleand select the ellipse from (446, 1248) to (578, 1372). - Fill the apple with a linear gradient from at the top to at the bottom. The side facing you is turned away from the light.
- Select a small oval from (492, 1243) to (532, 1266), Feather 3 px, and fill it with for the dimple where the stem sits.
- Select Light Pool and add a layer named
-
Light the apple from behind
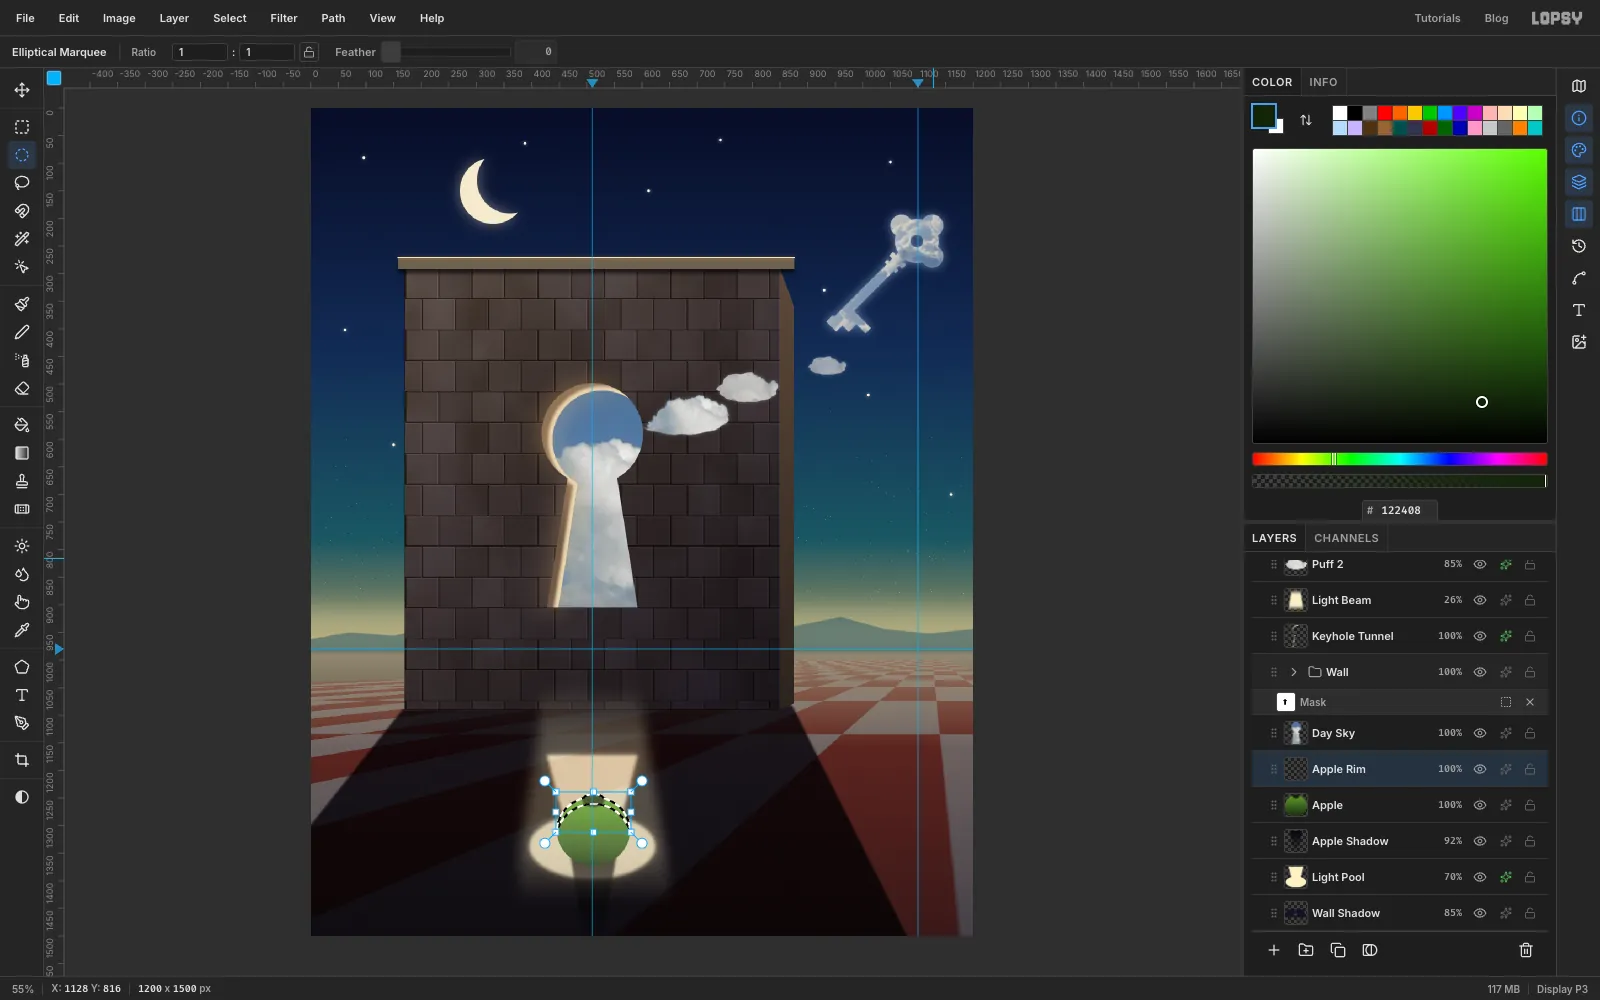
- Add a layer named
Apple Rimand Cmd-click the Apple thumbnail. - Zoom in, hold Alt and drag an ellipse slightly bigger than the apple and about 13 px lower, from (444, 1261) to (580, 1392). What's left is a thin crescent along the apple's top.
- Feather it 2 px and fill with .
- Deselect and set the layer to 85%.
That crescent of light is what says the sun is behind the apple.
- Add a layer named
-
Add the stem and leaf
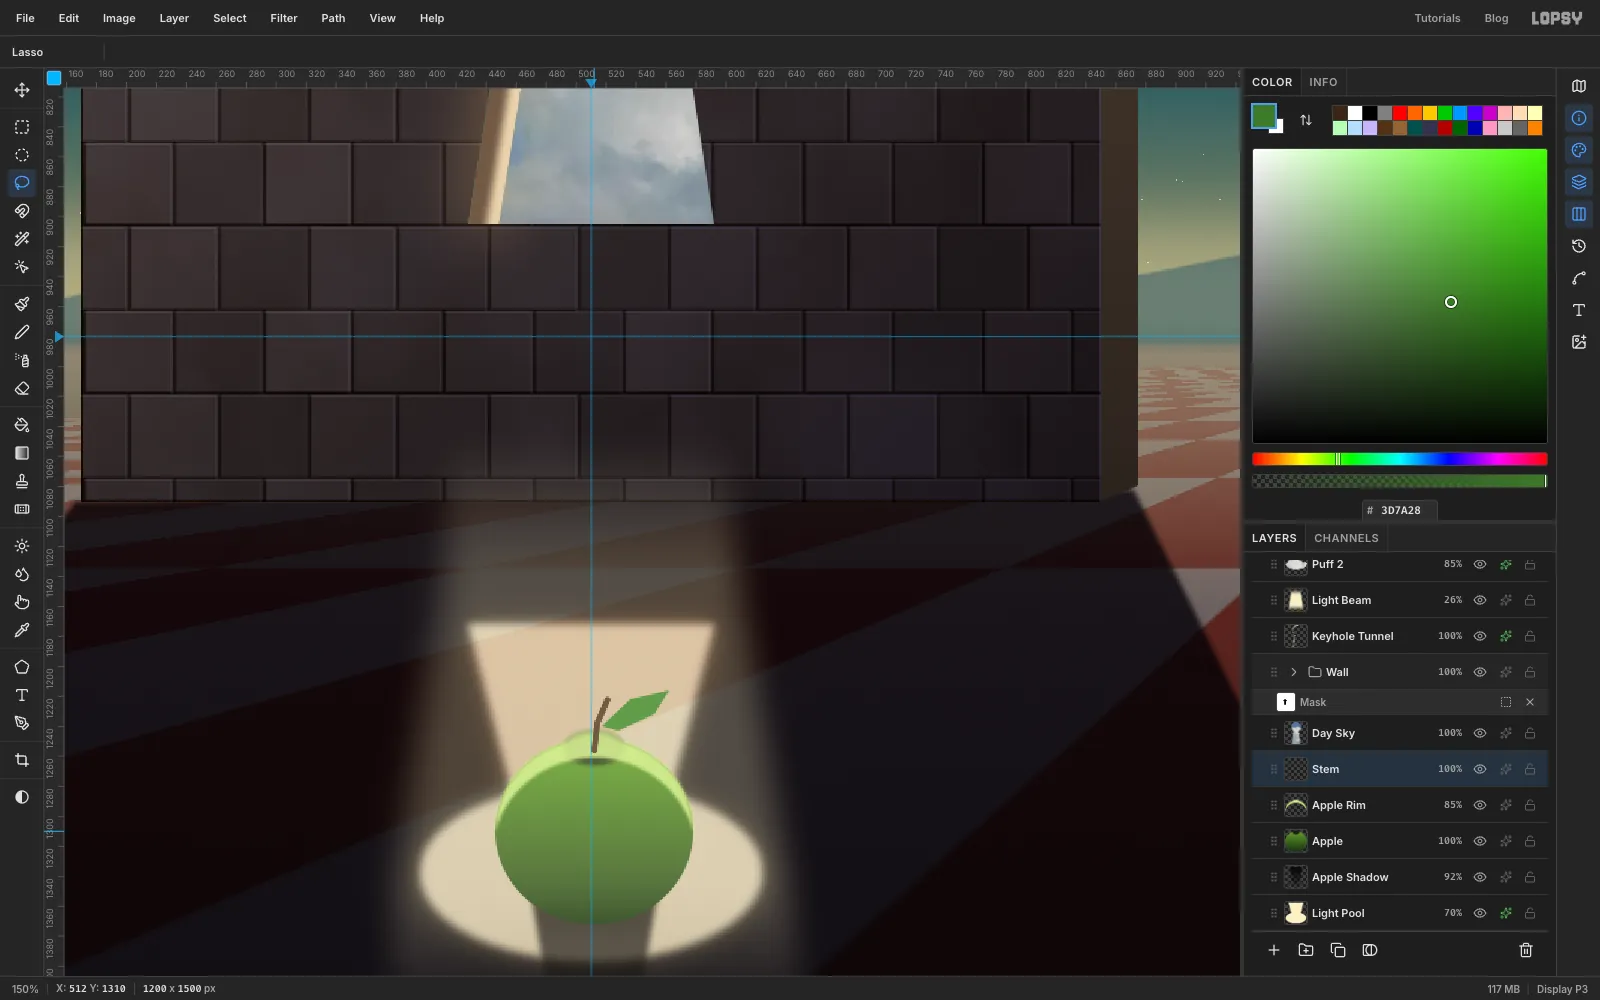
- Add a layer named
Stem. - Pick the Brush at size 5 with Hardness 80 and colour .
- Click in the dimple, then Shift-click twice, going up and slightly to the right, for a short bent stem.
- With the Lasso, draw a small leaf off the stem and fill it with .
- Add a layer named
-
Finish with grain and a vignette
- Select the Cloud Key group and add a layer named
Film Grain. Fill it with . - Add Add Noise (30, Mono, Gaussian) and set the layer to Soft Light at 45%. This gives every surface the same fine painted texture.
- Add a layer named
Vignette. Pick a Radial gradient with three stops, all :
- transparent at the start
- transparent at 55%
- 85% opacity at the end
- Drag from the middle of the picture to a top corner, then set the layer to 75%.
- Choose File → Quick Export PNG, and File → Save Project to keep the layers.
To push the surrealism further, try your own swap. Put a night sky in the keyhole of a sunny wall, or float the apple instead of the key.
- Select the Cloud Key group and add a layer named