Paint a Baroque Still Life of Artichokes
Paint a candlelit Spanish Baroque still life in Lopsy with lasso-and-gradient artichoke bracts, a custom seed brush, Smoke, and Multiply shadows.
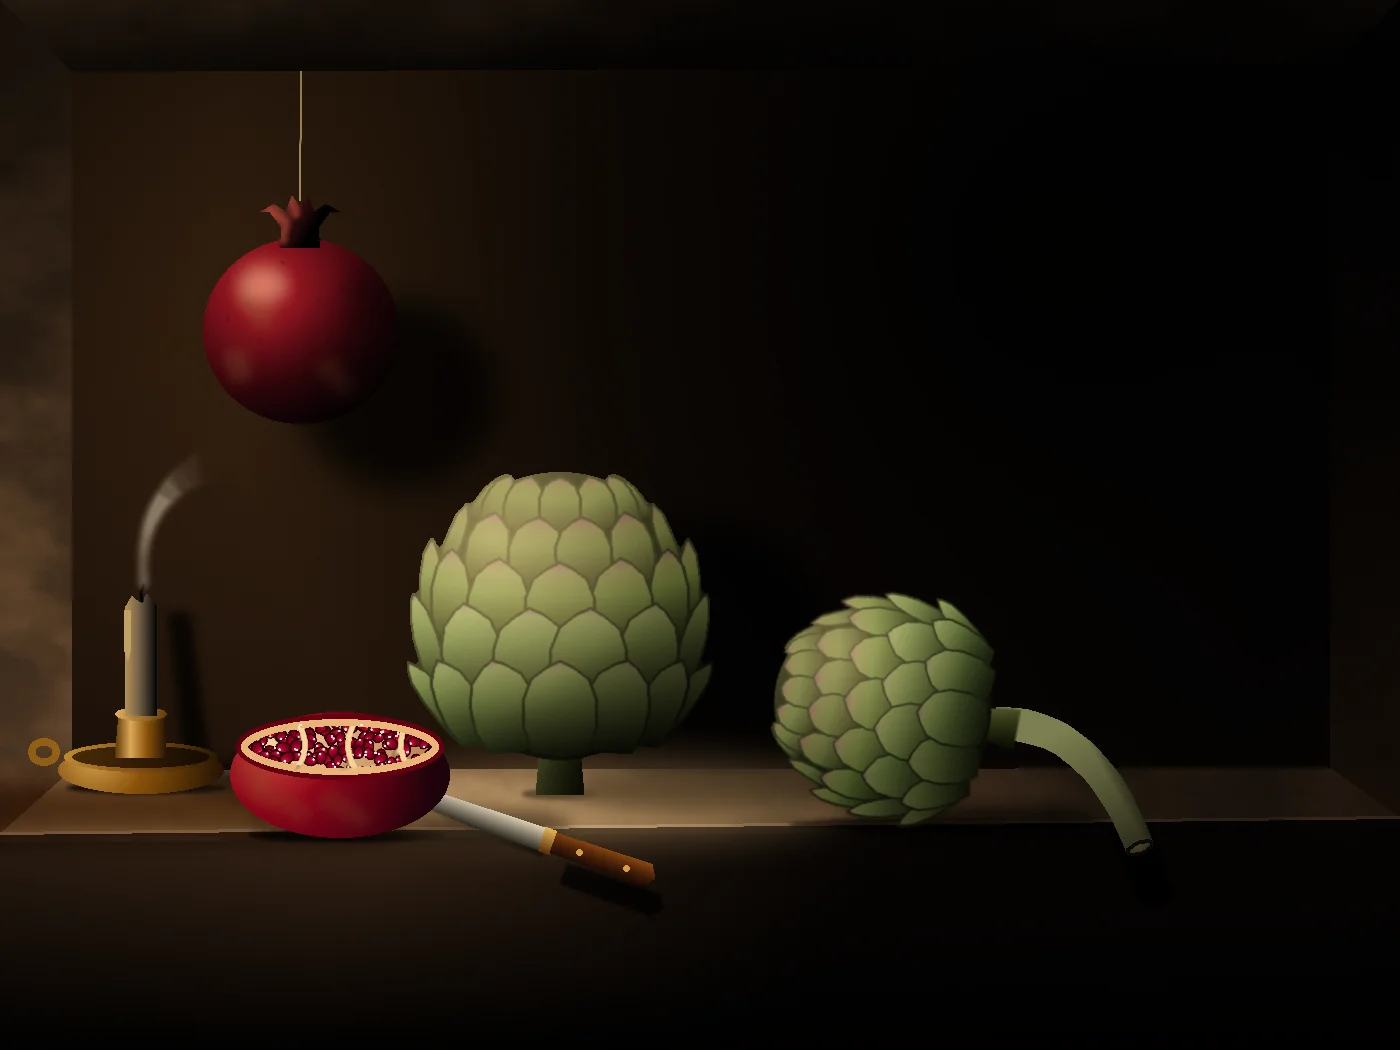
Spanish still-life painters around 1600 had a simple formula: put a few ordinary things on a stone ledge, let a single light fall on them from the upper left, and let everything else go black. The style is called the bodegón, and it is a good workout for any painting app.
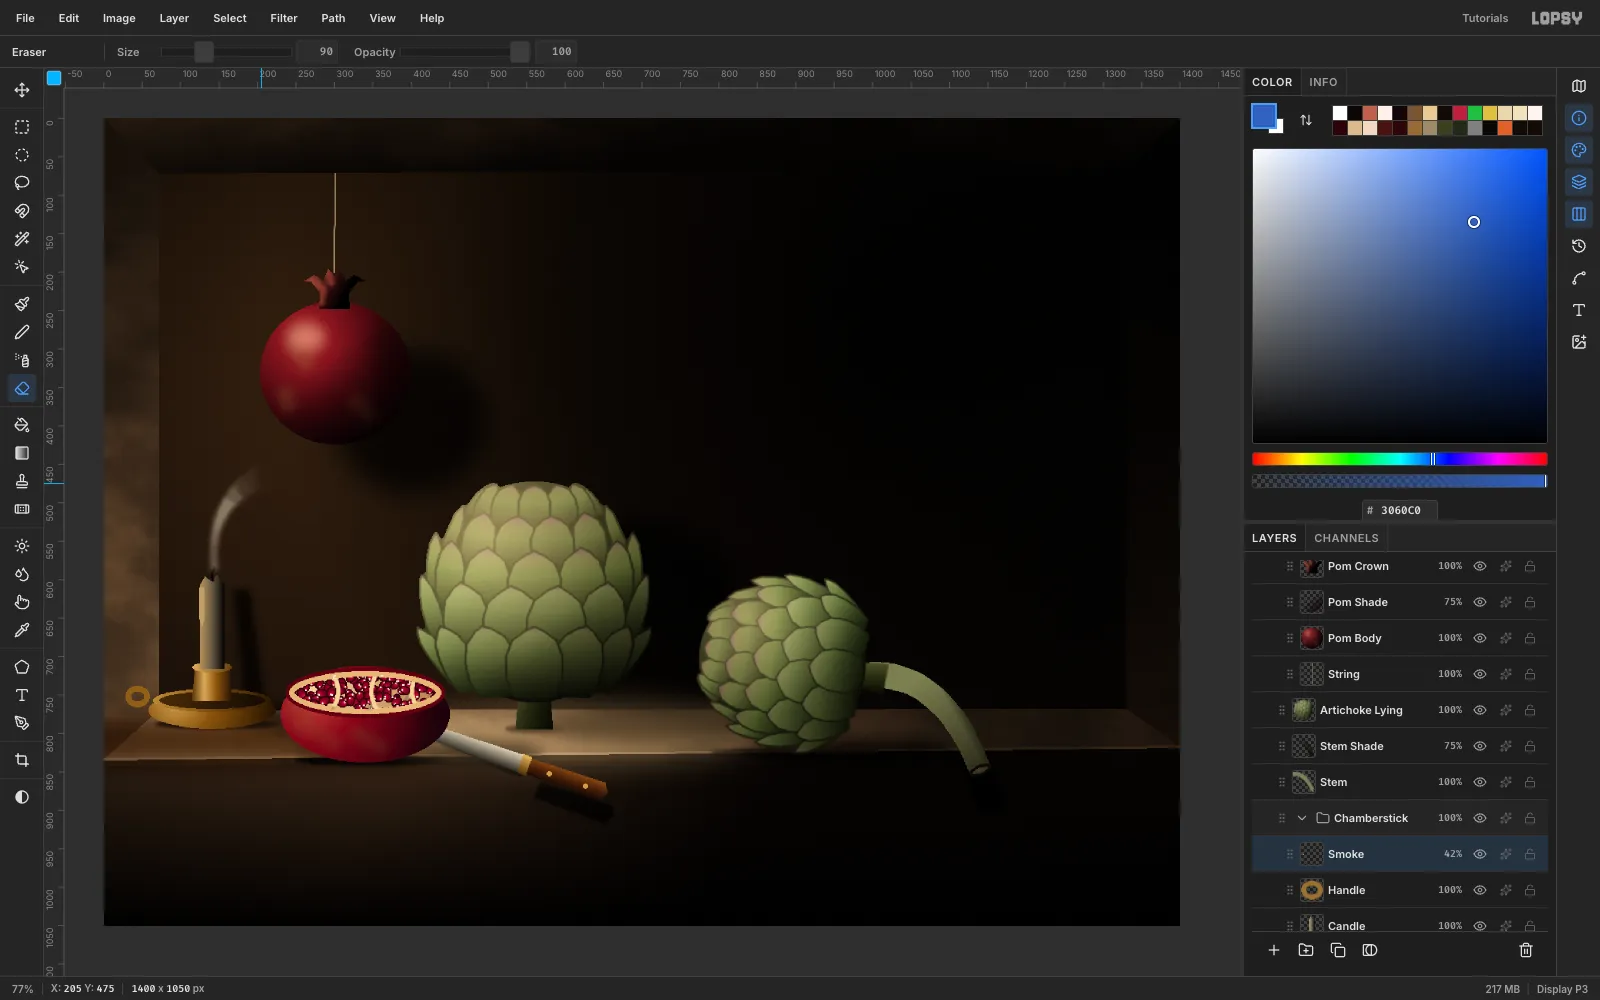
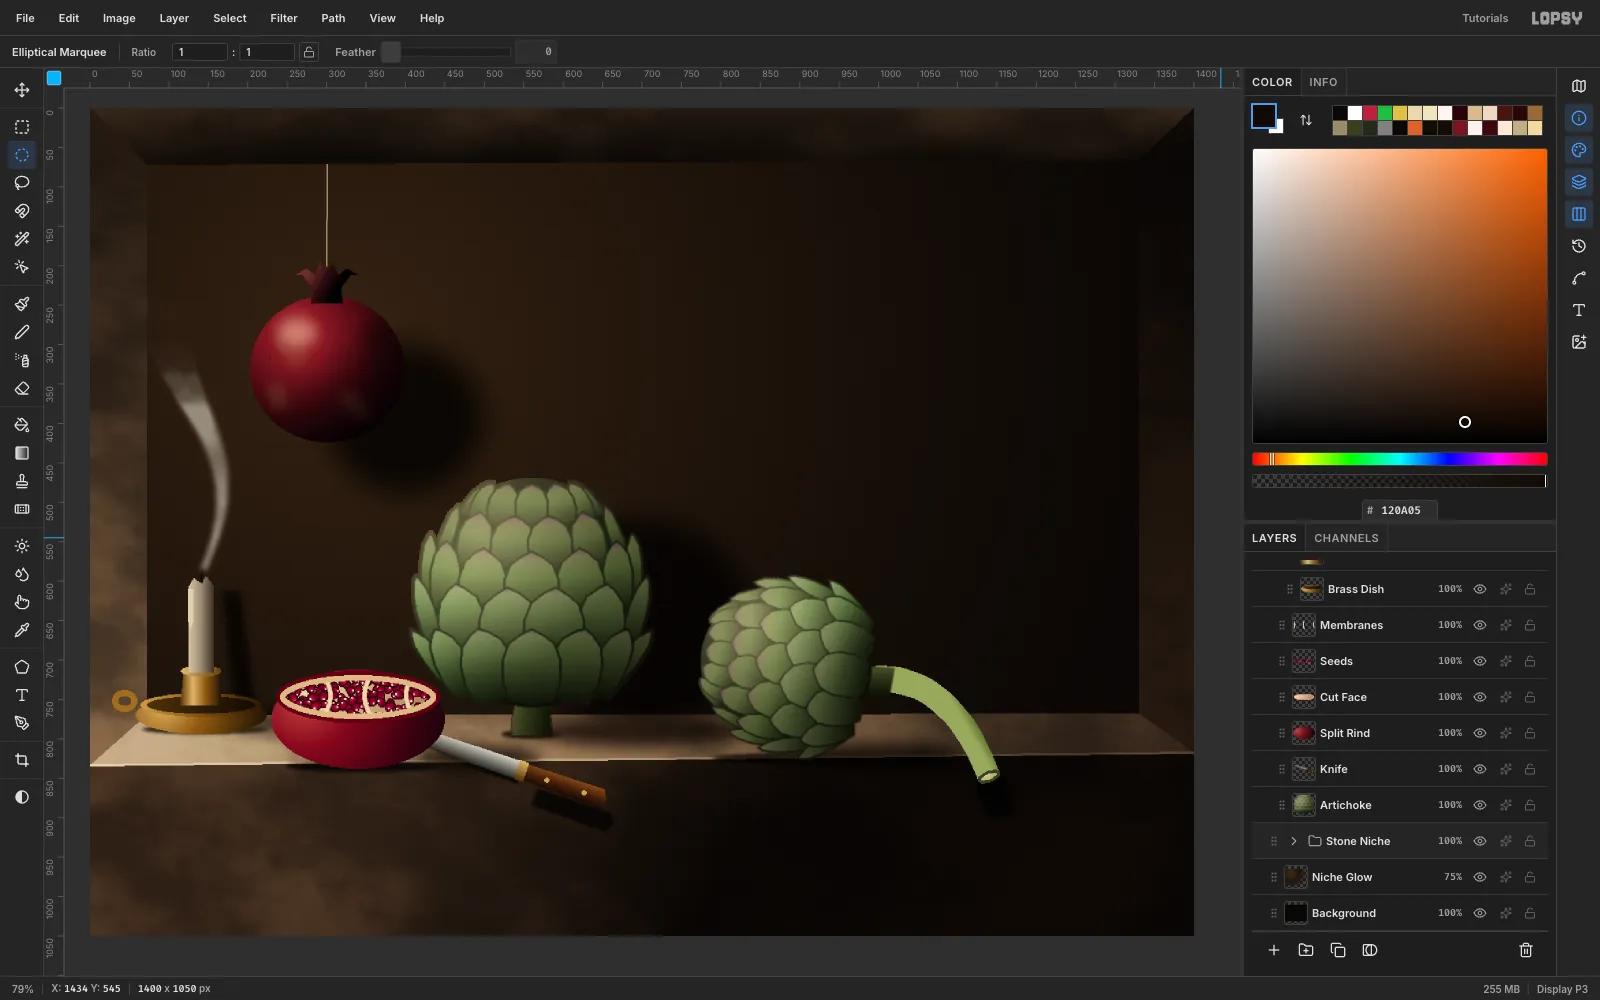
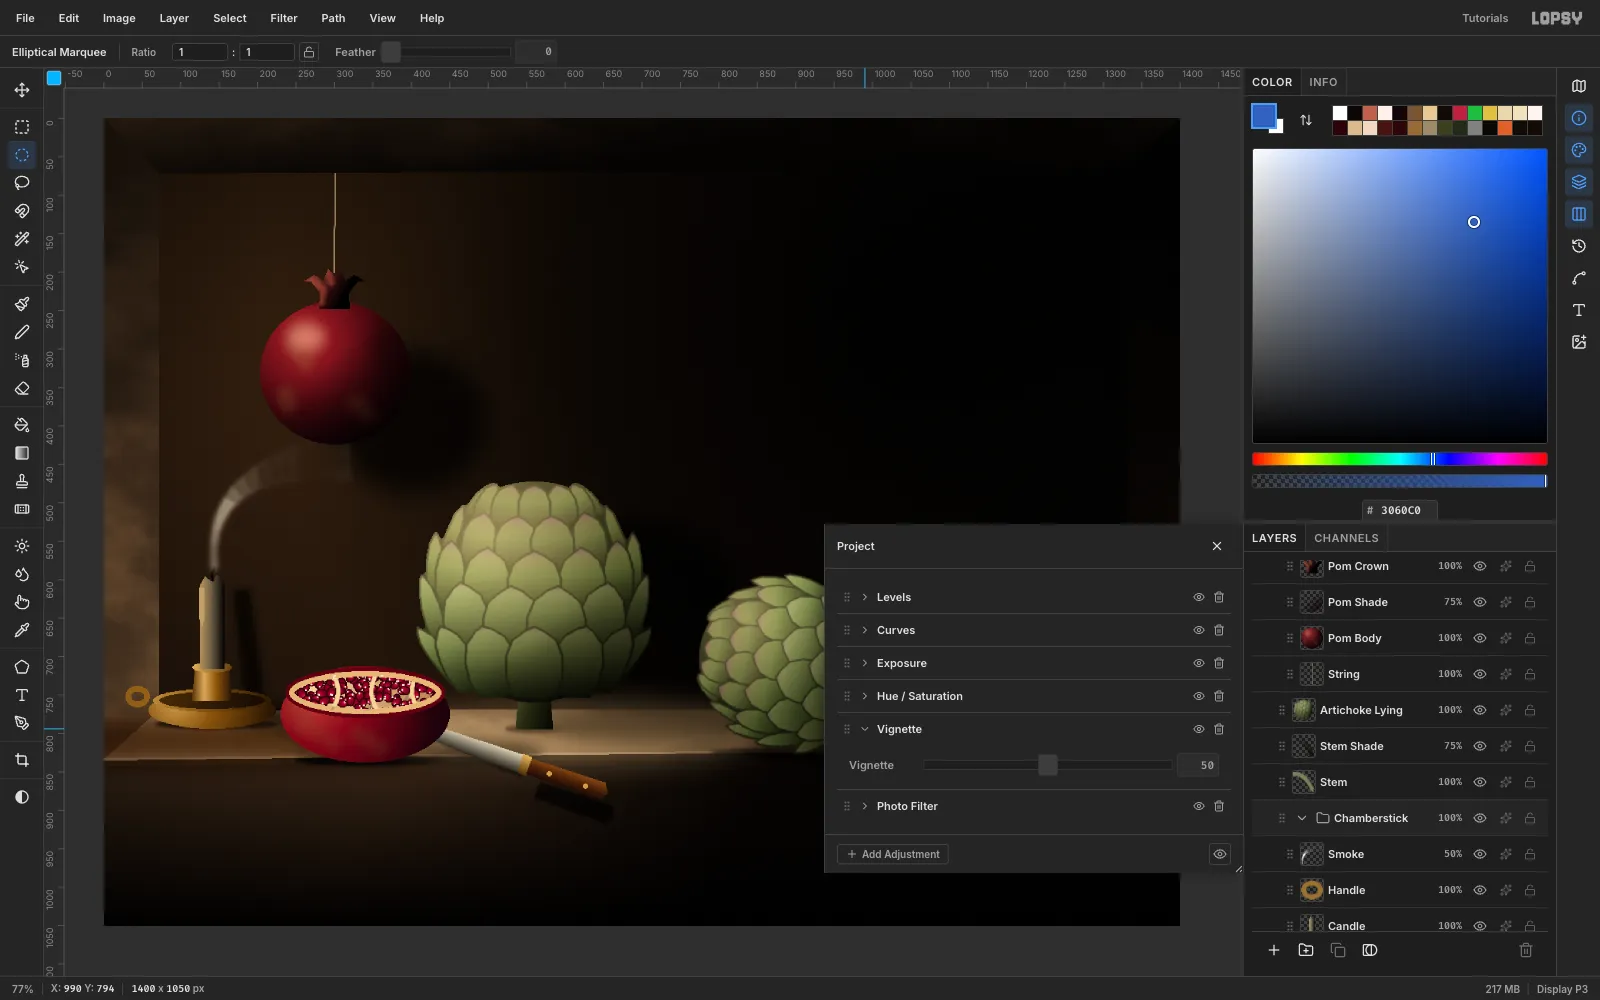
In this tutorial you'll paint Midnight Artichokes, a 1400 × 1050 bodegón. It has a pomegranate hanging on a string, two artichokes, a split pomegranate, a knife that sticks out over the ledge and a candle that has just been put out. The objects form a curve that starts at the hanging fruit and steps down to the right.
Along the way you'll use:
- polygon lassos filled with linear and radial gradients
- Select → Shrink to add outlines
- copy, paste, flip, rotate and scale transforms
- a custom brush made with Edit → Define Color Brush…
- the Clouds, Emboss, Smoke, Gaussian Blur and Hue/Saturation filters
- the Smudge and Eraser tools
- Multiply and Screen layers clipped with the Magic Wand
- root-level Vignette and Photo Filter adjustments
-
Build the stone niche
Choose File → New and set Width to
1400and Height to1050. Click Create.- Fill
Backgroundwith#0A0705(Edit → Fill). - Rename
Layer 1toNiche Glow. Add a Radial gradient that fades from#3E2B19to a transparent#1E150D. Drag it from the upper left (about 330, 300) toward the lower right, then set the layer to 75% opacity. That is your only light source. - Click New Group, name it
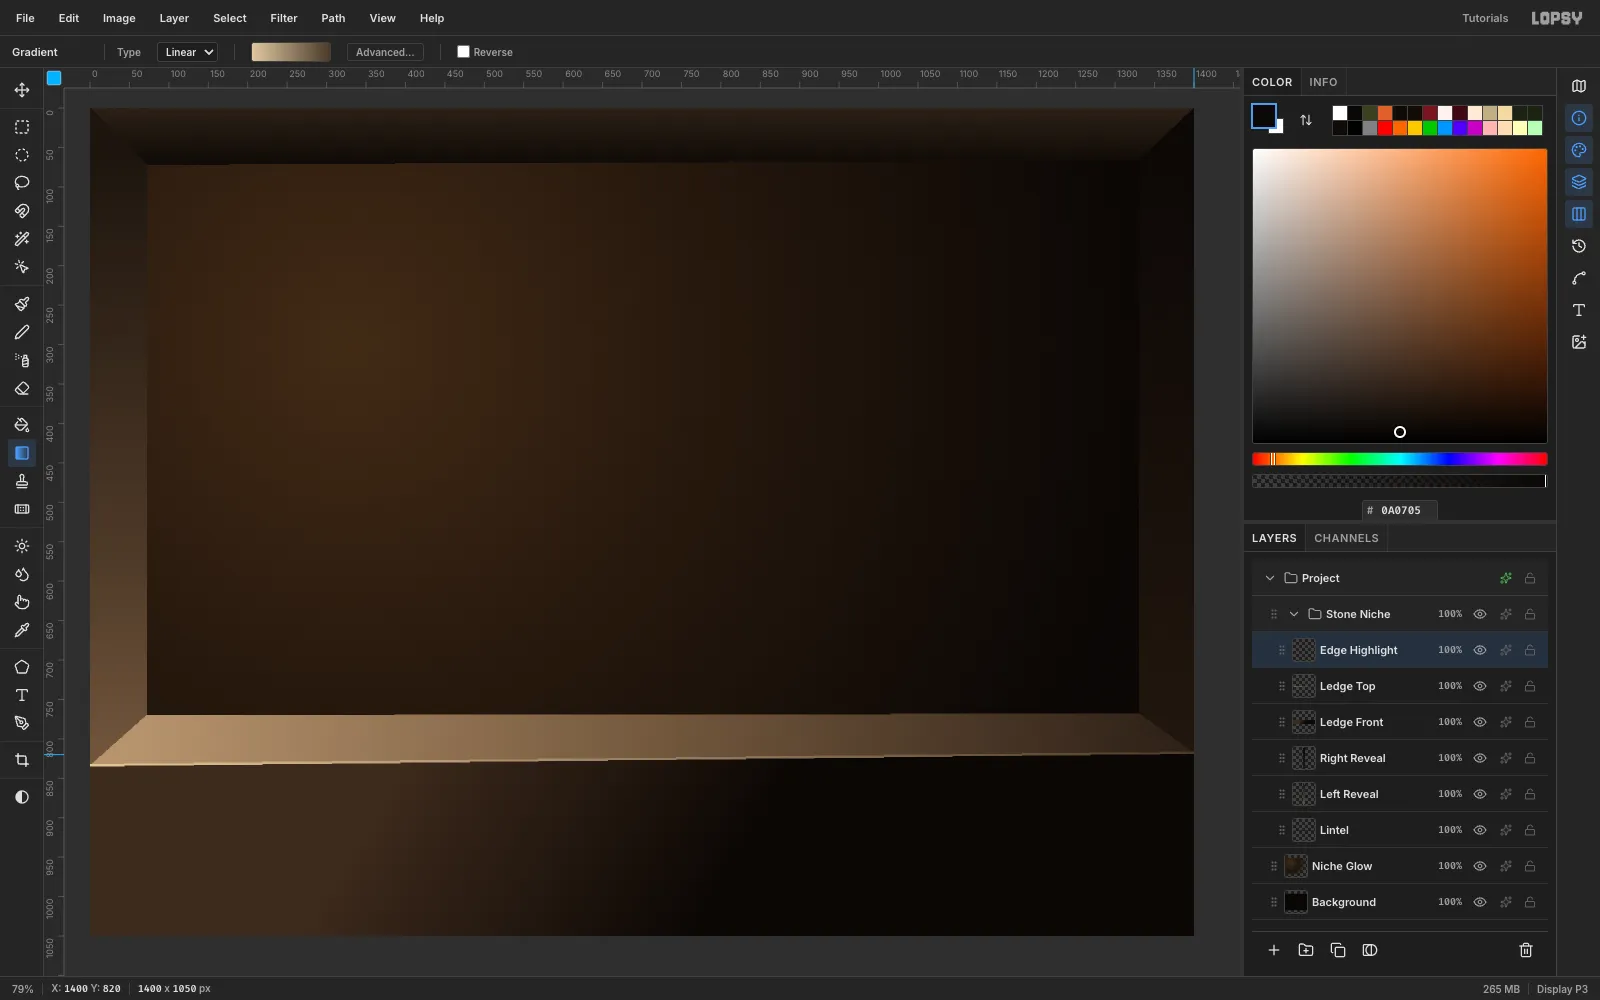
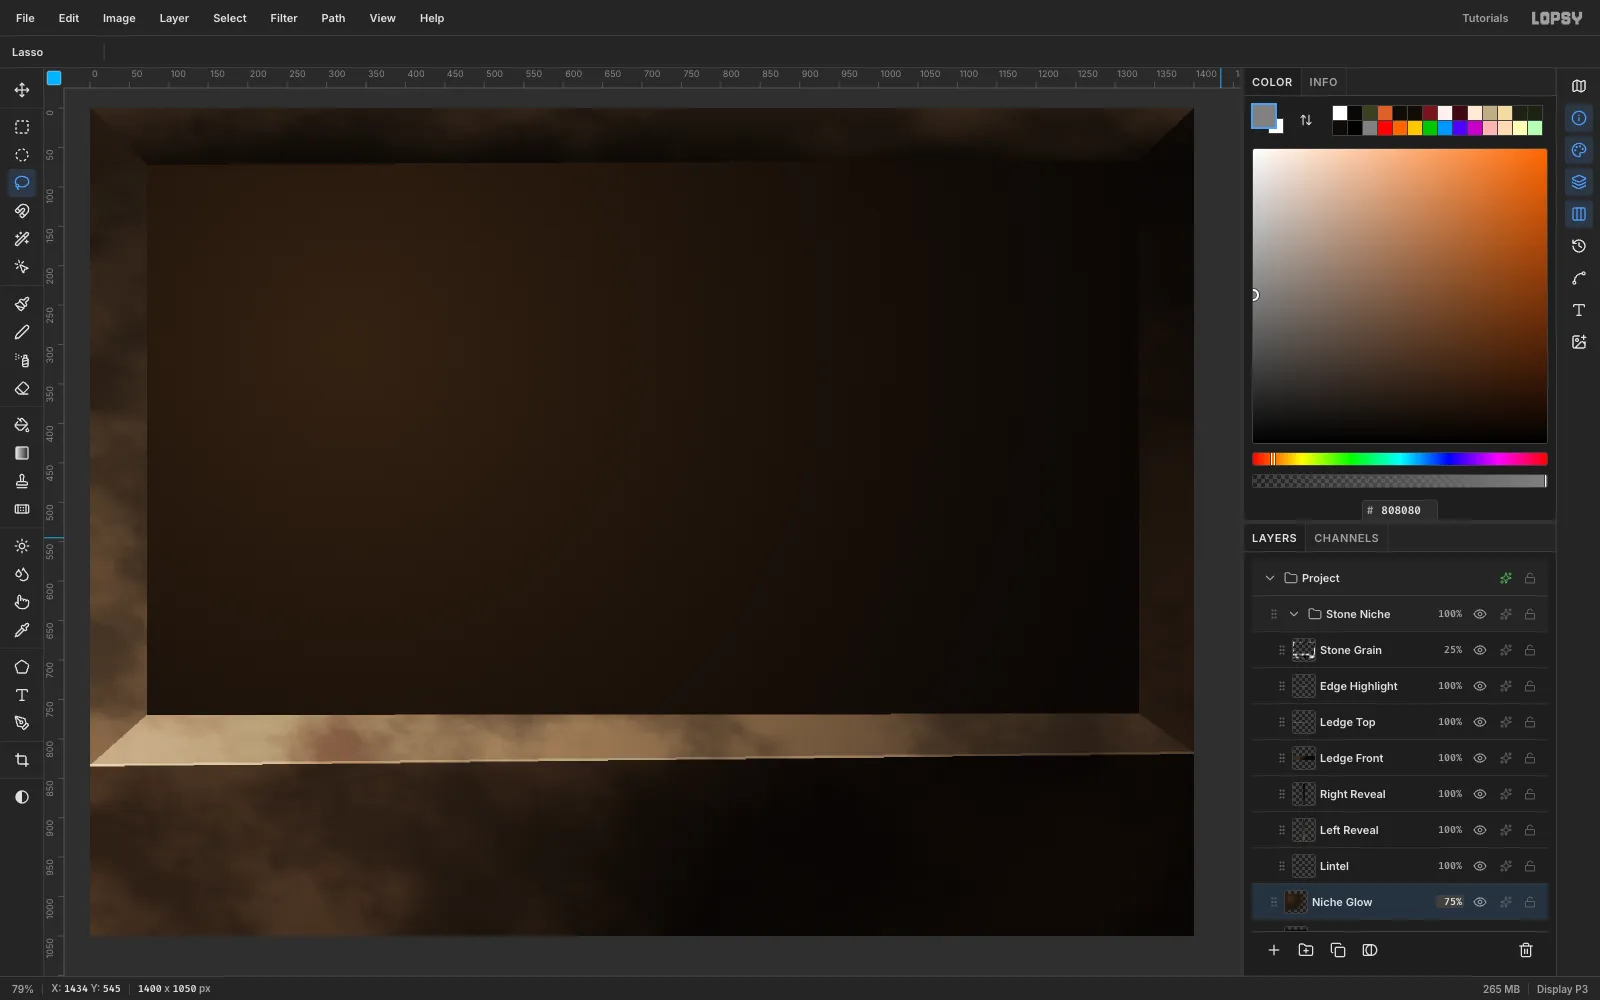
Stone Niche, and add one layer for each stone surface. Draw each one with the Lasso as a four-point polygon, then fill it with a linear gradient:
- Lintel: across the top, dark brown fading to near-black.
- Left Reveal: the thin left wall, lighter toward the ledge.
- Right Reveal: the thin right wall, almost black.
- Ledge Front: the front face,
#3A2B1Eto#0A0705. - Ledge Top: the top surface. Run the gradient left to right from warm
#B09472to dark#2A2018, so the light fades across it. - Edge Highlight: a 3 px strip along the ledge's front edge. It gives the stone a crisp lit lip.
- Fill
-
Give the stone a grain
- Add a layer called
Stone Grainand fill it with#808080. - Run these three filters in order:
- Filter → Clouds (Scale
9) - Add Noise (Amount
35, Mono, Gaussian) - Emboss (Angle
135, Strength45)
- Lasso the back-wall rectangle and press Delete, so the grain only covers stone.
- Set the layer to Overlay at 25%.
- Add a layer called
-
Paint the first artichoke bracts
- Select
Niche Glow, click New Group and name itStill Life. - Drag its grip above
Stone Niche, so everything you paint sits in front of the stone. - Add a layer called
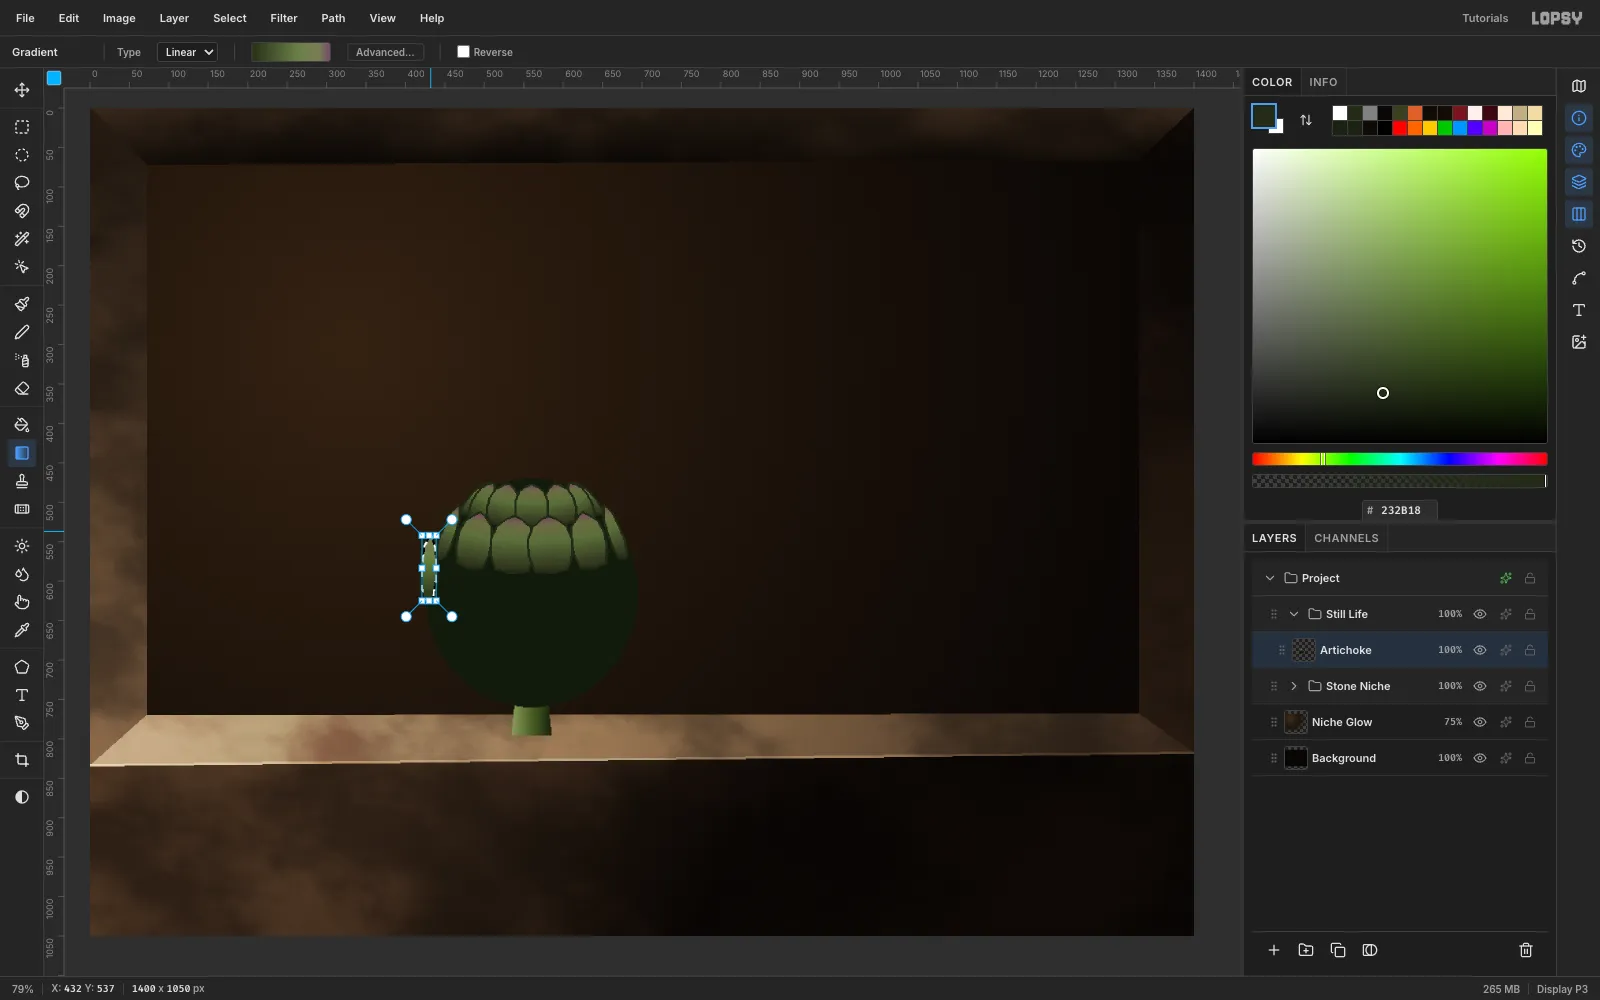
Artichoke. Lasso a short stem stub standing on the ledge and fill it with an olive gradient. - Fill a 270 × 290 ellipse with
#141A0E. This dark body shows through the gaps between the bracts.
Each bract (leaf scale) is a pointed, rounded leaf shape:
- Lasso the leaf shape and Edit → Fill it with
#232B18. - Choose Select → Shrink…, set
2px and click Apply. - Drag a linear gradient from the bract's base to its tip. For the inner rows, use
#2A2E1C→#5E6E40→#6C6C48→ a violet#6E3E62.
The violet appears only in the last few pixels, so each bract gets a purple tip rather than a purple stripe. The dark ring left by the shrink becomes the bract's outline.
- Select
-
Finish the globe row by row
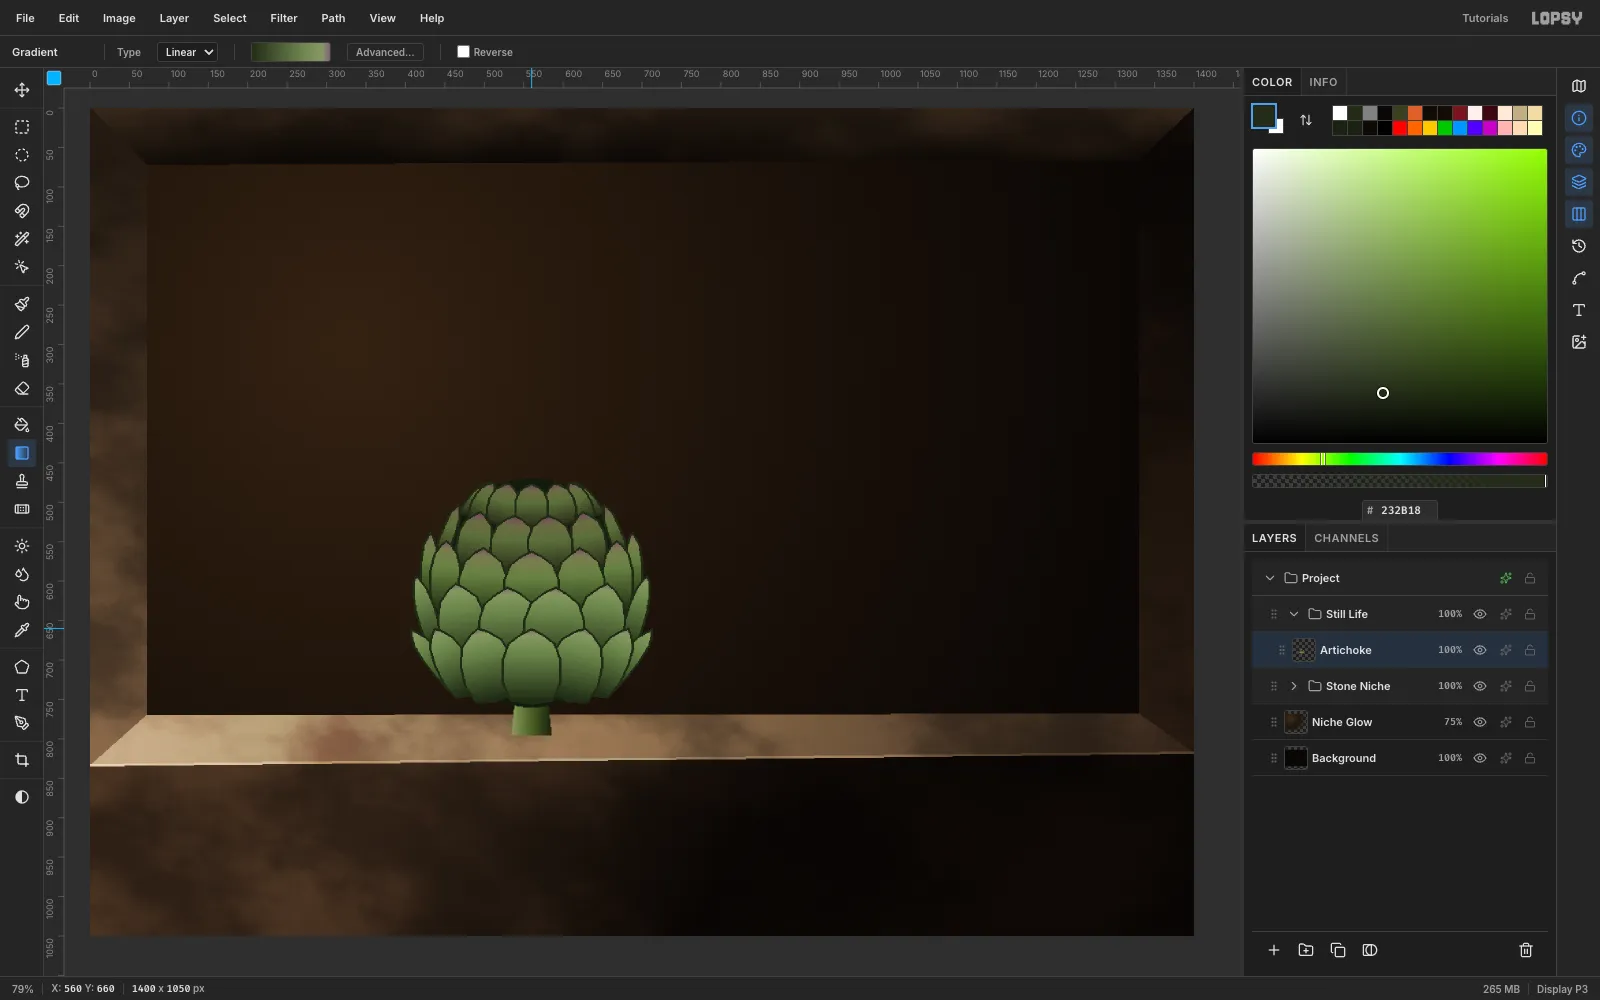
Paint 33 bracts in five rows, starting at the top and working down, so each lower bract overlaps the one above it.
- Draw each row as a shallow smile. The front bract sits lowest and the side bracts ride slightly higher. This reads as a ring of leaves wrapped around a sphere seen from a little above.
- Squeeze the side bracts sideways. A bract at the edge of the globe can be a third as wide as the one facing you. That foreshortening is what makes it look round.
- Tilt them to follow the form. Upper rows lean toward the top, and lower rows lean outward.
- Shift the colours down the globe. The lower rows use a greener gradient (
#222C17→#6E8450→#889866), with only a hint of violet at the tip.
-
Clip the modelling layers with the Magic Wand
- Run Filter → Gaussian Blur with Radius
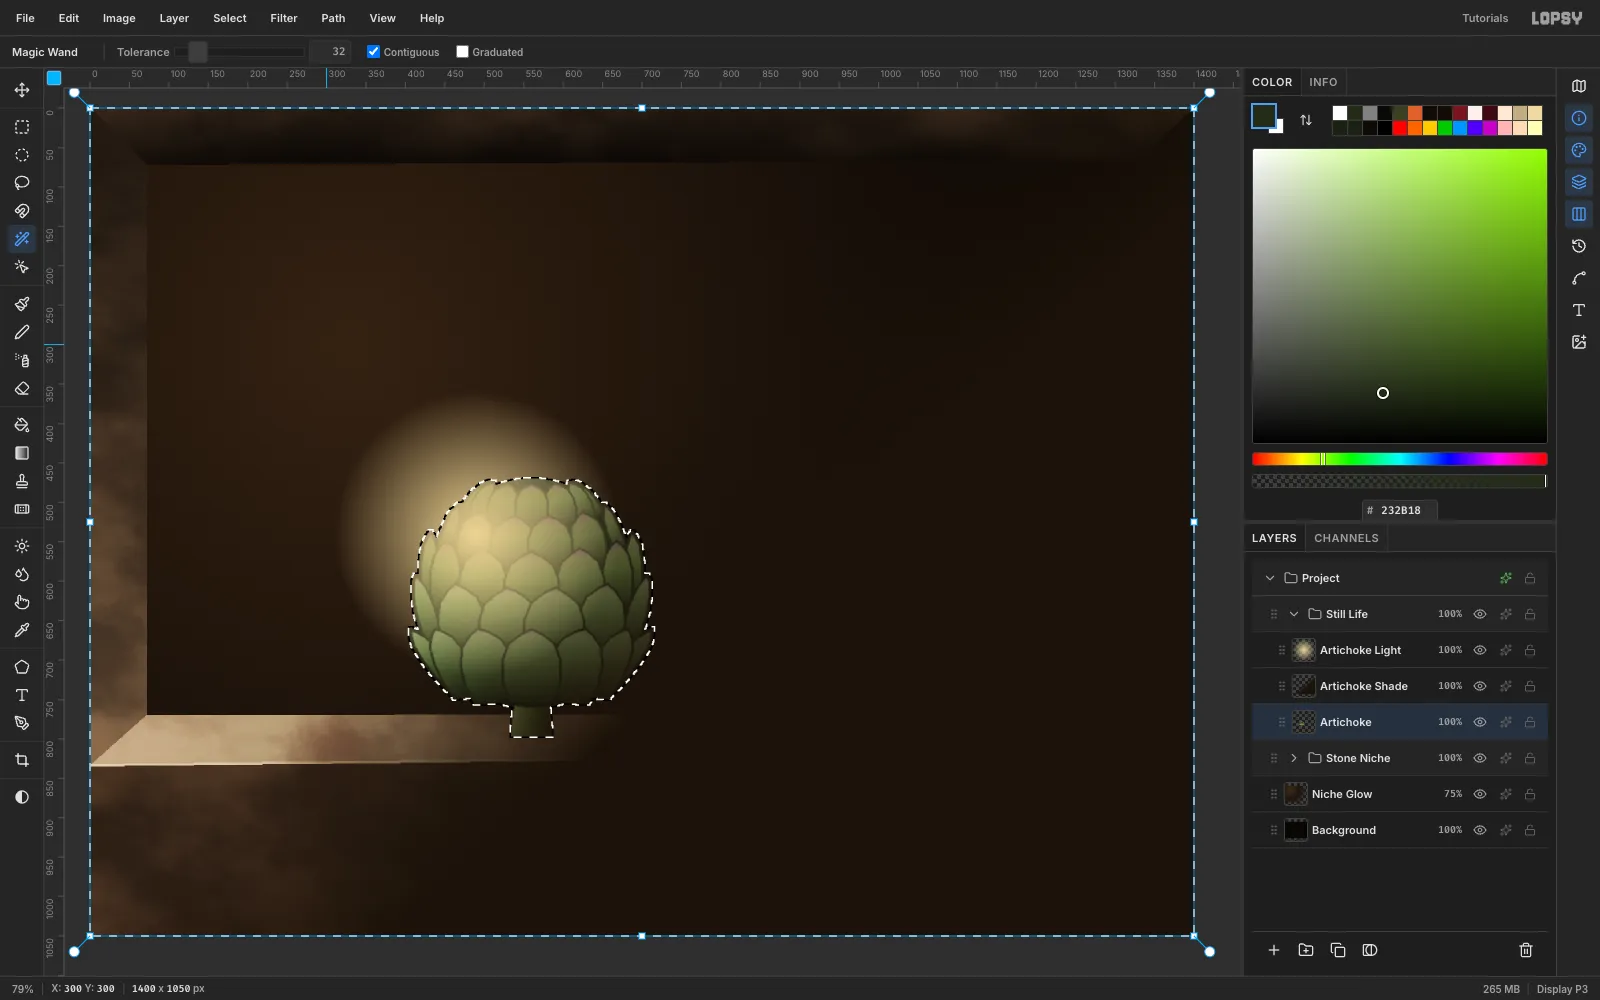
2onArtichoke. This softens the drawn outlines. - Add two helper layers above it:
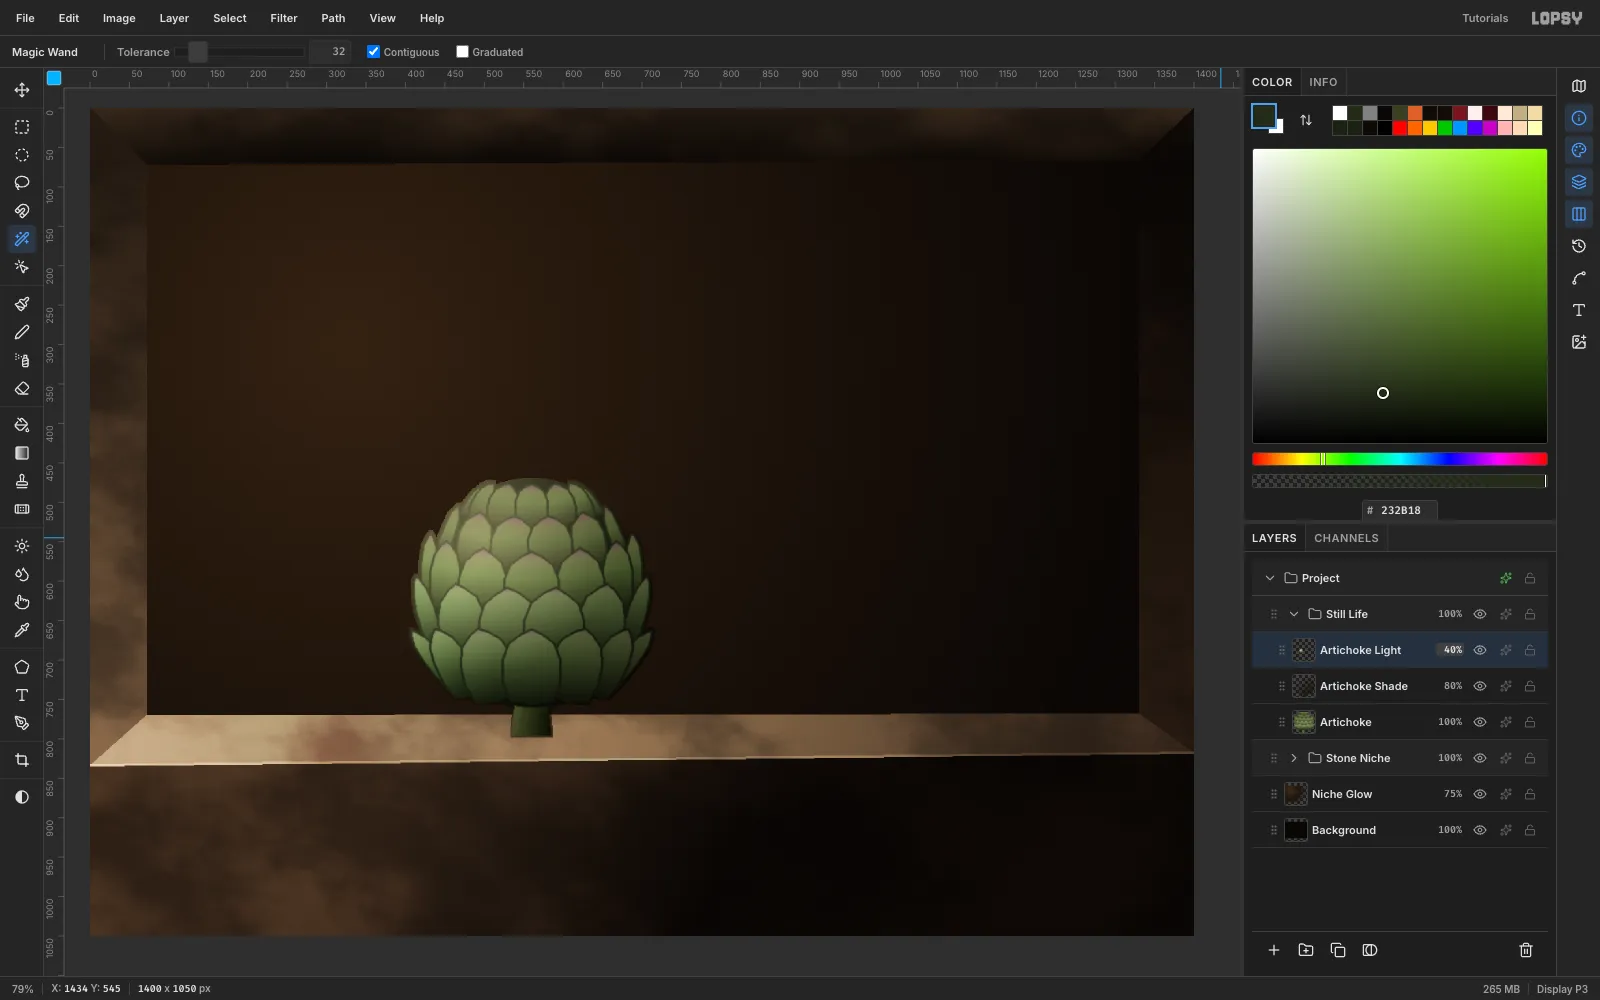
Artichoke Shade: a linear gradient from#1A120Ato transparent, dragged from the lower right toward the centre.Artichoke Light: a radial#E8D49Ato transparent, centred on the upper-left shoulder.
- To keep them inside the artichoke, select
Artichokeand click the Magic Wand on the empty wall beside it. - Select each helper layer in turn and press Delete.
- Run Filter → Gaussian Blur with Radius
-
Model the artichoke
- Set
Artichoke Shadeto Multiply at 80%. - Set
Artichoke Lightto Screen at 40%. - Select
Artichoke Shadeand choose Layer → Merge Down, then do the same withArtichoke Light.
Merge the Multiply layer first. Each blend mode then bakes directly into the artichoke's pixels.
- Set
-
Paste a copy and flip it
The second artichoke is the first one, turned over:
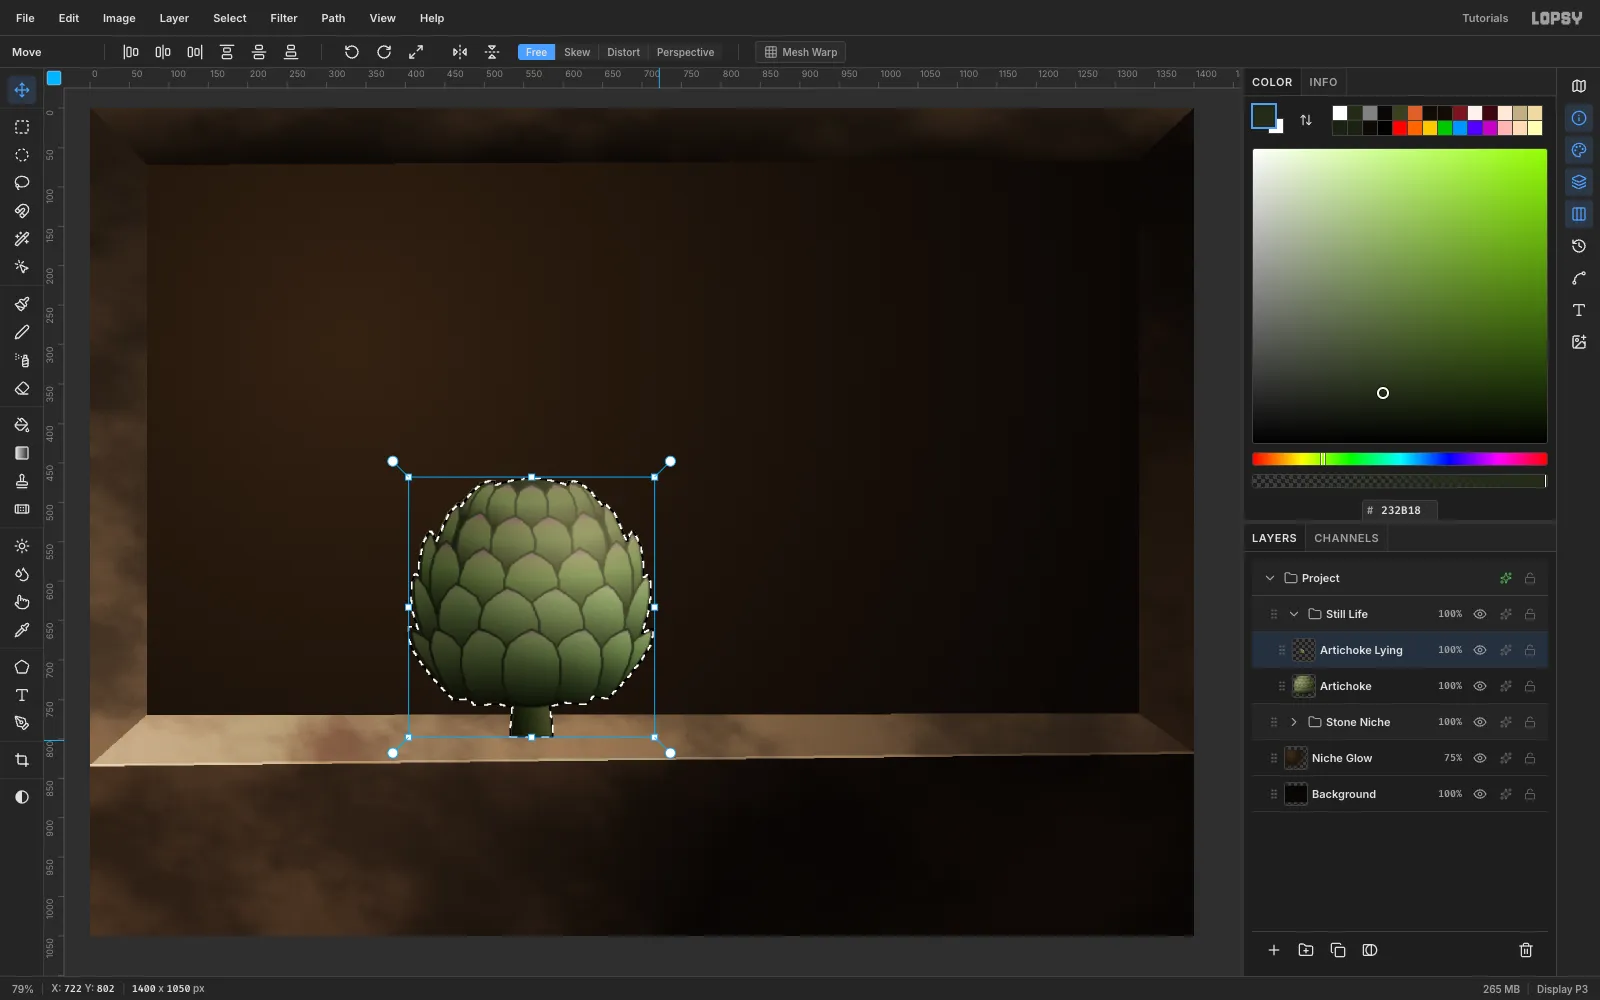
- With
Artichokeselected, draw a rectangular marquee a little larger than it. - Press ⌘C, then ⌘V, and rename the paste
Artichoke Lying. - Switch to the Move tool and click Flip Horizontal in the options bar.
Flipping keeps the highlight on the upper left once the artichoke is rotated. Press ⌘D, then drag the copy to the right.
- With
-
Rotate it onto its side
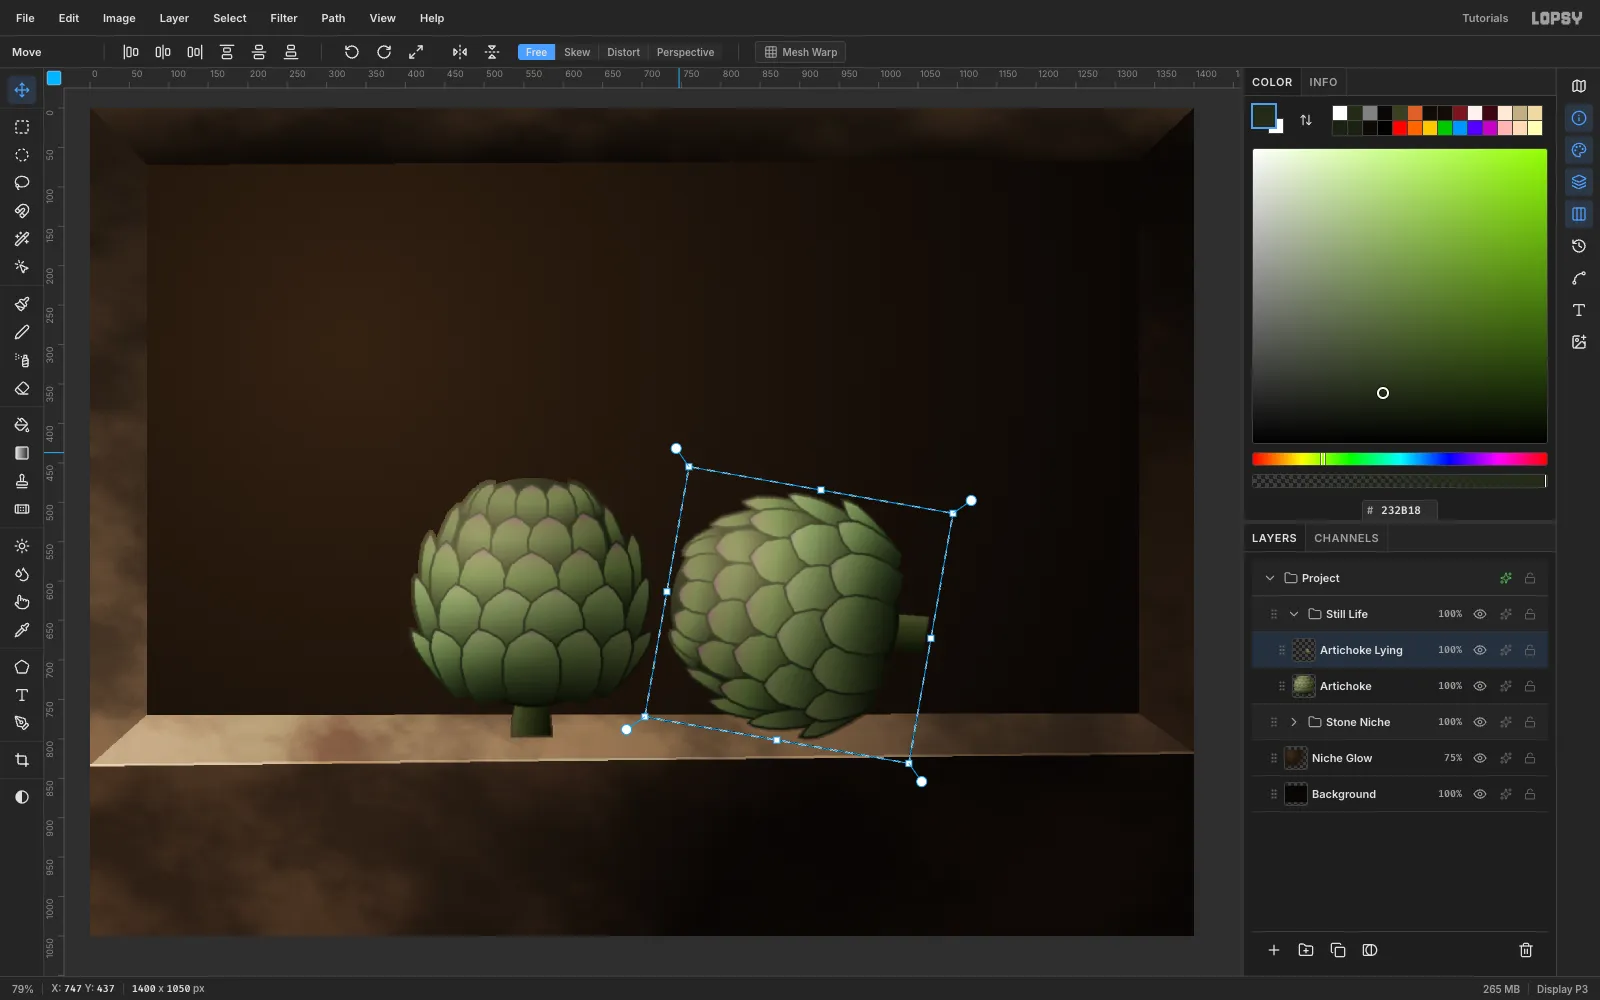
- Draw a marquee around the copy.
- With the Move tool, drag the round handle just off the box's top-right corner about 80° counter-clockwise. The artichoke's top now points left and its stem stub points right.
- Press ⌘D to commit.
Commit each transform with ⌘D before starting the next one.
-
Scale it down
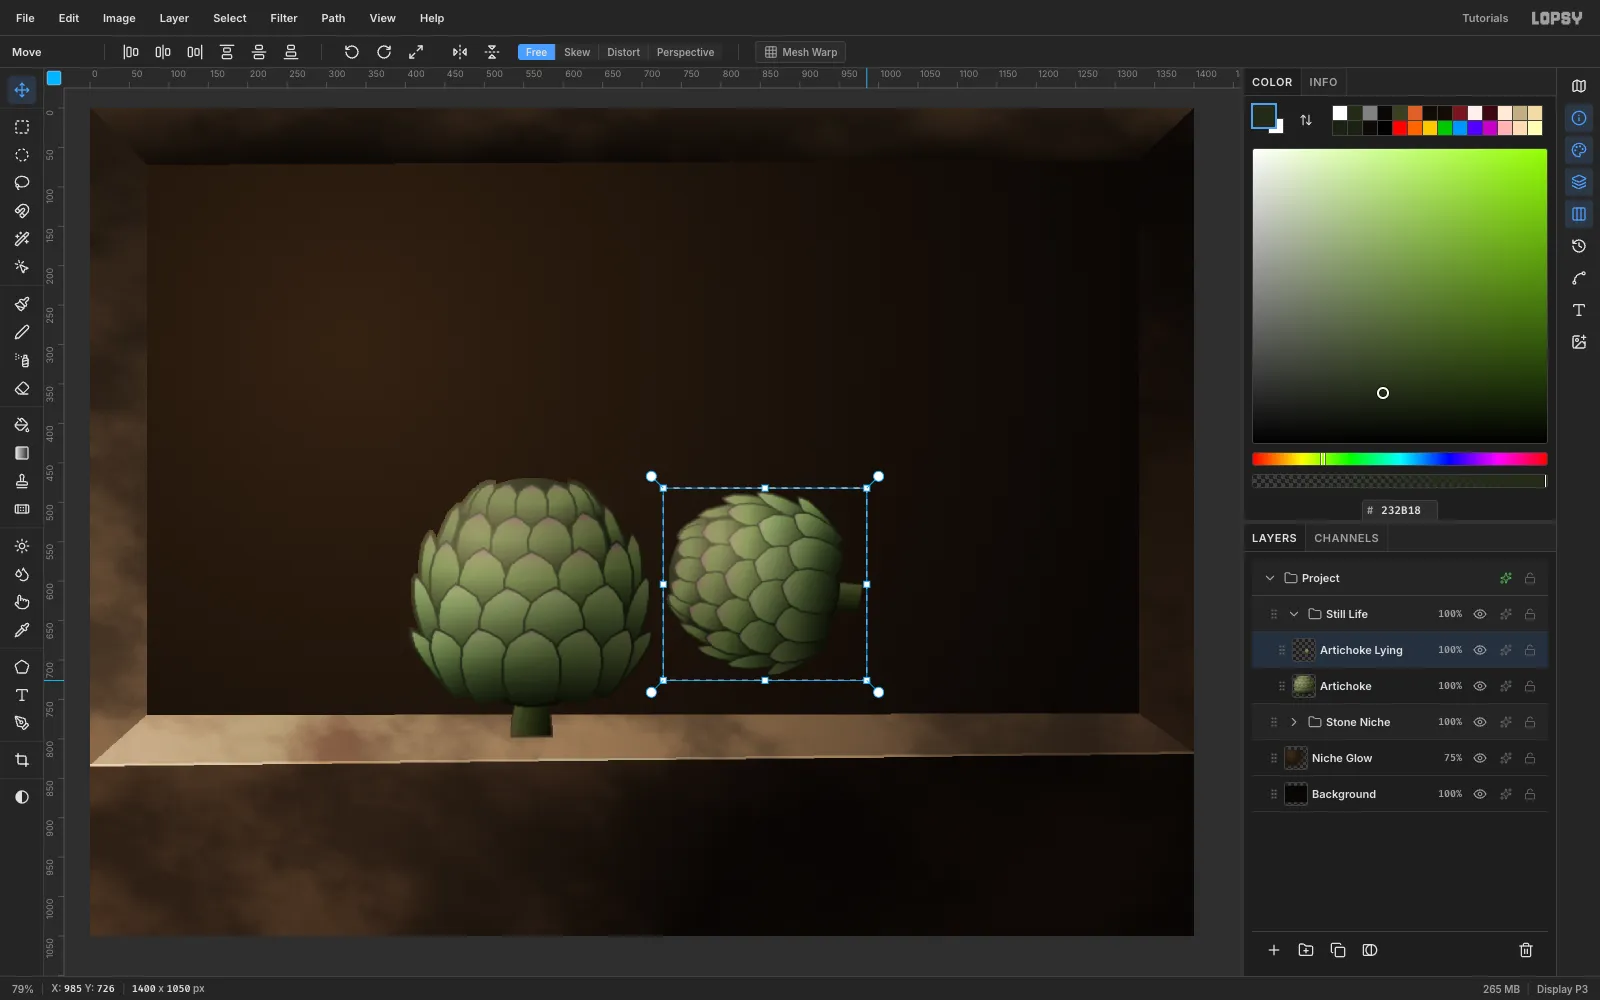
- Draw a fresh marquee around the lying artichoke.
- Hold ⌘ and drag the bottom-right corner handle inward to about 75%. ⌘ keeps the proportions.
- Press ⌘D.
A smaller second artichoke also reads as sitting a little further away.
-
Bring it forward on the ledge
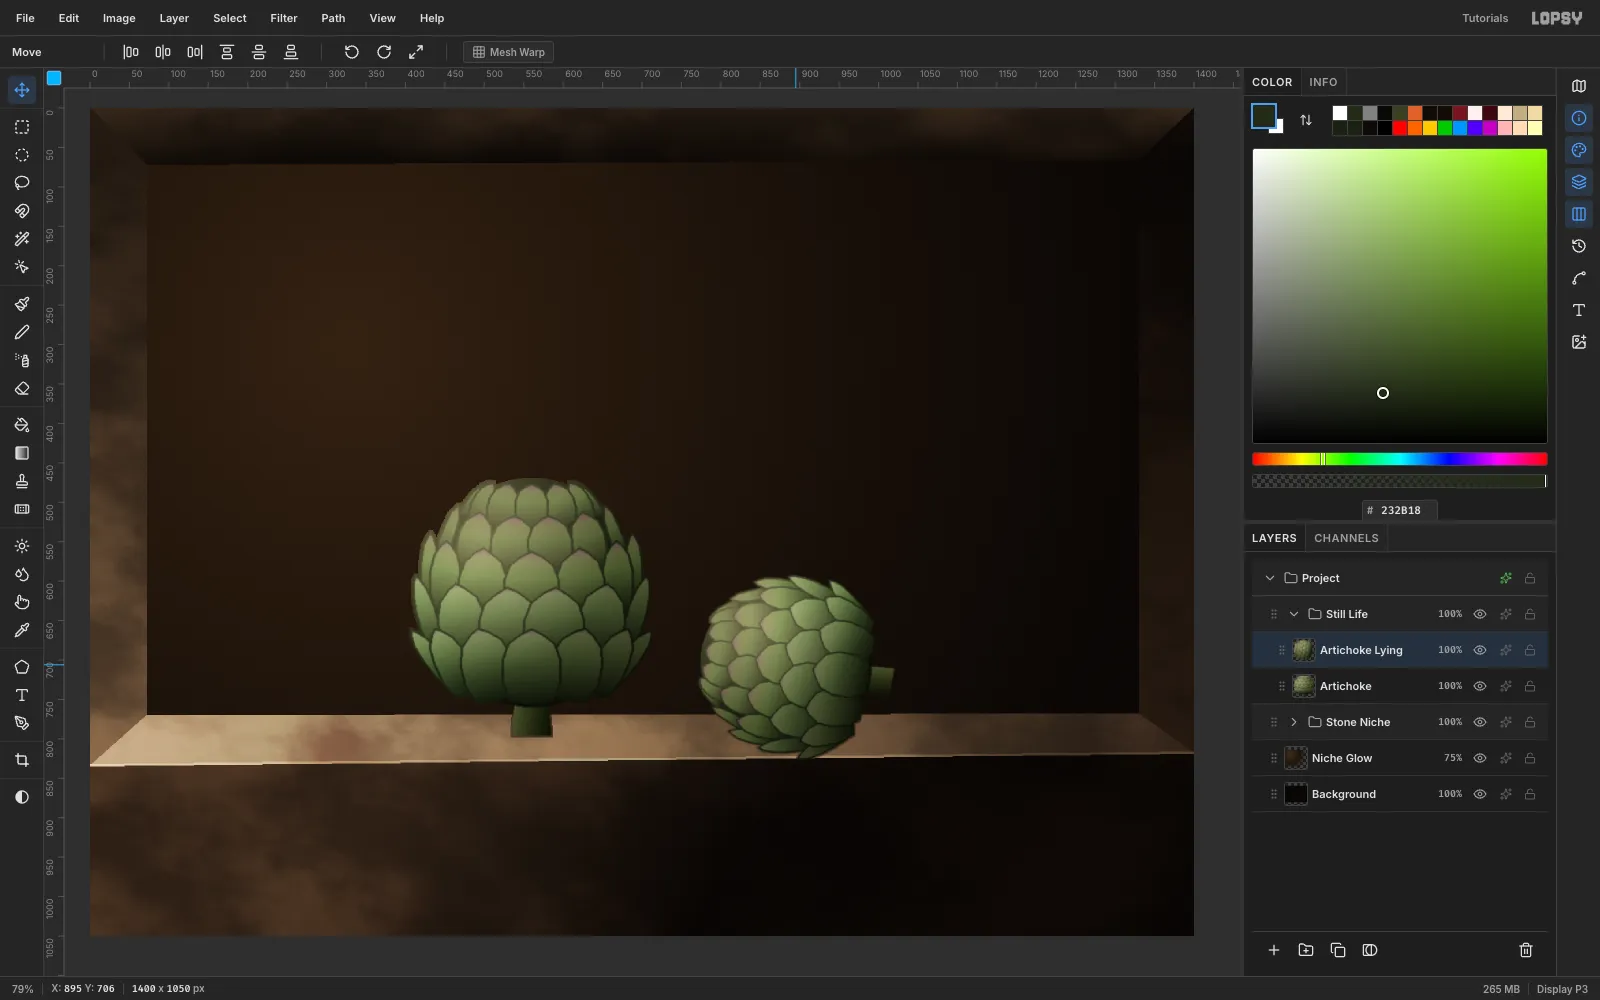
Move the lying artichoke down and to the right until its lowest bract touches the front half of the ledge (about y 828). It now sits in front of the standing one, which breaks up the single baseline.
-
Let the stem droop over the edge
- Select
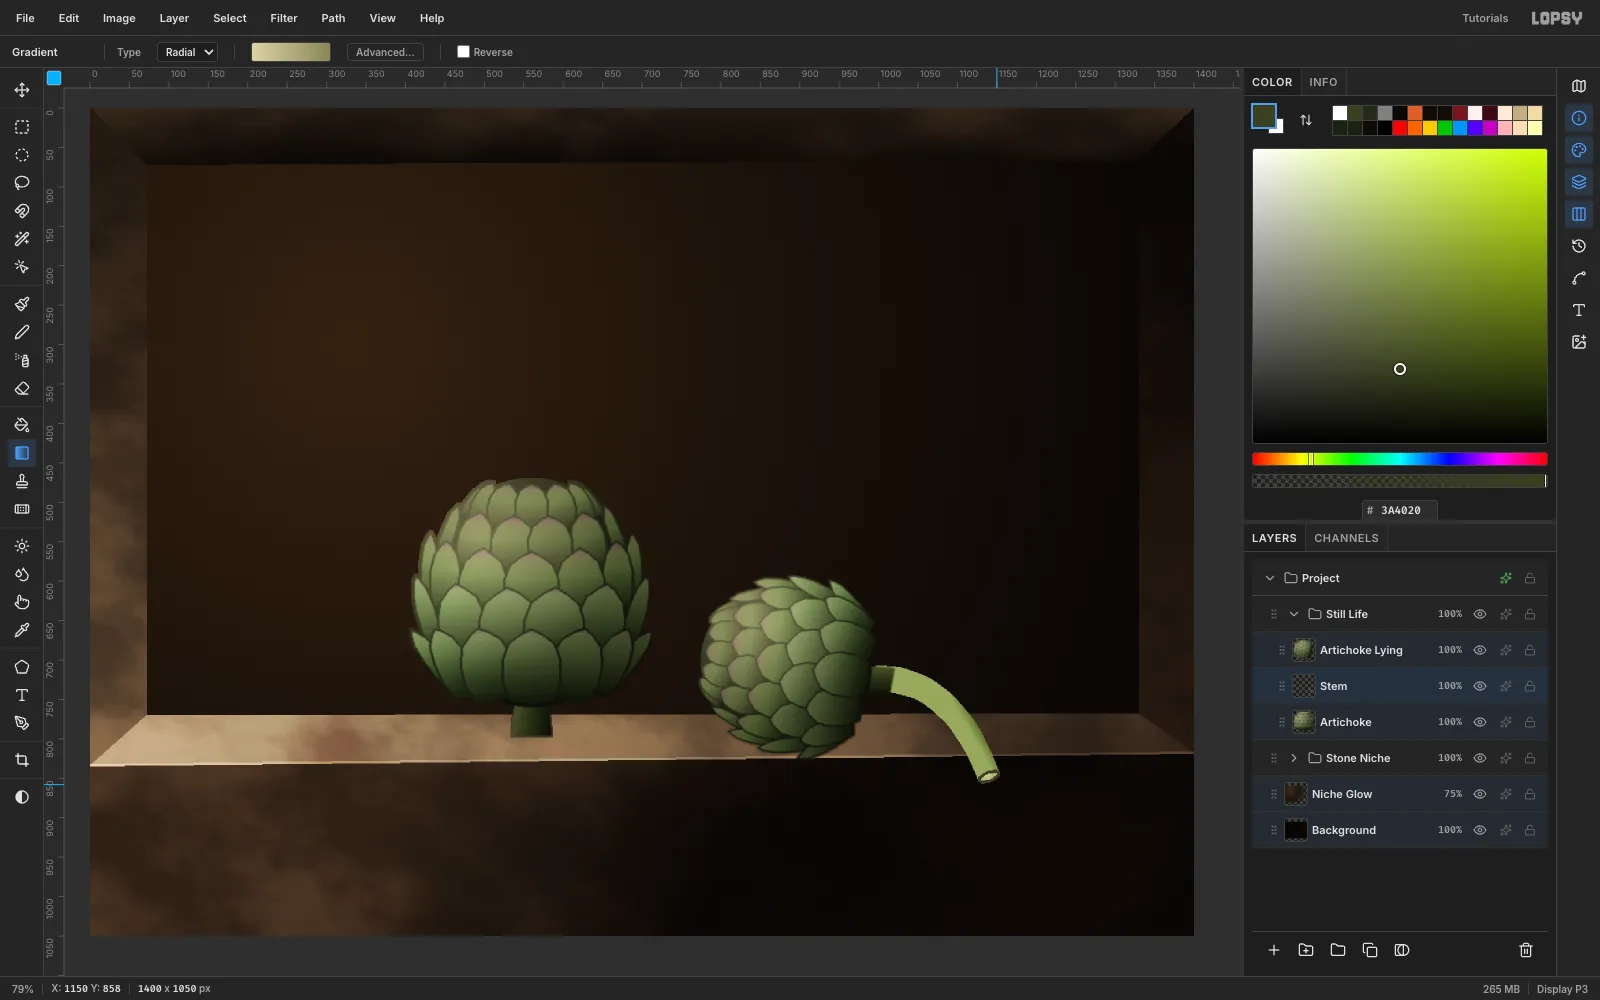
Artichoke, then click Add Layer. The newStemlayer lands between the two artichokes. - Lasso a stem about 34 px thick that starts at the lying artichoke's stub. Curve it out to the right, onto the ledge, and over the front edge.
- Fill it with a gradient across its width:
#9AA866→#56672F→#1C2410. - Finish the tip with the cut face:
- Lasso a small tilted ellipse.
- Fill it with
#3A4020. - Shrink the selection by 3 px.
- Fill the rest with a radial gradient from
#DCD3A4to#8A865A.
Something poking out of the picture toward you is a classic Spanish still-life trick.
- Select
-
Hang a pomegranate
Select
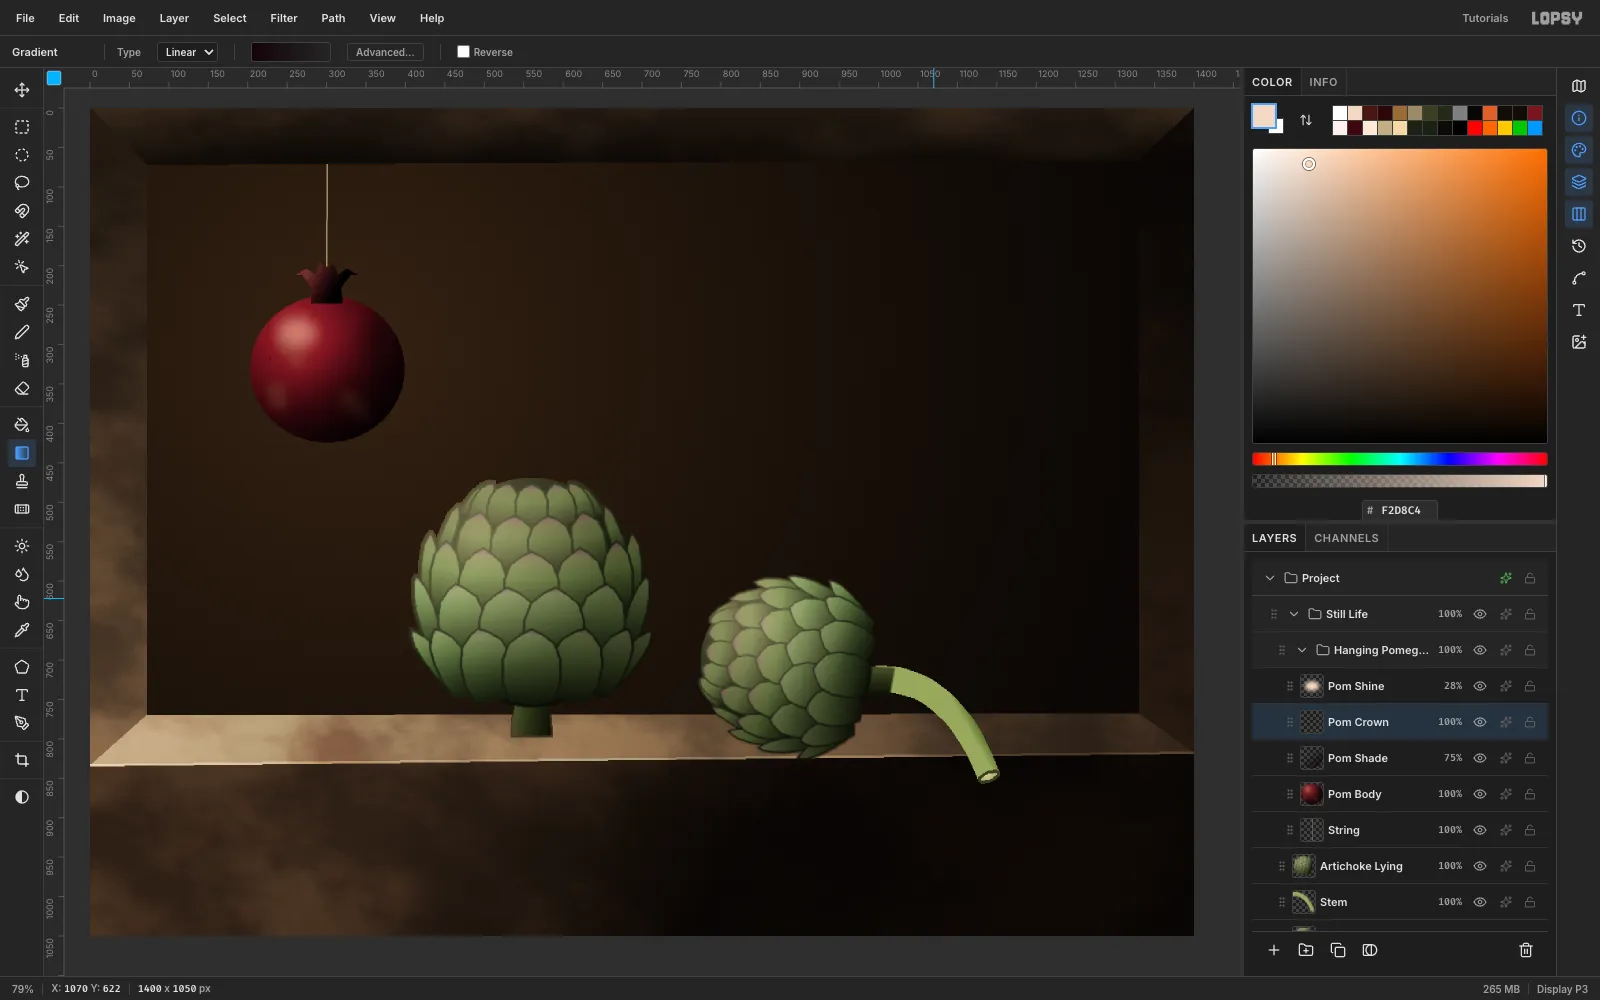
Artichoke Lyingand click New Group. Name the groupHanging Pomegranate, then add these layers inside it:- String: a 3 px Hard Round brush line in
#9C8C68, from the lintel down to about y 200. - Pom Body:
- Fill a 196 × 186 ellipse with a radial gradient:
#C85A4E→#96202A→#4A0A12→#10020A. Drag it from the upper left. - Add Noise at
6, Mono. - With the selection still live, dab a few low-opacity (22%) Soft Round blotches of
#9A6A34, plus a darker stroke of#2A060Adown the right side. - Run Hue/Saturation at Hue
+3, Saturation−12, Lightness−4.
- Pom Crown: a lassoed crown of six sepals with a red-to-black gradient. Add a couple of low-opacity
#C0604ASoft Round strokes on the lit sepals so they aren't a flat silhouette. - Pom Shade: a Multiply layer at 75% with a dark gradient in the body ellipse from the lower right.
- Pom Shine: a small ellipse with Feather
14, filled with#F2D8C4, on Screen at 28%. Keep it dim, so the fruit looks matte rather than plastic.
- String: a 3 px Hard Round brush line in
-
Lay a knife over the edge
- Select
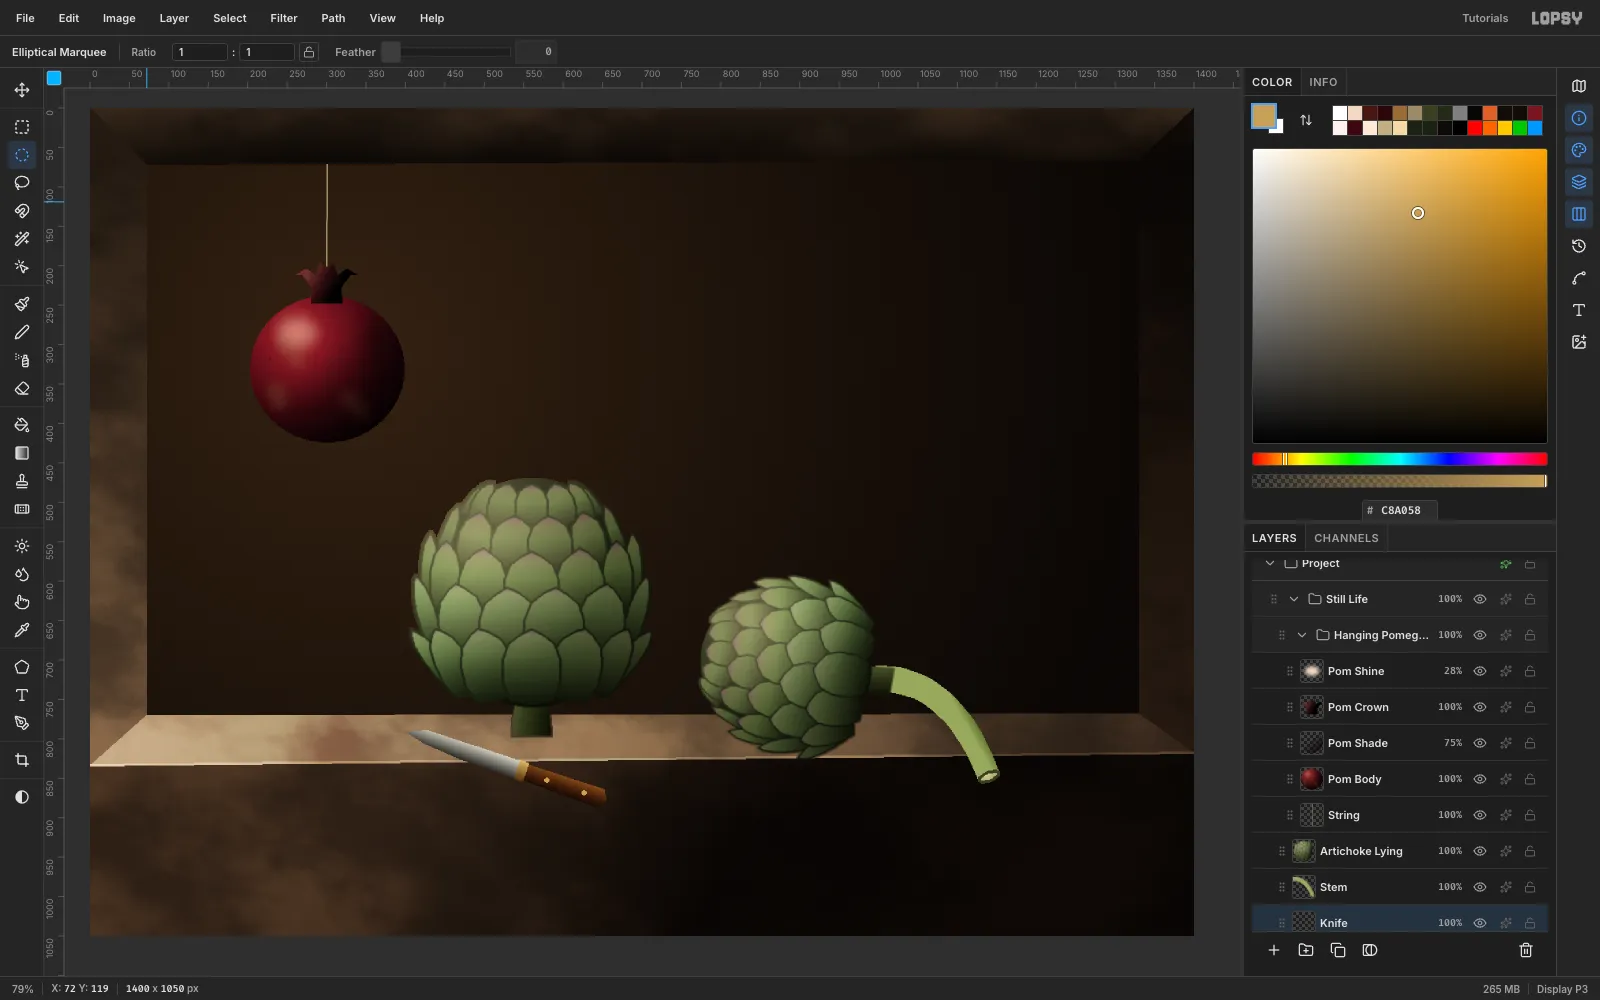
Artichokeand add a layer calledKnife. - Build the knife as three lassoed pieces along a line about 19° below horizontal, each with a gradient across its width:
- Blade: steel,
#CFCCC0→#848278→#262522. - Bolster: brass,
#D8B870→#4A3010. - Handle: wood,
#7A4A22→#40220E→#120804.
- Add two tiny brass rivets.
Put the tip at the back of the ledge, where the pomegranate will hide it, and let the whole handle project past the front edge.
- Select
-
Make a garnet seed brush
- On a temporary layer, fill a 20 × 26 ellipse with
#2A030Aand shrink it by 2 px. - Add a radial gradient:
#C23A4E→#82102A→#3A0410. - Add a tiny
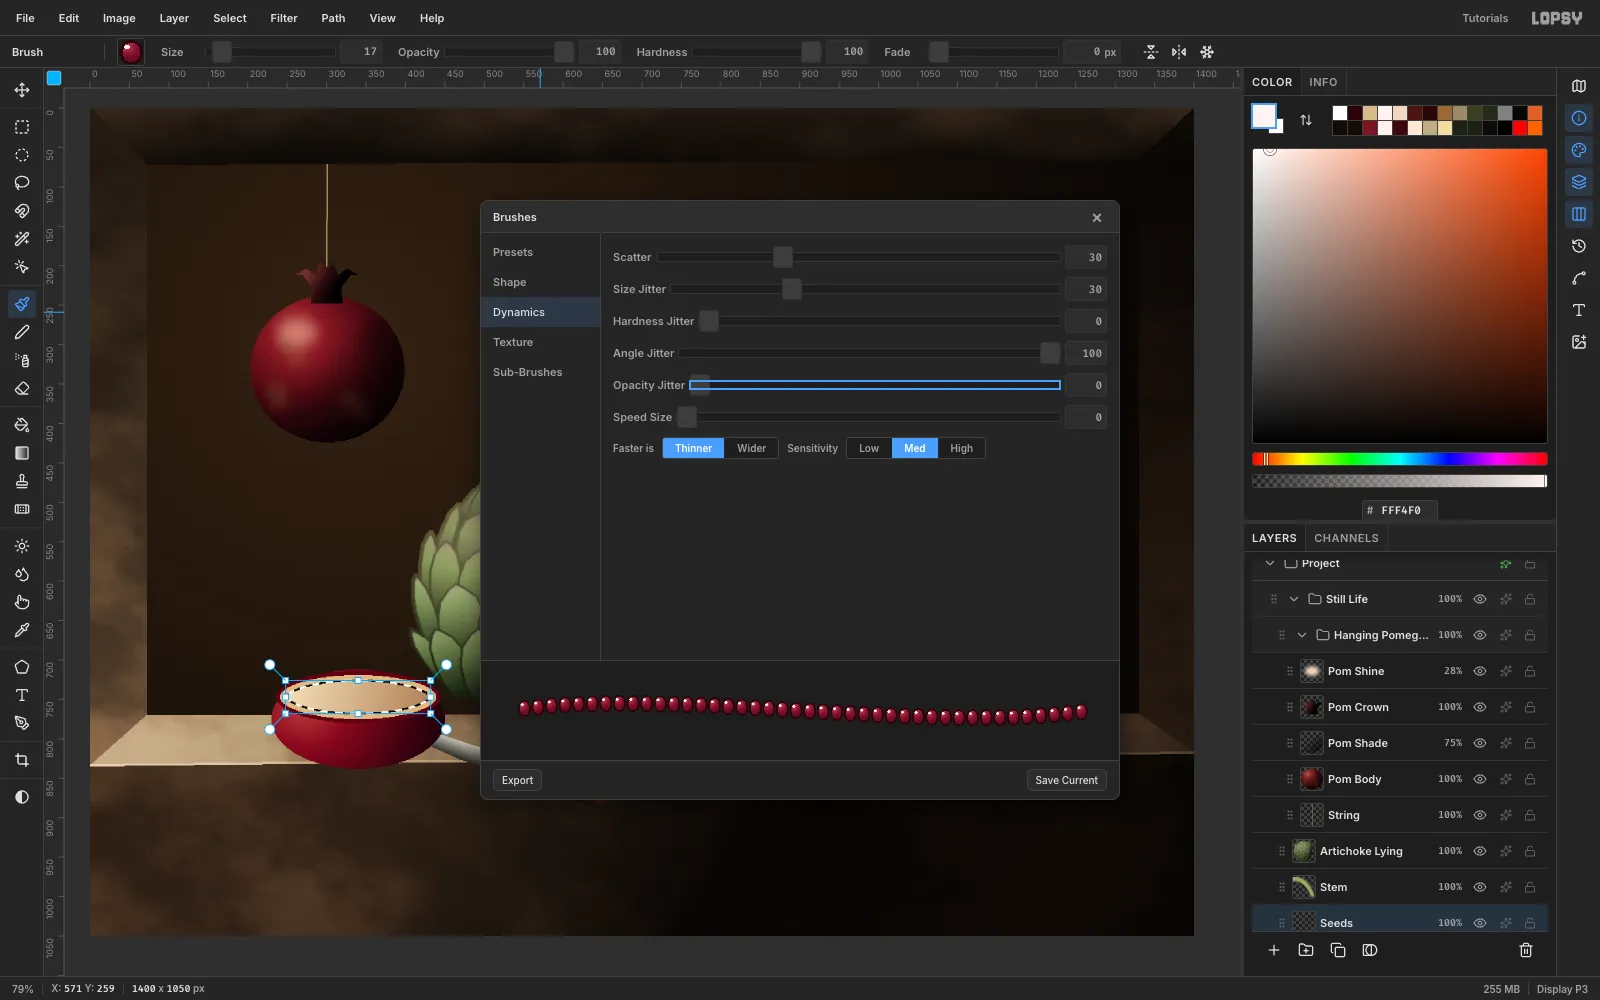
#FFF4F0highlight. - Marquee the seed and choose Edit → Define Color Brush…. Name it
Garnet Seed, then delete the temporary layer. - Open the brush presets, pick Garnet Seed, and set these values:
- Shape: Size
17, Spacing80. - Dynamics: Scatter
30, Size Jitter30, Angle Jitter100.
Set the values after picking the preset, because choosing a preset resets them.
- On a temporary layer, fill a 20 × 26 ellipse with
-
Paint the split pomegranate
- Add a
Split Rindlayer aboveKnife:
- Fill a 220 × 126 ellipse at the front left with a dark-red radial gradient that is lit from the left.
- Add Noise (
6). - Dab faint
#7A5530Soft Round mottling at 18% so the rind looks dull.
- Add a
Cut Facelayer:
- Fill a 208 × 66 ellipse with
#5A0E16. - Shrink it by 4 px and fill with the pale rind colour
#D9B98A. - Shrink it by 7 px more and fill with a cream pith gradient (
#EFDDB8→#A8805A).
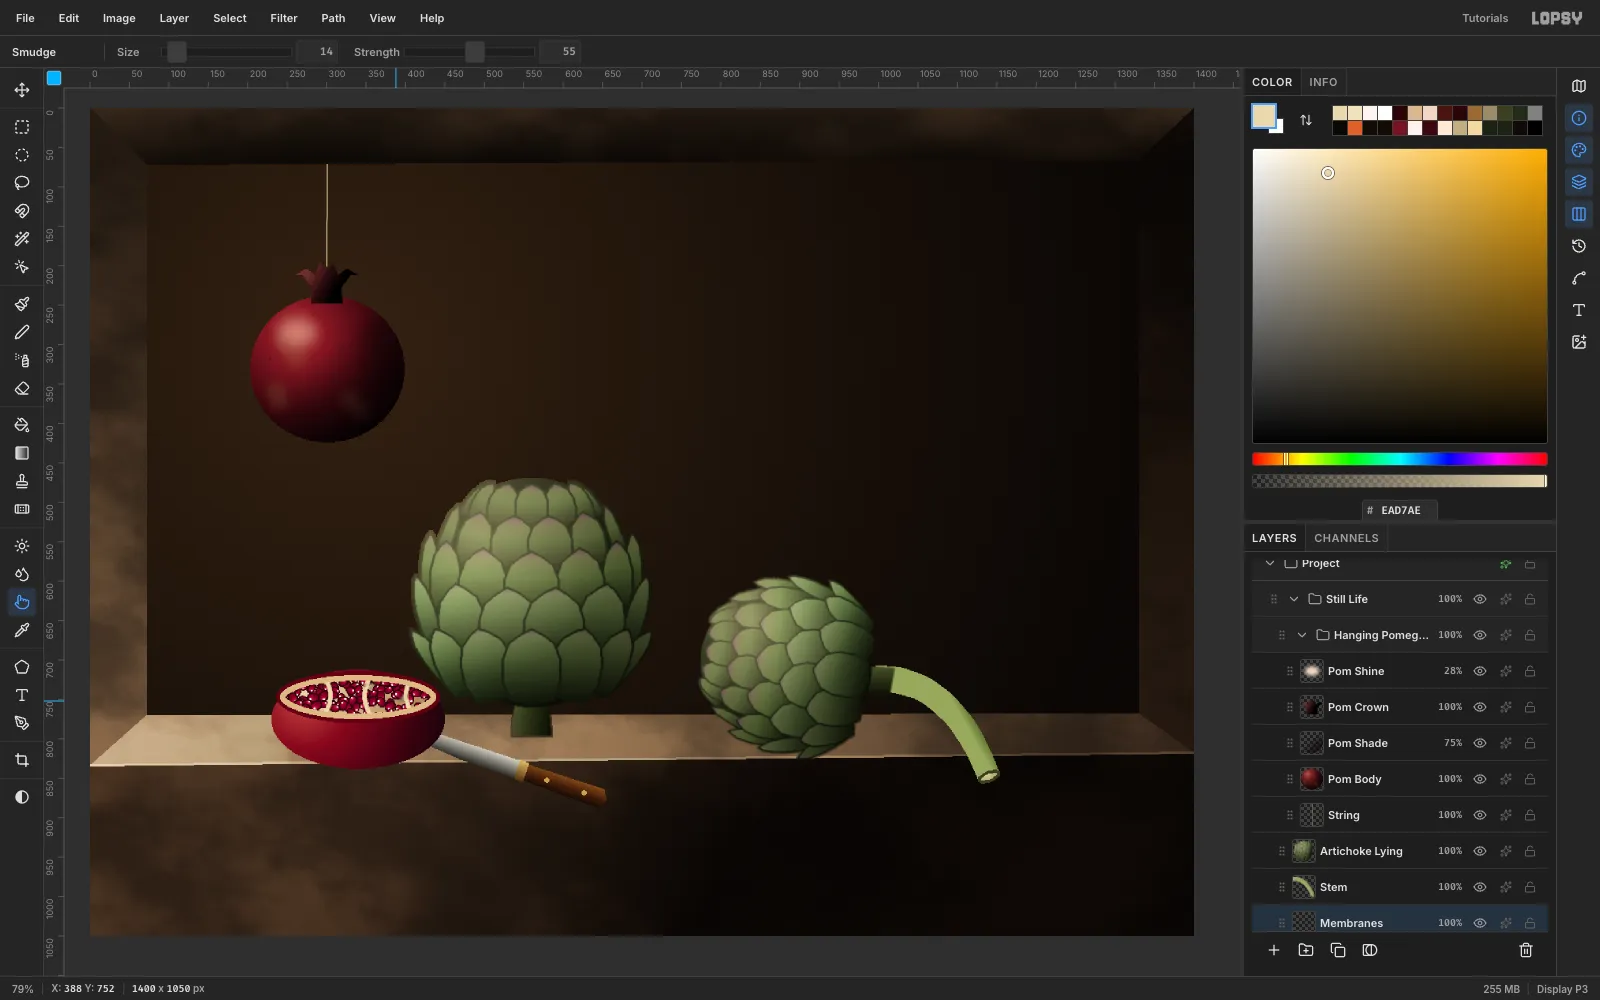
- Keep that selection live. On a
Seedslayer, paint zig-zag strokes of the Garnet Seed brush across it, then dot 2 px white highlights on a dozen seeds. - On a
Membraneslayer, draw three curved 7 px strokes of#EAD7AEto divide the seeds into chambers. - Nudge the membranes with the Smudge tool (Size
12, Strength60) so they wander instead of running straight like spokes.
- Add a
-
Add the chamberstick
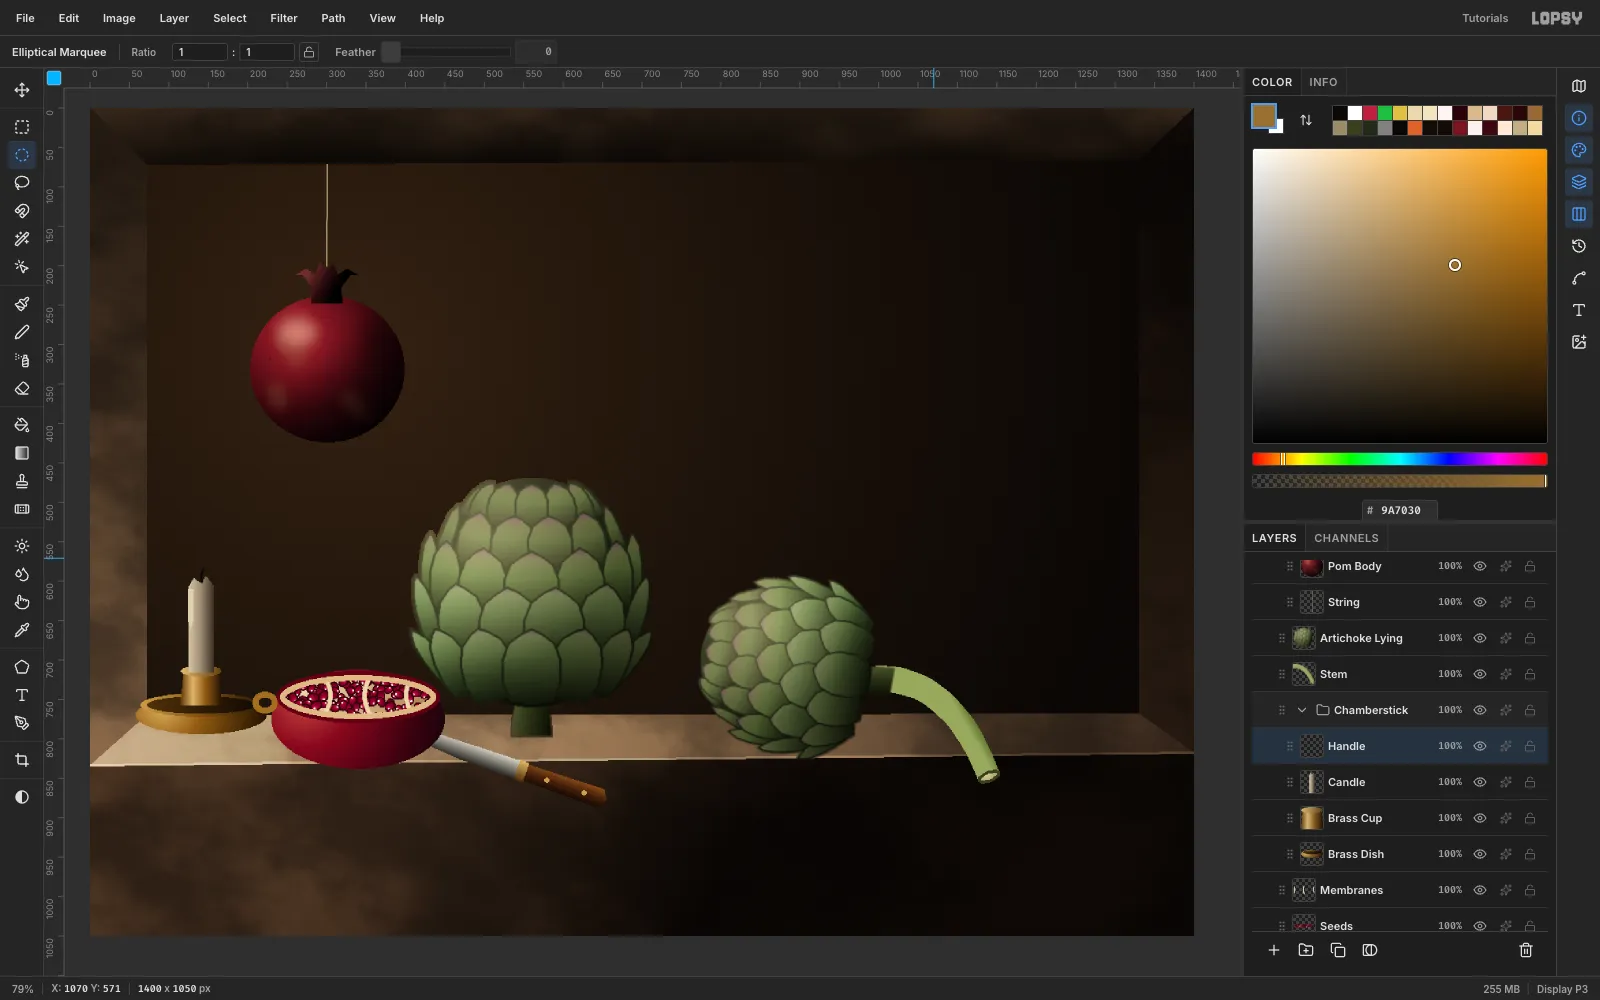
Select
Membranesand create aChamberstickgroup. Build it from these layers:- Brass Dish: three stacked ellipses with brass gradients (outer rim, top face and dark inner well).
- Brass Cup: a lassoed cylinder with a vertical highlight.
- Candle: a lasso with a ragged, melted top and a warm-grey gradient. Run Hue/Saturation at Lightness
−18, so the candle isn't the brightest thing in the picture. - Wick: a black 4 px brush stroke.
- Handle: a ring made by filling an ellipse, shrinking it by 7 px and pressing Delete. Drag it with the Move tool to the left side of the dish.
-
Let the smoke rise
- Add a
Smokelayer and lasso a thin band that rises from the wick and widens as it goes. - Select → Feather… it by
8, fill it with black, and run Filter → Smoke. - Run Brightness/Contrast at
+70/+45to make the wisps visible, then set the layer to Screen. - Fade the upper part away with a large Eraser (Size
110) at 30–70% opacity. - Drop the layer to about 42%.
Smoke should thin out as it climbs, not bend into a solid tube.
- Add a
-
Cast every shadow the same way
The light comes from the upper left, so every shadow falls down and to the right. In
Stone Niche, add aCast Shadowslayer aboveStone Grain. Fill all of these with#120A05:- Wall shadows: Feather
34ellipses behind the standing artichoke and the hanging pomegranate. - Floor shadows: Feather
20ellipses to the right of each object on the ledge. - Contact lines: Feather
4thin ellipses right at each object's base. These stop things from floating. - Knife handle: a Feather
3copy of the handle's outline, 30 px lower, on the ledge front.
Set the layer to Multiply at 80%.
- Wall shadows: Feather
-
Push the void into darkness
Add three more layers in
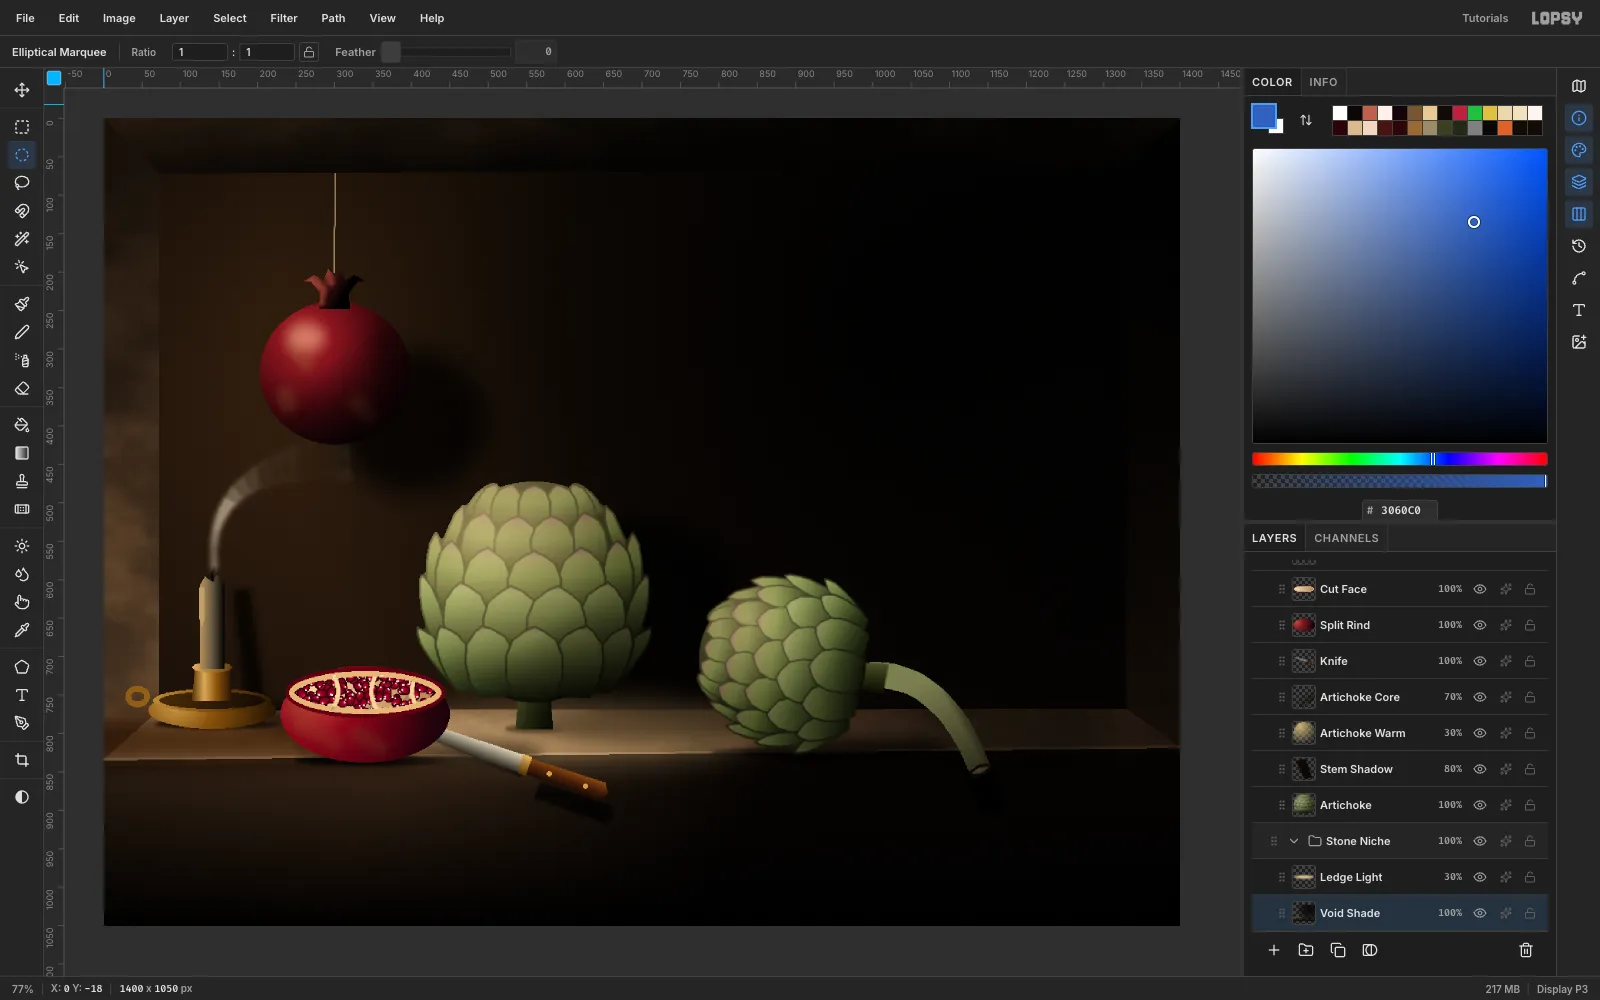
Stone Niche:- Void Shade, set to Multiply:
- A radial gradient from
#0C0806to transparent, centred on the upper right. - A darker linear gradient down the ledge front.
- A Feather
30fill of#6A5139over the left end of the ledge, which was the brightest spot and pulled the eye away from the subject.
- Ledge Light: a Feather
40ellipse of#E8C890on Screen at 30%. It pools the light on the ledge under the standing artichoke.
-
Warm the artichoke's lit side
The blur left a soft halo around the artichoke. To trim it:
- Magic Wand the empty wall on the
Artichokelayer and press ⇧⌘I to invert. - Shrink the selection by 2 px, invert again with ⇧⌘I, and press Delete.
Then, with the artichoke selected again, add two clipped layers:
Artichoke Warm: a radial#CDB672on Screen at 30%.Artichoke Core: a Multiply gradient at 70% from the lower right.
A little Add Noise (
4) on the artichoke breaks up the flat gradients.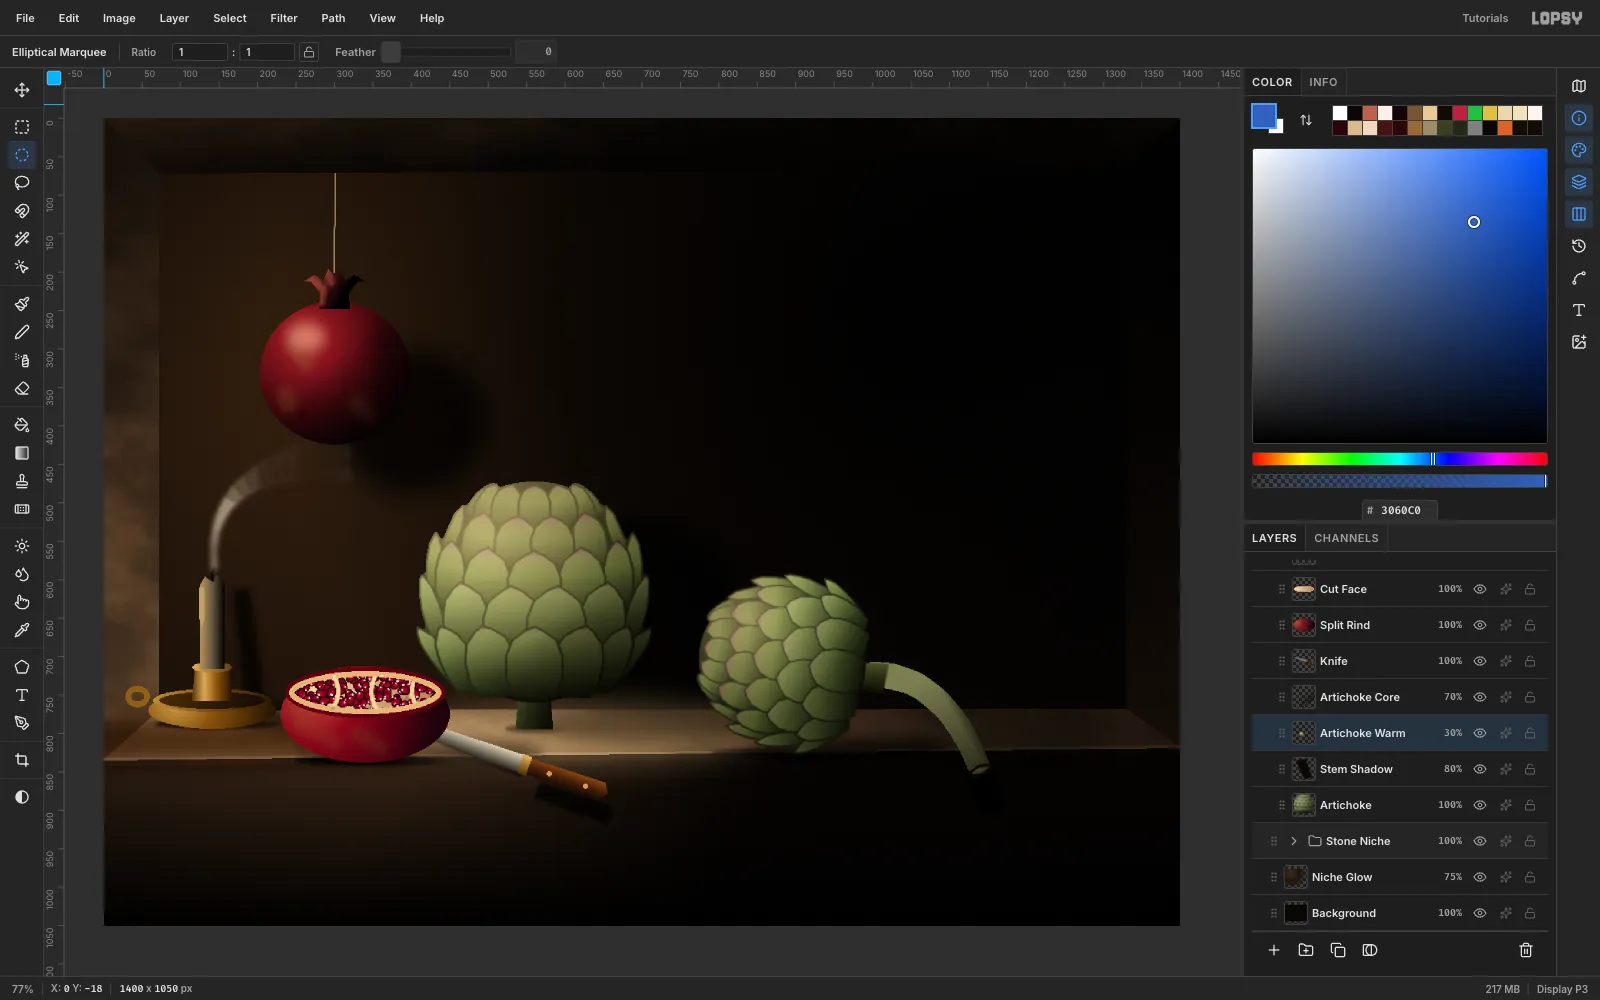
- Magic Wand the empty wall on the
-
Model the stem
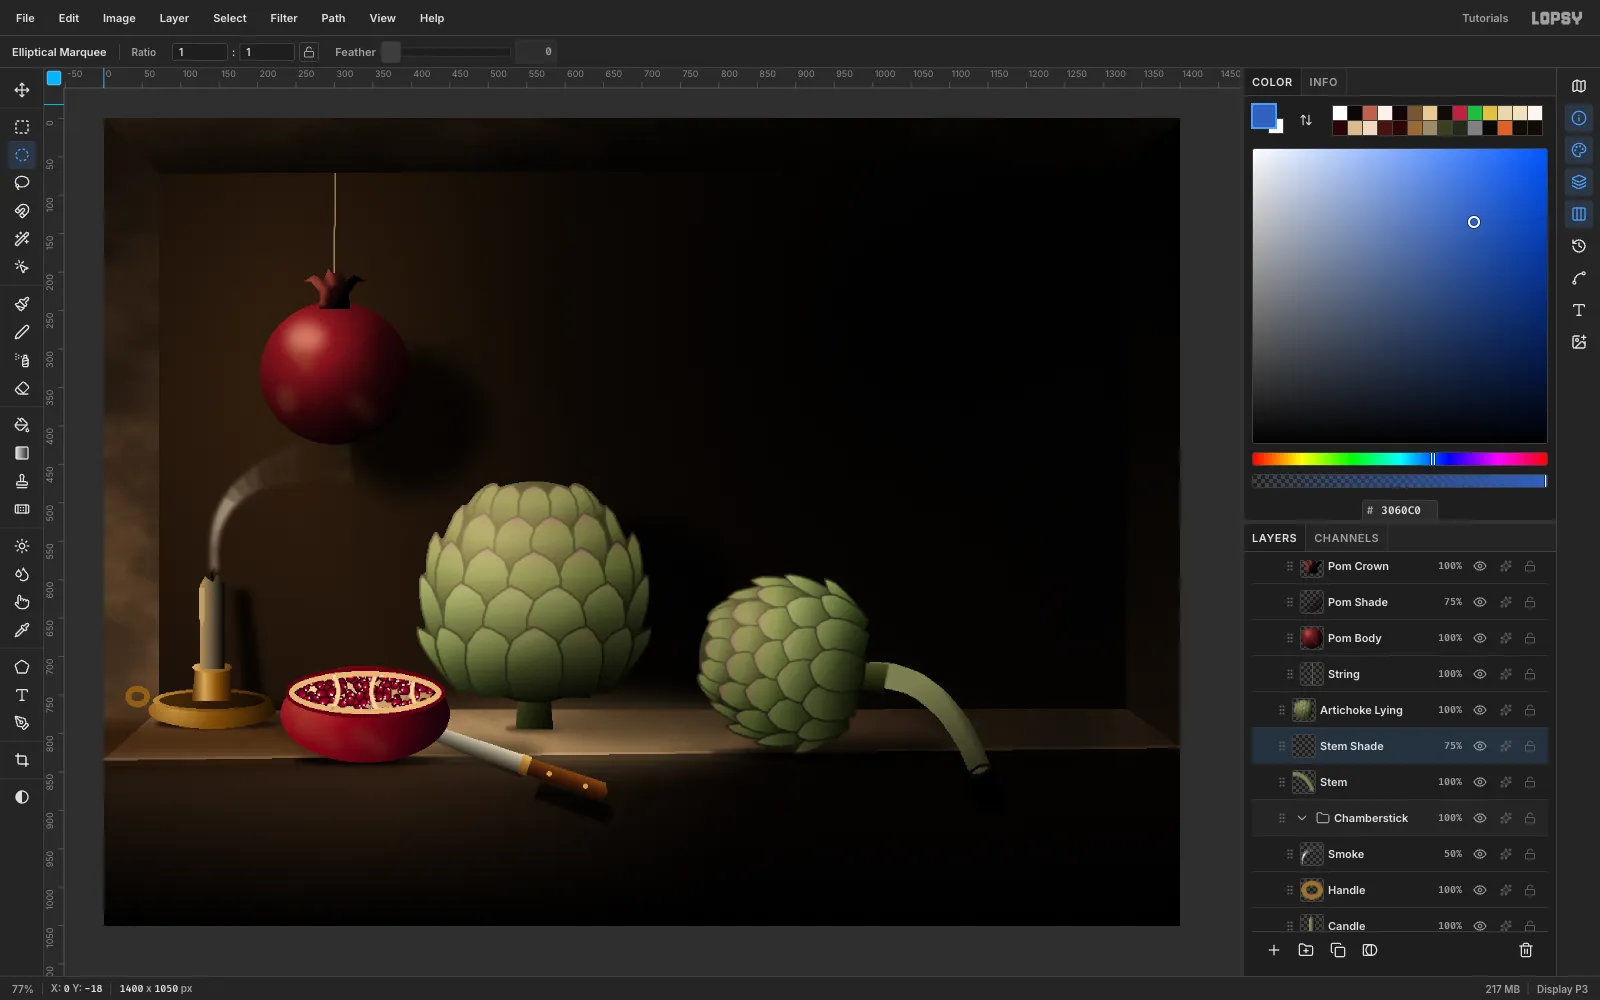
- Run Hue/Saturation on
Stemat Saturation−40and Lightness−10, so it's olive rather than lime. - Add a Multiply
Stem Shadelayer, clipped with the Magic Wand, that darkens the part hanging over the edge. - Add a hard
Stem Shadowon the ledge front below the tip.
- Run Hue/Saturation on
-
Finish with a vignette and warm filter
Choose Layer → Adjustment Layer… and click Got it to open the root adjustments. Then:
- Add Adjustment → Vignette and set it to
50. - Add Adjustment → Photo Filter and set Density to
10. It warms the whole scene like candle-lit varnish.
Add these root adjustments at the very end. After adding them, check that new layers still show on the canvas. If one doesn't, toggle Disable adjustments off and on again.
Export with File → Quick Export PNG and save your layers with File → Save Project.
- Add Adjustment → Vignette and set it to