Design a Swiss Style Album Cover with Overprinted Arcs
Build a Swiss Style album cover in Lopsy where seven arcs chart the track lengths, a rotated copy overprints them in orange, and a 24-hour scale shows the lag.
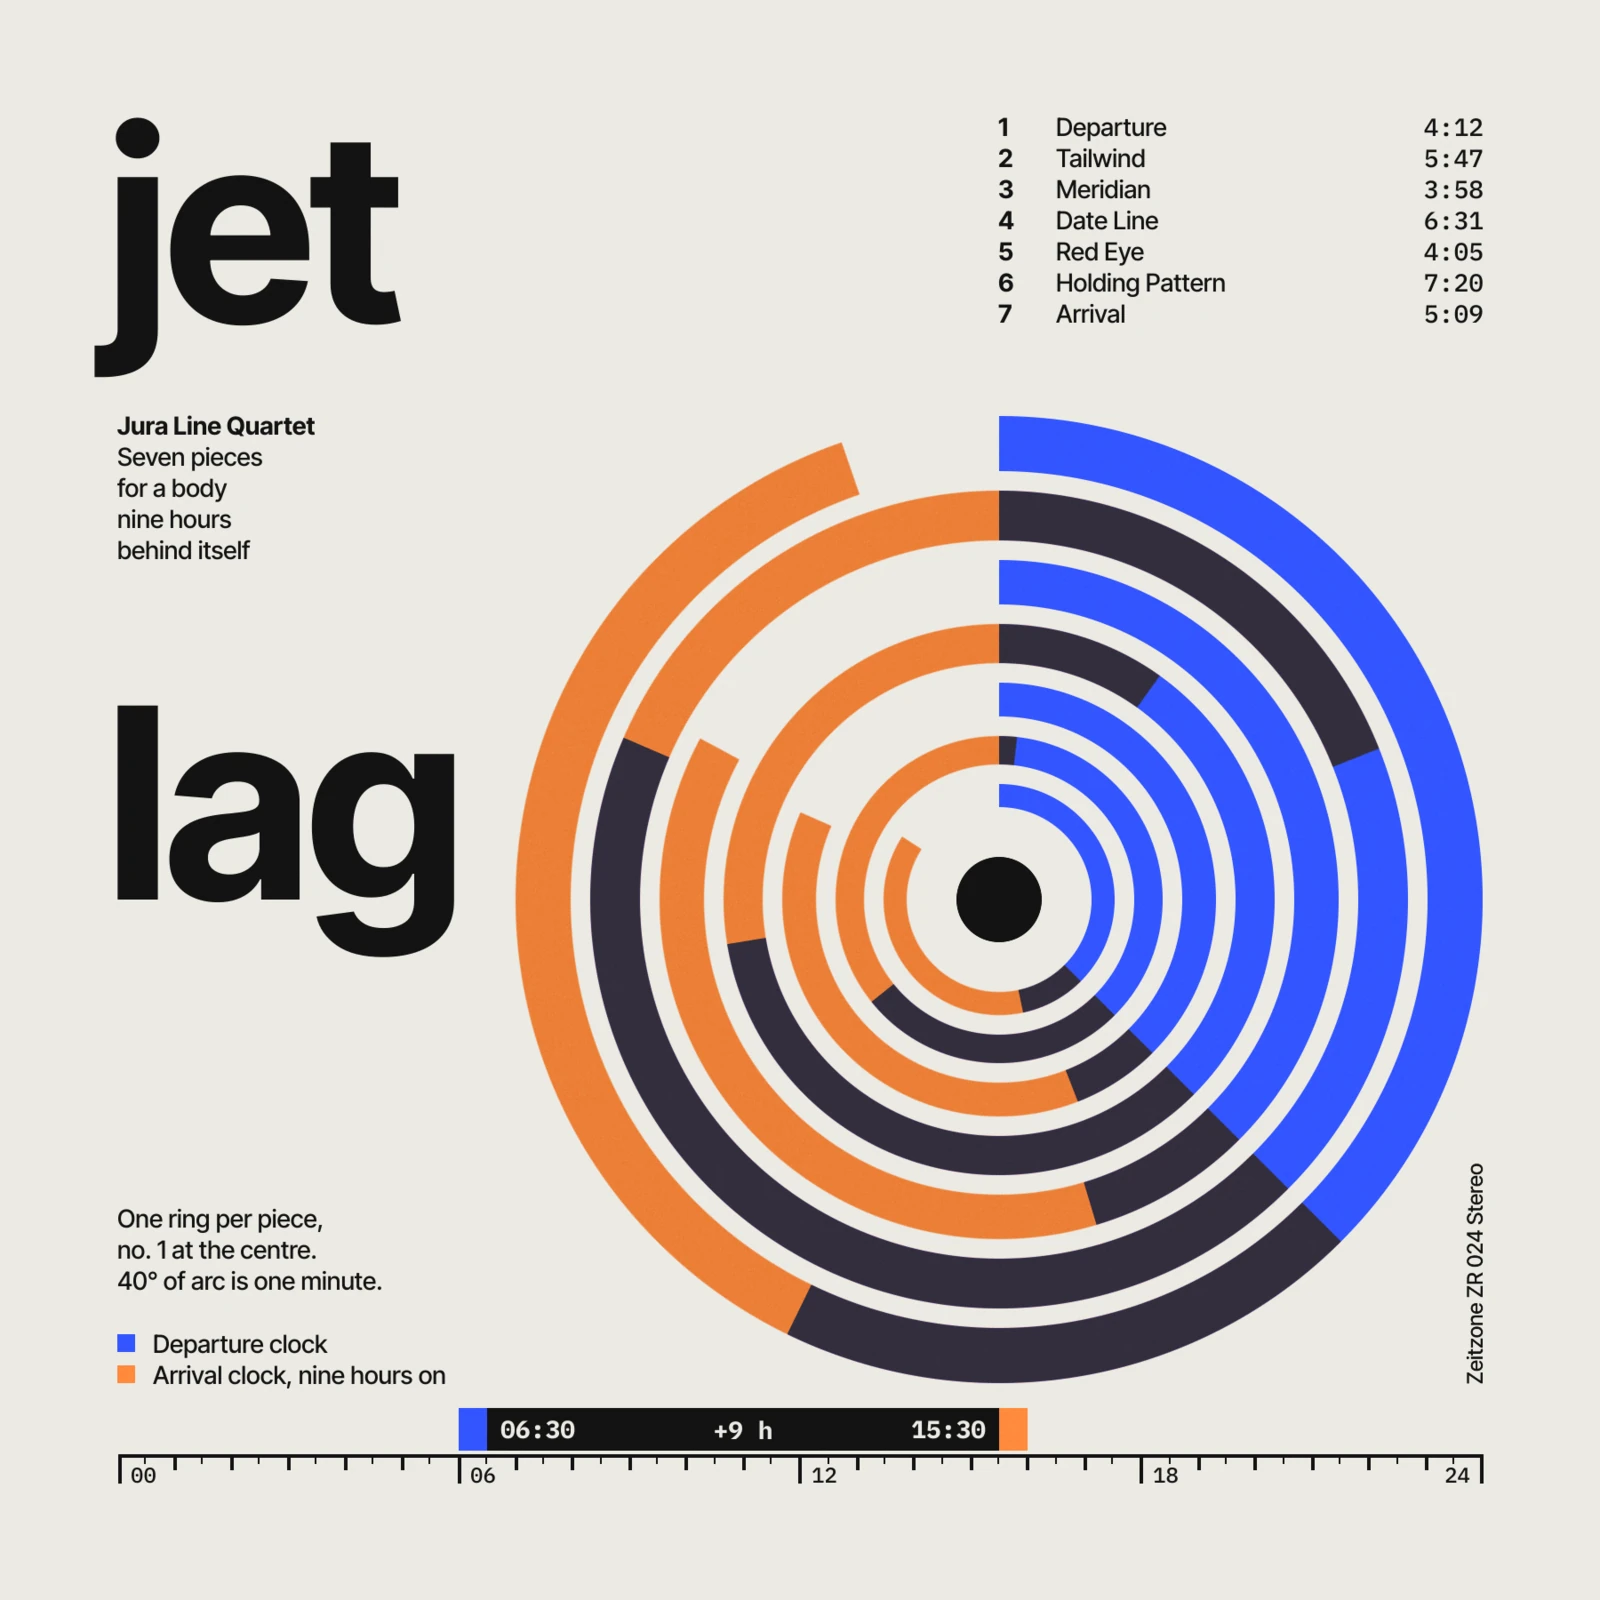
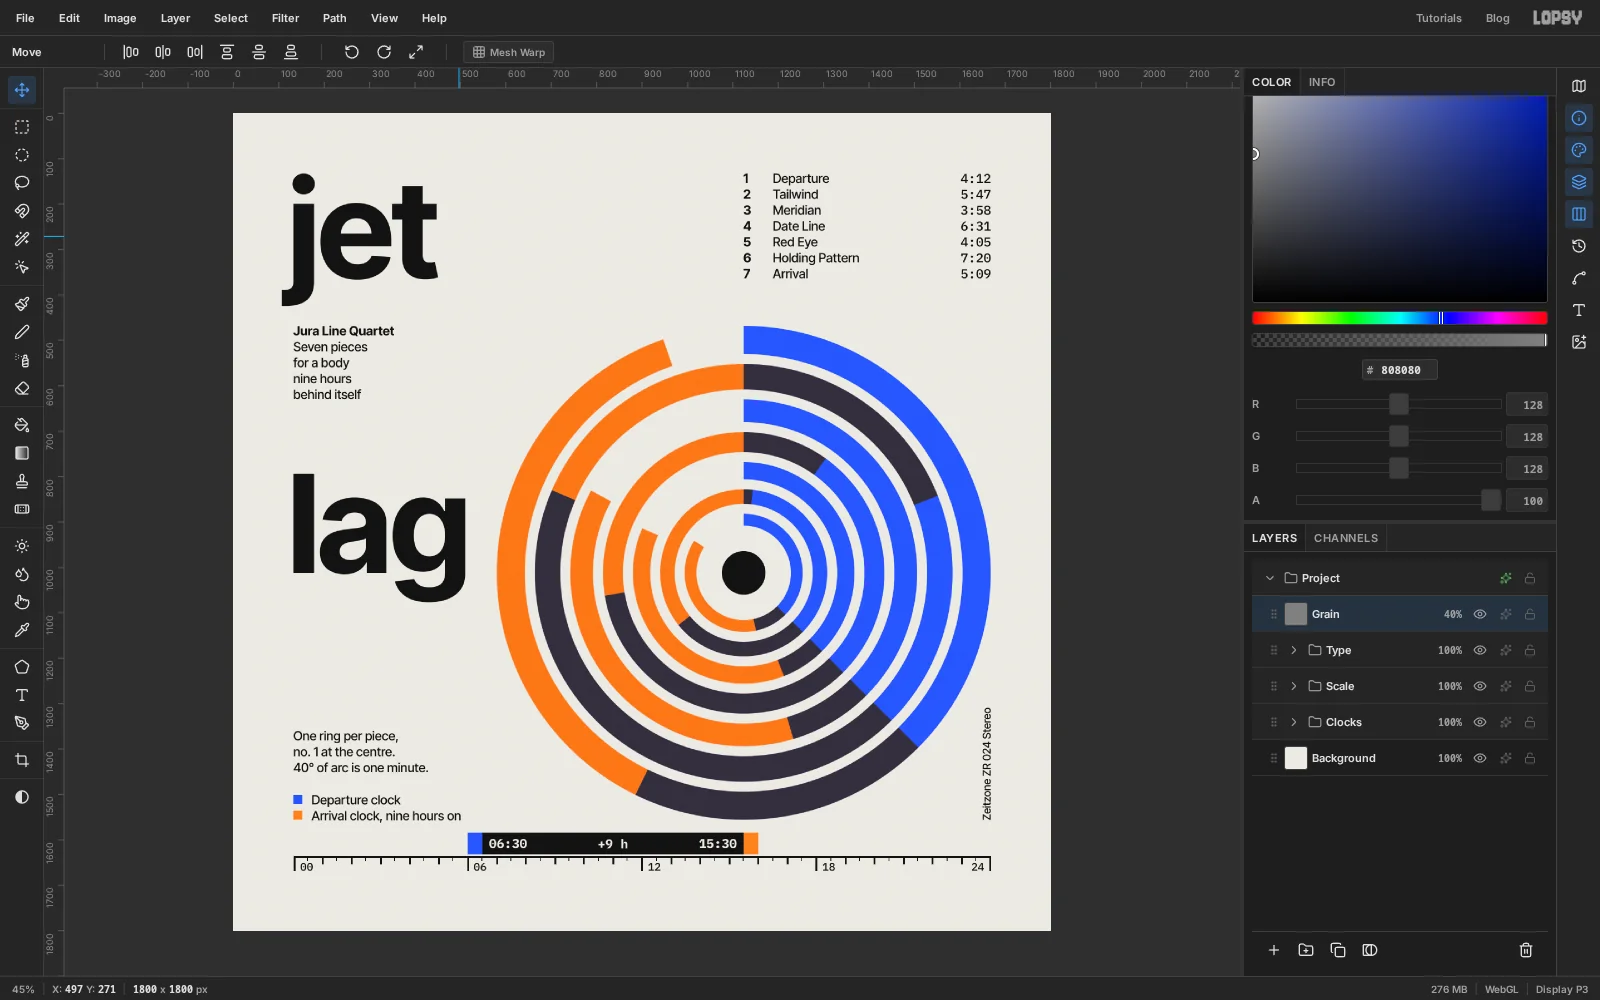
A jet-lagged body runs on two clocks at once: the one it left and the one it landed in. This cover for a made-up record, Jet Lag by the Jura Line Quartet, draws exactly that. Seven arcs, one per track, start at twelve o'clock and run as long as the track does. A second copy of the same arcs is turned 135°, which is nine hours on a 24-hour dial, and printed over the first in orange. Where the two inks overlap you get a third colour for free.
It's built the way Swiss Style posters were: a grid, one typeface family, two inks and nothing decorative. Every shape on the sheet is information.
Along the way you'll use:
- guides, and the grid at three sizes, as a snapping aid and as a ruler
- the Elliptical Marquee and Lasso with Alt to subtract from a selection
- a square marquee to rotate pixels around a chosen centre
- Color Overlay, the Multiply blend mode and Rasterize Layer Style
- the Shape tool, the Pencil with Shift-click lines, and Copy / Paste
- point text in two fonts, right and centre alignment, line height and letter spacing
- a rotated text line, groups, Add Noise and the Overlay blend mode
The palette is paper, black and two inks:
-
Paper
-
Ink black
-
Departure blue
-
Arrival orange
-
Grain grey
a texture layer, not an ink
-
Set up the paper and the guides
Open Lopsy. In the New Document dialog set Width and Height to
1800, choose a White background and click Create.- Select the Background layer, set the foreground colour to and choose Edit → Fill.
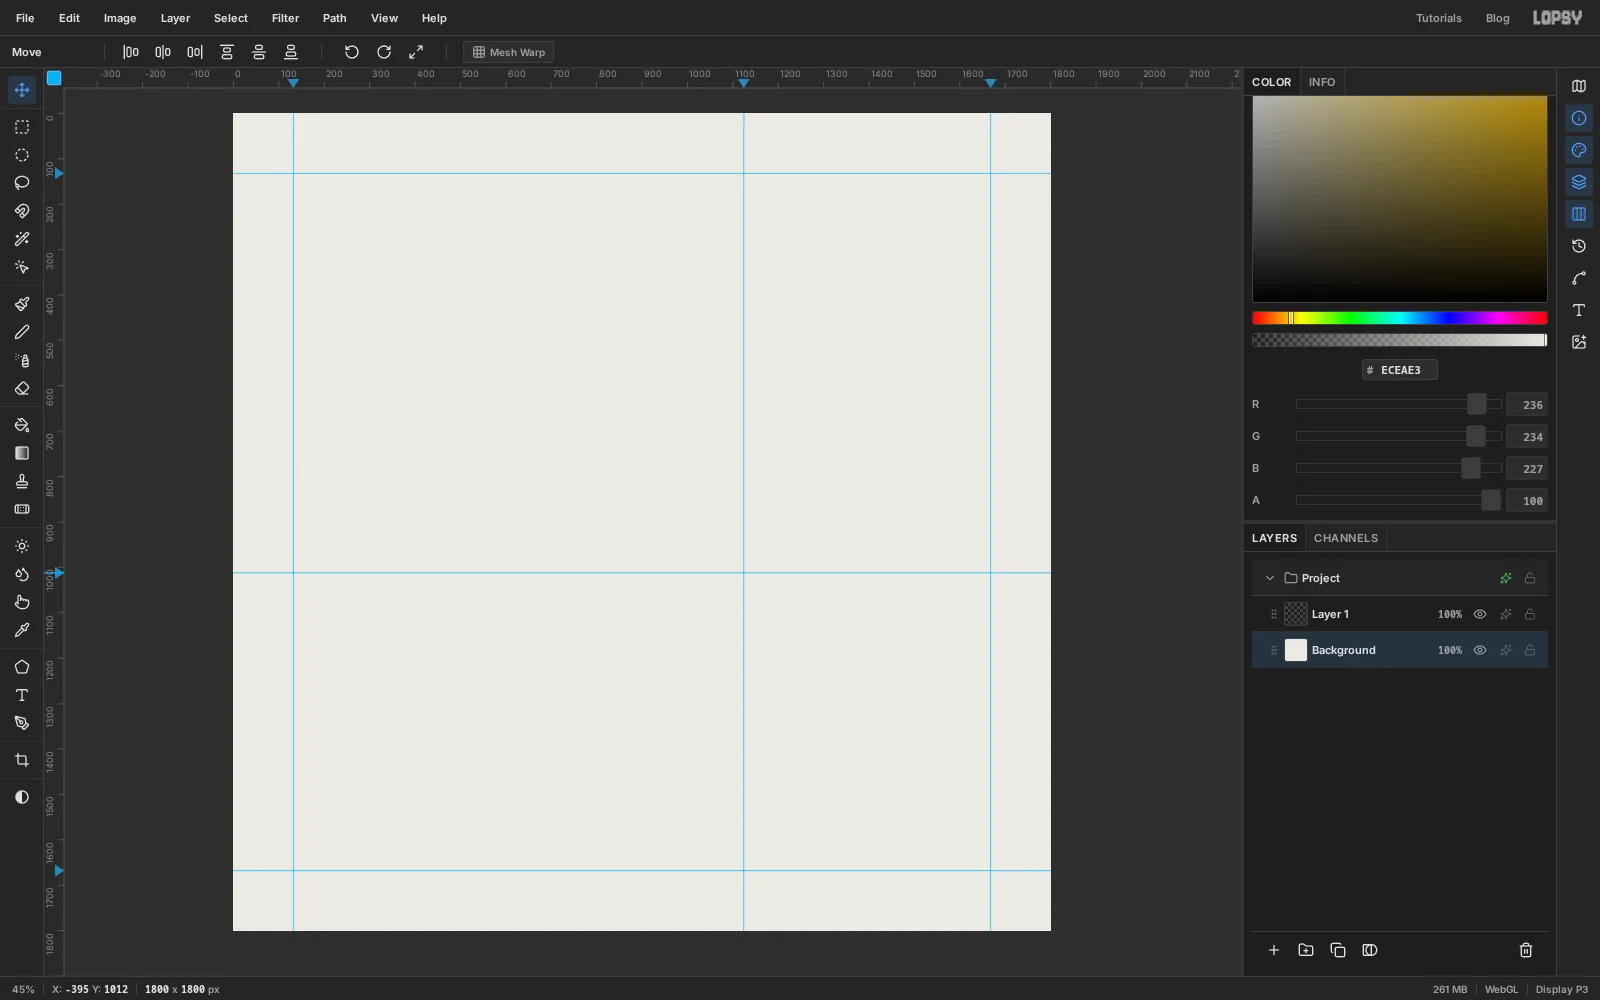
- Click the top ruler at 132 and at 1668 to drop two vertical guides, then click the left ruler at the same two numbers. These are the margins. A label follows the pointer along the ruler and shows the position before you click; zoom in if you can't land on the exact number, and click a guide's marker on the ruler to remove a wrong one.
- Click the top ruler at 1124 and the left ruler at 1012. Where these two cross is the hub of the disc.
The hub sits right of centre on purpose. The left third of the sheet stays free for the title.
-
Select the outer ring
Select Layer 1 and rename it Blue arcs. Each arc starts as a ring, and a ring is one circle with a smaller circle taken out of it.
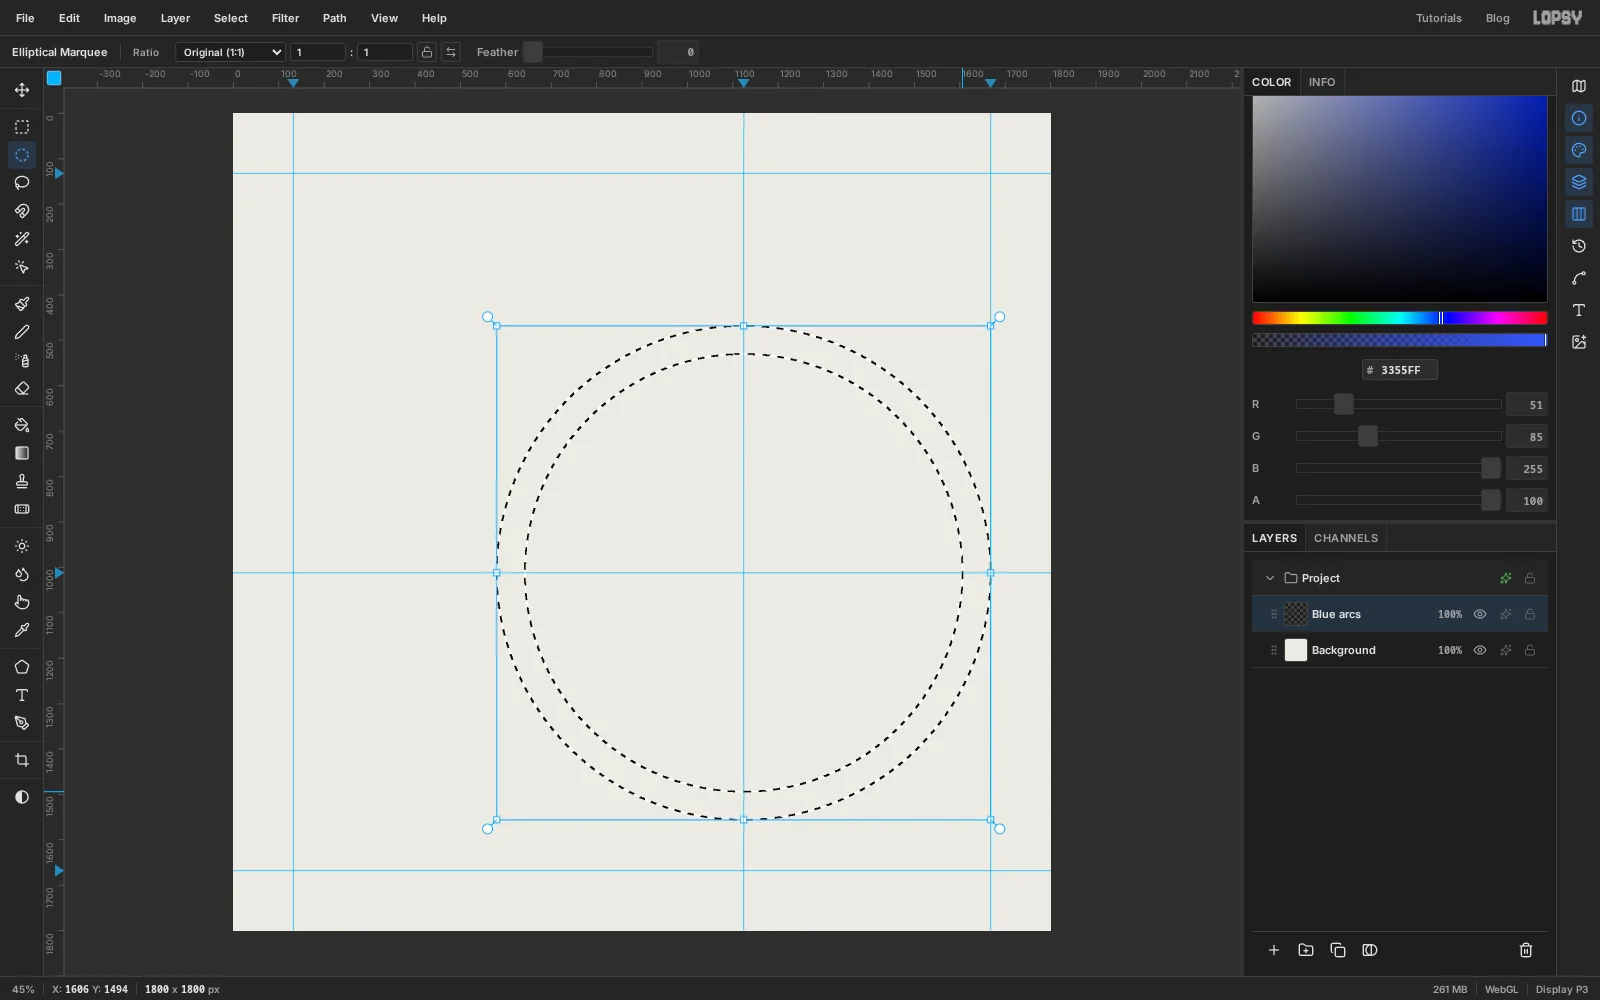
- Choose the Elliptical Marquee. Put the pointer up and to the left of the hub, where the status bar reads about X: 580 Y: 468. Hold Cmd to keep the shape a circle and drag down and to the right until the edge snaps onto the right margin guide. That is a circle of radius 544 around the hub.
- Now hold Alt and Cmd together and drag a second circle from about X: 642 Y: 530 until the status bar reads about X: 1606 Y: 1494, the same distance the other side of the hub. Alt subtracts it, and a ring 62 px wide is left.
-
Cut the ring down to the track's length
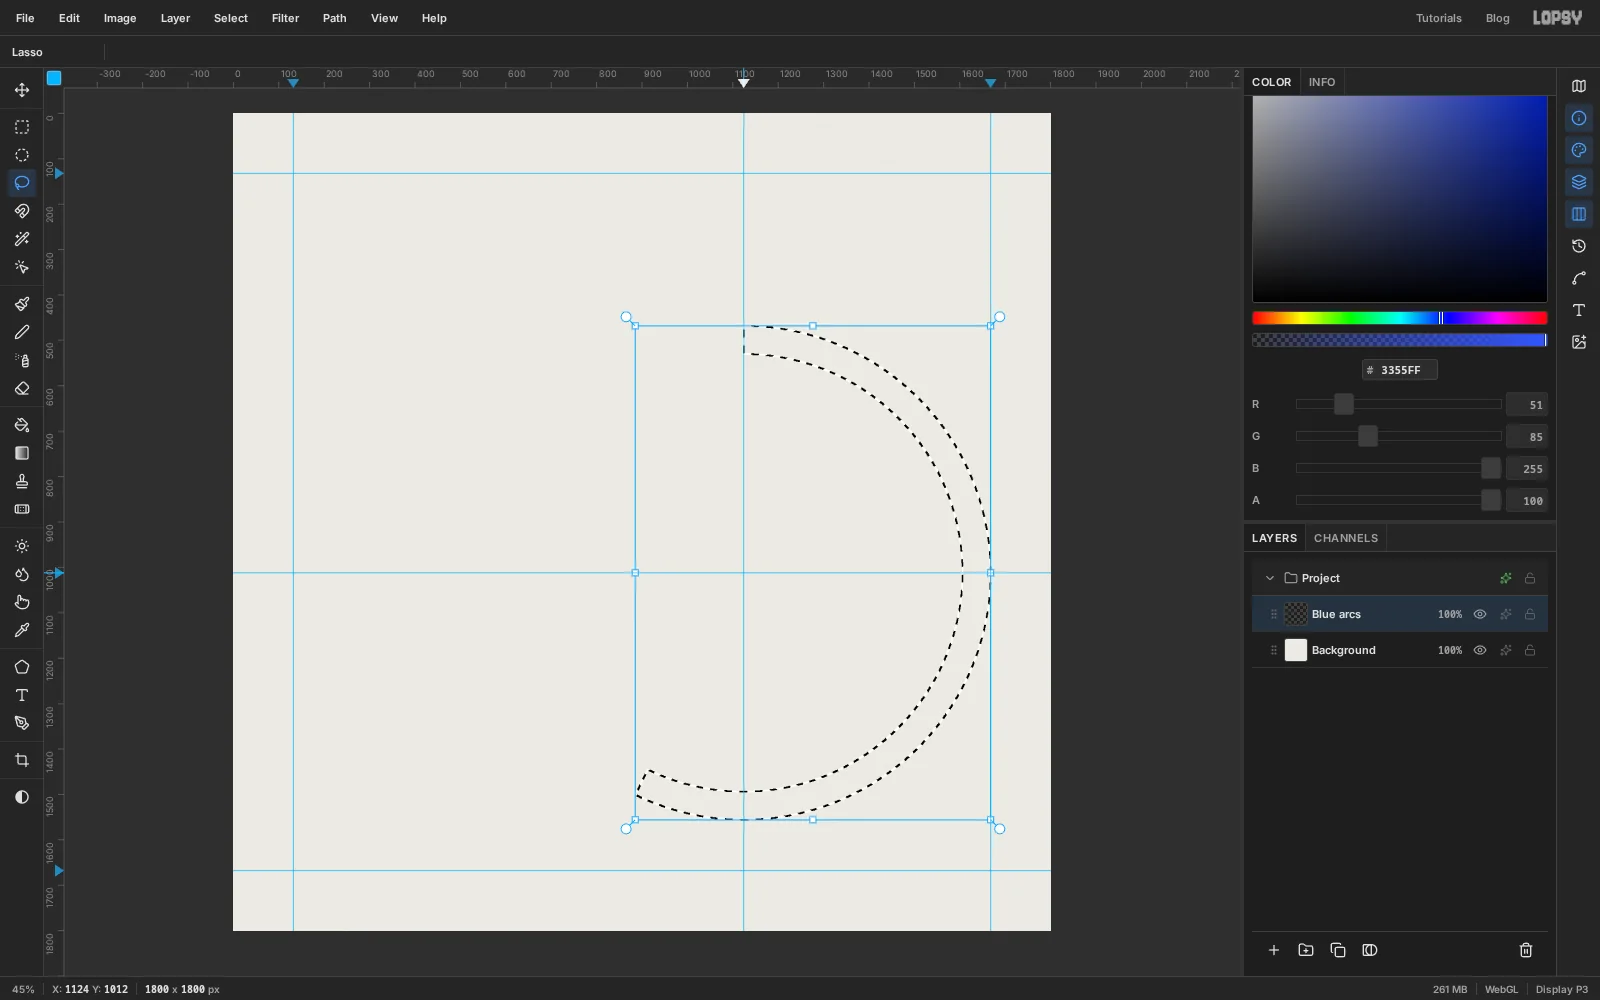
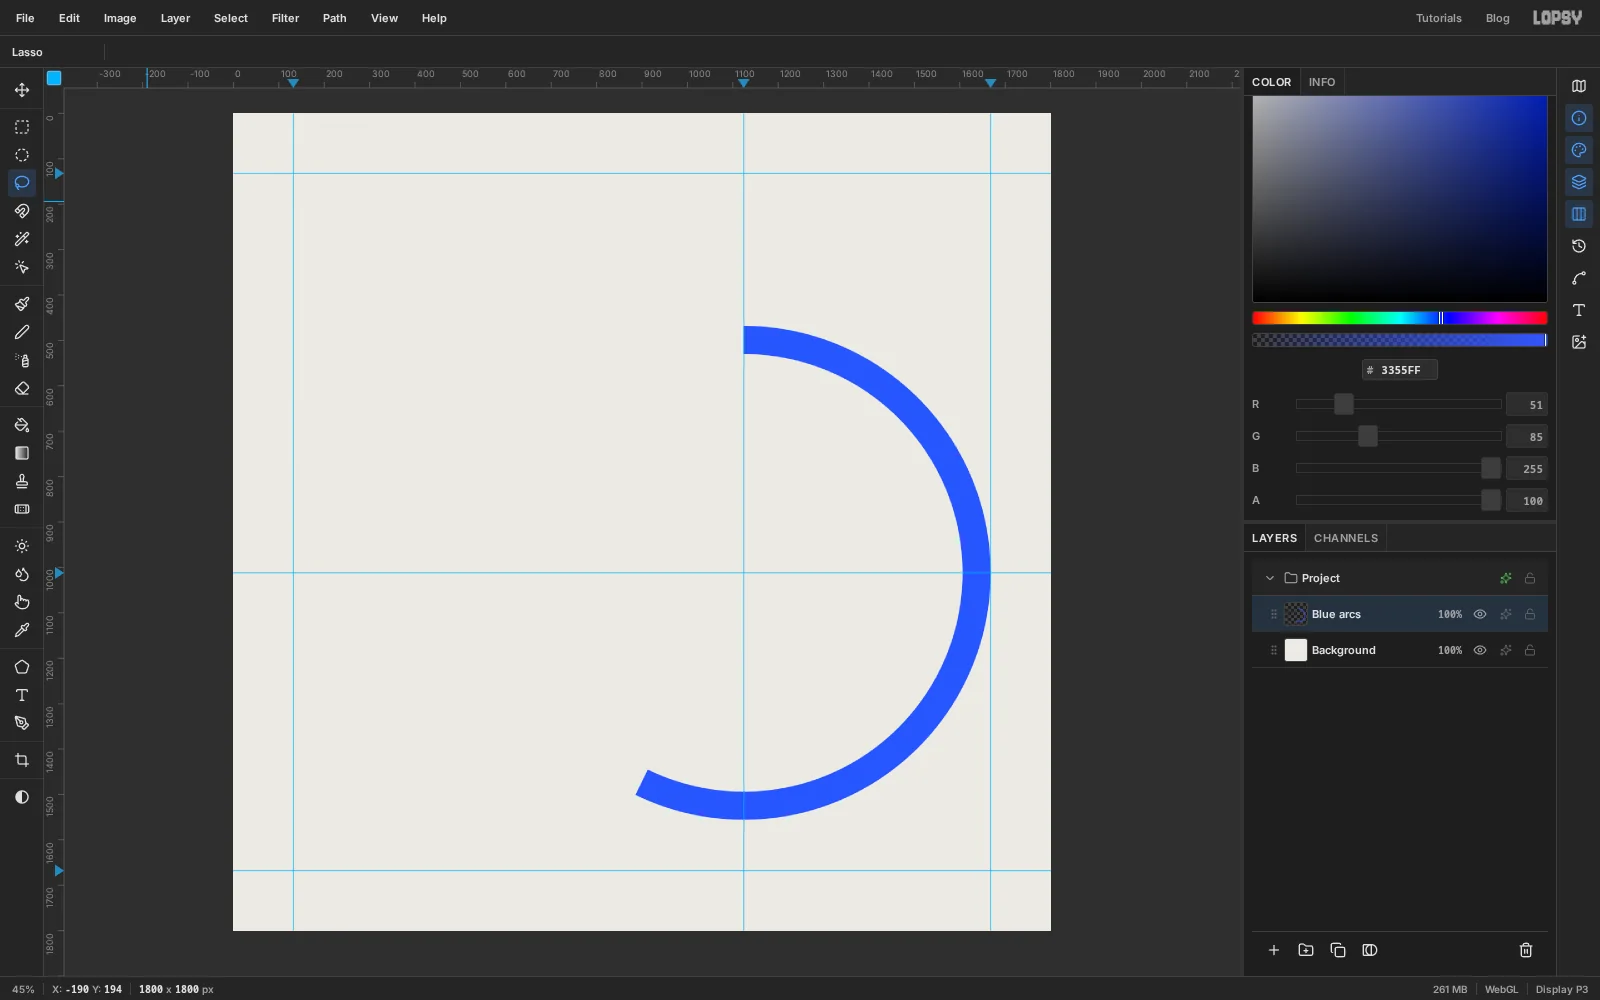
The outer ring is track 7, Arrival, which runs 5:09. One minute is 40° of arc on this cover, so the arc covers 5.15 × 40 = 206° clockwise from twelve o'clock. The rest of the ring has to go.
Choose the Lasso and hold Alt. Start on the hub, drag straight out past the ring at about seven o'clock, carry on clockwise around the outside of the ring up to twelve o'clock, then come straight back down the vertical guide to the hub and let go. The wedge you traced is subtracted from the ring.
Think of the angles as an ordinary clock face: every hour is 30°, so 206° is a little before seven. (The clock face is only a way to describe where an arc stops. The nine-hour turn later on uses a 24-hour dial.)
-
Fill the first arc
Set the foreground colour to and choose Edit → Fill, then press Cmd+D to deselect.
If the end of the arc isn't where you want it, press Cmd+Z a few times to step back to the plain ring and trace the wedge again. Each circle and each wedge is its own undo step.
-
Repeat for the other six rings
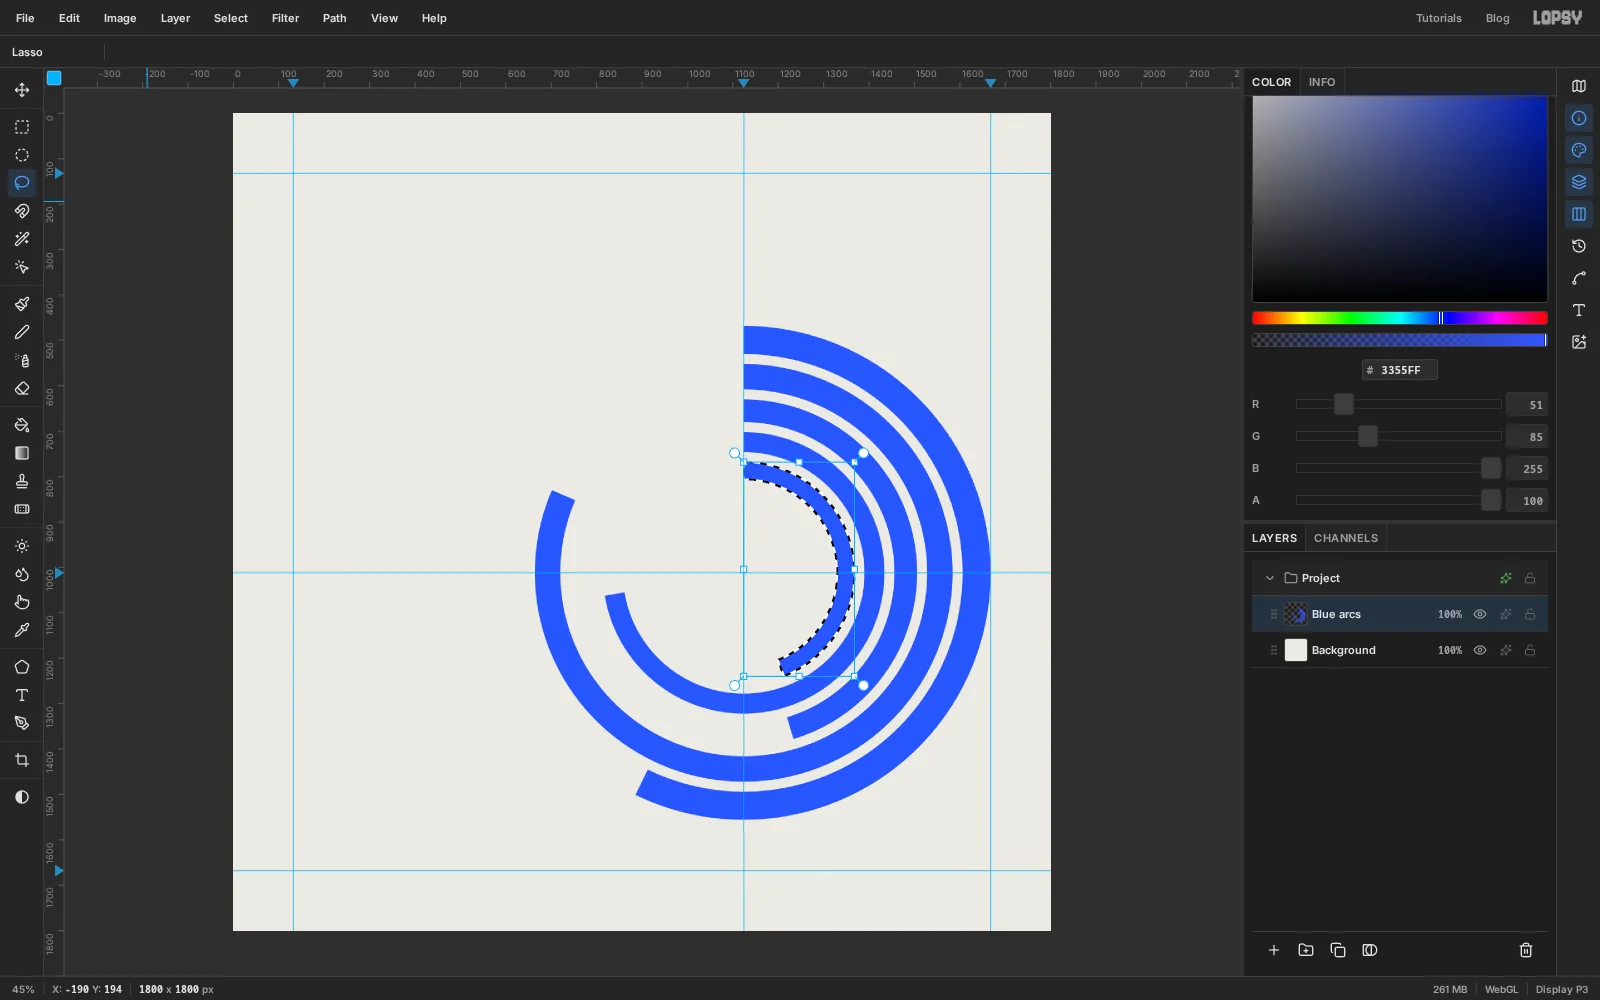
Work inwards, one ring per track. Each ring gets the same four moves: a circle, a smaller circle with Alt, a lasso wedge with Alt, then Edit → Fill. The two circles of each ring start at the corners given here.
- Ring 7, Arrival, 5:09: radius 544 to 482, an arc of 206° that ends just before 7 o'clock
- Ring 6, Holding Pattern, 7:20: radius 460 to 404, 293°, ends just before 10 o'clock (circles start at 664, 552 and 720, 608)
- Ring 5, Red Eye, 4:05: radius 382 to 332, 163°, ends at half past 5 (circles start at 742, 630 and 792, 680)
- Ring 4, Date Line, 6:31: radius 310 to 266, 261°, ends just before 9 o'clock (circles start at 814, 702 and 858, 746)
- Ring 3, Meridian, 3:58: radius 244 to 206, 159°, ends just after 5 o'clock (circles start at 880, 768 and 918, 806)
- Ring 2, Tailwind, 5:47: radius 184 to 152, 231°, ends just before 8 o'clock (circles start at 940, 828 and 972, 860)
- Ring 1, Departure, 4:12: radius 130 to 104, 168°, ends just after half past 5 (circles start at 994, 882 and 1020, 908)
The rings get 6 px narrower each time and the gap between them stays at 22 px. Don't worry about hitting the angles to the degree, or the radii to the pixel. What matters is that every arc starts on the vertical guide and that a longer track gets a visibly longer arc.
-
Duplicate the arcs and box them in a square
Choose Layer → Duplicate Layer and rename the copy Orange arcs. This copy becomes the arrival clock.
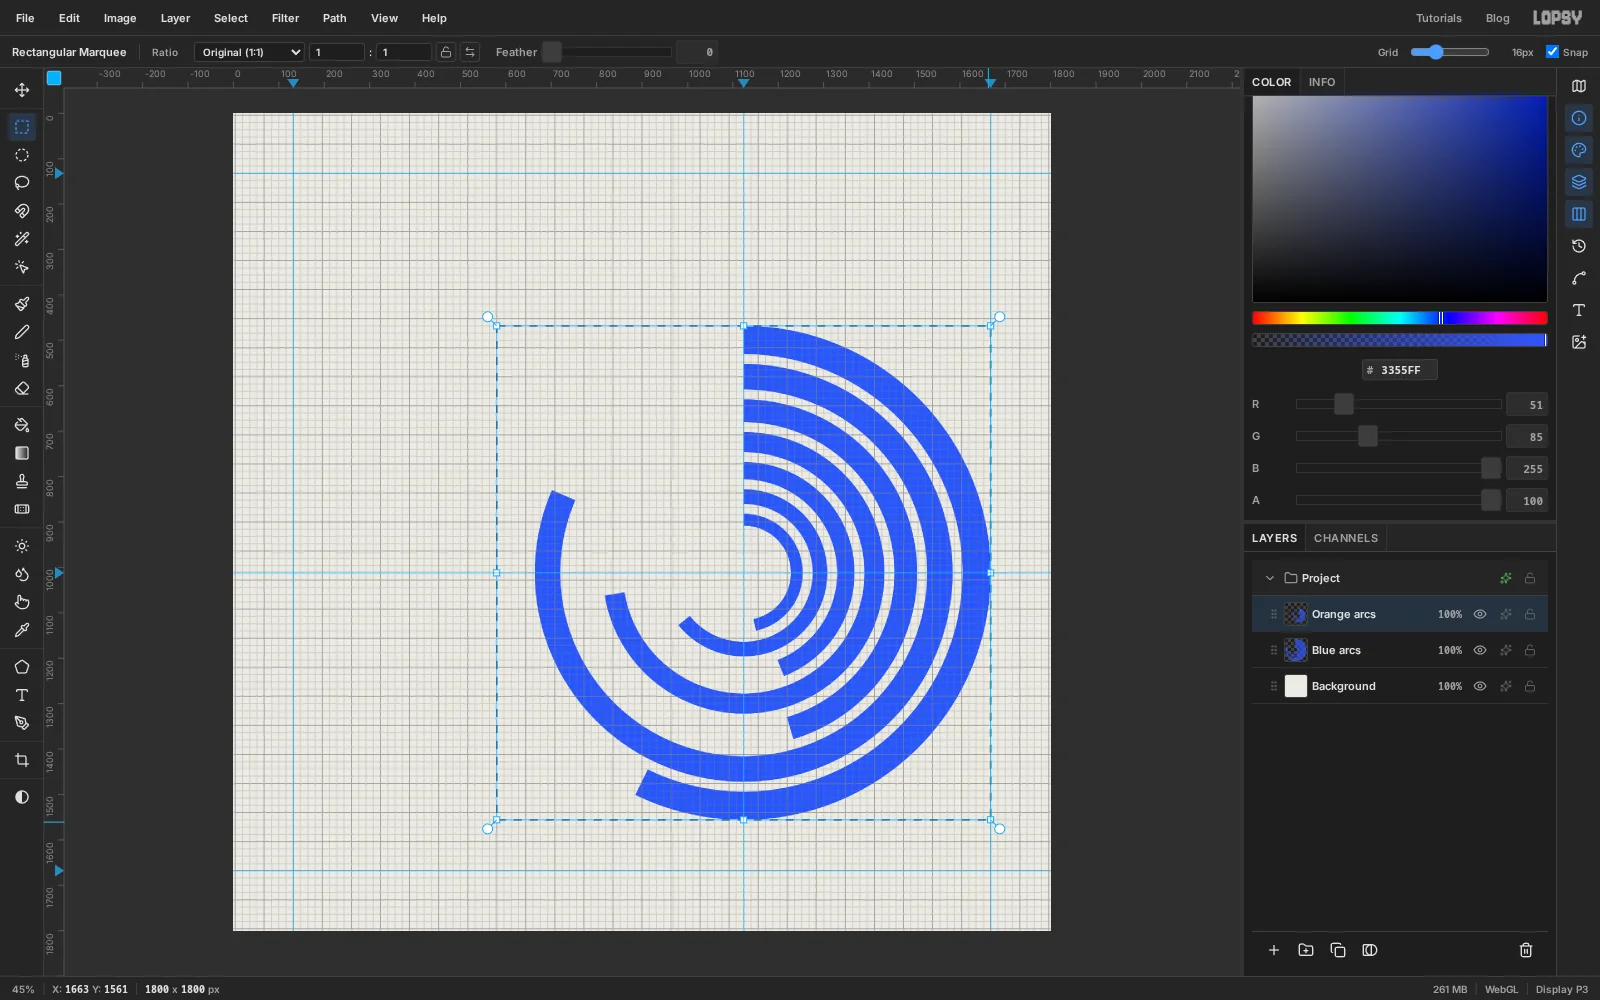
The copy has to turn around the hub. A selection rotates around the centre of its own box, and the arcs don't fill their circle evenly, so give them a box that does:
- Choose View → Show Grid. With the Rectangular Marquee active, drag the Grid slider at the right of the options bar to 16px and leave Snap ticked.
- Hold Cmd and drag a square from the corner where the very first circle started (about X: 580 Y: 468) until its right edge meets the right margin guide. Snapping pulls the corners onto the grid, and the square ends up exactly around the circle, with its centre on the hub.
-
Rotate the copy nine hours
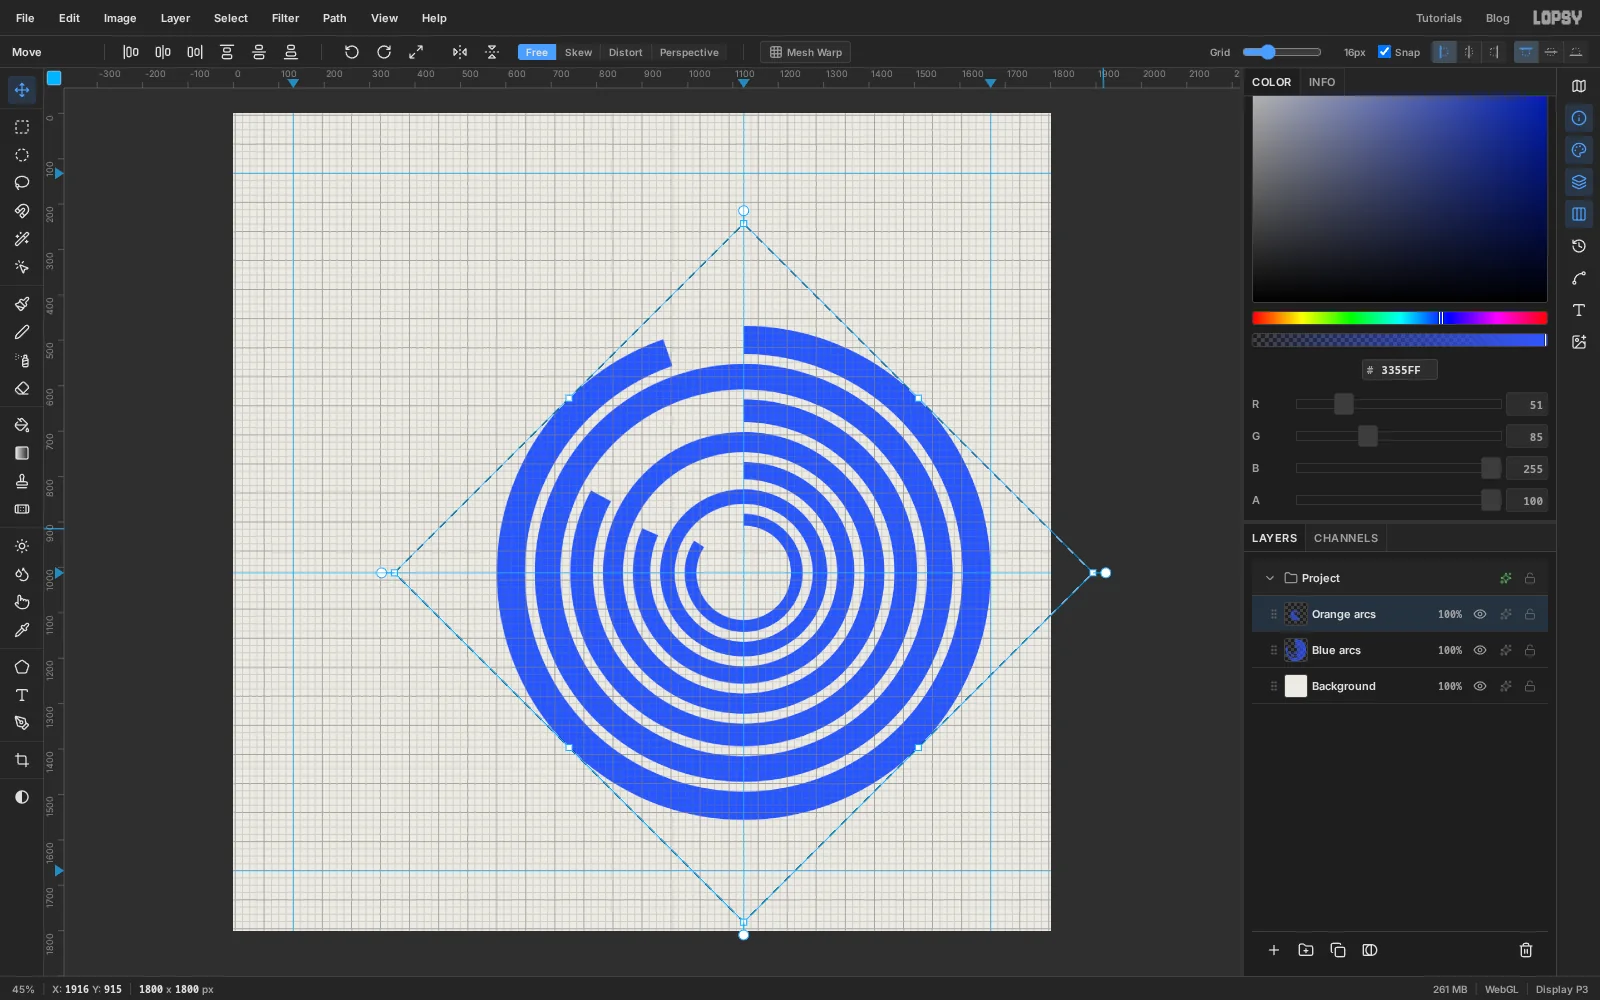
Switch to the Move tool. Handles appear around the square. Grab the small round handle just outside a corner and drag it clockwise.
While the grid is snapping, rotation clicks round in 15° steps, and 15° is one hour on a 24-hour dial. Count nine steps. At 135° the square stands on its corner like a diamond. Let go and press Cmd+D to commit.
-
Print the copy in orange
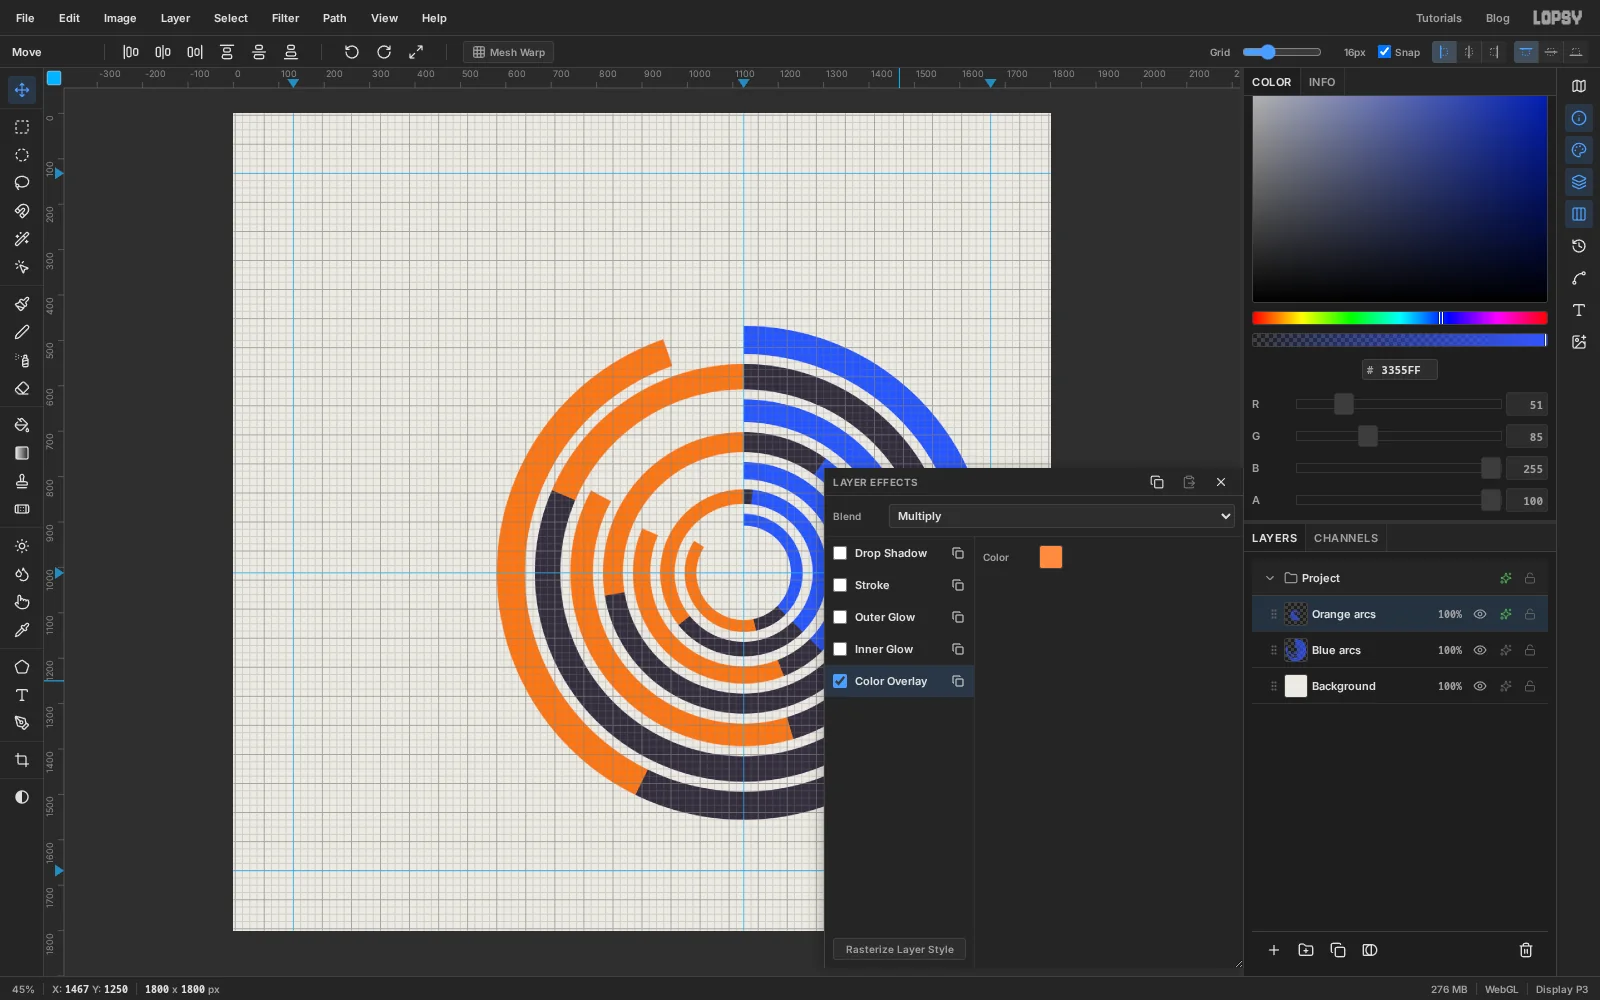
- Click the effects button (✦) on the Orange arcs row. Tick Color Overlay, click its colour swatch and enter .
- At the top of the drawer, set Blend to Multiply.
- Click Rasterize Layer Style at the bottom of the drawer, then close it.
Multiply behaves like a second ink printed on top of the first. Orange over paper stays orange, and orange over blue turns into a dark indigo that is clearly not the black of the type. Two inks, three colours.
Rasterizing bakes the orange into the pixels, so the effect can be forgotten from here on.
-
Add the hub with the Shape tool
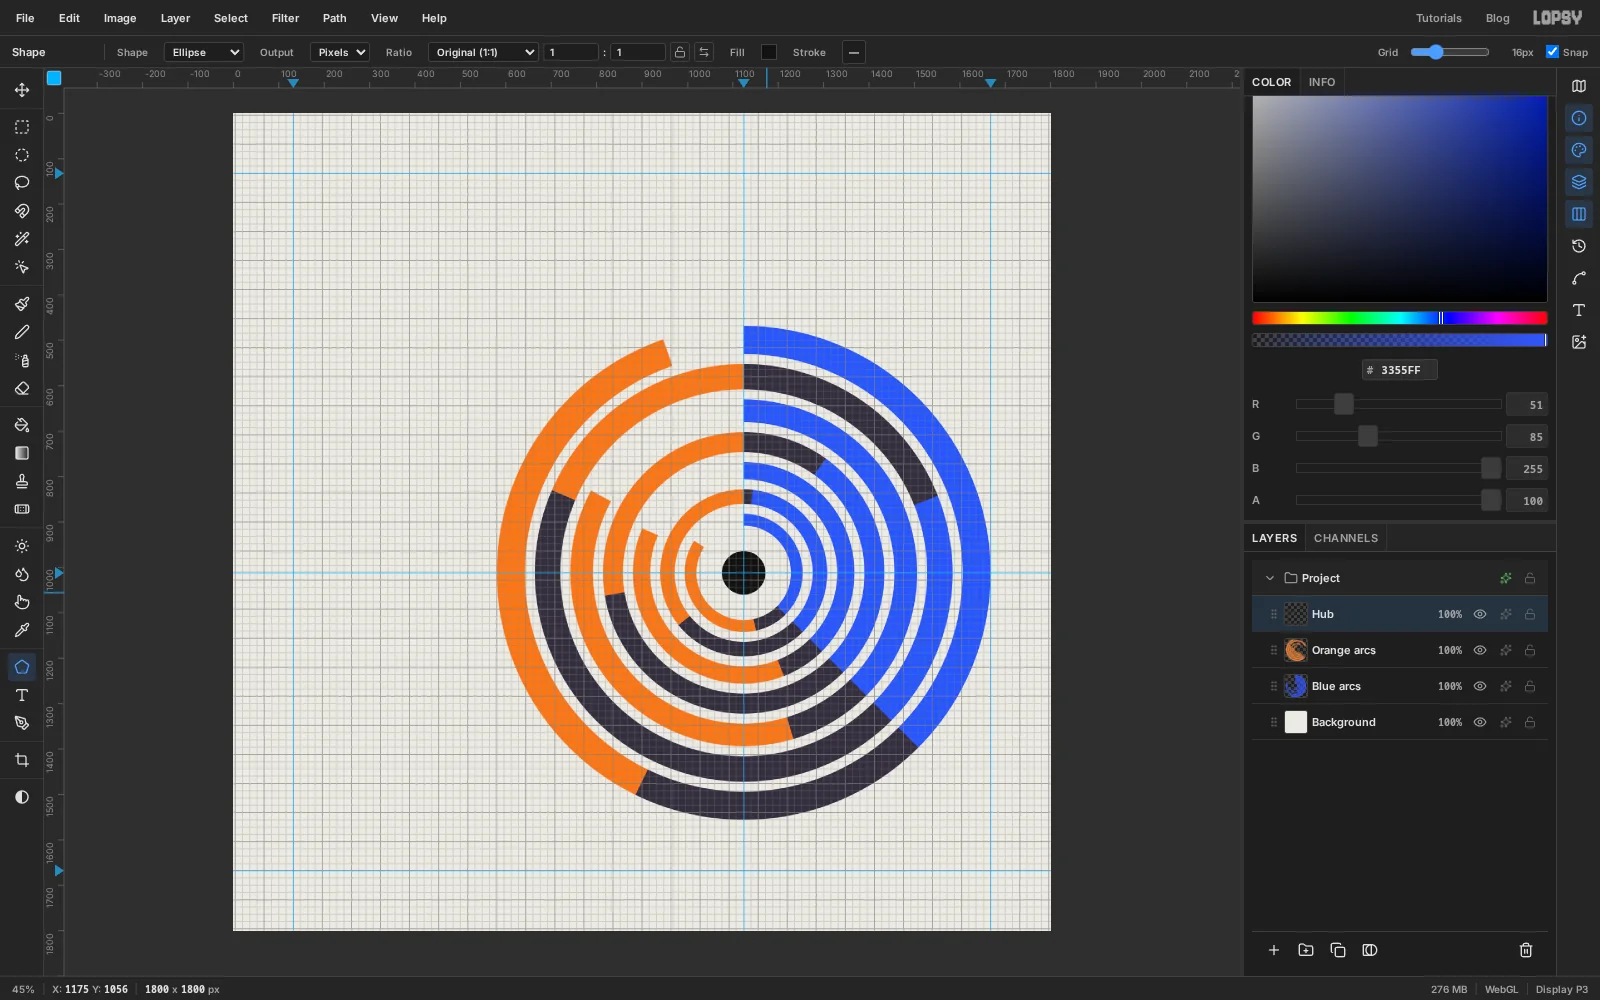
Click Add Layer and name the layer Hub.
Choose the Shape tool, set Shape to Ellipse, click the Fill swatch and enter . The Shape tool draws from the centre outwards, so press on the hub, where the two guides cross, and drag out three grid squares across and three down. Snapping makes it a 96 px disc sitting exactly on the hub.
-
Set the title
Choose View → Show Grid to hide the grid: nudging type is easier without snapping. Click New Group, name it Type, and keep it selected so the text layers land inside it.
- Set the foreground colour to . Choose the Text tool and click near the top-left corner. Set Size to
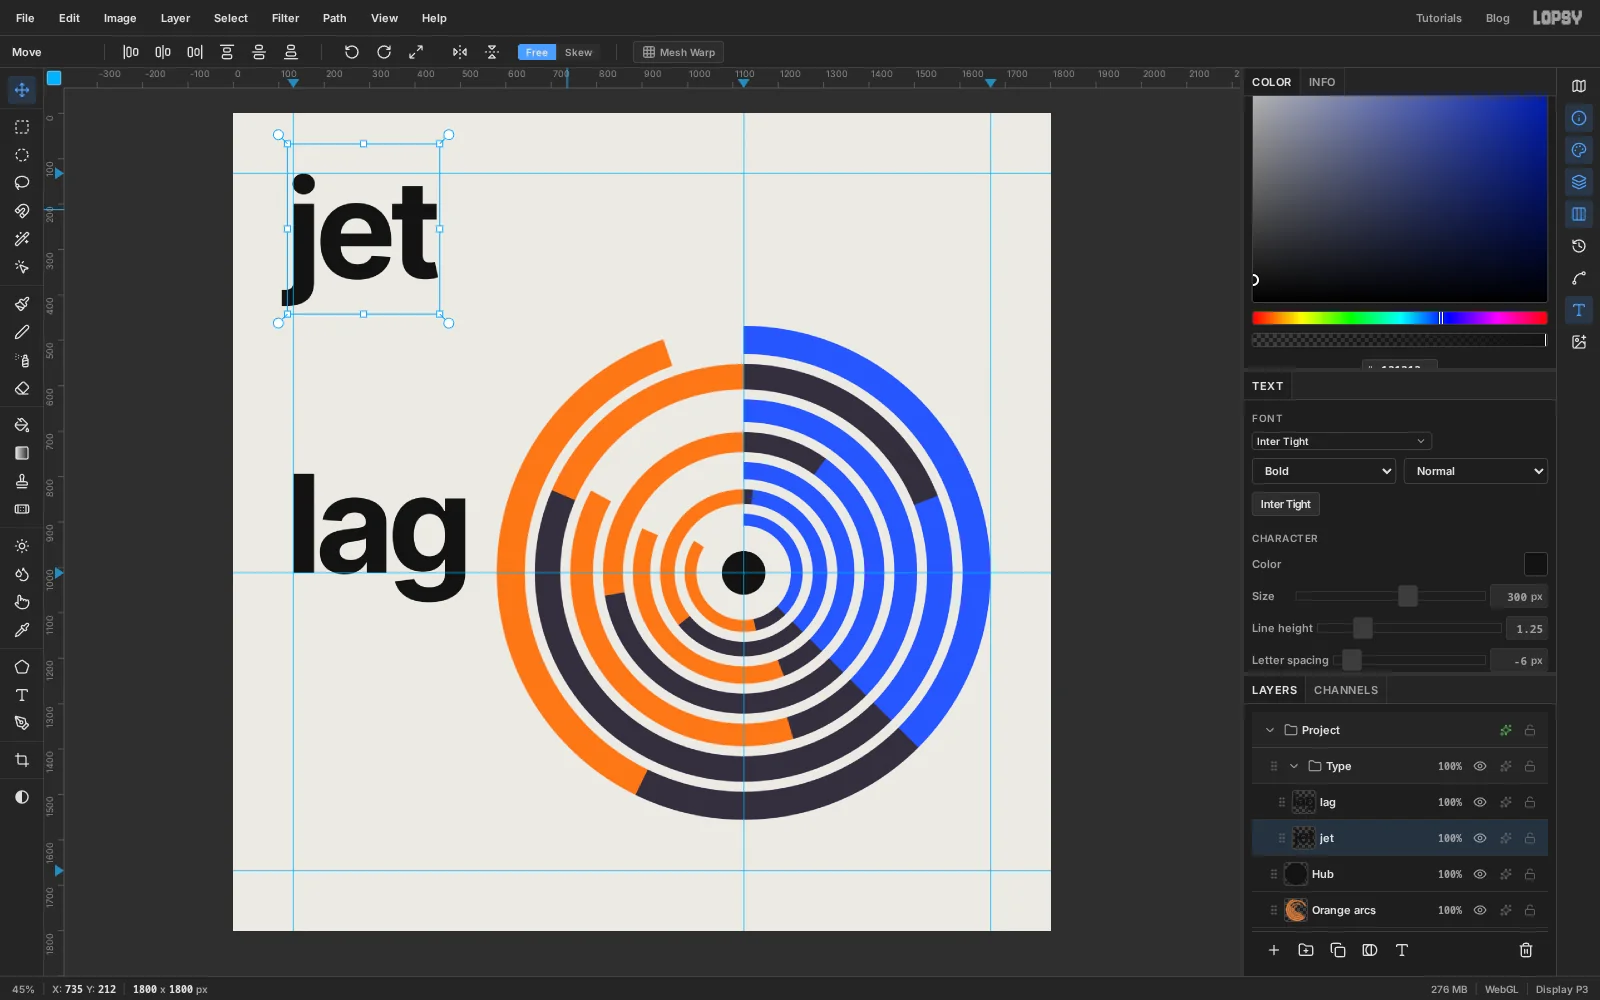
300, pick Inter Tight from the font menu and Bold from the weight menu. Typejetand press Tab. - Open the Text panel from the buttons on the far right and set Letter spacing to
-6. - Click an empty area halfway down the left side, type
lag, press Tab and set its Letter spacing to-6as well. - Switch to the Move tool and use the arrow keys (Shift moves 10 px at a time). Move jet until the dot of the j touches the top guide and its stem stands on the left guide. The hook of the j hangs out into the margin, and that's fine.
- Move lag until the l stands on the left guide and the word's baseline sits on the horizontal guide through the hub.
The words are split on purpose. "jet" takes off from the top margin, and "lag" has dropped behind to the axis of the clocks.
- Set the foreground colour to . Choose the Text tool and click near the top-left corner. Set Size to
-
Set the track list in three columns
The list is three text layers, so each column keeps its own alignment. Use Size
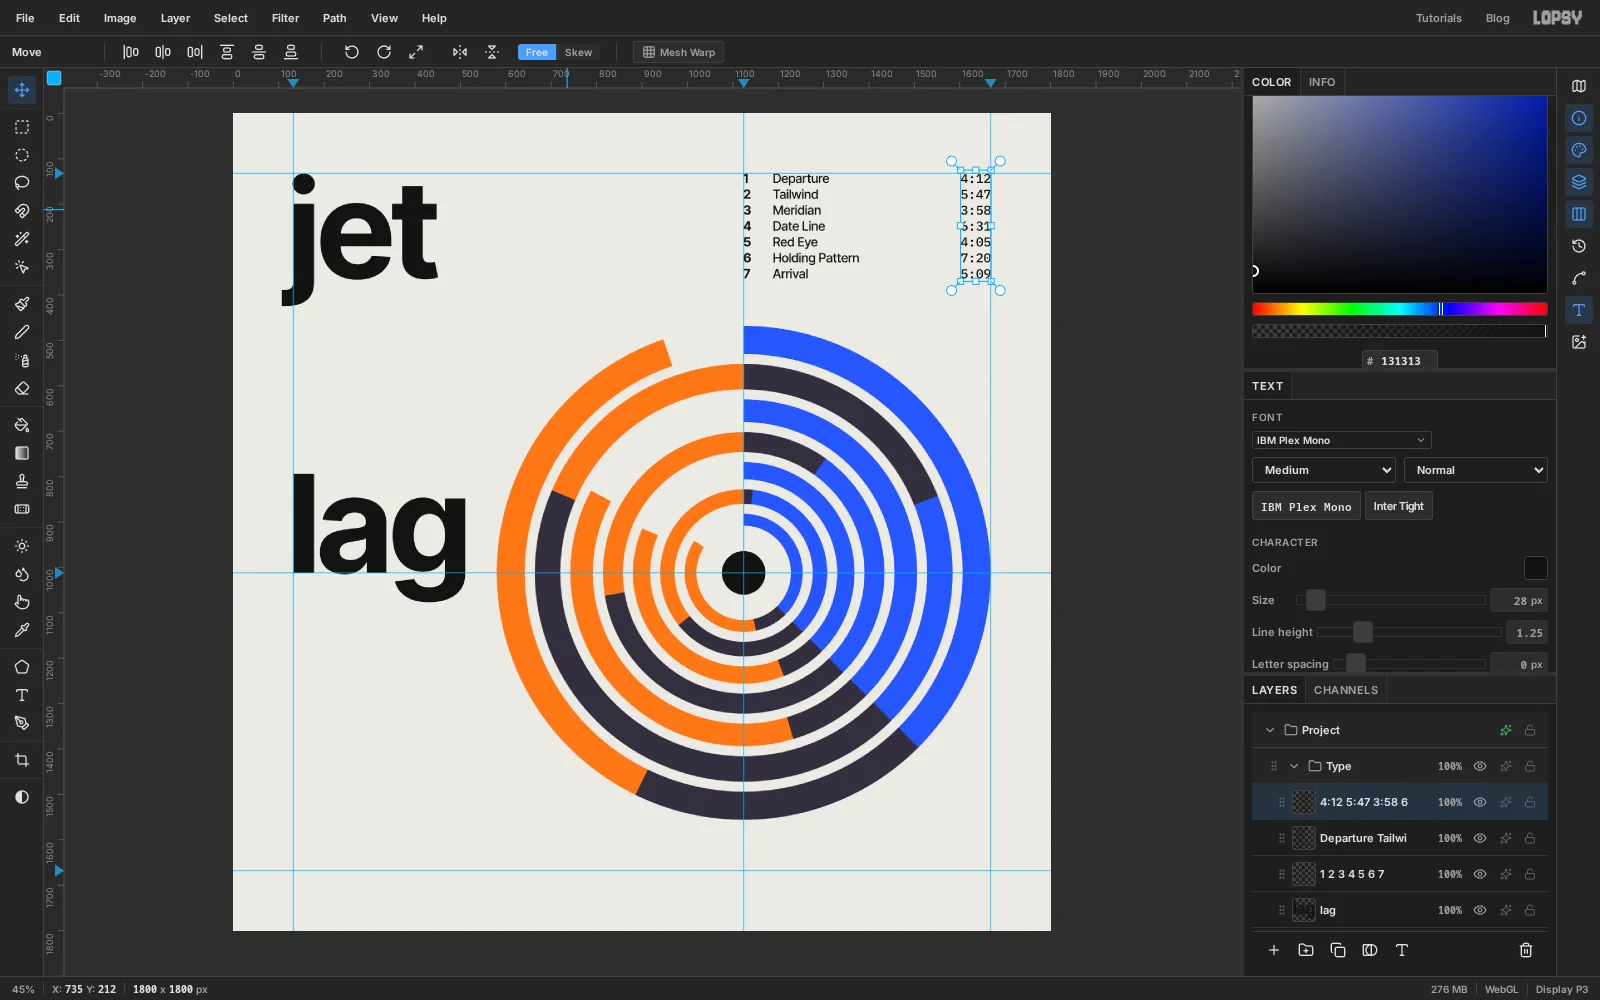
28for all three, and after typing each one set Line height to1.25in the Text panel. Press Enter between lines and Tab when the column is done.- Numbers: click on the vertical hub guide near the top. Inter Tight, Bold. Type
1to7, one per line. - Titles: click 64 px to the right of the numbers. Inter Tight, Medium. Type
Departure,Tailwind,Meridian,Date Line,Red Eye,Holding Pattern,Arrival. - Durations: set Align to Right and click on the right margin guide. Pick IBM Plex Mono, Medium. Type
4:12,5:47,3:58,6:31,4:05,7:20,5:09.
A monospaced font gives every digit the same width, so the colons line up down the column.
Click the durations layer, Shift-click the numbers layer to select all three, and nudge them together with the Move tool until the top of the first line touches the top guide. At this size and line height the last line then shares its baseline with "jet".
- Numbers: click on the vertical hub guide near the top. Inter Tight, Bold. Type
-
Add the artist and the key
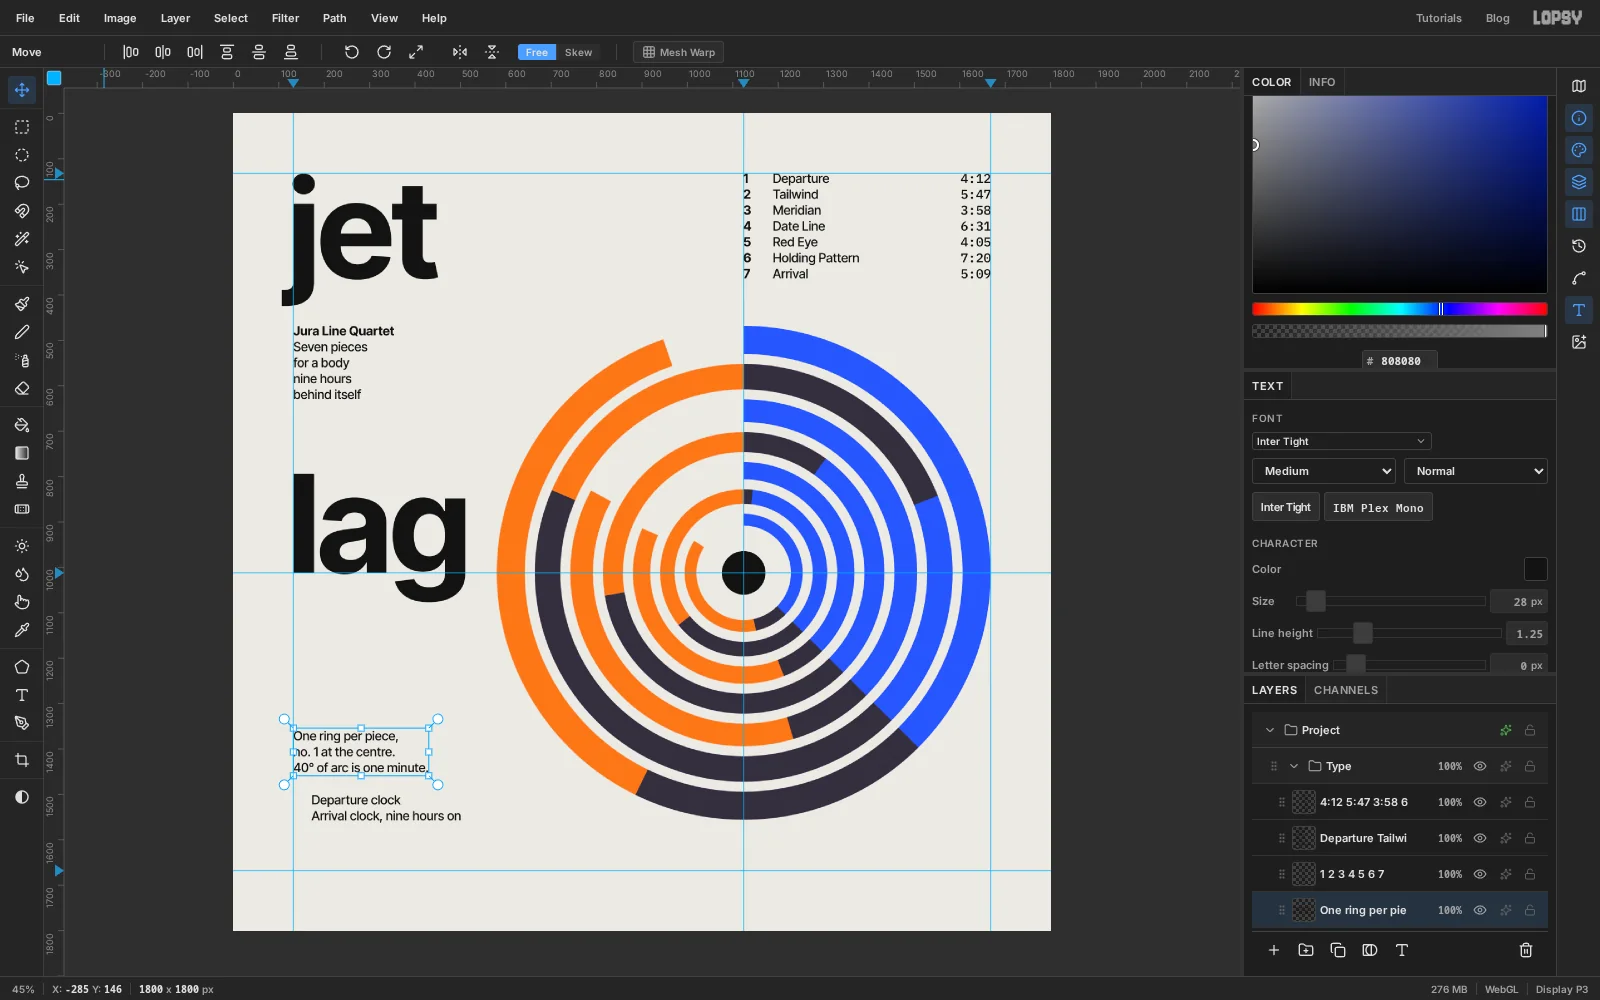
Set Align back to Left. These are four more Inter Tight layers at Size
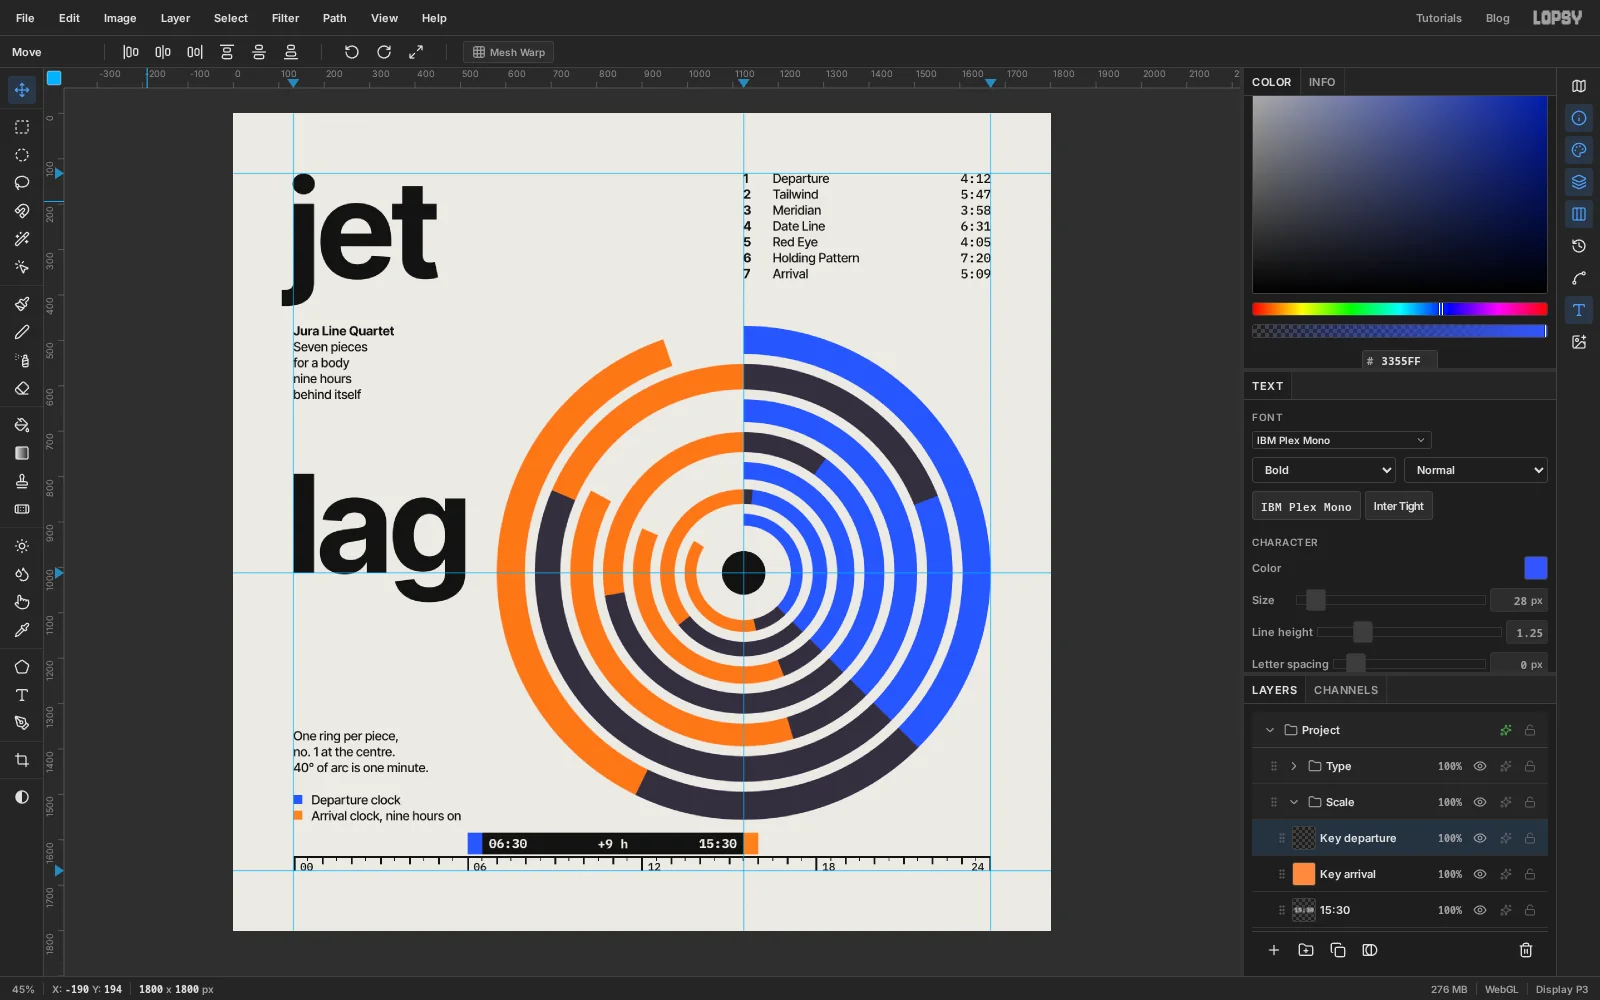
28, Line height1.25.Jura Line Quartetin Bold. Move it so the tops of the capitals are level with the top of the disc.Seven pieces/for a body/nine hours/behind itselfin Medium, on four lines, directly underneath.One ring per piece,/no. 1 at the centre./40° of arc is one minute.in Medium, on three lines.Departure clock/Arrival clock, nine hours on, on two lines, starting 40 px in from the left guide to leave room for a colour square.
Move the last block until its second baseline is level with the bottom of the disc, and put the three-line block one empty line above it. All four blocks keep their left edge on the margin guide, apart from the indented key.
-
Draw the nine-hour bar
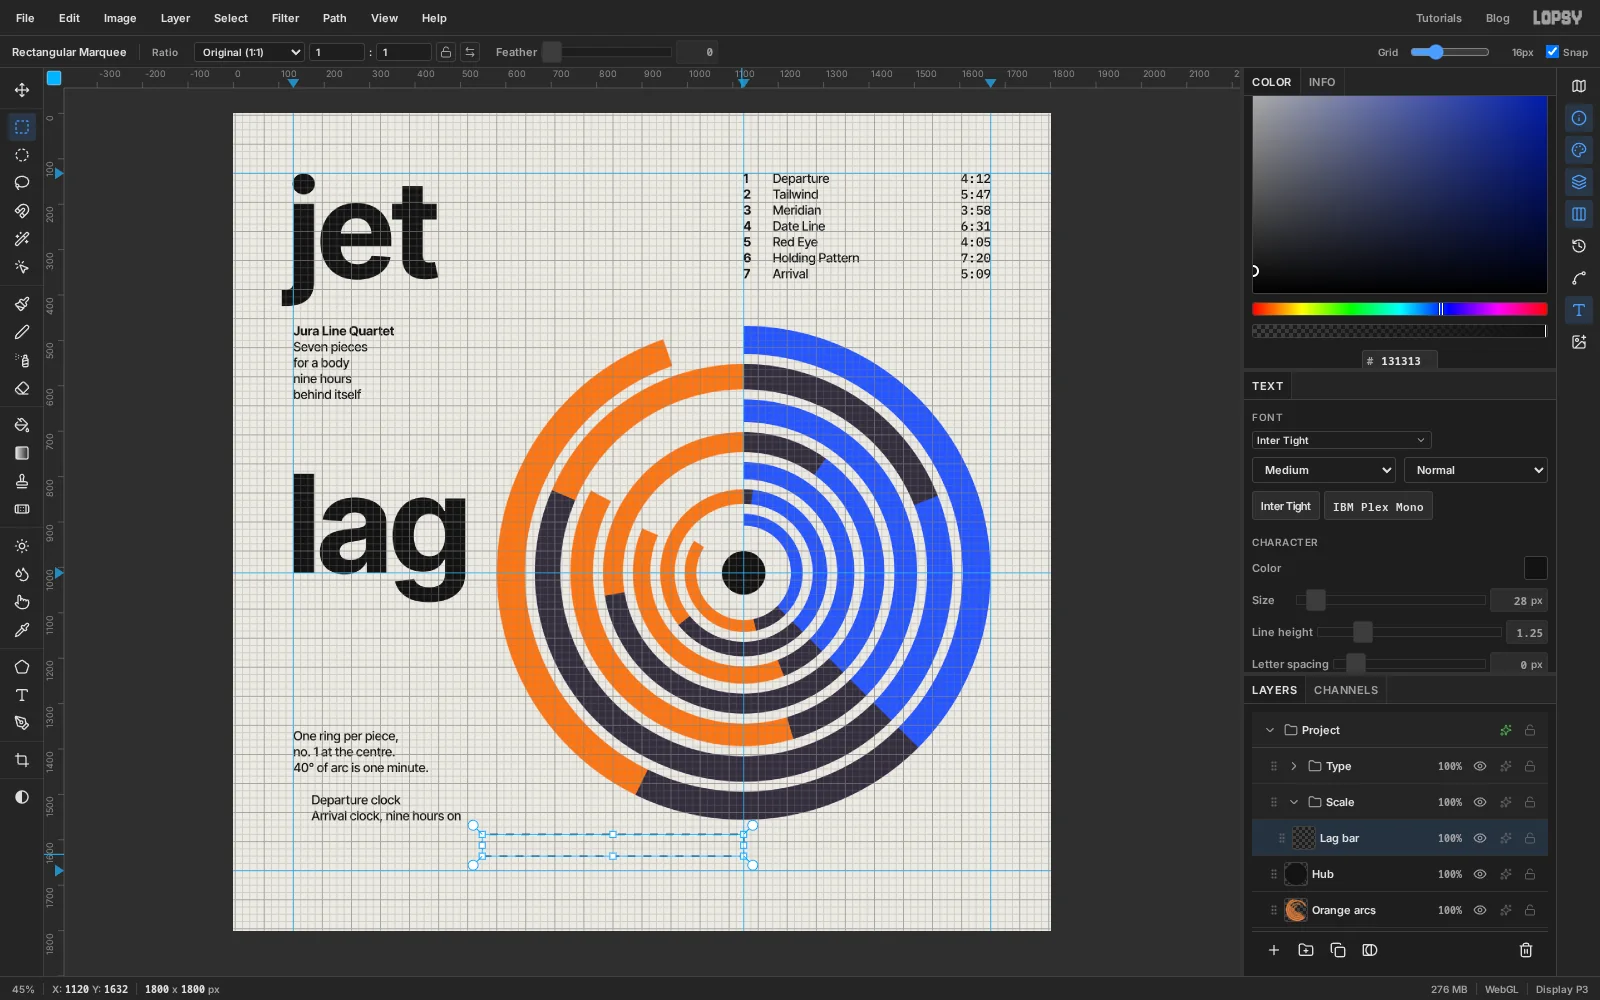
Along the bottom runs a 24-hour scale, 64 px to the hour, from the left margin to the right. The bar marks the nine hours between a 06:30 departure and a 15:30 arrival.
- Select Hub, click New Group and name it Scale. Add a layer inside it named Lag bar.
- Choose View → Show Grid again (still 16px). With the Rectangular Marquee, start at about X: 548 Y: 1588, just under the disc, and drag right to the vertical hub guide and down to Y: 1636. Snapping gives a bar 576 px long and 48 px high. Fill it with .
- Drag a marquee two grid squares wide and the same height as the bar against its left end, and fill it with . Do the same against the right end with .
- Deselect, hide the grid, and with the Move tool press ↑ four times. That opens a 4 px gap above where the rule is about to go.
The black part is exactly 576 px, nine hours at 64 px each, and it ends on the hub guide. The colour caps sit outside the measured span.
-
Rule the scale with the Pencil
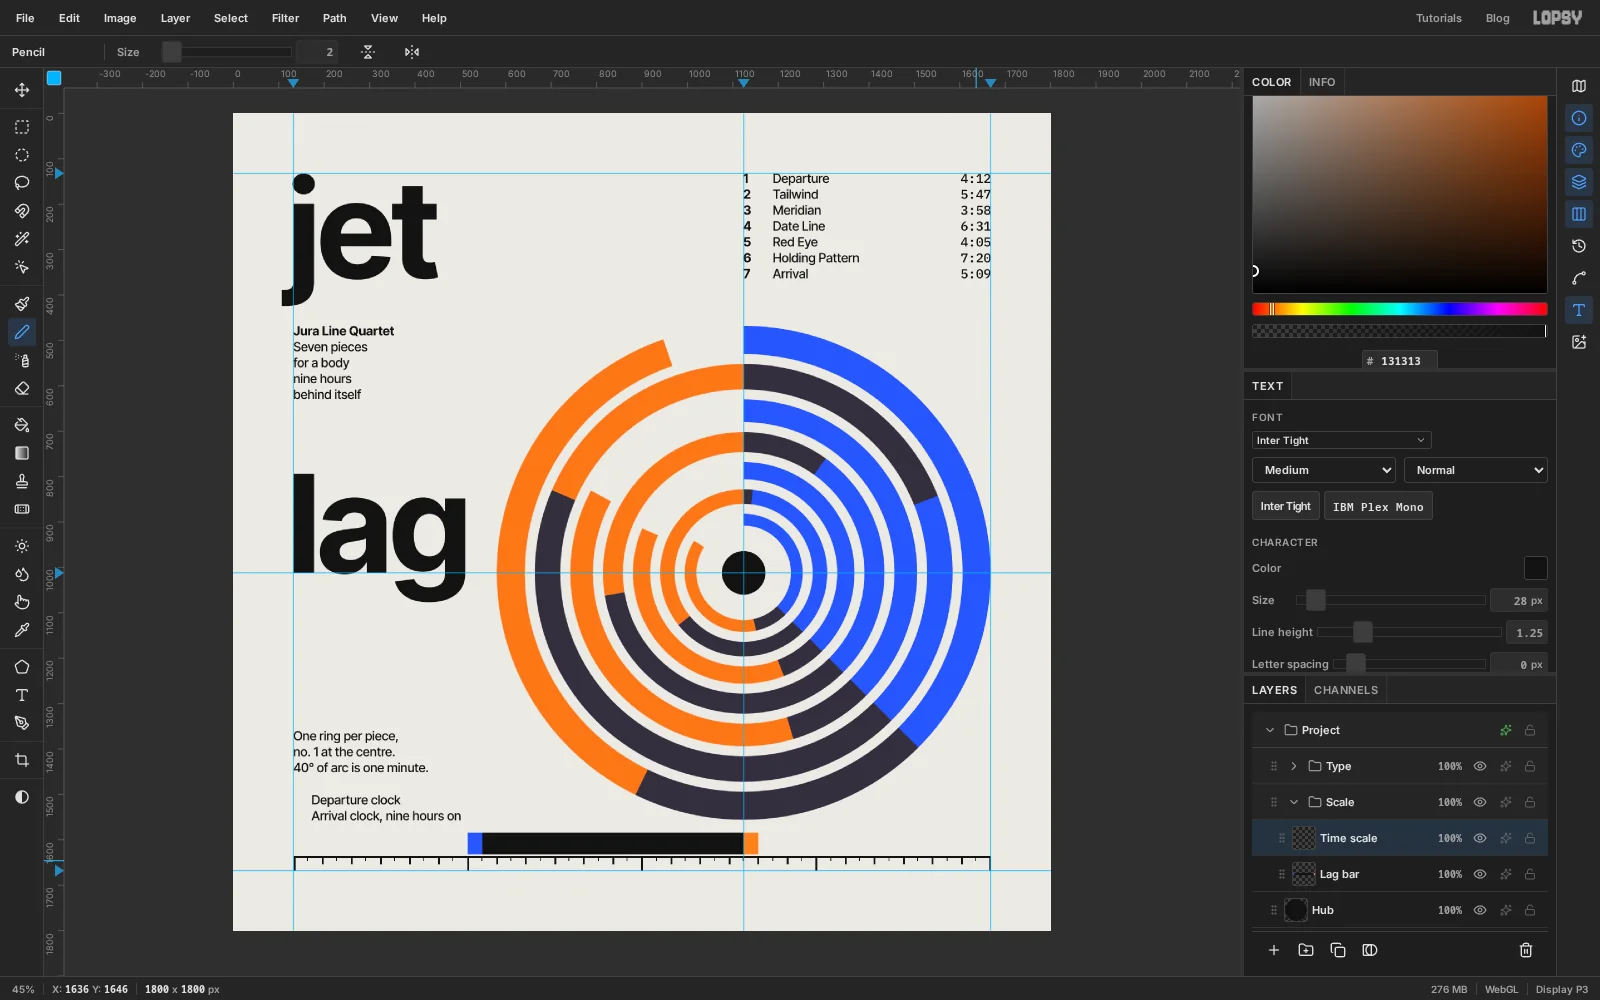
Add a layer named Time scale and set the foreground back to . Choose the Pencil and set Size to
4.The Pencil doesn't snap, but the grid still makes a good ruler. Show it, set the Grid slider to 32px and untick Snap: every grid line between the margins is now an hour or a half-hour mark. Hide the grid again when the ticks are done.
- Click at the left margin just under the bar (about Y: 1638), then Shift-click at the right margin. Shift-click draws a straight line from the last point.
- For the hours, click on the rule and Shift-click straight below it, every 64 px from the left margin to the right: 25 ticks. Make them about 16 px long, and take the ones at 0, 6, 12, 18 and 24 hours down to the bottom margin guide.
- Set Size to
2and add a short tick halfway between each pair of hours.
The half-hour ticks are what let the bar start and stop at 06:30 and 15:30 without floating between marks.
-
Label the scale and the bar
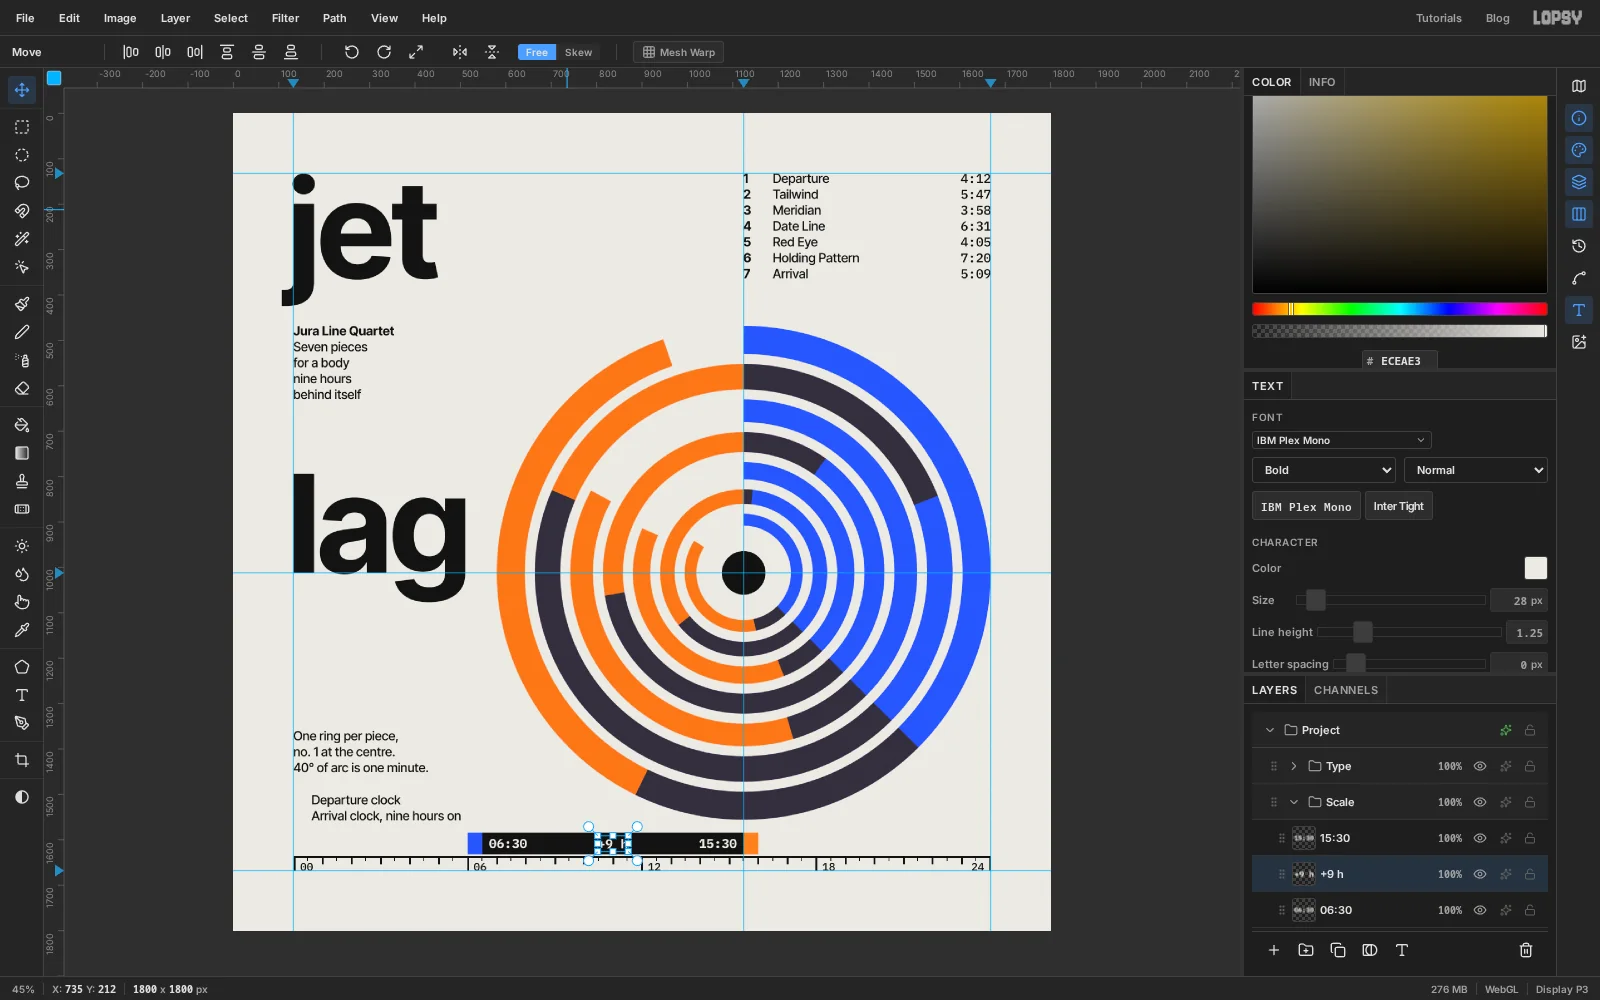
All of these are IBM Plex Mono, and like everything else in this part of the sheet they go in the Scale group. Start each one in the empty bottom margin and nudge it up into place.
- With the foreground at , Medium, Size
24: type00,06,12and18as four layers and put each one just to the right of its long tick, standing on the bottom margin guide. Put24to the left of the last tick so it stays inside the margin. - Set the foreground to the paper colour , Bold, Size
28. Type06:30and move it inside the bar, 16 px in from the blue cap. - Set Align to Center, type
+9 hand put it in the middle of the bar. - Set Align to Right, type
15:30and put it the same distance in from the orange cap.
Check that the bar text has the same amount of black above and below it, and nudge it with the arrow keys if it doesn't.
- With the foreground at , Medium, Size
-
Add the key squares with Copy and Paste
The key needs a square of each ink, the same height as the capital letters.
- Add a layer named Key arrival. Show the grid, and with the Rectangular Marquee active set the Grid slider to 4px.
- Drag a 20 px square on the left margin guide beside "Arrival clock", from the baseline up to the top of the capital A. Fill it with .
- Press Cmd+C and Cmd+V. The copy arrives on a new layer in the same place. Rename it Key departure.
- Hide the grid, press Cmd+D, and with the Move tool nudge the copy up one line, 35 px: Shift+↑ three times, then ↑ five times.
- Hold Cmd and click the layer's thumbnail to select its pixels, then fill with and deselect.
-
Turn a catalogue line up the margin
One line of small print runs up the right margin, as it does on a lot of Swiss sleeves.
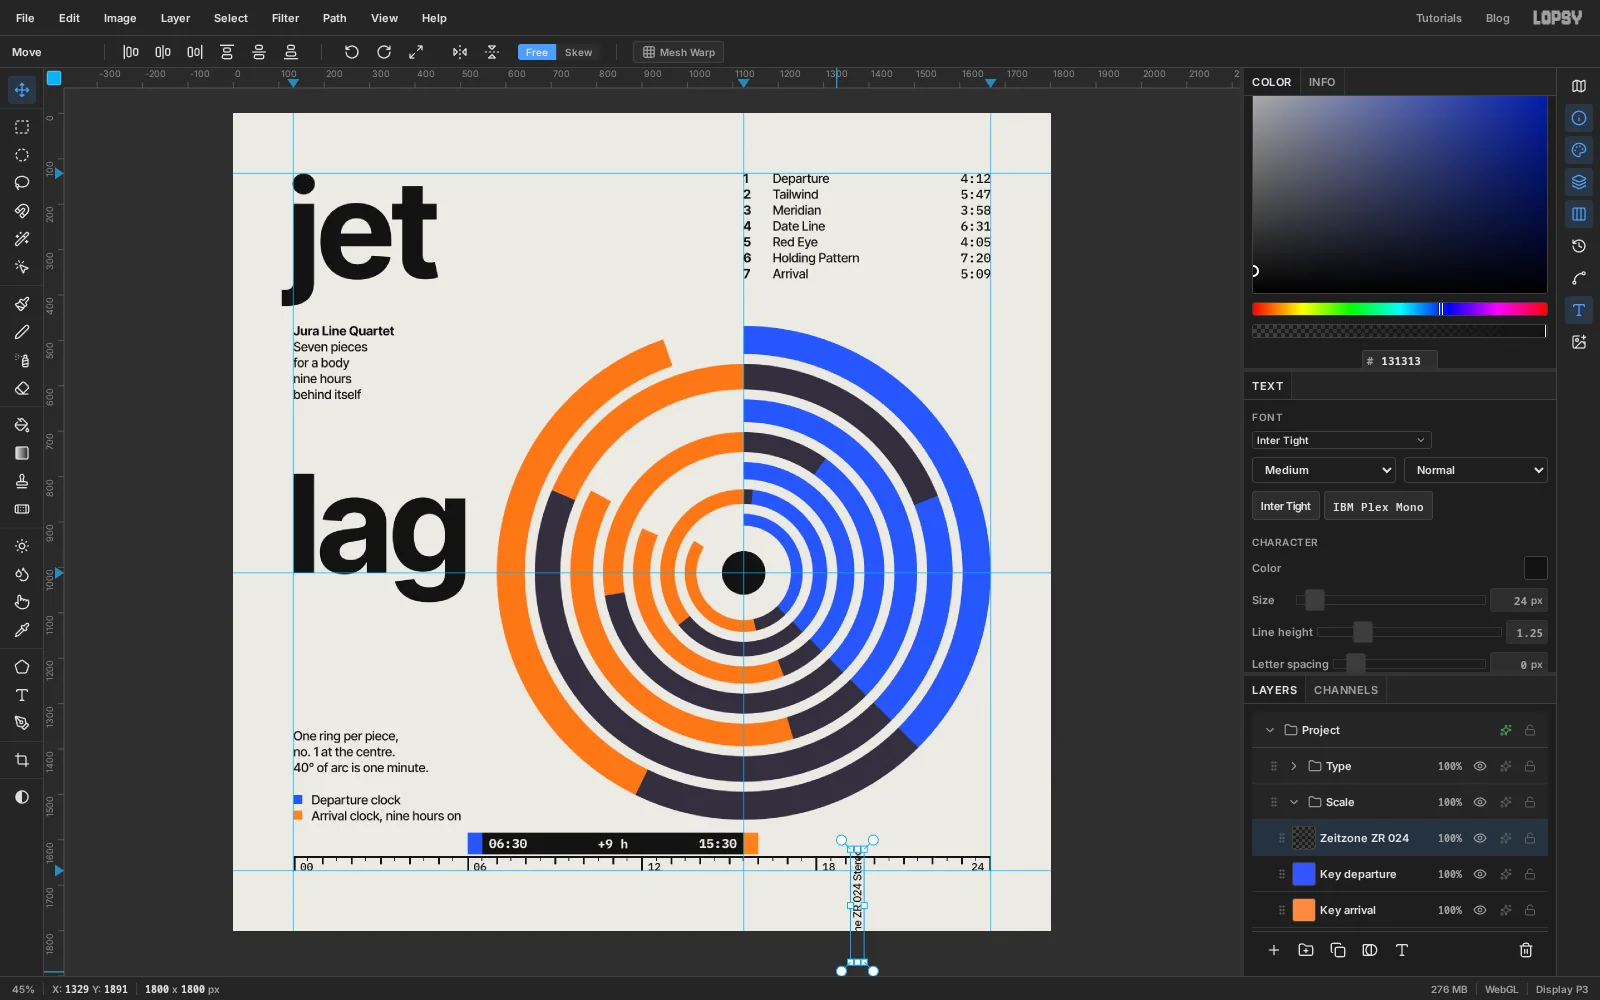
- With the Text tool, click in the empty bottom margin. Inter Tight, Medium, Size
24, foreground . TypeZeitzone ZR 024 Stereoand press Tab. - Switch to the Move tool. Hold Cmd and drag the round handle outside the corner anticlockwise. With Cmd held the rotation snaps every 15°, so stop when the line stands upright, reading from bottom to top. Press Esc to finish; the rotation is kept.
- Move the line so the feet of the letters stand on the right margin guide and the Z is level with the bottom of the disc.
The text is still live after rotating, so you can retype it later.
- With the Text tool, click in the empty bottom margin. Inter Tight, Medium, Size
-
Group the clocks
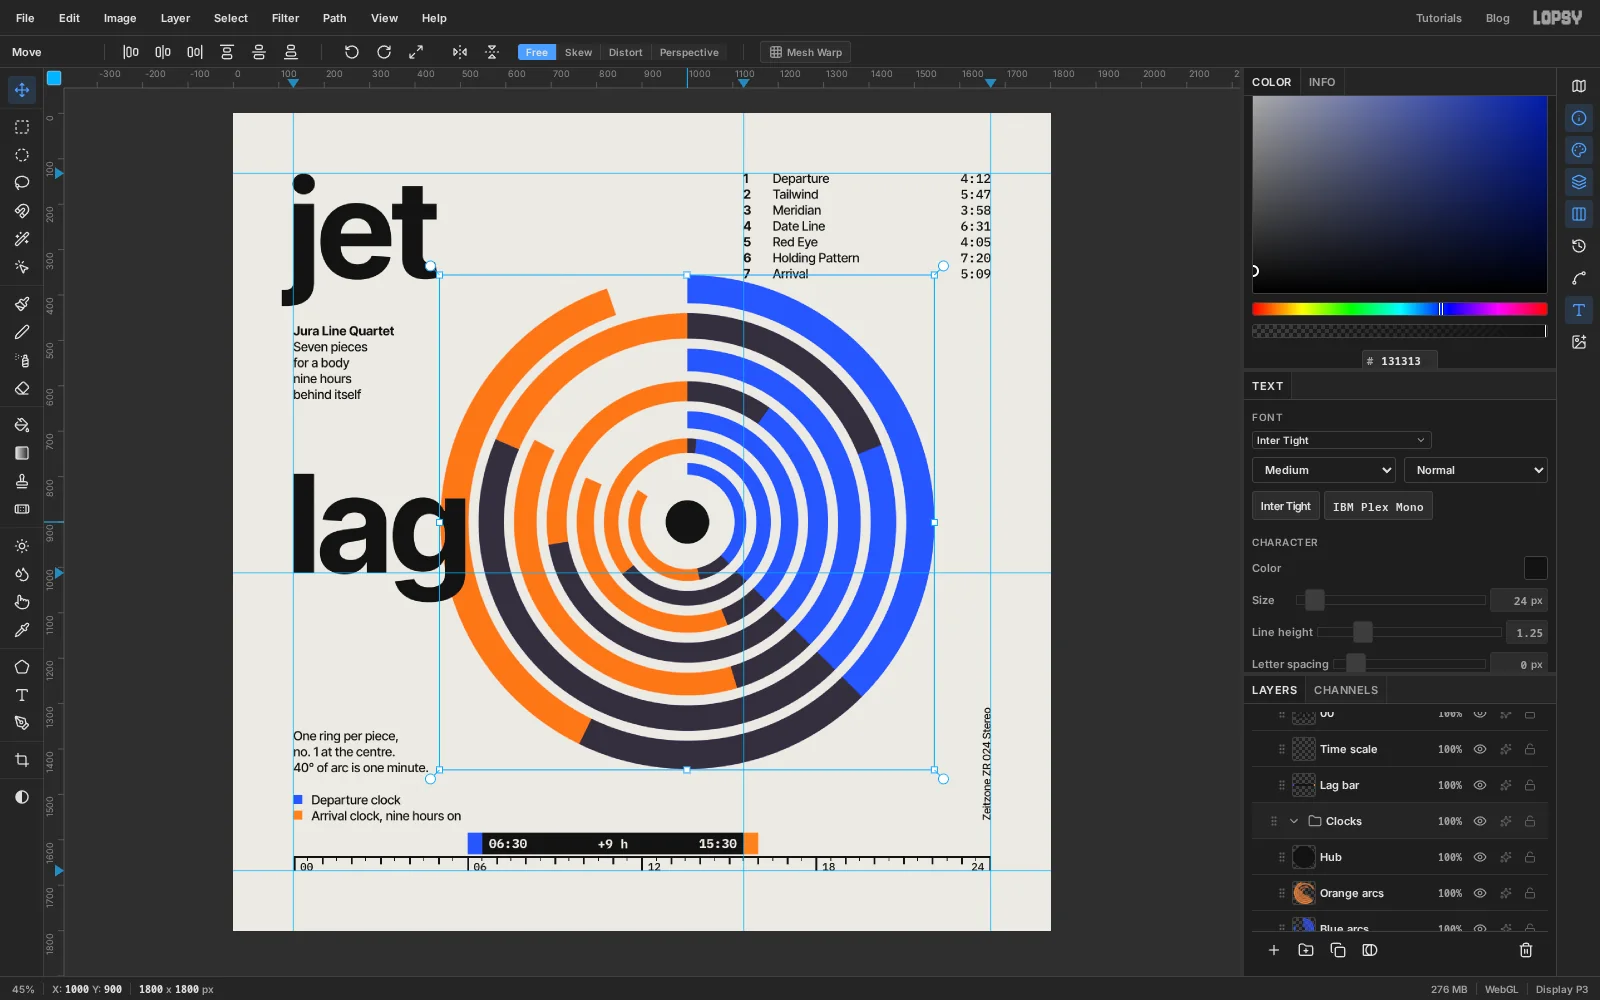
Select Hub, Shift-click Blue arcs so all three disc layers are selected, and choose Layer → Group Layers. Name the group Clocks.
With the group selected, the Move tool treats both clocks and the hub as one piece. Try it: drag the disc somewhere else, then press Cmd+Z to put it back where the grid wants it.
-
Add print grain
Flat screen colour looks nothing like ink on board, so a little noise goes over everything.
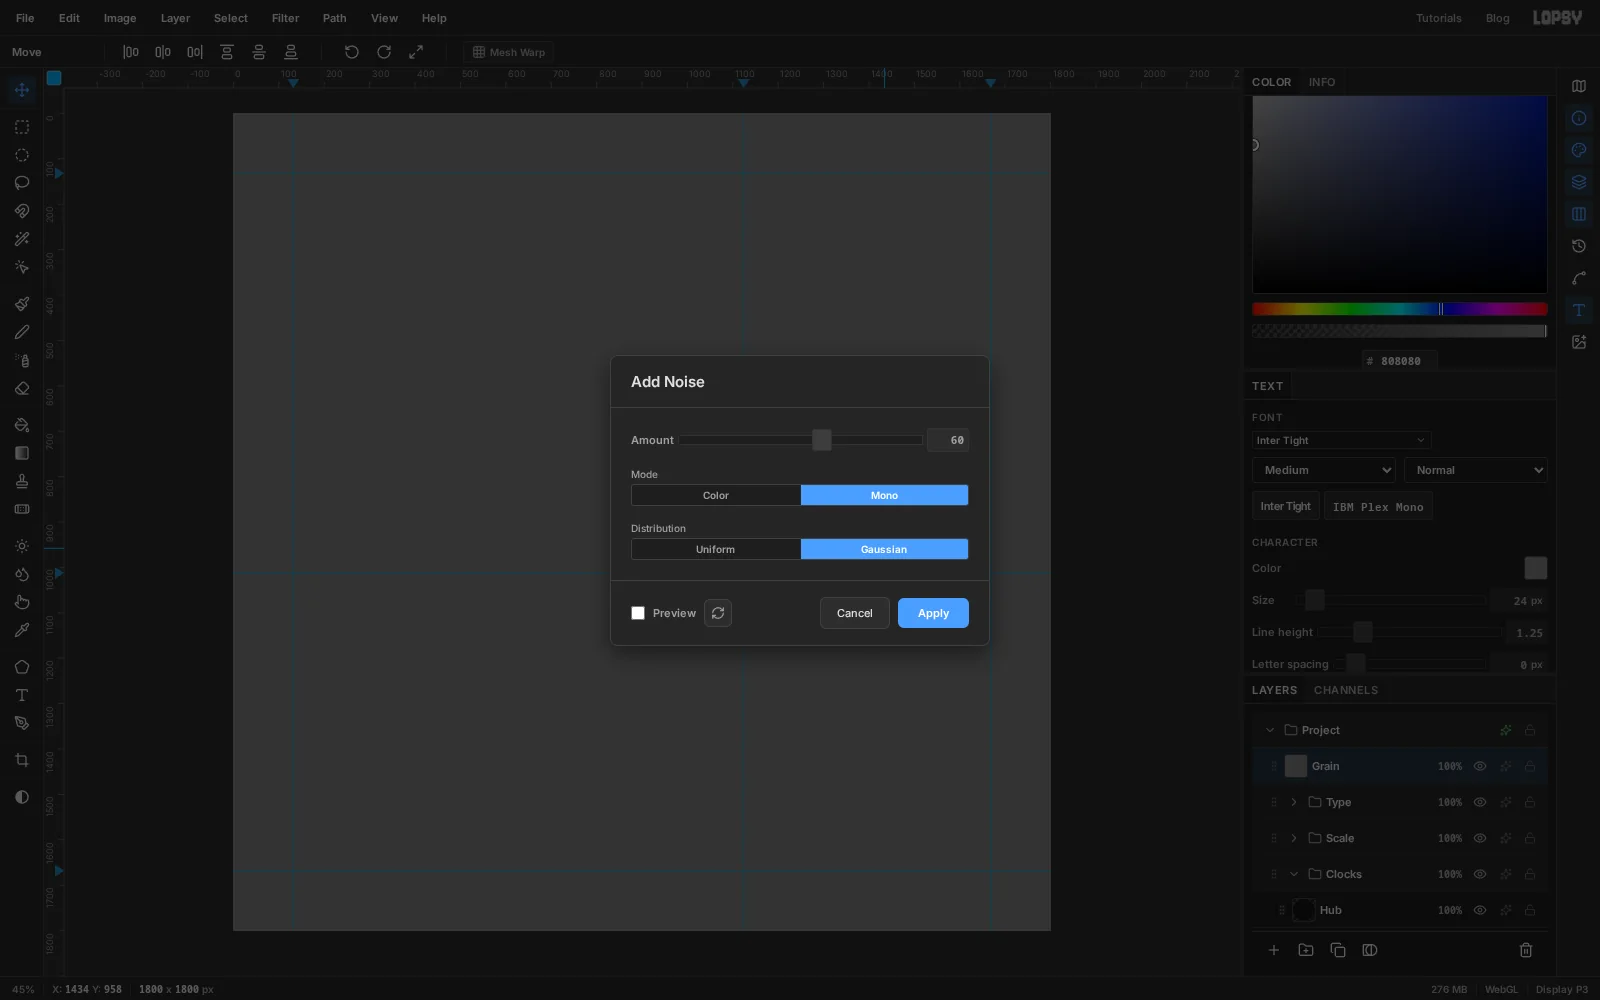
- Collapse the Type group, select it and click Add Layer. The new layer lands above the group. Name it Grain.
- Set the foreground to and choose Edit → Fill.
- Choose Filter → Add Noise…. Set Amount to
60, click Mono and Gaussian, then Apply. - Open the layer's effects and set Blend to Overlay. Click the layer's opacity and bring it down to 40%.
Mid-grey does nothing in Overlay, so only the speckle shows: a little lighter here, a little darker there, in the inks and the paper alike.
-
Hide the guides and export
Choose View → Show Guides to hide the guides and look at the sheet as a whole. Check the edges that are meant to meet: the disc and the right margin, the track numbers and the vertical axis, "lag" and the horizontal axis, the end of the bar and the hub.
Choose File → Quick Export PNG for the cover, and File → Save Project to keep the layers.