Design a Hand-Painted Market Sign Magazine Cover
Make a food magazine cover in the style of hand-painted market signs with Lopsy. Split-shade lettering, painted zucchini blossoms, a starburst and checker trim.
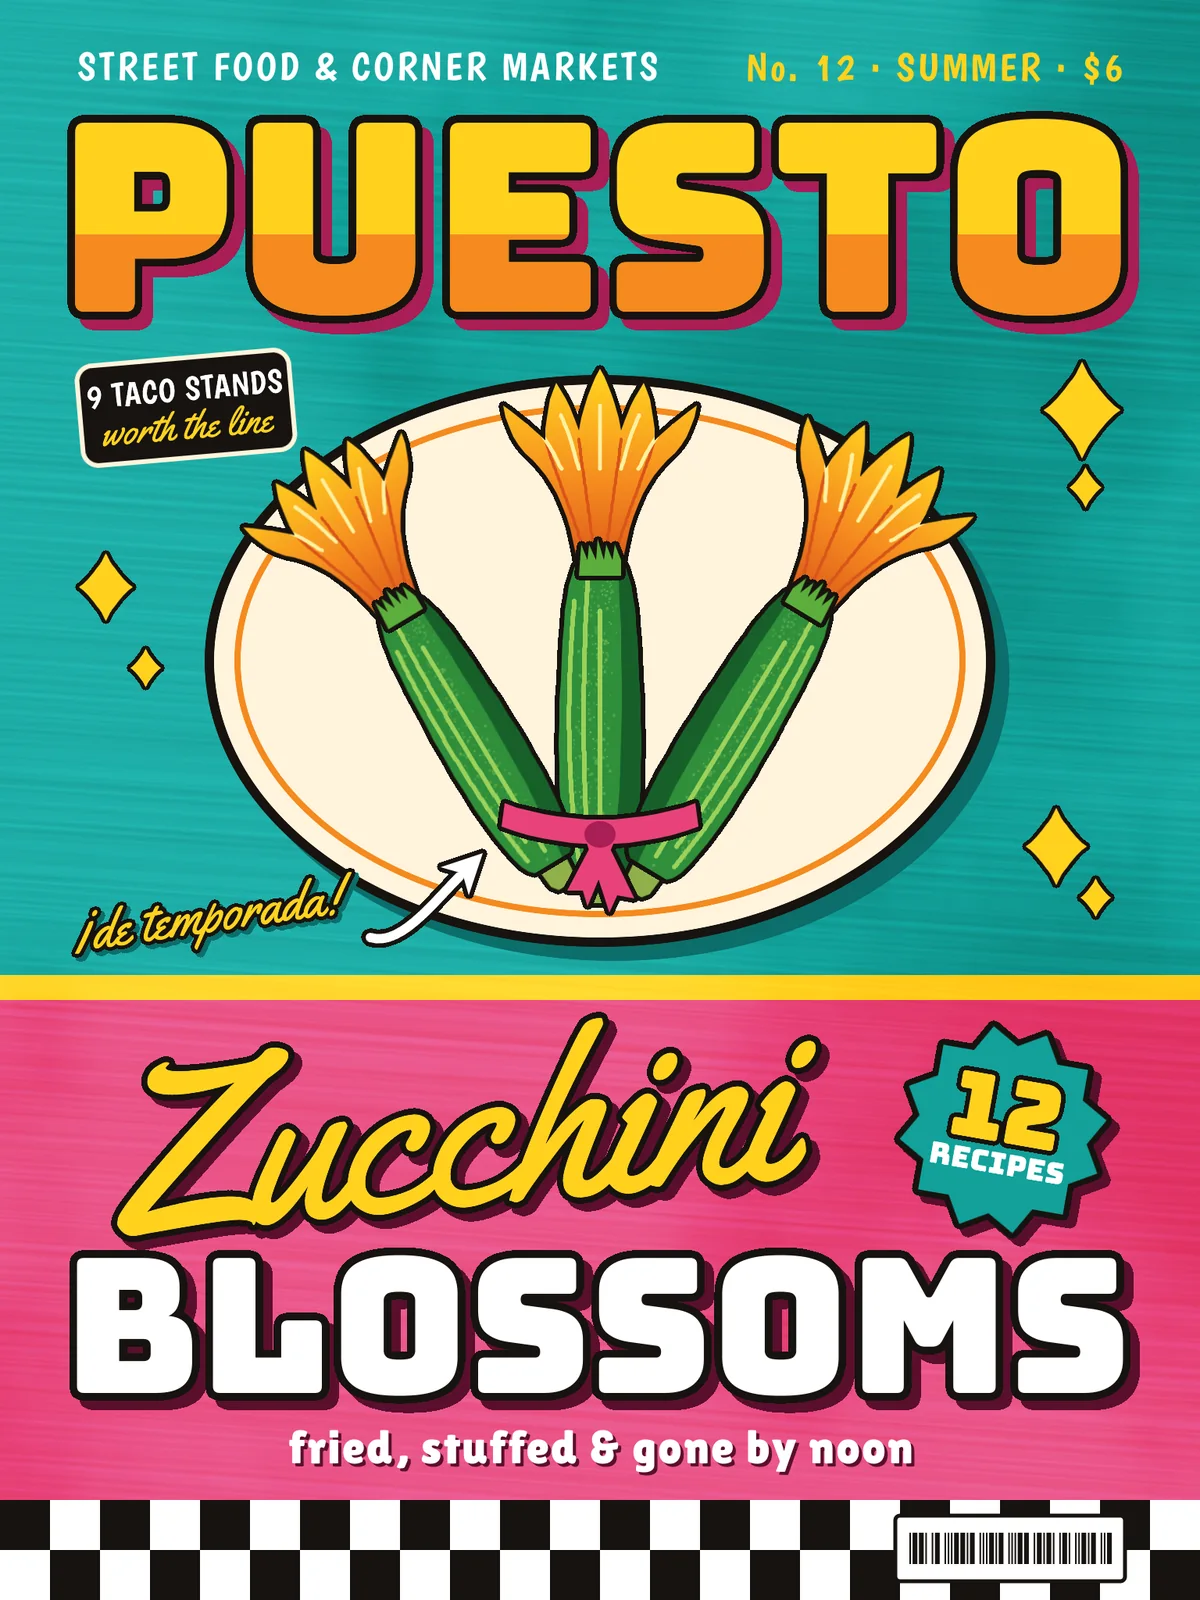
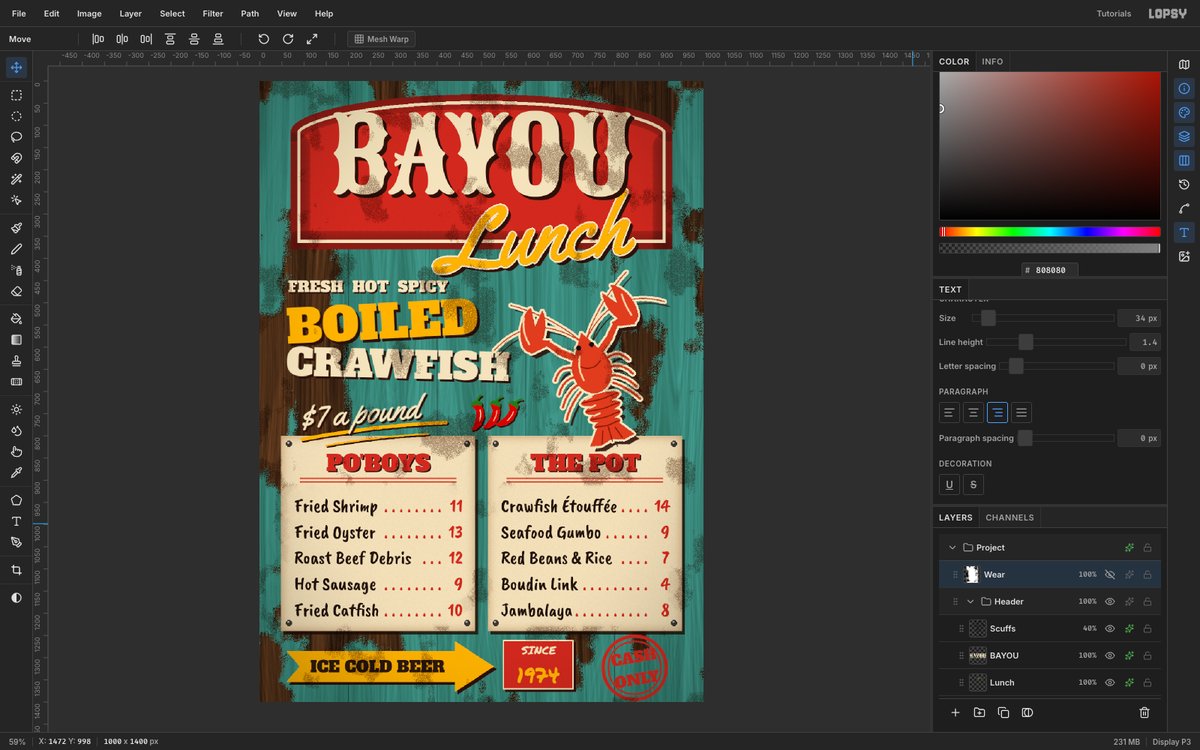
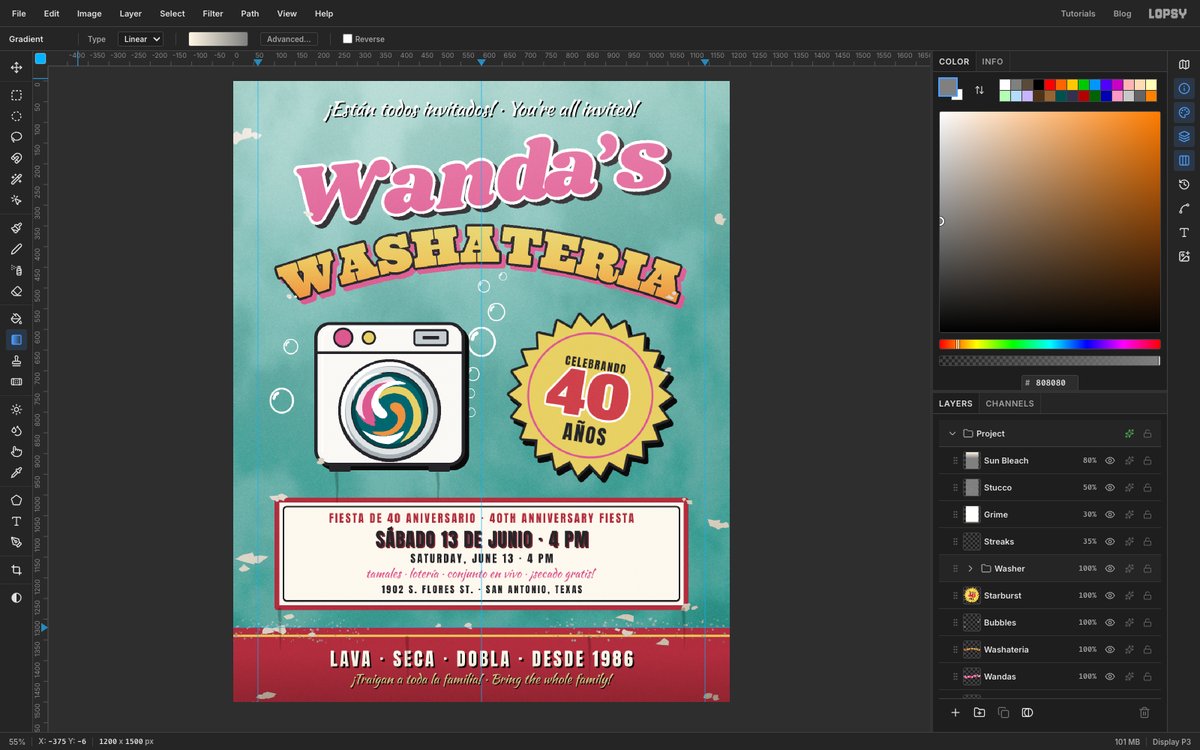
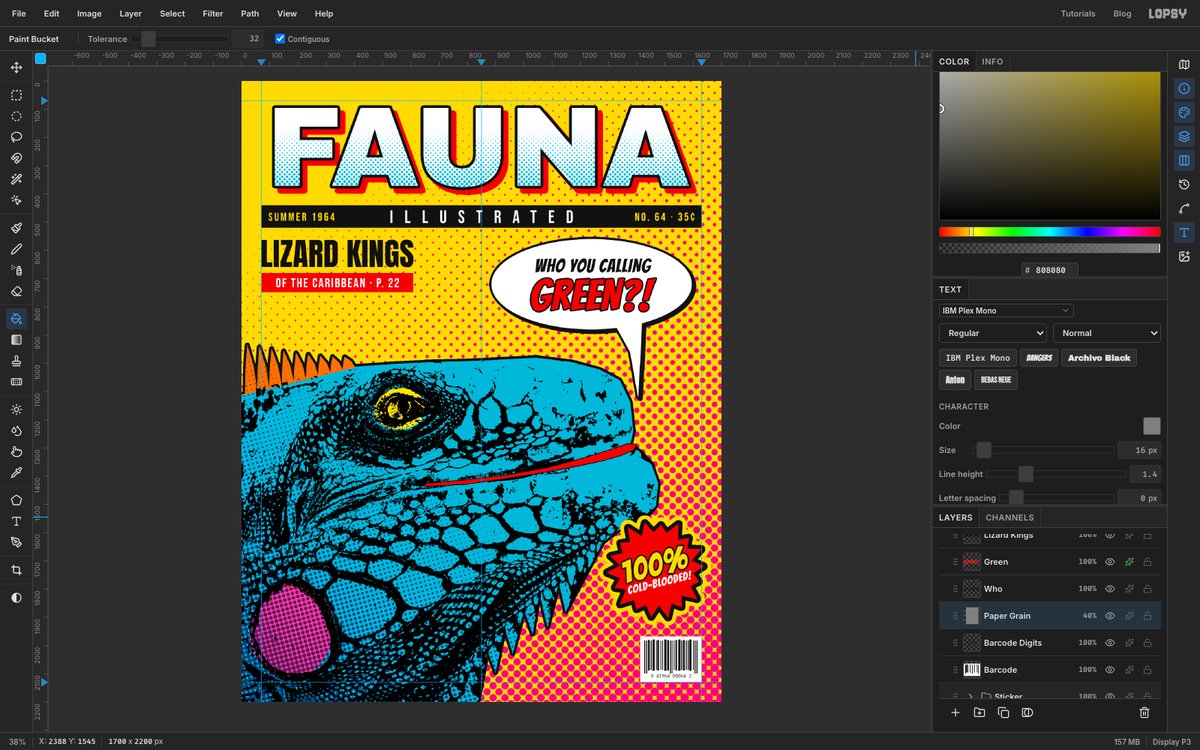
Walk through any street market and the best typography is on the stalls: fat capitals with a black outline and a shade knocked off to one side, a script word thrown in at an angle, the produce painted on a white oval, a starburst shouting a number. Nobody chose a grid system. It works because every piece is bold, flat and outlined.
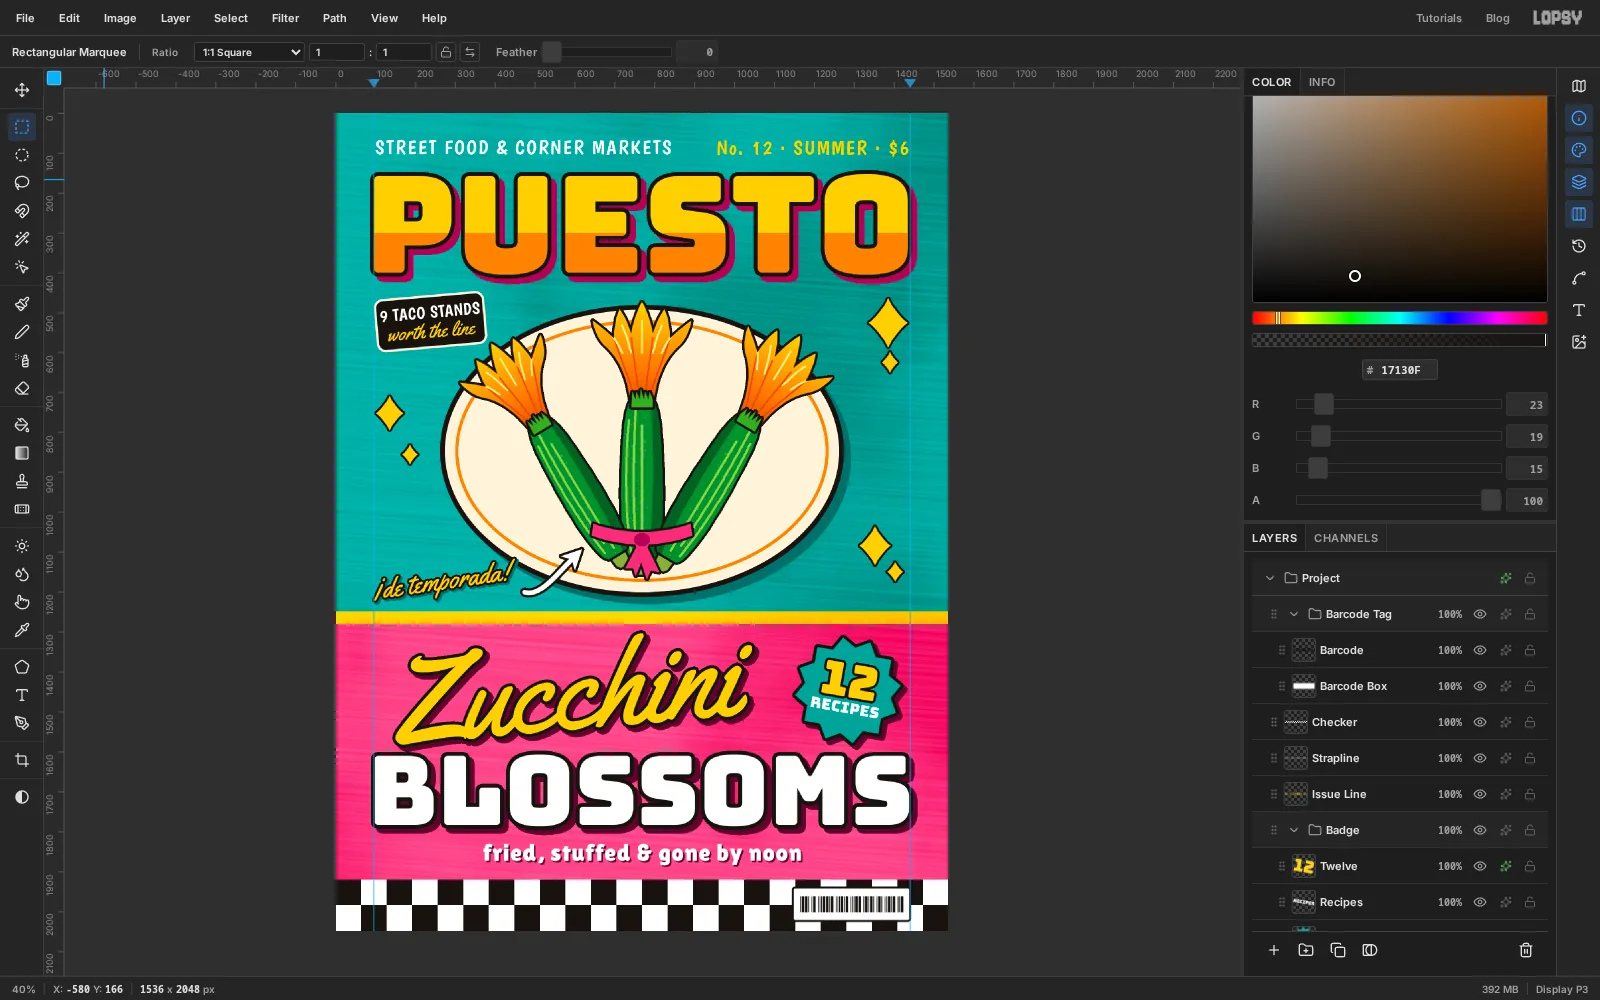
In this tutorial you'll borrow that look for the cover of Puesto, a made-up street food quarterly, at 1536 × 2048 px. The cover story is zucchini blossoms, so you'll paint one zucchini with its flower and turn it into a bunch of three.
Along the way you'll use:
- the grid with Snap, Define Pattern and Fill with Pattern for the wall and the checker trim
- Clouds and Texture for a rolled-paint surface
- text in Bungee, Yellowtail, Boogaloo, Lilita One and Libre Barcode 39, with Stroke and Drop Shadow effects for the sign-painter outline and shade
- a layer loaded as a selection and intersected with a marquee, for two-tone letters
- the Lasso, Gradient, Brush and Spray tools for the illustration
- groups that you duplicate, flip, scale and rotate with the Move tool
- the Shape tool, Merge Down, the Pen tool and copy and paste
The palette:
-
Wall
-
wall shade
-
Dado pink
-
magenta shade
-
maroon shade
-
Yellow
-
Orange
-
Zucchini
-
Cream
-
Ink
-
Block in the wall with the grid
Choose File → New, set the size to 1536 × 2048 px and click Create. Both numbers divide by 64, which is why the grid will line up with the edges.
Click the
Backgroundlayer, set the foreground to and choose Edit → Fill. That's the upper wall.Painted walls often have a second colour along the bottom, called a dado. Click
Layer 1and rename itDado(double-click its name). Choose View → Show Grid. A Grid slider appears at the right of the options bar: drag it until it reads64px, and leave Snap ticked.Pick the Rectangular Marquee and drag from the left edge of the canvas, at about
y 1280, to the right edge at abouty 1920. You don't have to be accurate. The marquee jumps to the nearest grid lines, and to the canvas edge when you're close to it. Set the foreground to , choose Edit → Fill, and press Cmd+D.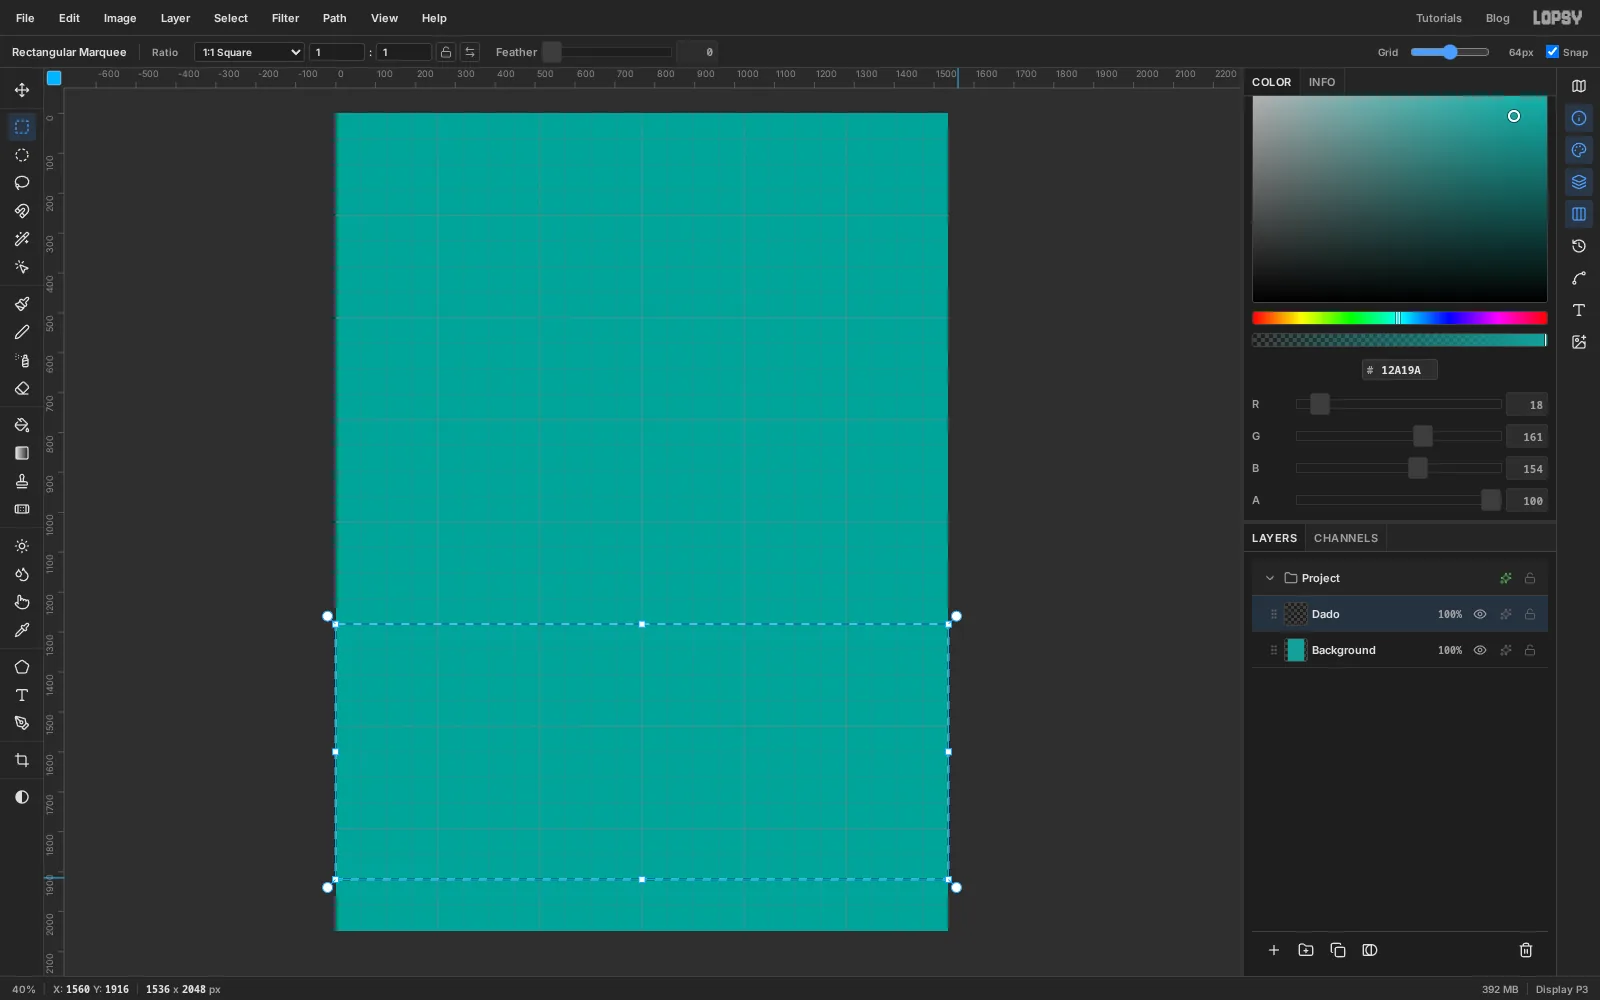
-
Add the stripe and draw a checker tile
Click Add Layer and name the layer
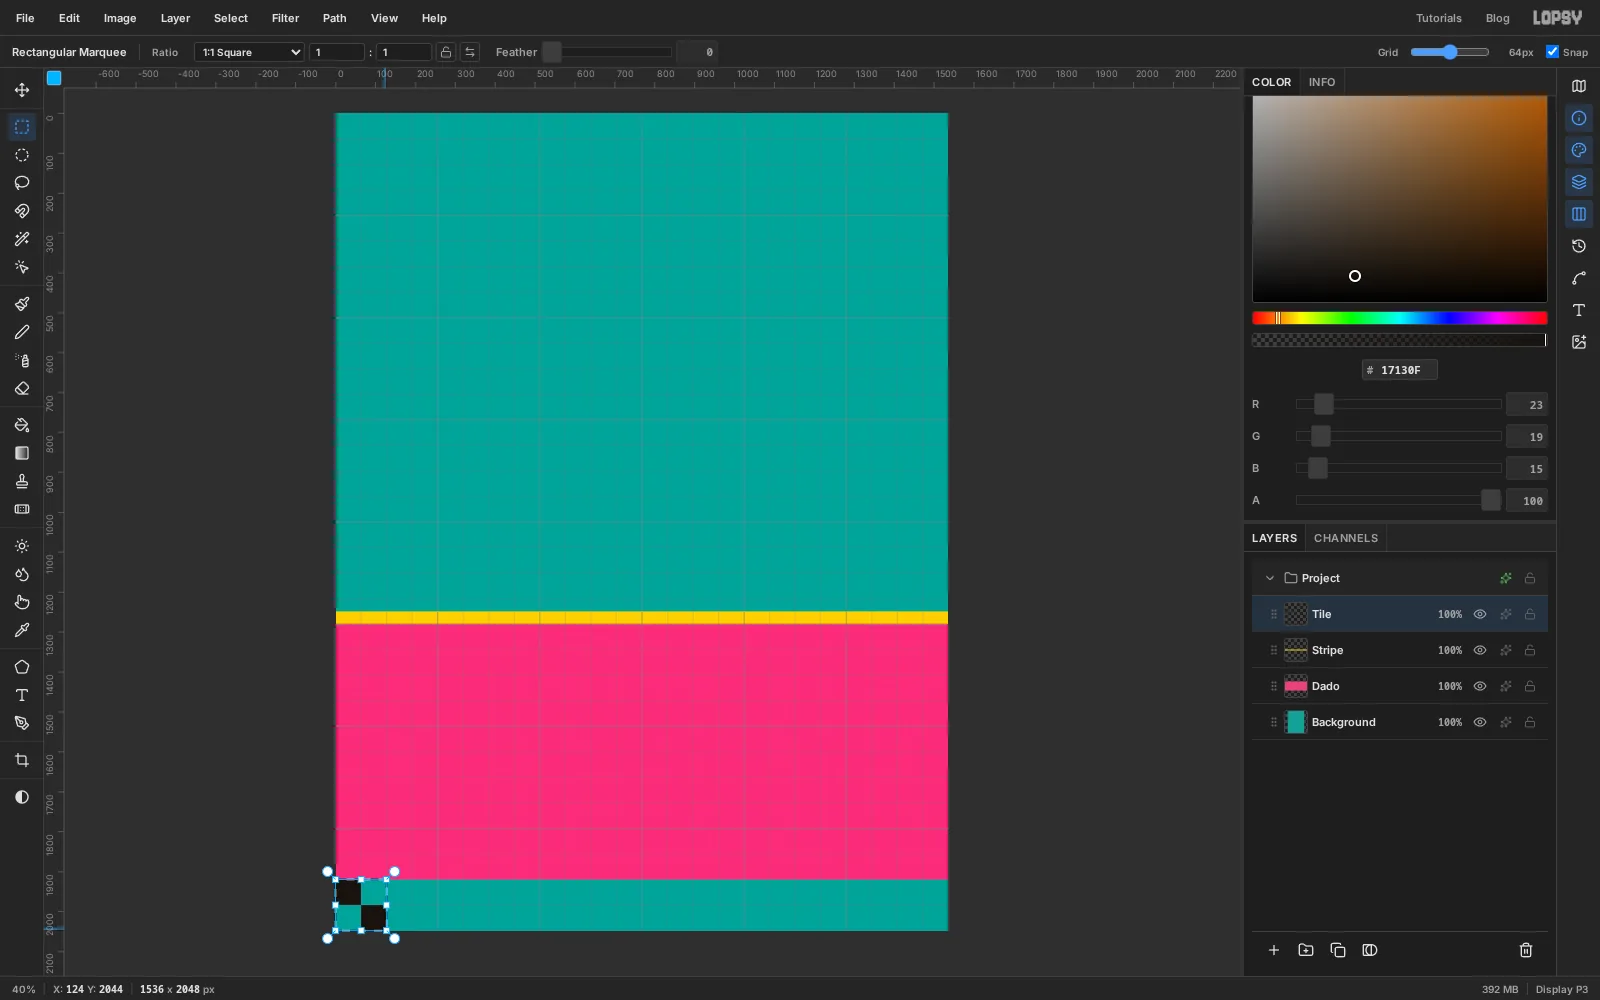
Stripe. Drag the Grid slider down to32px, then marquee a strip one cell tall directly above the pink, fromy 1248toy 1280. Start and finish the drag just outside the canvas so the strip covers the full width. Fill it with and deselect. Set the grid back to64px.The bottom strip of the cover is a checkerboard, and you only need to draw one tile of it. Add a layer called
Tile. The checker strip will be the bottom two rows of the grid. Marquee the single cell at the left end of the upper of those two rows, the one that starts at0, 1920. Hold Shift and marquee the cell diagonally below and to the right of it, which ends in the bottom edge of the canvas. Holding Shift adds to the selection instead of replacing it. Fill both with ink .Now marquee the whole 2 × 2 block, 128 px square, and choose Edit → Define Pattern. Nothing appears to happen, but the pattern is saved. The two empty cells stay transparent in the pattern, so whatever is underneath will show through them.
-
Tile the trim with Fill with Pattern
Press Cmd+D. Add a layer called
Checkerand marquee the bottom two rows of the grid across the full width, fromy 1920to the bottom edge. Fill the selection with white first. Then choose Edit → Fill with Pattern…. Your pattern is already selected, so leave the sliders alone and click Apply. The black squares tile across the white.Deselect, click the
Tilelayer and click Delete Layer. Choose View → Show Grid again to hide the grid.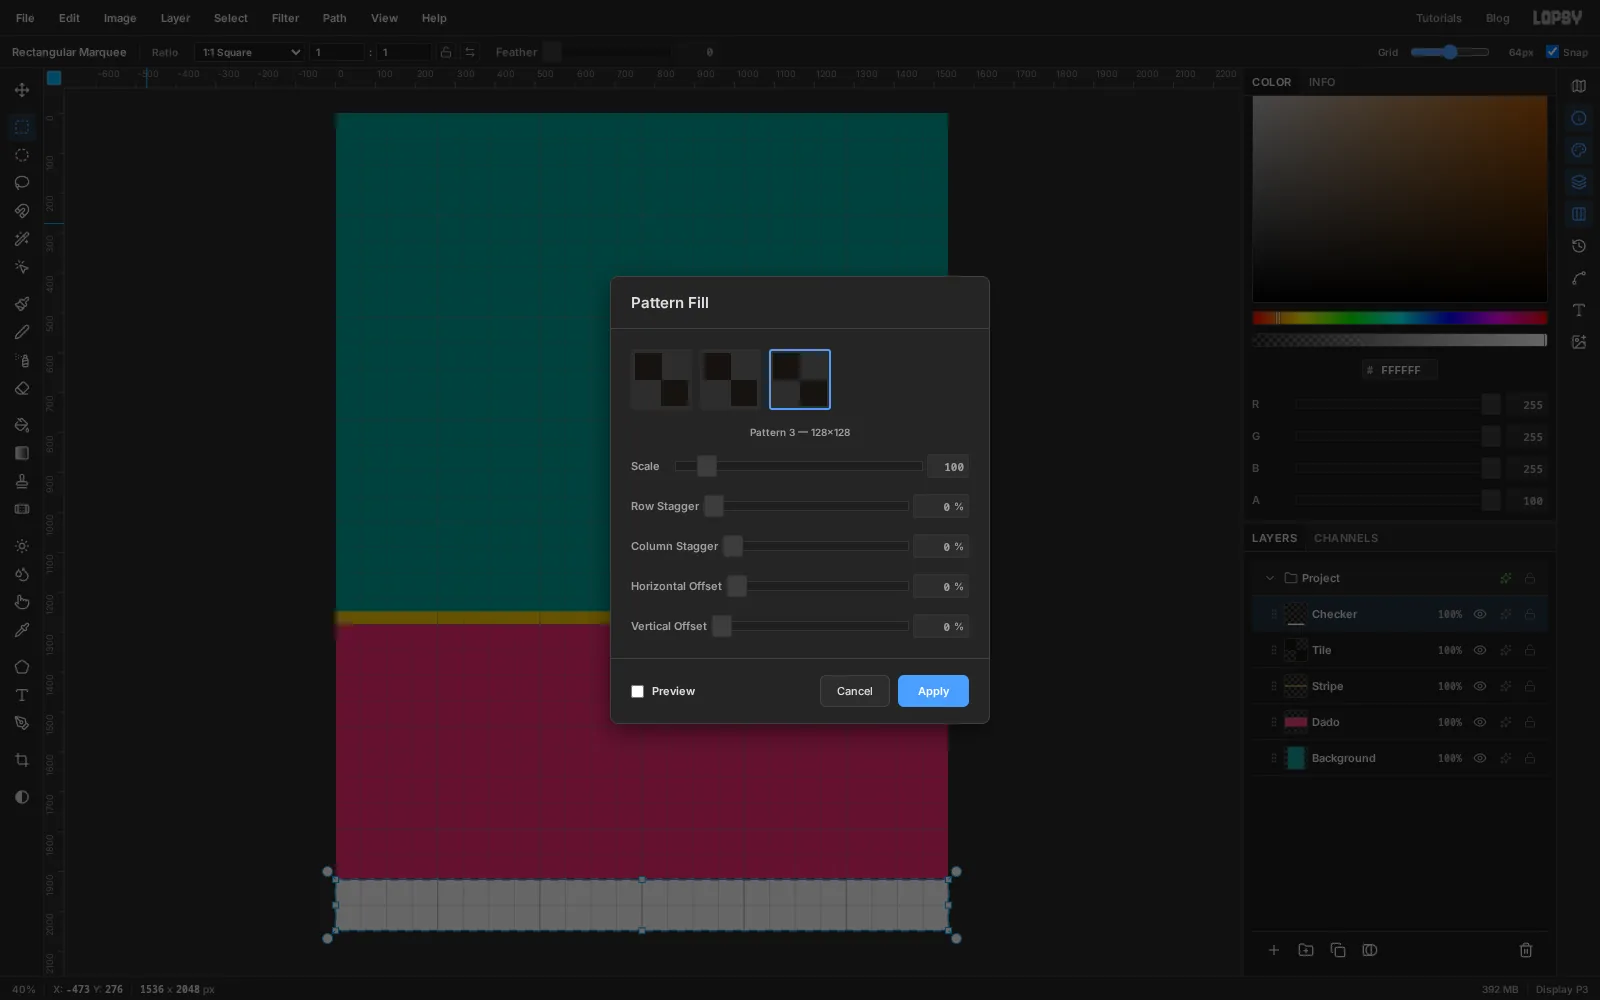
-
Roll on some paint texture
Flat colour looks like vinyl. Two quiet layers make it look like emulsion on plaster.
Click
Stripe, add a layer calledWall Wear, choose Filter → Clouds…, set Scale3and click Apply. Open the layer's effects drawer (the ✦ button on its row), set the blend mode to Soft Light, close the drawer, and lower the layer's opacity to30%. That gives the wall soft patches.Add another layer called
Brush Drag. Fill it with mid grey , then choose Filter → Texture…. Click Streaks and set Amount70, Size8, Stretch10and Angle4, then click Apply. Set this layer to Overlay at12%. The streaks should be barely visible, like the track of a wide brush. If you can see them from across the room, lower the opacity.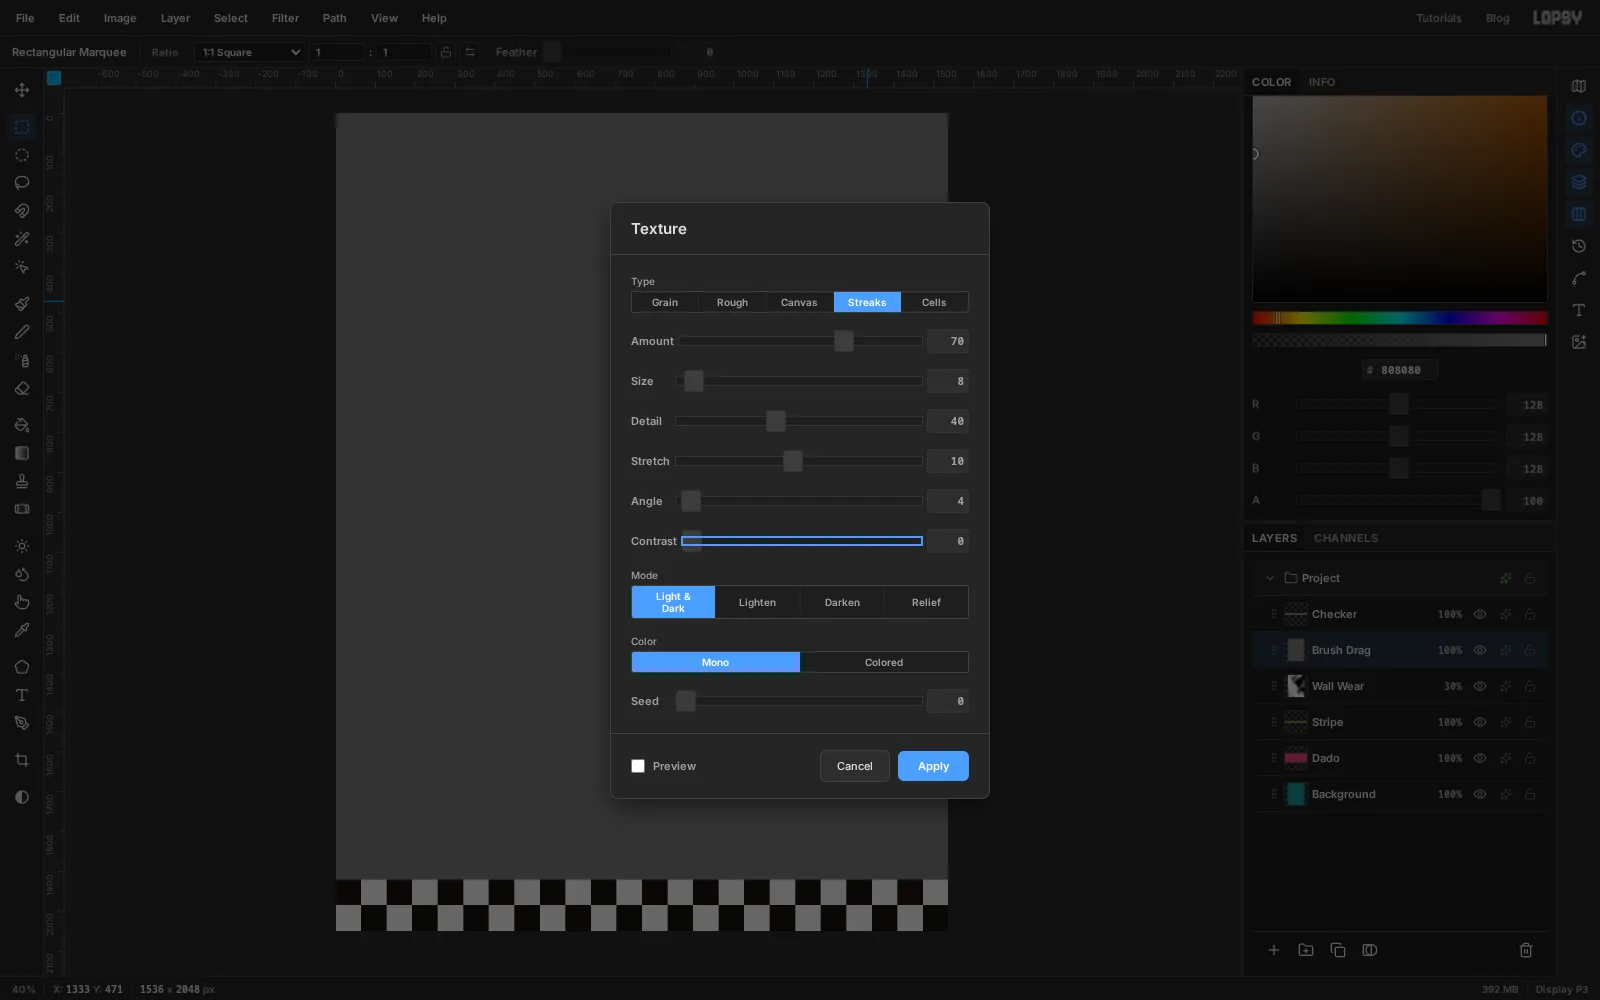
-
Set the masthead
Click the top ruler at
96and again at1440to drop two vertical guides. These are the side margins.Click
Brush Dragso a pixel layer is selected. Set the foreground to , pick the Text tool, choose the font Bungee and set Size336. Click on the wall, typePUESTOand press Tab to commit. The layer is namedPUESTOafter its text. Bungee was drawn for shop signs, so it already has the right weight.Switch to the Move tool and drag the word from the middle of a letter until the P sits on the left guide and the tops of the letters are about 150 px from the top of the canvas. At this size the O finishes just short of the right guide.
Now the outline and shade. Click the ✦ button on the
PUESTOrow. Tick Stroke, set Width10and the colour to . Tick Drop Shadow and set Offset X14, Offset Y14, Blur0, Opacity100and the colour to . With no blur the shadow is a hard copy of the letters, which is what a sign painter's shade is. Close the drawer.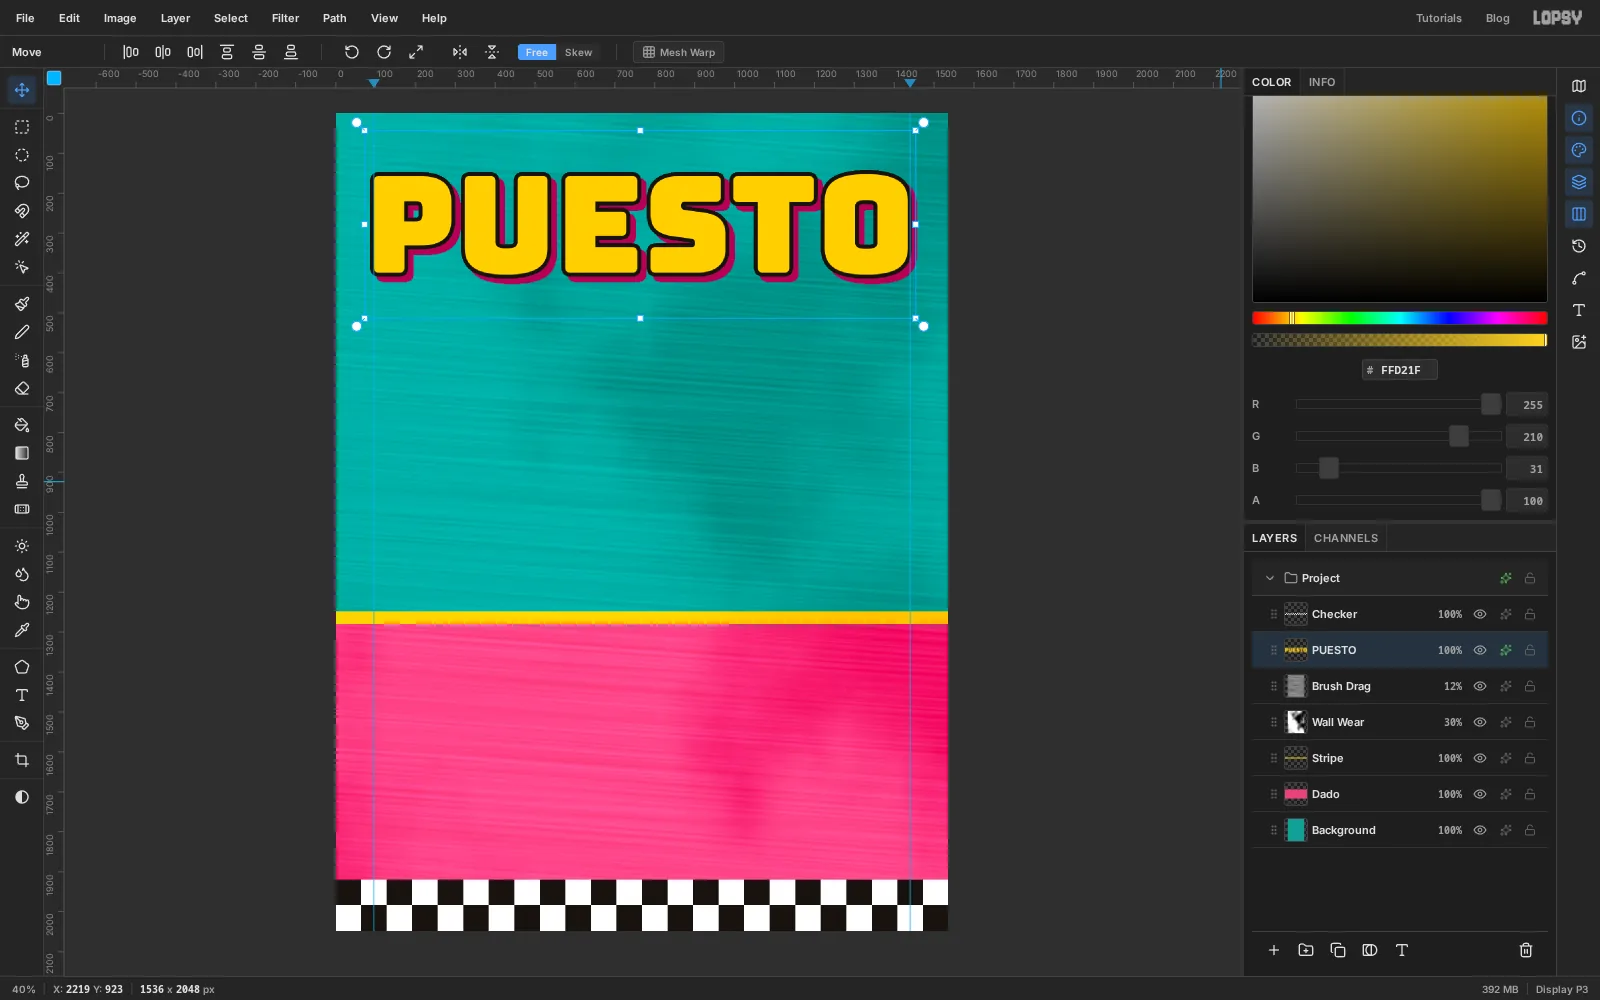
-
Split-shade the letters
Sign painters often paint the bottom of each letter a darker colour. You can get that by selecting only the lower part of the letters.
With
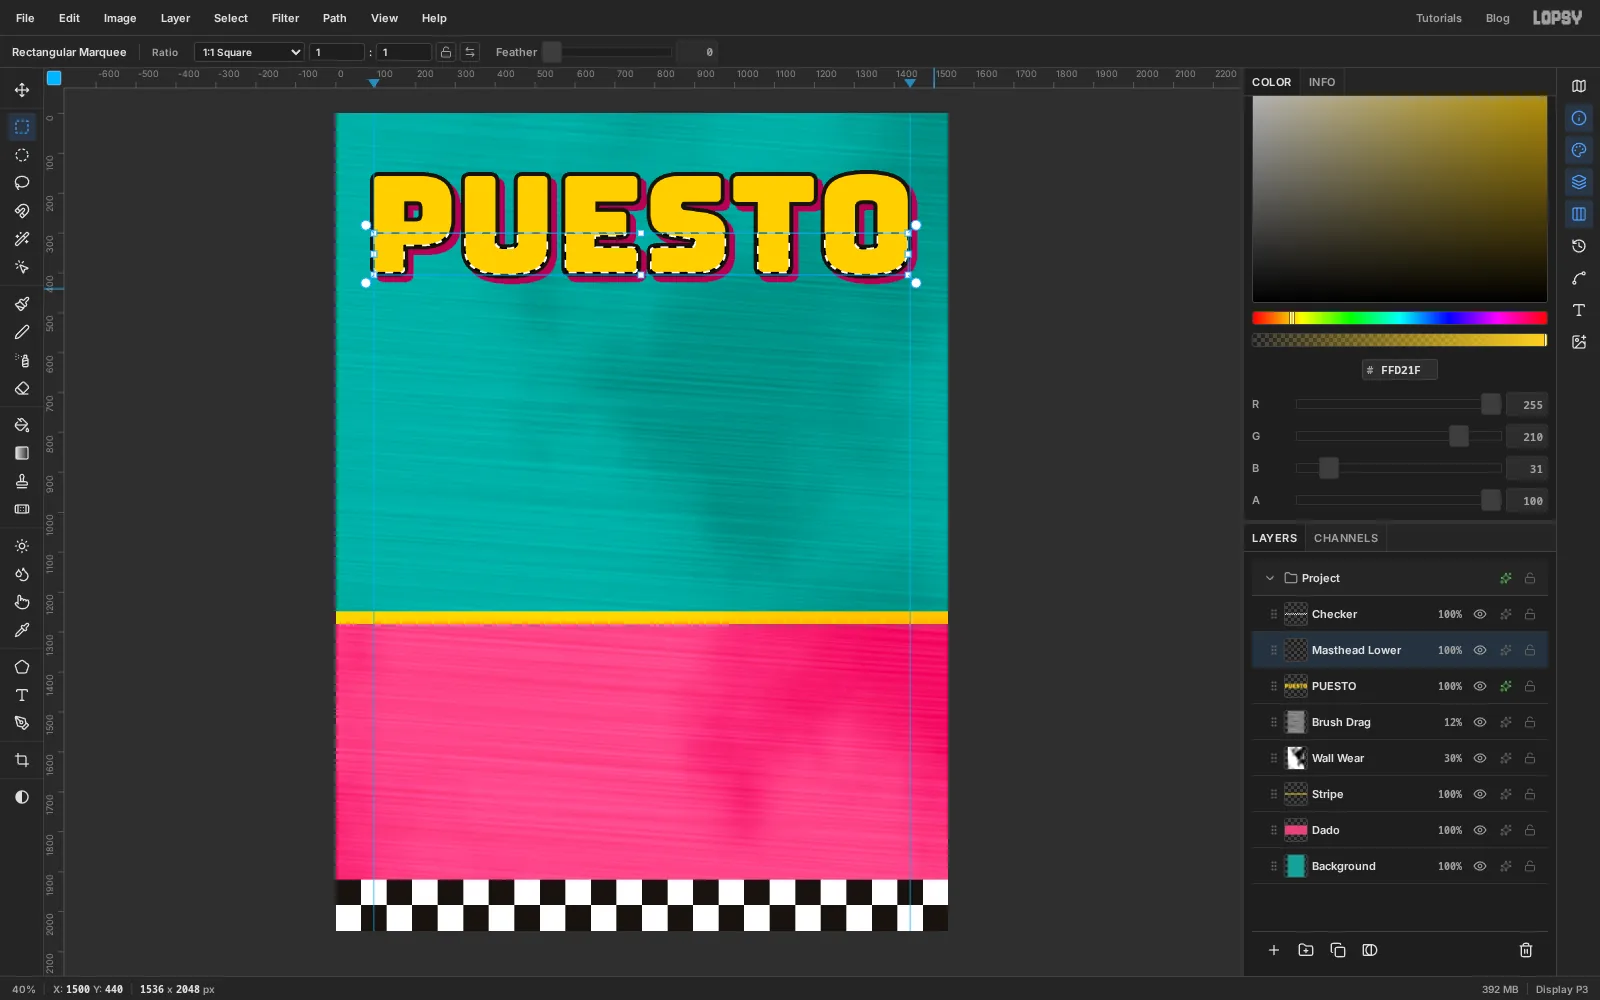
PUESTOselected, click Add Layer and name the layerMasthead Lower. Hold Cmd and click the thumbnail of thePUESTOlayer. The letters load as a selection.Pick the Rectangular Marquee, hold Shift+Option, and drag a box that starts left of the P at about
y 300and ends right of the O below the letters. With both keys held, the selection keeps only the part inside your box, so you're left with the bottom 100 px of each letter.Set the foreground to , choose Edit → Fill and deselect. The orange sits inside the black outline because the outline is drawn outside the letters.
-
Add the strapline and issue line
Click
Masthead Lower. Set the foreground to white, pick the Text tool, choose Boogaloo at Size50, click an empty part of the wall and typeSTREET FOOD & CORNER MARKETS. Press Tab and rename the layerStrapline. Open the Text panel from the panel buttons on the right edge of the window and set Letter spacing to4.With the Move tool, drag the line above the masthead so its first letter sits on the left guide and its top is about 65 px from the top of the canvas. That leaves a clear gap above the black outline of the masthead.
Click
Masthead Loweragain, change the foreground to , and typeNo. 12 · SUMMER · $6the same way (the middle dot is Option+Shift+9 on a Mac, or copy it from here). Rename the layerIssue Line. Move it to the same height with its last character on the right guide.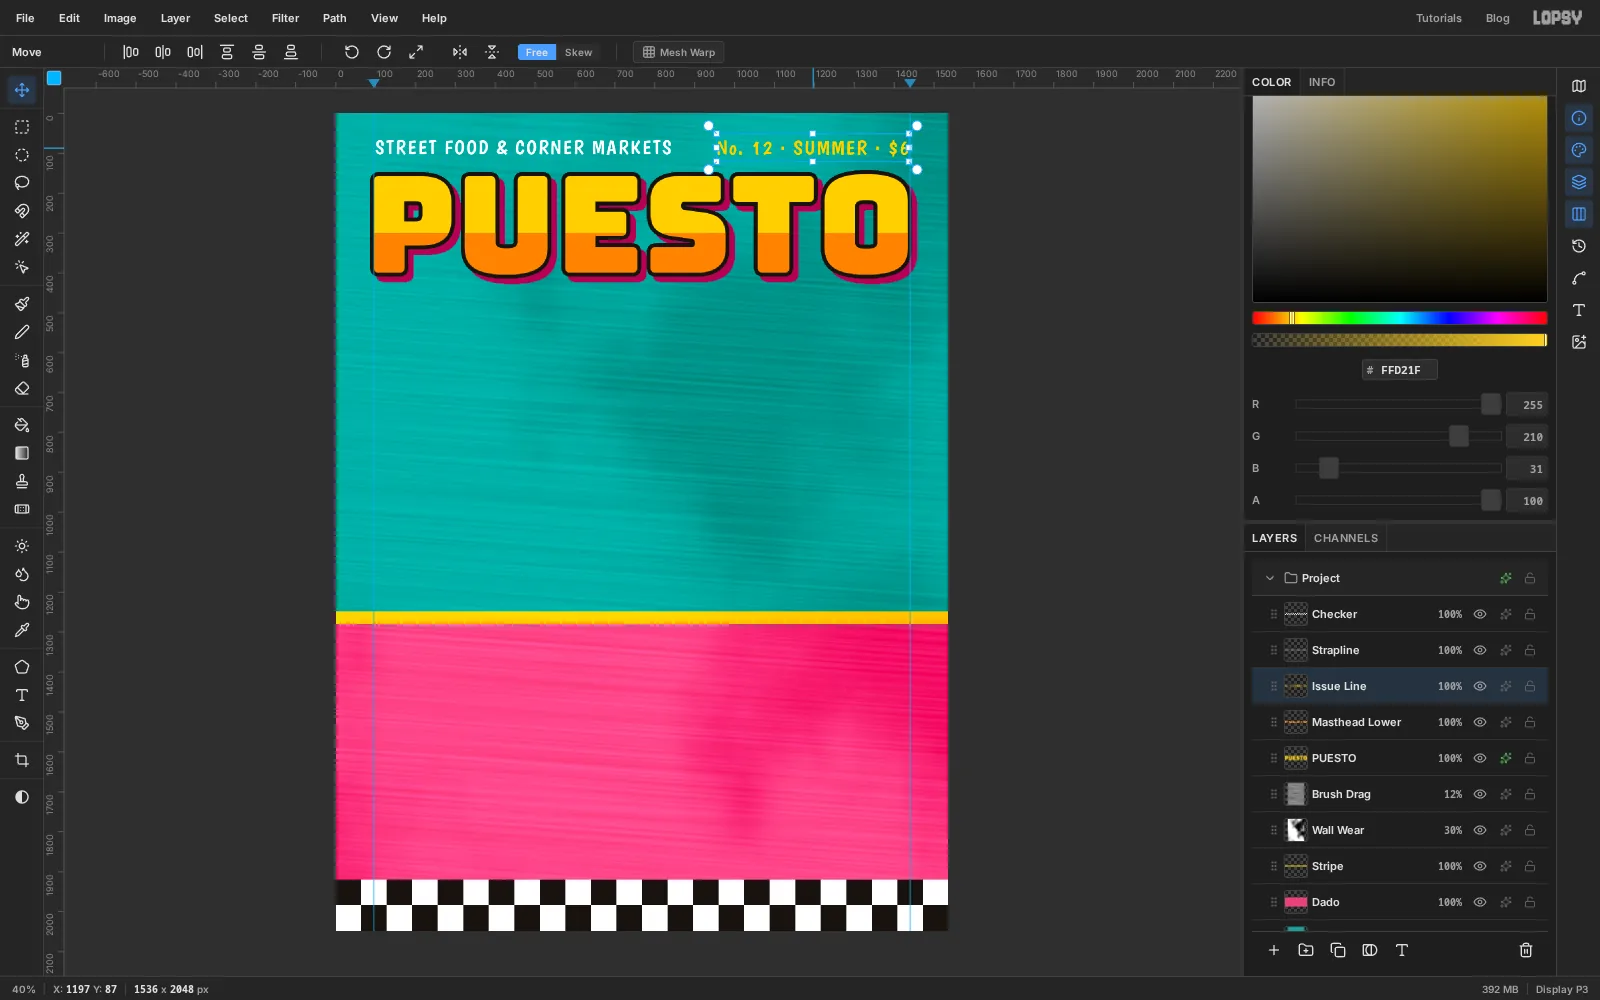
-
Paint the medallion
Produce on a market sign is nearly always painted on a pale oval, so it stays readable against a loud wall.
Click
Brush Dragand add a layer calledMedallion. Pick the Shape tool and choose Ellipse. Click the Fill swatch and enter . Click the Stroke button, enter , and set Width12.The Shape tool draws outward from the point where you press. Press at the centre of the oval, on the centre line of the canvas at about
768, 845, and drag down and right to about1270, 1205. In the layer's effects drawer, add a Drop Shadow with Offset X18, Offset Y18, Blur0, Opacity100and the colour .Add a layer called
Ring. In the Shape options, click the Fill swatch and choose Remove fill, change the stroke to and set Width8. Press at the same centre and drag again, letting go about 35 px short of where you released the first time, so the ring sits evenly inside the black outline.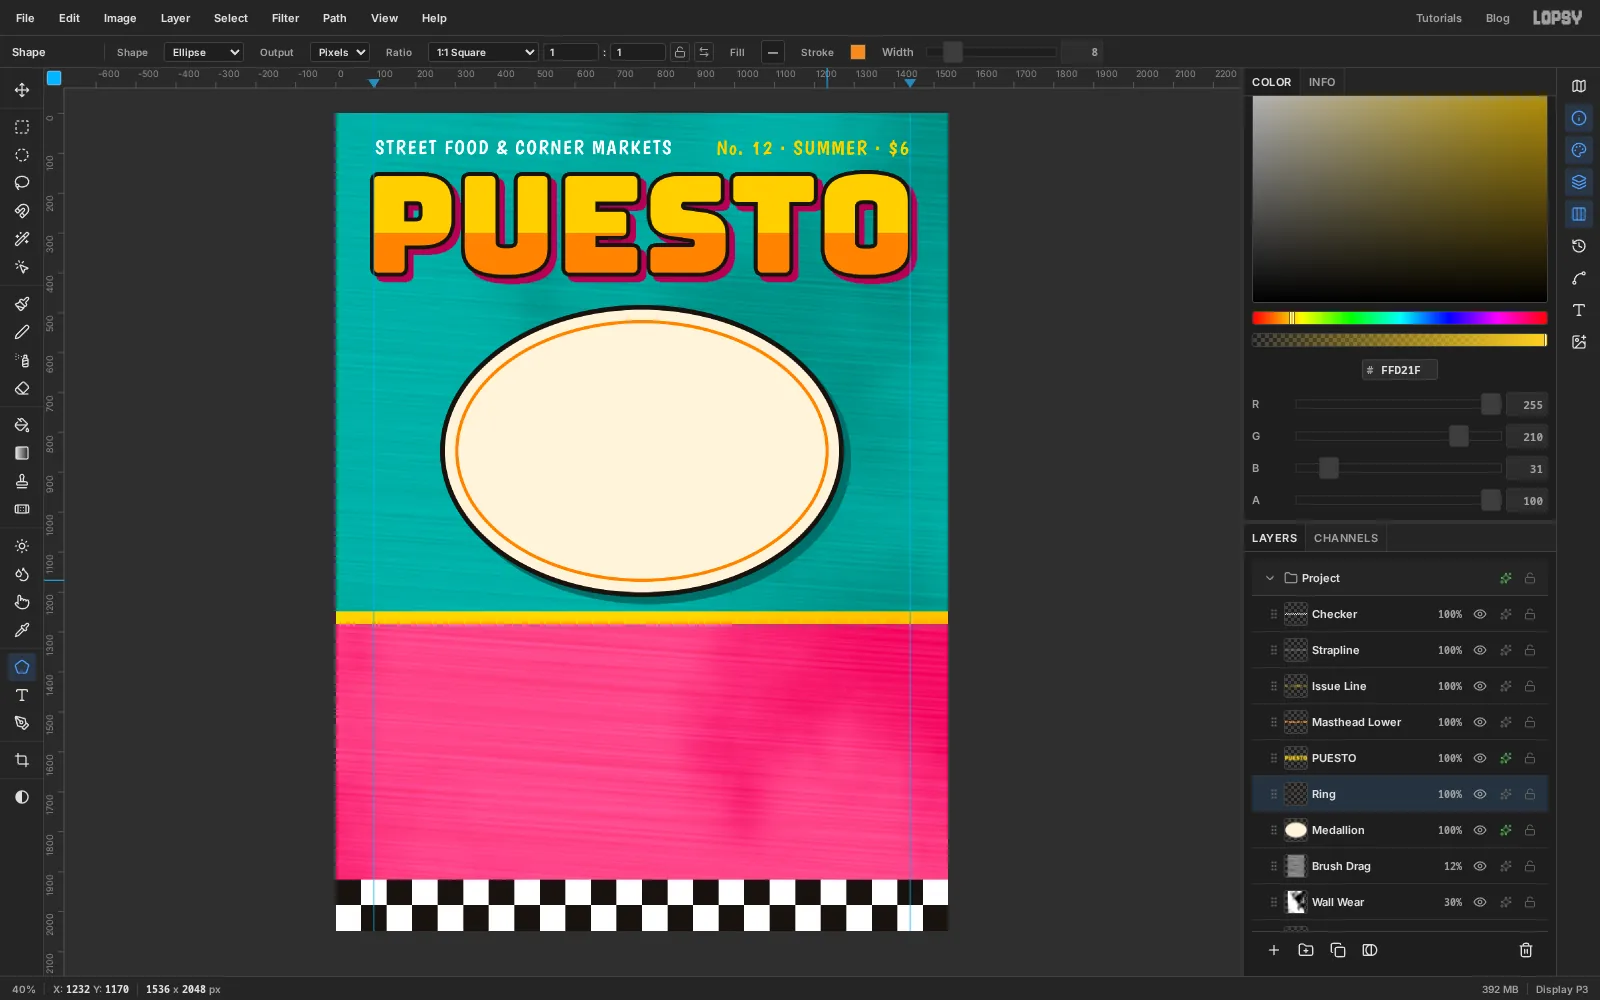
-
Draw the zucchini body
You'll paint one zucchini standing upright, then copy it. Click
Ringand add three layers, namedStem,BlossomandBodyfrom the bottom up.Click
Stem. With the Lasso, draw a small stub about 45 px wide and 50 px tall near the bottom of the medallion, centred onx 768with its bottom edge at abouty 1155. Fill it with and deselect.Click
Body. Lasso a long club shape that sits on top of the stem and rises about 410 px, to roughlyy 710. Make it about 110 px across at its widest, a little narrower at the top, with rounded ends. Fill it with and deselect.For the shaded side, hold Cmd and click the
Bodythumbnail to load the body as a selection. Then hold Shift+Option and lasso loosely around the right third of the body, going well outside its edge. Only the part of your loop that falls inside the body stays selected, so the outer edge is perfect without any care on your part. Fill with and deselect.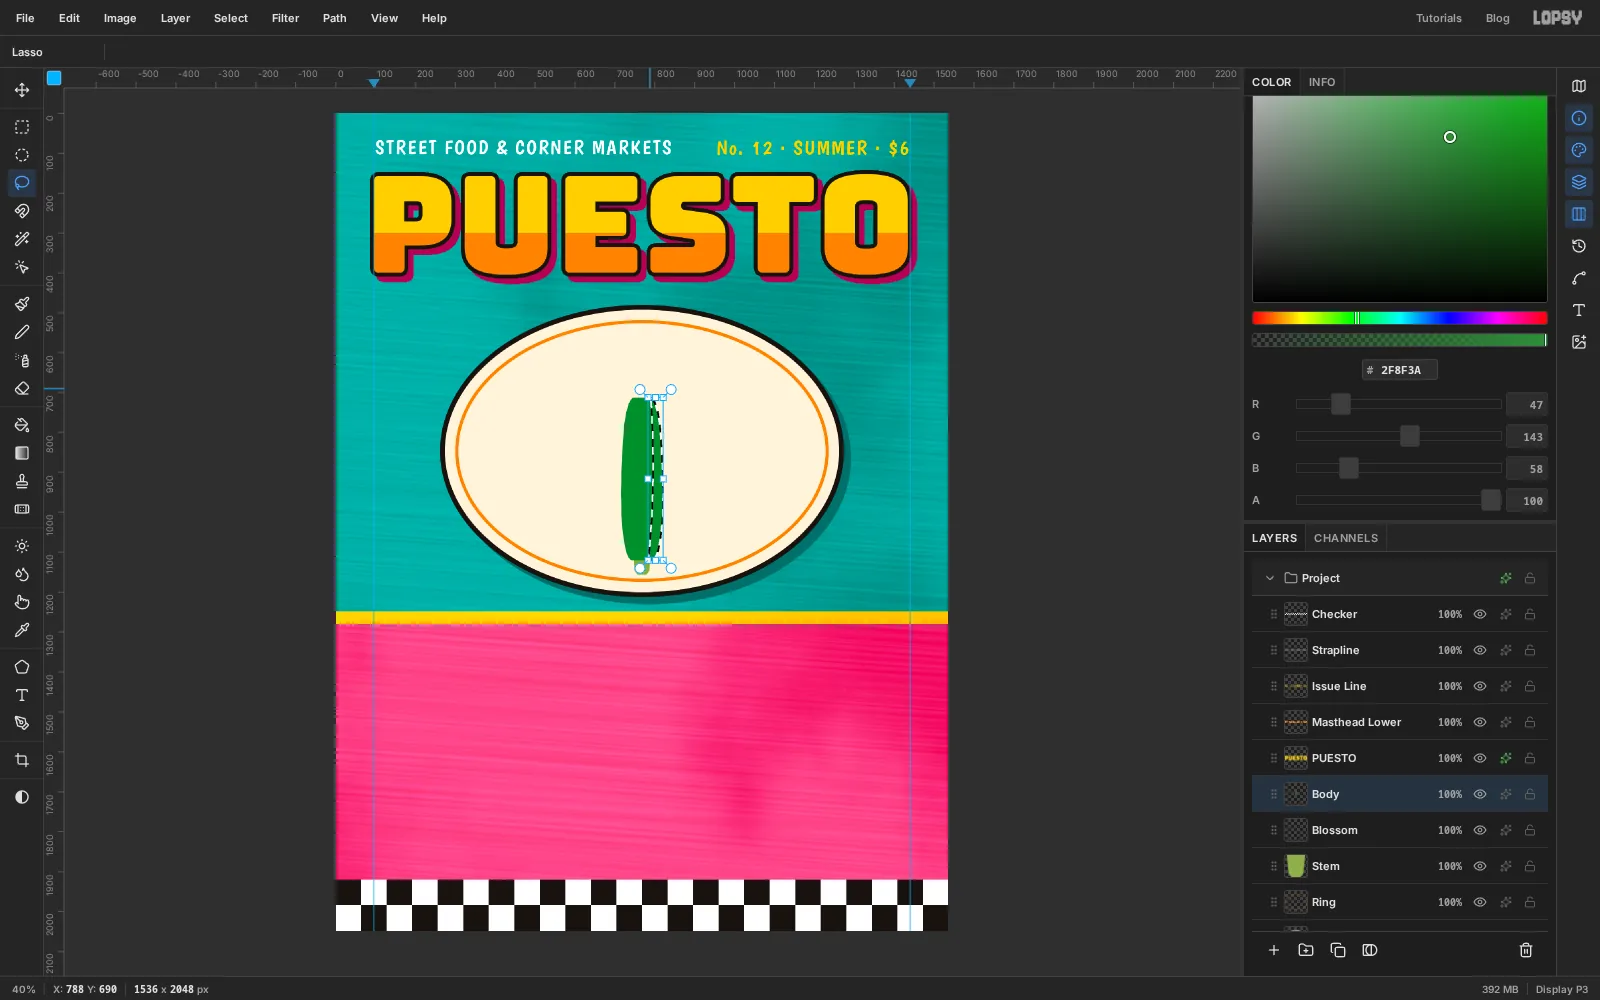
-
Add stripes and freckles
Cmd-click the
Bodythumbnail again so your painting stays inside the body. Pick the Brush, set Size7and Hardness90, and set the foreground to . Paint three long stripes from near the bottom to near the top, following the curve of the left side. Start and stop them at slightly different heights so they don't look ruled.Pick the Spray tool, set Size
55and Density12, and make one slow pass up the middle of the body. This leaves the fine pale freckles zucchini skin has. Press Cmd+D.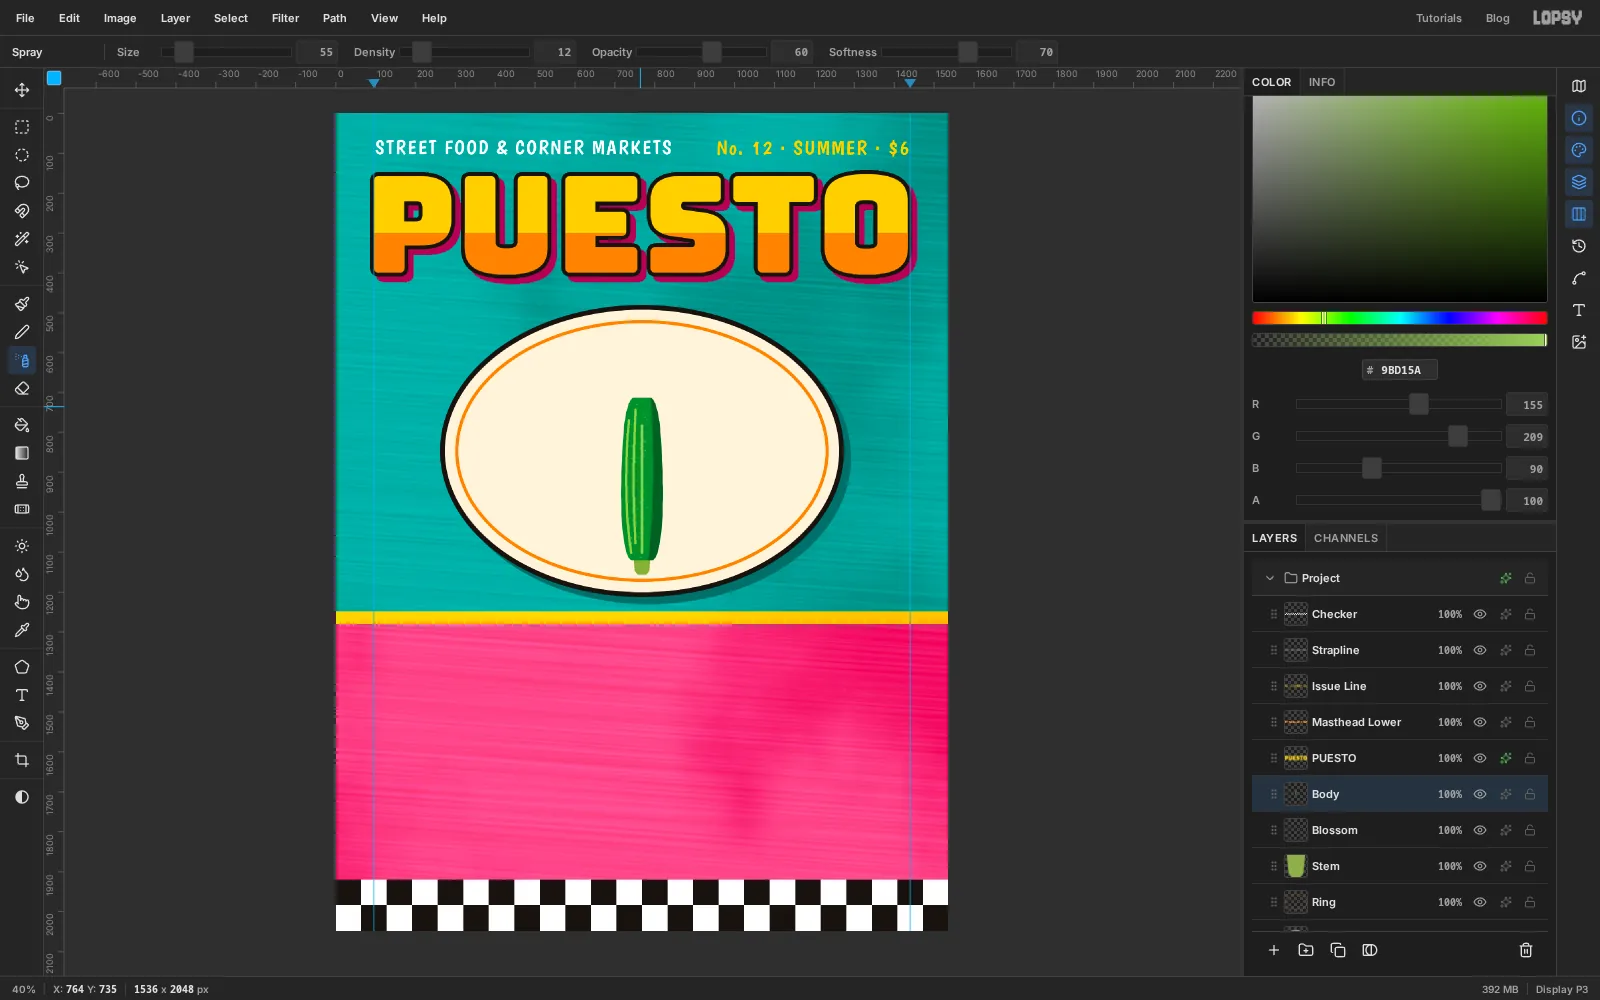
-
Paint the blossom
Click the
Blossomlayer. It's under the body, so the base of the flower tucks in behind the fruit.With the Lasso, draw the flower in one loop. Start inside the top of the body, flare outward like a trumpet for about 150 px, then make five pointed petals across the top: a tall one in the middle, two a little shorter beside it, and two outer ones that curl away to the sides. The middle tip should poke just above the rim of the medallion.
Pick the Gradient tool, leave it on Linear, and click Advanced…. Set three stops: at the left end, a little before the middle, and at the right end. Click Done, then drag from the base of the flower straight up to the tip of the middle petal.
Keep the selection. With the Brush at Size
5and the colour , paint four creases from the base up to the notches between the petals. Change to pale yellow at Size6and paint a short highlight on each petal. Deselect.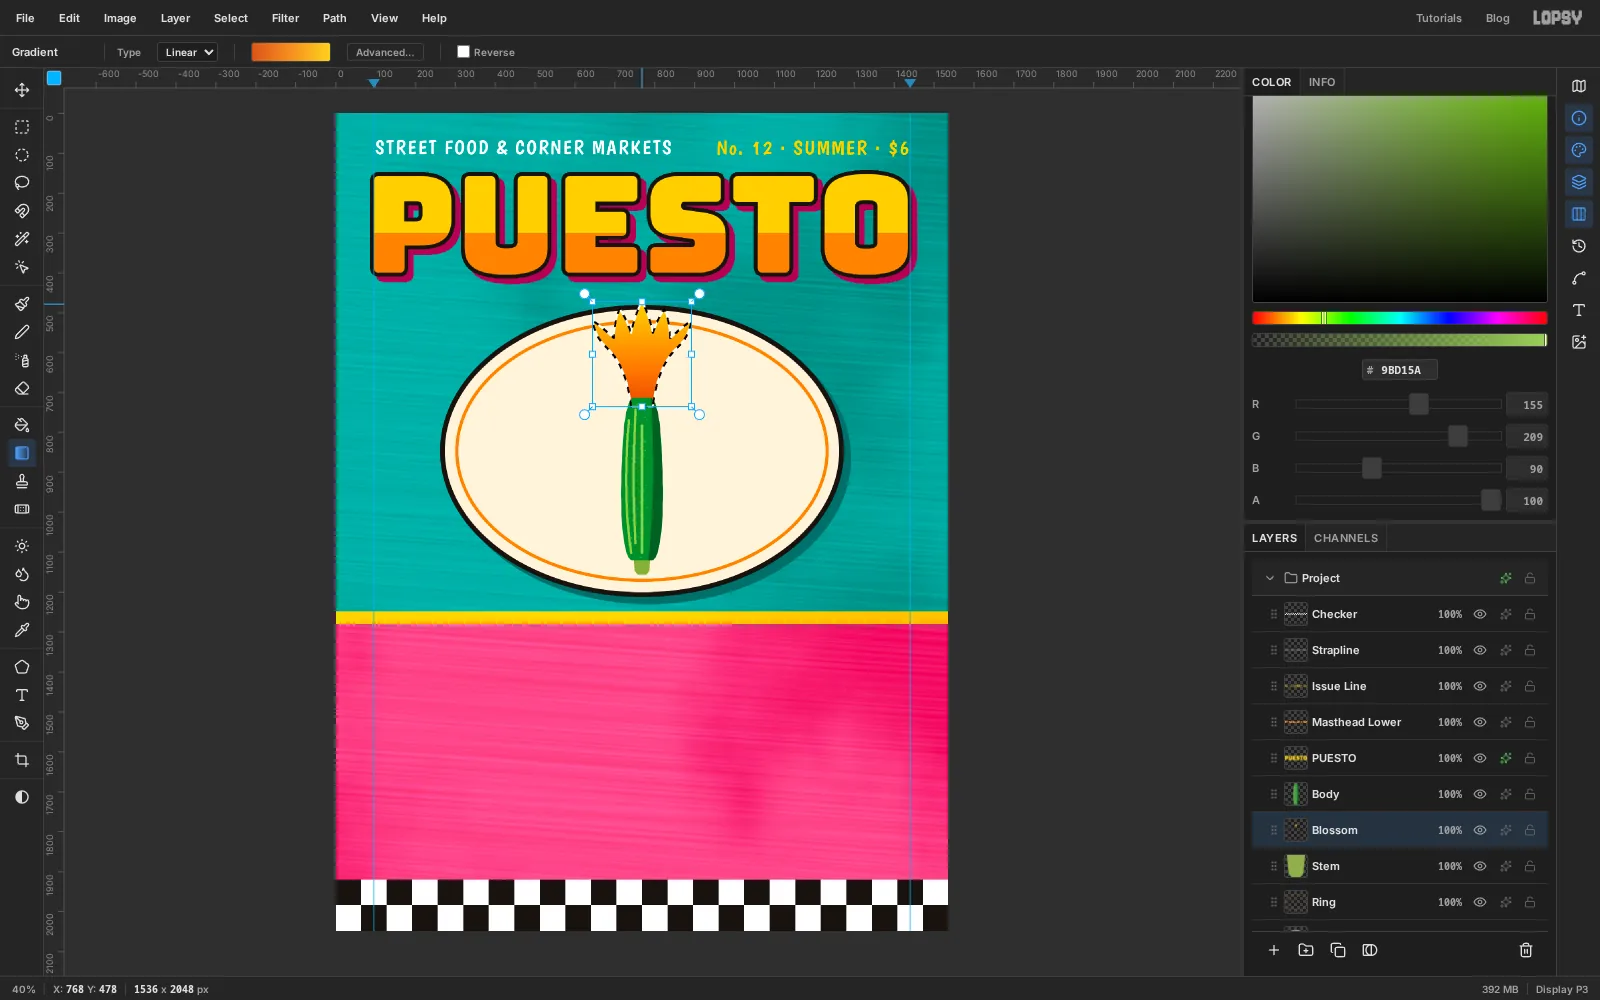
-
Add the calyx, outline everything and group it
Click
Bodyand add a layer calledCalyx. Lasso a small collar about 55 px wide where the flower meets the fruit, with five little teeth pointing up, fill it with and deselect.Every part gets the black key line. On each of the four layers in turn,
Stem,Blossom,BodyandCalyx, open the effects drawer, tick Stroke, and set Width6and the colour .Click
Stem, hold Shift and clickCalyxso all four layers are selected, and choose Layer → Group Layers. Name the groupZucchini.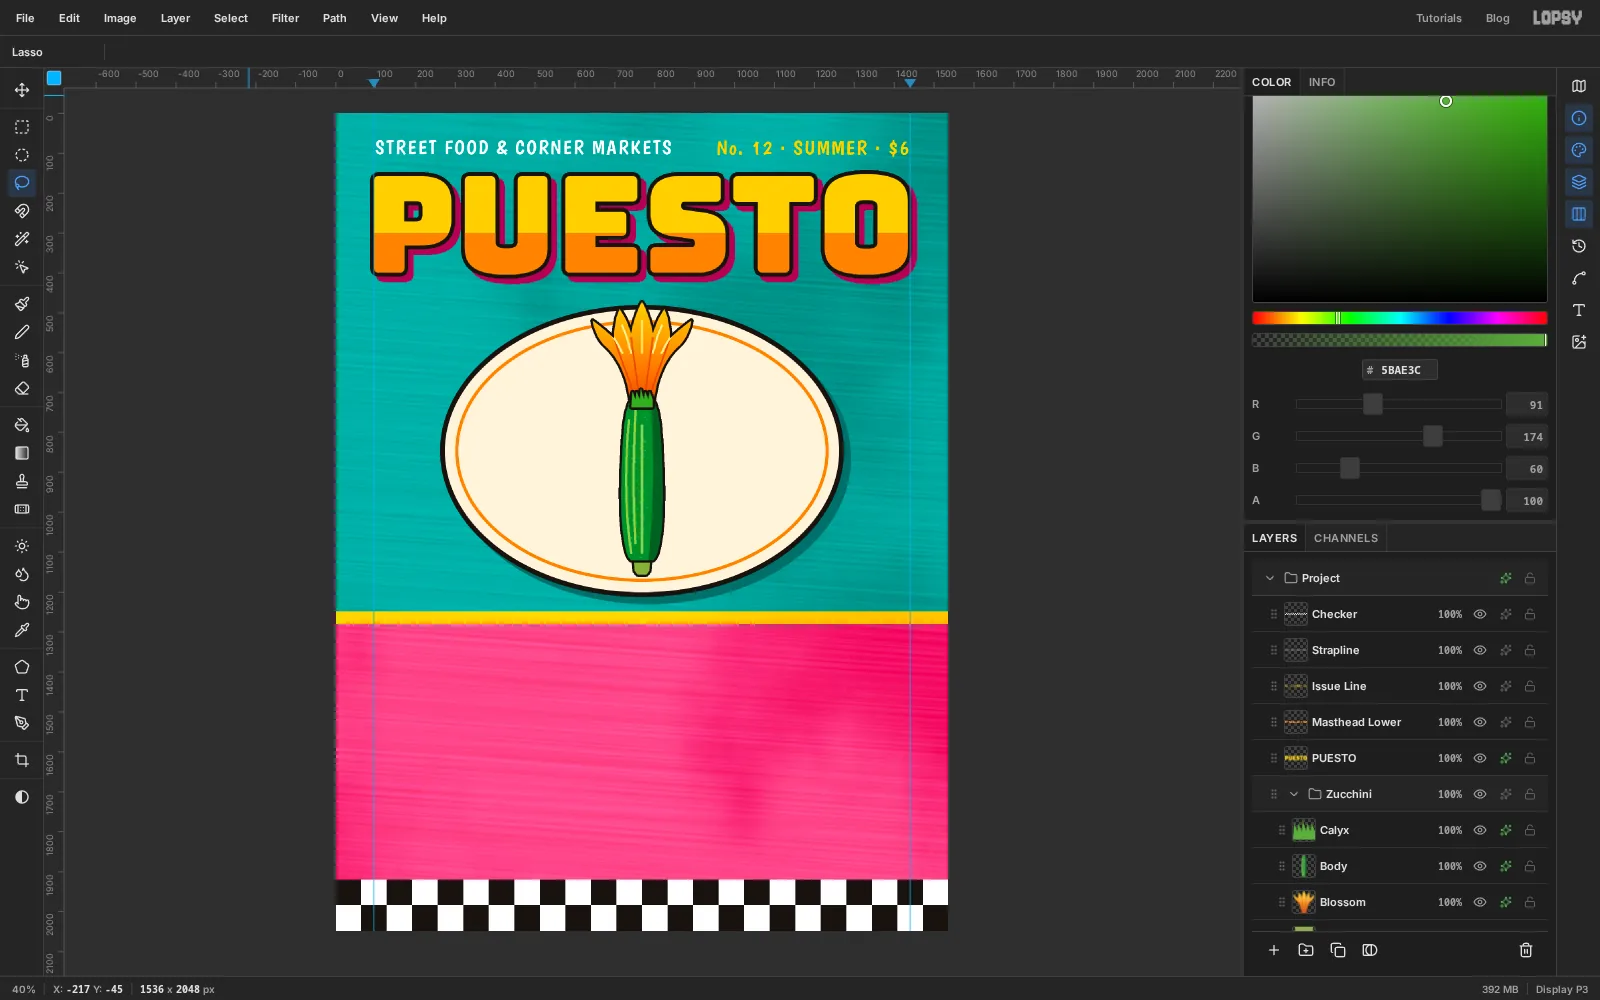
-
Duplicate the group, flip it and rotate it
Click the
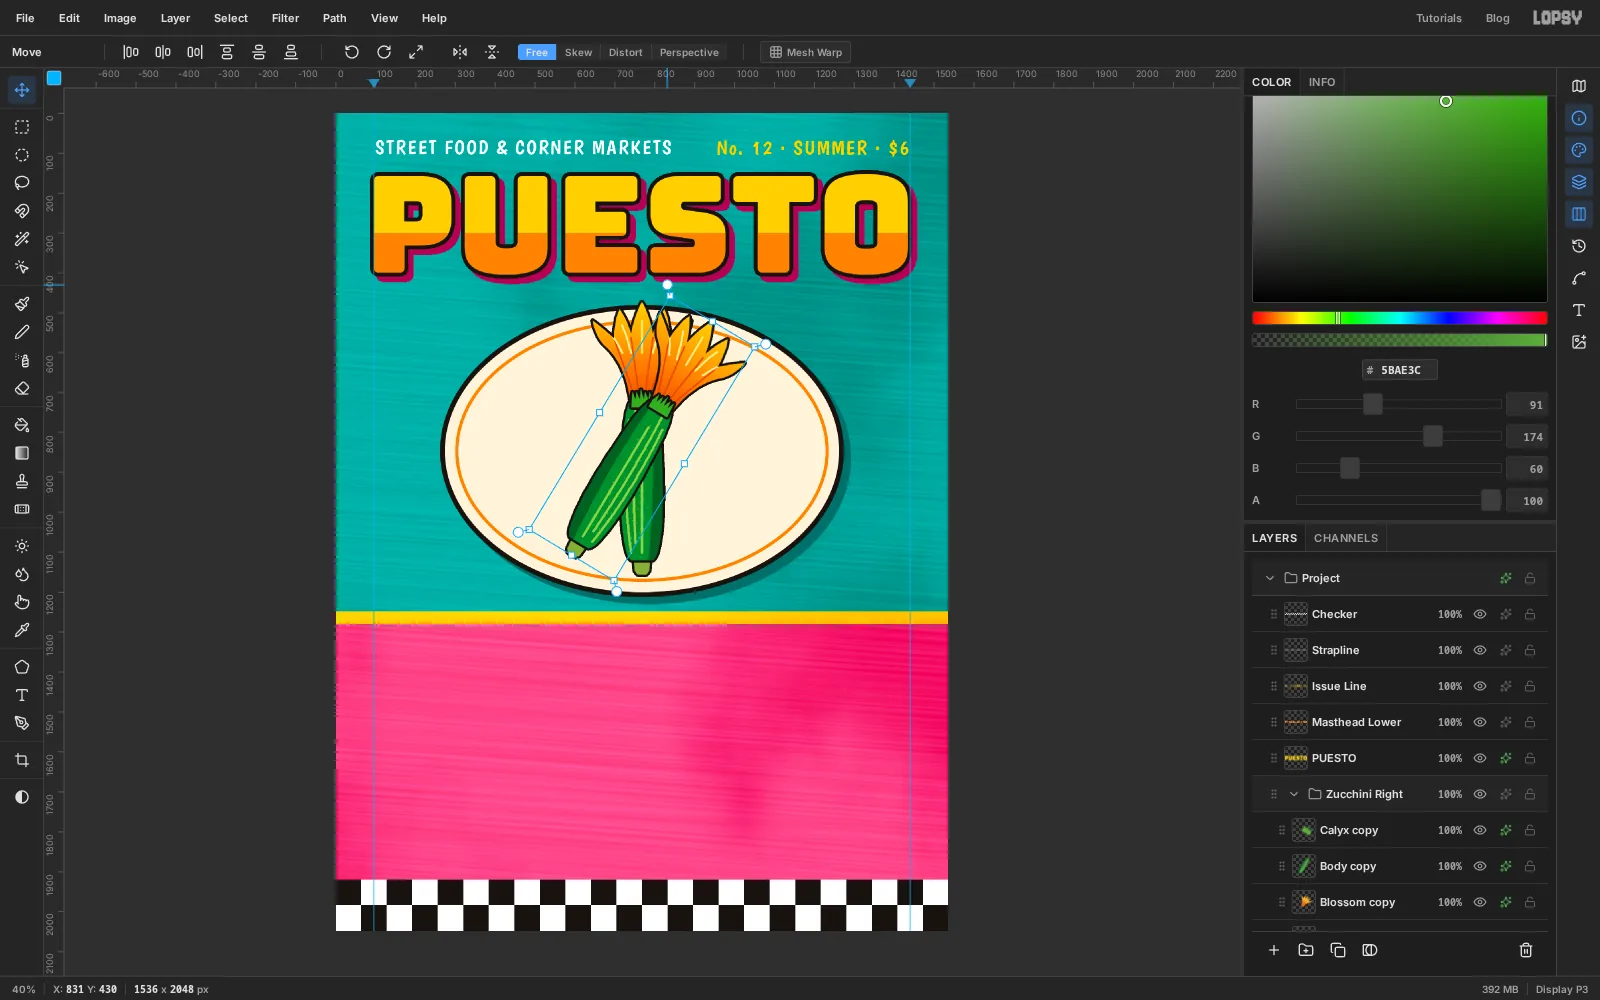
Zucchinigroup and click Duplicate Layer. The whole group is copied with its outlines. Name the copyZucchini Right.With the copy selected, pick the Move tool. Click Flip Horizontal in the options bar so the shaded flank swaps sides. Three identical zucchini look like clip art, and flipping one is the cheapest way to hide it.
Handles appear around everything in the group. Move the pointer just outside a corner until it becomes a curved arrow, then drag to turn the group about 30° clockwise. Press Cmd+D to commit.
Now drag the copy, from the middle of its body, right and a little down until its stem sits beside the first stem, almost touching it. The flower should end up crossing the rim of the medallion on the right.
-
Make the third one smaller
Duplicate
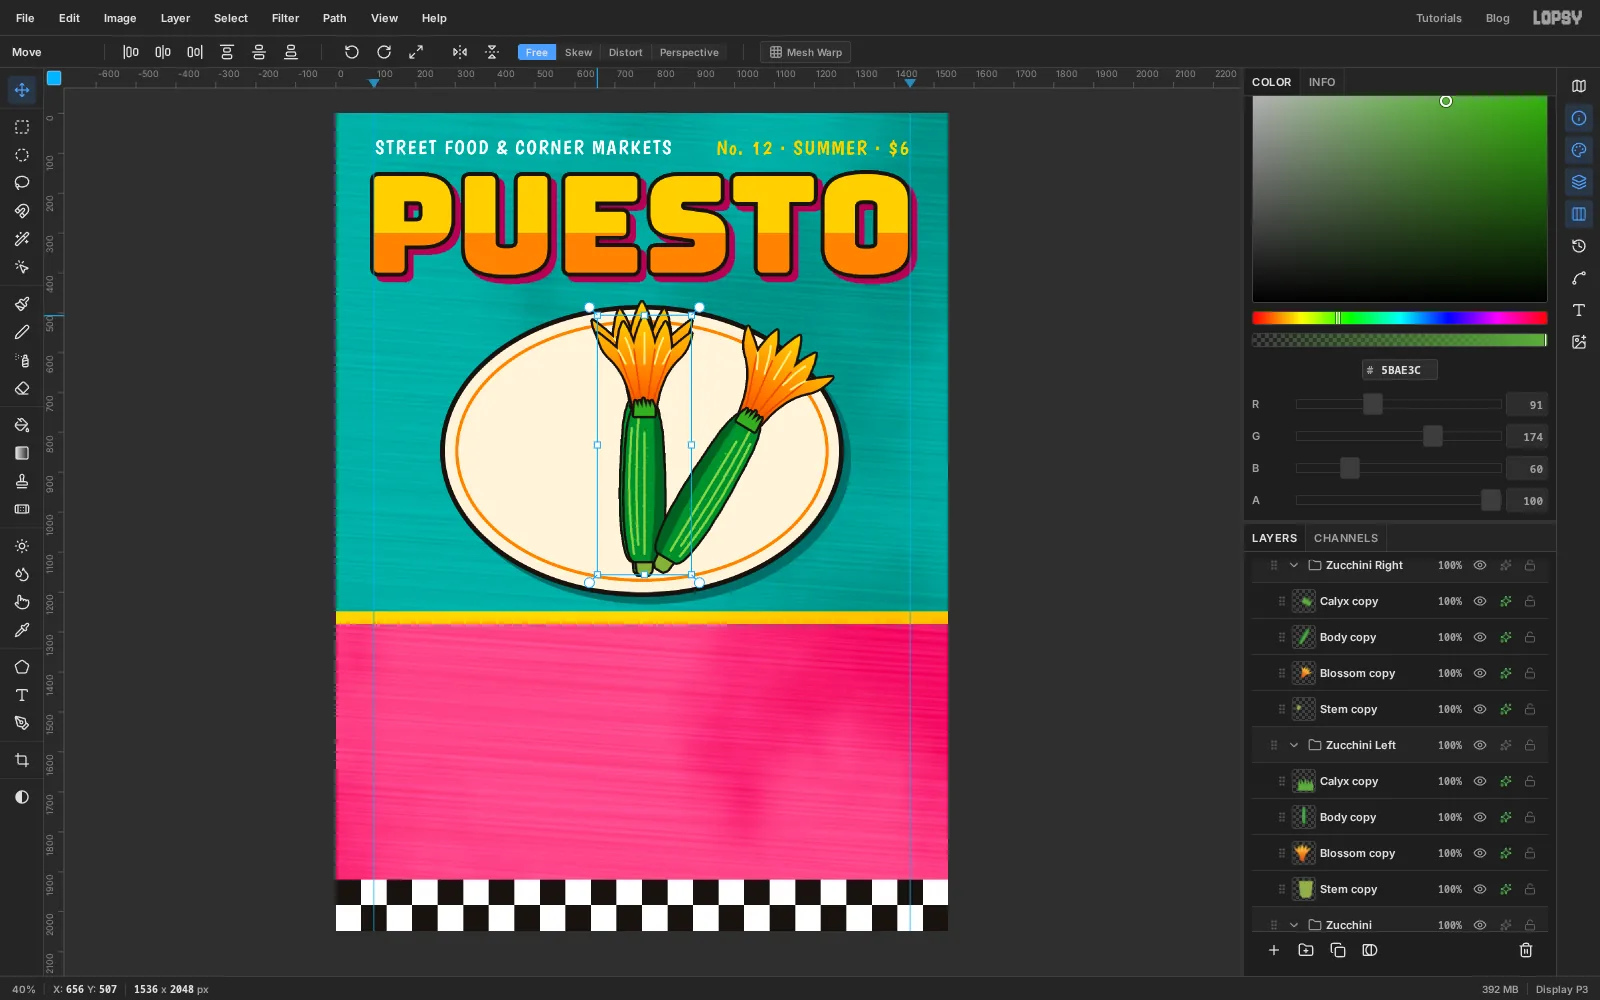
Zucchiniagain and name the copyZucchini Left. This one isn't flipped. Instead, hold Cmd and drag its top left corner handle a short way inward to shrink it to about 95%. Holding Cmd keeps the proportions. Commit with Cmd+D.Select the group again, rotate it about 30° the other way, commit, and drag it so its stem sits just left of the middle stem. You now have a fan of three with their stems together and their flowers spread across the top of the oval.
-
Tie the bunch with twine
Three stems meeting in one place is the weakest part of the drawing, so cover it. Click
Masthead Lowerso the next layer goes on top of the zucchini groups, and add a layer calledTwine.With the Lasso, draw a band about 30 px tall that curves gently across all three zucchini a little above the stems, and fill it with pink . Lasso two short ribbon tails hanging from the middle of the band, each with a notch cut in its end, and fill them with the same pink. Then pick the Elliptical Marquee, drag a small oval over the middle of the band and fill it with for the knot. Deselect.
Give the layer a Stroke of
6in .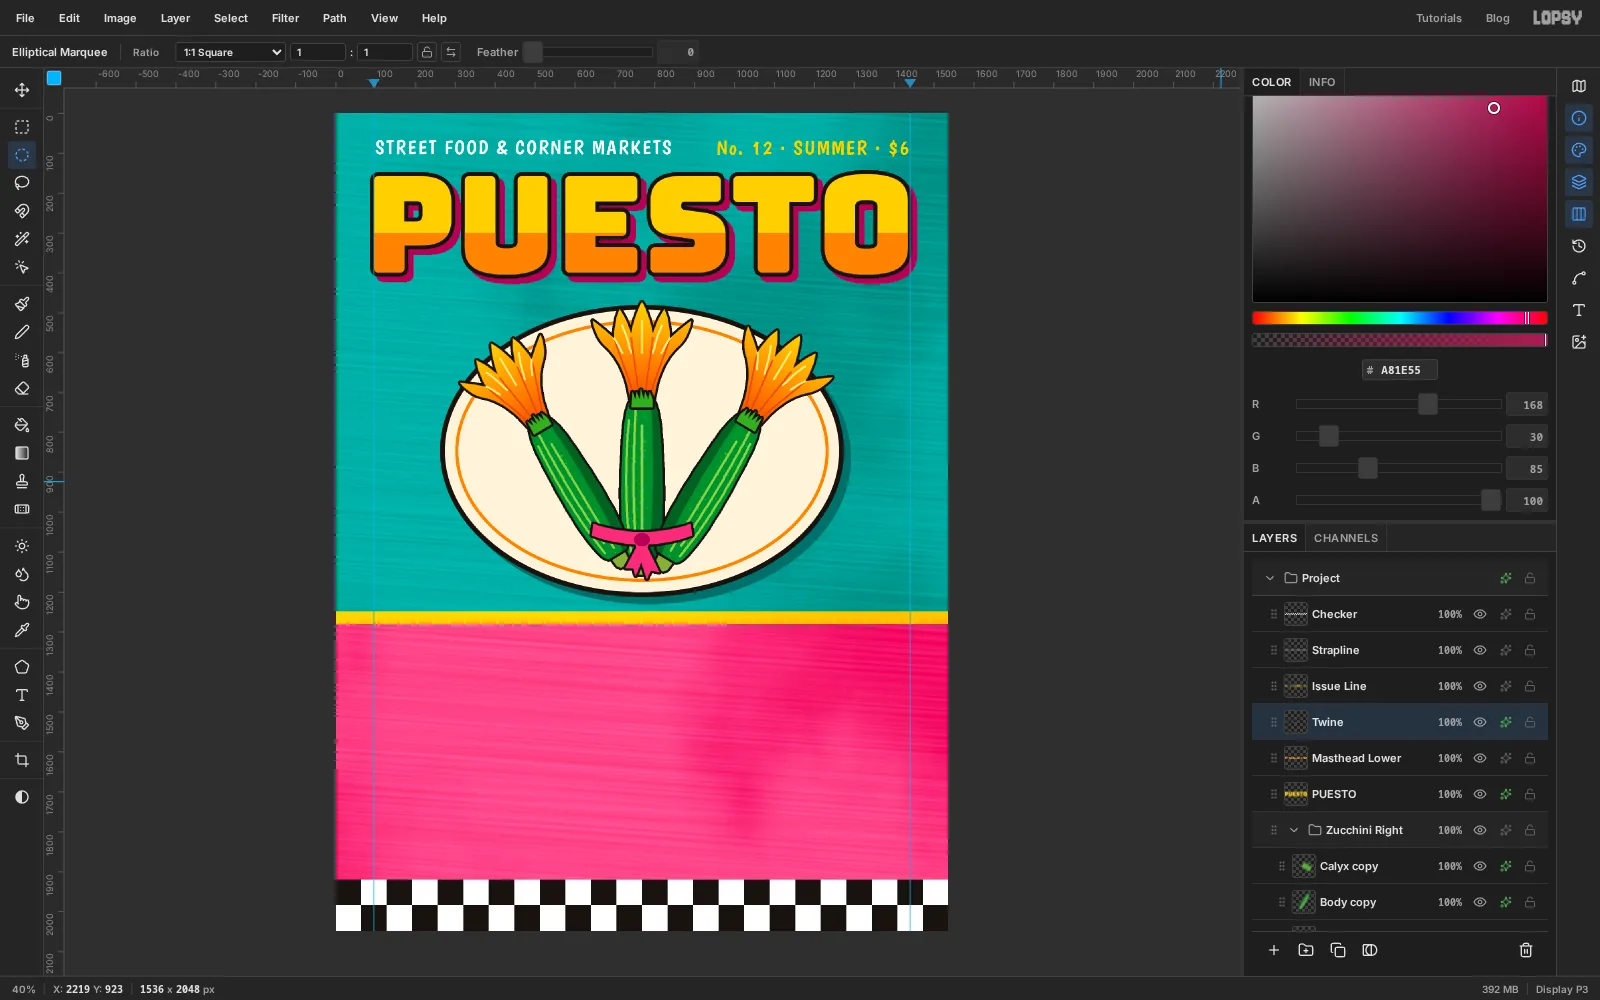
-
Letter BLOSSOMS on the dado
Click
Twine. Set the foreground to white, pick the Text tool, choose Bungee at Size240, and set Letter spacing in the Text panel back to0. Click on the wall, typeBLOSSOMSand commit.Move it onto the pink so it's centred between the guides, with the tops of the letters a little over 320 px below the yellow stripe. That leaves room for the script word above it. The Move tool's Align center horizontally button centres it for you.
Add a Stroke of
10in , and a Drop Shadow with offsets of12, Blur0, Opacity100and the colour . The magenta you used for the masthead shade would disappear on pink, so the shades down here are maroon.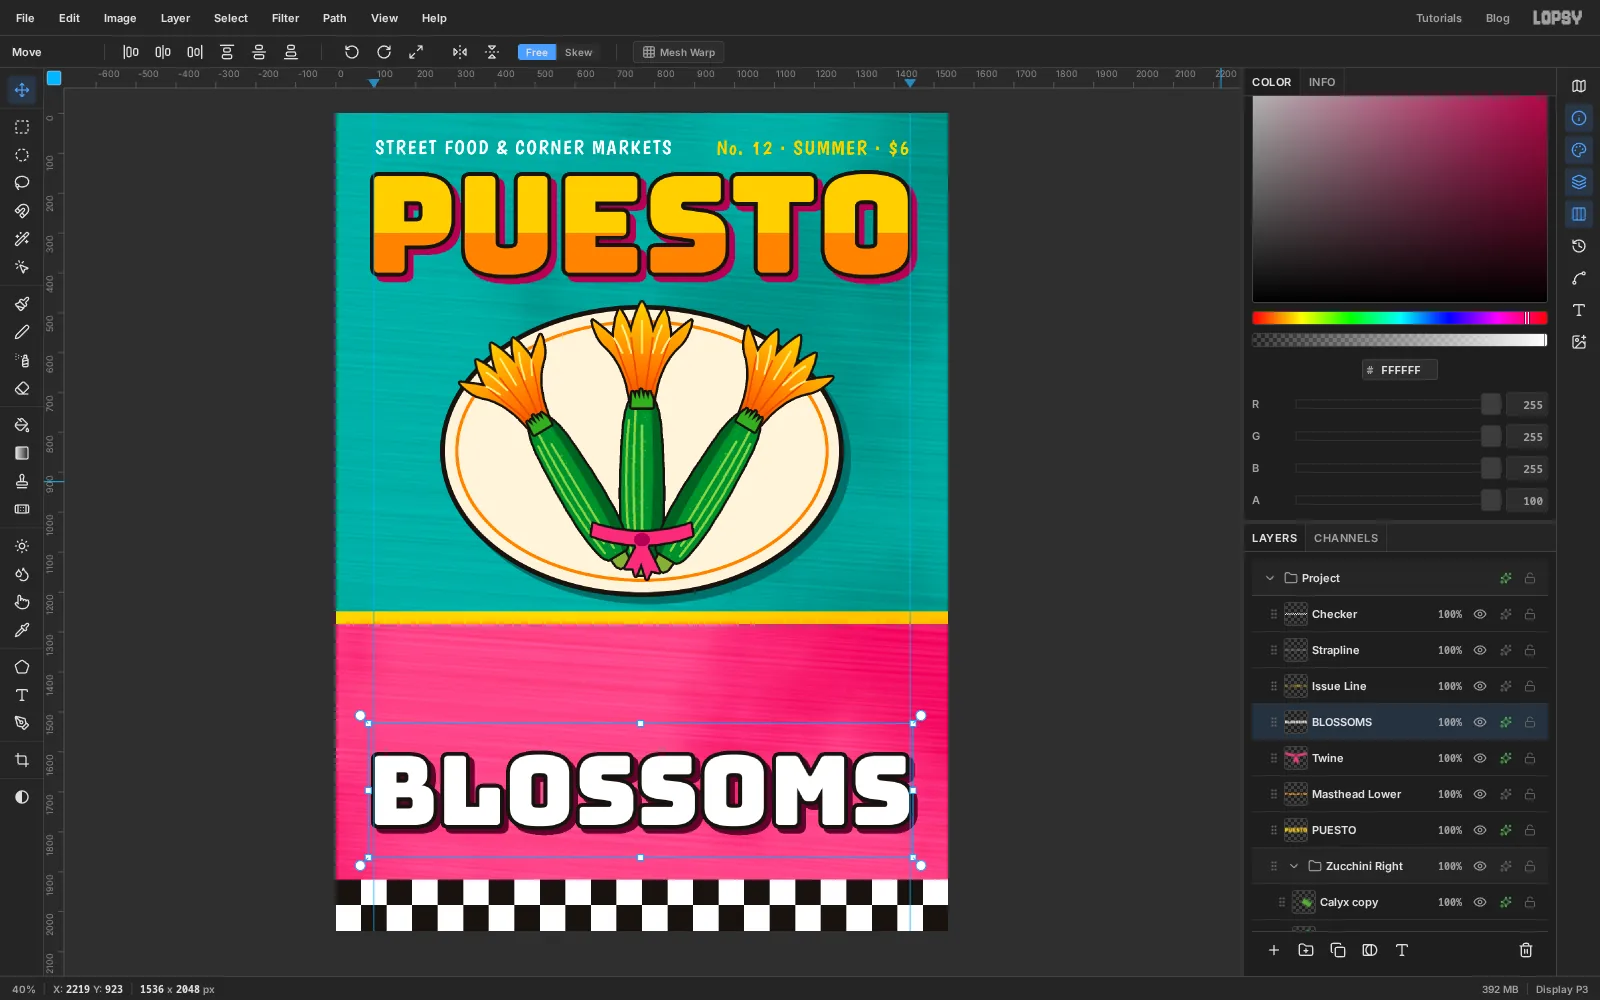
-
Add the script word at an angle
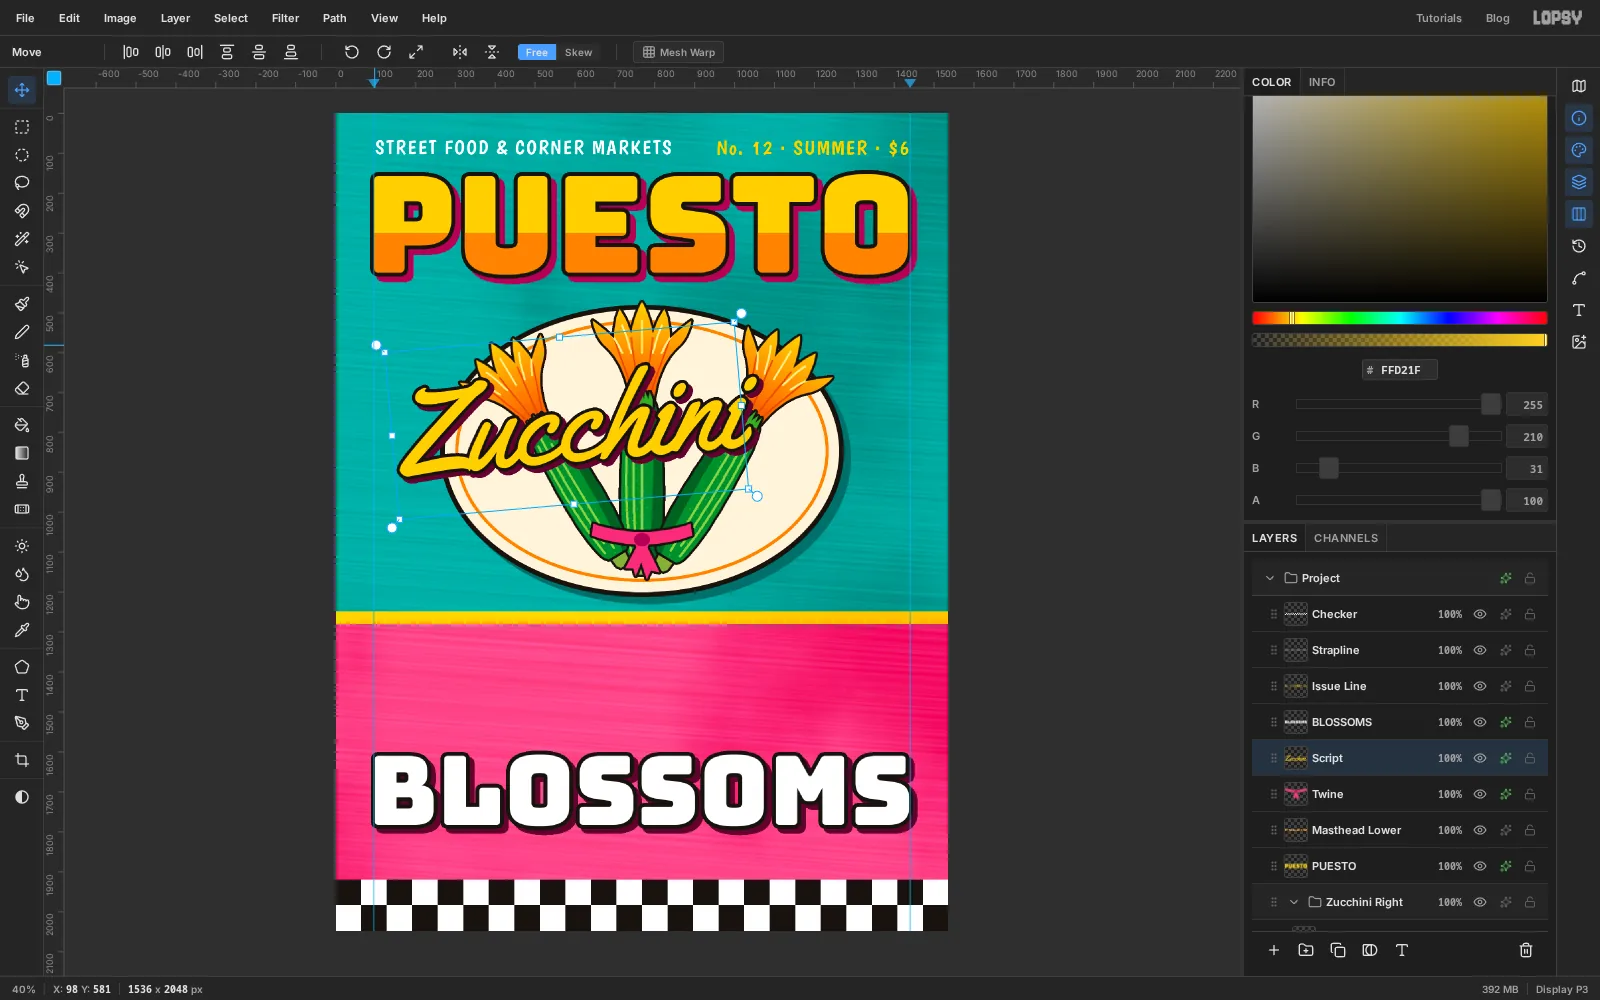
Block capitals paired with one script word is the classic sign-painter combination. Click
Twine, set the foreground to , choose Yellowtail at Size300, click on the wall and typeZucchini. Rename the layerScript, so it isn't confused with theZucchinigroup.Give it a Stroke of
8in and a Drop Shadow with offsets of10, Blur0, Opacity100and the colour .With the Move tool, drag just outside a corner handle to tilt the word about 5° anticlockwise, so it climbs to the right. Text keeps its rotation and stays editable. Press Cmd+D, then drag the word onto the pink band above BLOSSOMS. Start it about 50 px in from the left guide and set it so the tail of the Z stops a little above the outline of the B. The tall h should stay below the yellow stripe.
-
Set the subline
Click
Twine, set the foreground to white, and choose Lilita One at Size60with Letter spacing2. Typefried, stuffed & gone by noonand rename the layerSubline.Centre it under BLOSSOMS. Leave the same gap above it as below it: the bottom of the
gandyshould be as far from the checker strip as the tops of the letters are from the maroon shade above. Add a Drop Shadow with offsets of4, Blur0, Opacity100and the colour so the thin strokes hold up on the pink.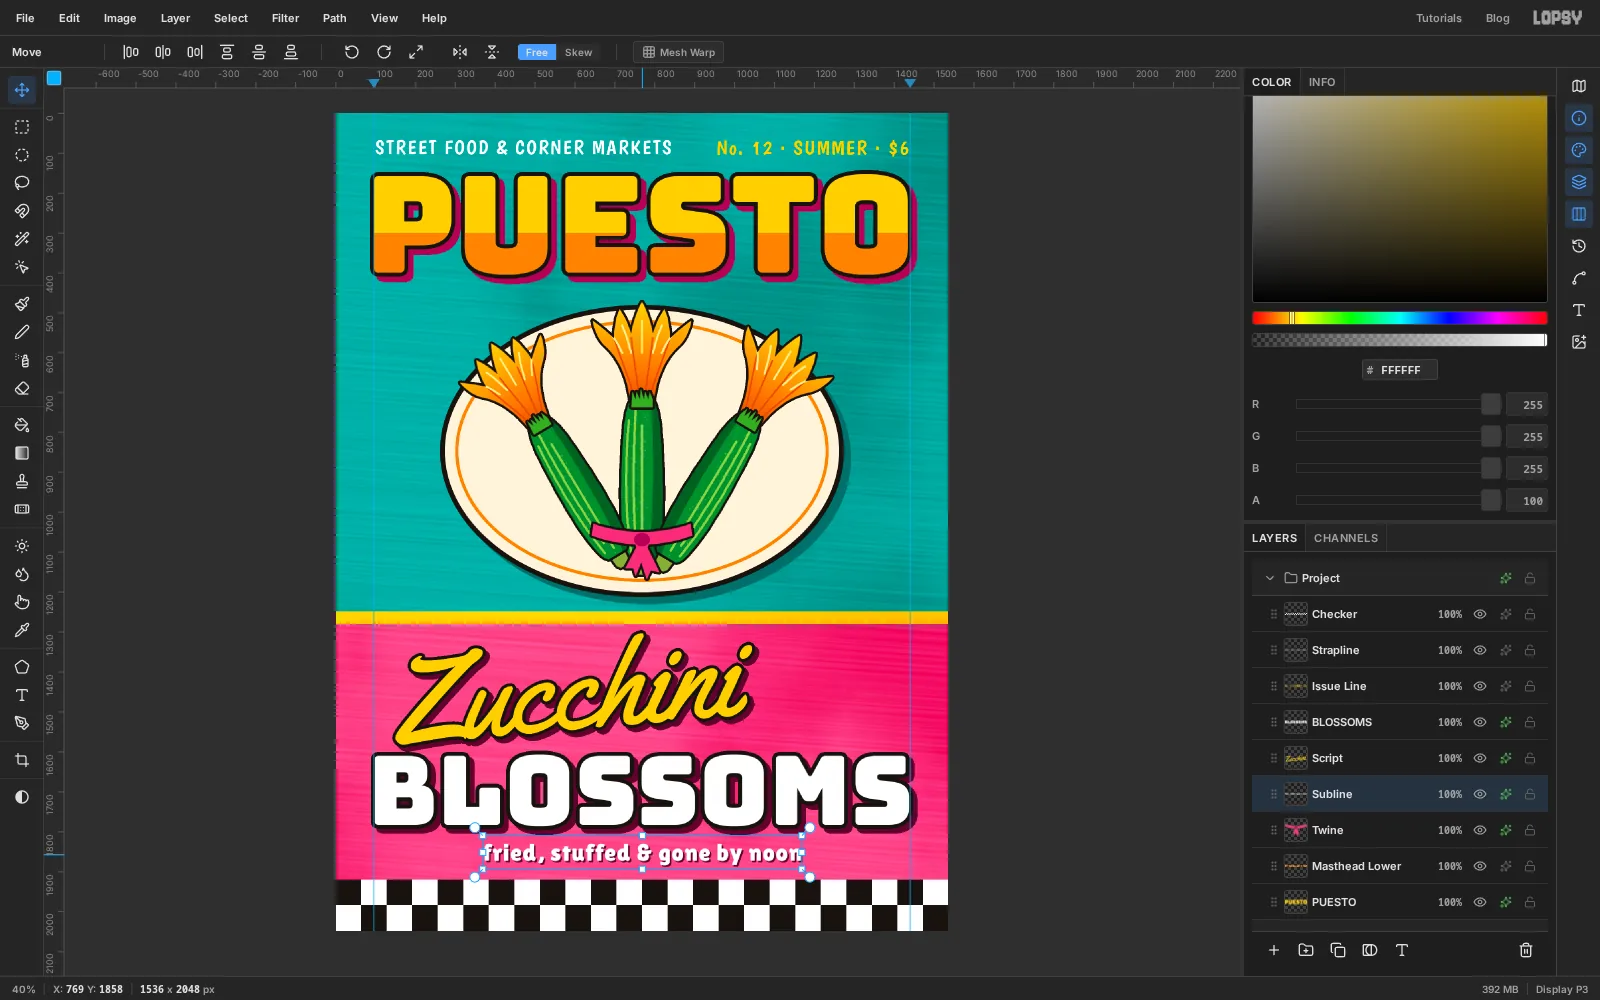
-
Build a starburst from three squares
The Shape tool has no star, but three squares turned 30° apart make a twelve-point burst.
Click
BLOSSOMSand add a layer calledBurst. Pick the Shape tool, choose Rectangle, set the fill to the wall colour and remove the stroke. In the space to the right of the script, press about 250 px in from the right edge and 165 px below the yellow stripe, hold Cmd to keep the shape square, and drag out until the square is about 190 px across.Click Duplicate Layer and name the copy
Burst 30. A single pixel layer on its own has no transform handles: the Move tool just slides it. To turn it, select its pixels first. Pick the Rectangular Marquee and drag a box around the square with a little room to spare. Switch to the Move tool and drag just outside a corner until the copy has turned 30°. Holding Cmd while you turn snaps the angle to 15° steps, which makes 30° easy to hit. Commit with Cmd+D.Click the original
Burstlayer, duplicate it again, name this copyBurst 60, and turn it 60° the same way. Then clickBurst 30, the top one of the three, and press Cmd+E twice to merge all three squares into one layer. If the merged layer has picked up a different name, rename itBurst.Give it a Stroke of
8in and a Drop Shadow with offsets of10, Blur0, Opacity100and the colour .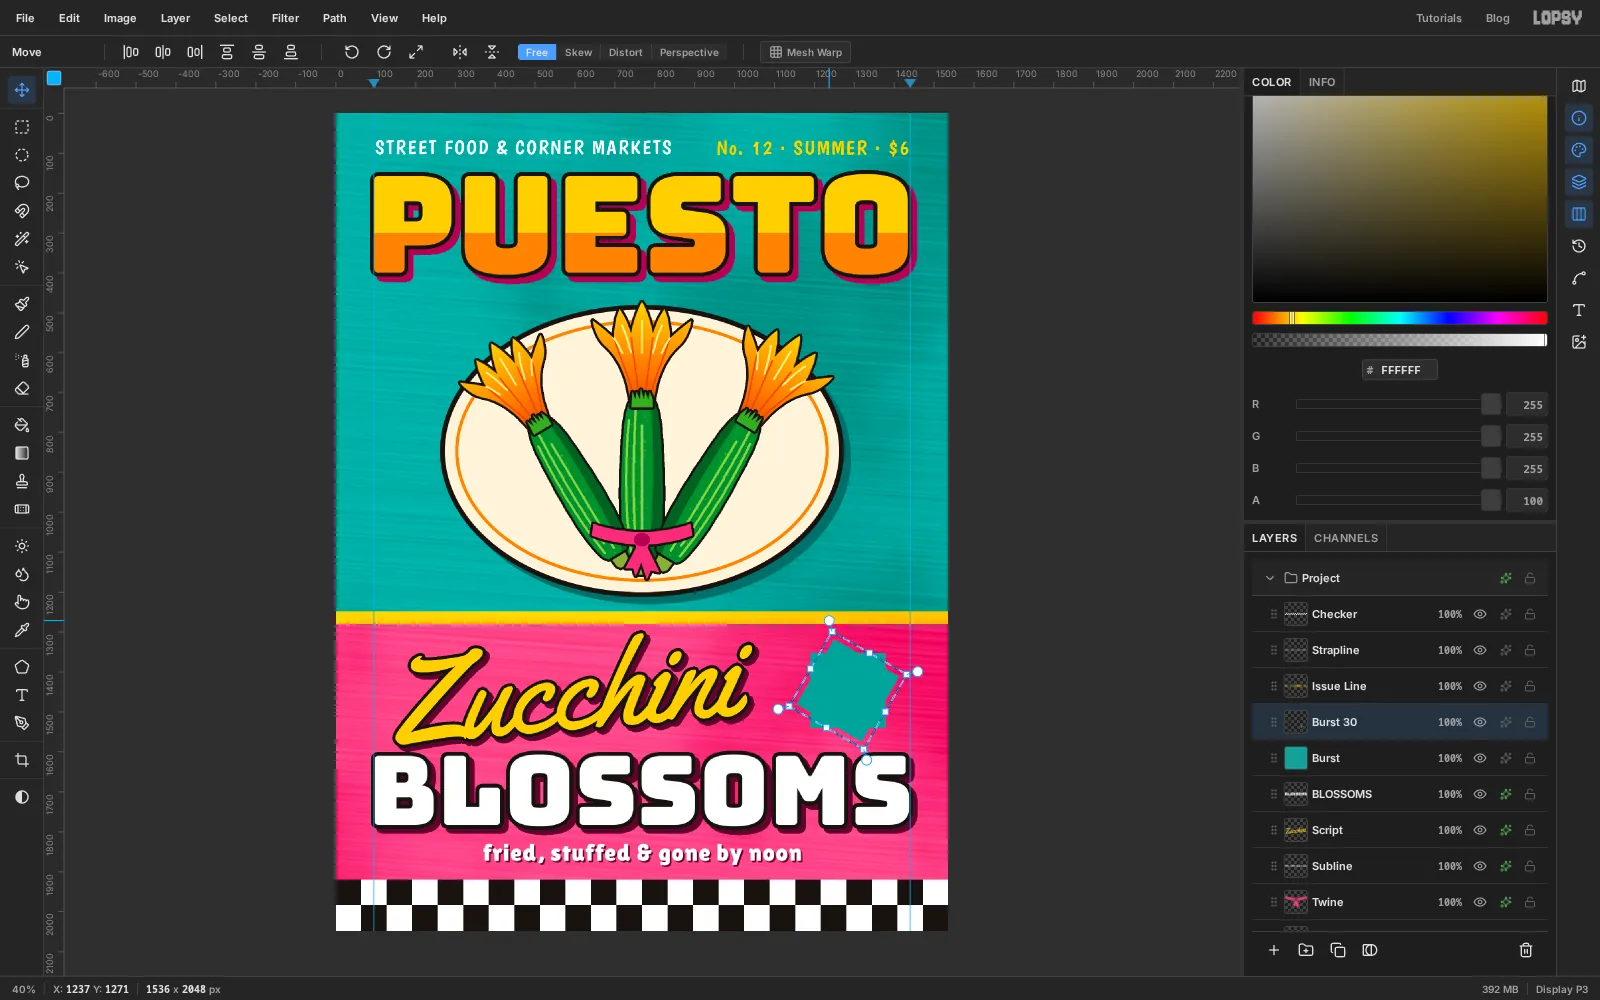
-
Letter the badge and tilt it
Click
Burst. In Bungee at Size116, colour , letter spacing0, type12on an empty part of the wall and rename the layerTwelve. Add a Stroke of6in and drag it onto the burst, a little above centre.Click
Burstagain and typeRECIPESin white Bungee at Size38, and rename the layerRecipes. Put it under the number with a gap of roughly 15 px. Check the pair against the burst: the space above the12should match the space belowRECIPES, and the ends ofRECIPESshould stay well clear of the inner points of the star.Click
Burst, then hold Cmd and clickTwelveandRecipesin the Layers panel so all three are selected. With several layers selected the Move tool does show handles, around all of them at once, so no marquee is needed this time. Rotate them together about 10° clockwise and commit. Because the three turn as one, the type stays seated in the star.With the three still selected, choose Layer → Group Layers and name the group
Badge.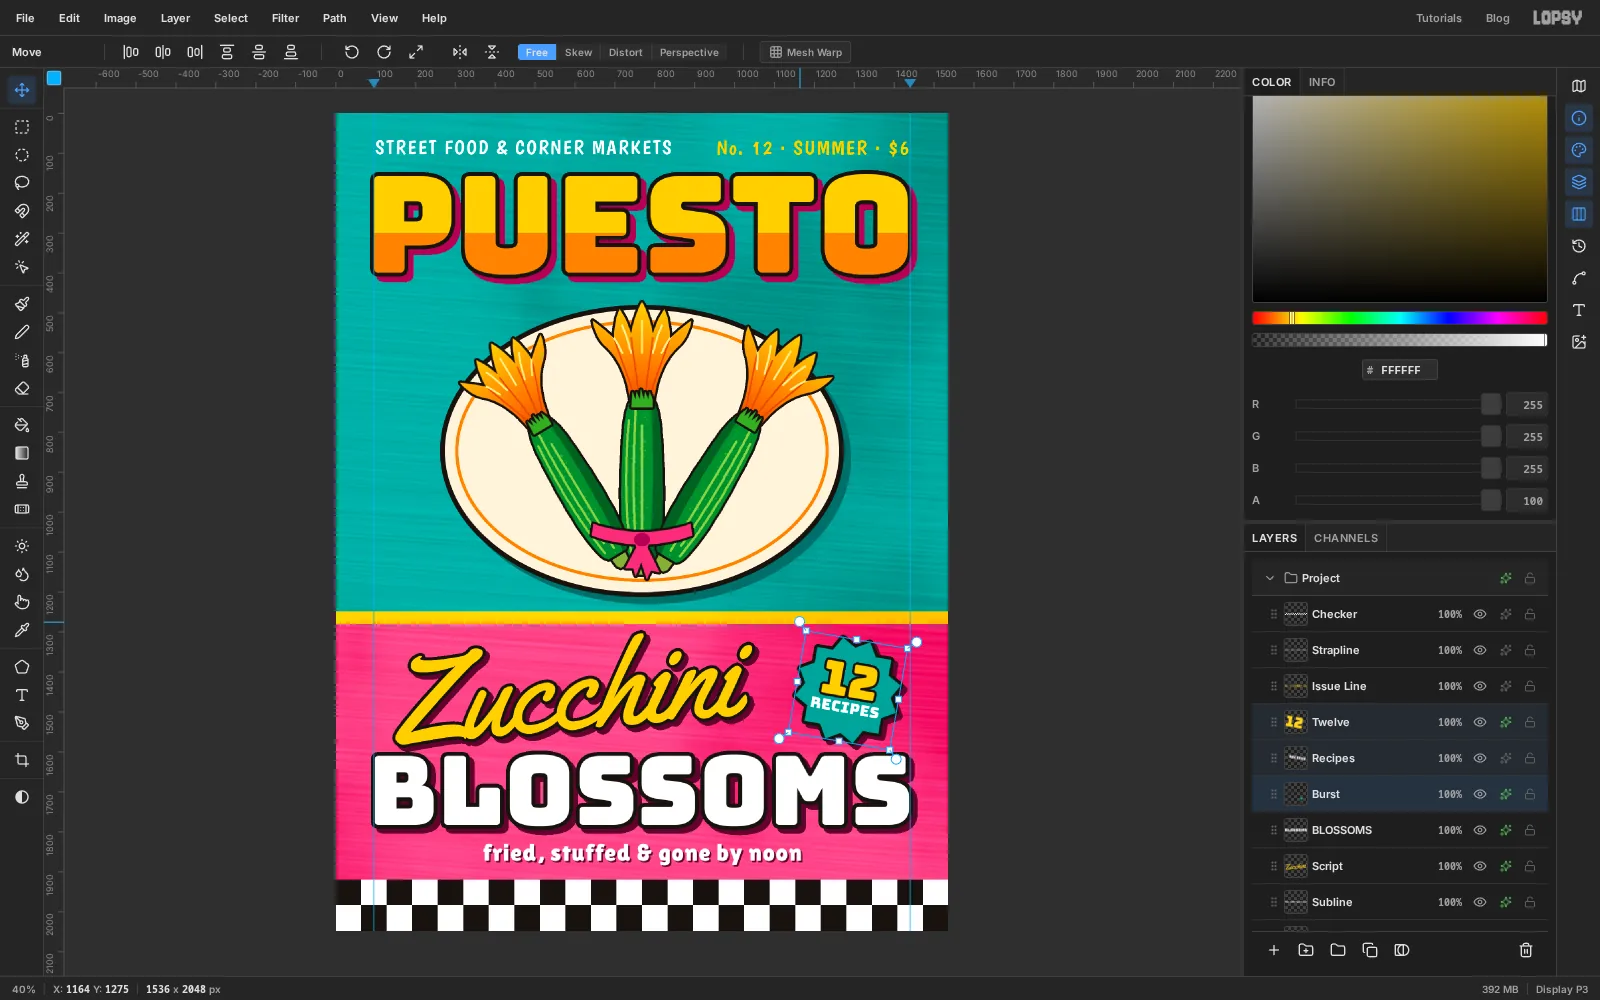
-
Hang a slate tag
A second cover line goes on a chalkboard tag in the gap between the masthead and the left blossom.
Click
Twineand add a layer calledSlate. With the Shape tool on Rectangle, set the fill to , the stroke to at Width6, and Corner Radius20. Press about 140 px to the right of the left guide and 100 px below the masthead's outline, and drag out a tag about 280 px wide and 135 px tall. Its left edge should land on the left guide. The Shape tool snaps to guides, so it will catch when you're close.Click
Slate, and type9 TACO STANDSin white Boogaloo at Size42with letter spacing1, and rename the layerTacos. ClickSlateagain and typeworth the linein yellow Yellowtail at Size50with letter spacing0. Rename that oneWorth.Drag both lines onto the tag and take a moment to seat them. Centre each line left to right, so the gap before the
9matches the gap after the lastS. Leave roughly 25 px between the top line and the top border, and the same between the script and the bottom border. Measure the script from the bottom of the main letters, not from the top of the tallhandl.In the Layers panel click
Slate, hold Shift and click the top one of the three layers so all three are selected, then rotate them about 5° anticlockwise with the Move tool and commit. Group them asSlate Tag.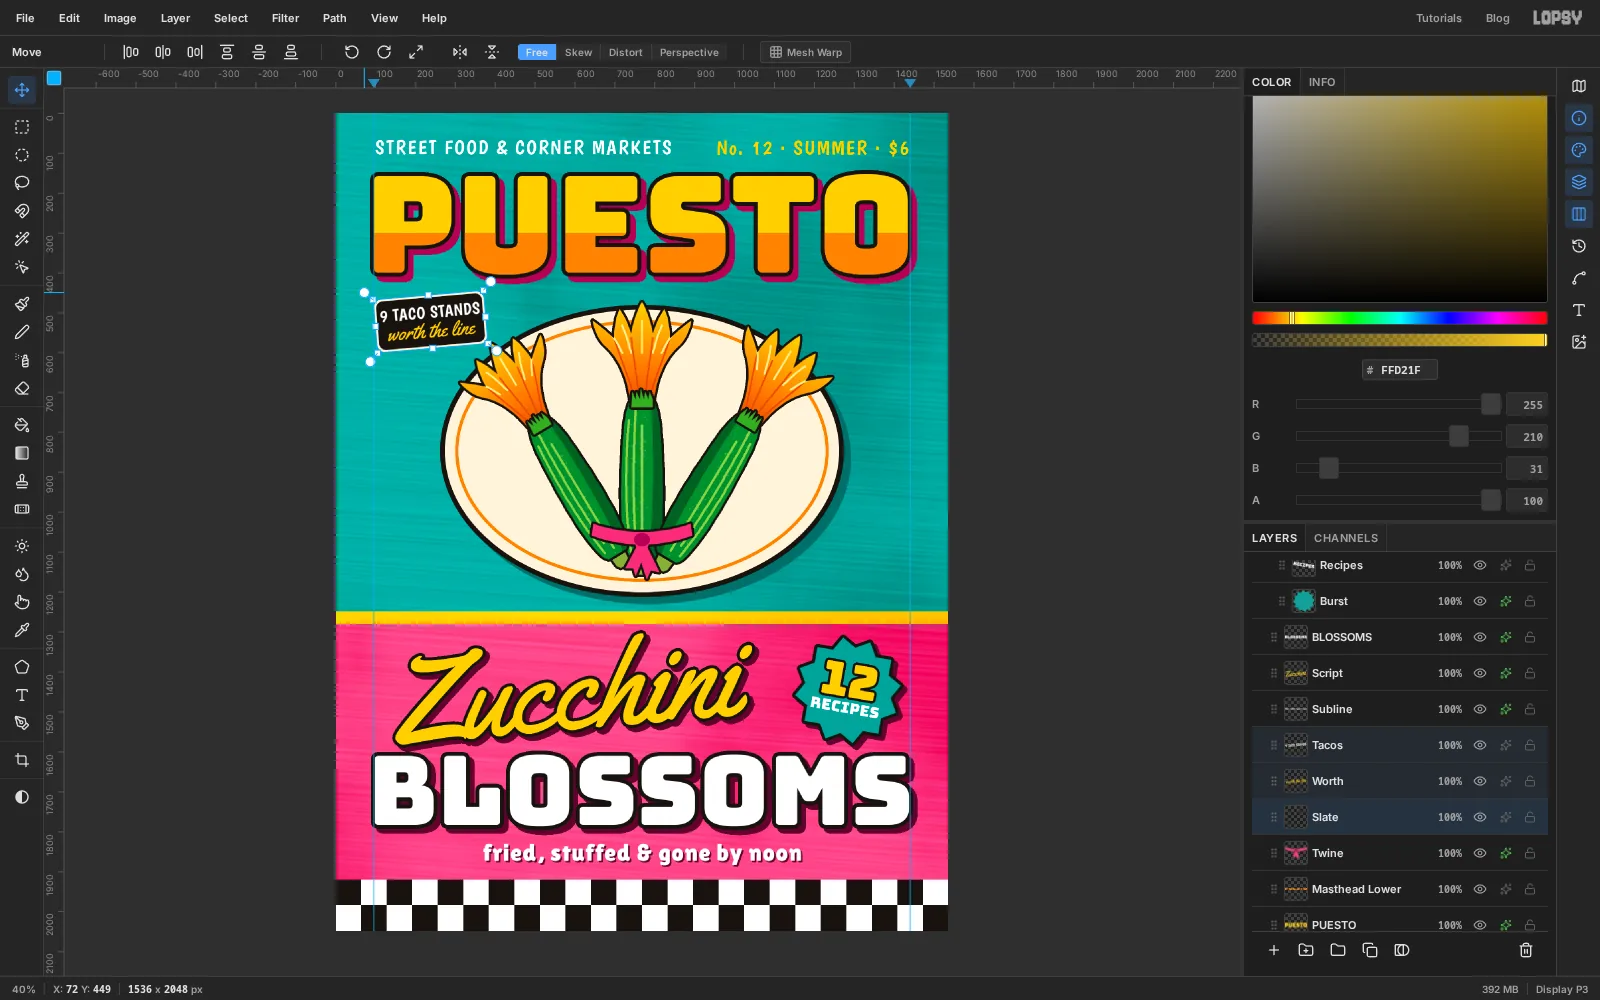
-
Draw a call-out arrow with the Pen tool
Click
Twine. In yellow Yellowtail at Size68, type¡de temporada!, which means "in season" (the opening ¡ is Option+1 on a Mac, or copy it from here). Rename the layerTemporada. Give it a Stroke of5in and a Drop Shadow with offsets of5, Blur0, Opacity100and the colour . Tilt it about 8° anticlockwise and drag it into the bottom left of the wall, starting on the left guide and sitting a little above the yellow stripe.Click
Twineagain and add a layer calledArrow. Set the foreground to white and pick the Pen tool. Press about 20 px past the end of the script and drag a short way right and slightly down. Dragging as you place a point pulls out handles and makes a curve. Then press just inside the rim of the medallion, about 110 px to the right and 80 px up from the first point, and drag up and to the right. You should see a smooth swoop that ends pointing at the twine bow.Set Stroke to
12in the options bar and press Enter. The path is painted onto the layer in the foreground colour. To hide the blue path outline afterwards, open the Paths panel and clickPath 1once to deselect it.With the Lasso, draw an arrowhead at the end of the stroke, a triangle with a small notch in its back edge, fill it with white and deselect. Add a Stroke of
6in to the layer.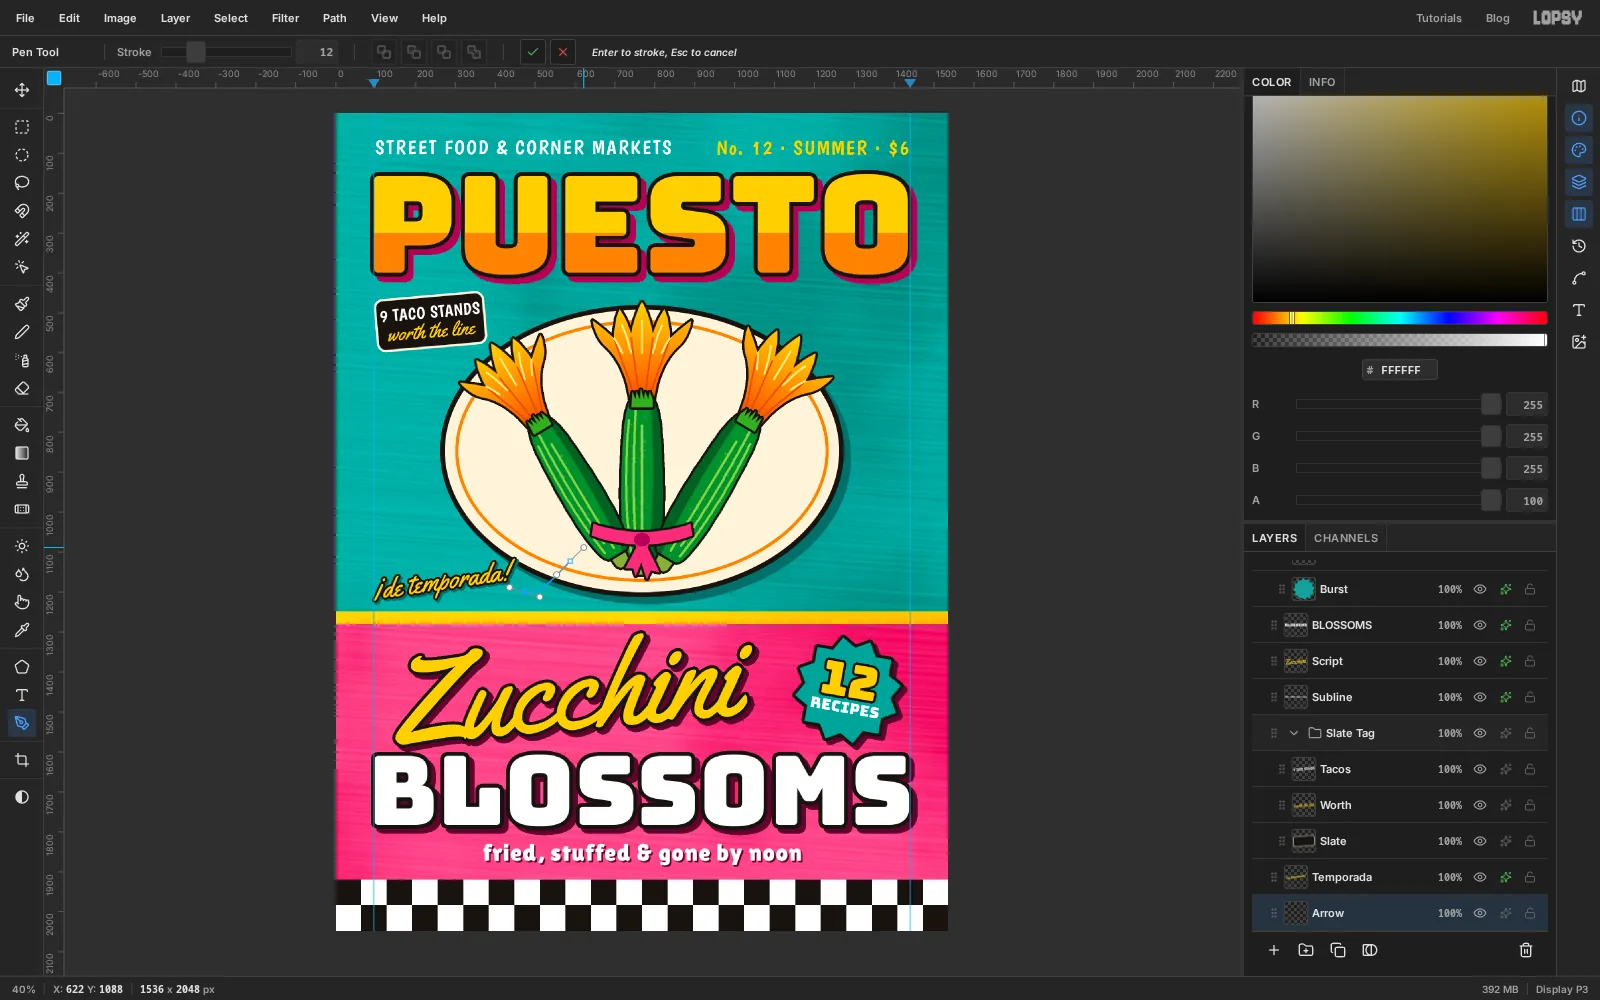
-
Scatter sparkles with copy and paste
Click
Twineand add a layer calledSparkle. With the Lasso, draw a four-point sparkle about 100 px wide and 125 px tall at the top right of the wall, near1385, 525: four points with sides that curve inward between them. Fill it with and deselect.Marquee around it and press Cmd+C, then Cmd+V. The copy arrives on a new layer, already selected. With the Move tool, drag it to a new spot, then hold Cmd and drag a corner handle inward to shrink it. Press Cmd+D.
Paste four more times and place them the same way, so you end up with a big and a small sparkle in each of three places: top right of the wall, bottom right, and left of the medallion. Vary the sizes between about 40% and 80%.
Each paste made its own layer. Click the top
Pasted Layerand press Cmd+E five times to merge them all down intoSparkle, then add a Stroke of5in . One effect now outlines all six.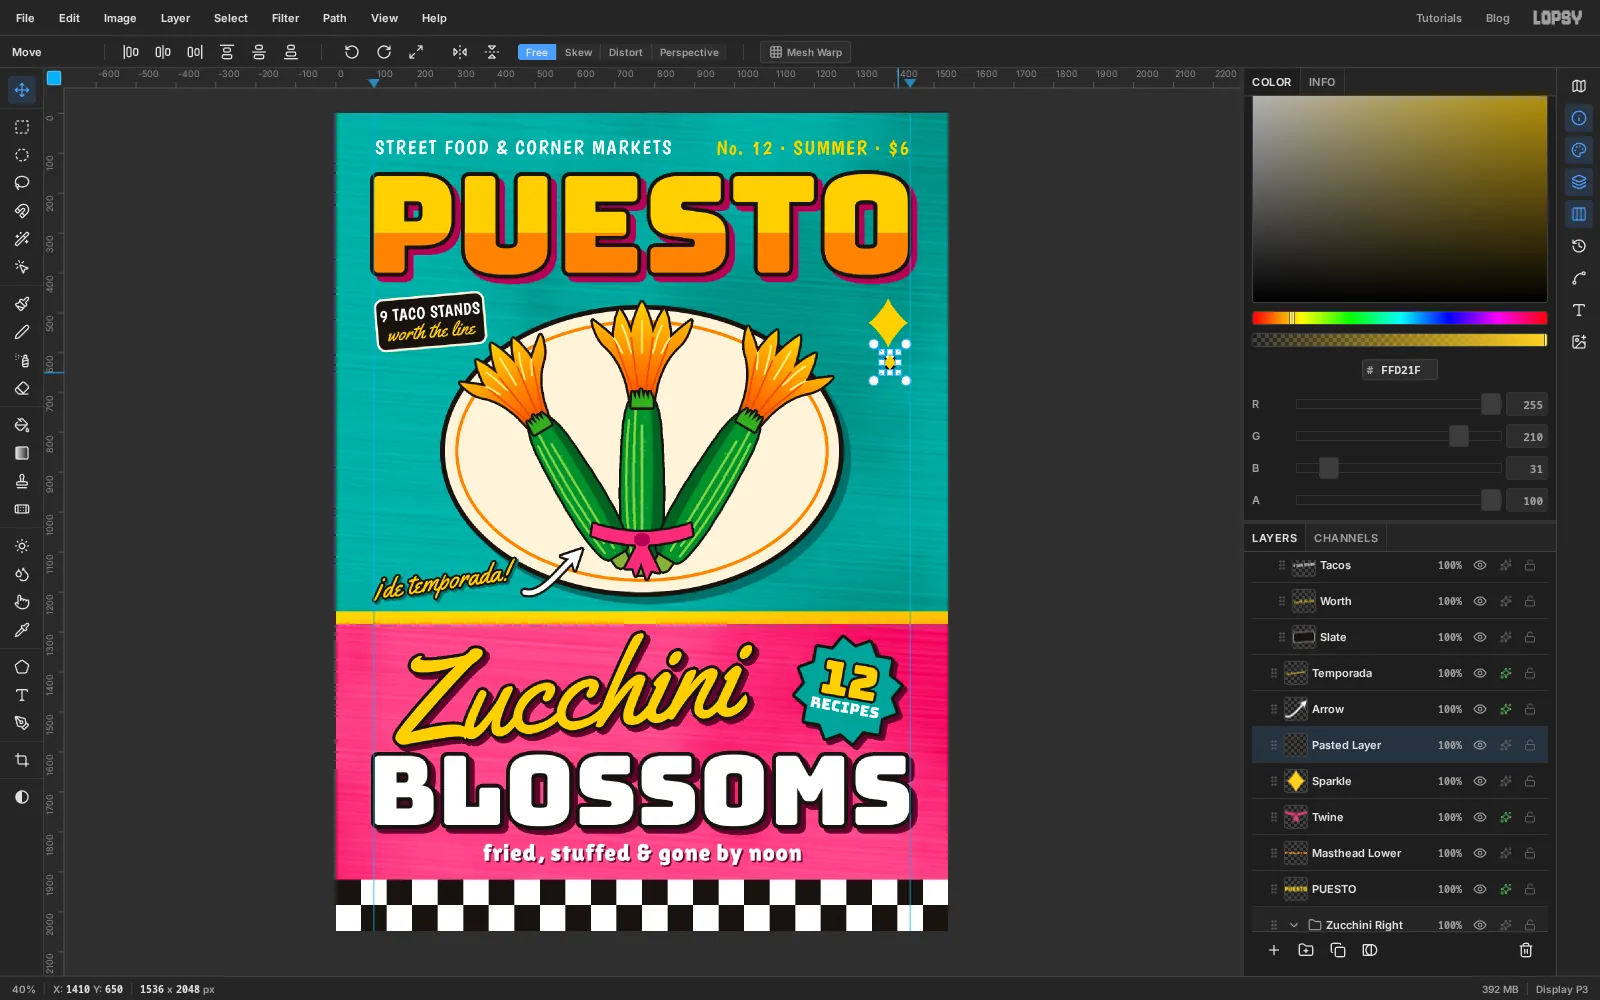
-
Add the barcode and export
Click
Checkerand add a layer calledBarcode Box. With the Shape tool on Rectangle, set the fill to white, the stroke to at Width5and Corner Radius6. Draw a box about 290 px wide and 85 px tall at the bottom right, with its right edge on the guide and the same amount of checker showing above it as below.Click
Barcode Box, set the foreground to , and typePUESTO12in Libre Barcode 39 at Size68. The font turns the letters into bars. Rename the layerBarcode. Centre it in the box with an even margin on all four sides, then group the two layers asBarcode Tag.Look over the whole cover once more before you export. Check that nothing touches something it shouldn't: the masthead shade and the middle blossom, the slate and the left blossom, the Z and the B, the subline and the checker.
Choose File → Save Project to keep the layered file, then File → Quick Export PNG.
To make your own issue, retype the cover lines, repaint the medallion with whatever is in season, and swap the wall and dado colours. The outline and hard shade will hold the cover together with any palette.