Paint a Rótulo-Style Laundromat Party Invitation
Make a weathered, hand-painted Mexican-American shop-wall invitation in Lopsy, with sign-painter lettering, arched text, a painted washer and chipped stucco.

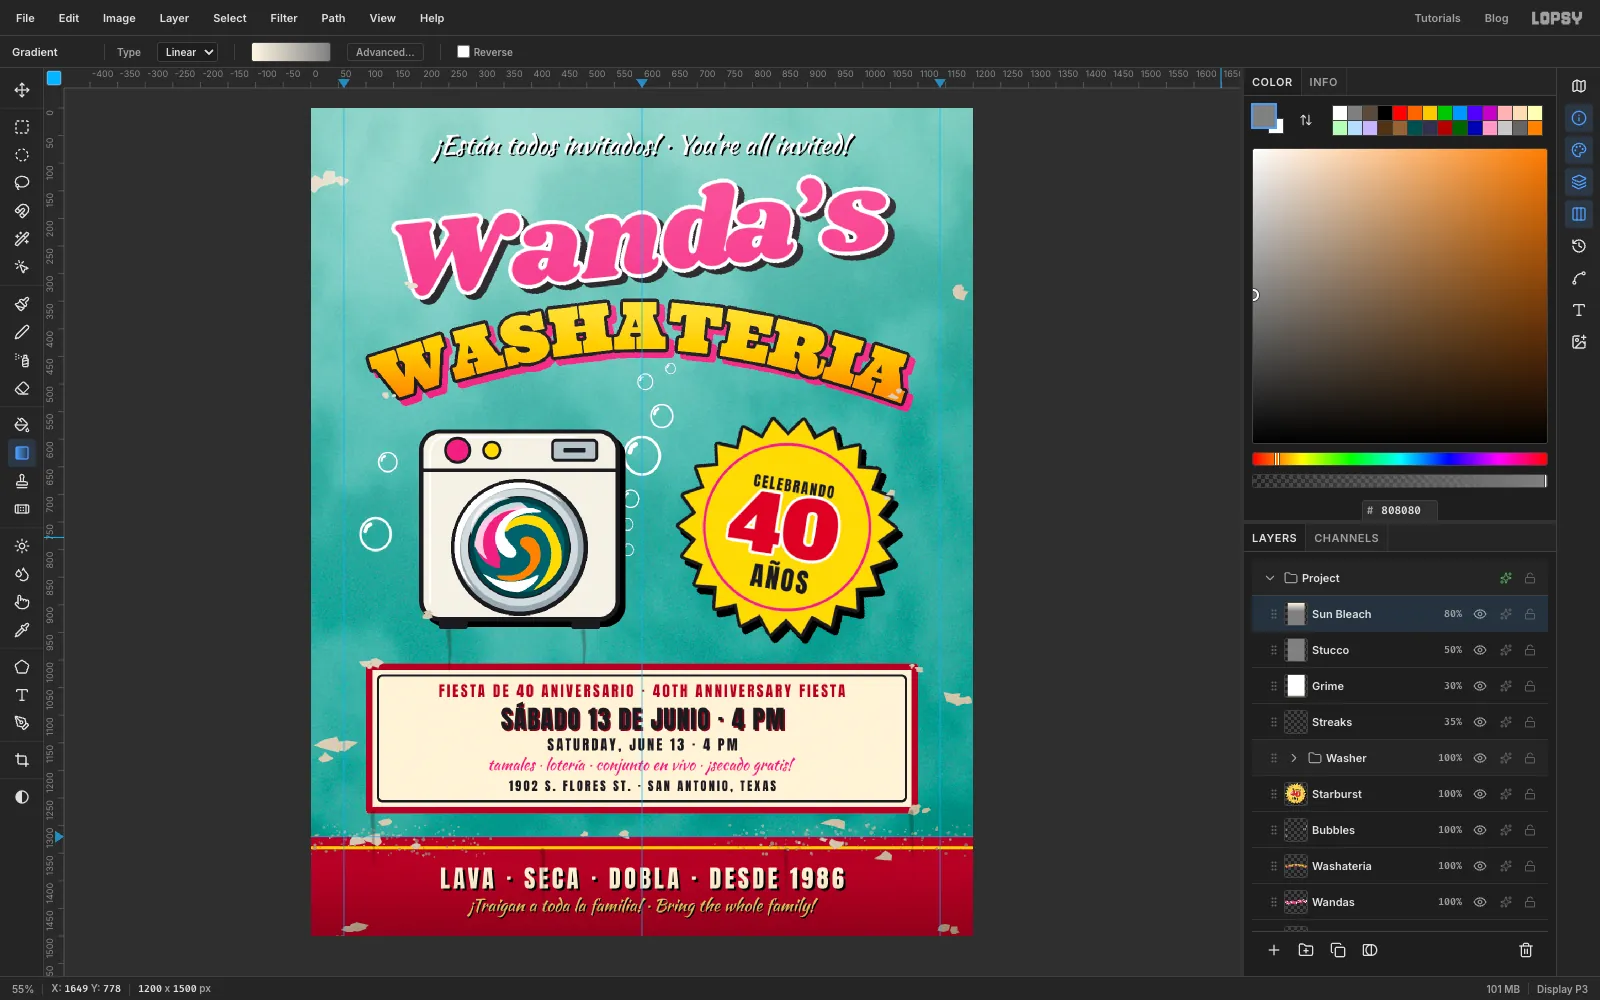
All over South Texas and Mexico, small shops advertise with rótulos: signs painted straight onto the wall by a local sign painter. A taquería, a tire shop or a laundromat gets its name in fat brush lettering, a cheerful picture of what it sells, a starburst for the special, and a painted wainscot along the bottom of the wall. The lettering has a white keyline and a hard black "shade", the colours are bright enamel, and then the Texas sun gets to work. The paint fades, chips off the stucco and picks up grime.
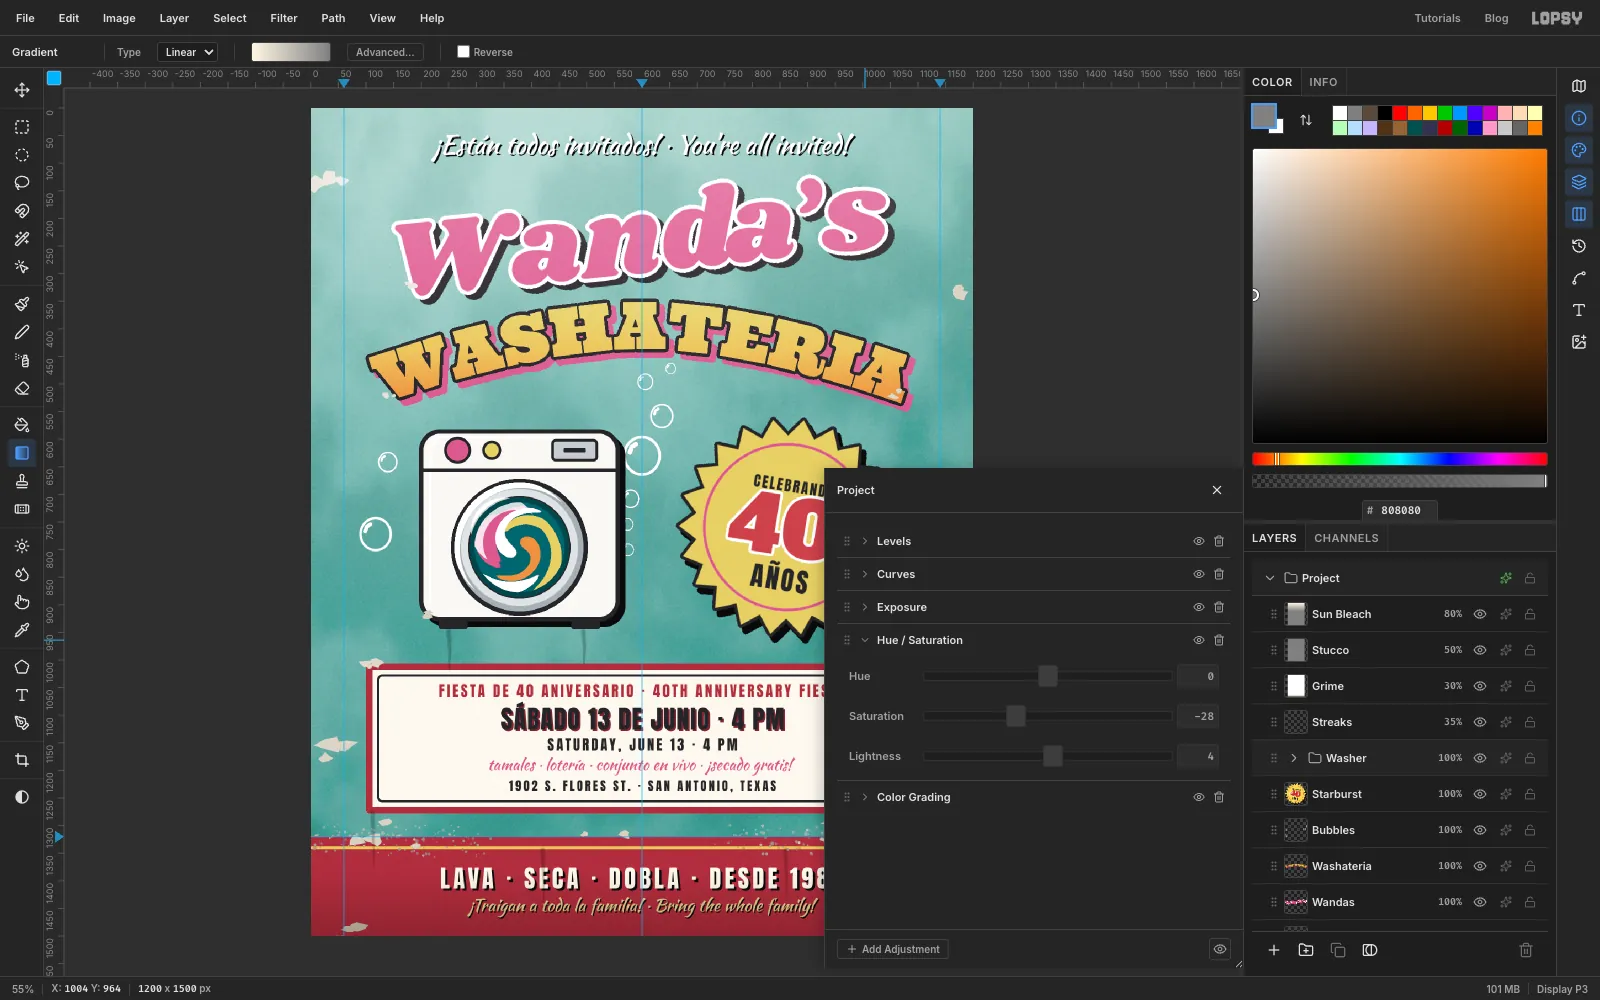
In this tutorial you'll paint one as a party invitation. Wanda's Washateria, a fictional family laundromat in San Antonio, is turning 40, and the whole neighbourhood is invited. It's 1200 × 1500 px, a 4:5 portrait that prints well and works on a phone, and it has:
- a sun-faded turquoise stucco wall with a red wainscot (the zócalo) and a yellow pinstripe
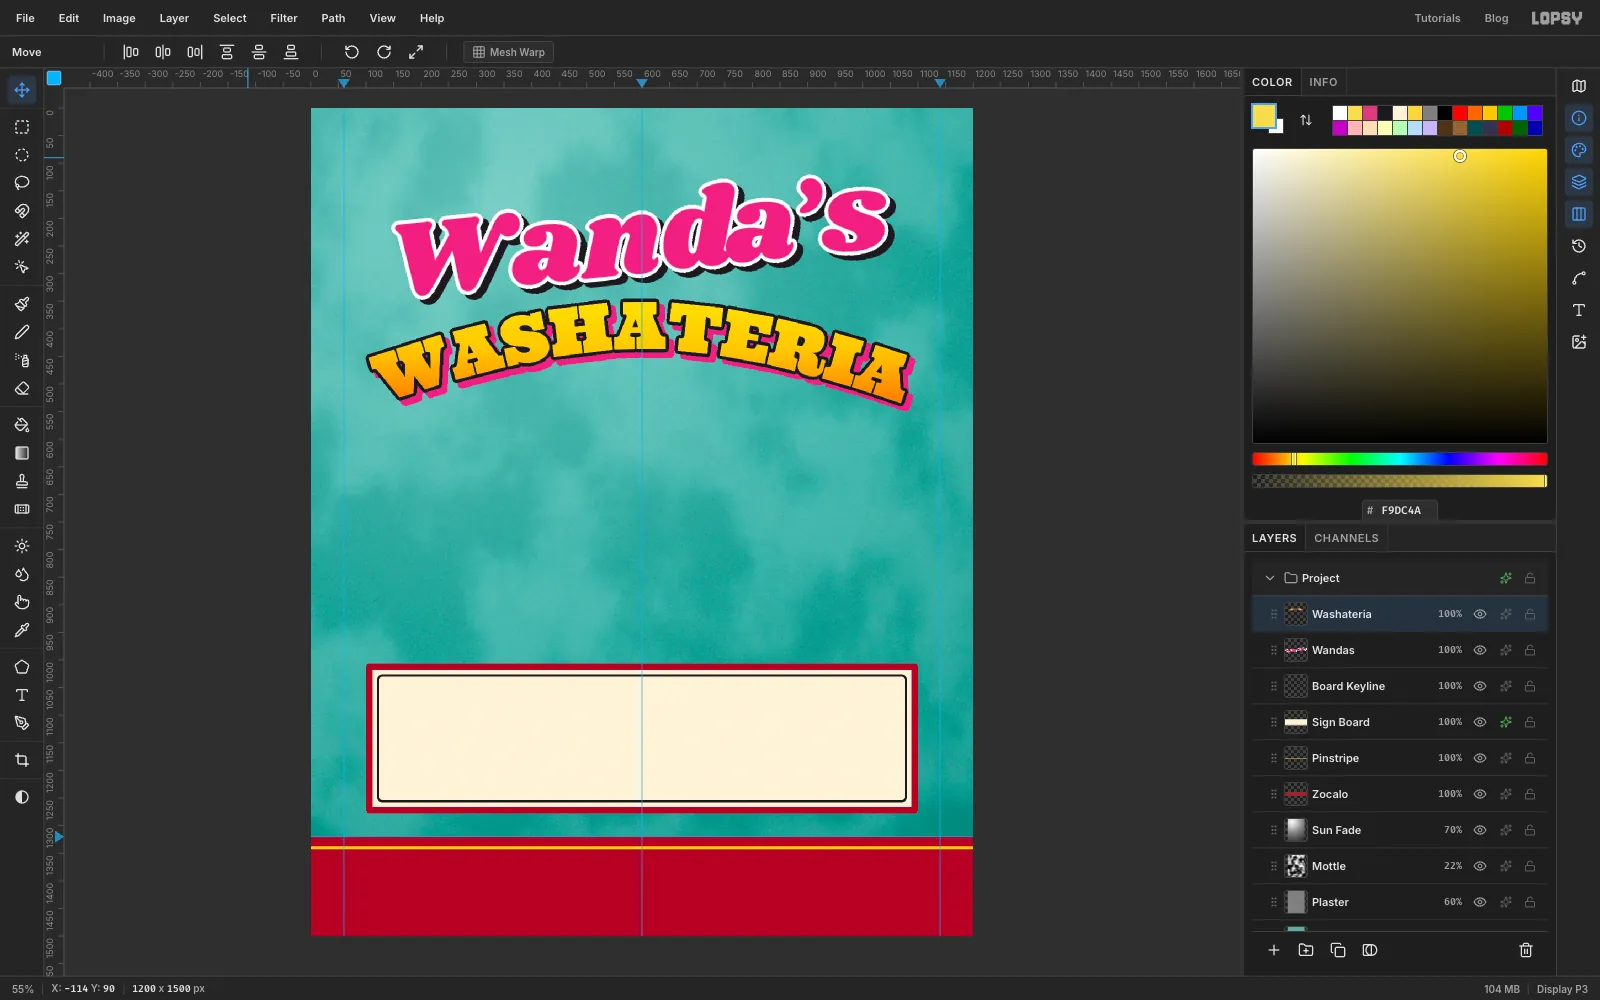
- Wanda's in sign-painter script with a keyline and a shade, and WASHATERIA arched along a Pen curve
- a naive washing machine with laundry swirled by Liquify, and a stream of soap bubbles
- a 40 AÑOS starburst, a cream sign board with the party details, and bilingual copy
- real weathering: paint chips that show bare plaster, grime streaks, stucco relief and a bleached top
The tools you'll use:
- guides, the grid with Snap, the Rectangular and Elliptical Marquees and the Lasso, with Shift to add and Option to subtract
- the Shape tool (rectangles and ellipses with fill, stroke and corner radius) and the Pen tool
- Text in Shrikhand, Ultra, Anton, Alfa Slab One and Kaushan Script, and text on a path
- the Brush, Spray, Gradient and Edit → Fill
- Copy, Cut, Paste, the Move tool's scale and rotate handles, Duplicate Layer and Merge Down
- Quick Mask, Cmd-clicking a layer thumbnail, Select → Shrink and Inverse
- Liquify, Add Noise, Gaussian Blur, Emboss and Clouds
- Stroke, Drop Shadow and Color Overlay, Rasterize Layer Style
- the Overlay, Soft Light and Multiply blend modes, groups, and a group Hue / Saturation adjustment
The palette:
-
Wall
-
bare plaster
-
Wainscot red
-
pinstripe
-
board cream
-
Rosa mexicano
-
sign-painter black
-
WASHATERIA
-
Starburst red
-
porthole teal
-
Chrome
-
washer enamel
-
Streaks
-
grime
-
script yellow
-
Coin slot
-
glass edge
-
date shade
-
Start the document and paint the wall
Choose File → New and make a document 1200 wide and 1500 high, in pixels. Every layer you add lives inside Project, the group at the top of the Layers panel that each new document starts with.
Drop guides by clicking the rulers. Click the top ruler at 60, 600 and 1140 for the two side margins and the centre line. Click the left ruler at 1320: that's where the red wainscot will start.
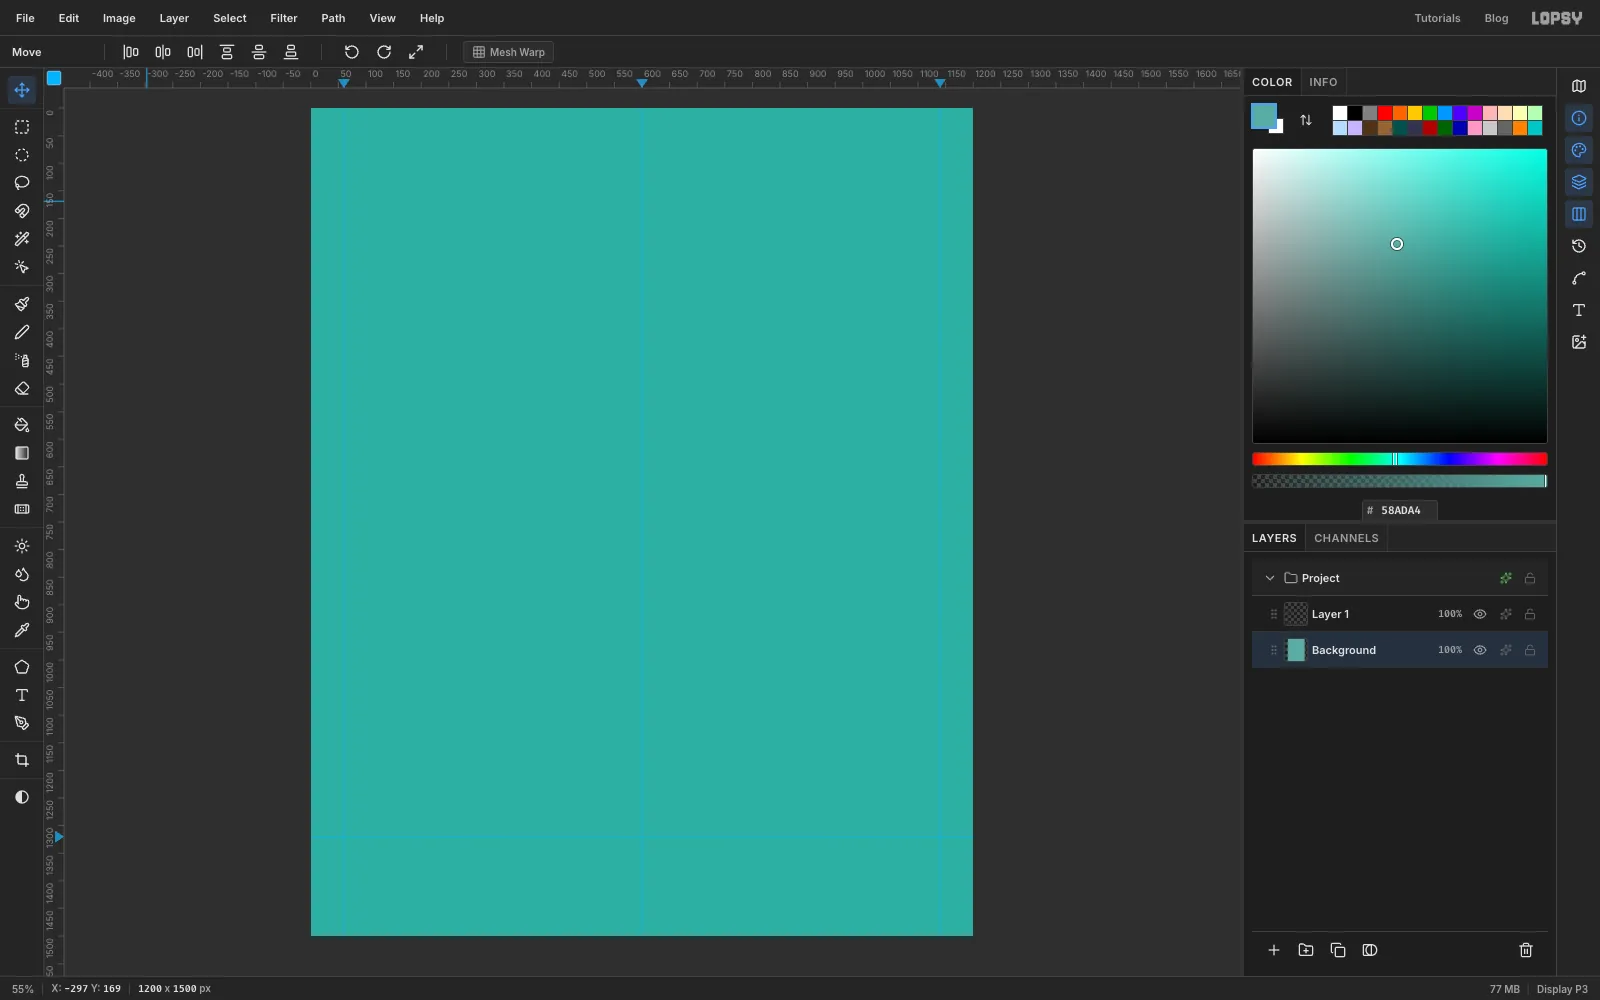
Set the foreground colour to the wall turquoise , select the Background layer and choose Edit → Fill.
-
Give the wall a plaster grain
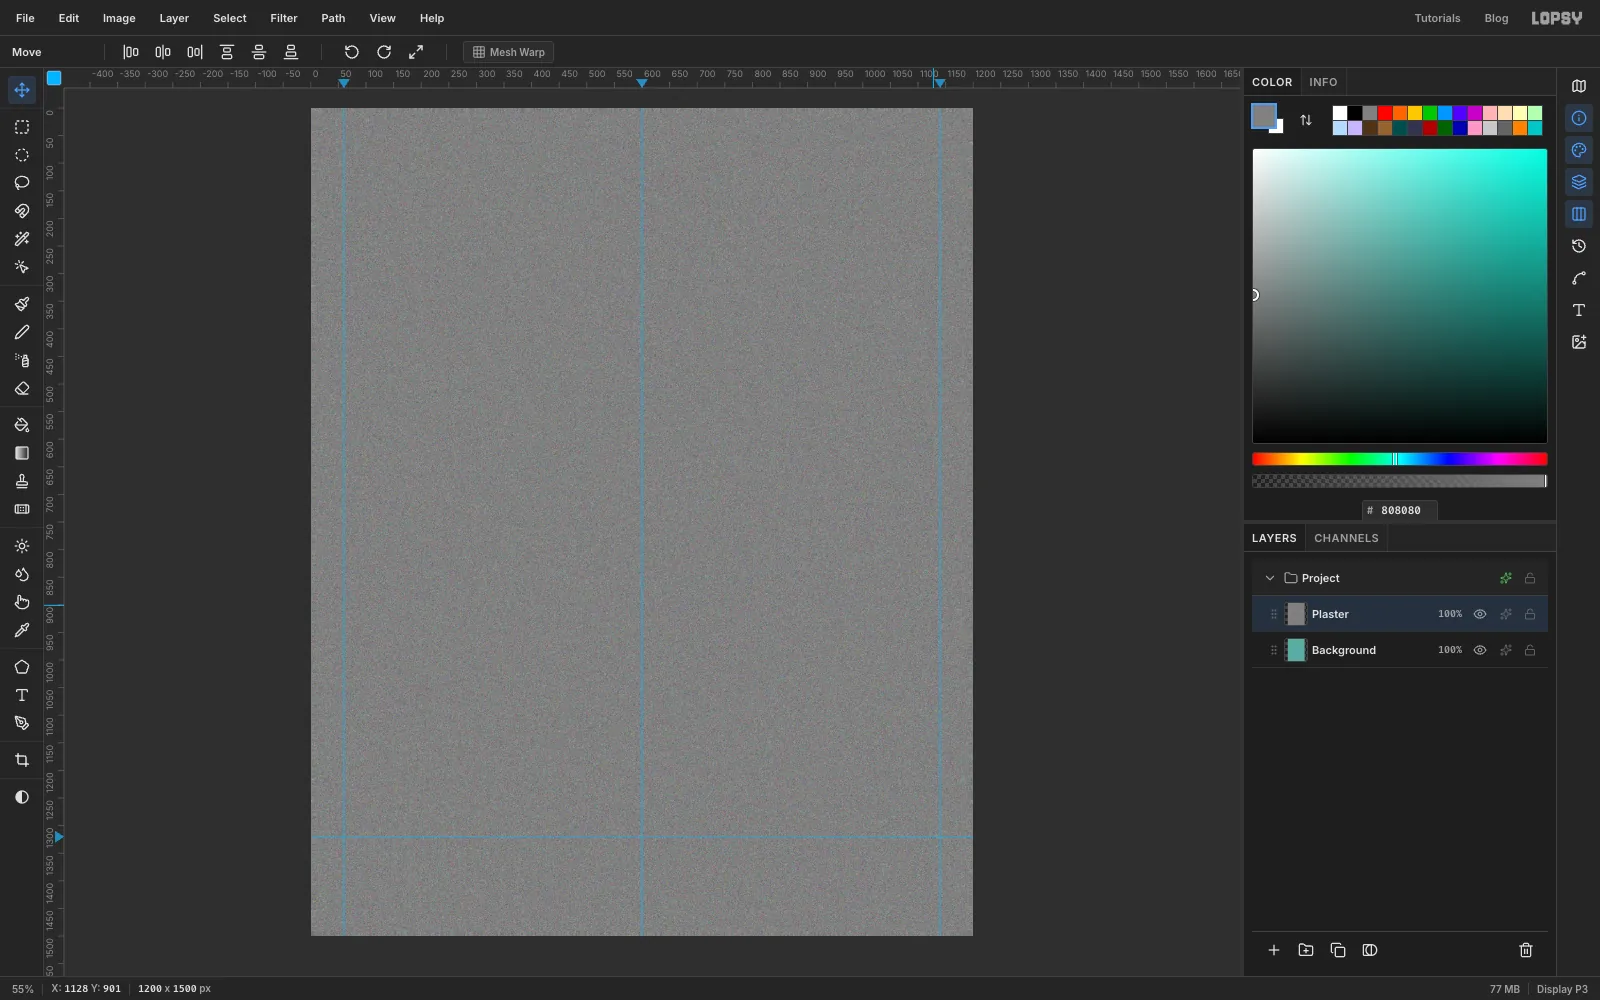
A painted wall is never flat. Rename the empty Layer 1 to Plaster and fill it with mid-grey .
Run three filters on it, in this order:
- Filter → Add Noise… with Amount 45
- Filter → Gaussian Blur… with Radius 1.5, which turns the pixel noise into little lumps
- Filter → Emboss… with Angle 135 and Strength 70, which lights the lumps from the top left
-
Fade the paint unevenly
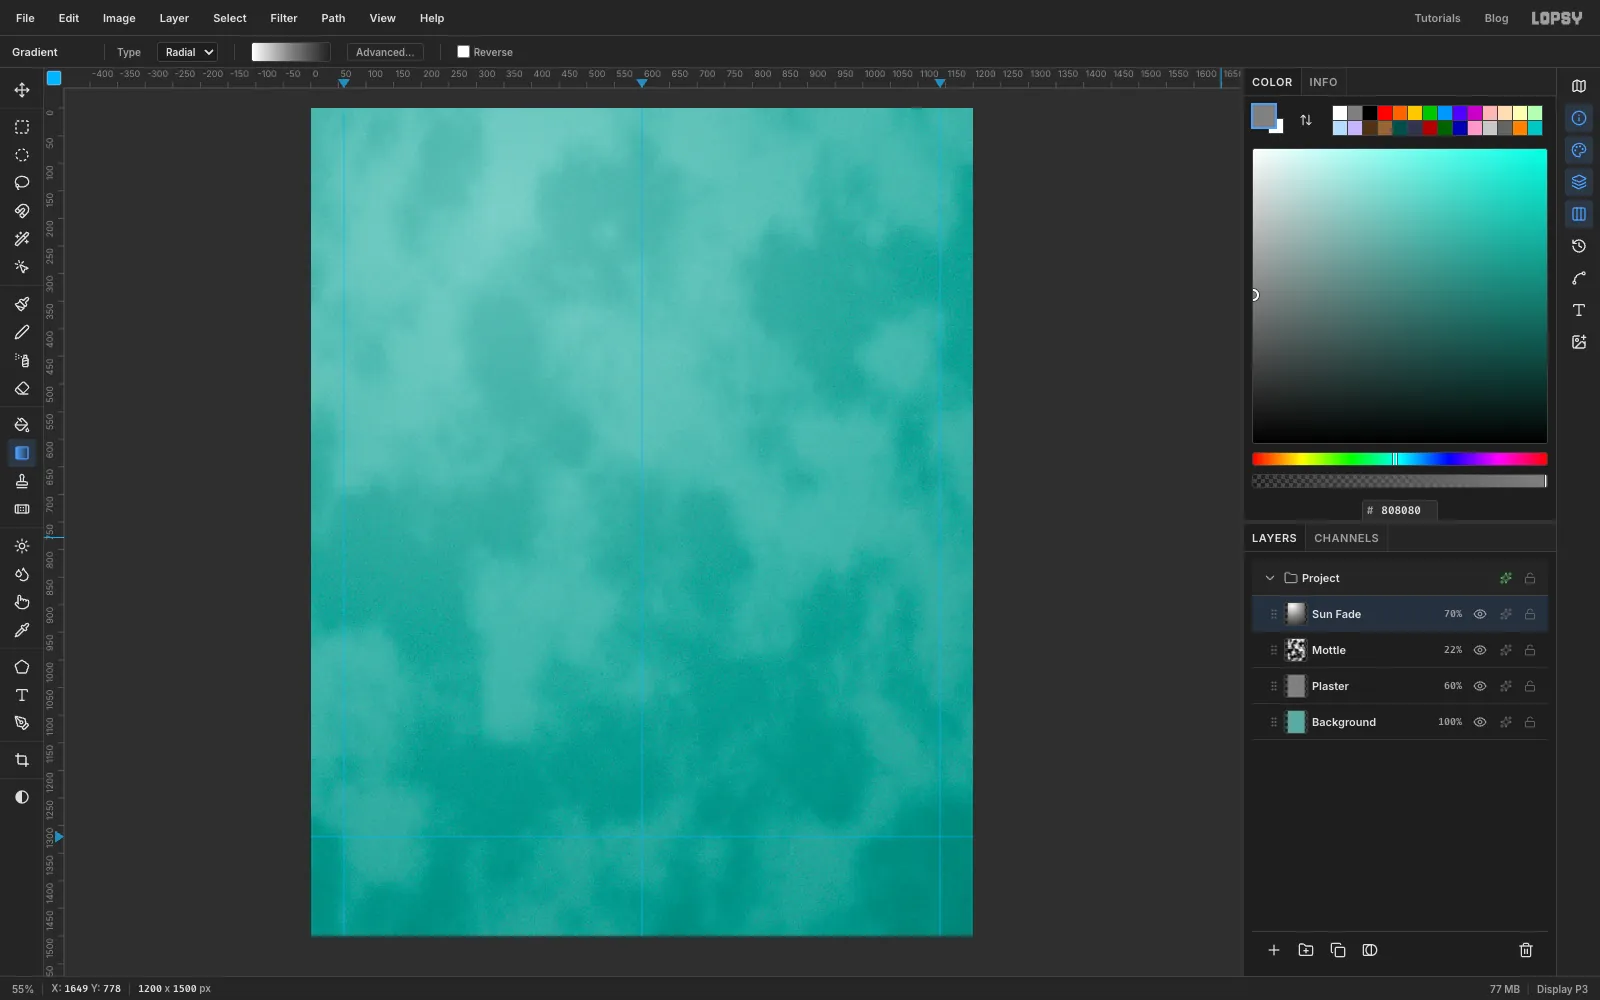
Open the Plaster layer's effects (the ✦ button on its row), set the blend mode to Overlay, and set the layer opacity to 60%. Mid-grey disappears in Overlay, so only the grain shows on the wall.
Add a layer called Mottle and fill it with mid-grey too. Run Filter → Clouds… at Scale 10, then Gaussian Blur at 6. Set it to Soft Light at 22%. These soft patches look like a wall that's been touched up in slightly different batches of paint.
Add a layer called Sun Fade. Pick the Gradient tool, choose Radial, and use Advanced… to set three stops: white , mid-grey at the middle and dark grey at the end. Drag from the upper left of the wall, about a quarter of the way in, to the bottom-right corner. Set it to Soft Light at 70%. The wall is now lighter where the sun hits it and darker toward the corners.
-
Mark out the wainscot on the grid
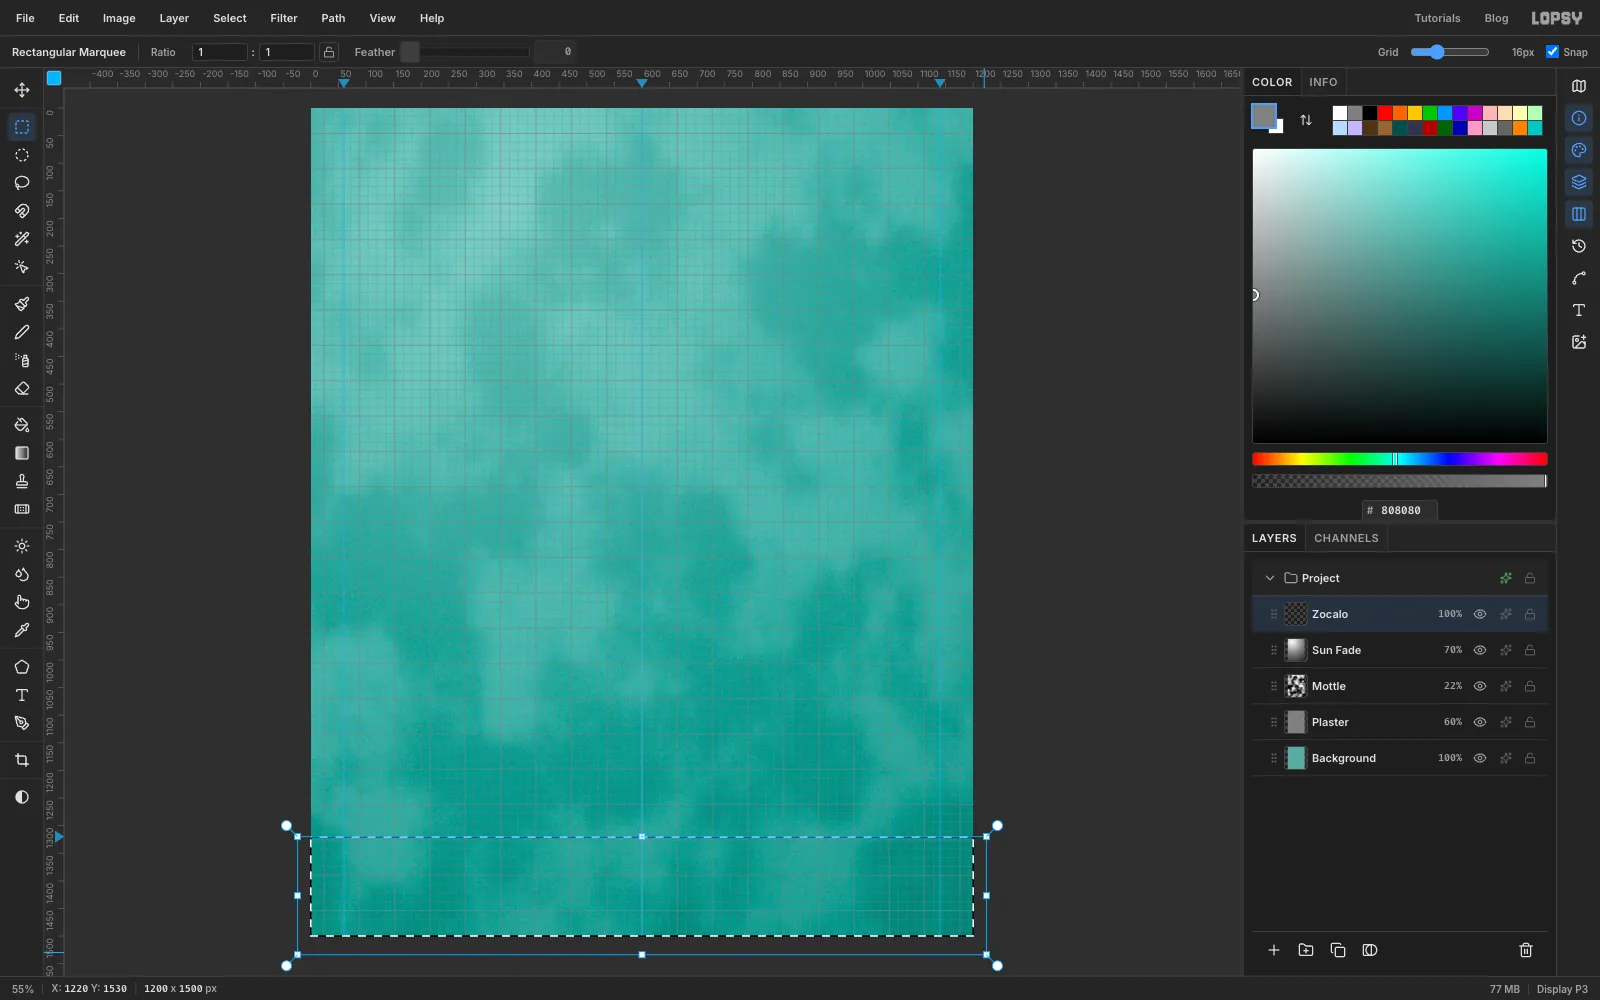
Add a layer called Zocalo. Choose View → Show Grid. This also turns on Snap, so the marquee edges lock to the grid and to your guide.
With the Rectangular Marquee, drag from just outside the left edge of the canvas, on the 1320 guide, down past the bottom-right corner. The top edge snaps to the guide.
-
Paint the wainscot and its pinstripe
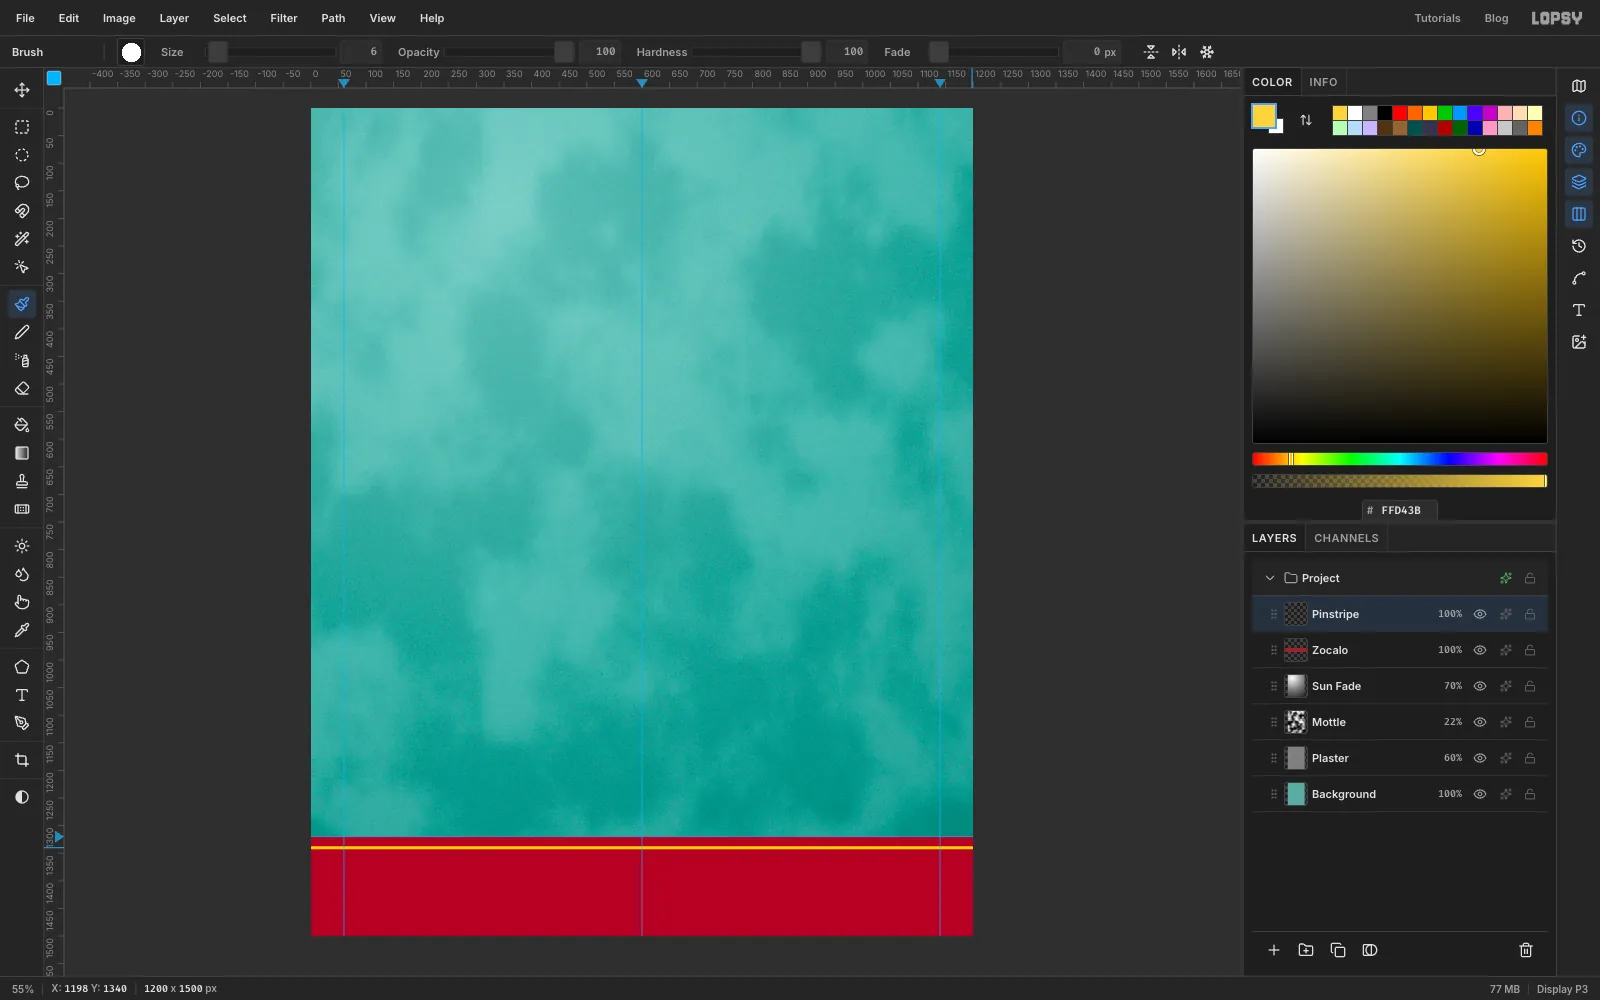
Set the foreground to wainscot red and choose Edit → Fill. Press Cmd+D to deselect, then turn the grid off again with View → Show Grid, and untick Snap in the options bar.
Add a layer called Pinstripe. Pick the Brush, open the brush settings and set Size 6, Hardness 100. Choose pinstripe yellow . Click at the left edge, 20 px below the top of the red, hold Shift and click at the right edge. You get a straight line, like a sign painter running a striping brush along a straightedge.
-
Paint the sign board
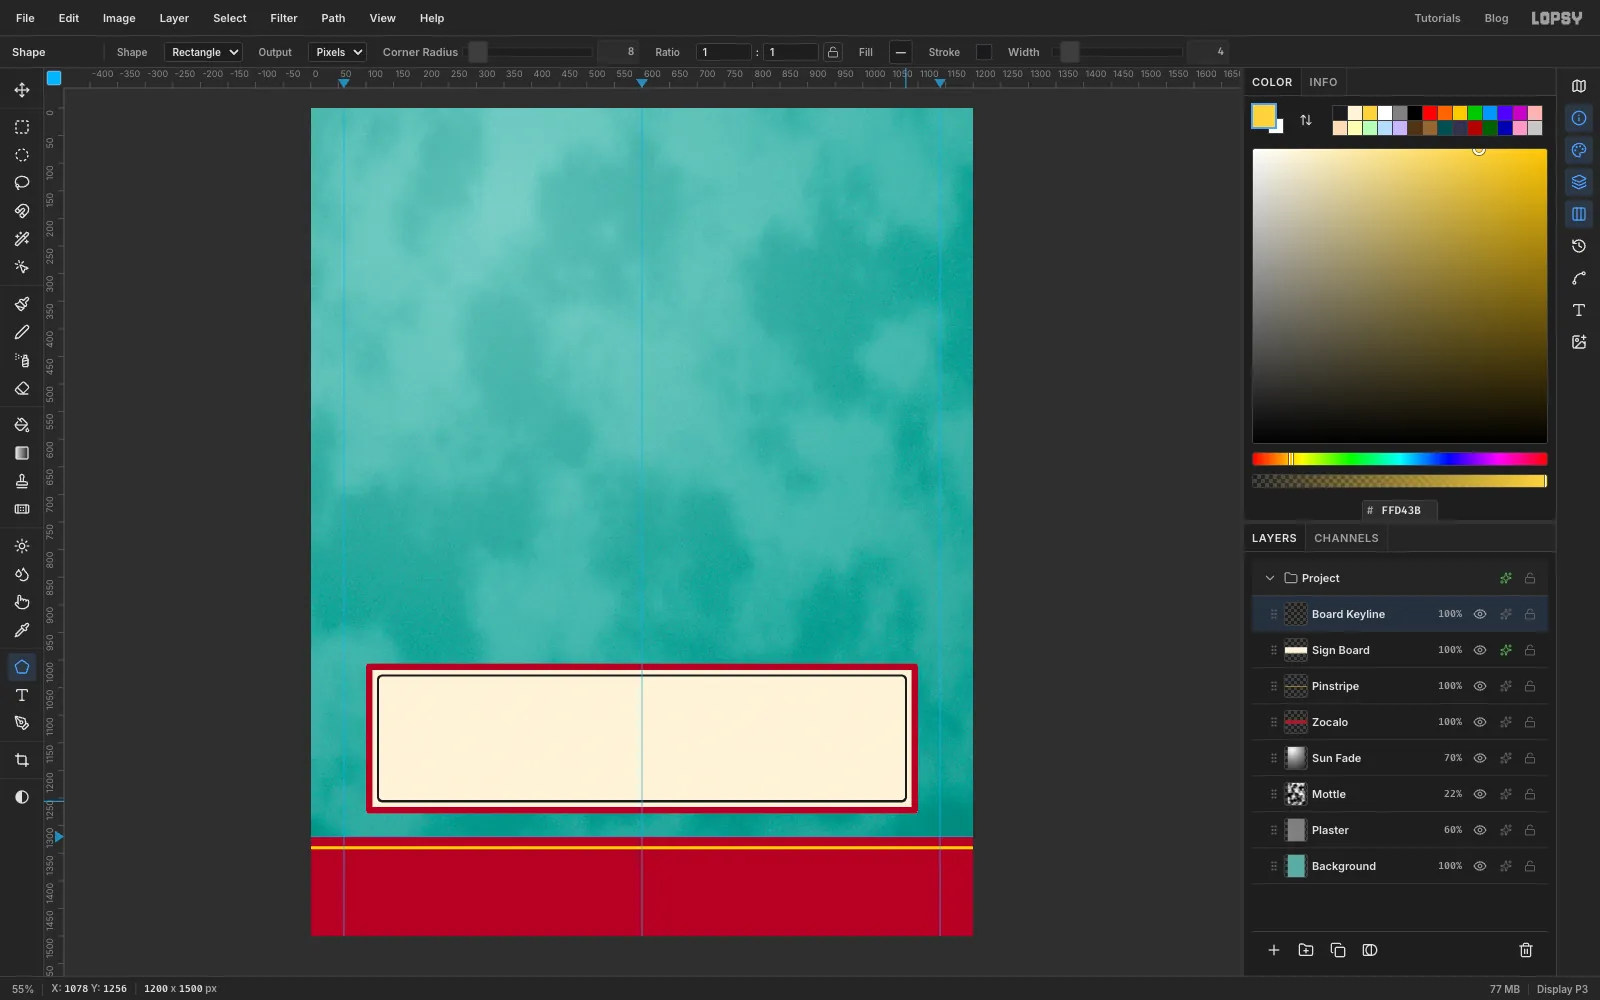
Add a layer called Sign Board. Pick the Shape tool and set Shape to Rectangle, Output to Pixels and Corner Radius to 6. Click the Fill swatch and type board cream , and remove the stroke.
The board is 1000 × 272 px, centred on the middle guide, with its bottom edge about 40 px above the wainscot. Shapes grow out from the point where you press, so start at the board's centre: press on the centre guide at about y 1142, and drag out until the corner reaches x 1100, y 1278. That leaves a 100 px margin on each side.
Open the effects drawer, tick Stroke, set Width 12, colour and position inside. That's the red frame.
Add a layer called Board Keyline. Draw another rectangle from the same centre point, with no fill, a 4 px stroke in sign-painter black and Corner Radius 8. Stop when it sits about 10 px inside the red frame all round, about 956 × 228 px.
-
Letter "Wanda's" in brush script
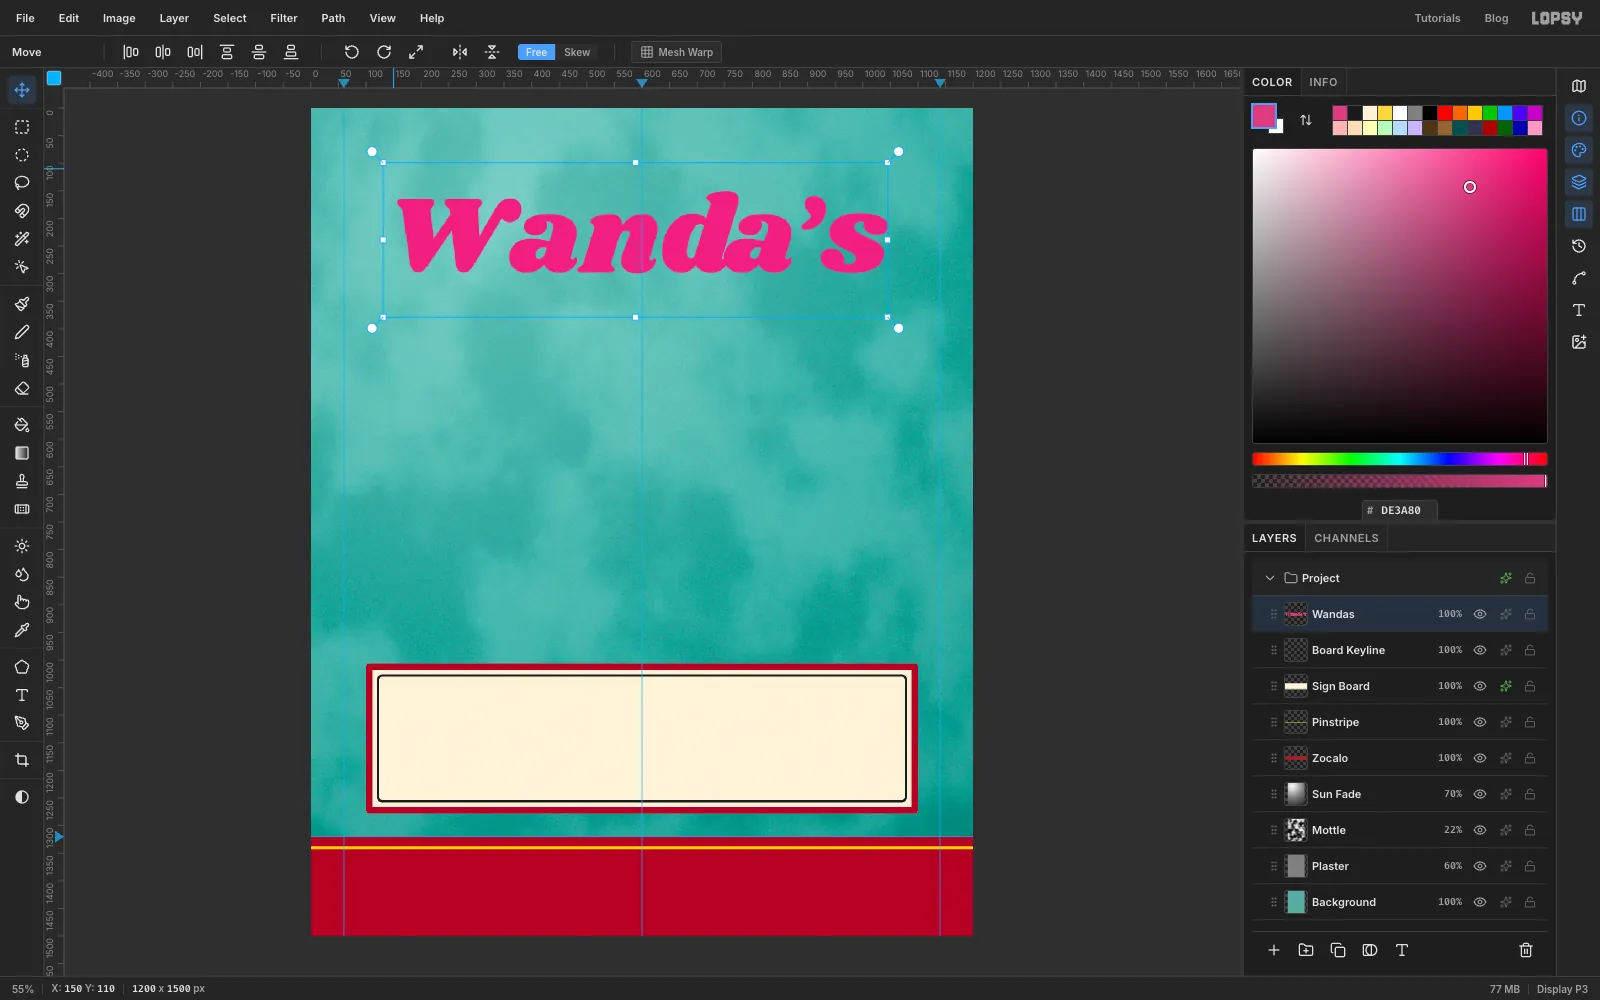
Select the Board Keyline layer so the new text lands above it. Pick the Text tool, choose Shrikhand at size 200 and rosa mexicano , click in an empty part of the wall and type
Wanda’s. Use a curly apostrophe (’), as a sign painter would. Press Tab to finish, then double-click the layer name and call it Wandas.Switch to the Move tool and nudge it with the arrow keys until it's centred on the middle guide, with the middle of the word about 224 px down from the top.
-
Add the keyline and the shade
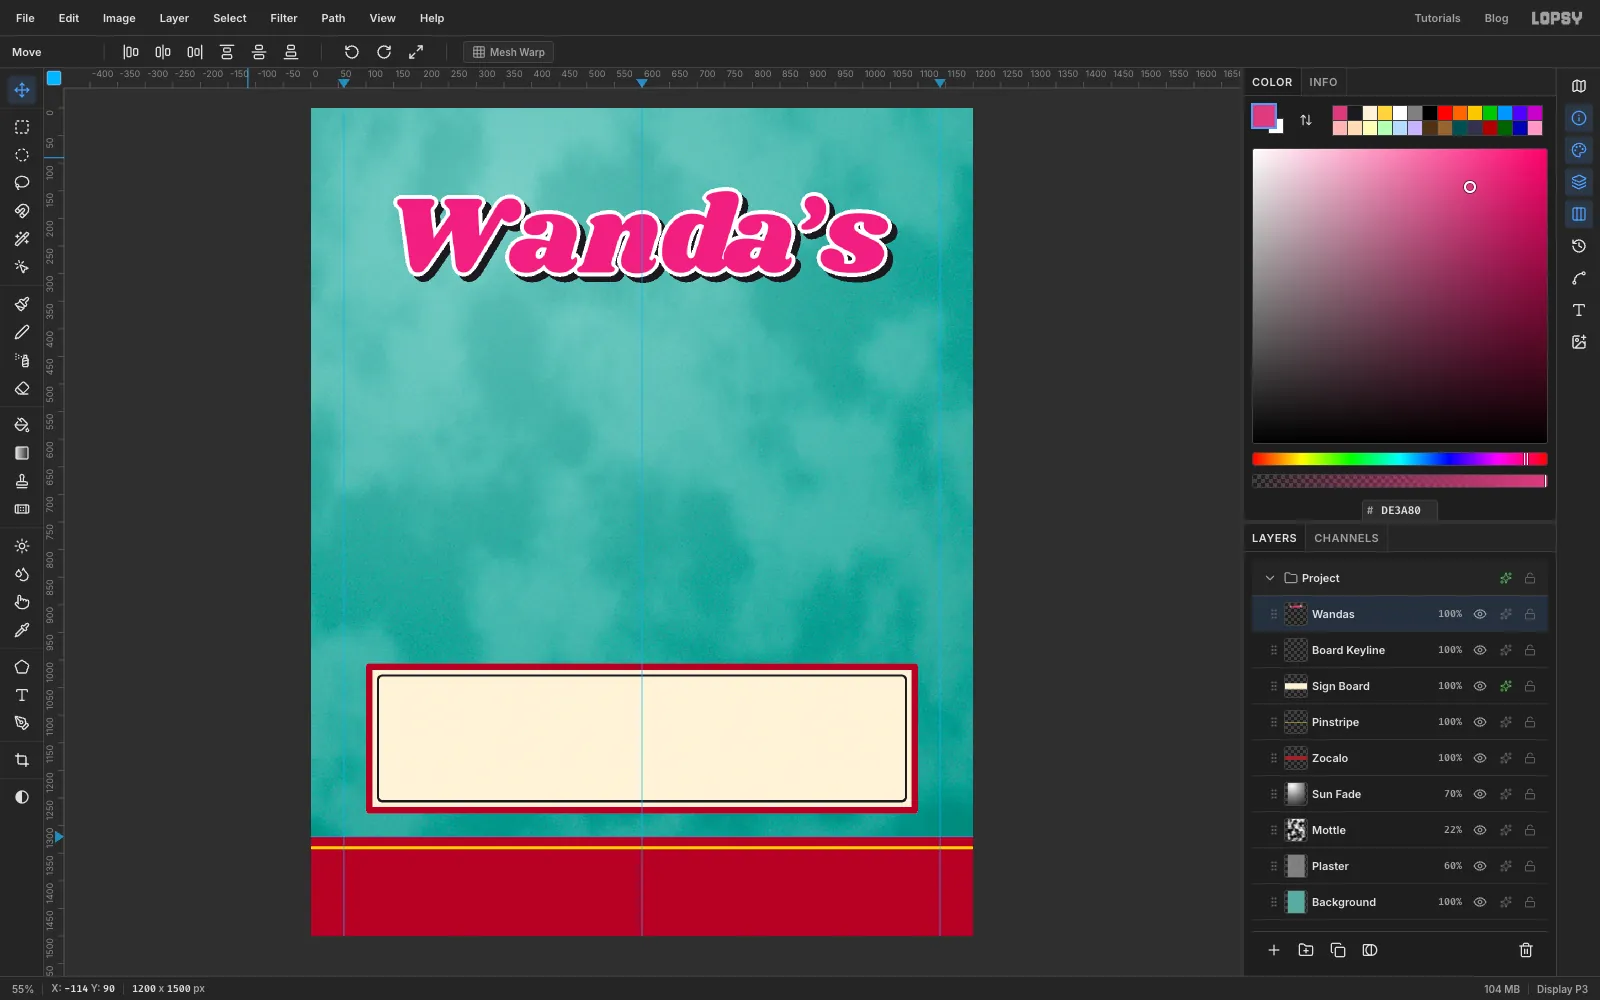
Rótulo lettering is built in layers of paint: the letter, a thin outline called a keyline, and a solid "shade" that makes it pop off the wall.
- Click Rasterize Layer at the foot of the Layers panel. From here on it's paint.
- In the effects drawer, add a Stroke of 7 in white, outside, then click Rasterize Layer Style.
- Click Duplicate Layer. Check that the copy lines up exactly with the original (a duplicate can land 10 px down and to the right); if it moved, nudge it back with the arrow keys.
- Select the original layer underneath. Add a Color Overlay in black and rasterize its style. With the Move tool, press Right ten times and Down ten times (or Shift+arrow once each) to push it 10 px down and to the right.
- Select the copy and choose Layer → Merge Down.
Now letter, keyline and shade are one layer.
-
Tilt the name
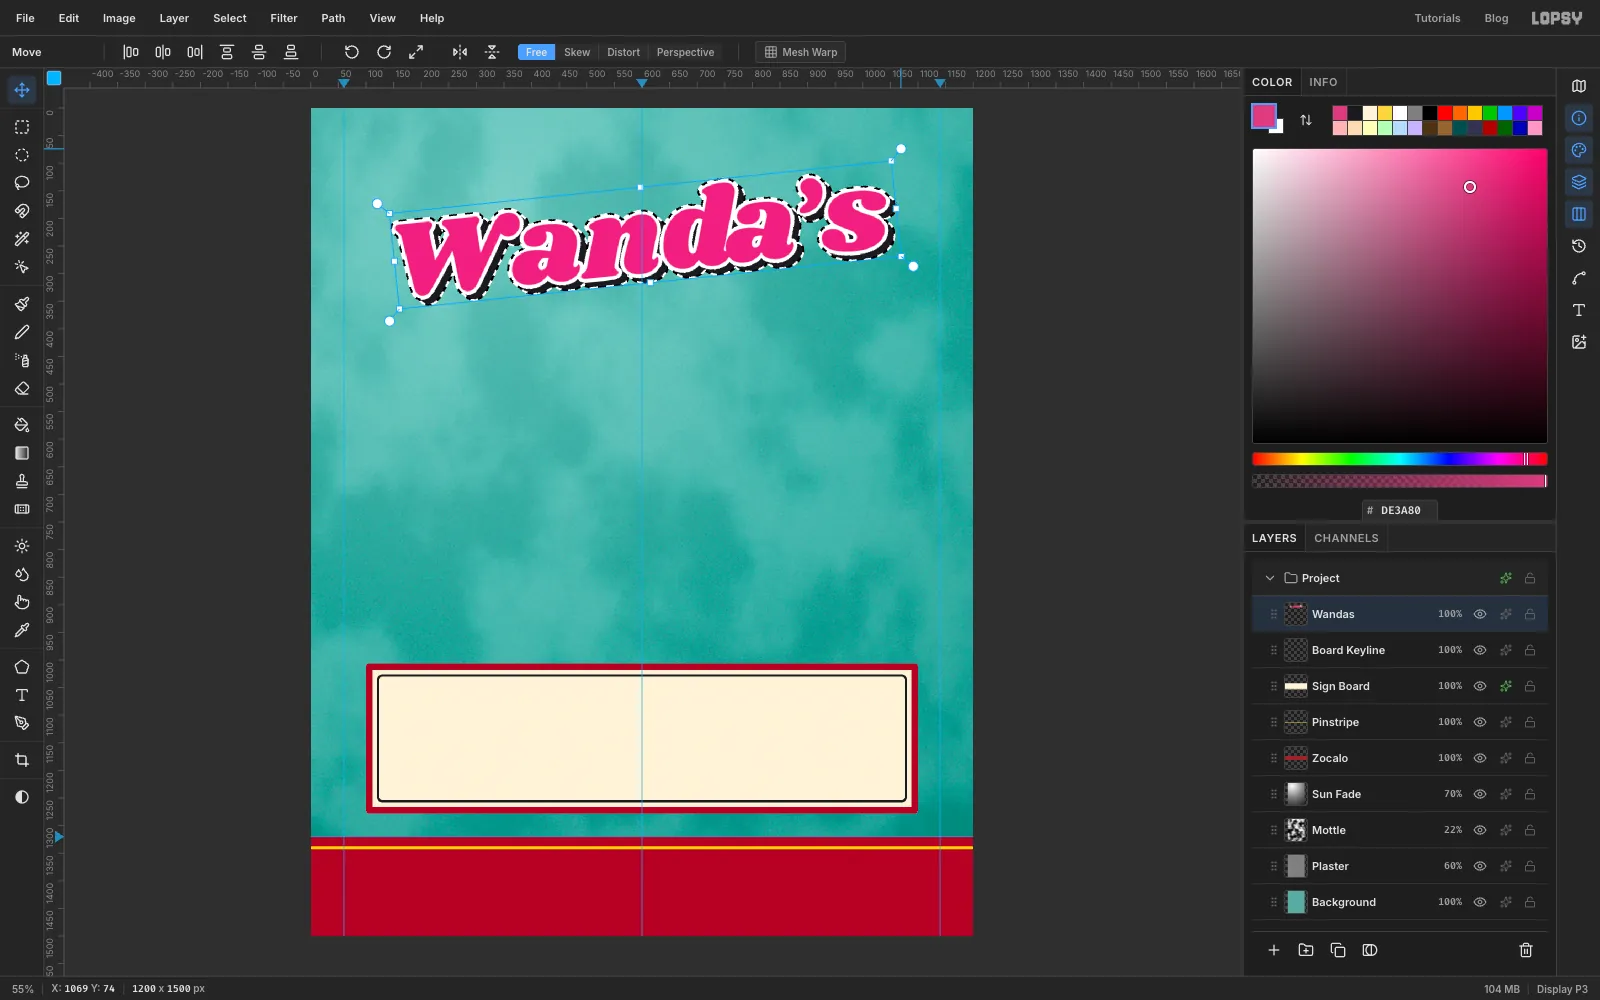
Hand-painted names often climb a little toward the right. Cmd-click the Wandas layer thumbnail to select its outline. With the Move tool, drag the round rotation handle just outside the top-right corner upward until the word is turned about 6° anticlockwise. Press Cmd+D: deselecting applies the rotation.
-
Draw the arch with the Pen
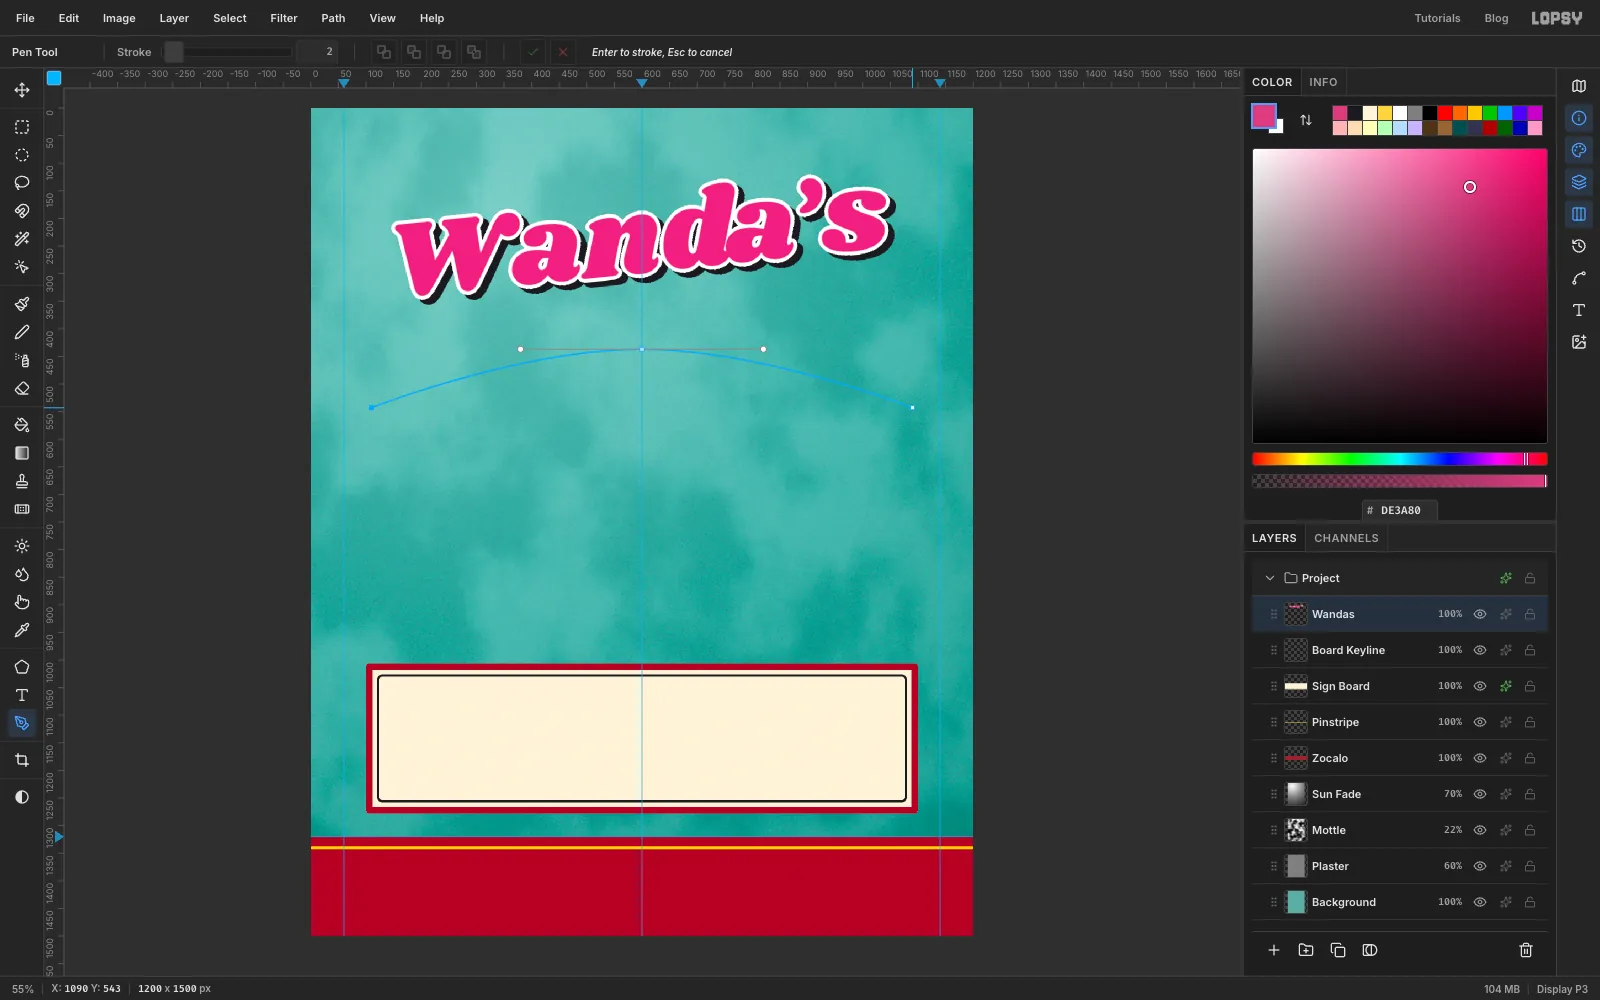
The arch needs just three points. Pick the Pen tool and click once near the left margin, a little below the bottom of Wanda's (about x 110, y 543). On the centre guide, about 100 px higher than that, press and drag straight out to the right about 220 px to pull out smooth handles; that makes the top of the arch round instead of pointed. Then click near the right margin at the same height as your first point. Click the ✓ (Commit path) button in the options bar.
-
Put WASHATERIA on the curve
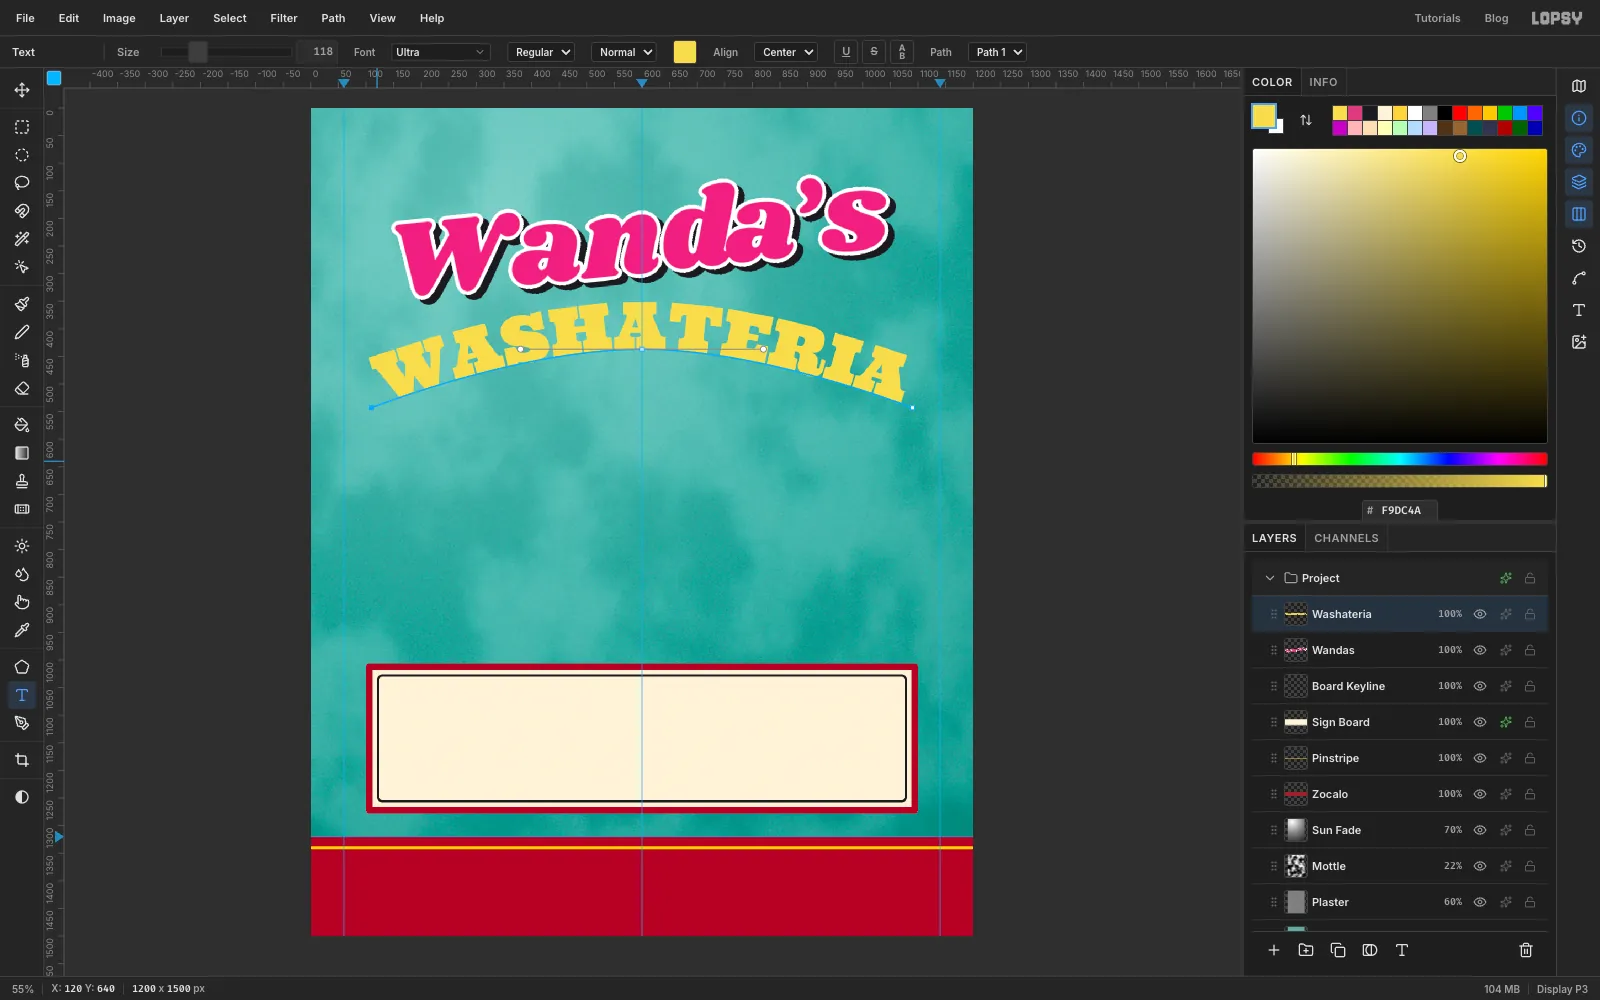
Select the Wandas layer. With the Text tool, set Ultra at size 118 in , click in an empty spot and type
WASHATERIA. Press Tab and rename the layer Washateria.With the text layer still selected, open the Path dropdown in the options bar and choose Path 1, then set Align to Center. Each letter stands on the curve and tilts to follow it, and the word sits centred on the arch.
-
Paint a blend into the letters
Sign painters love a "blend": two colours wet-blended inside the letters.
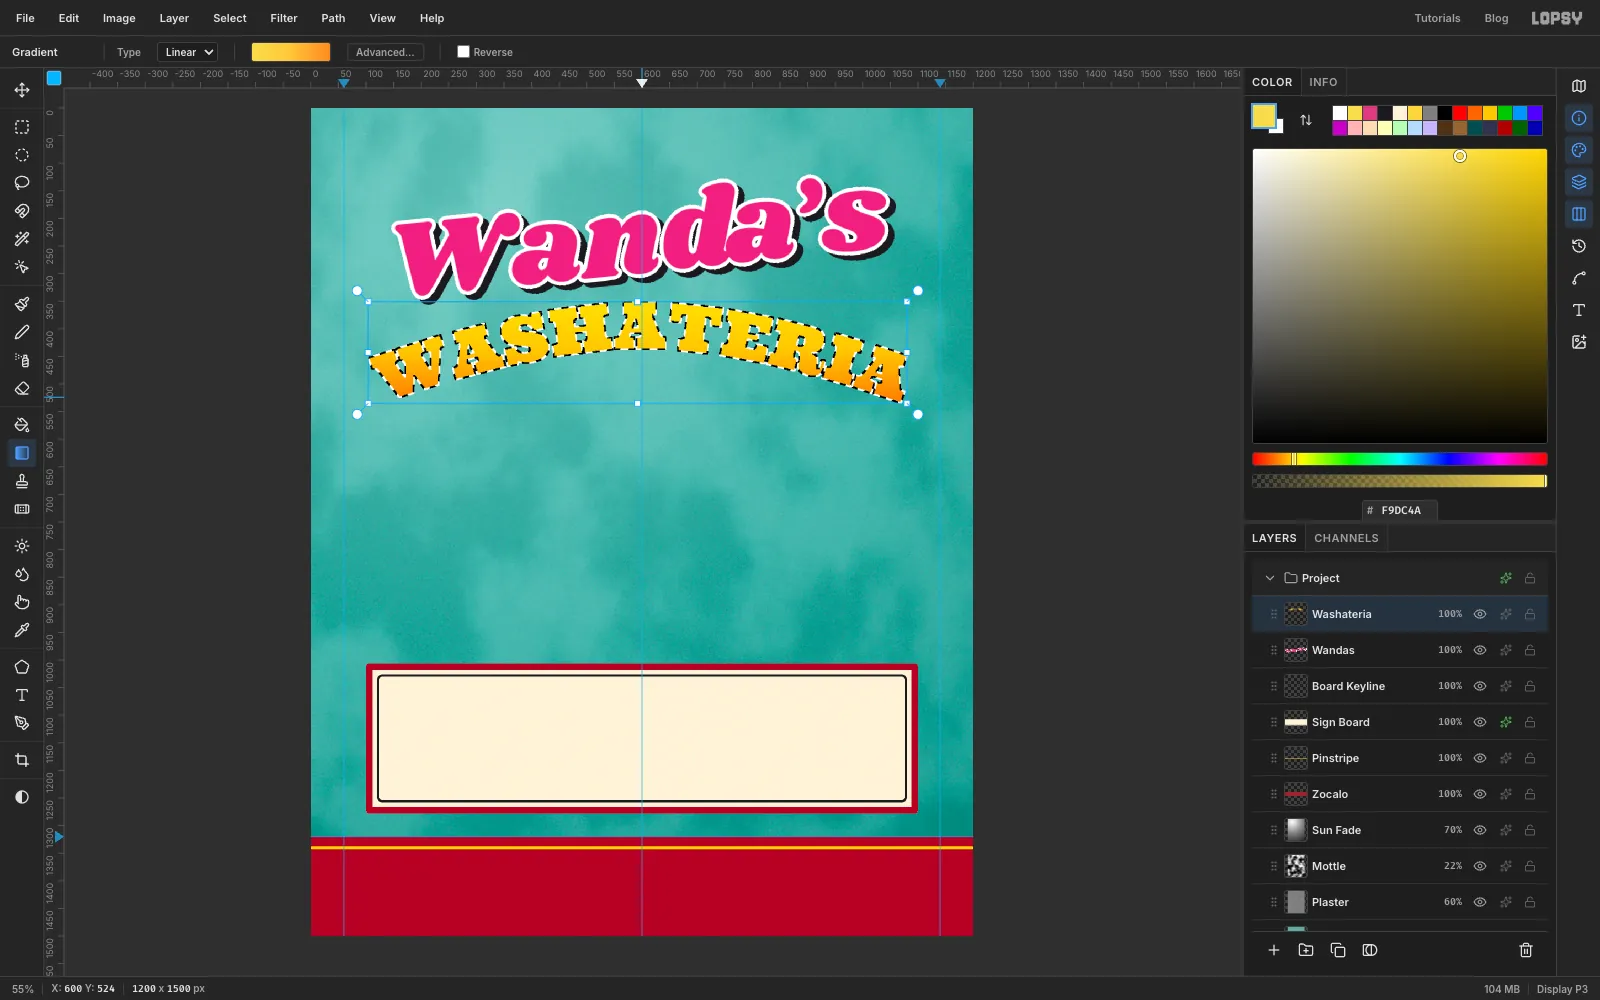
Click Rasterize Layer, then open the Paths panel and click Delete Path, since you don't need the curve any more. Cmd-click the Washateria thumbnail to select the letters.
Pick the Gradient tool, Linear, and in Advanced… set yellow , a middle stop at about 45% in , and orange . Drag from the top of the letters straight down to their bottom. The gradient only lands inside the selection. Deselect.
-
Outline and shade WASHATERIA
Add a Stroke of 6 in black, outside, and rasterize the style.
Then build the shade the same way you did for Wanda's: duplicate, put the copy back on top, give the original a Color Overlay, rasterize it, nudge it 10 px right and 10 px down, and merge the copy down into it. This time make the overlay rosa . A coloured shade is a classic rótulo touch, and it keeps the two names from looking alike.
-
Paint the washing machine body
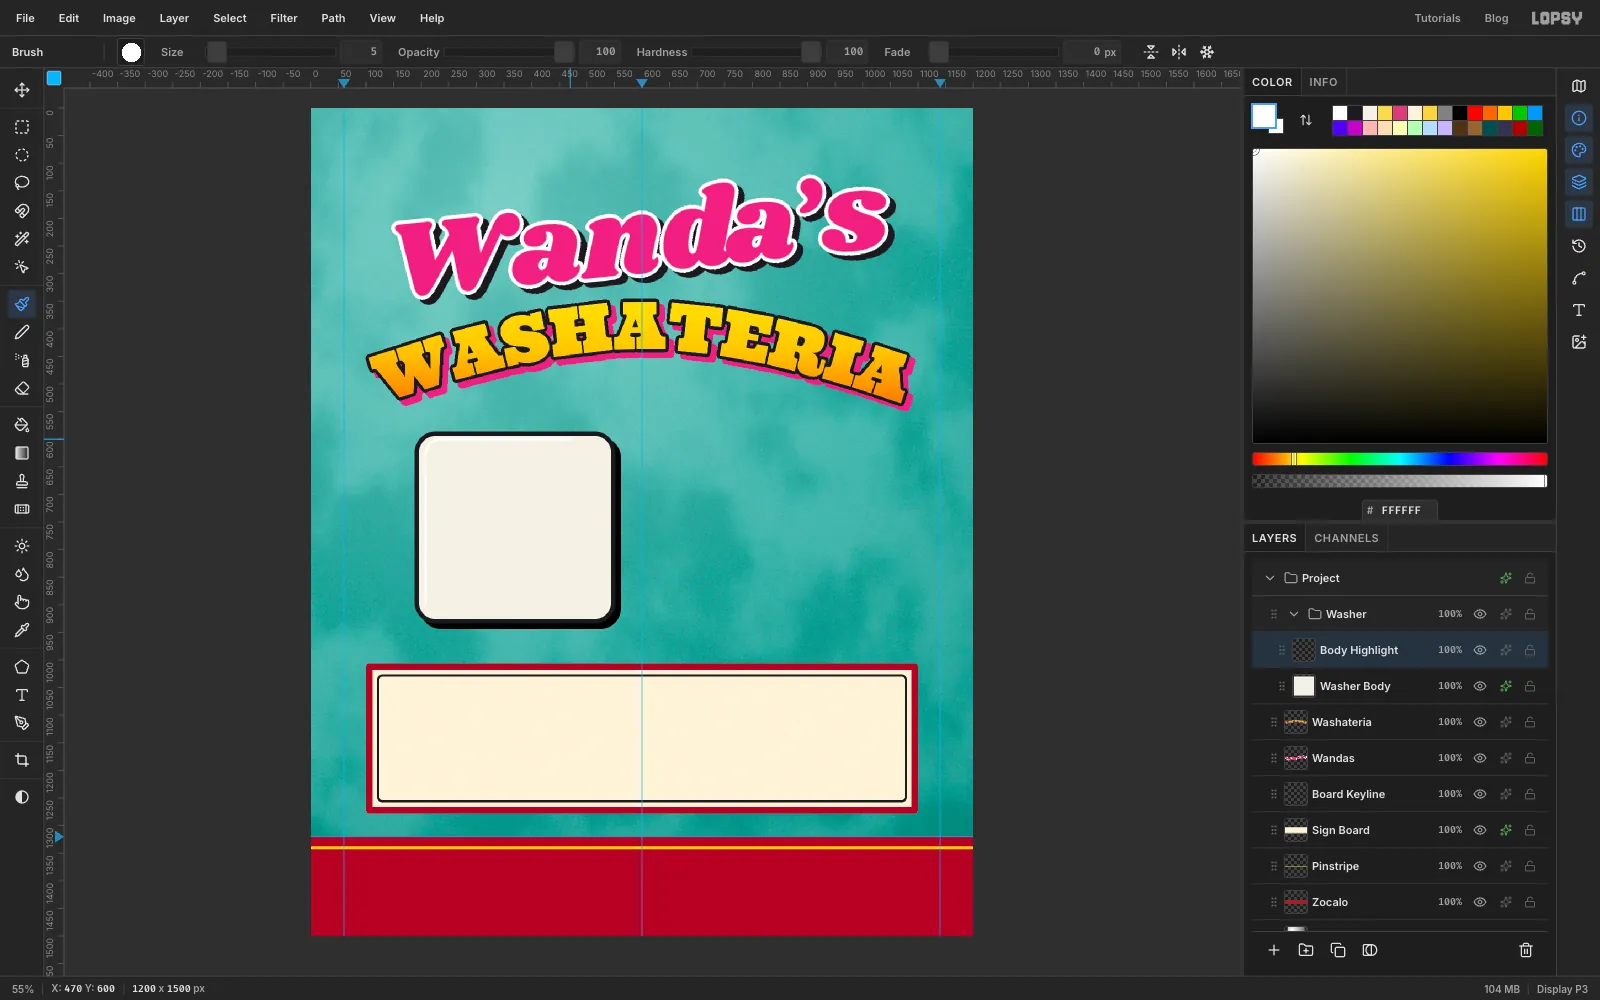
Select Washateria, click New Group and name it Washer. Add a layer inside it called Washer Body.
With the Shape tool, draw a Rectangle with Corner Radius 34, fill and an 8 px black stroke. Make it about 356 × 340 px, sitting a little left of centre in the space under the arch. Remember that it grows from where you press: start at its centre, about x 370, y 760, and drag out to about x 548, y 930.
Add a Drop Shadow with Offset X 10, Offset Y 10, Blur 0 and Opacity 100. Zero blur gives a hard shade, the same 10 px down and to the right as the lettering.
Add a layer called Body Highlight. With the Brush at Size 5 in white, click near the bottom of the body's left side, just inside the outline, then Shift-click up to the top-left corner, round the corner in two short clicks, and along under the top edge. A painter's highlight on the left and top makes the enamel look rounded.
-
Add the controls
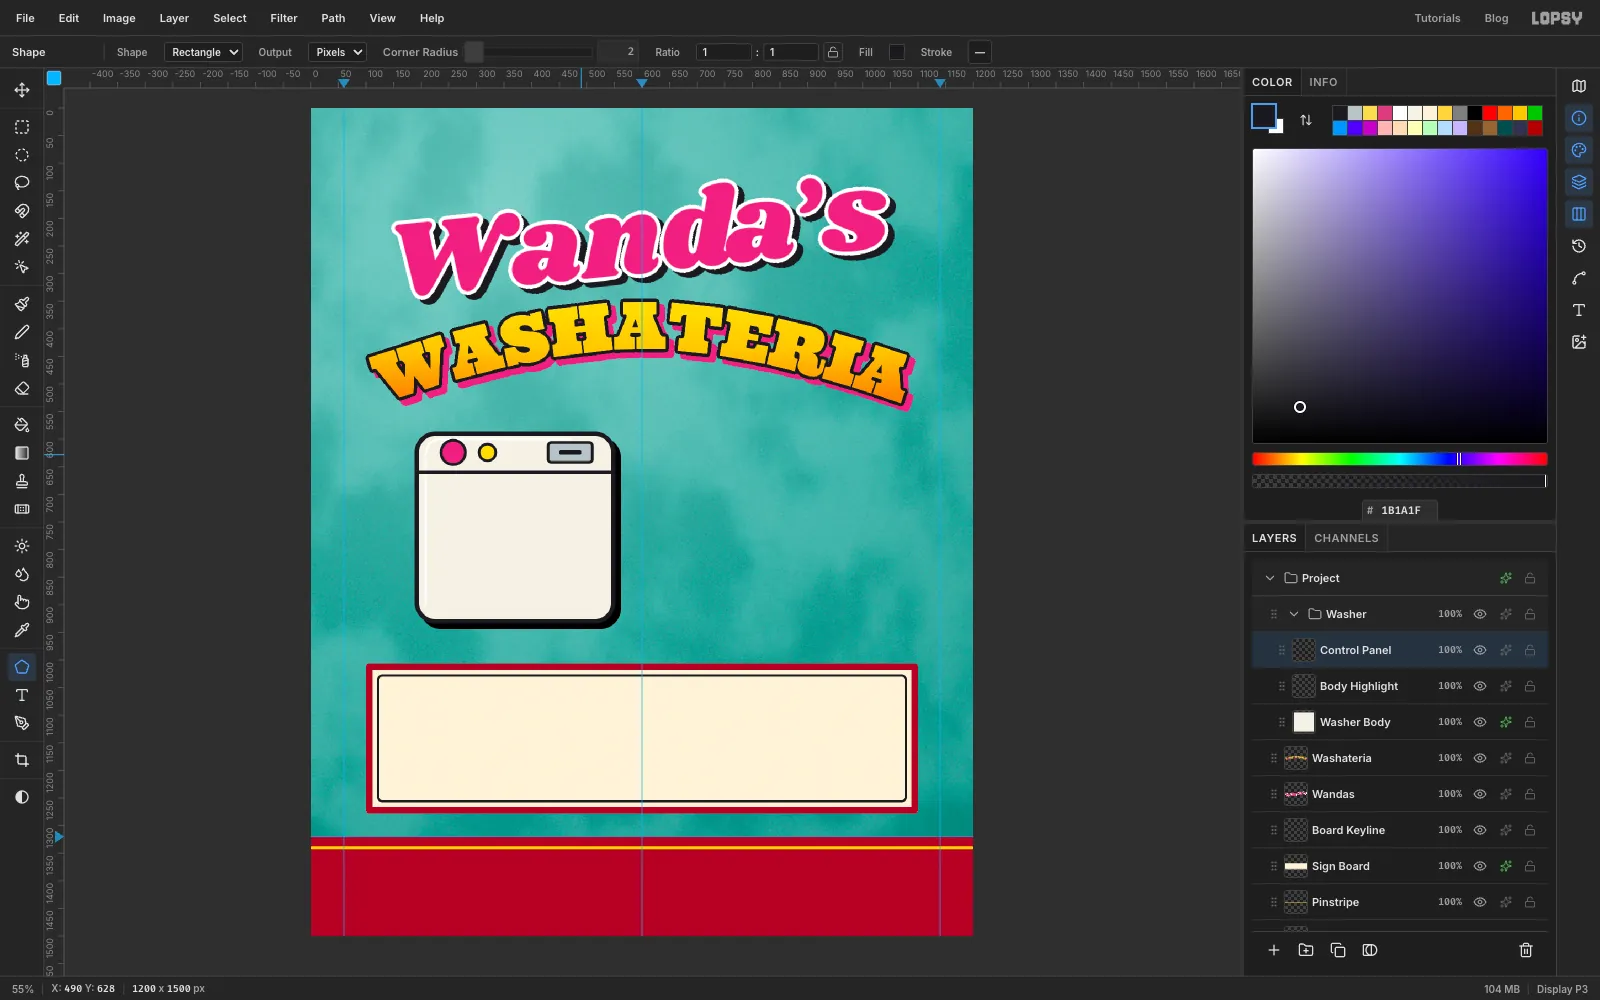
Add a layer called Control Panel. With the Brush at Size 7 in black, Shift-click a line across the body about 70 px below its top edge.
In the band above it, use the Shape tool's Ellipse, each with a 5 px black stroke:
- a pink dial about 44 px across near the left
- a yellow dial about 30 px across beside it
On the right, draw a Rectangle, 80 × 36, with Corner Radius 6, in grey with a 5 px black stroke. For the coin slot, draw a black bar inside it, about 40 × 8, with Corner Radius 2 and the stroke removed.
-
Paint the porthole
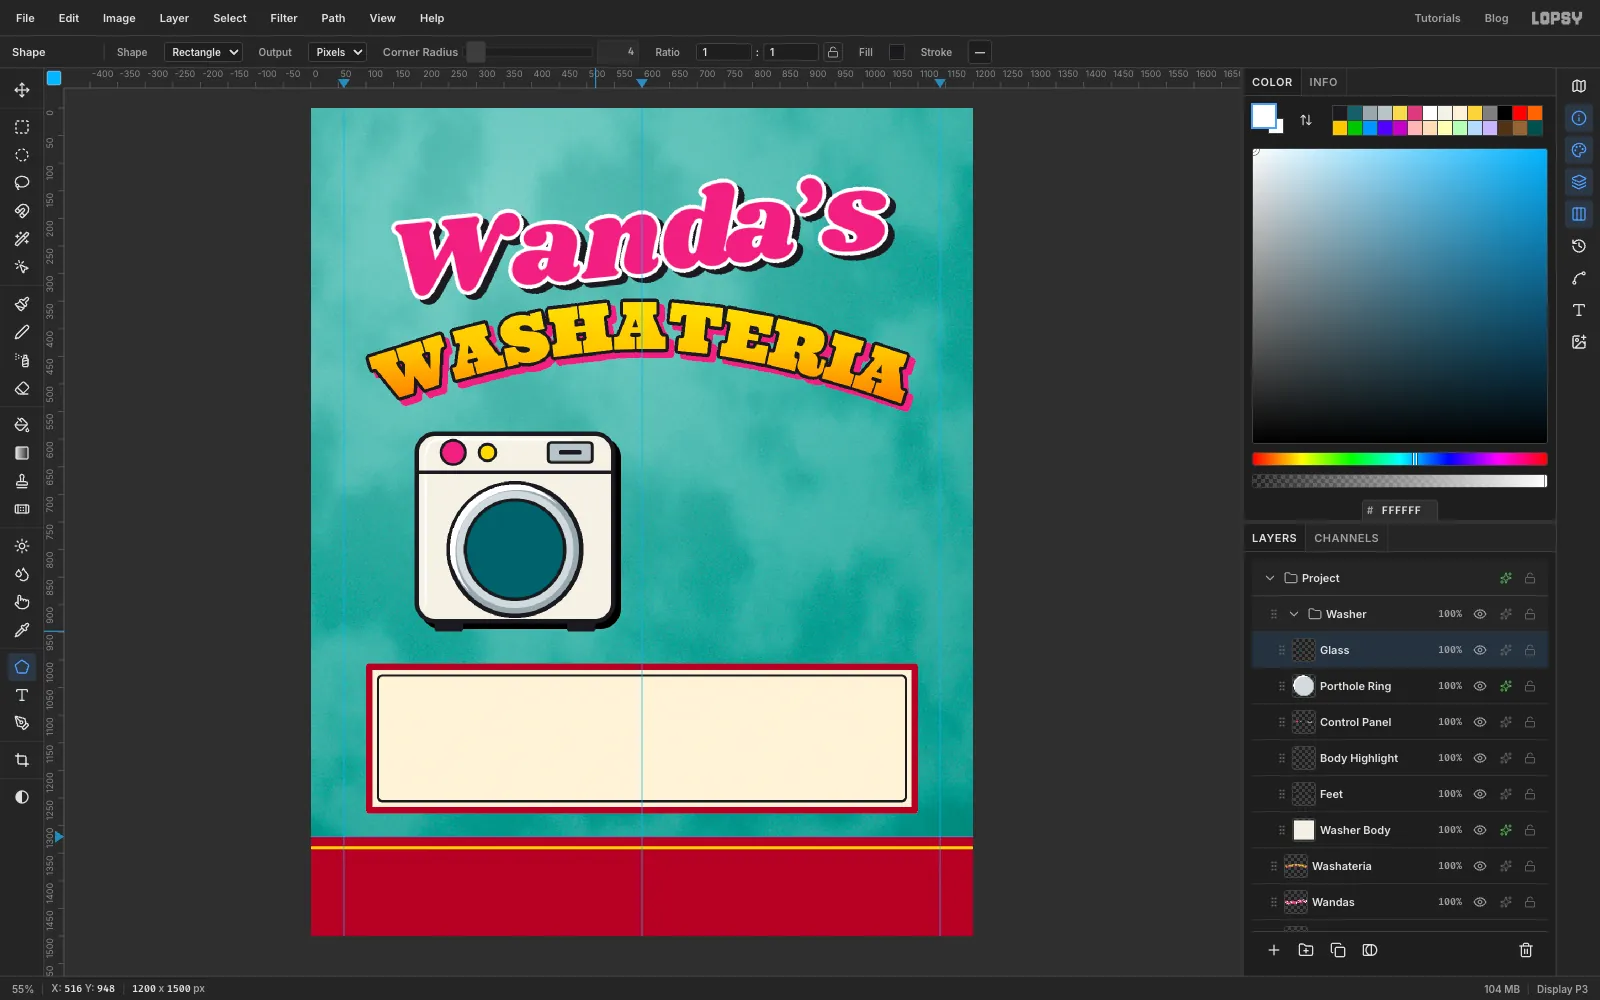
Add a layer called Porthole Ring. Draw an Ellipse 240 px across, centred about 40 px below the middle of the body, in chrome with an 8 px black stroke.
Real sign painters don't airbrush chrome. They paint it in flat bands:
- With the Elliptical Marquee, drag a circle about 212 px across on the same centre and fill it with .
- For the highlight, drag a circle 224 px across, nudged a few pixels up and left of the centre. Hold Option and drag the same size circle a few pixels down and right to subtract it. A thin crescent is left at the upper left. Fill it with white.
Add a Stroke of 6 black, inside, to the ring. It doubles up the outer rim so the porthole reads as a heavy bezel from across the street.
Select Washer Body and add a layer called Feet. Draw two black rectangles, about 52 × 20, with Corner Radius 4 and no stroke, under the bottom corners of the washer so they peek out below it.
Select Porthole Ring and add a layer called Glass. Draw an Ellipse 180 px across on the porthole centre, in porthole teal with a 6 px black stroke.
-
Throw in the laundry
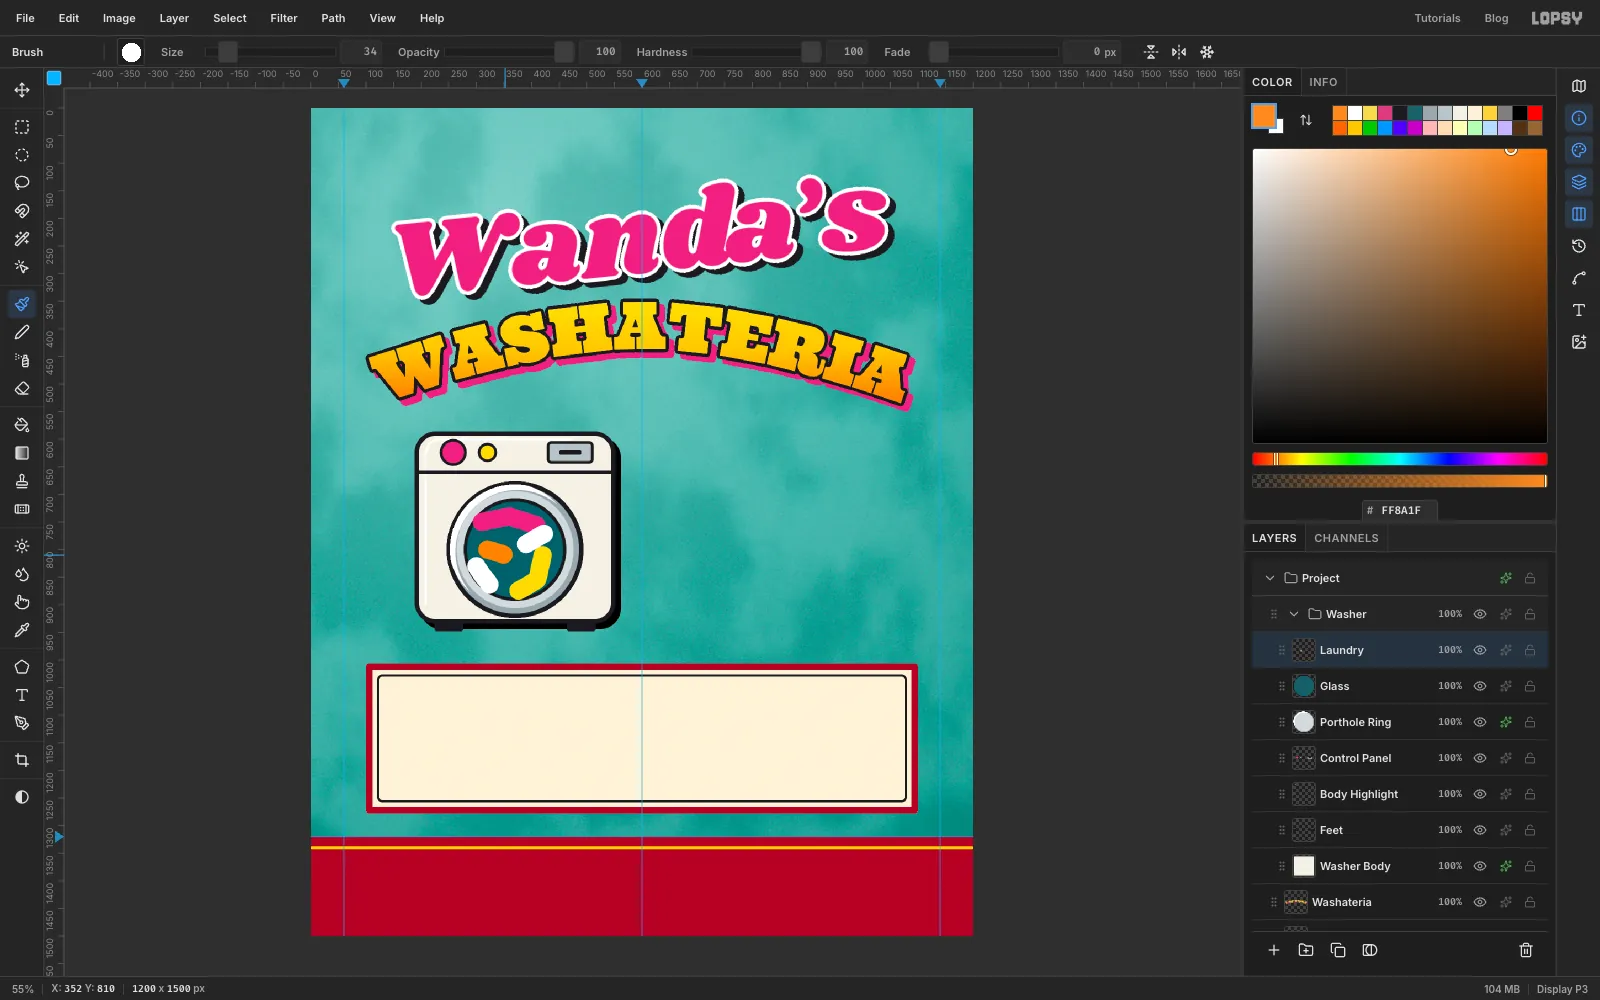
Add a layer called Laundry. With the Brush at Size 34, Hardness 100, paint five short fat strokes inside the glass: a pink sock across the top, a yellow one curving down the right side, two short white towels and a small orange one in the middle. Don't worry about spilling over the edge; you'll trim it.
-
Spin it with Liquify
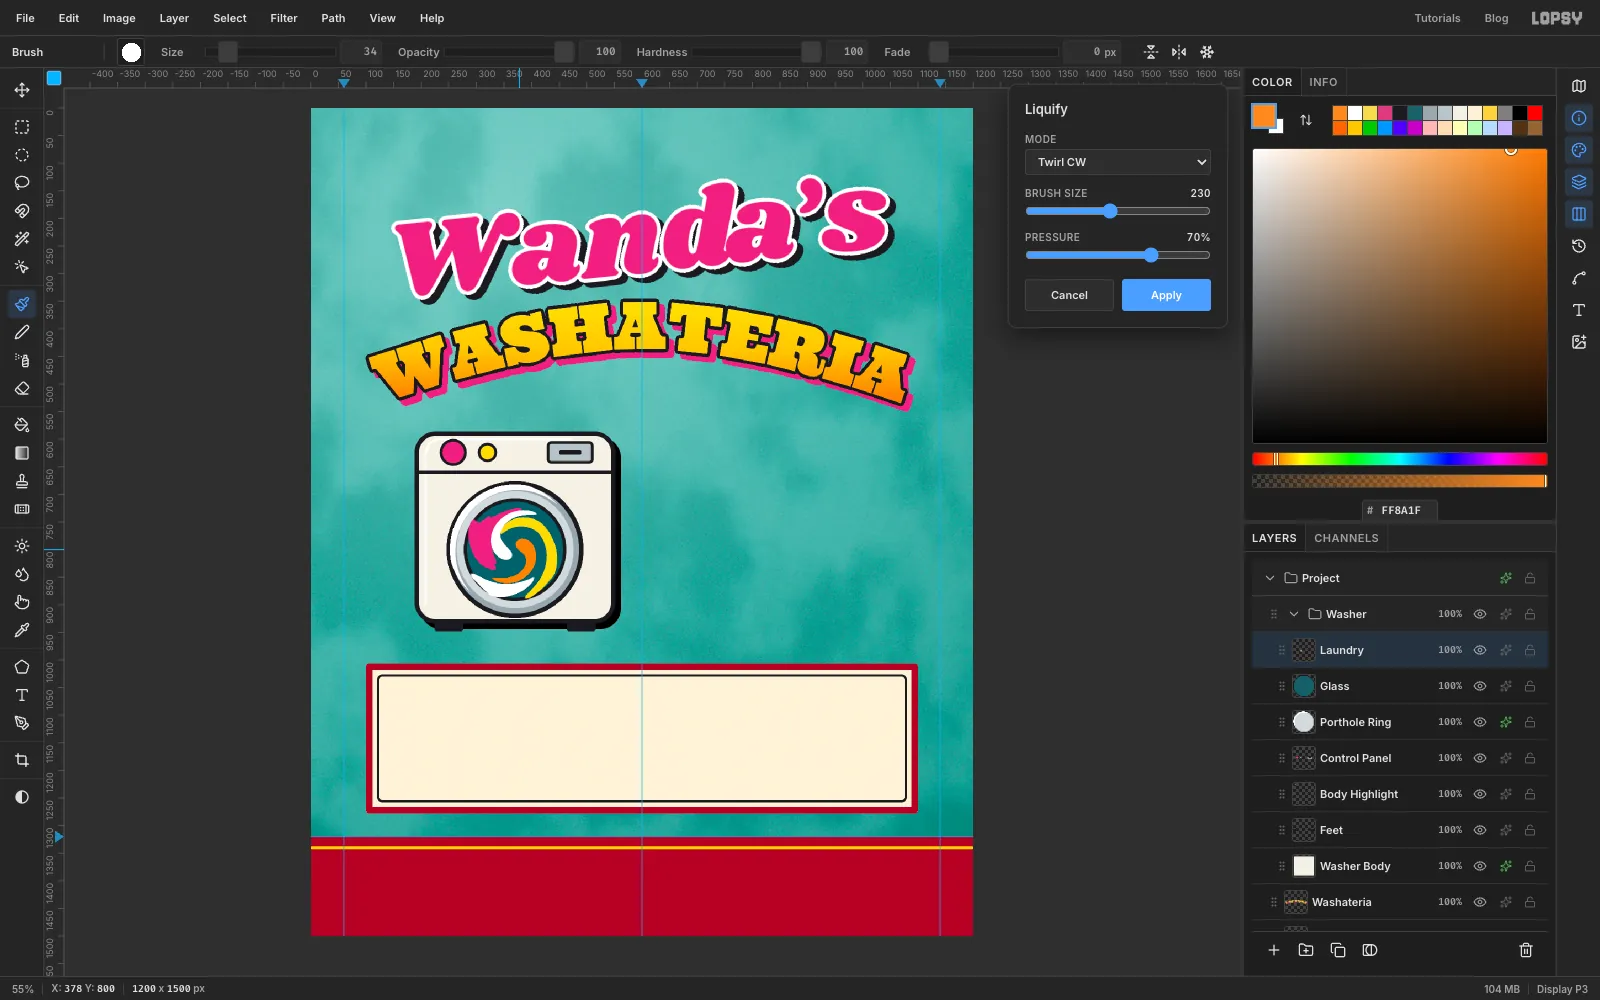
Choose Filter → Liquify…. Set Mode to Twirl CW, Brush Size to 230 and Pressure to 70.
Put the brush on the middle of the porthole and drag in small circles three or four times without moving off the centre. The laundry spins into a spiral, as if the drum is going. Click Apply.
-
Trim the laundry to the glass
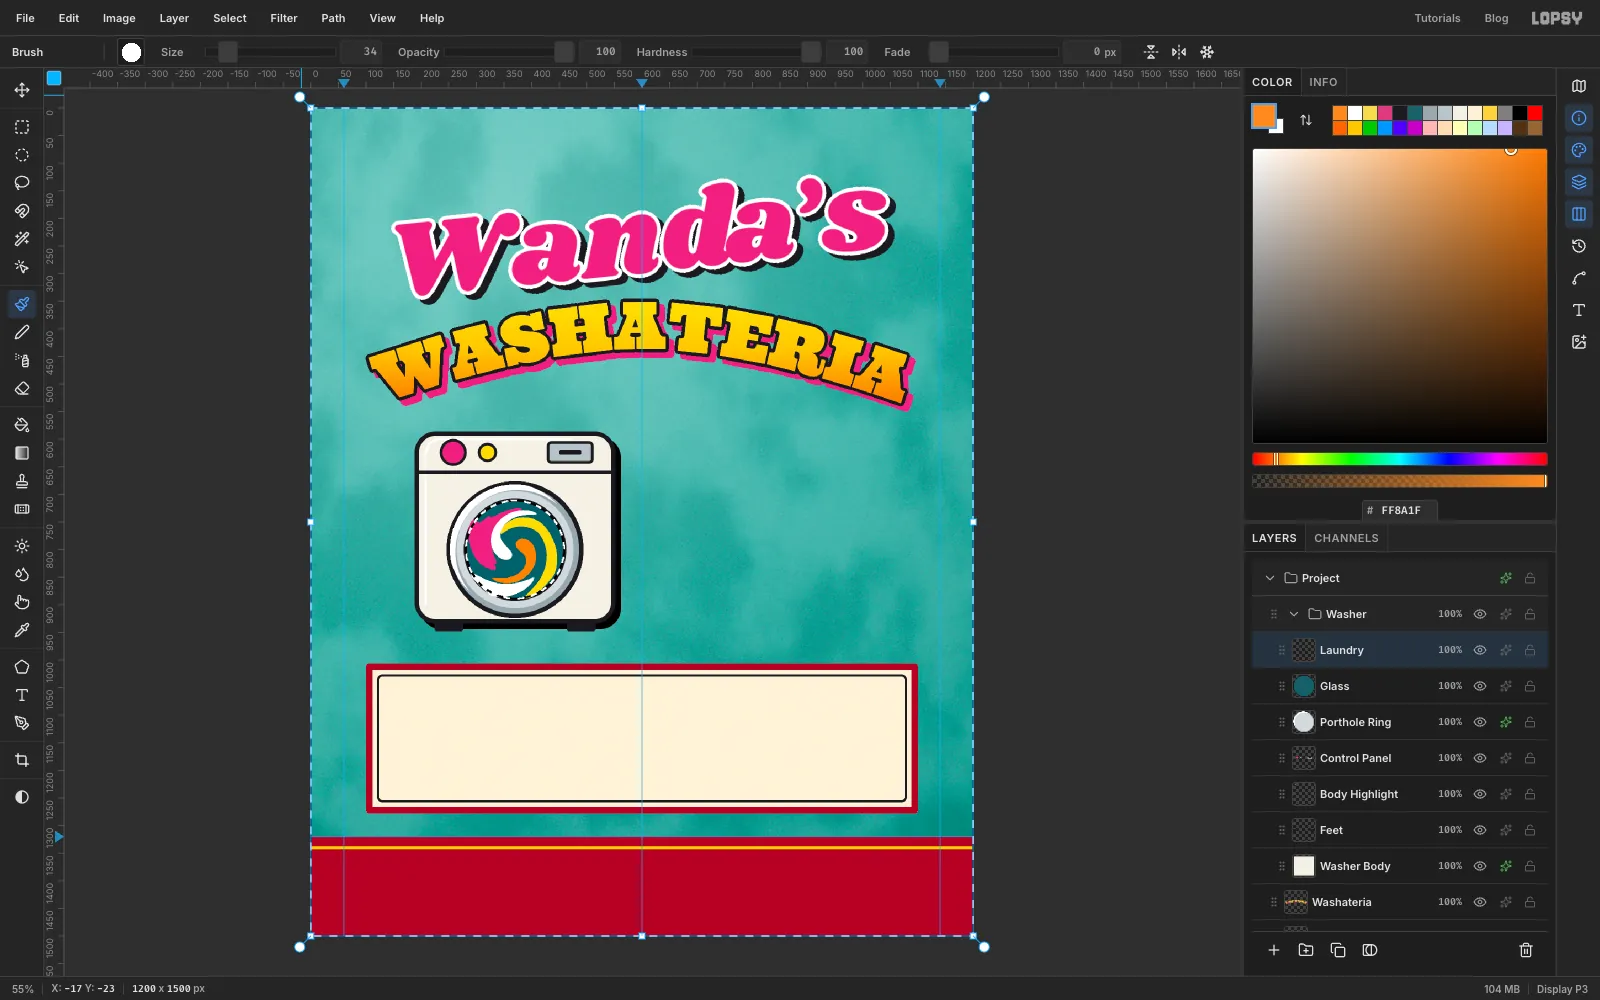
Cmd-click the Glass thumbnail to select the glass circle. Choose Select → Shrink… and shrink it by 4 px, so the trim stays inside the black edge. Choose Select → Inverse. With Laundry still the active layer, press Delete. Deselect.
-
Add the glass shine and a painted edge
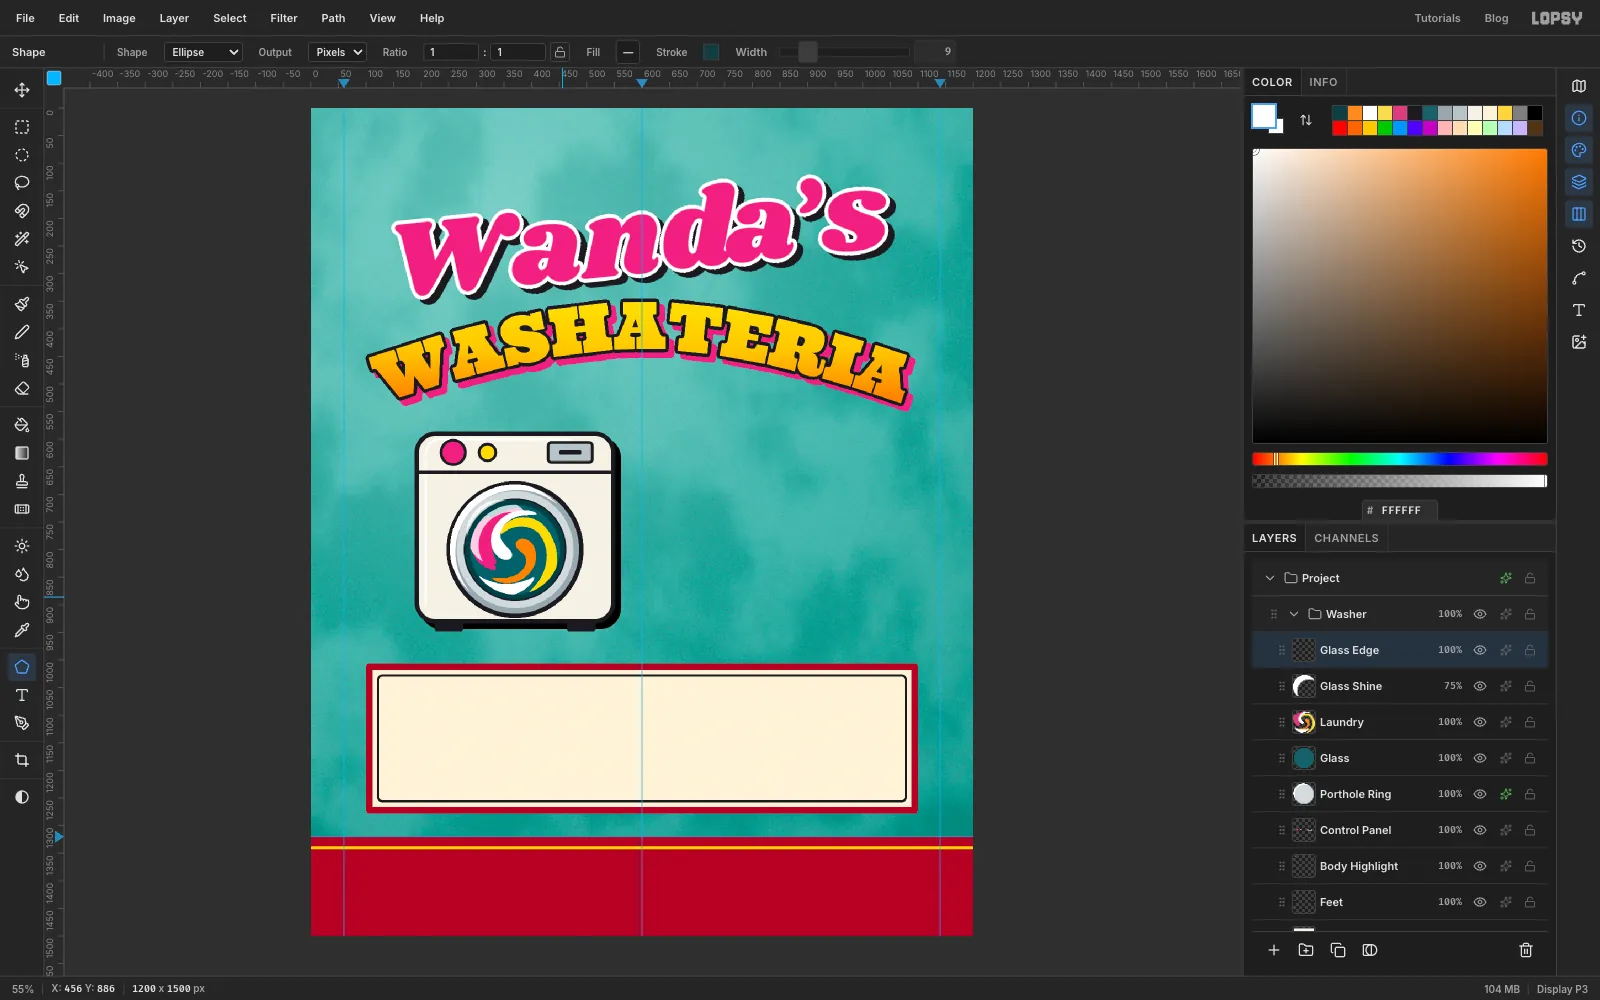
Add a layer called Glass Shine. With the Elliptical Marquee, drag a circle about 120 px across over the upper left of the glass. Hold Option and drag another the same size about 20 px down and to the right to cut it away. Fill the crescent with white and set the layer to 75%.
Add a layer called Glass Edge. Draw an Ellipse about 172 px across on the porthole centre with no fill and a 9 px stroke in dark teal . The laundry now looks like it's inside the glass, not stuck on top of it.
-
Paint one soap bubble
Select Washateria and add a layer called Bubbles, so the bubbles sit outside the Washer group.
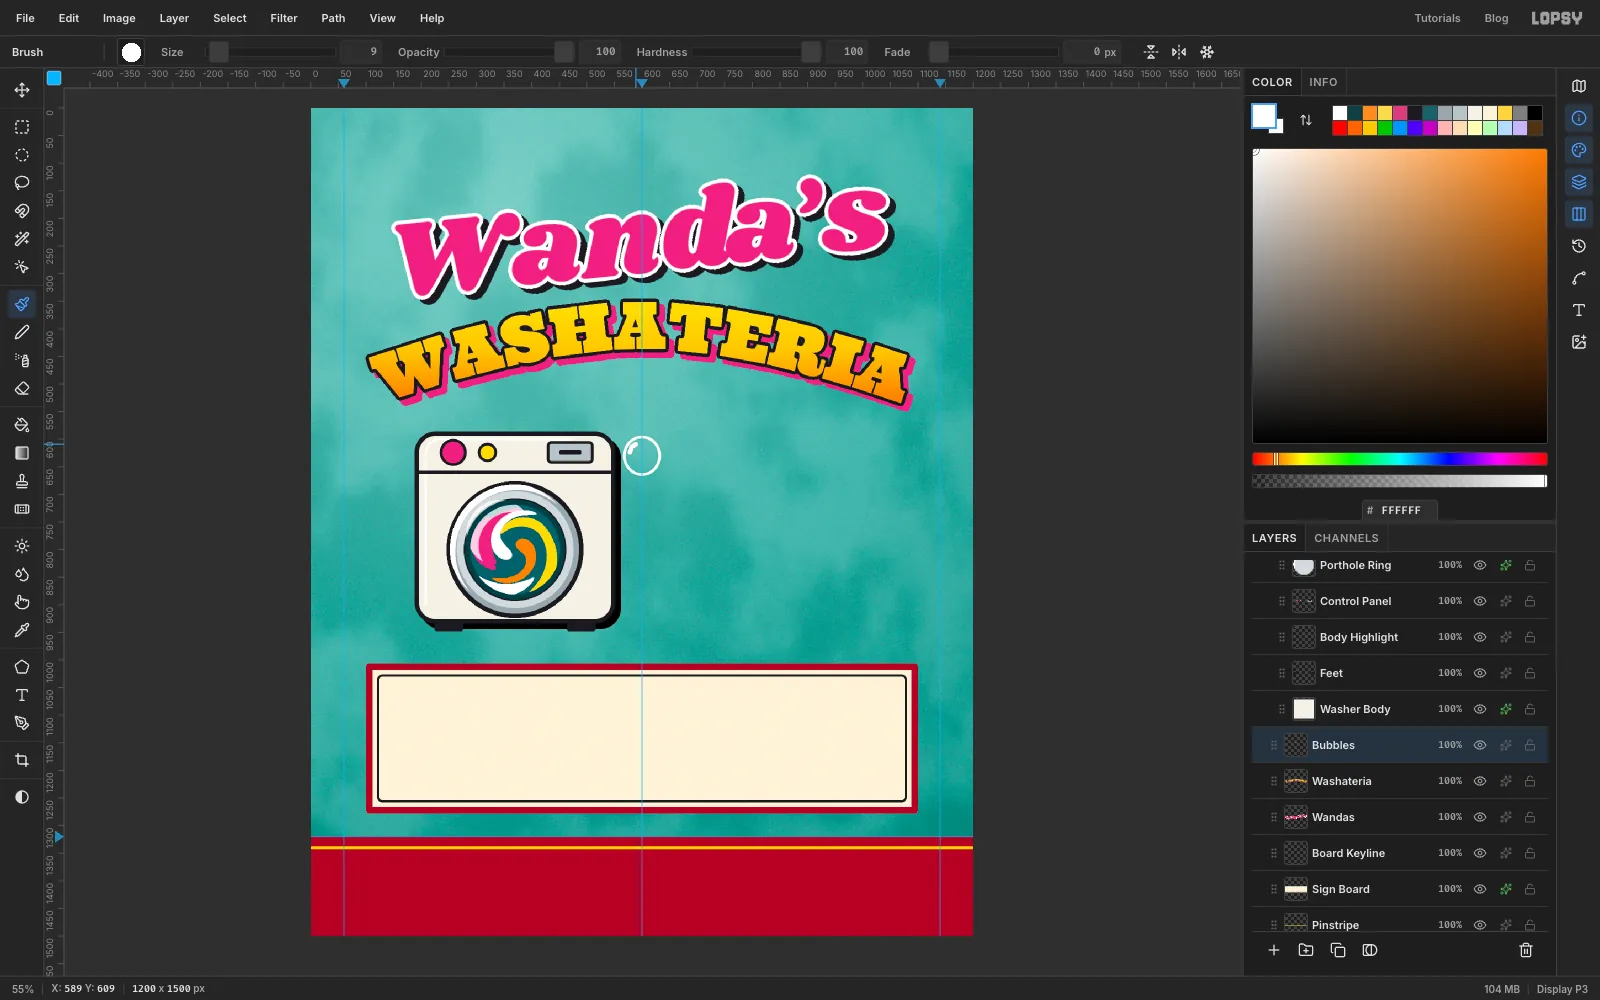
Draw an Ellipse about 68 px across, with no fill and a 5 px white stroke, just right of the washer's top-right corner. With the Brush at Size 9, paint a short curved highlight inside its upper left.
-
Copy, paste and scale more bubbles
Draw a Rectangular Marquee around the bubble, press Cmd+C and deselect.
Now make the rest. For each new bubble:
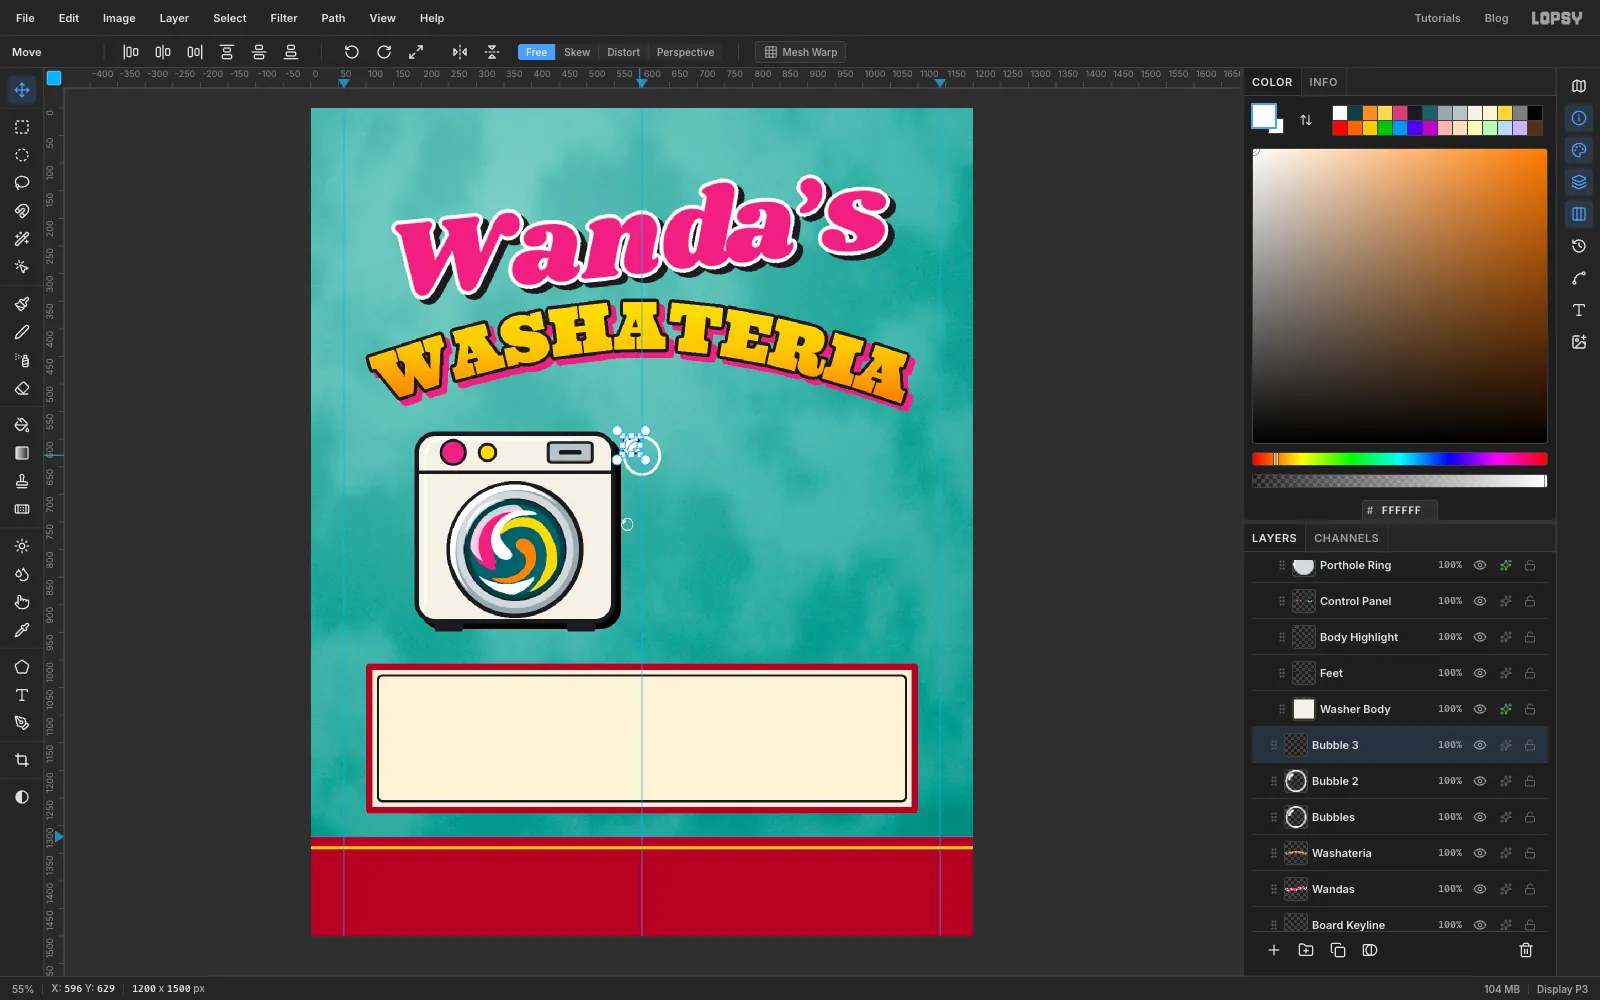
- Press Cmd+V. The copy pastes in place on a new layer called Pasted Layer. Rename it straight away (Bubble 2, Bubble 3 and so on), so you can tell them apart.
- Cmd-click its thumbnail to select it.
- With the Move tool, hold Cmd and drag the bottom-right corner handle inward to shrink it evenly.
- Drag from inside the selection to move it into place, then deselect.
-
Make the bubbles rise
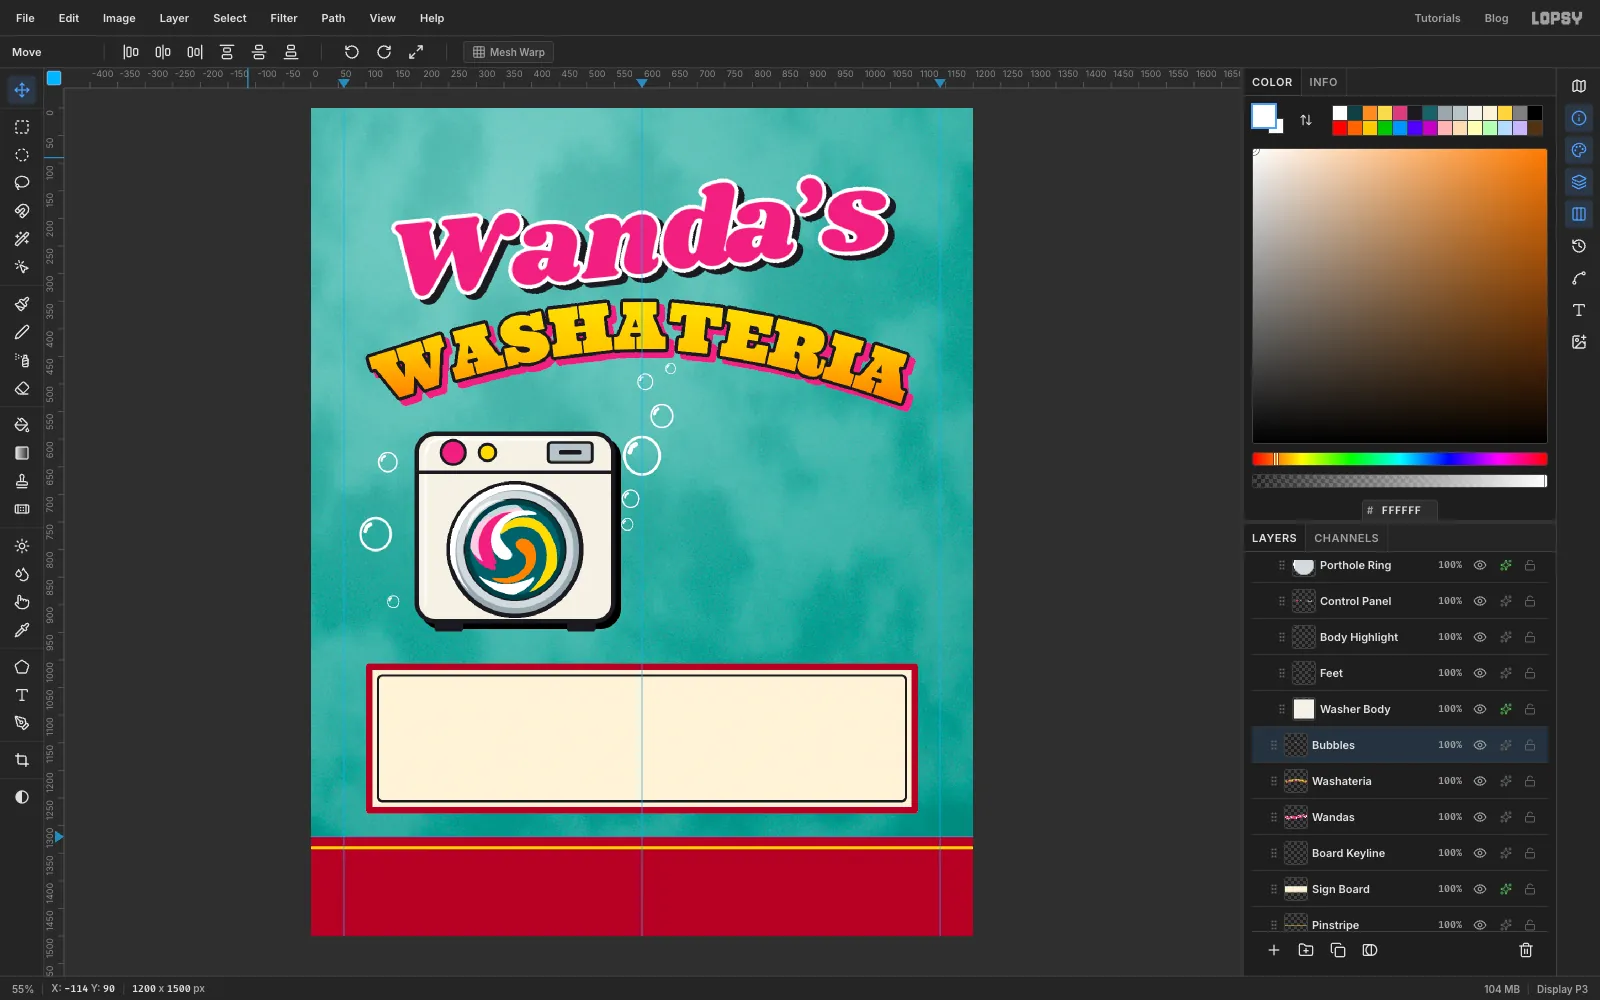
Paste eight copies at different sizes, from about a quarter of the original to just under full size. Five go in a loose stream that rises up the right side of the washer and drifts toward the middle of WASHATERIA, getting smaller as they climb. The other three go to the left of the washer, one small, one large and one tiny.
Vary the sizes a lot. Scaling also thins each copy's outline, so the little ones look further away.
Then select each bubble layer in turn, from the top, and choose Layer → Merge Down until they're all in Bubbles.
-
Cut the starburst
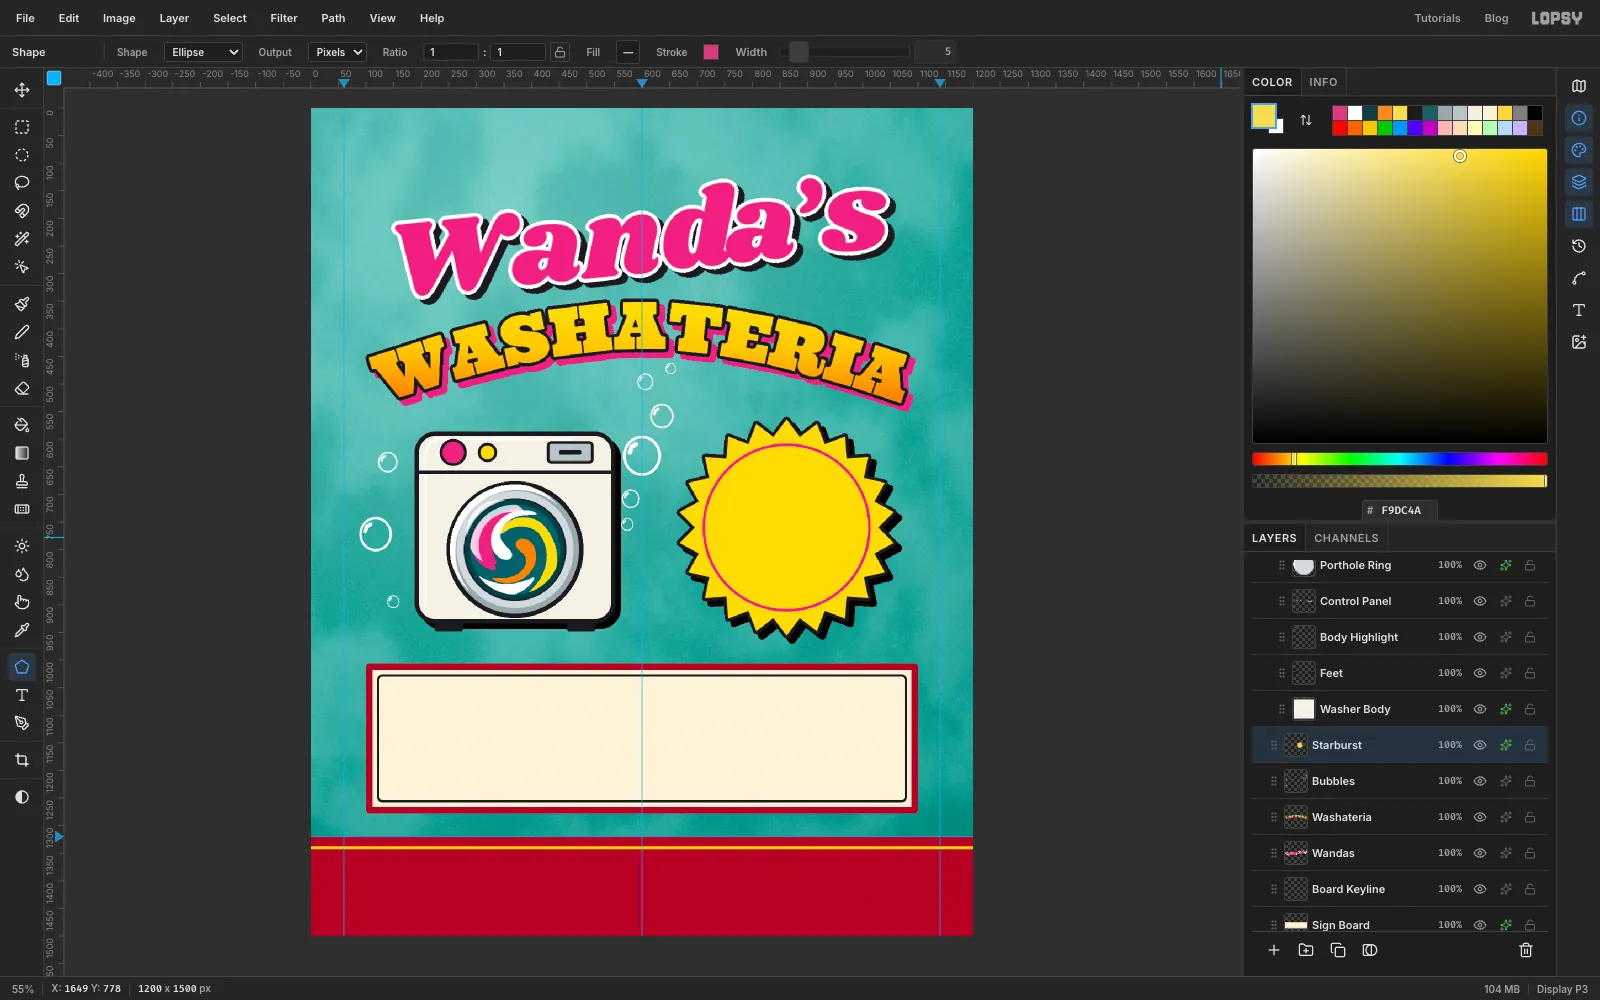
Add a layer called Starburst above Bubbles. The star is about 390 px across, to the right of the washer, with its centre level with the middle of the washer (about x 862, y 760).
Before you start, click the rulers to drop a vertical and a horizontal guide through that centre; they help keep the points even. With the Lasso, start at the top tip and drag in short straight zig-zags around the centre: out to a tip about 195 px from the centre, back in to a valley about 30 px closer, out to the next tip. Make 22 points and finish back where you started. Zoom in and take your time. Hand-cut stars on real signs are never perfect, so small wobbles are fine. Remove the two guides when you're done.
Fill it with yellow and deselect. Draw an Ellipse 300 px across on the star's centre, with no fill and a 5 px rosa stroke.
Add a Stroke of 6 black (outside) and a Drop Shadow of 10 / 10, Blur 0, Opacity 100, then click Rasterize Layer Style.
-
Set the starburst type
With Starburst selected, add three lines of text and centre each one on the star with the Move tool's arrow keys:
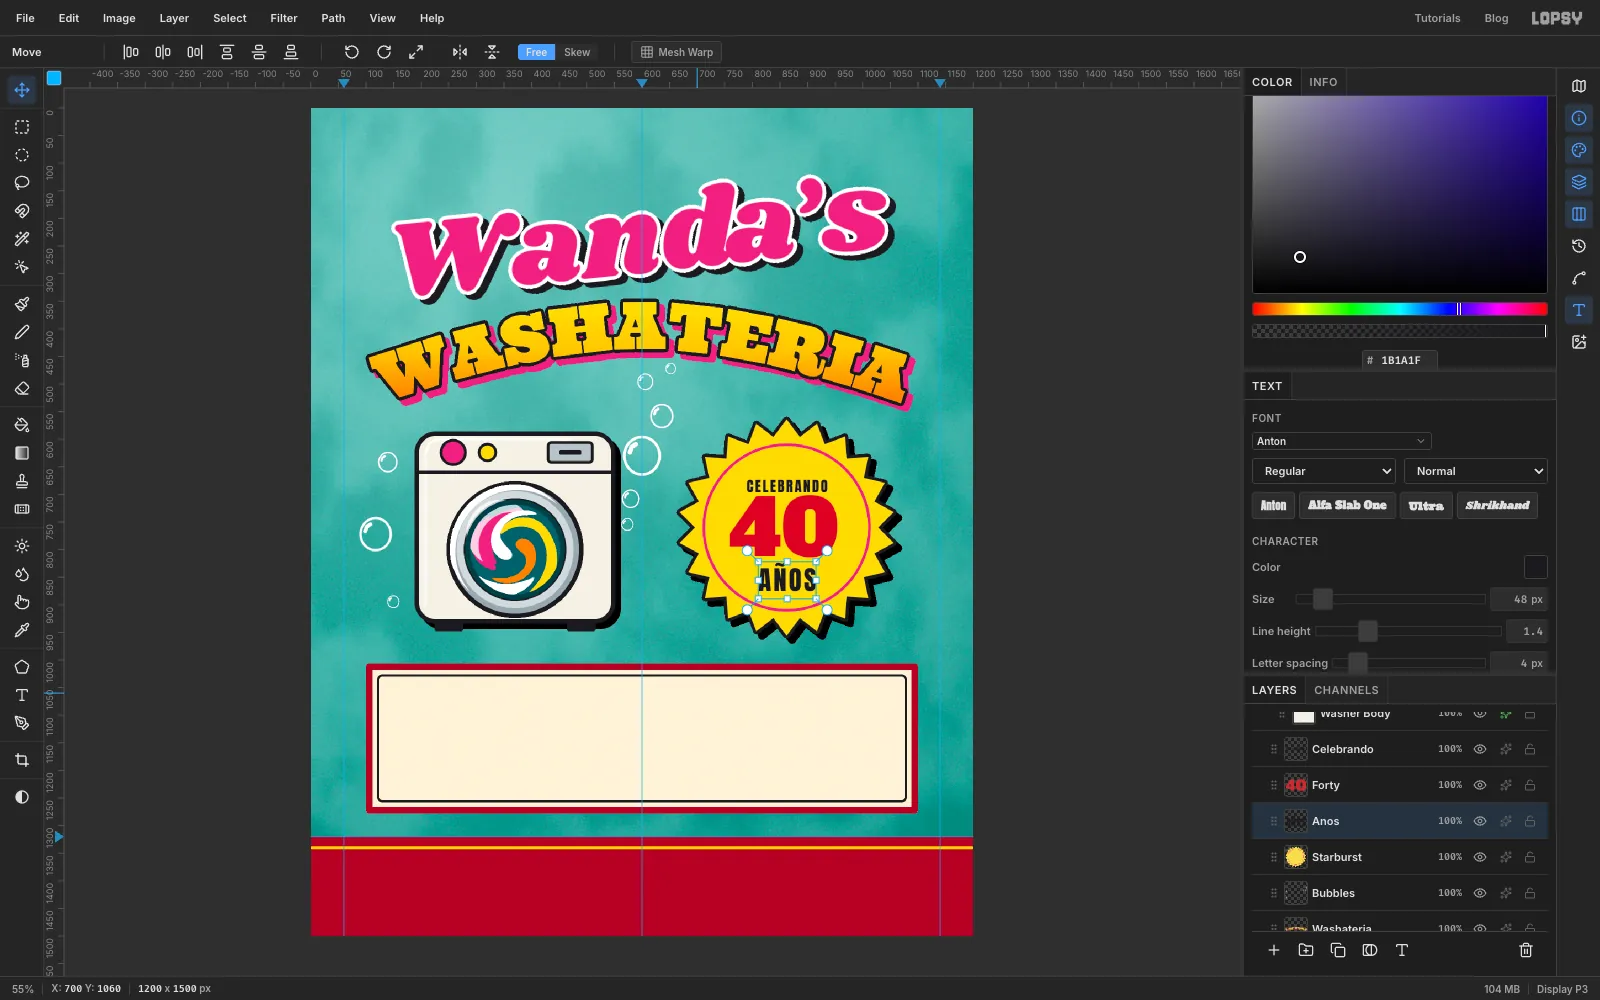
CELEBRANDOin Anton at 26, black, with Letter spacing 3 in the Text panel, about 76 px above the centre40in Alfa Slab One at 140, in starburst red , nudged about 6 px left of the centre so it looks centredAÑOSin Anton at 48, black, Letter spacing 4, about 88 px below the centre
Name the layers Celebrando, Forty and Anos, and click Rasterize Layer on each one as soon as it's centred, before you set up the next. Give the 40 a white Stroke of 5 and rasterize its style. Then merge the type down into Starburst: select the text layer directly above it, choose Layer → Merge Down, and repeat until all three are merged in.
-
Tilt the starburst
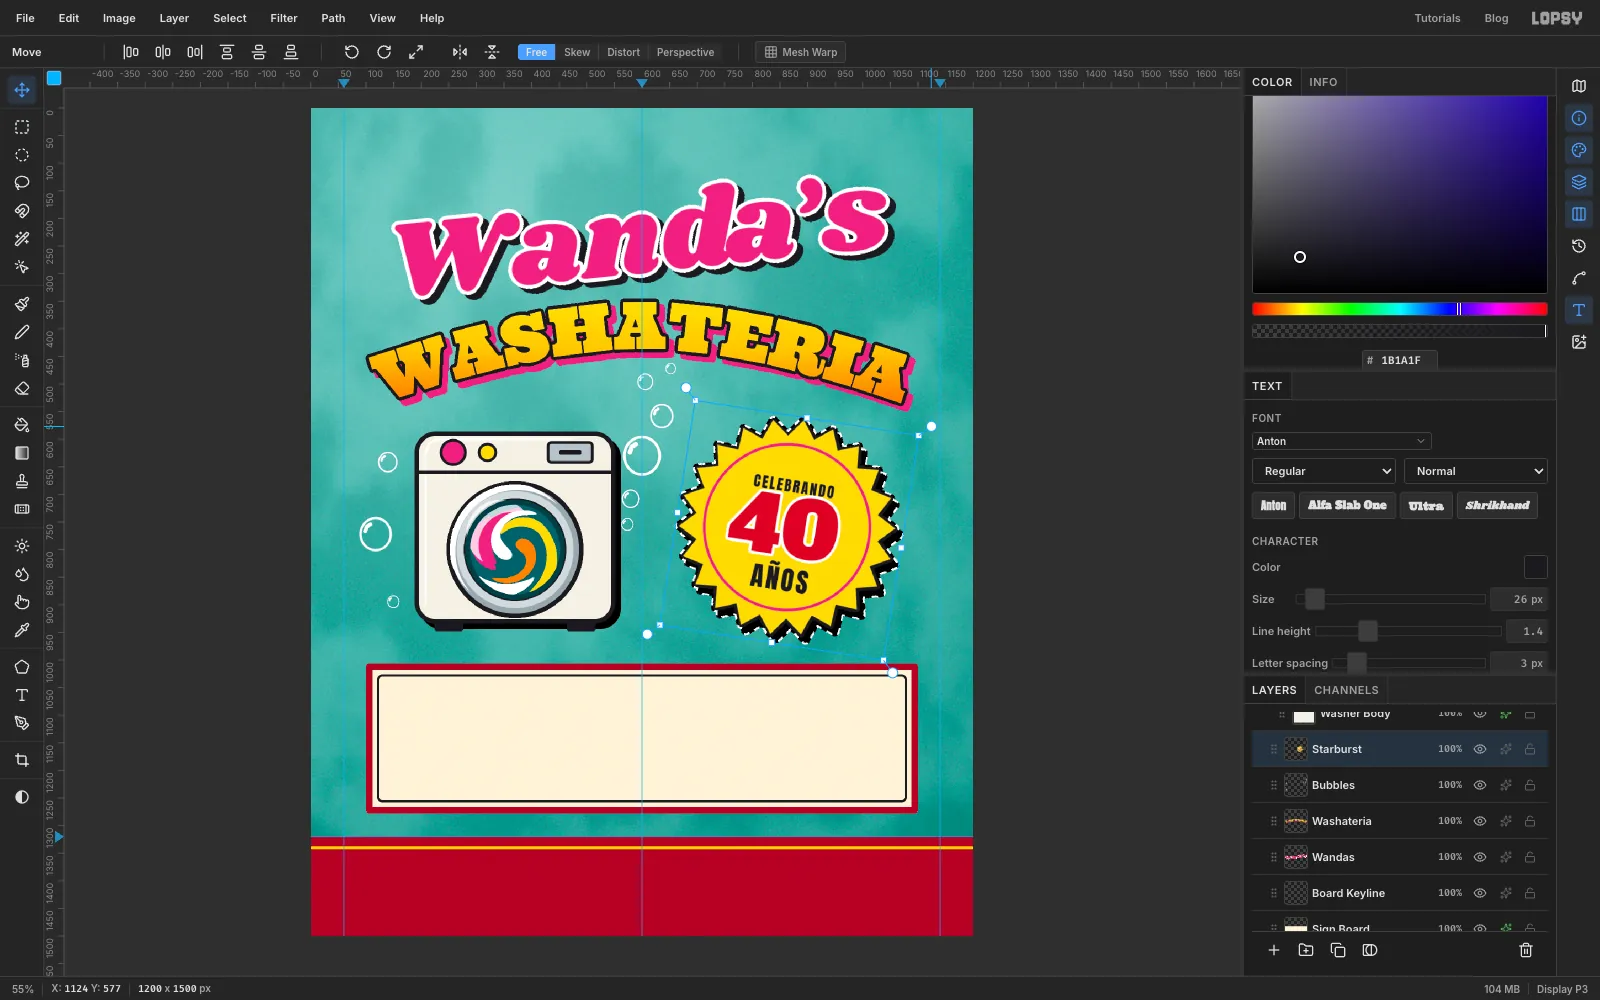
Cmd-click the Starburst thumbnail and drag its rotation handle to turn it about 9° clockwise, against the tilt of the name. Press Cmd+D.
-
Letter the sign board: the occasion and the date
The board copy is stacked from the top. Each line is centred on the middle guide and sits a small, even gap below the one above. As before, name each line and click Rasterize Layer as soon as it's in place. Rasterized lines also take part in the weathering at the end.
Select Board Keyline, then add:
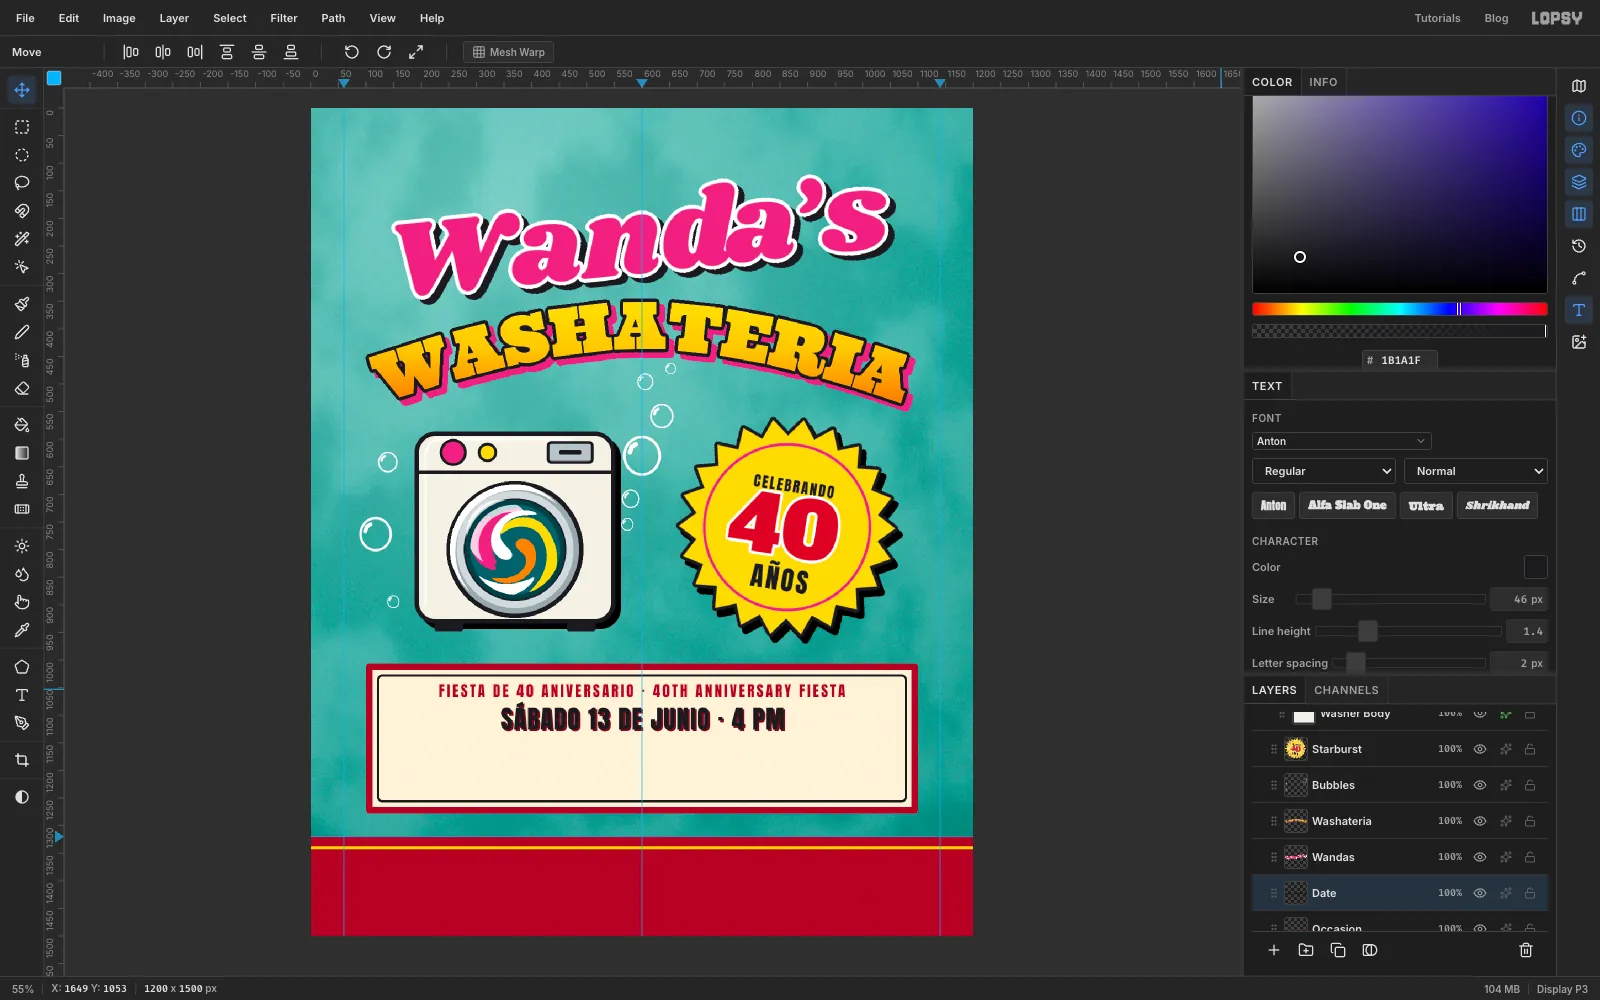
FIESTA DE 40 ANIVERSARIO · 40TH ANNIVERSARY FIESTAin Anton at 27, red , Letter spacing 4, named Occasion. Tuck it just under the top of the black keyline, about 13 px below its inside edge.SÁBADO 13 DE JUNIO · 4 PMin Anton at 46, black, Letter spacing 2, named Date, about 10 px below. Give it a Drop Shadow of 3 / 3, Blur 0, Opacity 100 in dark red , and rasterize the style.
-
Finish the board copy
Carry on down, selecting the previous line each time so the new one stacks above it in the Layers panel:
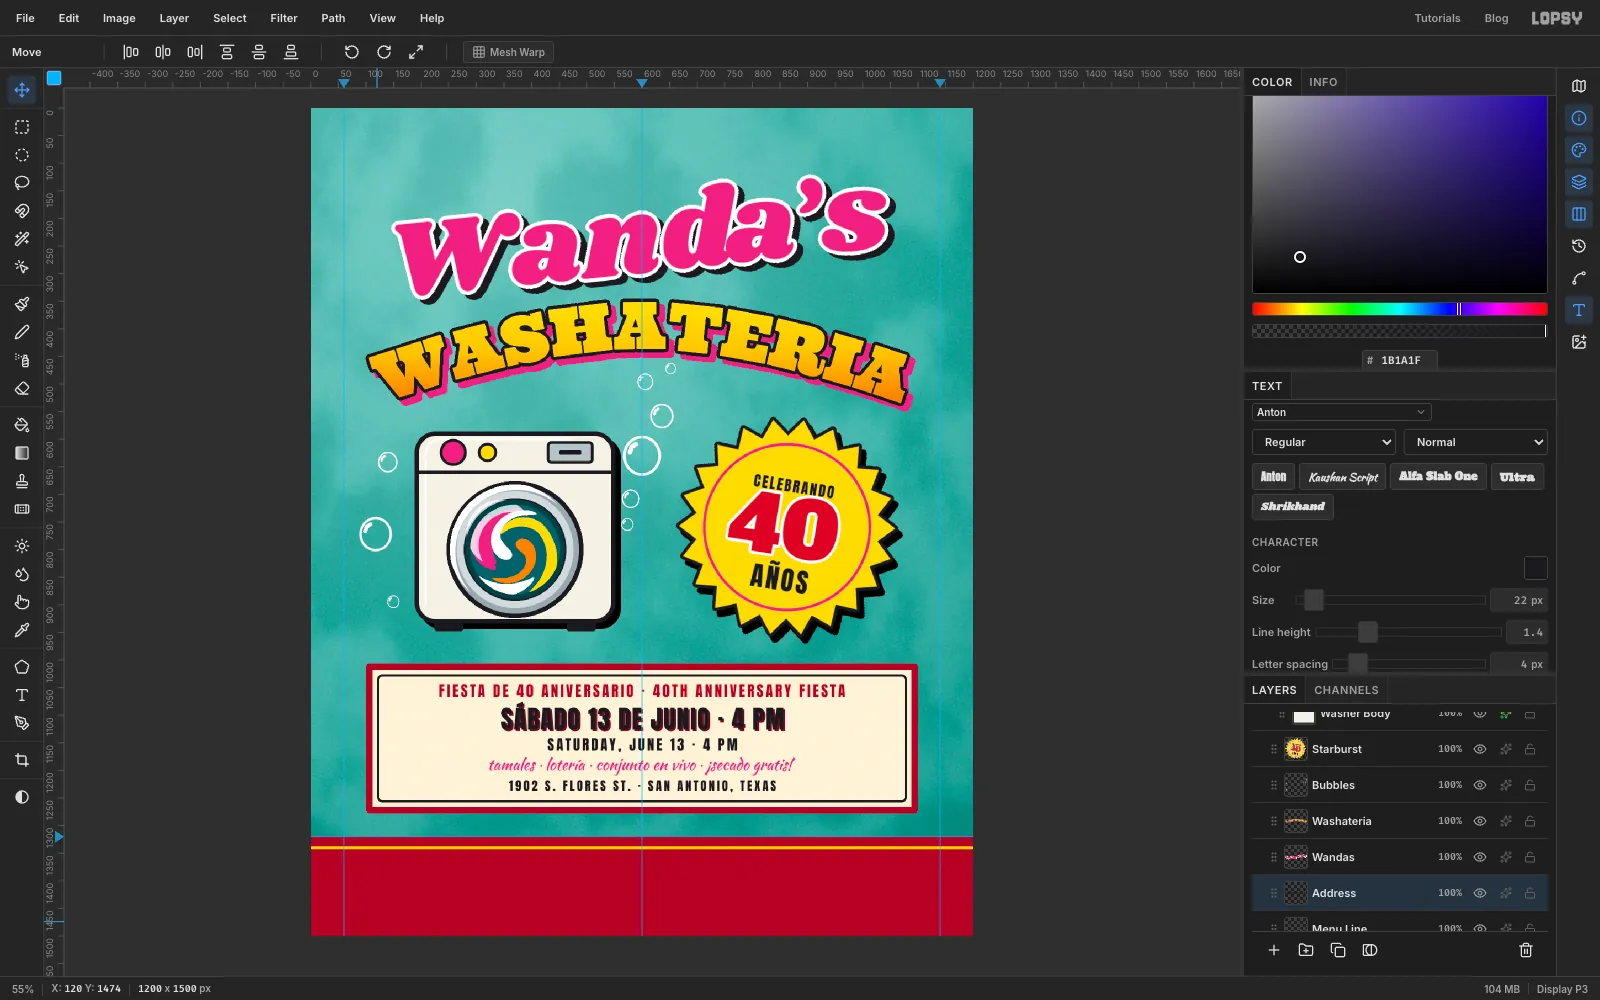
SATURDAY, JUNE 13 · 4 PMin Anton at 26, black, Letter spacing 4, named Date EN, about 15 px under the date. The big date gets a little extra air.tamales · lotería · conjunto en vivo · ¡secado gratis!in Kaushan Script at 28, rosa, named Menu Line, about 10 px below.1902 S. FLORES ST. · SAN ANTONIO, TEXASin Anton at 22, black, Letter spacing 4, named Address, about 10 px below.
Check the gap above the first line and below the last one. They should match, about 13–15 px from the keyline. If the bottom is tight, nudge the whole stack up a pixel or two.
-
Add the tagline and the wainscot lettering
Select Pinstripe and add
LAVA · SECA · DOBLA · DESDE 1986in Anton at 44, cream , Letter spacing 6, and name it Slogan. Rasterize it, give it a black Drop Shadow of 4 / 4, Blur 0, and rasterize the style.Add
¡Traigan a toda la familia! · Bring the whole family!in Kaushan Script at 31 in script yellow , named Familia, about 16 px under the slogan. Rasterize it and give it a 2 / 2 black shadow. Then nudge the two lines together so the pair sits centred between the pinstripe and the bottom edge, about 33 px of red above and below.Last, add
¡Están todos invitados! · You’re all invited!in Kaushan Script at 46 in white, named Invitados, centred across the top in the space above Wanda's (its middle about 70 px down). Rasterize it and give it a 3 / 3 black shadow.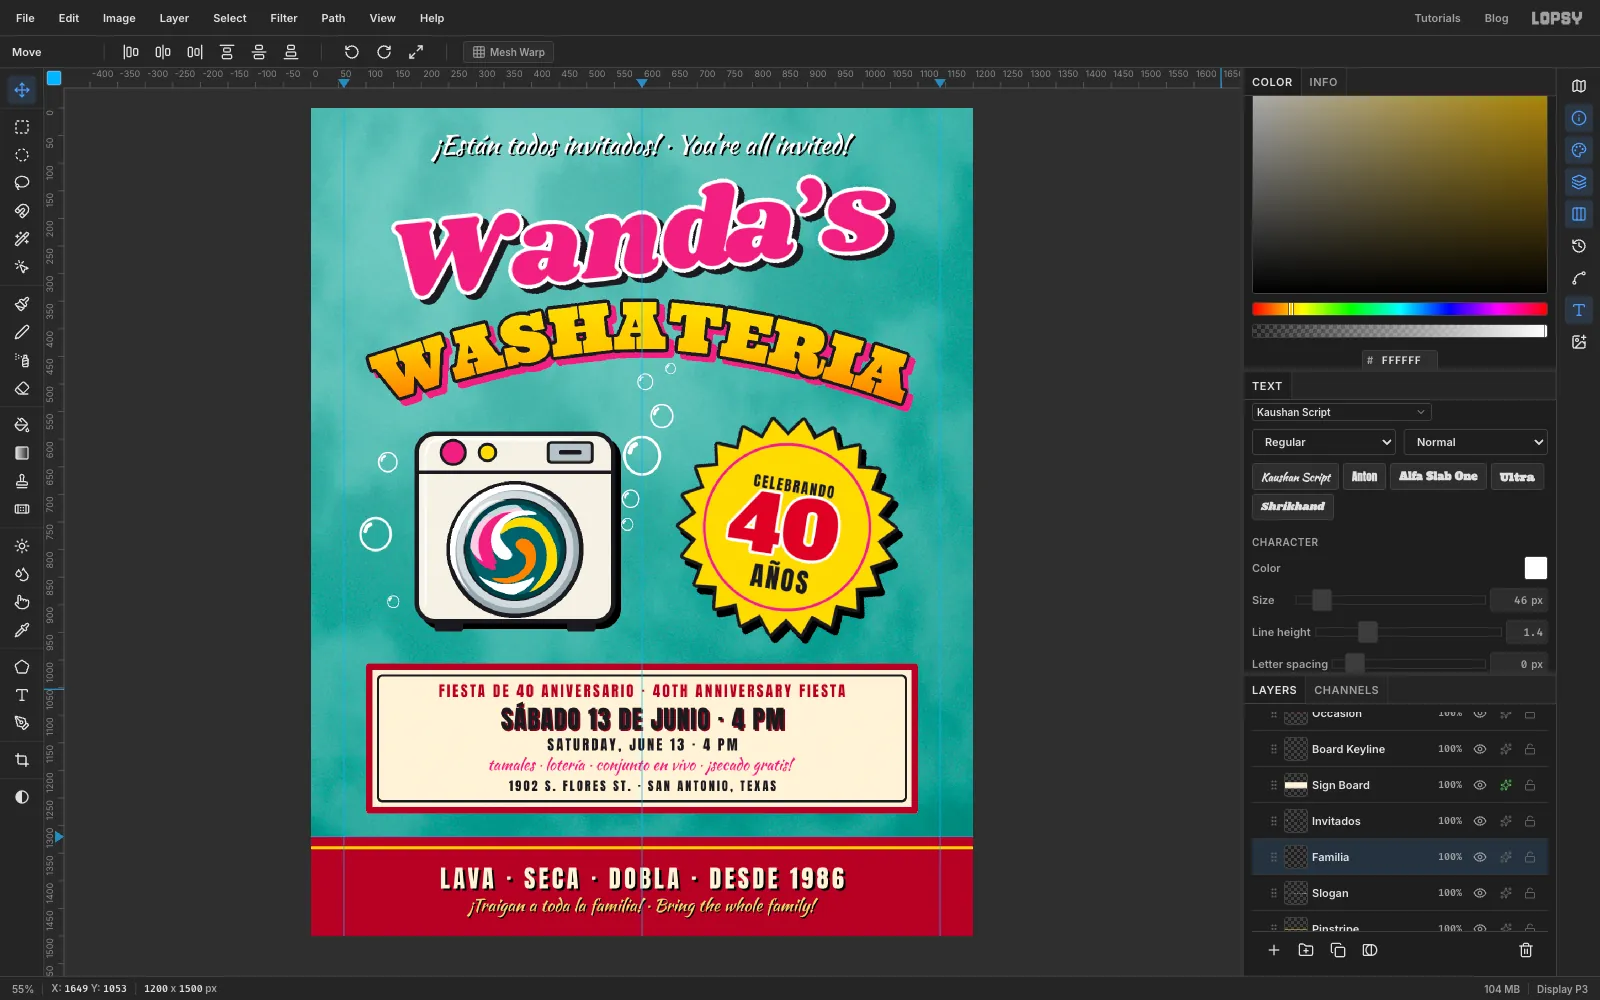
-
Cut and paste a bubble
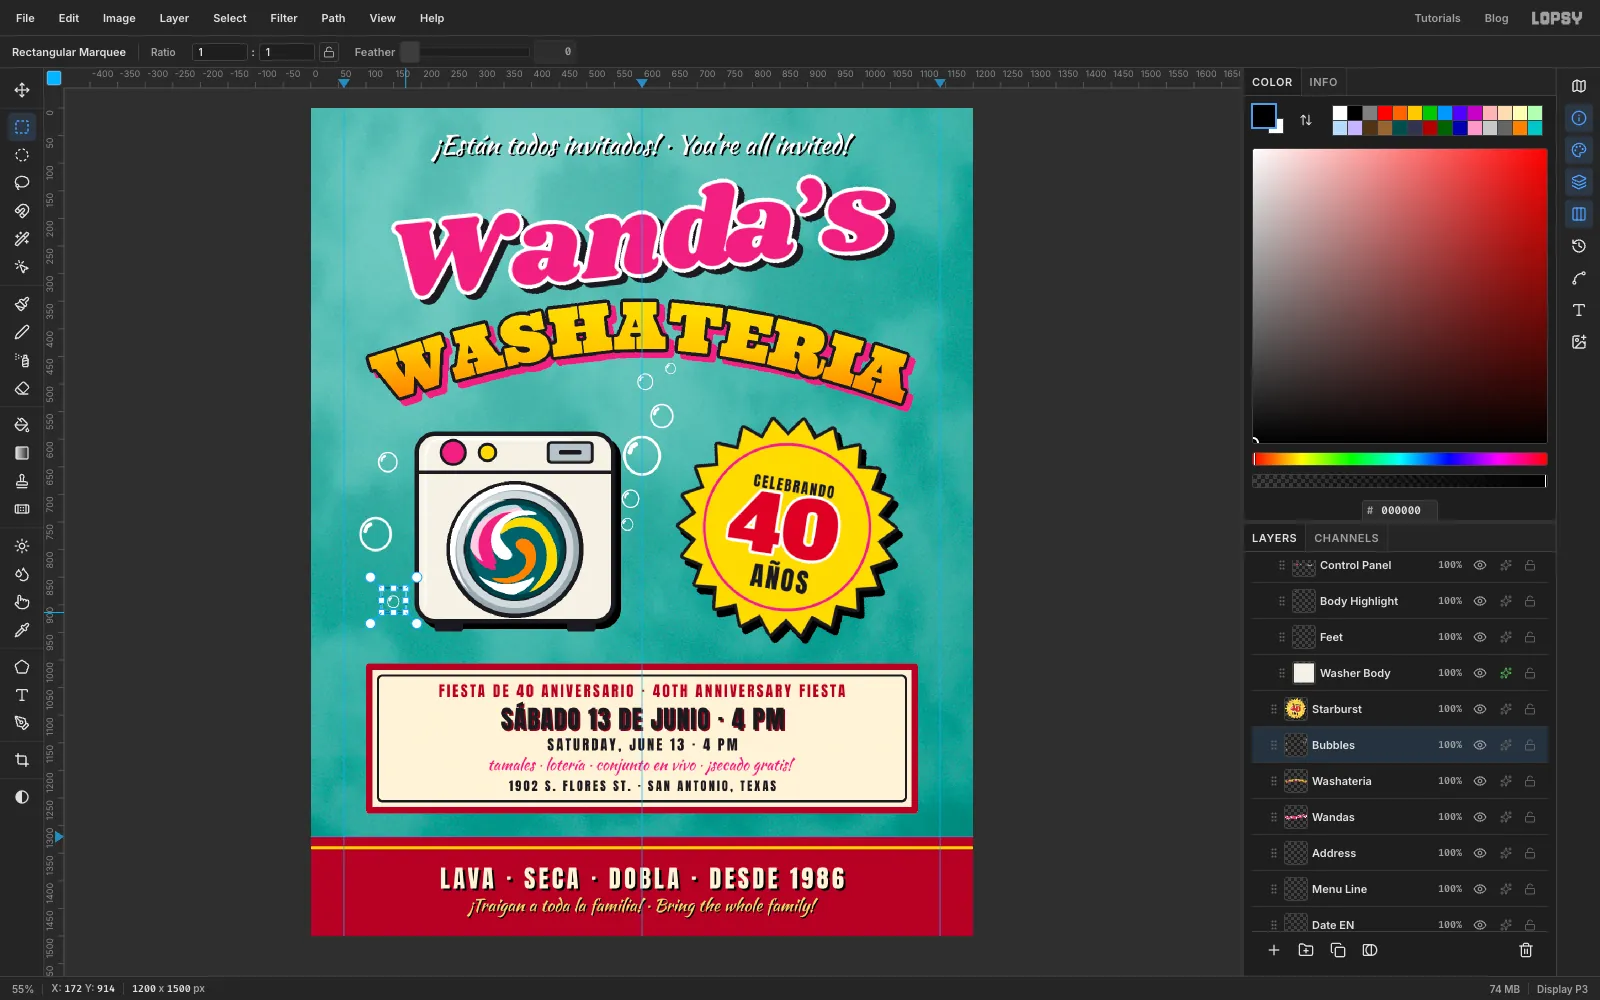
Step back and look at the bubbles. The tiny one low on the left pulls the eye away from the washer, and the stream on the right is thin where it leaves the machine. Move that bubble over. Select Bubbles, draw a marquee around that bubble and press Cmd+X, then Cmd+V. It pastes back on its own layer.
Deselect, then drag it with the Move tool to the bottom of the bubble stream, just right of the washer, about level with the porthole centre. Merge it back down into Bubbles.
-
Move the washer as one piece
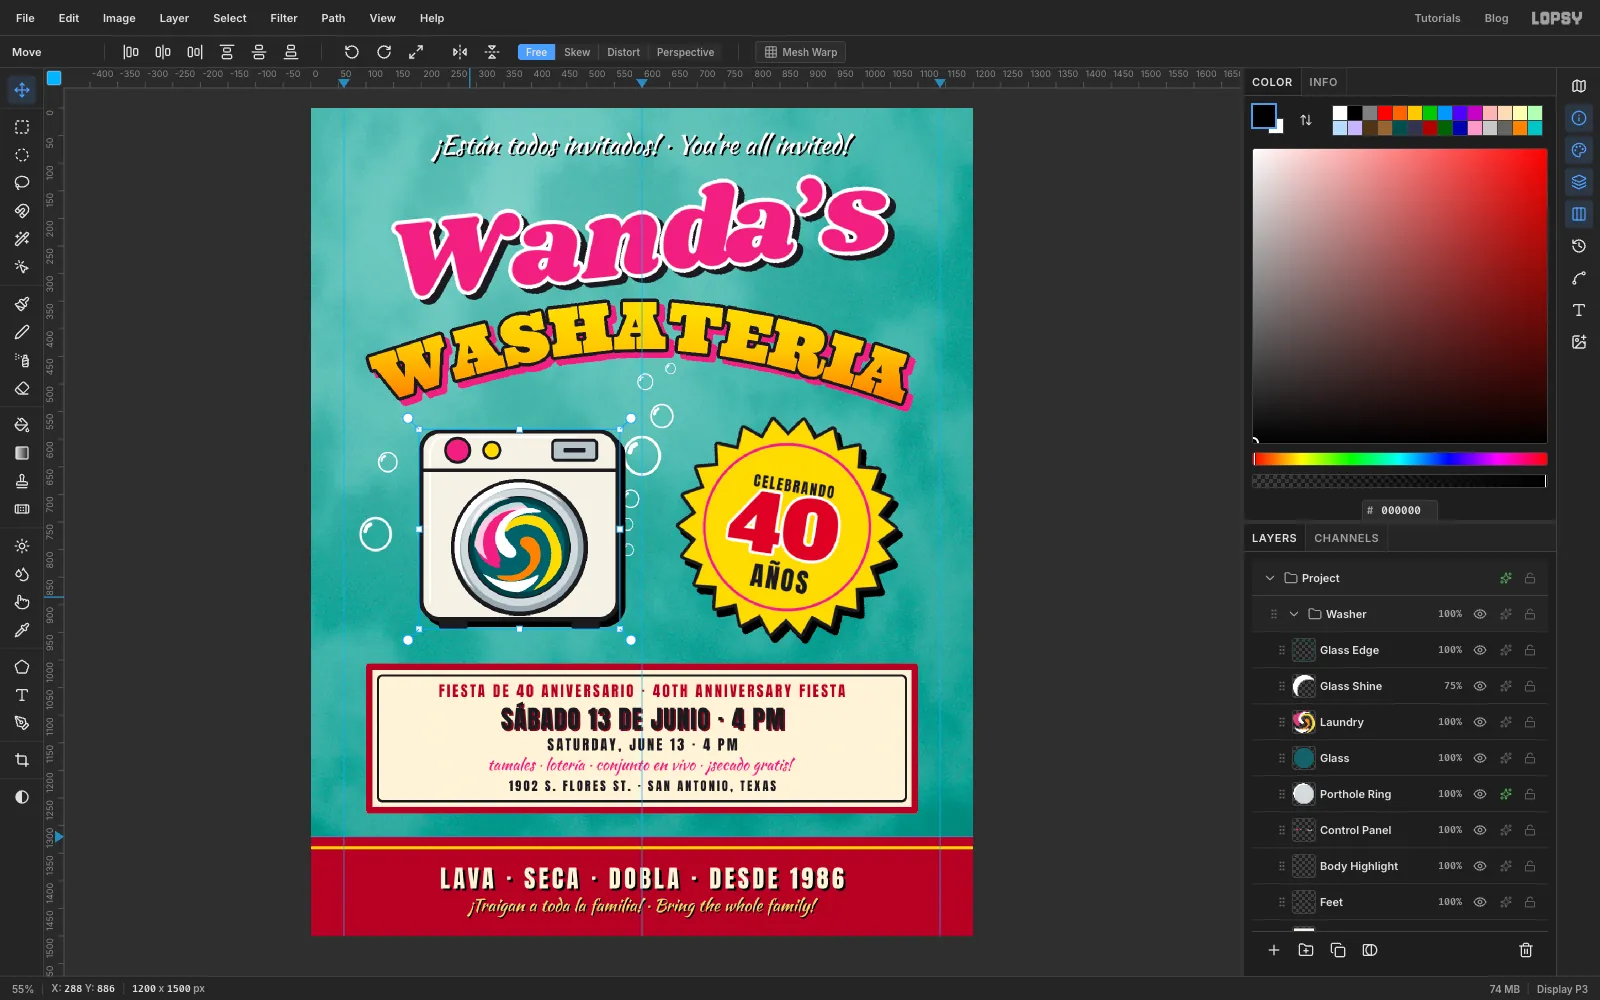
Click the Washer group row and drag the washer with the Move tool about 8 px right and 4 px up, so the gaps to the left edge and to the starburst even out. Everything inside the group moves together: body, shadow, dials, porthole and laundry.
-
Lasso the paint chips
Now age the paint. Select Background and add a layer called Bare Plaster. It sits just above the wall colour.
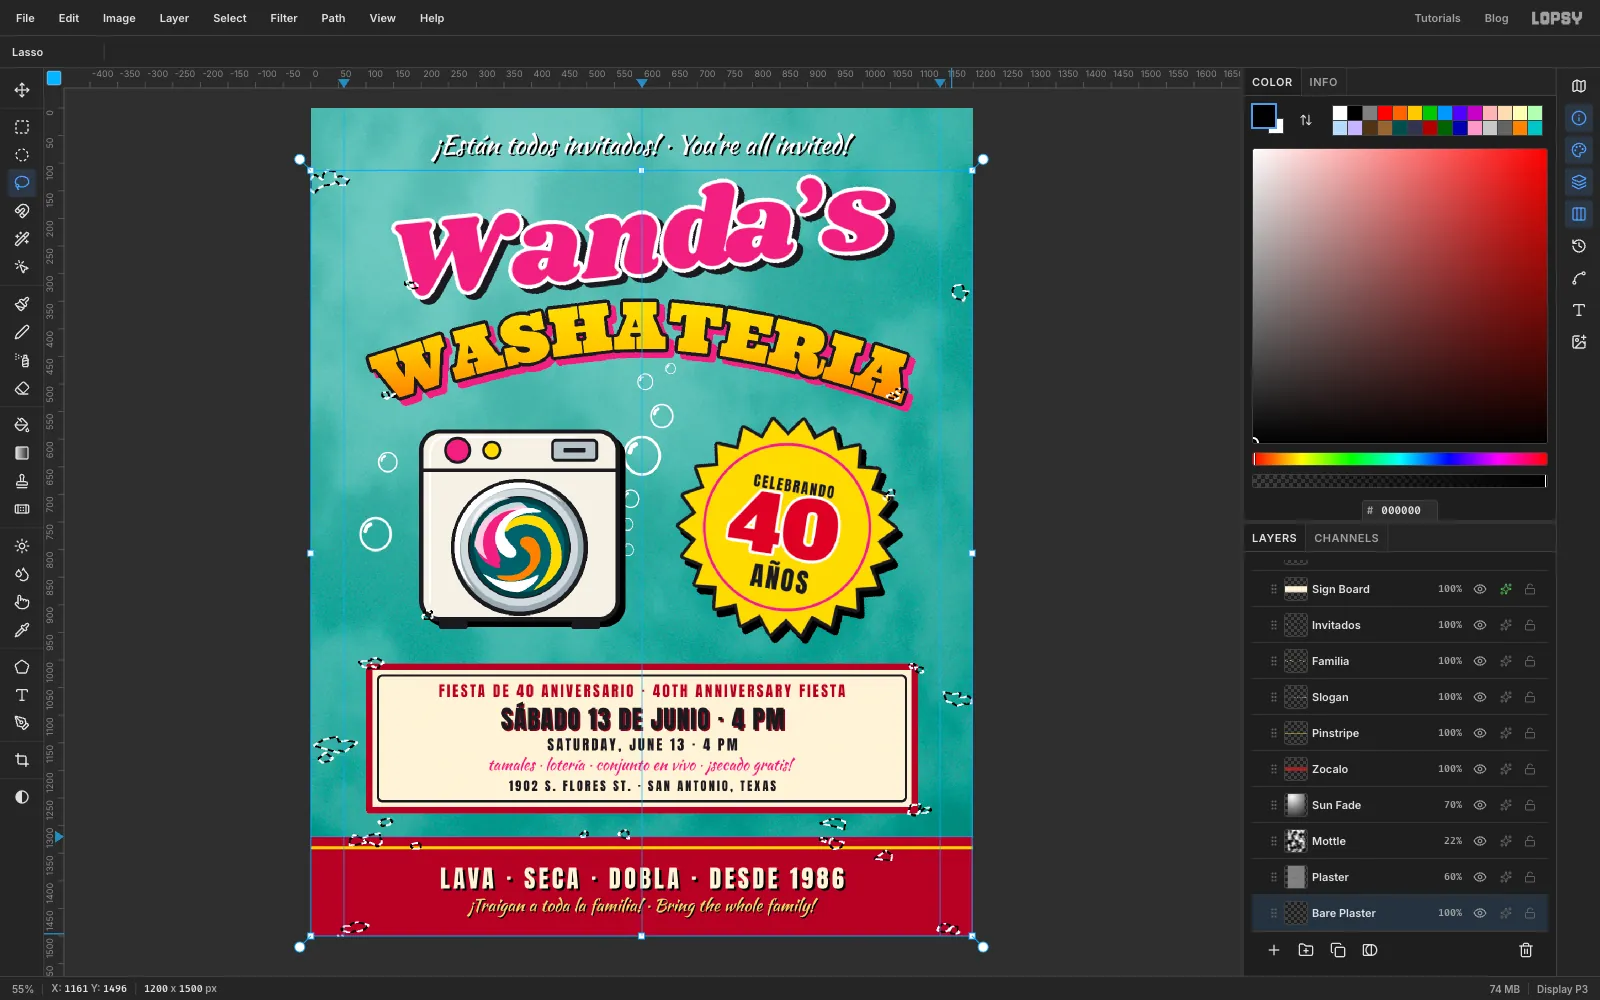
With the Lasso, draw a small jagged flake, 10–40 px across. Then hold Shift and draw about forty more, to add them to the selection. Paint comes off where water and knocks get to it, so cluster the chips:
- along the top edge of the wainscot
- at the corners of the sign board
- low on the wall and in the top corners
- at the washer's bottom-left corner and on the tips of the starburst
- at the two ends of WASHATERIA and the bottom of the big W
Vary the sizes and make each flake an irregular shape, not a circle.
-
Add flaking along the wainscot edge
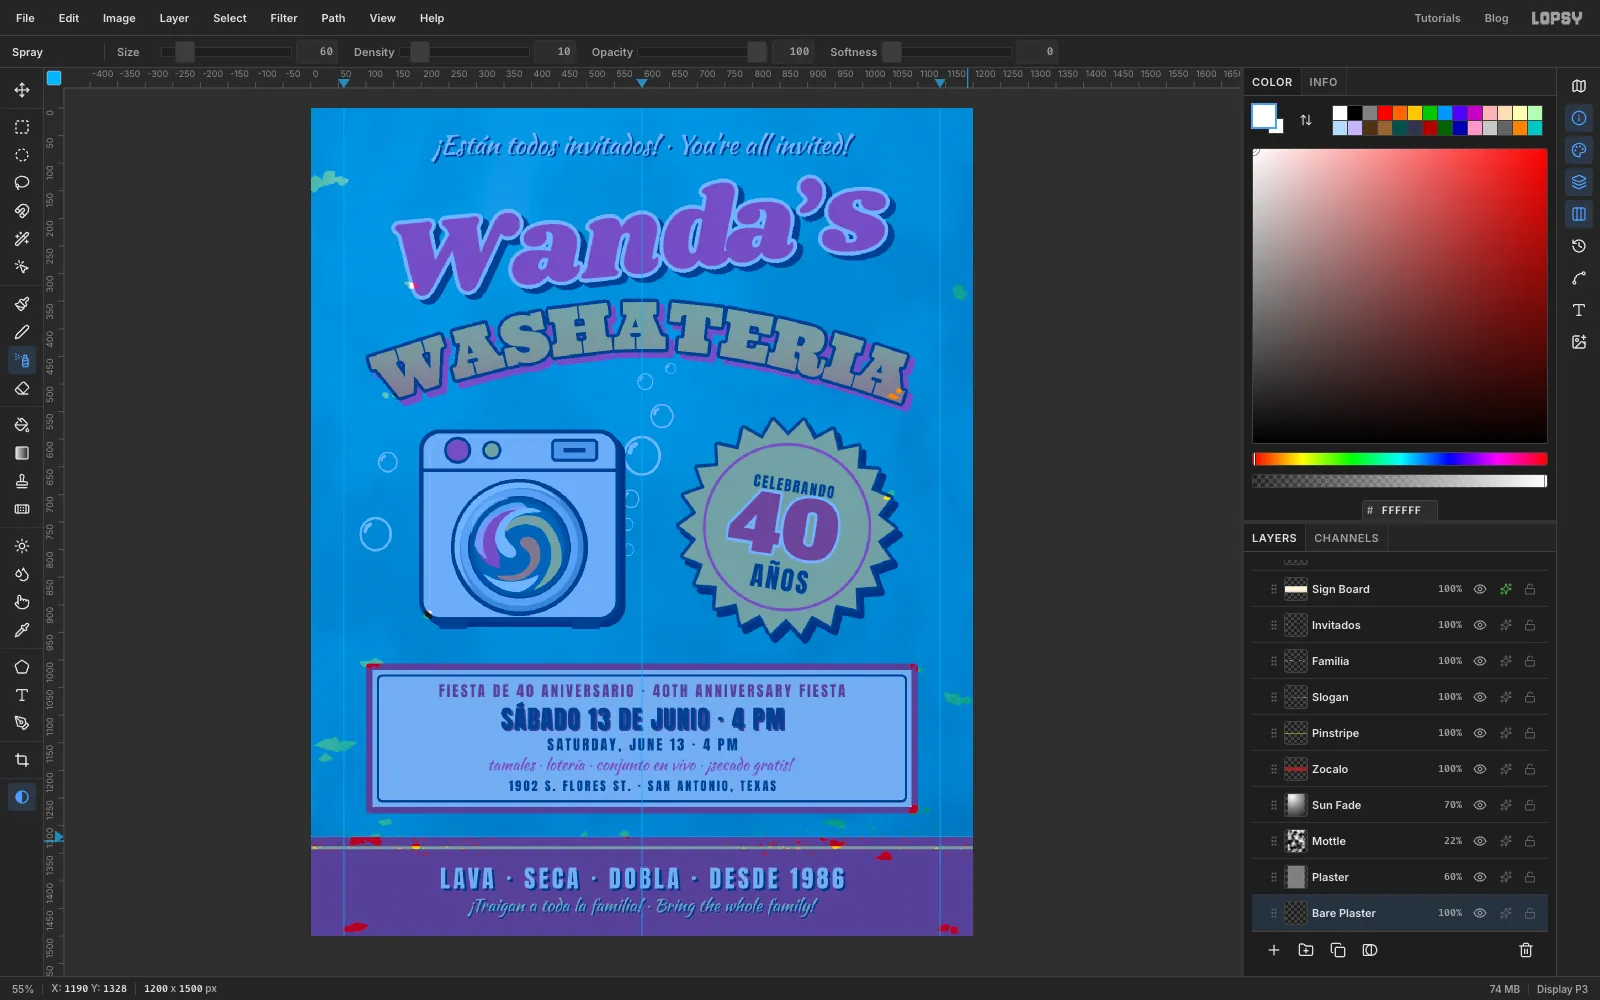
Press Q to enter Quick Mask. The selection turns into a blue overlay that you can paint on.
Pick the Spray tool and set Size 60, Density 10, Opacity 100 and Softness 0. With white as the foreground colour (white adds to the selection), spray along the top edge of the wainscot across the left third, and again across the right third. You get a ragged line of tiny flakes where the paint has lifted.
Press Q again to turn the mask back into a selection.
-
Knock the chips out of the paint
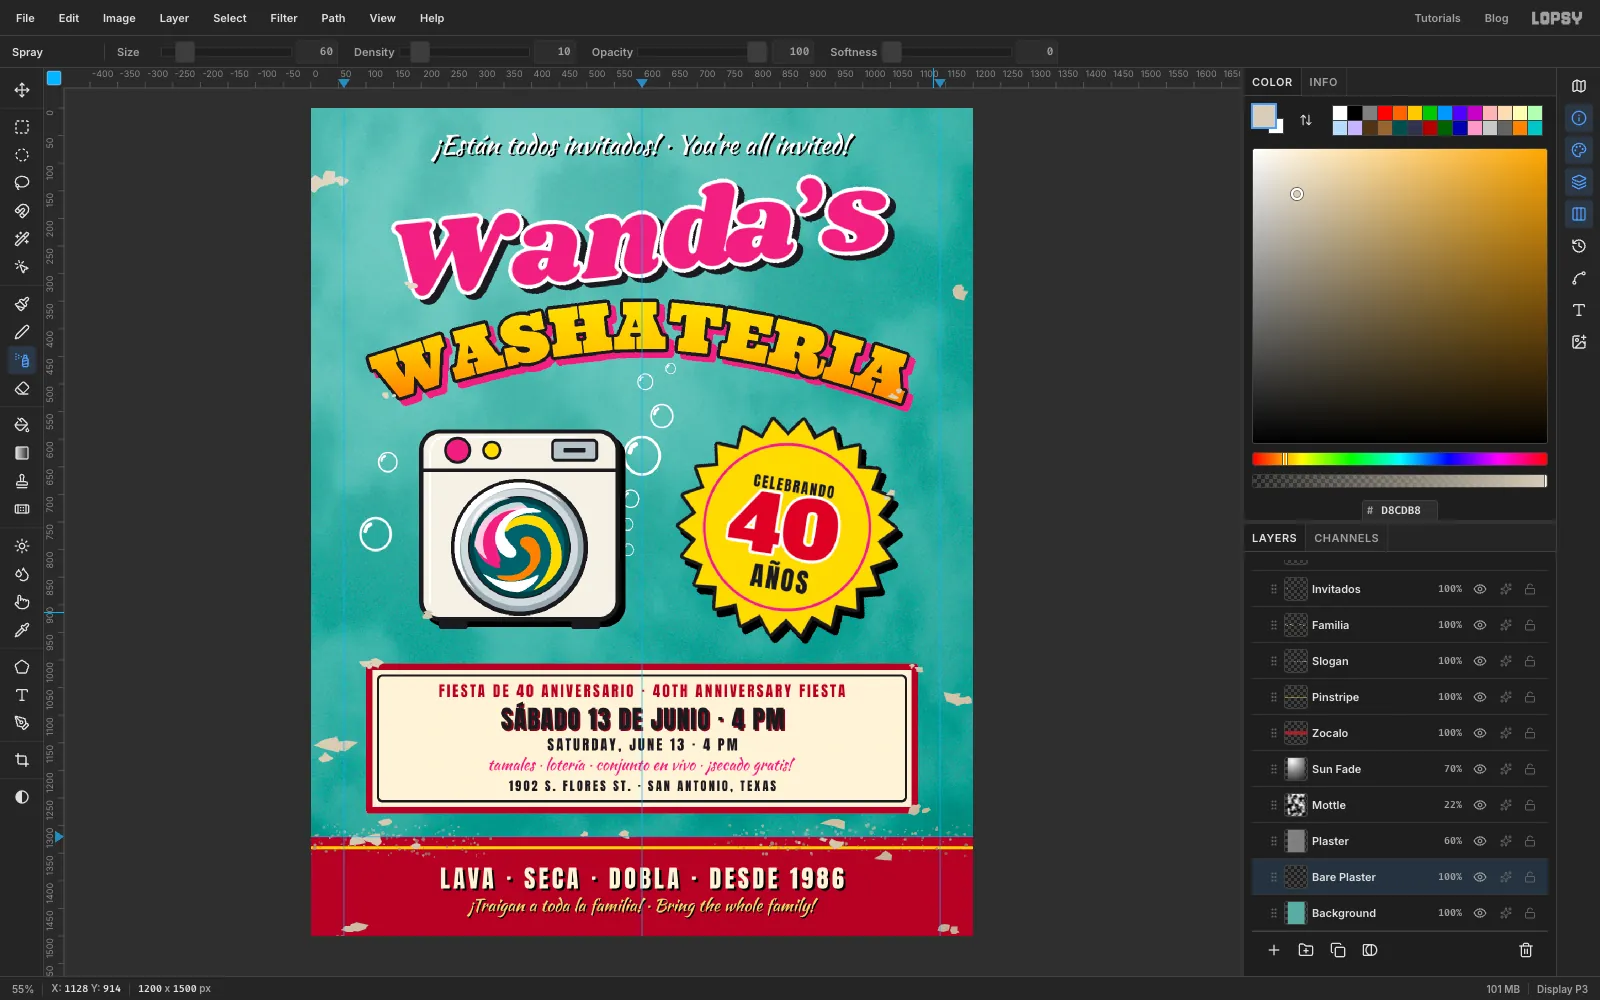
Two layers still have live effects: Sign Board (its red Stroke) and Washer Body (its Drop Shadow). Select each one and click Rasterize Layer Style. Otherwise the effects would draw a new red ring and a new shadow around every hole.
Keeping the selection, click each painted layer and press Delete: Sign Board, Board Keyline, Zocalo, Pinstripe, Slogan, Wandas, Washateria, Starburst, Washer Body and Feet.
Select Bare Plaster, set the foreground to , choose Edit → Fill, and run Add Noise at 10 for a little grit. Deselect. The holes now show chalky plaster instead of turquoise.
-
Run grime down from the board
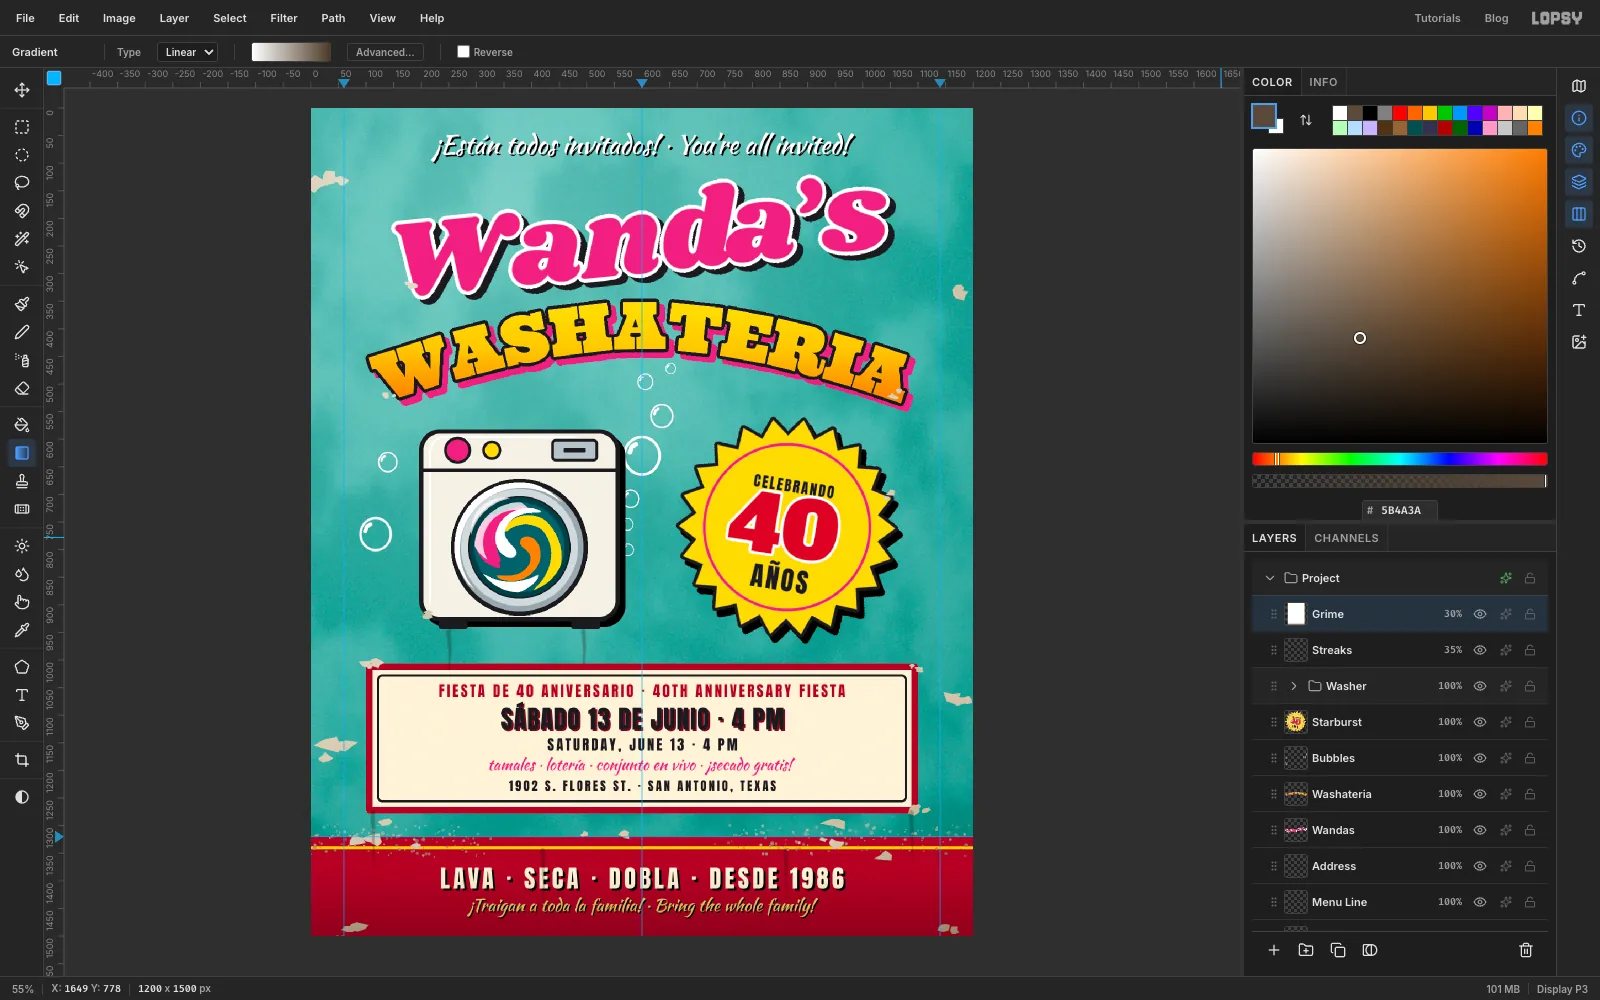
Click the arrow on the Washer group to collapse it, then select the group row. A new layer will now go above the group rather than inside it, at the top of the stack. Add a layer called Streaks.
Open the Brush settings dialog (the brush preset button in the options bar) and set Size 12, Hardness 35 and, on the same Shape tab, Taper 100. Use streak brown . Drag short streaks straight down: from each bottom corner of the sign board (about 150 px and 120 px long), under each washer foot, and down from the pinstripe in two places. Taper narrows each streak along its length, so it reads as a drip rather than a painted line. Run Gaussian Blur at 2, then set the layer to Multiply at 35%.
Add a layer called Grime. Draw a Linear gradient from white to , from about 120 px above the bottom edge down to the bottom. Set it to Multiply at 30%. It reads as splash-back dirt from the sidewalk.
-
Press stucco into everything
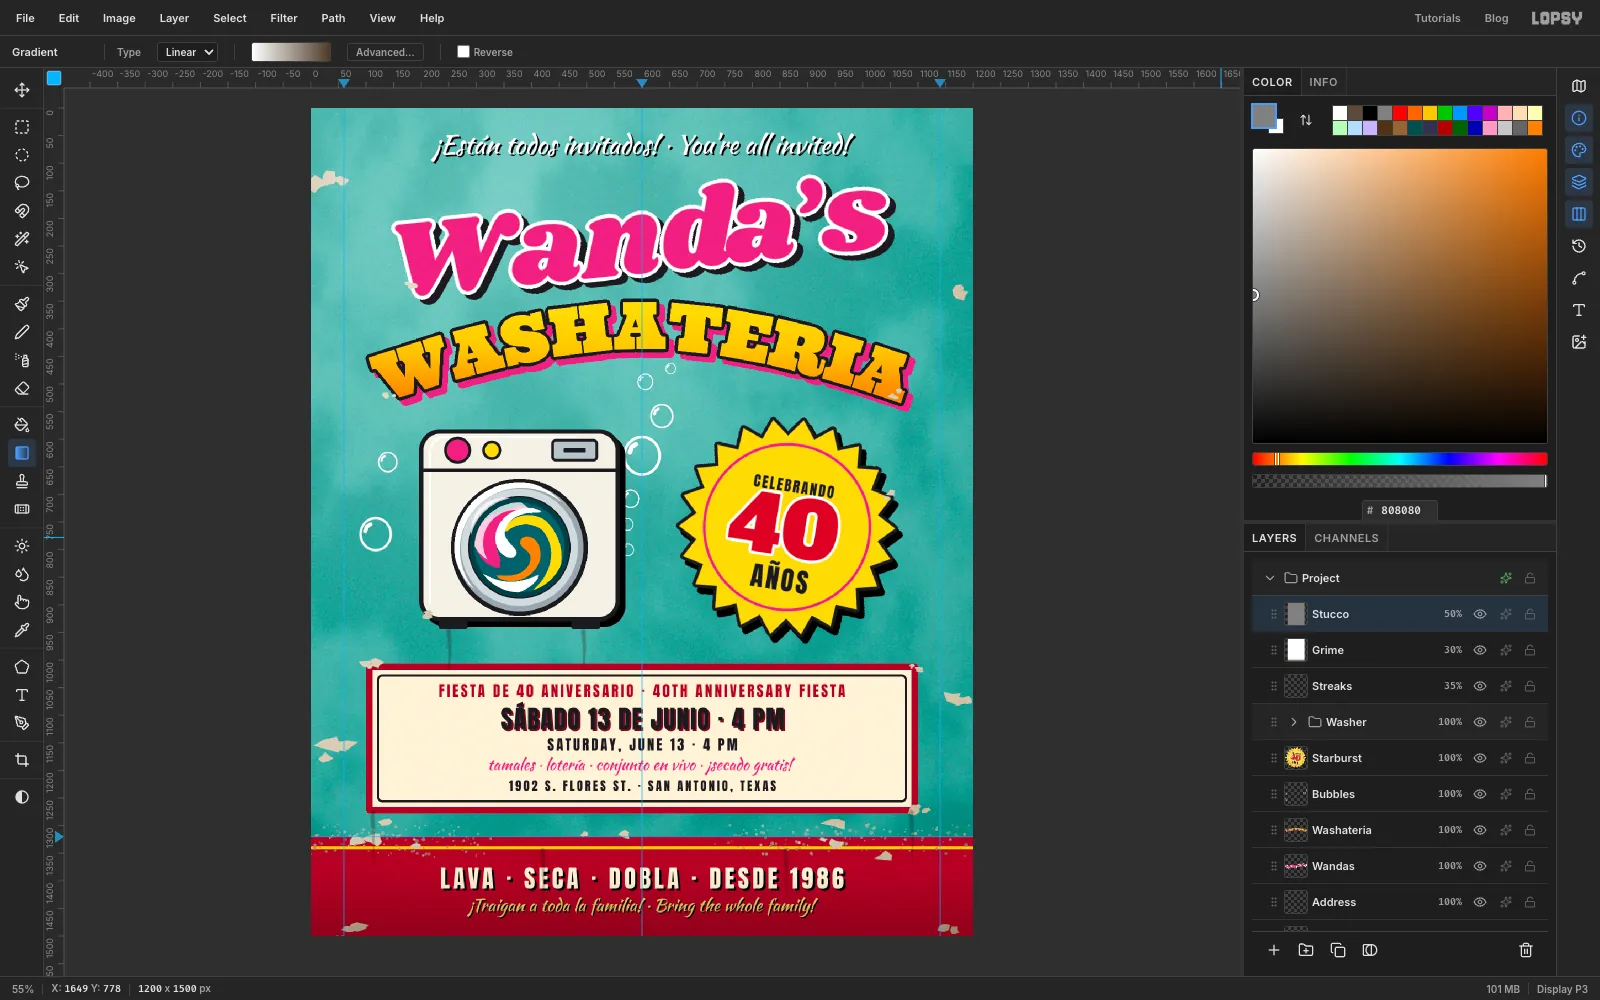
Add a layer called Stucco at the top and fill it with mid-grey. Run Add Noise at 40, Gaussian Blur at 2.5 and Emboss at Angle 135, Strength 100. Set it to Overlay at 50%.
This is the step that makes it look painted onto the wall. The bumps now show through every letter, the board and the washer, not just the turquoise.
-
Bleach the top of the wall
Add a layer called Sun Bleach. Draw a Linear gradient from warm white at the top edge down to mid-grey at about y 560. Set it to Soft Light at 80%. The grey end does nothing in Soft Light, so only the top of the wall and the names get sun-bleached.
-
Fade the whole sign
Scroll to the top of the Layers panel, click the Project group row and open its effects. For a group this shows the Adjustments list, which starts with a few neutral adjustments already in it. Expand Hue / Saturation and set Saturation to −28 and Lightness to 4. Everything inside the group fades together, like enamel after a few Texas summers.
Choose File → Save Project to keep the layers, and File → Quick Export PNG for the finished invitation.