Design a Voxel Art Hot Chocolate Tin Label
Build a voxel s'mores scene for a hot chocolate tin label in Lopsy with isometric pattern tiles, Pen-traced cube faces, Magic Wand seams and extruded type.
Voxel art is pixel art in three dimensions: everything is built from identical little cubes. Seen from the classic 2:1 isometric angle, every cube shows the same three faces: a diamond on top, a face on the left and a face on the right. If you keep one light direction and give each kind of face its own shade, any pile of cubes reads as a solid object.
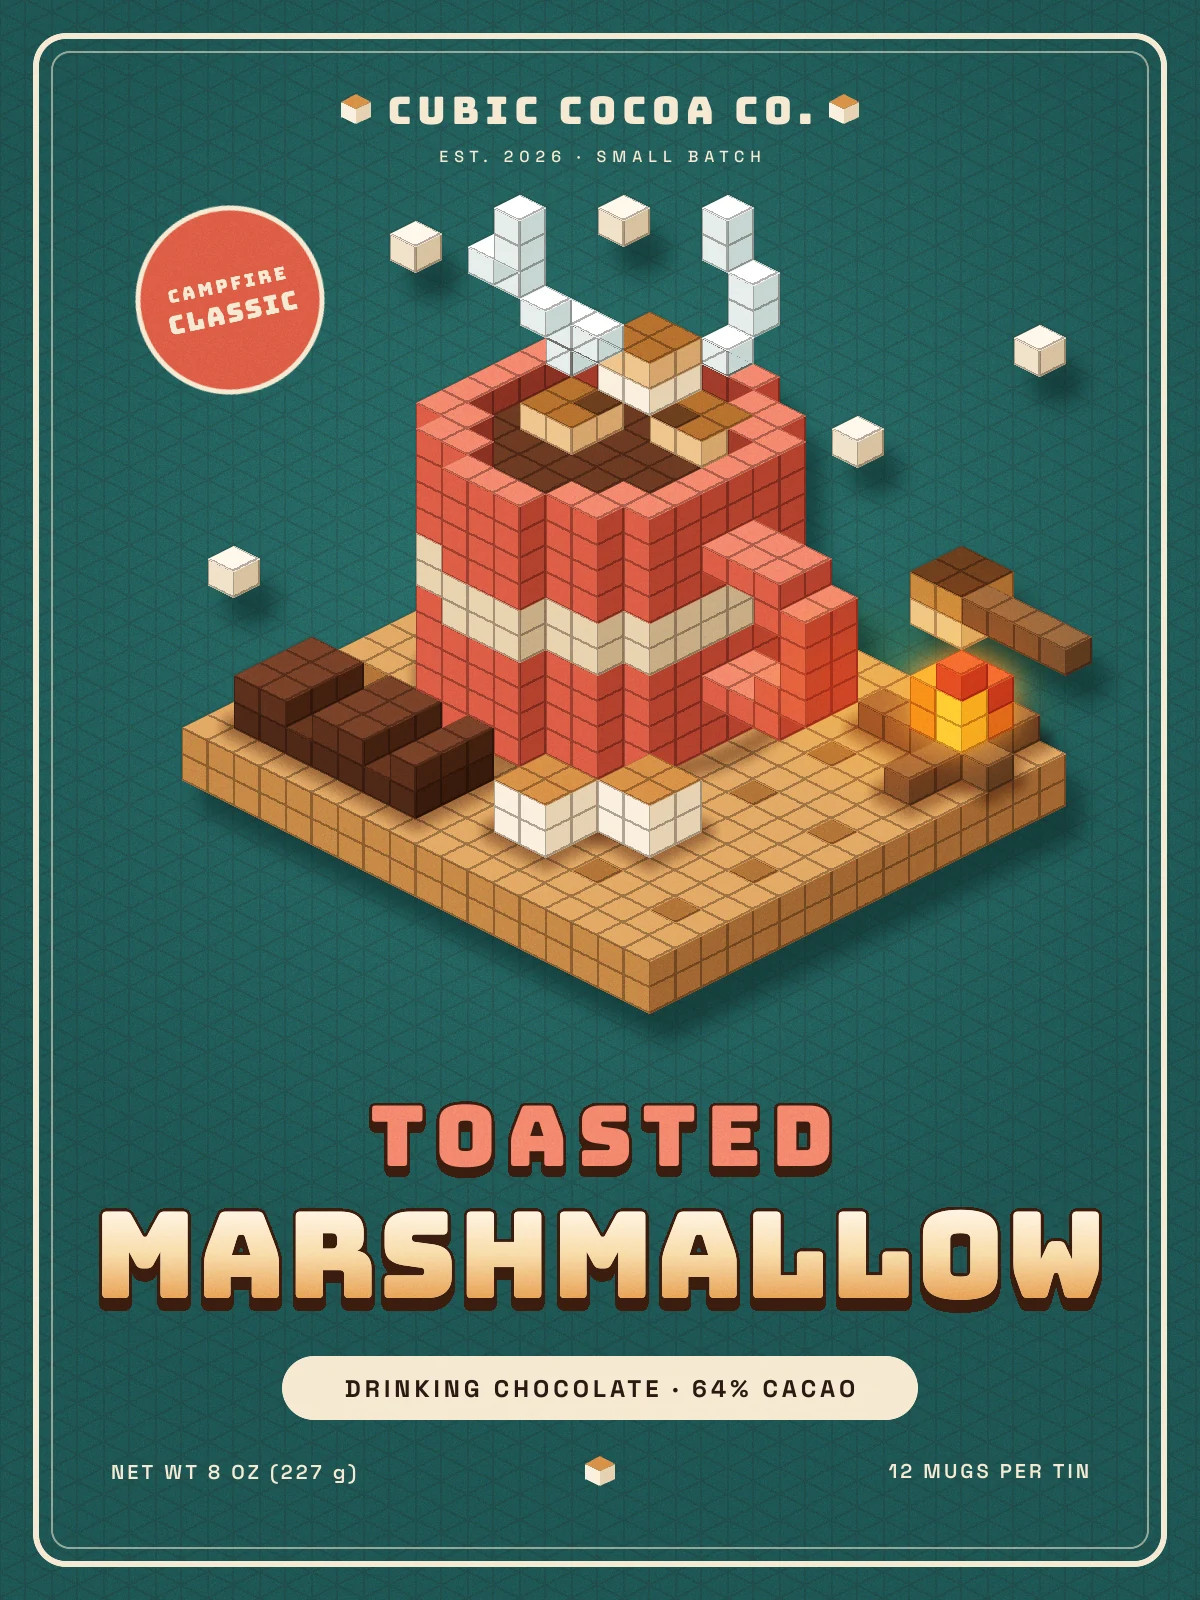
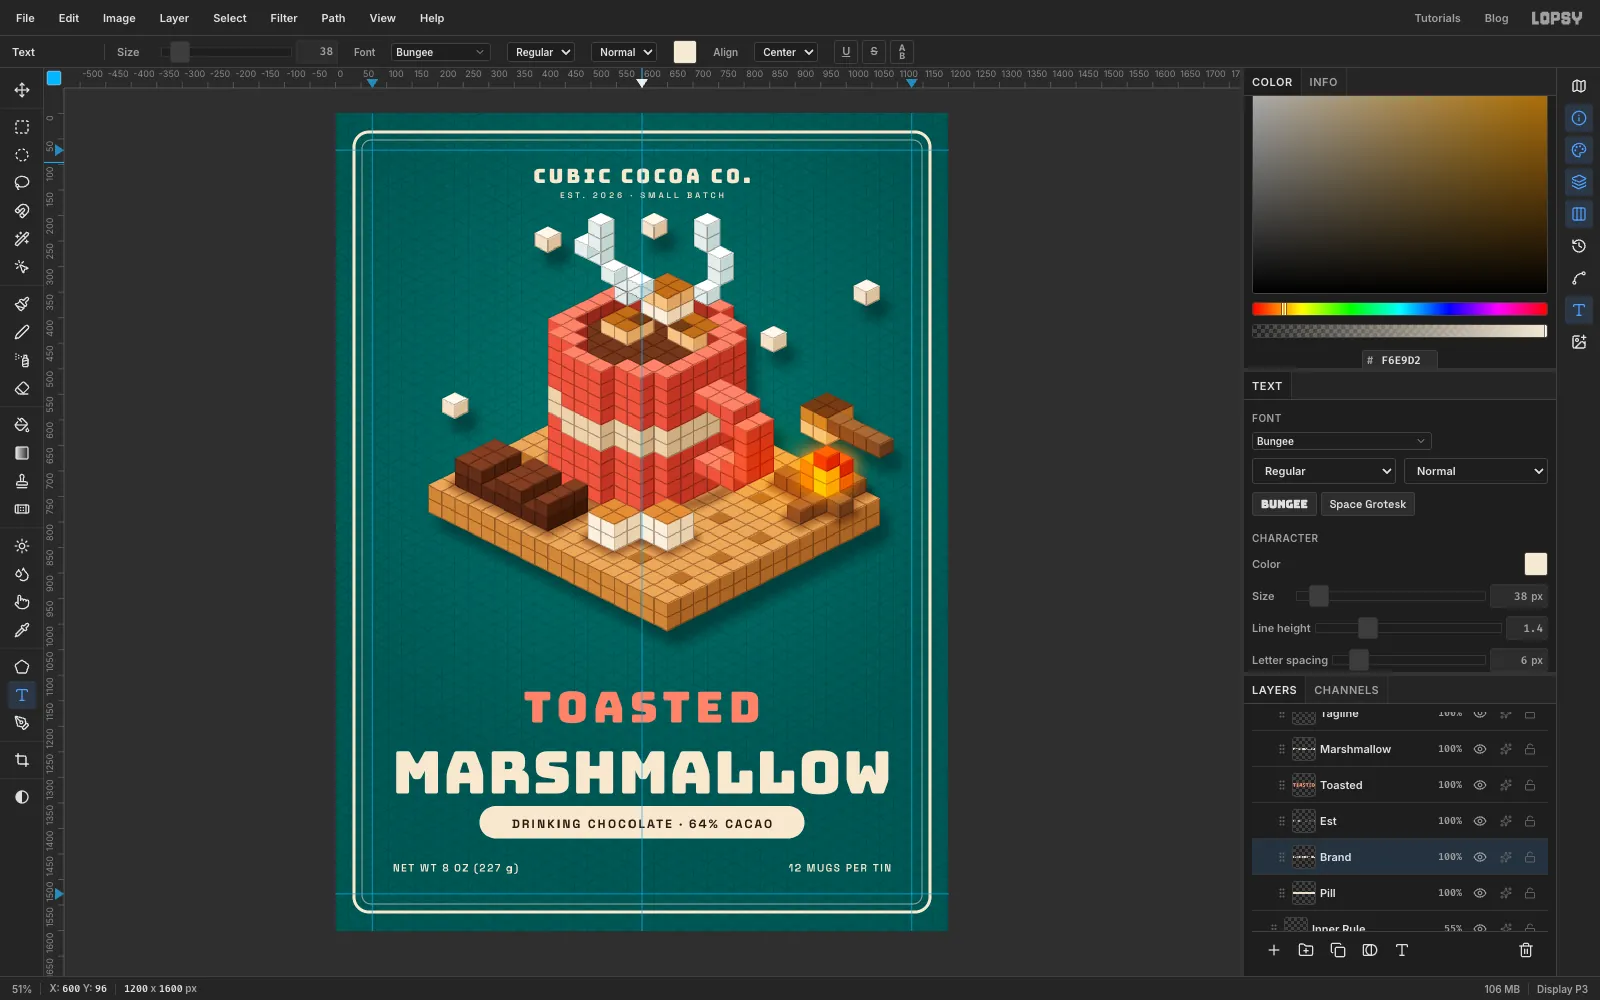
In this tutorial you'll paint a voxel s'mores scene on the front of a hot chocolate tin label, Cubic Cocoa Co. — Toasted Marshmallow. It's a 1200 × 1600 px label. You won't need a 3D program. You'll set up isometric graph paper in Lopsy and trace each face of the scene on it with the Pen, the way you would on paper. The label has:
- a floating graham-cracker slab with a mug of cocoa, toasted marshmallows, a chocolate bar, a little campfire and rising steam
- seams between the cubes, added in one go with the Magic Wand and four home-made patterns
- chunky Bungee type with a toasted gradient and a solid extrusion
- a rotated badge, a cream pill and small cube icons
The tools you'll use:
- the Pencil, Edit → Define Pattern and Edit → Fill with Pattern
- the Pen with the Paths panel's Path to Selection, and Edit → Fill
- the Magic Wand with Contiguous off, and Multiply and Overlay blend modes
- the Brush, the Gradient tool, the Shape tool and Add Noise
- the Drop Shadow, Outer Glow and Stroke effects
- the Rectangular Marquee, Cut, Copy and Paste, the Move tool and its rotate handle
- groups, guides and the Text tool
The fonts are free Google Fonts from Lopsy's font picker: Bungee for the name and the badge, and Space Grotesk for the small type.
Every cube material gets three shades, listed top / left face / right face:
-
Label teal
-
cream
-
ink
-
Cracker
-
docking holes
-
Mug
-
inside walls
-
cream band
-
Chocolate
-
grooves
-
cocoa
-
Marshmallow
-
toasted
-
charred
-
Wood
-
Flame core
-
flame
-
flame tips
-
Floating cubes
-
steam
-
Type coral
-
badge
-
extrusion
-
MARSHMALLOW
-
Contact shadow
-
fire glow
-
firelight
-
drop shadow
-
grain grey
-
Set up the label stock
Open Lopsy. In the New Document dialog set Width to
1200and Height to1600, and click Create. Delete the emptyLayer 1with the bin button at the bottom of the Layers panel, so onlyBackgroundis left.- Click the Background layer, set the foreground colour to in the Color panel's hex field, and choose Edit → Fill.
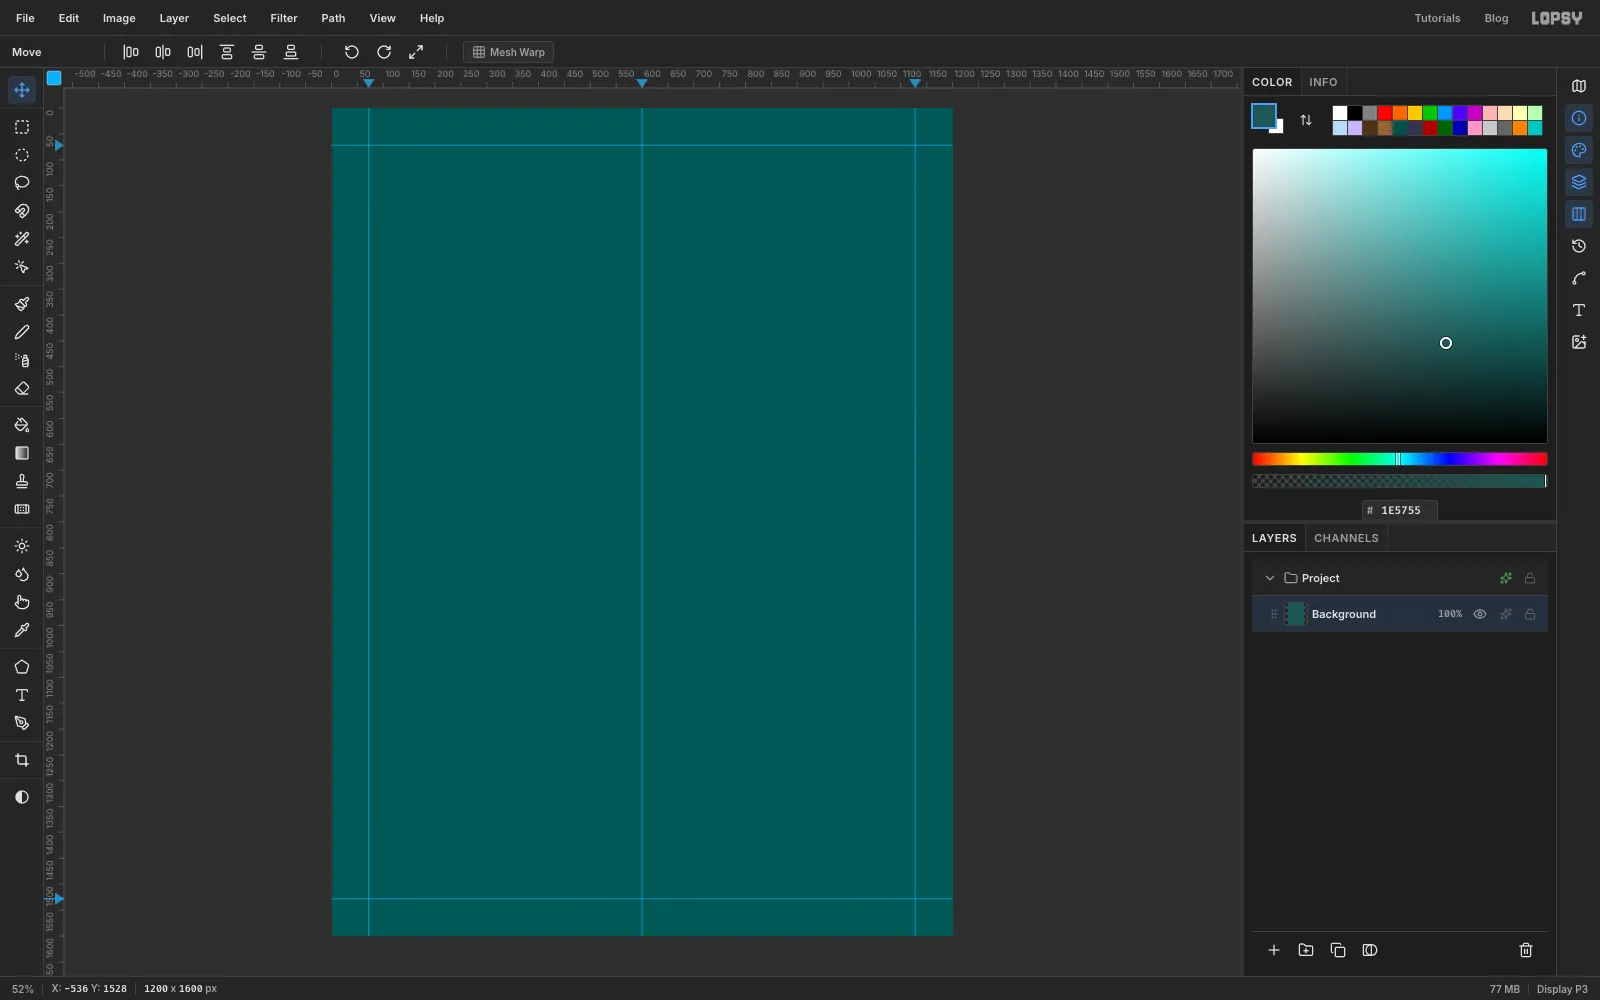
- Click the top ruler at 600 to drop a vertical guide down the middle, then at 72 and 1128 for the side margins.
- Click the left ruler at 72 and 1528 for the top and bottom margins.
The guides are only for lining up type later. The scene gets its own grid in the next steps.
-
Draw the isometric tiles with the Pencil
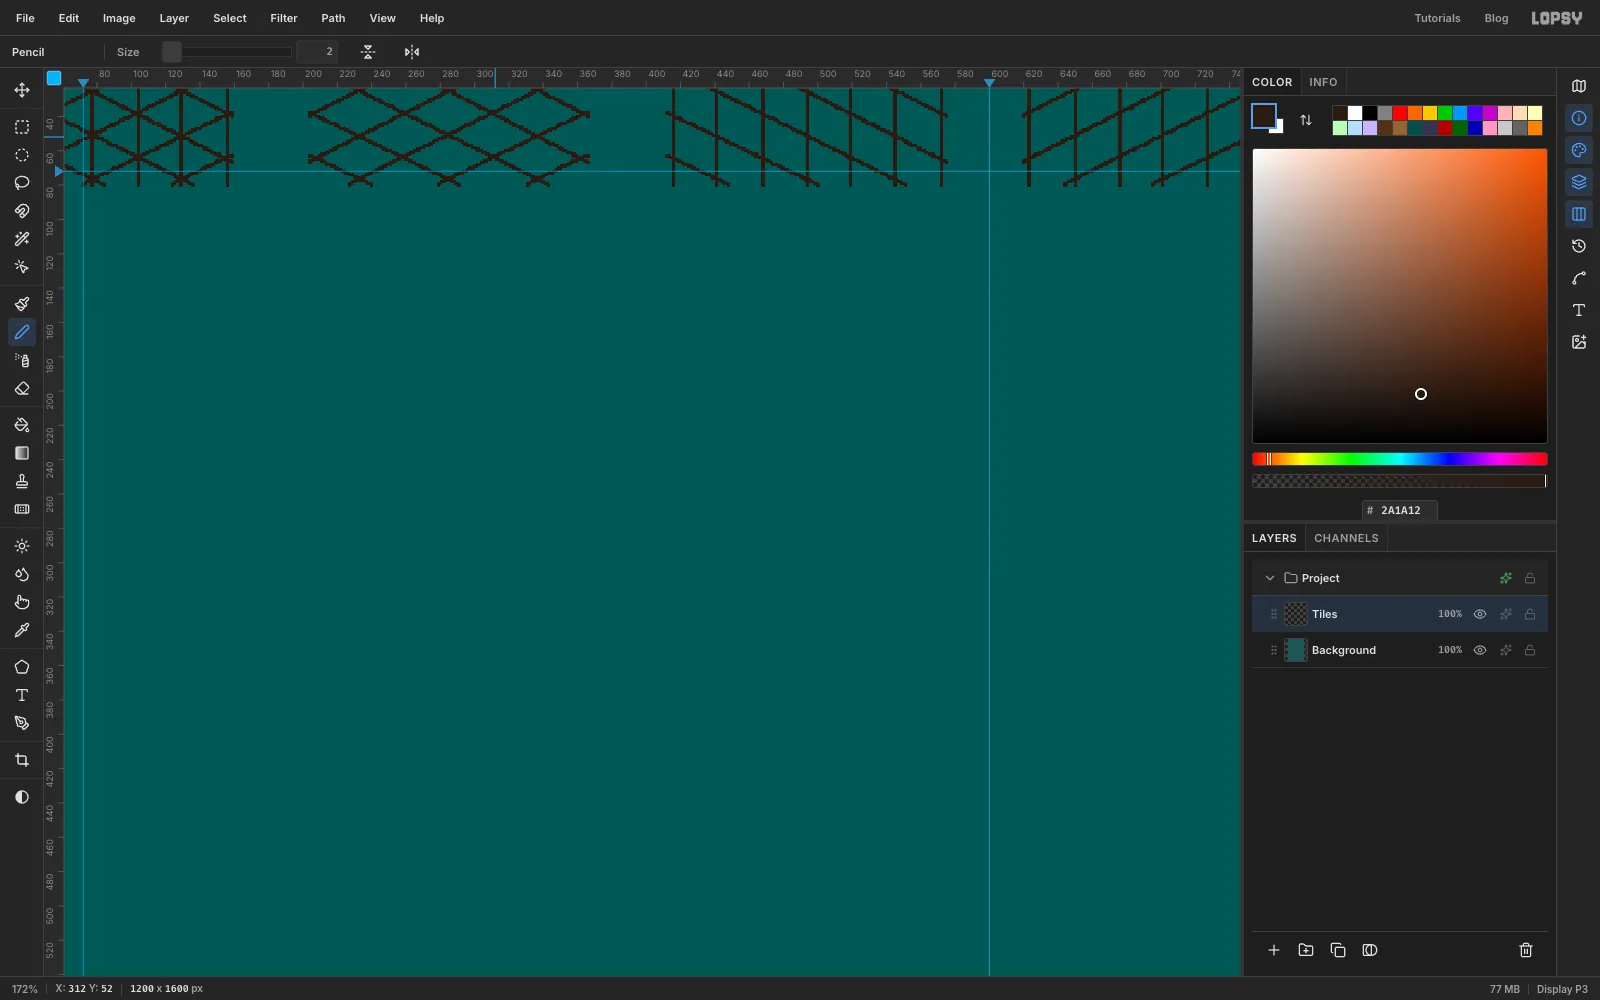
You need four small repeating tiles: one for graph paper and one for the seams on each kind of cube face. You'll draw them along the top edge of the canvas and delete them afterwards.
- Add a layer with the + button and name it
Tiles(double-click its name). - Pick the Pencil (N), set Size to
2and the colour to . - Draw four blocks, each 156 × 78 px (three tiles across and three down), from y = 0 to 78, starting at x = 0, 208, 416 and 624. Click where a line starts, then Shift-click where it ends, and let each line run a few pixels past the block.
- Verticals: one every 26 px across the block, the full 78 px tall.
- Falling diagonals: lines that drop 1 px for every 2 px to the right. Three start on the block's left edge at y = 13, 39 and 65, and three more come in through its top edge at 26, 78 and 130 px from the left.
- Rising diagonals: the mirror image. Three start on the left edge at y = 13, 39 and 65 and rise, and three more come in through the bottom edge at 26, 78 and 130 px from the left.
- Block 1 (x = 0) gets all three sets: that's the graph paper. Block 2 (x = 208) gets only the two diagonal sets: the diamond seams of top faces. Block 3 (x = 416) gets the verticals and the falling diagonals, for left faces. Block 4 (x = 624) gets the verticals and the rising diagonals, for right faces.
Zoom in with Cmd and the scroll wheel to check that the lines meet at the same points in every block.
- Add a layer with the + button and name it
-
Turn the middle tiles into patterns
Each pattern is the middle tile of its block, so the lines run cleanly across the tile's edges and it repeats without seams.
- Pick the Rectangular Marquee (M) and click the canvas once without dragging. In the Rectangular Selection dialog type From
52,26and To104,52, and press Enter. - Choose Edit → Define Pattern. This is Pattern 1, the graph paper.
- Do the same for the other blocks, from
260, 26to312, 52(Pattern 2, tops), from468, 26to520, 52(Pattern 3, left faces) and from676, 26to728, 52(Pattern 4, right faces).
Press Cmd+D to deselect and delete the
Tileslayer. Patterns aren't saved in.lopsyproject files, so define them again if you reopen the project later.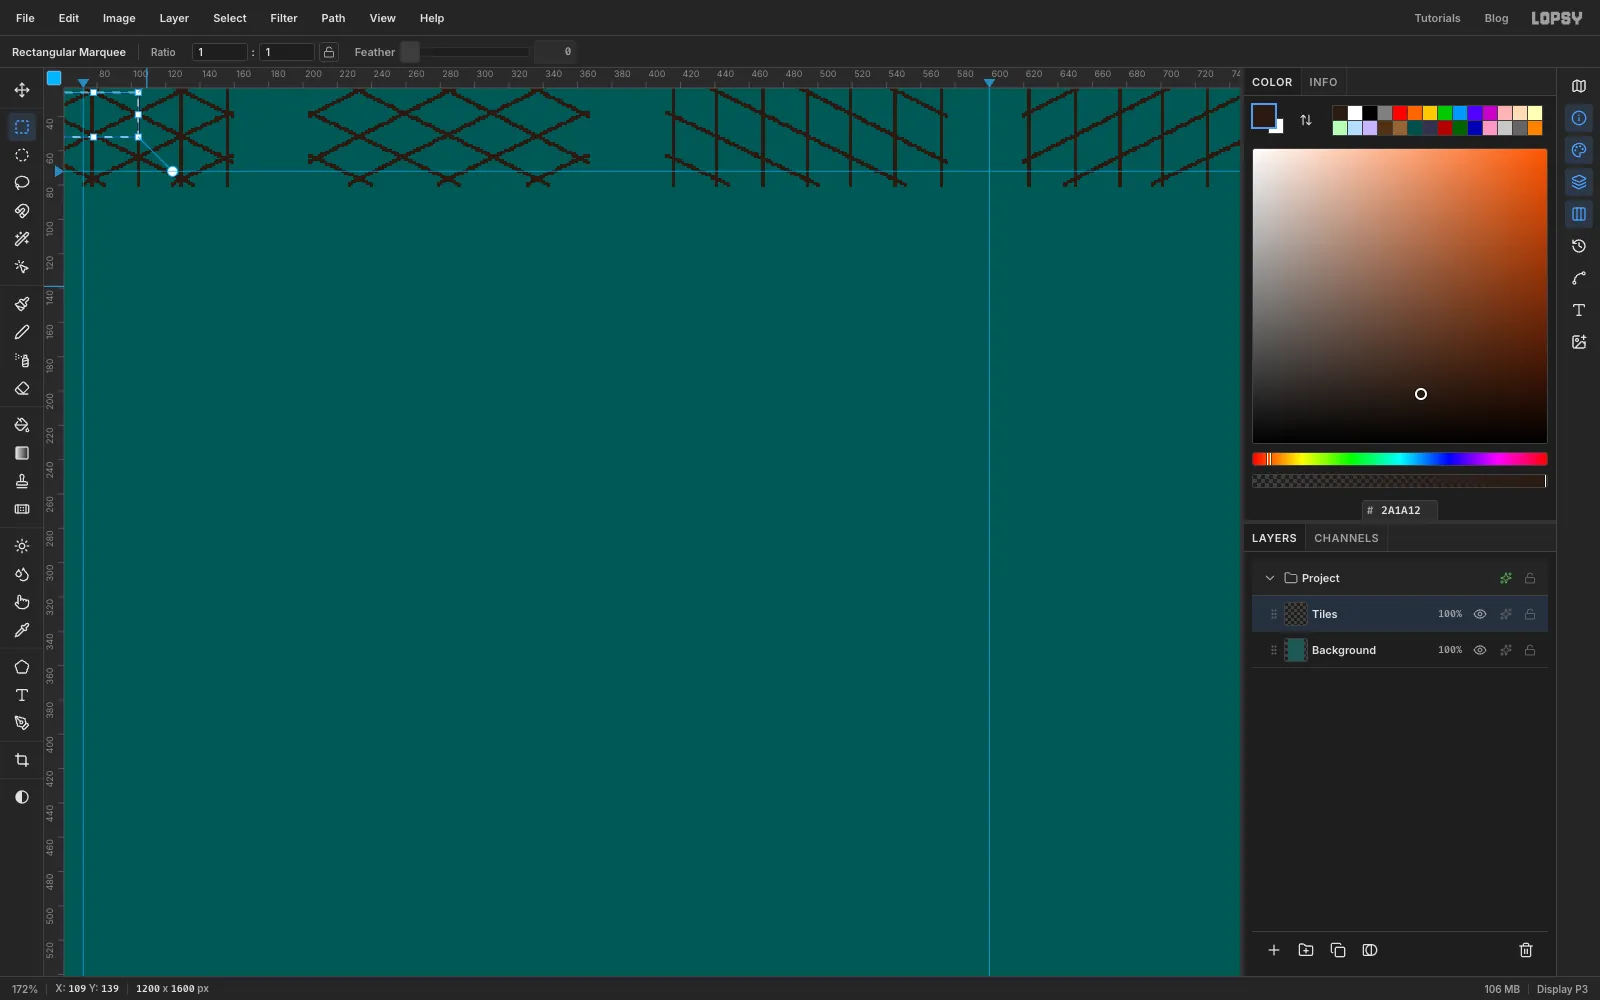
- Pick the Rectangular Marquee (M) and click the canvas once without dragging. In the Rectangular Selection dialog type From
-
Fill a layer with isometric graph paper
- Click Background and add a layer above it named
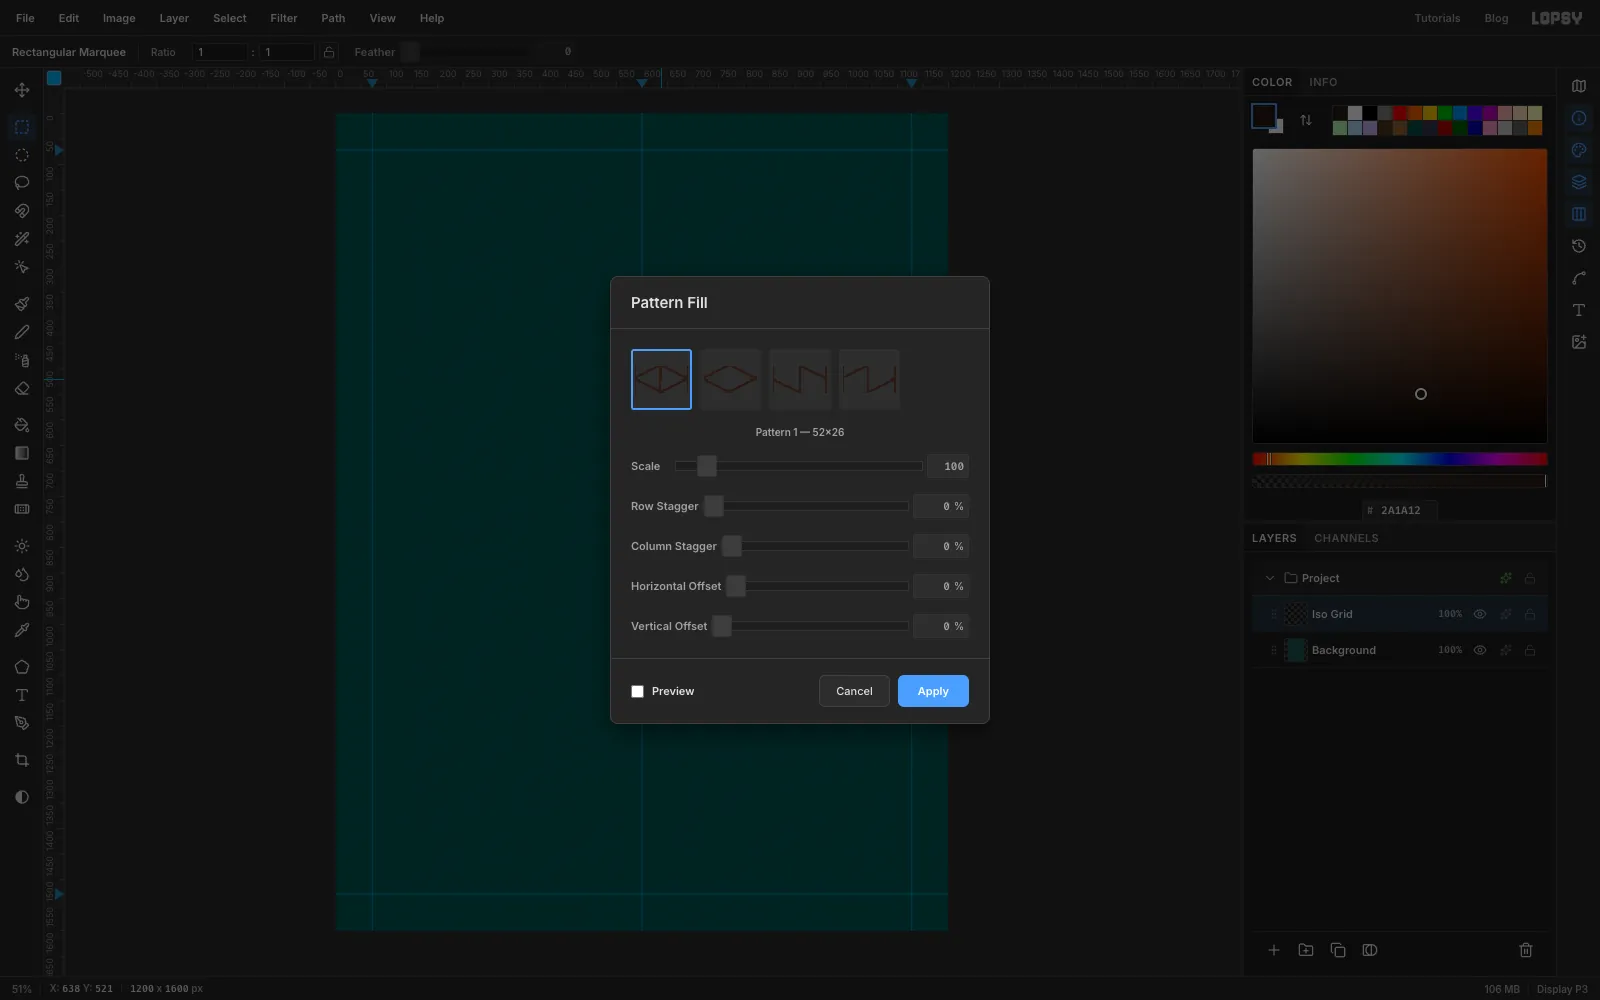
Iso Grid. - Choose Edit → Fill with Pattern…, click the first pattern (the full triangle grid) and click Apply.
- Click the opacity readout on the layer row and drag it down to 30%.
The pattern tiles from the canvas's top-left corner, and so does every pattern you'll use later. That's why every cube in this tutorial lines up with this grid.
- Click Background and add a layer above it named
-
Check the grid
Zoom in and look at the grid. Every small triangle is half a cube face. Two triangles side by side, sharing a vertical line, make a top diamond. Two triangles sharing a slanted line make a left or a right face.
Here's the layout of the scene, measured in cubes:
- The graham cracker is a slab 18 cubes along its right edge, 16 along its left and 2 thick. Its top corners are at
598, 520(back),1066, 754(right),650, 962(front) and182, 728(left). - The mug stands in the middle of the cracker. Its footprint is a stepped circle with rows of 3, 7, 9, 9, 9, 9, 9, 9, 7 and 3 cubes. It's 10 cubes tall with walls one cube thick, and the 5th and 6th layers up are a cream band. A C-shaped handle, 2 cubes thick, sticks out 3 cubes on the right.
- The cocoa fills the mug to one cube below the rim. Three 2 × 2 × 2 marshmallows float in it, and one of them sticks up above the rim.
- A chocolate bar, 7 × 3 cubes, lies at the front left. Its raised squares are split by one-cube grooves.
- Two more marshmallows sit on the cracker in front of the mug.
- A campfire sits on the right corner: two crossed logs and a stepped flame. A marshmallow on a stick comes in from the right, two cubes above the flame.
- Two wisps of steam rise from the cocoa, and five single floating cubes hang around the scene.
The footprint rows run parallel to the cracker's back-right edge (from
598, 520towards1066, 754), counted from the back. A few anchors to place things: the centre of the mug's base is at about611, 683, the chocolate bar's back corner is at312, 689, and the flame stands on the logs at962, 728.Try one cube first, on a spare layer. Pick a grid point
x, yfor its top corner. Its outline is a hexagon:x, y, thenx+26, y+13,x+26, y+39,x, y+52,x−26, y+39andx−26, y+13. Fill the hexagon with the right-face colour. Then trace the left face (x−26, y+13,x, y+26,x, y+52,x−26, y+39) and fill it, and finally the top diamond (x, y,x+26, y+13,x, y+26,x−26, y+13).For anything bigger, never trace cube by cube. A run of faces that point the same way and share a colour is one shape. The whole left side of the cracker is a single long strip, for example. The lines between the cubes come later, all at once.
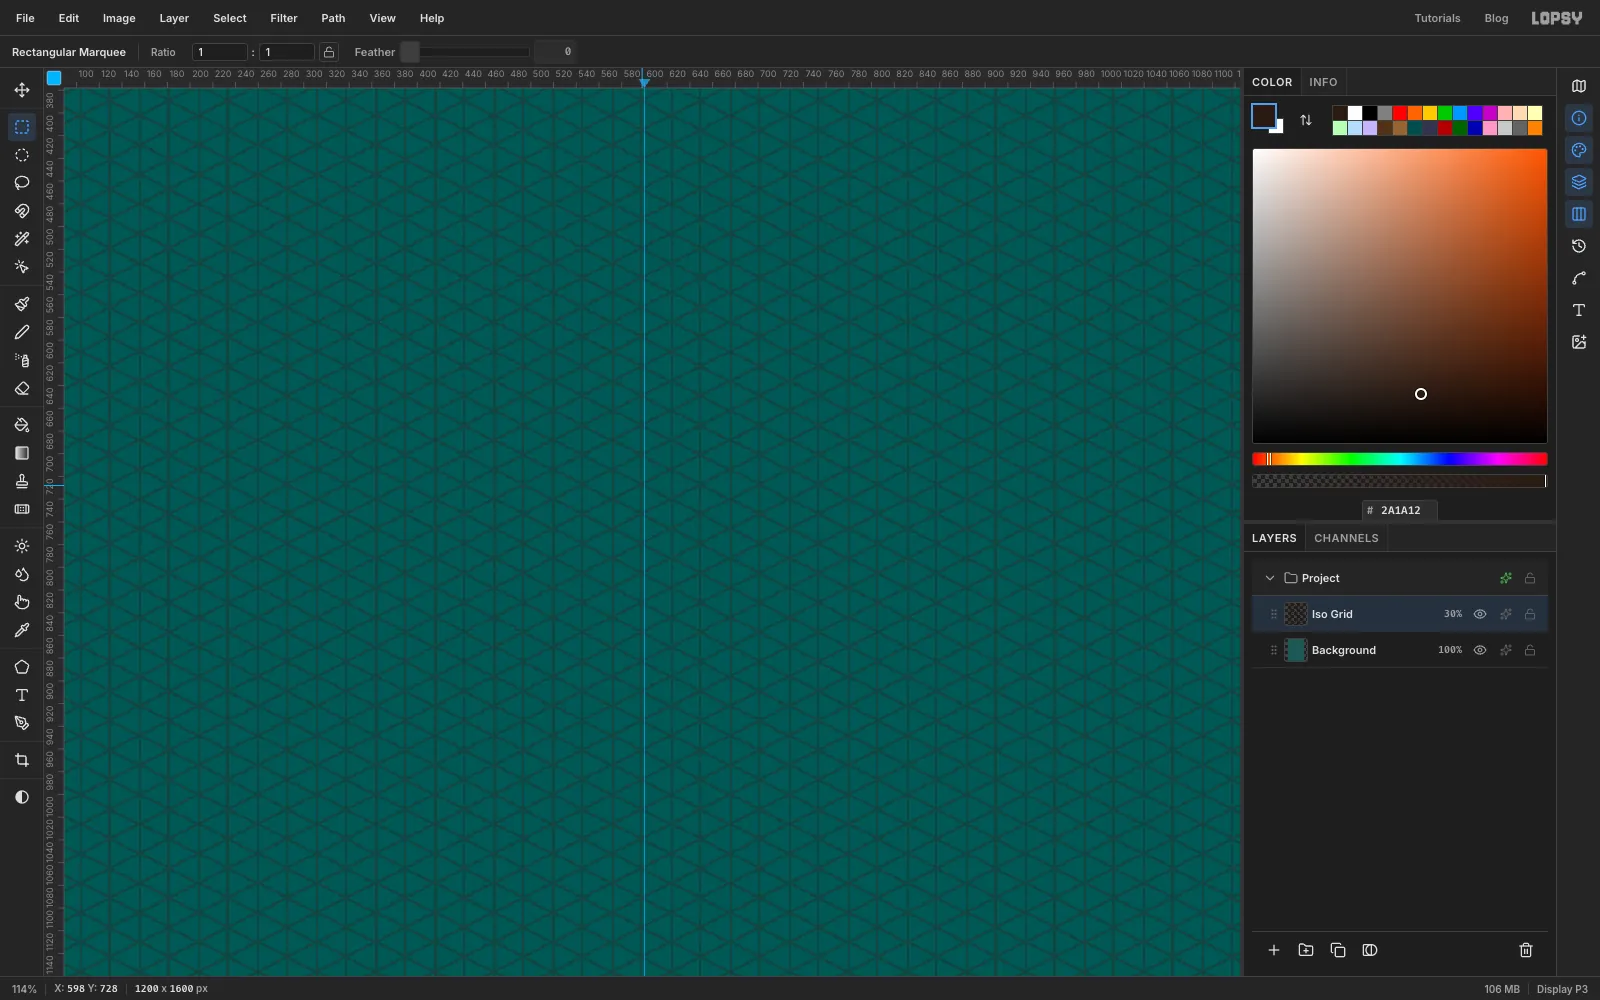
- The graham cracker is a slab 18 cubes along its right edge, 16 along its left and 2 thick. Its top corners are at
-
Trace the whole scene's outline with the Pen
Before the faces, you'll paint a dark outline layer under the whole scene. Where two faces meet, the antialiased edges let a little of the layer below through. A dark layer under everything turns that into a crisp dark line instead of a teal fringe.
- Click
Iso Grid, then click the New Group button (the folder with a plus) and name the groupVoxel Scene. Add a layer inside it namedBase. - Pick the Pen (P). Click from corner to corner around the outside of the whole scene, following the grid lines, and finish by clicking the first point to close the path.
- Open the Paths panel from the strip on the right edge of the window. With the path selected, click Path to Selection (the dotted square), then Delete Path (the bin).
- Set the colour to and choose Edit → Fill.
Do the same for each floating cube and for the stick, which don't touch the main outline. Leave the steam out: it should stay soft at the edges, without a dark rim.
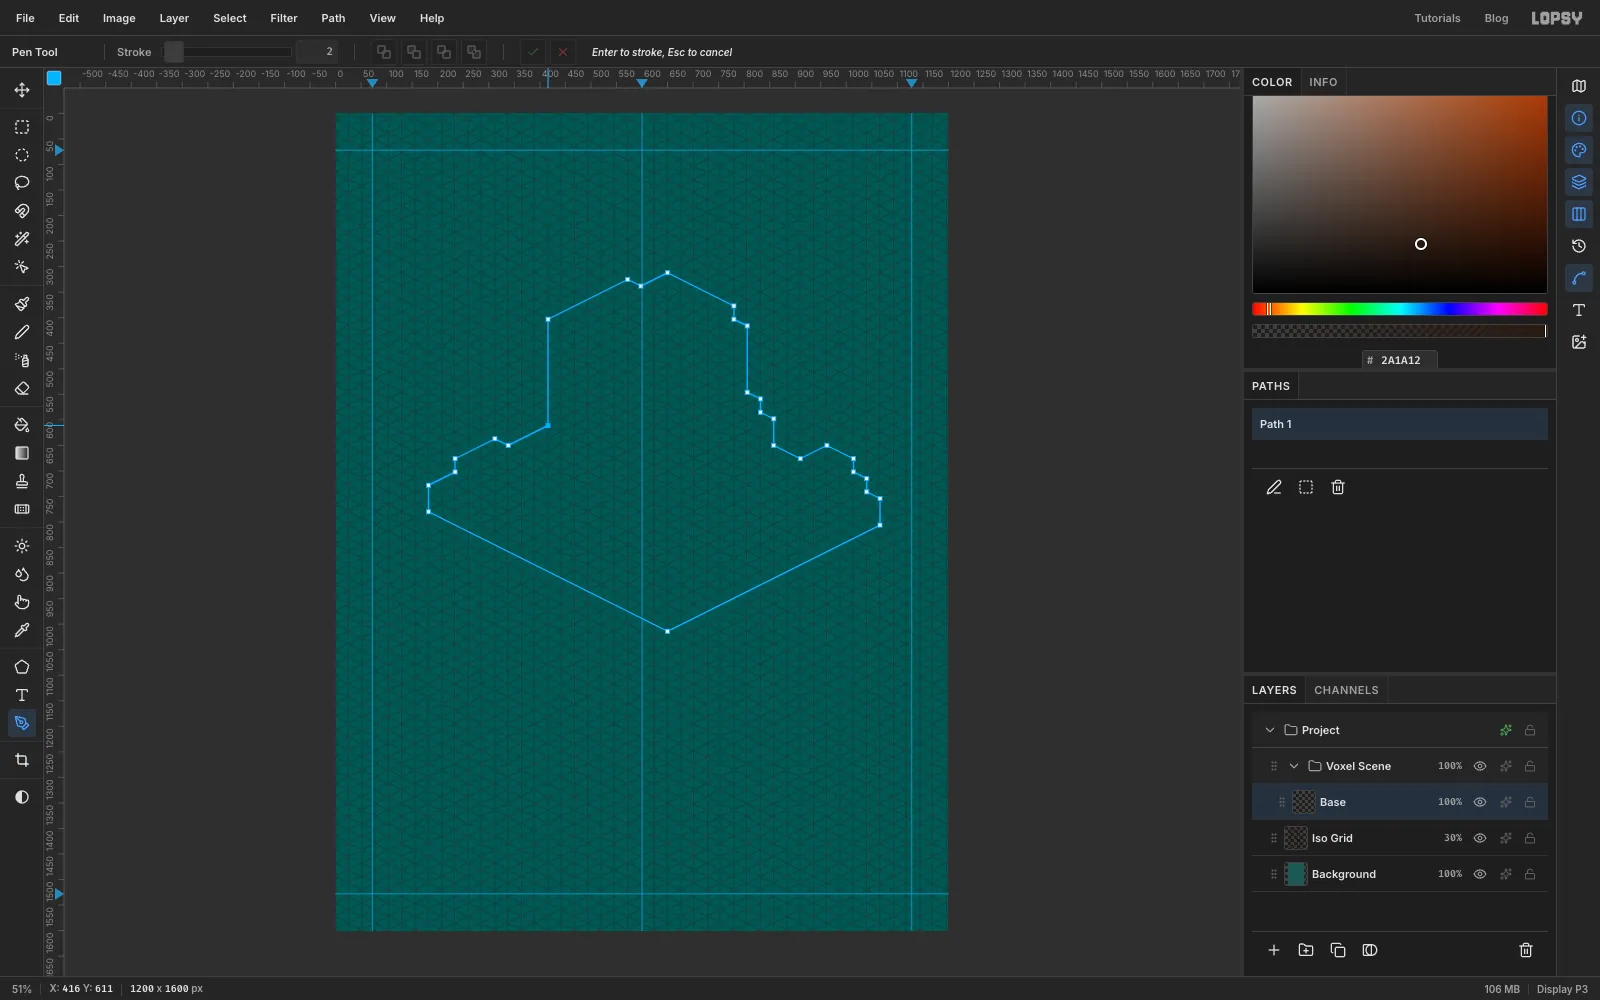
- Click
-
Fill the silhouette
You now have the scene as one dark cut-out. Every face you paint from here goes on top of it. This Pen → Path to Selection → Delete Path → Fill loop is how you'll paint every face in the scene, so it's worth getting into a rhythm with it.
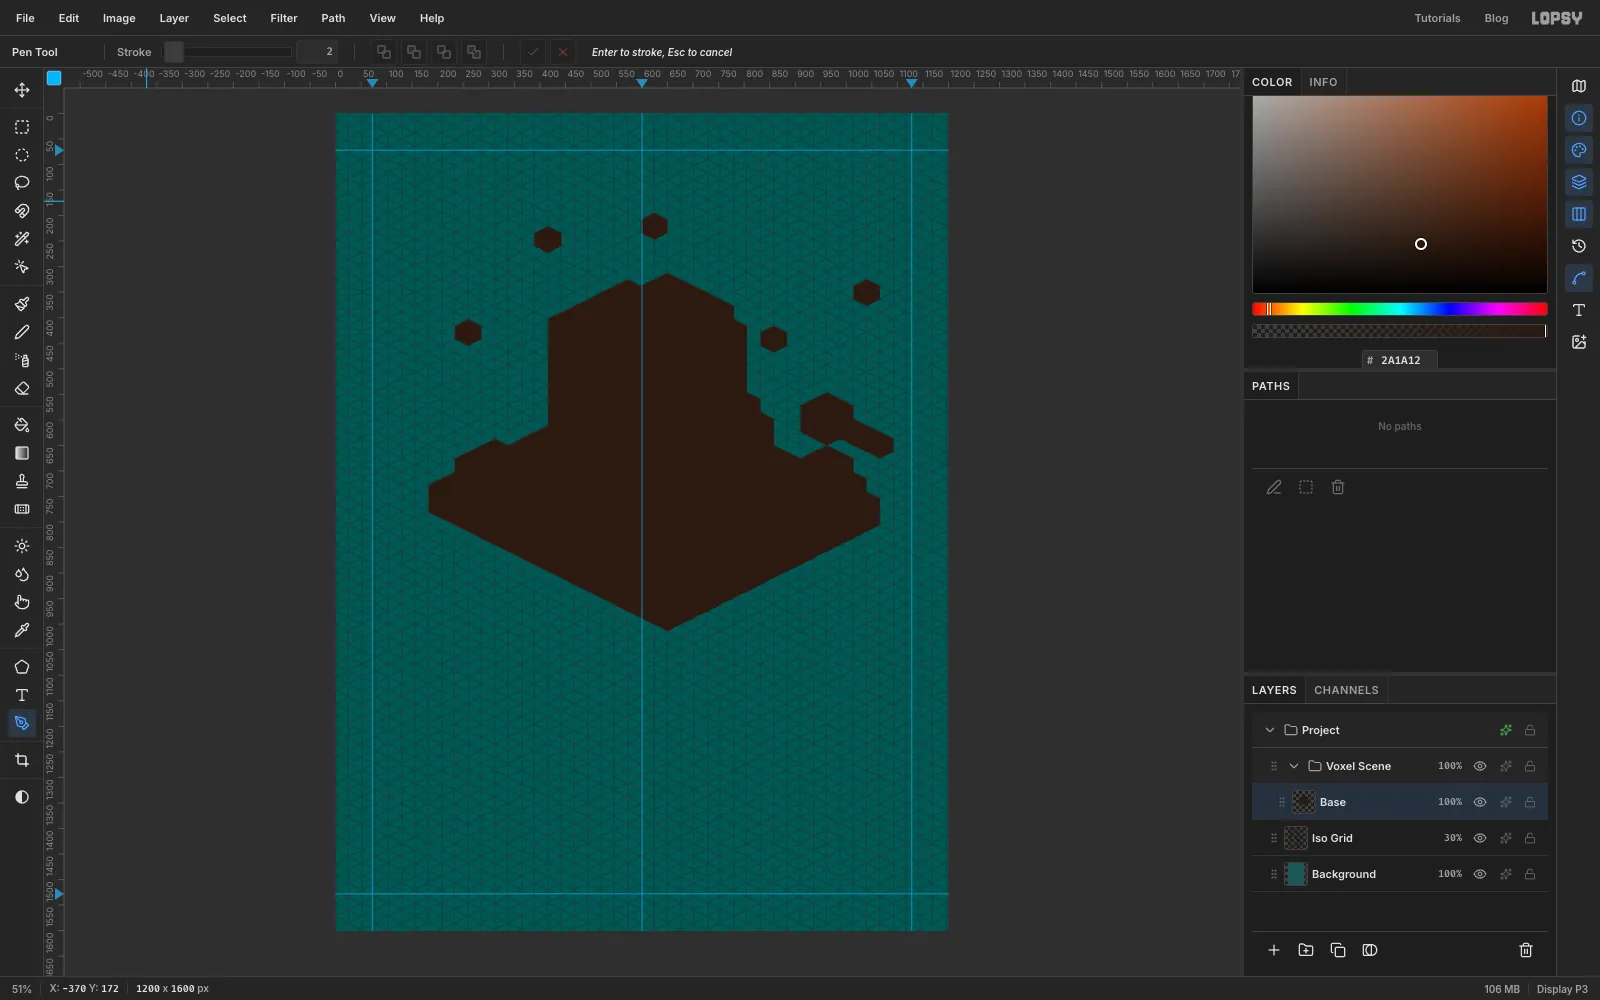
-
Paint the graham cracker
Add a layer named
CrackeraboveBase. Paint each object darkest first:- Trace the cracker's whole visible outline and fill it with the right-face colour, .
- Trace the top surface and fill it with . The mug and the other objects hide part of it, so the outline goes around their bases.
- Trace the left side, the strip under the front-left edge, and fill it with . The dark fill you laid first is already the right side.
- For the docking holes, trace single top diamonds (one cube every third row and column) and fill them with .
Painting darkest first means that where a lighter face meets a darker one, the edge blends into the darker colour.
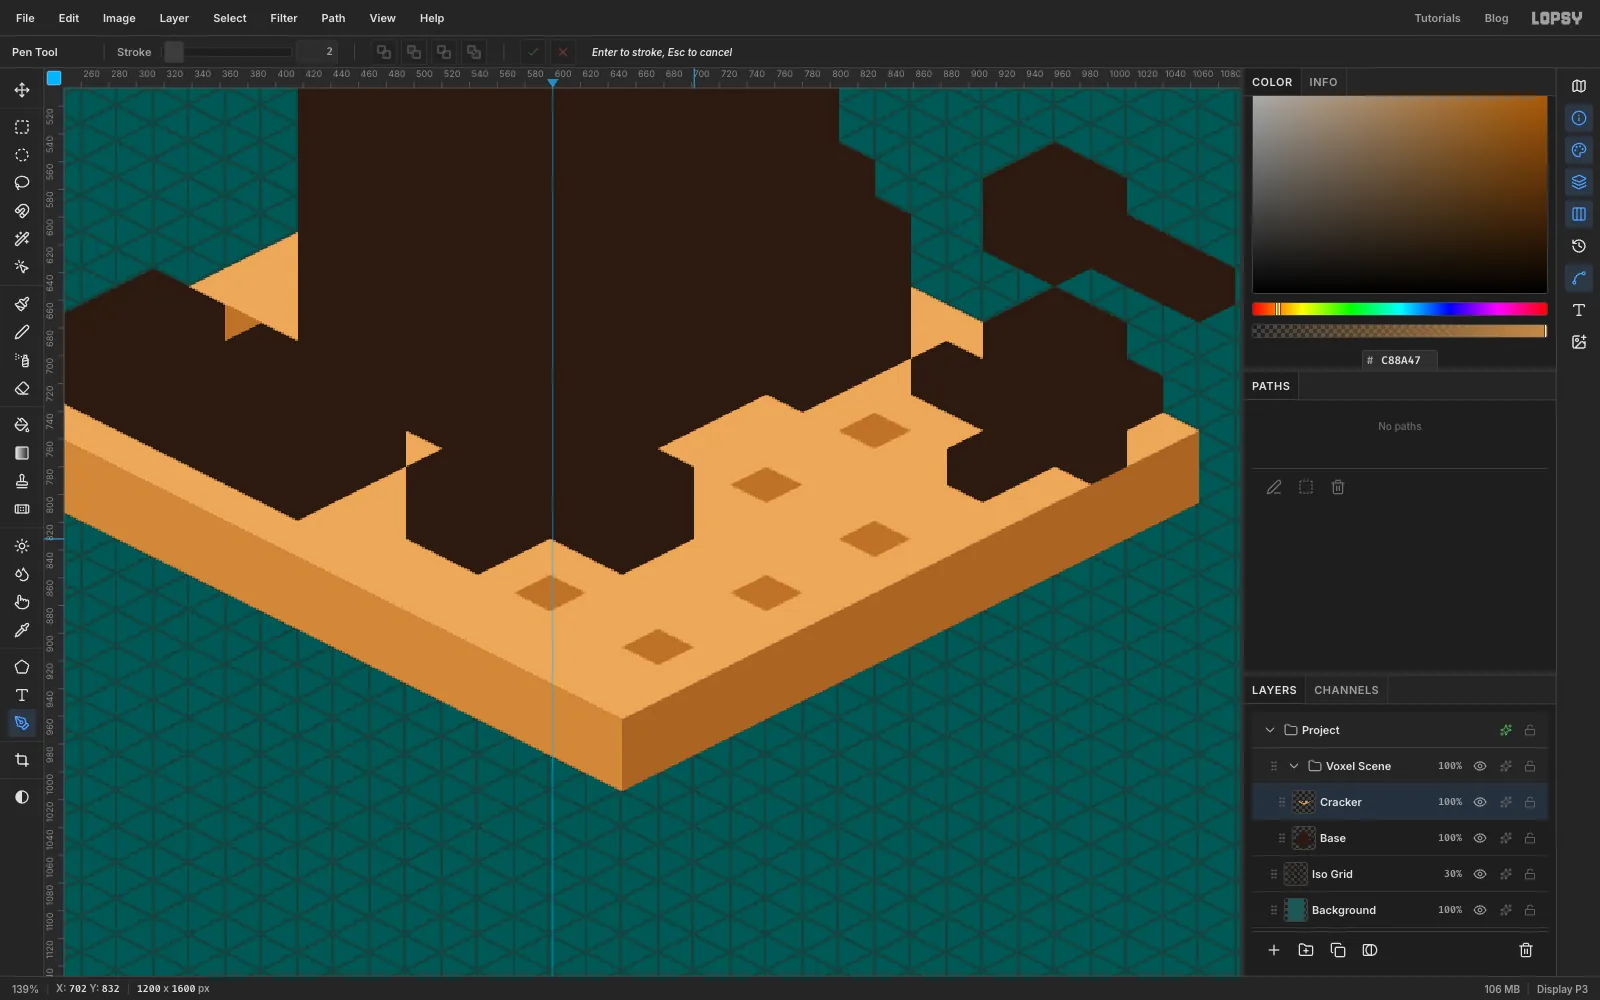
-
Trace the mug's outline
First add a layer named
ChocolateaboveCrackerand paint the bar the same way. Fill its whole outline with the darkest groove colour , then the grooves' other faces and , then the raised squares: right faces , left faces and tops .Then add a layer named
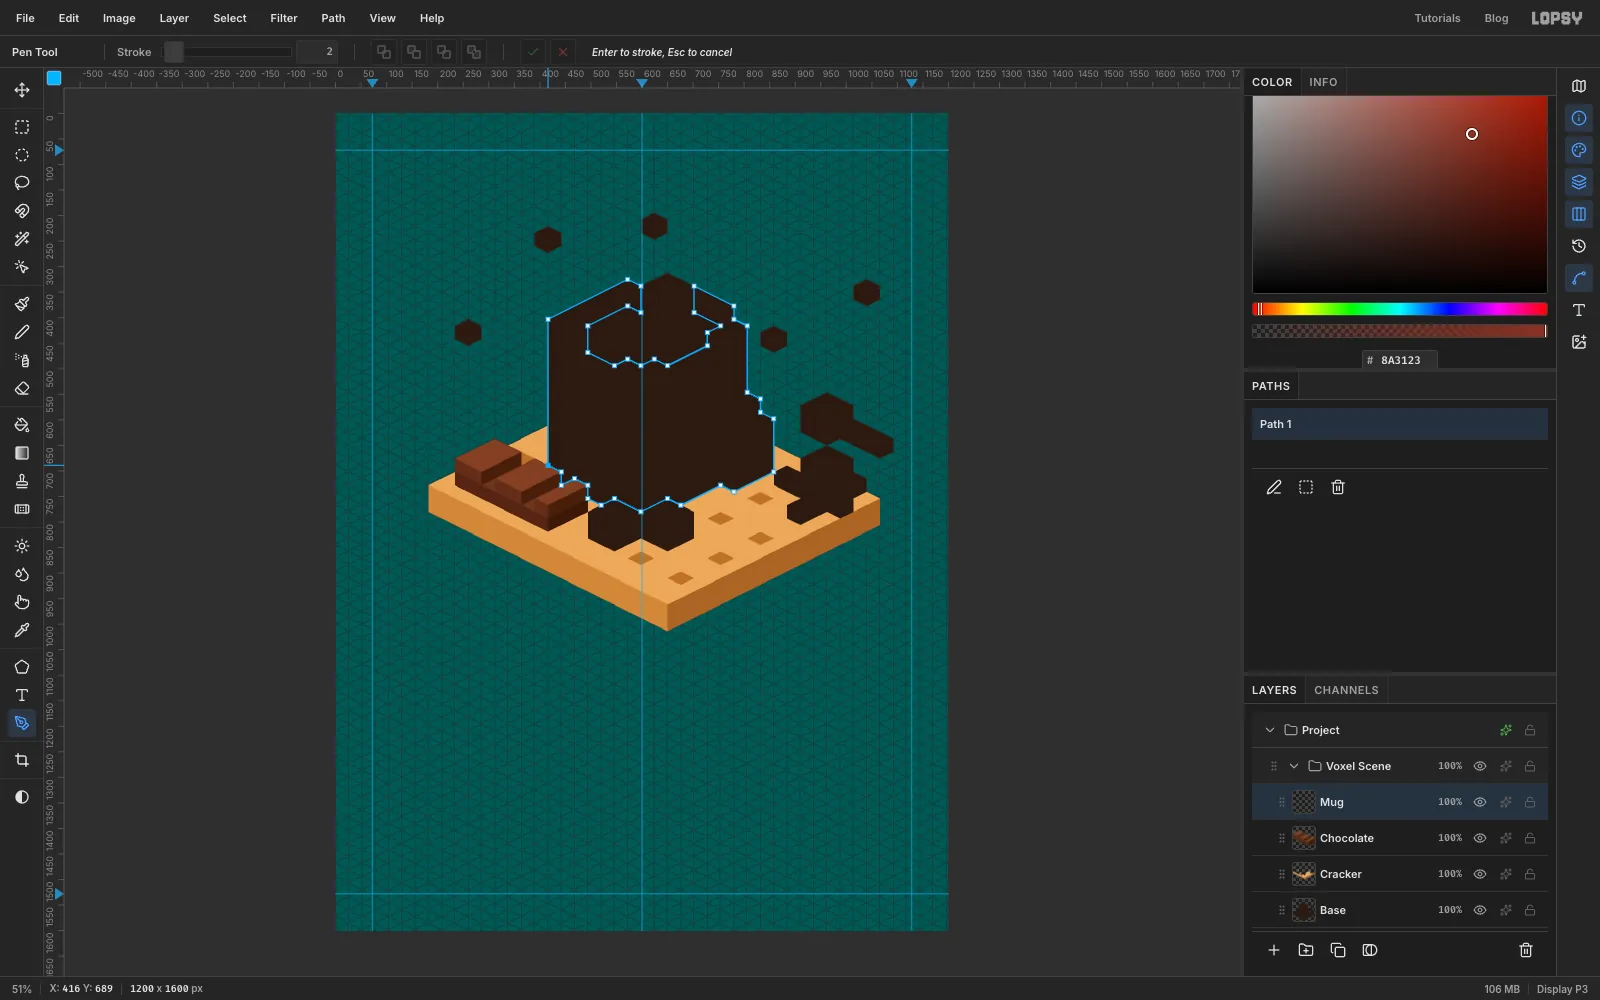
Mug. Trace the mug's outline in one path: up the stepped left side, along the inside of the rim where the cocoa shows through, down the right side and around the handle.The mug's sides are made of steps. Each cube in the circular footprint pushes the outline out or in by one cube, so the side of the mug is a run of tall strips, each one cube wide, alternating between left and right faces.
-
Fill the mug's dark side
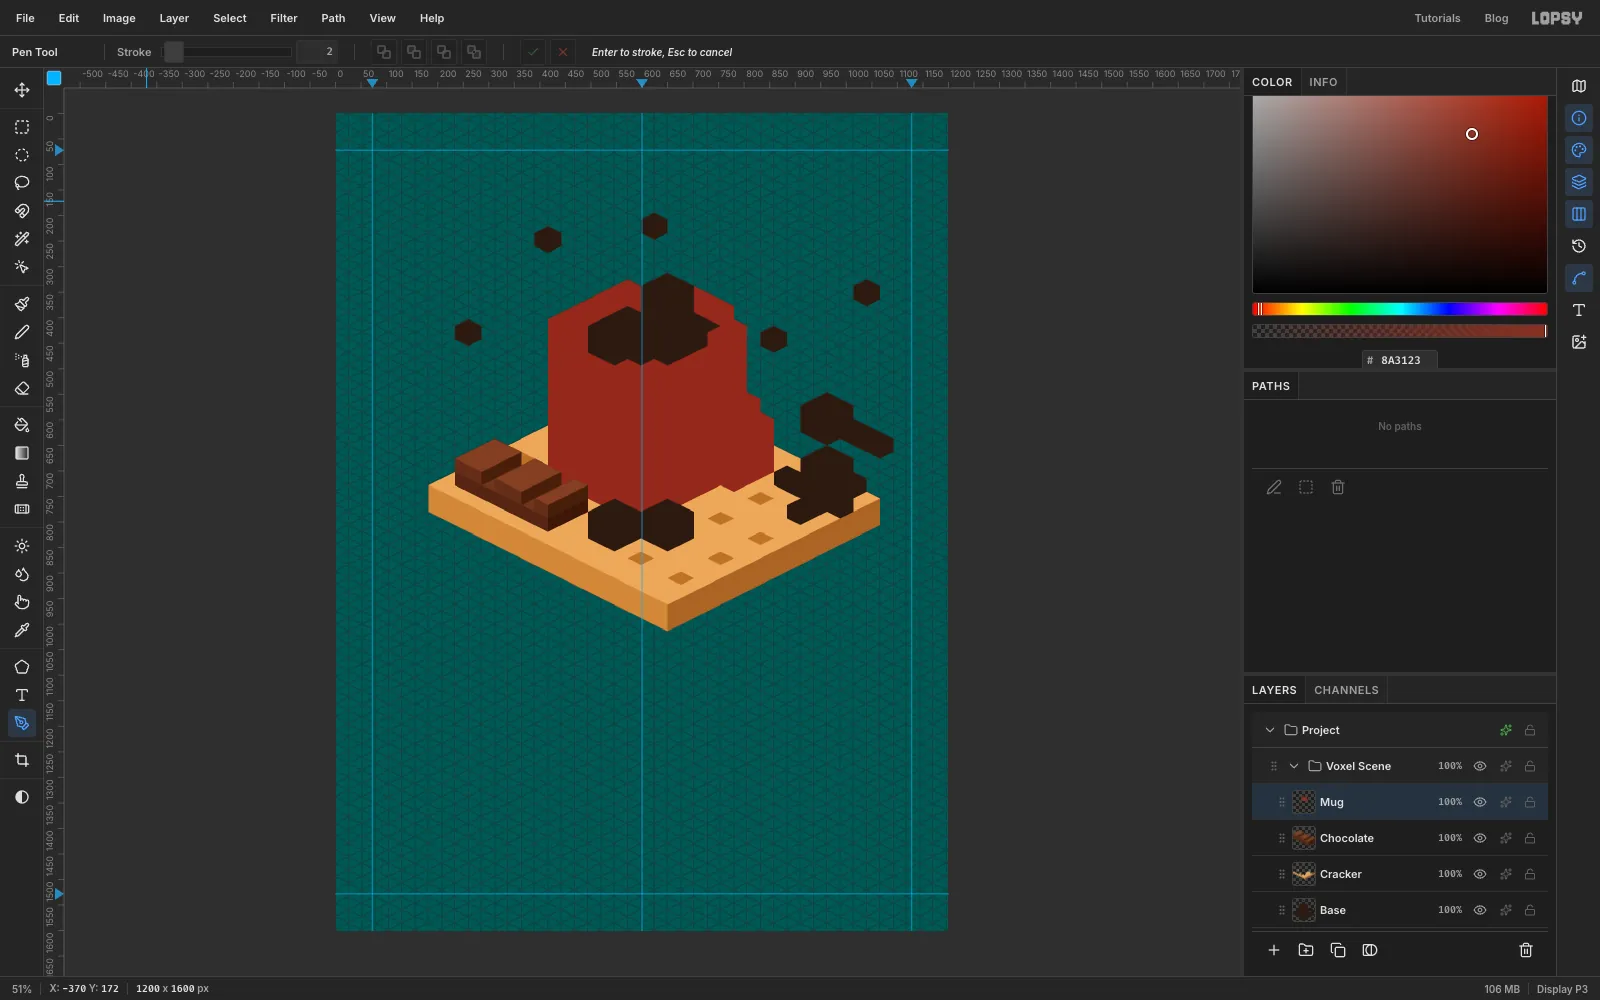
Fill the outline with the darkest colour the mug uses, , the shadowed inside of the rim. Every other face is lighter, so you only need to add faces on top of it from here.
-
Paint the mug's faces
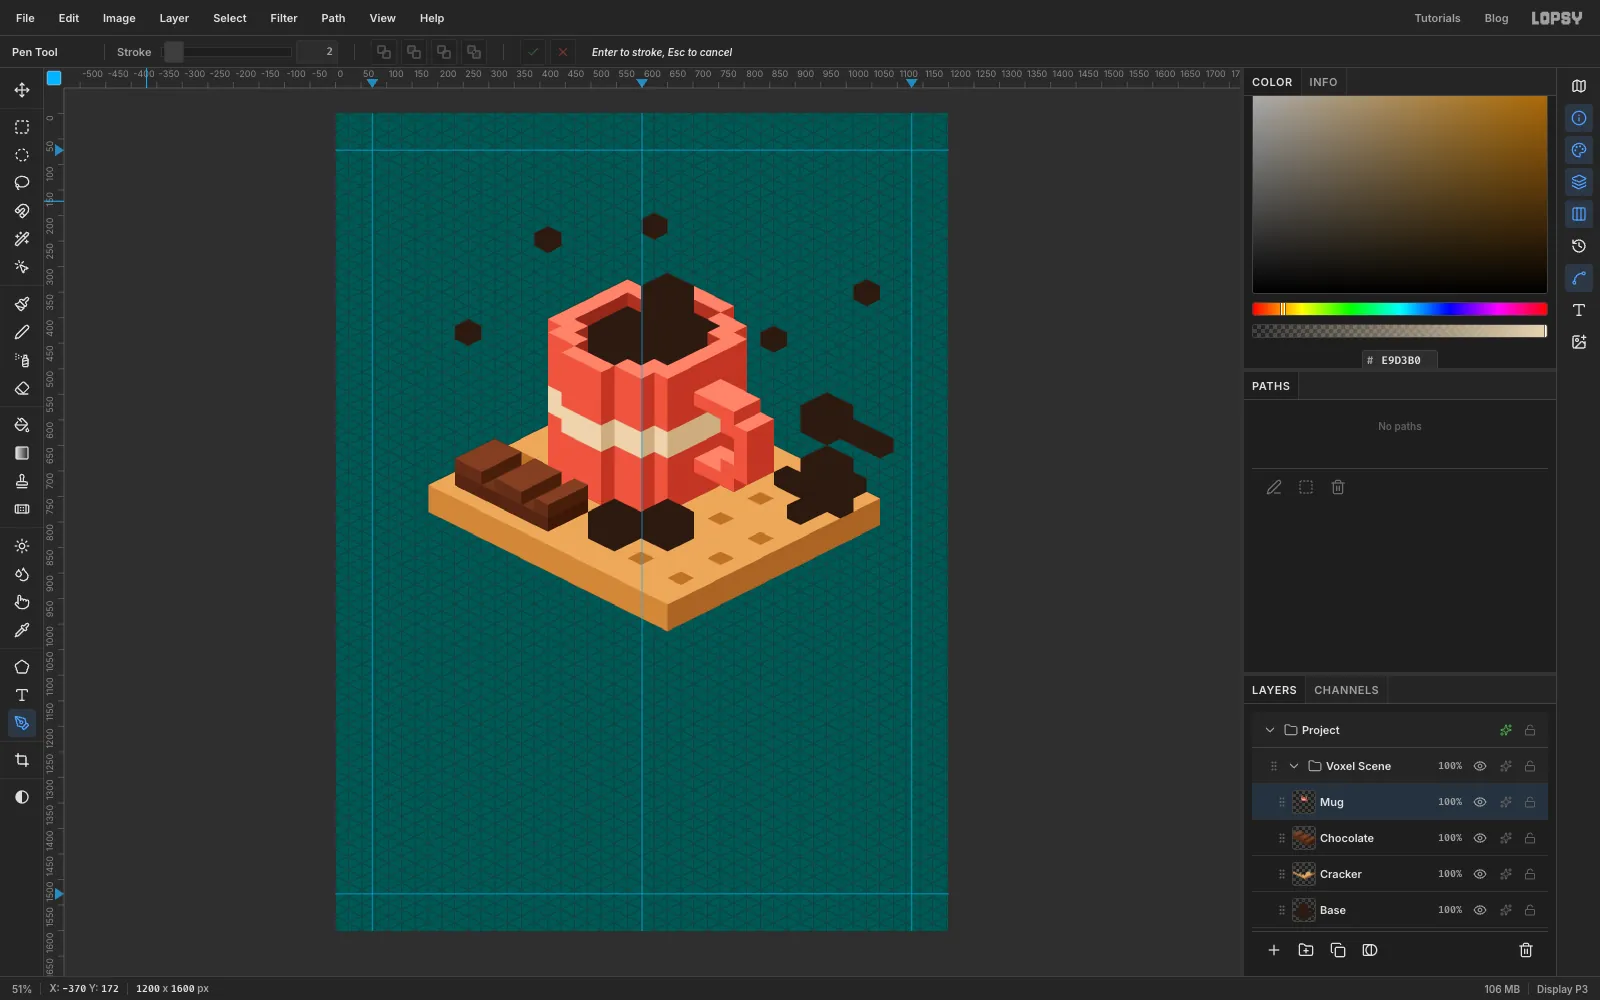
Trace and fill the rest of the mug's faces, darkest first:
- The left-facing faces inside the rim, . Like the right-facing ones you just filled, they're in shadow.
- The right faces of the mug and handle, .
- The left faces of the mug, . Each strip runs from the rim down to the cracker, broken only by the band.
- The cream band's right faces , then its left faces .
- The rim and the tops of the handle, .
-
Paint the rest of the scene
Give each object its own layer above
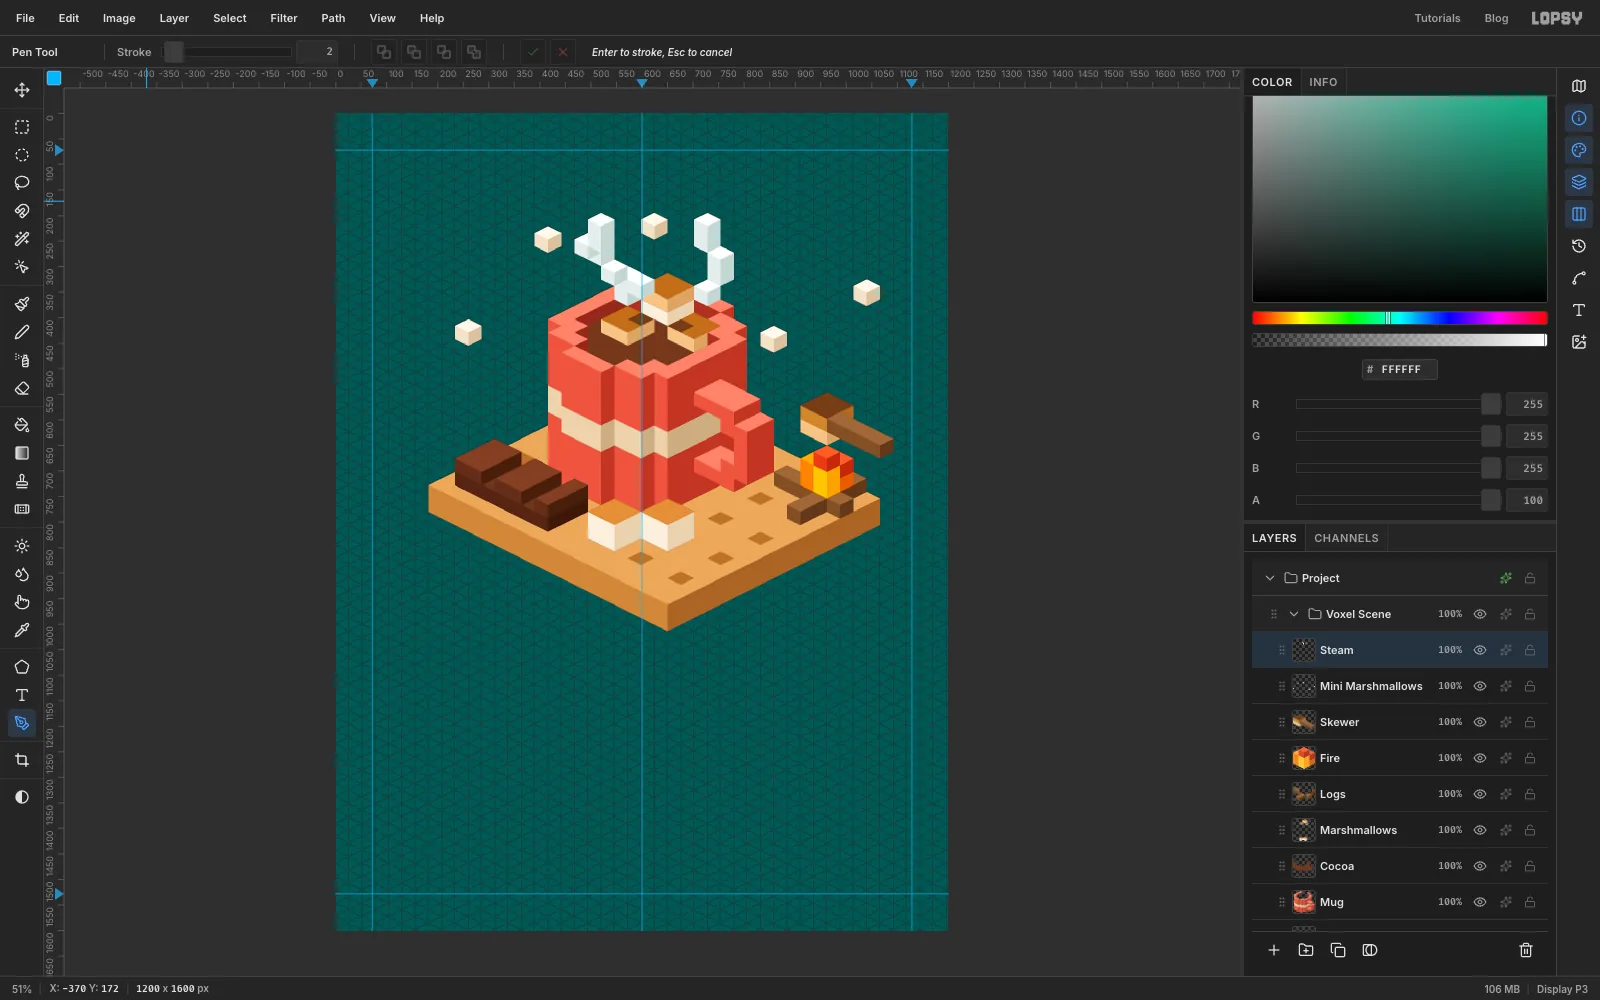
Mug, in this order, and paint each one the same way: the whole outline in the darkest colour that object uses, then the lighter faces from dark to light.Cocoa: the flat surface inside the mug, .Marshmallows: sides and with plain tops . The floating ones have a toasted top layer: and on the sides and on top, with a few top diamonds in charred .Logs: wood / / .Fire: orange / / , with a yellow core / and red at the back and tip / / .Skewer: the stick in wood colours, and the marshmallow on the end with toasted sides and a charred top layer: / on the sides and on top.Mini Marshmallows: the five floating cubes, / / .Steam: two wisps, / / . Keep it fully opaque. See-through steam over the coral rim turns a muddy pink.
Close the Paths panel when you're done.
-
Cut a floating cube and move it
One floating cube on the left sits where the badge will go. Move it lower:
- Click
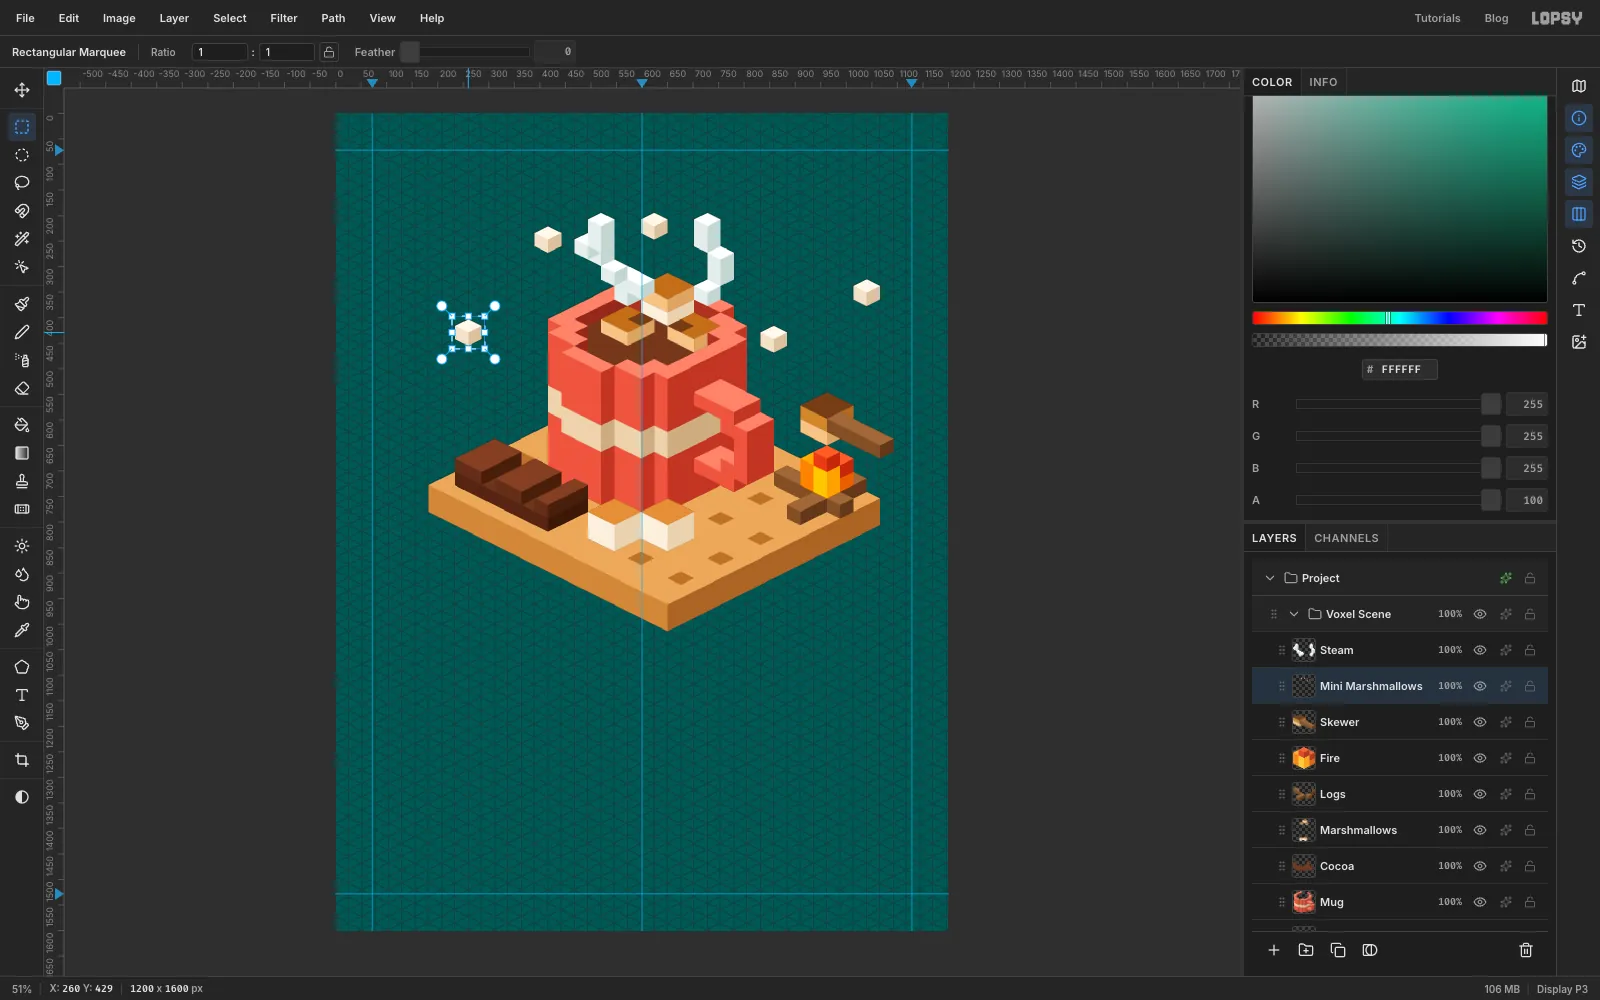
Mini Marshmallows. Drag a Rectangular Marquee around the cube on the left, about228, 397to292, 461. - Press Cmd+X, then Cmd+V. Lopsy pastes it into a new layer in the same place, selected, with the Move tool active. Name the layer
Mini Drifter. - Drag the cube 26 px left and 143 px down, so it lands between
208, 546and260, 598. Watch the status bar as you drag. On this grid a move of 26 px across has to come with 13 px plus a multiple of 26 px down, or the seams you add next won't line up with its edges. - Its dark outline is still on
Base. ClickBase, draw the same marquee and press Delete. Then Cmd+D.
- Click
-
Select every top face with the Magic Wand
Now for the seams. Each kind of face gets its own pattern, so you need a selection of all the top faces, then all the left faces, then all the right faces.
- Click
Steamand add three layers above it:Seams Right,Seams LeftandSeams Top. - Pick the Magic Wand (W). Set Tolerance to
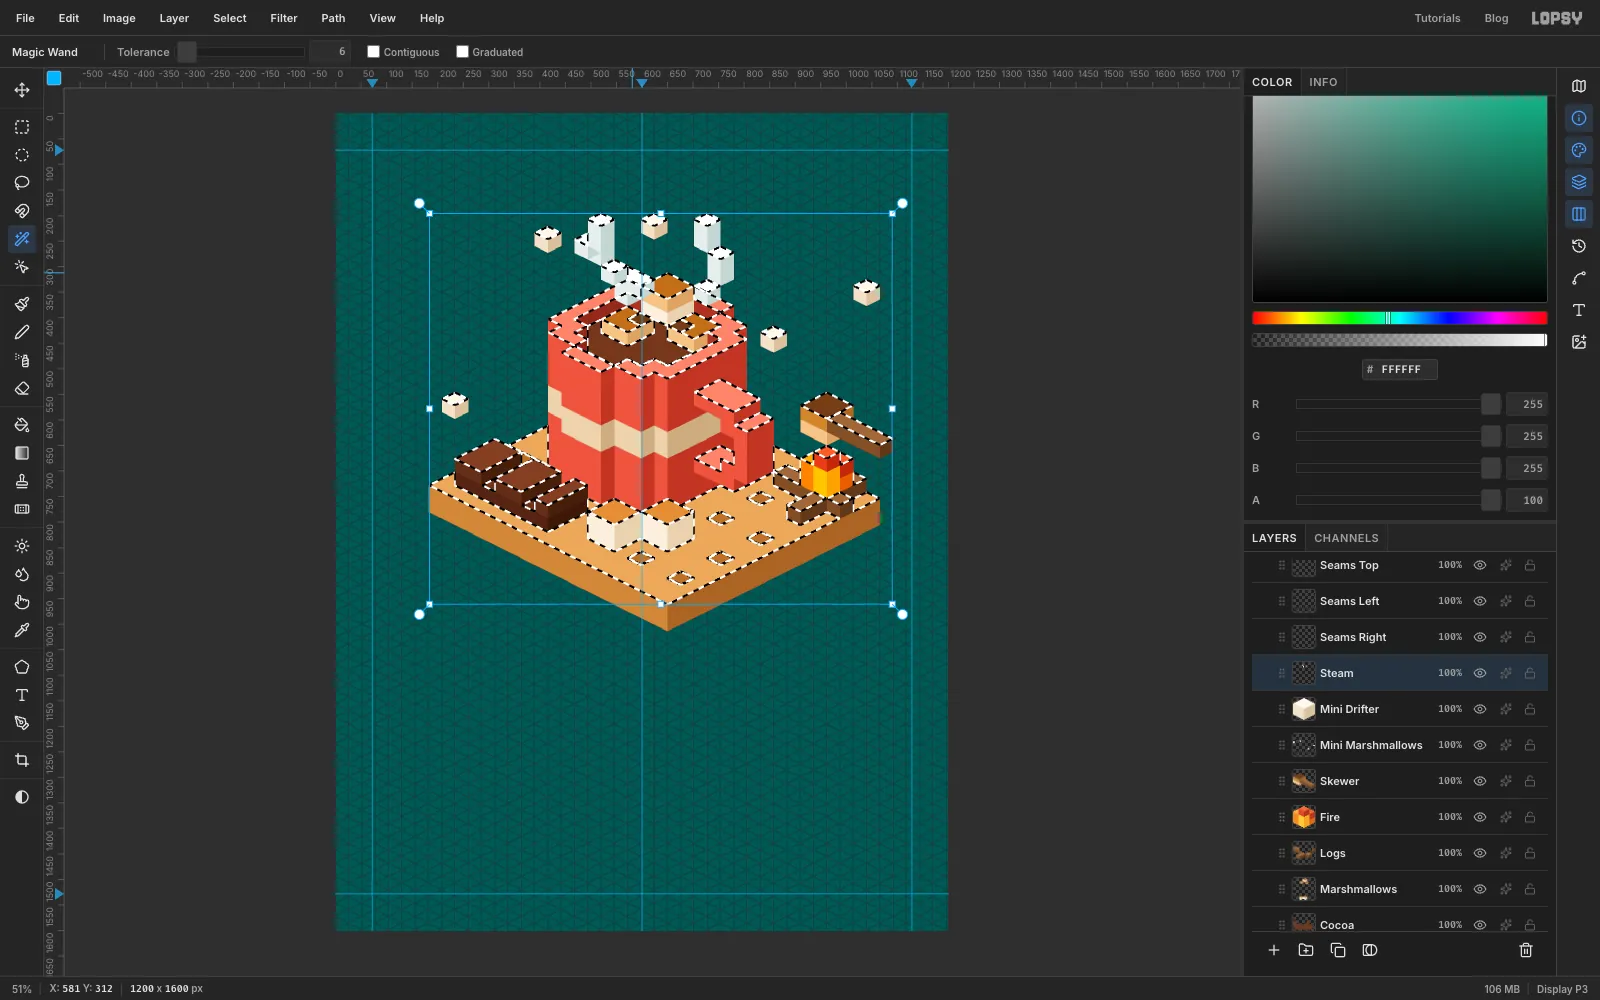
6and untick Contiguous. - The wand reads the active layer only. Click
Crackerand click its top colour. Then hold Shift and click each other top colour on that layer, like the docking holes. - Click the next object layer and Shift-click its top colours, and so on through every layer from
Chocolateup toSteam. Each click adds every pixel of that exact colour on the layer.
The tolerance is low so a top colour doesn't pick up a side colour that's close to it.
- Click
-
Fill the top seams with a pattern
- Click
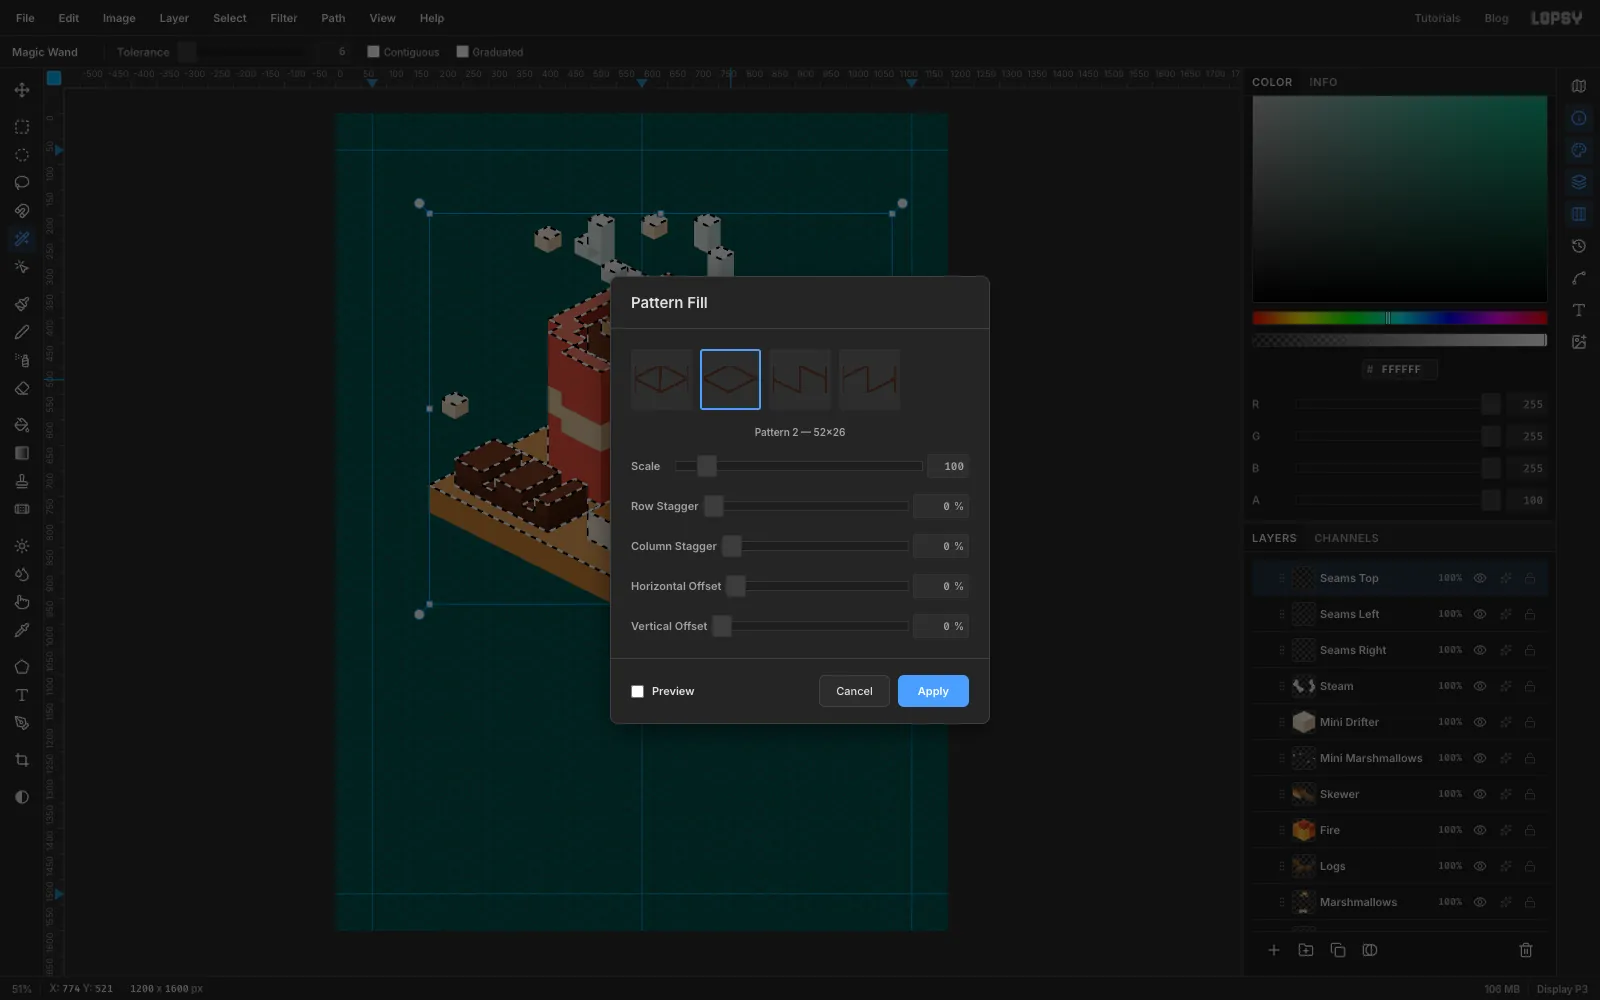
Seams Top. The selection stays. - Choose Edit → Fill with Pattern…, click the diamond tile (Pattern 2) and click Apply.
- Repeat for the left faces: select them all with the wand (click the first colour without Shift to start a new selection), click
Seams Leftand fill with Pattern 3. Then do the right faces onSeams Rightwith Pattern 4. - For each seam layer, open the Effects drawer with the sparkle button on the layer's row and set the blend mode at the top of the drawer to Multiply. Lower each one's opacity to 35%.
- Click
-
Check the seams up close
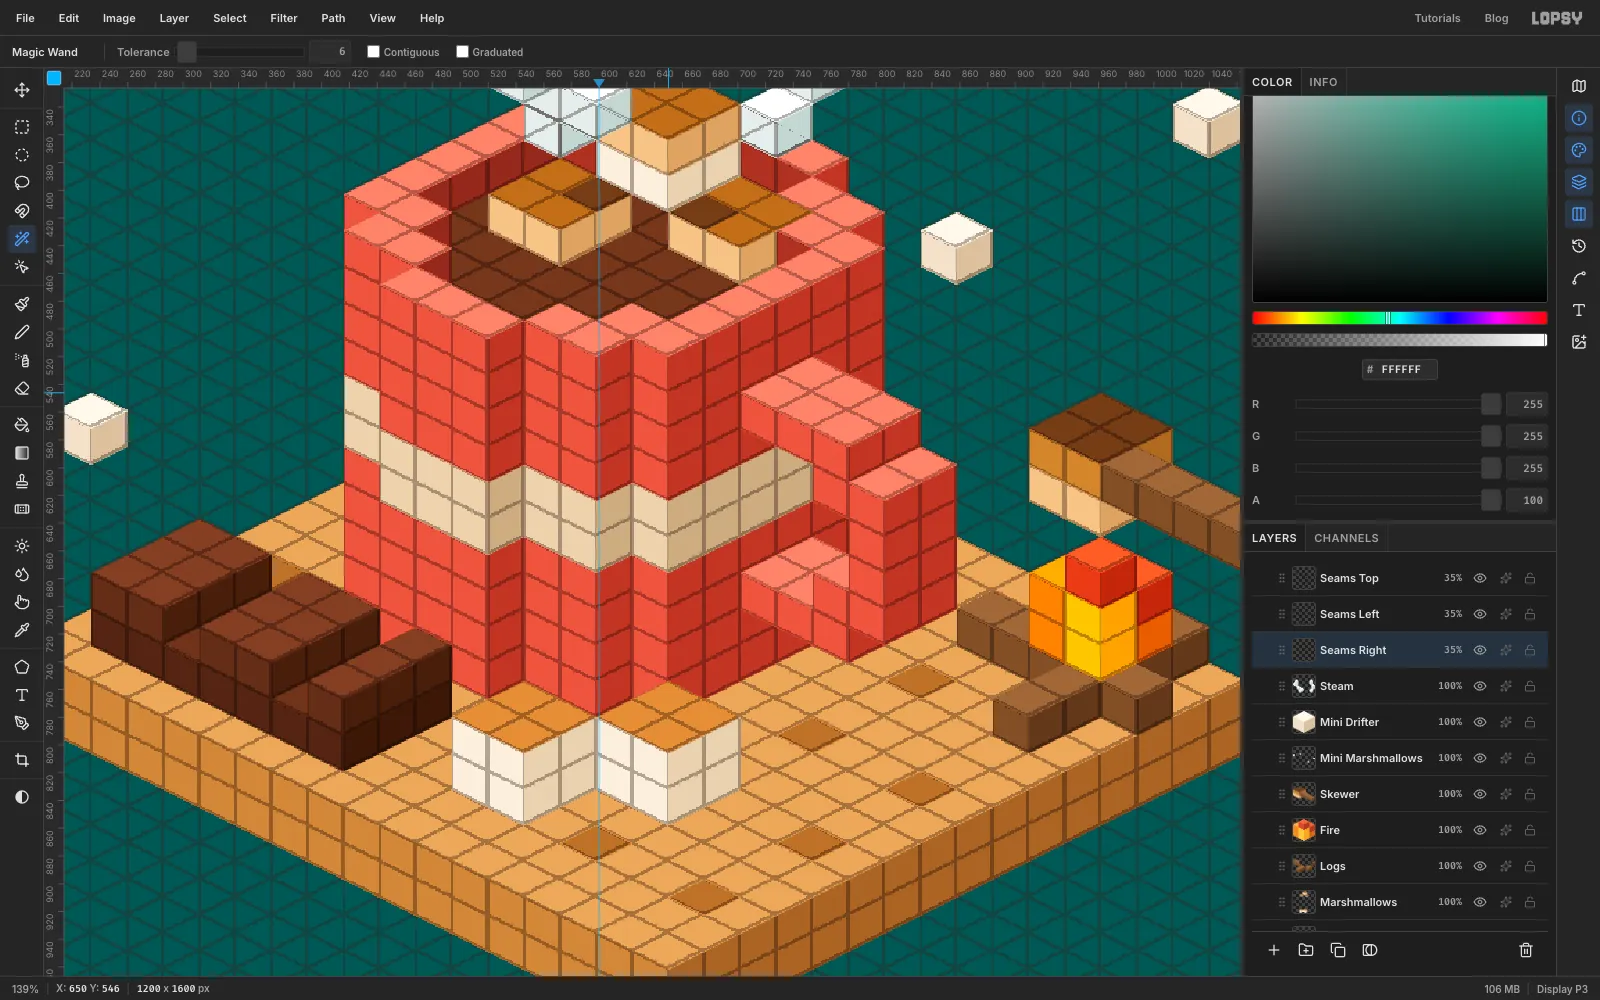
Zoom in. Every seam should sit on a face edge, because the patterns and the faces both line up with the canvas's top-left corner. If seams cross a face halfway, a face was traced one grid line off.
-
Paint contact shadows
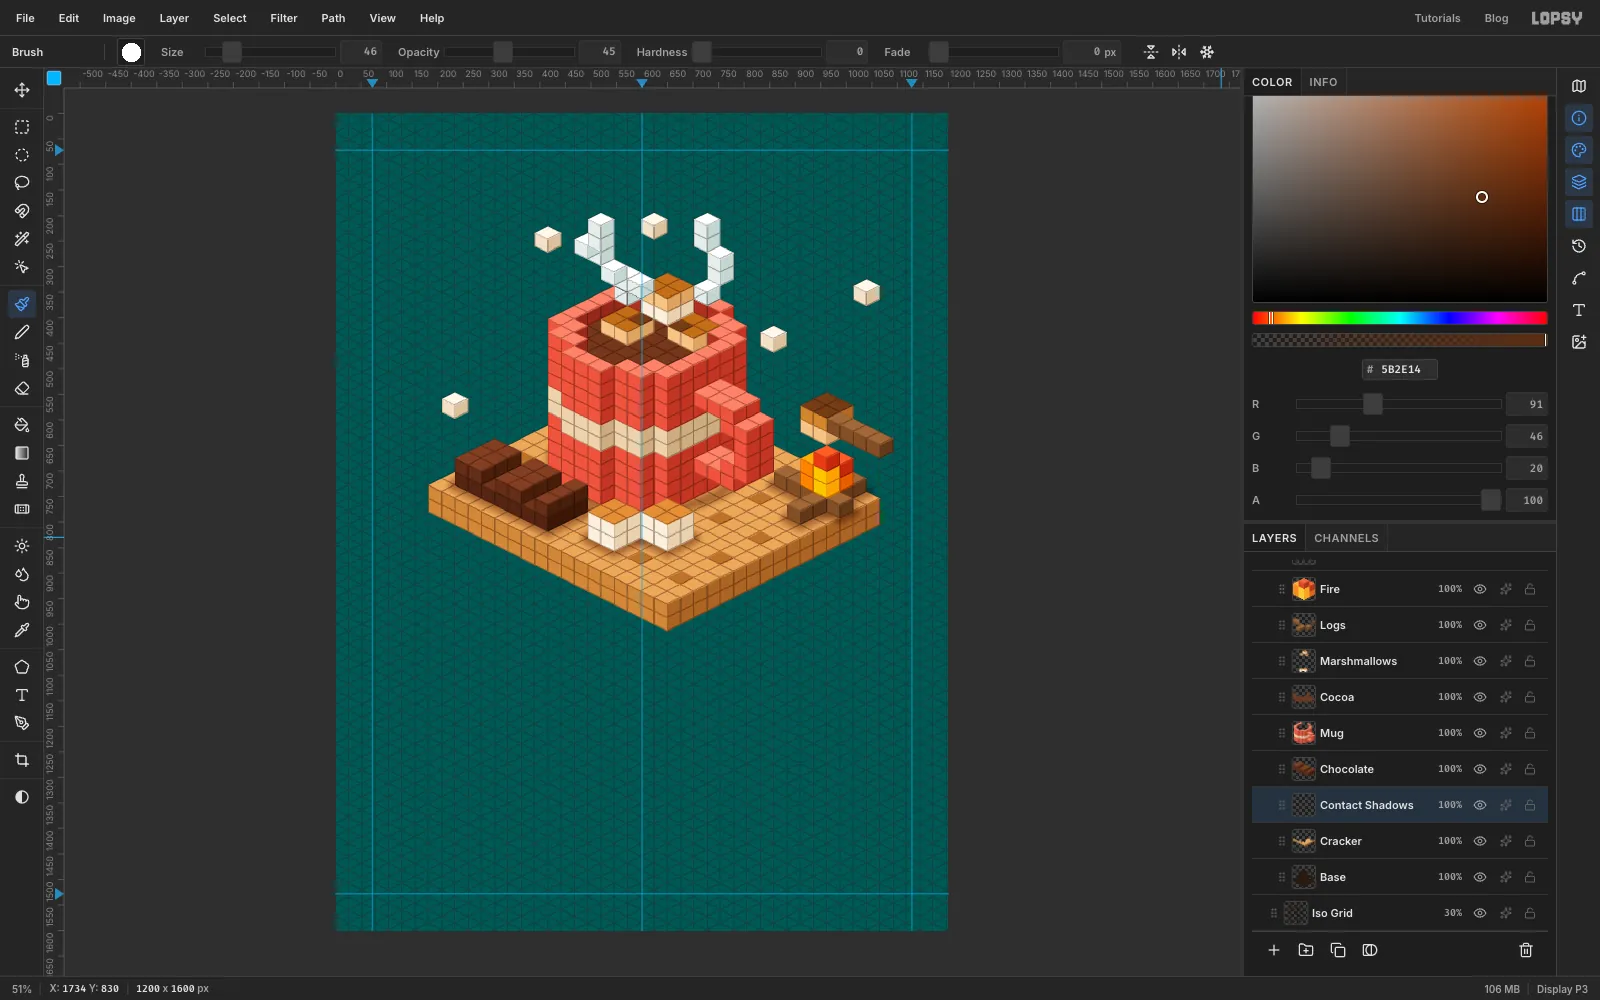
Where an object stands on the cracker, the corner should be darker.
- Click
Crackerand add a layer above it namedContact Shadows. It sits under every object, so you can paint loosely. - Pick the Brush (B). Set Size to
46, Hardness to0and Opacity to45%, and the colour to . - Paint a ring around the base of the mug, then around the chocolate bar, the two marshmallows on the cracker and the logs. The objects on top hide whatever runs under them.
- Set the layer to Multiply.
- Click
-
Add the glow, the drop shadow and the firelight
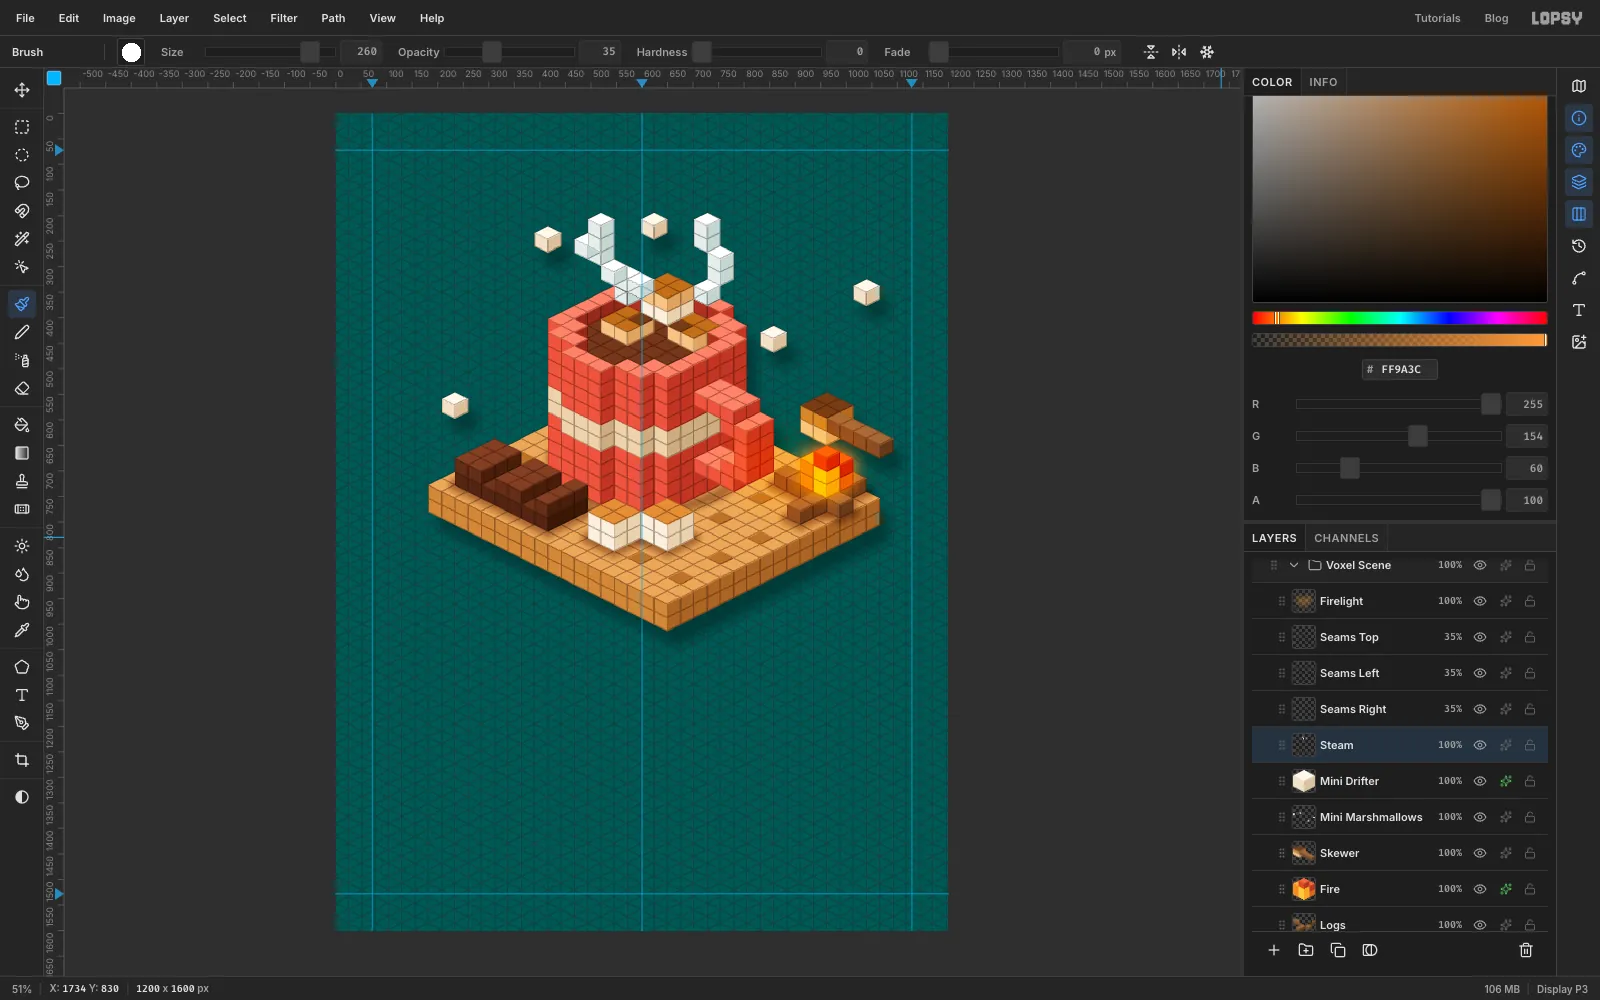
- Click
Fire, open its Effects drawer and turn on Outer Glow: colour , Size46, Spread4, Opacity80. - Click
Baseand turn on Drop Shadow: colour , Offset X18, Offset Y30, Blur30, Spread0, Opacity55. GiveMini Drifterthe same shadow. The light comes from the top left, so the shadows fall down and to the right. - Click
Seams Topand add a layer namedFirelight. With the Brush at Size260, Hardness0and Opacity35%, dab over the fire and the cracker around it. Set the layer to Overlay.
- Click
-
Light the label from behind the scene
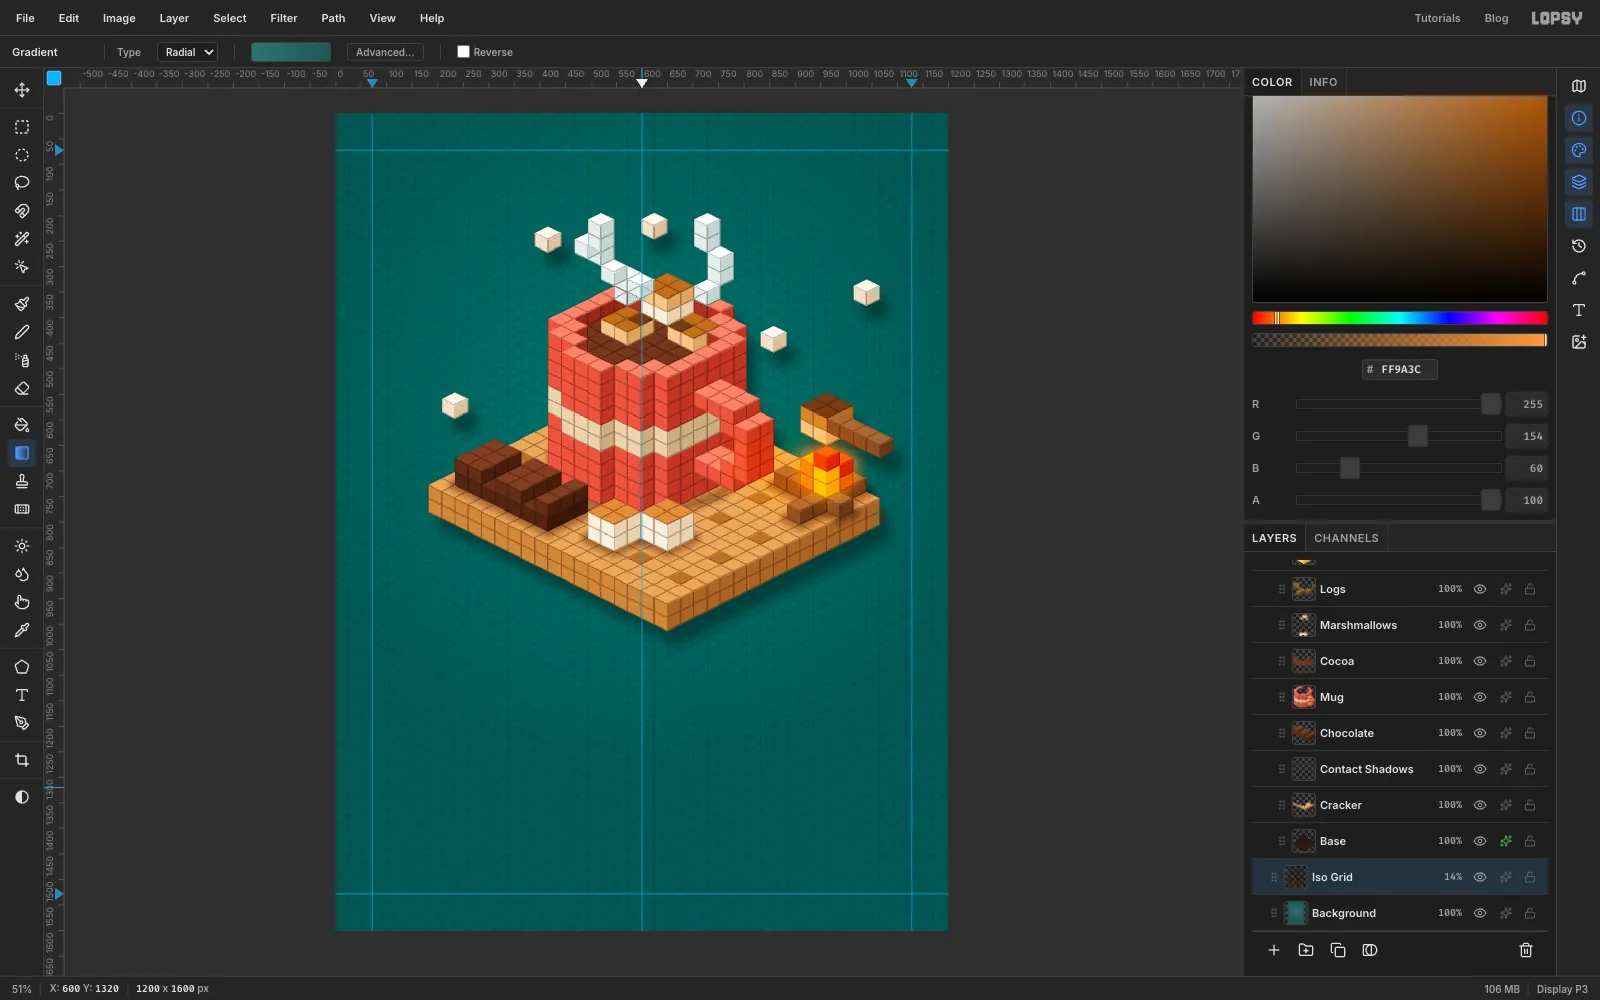
- Click Background. Pick the Gradient tool, set Type to Radial and click Advanced…. Make a two-stop gradient from to and click Done.
- Drag from
600, 600straight down to600, 1320. - Click
Iso Gridand lower its opacity to 14%. It stays as a quiet texture.
-
Frame the label
- Collapse the
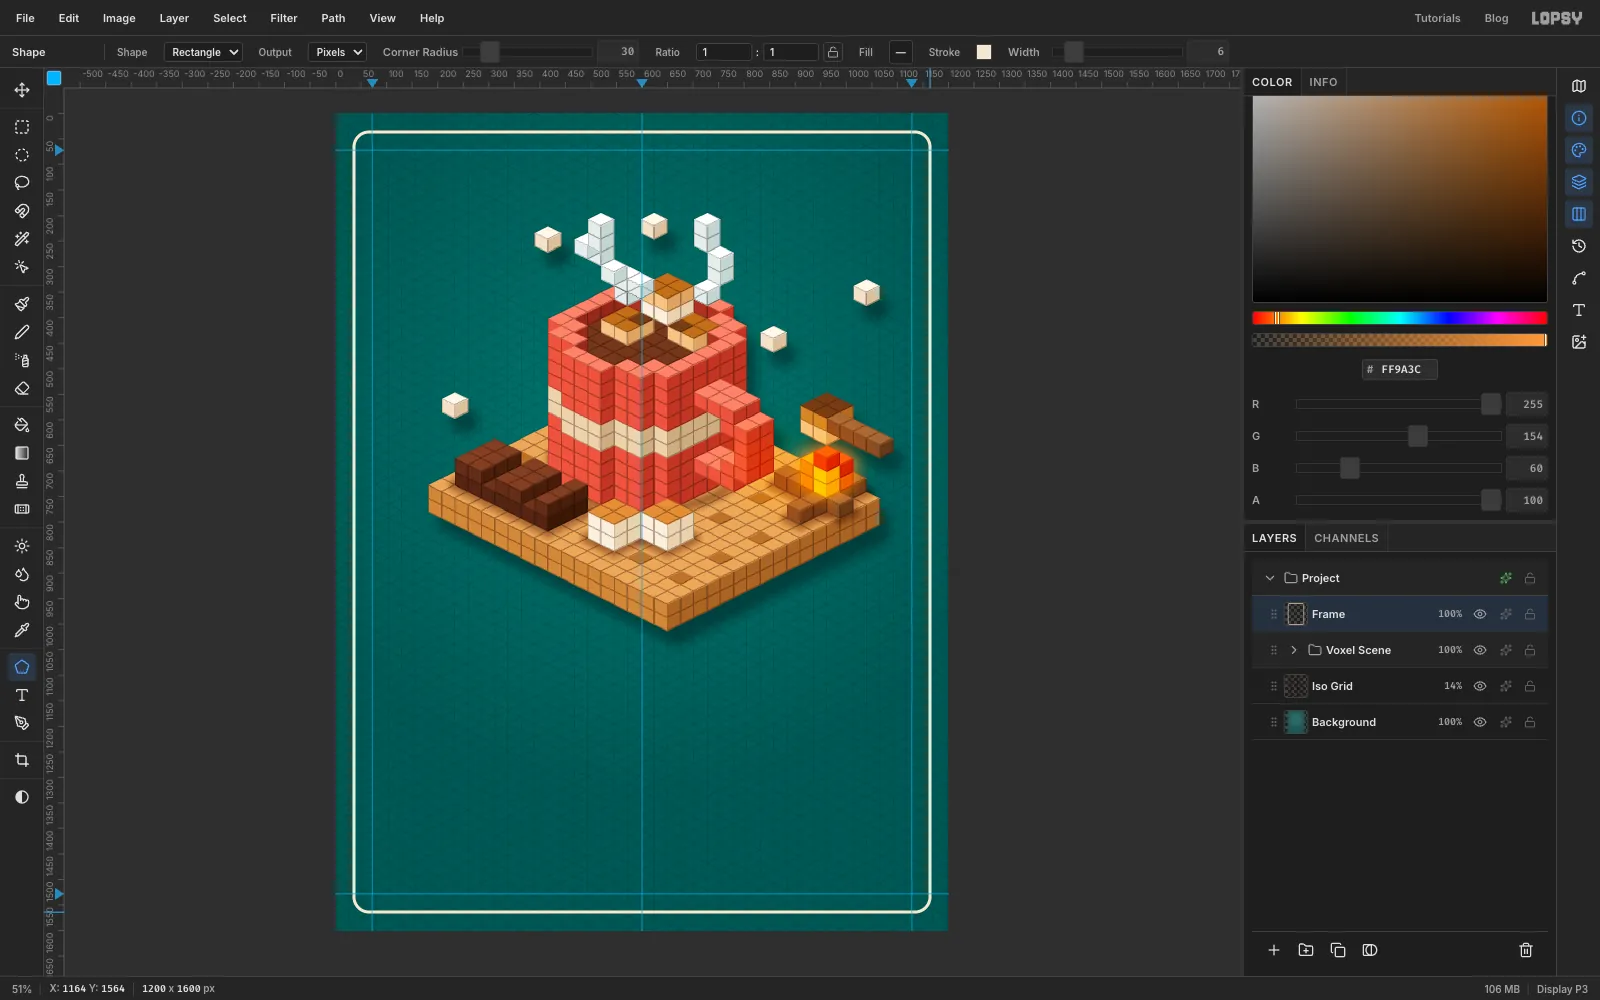
Voxel Scenegroup with its arrow and click it, so new layers go above it rather than inside. Add a layer namedFrame. - Pick the Shape tool (U). Set Shape to Rectangle, Output to Pixels and Corner Radius to
30. Click the Fill swatch and choose Remove fill, then click the Stroke dash and set it to . Set Width to6. - Shapes draw from the centre. Drag from
600, 800to1164, 1564. - Add a layer named
Inner Ruleand draw a second rectangle from the same centre to1148, 1548, with Corner Radius18and Width2. Lower it to 55% opacity.
- Collapse the
-
Set the type
- Click
Inner Ruleand make a New Group namedLabel Type. Add a layer namedPilland draw a Rectangle with the Shape tool: fill , no stroke, Corner Radius32, dragged from600, 1388to918, 1420. - Pick the Text tool (T). Before each new line of type, click the
Pilllayer so the Text options don't restyle the last text you made. Work from the bottom up, so no click lands inside text you've already set, and name each layer after its words:Net Weight,Servings,Tagline,Marshmallow,Toasted,EstandBrand:
NET WT 8 OZ (227 g): Space Grotesk SemiBold, 20 px, , letter spacing 3, at the left margin.12 MUGS PER TIN: the same, aligned right, at the right margin.DRINKING CHOCOLATE · 64% CACAO: Space Grotesk Bold, 24 px, , letter spacing 4, centred.MARSHMALLOW: Bungee, 120 px, , letter spacing 2, centred.TOASTED: Bungee, 84 px, , letter spacing 10, centred.EST. 2026 · SMALL BATCH: Space Grotesk Medium, 16 px, cream, letter spacing 6, centred.CUBIC COCOA CO.: Bungee, 38 px, cream, letter spacing 6, centred.
- Click
-
Line the type up
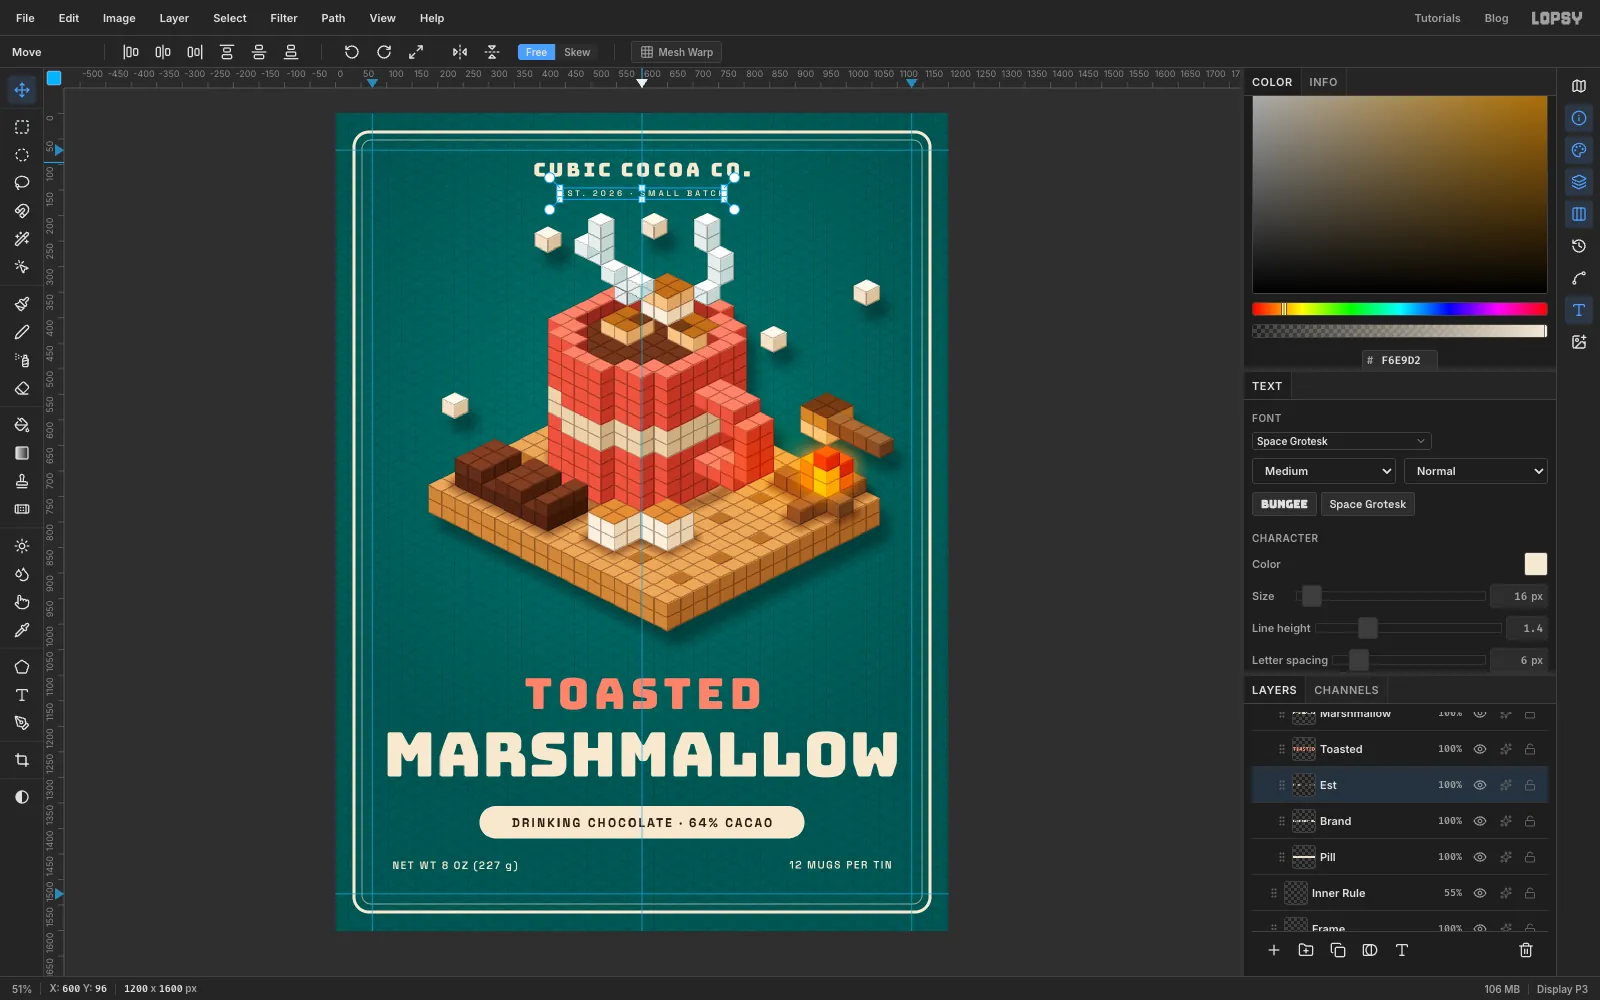
Select each text layer, pick the Move tool (V) and nudge it with the arrow keys (Shift moves 10 px). Don't drag small type with the mouse, because a drag that starts on an edge grabs a scale handle.
MARSHMALLOWspans 102 to 1098, with its cap tops at y = 1210.TOASTEDis centred with its tops at 1104, 90 px under the bottom corner of the cracker.- The tagline is centred in the pill: 64 px of cream on each side and about 24 px above and below the caps.
- The footer lines sit with their cap tops at 1464, 112 px in from each side.
CUBIC COCOA CO.has its tops at 96, and the small line under it at 150.
That gives an even rhythm down the bottom of the label: about 44 px from TOASTED to MARSHMALLOW, from MARSHMALLOW's extrusion to the pill and from the pill to the footer.
-
Toast the big word with a gradient
- Click the
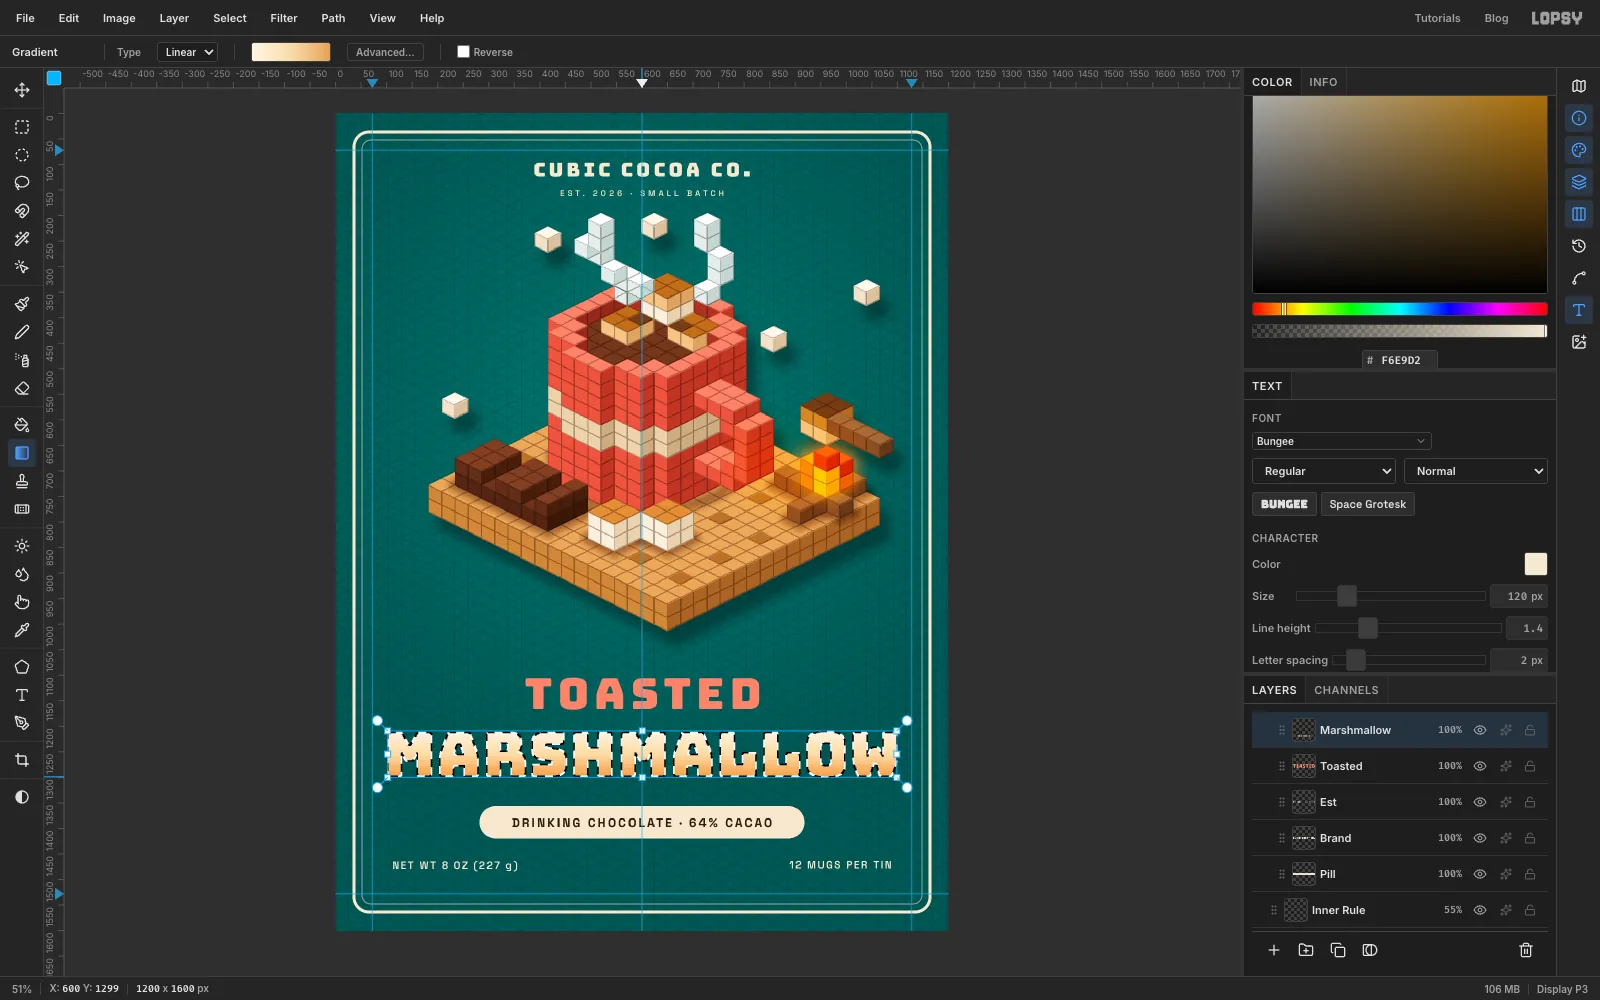
Marshmallowlayer and click Rasterize Layer at the bottom of the Layers panel (the T button). - Cmd-click its thumbnail to select its letters.
- Pick the Gradient tool, set Type to Linear and in Advanced… make three stops: , at 50% and .
- Drag straight down from the tops of the letters to their bottoms, then press Cmd+D.
- Click the
-
Extrude the title
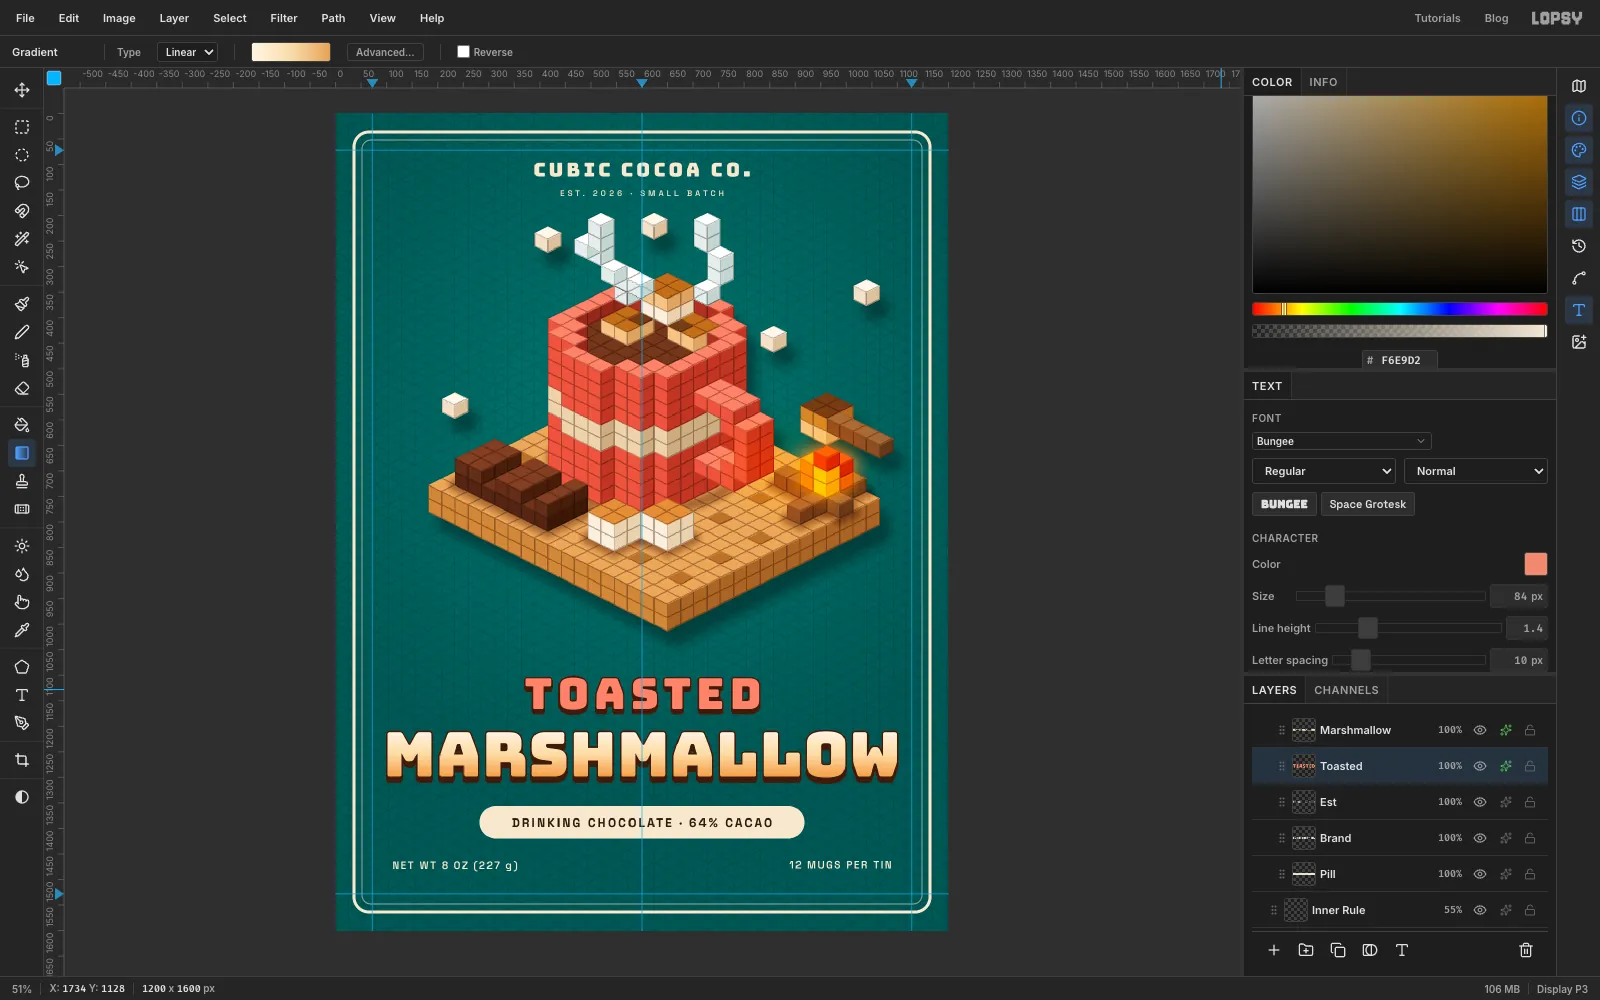
A drop shadow with no blur makes a solid extrusion, like a stack of cubes under each letter.
- With
Marshmallowselected, open the Effects drawer. Turn on Stroke: Width3, colour . - Turn on Drop Shadow: colour , Offset X
0, Offset Y10, Blur0, Spread0, Opacity100. - Do the same on
Toastedwith an Offset Y of8. It's still live text, so you can fix a typo later.
- With
-
Copy the cube icon
The brand line has a tiny cube at each end.
- Click
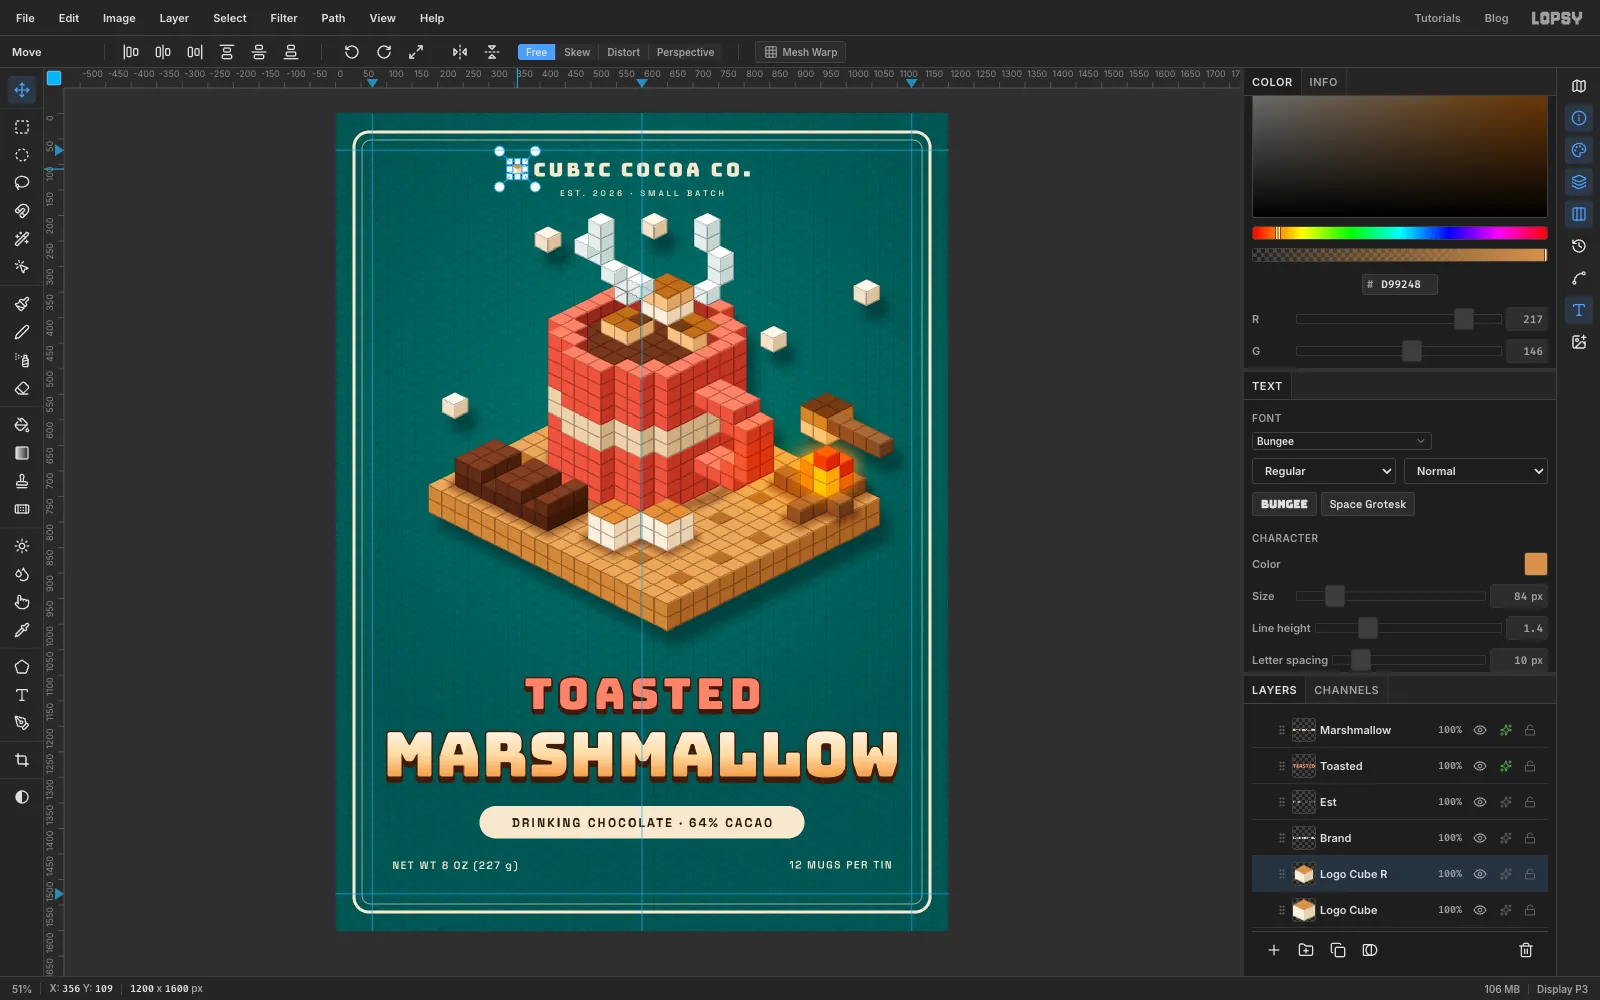
Pilland add a layer namedLogo Cube. Draw a cube 30 px wide with the Pen, one face at a time, just like the test cube but at half the size: the right face in , the left face in and the top diamond in . - Place it with its centre 34 px left of the
Cin CUBIC and its bottom point on the baseline of the capitals. - Draw a marquee just around it, press Cmd+C, then Cmd+V. The copy lands on top of the original, already selected. Name it
Logo Cube Rand drag it across until it sits 34 px right of the full stop. - Press Cmd+V again for a third copy, name it
Logo Cube Footand nudge it to the middle of the footer line, level with the capitals of12 MUGS PER TIN.
- Click
-
Build the badge
- Collapse
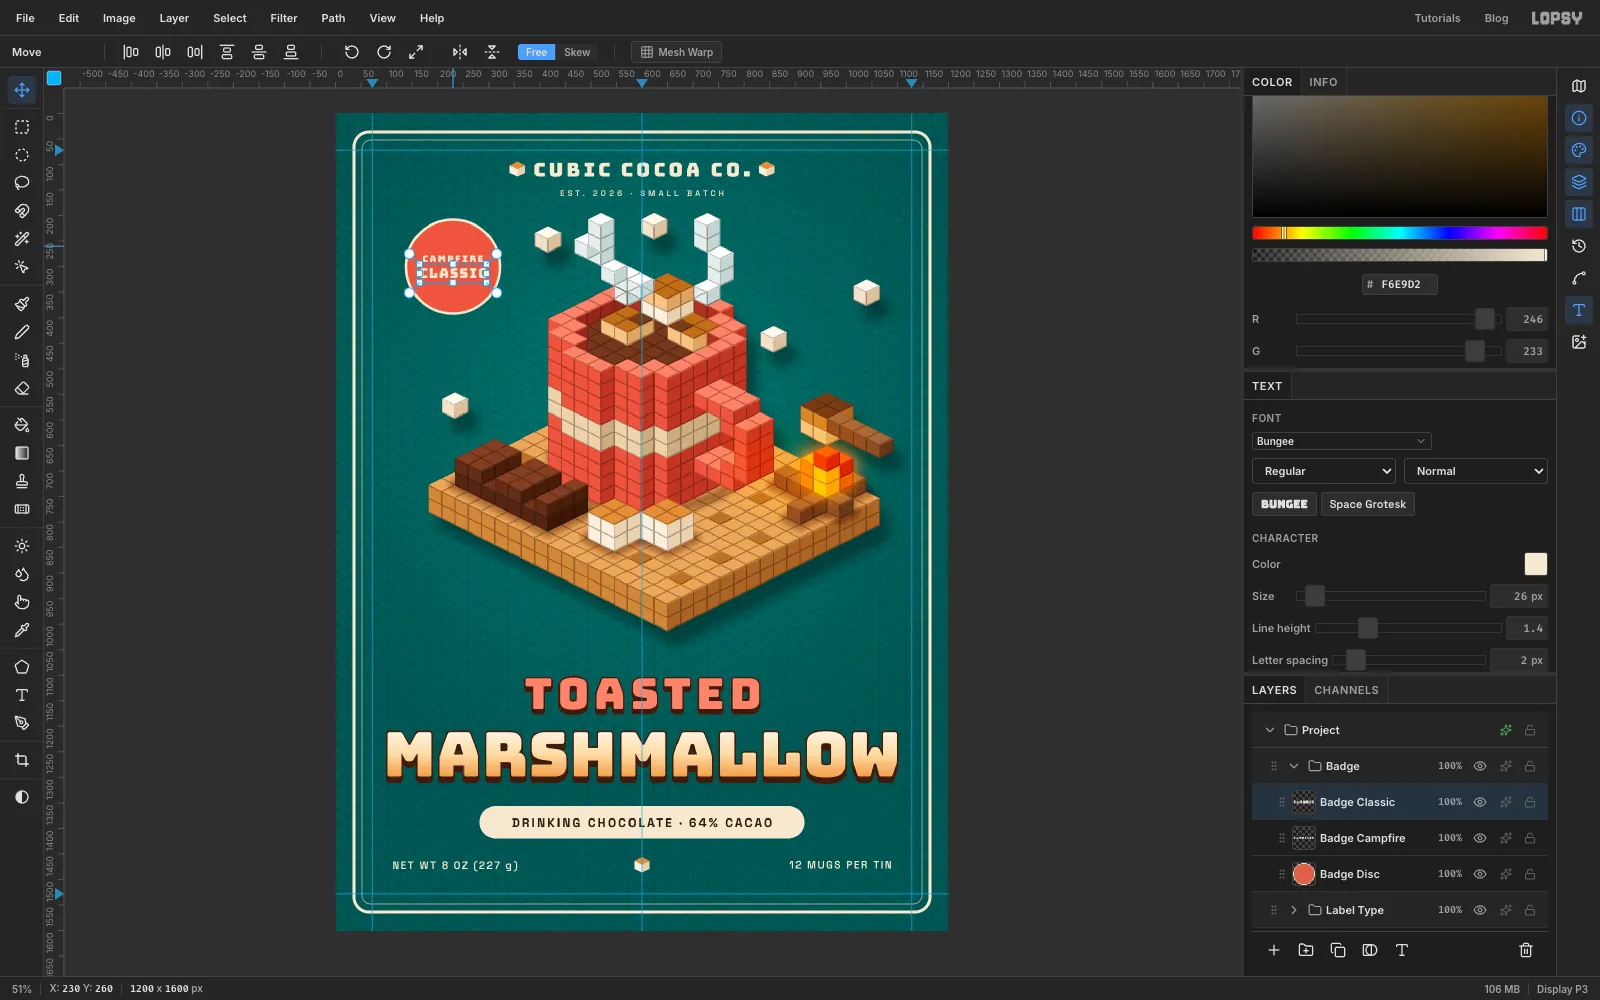
Label Type, click it and make a New Group namedBadge. Add a layer namedBadge Disc. - With the Shape tool set to Ellipse, fill , stroke at Width
5, drag from230, 300to322, 392. That's a circle 184 px across. - Click
Badge Discand typeCLASSICin Bungee, 26 px, cream, letter spacing 2, centred. That makes it about 126 px wide. ClickBadge Discagain and typeCAMPFIREin Bungee, 18 px, letter spacing 3. Name the layersBadge ClassicandBadge Campfire. - Nudge both so the two lines sit together in the middle of the circle, 12 px apart. Leave at least 14 px between the ends of
CLASSICand the ring.
- Collapse
-
Rotate the badge
- Click the
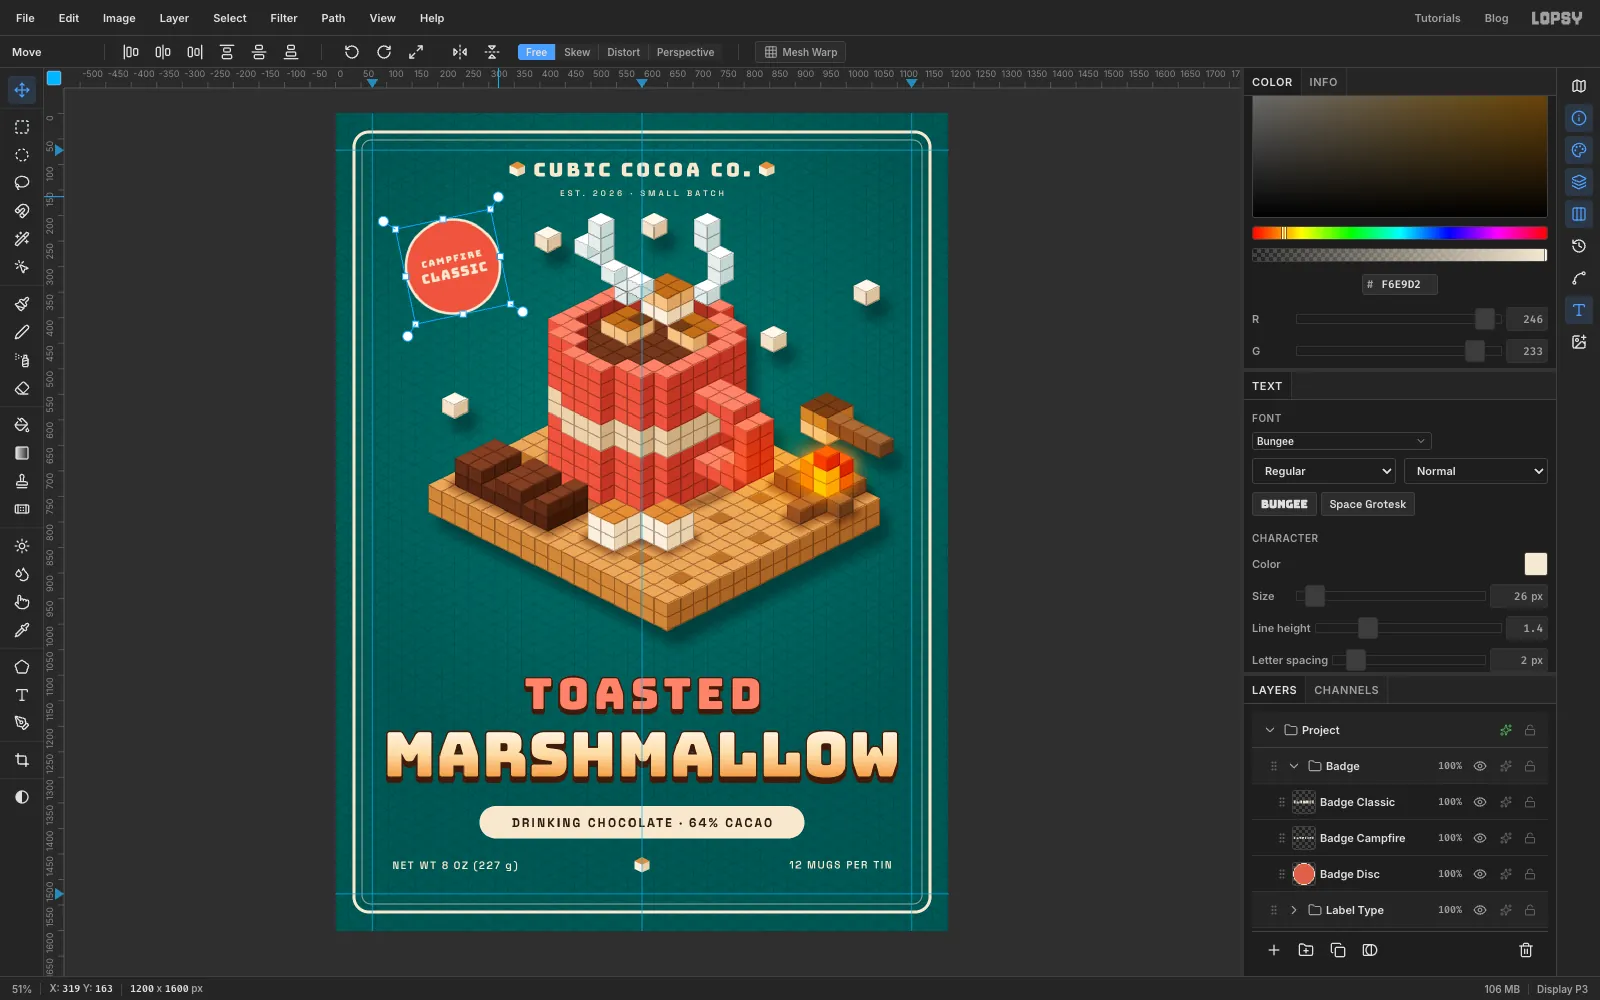
Badgegroup row so the Move tool transforms the whole group. - With the Move tool, hover just outside a corner handle until the cursor turns into a rotate arrow, and drag counter-clockwise by 12°.
- Press Enter to apply.
The disc and both lines of live text turn together. Press Cmd+Z and Cmd+Shift+Z to compare: undo puts the badge back level exactly, and redo tilts it again.
- Click the
-
Add print grain
- Collapse
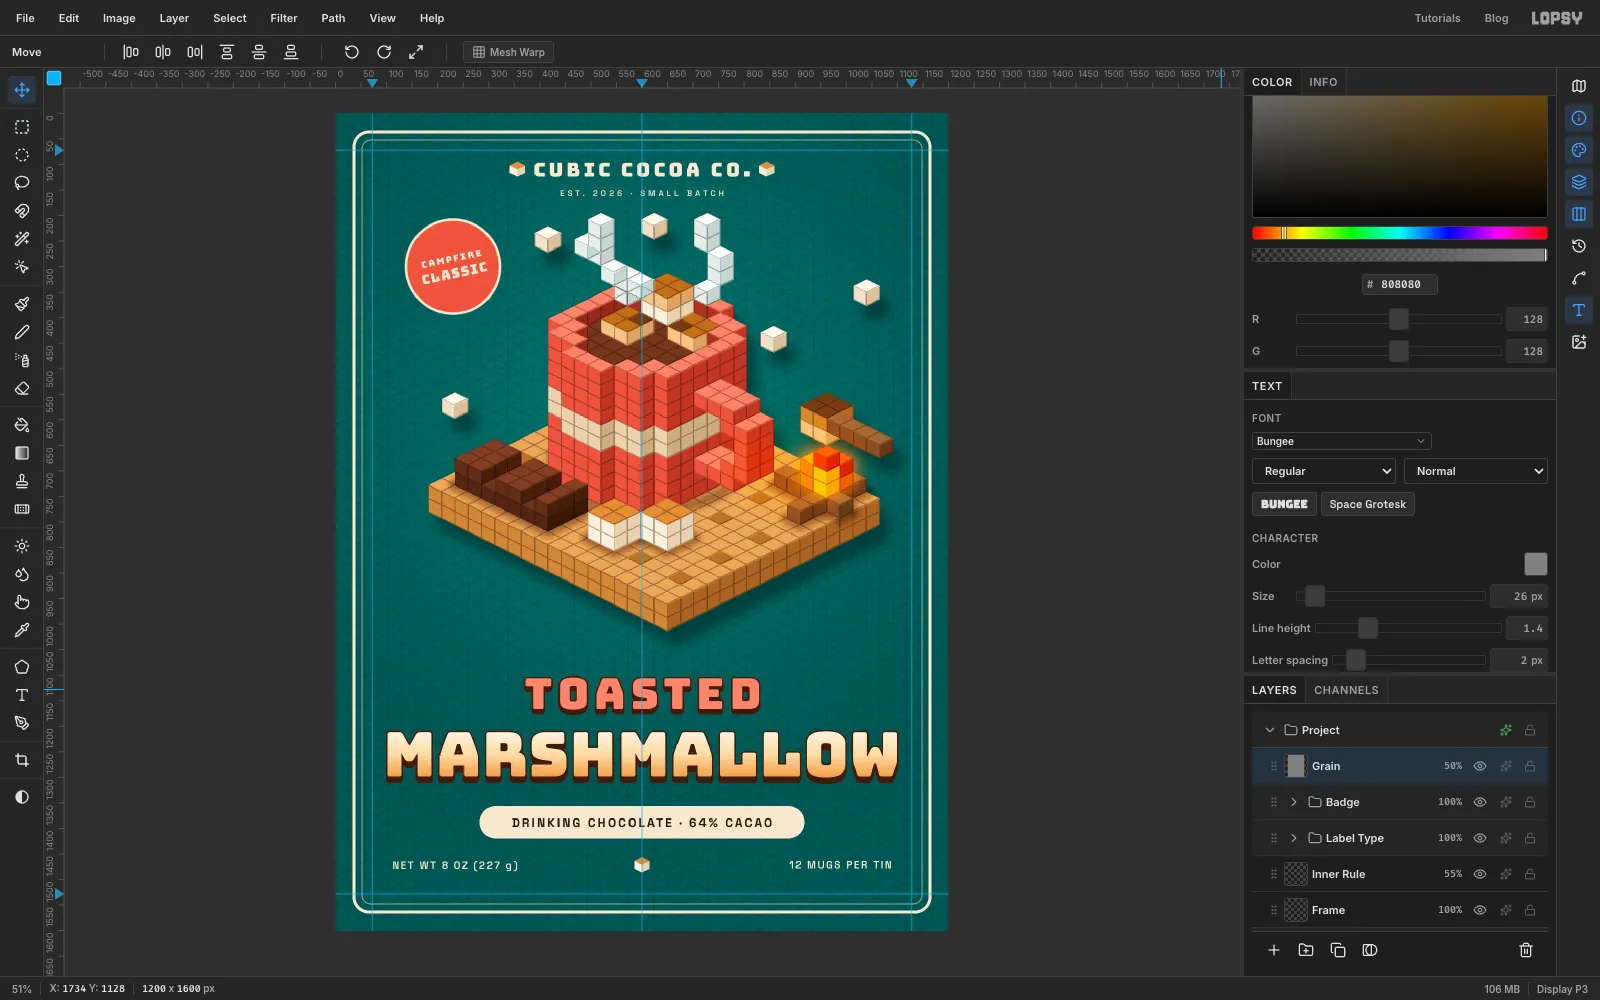
Badge, click it and add a layer on top namedGrain. - Fill it with using Edit → Fill.
- Choose Filter → Add Noise…, set Amount to
40and click Apply. - Set the layer to Overlay at 50% opacity.
Save the project with File → Save Project, then File → Quick Export PNG for the label artwork.
- Collapse