Design a Woodcut Barn Dance Invitation in Lopsy
Cut a two-ink woodcut invitation in Lopsy, with a fiddle drawn from one mirrored Pen shape, a sunburst sky, a ribbon banner, wood type and worn ink.
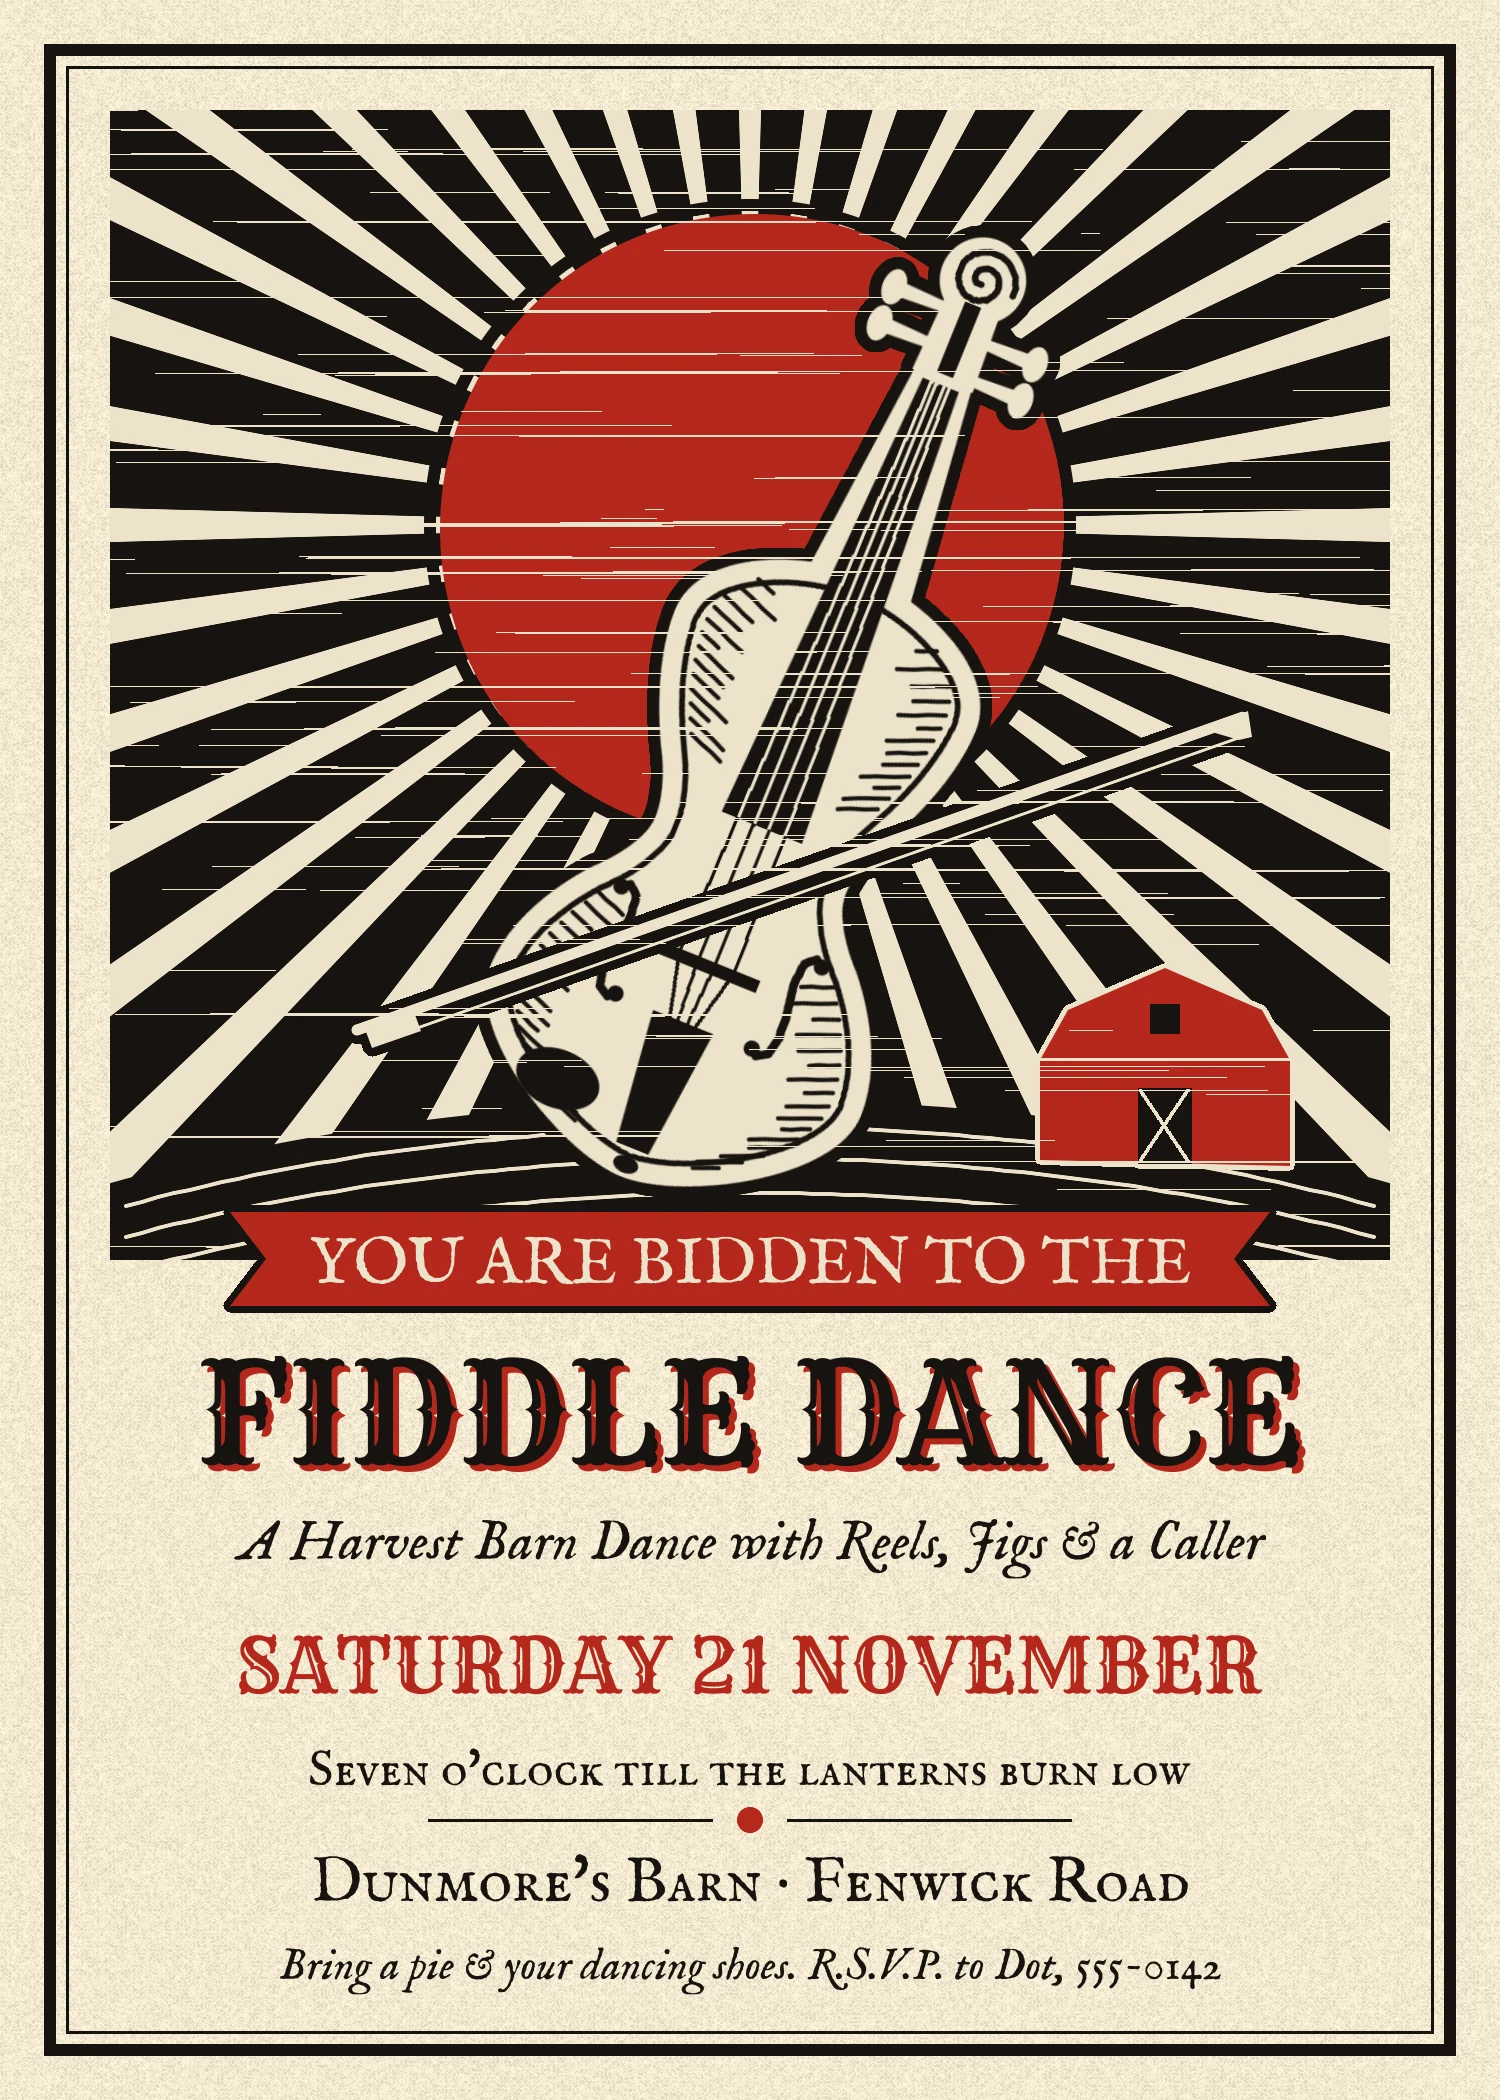
A woodcut is printed from a plank. Everything you want to stay white is cut away, the wood that's left is rolled with ink, and the paper is pressed on top. That's why woodcuts look the way they do:
- big flat areas of solid ink, with detail carved out as white lines
- short, straight hatch marks instead of smooth shading
- a second colour printed from a second block, which never lines up perfectly with the first
- thin scratches where the grain of the wood didn't take the ink
This invitation to a harvest barn dance uses all four. It's 1500 × 2100 px (5 × 7 inches at 300 dpi) and uses two inks on cream paper. Nothing is imported. The fiddle is drawn from scratch, starting with half a body made with the Pen tool.
The tools you'll use:
- the Pen tool, Path to Selection, copy and paste, and Flip Horizontal to mirror half a shape
- the Lasso, the two Marquees and Edit → Fill for flat shapes, with Select → Shrink… and Grow… for rings and outlines
- Shift+Alt-dragging a marquee to intersect two selections
- the Brush with Symmetry, and the Pencil with Shift-click for straight lines
- Filter → Sunburst…, Texture… and Threshold…, including on a layer mask
- groups, and the Move tool's scale and rotate handles on a whole group
- the Stroke layer effect
- live text in Rye, IM Fell English and IM Fell English SC
The palette is one black, one red and the paper:
-
Paper
-
Black ink
-
Barn red
-
Lay down the paper
Choose File → New, keep the units on Pixels, and make the document 1500 wide and 2100 high.
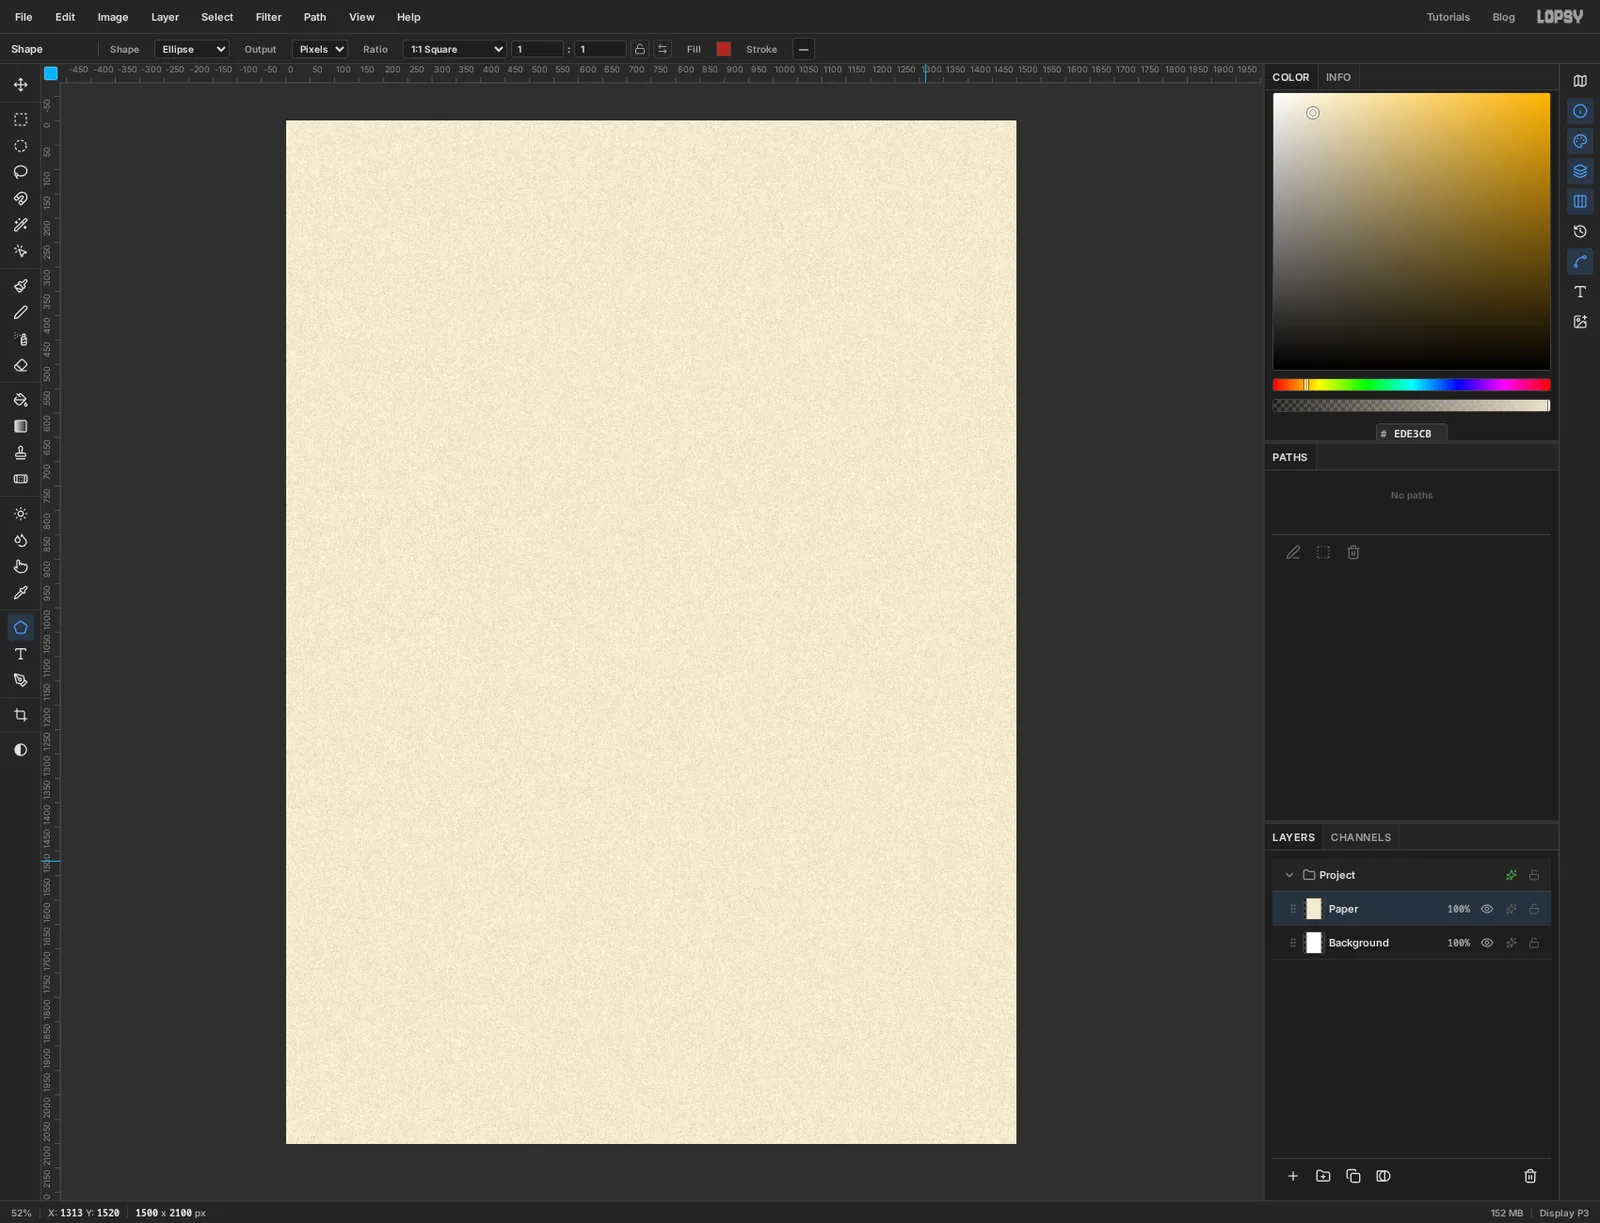
Click Layer 1, double-click its name and rename it Paper. Set the foreground colour to and choose Edit → Fill.
Flat cream looks like a screen, not a sheet of paper. Choose Filter → Texture…, set Type to Rough, Amount 14, Size 4 and Detail 70, and click Apply. That gives the sheet a soft, fibrous tooth.
-
Ink a black block for the sky
The card is symmetrical, so start with a centre line. Hold Cmd and click the top ruler near the middle. The guide snaps to exactly half way, at x 750.
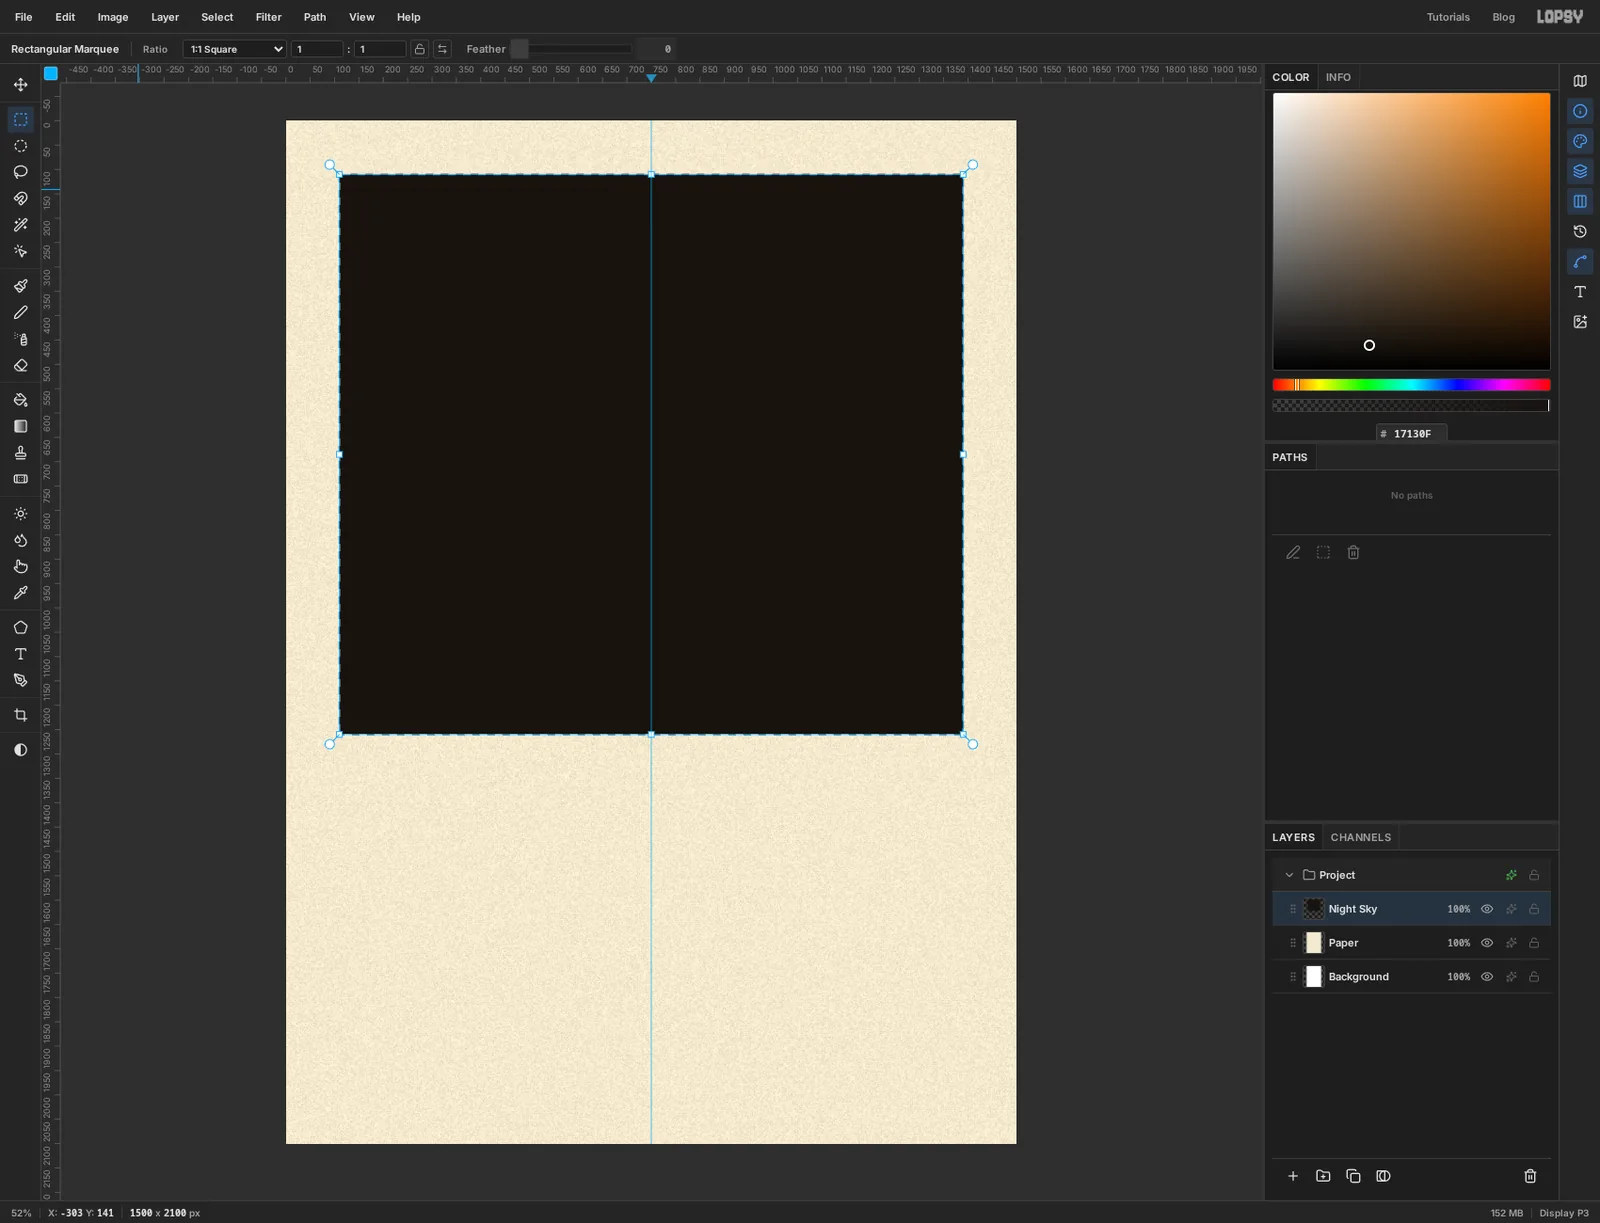
Click Add Layer and name the layer Night Sky. Pick the Rectangular Marquee and drag a block that fills the top half of the card, leaving an even margin of about 110 px at the top and sides. Mine runs from 110, 110 to 1390, 1260. Set the foreground to and choose Edit → Fill. Keep the selection.
-
Carve the rays with Sunburst
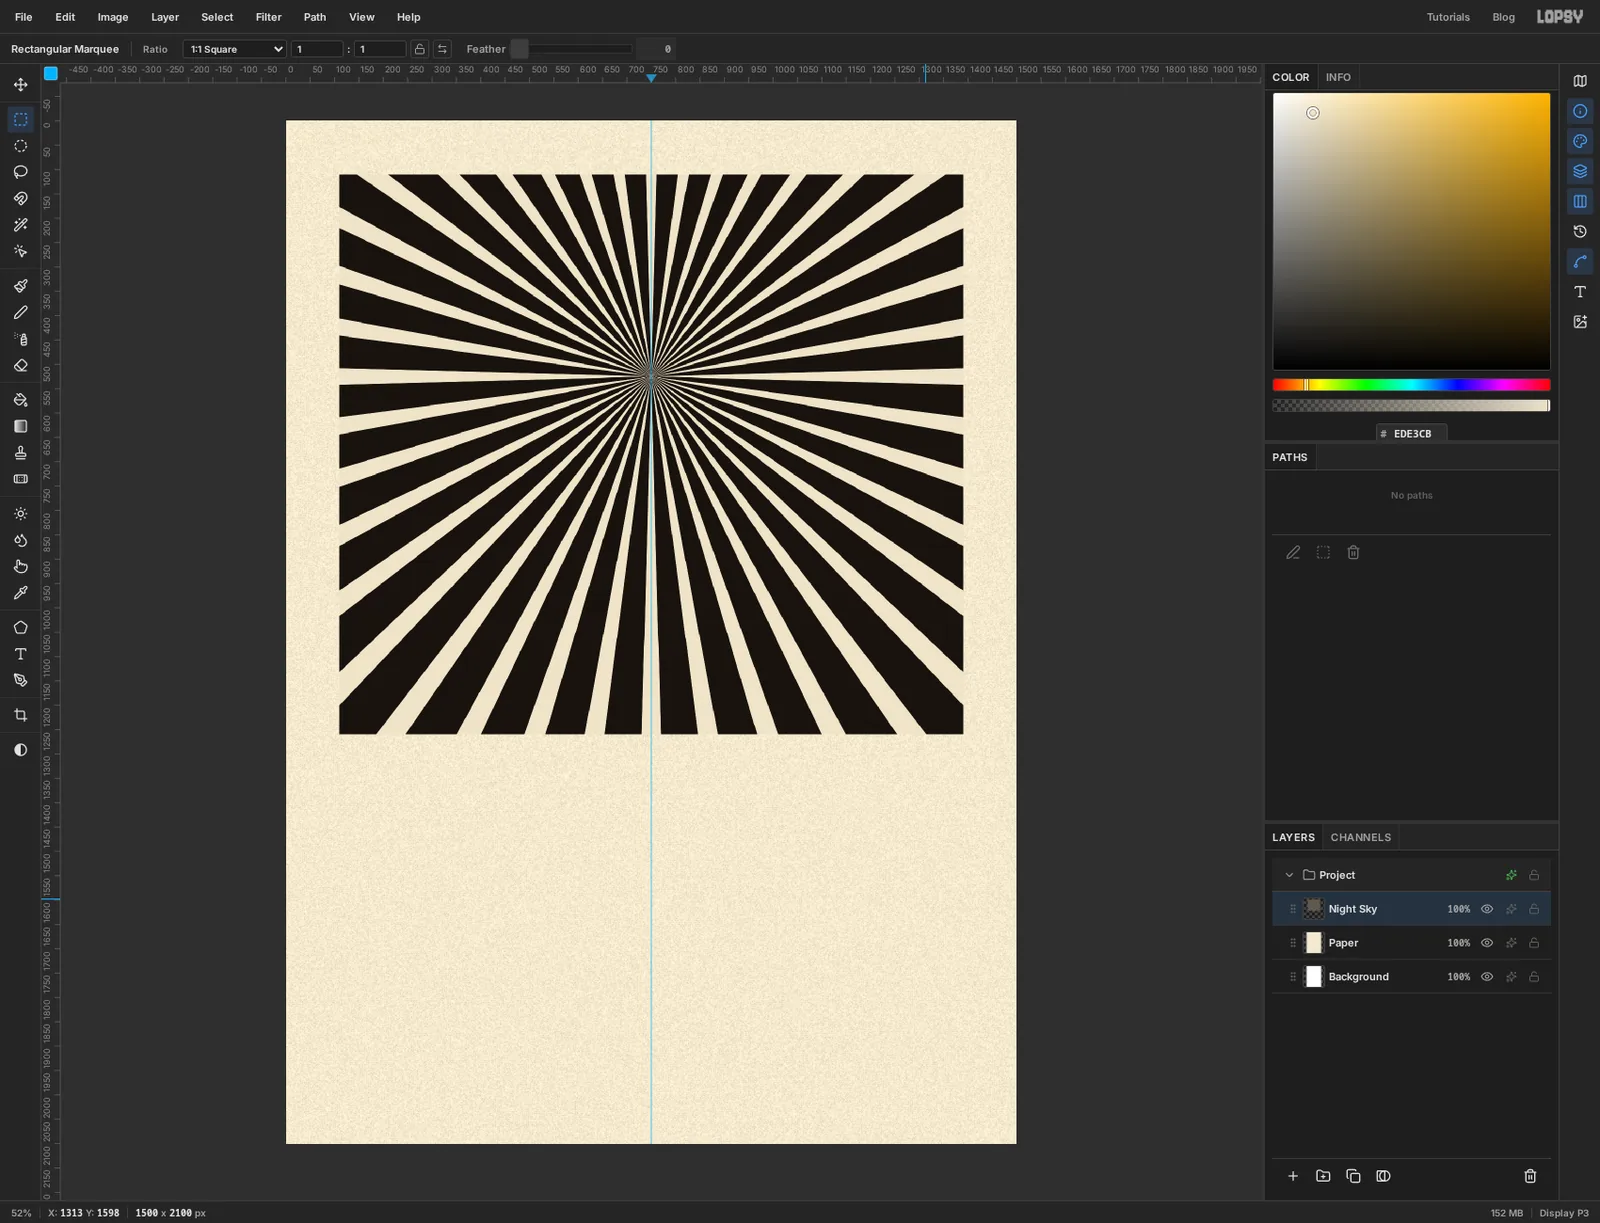
A carver would gouge the rays out of the block so the paper shows through. The Sunburst filter paints rays in the foreground colour, so set the foreground back to the paper colour, .
Choose Filter → Sunburst… and set:
- Rays 40
- Width 34
- Center Y 25, so the rays start a quarter of the way down the card, where the moon will go
- Jitter 30 and Seed 7, so the rays aren't all the same length
Click Apply. Because the block was still selected, the rays stop at its edges. Deselect with Cmd+D.
-
Cut a keyline ring for the moon
The moon is printed in red from a second block, and the black block carries a ring around it. Do the red first. Add a layer called Harvest Moon. Pick the Elliptical Marquee, hold Cmd to keep it round, and drag a circle about 630 px across around the point the rays come from (750, 525). Mine runs from 435, 210 to 1065, 840. Fill it with and deselect.
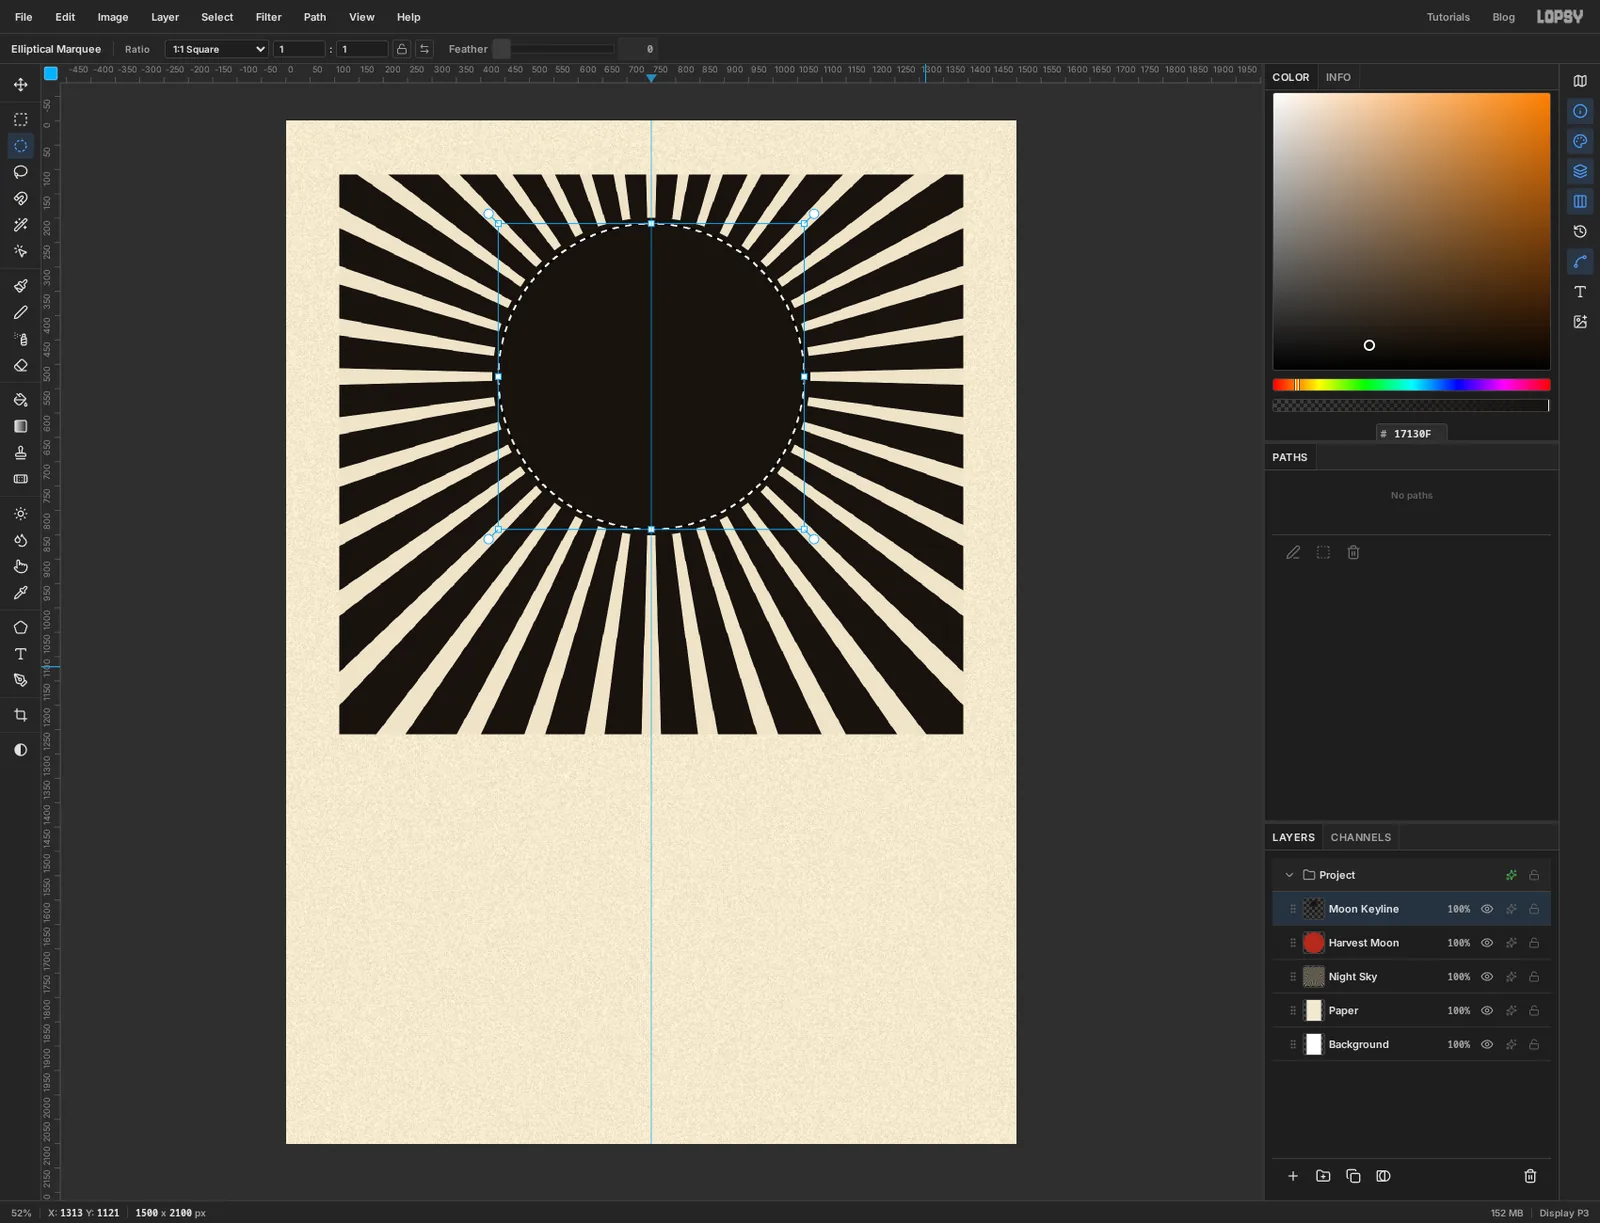
Add another layer called Moon Keyline. Drag a slightly bigger circle around the same centre, about 650 px across (from 424, 199 to 1076, 851), and fill it with black . Then choose Select → Shrink…, enter 12 and click Apply. The selection is now 12 px inside the edge of the black disc, as in the screenshot.
-
Knock the red out of register
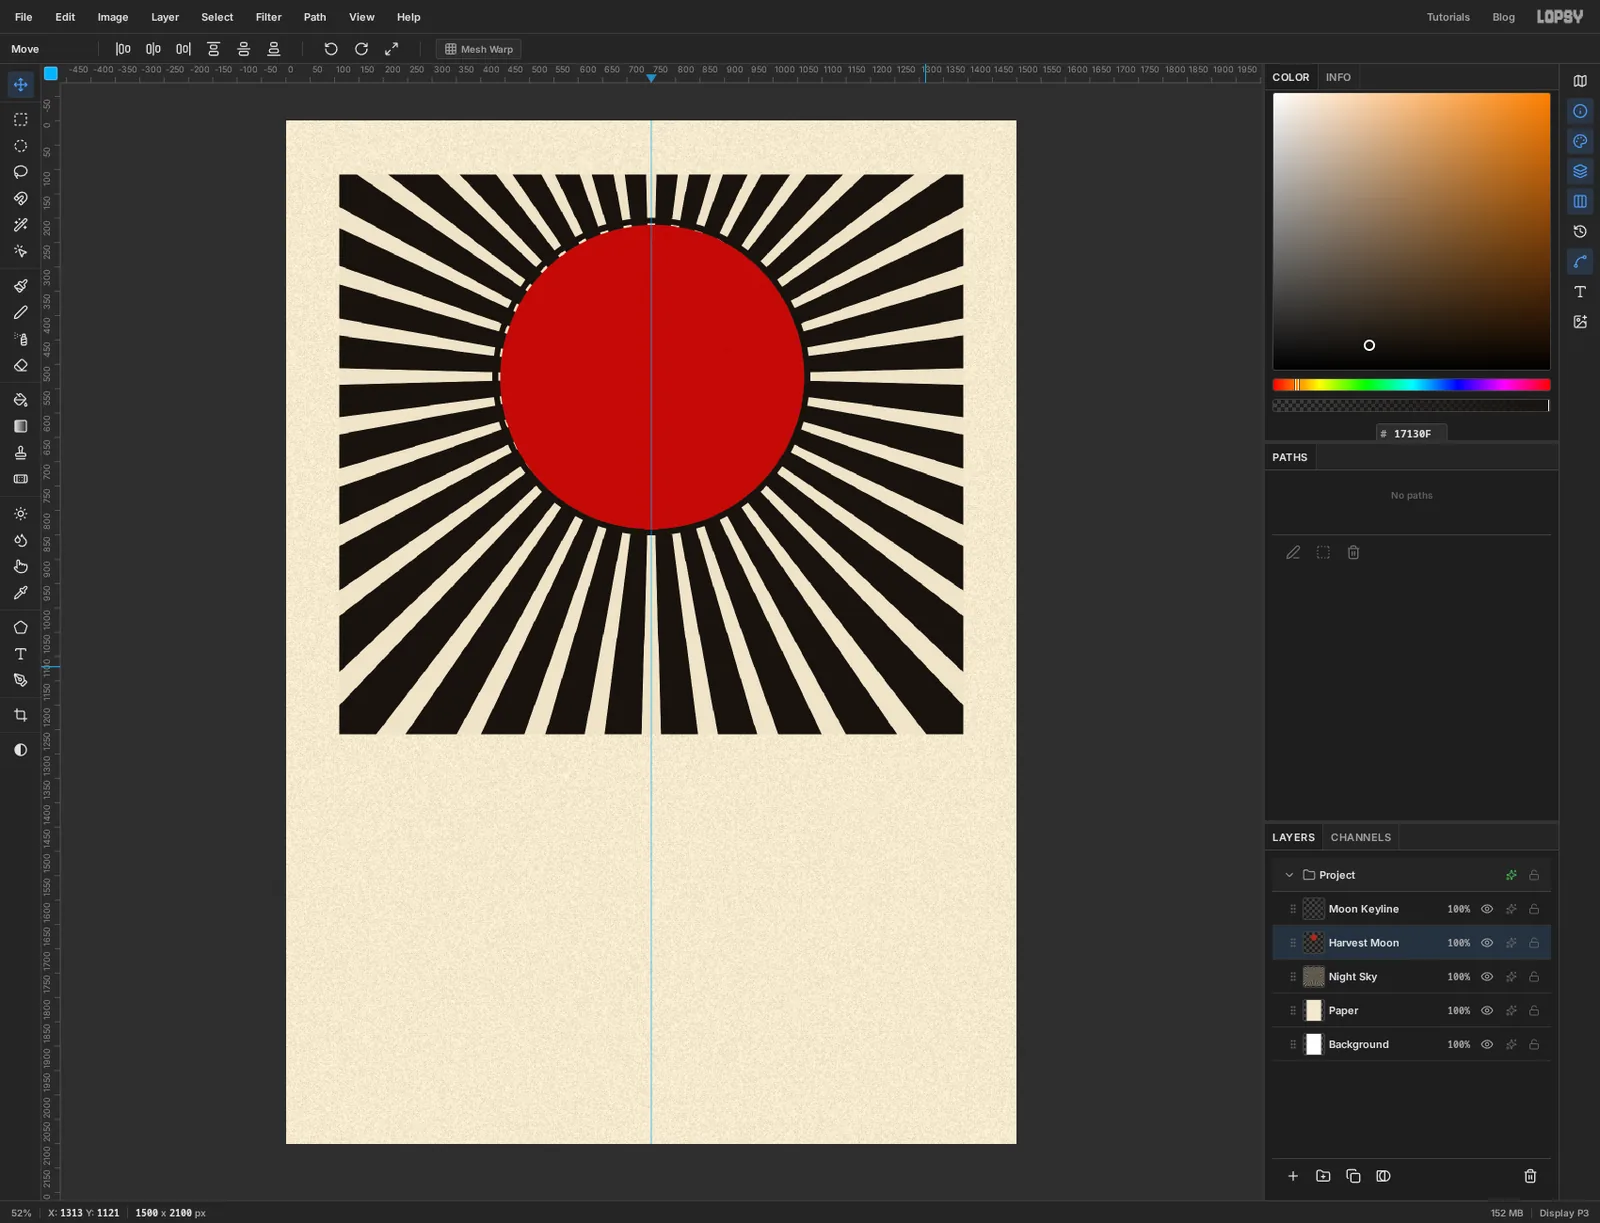
Press Delete to clear the middle of the black disc. That leaves a 12 px ring. Deselect.
On a real two-block print the colours are never quite lined up. Click Harvest Moon, pick the Move tool and tap → five times and ↓ four times. The red slides down and to the right under the ring. A thin crescent of bare paper opens at the upper left, and the red tucks under the ring on the other side.
-
Draw half a fiddle with the Pen
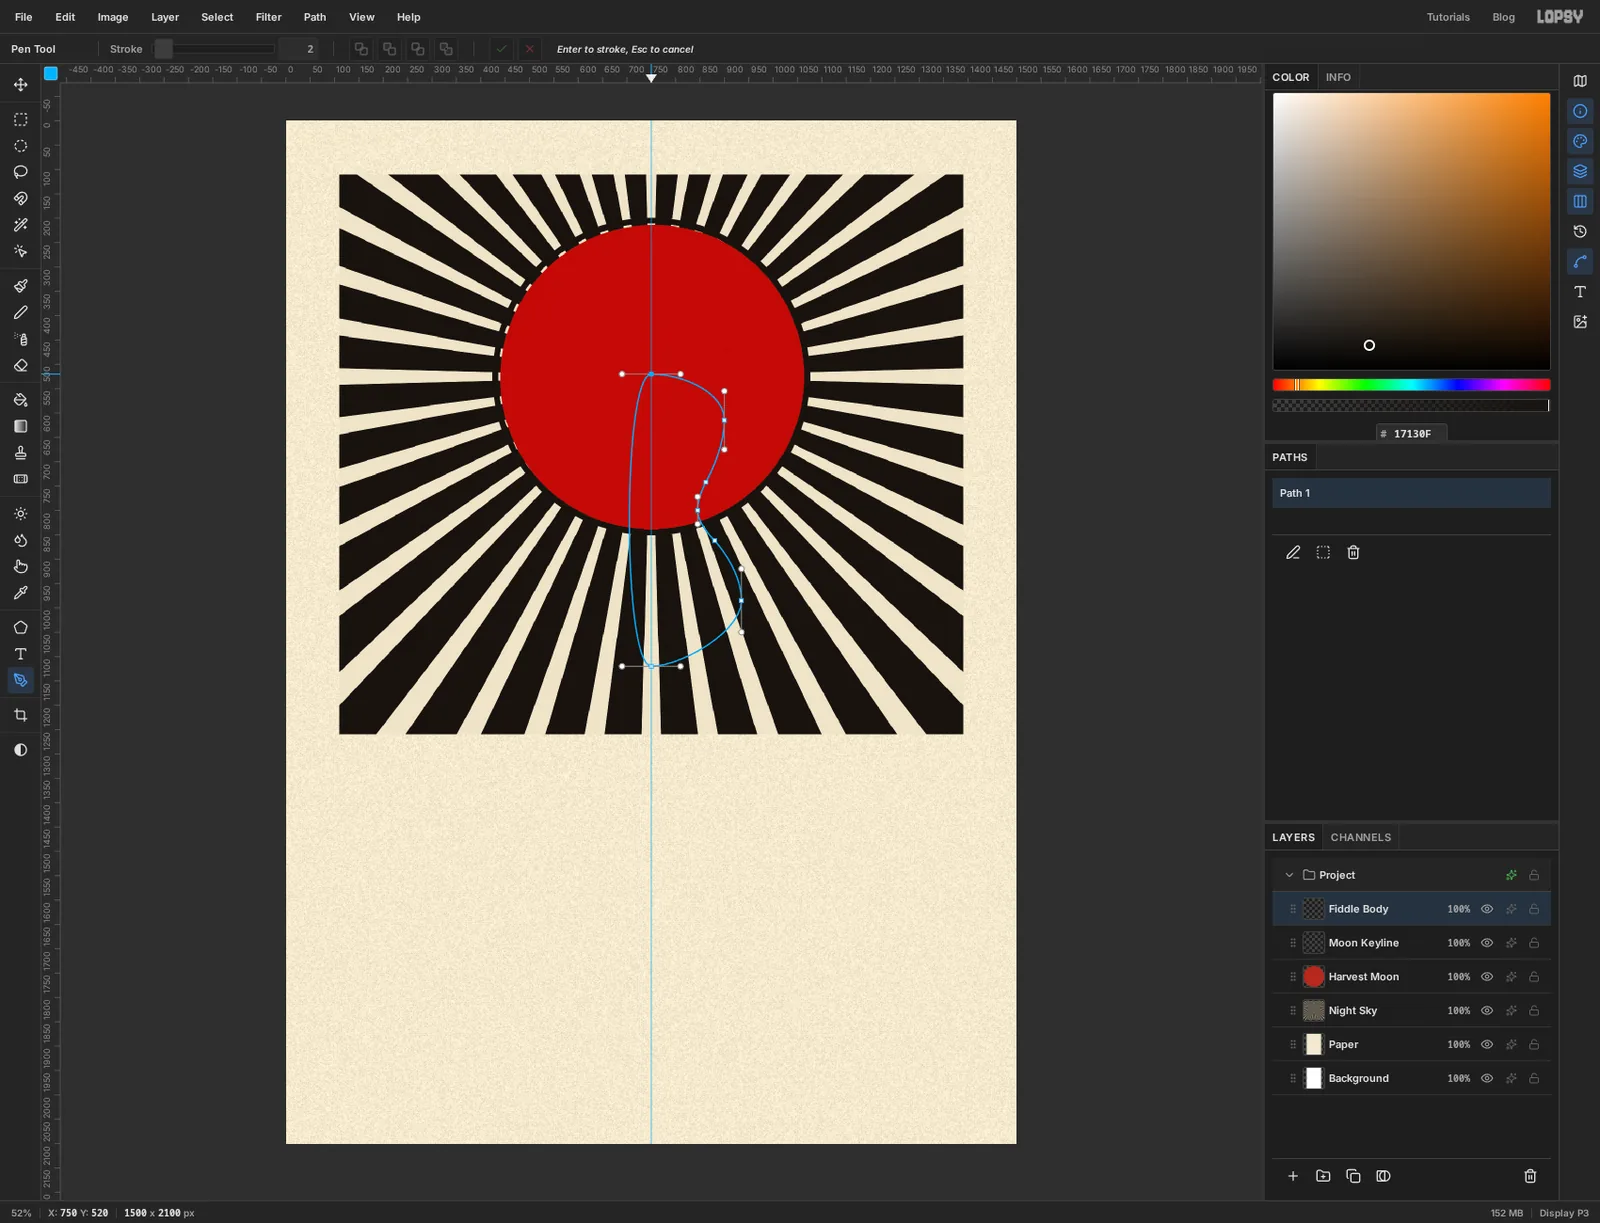
A fiddle is symmetrical, so you only need to draw half of it. Add a layer called Fiddle Body, pick the Pen tool, and work down the right-hand side of the centre guide. Click to place a corner. Press and drag to place a smooth anchor, pulling the handle in the direction the curve should leave.
- Press on the guide at 750, 520 and drag right about 60 px. This is the top of the body.
- Press at 900, 615 and drag straight down 60 px. This is the widest point of the upper bout.
- Click at 862, 742. This is a sharp corner where the waist begins.
- Press at 845, 800 and drag down about 30 px for the narrowest part of the waist.
- Click at 880, 862 for the lower corner.
- Press at 935, 985 and drag down 65 px for the widest point of the lower bout.
- Press on the guide at 750, 1120 and drag left 60 px for the bottom.
- Click the first anchor again to close the path.
Don't worry about the closing side bulging a little past the guide. It gets covered in the next step.
Open the Paths panel and click Path to Selection. Set the foreground to and choose Edit → Fill. Then click Delete Path so the blue outline is out of the way, and deselect.
-
Mirror the half to finish the body
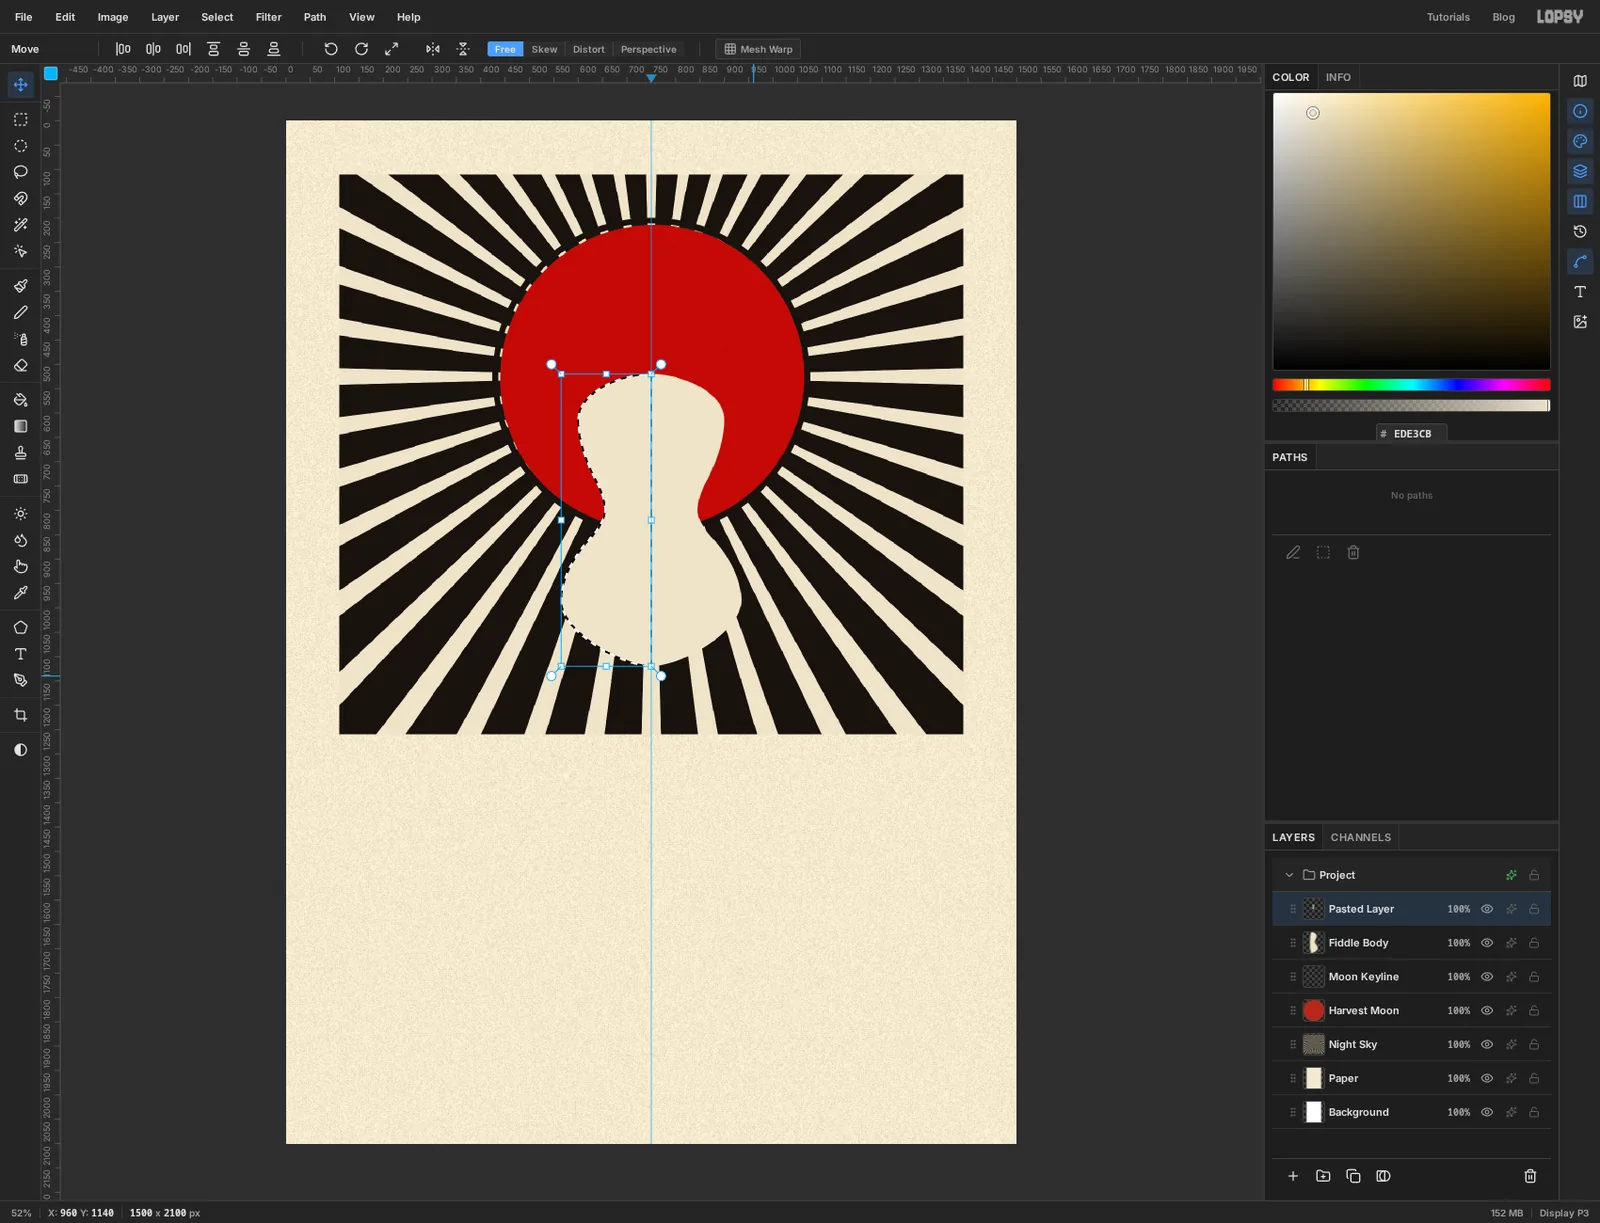
Pick the Rectangular Marquee and drag a box around the half body, starting on the centre guide. The edge snaps to the guide, so the box holds only what's to the right of x 750. Press Cmd+C and then Cmd+V. The copy arrives on a new layer, exactly on top of the original.
Now flip the copy across the middle of the card. Press Cmd+A to select the whole canvas, pick the Move tool and click Flip Horizontal in the options bar. Because the selection is the whole canvas, the flip happens around the canvas centre, which is the guide. The copy lands as a perfect mirror image on the left.
Deselect, then press Cmd+E to merge the pasted layer down into Fiddle Body.
-
Inlay the purfling
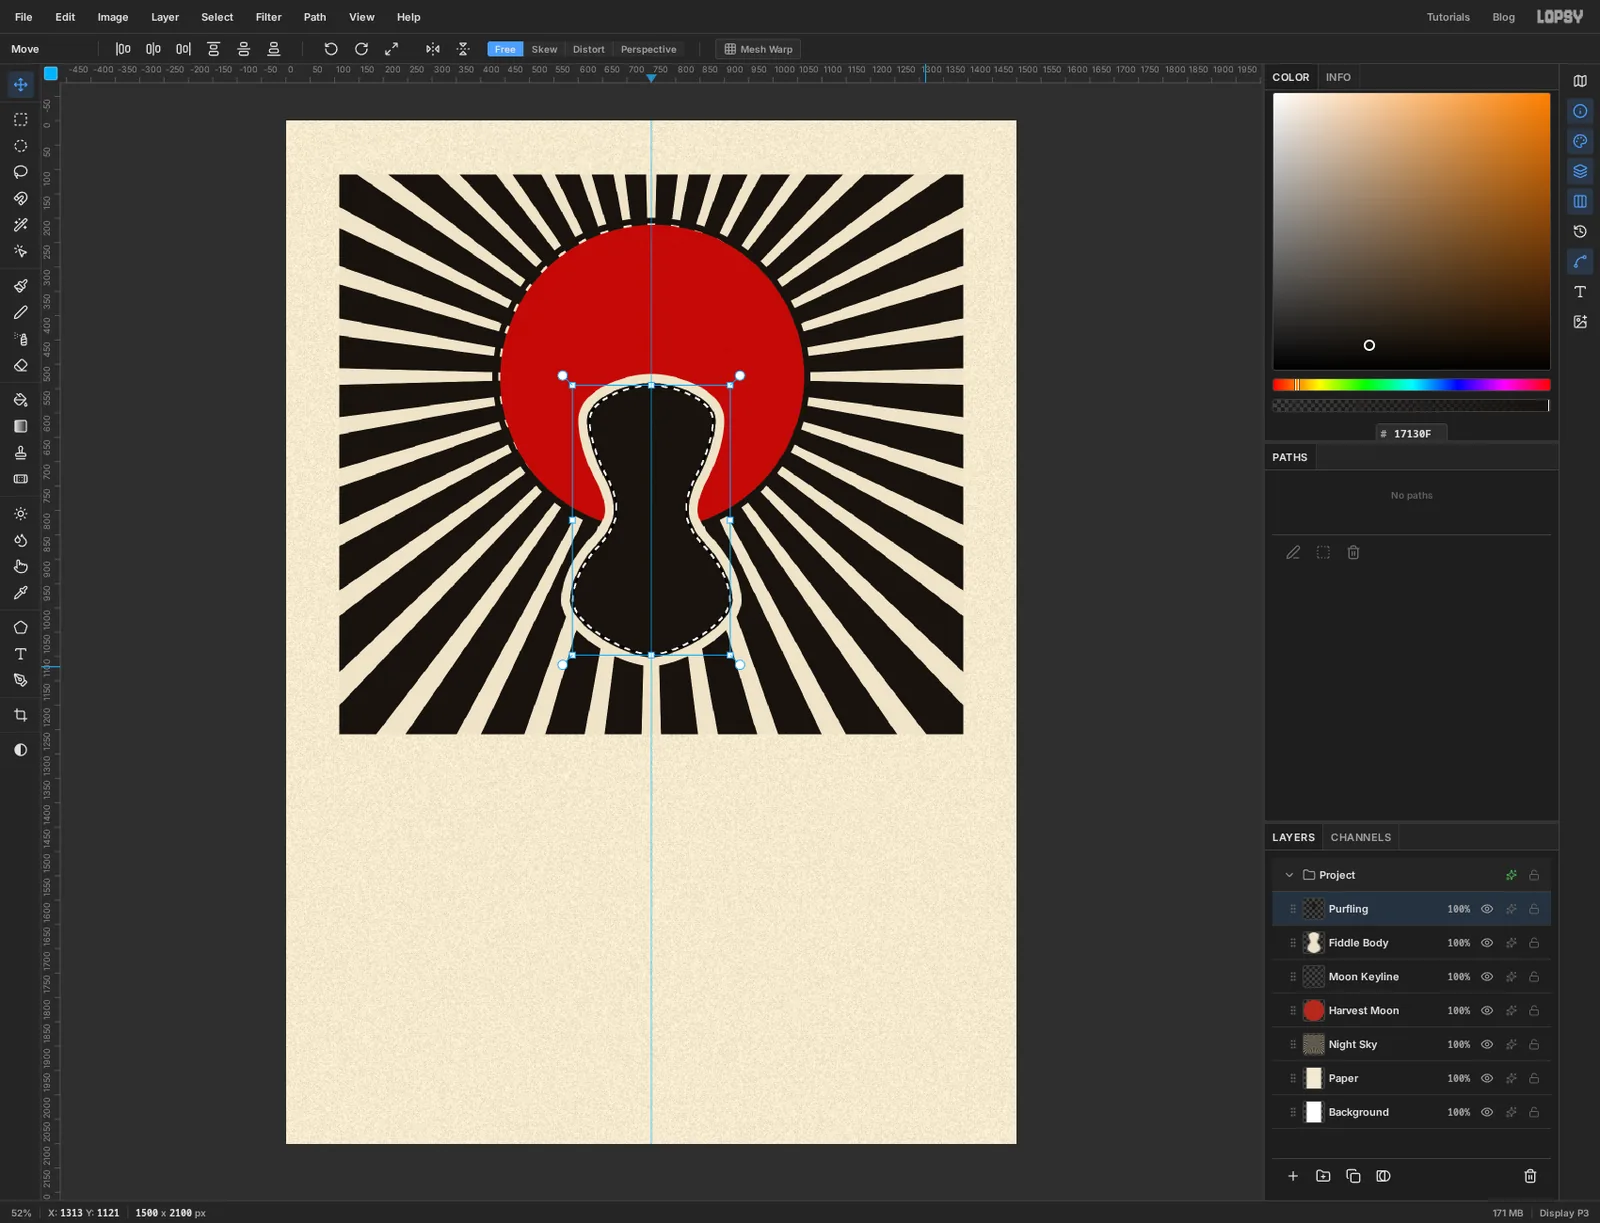
Purfling is the thin dark line that runs just inside the edge of a violin. Hold Cmd and click the Fiddle Body thumbnail in the Layers panel to select the body's shape. Choose Select → Shrink… at 18.
Add a layer called Purfling and fill the selection with black . It looks alarming for a moment, as in the screenshot. Choose Select → Shrink… again at 5 and press Delete. What's left is a 5 px line that follows the outline all the way round. Deselect.
-
Add the neck, scroll and pegs
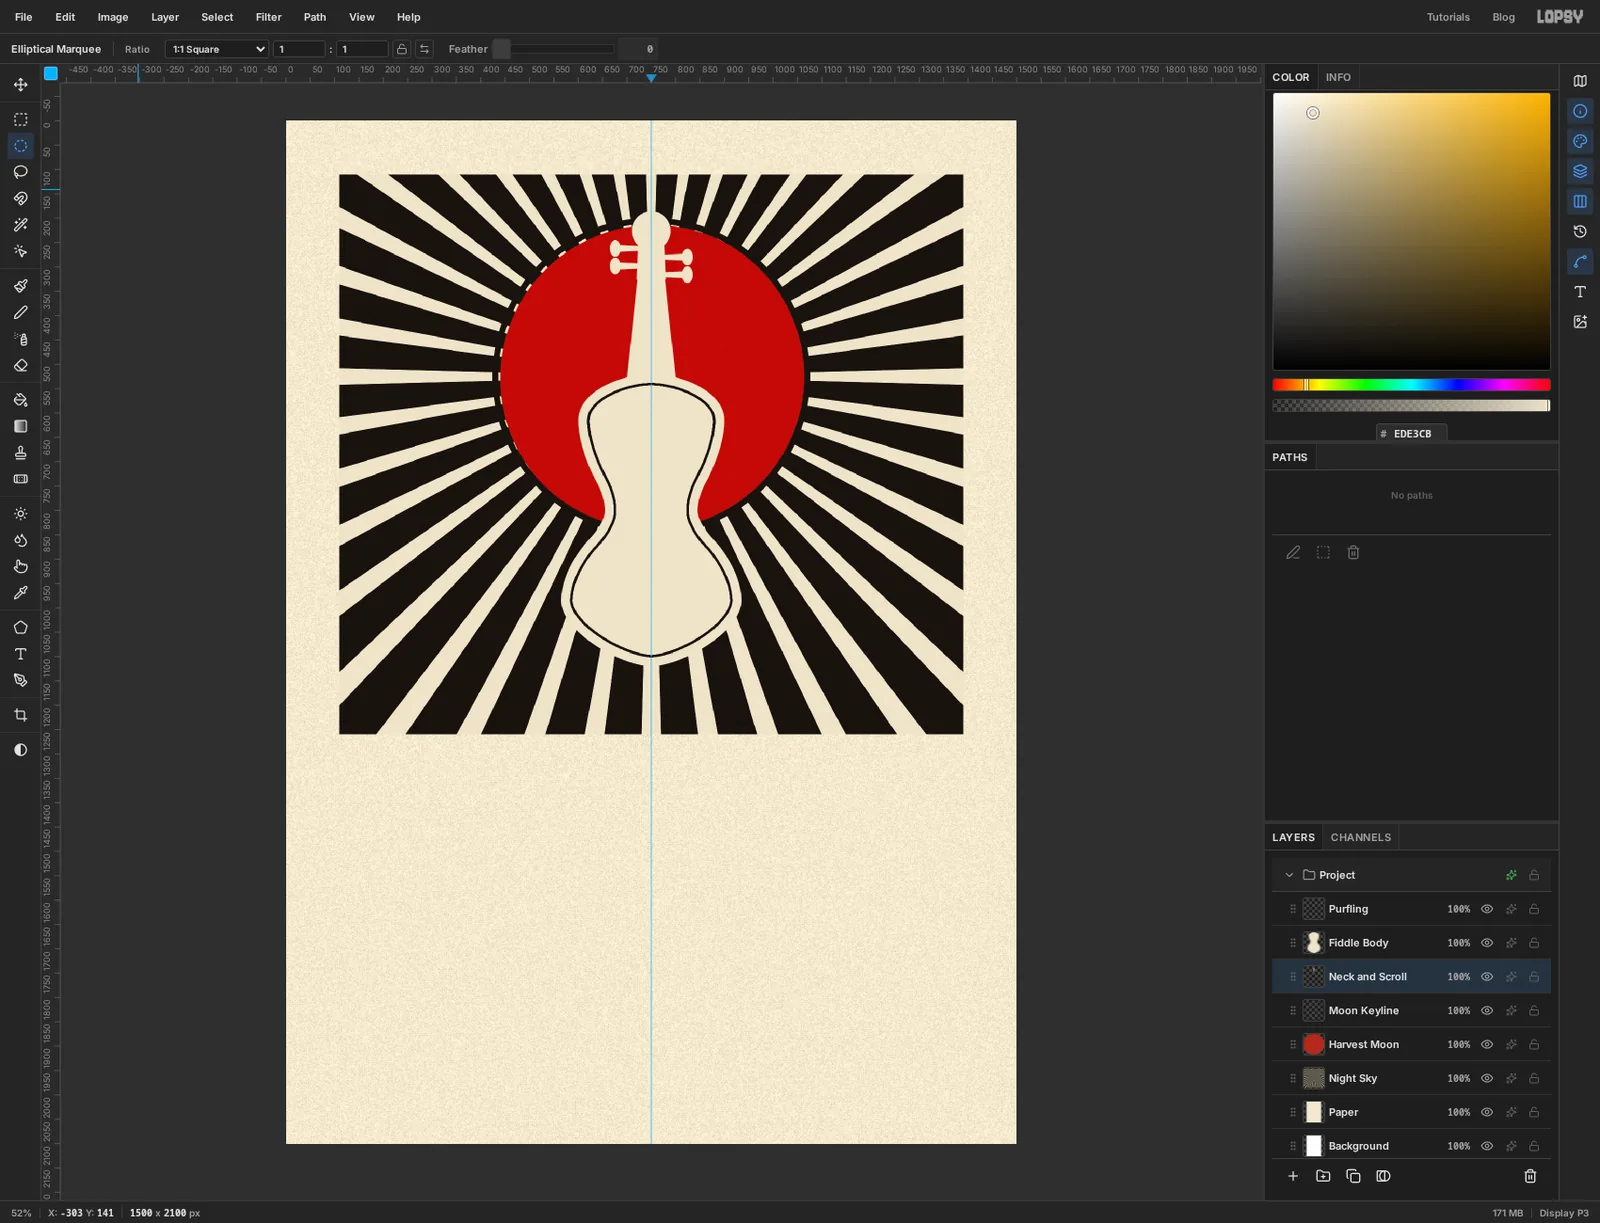
The neck goes behind the body. Click Moon Keyline, then Add Layer and name the new layer Neck and Scroll. It lands just above the moon and below the body.
Set the foreground to . Each part is a selection filled with Edit → Fill. For the straight-sided ones, pick the Lasso and drag from corner to corner in straight runs, finishing back where you started. Press Cmd+D after each fill, or the next drag will move the old selection instead of starting a new one.
- The neck: a tall, tapering strip centred on the guide. Its corners are 722, 322 and 778, 322 at the top and 800, 530 and 700, 530 at the bottom, where it disappears under the body.
- The pegbox: a box about 54 px wide above the neck, from y 236 to y 326.
- The scroll: an 80 px circle centred on 750, 226, sitting on top of the pegbox. Use the Elliptical Marquee.
- Four pegs: two sticking out to the left at y 262 and y 298, and two to the right at y 280 and y 316. Each is a tapering shaft about 40 px long and 12 px thick, with an upright oval about 22 × 34 px on the end for the grip.
Keep the shapes simple and slightly uneven. A woodcut is carved with a knife, so nothing should look machine-made.
-
Fit the black parts
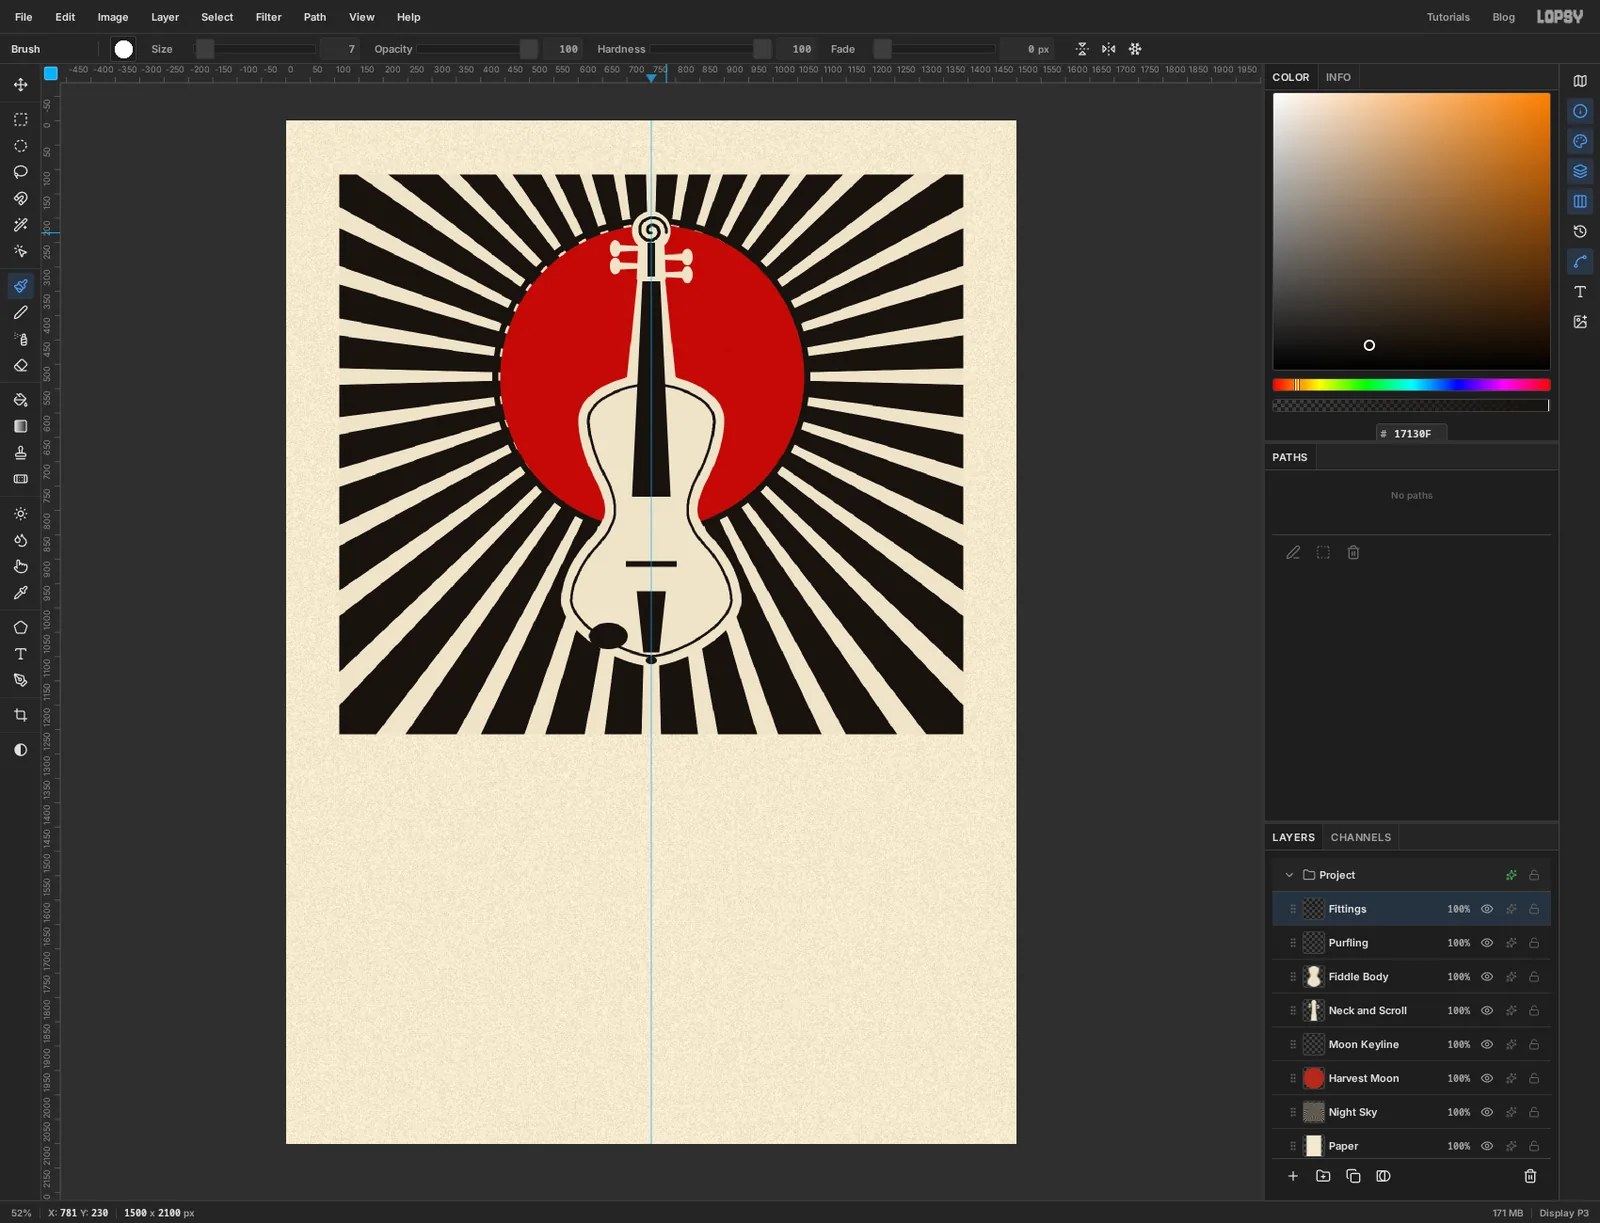
Click Purfling and add a layer above it called Fittings. Switch the foreground to black and fill these shapes the same way, with the Lasso for the tapered ones, the Rectangular Marquee for the boxes and the Elliptical Marquee for the ovals. Keep them centred on the guide:
- The fingerboard: a long strip from just under the pegbox (y 330) down to about y 772, 36 px wide at the top and 80 px wide at the bottom.
- The pegbox slot: a 16 px wide rectangle up the middle of the pegbox, from y 250 to y 320.
- The bridge: a thin bar about 104 × 12 px across the body at y 904.
- The tailpiece: a wedge from y 966 to y 1092 that's 60 px wide at the top and narrows towards the bottom edge.
- The chinrest: an oval about 80 × 54 px at the lower left of the body, centred near 662, 1058.
- The end button: a tiny oval where the tailpiece meets the bottom edge.
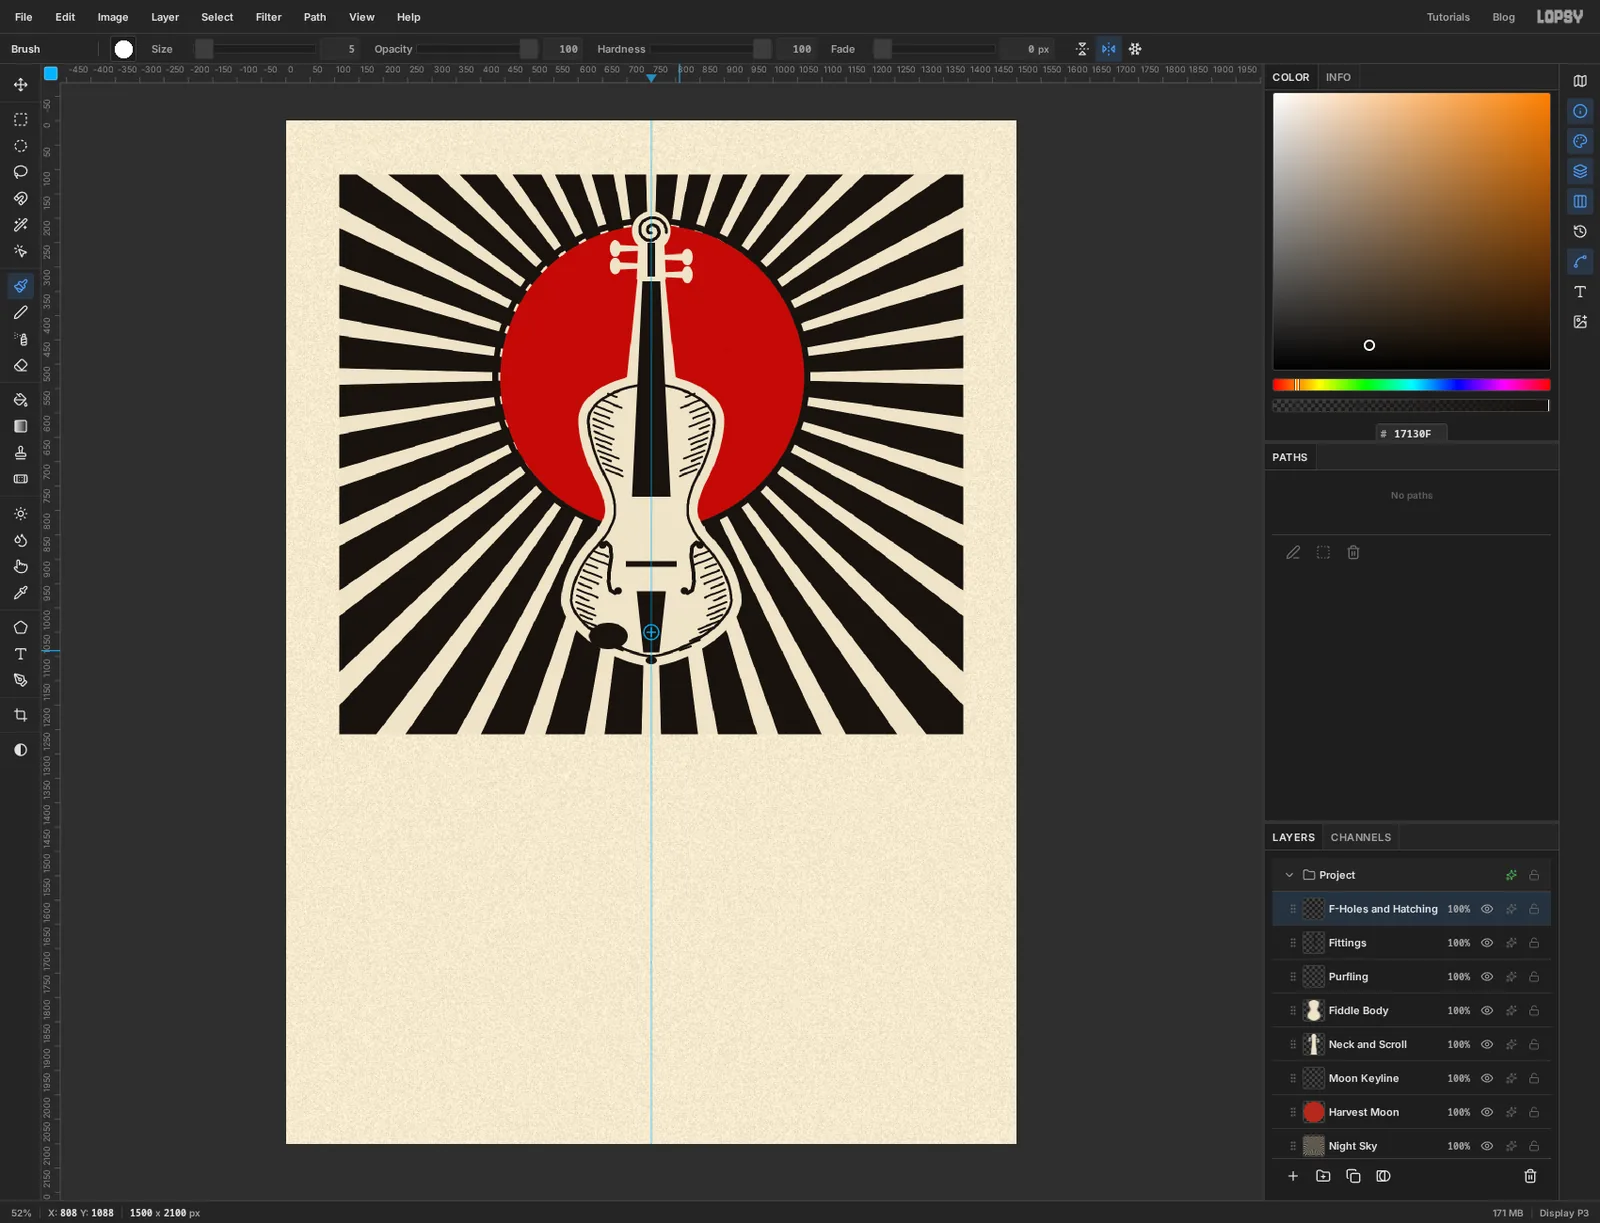
For the scroll, pick the Brush, set Size 7 and Hardness 100, and draw a spiral outwards from the centre of the circle in one stroke, about two turns.
-
Paint both f-holes at once
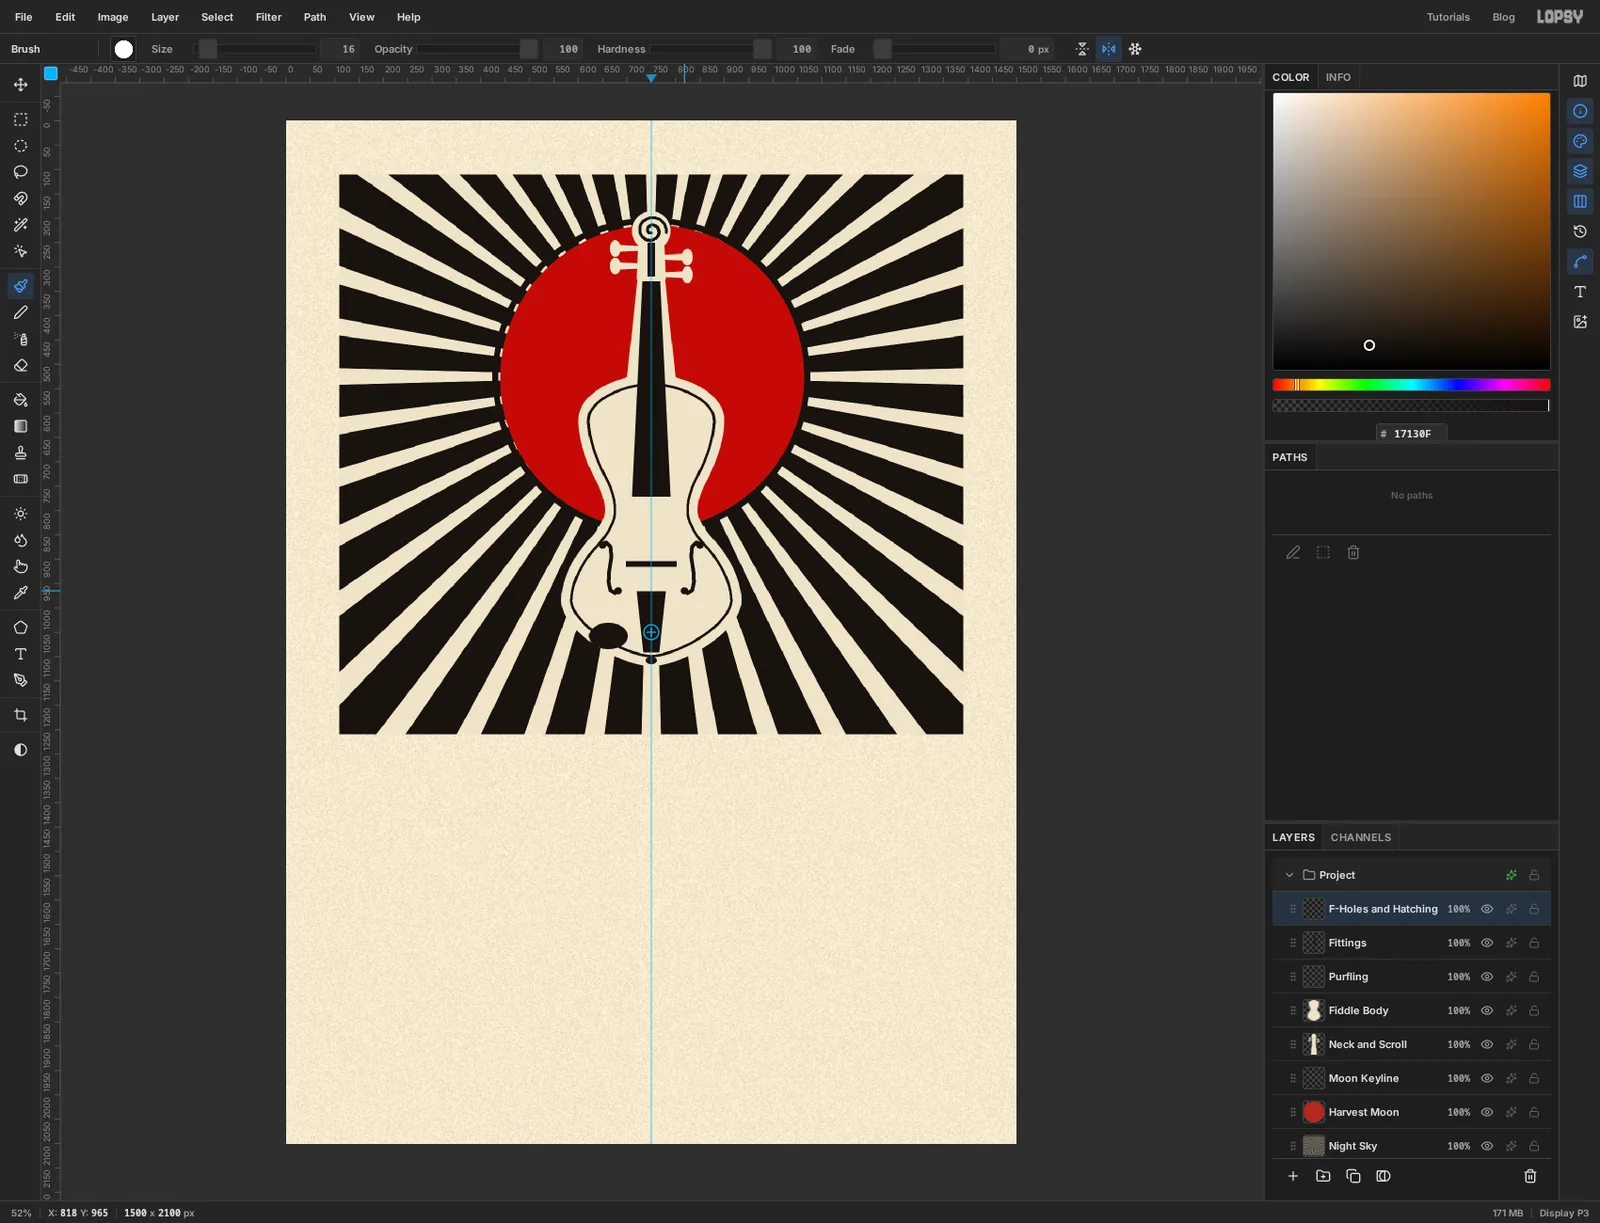
Add a layer called F-Holes and Hatching. With the Brush still selected, set Size 9 and click Symmetry Vertical in the options bar. A ringed crosshair appears at the canvas centre. Whatever you paint on one side of it is mirrored on the other.
On the right-hand side of the body, level with the bridge, draw a slim S about 100 px tall, starting with a small hook at the top right (around 852, 872) and finishing with a hook at the bottom left (around 816, 964). The left f-hole draws itself as you go. Set Size 16 and click once on each end of the S to give it the round notches of a real f-hole.
-
Hatch the shading
Leave symmetry on and set Size 5. Shade the body the way a carver would, with rows of short cuts. Work down the inside of the right-hand edge of the upper bout, then the lower bout. Each mark starts about 12 px inside the purfling line and runs 20 to 40 px towards the middle, tilted slightly downhill. Space them about 13 px apart and vary the lengths. Leave the waist clear.
When you're done, click Symmetry Vertical again to turn it off.
-
String it
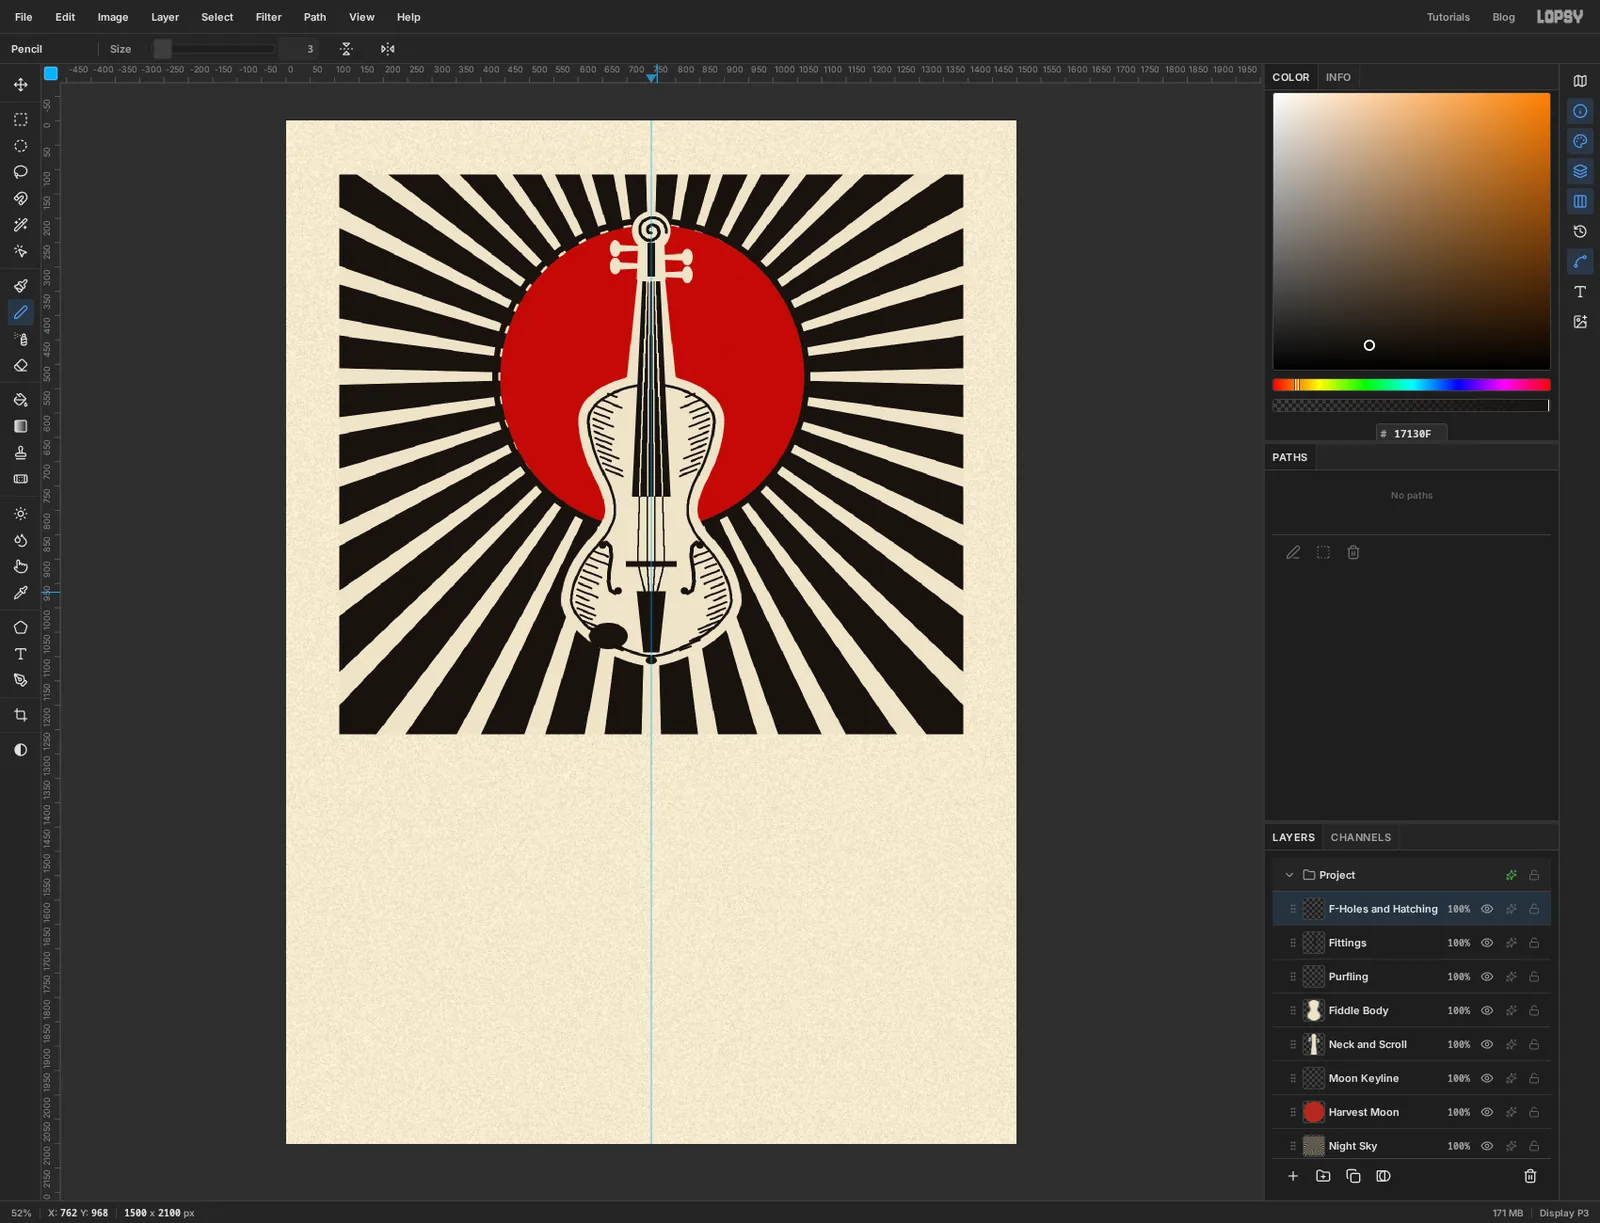
Stay on F-Holes and Hatching. Pick the Pencil and set Size 3. After one click, a Shift-click draws a straight line from the last point.
Each string is cream where it crosses the black fingerboard and black where it crosses the cream body. For each of the four strings:
- Set the foreground to . Click at the top of the fingerboard, then Shift-click at its bottom edge.
- Set the foreground to . Click the same spot at the bottom of the fingerboard, Shift-click on the bridge, then Shift-click on the top of the tailpiece.
The strings start 6 px apart at the top (x 741 to x 759), fan out to about 19 px apart at the bridge (x 722 to x 778), and pinch back in to 8 px apart at the tailpiece.
-
Group the fiddle and scale it up
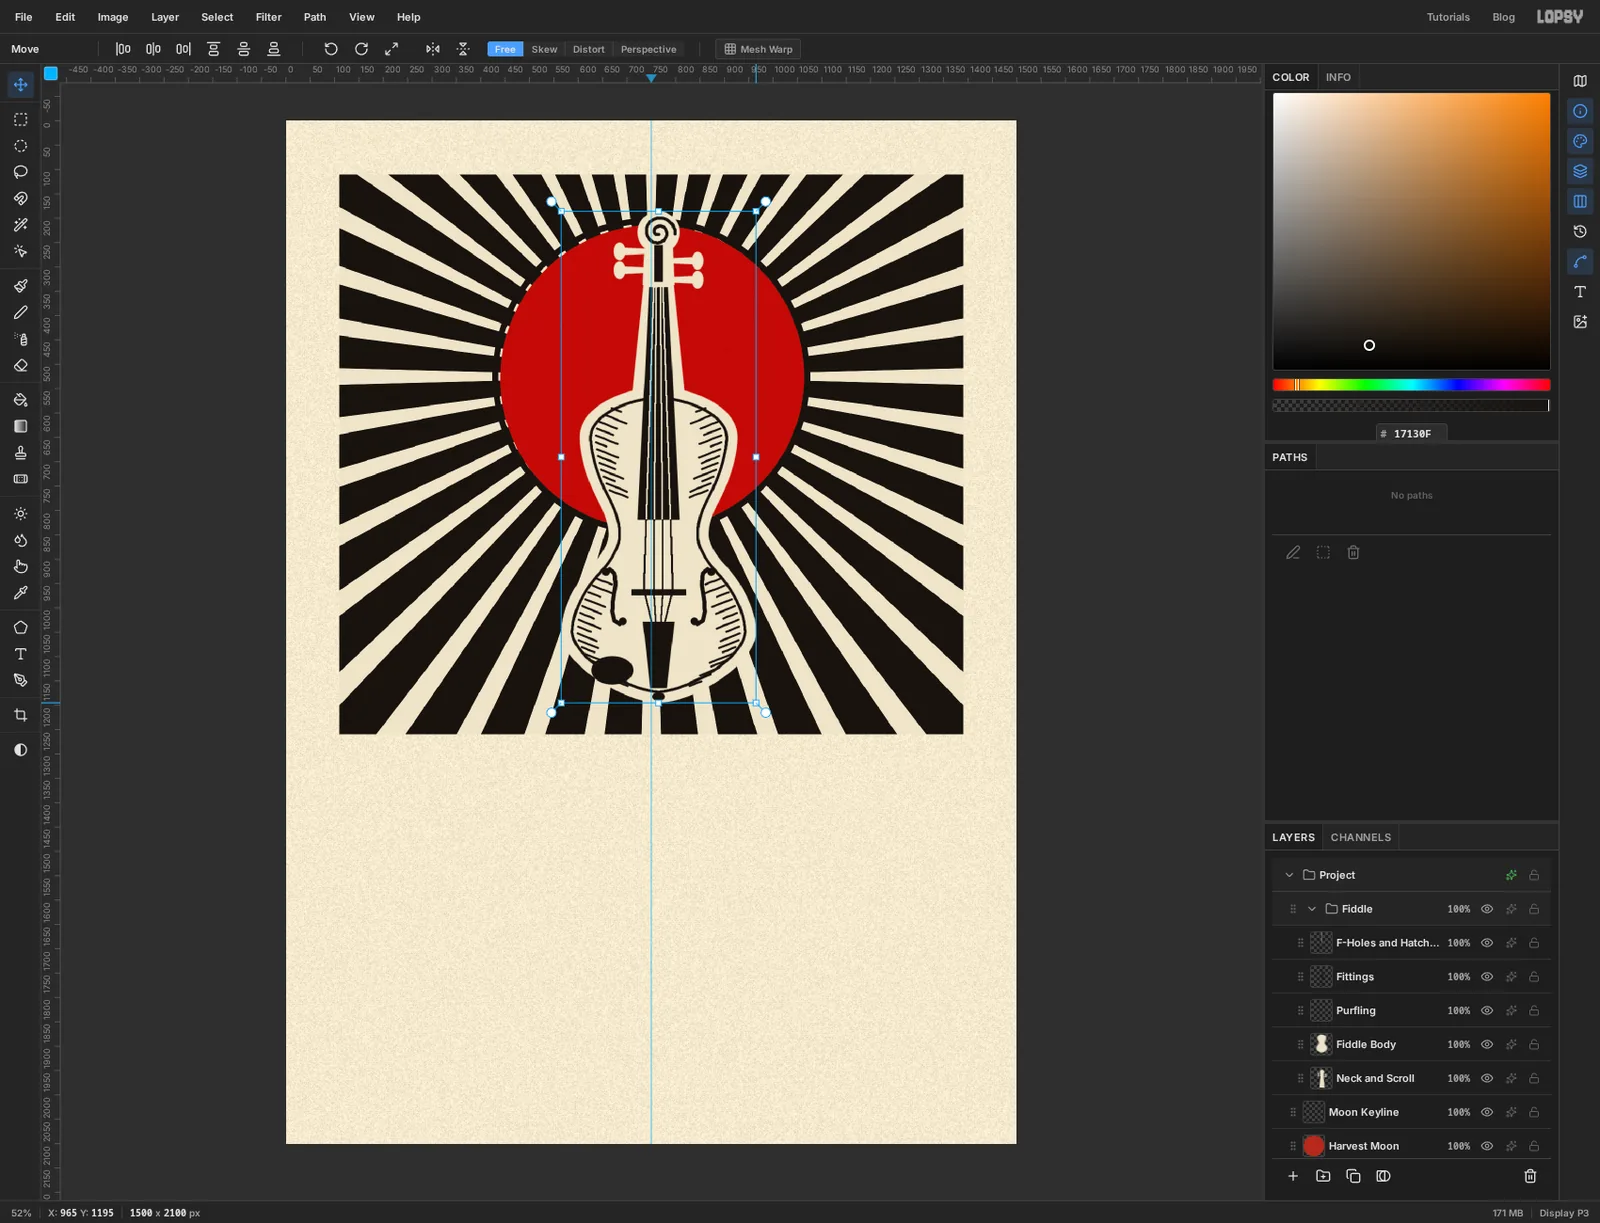
Click F-Holes and Hatching at the top of the stack, then Shift-click Neck and Scroll to select all five fiddle layers. Choose Layer → Group Layers, double-click the new group's name and call it Fiddle.
With the group selected and nothing marquee-selected, pick the Move tool. The handles wrap the whole instrument. Hold Cmd to keep the proportions and drag the bottom-right handle outwards by about 30 px to make the fiddle roughly 8% bigger. Press Cmd+D to commit.
-
Lean it over
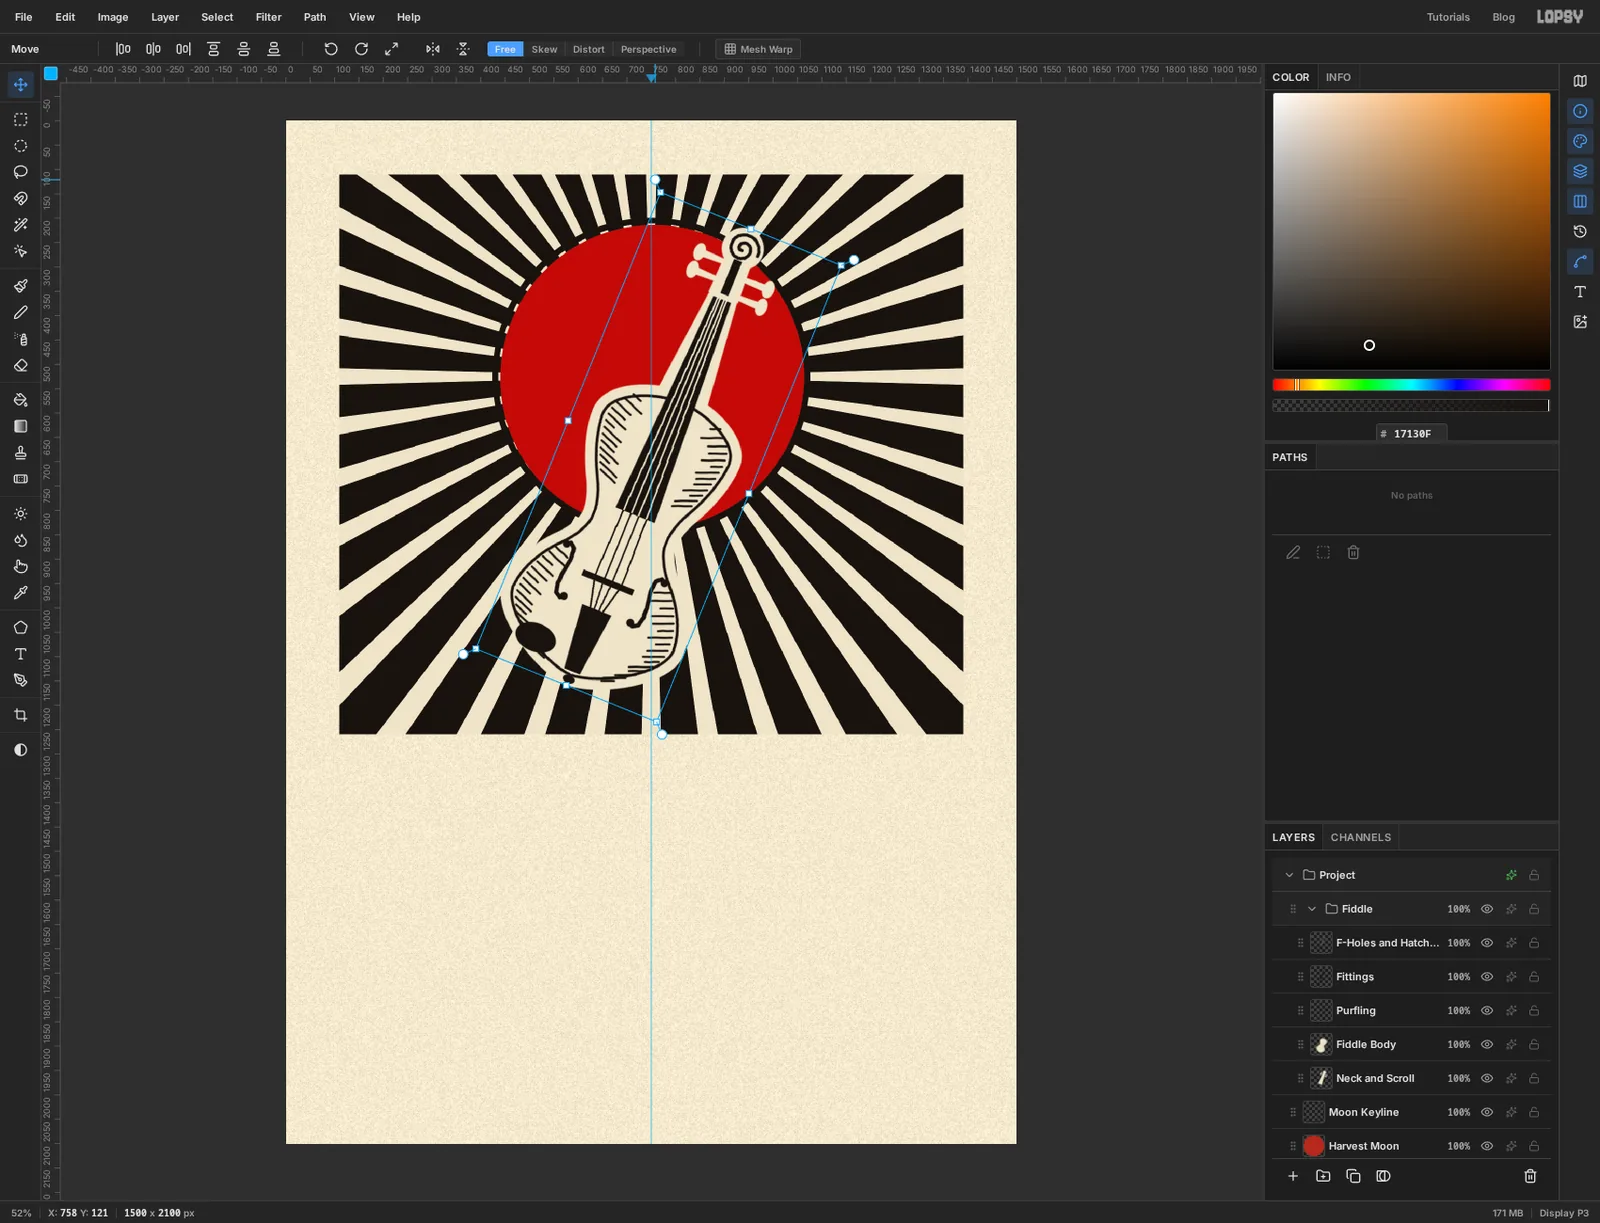
Click the Fiddle group again. Move the pointer just outside the top-left corner of the box, where the round rotate handle is, and drag clockwise until the fiddle leans about 22° to the right. All five layers turn together. Press Cmd+D to commit.
Then drag from the middle of the body to slide the whole group about 45 px right and 20 px down, so the body sits low in the block and the scroll crosses the edge of the moon.
-
Cut a black outline around it
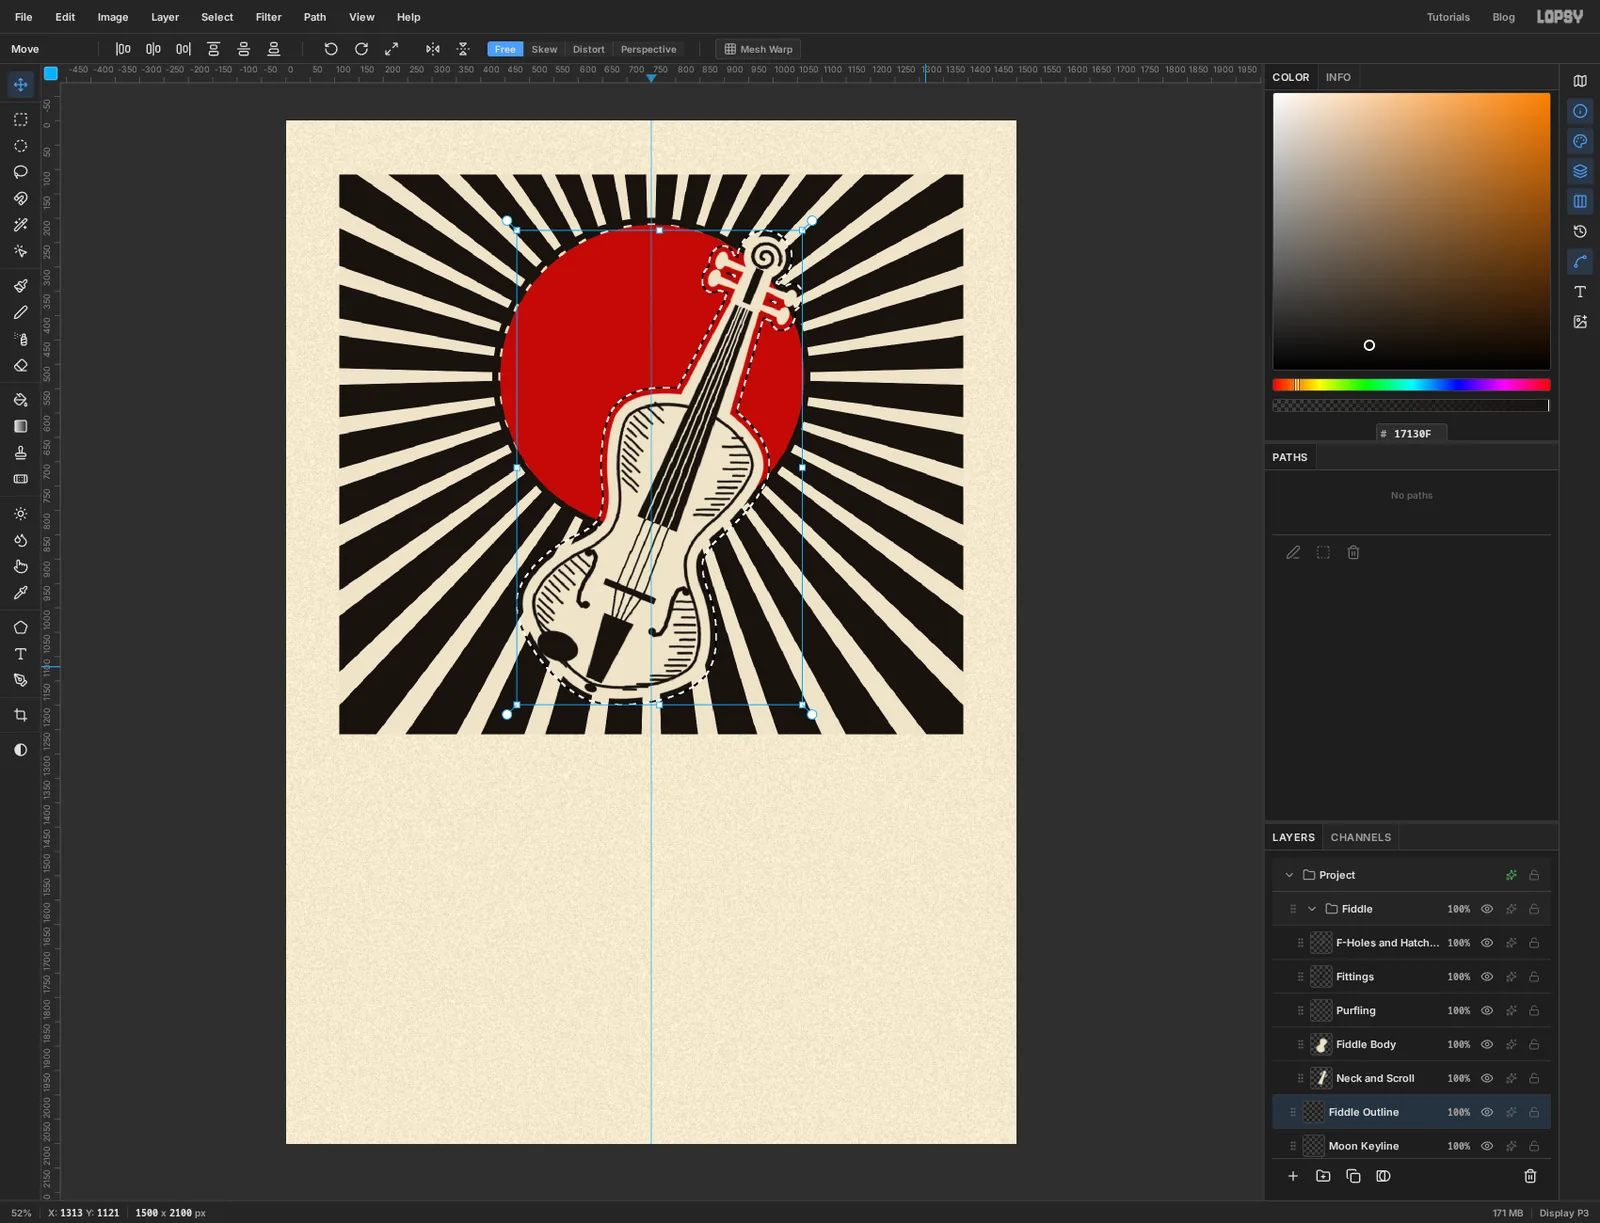
The cream fiddle disappears wherever it crosses a cream ray. On a woodcut, a line of black would be left standing around it. Groups don't take layer effects, so build the outline from a selection.
Click Moon Keyline and add a layer called Fiddle Outline. It sits under the group. Hold Cmd and click the Fiddle Body thumbnail, then hold Cmd+Shift and click the Neck and Scroll thumbnail to add it. Choose Select → Grow… at 12, fill with black and deselect.
-
Raise a hill with two selections
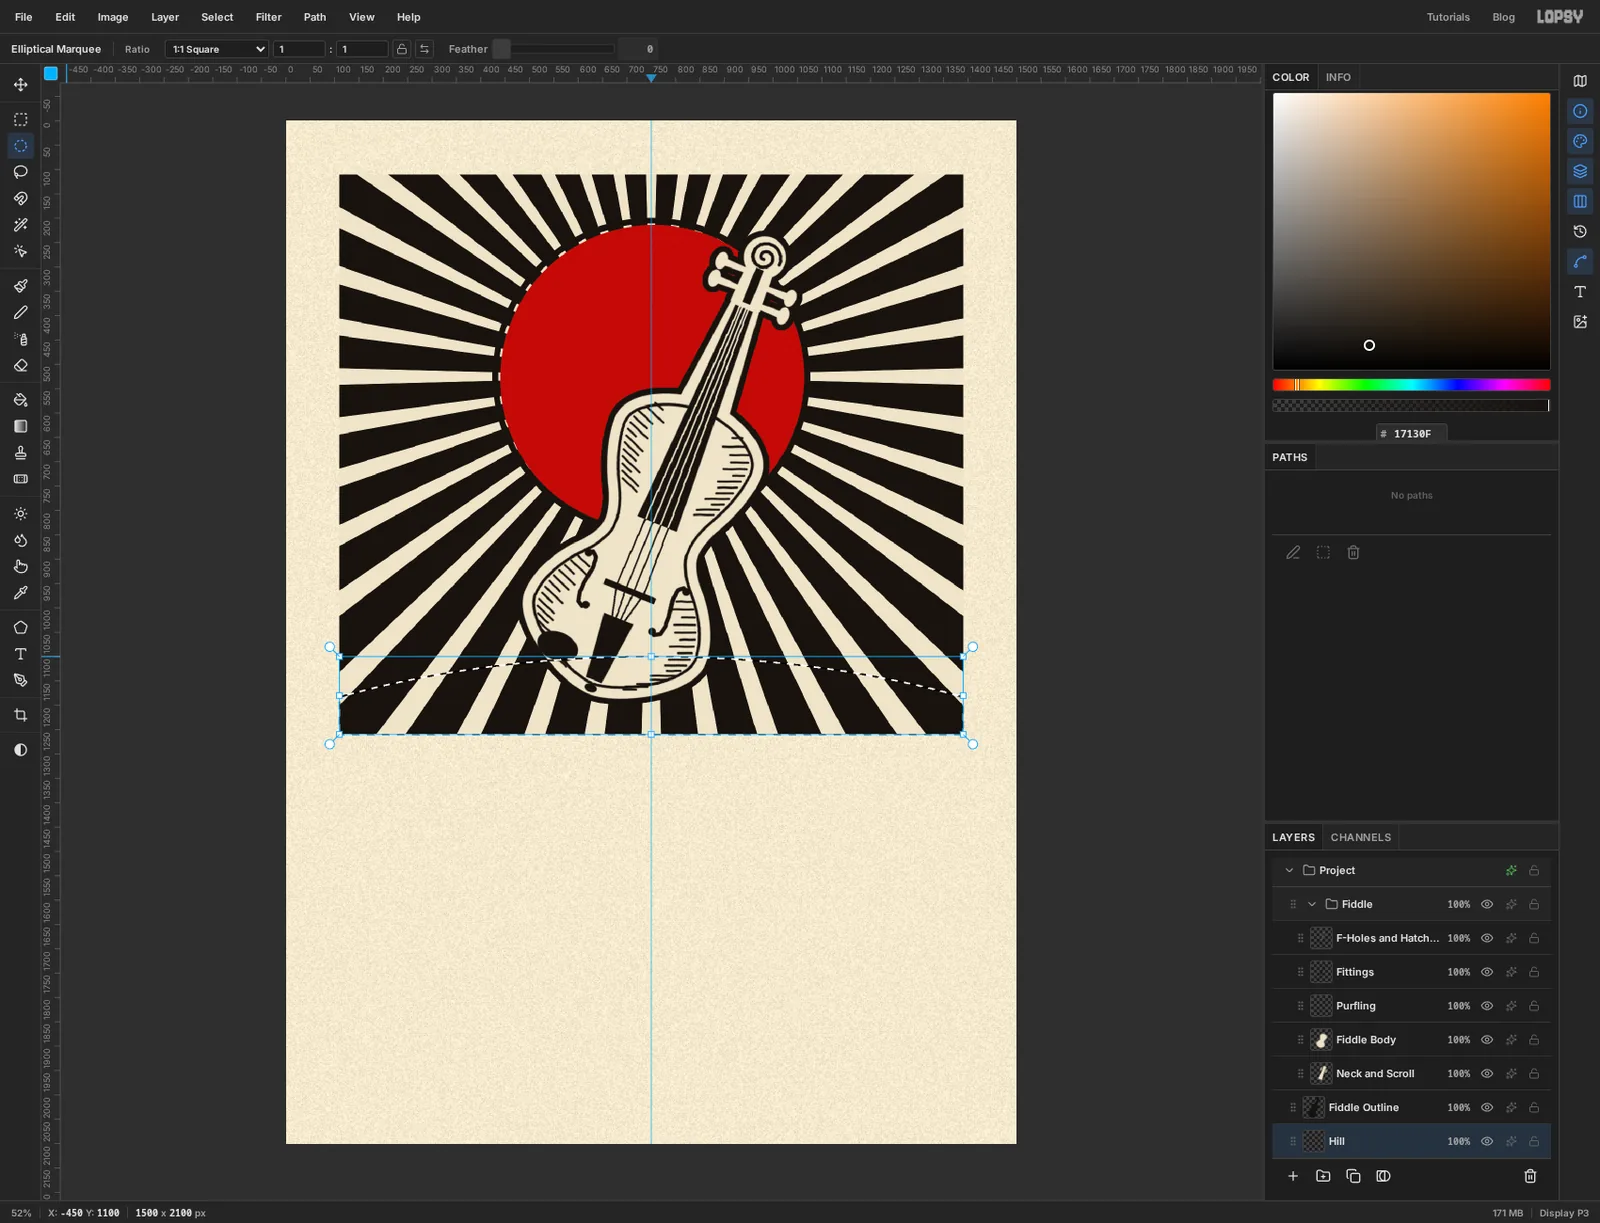
The fiddle needs ground to stand on. Click Moon Keyline and add a layer called Hill.
Hold Cmd and click the Night Sky thumbnail to select the block. Now switch to the Elliptical Marquee, hold Shift+Alt and drag a very large, flat ellipse whose top edge crosses the block about 160 px above its bottom edge. Start the drag in the grey area below and to the right of the canvas and finish above and to the left. Mine runs from 1950, 2180 to -450, 1100. It's fine for most of it to hang off the edges. Holding both keys keeps only the part where the two selections overlap, which is a low mound with square bottom corners.
Fill it with black and deselect.
-
Plough the furrows
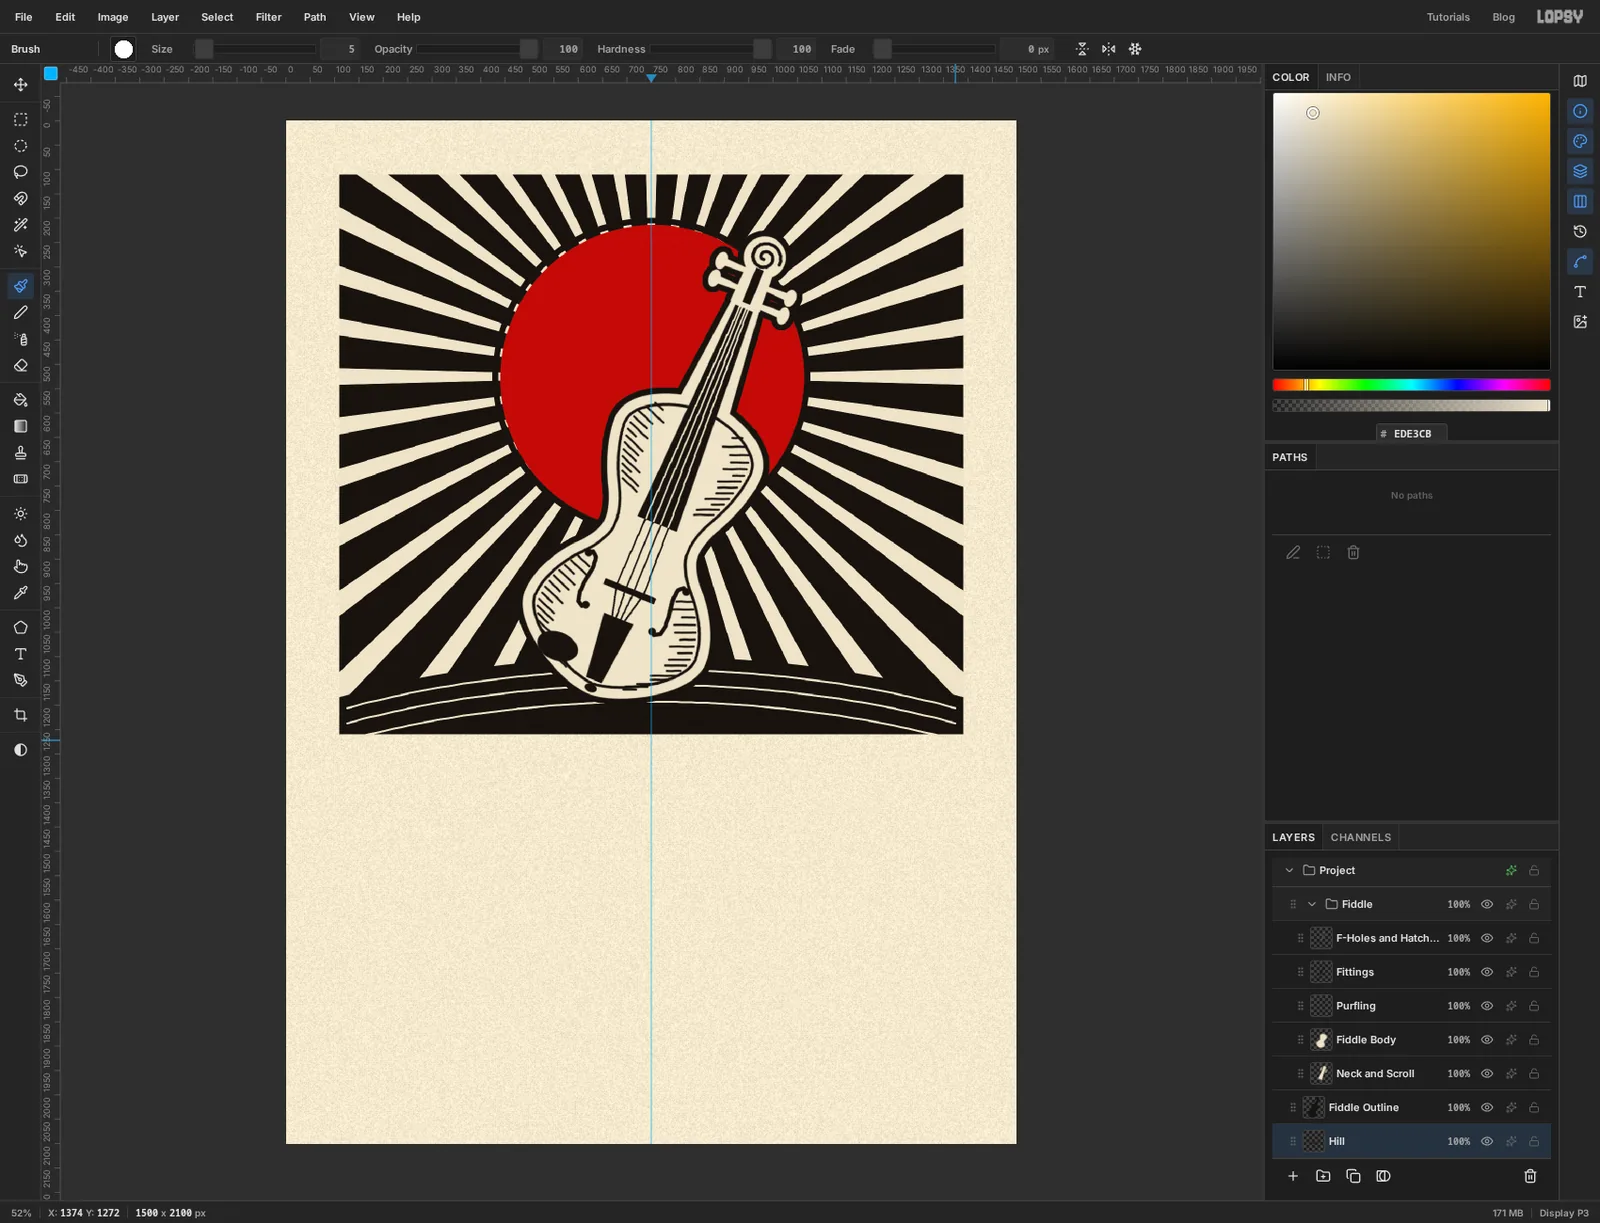
Pick the Brush, set the foreground to , Size 5 and Hardness 100. Draw three long lines across the hill from one side of the block to the other, each one following the curve of the hilltop and a little lower than the last. Slightly wobbly lines look better here than perfect ones.
-
Build the barn
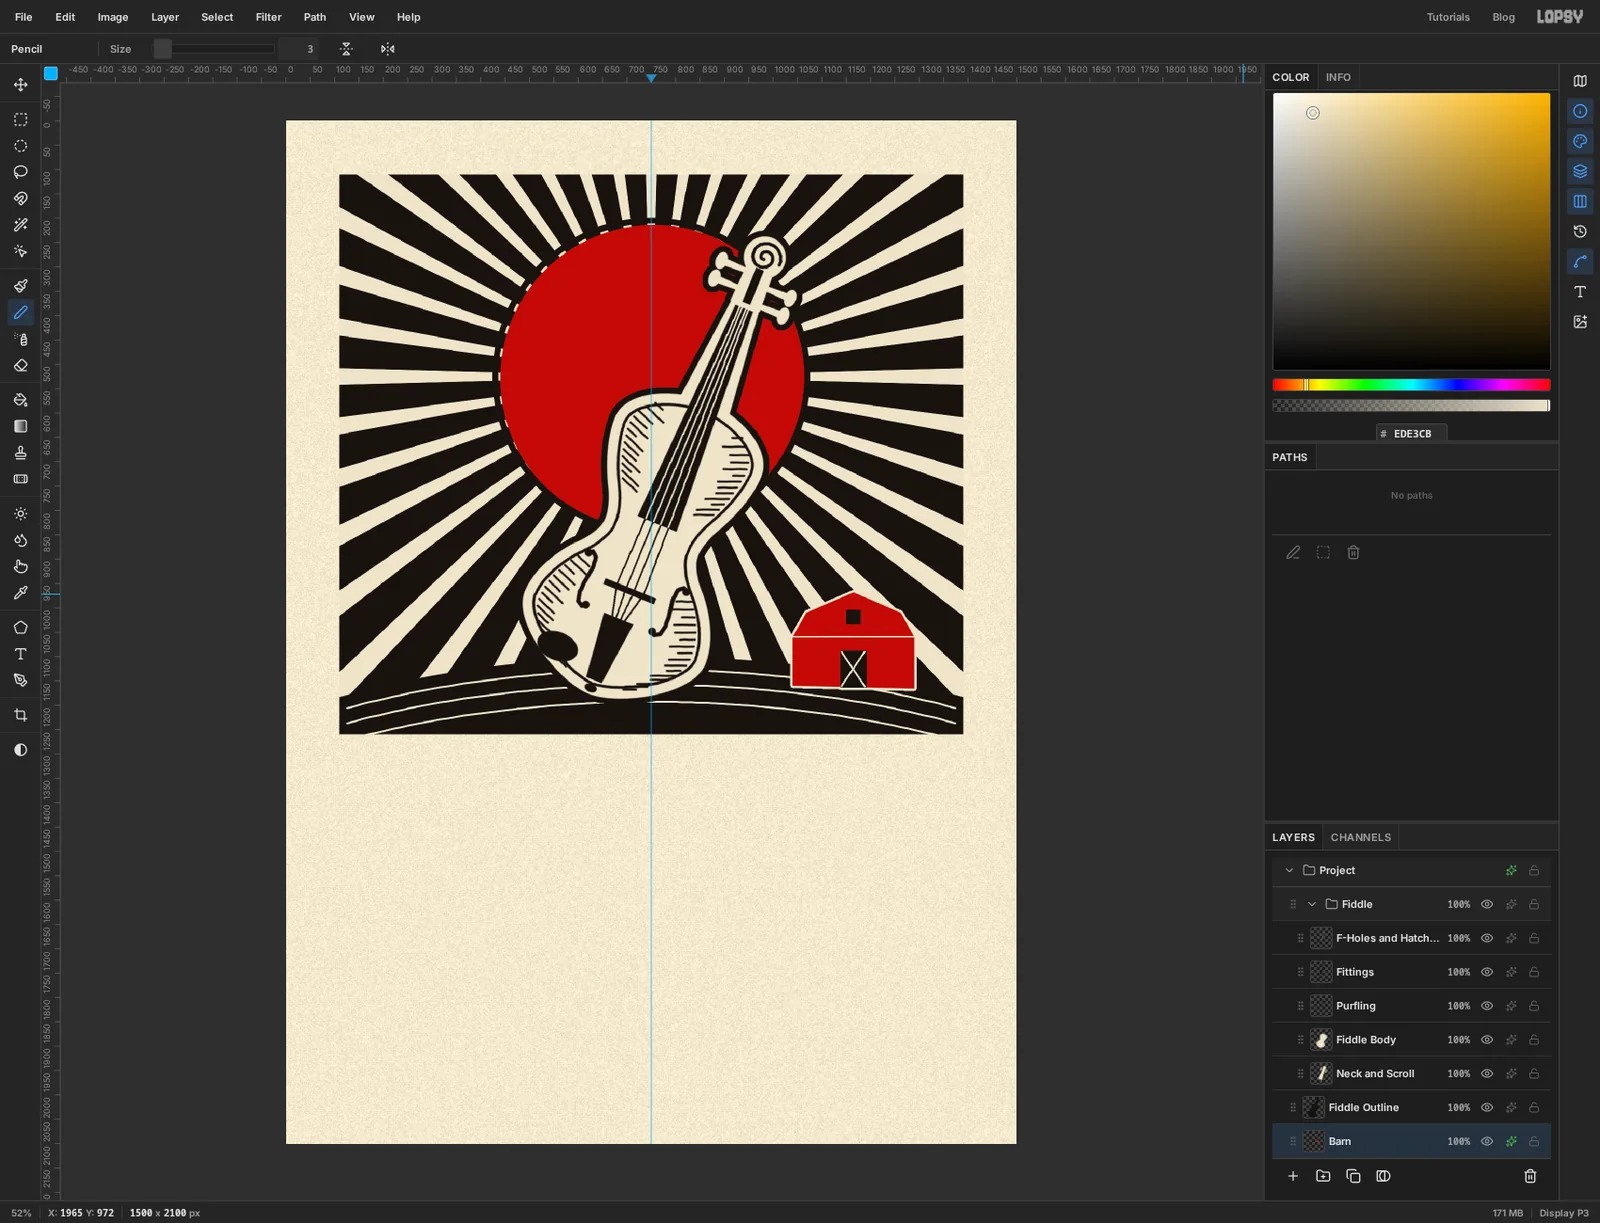
Add a layer called Barn above Hill. A gambrel roof has two slopes on each side, so the barn's outline has seven corners. With the Lasso, drag from corner to corner: up the left wall from 1040, 1160 to the eaves at 1040, 1060, in to 1068, 1010, up to the ridge at 1165, 968, down to 1262, 1010 and 1290, 1060, down the right wall to 1290, 1166, and back along the base. The base is sunk slightly into the hill. Fill it with and deselect.
With the Rectangular Marquee, fill a black door about 54 × 76 px in the middle of the wall, reaching the base, and a 30 px black square for the hayloft under the ridge. With the Pencil at Size 3 and the cream foreground, click and Shift-click to draw an X across the door and a line across the wall at eaves height.
Click the sparkle button on the Barn row to open its effects, tick Stroke, and set Width 5 with the stroke colour . The cream line separates the red from the black hill and the rays.
-
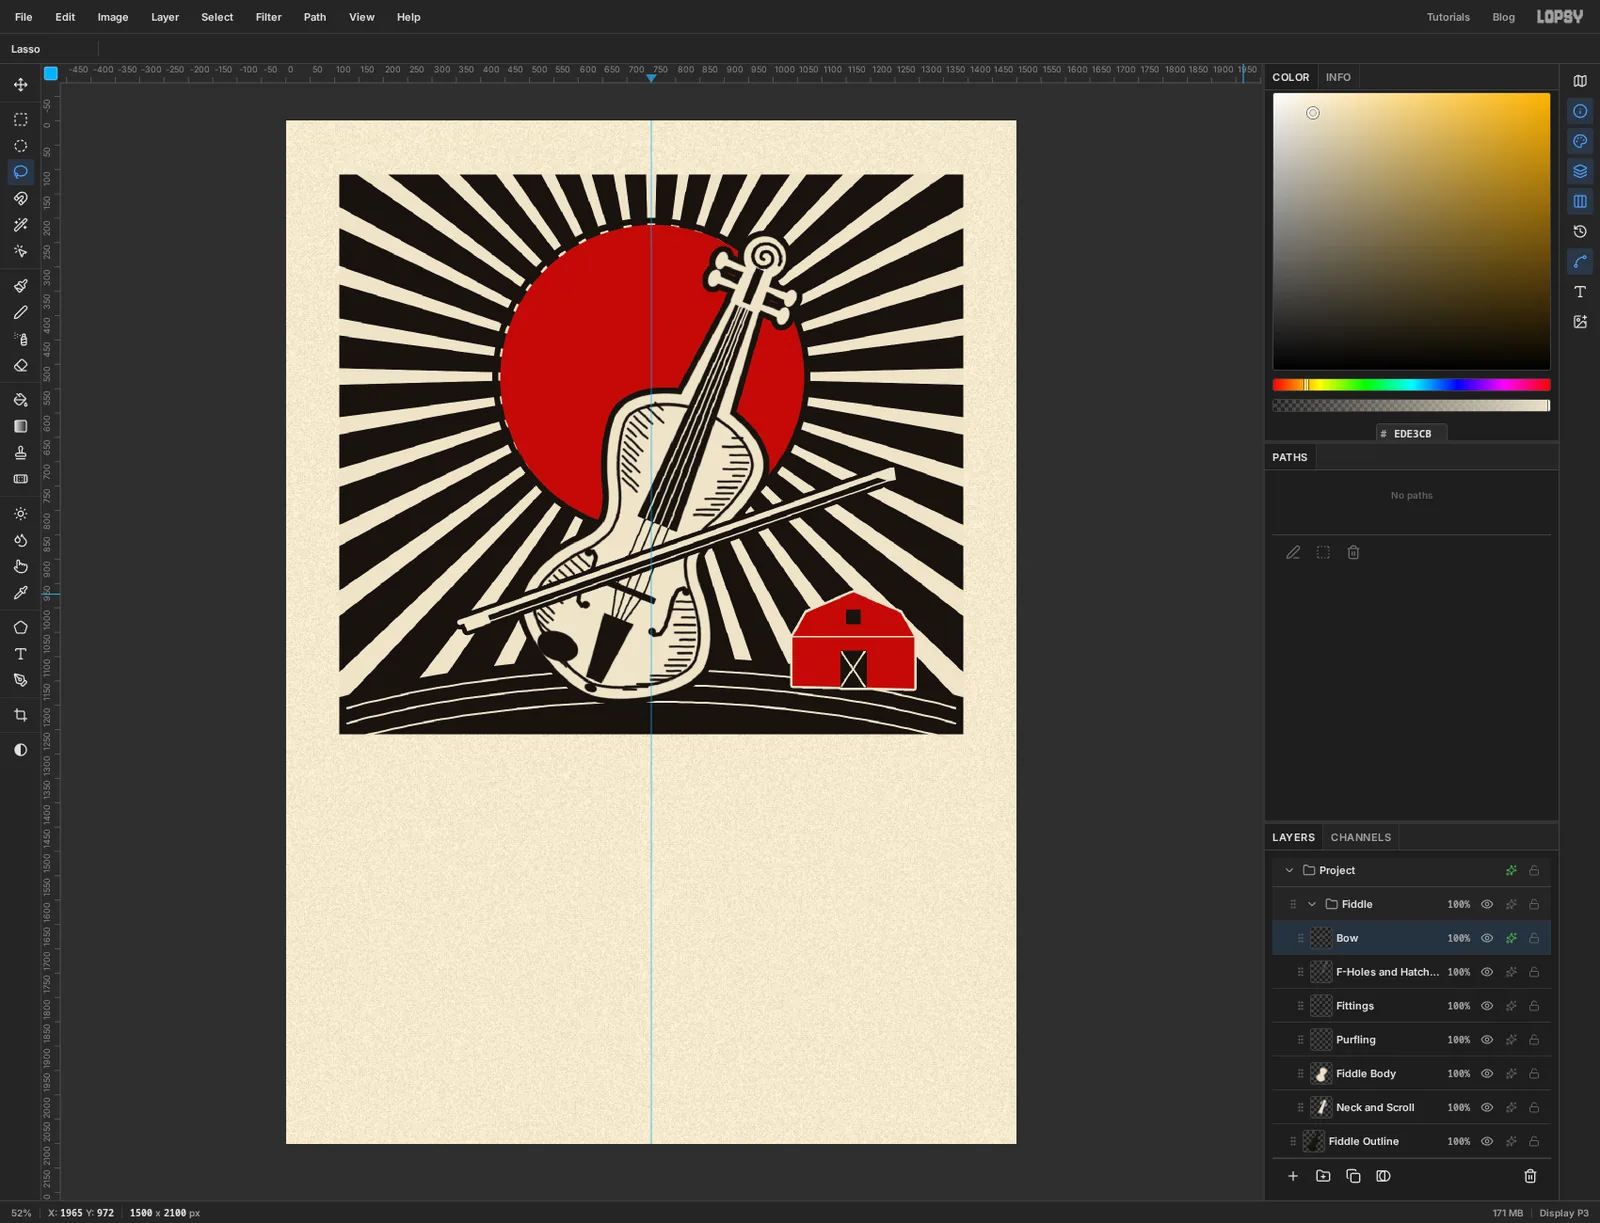
Lay the bow across the strings
Click F-Holes and Hatching inside the Fiddle group and add a layer called Bow. It lands at the top of the group.
Pick the Brush with the cream foreground and Hardness 100:
- The stick: set Size 12. Click to the lower left of the fiddle, then Shift-click to the upper right, so the line crosses the strings between the end of the fingerboard and the bridge. Mine is about 940 px long and rises to the right.
- The hair: set Size 4 and draw a second line parallel to the first, about 18 px below it.
- The frog and tip: with the Lasso, fill a small block joining stick and hair at the lower-left end, and a small wedge joining them at the upper-right end.
Open the Bow layer's effects, tick Stroke, and set Width 9 in black .
-
Rule the double border
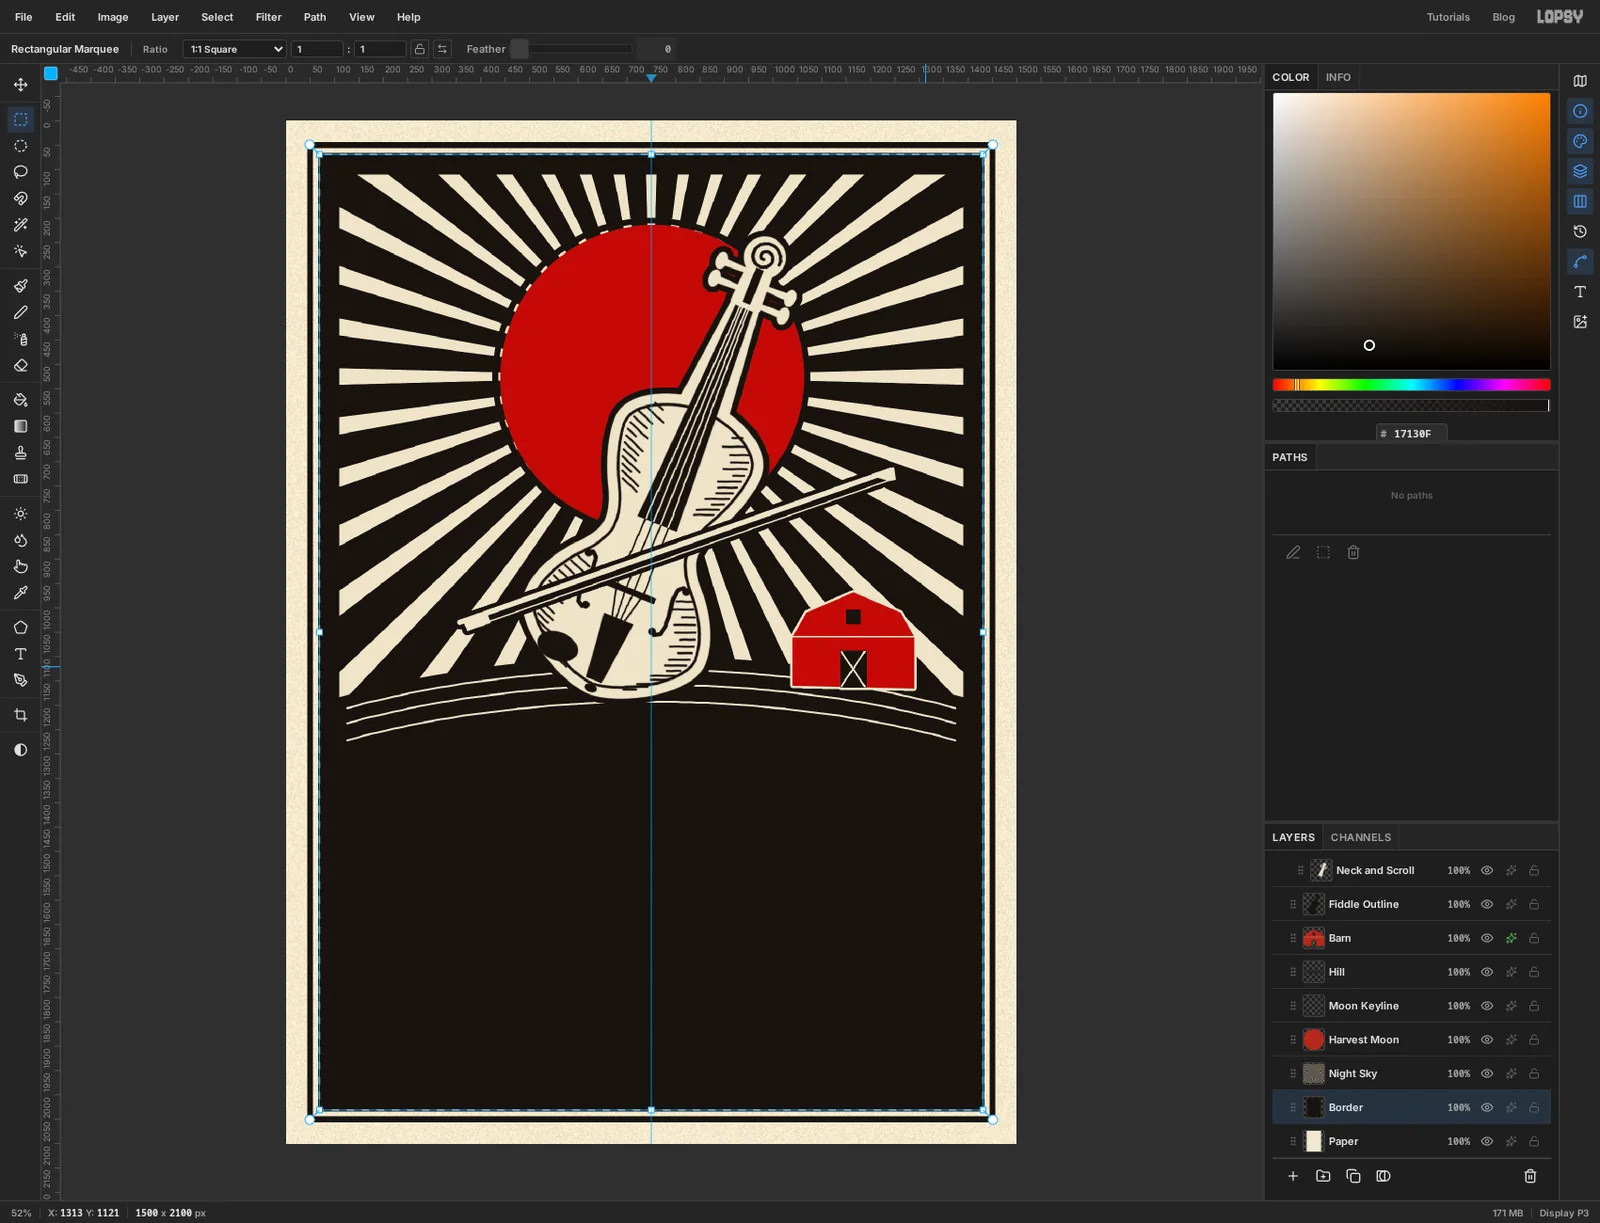
Click Paper and add a layer called Border. With the Rectangular Marquee, drag a box about 44 px in from every edge of the card and fill it with black. The paper around and below the picture goes black for a moment. Then:
- Select → Shrink… at 12, and press Delete. That leaves the thick outer line.
- Select → Shrink… at 10, and fill with black again. This is the moment in the screenshot.
- Select → Shrink… at 3, and press Delete. That leaves the thin inner line.
Deselect.
-
Hang the ribbon
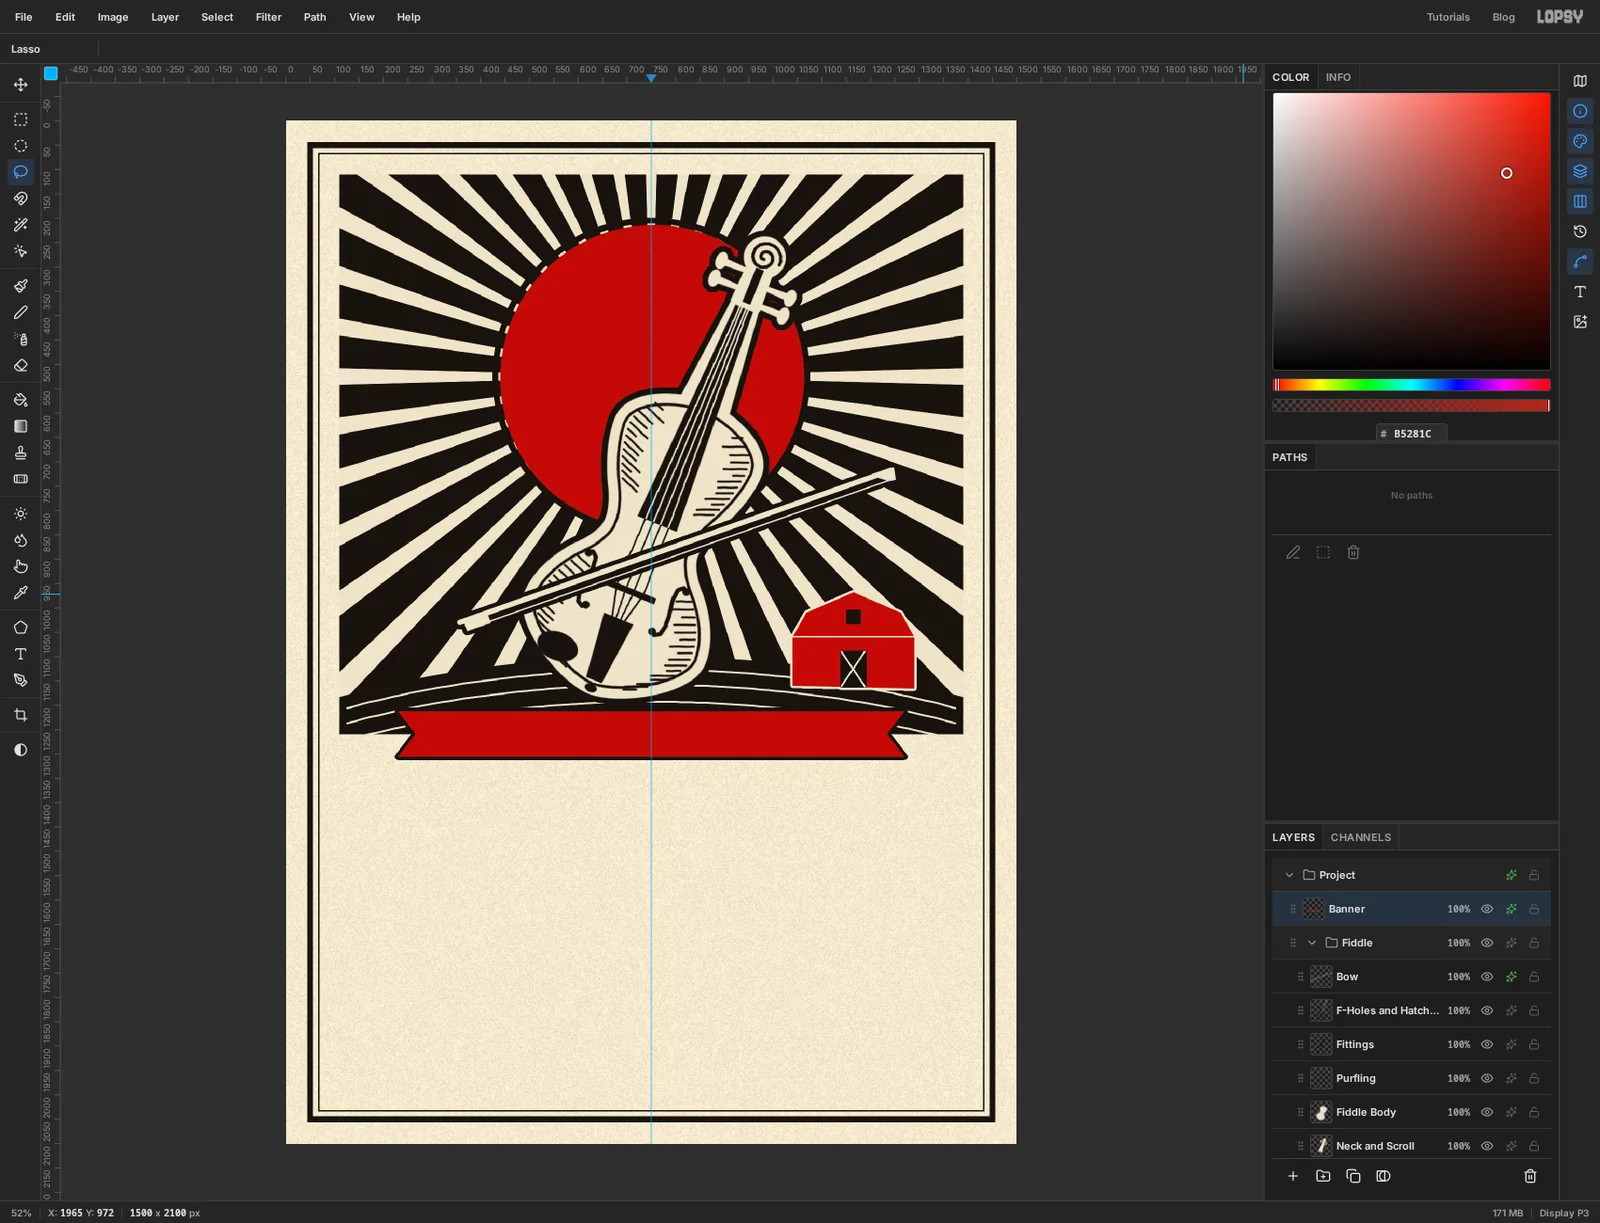
Click Fiddle Outline and add a layer called Banner. Starting there keeps the new layer outside the Fiddle group. Drag it by the grip at the left of its row to the very top of the Layers panel, above the Fiddle group.
With the Lasso, draw a wide ribbon that straddles the bottom edge of the black block: about 1040 px wide and 94 px tall, from y 1212 to y 1306, with a V notch cut into each end. Fill it with . Open its effects, tick Stroke and set Width 7 in black.
-
Set the banner line and the title
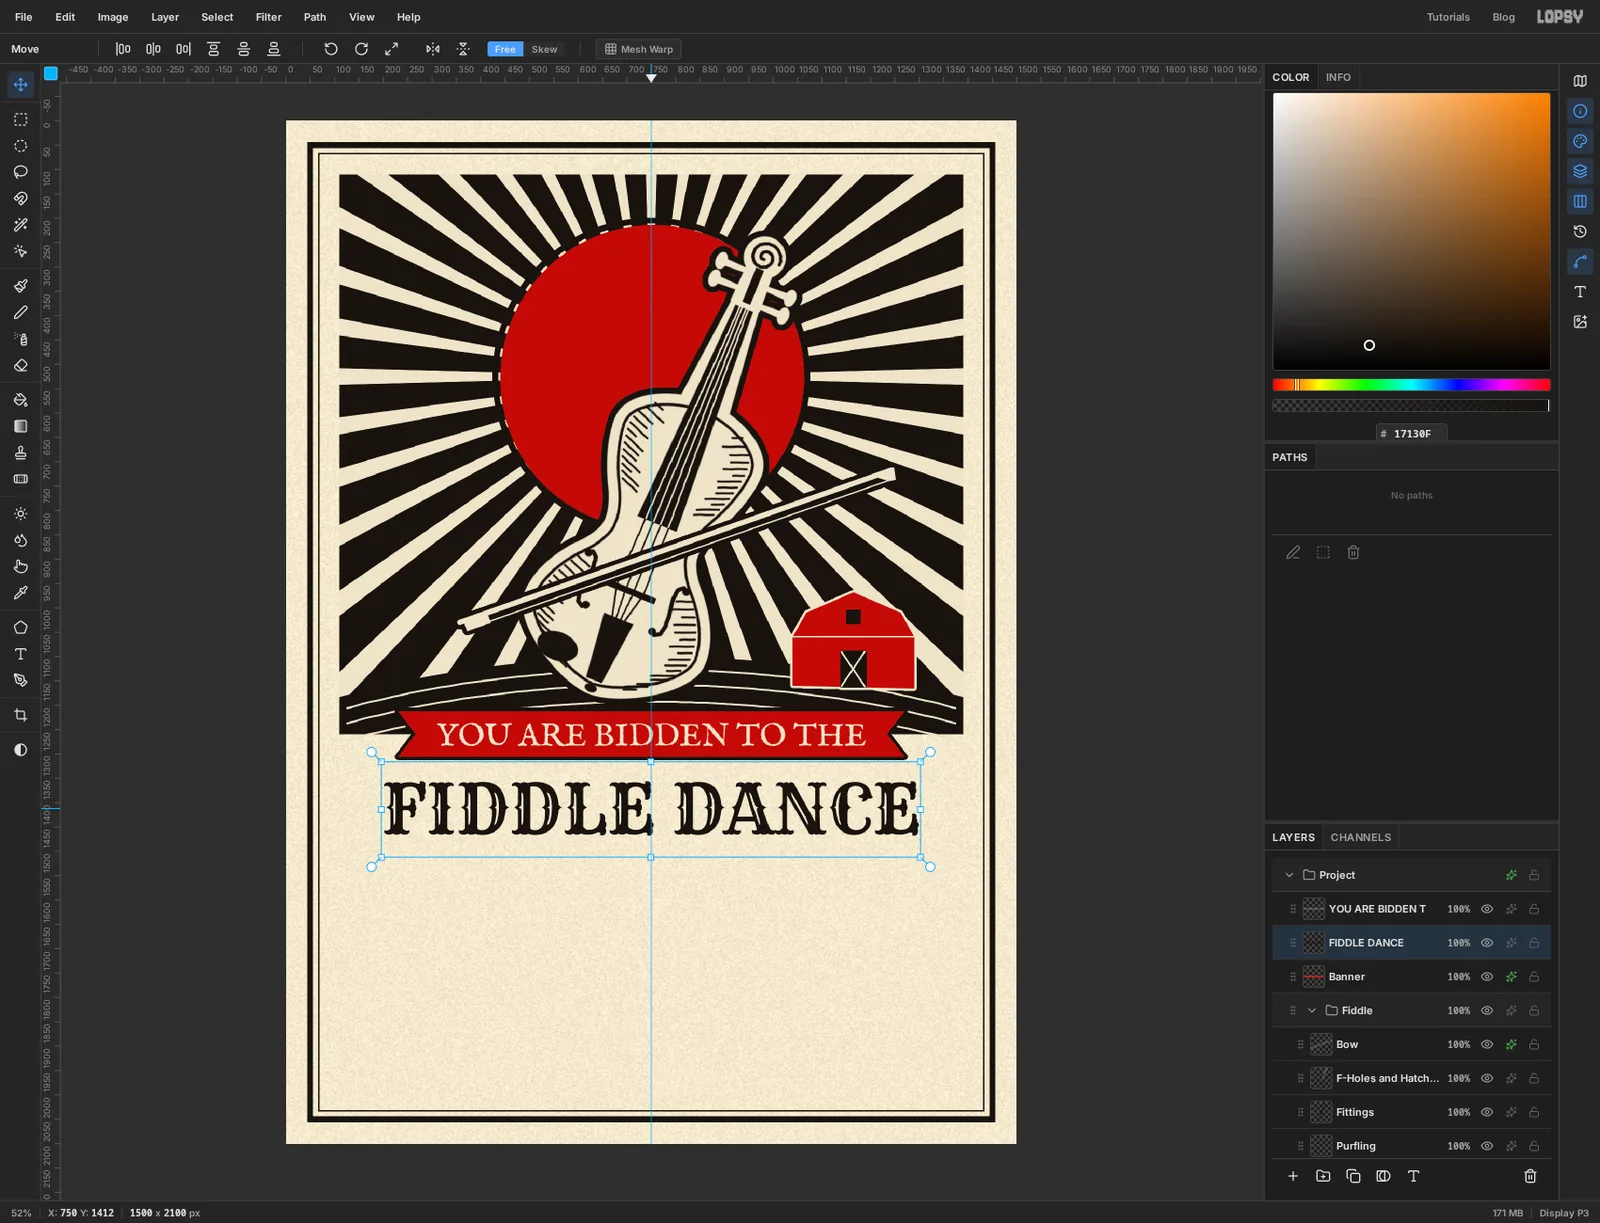
Pick the Text tool. For each line, first click the Banner layer in the Layers panel. If a text layer is still active, changing the font or size restyles that line instead of setting up the next one. Then choose the font, size and colour, click an empty part of the paper, type, and press Tab to commit. Then pick the Move tool, click Align center horizontally in the options bar, and nudge the line up or down with the arrow keys (Shift moves 10 px at a time).
- YOU ARE BIDDEN TO THE in IM Fell English SC, size 66, cream . Seat it in the middle of the ribbon. Check that the gap above the letters matches the gap below, and that the first and last letters stay well clear of the notches.
- FIDDLE DANCE in Rye, size 140, black . Put the tops of the letters about 50 px below the ribbon.
-
Add the details
Set the rest the same way, clicking Banner before each one and centring each line on the card. Because every line starts from Banner, each new text layer lands just above it, under the lines you've already set:
- A Harvest Barn Dance with Reels, Jigs & a Caller in IM Fell English, Italic, size 56, black
- SATURDAY 21 NOVEMBER in Rye, size 76, red
- Seven o'clock till the lanterns burn low in IM Fell English SC, size 50, black
- Dunmore's Barn · Fenwick Road in IM Fell English SC, size 64, black
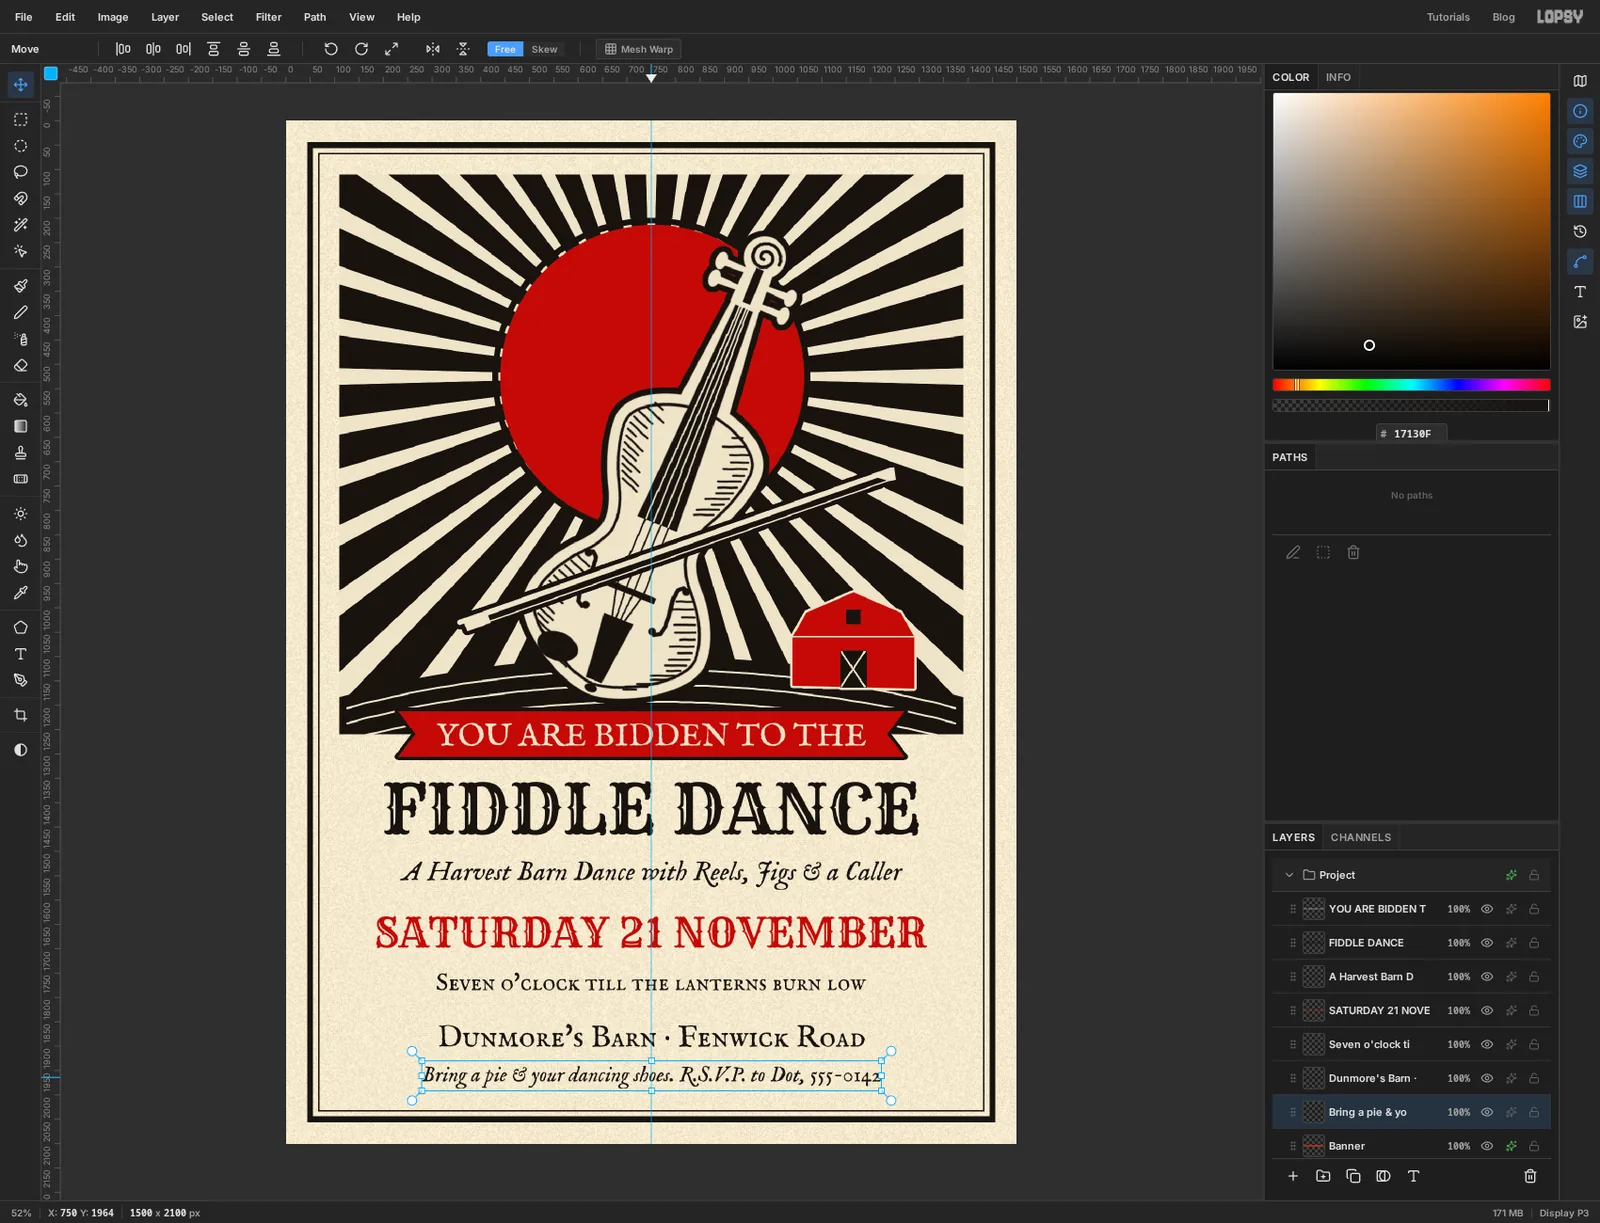
- Bring a pie & your dancing shoes. R.S.V.P. to Dot, 555-0142 in IM Fell English, Italic, size 44, black
Aim for gaps of about 50 px between the title, the subtitle, the date and the time. Leave a wider gap of about 70 px between the time and the venue for a rule. Keep the date narrower than the title so the title stays in charge. The last line has descenders (the p, g and y), so check it sits at least 35 px above the inner border line.
-
Print the title's red shadow
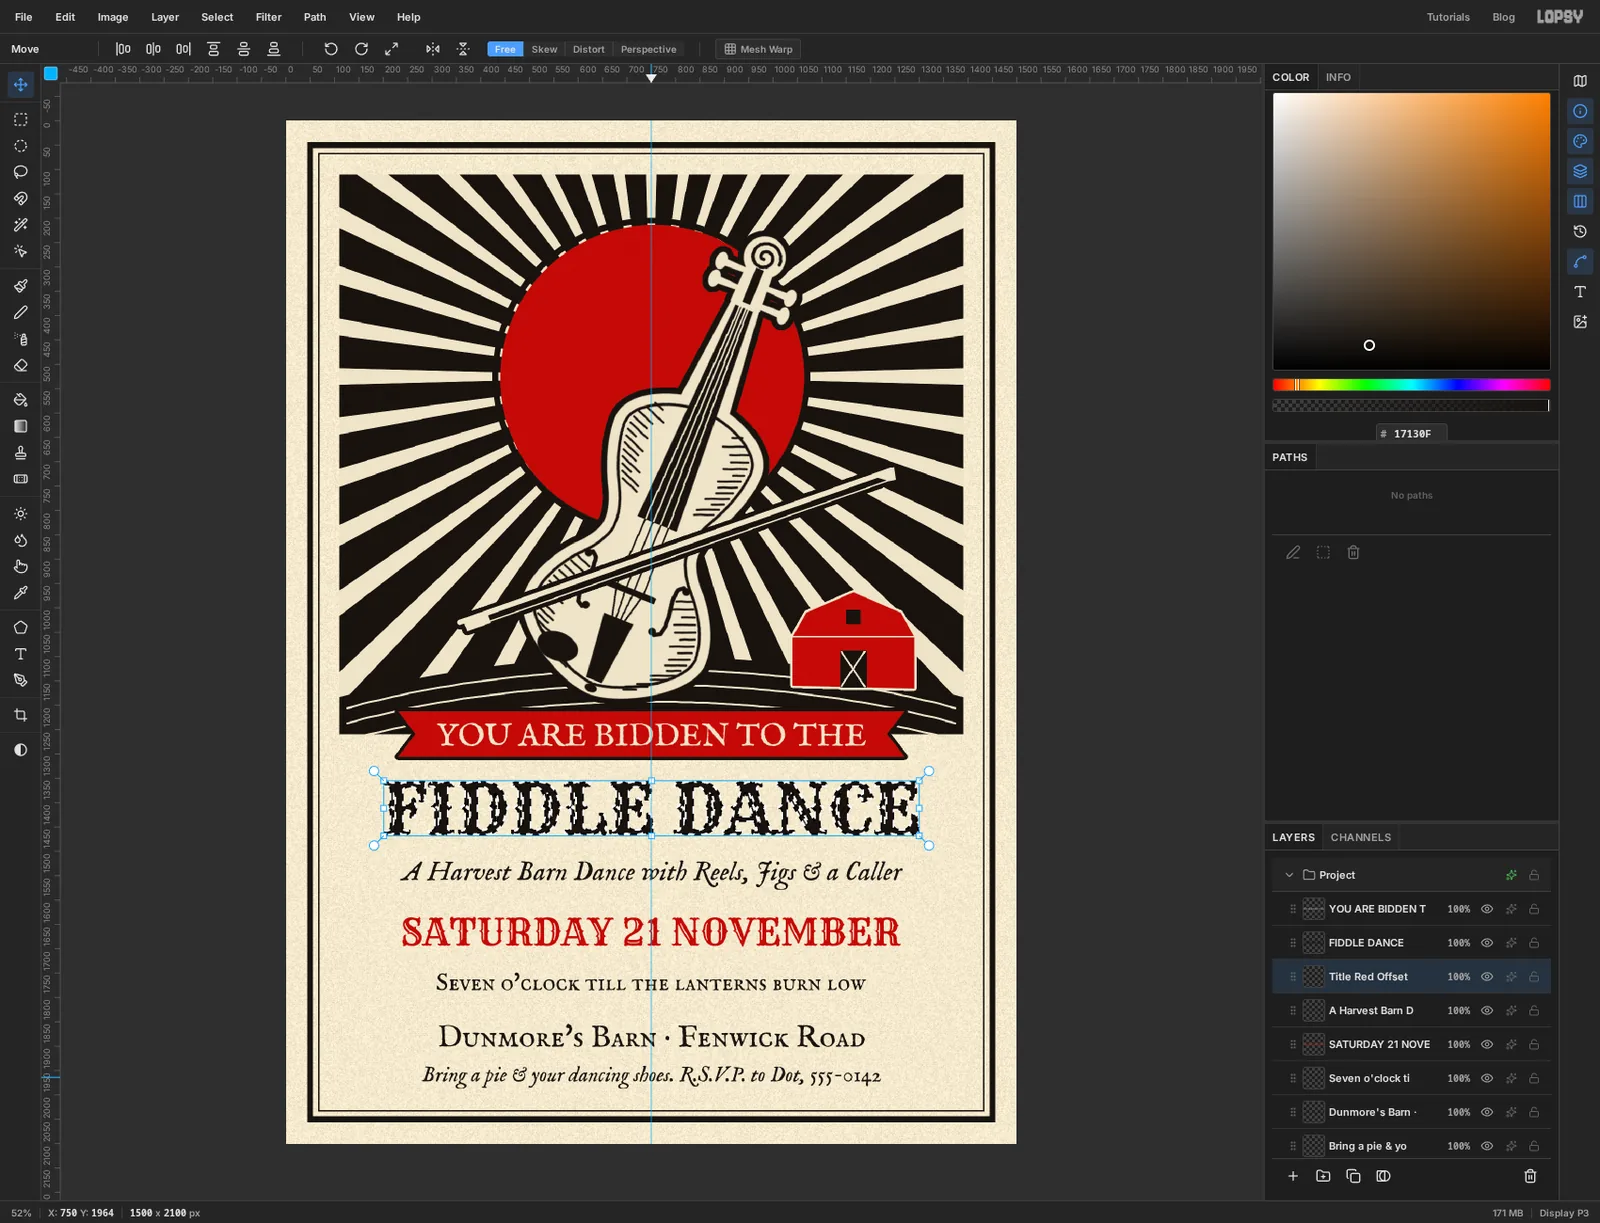
Give the title a second colour. Click the subtitle layer, the one directly below FIDDLE DANCE in the panel. Hold Cmd and click the FIDDLE DANCE thumbnail to select the letters themselves. Add a layer called Title Red Offset. It lands just under the title.
Fill the selection with and deselect. Nothing seems to change, because the red is hidden exactly behind the black.
-
Shift the red and draw the rule
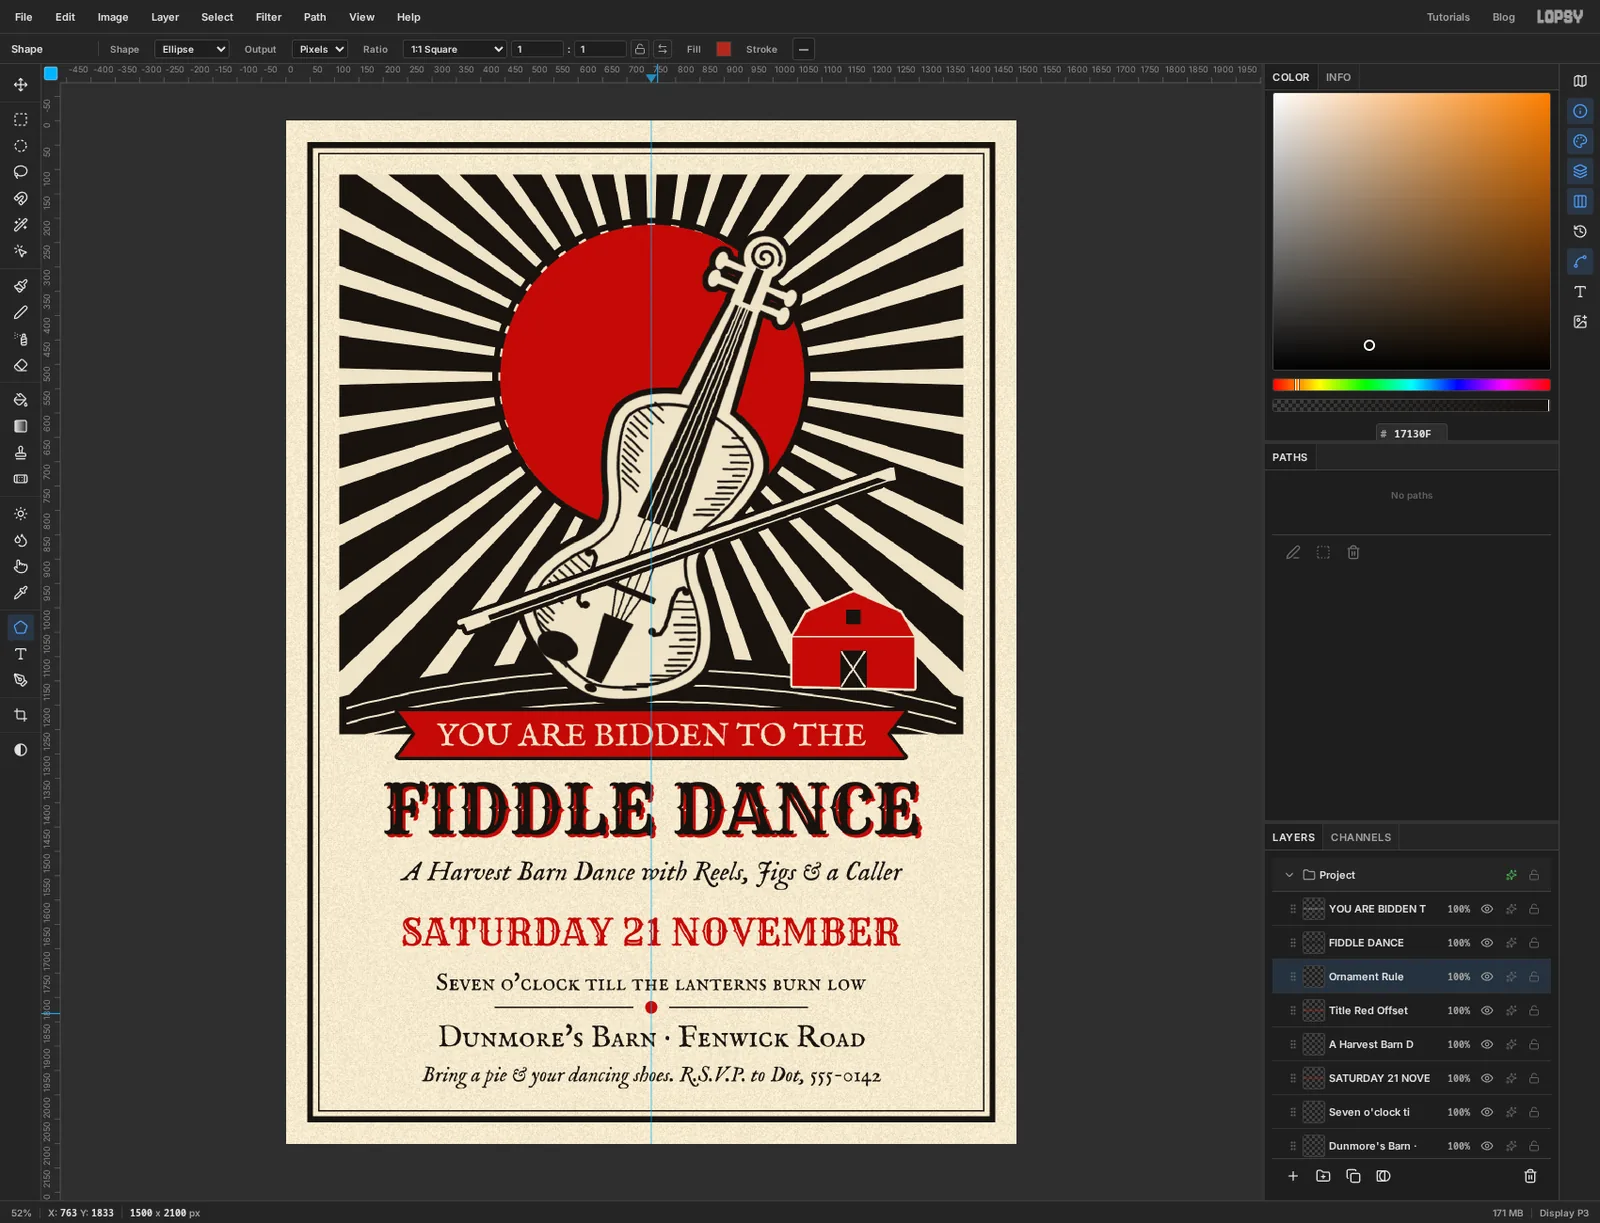
With the Move tool, tap → six times and ↓ six times. The red slides out from behind the letters like a second block printed off register.
Add a layer called Ornament Rule and stay on it for the rest of this step. With the Pencil at Size 3 in black, draw two short horizontal lines in the gap between the time and the venue: click and Shift-click from x 430 to x 712, then from x 788 to x 1070, both at y 1820.
Pick the Shape tool, set Shape to Ellipse, click the Fill swatch and set it to . Hold Cmd and drag a small dot from the centre guide, between the two lines. Shapes grow from their centre, so it lands exactly in the gap.
Last, group the lettering. Click the top text layer, Shift-click the bottom one, and choose Layer → Group Layers. Title Red Offset and Ornament Rule sit between them, so they go into the group too. Name it Type.
-
Scratch wood grain into a mask
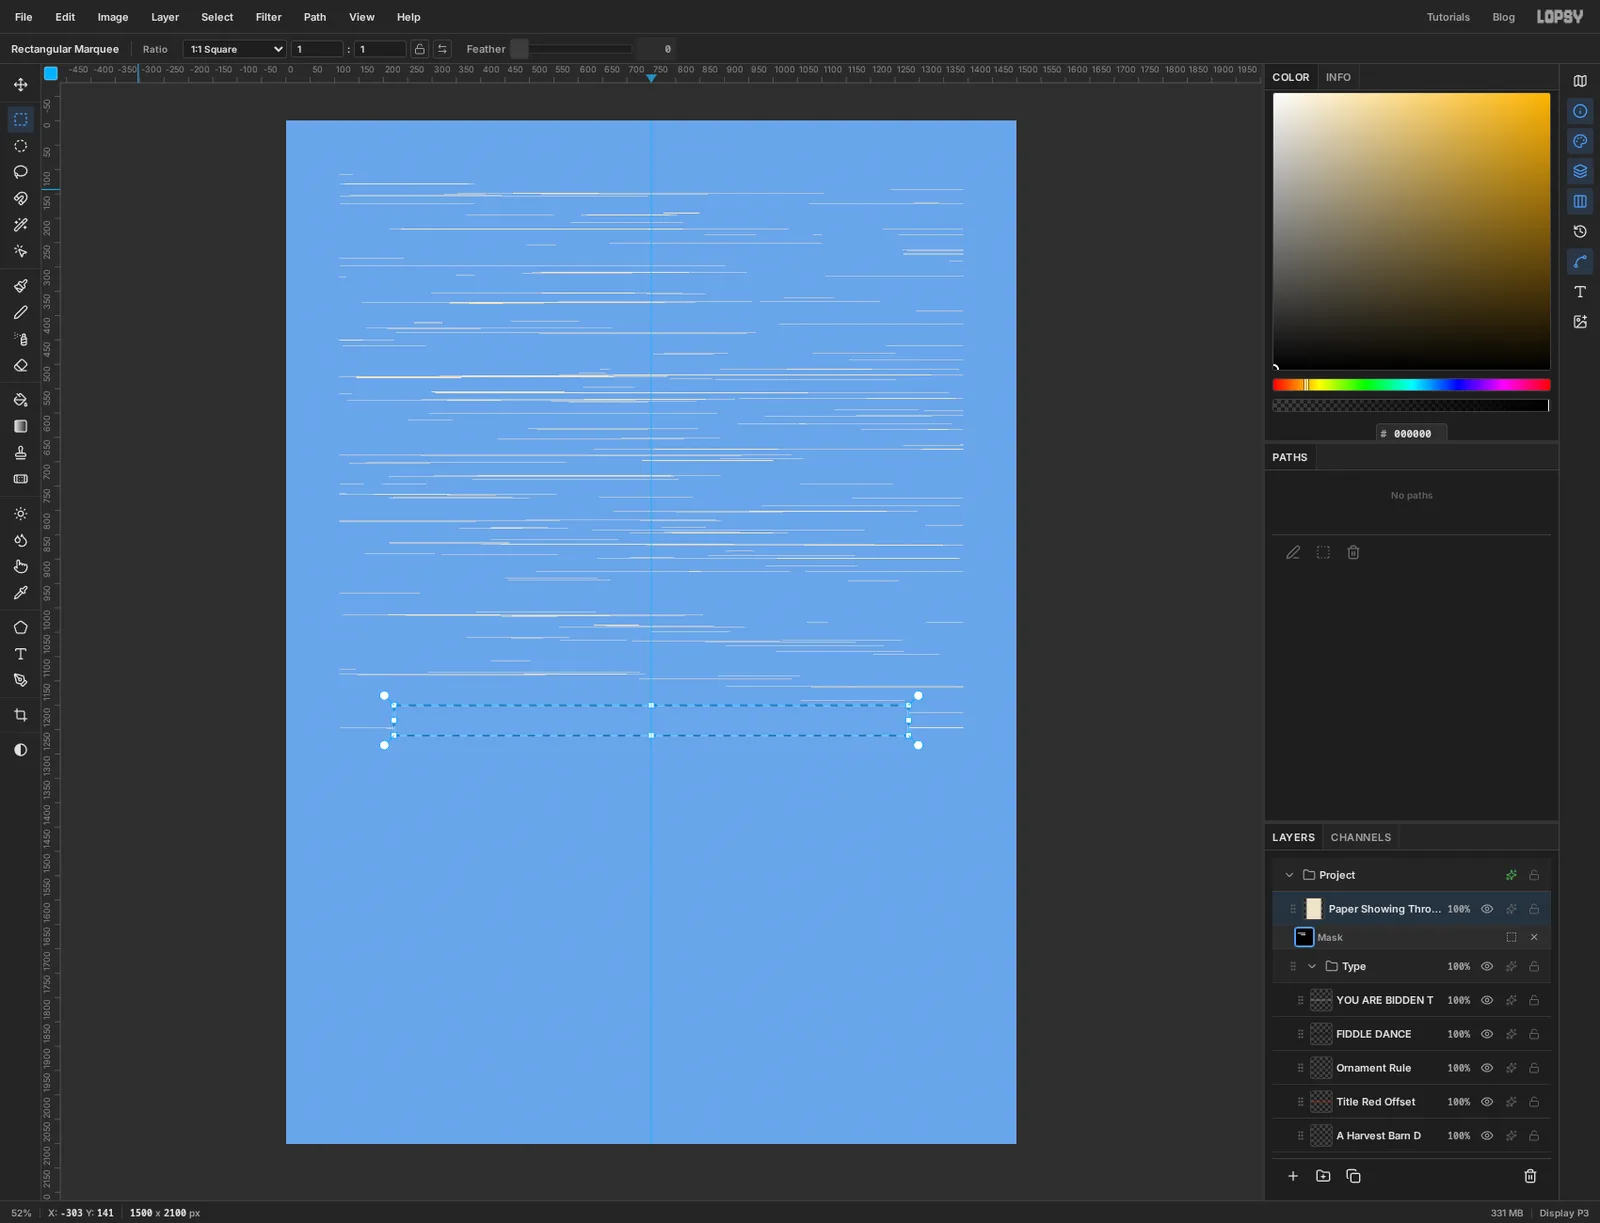
On a real print the grain of the plank leaves thin gaps in the ink. If you made those gaps white, they'd show on the bare paper too, which is wrong. Use a layer of paper colour instead, and let a mask decide where it shows.
- Add a layer called Paper Showing Through and drag it to the top of the panel, above Type. Fill it with . The whole card turns cream.
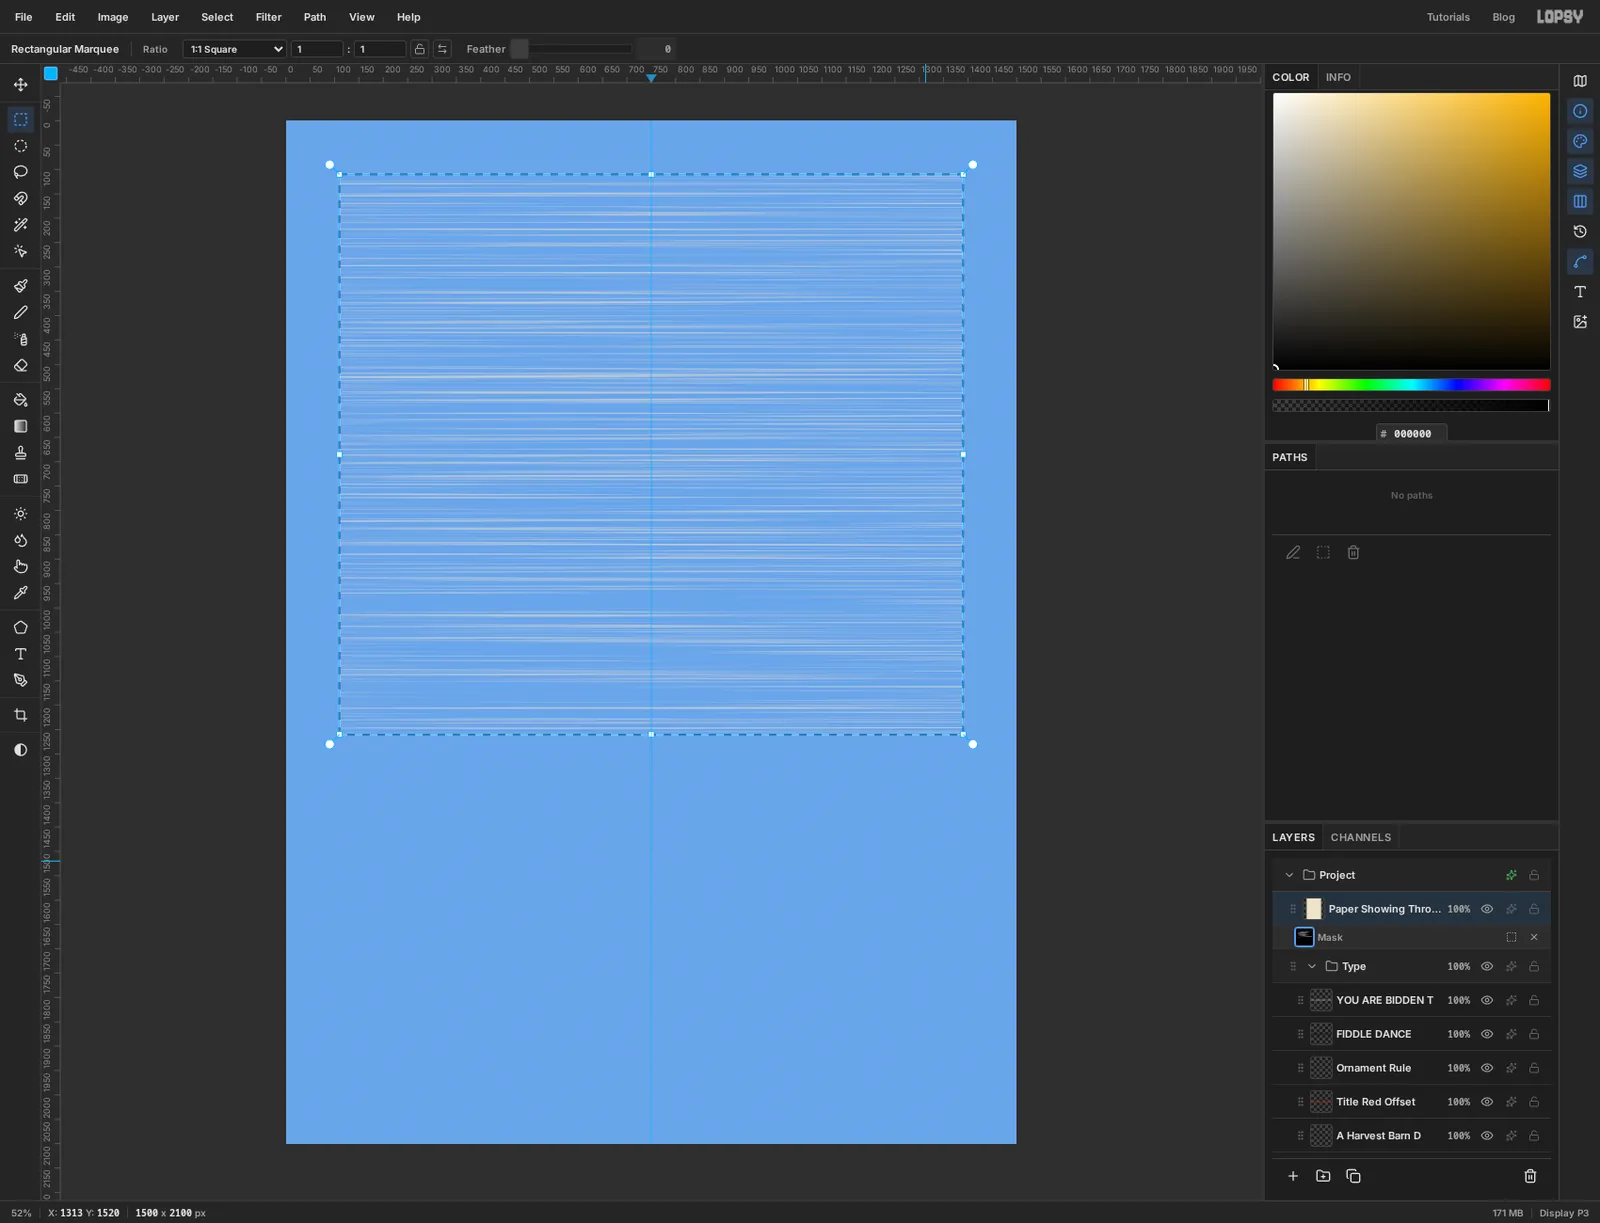
- Click Add Mask. You're now editing the mask, and the canvas shows it as a blue tint.
- Set the foreground to black and choose Edit → Fill. The mask is all black, the layer is hidden and the card is back.
- With the Rectangular Marquee, drag over the picture block again, from 110, 110 to 1390, 1260, so the type stays clean.
- Choose Filter → Texture…. Set Type to Streaks, Mode to Lighten, Amount 100, Size 4, Detail 50, Stretch 20 and Seed 14, and click Apply.
Filters run on the mask while you're in mask edit mode, so the streaks are drawn into the mask and not into the layer.
-
Harden the grain with Threshold
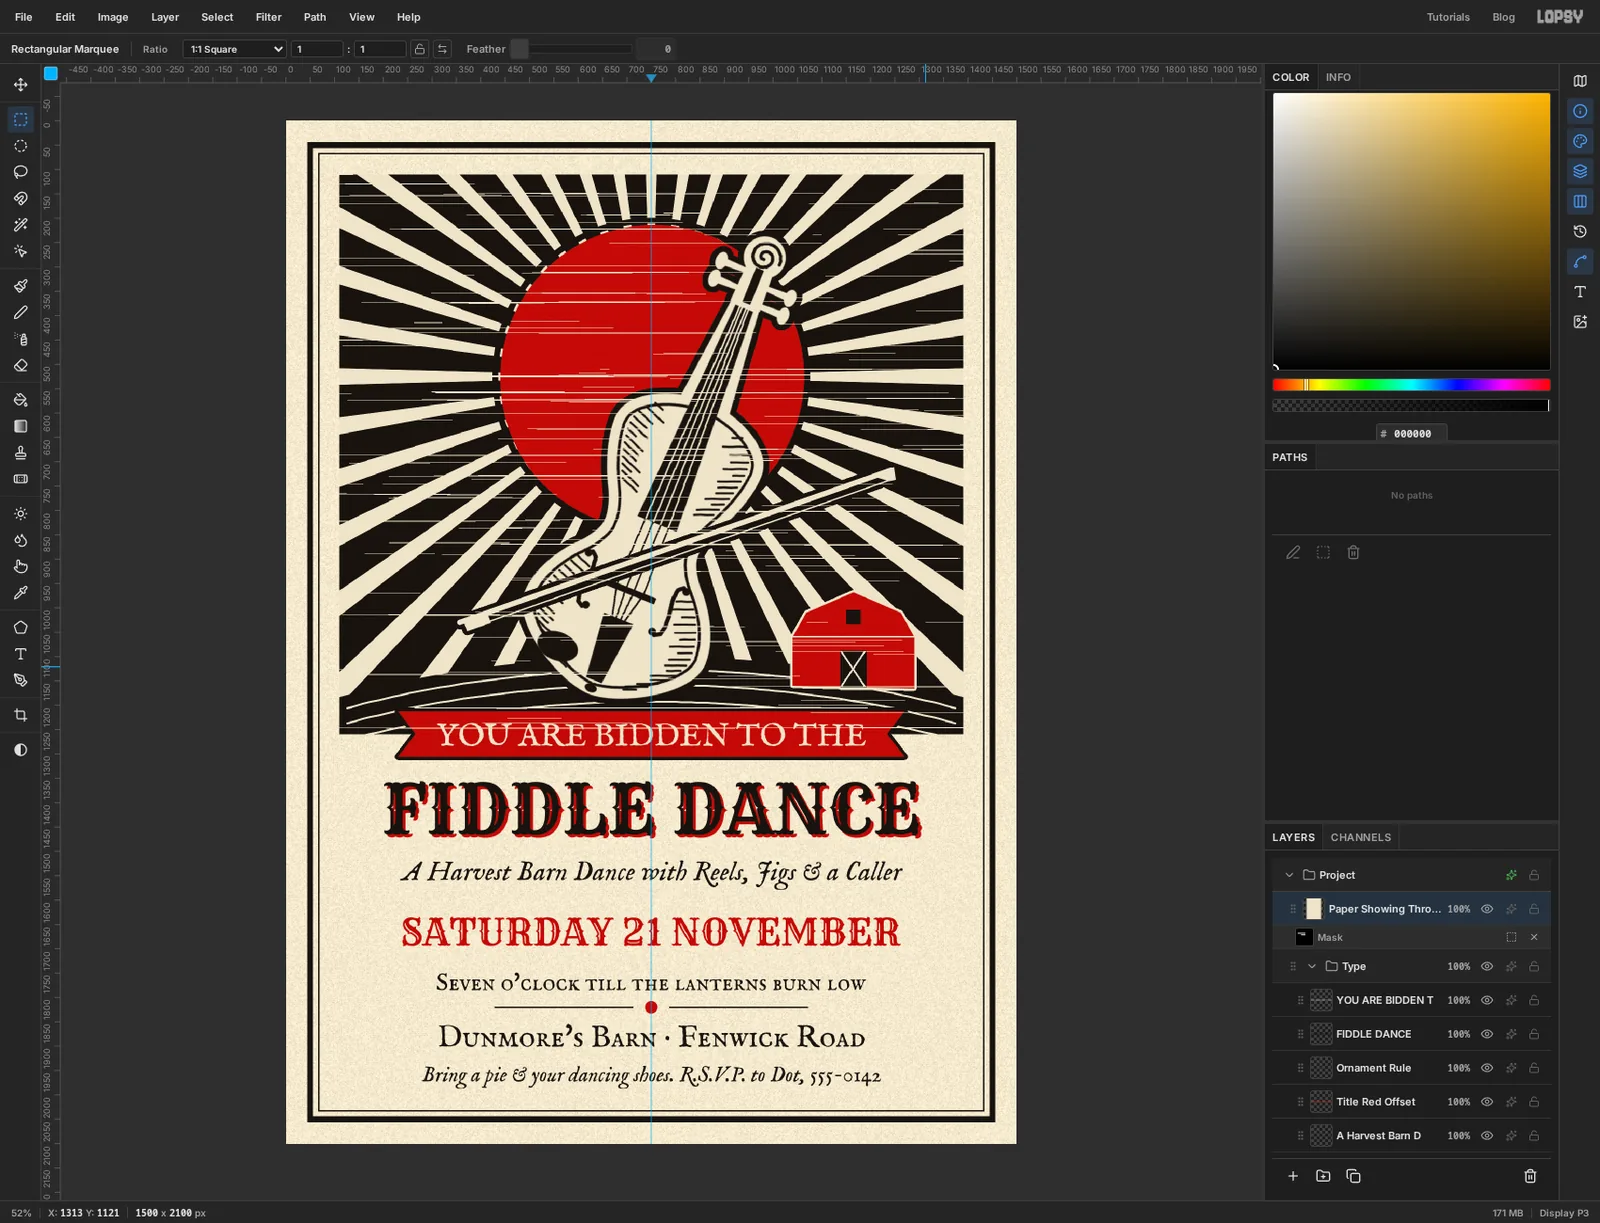
The streaks are soft and grey. Ink doesn't half-print, so make them hard. Choose Filter → Threshold…, set Level 116 and click Apply. Only the brightest few streaks survive, as pure white lines in the mask. Deselect, then click the layer's row to leave mask edit mode.
Thin lines of paper now cut across the black and the red, and they're invisible on the cream rays and the fiddle.
-
Clear the grain off the ribbon
One or two scratches run through the ribbon's lettering and read like a strike-through. Click the mask thumbnail on the Paper Showing Through row to edit the mask again. Drag a marquee around the top half of the ribbon, the part that overlaps the picture block, and with black as the foreground choose Edit → Fill. Deselect and click the layer row to leave the mask.
That's the invitation. Choose File → Save Project to keep the layers, and File → Quick Export PNG for a file you can print or send.