Design a Blueprint Invitation for a Waterwheel Restoration
Make a cyanotype blueprint invitation in Lopsy, with a drafted waterwheel elevation, a cyanotype photo plate, an engineering title block and red-pencil notes.
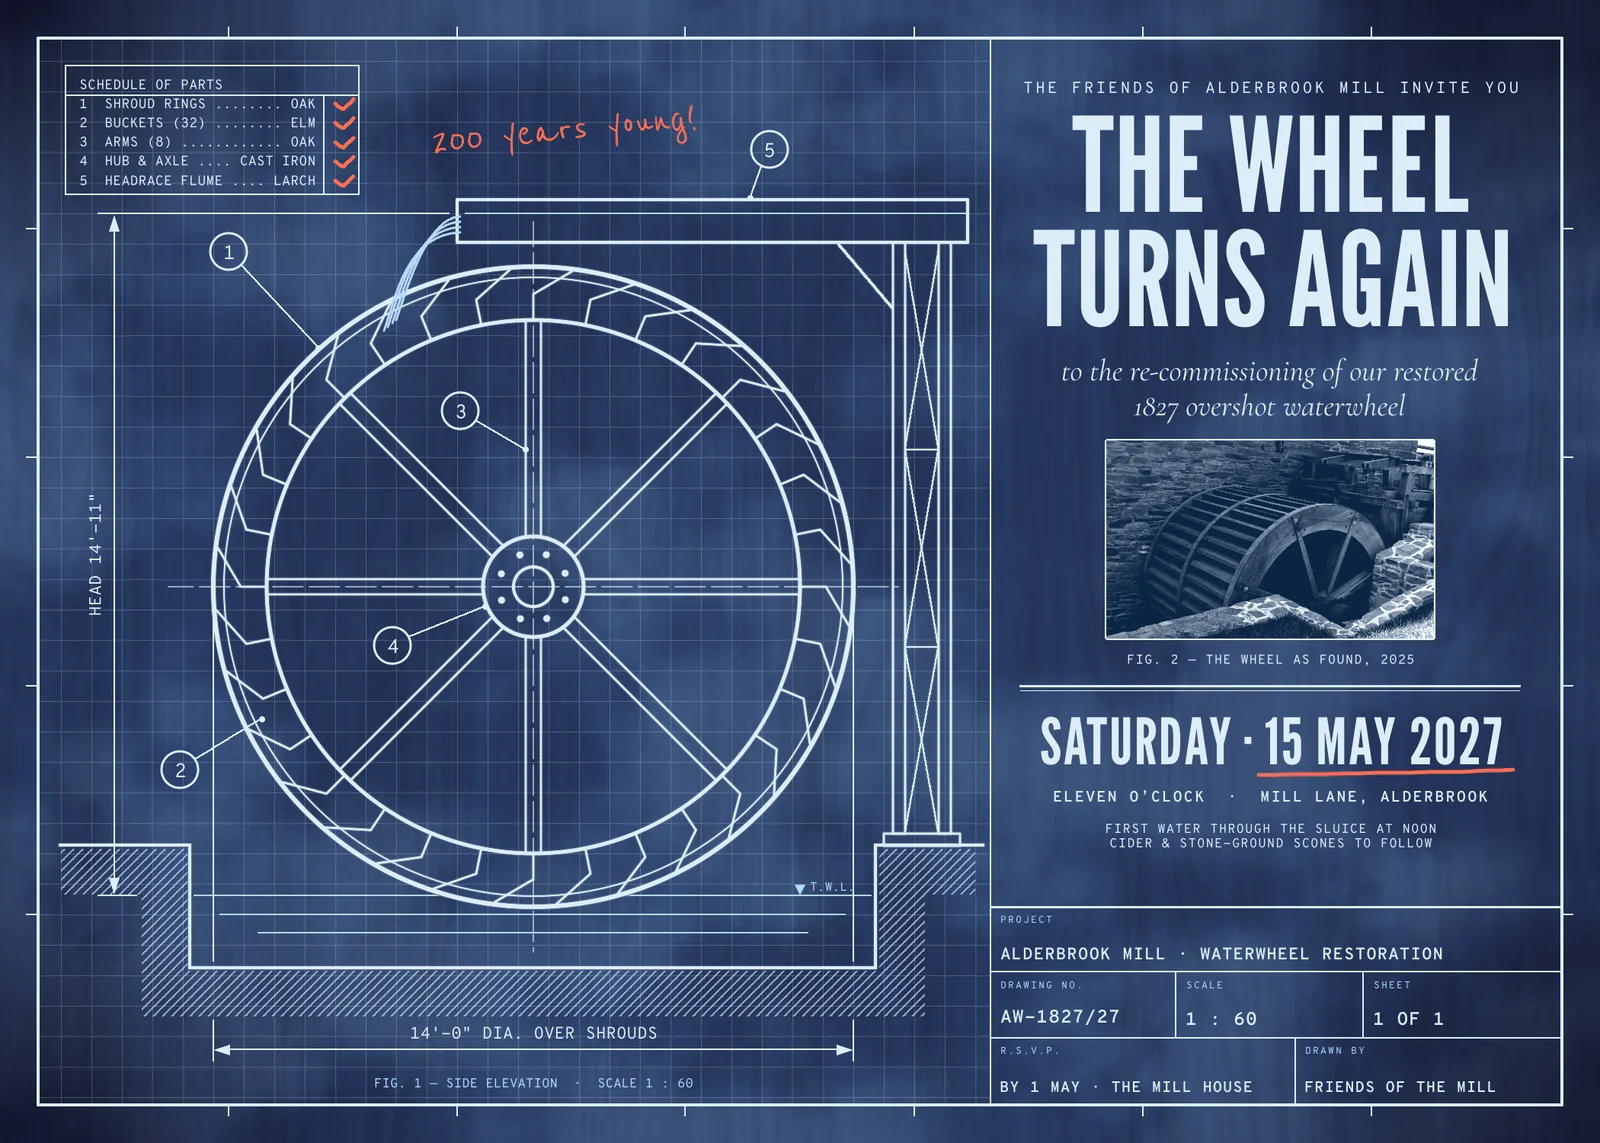
Before photocopiers, engineers copied their drawings as cyanotypes. The drawing was pressed against paper coated with iron salts and left in the sun. Wherever the ink blocked the light, the paper stayed white, and everything else turned a deep Prussian blue. That's where the white-on-blue blueprint look comes from, along with its little imperfections:
- blotchy, streaky blue where the coating went on unevenly
- a darker edge where the sheet got more sun
- white lines that bleed very slightly into the blue
- a ruled border, a title block in the corner, and notes added later in coloured pencil
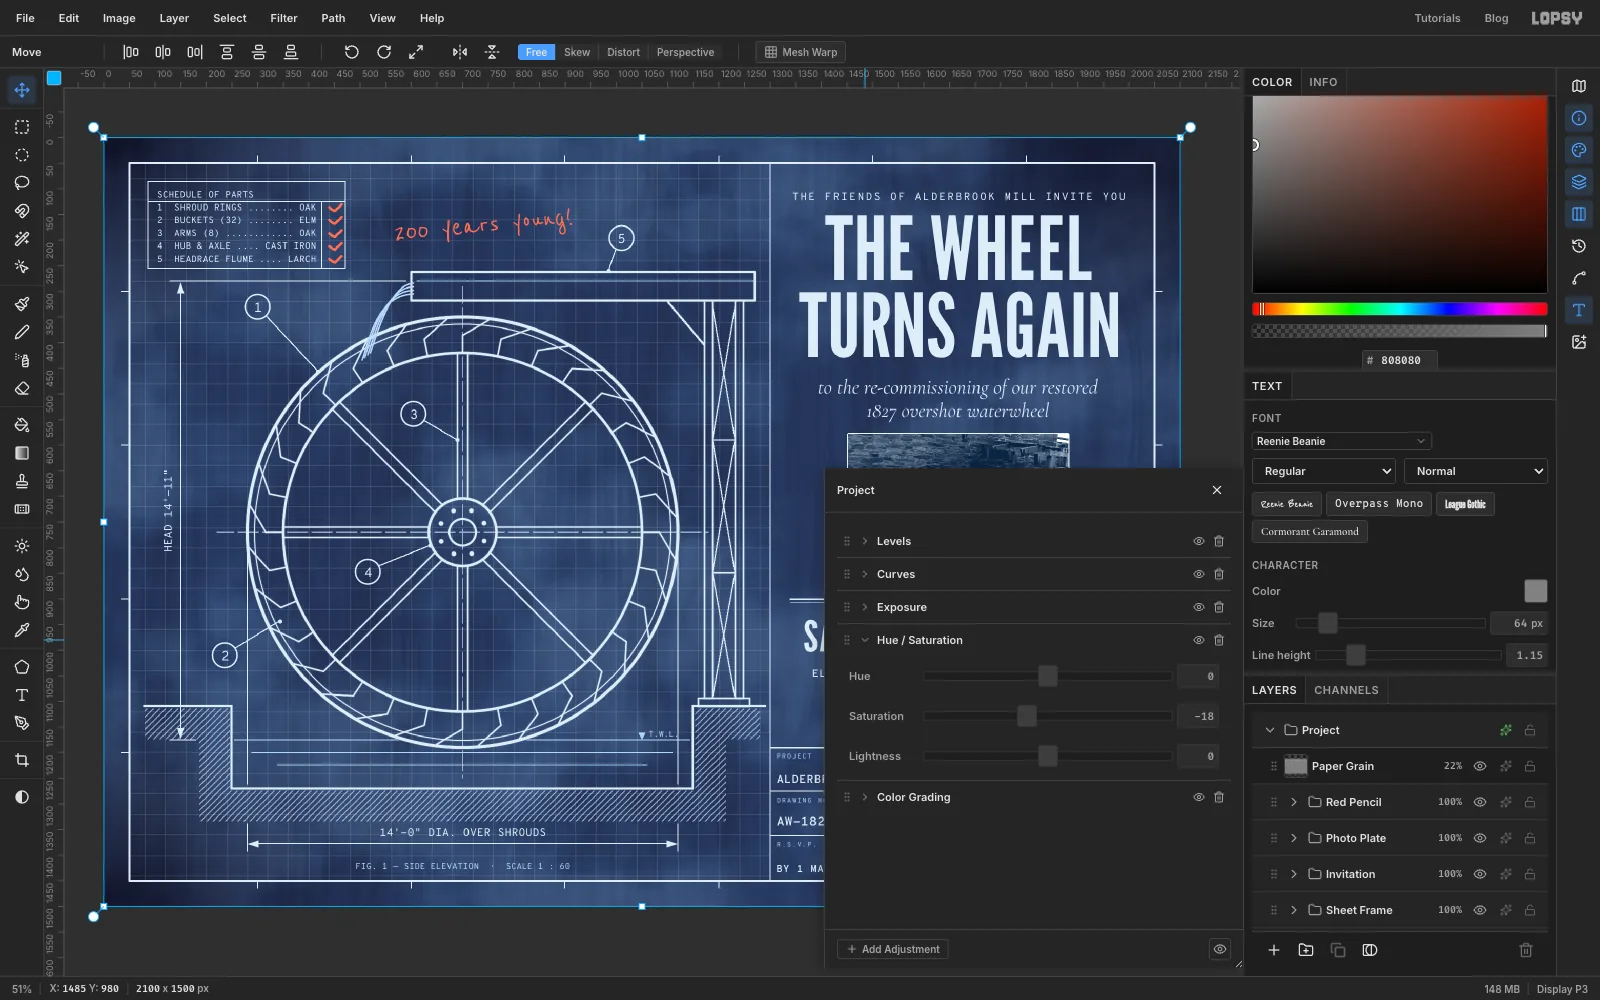
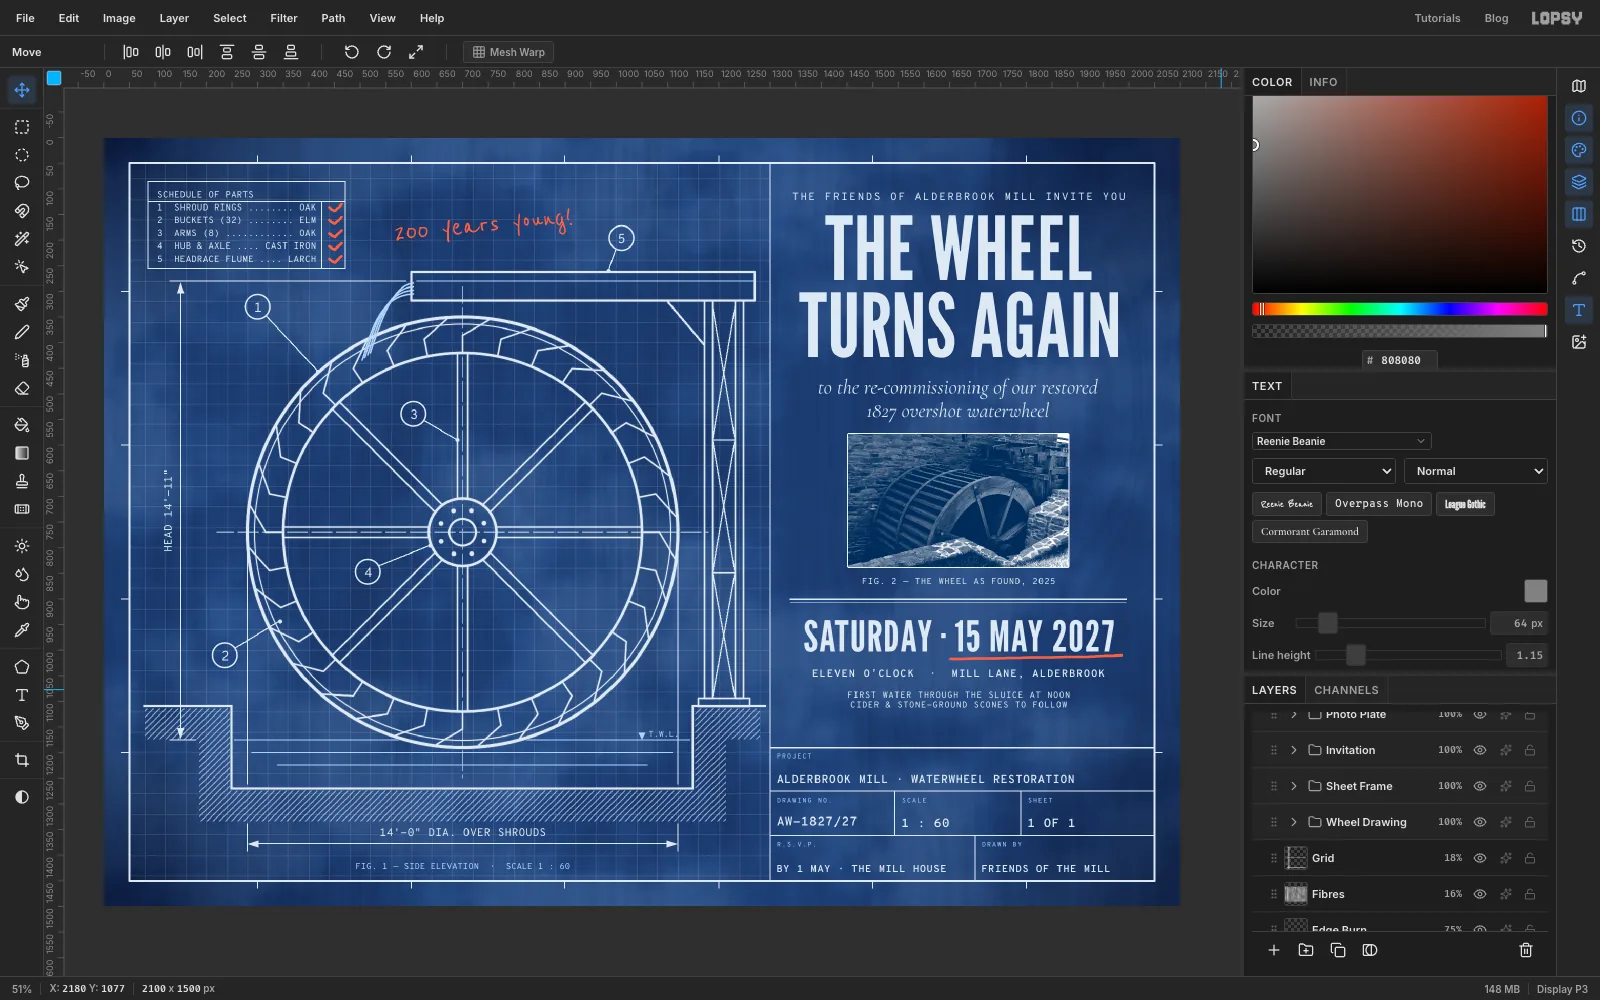
This invitation uses all of that for a happy occasion. The Friends of Alderbrook Mill are re-commissioning their restored 1827 overshot waterwheel. The card is 2100 × 1500 px (7 × 5 inches at 300 dpi). The left side is a technical drawing of the wheel. The right column holds the invitation, a cyanotype photo of the wheel "as found", the date and an engineering title block.
You'll need one photo from Wikimedia Commons: Peirce Mill Water Wheel.jpg by Bonnachoven, released under CC0 (public domain). It shows a wooden wheel against a stone mill wall. Download any version wider than 2100 px. Lopsy fits it to the card when you drop it in.
The tools you'll use:
- the Shape tool's click-to-size dialog for exact circles and rectangles
- the Brush with Radial Symmetry, and a custom dash-dot brush made with Edit → Define Brush…
- the Pencil, with Shift-click for straight lines
- the Pen tool for curves and triangles, and Path to Selection
- the Rectangular and Elliptical Marquee exact-corners dialogs, Select → Feather / Inverse, and Shift-drag to add to a selection
- Edit → Define Pattern and Fill with Pattern… for the grid and the earth hatching
- Clouds, Fibers, Gaussian Blur, Add Noise, Desaturate and Brightness/Contrast
- the Move tool's scale and rotate handles and its Rotate 90° buttons, Duplicate Layer and Merge Down
- live text in four Google fonts: League Gothic, Cormorant Garamond, Overpass Mono and Reenie Beanie
- layer effects (Stroke and Outer Glow), and the Soft Light, Multiply, Overlay and Screen blend modes
- groups, and the root group's Color Grading and Hue / Saturation adjustments
The palette is cyanotype blue, white line and one red pencil:
-
Prussian paper
-
edge burn
-
photo backing
-
Line white
-
Water
-
hatch
-
Red pencil
-
Grain grey
only for the noise layer
-
Coat the paper
Choose File → New, keep the units on Pixels, and make the document 2100 wide and 1500 high.
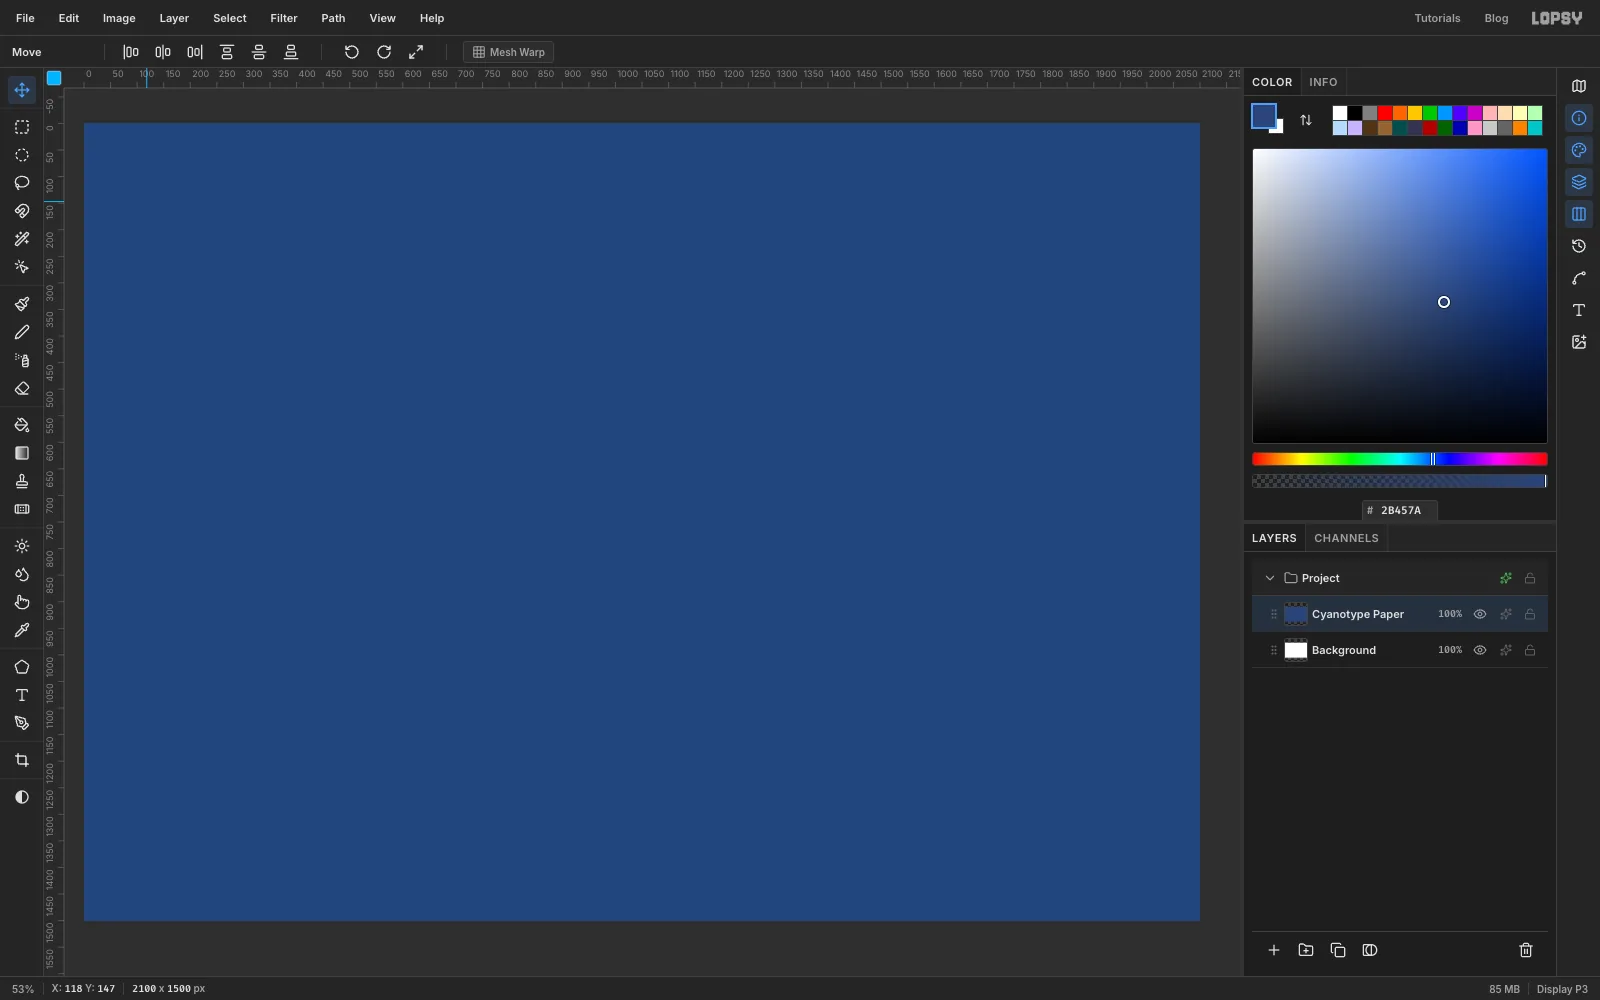
Click Layer 1, double-click its name and rename it Cyanotype Paper. Set the foreground to and choose Edit → Fill. Leave the white Background layer underneath. It never shows.
-
Mottle the coating and burn the edges
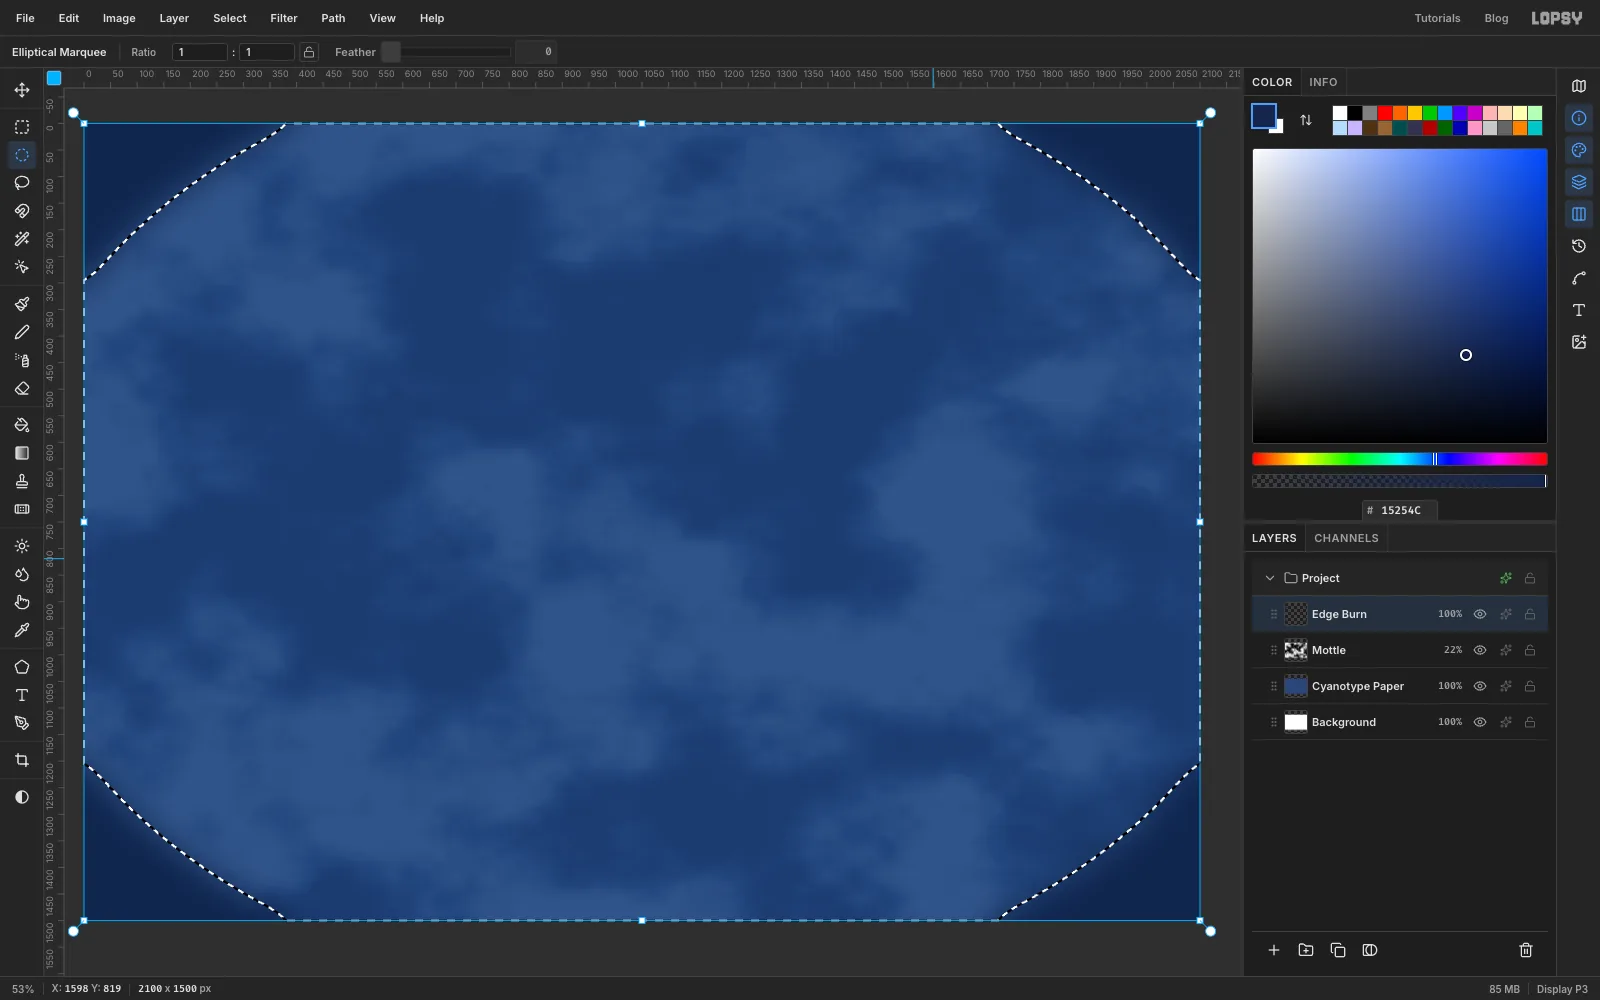
Hand-coated paper is never even. Click Add Layer and name the layer Mottle. Choose Filter → Clouds… with Scale 9. Open the layer's effects with the sparkle button on its row, set the blend mode to Soft Light, close the drawer, and set the layer's opacity to 22%.
Now darken the edges. Add a layer called Edge Burn and fill it with . Pick the Elliptical Marquee and click once on the canvas without dragging. The exact-size dialog opens. Set From to -160, -140 and To to 2260, 1640, and press Enter. The ellipse is bigger than the canvas, so only its curves cut across the corners. Choose Select → Feather… at 63, the most it softens, and press Delete. The blur in the next step does the rest.
-
Soften the burn and add fibres
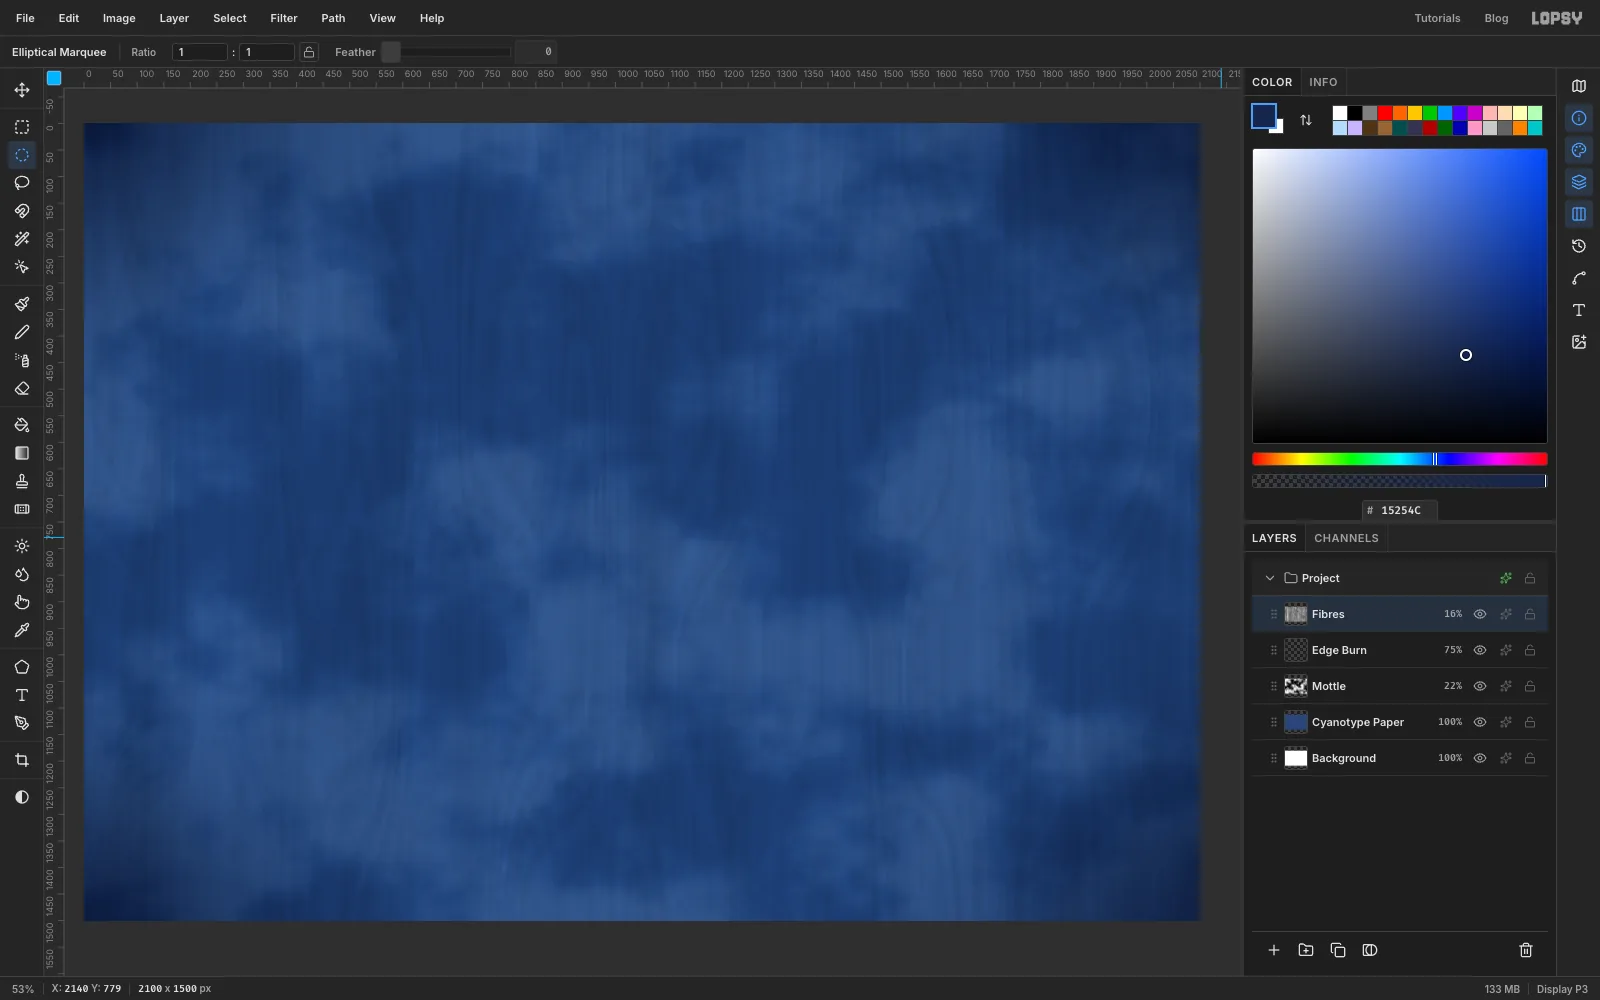
Deselect with Cmd+D, then run Filter → Gaussian Blur… at 140 so the burn fades smoothly into the middle. Set Edge Burn to Multiply at 75%.
The coating was brushed on, so add the brush marks. Add a layer called Fibres, run Filter → Fibers… with Variance 24 and Strength 6, and set it to Overlay at 16%. You get faint vertical streaks, like emulsion dragged across the sheet.
-
Draw one square of graph paper
The grid is a pattern made from one 40 px square. Add a layer called Tile. Pick the Pencil, set Size 1 and the foreground to white .
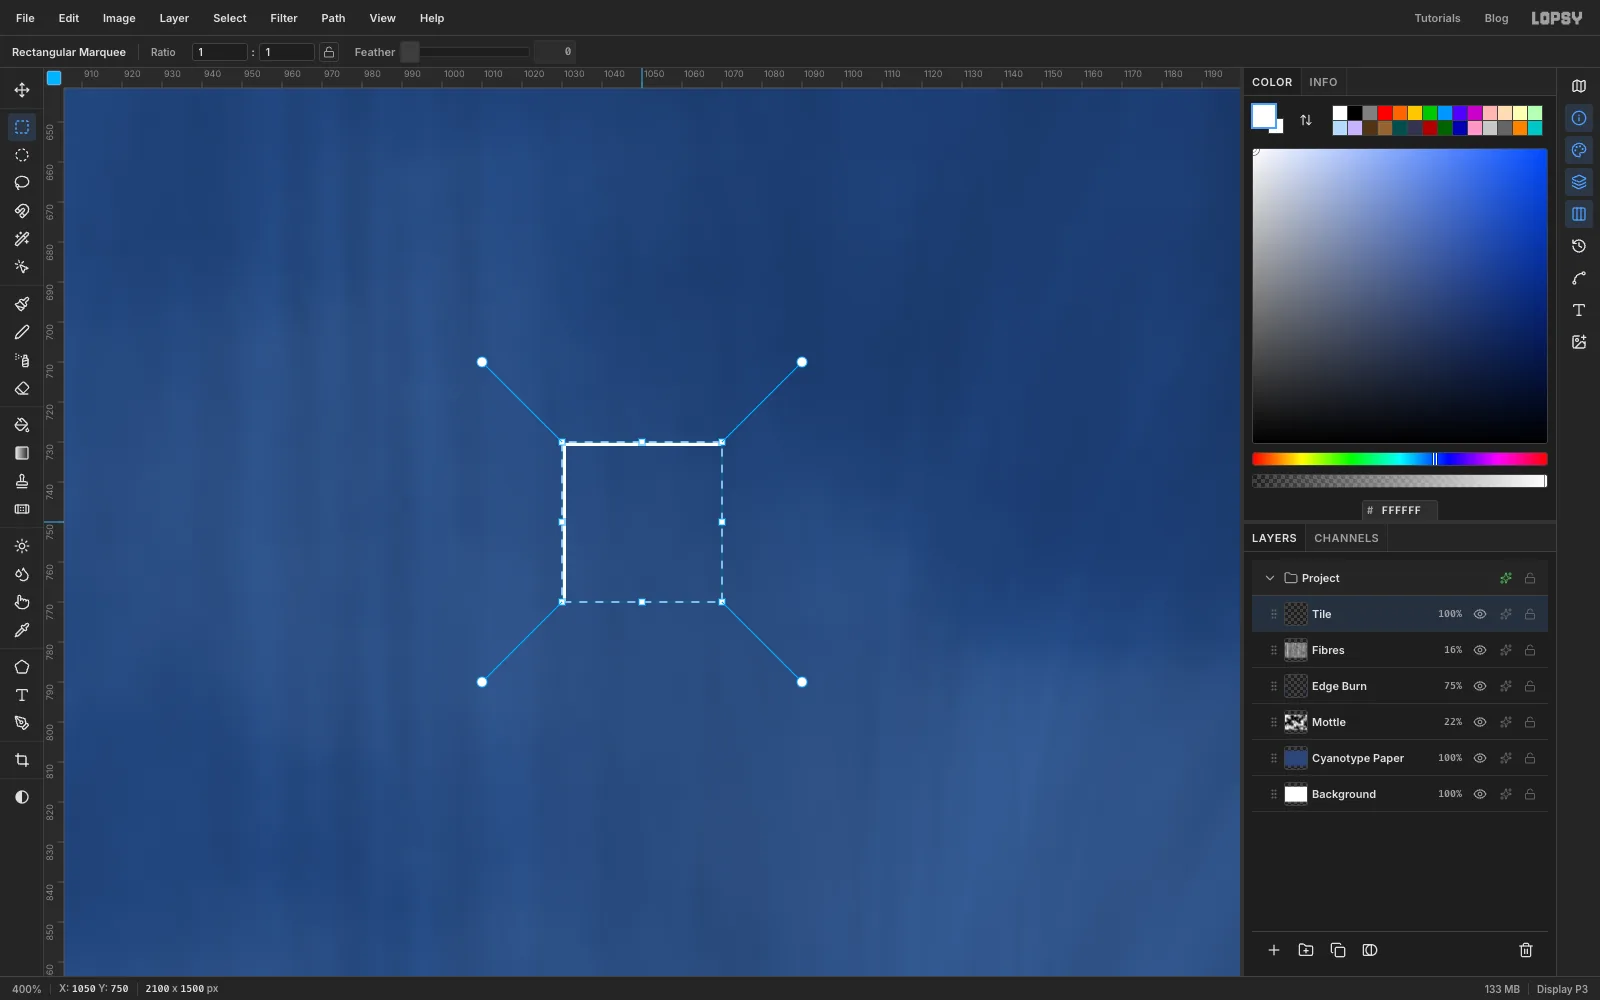
Zoom in so you can place single pixels. Choose View → Actual Size, then View → Zoom In three times. In the middle of the canvas, draw an L:
- Click at 1030, 730 and Shift-click at 1030, 769 for the left edge.
- Click at 1031, 730 and Shift-click at 1069, 730 for the top edge.
Pick the Rectangular Marquee, click once and enter From 1030, 730 and To 1070, 770. That's exactly 40 × 40 px, with the L on its top and left edges, hidden under the marching ants. Choose Edit → Define Pattern.
-
Fill the drawing panel with the grid
Choose View → Fit to Screen and deselect. Delete the Tile layer with the bin button at the bottom of the Layers panel.
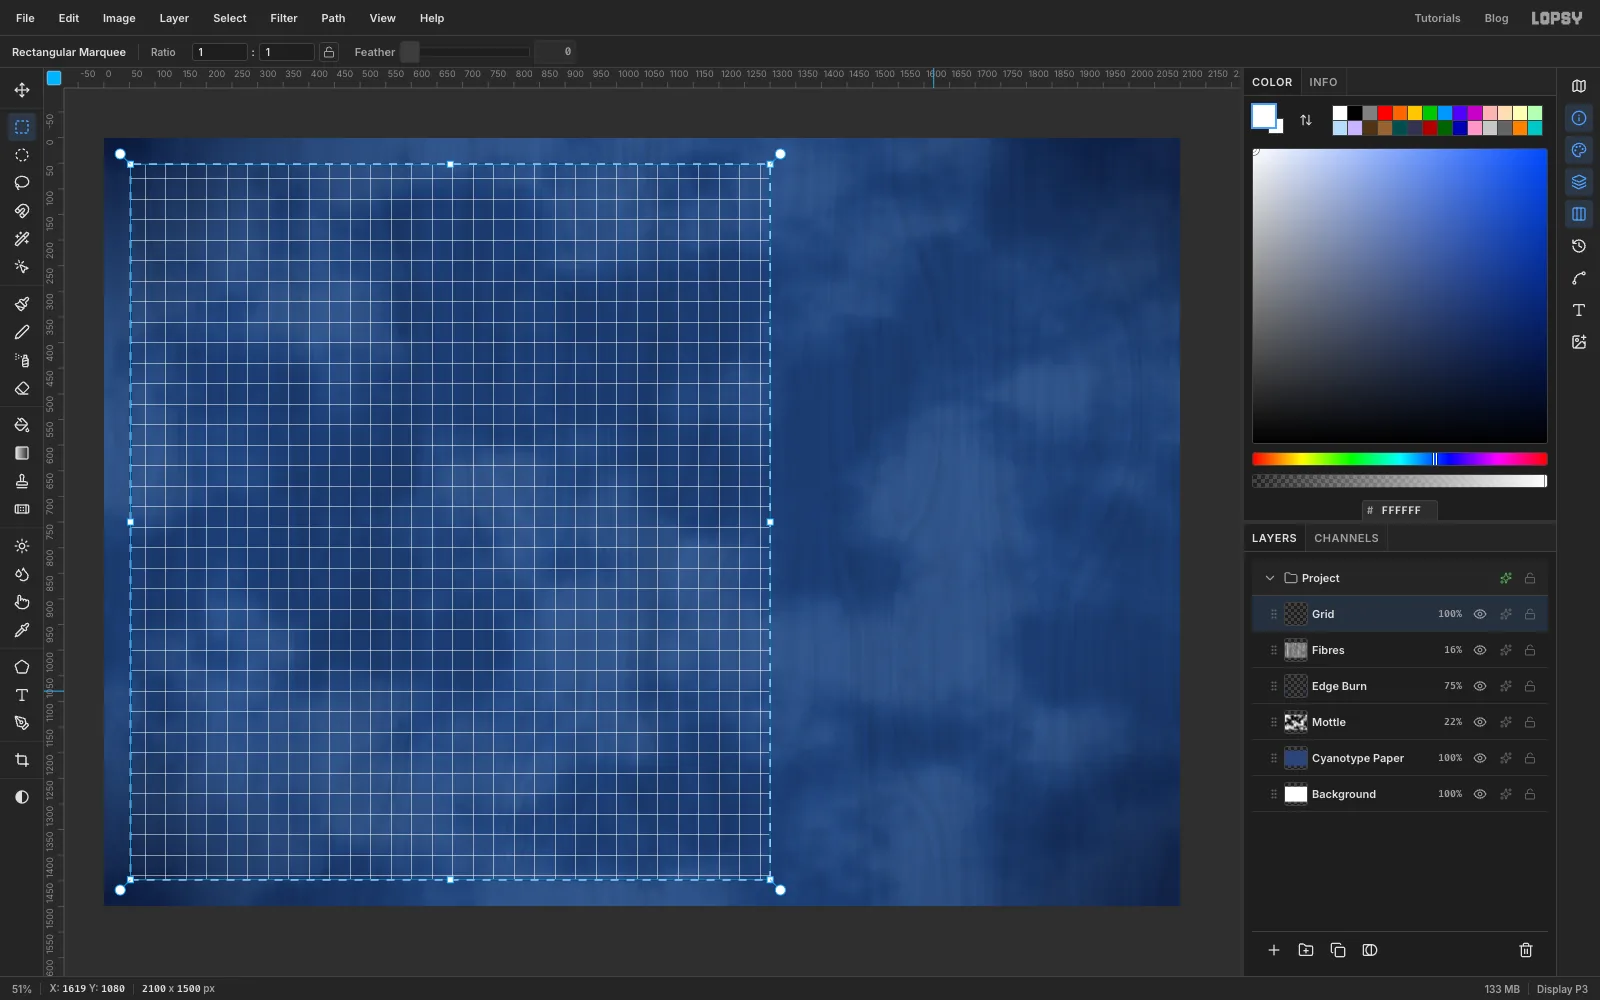
Add a layer called Grid. Click the canvas with the Rectangular Marquee and enter From 52, 52 and To 1300, 1448. This is the drawing panel. The right-hand column stays plain for the text. Choose Edit → Fill with Pattern…, pick the 40×40 pattern and click Apply. Deselect and set Grid to 18% opacity.
-
Rule the sheet frame
Click New Group in the Layers panel and name it Sheet Frame. Add a layer inside it called Border. Pick the Shape tool and set:
- Shape to Rectangle
- Fill to none (click the fill swatch and choose Remove fill)
- Stroke to line white , Width 4
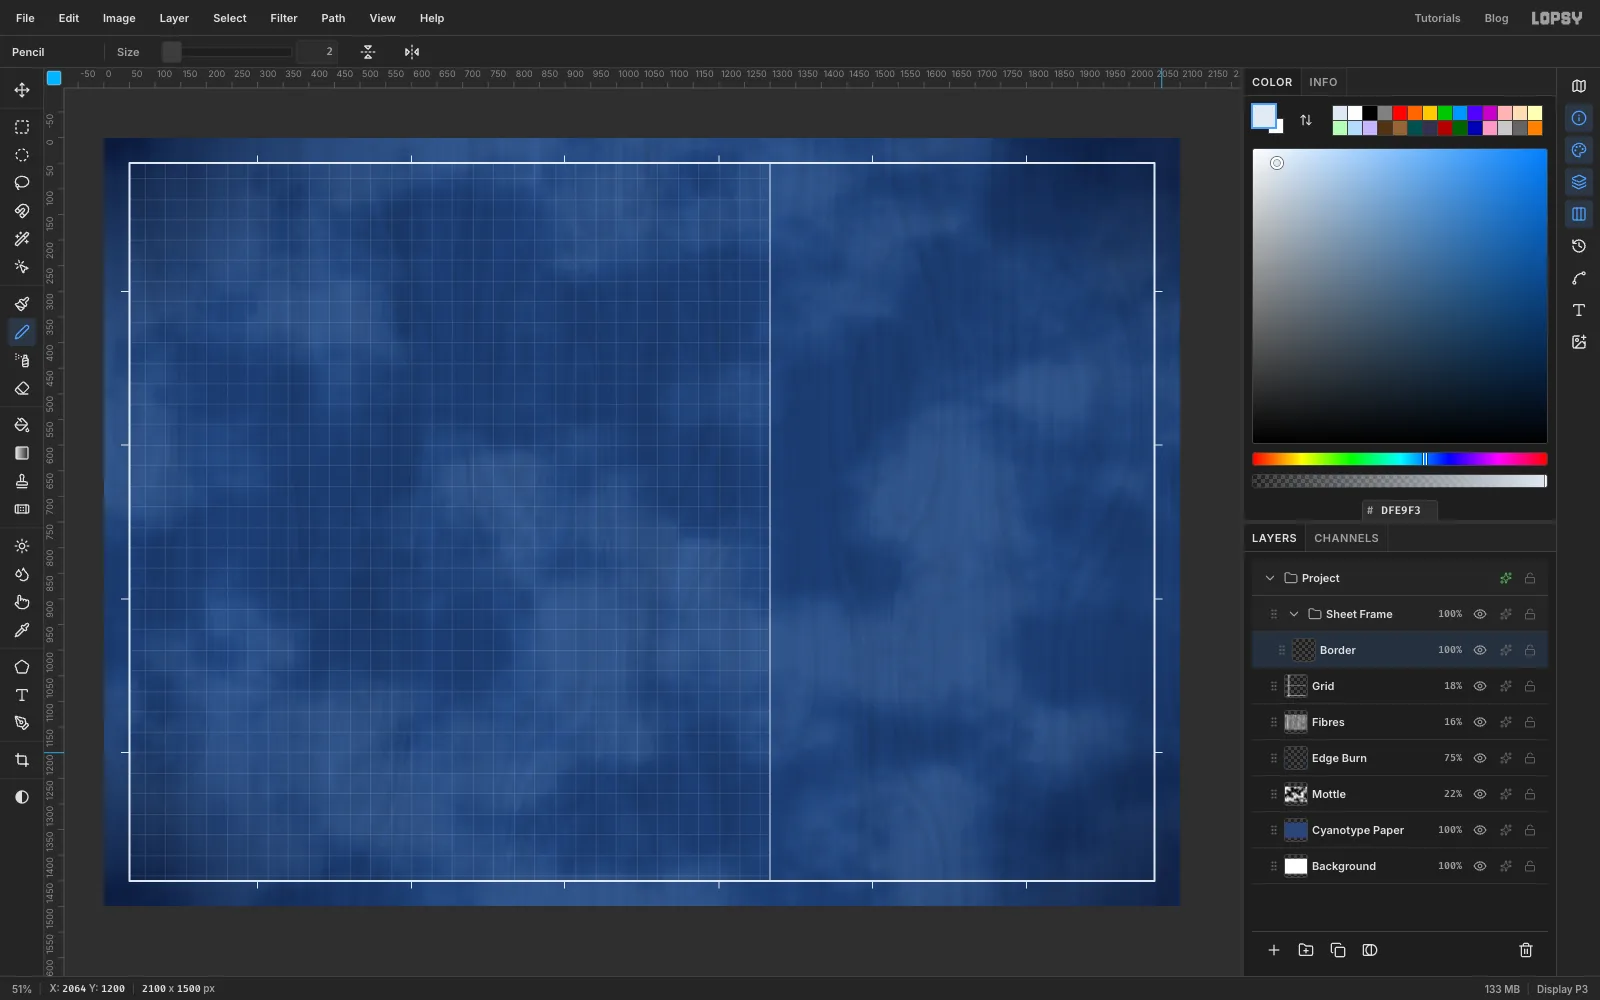
Click once at the exact centre of the canvas, 1050, 750, without dragging. In the Shape Size dialog, enter 2000 × 1400 and press Enter. The frame lands 50 px in from every edge, at x 50 and 2050 and y 50 and 1450.
Pick the Pencil at Size 2 with . Click on the top edge of the frame at x 1300 and Shift-click straight down on the bottom edge to divide the sheet. Then add short zone ticks just outside the frame: at x 300, 600, 900, 1200, 1500 and 1800 on the top and bottom edges, and at y 300, 600, 900 and 1200 on the left and right edges. Each tick is a click on the frame and a Shift-click 14 px outward.
-
Draw the shrouds and the sole
Click Grid and make a New Group called Wheel Drawing. Because Grid was active, the group sits above it and below the frame. Add a layer inside the group called Rims.
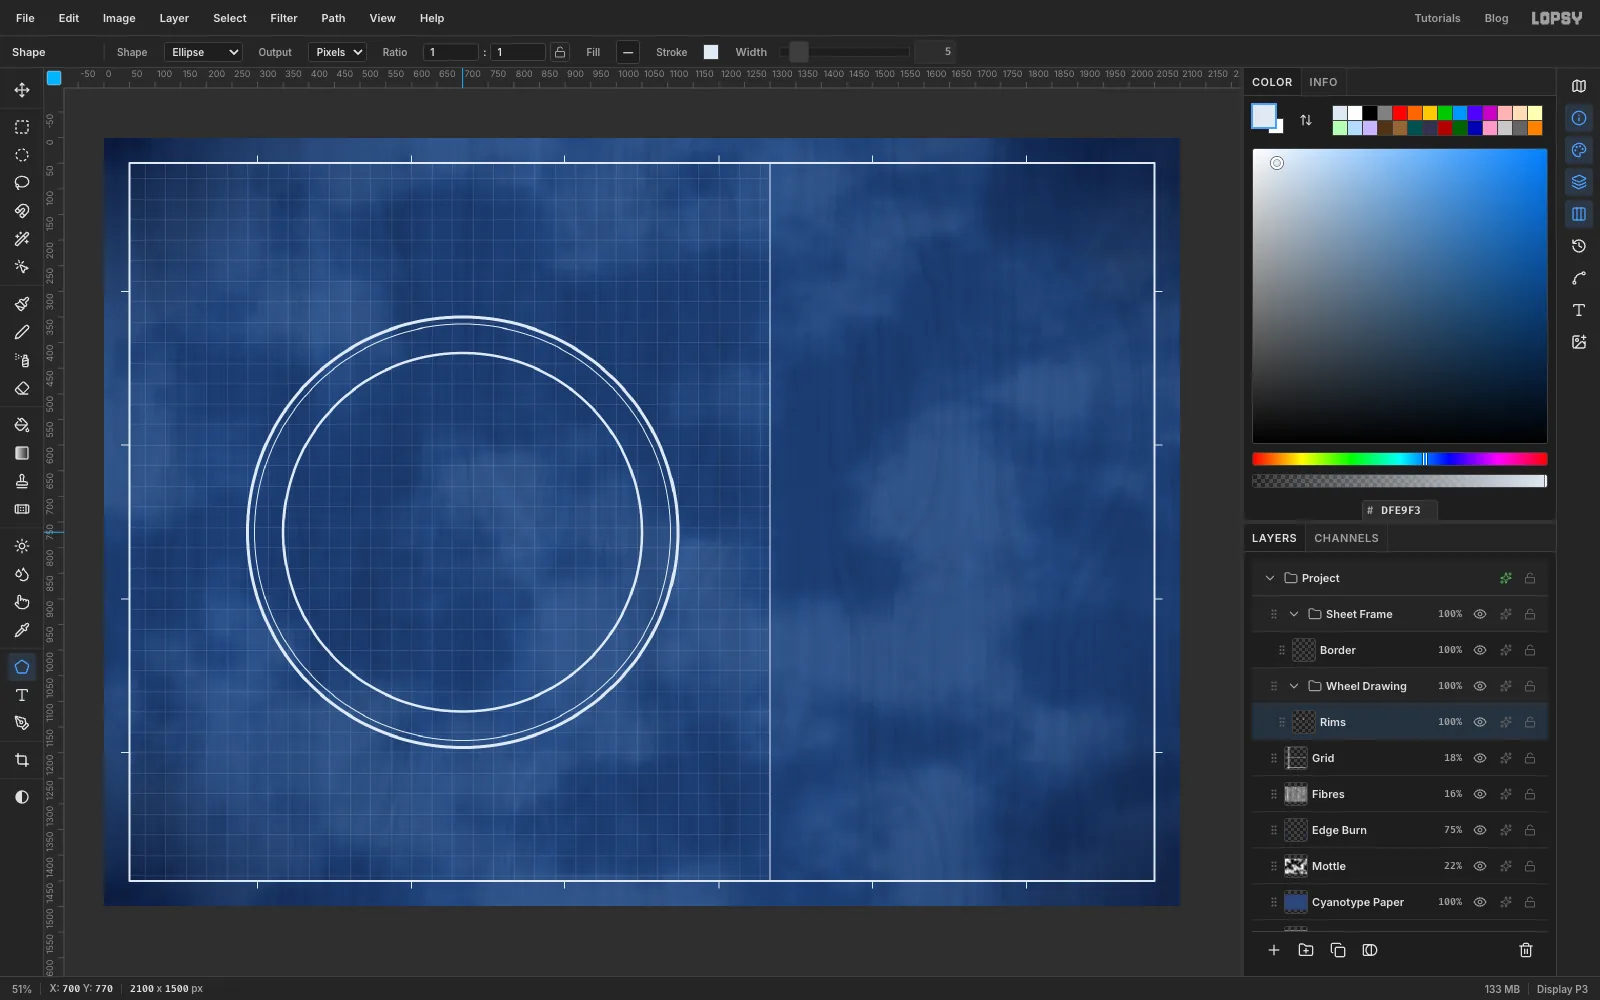
The wheel's hub sits at 700, 770. Keep the Shape tool, switch Shape to Ellipse, keep the fill off and the stroke white. Click the hub point each time and type the size into the dialog:
- Width 6, 840 × 840: the outer edge of the shroud
- Width 2, 812 × 812: the inner edge of the shroud
- Width 5, 700 × 700: the sole, where the buckets start
The shape tool draws from the point you click, so all three circles share one centre.
-
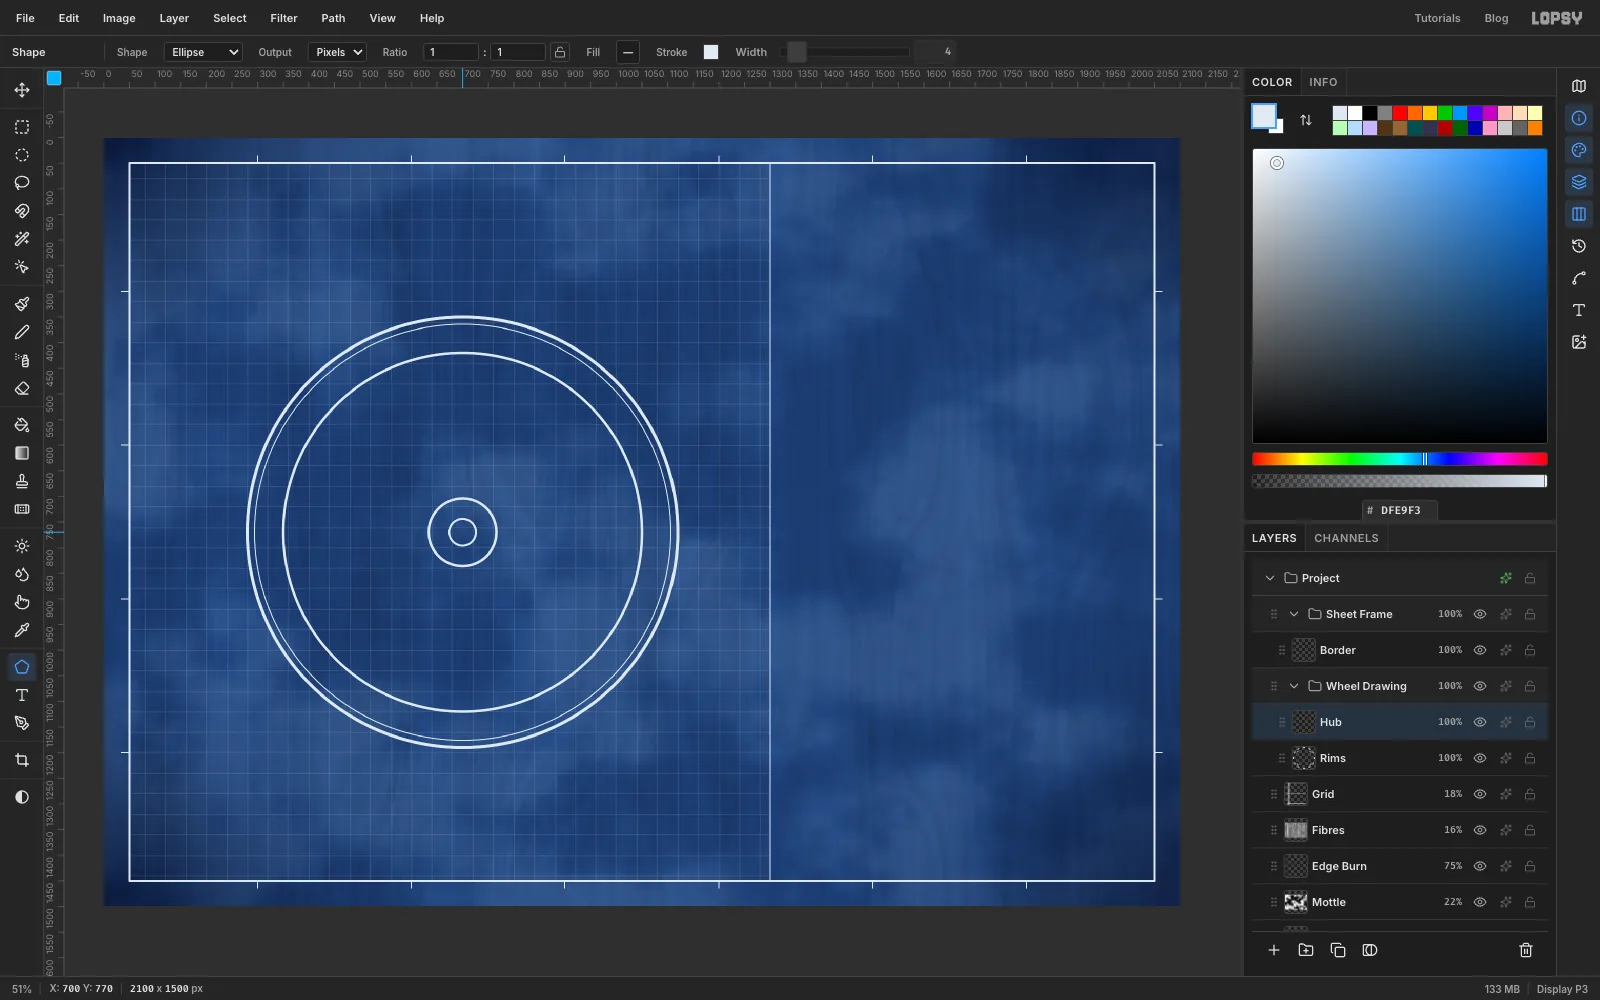
Add the hub and the axle
Add a layer called Hub. Click the hub point again and make a 132 × 132 circle at Width 5. Then make a 52 × 52 circle at Width 4 for the axle.
-
Paint 32 buckets with radial symmetry
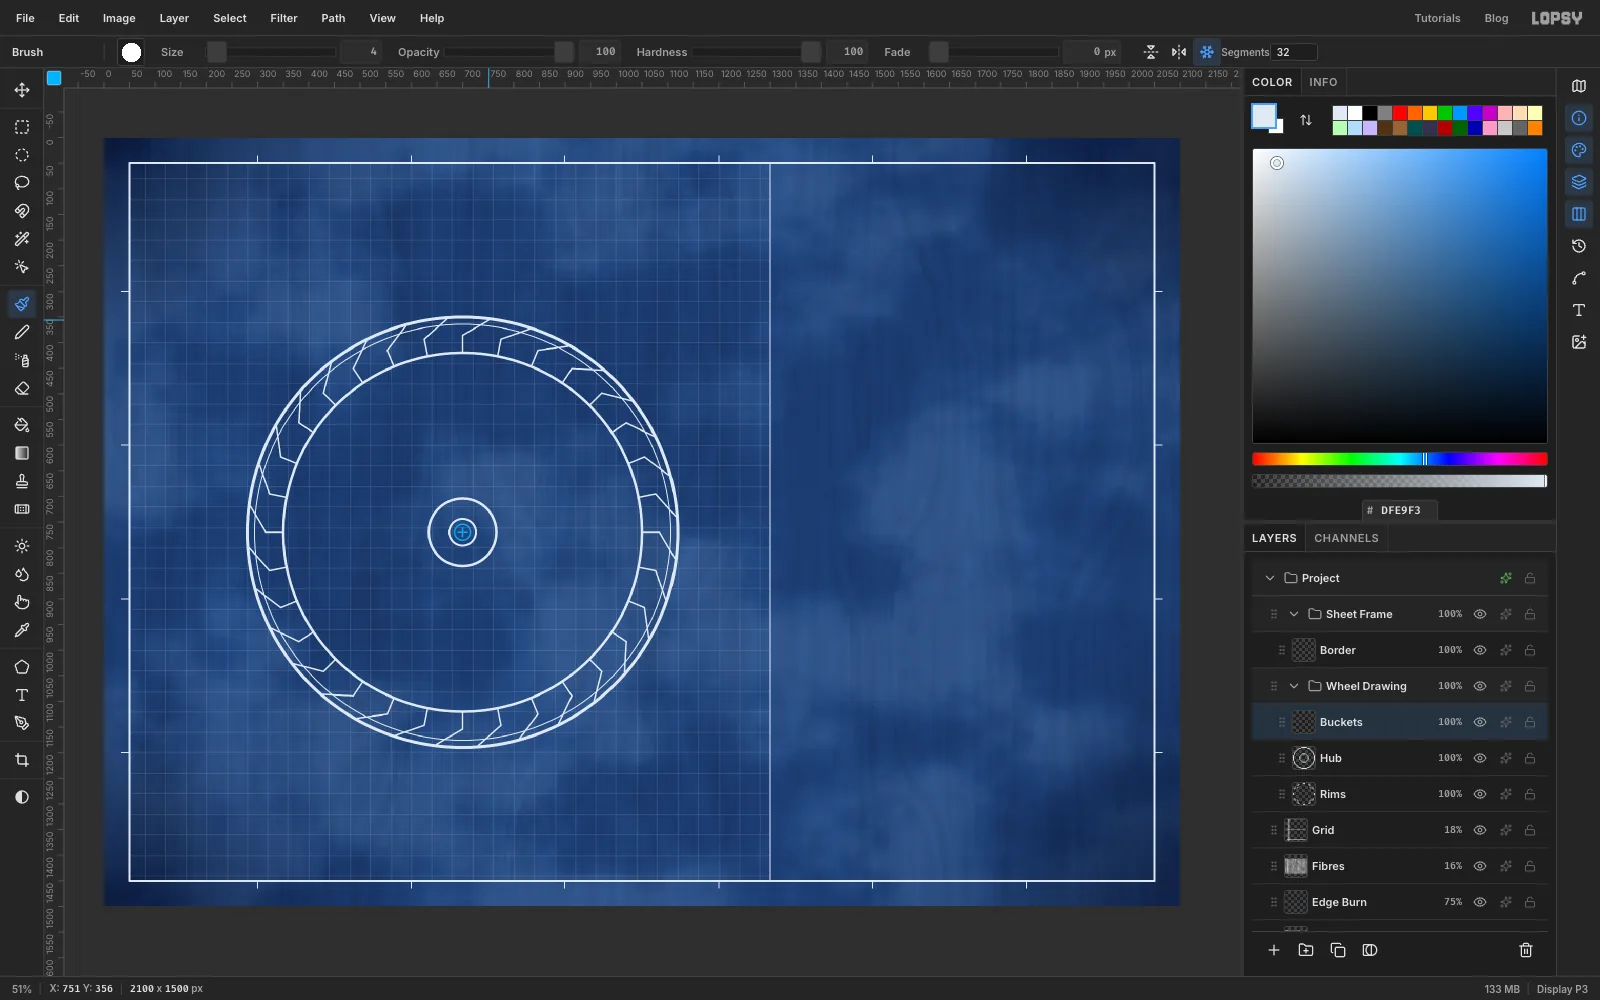
Pick the Brush and choose Hard Round from the brush presets. Set Size 4 and the foreground to . In the Brush options bar, click Radial Symmetry and set Segments to 32.
Add a layer called Buckets. Hold Cmd and click the centre of the hub. That moves the symmetry centre to 700, 770 without painting. Now draw one bucket at the top of the wheel:
- Click on the sole straight above the hub, at 700, 420.
- Shift-click 34 px further out, at 700, 386.
- Shift-click up to the outer shroud a little to the right, at about 751, 356.
Every click is repeated 32 times around the wheel, so one bent board becomes a full ring of buckets.
-
Paint the eight arms
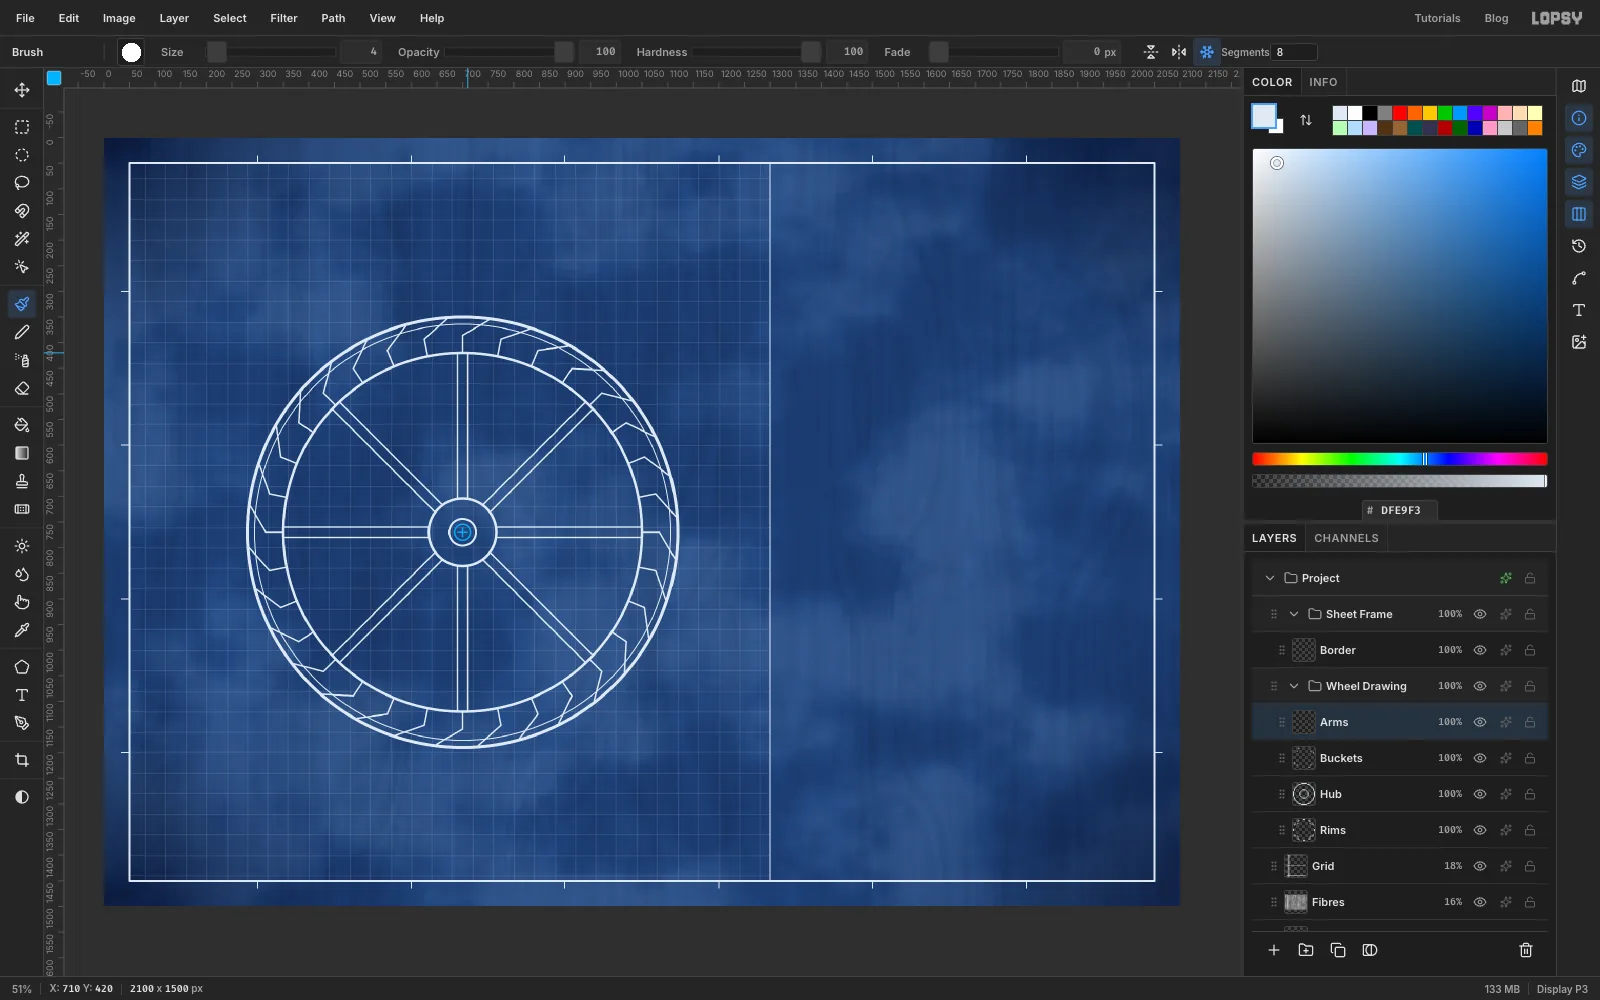
Add a layer called Arms and change Segments to 8. Each arm is a pair of parallel lines 20 px apart:
- Click just outside the hub at 690, 705 and Shift-click on the sole at 690, 420.
- Click at 710, 705 and Shift-click at 710, 420.
Symmetry turns the one vertical arm into eight.
-
Bolt the hub
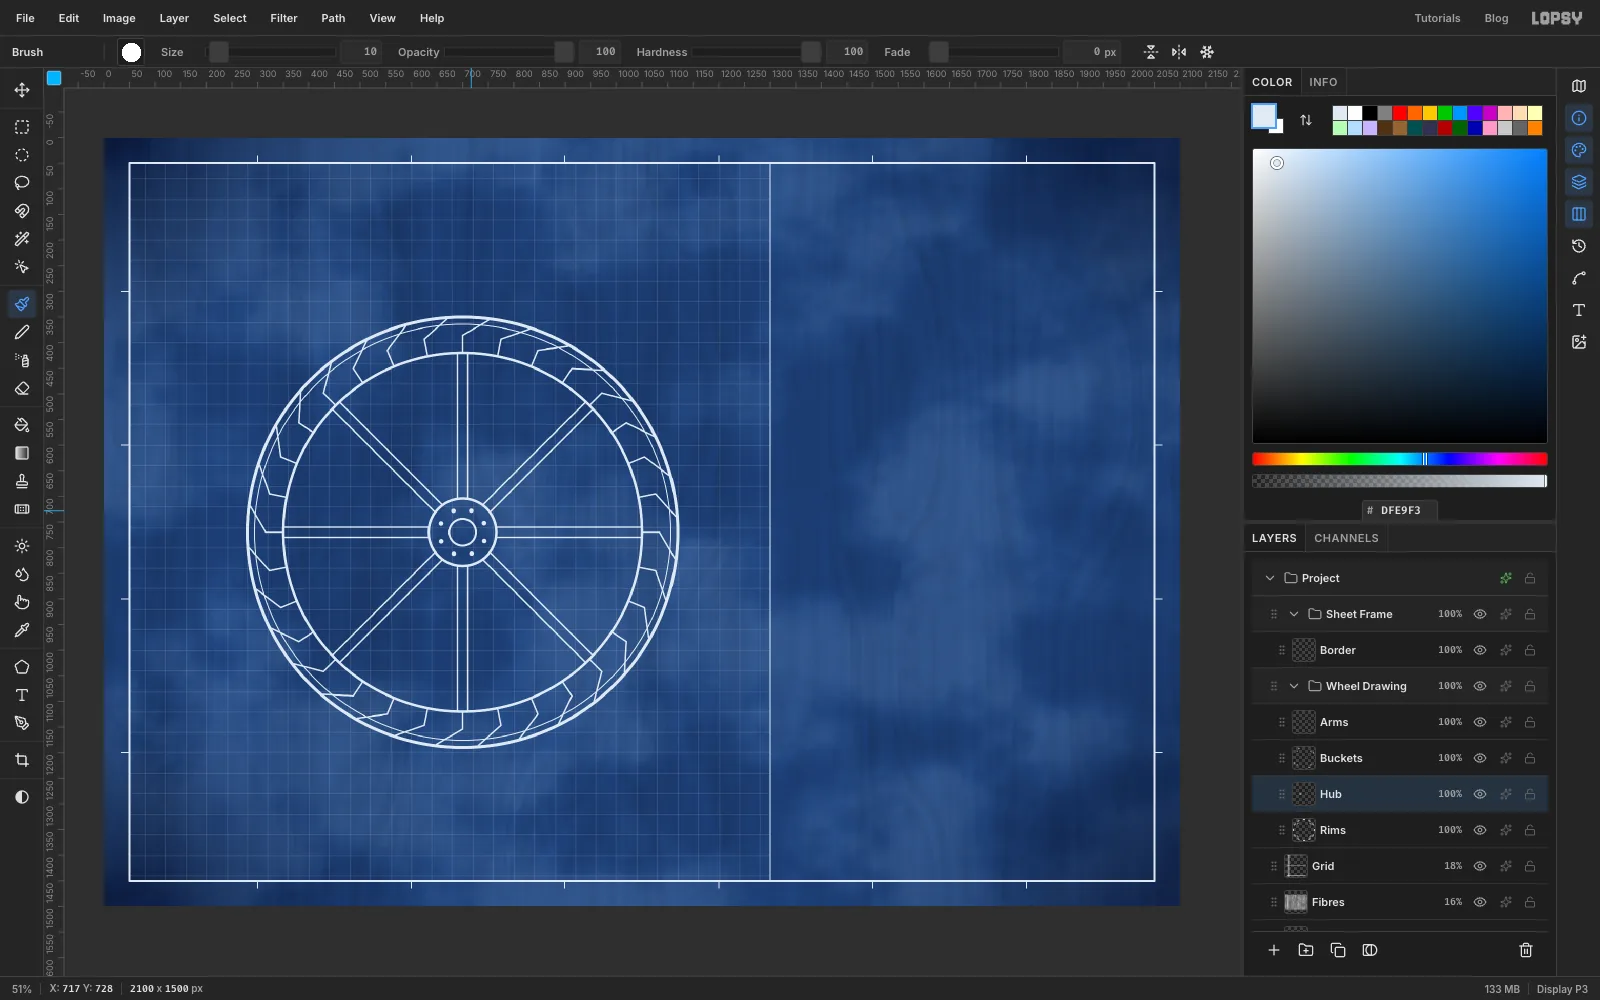
Click the Hub layer, set the brush Size to 10 and click once at 717, 728, a little above and to the right of the axle. Symmetry places all eight bolts. Click Radial Symmetry again to turn it off.
-
Make a dash-dot brush for centre lines
Engineers mark the centre of a circle with a thin chain line, a long dash and then a dot. Lopsy doesn't ship one, so make it. Brush tips are taken from the dark pixels in a selection.
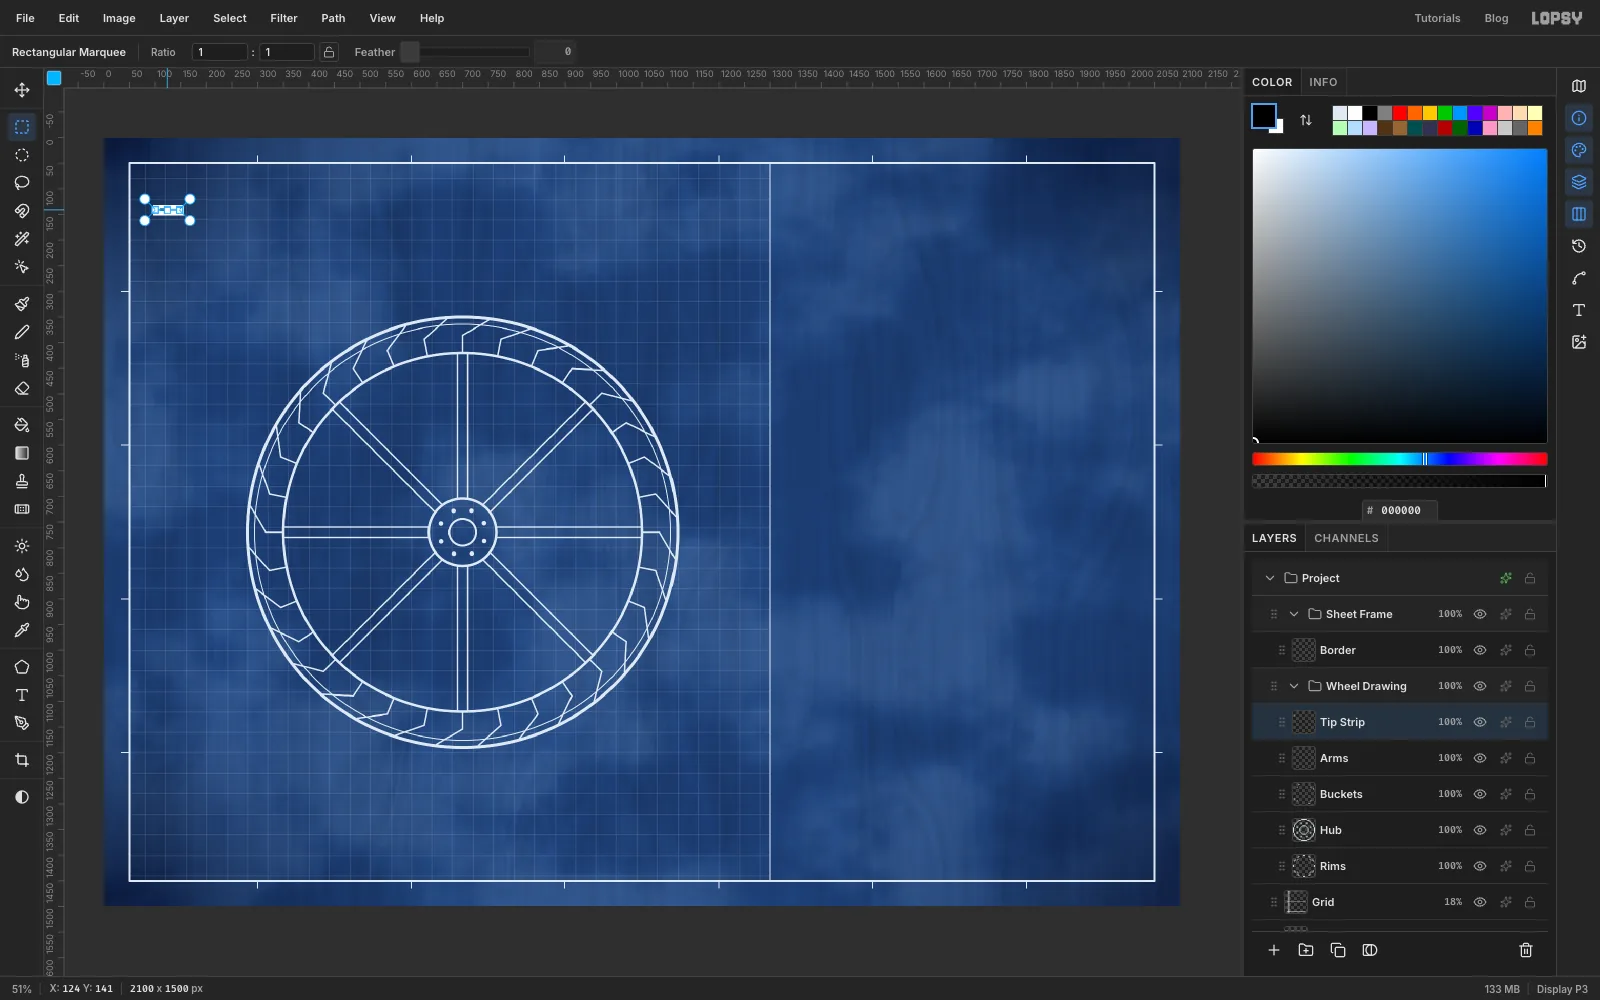
Add a layer called Tip Strip. With the exact-corners marquee dialog:
- Select 96, 132 to 156, 152, set the foreground to white and choose Edit → Fill.
- Set the foreground to black . Select 100, 140 to 130, 142 and fill it (the 30 px dash).
- Select 136, 140 to 142, 142 and fill it black (the 6 px dot).
- Select 100, 140 to 148, 142. That's one 48 px repeat: dash, gap, dot, gap.
Choose Edit → Define Brush…, name it Dash Dot, and deselect. Delete the Tip Strip layer. The new tip is now the active brush.
-
Draw the horizontal centre line
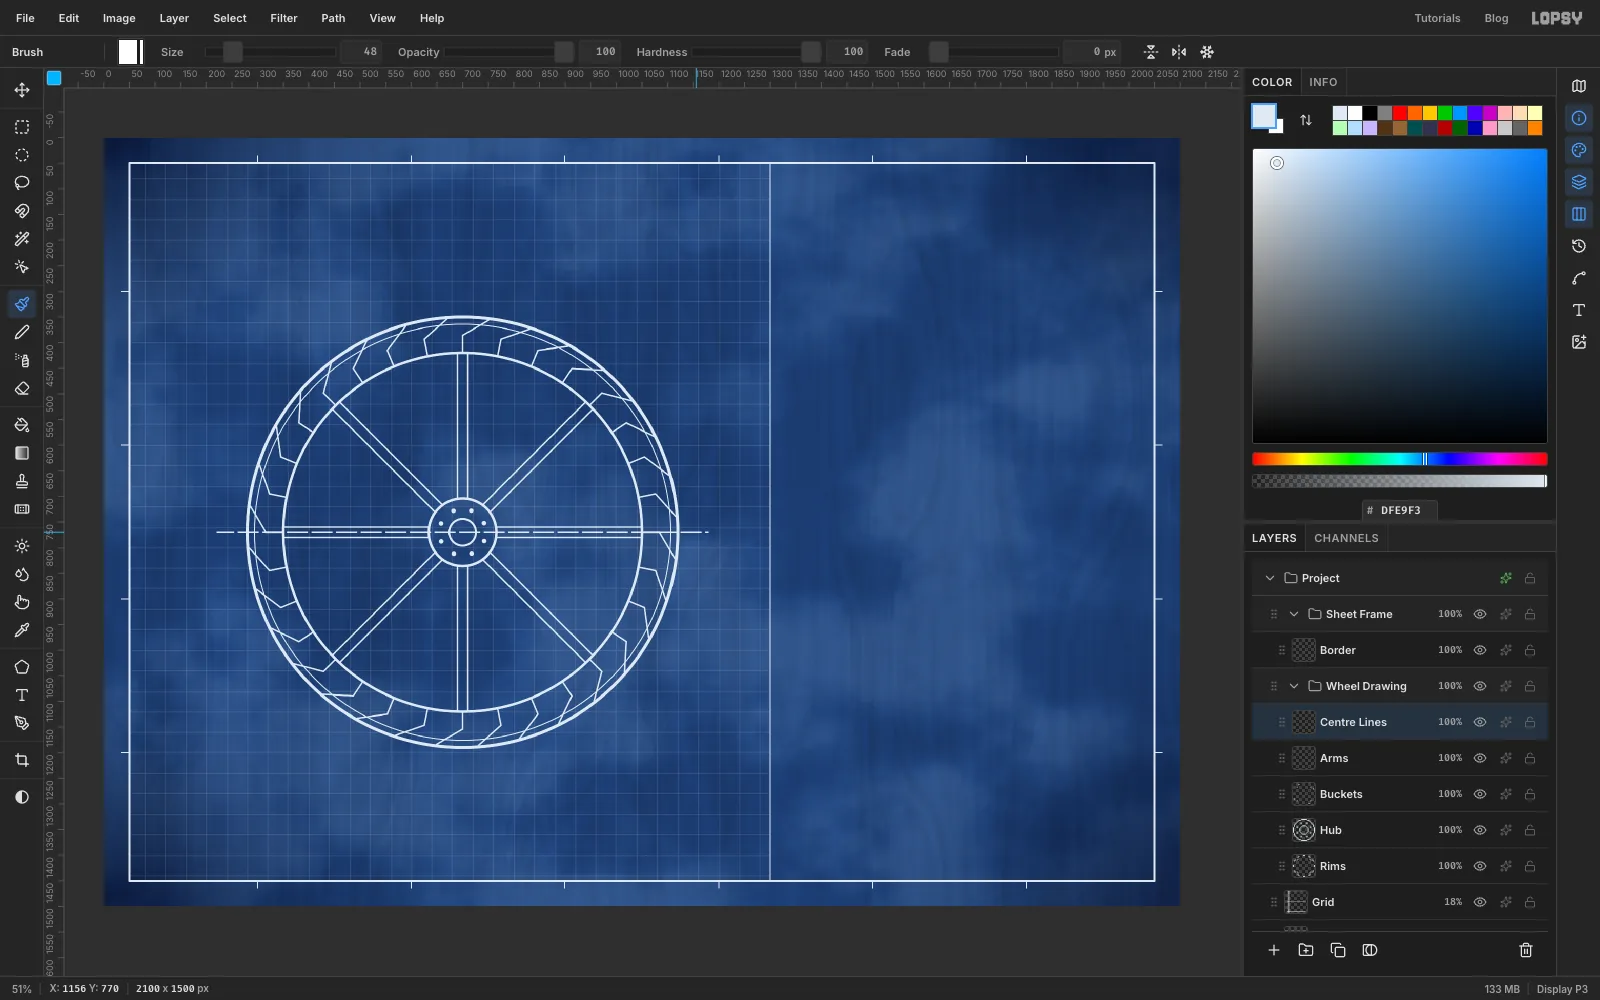
Click Arms and add a layer called Centre Lines. Set the brush Size to 48. Open the brush presets, go to the Shape tab and set Spacing to 100% so the repeats sit end to end. Close the panel.
With the foreground still , click at 244, 770 and Shift-click at 1156, 770. The line starts and ends the same distance from the hub, which matters for the next step.
-
Turn a copy upright
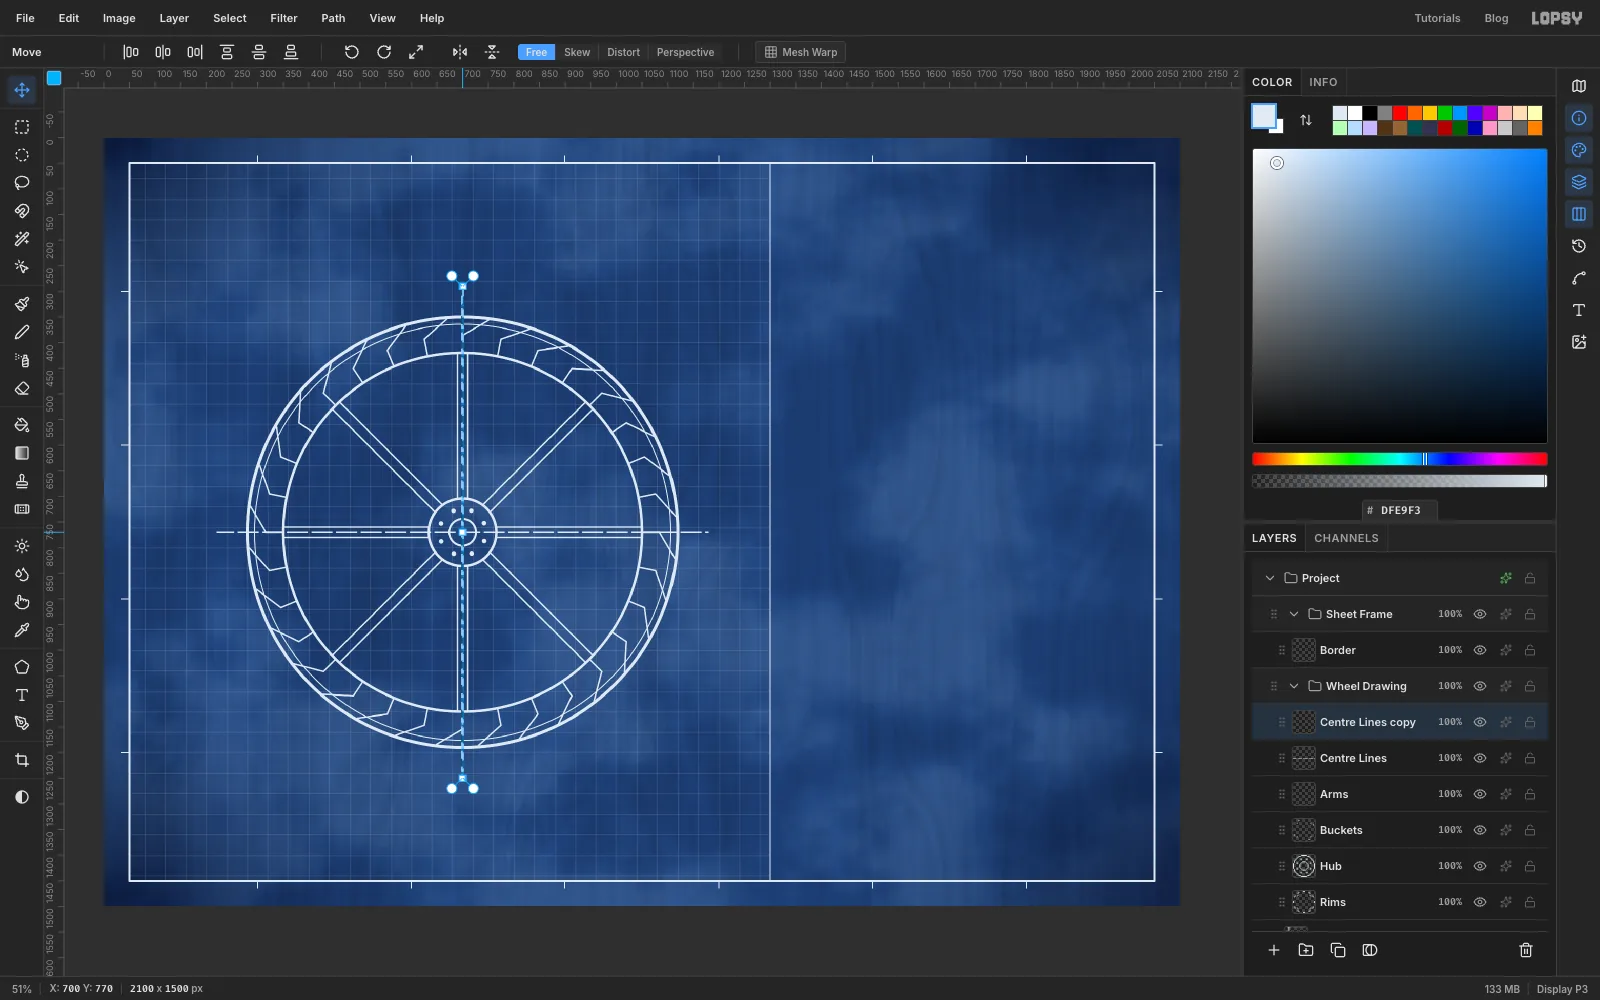
The tip doesn't rotate with the stroke, so a vertical line drawn with it would come out as a stack of flat dashes. Turn a copy instead:
- Click Duplicate Layer.
- Marquee from 220, 750 to 1180, 790. That's a box centred on the hub.
- Pick the Move tool and click Rotate 90° CW in its options bar.
The copy spins about the centre of the box, so it stands up through the hub. Press Cmd+D, choose Layer → Merge Down and set Centre Lines to 60%. Centre lines should be lighter than the parts they measure.
-
Build the flume and the trestle
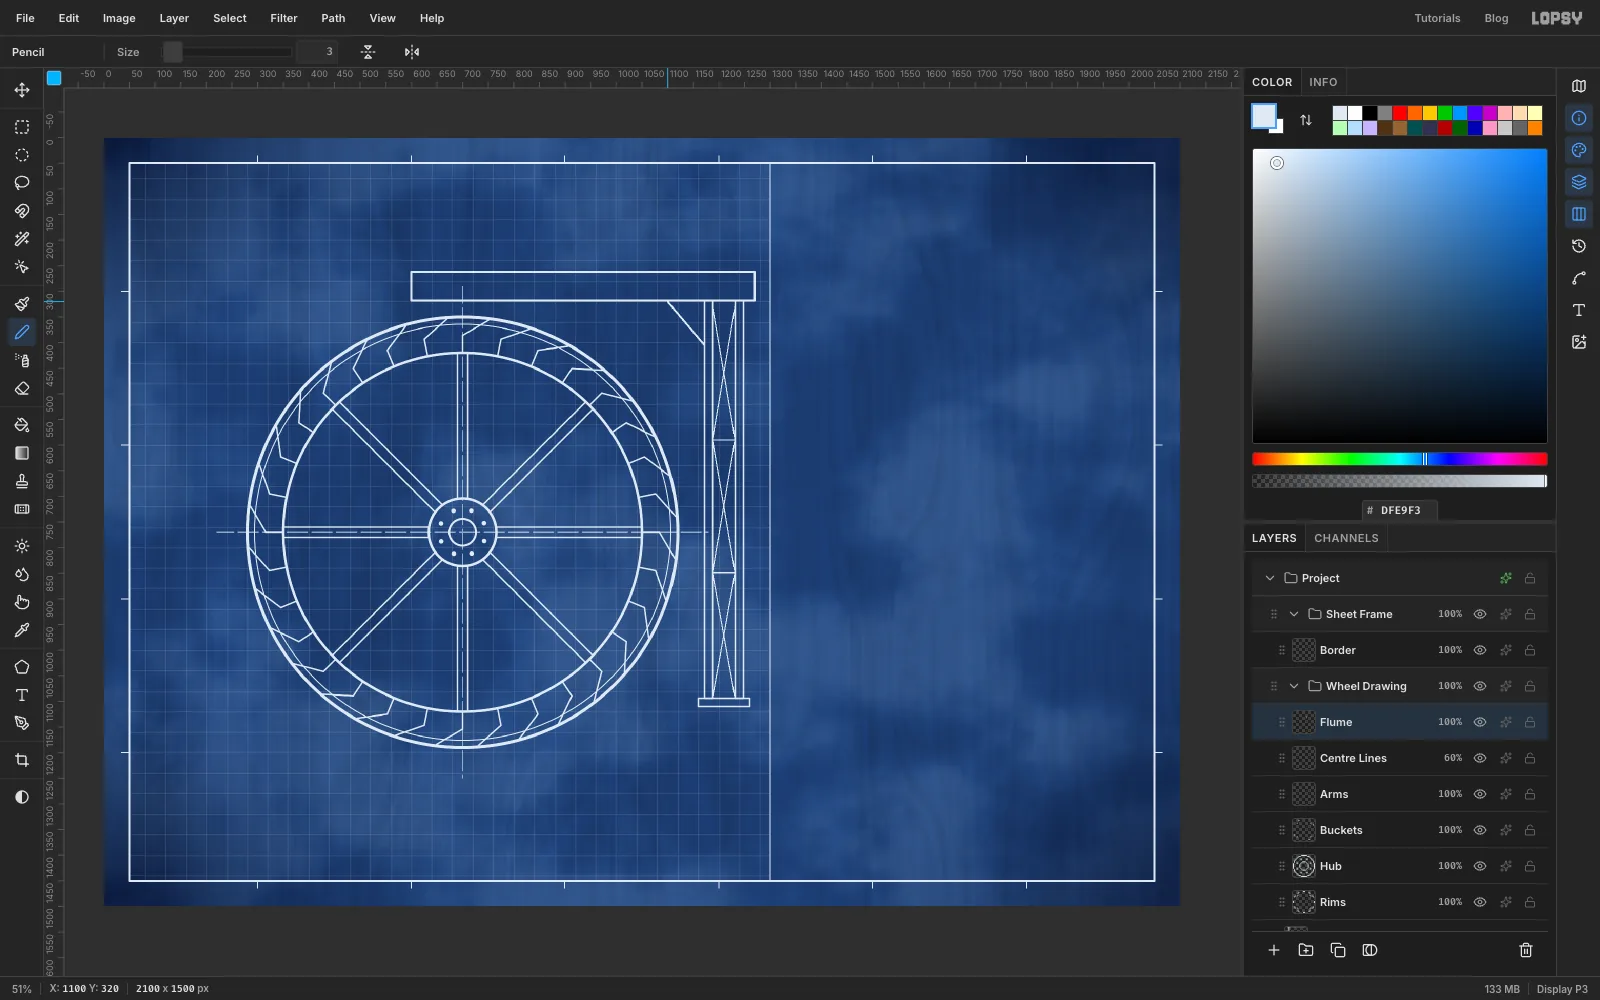
An overshot wheel is fed from above by a wooden channel called a flume. Add a layer called Flume. With the Shape tool on Rectangle, no fill and a white stroke, click each centre point and type each size:
- the flume: Width 4, centre 935, 290, 670 × 56
- two posts: Width 3, centres 1180, 706 and 1240, 706, each 16 × 776
- a footing: centre 1210, 1102, 100 × 16
Then pick the Pencil at Size 2. Draw horizontal ties between the posts at y 590 and 850, and an X of braces in each of the three bays between them. Switch to Size 3 and draw a knee brace from the left post at 1172, 404 up to the underside of the flume at 1100, 320.
-
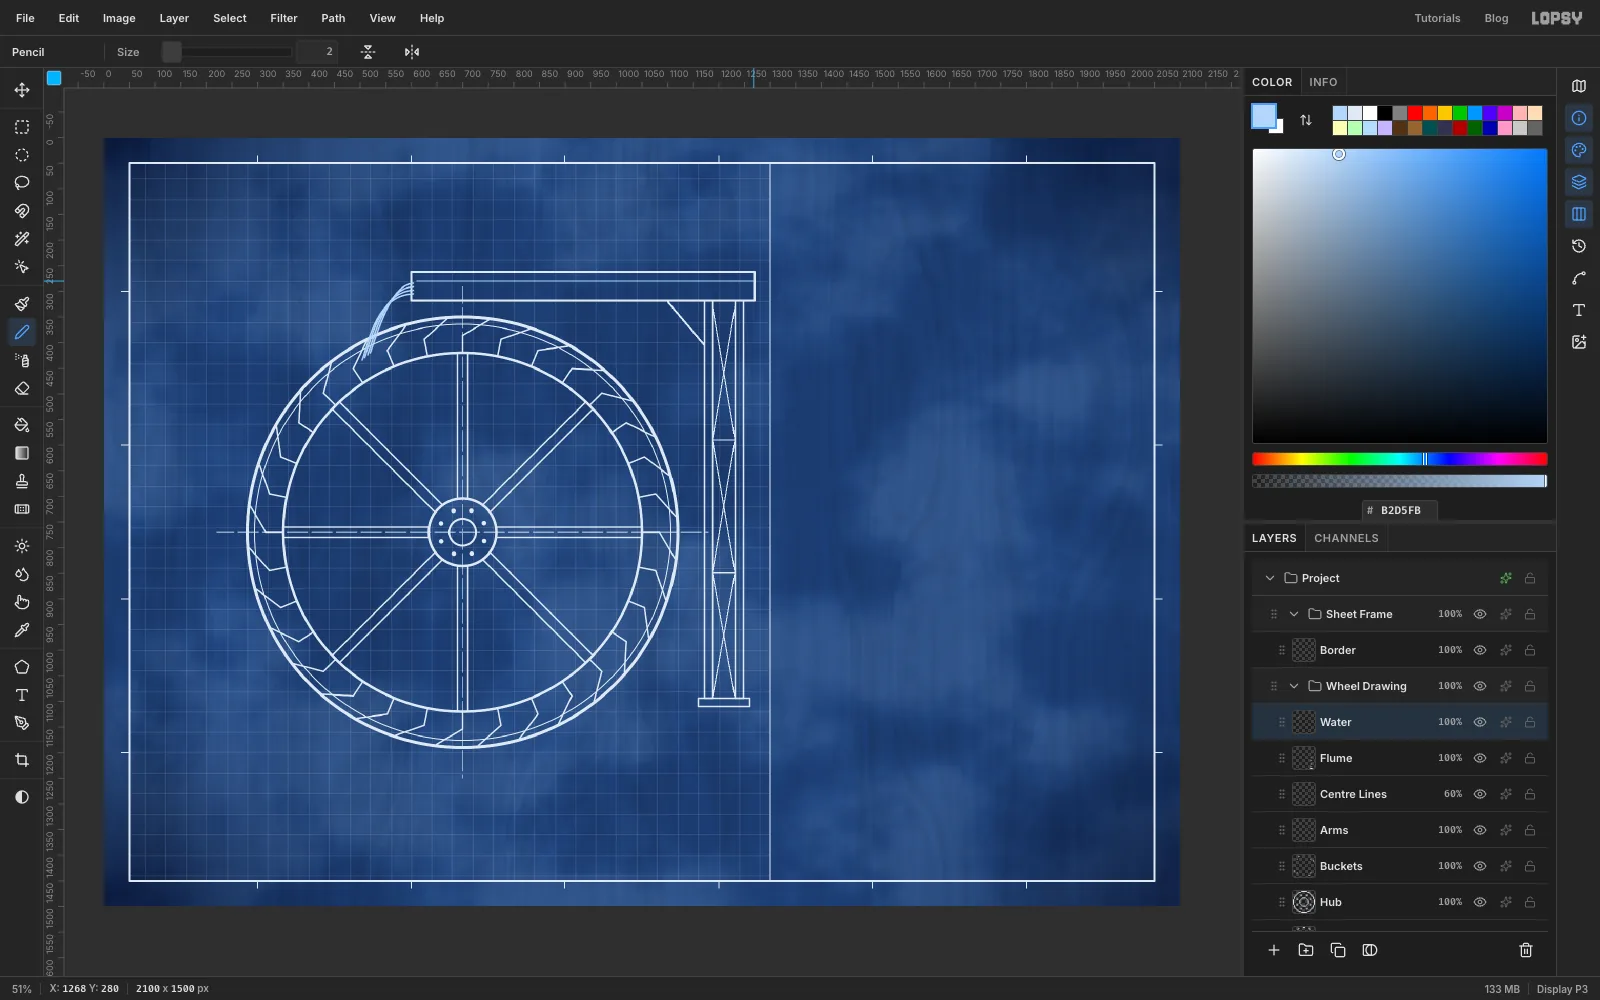
Pour the water
Add a layer called Water and set the foreground to . Pick the Pen tool and set its Stroke to 3. For each stream:
- Press at the open end of the flume, about 604, 284, and drag a little to the left to pull out a handle.
- Press down on the buckets at about 520, 420 and drag downward.
- Press Enter to stroke the path.
Draw four streams, starting each one about 7 px lower at the flume and landing a little further left. Delete each path in the Paths panel after you stroke it. The next stream starts only 7 px from the last one's first anchor, and a press that close would grab that anchor instead of starting a new path. Then pick the Pencil at Size 2 and draw the water level inside the flume, from 612, 280 to 1268, 280.
-
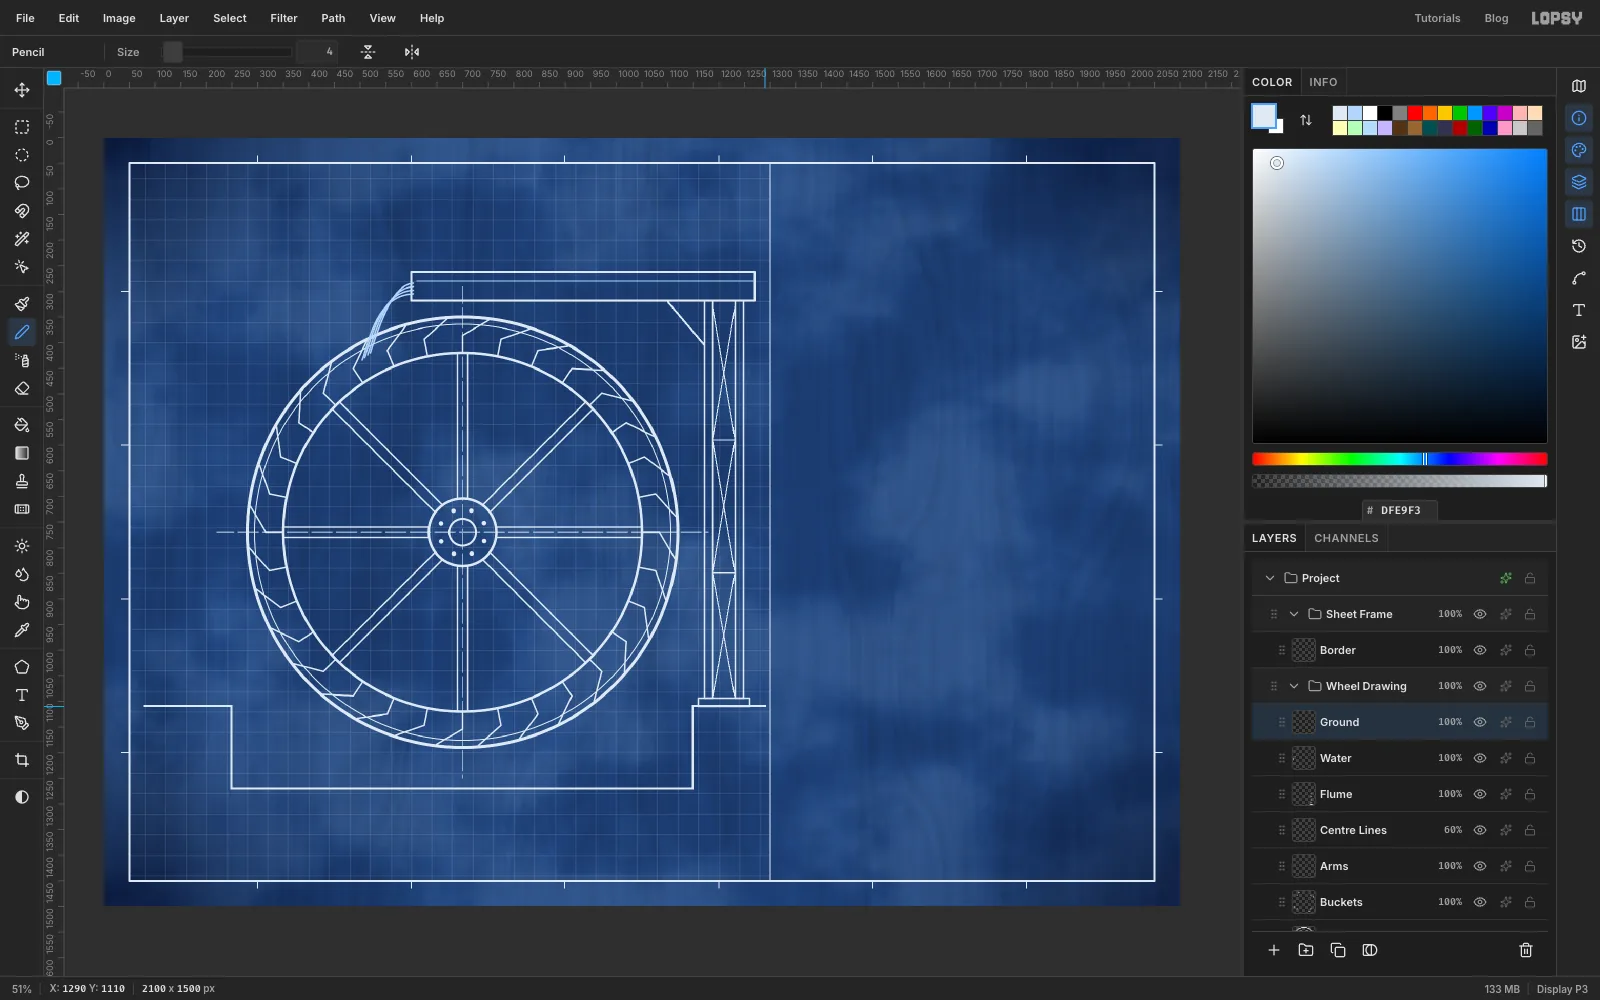
Dig the wheel pit
Add a layer called Ground. Pick the Pencil at Size 4 with . Click at 80, 1110, then Shift-click each corner in turn: 250, 1110, 250, 1270, 1150, 1270, 1150, 1110 and 1290, 1110. Shift-click joins each point to the last one, so the pit draws as one line.
-
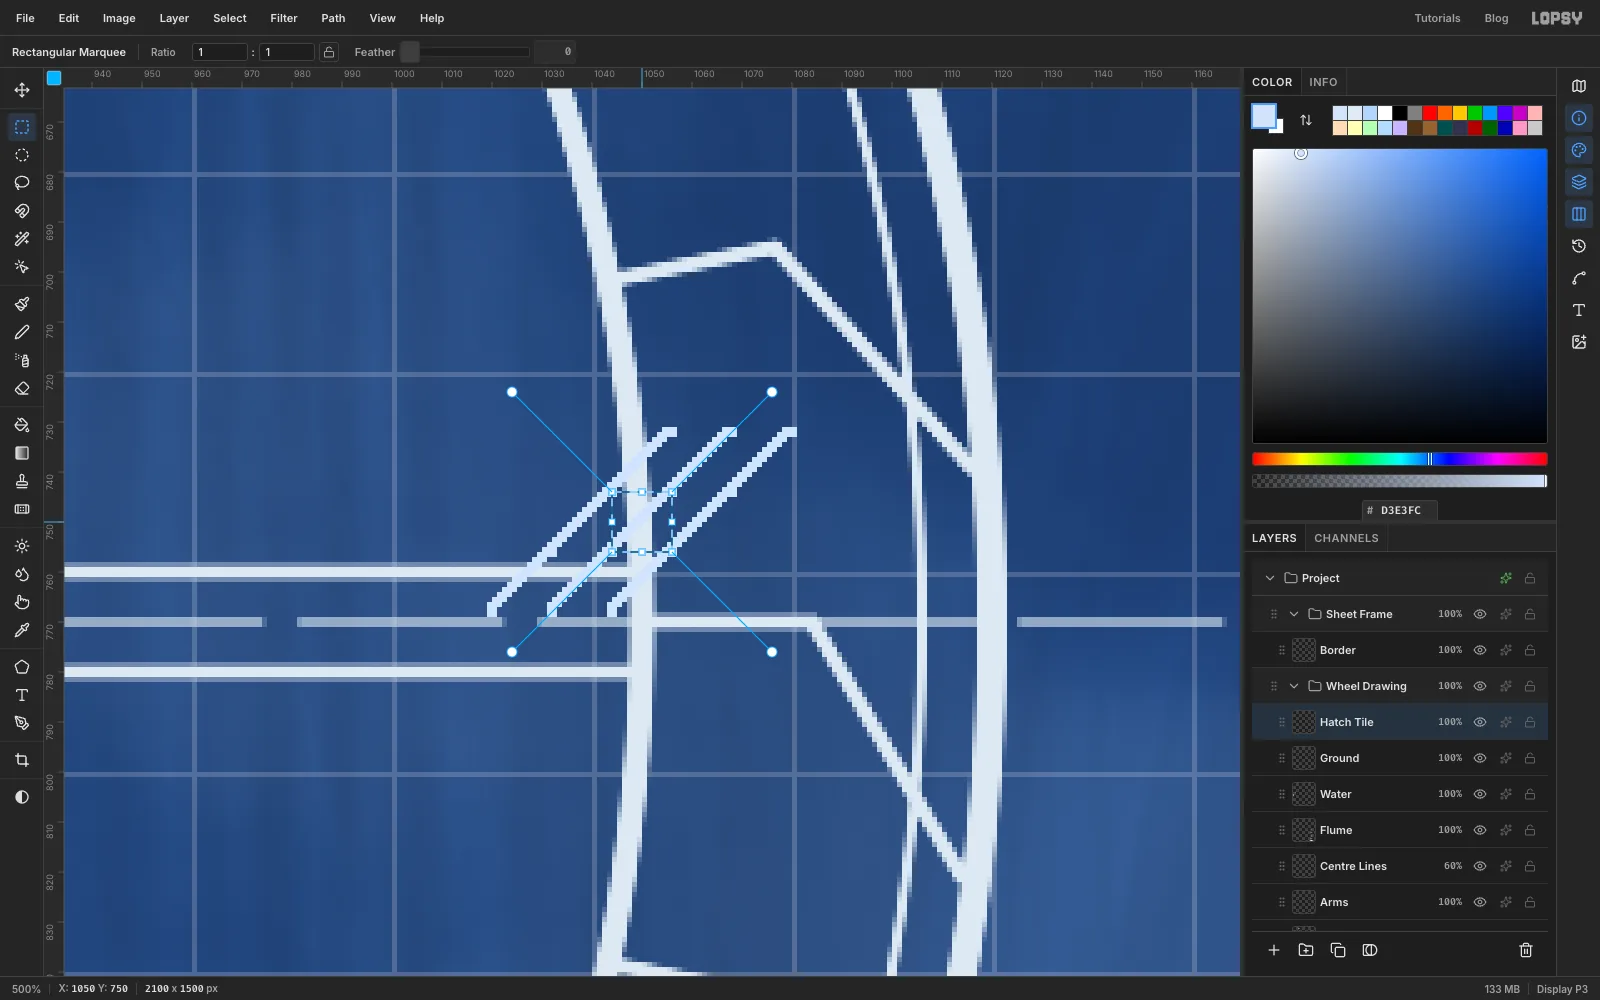
Draw a seamless hatch tile
Cut earth is shown with 45° hatching. Make it a 12 px pattern. The catch is that a diagonal line only tiles cleanly if the tile also holds the corners of its neighbours.
Add a layer called Hatch Tile. Pick the Pencil at Size 2 with . Choose View → Actual Size, then Zoom In four times. Draw three parallel diagonals 12 px apart:
- 1020, 768 to 1056, 732
- 1032, 768 to 1068, 732
- 1044, 768 to 1080, 732
Marquee the middle square from 1044, 744 to 1056, 756 and choose Edit → Define Pattern. Choose View → Fit to Screen, deselect, and delete the Hatch Tile layer.
-
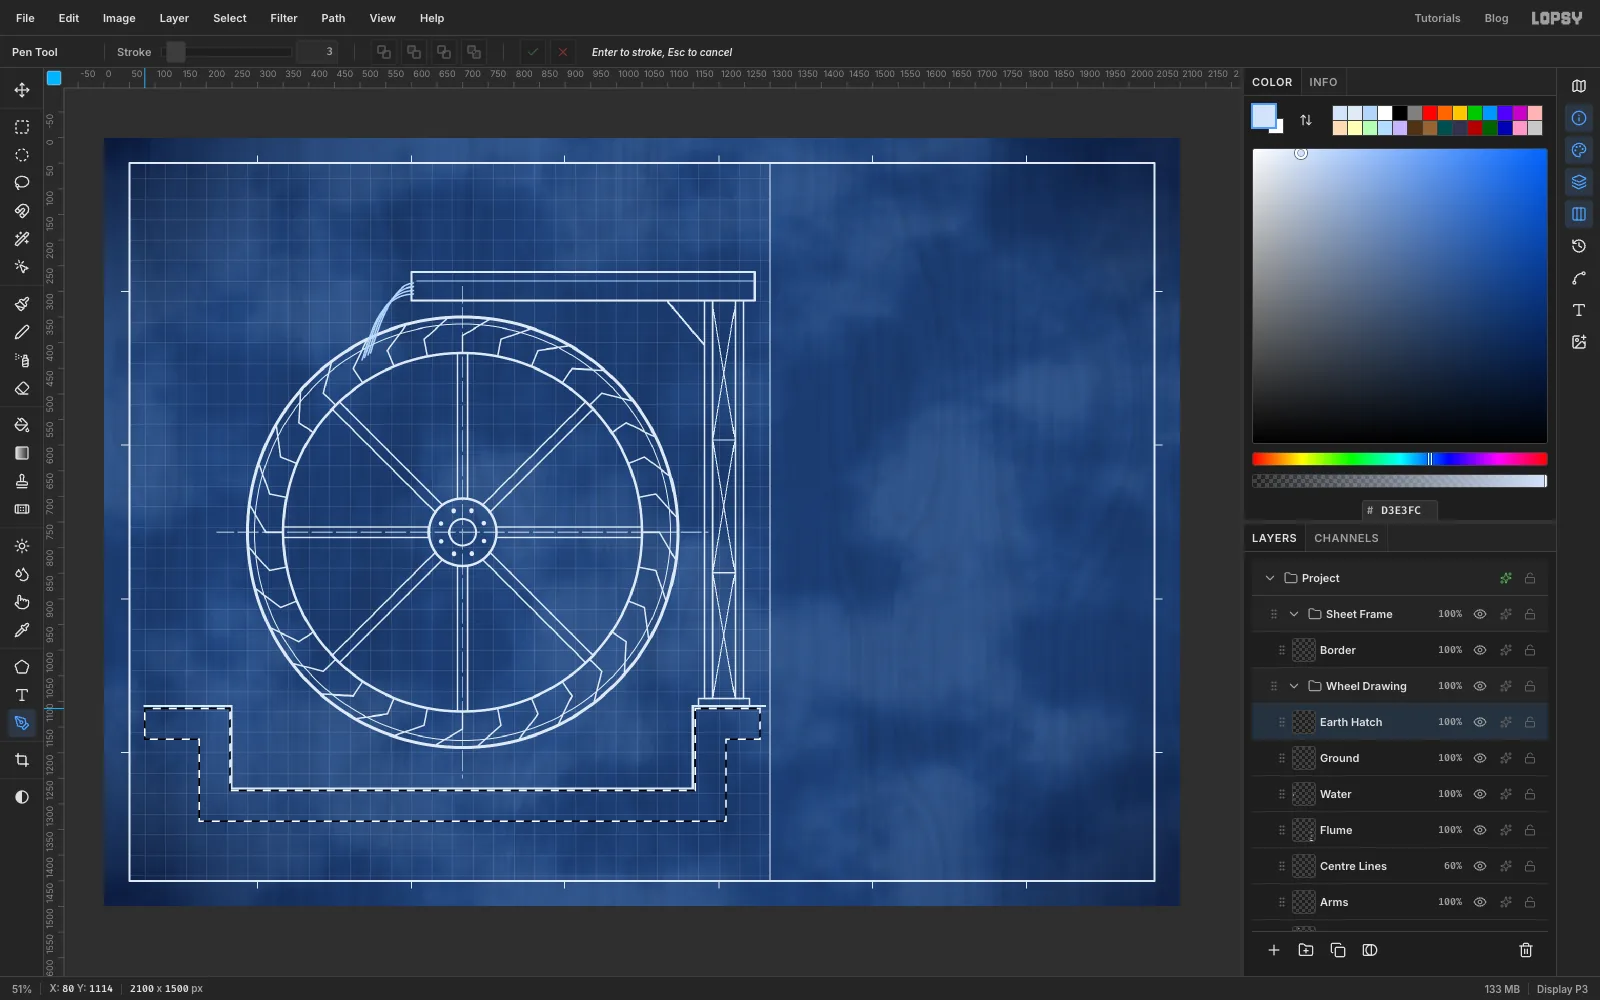
Hatch the earth around the pit
Click Ground and add a layer called Earth Hatch. The earth is a band 60 px thick that hugs the outside of the ground line and the pit. Pick the Pen tool and click its twelve corners in order, then click the first point again to close it:
- along the top: 80, 1114, 246, 1114, 246, 1274, 1154, 1274, 1154, 1114, 1280, 1114
- back along the bottom: 1280, 1174, 1214, 1174, 1214, 1334, 186, 1334, 186, 1174, 80, 1174
In the Paths panel, click Path to Selection, then Delete Path. Choose Edit → Fill with Pattern…, pick the 12×12 pattern and click Apply. Deselect and set the layer to 60%.
-
Add the tail-water lines
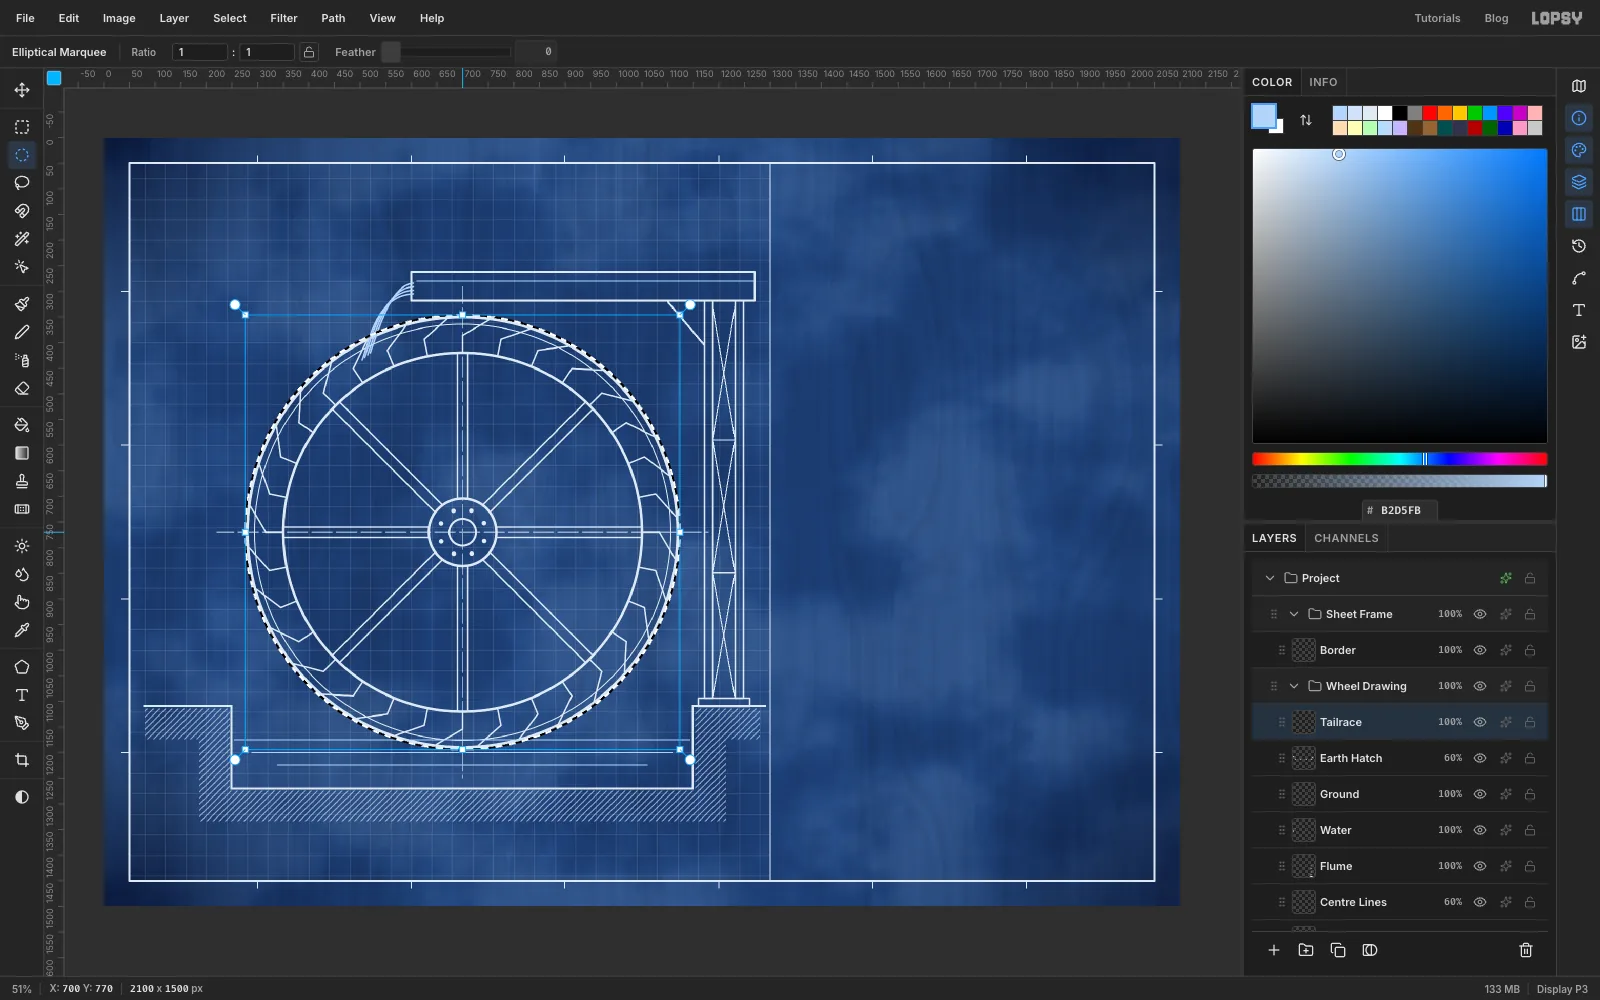
Add a layer called Tailrace. With the Pencil at Size 2 and , draw three level lines across the pit at y 1176, 1200 and 1224, each a little shorter than the one above.
The wheel stands in front of the water, so clear the lines from the wheel. Click the canvas with the Elliptical Marquee and enter From 276, 346 and To 1124, 1194, a circle just outside the shroud. Press Delete and deselect.
-
Draw the dimensions
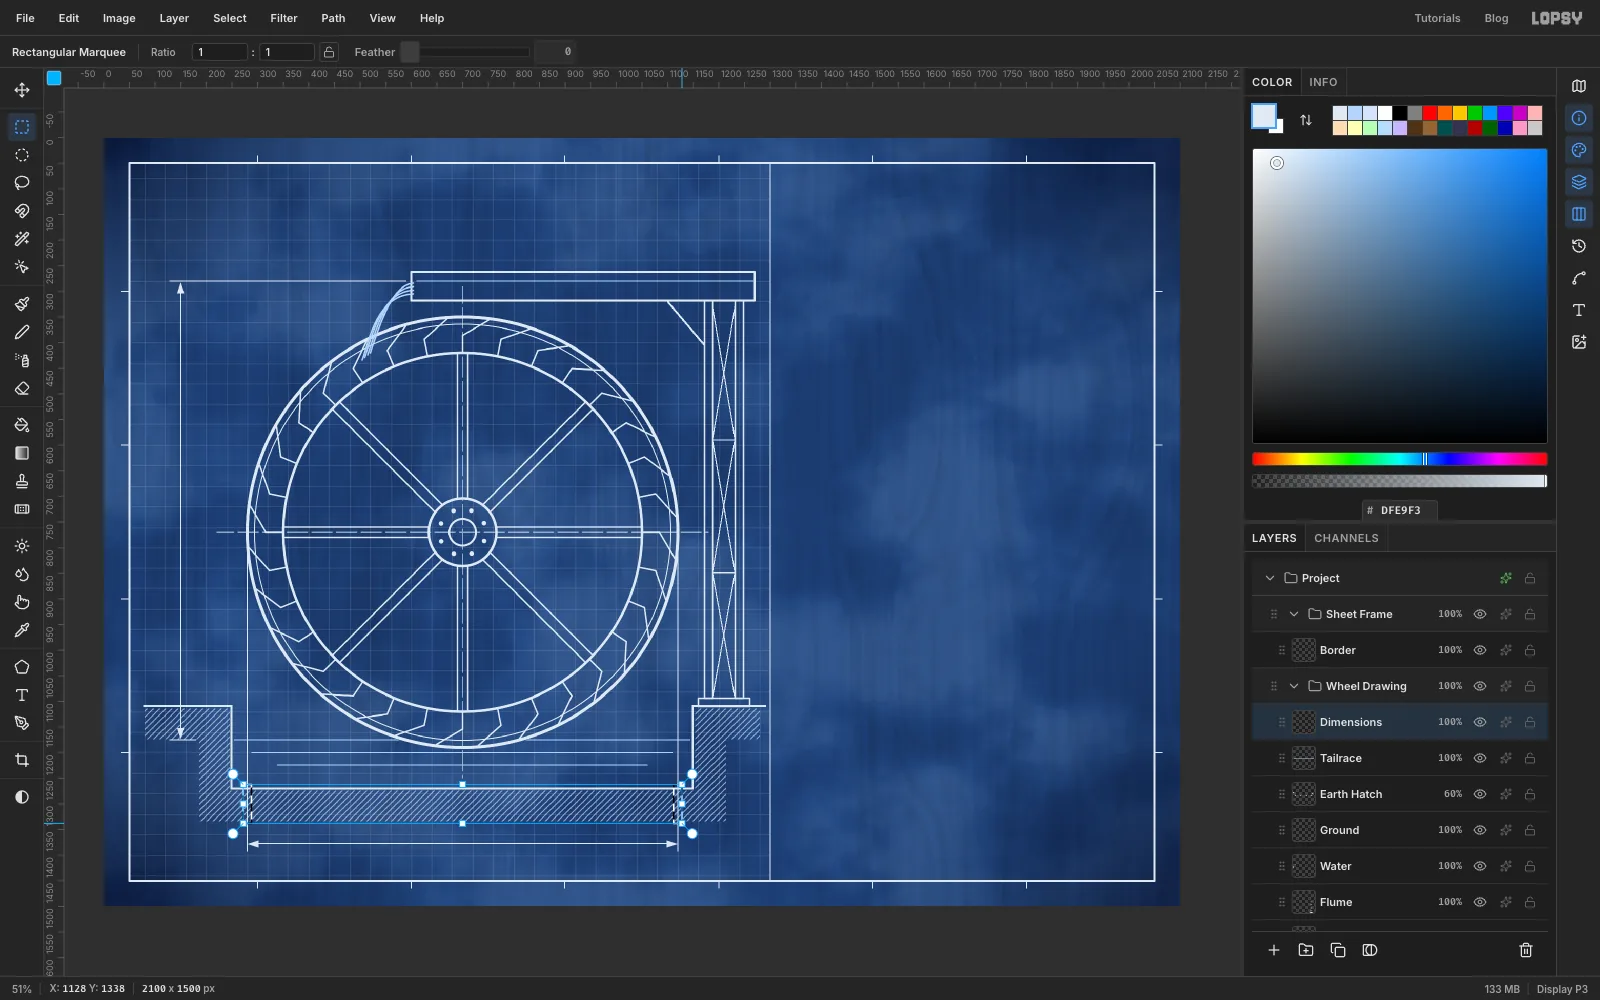
Add a layer called Dimensions and use the Pencil at Size 2 in line white.
Head, the height the water falls. Draw an extension line left from the flume's water level, from 590, 280 to 130, 280. Draw another left from the tail-water, from 180, 1176 to 130, 1176. Stop it short of the hatching. Then draw the dimension line between them at x 150, from 150, 296 down to 150, 1160.
Diameter. Draw extension lines straight down from the left and right edges of the wheel, from 280, 782 and 1120, 782 to y 1392. Then draw the dimension line between them at y 1378, from 296 to 1104.
Arrowheads. Each end gets a solid triangle 22 px long and 14 px wide, its tip touching the extension line. Pick the Pen and click the three corners, then the first one again to close it:
- top of the head line: 150, 282, 143, 304, 157, 304
- bottom of the head line: 150, 1174, 143, 1152, 157, 1152
- left end of the diameter: 280, 1378, 302, 1371, 302, 1385
- right end of the diameter: 1120, 1378, 1098, 1371, 1098, 1385
After each triangle, click Path to Selection and Delete Path in the Paths panel, choose Edit → Fill, and deselect.
Extension lines shouldn't cross a hatched section. Marquee a thin box around the left extension line where it crosses the pit floor and the hatch, from 272, 1262 to 288, 1338. Hold Shift and drag a matching box from 1112, 1262 to 1128, 1338 over the right one to add it, then press Delete.
-
Mark the tail-water level
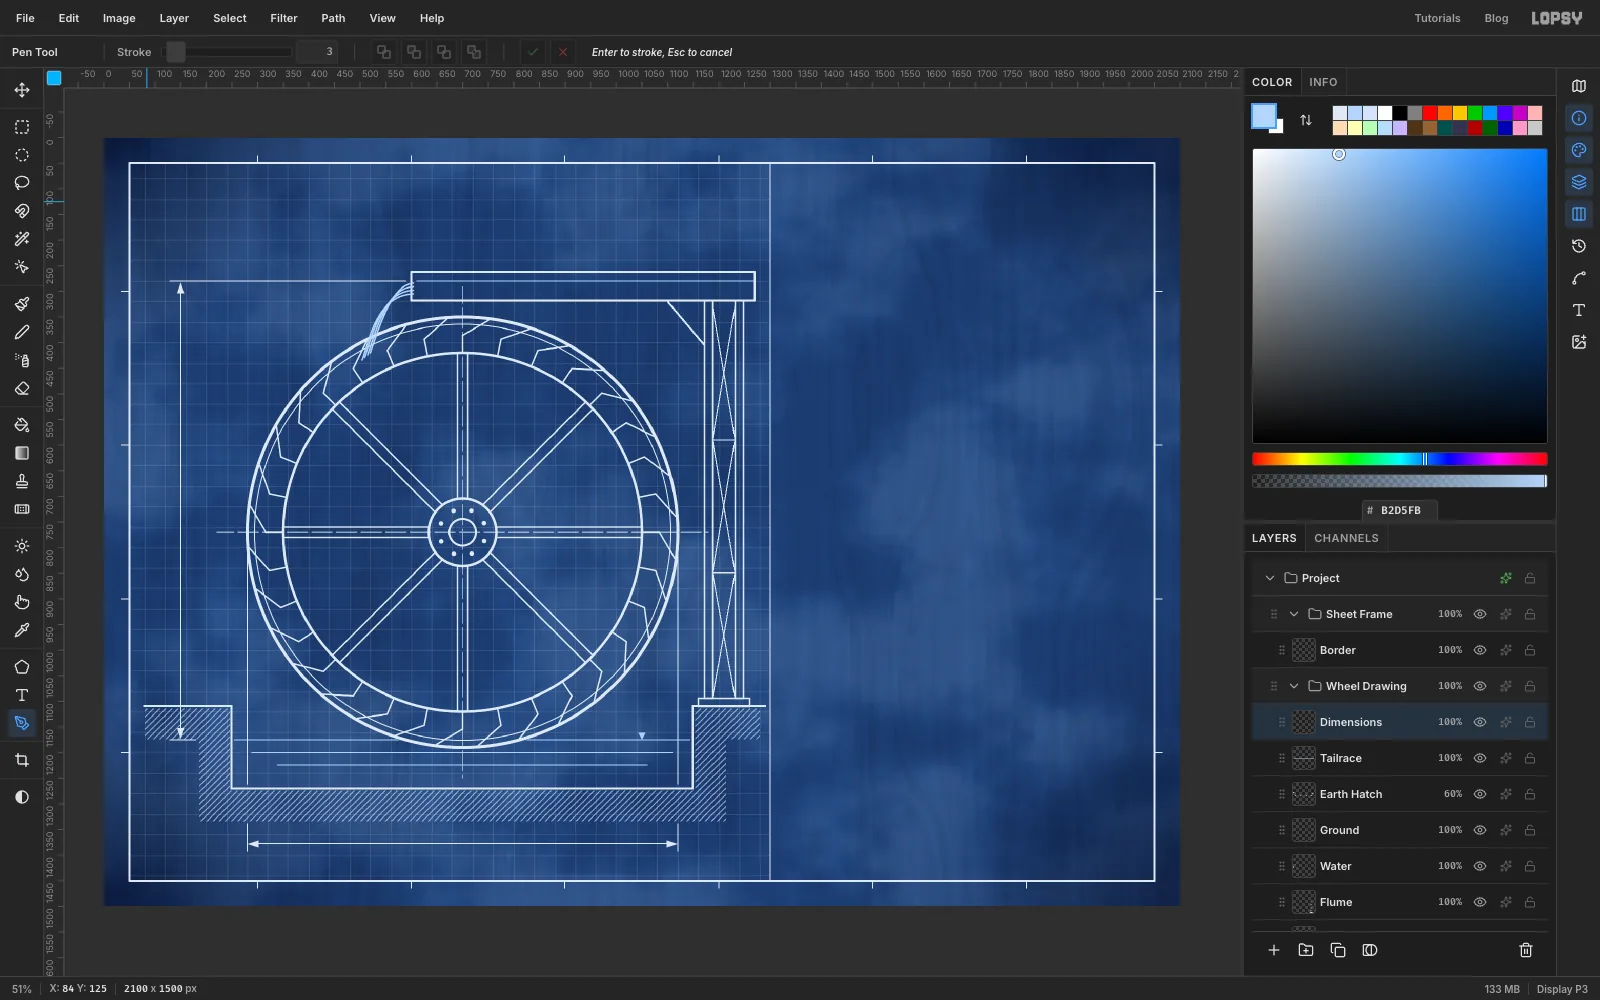
Deselect. Engineers mark a water level with a small downward triangle sitting on the line. With the Pen, click 1043, 1161, 1057, 1161 and 1050, 1175, then close it. Use Path to Selection, delete the path, set the foreground to , choose Edit → Fill and deselect.
-
Add the balloons and leaders
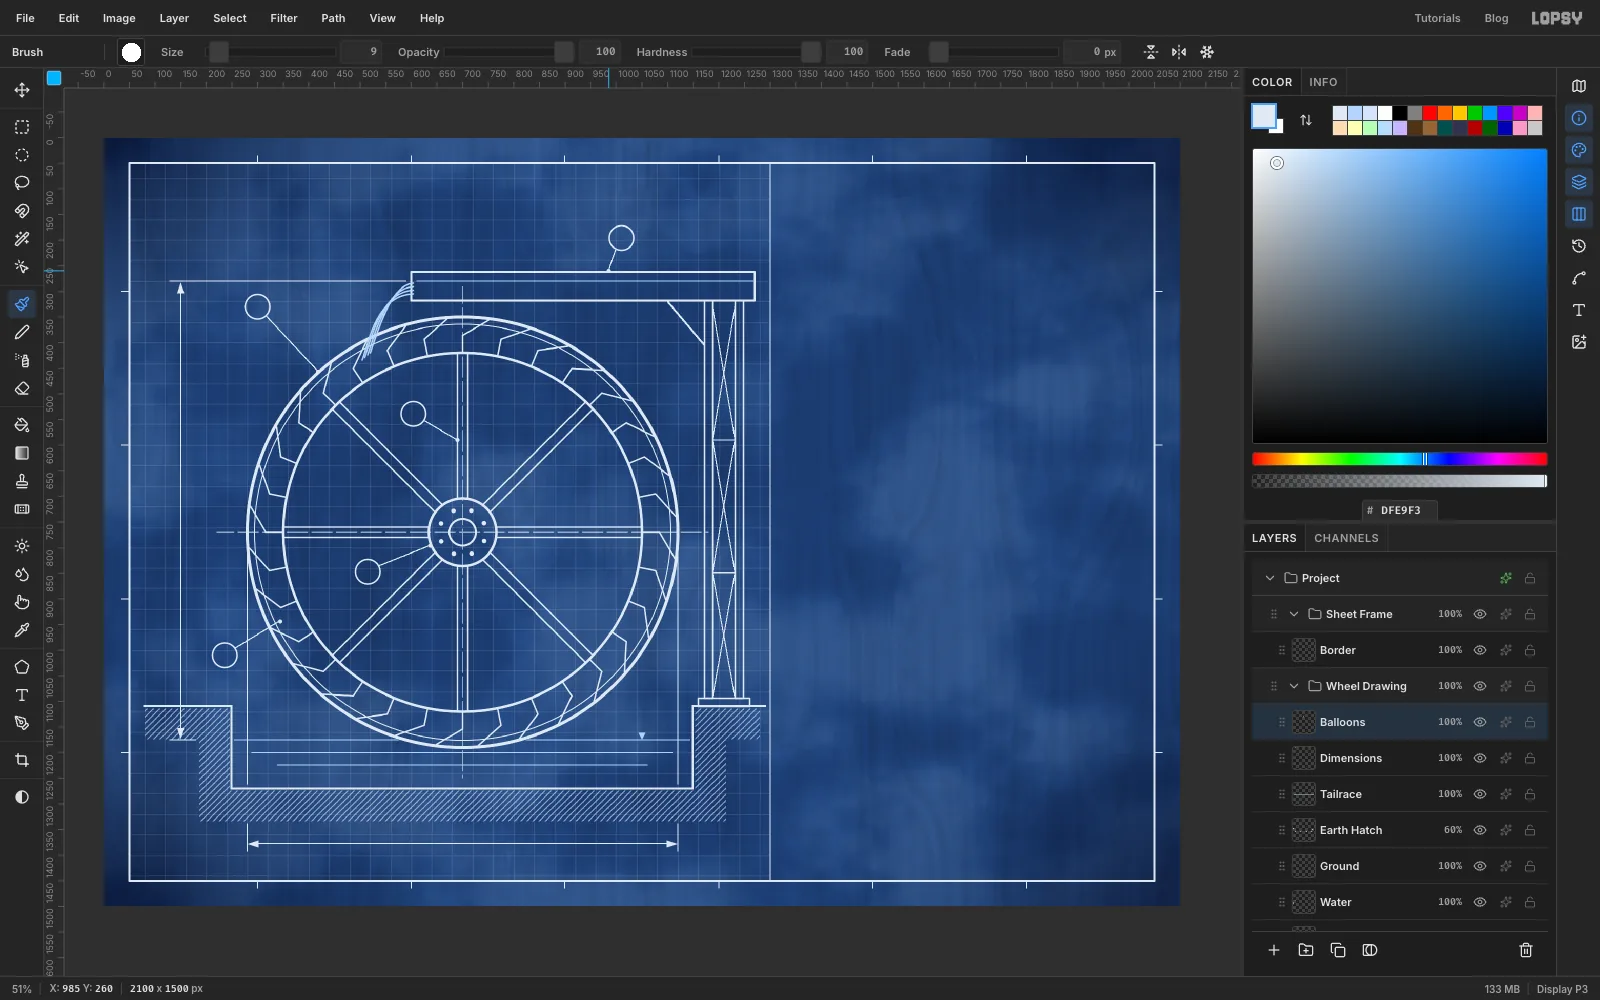
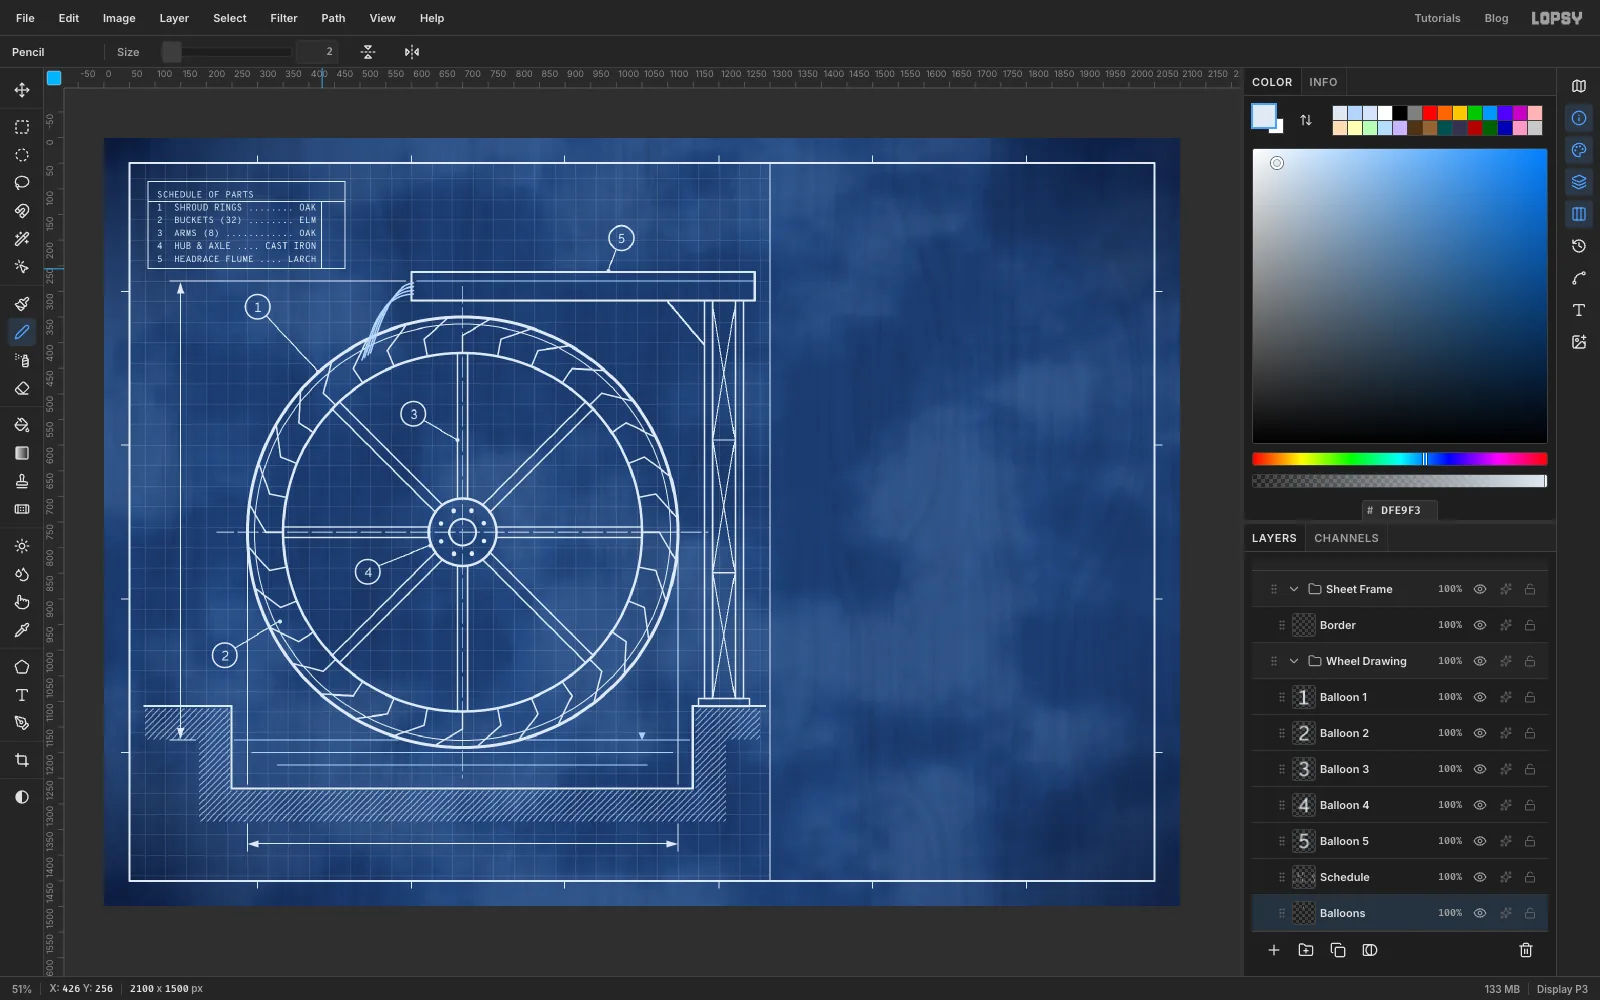
Drawings number each part in a small circle, called a balloon, with a line to the part. Add a layer called Balloons. With the Shape tool on Ellipse, Width 3, no fill, make five 48 × 48 circles. Place them in clear space:
- top left, outside the wheel, at 300, 330 (the shroud)
- lower left, at 236, 1010 (a bucket)
- inside the wheel between the top arms, at 604, 539 (an arm)
- inside the wheel, left of the hub, at 515, 847 (the hub)
- above the flume at 1010, 196 (the flume)
With the Pencil at Size 2, draw each leader from the edge of its balloon to the part. Leader 3 must end on an arm line, not in the gap between two. Pick the Brush with the Hard Round preset at Size 9 and click once at the end of each leader to put a dot on it.
-
Number the balloons and box the schedule
Pick the Text tool. Before each new piece of text, click a raster layer such as Balloons. If a text layer is active, the options bar restyles it instead of setting up the next one. Use Overpass Mono in line white:
- 26 px numbers 1 to 5, one in each balloon. Click in empty space, type, press Tab to commit, then nudge it into the centre of its circle with the Move tool and the arrow keys.
- an 18 px parts list with its top-left corner at 100, 100. Type each line, pressing Enter between them:
SCHEDULE OF PARTS,1 SHROUD RINGS ........ OAK,2 BUCKETS (32) ........ ELM,3 ARMS (8) ............ OAK,4 HUB & AXLE .... CAST IRON,5 HEADRACE FLUME .... LARCH
Lopsy names each text layer after its text. Renaming them (Balloon 1, Schedule and so on) is optional, but it makes the panel easier to read.
Now box the list. Click Balloons and pick the Pencil at Size 2. Draw a box around the parts list with about 14 px of margin and an extra 60 px on the right. Rule a line under the heading. Add a vertical line about 14 px to the right of the longest line, from the heading rule down to the bottom of the box. That narrow column will hold the red ticks.
-
Label the dimensions
Still clicking Balloons before each one, add these in Overpass Mono:
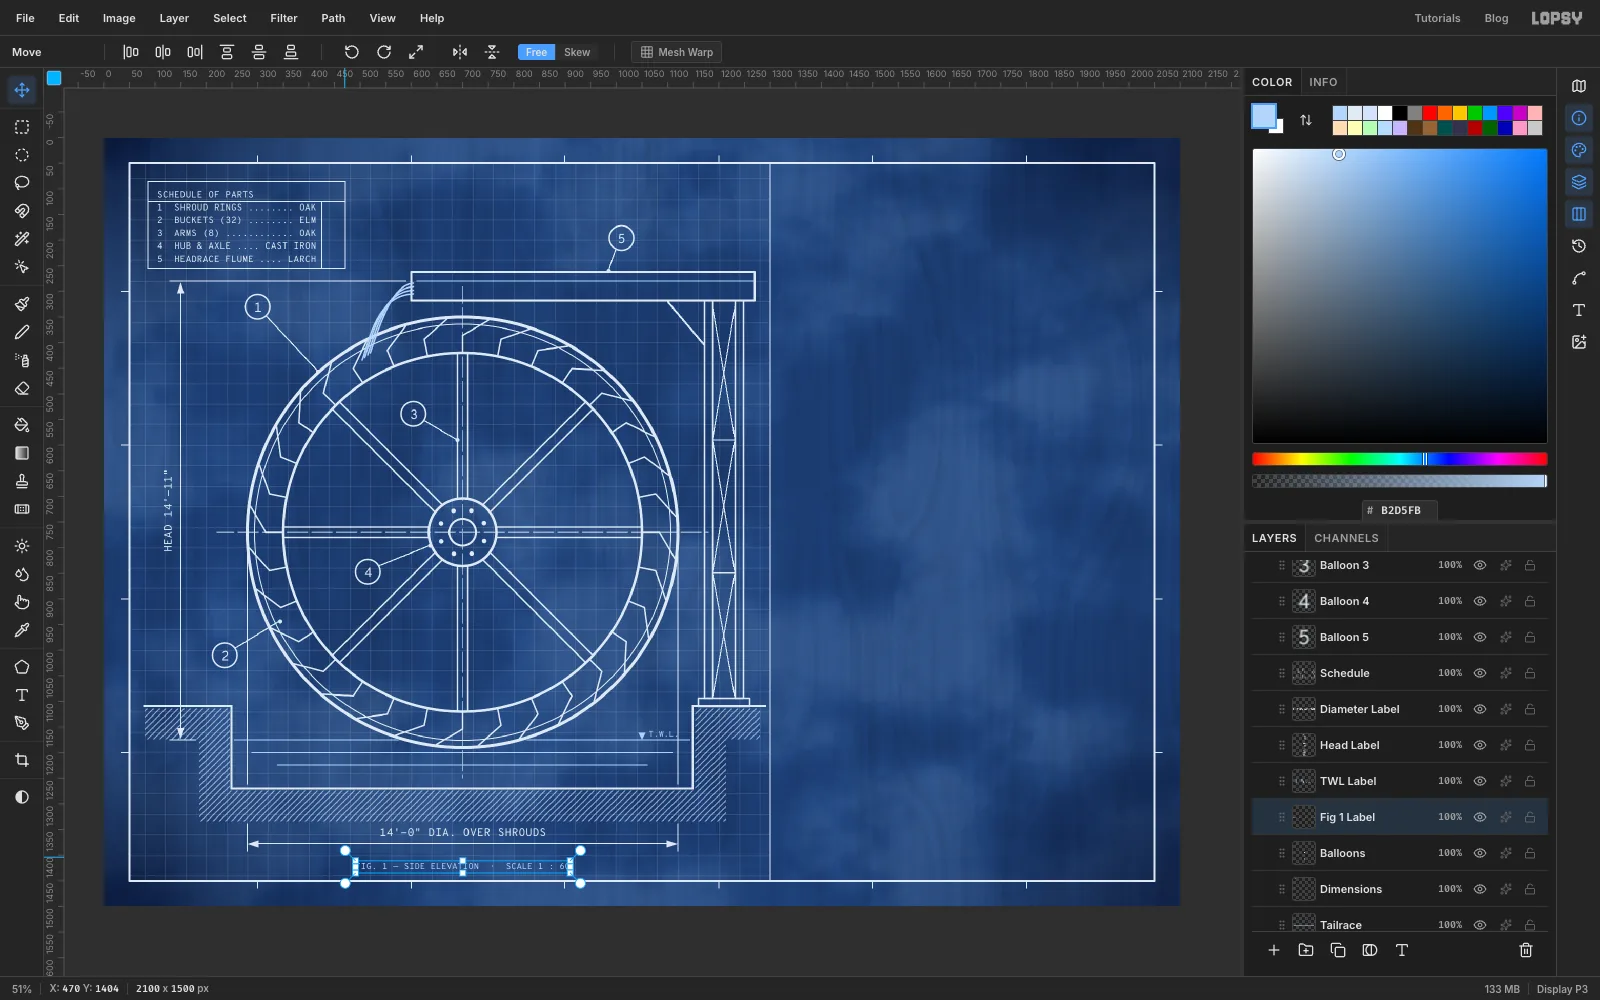
14'-0" DIA. OVER SHROUDSat 22 px in line white, centred above the diameter lineHEAD 14'-11"at 22 px in line white. With the Move tool, click Rotate 90° CCW, then nudge it to sit just left of the head dimension line.T.W.L.at 16 px in , just right of the triangleFIG. 1 — SIDE ELEVATION · SCALE 1 : 60at 17 px in , centred under the drawing at y 1420
The numbers are to scale. At 1:60 and 300 dpi, the 840 px wheel is exactly 14'-0", and the 896 px head is 14'-11".
-
Set the headline
Collapse the Wheel Drawing and Sheet Frame groups with their arrows. Click Sheet Frame and make a New Group called Invitation. Add an empty layer inside it called Text Anchor. Click it before each new piece of text, as before.
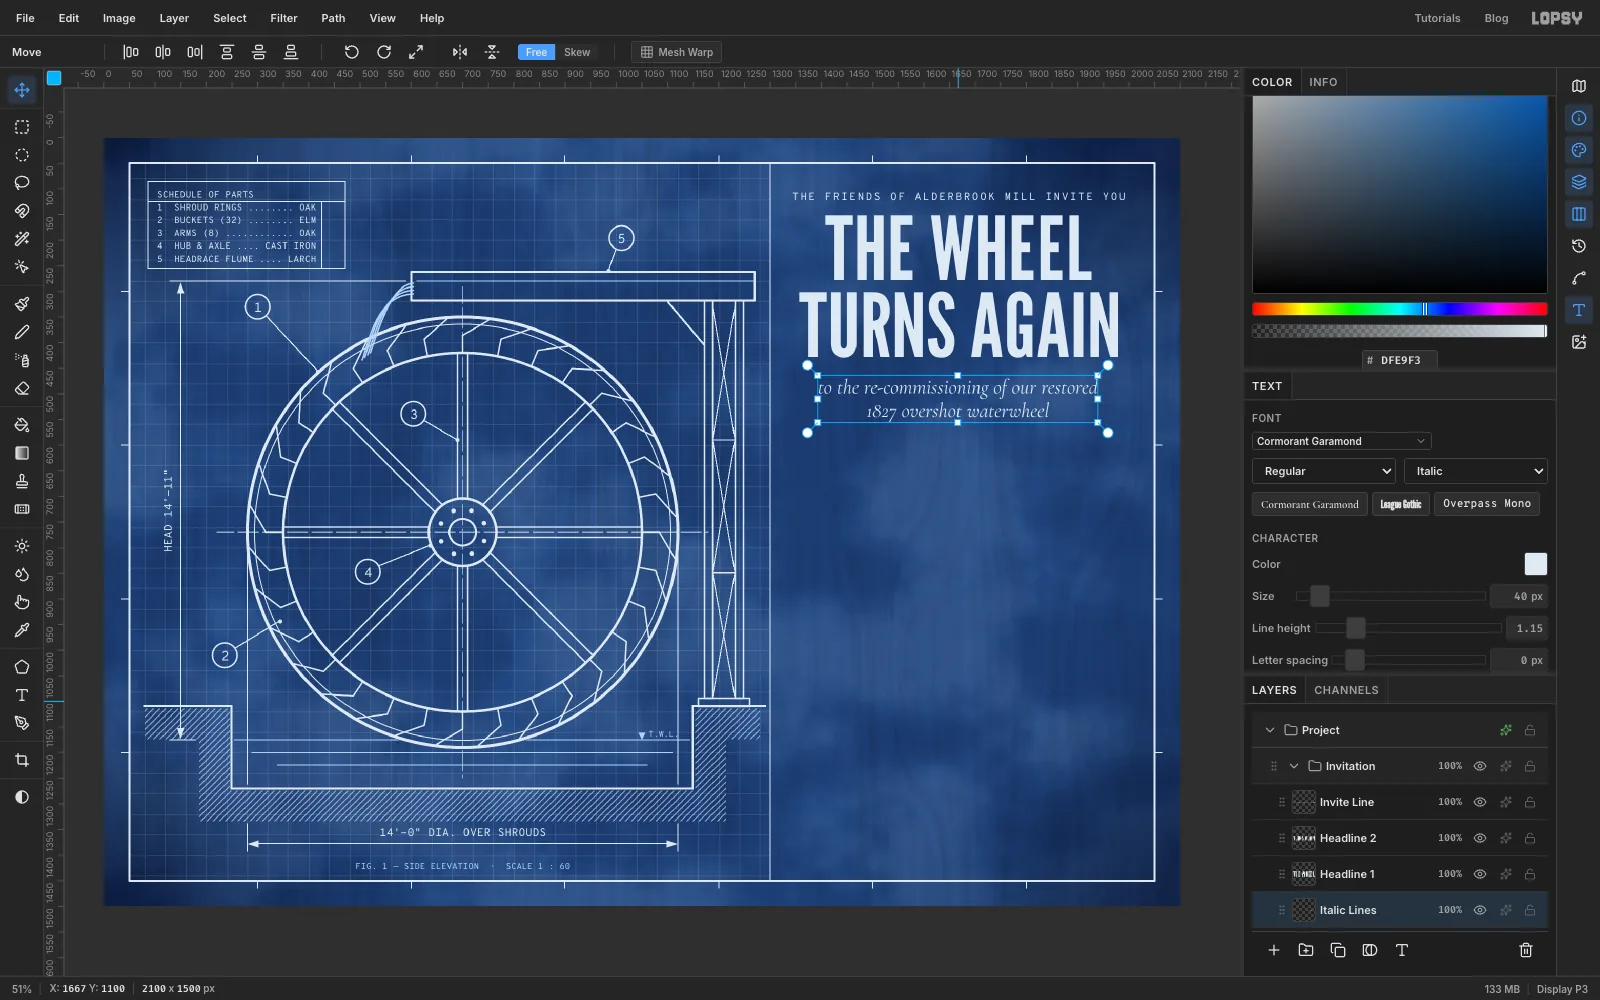
Centre everything in the column on x 1667, the line the photo plate will sit on. Set each line, then centre it with the Move tool and the arrow keys:
THE FRIENDS OF ALDERBROOK MILL INVITE YOUin Overpass Mono 21 px, with Letter spacing 3 in the Text panel, at y 114THE WHEELandTURNS AGAINin League Gothic 172 px, as two separate layers centred at y 214 and 364. Create the lower one first, so a click for the second never lands on the first.to the re-commissioning of our restored/1827 overshot waterwheelin Cormorant Garamond, Italic, 40 px, with Align set to Center and Line height 1.15 in the Text panel, centred at y 512
Set Letter spacing back to 0 before each new text. Lopsy carries the last value over to the next text you create.
-
Drop in the photo and scale it
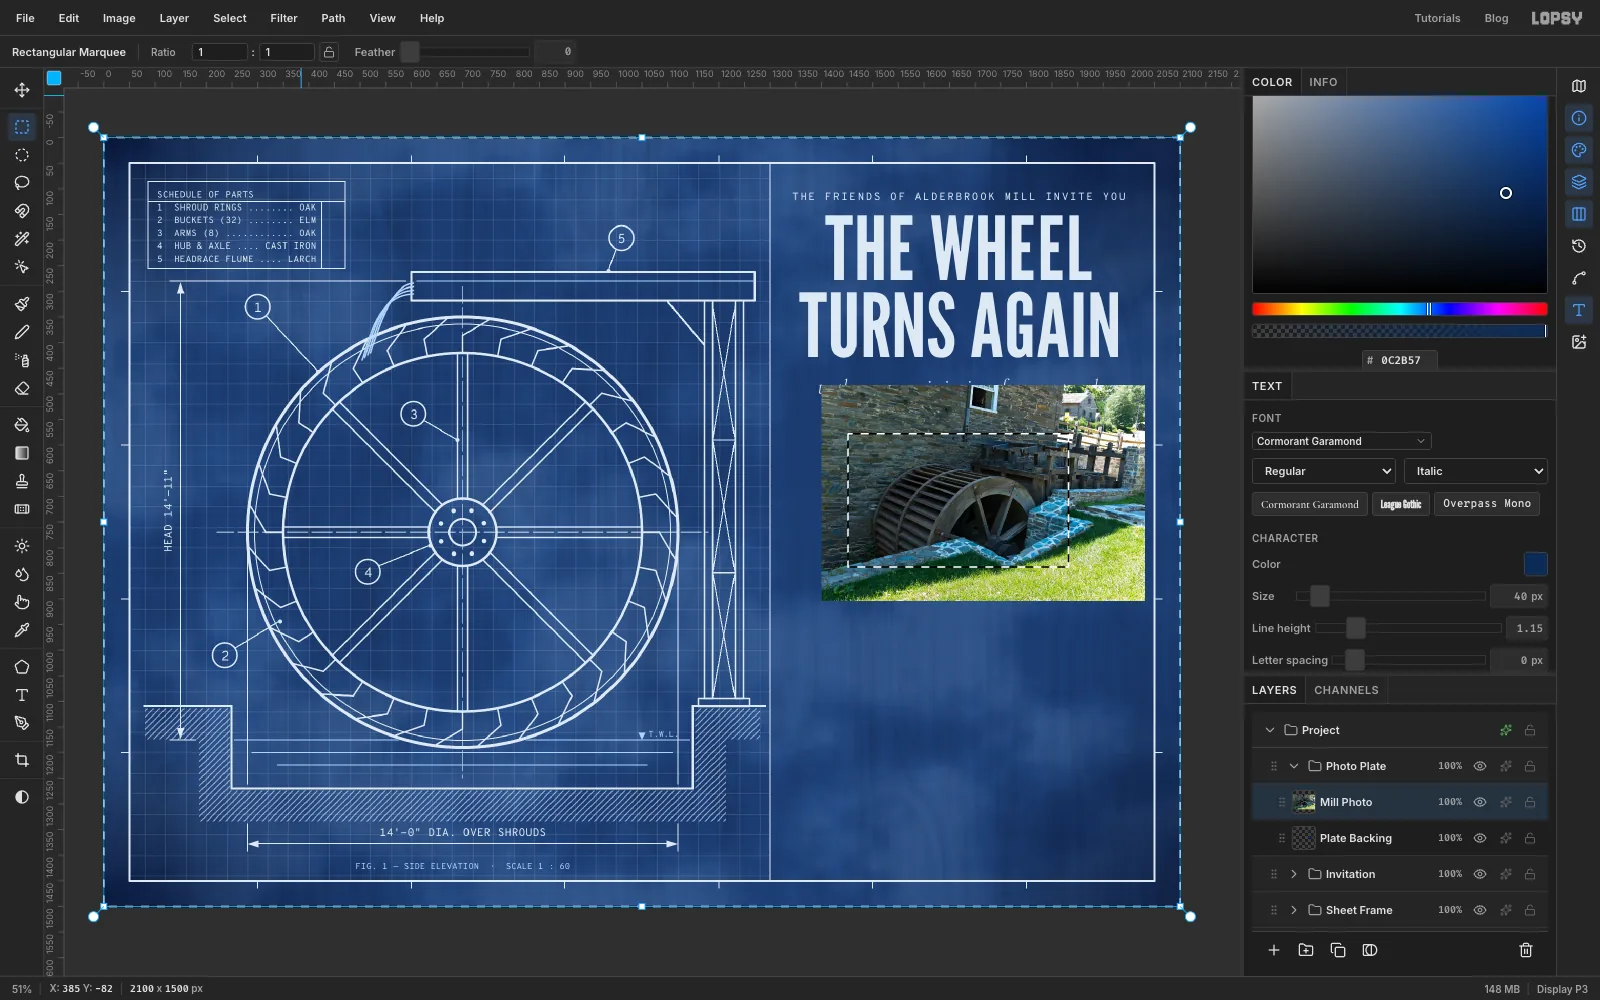
Collapse Invitation, click it, and make a New Group called Photo Plate. Add a layer called Plate Backing. Marquee 1452, 578 to 1882, 838, fill it with and deselect. This dark panel sits behind the photo.
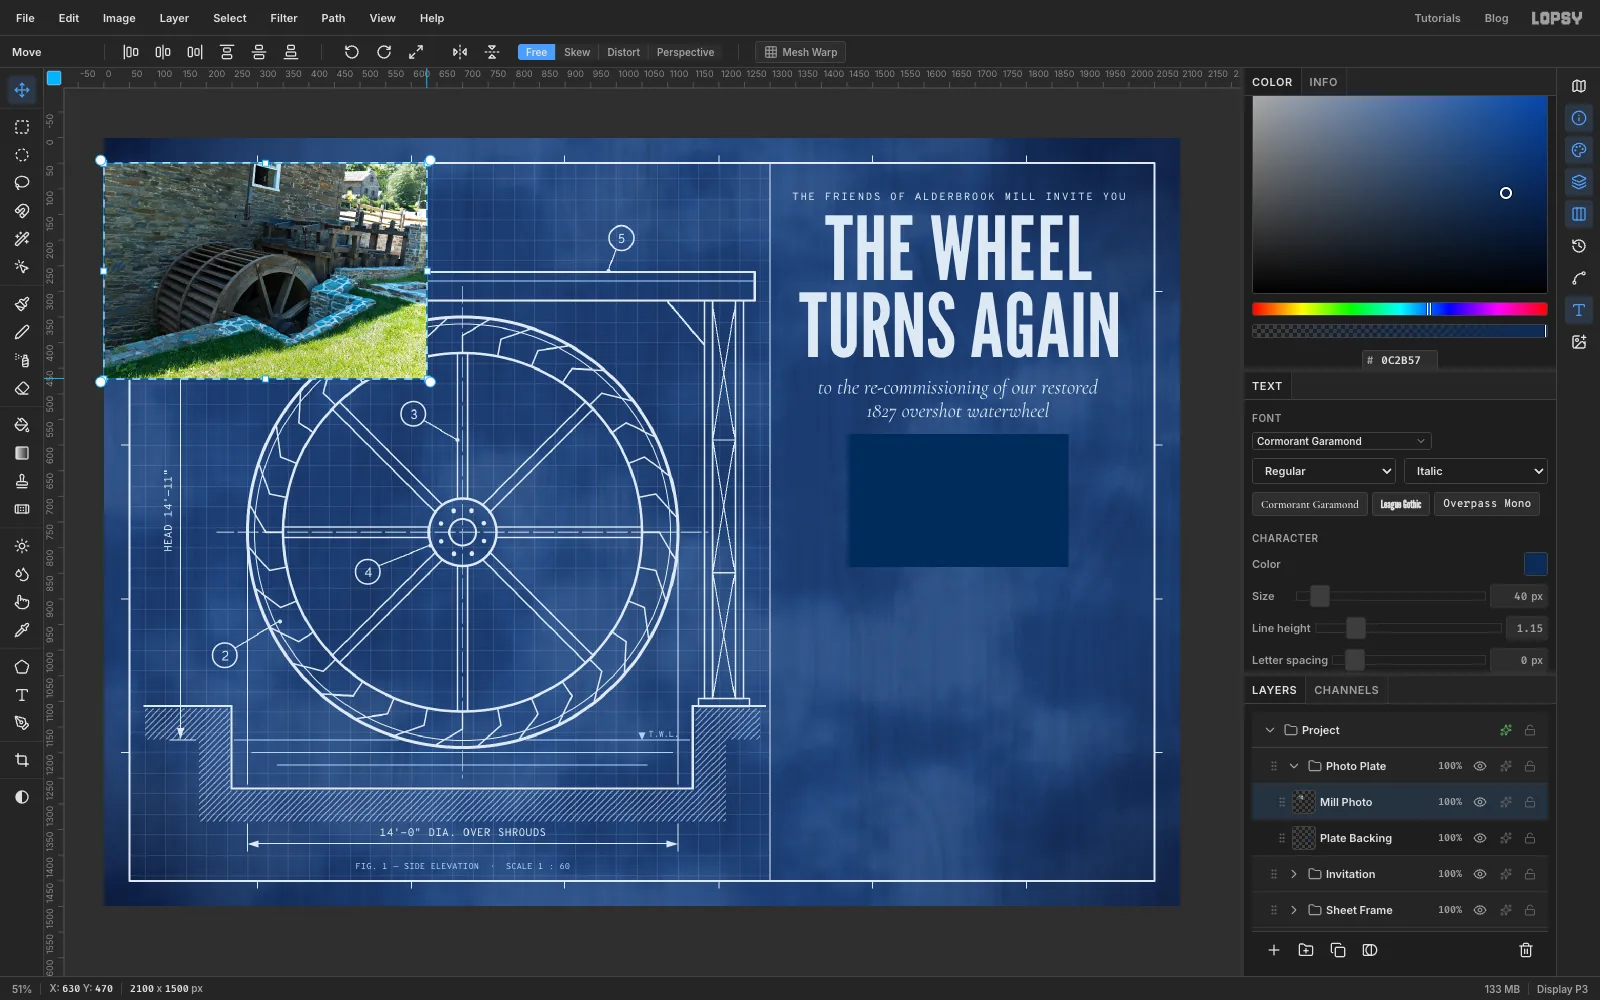
Drag the downloaded photo from your desktop onto the canvas. It's bigger than the card, so Lopsy shrinks it to fit and centres it, already selected, with the Move tool active. Rename the layer Mill Photo.
Hold Cmd and drag the bottom-right handle up and to the left until the photo is about 30% of its dropped size, roughly 630 px wide. Cmd keeps the proportions. Press Cmd+D to commit the scale.
-
Place and crop the photo
Drag the photo so the wheel fills the lower left of the navy panel and the stone wall shows behind it. Keep the whole photo on the canvas. Pixels left hanging past the edge aren't cleared by the next step, and would slide back into view if you moved the plate later.
Marquee the panel again, 1452, 578 to 1882, 838. Choose Select → Inverse, press Delete and deselect. The photo is now trimmed exactly to the panel.
-
Turn the photo into a cyanotype
With Mill Photo active:
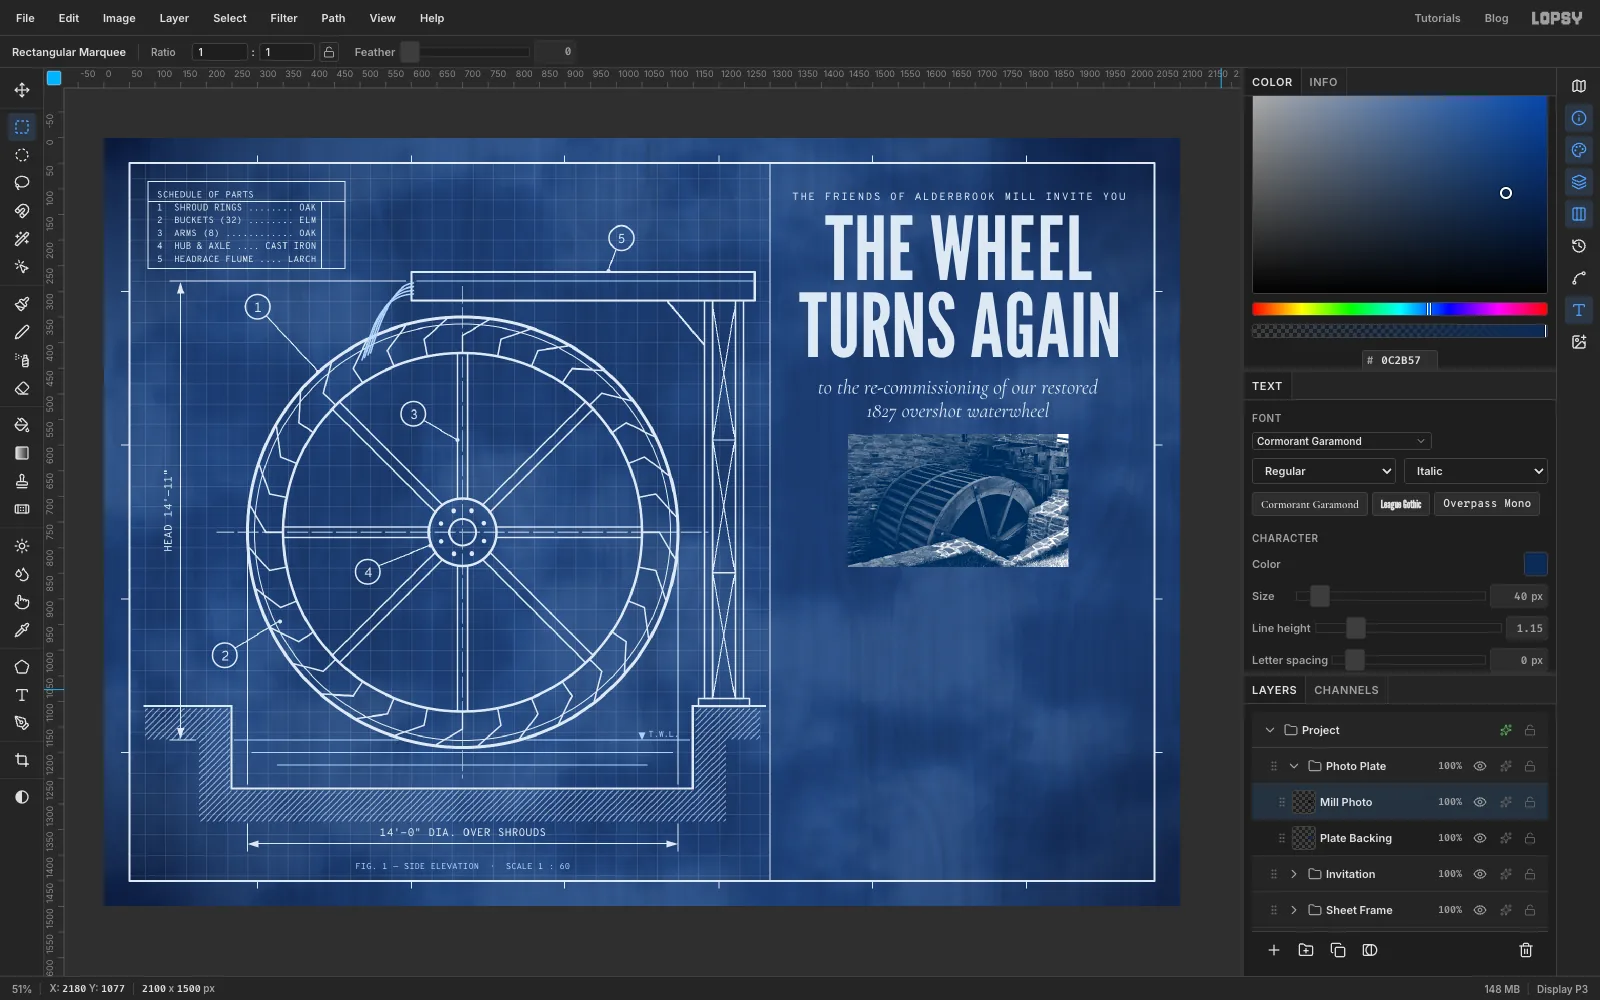
- Choose Filter → Desaturate.
- Run Filter → Brightness/Contrast… with Brightness 5 and Contrast 50, so the stones and wheel rim go nearly white.
- Open the layer's effects and set the blend mode to Screen.
Screen keeps only the light parts of the photo. Its dark areas drop away to show the navy backing, so the photo turns into blue and white tones like a real cyanotype print.
-
Frame the plate
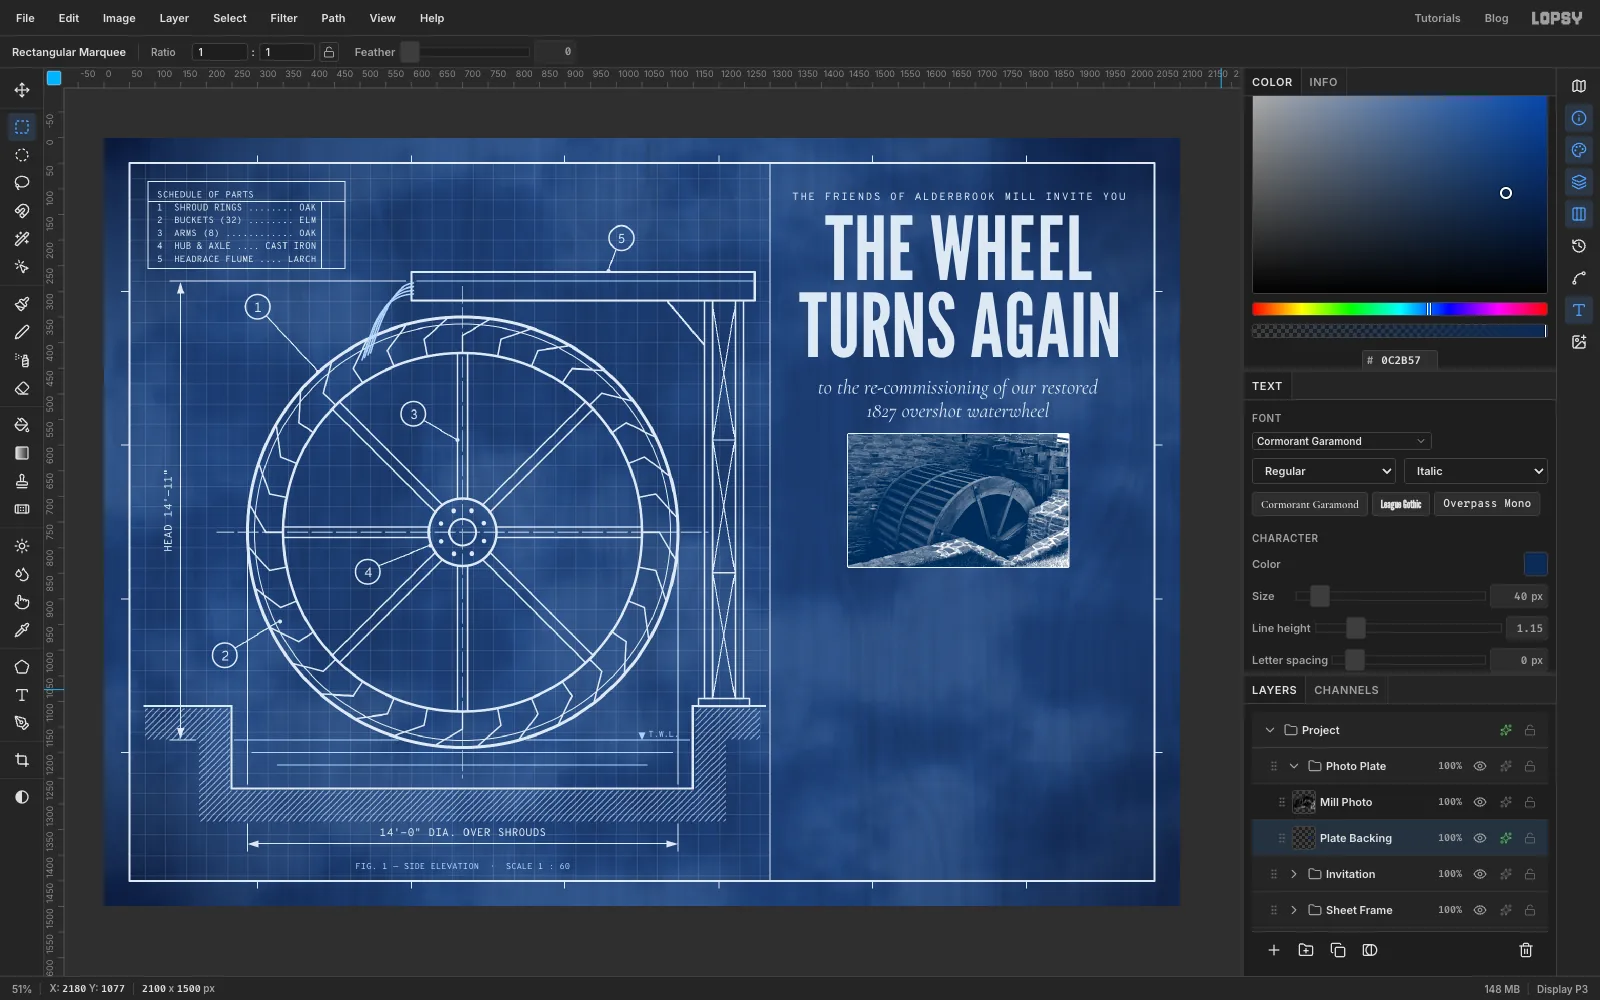
Click Plate Backing, open its effects and turn on Stroke at Width 2 in . Keep the plate square to the grid with no shadow. Everything else on the sheet is flat, so a tilted, shadowed snapshot would look stuck on.
-
Set the date block
Expand the Invitation group, click Text Anchor and add:
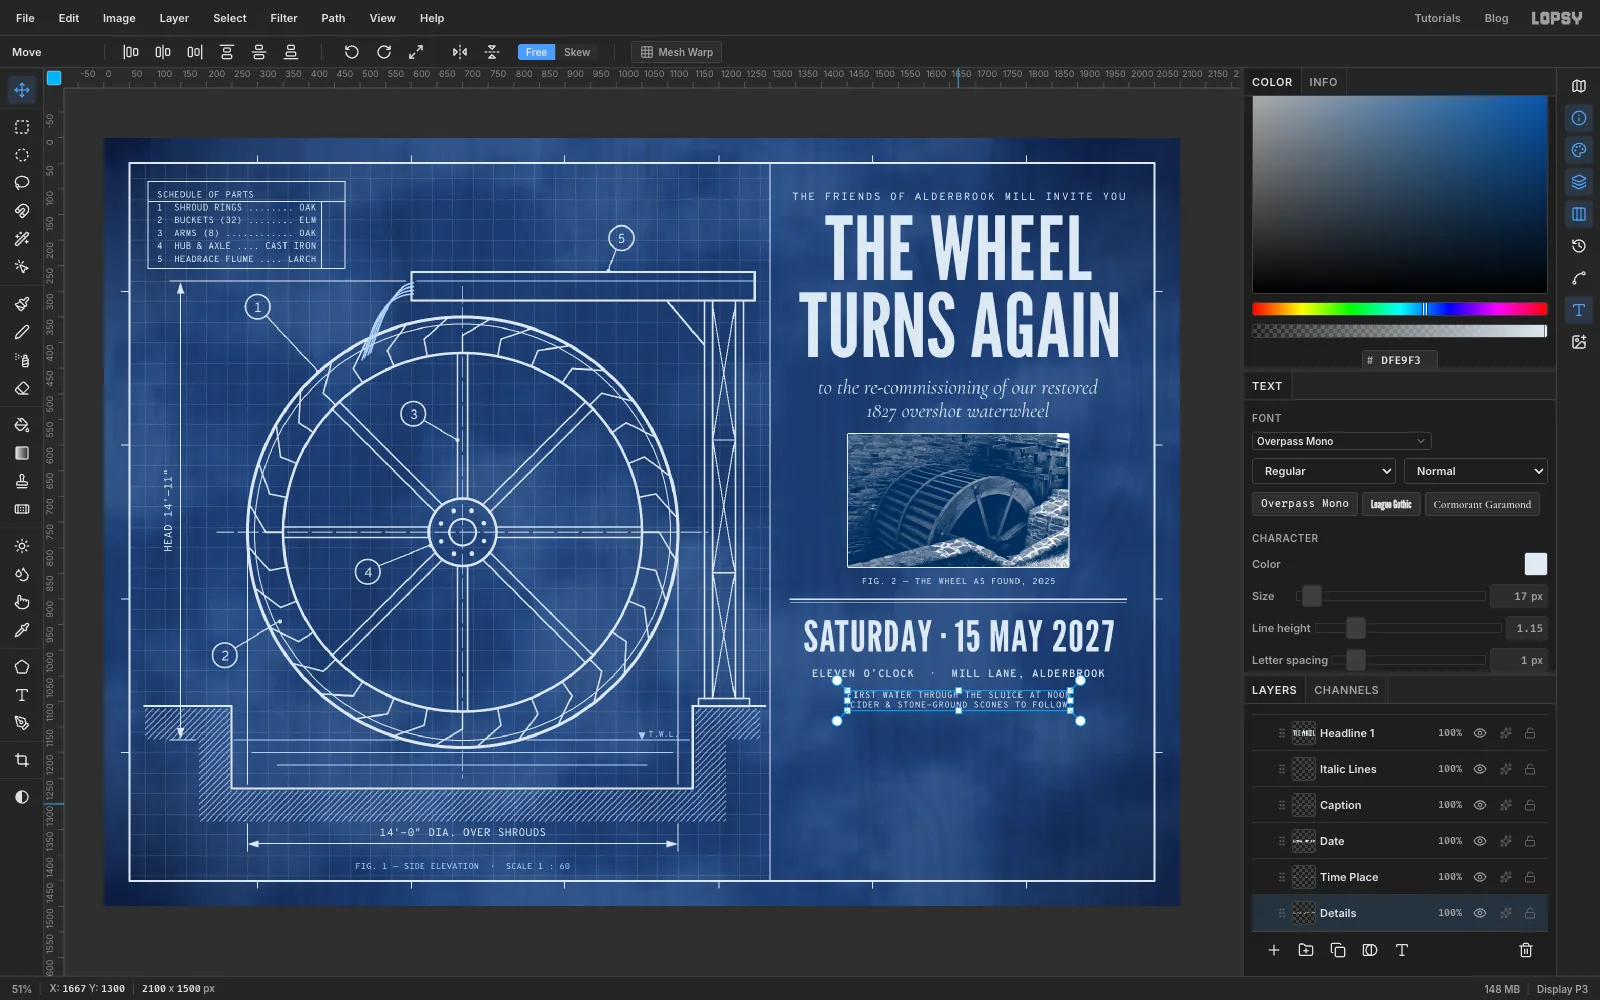
FIG. 2 — THE WHEEL AS FOUND, 2025in Overpass Mono 17 px, Letter spacing 1, centred at y 866
Add a raster layer called Rules. With the Pencil, draw a Size 3 line from 1340, 900 to 1994, 900, and a Size 1 line 7 px below it. Clicking Rules before each of the next texts:
SATURDAY · 15 MAY 2027in League Gothic 84 px, Letter spacing 2, centred at y 972ELEVEN O'CLOCK · MILL LANE, ALDERBROOKin Overpass Mono 20 px SemiBold, Letter spacing 2, at y 1046FIRST WATER THROUGH THE SLUICE AT NOON/CIDER & STONE-GROUND SCONES TO FOLLOWin Overpass Mono 17 px, centre-aligned, at y 1096
-
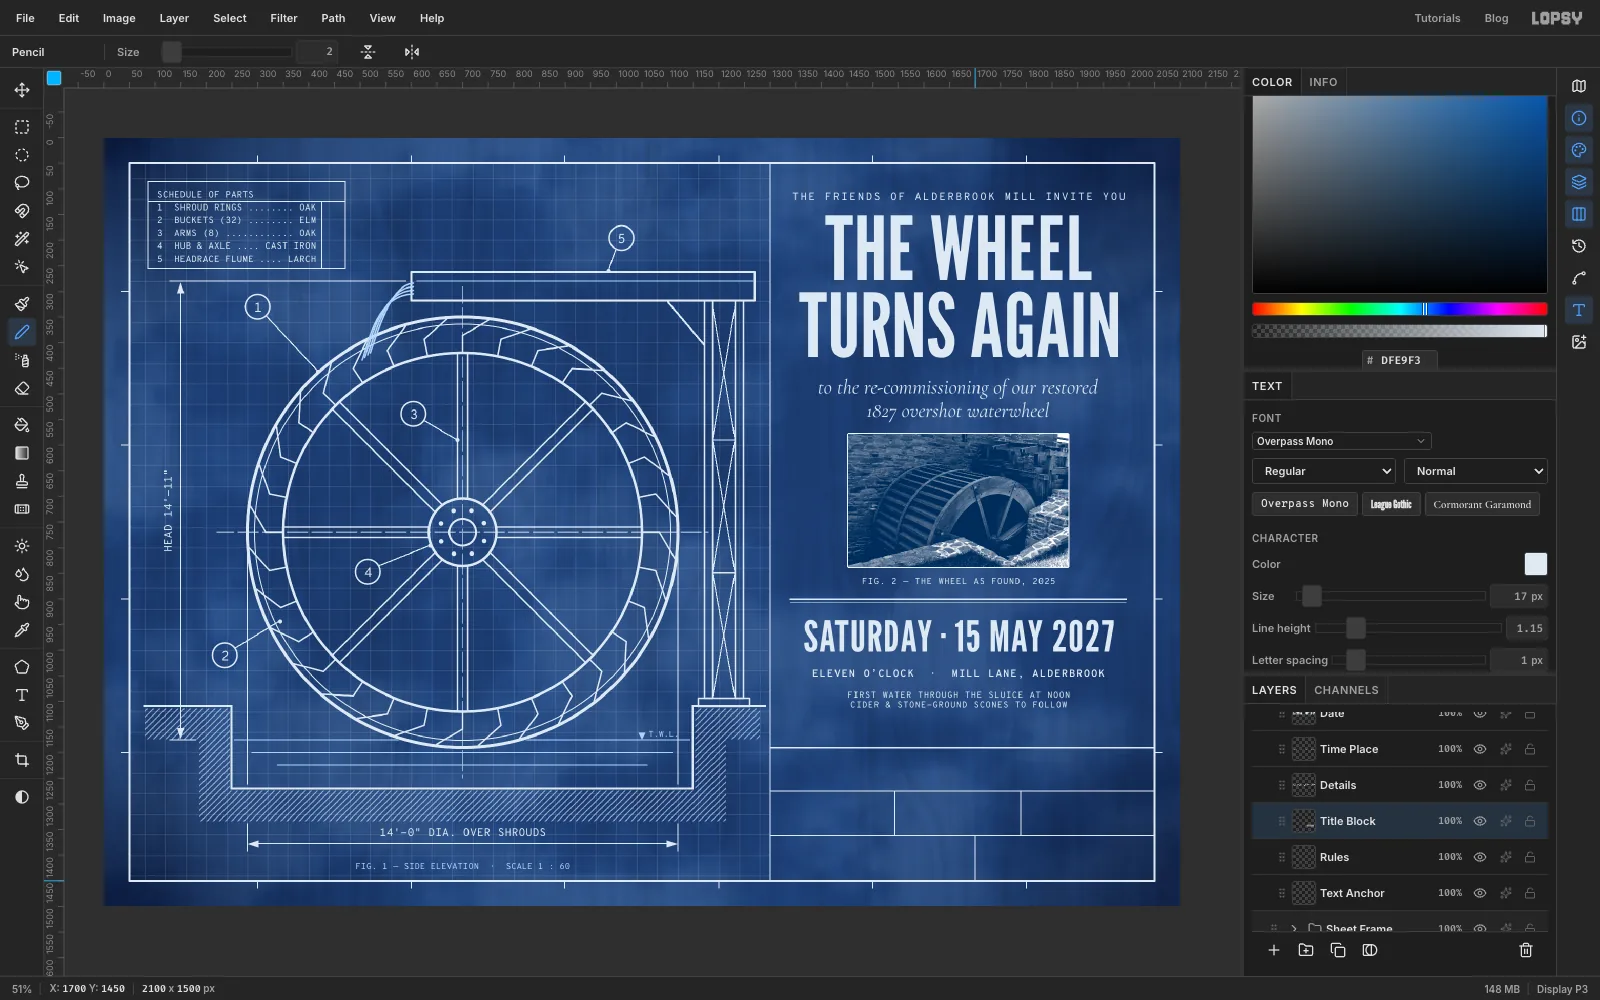
Rule the title block
Every engineering sheet carries a title block in its bottom-right corner. Add a layer called Title Block. With the Pencil:
- Size 3: a top line from the divider at 1300, 1190 to the frame at 2050, 1190
- Size 2: row lines at y 1276 and 1362, also running from the divider to the frame
- Size 2: cell dividers at x 1544 and 1790 in the middle row, and at x 1700 in the bottom row
The block uses the sheet frame as its right and bottom edges. A second line just inside the frame would look like a misprint.
-
Fill in the title block
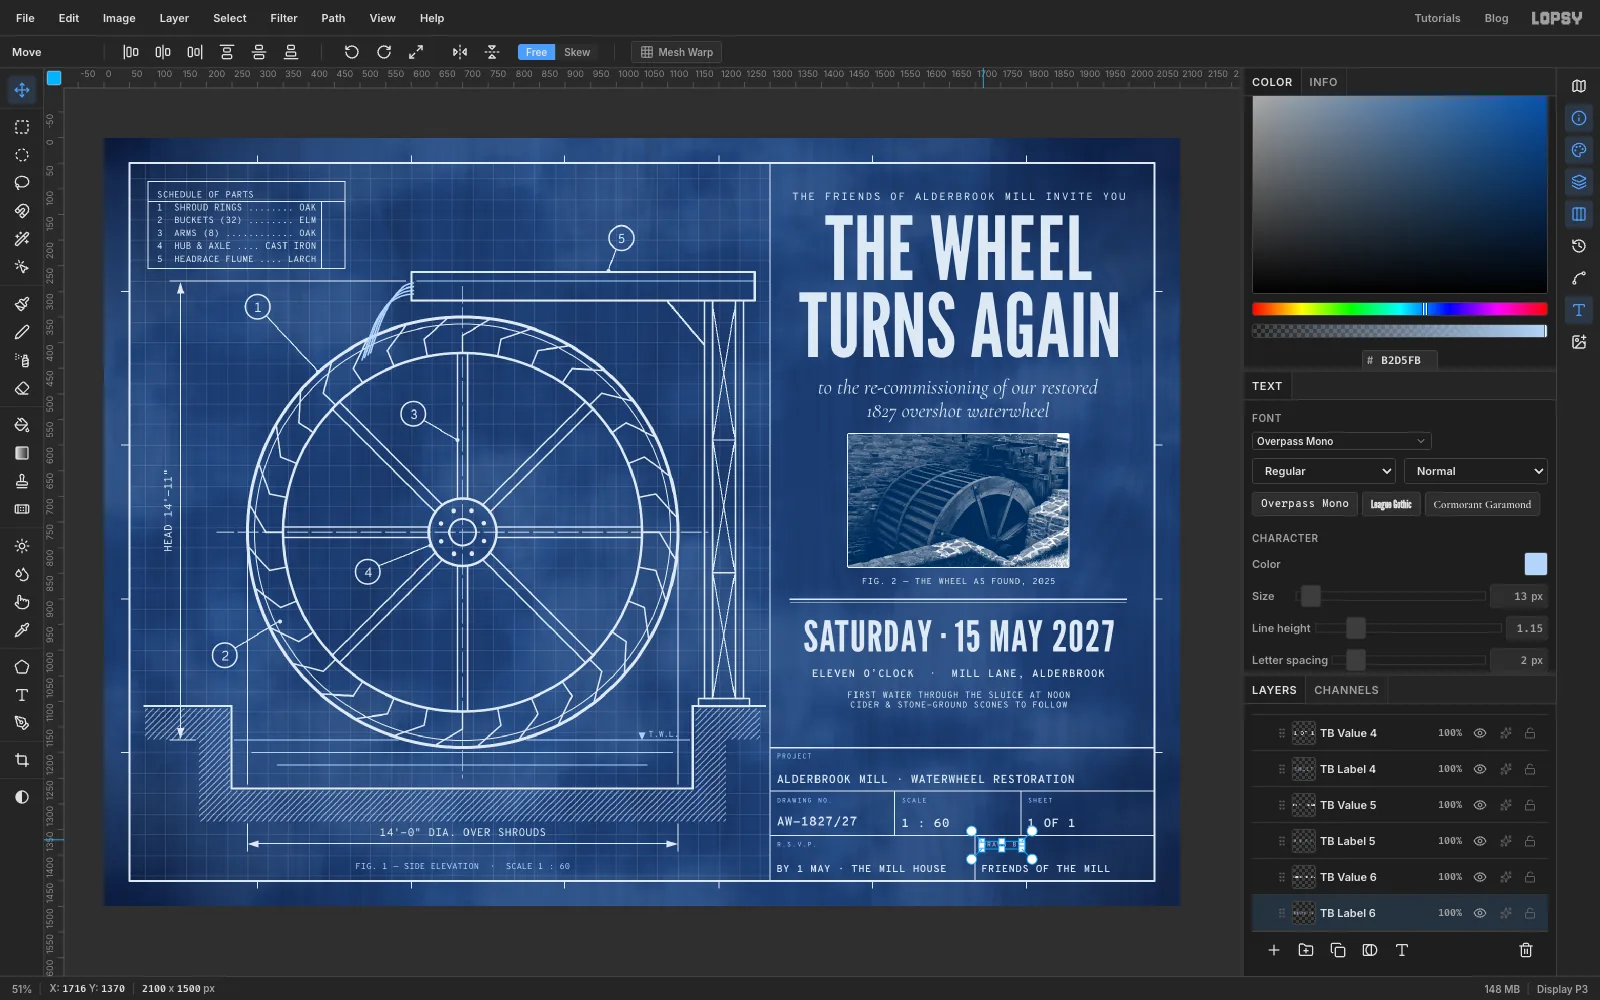
Each cell has a tiny label at its top left and a bold value along its bottom. For every cell, click Title Block first. Create the value first and the label second. Click inside the empty cell each time, so the Text tool never lands on a text you already made.
- values in Overpass Mono SemiBold, 24 px with Letter spacing 1. Use 22 px for the project name and 20 px for the bottom row. Nudge each one so it starts 14 px in from the cell's left line and sits 18 px above the cell's bottom line.
- labels in Overpass Mono 13 px in with Letter spacing 2, 14 px in and 12 px down from the cell's top-left corner
The cells read: PROJECT ALDERBROOK MILL · WATERWHEEL RESTORATION, DRAWING NO. AW-1827/27, SCALE 1 : 60, SHEET 1 OF 1, R.S.V.P. BY 1 MAY · THE MILL HOUSE, and DRAWN BY FRIENDS OF THE MILL.
-
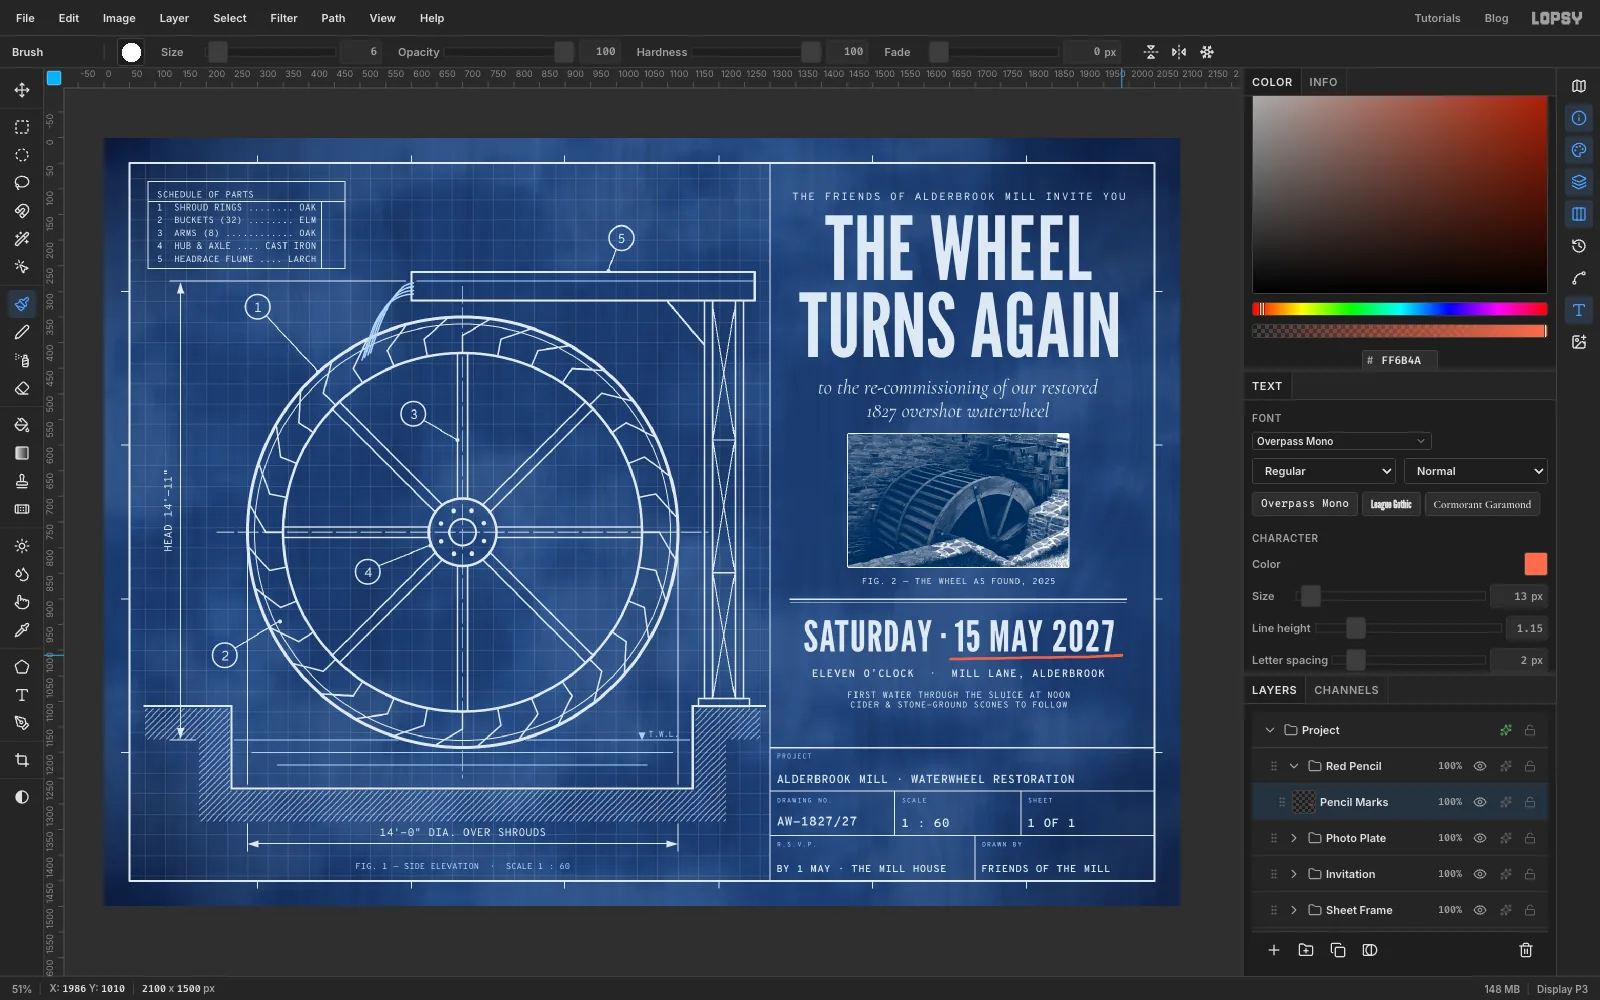
Underline the date in red pencil
Collapse Invitation and Photo Plate, click Photo Plate, and make a New Group called Red Pencil. Add a layer called Pencil Marks.
Pick the Brush, choose Hard Round, set Size 6 and the foreground to red . In one loose stroke, drag under 15 MAY 2027 from just left of the 1 to just past the 7. Let it rise a few pixels towards the end, the way a hand does.
-
Tick the parts and scrawl a note
Still on Pencil Marks, draw a quick tick in the schedule's narrow column beside each of the five parts. Each tick is a short stroke down and then a longer one up to the right.
Click Pencil Marks again, pick the Text tool and type
200 years young!in Reenie Beanie 64 px, red. Move it into the open space between the schedule and balloon 5, centred around 740, 176. Keep it at least 60 px from the balloon. Pick the Move tool, hover just outside the top-right corner of the text's box until the cursor becomes a crosshair, and drag up a little to tilt it about 5° anticlockwise, so the end of the note rises.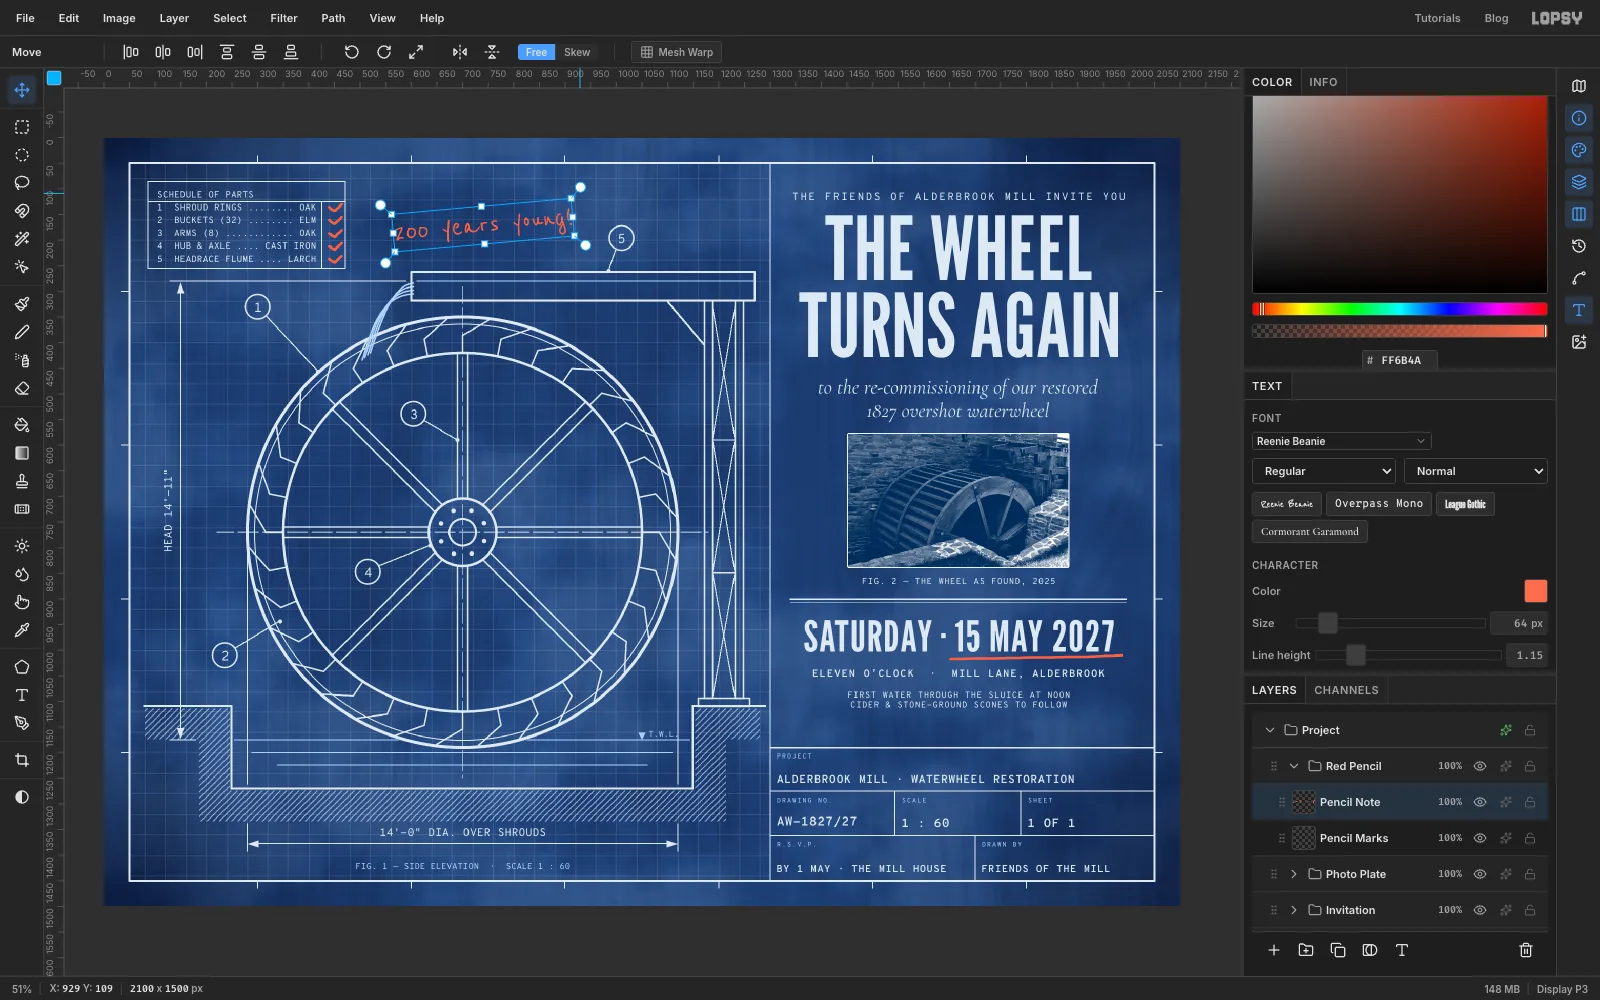
-
Add grain and a little line bleed
Collapse Red Pencil, click it, and add a layer called Paper Grain. Fill it with and run:
- Filter → Add Noise… at Amount 40, Mono, Gaussian
- Filter → Gaussian Blur… at 1
Set it to Overlay at 22%. Mid-grey disappears in Overlay, and the noise is all that's left.
Real cyanotype lines bleed a little into the blue. Expand Wheel Drawing. On each of Rims, Buckets, Arms, Hub, Flume and Ground, turn on Outer Glow with Size 3, Spread 0, Opacity 55 and colour .
-
Warm the shadows with Color Grading
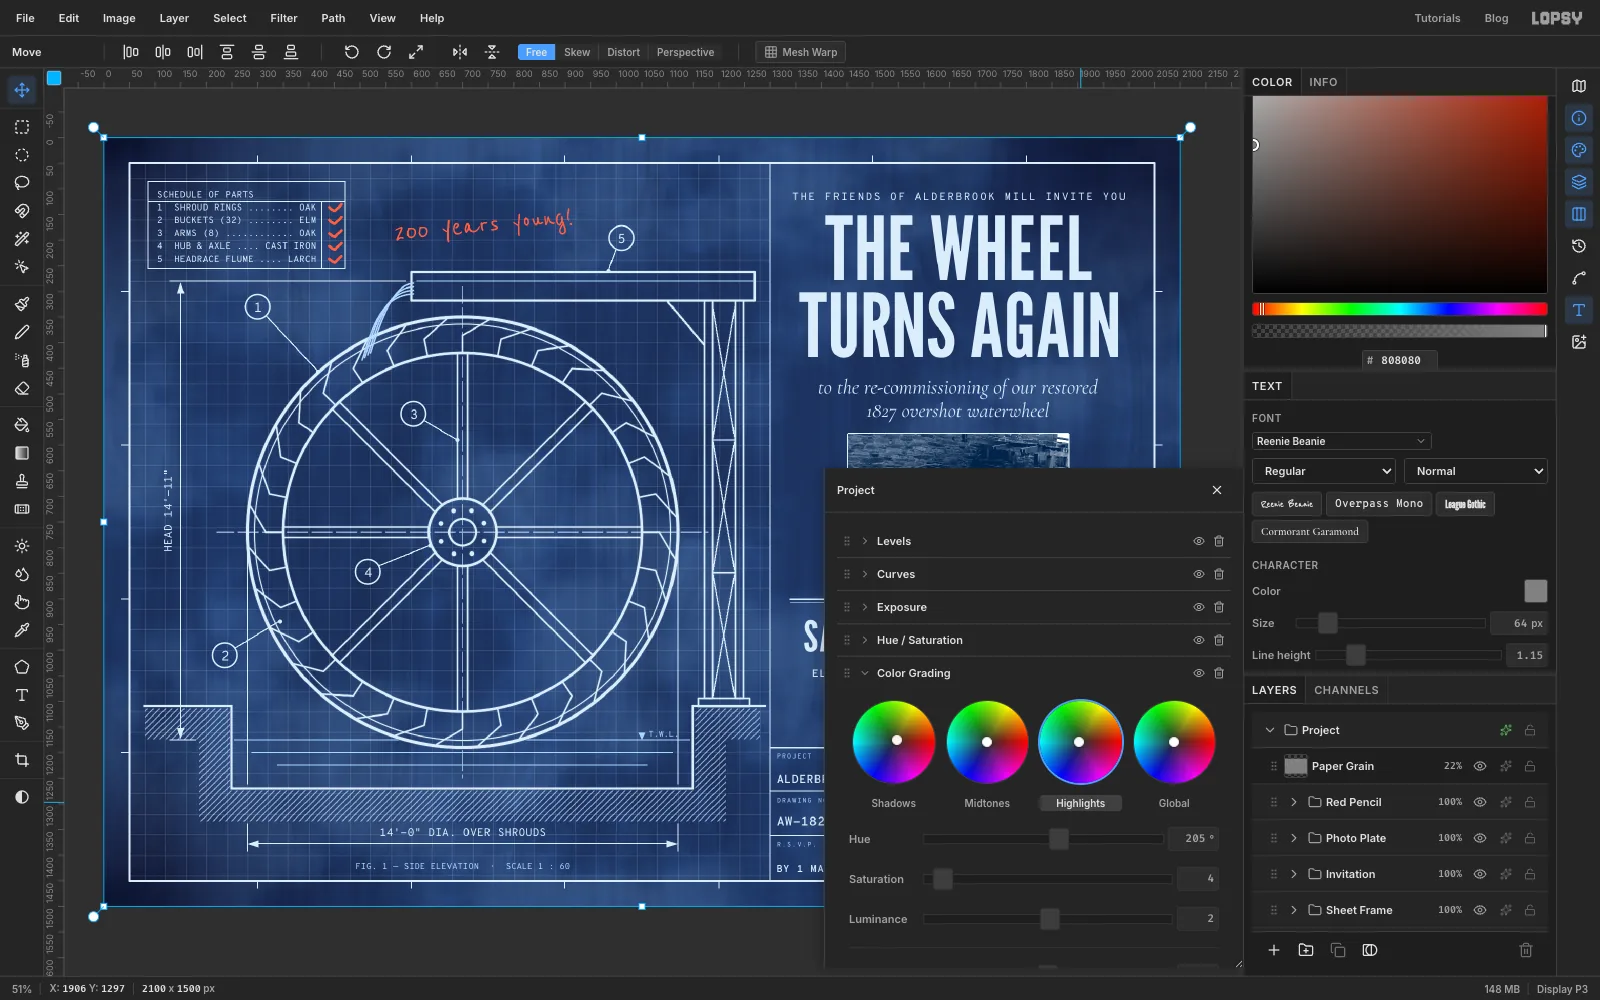
Every new Lopsy document has a stack of neutral adjustments on its root Project group. Click Project and open its adjustments with the sparkle button on its row. On a group it opens the adjustment stack, not layer effects. Expand the Color Grading node. It opens on Midtones, and the sliders below the wheels only change the wheel that's selected:
- Click Shadows under the first wheel, then set Hue 30, Saturation 8, Luminance -6. A touch of warmth takes the digital edge off the blue.
- Click Highlights, then set Hue 205, Saturation 4, Luminance 2. The whites go very slightly cool.
-
Calm the blue with Hue / Saturation
Expand the Hue / Saturation node and set Saturation to -18. Pure screen blue looks like a computer made it. Real Prussian blue is a little greyer. Close the drawer.
Save with File → Save Project, then File → Quick Export PNG.