Draw a Blueprint Vacuum Tube Tattoo Flash Sheet
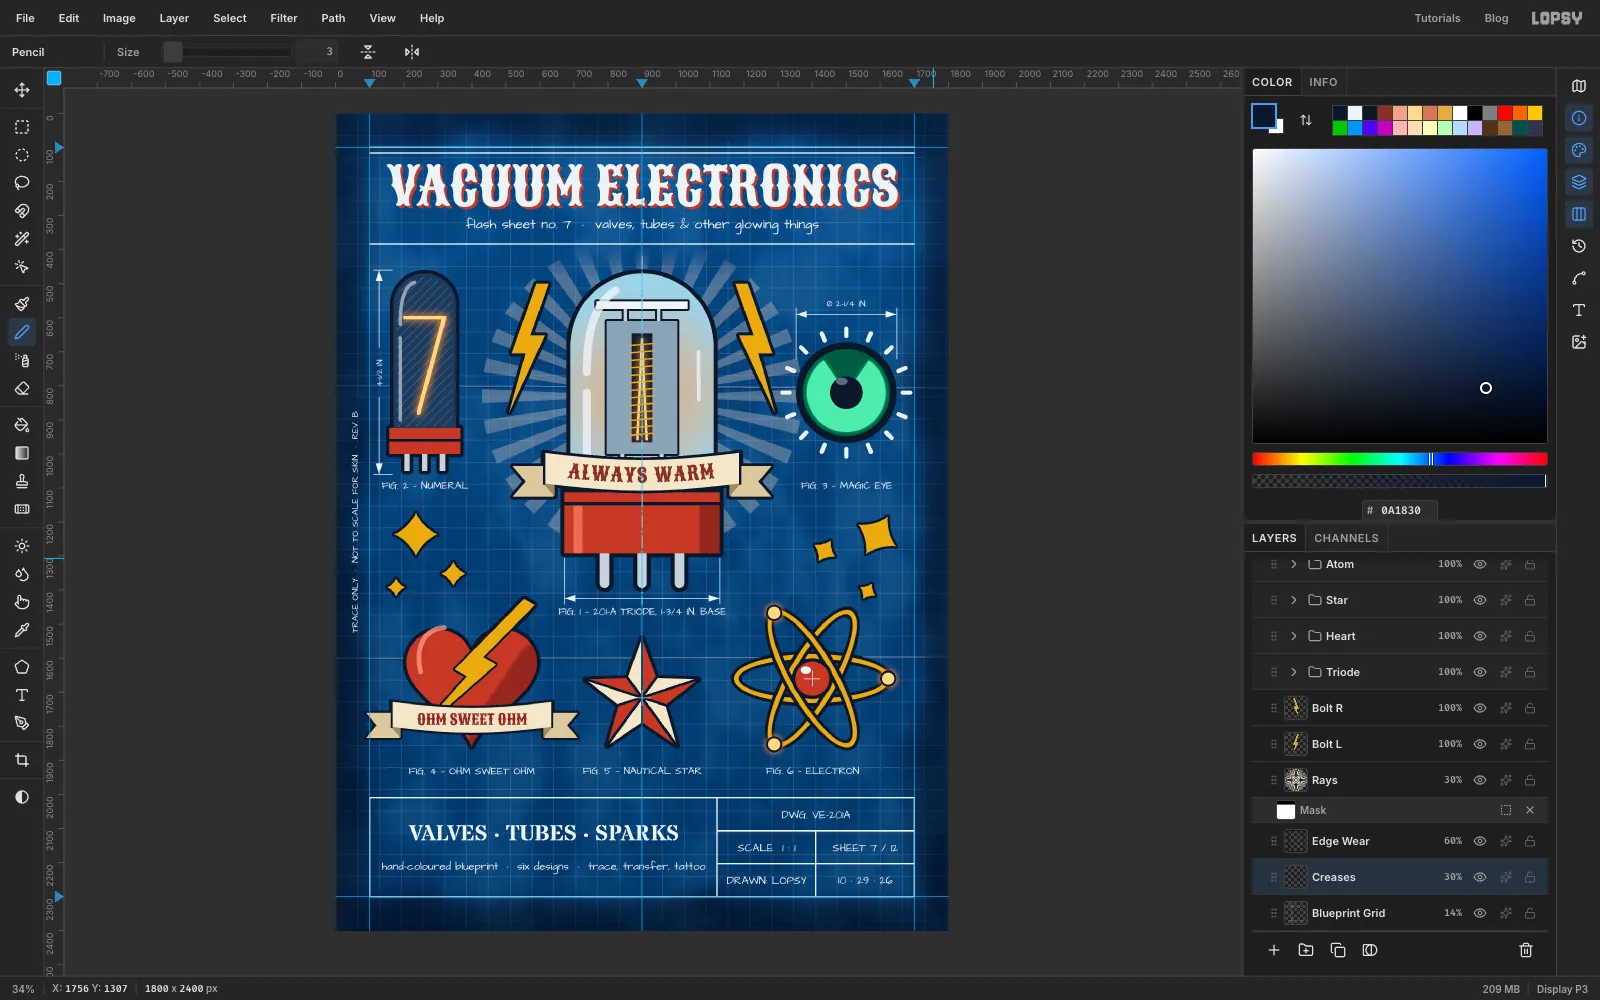
Draw a blueprint-style tattoo flash sheet of radio valves in Lopsy, with a glowing triode, a Nixie tube, a magic eye, curved banner type and drafting notes.
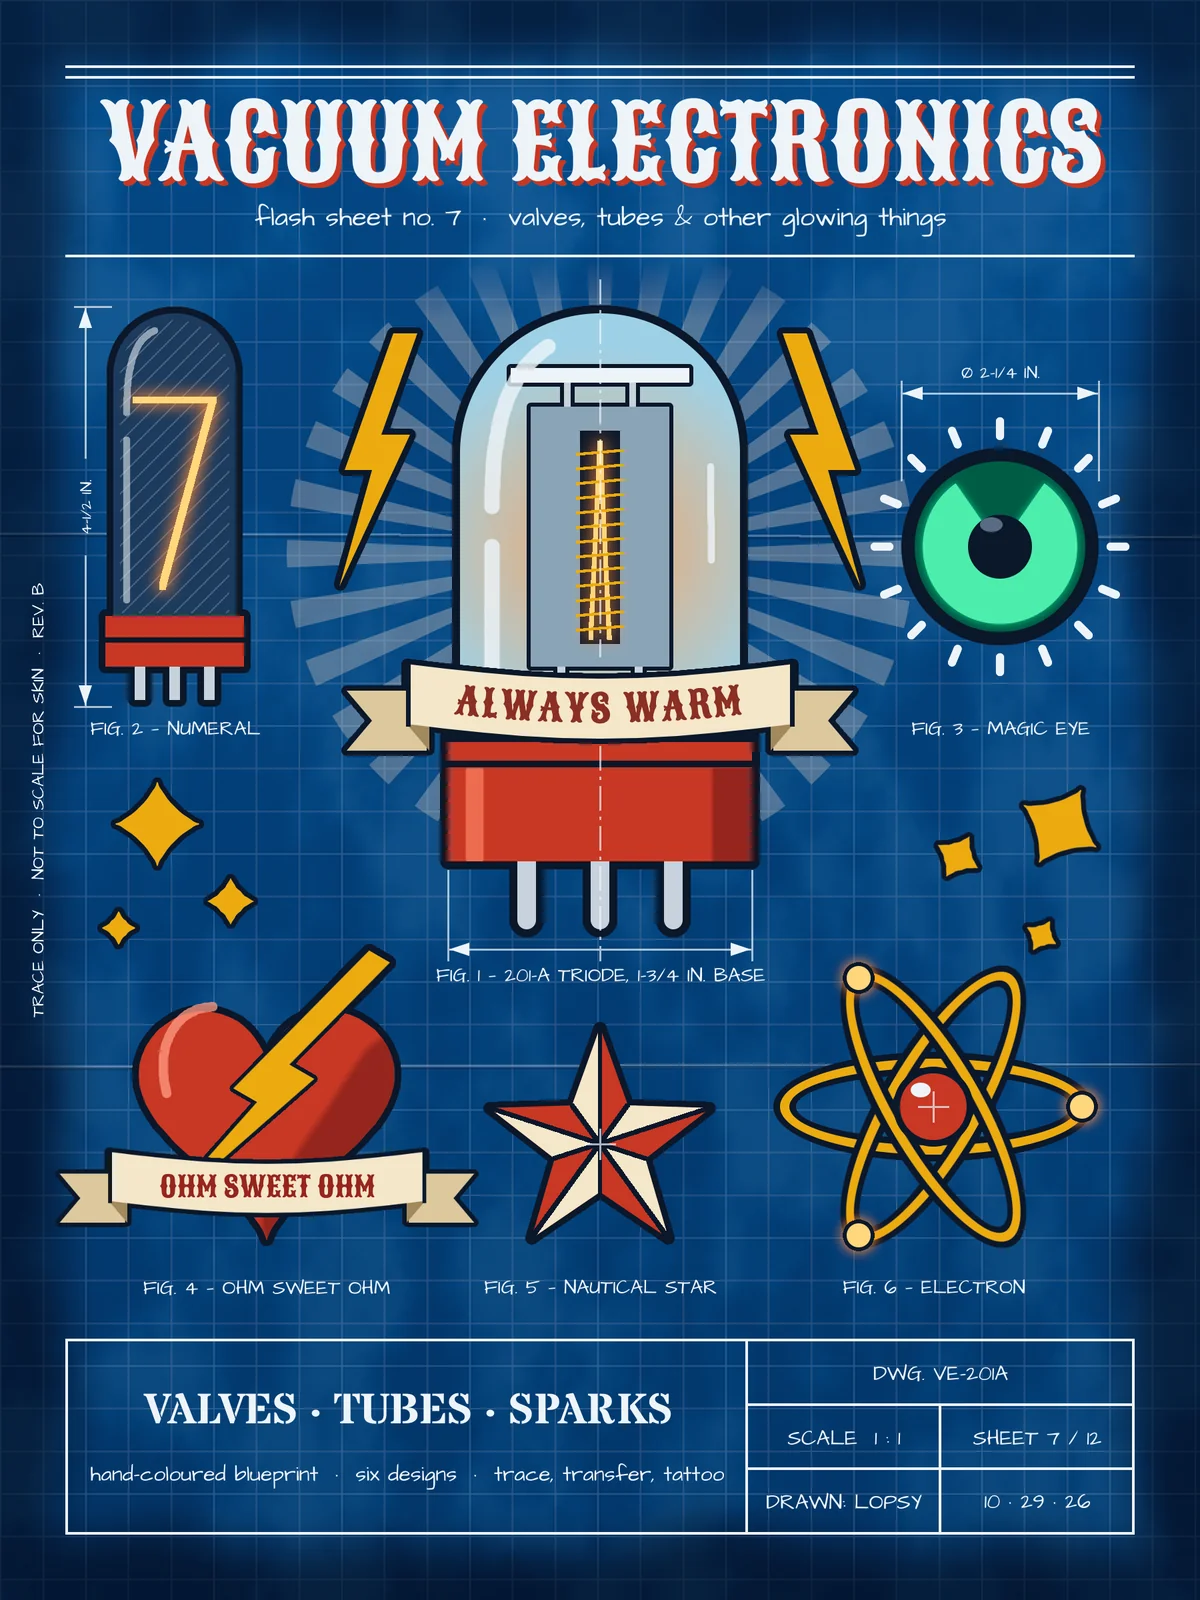
Tattoo flash is a sheet of ready-to-go designs that hangs on a shop wall. American traditional flash has a recognisable recipe: one big centrepiece, smaller "fillers" around it, heavy black outlines, flat colour, and banners with a motto. Blueprints have their own recipe: white lines on Prussian blue paper, a grid, dash-dot centre lines, dimension arrows and a title block in the corner.
In this tutorial you'll combine the two into a flash sheet called Vacuum Electronics: radio valves drawn as tattoos, then annotated like an engineer's drawing. The centrepiece is a 1920s 201-A triode with a glowing filament and an "ALWAYS WARM" banner (valve radios have to warm up). The fillers are a Nixie tube, a magic-eye tuning tube, an "OHM SWEET OHM" heart, a nautical star and an atom.
Every tattoo piece uses the same outline trick: fill the colours on one layer, ⌘-click its thumbnail to select its shape, Grow the selection and fill it with ink on a layer underneath. You'll also use Sunburst with a layer mask, Fill with Pattern, Outer Glow, radial symmetry, type on a Pen path, and rotate, scale and flip copies with the Move tool.
One habit to build before you start: while a text layer is selected, the Text options restyle that layer. Click a plain layer before you set up new type.
The canvas is 1800 × 2400. The reference photo of a Premier X-201A triode is by Joe Haupt on Wikimedia Commons (CC BY-SA 2.0). It's only used for proportions, so any photo of an old radio valve will do. The fonts are Sancreek, Architects Daughter and Stardos Stencil, all in the font browser. You'll make about 70 layers, so name each one as you go.
The palette:
-
Paper
-
edge wear
-
Chalk
-
ink
-
Flash red
-
Mustard
-
cream
-
banner tails
-
Glass
-
steel
-
Nixie glass
-
Glow orange
-
filament
-
Magic eye
-
cap grey
-
highlight coral
-
Crease shadow
-
Set up the sheet and paper colour
Choose File → New, make a 1800 × 2400 document and click Create.
Click the top ruler at 100, 900 and 1700 to drop three vertical guides: the two side margins and the centre line. Click the left ruler at 100 and 2300 for the top and bottom margins.
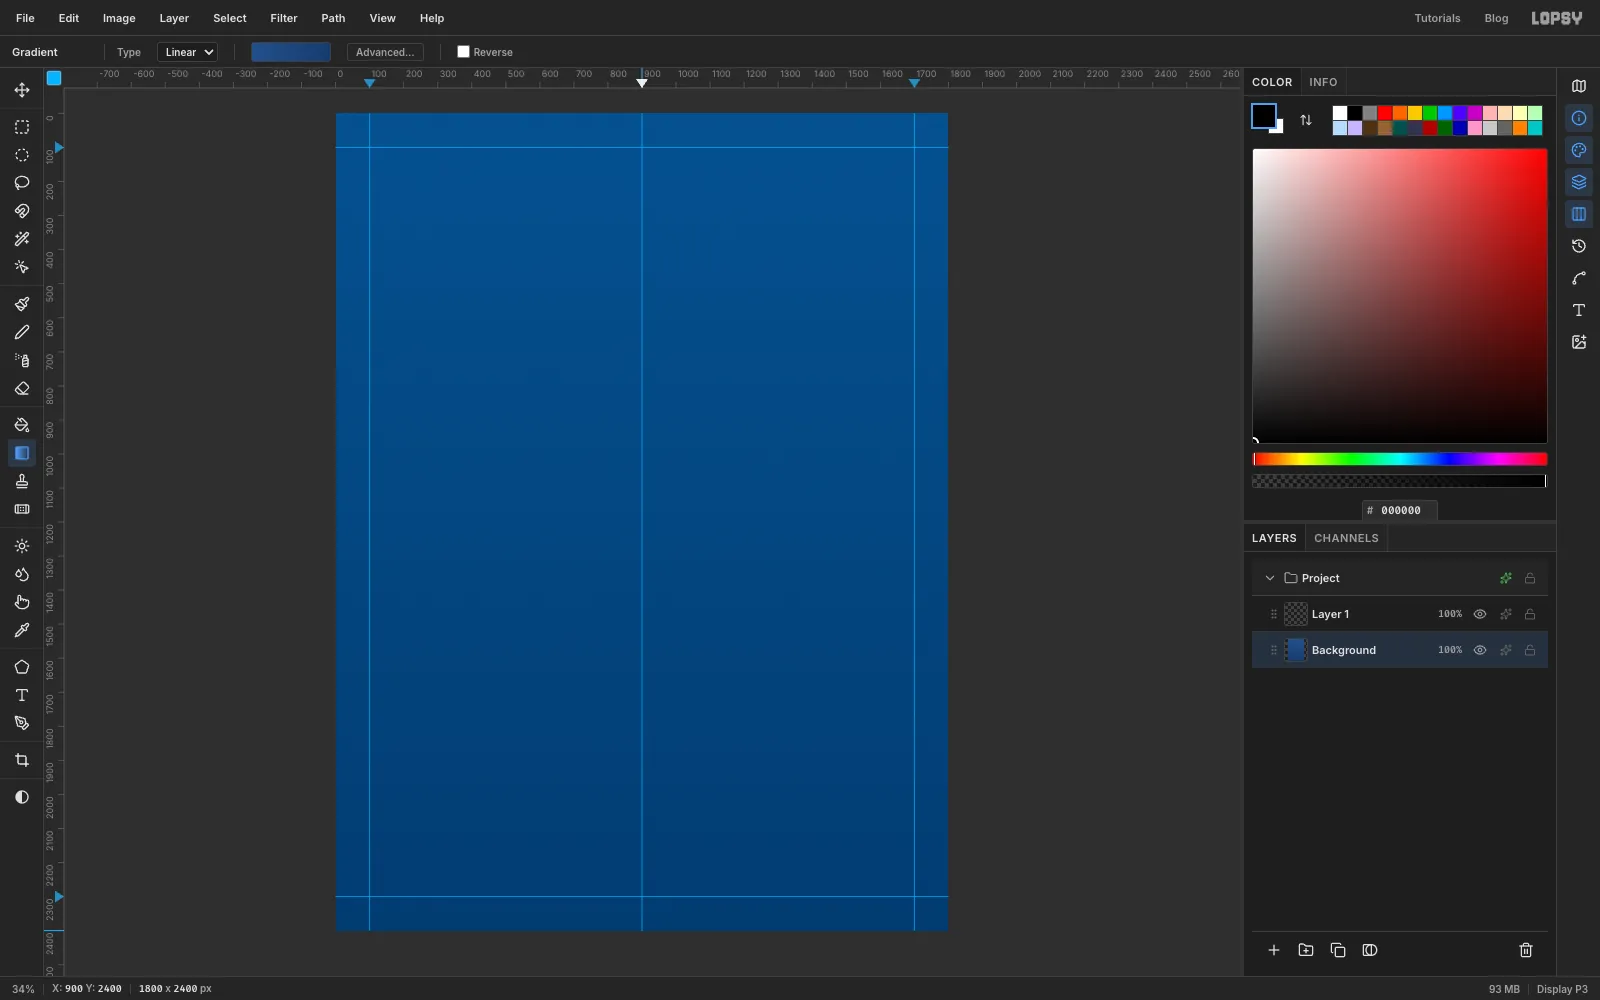
Select Background. Pick the Gradient tool, set Type to Linear, click Advanced… and set the left stop to and the right stop to . Drag from the top edge of the canvas straight down to the bottom edge.
-
Mottle the paper with Clouds
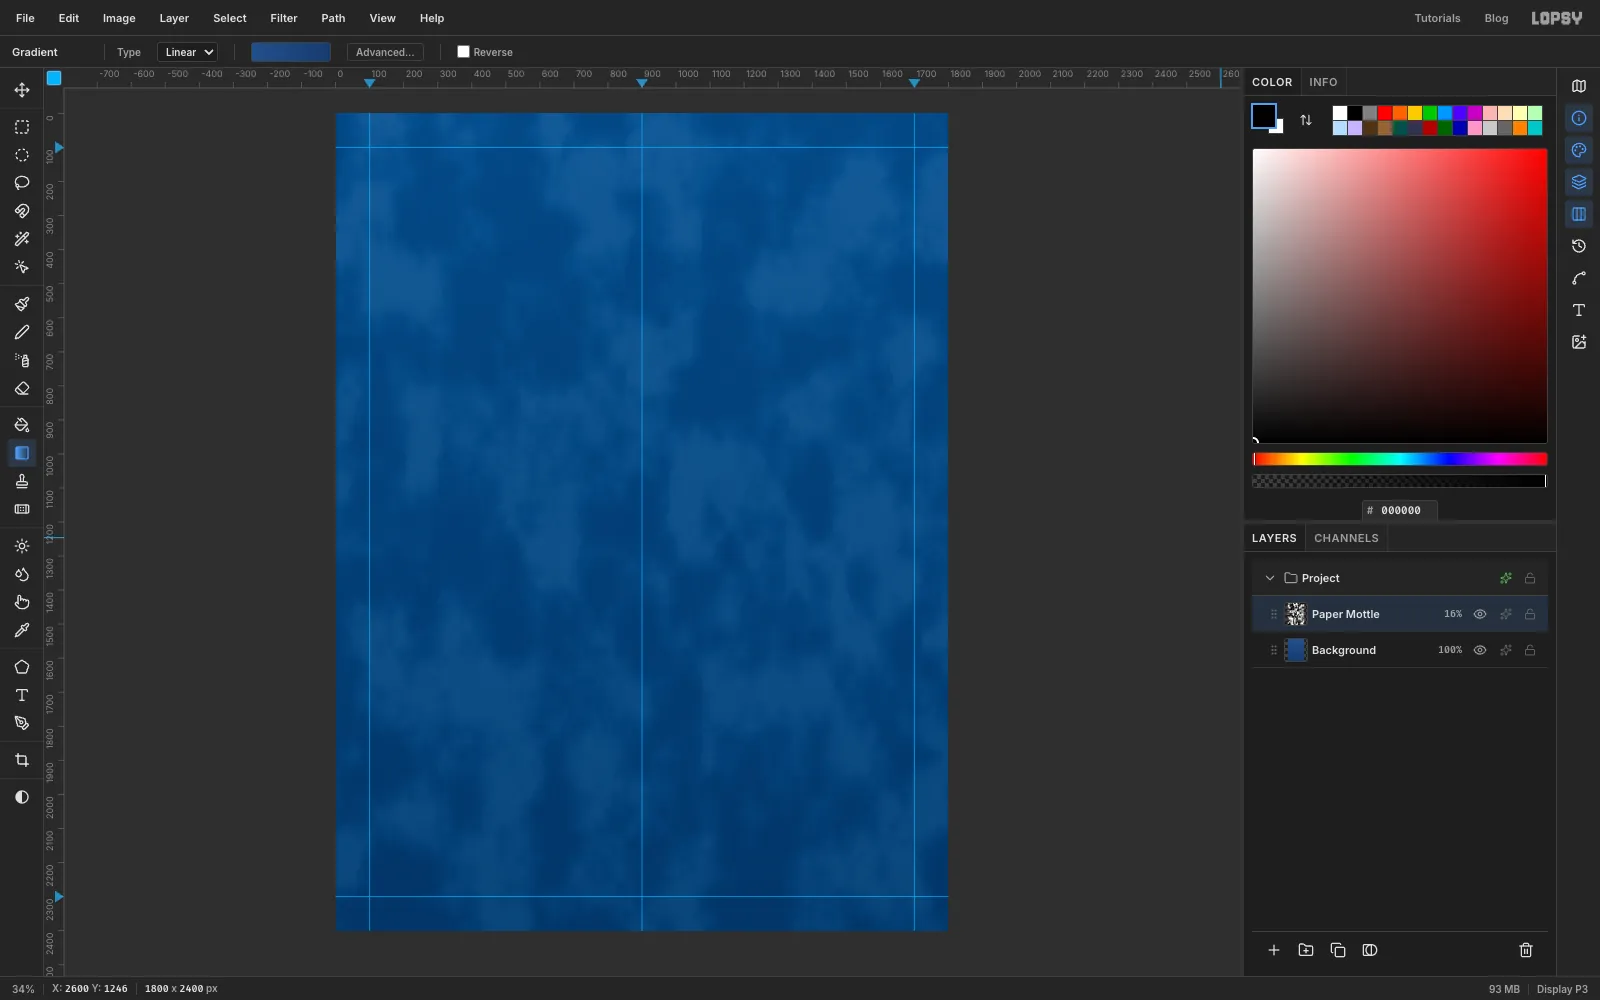
Rename Layer 1 to Paper Mottle. Choose Filter → Clouds…, set Scale to 14 and click Apply.
Open the layer's effects (the ✦ button on its row), set the blend mode to Soft Light and close the drawer. Then lower the layer's opacity to 16%. The paper now has the uneven exposure of a real blueprint.
-
Tile a blueprint grid
Add a layer called Tile and set the foreground to chalk .
With the Rectangular Marquee and nothing selected, click once on the canvas. The Rectangular Selection dialog opens: enter From 0, 0 To 64, 2 and click Select, then choose Edit → Fill. Do the same for From 0, 0 To 2, 64. That's one grid cell with a line along its top and left edges.
Select From 0, 0 To 64, 64 and choose Edit → Define Pattern. Deselect with ⌘D and delete the Tile layer.
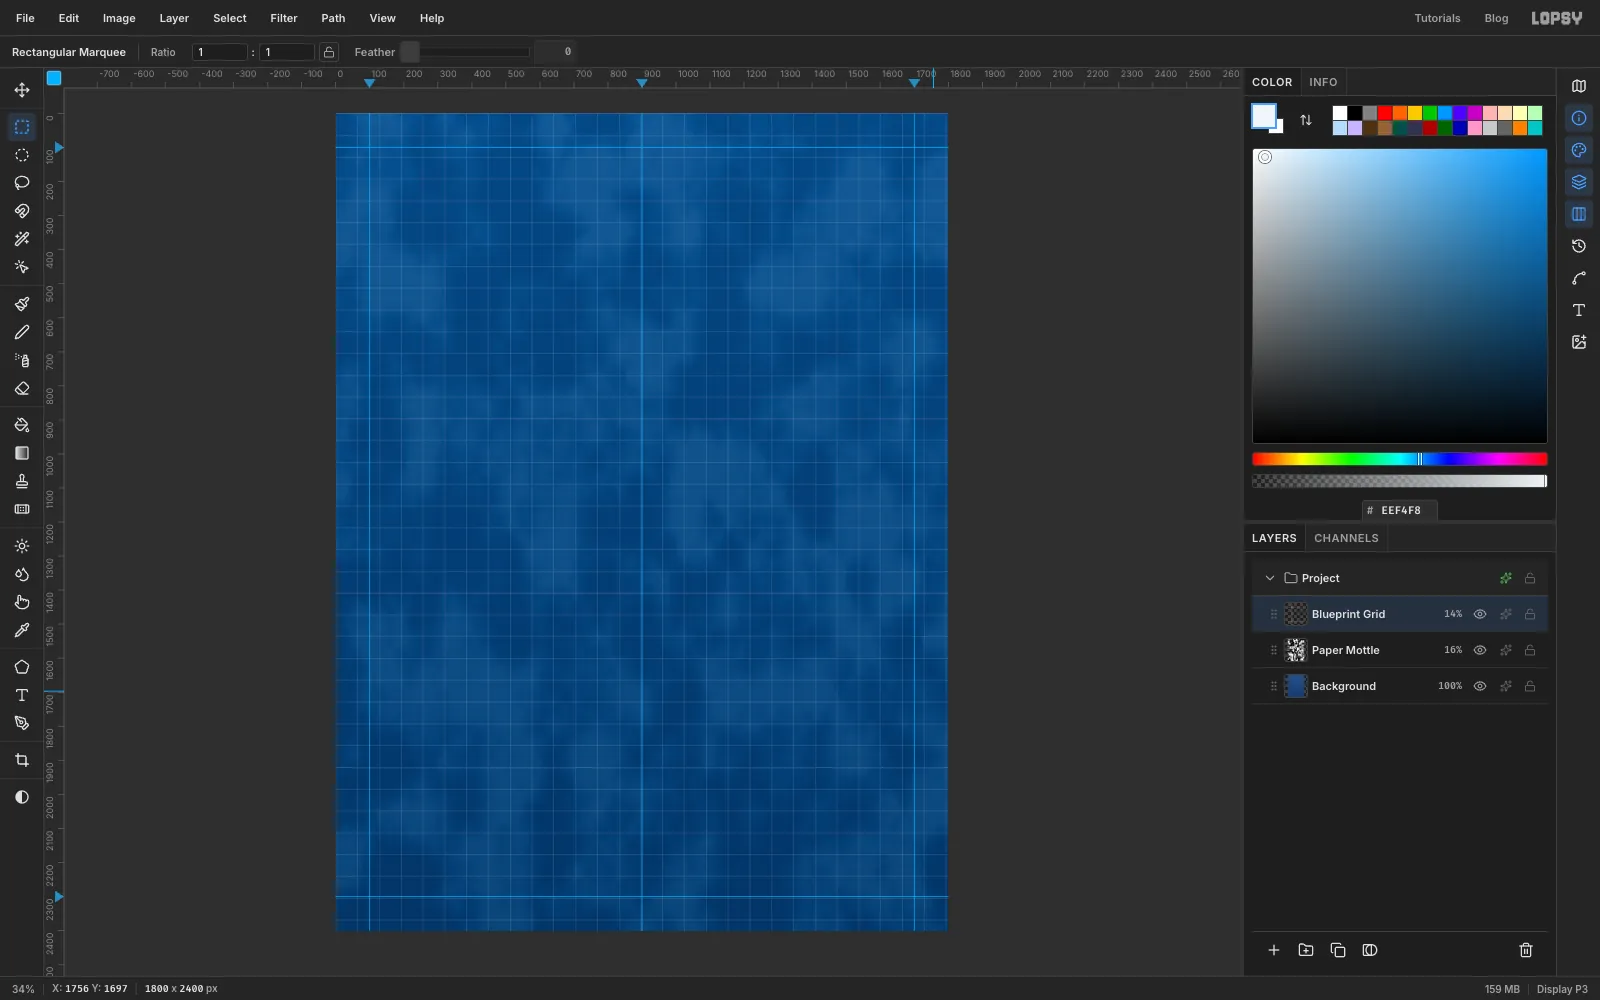
Add a layer called Blueprint Grid, choose Edit → Fill with Pattern…, pick the new pattern and click Apply. Lower the layer to 14%.
-
Burst rays behind the centrepiece
Add a layer called Rays and set the foreground to cream .
Pick the Elliptical Marquee and click once on the canvas. Enter From 430, 360 To 1370, 1300 for a circle centred where the triode will go.
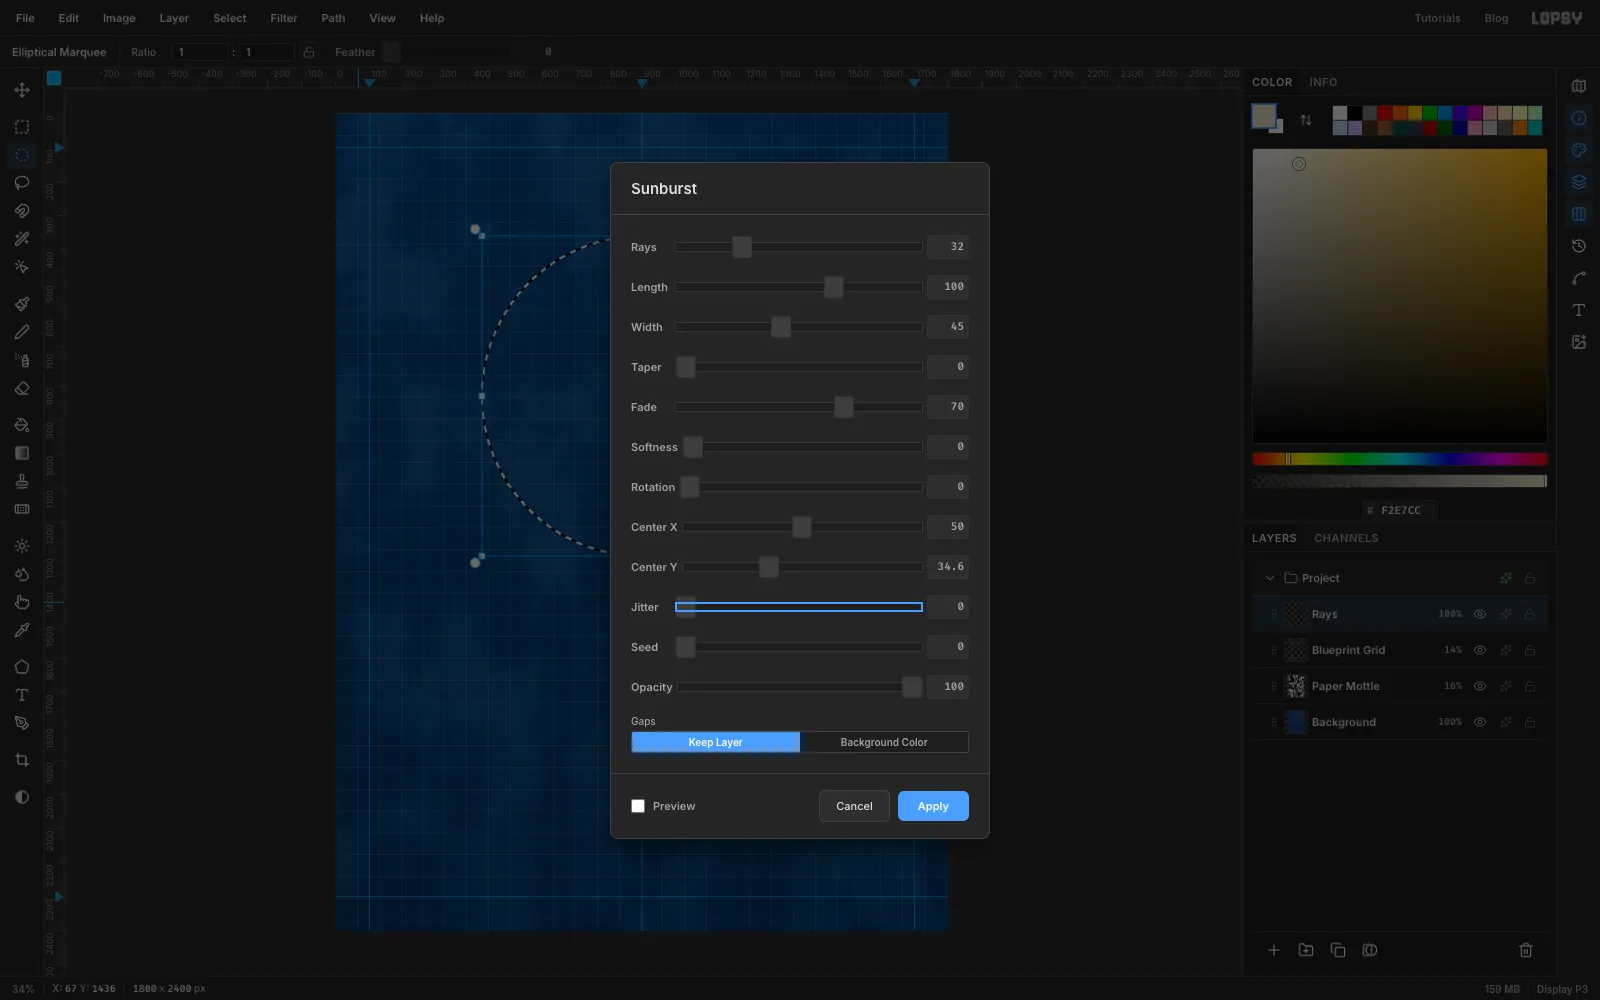
Choose Filter → Sunburst… and set Rays 32, Width 45, Fade 70 and Center Y 34.6 (that's 830 px down, the middle of the circle). Leave Center X at 50 and click Apply. Deselect.
-
Fade the ray tips with a layer mask
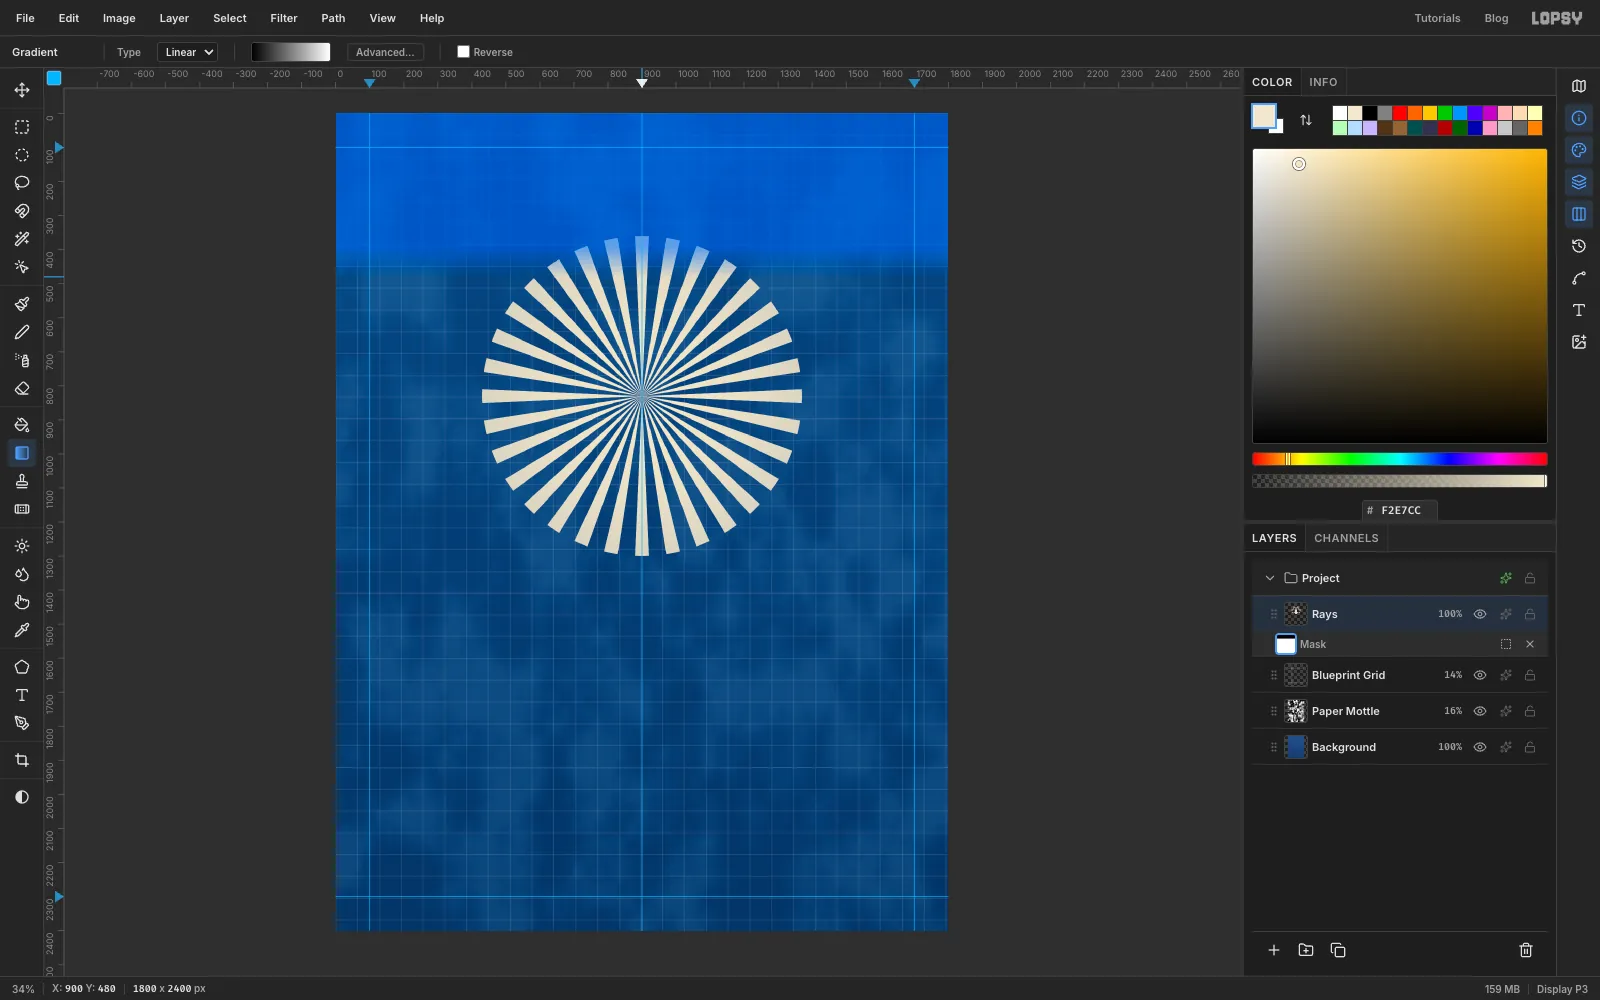
The rays mustn't run up into the title. Click Add Mask at the bottom of the Layers panel, then click the new mask thumbnail to edit it. The canvas shows masked areas in blue.
Pick the Gradient tool and set its stops to black on the left and white on the right in Advanced…. Drag from about y 390 (just under where the header will end) straight down to about y 480. Everything above that band is now hidden, and the rays fade in below it.
Click the Rays name to leave the mask, and set the layer to 30%.
-
Open a reference photo
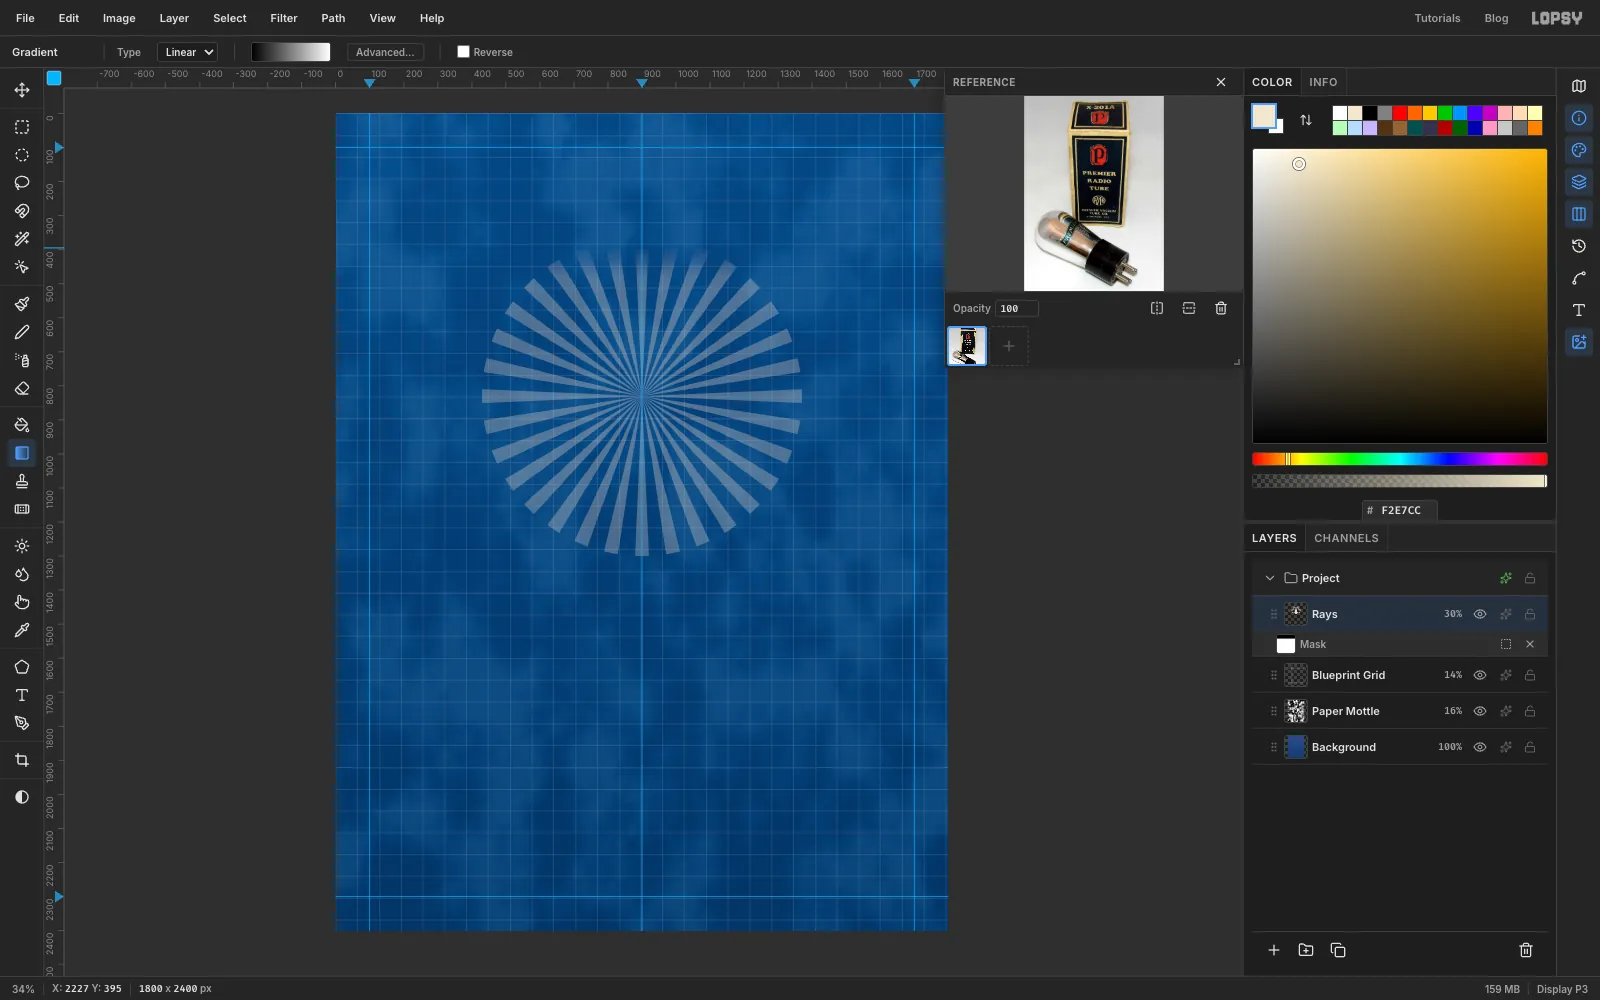
Click Reference on the panel toolbar, click the drop zone and choose a photo of an old radio valve. The drawer floats next to the canvas so you can check proportions while you draw: the 201-A has a round-topped glass envelope with straight sides, a short dark base and two or four stubby pins.
You'll draw a flat tattoo version of it, so you won't trace anything.
-
Select the glass envelope
Click New Group and name it Triode. Inside it, click Add Layer twice and name the layers Tube Ink (bottom) and Tube (top).
Turn off View → Snap to Guides. Small selections near the centre guide would otherwise snap onto it.
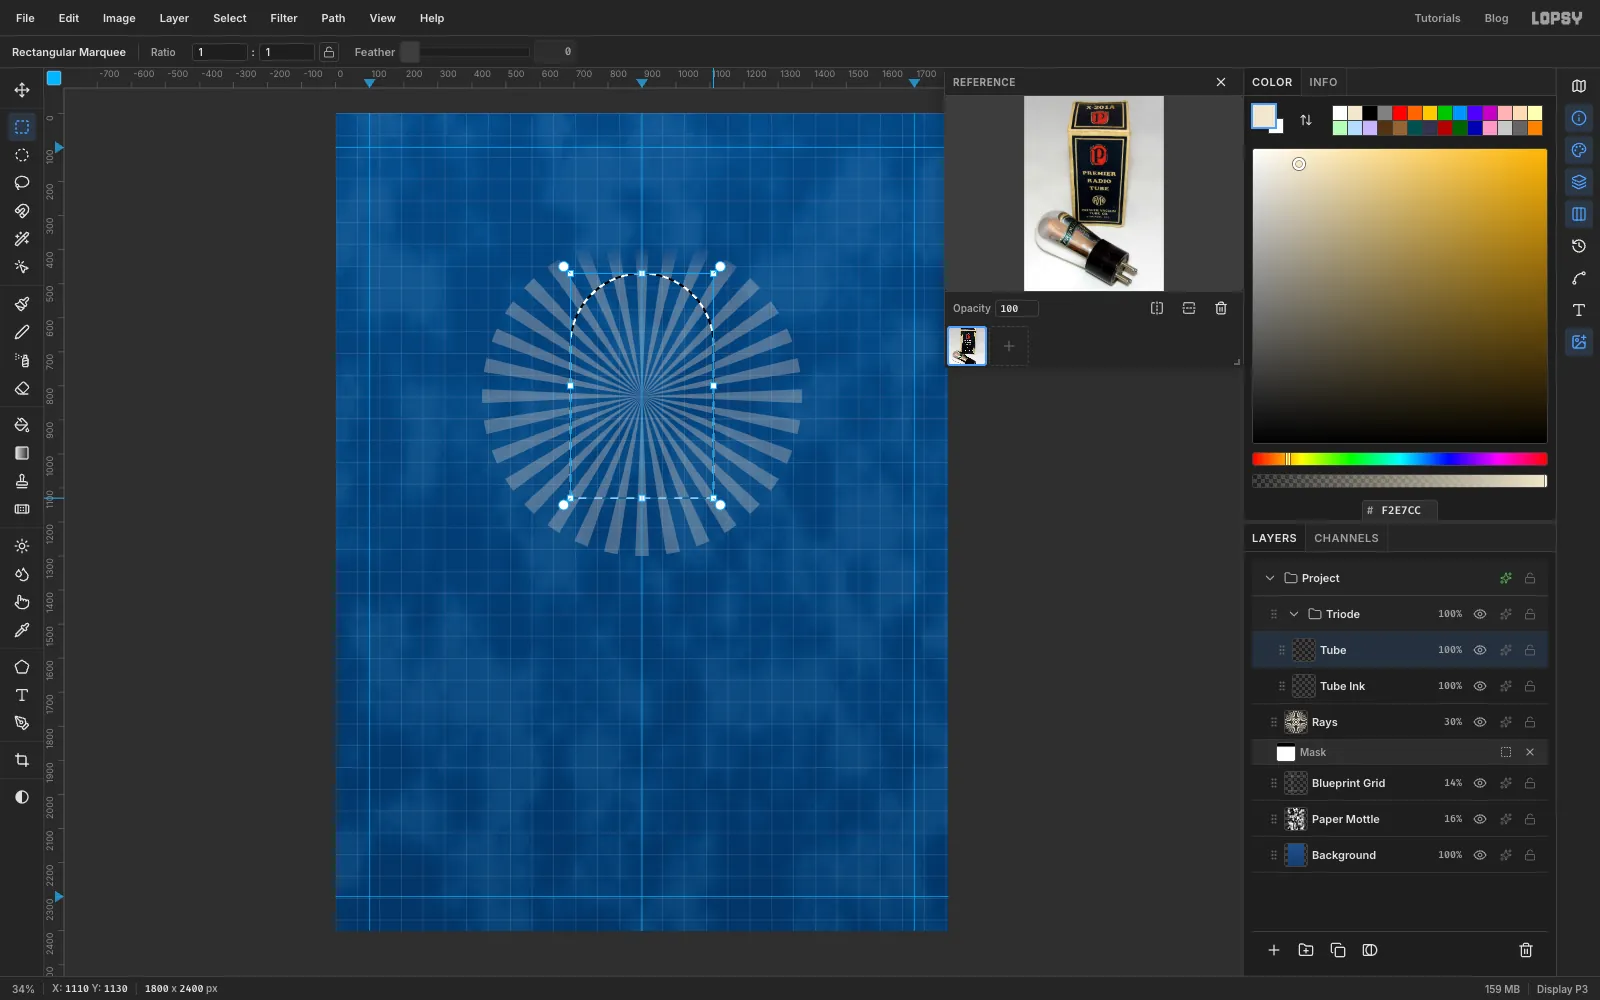
With the Elliptical Marquee, click and enter From 690, 470 To 1110, 890. Switch to the Rectangular Marquee, hold Shift and drag from 690, 680 down to 1110, 1130. Shift adds the rectangle to the circle, giving you a bullet shape.
-
Fill the glass, base and pins
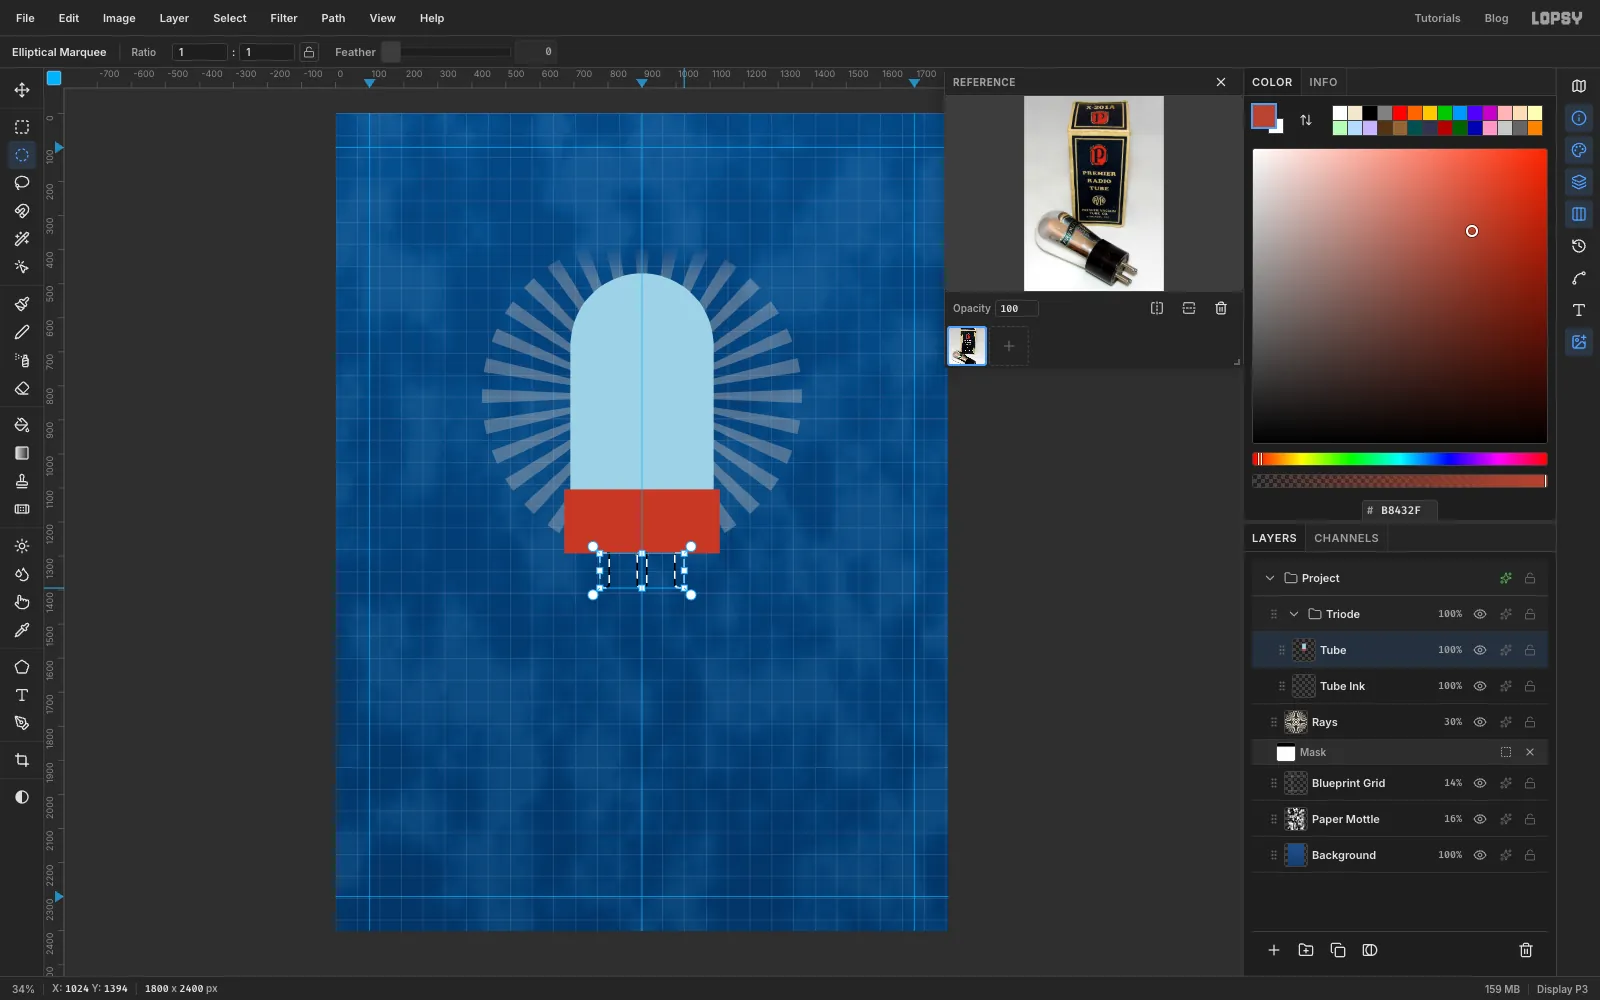
On Tube, choose Edit → Fill with glass .
Deselect, click with the Rectangular Marquee and enter From 672, 1104 To 1128, 1292 for the base. Fill it with flash red .
For the pins, deselect and select a 28 px-wide strip from 776, 1292 to 804, 1380. Shift-drag two more strips, from 886 to 914 and from 996 to 1024 across, over the same height. Switch to the Elliptical Marquee and Shift-drag a 28 px circle over the bottom of each strip for a rounded tip. Fill them with steel and deselect.
-
Grow the silhouette into an outline
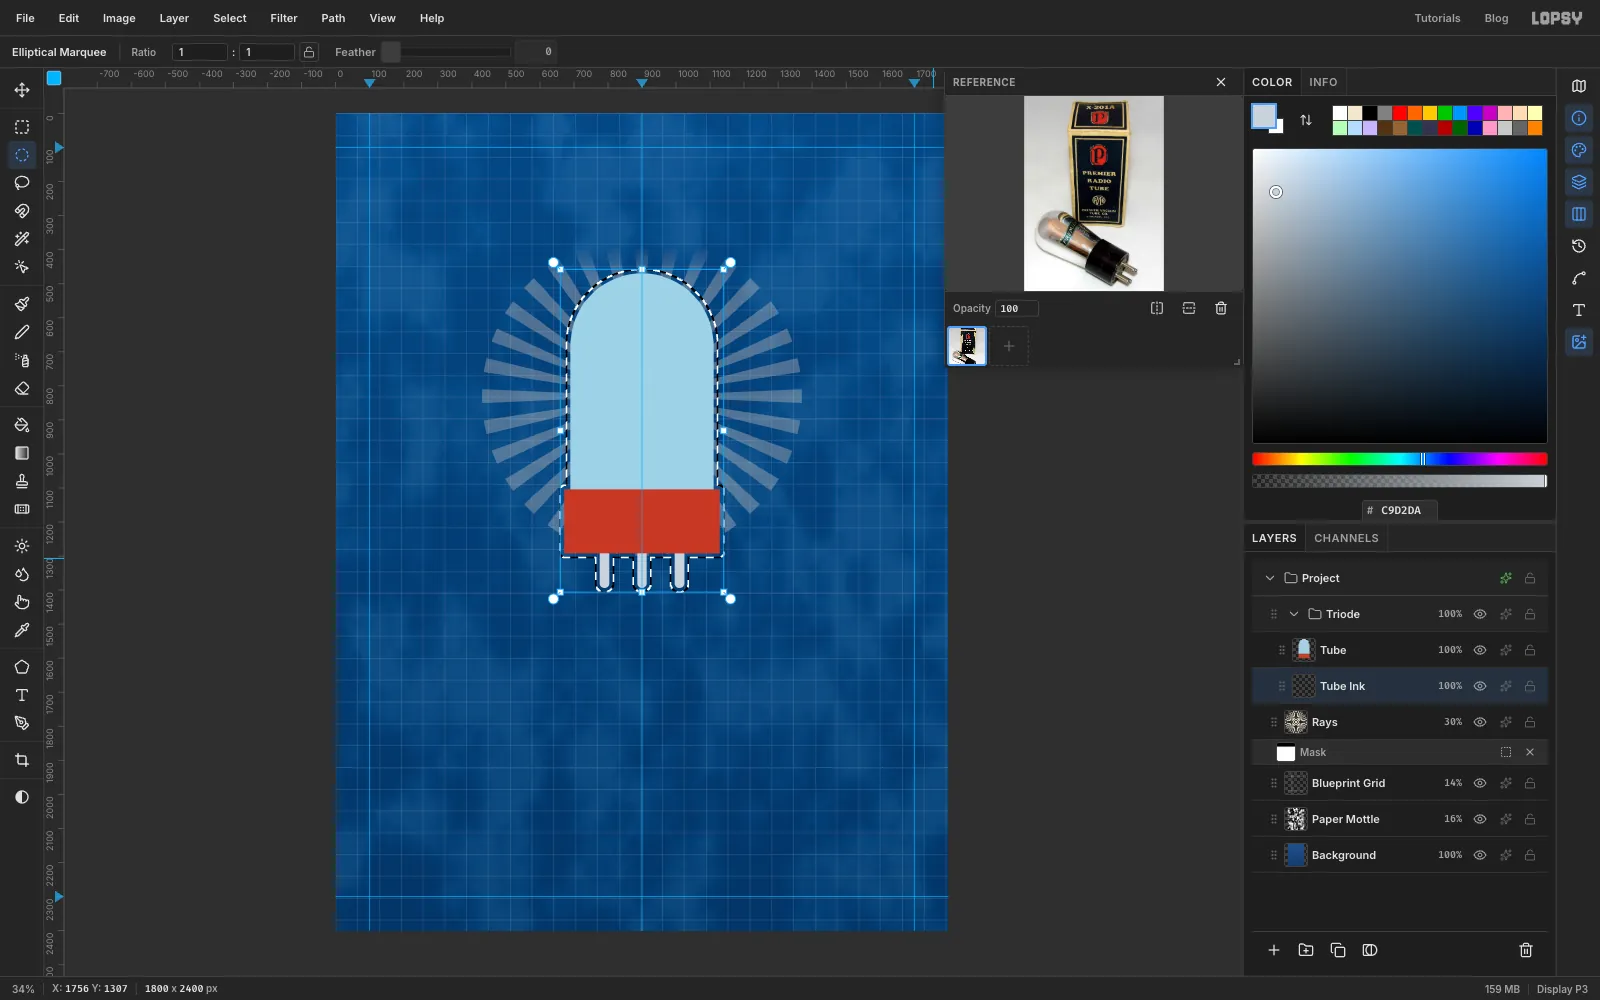
Hold ⌘ and click the Tube thumbnail in the Layers panel. That loads the tube's whole shape as a selection.
Choose Select → Grow…, enter 12 and click Apply. The selection now sits a fat line-width outside the drawing.
-
Fill the ink outline
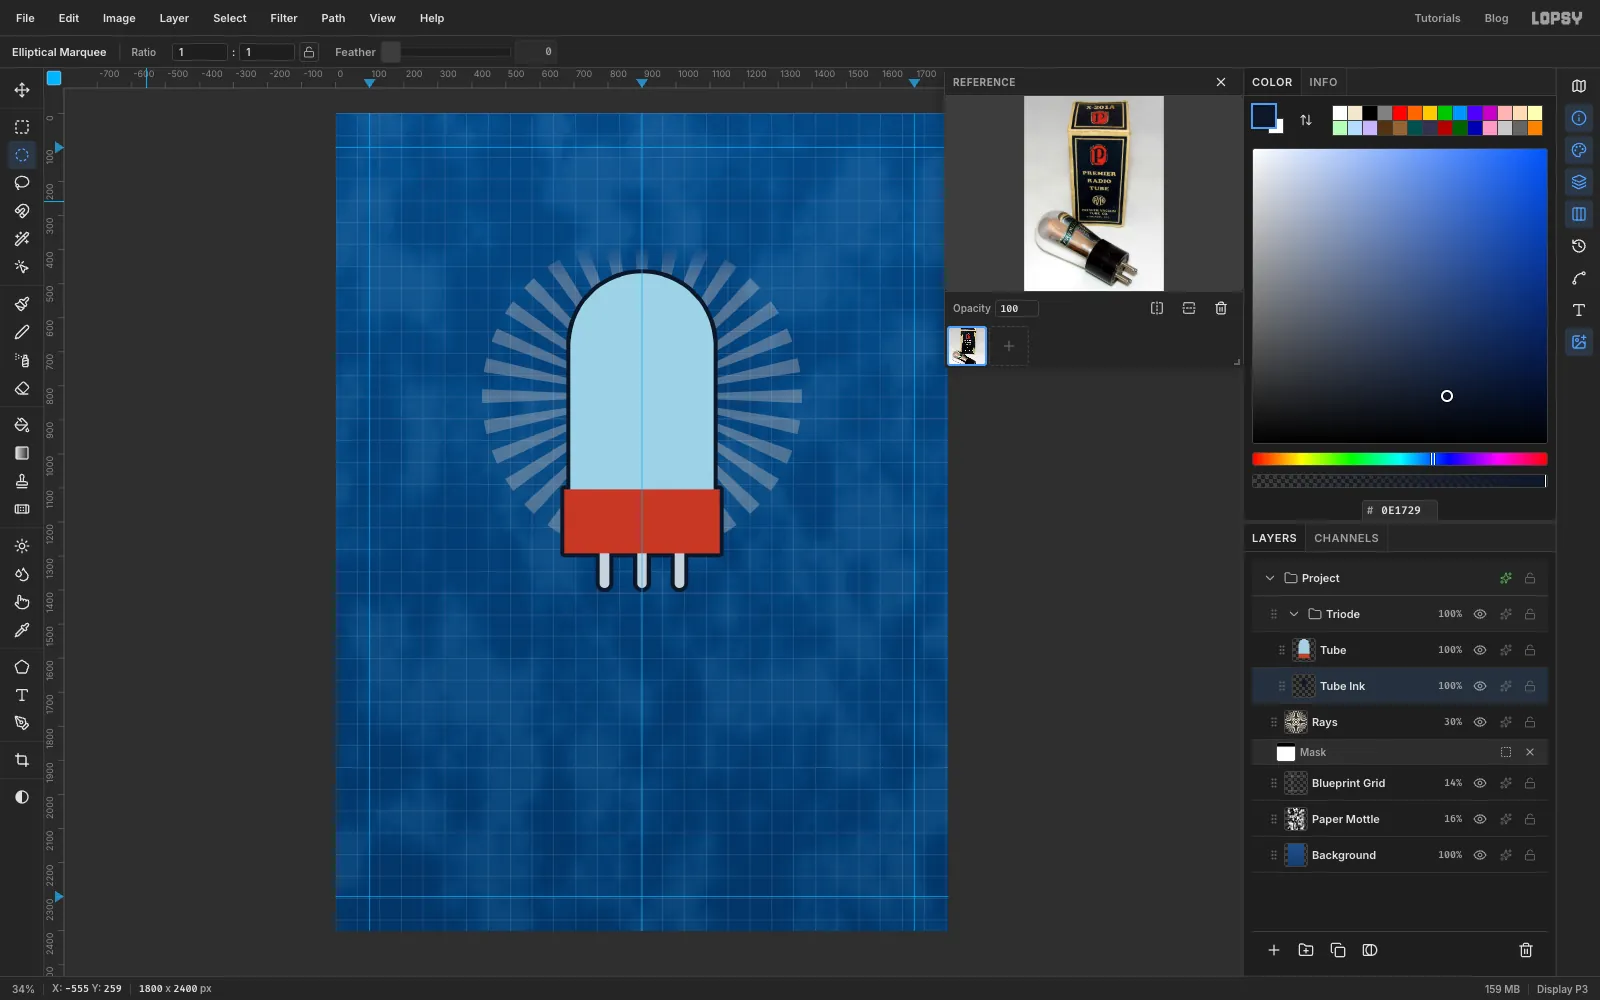
Click Tube Ink and fill the grown selection with ink . Because the ink sits on the layer under the colours, only a 12 px border shows. You get a clean outline with no stroke to draw. Deselect.
You'll outline every other piece on the sheet the same way.
-
Warm up the glass
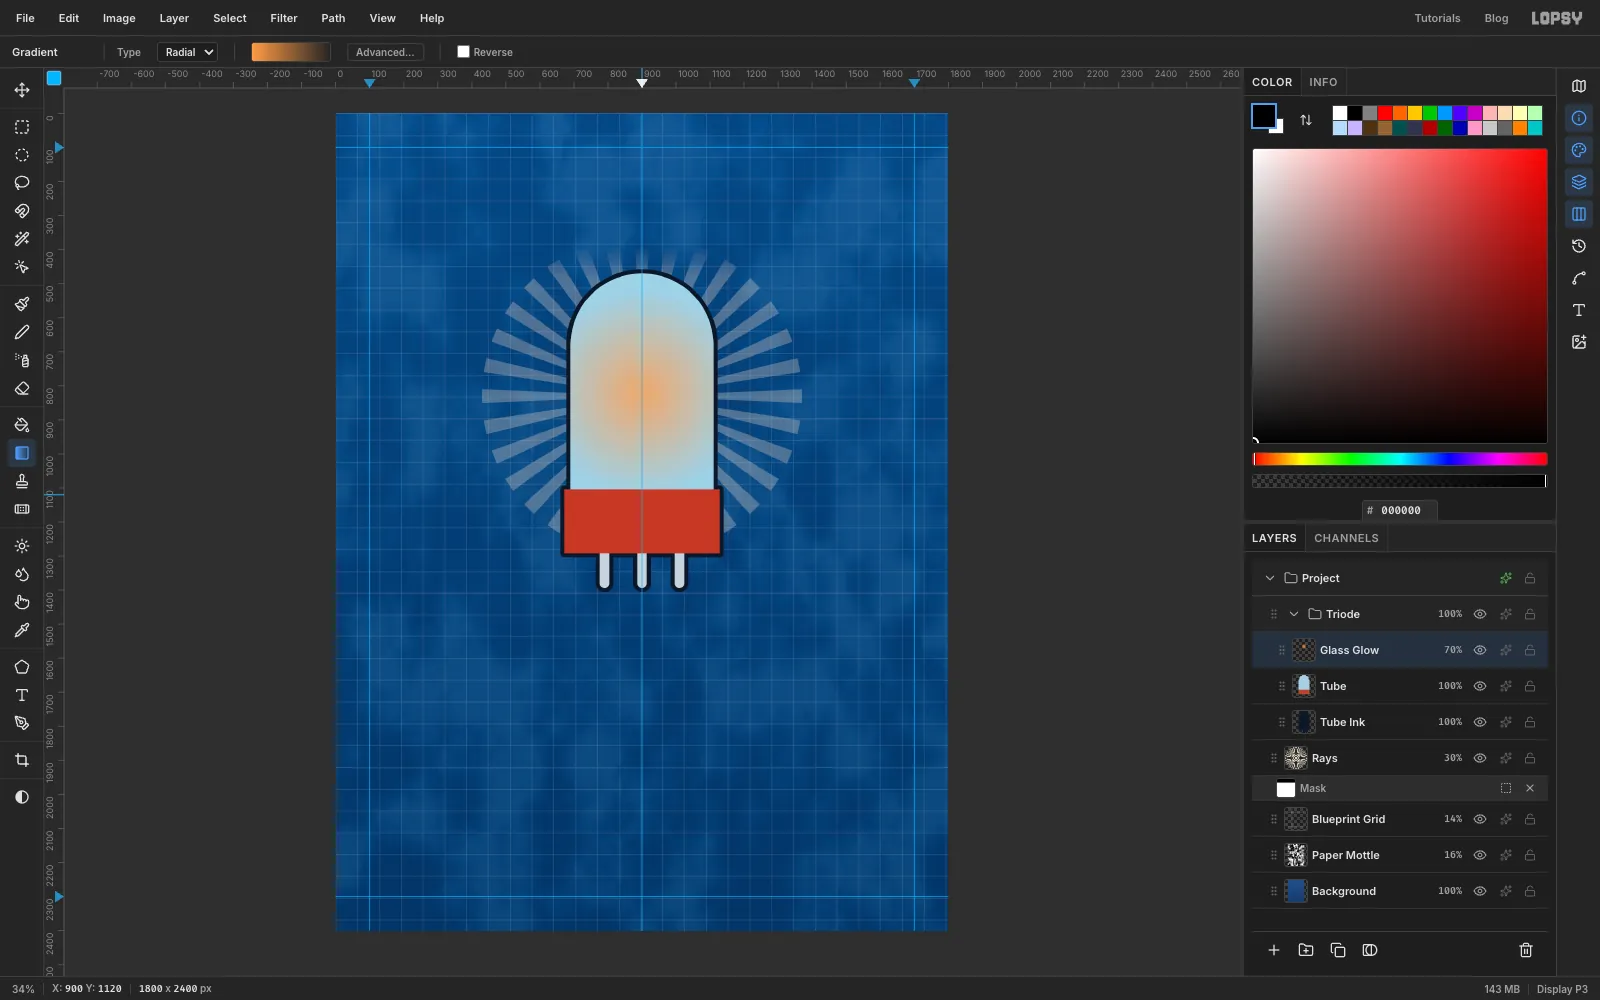
Click Tube and add a layer called Glass Glow, so it sits above the glass. Select the bullet shape again (the circle plus the Shift-added rectangle, as before).
Set a Radial gradient from glow orange at full opacity to the same orange at 0% opacity. Drag from the middle of the glass, around 900, 820, about 300 px downwards. Deselect and set the layer to 70%.
-
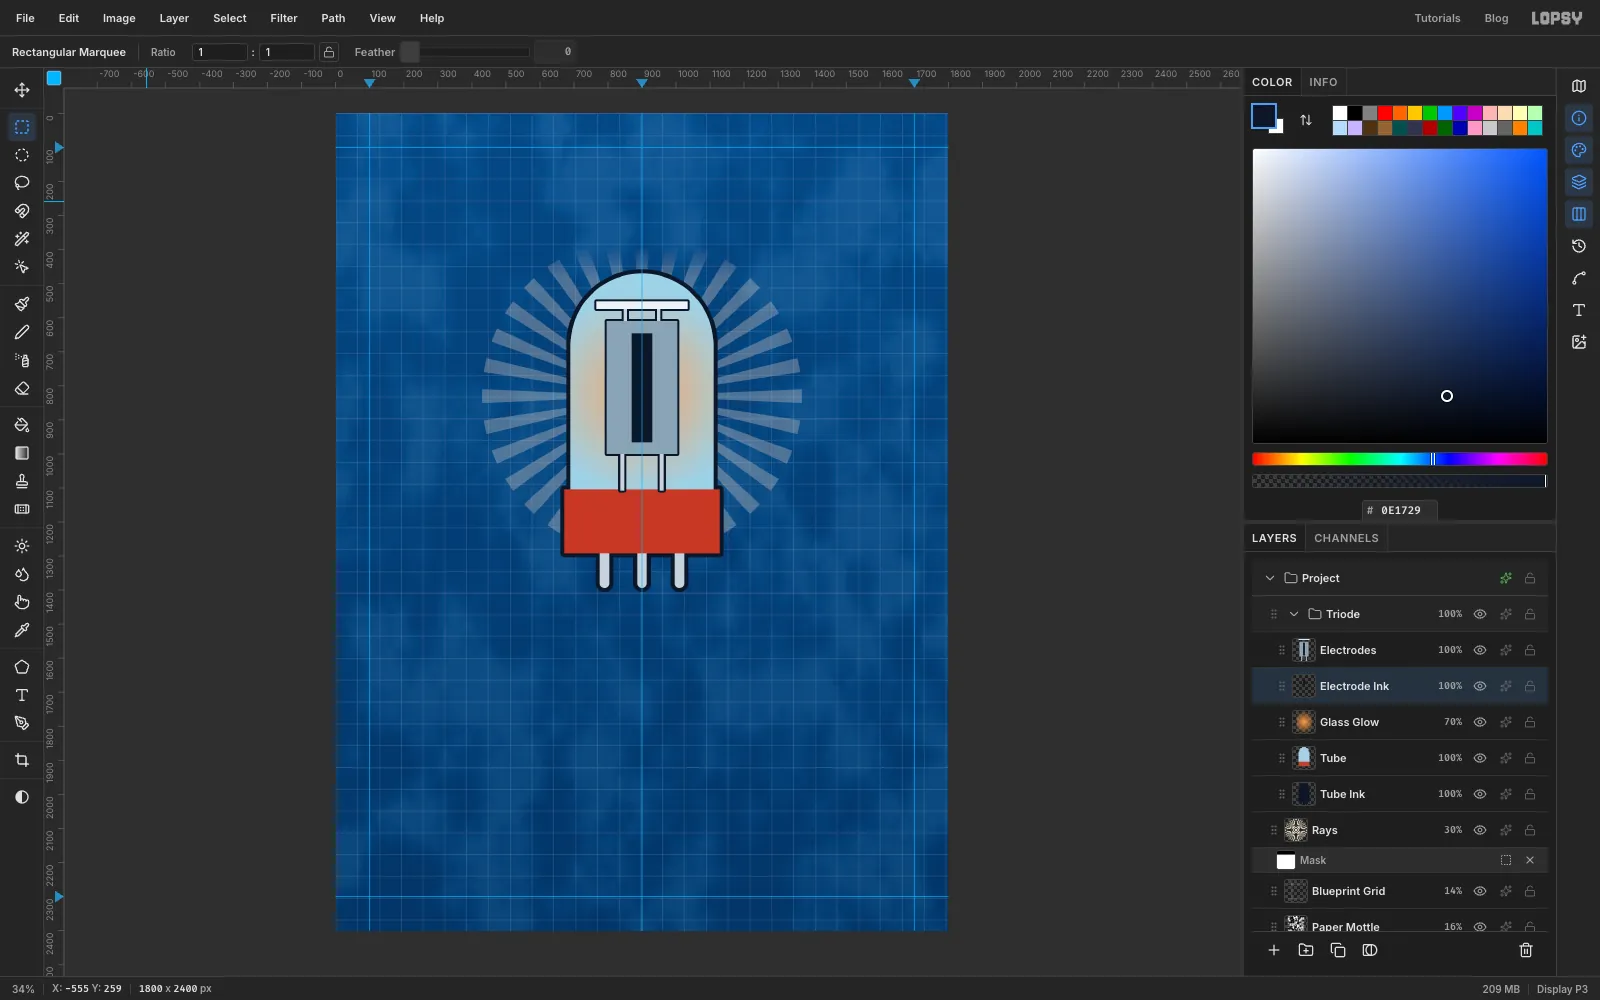
Draw the electrodes
Add two layers above Glass Glow: Electrode Ink, then Electrodes.
On Electrodes, use exact-corner selections and Edit → Fill:
- the mica spacer, a thin strip from 766, 552 to 1034, 574, in chalk ;
- the plate, from 796, 610 to 1004, 1000, in dark steel ;
- in steel , two support rods from the plate down to the base (836, 1000 to 848, 1108 and 952, 1000 to 964, 1108) and two short posts up to the mica (846, 574 to 856, 610 and 944, 574 to 954, 610), Shift-adding each to the selection;
- a slot down the middle of the plate, from 870, 646 to 930, 966, in ink.
⌘-click the Electrodes thumbnail, Grow by 6, click Electrode Ink and fill with ink.
-
Light the filament
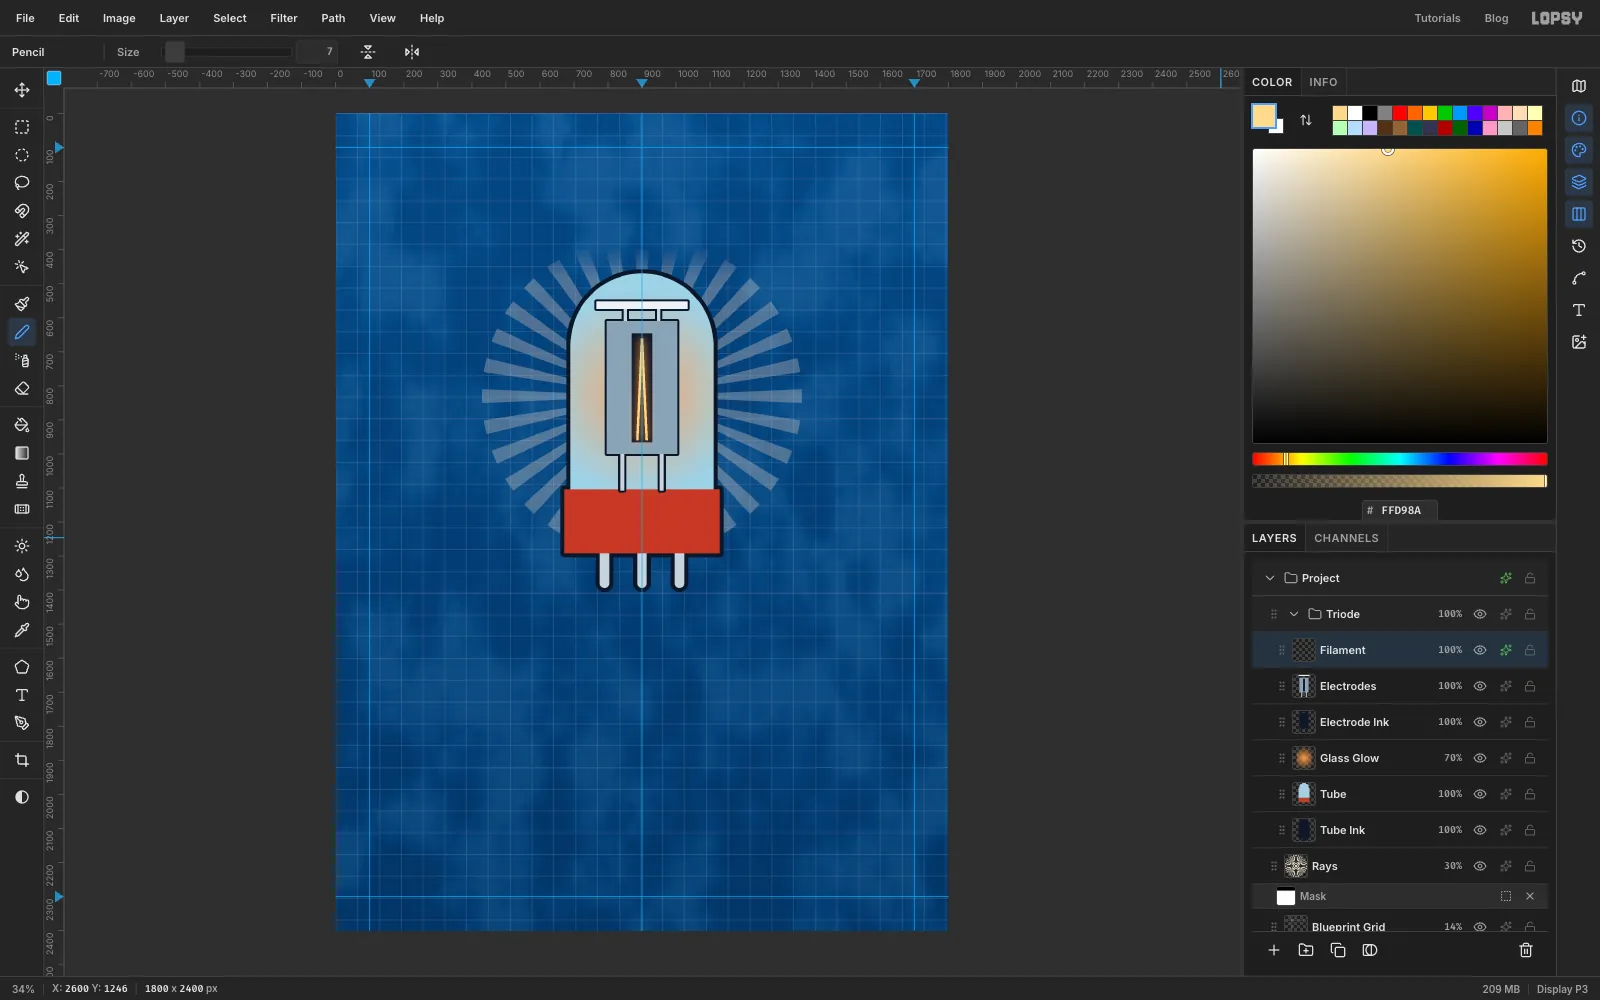
Add a layer called Filament. Pick the Pencil, set Size to 7 and the colour to .
Click near the bottom left of the slot, then Shift-click at the top centre and again at the bottom right. Shift-click draws straight lines, so you get a thin inverted V.
Open the layer's effects and turn on Outer Glow: Size 34, Spread 20, Opacity 95, colour .
-
Wind the grid coil
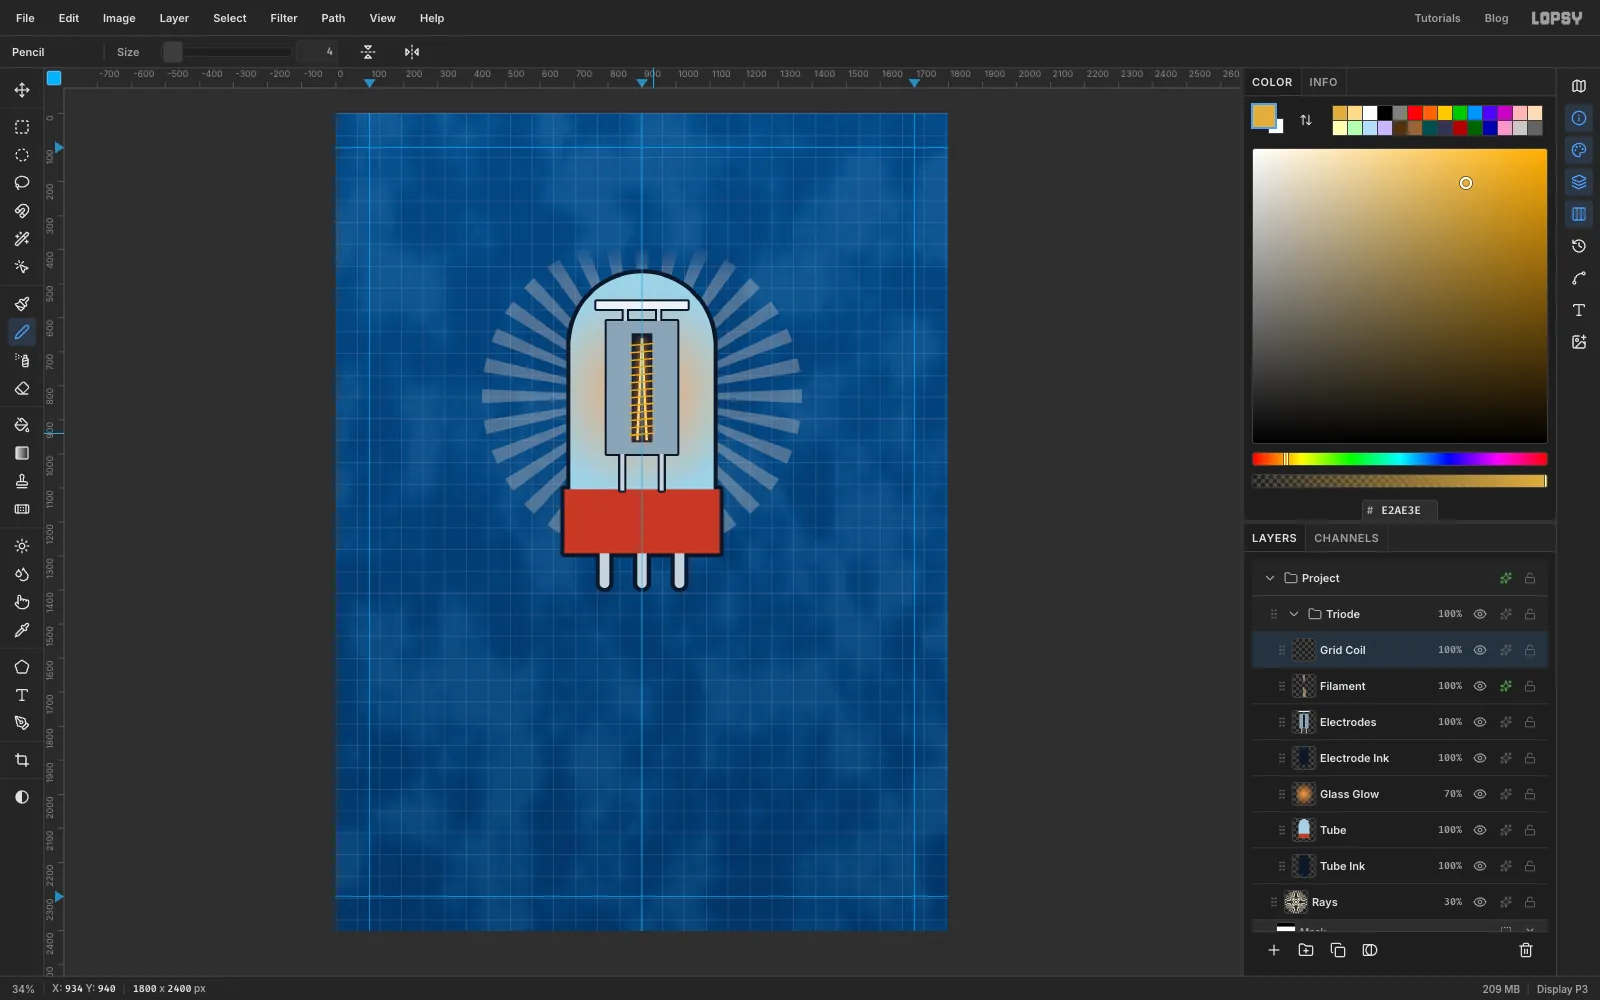
Add a layer called Grid Coil. Set the Pencil Size to 4 and the colour to mustard .
Draw short, very slightly slanted rungs across the slot: click just left of the slot, Shift-click just right of it, then move down about 22 px and repeat all the way down. This is the valve's control grid, wrapped around the filament.
-
Add a glass highlight
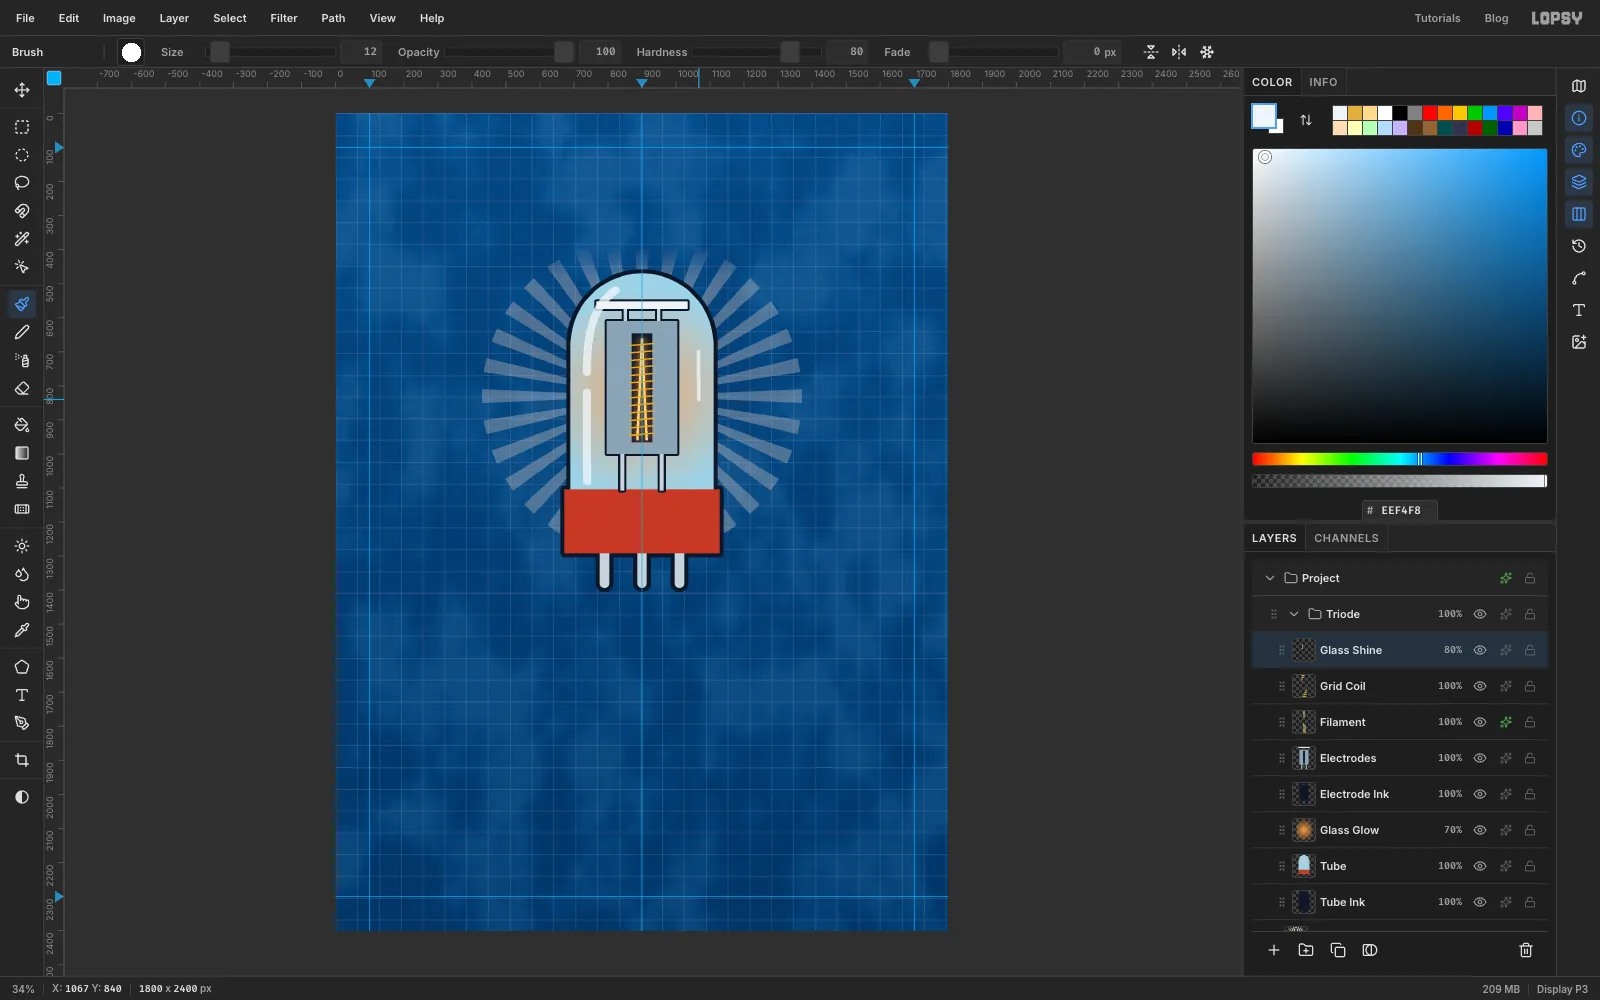
Add a layer called Glass Shine. Pick the Brush at Size 26 with chalk .
Paint one curved stroke that starts on the dome near the top left and runs down the left side of the glass. Leave a small gap and continue the stroke down to just above the base. Switch to Size 12 and add a short stroke down the right side. Set the layer to 80%.
-
Shade the base
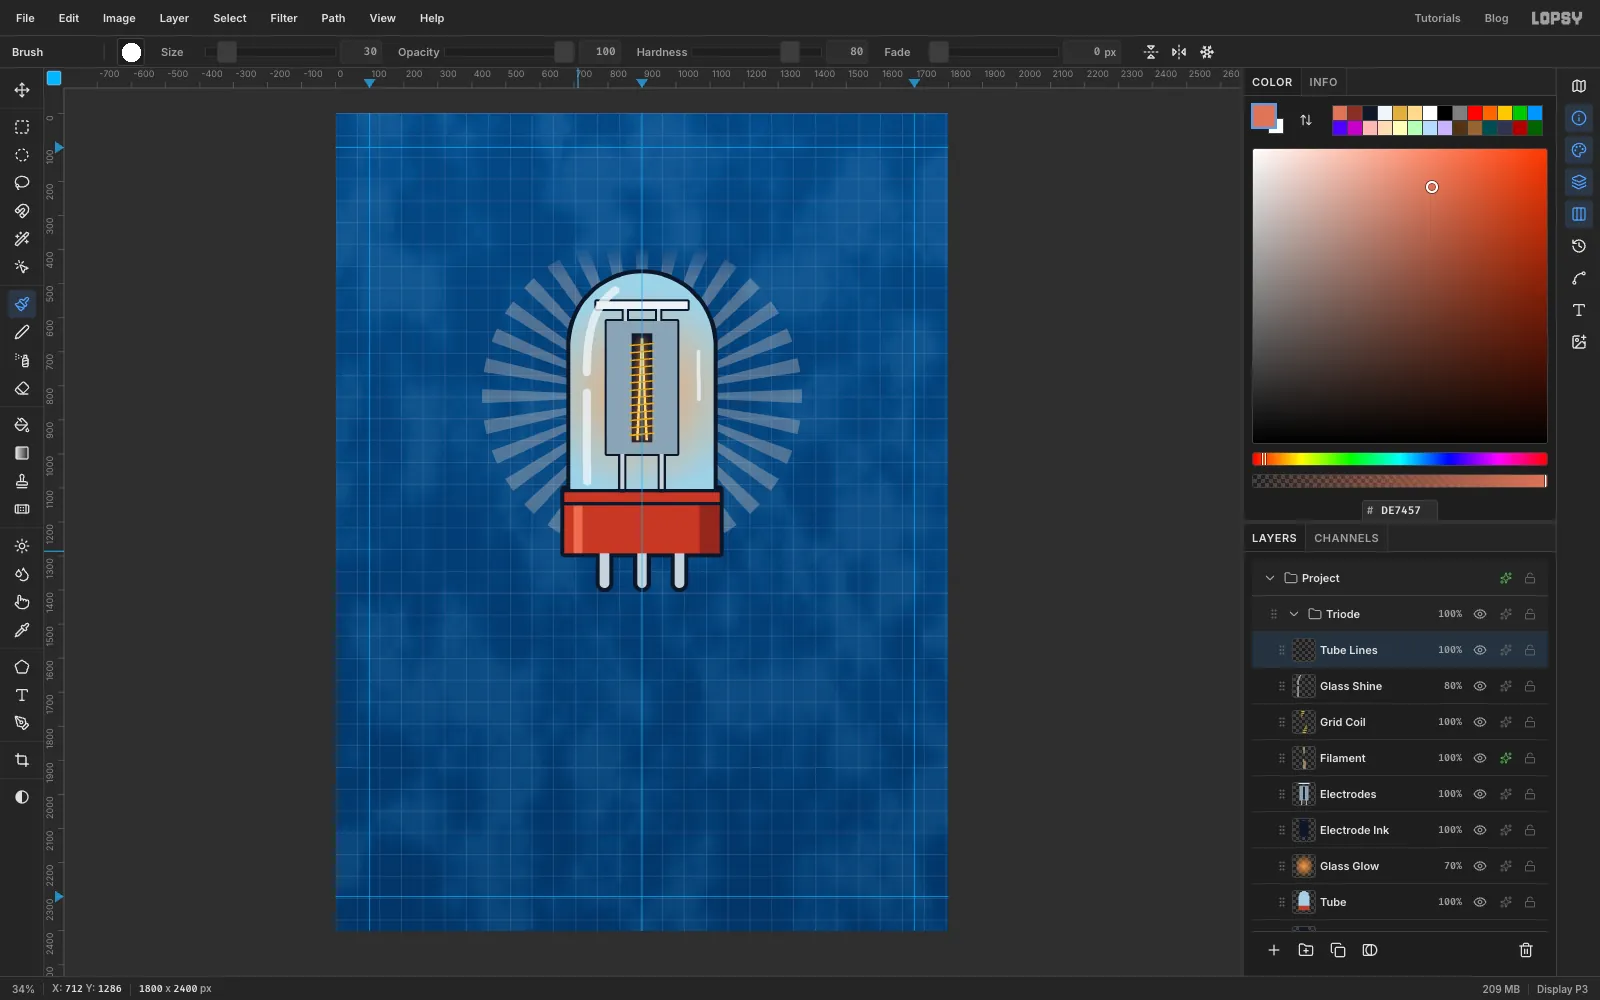
Add a layer called Tube Lines. With the Pencil at Size 10 and ink, Shift-click two horizontal lines across the top of the base, one along the glass joint and one about 40 px lower. They read as the rim of the base.
Select the base below the lower line with the Rectangular Marquee. Painting stays inside the selection. With the Brush at Size 70, paint one vertical stroke of down the right edge. At Size 30, paint one stroke of down the left edge. Deselect.
-
Lasso the ribbon banner
Add two layers above Tube Lines: Banner Ink, then Banner.
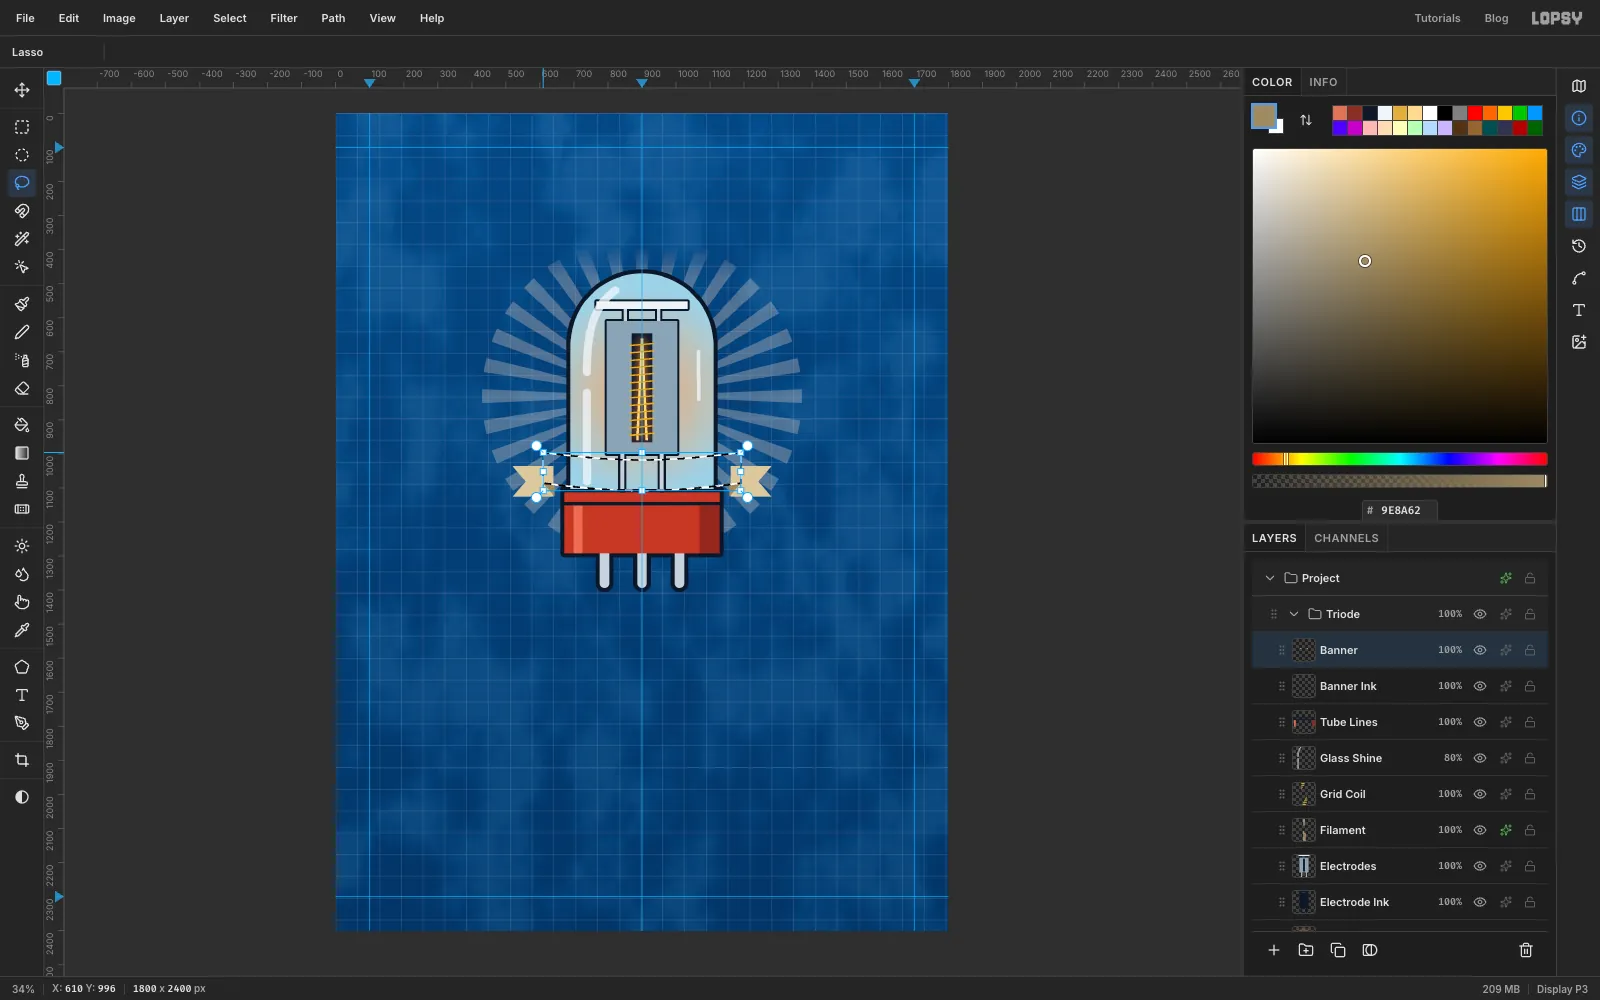
On Banner, use the Lasso to draw the two tails, which hang a little lower than the band: a rectangle off each end with a V notch cut into its outer edge. Hold Shift while you draw the second tail to add it. Fill with . Lasso a small triangle where each tail tucks under the band and fill it with the darker for the fold.
Now lasso the band itself: a strip about 90 px tall from x 610 to x 1190 that sags about 20 px in the middle.
-
Outline the banner
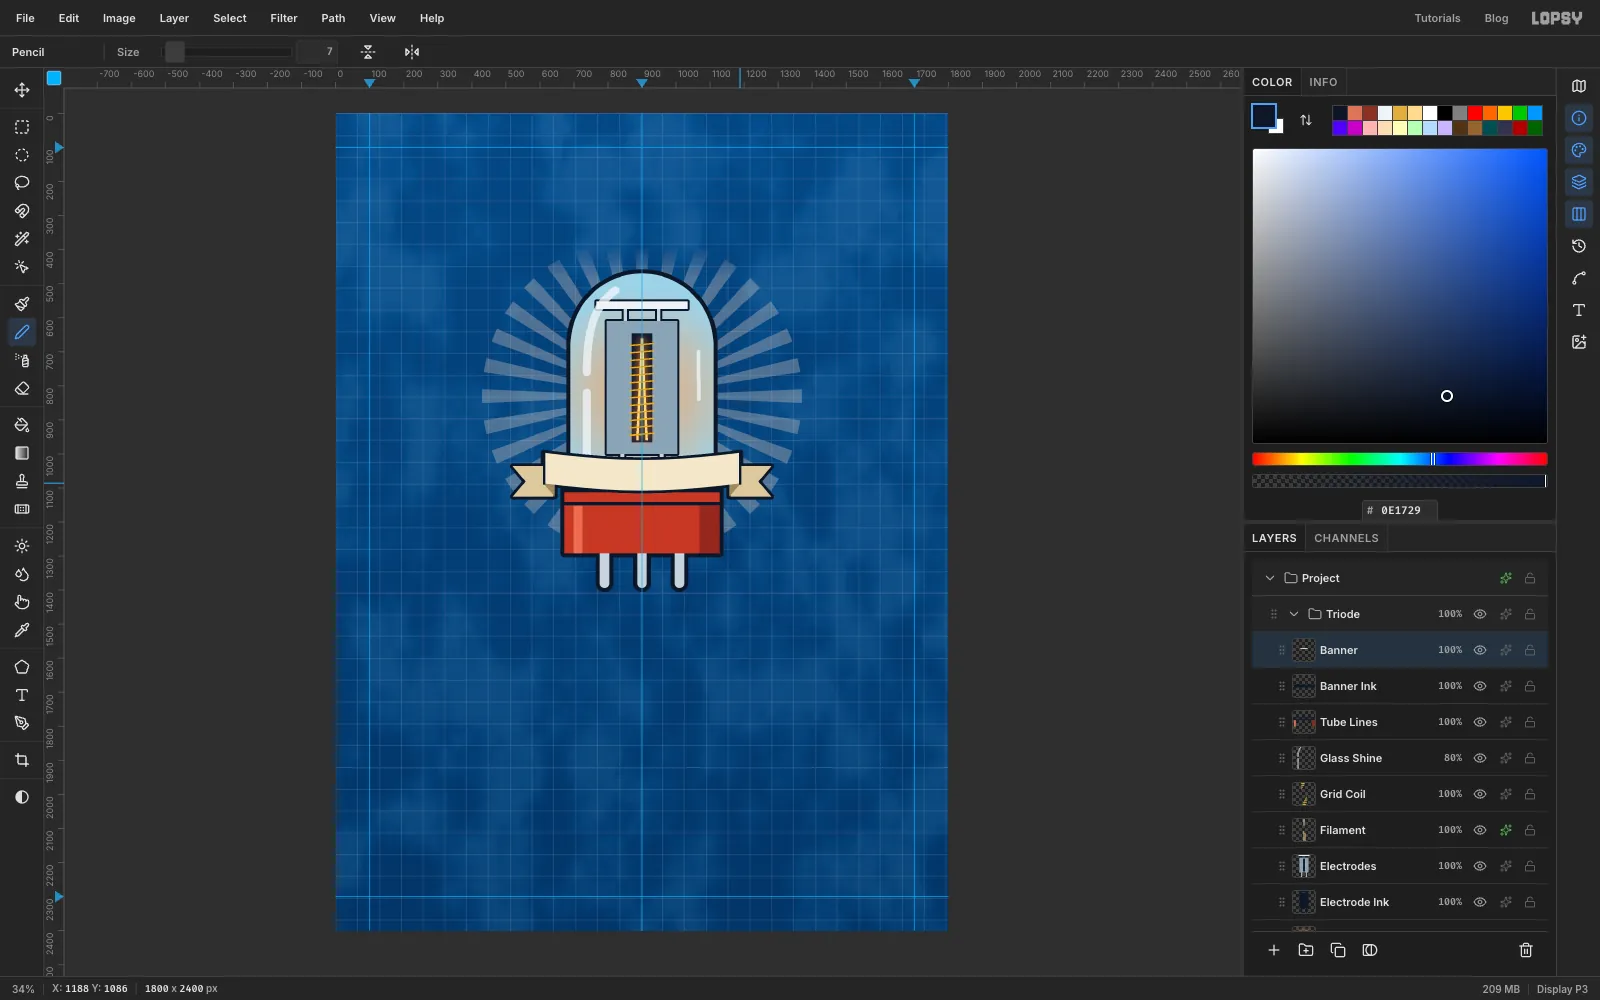
Fill the band with cream and deselect.
Outline it the usual way: ⌘-click Banner, Grow by 8, and fill ink on Banner Ink. Then click Banner again. With the Pencil at Size 7 in ink, Shift-click a short line down each end of the band where it meets the tails.
Choose Layer → Merge Down and rename the result Banner, so the banner and its outline become one layer you can copy later.
-
Draw a curved baseline with the Pen
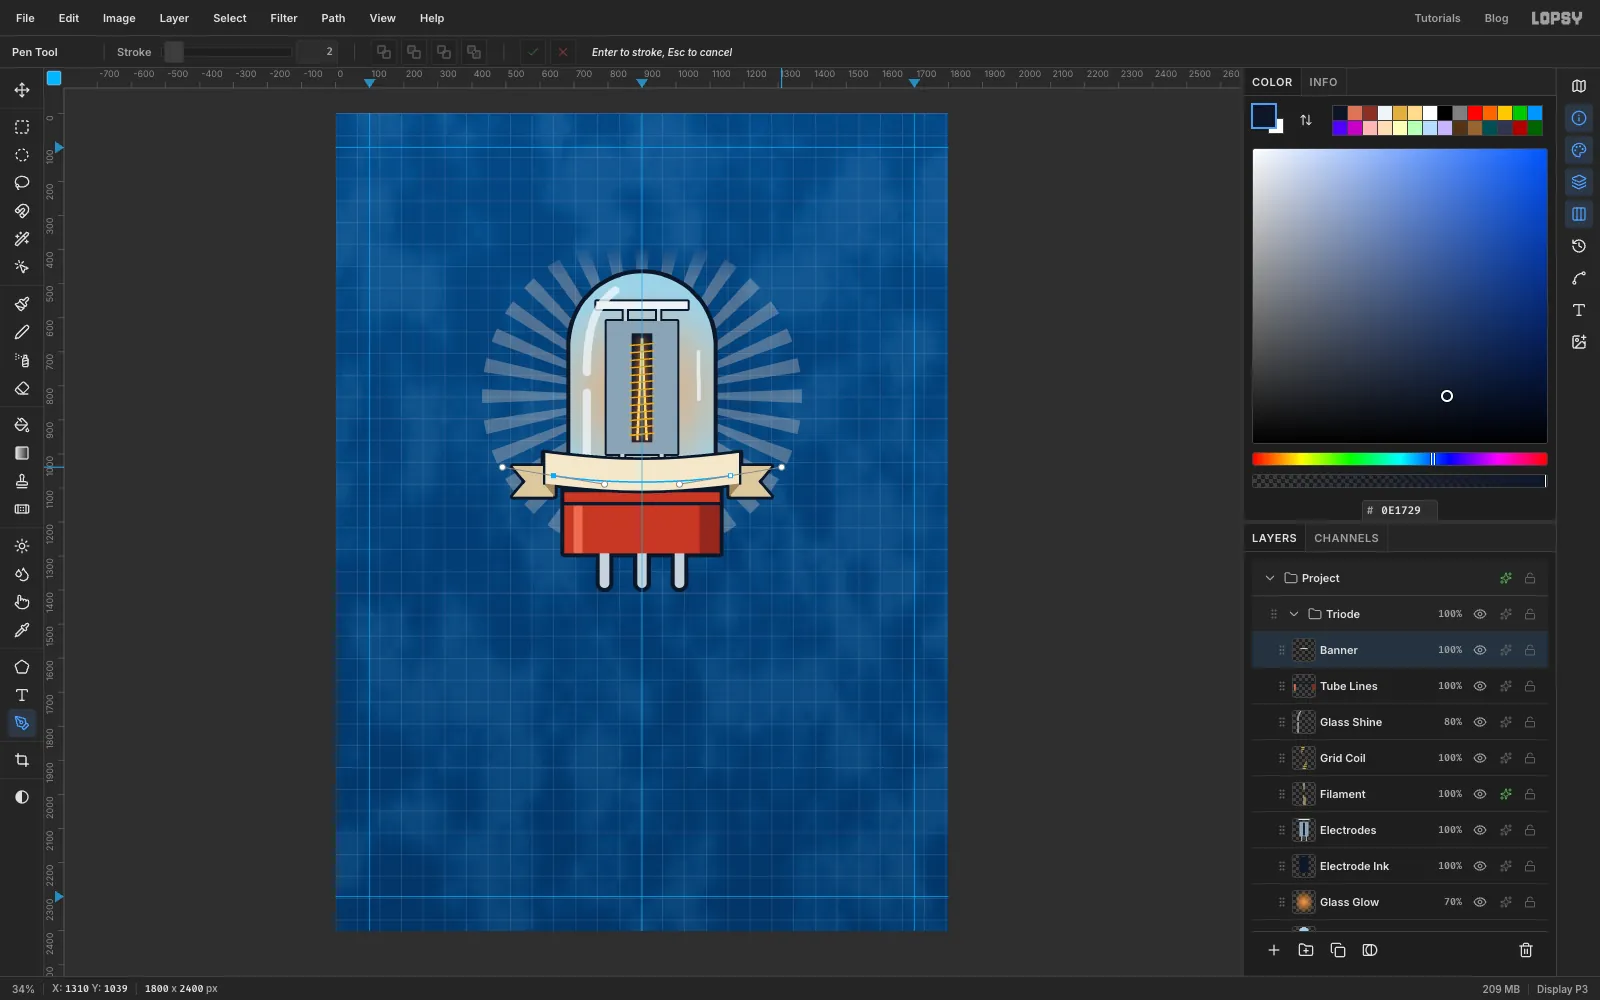
Pick the Pen tool. Press near the left end of the band (about 640, 1064) and drag down and to the right before releasing. That sets the handle that bends the curve. Press near the right end (about 1160, 1064) and drag up and to the right.
The path should sag through the middle of the band, matching its curve. Click the ✓ (Commit path) button in the options bar.
-
Set the motto on the path
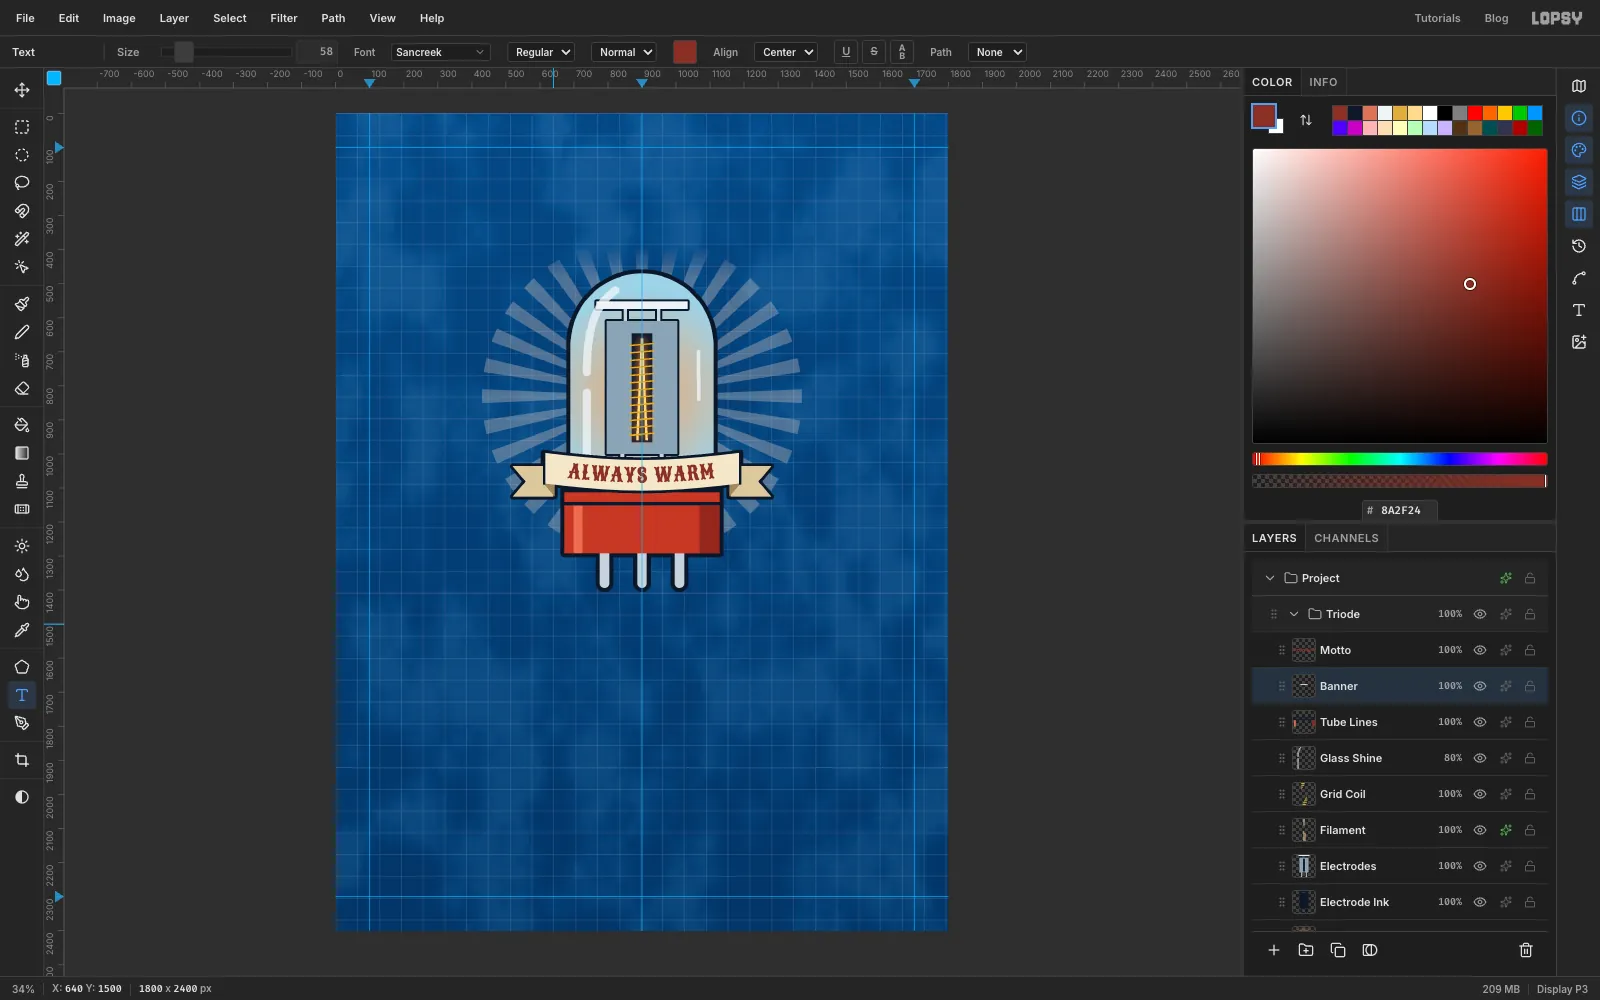
Pick the Text tool. Choose Sancreek at Size 58 and colour . Click in an empty part of the canvas, type ALWAYS WARM and press Tab to commit. Rename the layer Motto.
With Motto selected, choose your new path in the options bar's Path list, and the type jumps onto the curve. In the Text panel, set Letter spacing to 4 and click Align center.
Letter spacing carries over to the next text you type. Select a raster layer (Banner is fine) and set Letter spacing back to 0 before you close the Text panel.
-
Draw a lightning bolt
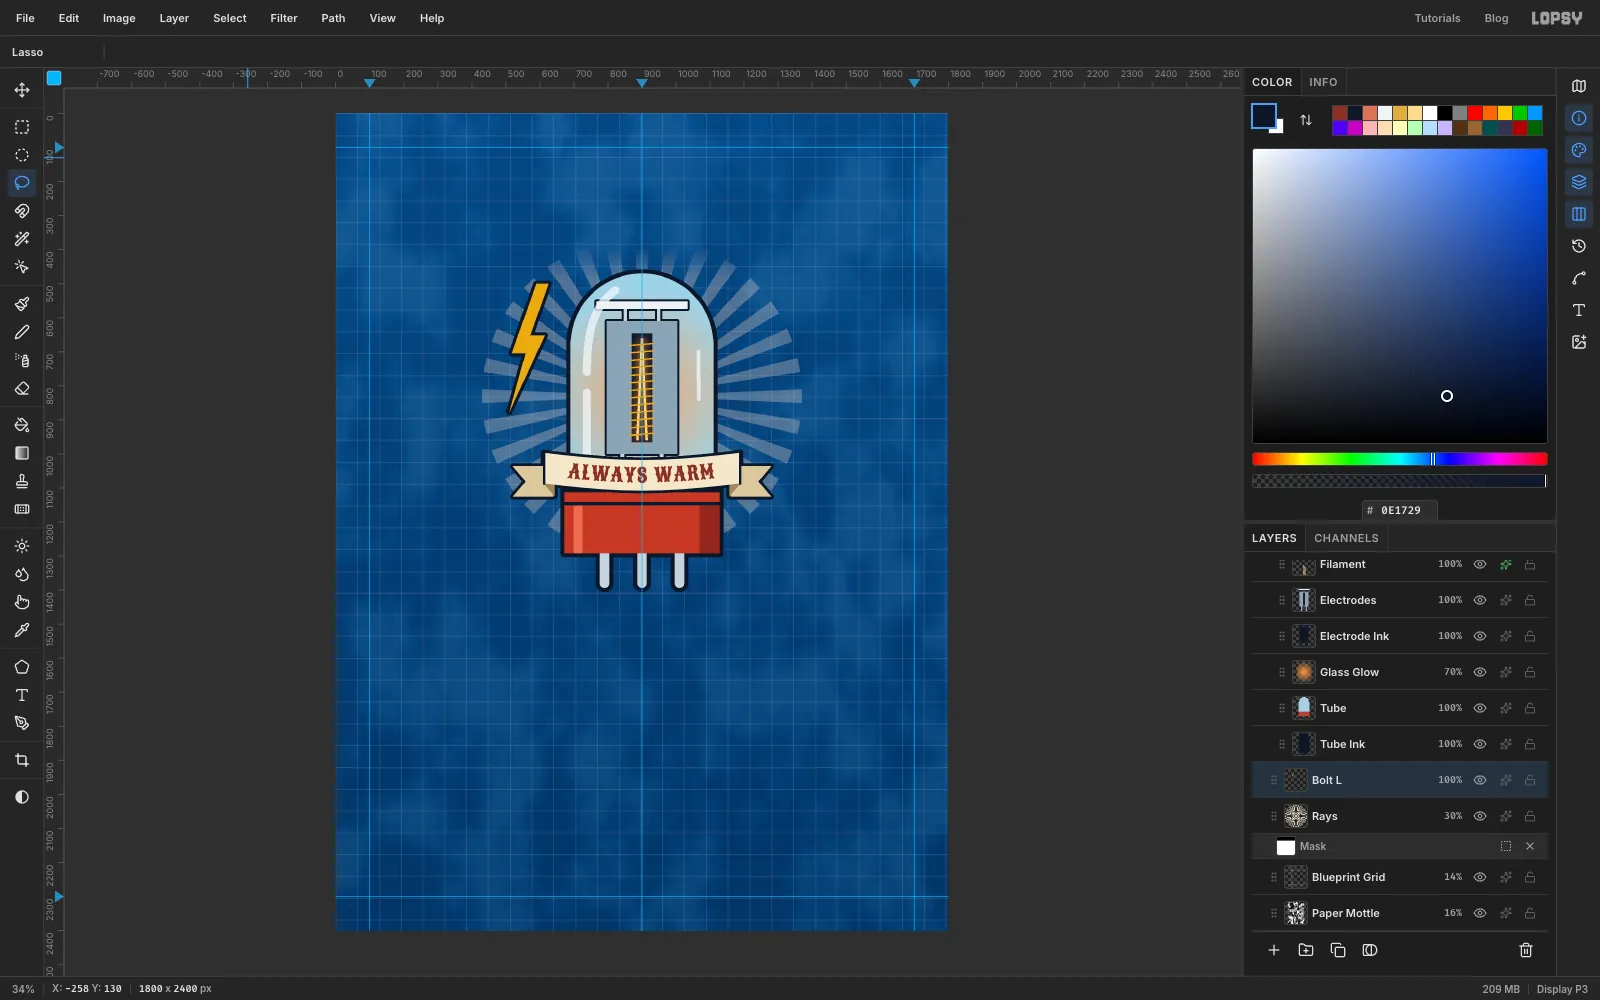
Collapse the Triode group and click Rays, so new layers go between the rays and the triode. Add Bolt Ink, then Bolt.
With the Lasso, draw a classic zigzag bolt about 140 px wide and 380 px tall to the left of the glass. Start at the top right, cut down-left to a step, jog right, then run down to a sharp point at the bottom left. Fill it with mustard .
Outline it: ⌘-click Bolt, Grow by 9, fill ink on Bolt Ink. Then select Bolt, choose Layer → Merge Down and name the result Bolt L.
-
Duplicate and flip the bolt
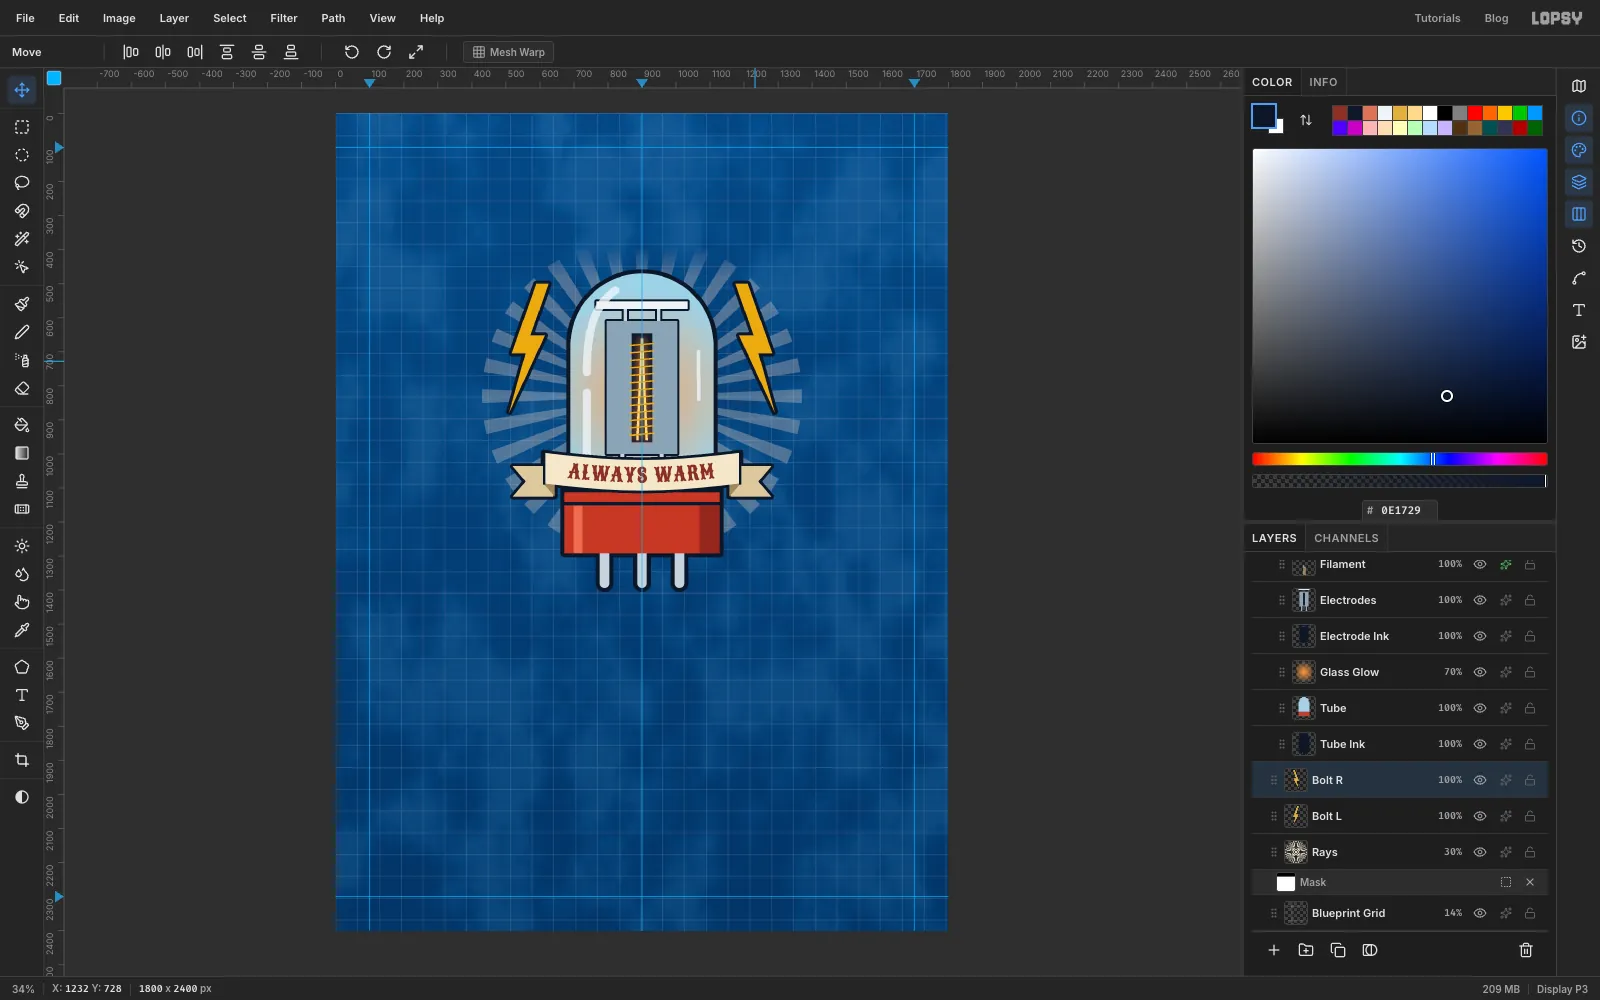
Choose Layer → Duplicate Layer and rename the copy Bolt R. Choose Image → Flip Horizontal. The bolt flips in place.
Pick the Move tool and drag Bolt R straight across to the right of the glass, the same distance from the centre guide as Bolt L.
-
Try the triode lower
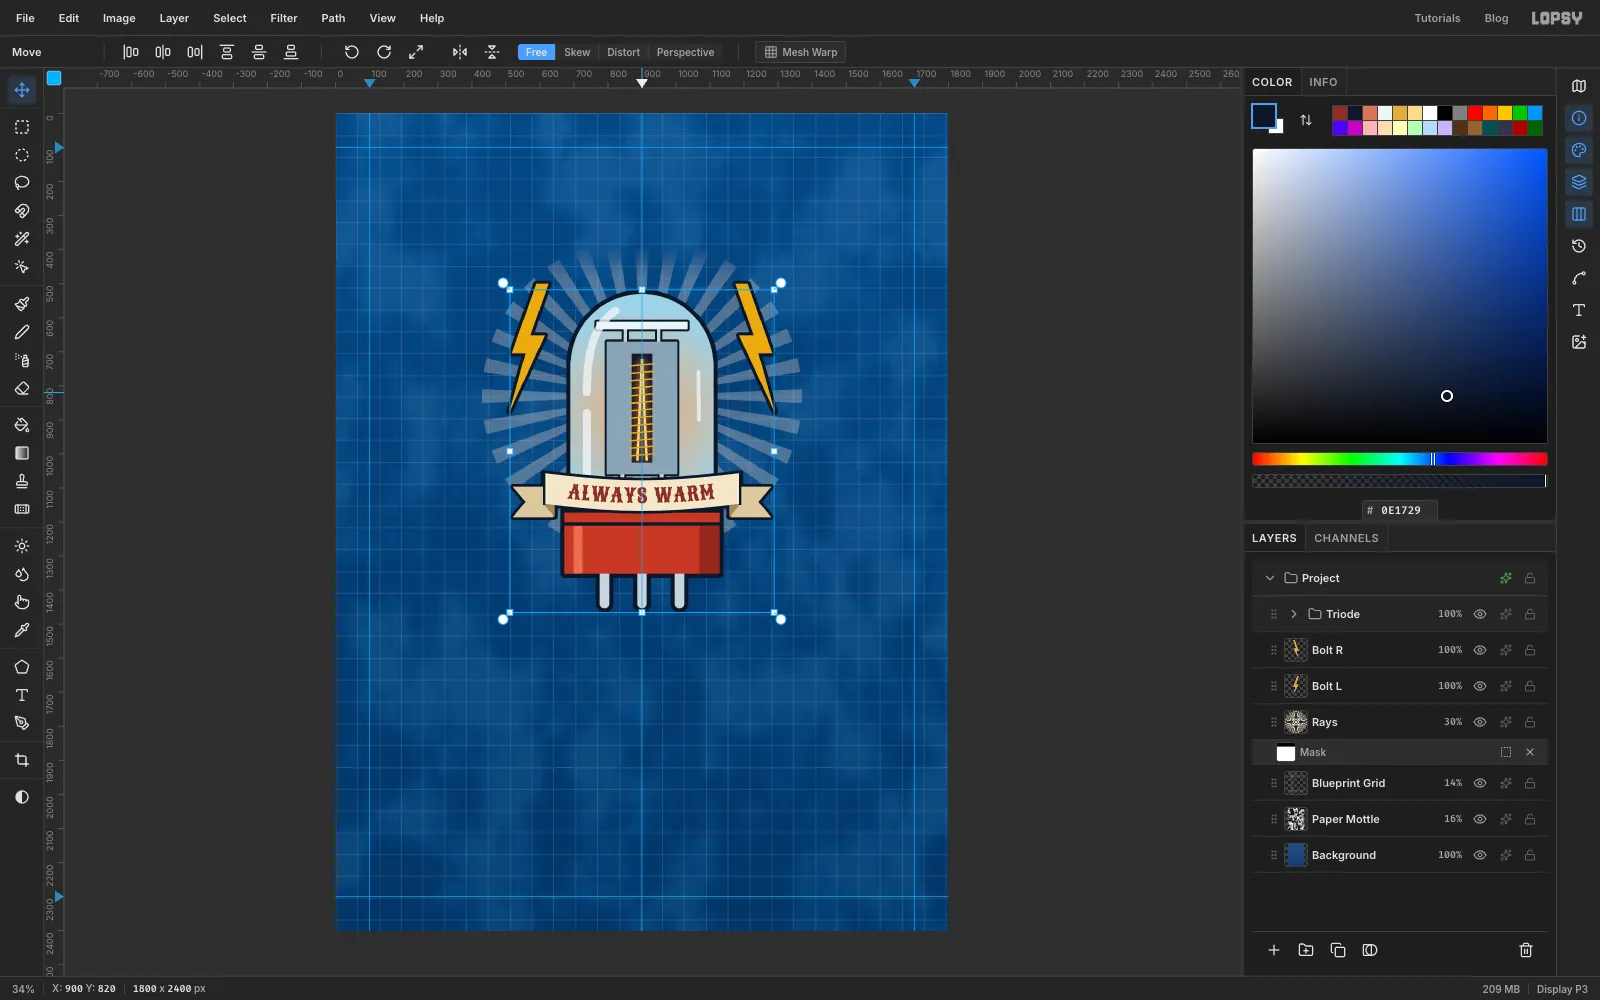
Because the valve is built inside Triode, you can try a different placement in one move. Click the Triode group's row and drag down on the canvas with the Move tool. Glass, electrodes, glow, banner and the motto on its path all travel together.
Lower down, the glass drifts off the centre of the rays and the base crowds the space for the bottom row. Press ⌘Z to put it back where it was.
-
Build the Nixie tube
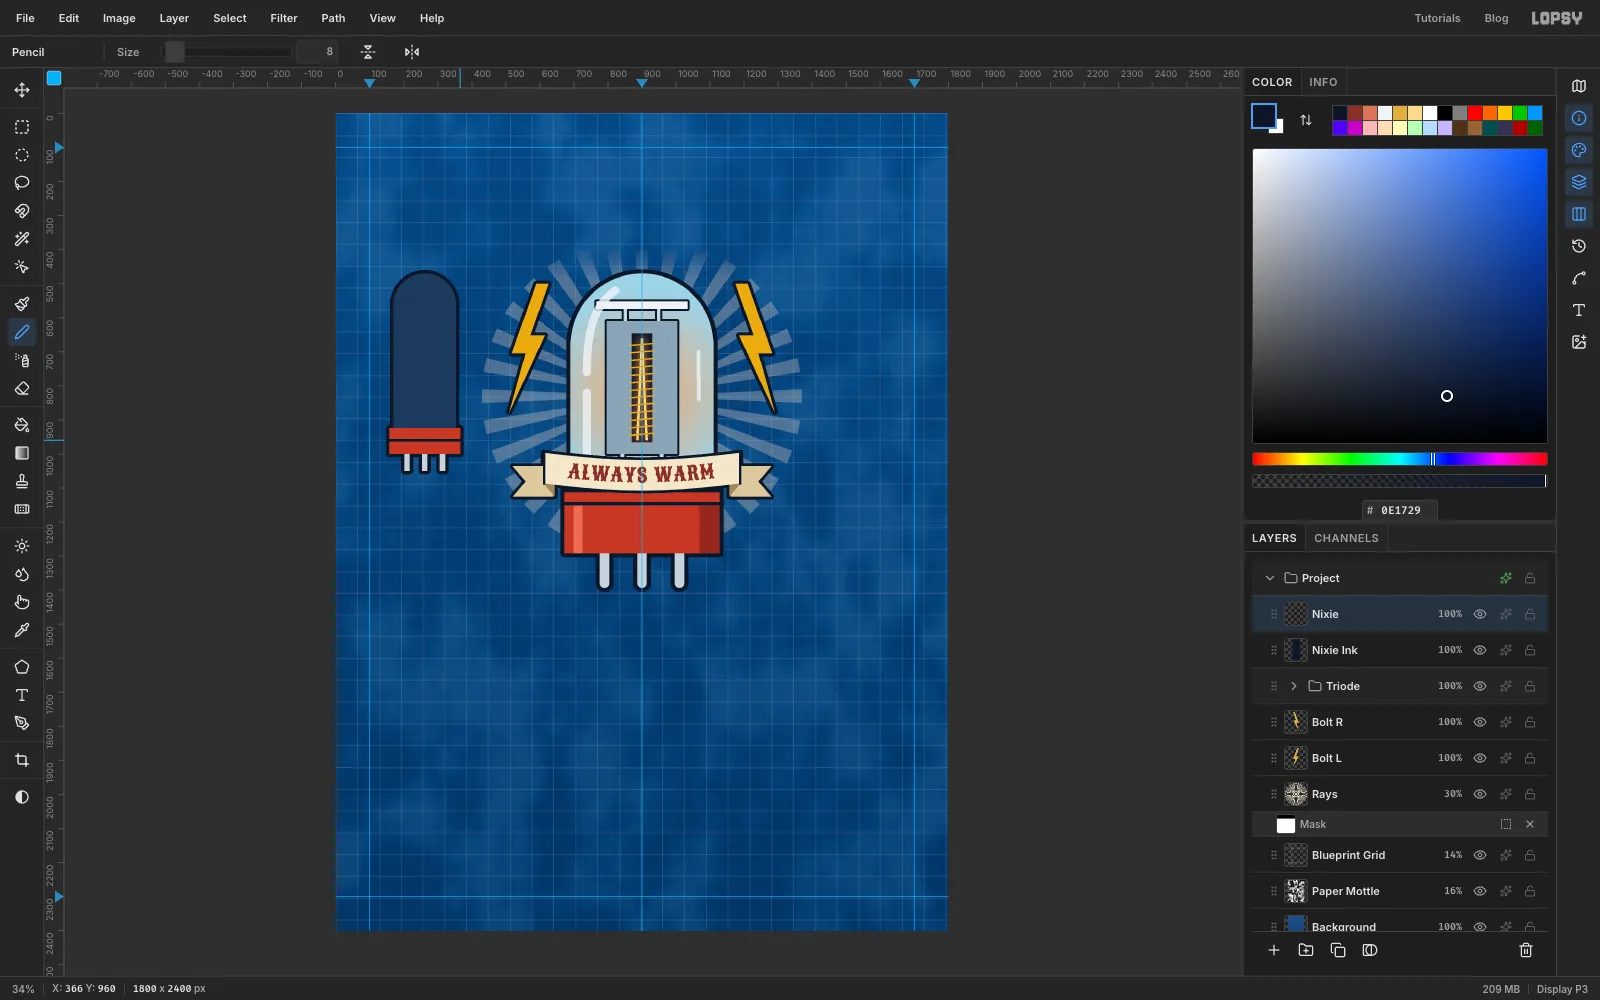
Click the Triode row and add Nixie Ink, then Nixie.
On Nixie, select a circle from 170, 470 to 354, 654 and Shift-add a rectangle from 170, 562 down to 354, 930. Fill it with smoky . Select the base from 158, 924 to 366, 1000 and fill it with flash red. Add three 16 px pins below the base in steel.
Outline it with Grow 10 on Nixie Ink. Click Nixie again, set the Pencil to Size 8 in ink and Shift-click a seam across the middle of the base.
The Nixie and the sparkles later on stay as loose layers rather than groups: each is one small piece you won't need to move as a unit.
-
Light the Nixie numeral
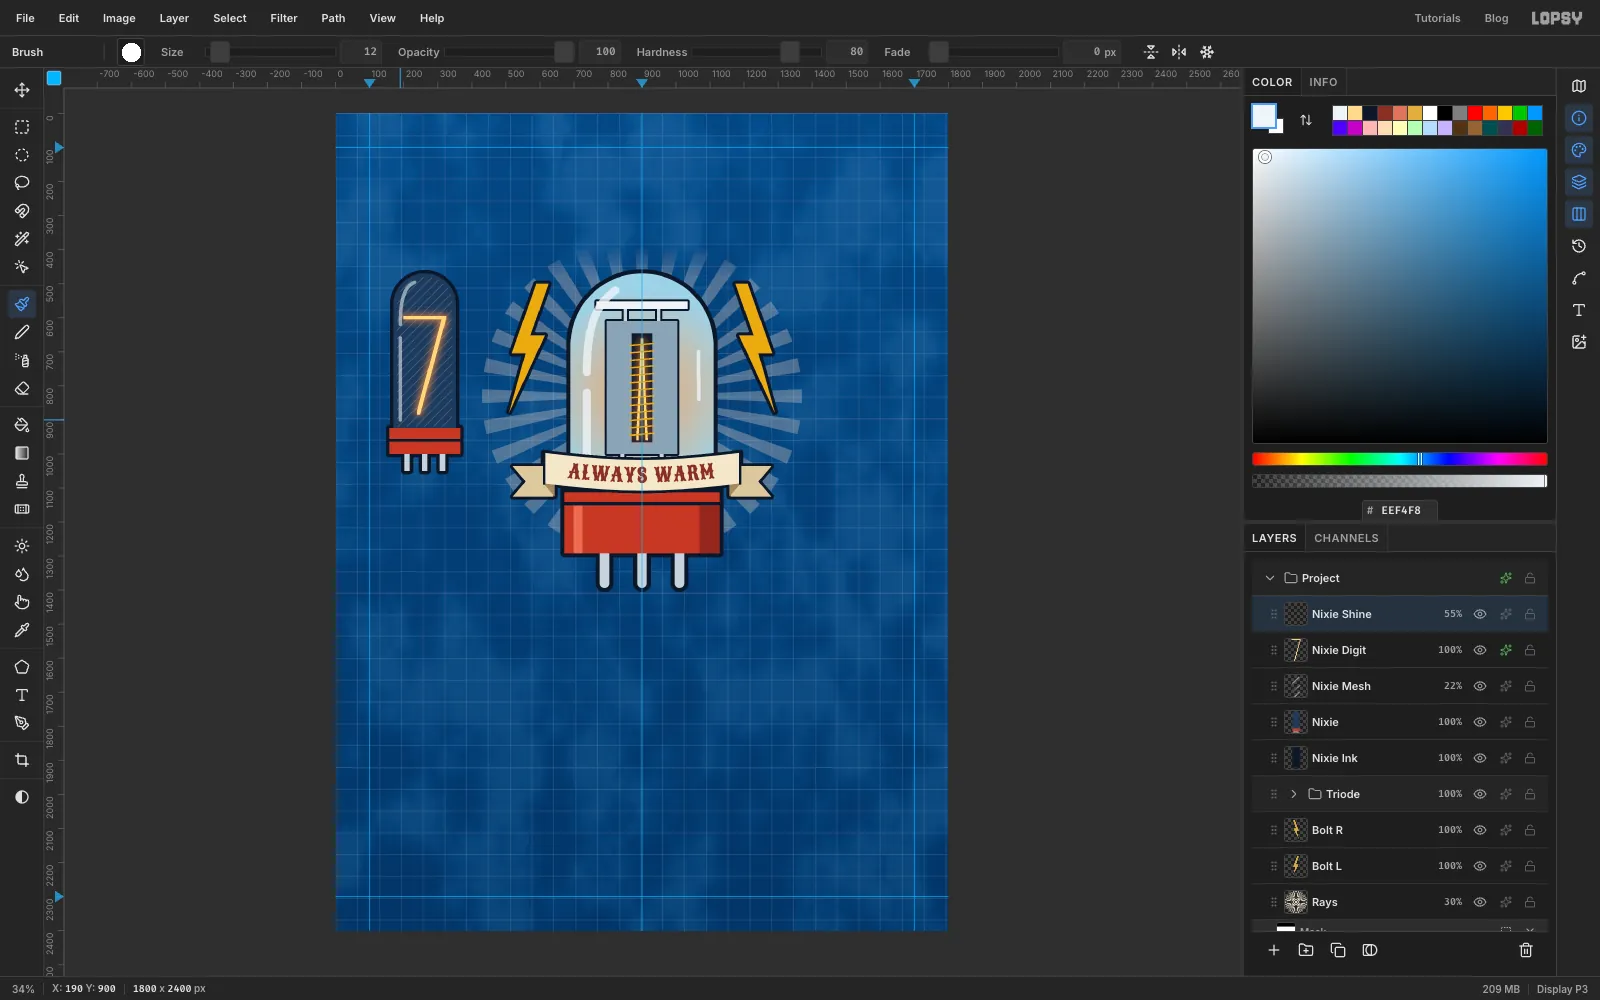
Add Nixie Mesh. Select a circle from 180, 480 to 344, 644 and Shift-add a rectangle from 180, 562 to 344, 920: the glass shape, 10 px inside its outline. With the Pencil at Size 2 in chalk, Shift-click diagonal lines about 26 px apart across the glass. The selection keeps them inside it. Deselect and set the layer to 22%.
Add Nixie Digit. With the Pencil at Size 10 and , click, Shift-click and Shift-click to draw a 7: across the top, then a long diagonal down. Give it Outer Glow at Size 30, Spread 25, Opacity 100 in .
Add Nixie Shine and brush a thin chalk highlight down the left of the glass at Size 12. Set it to 55%.
-
Cut the magic eye's shadow wedge
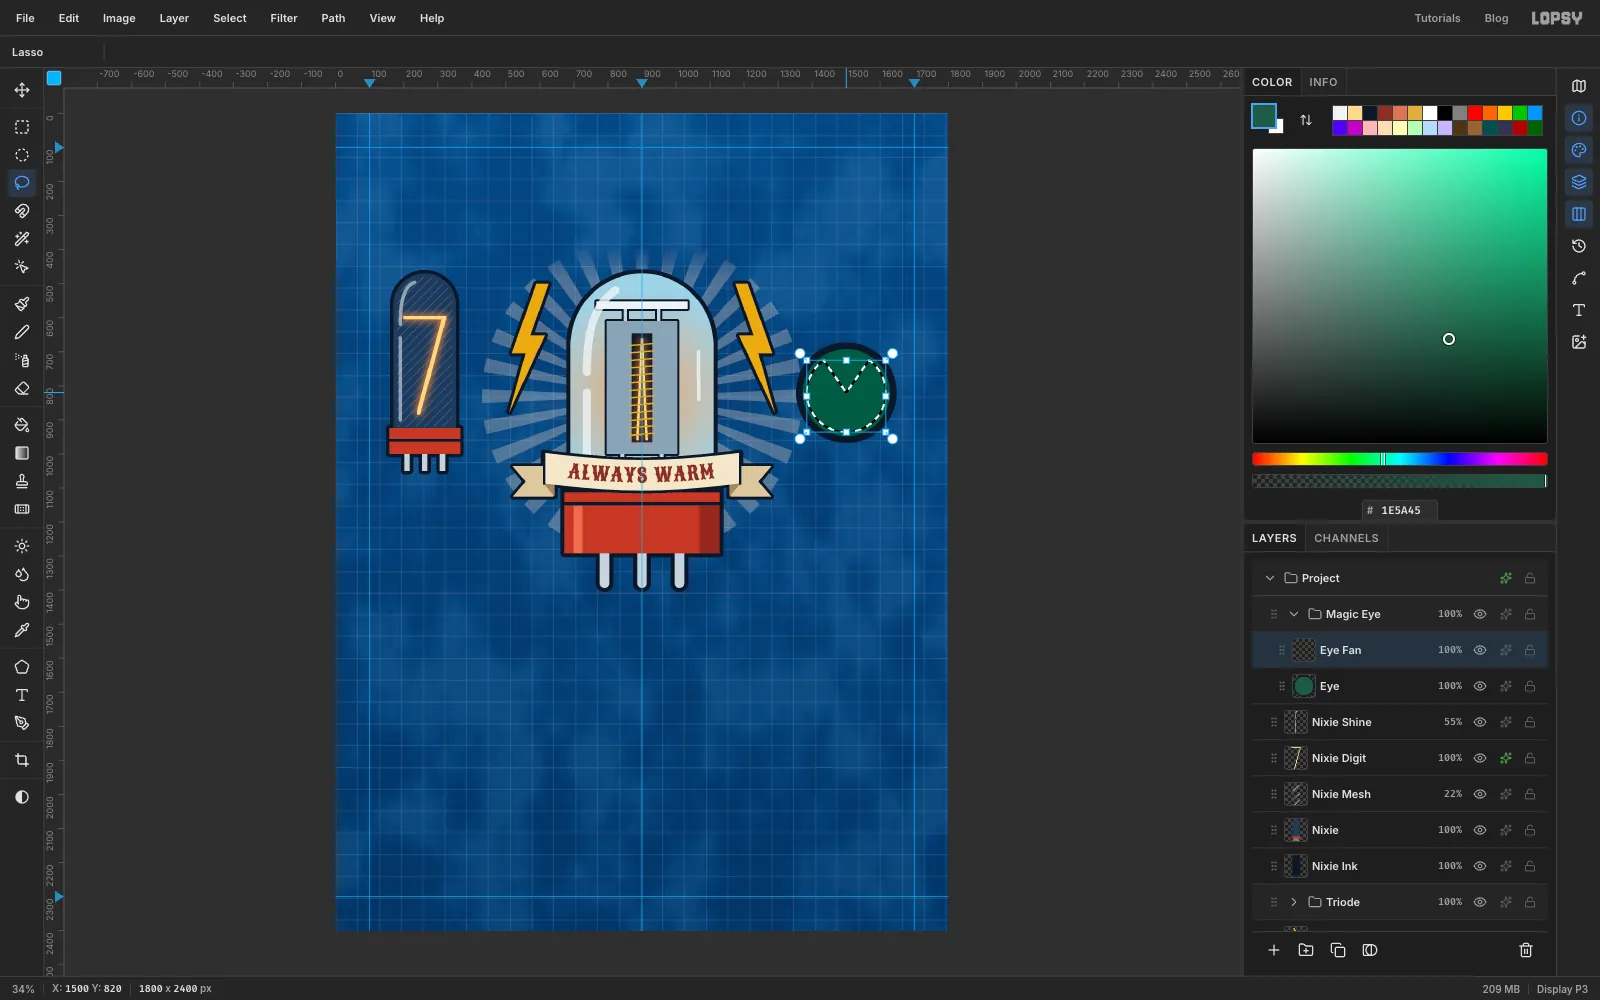
Click New Group and name it Magic Eye. Add a layer called Eye. Fill a circle from 1352, 672 to 1648, 968 with ink. Fill a slightly smaller circle, 20 px in on every side, with dark green .
Add a layer called Eye Fan. Select a circle from 1384, 704 to 1616, 936, 32 px inside the ink ring. Then pick the Lasso, hold ⌥ and draw a narrow pie wedge from the centre out past the top of the circle. ⌥ subtracts it. This is the shadow wedge that opens and closes on a real tuning eye.
-
Fill the fan and tick the dial
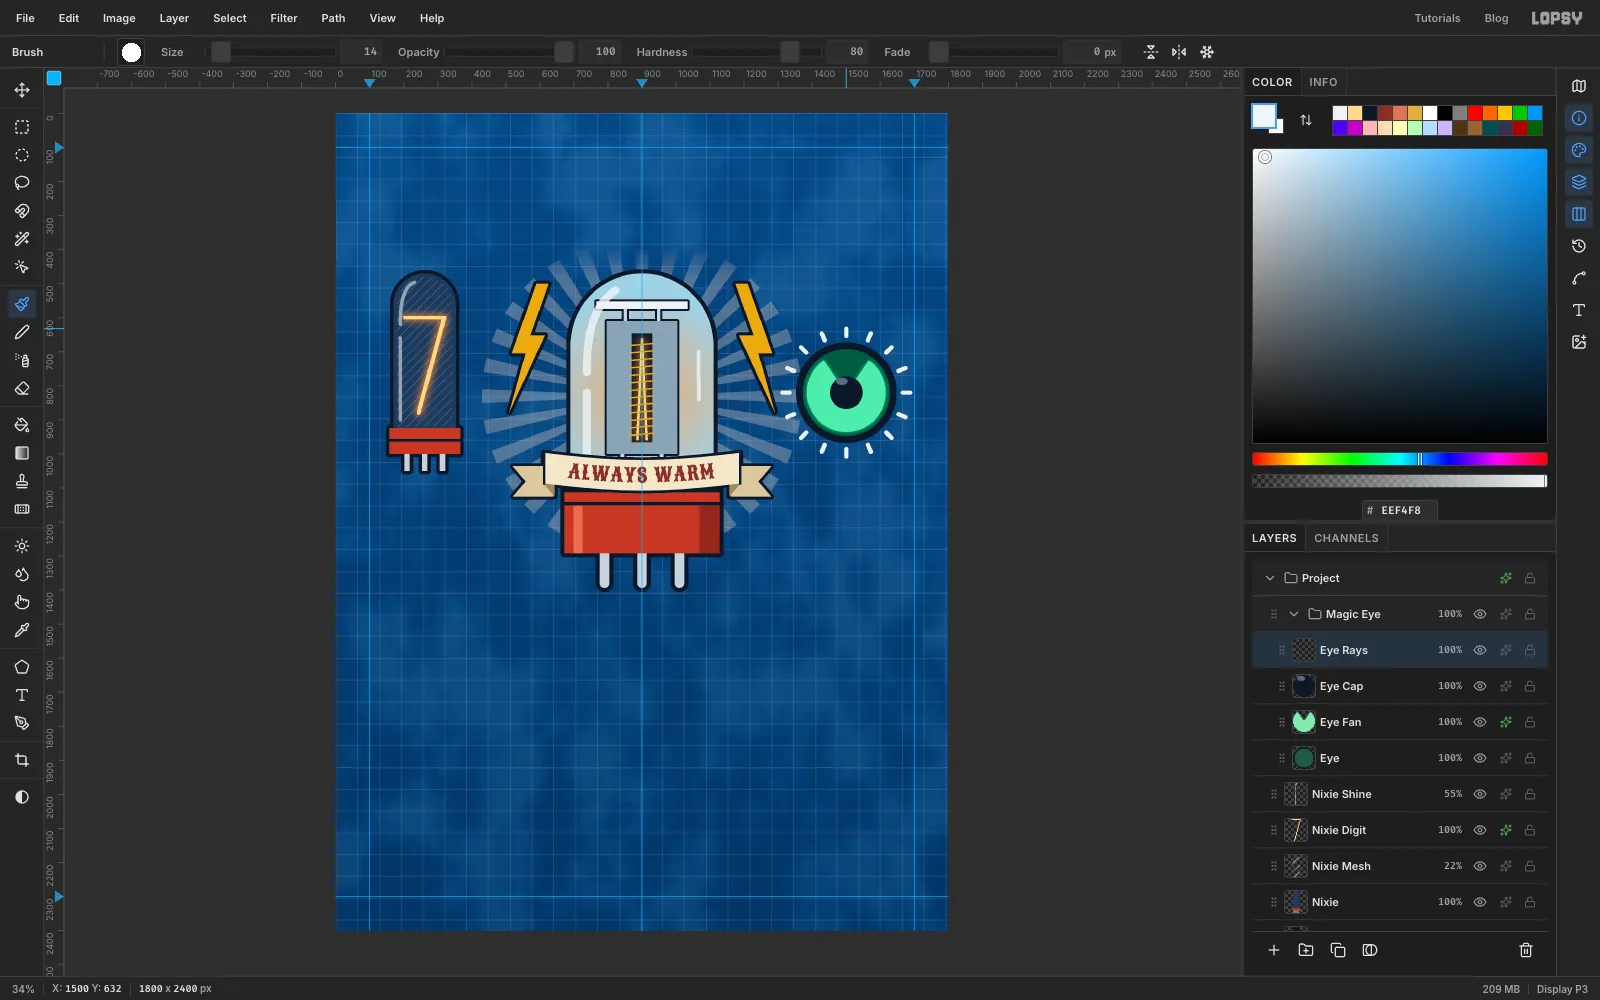
Fill the fan with mint , deselect and give it a subtle Outer Glow (Size 16, Spread 10, Opacity 70) in the same mint.
Add Eye Cap. Fill a 96 px circle at the centre with ink and a small oval near its top left with as a highlight.
Add Eye Rays. Pick the Brush, click Radial Symmetry in its options bar and set Segments to 16. ⌘-click the centre of the eye to move the symmetry centre there. With the Brush at Size 14 in chalk, drag one short stroke straight up above the ring. All 16 tick marks appear at once. Turn Radial Symmetry off again.
-
Draw the heart
Collapse the groups, click the Triode row and click New Group. Name it Heart and add Heart Ink and Heart Fill.
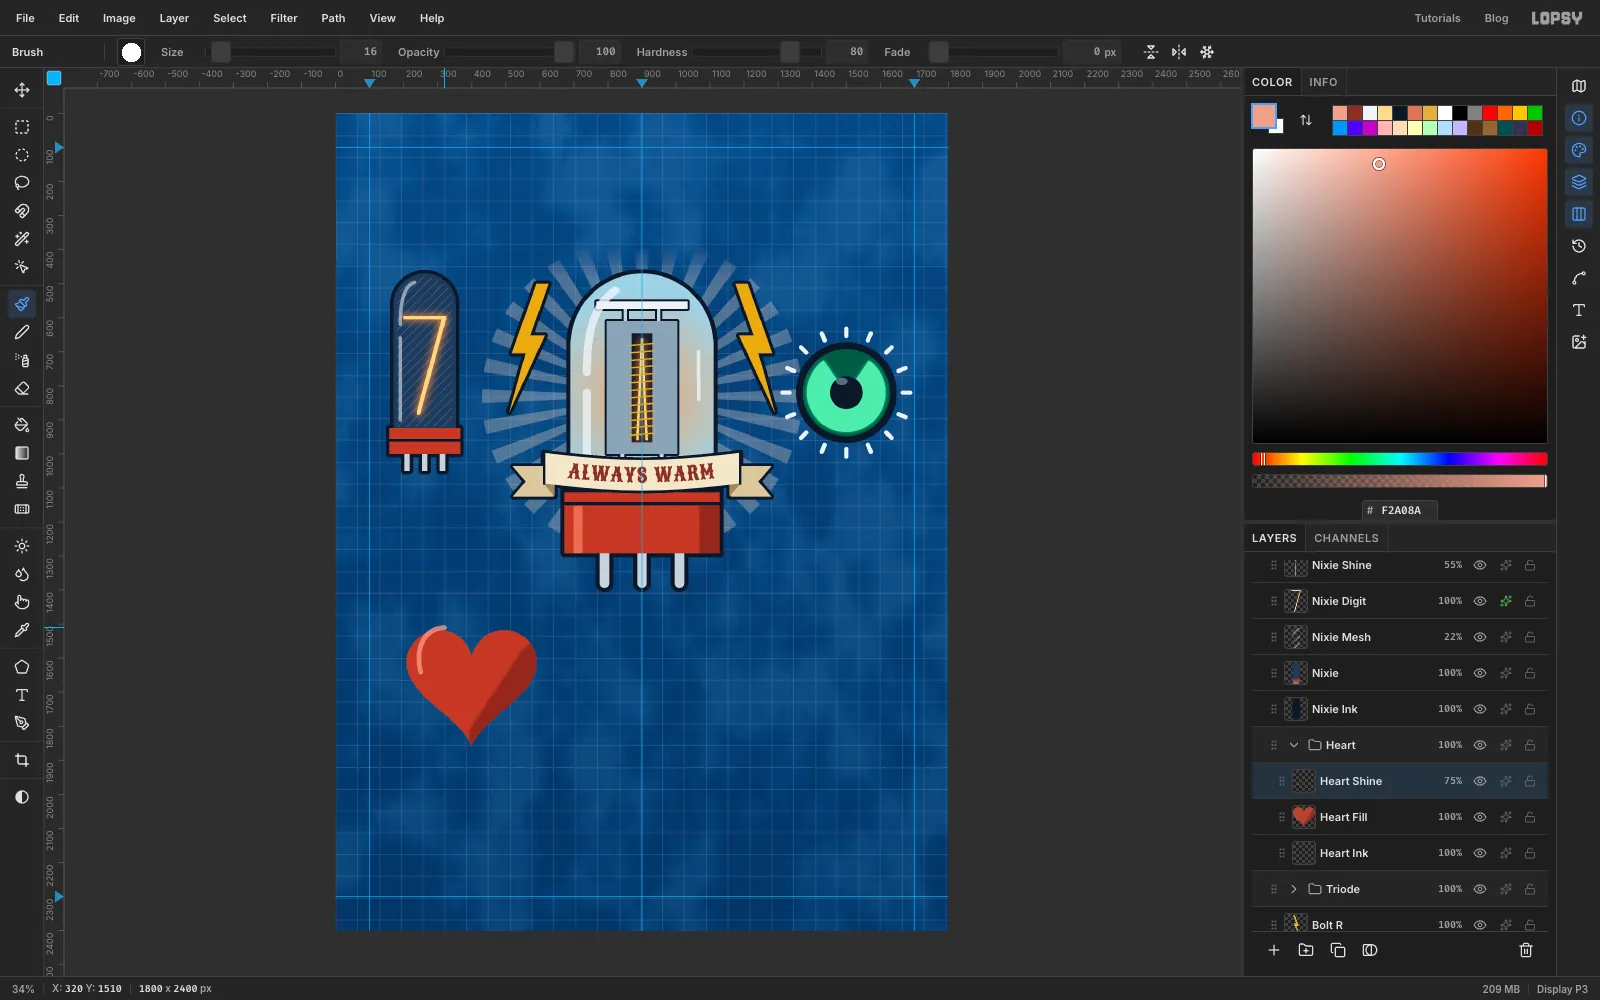
On Heart Fill, use the Lasso to draw a heart about 380 px wide with its centre around 400, 1660, and fill it with flash red. Keep the selection active. With the Brush at Size 150 in , sweep one stroke down the right side. The selection keeps the shading inside the heart. Deselect.
Add Heart Shine and brush a thin curved highlight at Size 16 in coral round the upper left lobe. Set the layer to 75%.
-
Rotate a bolt through the heart
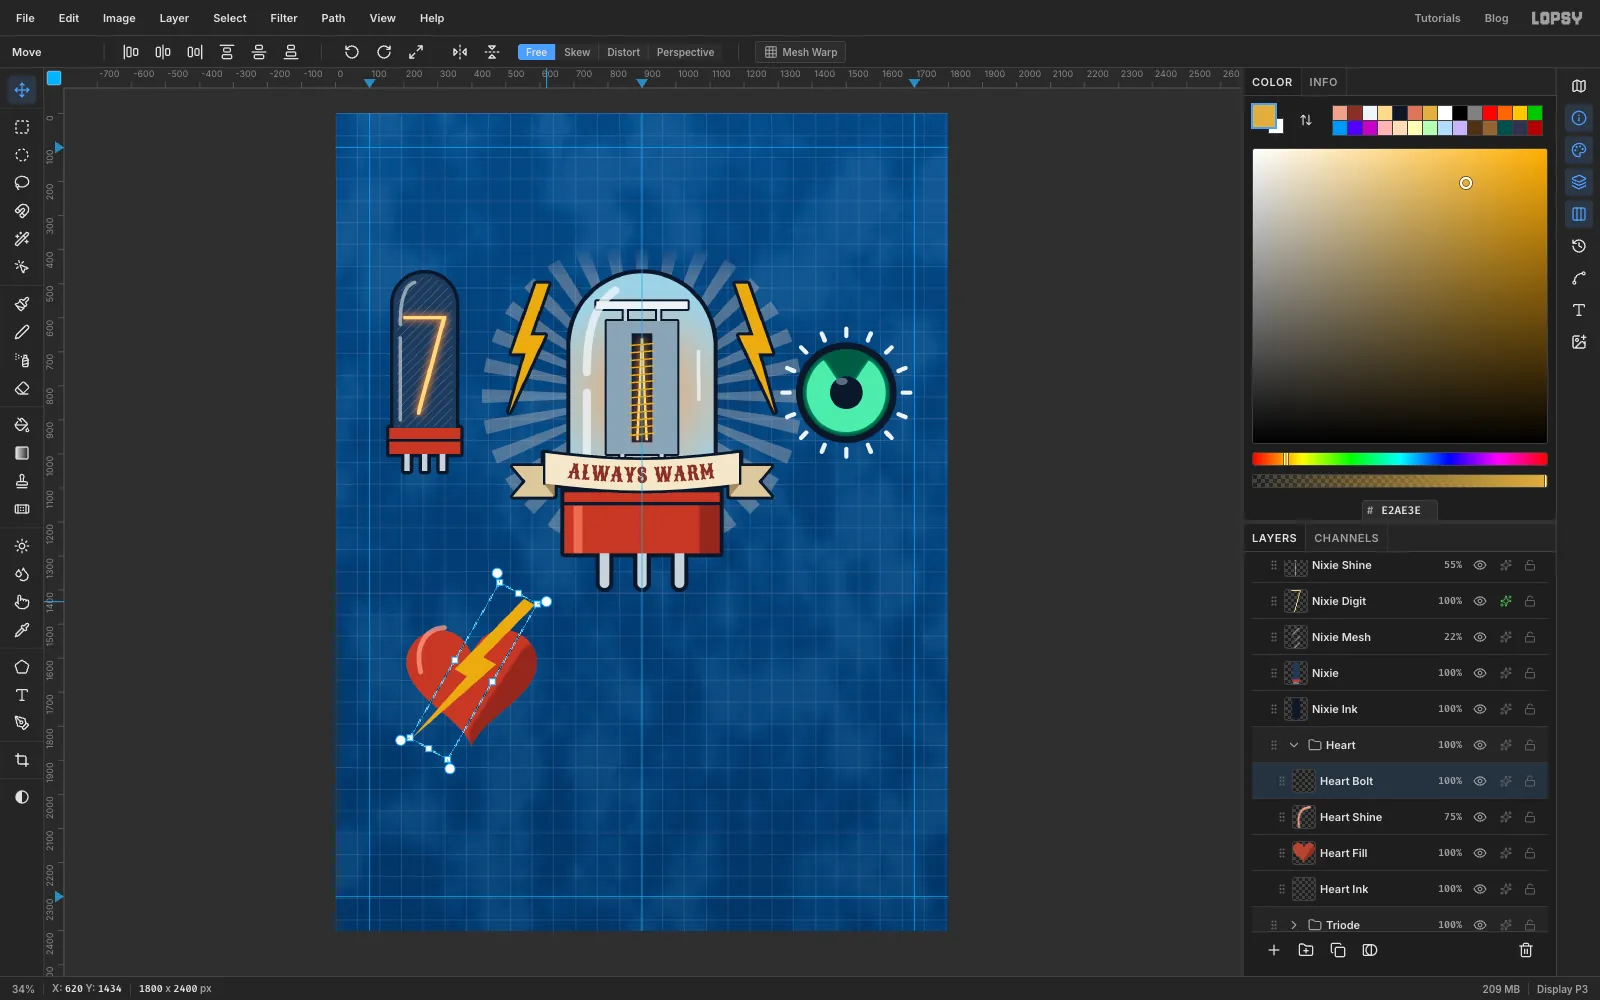
Add a layer called Heart Bolt and lasso a tall, thin bolt (about 140 × 520 px) standing upright over the heart. Fill it with mustard.
Draw a Rectangular Marquee around the bolt, switch to the Move tool and hover just outside a corner handle until the cursor becomes a curved arrow. Hold ⌘ to snap to 15° steps and drag the corner round by two steps, to 30°. Press Enter to commit.
-
Outline the heart and bolt together
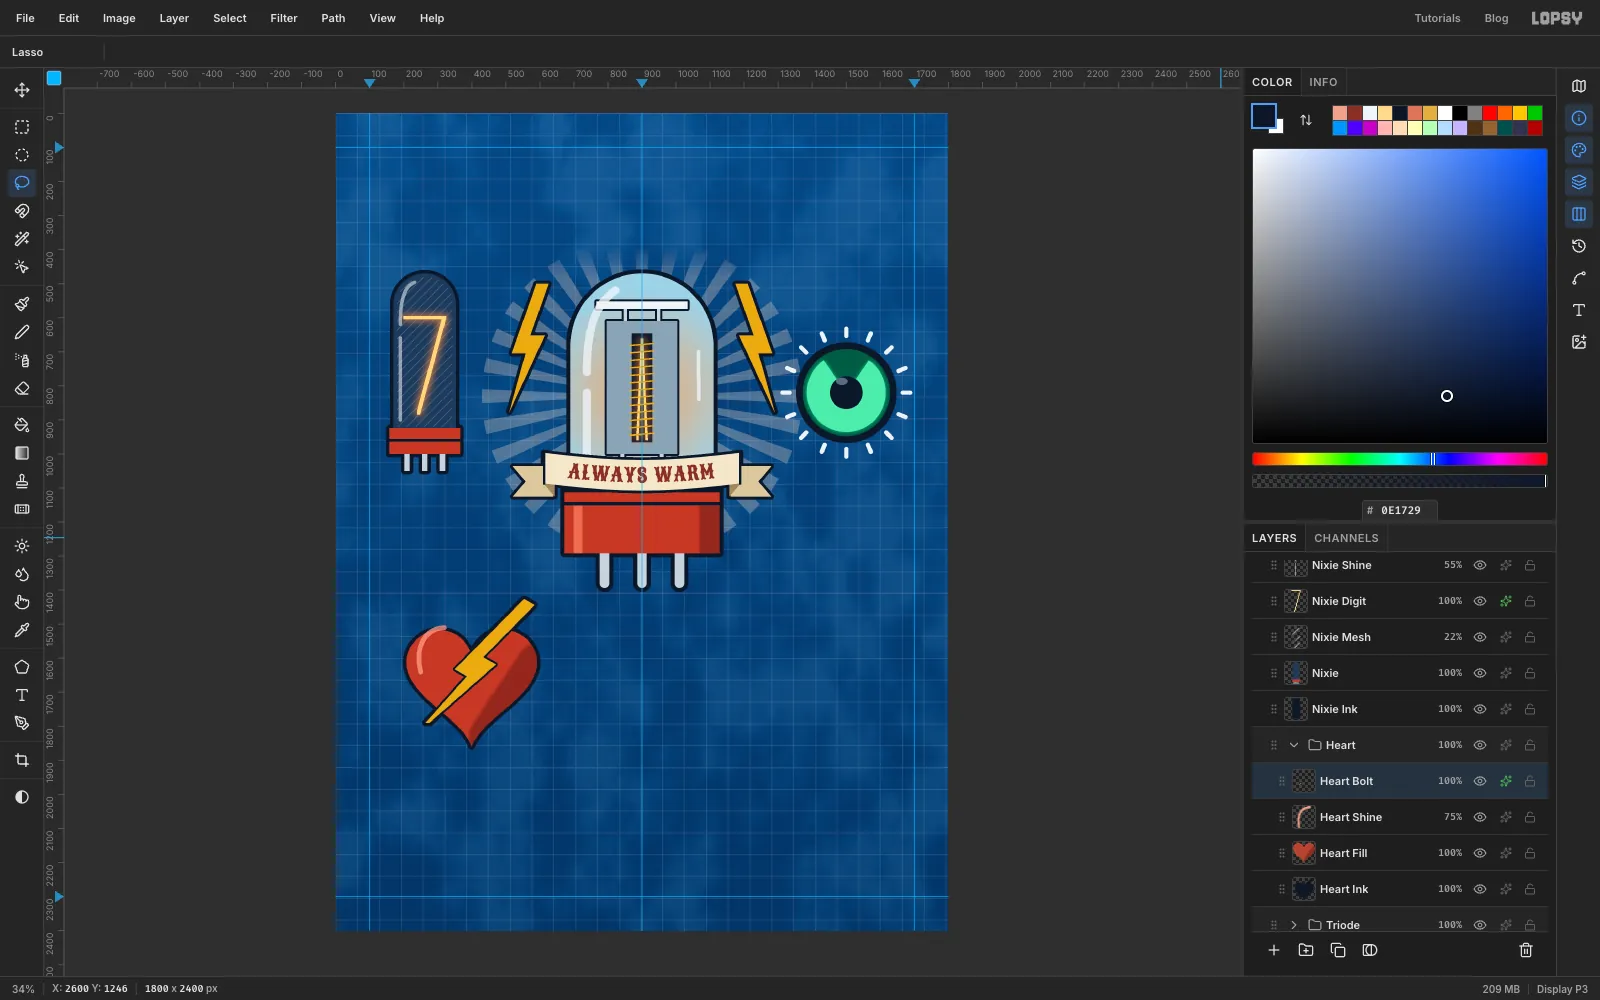
Lasso the bolt's bottom tip, below where the banner will cross the heart, and press Delete. Deselect.
⌘-click the Heart Bolt thumbnail. Then pick the Lasso, hold Shift and trace the heart's outline to add it to the selection. Grow by 10, click Heart Ink and fill with ink.
The bolt also needs its own edge where it crosses the heart. Open Heart Bolt's effects and turn on Stroke at Width 6 in ink.
-
Paste a copy of the banner
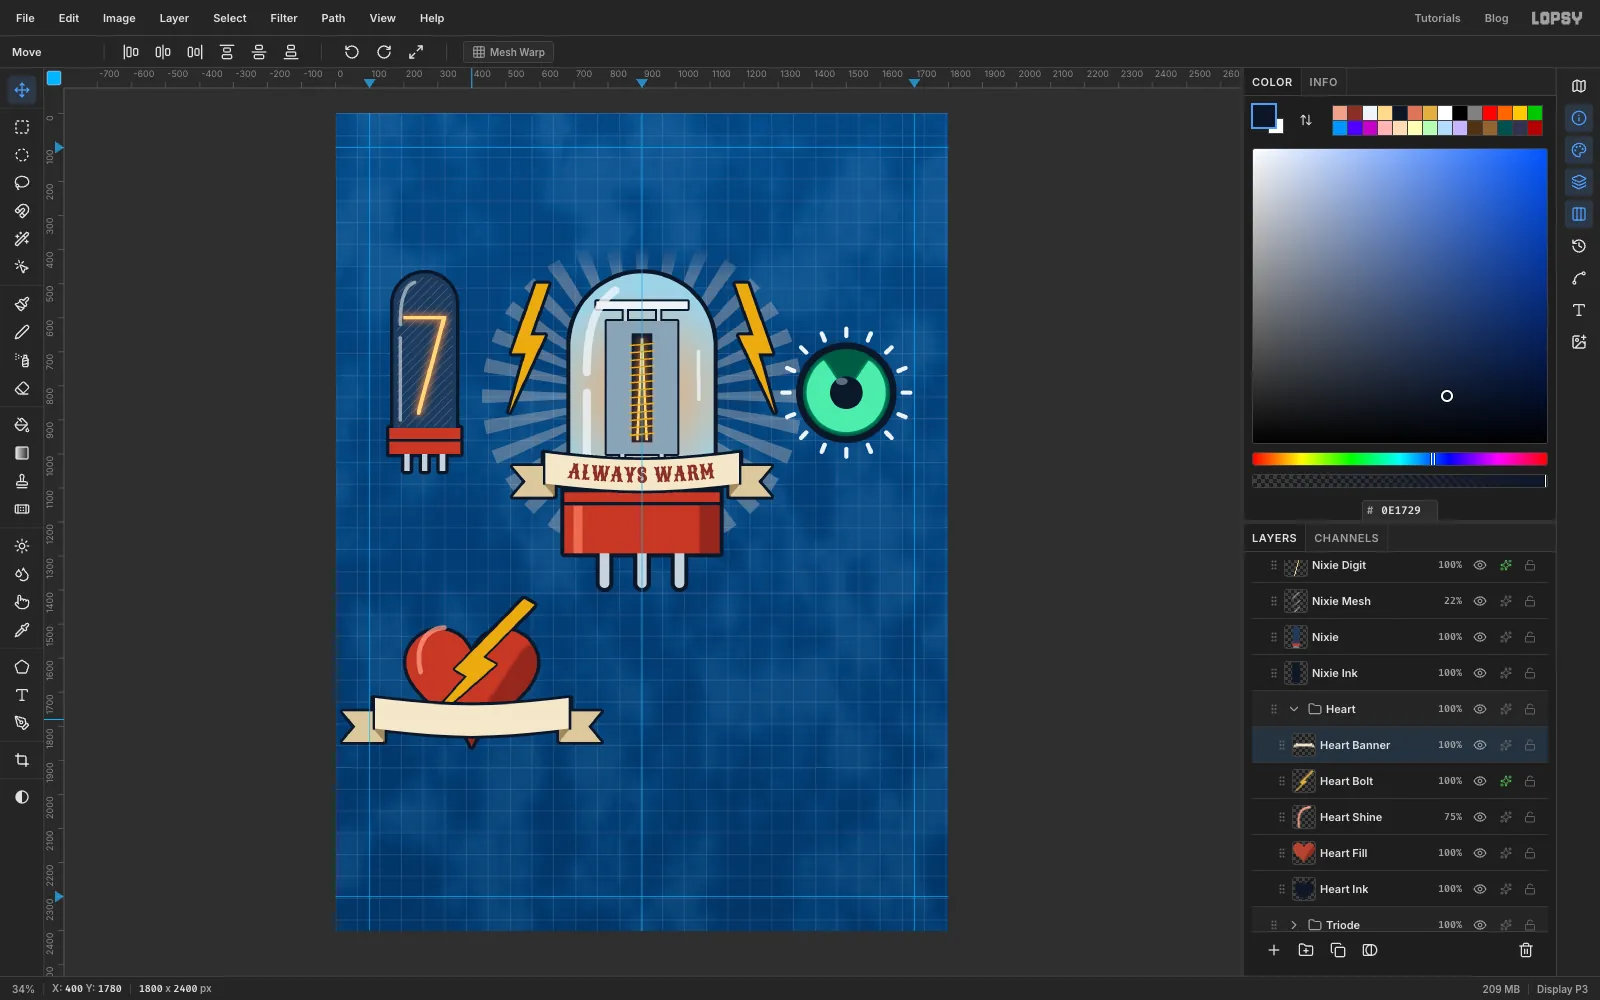
Expand Triode and click Banner. Draw a Rectangular Marquee around the banner and its tails, and press ⌘C. Deselect, collapse Triode, expand Heart and click Heart Bolt.
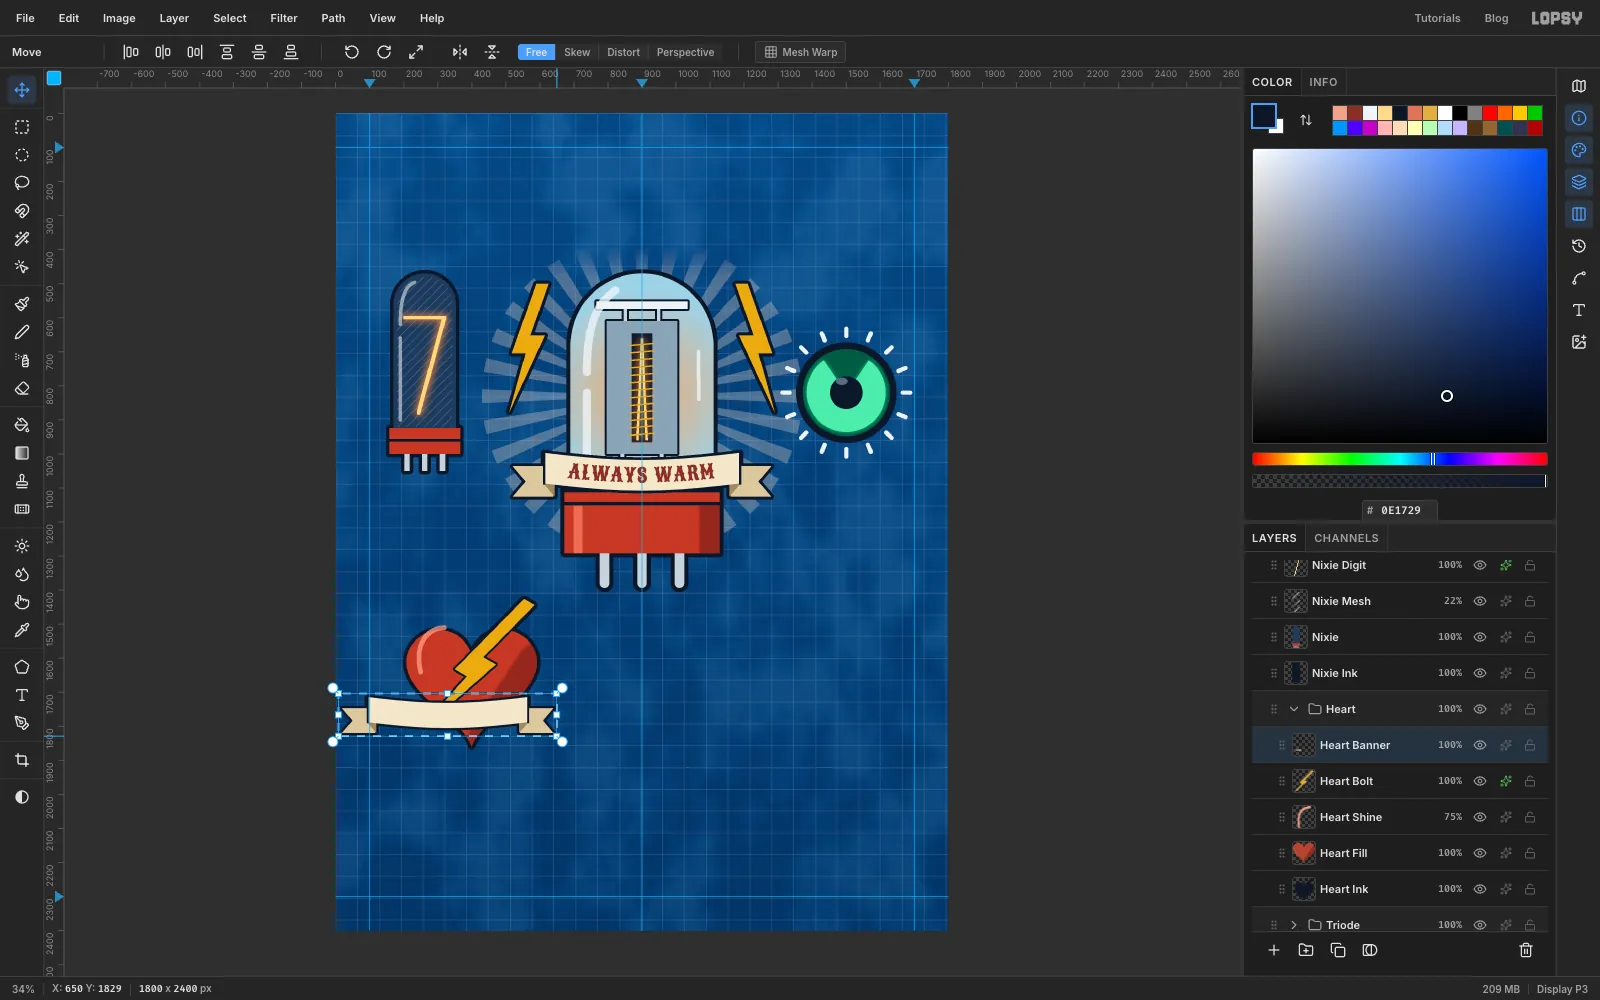
Press ⌘V. The copy lands on a new layer directly above Heart Bolt. Rename it Heart Banner, deselect, and drag it with the Move tool down over the lower part of the heart.
-
Scale the banner to fit
The full-size banner overhangs the heart. Draw a marquee around the pasted banner, then with the Move tool hold ⌘ and drag the bottom-right corner handle inwards. ⌘ keeps the proportions. Stop when the tails sit just inside the heart's edges (about 82% of the original width) and press Enter.
Nudge the banner with the arrow keys until it's centred on the heart.
-
Letter the heart's banner
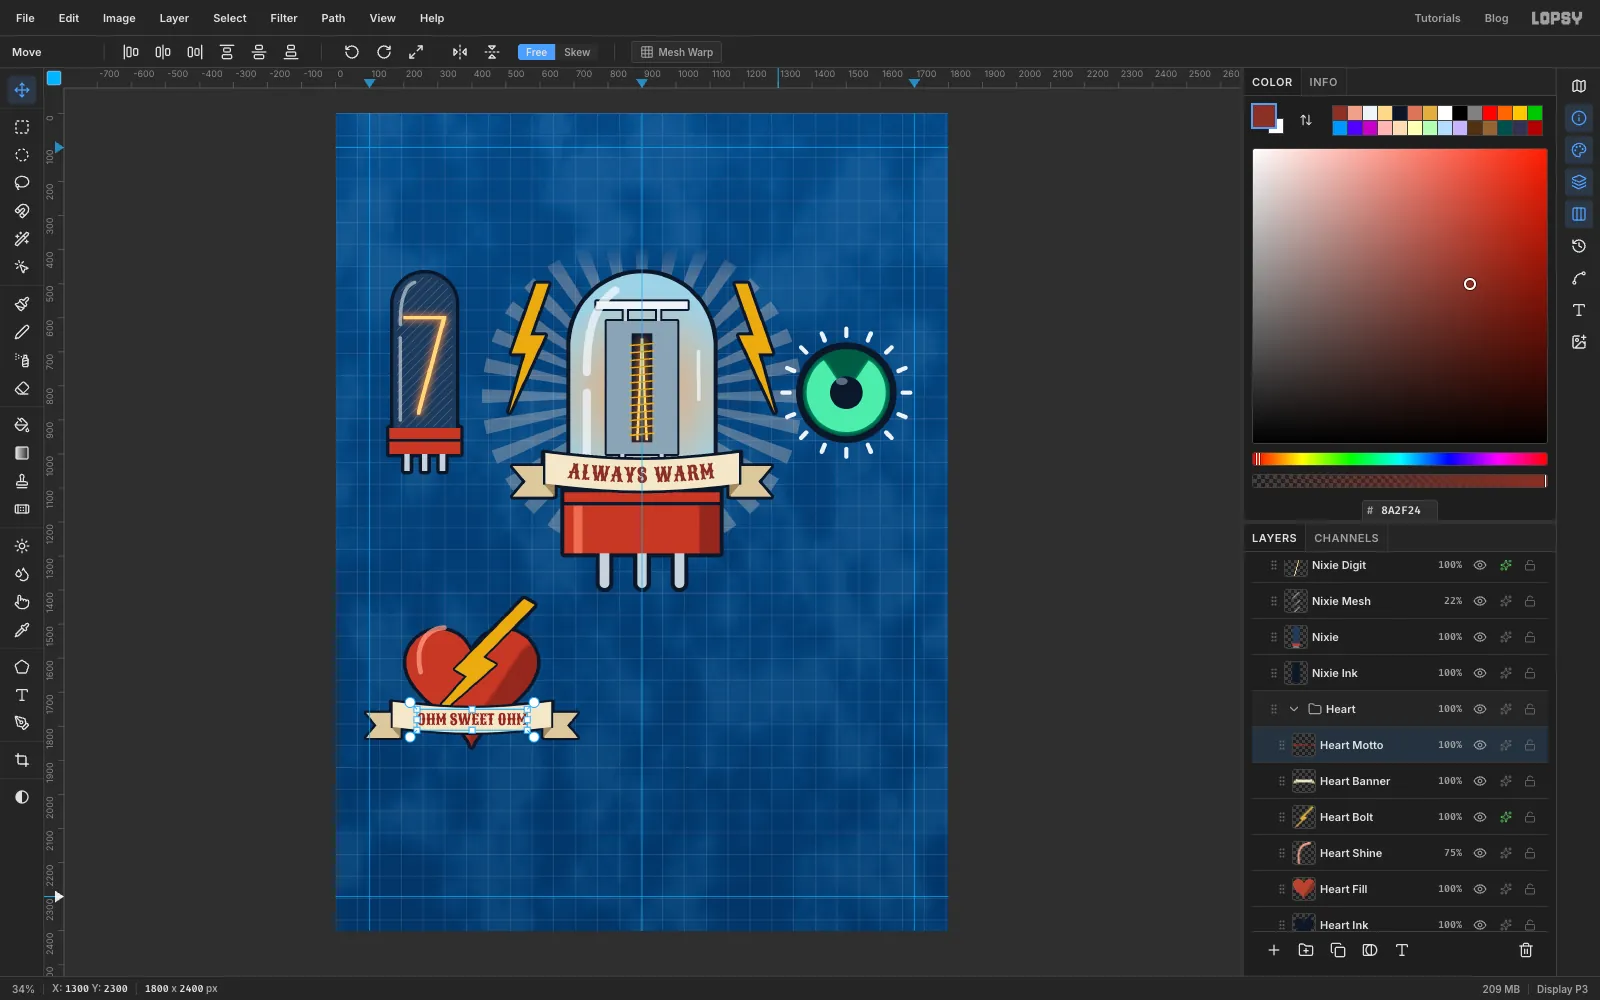
With the Text tool, choose Sancreek at Size 44 in . Click in empty canvas, type OHM SWEET OHM and press Tab. Rename it Heart Motto.
Switch to the Move tool and nudge the text onto the banner with the arrow keys (Shift moves 10 px at a time). Centre it left to right, and leave the same space above the capitals as below them.
-
Split a nautical star
Collapse Heart, click its row and add a New Group called Star with Star Ink and Star Fill inside it.
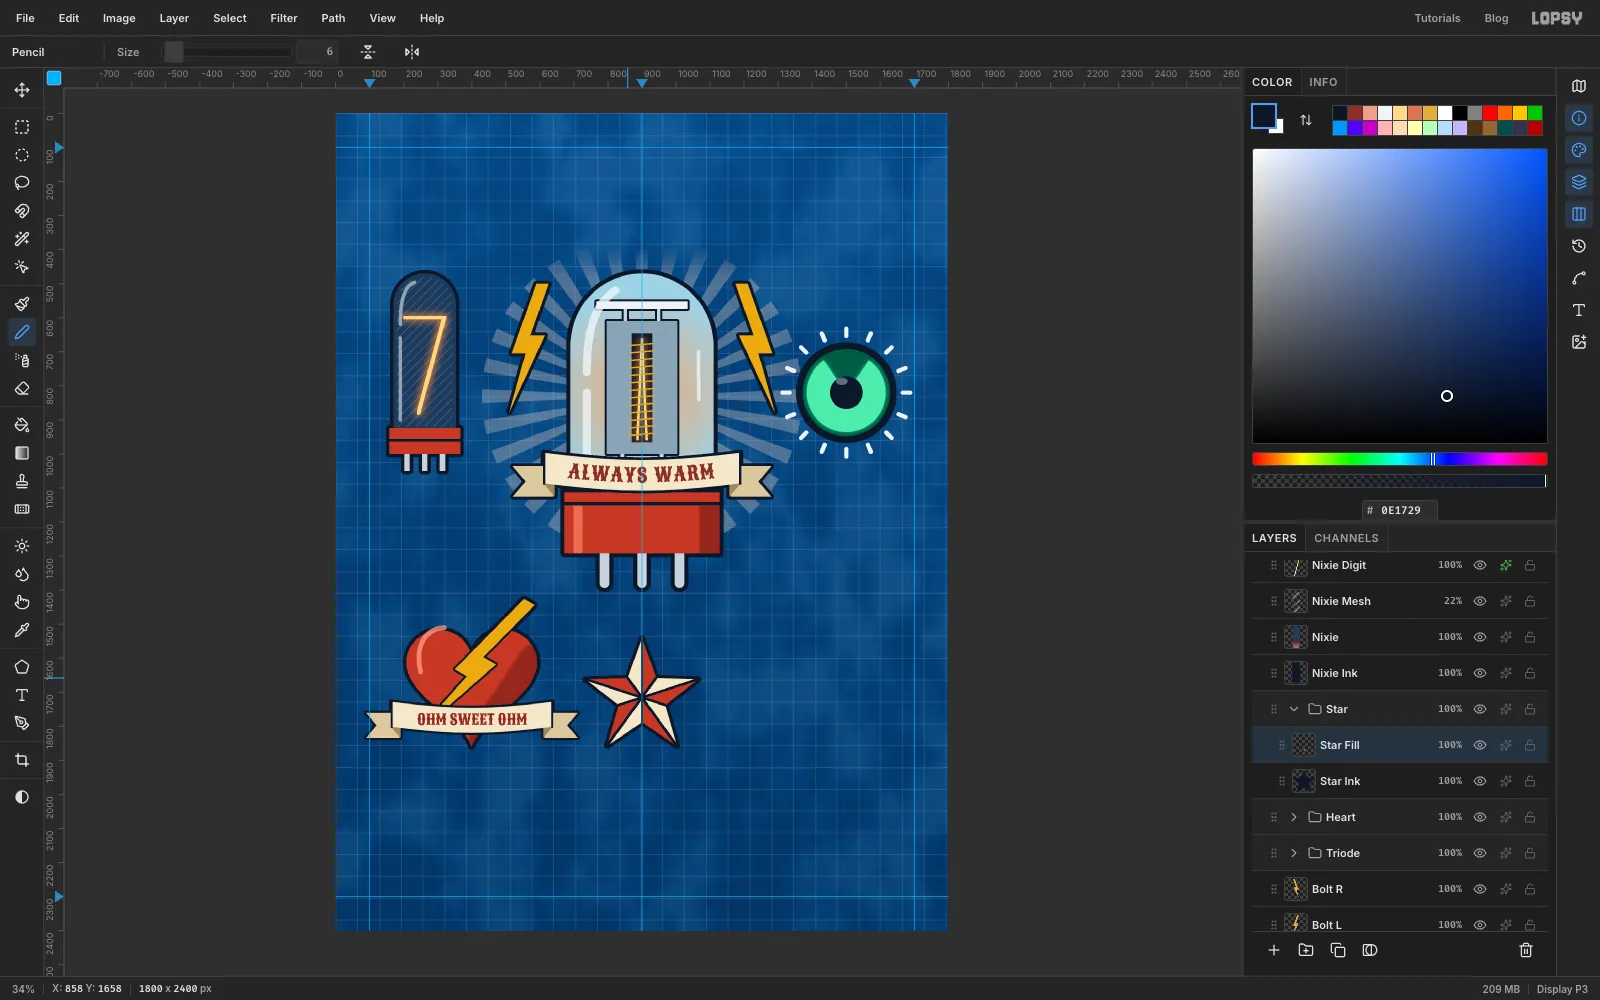
On Star Fill, lasso a five-point star centred on 900, 1716, with points about 175 px from the centre, and fill it with flash red.
For the two-tone points, lasso a thin triangle from the centre to each tip and back along the tip's left edge. Hold Shift to add each one. Fill them with cream .
Outline the star with Grow 9 on Star Ink. Then click Star Fill, and with the Pencil at Size 6 in ink, draw a spoke from the centre to each outer point.
-
Draw one orbit ring
Collapse Star, click its row and add a New Group called Atom with a layer called Orbit A inside it.
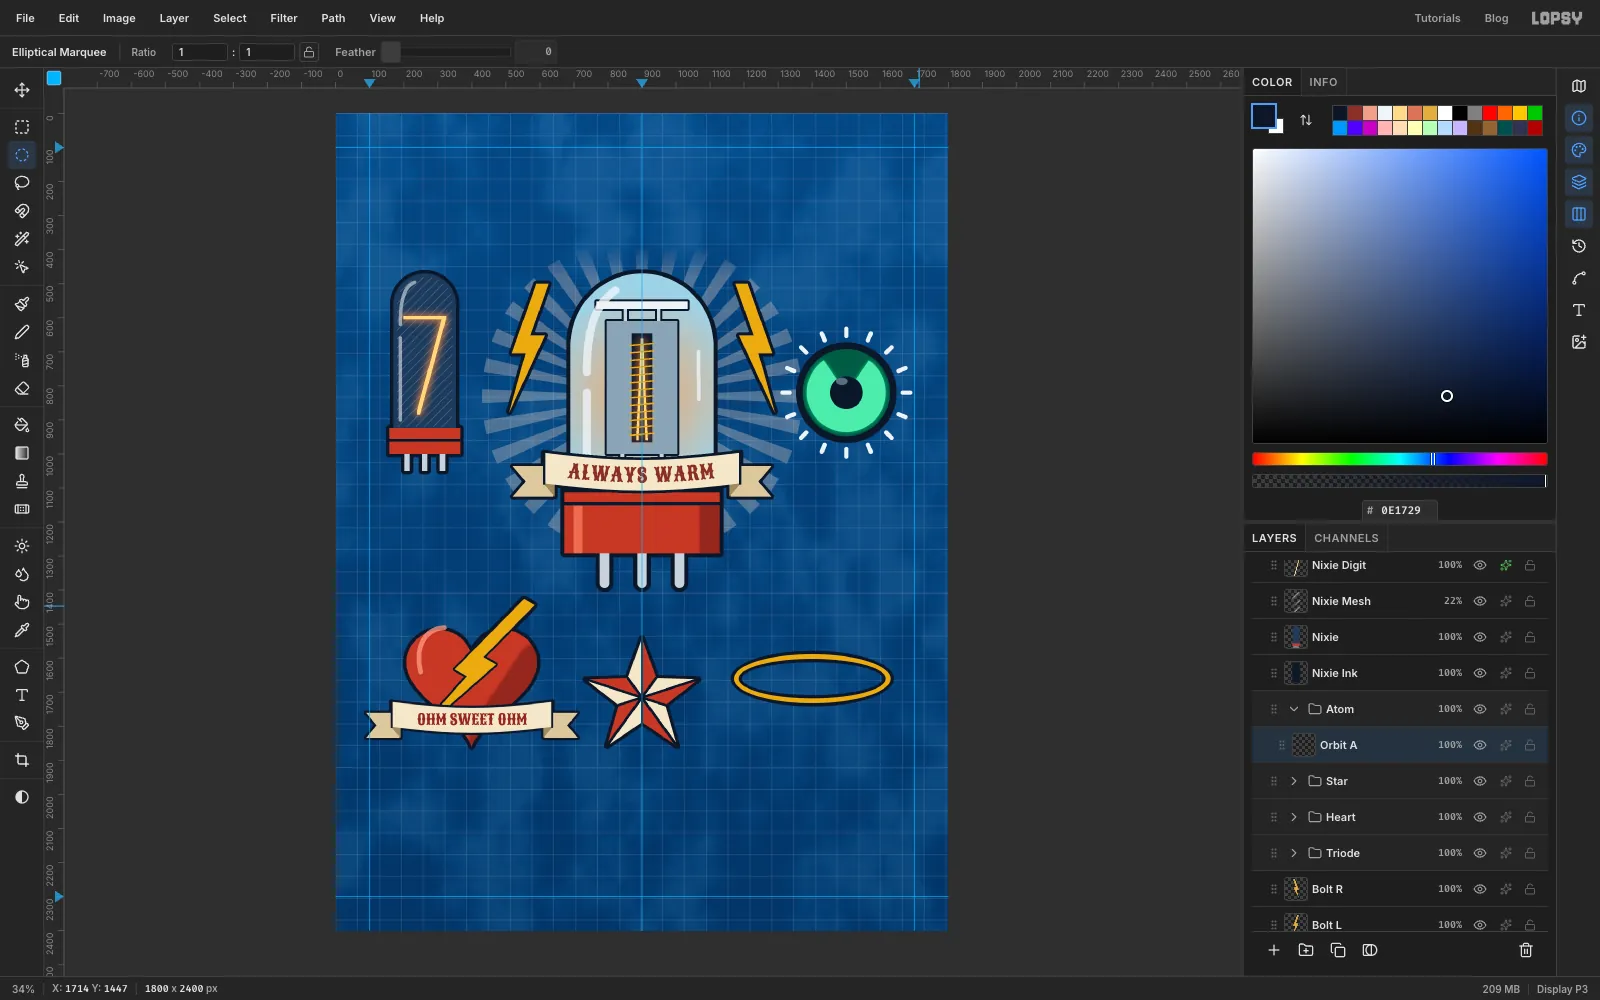
Use exact-corner ellipses centred on 1400, 1660:
- 480 × 164, filled with ink;
- 460 × 144, filled with mustard;
- 432 × 116, filled with ink;
- 412 × 96, then press Delete.
That's a mustard ring with an ink line on both edges.
-
Rotate copies of the orbit
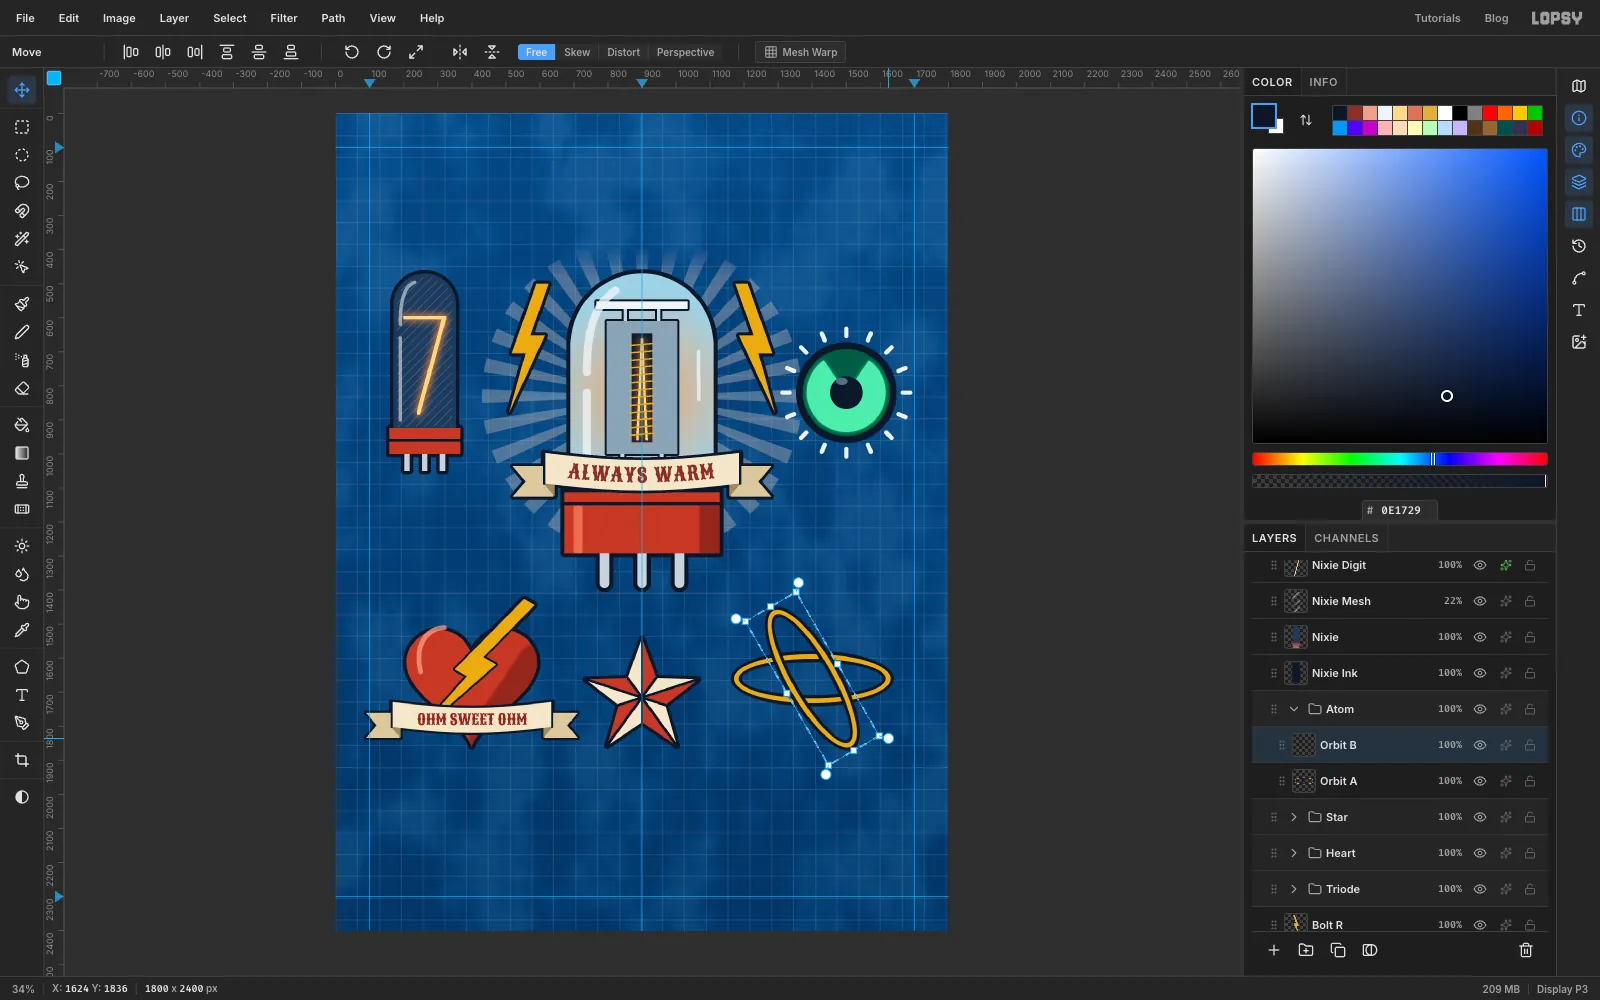
Choose Layer → Duplicate Layer and rename the copy Orbit B. Draw a marquee around the ring, switch to the Move tool, then hold ⌘ and drag a corner rotation handle round 60° (four 15° steps). Press Enter.
Click Orbit A again, duplicate it as Orbit C and rotate it −60°.
-
Add the nucleus and electrons
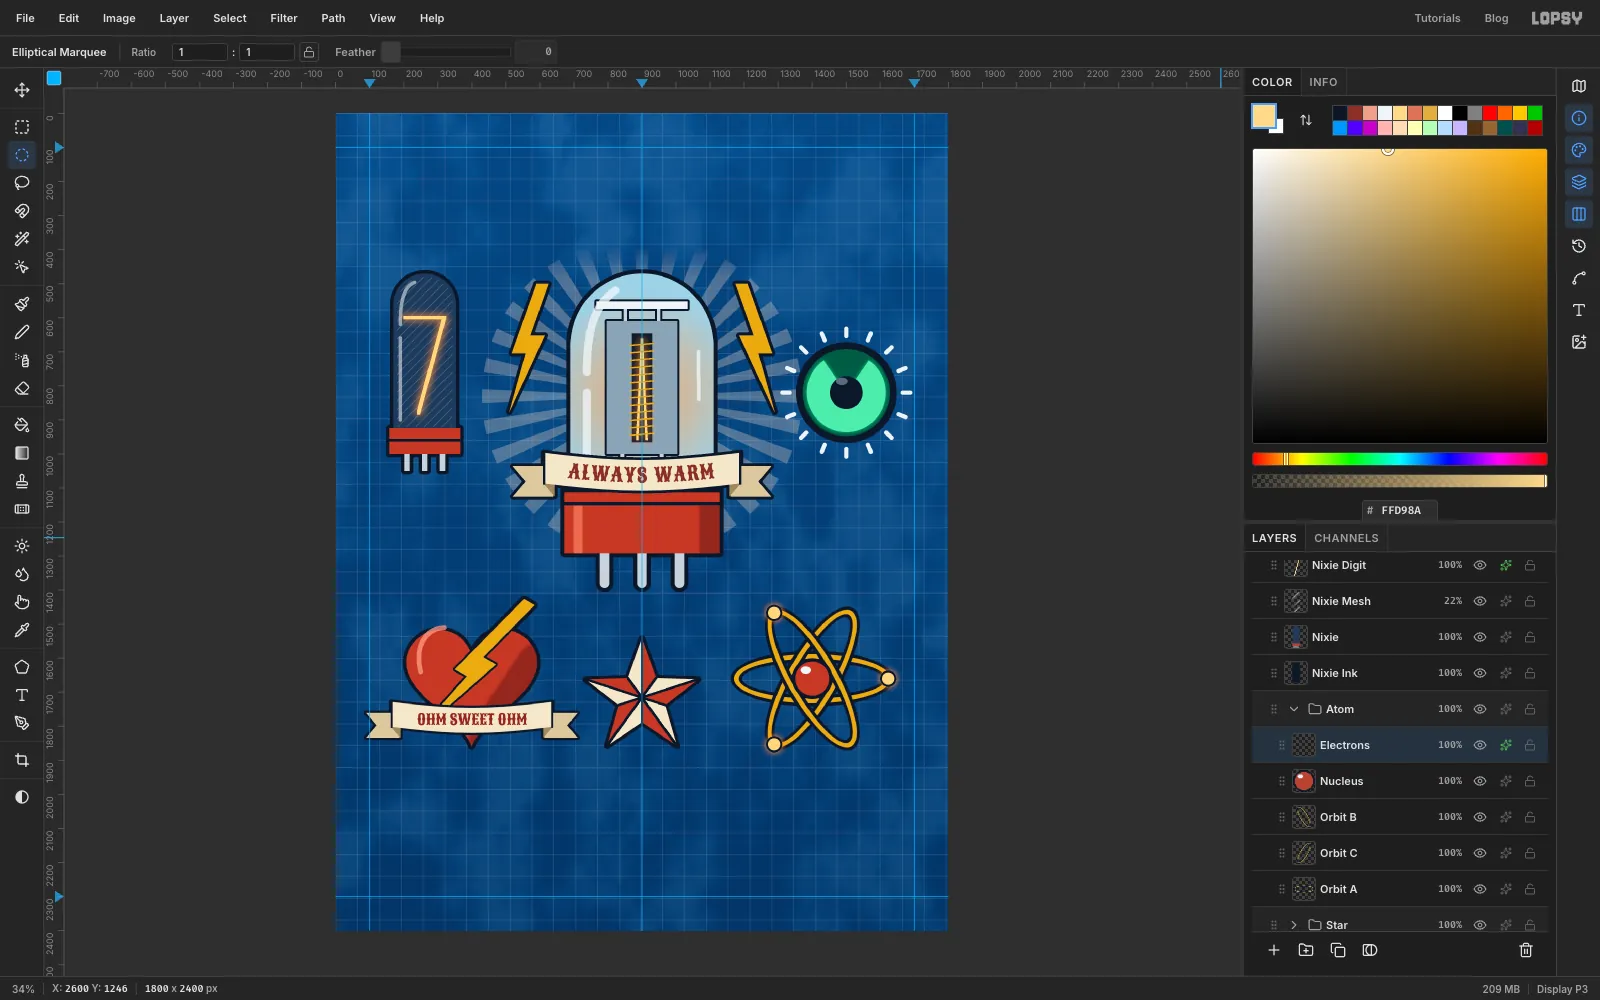
Click Orbit B, the top orbit layer, so the next layers go above all three rings. Add Nucleus: an ink circle 120 px across with a red circle inside it and a small chalk highlight.
Add Electrons. Select three 36 px circles on the tips of different orbits, adding with Shift. Fill with , then turn on Stroke (Width 6, ink) and Outer Glow (Size 22, Spread 15, Opacity 90, orange).
-
Scatter sparkle fillers
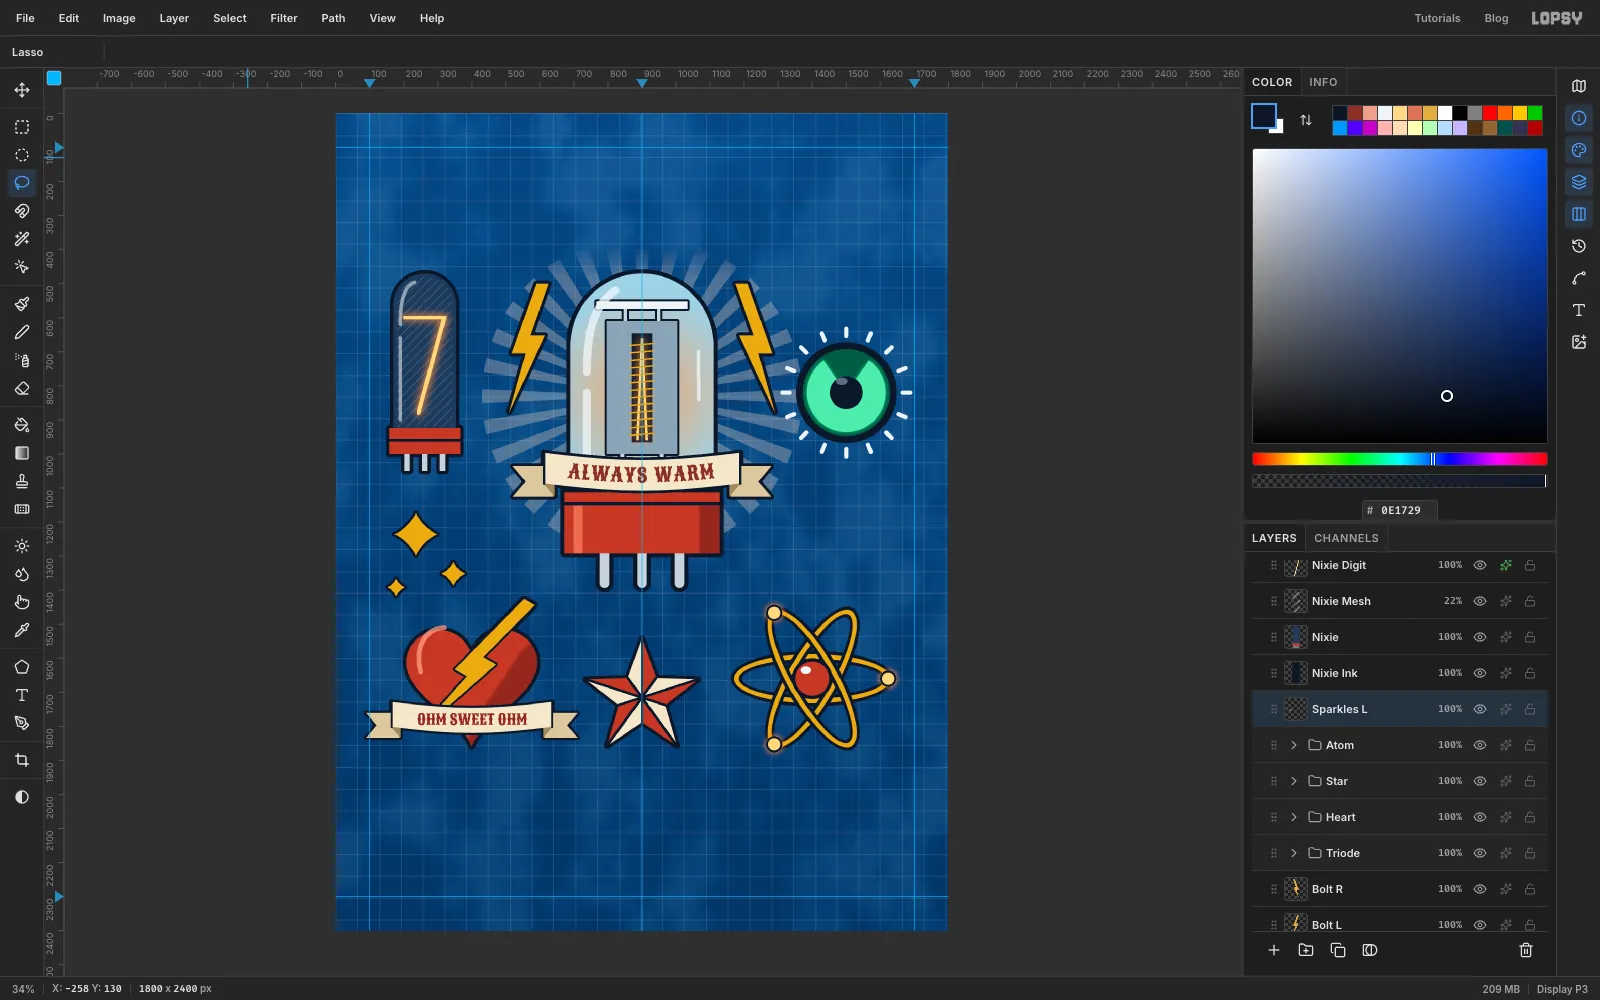
Collapse Atom, click its row and add Sparkles Ink and Sparkles.
Lasso three four-point sparkles with concave sides in the empty space below the Nixie: a big one, a medium one and a small one, adding with Shift. Fill them with mustard, outline them with Grow 7 on Sparkles Ink, then select Sparkles, Merge Down and rename the layer Sparkles L.
-
Copy, flip and turn the sparkles
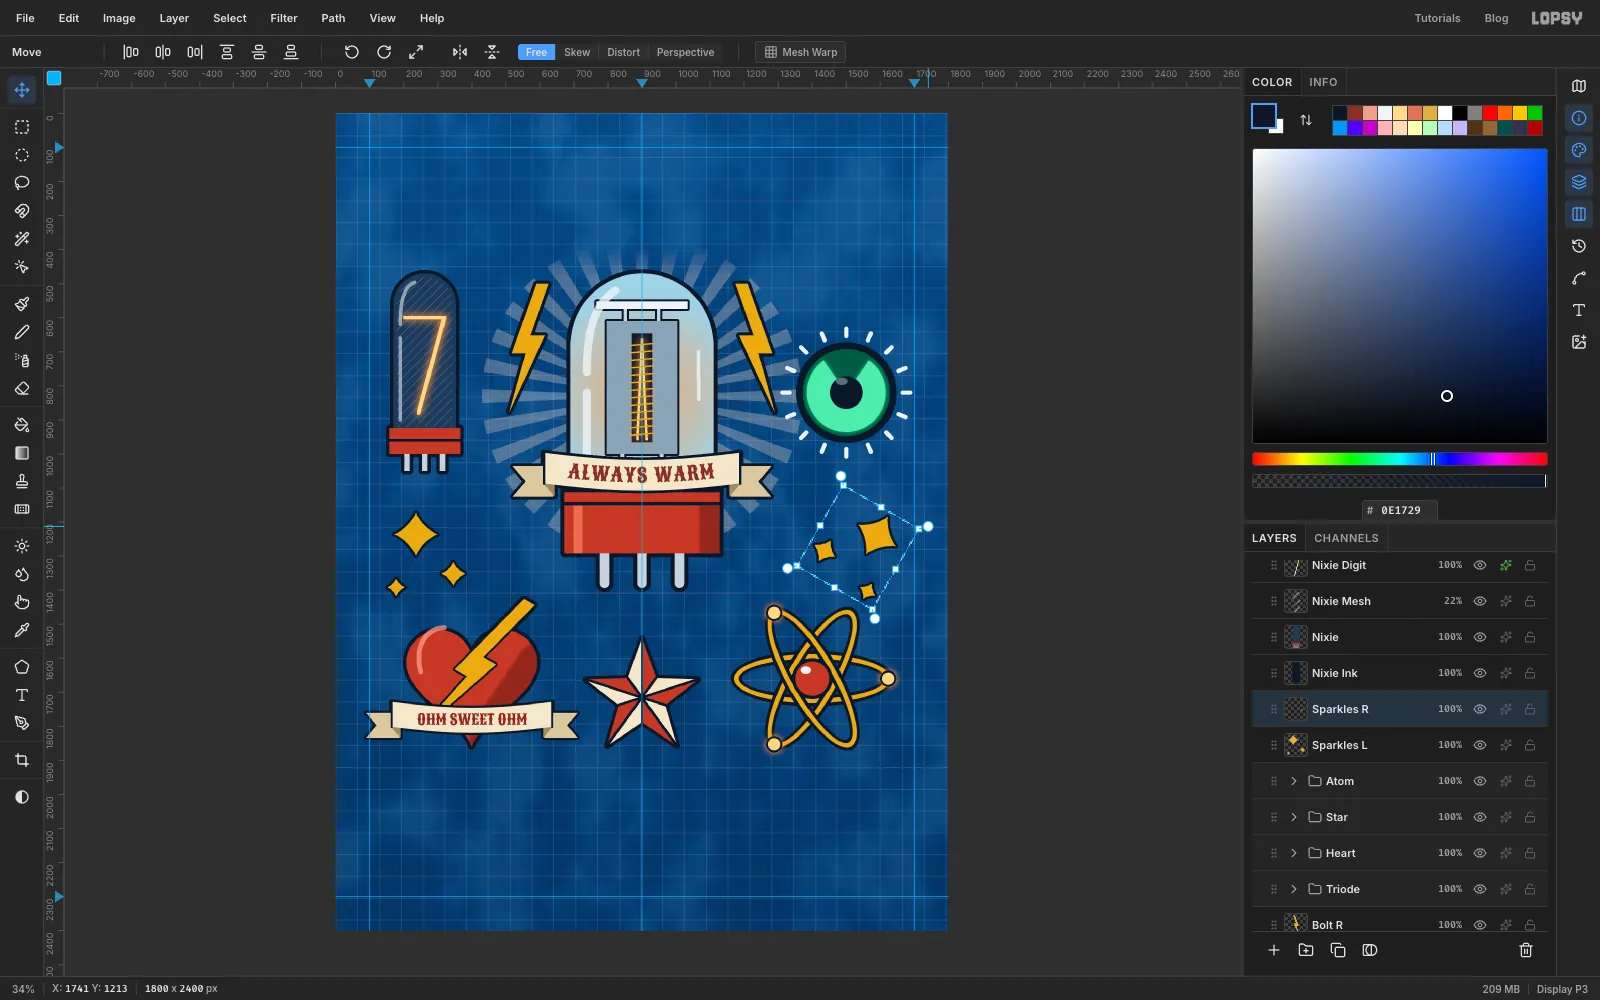
Marquee the cluster, press ⌘C, deselect and press ⌘V. Rename the paste Sparkles R and deselect.
Choose Image → Flip Horizontal, then drag the copy across with the Move tool into the gap above the atom. An exact mirror looks mechanical, so draw a marquee round it and ⌘-rotate it 30°. Press Enter.
-
Letter the title
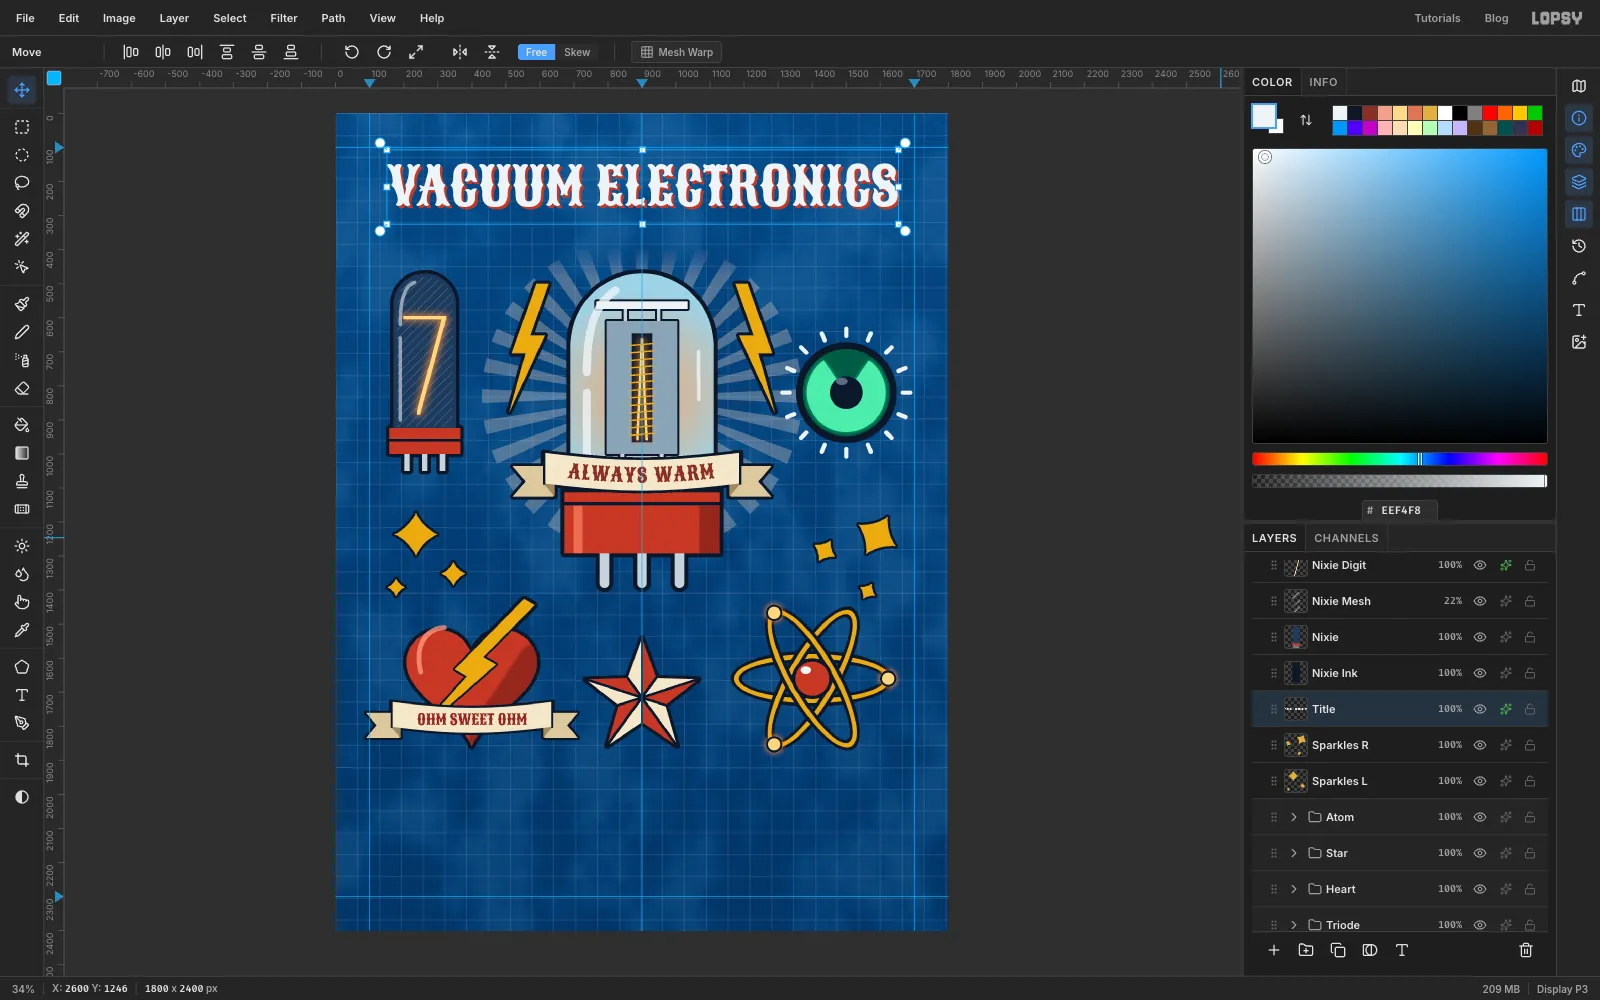
Click Sparkles R so no text layer is selected. With the Text tool, choose Sancreek at Size 156 in chalk, click in empty canvas and type VACUUM ELECTRONICS. Press Tab and rename it Title. At that size it fills the width between the margin guides. Nudge it until it's centred on the centre guide, around y 210.
Give it a hard Drop Shadow in flash red : Offset X 7, Offset Y 7, Blur 0, Opacity 100. This is the classic flash-lettering shadow.
-
Add the subtitle and header rules
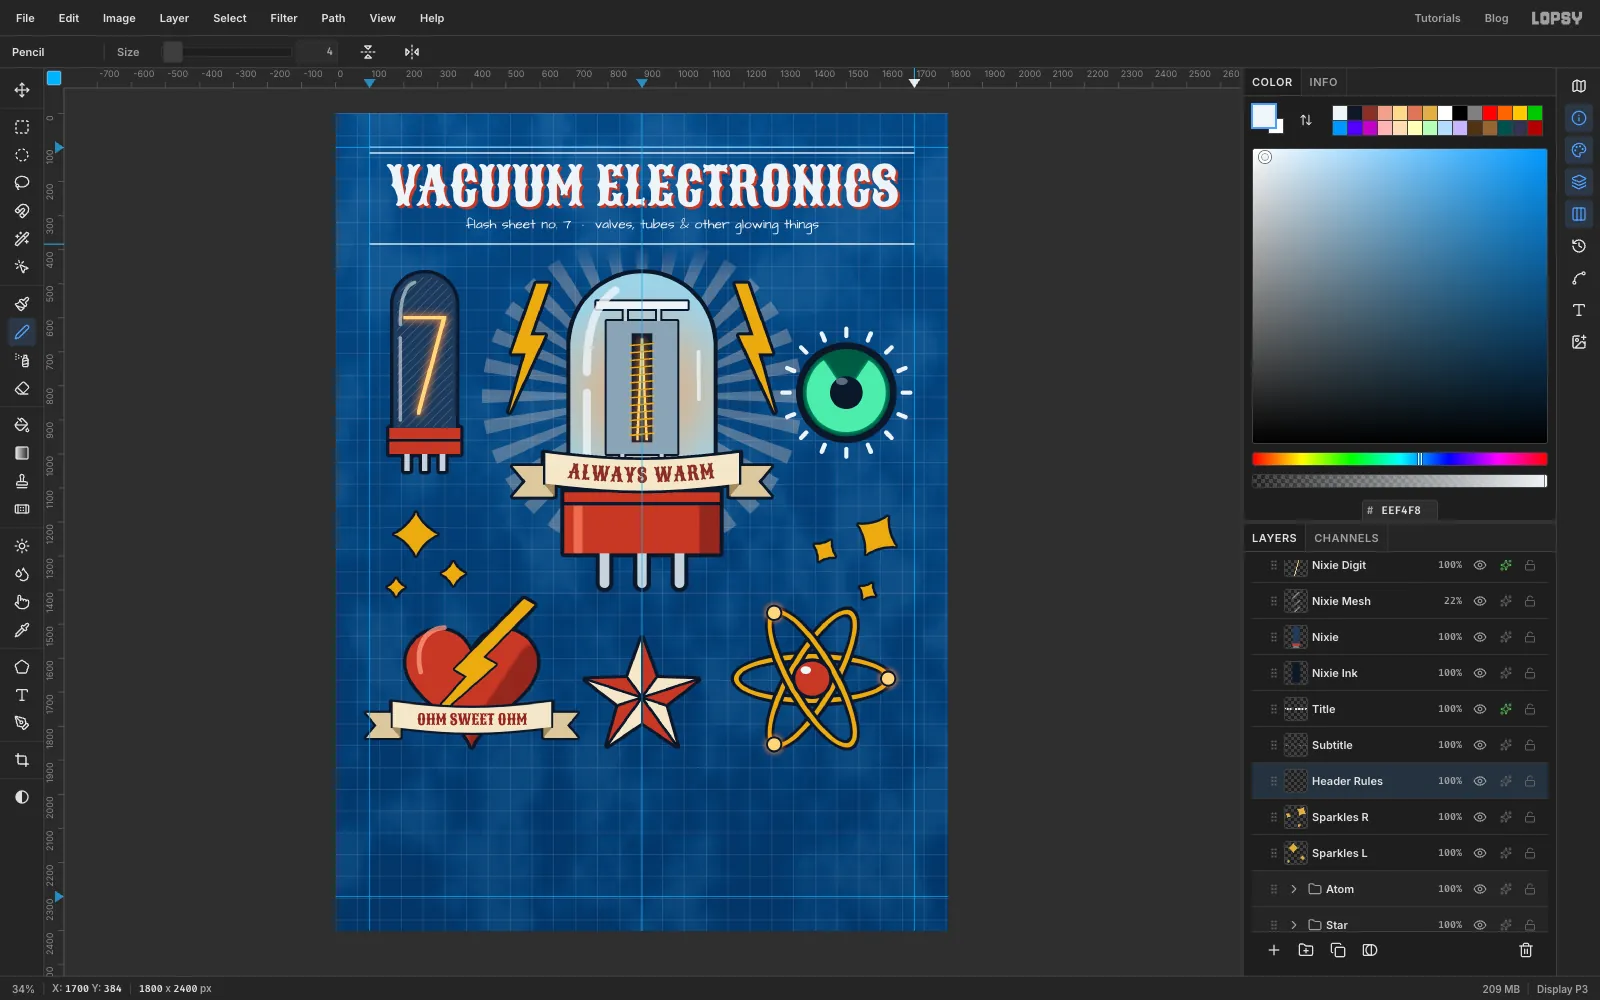
Click Sparkles R again and type the subtitle in Architects Daughter at Size 40: flash sheet no. 7 · valves, tubes & other glowing things. Rename it Subtitle and centre it under the title.
Add a layer called Header Rules. With the Pencil at Size 4 in chalk, Shift-click a double rule across the top margin (at y 100 and y 116) and a single rule under the subtitle at y 384.
-
Draw the construction lines
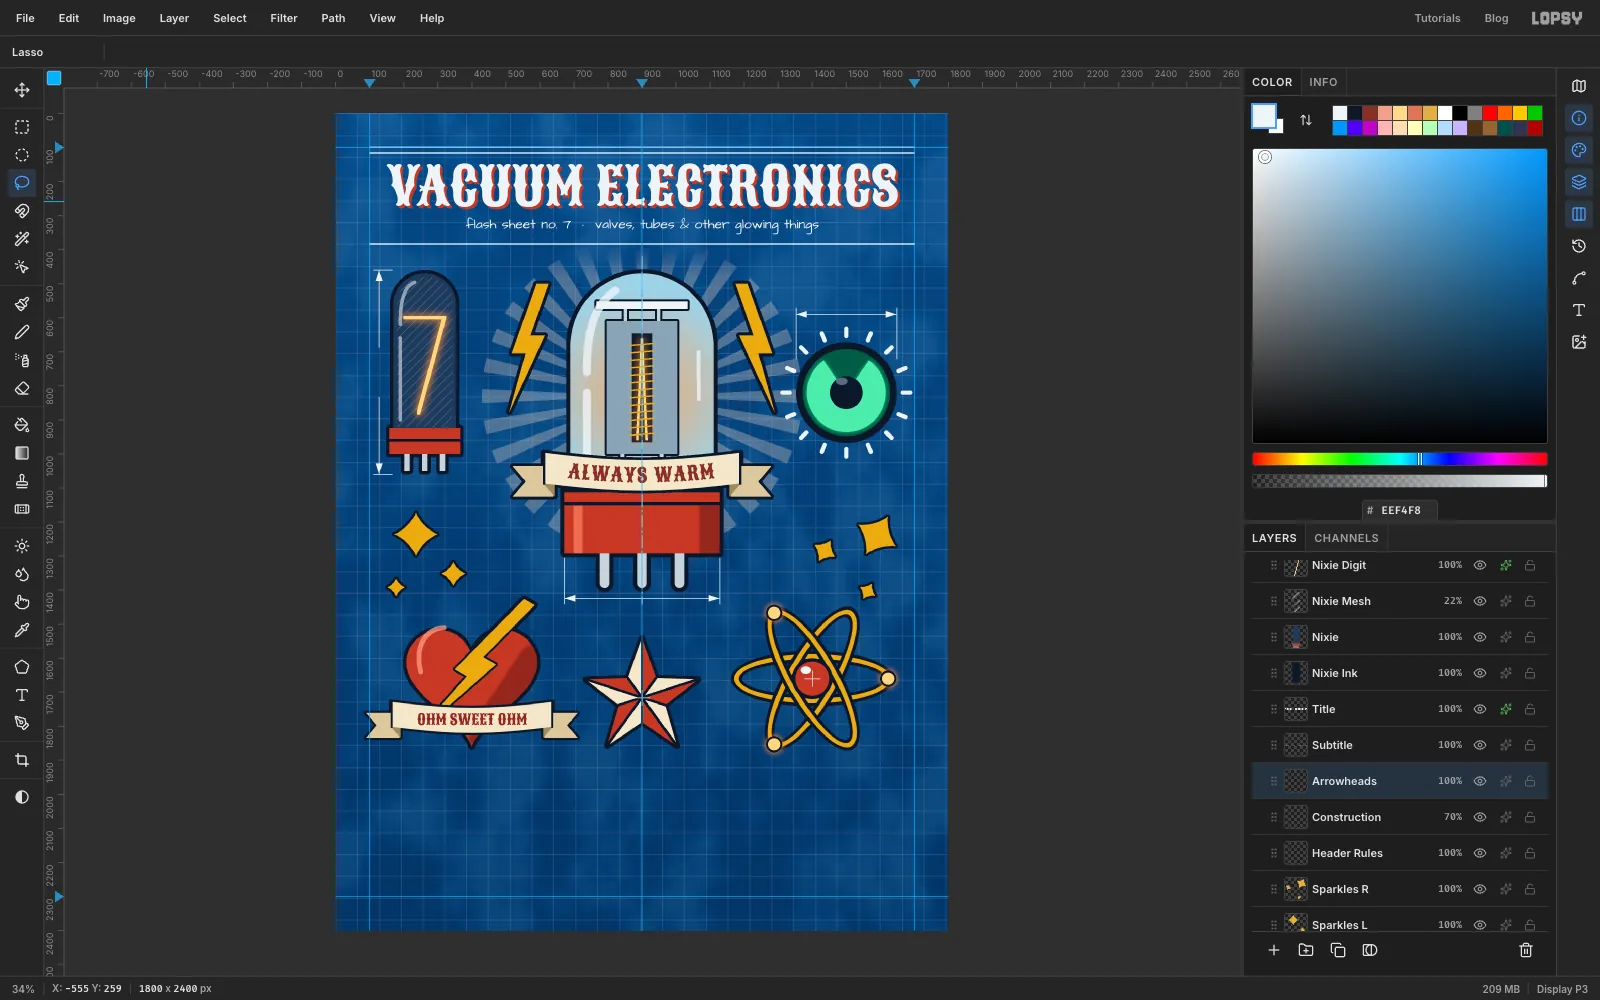
Add a layer called Construction. With the Pencil at Size 3 in chalk:
- Draw a dash-dot centre line down the triode's centre guide: alternate a 34 px dash, a 12 px gap, a dot and another 12 px gap. Stop at the top of the banner and start again below it, so the line never crosses the motto.
- Draw small crosshairs on the centres of the magic eye, the star and the atom.
- Under the triode, draw extension lines down from the base's corners at x 672 and x 1128 (from y 1306 to y 1440) and a dimension line between them at y 1424.
- Above the magic eye, draw extension lines at x 1352 and x 1648 (from y 572 to y 720) and a dimension line at y 590.
- Beside the Nixie, draw short ticks at y 460 and y 1060 and a vertical dimension line at x 128 between them. Leave a gap from y 686 to y 834 for a label.
Set the layer to 70%. Add Arrowheads and lasso a small triangle on each end of each dimension line, pointing outwards, adding with Shift. Fill them with chalk.
-
Label each figure
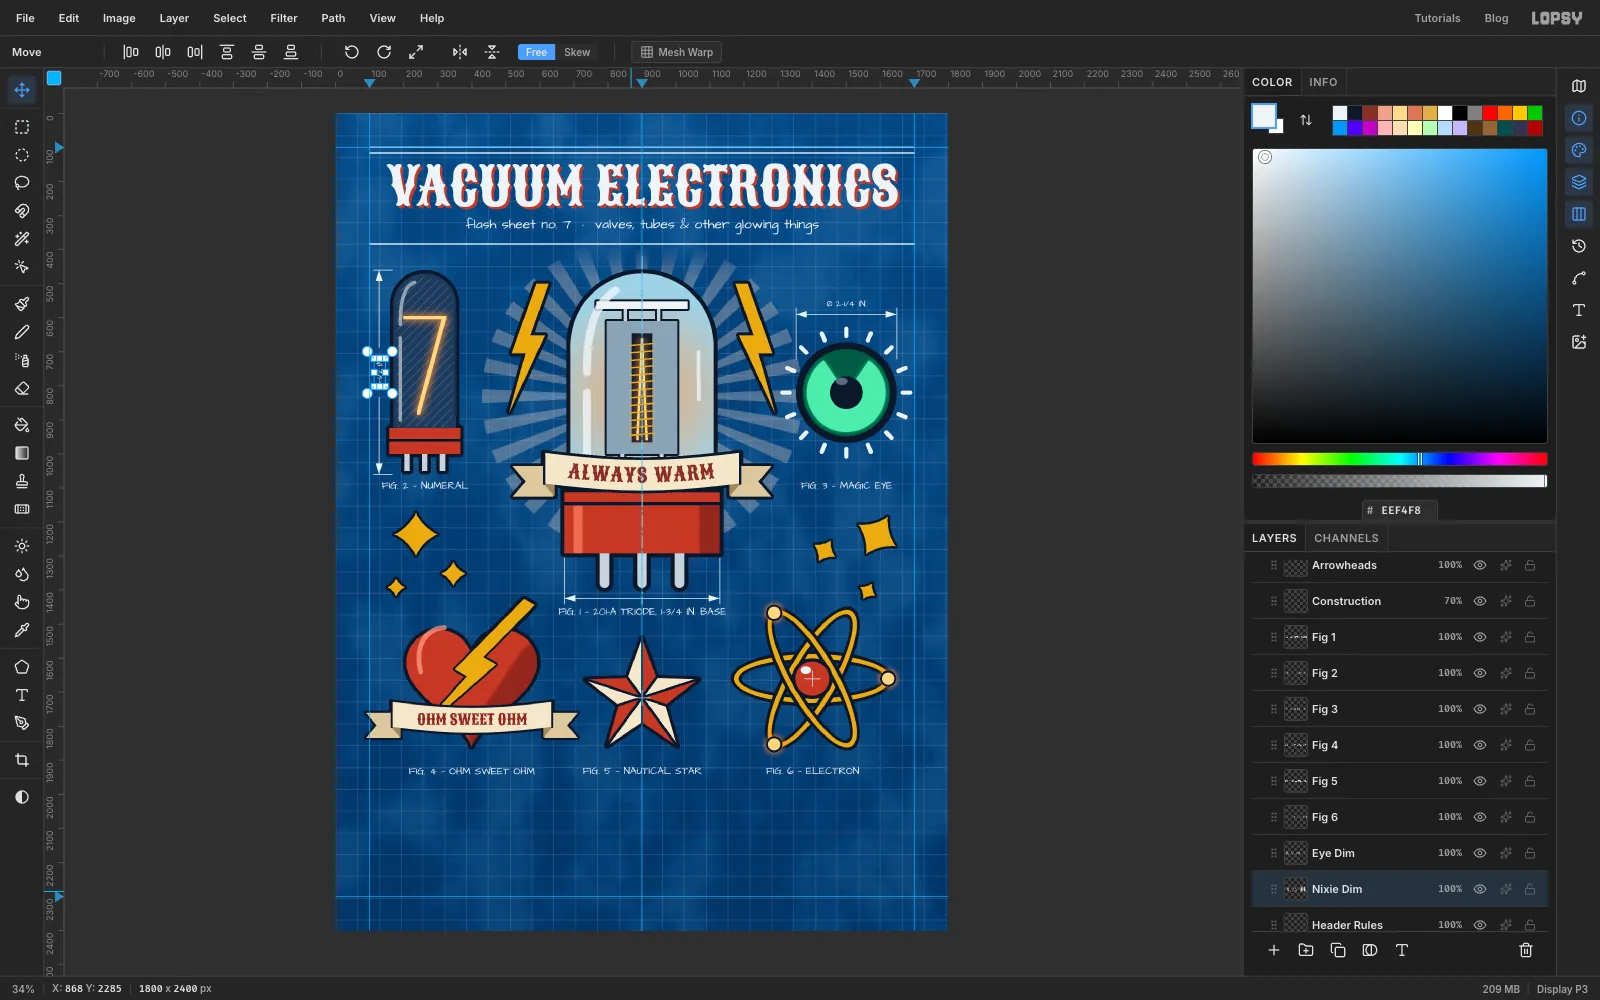
Click Header Rules before each label. In Architects Daughter at Size 30 in chalk, type each caption in empty canvas, press Tab, rename it (Fig 1 to Fig 6), then nudge it into place with the Move tool:
- FIG. 1 — 201-A TRIODE, 1-3/4 IN. BASE just under the triode's dimension line;
- FIG. 2 — NUMERAL and FIG. 3 — MAGIC EYE on one shared line under the Nixie and the eye;
- FIG. 4 — OHM SWEET OHM, FIG. 5 — NAUTICAL STAR and FIG. 6 — ELECTRON on one line, about 50 px under the bottom row.
At Size 26, add Ø 2-1/4 IN. centred above the magic eye's dimension line and name it Eye Dim.
-
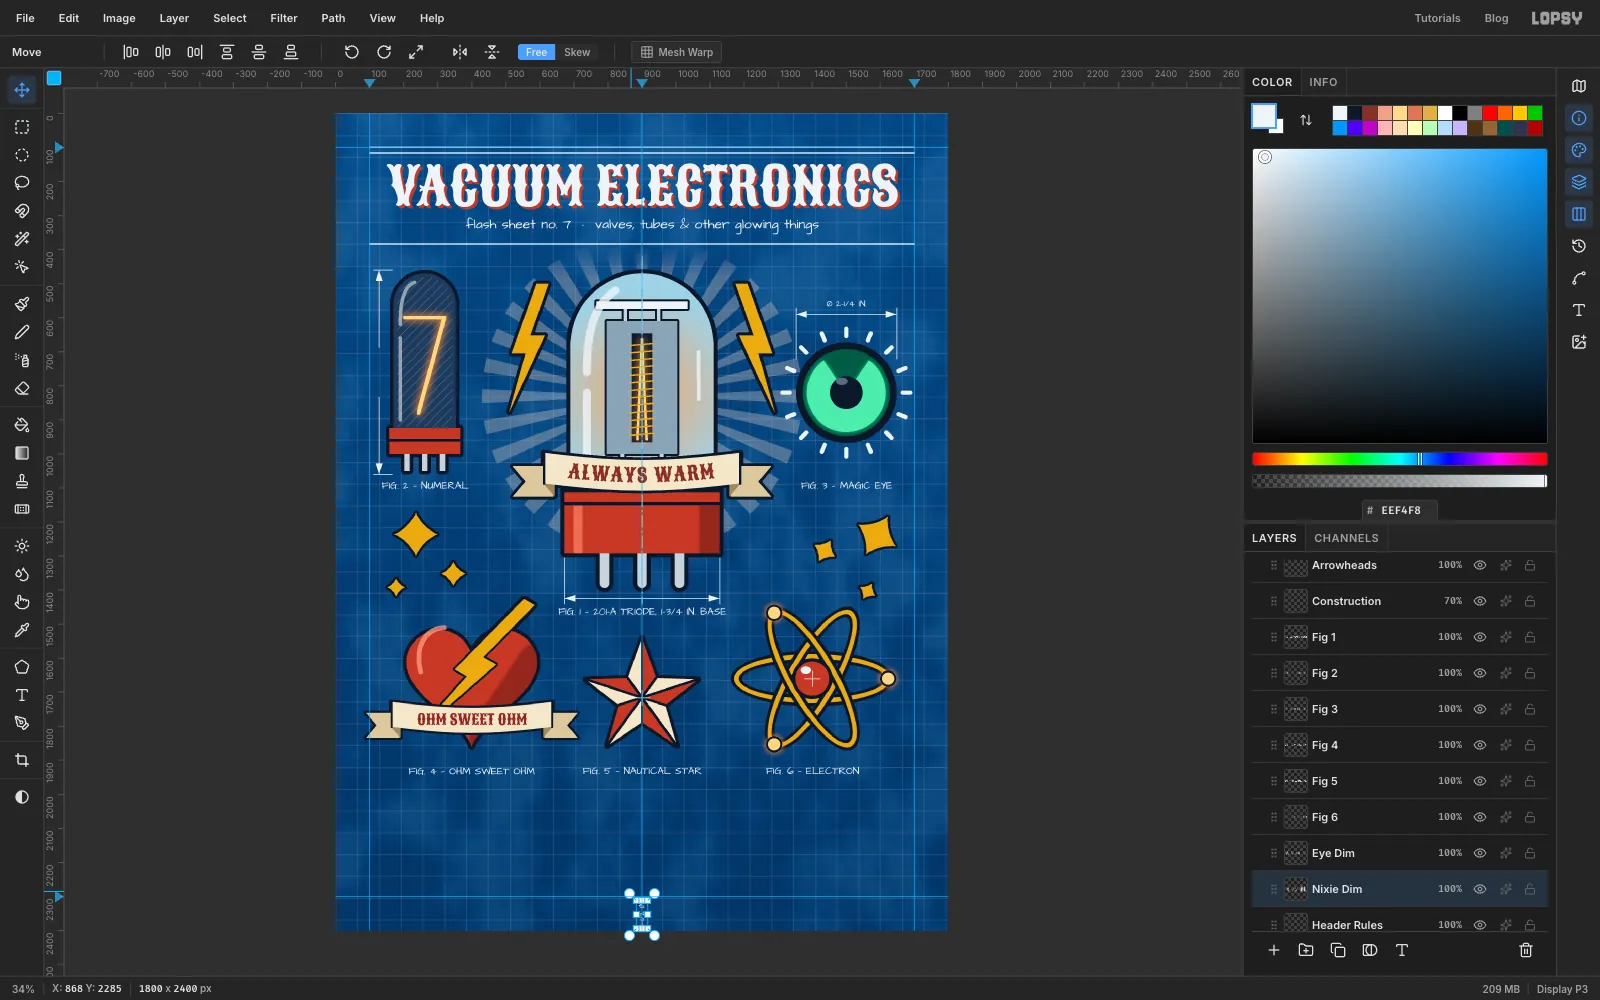
Turn the height label sideways
Click Header Rules, type 4-1/2 IN. at Size 24 and name it Nixie Dim. Draw a marquee around it, then with the Move tool ⌘-drag a corner rotation handle −90° so it reads bottom to top. Press Enter and nudge it into the gap you left in the Nixie's height line. The text stays editable after rotating.
-
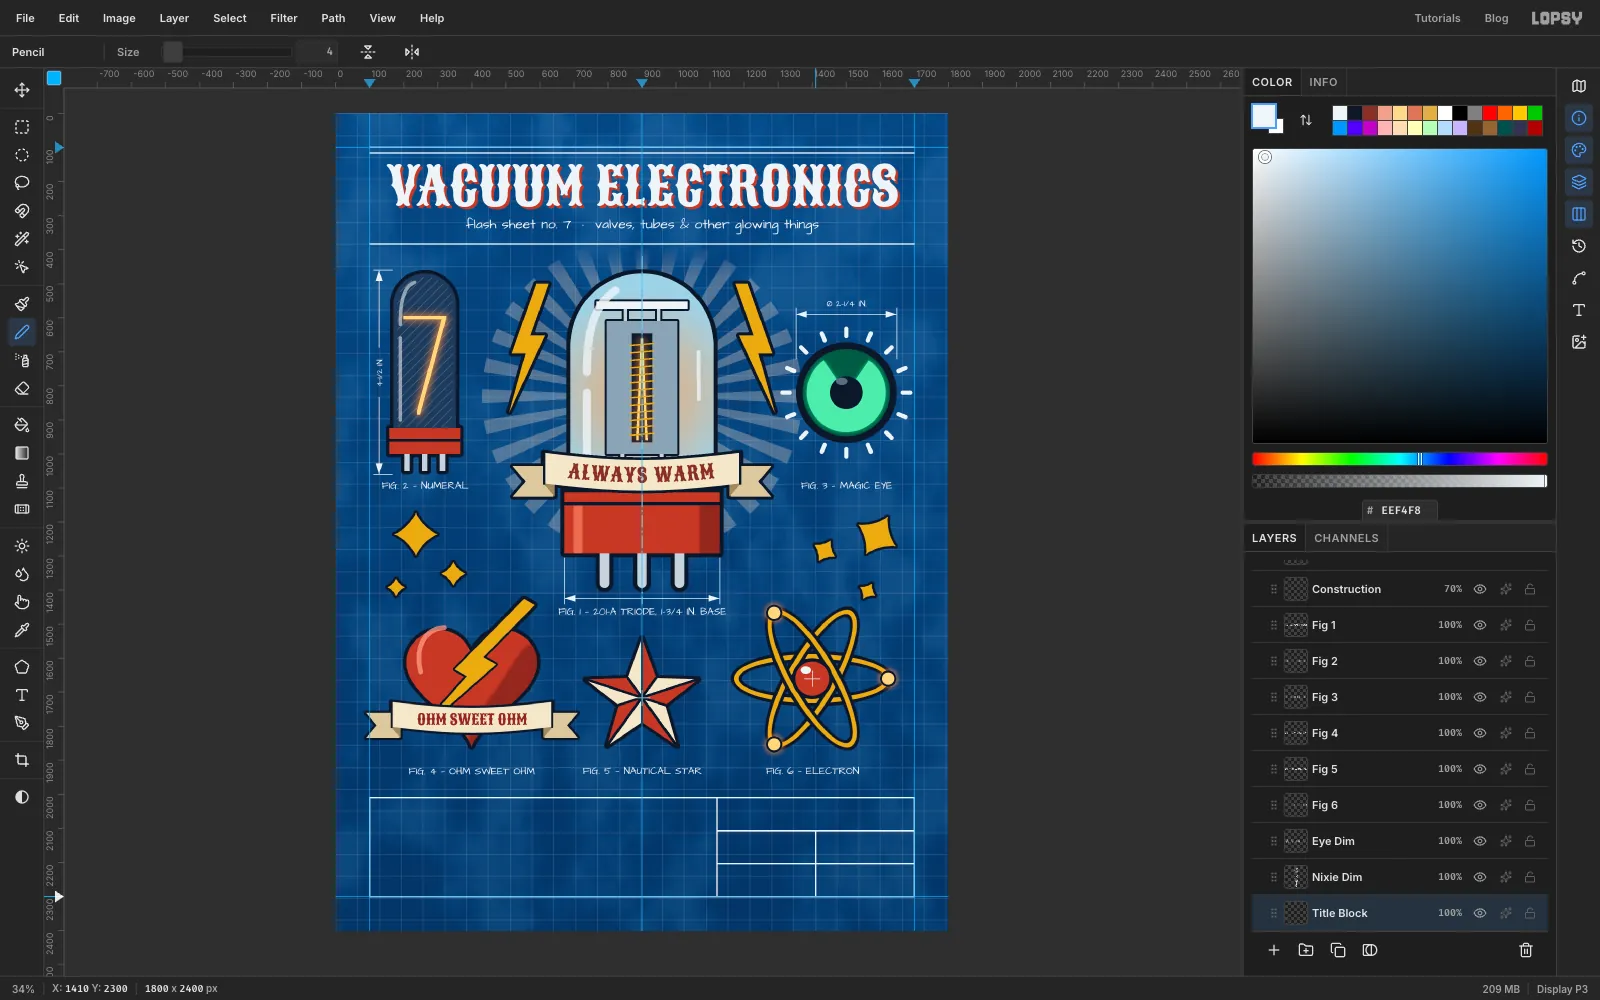
Rule the title block
Add a layer called Title Block. With the Pencil at Size 4 in chalk, Shift-click a rectangle from the left to the right margin, from y 2010 down to the bottom margin. Split it with a vertical line at x 1120.
Right of that line, Shift-click horizontal lines at y 2107 and y 2203, and a vertical line at x 1410 from y 2107 down to the bottom. That leaves one cell across the top and four below it.
-
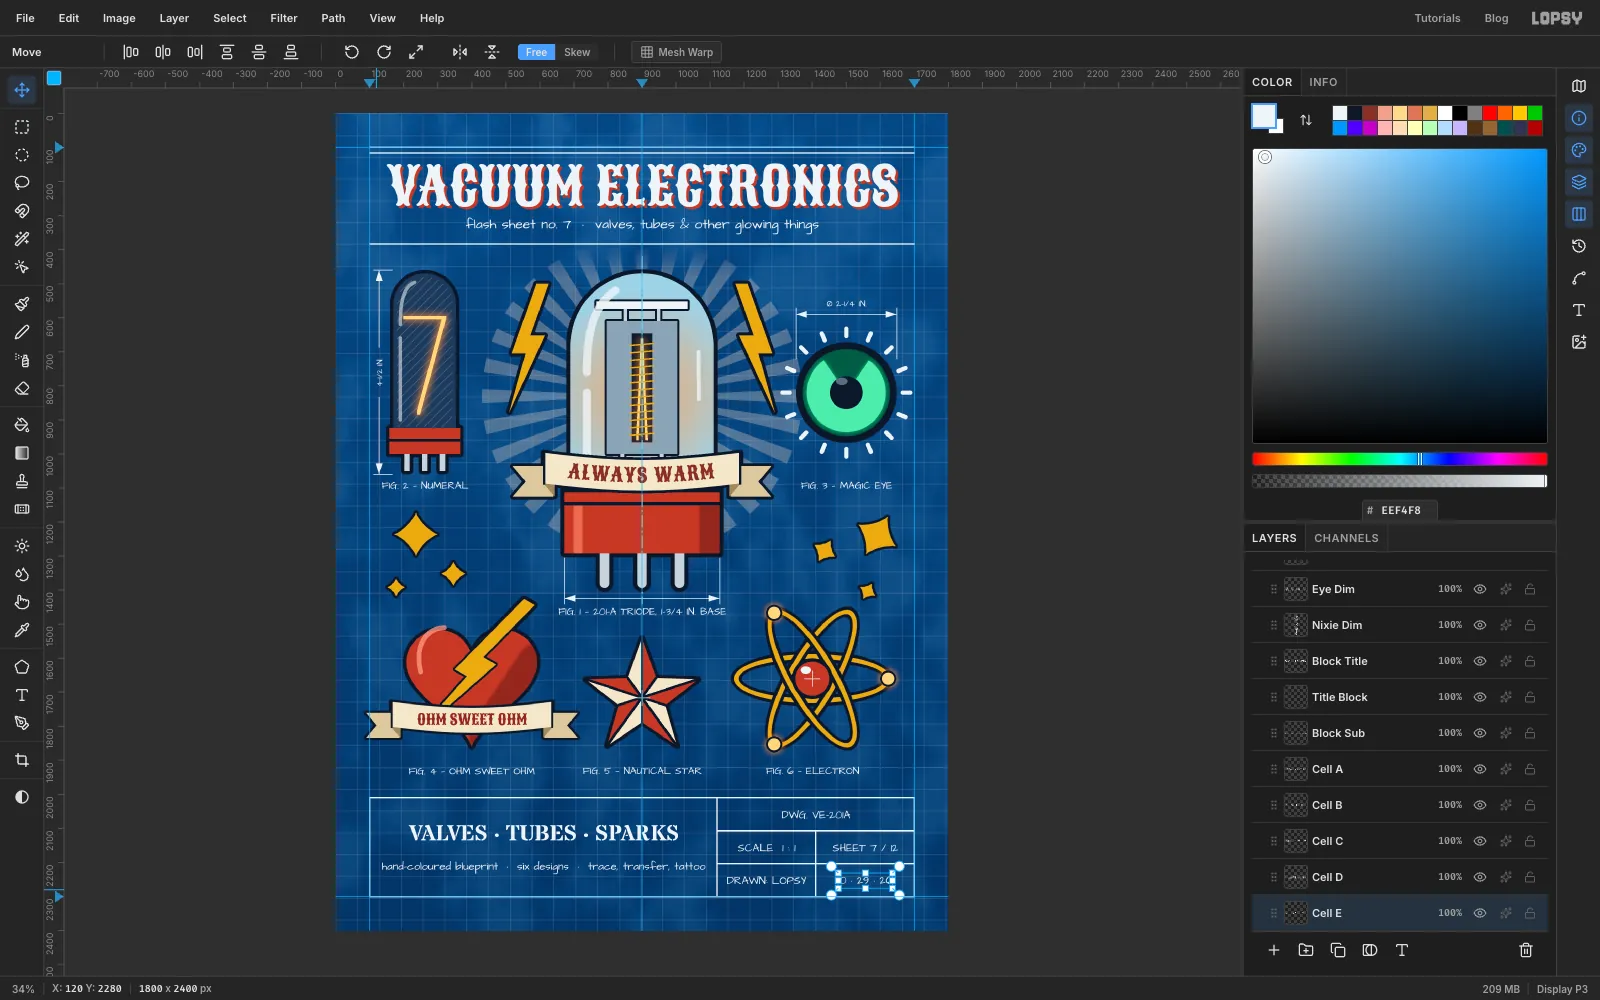
Letter the title block
Click Header Rules. In the left cell, type VALVES · TUBES · SPARKS in Stardos Stencil, weight Bold, at Size 64, and name it Block Title. Under it, at Size 32 in Architects Daughter, type hand-coloured blueprint · six designs · trace, transfer, tattoo and name it Block Sub.
Fill the cells at Size 32, clicking Header Rules before each one: DWG. VE-201A, SCALE 1 : 1, SHEET 7 / 12, DRAWN: LOPSY and the date. Name them Cell A to Cell E and centre each one in its cell.
-
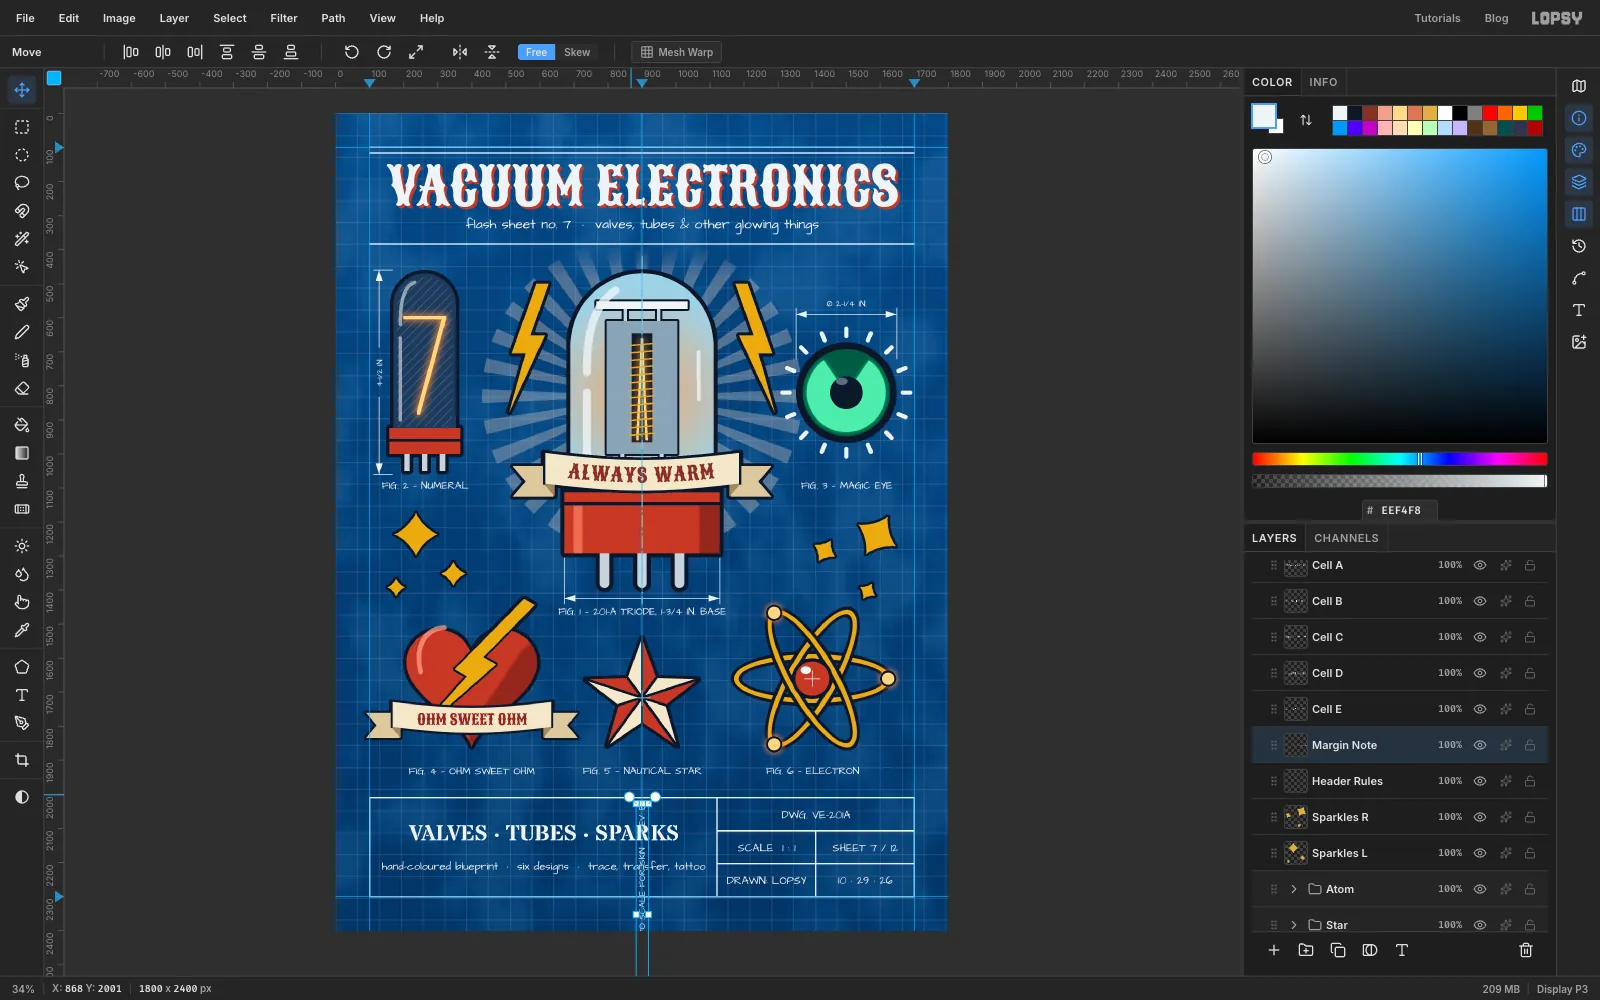
Add a vertical margin note
Click Header Rules and, at Size 26, type TRACE ONLY · NOT TO SCALE FOR SKIN · REV. B. Name it Margin Note. Rotate it −90° with a marquee and a ⌘-drag on a corner handle, the same way as the height label. Press Enter and centre it in the left margin, halfway down the sheet.
-
Age the edges and finish
Click Blueprint Grid and add a layer called Edge Wear. With the Lasso, draw a slightly wobbly rectangle just inside the margins. Choose Select → Inverse, then Select → Feather… at 63, and fill with . Deselect, set the blend mode to Multiply and the opacity to 60%. The edges darken unevenly, like a print that has been handled.
Add a layer called Creases. With the Pencil at Size 3, Shift-click a chalk line across the full width at y 800 and y 1600. Add a dark line 4 px below each one. Choose Filter → Gaussian Blur… at 1.5 and set the layer to 30%. The sheet now looks folded in thirds.
Deselect, hide the guides with View → Show Guides, and choose File → Quick Export PNG. Save the project with File → Save Project too, so the banners, curved type and labels stay editable.