Make a 16-Bit Pixel Art Zine Cover with a Volcano
Build a 16-bit pixel art zine cover in Lopsy with ordered dithering, Gradient Maps, stepped stencils, a pixel hiker sprite and a game-style dialog box.
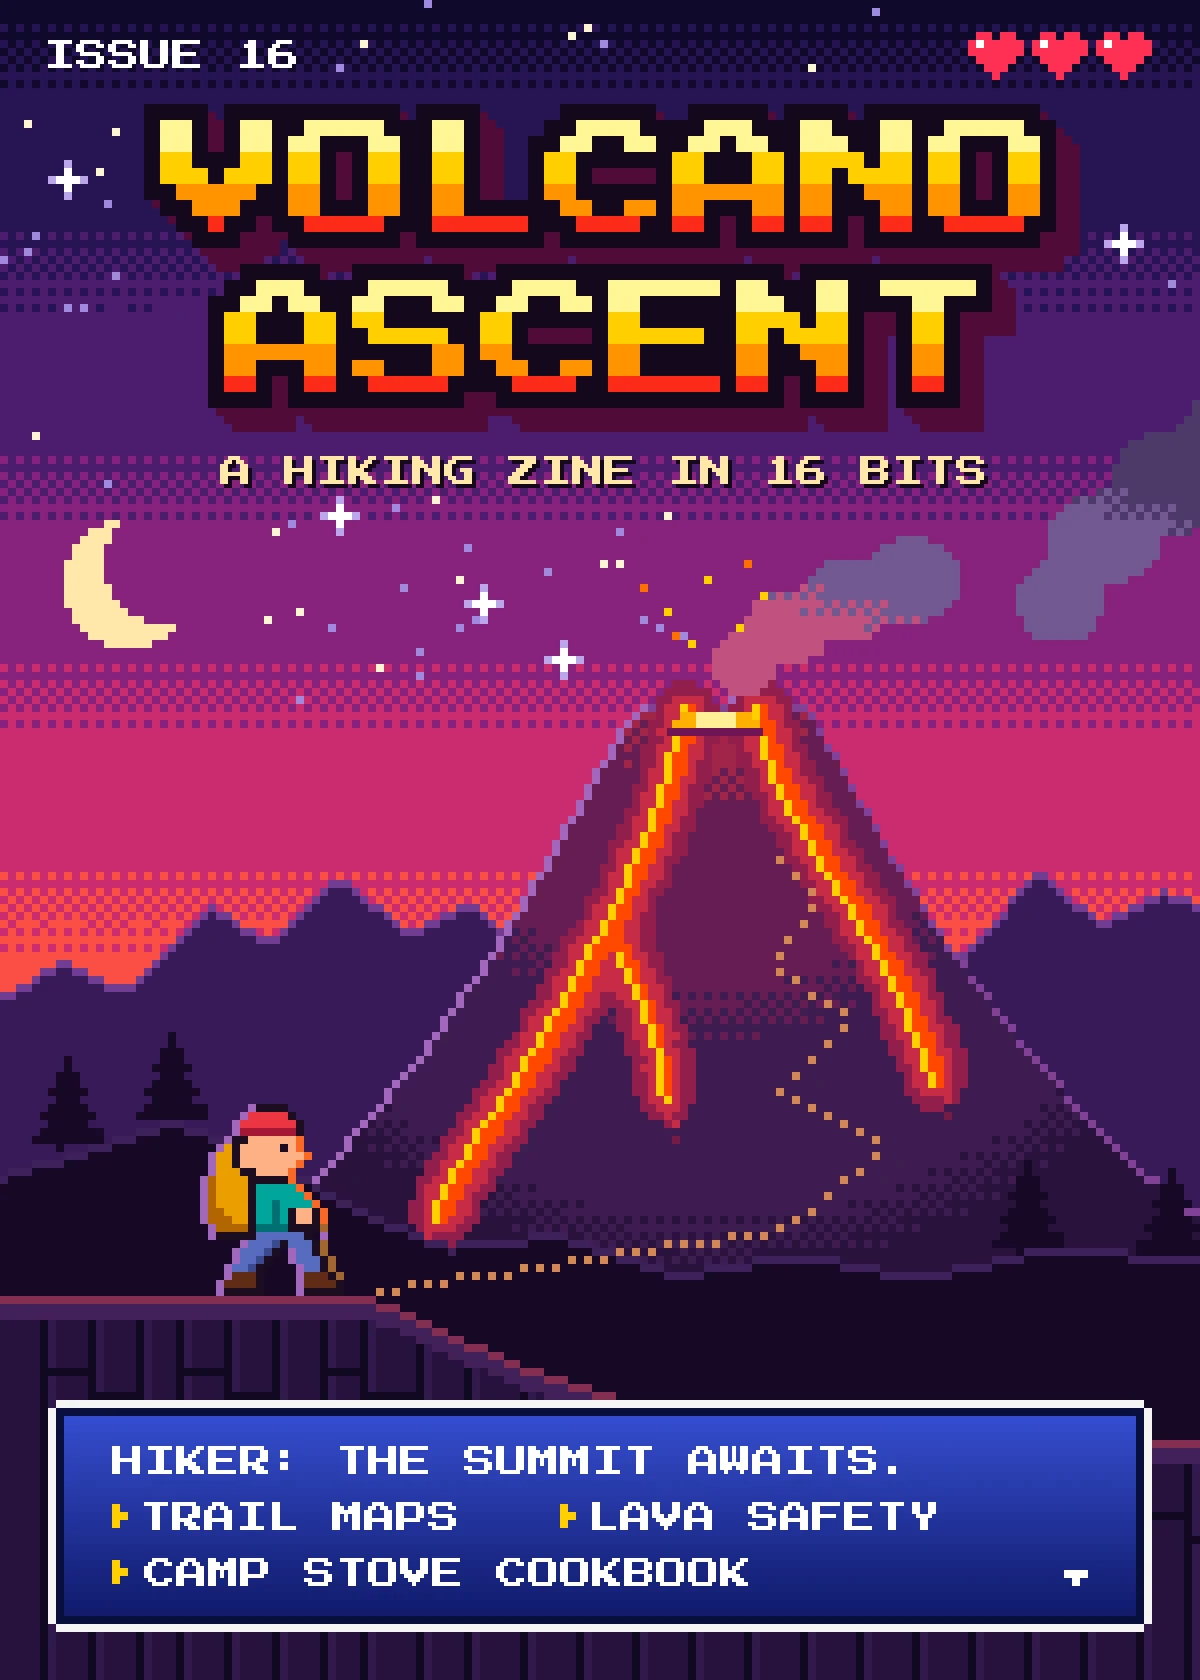
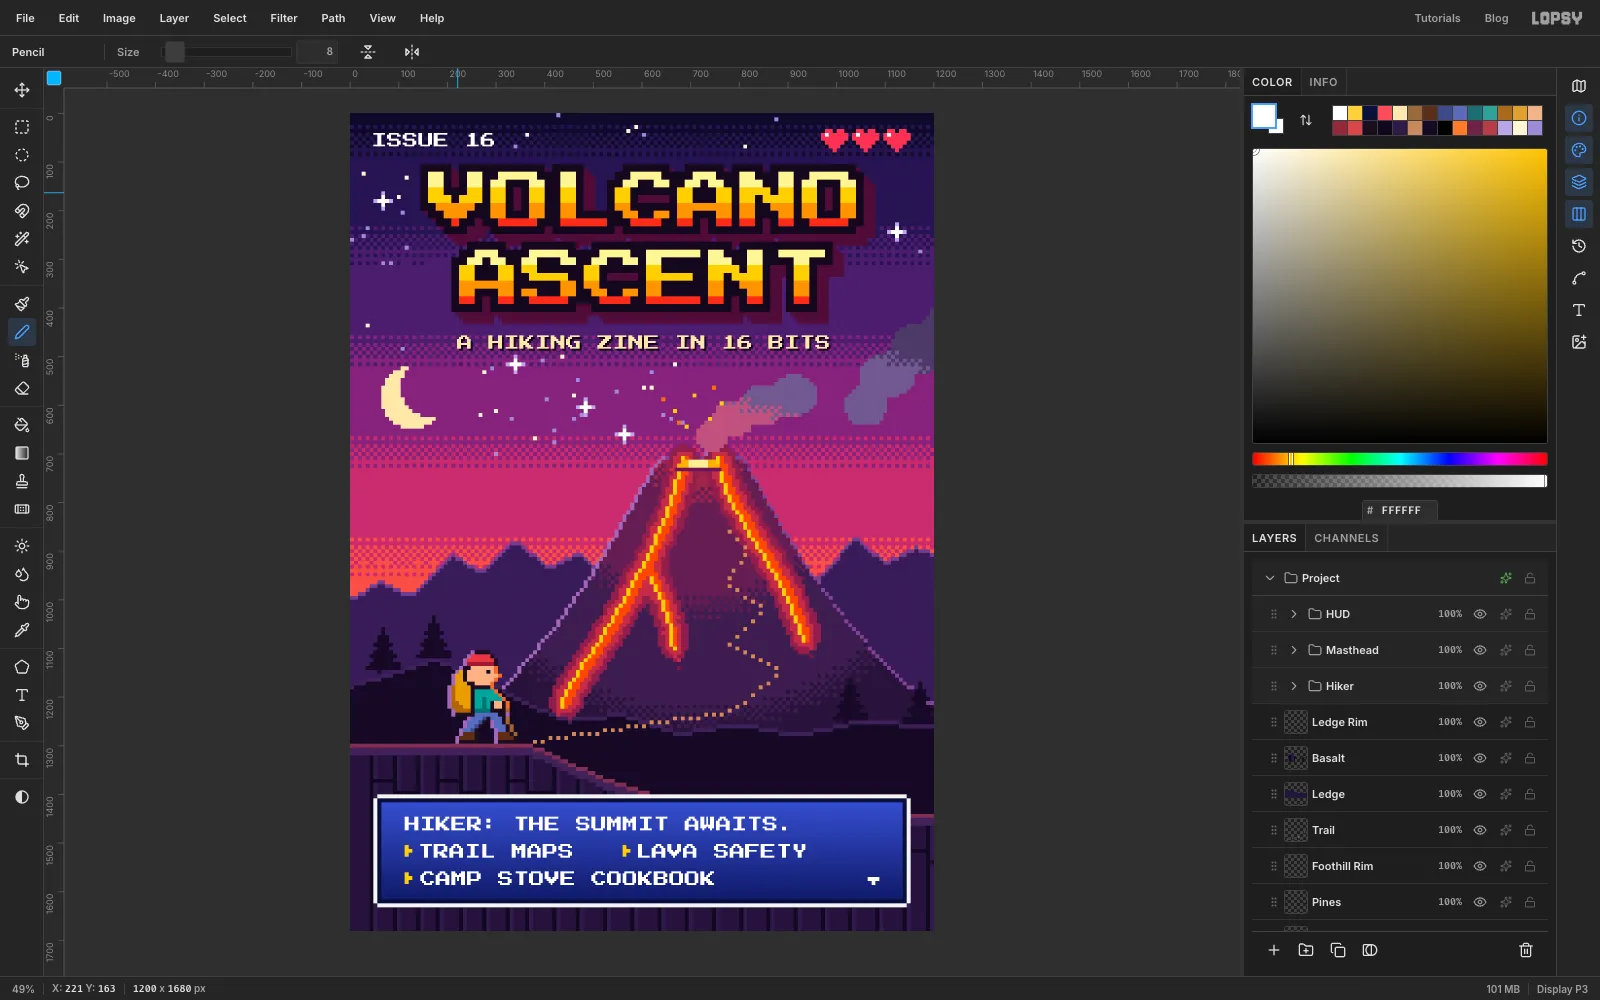
Games from the Super Nintendo and Mega Drive era got lush skies out of tiny palettes with a few tricks. They used flat bands of colour, a checkerboard dither where two bands meet, crisp stair-stepped edges, and a bright line wherever light catches a shape. In this tutorial you'll use those tricks to make Volcano Ascent, a 1200 × 1680 px cover for an imaginary hiking zine. It looks like the title screen of a game that never existed. A hiker stands on a ledge looking up at a glowing volcano, and a role-playing game dialog box lists what's in the issue.
Everything is built on an 8 px grid, so each "art pixel" is an 8 × 8 square and the cover is 150 × 210 art pixels. You won't place the dither by hand. A four-square pattern, the Posterize filter and a Gradient Map turn any smooth grey gradient into a 16-bit one. No photos are needed.
Along the way you'll use:
- the grid with snapping, and the Rectangular Marquee's exact-corners dialog
- Define Pattern and Fill with Pattern to make an ordered dither
- Pixelate, Posterize, Threshold, Gaussian Blur, Select → Grow and Drop Shadow
- Gradient Map adjustments on groups
- a white-on-black "stencil" with the Magic Wand to turn any shape into stair-stepped pixels
- the Elliptical Marquee and Lasso, with Shift to add and Alt to subtract
- Cmd-clicking thumbnails and nudging the selection with the arrow keys to light the edges of a shape
- the Pencil at 8 px for stars, trees, a trail and a hand-placed hiker sprite
- the Brush, the Gradient tool (linear and radial) and Edit → Fill
- copy and paste, scaling and rotating with the Move tool, Align center horizontally and Image → Flip Horizontal
- New Group, Add Layer, Merge Down and Rasterize Layer
- Text in Press Start 2P, a free pixel font
The palette:
-
Sky
-
Volcano
-
rim
-
moonlight
-
Lava
-
lava light
-
glow
-
tapers
-
embers
-
Crater
-
crater lip
-
Smoke
-
Mountains
-
mountain rim
-
Foothills and pines
-
foothill rim
-
trail
-
Basalt
-
tops
-
joints
-
ledge rim
-
Hiker outline
-
beanie
-
skin
-
pack
-
Jacket
-
trousers
-
boots
-
stick
-
lava rim
-
Title bands
-
outline
-
extrusion
-
Dialog box
-
borders
-
menu cursors
-
Moon
-
stars
-
hearts
-
Set up the document and an 8 px grid
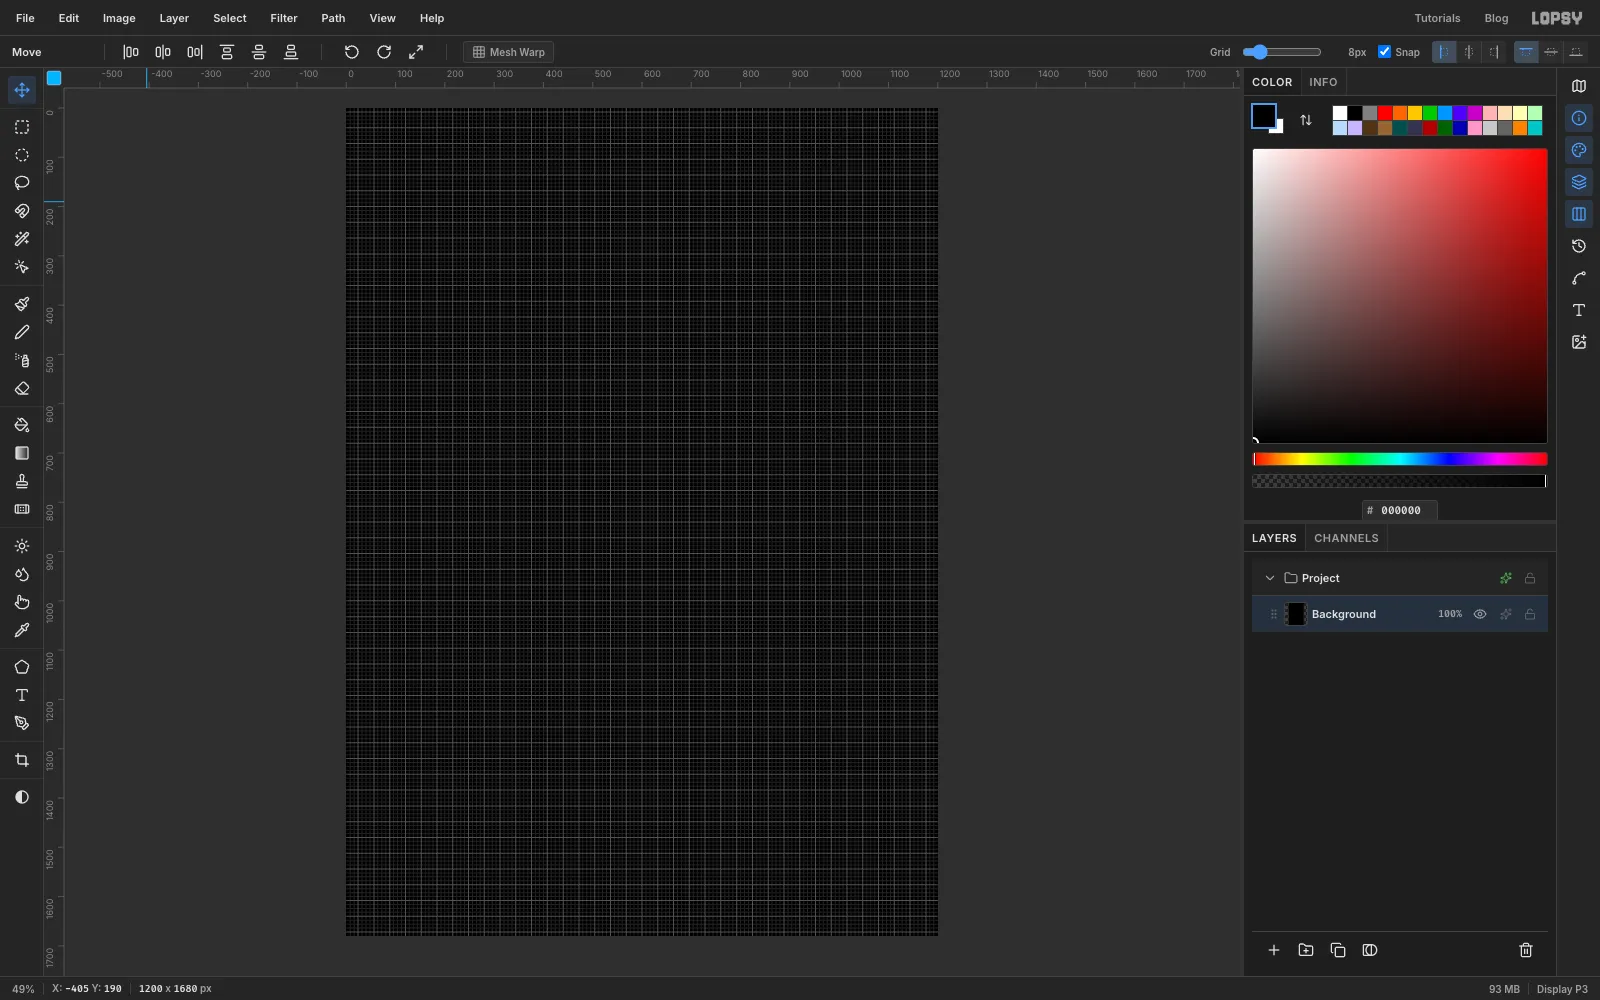
Create a new document 1200 × 1680 px. Choose View → Show Grid, then drag the Grid slider at the right of the options bar to 8px and make sure Snap is ticked. With snapping on, marquees land on grid lines, and the arrow keys nudge a selection by exactly one grid square. You'll rely on both.
Delete the empty Layer 1. Select the Background layer, choose Select → All, set the foreground colour to black () and choose Edit → Fill. Deselect with Cmd+D.
-
Make a Bayer dither tile and define it as a pattern
Ordered dithering uses a small grid of thresholds called a Bayer matrix. The 2 × 2 version has four values, and you'll paint it as four grey squares.
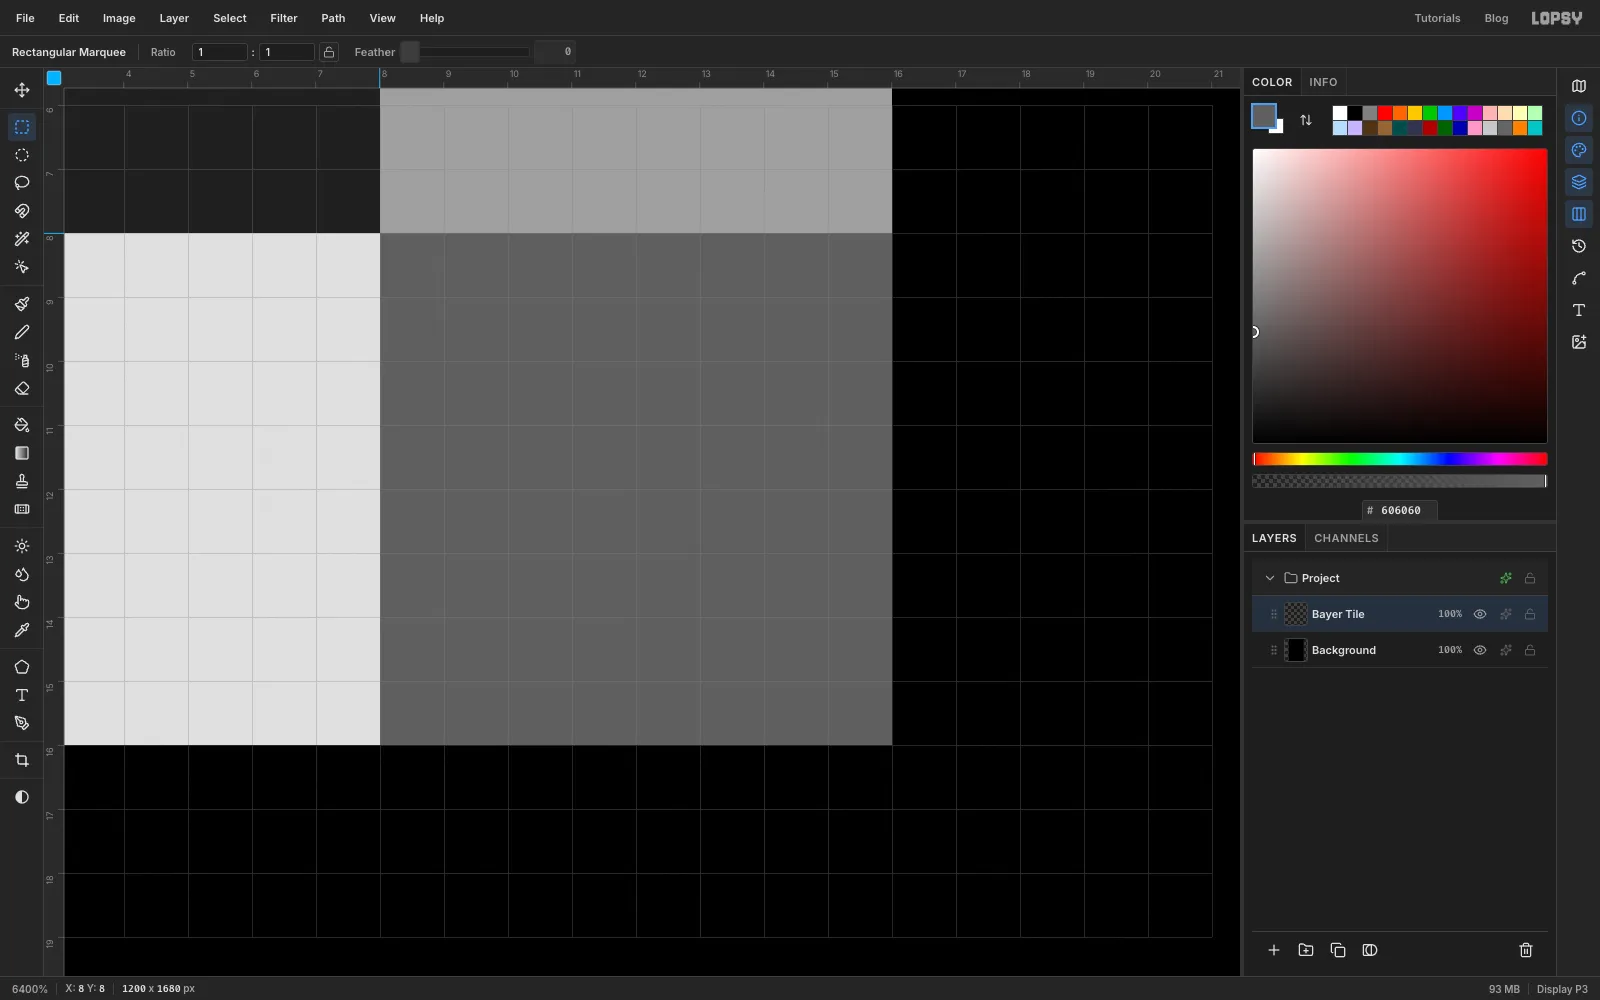
Click Add Layer and name it Bayer Tile. Pick the Rectangular Marquee. A single click with nothing selected opens a dialog where you type exact corners. Make these four squares, and for each one press Cmd+D to deselect first, click once, type the corners and fill with Edit → Fill:
- From 0, 0 to 8, 8, filled with .
- From 8, 0 to 16, 8, filled with .
- From 0, 8 to 8, 16, filled with .
- From 8, 8 to 16, 16, filled with .
Deselect, then select the whole tile from 0, 0 to 16, 16 and choose Edit → Define Pattern. Deselect again and delete the Bayer Tile layer. The pattern stays available for the rest of the session.
-
Paint the sky as a grey gradient
Every coloured area on this cover starts out in grey, because grey values are what Posterize and the Gradient Map work on.
Select the Background layer and click New Group in the Layers panel footer. Name it Sky. With the group open, click Add Layer and name the layer Sky Value.
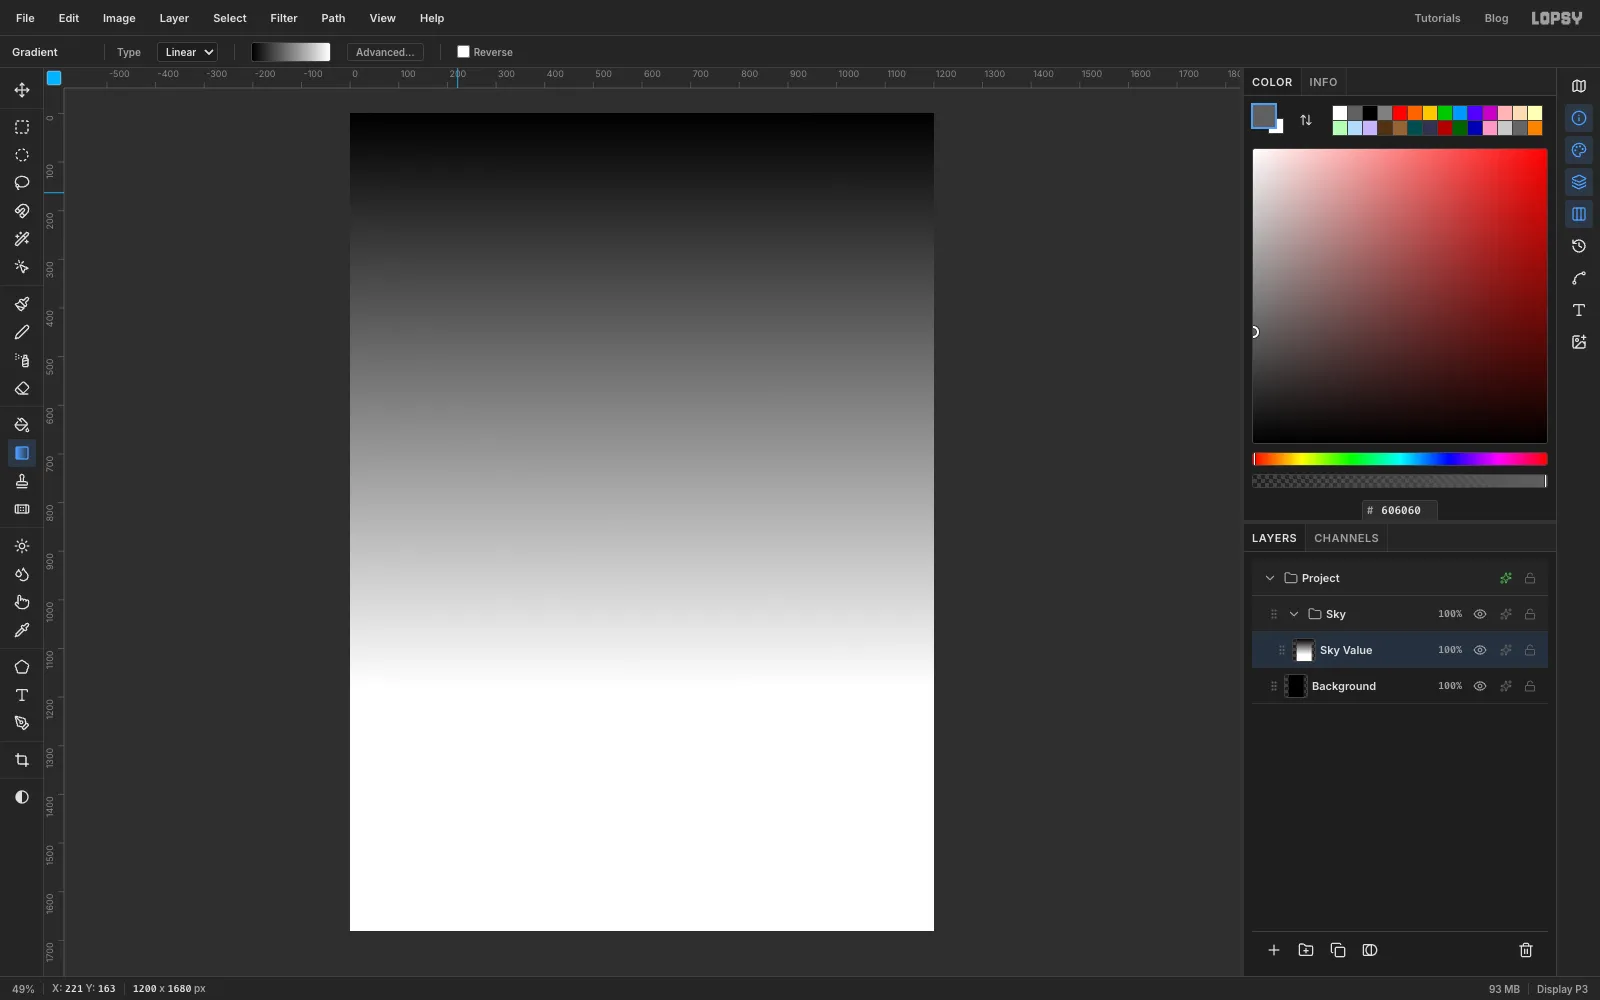
Pick the Gradient tool and set Type to Linear. Click Advanced…, click each end stop and type its colour into the hex field: black on the left and white on the right. Drag from the top edge of the canvas straight down to about 500 px above the bottom edge. Everything below that will be hidden by the ground later.
-
Pixelate it and fill a layer with the dither pattern
Choose Filter → Pixelate… and set Block Size to 8. The gradient becomes 8 px tall steps that line up with the grid.
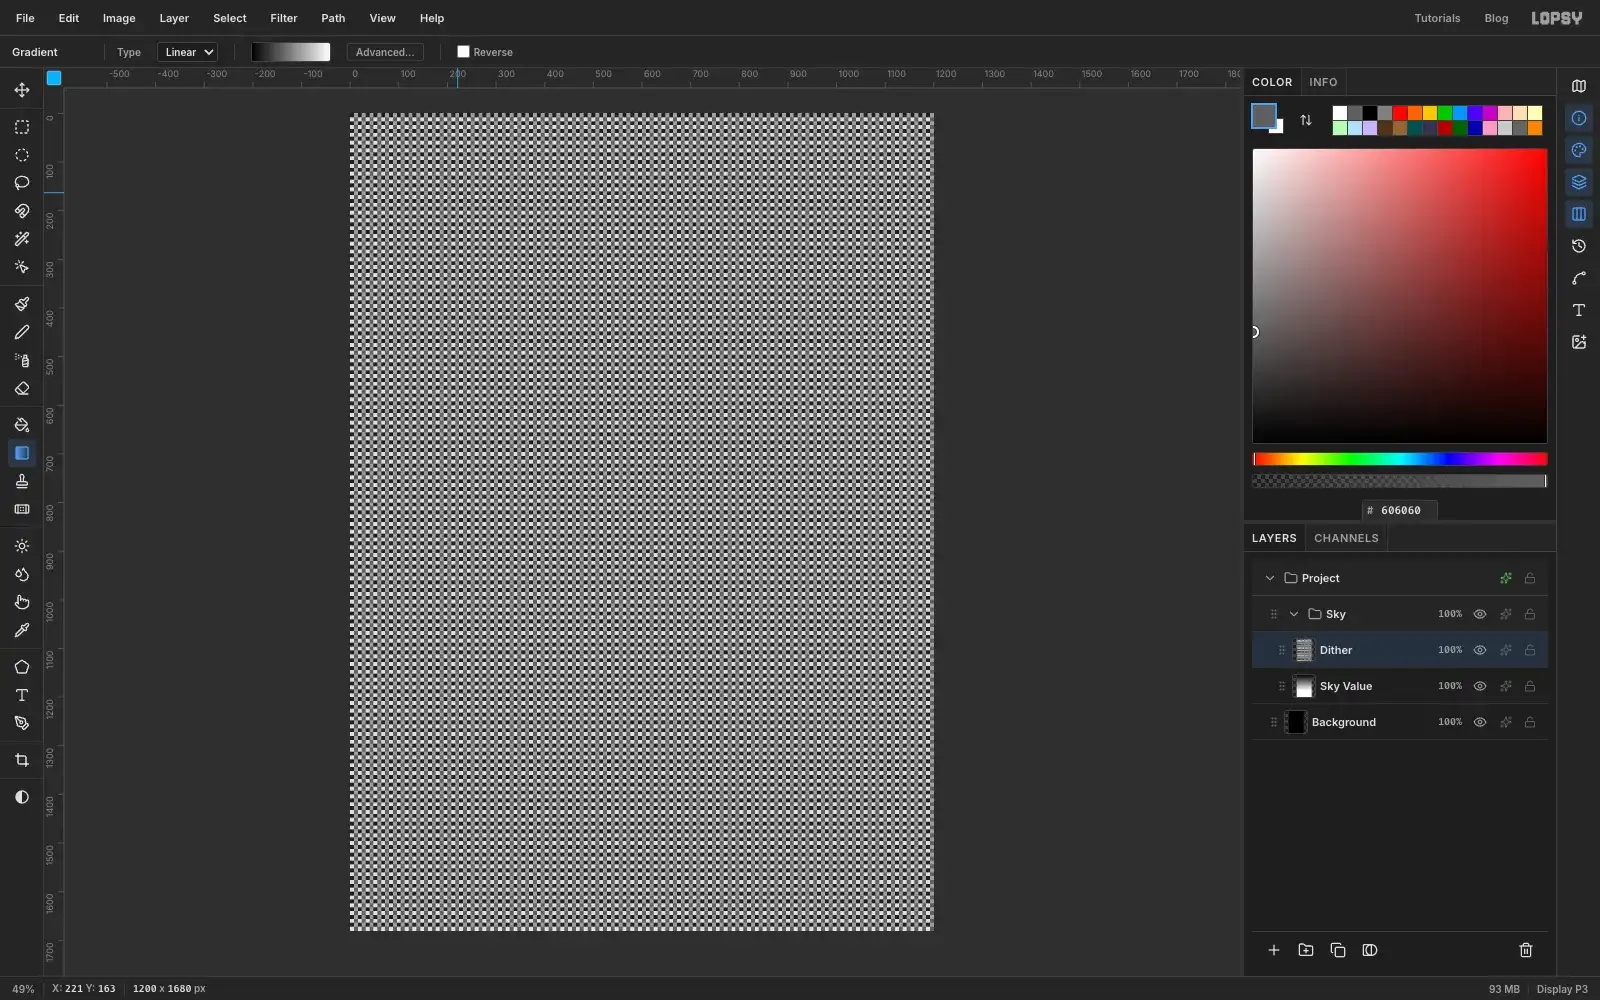
Click Add Layer and name it Dither. Choose Edit → Fill with Pattern…, pick the 16 × 16 pattern you defined and click Apply. The four greys repeat across the whole canvas, every square sitting exactly on a grid square.
-
Merge the pattern at 8% and posterize to seven greys
Click the Dither layer's opacity and set it to 8%, then choose Layer → Merge Down. Each grid square of the sky is now nudged up by a slightly different amount, following the pattern.
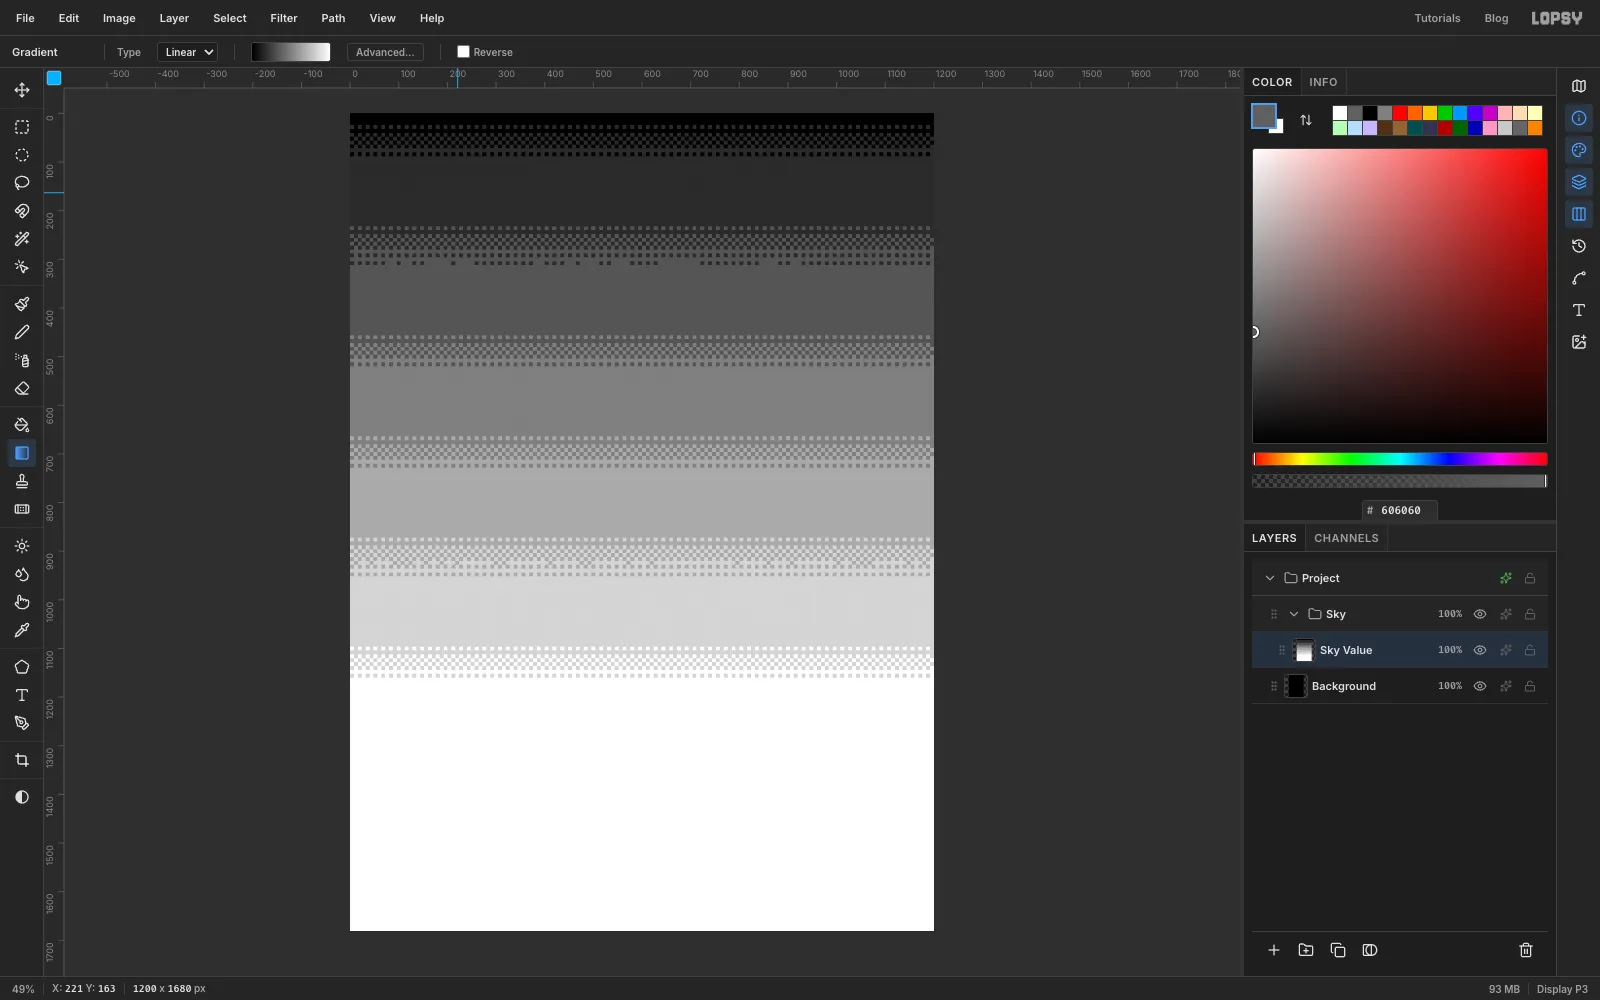
Choose Filter → Posterize… and set Levels to 7. Posterize rounds every pixel to the nearest of seven greys. Most of the sky lands on a flat band. Near the line between two bands, the 8% nudge tips some squares up and leaves others down, always in the same order. You get transitions that step from one pixel in four, to a checkerboard, to three in four: the classic 16-bit sky.
-
Colour the sky with a Gradient Map
Click the Sky group's effects button (the sparkle icon on its row) to open Group Adjustments. Click Add Adjustment → Gradient Map and expand it.
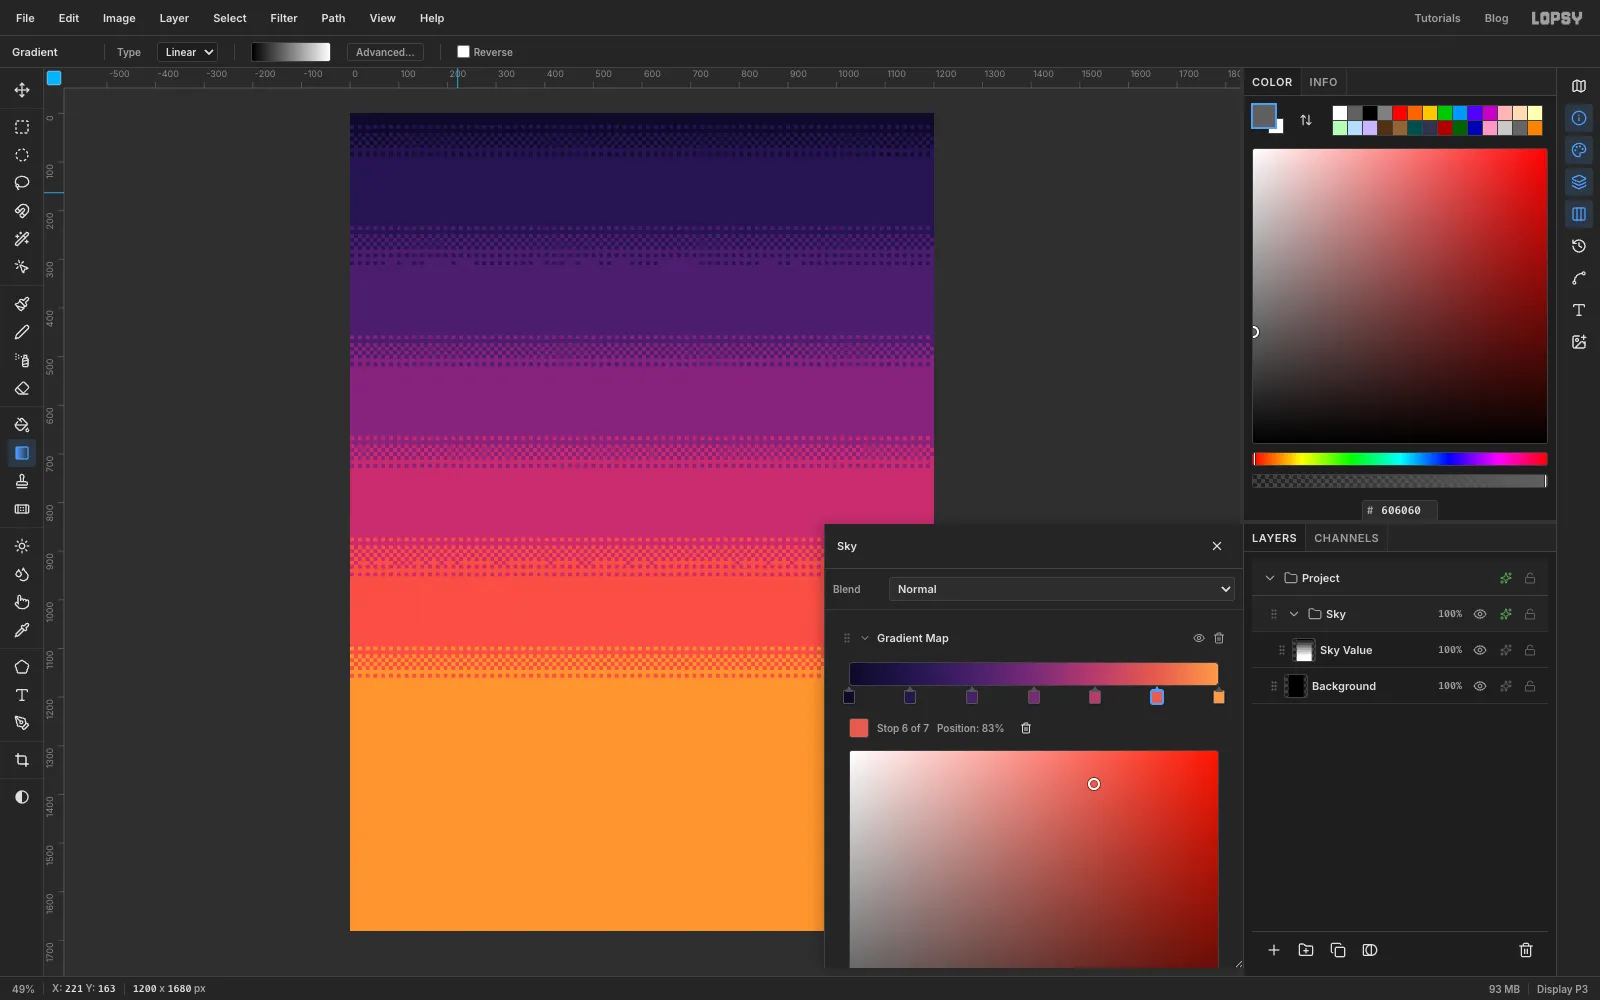
Give the map seven stops, one for each grey level. Click the row under the gradient bar to add stops at roughly 0, 17, 33, 50, 67, 83 and 100%. Select each one and type its colour into the hex field: , , , , , and .
Each grey band becomes one flat colour, and the dither now mixes neighbouring colours instead of greys. Because it's an adjustment, you can retune the palette at any time.
-
Scatter pixel stars with the Pencil
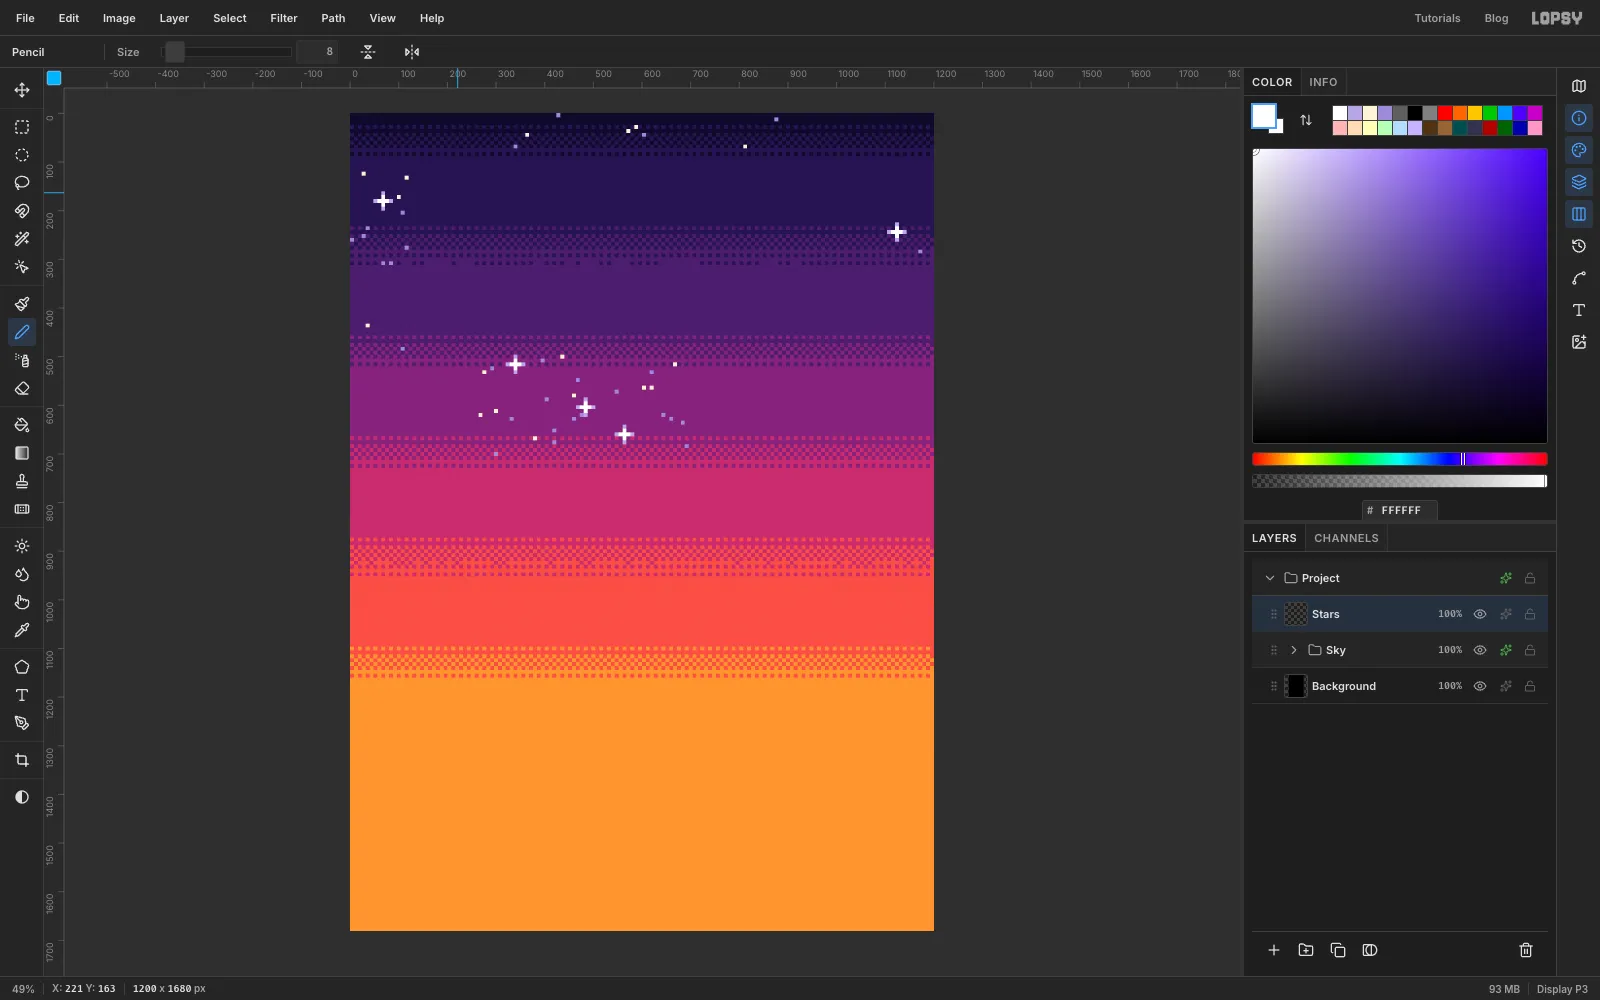
Collapse the Sky group, select it and click Add Layer. Name the new layer Stars. Pick the Pencil, set its Size to 8 and click in grid squares to place single-pixel stars. Use for dim stars and for bright ones, about three dim stars for every bright one. Keep them out of the middle of the top third, where the title will go, and away from the two top corners.
For a twinkle, click a square and Shift-click two squares to its right to draw a line, then extend it two squares to the left the same way, in . Do the same vertically. Finish with a small white plus in the centre: three pixels across, one above and one below. Five twinkles is plenty.
-
Cut a crescent moon from two circles
Curves drawn with marquees have soft, anti-aliased edges, and that breaks the pixel art look. To get stair-stepped edges, draw each shape in white on a black stencil, then let Pixelate and Threshold snap it to the grid.
Click Add Layer and name it Moon. Click Add Layer again and name this one Stencil. Choose Select → All and fill it black.
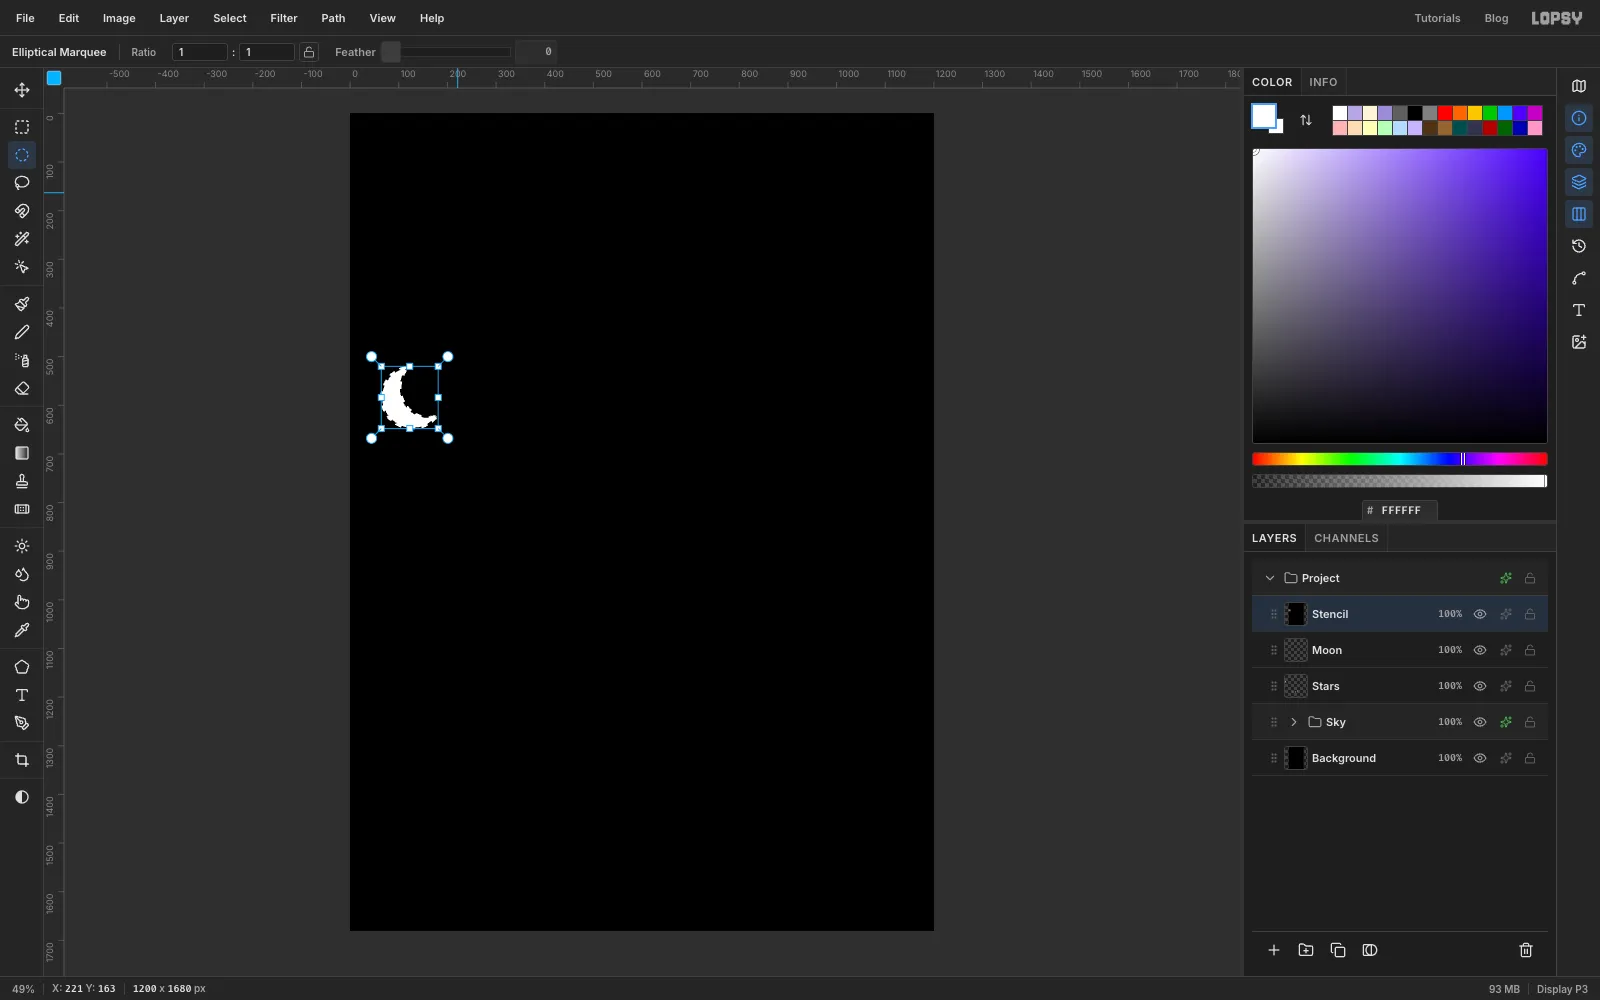
Pick the Elliptical Marquee and drag a circle from about 64, 520 to 192, 648. Hold Alt and drag a second circle from about 104, 504 to 216, 624. That subtracts it and leaves a crescent. Fill the selection with white.
-
Turn the crescent into pixels with the stencil
Deselect, then:
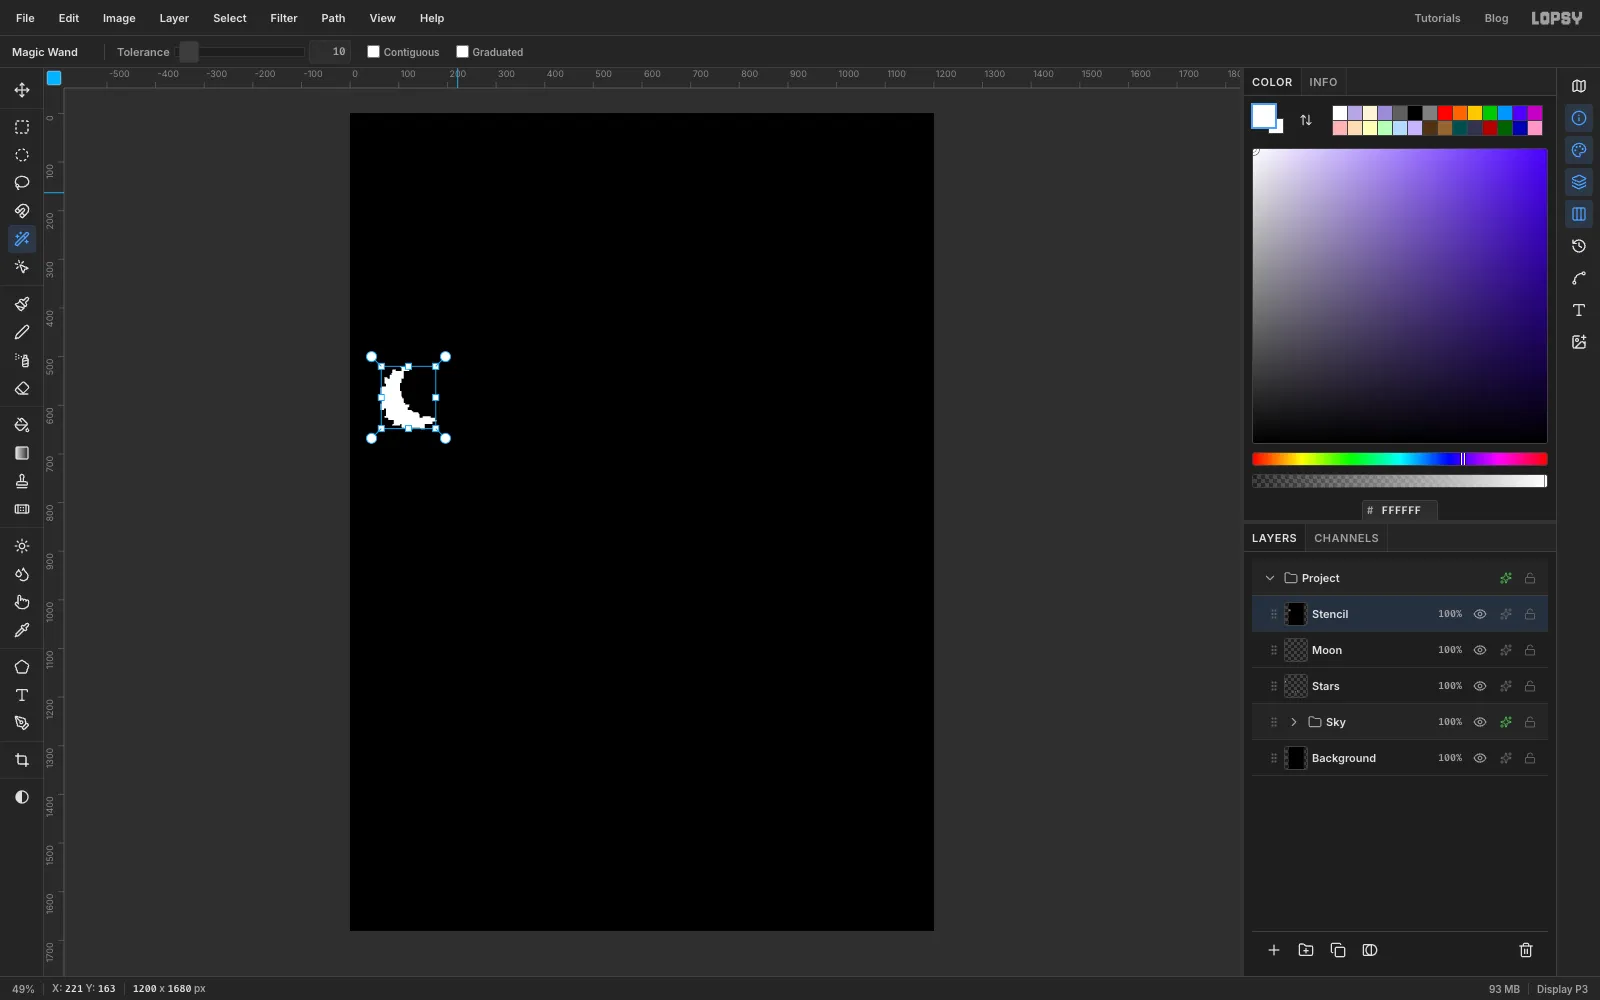
- Choose Filter → Pixelate… with Block Size 8.
- Choose Filter → Threshold… with Level 128. Squares that were more than half covered turn white, and the rest turn black.
- Pick the Magic Wand, set Tolerance to 10, untick Contiguous, and click the white crescent.
You now have a selection whose edges follow the grid. Click the Stencil row and delete it with the trash button. The selection stays.
-
Fill the moon
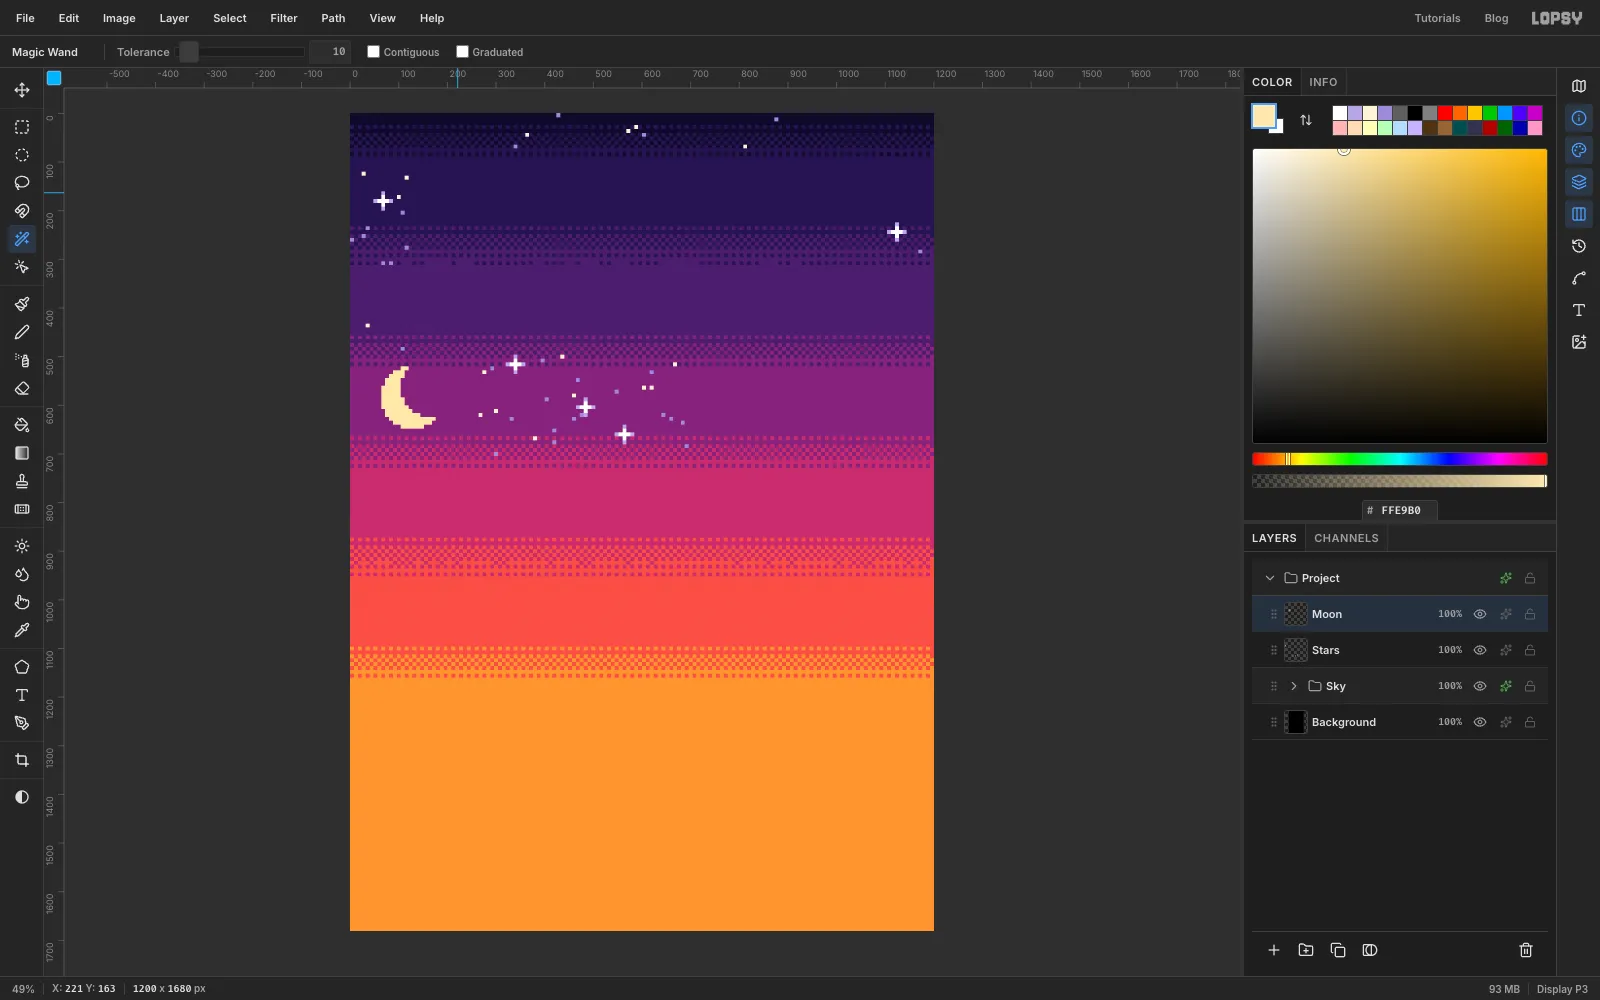
Select the Moon layer, fill the selection with and deselect.
-
Add a mountain range with a lit edge
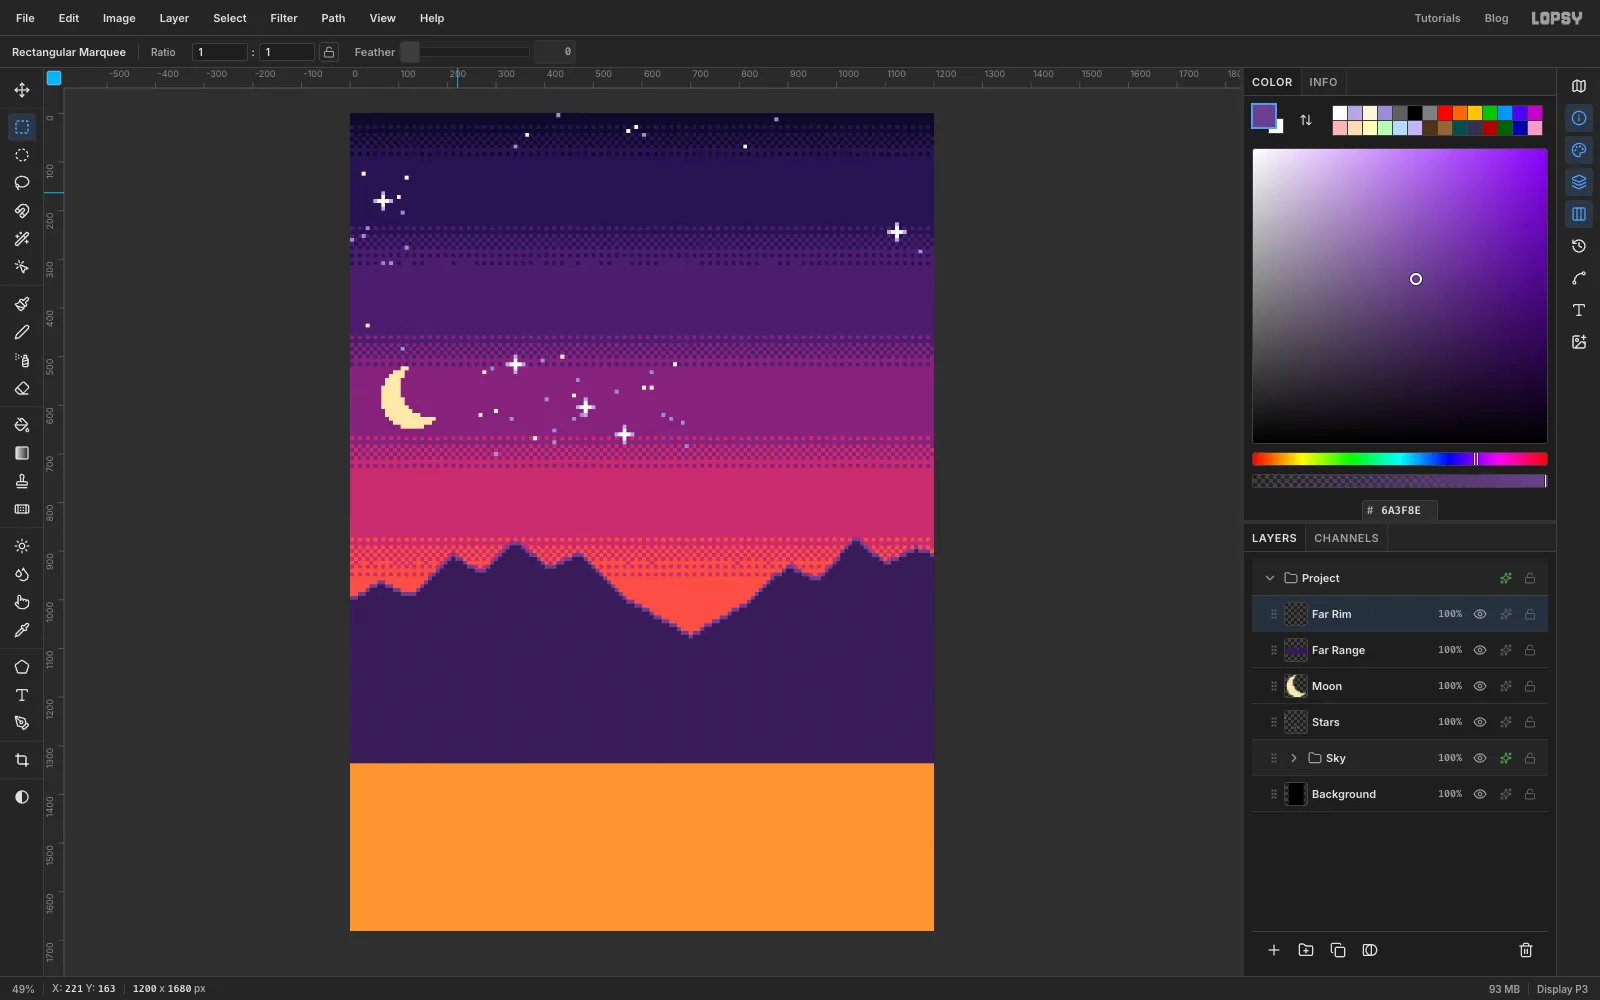
Add a layer named Far Range and stencil a jagged ridge with the Lasso. Start off the left edge a little more than halfway down the canvas, and zigzag across with about eight peaks of different heights. The tallest reach a bit above the 900 px mark on the ruler. Leave a low dip just right of the middle, where the volcano will stand. Come back along a line well below the ridge, at about y 1340. Fill it with .
Now light its top edge. This trick comes back many times:
- Add a layer named Far Rim.
- Cmd-click the Far Range thumbnail to load its shape as a selection, select Far Rim and fill with .
- Cmd-click the Far Range thumbnail again. With the Rectangular Marquee tool active, press Down once. With Snap on, the selection moves exactly one grid square.
- Select Far Rim and press Delete.
Everything the moved selection covers is erased. That leaves a one-pixel line along each column's top edge, the edge light. Press a different arrow to light a different side.
-
Draw the volcano and fill it with a radial gradient
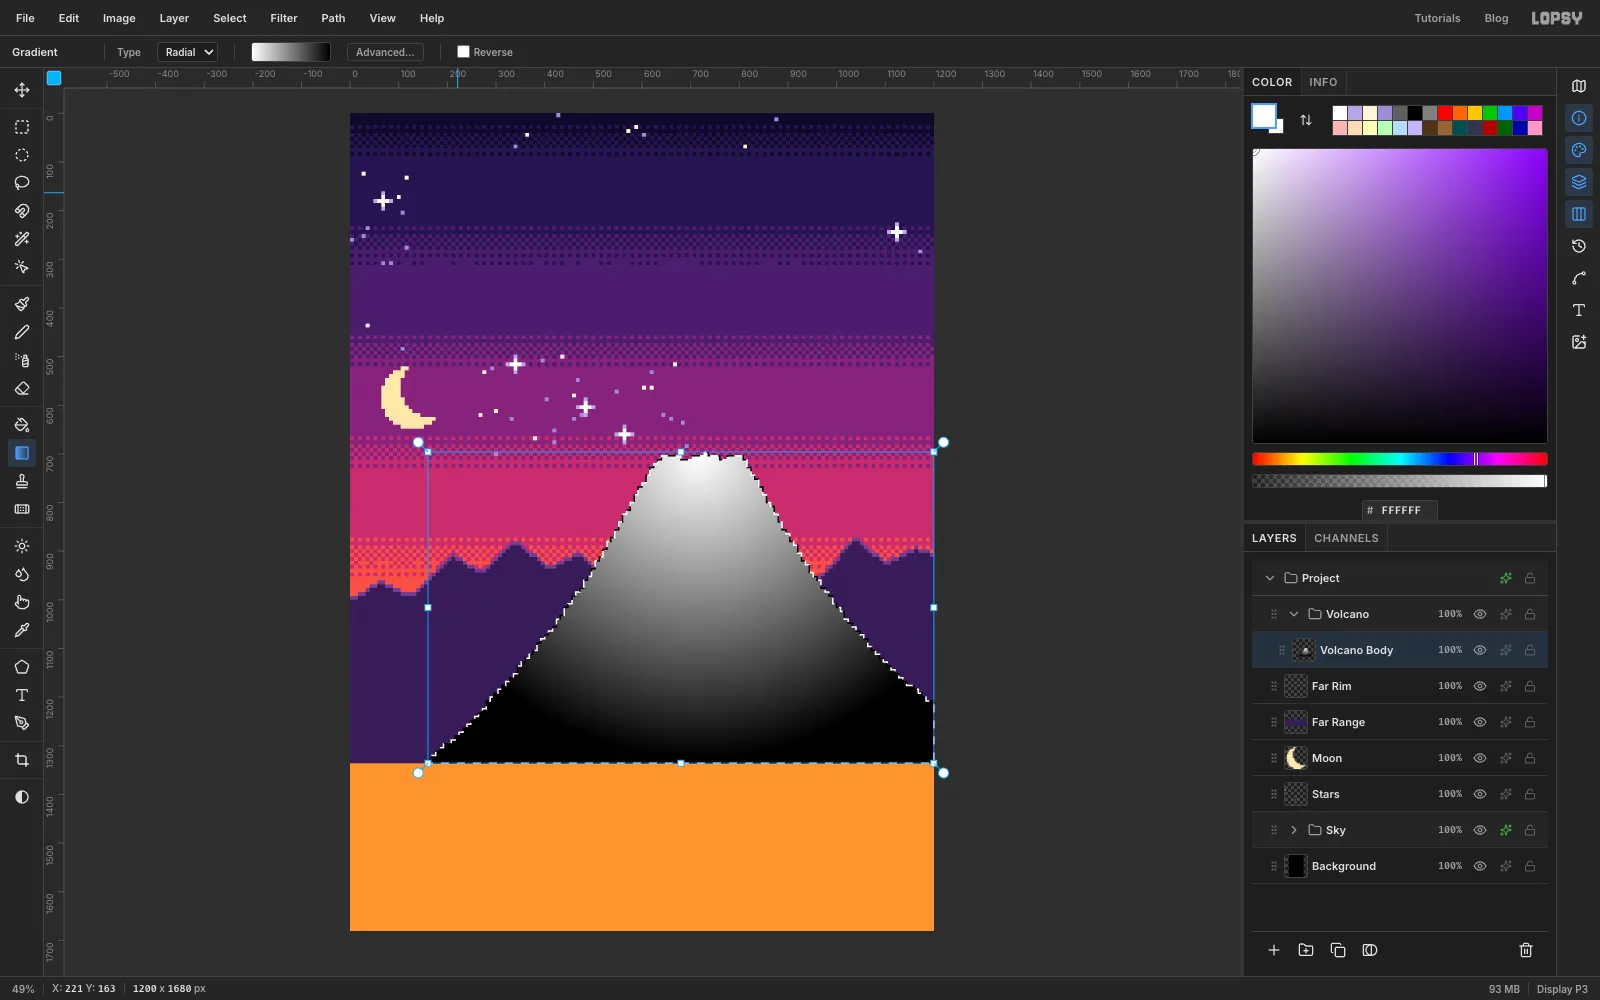
Select Far Rim and click New Group. Name the group Volcano and add a layer inside it named Volcano Body.
Stencil the cone with the Lasso. It's a wide, slightly concave cone with its summit just right of the centre, about 40% of the way down the canvas. Make the summit a ragged flat top about 150 px wide. Run the left flank down to the bottom-left corner area, and the longer right flank off the right edge about three quarters of the way down. Close it along the bottom, below the mountains.
Keep the selection. Select Volcano Body. Set the Gradient tool to Radial with white on the left stop and black on the right, and drag from the centre of the summit about 620 px straight down.
-
Dither the volcano and map it to four colours
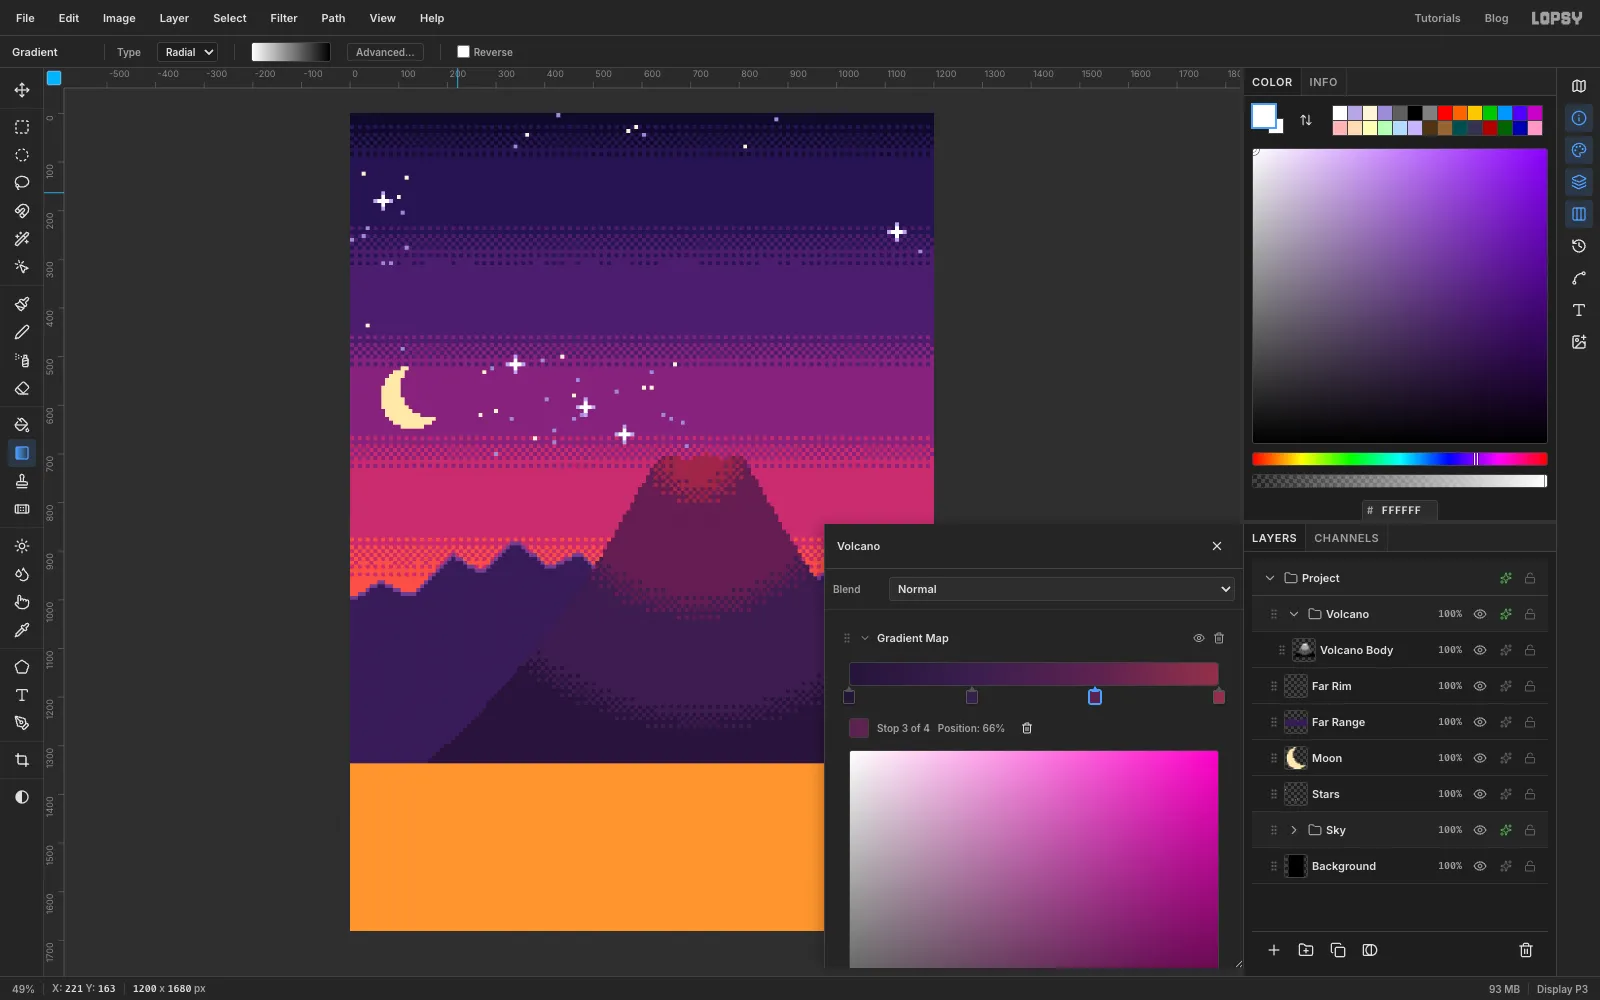
Repeat the sky recipe inside the selection:
- Filter → Pixelate…, Block Size 8.
- Add a layer named Dither, choose Edit → Fill with Pattern… and set the layer's opacity to 10%. The pattern only fills inside the selection.
- Deselect and choose Layer → Merge Down.
- Filter → Posterize… with Levels 4.
Open the Volcano group's Group Adjustments, add a Gradient Map with four stops at 0, 33, 67 and 100%, and set them to , , and . The cone is darkest at its base and glows plum near the crater.
-
Light the volcano's edges
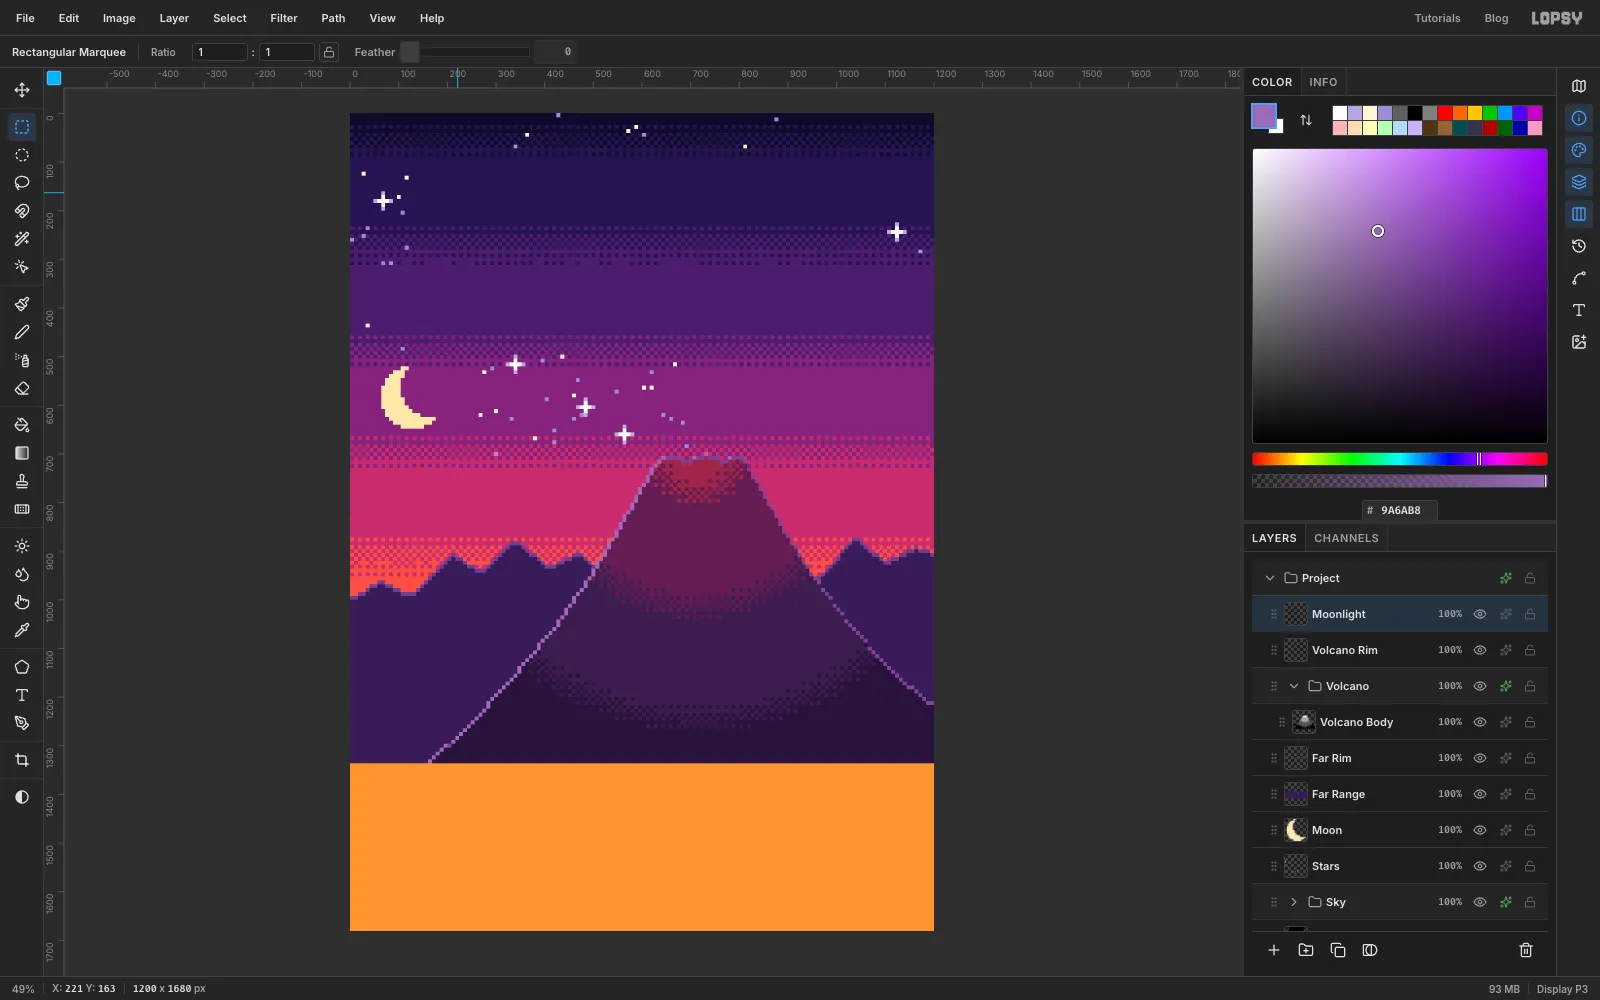
Collapse the Volcano group. With the group selected, add a layer named Volcano Rim and edge-light Volcano Body: Cmd-click its thumbnail and fill, then Cmd-click again, press Down and delete. Use .
The moon is on the left, so add one more layer, Moonlight, and edge-light Volcano Body again. This time press Right and fill with . Moving the selection right leaves only the left-facing edges lit.
-
Paint the lava streams on a stencil
Add a layer named Lava Glow, then another named Lava above it.
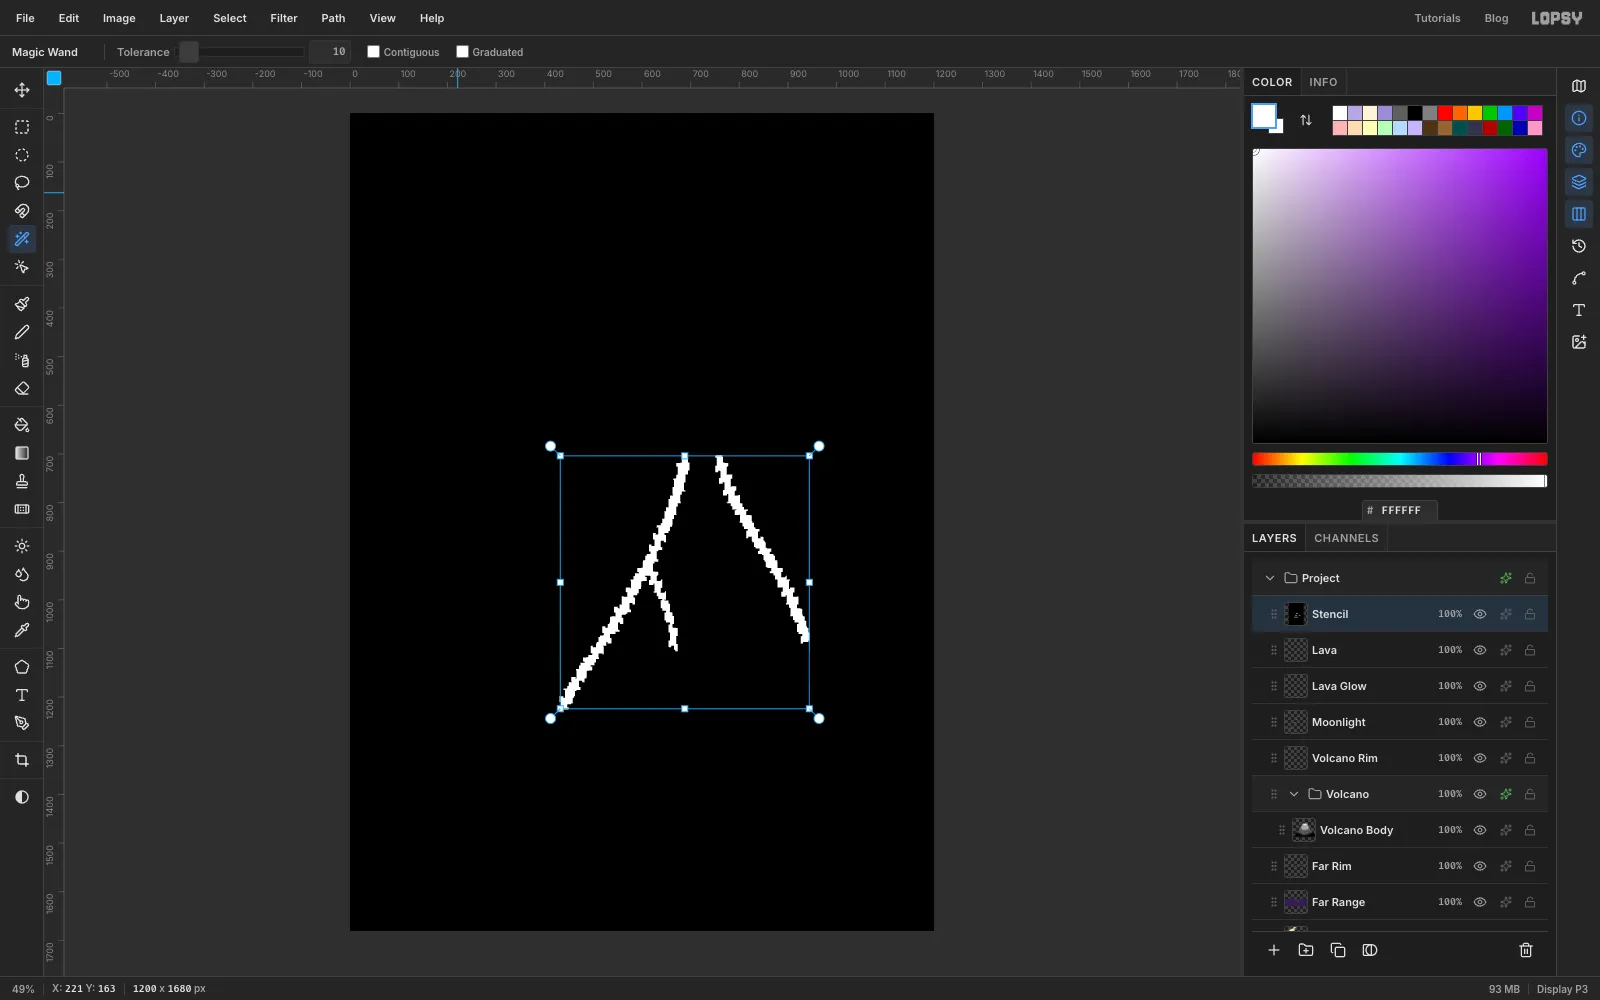
Stencil the streams, but paint the white with the Brush at Size 22 and Hardness 100:
- Drag one stream from the left side of the crater down and to the left, wobbling slightly, and stop about two thirds of the way to the volcano's foot.
- Drag a second from the right side of the crater down and to the right, stopping a little higher than the first.
- Set the size to 16 and drag a short branch off the first stream, about halfway down.
Pixelate, Threshold and Magic Wand as usual, delete the stencil, then fill the Lava layer with .
-
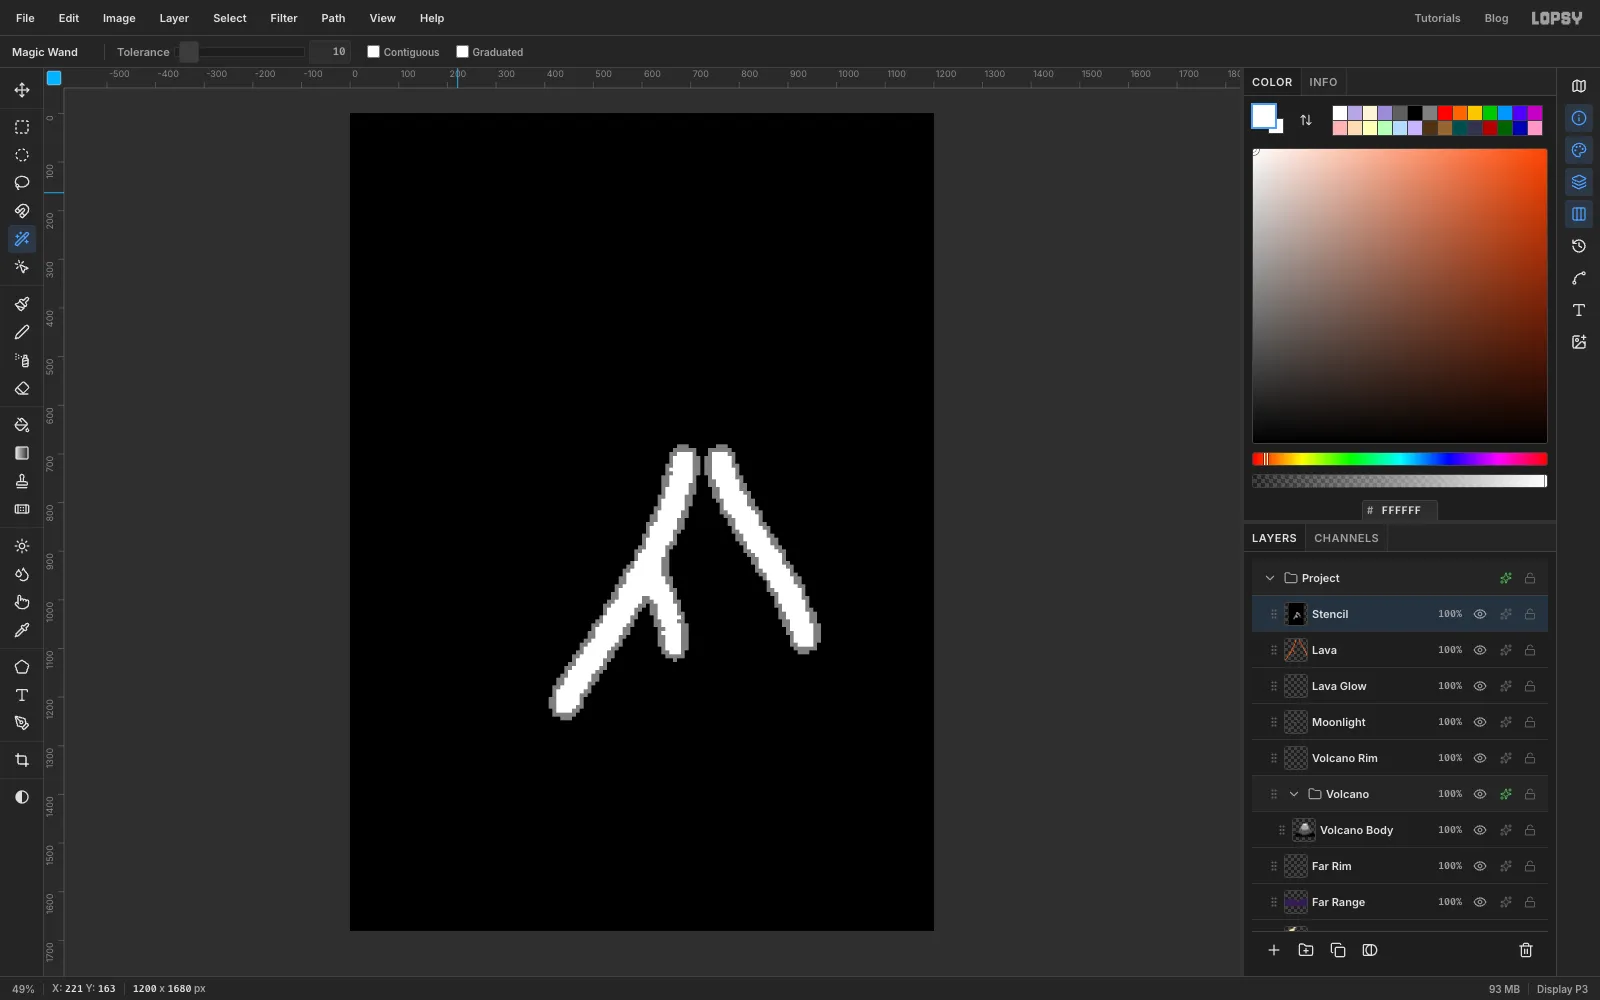
Make a stepped glow stencil
A soft Outer Glow would look out of place on pixel art, so build a stepped one instead:
- With Lava selected, add a layer named Stencil and fill it black.
- Cmd-click the Lava thumbnail and choose Select → Grow… with 16 px.
- Select Stencil, fill with white and deselect.
- Filter → Gaussian Blur… with Radius 20, then Pixelate at 8.
- Add the dither pattern at 12% and Merge Down, as before.
- Posterize with Levels 3.
You end up with three values: black, a mid-grey halo and a white core around each stream.
-
Fill the glow and light the streams
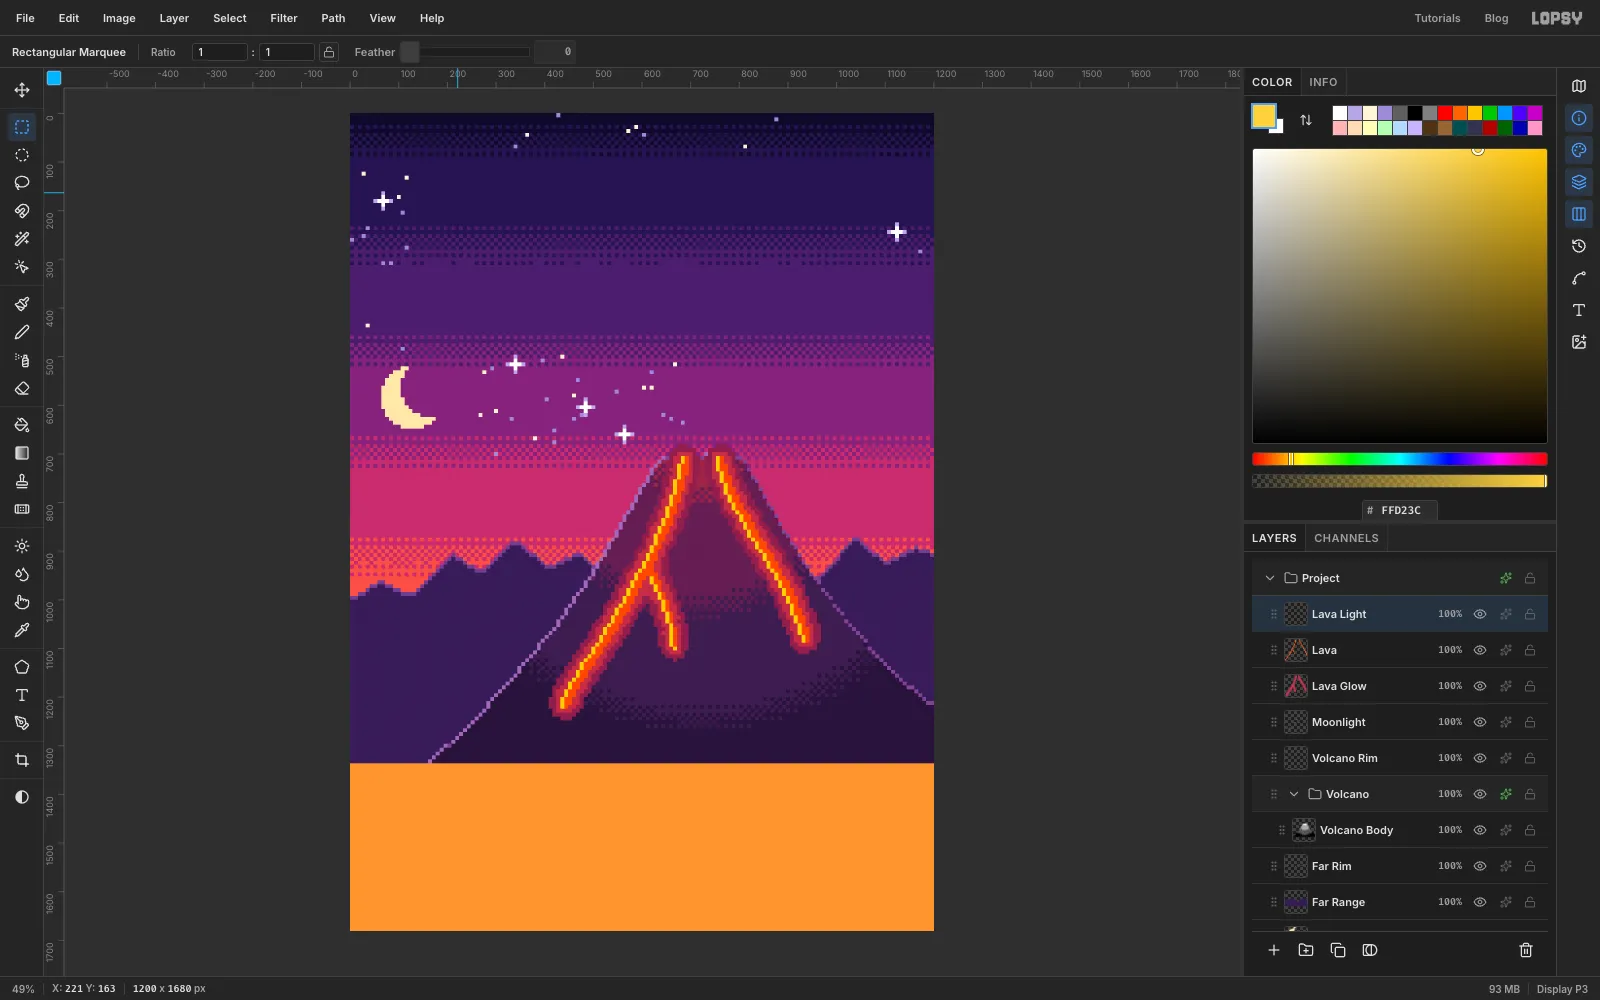
With the Magic Wand (Contiguous still off), click a mid-grey square of the halo, select Lava Glow and fill with . Deselect, go back to Stencil, click the white core, select Lava Glow and fill with . Then delete the stencil. The Lava layer sits above the glow, so only the parts outside the streams show.
Add a layer named Lava Light and edge-light the Lava shape with Right, filling with . Every stream gets a bright left edge.
-
Set the crater into the summit
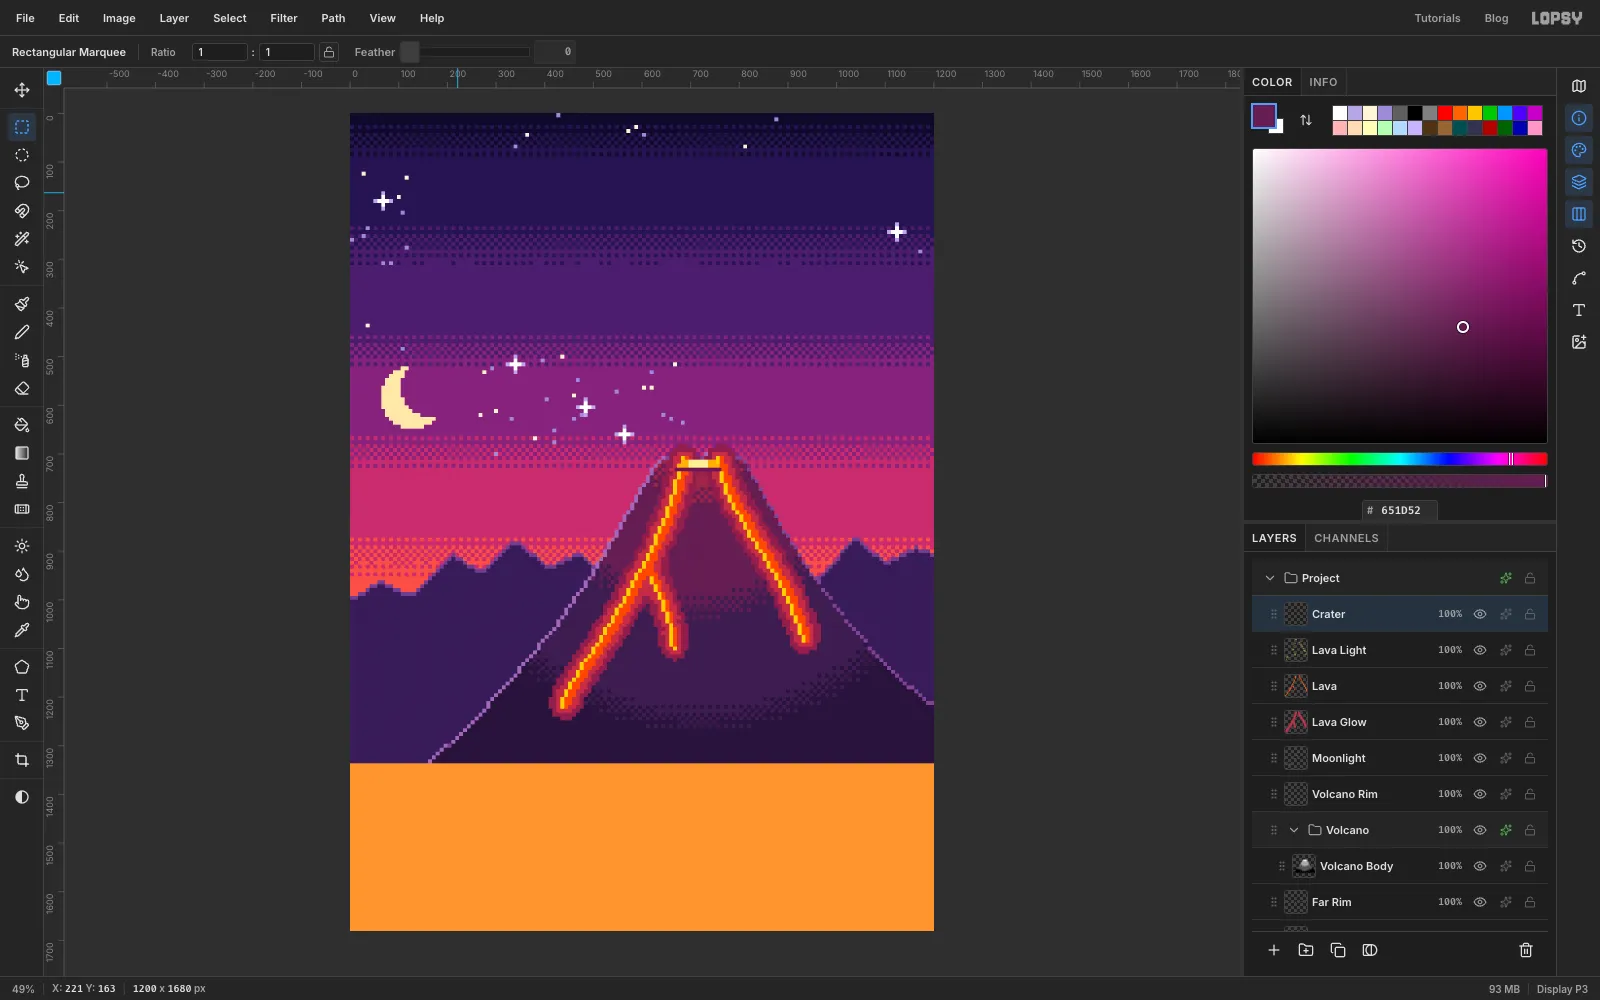
Add a layer named Crater:
- Stencil an ellipse about 88 × 20 px, set just inside the summit, and fill it with .
- Stencil a smaller ellipse, about 52 × 10 px, in the same place and fill it with .
- With the Rectangular Marquee, select a strip 96 × 8 px under the pool, from about 667, 728 to 763, 736. Fill it with .
That dark front lip makes the glow sit inside the peak instead of on top of it.
-
Taper the streams and add embers
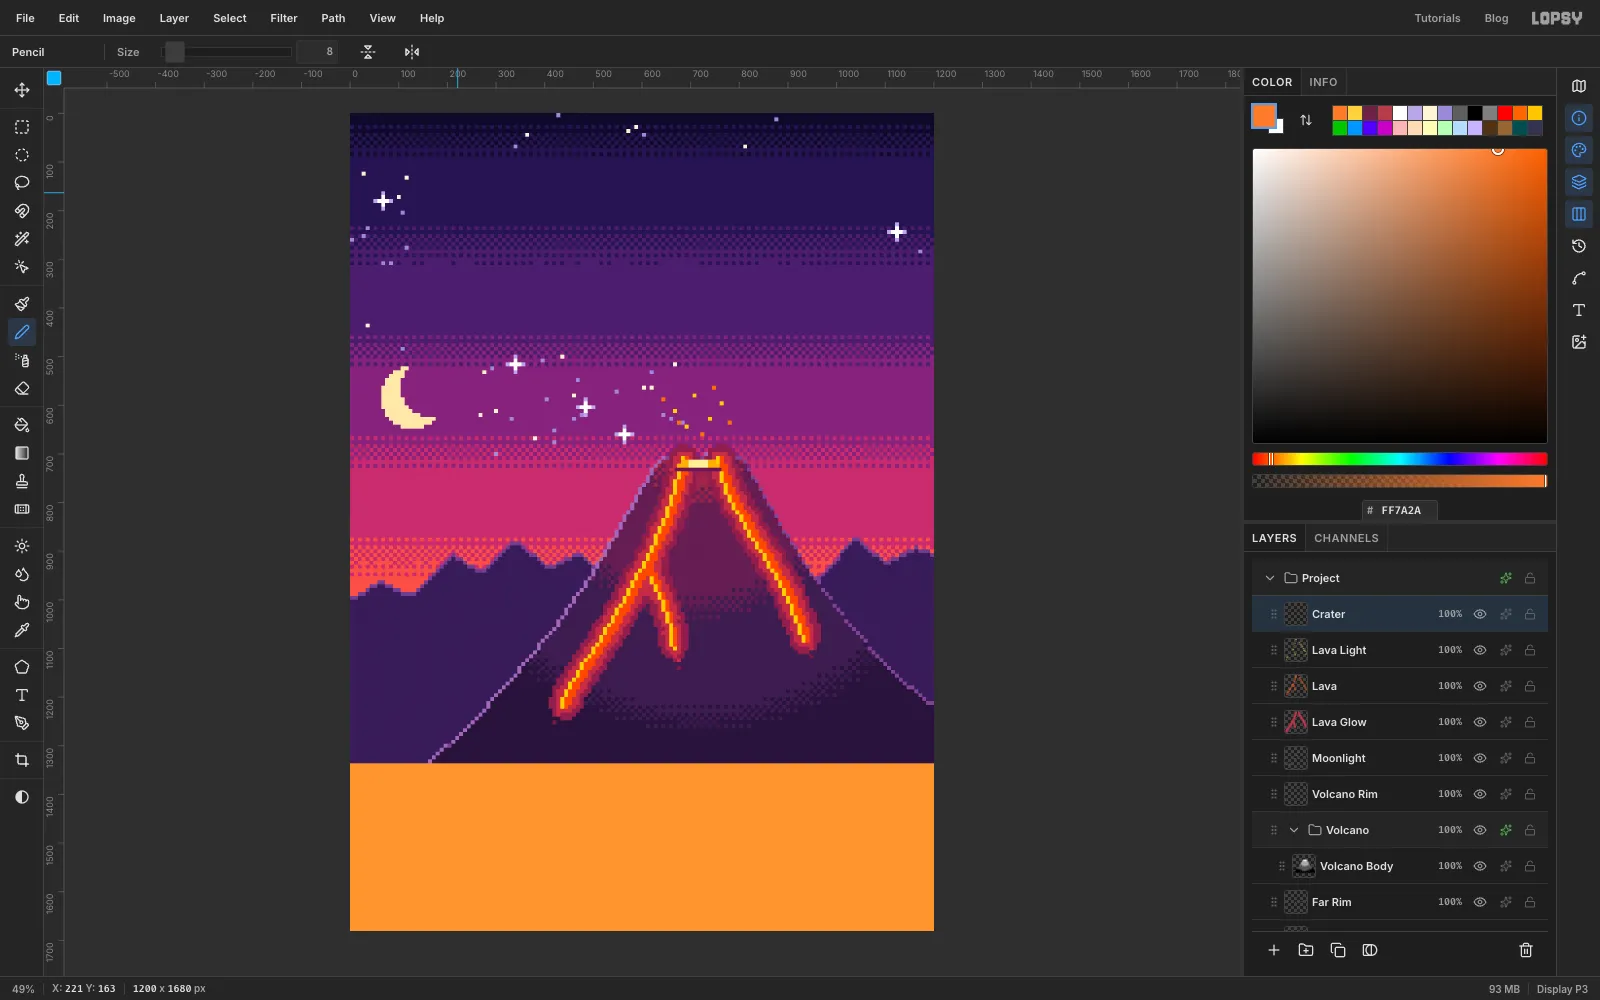
Select the Lava layer and pick the Pencil (Size 8). Where each stream ends, carry on in the same direction with two pixels, then one pixel. The streams now fade out instead of stopping with a flat cut.
Select Crater and click a handful of embers into the sky just above the crater: about five in and five in .
-
Rough out the smoke with overlapping ovals
With Crater selected, click New Group. Name the group Plume and add a layer named Plume Body inside it. Then add another layer above it named Puffs.
With the Elliptical Marquee, drag an oval just above the crater. Hold Shift and drag three more, each a little bigger, higher and further right, so they climb up and to the right. Fill with white.
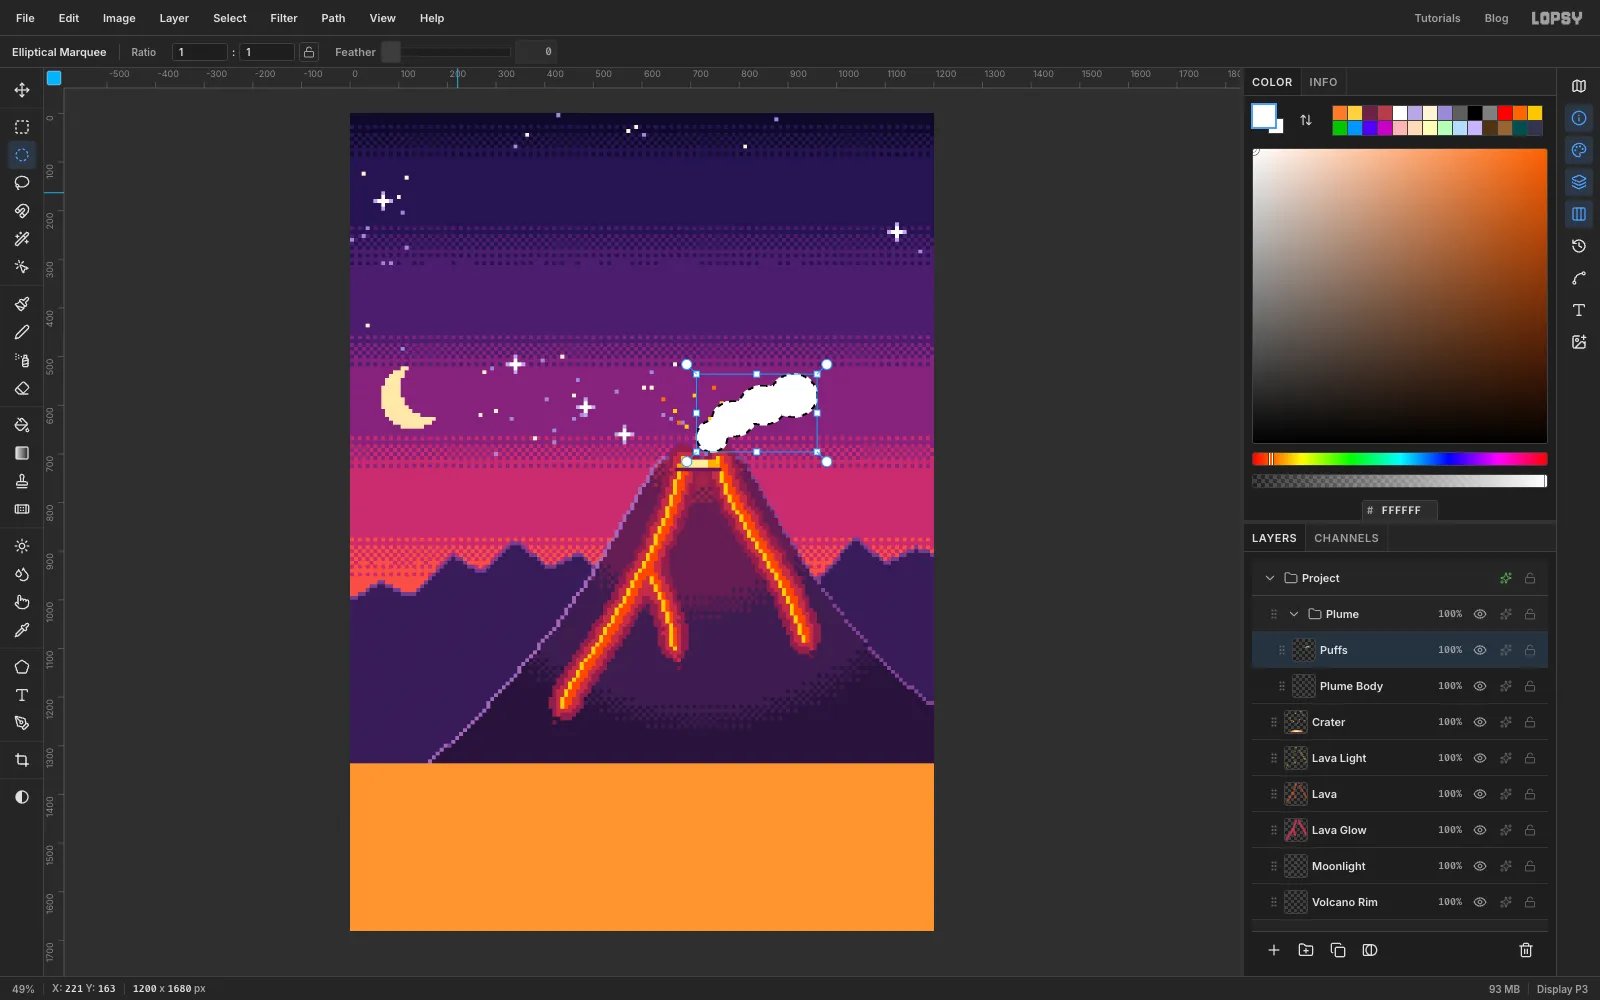
-
Copy, scale and rotate the puffs
Draw a Rectangular Marquee around the four ovals, then press Cmd+C and Cmd+V. The copy pastes in place on a new layer, but with no selection, so the Move tool has no handles to grab. Draw the same marquee again over the copy, then switch to the Move tool:
- Hold Cmd and drag the top-right corner handle outwards until the copy is about a third bigger.
- Drag the round rotation handle just outside a corner to tilt the copy about 14° anticlockwise.
- Drag the copy up and to the right so it carries on from the first cluster and runs off the right edge.
Keep the smoke clear of the row where the subtitle will go, a band about 450 to 500 px down. Press Cmd+D, then Layer → Merge Down into Puffs.
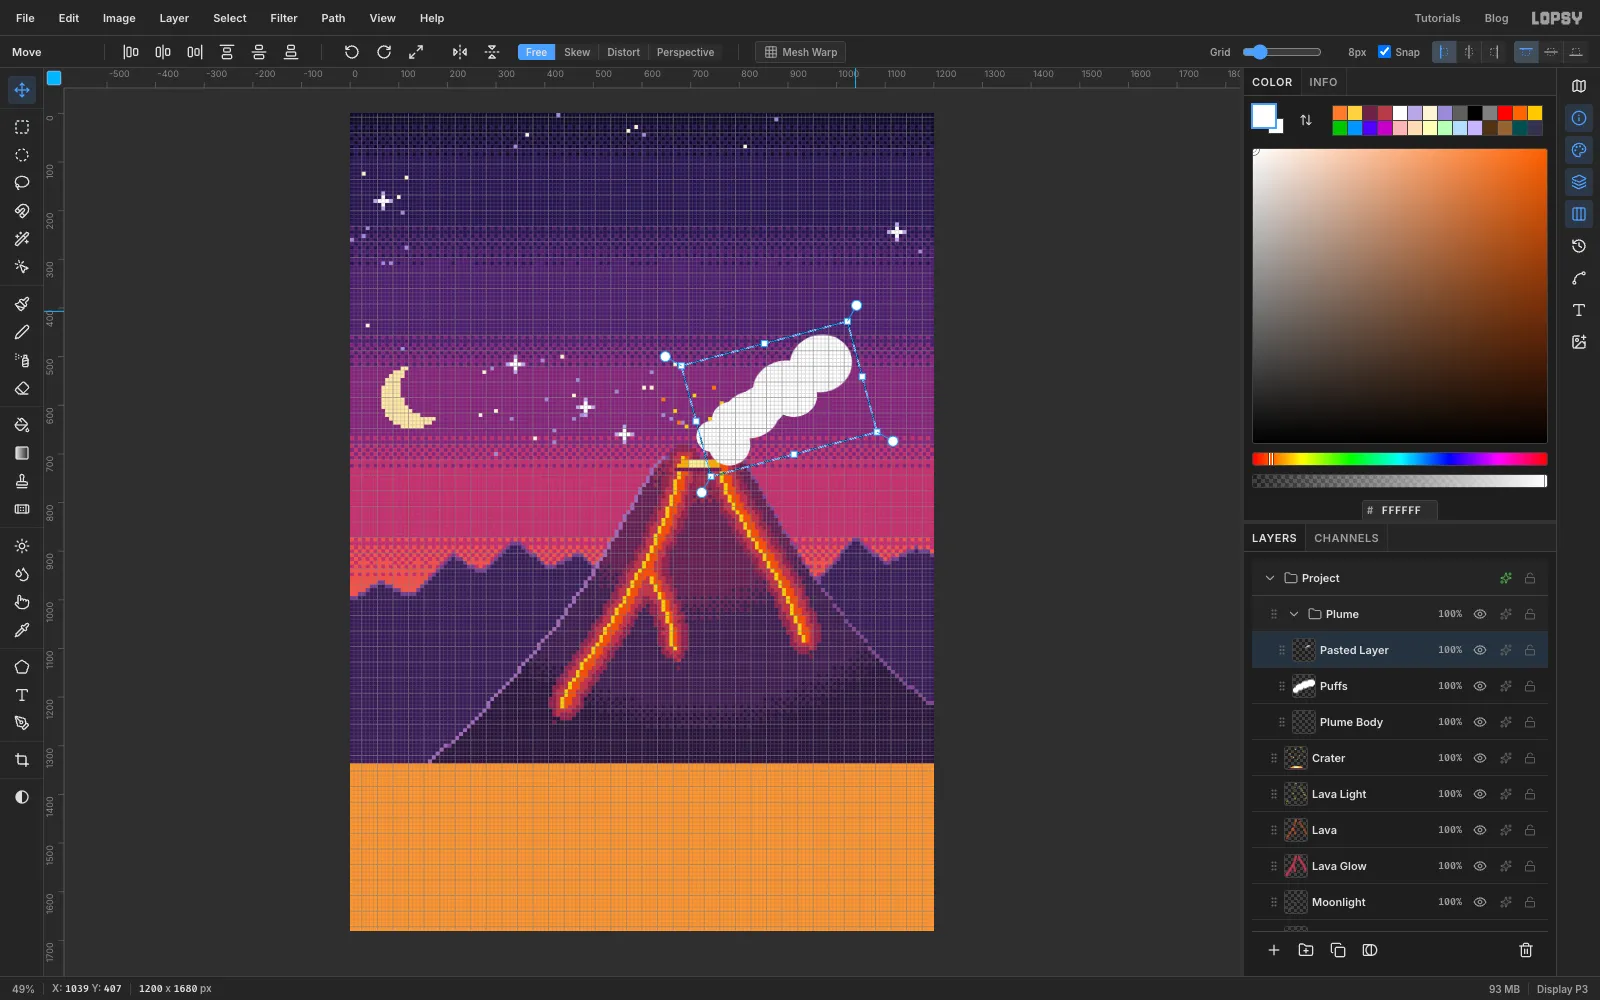
-
Stencil the smoke
The puffs are already on their own layer, so make the stencil underneath them. Select Plume Body and add a layer named Stencil. It lands between Plume Body and Puffs. Fill it black, select Puffs and choose Merge Down. The white puffs drop onto the black.
Pixelate at 8, Threshold at 128 and Magic Wand the white as usual, then delete the stencil.
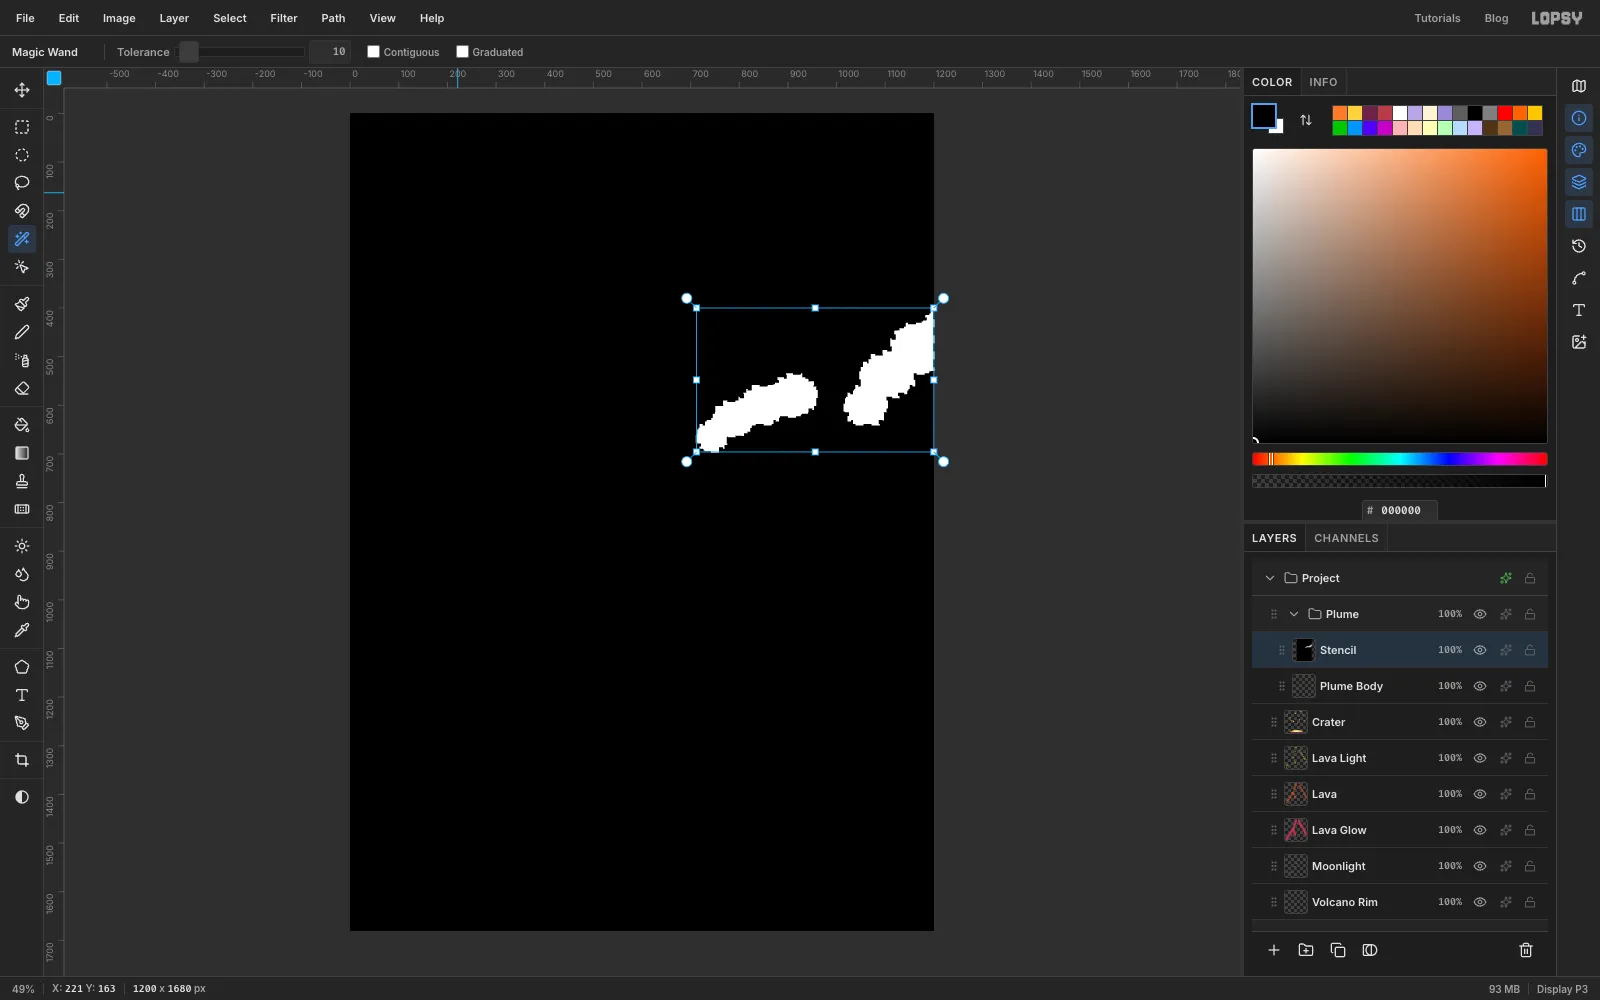
-
Shade the smoke with three dithered tones
Keep the selection and select Plume Body. Drag a Linear gradient from white near the crater to black at the top right. Then:
- Pixelate at 8.
- Add the dither pattern at 12% and Merge Down.
- Deselect and Posterize to 3 levels.
In the Plume group's Group Adjustments, add a Gradient Map with stops at 0, 50 and 100%: , and . The underside now glows pink in the lava light. Collapse the group.
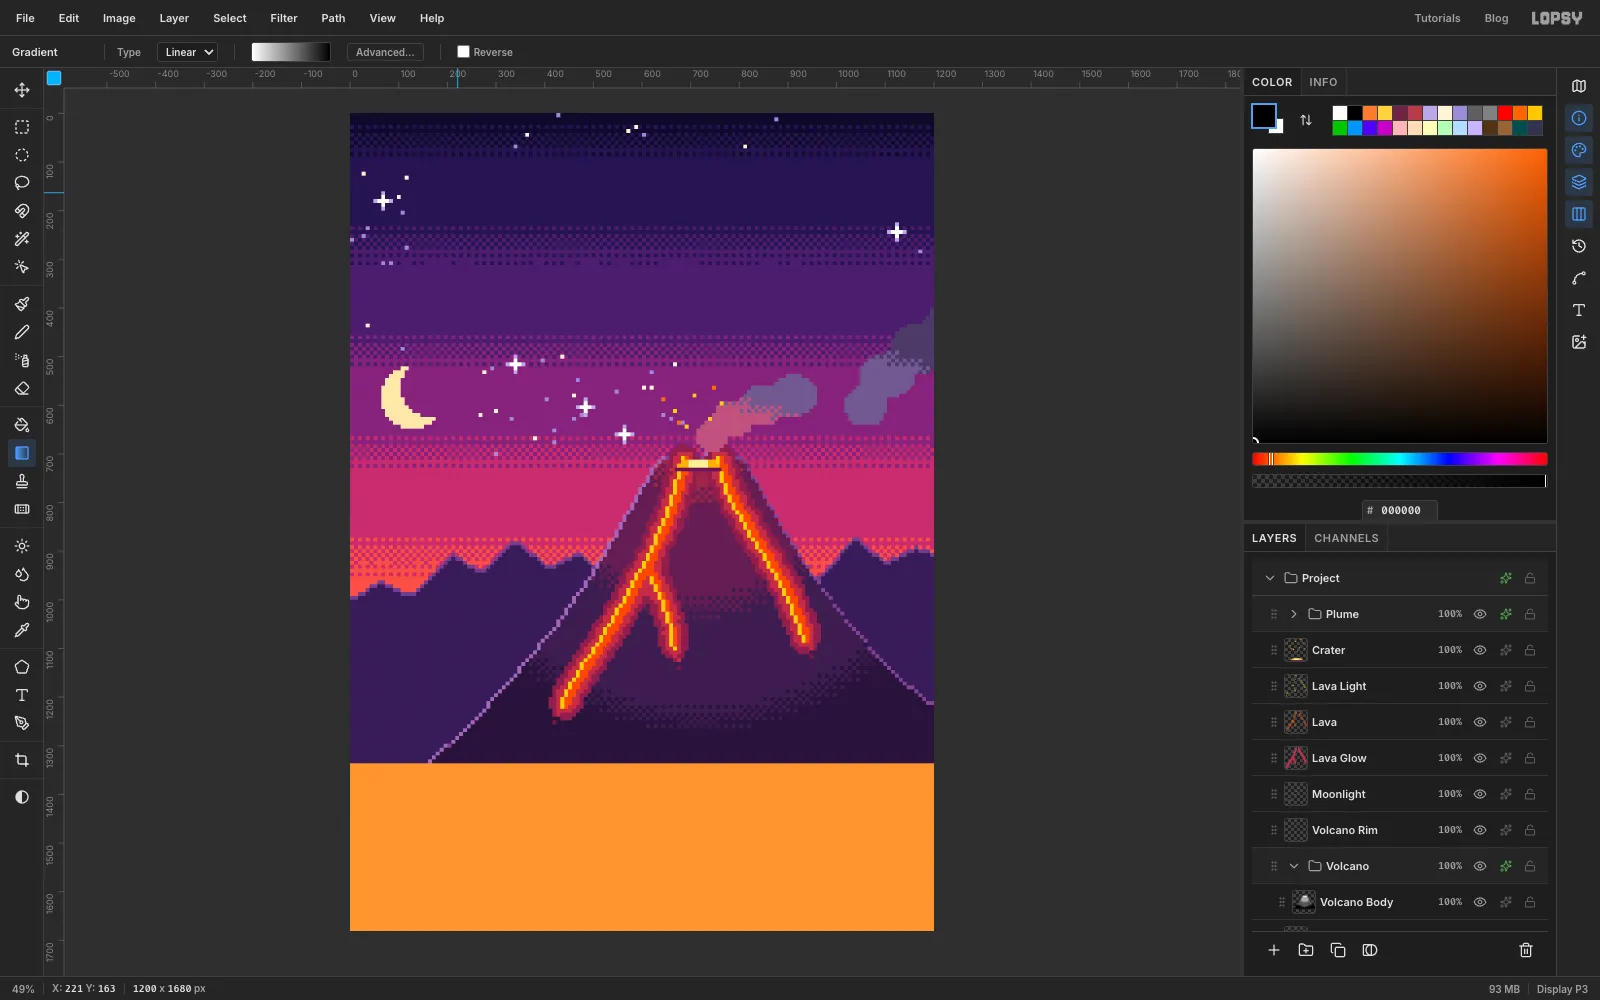
-
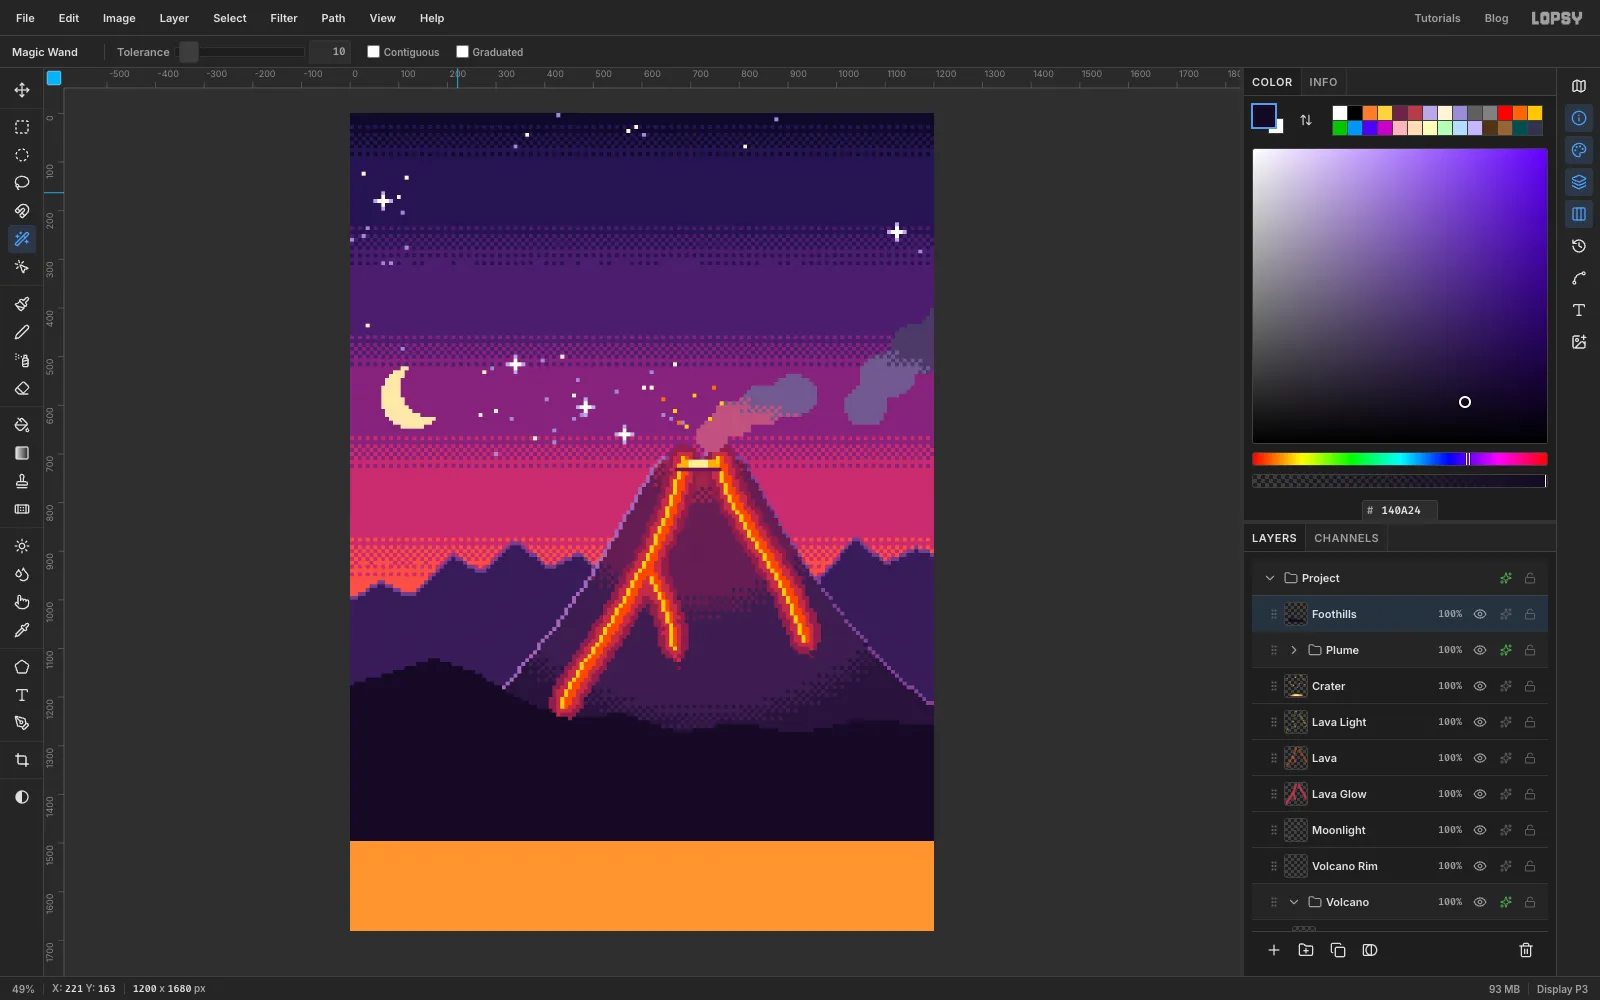
Roll out the foothills
Select the Plume group and add a layer named Foothills. Stencil a band of rolling hills with the Lasso:
- Start off the left edge a little below the mountains.
- Rise to a rounded hilltop about 170 px in, where the hiker's backdrop will be.
- Roll down and to the right in gentle bumps, crossing the foot of the volcano.
- Close the shape low down, well below where the ledge will start.
Fill it with , the darkest colour on the cover. Against it, the volcano's base and the hiker both stand out.
-
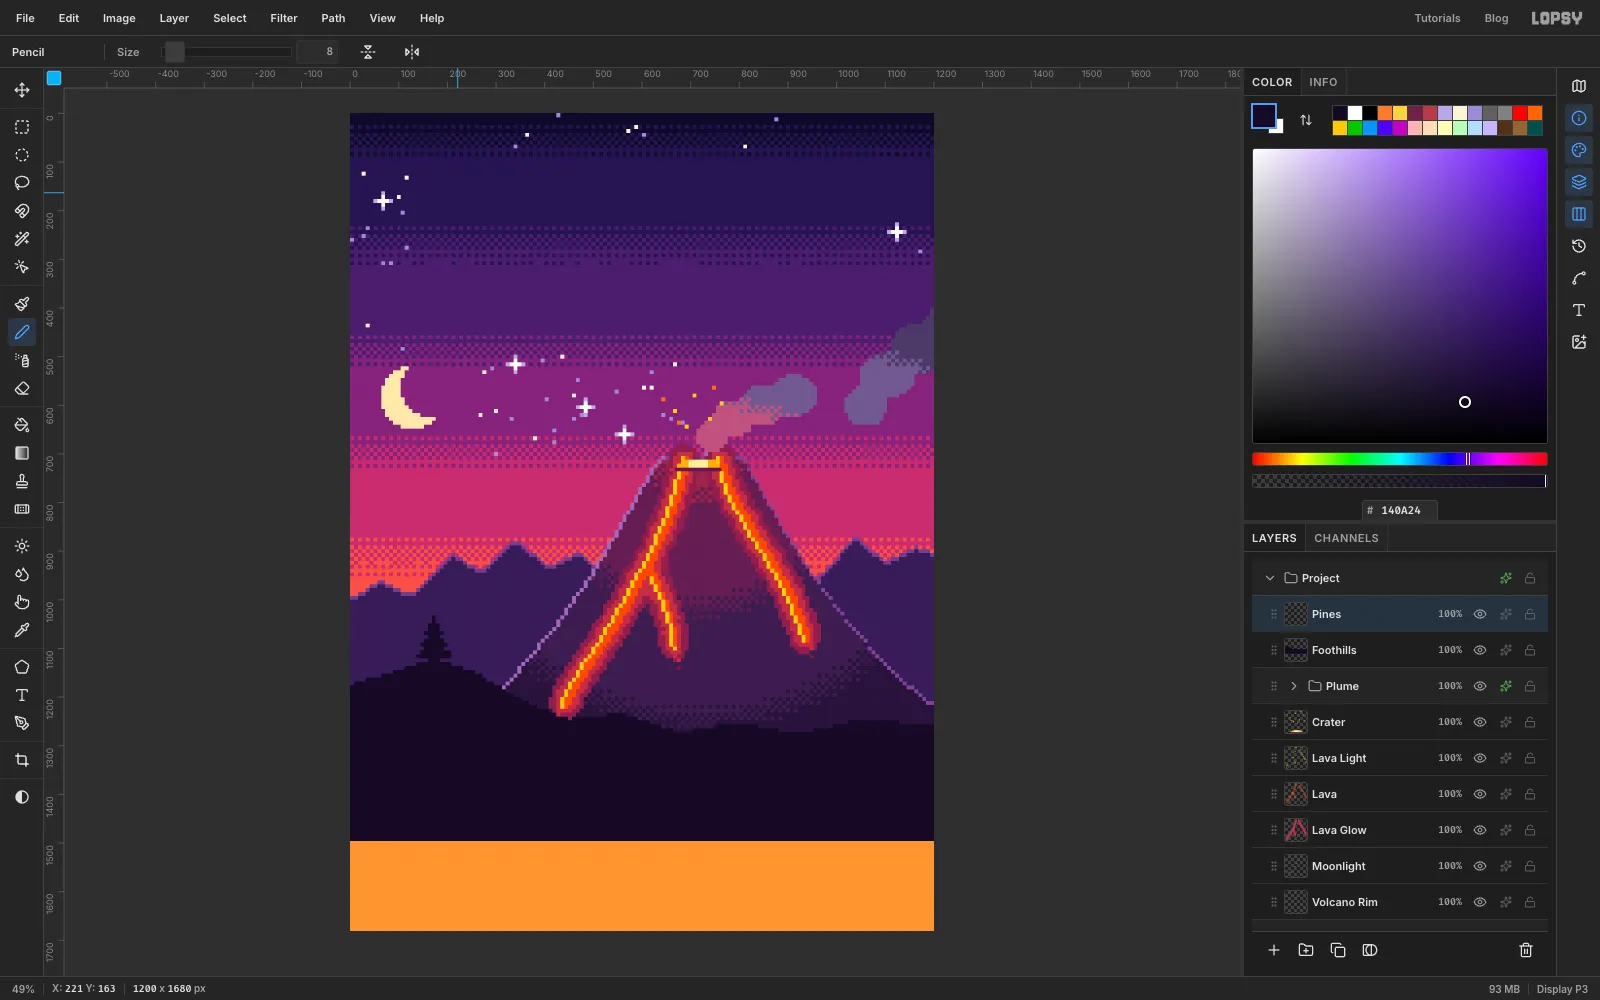
Draw a pine tree pixel by pixel
Add a layer named Pines. With the Pencil (Size 8) in , draw a pine 9 pixels wide and 12 tall on the left hilltop. Draw each row with a click and a Shift-click. Counting columns 1–9 from the left, the rows from the top are:
- A one-pixel tip in column 5, two rows tall.
- Two rows 3 wide (columns 4–6).
- A row 5 wide (3–7).
- A row 3 wide (4–6), which makes a notch.
- Rows 5 wide (3–7), then 7 wide (2–8), then 5 wide (3–7).
- A row 8 wide that hangs to the right (2–9).
- The full 9-wide base.
- A one-pixel trunk in column 4, slightly off-centre.
The longer bough and the off-centre trunk make the tree lopsided on purpose, so mirrored copies look different.
-
Copy the pine along the ridge
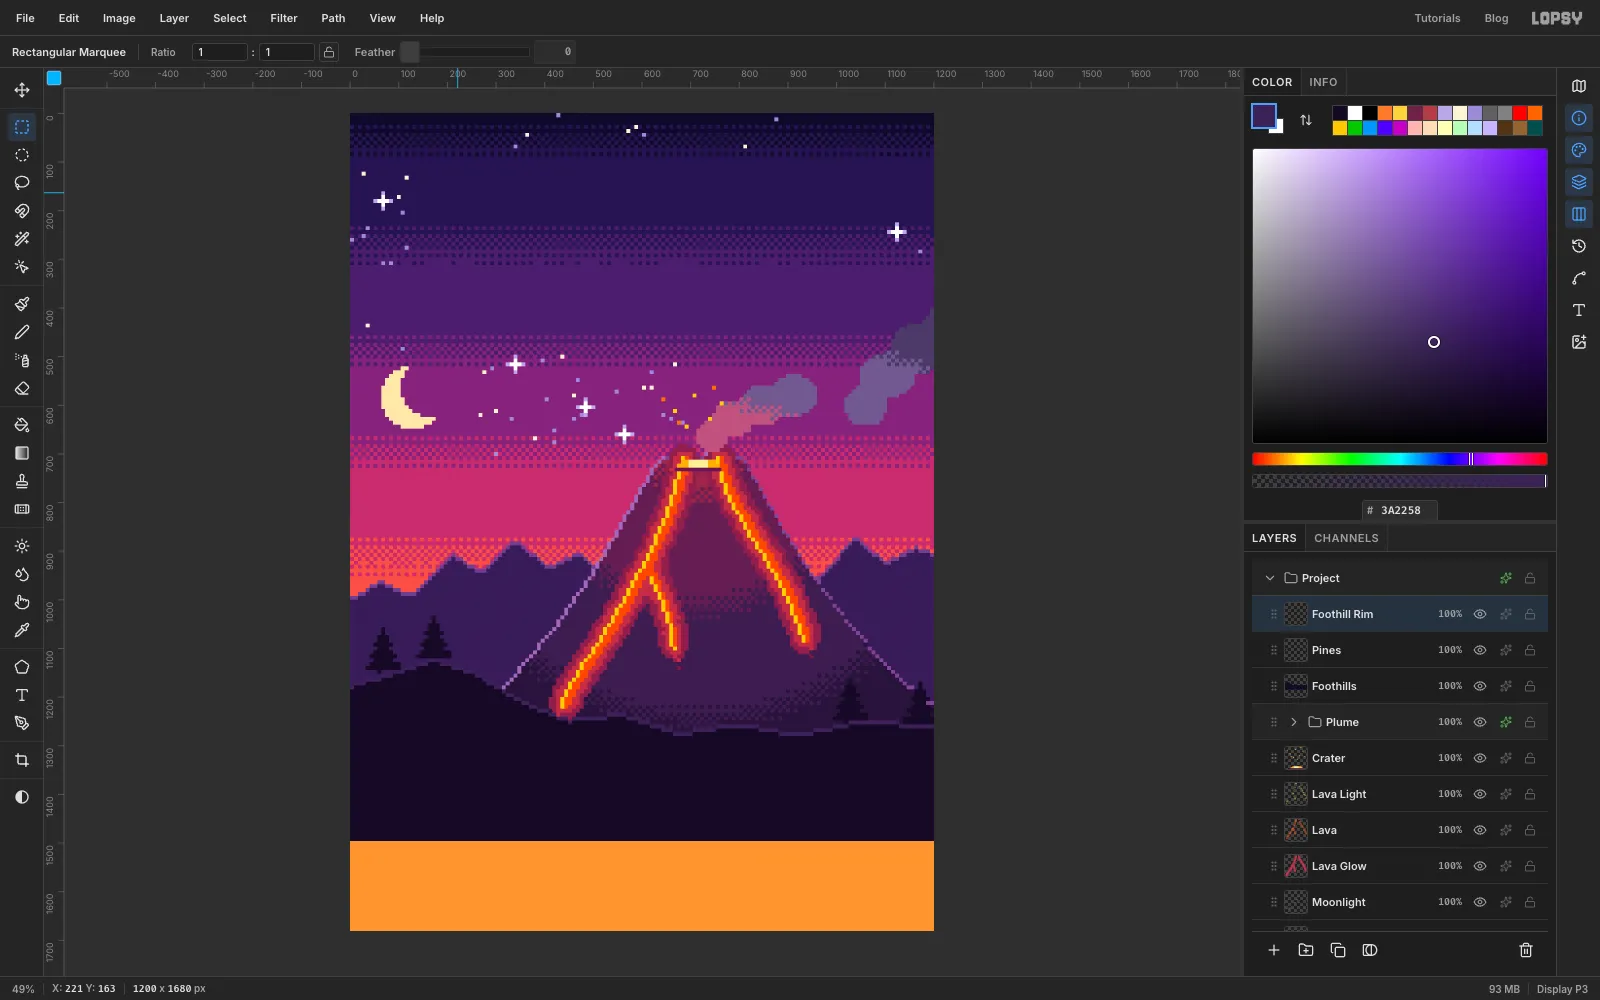
Draw a marquee around the pine, press Cmd+C and Cmd+V, and drag the copy with the Move tool to another spot, standing on the hill line. Press Cmd+D and Merge Down. Make three copies: one just left of the first, and two on the right-hand hills. Before merging the last one, choose Image → Flip Horizontal to mirror it.
Add a layer named Foothill Rim and edge-light the Foothills with Down in .
-
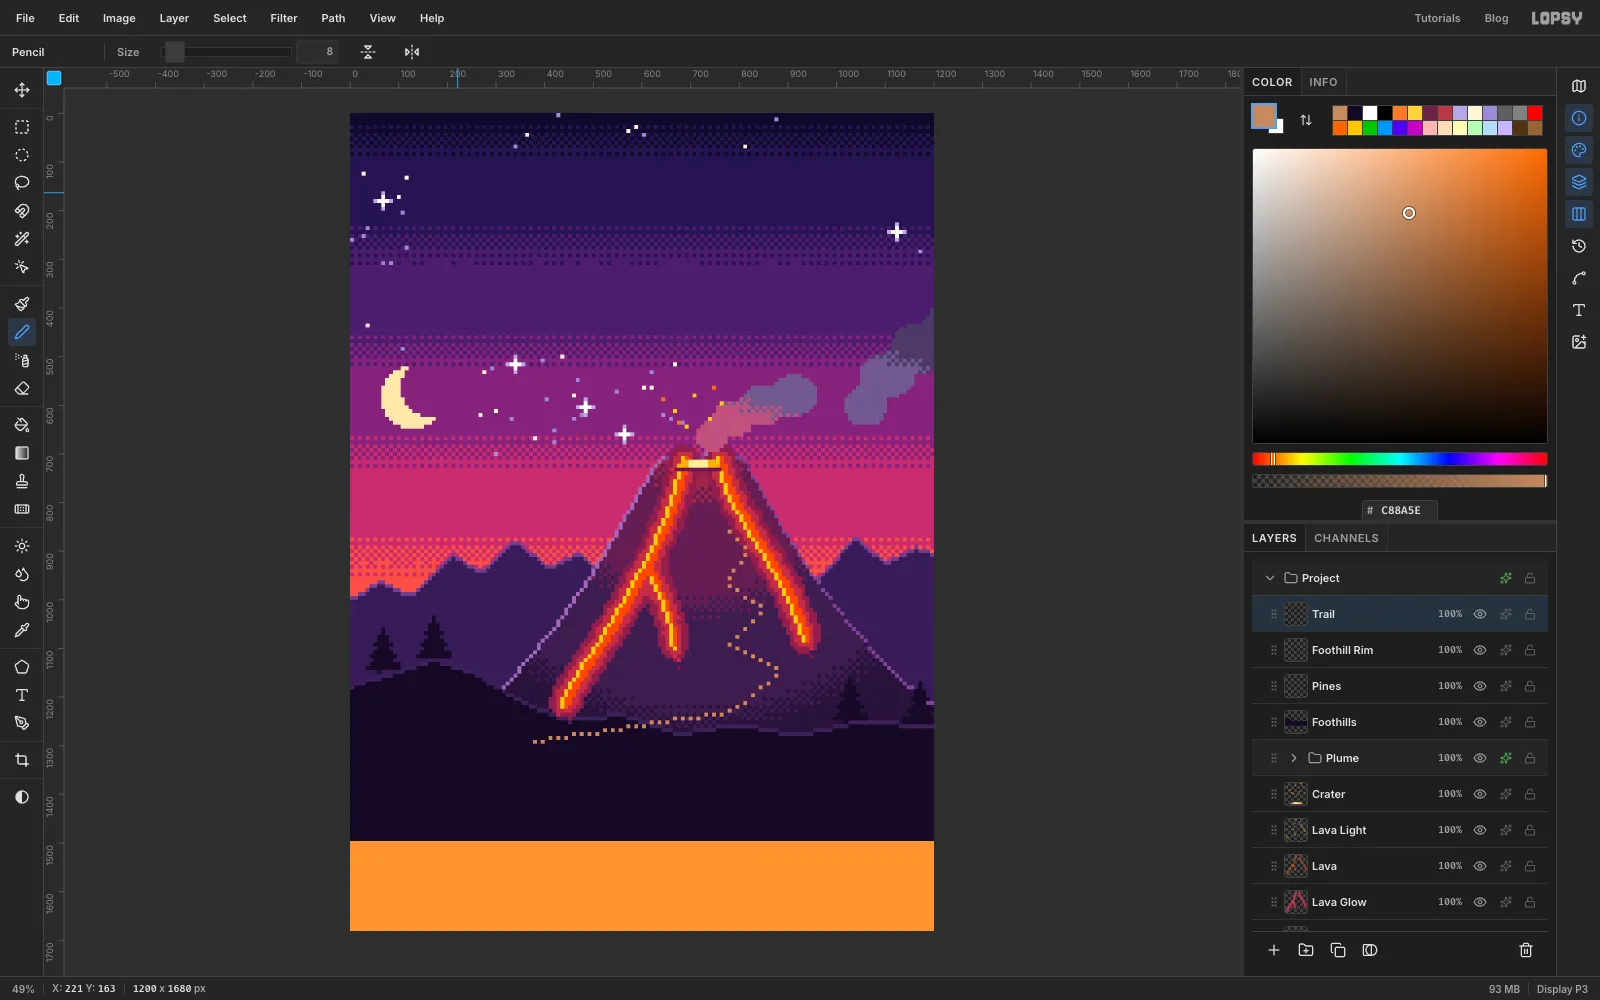
Dot a switchback trail up the slope
Add a layer named Trail. With the Pencil in , click every other grid square to make a dashed path:
- Start at the right end of the flat hilltop on the left. That's where the ledge will stop, about 1290 px down.
- Run gently up and right across the foothills to below the volcano's centre.
- Zigzag up the flank in four switchbacks between the two long lava streams, ending about halfway up the cone.
-
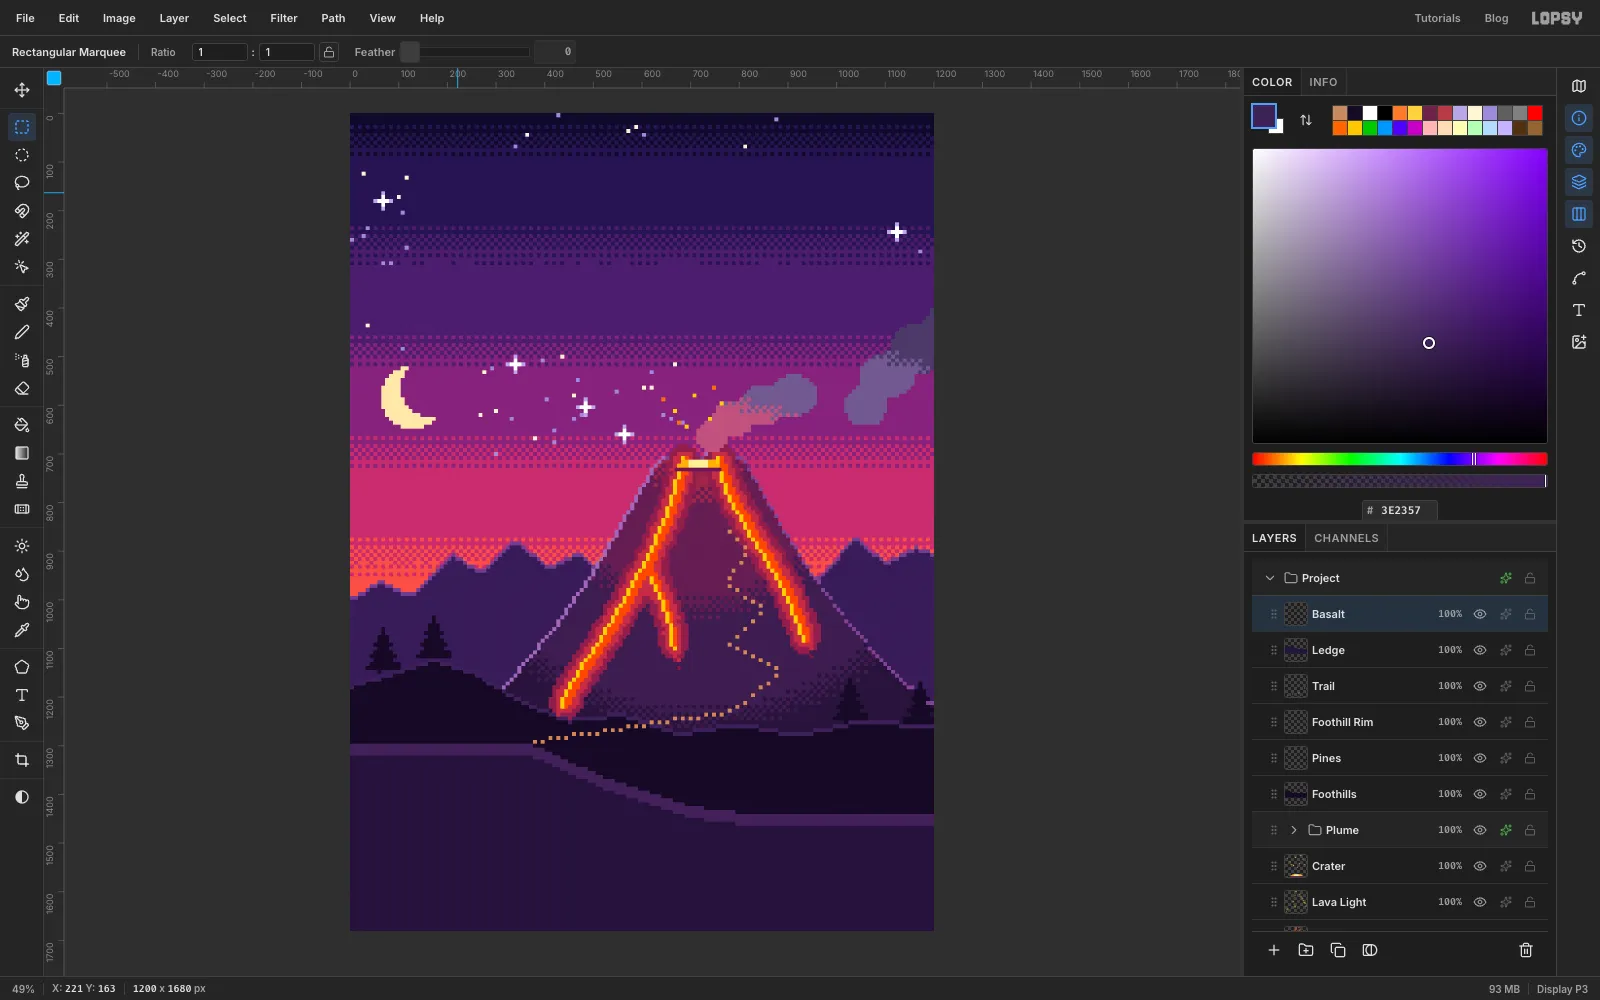
Lay down the ledge and its lit tops
Add a layer named Ledge and stencil the ground with the Lasso:
- Draw a flat top 1296 px down, from the left edge to about a third of the way across.
- Slope it down to the right until it is about 1440 px down at two thirds of the way across.
- Run it level to the right edge, then close it along the bottom of the canvas.
Fill it with . Then add a layer named Basalt and edge-light the Ledge with Down pressed three times, in . That gives every column of rock a three-pixel lit top face.
-
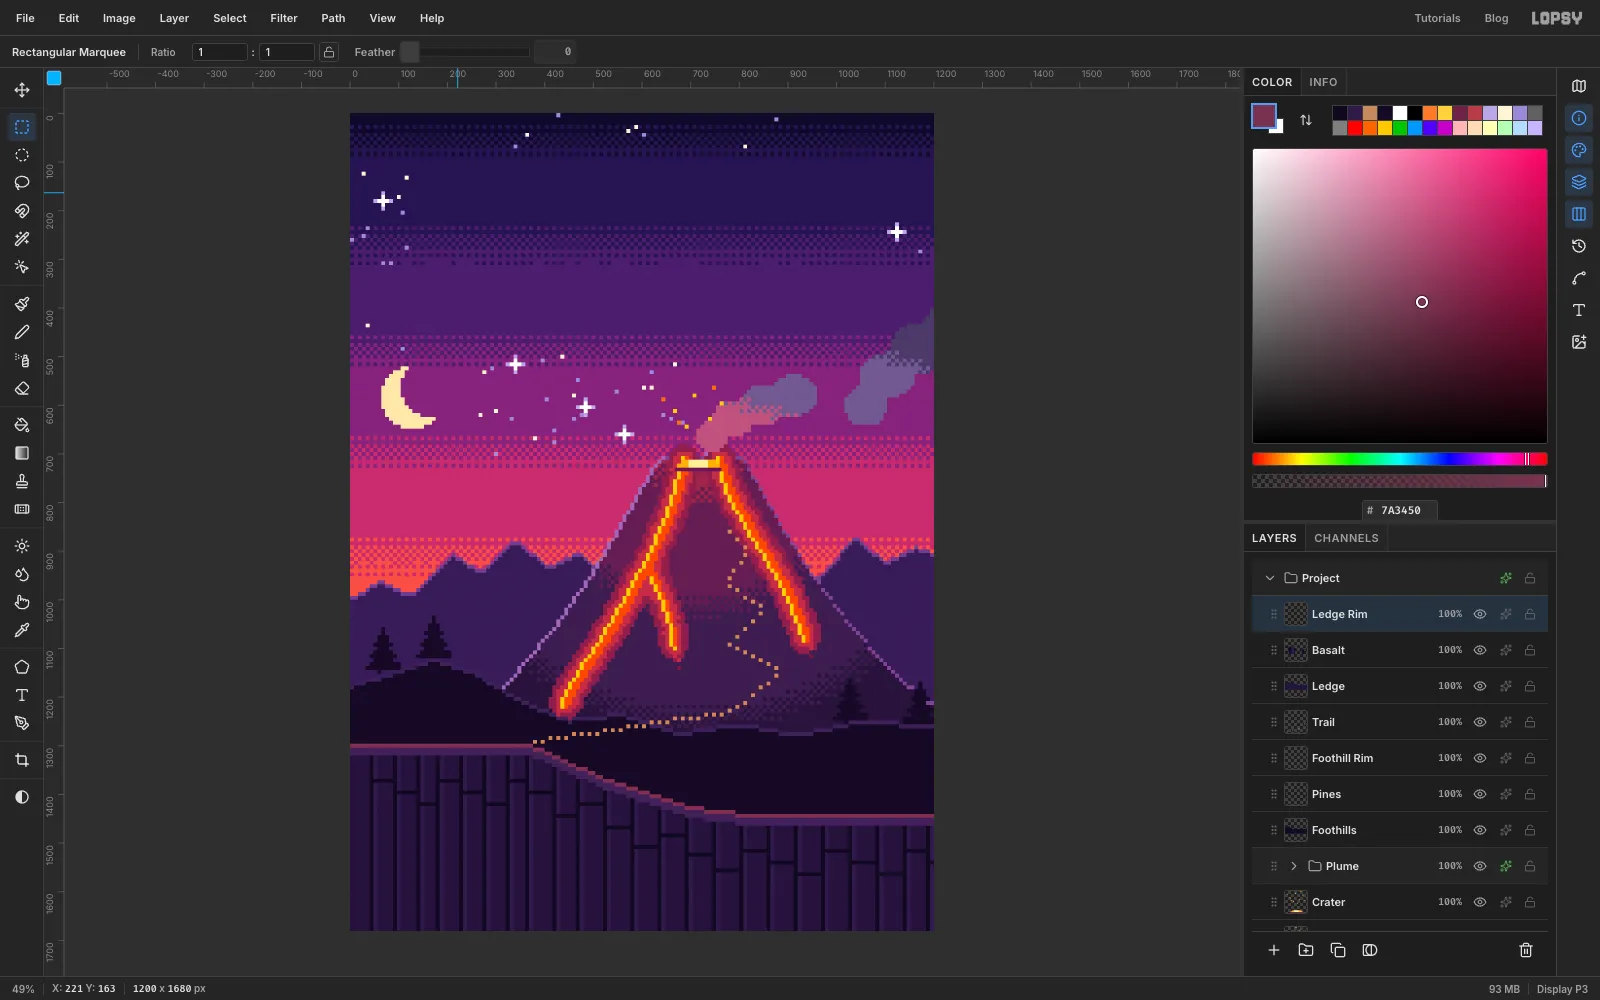
Cut the basalt into columns
Basalt cracks into tall columns, so draw the joints straight down with the Pencil on the Basalt layer:
- In , click just below the lit top face and Shift-click at the bottom of the canvas. Repeat every 40–56 px across the ledge, varying the spacing a little.
- In , draw a second line one pixel to the right of each joint. This is the moonlit side of each column.
- Add short horizontal joints between neighbouring columns, each at a different height.
Finish with a layer named Ledge Rim, edge-lit from the Ledge with Down in .
-
Place the hiker sprite
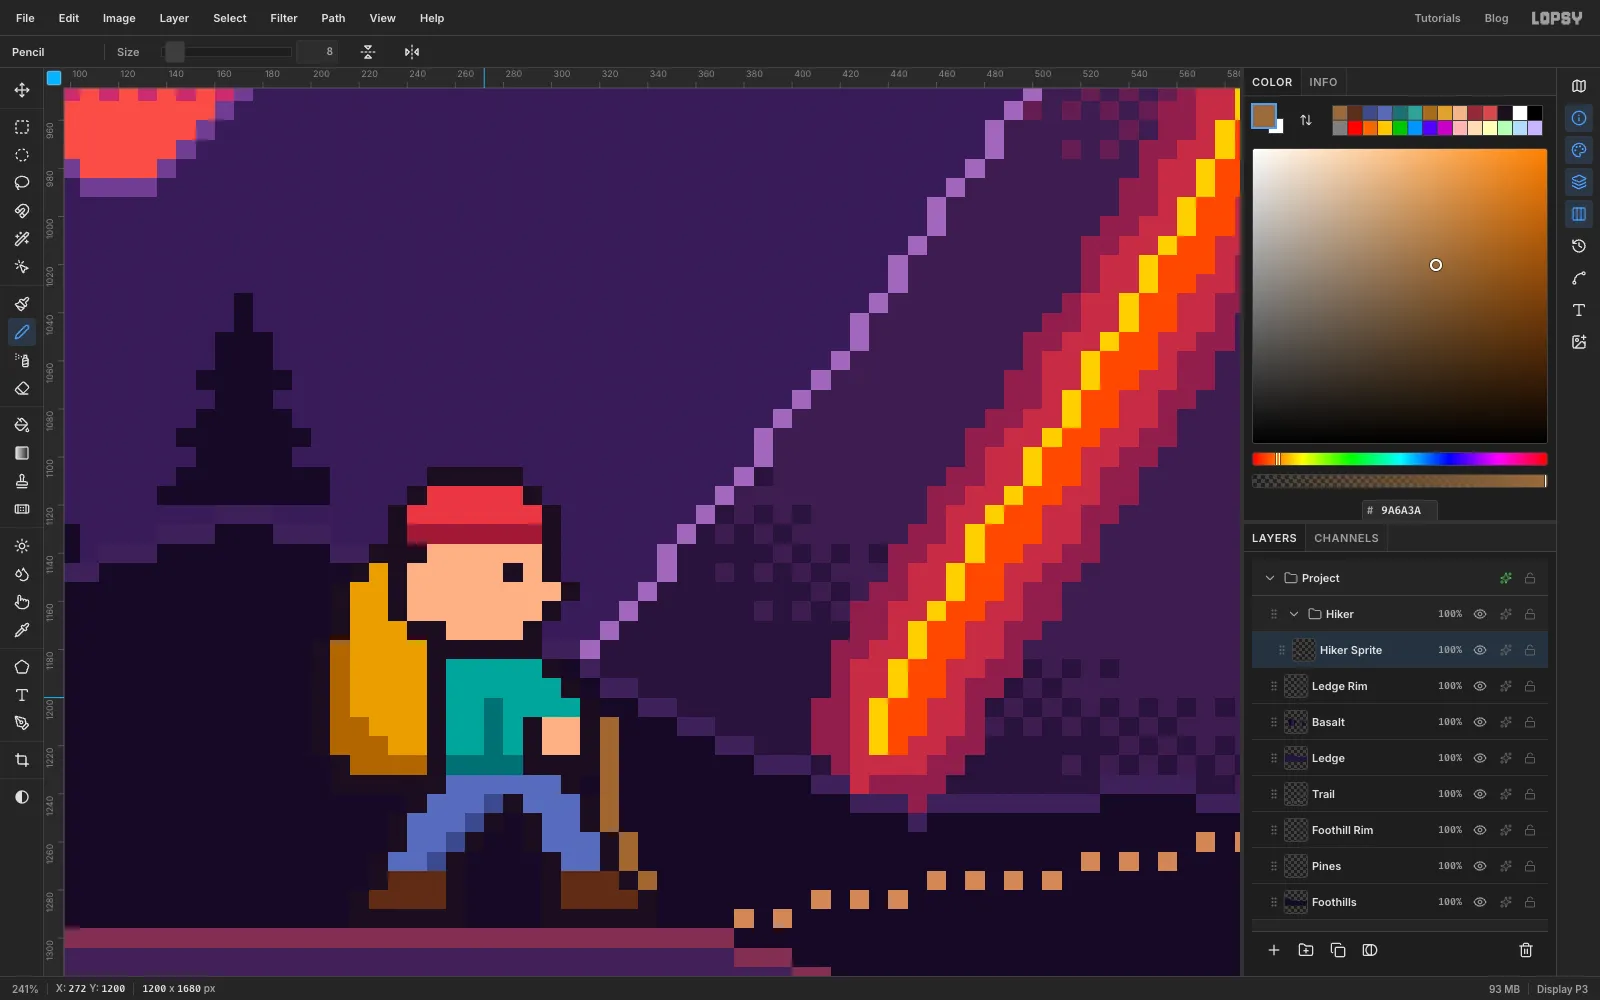
Select Ledge Rim, click New Group and name it Hiker. Add a layer inside it named Hiker Sprite. The sprite is 18 pixels wide and 24 tall. It stands on the flat part of the ledge, with its left edge 200 px in and the bottom of its boots on the ledge's top line. Zoom in and use the screenshot above as your chart. At this zoom, each art pixel is clear enough to count.
Work in three passes, drawing long runs with a click and a Shift-click:
- Outline in : the head, beanie, pack, body, legs and boots.
- Flat fills: beanie , face and hand , pack , jacket , trousers , boots and the stick .
- Shading: a band at the bottom of the beanie, down the back of the pack, a fold in the jacket and on the inside of the trousers.
-
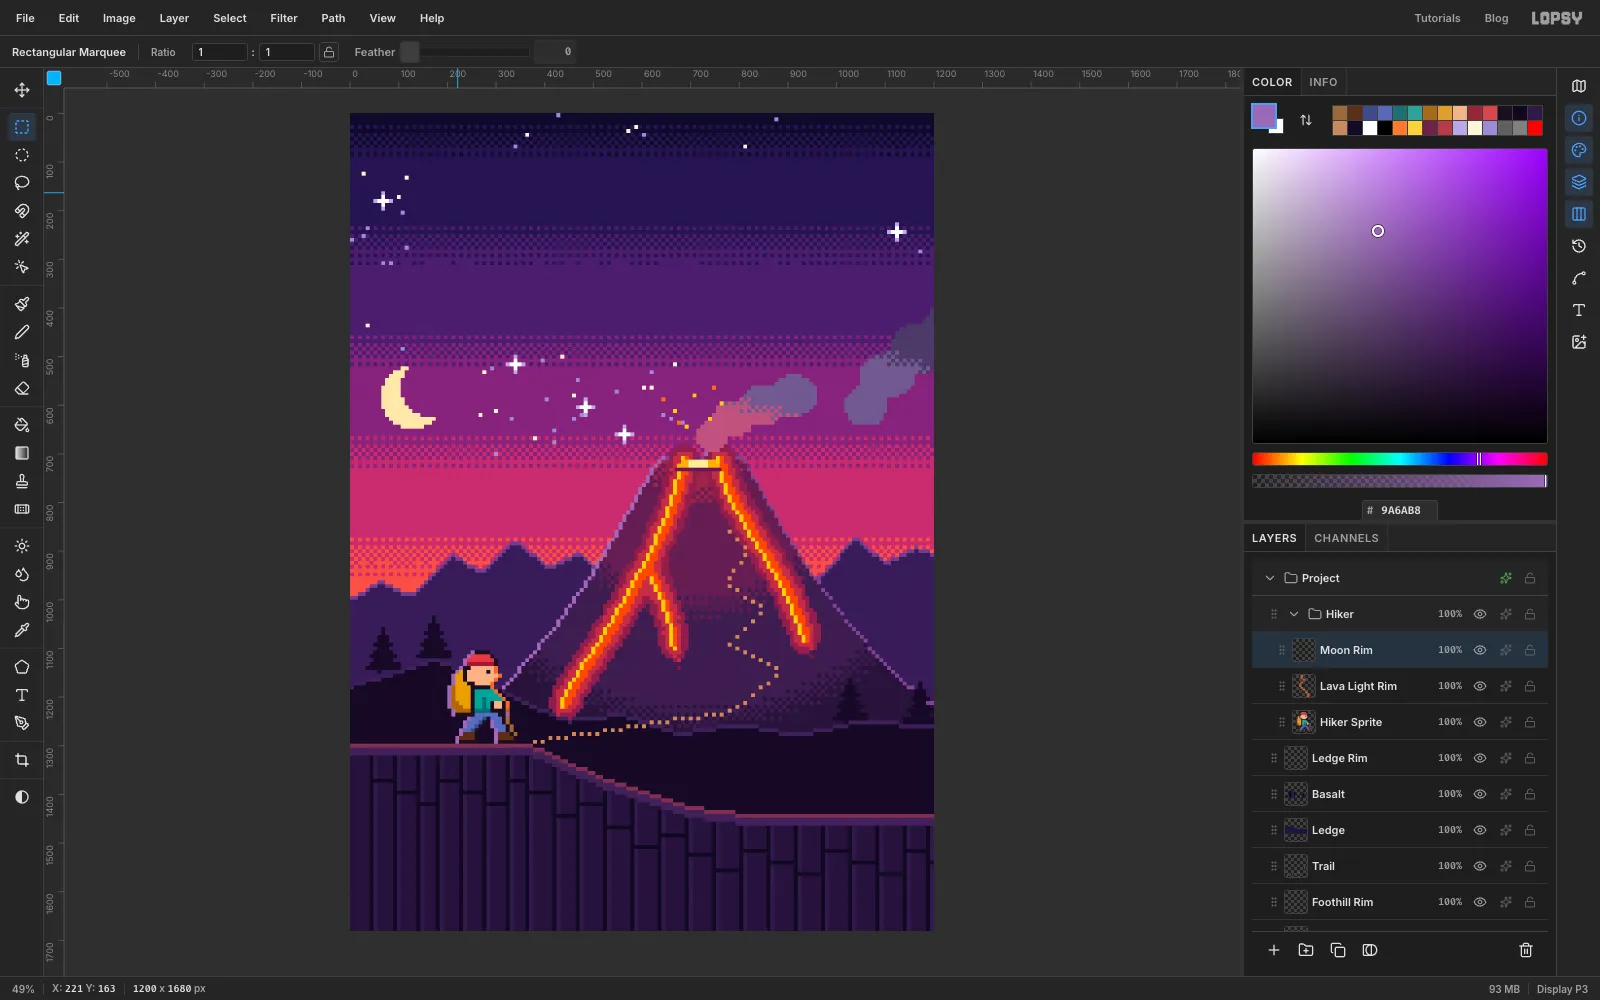
Rim-light the hiker
Add a layer named Lava Light Rim and edge-light the Hiker Sprite with Left in . That lights every edge that faces right, towards the lava. You only want it on the face, arm and front of the pack. Select the top 40 px of the sprite (the beanie) and press Delete. Do the same for the bottom 80 px (the legs and stick).
Then add a layer named Moon Rim and edge-light the sprite with Right in . The back of the pack now catches the moonlight and separates from the dark hills.
-
Set the title in Press Start 2P
Collapse the Hiker group, select it and click New Group. Name the group Masthead. Add a layer named Title Shadow, then one named Title Outline. The text will go above them.
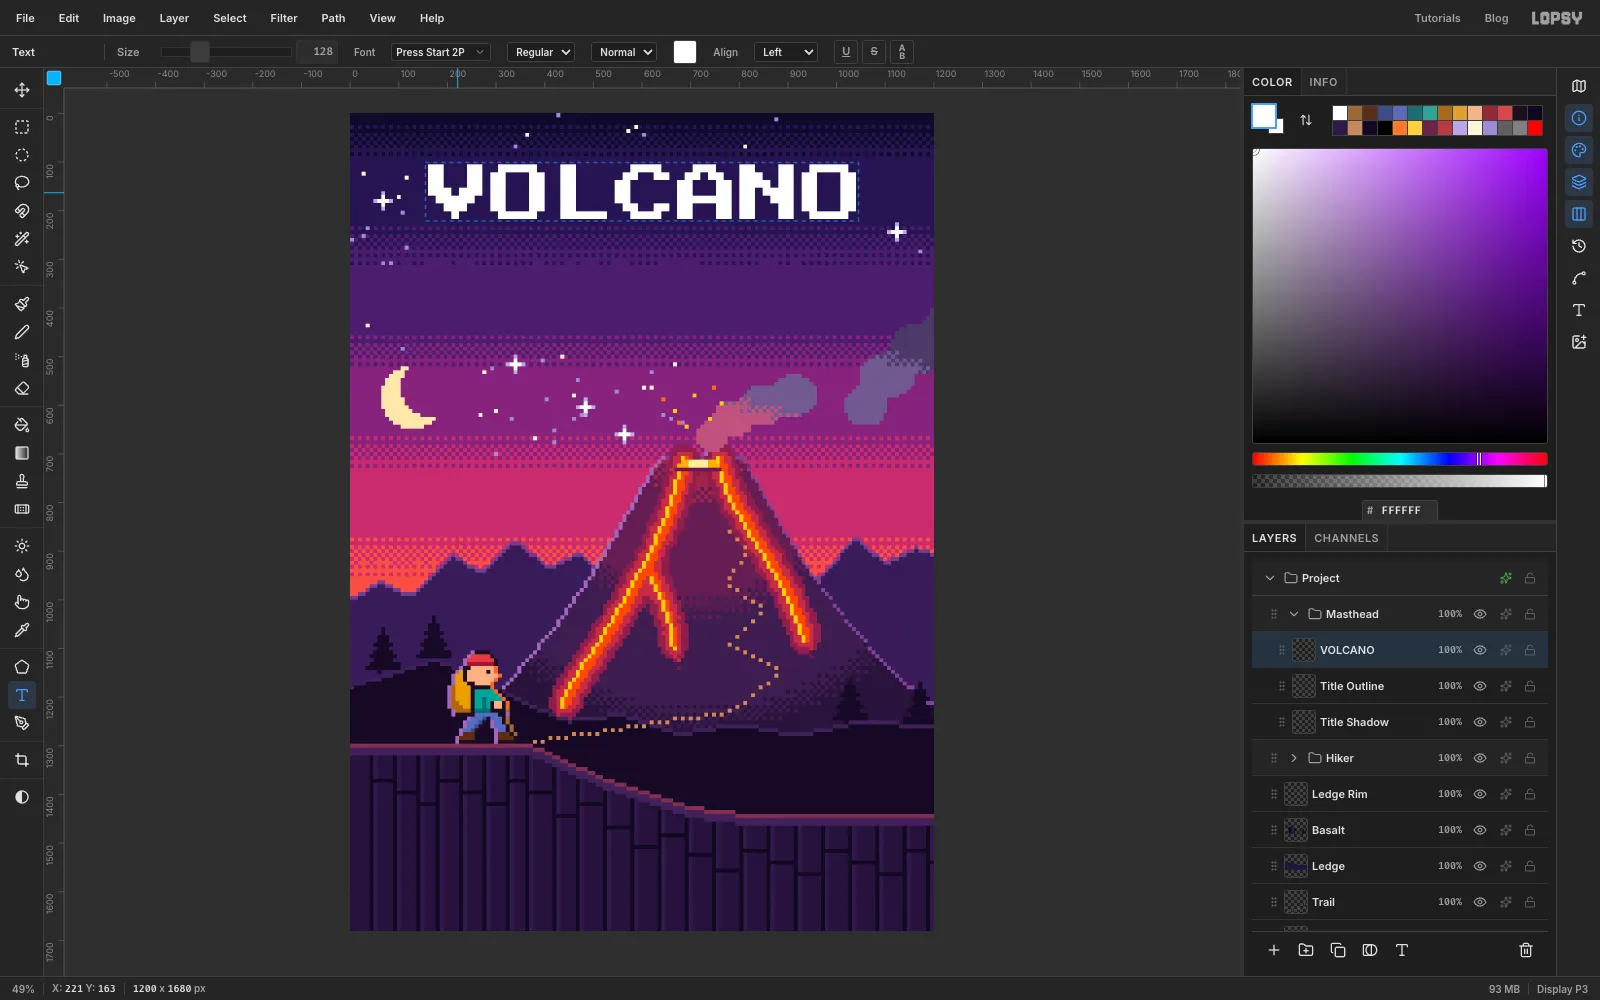
Pick the Text tool. In the options bar choose Press Start 2P, set Size to 128 and the colour to white, click near the top of the canvas and type VOLCANO. Press Tab to commit. At 128 px, each pixel of the font is exactly 16 px, two grid squares.
Switch to the Move tool and click Align center horizontally in the options bar. Untick Snap for a moment and use the arrow keys (Shift+arrow moves 10 px) to bring the top of the letters to 120 px down. The ruler and the Info panel show where you are. Add ASCENT the same way, centred, with the top of its letters at 280 px. Then tick Snap again.
-
Band the letters in four colours
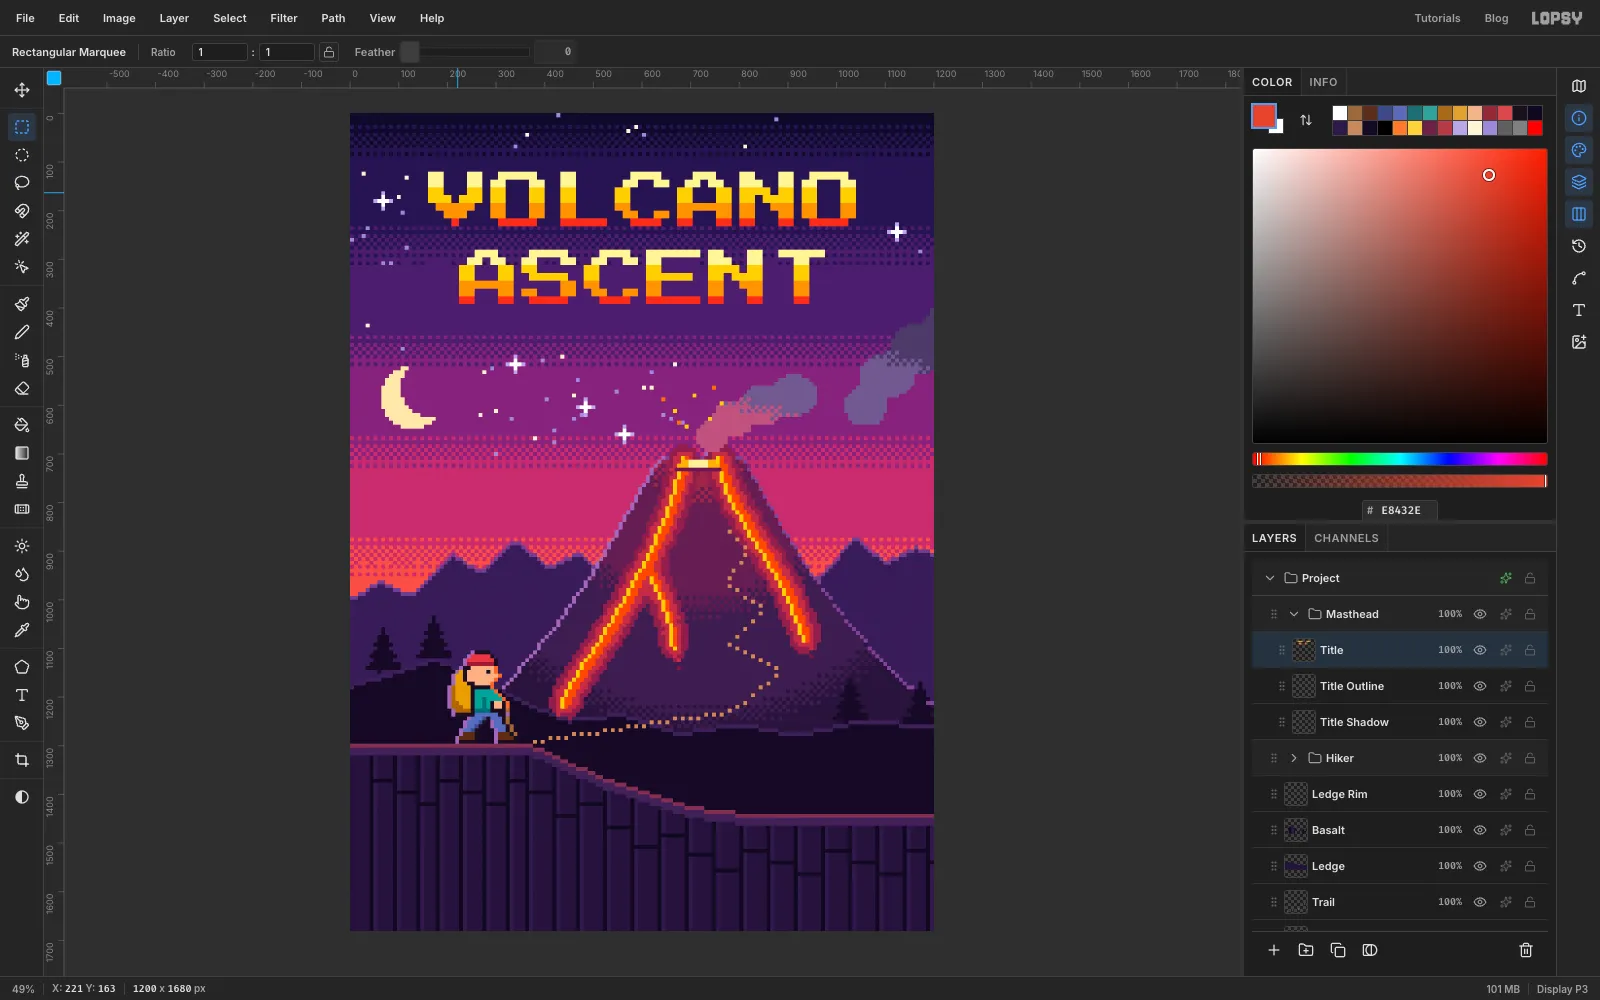
Old game logos were often filled with hard horizontal stripes of colour instead of a smooth gradient. Select each text layer and click Rasterize Layer. Select ASCENT and choose Merge Down, then rename the merged layer Title.
Each line is 7 font pixels (112 px) tall. Colour it in bands that are 2, 2, 2 and 1 font pixels tall:
- Cmd-click the Title thumbnail.
- With the Rectangular Marquee, hold Shift+Alt and drag across the full width from 120 to 152 px down. That intersects the selection with the letters' top two rows.
- Fill with .
Repeat for 152–184 in , 184–216 in and 216–232 in . Then do ASCENT the same way, starting at 280.
-
Walk an outline around the letters
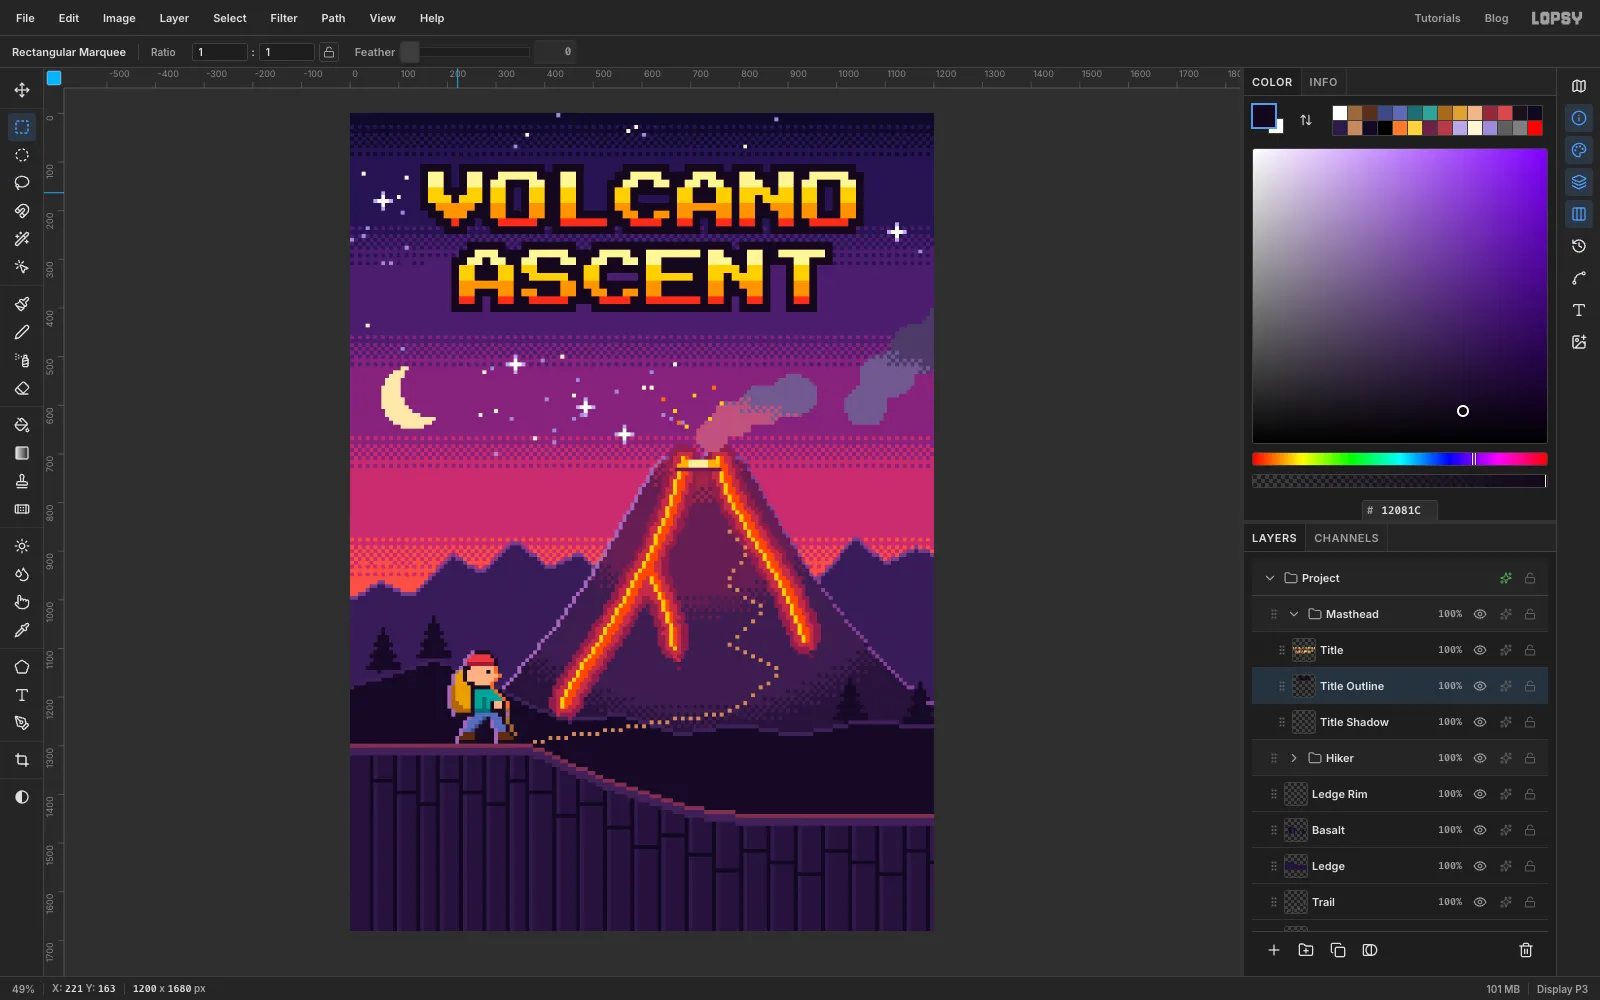
Cmd-click the Title thumbnail, select the Title Outline layer and set the foreground colour to . With the Rectangular Marquee tool active, move the selection around a square, filling at each stop. Each arrow press moves it 8 px:
- Press Left twice and fill.
- Press Up twice and fill.
- Press Right twice and fill, then Right twice more and fill.
- Press Down twice and fill, then Down twice more and fill.
- Press Left twice and fill, then Left twice more and fill.
The eight fills, each 16 px off in a different direction, add up to a one-font-pixel outline with square corners.
-
Extrude the title in 3D
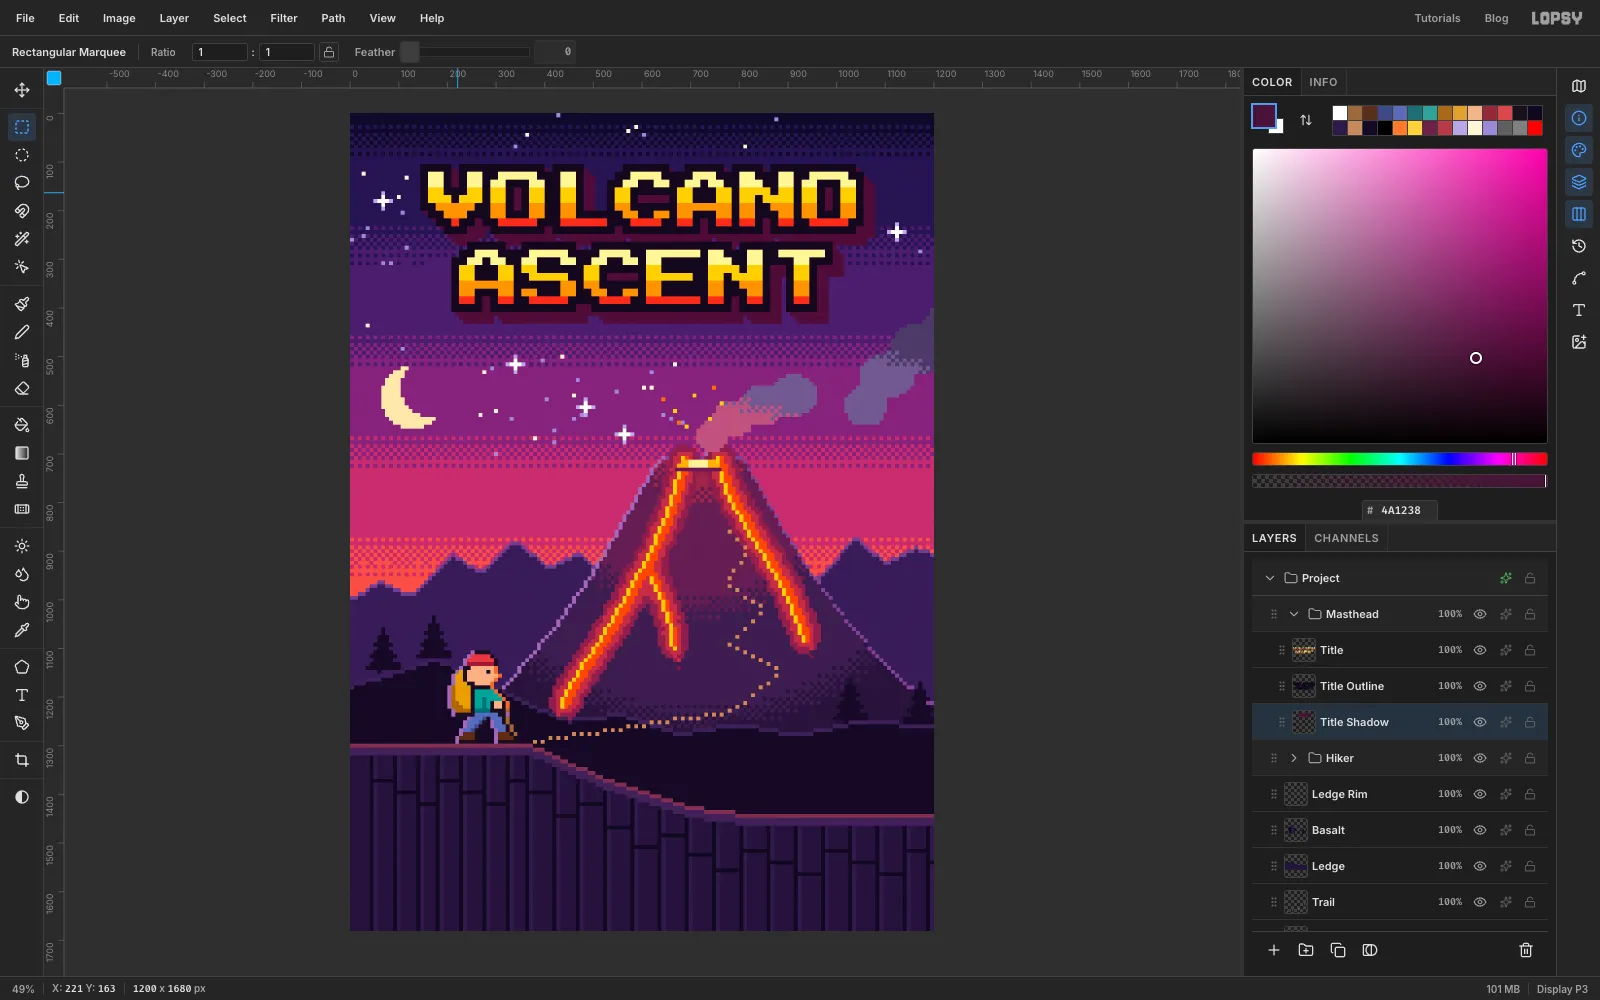
Cmd-click the Title Outline thumbnail, select Title Shadow and set the colour to . Press Right and Down once each, then fill. Do that two more times. The three stacked fills step down and to the right behind the outline and give the title depth.
-
Add the subtitle with a hard shadow
Collapse Masthead, select it and click New Group. Name it HUD, after a game's heads-up display, the strip that shows the score and lives. Add a layer inside it named HUD Pixels.
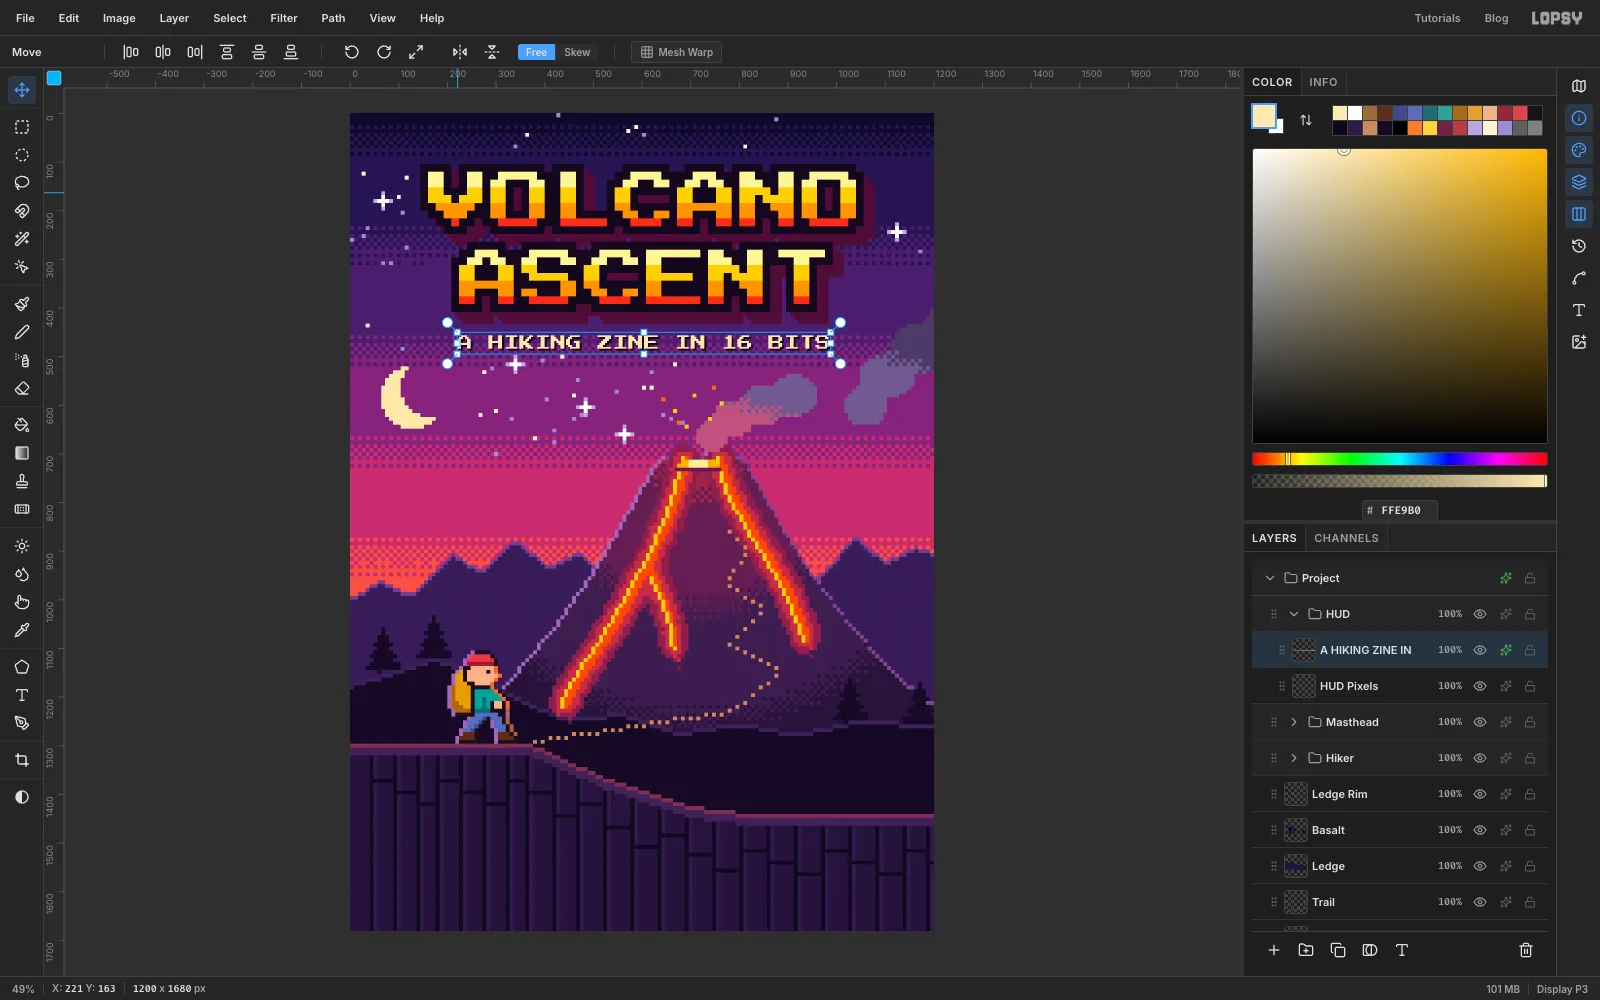
With the Text tool, Press Start 2P at Size 32 in , type A HIKING ZINE IN 16 BITS. Centre it with Align center horizontally and nudge the top of the letters to 456 px down. Open its layer effects and turn on Drop Shadow with Offset X 4, Offset Y 4, Blur 0, Opacity 100 and colour . A hard shadow is how 16-bit games kept small type readable over a busy background.
-
Add the top bar
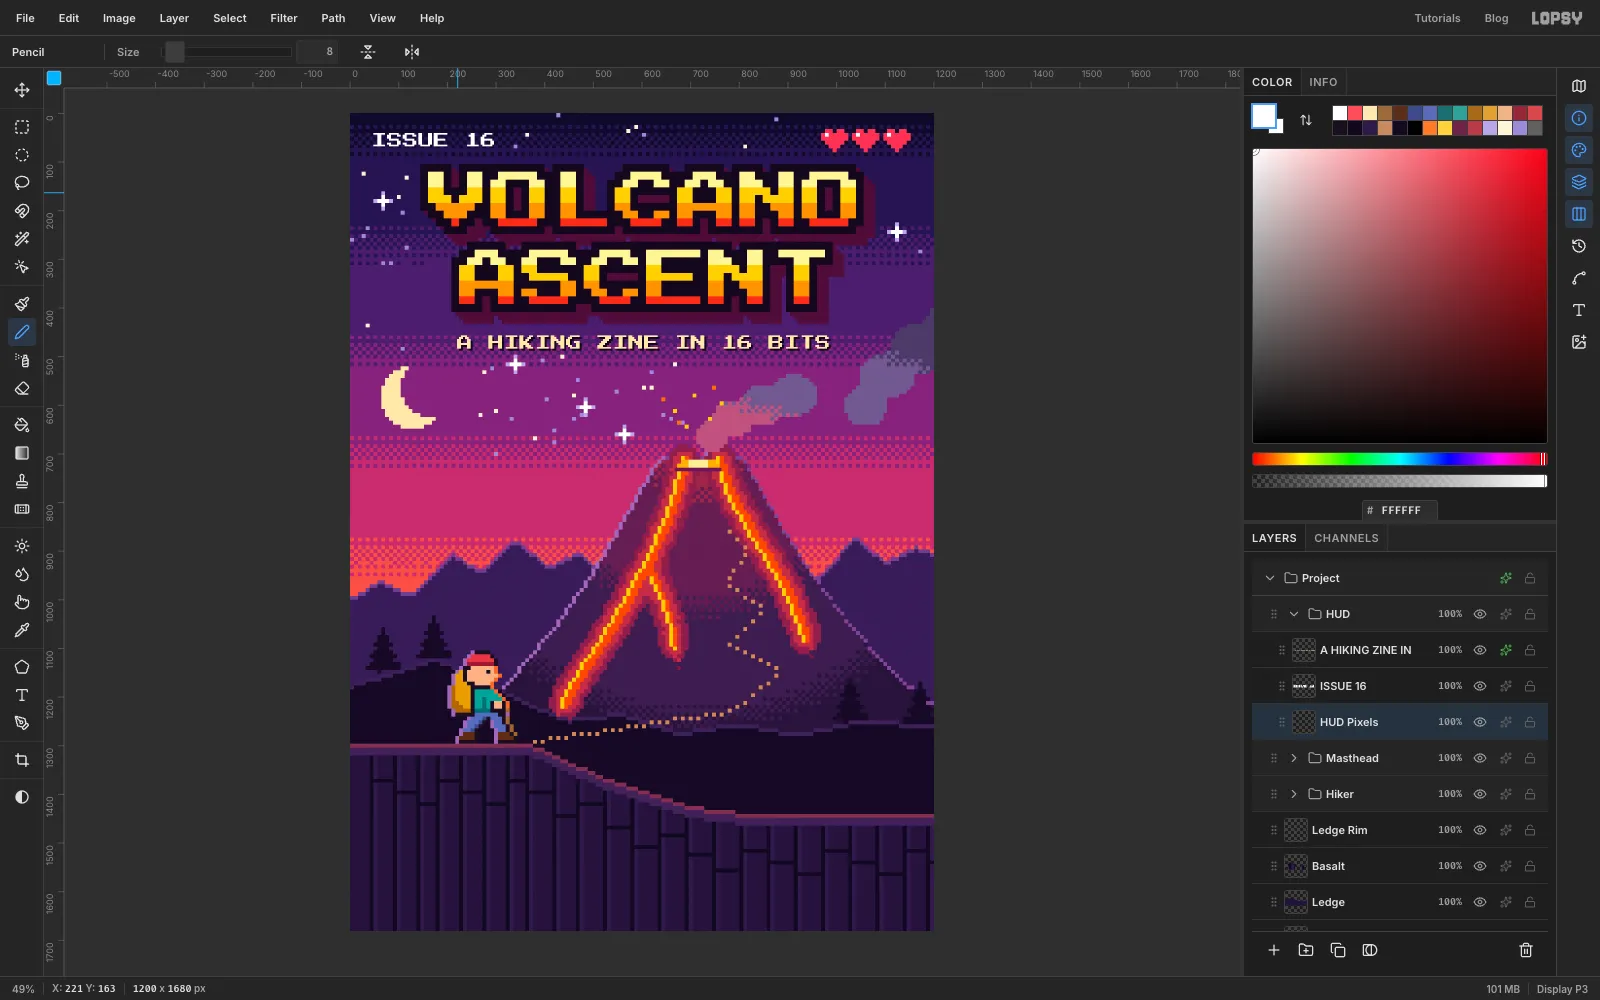
Select HUD Pixels, then type ISSUE 16 in white at Size 32 and move it so its top-left corner sits 48 px from the left and 40 px from the top.
On HUD Pixels, draw three pixel hearts with the Pencil in . Each heart is 7 pixels wide and 6 tall. From the top, its rows are:
- Two pixels, a gap, then two more.
- Seven pixels, with the second one white for a highlight.
- Seven pixels.
- Five pixels.
- Three pixels.
- One pixel.
Leave one pixel between hearts, and end the last one 48 px from the right edge, so it matches the margin on ISSUE 16.
-
Build the dialog box
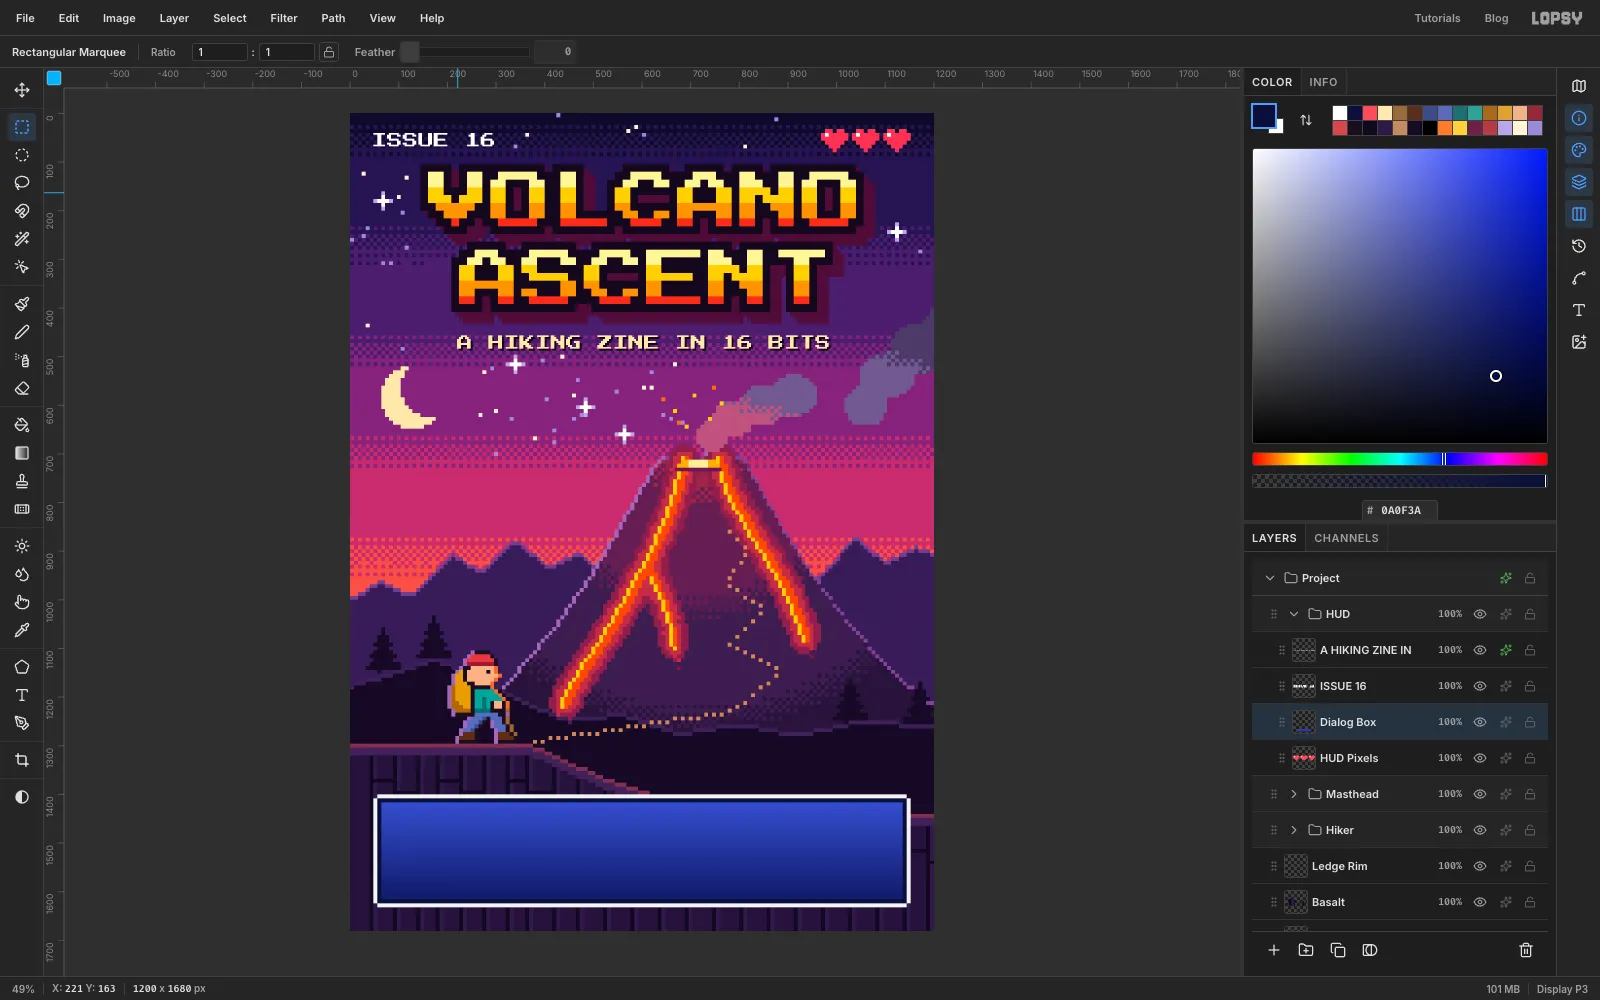
Add a layer named Dialog Box. Use the Rectangular Marquee's exact-corners dialog for each rectangle. Remember to press Cmd+D before each click.
- 48, 1400 to 1152, 1632, filled with , the white border.
- 56, 1408 to 1144, 1624, filled with , the navy inner border.
- 64, 1416 to 1136, 1616. Set the Gradient tool to Linear and, in Advanced…, type and into the two stops. Drag from the top of this selection to the bottom, then choose Filter → Pixelate… at 8 to step it into bands.
To notch the corners, select each 8 × 8 corner square of the white border and press Delete.
-
Write the dialog text and menu cursors
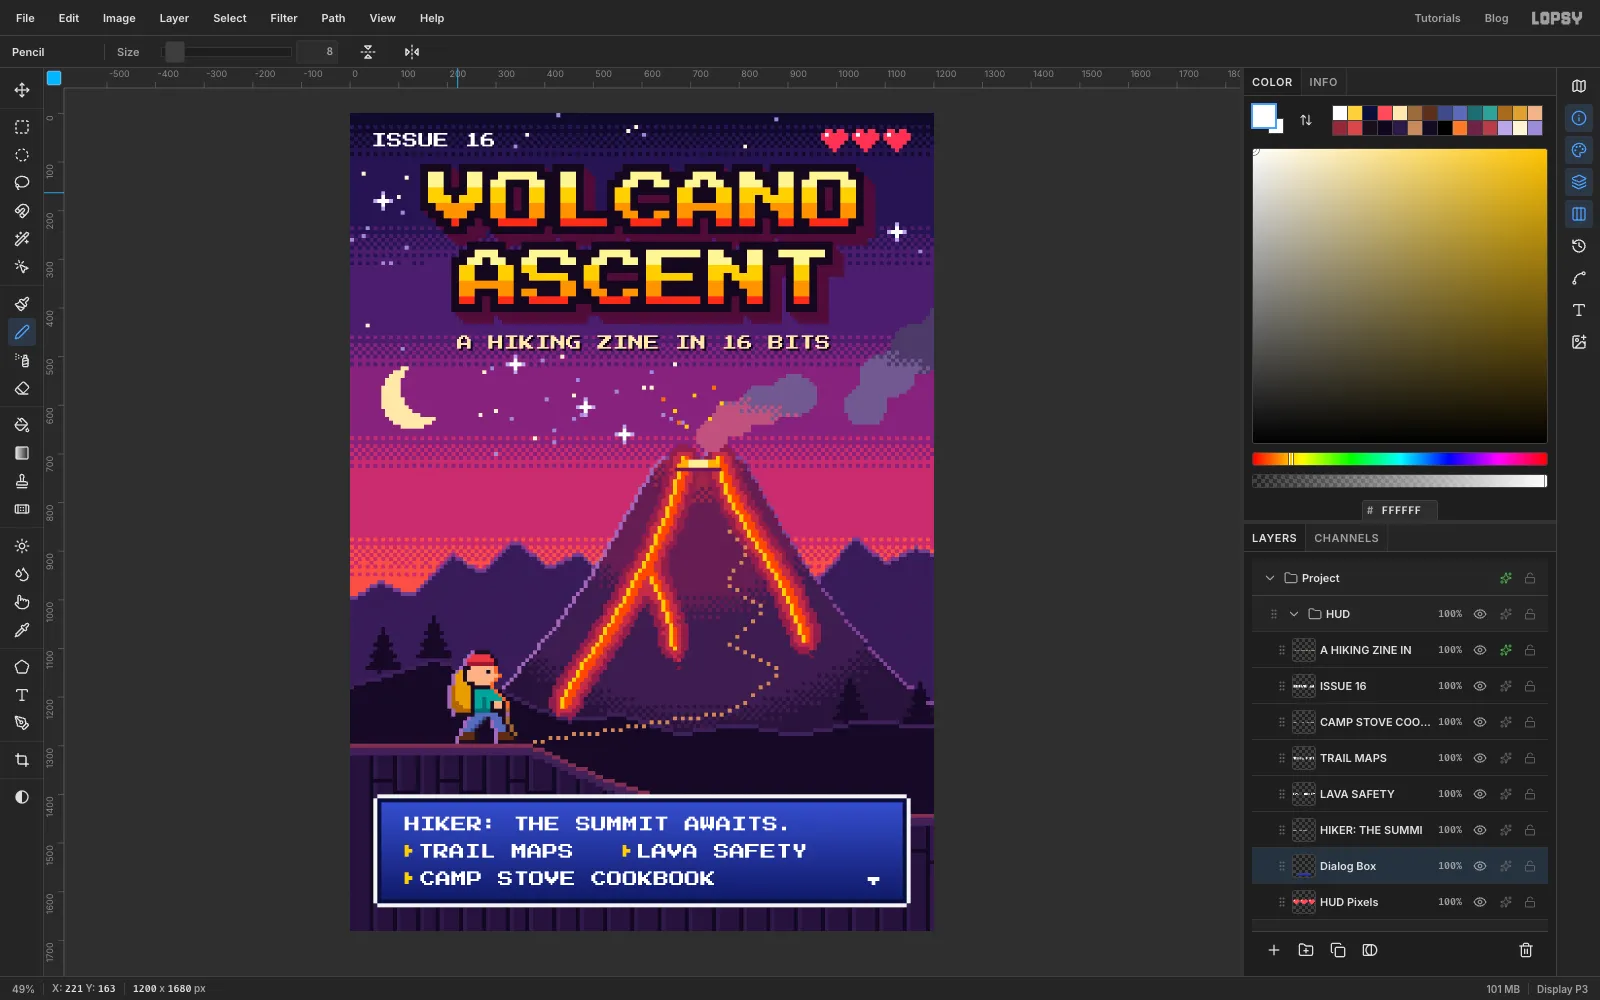
Type the lines in white Press Start 2P at Size 32. Click the Dialog Box row before each new line, so the text layer lands in the HUD group above the box. Make the bottom line first. A click inside an existing line's text box edits that line instead of starting a new one, so working upwards keeps every click in empty space. The positions are for the top-left of each line's letters:
- CAMP STOVE COOKBOOK at 144, 1558
- TRAIL MAPS at 144, 1502
- LAVA SAFETY at 592, 1502
- HIKER: THE SUMMIT AWAITS. at 112, 1446
That puts the lines 56 px apart, with about 30 px of padding above and below.
On Dialog Box, draw a menu cursor in front of each menu item with the Pencil in . Each cursor is a small triangle: one pixel, then two, then one, stacked. Put the cursors 112 px and 560 px in from the left, so the first column lines up with the H of HIKER, and centre them on their lines. At the bottom right, add a white "more" arrow: three pixels in a row with one under the middle.
-
Save and export
Collapse the HUD group. Save the project with File → Save Project and export the cover with File → Quick Export PNG.
To change the mood later, open any group's Gradient Map and retype its stops. The dithering stays put, because it lives in the grey values underneath.