Paint a Psychedelic Eclipse in Blacklight Neon
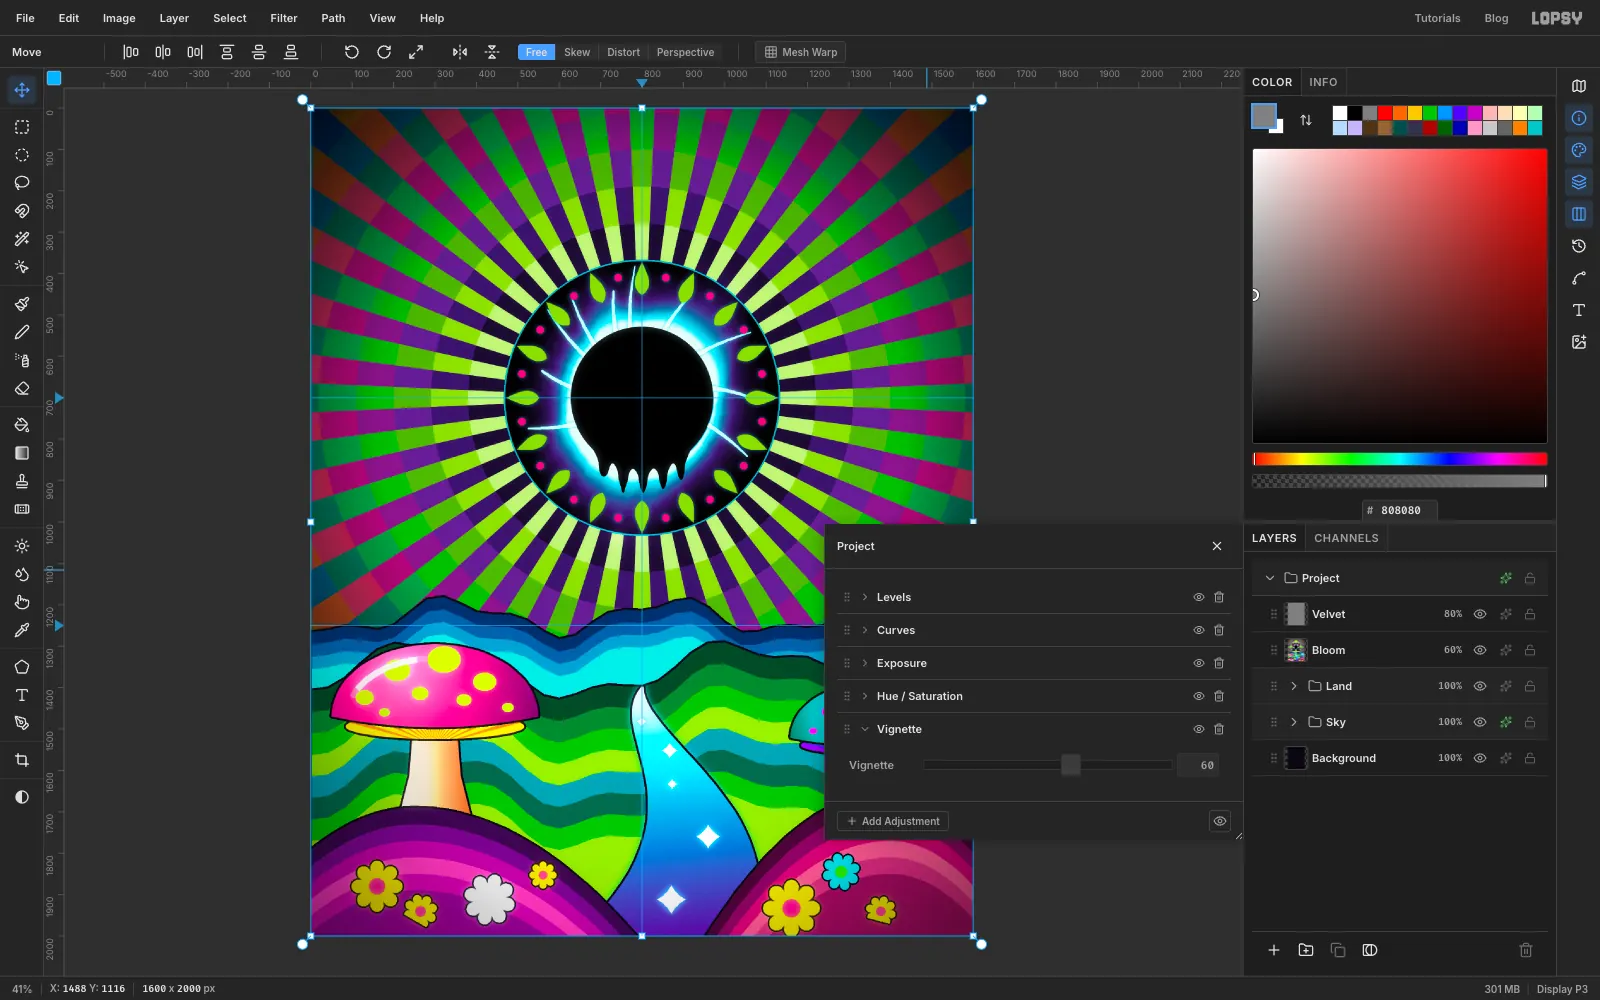
Paint a psychedelic eclipse in Lopsy: op-art rays, a NASA eclipse photo with a melting moon, banded neon hills, glowing mushrooms and velvet grain.
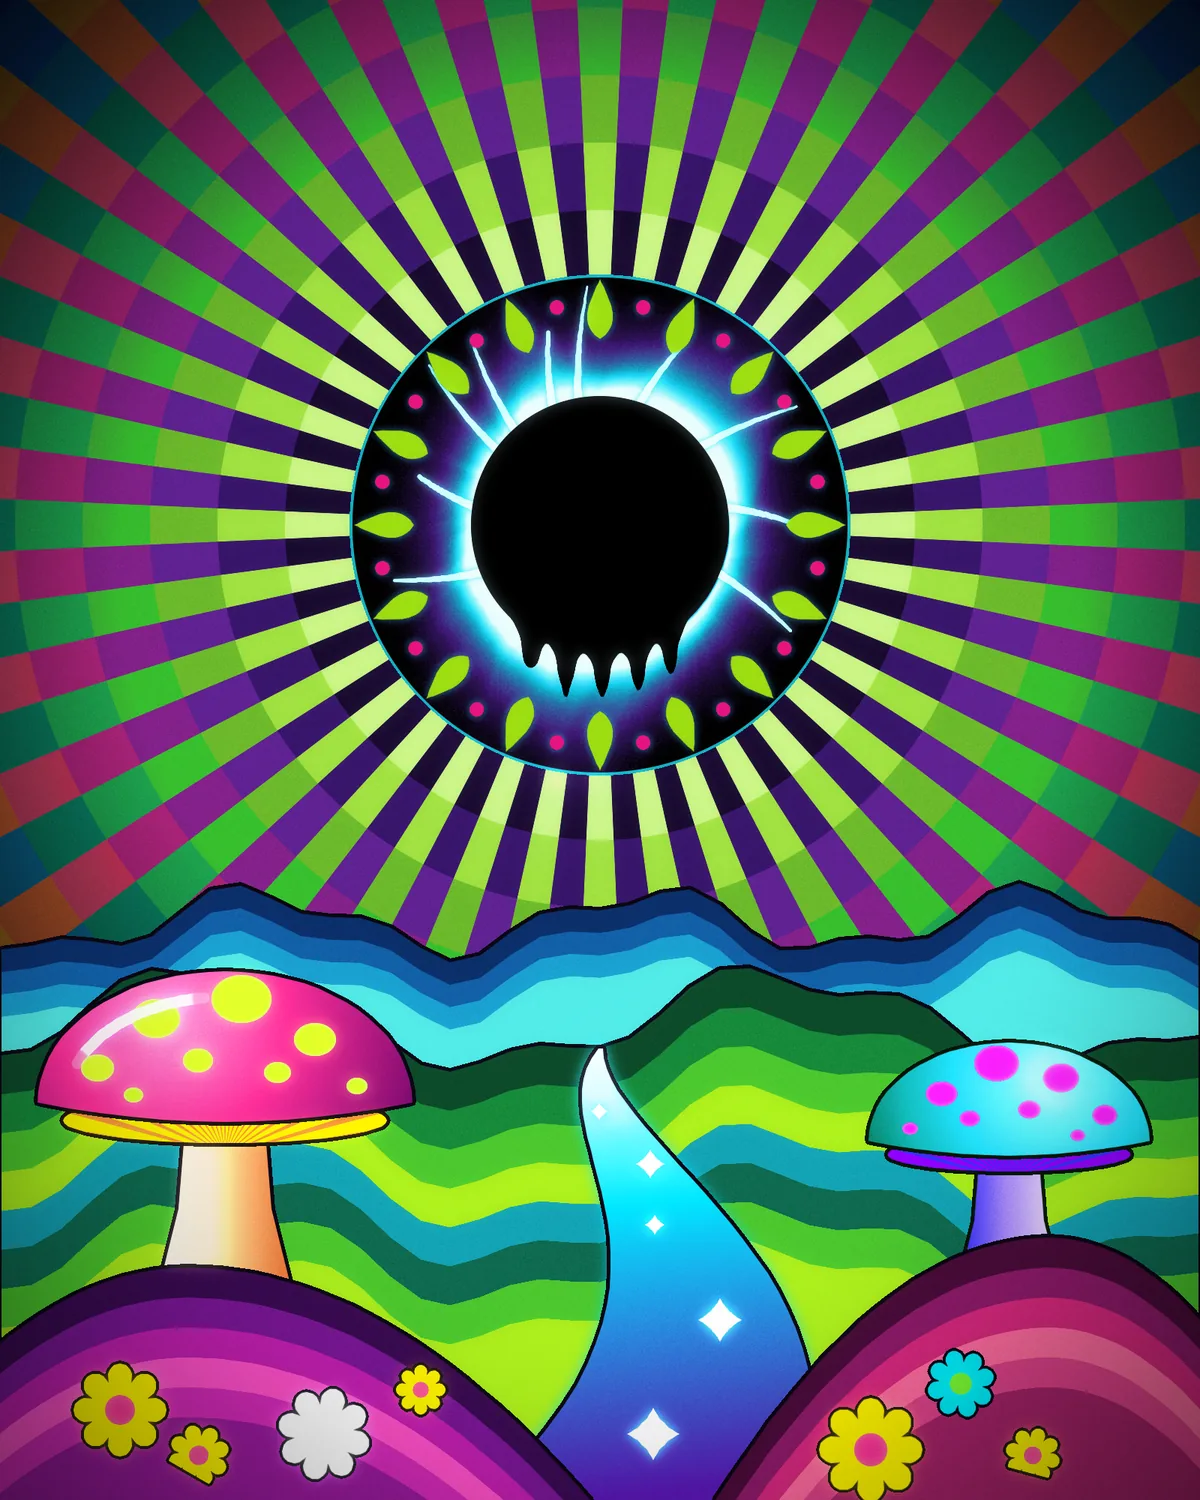
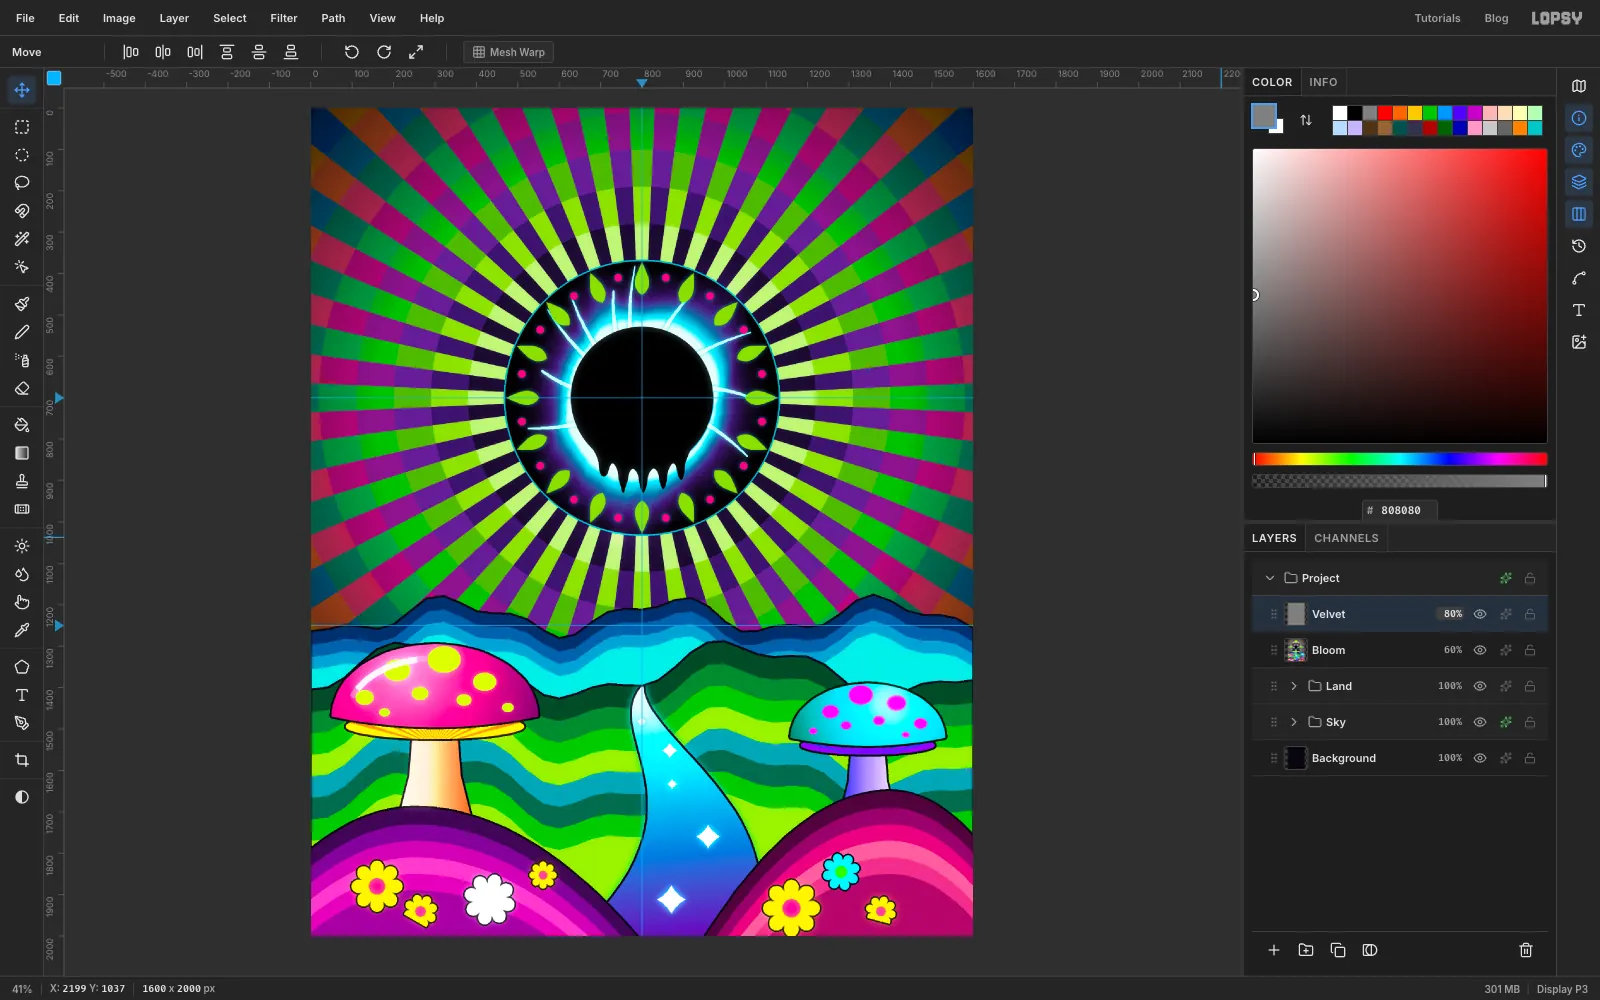
Late-60s psychedelic posters and 70s blacklight velvet prints work on the same idea: put saturated, clashing colours side by side until they seem to vibrate, then give the eye one dark, simple shape to rest on. Here that shape is a total eclipse. A real NASA eclipse photo gives the corona its structure. Everything around it is built from flat, hard-edged shapes you can draw with selections and fills.
The sky is an op-art trick. Ten concentric rings of colour sit under a burst of white rays set to Difference, so every ray flips the ring beneath it to its opposite colour. The landscape uses another old poster trick: each hill is filled, duplicated, refilled in the next colour and nudged down, which leaves even stripes that follow the ridge line.
Along the way you'll use:
- the Elliptical Marquee's typed-in corners for exact circles, Edit → Fill, and ruler guides
- Sunburst with the Difference blend mode, and a layer mask
- a dropped-in photo, Screen blending and a group Gradient Map
- Liquify (Push Forward) for melting drips, and brush strokes with Taper
- Kaleidoscope for a ring of petals
- Duplicate Layer, Cmd-click thumbnails, arrow-key nudges and Merge Down for banded hills
- Stroke, Outer Glow and Inner Glow effects, Select → Inverse and the Eraser
- duplicating a whole group, then scaling, flipping and recolouring it with a Hue / Saturation adjustment
- copy and paste with the grid and Snap, rotate and scale handles, and a Hue/Saturation filter
- Copy Merged with Bloom, Add Noise grain and a Vignette
The palette is fluorescent colour on near-black:
-
Velvet black
-
halo
-
shade
-
Sky rings
-
Corona
-
neon cyan
-
streamers
-
Petals
-
dots
-
Far hills
-
Mid hills
-
River
-
Left hill
-
Right hill
-
Mushroom cap
-
stem
-
gills
-
Daisy
-
grain grey
-
Set up the canvas and guides
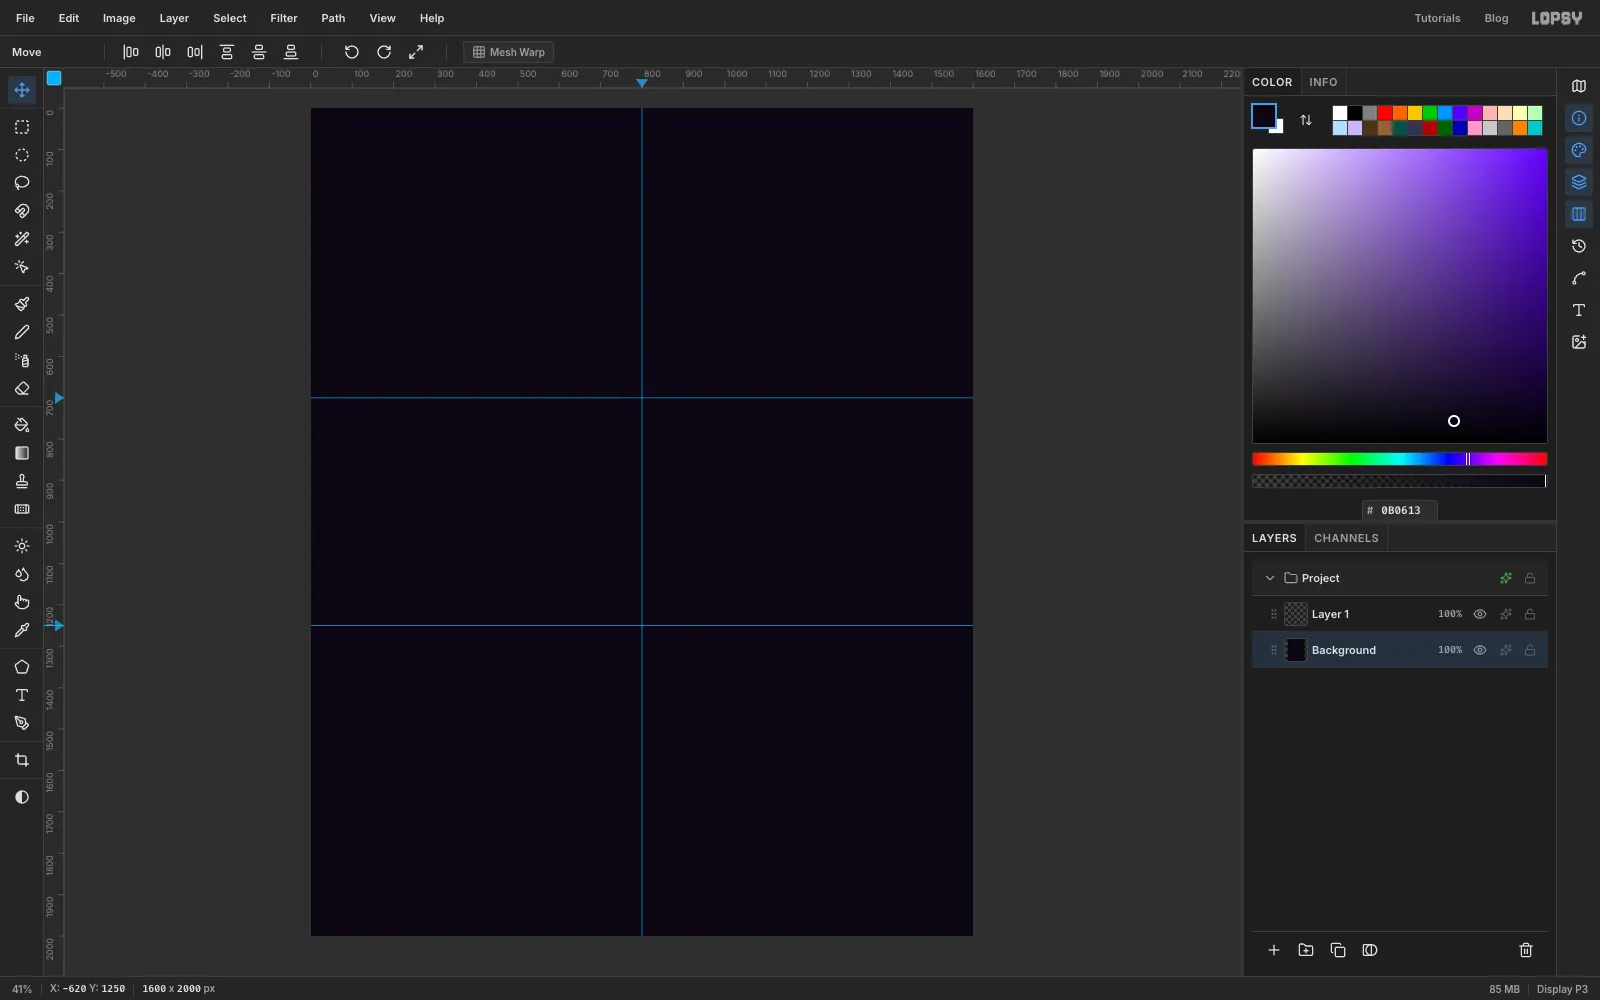
- Create a new document 1600 × 2000 px.
- Click the Background layer, set the foreground colour to and choose Edit → Fill.
- Click the top ruler at
800for a vertical guide down the middle. Click the left ruler at700(the centre of the eclipse) and at1250(roughly where the horizon will sit).
-
Paint ten concentric sky rings
- Click Layer 1 and rename it
Sky Rings(double-click the name). Fill it with . - Now fill smaller and smaller circles, all centred on the guide crossing at
800, 700. Use the Elliptical Marquee dialog for each one, then fill it:
- radius
1050in - radius
960in - radius
870in - radius
780in - radius
690in - radius
600in - radius
510in - radius
420in - radius
330in
- Deselect.
The big circles run off the canvas, so their From corners are negative. Radius
1050runs from-250, -350to1850, 1750. Type them in anyway. Each fill only covers the middle of the circle before it, so you're left with a ring of every colour.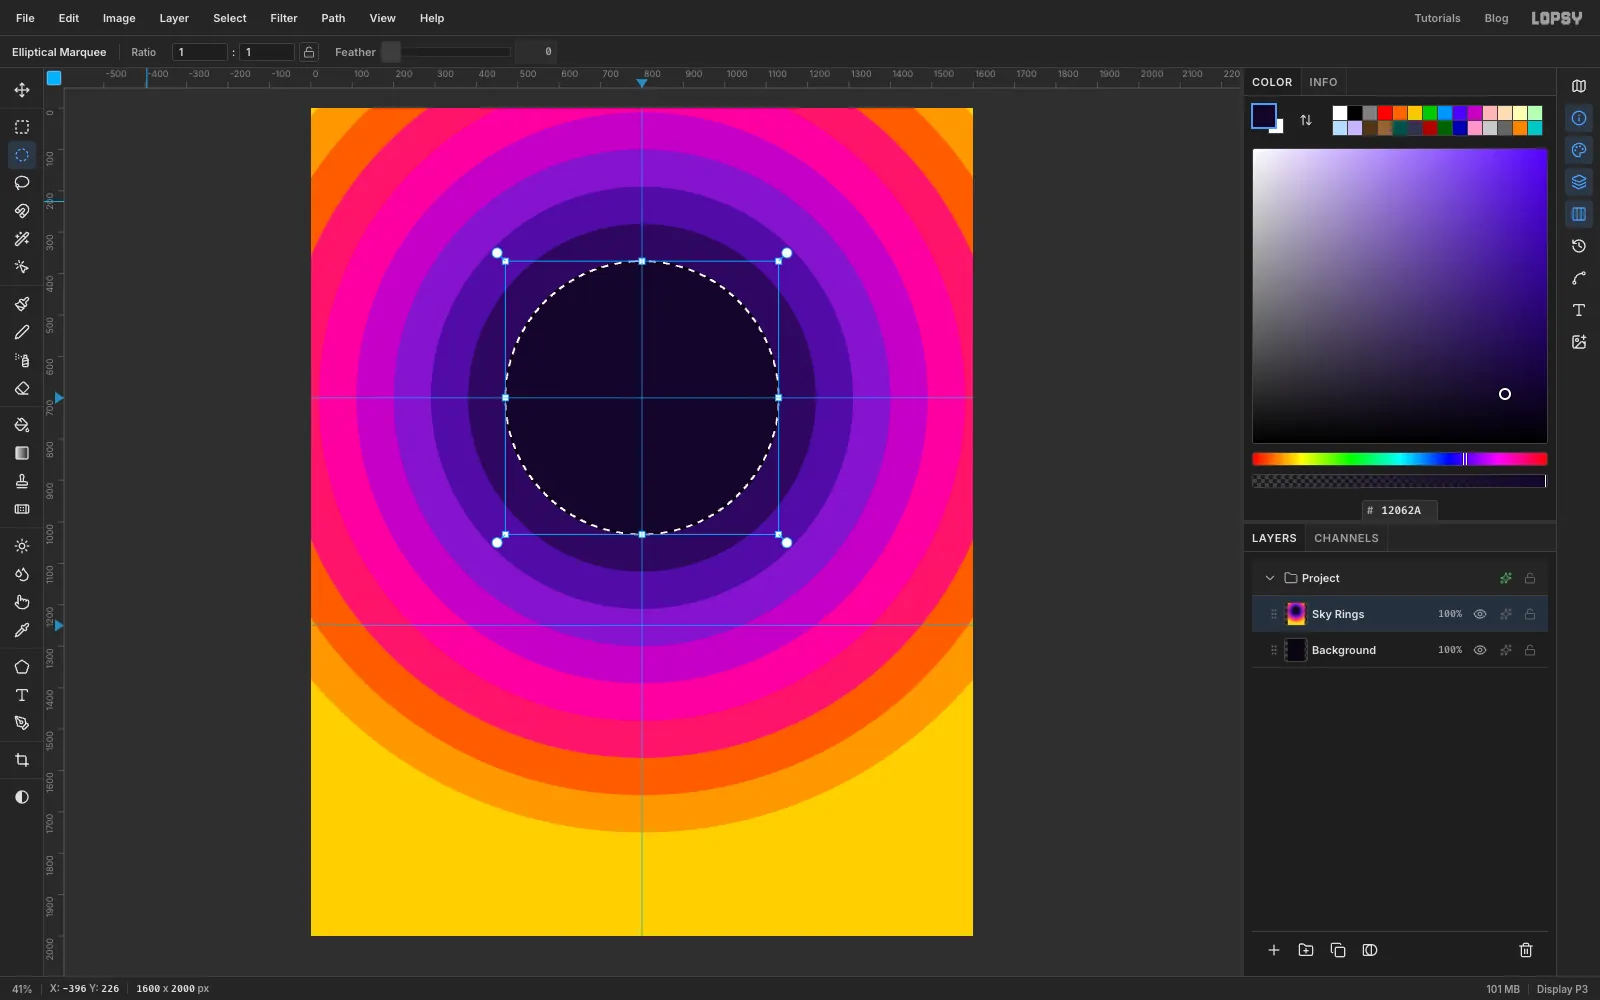
- Click Layer 1 and rename it
-
Burst white rays from the eclipse
- Add a new layer called
Raysand set the foreground colour to white. - Choose Filter → Sunburst… and set Rays
36, Length150, Width50, Taper0, Softness0, Center X50and Center Y35, then click Apply.
Center Y is a percentage of the canvas height, so
35puts the burst exactly on the700guide.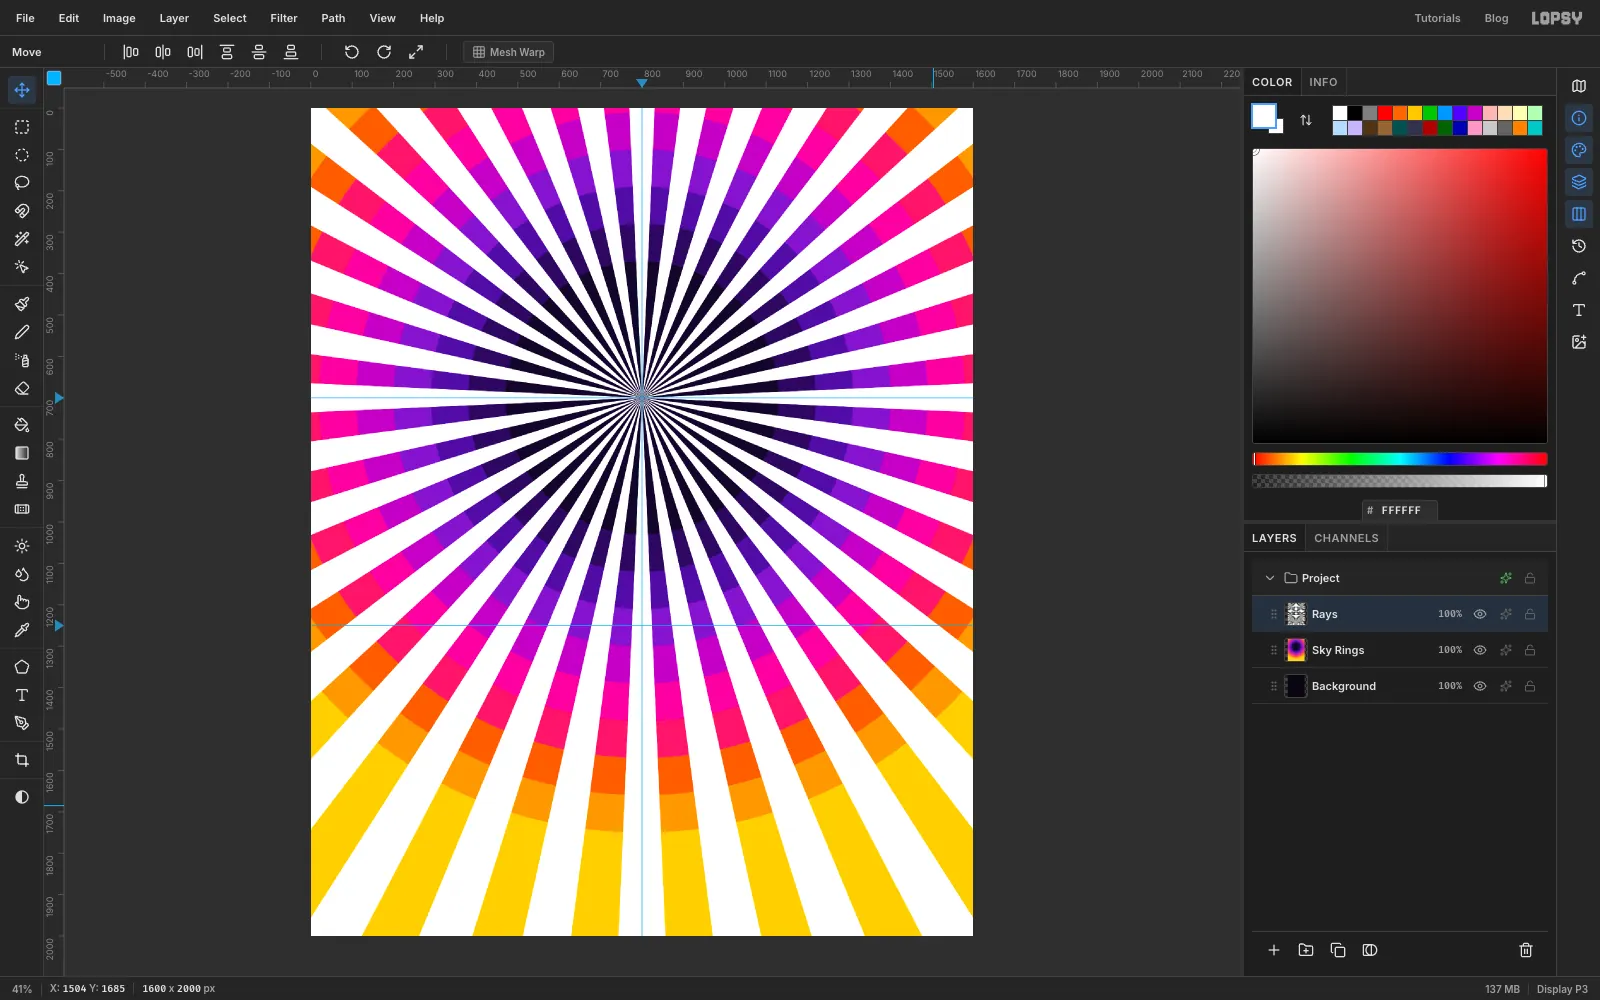
- Add a new layer called
-
Flip the rings with Difference
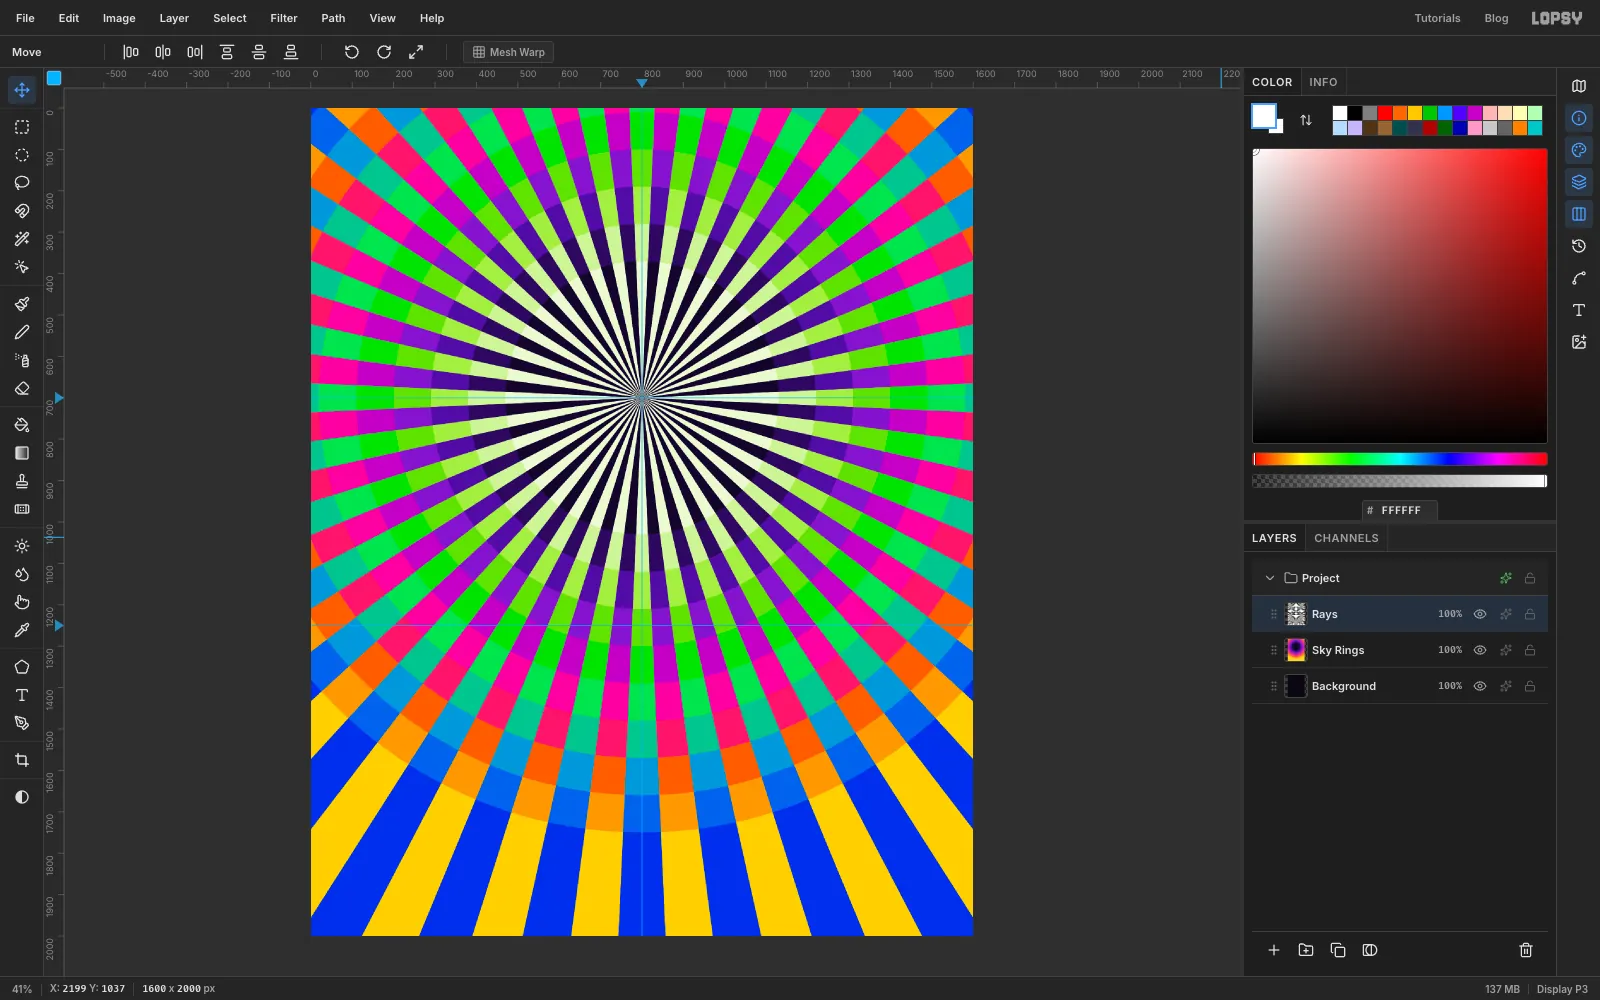
Open the Rays layer's effects drawer and set Blend to Difference.
Difference subtracts colours, so white turns every colour underneath into its opposite. Magenta becomes green, violet becomes lime and yellow becomes blue. Rays and gaps now alternate between a colour and its complement, which is the vibrating checker of op-art posters.
-
Keep the centre calm with a mask
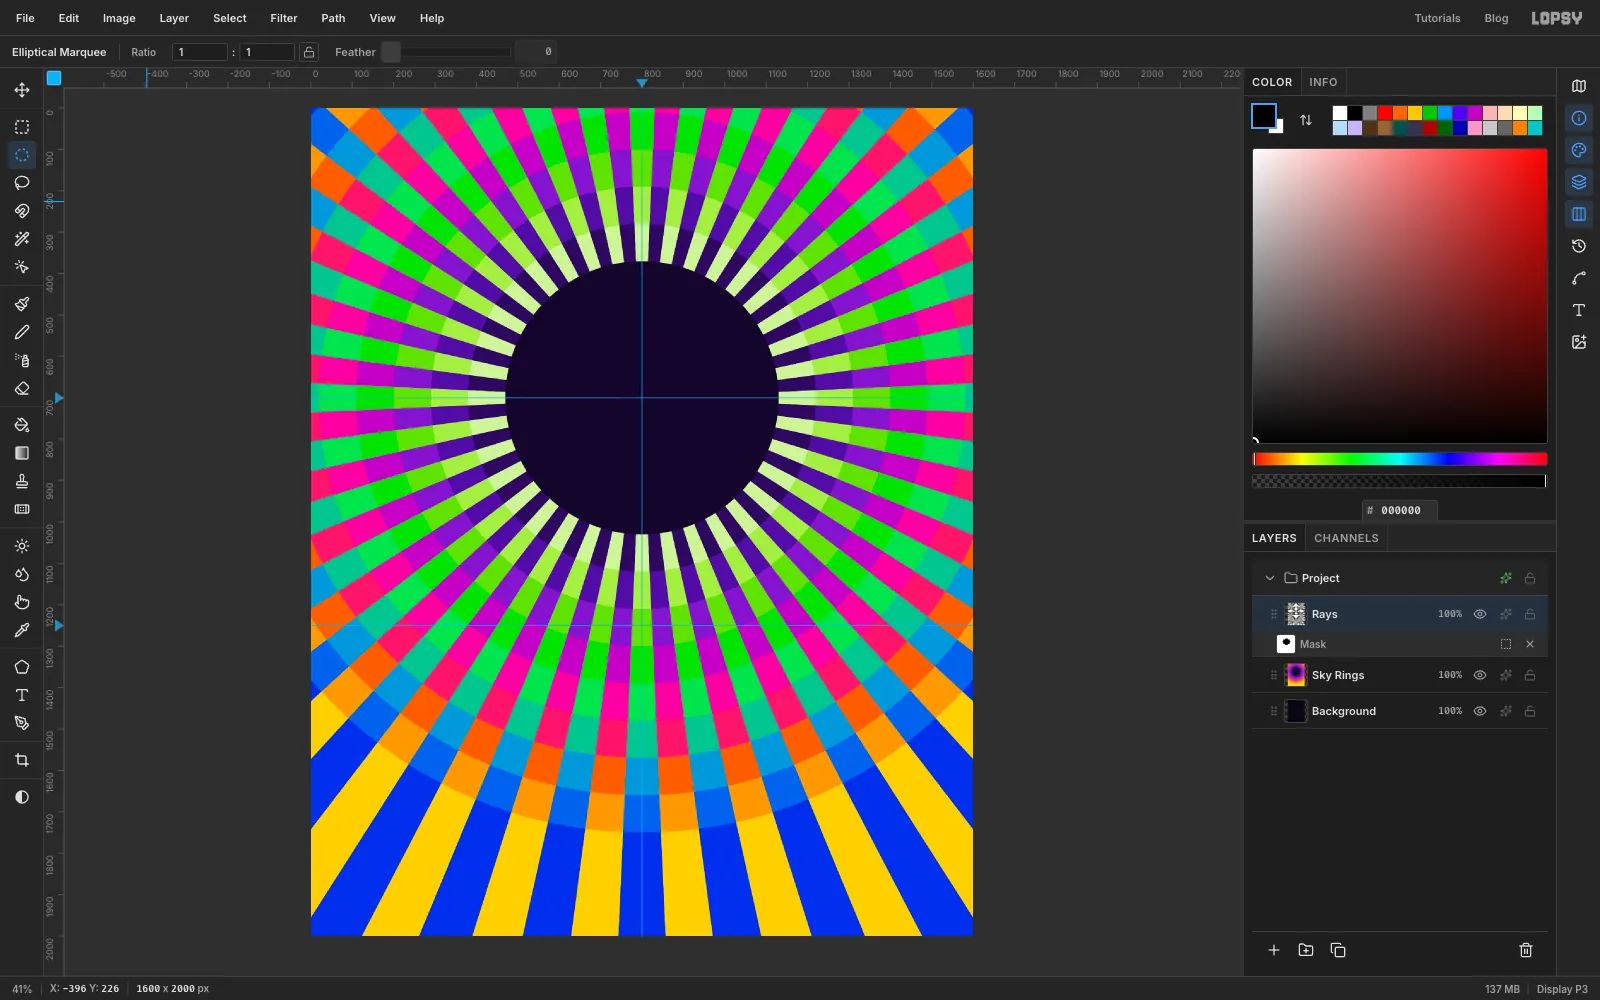
- With Rays selected, click Add Mask at the bottom of the Layers panel, then click the new Mask thumbnail to edit it.
- Select a circle of radius
330around800, 700(from470, 370to1130, 1030), set the foreground colour to black and choose Edit → Fill. - Deselect, then click the Rays layer's name to stop editing the mask.
-
Fade the outer sky to velvet black
- Add a layer called
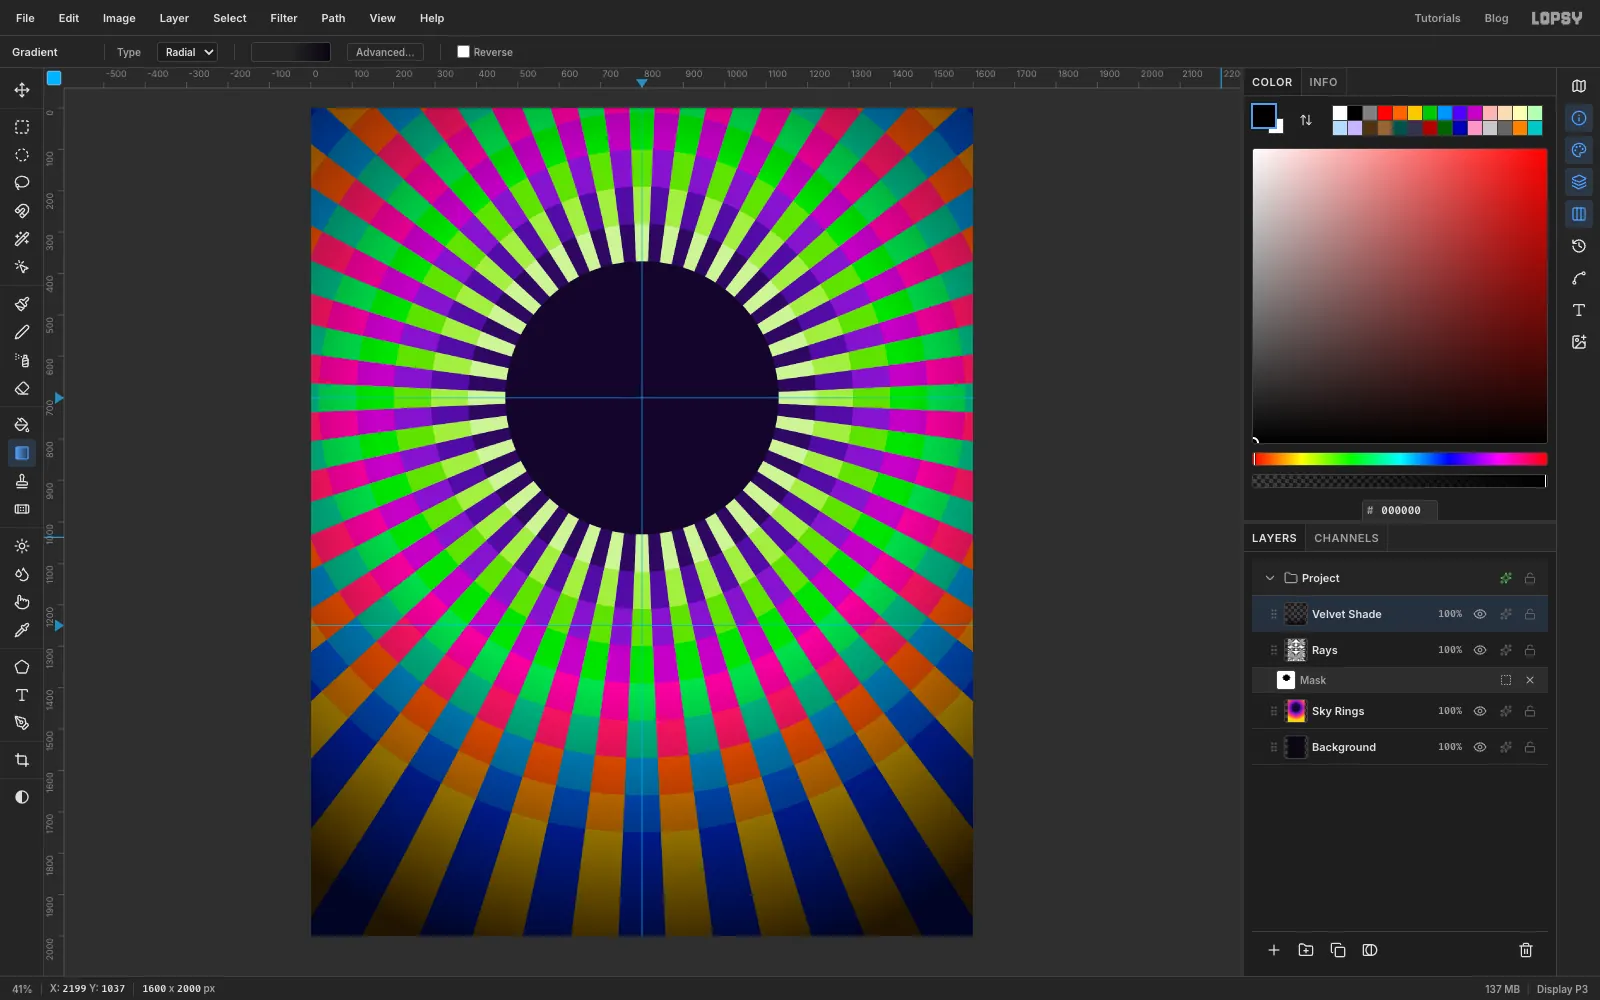
Velvet Shade. - Choose the Gradient tool, set Type to Radial and click Advanced…. Make three stops, all :
- one at the start with its opacity at
0 - one at about 48% with its opacity at
0 - one at the end of the bar (100%) with its opacity at about
90
- Drag from the middle of the moon straight to the right, well past the canvas edge, about
1350px. - Set the layer to Multiply.
Blacklight posters sit on black velvet. This layer leaves the middle of the picture alone and pulls the corners down towards black.
- Add a layer called
-
Add a dark halo disc
- Add a layer called
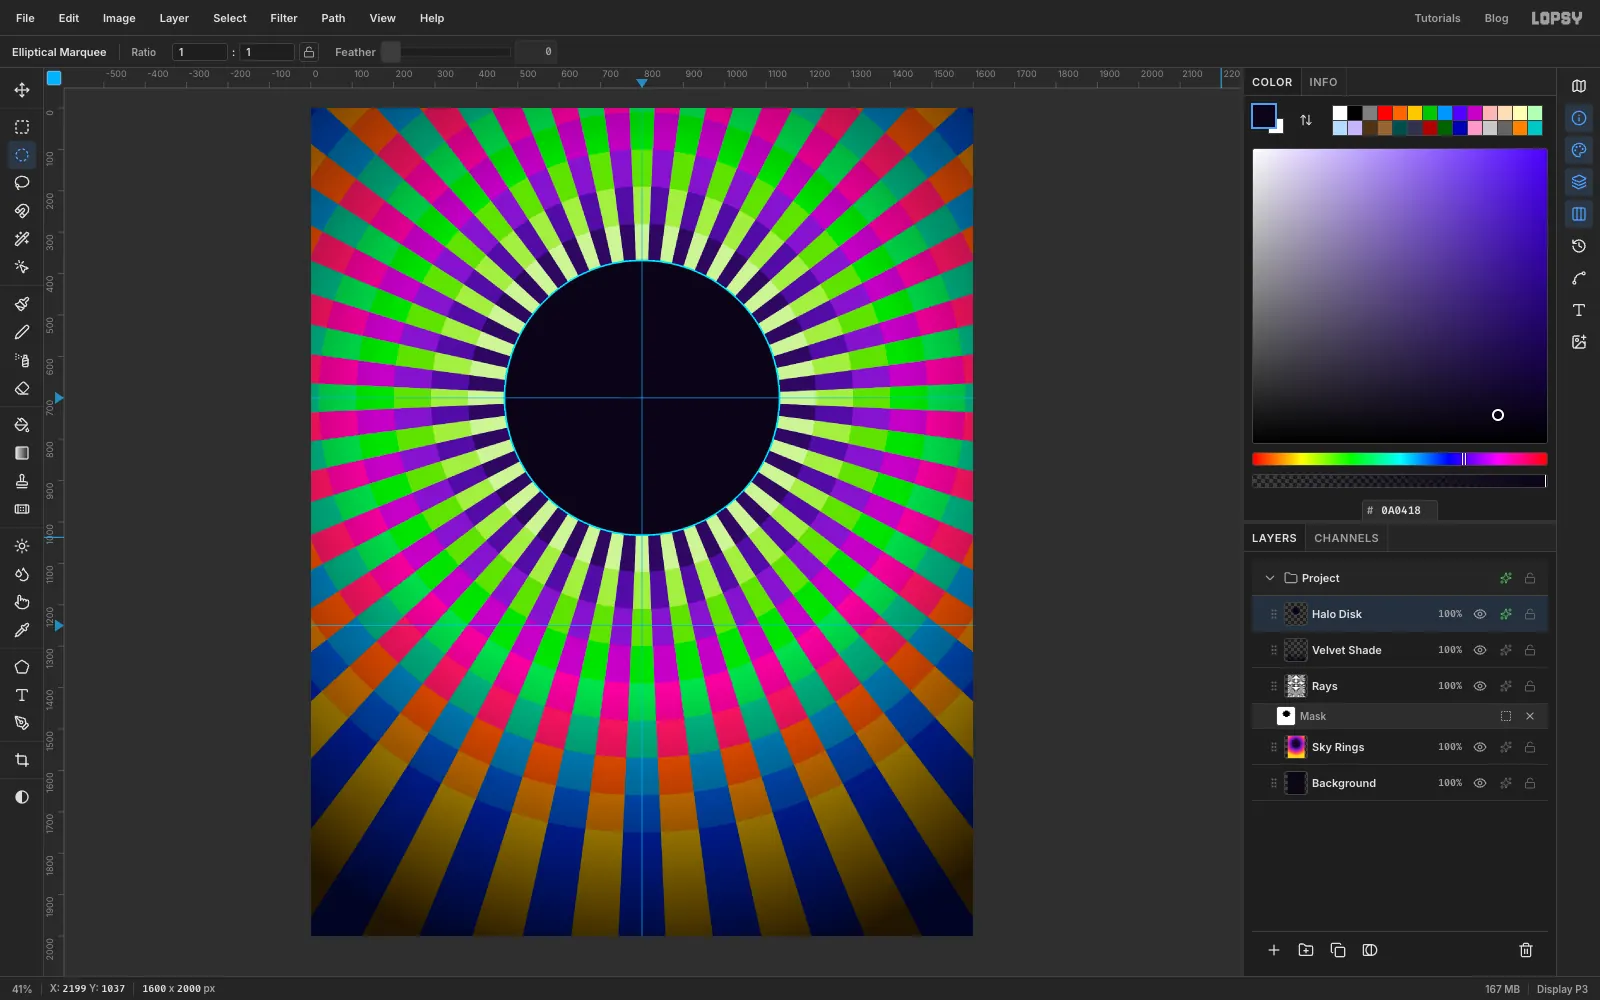
Halo Disk. - Select the same radius
330circle around800, 700and fill it with . Deselect. - Add a Stroke effect: Width
4, colour .
The corona will glow against this disc, and the thin cyan rim gives the mandala a clean edge.
- Add a layer called
-
Drop in an eclipse photo
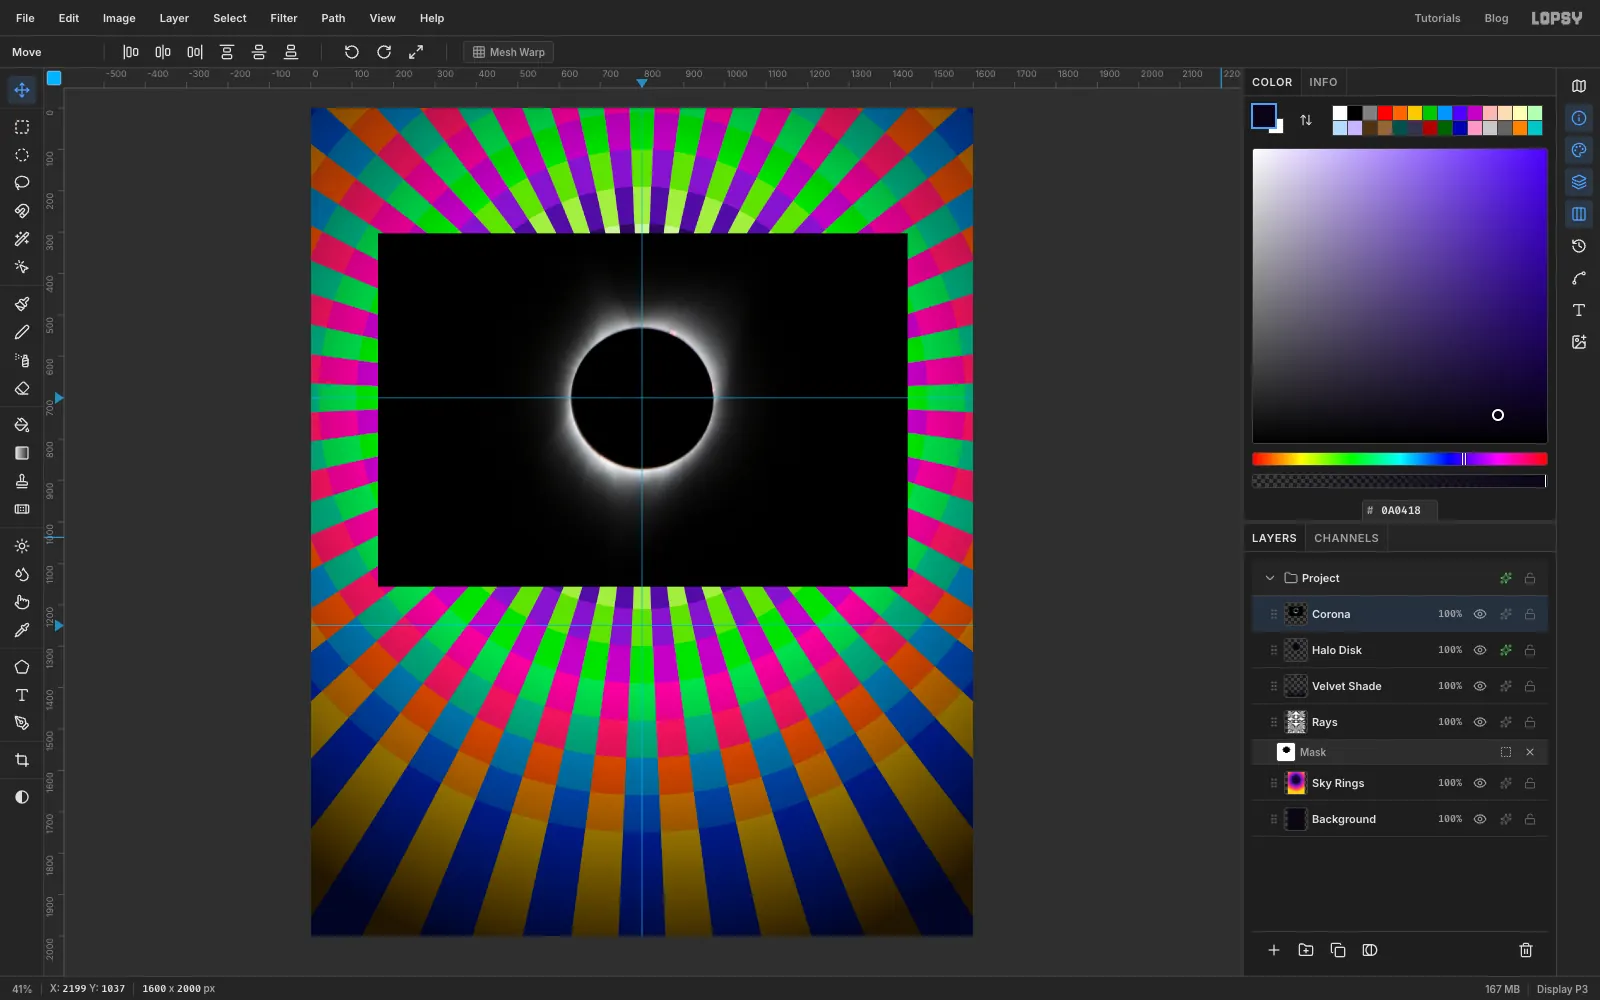
This painting uses NASA's public-domain photo of the 21 August 2017 total solar eclipse ("2017 Total Solar Eclipse (AFRC2017-0233-006)" on Wikimedia Commons). The 1280 px wide version works well. Any eclipse photo with the moon near the middle will do.
- Drag the image file from your desktop onto the canvas. It lands in the top-left corner as a new layer, already selected, with the Move tool active.
- Drag the photo until its black moon sits on the guide crossing, then use the arrow keys to settle it exactly. Shift+arrow moves 10 px at a time.
- Deselect and rename the layer
Corona.
-
Screen the photo into a group
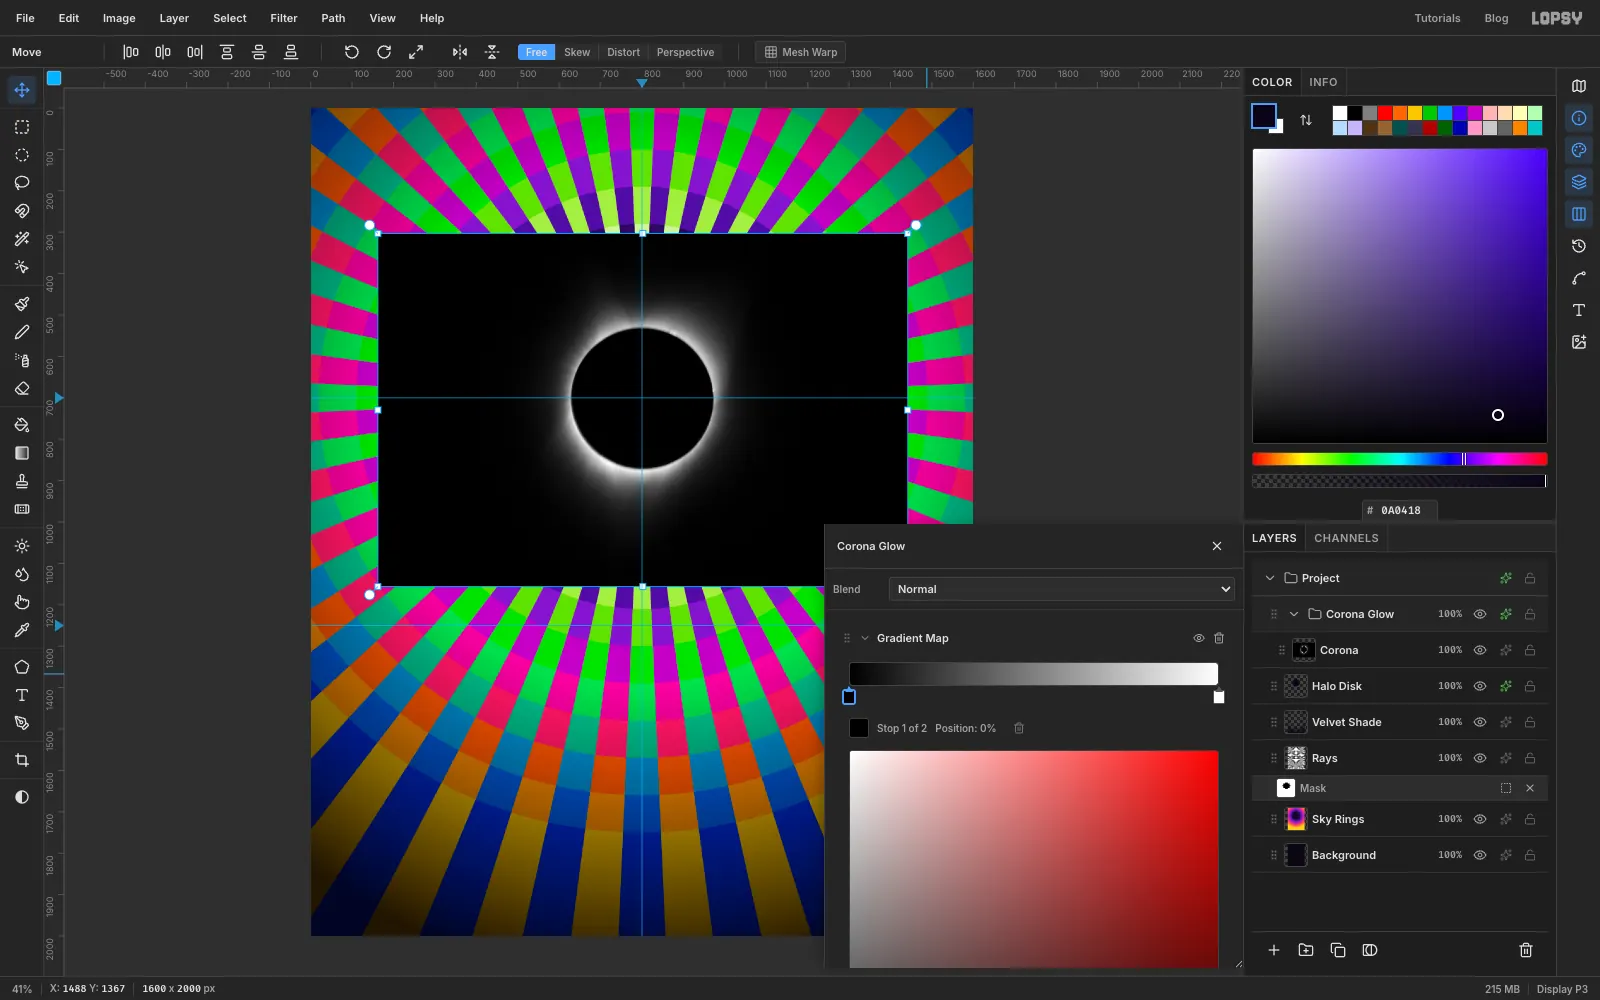
- Set the Corona layer to Screen, which makes black disappear.
- Choose Layer → Group Layers and rename the group
Corona Glow. - Open the group's effects drawer and click Add Adjustment. Scroll down the menu and choose Gradient Map.
The photo turns into a black rectangle. Once a group has an adjustment, it is blended on its own first, so the Screen on the photo only sees an empty group. The next step fixes that.
-
Tint the corona with a Gradient Map
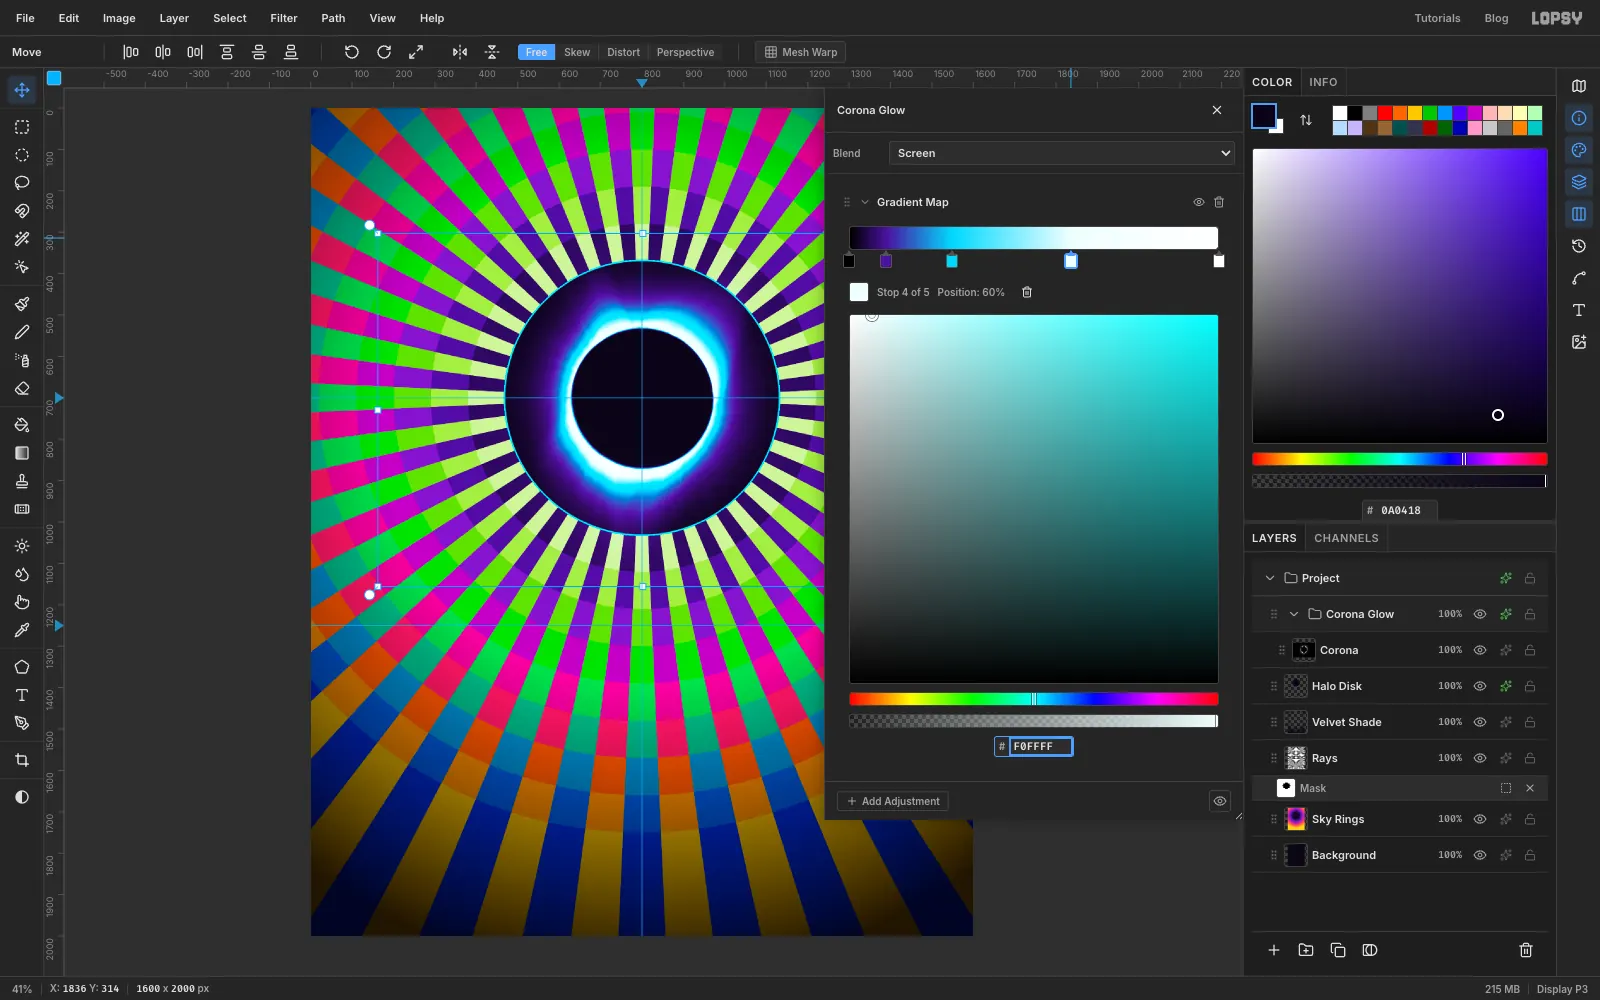
- Set the Corona Glow group's own Blend to Screen. The rectangle vanishes.
- In the Gradient Map, click an end stop to recolour it, click the bar to add a stop, and type each colour into the hex field. Set these stops:
- black at the start
- at 10%
- at 28%
- at 60%
- white at the end
The faint grey streamers in the photo turn violet and cyan, and the bright inner corona turns white.
-
Add the moon
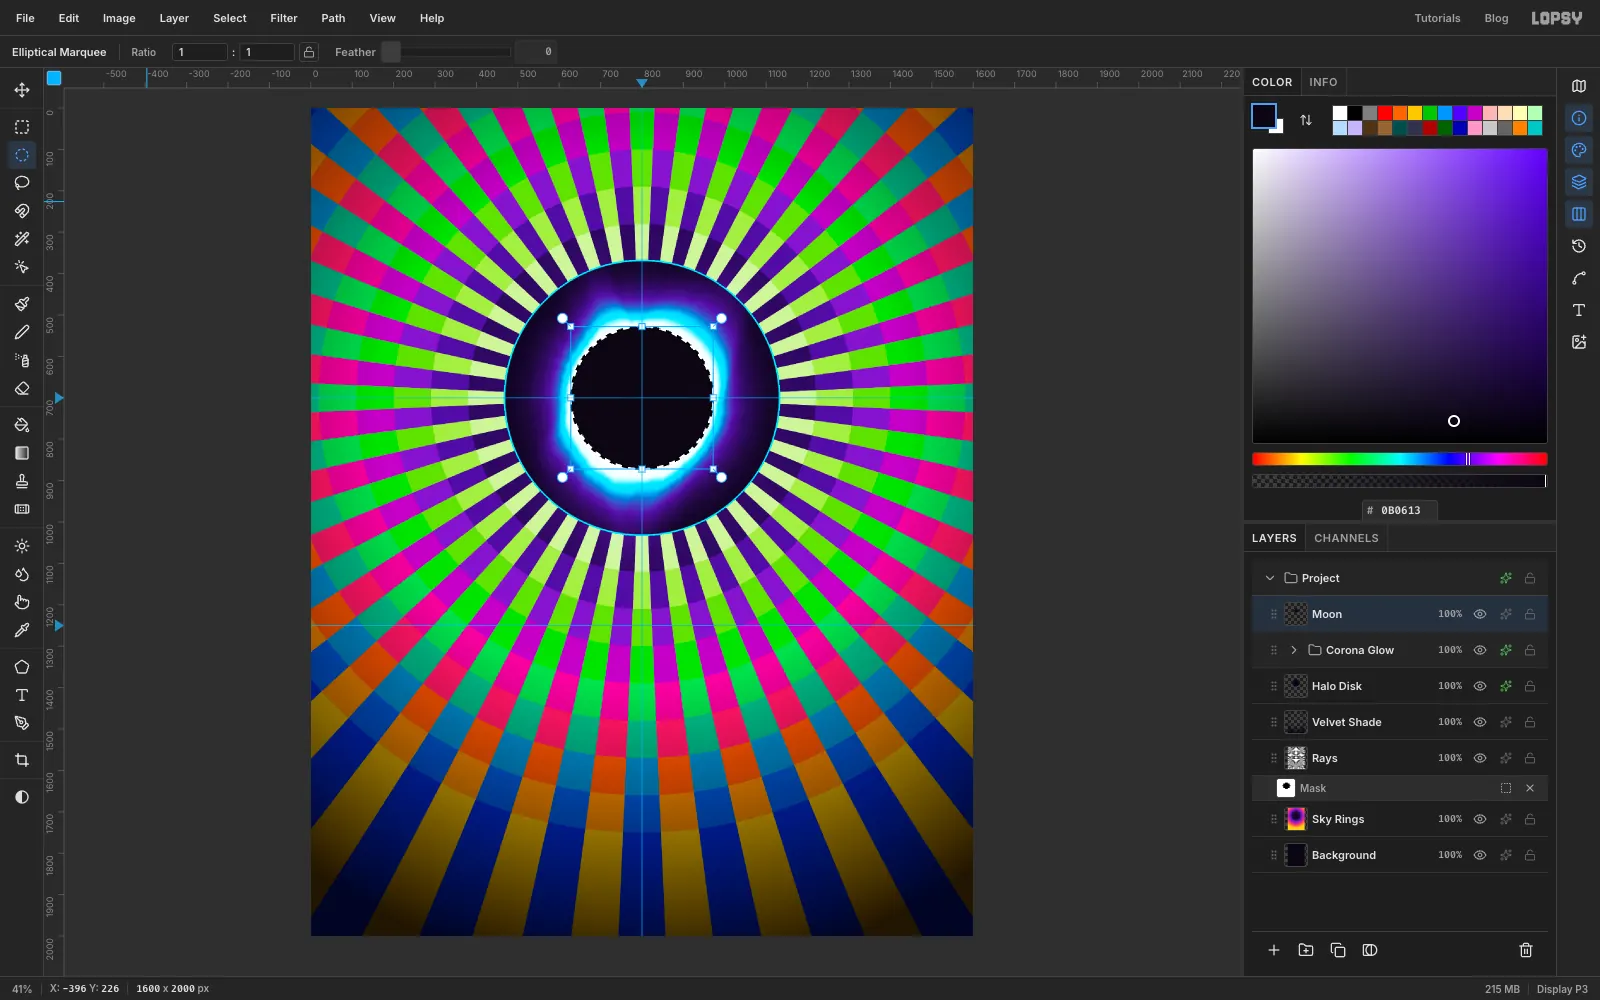
- Close the drawer and collapse the Corona Glow group (the arrow on its row), so the next layer lands above it rather than inside.
- Add a layer called
Moon, select a circle of radius172around800, 700and fill it with . Deselect.
-
Melt the moon with Liquify
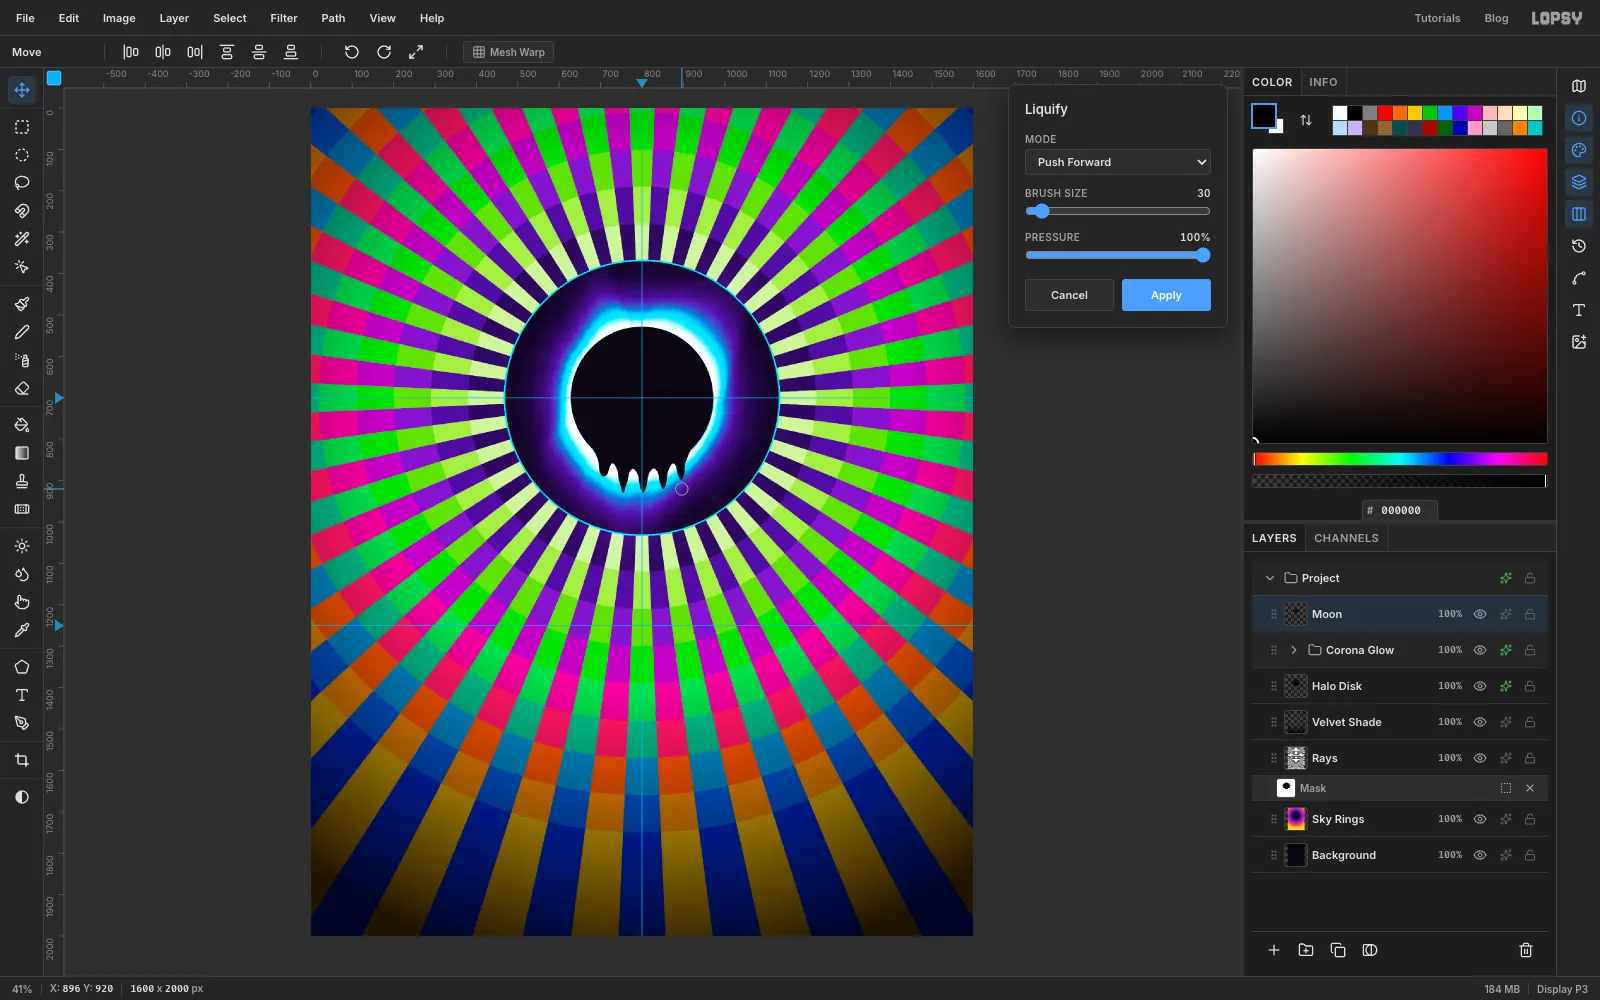
- With Moon selected, choose Filter → Liquify…. Leave Mode on Push Forward and set Brush Size
30and Pressure100%. - Start just inside the moon's lower edge and drag straight down about 100 px. Start the next drag a little lower down the same drip and drag again, until the drip is as long as you want.
- Make five drips spaced evenly across the bottom of the moon. Let the middle one run longest, past the petal ring you'll add later (to about y =
1100), and keep the two outside ones short. Then click Apply.
- With Moon selected, choose Filter → Liquify…. Leave Mode on Push Forward and set Brush Size
-
Paint corona streamers
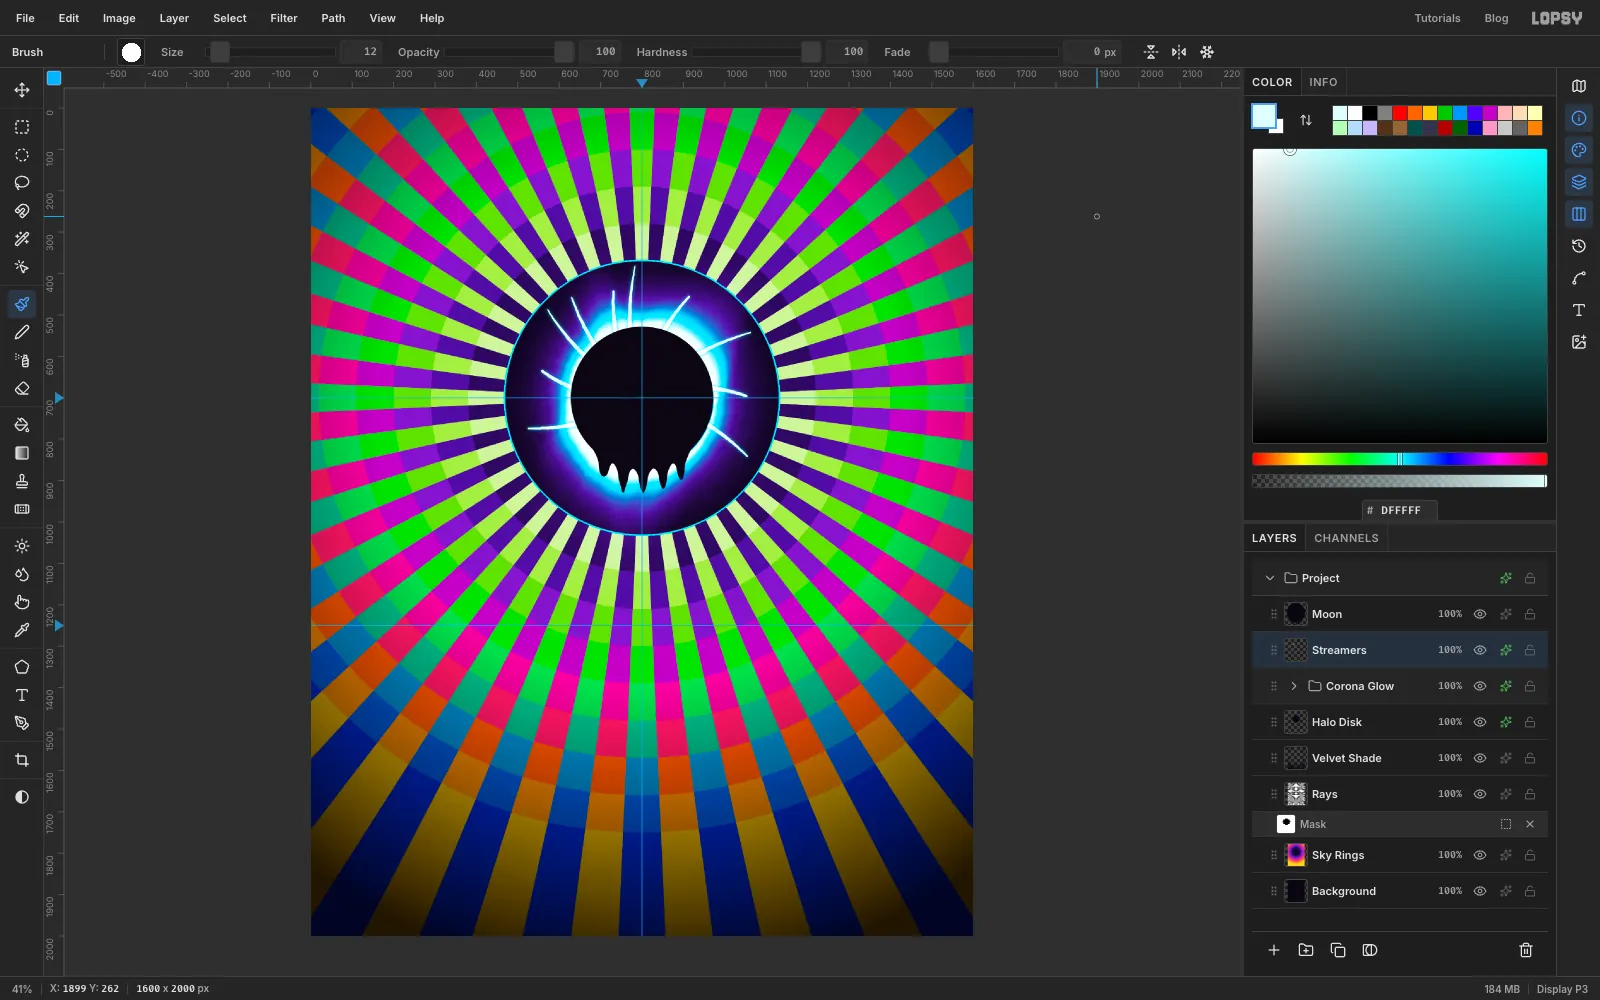
- Click the Corona Glow row and add a layer called
Streamers. It sits between the group and the Moon. - Choose the Brush with Size
12and Hardness100. Open the brush settings and set Taper to220, so each stroke thins out to a point. - Set the colour to . Paint ten strokes outward from the moon's edge, curving them slightly. Vary the lengths, and stop every one inside the dark disc. Leave a gap at the bottom where the drips are.
- Set the layer to Screen.
- Add an Outer Glow with Size
12, Opacity80and colour .
- Click the Corona Glow row and add a layer called
-
Draw one petal
The Kaleidoscope filter mirrors one wedge of a layer around the canvas centre, so you build the petal ring at
800, 1000and move it up afterwards.- Click Moon and add a layer called
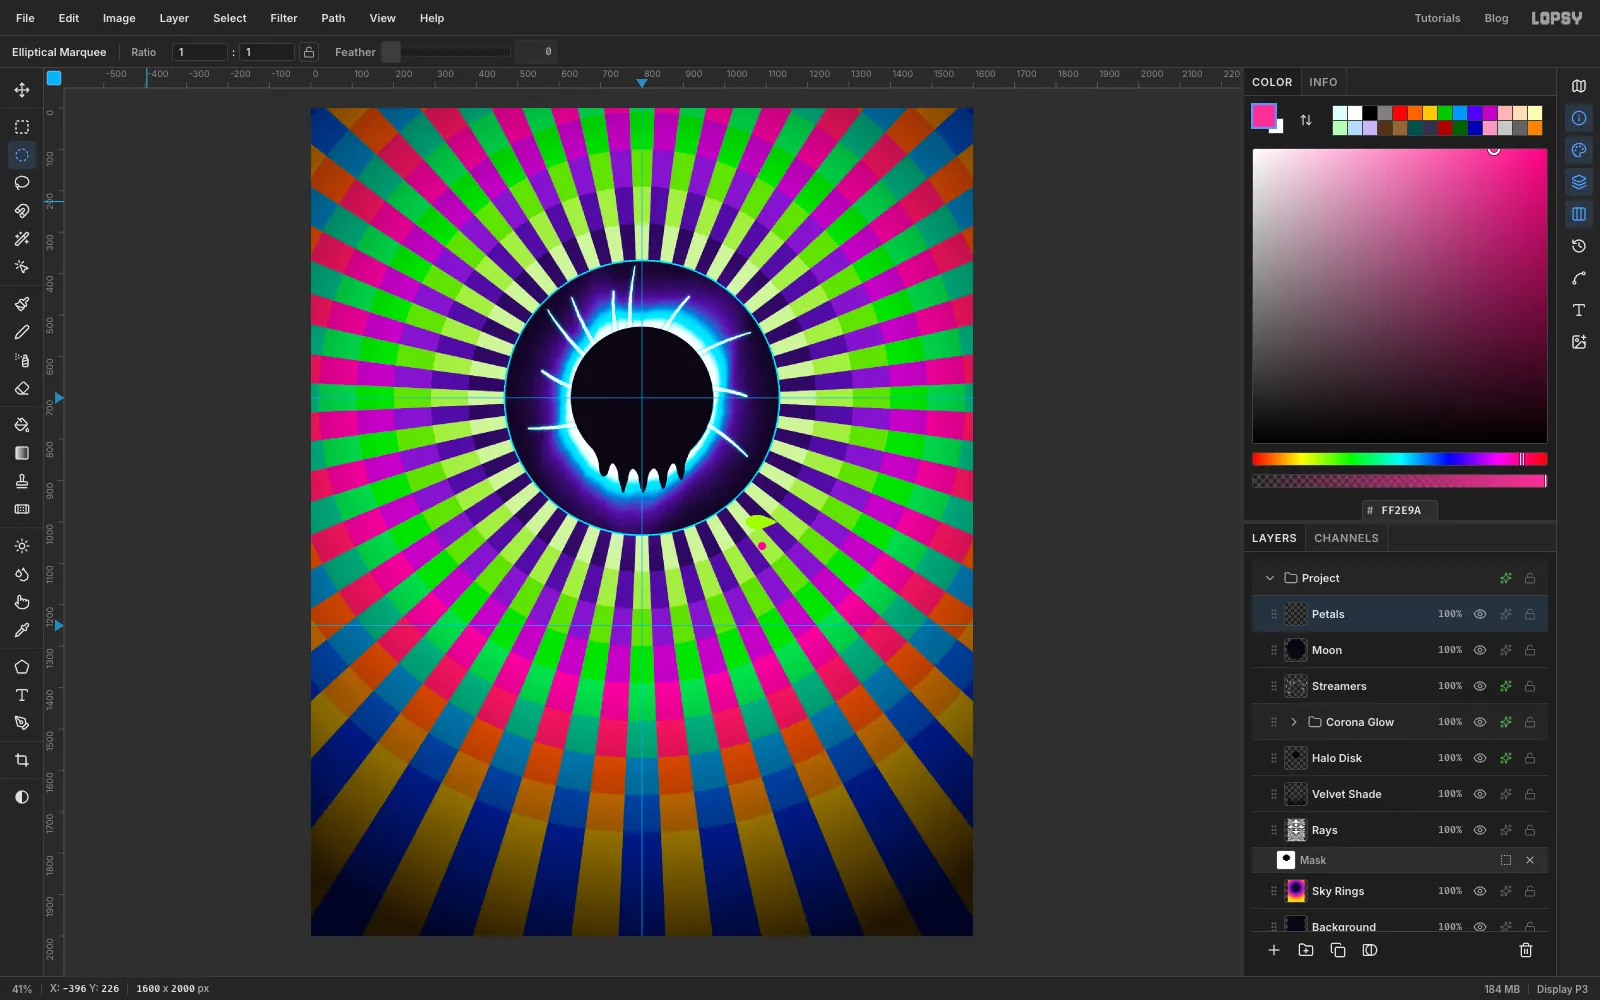
Petals. - With the Lasso, draw a slim leaf lying on the
1000line at 3 o'clock from the canvas centre, pointing away from it. Start about 250 px right of the centre and make it about 80 px long and a third as wide. Fill it with . - Select a circle of radius
10around1090, 1058and fill it with . Deselect.
The dot sits a little below the petal, half a segment round, so it ends up between the petals.
- Click Moon and add a layer called
-
Mirror it with Kaleidoscope
Choose Filter → Kaleidoscope… with Segments
16and Rotation0, and click Apply.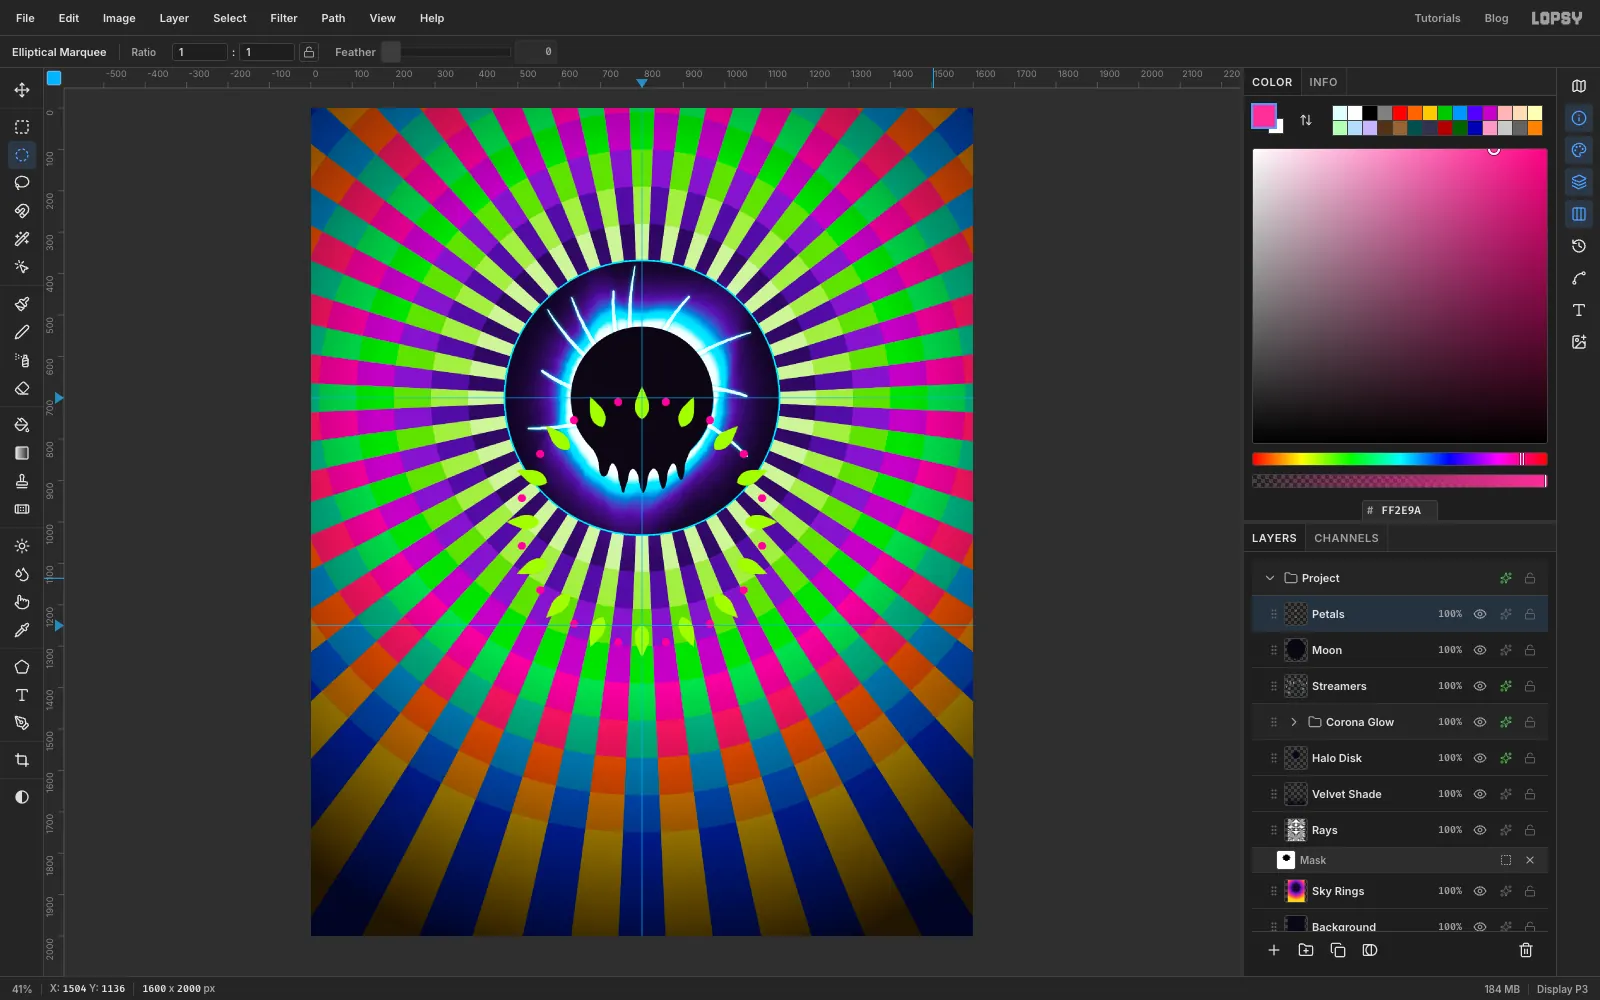
-
Lift the ring onto the eclipse
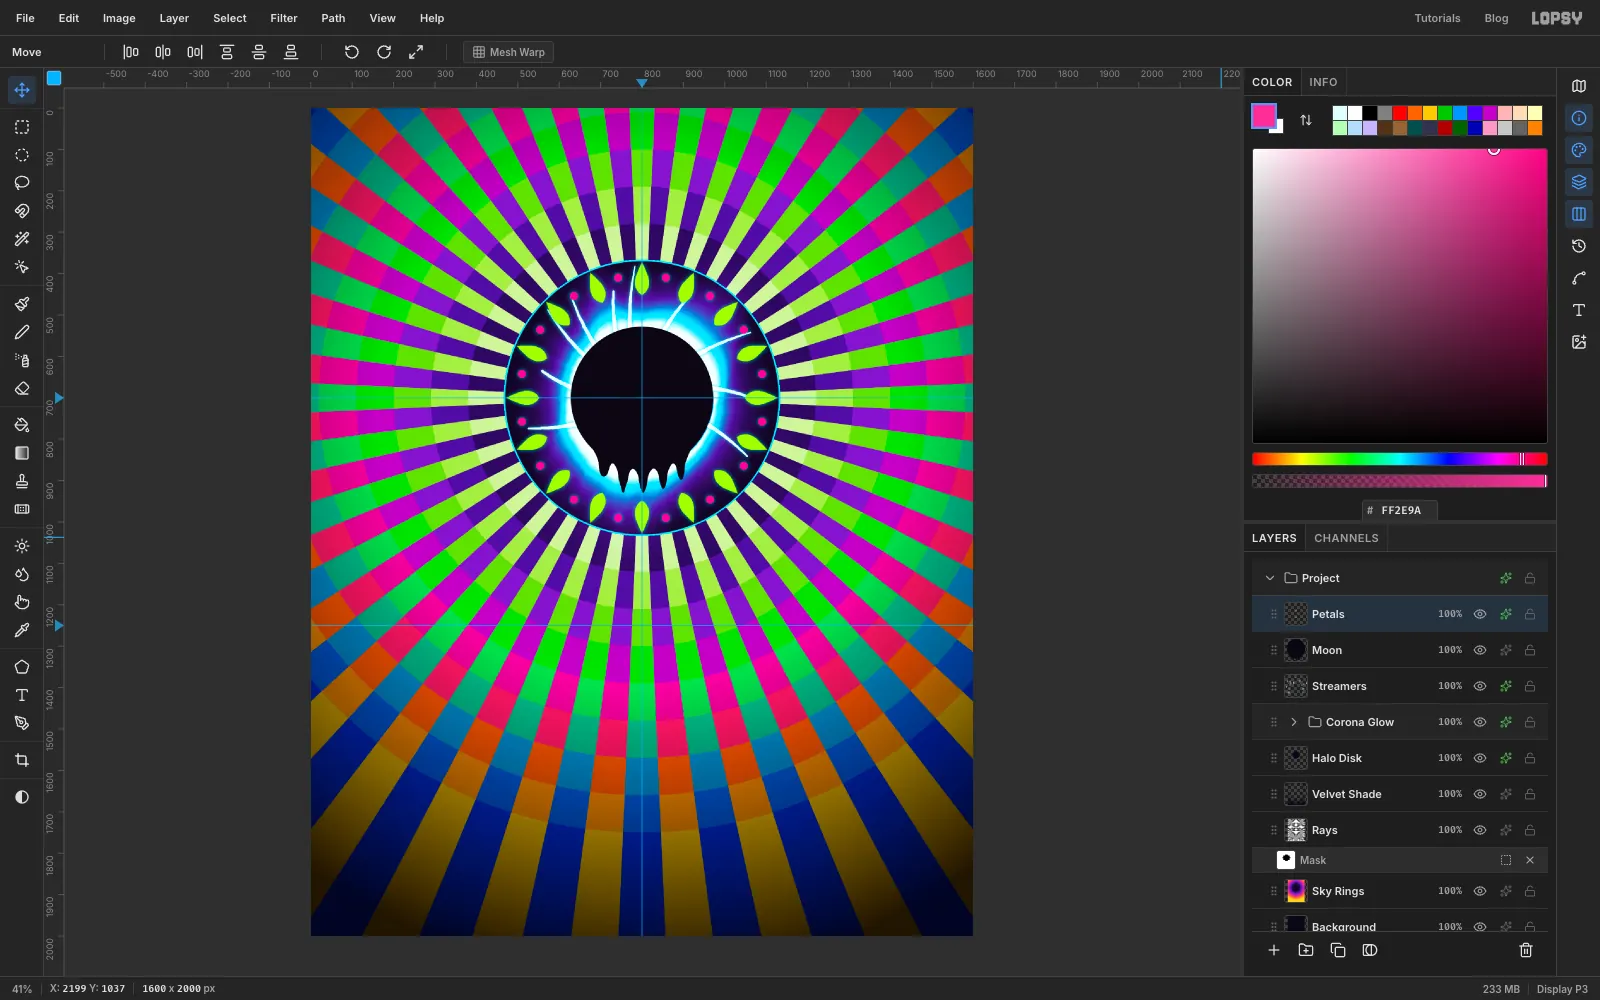
- With the Move tool, drag the ring straight up until it sits evenly inside the dark disc (it needs to rise 300 px). Use the arrow keys for the last few pixels.
- Add an Outer Glow to the Petals layer: Size
14, Opacity80, .
-
Start the far hills with offset copies
- Add a layer called
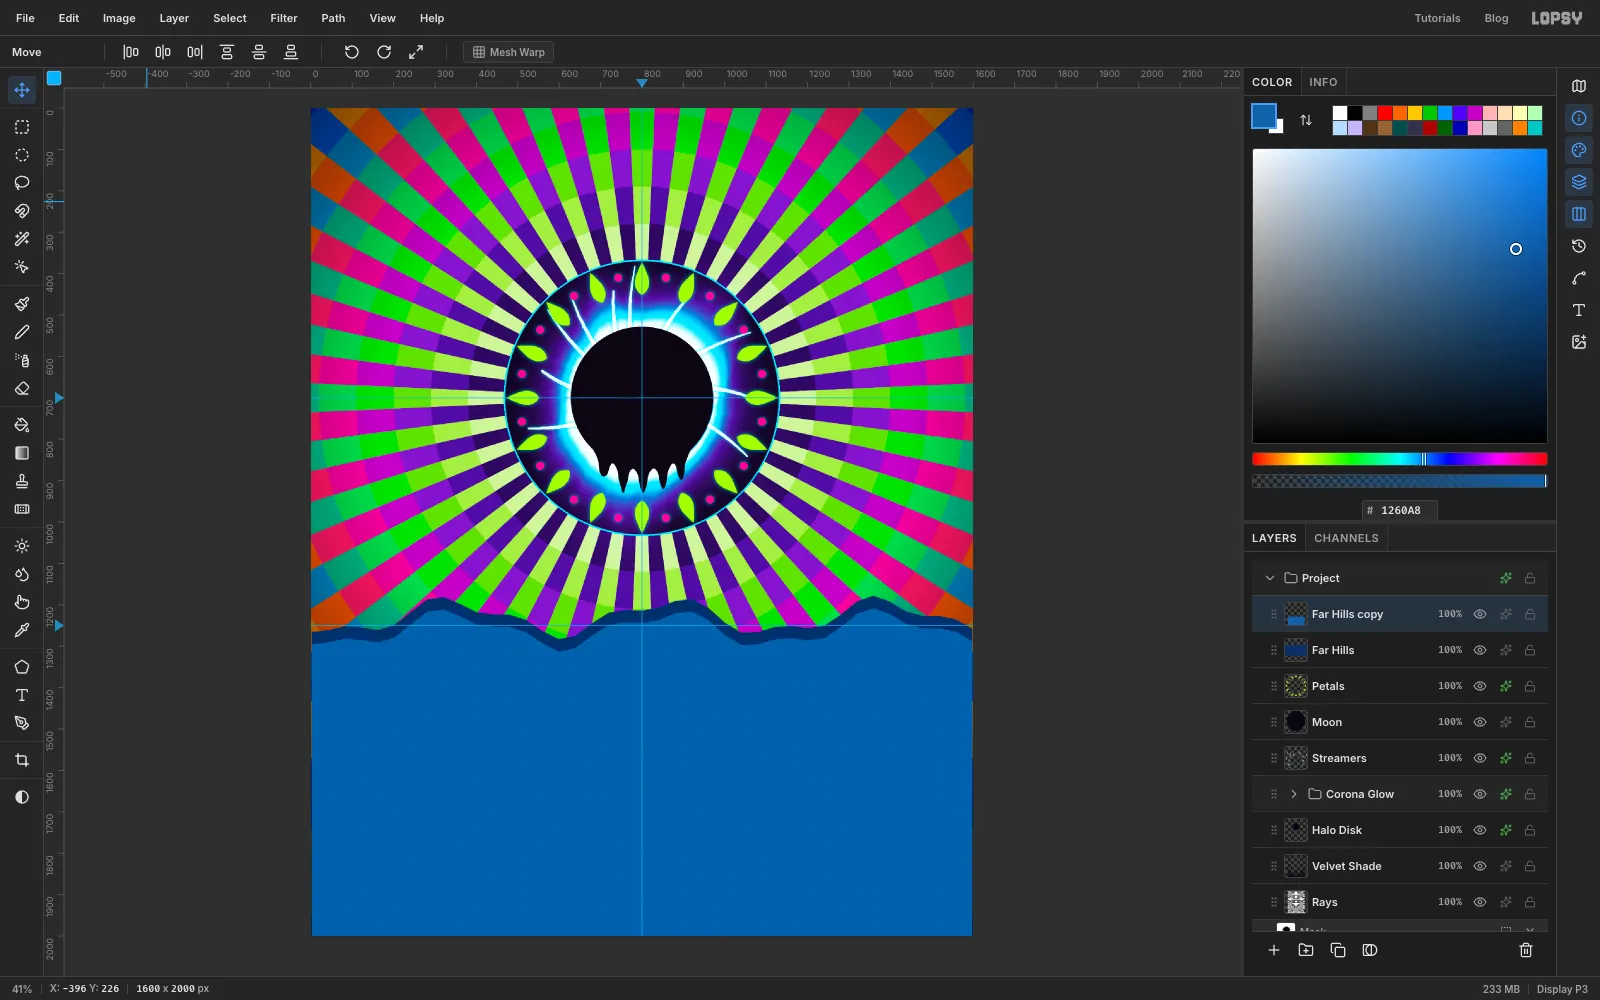
Far Hills. With the Lasso, draw a gently wavy ridge across the whole width, dipping and rising between about y =1180and1270. Carry the shape down to the bottom of the canvas and fill it with . - Choose Layer → Duplicate Layer. Cmd-click the copy's thumbnail, fill it with and deselect.
- With the Move tool, press Shift+Down three times to drop the copy 30 px. A navy stripe now shows along the ridge.
- Add a layer called
-
Finish the far hills
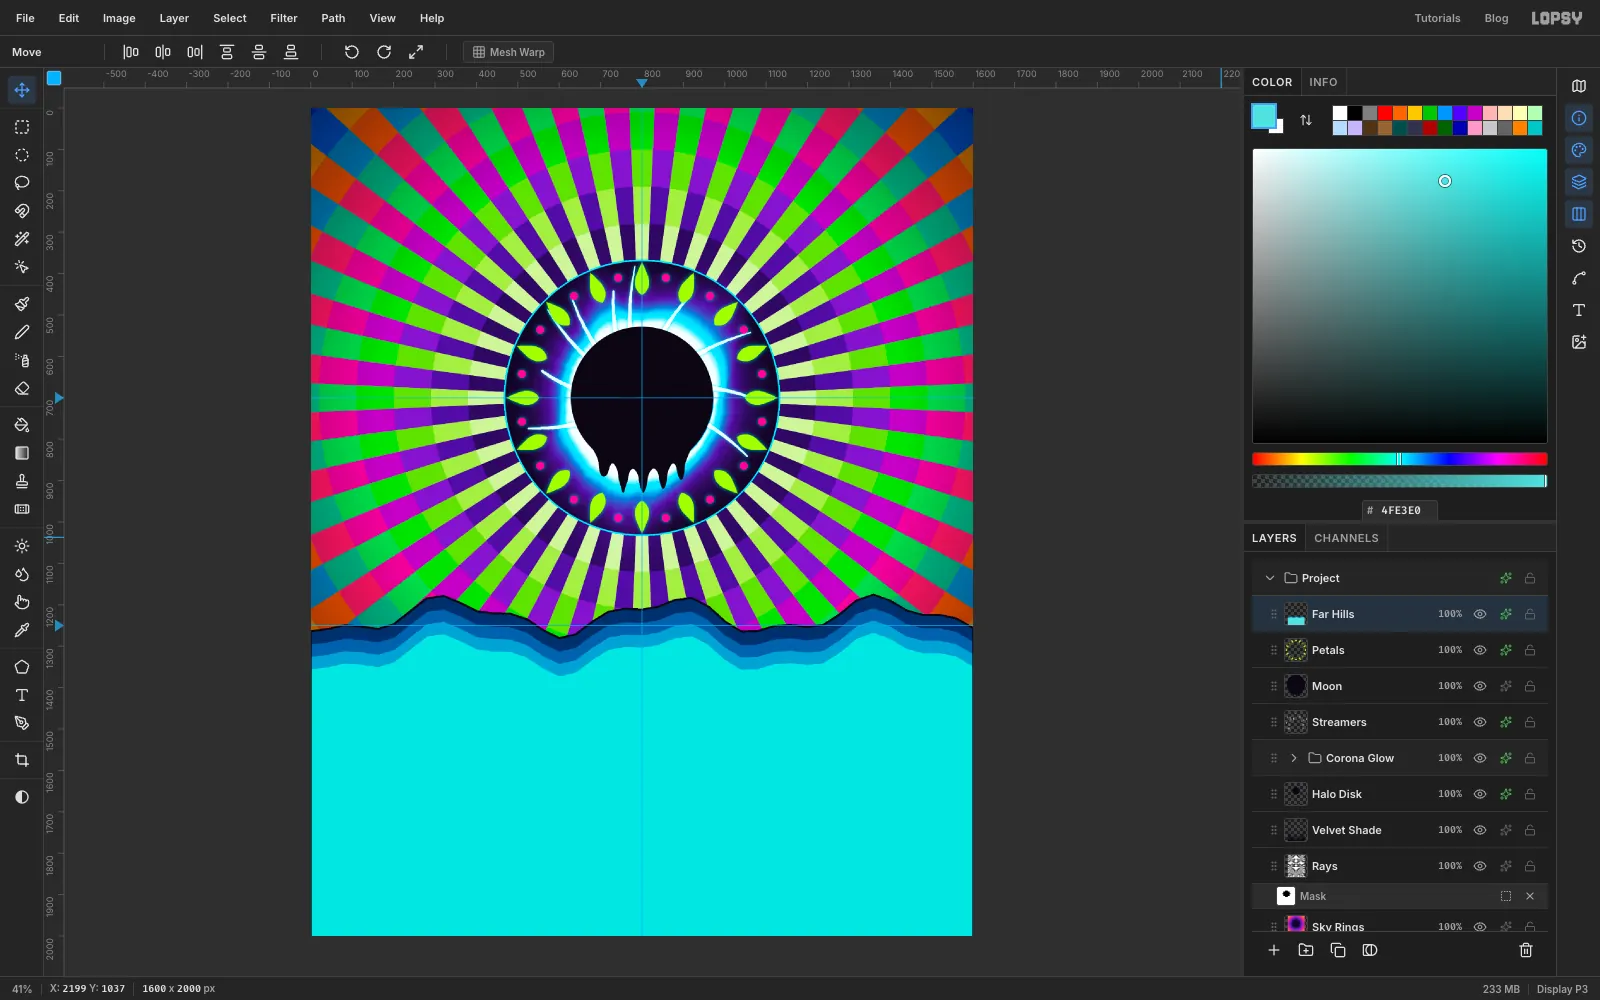
- Repeat the duplicate, fill and 30 px nudge twice more, with and then . Always duplicate the newest copy, and set the foreground colour before Edit → Fill.
- Click the top copy and choose Layer → Merge Down three times. Rename the result
Far Hills. - Add a Stroke effect: Width
5, colour .
-
Band the mid hills
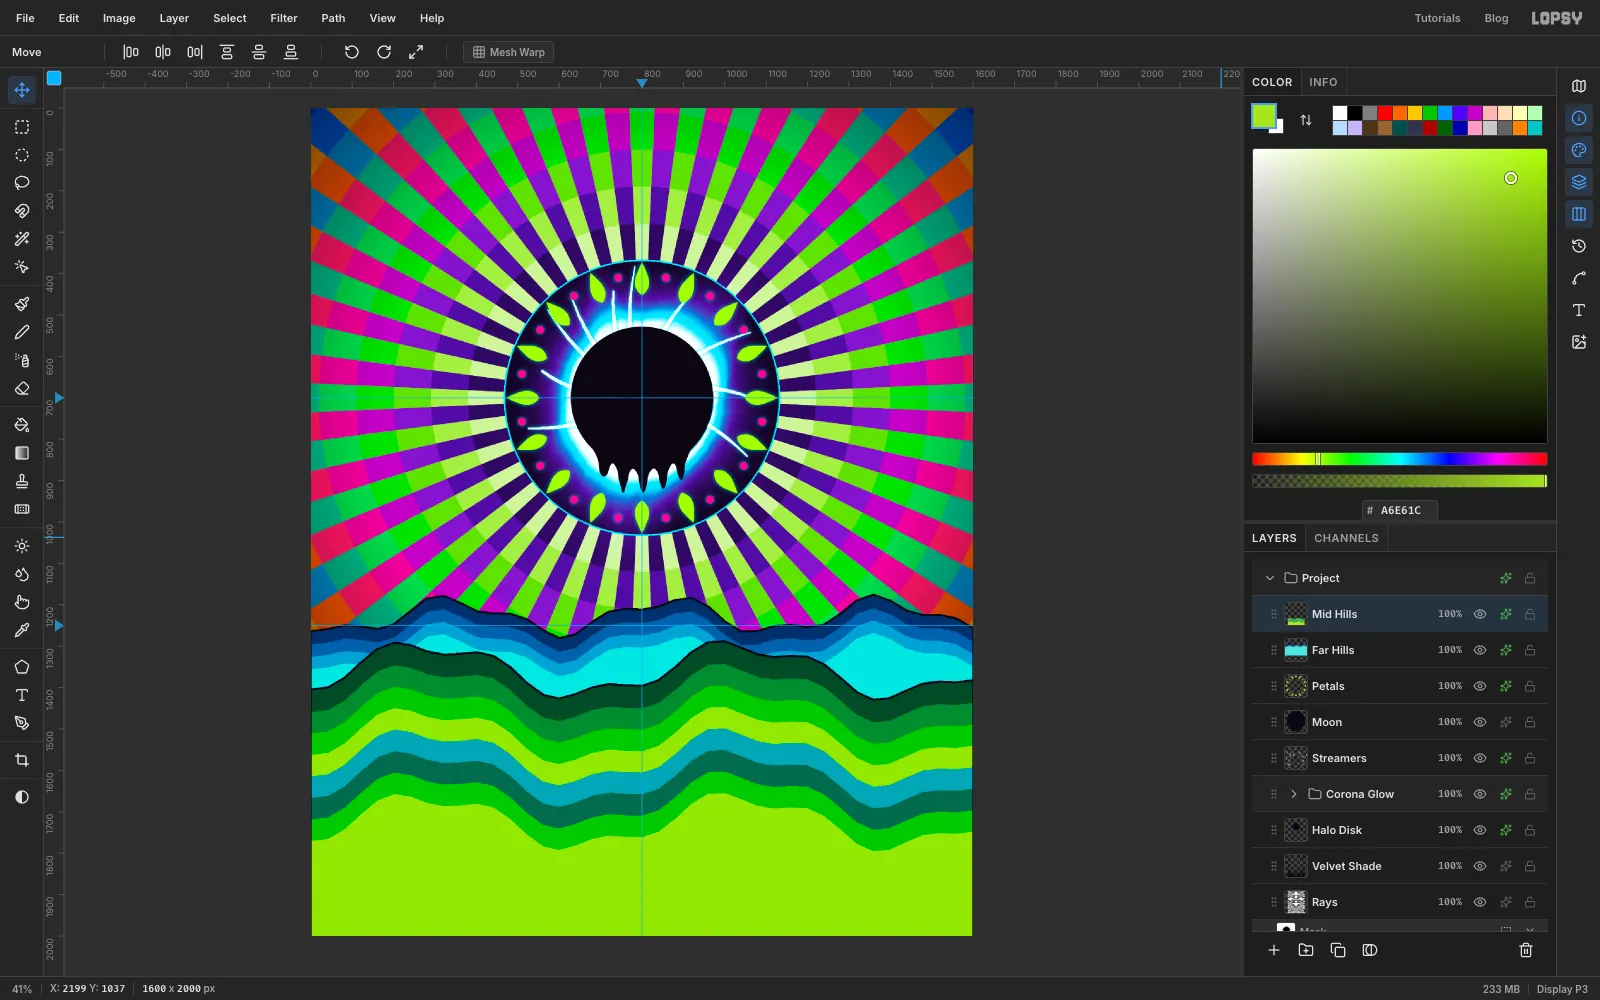
Add a layer called
Mid Hillsand lasso a bolder ridge in front, between about y =1300and1420. Band it the same way with 52 px nudges (Shift+Down five times, then Down twice). Use eight colours:- , , ,
- , , ,
Click the top copy and choose Merge Down seven times. Rename the result
Mid Hillsand give it the same black Stroke of5.The wider stripes make this range feel closer than the far hills.
-
Wind a river out of the ridge
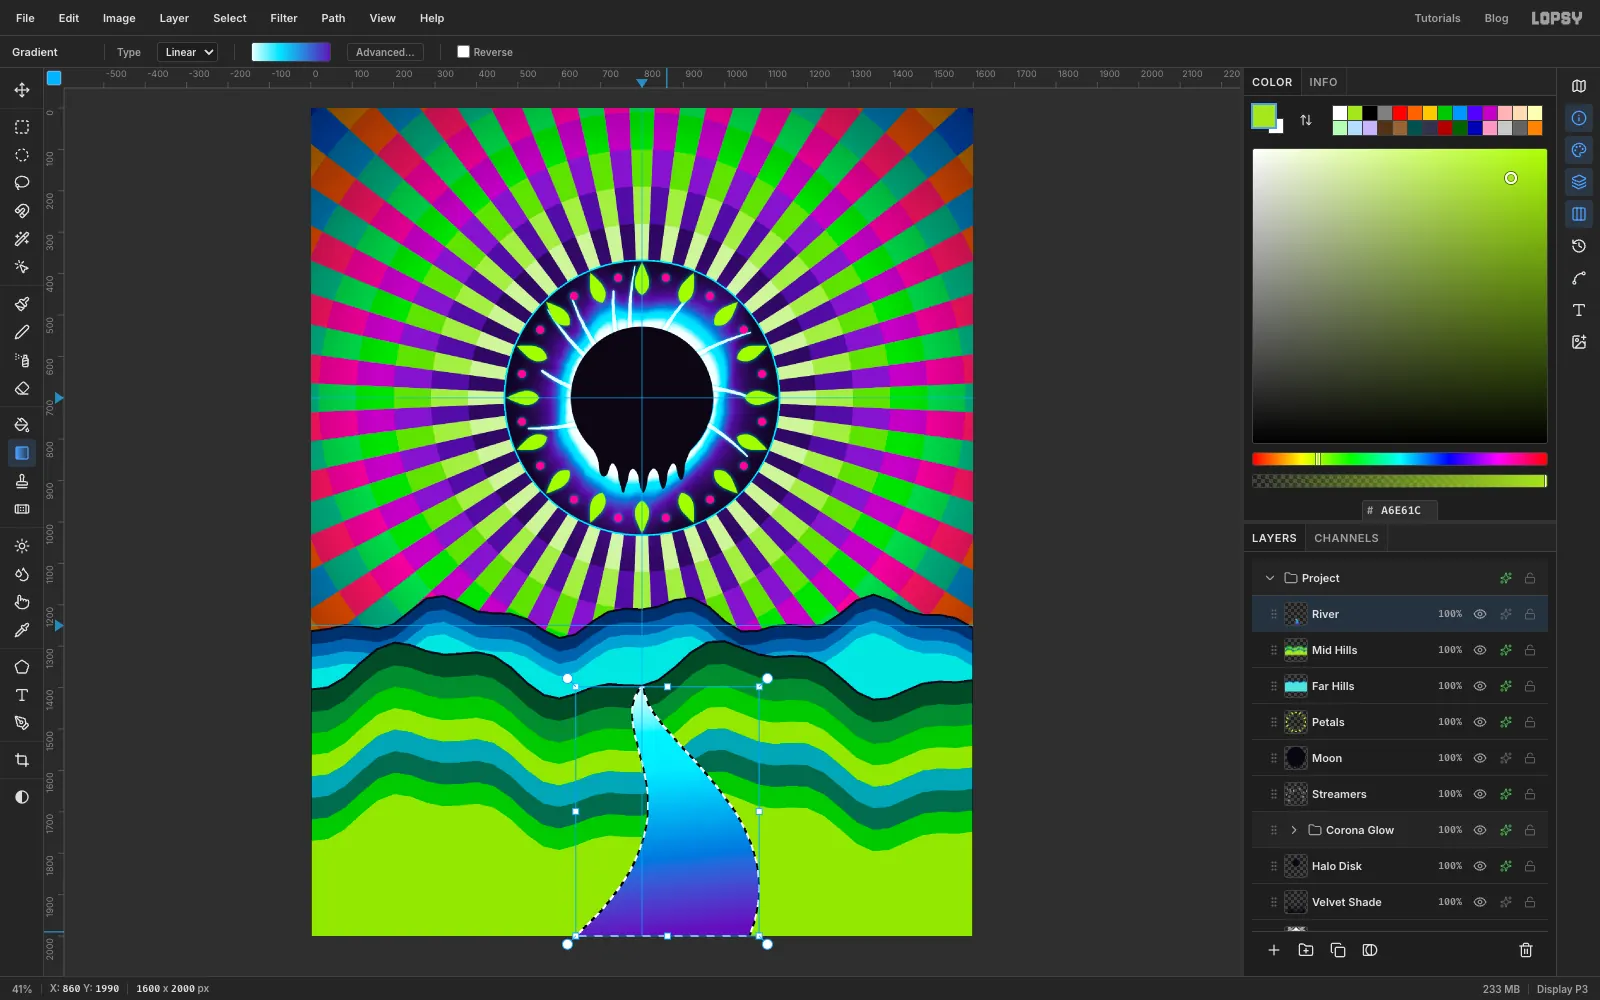
- Add a layer called
River. With the Lasso, start at a point on the green ridge at800, 1398. - Draw the left bank swinging left, then right, then reaching the bottom edge at about x =
640. Come back up the right bank from about x =1060, so the river widens towards you. - Choose the Gradient tool (Linear) with stops , at 35% and . Drag from the top of the river to the bottom.
- Deselect. Add a black Stroke of
5and an Outer Glow (Size25, Opacity60, ).
- Add a layer called
-
Add the near hills
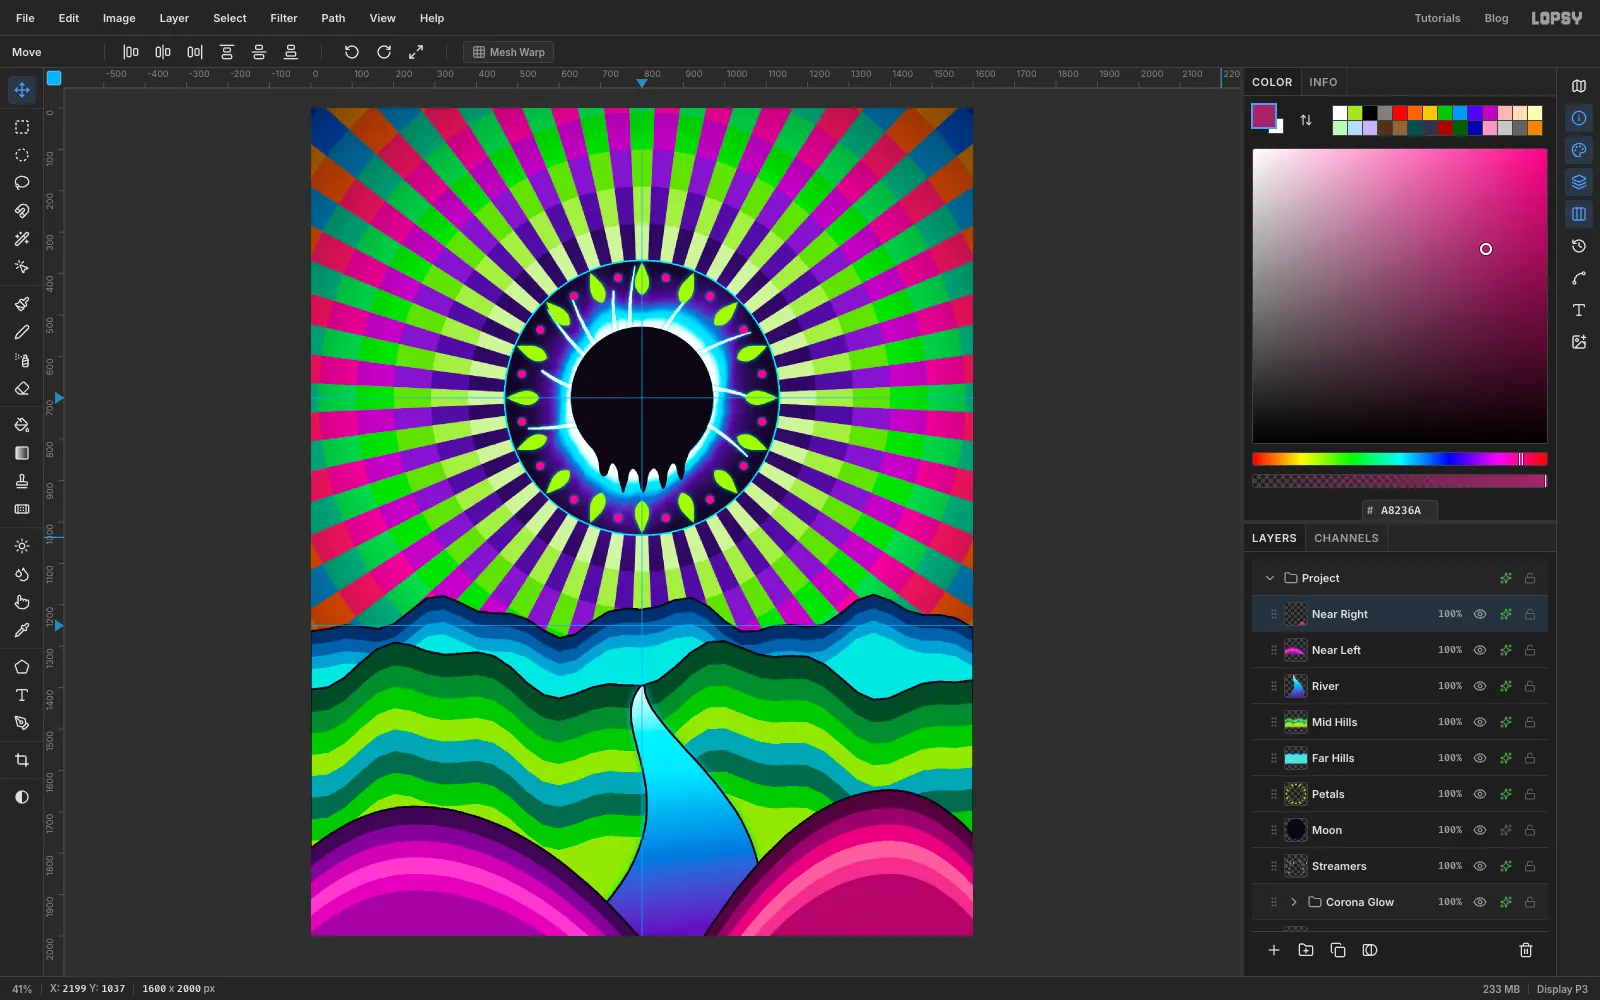
- Add a layer called
Near Leftand lasso a round mound peaking at about250, 1690. Let it drop gently to the left edge and steeply to the right, off the bottom of the canvas left of the river mouth. Fill it with . - Band it as before, nudging each copy 40 px (Shift+Down four times). Use , , , and .
- Click the top copy and choose Merge Down five times. Rename the result
Near Leftand add a black Stroke of5. - Repeat for
Near Right, a mound peaking at about1400, 1650that drops off the bottom right of the river mouth and gently to the right edge. Use , , , , and .
- Add a layer called
-
Shape the mushroom stem
- Click Near Left and add a layer called
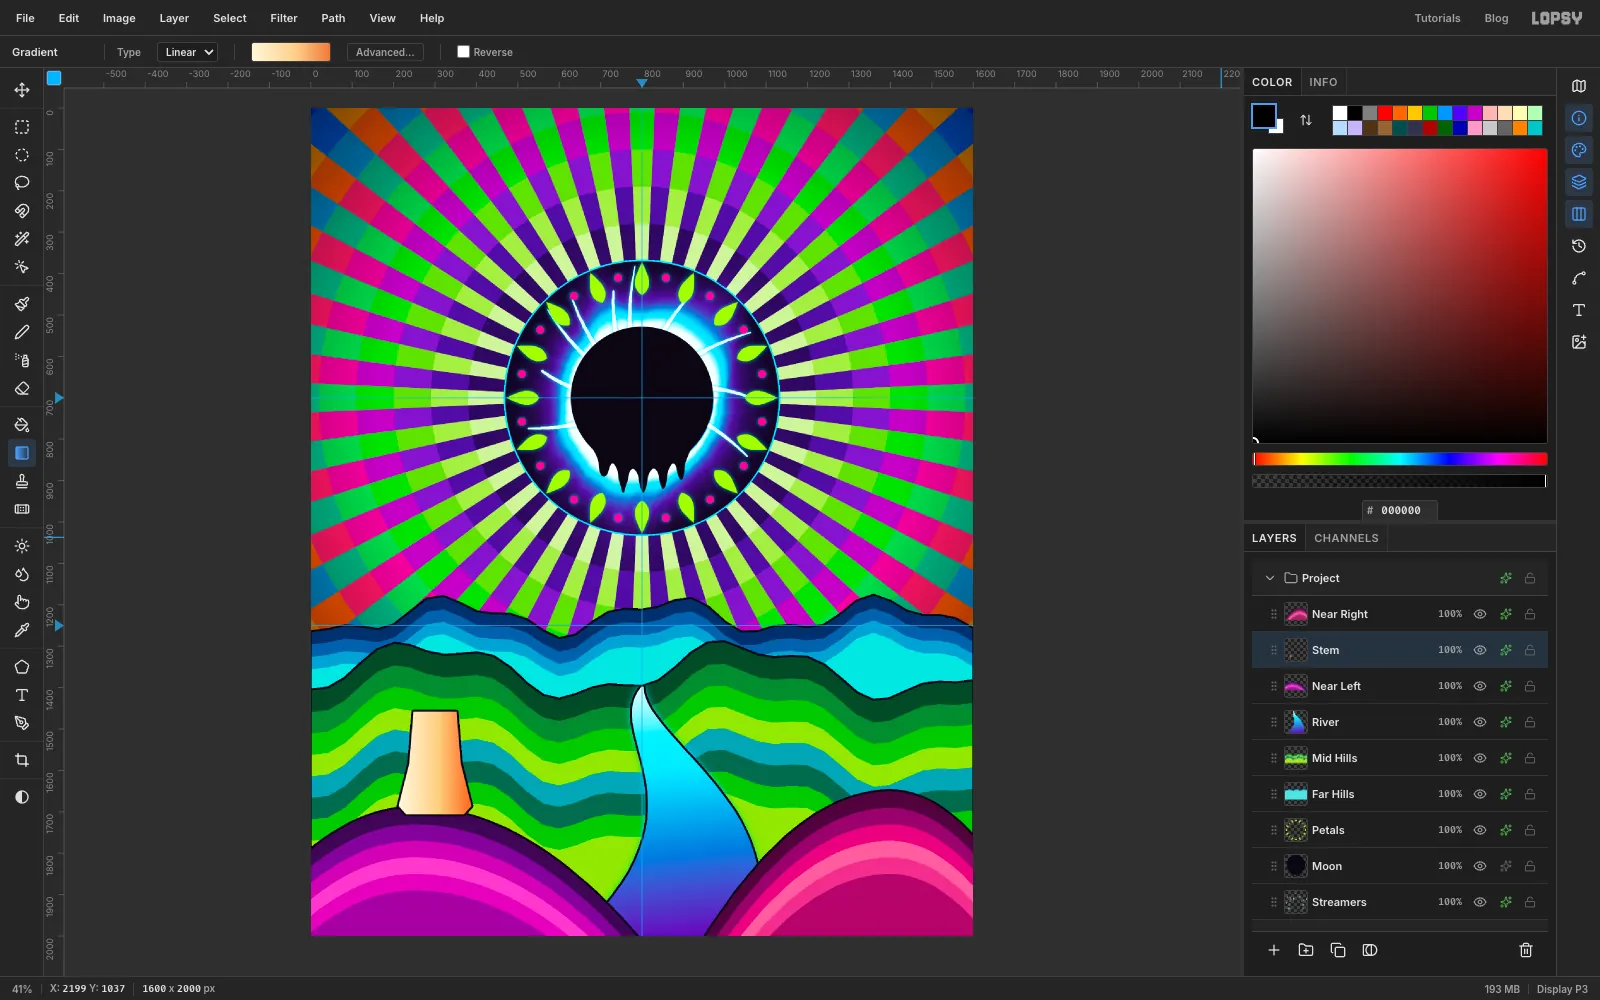
Stem. - Lasso a stem centred on x =
300, from about1458down to the top of the hill. Make it about a fifth as wide as the cap will be at the top, slightly wider in the middle, and flaring like a trumpet at the base. - Fill it with a Linear gradient dragged left to right across the stem: , at 55% and .
- Deselect and add a black Stroke of
5.
- Click Near Left and add a layer called
-
Add striped gills
- Add a layer called
Gills. Lasso a flat oval across the top of the stem, a little narrower than the cap will be and about 60 px tall, and fill it with . - Keep the selection, set the foreground colour to , and run Filter → Sunburst… with Rays
44, Length16, Width35, Taper0, Softness0, Center X18.75and Center Y75.5.
Those centre values are
300, 1510, just below the oval where the stem meets it, so the lines fan out from the stem. The selection keeps the rays inside the oval, so they read as gills. Deselect and add a black Stroke of5.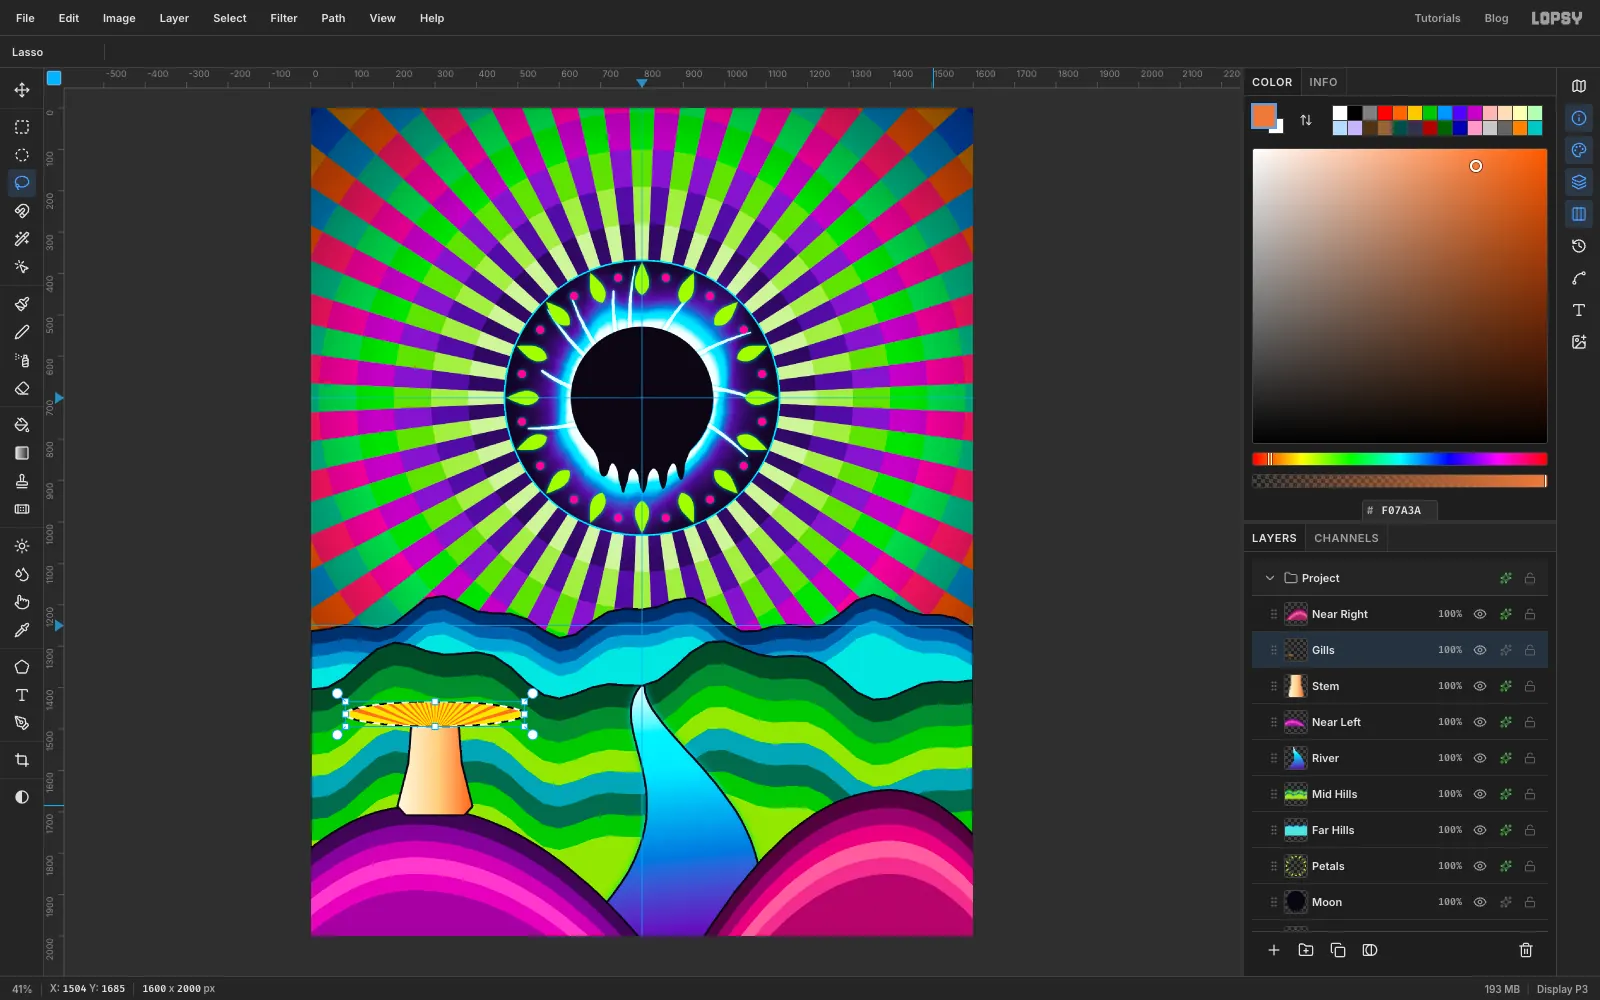
- Add a layer called
-
Paint the cap
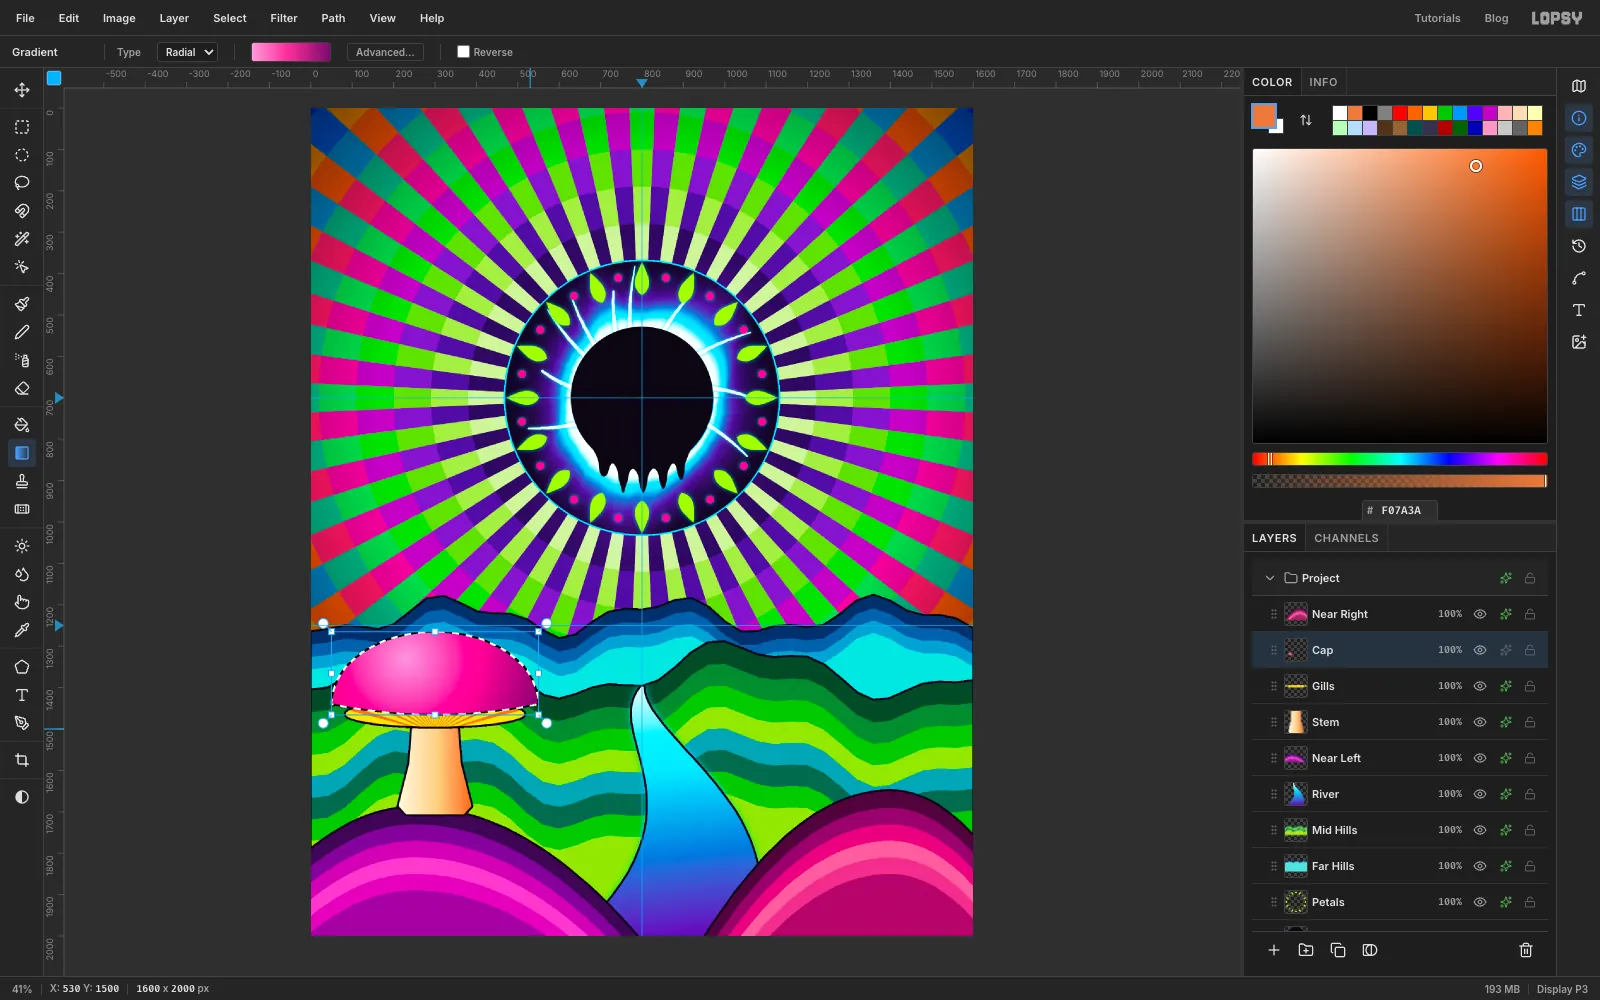
- Add a layer called
Cap. Lasso a dome over the gills, centred on about300, 1440, roughly 500 px wide and 175 px tall, with a slightly scooped underside. - Fill it with a Radial gradient of , at 45% and . Drag from about
230, 1330(the highlight) to530, 1500. - Deselect and add a black Stroke of
5.
- Add a layer called
-
Spot the cap and trim the spots
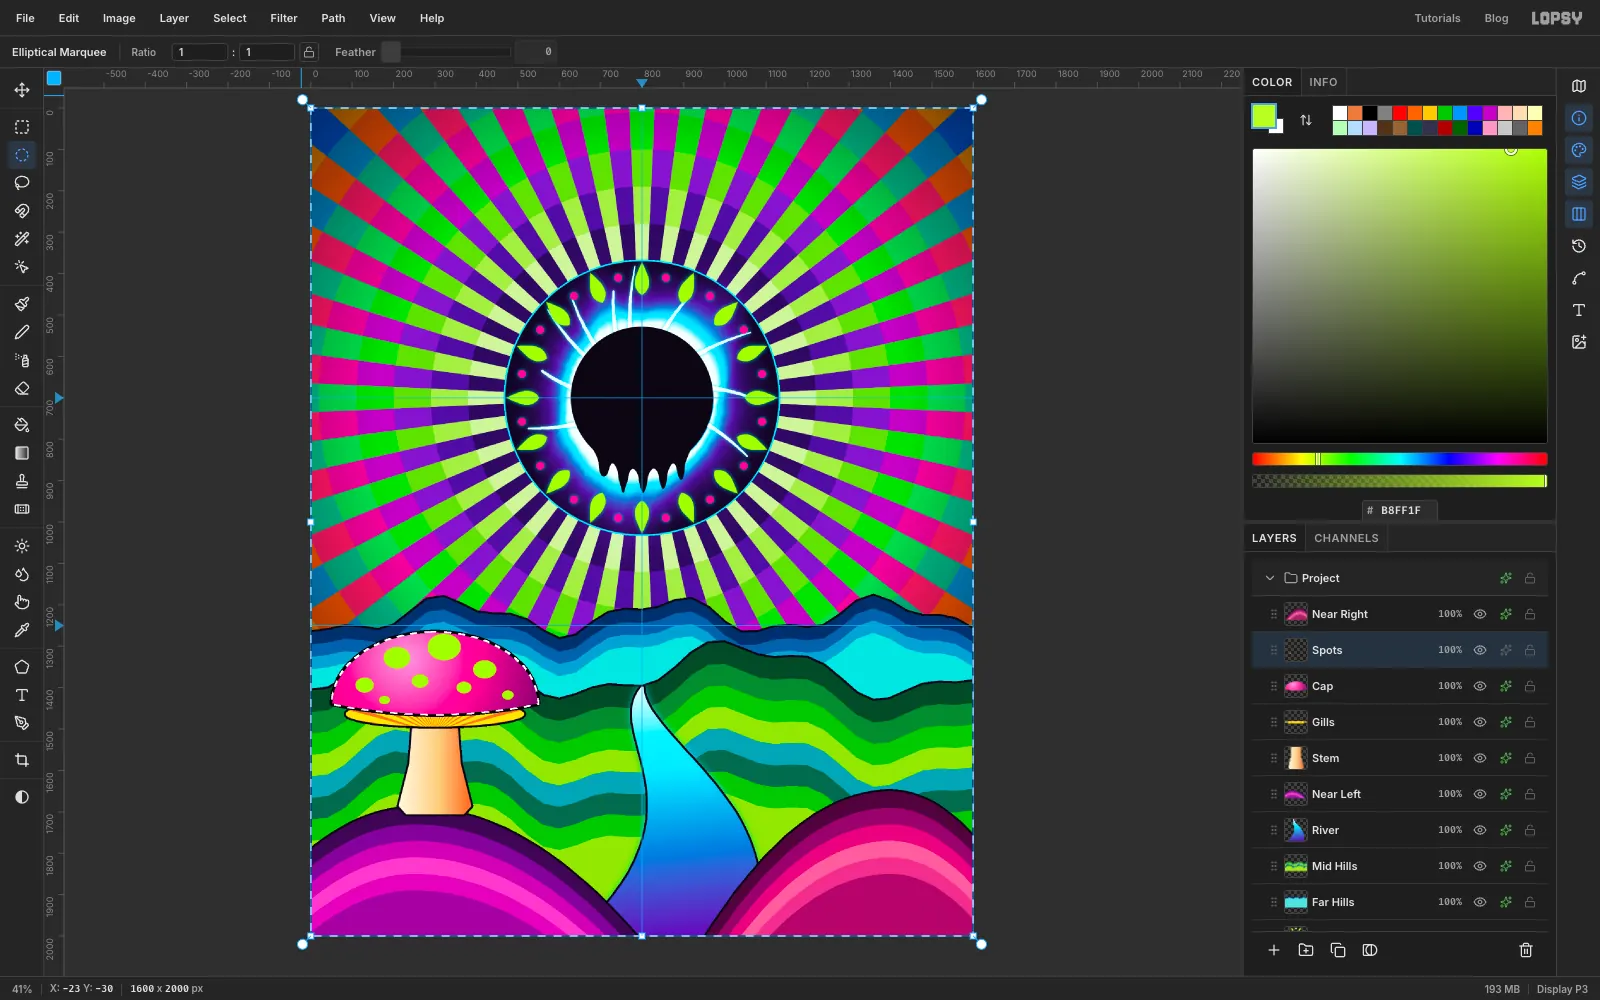
- Add a layer called
Spotswith the foreground colour . Drag eight slightly squashed ovals across the cap with the Elliptical Marquee, filling each one. Make the big ones up near the crown (about 80 px across) and the small ones near the rim (about 25 px). - Cmd-click the Cap thumbnail, choose Select → Inverse, and press Delete to trim anything hanging off the cap.
- Deselect and add an Inner Glow (Size
8, Opacity70, white).
- Add a layer called
-
Group the mushroom
Click Stem, Shift-click Spots, choose Layer → Group Layers, and rename the group
Big Mushroom.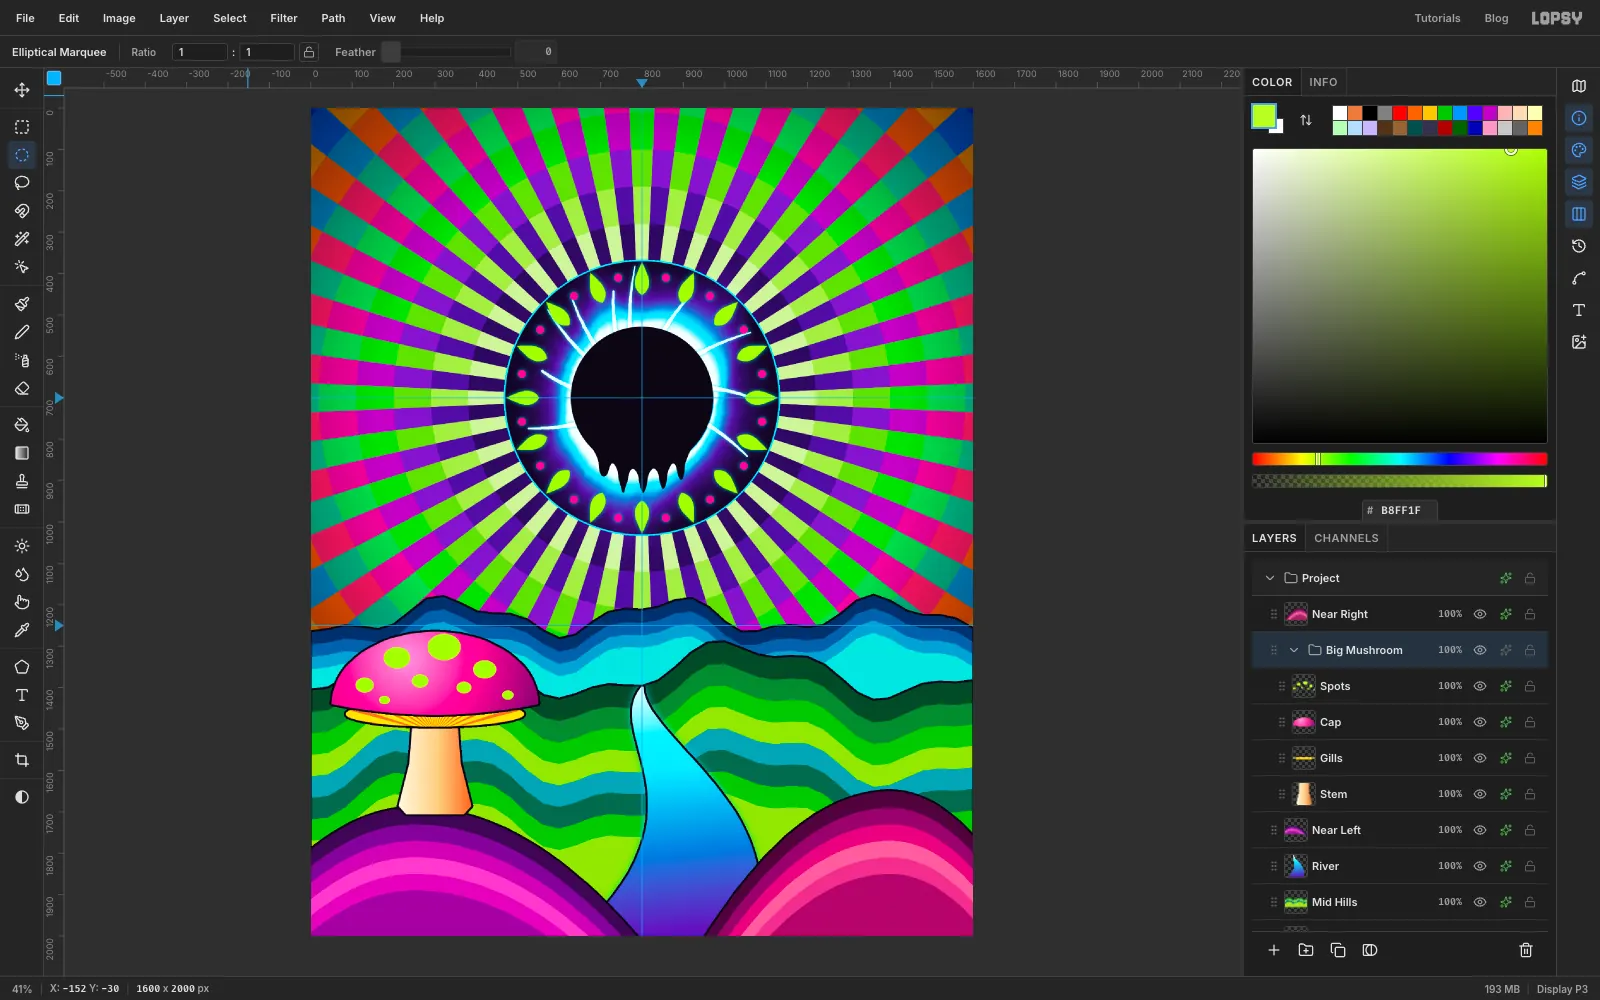
-
Copy the whole mushroom
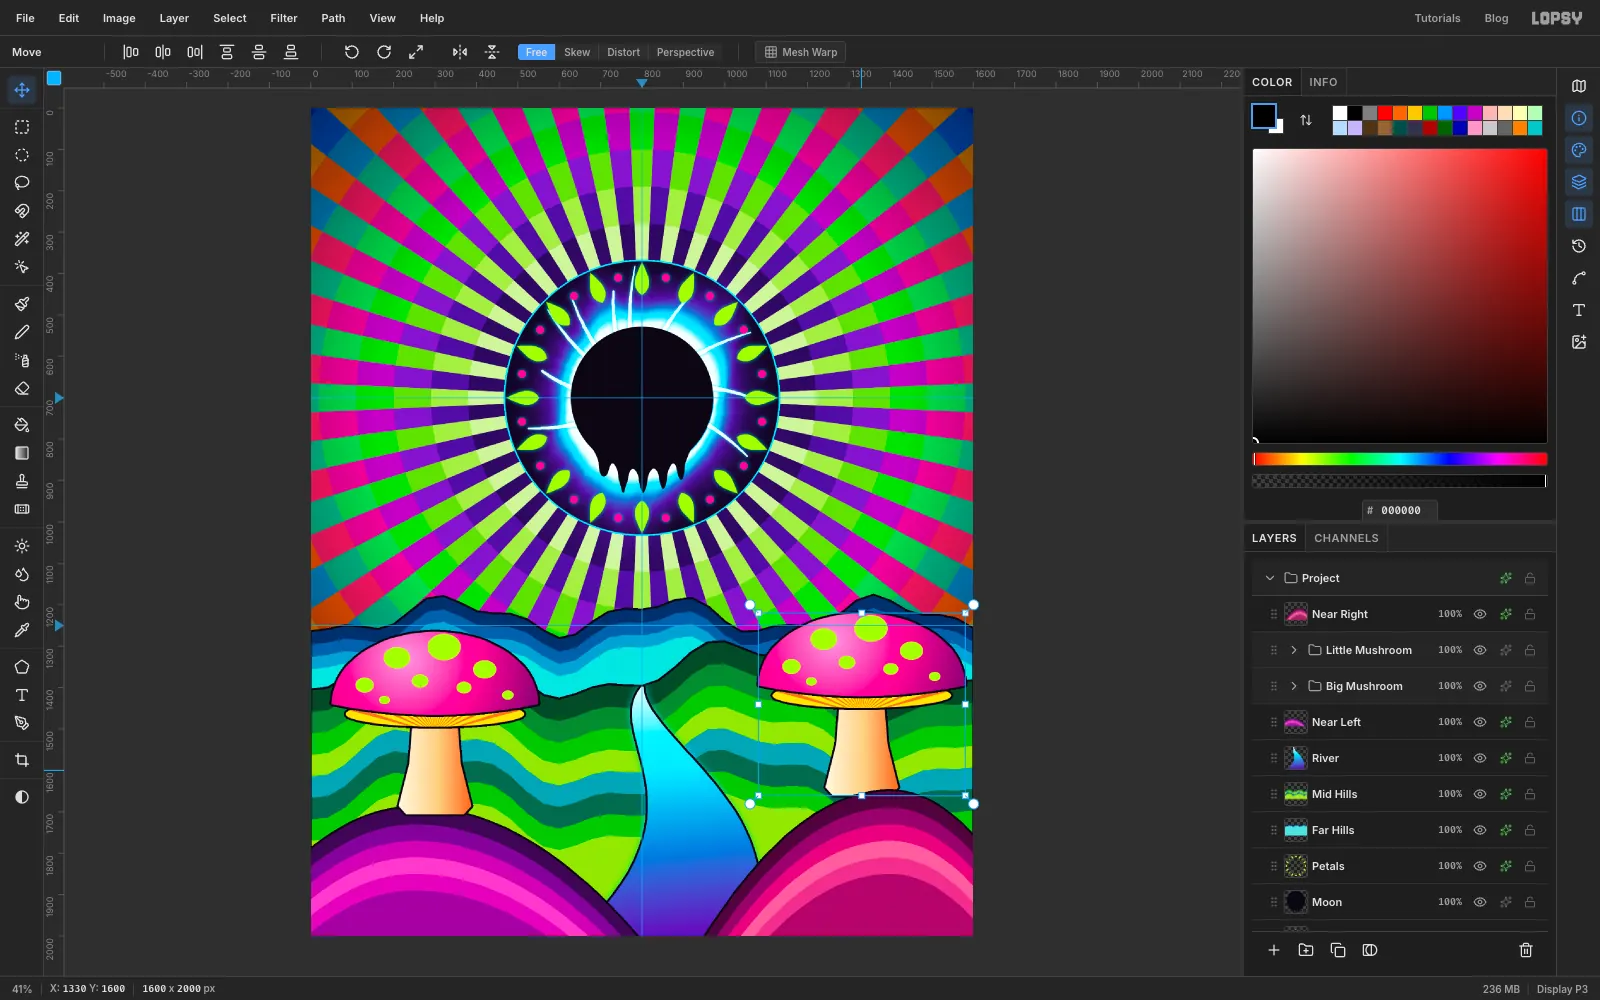
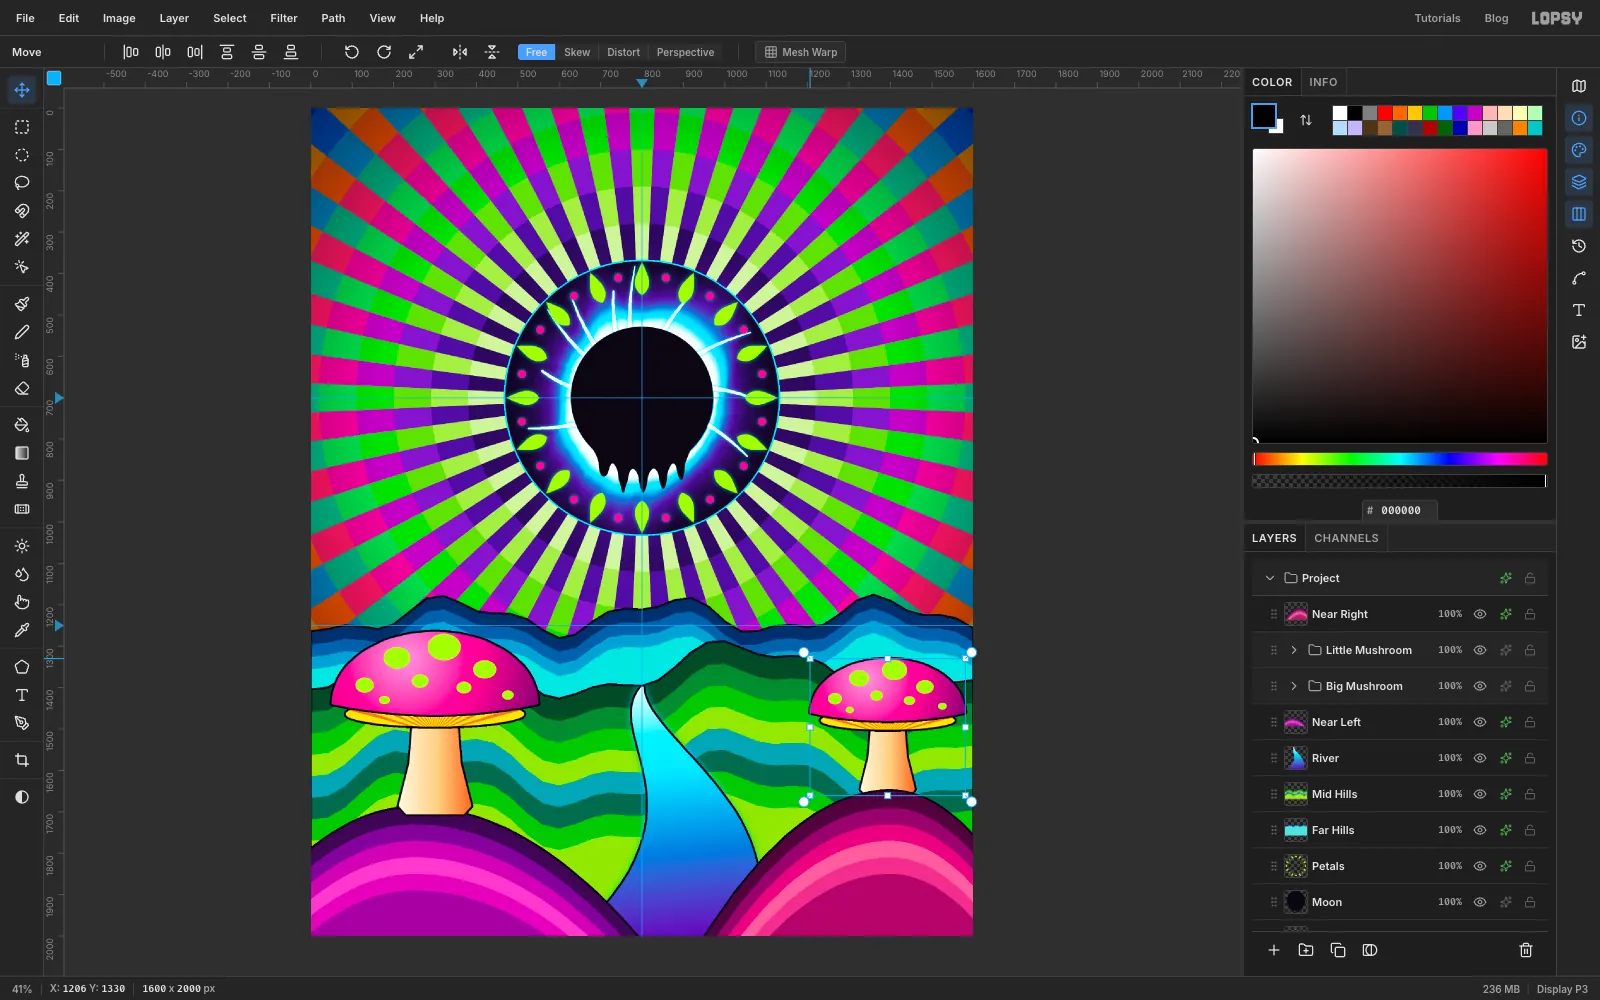
- Collapse Big Mushroom and choose Layer → Duplicate Layer. Rename the copy
Little Mushroom. - With the Move tool, drag the copy across so its stem base sits on the crest of the right-hand hill.
- Collapse Big Mushroom and choose Layer → Duplicate Layer. Rename the copy
-
Shrink the copy
Hold Cmd and drag the copy's top-left corner handle in and down until it's about three quarters of its size. Holding Cmd keeps the proportions.
-
Flip it
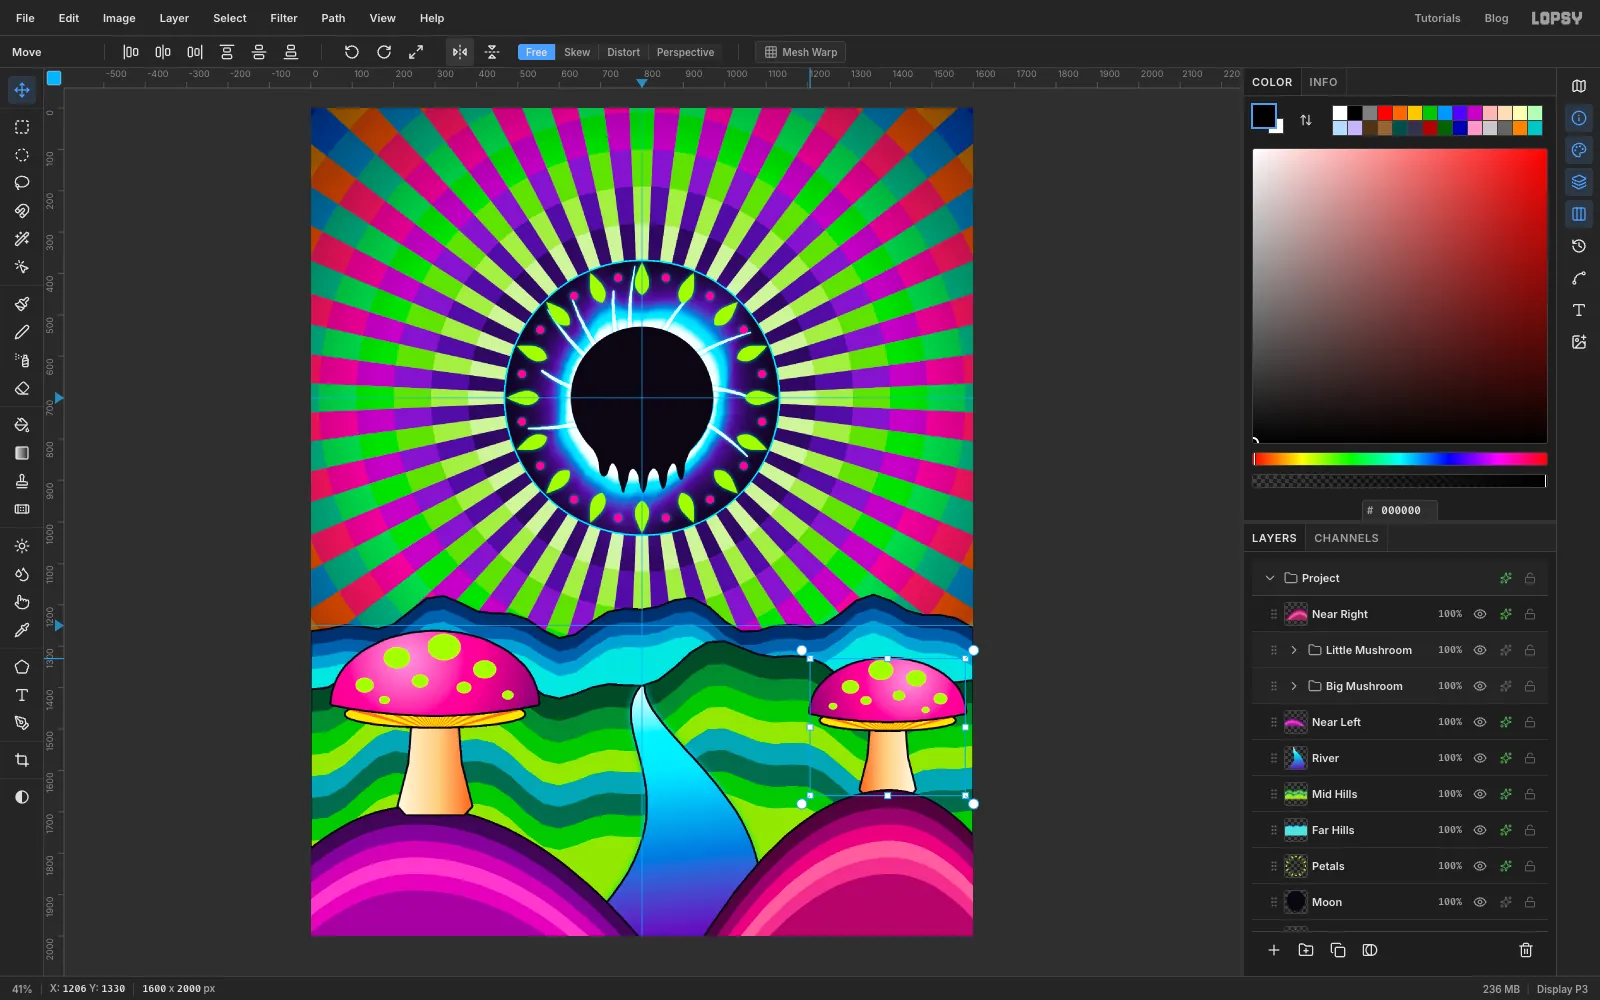
Click Flip Horizontal in the options bar so the copy doesn't look like a clone. Then nudge it a little left and down with the arrow keys, until the hill's crest hides the bottom of its stem.
-
Recolour the copy
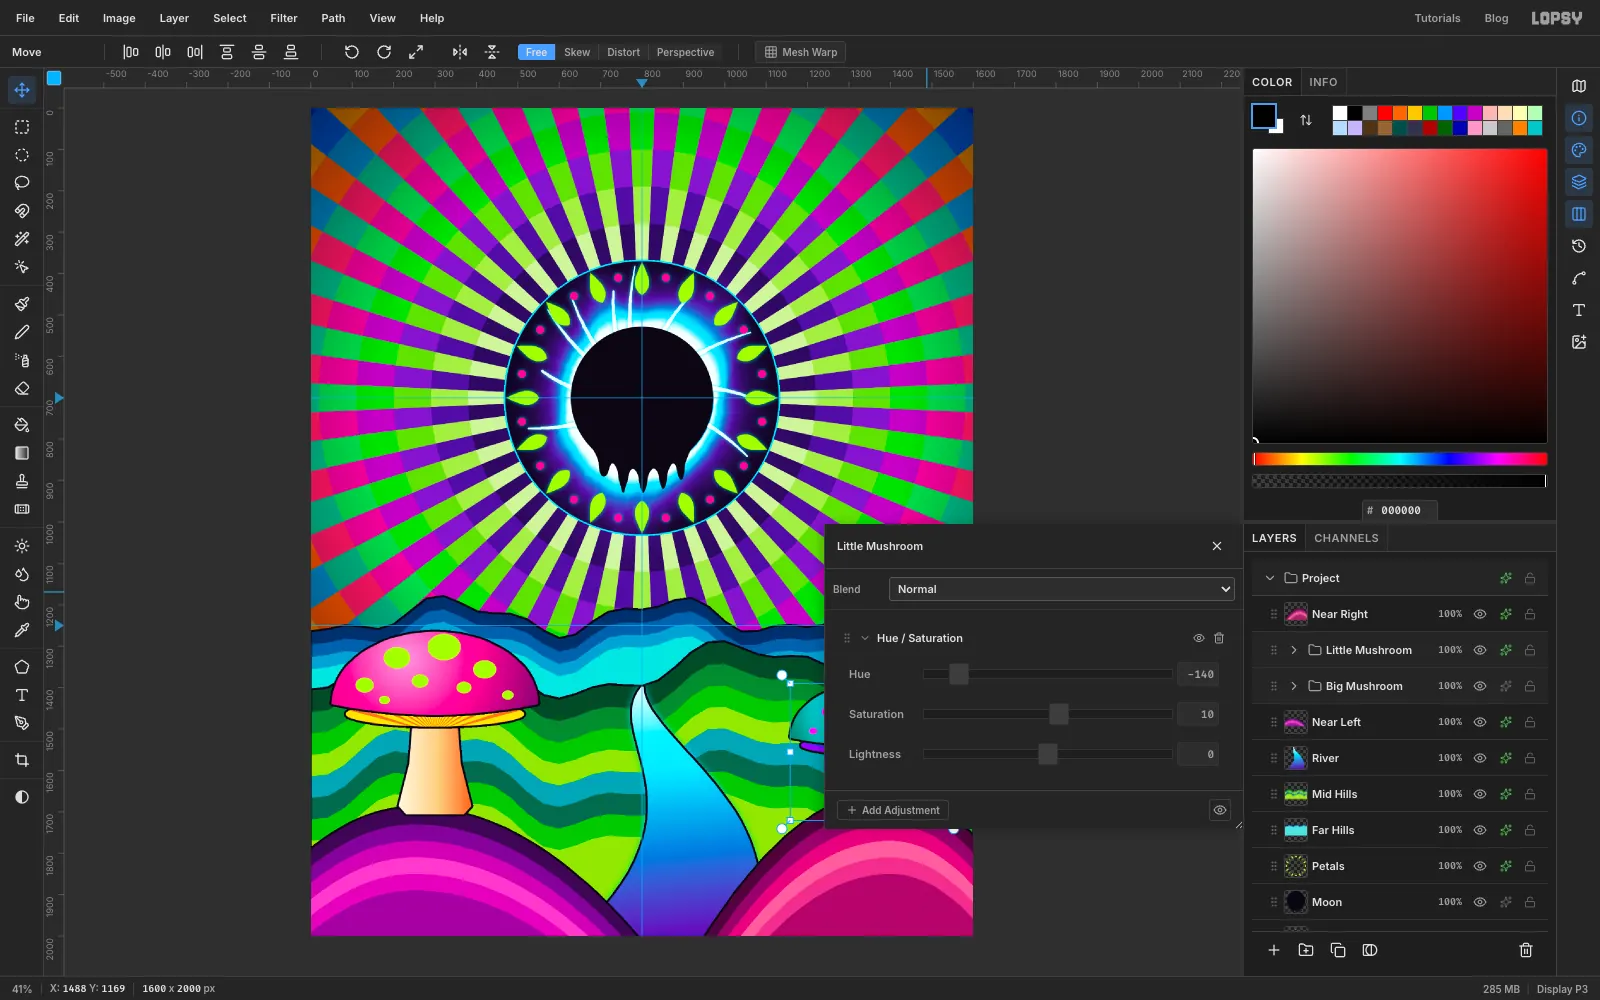
Open the Little Mushroom group's effects drawer, click Add Adjustment and choose Hue / Saturation. Set Hue
-140and Saturation10.The adjustment only affects the group, so the pink cap turns cyan, the lime spots turn magenta and the stem turns violet, while the original stays pink.
-
Draw a daisy
- Click Near Right and add a layer called
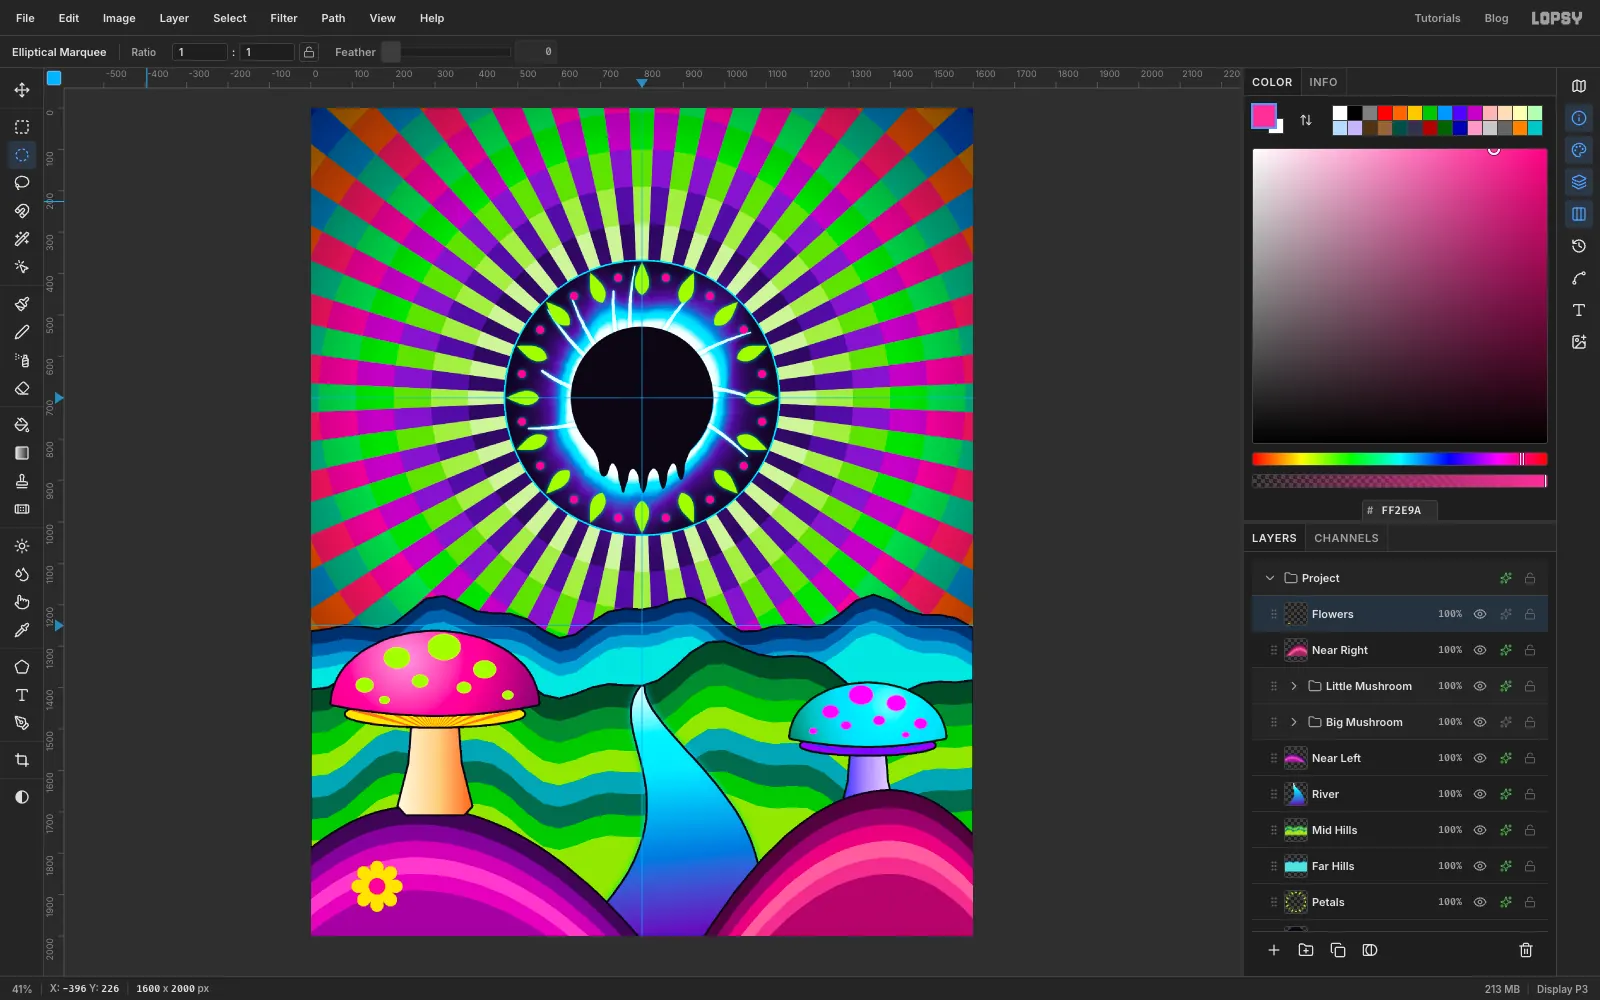
Flowers, so the flowers sit above both front hills. - Lasso an eight-petal daisy about 124 px across, low on the left hill. You can lasso one petal, then hold Shift and lasso the other seven around it. Fill it with .
- Select a circle of radius
20in its middle and fill it with . Deselect.
- Click Near Right and add a layer called
-
Scatter copies on the grid
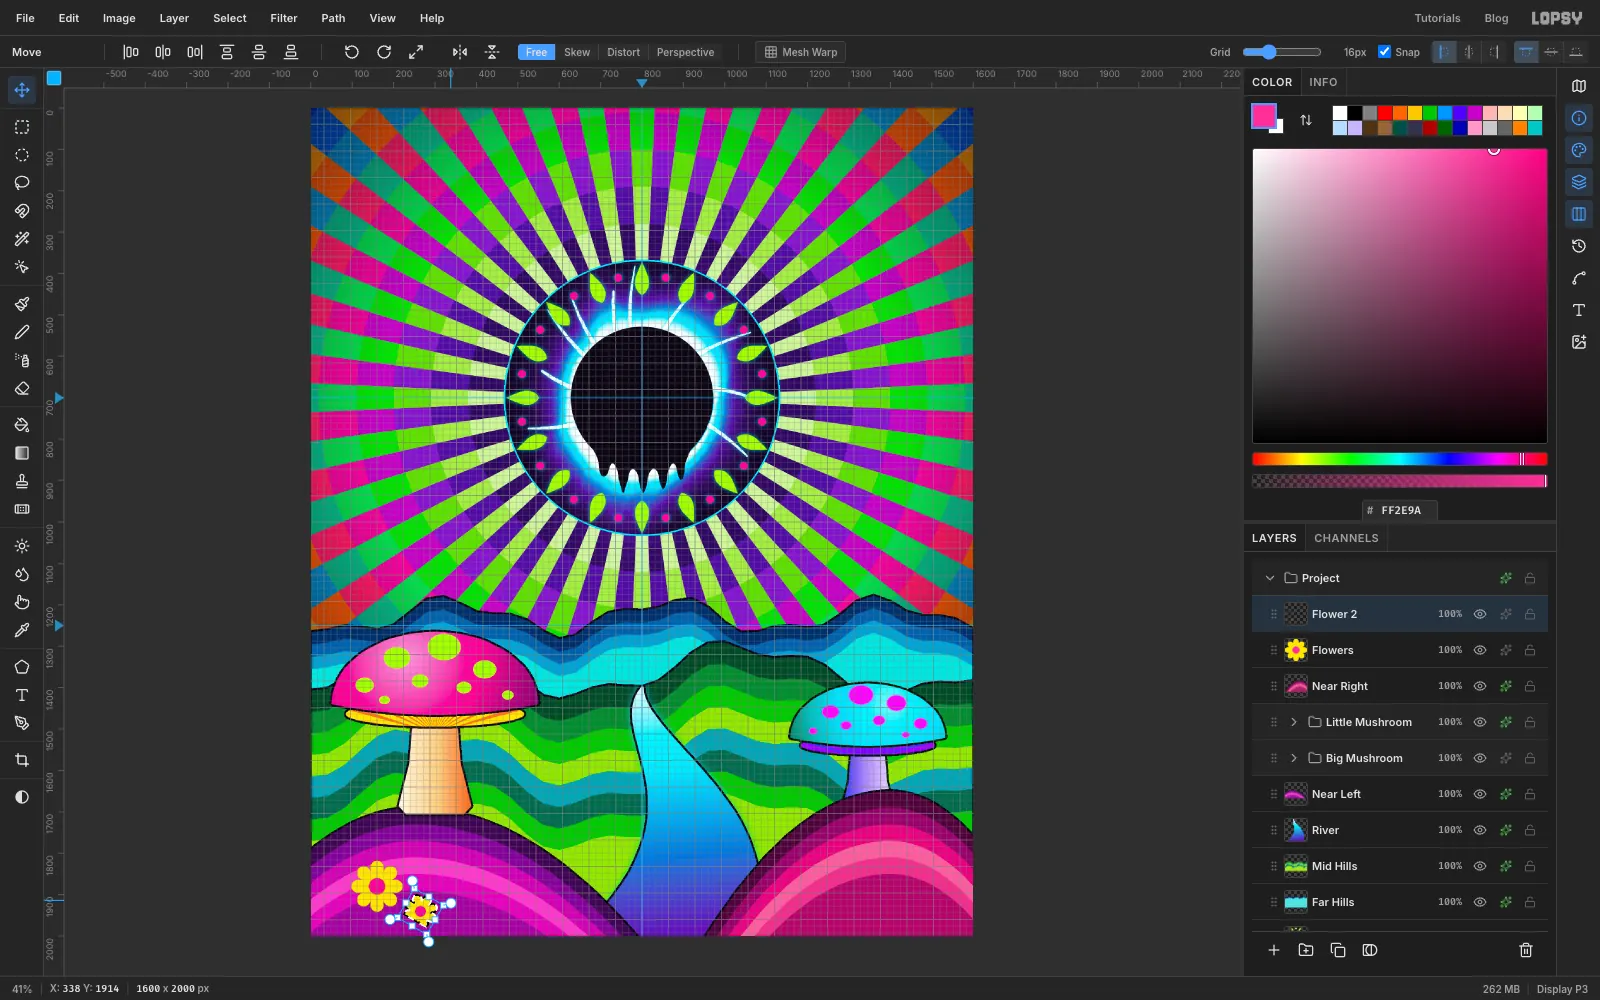
- Choose View → Show Grid. Snap comes on with it, so dragged copies jump in 16 px steps and the rotate handle turns in 15° steps.
- For each copy:
- Click the Flowers layer and draw a Rectangular Marquee around the daisy.
- Press Cmd+C then Cmd+V. The paste lands in place.
- Drag it to its new spot.
- Cmd-drag a corner handle to resize it, and drag just outside a corner to turn it.
- Press Cmd+D to commit.
- Make six copies:
- two on the left hill, one small and turned 30°, and one full size turned 15°
- one half size near the river bank, turned 45°
- three on the right hill: one 10% larger, one at 70% turned 30°, and a small one turned 15°
- For variety, recolour two of the copies with Filter → Hue/Saturation…. Do it right after Cmd+D commits the copy, while it's still on its own layer:
- Lightness
75makes a white daisy. - Hue
130makes a cyan one.
-
Merge and outline the daisies
Hide the grid with View → Show Grid. Click the top daisy copy, choose Layer → Merge Down six times, and rename the result
Flowers. Add a black Stroke of4.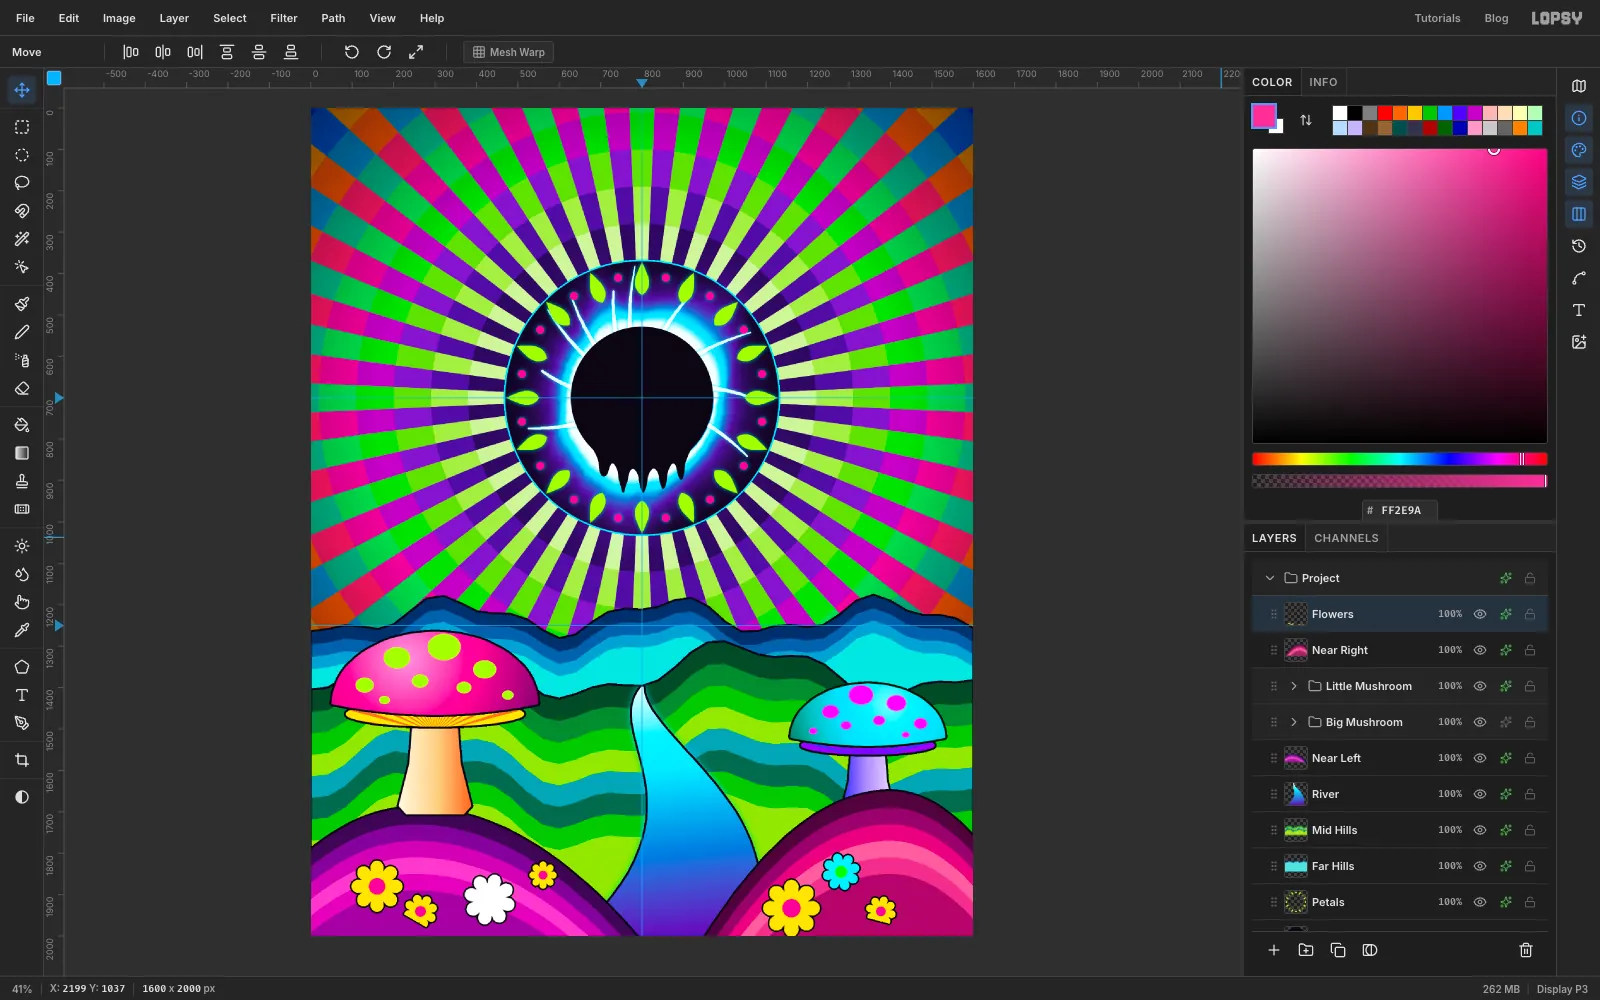
-
Sparkle the river
- Click River and add a layer called
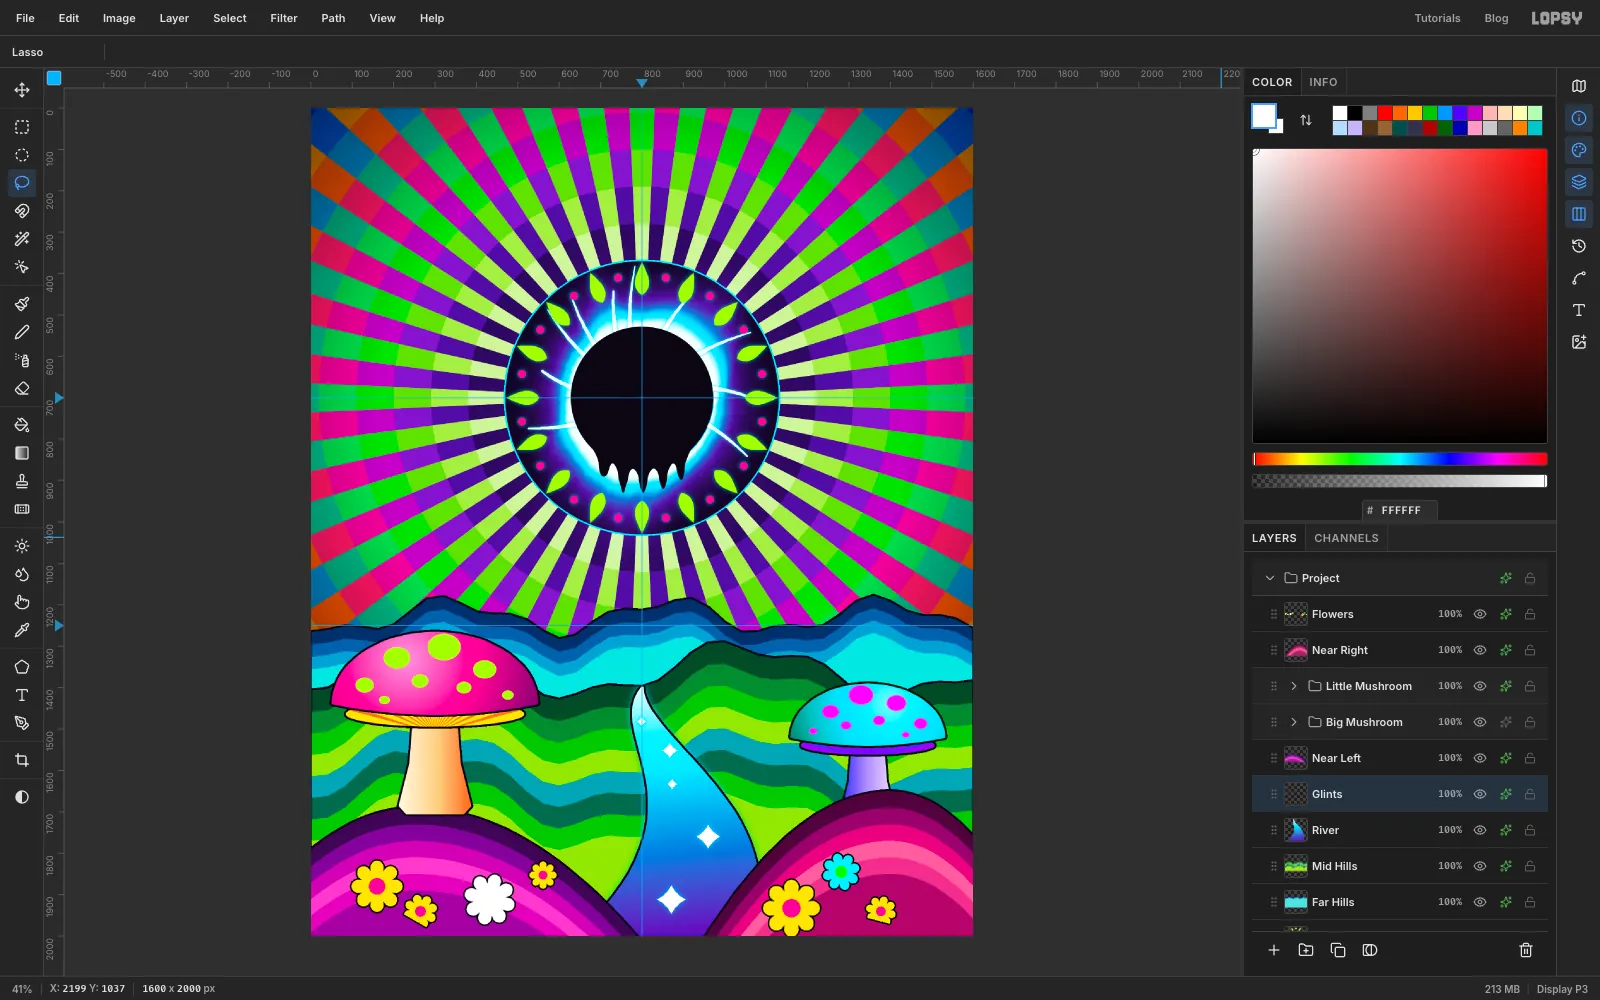
Glints. - Lasso five four-point sparkles in white. Start small near the source and grow them towards the bottom edge (about 12 px to 36 px across). Stagger them left and right of the river's centre line so they don't look like a row of lights.
- Add an Outer Glow: Size
18, Opacity90, .
- Click River and add a layer called
-
Add a cap highlight
- Expand Big Mushroom, click Spots and add a layer called
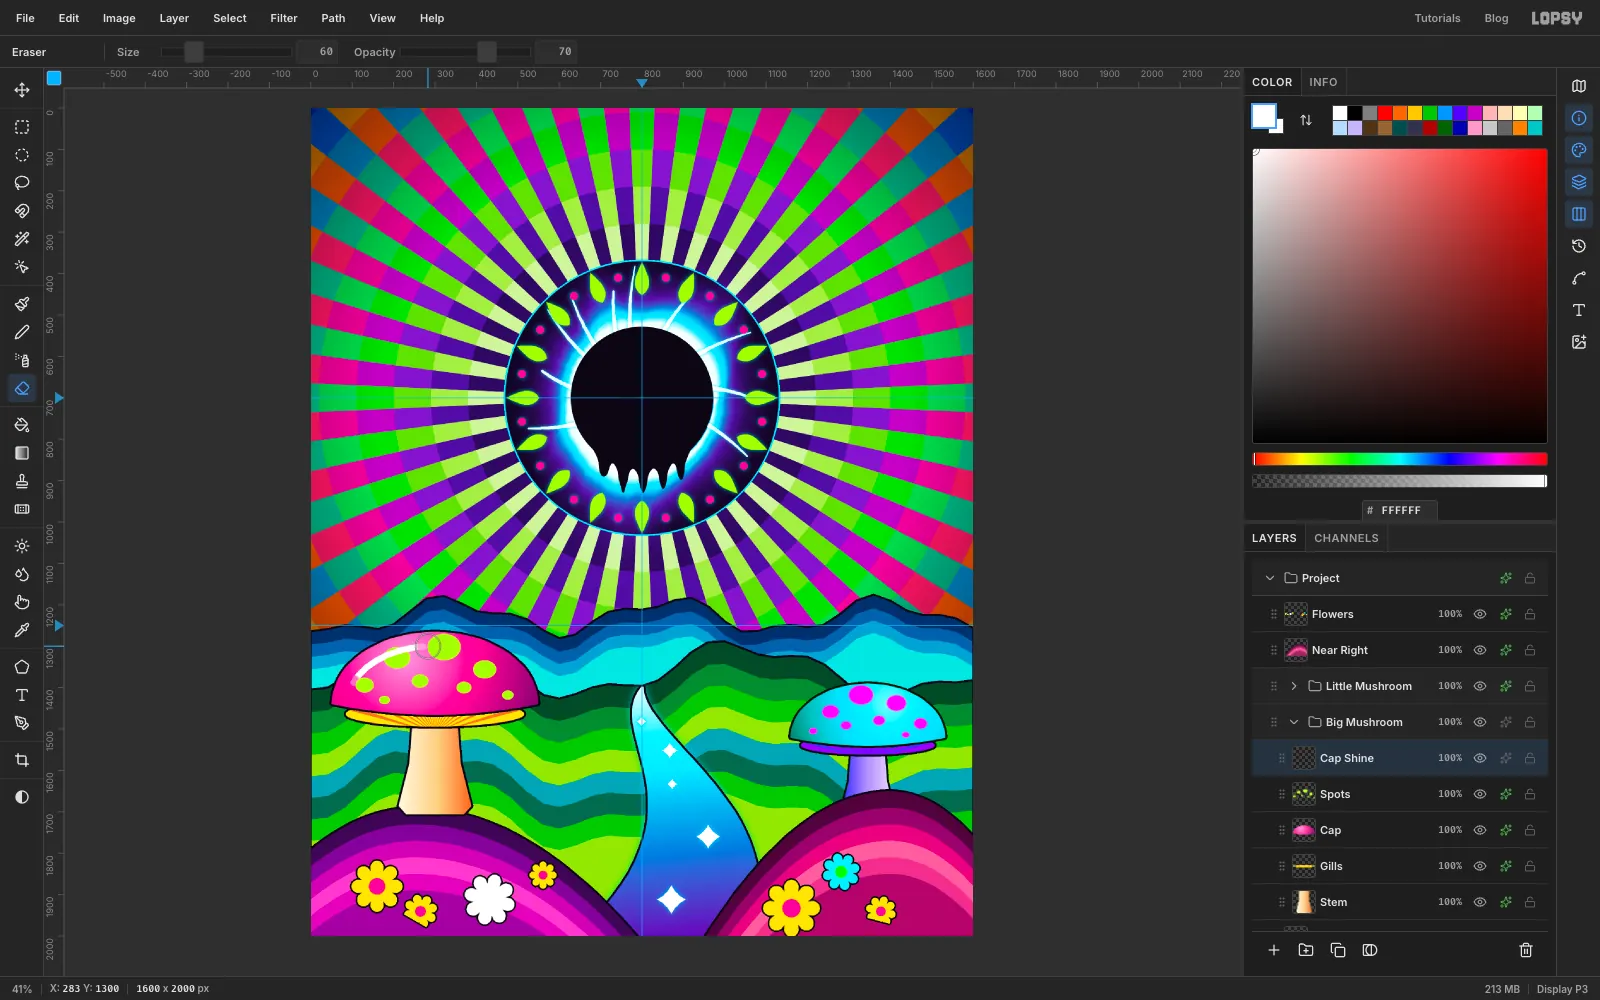
Cap Shine. - With the Brush (Size
16, Hardness100, white), paint one arc just inside the cap's upper-left edge. - Choose the Eraser with Size
60and Opacity70, and click once over each end of the arc to fade it out. Set the layer to85%.
- Expand Big Mushroom, click Spots and add a layer called
-
Tuck the big mushroom behind its hill
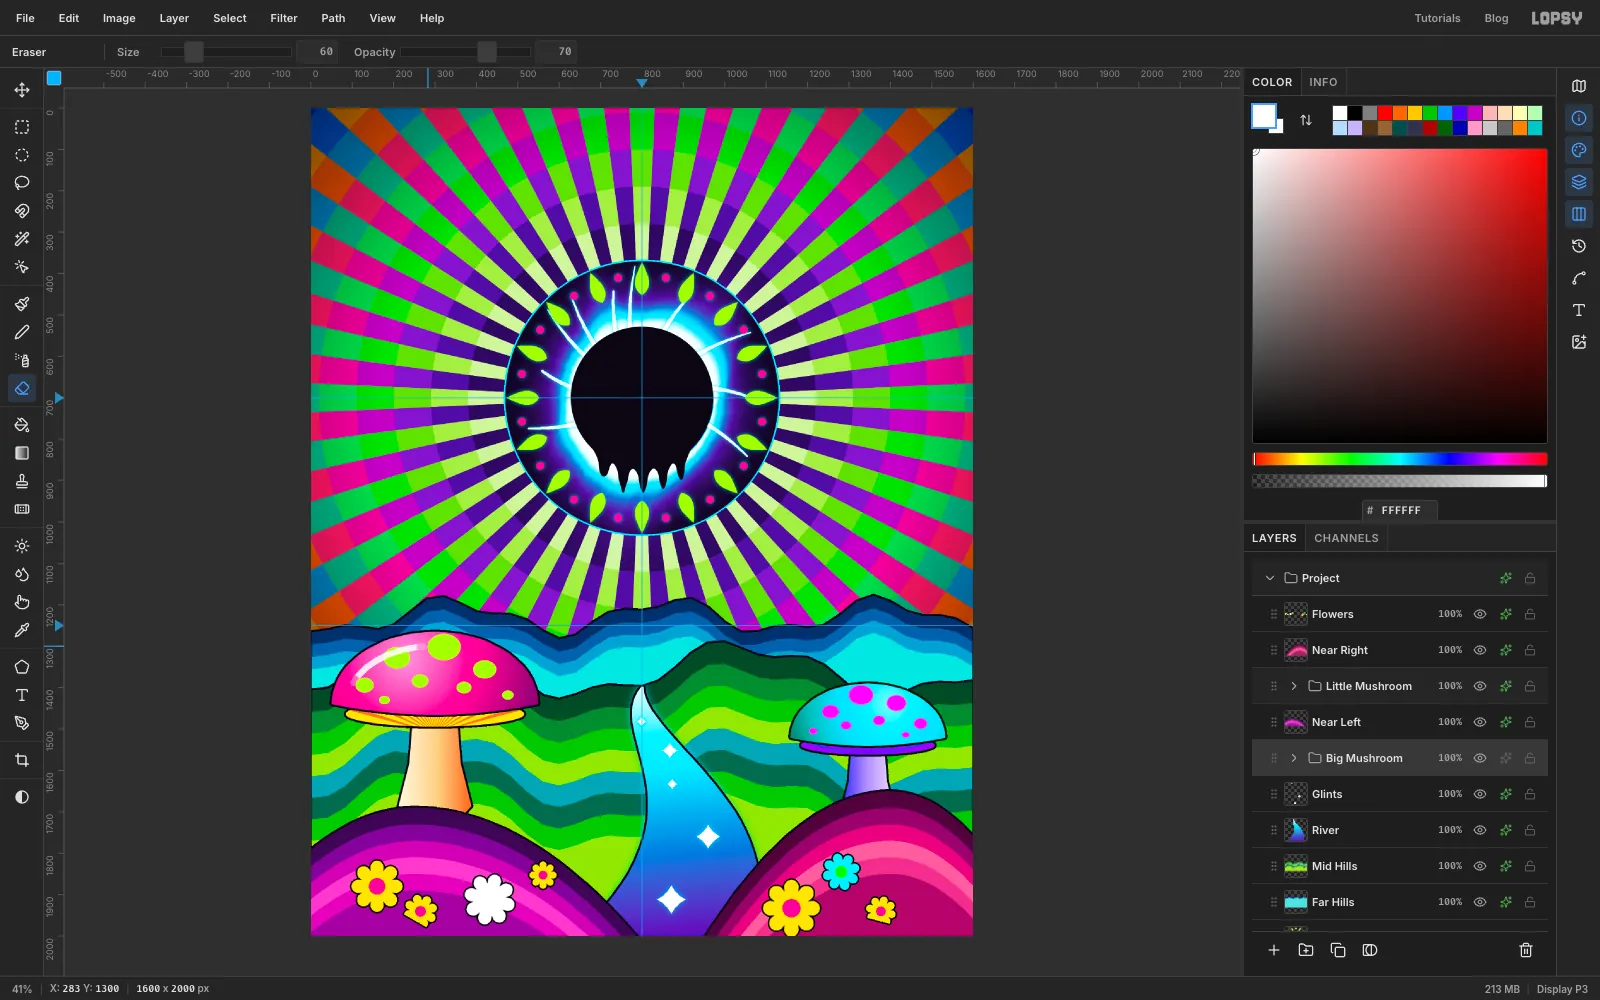
Collapse Big Mushroom and drag its row down below Near Left. The hill is now drawn in front of the mushroom, ready to hide its base.
-
Group the land and the sky
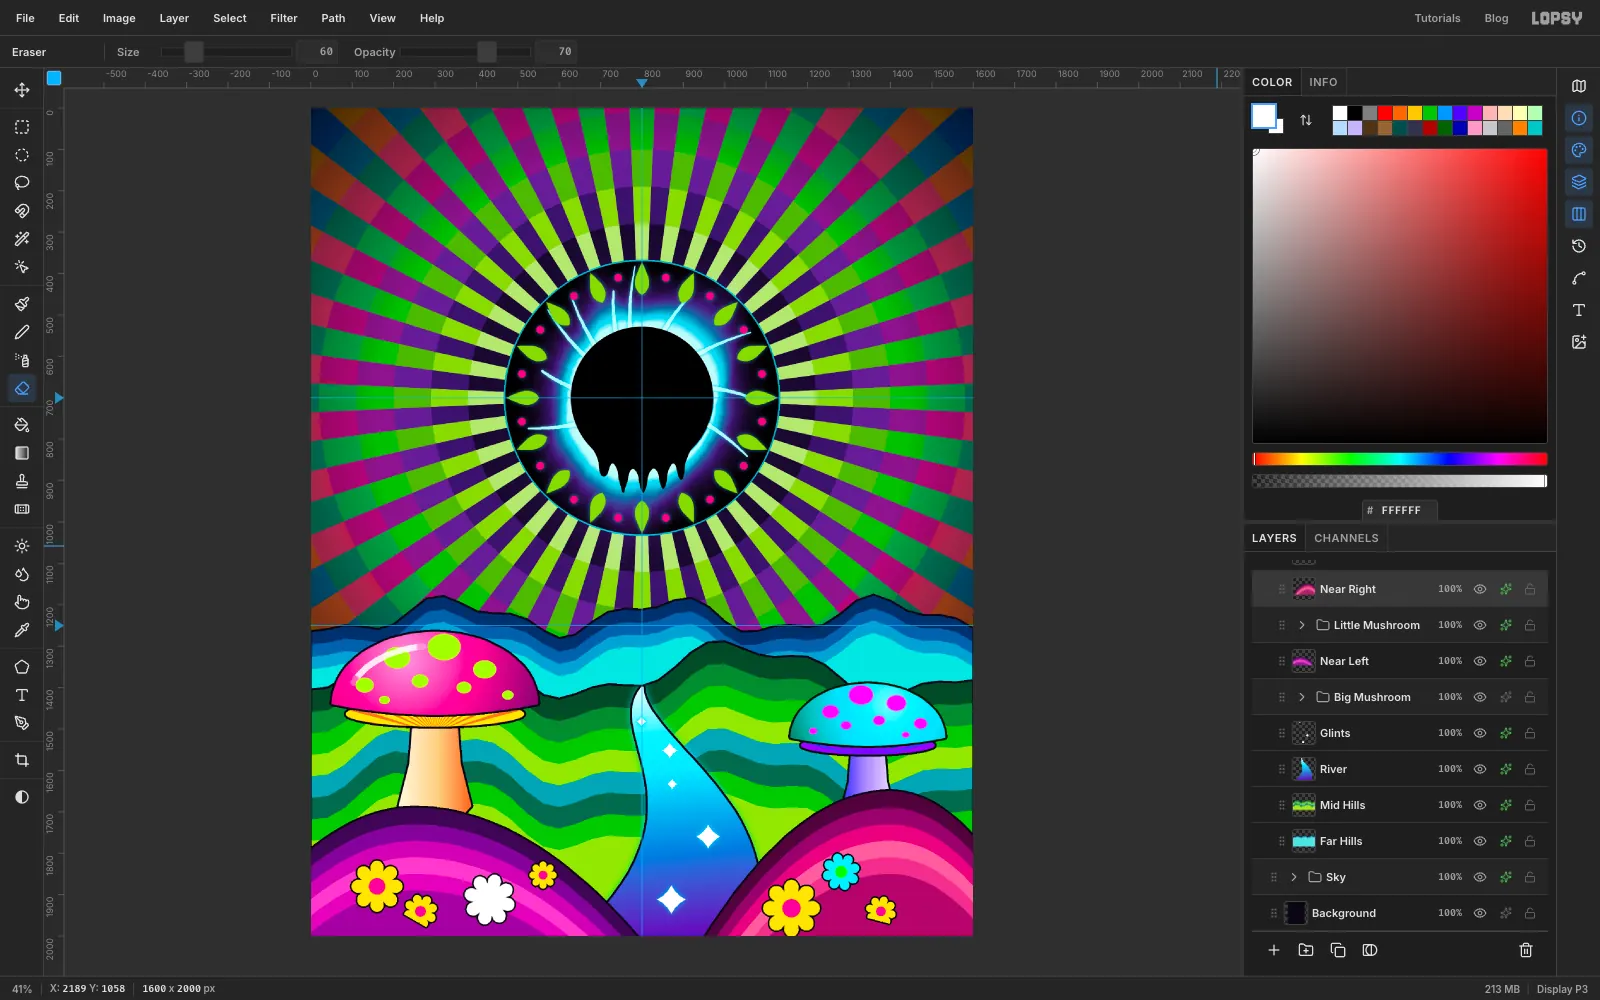
- Click Far Hills, Shift-click Flowers, choose Layer → Group Layers, and name the group
Land. - Do the same from Sky Rings to Petals and name it
Sky. - Give the Sky group a Hue / Saturation adjustment with Saturation
-15and Lightness-10. The sky steps back a little and the landscape and eclipse come forward.
- Click Far Hills, Shift-click Flowers, choose Layer → Group Layers, and name the group
-
Settle the mushroom into the hill
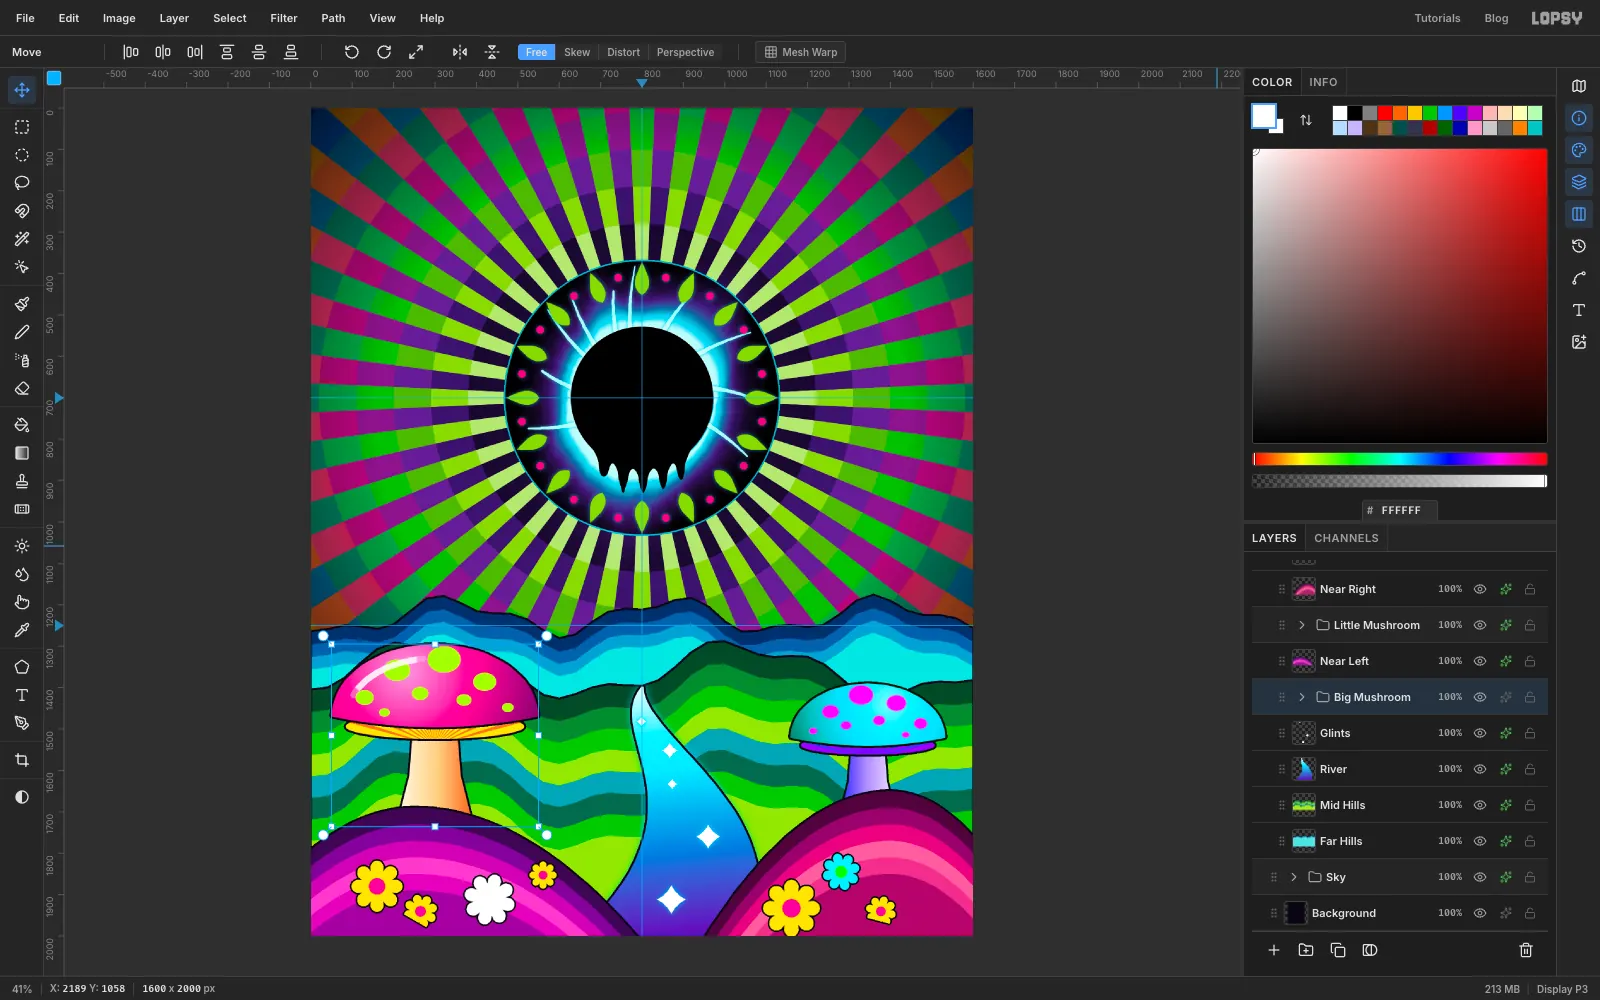
Expand Land and click the Big Mushroom group. Choose the Move tool and press Shift+Down three times. The whole group moves 30 px together, the stem's base disappears behind the crest, and the cap now overlaps the blue ridge behind it instead of just touching it.
-
Add a neon bloom
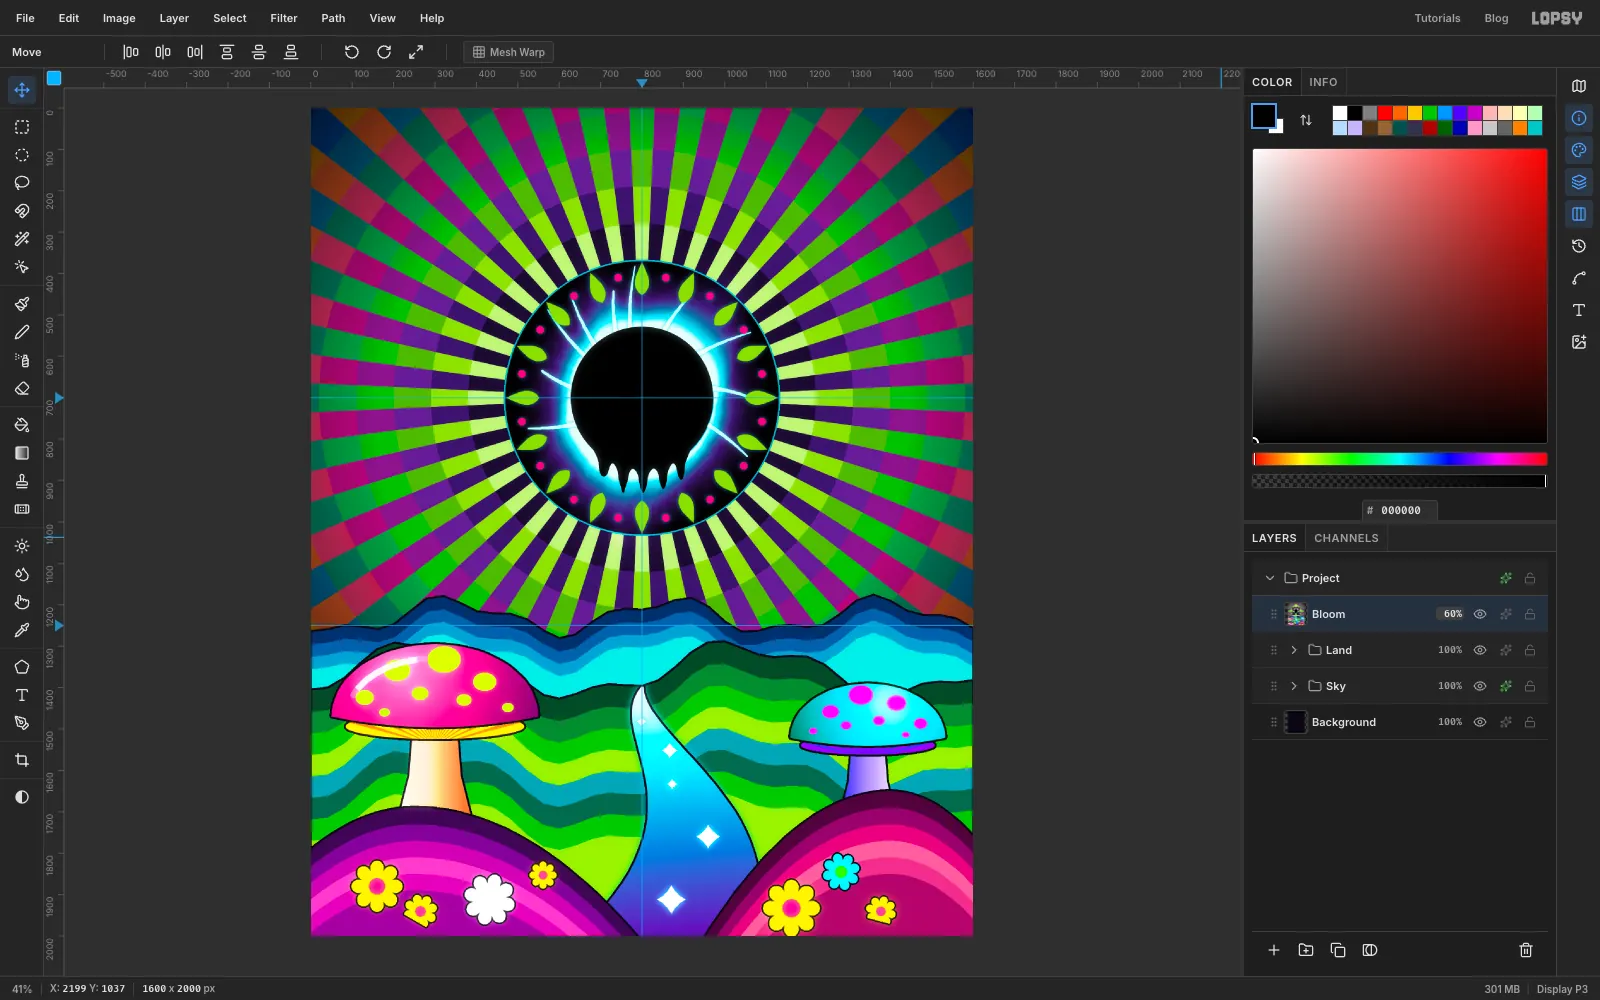
- Click the Land group, choose Edit → Copy Merged, then press Cmd+V. Rename the new layer
Bloom. - Run Filter → Bloom… with Threshold
85, Soft Knee30, Radius28and Intensity60. - Set the layer to Lighten at
60%.
Lighten only lets the glow through where it's brighter than the painting underneath, so you get halos without washing out the colours.
- Click the Land group, choose Edit → Copy Merged, then press Cmd+V. Rename the new layer
-
Add velvet grain
- Click Bloom and add a layer called
Velvetabove it. Fill it with . - Run Filter → Add Noise… with Amount
45, Mono and Gaussian, then Filter → Gaussian Blur… with Radius1. - Set the layer to Overlay at
80%. Grey vanishes in Overlay, so only the speckle is left, like the nap of a flocked velvet poster.
- Click Bloom and add a layer called
-
Finish with a vignette
Click the Project group and open its effects drawer. It already lists neutral Levels, Curves, Exposure and Hue / Saturation adjustments, so leave those alone. Click Add Adjustment, choose Vignette and set it to
60.Save your work with File → Save Project, and use File → Quick Export PNG to export the finished painting.