Paint a Sticker-Bombed Boombox in Window Light
Paint a teal 80s boombox covered in die-cut stickers in Lopsy, on a sunlit wooden table, with soft brushwork, layer effects, perspective and live text.
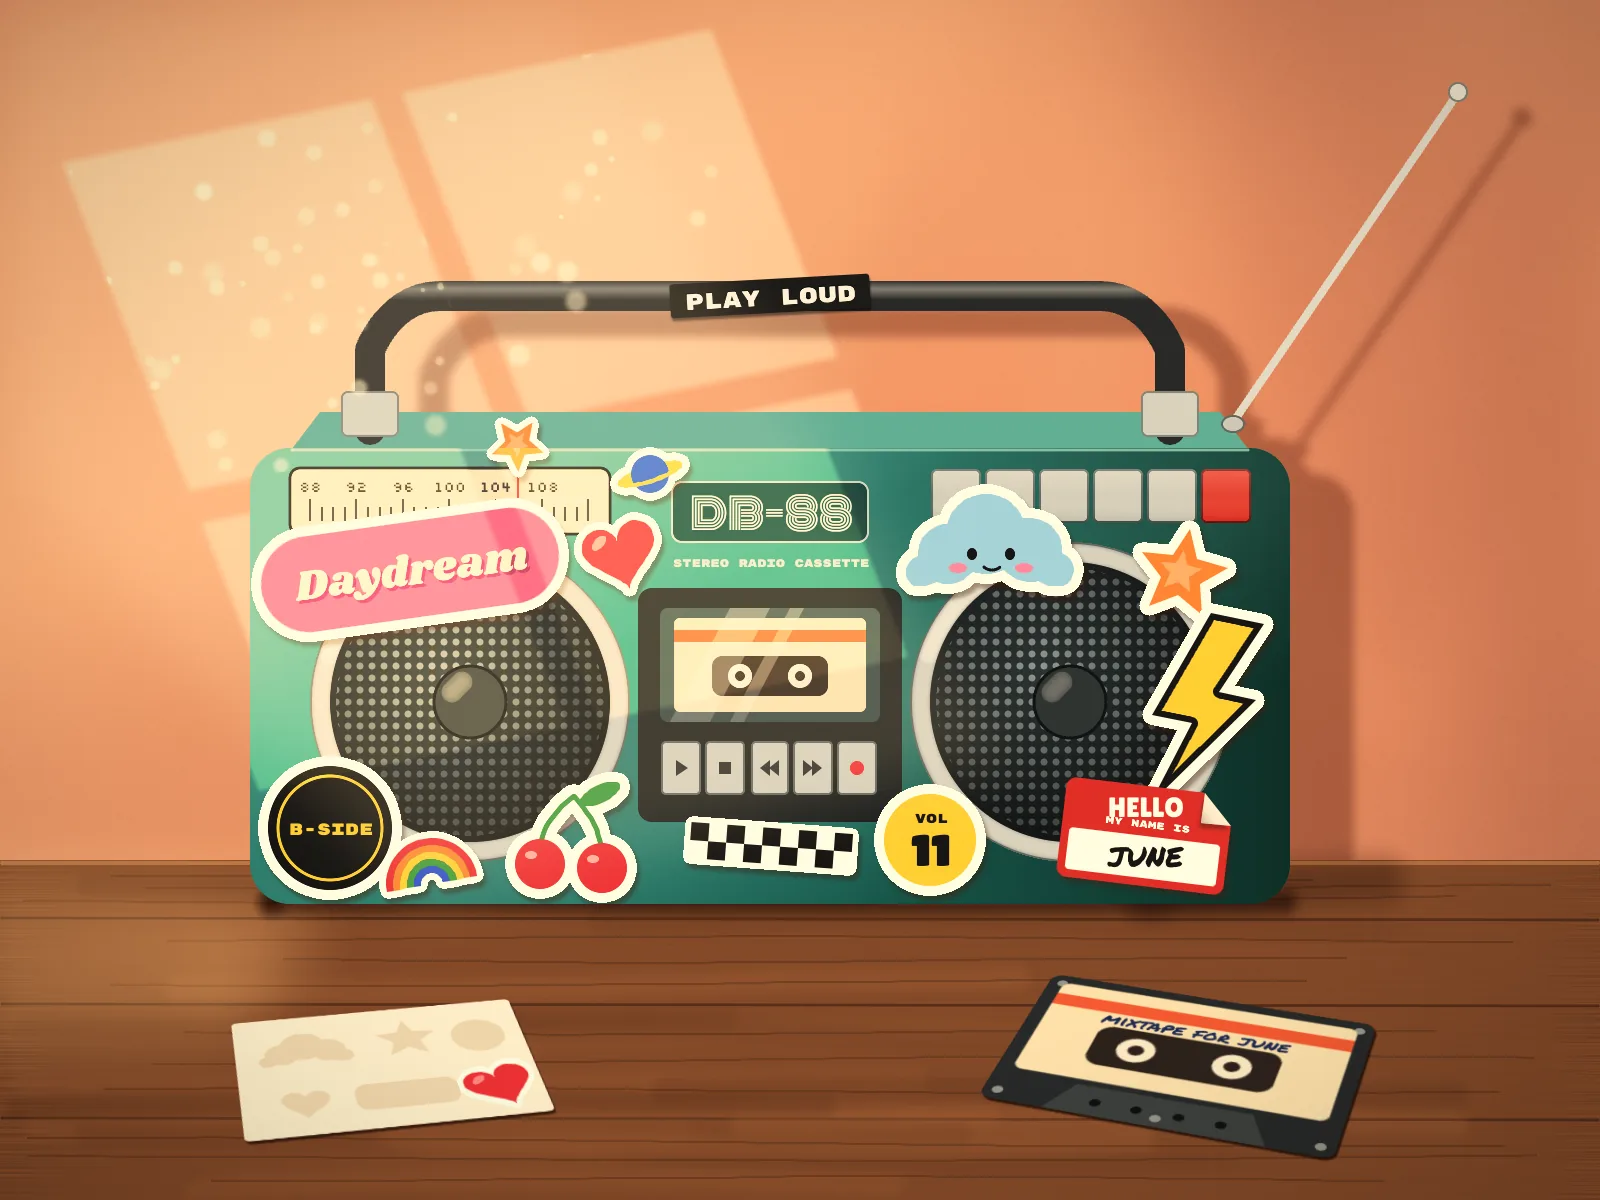
Sticker bombing means covering a surface, such as a laptop, a guitar case or a skateboard, with so many stickers that they overlap and almost hide it. The stickers stay readable because each one has a thick white die-cut border and simple, bold shapes.
This painting puts that look on an old boombox. The room is painted loosely with soft brushes. The boombox is built from clean shapes and shaded with gradients. The stickers are flat graphics with a border and a shadow. A last pass of window light, cast shadows and brush texture ties the three styles together.
Along the way you'll use:
- the Brush and Smudge tools for a loose painted wall and a wooden table, with Add Noise and Motion Blur for grain
- ruler guides, the Lasso (with Shift to add), Feather and blend modes for window light
- the Shape tool's rounded rectangles and ellipses, the Pen tool for a curved handle, and Select → Shrink for chrome rings
- Define Pattern and Fill with Pattern for speaker perforations and a checkerboard
- Stroke and Drop Shadow layer effects as die-cut sticker borders
- live text in Shrikhand, Monoton, Rubik Mono One, Titan One, Lilita One, Permanent Marker and Silkscreen
- copy and paste, rotating and scaling several layers at once, Perspective mode, and moving a whole group
- Rasterize Layer Style, a peeled corner, and Photo Filter, Saturation & Vibrance and Vignette adjustments
The palette is warm apricot and walnut around a teal boombox, with candy-coloured stickers:
-
Wall
-
wall light
-
wall warm
-
wall shade
-
Window light
-
wall shadow
-
Table
-
seams
-
lip
-
sheen
-
Boombox teal
-
top
-
edge
-
brand plate
-
Chrome
-
grille
-
holes
-
deck
-
deck window
-
handle
-
Cassette cream
-
cassette stripe
-
tag red
-
ring yellow
-
Sticker pink
-
lemon
-
tangerine
-
sky
-
Cherry
-
leaf
-
cobalt
-
ink
-
cream
-
Sticker shadow
-
Set up the wall and guides
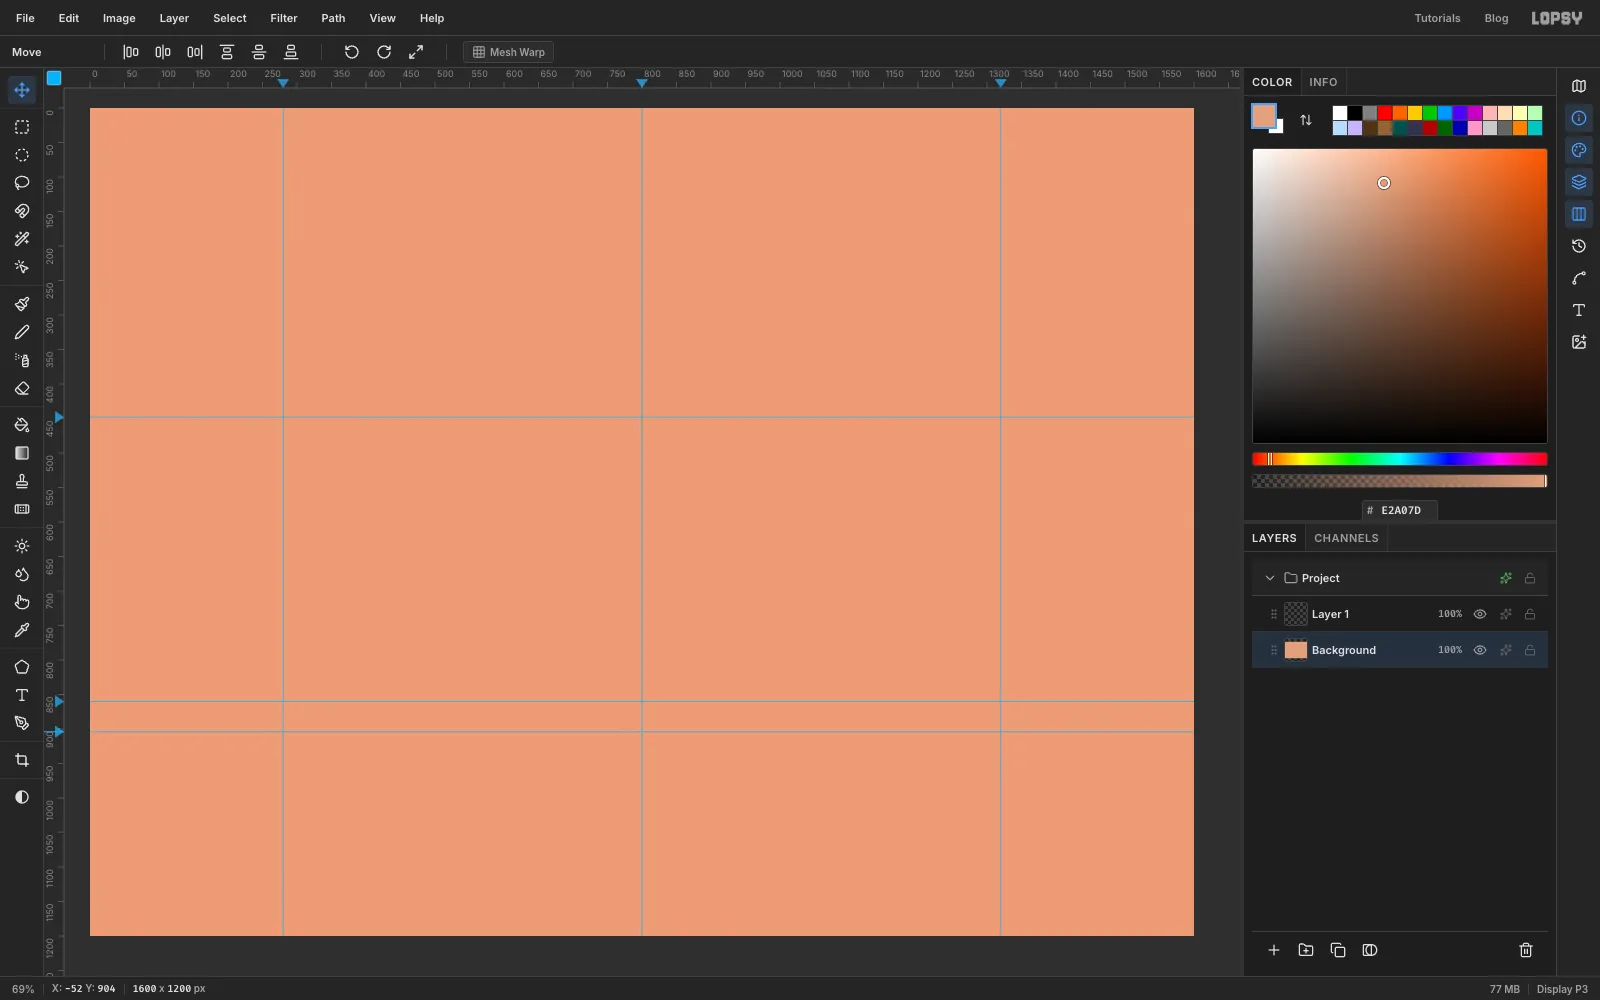
- Create a new document 1600 × 1200 px.
- Click the Background layer, set the foreground colour to and choose Edit → Fill.
- Click the top ruler at
280,800and1320for three vertical guides: the boombox's left end, its centre and its right end. - Click the left ruler at
448,860and904for three horizontal guides: the top of the boombox, the back edge of the table, and the bottom of the boombox.
-
Paint the wall with big soft strokes
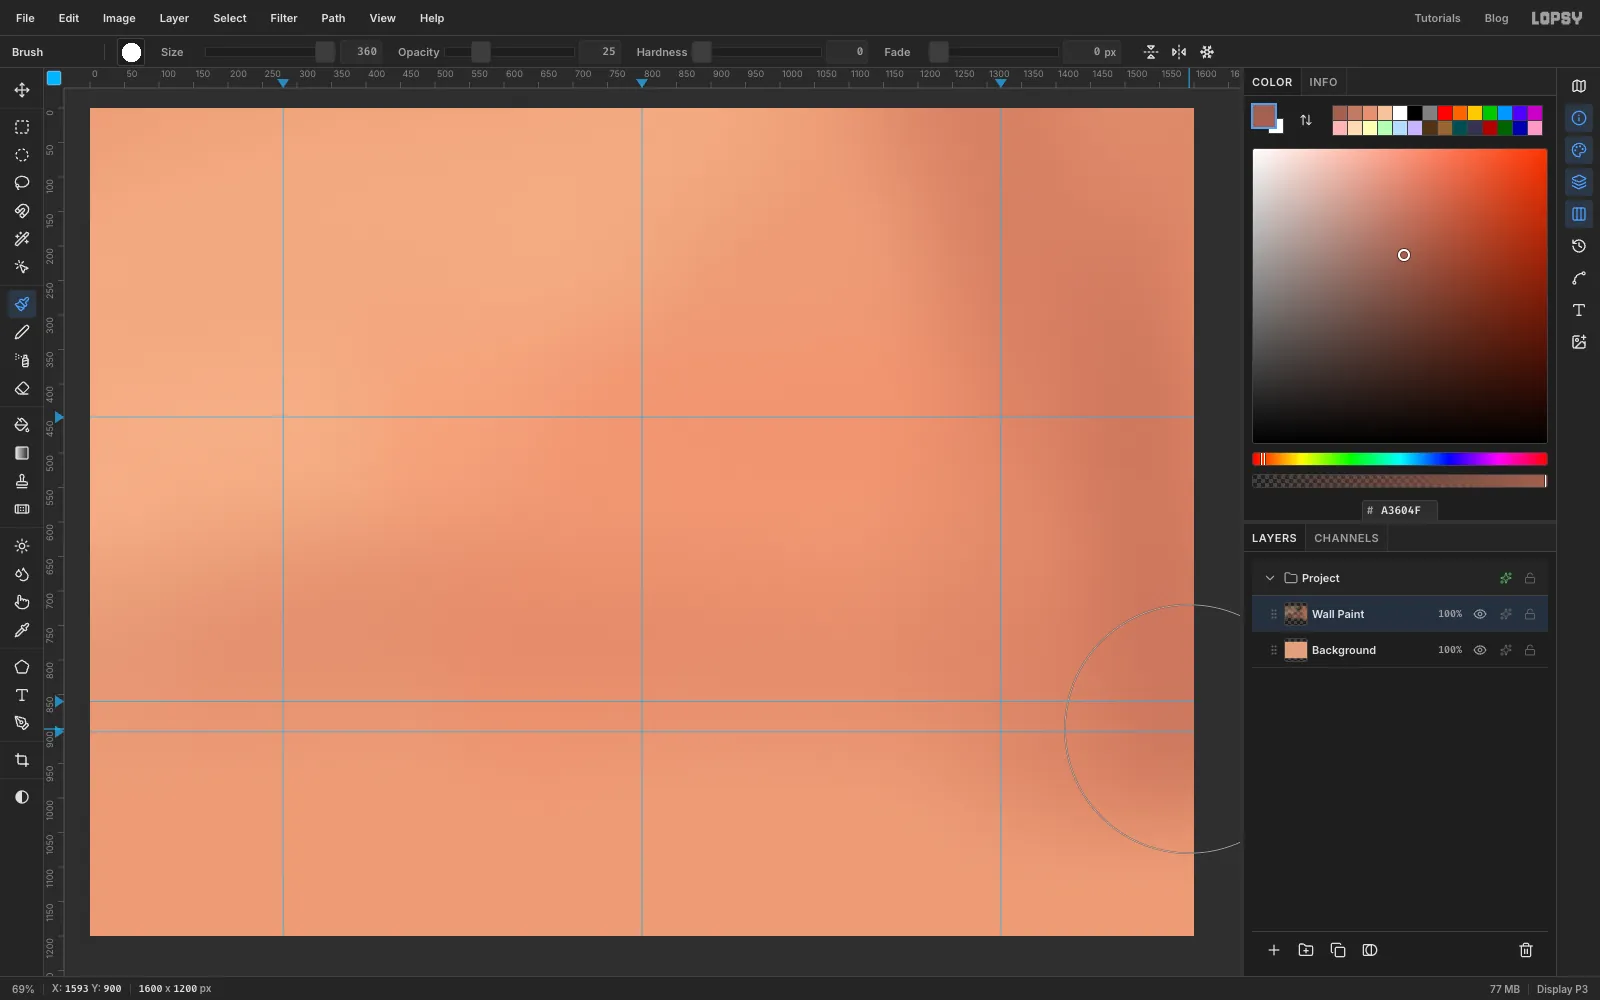
Rename Layer 1 to
Wall Paint. Pick the Brush with Size420, Opacity22and Hardness0.- The window will be at the upper left, so start there. In , paint six long strokes that rise from the left edge towards the top, each a little lower than the last.
- In , paint five strokes across the middle of the wall, from the centre out past the right edge.
- Raise Size to
480and Opacity to30. In , paint four strokes down the right side, then one long stroke across the wall just above the table line. - Drop to Size
360, Opacity25, and run one stroke of down the far right edge.
-
Blend the strokes with Smudge
Choose the Smudge tool with Size
220and Strength55. Drag five slightly curving strokes from the top of the wall down to the middle, spaced across the width. The tones melt into each other, but you can still see the direction of the brushwork.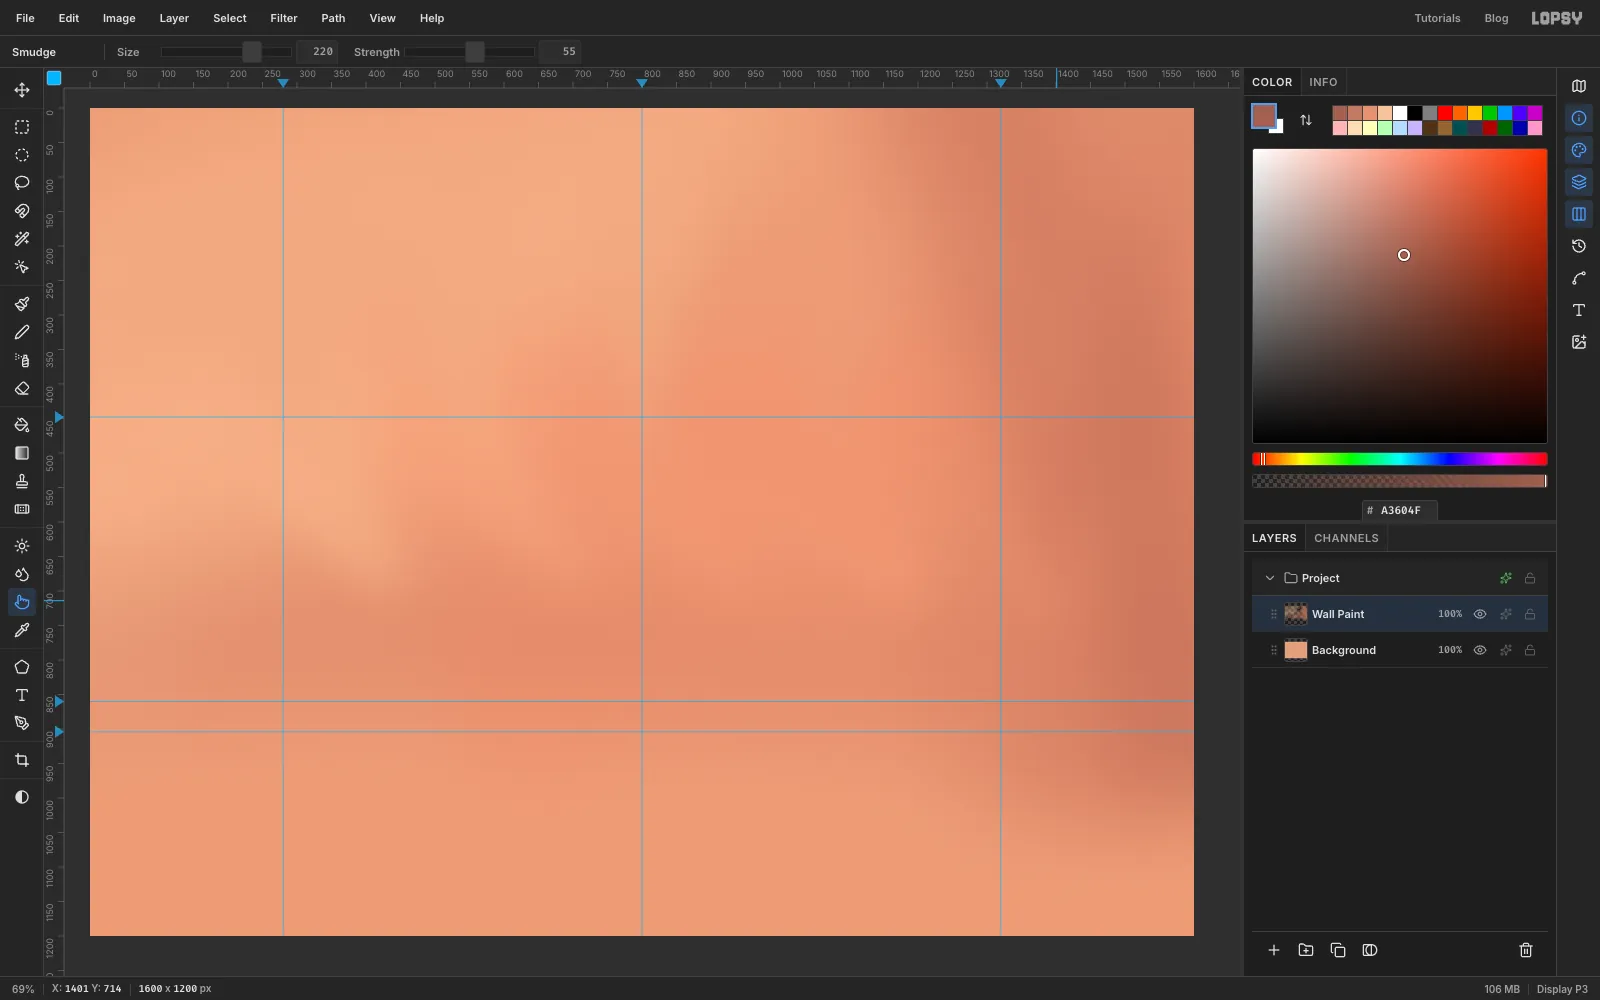
-
Add plaster grain
- Add a layer called
Plasterand fill it with . - Run Filter → Add Noise… with Amount
22, Mono and Gaussian. - Run Filter → Gaussian Blur… with a Radius of
1. - Set the layer to Overlay at
45%.
- Add a layer called
-
Lay the wooden table
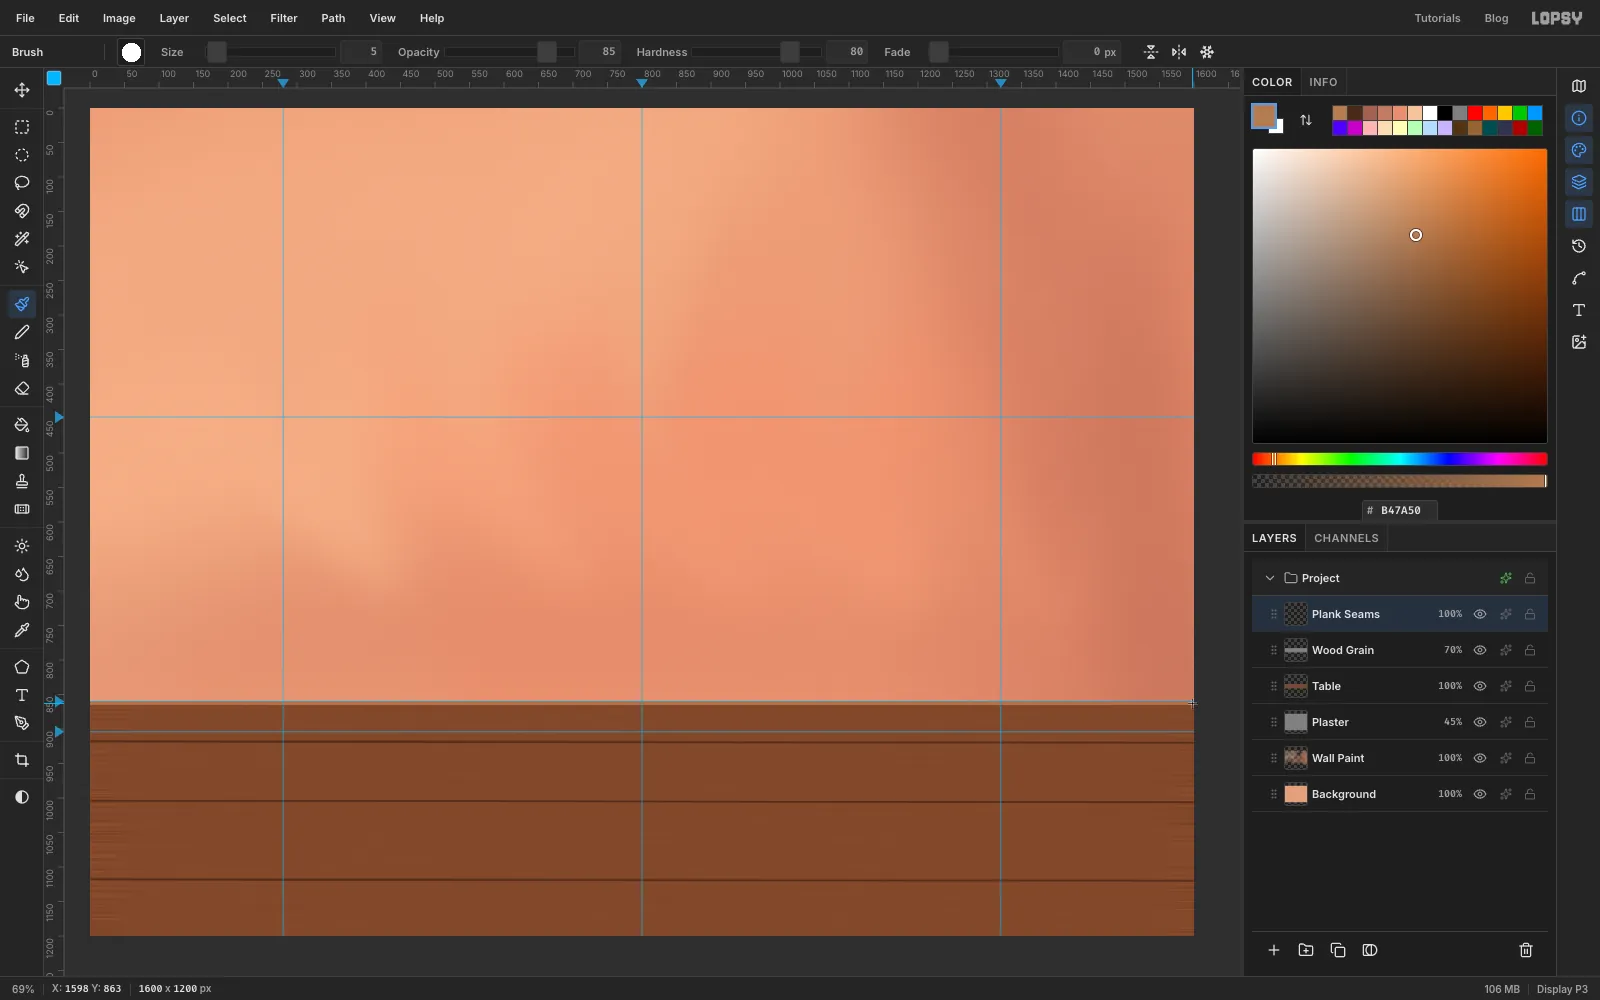
- Add a layer called
Table. With the Rectangular Marquee, drag from the860guide at the left edge to the bottom-right corner, and fill it with . - Keep the selection. Add a layer called
Wood Grain, fill it with , and run Add Noise at Amount70with Mono and Uniform. - Run Filter → Motion Blur… with Angle
0and Distance140. Deselect, then set the layer to Overlay at70%. - Add a layer called
Plank Seams. With the Brush at Size4, Opacity85and Hardness80, use to draw three straight lines across the table at abouty 918,1004and1118. Click at the left edge, then Shift-click at the right edge for each one. The seams get further apart as they come towards you. - Switch to , set Size to
5, and draw one more line just under the table's back edge for a lip catching the light.
- Add a layer called
-
Select four window panes
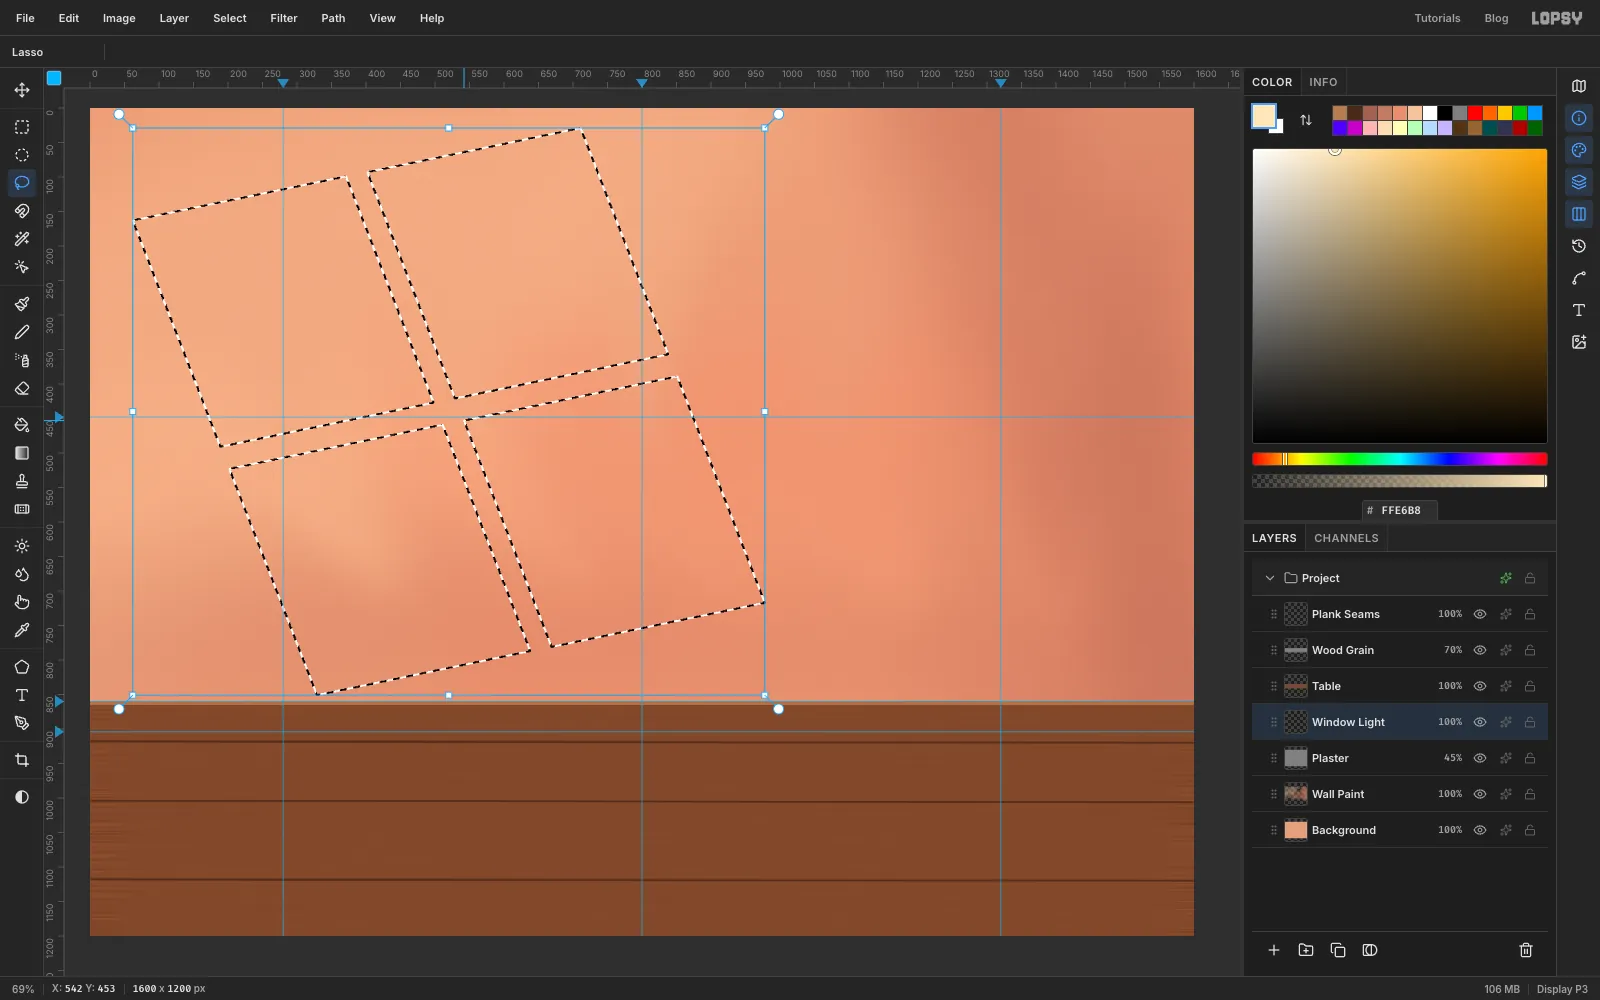
- Click
Plasterand add a layer calledWindow Light. It lands under the table. - With the Lasso, draw the first pane as a tilted four-sided shape. Its top-left corner is near
60, 165, its top edge rises to the right, and its sides slope down to the right. - Hold Shift and draw the other three panes the same way, leaving a narrow gap between them like a window's frame. Together the four panes make a skewed window. Its outer corners sit at about
60, 165(top left),710, 30(top right),980, 715(bottom right) and330, 850(bottom left).
- Click
-
Fill the window light
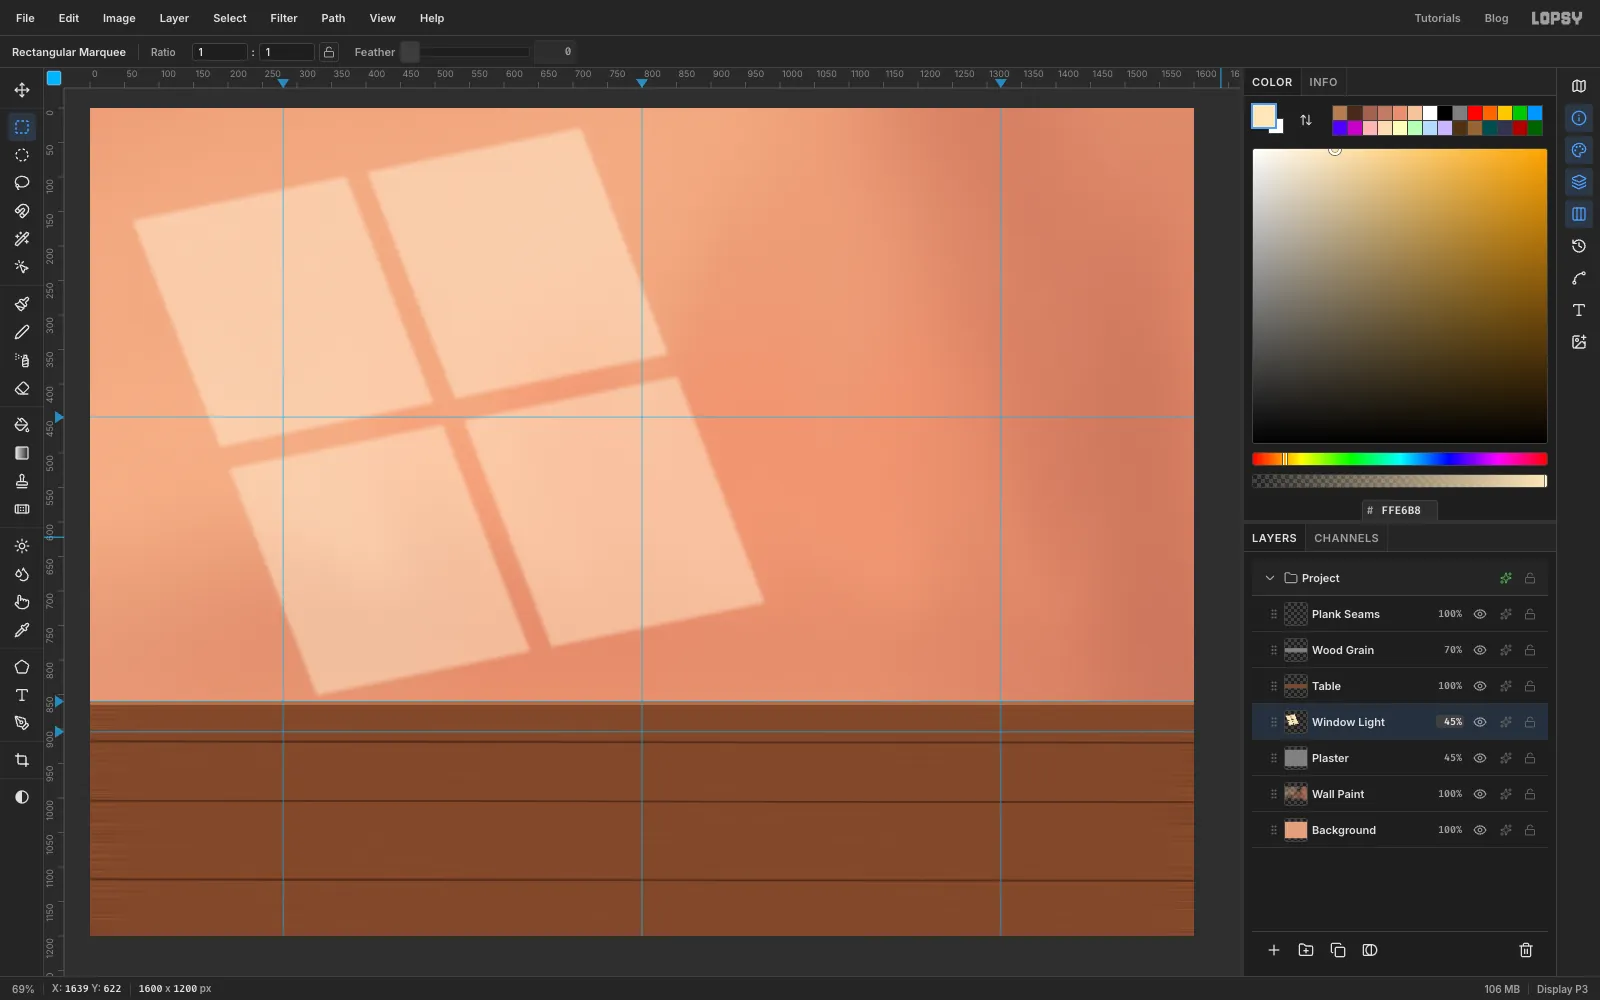
- Choose Select → Feather… with
6px and fill with . Deselect. - The light shouldn't land on the table, so marquee the table area from the
860guide down and press Delete. - Set
Window Lightto Screen at45%.
- Choose Select → Feather… with
-
Build the boombox body
- Click
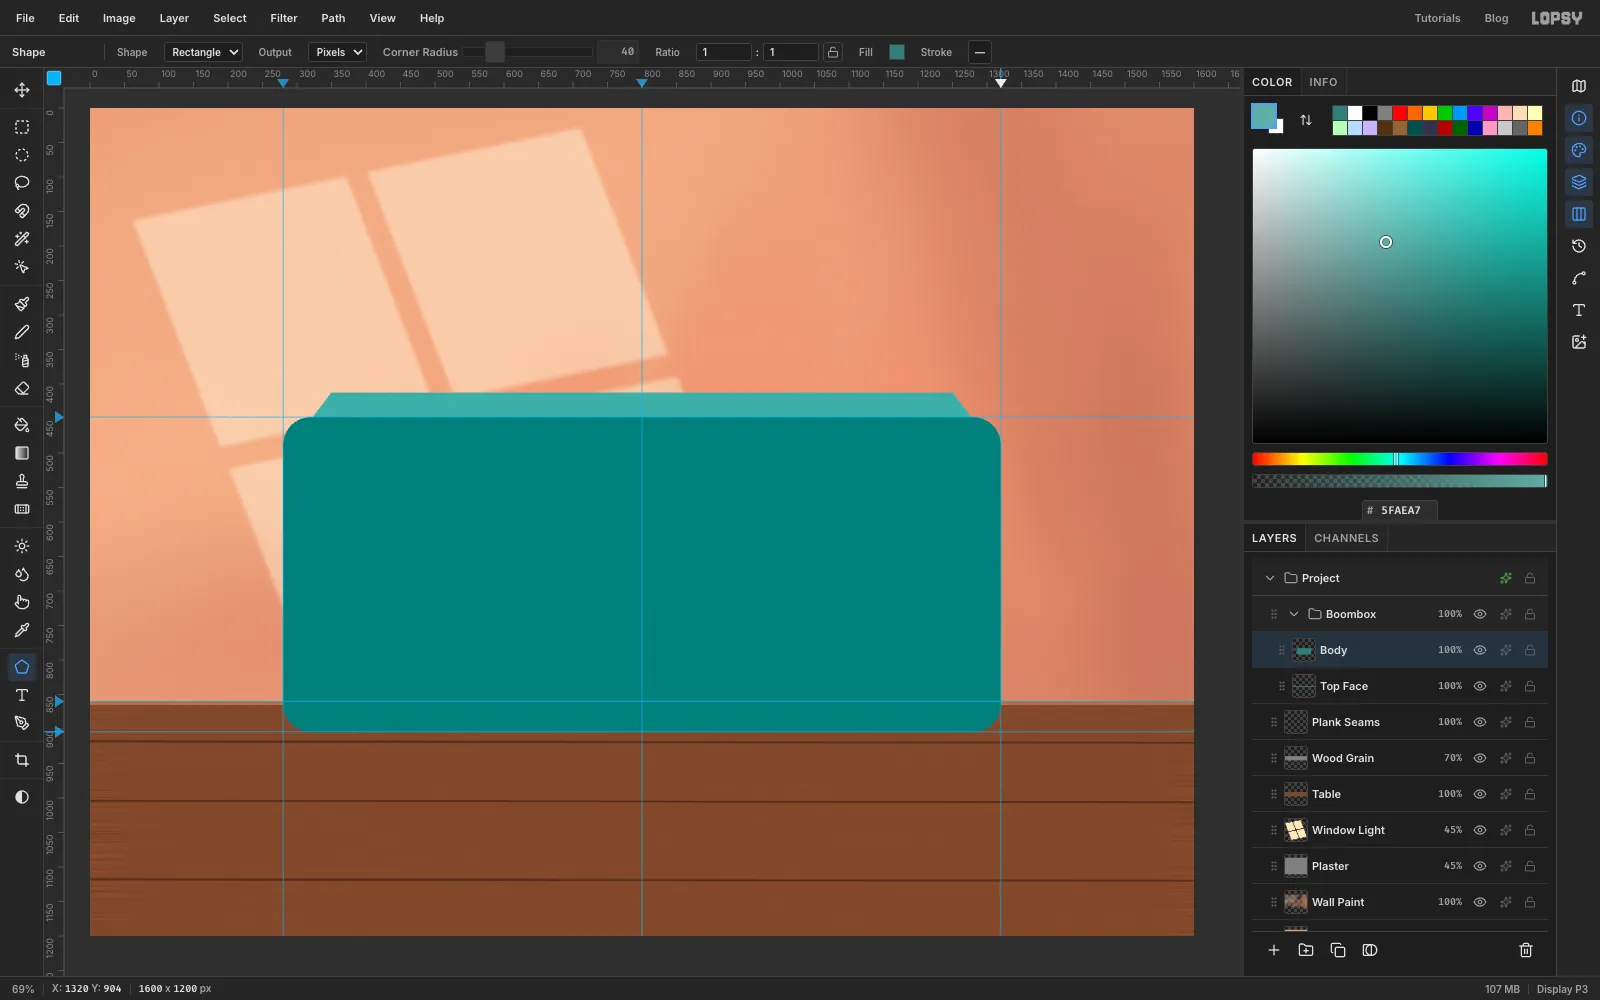
Plank Seams, click New Group and name the groupBoombox. - Add a layer called
Top Face. With the Lasso, draw a shallow strip on top of the box, from318, 454and1282, 454back to1250, 412and350, 412, and fill it with . - Add a layer called
Body. Choose the Shape tool with Shape set to Rectangle, Output Pixels, Corner Radius40, fill and no stroke. - Shapes grow from the centre, so press at
800, 676where the guides cross and drag out to the bottom-right guide corner at1320, 904. The guides snap the box into place.
- Click
-
Light the body with a gradient
- Add a layer called
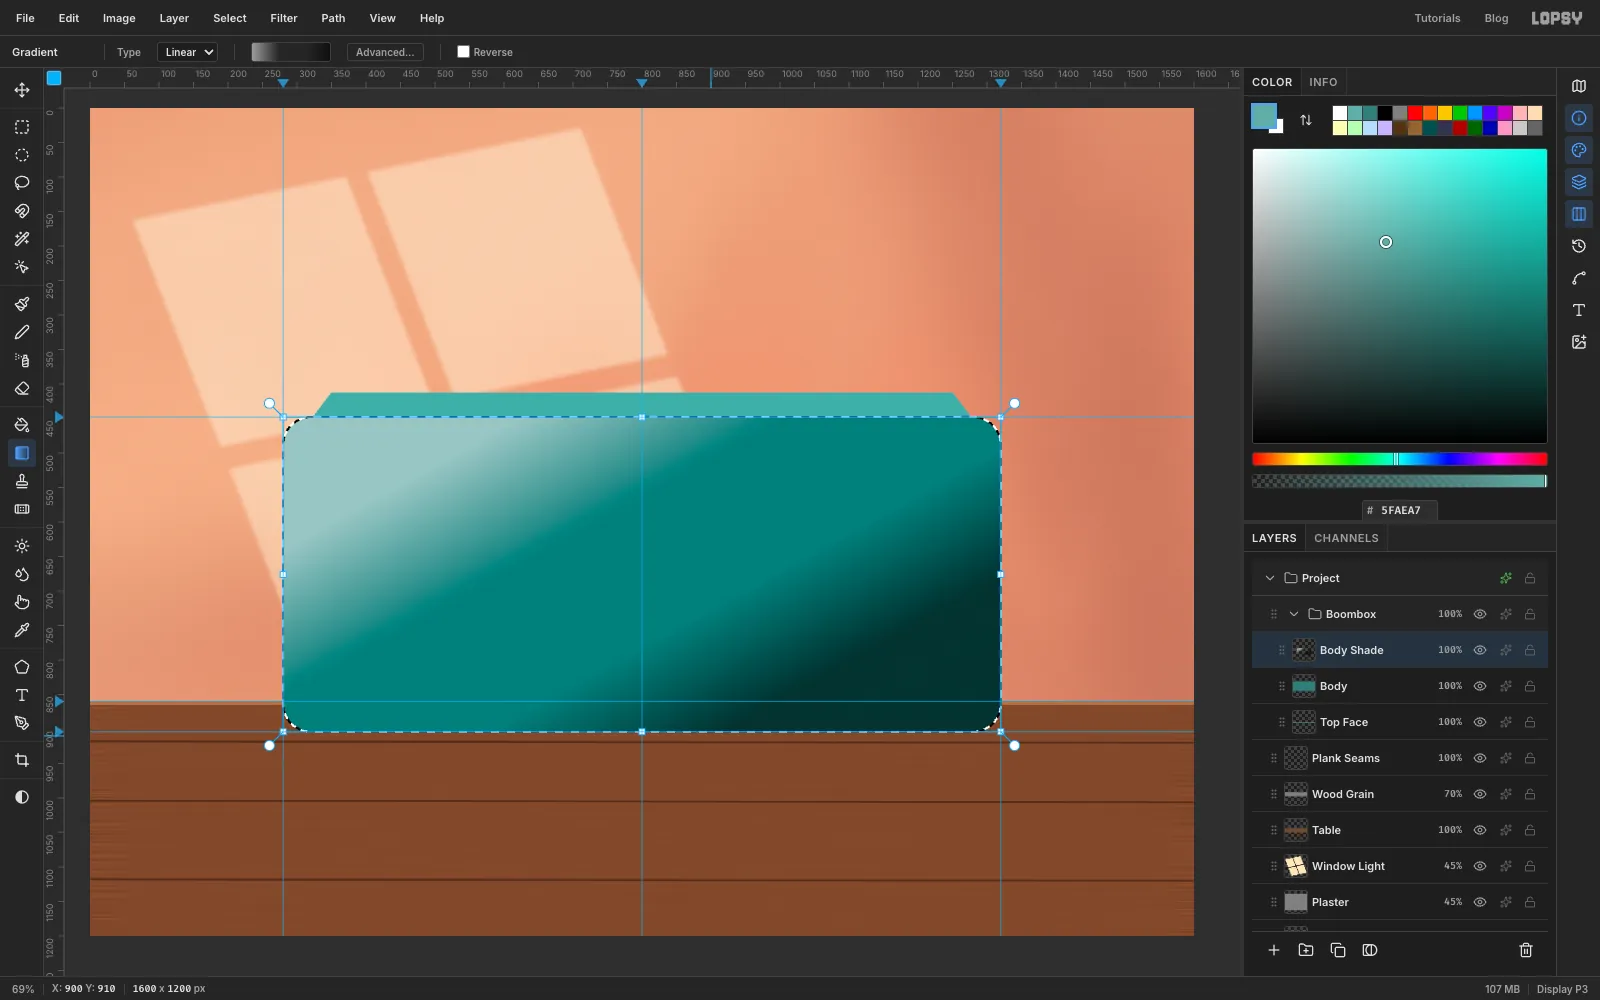
Body Shadeand Cmd-click theBodythumbnail. - In the Gradient tool's Advanced… editor, set four stops: white at
55%opacity at the start, white at0%about a third of the way, black at0%about two thirds of the way, and black at60%at the end. - Drag from just above the box's top centre (
640, 440) down to just below its bottom (900, 910). Deselect. - Set the layer to Soft Light.
- Add a layer called
Body Edge. With the Brush at Size4, Opacity80, Hardness90, draw a straight line along the body's top edge (click, then Shift-click).
- Add a layer called
-
Draw the handle with the Pen
- Click
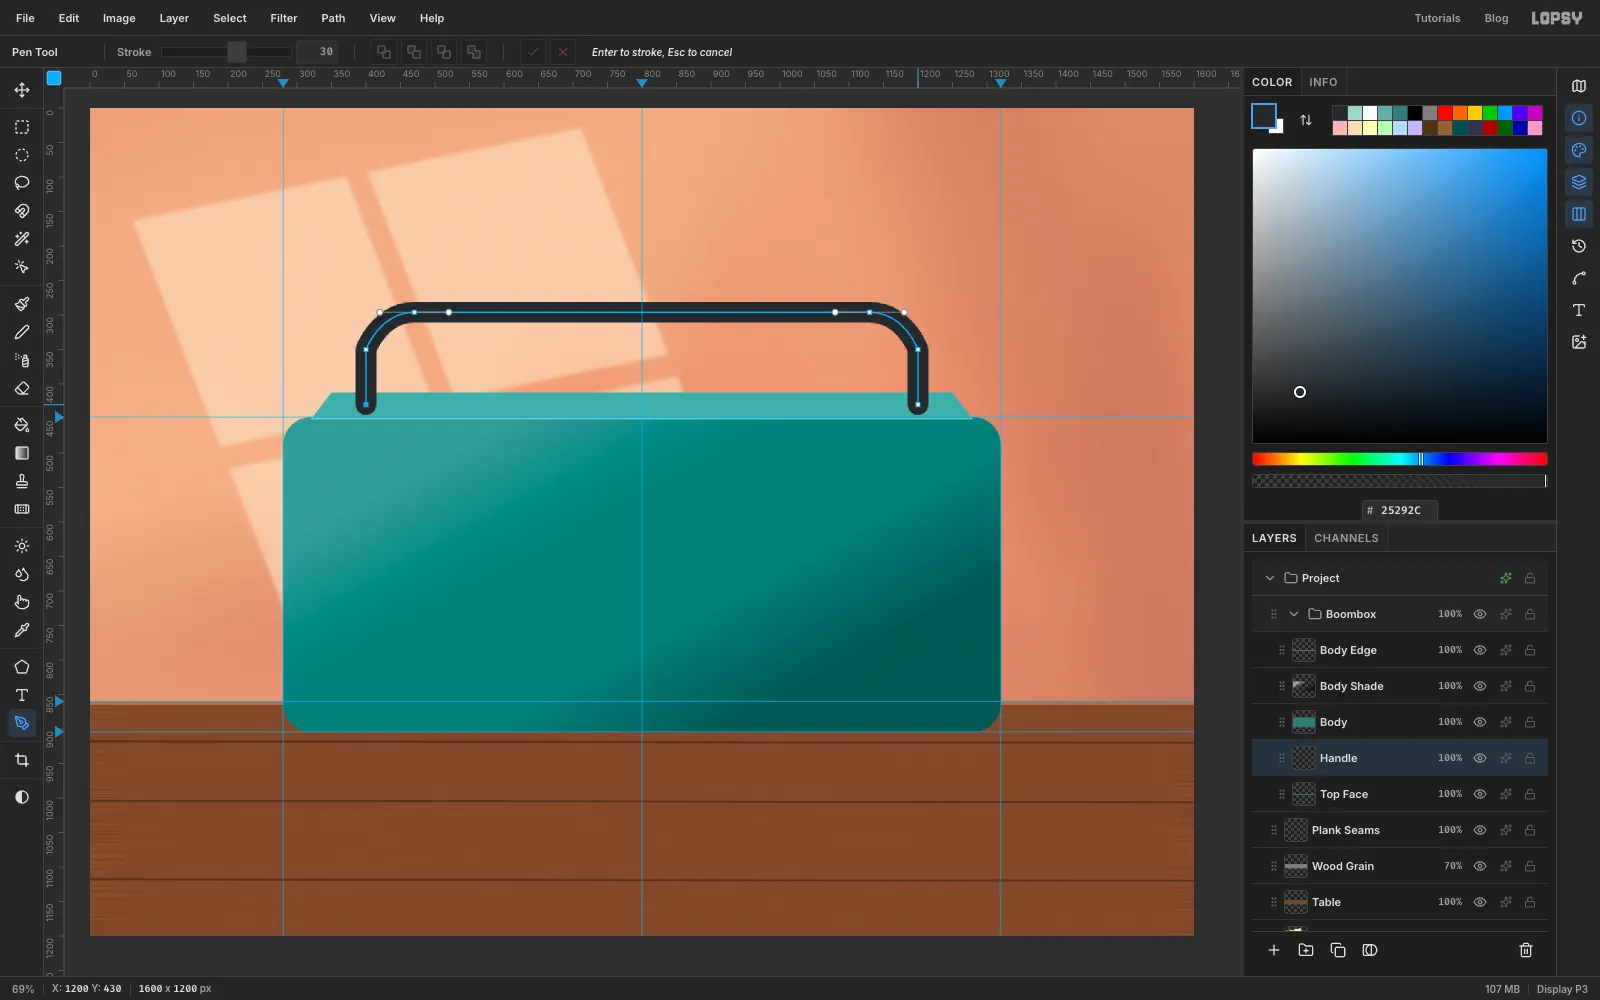
Top Faceand add a layer calledHandle. It sits under the body. - Set the foreground to , choose the Pen tool and set Stroke to
30. - Click at
400, 430and400, 350for the left post. - Press at
470, 296and drag right to520, 296. That pulls out a curve handle and rounds the corner. - Press at
1130, 296and drag right to1180, 296for the other corner. - Click
1200, 350and1200, 430for the right post, then press Enter. The path is stroked 30 px wide.
- Click
-
Add shine, mounts and an antenna
- Add a layer called
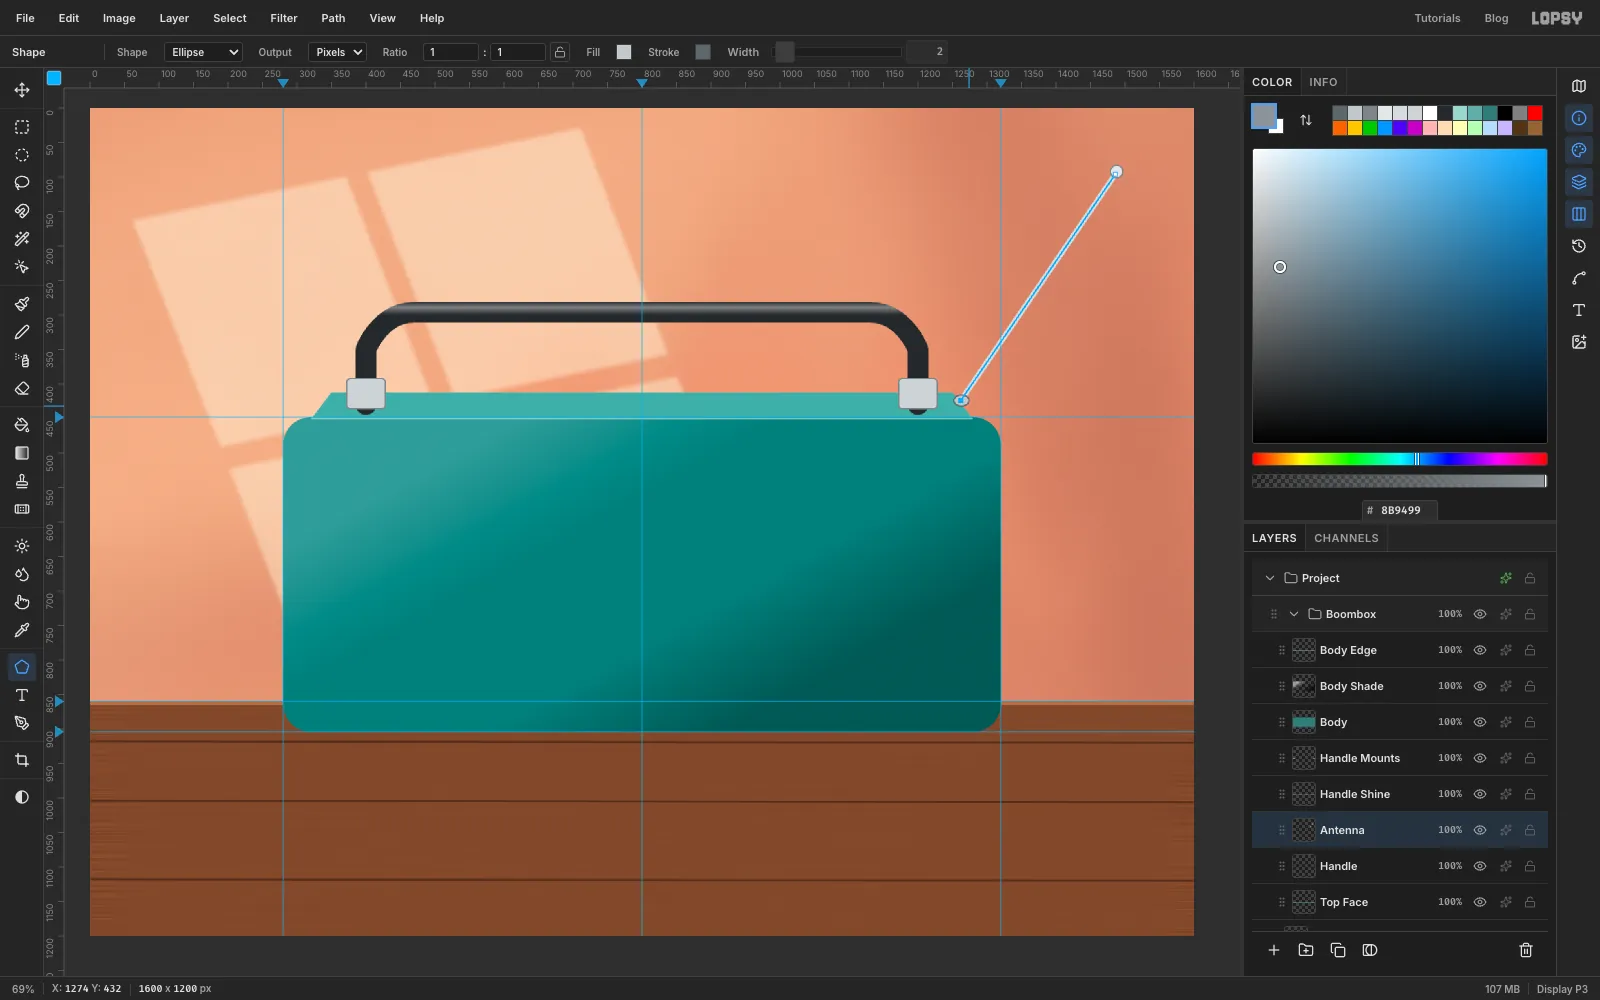
Handle Shineand Cmd-click theHandlethumbnail. Make a gradient from transparent white, to white at40%in the middle, to transparent white. Drag it straight down across the top bar, fromy 280to300. Deselect and set the layer to Screen. - Add a layer called
Handle Mounts. With the Shape tool (Rectangle, Corner Radius6, fill , stroke at Width2), draw a 56 × 44 px block centred on the foot of each post, at400, 414and1200, 414. - Click
Handleand add a layer calledAntenna. With the Pen at Stroke8and foreground , click1262, 424, then click1486, 96and press Enter. Draw a second line 3 px to the right with Stroke3in for its shadow side. - Add the tip and the swivel with the Shape tool set to Ellipse. Make an 18 px ball (, stroke ) at the top of the rod, and a flat 22 × 16 px oval (, stroke ) where it meets the box.
- Add a layer called
-
Mark out the speakers
- Click
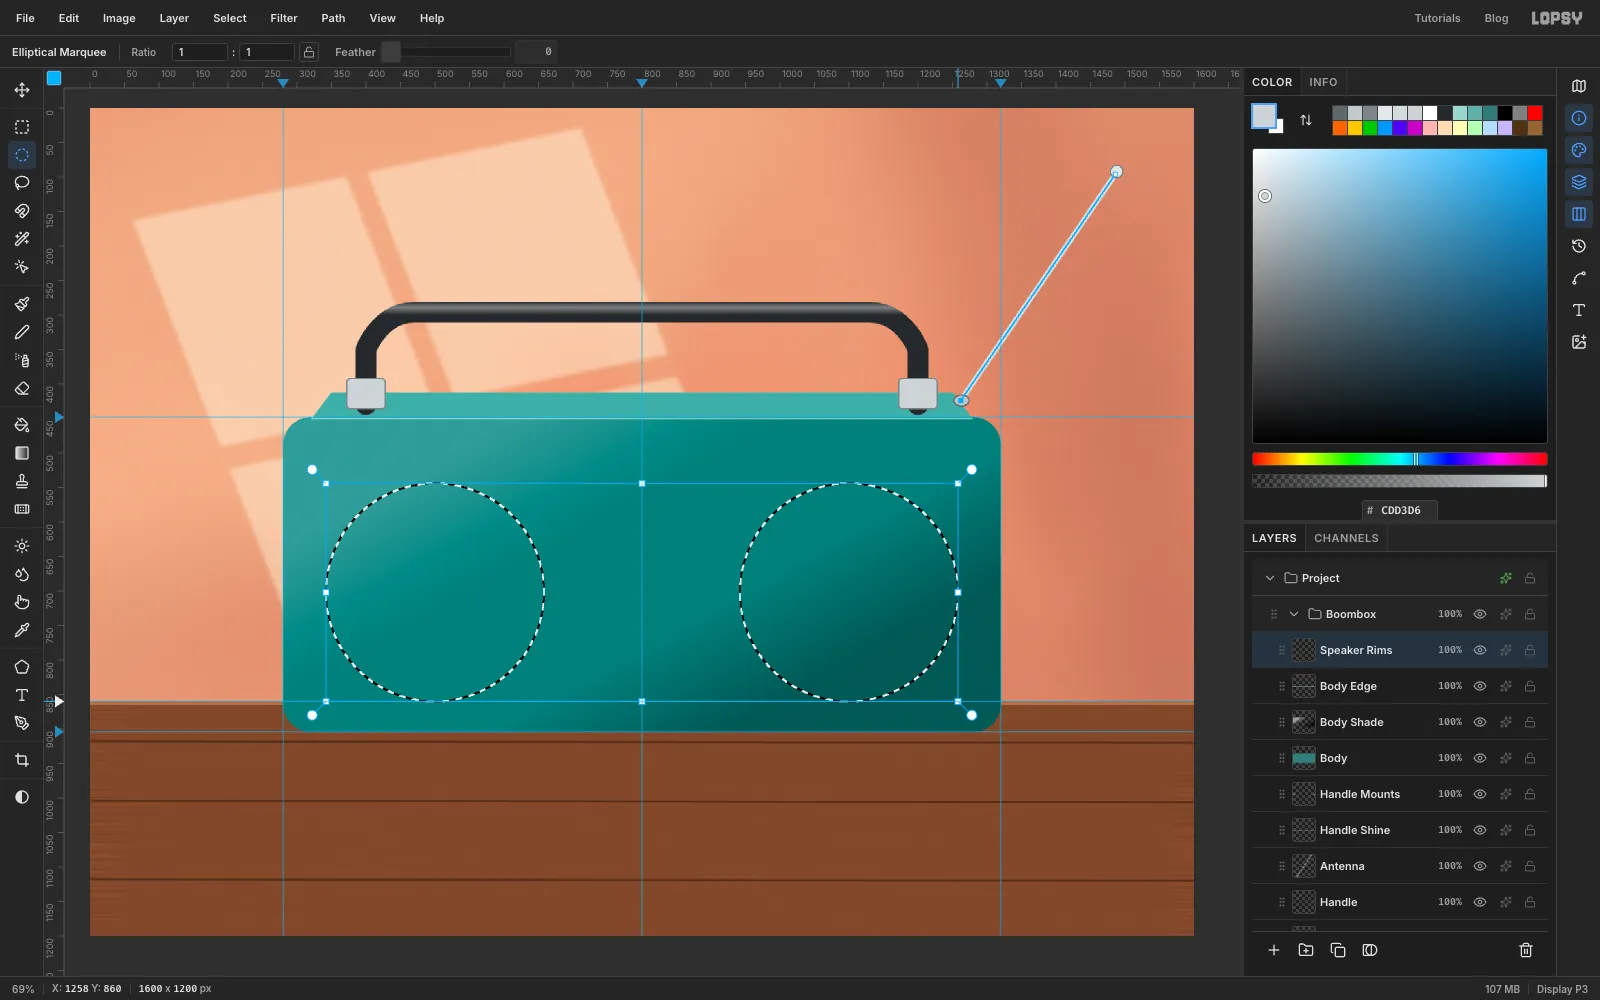
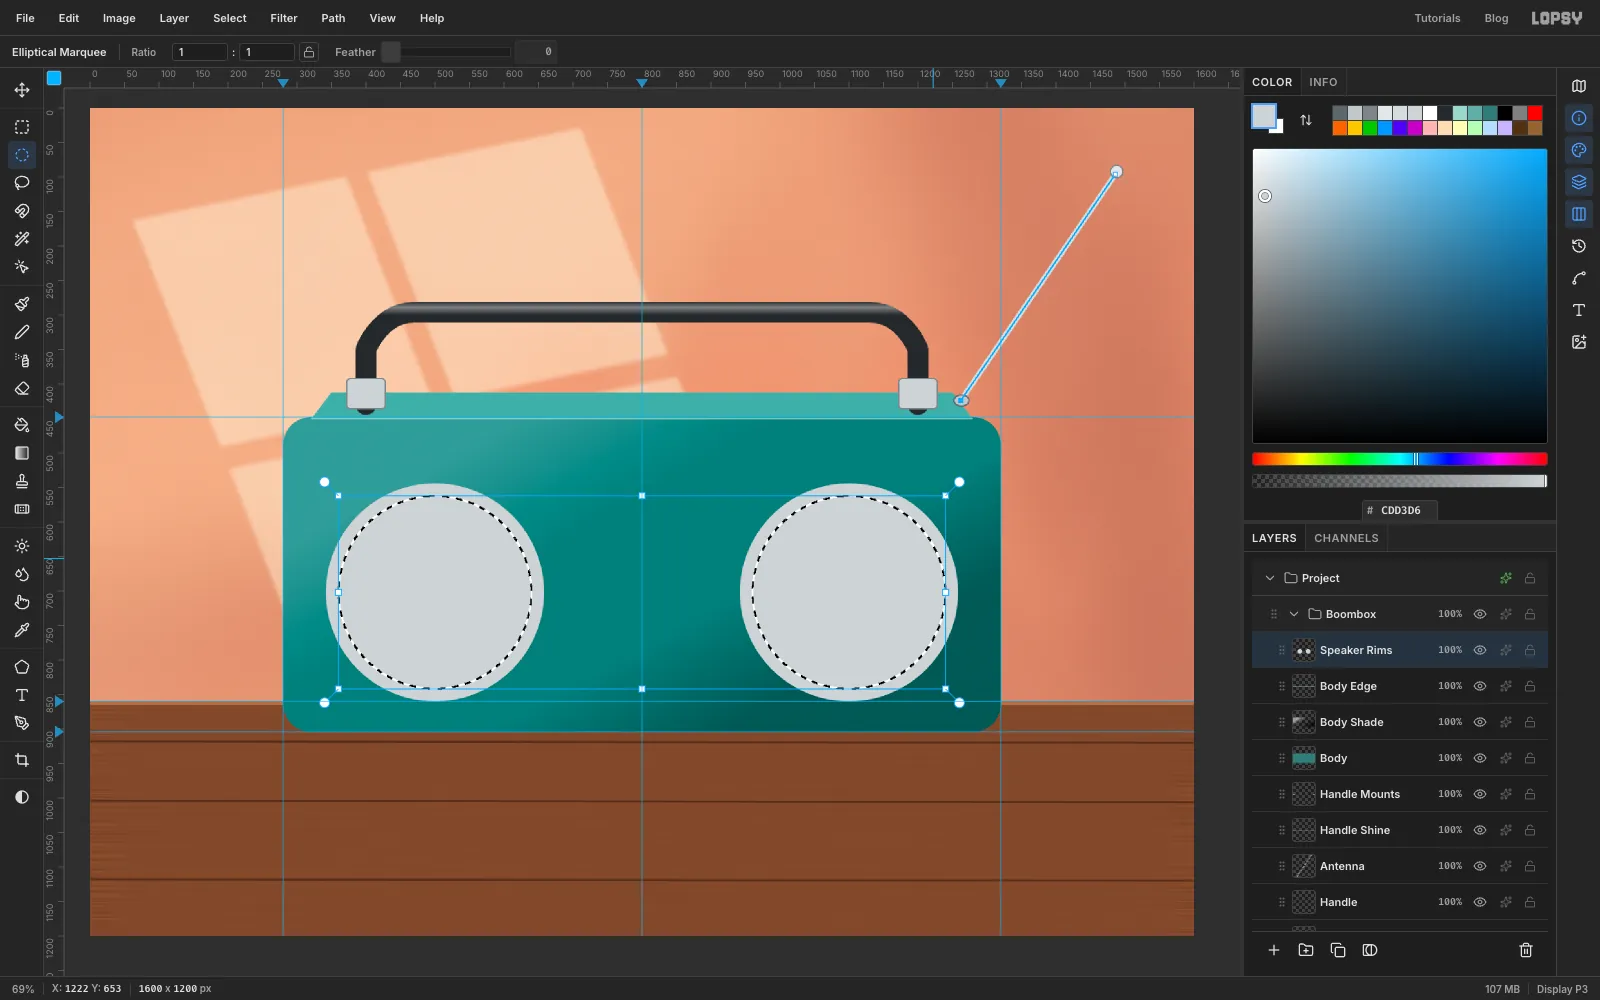
Body Edgeand add a layer calledSpeaker Rims. - With the Elliptical Marquee, drag a circle from
342, 544to658, 860. - Hold Shift and drag a second circle from
942, 544to1258, 860. Both are now selected.
- Click
-
Turn the circles into chrome rings
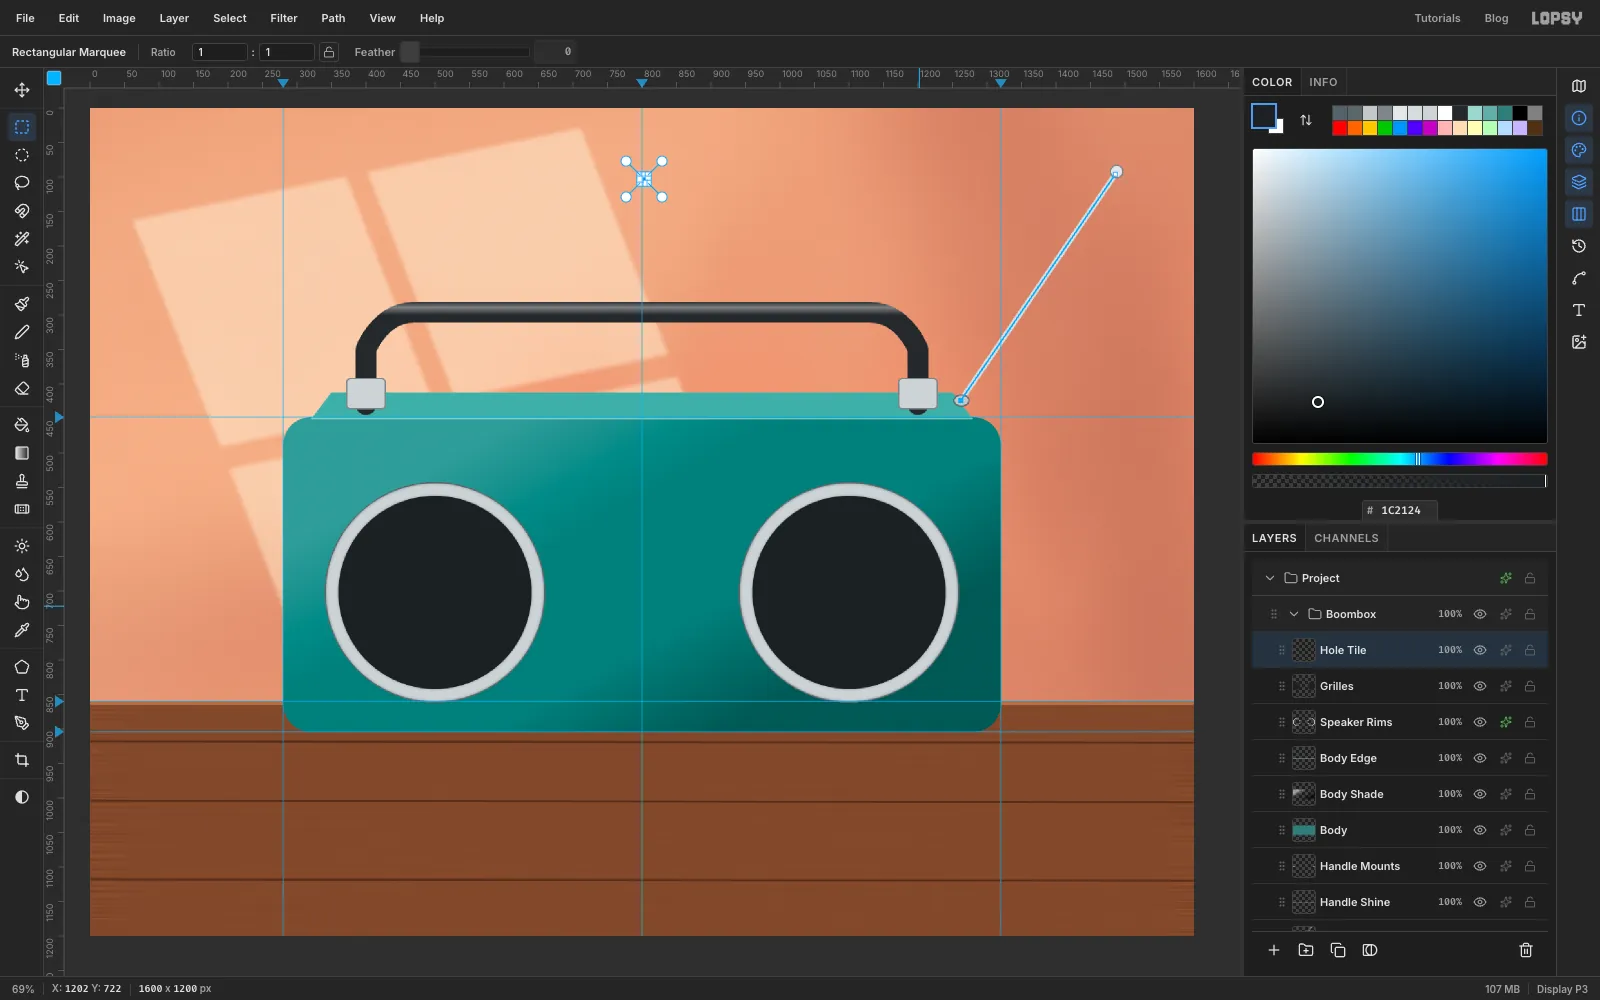
- Fill the selection with .
- Choose Select → Shrink… with
18px. - Press Delete to cut out the middles and leave two rings. Deselect.
- In the effects drawer, add an Inner Glow (Size
6, Opacity55, colour ) and a Stroke (Width2, colour ). - Add a layer called
Grilles. With the Elliptical Marquee, select a 280 px circle on each speaker centre (500, 702and1100, 702) and fill both with .
-
Make a perforation tile
- Add a scratch layer called
Hole Tile. - Choose the Shape tool, set it to Ellipse with fill , and click (don't drag) anywhere in empty wall space. In the Shape Size dialog enter
7×7. - Switch to the Rectangular Marquee and click once on the dot without dragging. In the Rectangular Selection dialog, enter a 12 × 12 square centred on the dot. Here that was From
797, 97and To809, 109. - Choose Edit → Define Pattern, deselect, and delete the
Hole Tilelayer.
- Add a scratch layer called
-
Finish the speakers
- Click
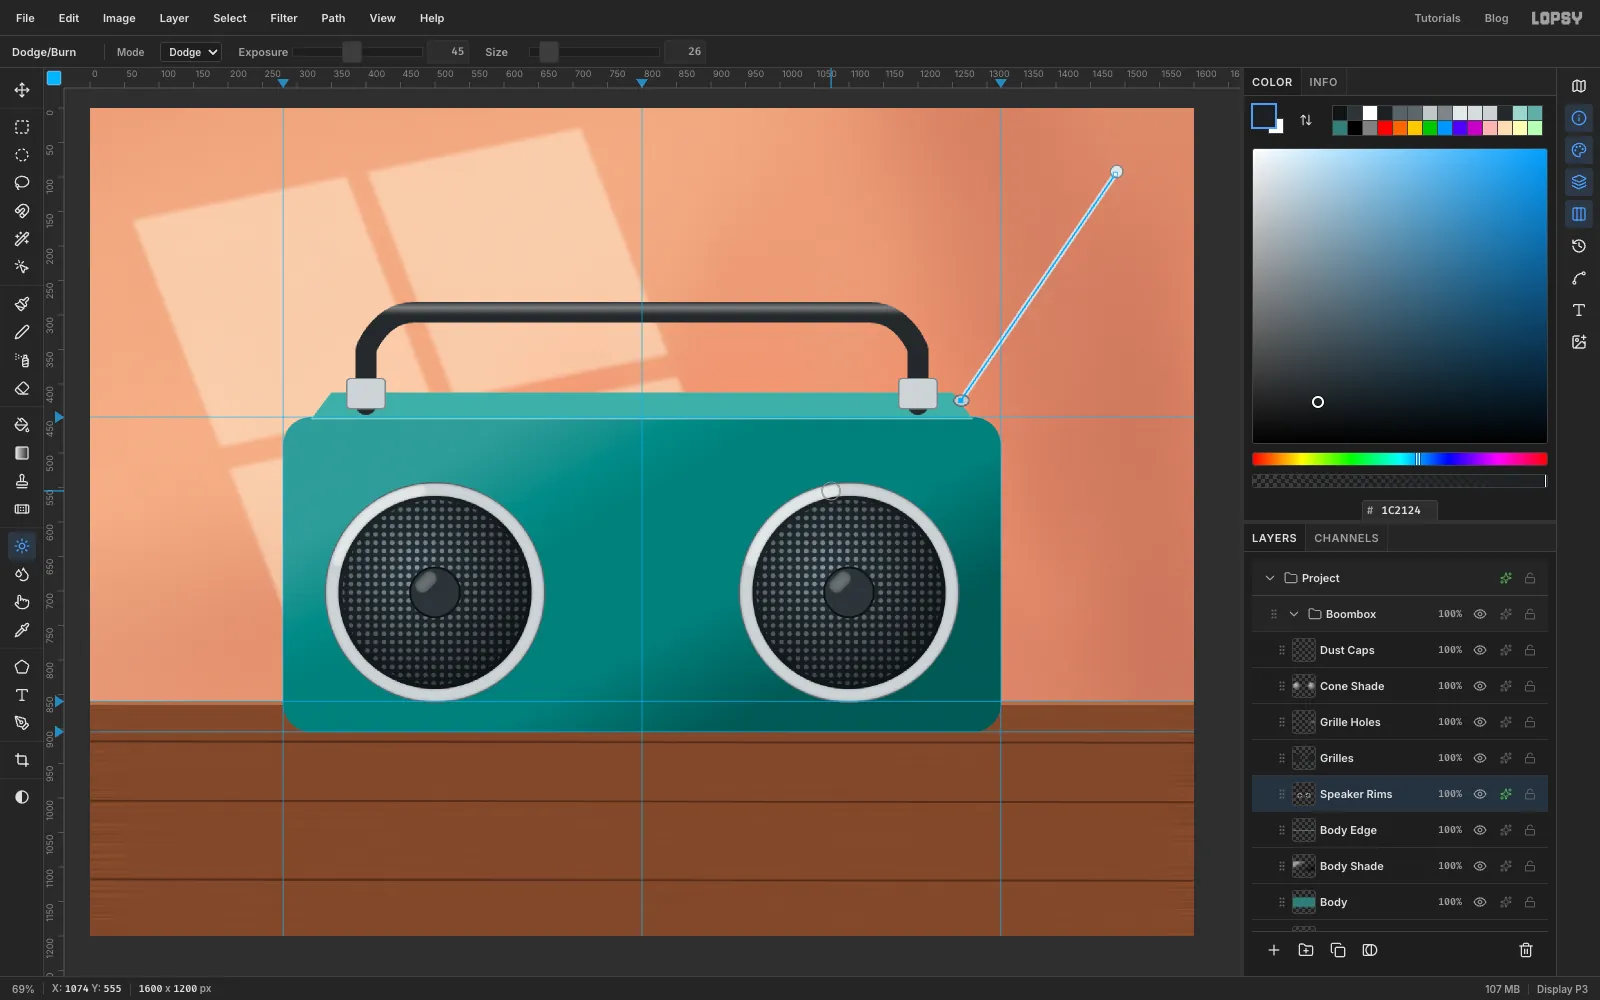
Grilles, add a layer calledGrille Holes, and Cmd-click theGrillesthumbnail. - Select → Shrink… by
6, then choose Edit → Fill with Pattern… and click Apply. Deselect. - Add a layer called
Cone Shade. Set up a Radial gradient from through to . With the Elliptical Marquee, select the left grille's circle and drag the gradient from a little above-left of its centre out to its lower-right edge. Then select the right grille and do the same. Each drag lands on top of the last, so the first one stays. Set the layer to Overlay. - Add a layer called
Dust Caps. With the Shape tool (Ellipse, fill , stroke at3), draw a 72 px cap on each speaker centre. - Pick Dodge with Exposure
30and Size22, and dab a small highlight on the upper left of each cap. Then clickSpeaker Rimsand, at Exposure45and Size26, run a short arc along the upper-left of each ring.
- Click
-
Build the cassette deck
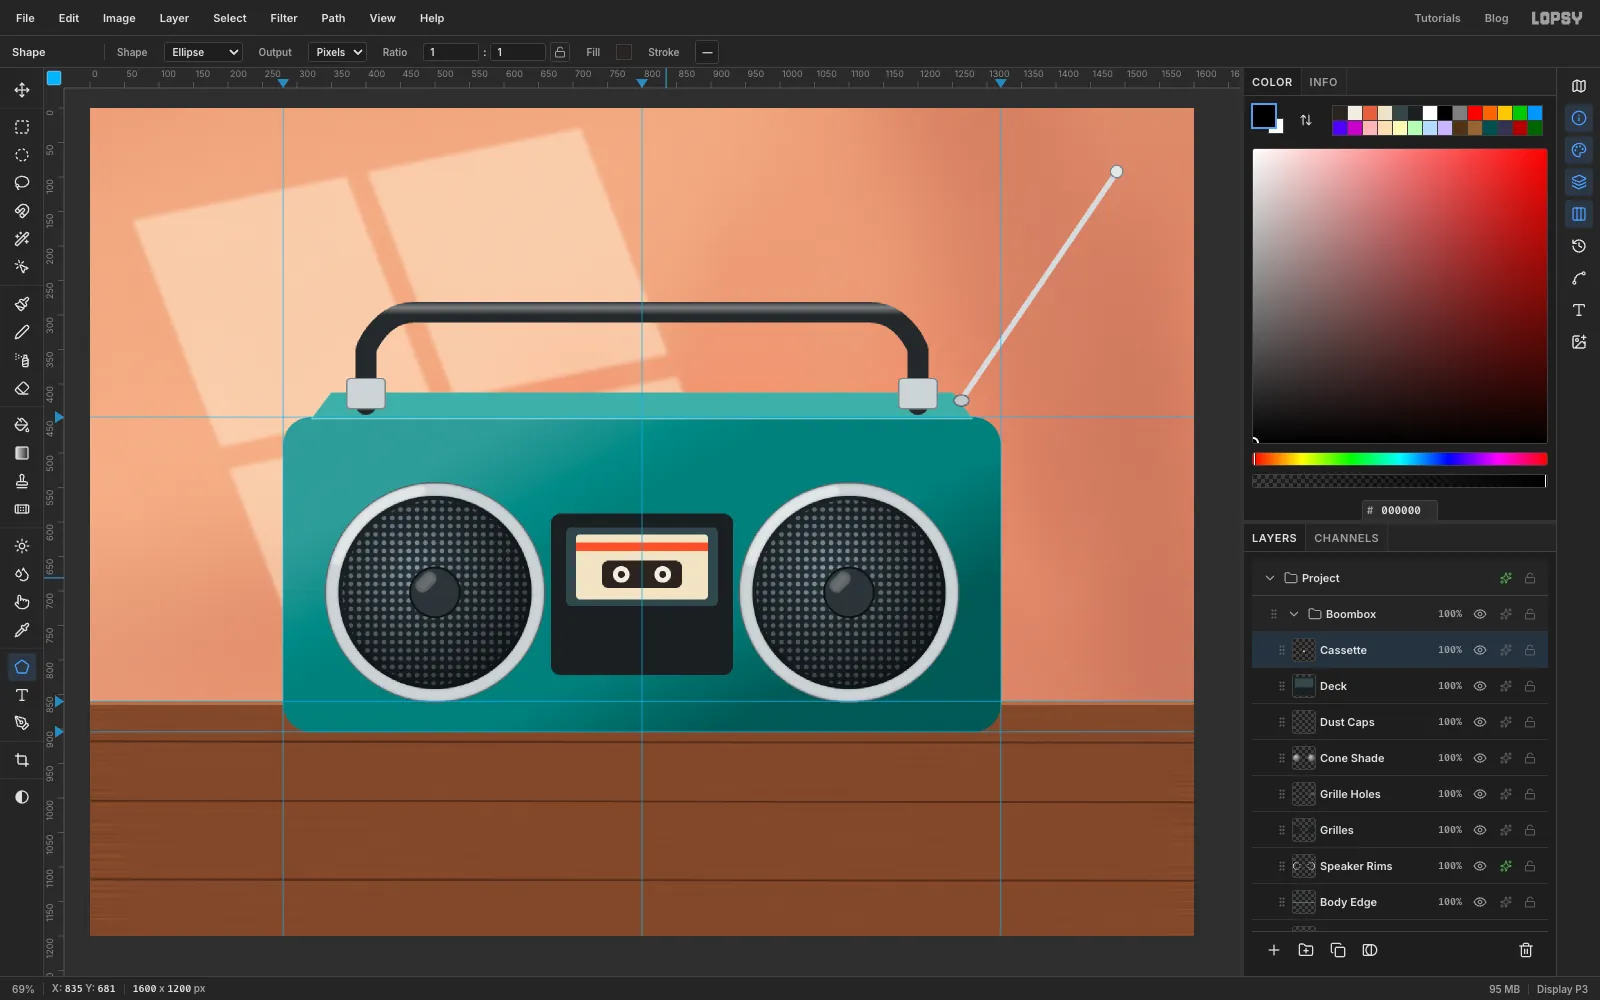
- Click
Dust Capsand add a layer calledDeck. With the Shape tool's Rectangle, draw a 264 × 234 px panel with Corner Radius14between the speakers, centred on800, 705. Inside it, draw a 220 × 114 px window with radius8, centred on800, 665. - Add a layer called
Cassetteand draw the tape on it:
- a cream label with radius
6, just inside the window - a stripe across its top with radius
0 - a dark tape window with radius
10in the middle - two 26 px reels with a dark stroke, each with a 10 px dark hub
- Click
-
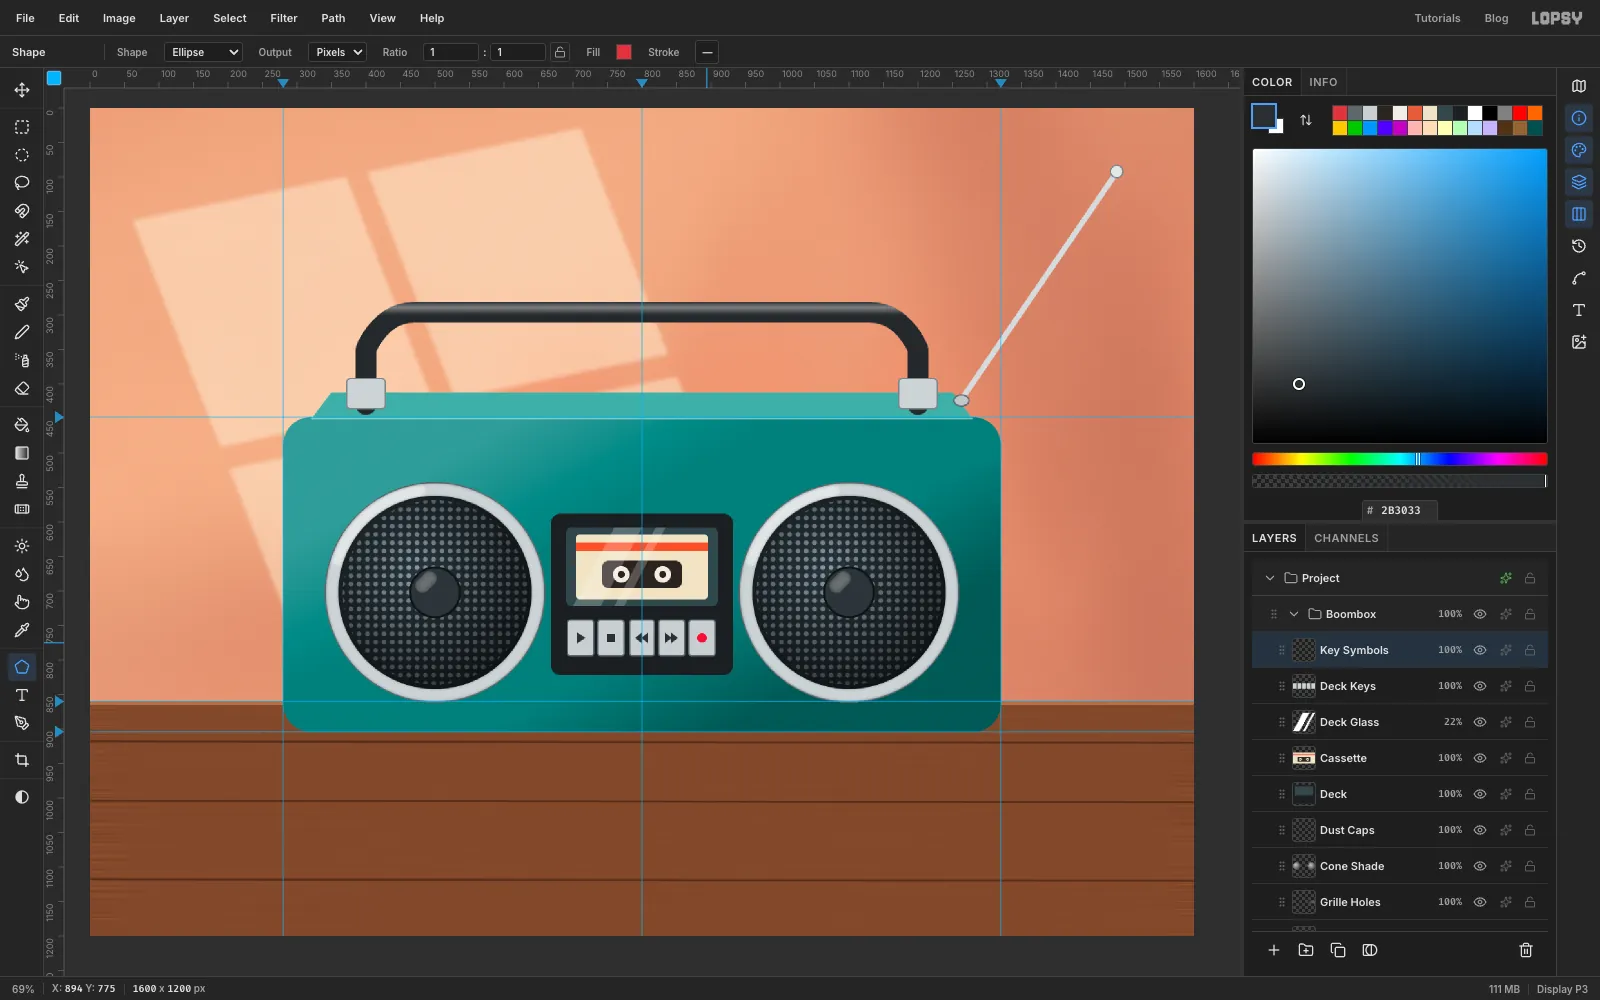
Add glass and transport keys
- Add a layer called
Deck Glass. Lasso two thin slanted strips across the window, fill them with white, and set the layer to Screen at22%. - Add a layer called
Deck Keys. Draw five grey keys (38 × 52 px, radius4, stroke ) in a row under the window. - Add a layer called
Key Symbols. Lasso small triangles and a square for play, stop, rewind and fast-forward, and finish with a 14 px red dot for record.
- Add a layer called
-
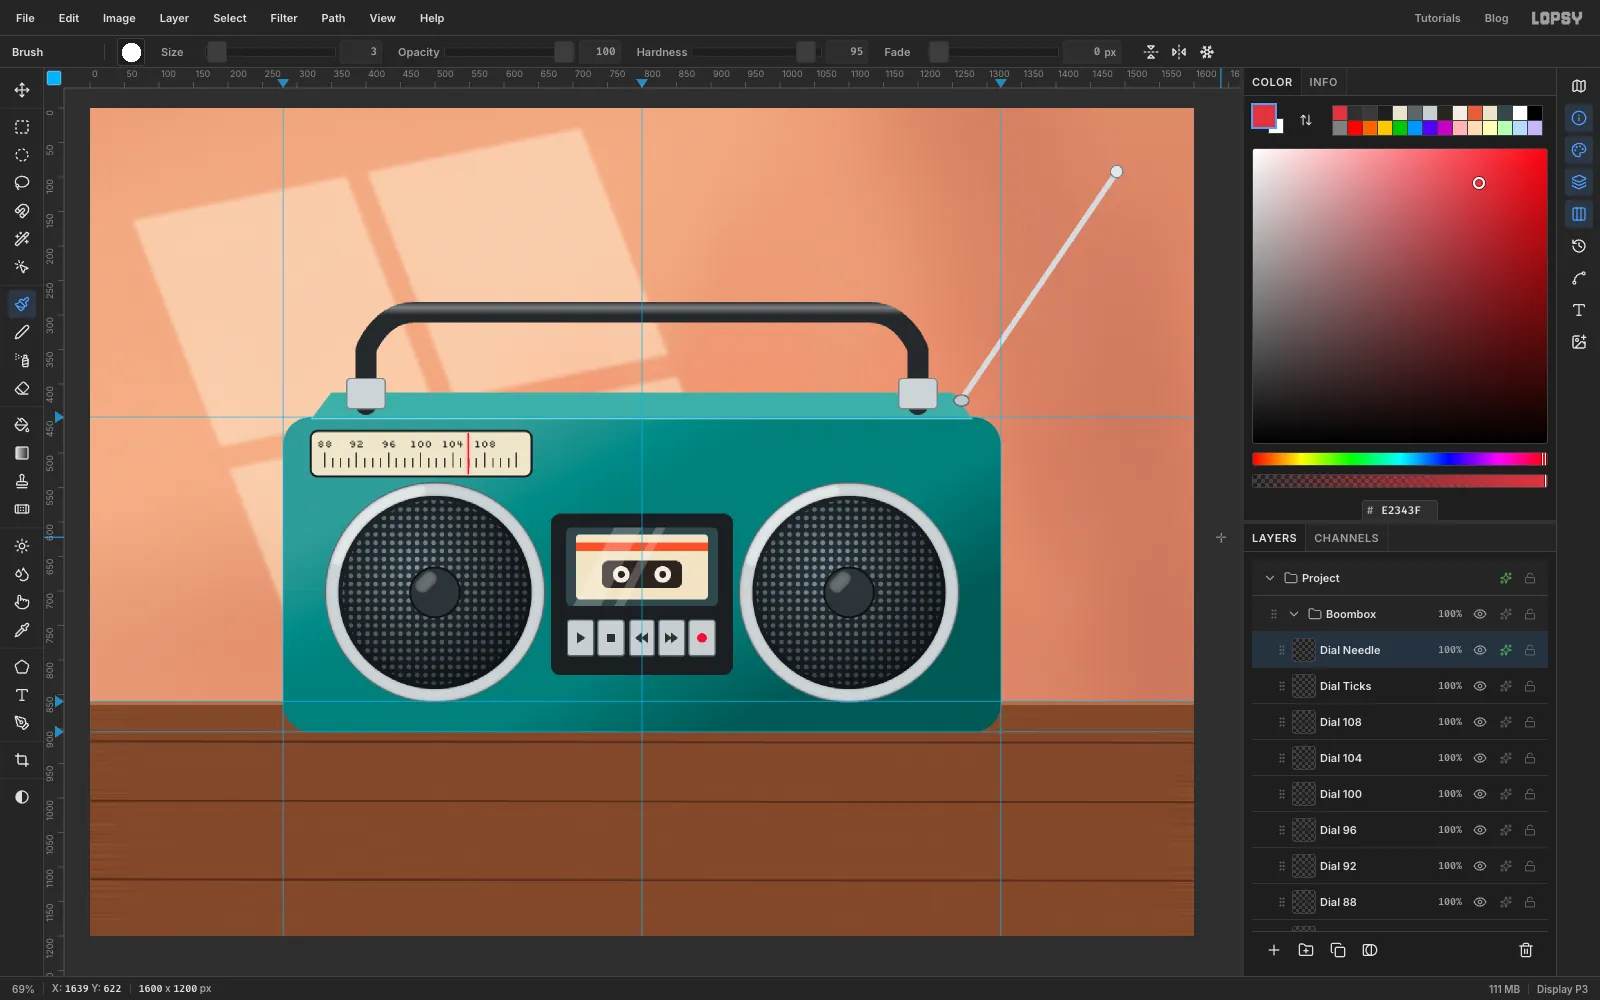
Add the tuning dial
- Add a layer called
Dialand draw a 320 × 66 px rectangle with radius10and a 3 px stroke, centred on480, 501. - Add a layer called
Dial Ticks. With the Pencil at Size2in , draw 25 short vertical ticks evenly spaced fromx 340tox 618, about 12 px apart (click the top of each, then Shift-click its bottom). Make every fourth tick longer, starting with the first. That gives seven long ticks. - Type the numbers
88,92,96,100,104and108in Silkscreen at Size15in , one text layer each, centred above the first six long ticks. The last long tick stays unlabelled. Work from right to left: clicking on existing text edits it instead of starting a new layer, so keep each new click clear of the label you just made. Rename each layerDial 88,Dial 92and so on. - Add a layer called
Dial Needleand, with the Brush at Size3, draw a red needle across the dial atx 548. Give it an Outer Glow (Size8, Opacity60, ).
- Add a layer called
-
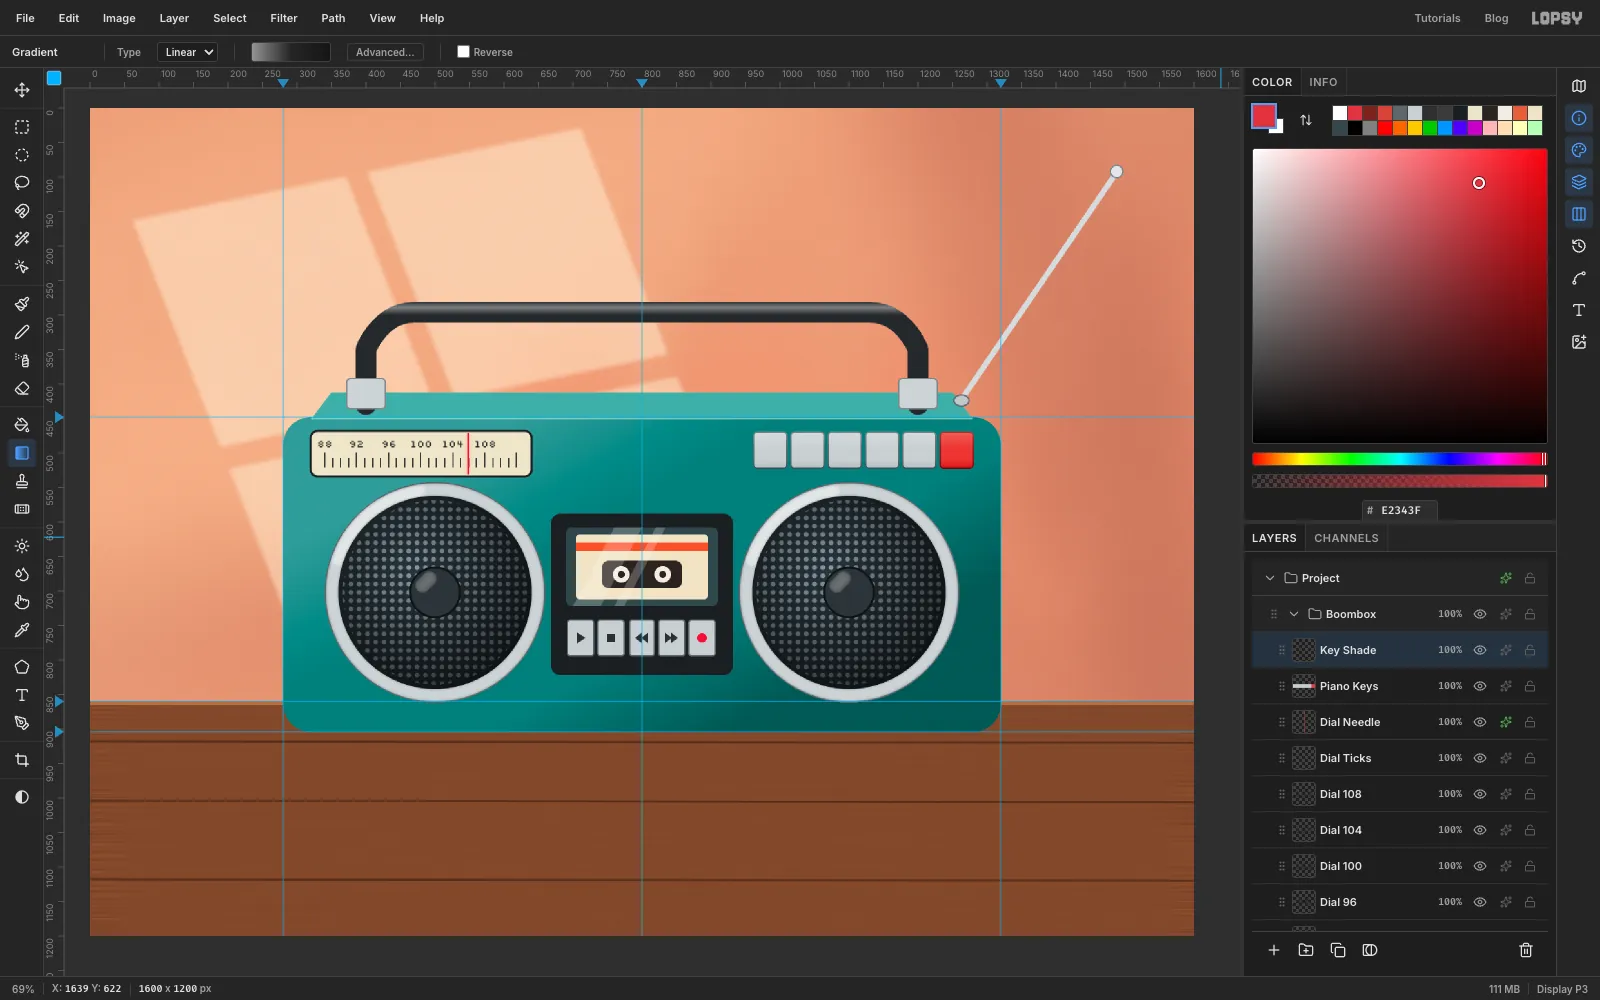
Add the preset keys
- Add a layer called
Piano Keys. Draw five keys (48 × 52 px, radius5, stroke ) at the top right, 6 px apart, then a sixth in red with a stroke. - Add a layer called
Key Shade, Cmd-click thePiano Keysthumbnail, and drag a gradient from the top of the keys to the bottom: white at50%, clear in the middle, black at45%at the bottom. Set it to Soft Light.
- Add a layer called
-
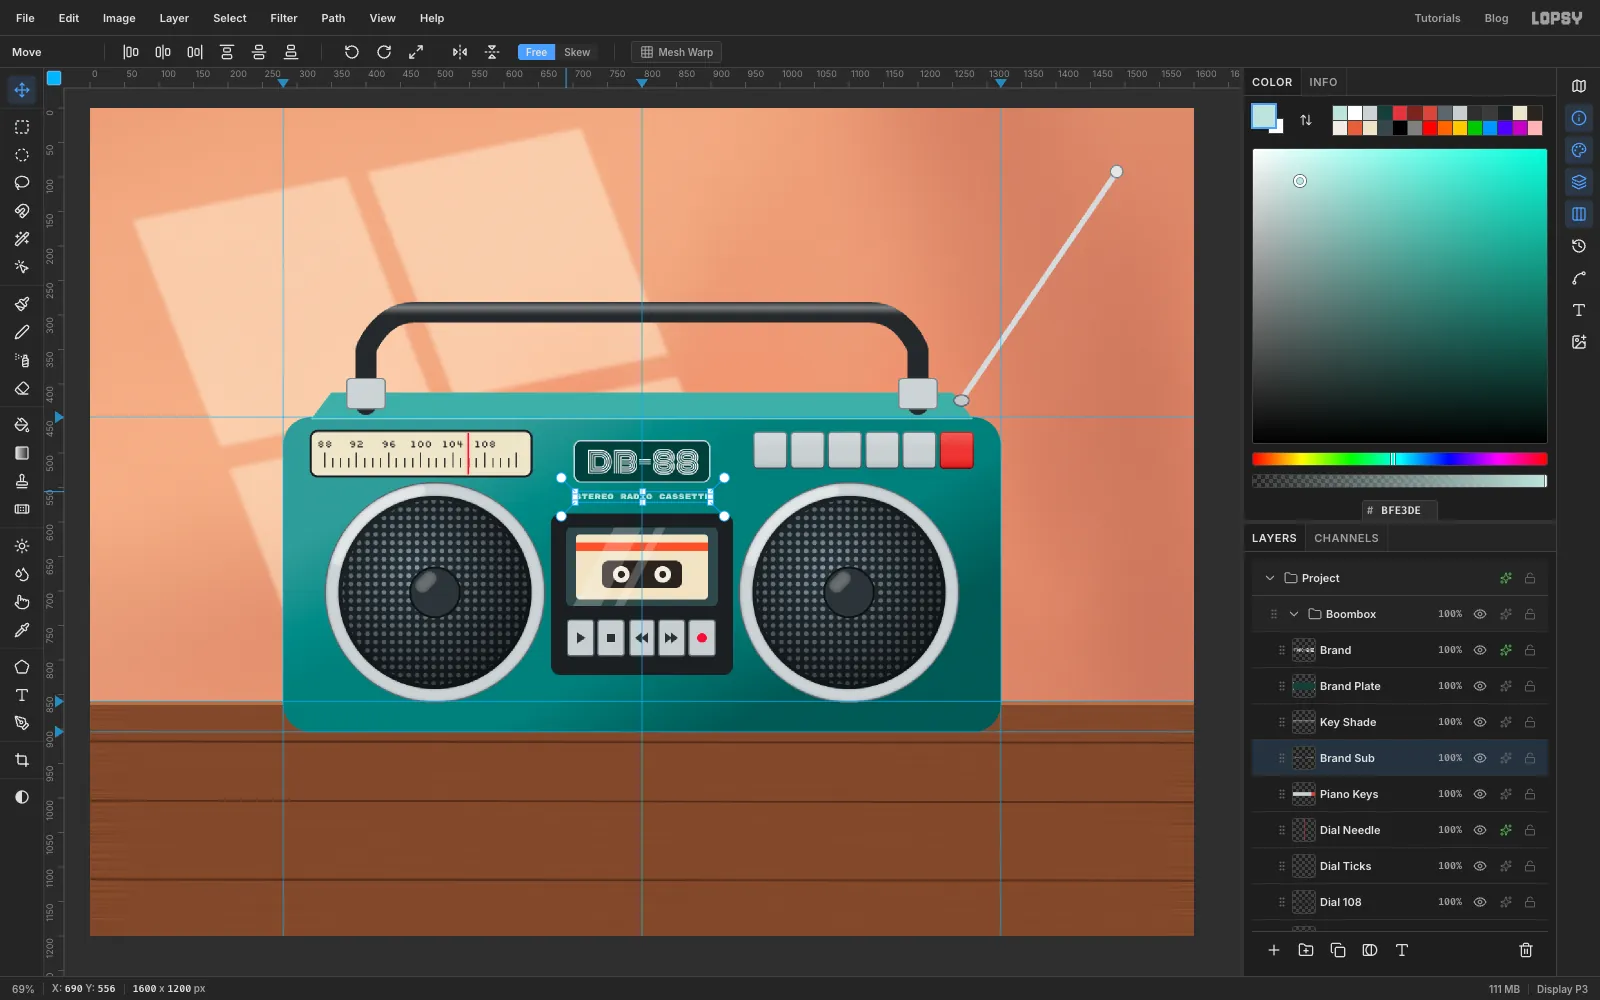
Set the brand
- Click
Key Shadeand add a layer calledBrand Plate. Draw a 194 × 60 px badge with radius10and a 2 px stroke, centred on801, 512. - Type
DB-88in Monoton at Size42.5in white and rename the layerBrand. Centre it on the badge with the Move tool's arrow keys. Give it a small Drop Shadow (Offset X1, Offset Y2, Blur2, Opacity45, ). - Click
Piano Keysand typeSTEREO RADIO CASSETTEin Rubik Mono One at Size11in . Rename itBrand Suband centre it under the badge.
- Click
-
Start the stickers with a die-cut pill
- Choose Edit → Clear Guides, so the guides don't snap your stickers.
- Click
Brand, click New Group and name itStickers. - Add a layer called
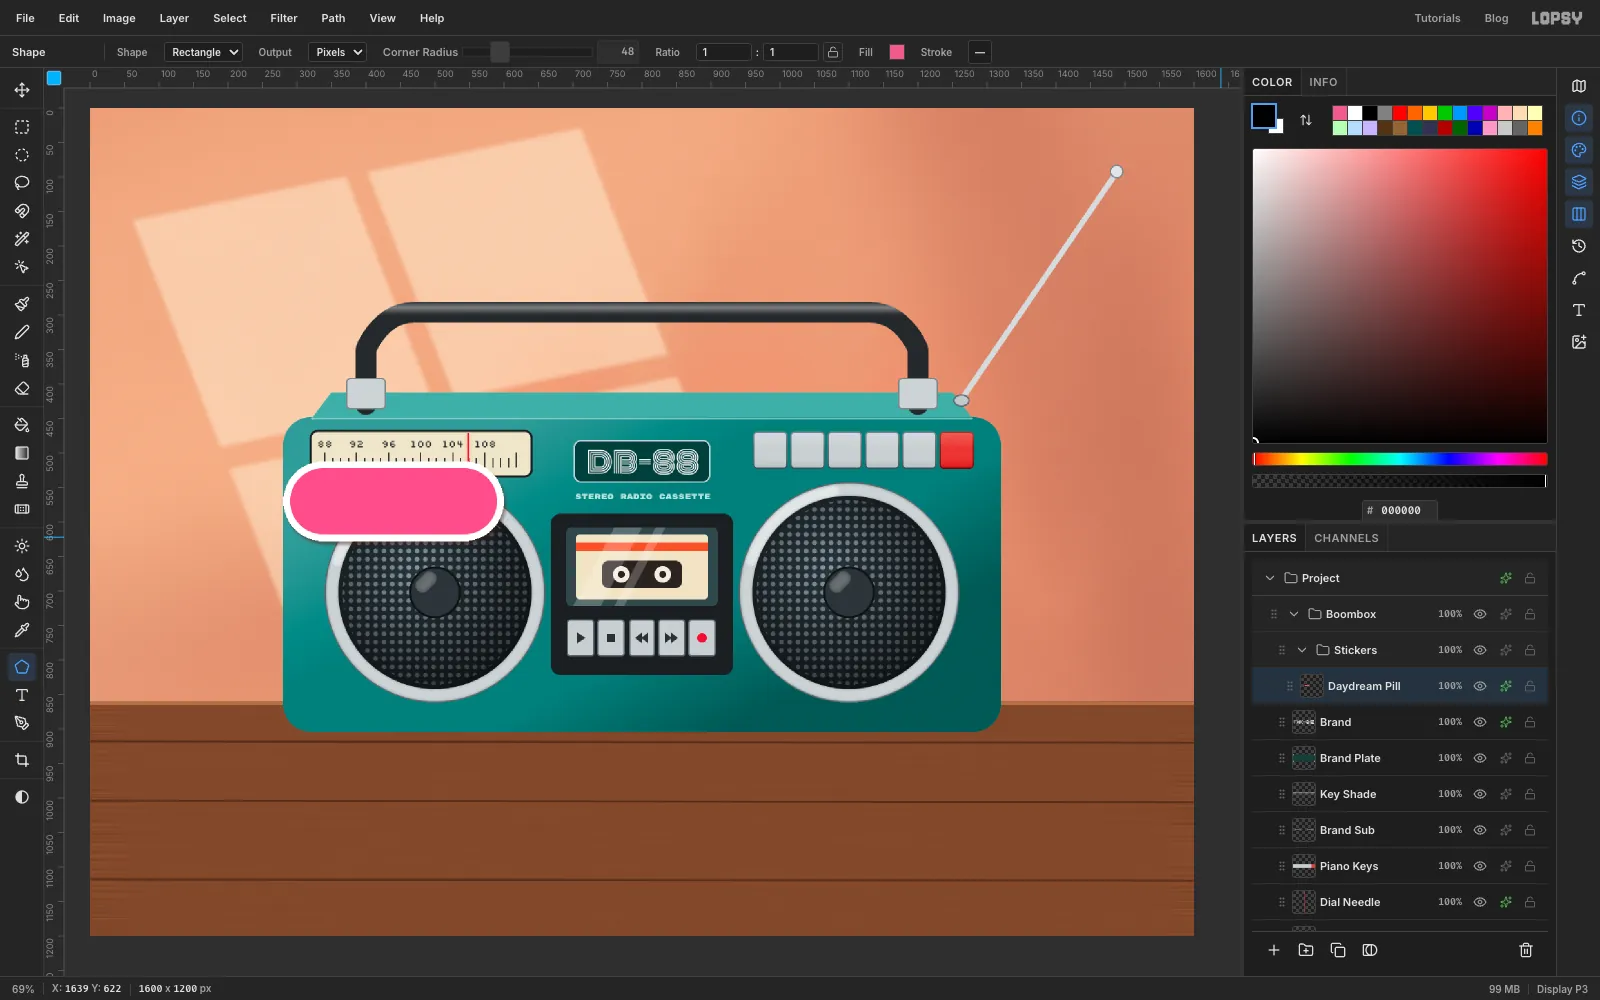
Daydream Pill. With the Rectangle shape at Corner Radius48, draw a 300 × 96 px pill centred on440, 570. - In the effects drawer, turn on Stroke at Width
10in white and set its position to Outside. That's the die-cut border. Add a Drop Shadow with Offset X3, Offset Y5, Blur6, Opacity45in .
You'll give every sticker this same border and shadow.
-
Letter the pill
- Type
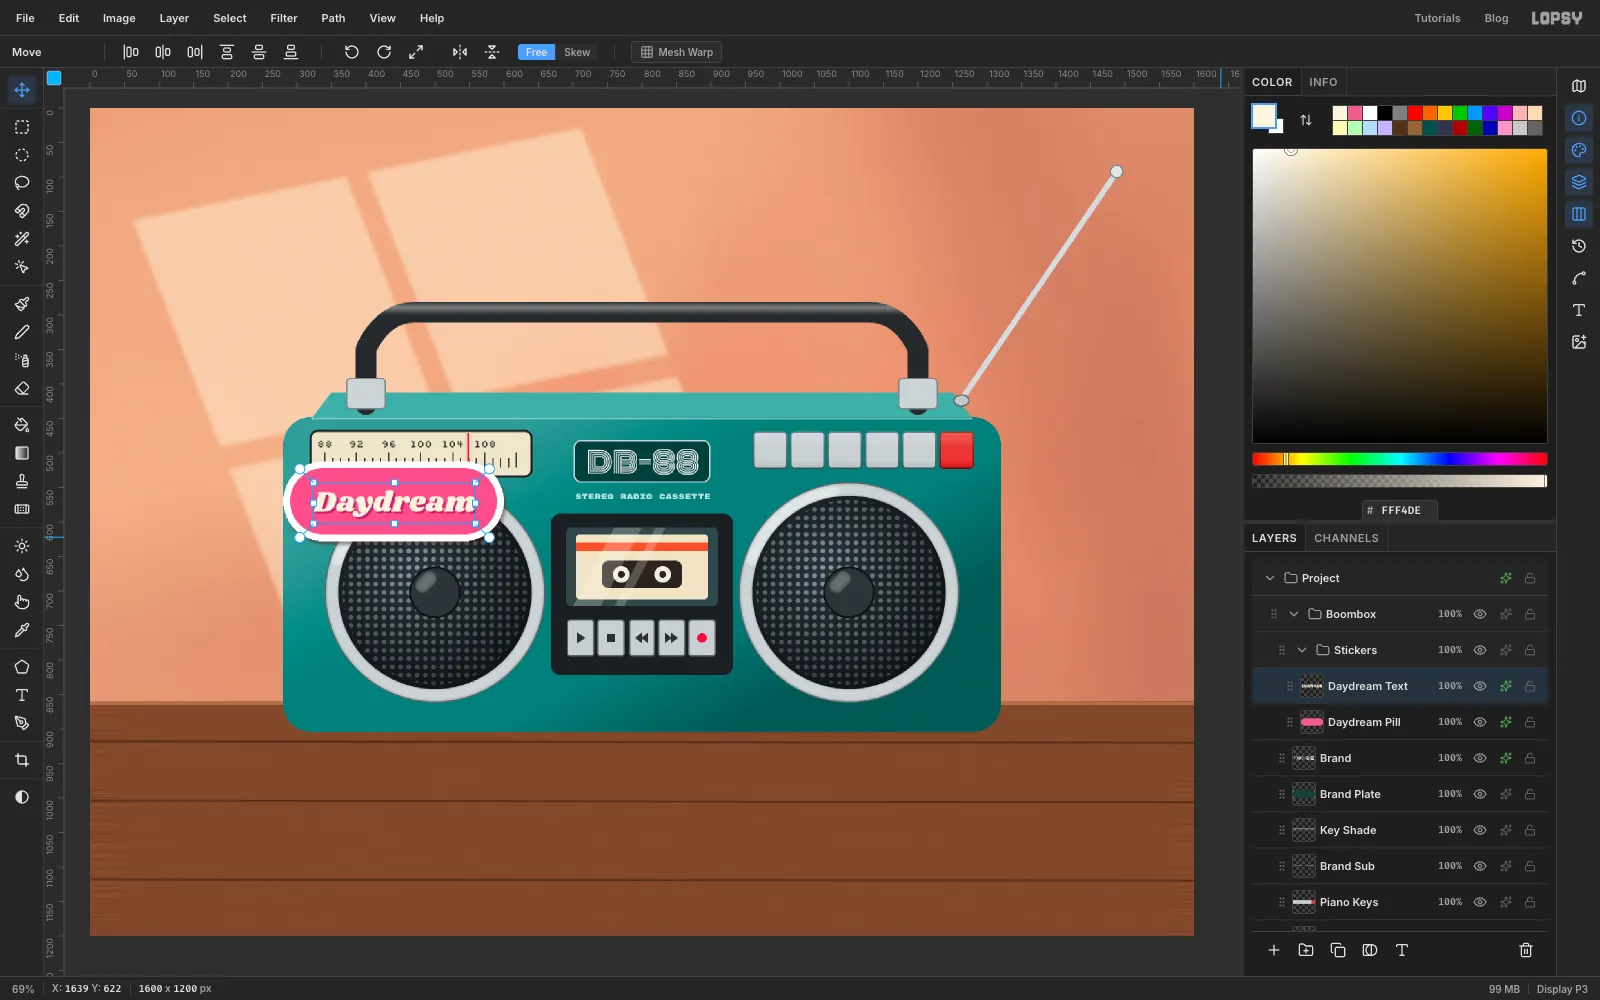
Daydreamin Shrikhand at Size42.5in , and rename the layerDaydream Text. - Centre it on the pill with the arrow keys, then nudge it 3 px lower. The tail of the y hangs below the other letters, so the word looks centred when it sits slightly low.
- Give the text a hard Drop Shadow in : Offset X
3, Offset Y3, Blur1, Opacity100.
- Type
-
Tilt the pill and its text together
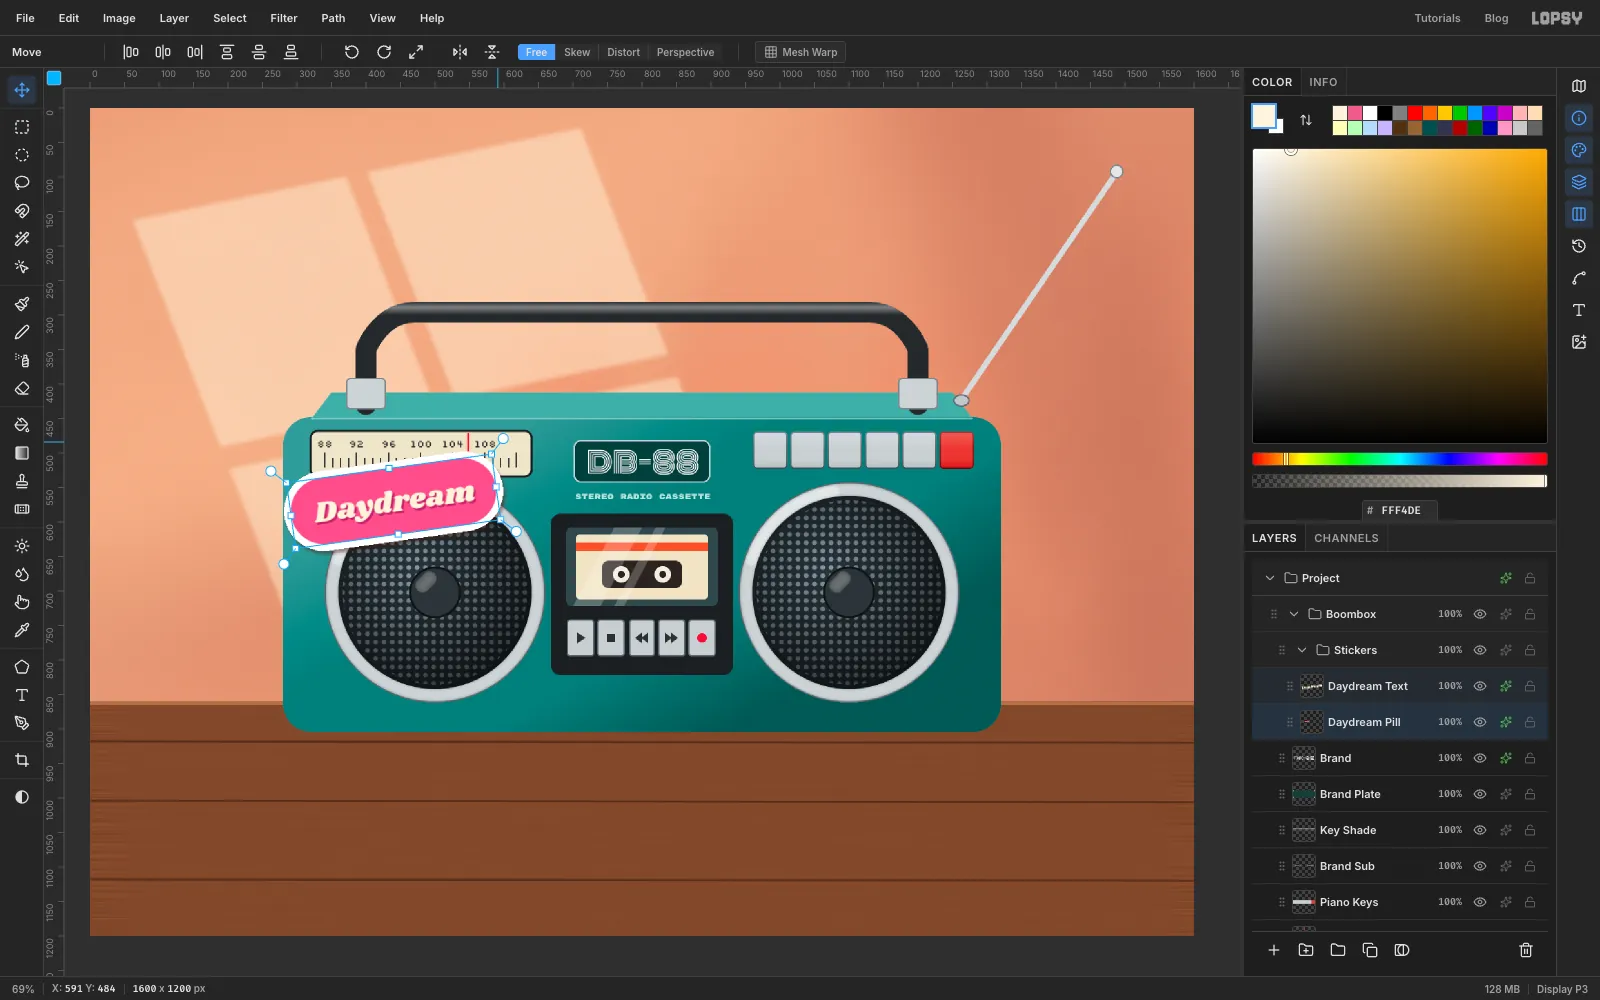
- Click the
Daydream Pillrow and Shift-click theDaydream Textrow. - With the Move tool, both layers share one transform box. Drag its top-right rotate handle (just outside the corner) up and to the left until the pill tilts about 8°.
- Press Cmd+D to finish. The text stays live and is still editable.
- Click the
-
Add a heart and a cloud
- Click
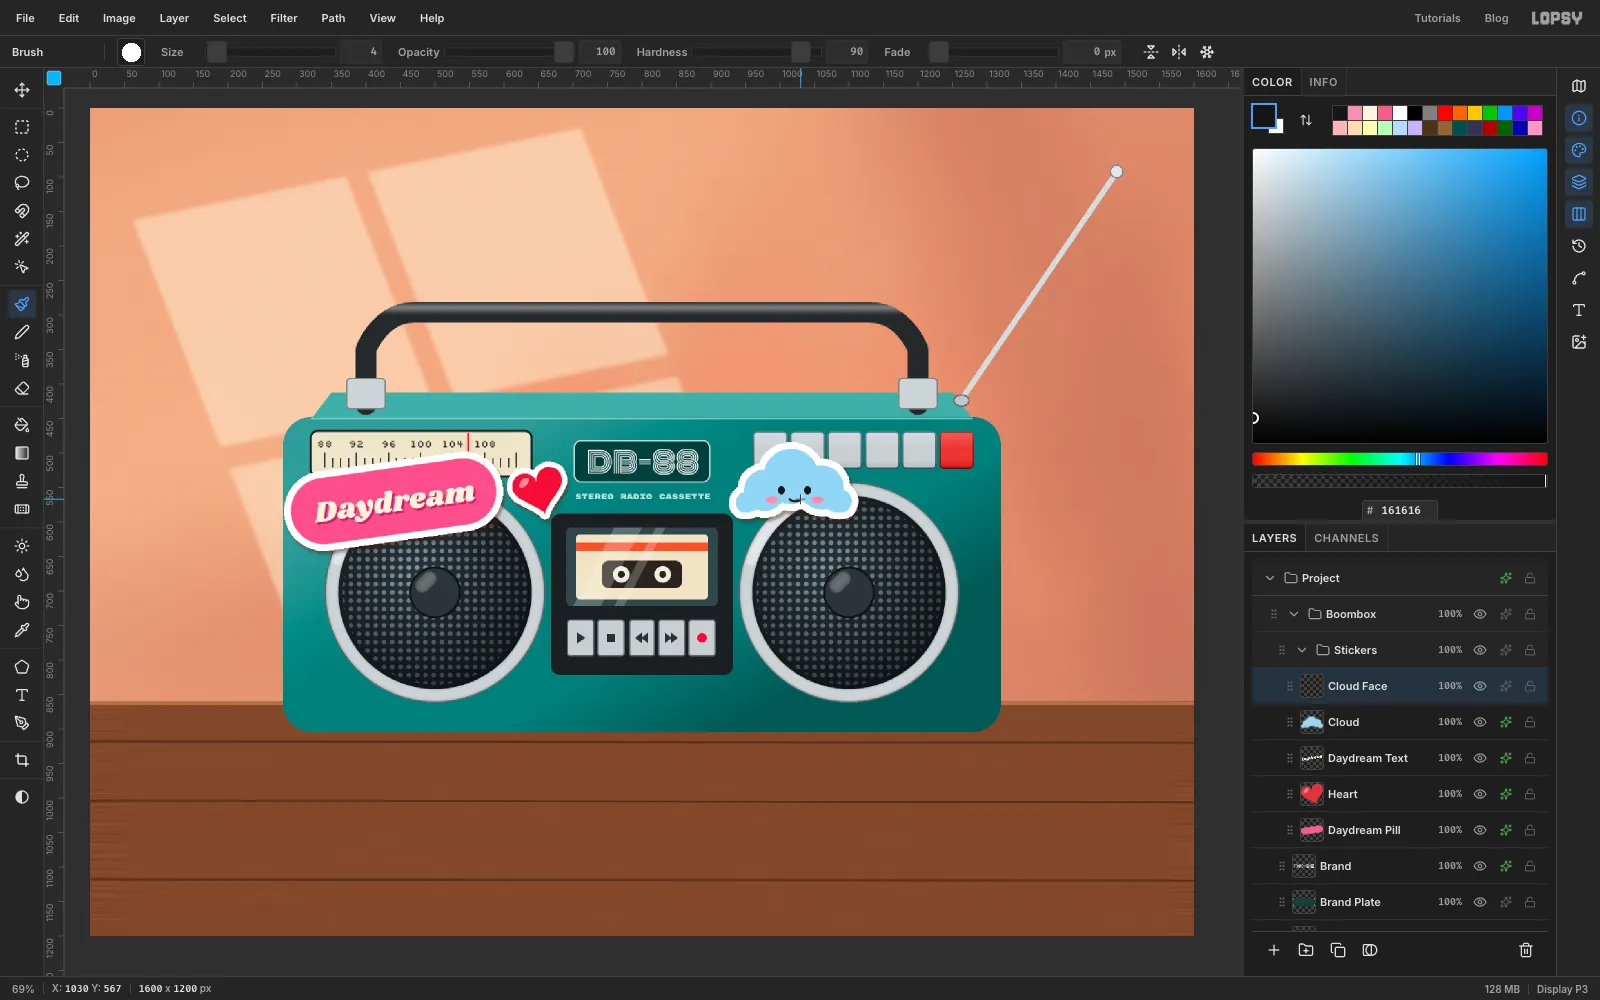
Daydream Pilland add a layer calledHeart. Lasso a heart about 75 px wide, tilted 15° to the left, between the pill and the brand, and fill it with . Lasso a small oval highlight on its left lobe in . Give it the sticker Stroke (Width8) and Drop Shadow. - Click
Daydream Textand add a layer calledCloud. Lasso a puffy cloud about 150 × 90 px with a flat bottom, centred near1022, 548, and fill it with . Give it the sticker border and shadow. - Add a layer called
Cloud Face. Draw two small ellipses for eyes and two ovals for cheeks, then add a smile with a few Shift-clicks of a 4 px brush.
- Click
-
Add a badge and cherries
- Click
Daydream Pillso the badge sits lowest in the pile. Add a layer calledB-Side Badge. - Draw a 124 px circle centred on
360, 828. Then set the Ellipse to no fill and a 3 px stroke, and draw a 104 px ring inside it. Add the sticker border and shadow. - Type
B-SIDEin Rubik Mono One at Size16.5in , rename itB-Side Textand centre it in the badge. - Click
Heartand add a layer calledCherries. With a 6 px brush, draw two curved stems that meet at the top, and lasso a leaf beside them. Draw two 50 px cherries at the bottoms of the stems, with small highlights. Add the sticker border and shadow.
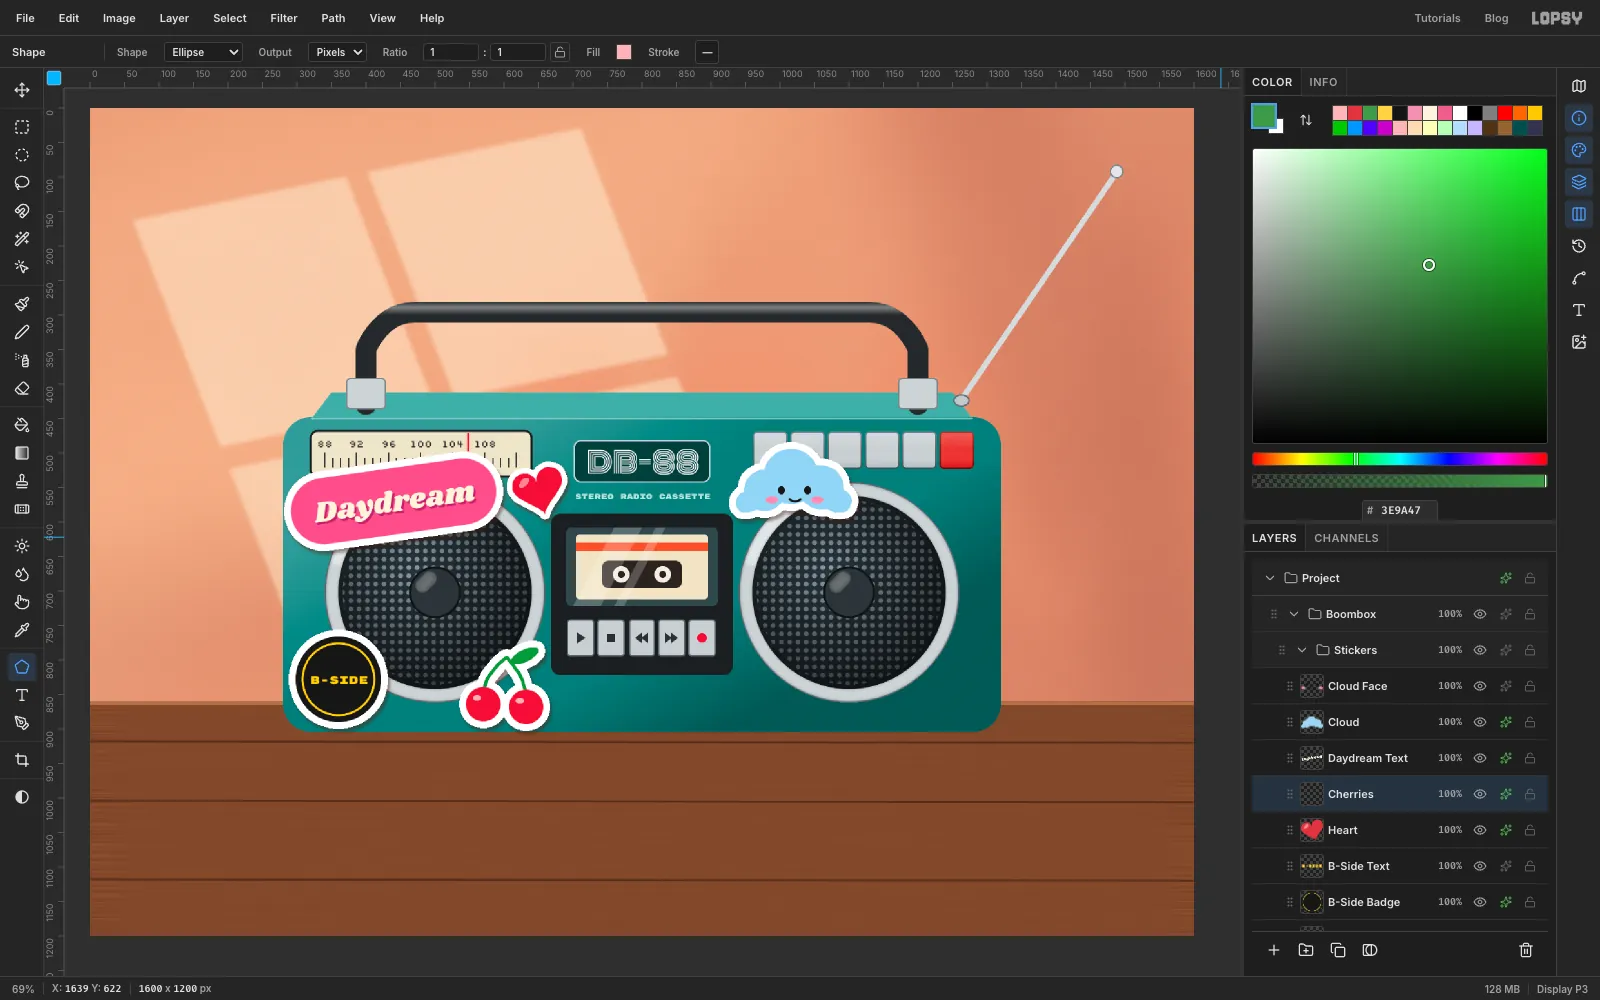
- Click
-
Copy a star
- Click
Cloud Faceand add a layer calledStar. Lasso a five-pointed star about 92 px across, centred near1212, 574, and fill it with . Lasso a smaller star inside it in , then add the sticker border and shadow. - Marquee a square around the star and press Cmd+C.
- Deselect and press Cmd+V. The copy lands in place on a new layer. Rename it
Small Star.
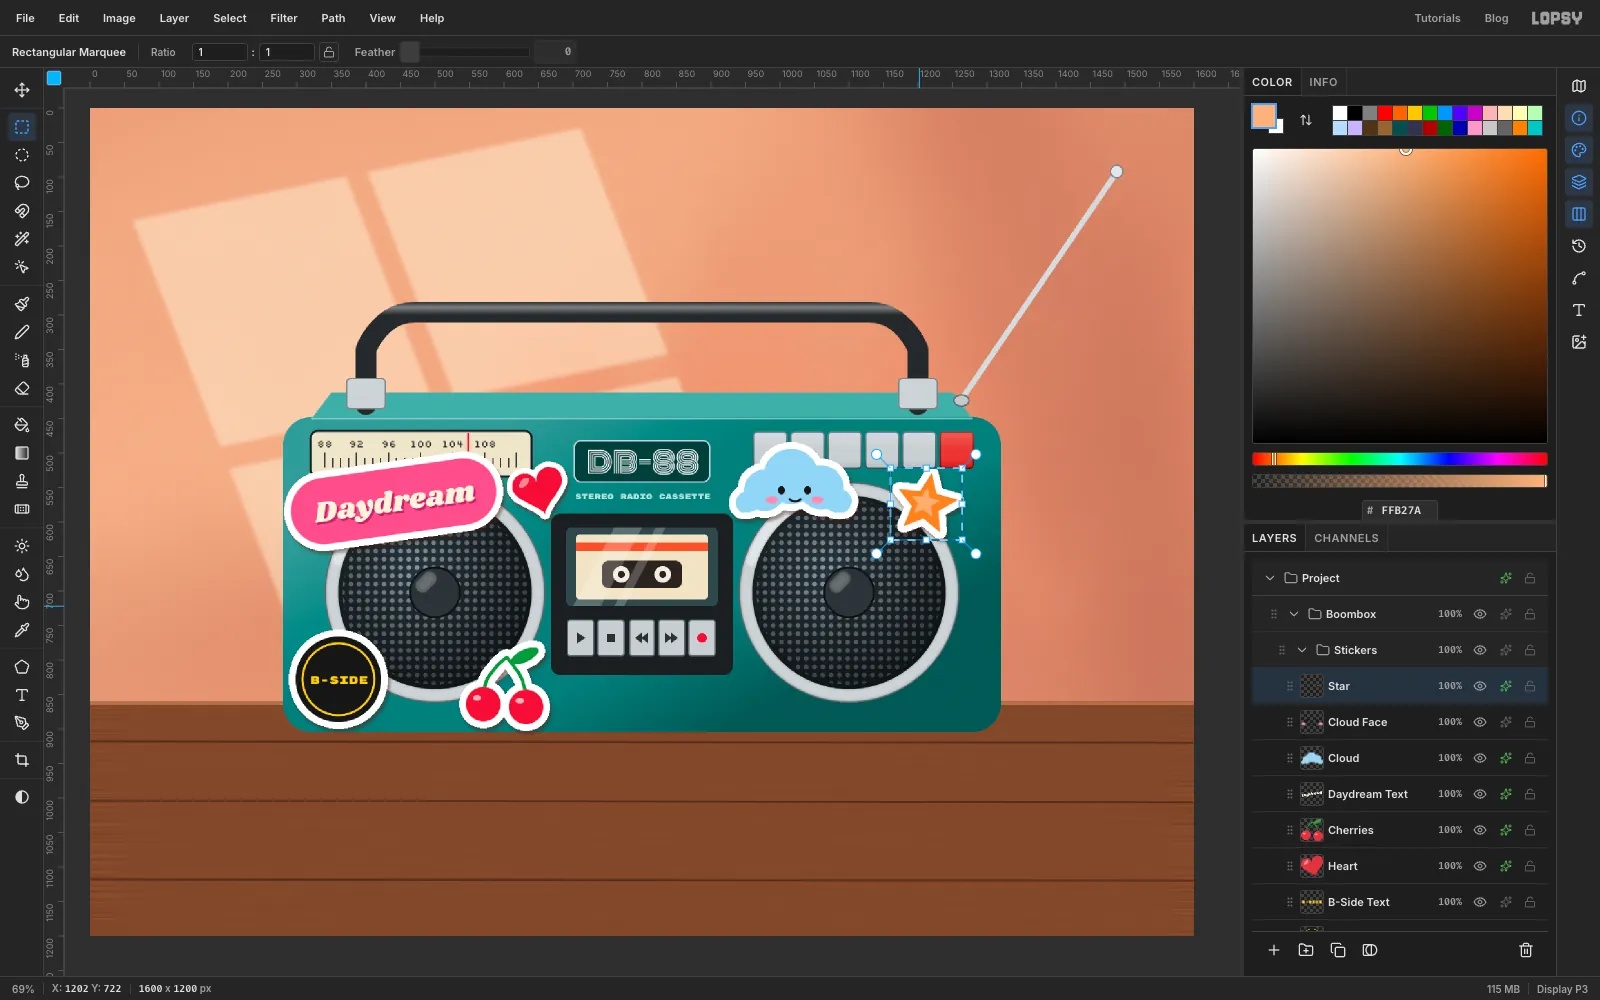
- Click
-
Move and shrink the copy
- Cmd-click the
Small Starthumbnail to select it. - With the Move tool, drag it to the top-left edge of the boombox, above the dial.
- Hold Cmd, which keeps the proportions, and drag the bottom-right corner handle in until the star is a bit over half its size.
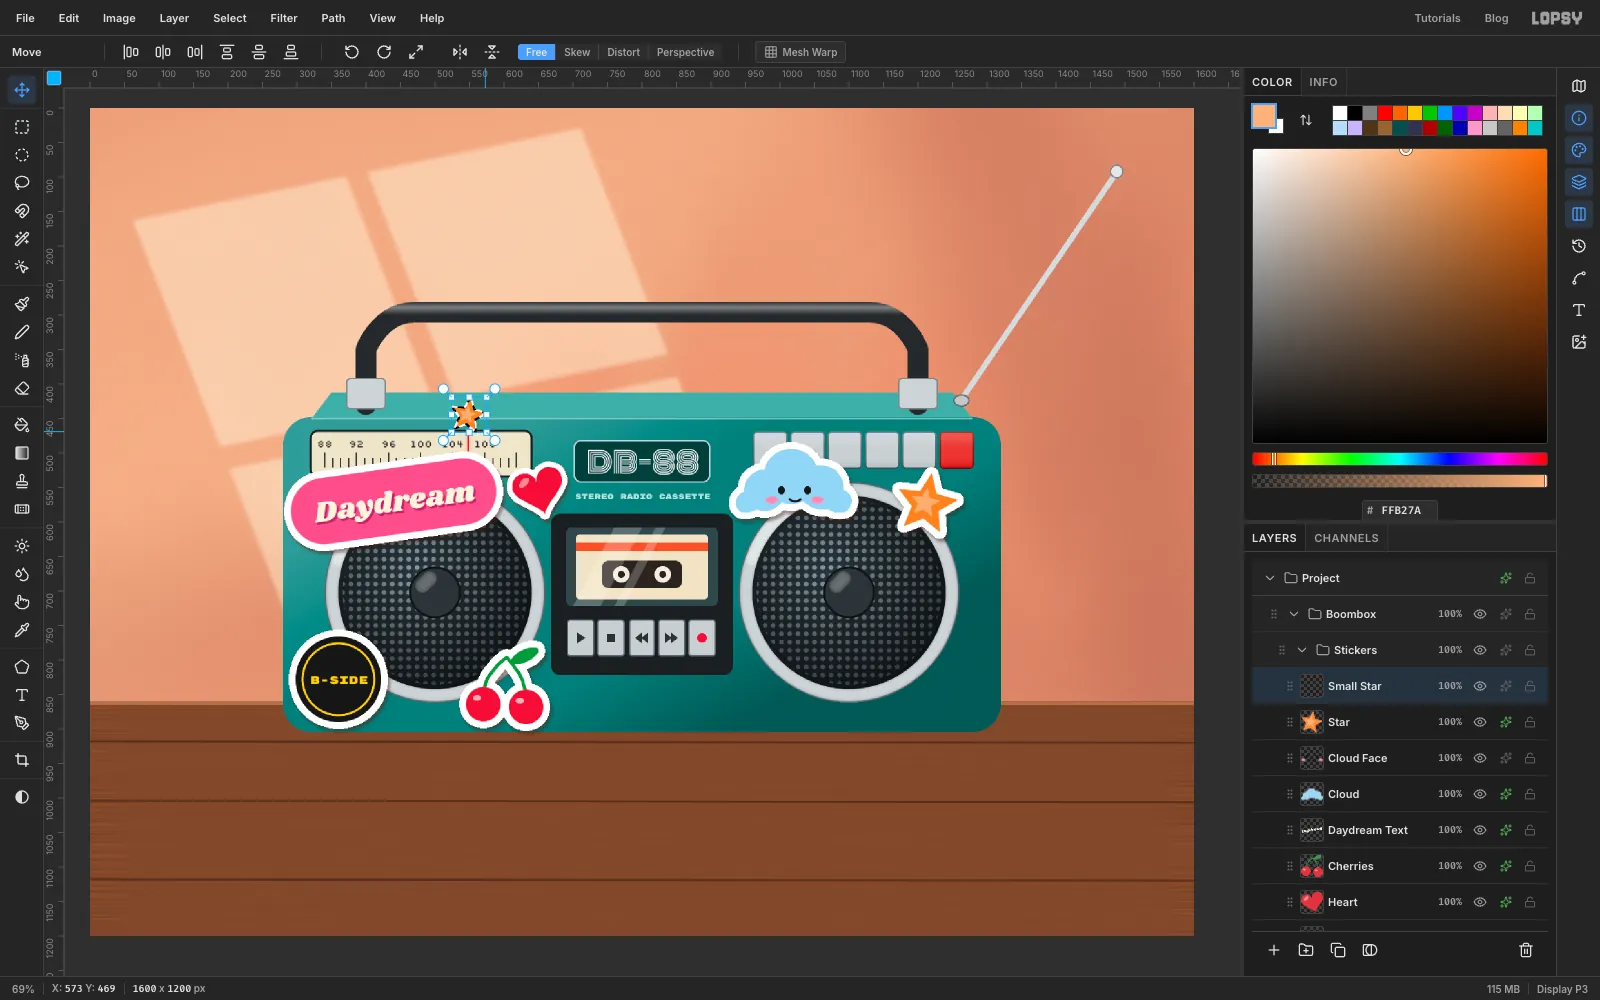
- Cmd-click the
-
Turn the small star
Drag the rotate handle at the top-right corner of the box about 24° clockwise, then press Cmd+D. Pasting copies pixels only, not effects, so add the sticker border (Width
7) and shadow again.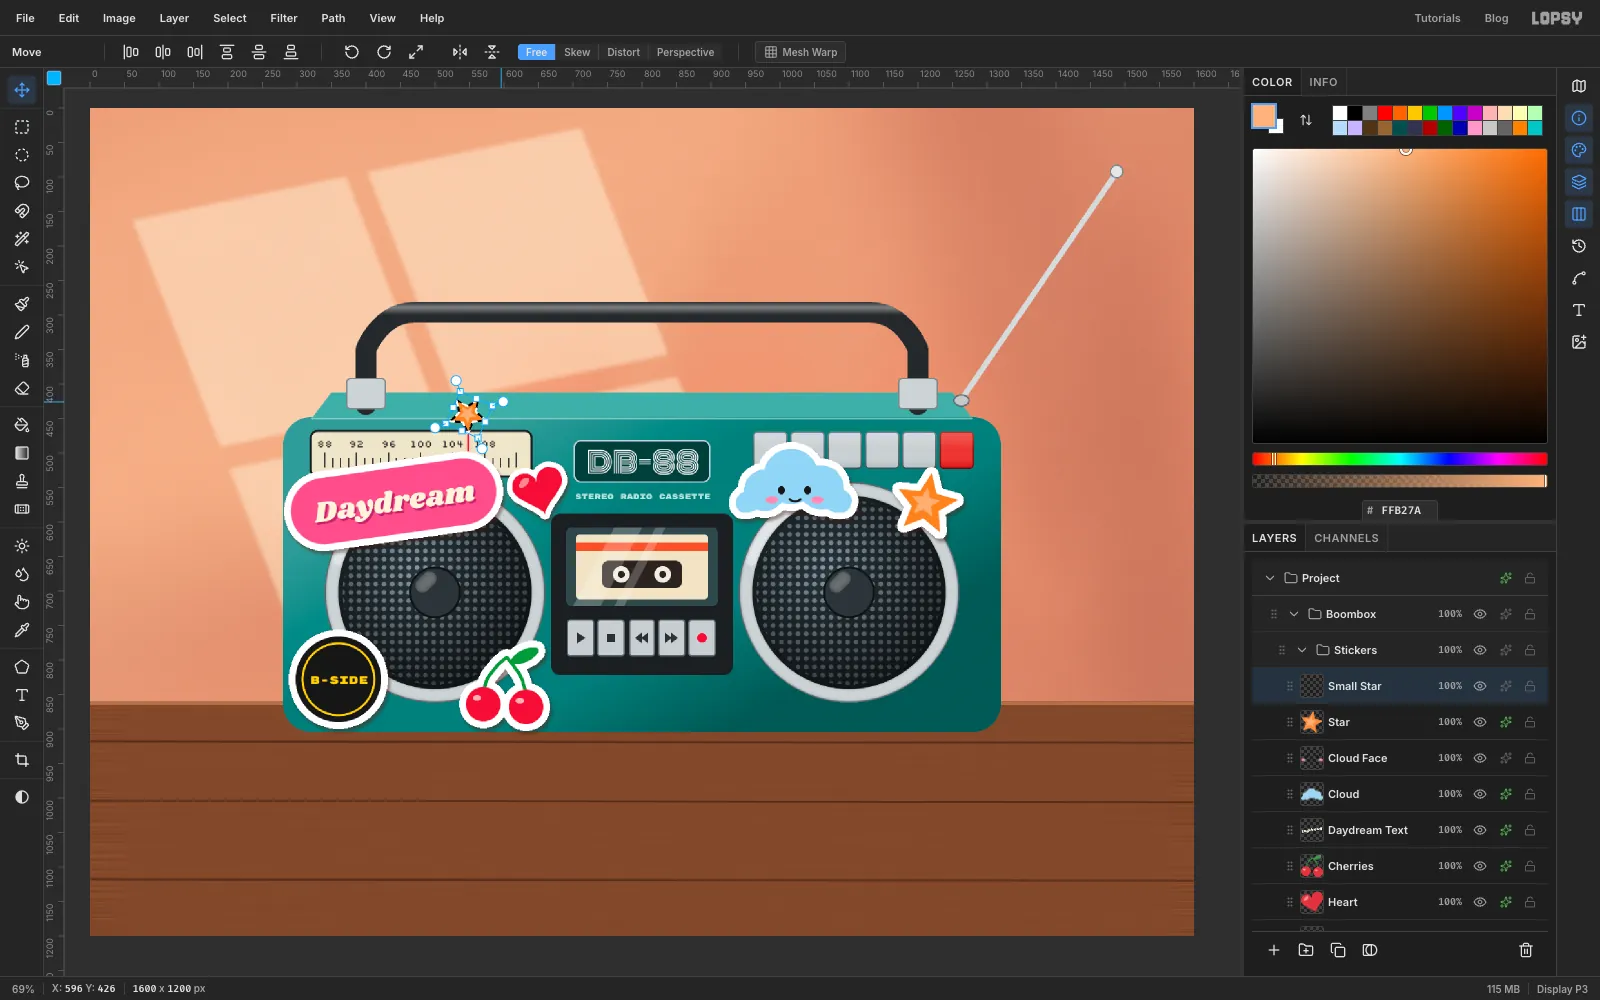
-
Add a lightning bolt
- Click
Starand add a layer calledBolt. Lasso a zig-zag bolt about 100 × 200 px, tilted 12°, and fill it with . Keep it fully on the body, at the right end. - Cmd-click the
Boltthumbnail, choose Select → Shrink… by6, and fill with . A black outline is left around the yellow. - Add the sticker border and shadow.
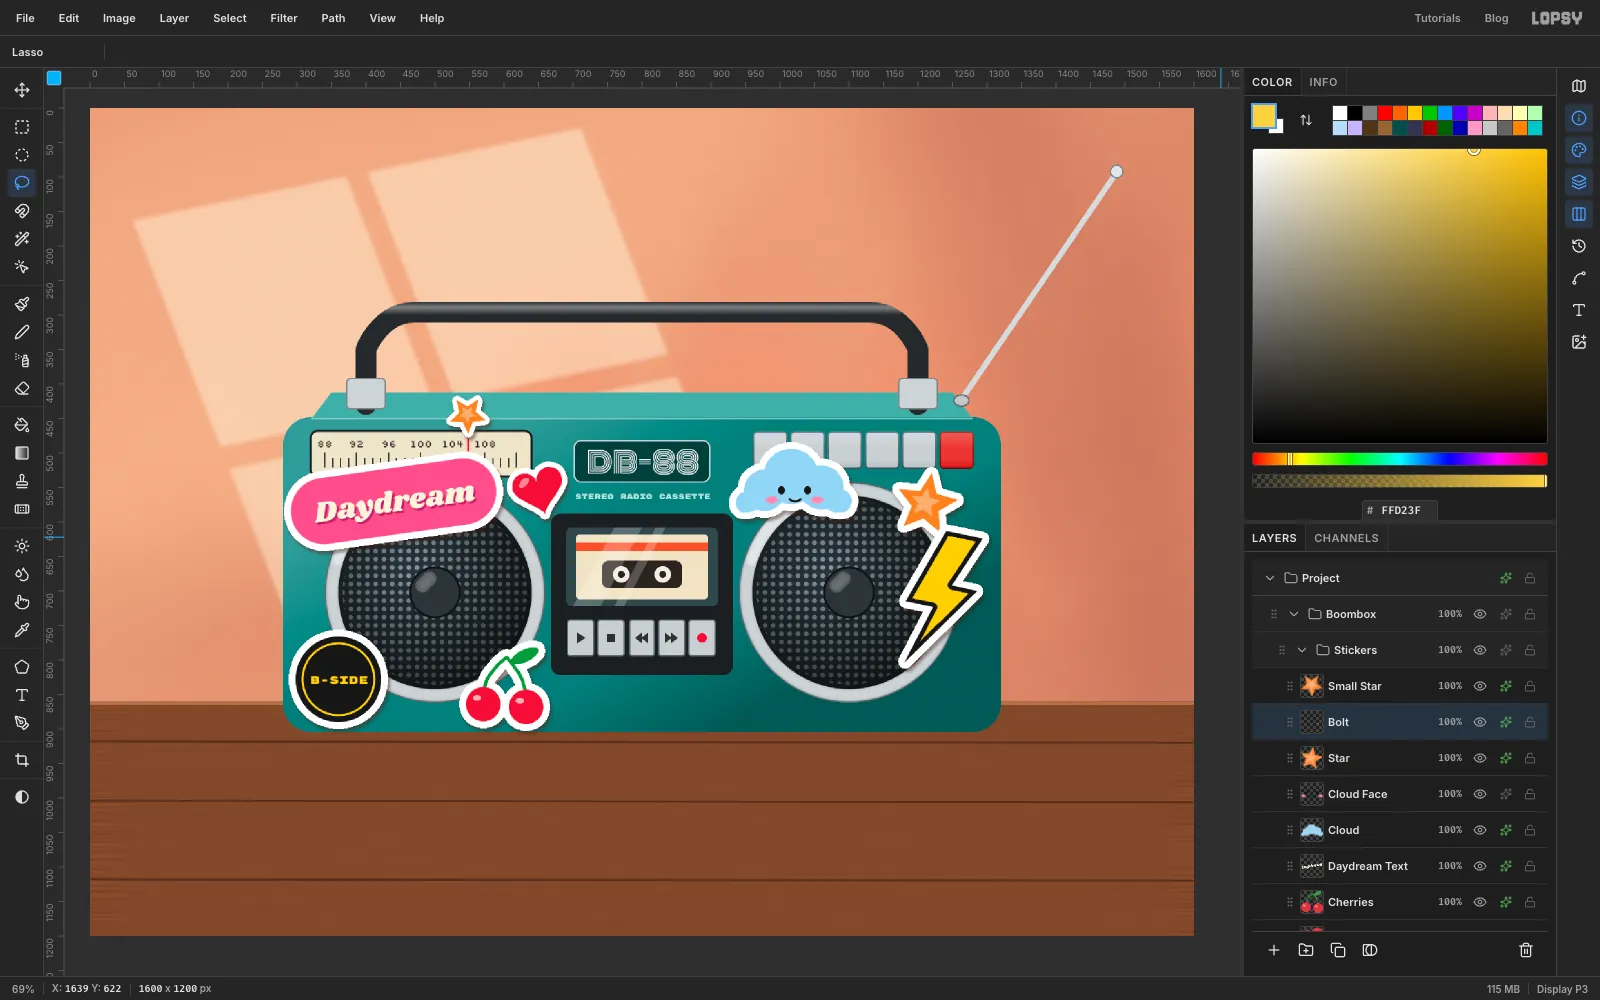
- Click
-
Add a VOL 11 disc
- Click
Boltand add a layer calledVol Badge. Draw a 92 px circle centred on960, 840and give it the sticker border and shadow. - Type
11in Titan One at Size44in and rename itVol 11. Then typeVOLin Rubik Mono One at Size13and rename itVol Label. CentreVol 11slightly below the disc's middle andVol Labelabove it, leaving about 20 px of yellow above and below.
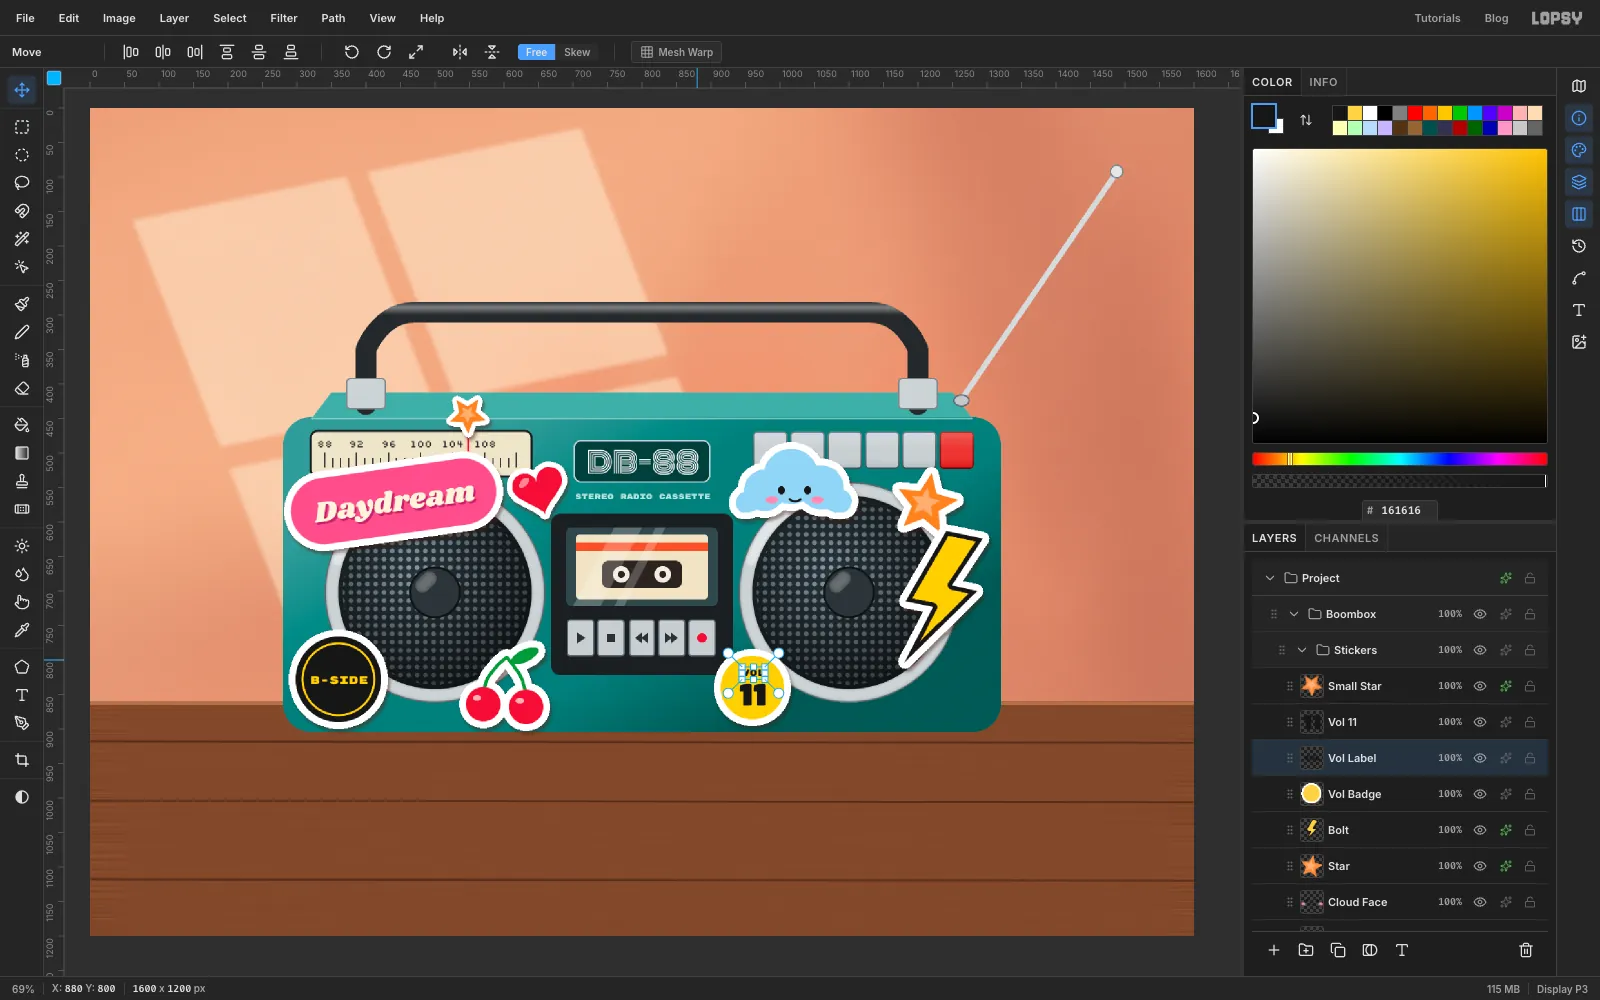
- Click
-
Make a HELLO name tag
- Click
Vol 11and add a layer calledHello Tag. Draw a 168 × 100 px rectangle with radius10, centred on1175, 836. On the same layer, draw a 152 × 42 px white panel with radius4, centred on1175, 857. Add the sticker's Drop Shadow only. The red edge is already a border. - Type the bottom line first:
junein Permanent Marker at Size34in , centred on the white panel. Clicking on existing text edits it, so starting at the bottom keeps the later clicks clear. Rename itHello Name. - Click
Hello Tagagain and typeHELLOin Lilita One at Size28in white. Rename itHello Wordand centre it 20 px below the top of the tag. - Type
my name isin Rubik Mono One at Size10in white. Rename itHello Smalland centre it 38 px below the top, which leaves a gap above the white panel.
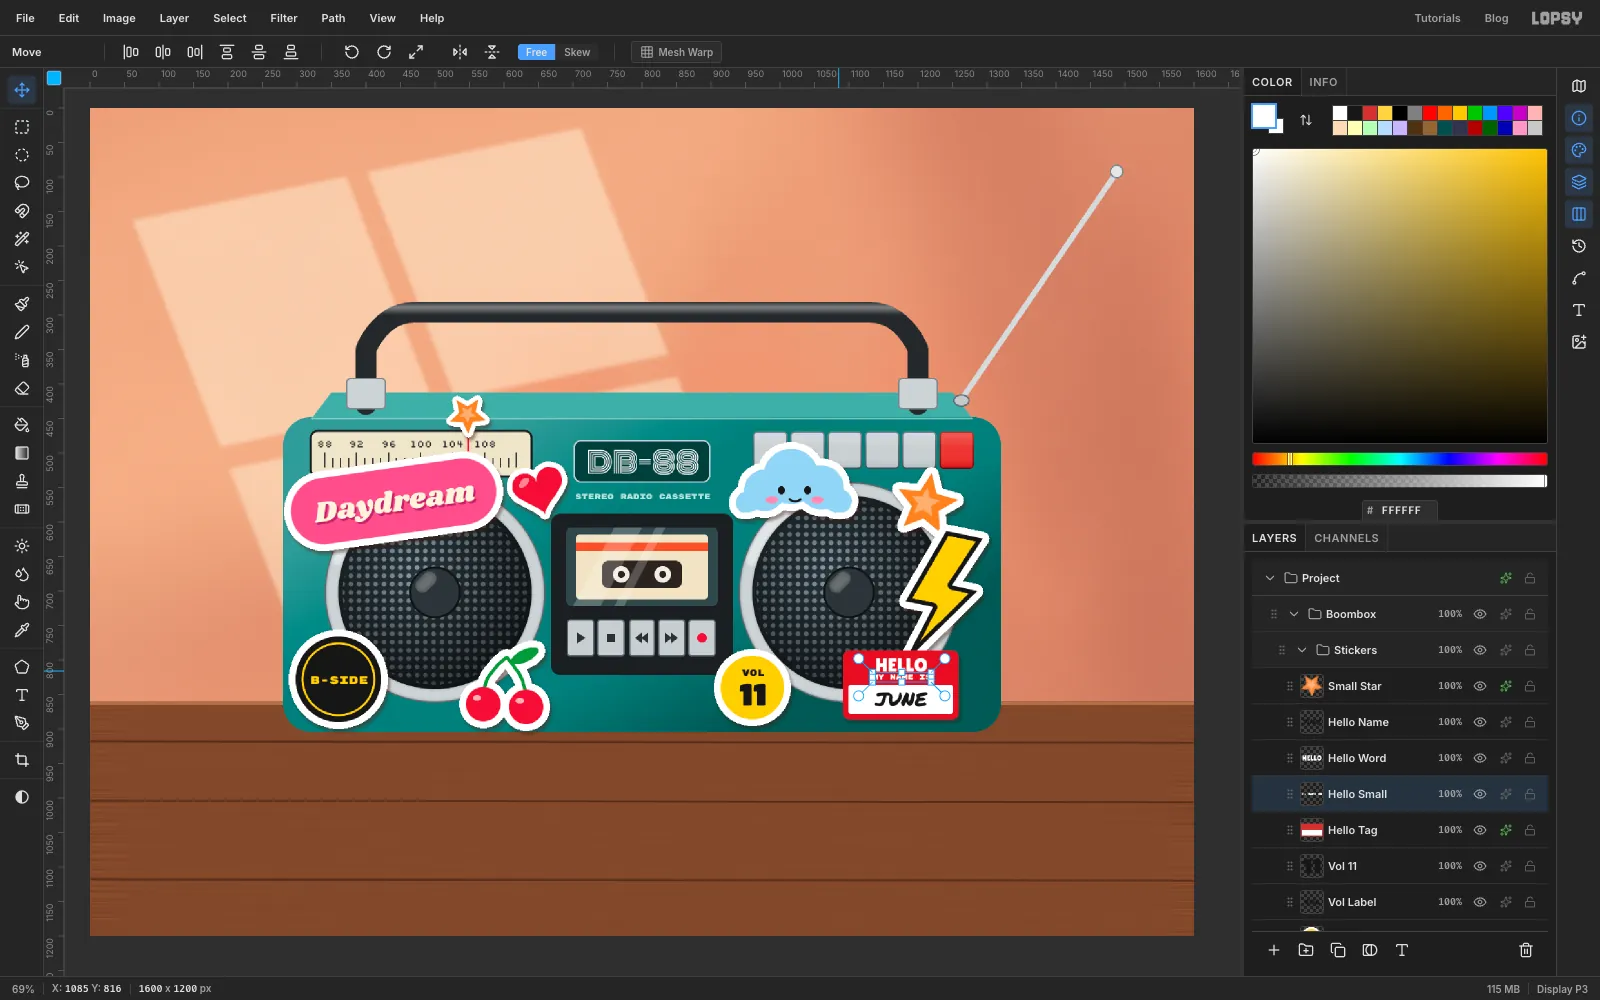
- Click
-
Tilt the tag as one piece
Click
Hello Tag, then Shift-click the three text rows. With the Move tool, drag the rotate handle about 7° clockwise and press Cmd+D.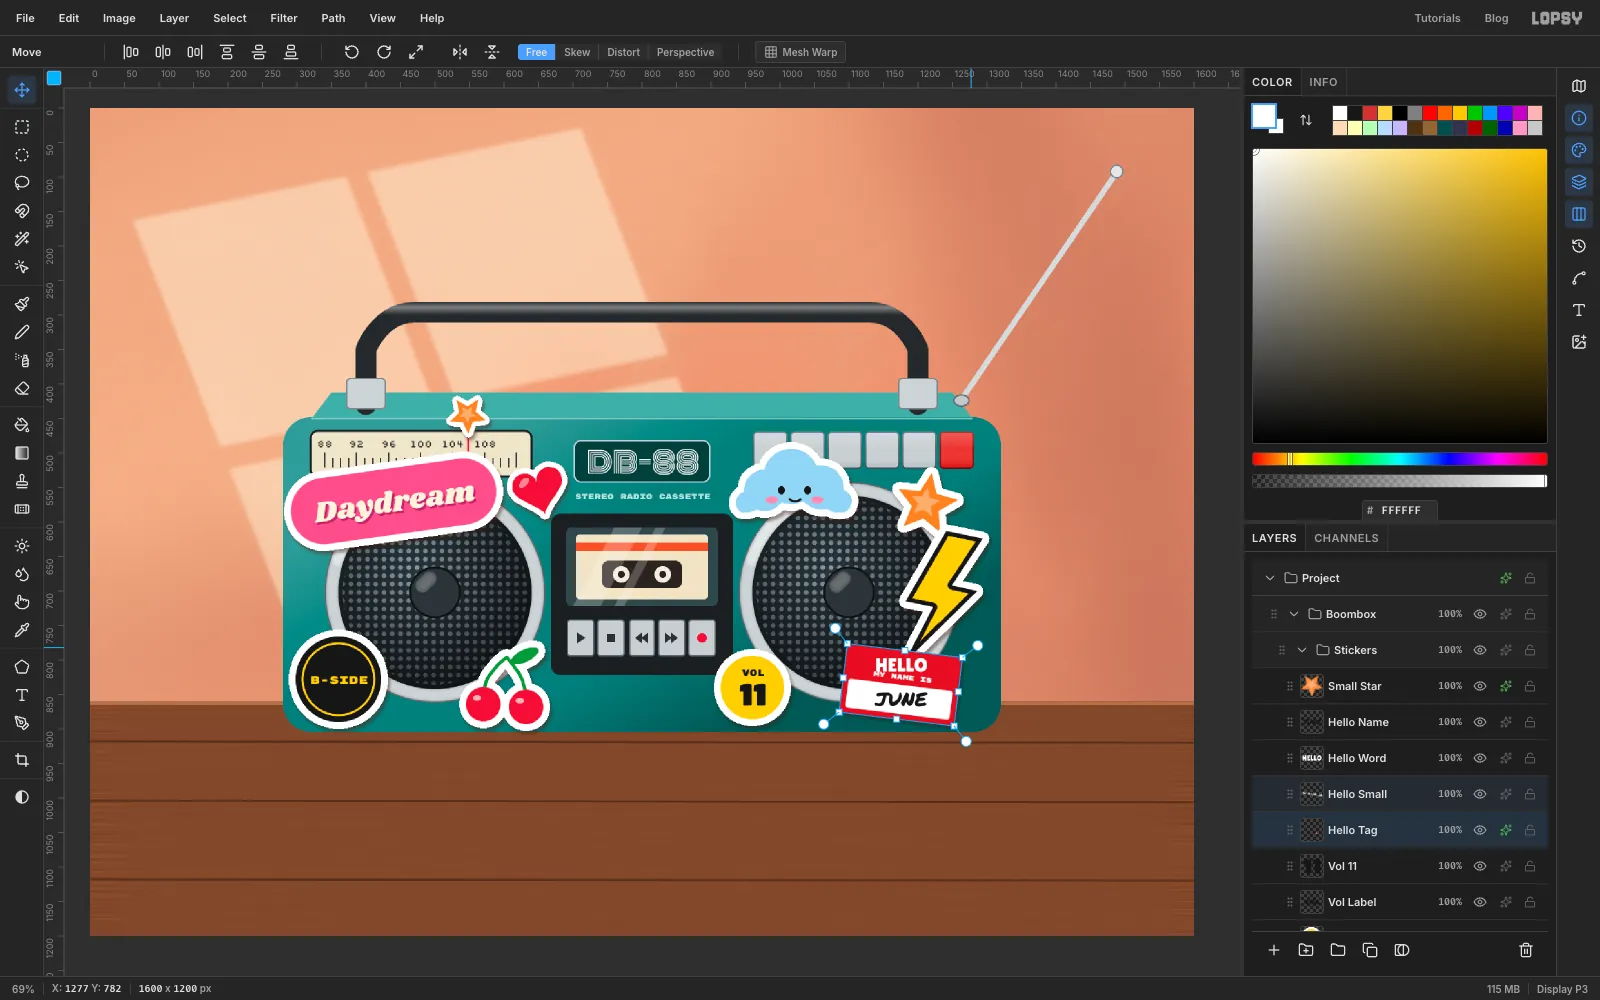
-
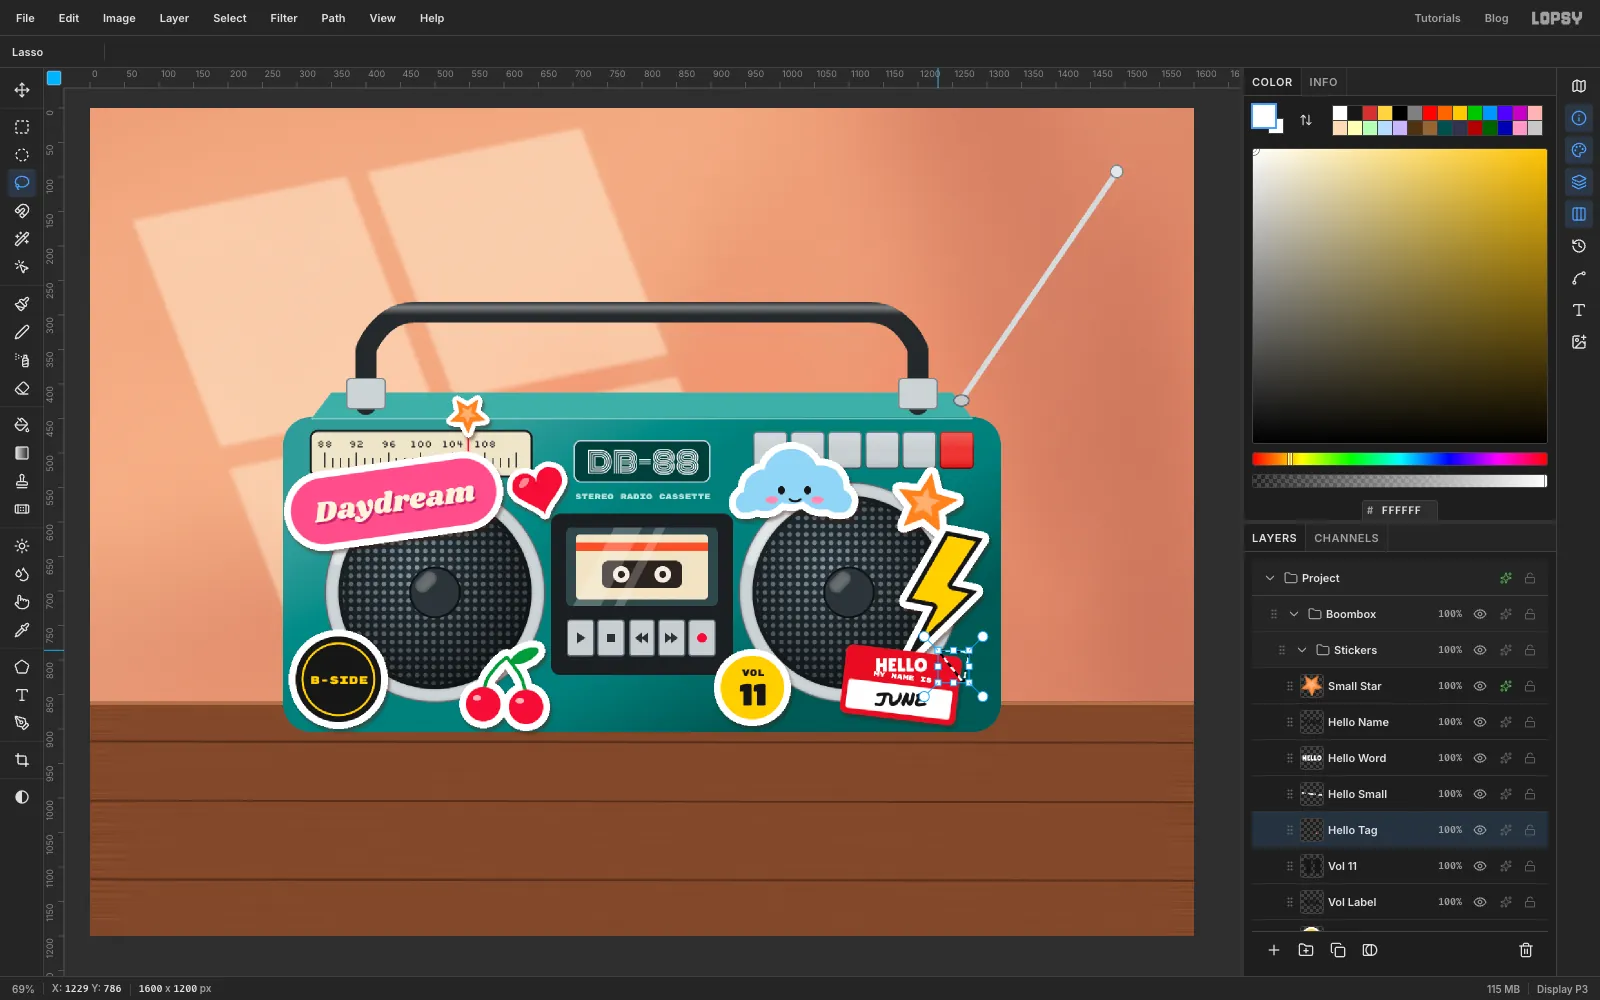
Peel back a corner
- Click
Hello Tagand click Rasterize Layer Style in its effects drawer, so the shadow becomes pixels you can cut. - With the Lasso, draw a triangle over the top-right corner. It should cross the top edge and the right edge about 30 px from the corner, along the tag's tilted edges. Press Delete.
- Click
-
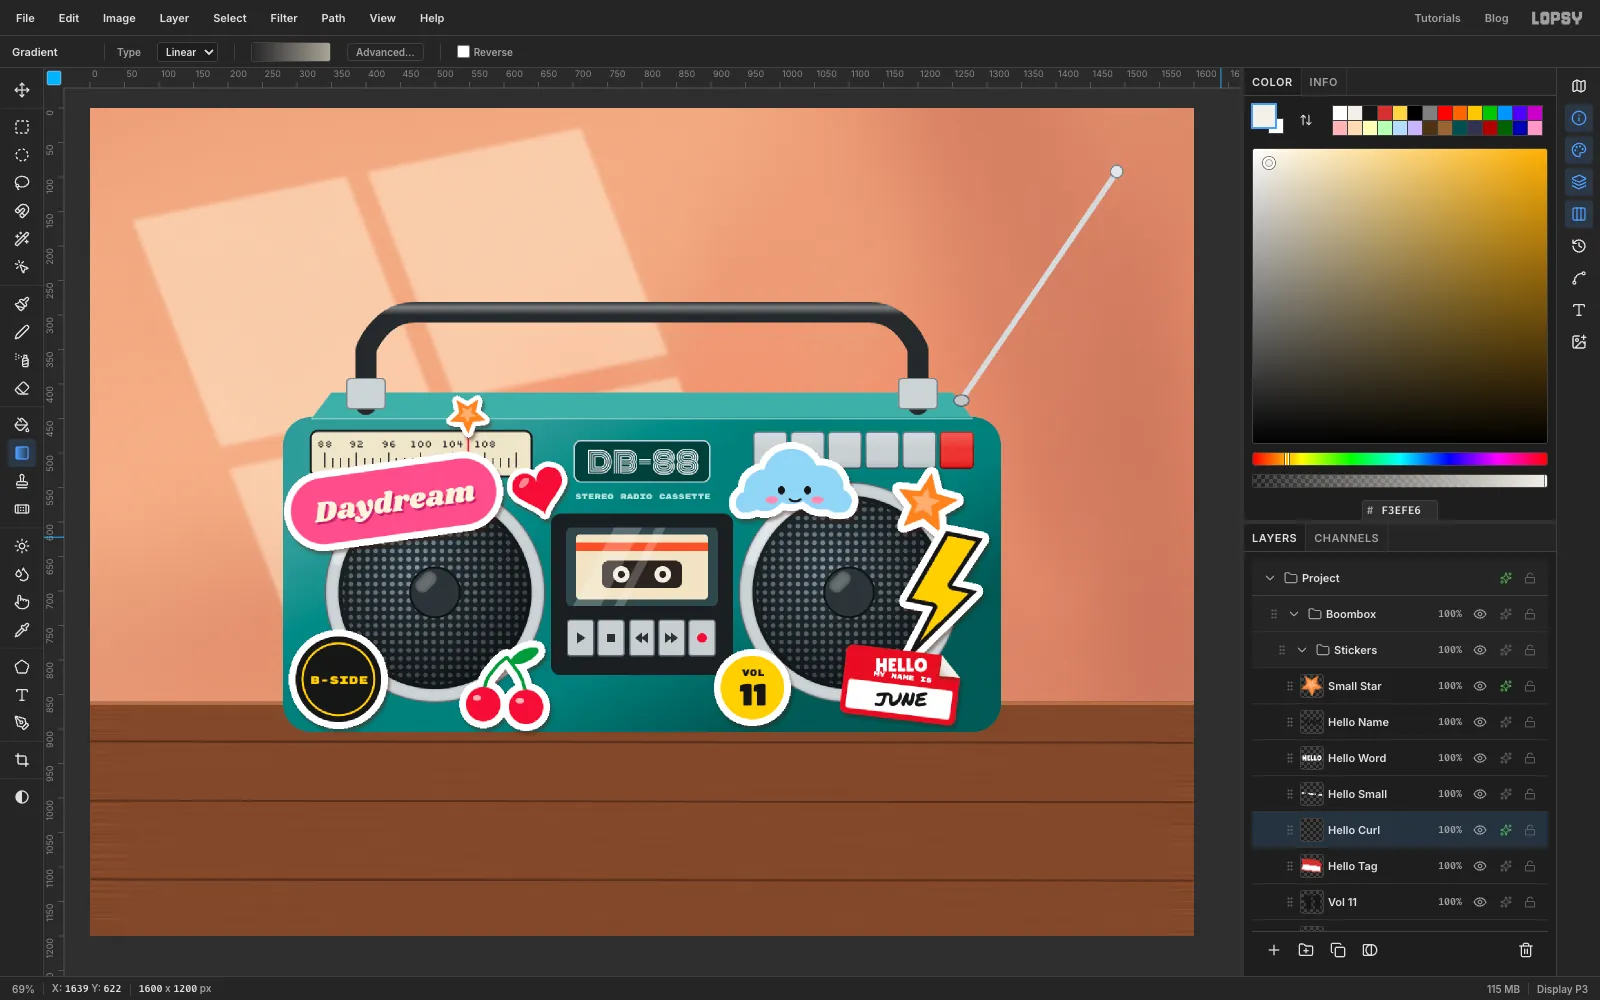
Fold the flap over
- Add a layer called
Hello Curl. Lasso the triangle you just cut, flipped over its fold line so the tip points back into the tag, and fill it with . That's the sticker's paper backing. - Cmd-click its thumbnail and drag a gradient from the fold line to the tip, from clear to at
90%. - Give it a Drop Shadow with Offset X
-2, Offset Y4, Blur5, Opacity45.
- Add a layer called
-
Tape the handle
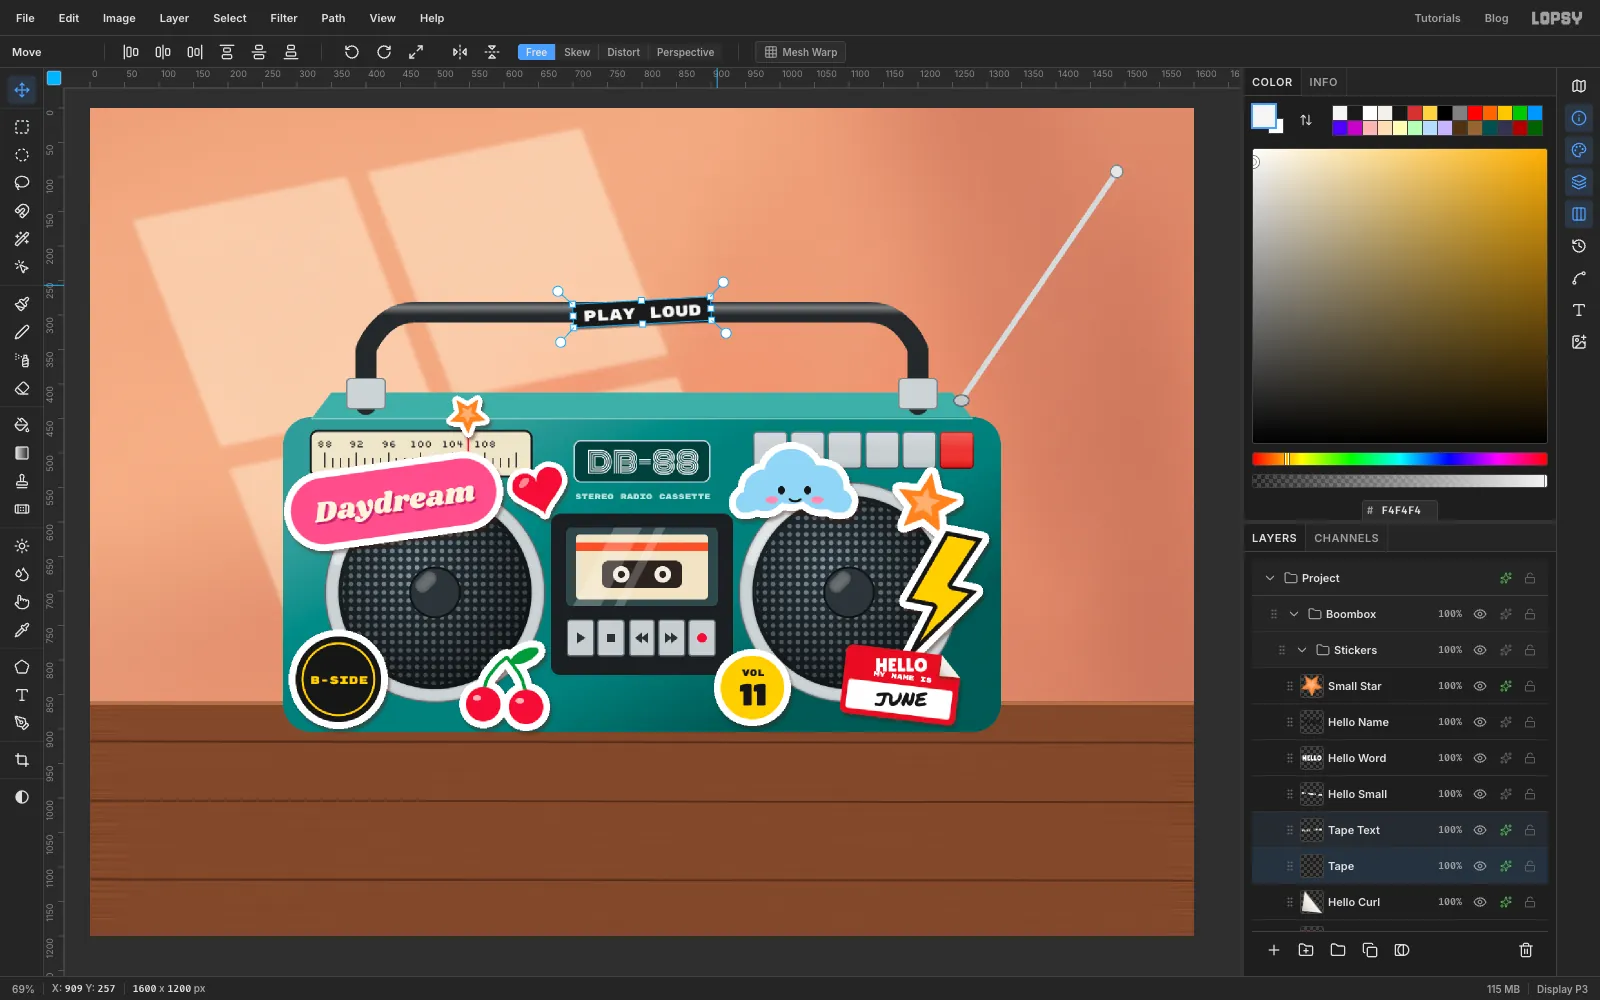
- Add a layer called
Tapeand draw a 200 × 34 px strip with radius3, centred on the handle's top bar at800, 296. It's a little thicker than the tube, so it reads as wrapped round it. Add a small black Drop Shadow with Offset X1, Offset Y3, Blur3and Opacity50. - Type
PLAY LOUDin Rubik Mono One at Size22.5in , rename itTape Textand centre it on the strip. Add a Drop Shadow of Offset Y-1, Blur1for a pressed-in look. - Select
Tapeand its text and rotate them together about 3° anticlockwise.
- Add a layer called
-
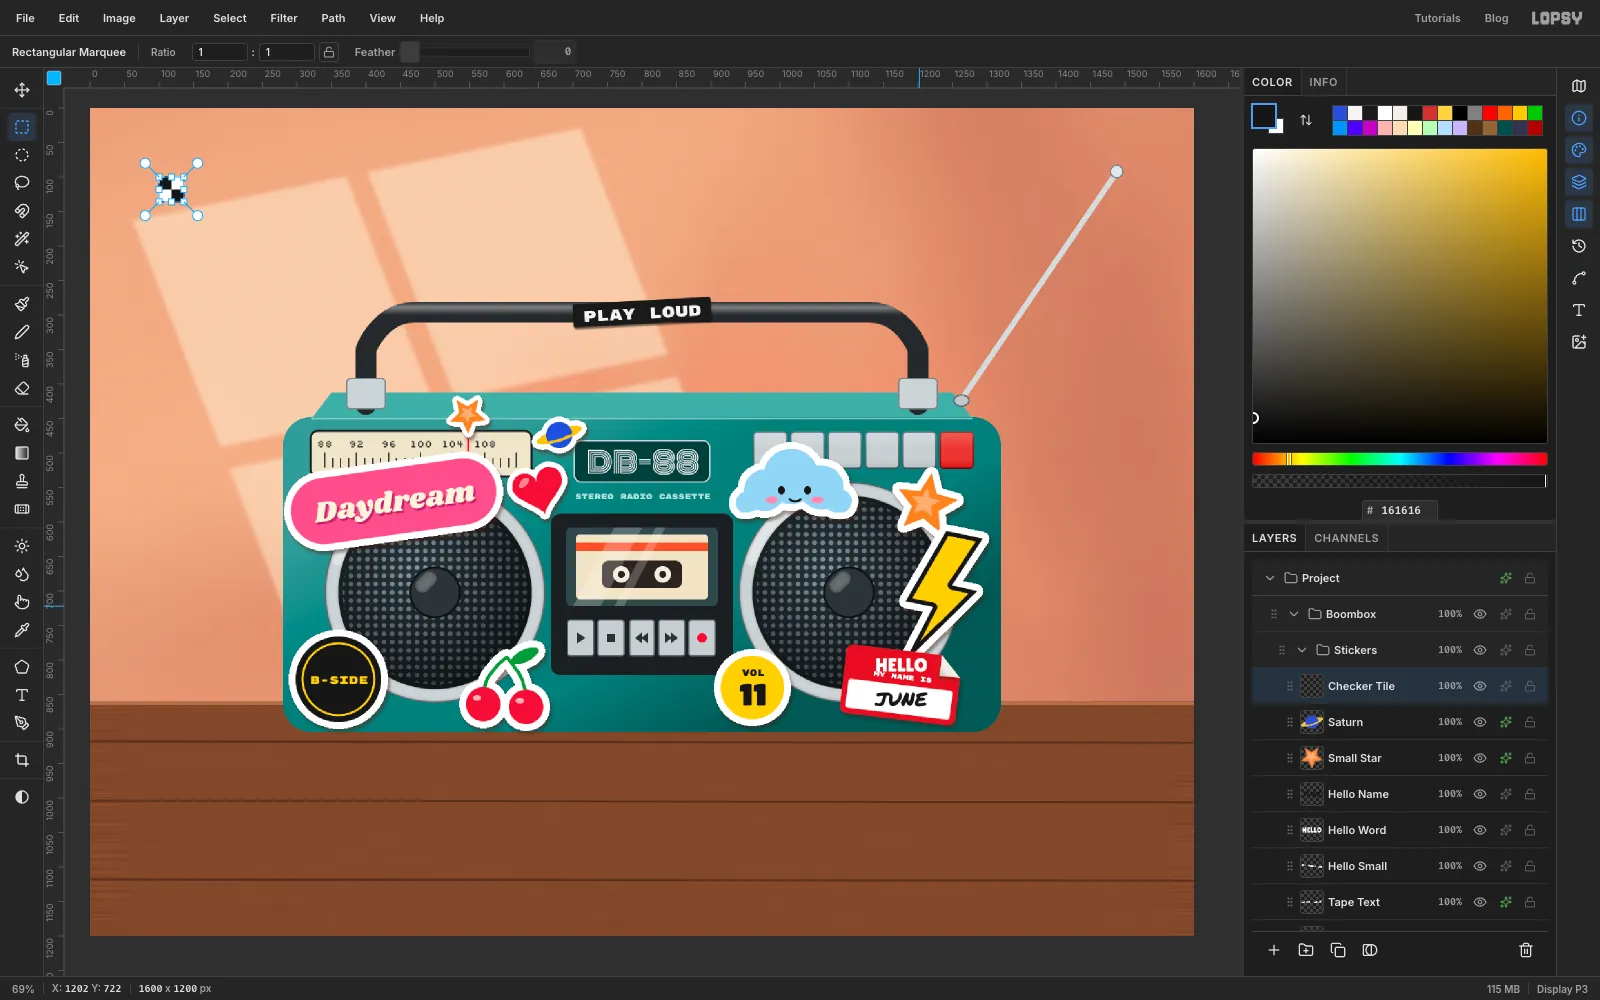
Define a checkerboard
- Add a scratch layer called
Checker Tile. - Click once with the Rectangular Marquee to open its dialog and select
100, 100to136, 136. Fill it with white. - Select
100, 100to118, 118and fill it with , then118, 118to136, 136and fill that too. - Select the whole 36 px square again, choose Edit → Define Pattern, then delete the scratch layer.
- Add a scratch layer called
-
Add Saturn, a checker strip and a rainbow
- Click
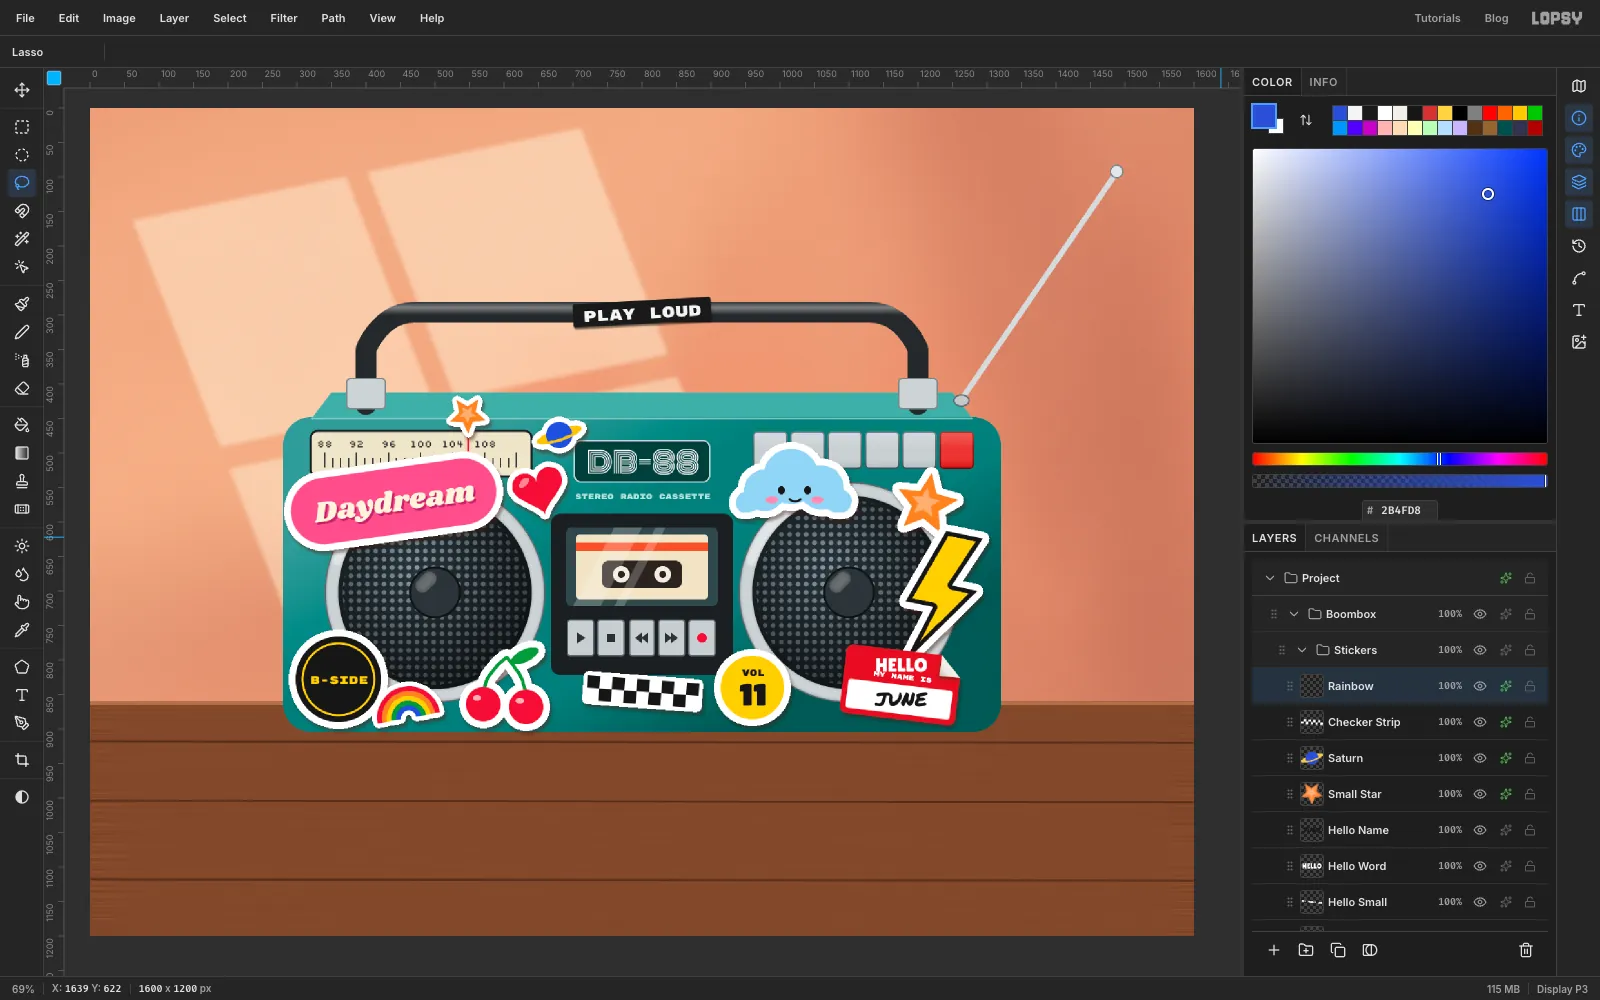
Small Starand add a layer calledSaturn. Lasso a thin yellow ellipse tilted about 18° for the ring, draw a 38 px cobalt planet over it, then lasso the lower half of the ring again and fill it with so the ring passes in front of the planet. Add the sticker border (Width8) and shadow. - Add a layer called
Checker Strip. Select720, 828to882, 864with the marquee dialog and choose Edit → Fill with Pattern… → Apply. Because the strip starts on a multiple of the tile size, the checks line up with its edges. Rotate it about 4° with the Move tool's rotate handle and press Cmd+D. Add the border (Width6) and shadow. - Add a layer called
Rainbow. With the Lasso, draw five half-rings 7 px thick, each nested inside the last, starting with a 92 px wide outer arc. Fill them, from the outside in, in , , , and , beside the B-SIDE badge. Add the border (7) and shadow.
- Click
-
Move the whole boombox
The antenna leans out to the right, so shift the whole boombox a little left to balance it. Click the
Boomboxgroup's row and, with the Move tool, drag it 30 px to the left. Every layer inside it moves together, including the stickers in the nested group. If its edges or centre line up with other content on the way, pink alignment lines appear.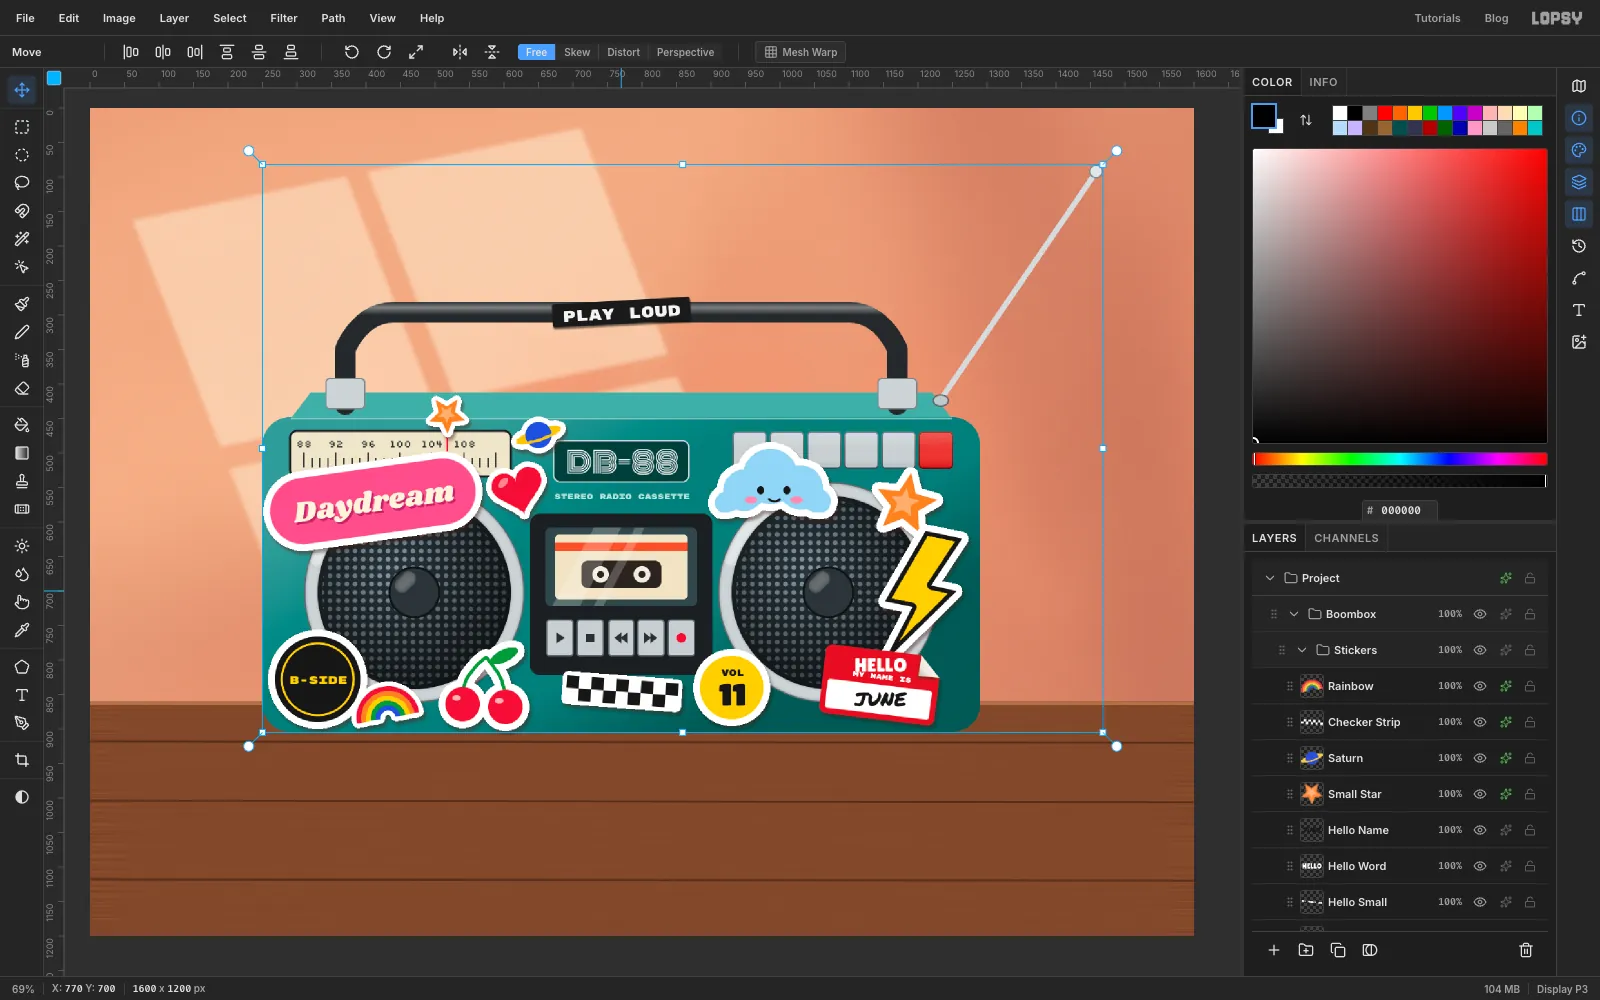
-
Put a cassette on the table
- Click
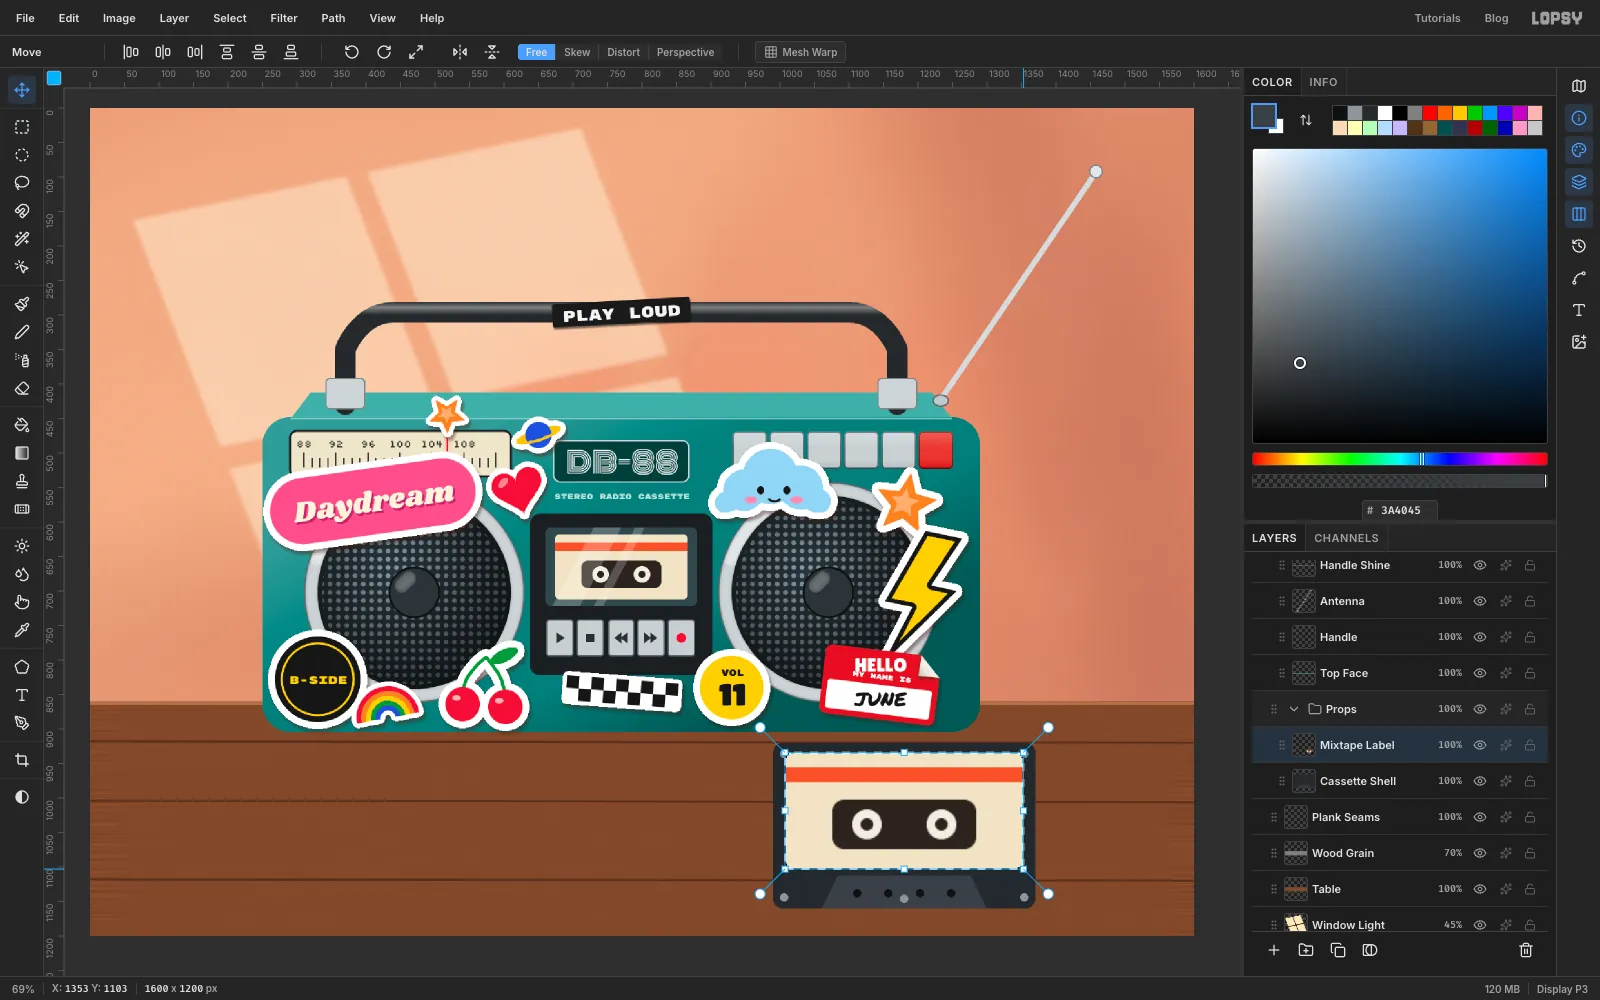
Plank Seams, click New Group and name itProps. Add a layer calledCassette Shell. - Draw a 380 × 240 px shell with radius
14, centred near1180, 1040. Lasso a trapezoid across its bottom edge, and add small screws at the corners and four dark holes along the bottom. - Reuse the label from the deck. Click the
Cassettelayer, Cmd-click its thumbnail, press Cmd+C and deselect. Then clickCassette Shelland press Cmd+V. Rename the new layerMixtape Label. - Cmd-click
Mixtape Label, drag it onto the shell's top-left area with the Move tool, and Cmd-drag its bottom-right handle (keeping the proportions) until it's 180% of its size. Press Cmd+D.
- Click
-
Write on the label
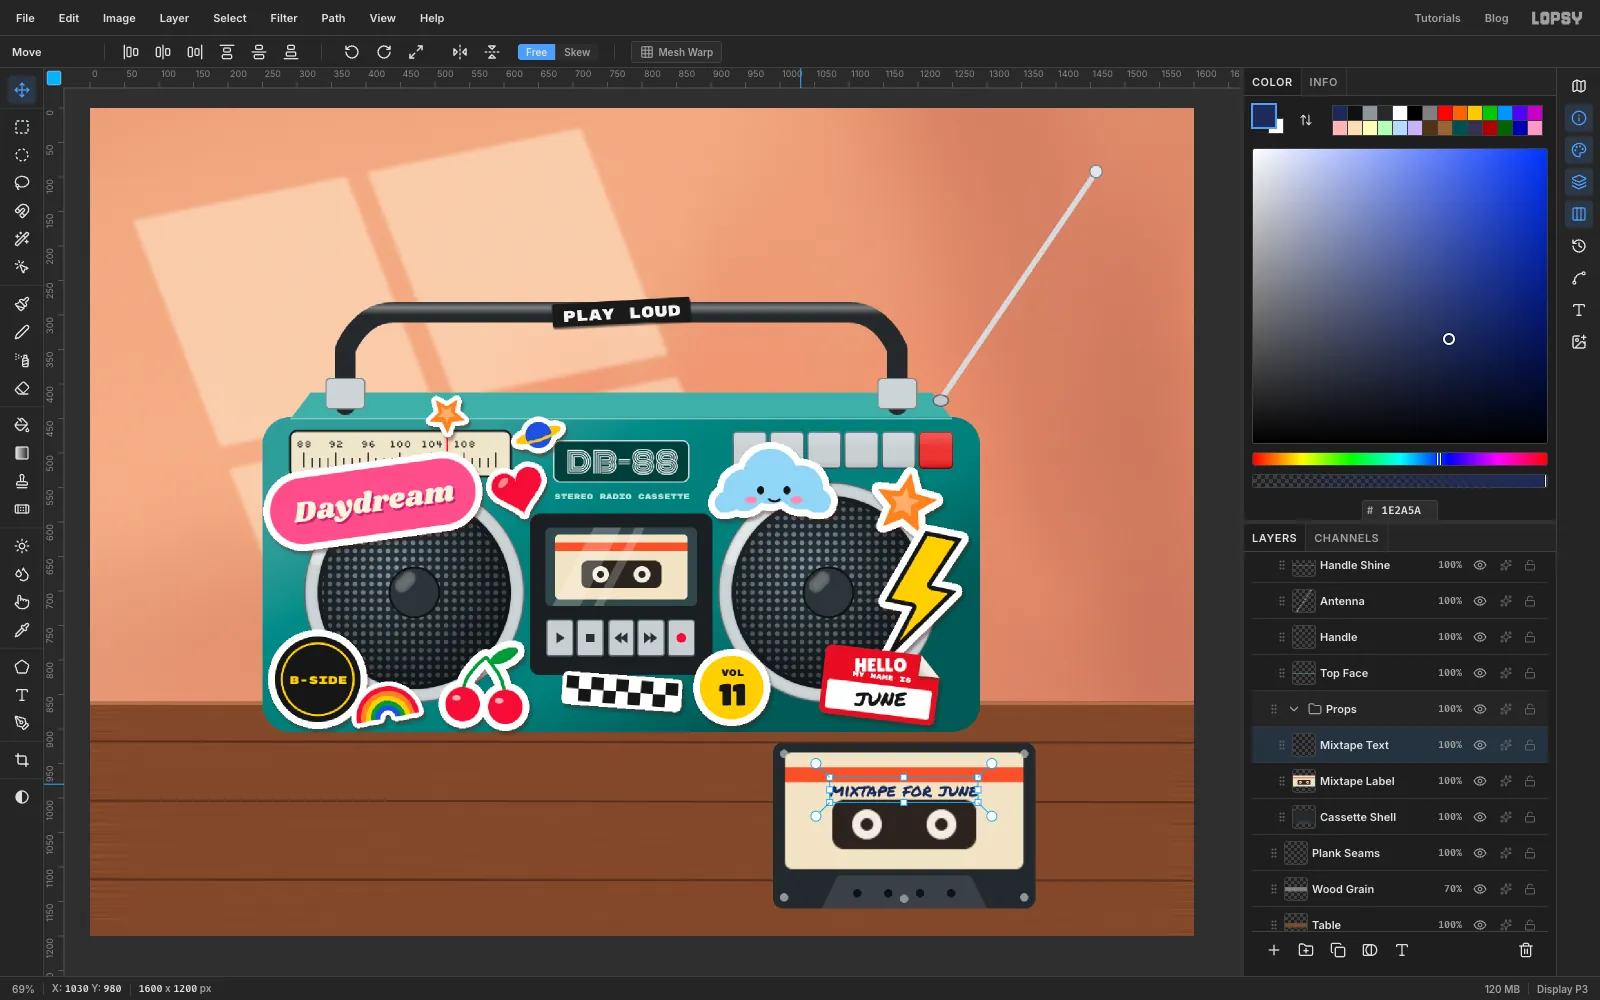
- Type
mixtape for junein Permanent Marker at Size22.5in , and rename itMixtape Text. Centre it in the cream band between the stripe and the window, with a few pixels clear of each. - Click Rasterize Layer at the bottom of the Layers panel. The next step uses Perspective, which can't bend live text.
- Type
-
Lay the cassette flat
- Click
Cassette Shelland Shift-clickMixtape LabelandMixtape Text. - Rotate the three about 16° clockwise and press Cmd+D.
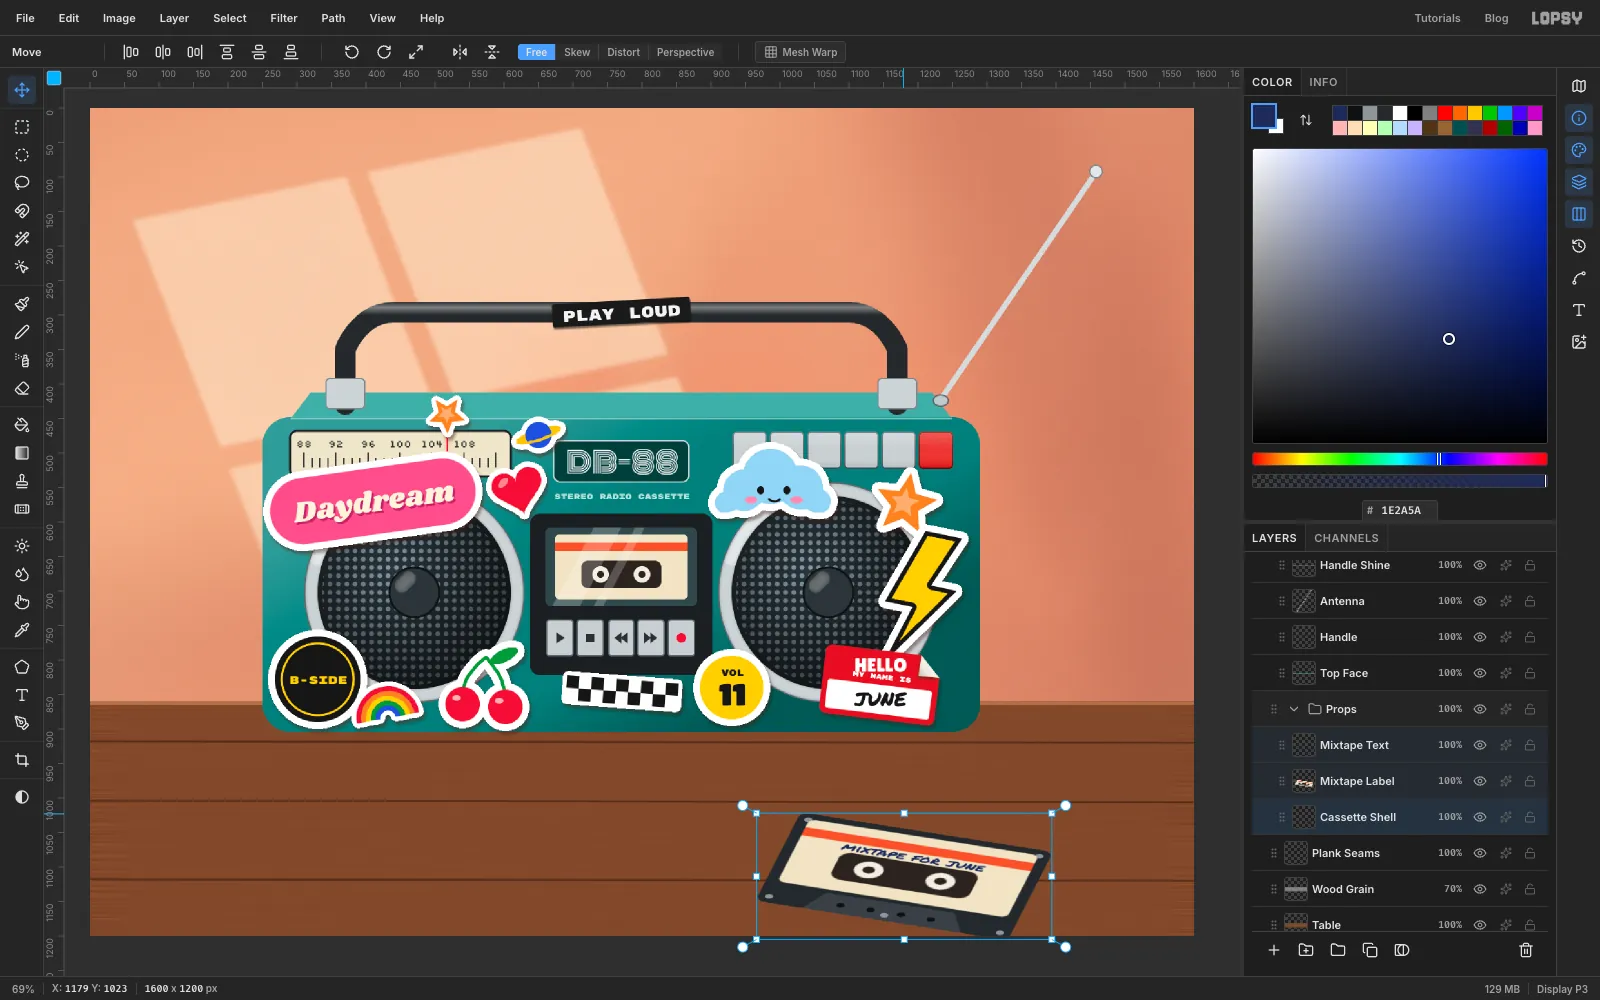
- Drag the top-middle handle down by nearly half the box's height and press Cmd+D. Turning first and squashing second makes the shape lean like an object on the table, not a card standing up.
- Click
-
Add perspective
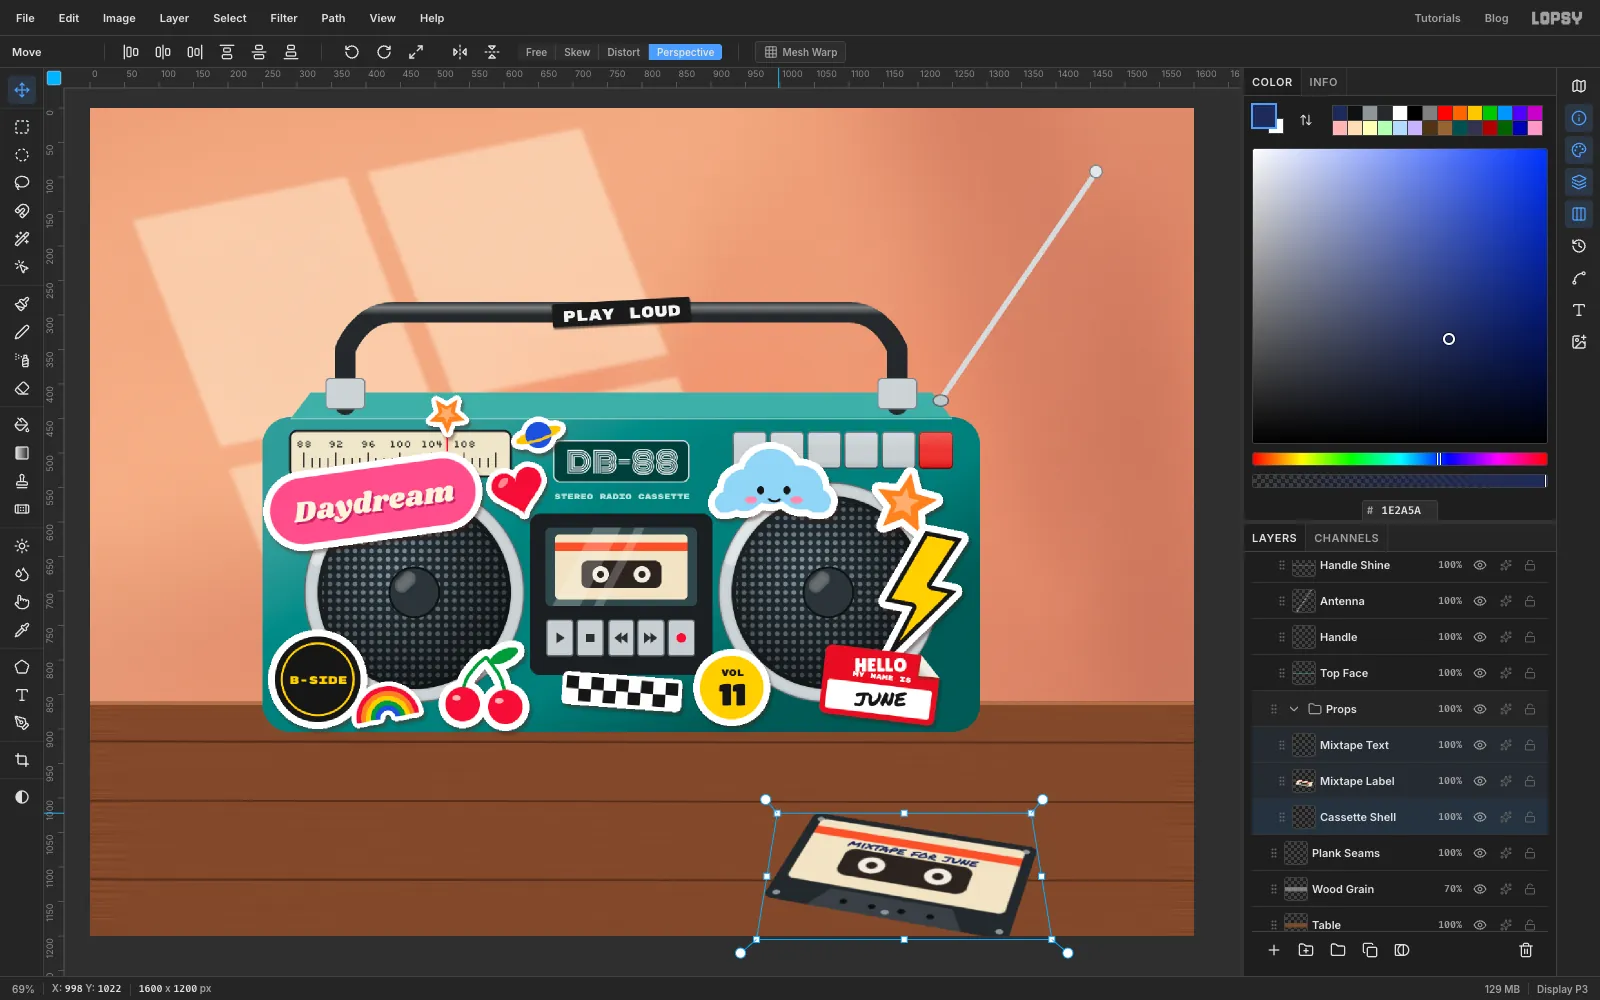
- In the Move tool's options bar, click Perspective.
- Drag the top-left corner handle about 25 px to the right. The top-right corner mirrors it, so the far edge narrows.
- Press Cmd+D, click Free, and drag the cassette into the lower right of the table.
- Give
Cassette Shella tight contact shadow: Drop Shadow with Offset X2, Offset Y3, Blur2, Opacity85in .
-
Add a peeled sticker sheet
- Add a layer called
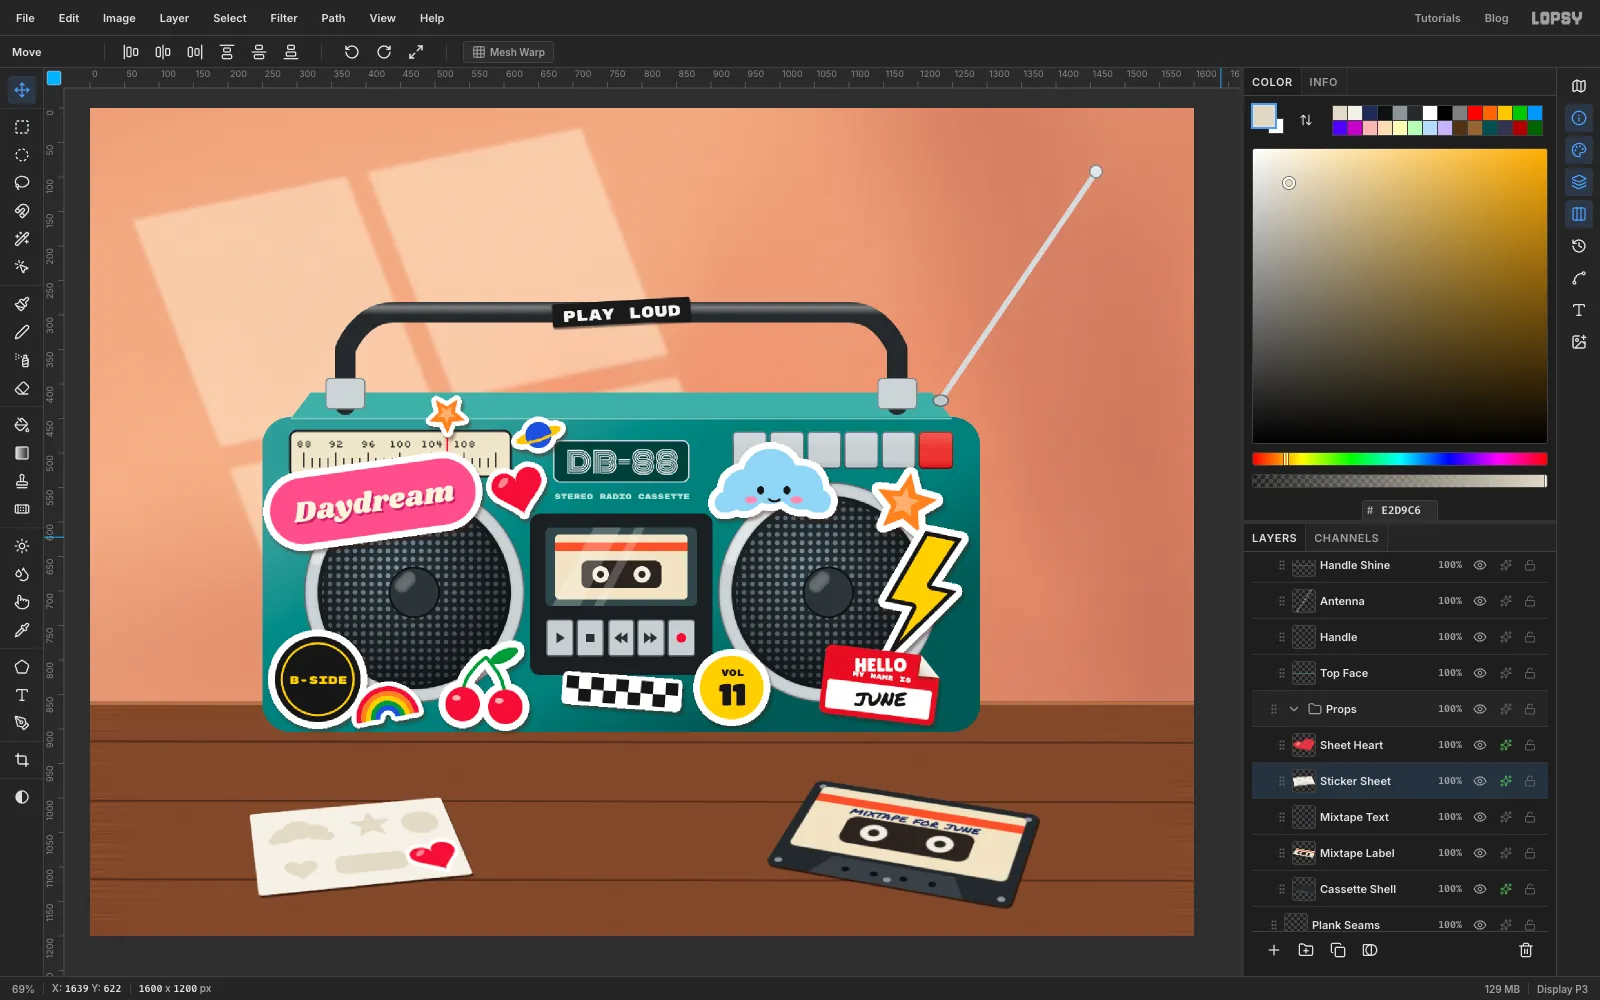
Sticker Sheetand draw a 320 × 210 px sheet with radius6, centred on400, 1050. - In , draw the ghost shapes of stickers that have been peeled off: a cloud, a star, a heart, a circle and a rounded bar.
- Copy the
Heartlayer and paste it as before, and rename the copySheet Heart. Drag it onto the sheet's lower-right corner and give it a white Stroke of6. - Select the sheet and its heart, then lay them flat the same way: turn them about 9° anticlockwise, squash the top down by nearly half, pull the far corners in with Perspective, and drag the pair into the lower left.
- Add the same tight Drop Shadow at Opacity
75.
- Add a layer called
-
Cast the boombox's shadow on the wall
- Click
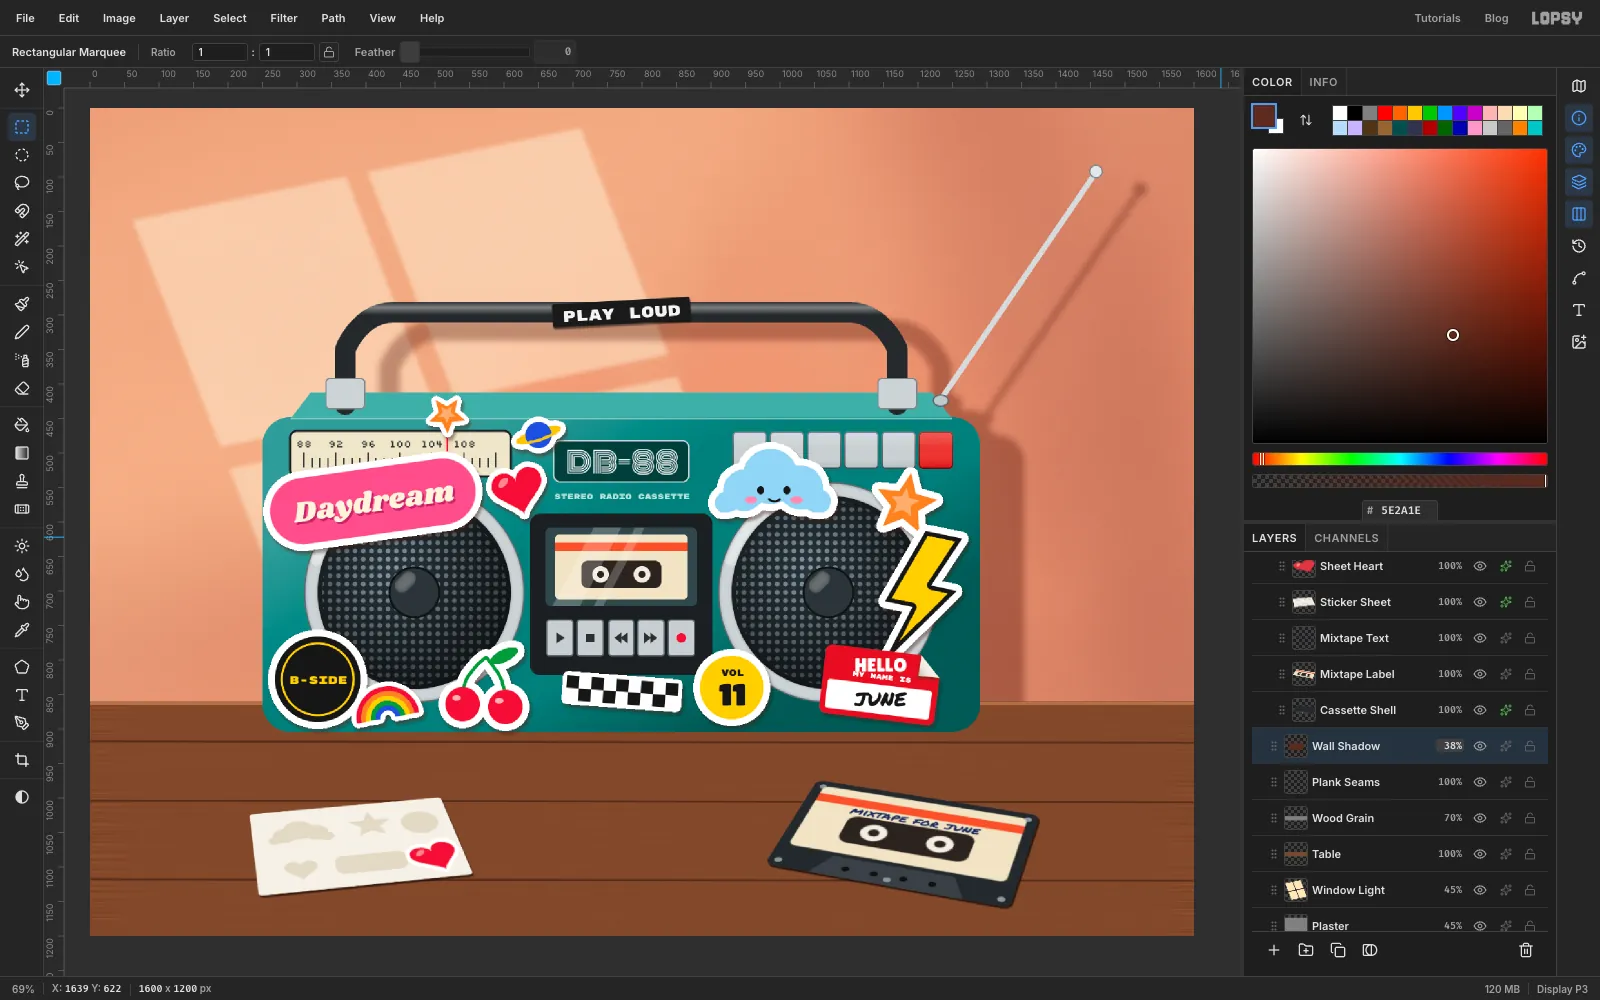
Plank Seamsand add a layer calledWall Shadow. - Set the foreground to . Cmd-click the thumbnail of
Bodyand fill, then do the same forTop Face,Handle,Handle MountsandAntenna. Deselect. - With the Move tool, nudge the layer 64 px right and 26 px down. Use Shift+arrow keys for 10 px steps.
- Run Gaussian Blur with a Radius of
14. - Marquee the table area and press Delete, so the shadow only falls on the wall.
- Set the layer to Multiply at
38%.
- Click
-
Ground it with a contact shadow
Add a layer called
Contact Shadow. With a soft Brush (Size46, Opacity55, Hardness0) in , click under the boombox's bottom-left corner and Shift-click under its bottom-right corner. Then, at Size90and Opacity30, add a short stroke off the right end where the light pushes the shadow. Set the layer to Multiply.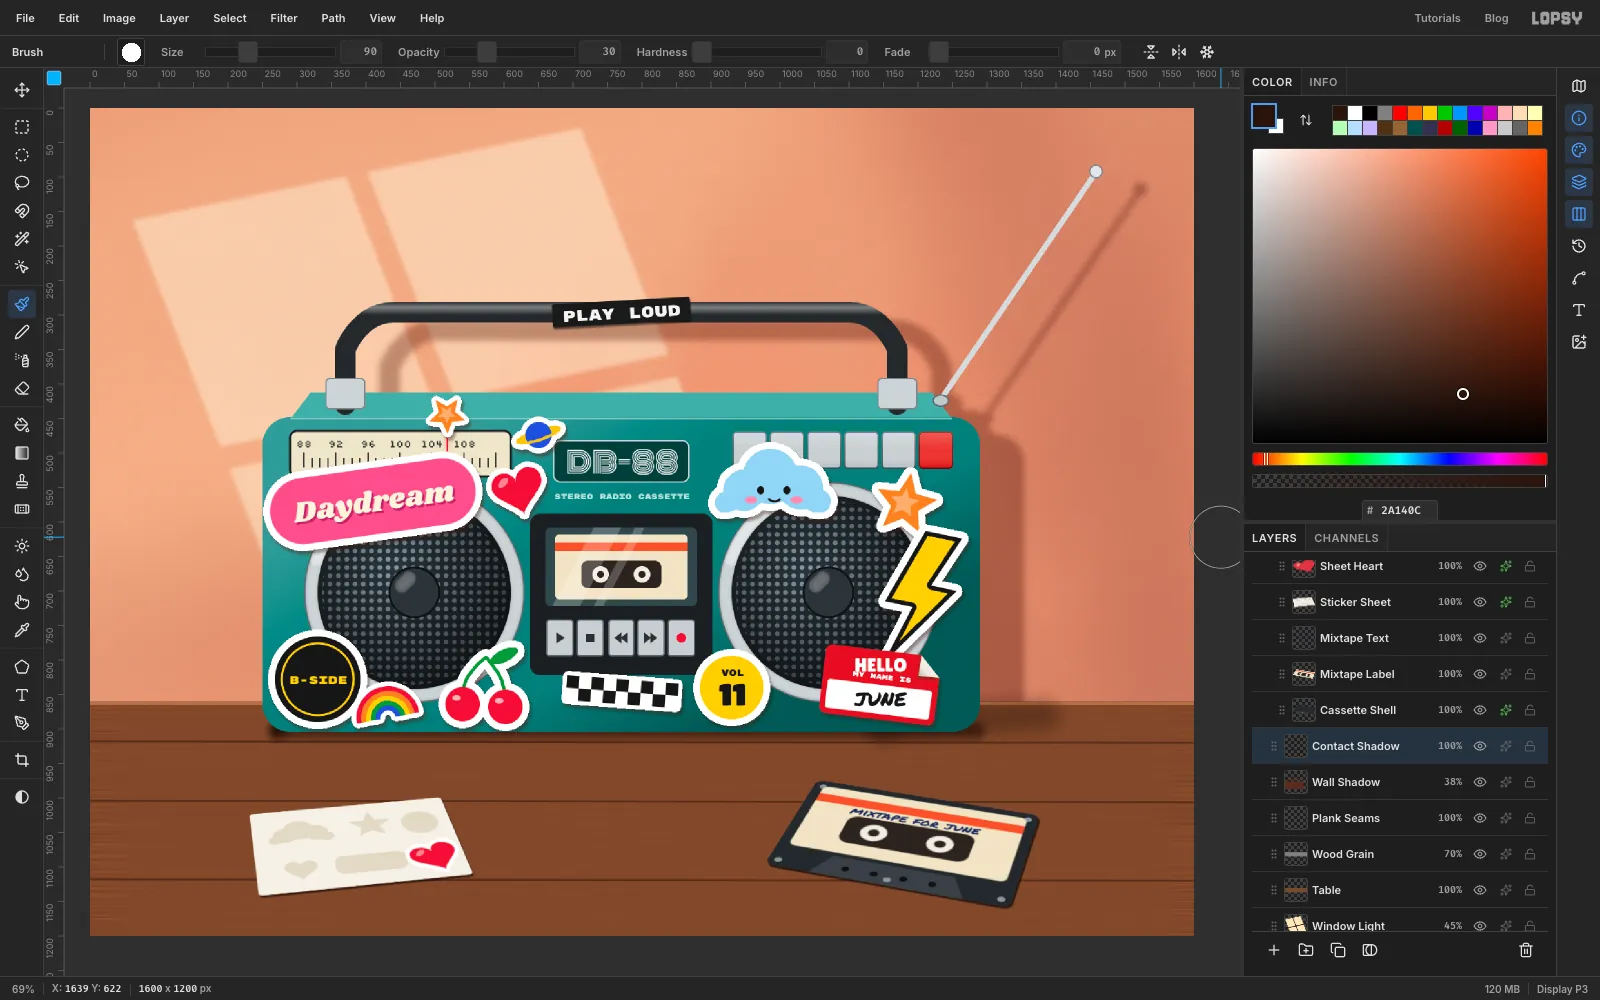
-
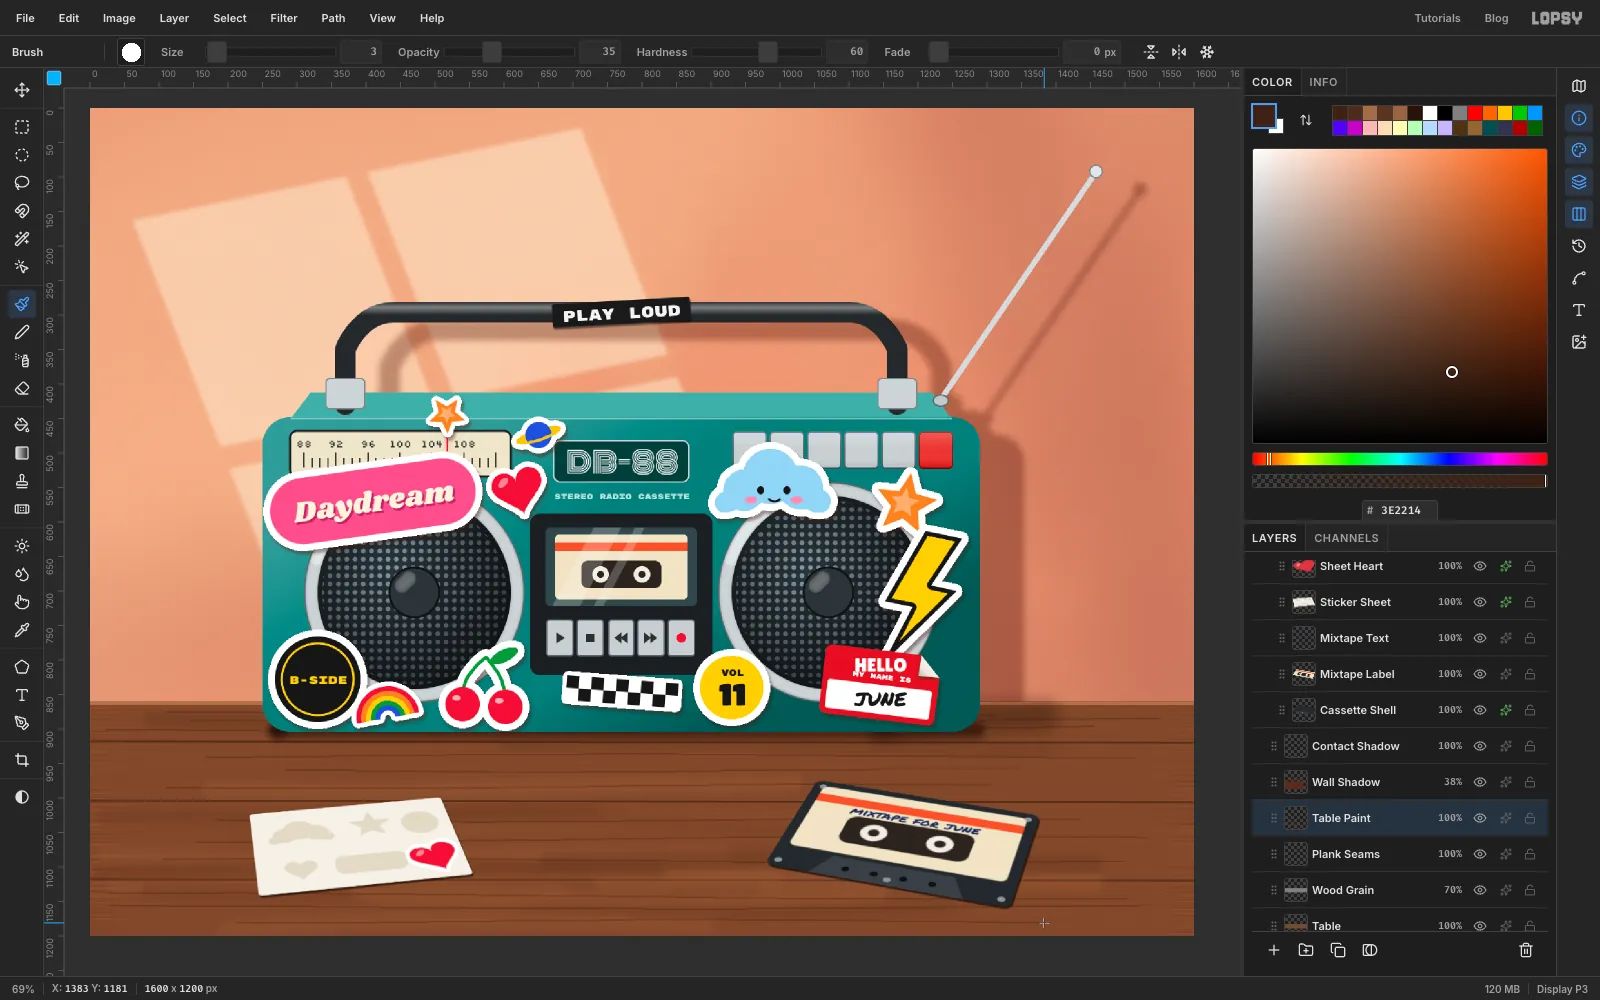
Paint the wood
- Click
Plank Seamsand add a layer calledTable Paint. - With the Brush at Size
40, Opacity22and Hardness20, paint long, slightly wavering strokes along the planks. Do four each in , , and , starting and stopping at different places. - Run Smudge (Size
60, Strength45) once along each plank. - With the Brush at Size
3, Opacity35, Hardness60, draw two or three thin grain lines along every plank.
- Click
-
Let the sun reach the table
Add a layer called
Table Sheen. With a soft Brush (Size220, Opacity35) in , paint two strokes across the left end of the table, just in front of the wall. Set the layer to Screen at75%.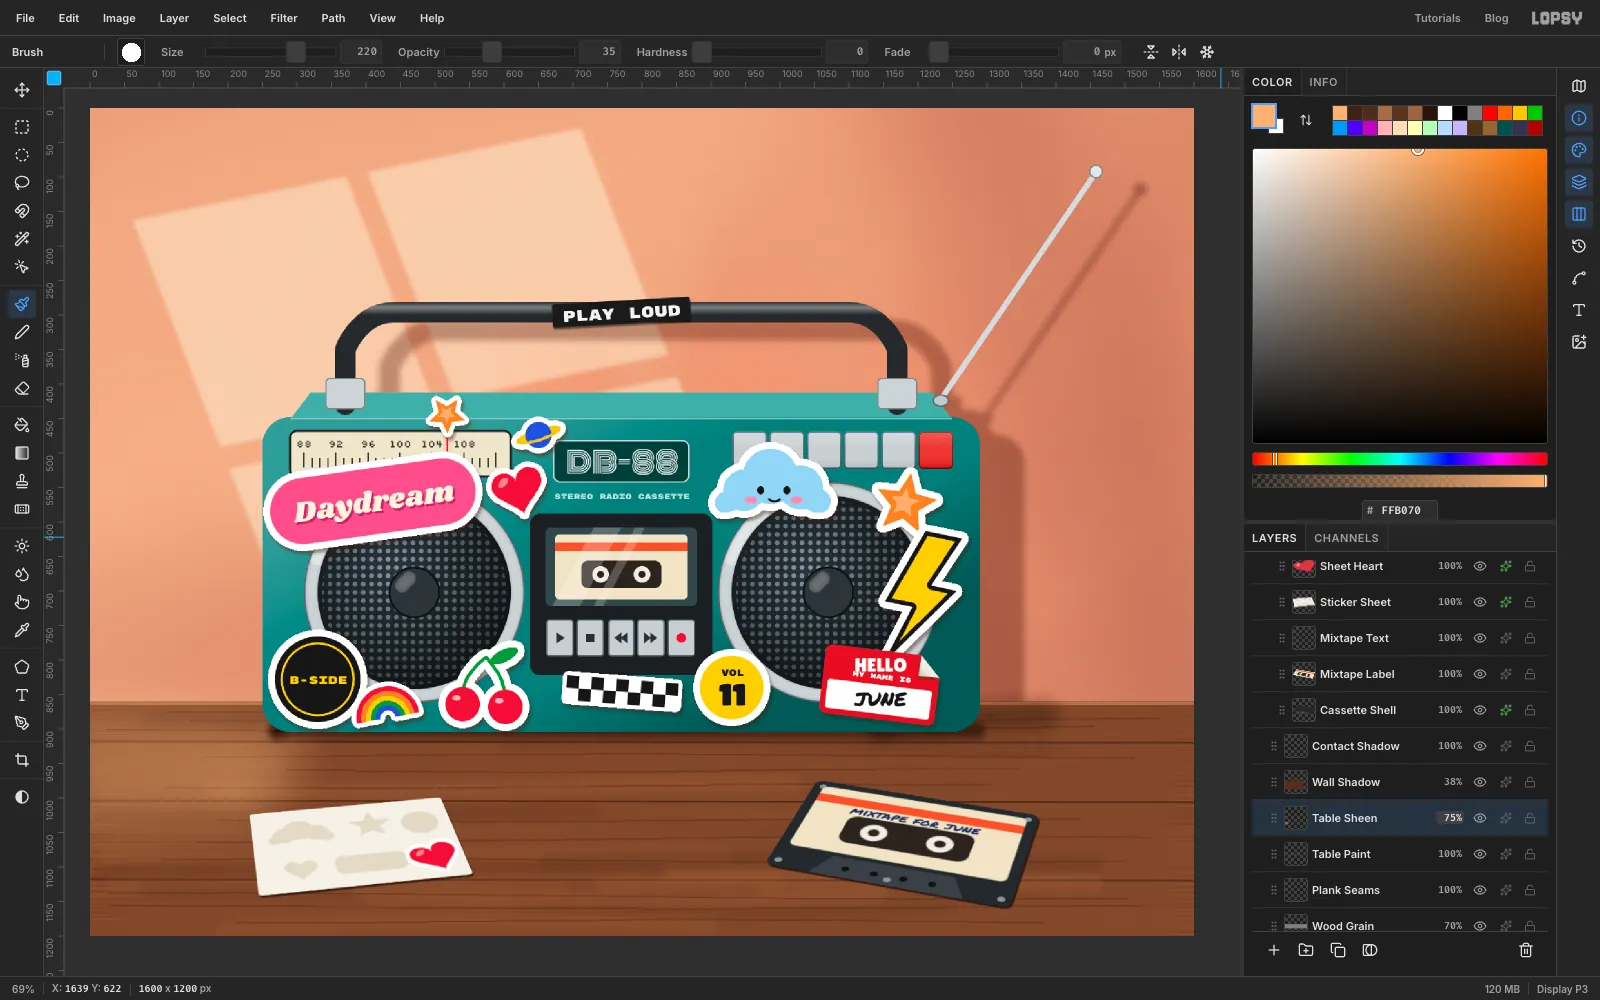
-
Throw the window light across the boombox
- Click
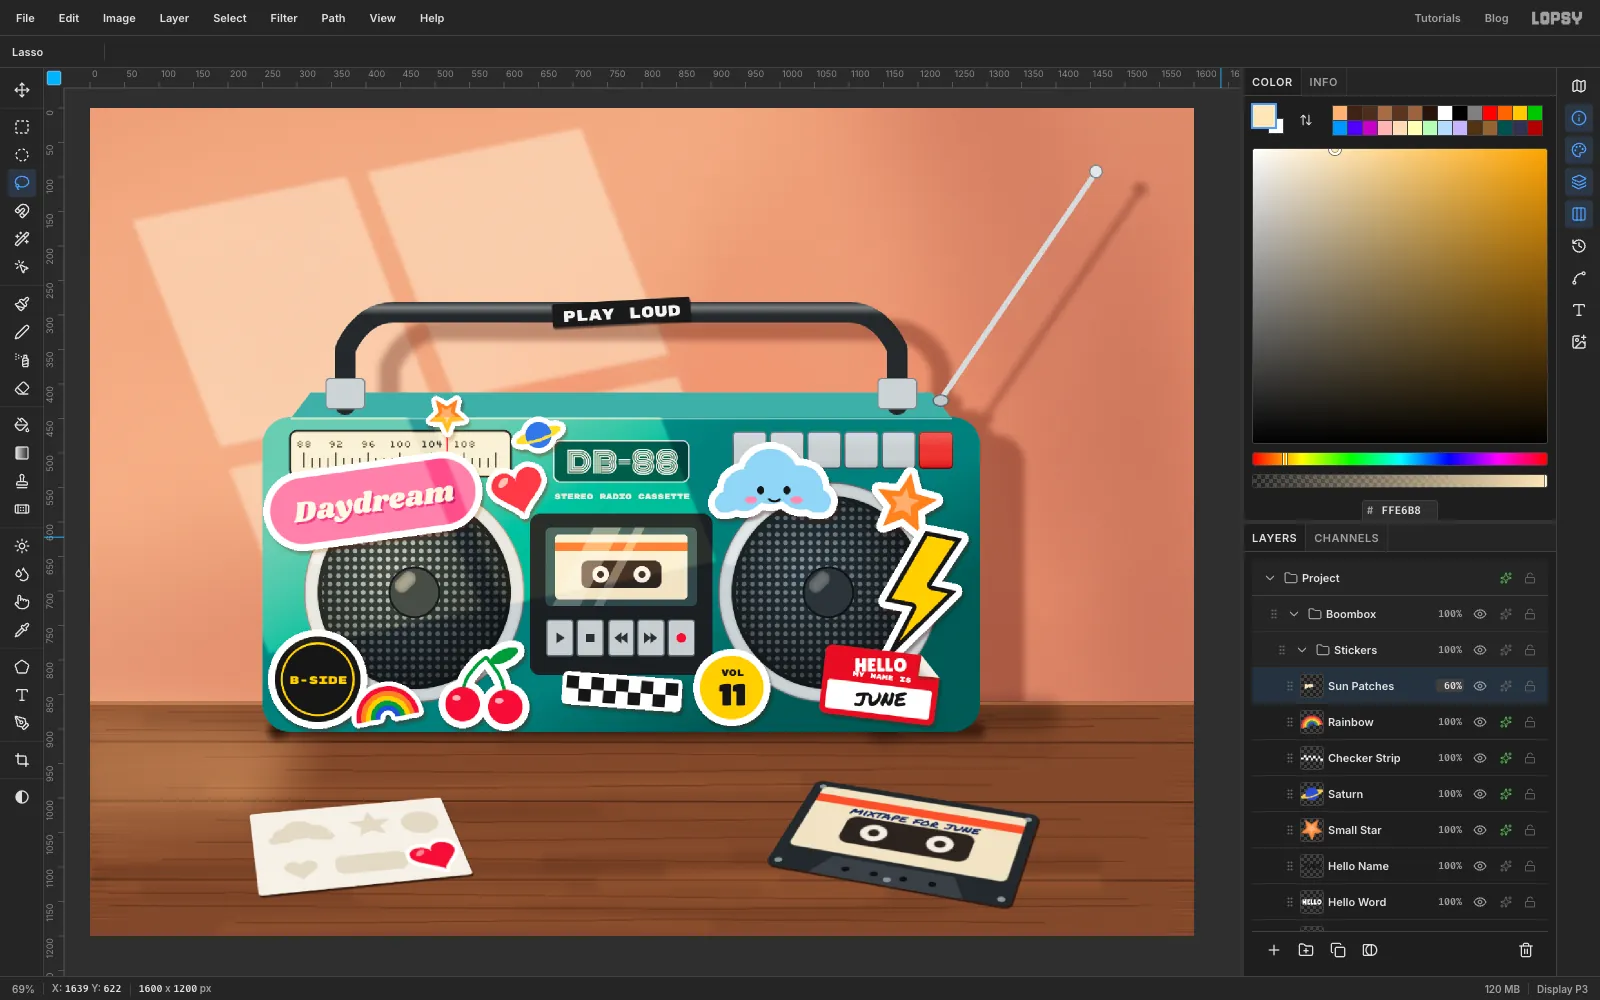
Rainbow(the top of theStickersgroup) and add a layer calledSun Patches. - Select the same four window panes, about 70 px further left and 60 px higher, because the boombox stands nearer the window than the wall does. The quickest way is to Cmd-click the
Window Lightthumbnail, switch to the Lasso, and nudge the selection with Shift+Left seven times and Shift+Up six times. You can also lasso the panes again with Shift. - Fill with and deselect.
- Cmd-click the
Bodythumbnail, choose Select → Inverse, clickSun Patchesand press Delete. The light now only falls on the front of the boombox. - Set the layer to Overlay at
60%.
- Click
-
Darken the shadow side
Click
Body Shadeand add a layer calledBody Burn. Cmd-click theBodythumbnail and drag a gradient from clear at aboutx 850to at50%at the right end. Deselect and set the layer to Multiply.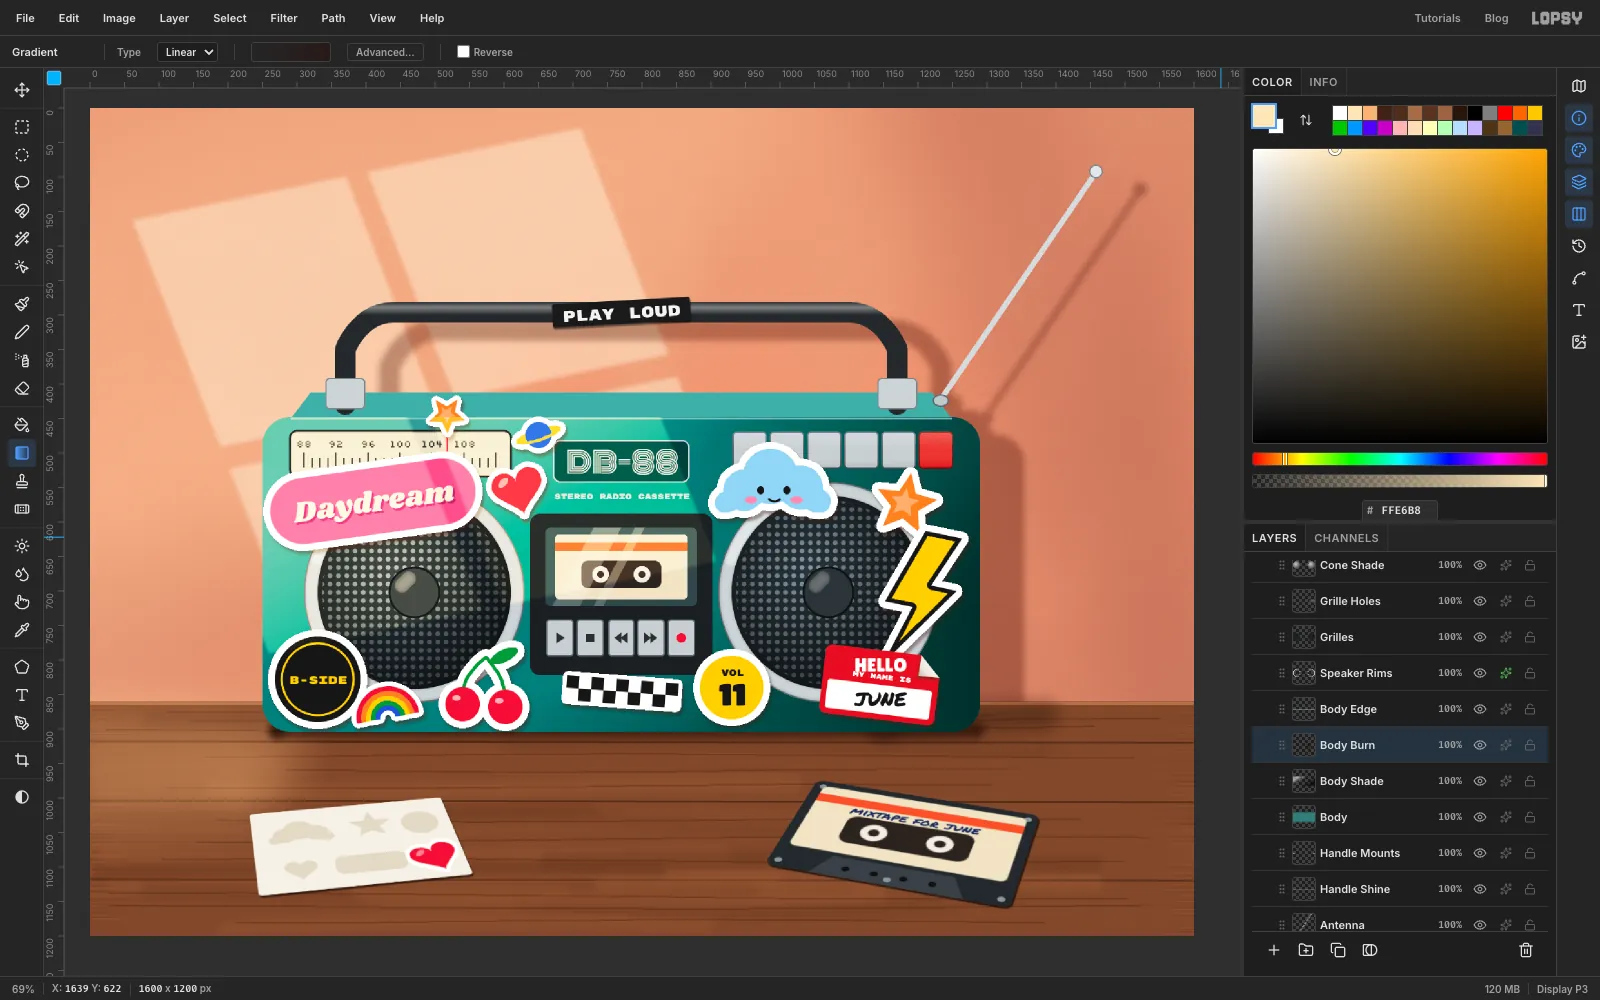
-
Select the sunbeams
Click
Sun Patchesand add a layer calledDust. Select the four window panes on the wall again: Cmd-click theWindow Lightthumbnail, or lasso them with Shift to add.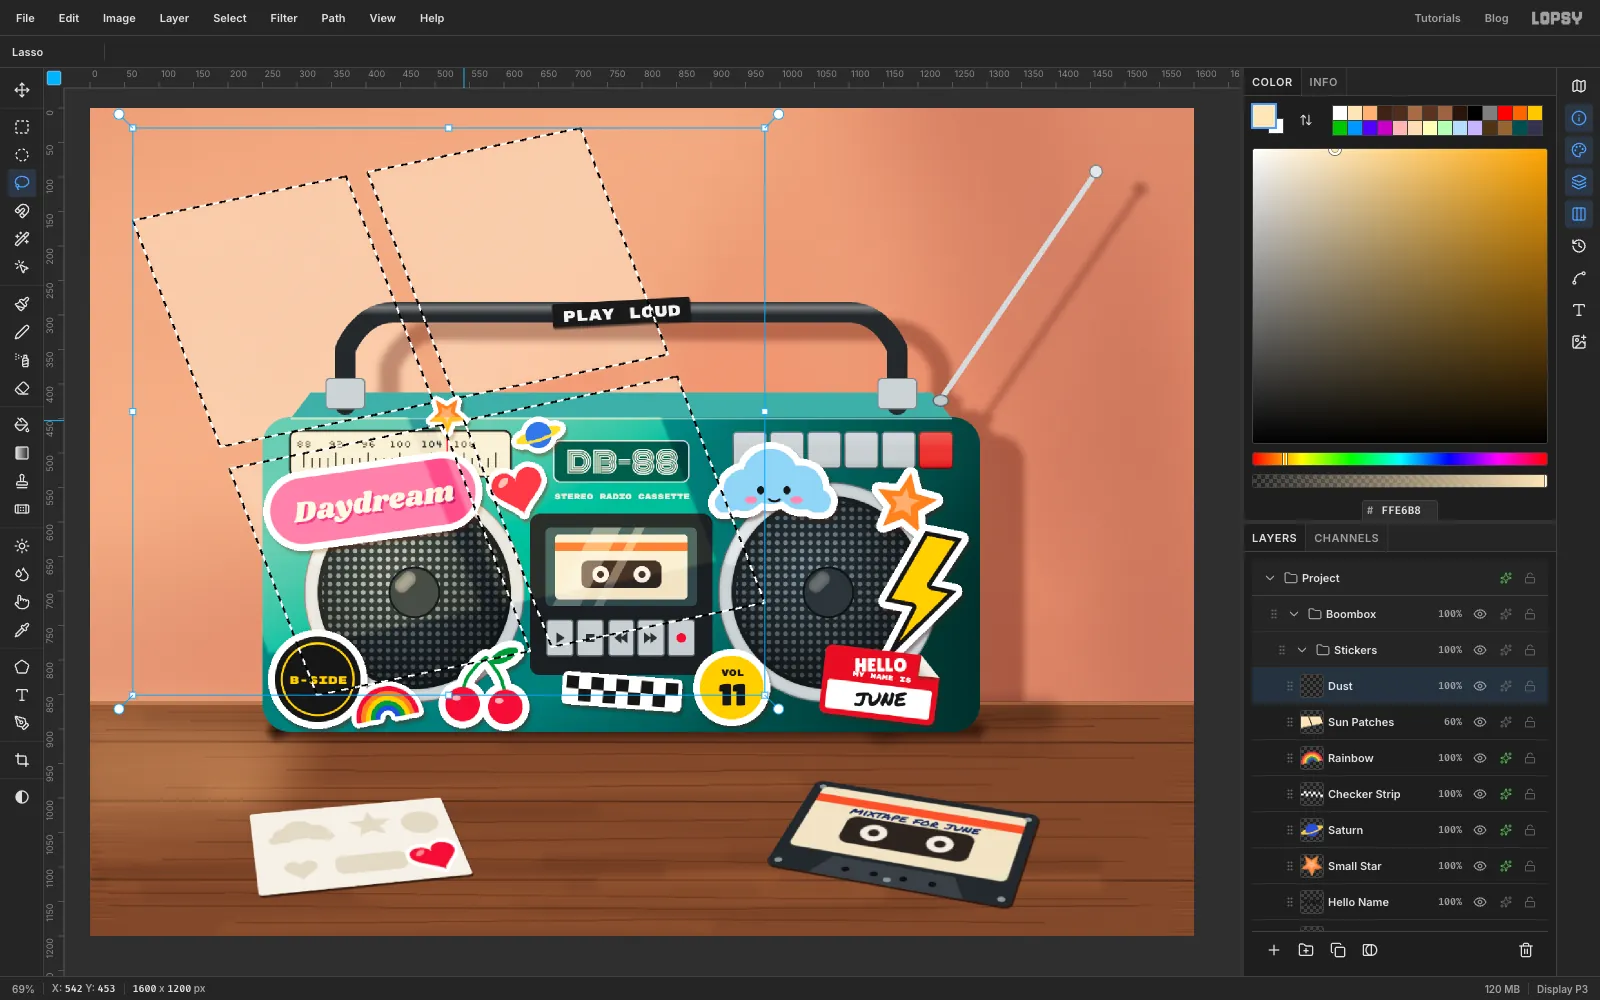
-
Spray dust into the beams
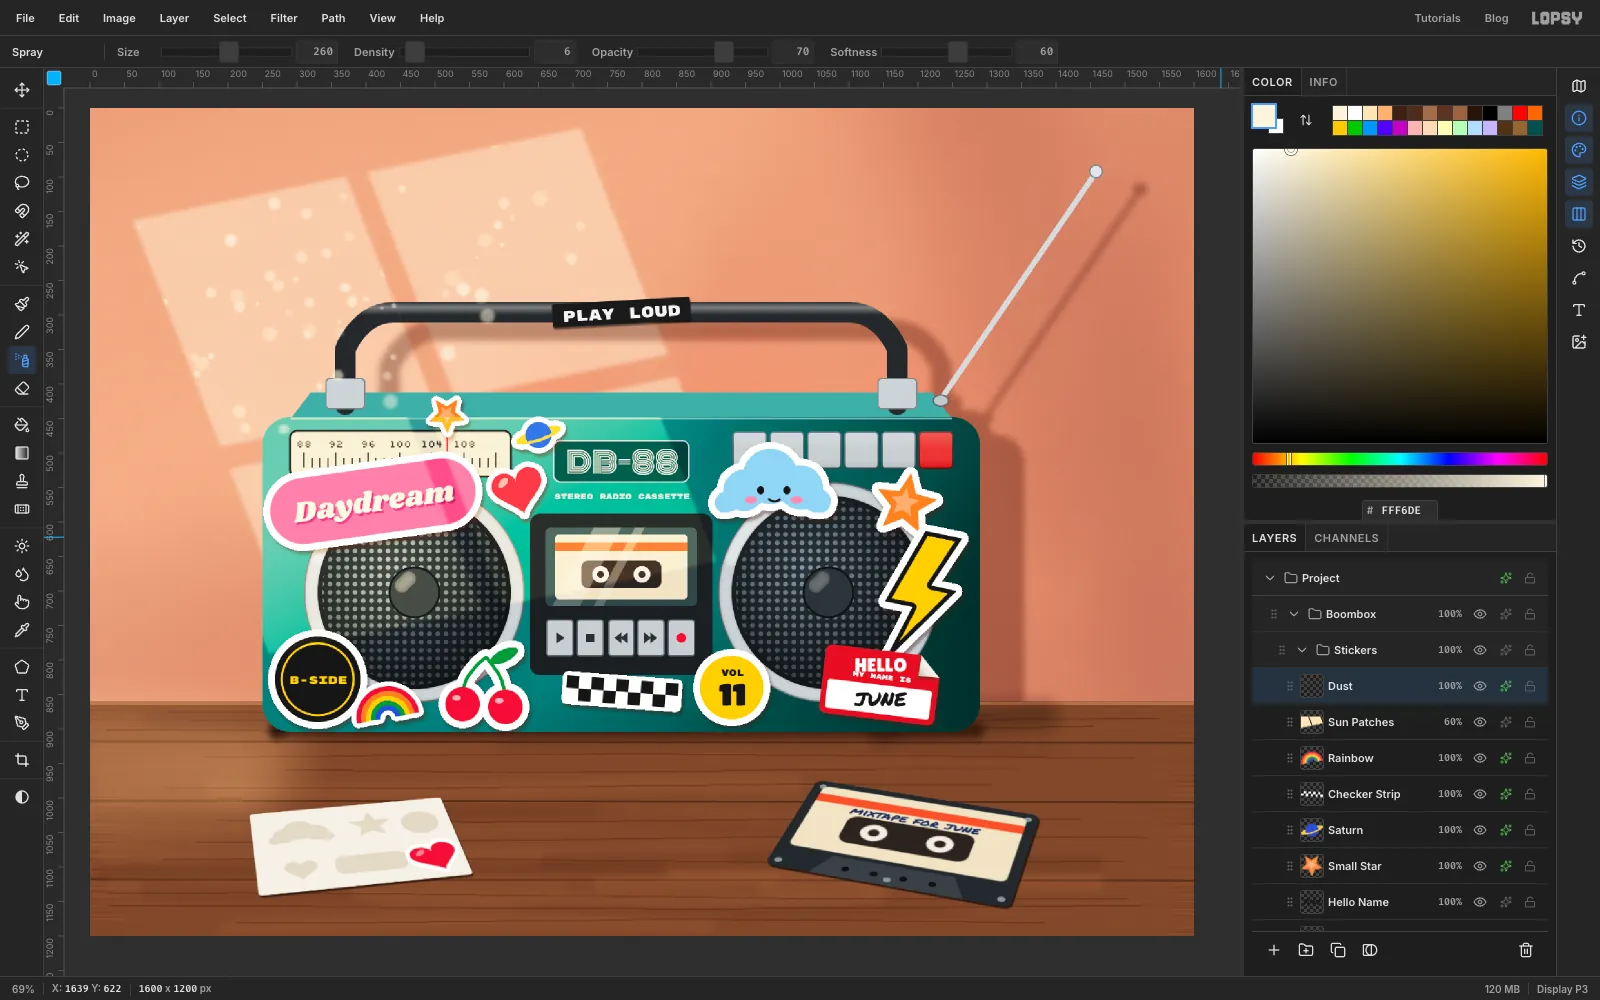
- Choose the Spray tool with Size
260, Density6, Opacity70and Softness60, in . - Drag two slow sweeps through the upper part of the beams, above and left of the boombox. The selection keeps the specks inside the light.
- Deselect, set the layer to Screen, and add an Outer Glow (Size
6, Opacity70, ).
- Choose the Spray tool with Size
-
Add a light shaft and brush texture
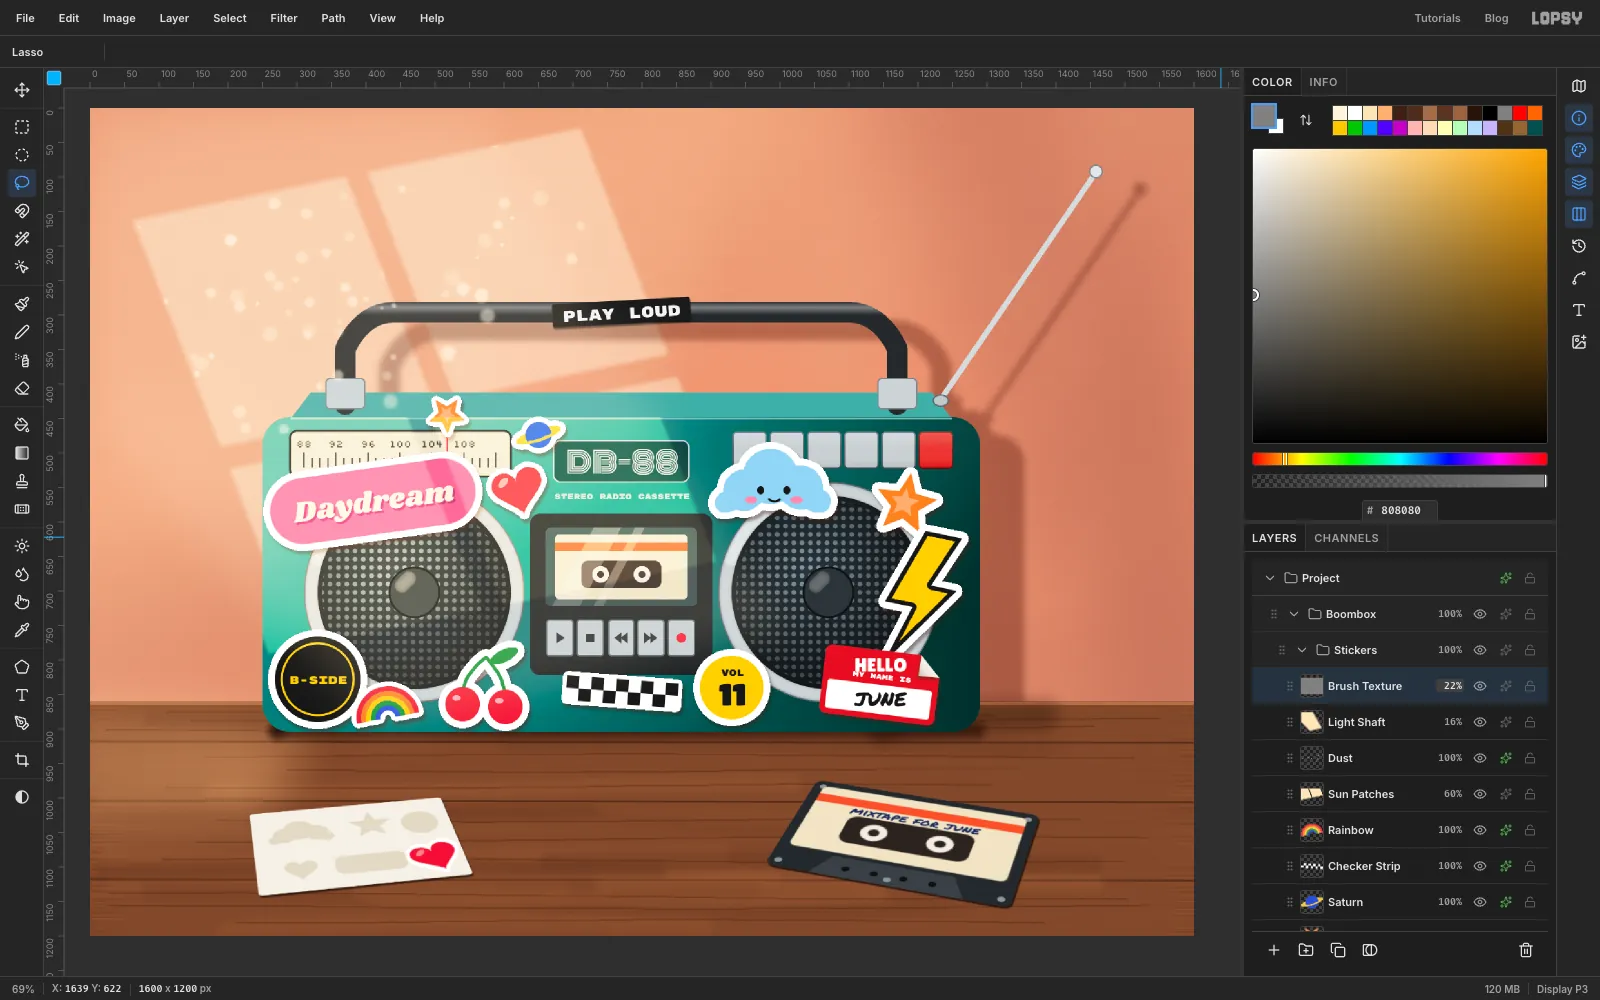
- Add a layer called
Light Shaft. Lasso a wide band from the top-left corner down across the boombox's left half, Feather it by60, fill it with , and set it to Screen at16%. - Add a layer called
Brush Texture, fill it with , and run Add Noise (Amount45, Mono, Uniform) followed by Motion Blur (Angle35, Distance16). - Set it to Overlay at
22%. The streaks sit over the flat sticker colours and make them look painted.
- Add a layer called
-
Warm the whole picture
- Click the
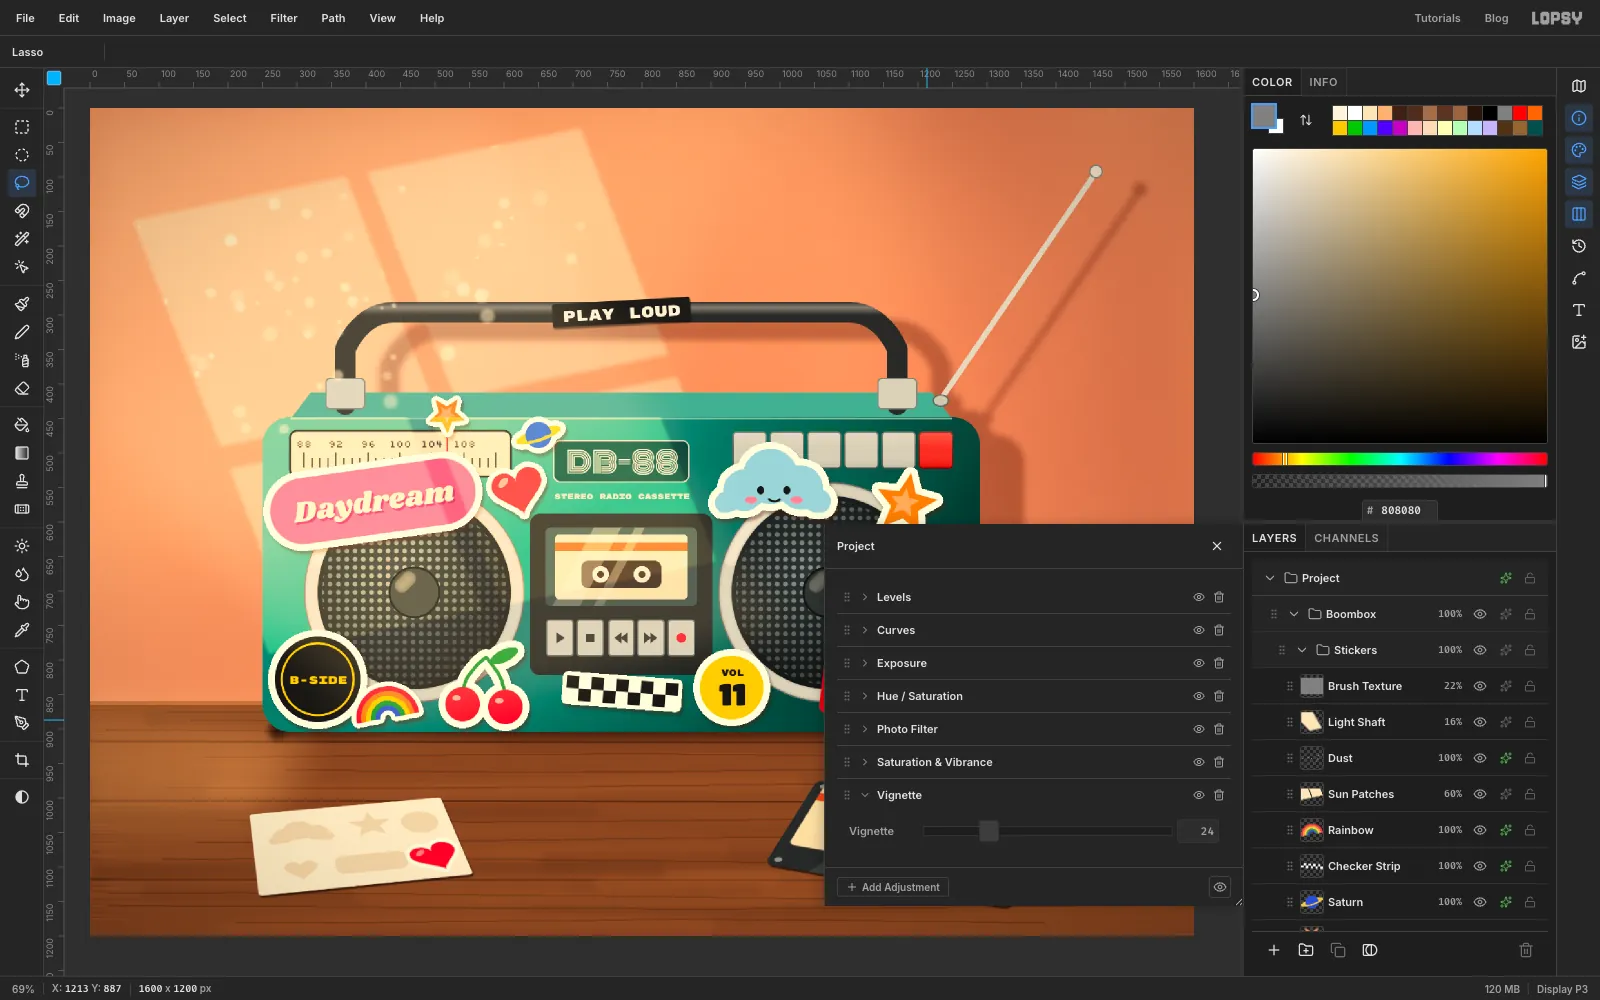
Projectgroup's row and open its effects drawer. - Click Add Adjustment and add a Photo Filter with Density
18, then Saturation & Vibrance with Vibrance12, then a Vignette of24. Leave the other adjustments in the list untouched.
Save your work with File → Save Project, and use File → Quick Export PNG to export the finished painting.
- Click the