Design a Lo-Fi VHS T-Shirt
Build a lo-fi beats T-shirt print in Lopsy, with a pixel-art dusk scene on a CRT screen, scanlines, VHS glitches, a pixel title and a taped label.
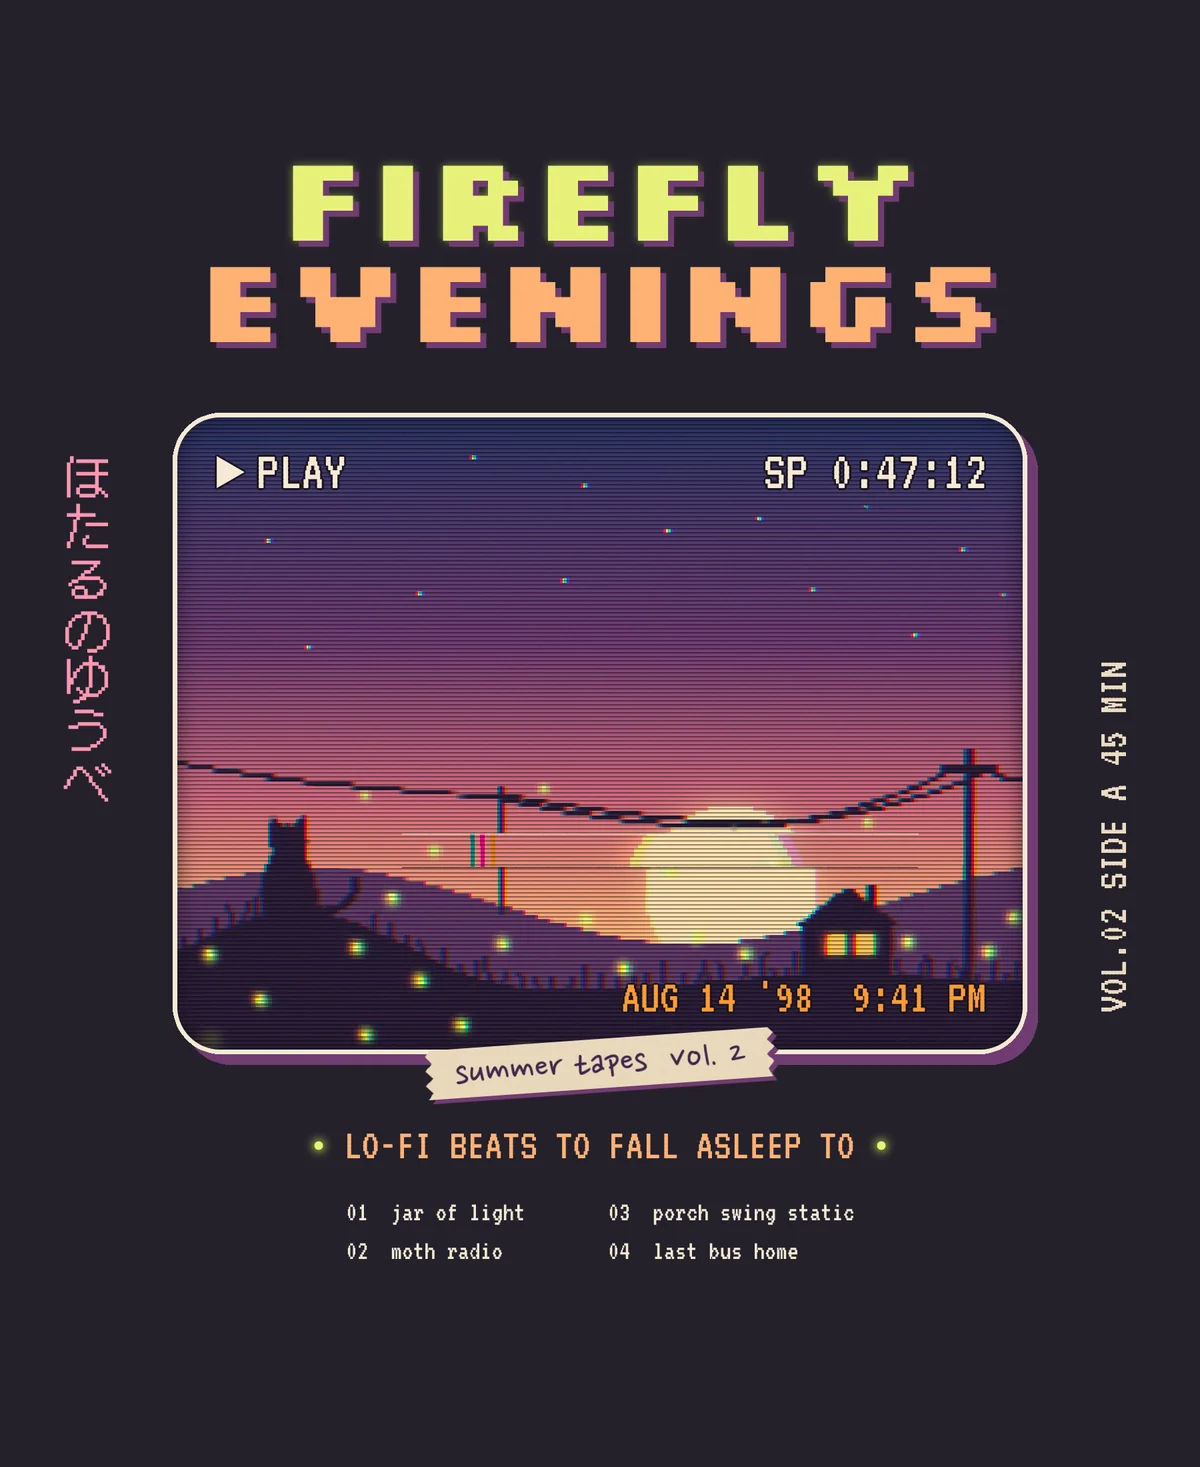
Lo-fi art borrows from three places: pixel art, old VHS tapes and late-evening colour. You get chunky pixels, scanlines, colour fringing, a tracking glitch or two, camcorder text, and a dusk sky that runs from navy to peach. This tutorial builds a T-shirt print for an imaginary "lo-fi beats to fall asleep to" tape, FIREFLY EVENINGS, at 1800 × 2200 px. The dark plum background stands in for the shirt.
The trick that makes it work is to paint the scene cleanly first and only then make it look cheap. You'll draw a smooth vector-style dusk scene, flatten it into one layer, and then push that copy through Pixelate, Lens Distortion, Chromatic Aberration, Pixel Stretch and Add Noise. The originals stay hidden underneath, so you can always go back.
The tools you'll meet along the way:
- ruler guides, the Gradient tool, the Lasso and Elliptical Marquee
- the Pencil with Shift-click lines, the Pen tool for sagging wires, and the Brush for grass and fireflies
- Move-tool scale and rotate handles, with Cmd to snap rotation to 15°
- Edit → Copy Merged, Pixelate, Lens Distortion, Chromatic Aberration, Pixel Stretch and Add Noise
- Select → Shrink / Grow / Inverse for a rounded screen
- Edit → Define Pattern and Fill with Pattern for scanlines
- the Shape tool, the Clone Stamp, Merge Down and groups
- Silkscreen, VT323, DotGothic16 (vertical) and Nanum Pen Script text
- the Outer Glow, Inner Glow, Stroke and Drop Shadow layer effects
Name every layer as you make it (double-click its name in the Layers panel). The steps refer to layers by name, and so do the screenshots. The later screenshots come from the finished project file, with layers you haven't made yet hidden, so the Layers panel sometimes lists one with its eye switched off.
The palette is a dusk sky and a few inks:
-
Shirt
the background, not an ink
-
Sky
-
Sun
-
sun glow
-
Hills
-
silhouettes
-
Window light
-
Fireflies
-
Cream
-
plum shadow
-
Title green
-
peach
-
Date stamp orange
-
rose
-
Tape
-
pencil ink
-
OSD outline
-
Scanline ink
-
tracking-line light
-
Set up the shirt and guides
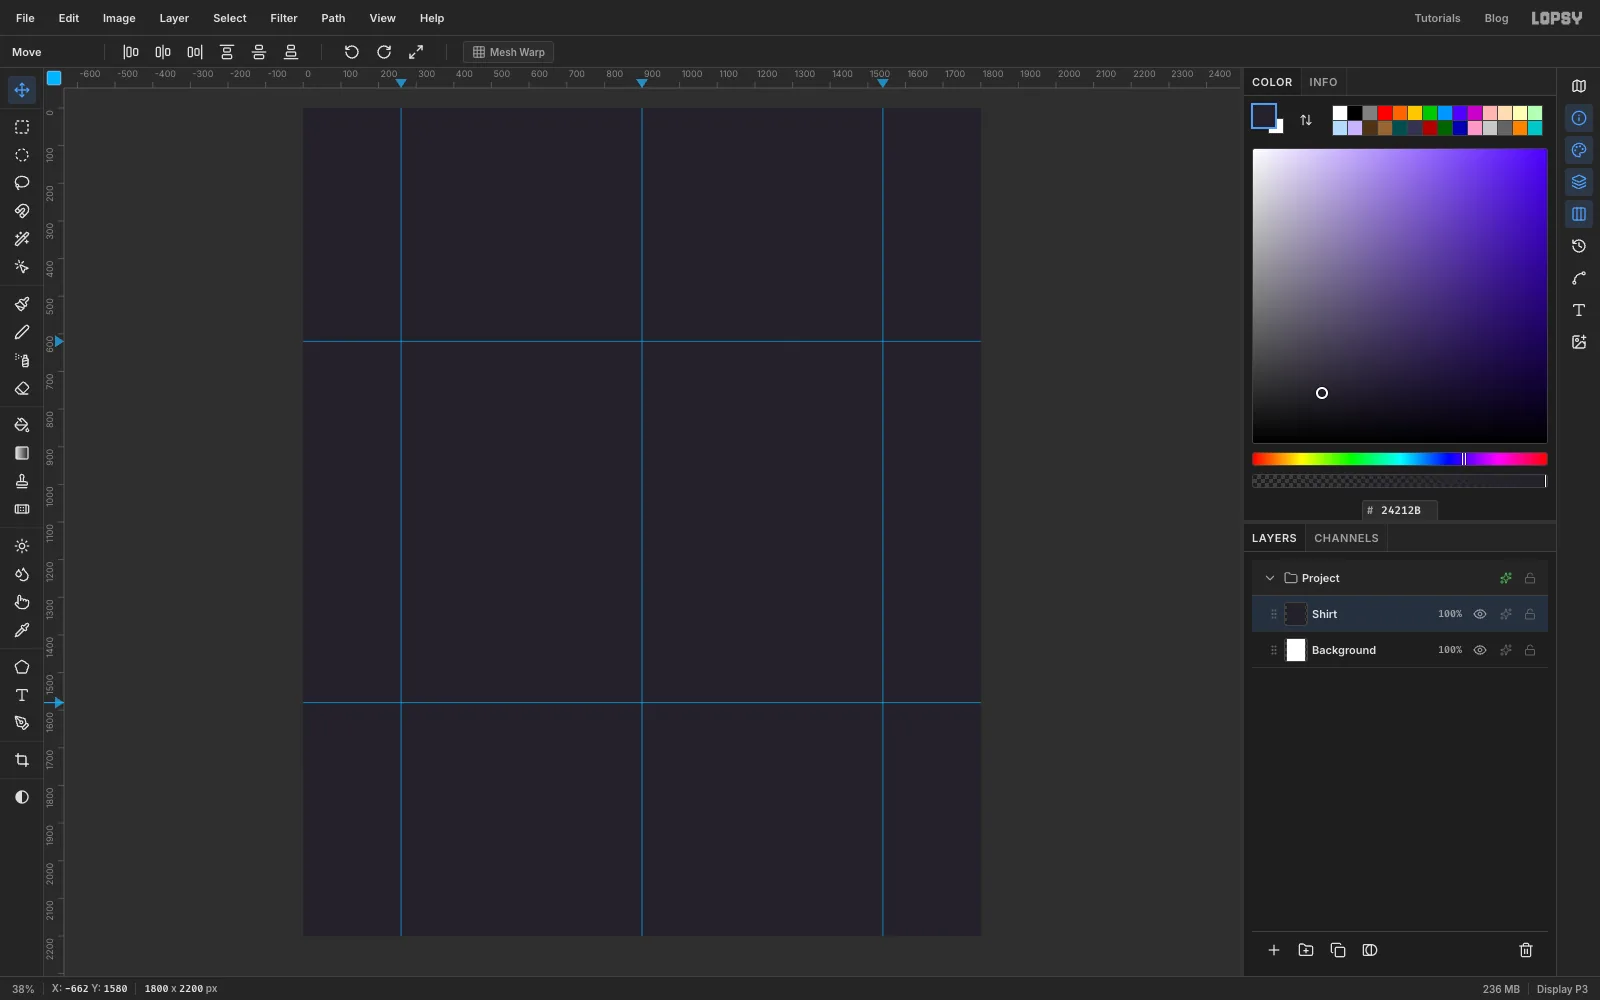
Choose File → New, keep the units on Pixels, make the document 1800 × 2200 and click Create. Rename Layer 1 to Shirt by double-clicking its name, set the foreground colour to and choose Edit → Fill.
The whole design hangs off a 1280 × 960 screen in the middle of the shirt. Click the top ruler at 260, 900 and 1540 to drop three vertical guides, then click the left ruler at 620 and 1580 for the top and bottom of the screen. View → Snap to Guides is on by default, which makes the next marquee land exactly on them.
-
Paint the dusk sky
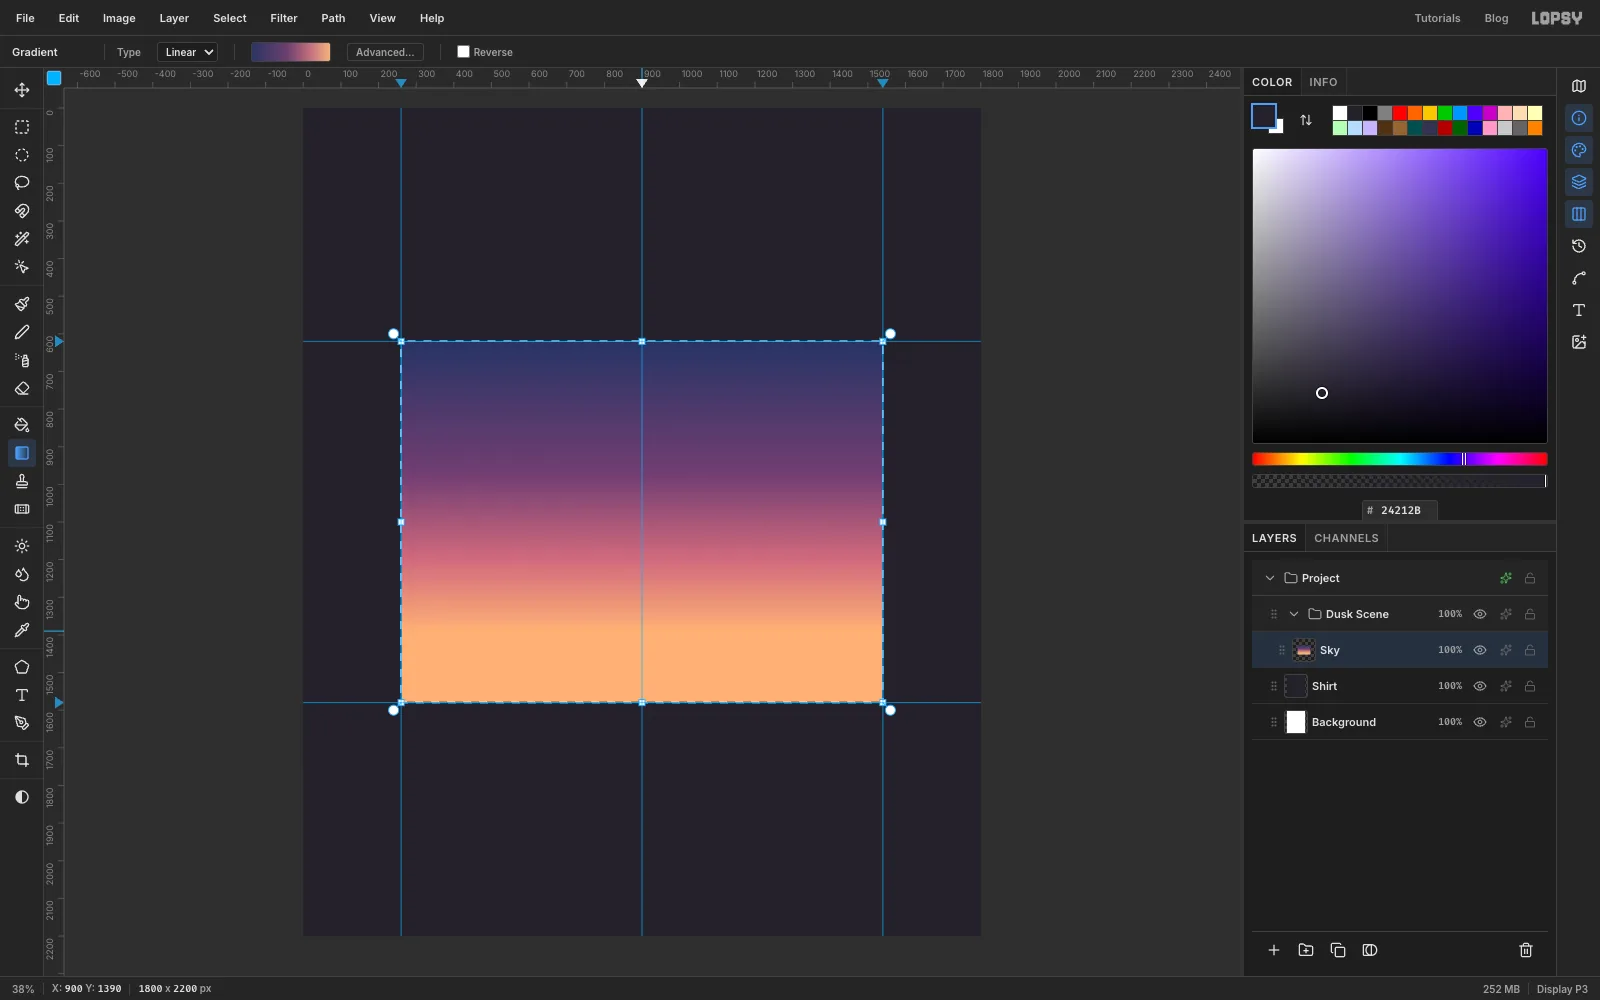
With Shirt selected, click New Group at the bottom of the Layers panel and name it Dusk Scene. Everything in the picture goes inside it. Add a layer called Sky.
Drag a Rectangular Marquee from guide to guide, top left to bottom right. Pick the Gradient tool, set Type to Linear and click Advanced…. Make four stops: on the left, at 45 %, at 75 % and on the right. Then drag from the top of the rectangle straight down to about two-thirds of the way, so the bottom third is the warm horizon colour.
-
Add the sun and the hills
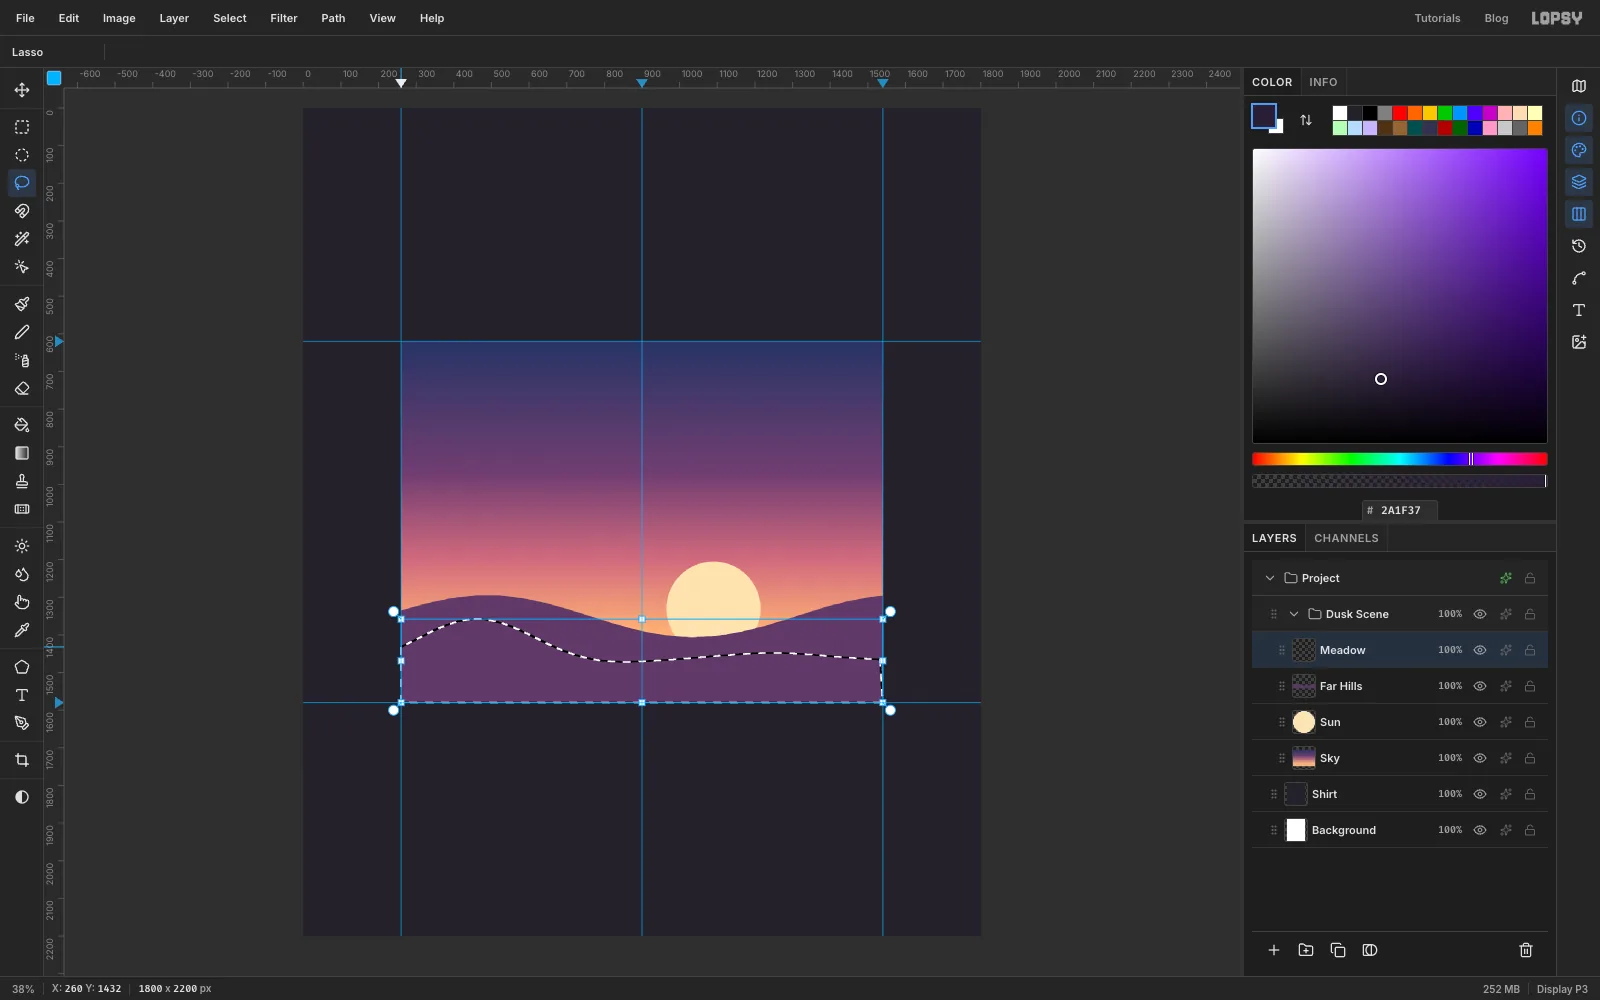
Add a layer called Sun. With the Elliptical Marquee, hold Shift and drag a circle about 250 px across, a little right of centre, sitting low enough that its bottom will be hidden by the hills. Fill it with .
Add a Far Hills layer. With the Lasso, draw a gently rolling line across the screen just over the bottom of the sun, then go down past the bottom guide and back along it to close the shape. Fill it with .
Add a Meadow layer and lasso a darker foreground in front: a round hill on the left (the cat will sit on top of it), dipping in the middle and rising slightly on the right. Fill it with . Keep the lasso inside the left and right guides.
-
Draw the house
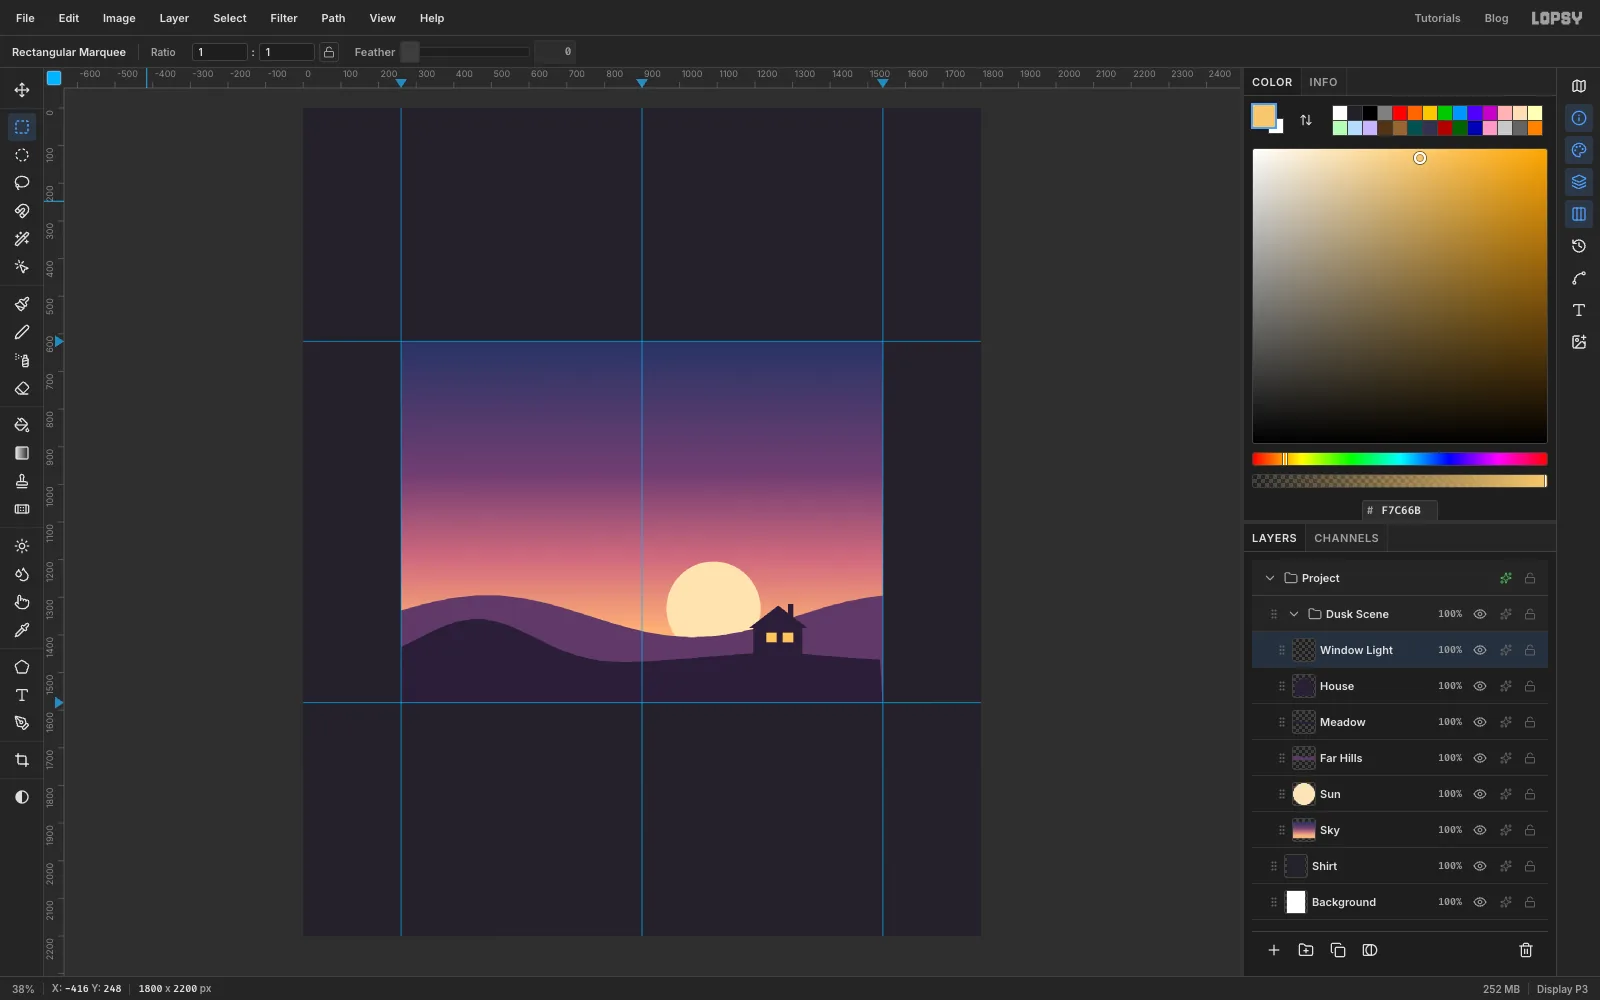
Add a House layer. With the Lasso, click around a simple house outline on the right of the meadow: two walls, a gable roof with a little overhang on each side, and a chimney. Fill it with the meadow colour , so it reads as one silhouette with the hill.
Add a Window Light layer, draw two small square marquees side by side on the house front and fill each with .
-
Put up the power poles
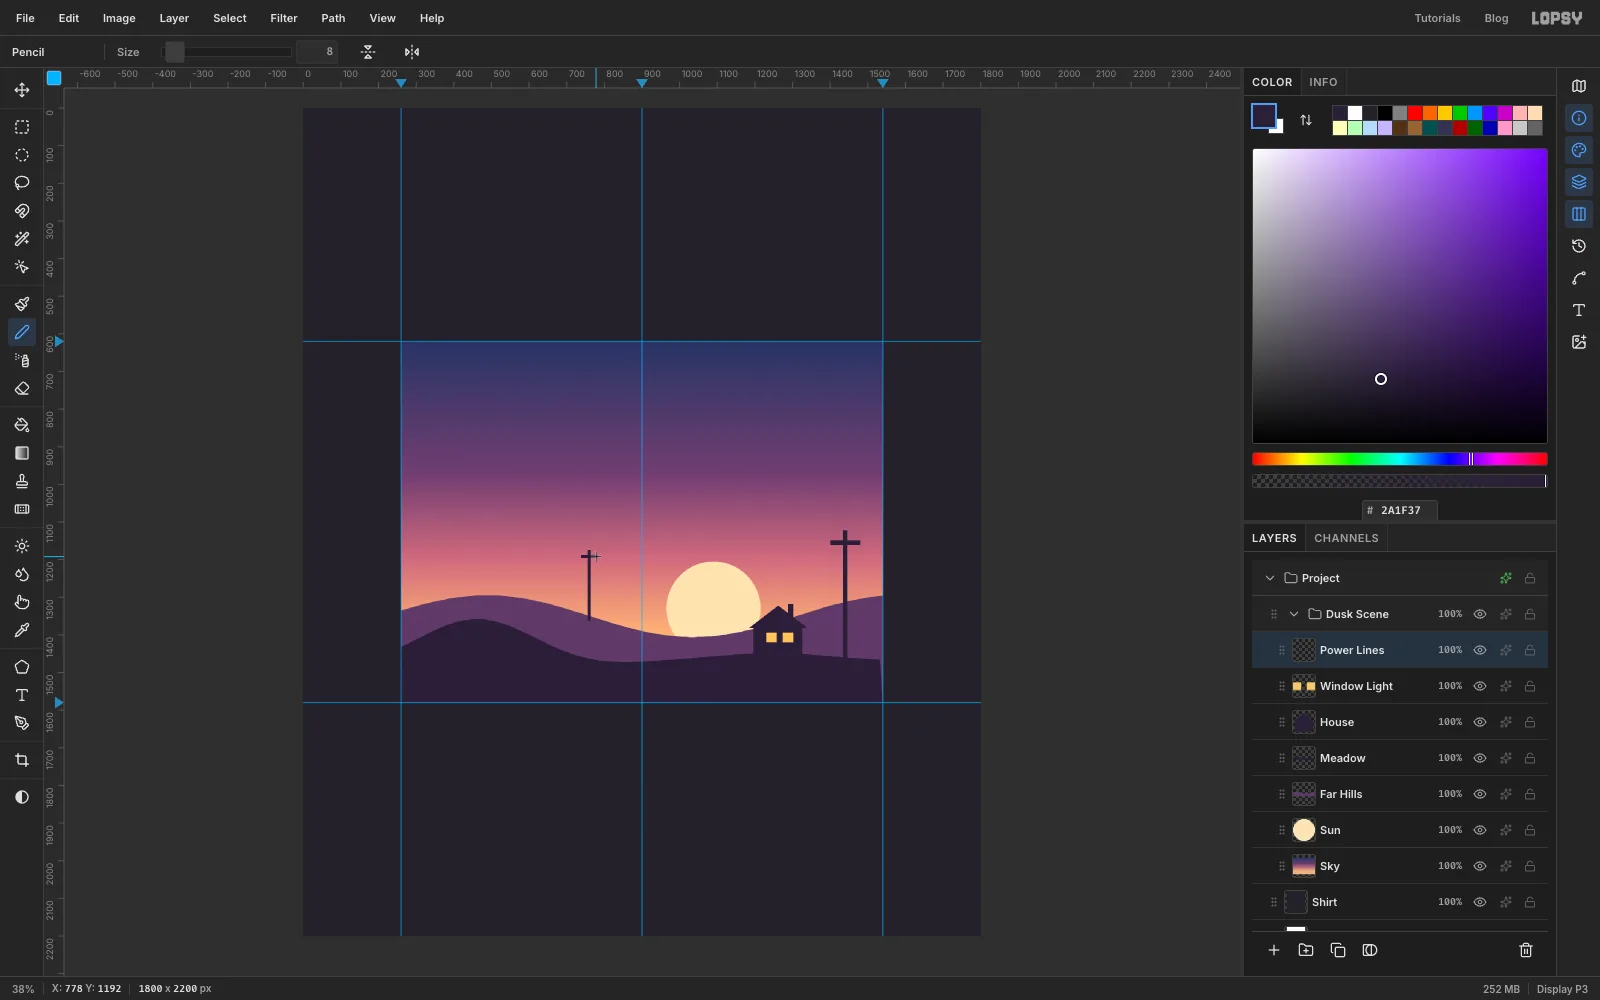
Add a Power Lines layer and keep as the colour. Choose the Pencil, set Size to 12, click at the foot of the first pole on the right of the meadow, then hold Shift and click where its top should be. That draws a perfectly straight upright. Draw the crossbar the same way.
Switch the Pencil to Size 8 and draw a smaller pole and crossbar on the far hills left of centre. The smaller pole reads as further away.
-
Hang the wires with the Pen tool
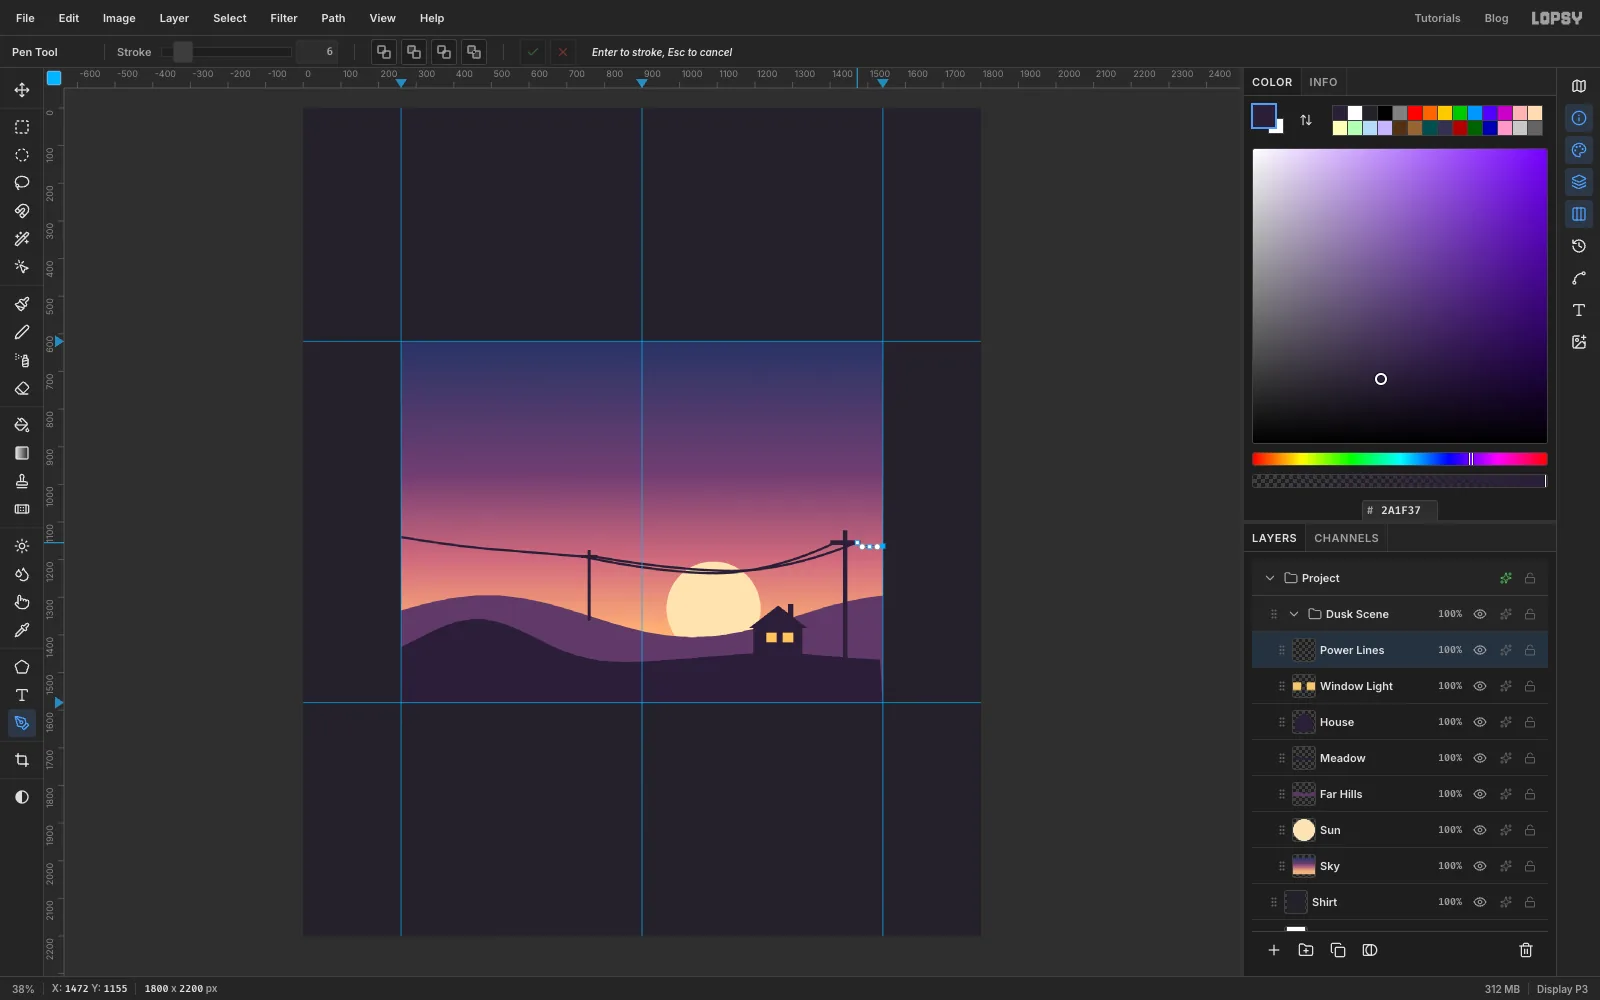
Wires sag, so draw them with the Pen tool rather than the pencil. Set its Stroke to 6 in the options bar. Click the left end of the small pole's crossbar, then click and drag a point halfway across, pulling the handle sideways along the wire to make a smooth curve, and click the right pole's crossbar. Press Enter to stroke the path with the foreground colour.
Draw a second wire from the other end of the crossbars, slightly lower. Then draw a third wire from the left edge of the screen to the small pole, and a short one from the big pole to the right edge. Keep the left-hand wire high: the cat sits under it in the next step.
-
Seat a cat on the hill
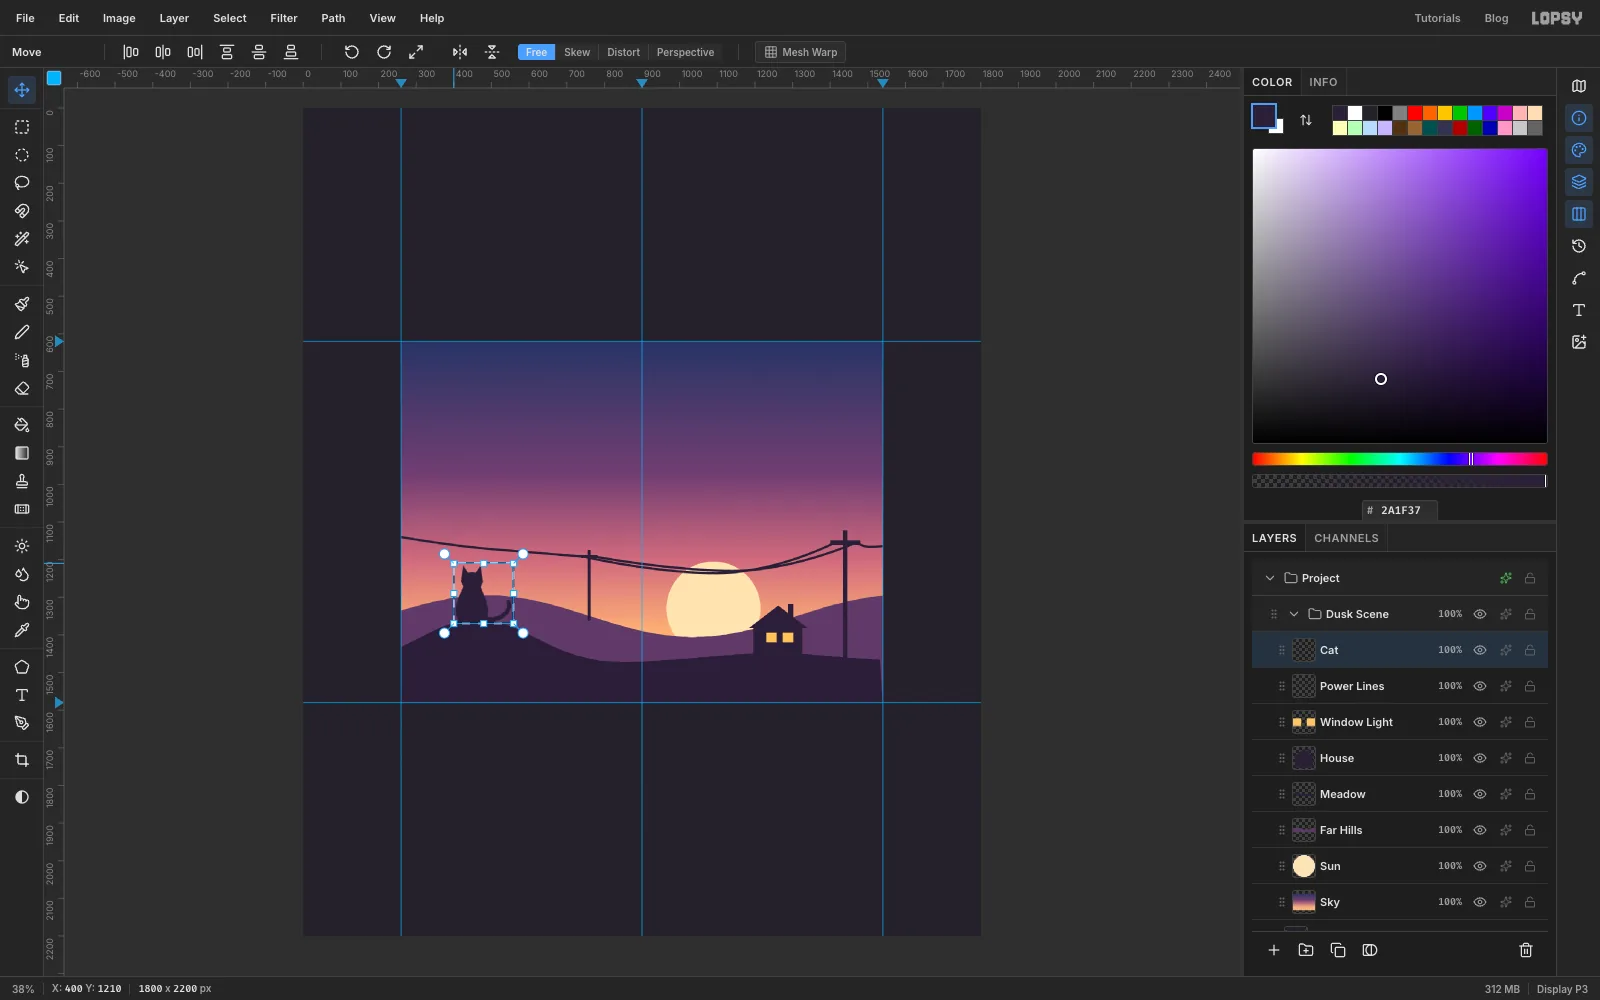
Add a Cat layer above Power Lines. With the Lasso, click around a cat sitting with its back to you on top of the left hill: a pear-shaped body, a round head and two pointed ears. Fill it with . Switch to the Brush at Size 10, Hardness 100, and paint a tail curling along the ground and up at the tip.
If the cat looks small against the poles, scale it up: draw a marquee around it, switch to the Move tool, hold Cmd to keep its proportions and drag the top-left corner handle up and out to about 125 %. Dragging the top corner keeps the cat's base planted on the hill. Press Cmd+D to commit.
-
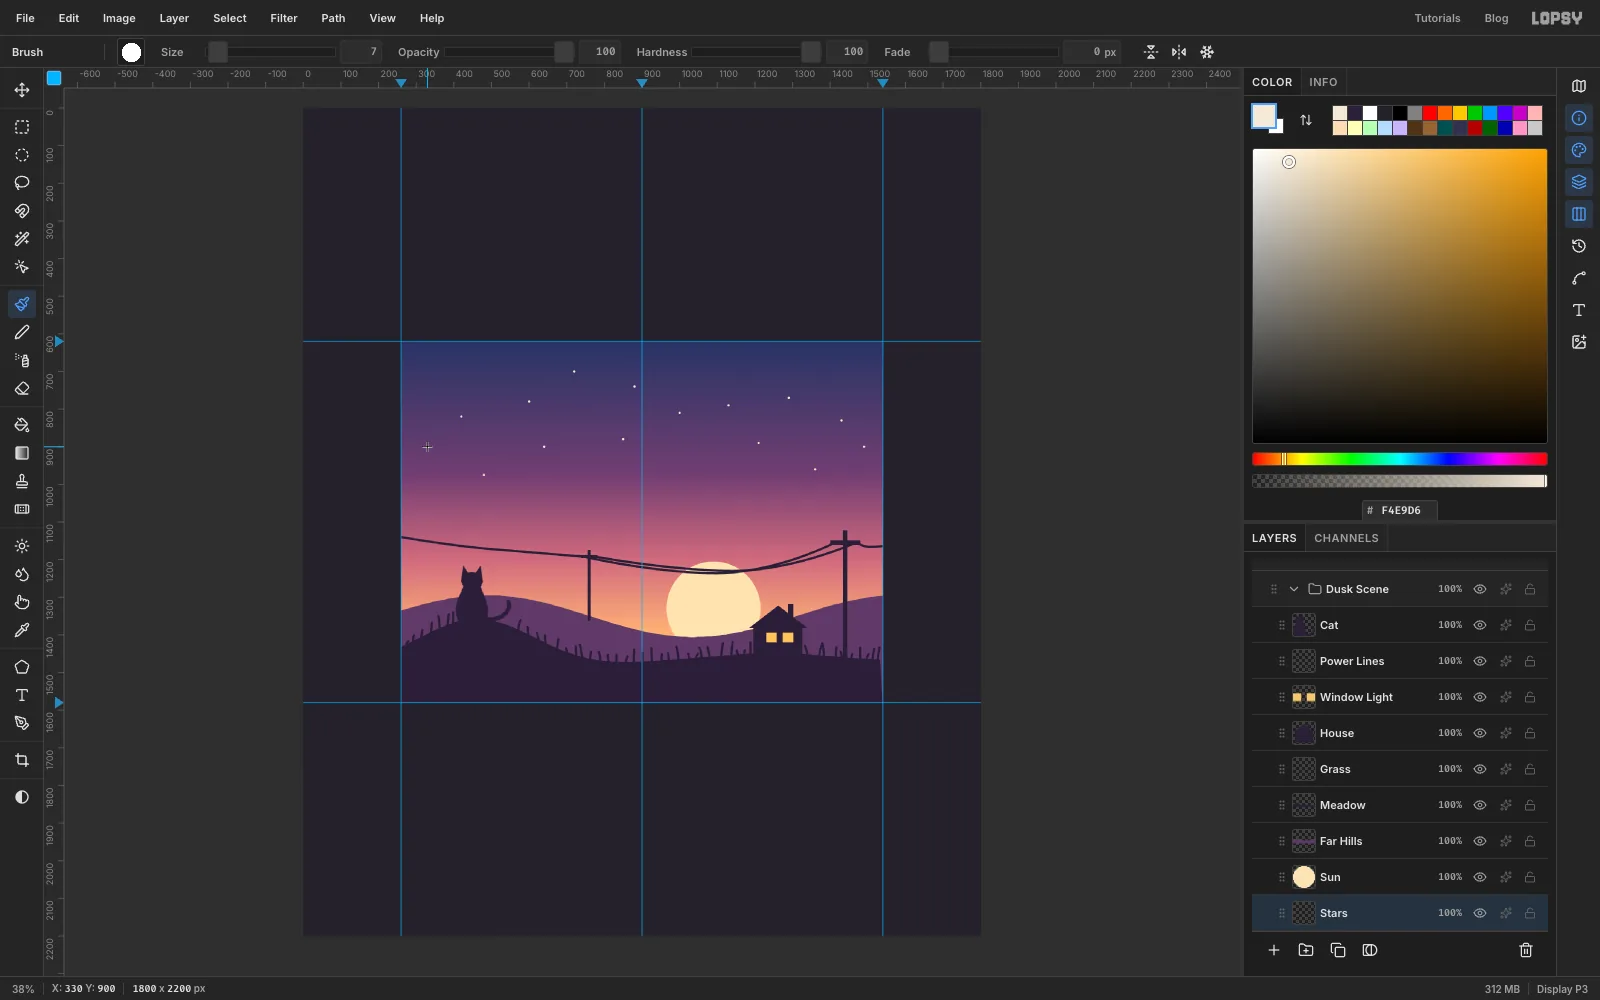
Grow grass and scatter stars
Add a Grass layer above Meadow. Keep the silhouette colour , set the Brush to Size 7, Hardness 100, and flick short strokes upwards all along the meadow's top edge, leaning some left and some right. Leave gaps around the cat and the house.
Add a Stars layer above Sky, set the colour to and click the brush (still size 7) a dozen or so times across the upper sky. Keep a clear band along the very top, where the VHS text will go later.
-
Release the fireflies
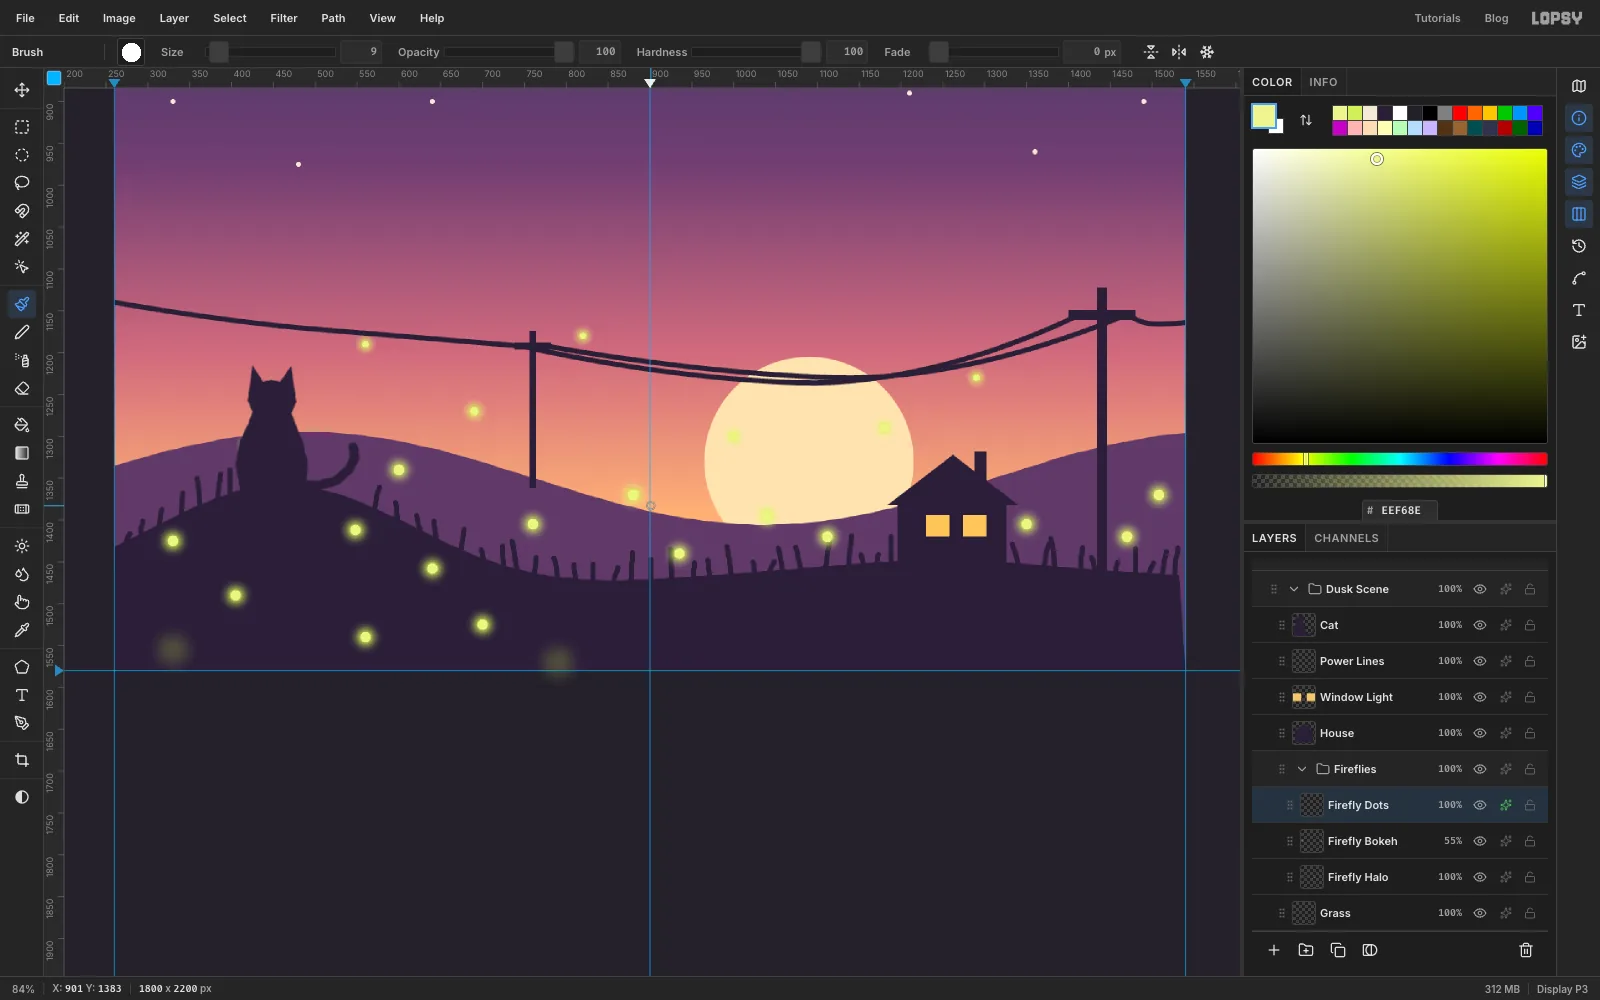
With Grass selected, click New Group and call it Fireflies. Inside it, make three layers, from the bottom up:
- Firefly Halo: set the brush to Size 44, Hardness 0, Opacity 40 % and colour , and click once wherever a firefly will be. Set the layer's Blend to Screen in the effects drawer.
- Firefly Bokeh: with the same soft brush at Size 64, click two big dots right at the bottom edge, as if very close to the lens. Set the layer to 55 % opacity.
- Firefly Dots: brush back to Opacity 100 %, Hardness 100, Size 14, colour . Click on each halo, using a smaller size (9–11) for the ones high in the sky. Then enable Outer Glow with colour , Size 10, Spread 40, Opacity 100.
Keep about twenty, spread over the hills and low sky. Leave the bottom-right corner clear, because the date stamp goes there.
-
Make the sun and windows glow
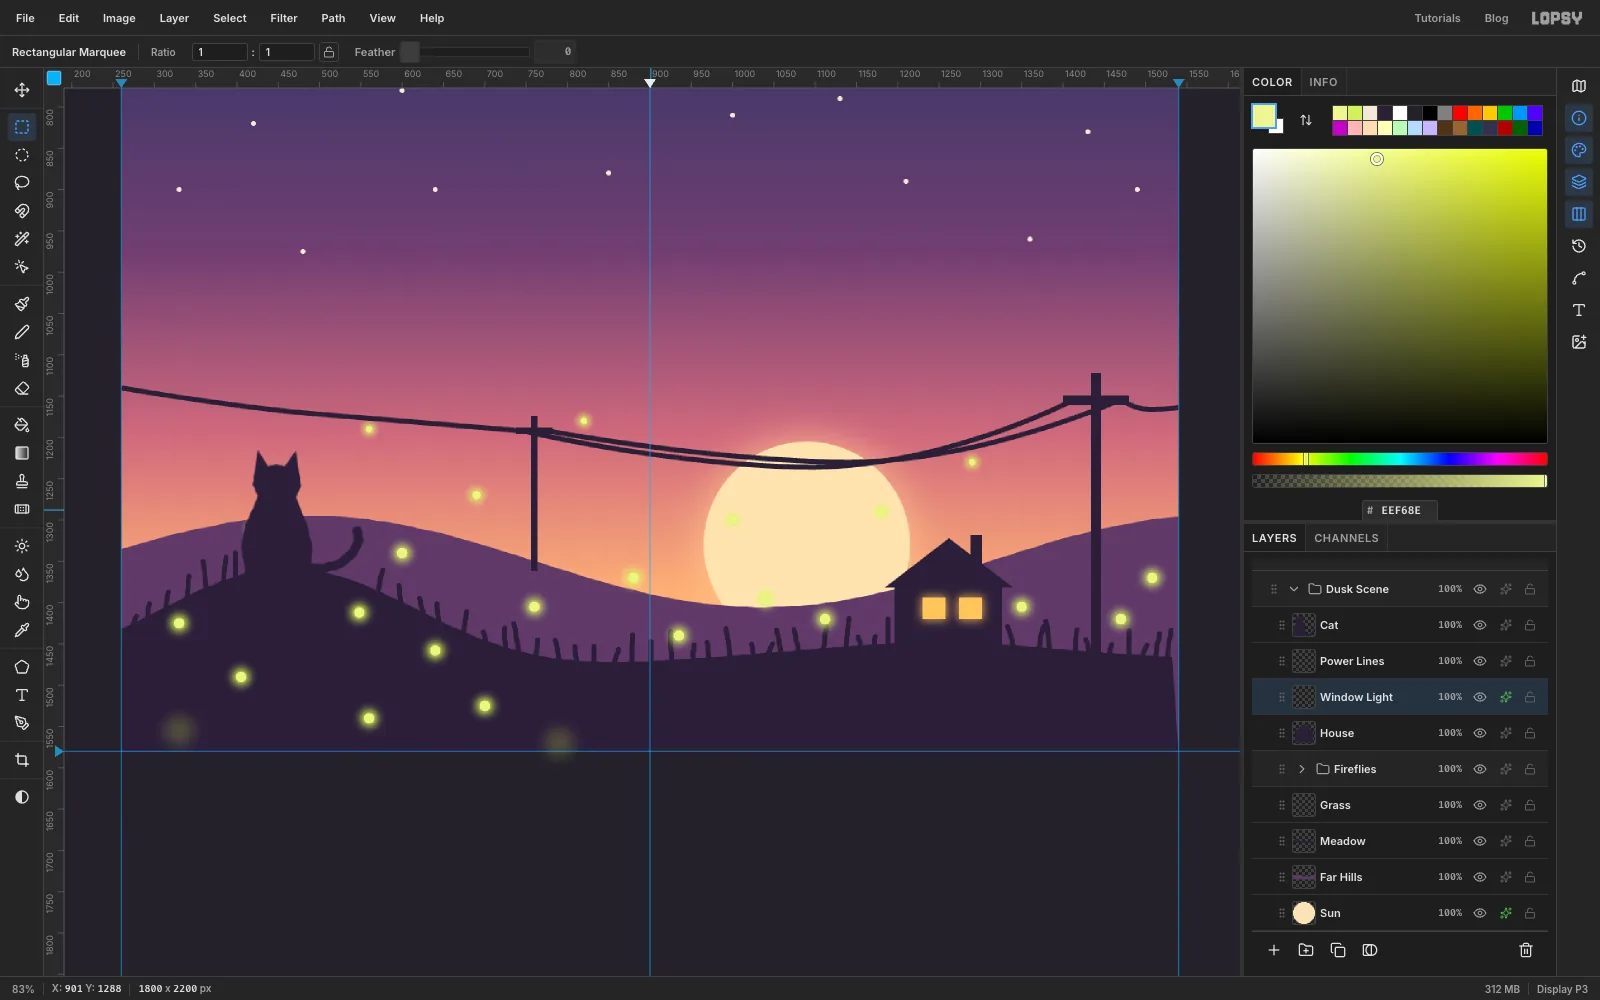
Select Sun and enable Outer Glow with , Size 63, Spread 10, Opacity 70. Select Window Light and give it an Outer Glow of , Size 16, Spread 20, Opacity 85.
The clean scene is done. Everything from here makes it look like a worn videotape.
-
Flatten a copy with Copy Merged
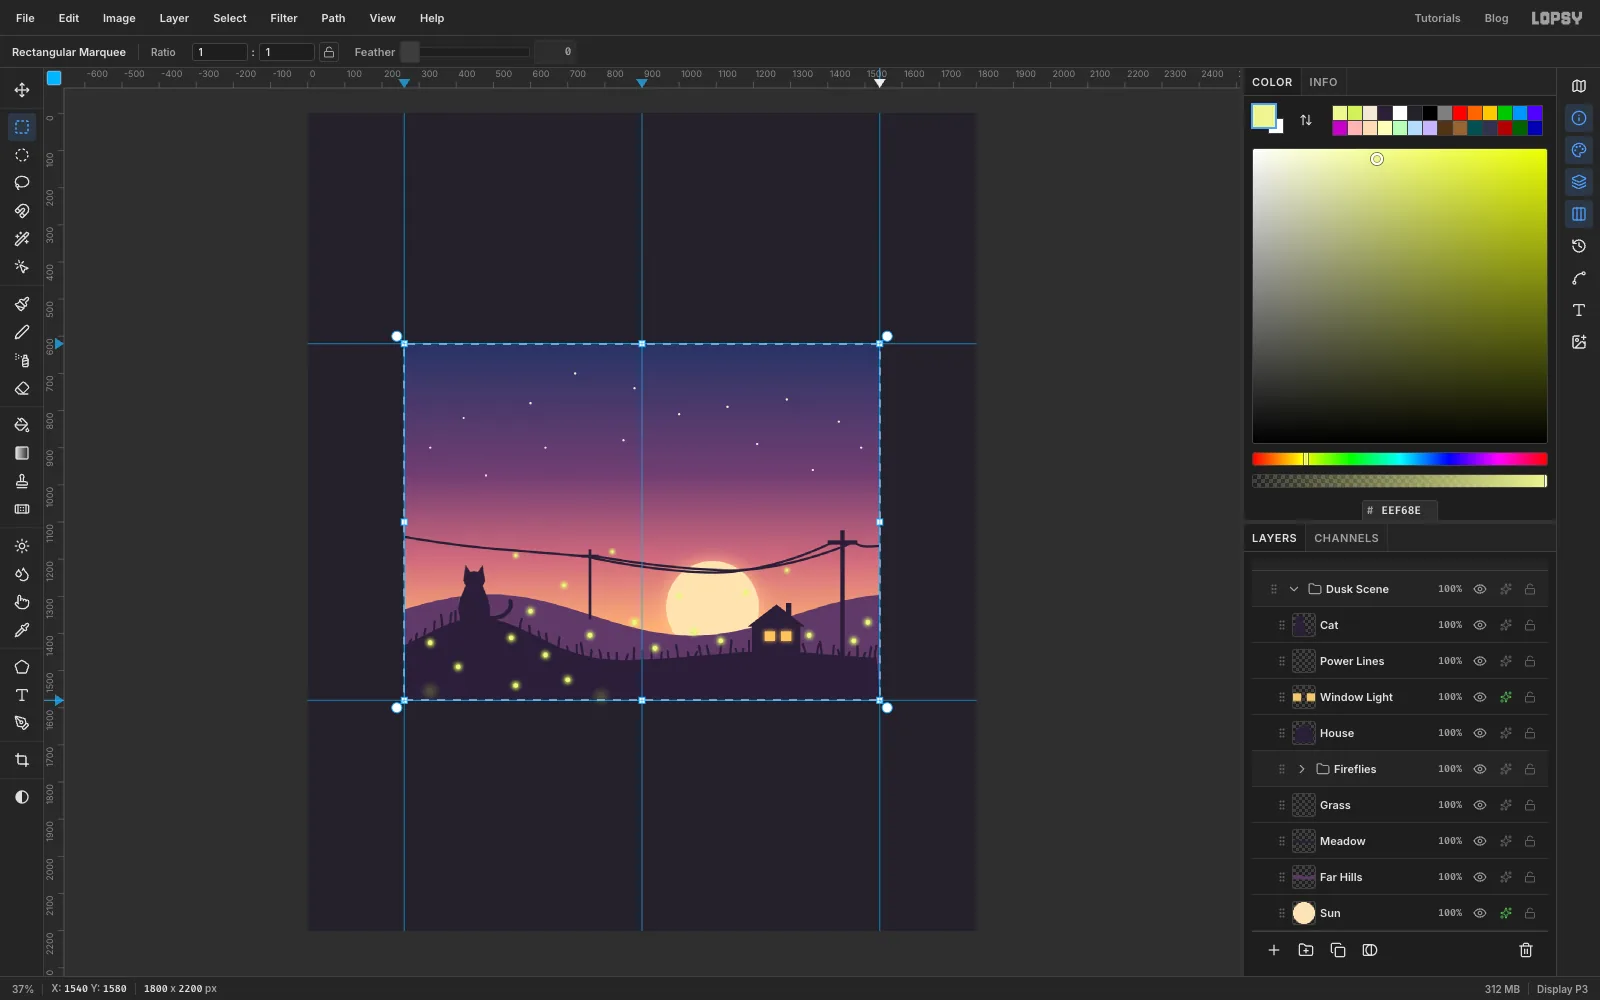
Select the Dusk Scene group, draw a marquee from guide to guide around the screen, and choose Edit → Copy Merged. Then Edit → Paste. The flattened copy lands in place, exactly over the original.
Rename the new layer Screen, drag it in the Layers panel so it sits above the Dusk Scene group rather than inside it, and click the eye on Dusk Scene to hide the originals.
-
Pixelate the scene
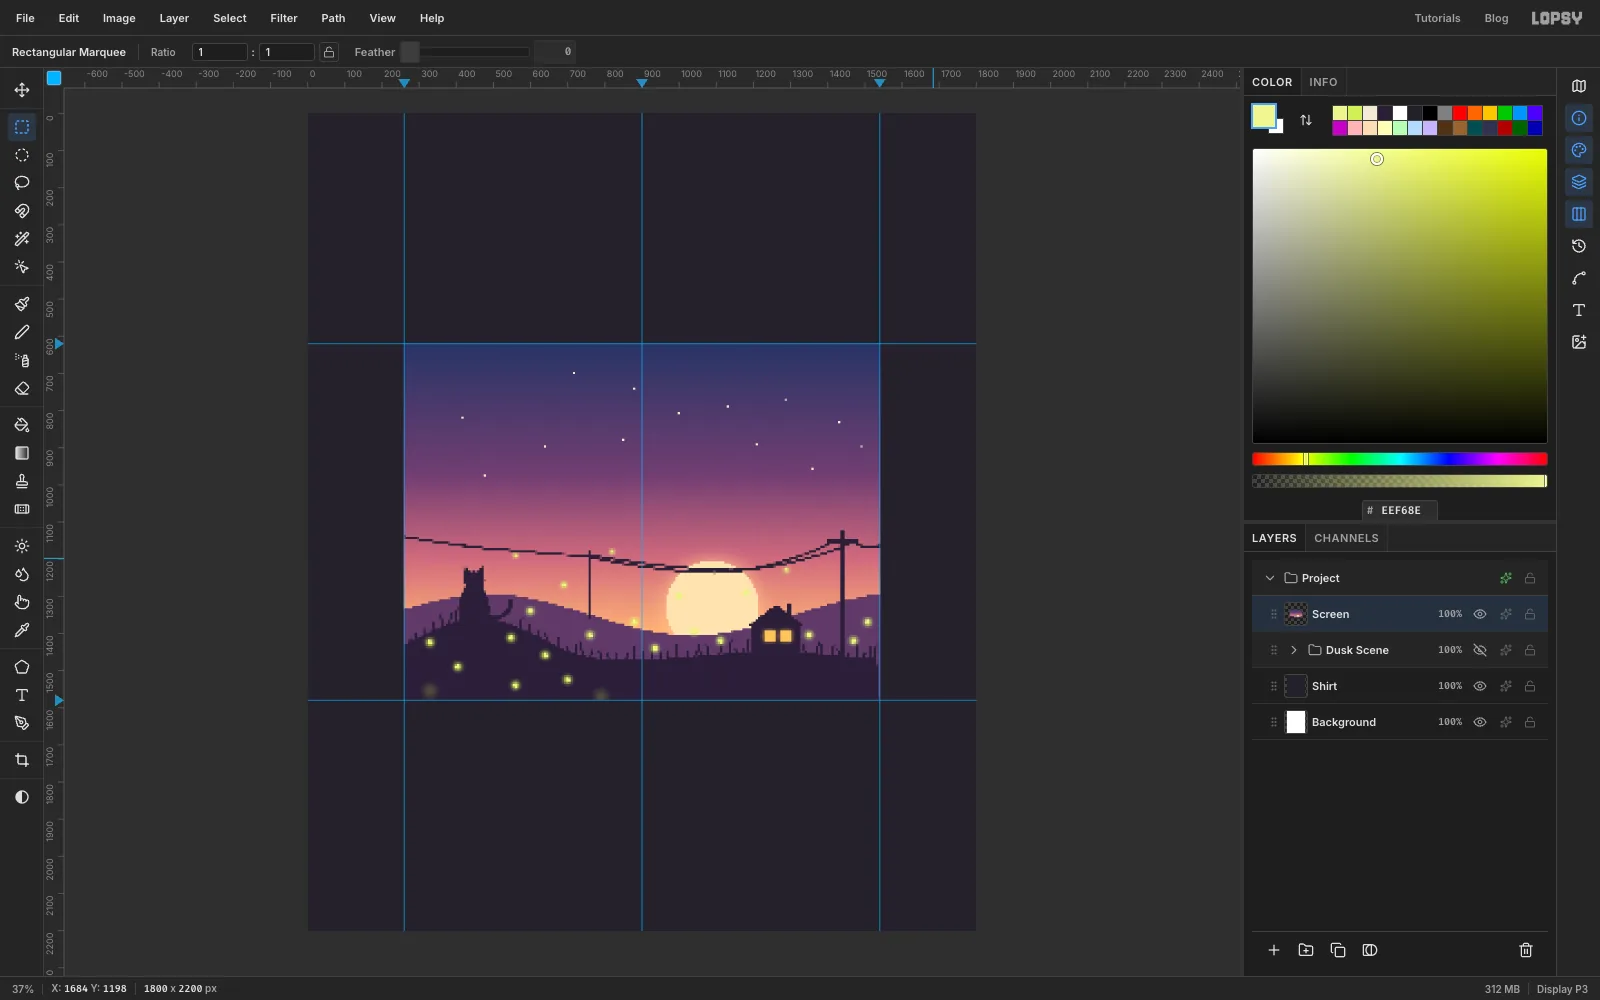
Press Cmd+D to deselect, so the filters below hit the whole layer. With Screen selected, choose Filter → Pixelate… and set Block Size to 6. Six-pixel blocks are coarse enough to read as pixel art across a room, and fine enough to keep the cat's ears.
-
Bulge it and split the colours
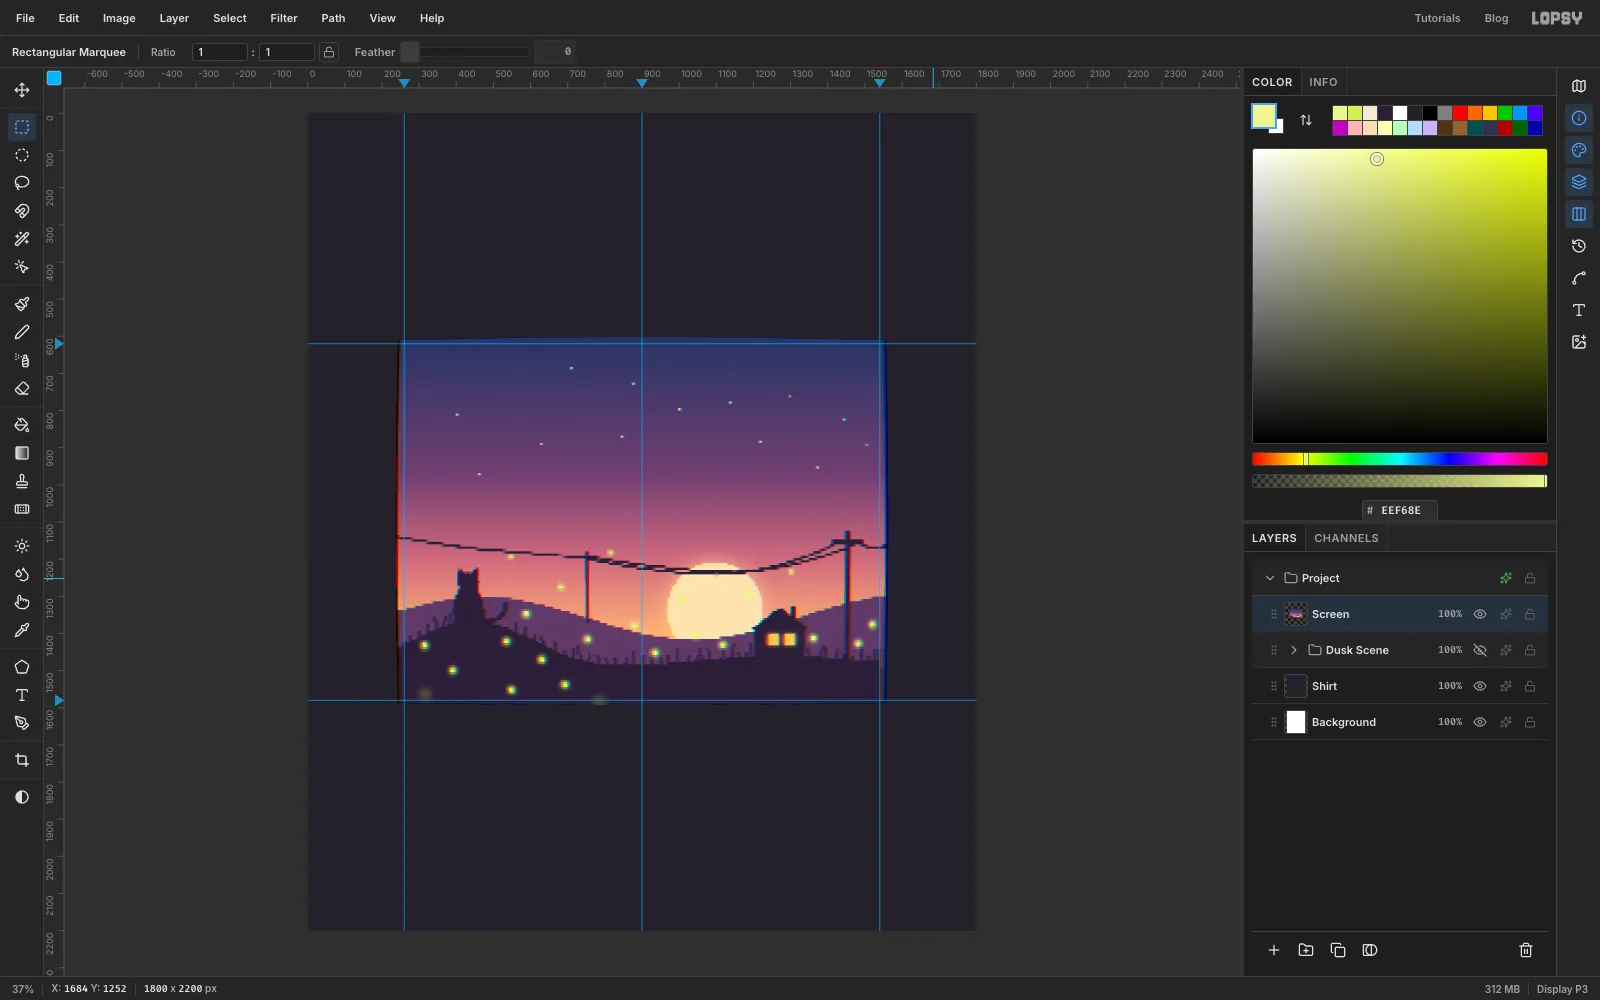
Choose Filter → Lens Distortion… and set Strength 14, Zoom 104 and Chromatic Fringing 25. That gives the gentle bulge of a curved CRT tube. The screen is centred on the document, so the bulge is centred on it too.
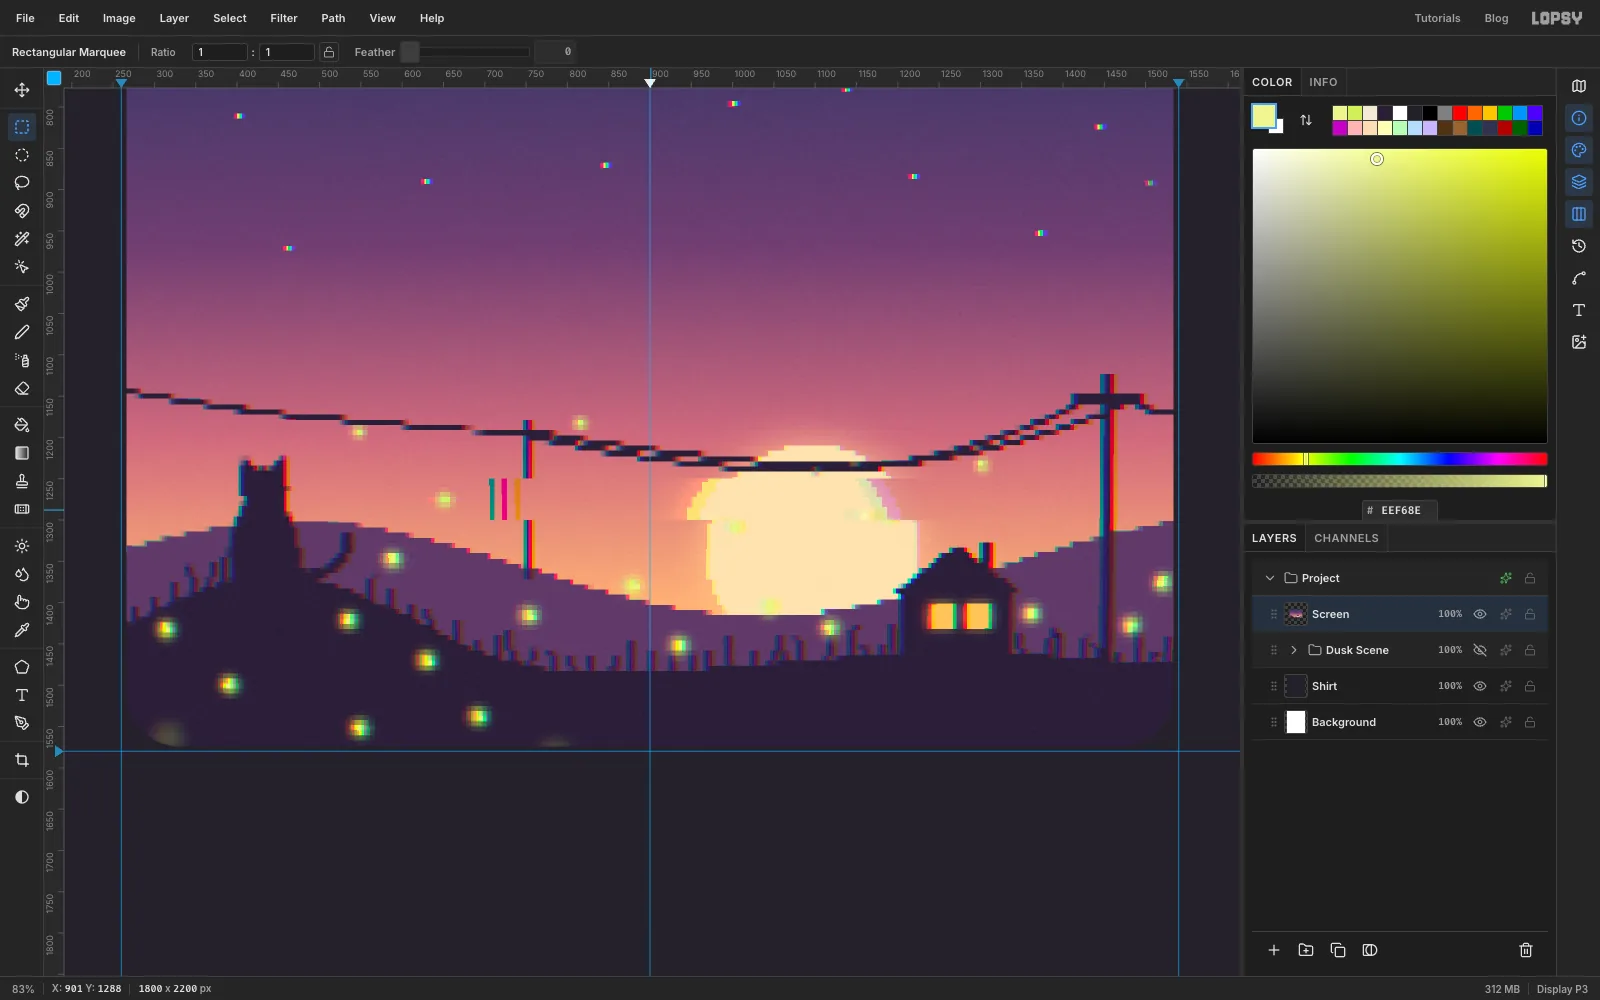
Then choose Filter → Chromatic Aberration… with Amount 4 and Direction 0. Every dark edge now has a red fringe on one side and a blue one on the other, like a worn tape.
-
Add a tracking glitch
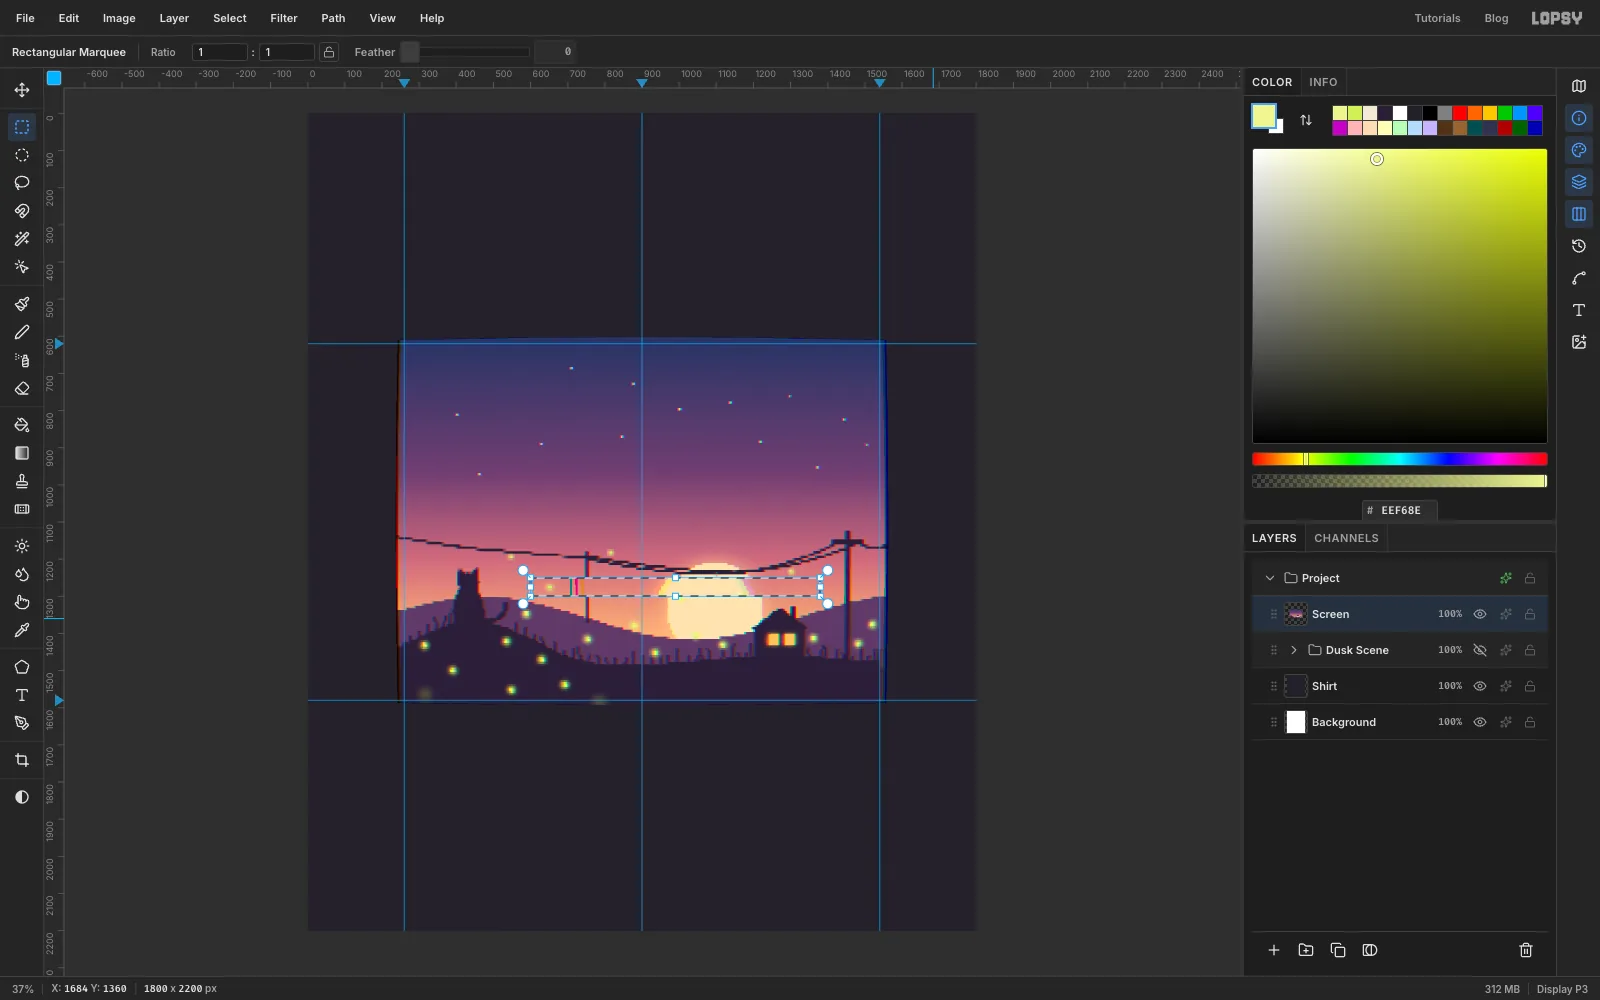
A VHS tracking error is a horizontal band that slides sideways. With the Rectangular Marquee, drag a thin band, about 50 px tall, across the upper half of the sun, from just right of the cat to about three-quarters of the way across. Choose Filter → Pixel Stretch… with Amount 60, Bands 3 and RGB Split 0.8.
Watch the preview and try a few Seed values until the sun is clearly sliced. Some seeds barely shift anything; seed 42 moves the band about 36 px. Keep the band well away from the screen's edges: a shifted edge would leave a notch in the frame.
Press Cmd+D, then run Filter → Add Noise… with Amount 12, Mono and Gaussian over the whole screen for tape grain.
-
Round the screen's corners
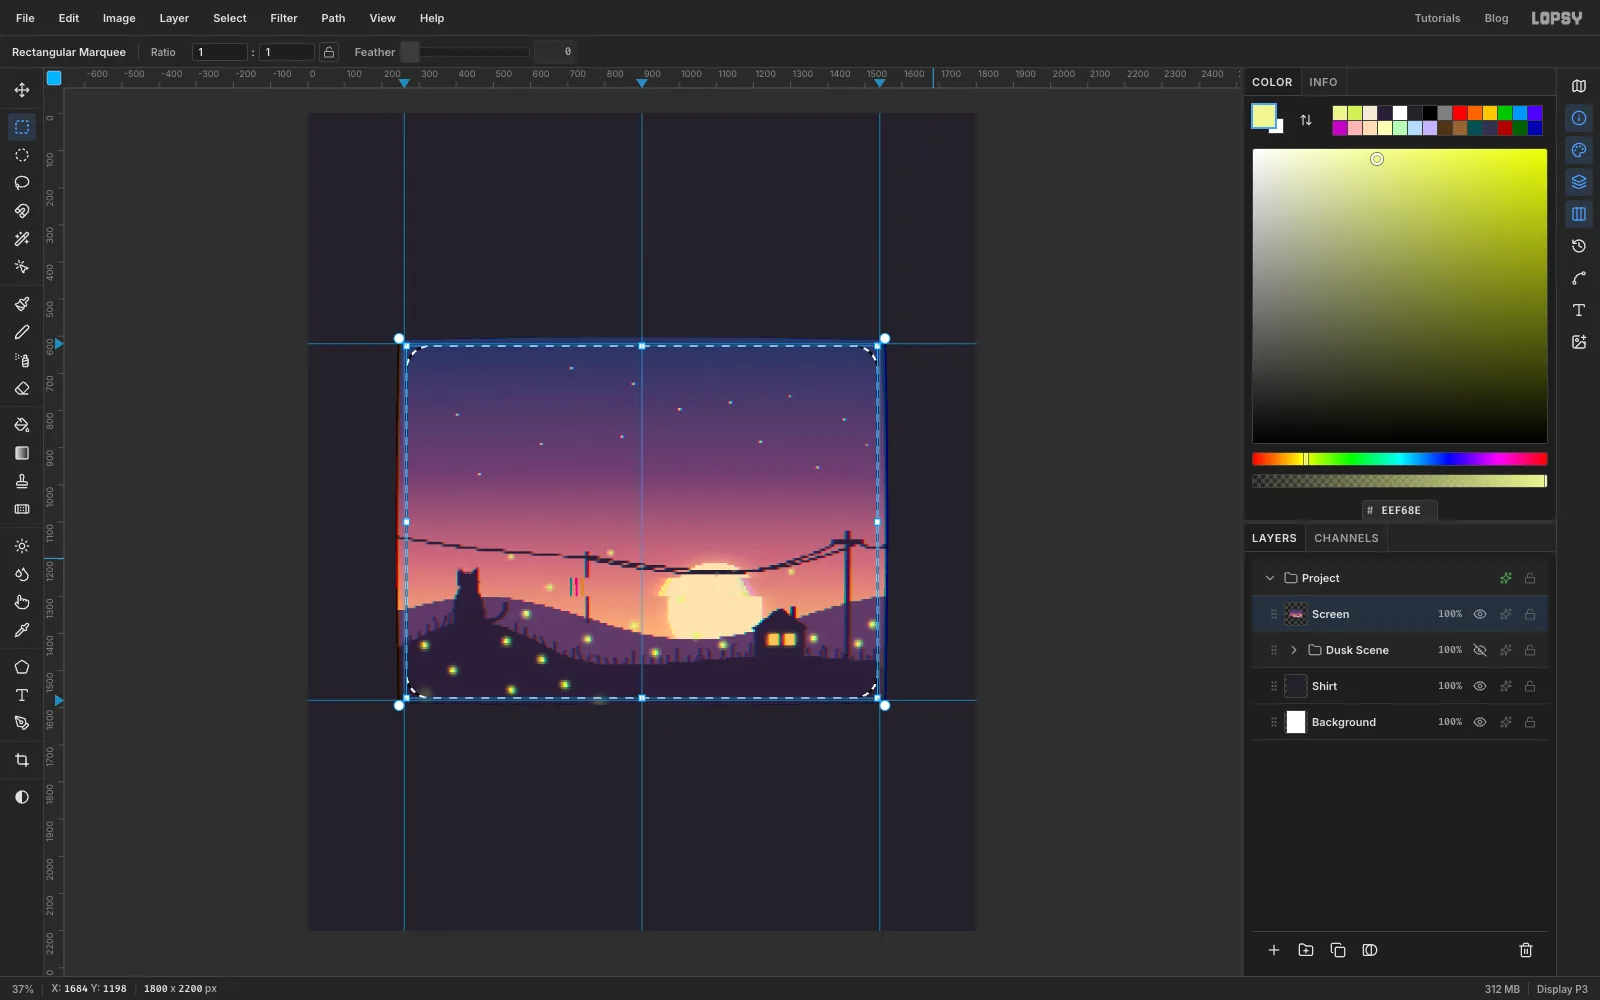
Now cut the rounded tube shape. Drag a marquee from guide to guide around the screen, choose Select → Shrink… by 70, then Select → Grow… by 64. Shrinking and growing back rounds the corners. Growing back 6 px less than you shrank also pulls the edge 6 px inside the guides, which trims the colour fringe the filters left along the edges.
-
Trim to the CRT shape
Choose Select → Inverse and press Delete, then Cmd+D. Everything outside the rounded rectangle is gone, and the screen now has clean, curved corners.
-
Make a scanline pattern
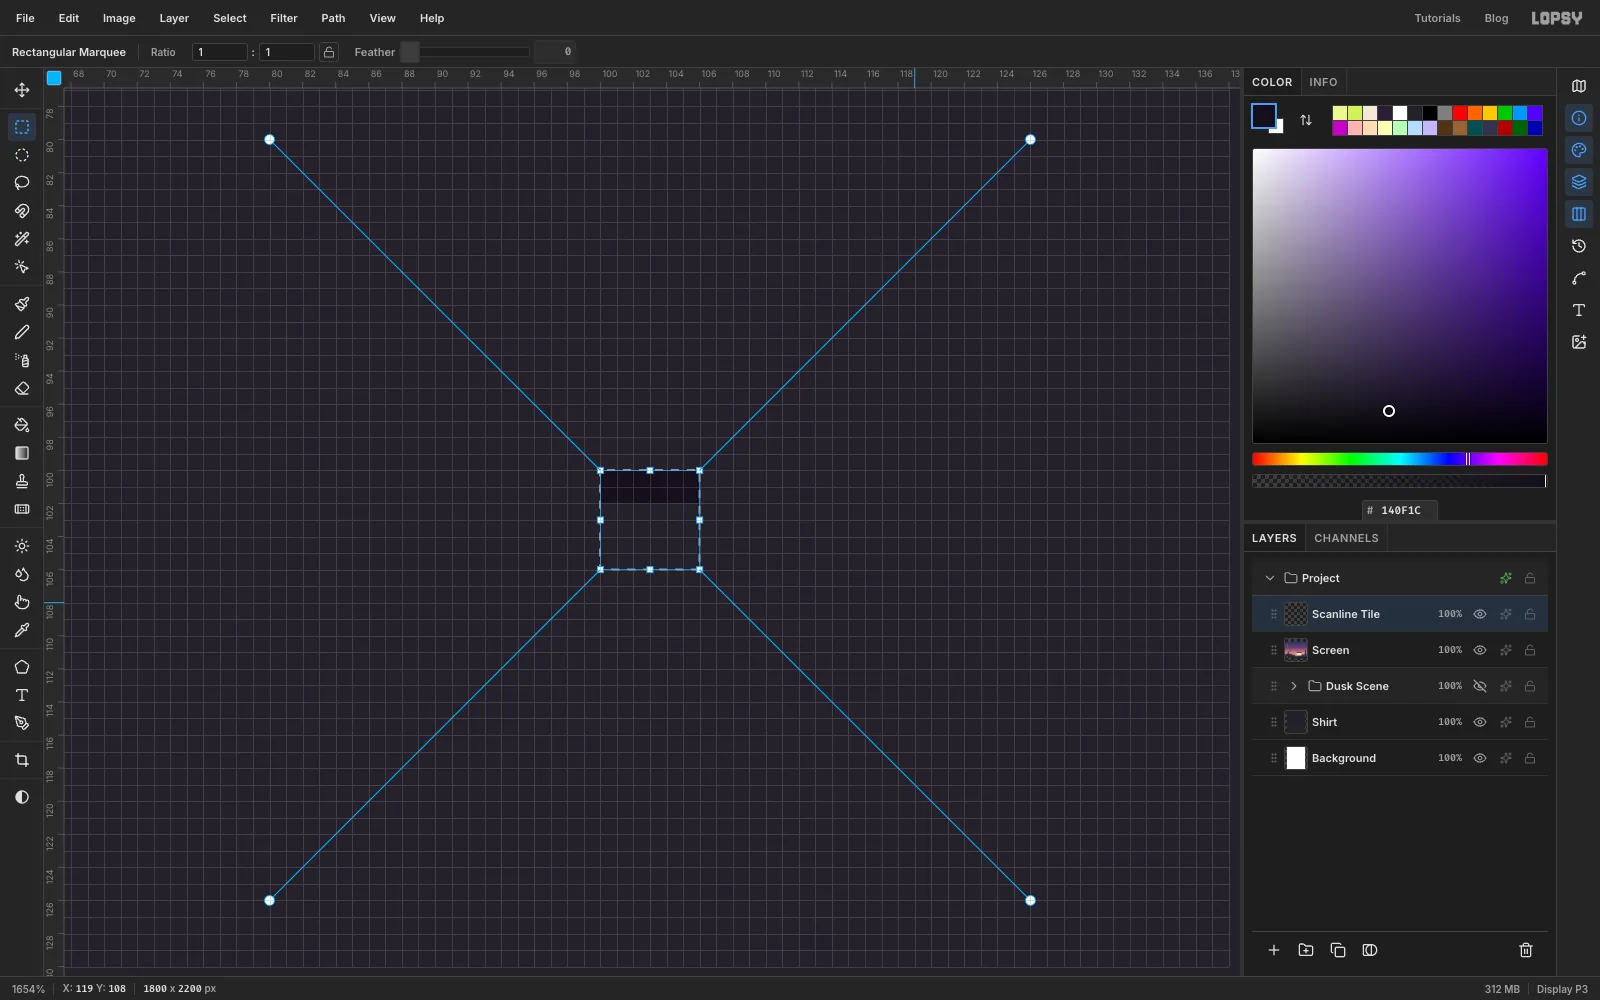
Scanlines are a repeating pattern of thin dark lines. Add a temporary layer, zoom right in (about 1600 %) on an empty corner of the canvas, drag a marquee 6 pixels wide and 2 tall, and fill it with . Then drag a 6 × 6 px square marquee starting at the same corner and choose Edit → Define Pattern. You now have a tile that is 2 px dark and 4 px clear. Delete the temporary layer.
-
Lay scanlines over the screen and frame it
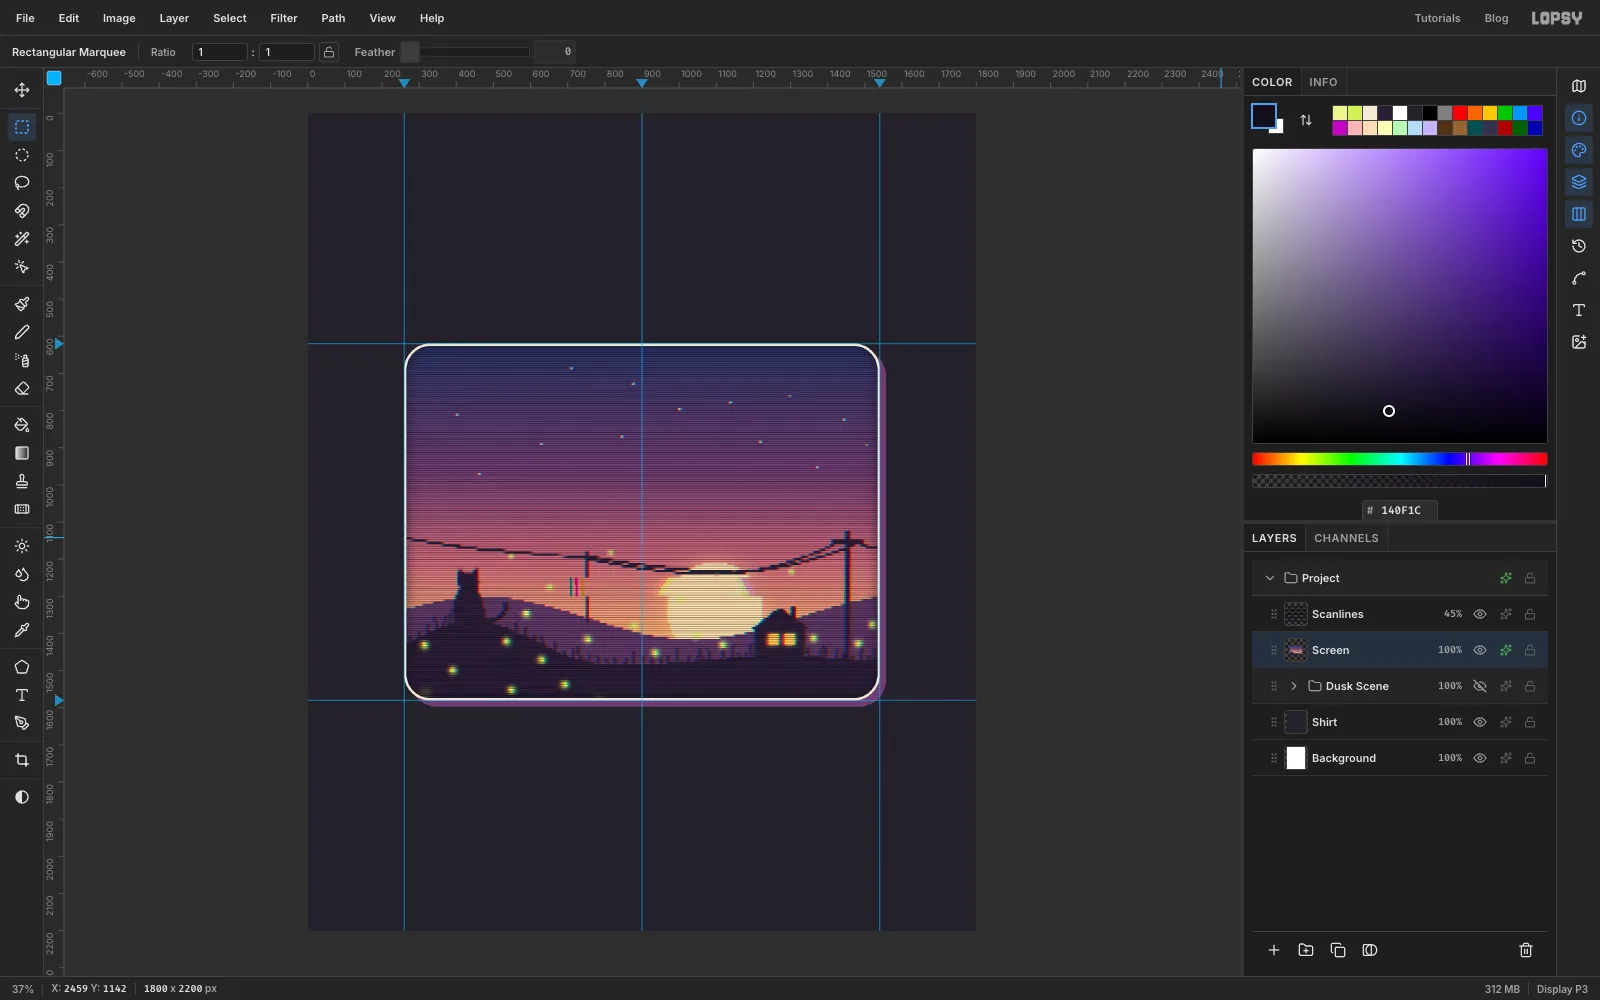
Add a Scanlines layer above Screen. Cmd-click the Screen thumbnail to load its shape as a selection, choose Edit → Fill with Pattern…, pick the 6 × 6 pattern and click Apply. Deselect, set the layer's Blend to Multiply and its opacity to 45 %.
Select Screen and add three effects:
- Stroke: Width 7, outside, , for the cream bezel
- Drop Shadow: Offset 16 / 16, Blur 1, Opacity 100, , a hard print-style offset
- Inner Glow: Size 50, Opacity 65, , to darken the tube's corners
-
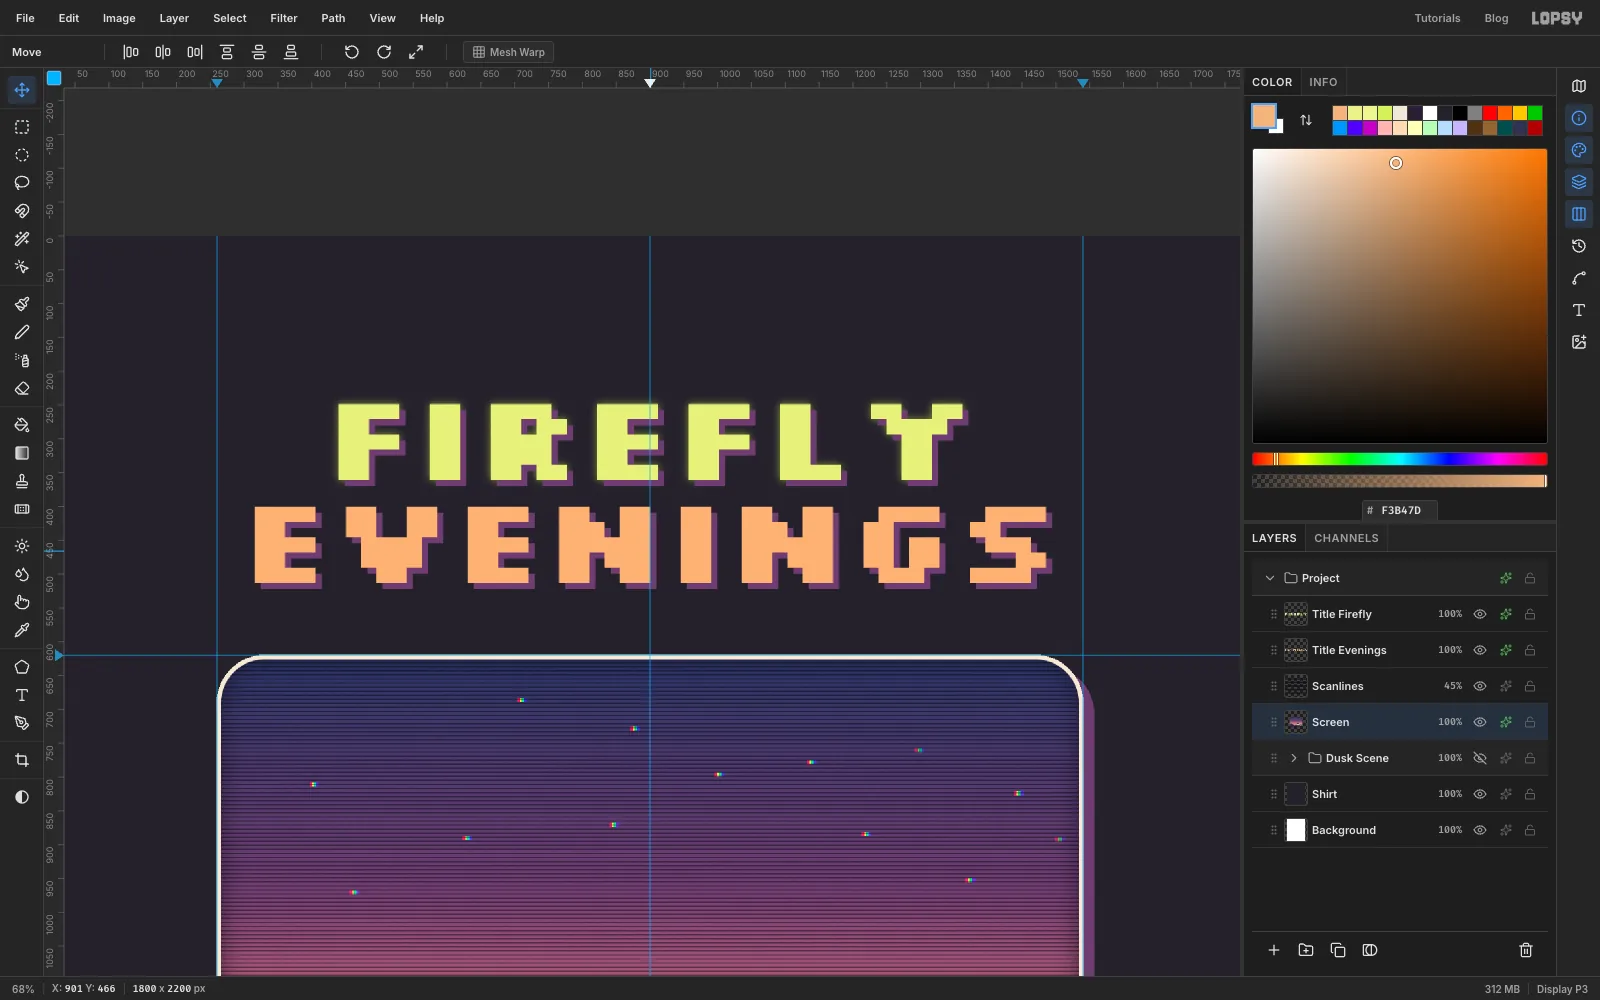
Set the pixel title
Select Scanlines so new layers land above it. Pick the Text tool, choose Silkscreen, Bold, Size 180, and set the colour to . Click in empty space above the screen, type
fireflyand press Tab to commit. Silkscreen draws every letter as a capital. Rename the layer Title Firefly.Set the colour to and type
eveningsthe same way in another empty spot, and name it Title Evenings. Then drag both into place with the Move tool: centred on the middle guide, with FIREFLY above EVENINGS and a gap of about 100 px between EVENINGS and the top of the screen.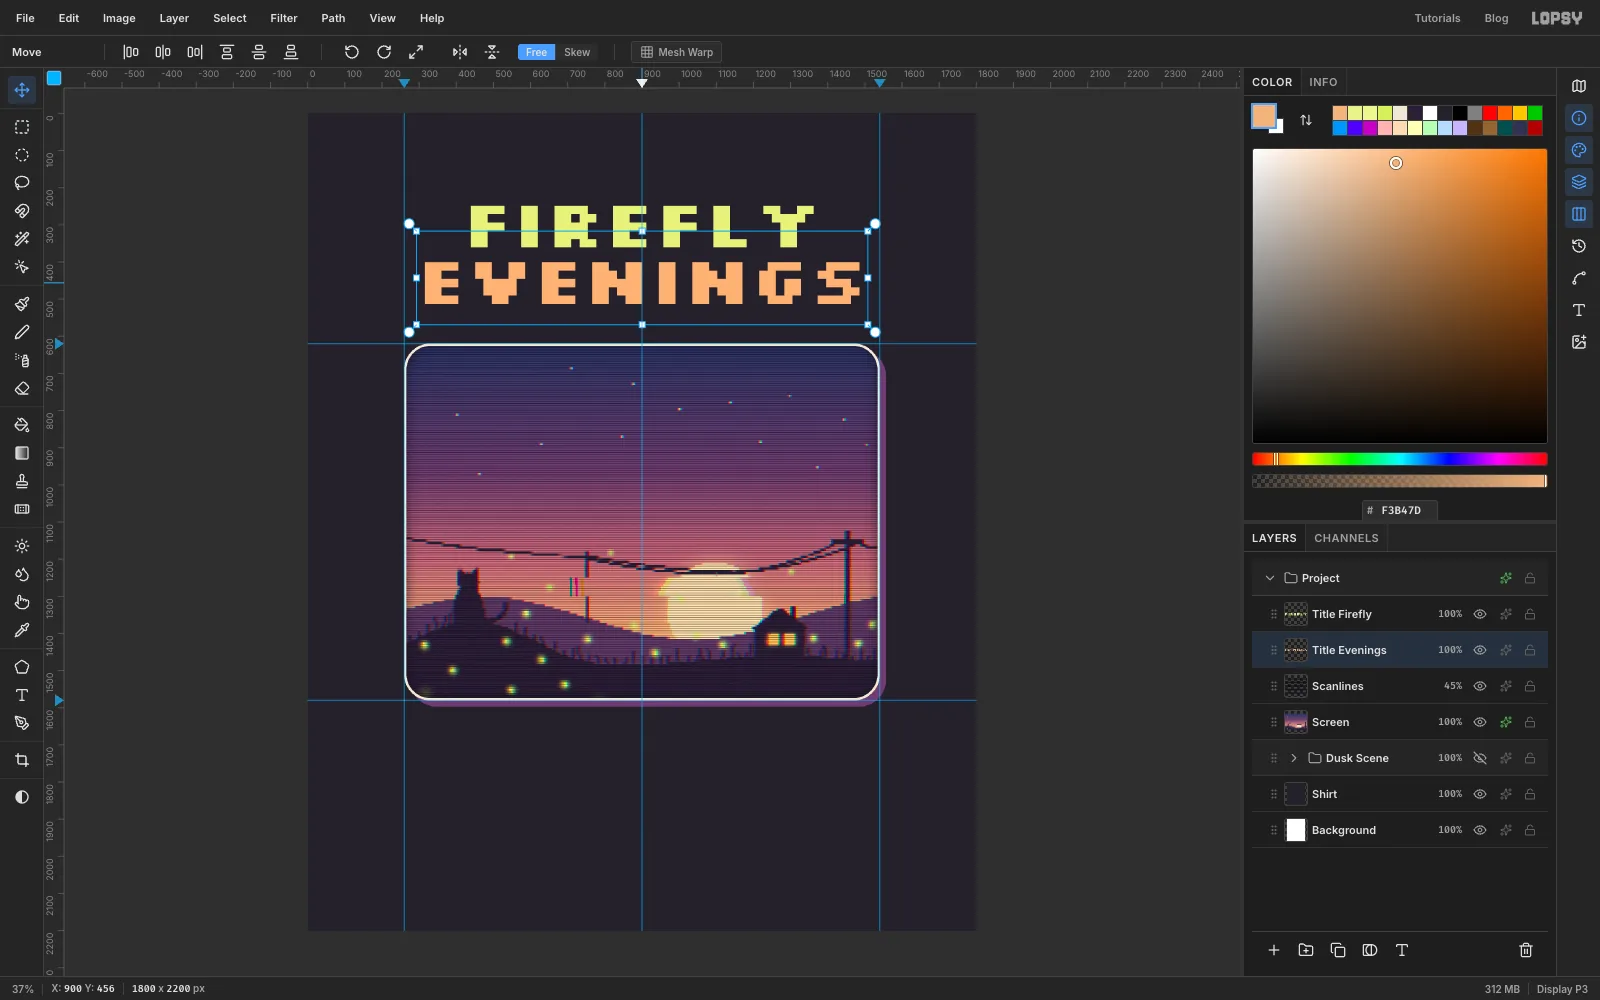
-
Give the title a hard shadow and a glow
Give both title layers a Drop Shadow of , Offset 9 / 9, Blur 1, Opacity 100, the same hard shadow style as the screen. Give Title Firefly an Outer Glow of , Size 18, Opacity 55, so the word glows like the fireflies below it.
-
Draw and rotate a play icon
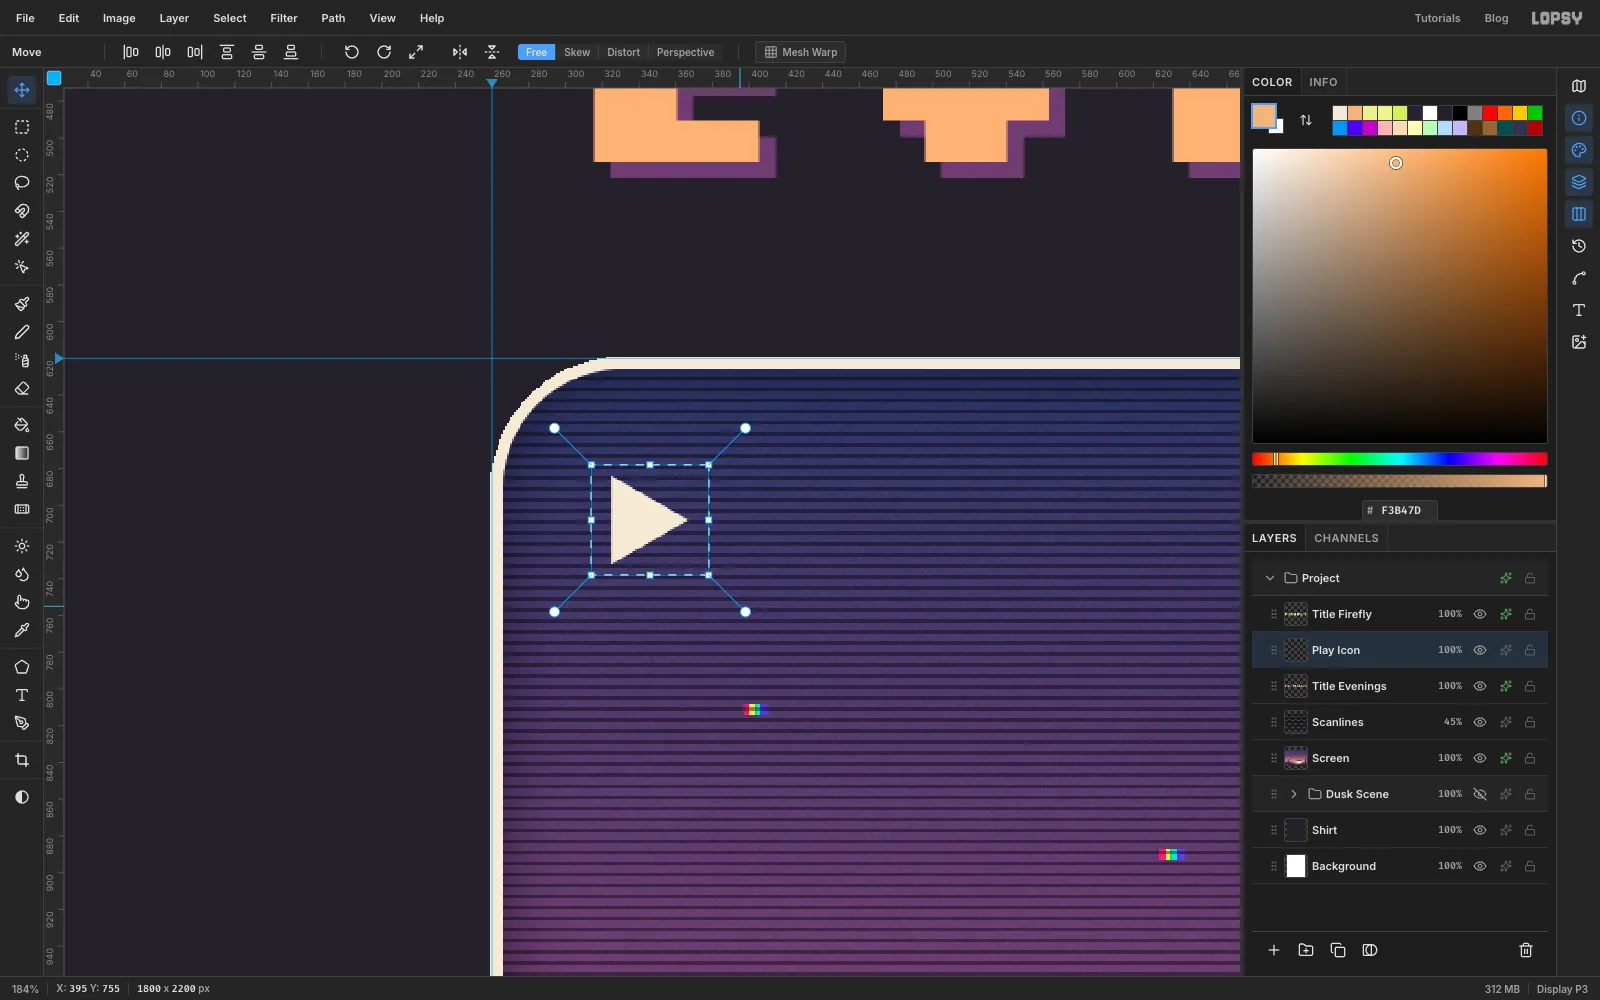
Add a Play Icon layer. Choose the Shape tool, set the shape to Polygon with 3 sides, set Fill to , and drag out a triangle about 48 px across near the screen's top-left corner, about 58 px in from each edge.
The polygon points up, so turn it: draw a marquee around it, switch to the Move tool, hold Cmd and drag the round rotate handle off the top-right corner a quarter-turn clockwise. Cmd snaps it to exactly 90°, so it now points right like a ▶ button. Press Cmd+D.
-
Add the VHS on-screen display
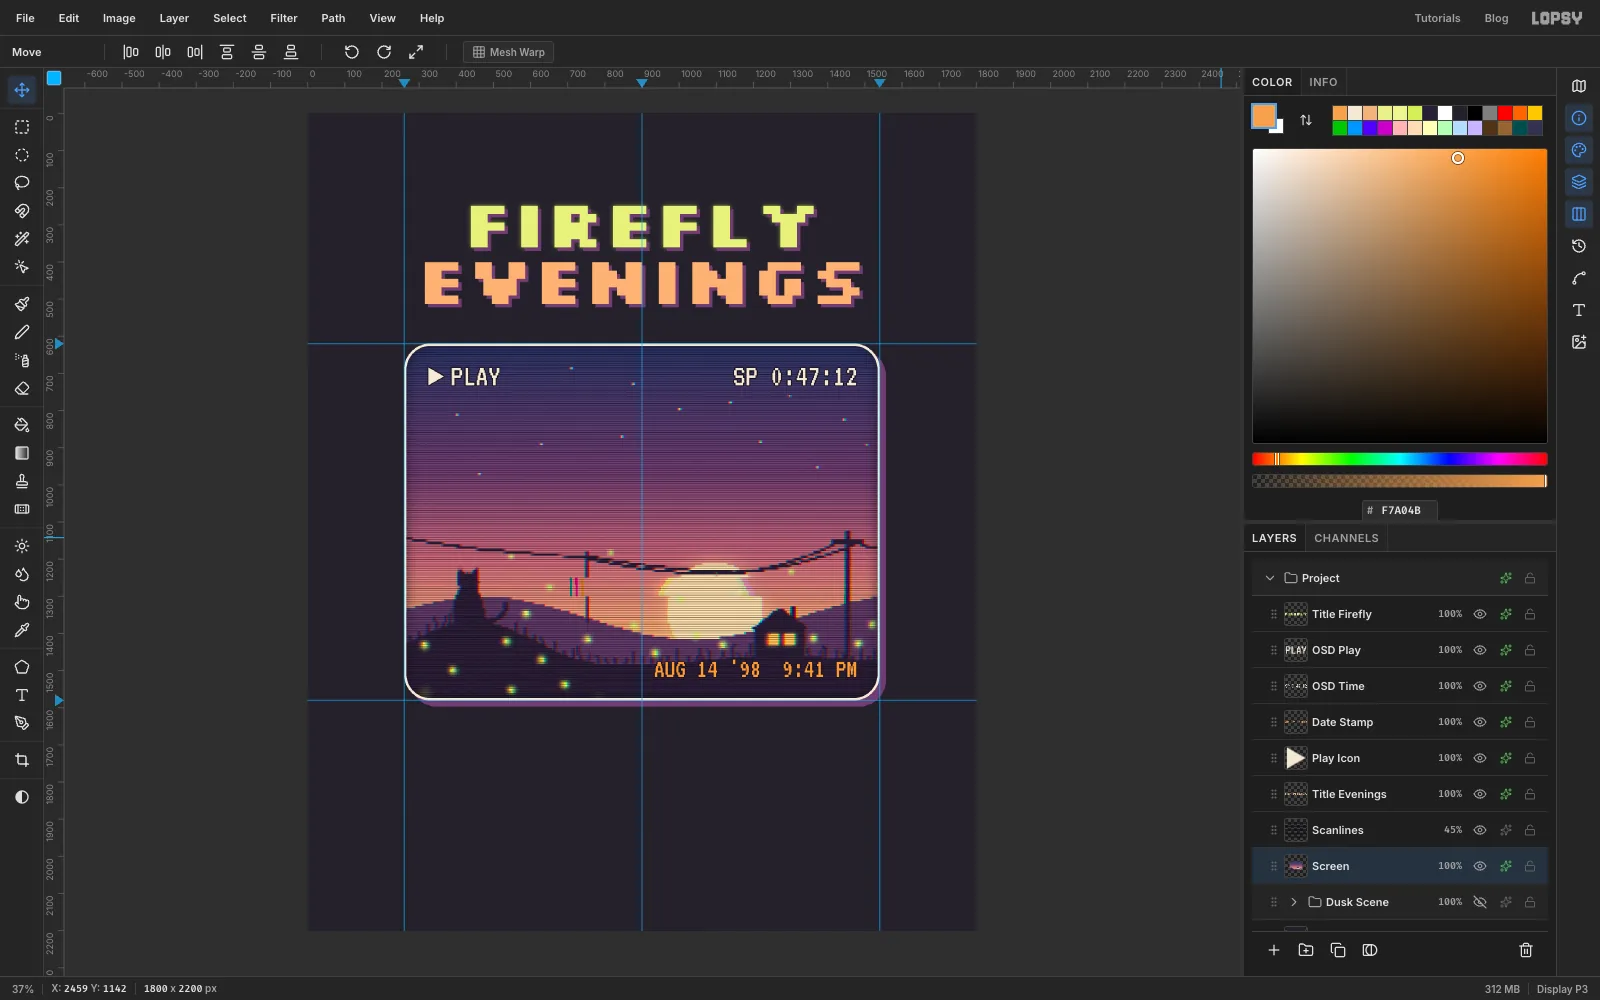
Choose VT323 in the Text tool, the classic VCR font. At Size 84 in , type
PLAYandSP 0:47:12in empty space and name the layers OSD Play and OSD Time. At Size 72 in , typeAUG 14 '98 9:41 PMand name it Date Stamp. Drag them into place:- PLAY just right of the triangle, with its capitals the same height as the triangle
- SP 0:47:12 at the top right
- the date stamp at the bottom right
Keep about 58 px between each one and the screen's edge, and line up the right edges of the counter and the date. Give all three, and the triangle, a 3 px Stroke of . That dark outline is what keeps VHS text readable over any picture.
-
Clone out stars that crowd the text
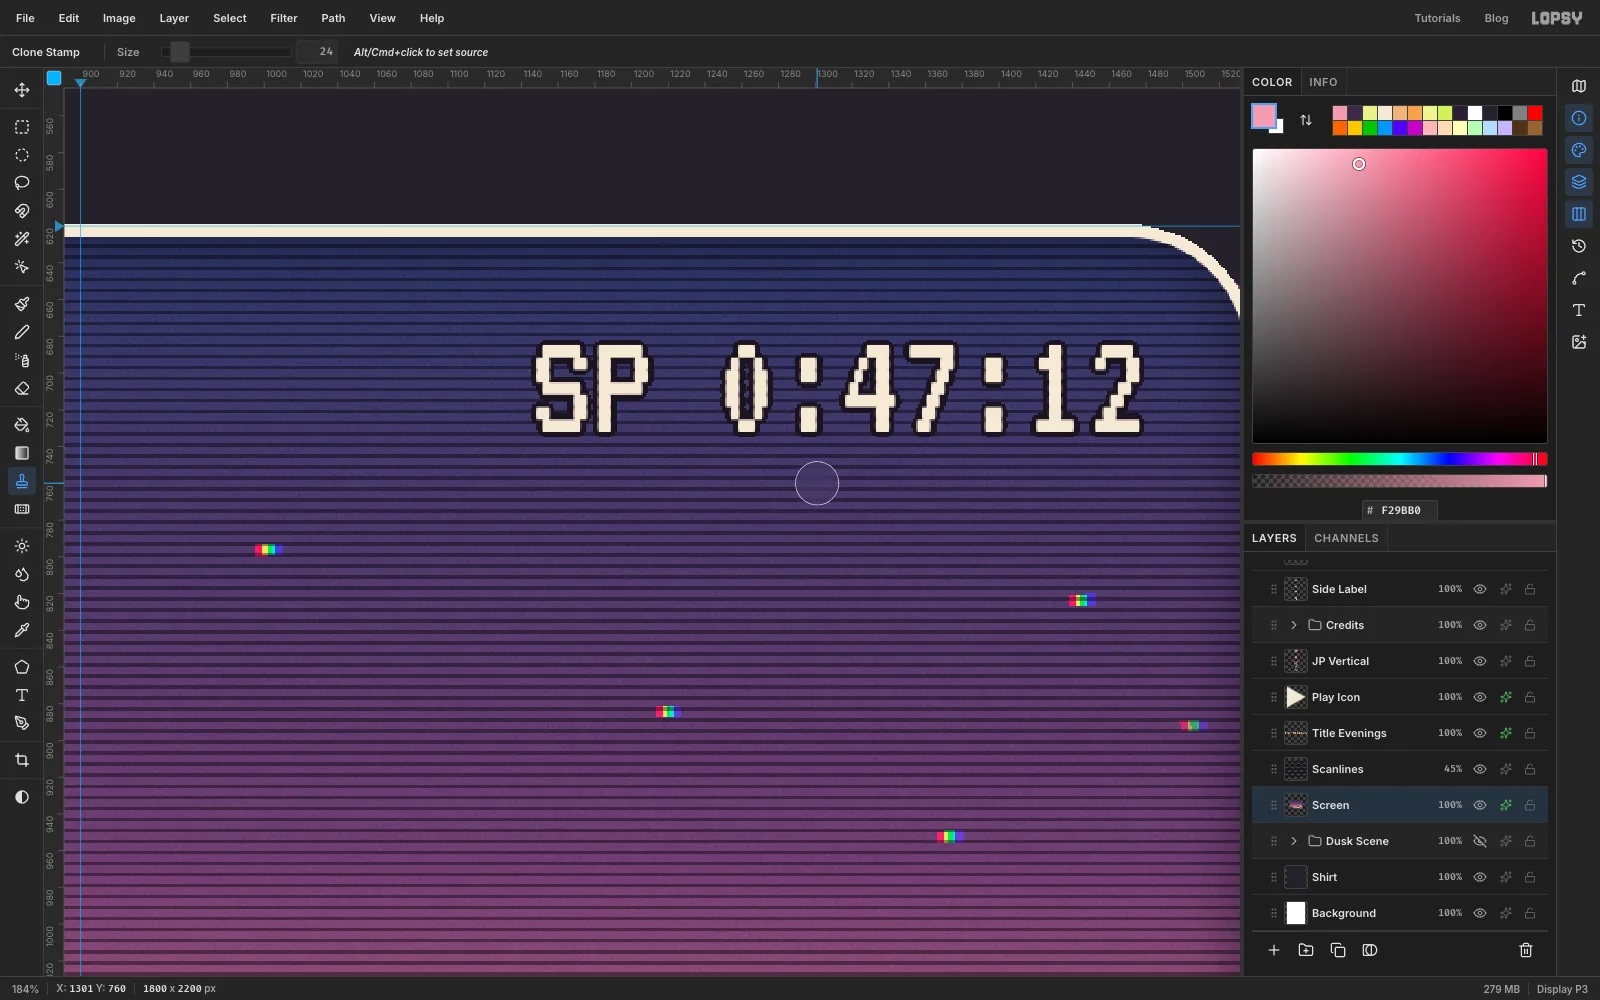
With the counter in place, two stars sit right under it and look like specks stuck to the numbers. Select Screen, pick the Clone Stamp, set Size to about 24, Alt-click a patch of plain sky a little to the left of a star, and click once on the star. The sky's colour bands are horizontal, so sky from the same height matches exactly. Do the same for the other star.
-
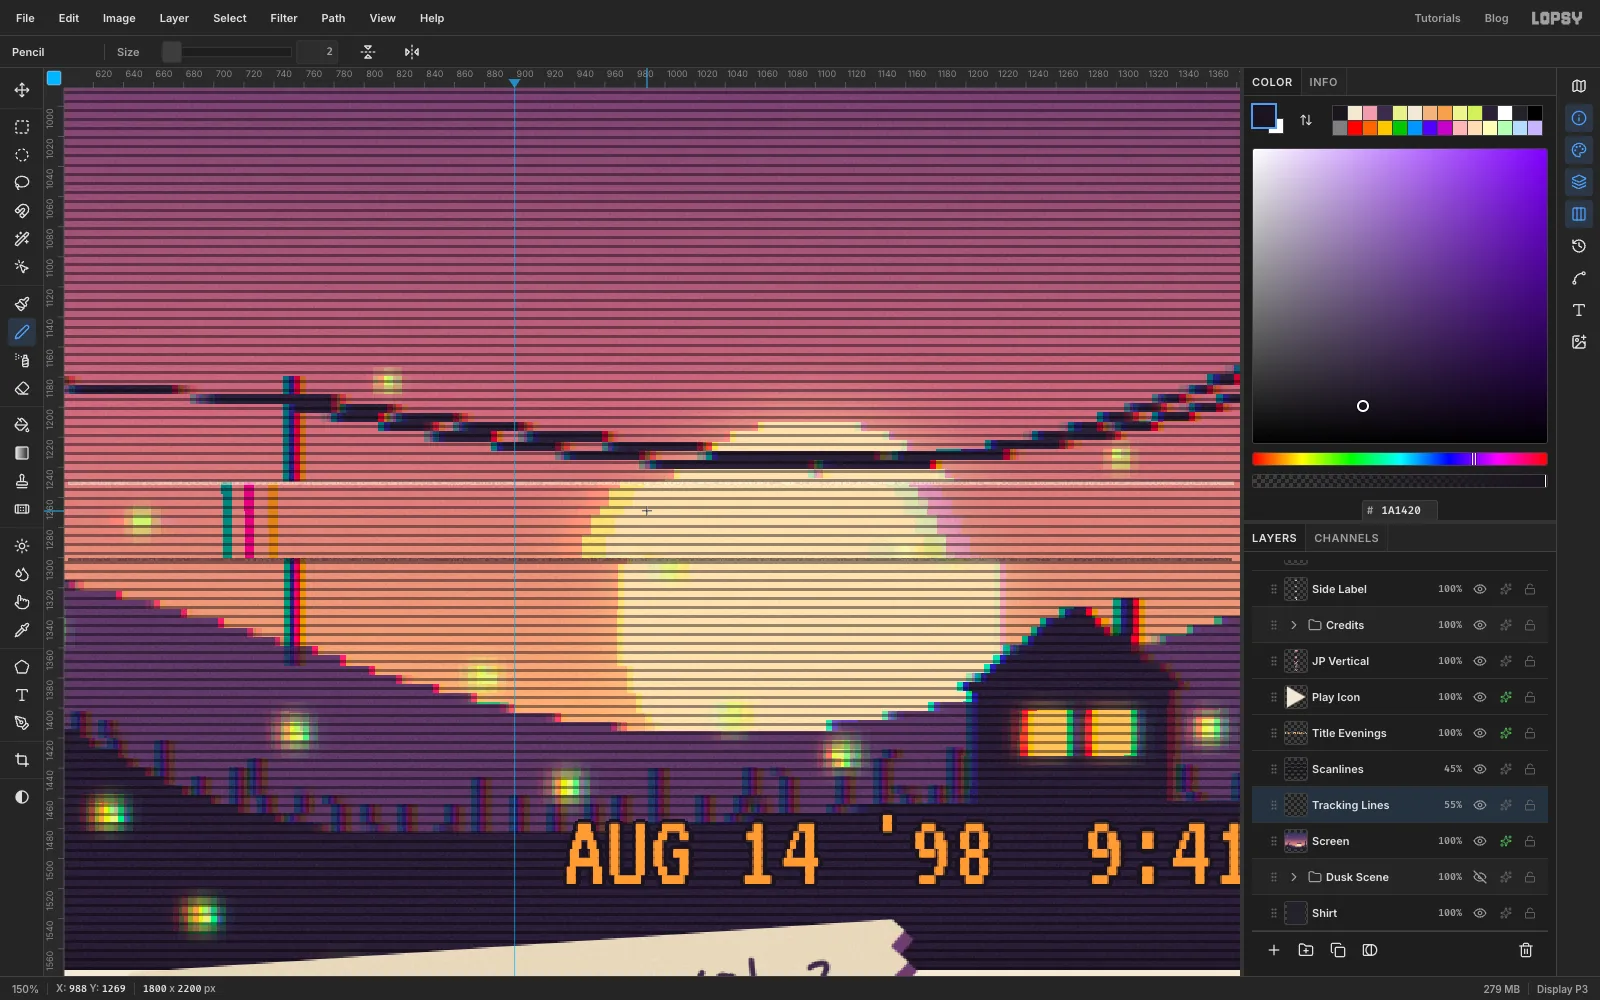
Edge the glitch band
A real tracking error has a bright noisy line where the band starts and a dark one where it ends. Those lines also make the band read as a band across the flat sky. Add a Tracking Lines layer above Screen.
With the Pencil at Size 3 in , click at the left end of the band's top edge and Shift-click at the right end. Switch to Size 2 in and draw the bottom edge the same way. Run Add Noise at Amount 60, Mono, Uniform so the lines break up like tape noise, and set the layer to 55 % opacity.
-
Set the tagline and tracklist
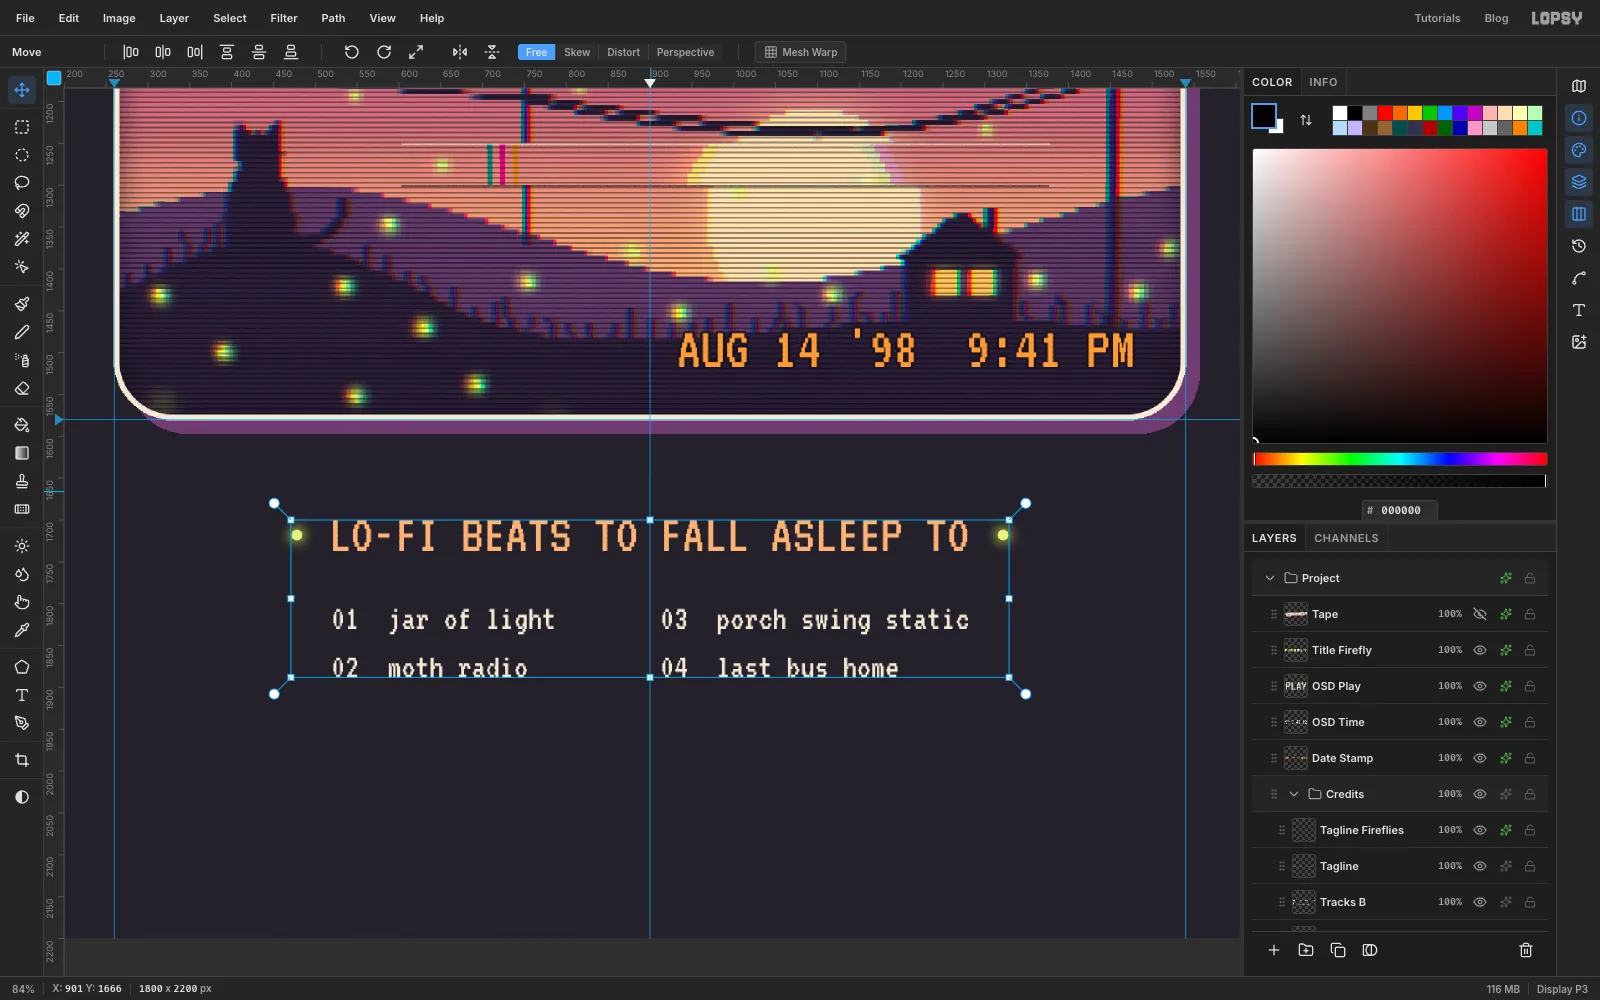
Below the screen, type
LO-FI BEATS TO FALL ASLEEP TOin VT323, Size 66, , name it Tagline, and centre it on the middle guide about 120 px below the screen. Capitals matter: in lowercase, VT323 joins thefandiof "lo-fi" into a single squeezed glyph.For the tracklist, use VT323 at Size 42 in and two text layers, Tracks A and Tracks B, each with two lines (press Enter between them):
01 jar of light/02 moth radio03 porch swing static/04 last bus home
Line the first column's left edge up with the tagline's first letter and the second column's right edge with its last letter. Select the tagline and both columns, choose New Group, call it Credits, and drag all three inside. Then add a Tagline Fireflies layer to the group and click two Size 14 brush dots, one on each side of the tagline about 35 px from the text, with the same Outer Glow as the fireflies.
-
Add a rotated side label
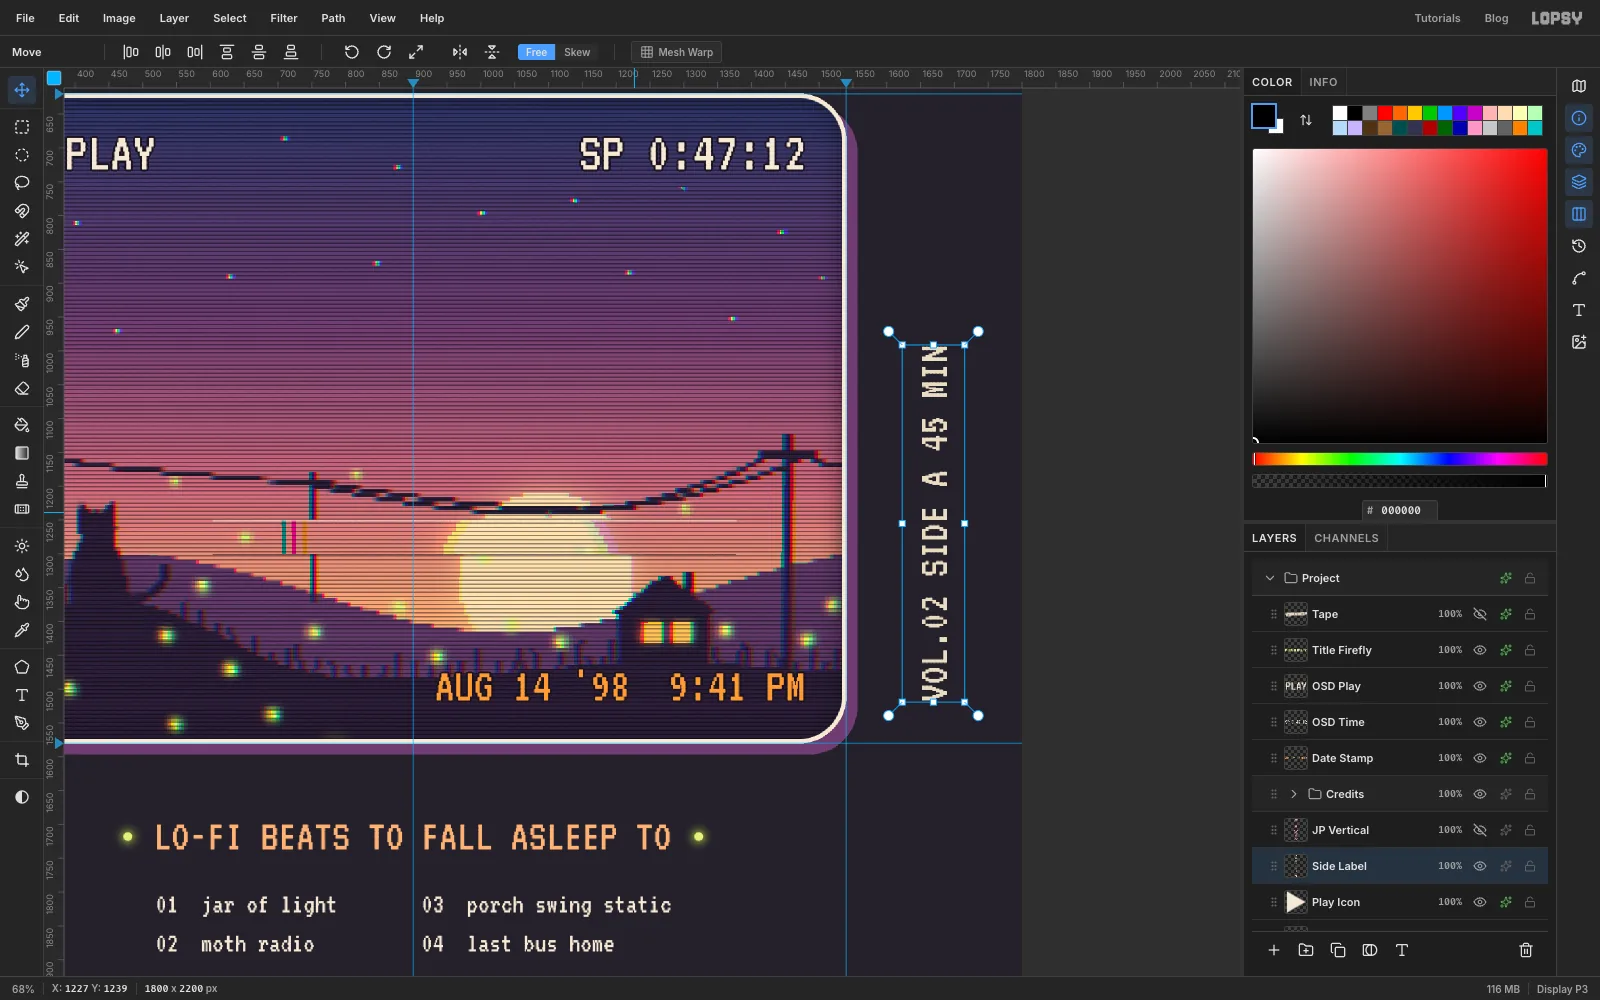
With Play Icon selected, use VT323, Size 66 and to type
VOL.02 SIDE A 45 MINin an empty spot below the design, and name it Side Label.With the Move tool, hold Cmd and drag the round rotate handle off the label's top-right corner a quarter-turn anticlockwise, so the label reads from bottom to top. Cmd snaps it to exactly 90°. Then drag it into the right margin, centred between the screen and the edge of the print, with its bottom level with the date stamp's baseline.
-
Set vertical Japanese in the left margin
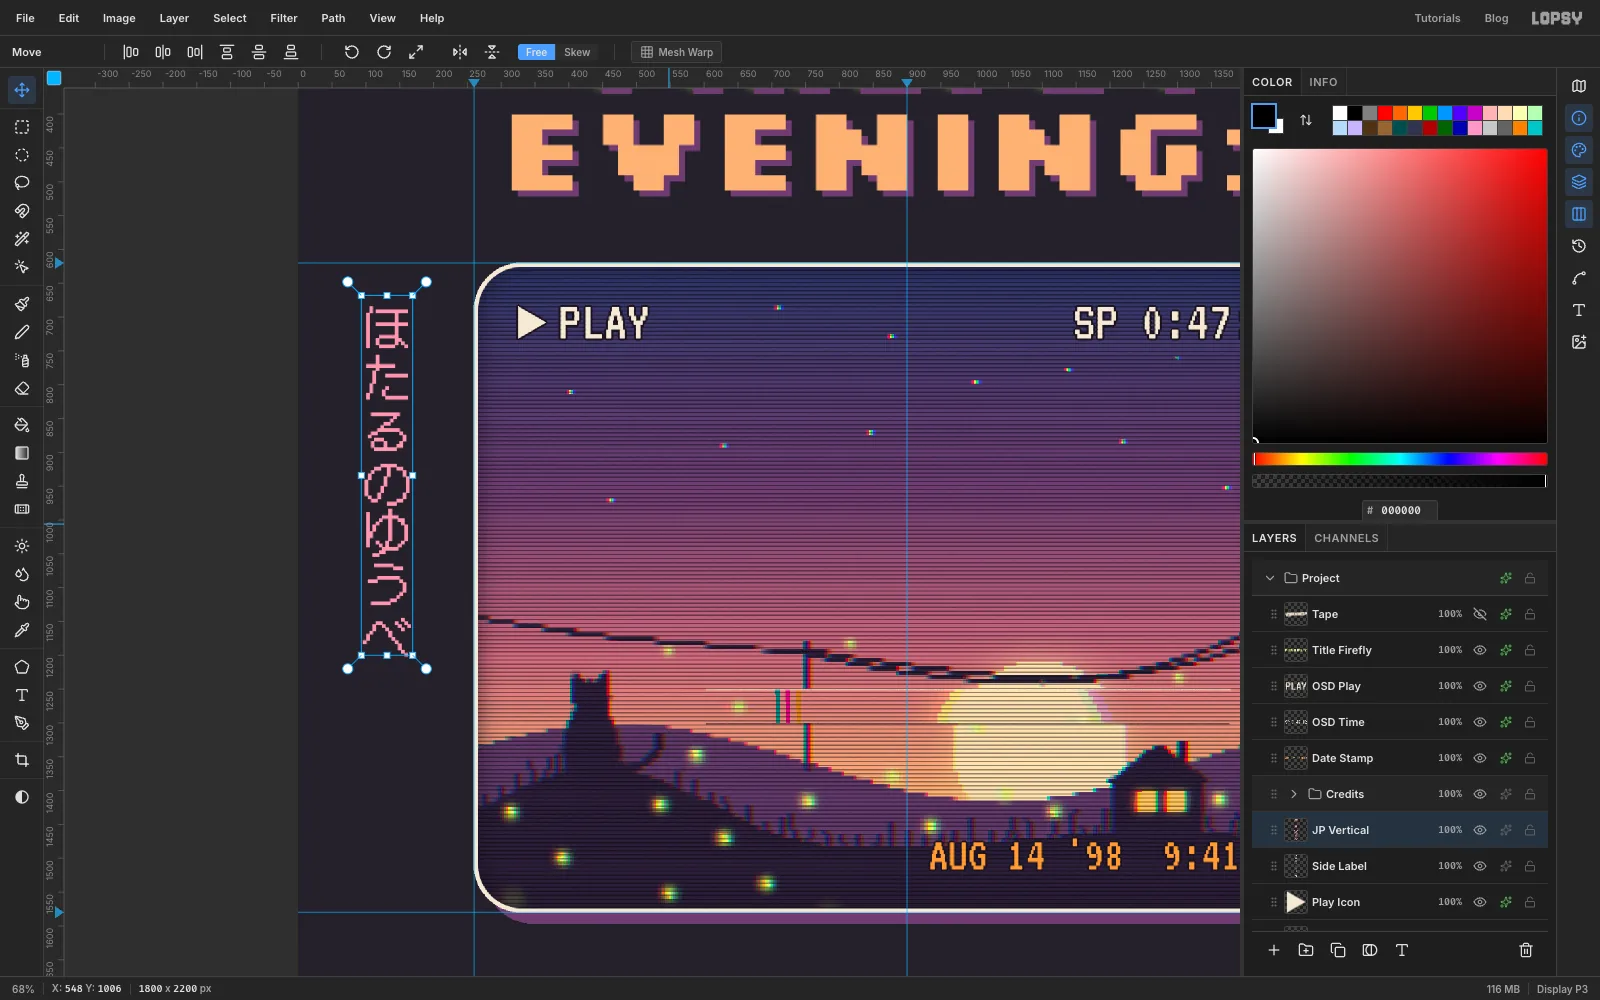
The left margin gets the title in Japanese: ほたるのゆうべ, "firefly evening". Copy those characters from this page. With Play Icon selected, choose DotGothic16, a pixel font with Japanese characters, at Size 76 in , and switch vertical text on in the options bar. Click in the left margin, paste with Cmd+V, press Tab and name the layer JP Vertical.
Drag it so it's centred in the left margin, with its top level with the top of PLAY. It's the same length as the side label, so the two mirror each other corner to corner: one hangs from the top line of the screen text, the other stands on the bottom line. When you're done, select a non-text layer and switch vertical text back off, or your next text will be vertical too.
-
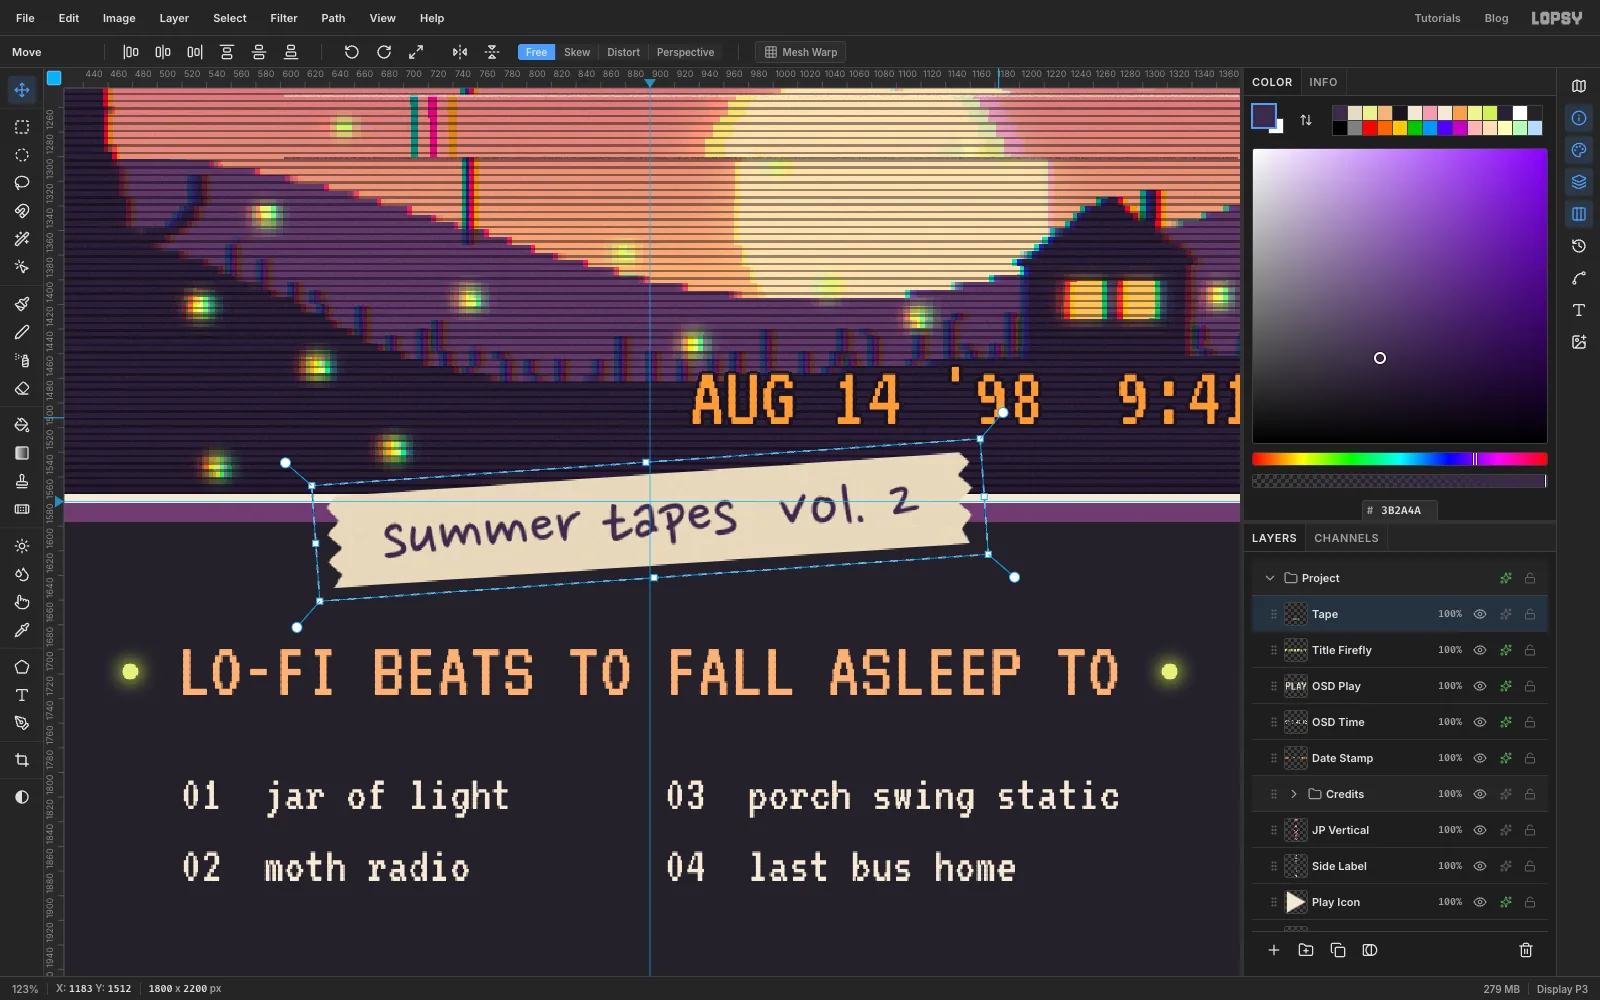
Cut a strip of masking tape
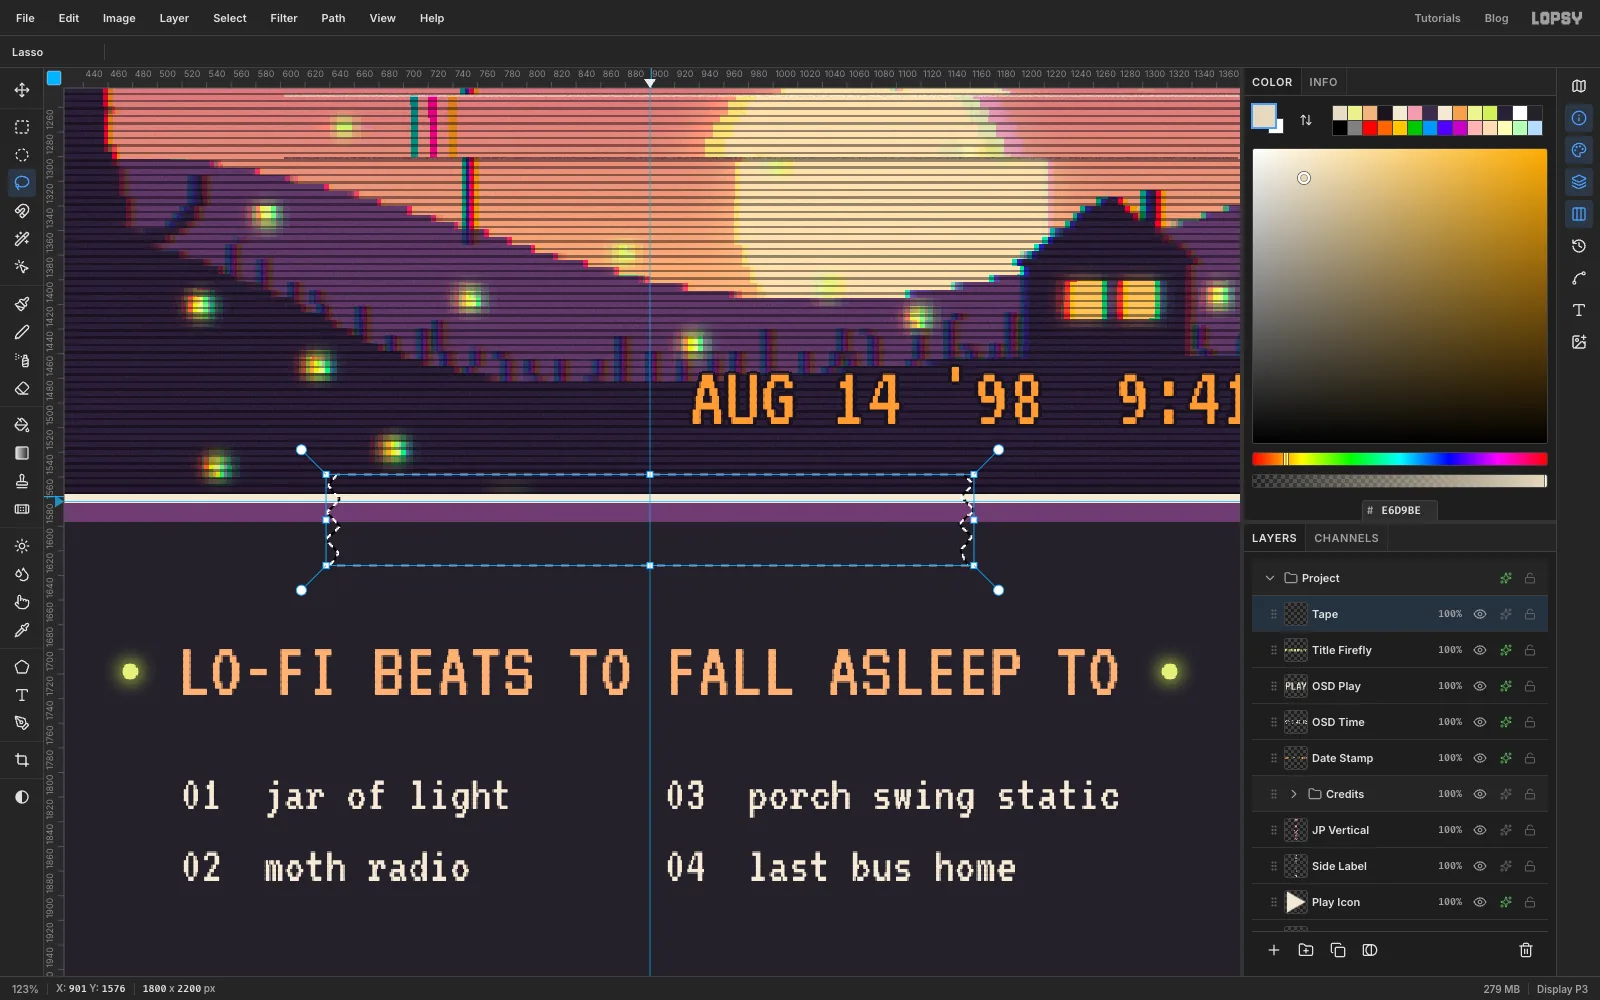
Select Title Firefly so the tape lands near the top of the stack, and add a Tape layer. With the Lasso, click around a strip about 520 × 75 px that straddles the screen's bottom edge in the middle. Zigzag the short ends with five or six small clicks, so they look torn rather than cut. Fill it with and run Add Noise (Amount 10, Mono, Gaussian) for a paper texture.
-
Write on the tape
With Tape selected, so the new text lands directly above it, choose Nanum Pen Script at Size 60 in and type
summer tapes vol. 2in empty space. Drag it onto the tape, centred with roughly 40 px to spare at each end. With the text layer selected, choose Layer → Merge Down so the writing becomes part of the tape.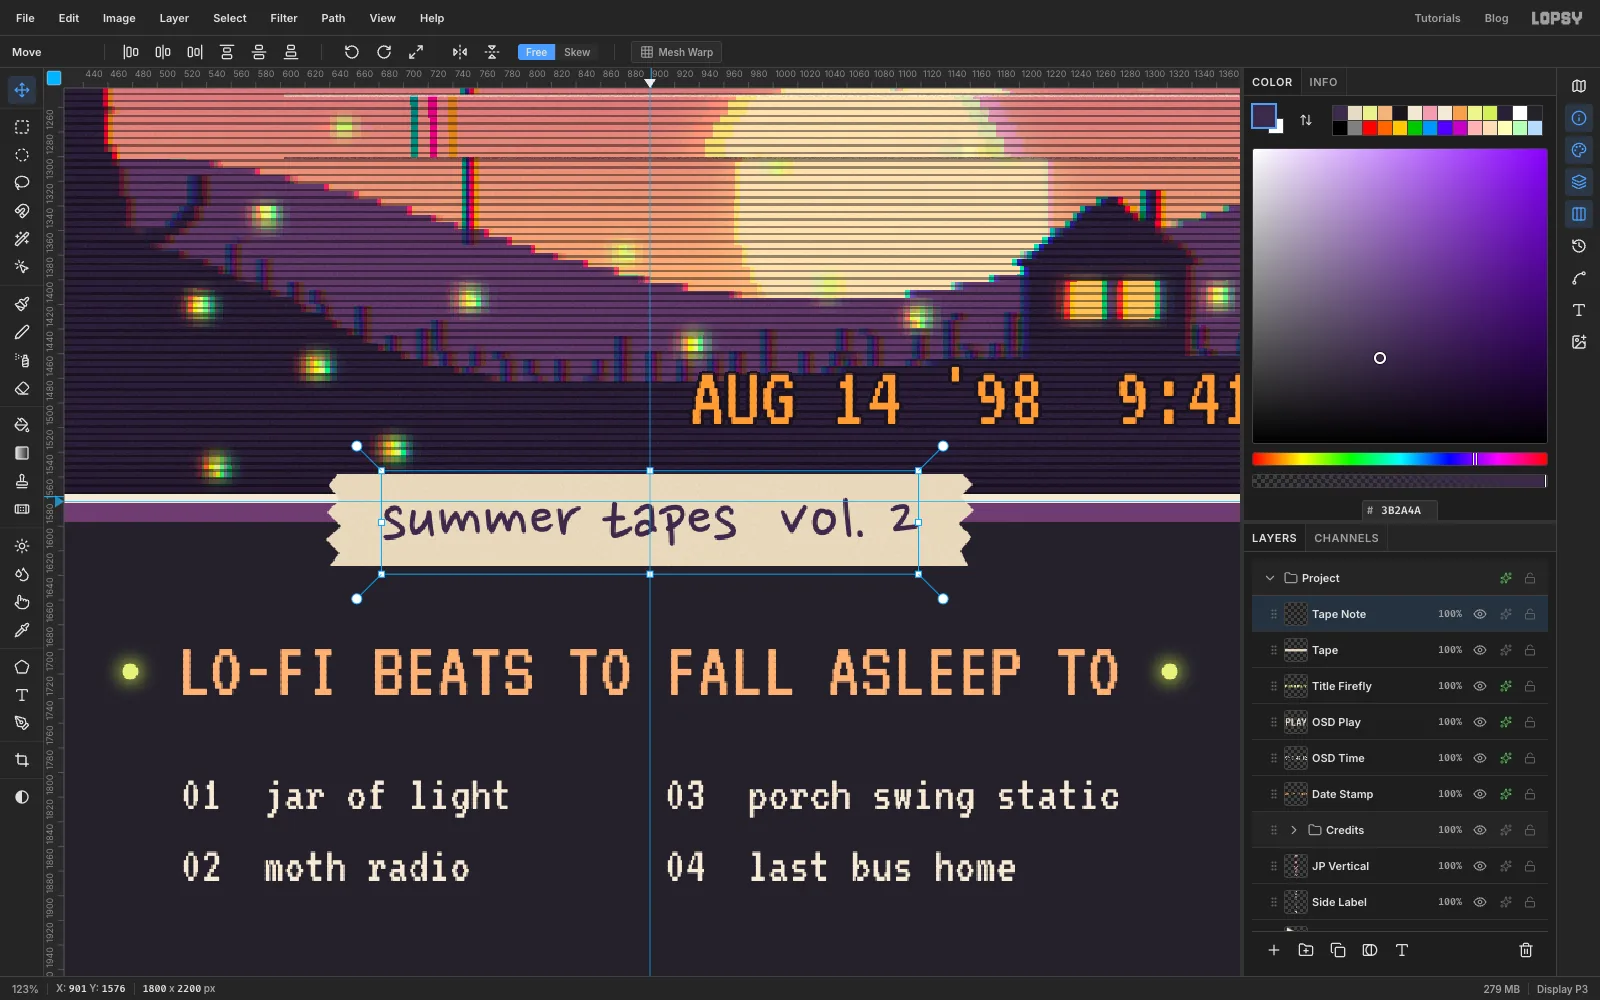
-
Tilt the tape
Draw a marquee around the tape, switch to the Move tool, and drag the rotate handle about 4° anticlockwise. Leave Cmd up this time: tape is never stuck on straight. Press Cmd+D to commit. Check that the raised corner still clears the date stamp.
Finish with a hard Drop Shadow on the tape: , Offset 6 / 6, Blur 1, matching the title and screen. Then save with File → Save Project and export with File → Quick Export PNG.