Design a Glitch Art Christmas Card
Make a glitch-art Christmas card in Lopsy with an RGB-split reindeer zoetrope, a pixel moon, datamosh slices, CRT scanlines and a 24-cell advent bar.
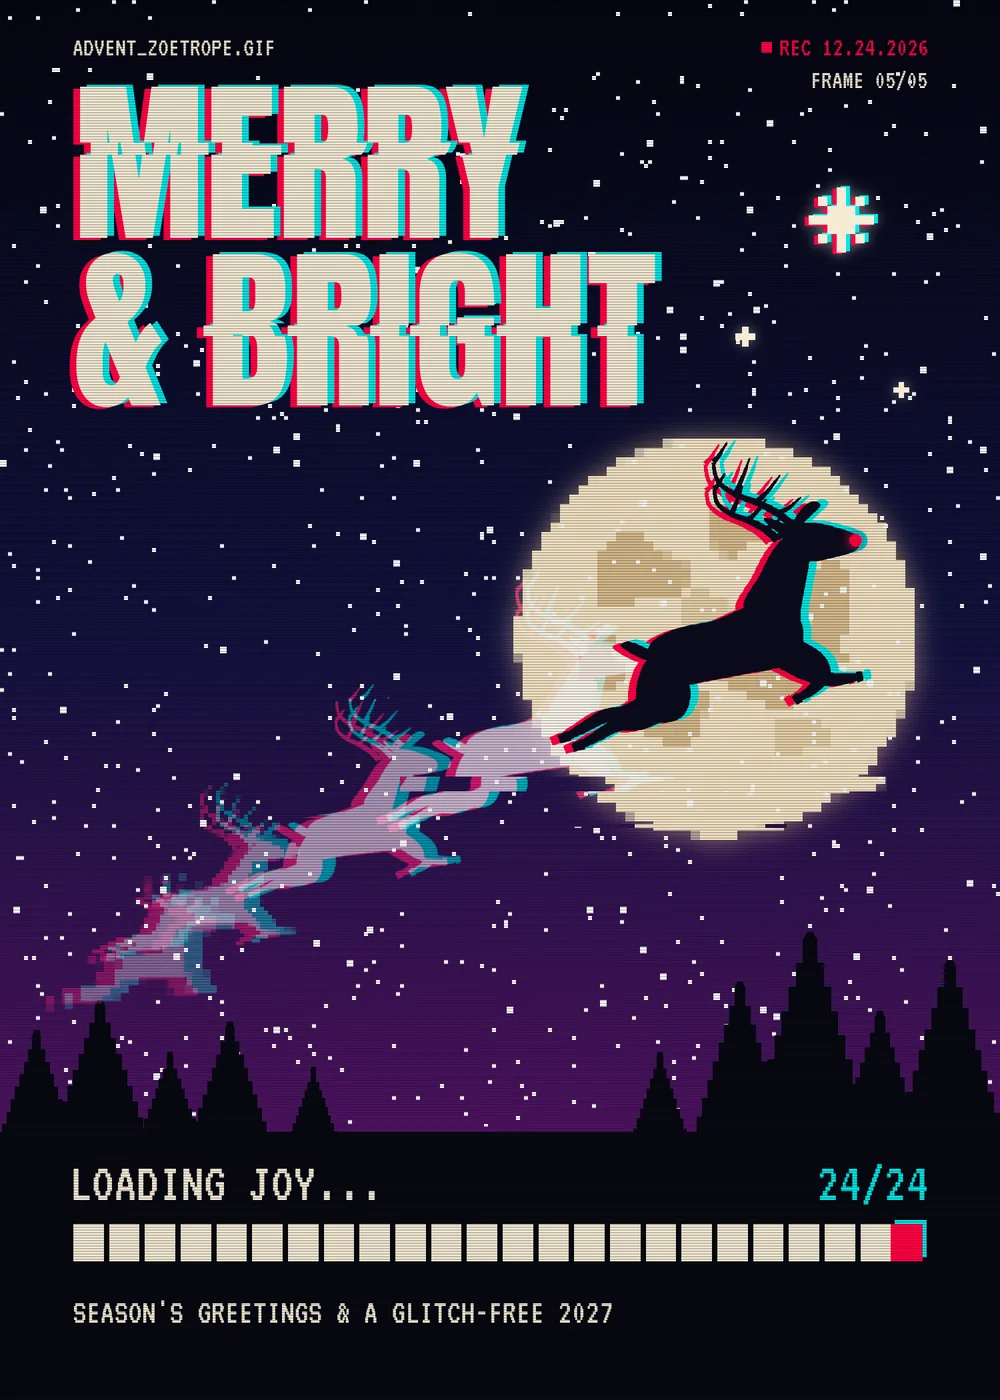
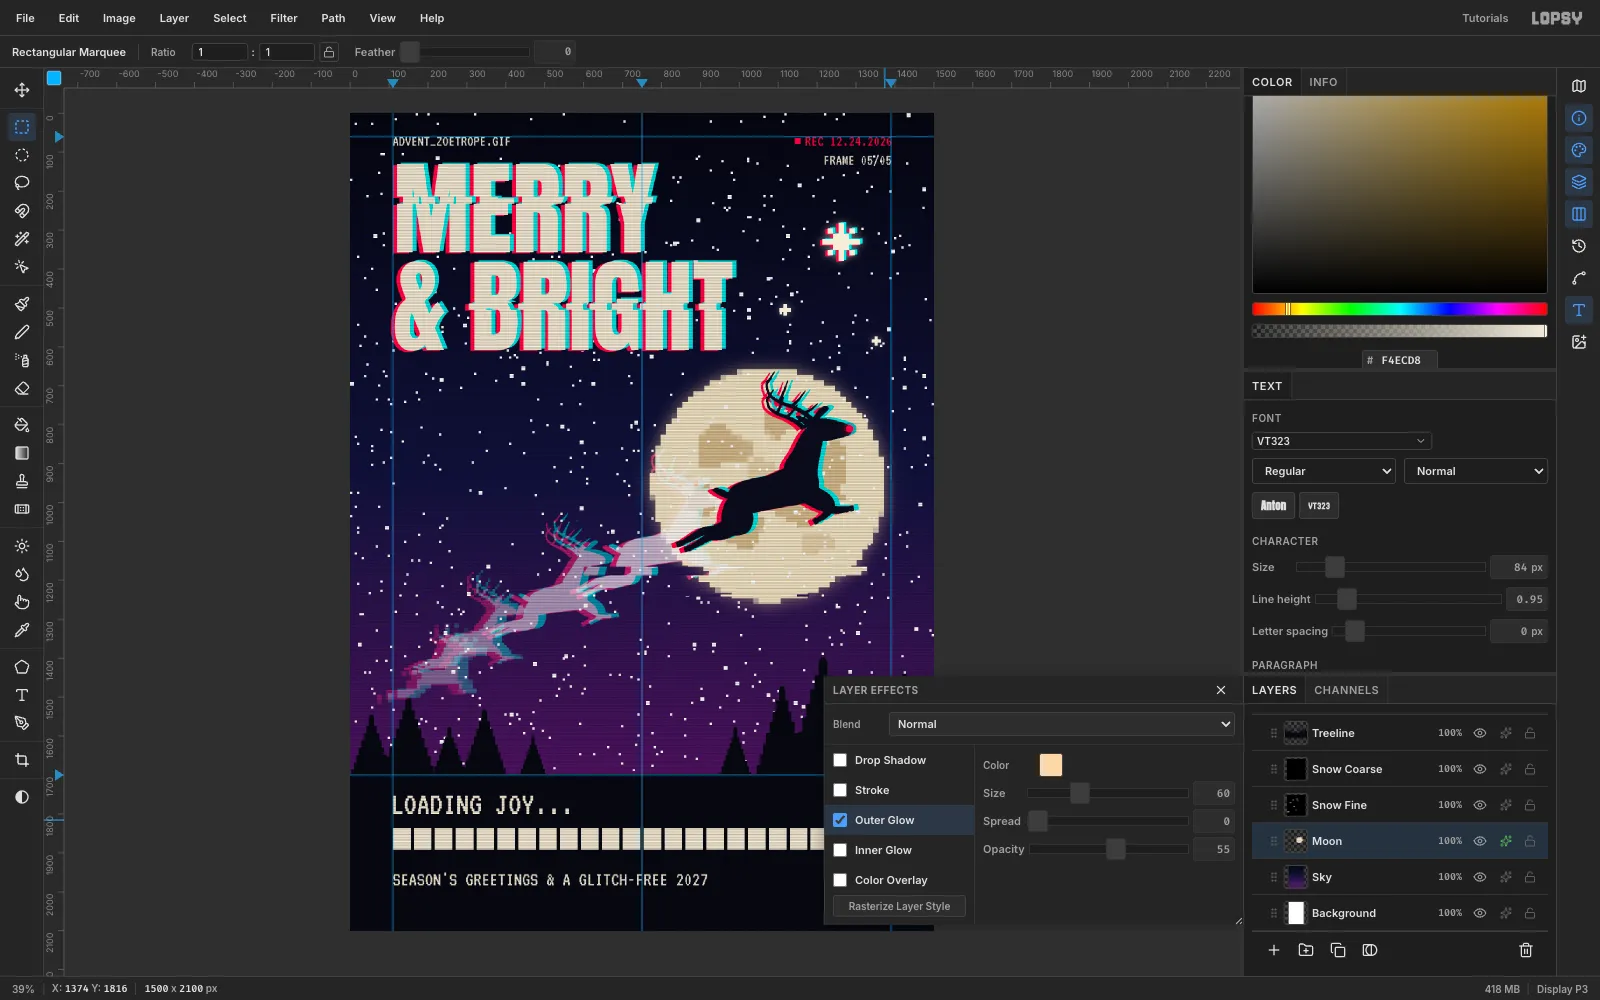
This card treats Christmas like a corrupted GIF. A reindeer leaps across the moon as a zoetrope sequence, the way an early animation toy or a Muybridge photo strip shows motion, one frame at a time. The newest frame is clean, and each older frame is a little more broken, from a red/cyan channel split through Pixel Stretch bands to blocky pixelation. The advent calendar becomes a 24-cell loading bar.
Glitch art works best when the damage is controlled. Keep to a small palette and put the effects in zones instead of spraying them everywhere:
- Night sky:
#05060F→#11113C→#4A1760 - Moon and type cream:
#F4ECD8(moon#F2E6C9) - Channel red:
#FF2A4D - Channel cyan:
#19E3E3 - Ink:
#0B0C1Cand#070811
Everything is drawn in Lopsy. The reindeer is a stack of Lasso selections, and every glitch comes from filters, layer effects and blend modes.
-
Start a 1500 × 2100 card
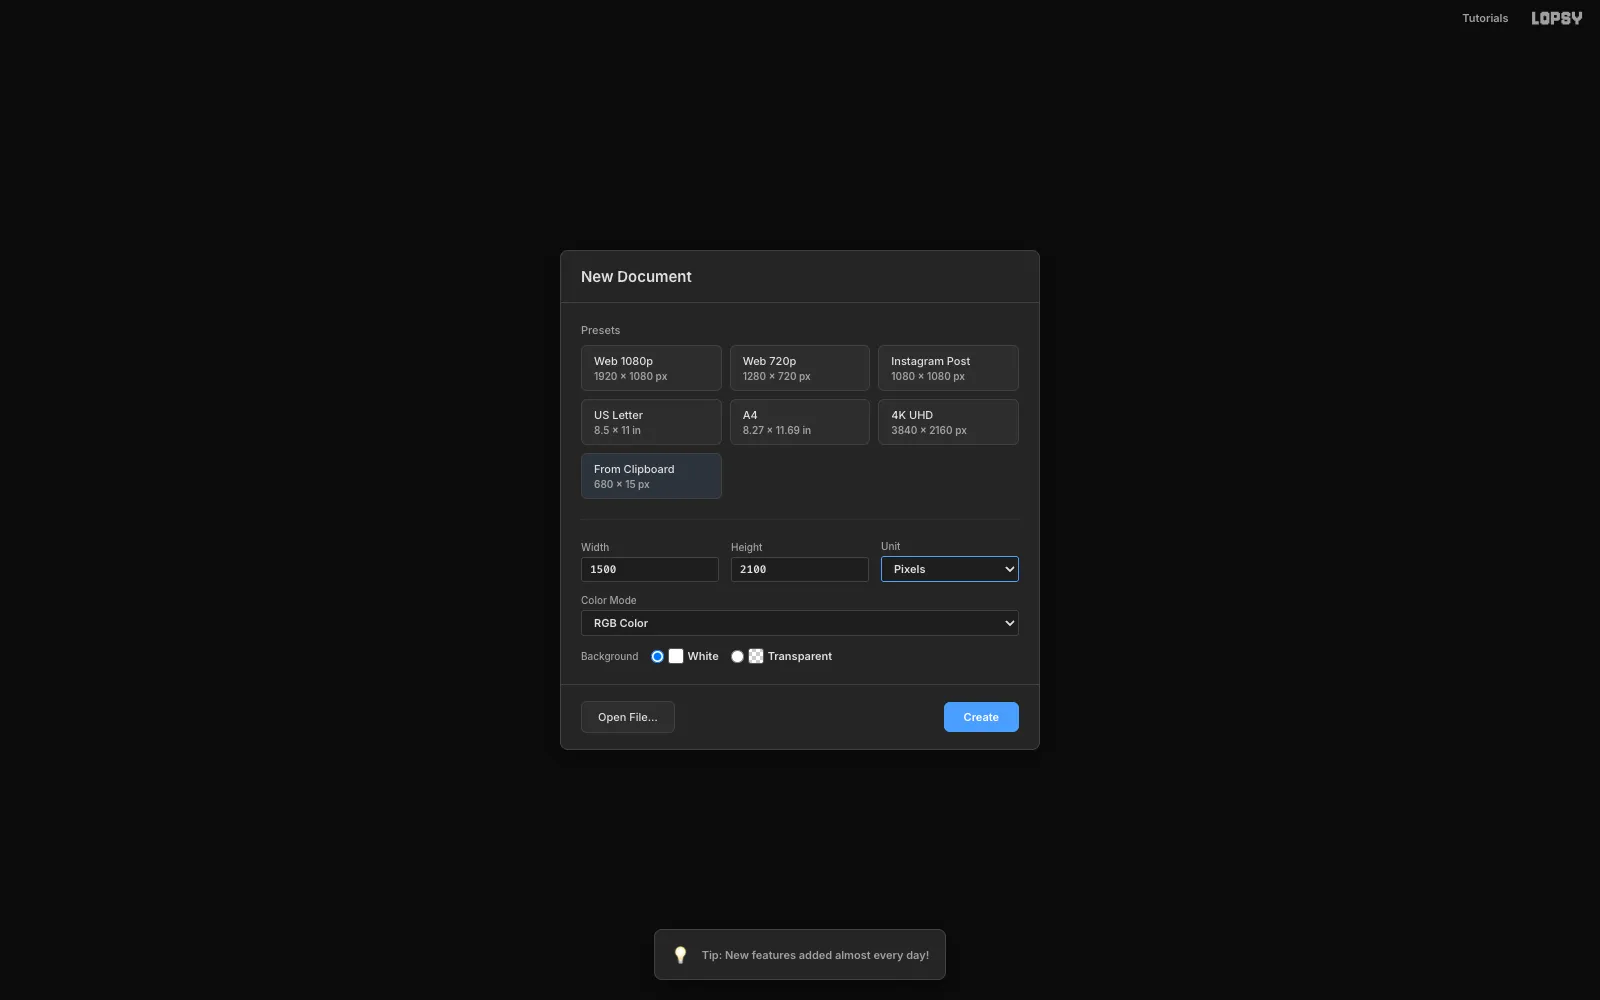
Choose File → New, check that Unit is Pixels, and enter 1500 × 2100. That's a 5 × 7 portrait card. Click Create.
-
Paint the night sky
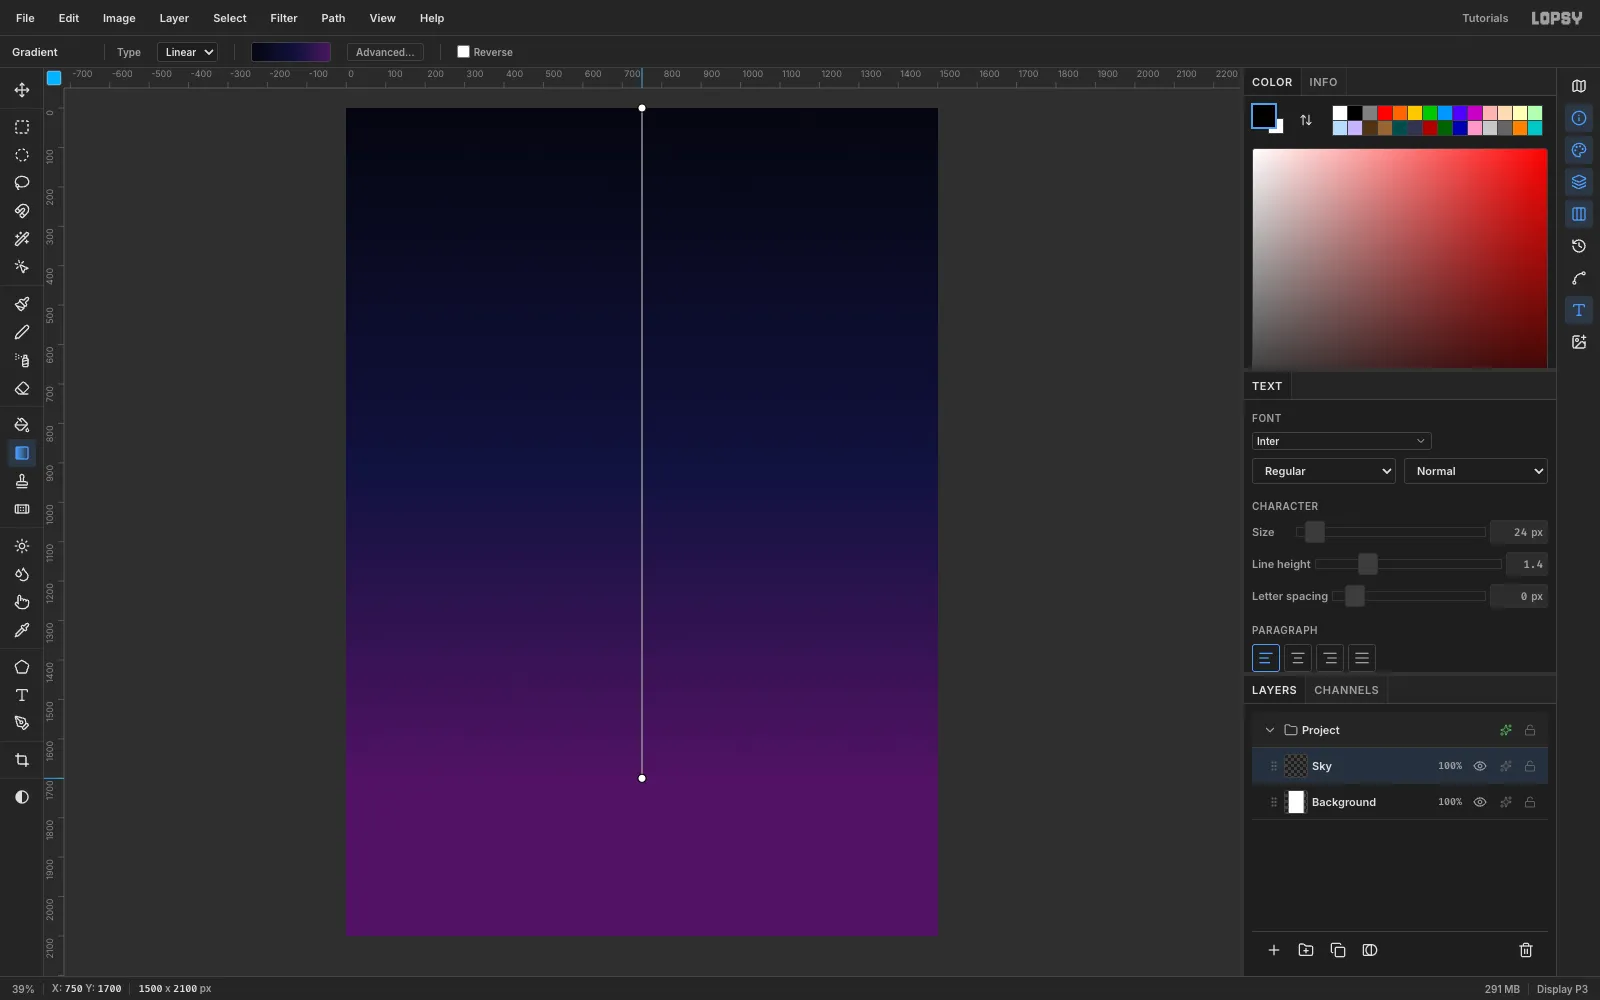
Rename Layer 1 to Sky. Pick the Gradient tool, set Type to Linear, and open Advanced… to set three stops:
#05060Fat 0%#11113Cat 55%#4A1760at 100%
Drag straight down from the top edge to about y 1700, where the ground will start. The violet glow then sits just above the horizon.
-
Add guides for the grid
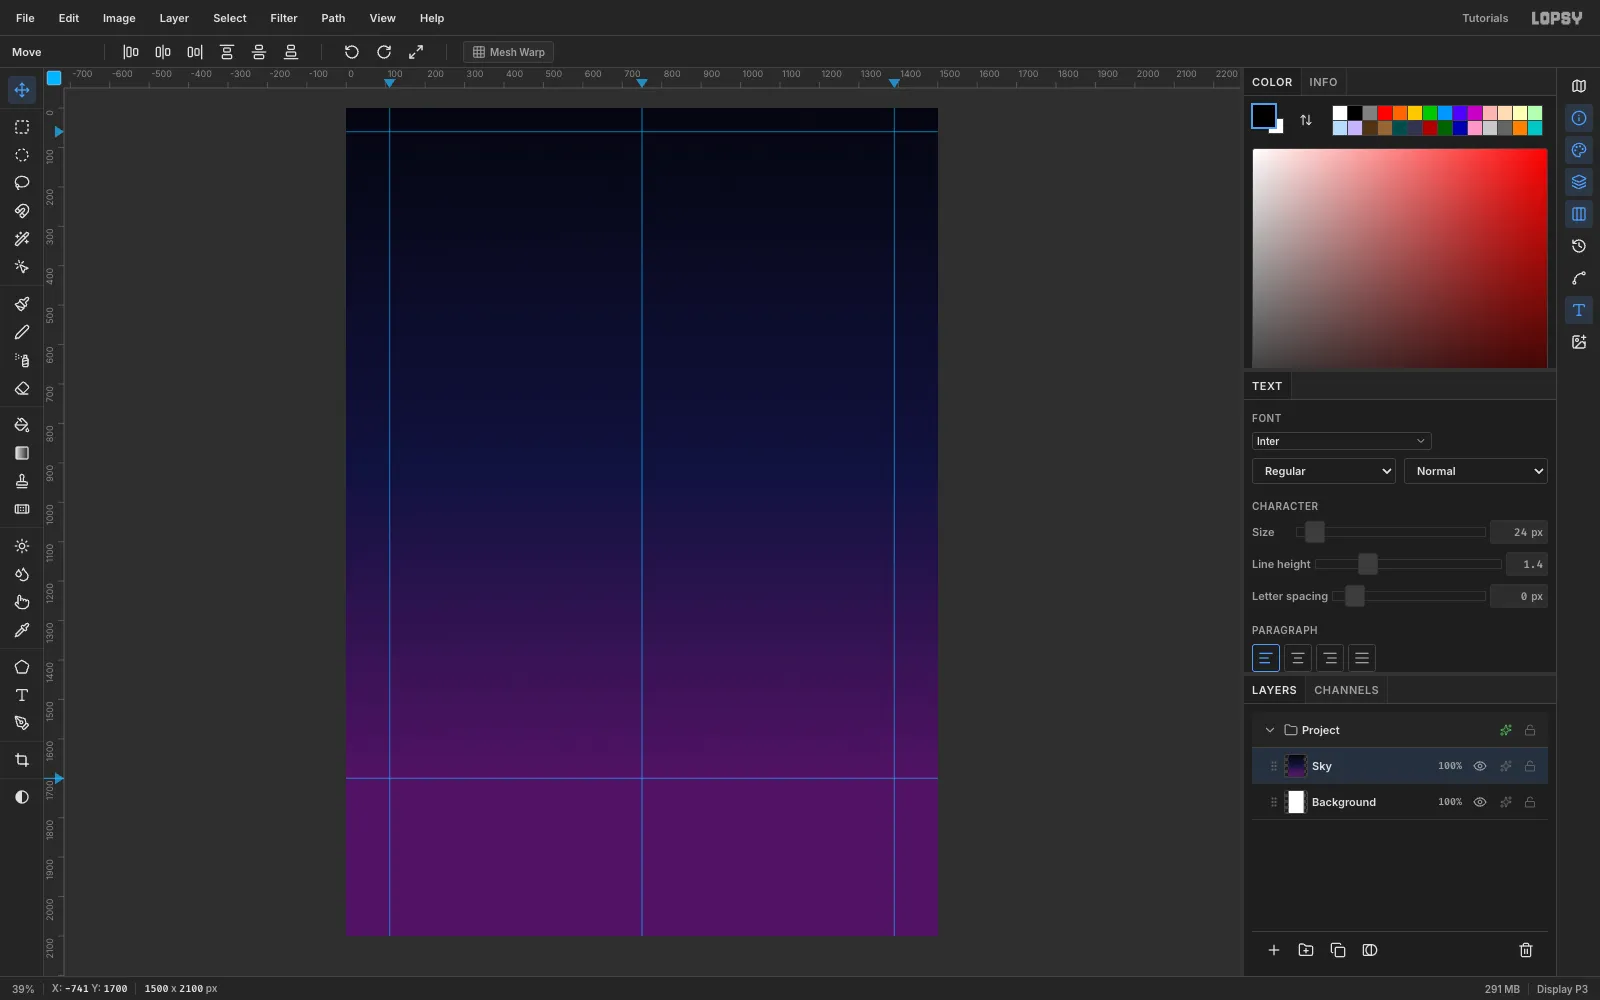
Click the top ruler at x 110, 750 and 1390 to drop vertical guides for the margins and centre. Click the left ruler at y 60 (the header line) and y 1700 (the horizon). Every block of type will hang off these lines.
-
Draw the moon
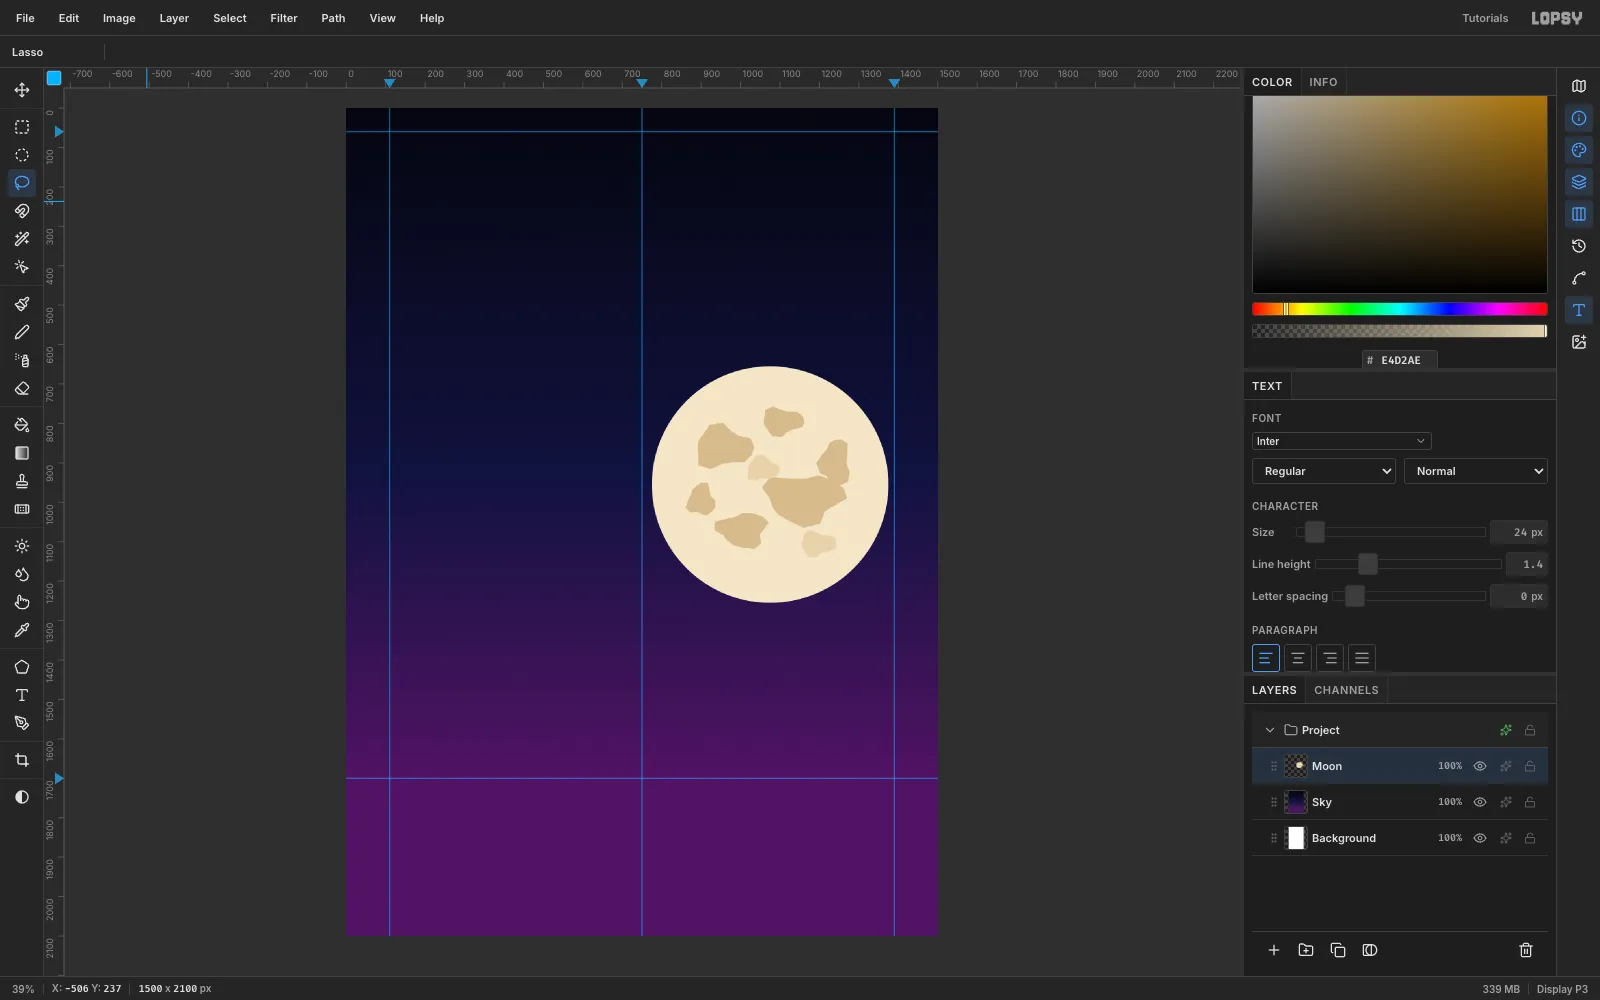
Click Add Layer and rename it Moon. With the Elliptical Marquee, drag a 600 px circle centred on 1075, 955, and fill it with
#F2E6C9using Edit → Fill.Then add the maria, the moon's dark patches:
- Lasso six soft blobs and fill them with
#D2BC92. - Lasso two lighter patches and fill them with
#E4D2AE.
Don't worry about smooth edges. The next step turns everything into pixels.
- Lasso six soft blobs and fill them with
-
Pixelate the moon
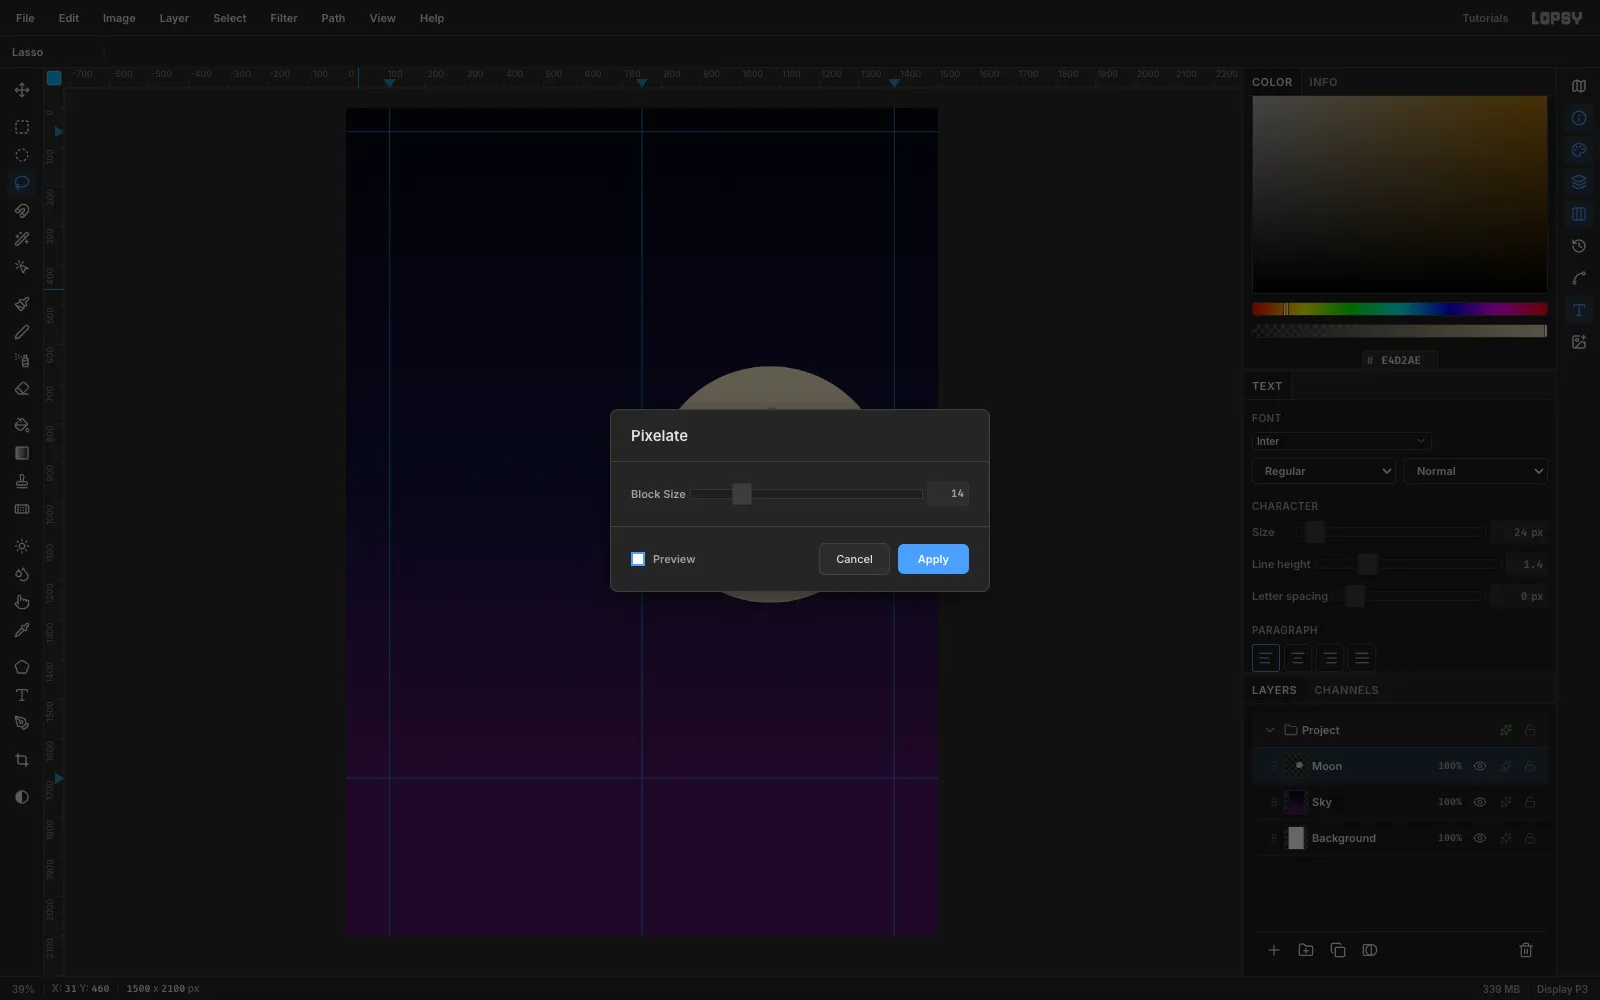
With Moon selected, choose Filter → Pixelate and set Block Size to 14. The circle becomes a stepped 8-bit disc, and the maria become chunky tiles. This is the first "low-res" zone of the card.
-
Build a pixel pine treeline
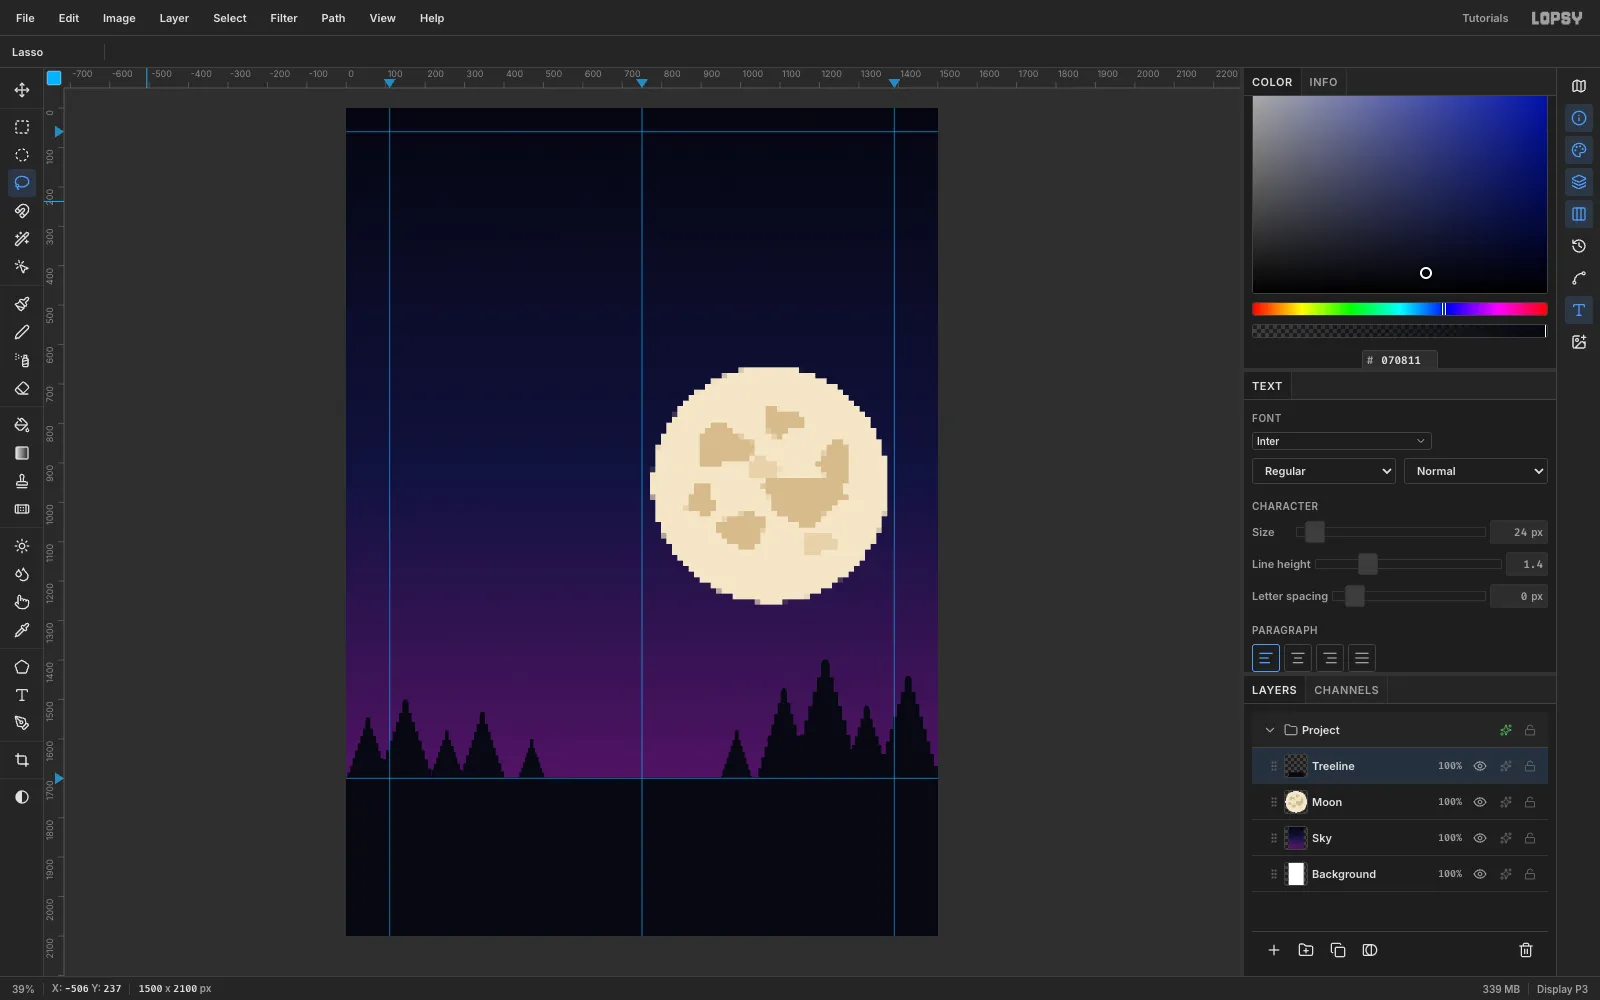
Add a Treeline layer. Marquee from 0, 1698 to the bottom-right corner and fill it with
#070811for the ground.Each pine is one Lasso polygon drawn as a staircase: 8 steps that narrow as they go up, with a small cap at the tip. Fill each one with the same ink. Keep the trees on the left short (under about 190 px), so the reindeer trail has room above them. Let the ones on the right grow up to 290 px.
-
Lasso the reindeer's body
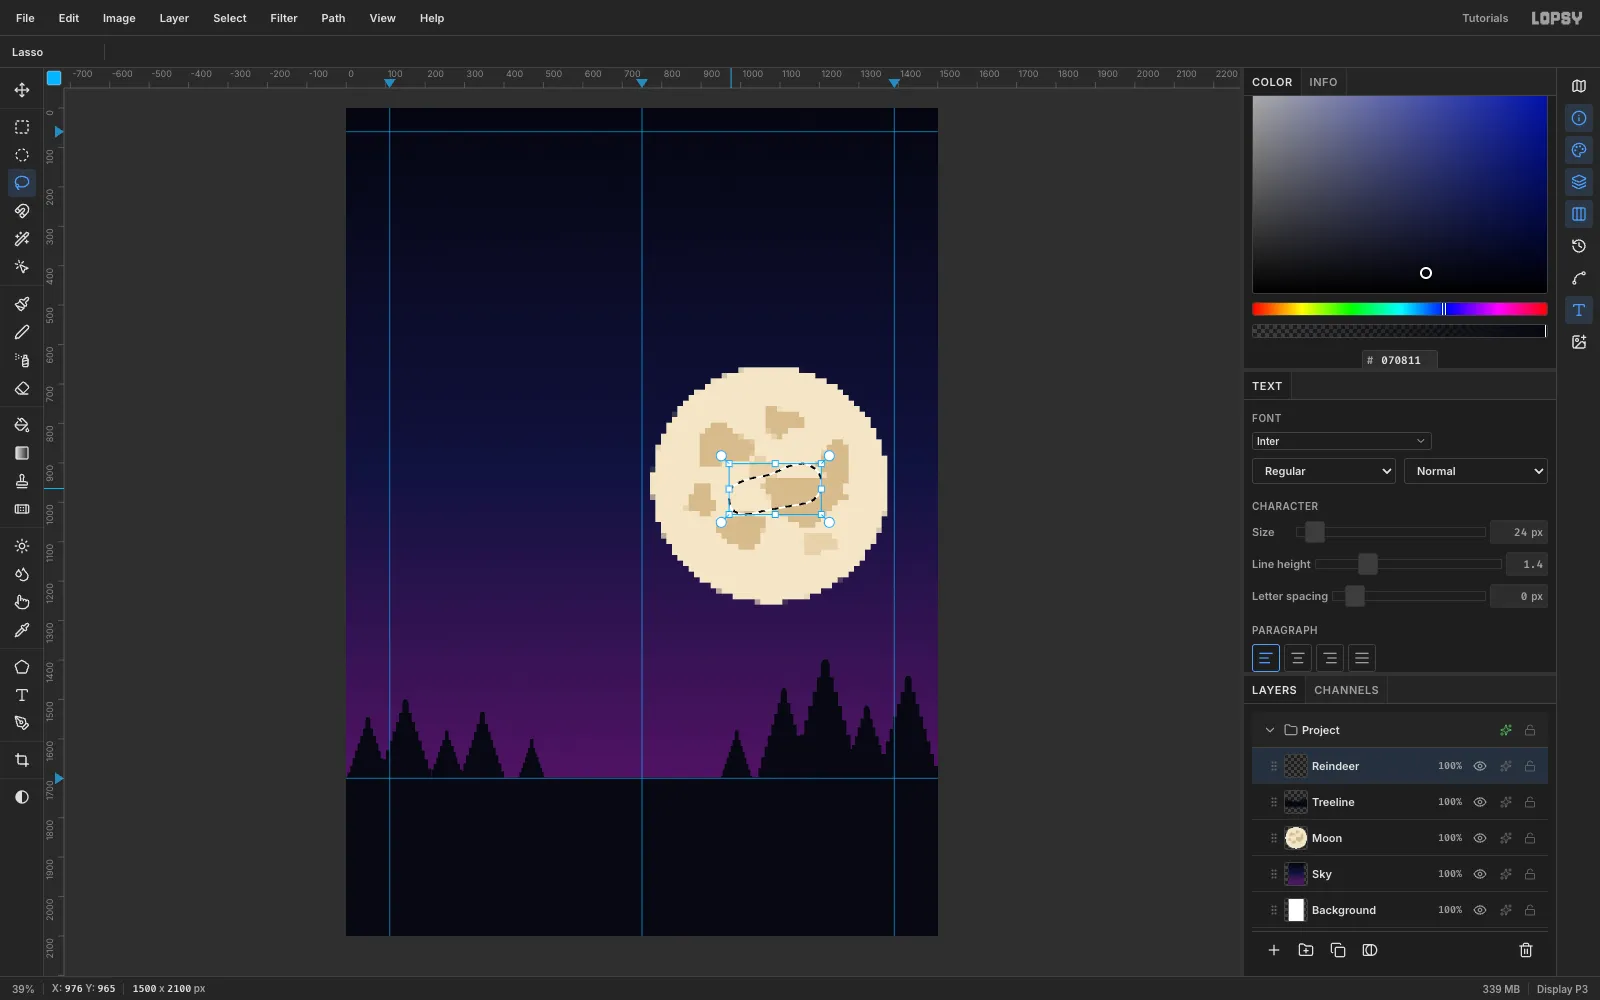
Add a Reindeer layer and set the foreground to cream
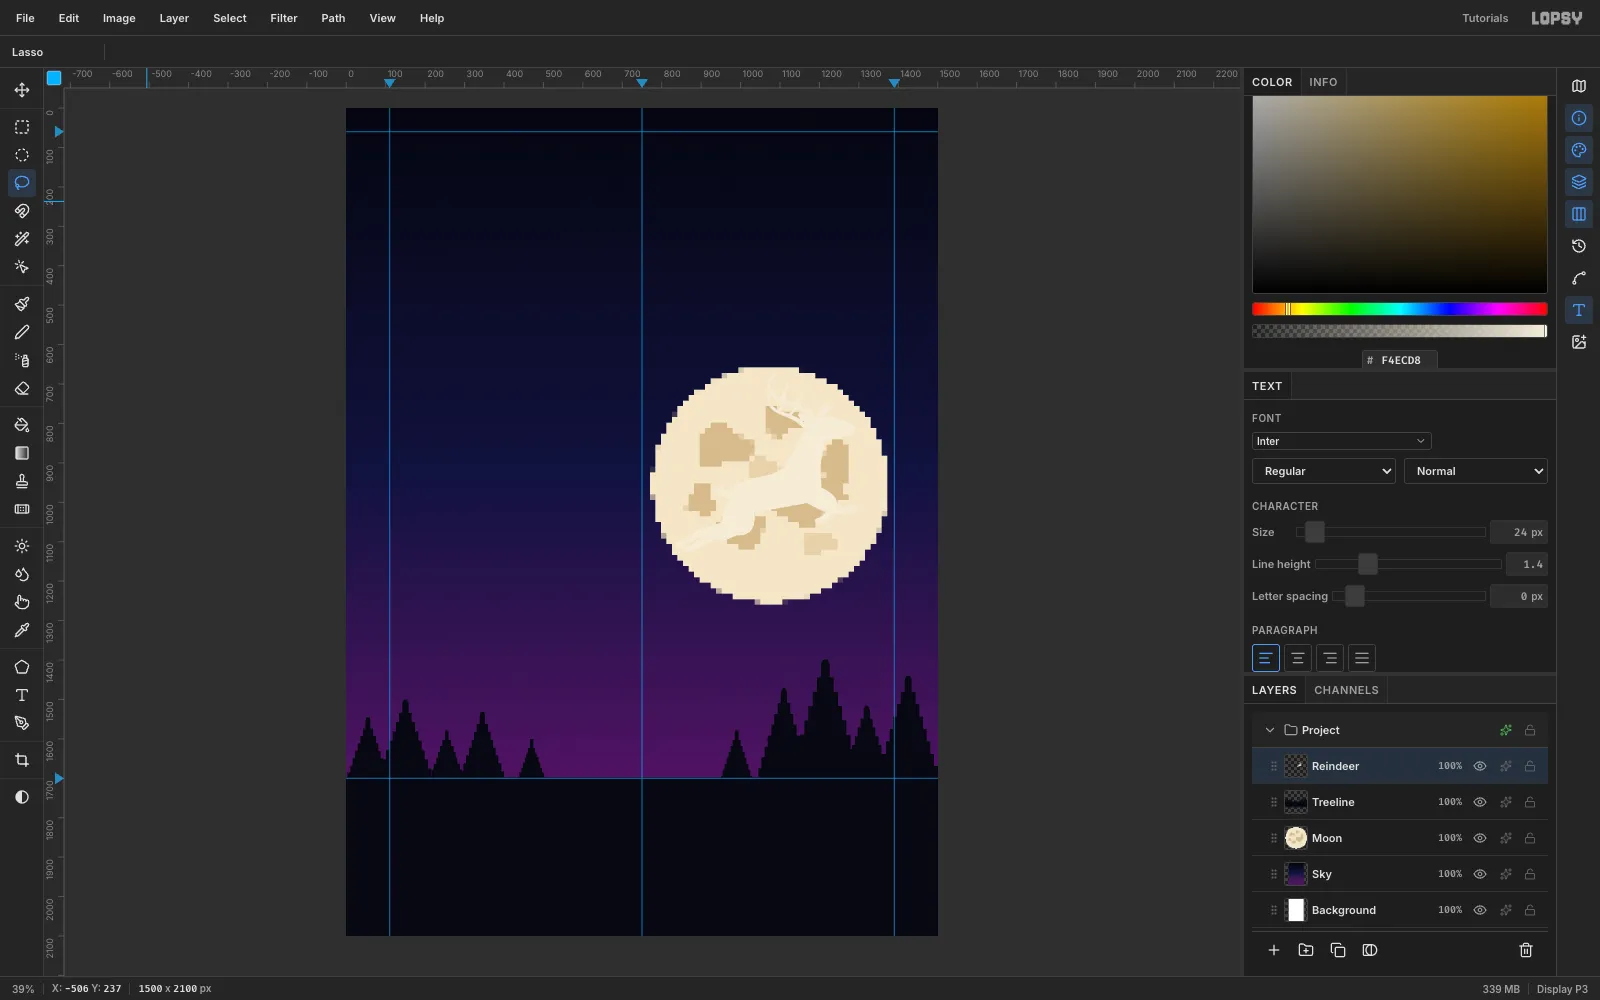
#F4ECD8. Build the silhouette from separate lasso selections, each filled with Edit → Fill. Overlapping fills merge into one clean shape.Start with the barrel-shaped body, with a deep chest on the right and a slimmer rump on the left. Tip the whole animal about 14° nose-up, so it's leaping toward the upper right.
-
Finish the silhouette
Keep adding pieces in the same colour:
- A thick neck with a smooth throat.
- A long head with a blunt muzzle, and a small ear pointing back.
- Two antlers. Each is a thick beam swept back about 35°, with four tines fanning forward and a flat brow tine over the face. Draw the far antler smaller and offset behind the near one.
- One foreleg folded under the chest and one reaching forward.
- Two hind legs stretched back, each with a big thigh.
- A short flicked tail.
-
Duplicate and scale the ghost frames
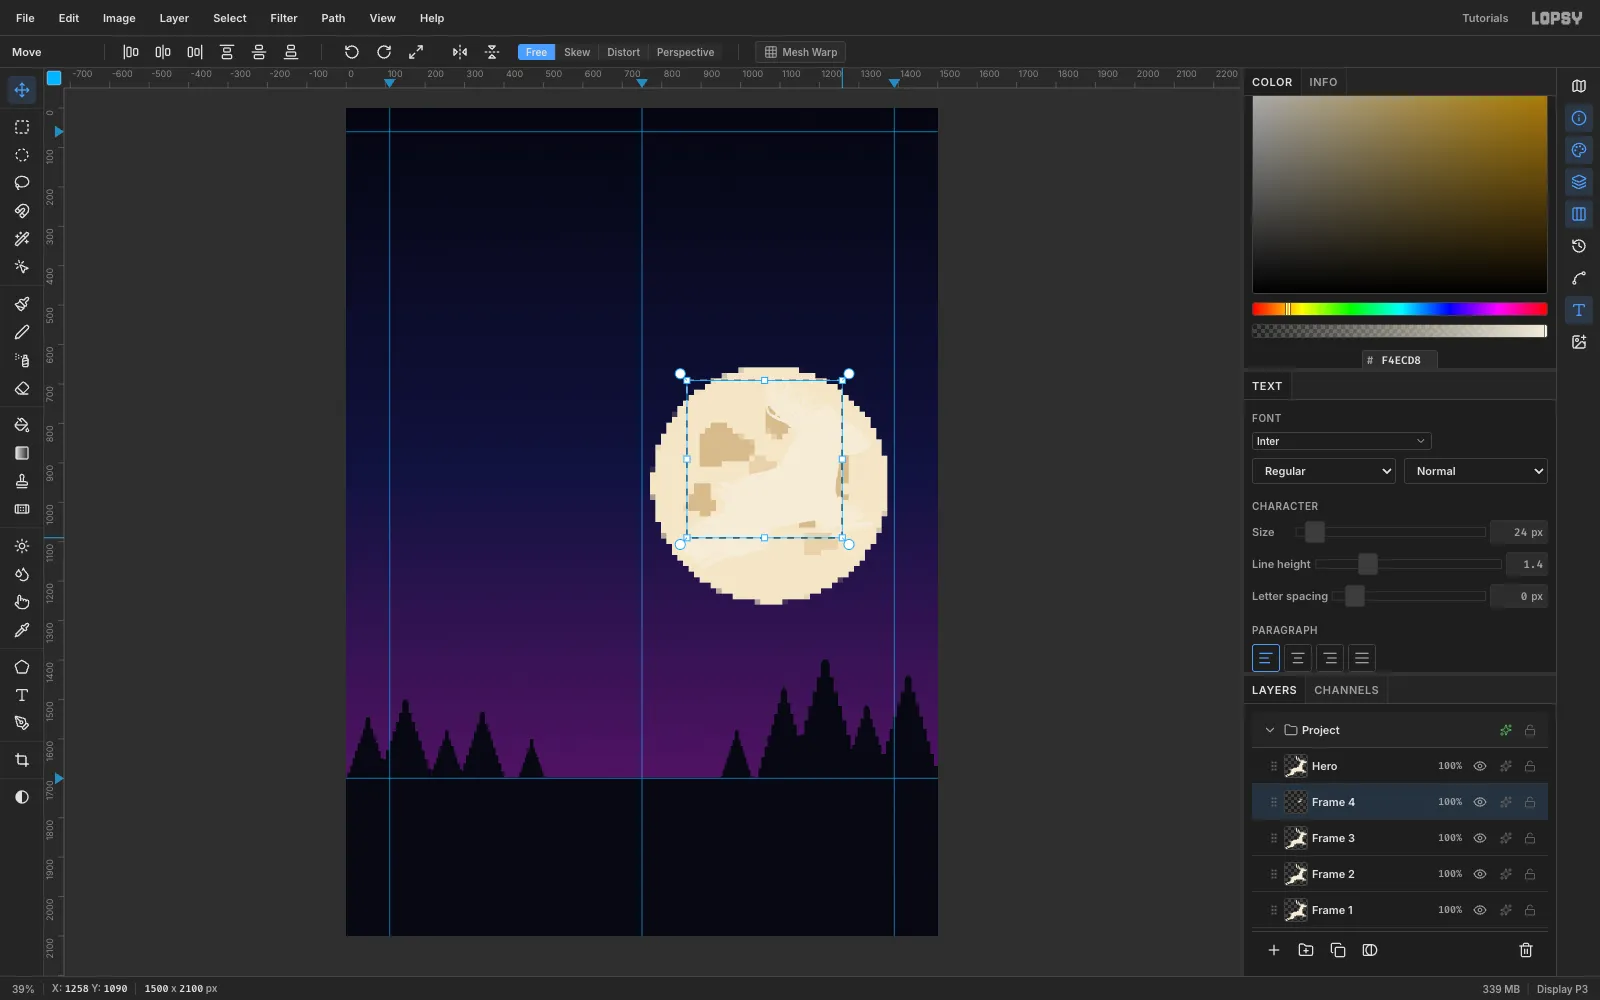
With Reindeer selected, click Duplicate Layer four times. Rename the top copy Hero and the others Frame 4, Frame 3, Frame 2 and Frame 1. Frame 4 is the newest ghost, closest to the hero.
For each frame:
- Draw a marquee a few pixels larger than the reindeer.
- Switch to the Move tool.
- Hold ⌘ and drag the bottom-right handle inward to scale the copy uniformly. Use 85%, 72%, 60% and 50% of the hero for Frames 4 → 1.
- Press ⌘D to commit.
-
Rotate each frame
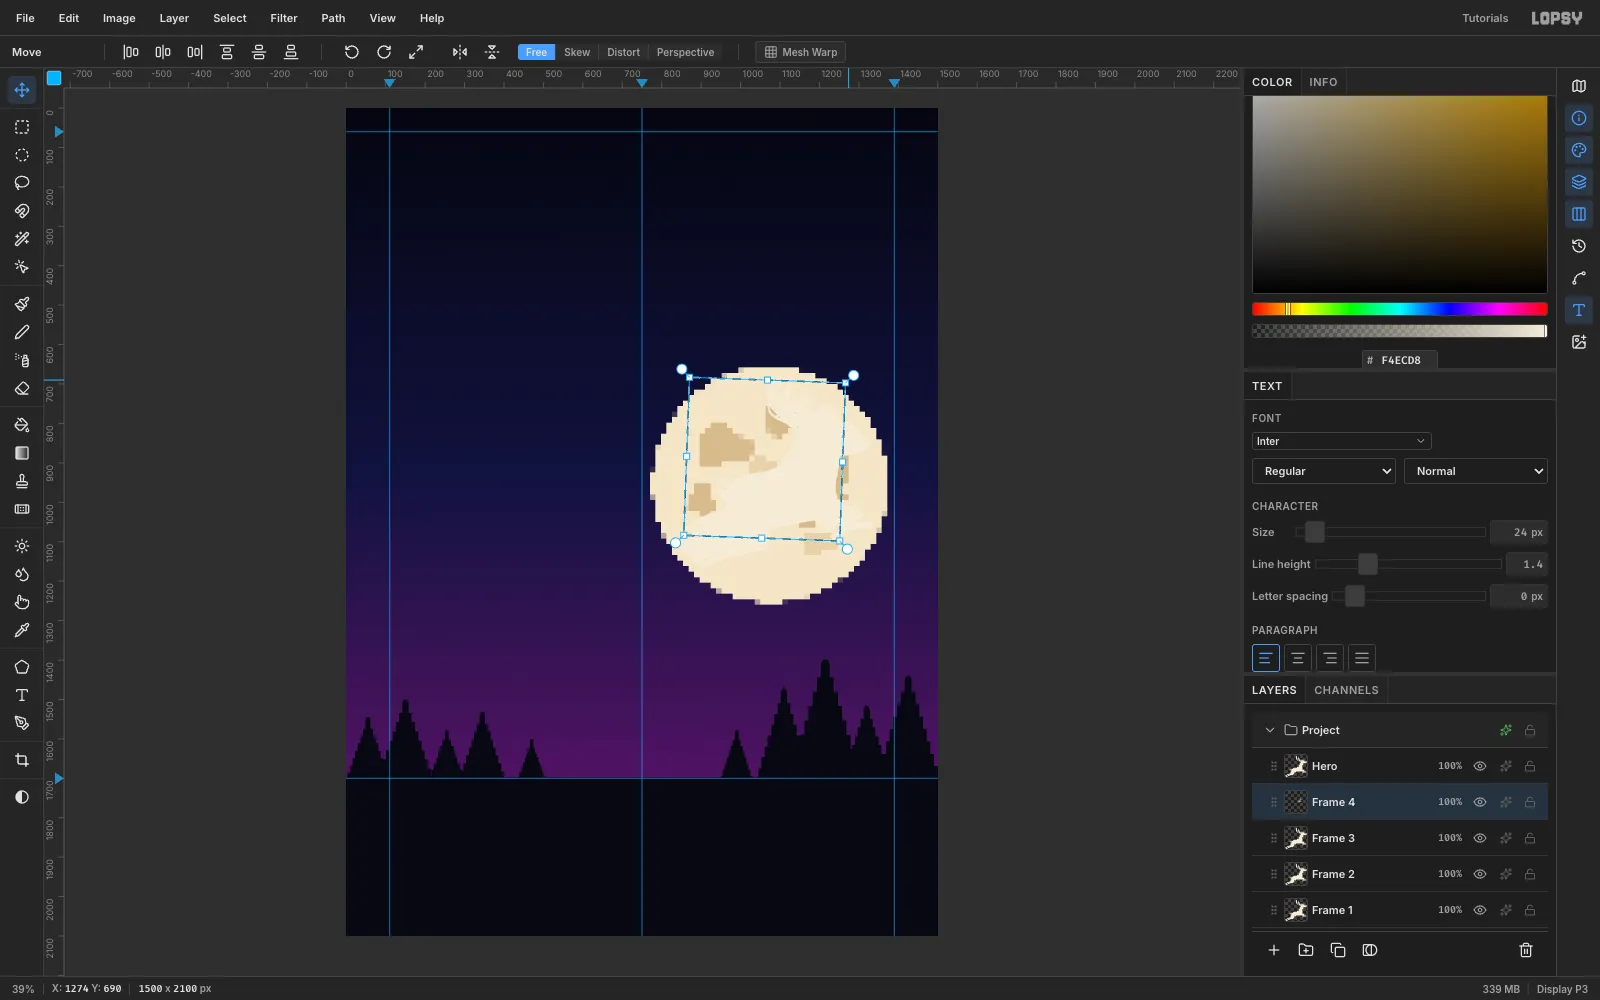
Marquee the scaled frame again and drag the round handle just outside the top-right corner to rotate it clockwise: 2° for Frame 4, then 4°, 6° and 8°. Older frames should flatten out, as if they're still on the upswing of the leap. Press ⌘D after each rotation.
-
Space the frames along an arc
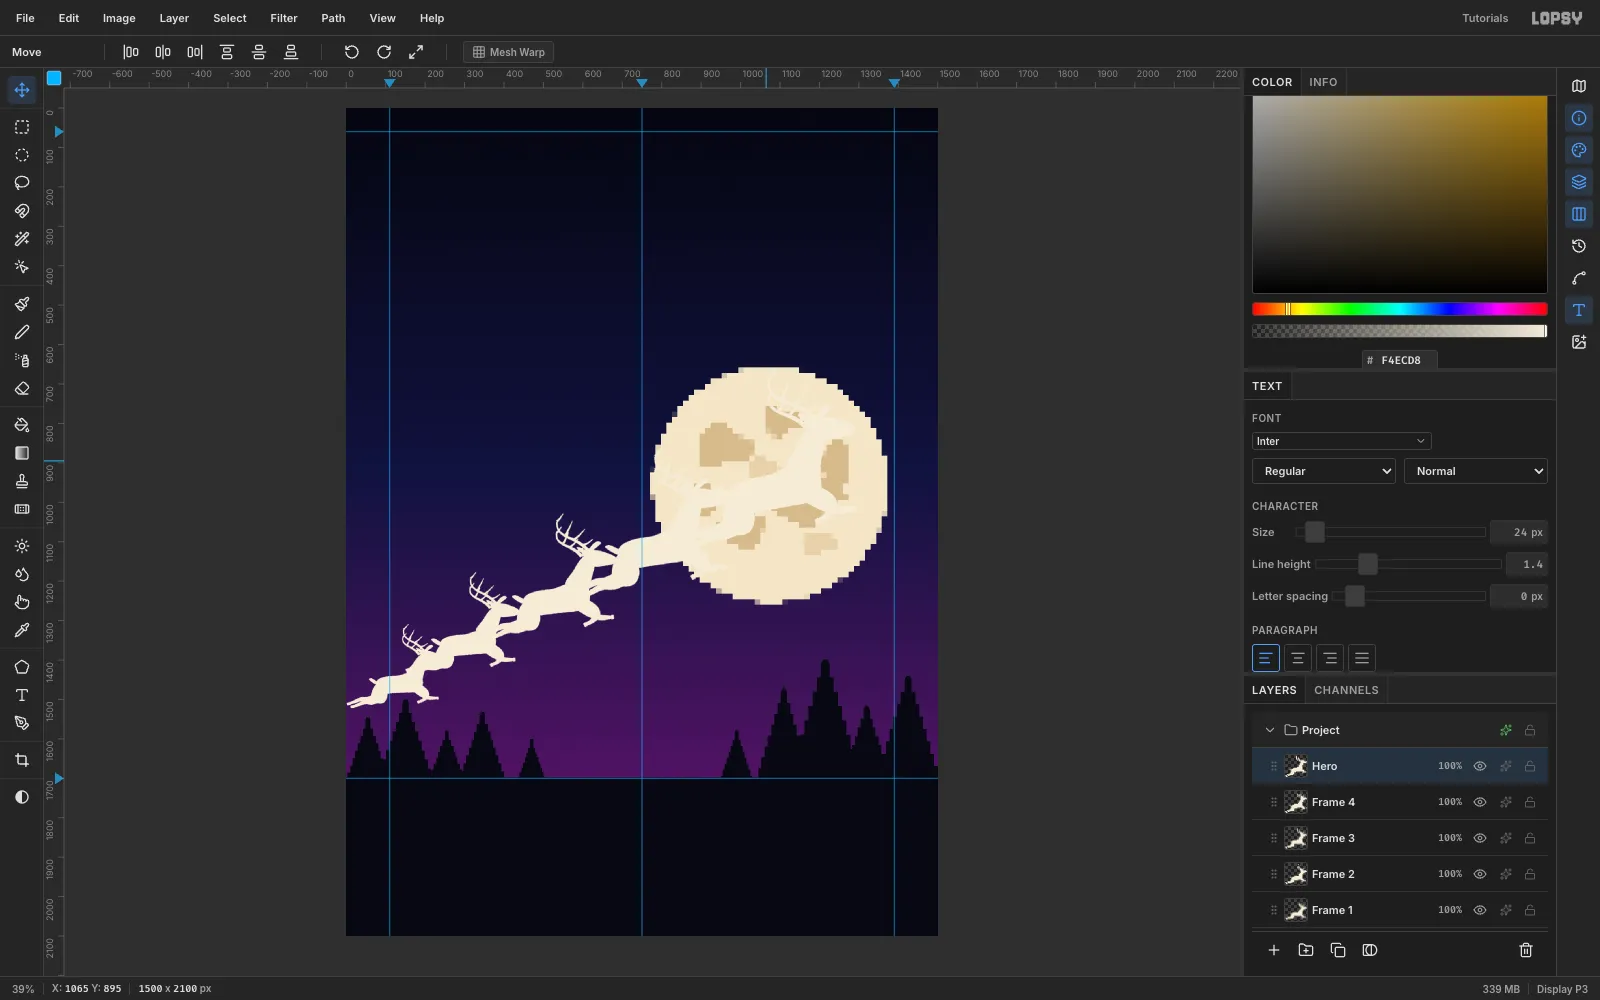
Drag each frame with the Move tool so the sequence steps down and to the left in an arc, each one smaller than the last. Let frames overlap only a little, around a tenth of their area, so each silhouette still reads on its own. Keep the last frame fully on the canvas, at least 60 px in from the left edge and above the pine tips.
-
Corrupt the older frames
Each frame gets a little more broken than the one before:
- Frame 4: leave it clean.
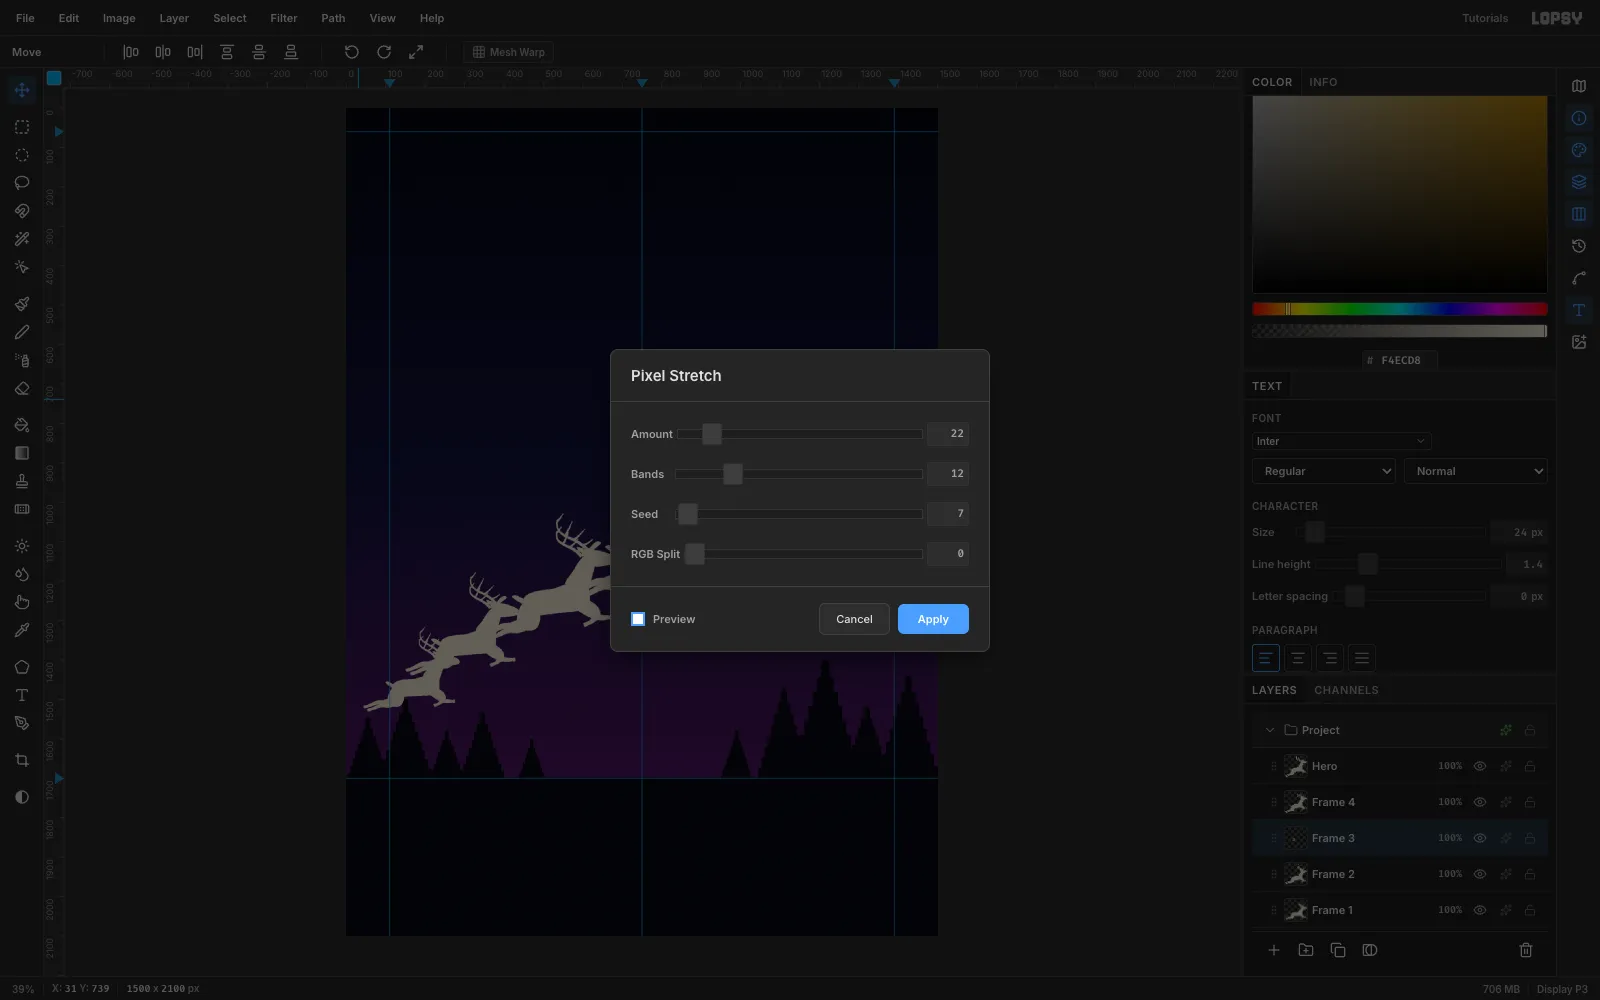
- Frame 3: Filter → Pixel Stretch, with Amount 22, Bands 12, Seed 7 and RGB Split 0.
- Frame 2: Pixelate with Block Size 6, then Pixel Stretch with Amount 30, Bands 9 and Seed 21.
- Frame 1: Pixelate with Block Size 12, then Pixel Stretch with Amount 36, Bands 7 and Seed 5.
Set RGB Split to 0. The colour comes from the next step.
-
Review the corruption gradient
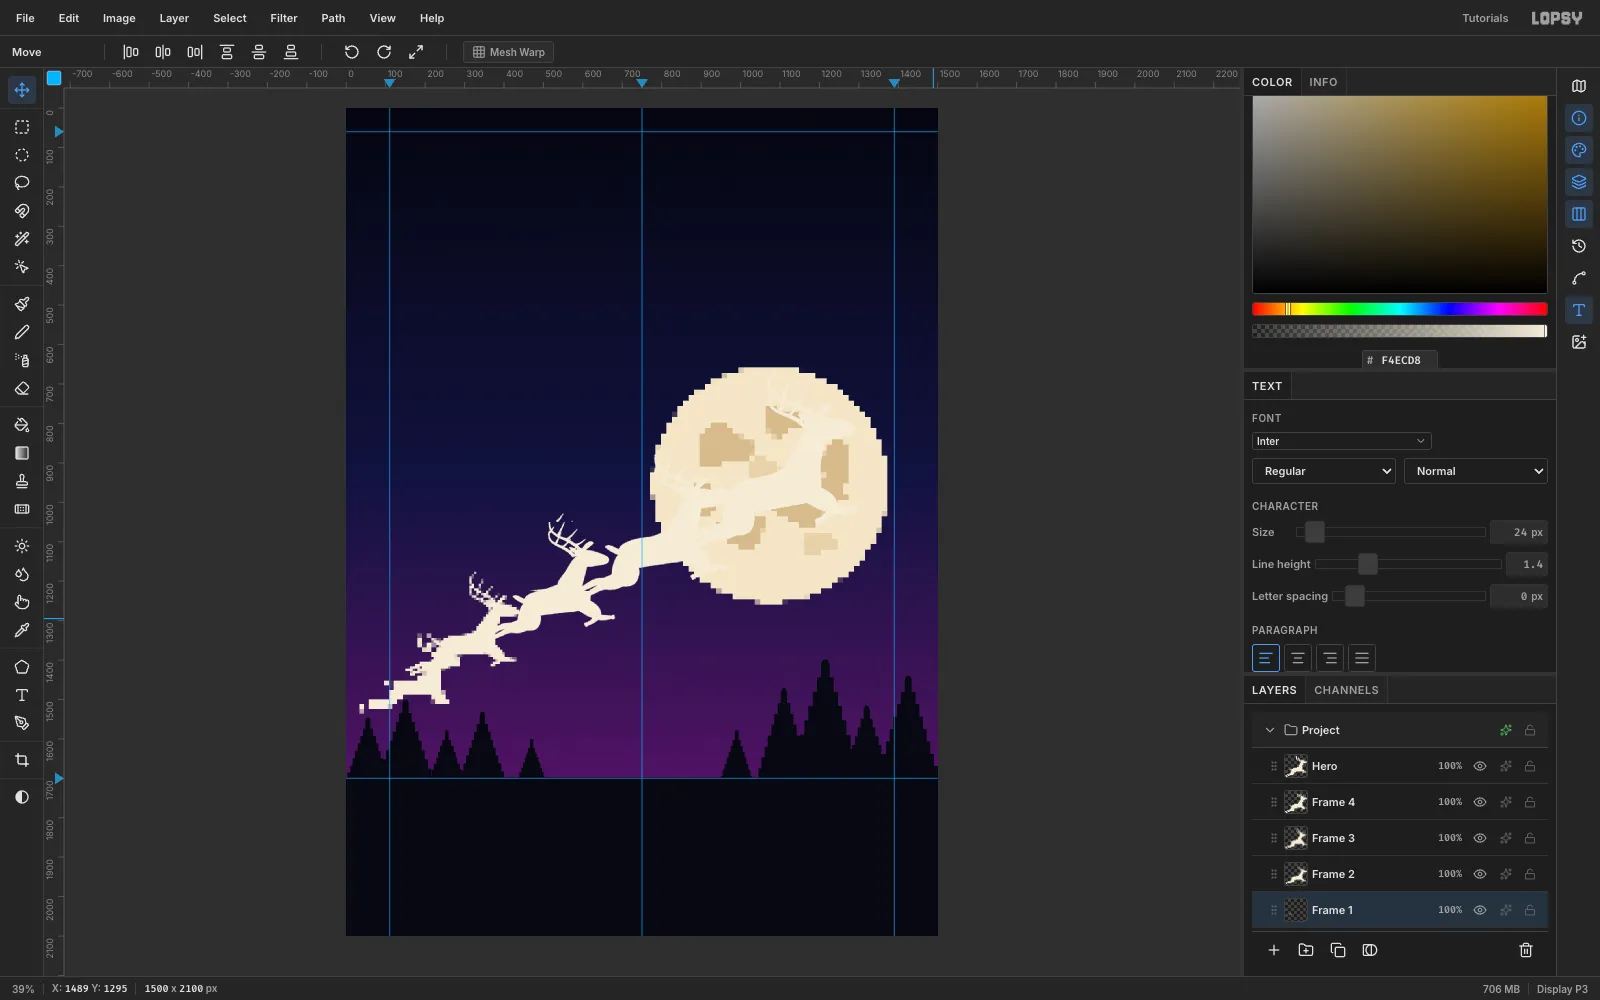
Read the trail from right to left: clean, then smeared, then blocky, then nearly dissolved. That gradient is what makes this look like a failing animation and not random noise.
-
Split each frame into red and cyan
For each frame:
- Click Duplicate Layer.
- Rename the original Frame N R and the copy Frame N C.
- Open Layer effects (✦). Turn on Color Overlay with
#FF2A4Don the R layer and#19E3E3on the C layer. - Set the blend mode of both layers to Screen.
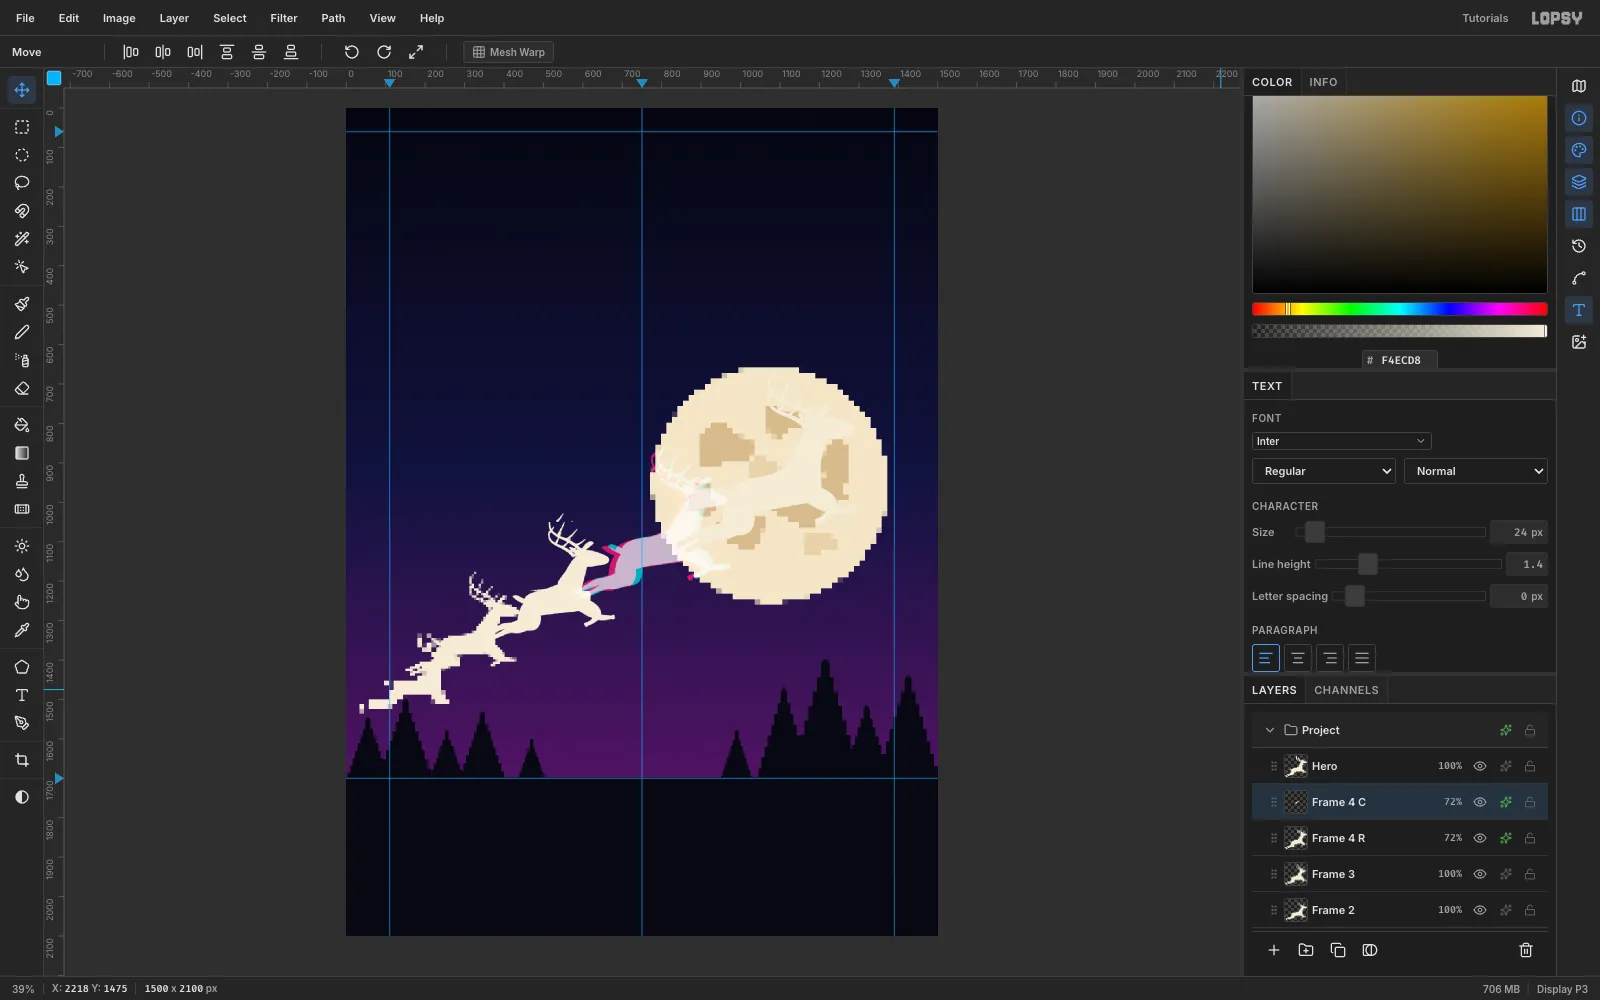
- Drag the R layer left and the C layer right. Use 8 px each way for Frame 4, then 10, 12 and 14 px for the older frames.
Where red and cyan overlap in Screen mode they add up to near-white. So each ghost gets a pale core with a red fringe on the left and a cyan fringe on the right, like a 3D anaglyph.
-
Fade the trail
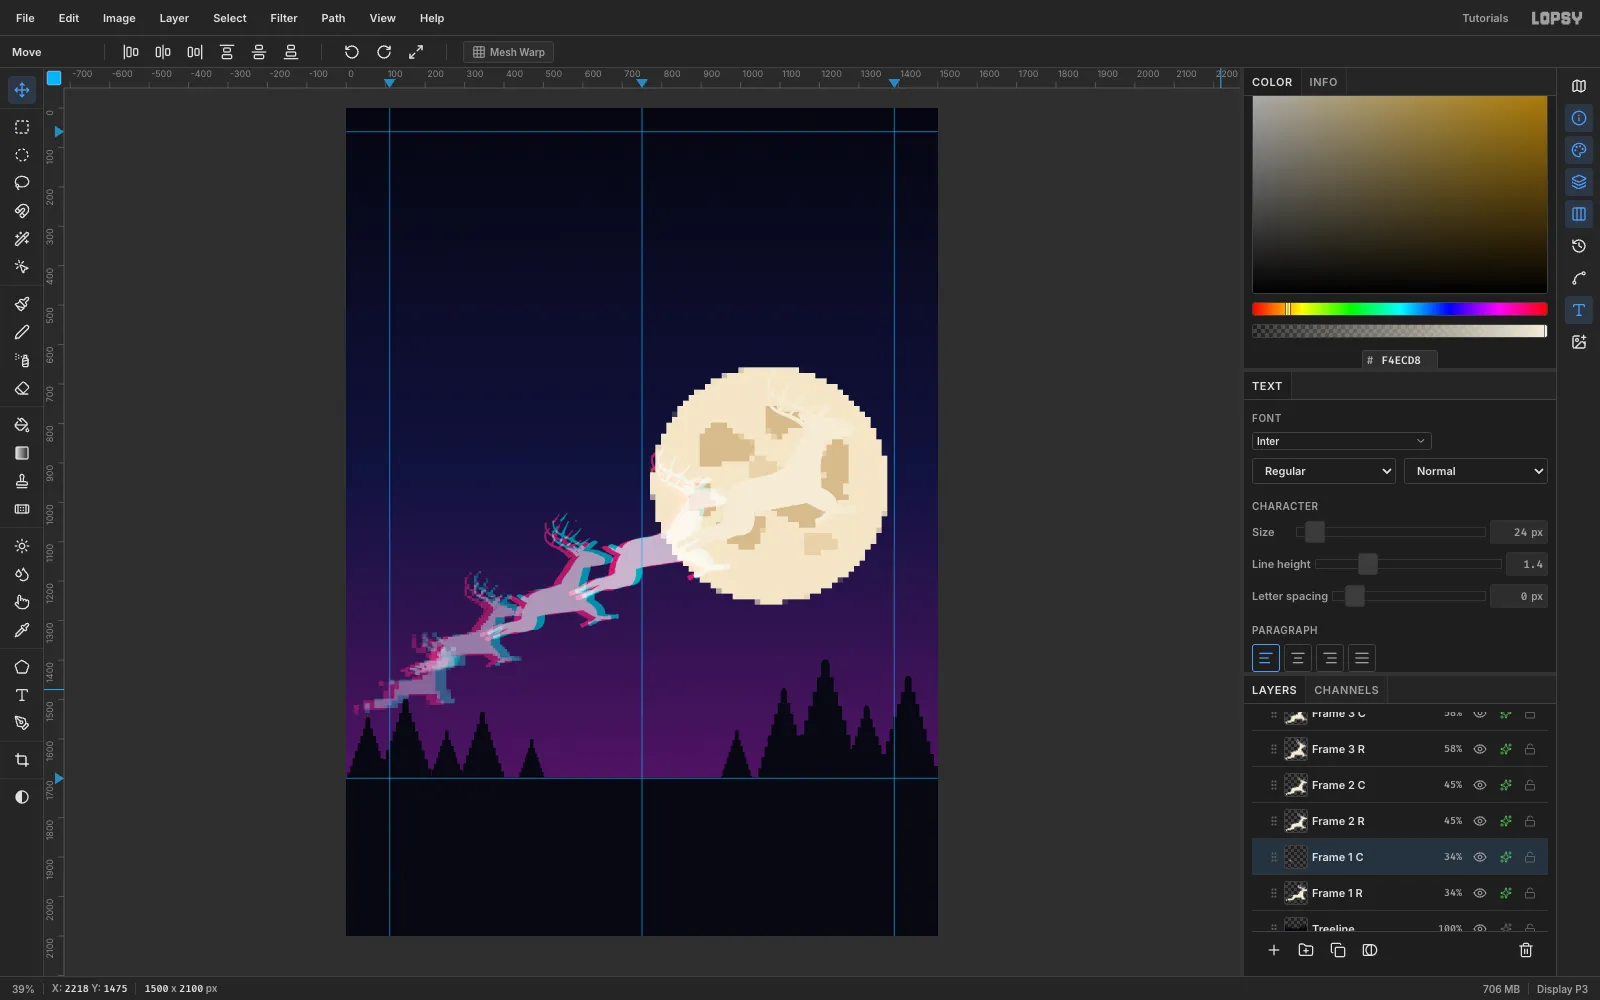
Set both layers of each pair to the same opacity: 72% for Frame 4, then 58%, 45% and 34%. The oldest frames now sink into the sky, and the hero stays the focus.
-
Ink the hero
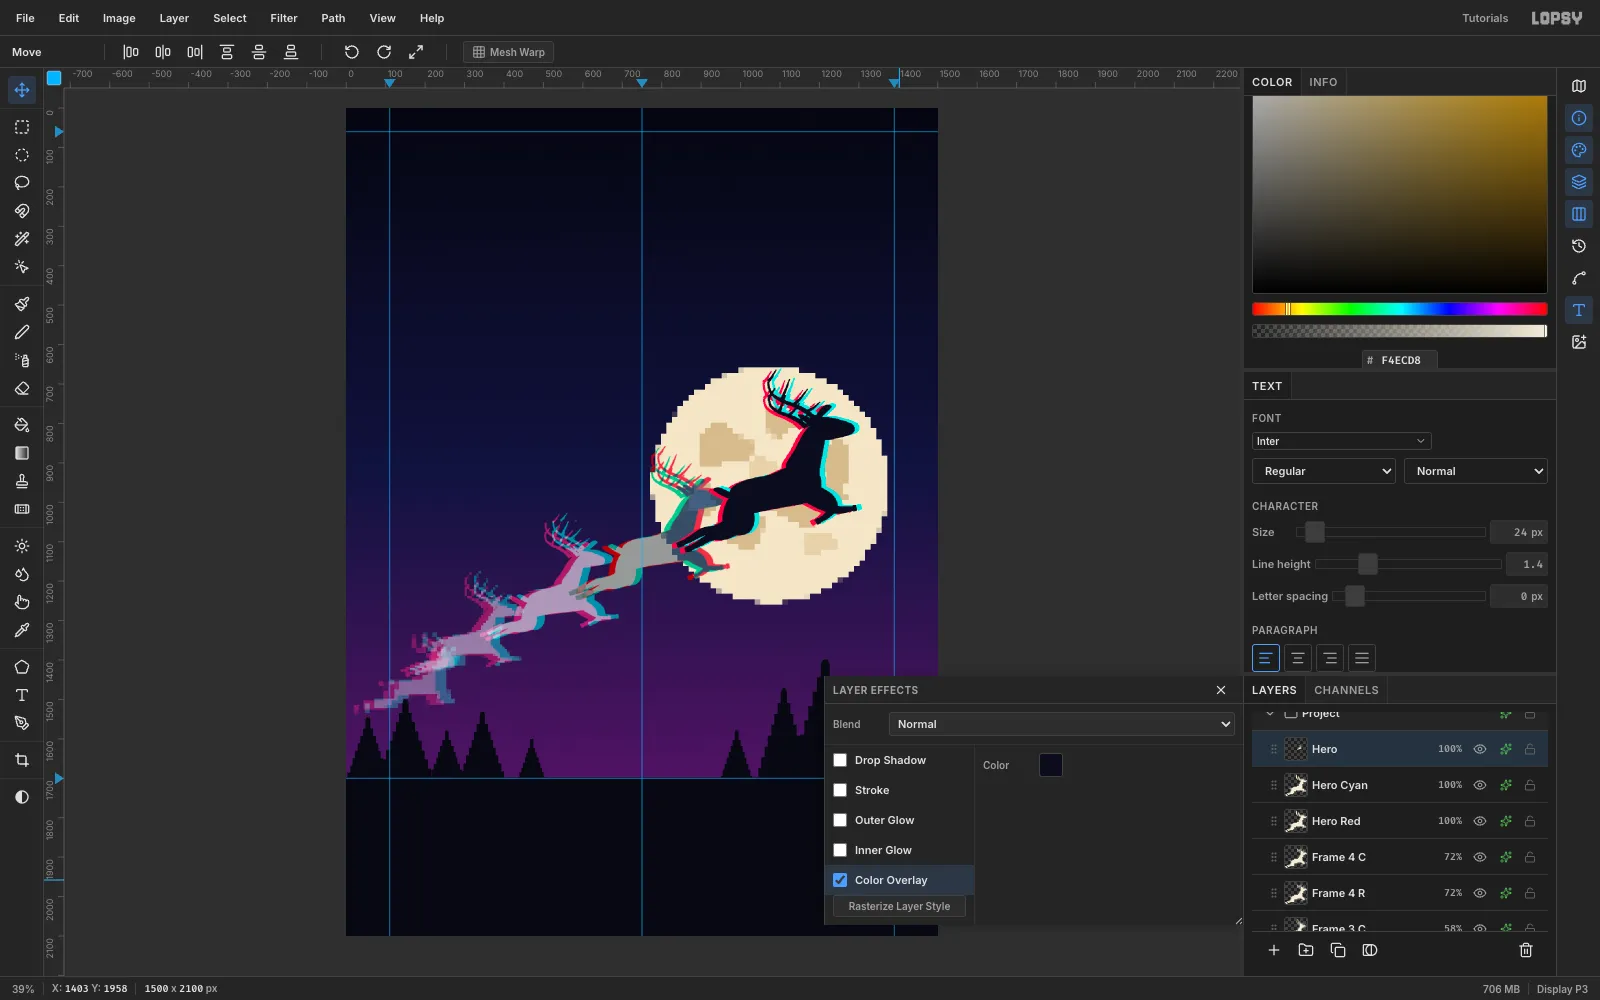
Duplicate Hero twice. Name the bottom layer Hero Red, the middle one Hero Cyan and the top one Hero:
- Move Hero Red 12 px left and 3 px down, with a
#FF2A4DColor Overlay. - Move Hero Cyan 12 px right and 3 px up, with a
#19E3E3Color Overlay. - Give Hero a
#0B0C1CColor Overlay.
Leave all three in Normal mode. Screen would vanish against the cream moon, but Normal keeps a sharp red and cyan edge on the black silhouette.
- Move Hero Red 12 px left and 3 px down, with a
-
Give him a red nose
Add a Nose layer. Draw a 19 px elliptical marquee on the tip of the muzzle and fill it with
#FF2A4D. This is the one warm spot in the scene; you'll give it a glow in the last steps.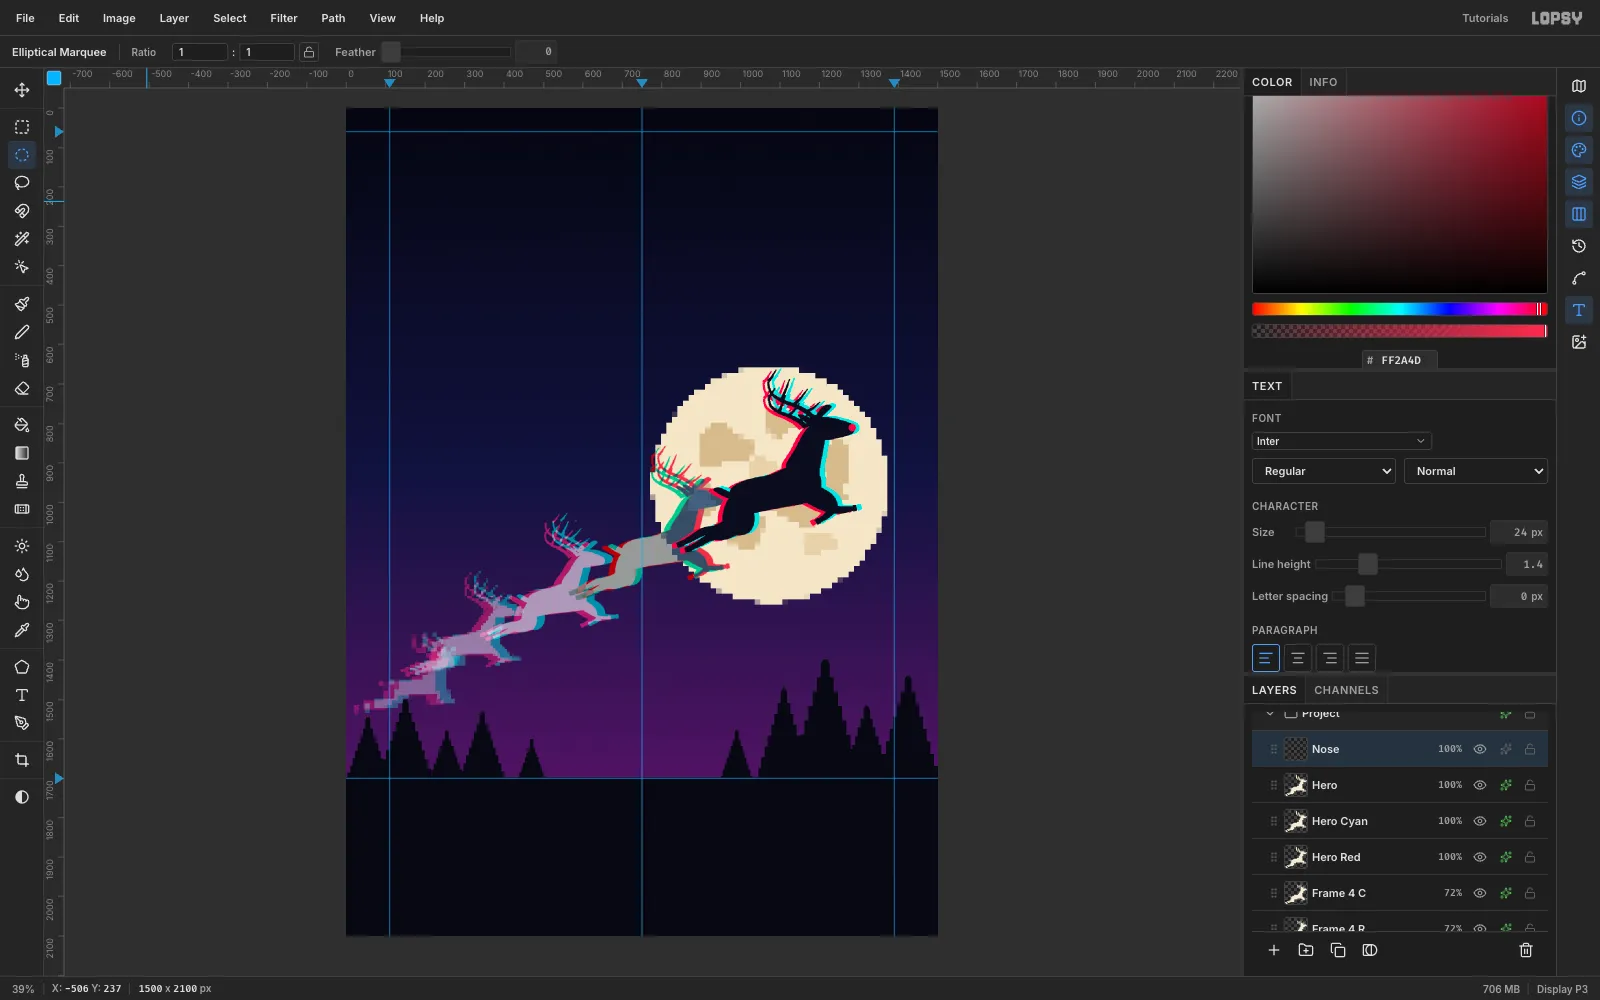
-
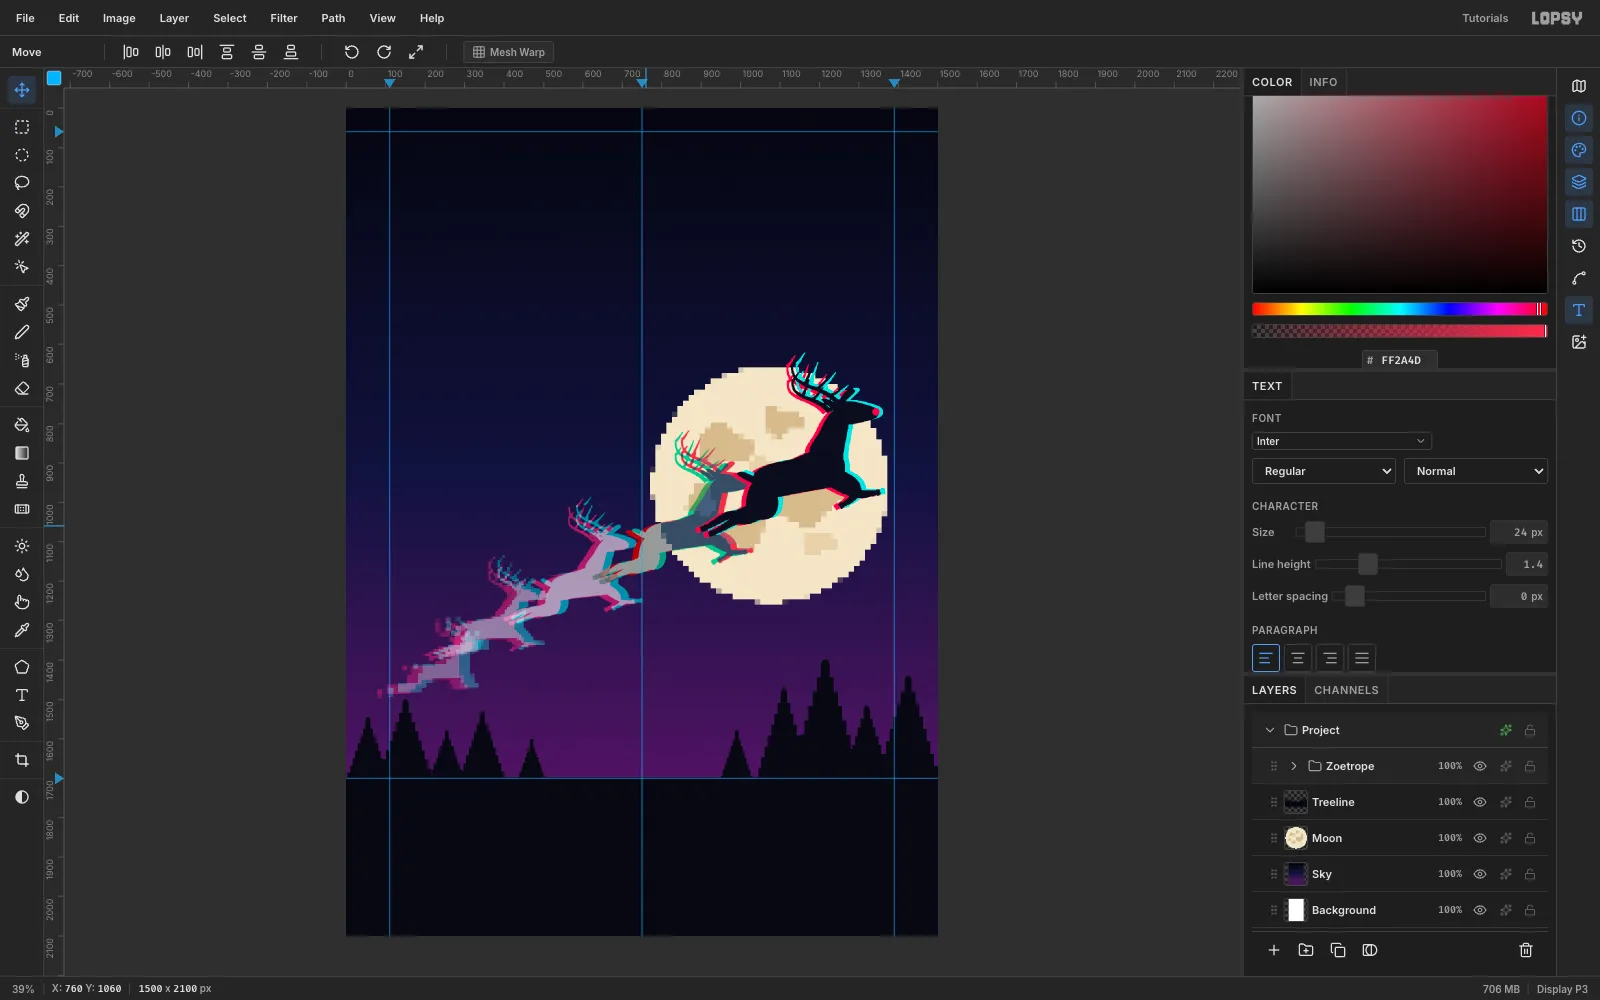
Group the zoetrope
Click Frame 1 R, Shift-click Nose, and choose Layer → Group Layers. Name the group Zoetrope.
With the group row selected, you can drag the whole animation with the Move tool to try other positions. ⌘Z puts it back exactly, and ⇧⌘Z redoes the move.
-
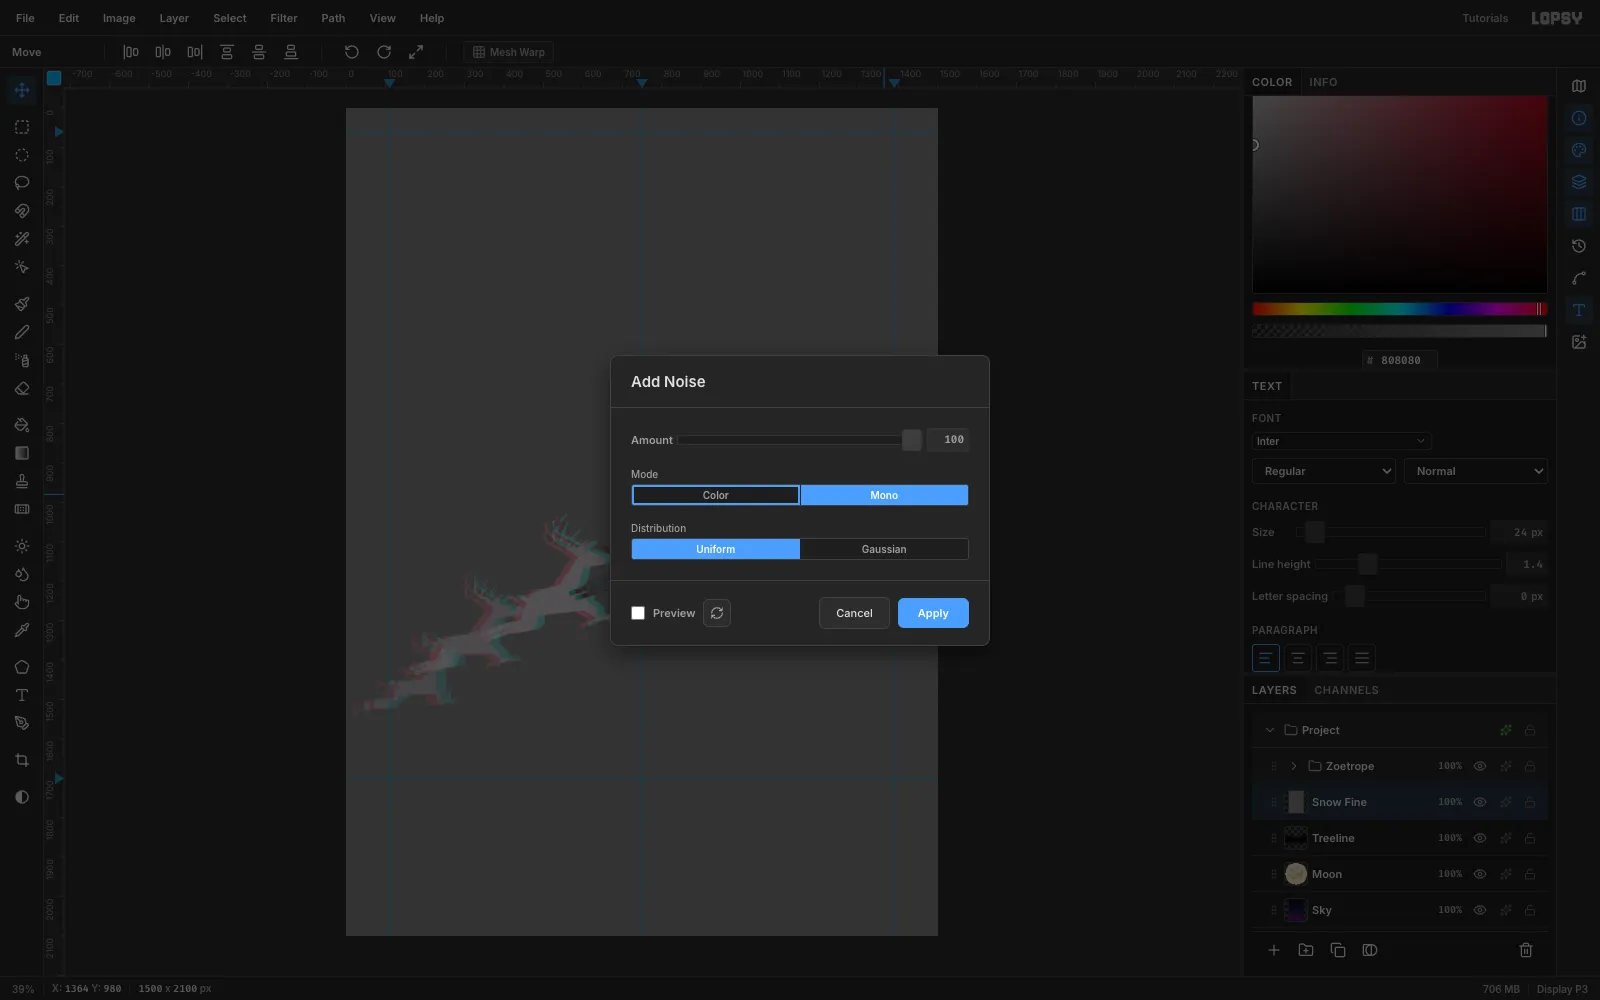
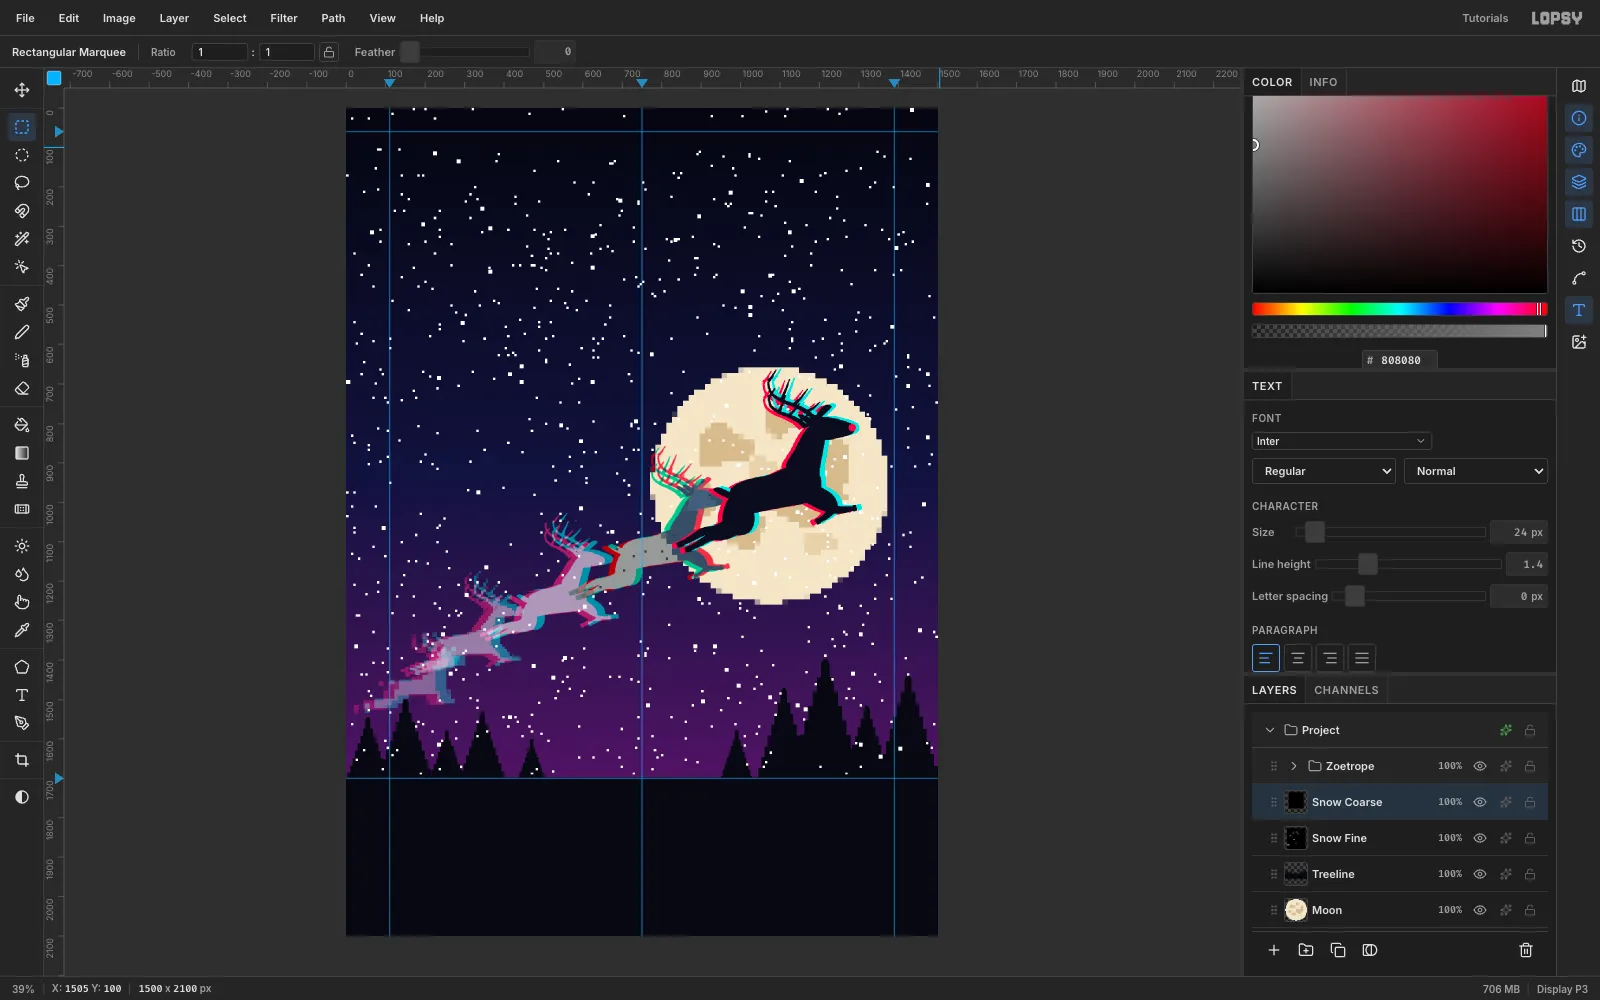
Make pixel snow
Click Treeline and add a layer called Snow Fine:
- Fill the layer with
#808080. - Filter → Add Noise… with Amount 100 and Mono.
- Filter → Pixelate with Block Size 6. The noise becomes 6 px tiles.
- Filter → Threshold at about 160, so only about 1% of the tiles stay white.
- Set the layer to Screen. The black disappears.
Repeat on a Snow Coarse layer with Block Size 10 and a Threshold of about 156, which leaves a handful of bigger flakes.
- Fill the layer with
-
Keep the snow off the ground
On both snow layers:
- Marquee everything below y 1690 and press Delete.
- Do the same for the thin header strip at the top.
Then drag Treeline above both snow layers in the Layers panel, so the pines hide any flakes behind them. The type area stays clean.
-
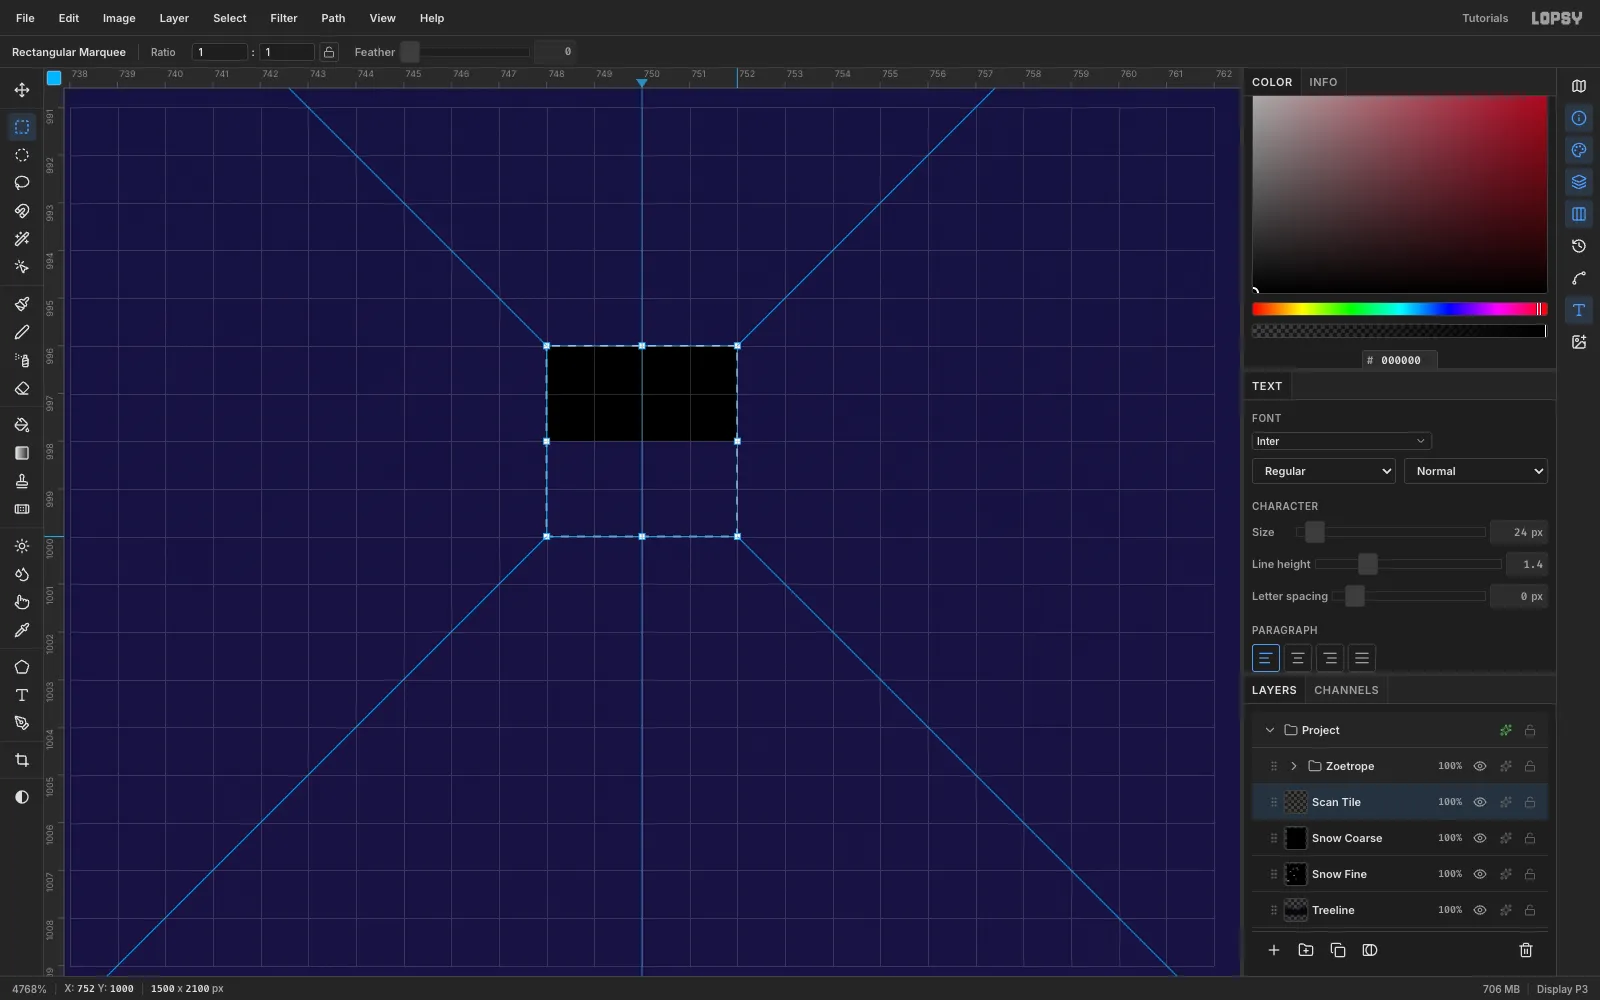
Draw a scanline tile
Add a temporary layer. Hold Ctrl and scroll up to zoom in all the way.
- Marquee a 4 × 2 px rectangle and fill it black.
- Marquee the 4 × 4 square that contains it.
- Choose Edit → Define Pattern.
That's one CRT scanline: 2 px dark, 2 px clear. Delete the temporary layer and press ⌘0 to fit the canvas again.
-
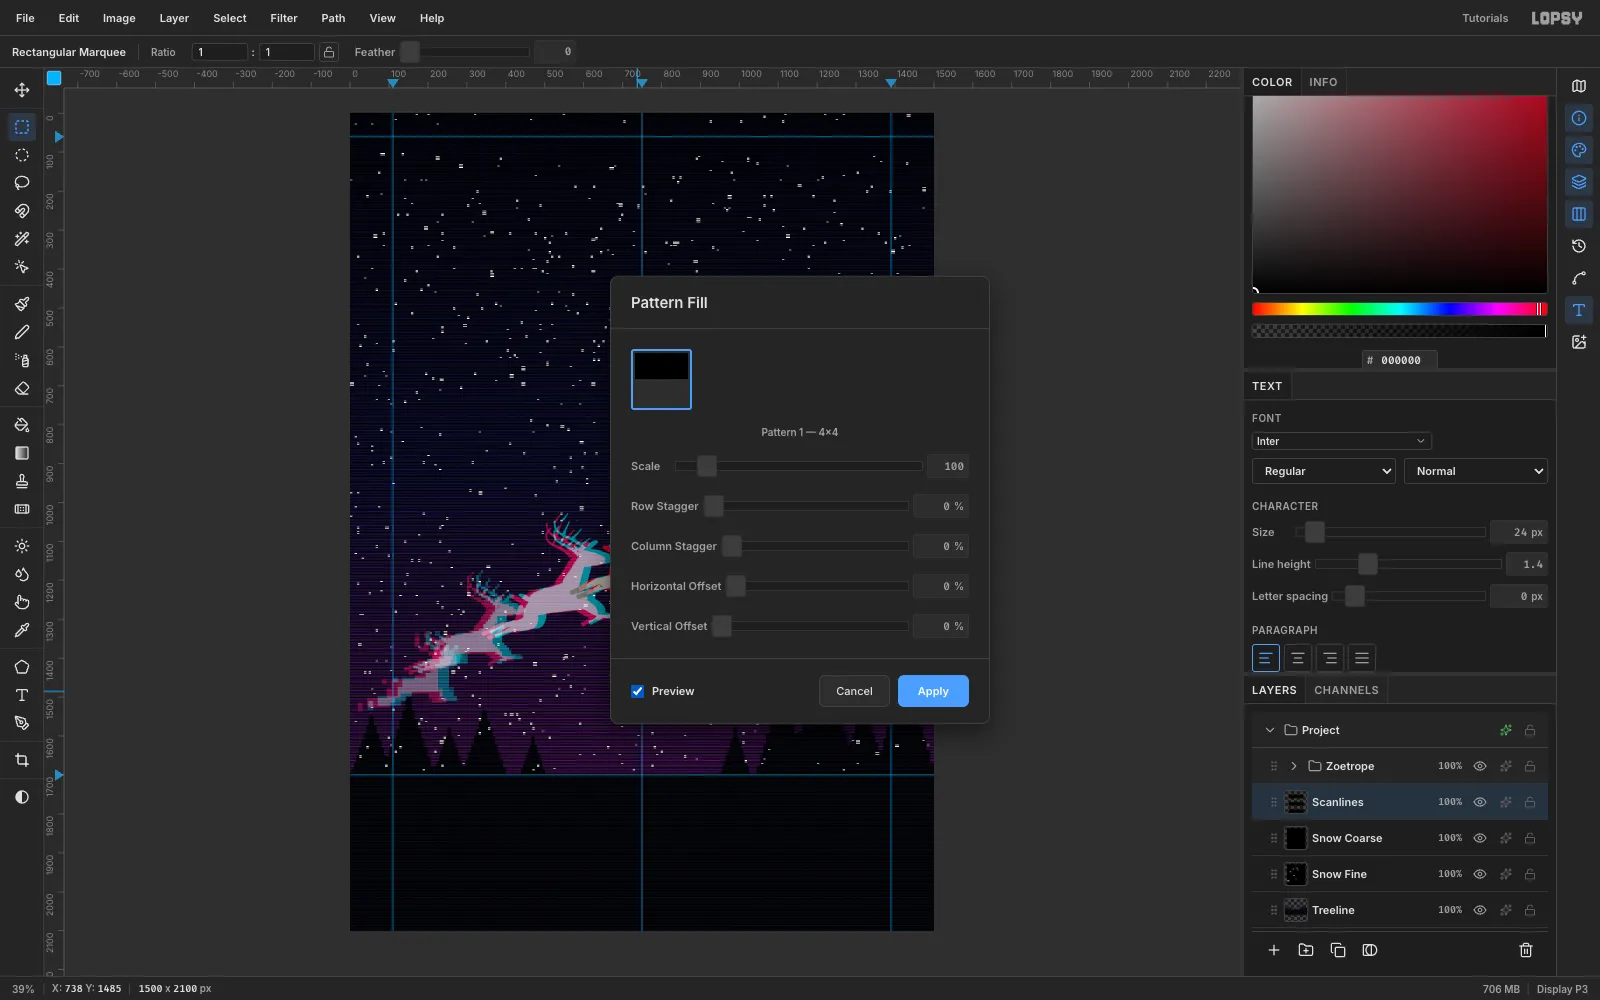
Fill the card with scanlines
Add a Scanlines layer. Choose Edit → Fill with Pattern…, pick the 4×4 pattern and tick Preview. Click Apply.
Drop the layer's opacity to 22%, then drag it above the Zoetrope group, so the lines run over everything and flatten it like a CRT screen.
-
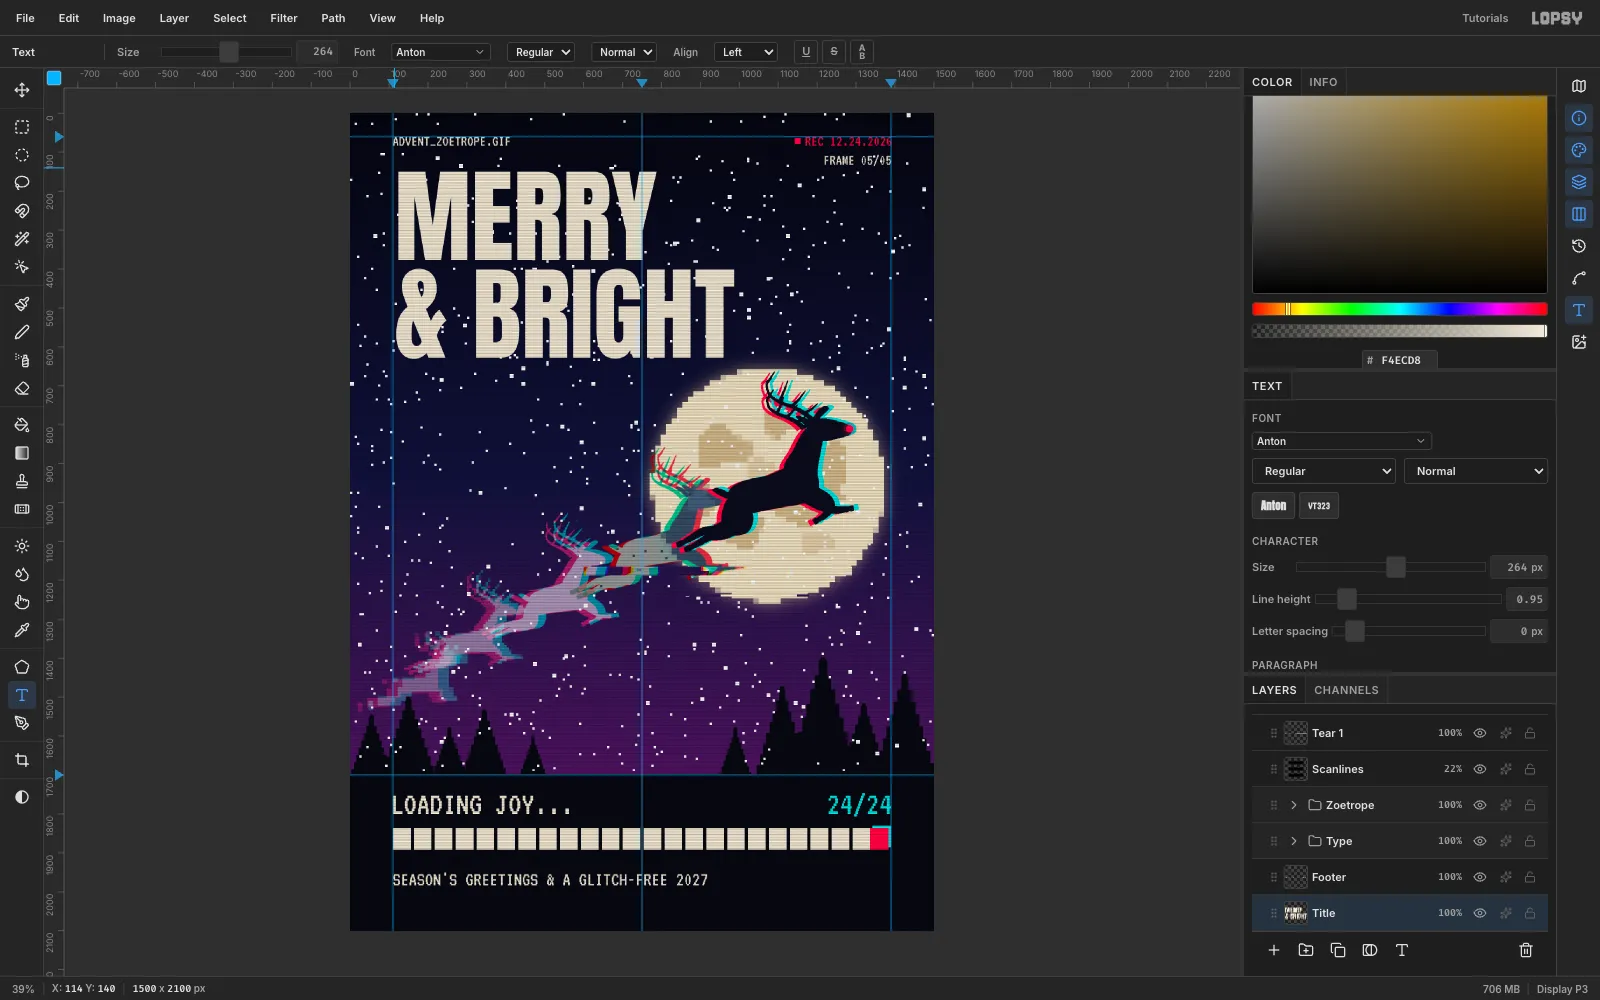
Set the headline
Click Snow Coarse, so the new text doesn't restyle any other layer. Pick the Text tool with Anton, Size 264, colour
#F4ECD8and Line height 0.95. Type MERRY, press Enter, then type & BRIGHT.Click Rasterize Layer, then move it so the letters' top-left corner sits at 114, 130. That leaves room for the red copy you'll add next, which sits 10 px further left, like a misregistered print.
-
Datamosh the title
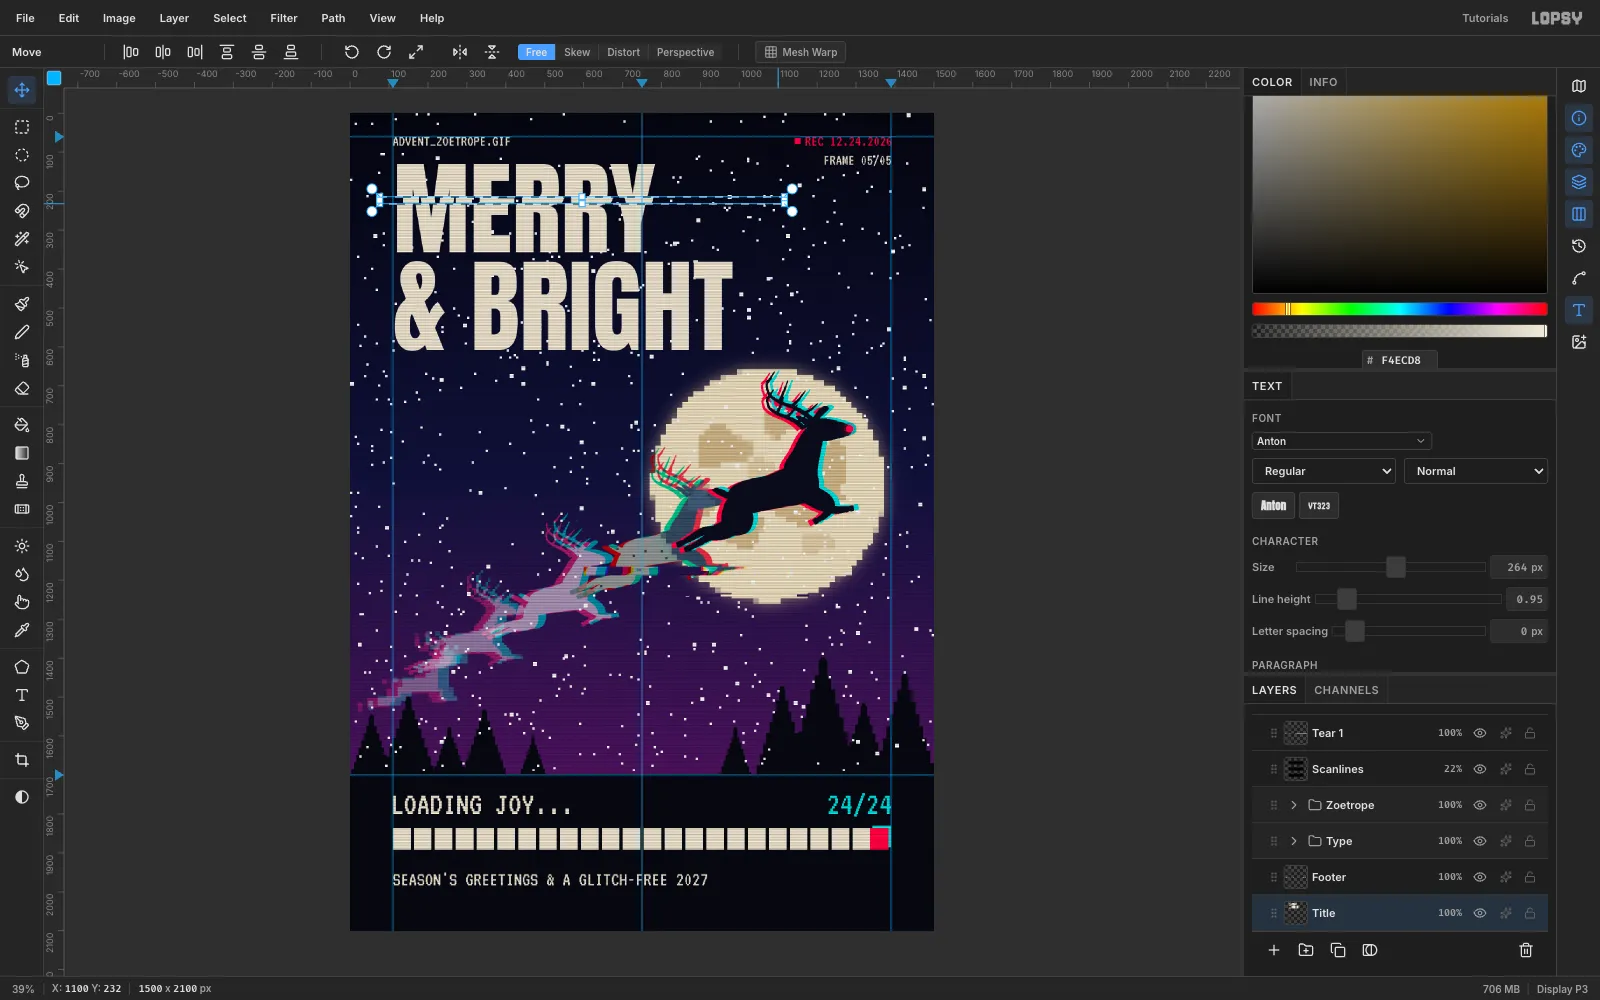
Glitch slices only work when the title stays readable, so make just two:
- Marquee a band across MERRY from y 214 to 232. With the Move tool, press Shift+→ once and → six times to shift it 16 px right. Press ⌘D.
- Marquee x 300 → 1100, y 488 → 504 across BRIGHT, which skips the &. Shift it 14 px left and press ⌘D.
Keep the slices thin and the shifts small. At 30 px or more, the shifted strokes start to read as doubled letters.
-
Split the title's channels
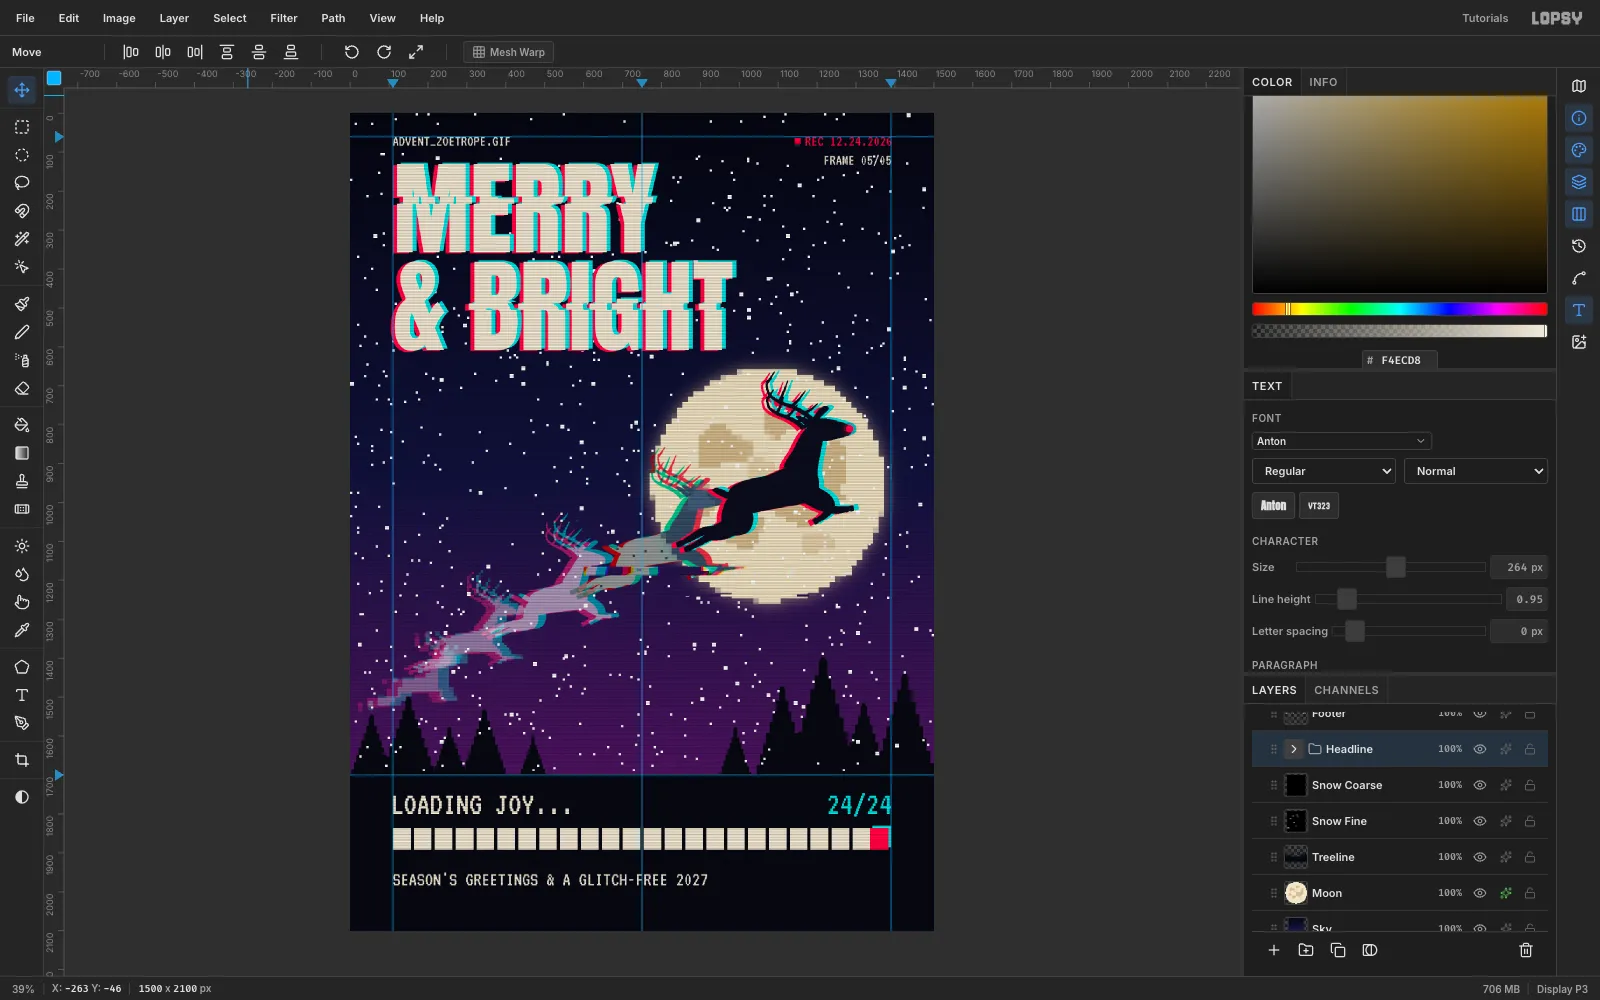
Treat the title like the hero. Click Duplicate Layer twice and name the layers Title Red (bottom), Title Cyan and Title (top):
- Title Red: 10 px left and 3 px down, with a
#FF2A4DColor Overlay. - Title Cyan: 10 px right and 3 px up, with a
#19E3E3Color Overlay.
Because the slices were cut before you duplicated, all three layers glitch in the same places. Group them as Headline.
- Title Red: 10 px left and 3 px down, with a
-
Add the terminal type
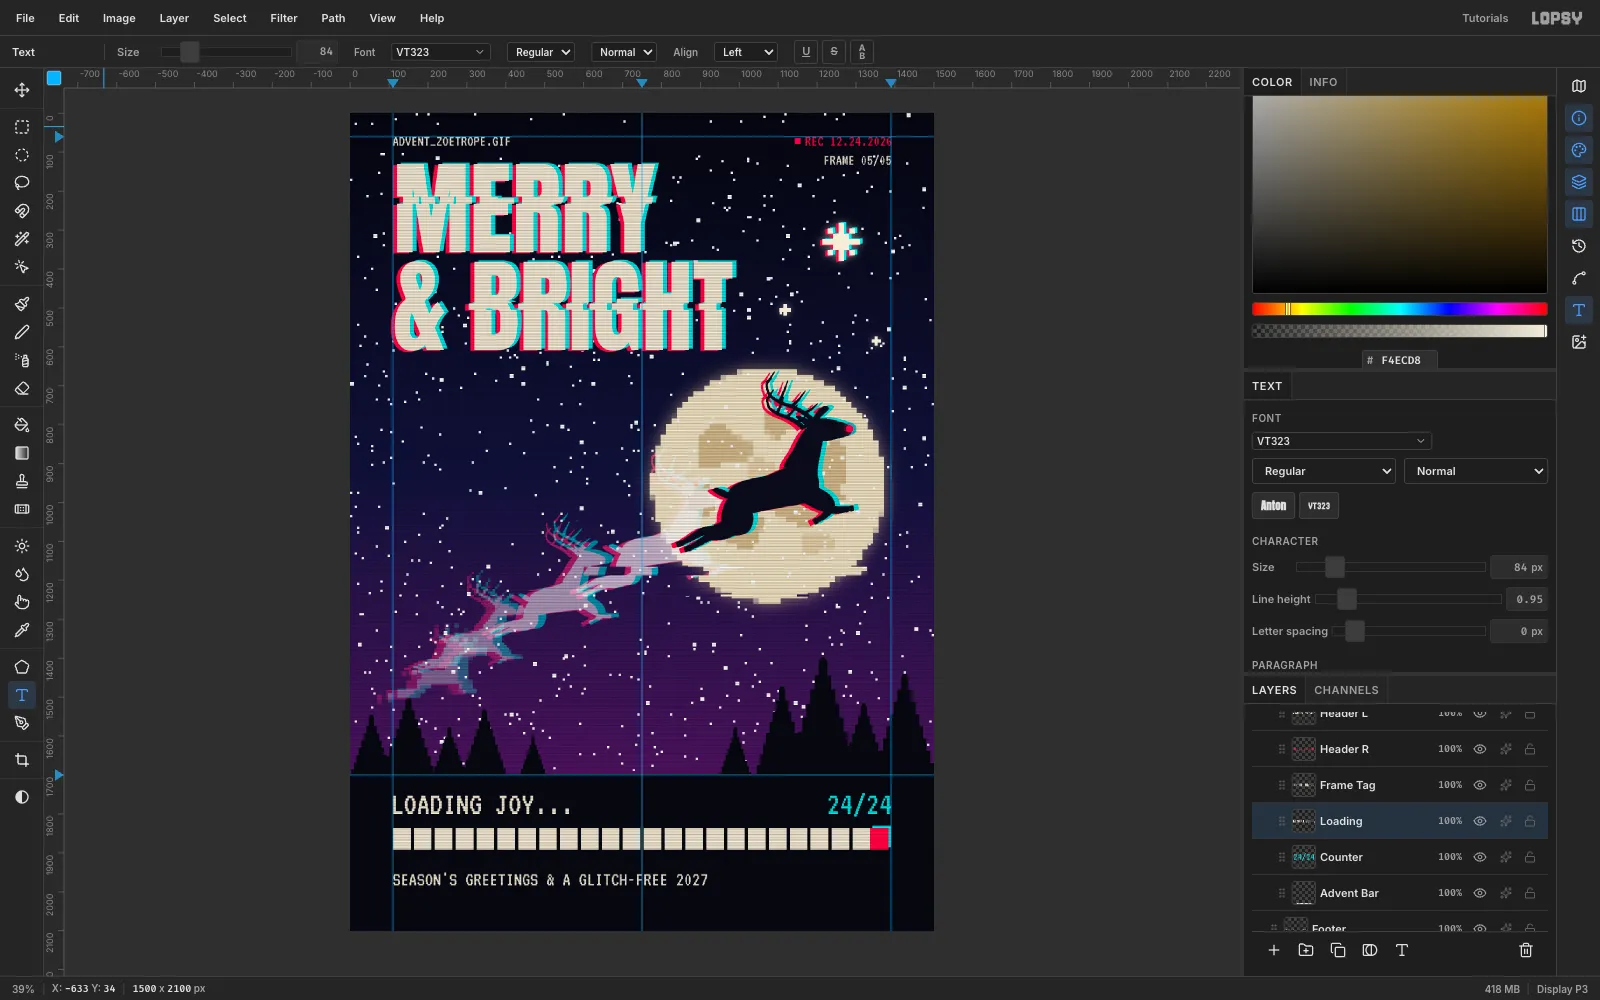
Use VT323, a pixel terminal face, for everything else. Hang the left blocks on the 110 guide and right-align the right blocks to 1390:
- ADVENT_ZOETROPE.GIF: 40 px cream, top-left at 110, 60.
- REC 12.24.2026: 40 px red, right edge on 1390, top at 60. Draw a 16 px red square just left of it as a recording light.
- FRAME 05/05: 40 px cream, right-aligned under REC.
- LOADING JOY...: 84 px cream at 110, 1752.
- 24/24: 84 px cyan, right edge on 1390, on the same line.
- SEASON'S GREETINGS & A GLITCH-FREE 2027: 52 px cream at 110, 1950.
-
Build the advent loading bar
Turn on View → Show Grid to check alignment. Add an Advent Bar layer and marquee-fill 24 cells between the 110 and 1390 guides, from y 1836 to 1892. Each cell is 45.67 px wide with an 8 px gap, so the pitch is 1288 ÷ 24 = 53.67 px.
Fill 23 cells cream. For the 24th, first fill a cyan cell 6 px up and to the right, then a red
#FF2A4Dcell on top. Christmas Eve is the one cell that's still flickering. Group all the type layers as Type.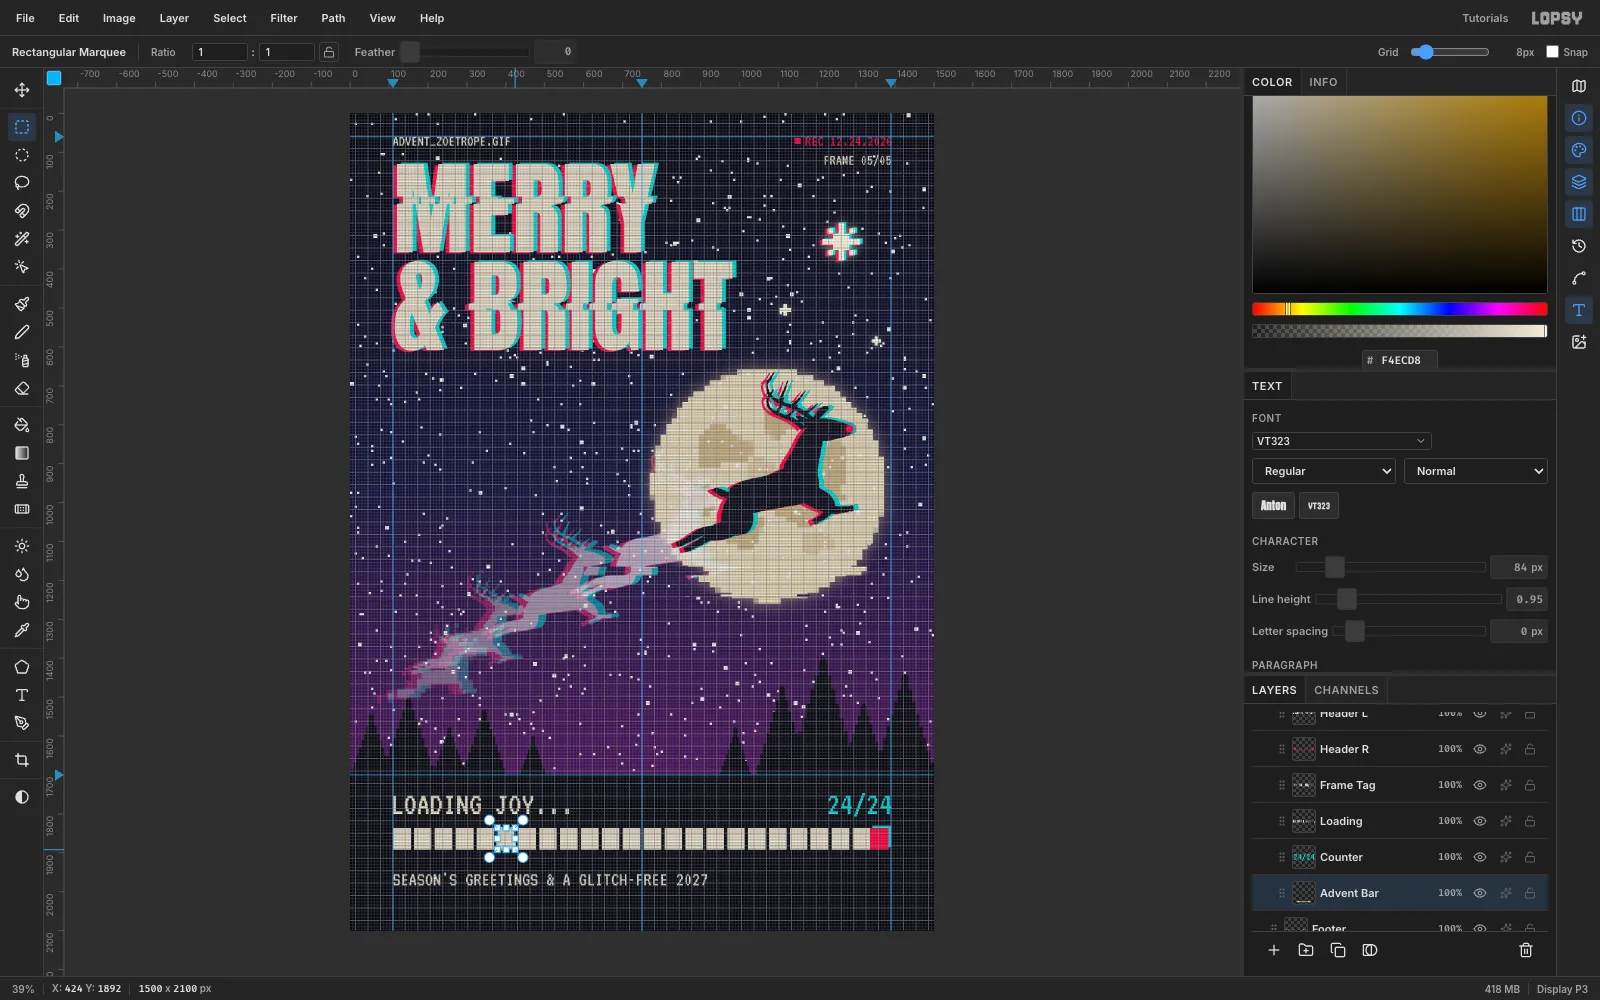
-
Tear the image with Copy Merged
Real datamosh artefacts cut across everything, so copy from the whole composite:
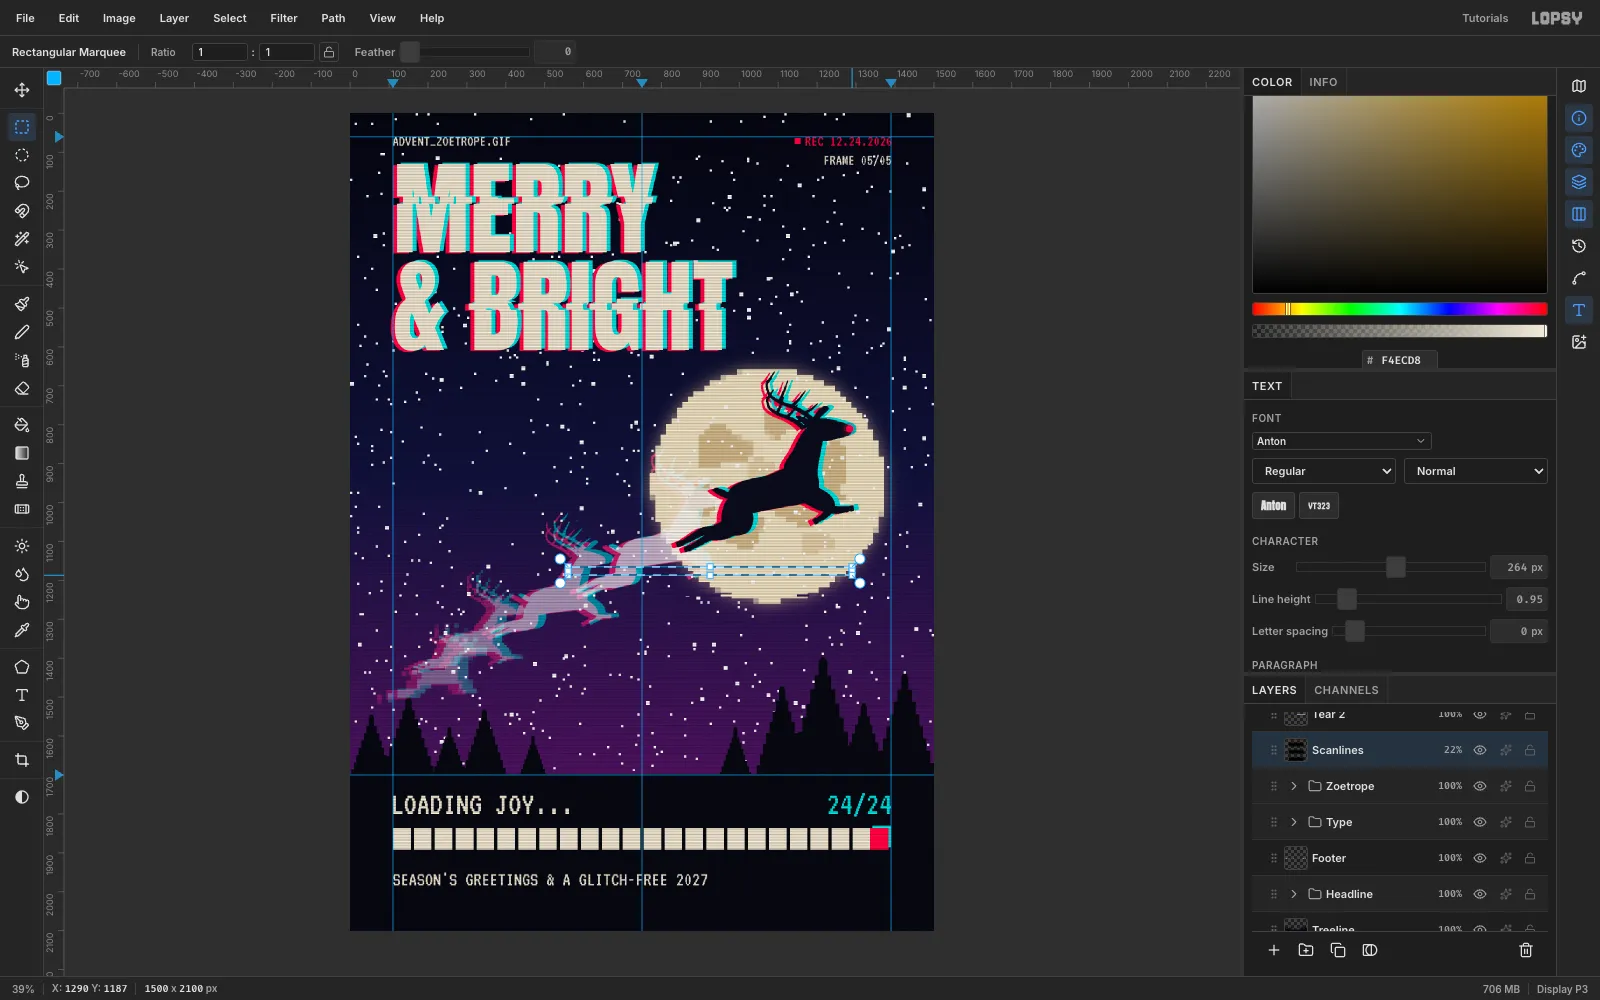
- Click the top layer. Marquee x 560 → 1290, y 1165 → 1187, below the hero's hooves, and press ⇧⌘C (Edit → Copy Merged).
- Wait a couple of seconds, then press ⌘V. The band pastes in place as a new layer.
- Shift it 40 px right with the arrow keys.
-
Add a second tear
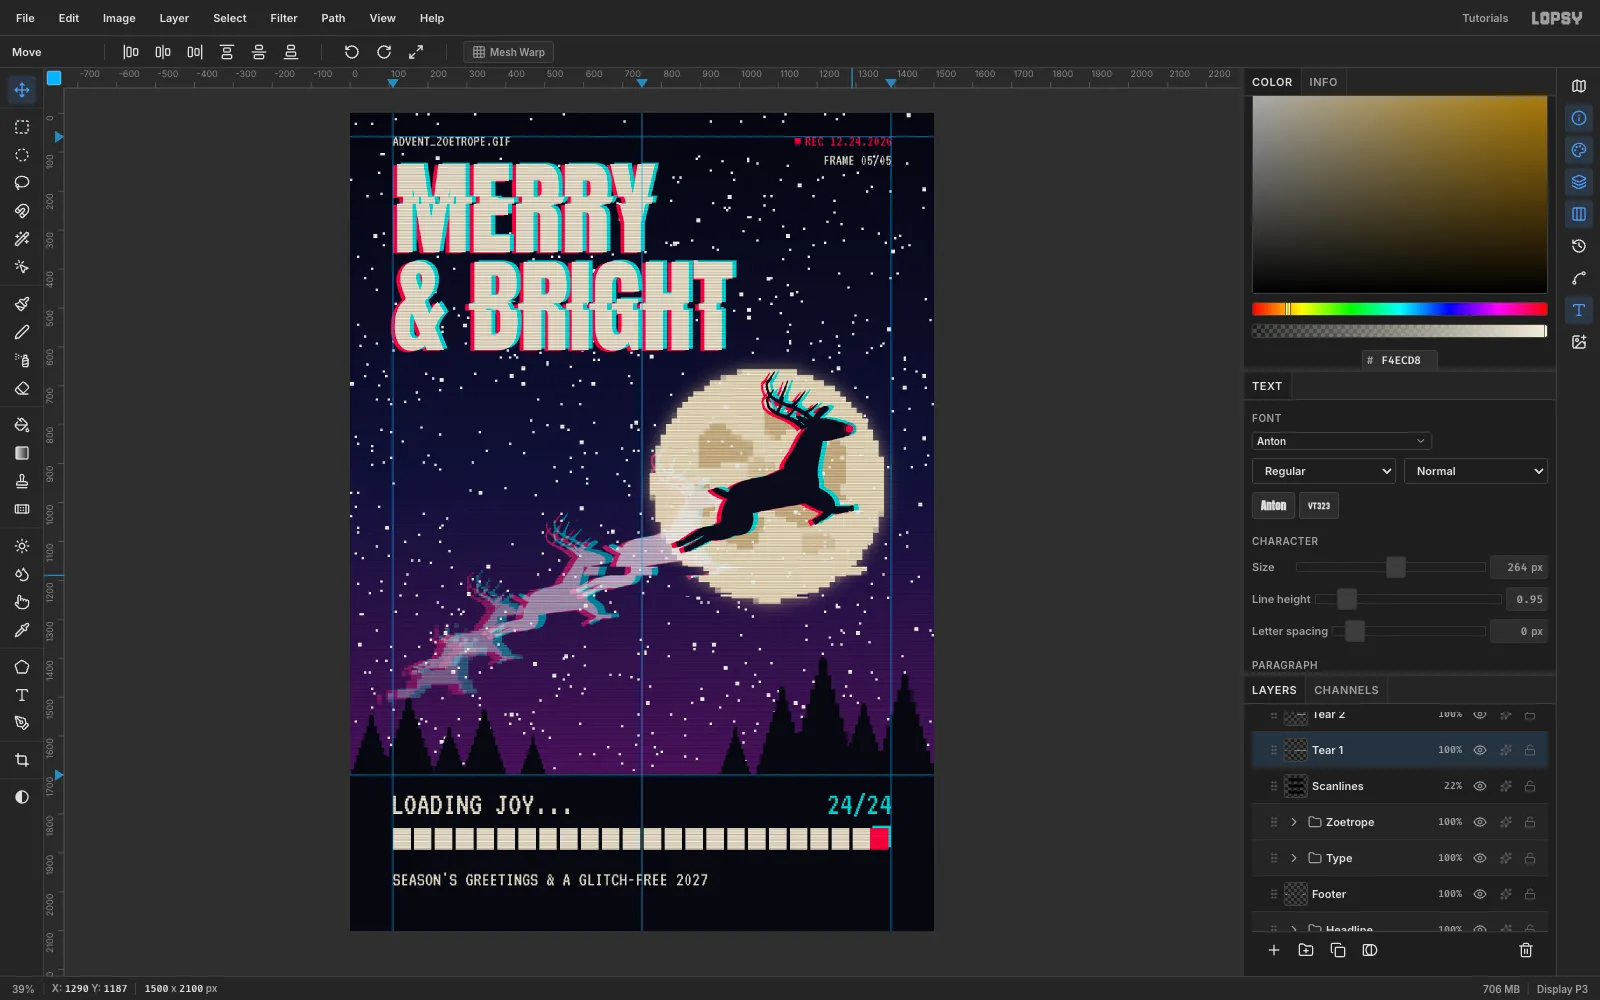
Make a second, 6 px band across the bottom of the moon and shift it 28 px left. Trim both bands so they end inside the moon. Glitches that spill into the empty sky just look like dead pixels.
-
Balance the corner with a pixel star
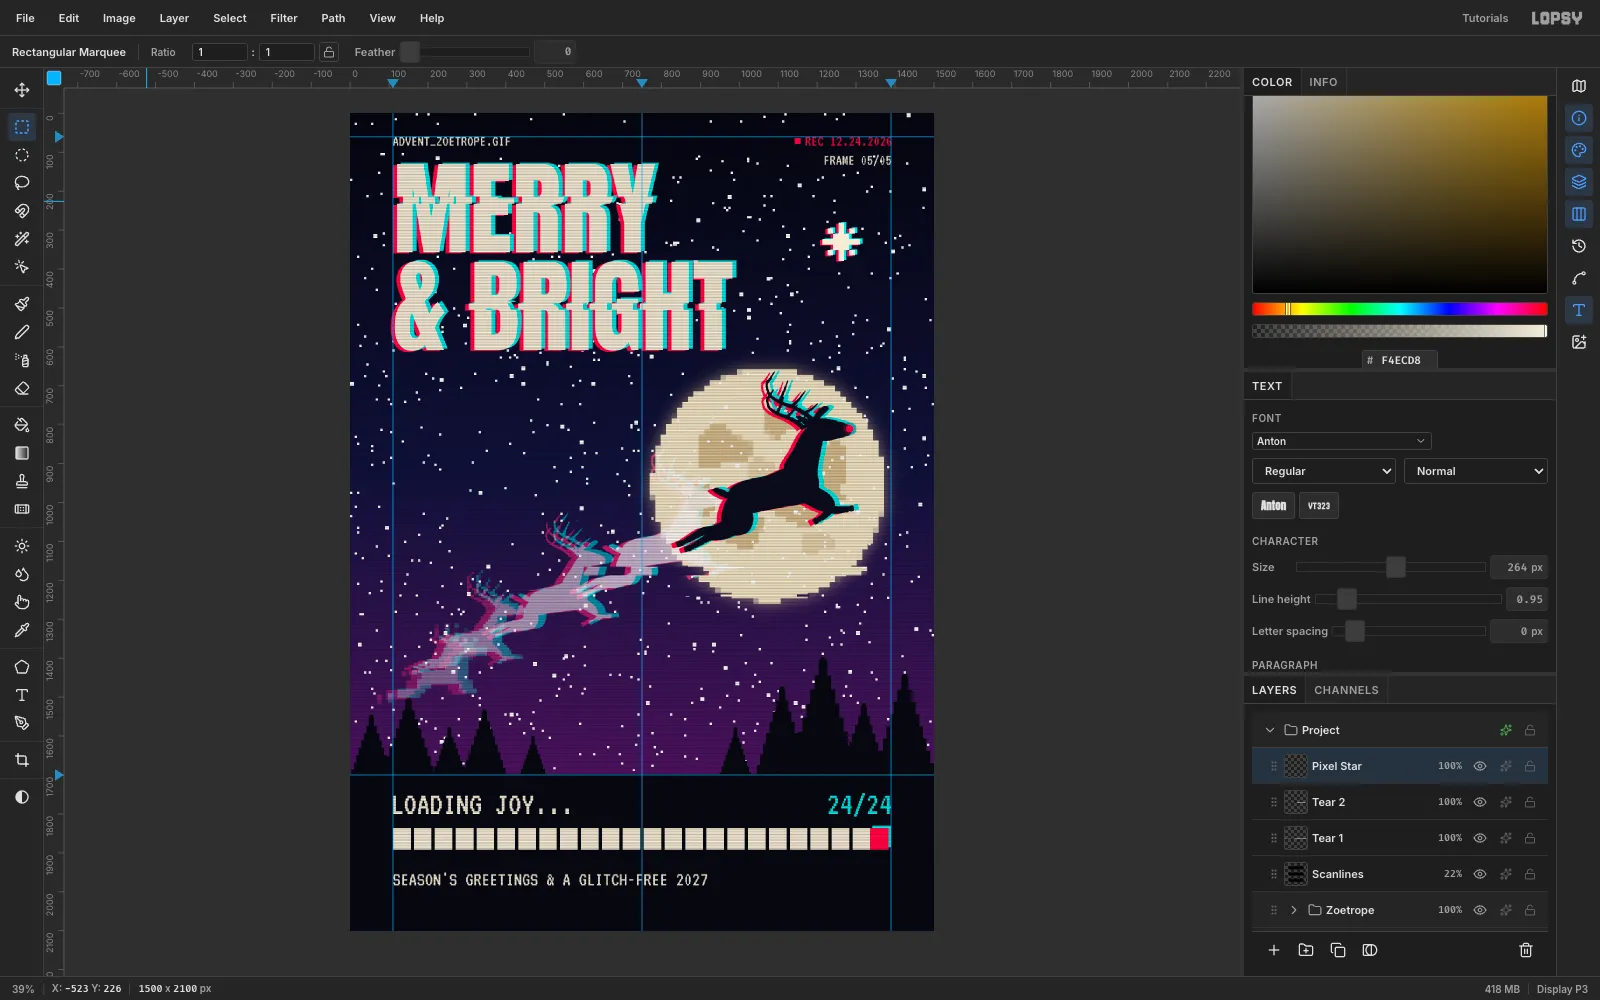
The top right is empty, so add a Christmas star. On a Pixel Star layer, build an 8-bit sparkle from 14 px squares:
- A cross 7 blocks tall and 7 blocks wide.
- A 3-block row just above and just below the centre.
- Four single blocks on the diagonals.
Draw it three times: in red 6 px to the left, in cyan 6 px to the right, then in cream on top. Add two small cream crosses nearby, then give the layer an Outer Glow in cream (Size 28, Opacity 45).
-
Make the moon glow
Leave the heavy effects until last. On Moon, turn on Outer Glow with
#FFD9A8(Size 60, Spread 0, Opacity 55). On Nose, add an Outer Glow in#FF2A4D(Size 22, Spread 10, Opacity 90). Rudolph now lights the frame.Check the whole card at ⌘0. Save the project with File → Save Project, then export with File → Quick Export PNG.