Make a Holographic Sticker Tattoo Flash Sheet
Build a holographic foil texture from Clouds and a Gradient Map, then use it for a sheet of die-cut flash stickers in Lopsy, led by a blue morpho butterfly.
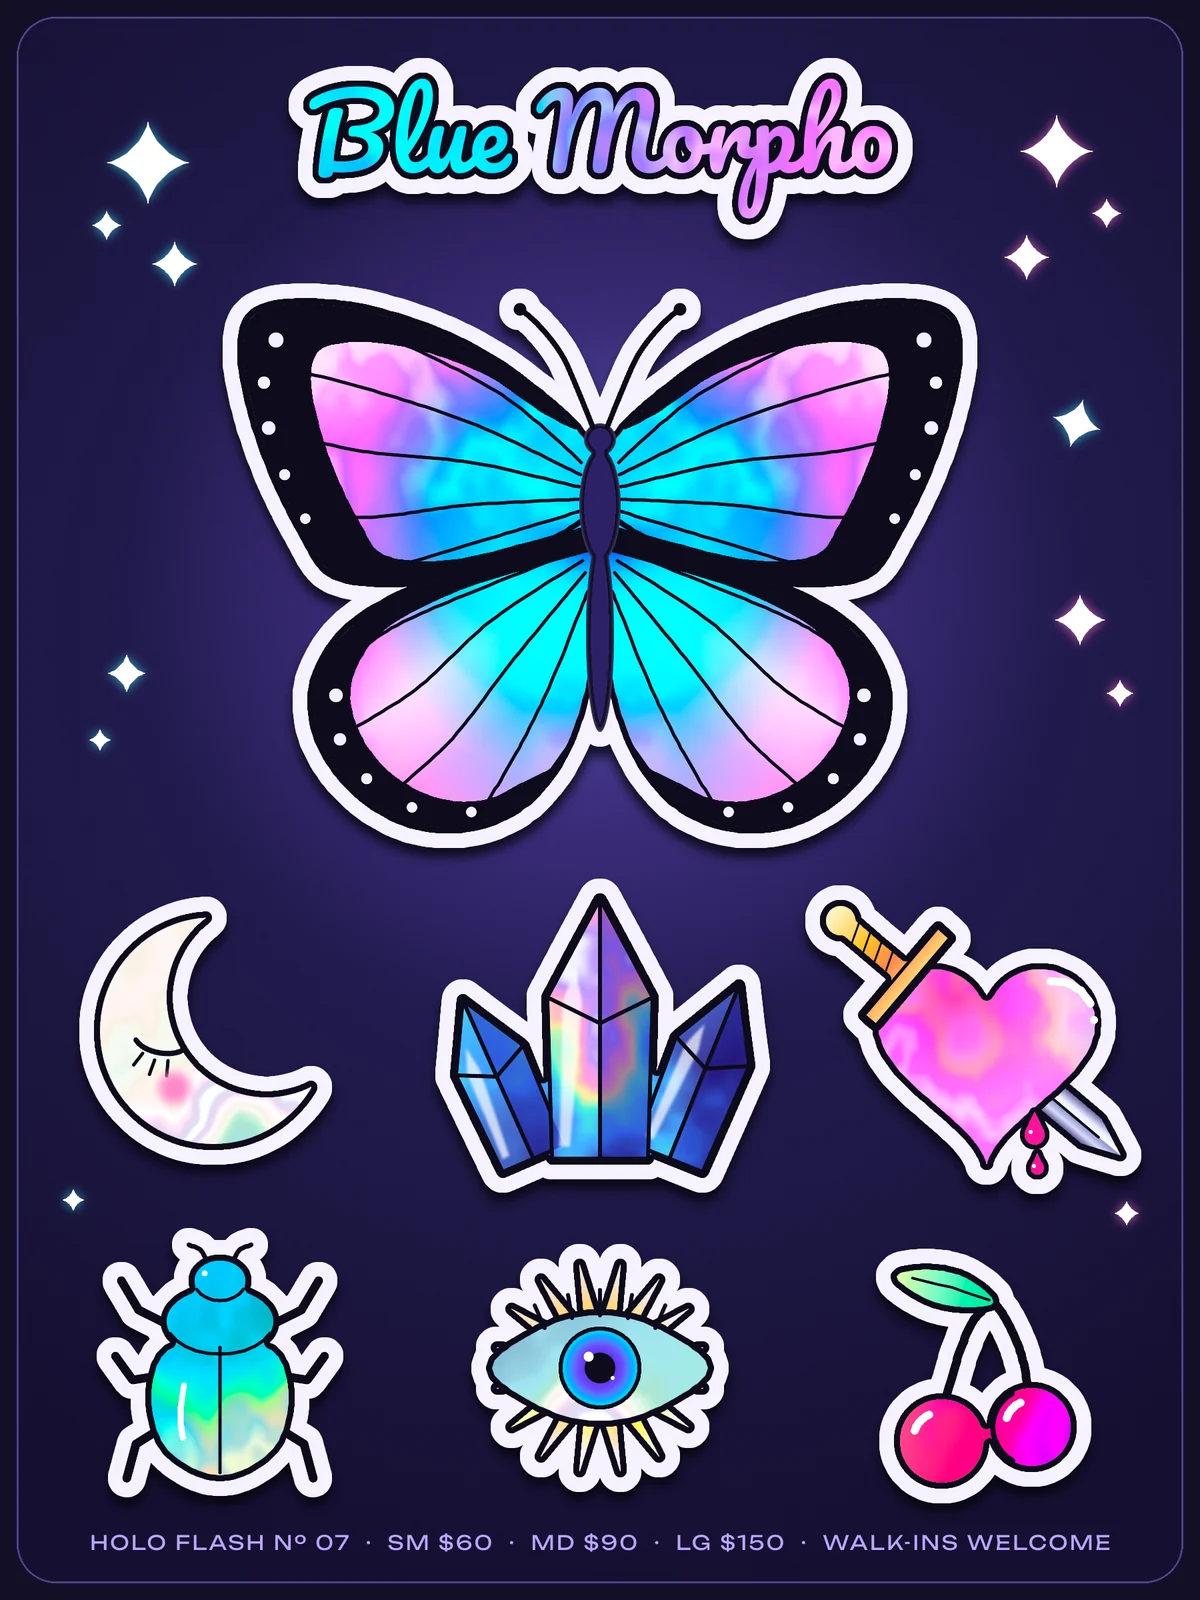
Holographic stickers are everywhere in tattoo shops: flash designs printed on rainbow foil and die-cut with a white border. This tutorial builds a whole sheet of them. The star is a blue morpho, the butterfly whose wings flash electric blue, and around it are six small classics of flash: a sleepy moon, crystals, a pierced heart, a scarab, an all-seeing eye and cherries.
The whole look comes from one trick. You make a single sheet of holographic foil once, then copy a piece of it into each design and tint it. Every sticker is built the same way, as a stack of layers inside its own group:
- Ink: the shape's selection grown by 9 px and filled near-black. This is the tattoo outline.
- Foil: a copy of the foil pasted into the shape itself.
- Tint: a gradient set to Hard Light, which pushes the foil towards the sticker's colour without flattening it. (A few stickers use Hue/Saturation instead, and the crystals use shading layers.)
- Details: veins, highlights and so on, each on its own layer.
- Die-cut: the silhouette grown by 22 px, filled white, with a drop shadow. This layer sits at the bottom of the group.
The fonts are free Google Fonts:
- Pacifico for the title
- Unbounded for the footer
The palette:
-
Sheet
radial
-
Outline ink
-
Die-cut white
-
Foil
-
Morpho tint
-
Heart pink
-
blood
-
Gold
-
Footer lavender
Lopsy keeps everything inside a top-level Project group. New layers land just above whichever layer is selected, inside its group, so check which row is selected before you add one.
-
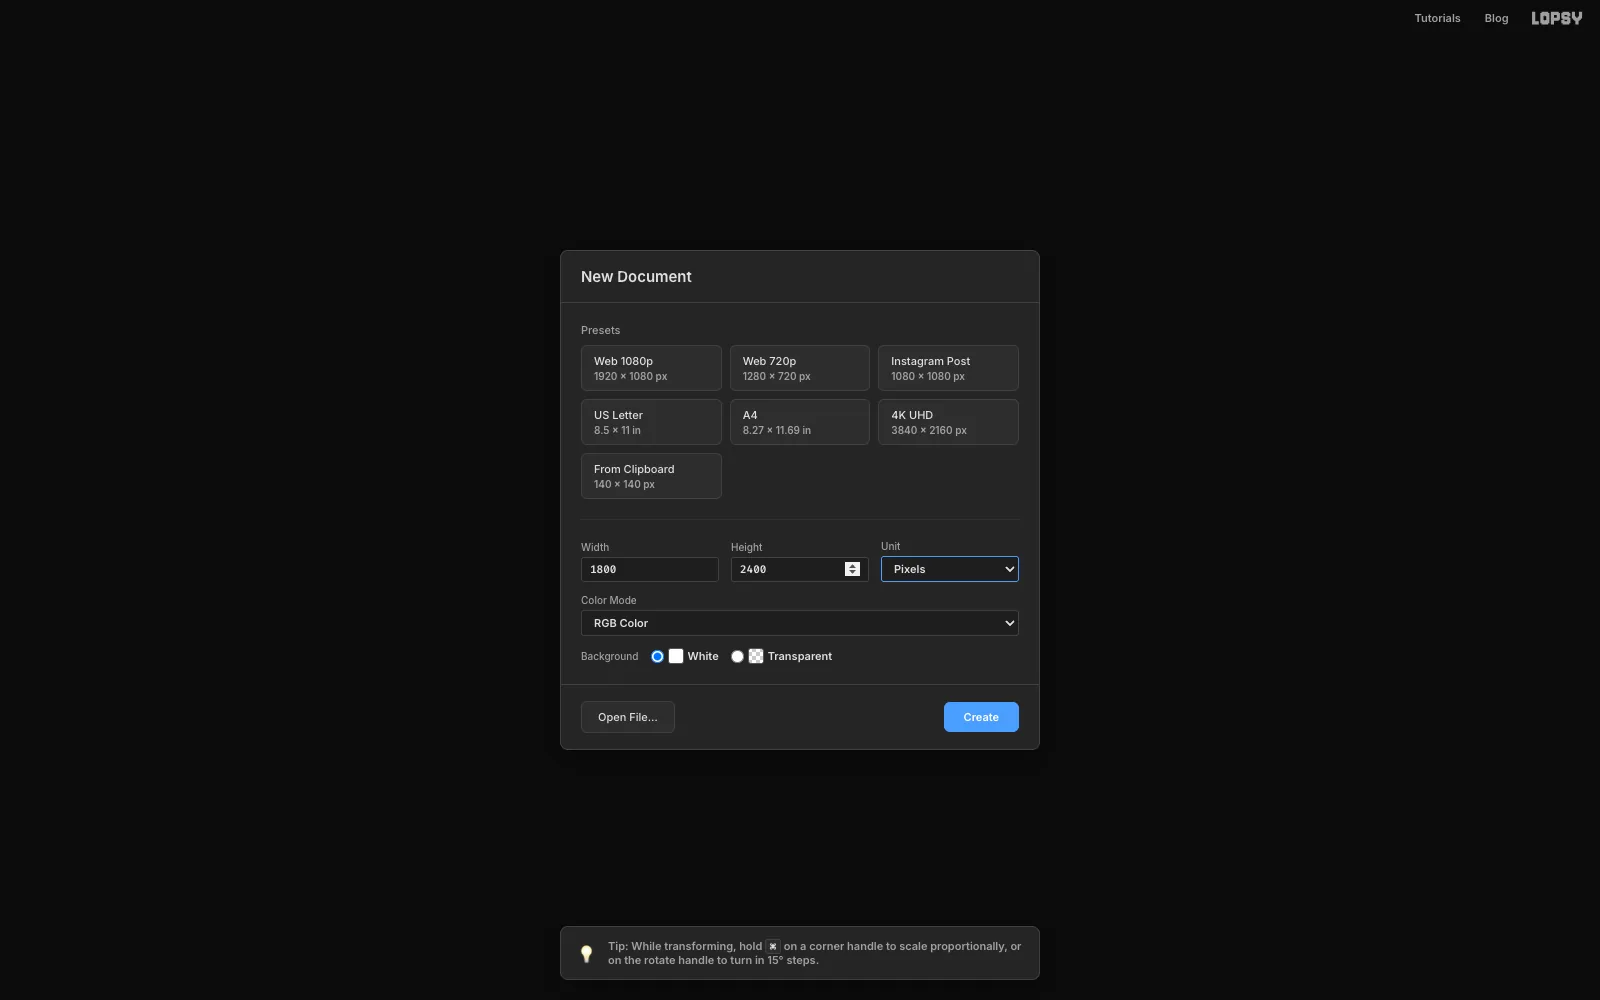
Create an 1800 × 2400 document
Open Lopsy. In the New Document dialog, set Width to
1800and Height to2400pixels and click Create. That's a 3:4 portrait sheet.Select Background, set the foreground colour to and choose Edit → Fill. This dark indigo only shows in the thin margin round the sheet.
-
Start the foil with Clouds and Solarize
Rename Layer 1 to
Holo Foil. Run Filter → Clouds… with Scale5. It always renders in greys, whatever your colours are set to.Now run Filter → Solarize… with Threshold
128. Solarize flips every tone above the threshold, so the soft clouds turn into bright crinkled ridges that wander across the page. Those ridges become the rainbow bands of the foil.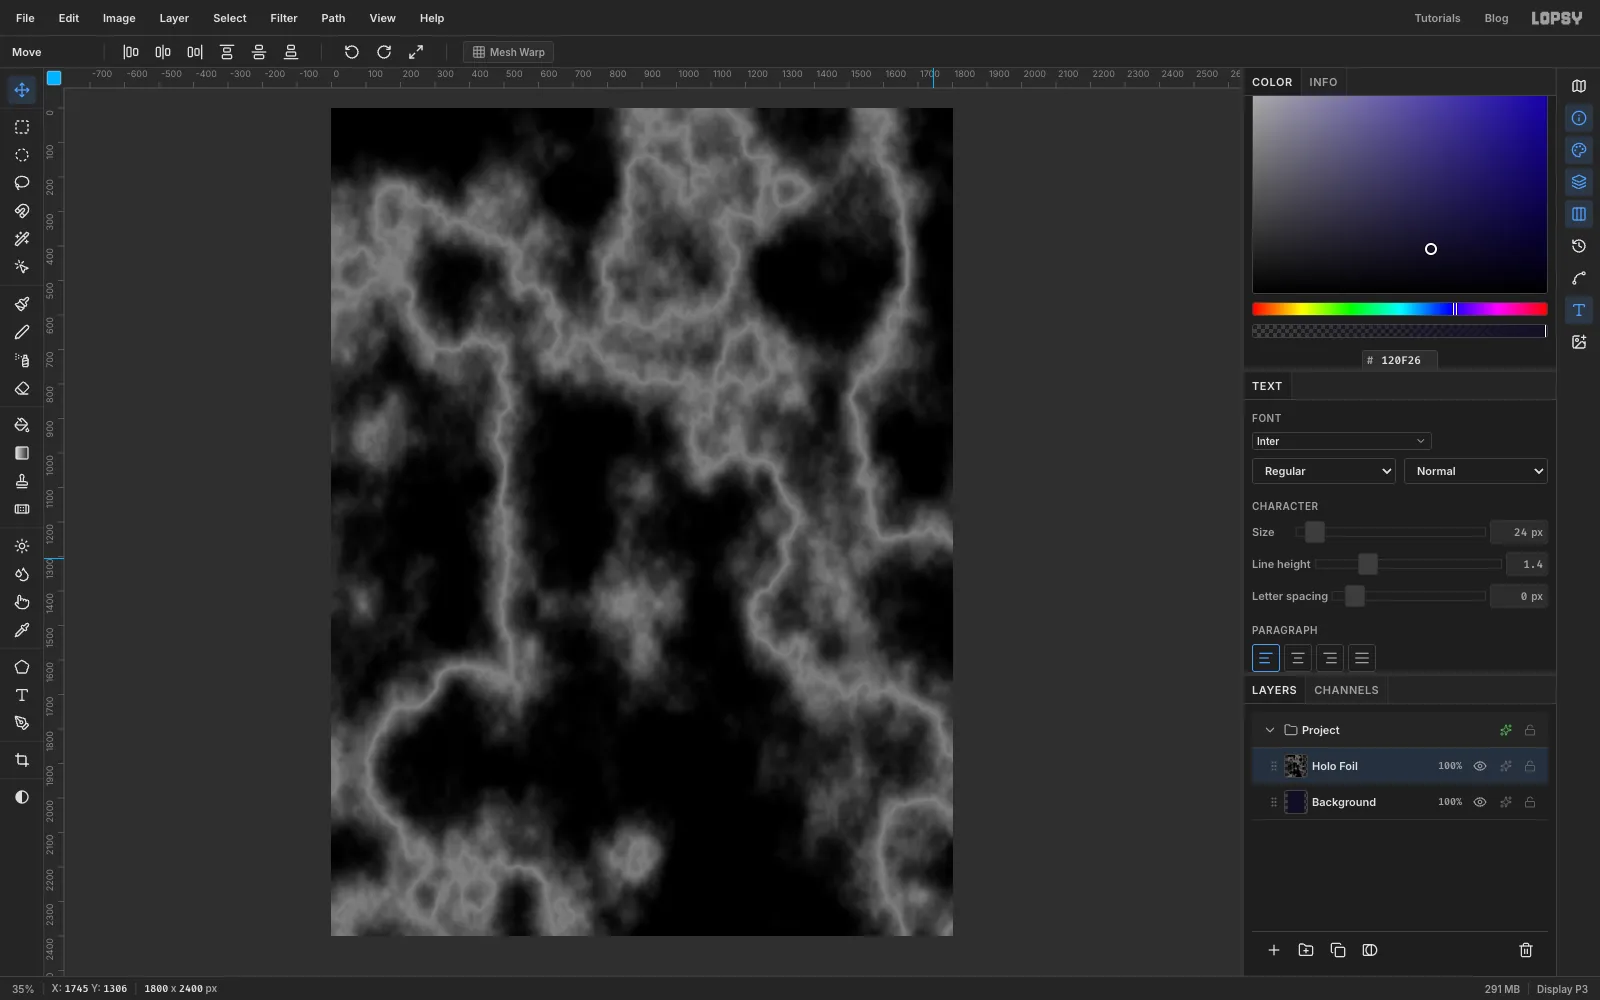
-
Stretch and soften the ridges
Solarize leaves everything in the darker half of the range. Spread it back out with Filter → Brightness/Contrast…: Brightness
50, Contrast100.Then run Filter → Gaussian Blur… with Radius
12, so the bands flow into each other smoothly. Do any tonal tweaks now, while the layer is still plain grey. Once the colour map goes on in the next step, it's much easier to judge the result.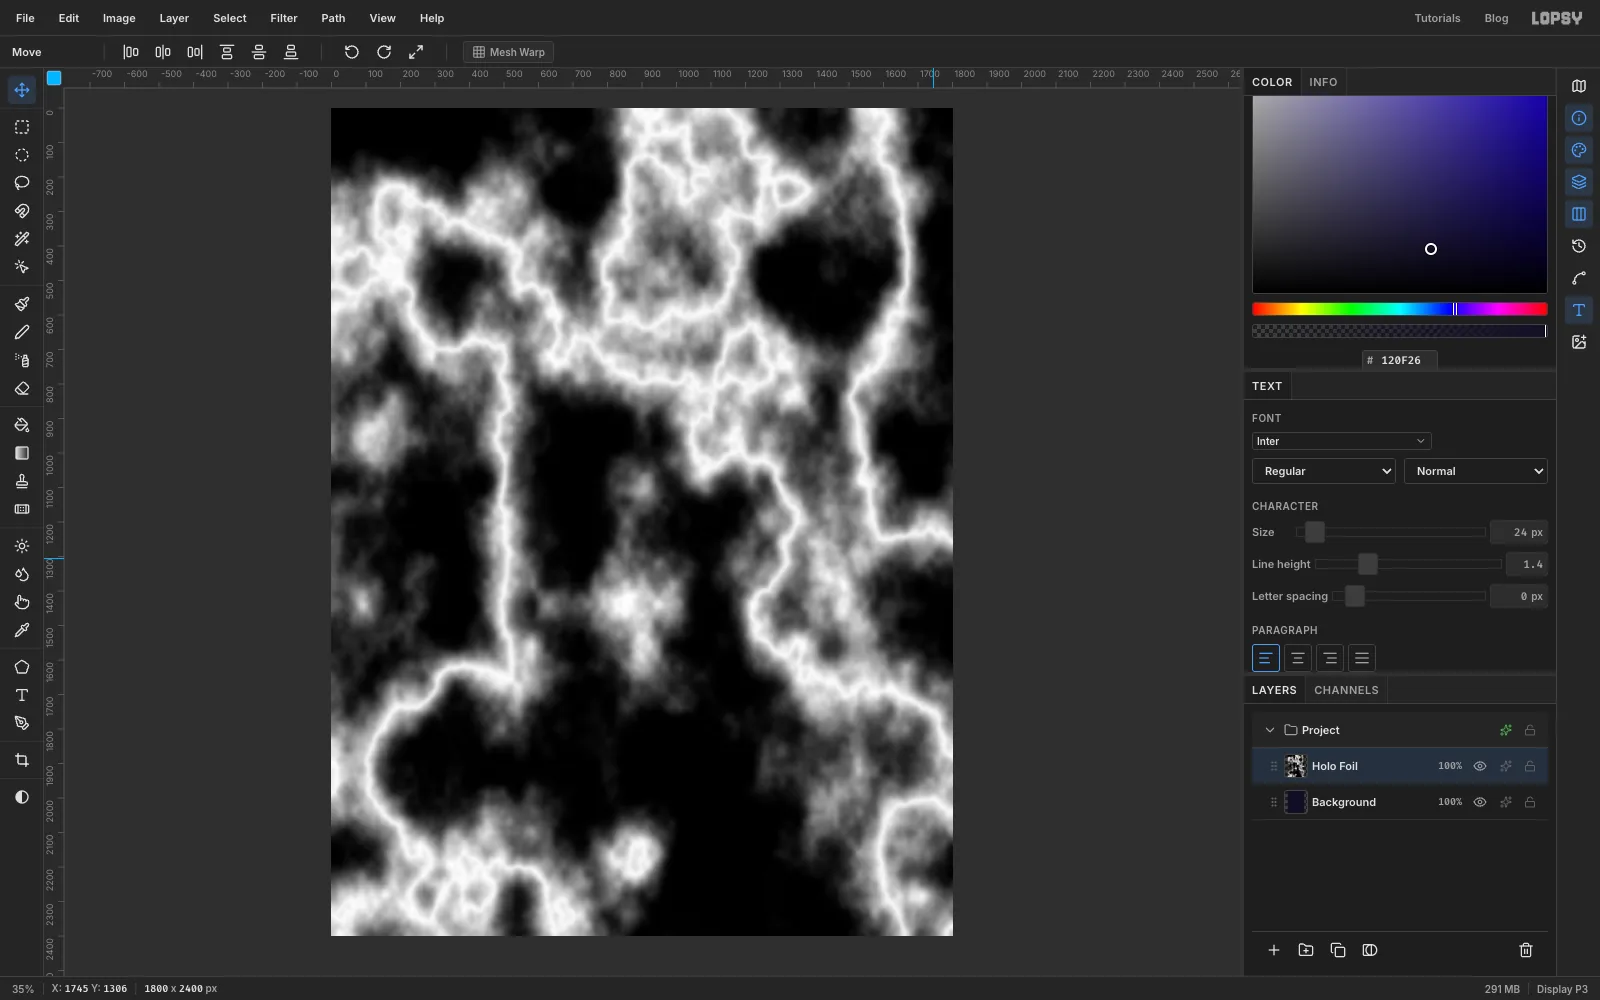
-
Map the greys to a rainbow
With Holo Foil selected, choose Layer → Group Layers and rename the group
Foil Lab. Click the group's effects button to open its drawer, click Add Adjustment and pick Gradient Map.Click the handle row under the gradient bar to add stops, then select each stop and type its hex code:
- 0%:
- 18%:
- 36%:
- 54%:
- 70%:
- 86%:
- 100%:
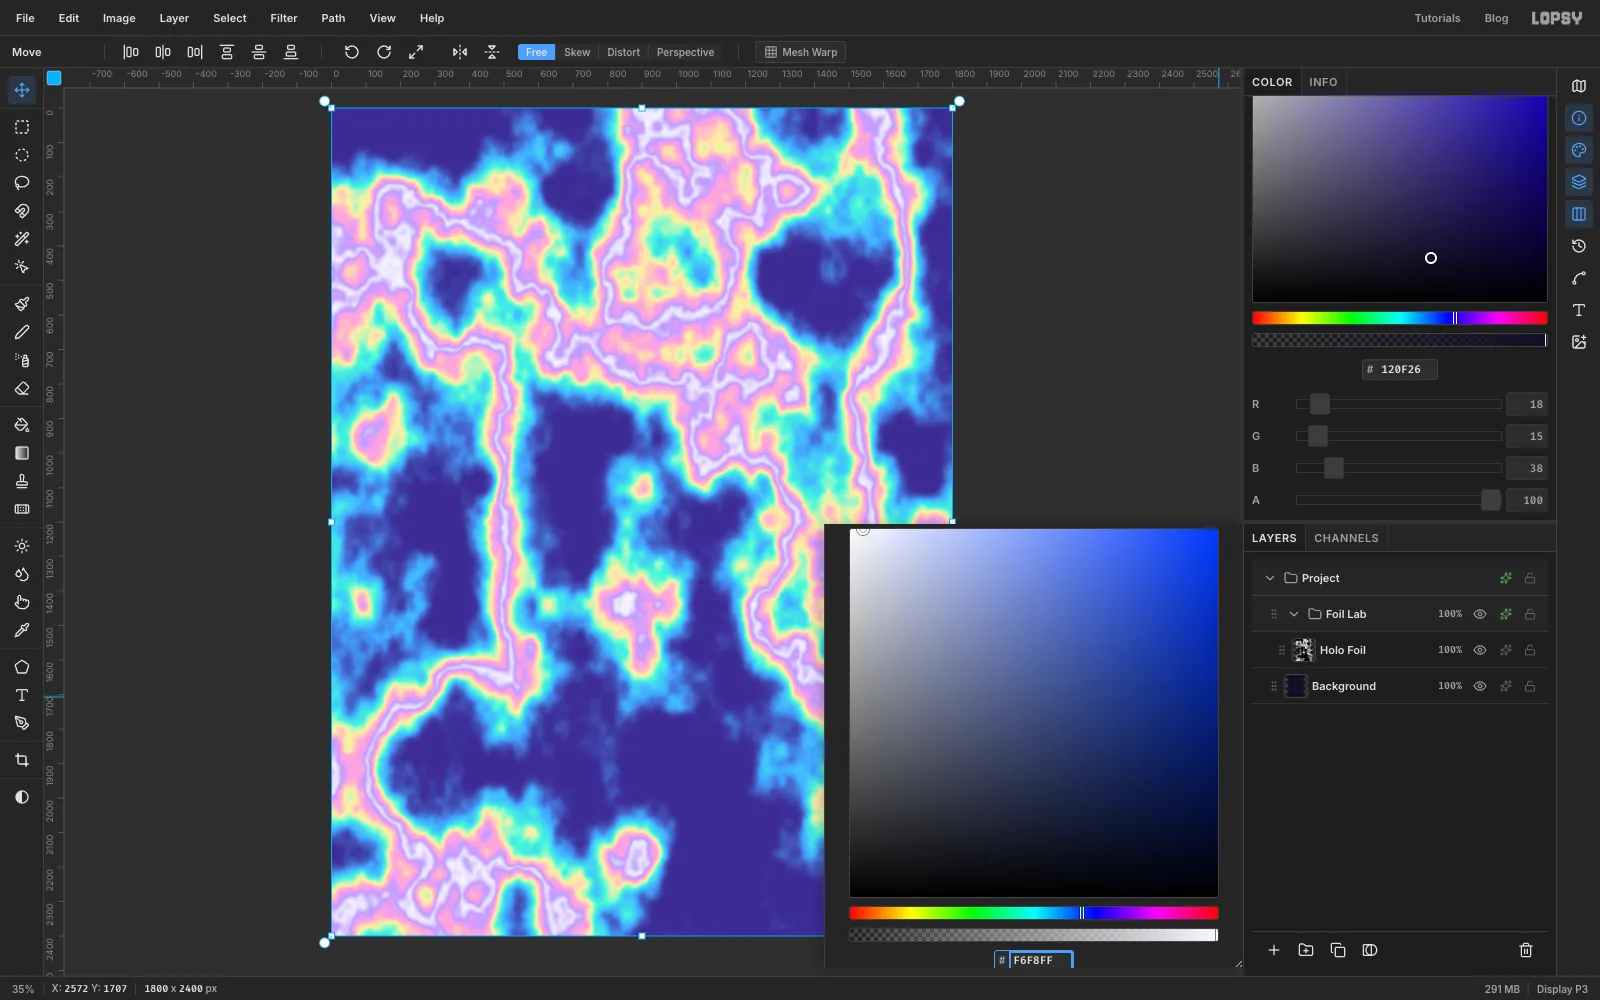
Each grey becomes a colour, so the ridges turn into thin-film rainbow bands with dark indigo pools between them.
-
Add a diagonal sheen
Real foil catches the light in broad stripes. With Holo Foil selected, click Add Layer (it goes inside Foil Lab) and name it
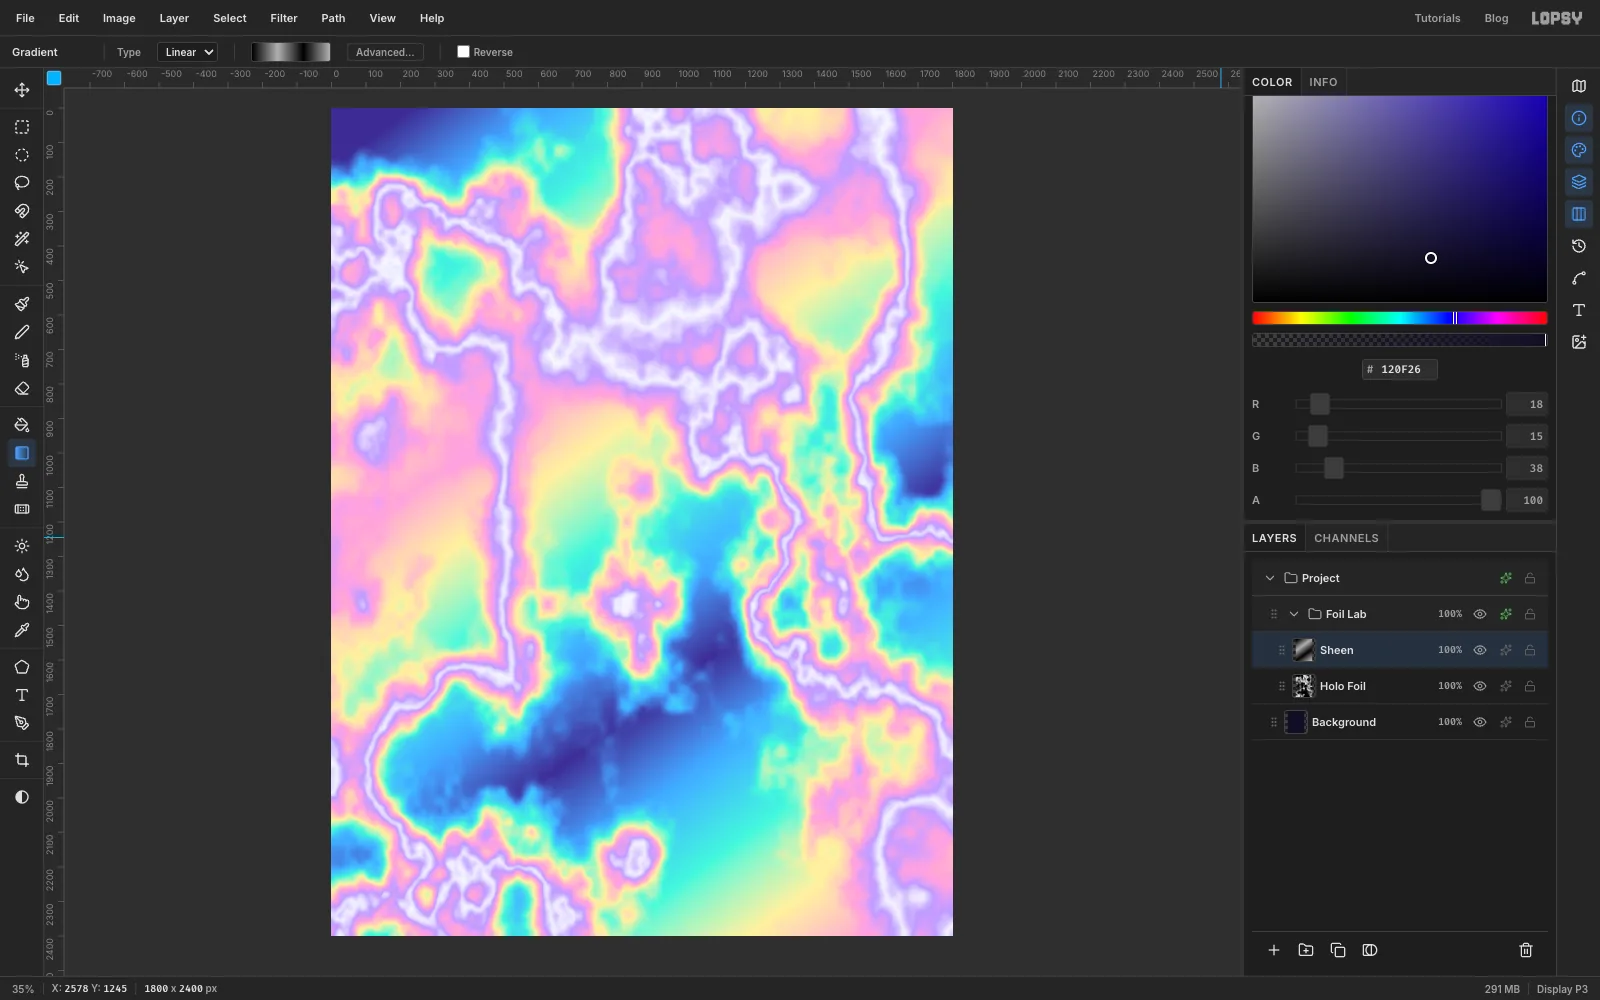
Sheen.Pick the Gradient tool, set it to Linear and open Advanced…. Make four stops: black at 0%, at 33%, black at 66% and at 100%. Drag from the top-left corner of the canvas to the bottom-right, then set the layer's blend mode to Screen. The stripes go through the Gradient Map too, so they come out as bright passes of colour rather than grey.
-
Bake the foil into one layer
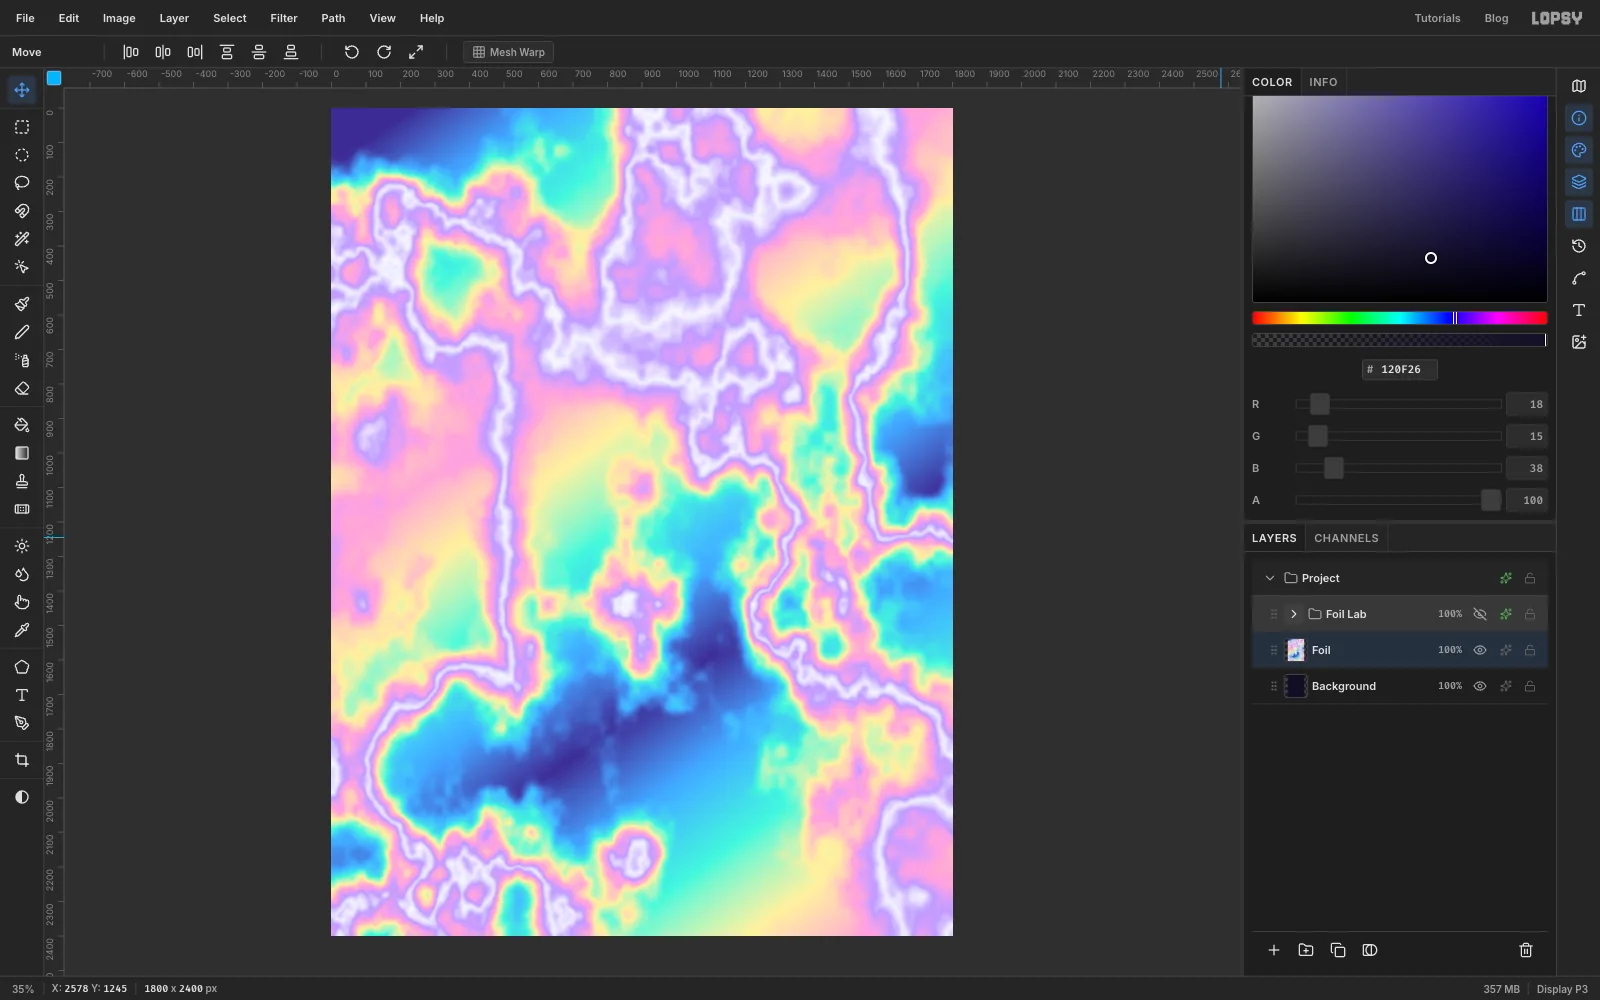
Deselect, then choose Edit → Copy Merged (Cmd+Shift+C). Select Background and paste (Cmd+V). The flattened foil lands on a new layer just above Background, outside the group. Rename it
Foil.Hide Foil Lab, then hide Foil too. From now on you'll copy pieces of this hidden layer into each sticker.
-
Draw the sticker sheet
Select Background, click Add Layer and name it
Sheet. With the Shape tool set to Rectangle, a Corner Radius of56and the fill , drag out a rectangle that leaves a narrow margin, about 28 px, on every side.Give it some depth:
- Cmd-click the Sheet thumbnail to select it. Then drag a Radial gradient ( → → ) from just above the centre down to the bottom edge.
- Run Filter → Add Noise… with Amount
6, Mono and Gaussian, for a printed-card grain. - In the effects drawer, turn on Stroke at Width
3in .
Last, add a layer called
Haloand drag a radial gradient from the middle of the upper half outwards. Use at 50% opacity, then at 18%, then fully transparent. Set the layer to Screen. This glow will sit behind the butterfly.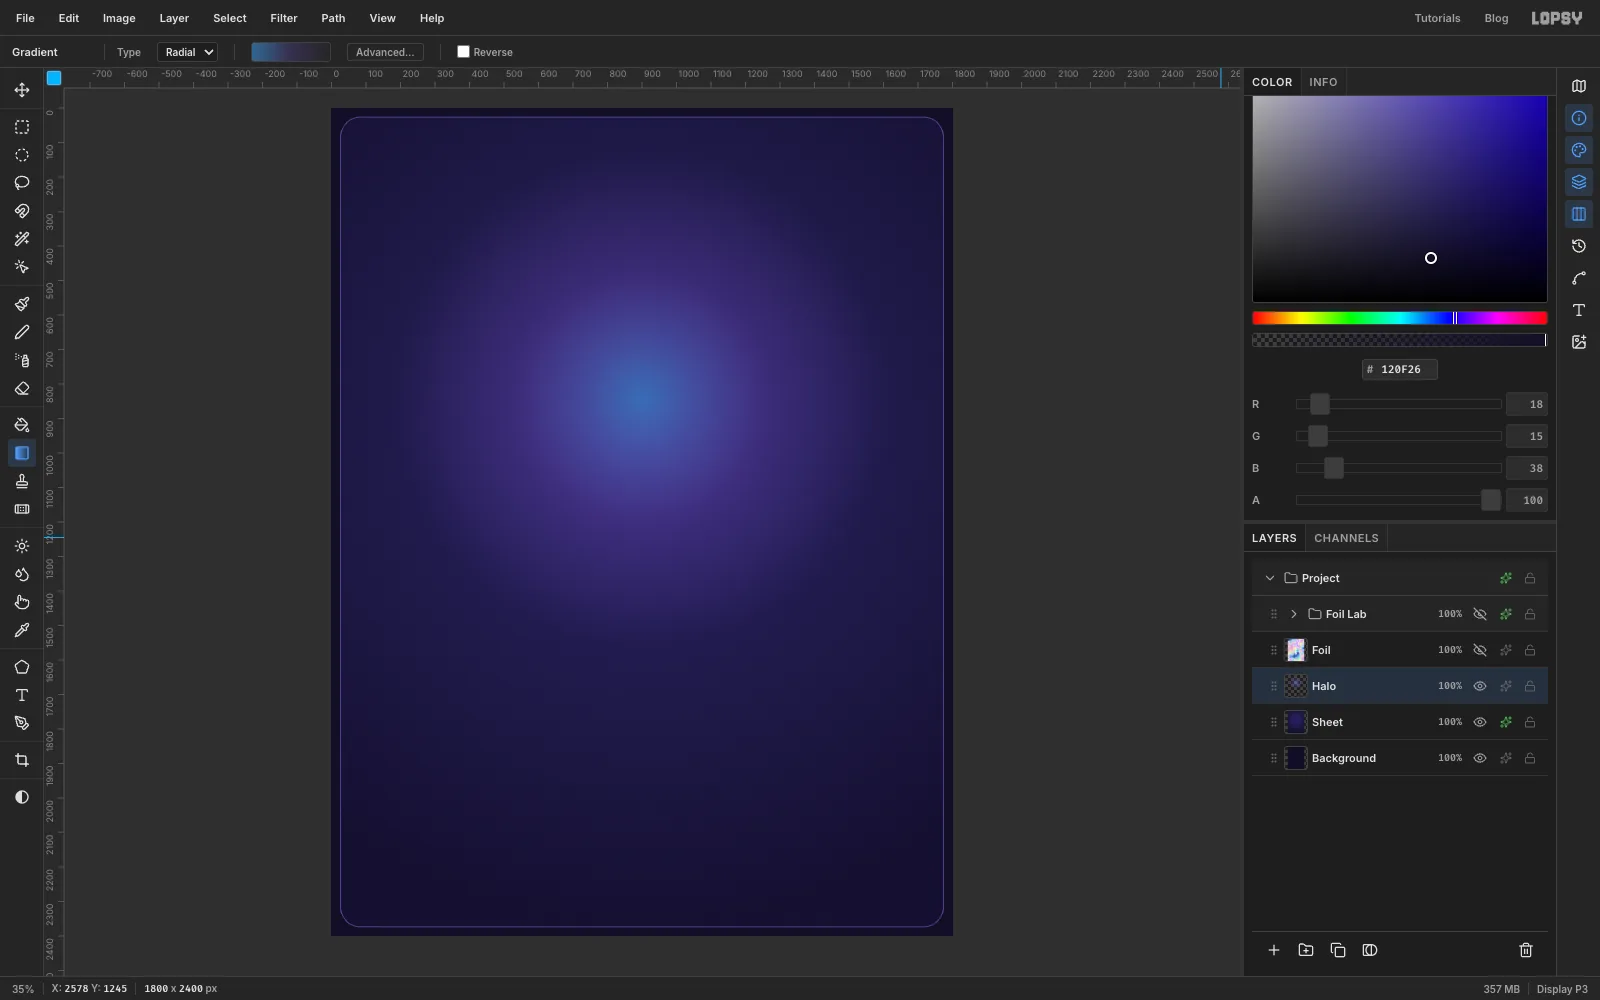
-
Lasso the left wings
Select Halo, click New Group and name it
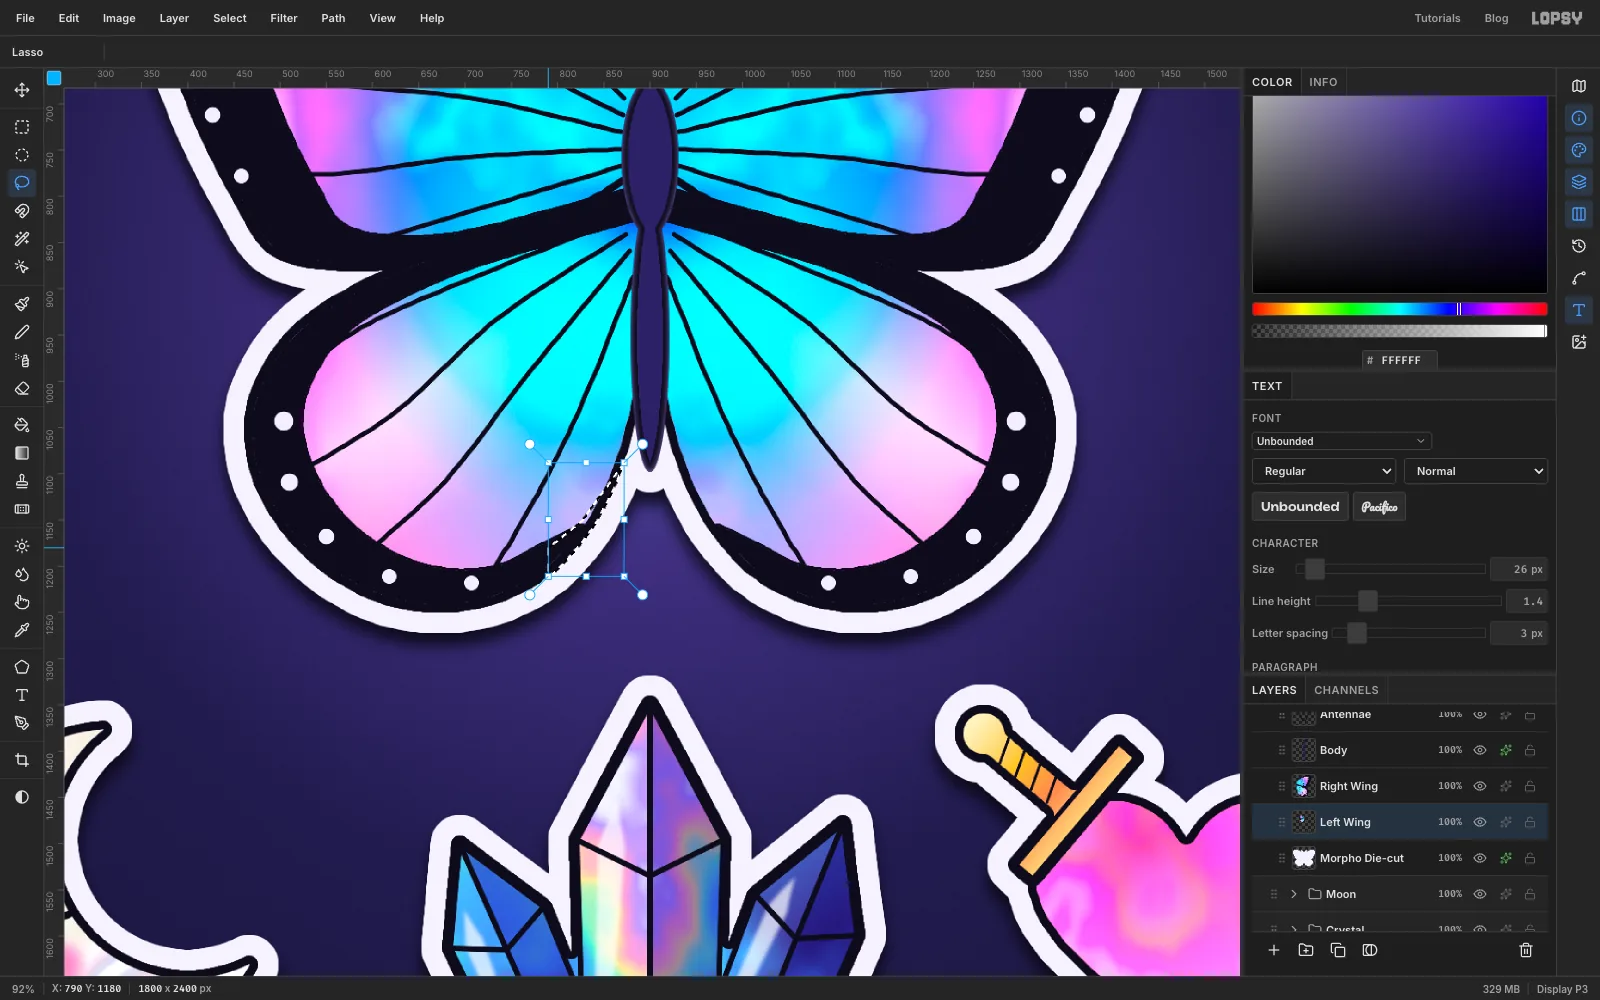
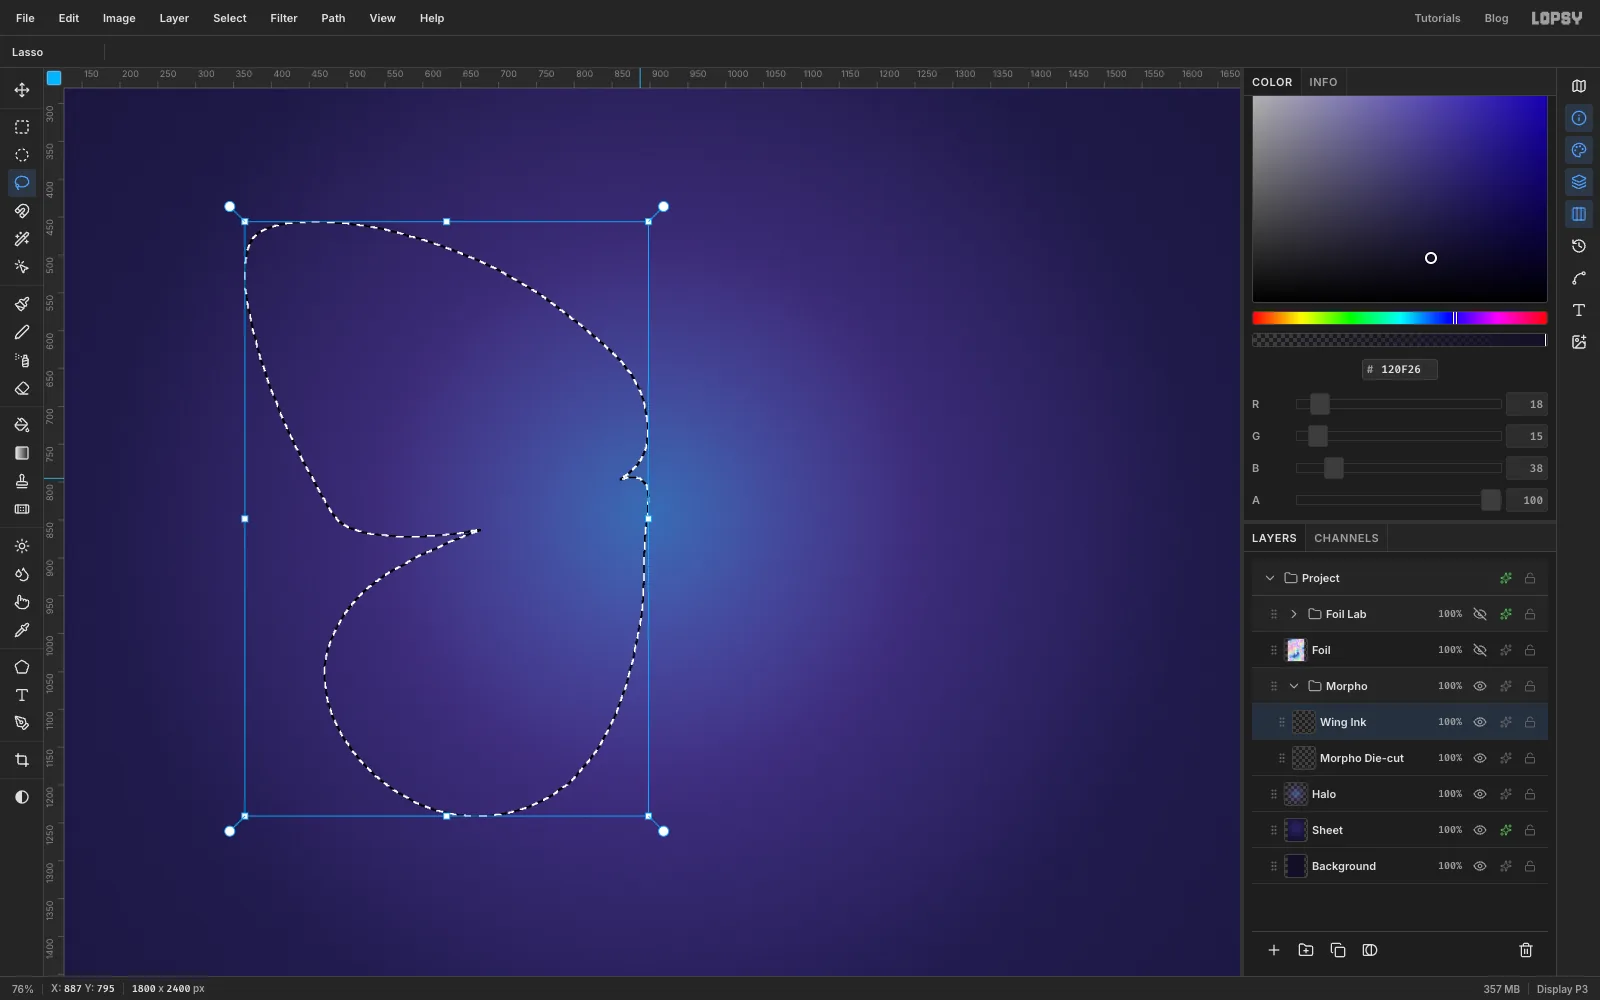
Morpho. Inside it, click Add Layer twice and name the layersMorpho Die-cutand thenWing Ink. Wing Ink should sit above the die-cut layer.Zoom in on the upper half. You only need to draw the left wings; the right ones will be a mirror copy. Keep the wings' inner edge on the vertical centre of the page (900 on the top ruler). The body will cover that seam, and the mirror copy will meet it exactly. With the Lasso:
- Draw the forewing. Start next to the body, about a third of the way down the sheet. Sweep up and out to a pointed tip near the top left, then come down the outer edge and back in to the body.
- Hold Shift and draw the hindwing below it: a rounded lobe that bulges out to the left and down. Shift adds it to the forewing selection.
-
Ink the outline
Choose Select → Grow… with Amount
9. Set the foreground to and choose Edit → Fill. Then Select → Shrink… by9to get back to the original wing shape, leaving a 9 px ink rim showing outside it. Keep the selection.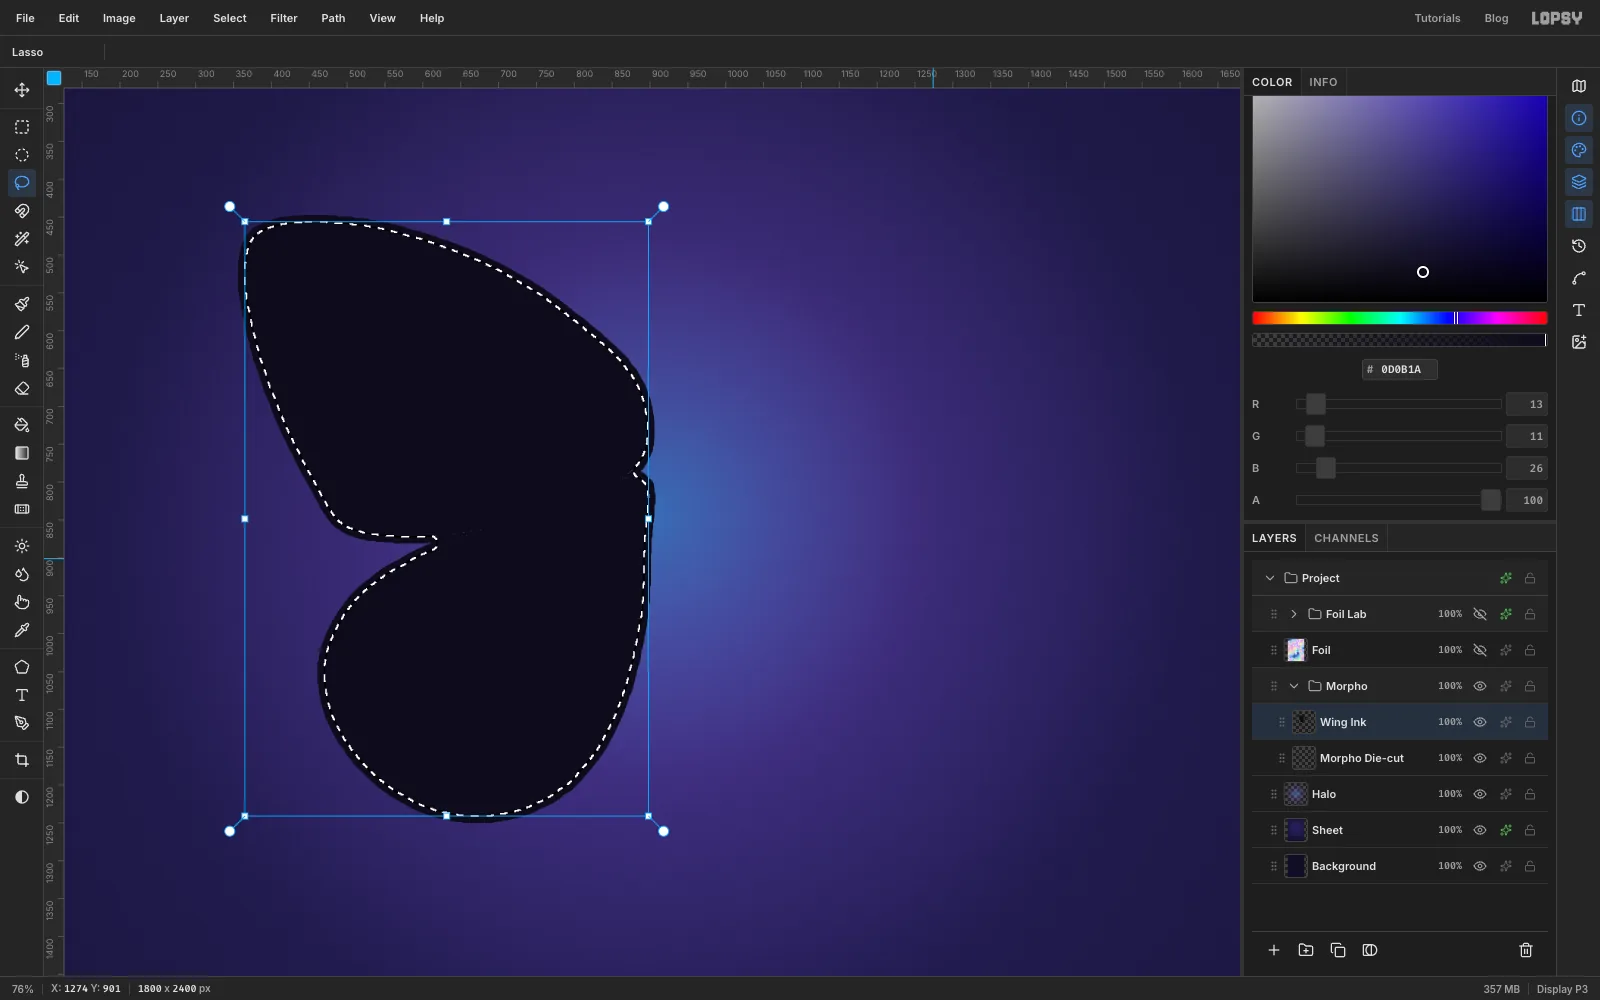
-
Paste the foil into the wing
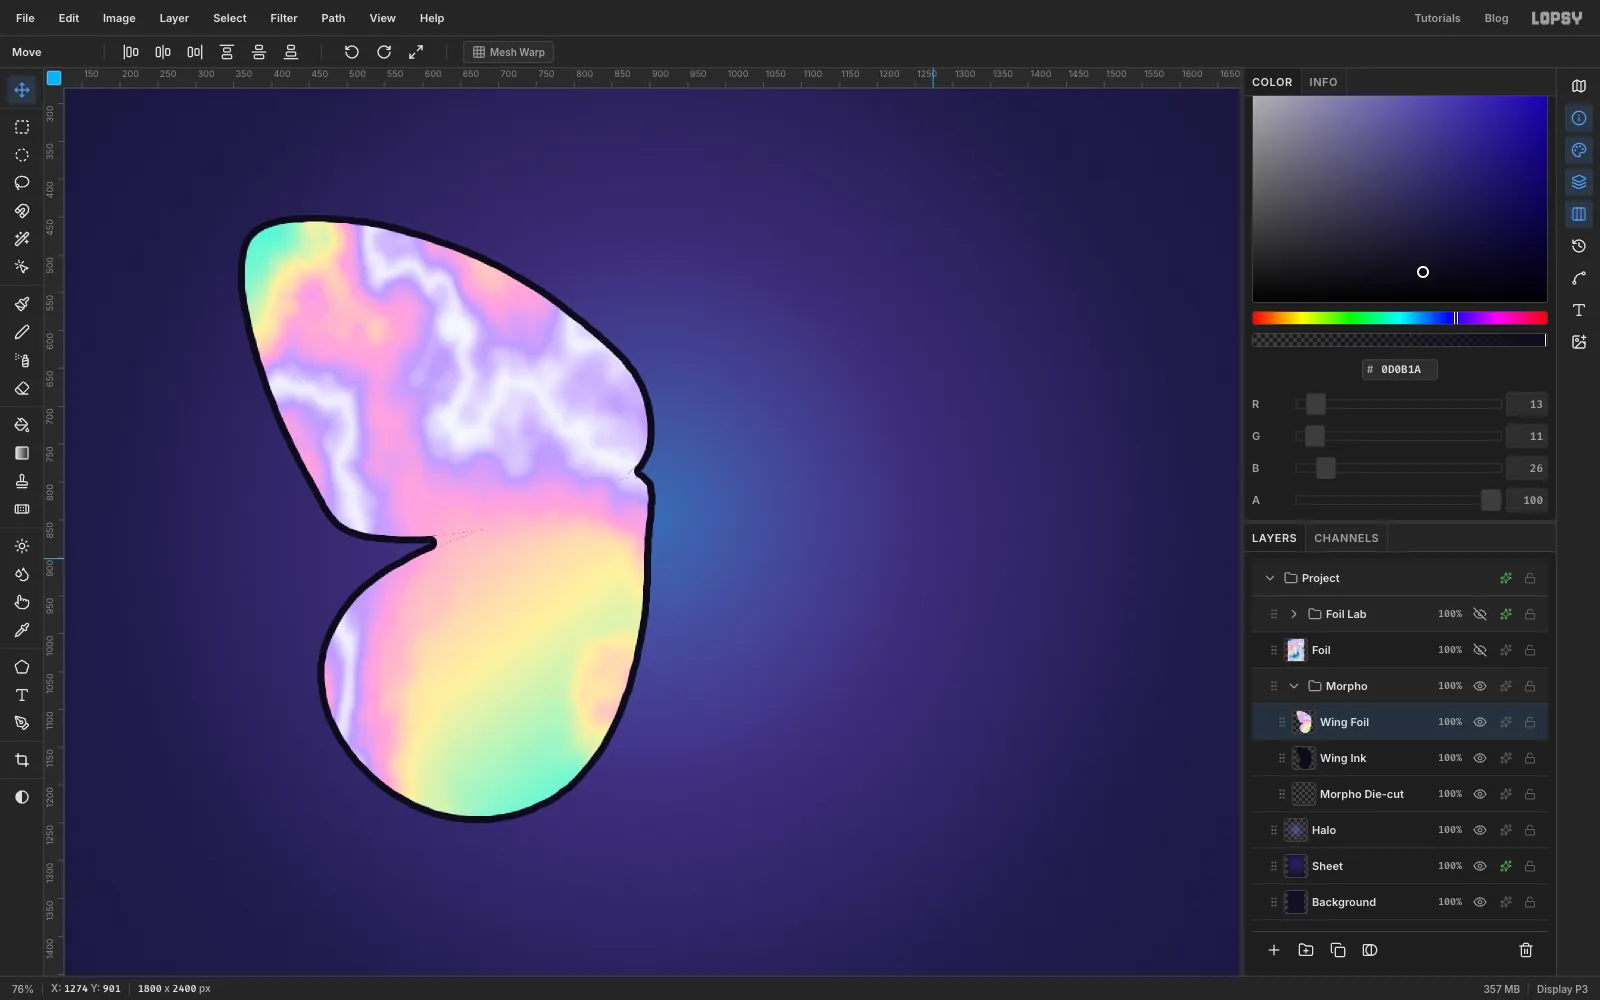
Select the hidden Foil layer and copy (Cmd+C). The selection limits the copy to the wing shape. Select Wing Ink and paste (Cmd+V). Pasting from inside Lopsy puts the piece back exactly where it was copied from, so the foil drops neatly inside the ink. Rename the new layer
Wing Foiland deselect.You'll repeat this copy from Foil, paste above the Ink move for every sticker.
-
Tint it iridescent blue
Add a layer above Wing Foil called
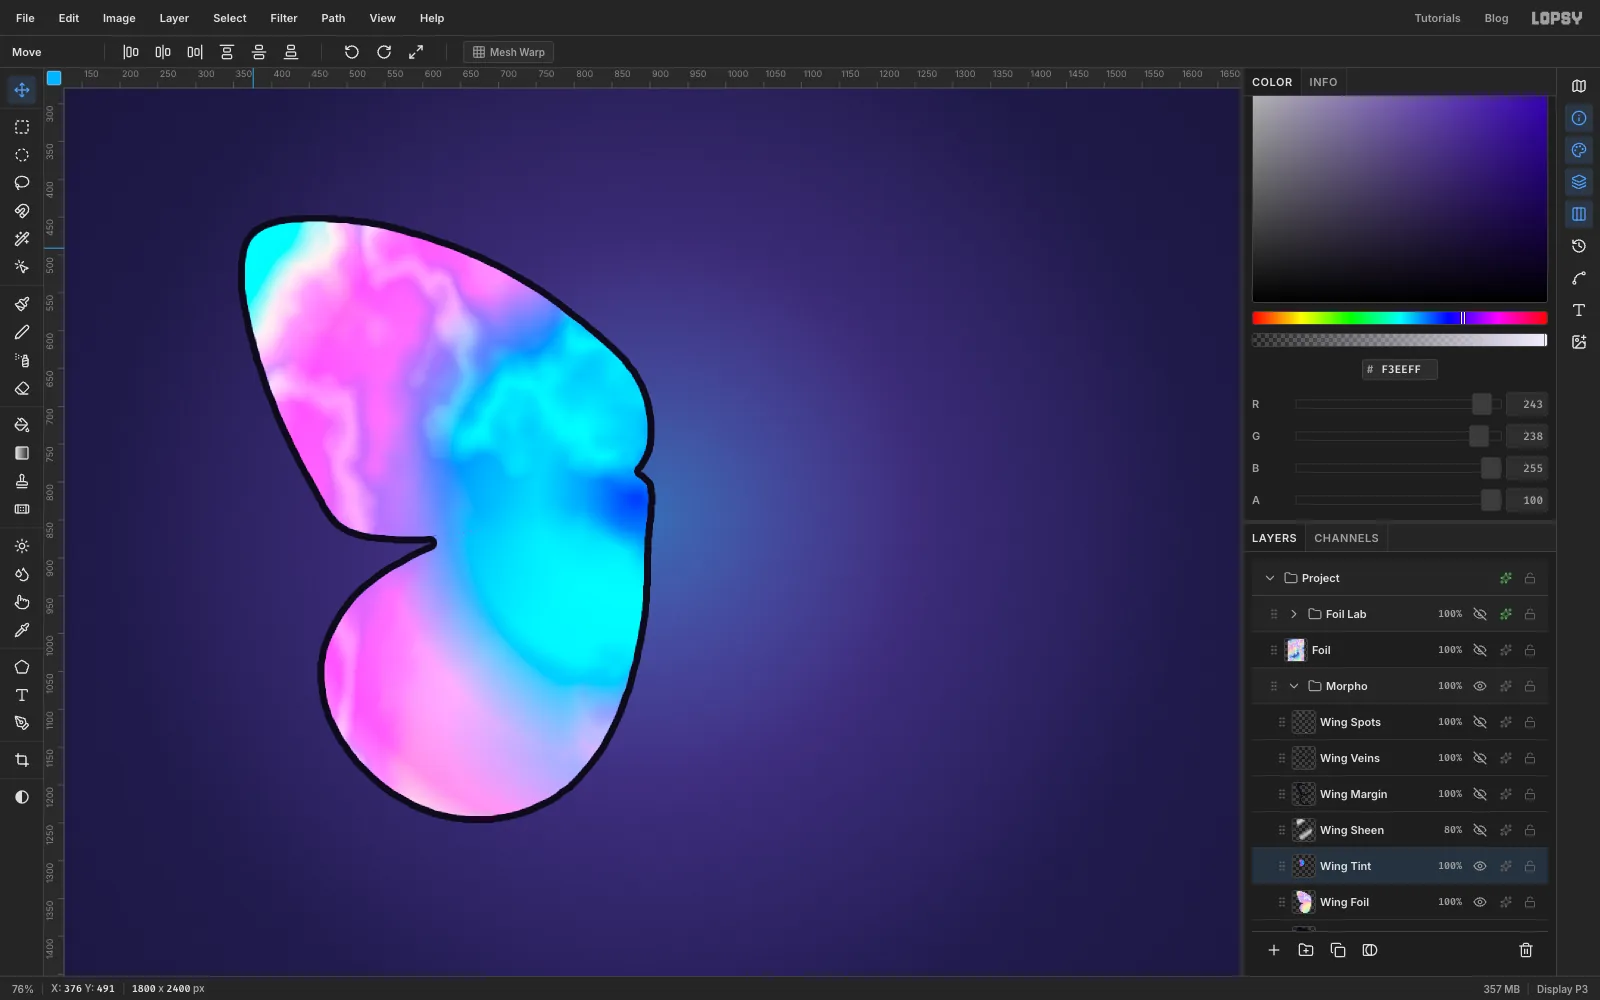
Wing Tint. Cmd-click the Wing Foil thumbnail to select the wing. Then drag a Radial gradient from where the wings meet the body out towards the forewing tip. Use these stops:- at 0%
- at 22%
- at 42%
- at 60%
- at 76%
- at 100%
Deselect and set the layer to Hard Light. Hard Light keeps the foil's light-and-dark bands and lays the hue rings over them, so the wing shimmers from blue to violet to pink instead of turning flat.
-
Add an Overlay sheen
Add a layer called
Wing Sheenand Cmd-click Wing Foil again. In Advanced…, make an all-white Linear gradient with two bright bands, one about a fifth of the way along and one about two-thirds. Each band fades to fully transparent on both sides, which you set with the stop's opacity. Drag it from the top-left of the wing to where it meets the body.Deselect, set the layer to Overlay and drop its opacity to
80%. The bright streaks only show on the colour, not on the black margins you're about to add.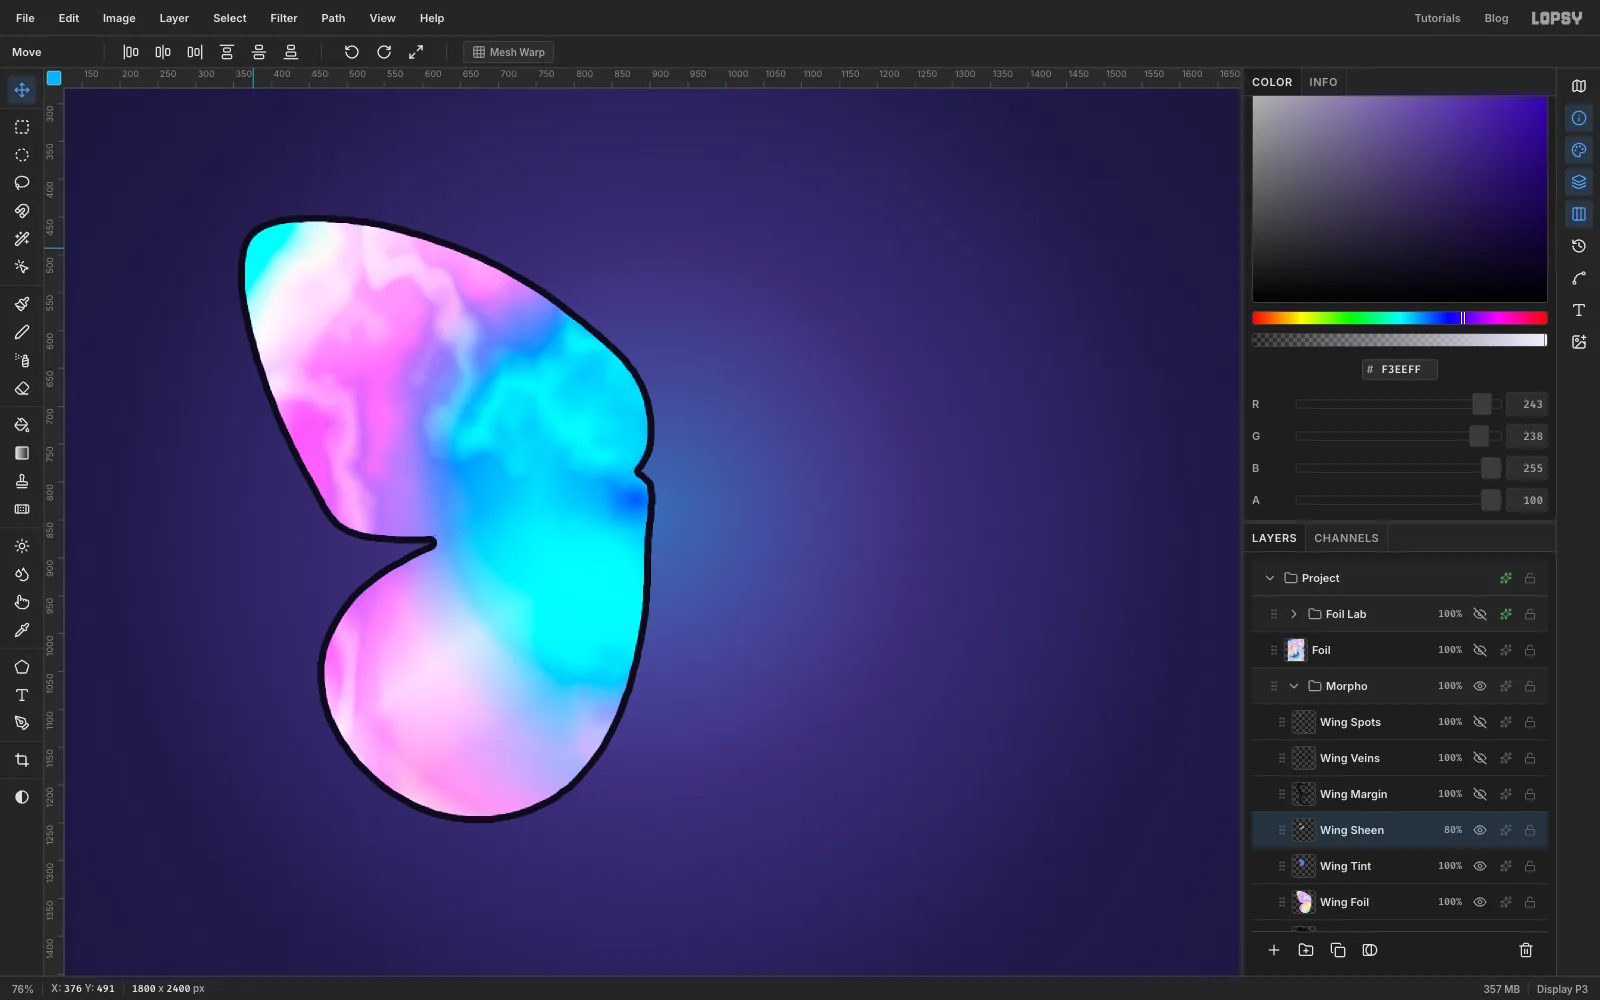
-
Cut the black margins
Real morphos have a black border round the blue. Add a layer called
Wing Marginand Cmd-click Wing Foil. With the Lasso, hold Alt (Option) and draw round the inner blue panel of the forewing to subtract it from the selection. Keep about 80–100 px from the outer edge at the tip, and less further in. Let the lasso run past the body on the right. Do the same for the hindwing.What's left is a band along the outer edges. Choose Select → Grow… by
2so the band overlaps the outline cleanly, then fill it with .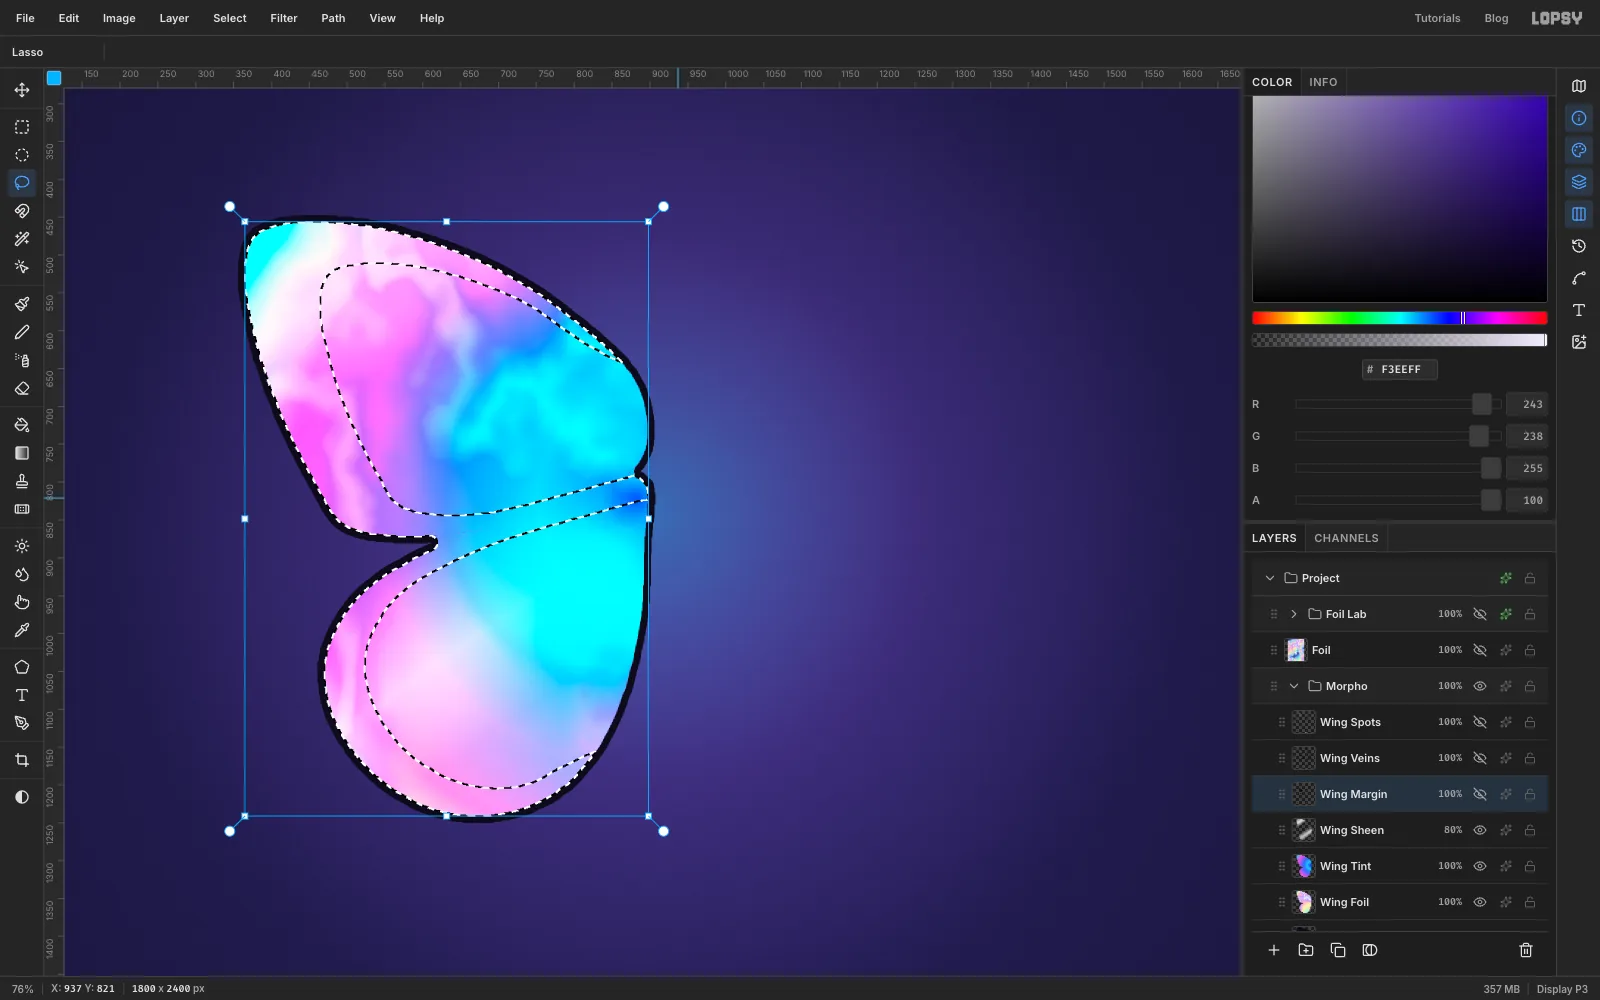
-
Paint veins and white spots
Add a layer called
Wing Veinsand Cmd-click Wing Foil, so the brush can't stray outside the wing. With a hard Brush at Size6in ink colour, paint veins fanning out from the body to the edges: five across the forewing and four across the hindwing. Use a9px brush along the forewing's lower edge so the two wings read as overlapping.Deselect, add a layer called
Wing Spots, and click white dots along the margin with brush sizes between 16 and 24. Use five on the forewing and five on the hindwing, smaller towards the body.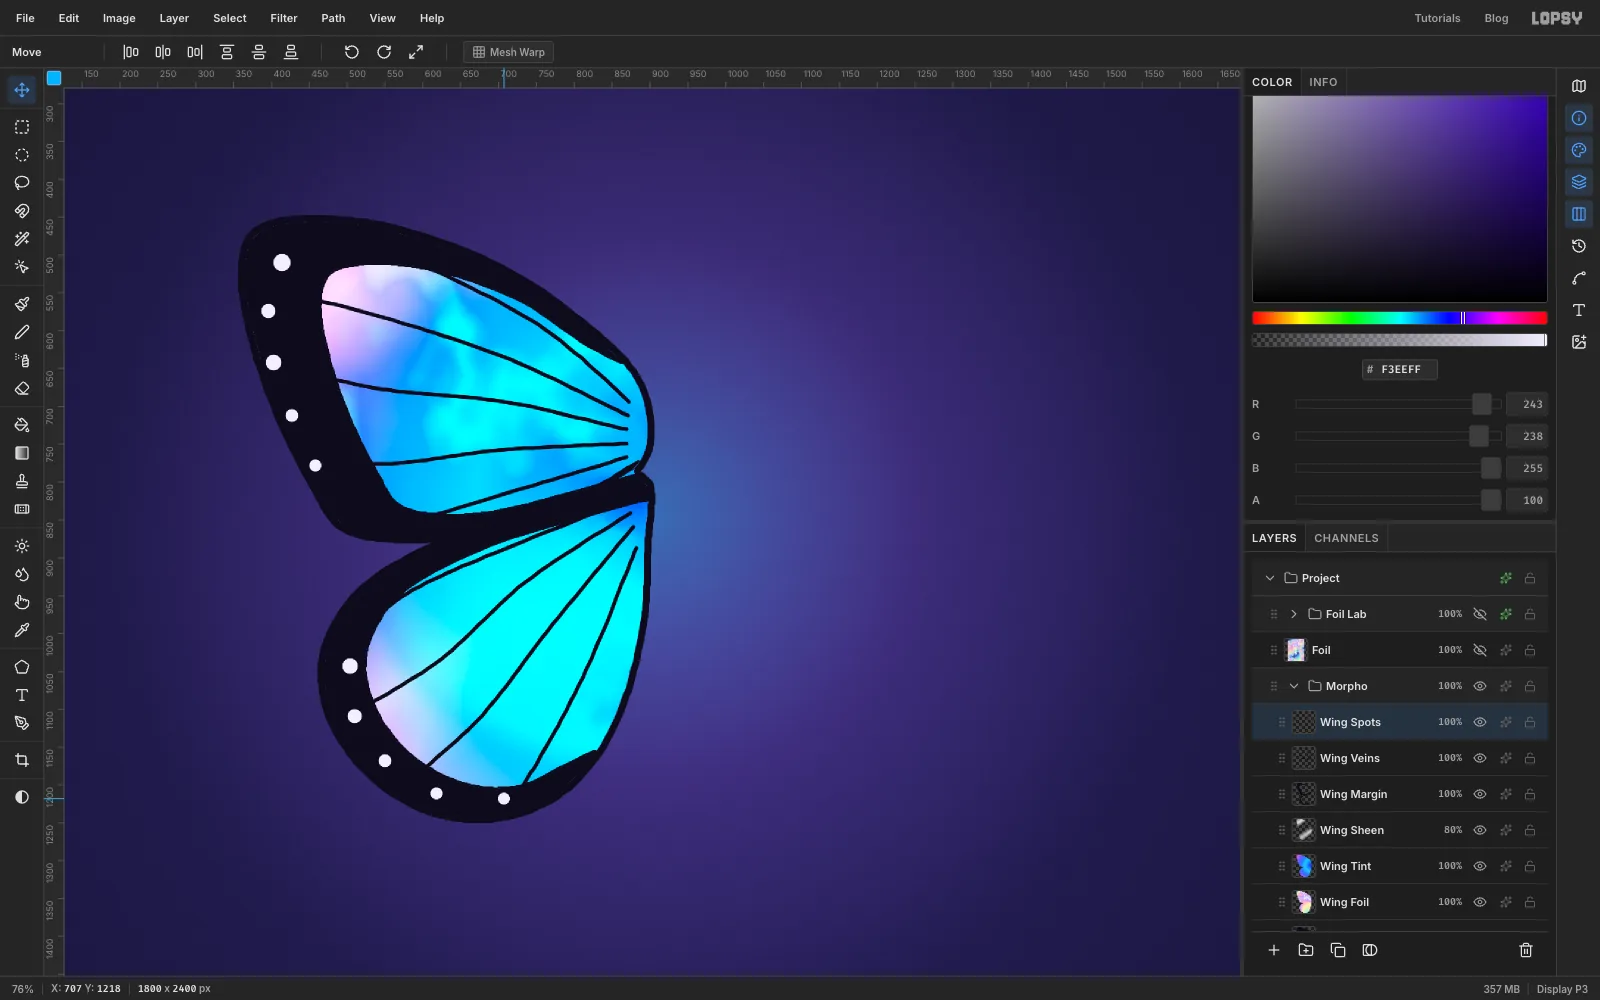
-
Merge and mirror the wing
Merge the wing into one layer. Select each of these in turn and choose Layer → Merge Down: Wing Tint, Wing Sheen, Wing Margin, Wing Veins and Wing Spots, then Wing Foil. Merging bakes in each layer's blend mode. Rename the result
Left Wing.Choose Layer → Duplicate Layer, rename the copy
Right Wing, and choose Image → Flip Horizontal. It mirrors the layer across the centre of the page, so the copy lands exactly opposite the original, with no lining up to do.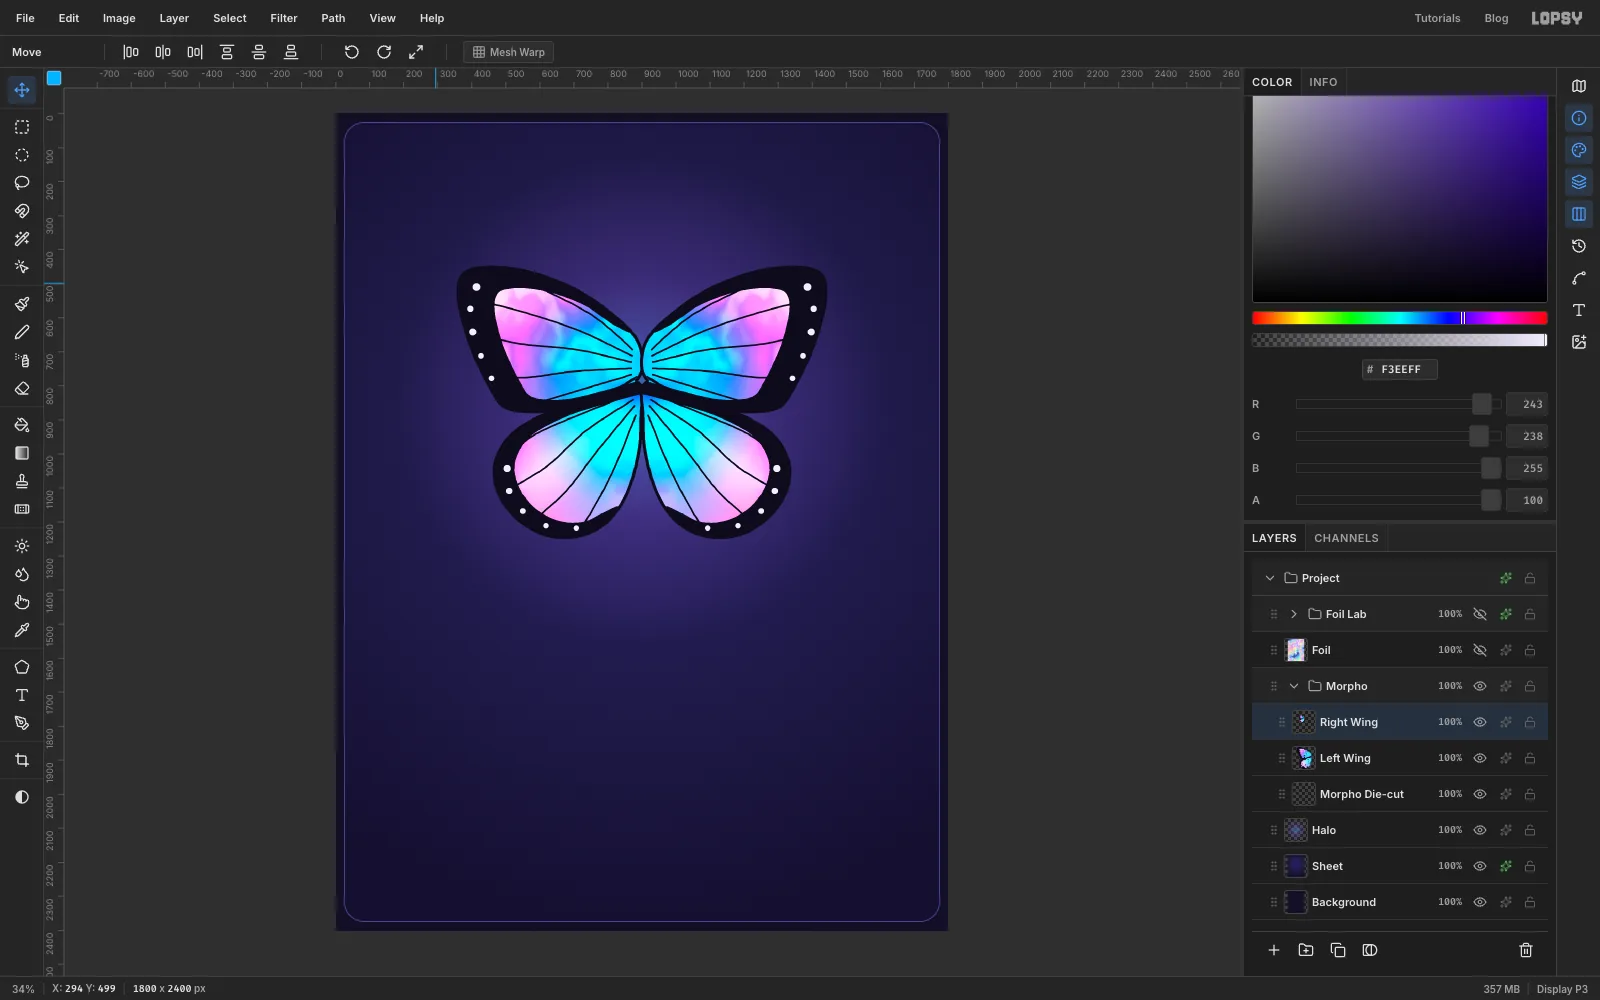
-
Add the body and antennae
Add a layer called
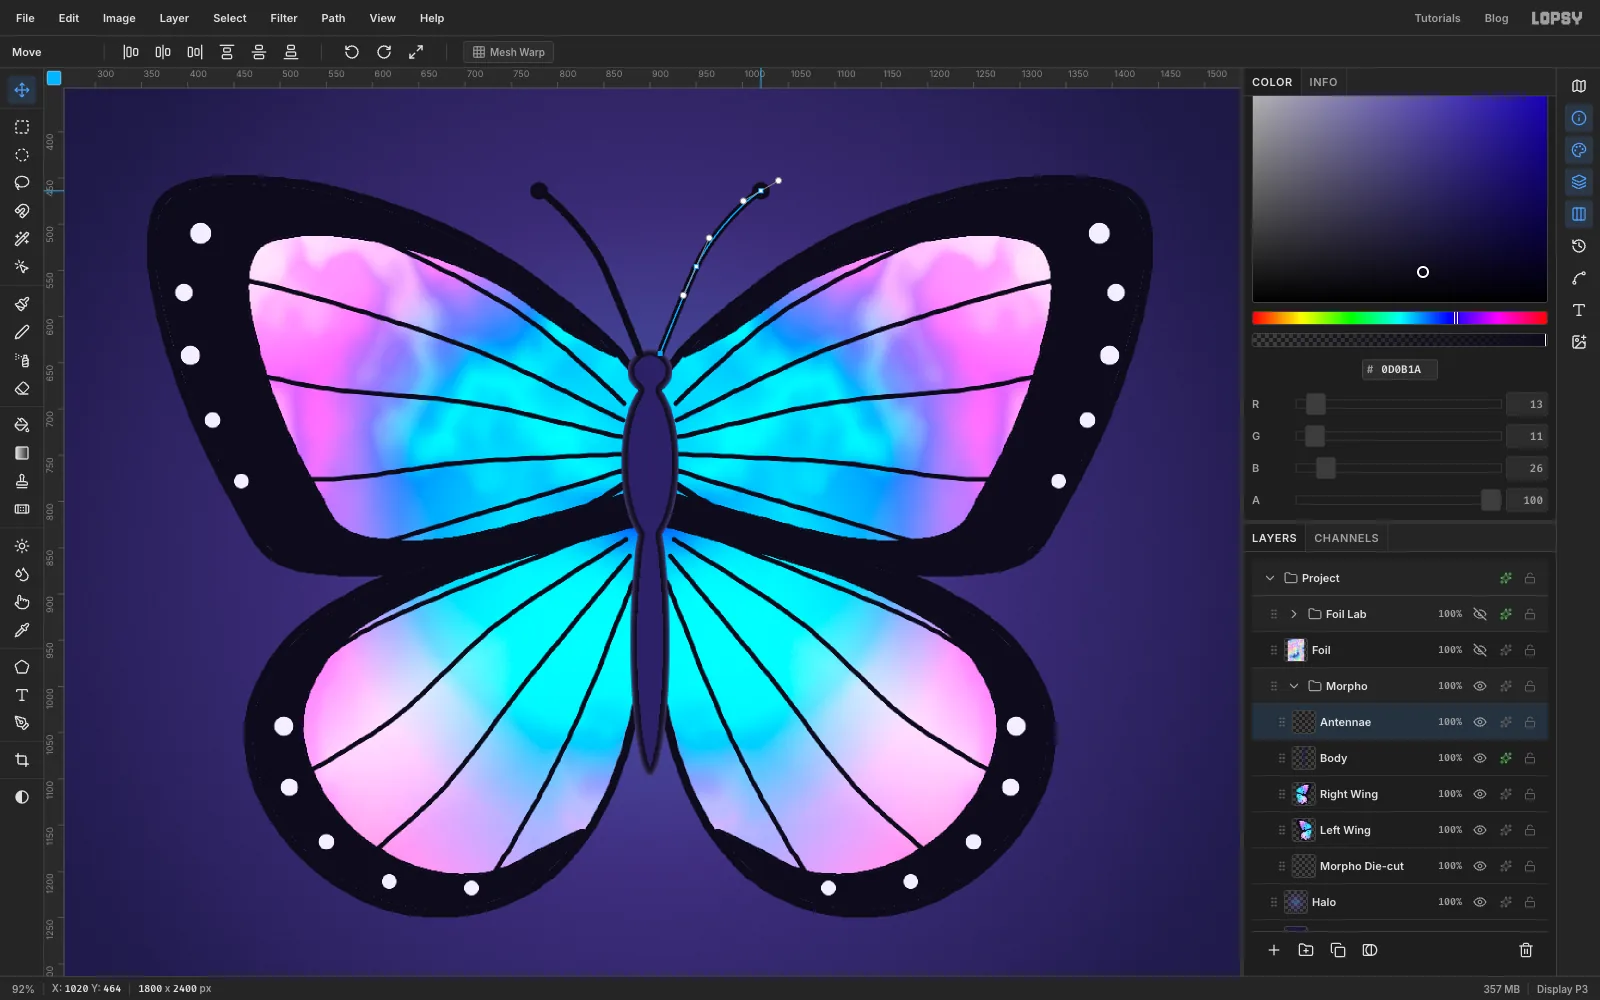
Body. With the Elliptical Marquee, draw a small round head. Then hold Shift and add a taller oval for the thorax below it and a long thin one for the abdomen. Fill the whole shape with ink, Shrink by7, and fill again with . Add an Inner Glow at Size10in .Add a layer called
Antennae. With the Pen tool set to a Stroke of8:- Click on the head and click again halfway up.
- Drag a smooth point at the tip, curving out and up.
- Press Enter to stroke the path.
Do the same on the other side. Finish each tip with a single 20 px brush dot.
-
Cut the white die-cut border
Cmd-click the Left Wing thumbnail. Select Morpho Die-cut, Grow by
22and fill with . Do the same for Right Wing, Antennae and Body. Each fill adds to the same white shape, which gives you one rounded sticker outline.Turn on Drop Shadow for the die-cut layer: Offset X
0, Offset Y14, Blur24, Opacity80, colour .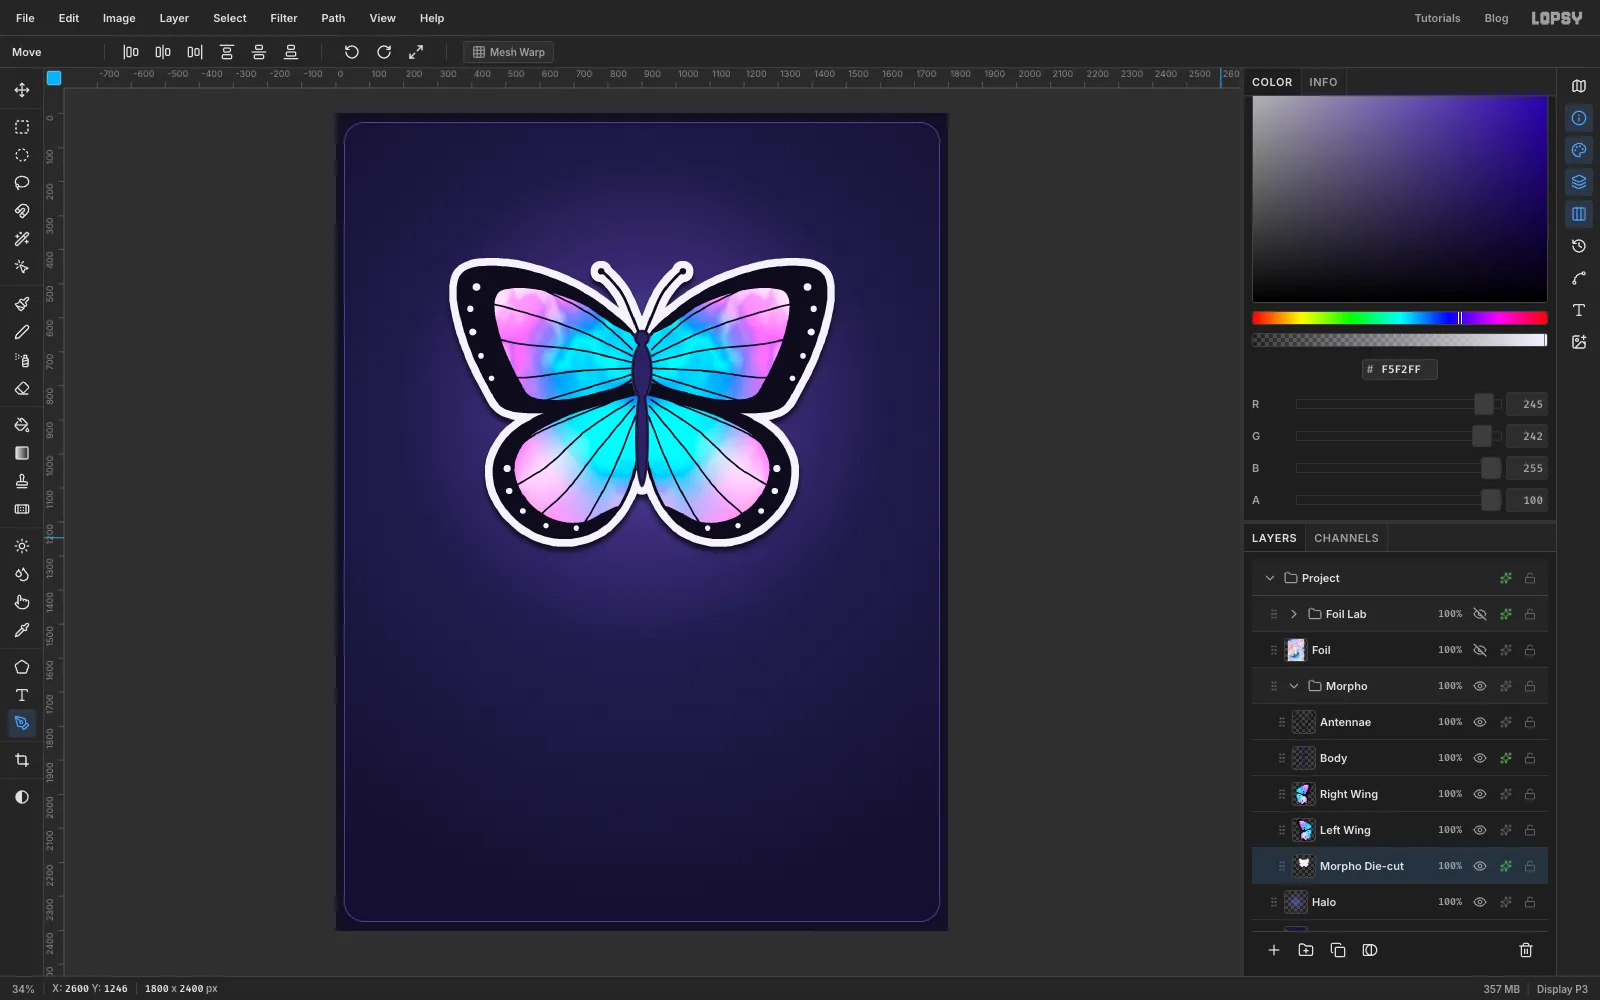
-
Make the sleepy moon
Collapse the Morpho group to keep the panel tidy. Each small sticker gets the same setup as the butterfly. Select Halo, make a New Group (here
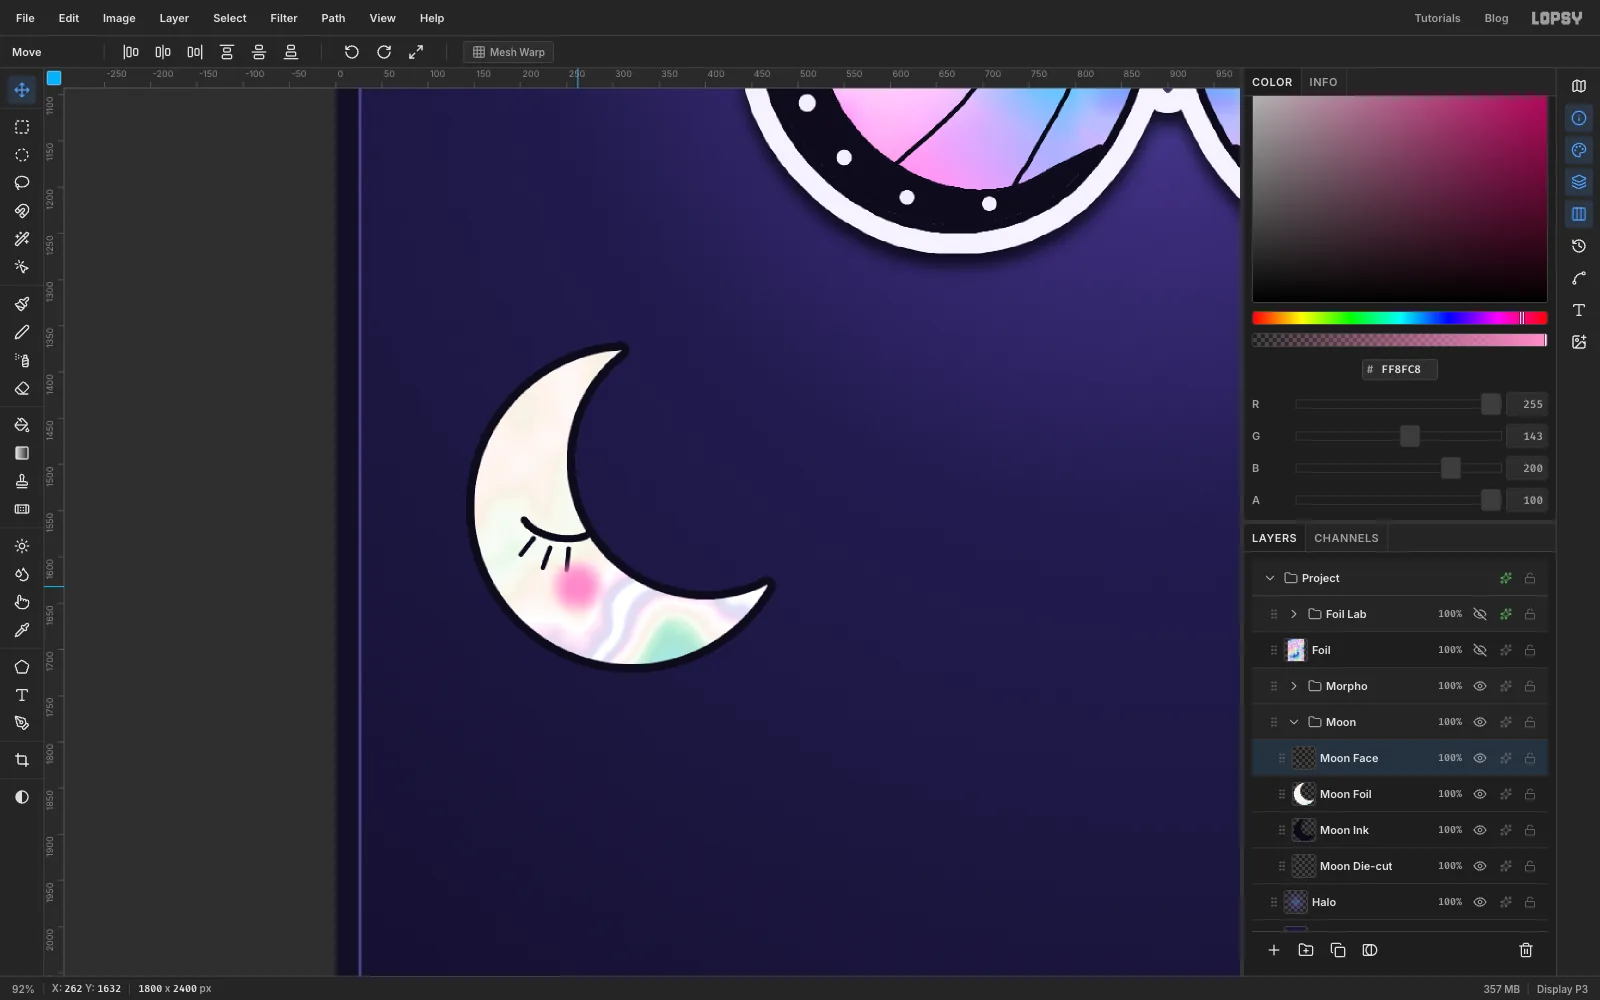
Moon), and add two layers inside it,Moon Die-cutand thenMoon Ink.With the Elliptical Marquee, hold Cmd and drag a circle about 340 px across, below the butterfly on the left. Then hold Alt and drag a slightly smaller circle offset up and to the right; subtracting it leaves a crescent.
Ink and foil it as before: Grow 9, fill ink, Shrink 9, then copy from Foil and paste above the ink. For a pearly opal moon, use Filter → Hue/Saturation… instead of a tint: Hue
-20, Saturation-35, Lightness12.On a
Moon Facelayer:- Draw the closed eye with the Pen: two points with curved handles, stroked at
8. - Add three short lashes. Click, then Shift-click with a 6 px brush.
- Add a soft pink blush with a 70 px brush at Hardness
0, clicked twice.
Then cut the die-cut the same way as the butterfly's.
- Draw the closed eye with the Pen: two points with curved handles, stroked at
-
Facet the crystal cluster
In a
Crystalgroup, lasso three pointed shards in the centre of the row with straight clicks:- a tall upright one in the middle
- a shorter one leaning left
- one leaning right
Hold Shift for the second and third. Ink and paste the foil as usual.
Shade the facets:
- Crystal Shade: lasso the right half of each shard and fill with , set to Multiply at
55%. - Crystal Shine: lasso a thin sliver on each left face, Select → Feather…
4, and fill white, set to Screen at70%.
For the facet lines, add
Crystal Lines. Lasso the middle shard, then choose Select → Inverse. Now the lines for the two back shards stop where they pass behind the front one. Draw them with a 7 px brush using click-then-Shift-click straight lines: each outline, a centre ridge and a V across the tip. Deselect and draw the front shard's lines.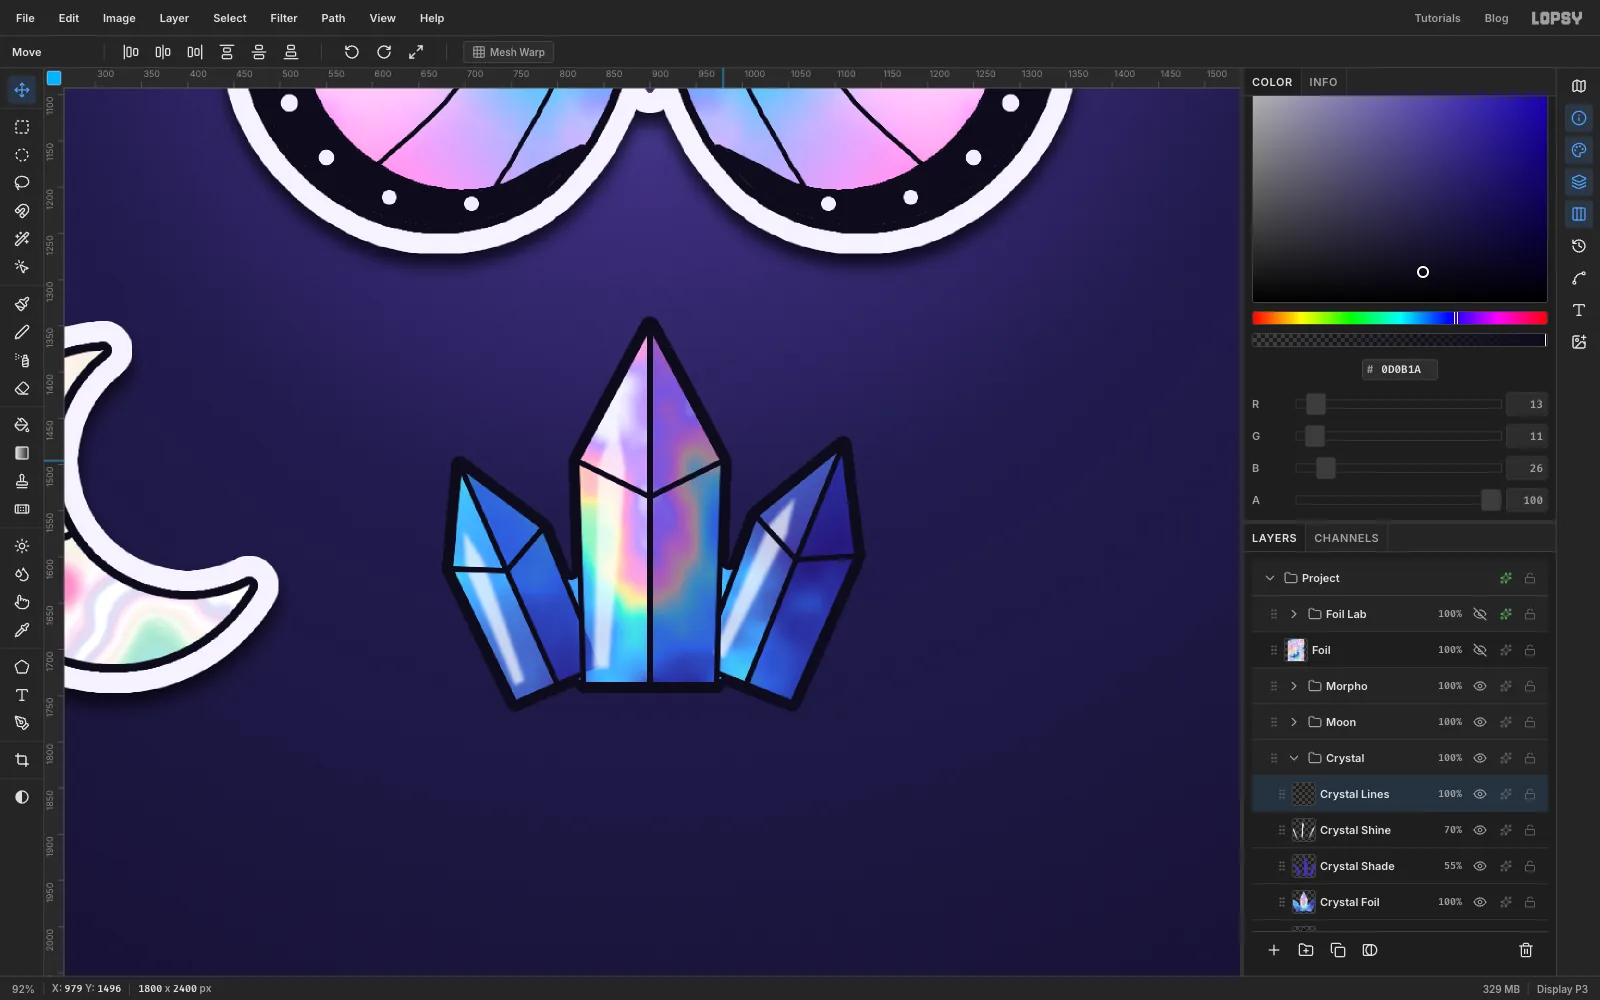
-
Put the blade behind the heart
In a
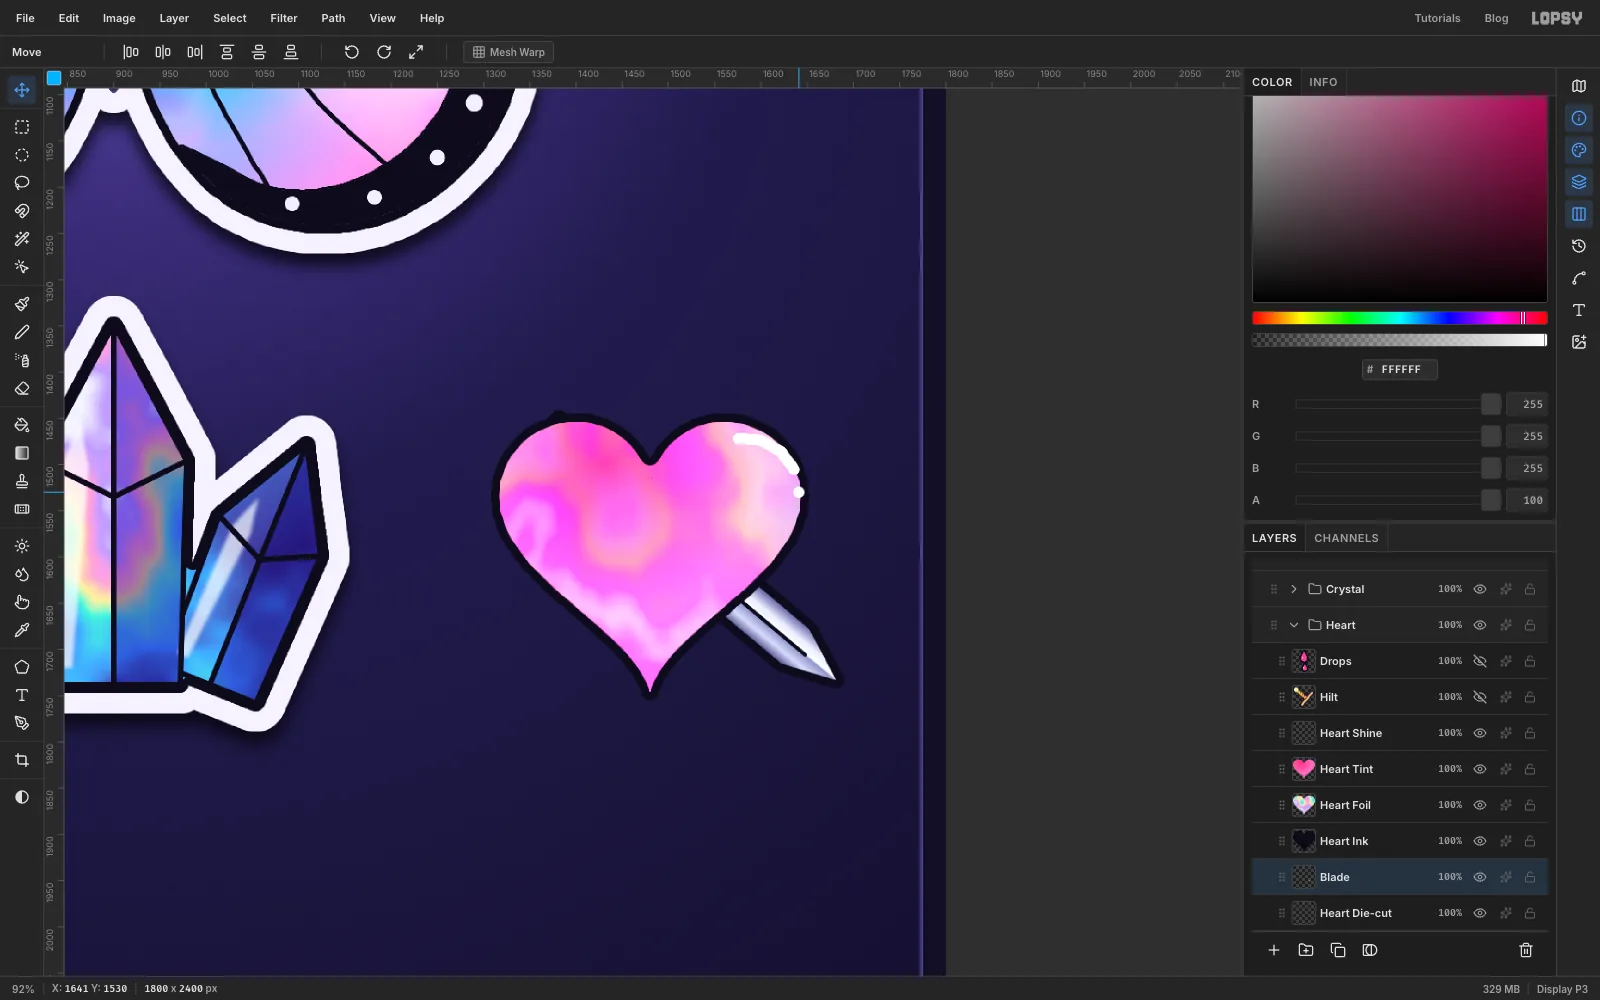
Heartgroup, lasso a heart shape on the right of the row. Ink it, paste the foil, and add a Hard Light radial tint from through to . On a new layer above the tint calledHeart Shine, brush a white highlight stroke round the right lobe and add a dot below it.The trick to a dagger that pierces the heart: the blade goes on a layer under the heart, and the hilt on a layer above it.
- Select Heart Die-cut and add a layer called
Blade. It sits under the heart ink. - Lasso a long blade running diagonally from the upper left of the heart to a point past its lower right.
- Ink it, then fill it with a chrome Linear gradient dragged across the blade, not along it. Use alternating light and dark greys: , , white, , , .
- Add a 5 px centre line.
The heart covers the middle, so only the tip shows where it comes out.
- Select Heart Die-cut and add a layer called
-
Add the hilt and the blood drops
Select Heart Shine and add a layer called
Hilt, so it sits above the heart. Lasso the crossguard as a short bar that rests across the heart's upper-left edge, where the blade goes in. Shift-add the grip, then Shift-add a round pommel at the end with the Elliptical Marquee (hold Cmd too to keep it a circle).Ink the hilt, then fill it with a gold gradient ( → → → ) running along the dagger. Outline the guard and add four short wrap lines across the grip with the brush.
On a
Dropslayer, lasso two teardrops hanging under the spot where the blade comes out. Ink them, fill them , and add a white glint to each. Die-cut Heart Ink, Blade, Hilt and Drops together.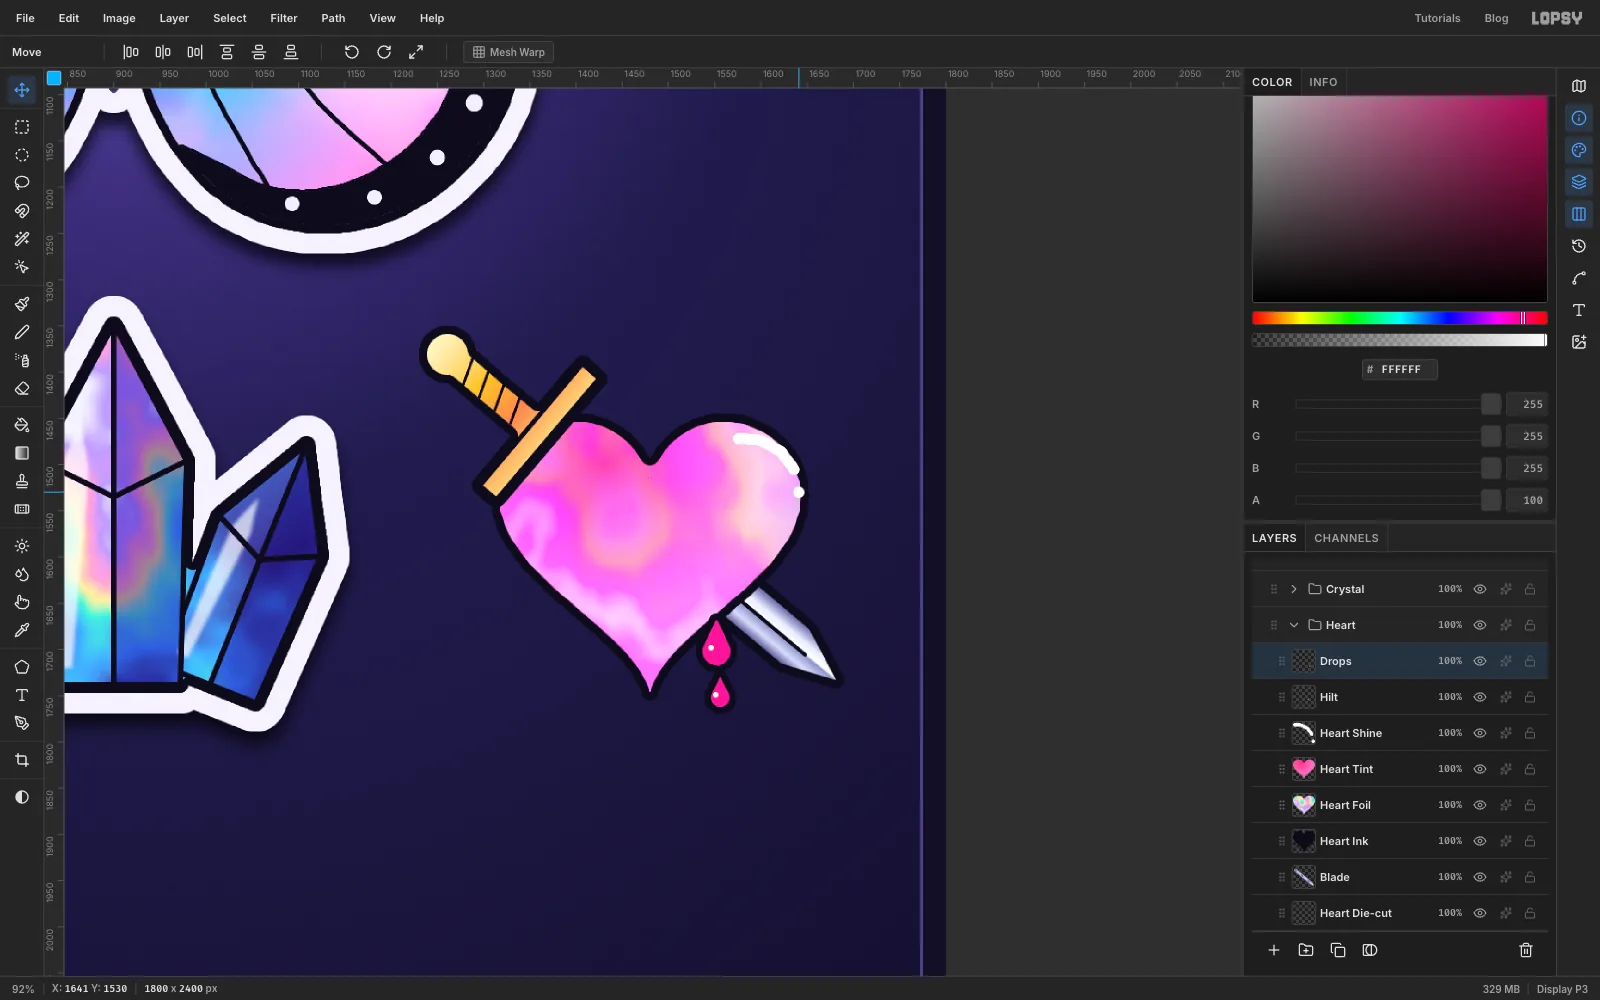
-
Build the scarab
Start the bottom row with a
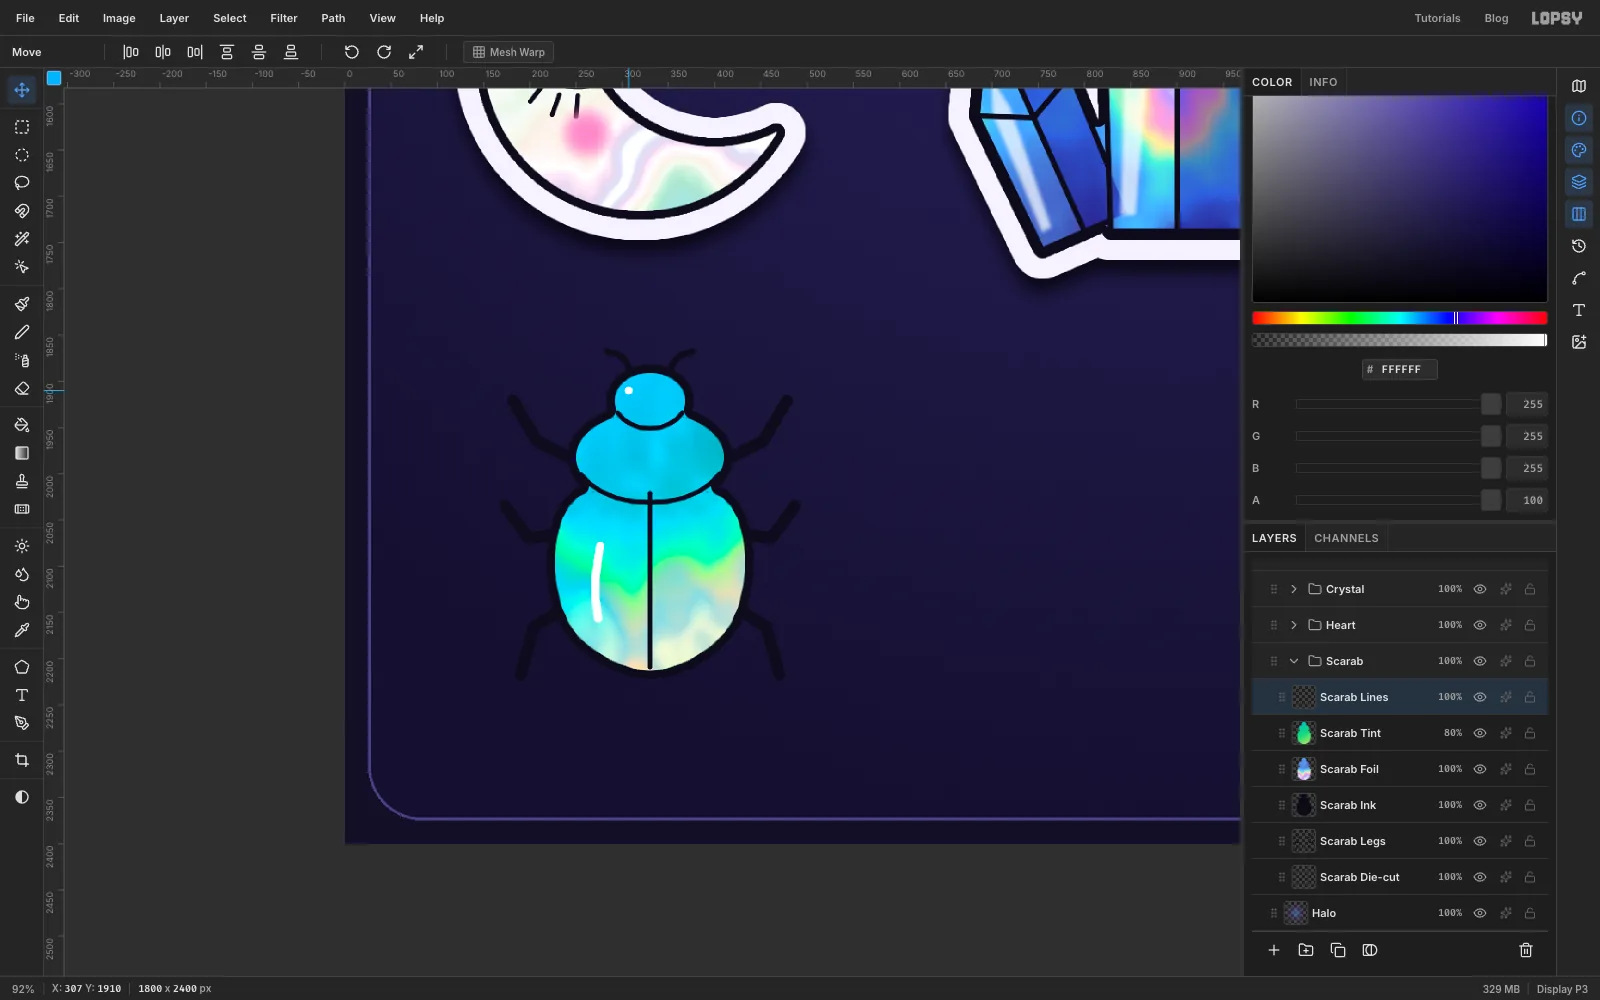
Scarabgroup. With the Elliptical Marquee, make a small head and Shift-add a wider oval for the thorax. Then Shift-lasso a rounded shield for the wing cases. Ink it, paste the foil, and add a Hard Light tint from to to at80%.Select Scarab Die-cut and add a layer called
Scarab Legs, so it sits between the die-cut and the ink and the legs tuck under the body. Draw six legs with a 14 px brush as click-and-Shift-click zigzags, and two short 8 px antennae.On a
Scarab Lineslayer above the tint:- Draw a straight line down the middle of the wing cases.
- Draw two curved lines where the head meets the thorax and the thorax meets the wing cases.
- Add a white streak and a white dot for shine.
Die-cut Scarab Ink and Scarab Legs together.
-
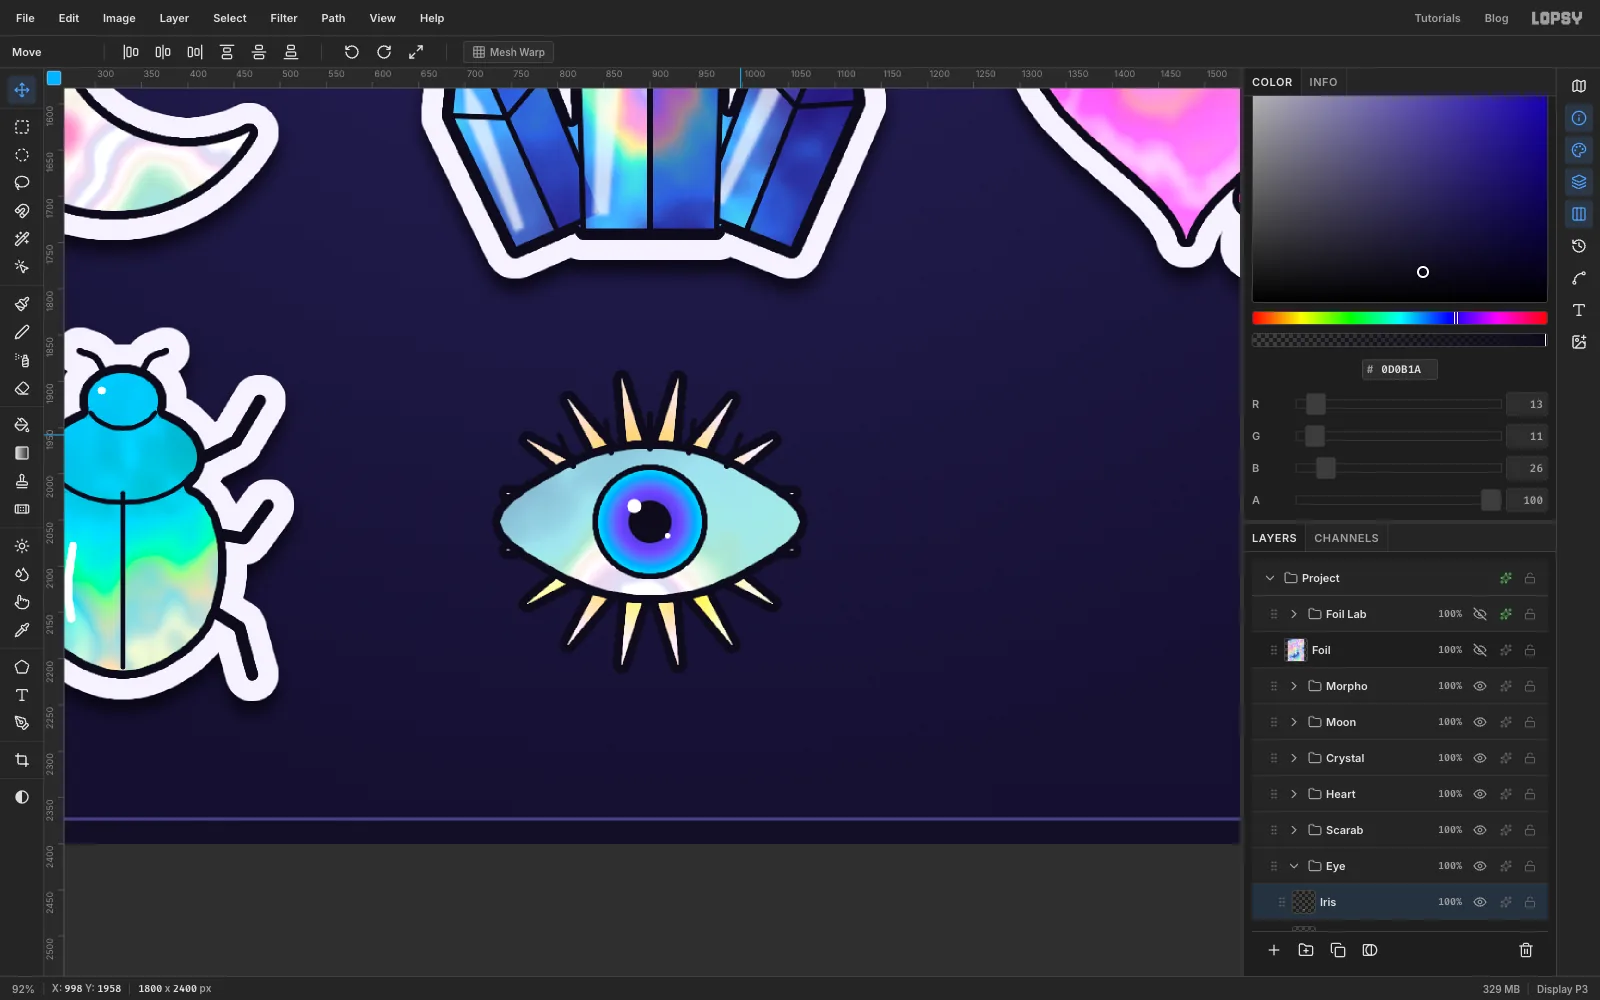
Draw the eye's rays with Sunburst
In an
Eyegroup, select Eye Die-cut and add a layer calledEye Rays. Set the foreground to ink and open Filter → Sunburst…. Set:- Rays
16 - Width
55 - Taper
100, for pointed rays - Rotation
11.25, so no ray points straight up
Move the centre onto the eye: keep Center X at
50and set Center Y to about85. Length is a percentage of the distance to the farthest corner, so about7gives rays roughly 160 px long.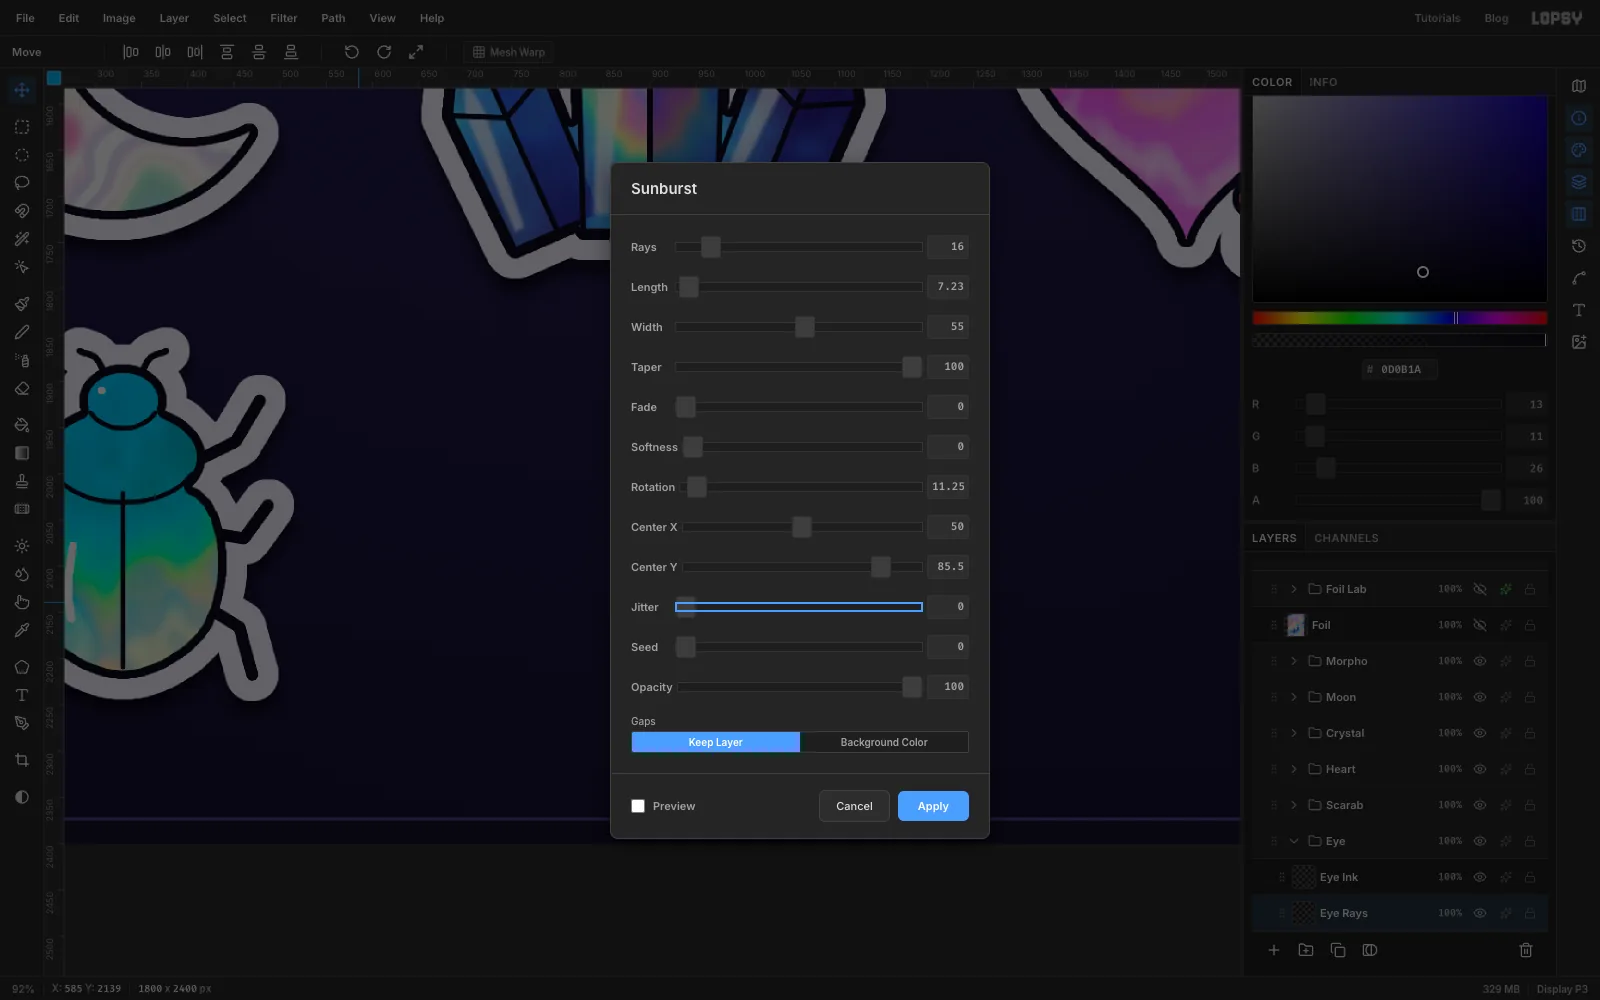
- Rays
-
Finish the sun-eye
Give the rays an outline and a foil fill:
- Cmd-click the Eye Rays thumbnail, keep Eye Rays selected, Grow by
9and fill with ink. Growing outwards keeps the thin ray tips intact. - Shrink by
9, copy from Foil, select Eye Rays and paste. Rename the pasteRay Foil. - Add a
Ray Tintlayer above it, Cmd-click Ray Foil, and drag a radial gold gradient ( → → ) out from the centre. Set it to Hard Light.
Then the almond. Lasso an almond shape across the middle of the rays and ink it on Eye Ink, which sits above the ray layers. Paste foil into it as usual, and give that foil the moon's pearly Hue/Saturation settings.
On an
Irislayer:- Draw a circle, ink it, and fill it with a radial gradient from to to .
- Add a black pupil and two white glints.
- Add five short lashes along the upper lid.
Die-cut Eye Rays and Eye Ink.
- Cmd-click the Eye Rays thumbnail, keep Eye Rays selected, Grow by
-
Add the cherries
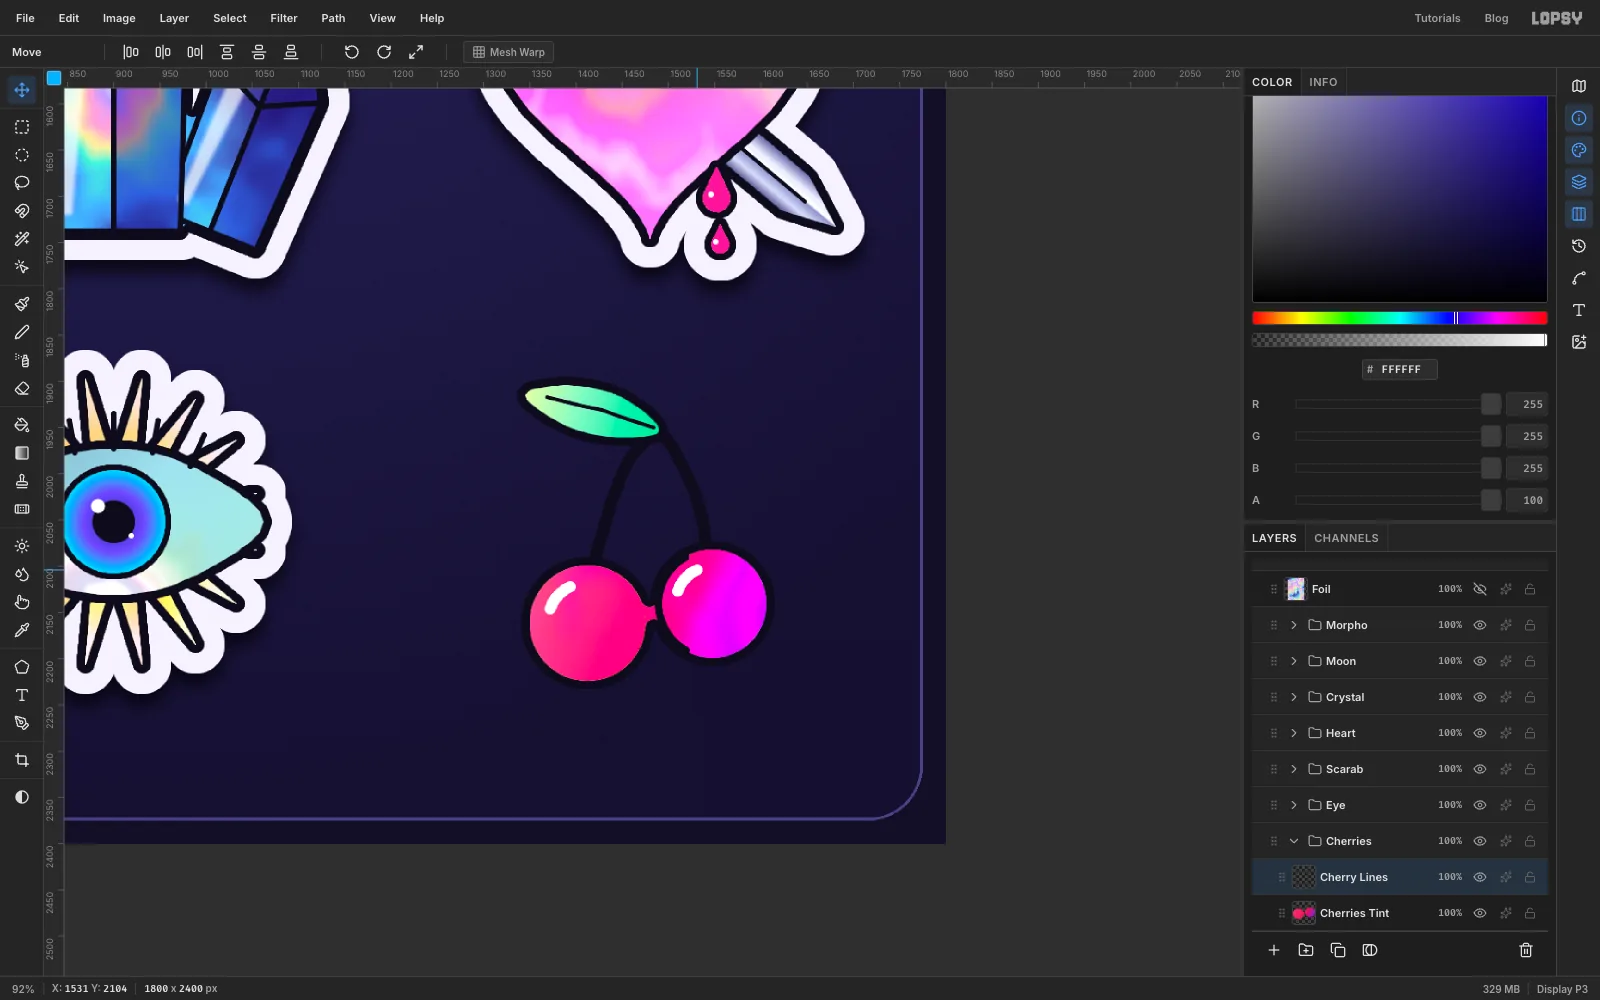
In a
Cherriesgroup, add aStemslayer above the die-cut. Brush two curved 14 px stems that meet at the top. Lasso a leaf that comes off the join, then ink it, fill it with a mint gradient ( → ) and give it a centre vein.Draw two circles with the Elliptical Marquee and Shift, ink them and paste the foil. Tint them Hard Light from to to . Add a 9 px ink arc on a new layer where the two cherries touch, and a curved white highlight on each. Die-cut Cherries Ink and Stems.
-
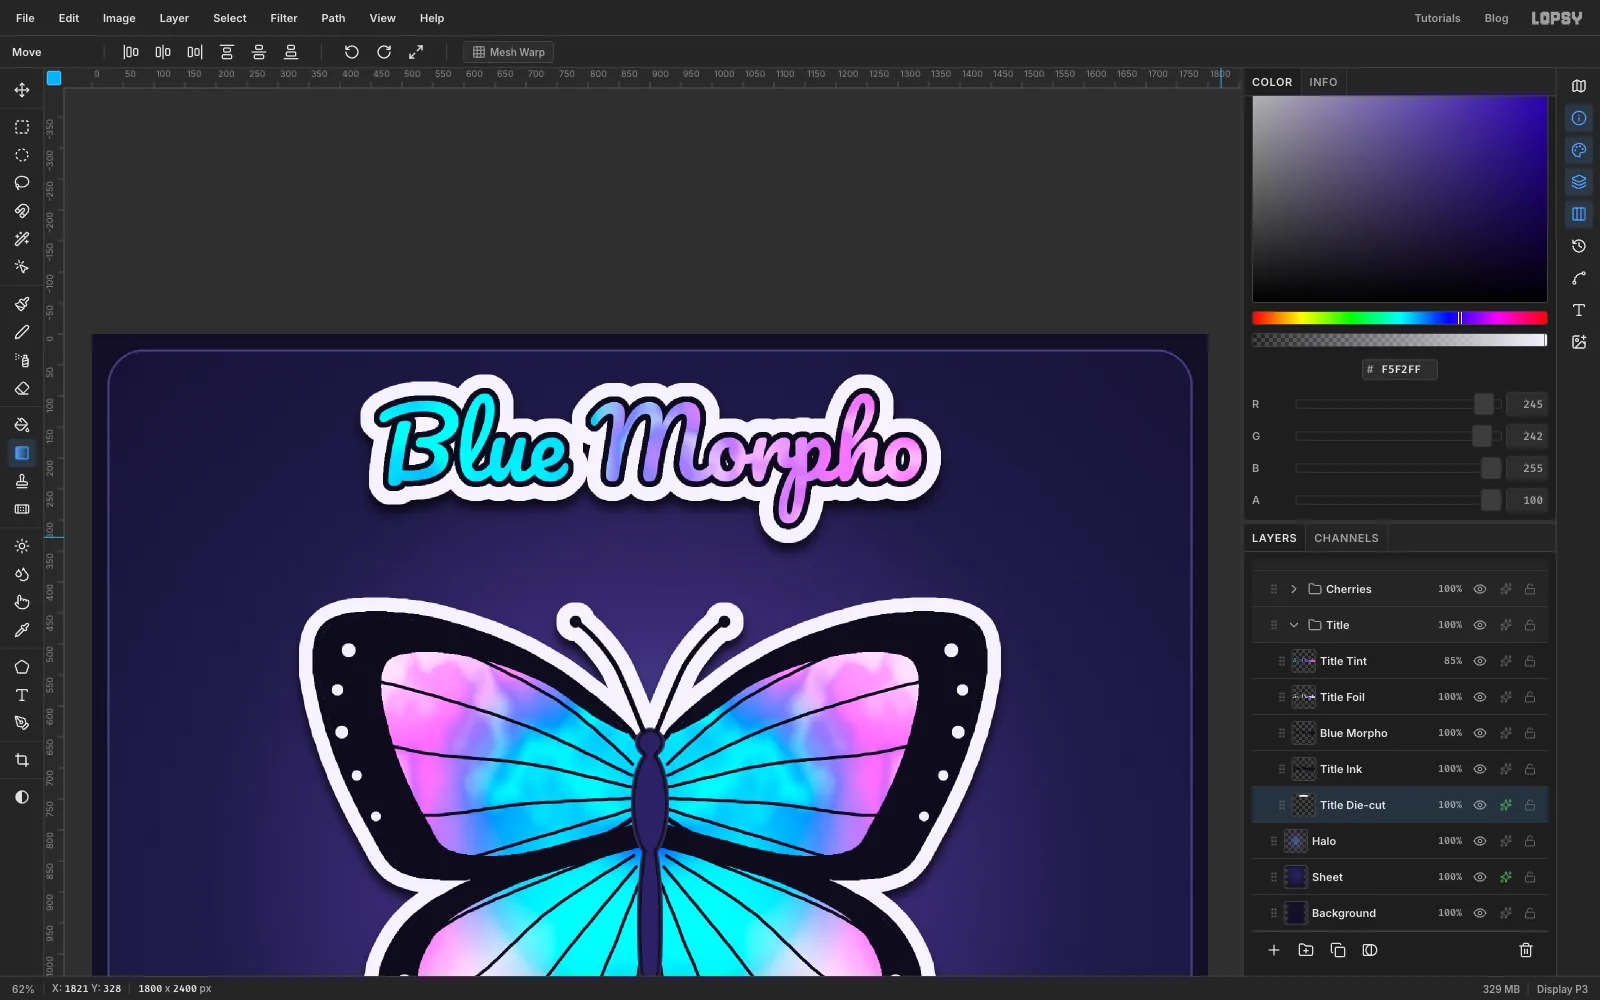
Set the title as a sticker
Select Halo, make a
Titlegroup, and addTitle Die-cutandTitle Inklayers inside it. With the Text tool, pick Pacifico at Size150, click in an empty area and typeBlue Morpho. Move it with the arrow keys so it's centred across the page, close to the top. Leave room above it for the white border.Text can be used like any other shape:
- Cmd-click the text layer's thumbnail to select the letters.
- Select Title Ink, Grow
9and fill with ink. - Cmd-click the text thumbnail again, copy from Foil and paste above the text. Rename the paste
Title Foil. - Add a
Title Tintlayer above it, Cmd-click Title Foil, and drag a linear gradient from left to right: , , , . Set it to Hard Light at85%. - Die-cut the Title Ink layer.
-
Add the footer line
Select Halo and add a layer called
Sparkles Cyan; you'll draw sparkles on it next. With it selected, new text lands at the top level instead of inside a sticker group. With the Text tool, choose Unbounded at26, colour . Click in an empty area and type the prices and details, with a spaced middle dot between every item:HOLO FLASH Nº 07 · SM $60 · MD $90 · LG $150 · WALK-INS WELCOMEIn the Text panel, set Letter spacing to
3. Nudge the line with the arrow keys until it's centred, halfway between the bottom row of stickers and the sheet's edge.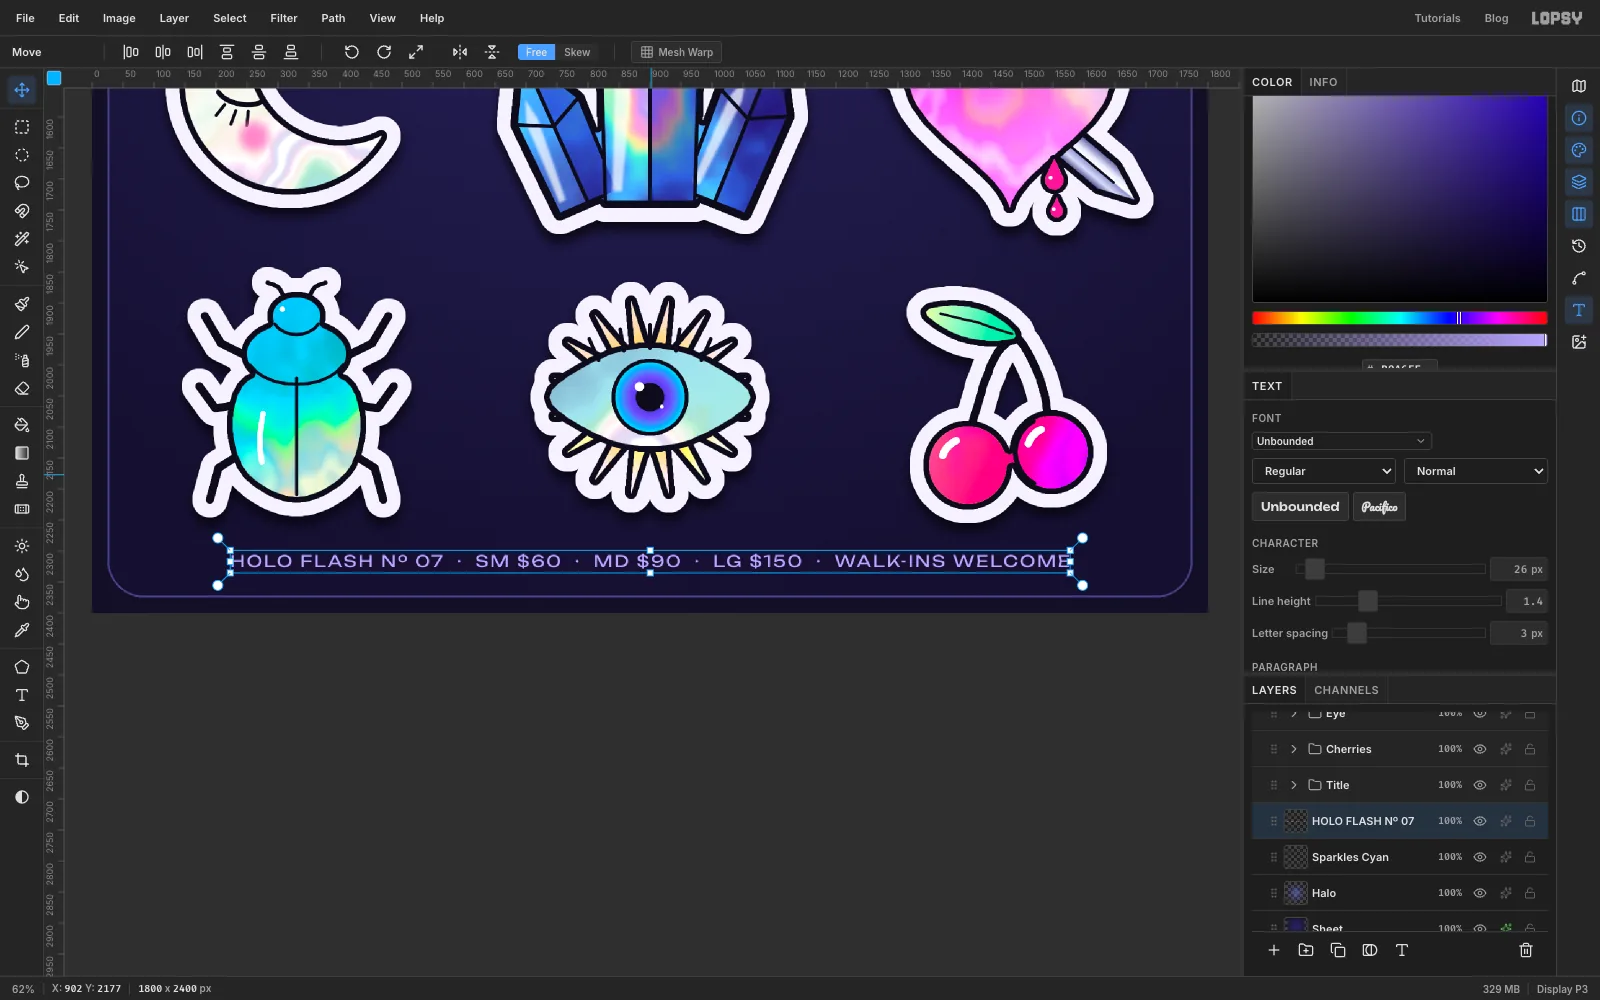
-
Scatter sparkle clusters
Select the
Sparkles Cyanlayer you made for the footer. Lasso four-point stars: go from tip to tip, bowing each side in towards the centre, like a diamond pinched at the waist. Shift-add the next ones as you go:- a big one and two small ones to the left of the title
- a couple more beside the butterfly's left wing
- a few small ones in the gaps round the lower rows (you'll prune them at the end)
Mix three sizes, roughly 130, 70 and 40 px across. Fill them white and give the layer an Outer Glow at Size
24in .Add a
Sparkles Pinklayer above it for the ones on the right, with an glow. Keep them in clusters near the title and wingtips rather than sprinkling them evenly.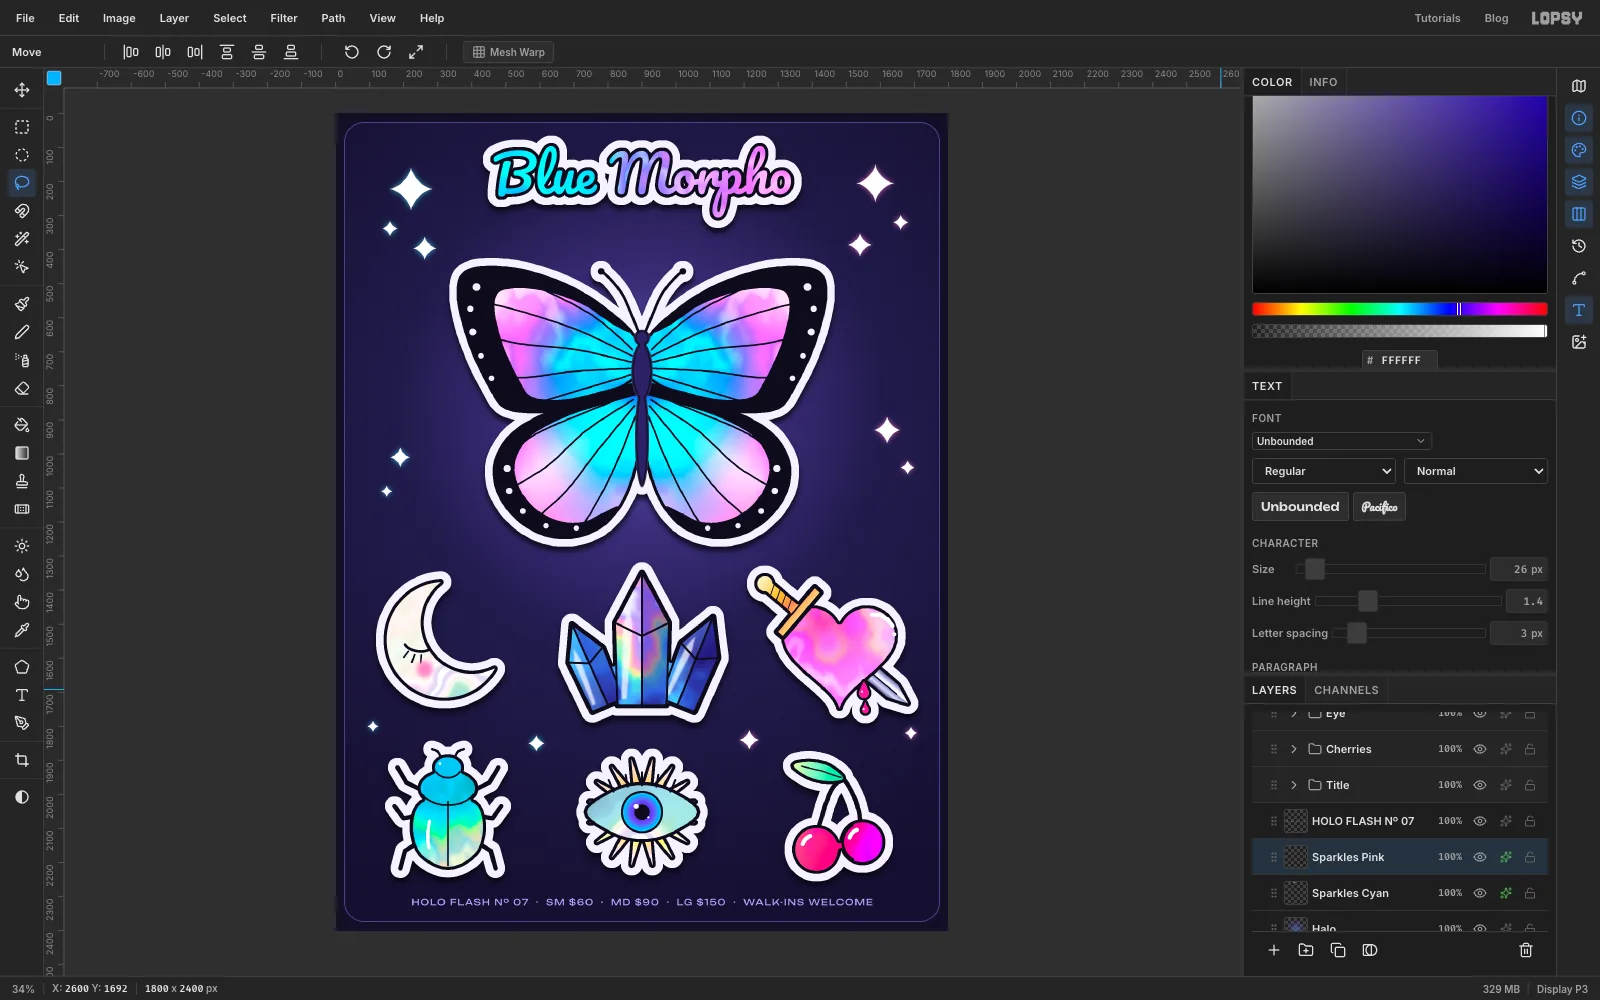
-
Paste, scale and rotate one more sparkle
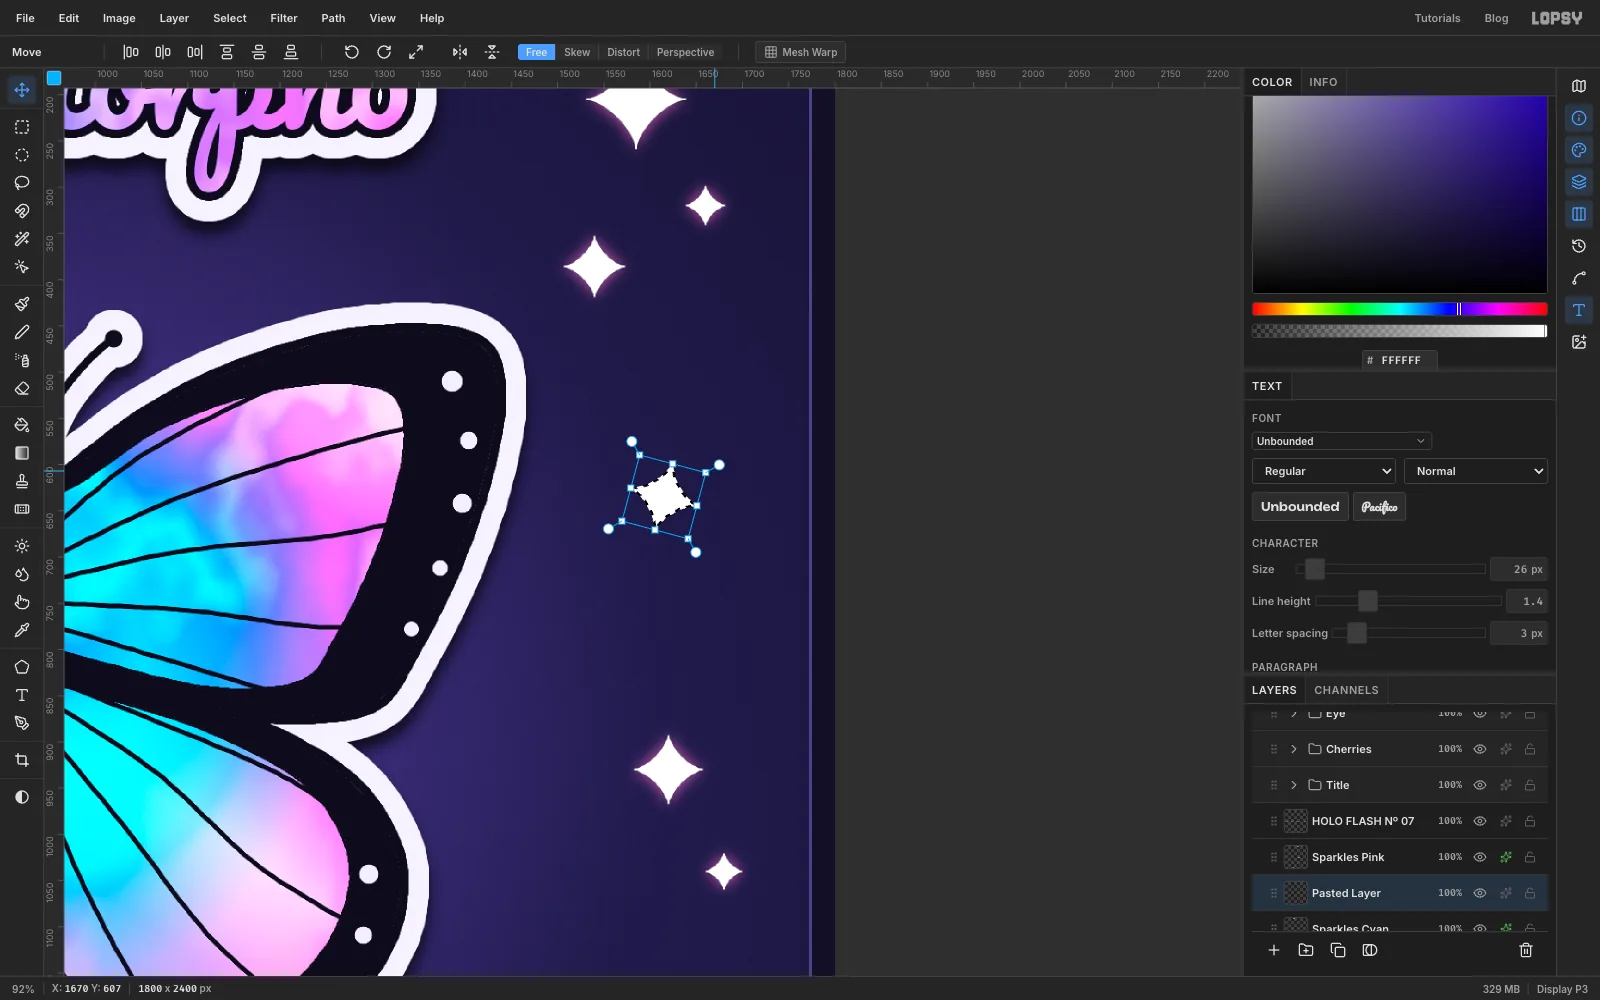
On Sparkles Cyan, drag a Rectangular Marquee round the big sparkle by the title. Copy and paste it; the paste is selected and the Move tool is active. Then:
- Drag it into the empty margin to the right of the butterfly's forewing.
- Hold Cmd and drag a corner handle inwards to scale it to about 60%, keeping its proportions.
- Hold Cmd and drag the round handle just outside a corner to rotate it. Cmd snaps to 15° steps, so stop at one step.
- Press Cmd+D to commit the transform, then Merge Down the pasted layer into Sparkles Cyan, so it gets the cyan glow.
-
Final polish
Step back and fix the small things:
- Close the margin gap. At the inner bottom of each hindwing, the black margin stops short of the body. Select Left Wing and Cmd-click its thumbnail. Hold Shift+Alt and lasso a wedge from the end of the margin up to the body; that keeps only the overlap. Fill it with ink. Repeat on Right Wing.
- Even out the space. The title sits too close to the top edge. Select the Title group and, with the Move tool, nudge it down about 20 px with the arrow keys (Shift + arrow moves 10 px at a time). Move the two big sparkles beside it the same way: marquee each one, then nudge it.
- Clear the gutter. If a sparkle crowds a sticker between the rows, marquee it and press Delete.
- Read the footer. Raise the footer to
30px and re-centre it.
Save the project with File → Save Project, then use File → Quick Export PNG for the finished sheet.