Design a Holographic Moth T-Shirt Graphic
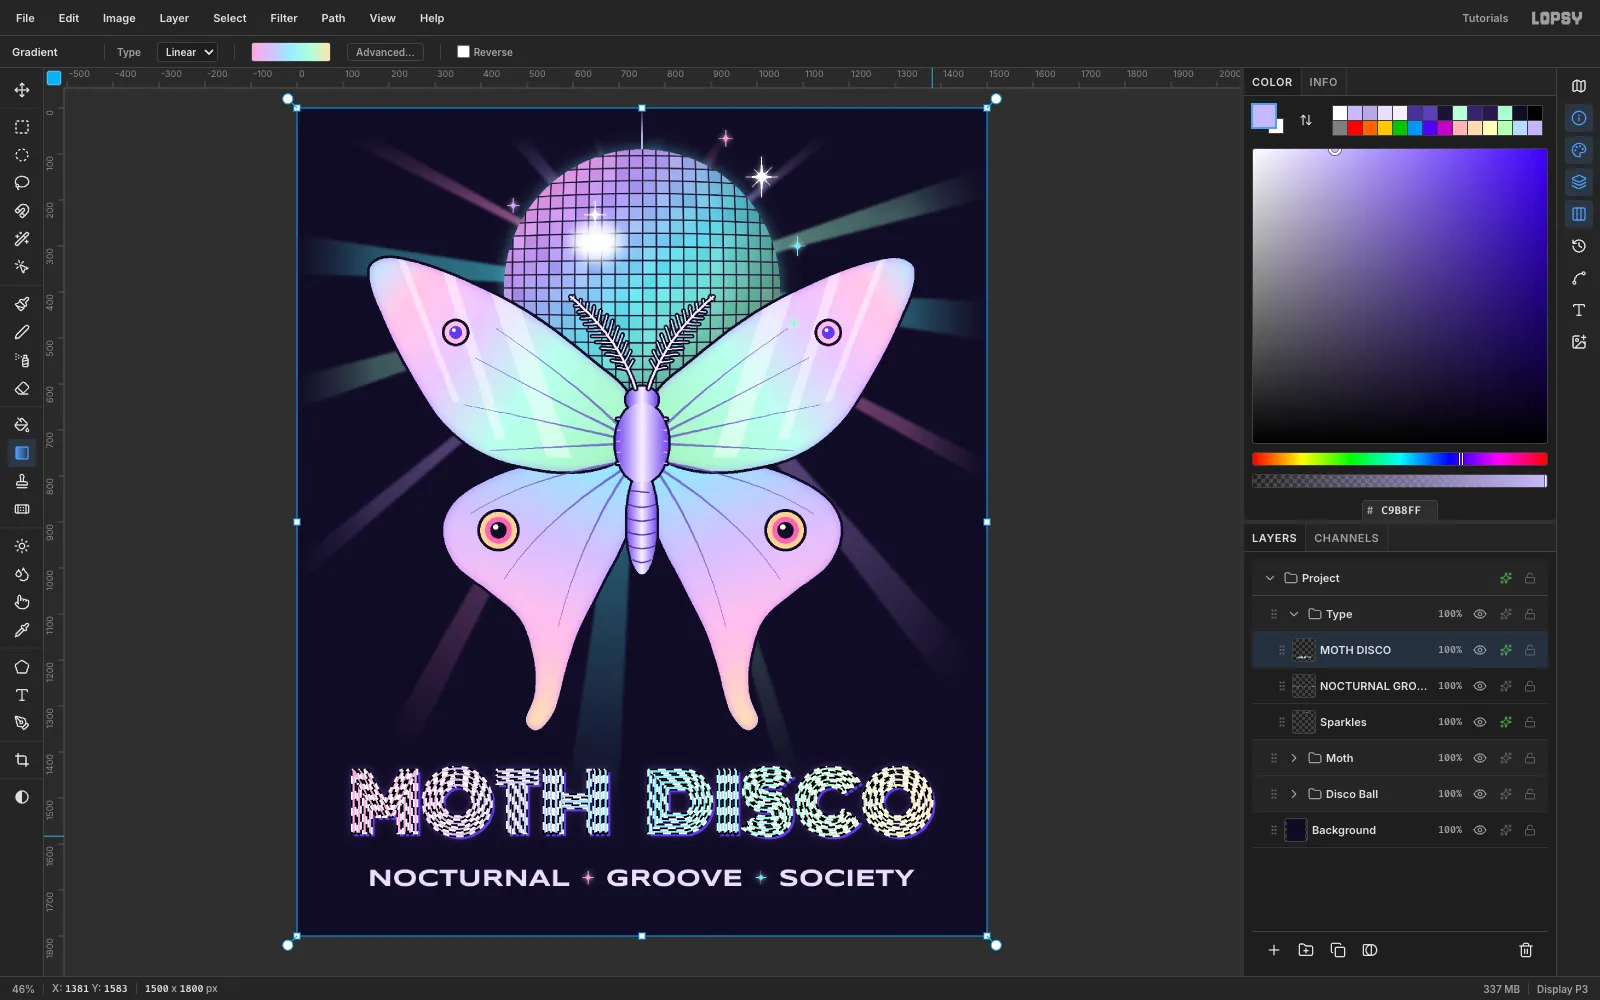
Make a MOTH DISCO tee in Lopsy with a pixelated mirror ball, pastel thin-film wings, symmetry-brush veins, a Monoton title and rotated sparkle glints.
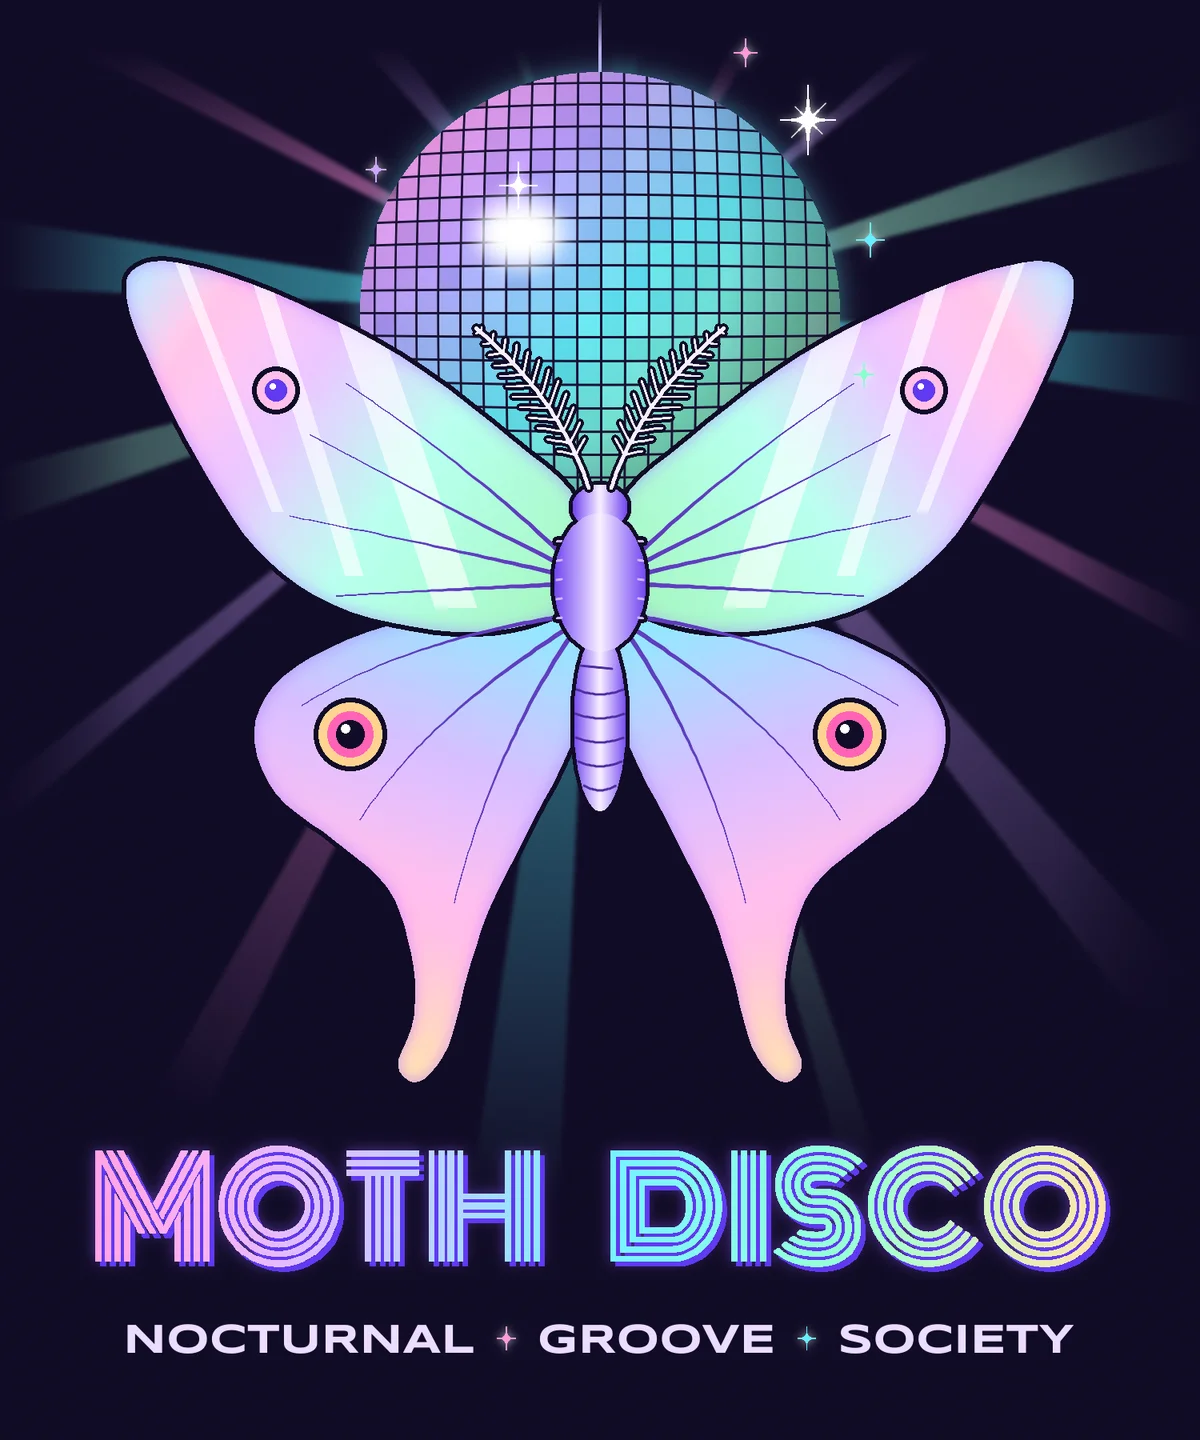
Holographic foil prints work because they fake light: pale thin-film colors, sharp white glints, and a dark shirt that makes them glow. In this tutorial you'll make MOTH DISCO, a 1500 × 1800 graphic for a black tee. A Luna moth flies to a mirror ball, the way moths fly to a porch light.
You'll build the mirror ball from a gradient, Add Noise, Pixelate and a pattern-filled grid, then bulge it with Lens Distortion. You'll cut the wings with the Lasso and fill them with pastel "thin-film" gradients. The veins and antennae are painted with the Symmetry brush, with Taper on the veins. To finish, you'll set a Monoton title with a holographic fill, and use copy, paste, rotate and scale to turn a four-point sparkle into an eight-point star.
The palette:
- Shirt ink
#100C24(the background, not an ink) - Holographic ramp
#FF9ED8→#B9A2FF→#8CEBFF→#A8FFD2→#FFE0A8 - Forewing thin-film
#B8F5C8→#C8FFF0→#E6C8FF→#FFC8E8→#C8E8FF - Hindwing thin-film
#9FE8FF→#D2BFFF→#FFC2E6→#FFE3B8 - Outline ink
#100C24, accent violet#5B3BE8/#8A5CFF
-
Set the shirt color
Choose File → New, enter 1500 × 1800 with Unit: Pixels, pick a White background and click Create. Click the Background row, set the foreground to
#100C24and choose Edit → Fill with nothing selected. Designing on the real shirt color stops pastels from looking washed out later. Rename Layer 1 to Beams.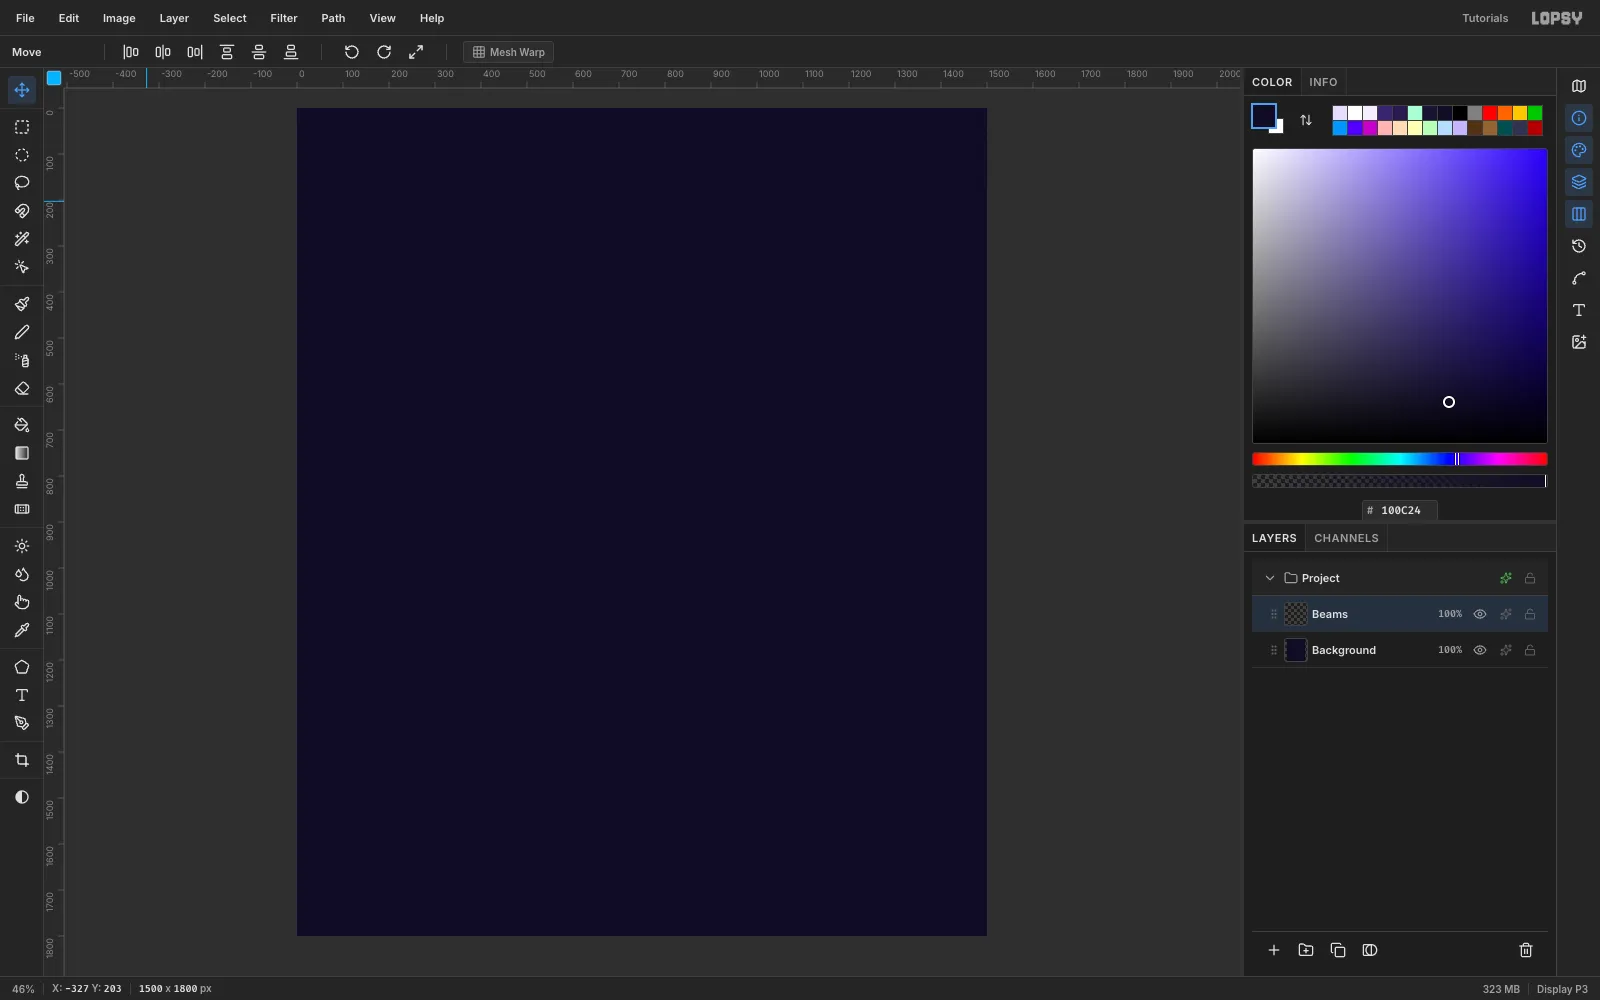
-
Cut the light beams
The mirror ball will sit at (750, 330), so all the beams start there. With the Lasso (L), draw a thin triangle from that point out past the canvas edge and use Edit → Fill. Repeat around the circle to make 16 beams. Vary the width so the far ends range from about 40 to 140 px, and rotate through
#7FF3FF,#FF9BE8,#C9A7FFand#B8FFD9. Uneven widths look like real stage light. Even ones look like a sunburst clip-art.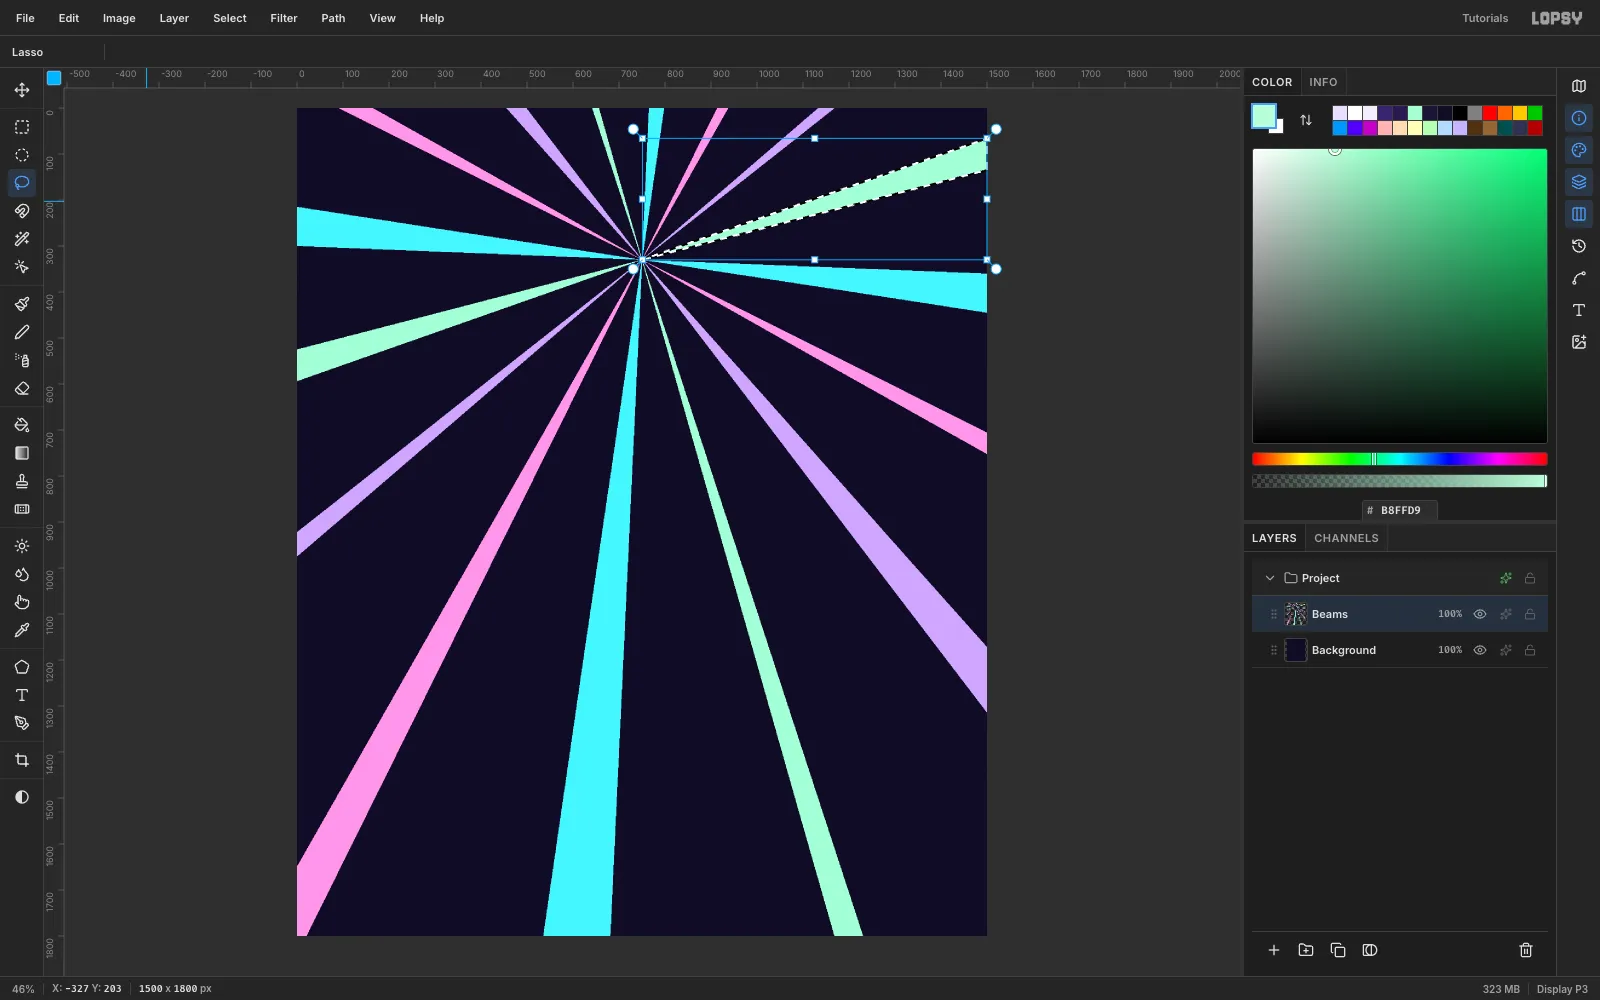
-
Soften and fade the beams
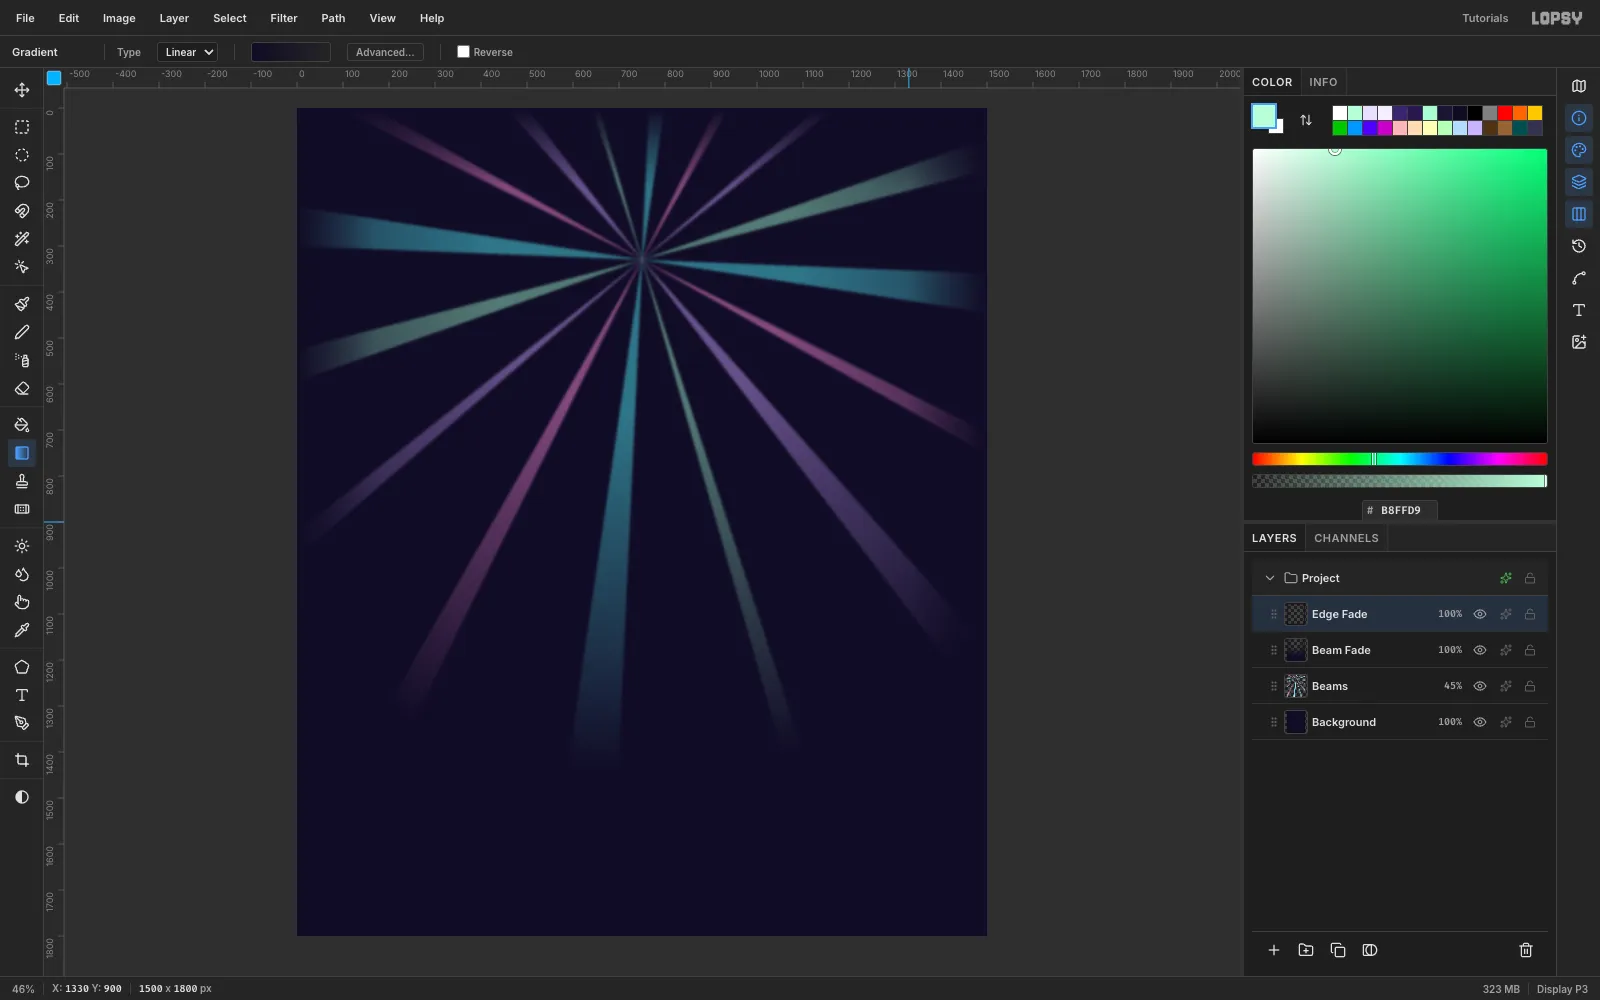
Press Cmd+D, run Filter → Gaussian Blur… at Radius 8, and set the Beams layer opacity to 45%. Add a Beam Fade layer and draw a Radial gradient from (750, 330) to (750, 1450) with ink stops: transparent up to 30%, then solid
#100C24.Next, add an Edge Fade layer. For each side, marquee a 170 px band along that edge and draw a Linear gradient from solid ink at the edge to transparent inward. On a t-shirt, a beam that runs off the artboard prints as a hard rectangle, so every beam has to fade out before it reaches an edge.
-
Fill the ball with a holographic gradient
Add a Ball layer. With the Elliptical Marquee, drag a 660 × 660 circle from (420, 0). Pick the Gradient tool, open Advanced… and set five stops:
#FF9ED8,#B9A2FF,#8CEBFF,#A8FFD2and#FFE0A8. Drag a Linear gradient diagonally from (480, 40) to (1020, 620).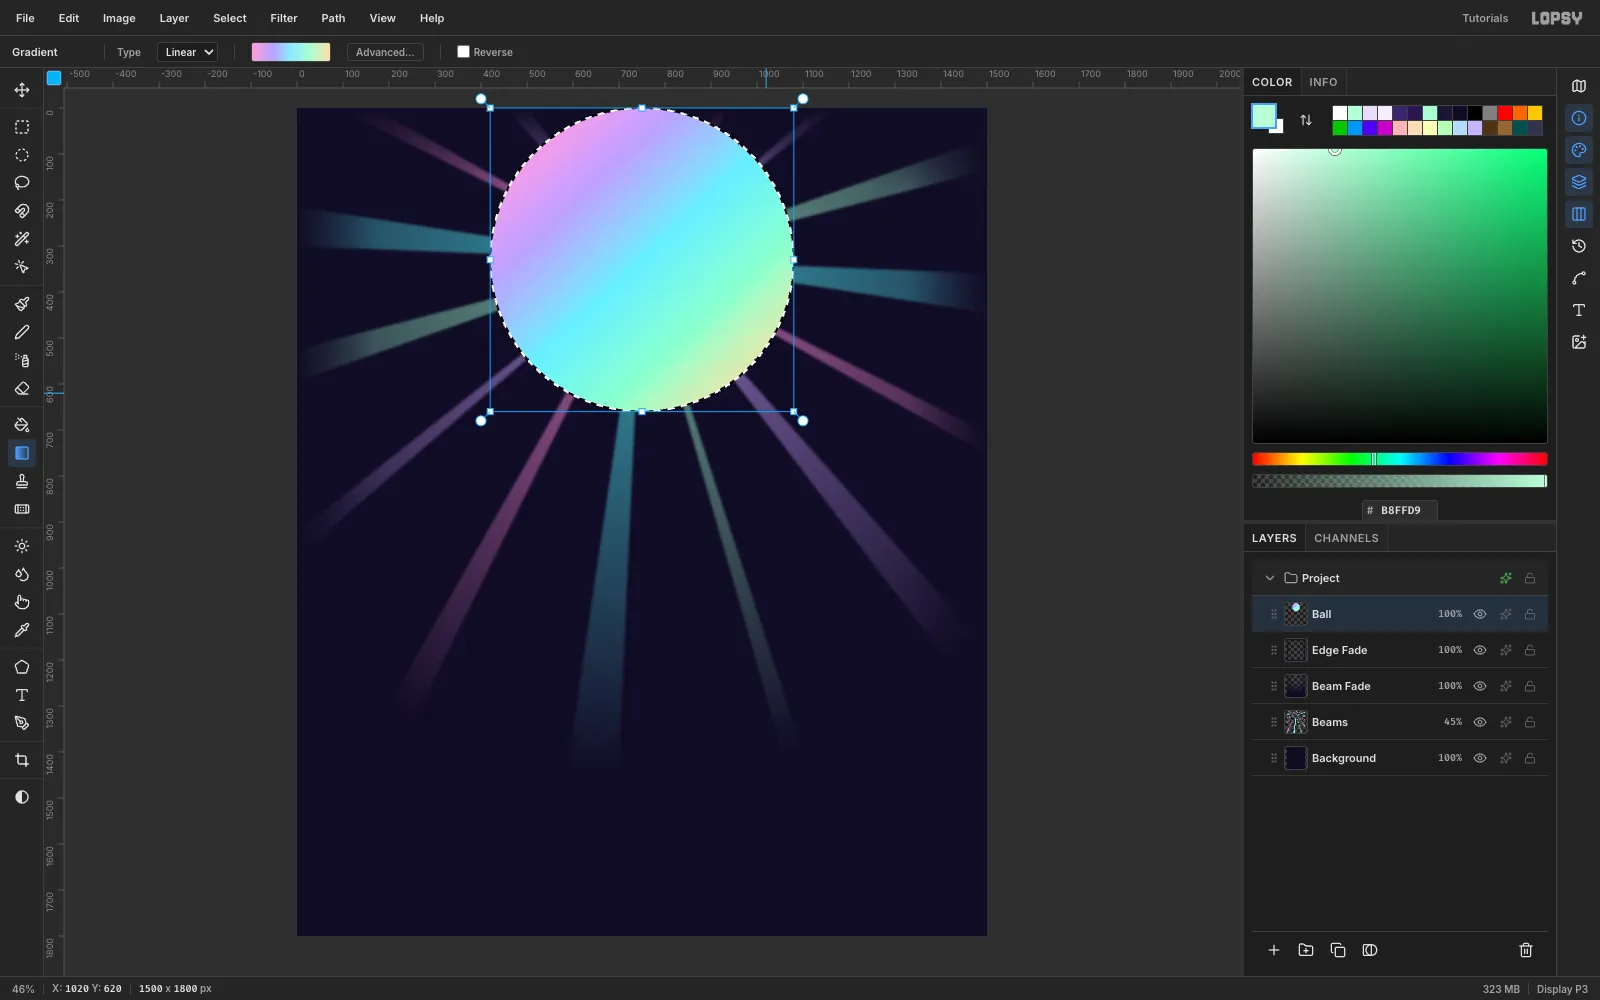
-
Turn it into mirror tiles
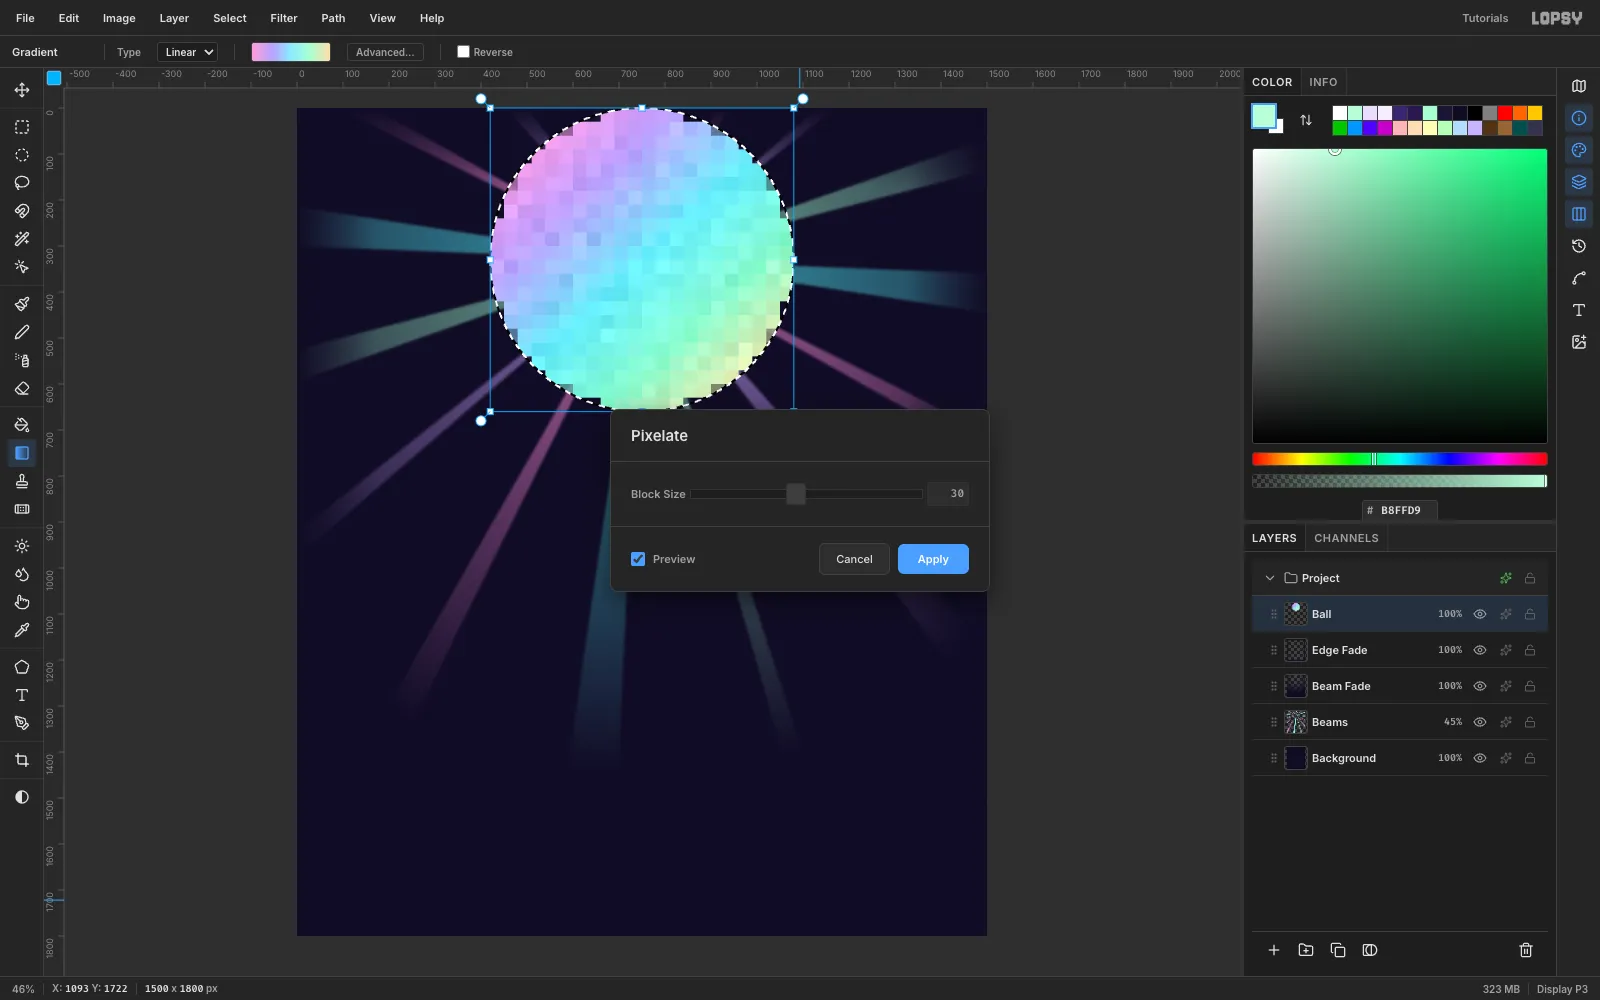
Keep the selection. Run Filter → Add Noise… with Mono, Uniform and Amount 40, then Filter → Pixelate with Block Size 30. The noise gives each 30 px tile its own brightness once it is averaged, so the tiles glint unevenly like real mirrors.
-
Add the grout grid with a pattern
Add a Ball Grid layer. Set the foreground to
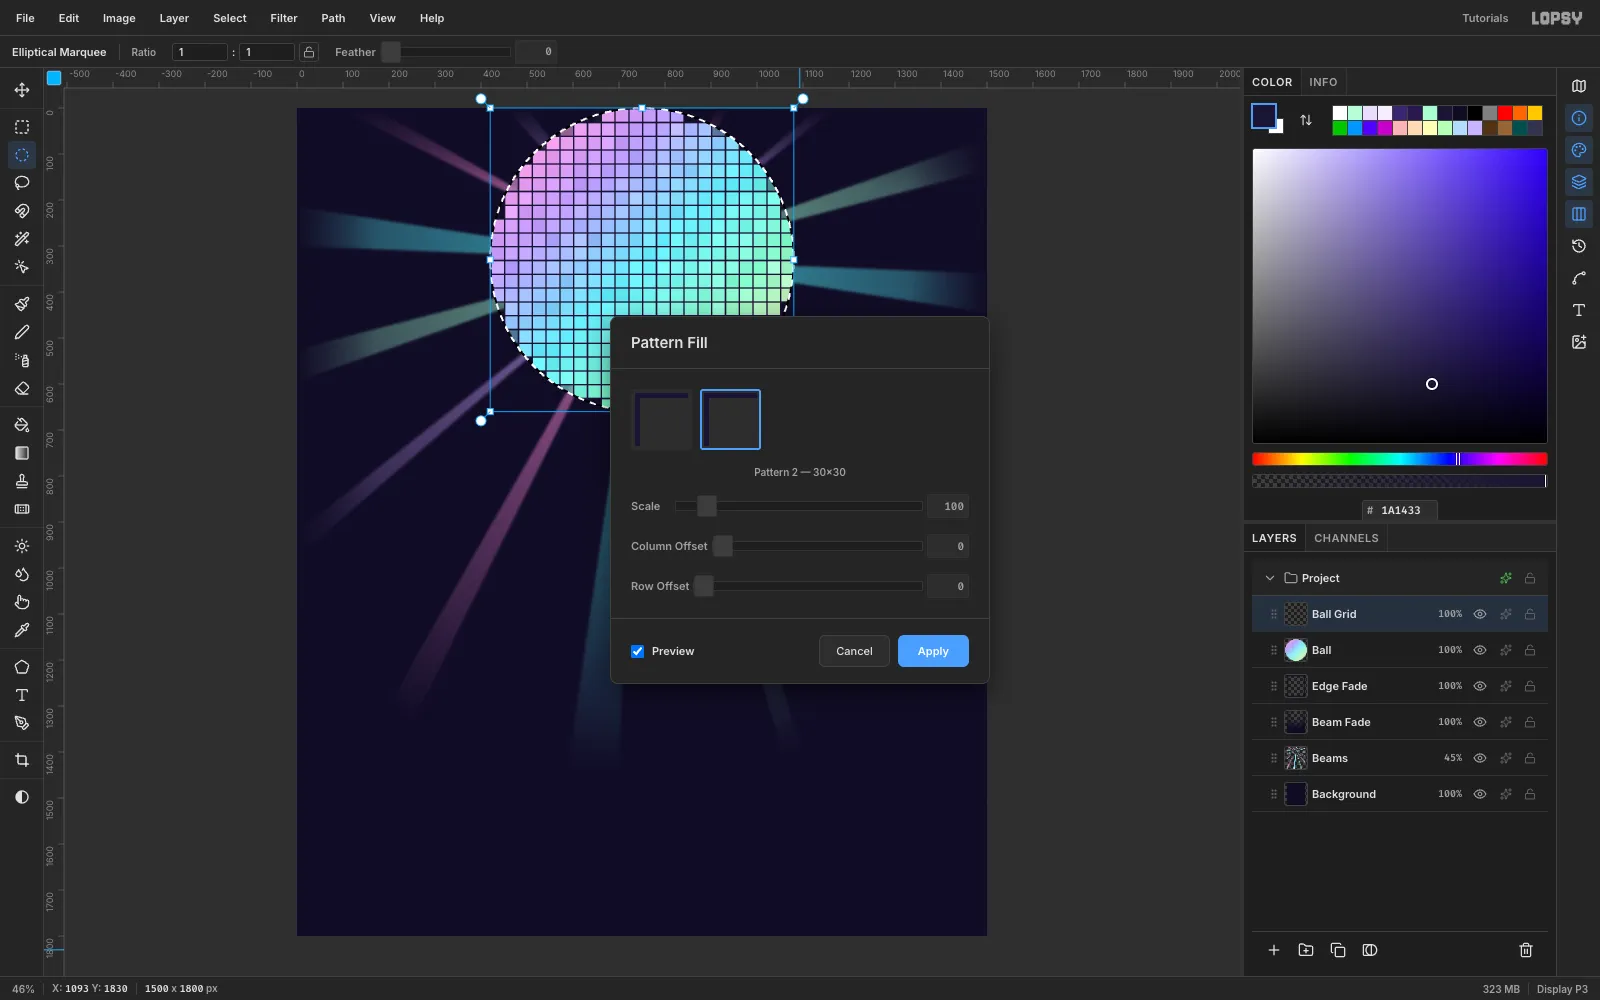
#1A1433. Marquee 30 × 3 at (0, 0) and fill it, then marquee 3 × 30 at (0, 0) and fill it. Marquee the 30 × 30 tile and choose Edit → Define Pattern, then press Delete to clear the tile. Pattern fills are anchored at the document origin, the same place as the Pixelate grid, so the lines fall exactly between the tiles.Re-draw the 660 × 660 circle at (420, 0). Choose Edit → Fill with Pattern…, pick the new 30 × 30 pattern, click Apply, then Layer → Merge Down into Ball.
-
Bulge it into a sphere
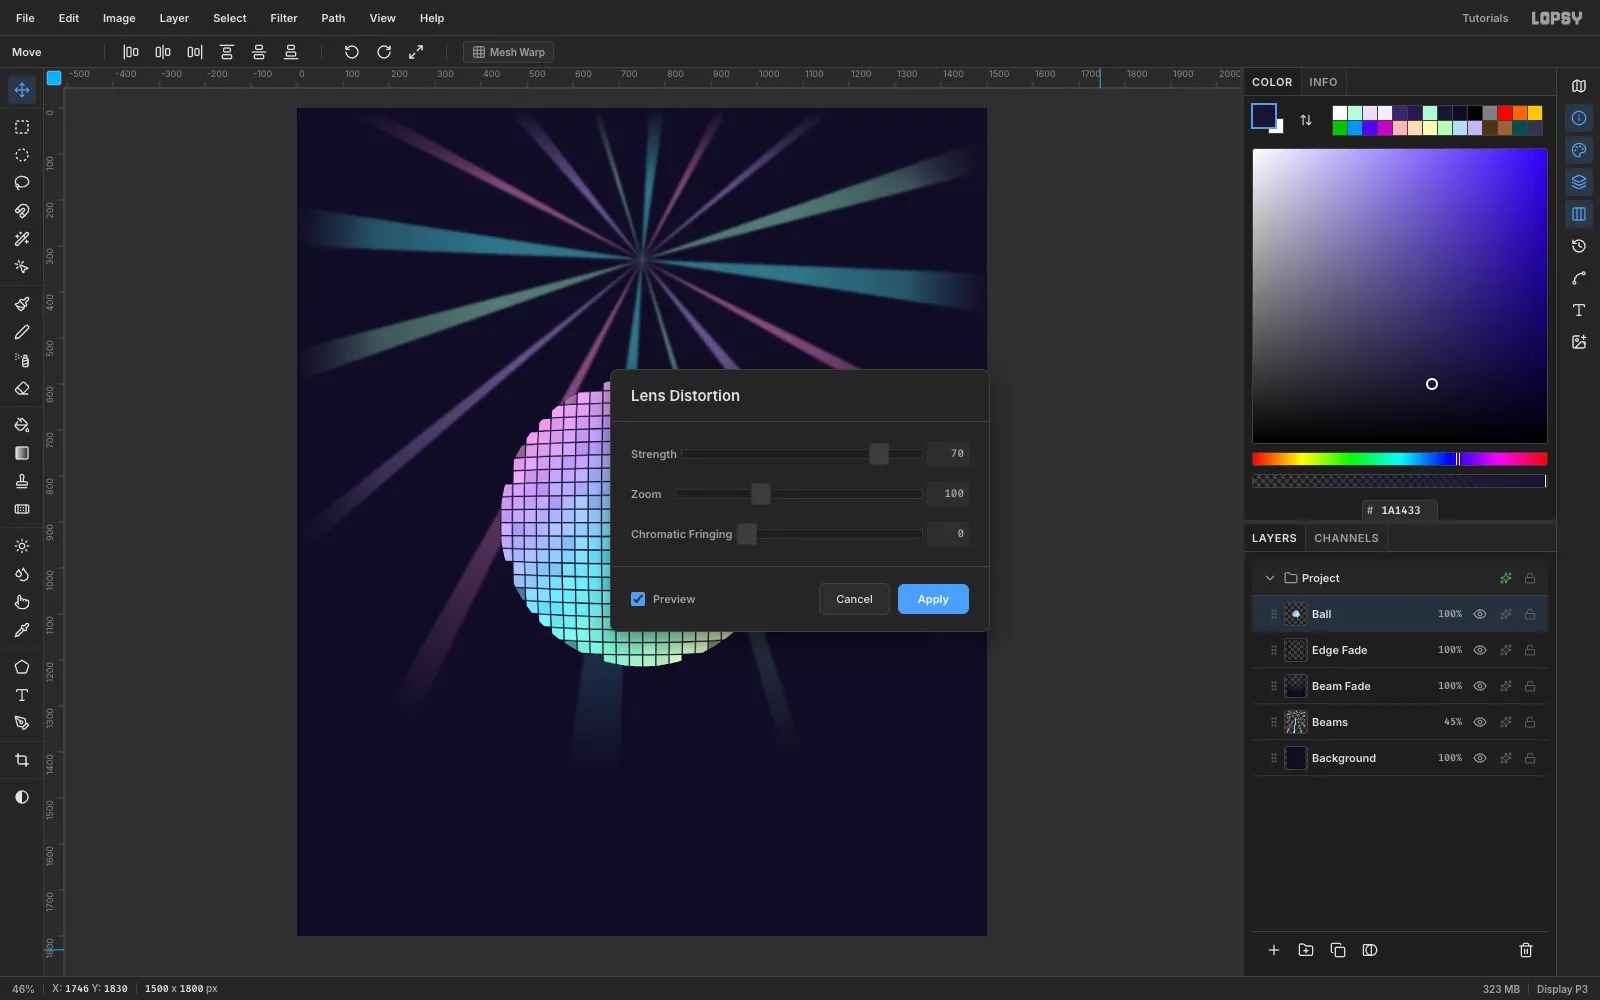
Lens Distortion bends around the middle of the layer, so move the ball there first. With the Move tool (V), drag it down from (750, 330) to (750, 900). Run Filter → Lens Distortion… with Strength 70, Zoom 100 and Chromatic Fringing 0. The edge tiles squeeze together, so the flat disc starts to read as a sphere.
Then clip it to a clean circle. Marquee 600 × 600 from (450, 600), choose Select → Inverse, press Delete, and press Cmd+D. Drag the ball back up to (750, 330).
-
Shade it, add a hotspot and a glow
Add a Ball Shade layer. Inside a 600 × 600 circle at (450, 30), draw a Radial gradient from (650, 230) to (1060, 660). Use ink
#100C24stops at 0%, 12% and 85% opacity, so the ball darkens away from the light.Add a Ball Shine layer. Set the Elliptical Marquee's Feather to 28, select 110 × 84 at (595, 190), fill it white and set the layer's blend mode to Screen. Reset Feather to 0. Finally, open the Ball layer's effects and add an Outer Glow in
#8CEBFFwith Size 48 and Opacity 45. The short stub at the top of this screenshot is a placeholder chain: a 5 px brush line and a small cap on Ball Shine. You will replace it later.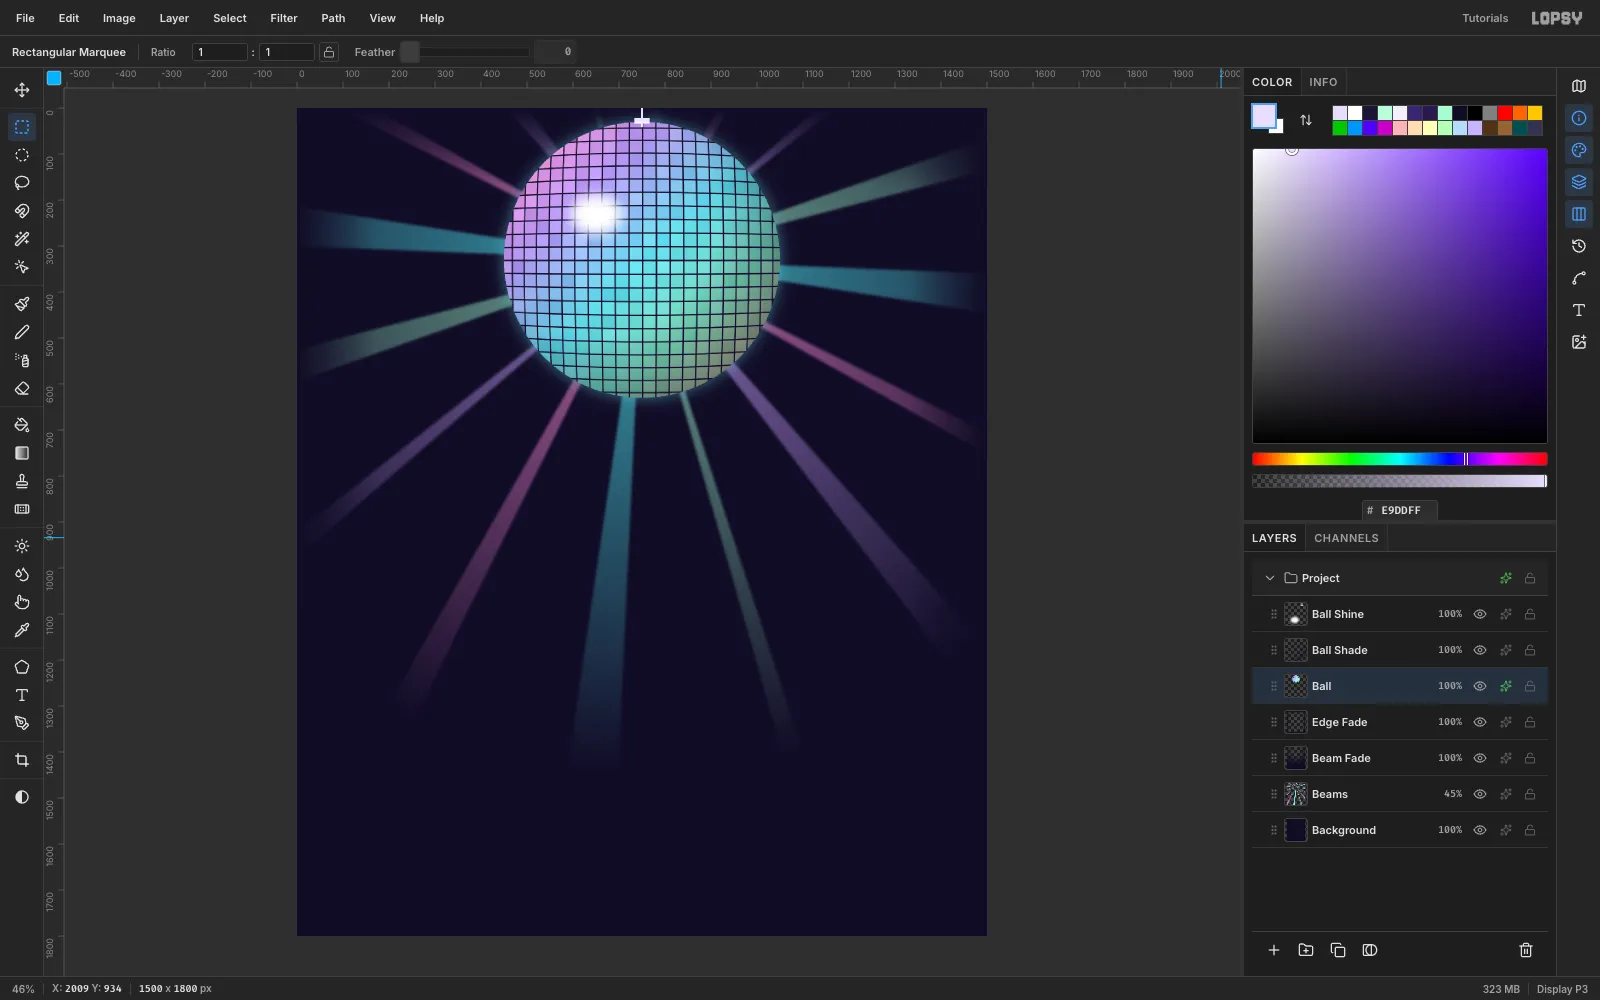
-
Group the ball, then make a Moth group
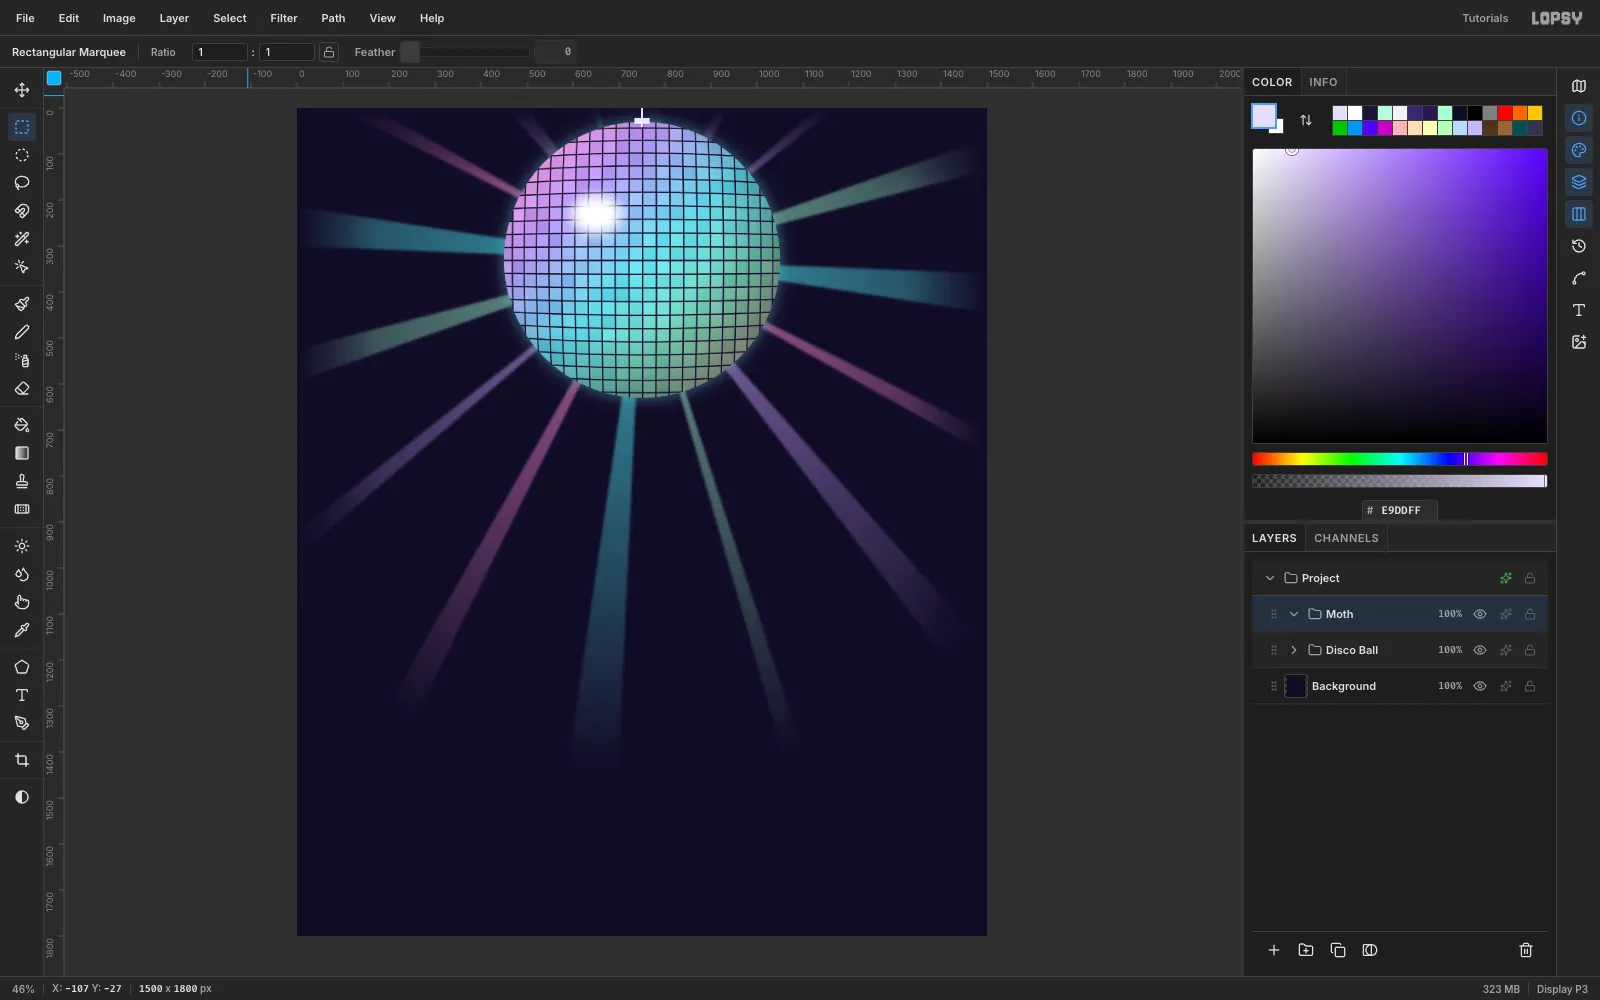
Click Beams, Shift-click Ball Shine and choose Layer → Group Layers. Rename the group Disco Ball and collapse it. Next, click Background, click New Group, name it Moth, and drag its row above the Disco Ball group. Every moth layer goes inside it.
-
Cut the wings with thin-film gradients
A Luna moth has broad forewings and hindwings that end in long, curling tails. Inside Moth, add a Hindwings layer. Lasso the right hindwing, running from the body at x 778 out to x 1182 and down to a tail tip near (980, 1350). Fill it with a Linear gradient of
#9FE8FF,#D2BFFF,#FFC2E6and#FFE3B8, dragged from the body toward the tail. Repeat on the left, mirrored across x = 750.Add a Forewings layer above it. Lasso each forewing from the shoulder up to a tip near (1334, 338). Fill it with
#B8F5C8,#C8FFF0,#E6C8FF,#FFC8E8and#C8E8FF, dragged from the body to the tip. Pale mint, lilac and pink next to each other read as thin-film iridescence. Saturated neon doesn't.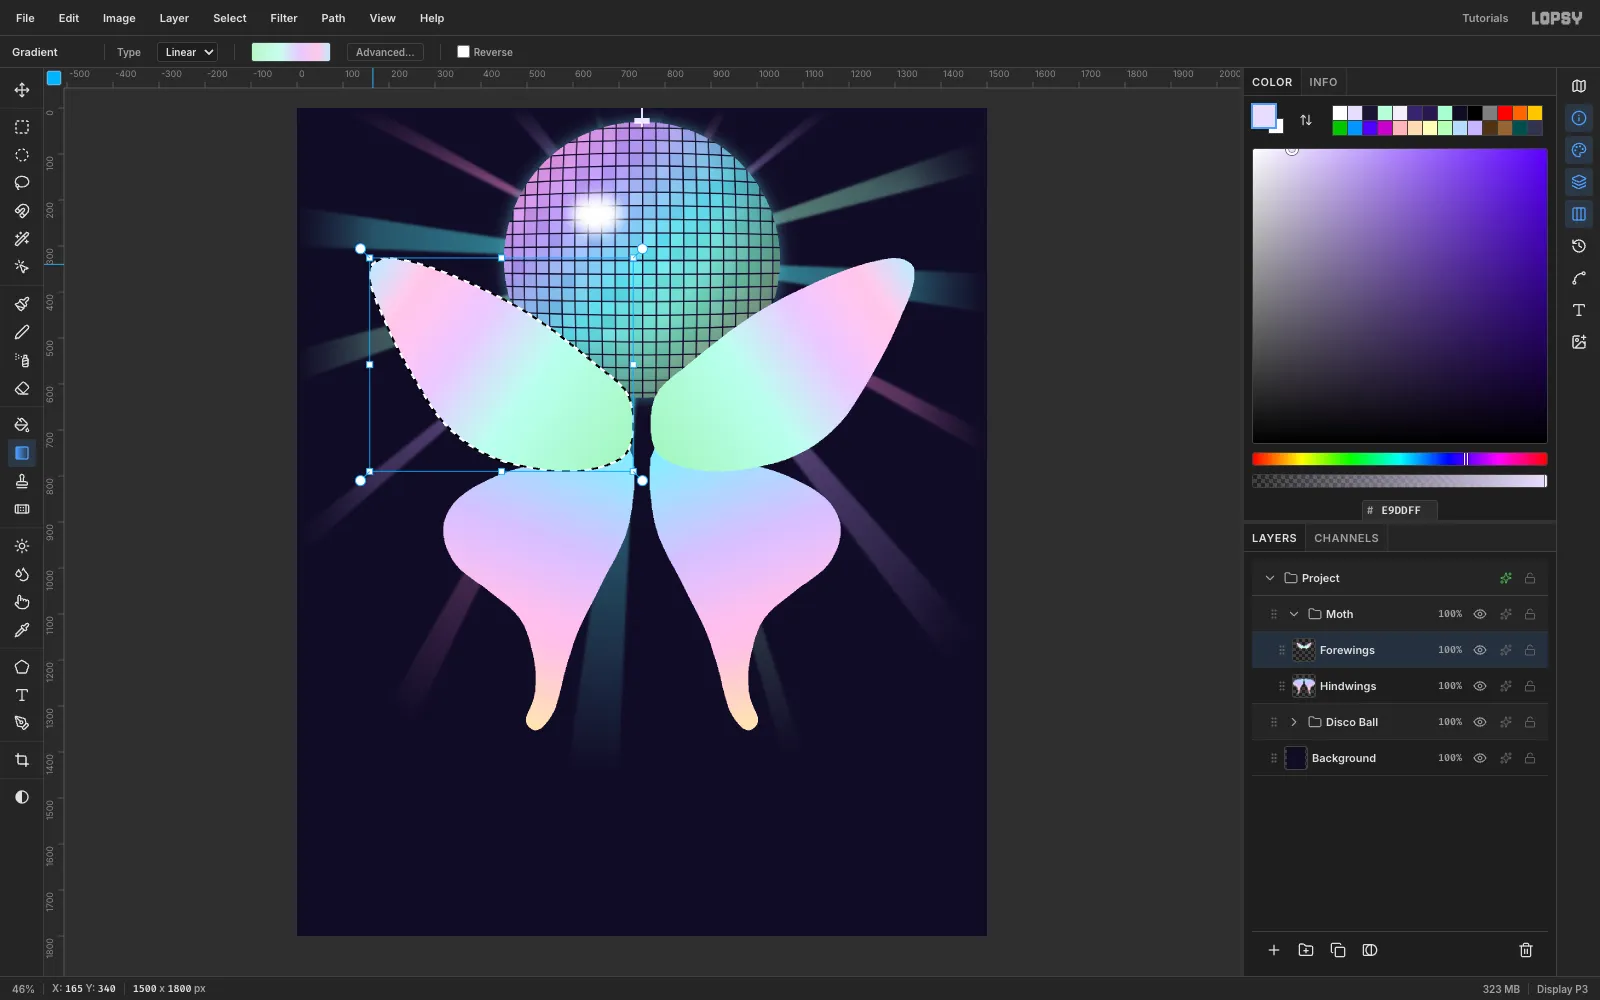
-
Outline the wings
On both wing layers, add a Stroke effect in
#100C24with Width 6 and Position outside. Also add an Inner Glow in#8A5CFFwith Size 30 and Opacity 50. The dark outline separates the pastel wings from the pastel ball behind them. The violet rim gives each wing a little depth.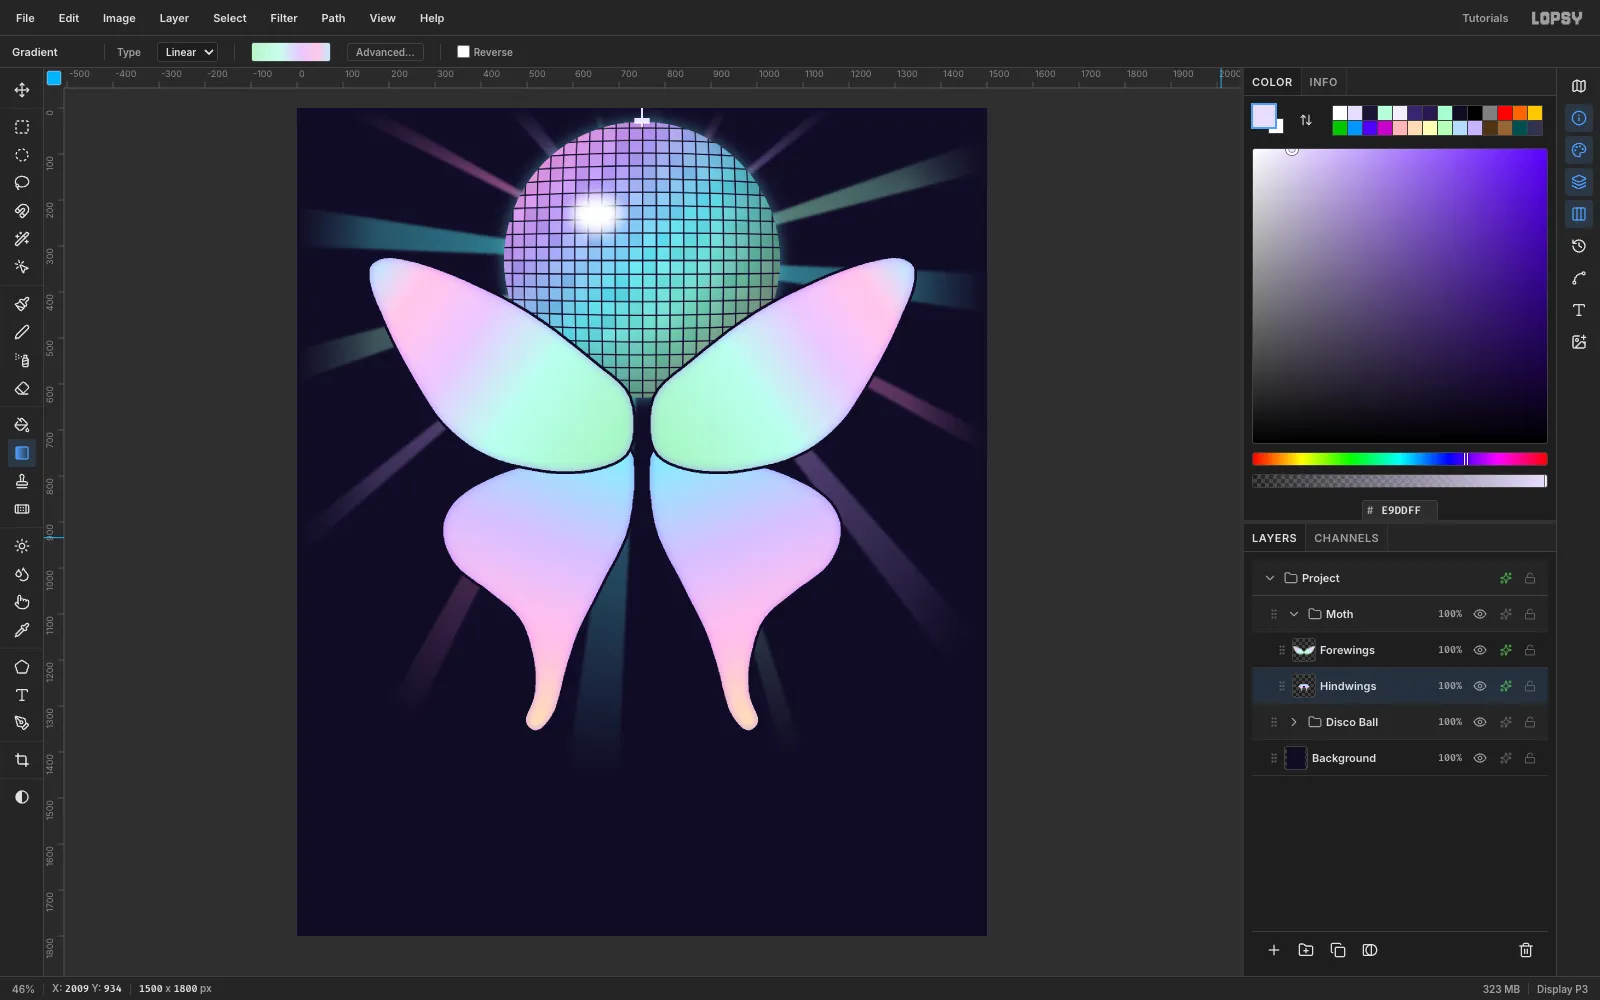
-
Add foil sheen streaks
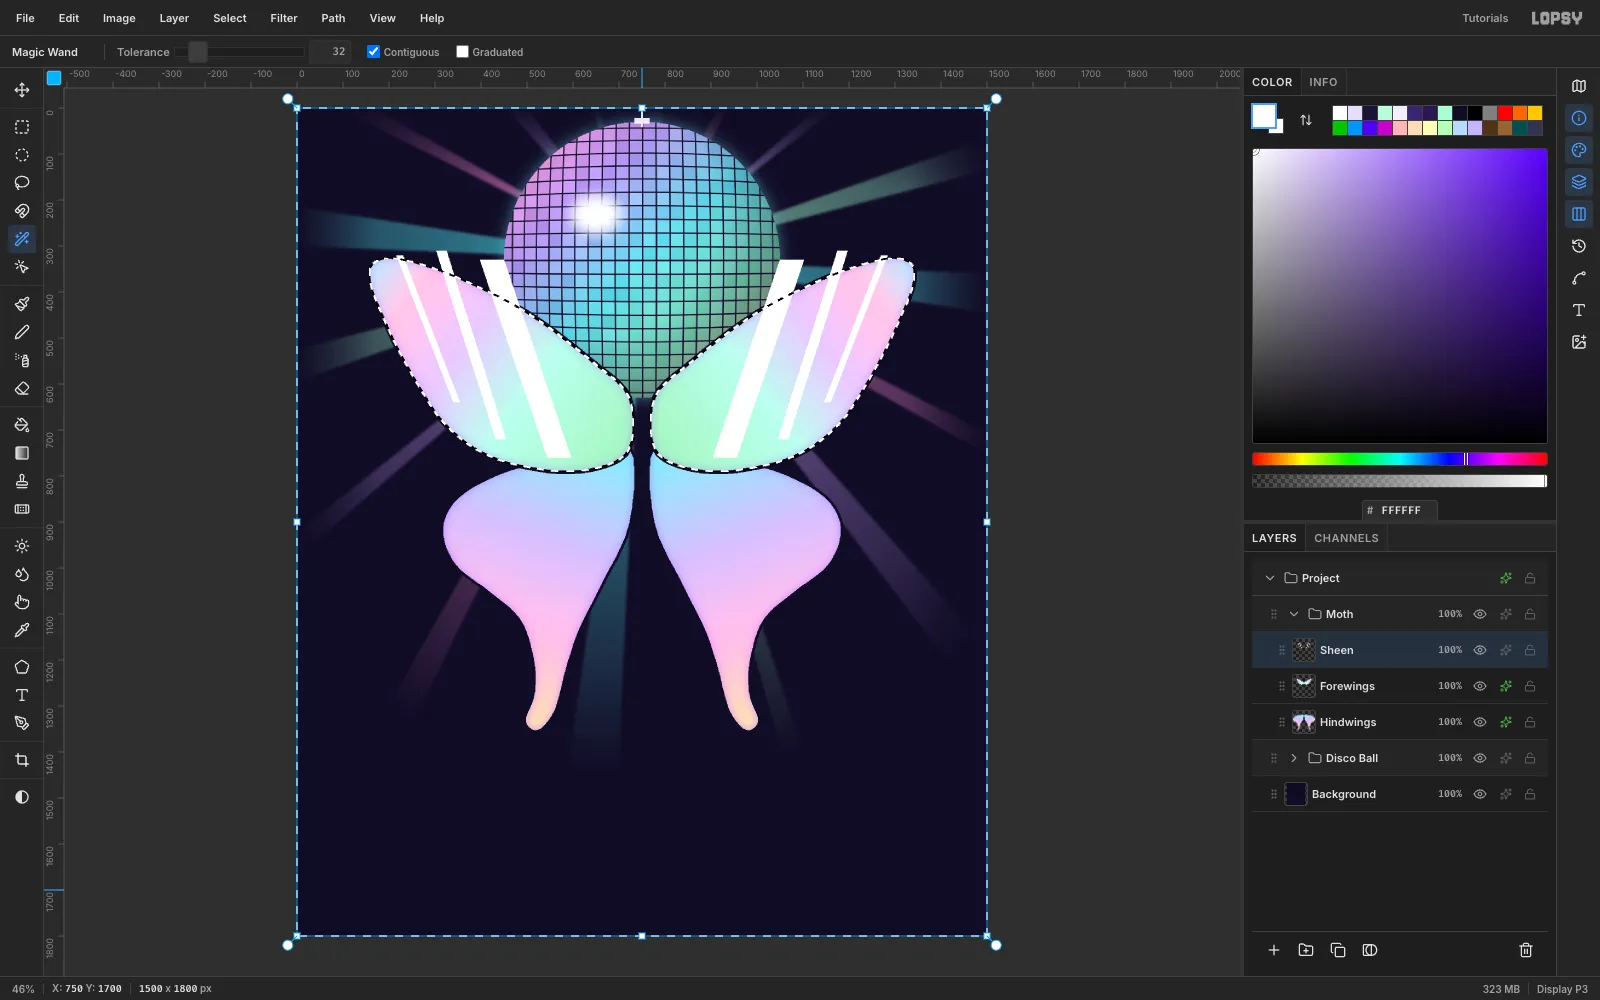
Add a Sheen layer above Forewings. Lasso three slanted white bars across each forewing, using different widths, and fill them white. Next, click Forewings. With the Magic Wand (Contiguous on), click the empty ground below the moth to select everything outside the wings, click Sheen, and press Delete. Set Sheen to Screen at 60%. Sharp diagonal glints are what make foil read as foil.
-
Give the brush a taper
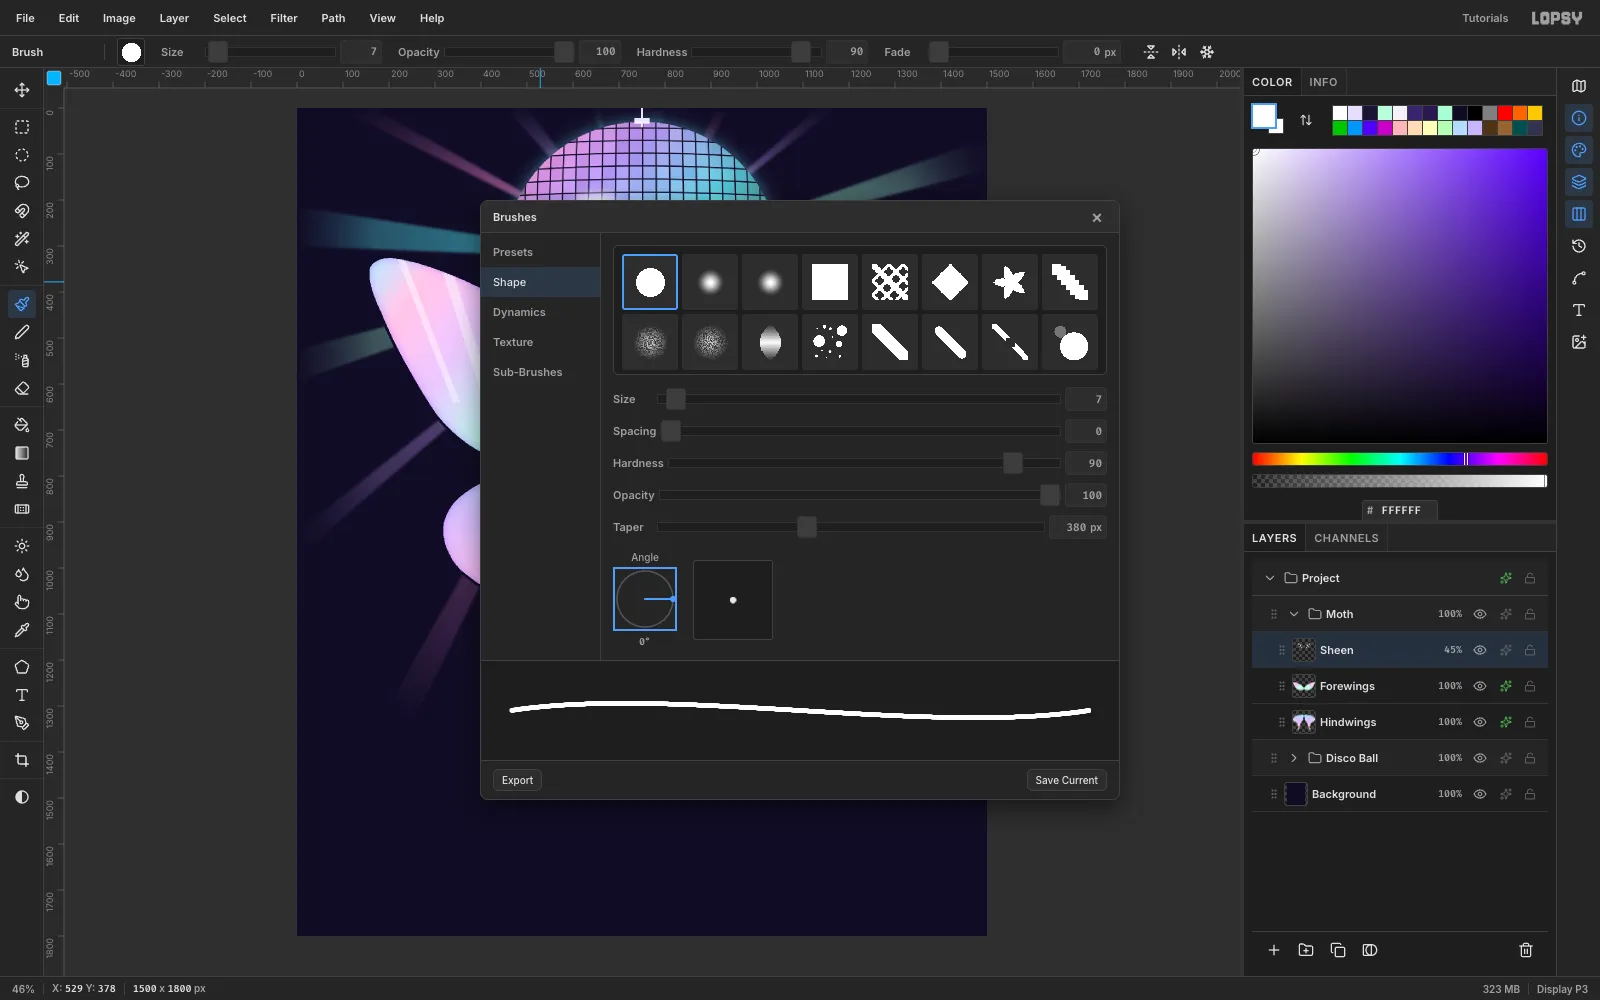
Choose the Brush (B), click the brush preview to open Brushes, go to the Shape tab, and set Size 7 and Taper 380. Each stroke now thins to a point over its last 380 px, the way a real wing vein does.
-
Paint the veins with Symmetry
Add a Veins layer and turn on Symmetry Vertical in the options bar. The mirror line is the document's center, x = 750, which is the moth's spine. Set the foreground to
#5A3FB8and paint seven curved veins on the right wing only, each starting at the body and ending short of the edge. The left side paints itself. Turn Symmetry off afterwards.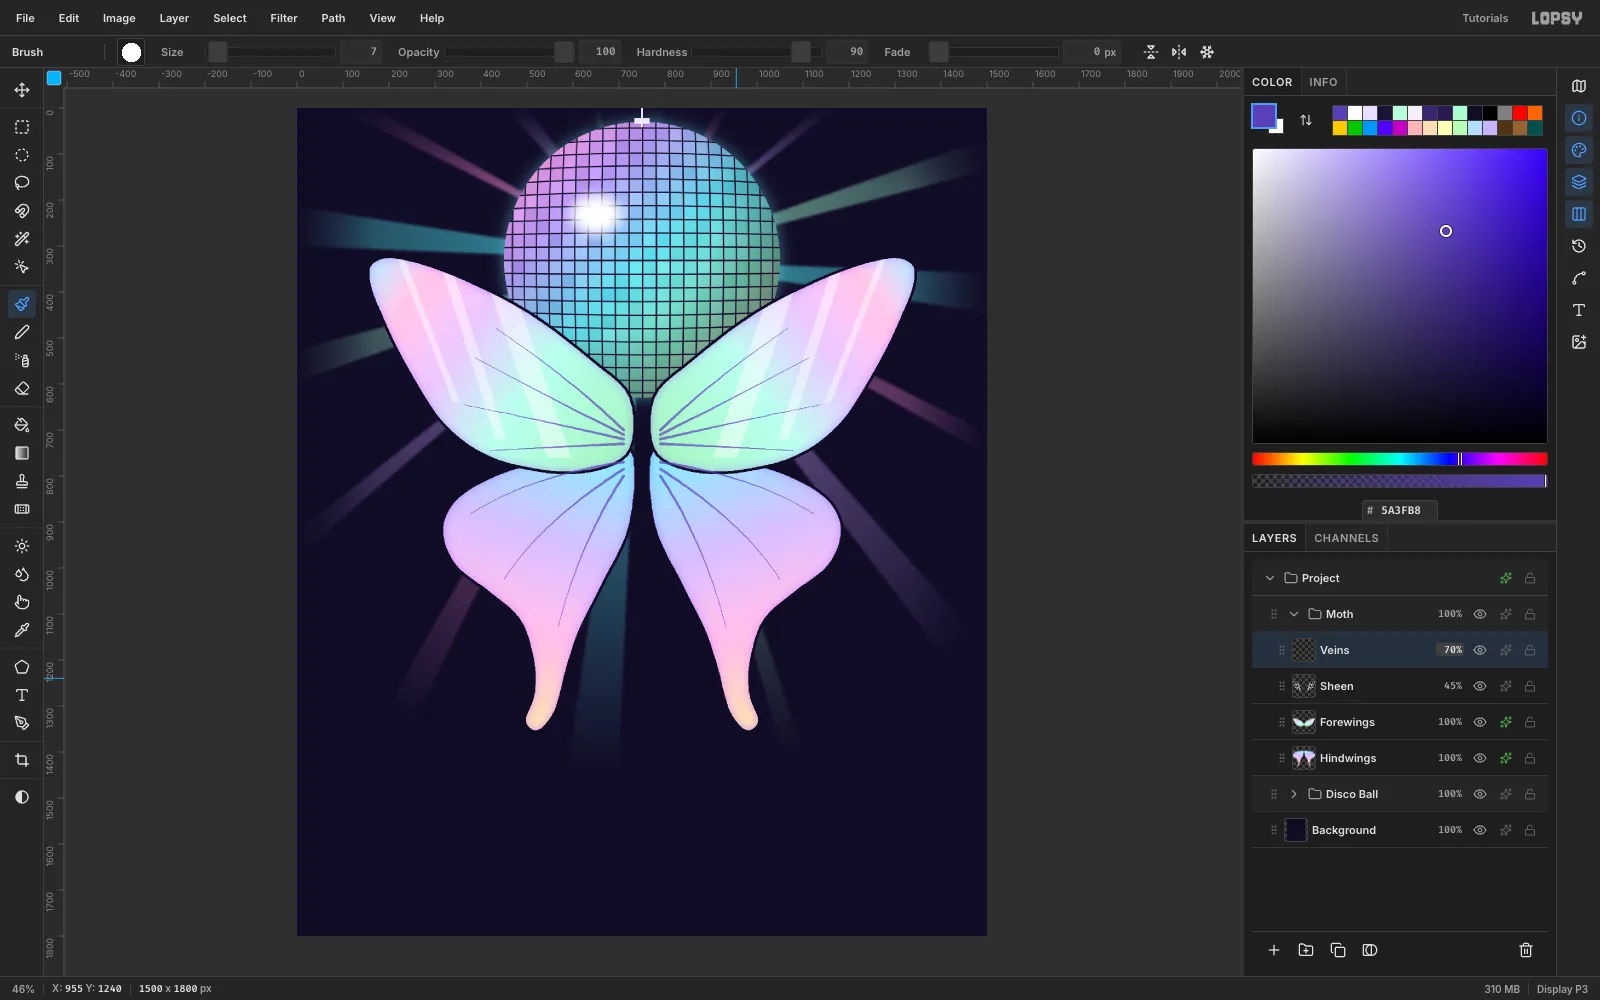
-
Add the eyespots
Add an Eyespots layer and build each spot from stacked circle fills. The hindwing spots sit at (1062, 918) and (438, 918), with radius 46 in ink, 40 in peach
#FFD59A, 29 in pink#FF6FB5, 18 in ink, and a 6 px white catch-light up and to the left. The forewing spots at (1155, 488) and (345, 488) are smaller: 30 ink, 24#FFC2E6, 14#5B3BE8. Keep them small and toward the outer edge, or the two big spots read as a cartoon face.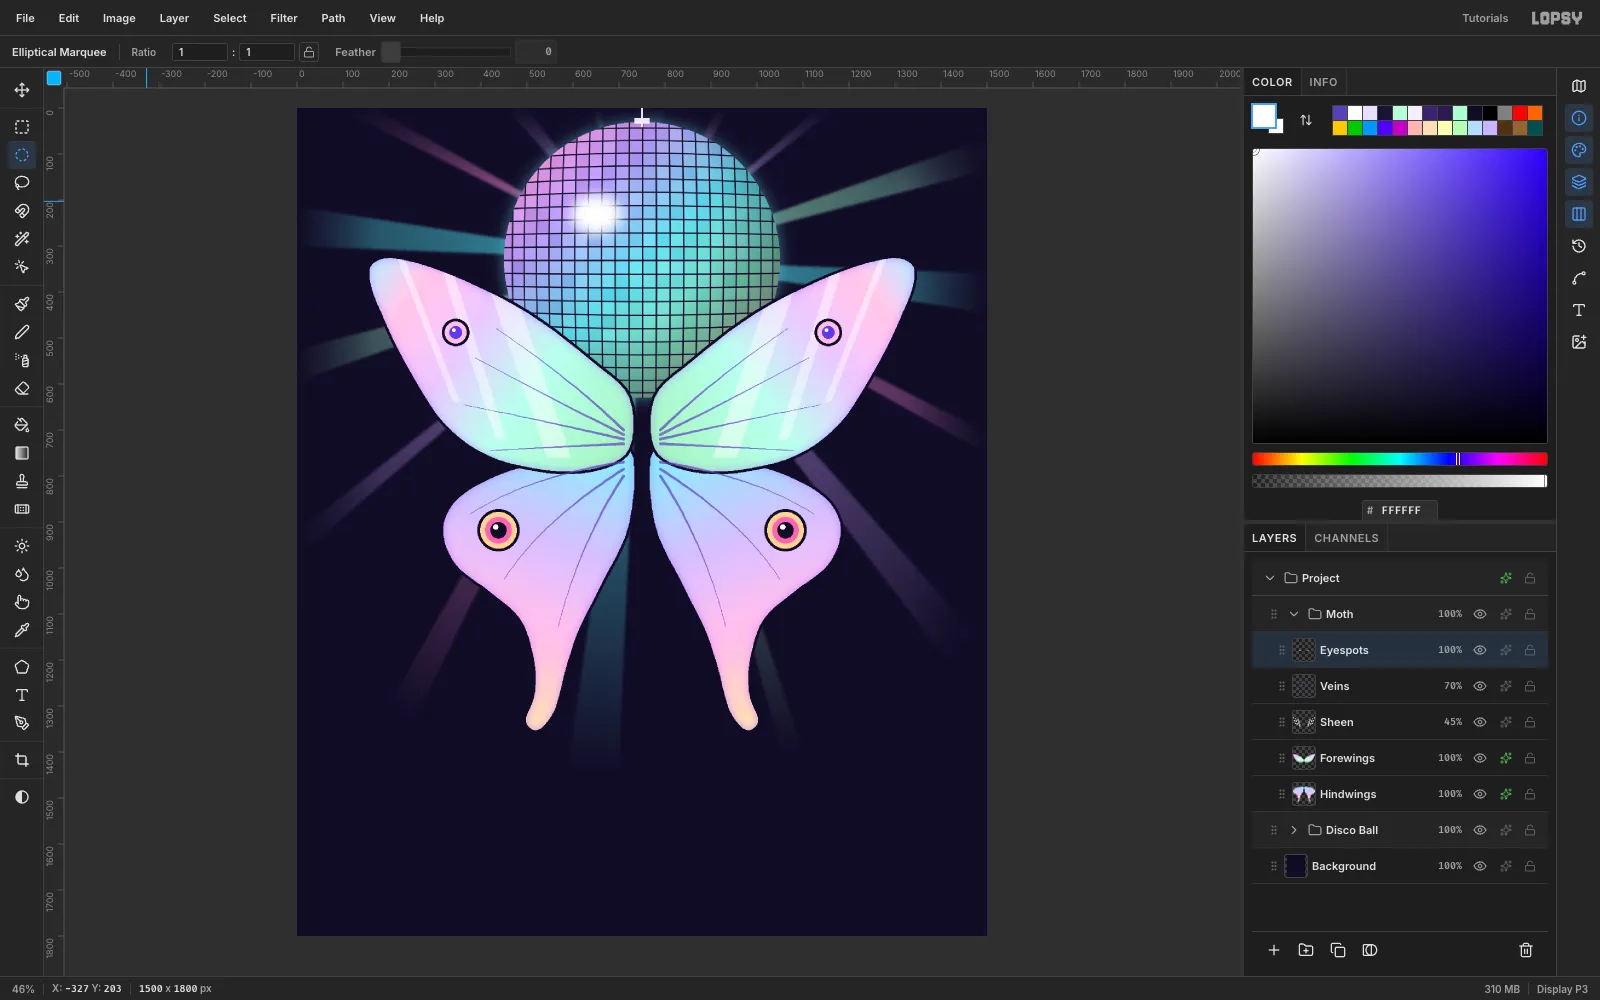
-
Build the body
Add a Body layer. Lasso three ovals: the abdomen (radius 32 × 112, centred at 750, 902), the thorax (57 × 87 at 750, 728) and the head (34 × 28 at 750, 634). Fill each with a left-to-right
#6A45E6→#F6EEFF→#6A45E6gradient for a pearly cylinder. Give the layer a 5 px ink Stroke, then brush six curved#4A2F9Abands across the abdomen. The head just touches the bottom of the ball, which tells the story: the moth has reached the light.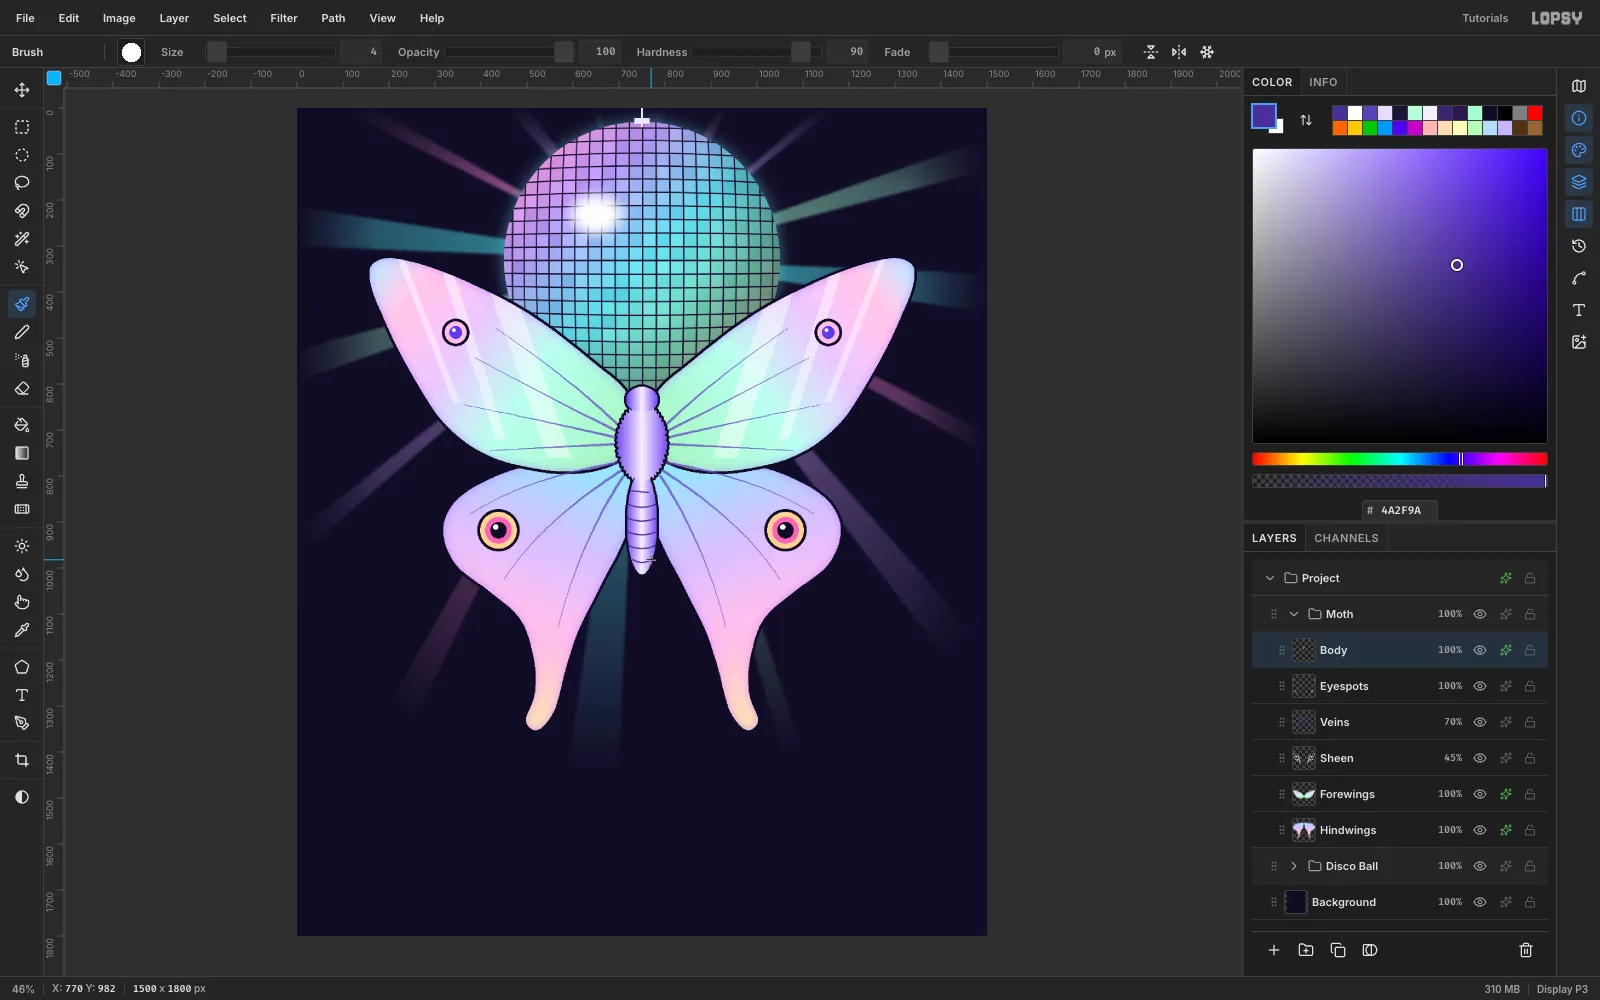
-
Paint feathered antennae
Add an Antennae layer. With Symmetry Vertical on and Taper back at 0, paint a 6 px
#F6EEFFcurve from the head up to (905, 410). Then add a row of short 4 px barbs on both sides, longest in the middle. Add a 4 px ink Stroke effect so the pale feathers stay readable over the bright ball.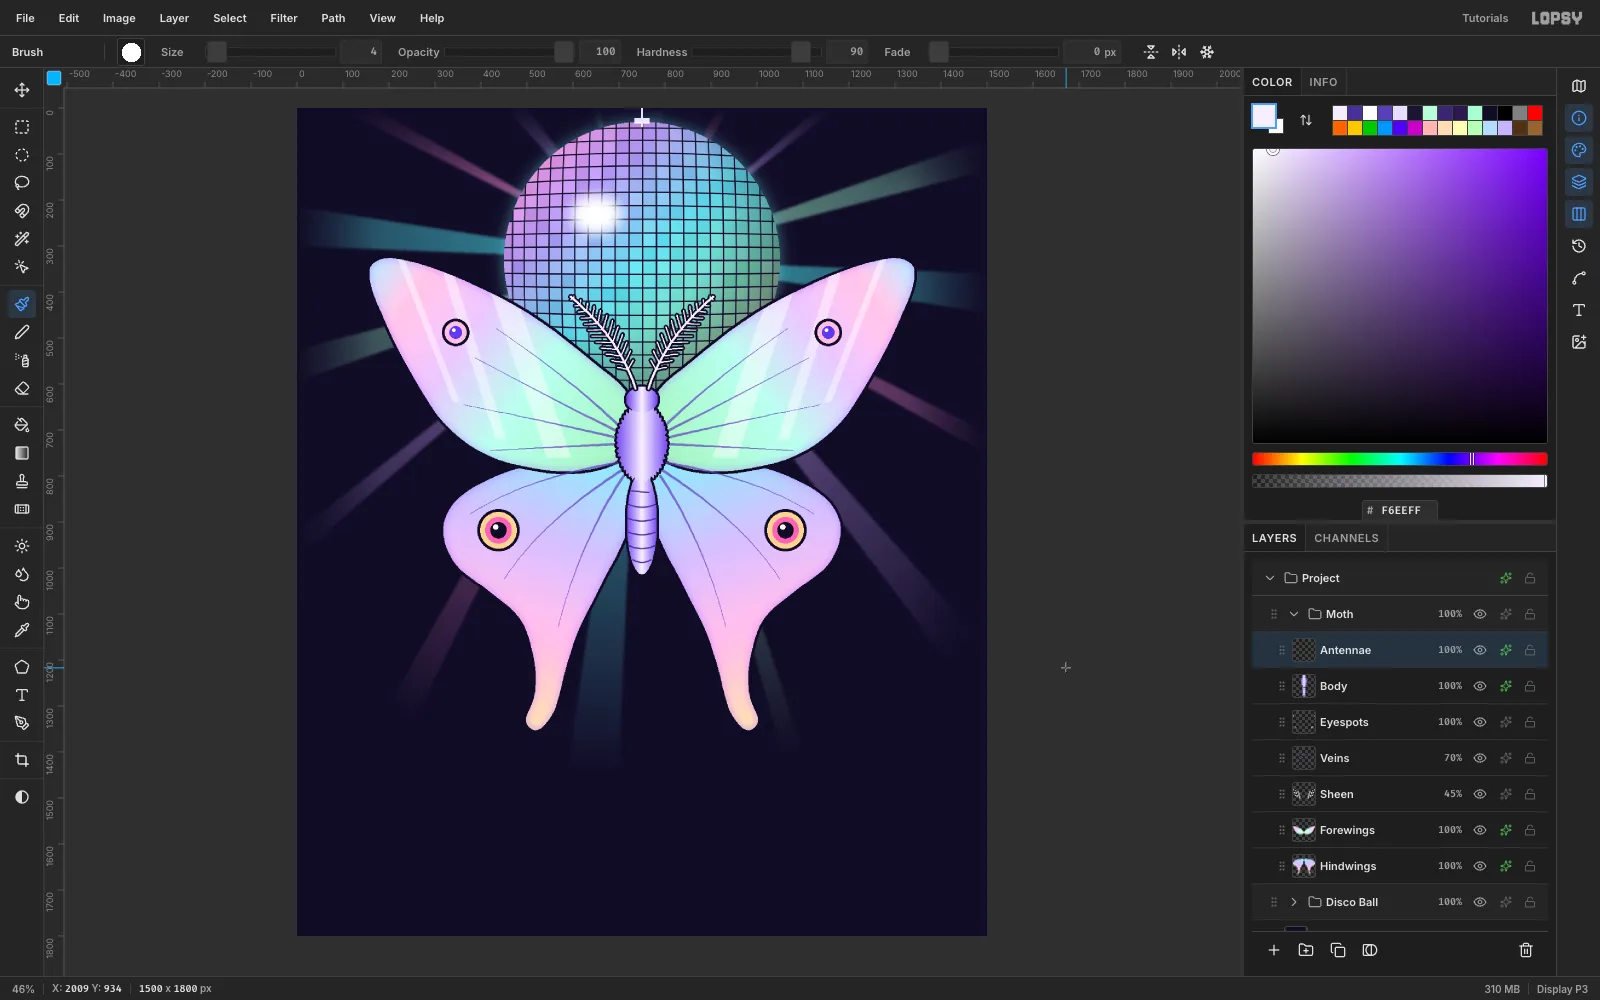
-
Set the title in Monoton
Collapse Moth, create a Type group above it the same way, and add a Sparkles layer inside it. Choose the Text tool (T) and set Size 180 and the font Monoton. Its inline stripes look like disco neon. Click in empty space and type
MOTH DISCOwith four spaces, so the gap between the words (about 94 px) is clearly wider than the gaps between letters. Press Tab to commit, then click Rasterize Layer.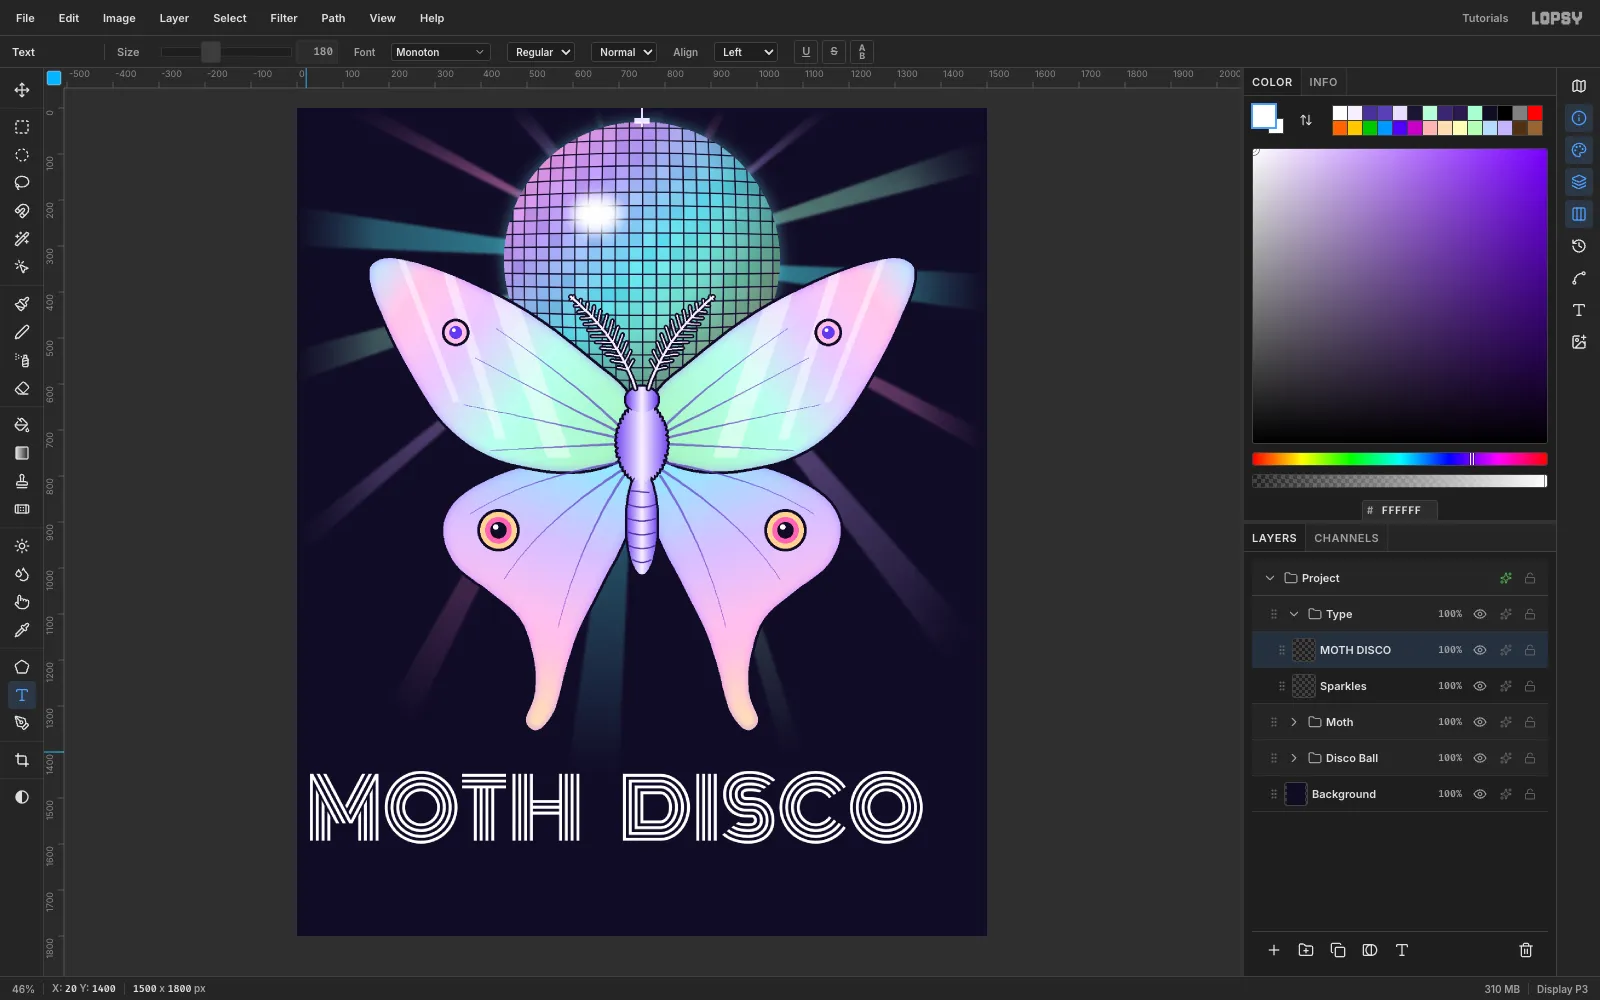
-
Fill the title with the holographic ramp
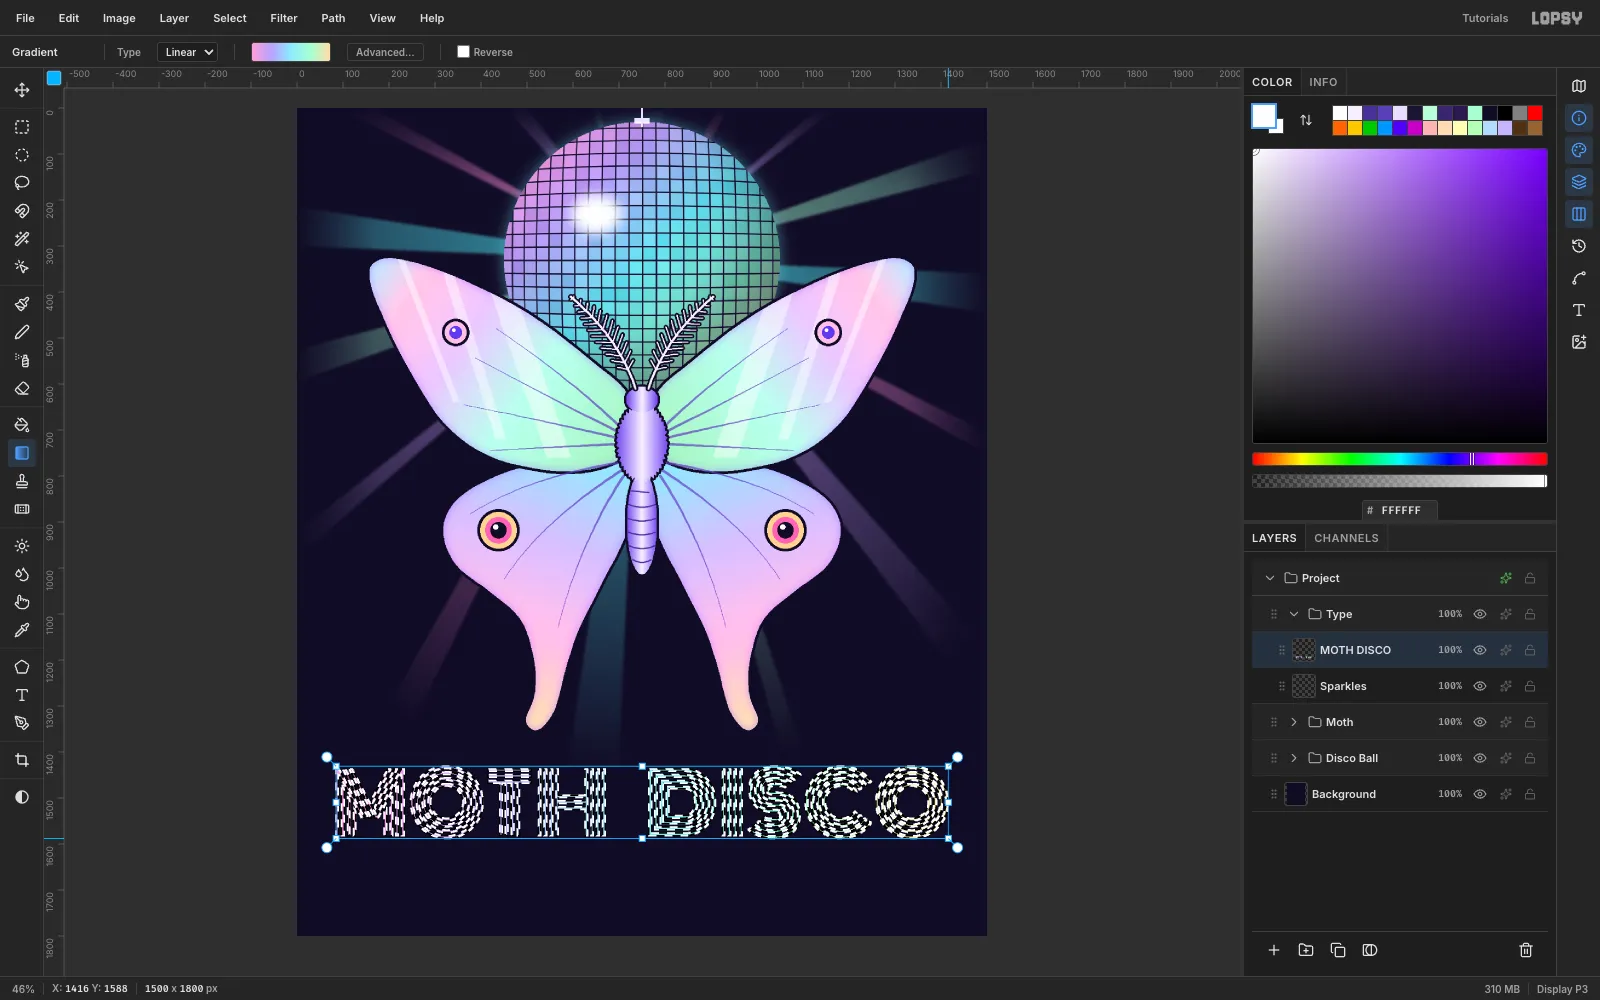
With the Magic Wand set to Contiguous off, click a white stripe to select every stripe at once. Then drag a Linear gradient across the whole word using the ball's five holographic stops. Press Cmd+D.
-
Add a violet shadow and glow
Open the title's effects. Add a Drop Shadow in
#5B3BE8with Offset X 6, Offset Y 6, Blur 0 and Opacity 100, and an Outer Glow in#8A5CFFwith Size 26 and Opacity 60. A hard, diagonal offset looks deliberate. A pink shadow straight underneath looks like a misregistered print.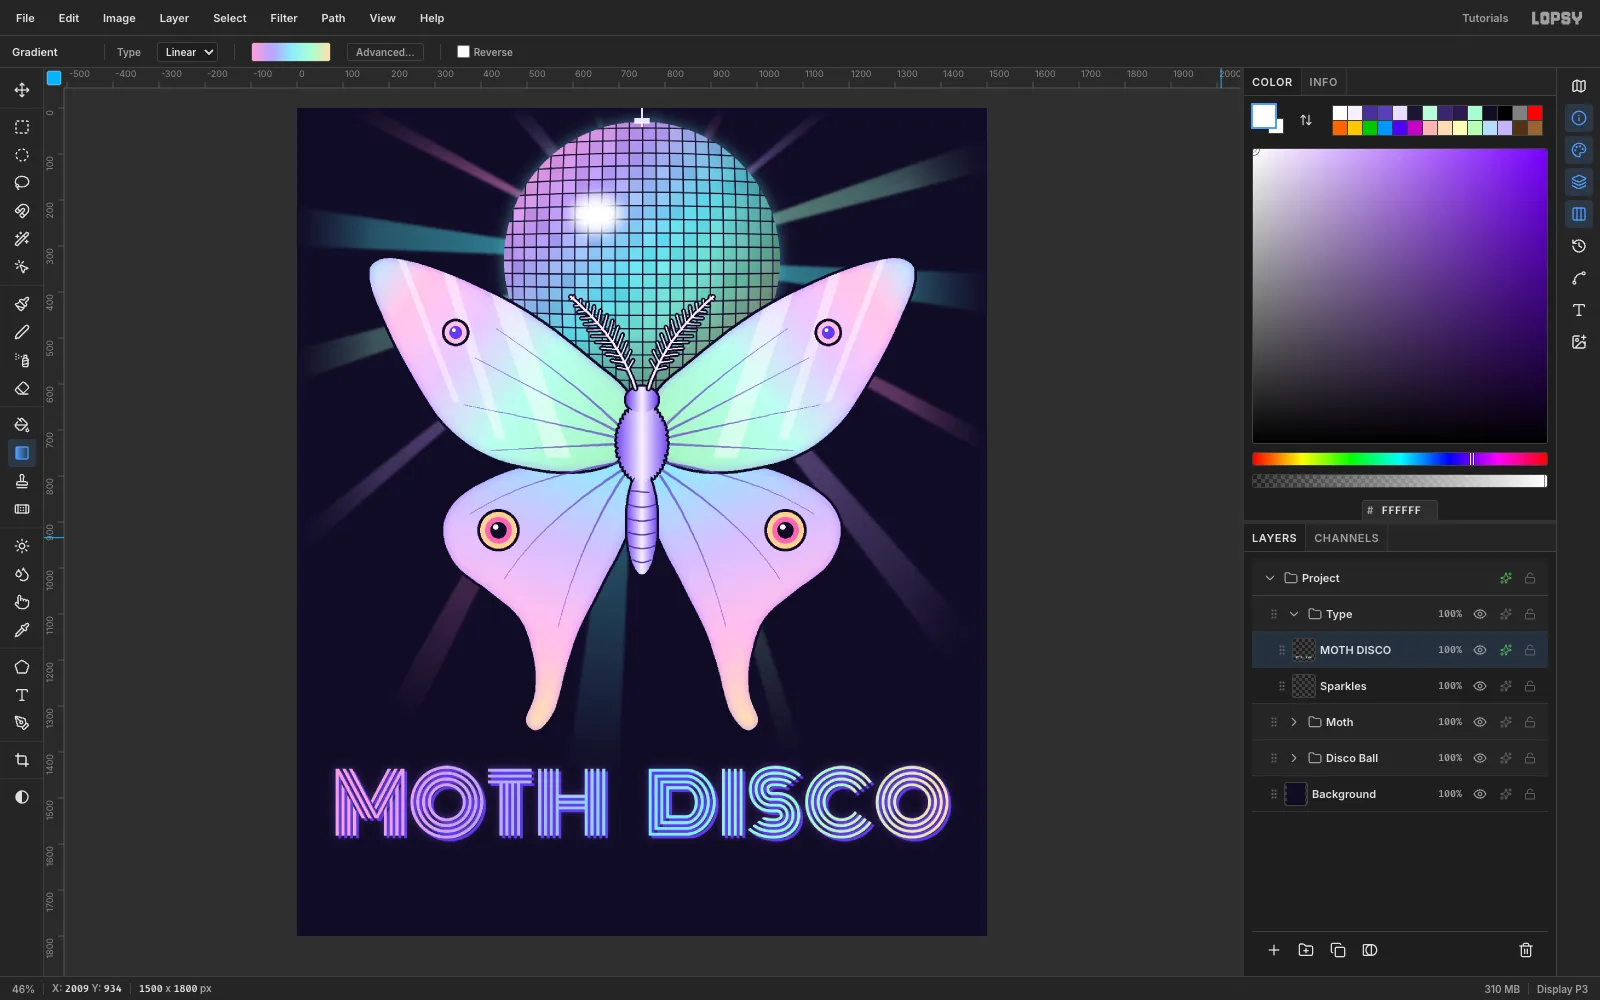
-
Add the subtitle
Click the Sparkles row so the new text doesn't restyle the title. Set Syncopate, weight 700, Size 52 and color
#E9DDFF. TypeNOCTURNAL GROOVE SOCIETYin empty space, then move it with the Move tool until it is centred at x = 750 with its caps from y 1655 to 1691. That leaves a clear bottom margin of about 110 px.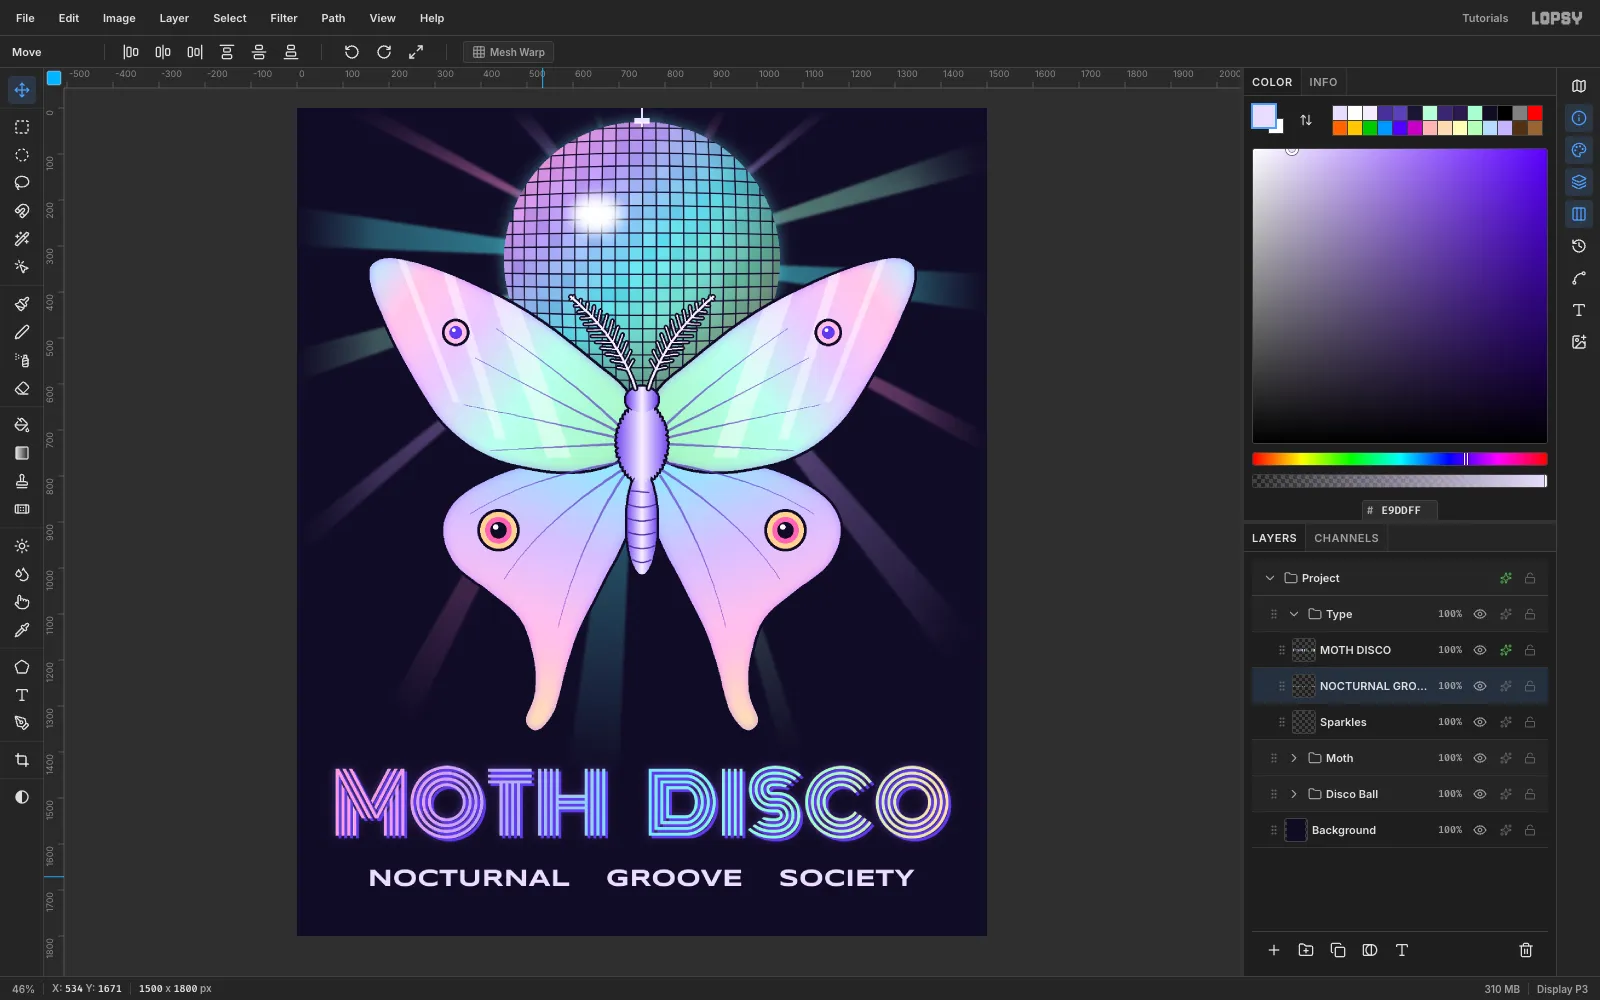
-
Scatter sparkle glints near the light
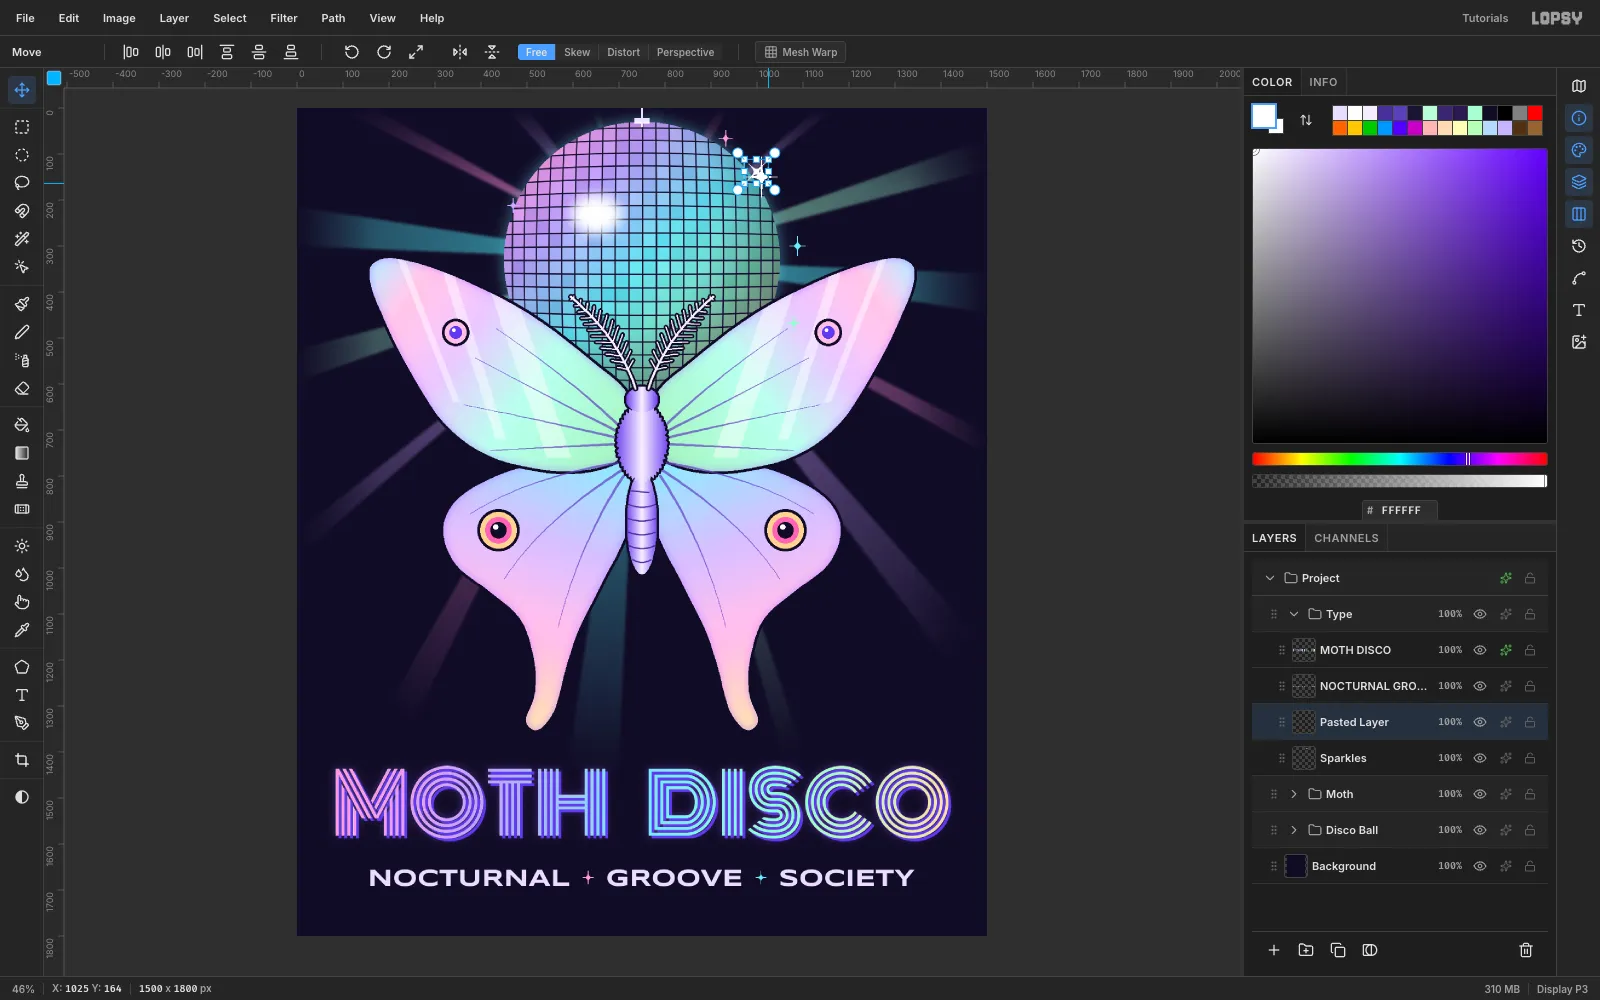
On Sparkles, lasso four-point stars with pinched, concave sides and fill them. Put a big white one at (1010, 150), smaller ones in
#8CEBFF,#FF9ED8and#A8FFD2around the ball's upper-right rim, and a white one on the hotspot. Add two 30 px stars in the gaps between the subtitle words as separators. Keeping the glints near the light source, instead of scattering them across the canvas, makes them read as reflections.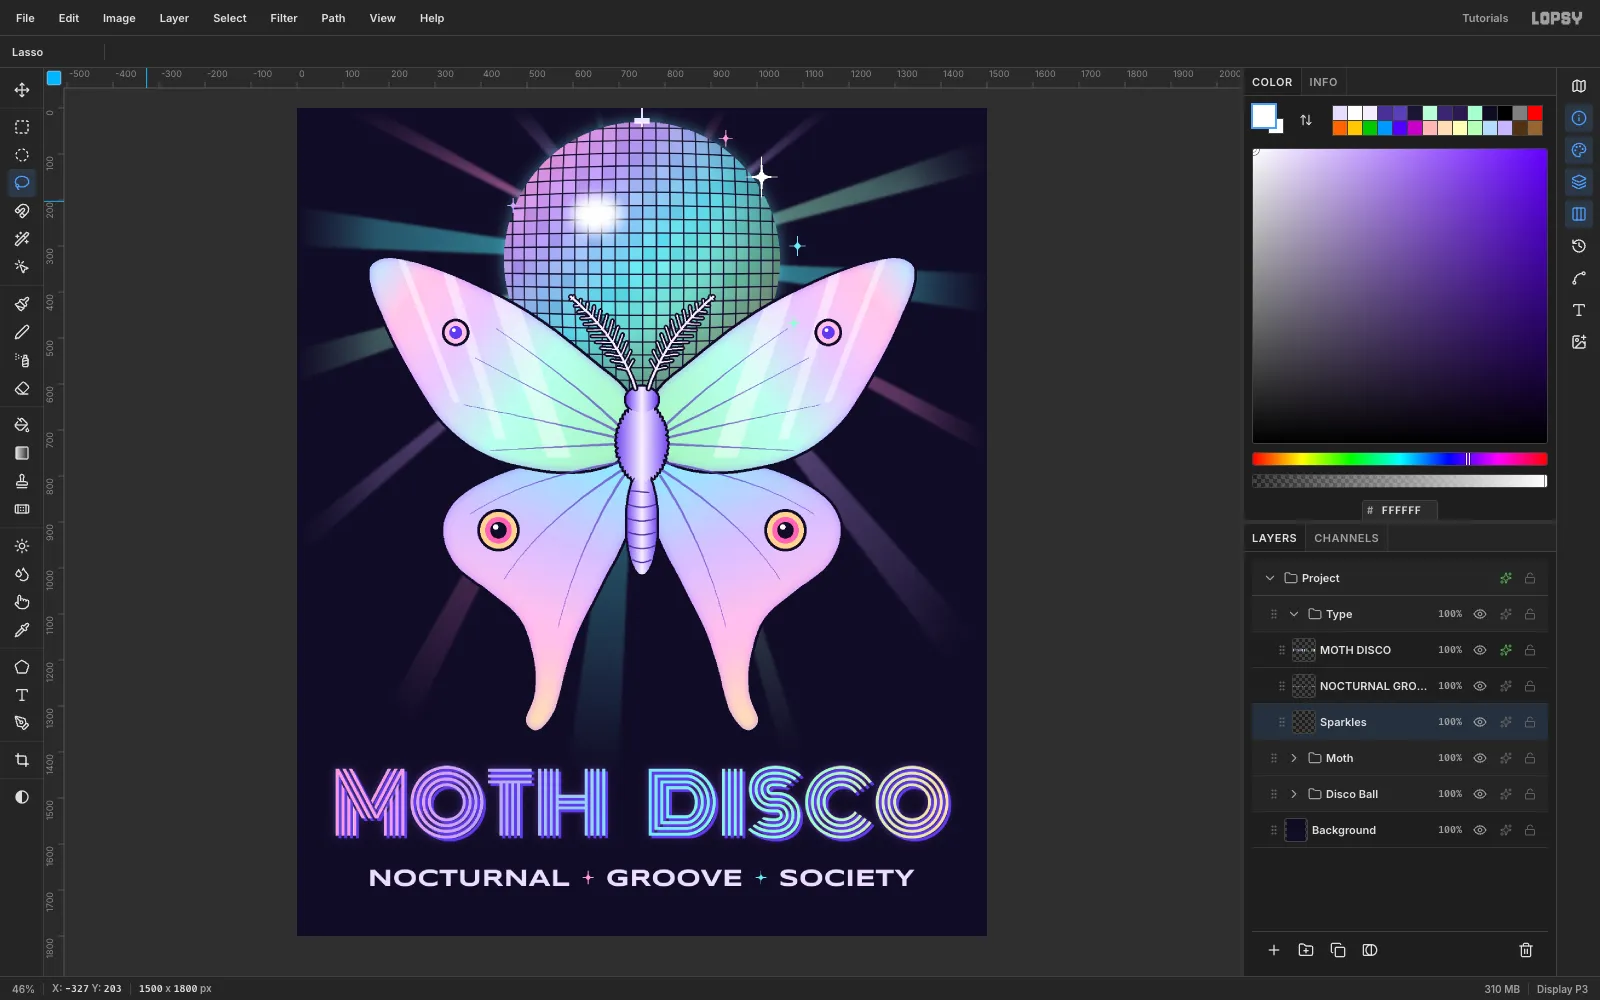
-
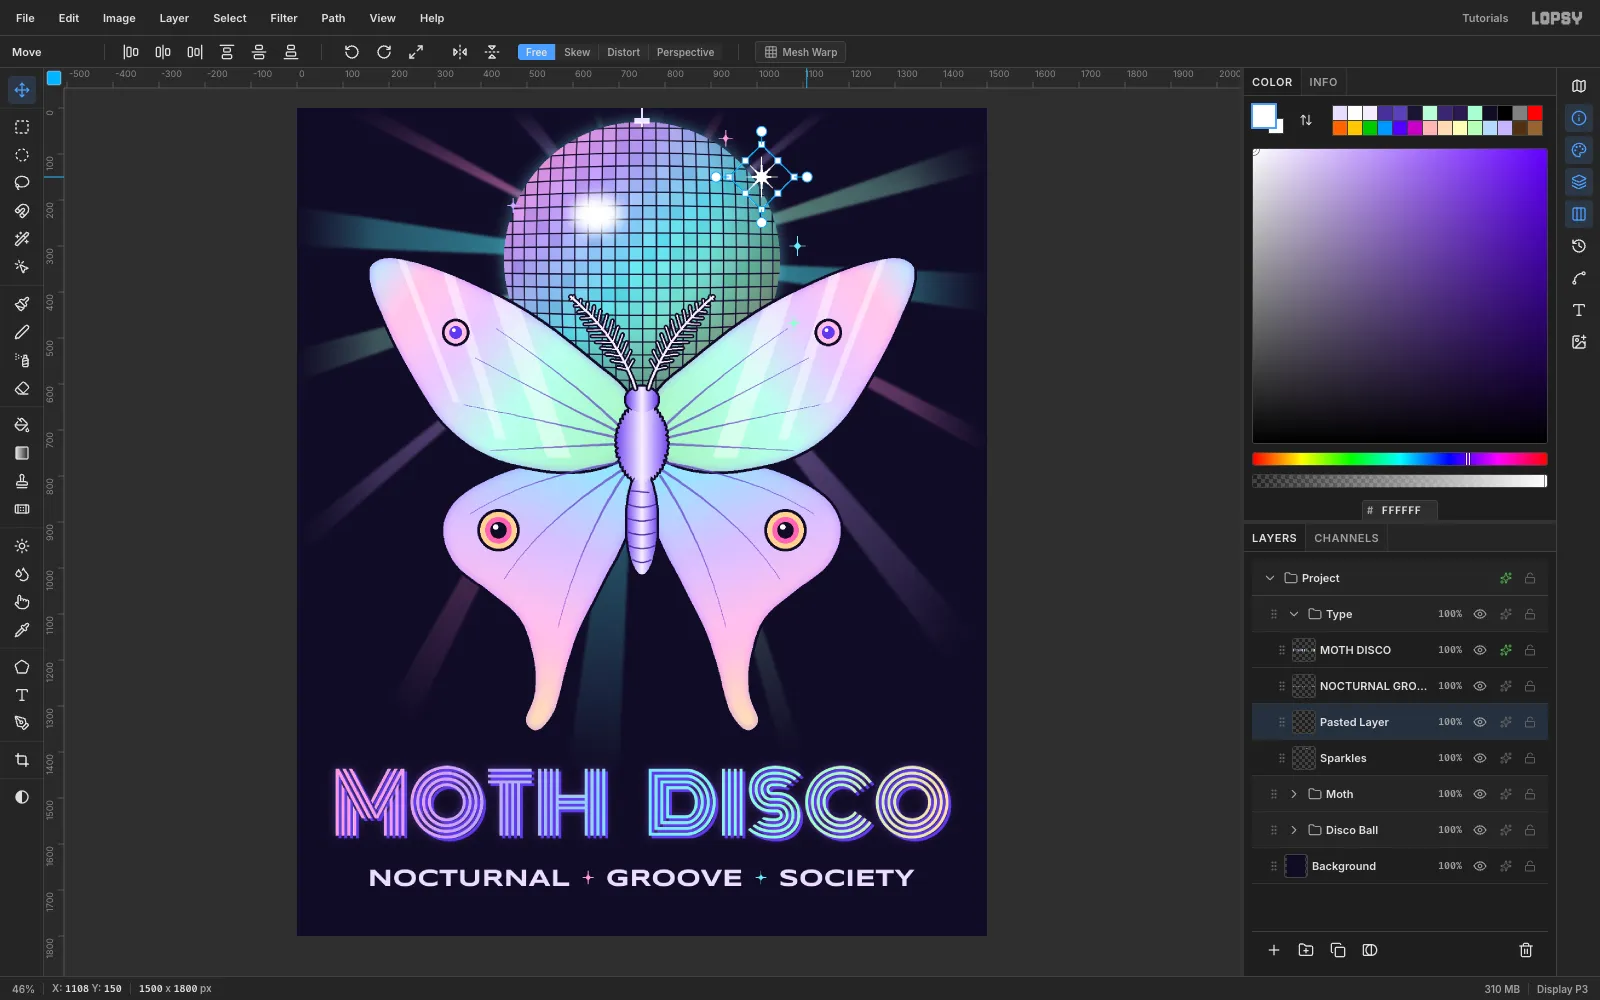
Rotate a copy of the big glint
Marquee 100 × 100 around the big star at (960, 100). Press Cmd+C, then Cmd+V. Marquee the same square again, switch to Move, hover just outside the top-right corner until the cursor becomes a crosshair, and drag around to rotate 45°. Press Cmd+D to commit.
-
Scale it and merge it into an eight-point star
Marquee the rotated copy. Cmd-drag its bottom-right handle inward to about 70% (Cmd keeps the scale uniform), then press Cmd+D. Drag the copy back to (1010, 150) so both stars share a center. Choose Layer → Merge Down, then give Sparkles an Outer Glow in white with Size 16 and Opacity 80.
-
Give the ball room at the top
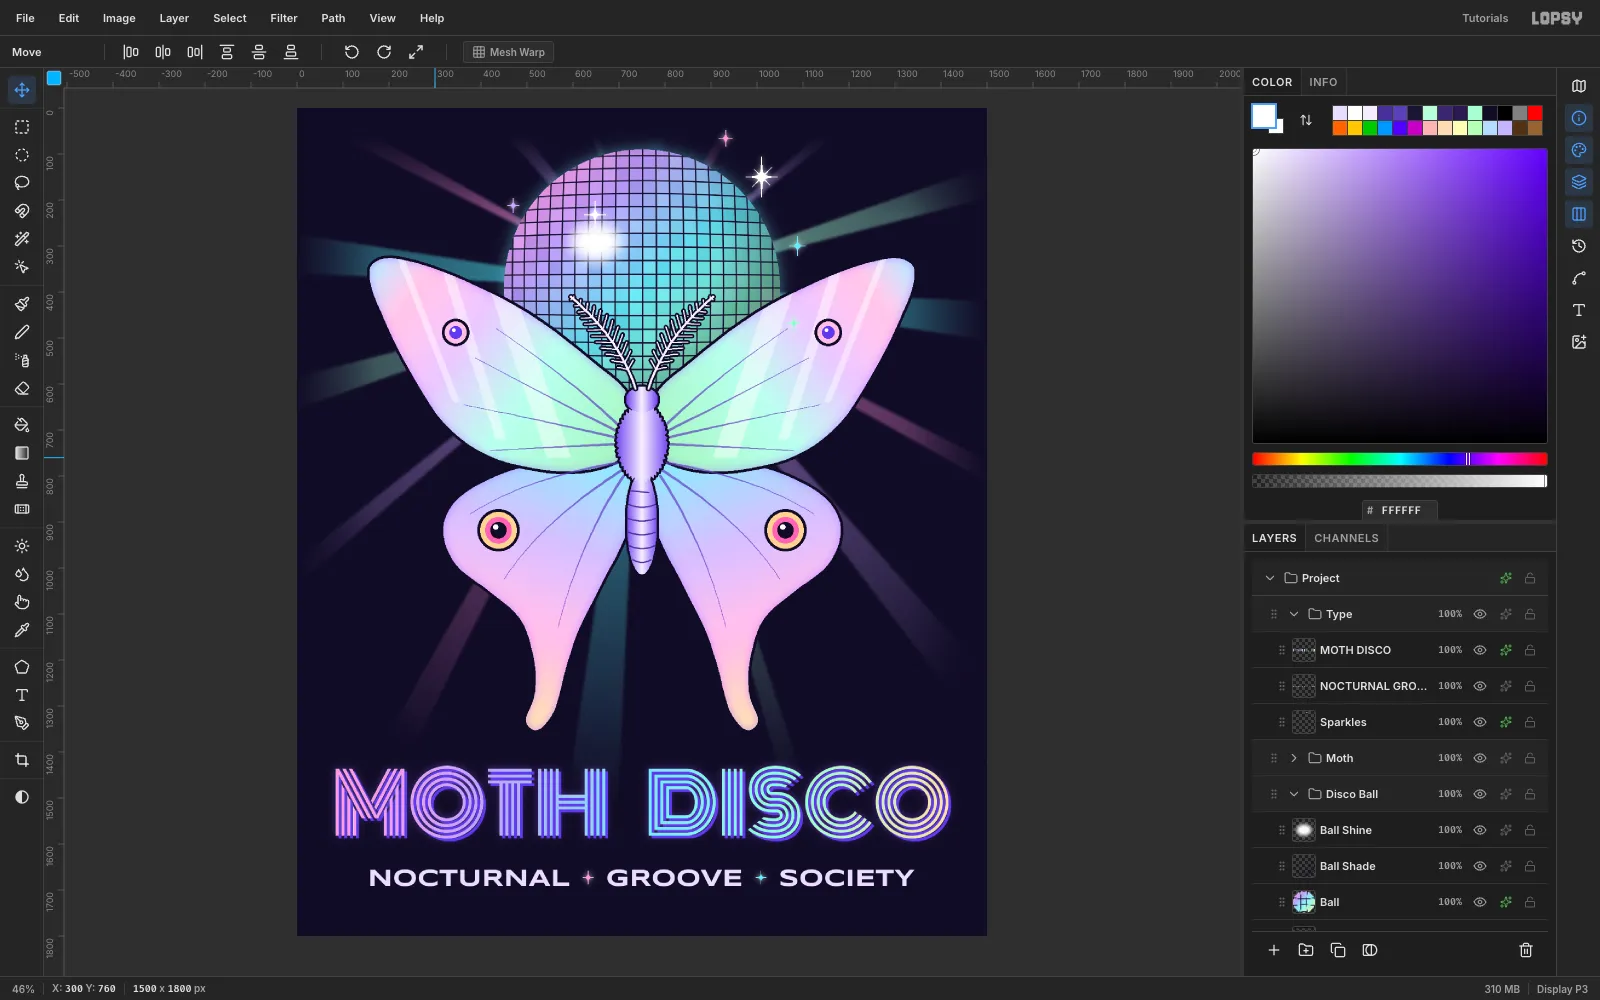
A ball that touches the top edge looks cropped. First remove the stub chain: on Ball Shine, marquee 70 × 50 at (715, 0) and press Delete. Then click the Disco Ball group row and drag with the Move tool 60 px down. The ball, its shading, the beams and the fades all move together. The ball's top now sits at y 90.
-
Hang it on a fading chain
Click Edge Fade inside the group and add a Chain layer above it. Marquee a 4 × 94 strip at (748, 0). Draw a Linear gradient from transparent
#B9A8E8at the top edge to solid#B9A8E8at y 60. The chain disappears into the darkness instead of stopping at the canvas edge. Also drop a hard 12 px white dot into the center of the hotspot on Ball Shine, so the highlight has a sharp core.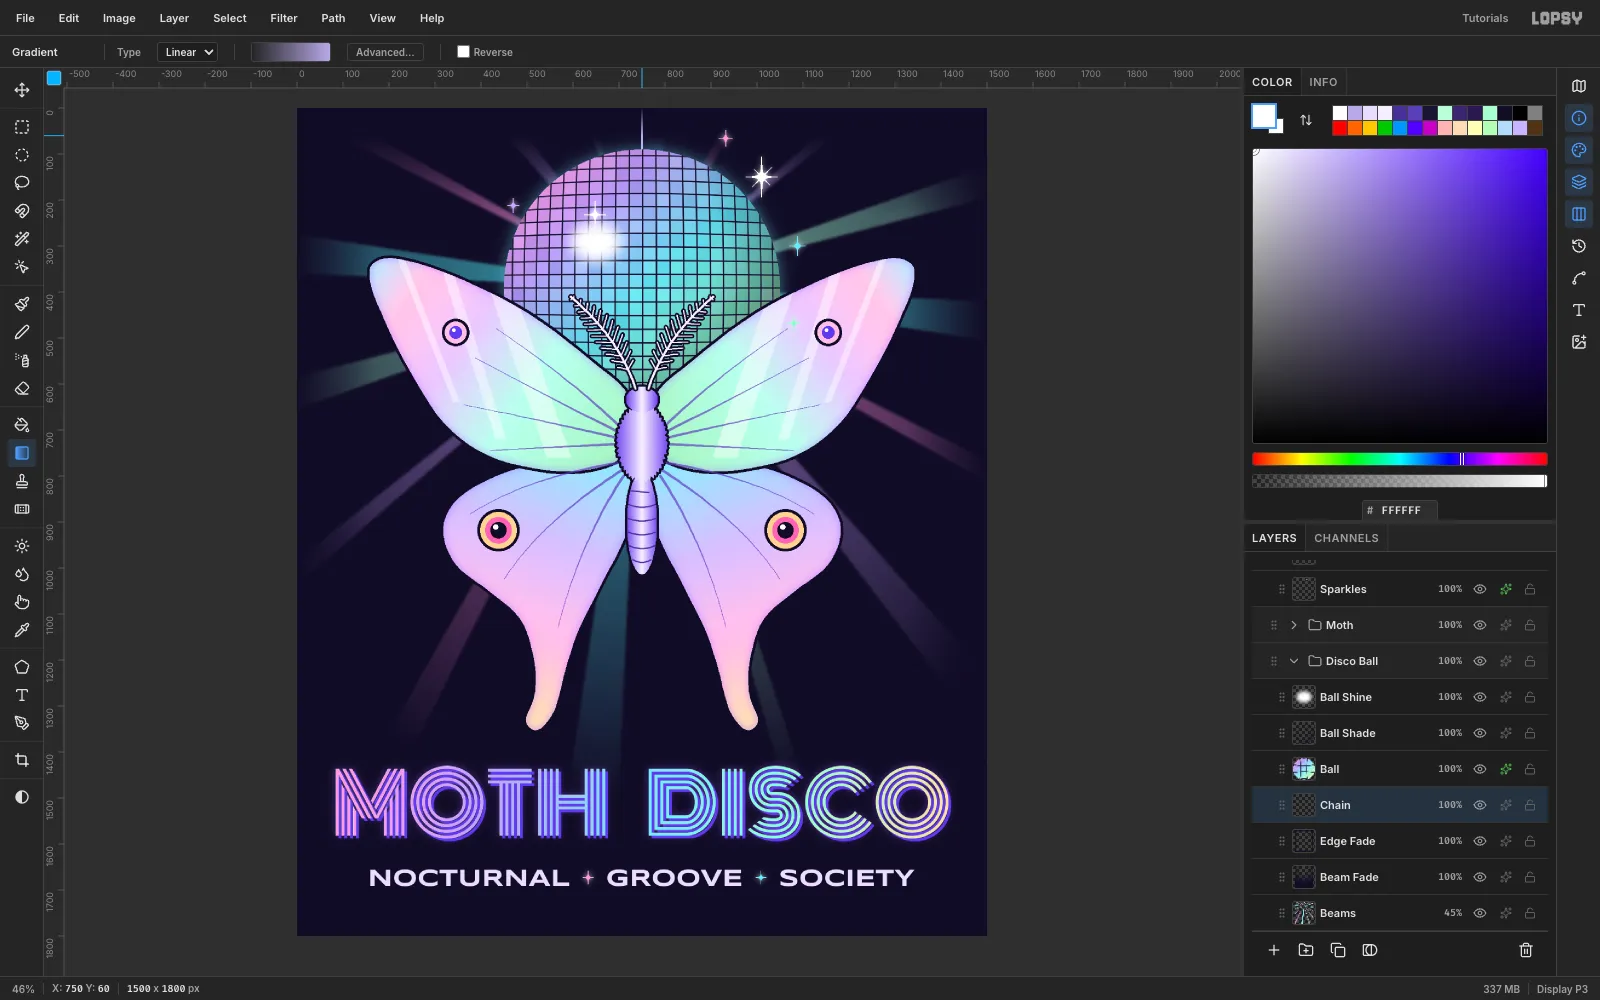
-
Smooth the thorax and add fur
On Body, lasso a smooth 57 × 87 oval over the thorax and refill it with the pearly gradient. With Symmetry Vertical on, brush five short, curved 4 px
#C9B8FFtufts along its right side. The left side mirrors them.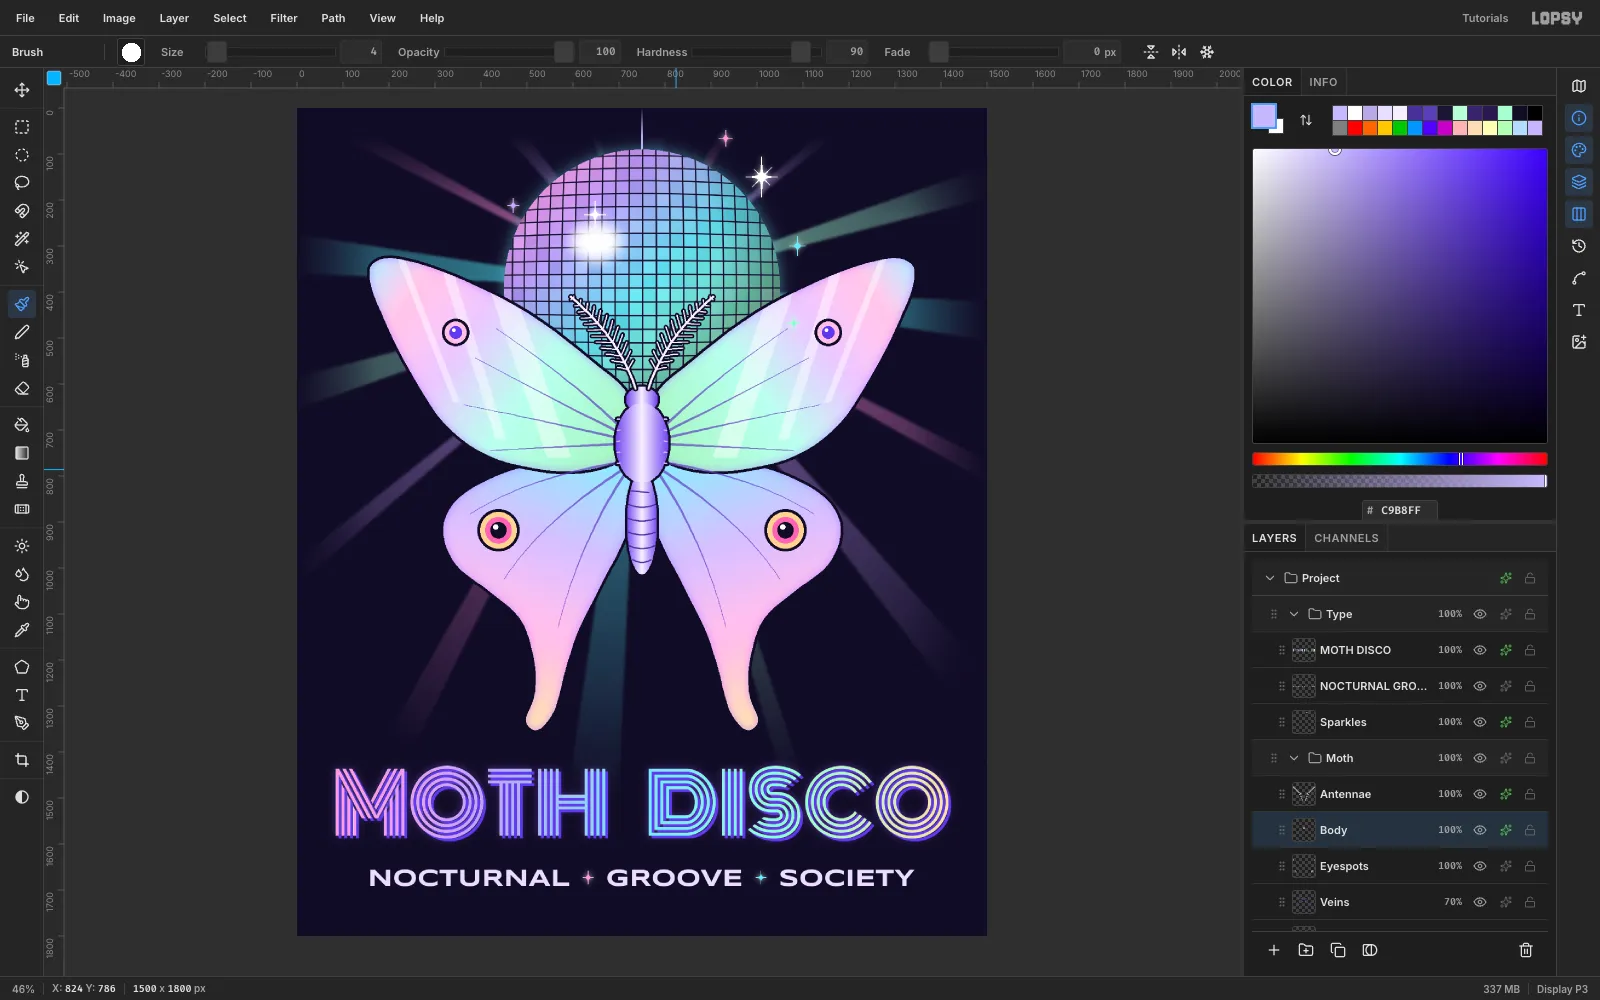
-
Match the title to the moth's width
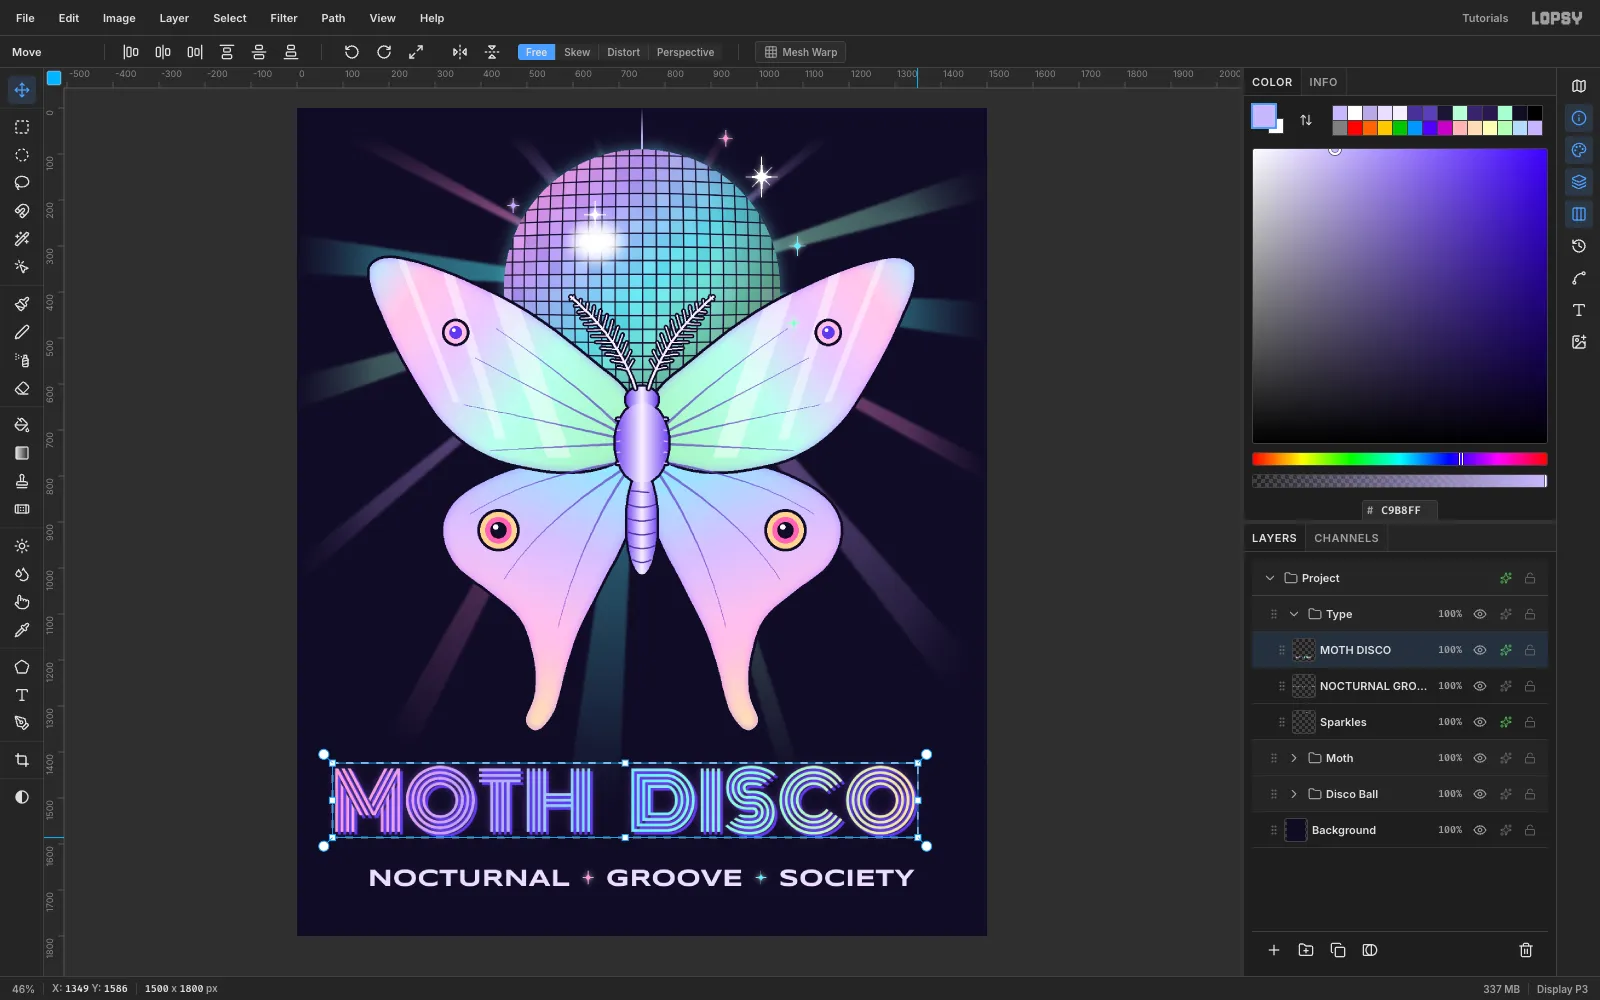
The title should be about as wide as the wingspan. Marquee the title with a few pixels to spare and Cmd-drag the bottom-right handle in to about 94.5%. Press Cmd+D, then move it so it runs from x 119 to 1381 with its top at y 1432.
-
Lighten the title ramp
The violet-blue in "TH" was the lowest-contrast part of the title on the dark shirt. With the Magic Wand (Contiguous off), click empty ground on the title layer and choose Select → Inverse to select every stripe. Refill it with a lighter ramp:
#FFA8DE,#D4C2FF,#96EEFF,#B0FFD8,#FFE4B0. Press Cmd+D, set Veins to 100% so the fine lines survive screen printing, and export with File → Quick Export PNG.