Make a 16-Bit Pixel Art Holiday Card with a Quest Log
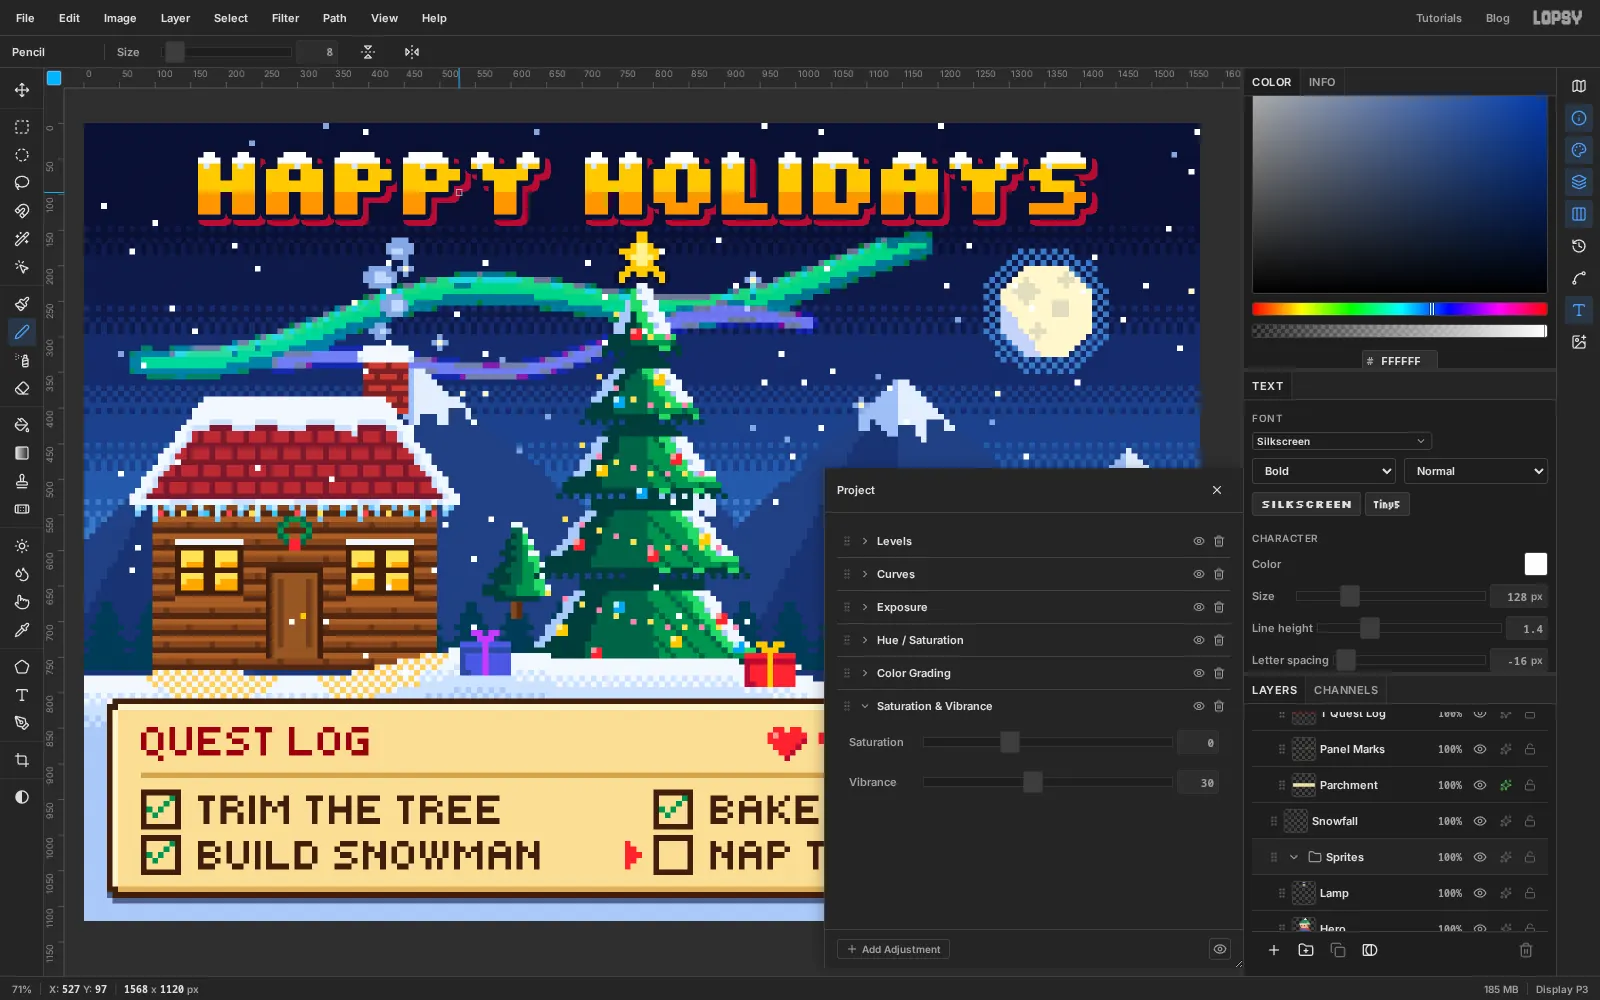
Draw a 16-bit pixel art holiday card in Lopsy with a dithered night sky, pattern-filled log cabin, a mirrored Christmas tree, sprites and an RPG quest log.
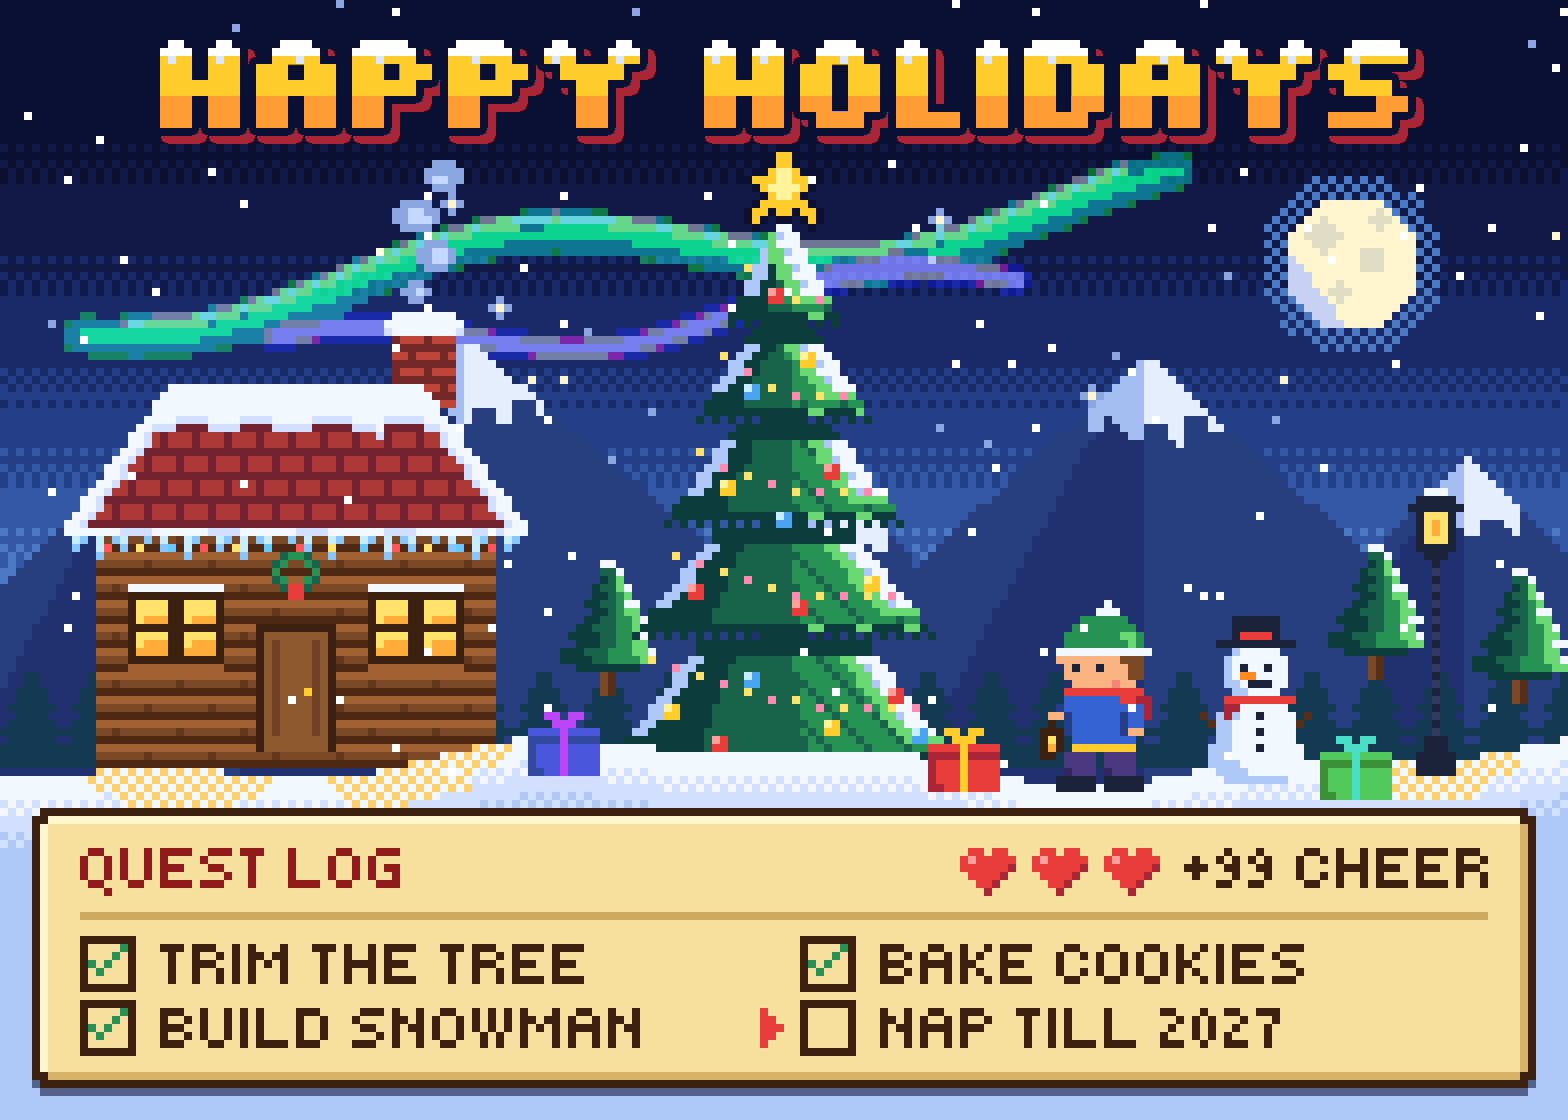
Role-playing games from the 16-bit era kept a quest log: a parchment window listing what you'd done and what was left. In this tutorial you'll borrow that screen for a holiday card. The scene is a snowy village at night, and the quest log underneath lists the season's chores, with one still to do.
The card is 1568 × 1120 px and everything sits on an 8 px grid, so each "art pixel" is an 8 × 8 square and the picture is 196 × 140 art pixels. You don't need any photos. Most of it is drawn with the Pencil one square at a time, and Lopsy's patterns, selections and symmetry do the repetitive parts for you.
Along the way you'll use:
- the grid with Snap, and the Rectangular Marquee for flat blocks of colour
- Define Pattern and Fill with Pattern, with Row Stagger for bricks and logs
- a checkerboard layer loaded as a selection, so the Pencil paints a dither by itself
- the Pencil at 8 px, with Symmetry for the tree
- the Paint Bucket and Magic Wand
- the Brush, a rotation with the Move tool, Pixelate, Posterize and the Screen blend mode for an aurora
- copy and paste, Flip Horizontal, Hue/Saturation, groups and moving a group as one
- Text in two free pixel fonts, Silkscreen and Tiny5, with Stroke and Drop Shadow effects
- a Saturation & Vibrance adjustment on the whole project
The palette:
-
Sky
-
Stars
-
moon shade
-
craters
-
halo
-
Aurora
-
Mountains
-
shaded face
-
snow caps
-
forest
-
Logs
-
knot
-
bricks
-
Roof
-
icicles
-
door
-
frames
-
Windows
-
eave lights
-
smoke
-
Tree
-
trunk
-
Star and gold
-
baubles
-
fairy lights
-
Snow
-
lamplight on snow
-
lamp post
-
Snowman nose
-
arms
-
Hero hat
-
skin
-
hair
-
cheek
-
scarf
-
coat
-
trousers
-
boots
-
Parchment
-
bevel
-
divider
-
ink
-
heading
-
ticks
-
Hearts
-
Title
-
title shadow
-
outline
-
snow drips
-
Set up the document and an 8 px grid
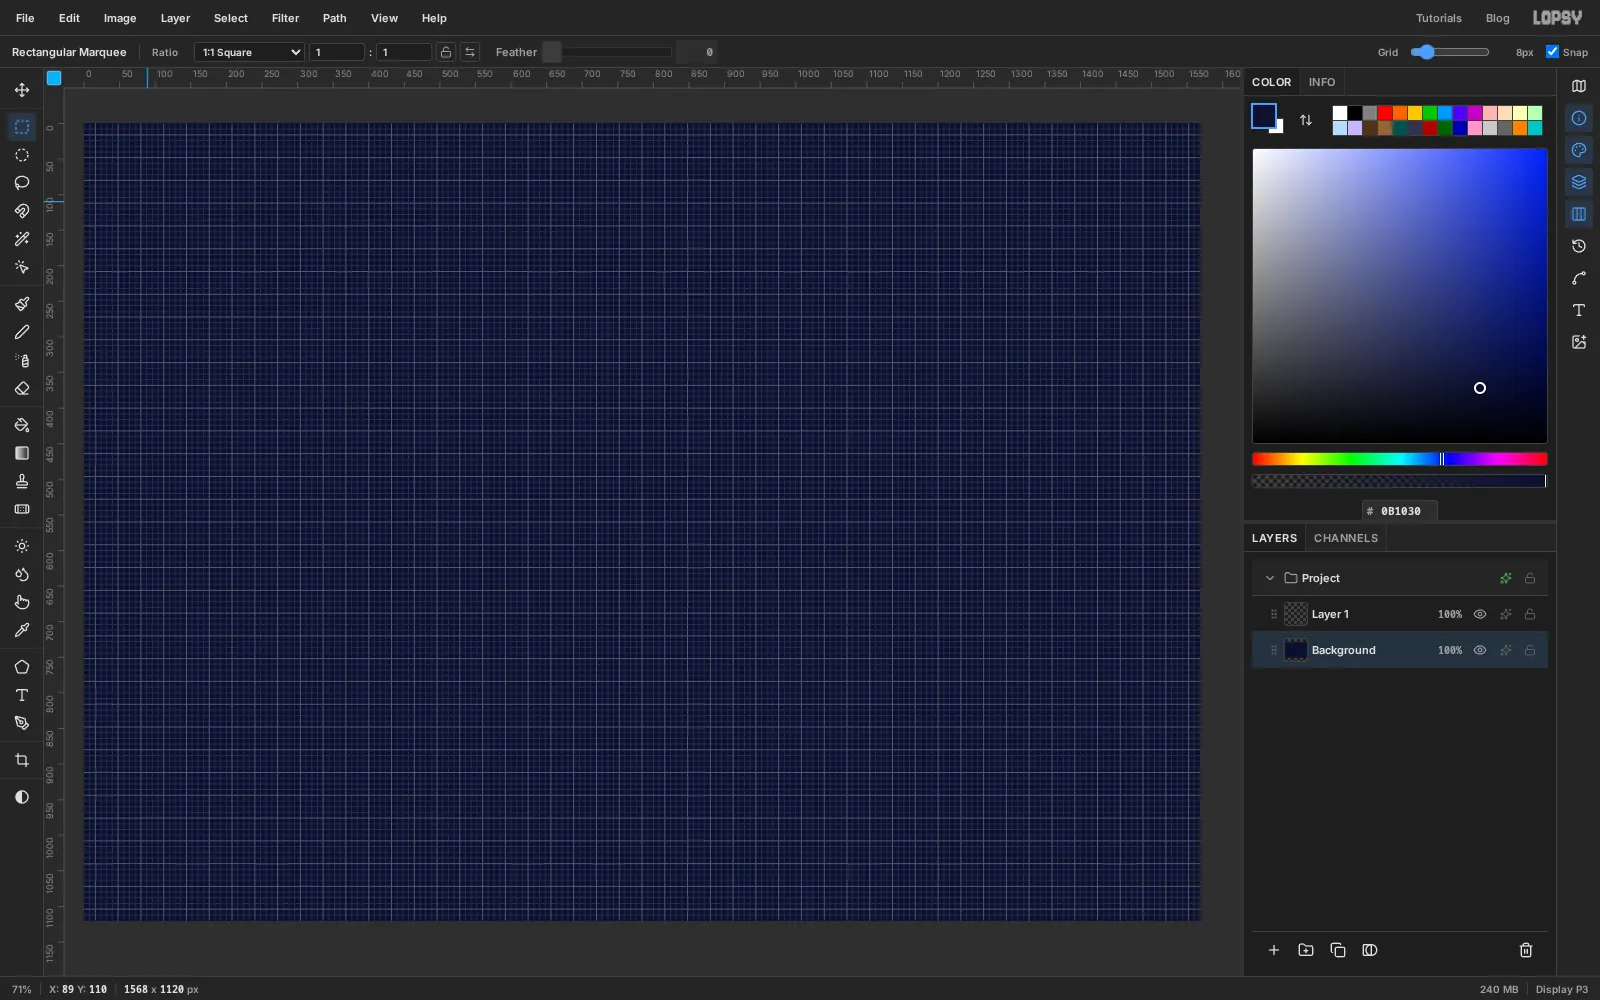
Create a new document 1568 × 1120 px. Choose View → Show Grid, then drag the Grid slider at the right of the options bar down to 8px and make sure Snap is ticked. From now on marquees land on grid lines.
Click the Background layer, set the foreground colour to and choose Edit → Fill. That's the darkest sky colour, and it will show through at the top.
-
Lay the sky down in flat bands
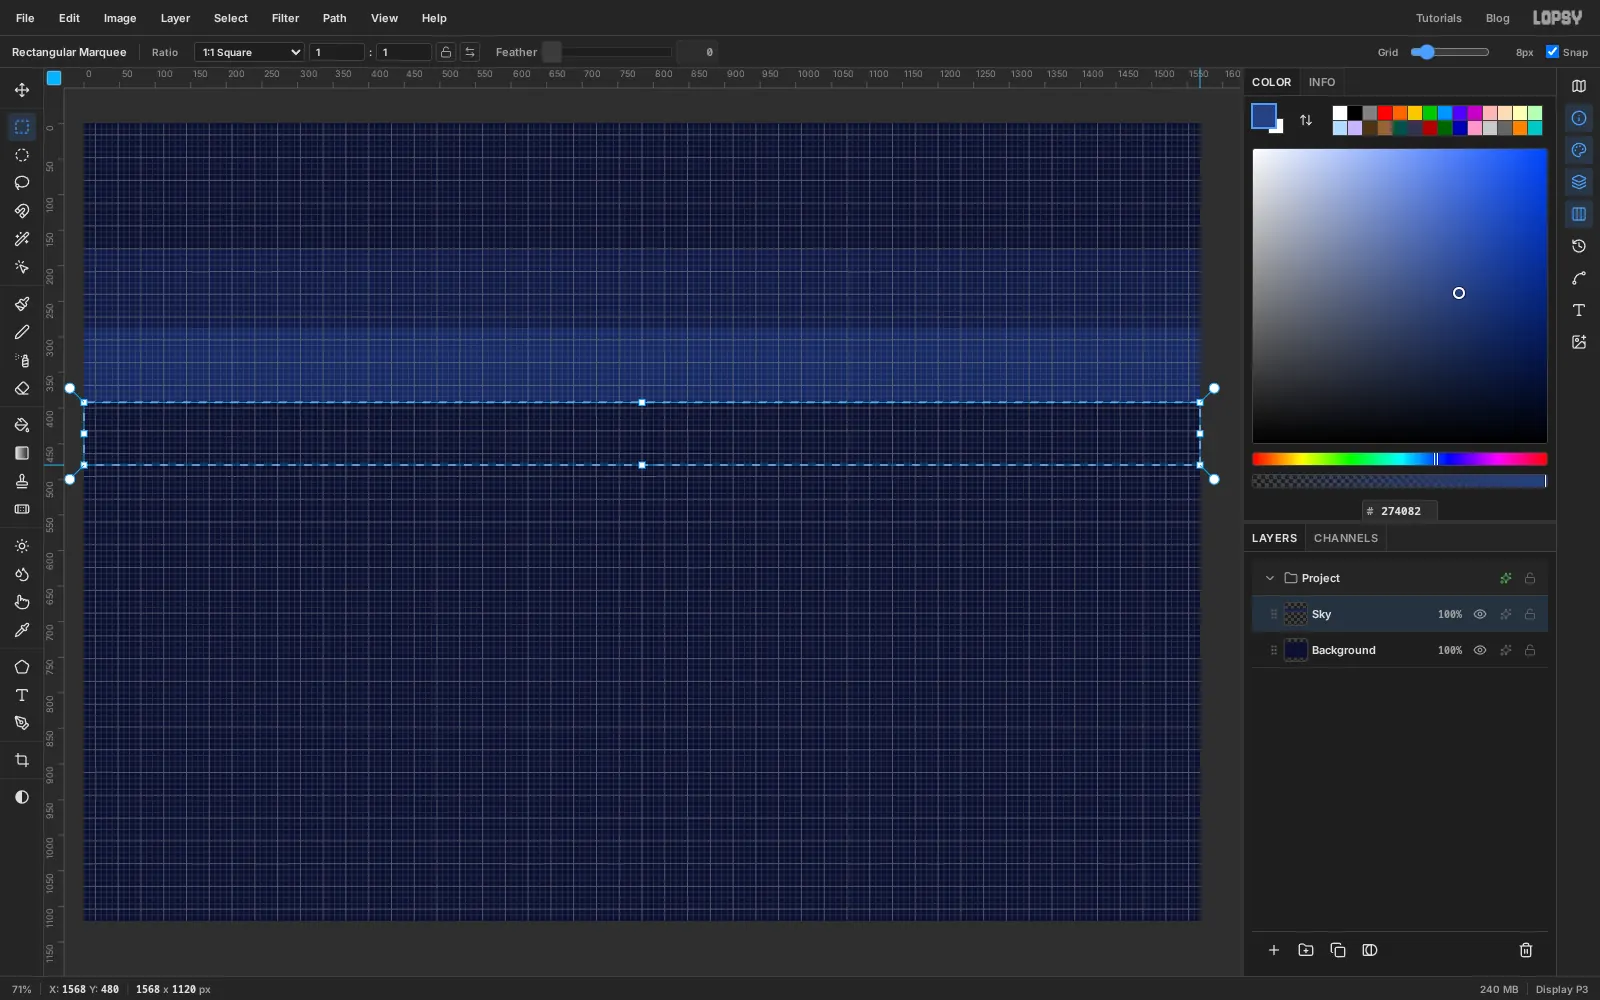
Click Layer 1 and rename it
Sky. Pick the Rectangular Marquee (M) and drag a strip across the full width of the canvas, from 176 px down to 288 px on the left ruler. Set the foreground to and choose Edit → Fill.Repeat for five more strips, each a little lighter than the last. You don't need to deselect between them, but start each new drag below the old strip: if you press inside the selection you'll move it instead.
- 288 → 392 px,
- 392 → 480 px,
- 480 → 560 px,
- 560 → 640 px,
- 640 → 832 px,
Press Cmd+D to deselect. The bottom of the canvas stays dark for now, because snow will cover it.
-
Make a checkerboard helper layer
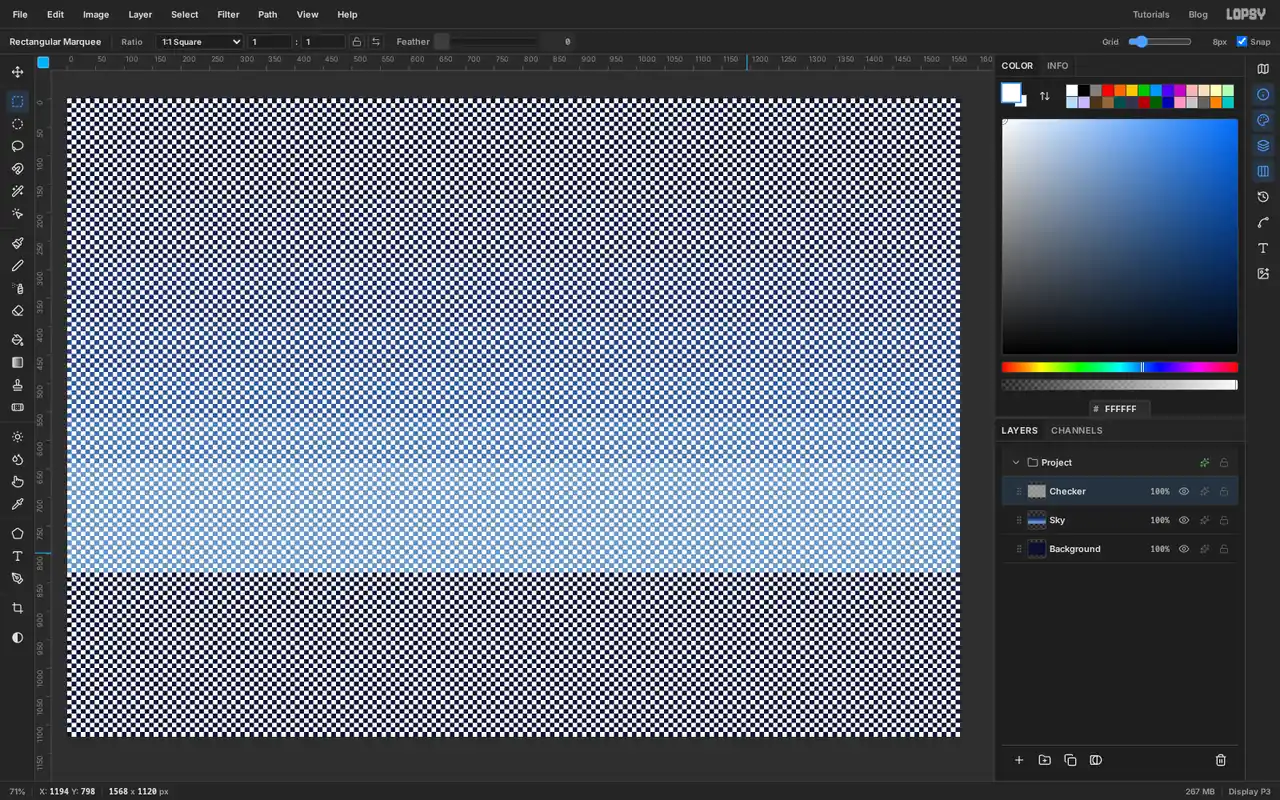
16-bit skies blend two colours by alternating them in a checkerboard, called a dither. Placing hundreds of squares by hand is slow, so make a checkerboard once and reuse it as a selection.
Click Add Layer and name it
Checker. Pick the Pencil (N), set Size to 8 and the foreground to white. Zoom in on the top-left corner of the canvas and click the very first square, then the square diagonally below and to the right of it.Switch to the Rectangular Marquee and drag from the corner over those 2 × 2 squares (16 × 16 px). Choose Edit → Define Pattern, then press Delete and Cmd+D. Now choose Edit → Fill with Pattern…, pick Pattern 1 and click Apply. The layer fills with a checkerboard that lines up with the grid.
Do it once more for a sparser version. Add a layer called
Sparse, click only the first square, define the same 2 × 2 area as a pattern, delete it, and fill the layer with Pattern 2. That one has one square in four.Click the eye on both layers to hide them. You'll never see them in the card, only borrow their shapes as selections.
-
Dither the edges between the bands
Each edge between two bands gets three passes, two squares tall each. The first pass sprinkles the lower colour into the band above:
- Hold Cmd and click the Sparse thumbnail. The whole sparse pattern loads as a selection.
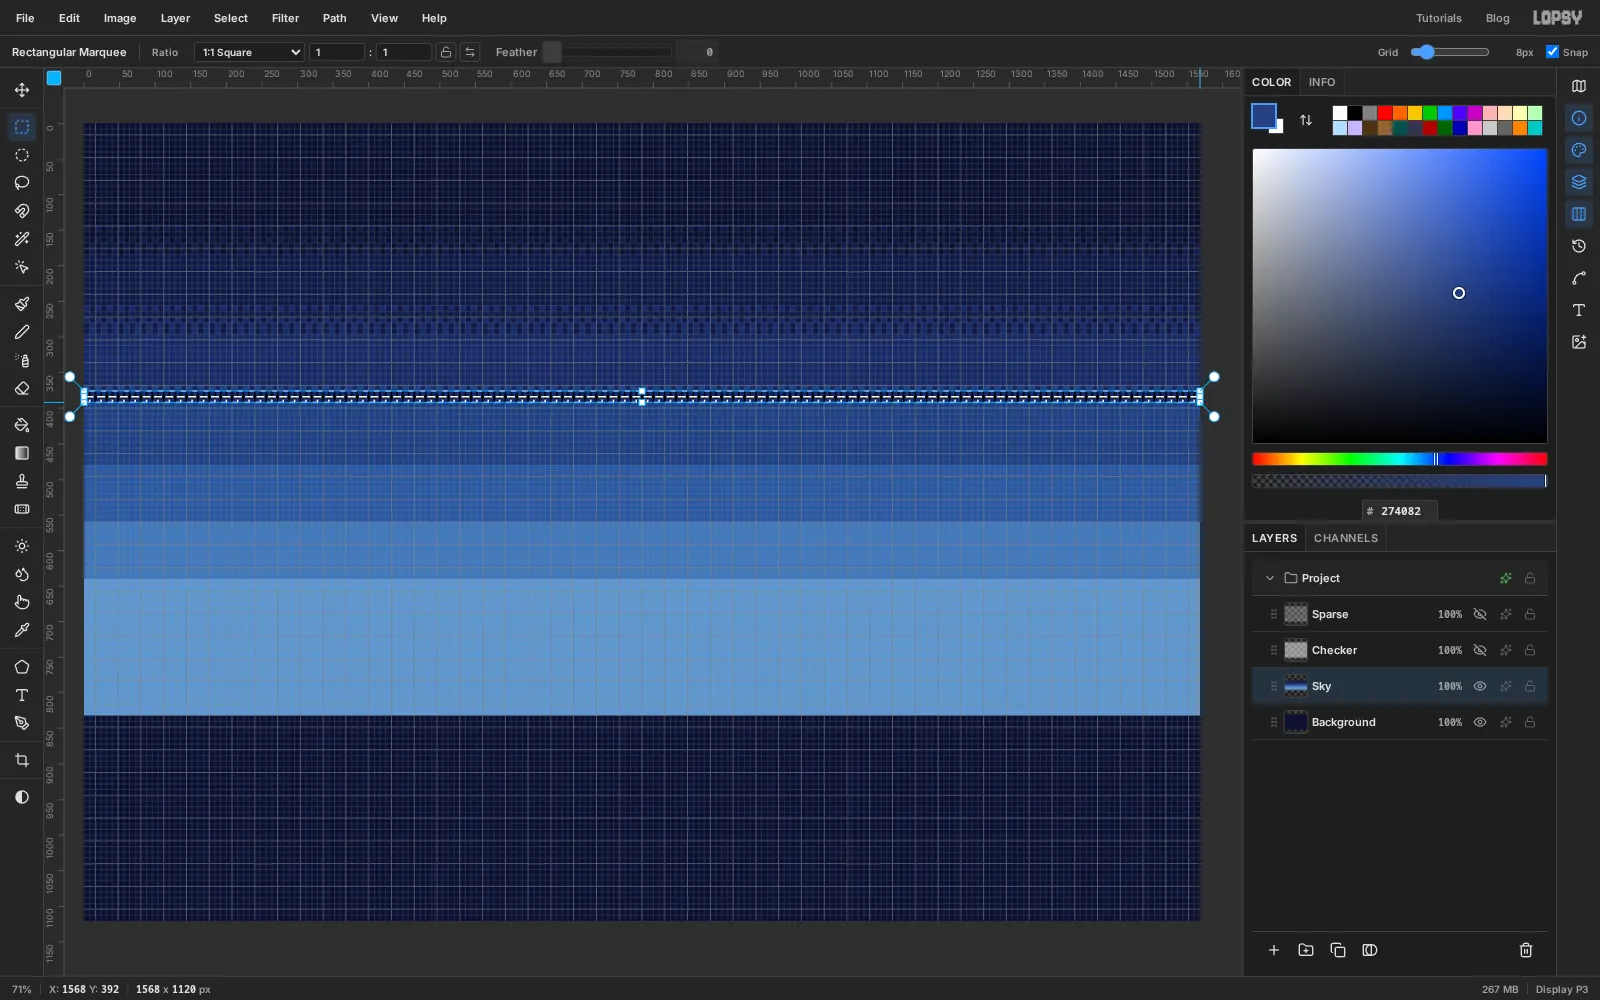
- With the Rectangular Marquee, hold Shift+Alt and drag a strip across the canvas that covers the third and fourth squares above the edge. Shift+Alt keeps only the overlap, so you're left with one square in four inside that strip.
- Click the
Skylayer, set the foreground to the lower band's colour and choose Edit → Fill.
Then do the same with the Checker thumbnail on the two squares right above the edge, still filling with the lower colour. Finally load Sparse again, intersect it with the two squares right below the edge, and fill with the upper band's colour.
Repeat for all six edges and deselect. Each edge now fades through a quarter, a half and three quarters.
-
Add stars and a full moon with a dotted halo
Click
Sky, then Add Layer and name itStars. With the Pencil still at 8 px, click single squares across the top two thirds of the sky. Use for most of them and for about one in three. Leave the top strip fairly clear for the title. For a twinkle, click the four squares above, below, left and right of a bright star in the dimmer colour.Add a layer called
Moon. The moon is a circle 16 squares across in the upper right, with its centre about 27 squares in from the right edge and 33 down from the top. Draw it a row at a time in : drag the Pencil along each row, starting with a row 8 squares wide, then 10, 12, 14 and 14, then six rows of 16, and back down the same way. Shade the lower-left edge with a crescent of two or three squares thick, and dab four small craters in , each a blob of three to nine squares.For the halo, Cmd-click the
Checkerthumbnail so the checkerboard is selected, click theMoonlayer again, and draw a ring three squares thick around the moon in . The Pencil only lands on every other square, so the ring comes out dithered. Deselect.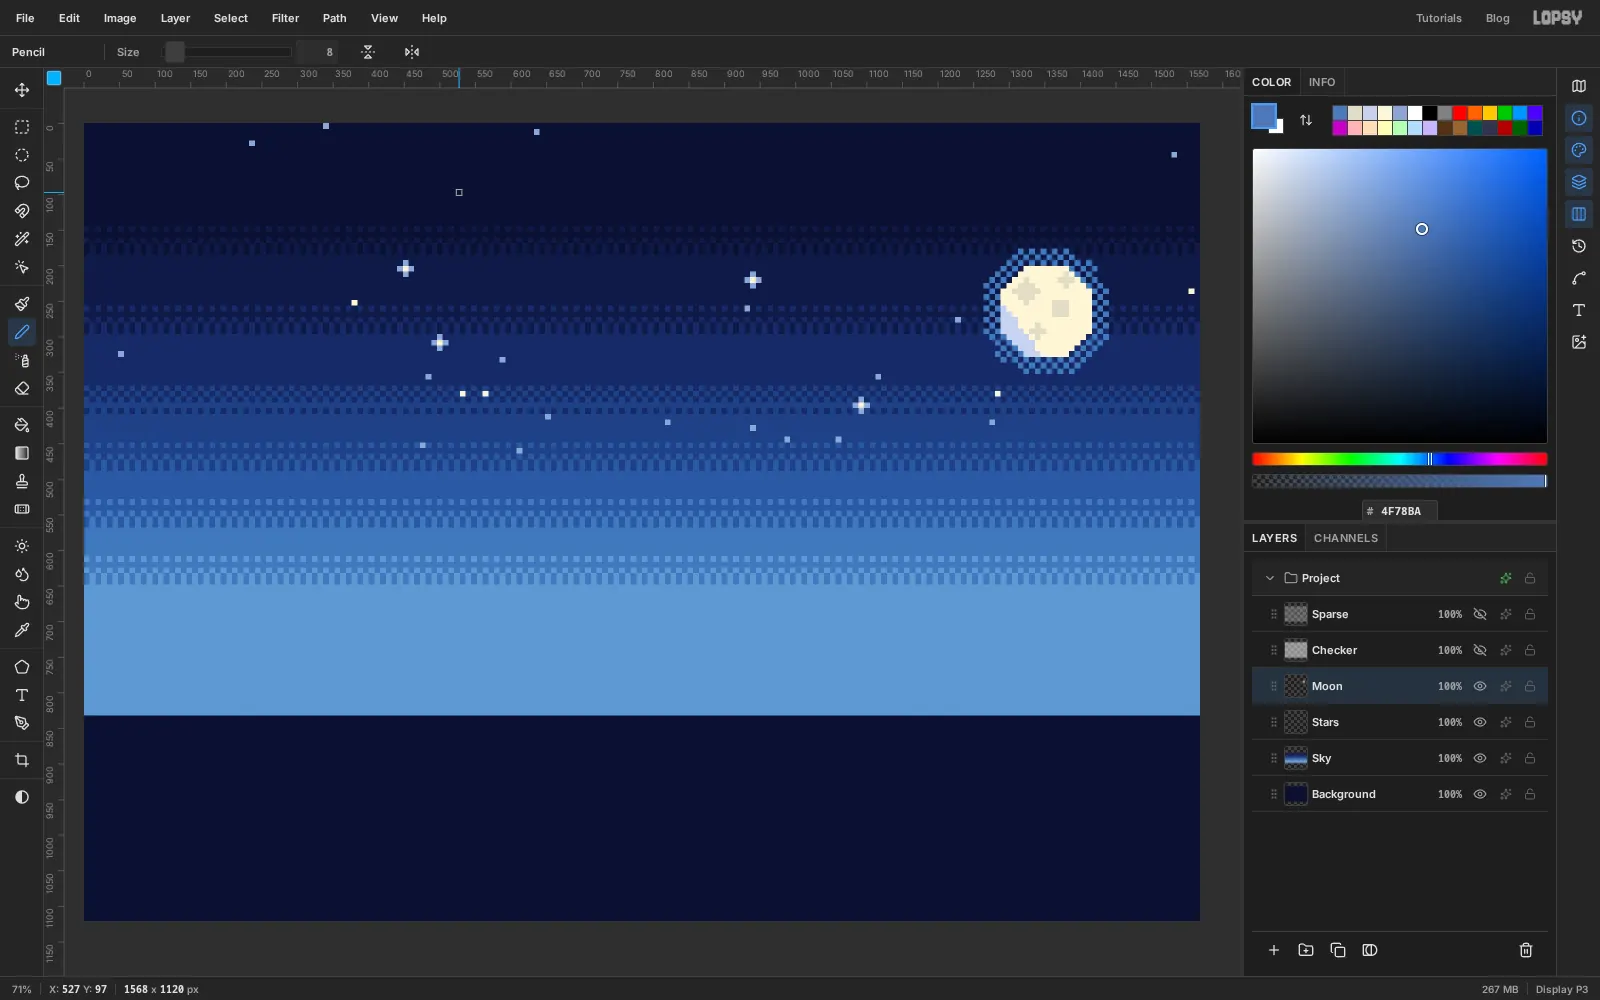
-
Brush an aurora and turn it
The aurora starts as ordinary soft brush strokes. A filter turns them into pixels in the next step.
Click
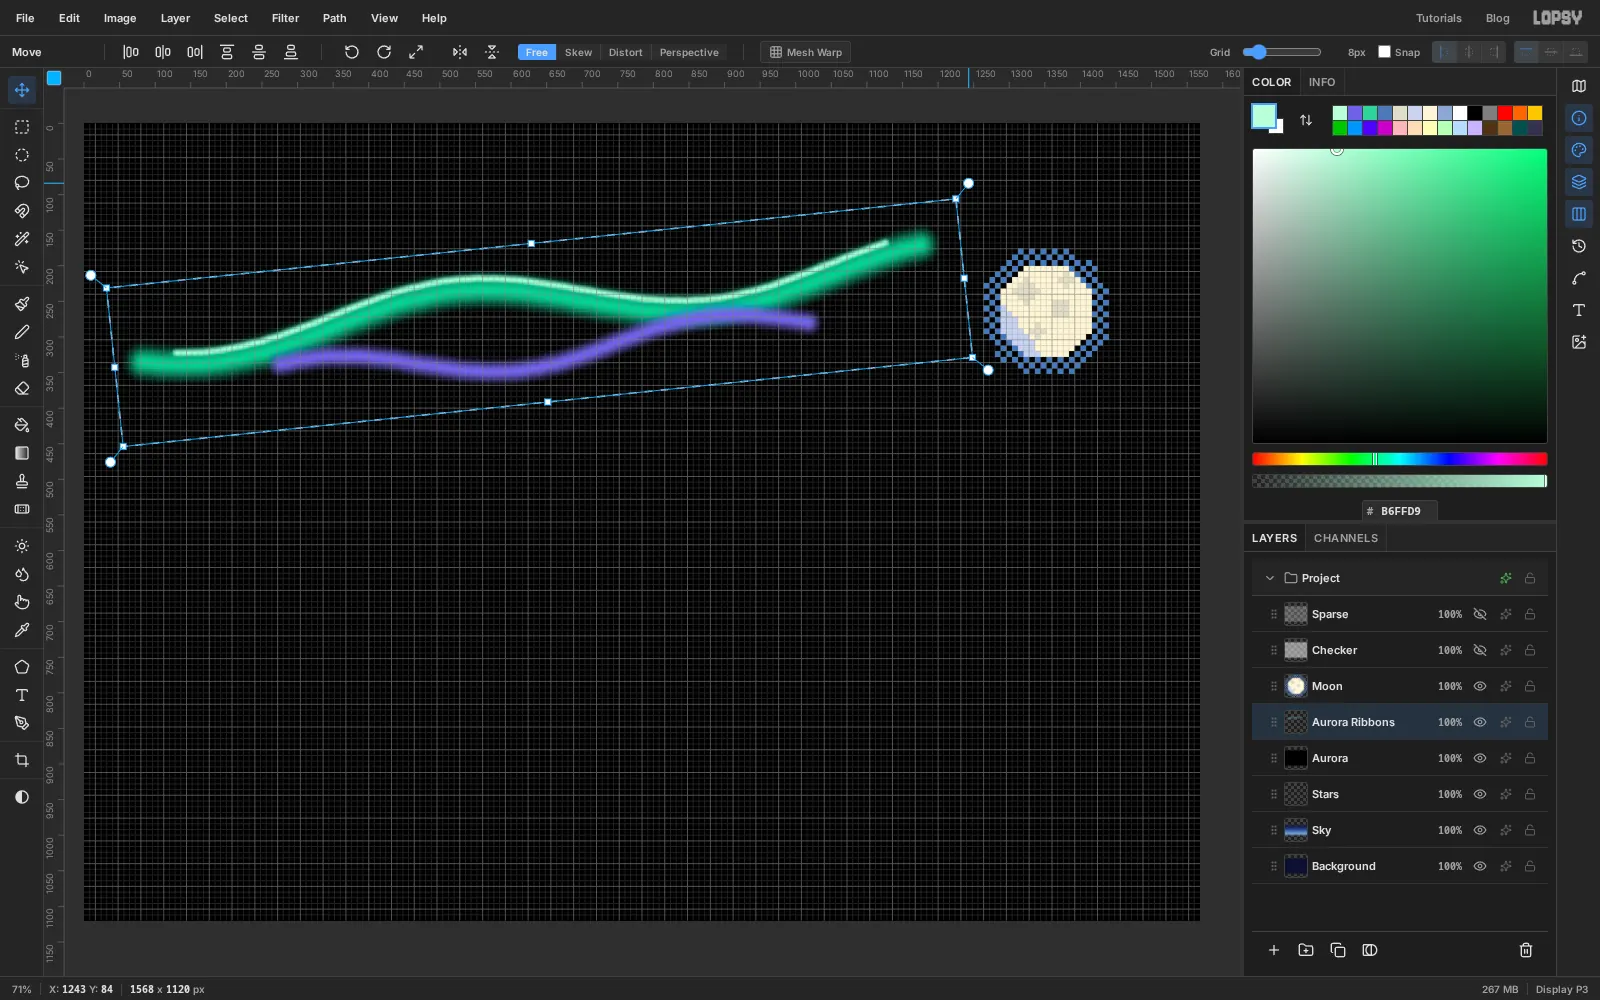
Stars, add a layer calledAuroraand fill it with black. The sky disappears until the end of the next step. Add another layer above it calledAurora Ribbons. Pick the Brush (B), set Size to 64 and Hardness to 0, and paint three strokes:- A long wavy ribbon in from the left edge to about three quarters of the way across, roughly 250 px from the top.
- A shorter ribbon in at Size 44, just under the middle of the first.
- A thin bright core in at Size 18, along the top of the first ribbon.
Drag a marquee around all three. Pick the Move tool (V) and untick Snap for a moment, because snapping locks rotation to 15° steps. Drag the round handle outside the top-right corner upward until the ribbons tilt about 6°, so the right end rises. Tick Snap again and deselect.
-
Pixelate, posterize and screen the aurora
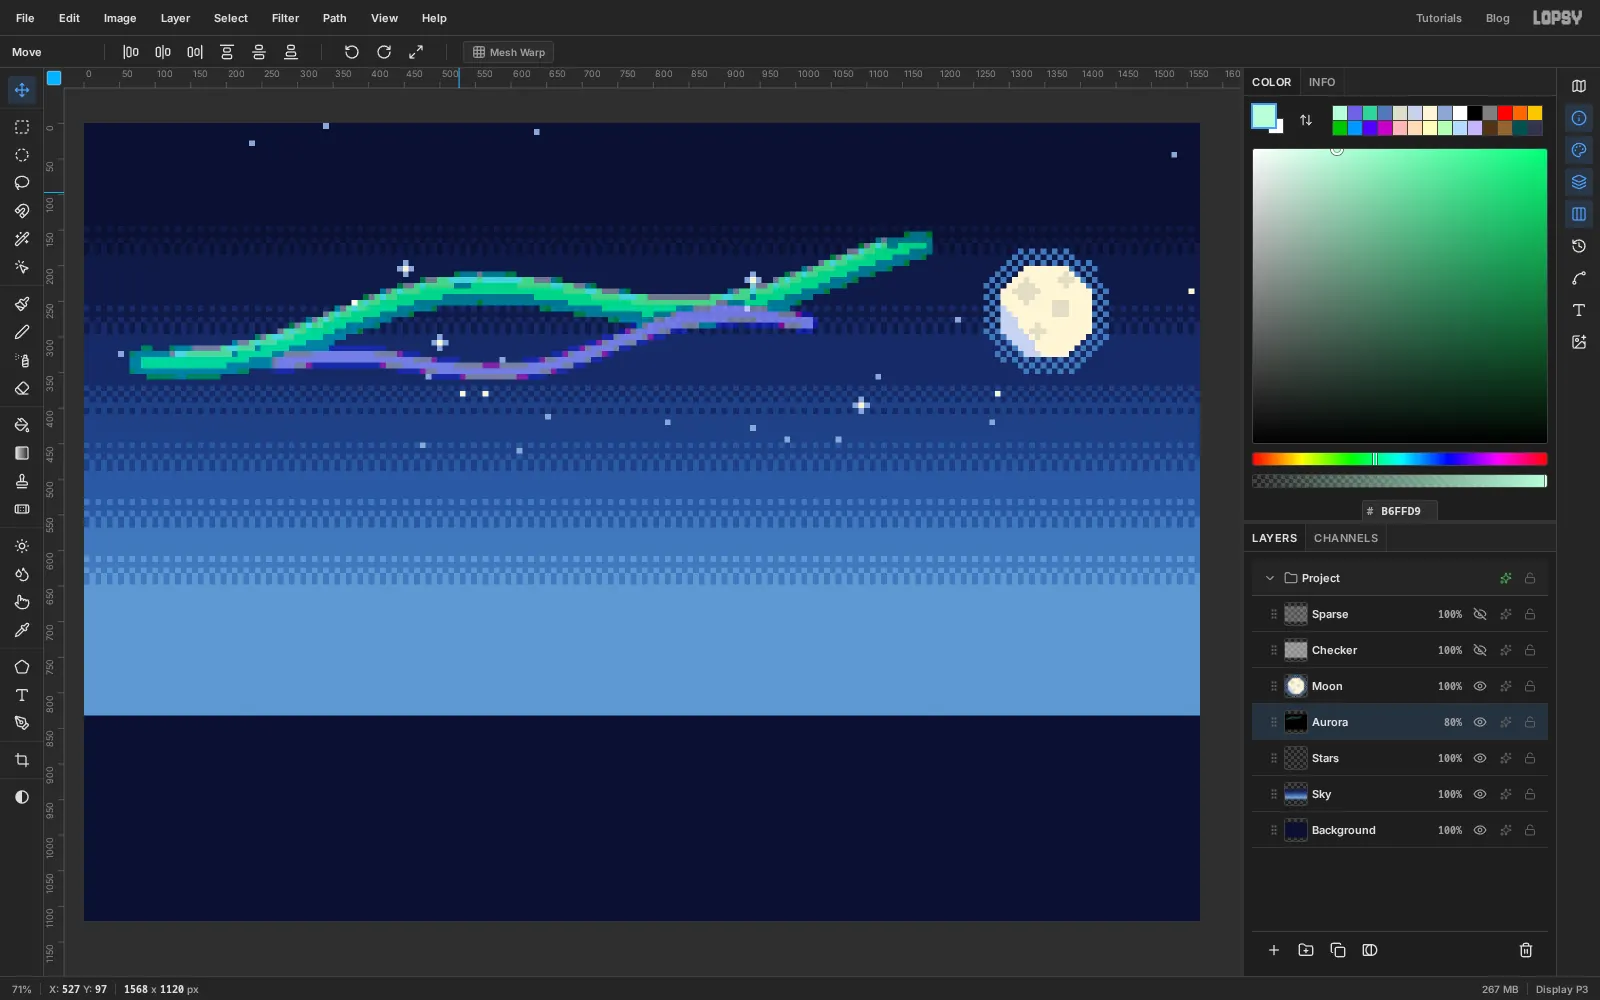
Choose Layer → Merge Down to drop the ribbons onto the black layer. Choose Filter → Pixelate…, set Block Size to 8 and apply. Every grid square becomes one flat colour. Then choose Filter → Posterize… with Levels at 3, which cuts the soft fade down to a few hard steps.
Click the layer's effects button (the sparkle icon on its row) and set Blend to Screen. Black has no effect in Screen, so only the ribbons show. Set the layer's opacity to 80%.
Painting on black first matters. Pixelate keeps a layer's transparent outline, so soft strokes on an empty layer would keep their smooth edge.
-
Draw the mountain ridge and fill it with the Paint Bucket
Click
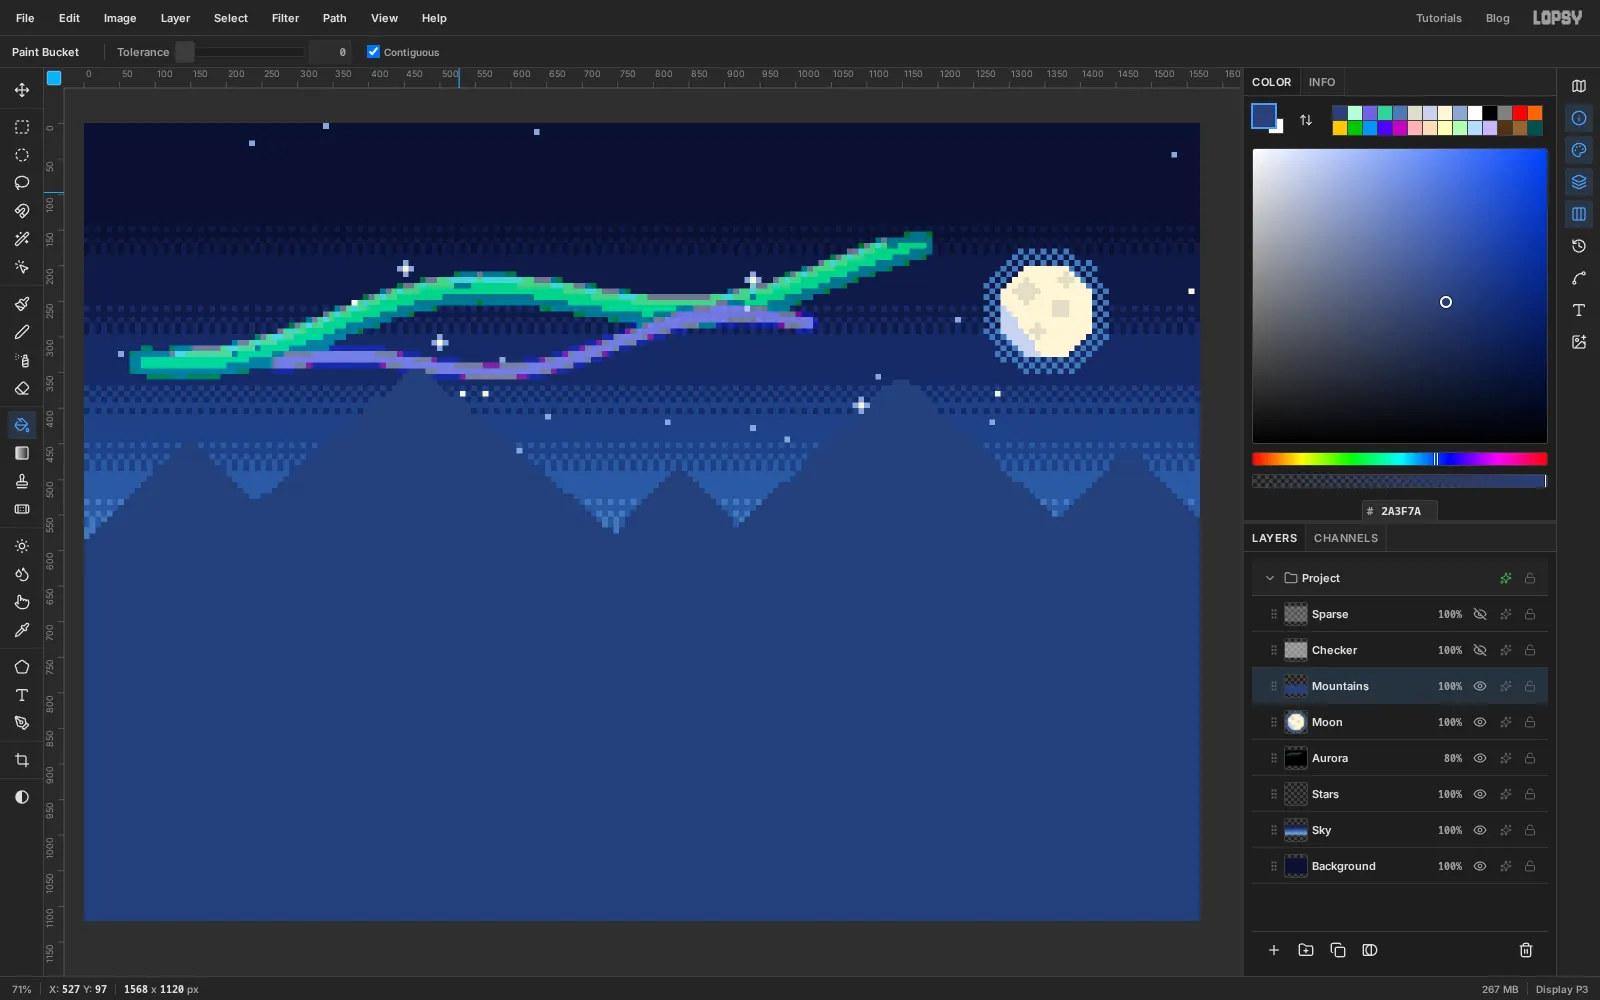
Moon, add a layer and name itMountains. With the Pencil at 8 px and , draw the ridge: a single stair-stepped line of squares that runs from the left edge to the right edge over five peaks. Put the two tallest about 345 px and 360 px from the top, a third of the way in from each side, and three lower ones between and beside them. Go up and down one square at a time. Each square must touch the next along a full side, not only at a corner, or the fill will leak.Pick the Paint Bucket (G), set Tolerance to 0 and click anywhere below the line. Everything under the ridge fills.
-
Paint snow caps inside a Magic Wand selection
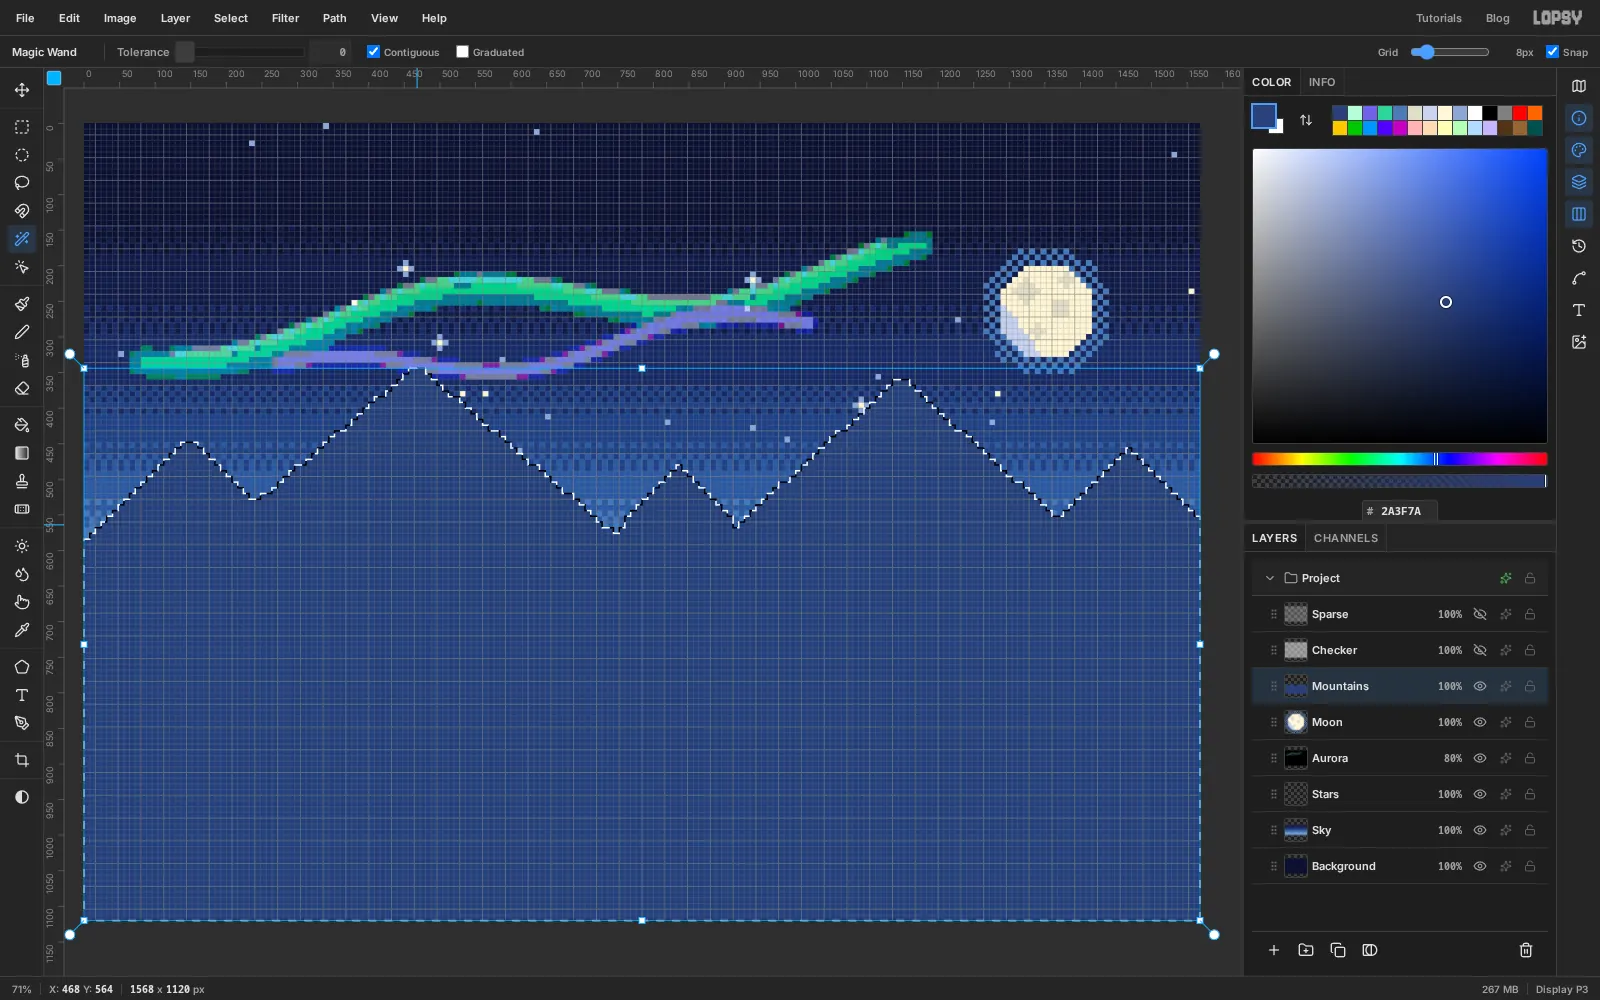
Pick the Magic Wand (W), set Tolerance to 0 and click the mountains. With that selection active the Pencil can't paint outside them, so you can be loose at the edges.
The moon is on the right, so that side is lit. On each peak, colour the top eight to ten rows on the right of the summit and on the left. Give the bottom of each cap a ragged edge by dropping every few columns one or two squares lower. Then run a wedge of down the left face of each mountain, starting one square wide under the cap and widening as it goes down. Deselect.
-
Fill a strip with a pine tree pattern
The distant forest is one tree, repeated.
Add a layer called
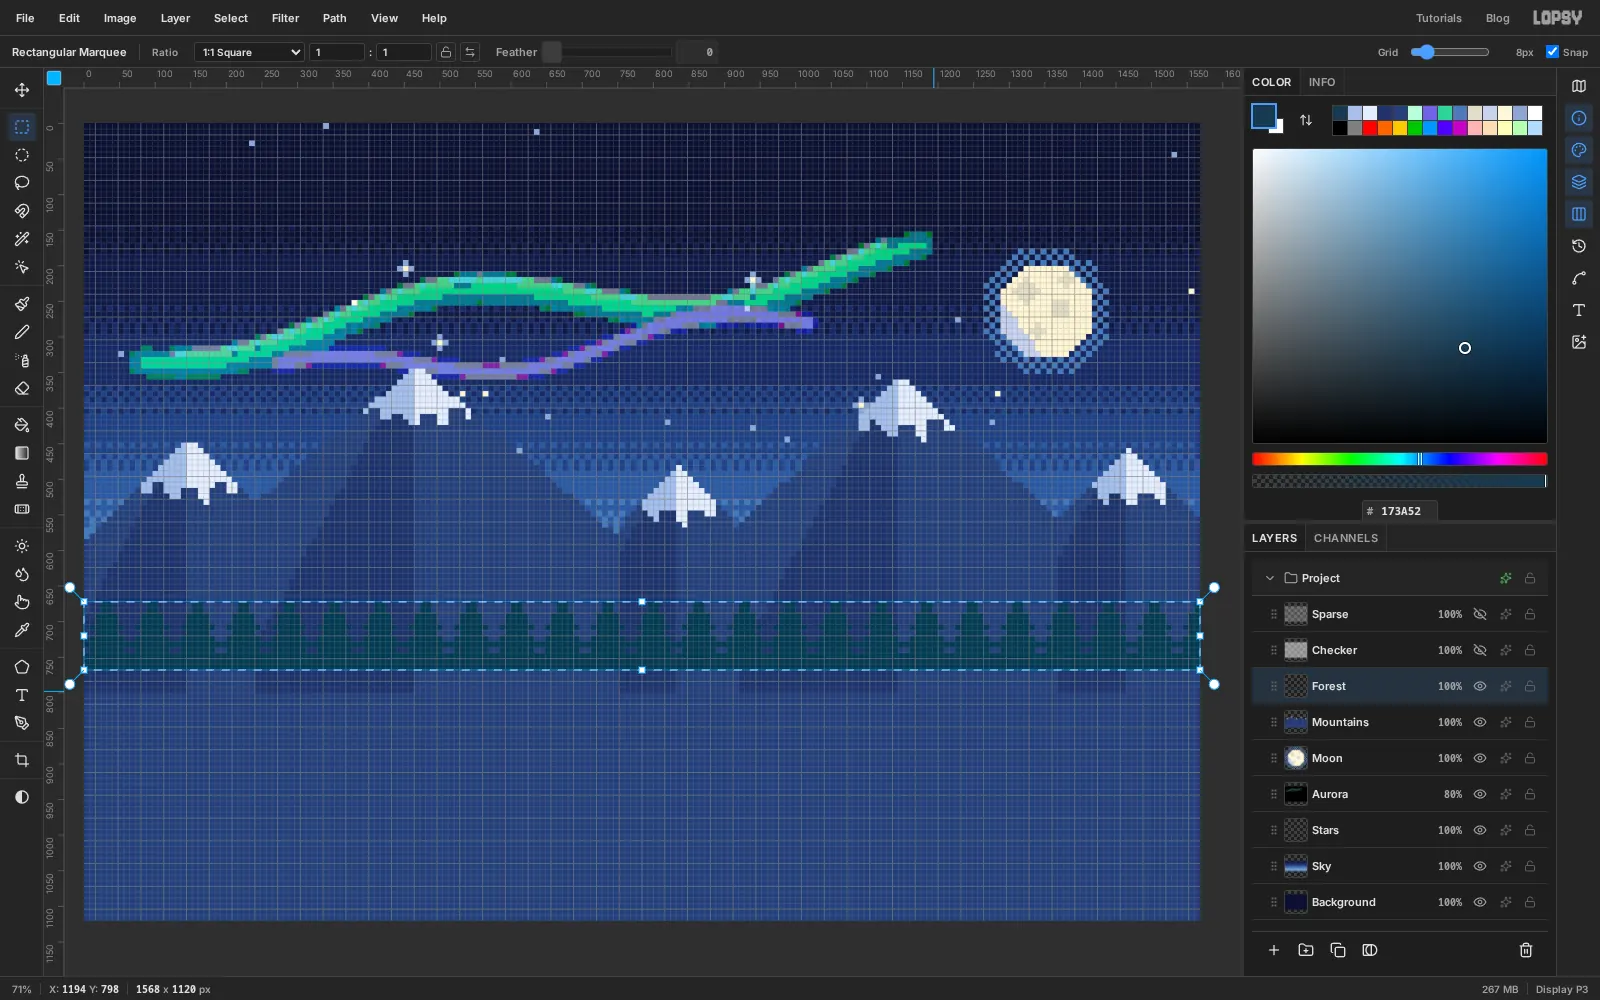
Forest. In the top-left corner, draw a small pine in that is 8 squares wide and 12 tall. From the top, make the rows 2, 2, 4, 4, 6, 4, 6, 8, 6, 8, 8 and 8 squares wide, each centred. The two rows that step back in read as gaps between branches. Marquee the 8 × 12 block (64 × 96 px), choose Edit → Define Pattern, and press Delete.Now drag a marquee across the full width of the canvas from 672 px to 768 px. Choose Edit → Fill with Pattern…, pick Pattern 3 and apply. Deselect.
-
Build the cabin wall from a staggered log pattern
Add a layer called
Cabin Wall. In the top-left corner draw a tile 8 squares wide and 3 tall: a top row of , a middle row of with one square of for a knot, and a bottom row of . Define it as a pattern and delete it, as before.Drag a marquee for the wall, 50 squares wide and 30 tall, with its top-left corner at 96, 528 and its bottom-right at 496, 768. That puts it 12 squares in from the left edge, with its foot level with the bottom of the forest. Choose Edit → Fill with Pattern…, pick Pattern 4 and set Row Stagger to 50%. Each row of tiles slides half a tile sideways, so the knots don't line up. Tick Preview to check, then apply and deselect.
The chimney works the same way. Add a layer called
Chimney. Make a tile 4 squares wide and 2 tall, with three squares of and one of on top and a full row of beneath. Define it, delete it, and fill a marquee 8 squares wide and 9 tall with Pattern 5 at Row Stagger 50%. Start it at 392, 336, which is above the right-hand third of the wall, so the roof will overlap its bottom. Finish it with a three-row cap of snow in , one square wider than the bricks on each side.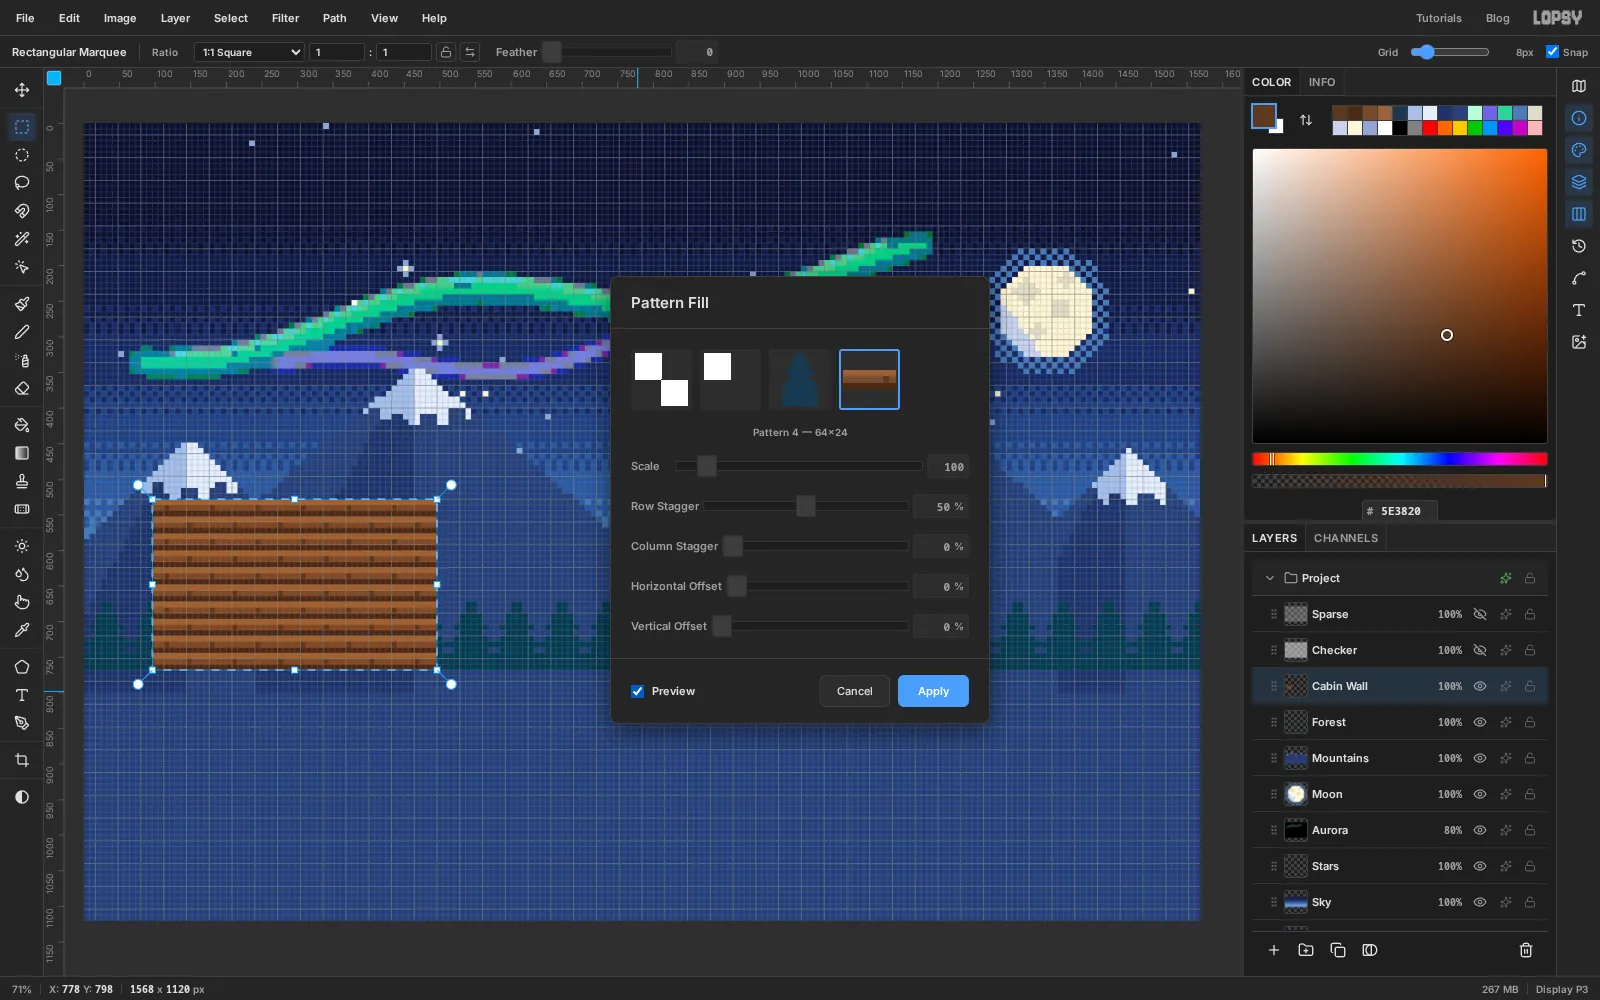
-
Draw the roof, door, windows and smoke
The rest of the cabin is drawn with the Pencil, each part on its own layer so you can fix one without touching the others.
- Roof: add
Roof. Draw a trapezoid 58 squares wide at the eave and 18 tall, sitting on top of the wall and overhanging it by four squares at each end. Step each side in three squares every four rows as you go up. Fill it with and draw shingle lines in on every third row, with short verticals between them. Cover the top five rows and both sloping edges in , with a line of under the snow. Along the eave add a row of snow and hang icicles one to three squares long in , with a tip. - Details: add
Cabin Details. Centre a door on the wall, 10 squares wide, starting 12 squares below the eave and running to the bottom of the wall. Draw it in with a frame, two plank lines in and a knob. Above it draw a small wreath, a ring 6 squares across in and with a bow. Under the eave, click a light every fourth square, cycling , and . - Windows: add
Windows. Draw two windows, one each side of the door, four squares in from the ends of the wall and seven squares below the eave. Each is 12 squares wide and 11 tall: a frame with a cross, four panes of with in their lower corners, a sill and a line of snow on top. - Smoke: add
Smoke. Draw four puffs rising from the chimney in with centres, each smaller than the one below.
Click
Smoke, Shift-clickCabin Walland choose Layer → Group Layers. Name the groupCabin.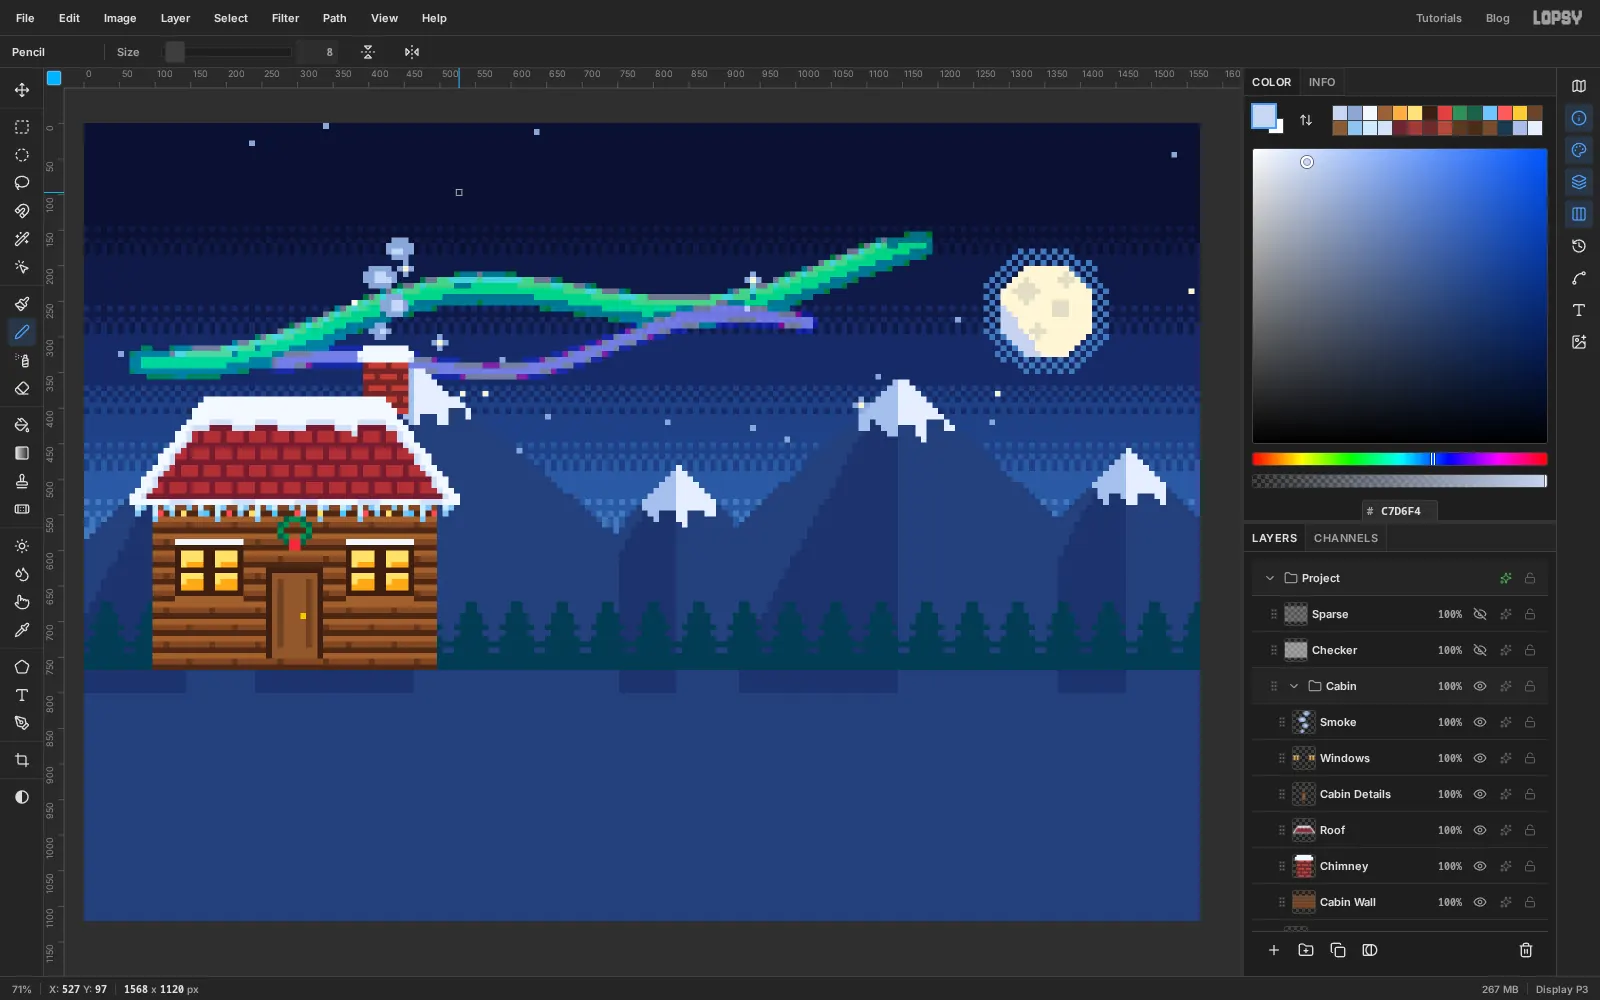
- Roof: add
-
Draw one pine, then copy it
Click the Project row at the top of the Layers panel, then Add Layer. Starting from the Project row puts the new layer at the top of the stack, not inside the Cabin group. Name it
Pine.Draw a pine 12 squares wide and 17 tall on the right, about 24 squares in from the right edge, with its foot level with the cabin's. Use for the body, down the left side, and toward the right, a few squares of snow on the right-hand tips, and a two-square trunk in and .
Drag a marquee around it, press Cmd+C and Cmd+V. The copy arrives on its own layer in the same place. With the Move tool, drag it left to sit between the cabin and the middle of the canvas. With Snap on it moves a whole square at a time, so it stays on the grid. Deselect, press Cmd+V again and drag that copy to the far right edge. Rename the copies
Pine 2andPine 3.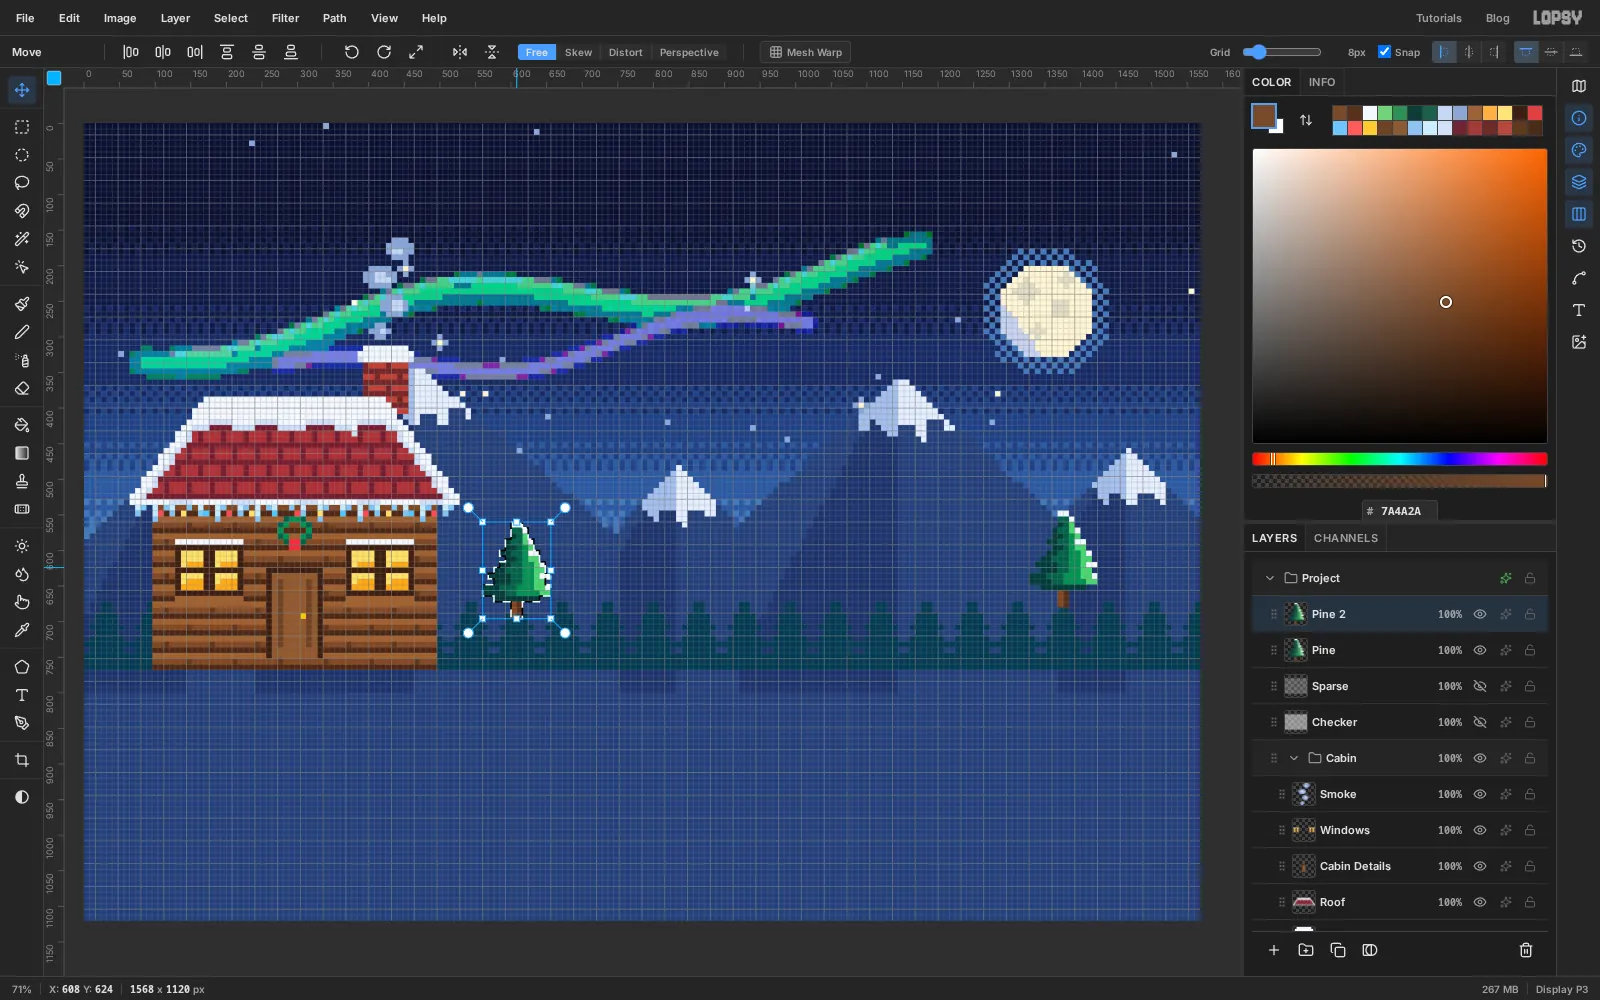
-
Draw half the tree with Symmetry
Click the Project row, add a layer and name it
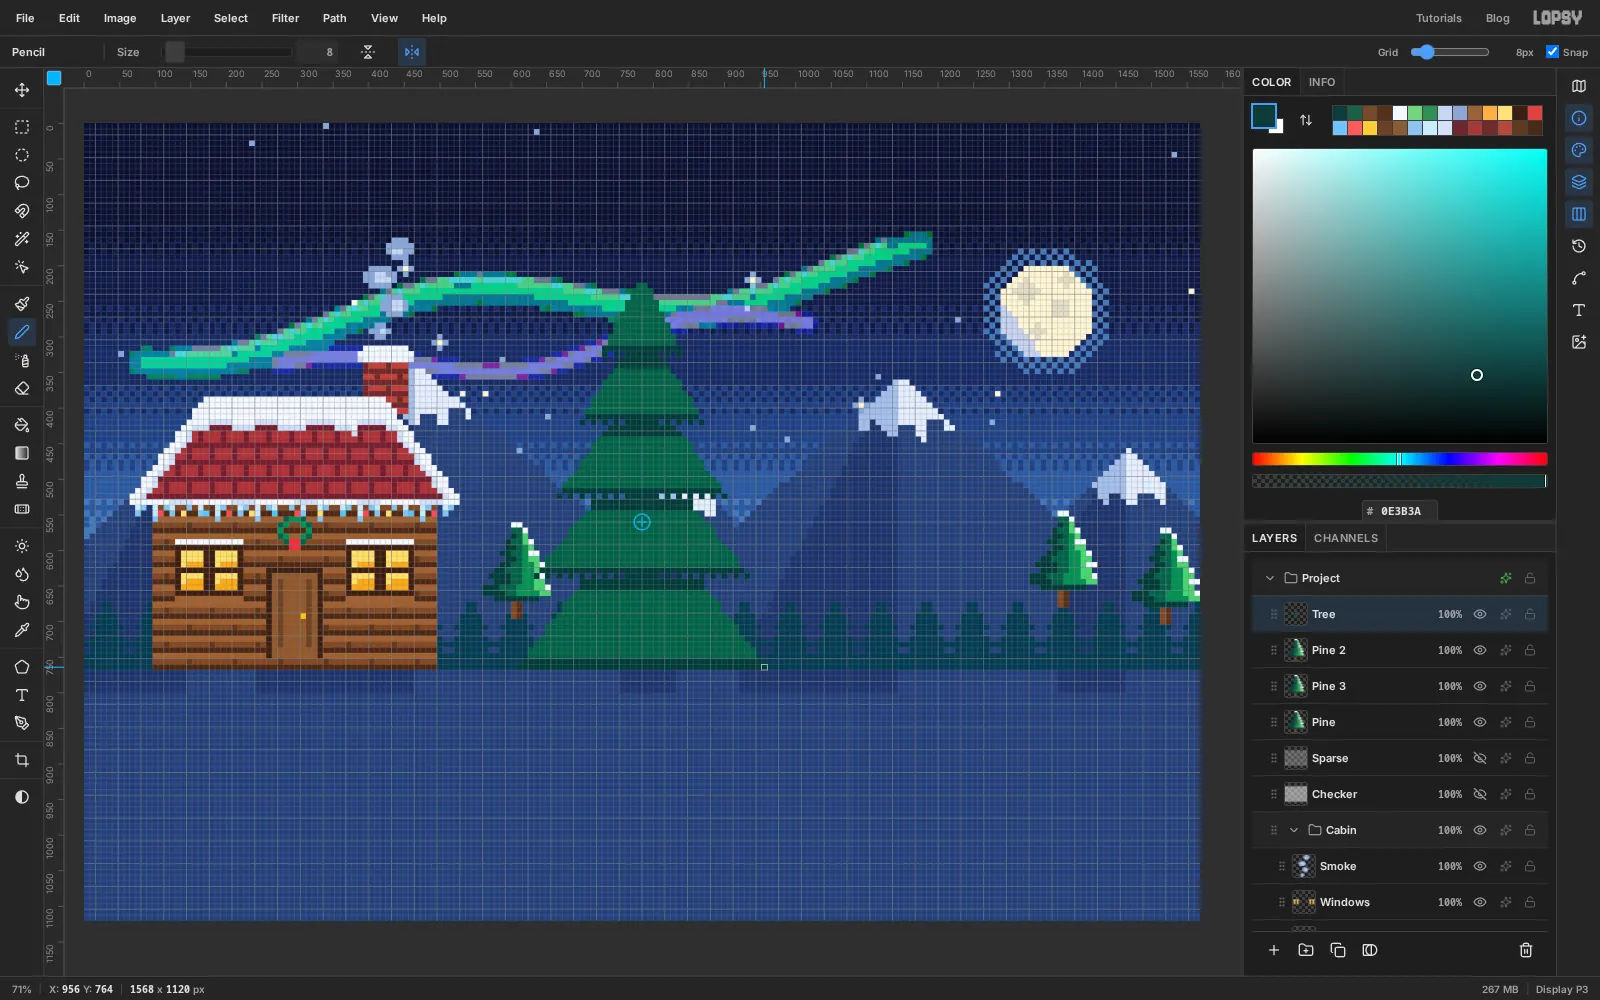
Tree. Pick the Pencil and click Symmetry Vertical in the options bar. A marker appears at the centre of the canvas, and everything you draw on one side is mirrored on the other.Draw the right half of a tree in , working down from about 225 px. It has five tiers. Each one starts narrow and widens by about one square every two rows. Each new tier starts two rows above where the last one ended, so the tiers overlap and the whole tree is 68 rows tall:
- 13 rows, from 1 square wide to 7
- 14 rows, from 3 to 11
- 15 rows, from 5 to 15
- 16 rows, from 7 to 19
- 18 rows, from 9 to 22
Those widths are for your half only. Finish each tier with two rows of , and on the very last row of a tier leave out every other square to make a ragged hem. Add two more dark rows just under each hem, where the tier above casts a shadow.
-
Light the tree and hang the decorations
Add a layer called
Tree Starwhile Symmetry is still on. Draw half of a five-point star above the tip in , about 4 squares wide and 9 tall, with a core. Then click Symmetry Vertical again to turn it off, and trace a one-square outline around the star in so it stands out against the aurora.Click
Treeagain. Add a short trunk six squares wide below the bottom tier in and . The snow will bury most of it. Lighting is not symmetrical, so paint it by hand:- the two outermost squares on the right edge of each tier in , for snow
- the next two or three squares in
- a band of across the right-hand third
- over the outer left third
- a single column of down the far left edge
Add a layer called
OrnamentsaboveTree. Draw about fifteen baubles, each 2 × 2 squares with a paler square in one corner, in red , gold and blue . Then add fairy lights: on each tier, click a single square every third column along a gently sagging line, alternating and .Group
Tree Star,OrnamentsandTreeasBig Tree.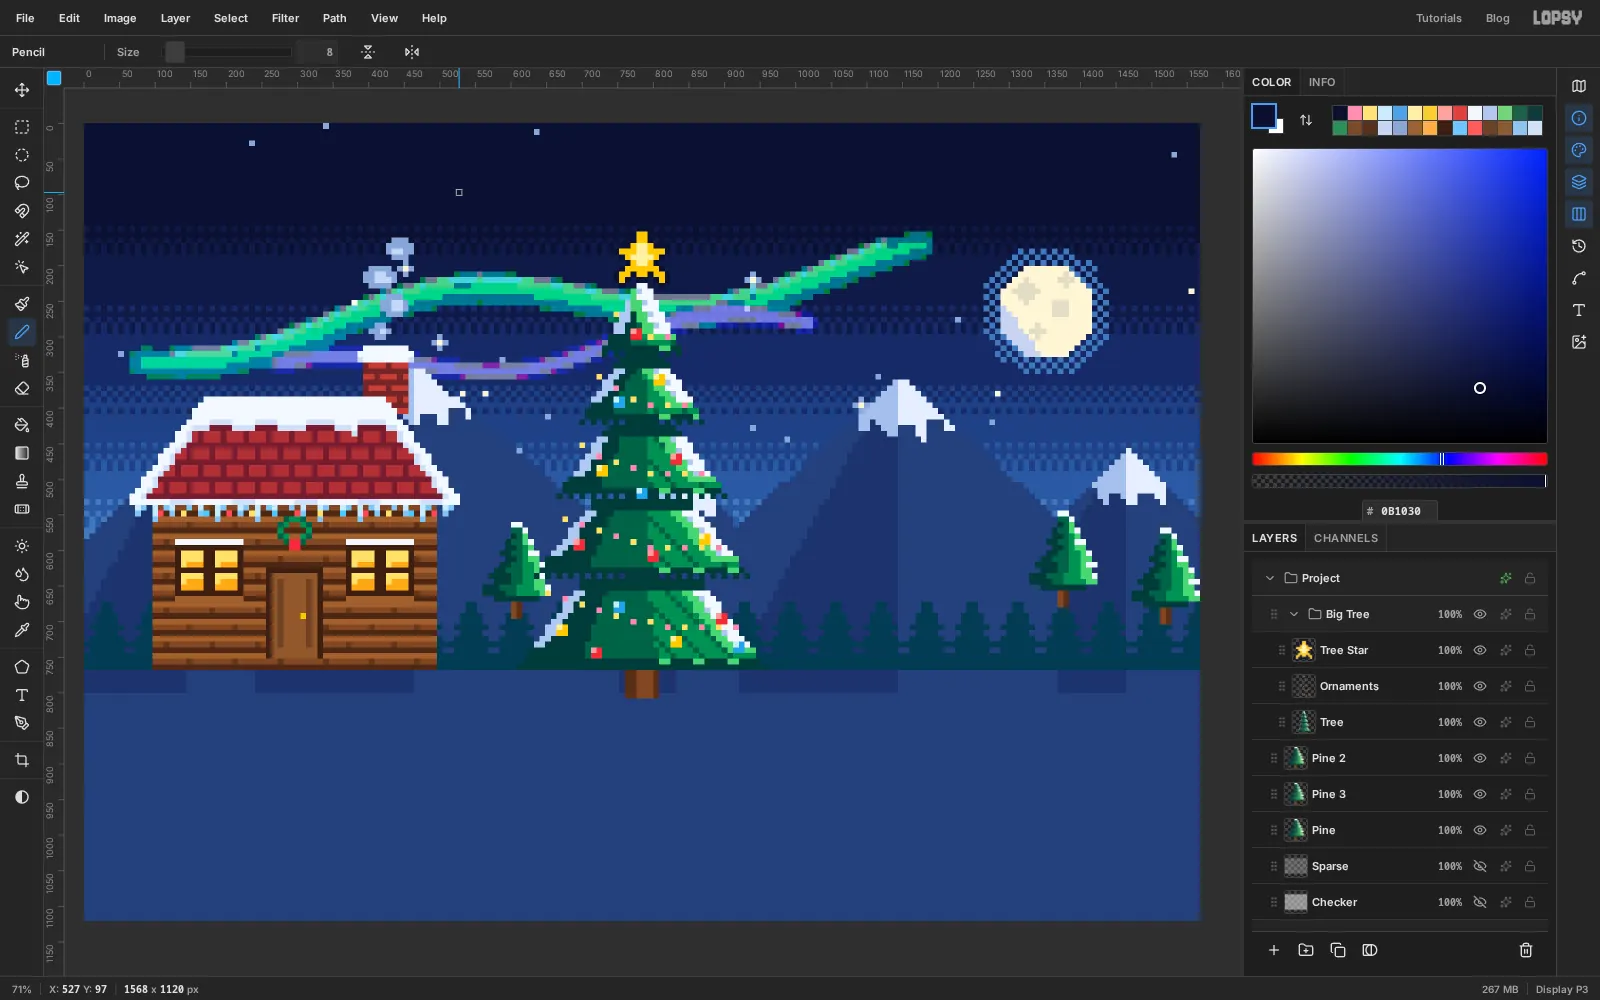
-
Lay the snow and dither its shadows
Click the Project row, add a layer and name it
Snow. It sits above the cabin, pines and tree on purpose, so the drifts cover their feet. With the Pencil in , draw the top edge of the snow from the left edge to the right edge, about 760 px down, rising and falling by two or three squares. Keep the line unbroken, as you did for the ridge. Pick the Paint Bucket and click below the line.Now shade it. About five squares below the top edge, drag the Pencil along rows of , following the curve of the surface. From nine squares down, switch to .
To soften the steps, Cmd-click the
Checkerthumbnail, clickSnowagain, and paint the two rows above each colour change in the darker colour. Only every other square takes the paint.Keep the selection for one more job. In , paint a patch about five rows deep on the snow under each cabin window, and one more on the right where the lamp post will stand. The dither reads as warm light spilling onto the snow. Deselect.
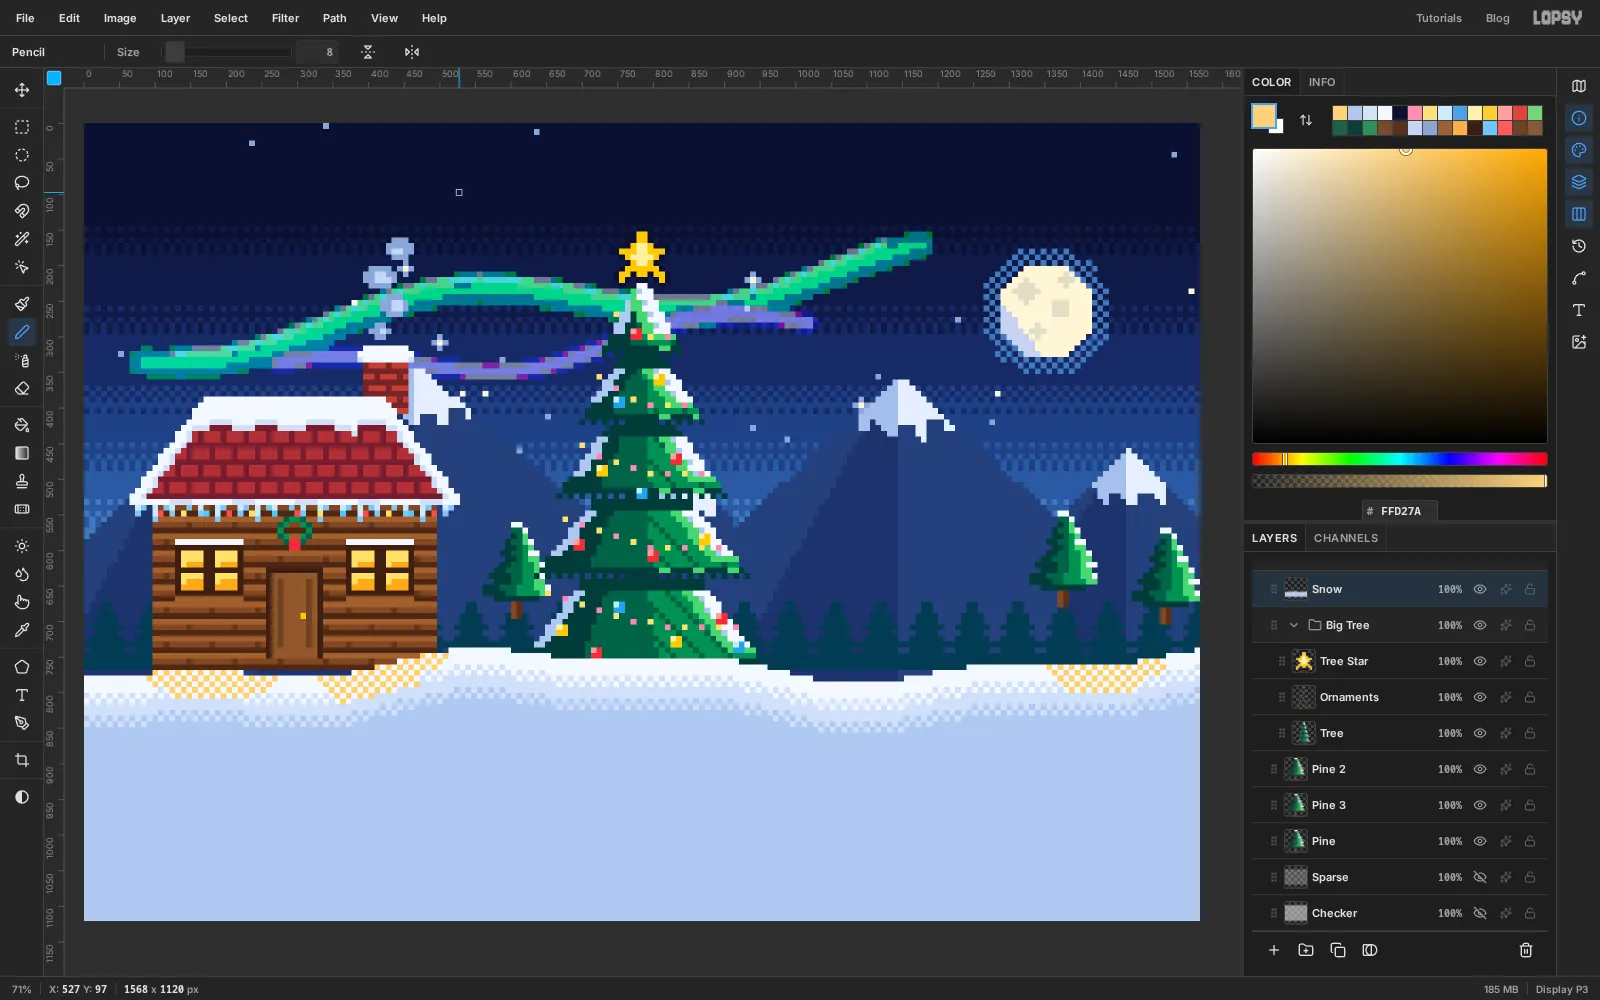
-
Wrap one present and recolour two copies
Click the Project row, add a layer and name it
Gift. To the right of the tree's base, draw a box 9 squares wide and 6 tall in , with a second row and a right-hand column of . Run a ribbon down the middle and add a small bow on top.Marquee the present, copy and paste it, and drag the copy to the left of the tree with the Move tool. While it is still selected, choose Filter → Hue/Saturation…, set Hue to −125 and Saturation to −20, and apply. The red box turns blue and its ribbon turns magenta.
Paste again, drag that copy over to the right, near where the lamp post goes, and apply Hue 125, Saturation −35 for a green one. Rename the two new layers
Gift BlueandGift Green.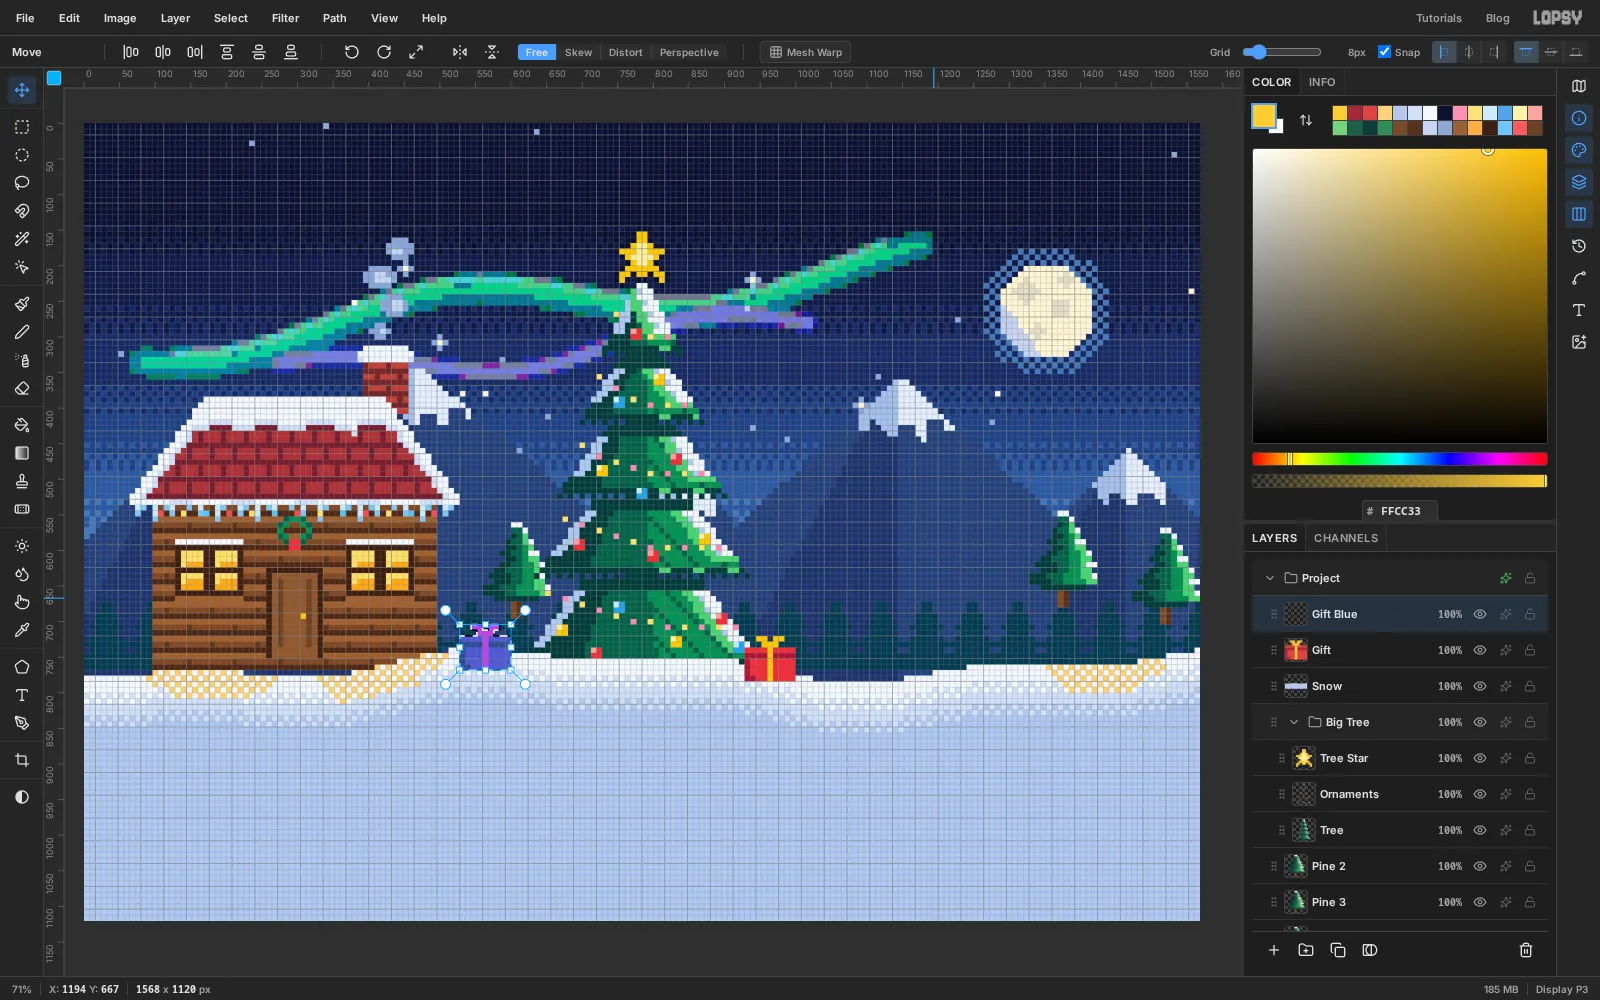
-
Draw the snowman and the hero, and flip the hero
Click the Project row and add a layer called
Snowman. Draw him about 40 squares in from the right edge, 14 squares wide and 21 tall, standing on the snow. Work from the top:- A top hat, 4 rows: a 6-square crown in with a band, on a 10-square brim.
- A head, 6 rows of up to 8 squares wide, with two eyes, a two-square nose and a three-square mouth.
- A scarf, one row of with a tail on one side.
- A body, 9 rows widening to 12 squares, with three buttons.
- Two stick arms in , each two squares long.
Shade his left side in , since the moon is on the right.
Add a layer called
Hero. Draw a child 16 squares wide and 24 tall between the tree and the snowman. Work from the top:- A bobble, 2 rows of , on a hat 4 rows tall in with a few squares of , and one row of for the fur brim.
- A face, 4 rows of , with hair at the back, two eyes and a cheek.
- A scarf, one row of , with a tail hanging behind.
- A coat, 6 rows of with arms, and one row of for the belt.
- One arm held out in front with a hand, carrying a lantern 3 squares wide: a frame around a and flame.
- Trousers, 3 rows of , and boots, 2 rows of .
It's easier to draw a character facing the way you find natural. If yours faces away from the tree, as mine did, drag a marquee around the sprite, pick the Move tool and click Flip Horizontal in the options bar. Deselect.
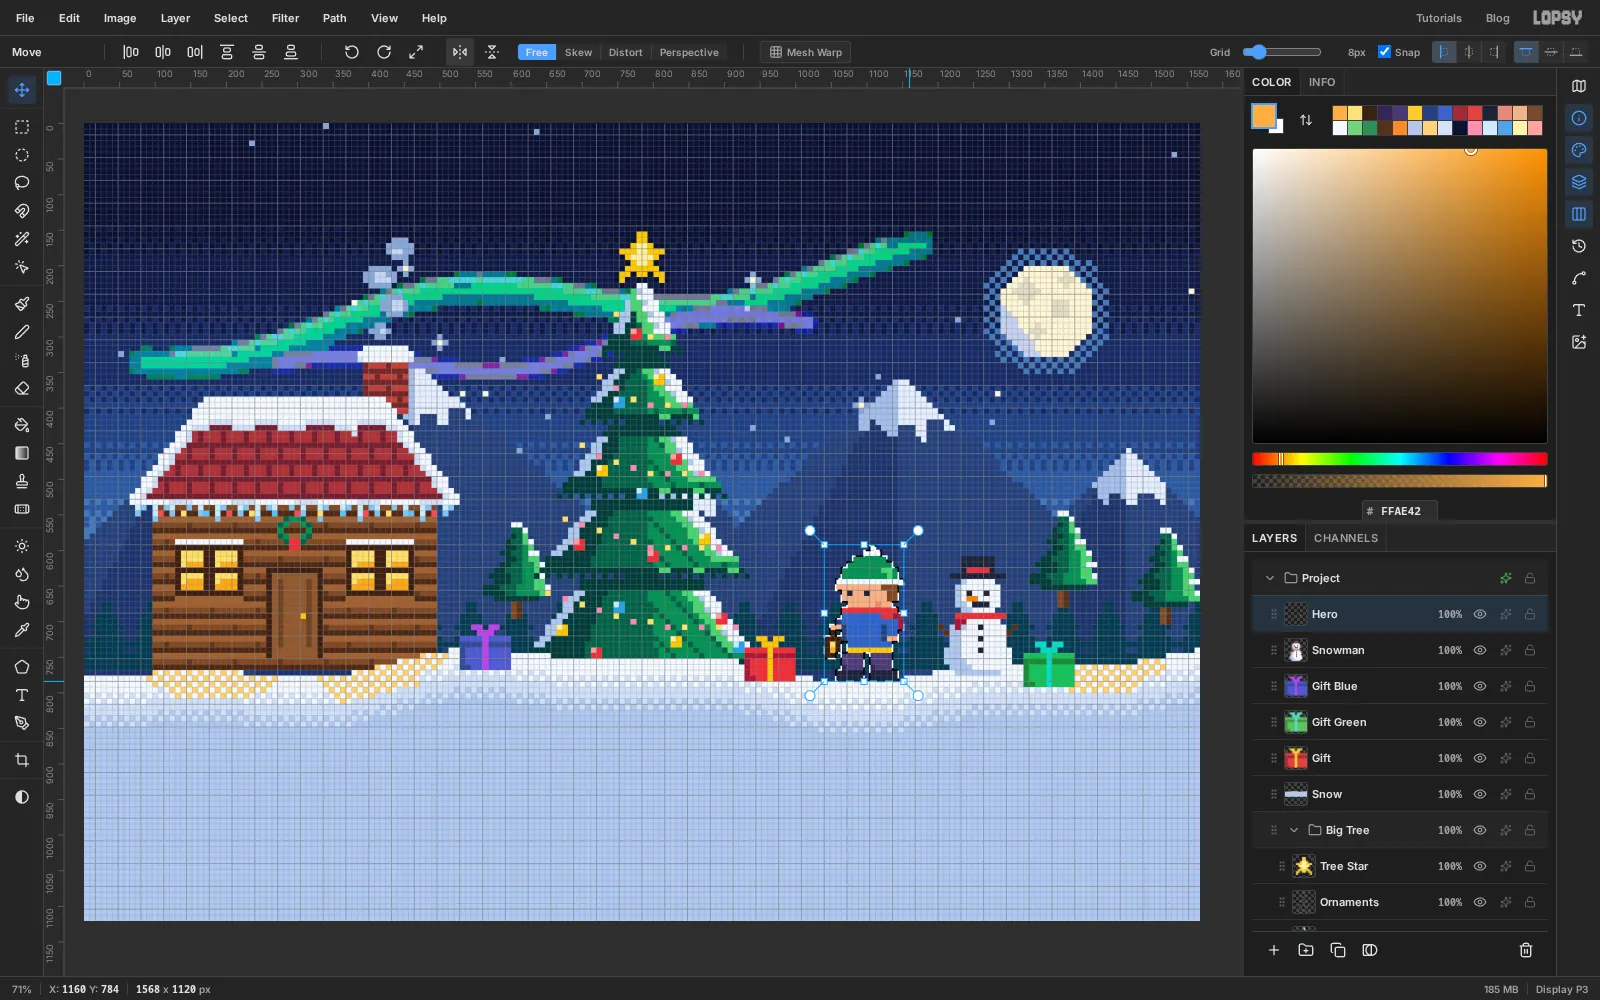
-
Add the lamp post, group the sprites and move them together
Add a layer called
Lamp. Near the right edge, draw a post one square wide and about 22 tall, alternating and , on a stepped base. Top it with a lantern head 7 squares wide: a dark frame, a pane with an centre, and a cap of snow.Click
Lamp, Shift-clickGiftand choose Layer → Group Layers. Name the groupSprites.With the group selected and the Move tool active, drag anywhere on the snowman and pull down by one square. All six layers move together, and everything settles into the snow. Press Cmd+Z and Shift+Cmd+Z to compare before and after.
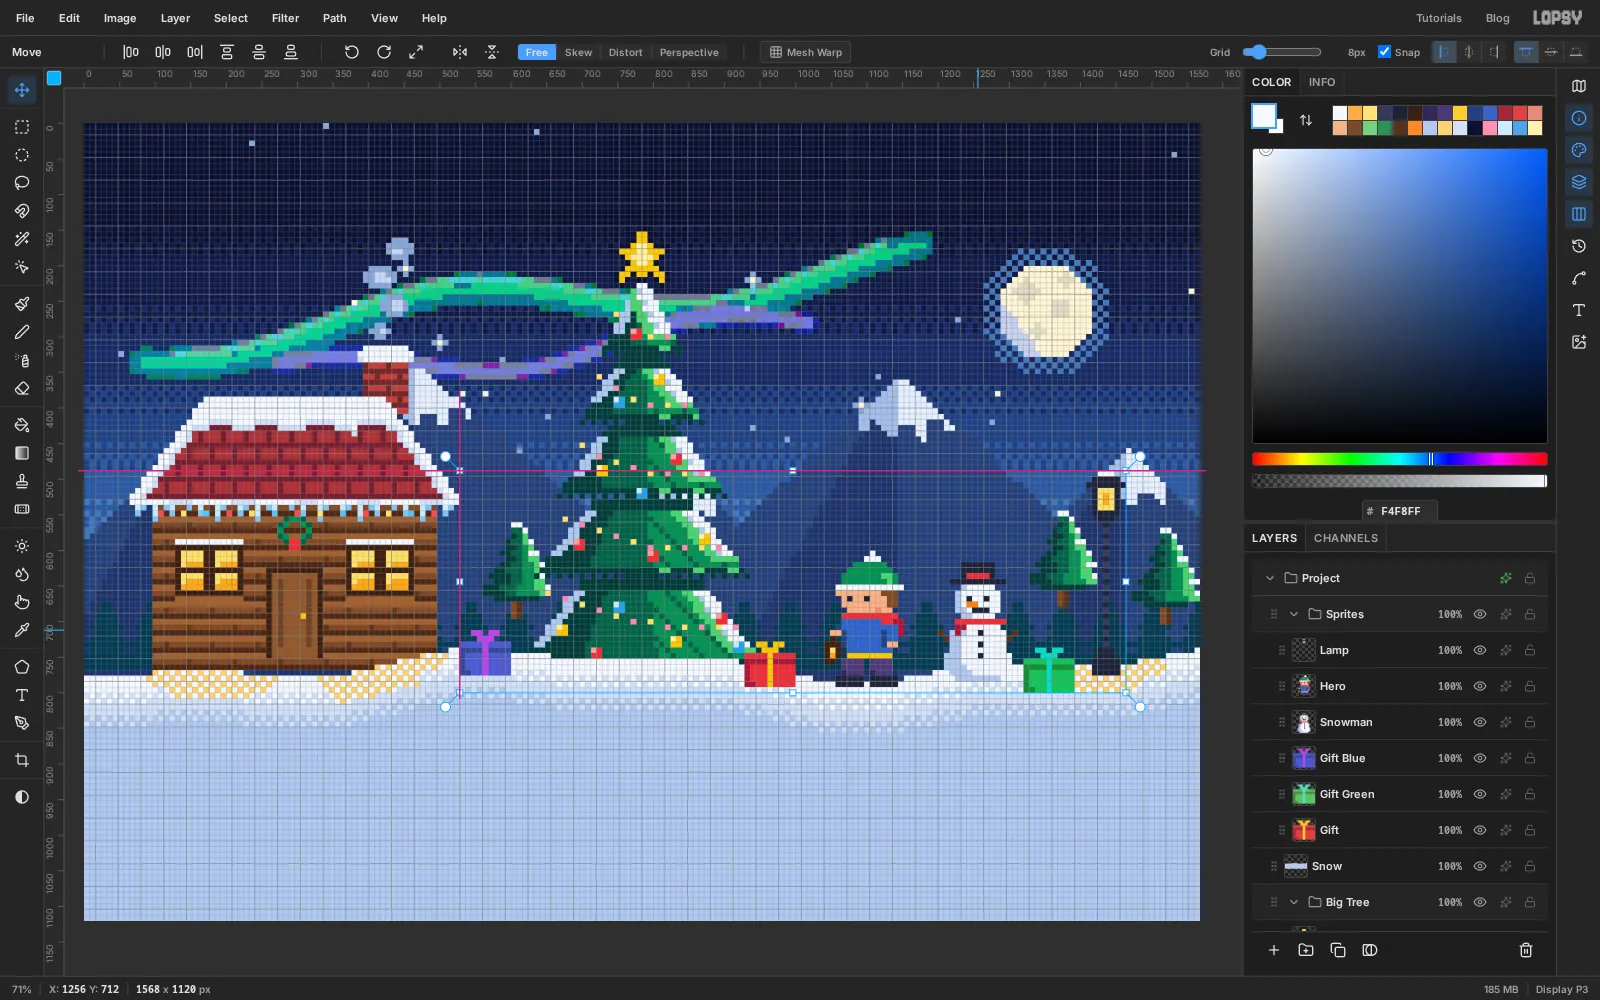
-
Scatter the snowfall
Click the Project row and add a layer called
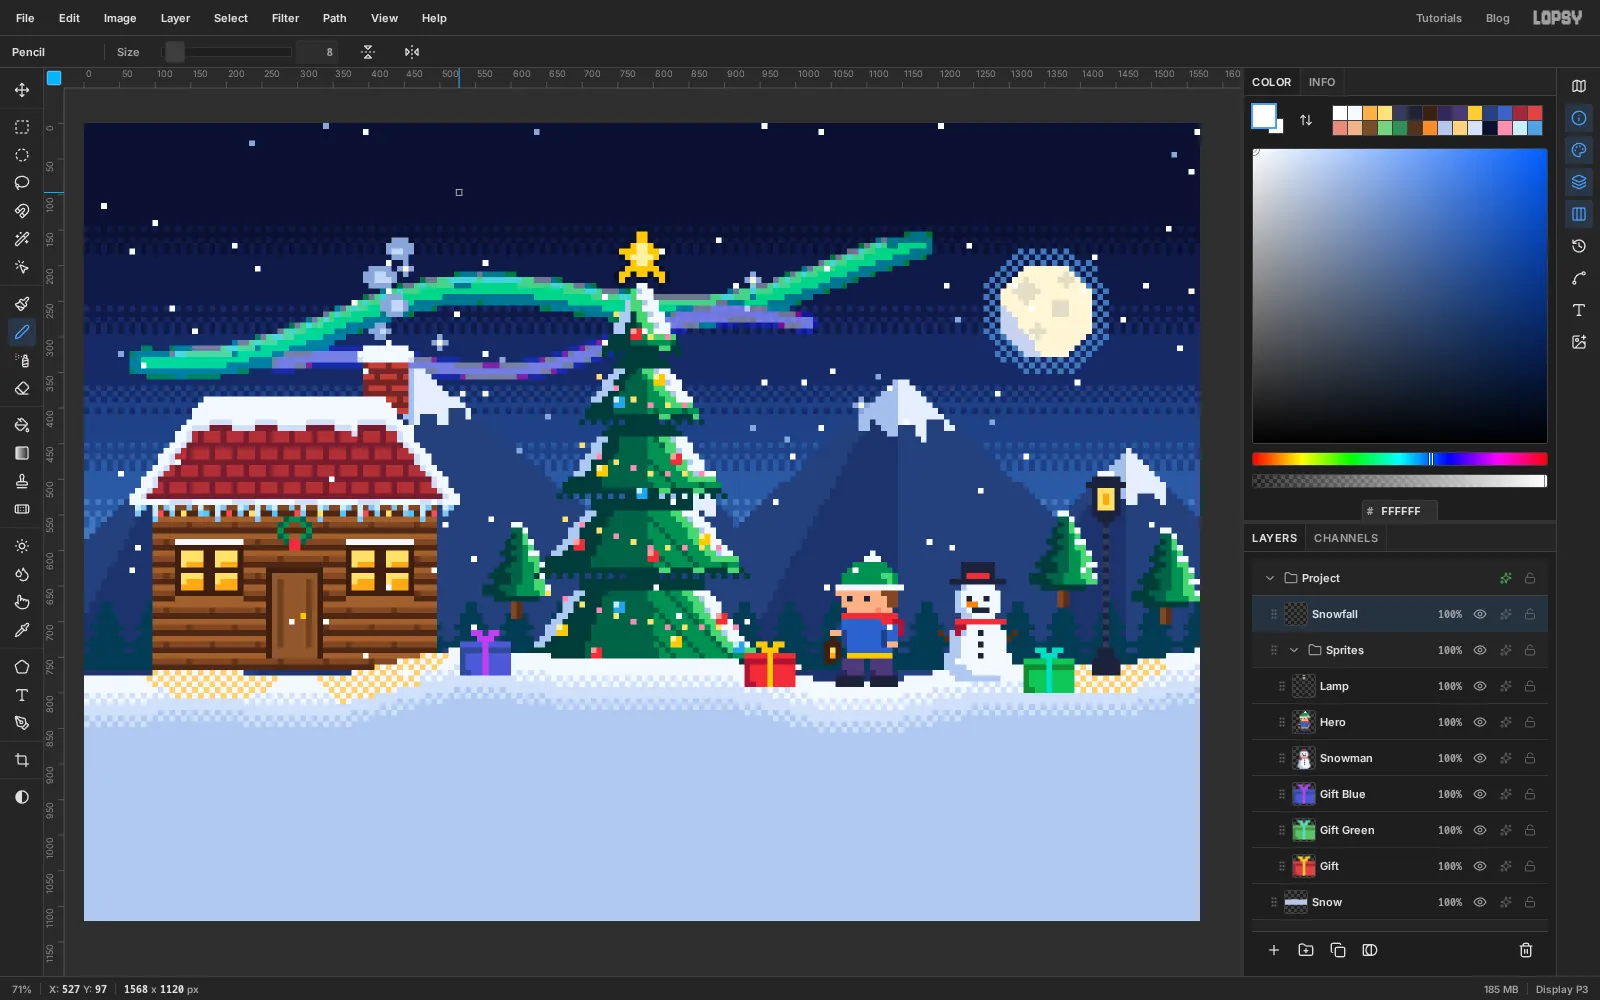
Snowfall. With the Pencil in white, click about eighty single squares all over the scene. Keep them at least three or four squares apart, and stay out of the strip at the top where the title goes and the bottom quarter of the canvas, where the quest log will sit.A few flakes in front of the cabin and the tree help. They put the snow between you and the scene.
-
Build the parchment panel
Click the Project row and add a layer called
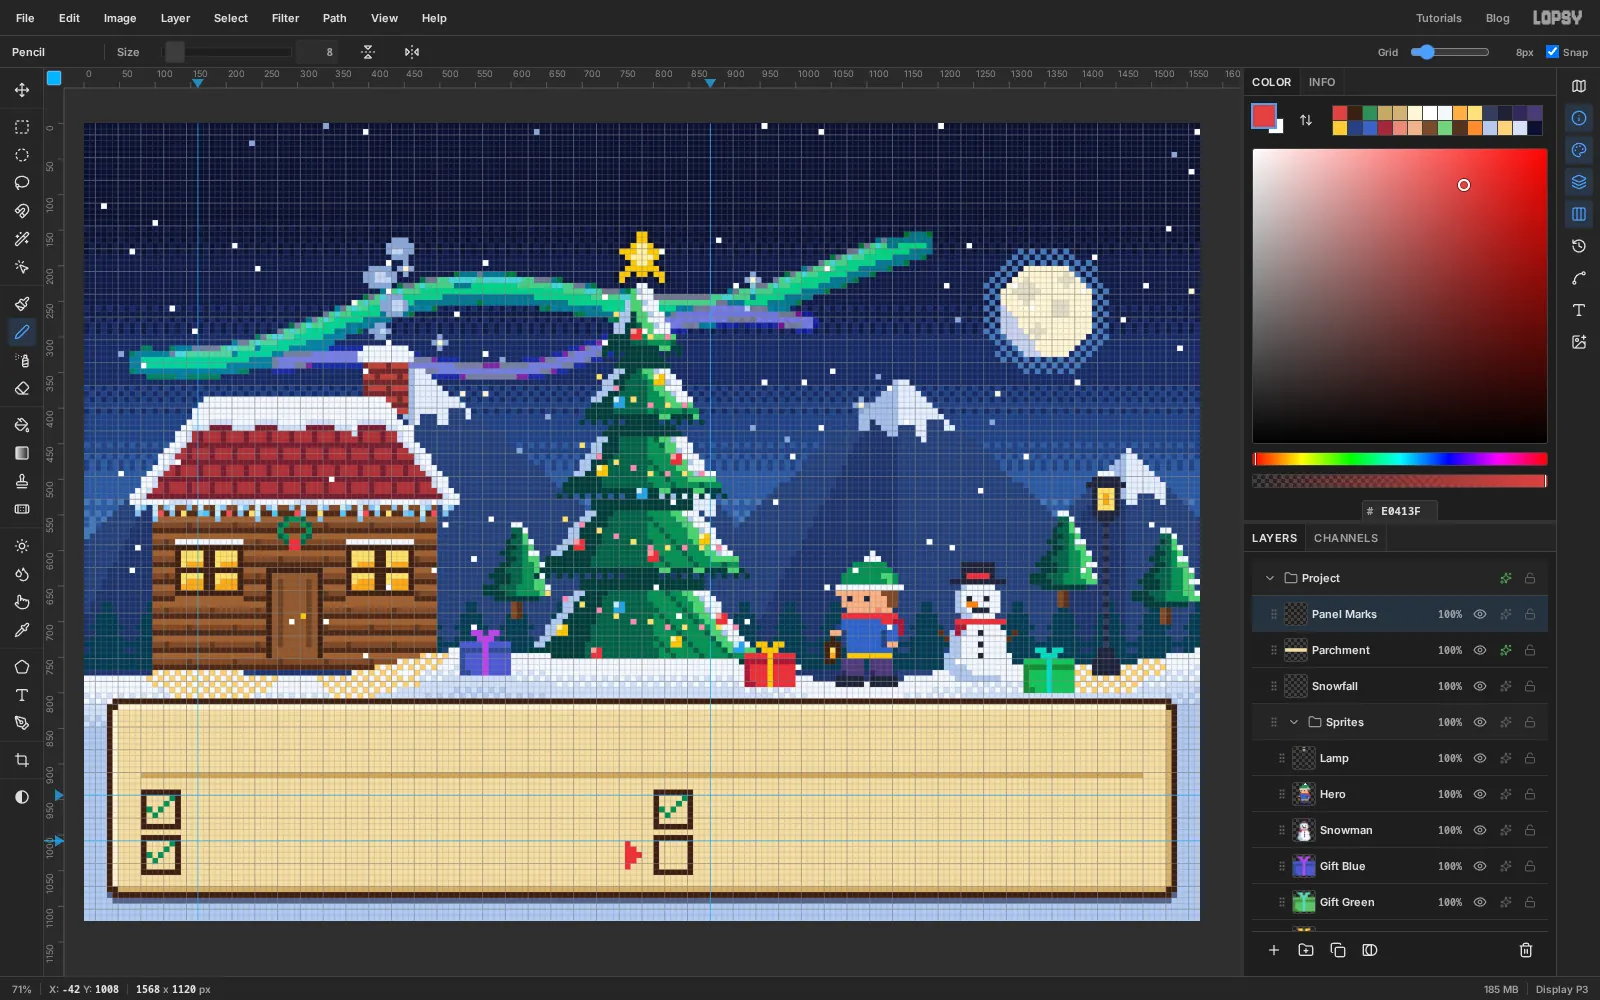
Parchment. Drag a marquee from 32, 808 to 1536, 1088, leaving four squares of margin at the sides and bottom, and fill it with . Deselect.With the Pencil in , draw the border along all four edges of the block. Click one corner, then Shift-click the next for a straight line. Just inside it, draw the top and left edges in and the bottom and right edges in . That bevel makes the panel look raised.
For the notched corners, marquee the single square at each corner of the border and press Delete. Then click one dark square diagonally inside each notch to close the outline.
Open the layer's effects, tick Drop Shadow and set Offset X to 0, Offset Y to 8, Blur to 0 and Opacity to 55, with the colour . With no blur, the shadow stays a crisp one-square step.
Add a layer called
Panel Marks:- a divider in across the panel, 13 squares below its top edge
- four checkboxes, each 7 × 7 squares of outline: two under the left end of the divider and two just right of centre
- a tick in inside three of them: two squares going down, then three going up to the right. Leave the lower-right box empty
- a cursor, a small triangle pointing right, one square to the left of the empty box
Click the top ruler three squares to the right of each column of boxes, and the left ruler level with each row, to drop guides where the text will start.
-
Set the heading in a pixel font
Click the Project row first. If a text layer is selected when you change the Text options, they restyle that layer.
Pick the Text tool (T). Choose the font Tiny5, set Size to 64 and the colour to . At 64 px each of the font's pixels is exactly one grid square. Click an empty patch of sky, type
QUEST LOGand press Tab to commit. Don't click inside the panel. Once there's text there, a click near it would edit that text.Pick the Move tool and untick Snap. Snap would line up the edge of the text layer's box, which is a few pixels outside the letters, and it's the letters that need to land on the grid. Drag the words into the top-left of the panel. Then use the arrow keys to nudge them a pixel at a time until the tops of the letters are five squares below the panel's top edge and the Q starts ten squares in from the left edge of the canvas. The letters should sit exactly on the grid squares. Tick Snap again and rename the layer
T Quest Log.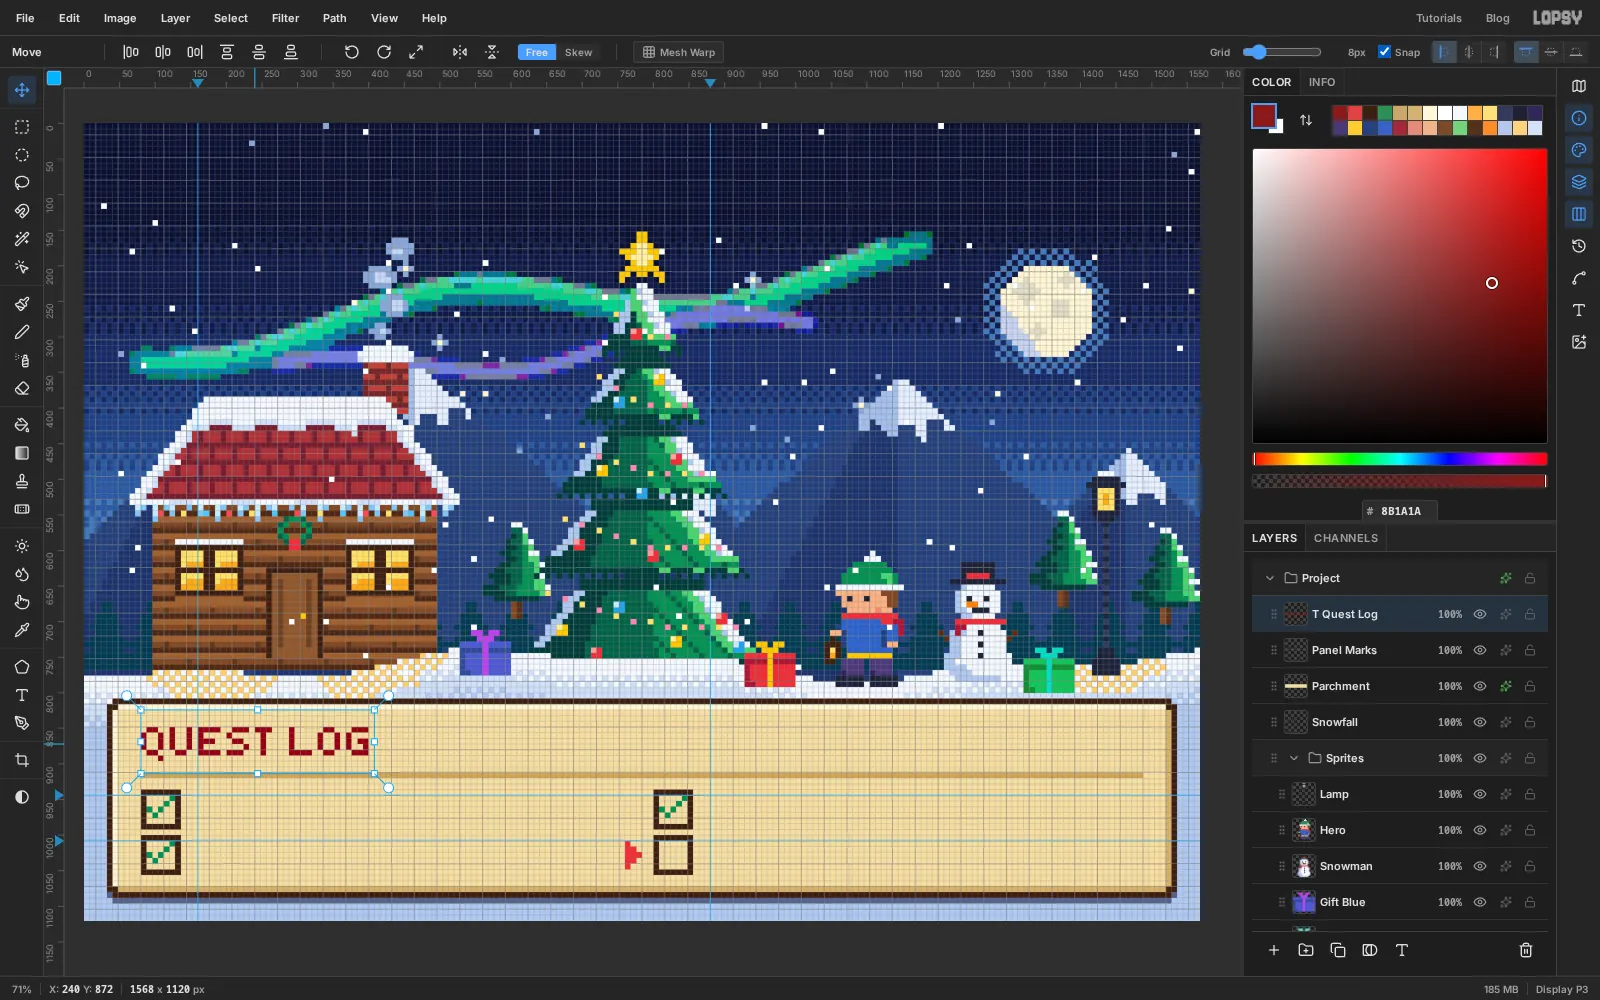
-
Add the quests, the reward and three hearts
Add the four quests the same way, in Tiny5 at 64 px and . For each one, click the Project row, click the sky, type, commit and move it into place against the guides:
TRIM THE TREEandBUILD SNOWMANbeside the two left-hand boxesBAKE COOKIESandNAP TILL 2027beside the two right-hand boxes
Leave three squares between each box and its text, and line the letters up with the middle five rows of the box so there's one square of box above and below them.
Type
+99 CHEERas a sixth text layer and seat it on the heading's row, with its last letter ten squares from the right edge of the canvas, to match the heading's inset on the left.Click
Panel Marksand draw three hearts to the left of the reward, each 7 squares wide and 6 tall in , with a highlight and a edge. Leave two squares between hearts and three between the last heart and the plus sign.Choose Edit → Clear Guides, then group everything from
Parchmentup to the last text layer asQuest Log.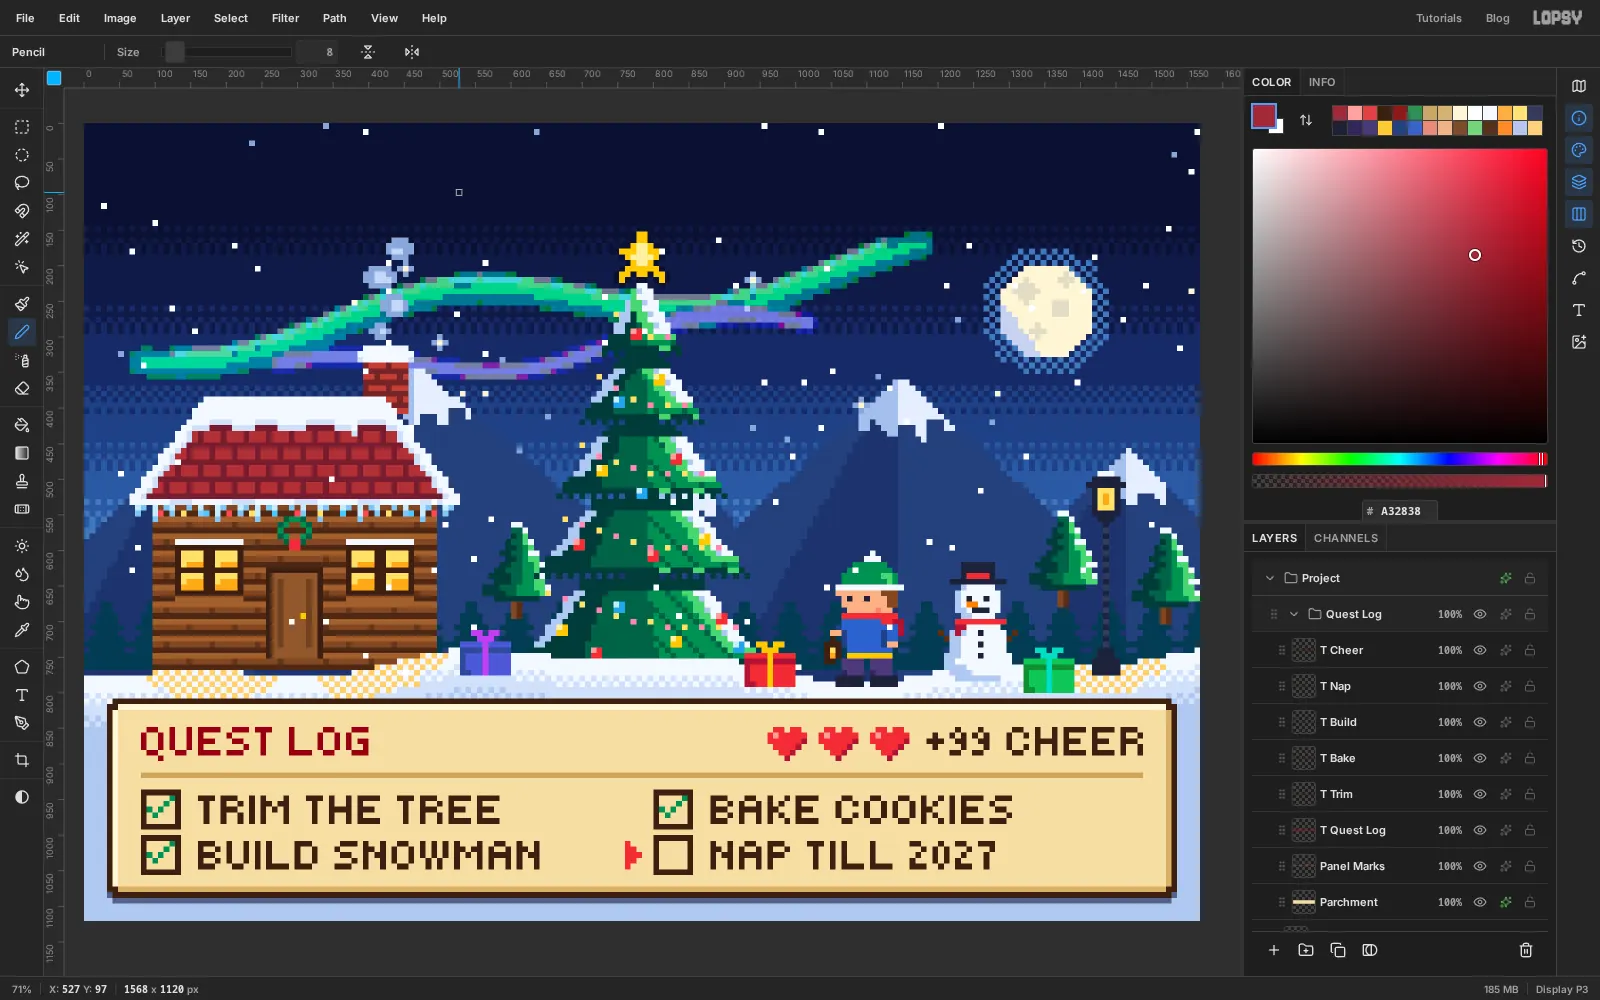
-
Type the title and tighten its tracking
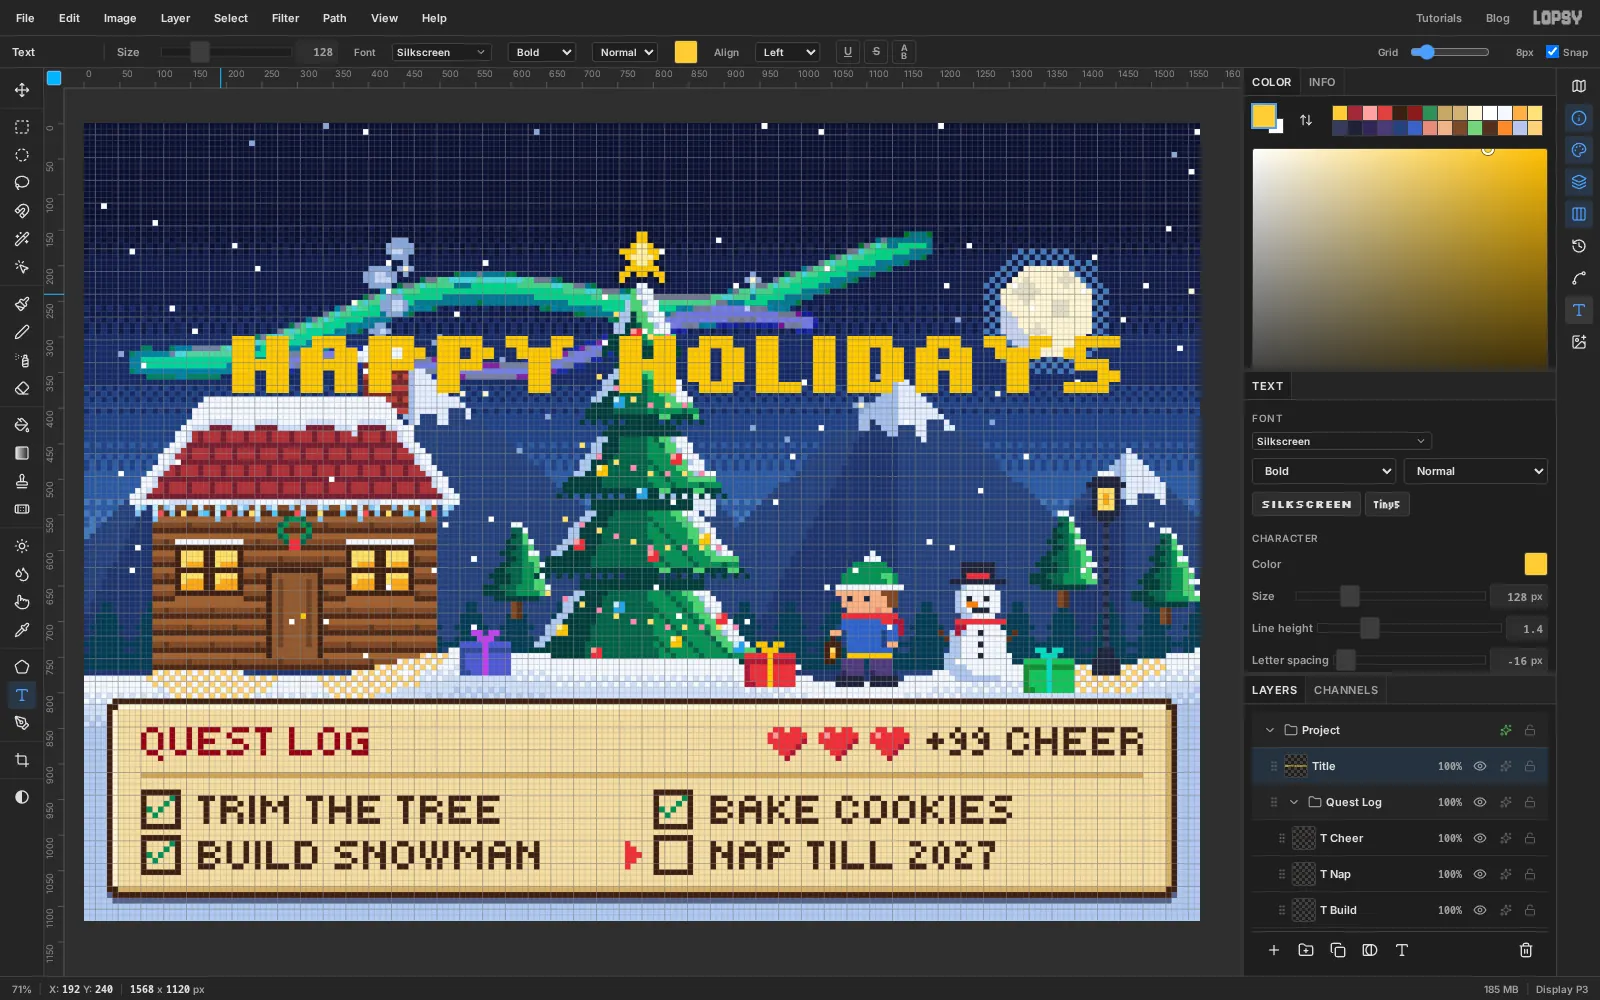
Click the Project row and pick the Text tool. Choose Silkscreen, set the weight to Bold, Size to 128 and the colour to . Click the sky and type
HAPPY HOLIDAYS, then press Tab. Rename the layerTitle.At 128 px each font pixel is two squares, so the title is still on the grid, but it runs almost edge to edge. Open the Text panel and set Letter spacing to −16. That closes each gap by one font pixel and leaves a comfortable margin on both sides.
With the Move tool and Snap off, drag and nudge the title until it is centred, with the tops of the letters six squares from the top edge.
Open the layer's effects. Tick Stroke and set Width to 8 and the colour to . Tick Drop Shadow and set Offset X and Offset Y to 8, Blur to 0, Opacity to 100 and the colour to .
-
Shade the lower half of the letters
Cmd-click the
Titlethumbnail to load the letters as a selection. With the Rectangular Marquee, hold Shift+Alt and drag a strip across the canvas covering the bottom four squares of the letters. Only the lower part of each letter stays selected.Click Add Layer, name the layer
Title Shade, set the foreground to and choose Edit → Fill. Deselect. The letters now step from gold to orange.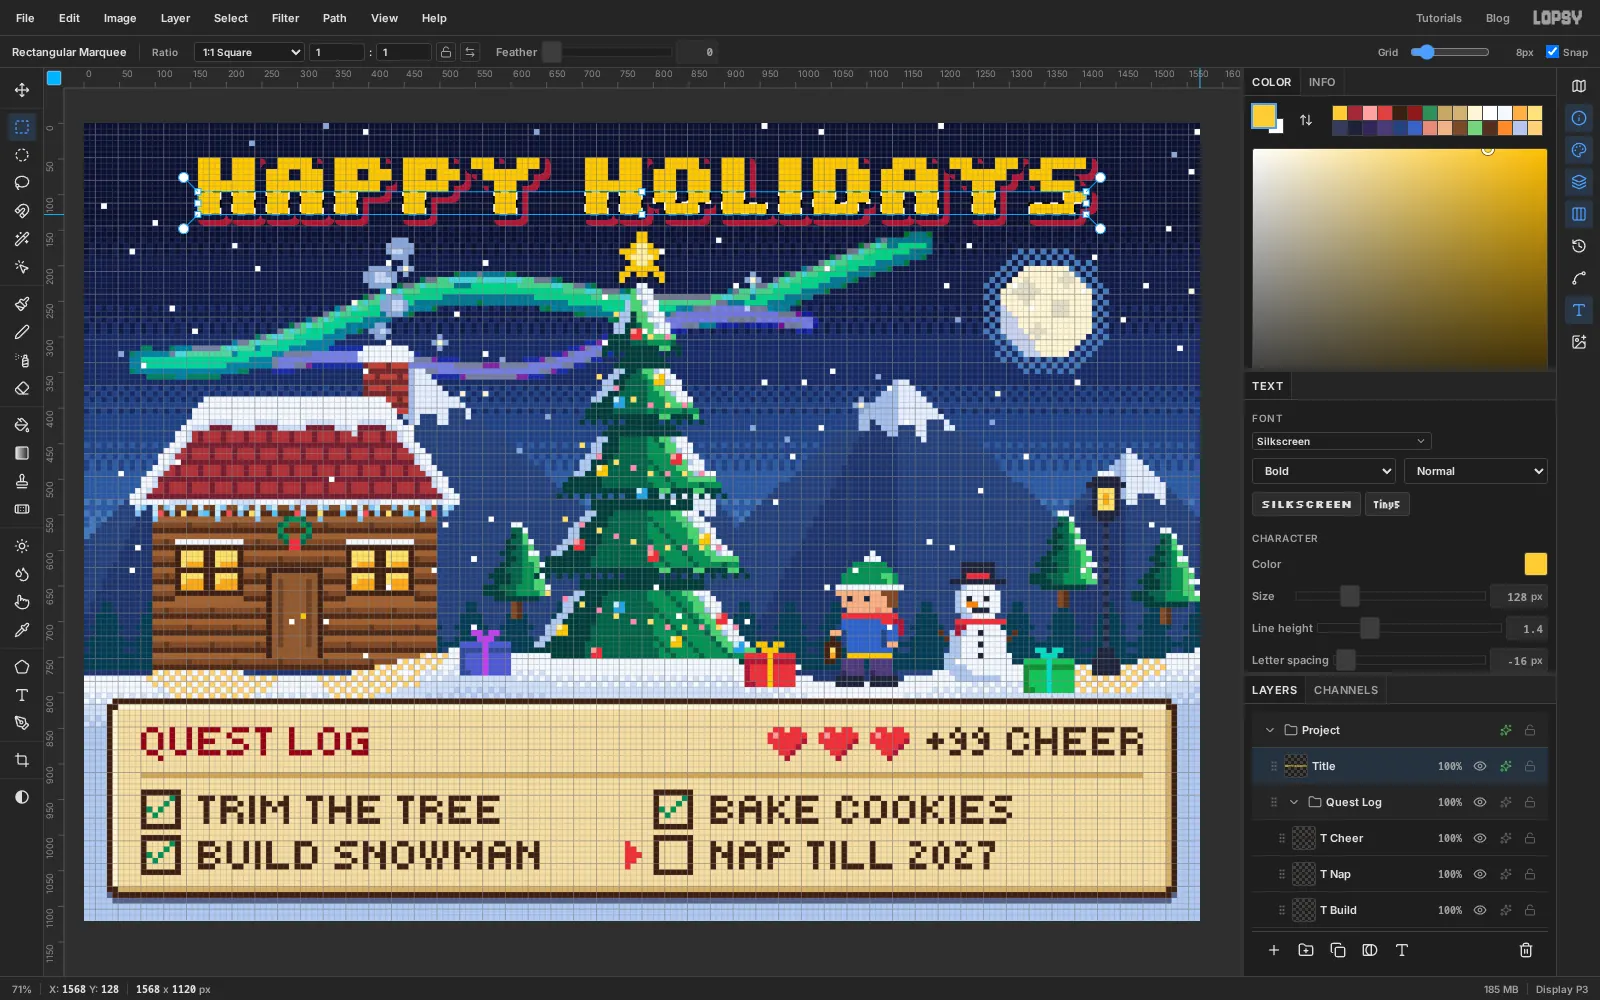
-
Cap the letters with snow
Add a layer called
Title Snowabove the shade. With the Pencil in white, paint over the top row of every letter, then add a second row above it on each flat top, stopping one square short at both ends so the snow looks heaped. Under a few of the wider letters, click one square of just below the cap for a drip.Group
Title Snow,Title ShadeandTitleasTitle Group.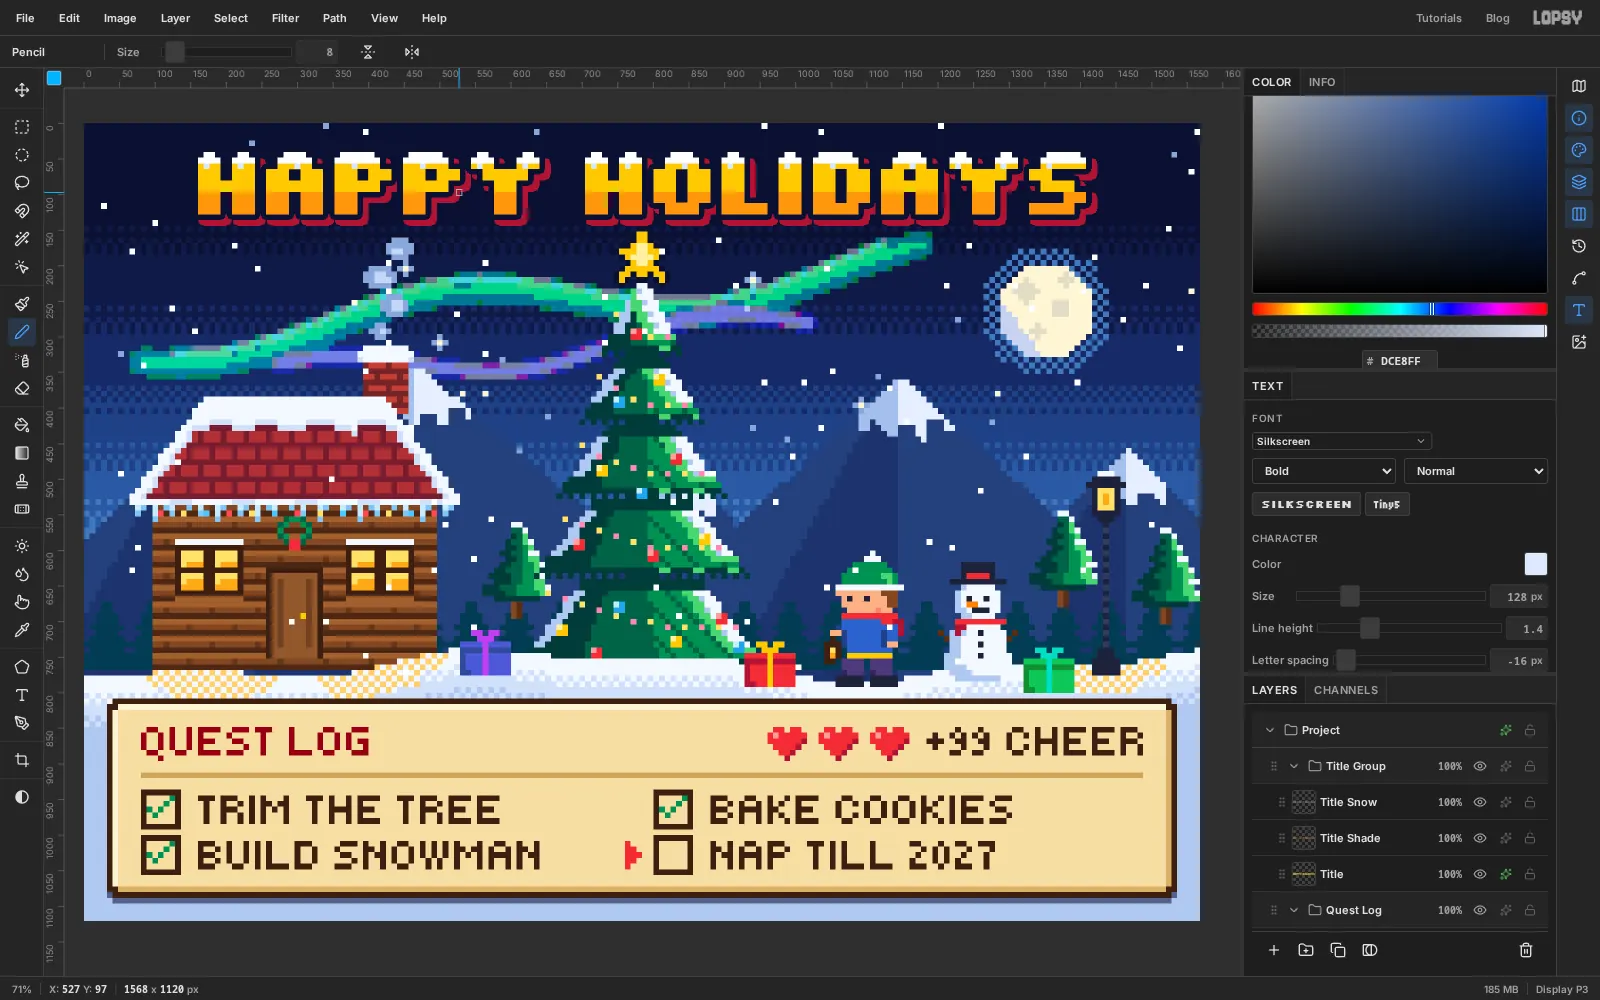
-
Boost the colour and export
Choose Layer → Adjustment Layer…. A note explains that Lopsy keeps adjustments on groups, not on separate layers. Click Got it and the list for the whole project opens. It already holds Levels, Curves, Exposure, Hue / Saturation and Color Grading, all at their neutral settings, so leave those alone. Click Add Adjustment → Saturation & Vibrance and set Vibrance to 30. Vibrance lifts the duller colours more than the bright ones, so the aurora and the tree get richer and the reds don't clip.
Choose File → Save Project to keep the layers, then File → Quick Export PNG for the card itself.