Make a Pixel Art Llama Iron-On Patch
Design a 16-bit pixel art iron-on patch in Lopsy with a photo-traced llama, dithered sunset, ribbon banner, gold merrowed edge and cross-stitch texture.
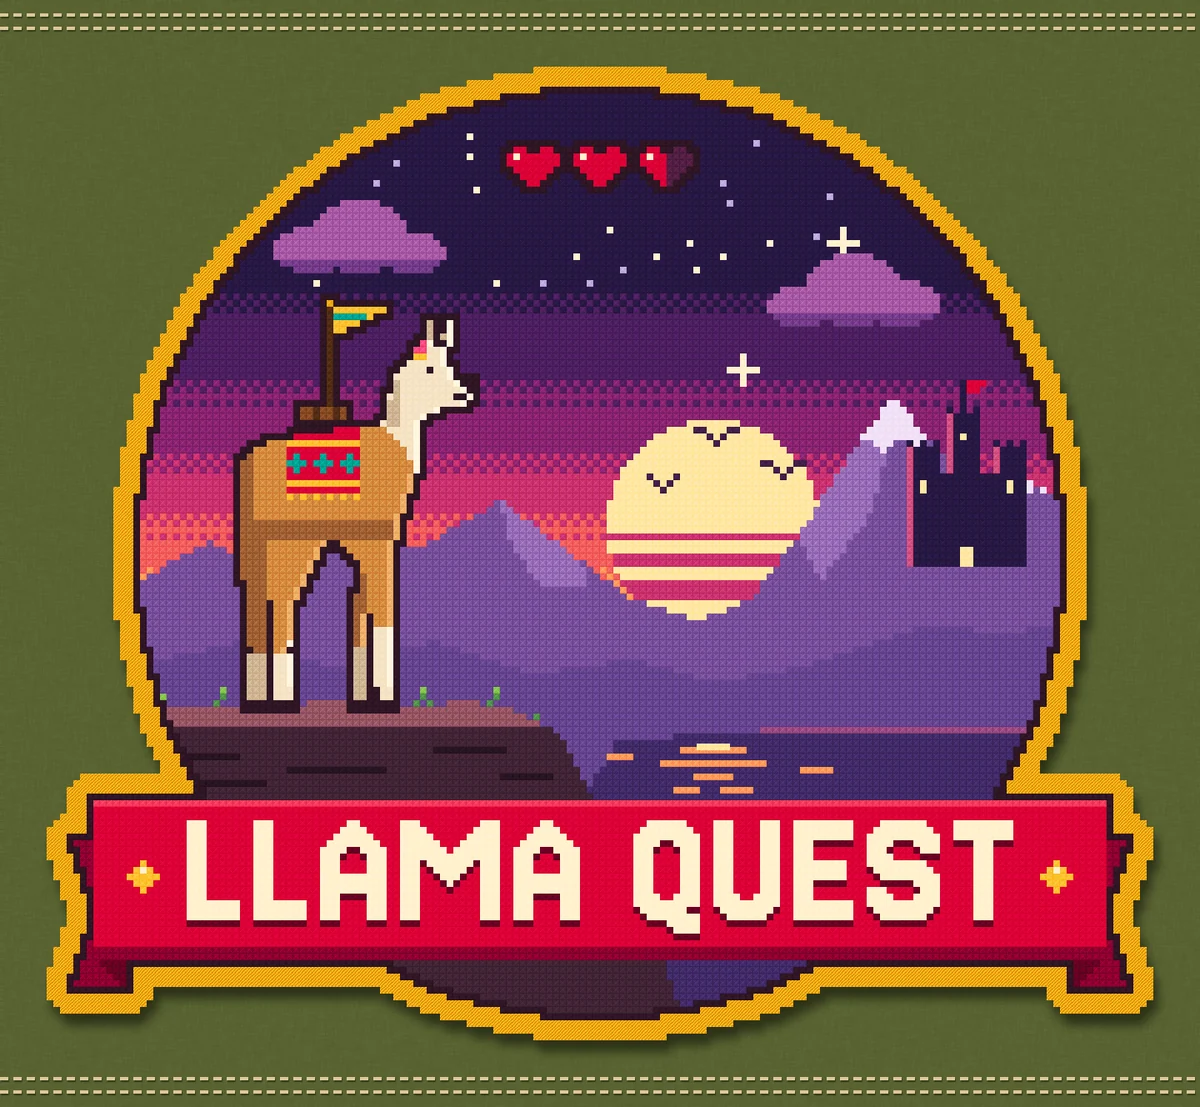
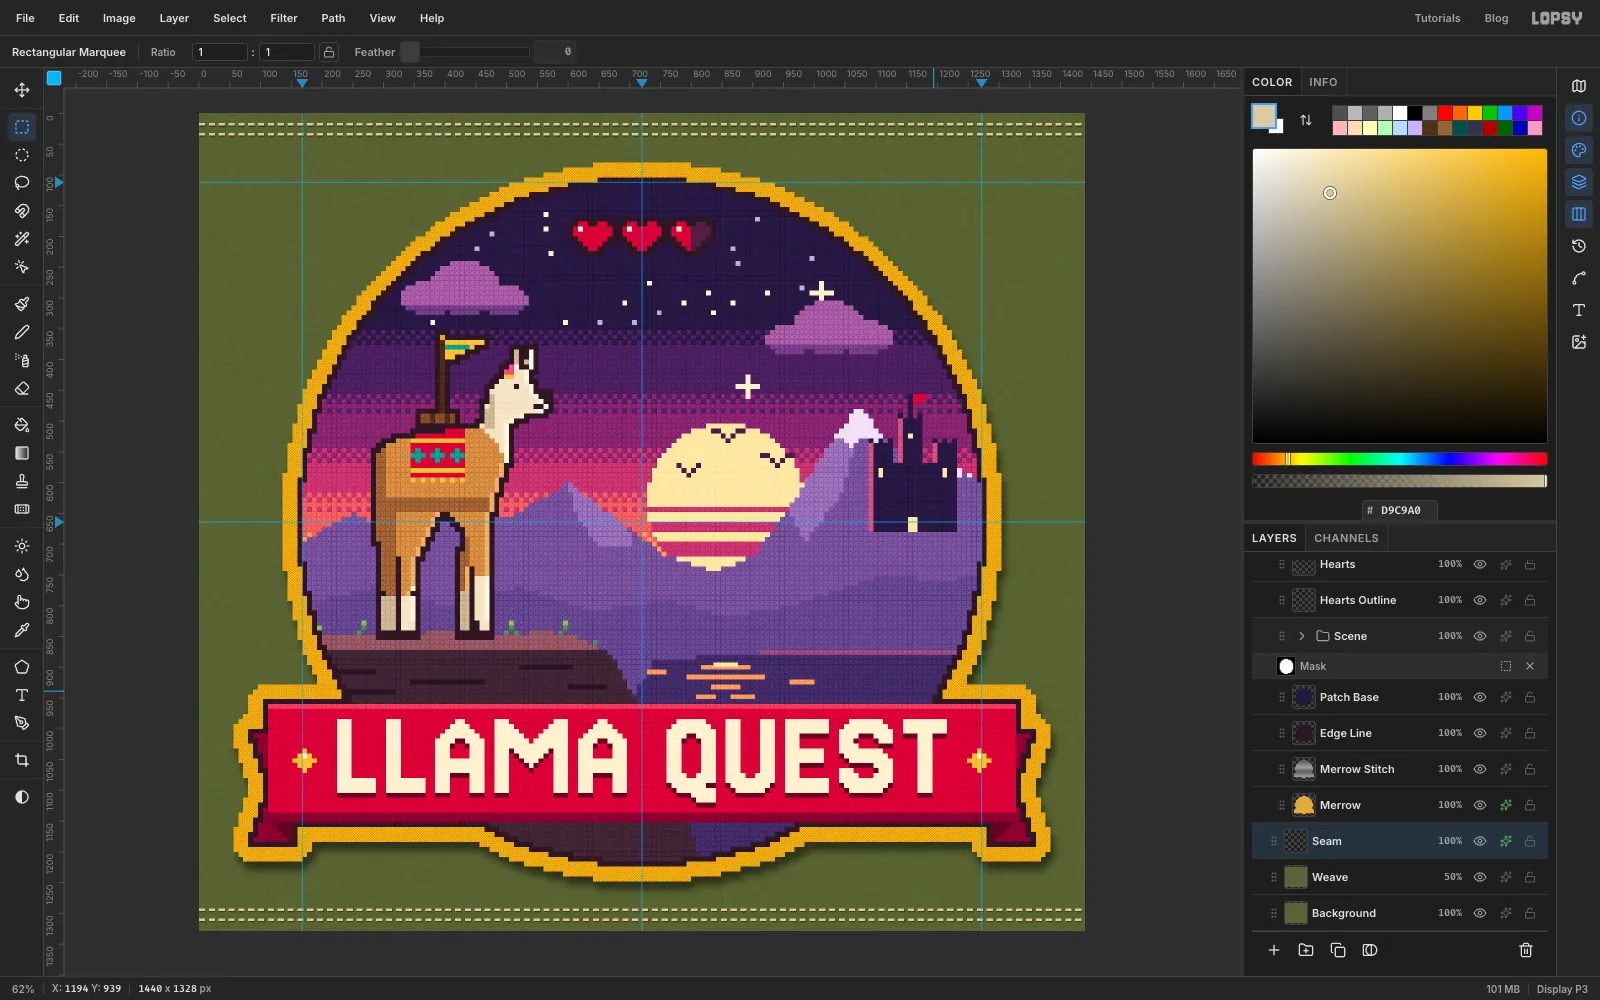
Embroidered patches and pixel art are a natural fit. Machine embroidery builds a picture from small blocks of thread, and a pixel sprite is already made of blocks. In this tutorial you'll design Llama Quest, an iron-on patch for a video game that never existed. A llama in an Andean saddle blanket stands on a cliff at sunset and looks out over a lake towards a distant castle. Three HP hearts float in the night sky, and a red ribbon banner carries the title. The finished patch gets a gold merrowed edge, a cross-stitch texture on every pixel and a soft shadow, and it is sewn onto an olive canvas backpack.
All the art sits on an 8 px grid, so one "art pixel" is an 8 × 8 square. The main trick is a pixel-snap stencil. You draw any smooth shape with a marquee, lasso or Pen. On a hidden black-and-white layer, Pixelate and Threshold turn the shape into crisp grid squares, and the Magic Wand picks those squares up again as a selection. You'll use it for the badge, sun, clouds, mountains, the llama and the embroidered edge.
The llama is traced from a reference photo, the way a sprite artist would: Lama 1 by Luc Viatour (CC BY-SA 3.0), a young llama standing on a hilltop against a clear blue sky.
Along the way you'll use:
- the grid with Snap, ruler guides, and the marquee's exact-corners dialog
- Define Pattern and Fill with Pattern for dithering, cross-stitch, satin and seam textures
- Pixelate, Threshold, Add Noise and Motion Blur
- the Magic Wand (contiguous and not), with Shift to add and Shift+Alt to intersect
- the Lasso and Elliptical Marquee, Select → Grow, Select → Inverse and Cmd-clicking thumbnails
- the Pencil at 8 px for stars, faces, patterns and rim light
- the Paint Bucket with Contiguous off, to recolour a pattern
- a group mask, New Group, Merge Down, blend modes and opacity
- dropping in a photo, scaling it with the Move tool, copy and paste, and Image → Flip Horizontal
- Text in Jersey 15, a free pixel font, plus Rasterize Layer
- Drop Shadow and Image → Canvas Size
The palette:
-
Night sky
-
Sun
-
sun slices
-
stars
-
birds
-
Clouds
-
Mountains
-
lit faces
-
snow
-
hills
-
Castle
-
rim
-
flag
-
windows
-
Lake
-
horizon glow
-
glints
-
Cliff
-
lit edge
-
cracks
-
grass
-
Llama coat
-
rim
-
cream
-
outline
-
Blanket
-
stripes
-
crosses
-
tassels
-
pack
-
Banner
-
fold
-
title
-
Cream rim light
-
empty heart
-
Merrow gold
-
backpack canvas
-
seam thread
-
Make the backpack canvas
Create a new document 1440 × 1440 px. It's taller than the patch needs. You'll trim it at the end, once the patch is finished and you can see where it sits.
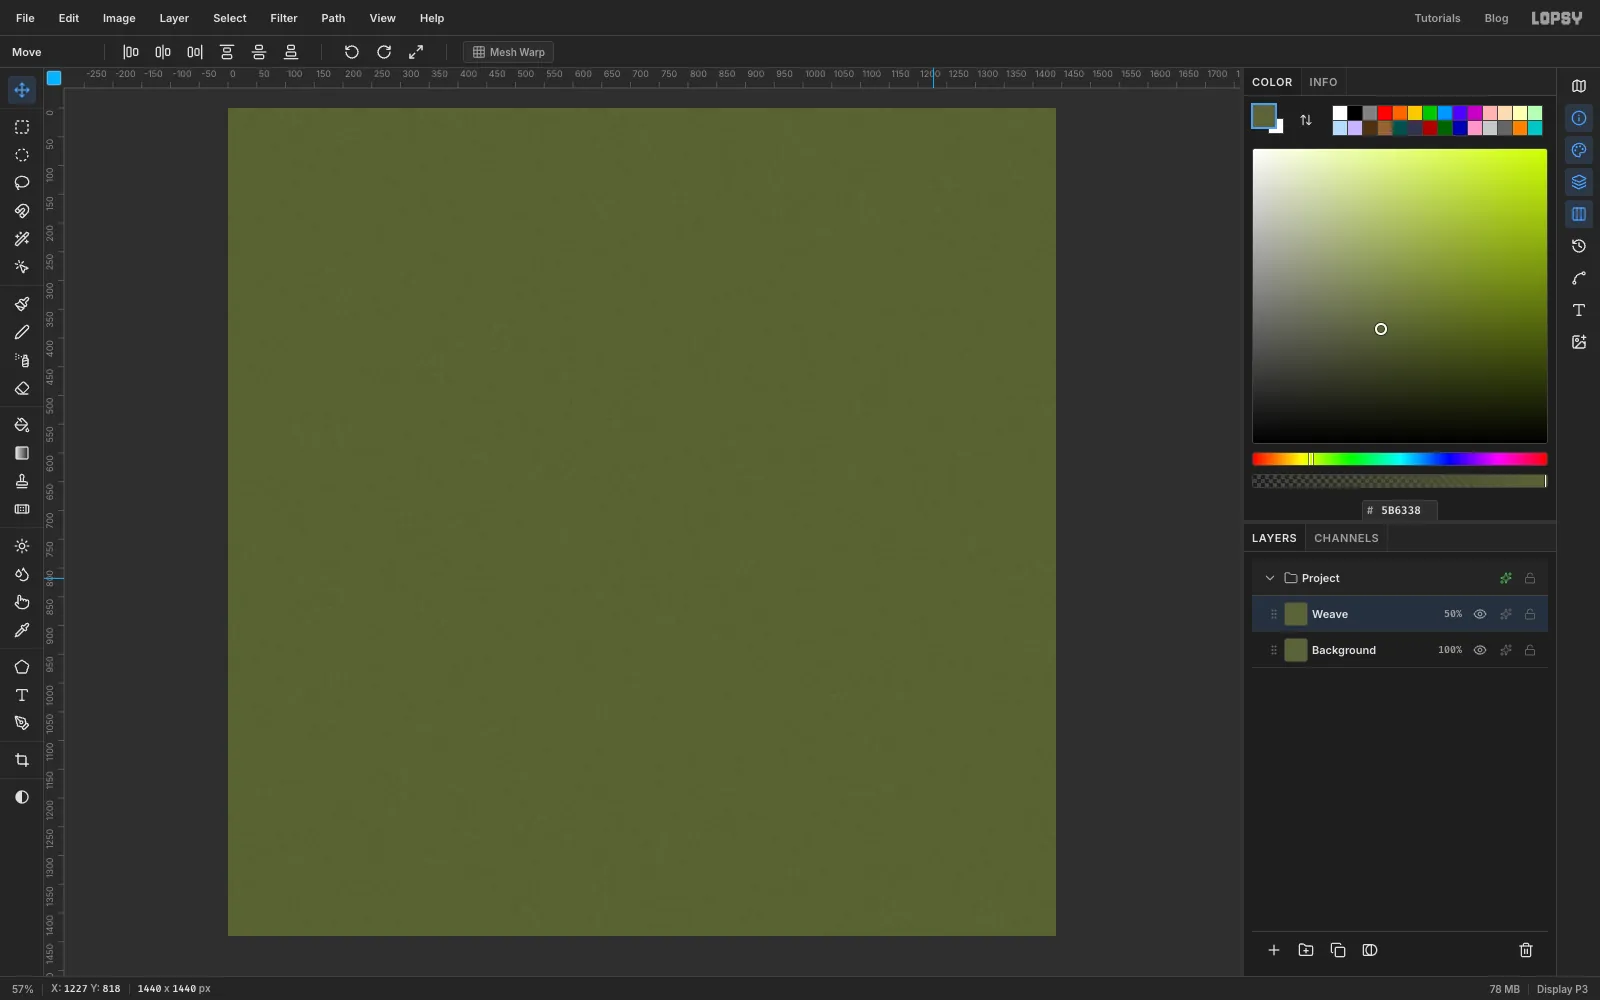
Select the Background layer, set the foreground colour to and choose Edit → Fill. Run Filter → Add Noise… with Amount 30 and Mode set to Mono, then Filter → Motion Blur… with Angle 0 and Distance 10. The noise stretches into horizontal threads.
Select Layer 1, double-click its name and rename it Weave. Fill it with the same olive, add the same noise, and run Motion Blur with Angle 90 this time. Set the layer's opacity to 50%. The two sets of streaks cross like a woven canvas.
-
Turn on an 8 px grid and add guides
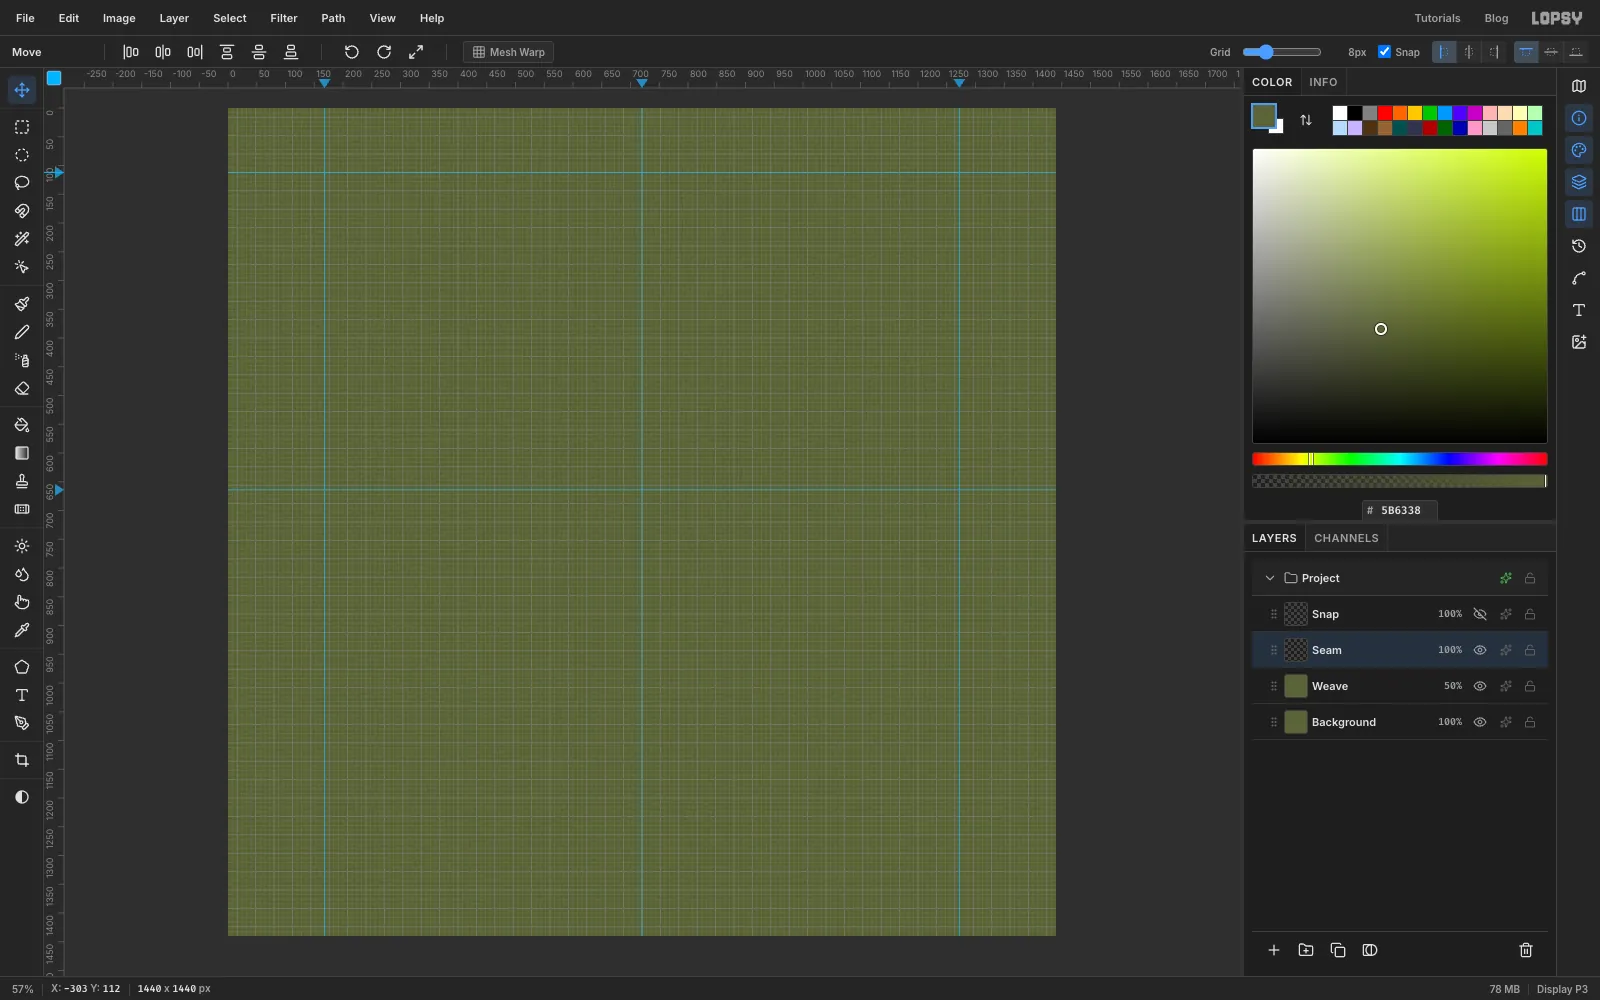
Choose View → Show Grid. Drag the Grid slider at the right of the options bar to 8px and make sure Snap is ticked. With snapping on, marquees land on grid lines.
The badge will be a circle centred at 720, 664 with a radius of 552 px. Click the top ruler at 720, 168 and 1272 to drop three vertical guides, and the left ruler at 664 and 112 for two horizontal ones.
Now add two layers you'll need later. Click Add Layer and name it Snap, then click its eye to hide it. Select Weave and add a layer called Seam. It sits between Weave and Snap.
-
Draw five tiny pattern tiles
Patterns will give you the dithering, the stitch textures and the seam. Add a layer called Tiles and zoom in on the top-left corner of the canvas.
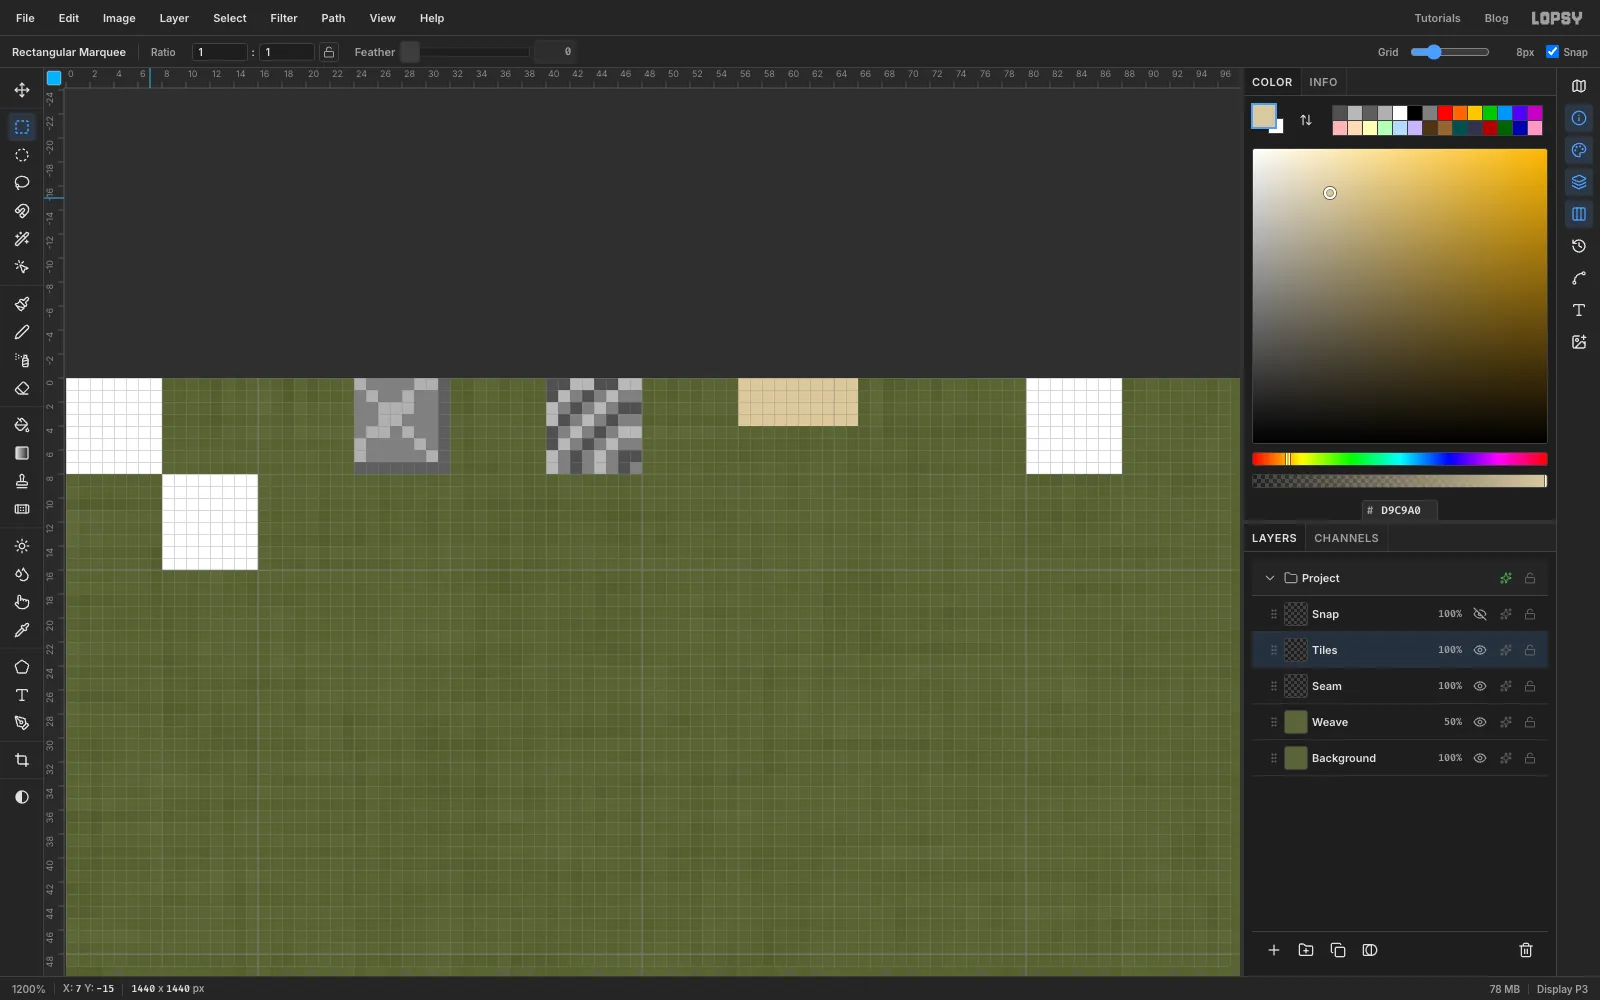
Pick the Rectangular Marquee. With nothing selected, a single click opens a dialog where you type exact corners. For each square below, press Cmd+D, click once, type the corners and use Edit → Fill:
- Checker: white squares from 0, 0 to 8, 8 and from 8, 8 to 16, 16.
- Cross-stitch: a square from 24, 0 to 32, 8. Switch to the Pencil at 1 px. Click one corner of the square and Shift-click the opposite corner to draw a diagonal in . Draw the other diagonal the same way. Then draw a line down the right edge and along the bottom edge.
- Satin: a square from 40, 0 to 48, 8. Fill it with diagonal Pencil lines running from bottom-left to top-right, alternating and , one pixel apart.
- Seam dash: a bar from 56, 0 to 66, 4.
- Sparse dot: a white square from 80, 0 to 88, 8.
Now define each tile. Marquee it and choose Edit → Define Pattern: the checker from 0, 0 to 16, 16, the cross-stitch 24, 0 to 32, 8, the satin 40, 0 to 48, 8, the dash 56, 0 to 72, 4 (the empty part is the gap between stitches) and the sparse dot 80, 0 to 96, 16. Deselect and delete the Tiles layer. Patterns stay available until you close the tab.
-
Draw a smooth circle on the Snap layer
Select Seam, click New Group in the Layers panel footer and name it Patch. With Patch open, click Add Layer four times to make Merrow, Merrow Stitch, Edge Line and Patch Base, from bottom to top. You'll fill them later.
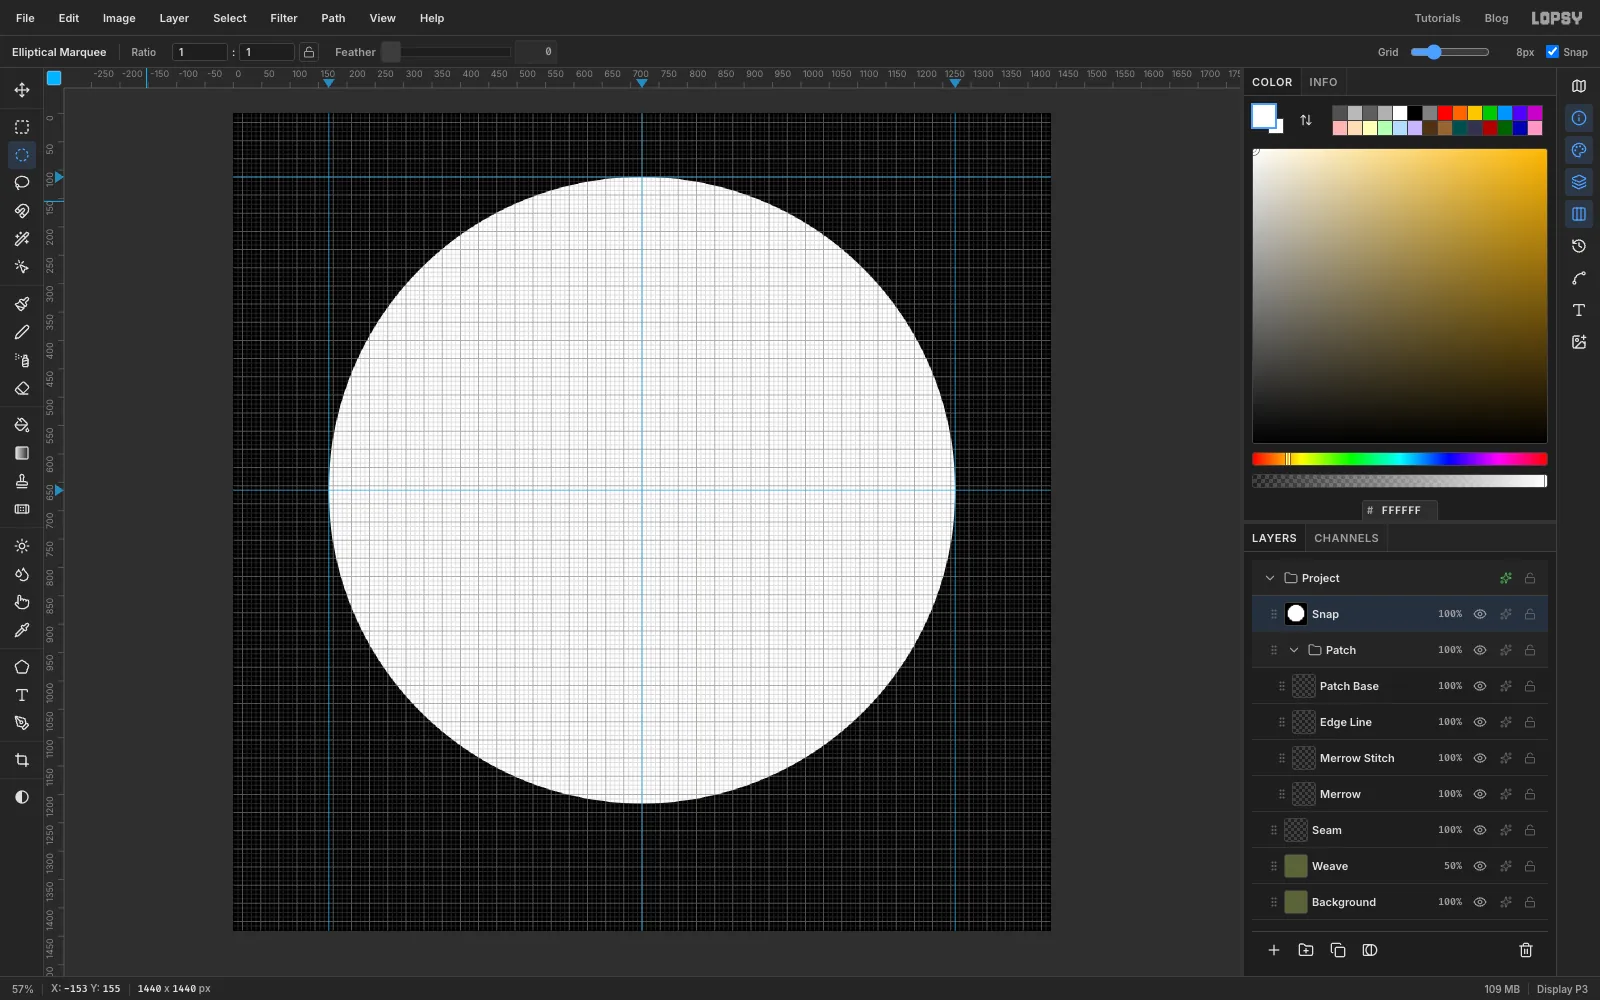
Now the pixel-snap stencil. Show the Snap layer and select it. Set the foreground to black and choose Edit → Fill with nothing selected, so the whole layer turns black. Pick the Elliptical Marquee, click once and enter 168, 112 to 1272, 1216. Set the foreground to white and fill. Deselect.
-
Pixelate the circle
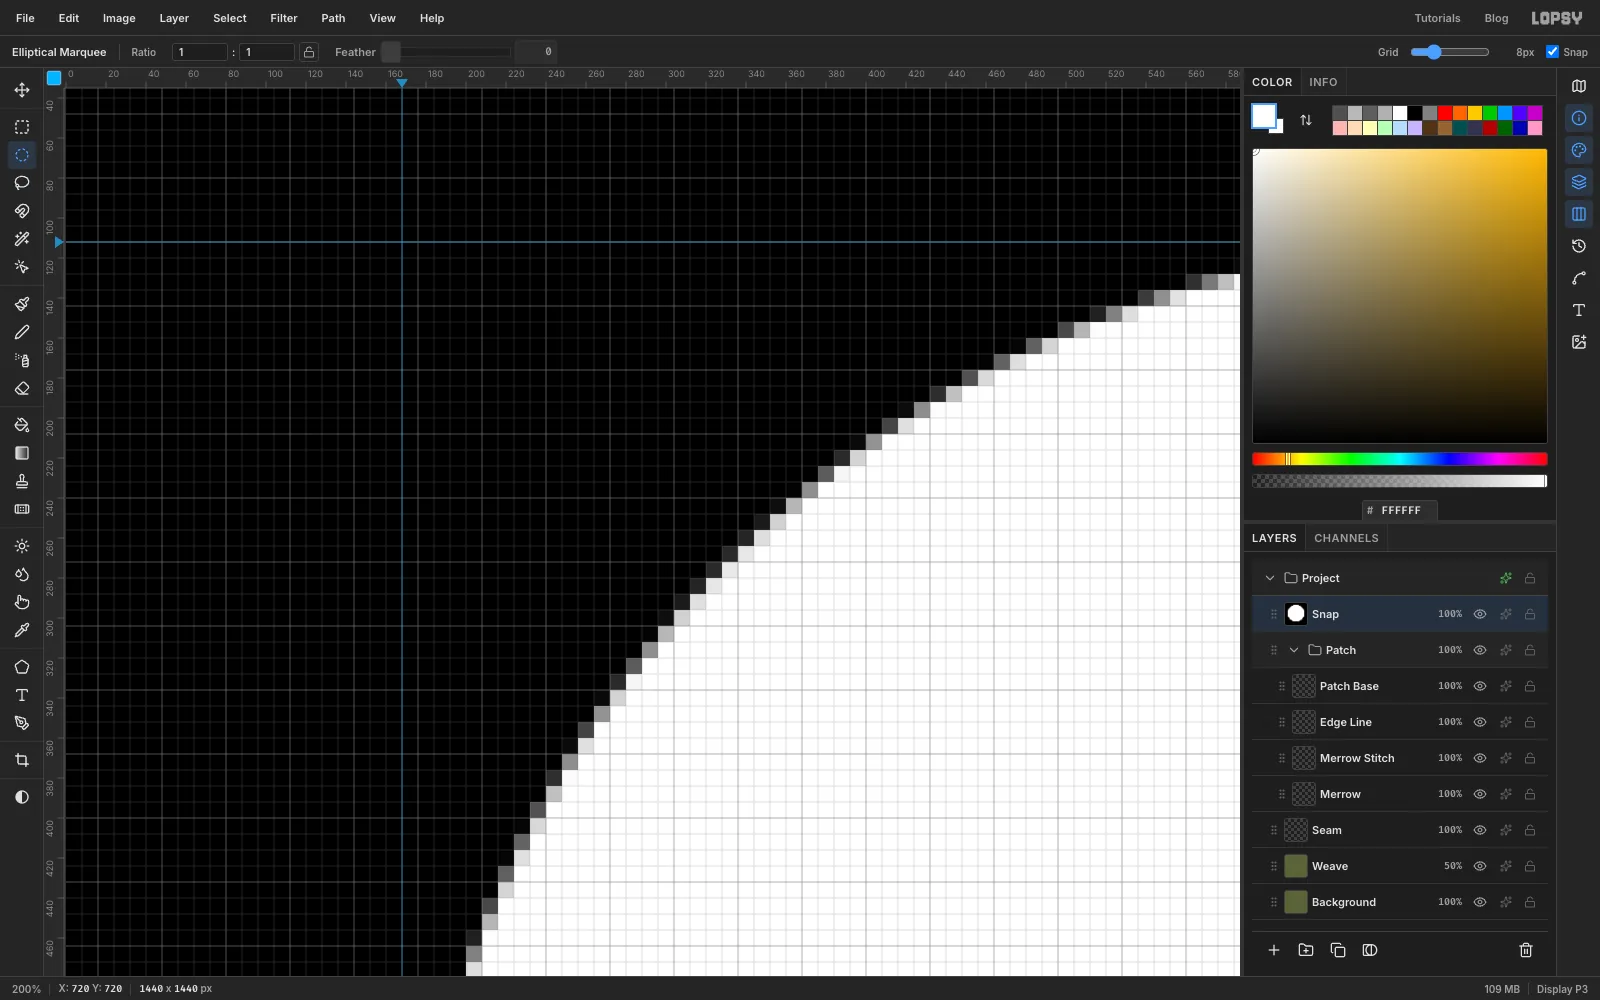
Choose Filter → Pixelate… and set Block Size to 8. Each grid square becomes one flat colour: white inside, black outside, and a grey along the edge that depends on how much of the square the circle covered.
-
Threshold it to hard steps
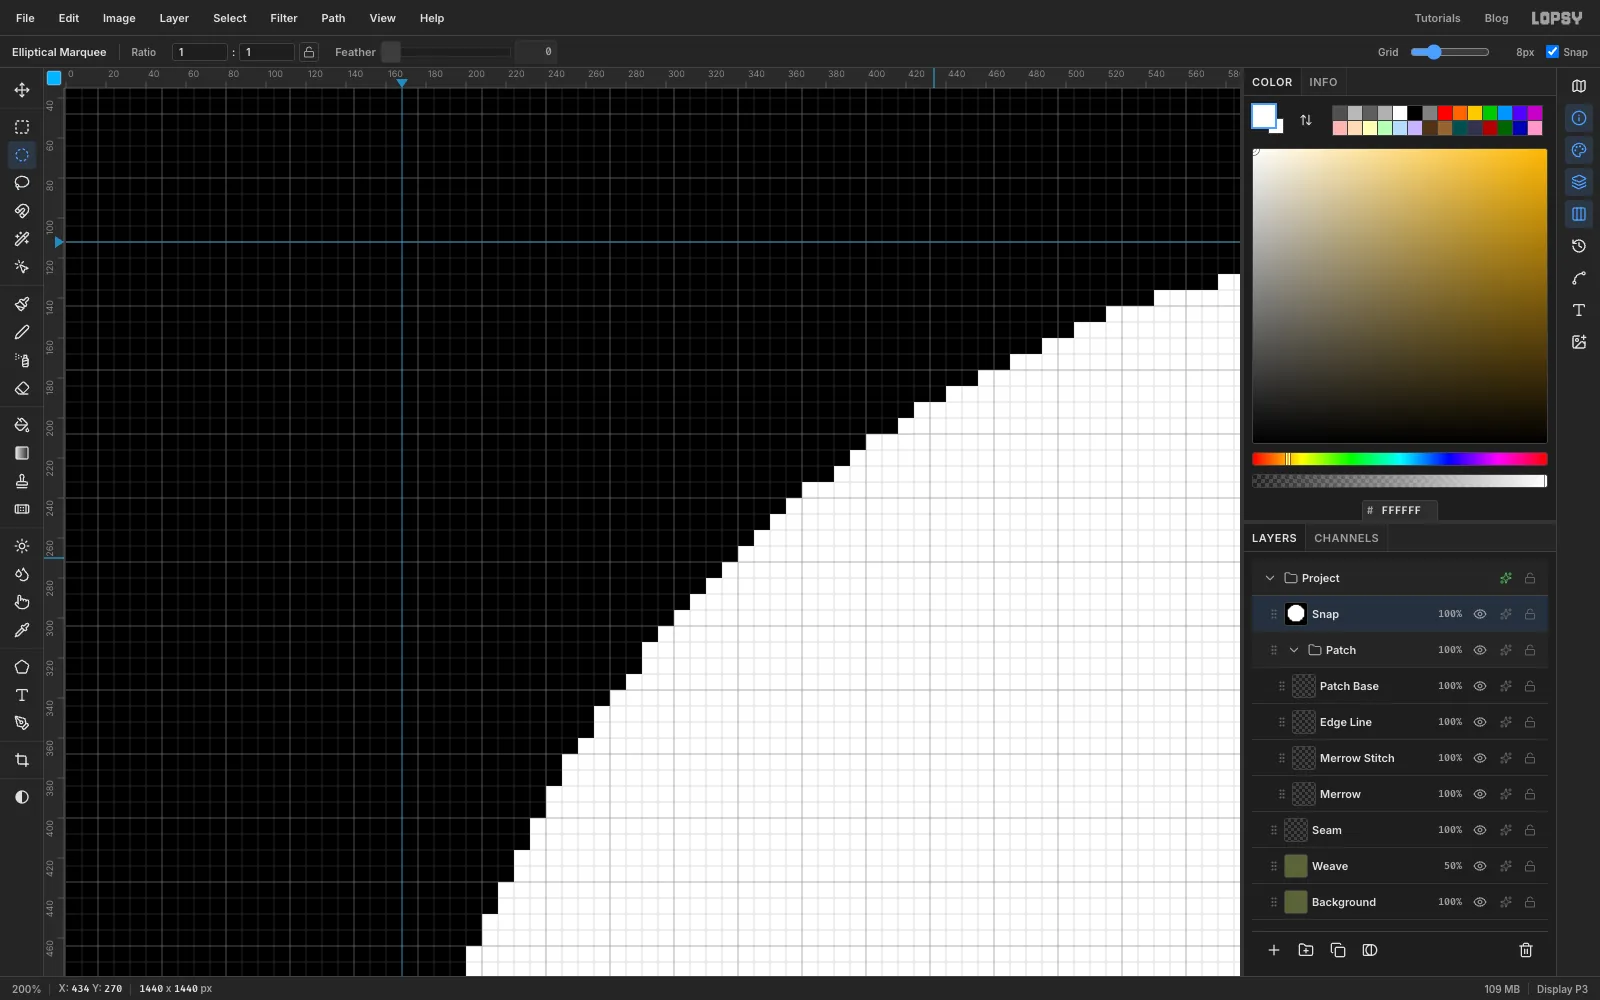
Choose Filter → Threshold… and leave Level at 128. Squares that were more than half white become white, and the rest become black. The edge is now a pixel-art staircase that sits exactly on the grid.
-
Wand the stencil into the badge
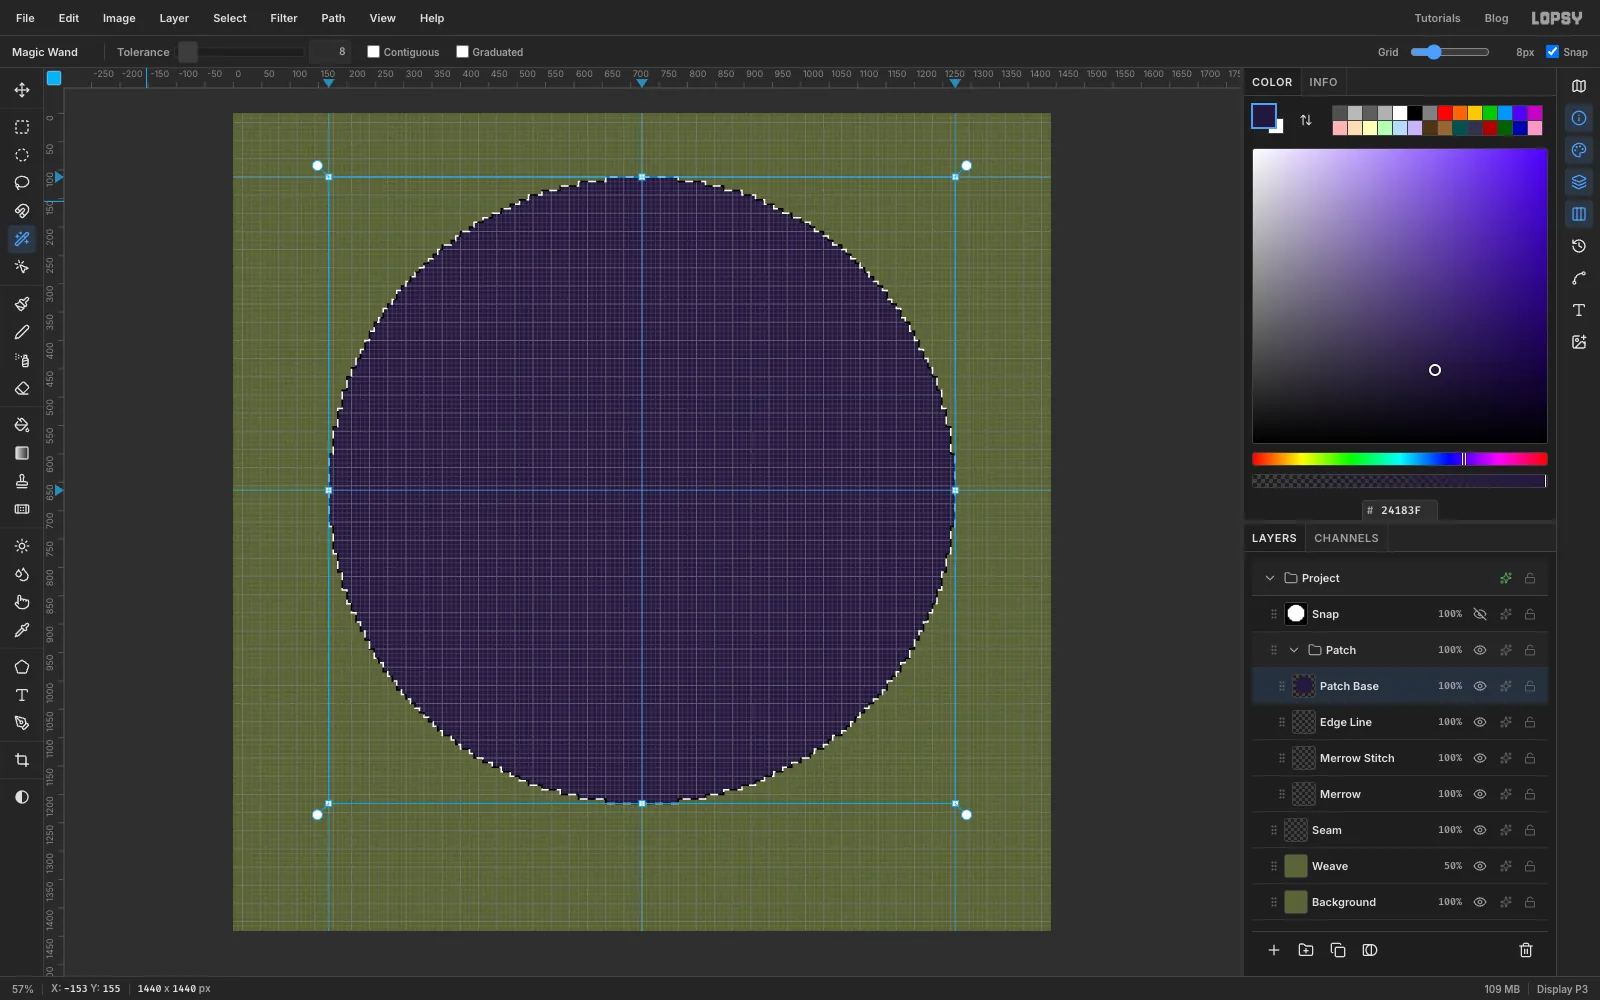
Pick the Magic Wand, untick Contiguous and set Tolerance to 8. Click inside the white circle. Hide the Snap layer again, select Patch Base, set the foreground to and fill. Deselect.
That's the pixel-snap stencil. In the rest of this tutorial, pixel-snap a shape means:
- Deselect (Cmd+D), select Snap (leave it hidden) and fill the whole layer black.
- Draw the shape with any selection tool. If you build it from another layer (a wand click or a Cmd-clicked thumbnail), select Snap again afterwards. Fill it white.
- Deselect, run Pixelate at 8 and Threshold at 128.
- Click the shape with the Magic Wand, Contiguous unticked, Tolerance 8.
- Select the layer you're working on, fill, and deselect.
-
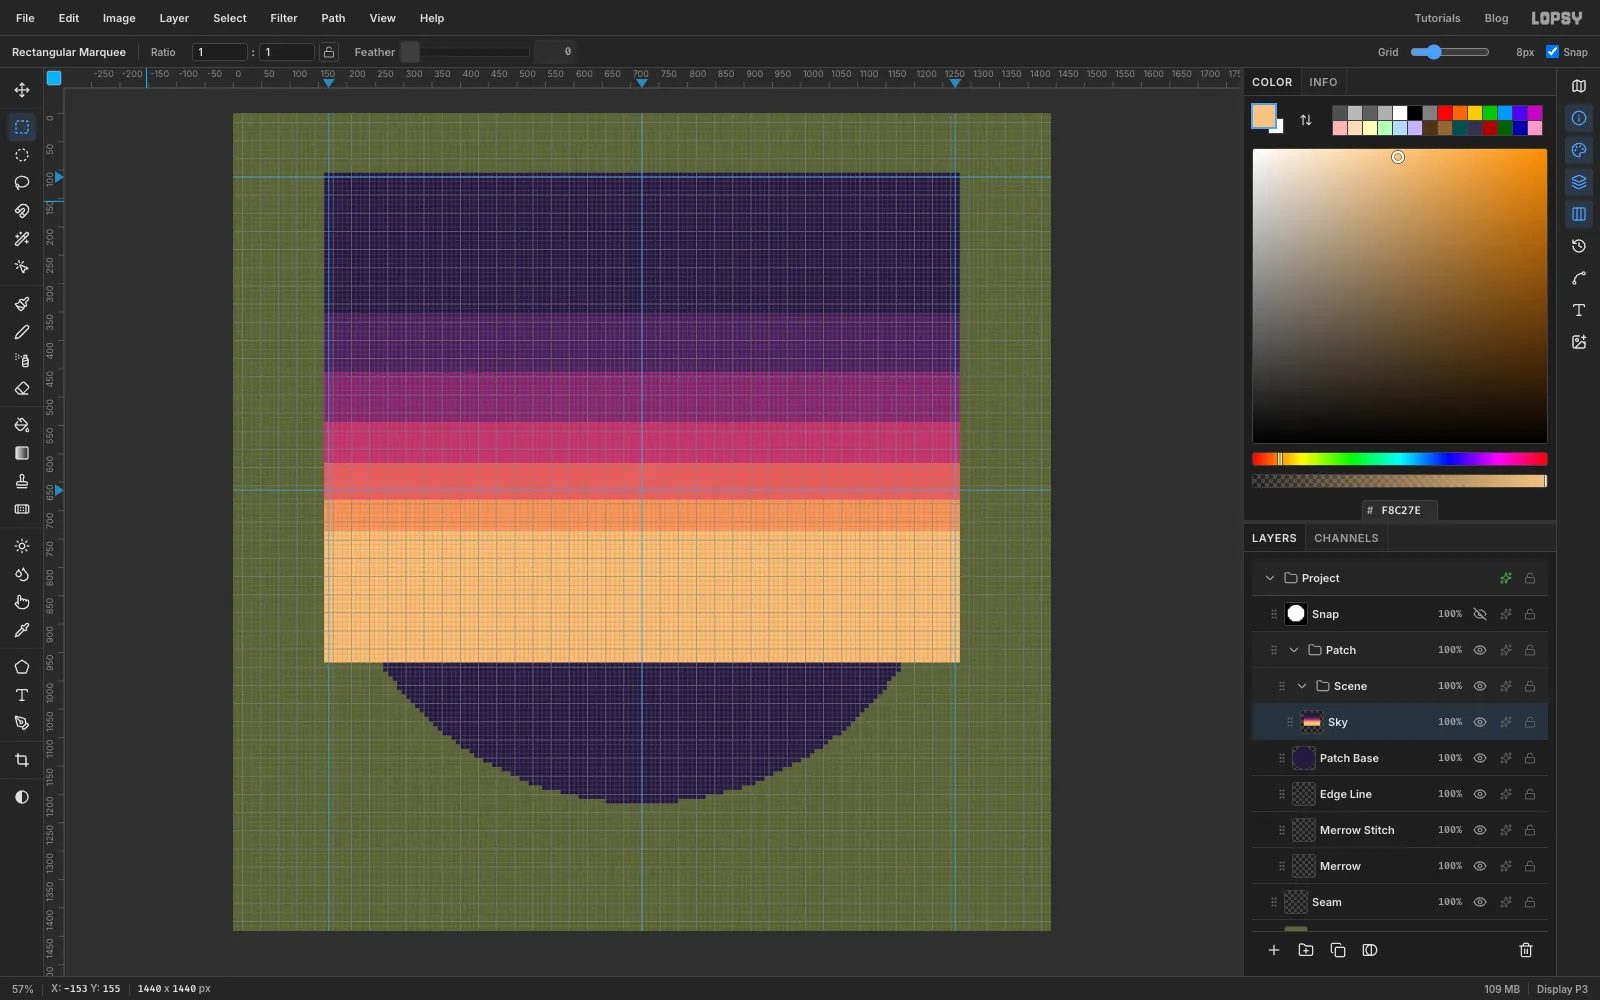
Paint the sky in seven bands
With Patch Base selected, click New Group and name it Scene, then add a layer called Sky. Every band runs from x 160 to x 1280. The edges of the badge will be trimmed later, so overshooting is fine. Use the exact-corners dialog and fill each band:
- 104 → 352:
- 352 → 456:
- 456 → 544:
- 544 → 616:
- 616 → 680:
- 680 → 736:
- 736 → 968:
-
Fill the band edges with a checkerboard
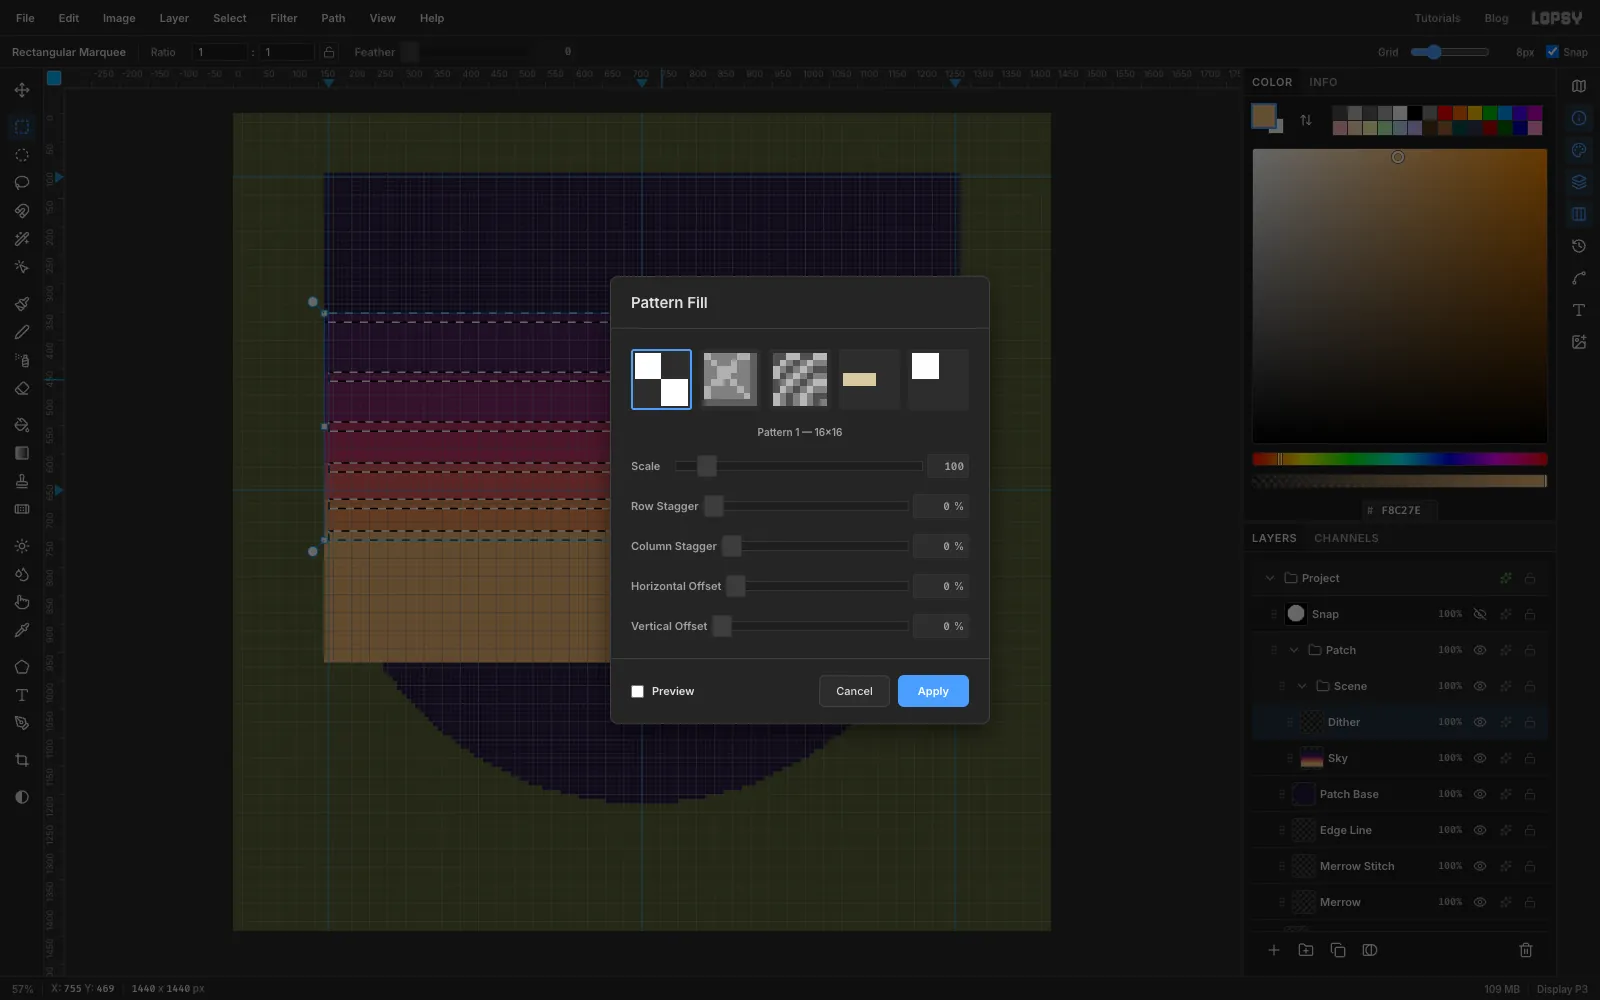
Add a layer called Dither. Marquee a 16 px strip along the top of each band below the first: x 160 → 1280, from 352 → 368, then hold Shift and drag the strips at 456, 544, 616, 680 and 736. Choose Edit → Fill with Pattern…, pick the checker and click Apply.
Repeat for the 16 px strip directly under each checker (368 → 384, 472 → 488 and so on), this time with the sparse dot pattern. You now have two rows of 50% dither and two of 25% at every band edge, all in white.
-
Recolour the dither
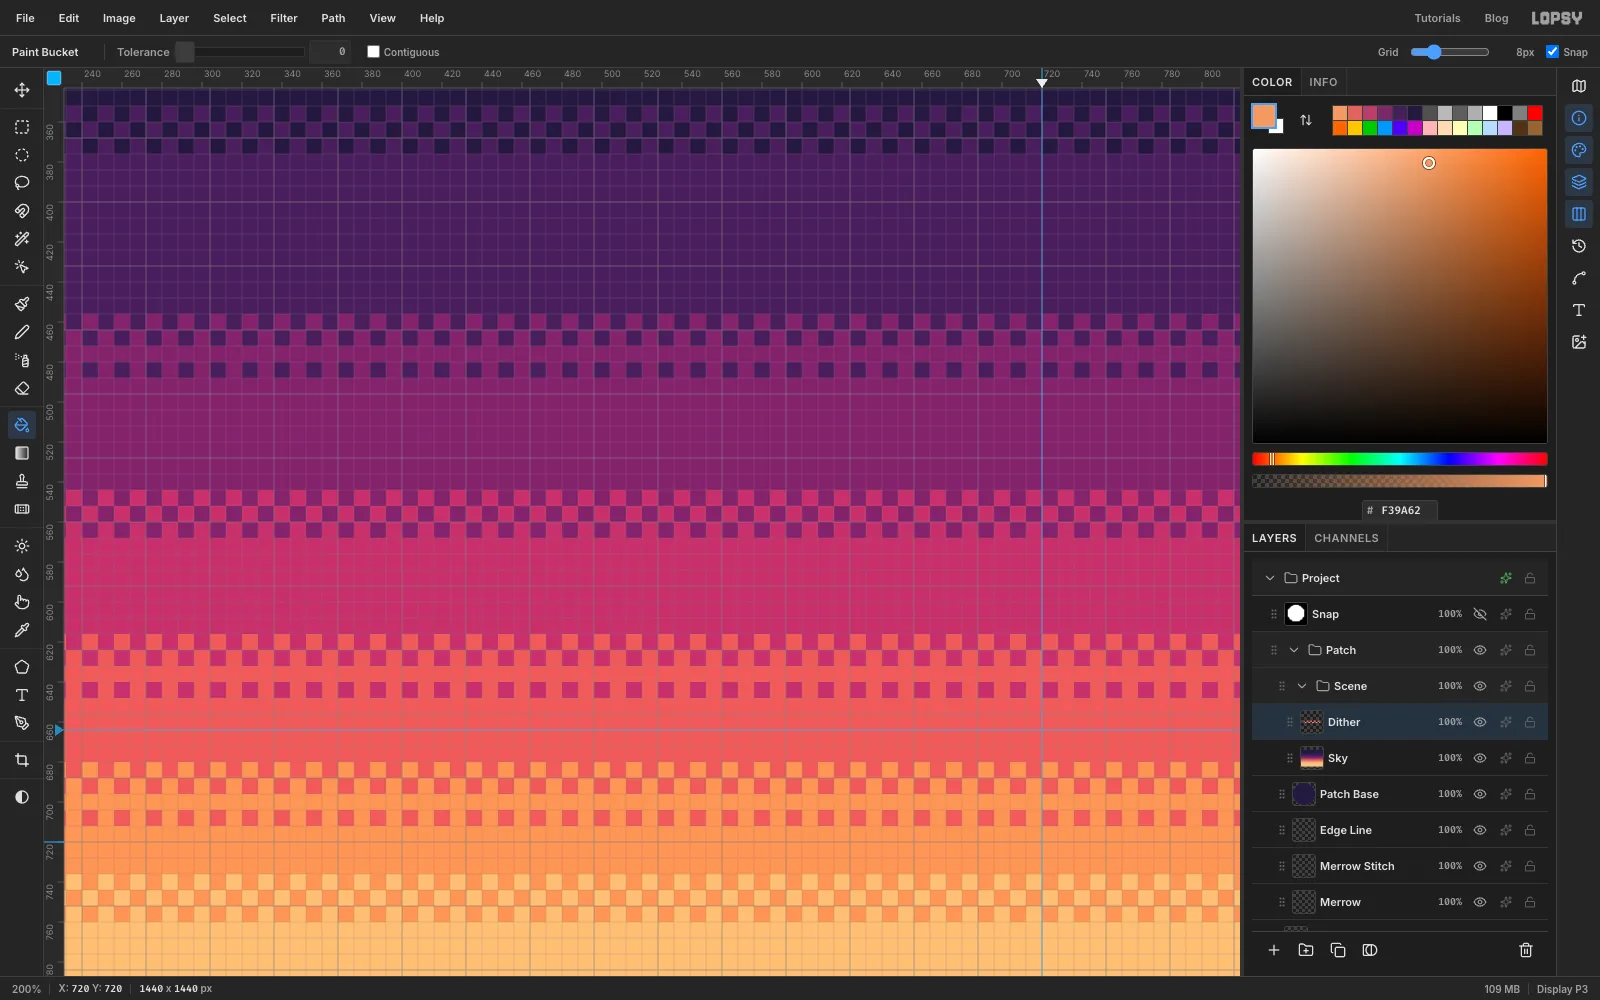
Pick the Paint Bucket, untick Contiguous and set Tolerance to 0. For each band edge, marquee the full 32 px of dither (for example 160, 352 to 1280, 384), set the foreground to the colour of the band above it and click any white square. Only the white squares inside the marquee change, so each band appears to melt into the next.
-
Mask the scene to the disc
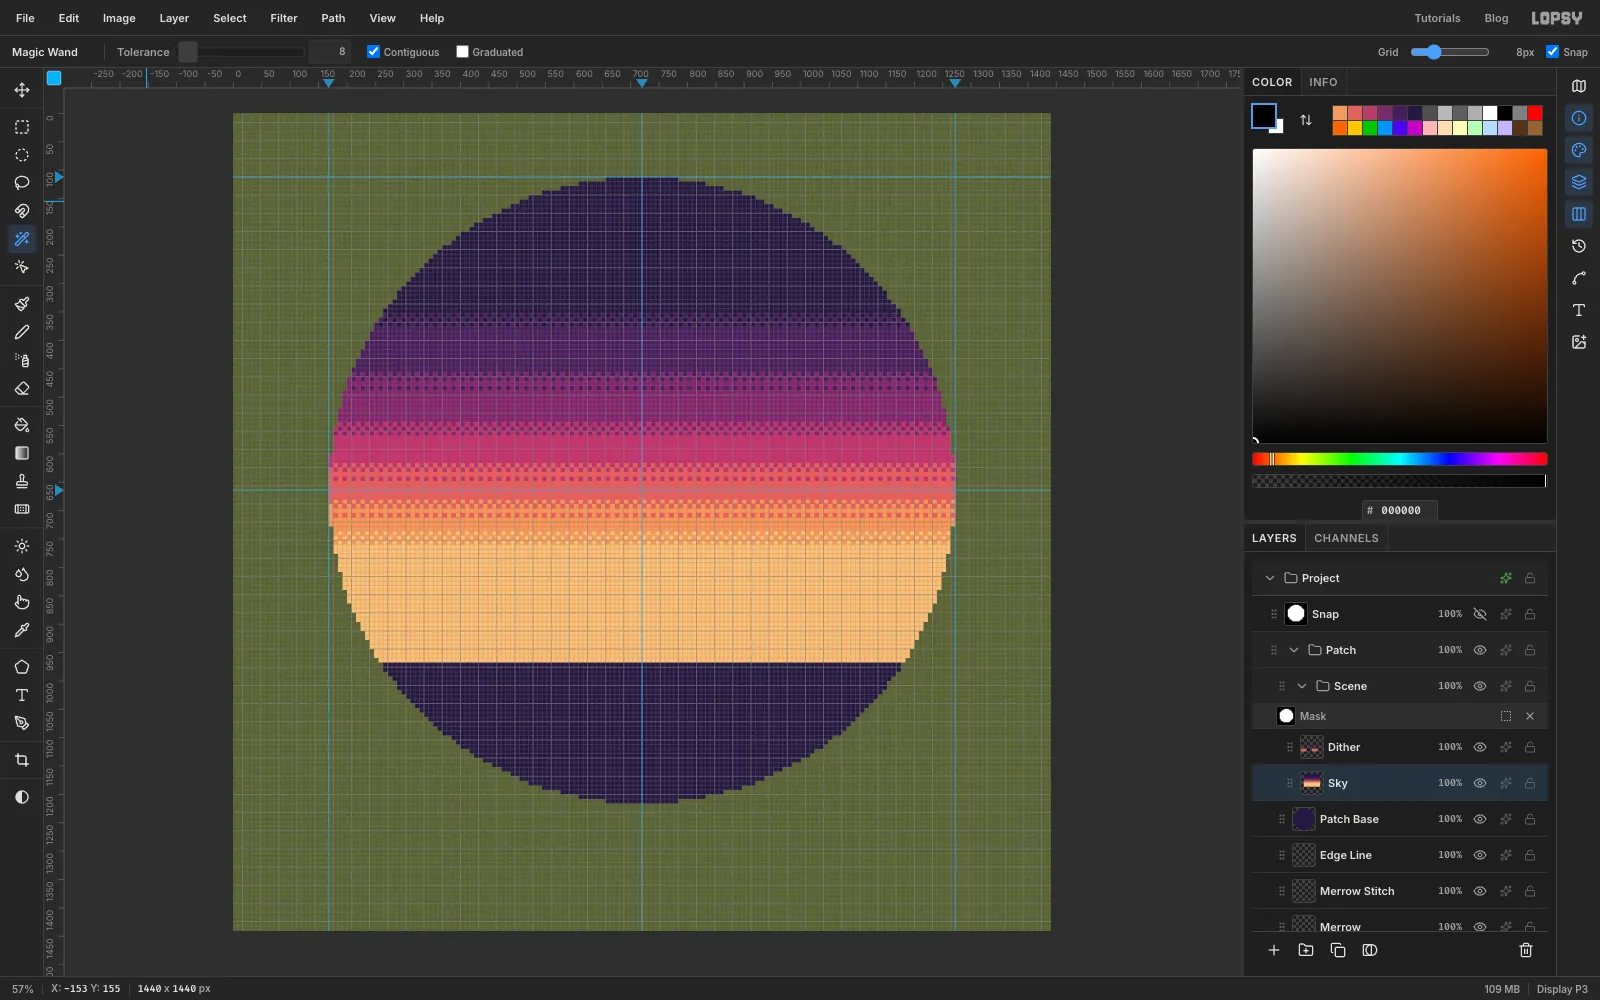
Select Patch Base and click the disc with the Magic Wand, this time with Contiguous ticked. Select the Scene group and click Add Mask. Choose Select → Inverse, click the mask thumbnail ("Edit mask for Scene"), set the foreground to black and choose Edit → Fill. Deselect. Everything you put in Scene from now on is clipped to the badge.
-
Make a sliced sunset sun
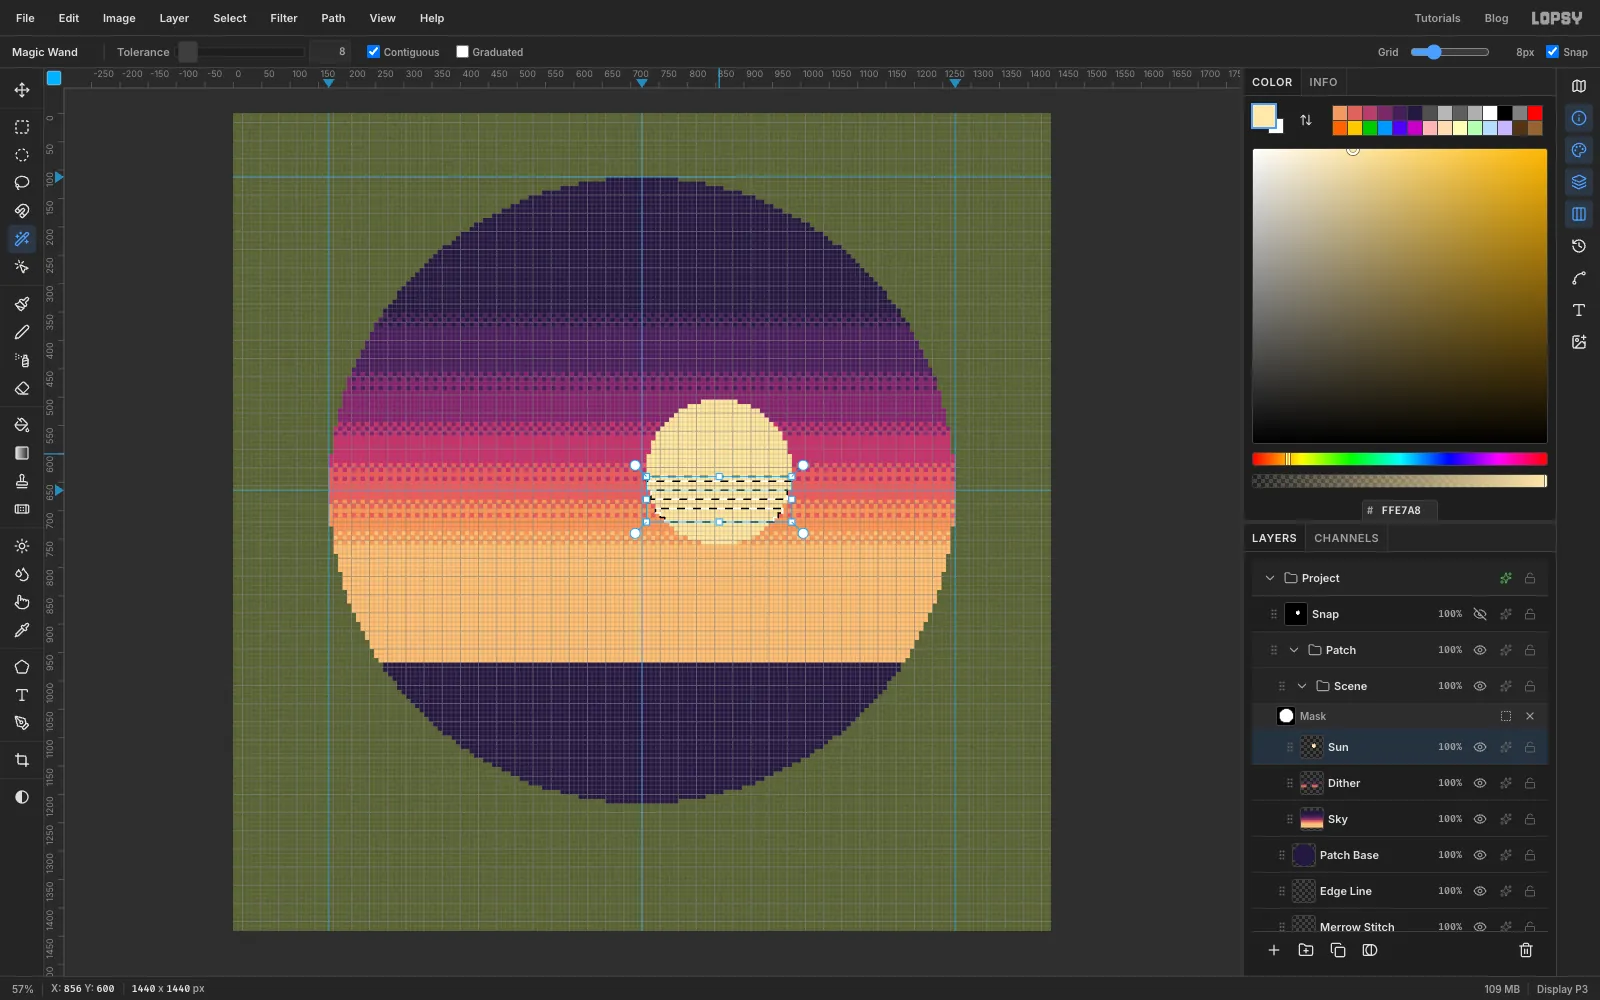
Select Dither and add a layer called Sun. Pixel-snap a circle from 728, 504 to 984, 760 and fill it with .
For the classic sliced look, marquee 720, 640 → 992, 648, then hold Shift and add 720, 664 → 992, 680 and 720, 696 → 992, 720. Pick the Magic Wand (Contiguous ticked) and Shift+Alt-click the sun, so only the parts of the bands inside the disc stay selected. Fill with raspberry and deselect. The stripes get thicker towards the horizon, and the sun keeps a clean round edge.
-
Pencil the stars and a twinkle
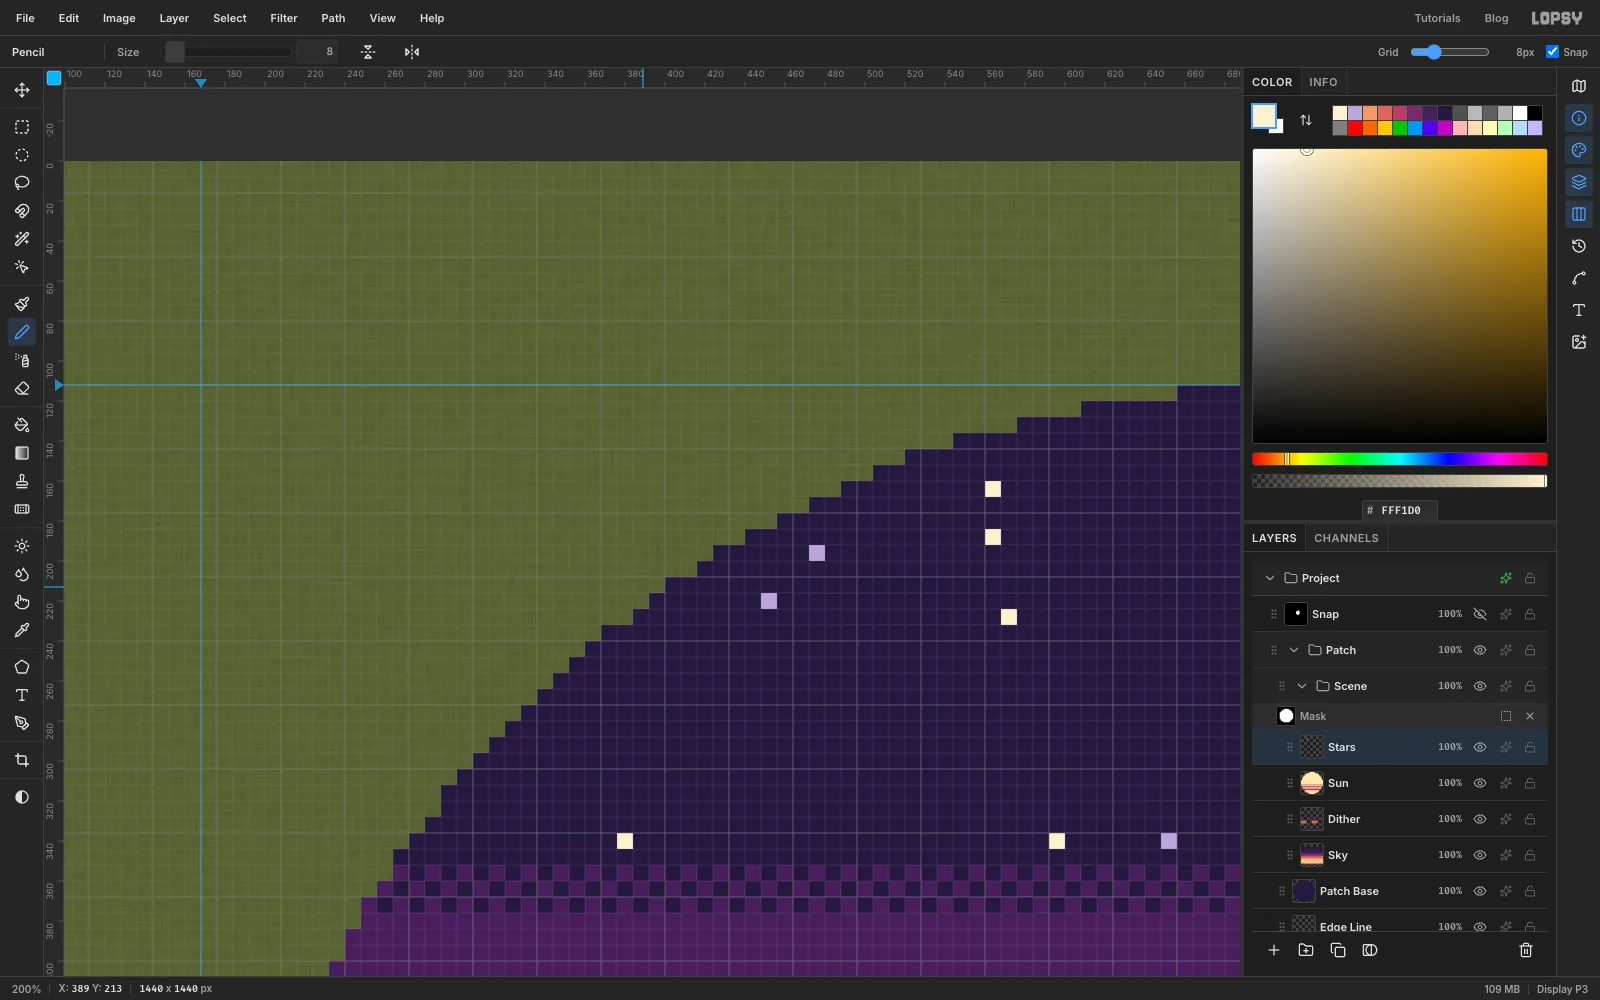
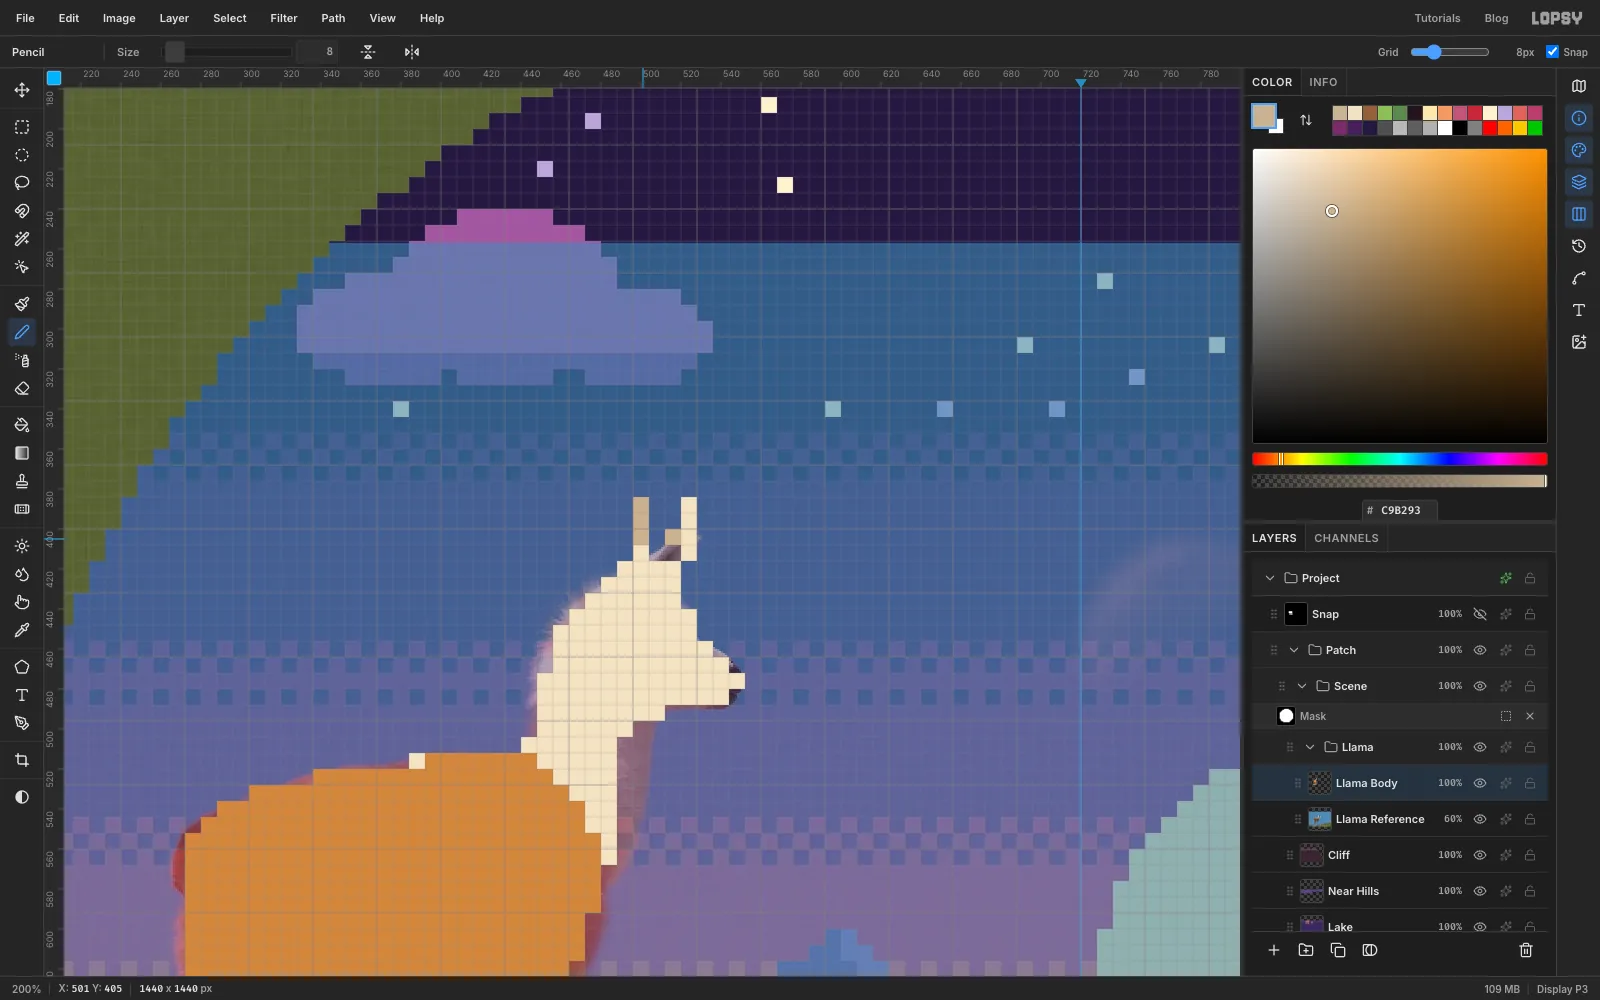
Add a layer called Stars. Pick the Pencil, set Size to 8 (it's still at 1 px from the tiles) and zoom to 200%. The 8 px Pencil paints an 8 × 8 block centred where you click, so aim for the middle of a grid square. At 200% that's easy to hit, and each star fills exactly one square. Keep the Pencil at 8 px for the rest of the tutorial. Click about a dozen stars in across the dark top band. Keep a clear space around the top centre, where the HP hearts will go. Add ten fainter ones in .
For a twinkle, click a plus shape five squares tall and five wide, centred around 388, 196.
-
Copy the twinkle twice
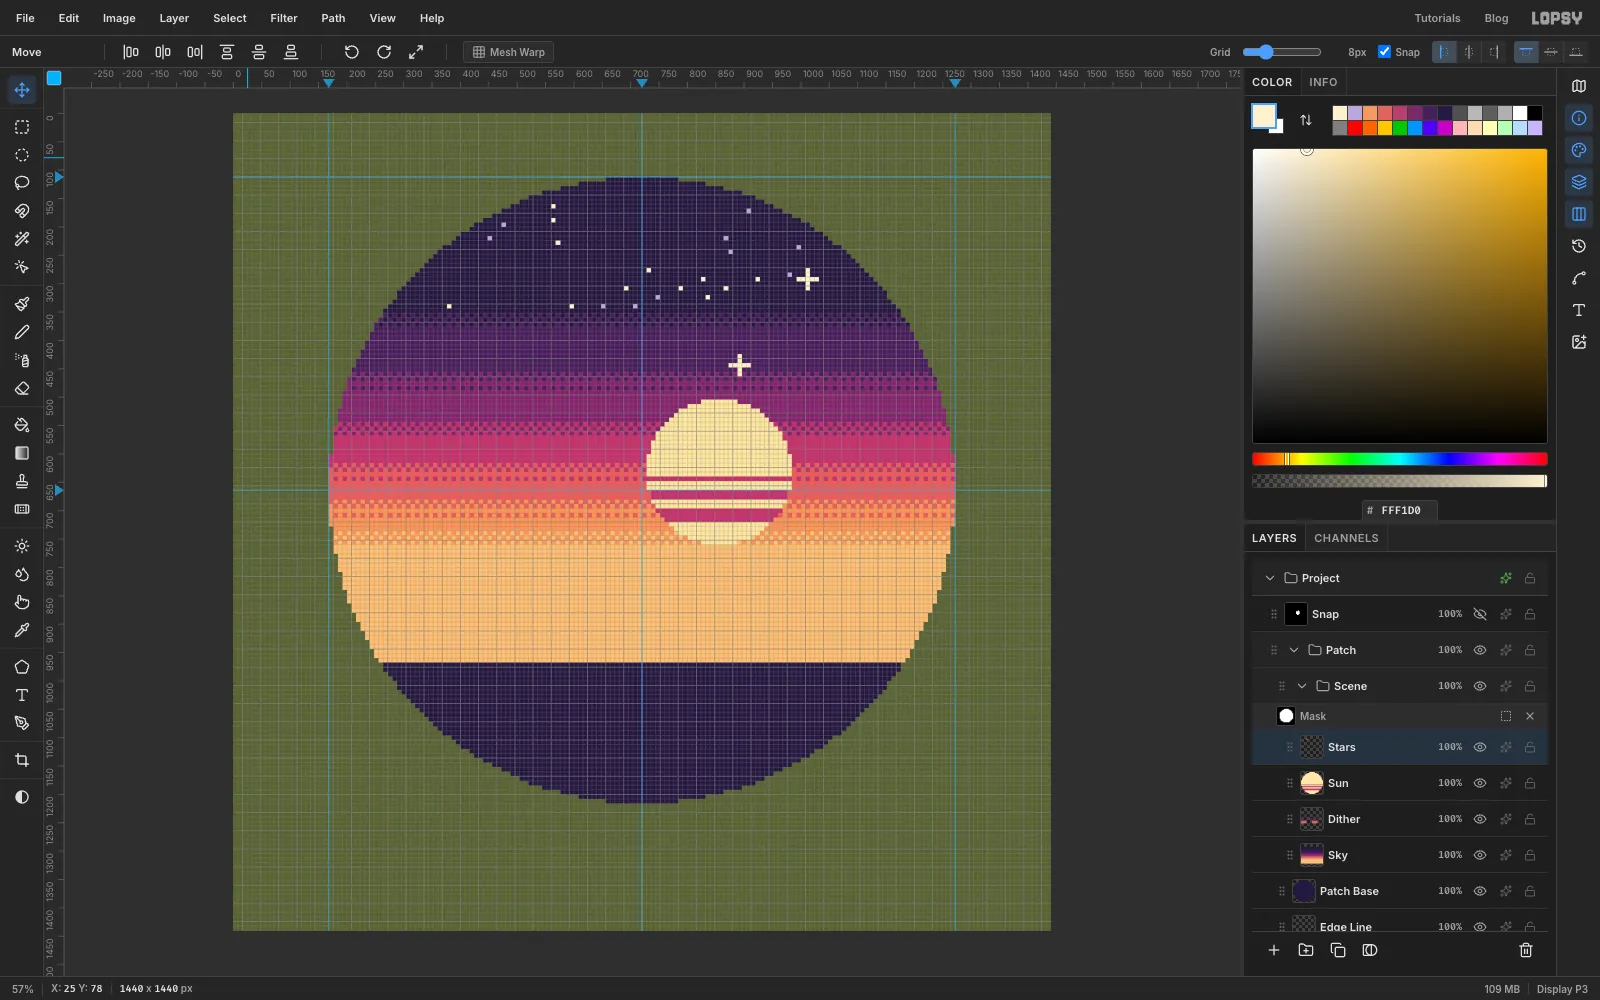
Marquee the twinkle (368, 176 → 408, 216) and press Cmd+C, then Cmd+V. The copy pastes in place, right on top of the original, on a new layer. Drag it with the Move tool to the upper right, around 1010, 290, deselect and choose Layer → Merge Down. Press Cmd+V again. The second copy also lands on the original. Drag it to just above the sun, around 890, 445, and merge it down too.
-
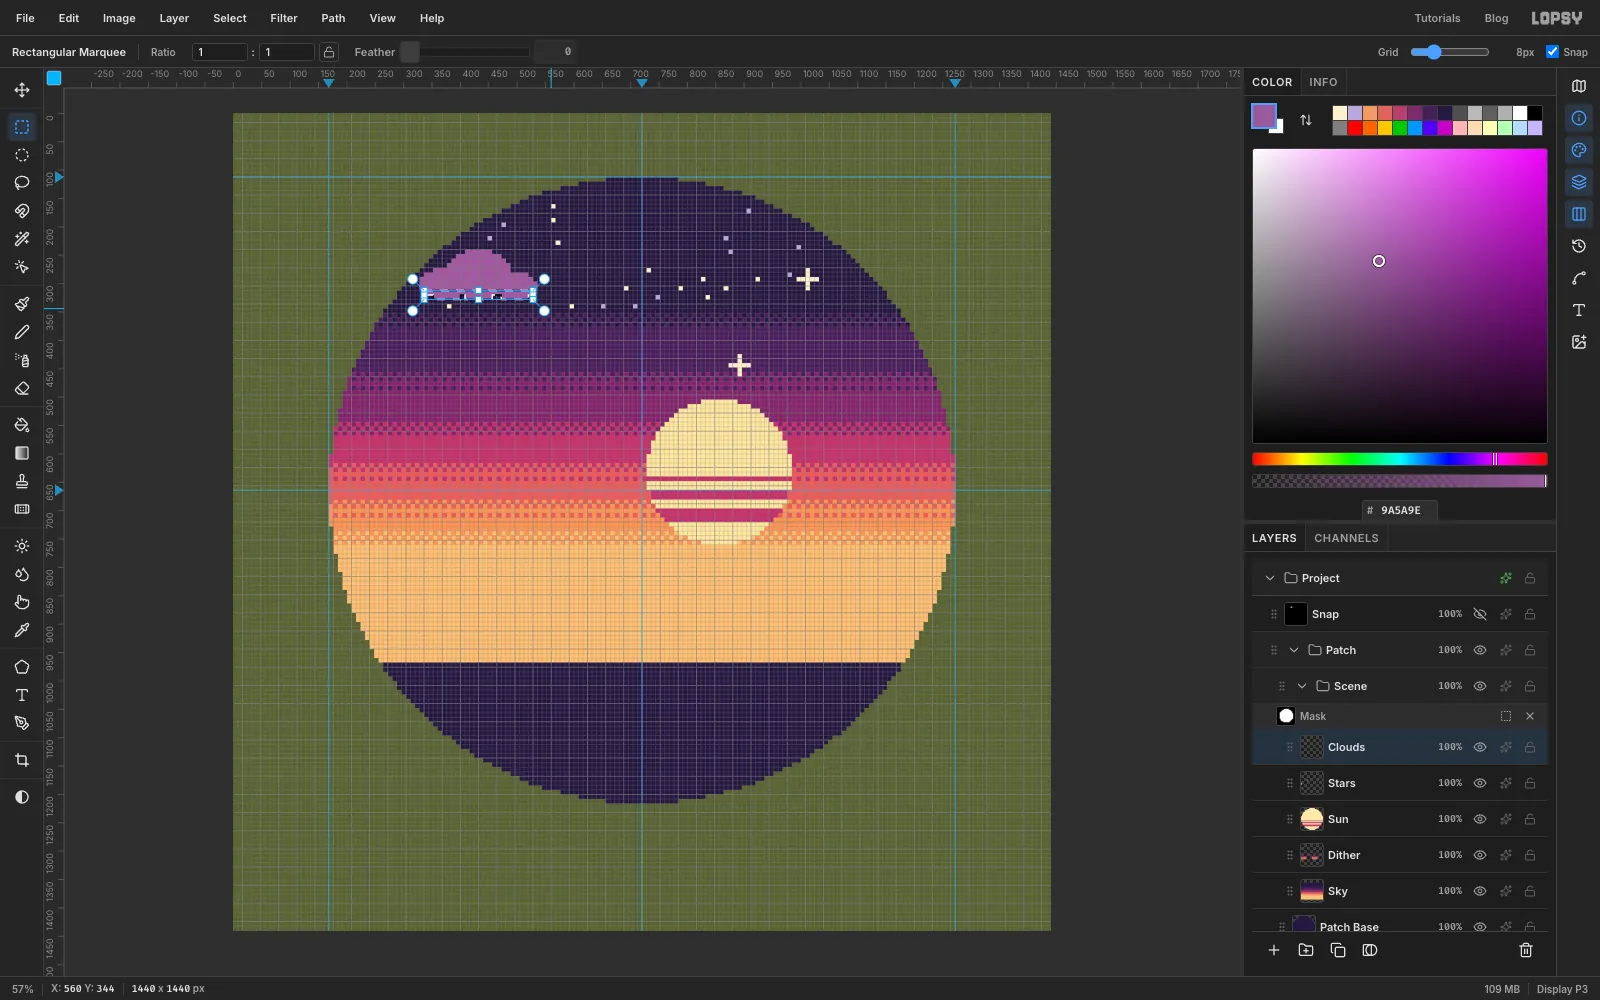
Build a cloud from three ellipses
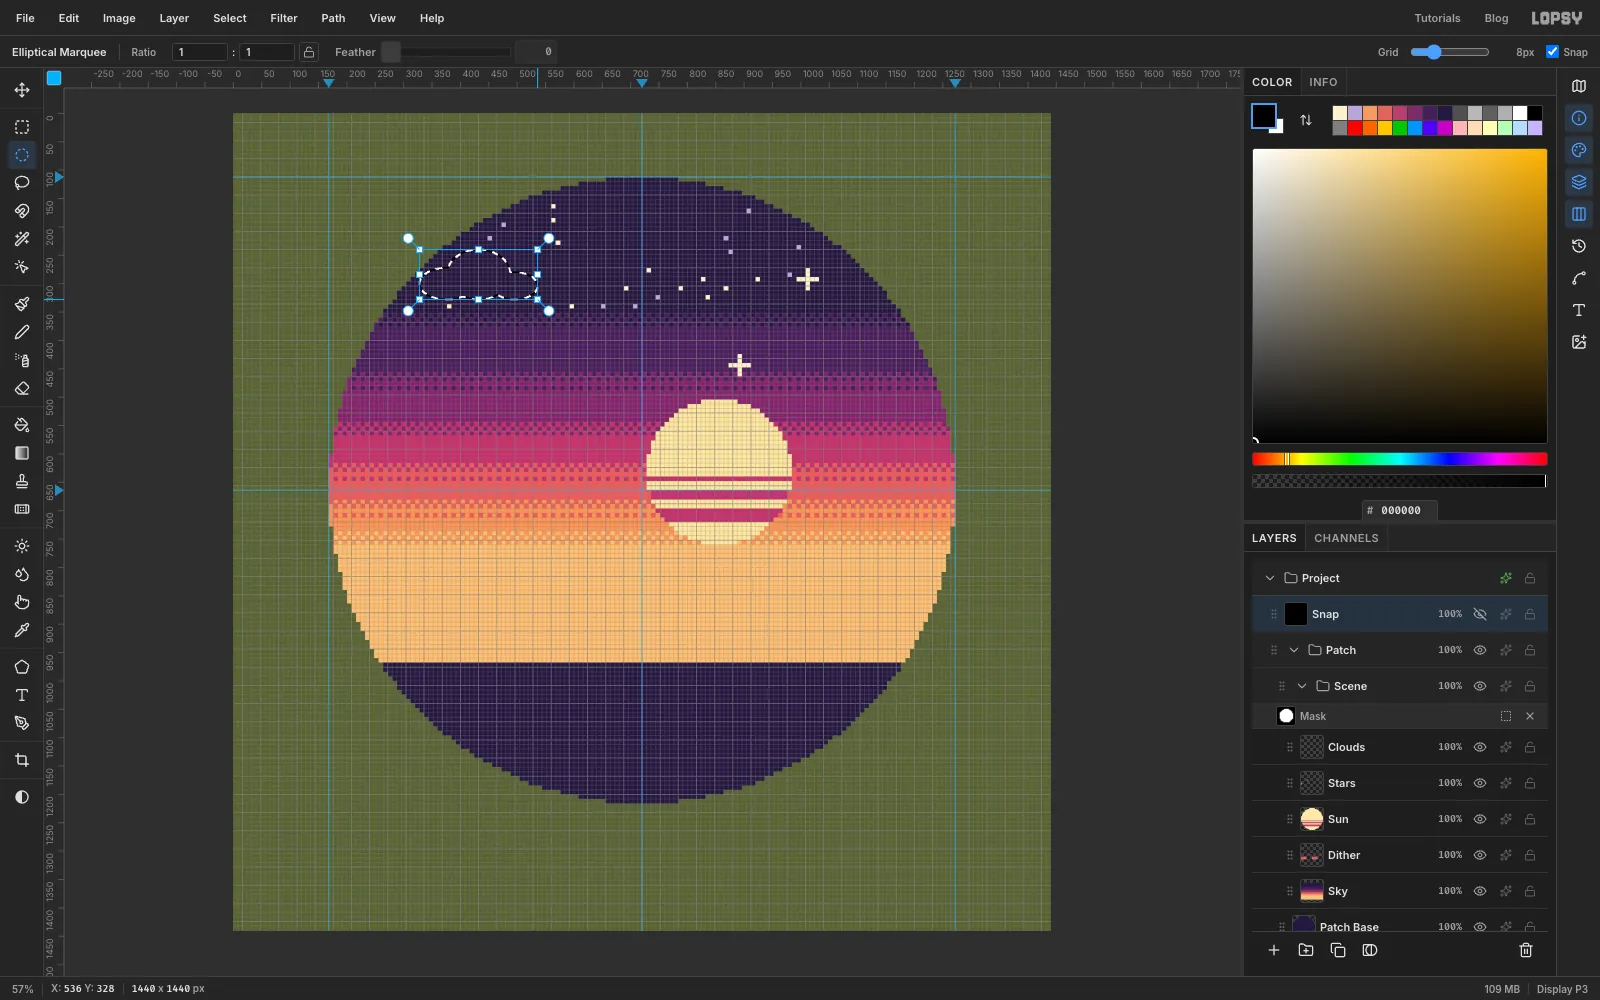
Add a layer called Clouds and pixel-snap a cloud. For step 2 of the routine, draw one ellipse from 328, 272 to 424, 328, then hold Shift and add 376, 240 → 488, 328 and 456, 280 → 536, 328. All three share a flat bottom edge. Fill the snapped cloud with .
-
Shade its underside
With the Clouds layer selected, click the cloud with the contiguous Magic Wand. Hold Shift+Alt and drag a rectangle over its bottom four rows (304, 312 → 560, 344). Only the overlap stays selected. Fill it with .
-
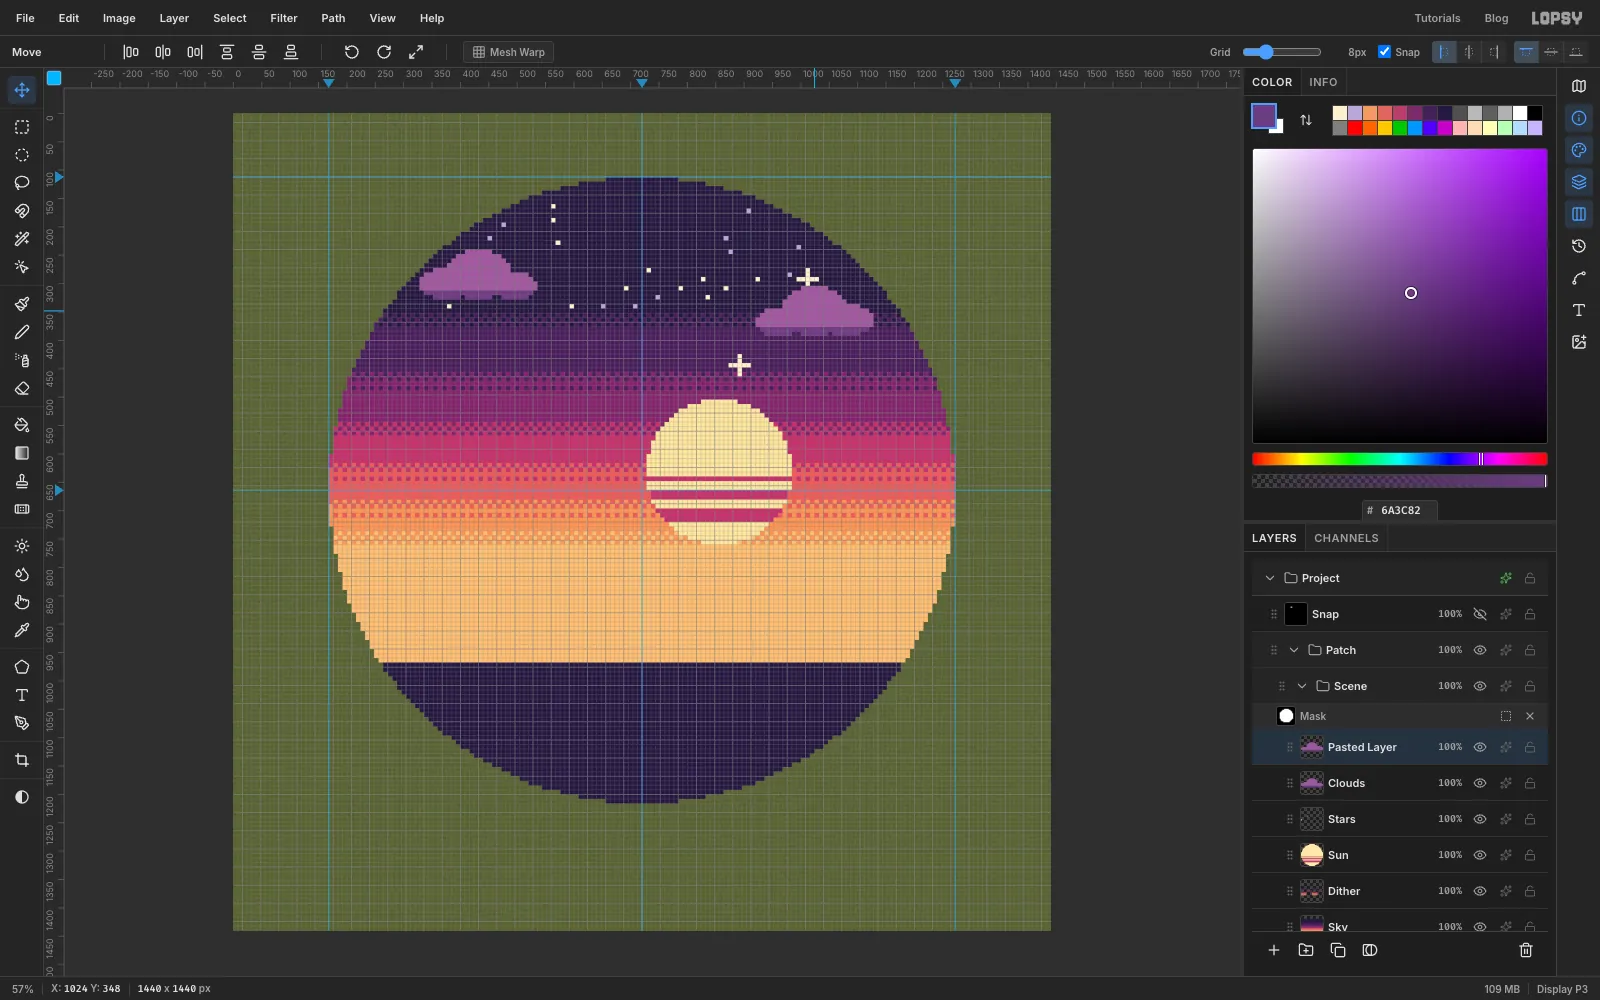
Copy, flip and move the cloud
Marquee the cloud (320, 232 → 544, 336), copy and paste it, and deselect. Choose Image → Flip Horizontal. On a layer this flips the pasted cloud in place, so the bumps now face the other way. Drag it to the right until its left edge sits around x 920 and its top around y 304. Merge it down into Clouds.
-
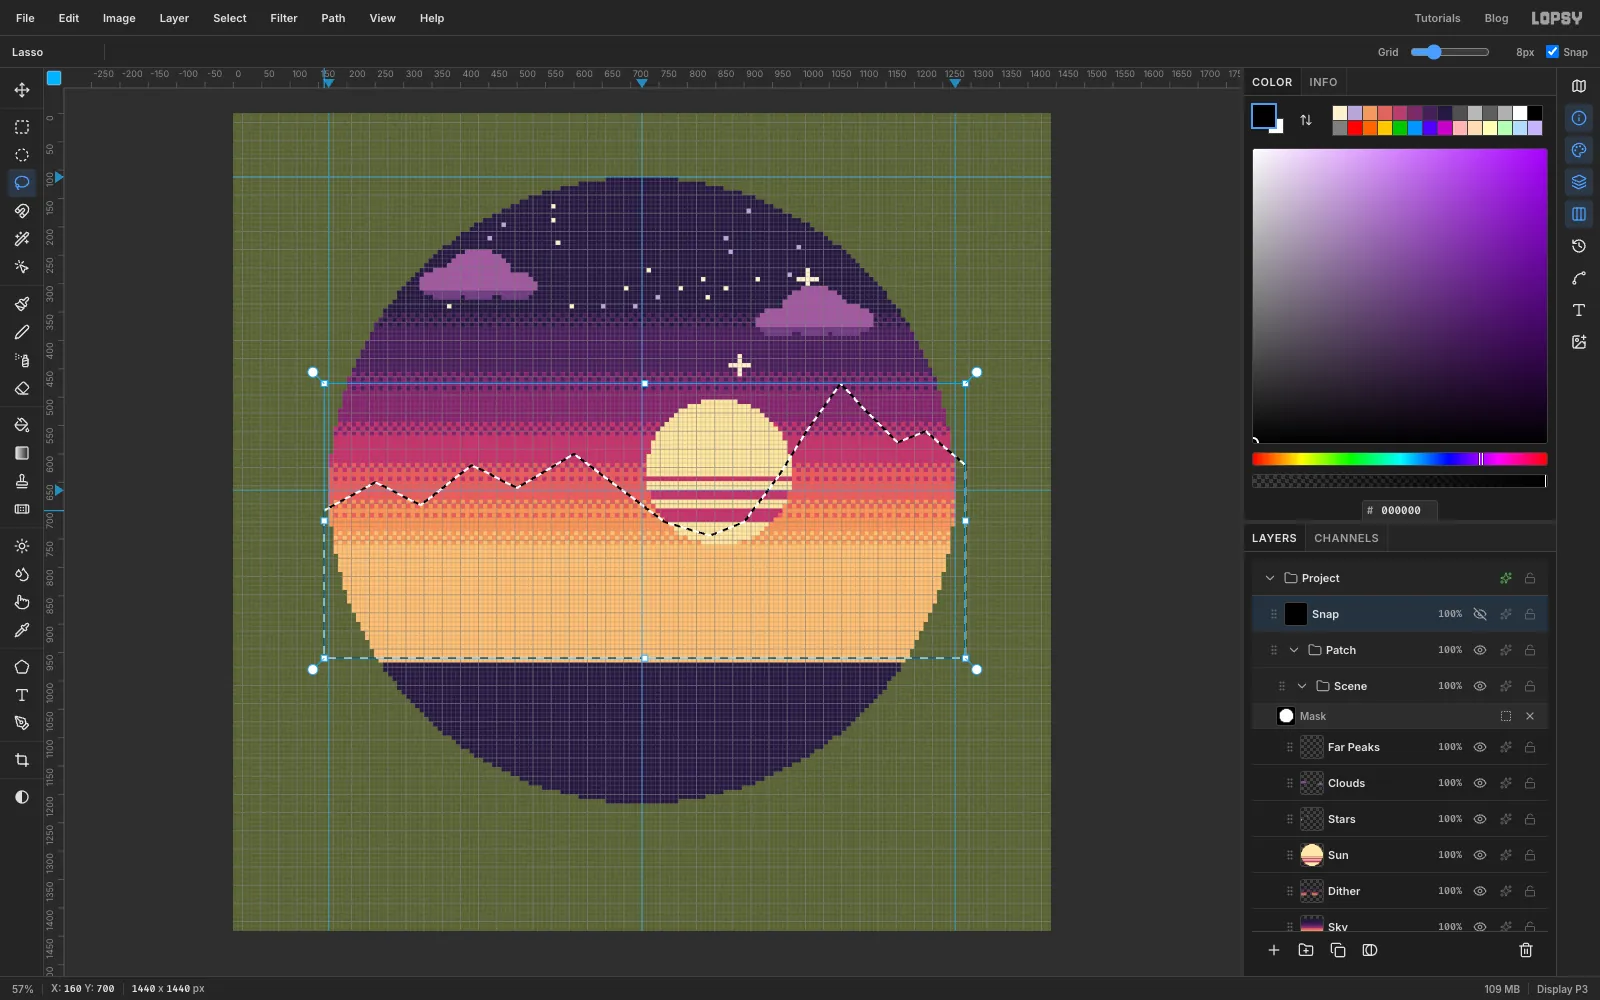
Lasso the far mountain range
Add a layer called Far Peaks. Pixel-snap a mountain range drawn with the Lasso. Start at the left edge of the badge around y 700, zig-zag across through peaks near 600, 600 and 1070, 476, dip into a valley under the sun at about 840, 744, and close the shape well below the horizon. Pixel-snap smooths out any wobble in your hand. Fill it with .
-
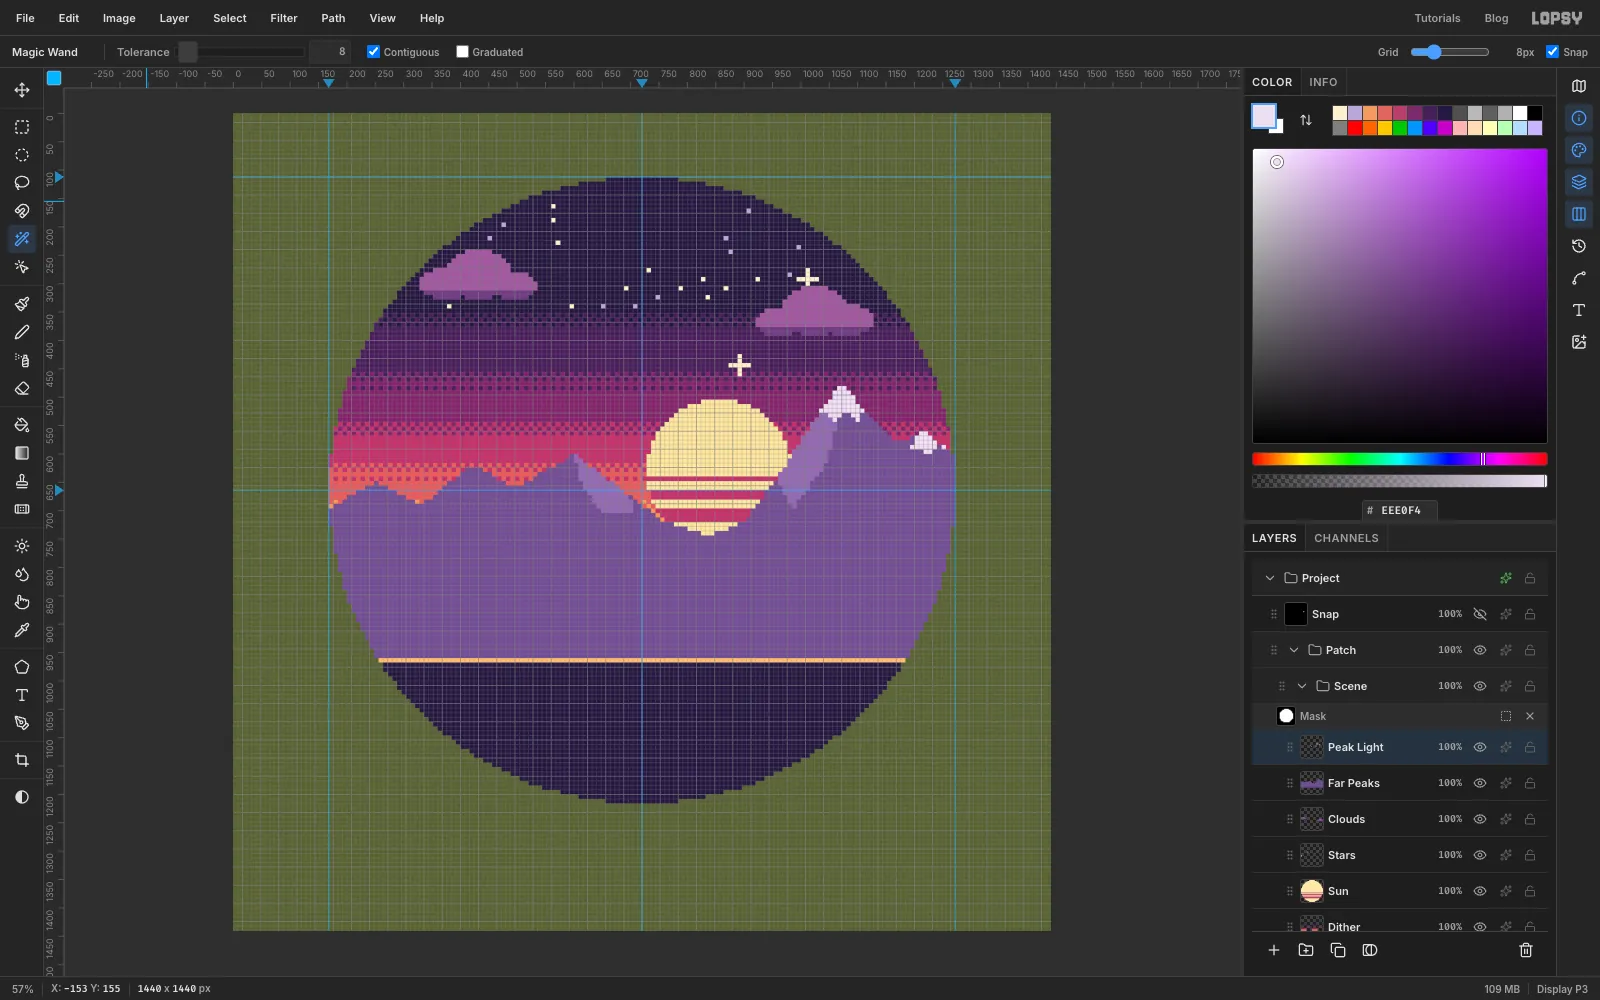
Light the faces and add snow
Add a layer called Peak Light. The sun sits between the peaks, so the faces turned towards it catch the light: the west face of the tall right peak and the east face of the left peak. Light them one at a time:
- Pixel-snap a lasso over the face, a long triangle from the summit down the side that faces the sun. Stop before step 5 of the routine.
- Select Far Peaks, tick Contiguous on the Magic Wand and Shift+Alt-click the range, so the light can't spill off the mountain.
- Select Peak Light, fill with and deselect.
Repeat the same three steps on Peak Light for two snow caps: small zig-zag shapes over the tips of the two right-hand peaks, filled with .
-
Build the castle from marquees
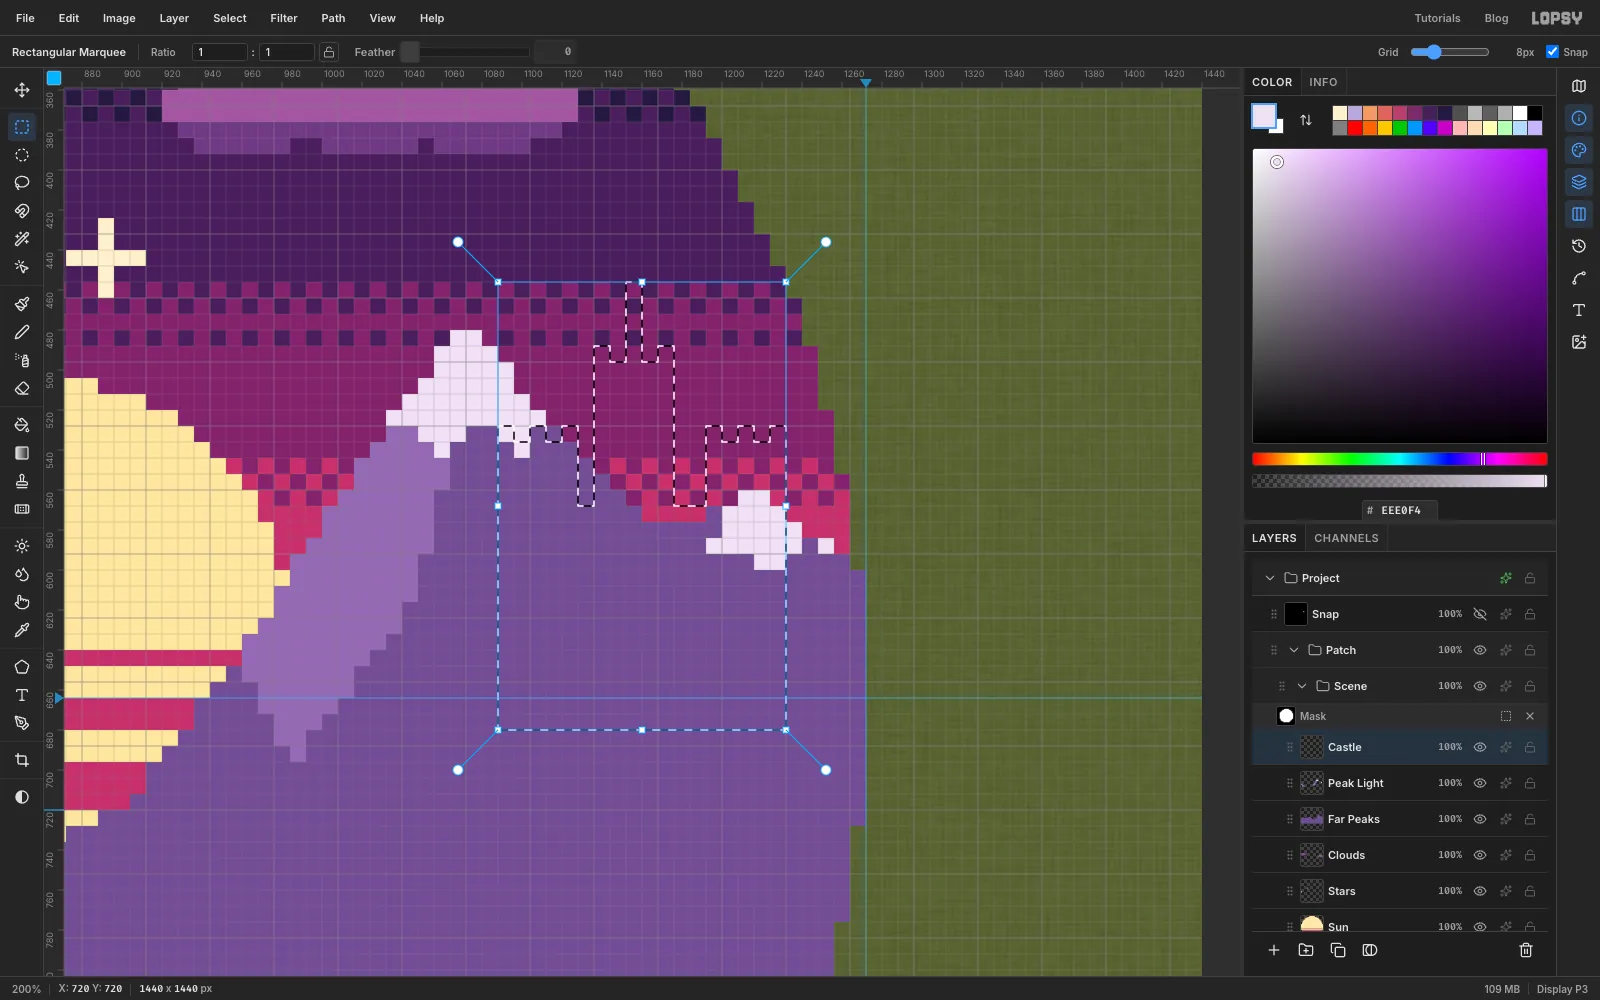
Add a layer called Castle. Because Snap is on, every marquee lands on the grid, so the castle doesn't need a stencil. Draw the keep (1128, 568 → 1192, 680), then hold Shift and add the left tower (1088, 536 → 1128, 680), the right tower (1192, 536 → 1232, 680) and the central tower (1136, 496 → 1176, 568). Add three one-square battlements on top of each tower, with one-square gaps between them, and a one-square flagpole from 1152, 456 to 1160, 488. Fill with and deselect. The castle stands on the shoulder of the tall peak, roughly level with where the llama's head will be.
-
Add windows, a flag and rim light
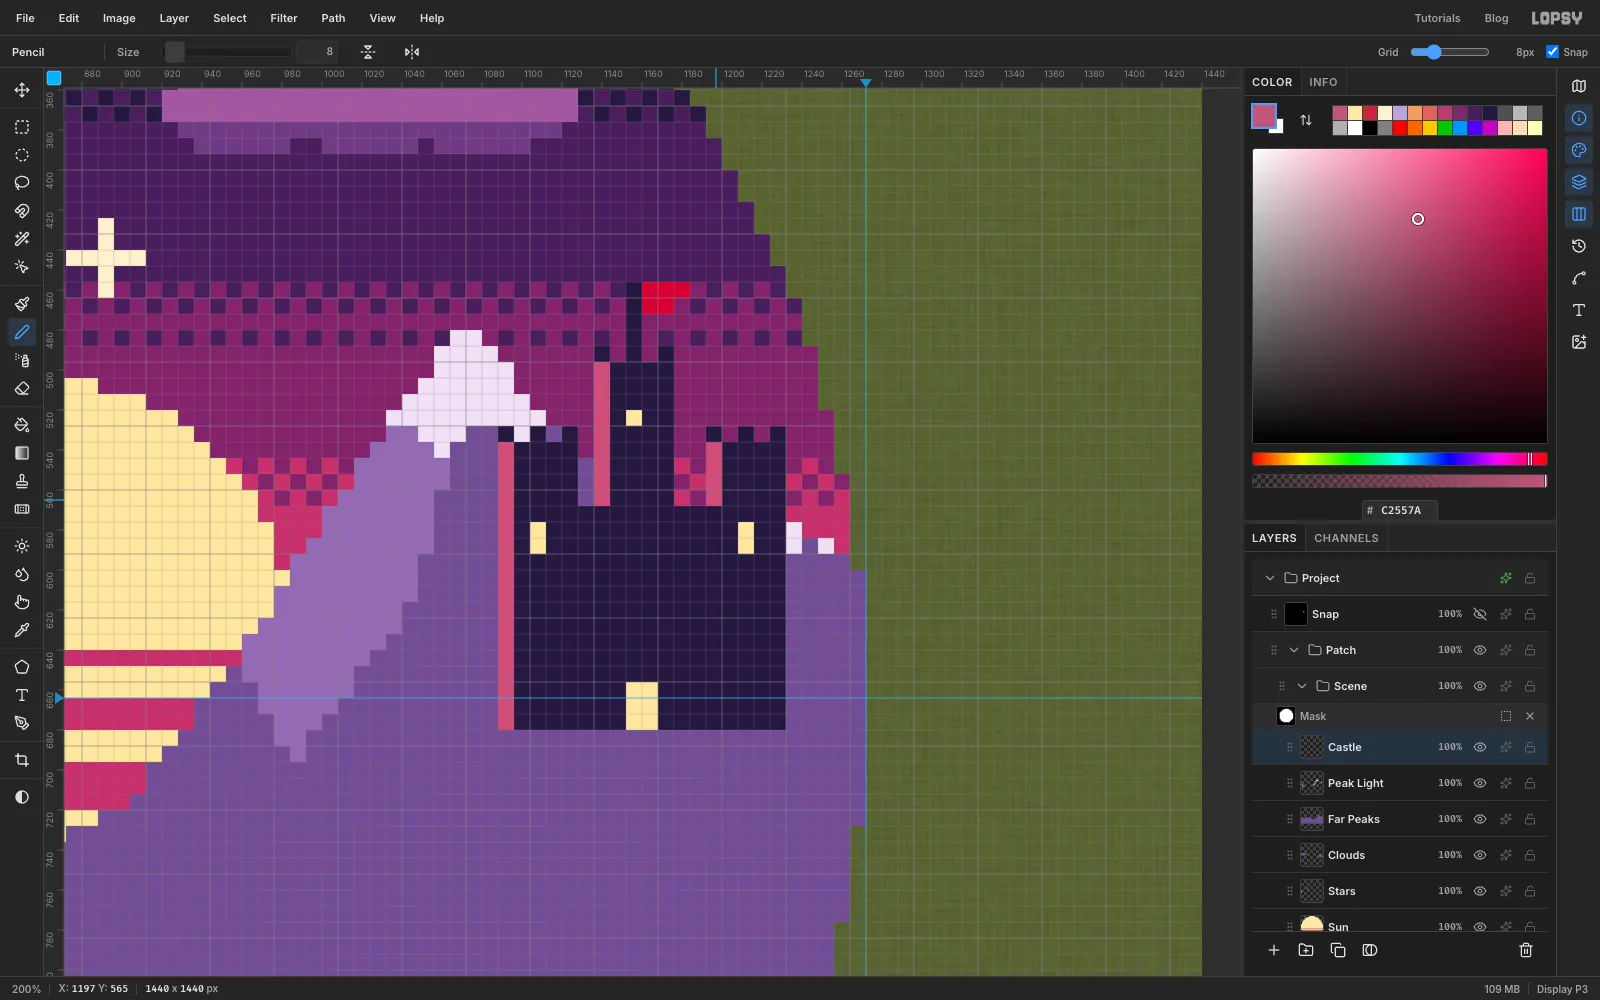
With the 8 px Pencil, click a three-square red flag () beside the top of the pole. Add one tall yellow window () in each side tower, a single window high in the central tower, and a lit gateway two squares wide and three tall at the foot of the keep. The sun is to the castle's left, so draw a pink rim () down the left edge of the left tower and the central tower. Click the top square and Shift-click the bottom one to draw each line.
-
Add the lake and the near hills
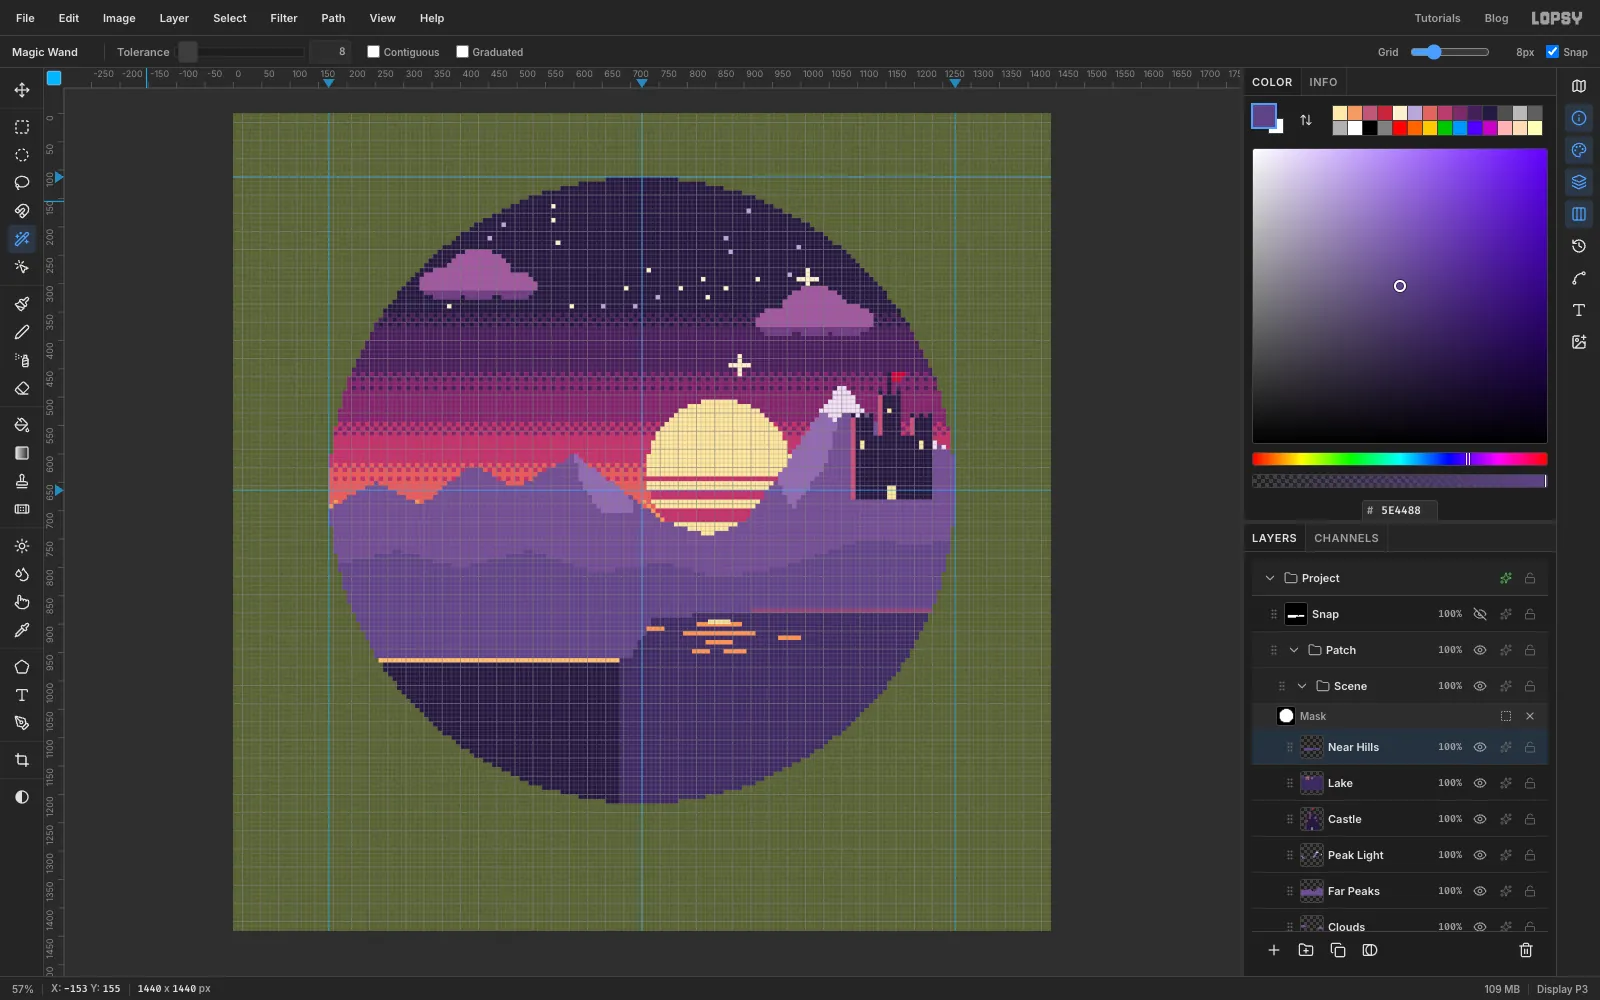
Add a layer called Lake and fill 680, 864 → 1288, 1232 with . Fill the top two rows (680, 864 → 1288, 880) with as a horizon glow, and deselect. With the 8 px Pencil, draw short horizontal dashes of under the sun, using a click and a Shift-click for each. Add one dash at the top for the brightest glint.
Add a layer called Near Hills. Pixel-snap a lasso of four or five low, rounded humps across the whole badge. Their tops sit between y 744 and y 820, and the highest is under the castle. Bring the lasso's bottom edge back along the lake shore at about y 872, and close it down the left side behind the cliff. Fill with . The hills are lighter than the lake and darker than the far peaks, so the three layers of distance stay apart.
-
Build the cliff ledge
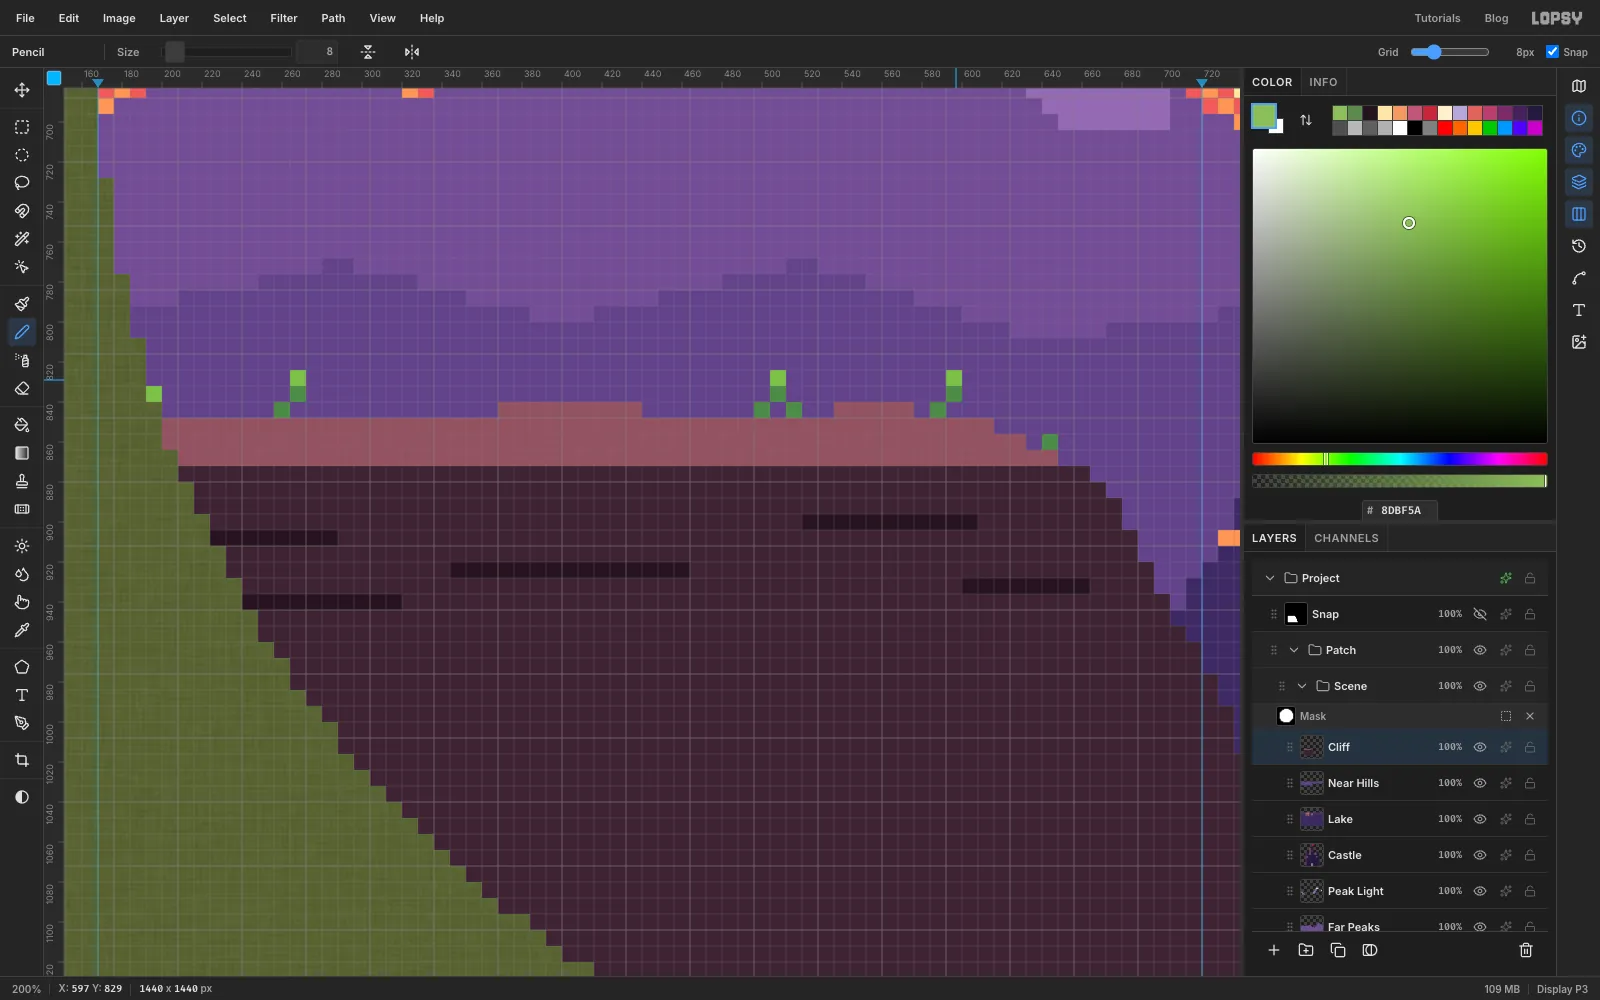
Add a layer called Cliff. Pixel-snap a lasso that runs along a ledge at about y 845 from the left edge to x 620. From there it drops in a steep diagonal to the bottom of the badge. Fill it with .
For a lit top, click the cliff with the contiguous Magic Wand, Shift+Alt-drag a marquee over the top few rows (152, 824 → 728, 872), fill with and deselect. Then, with the 8 px Pencil, draw a few horizontal cracks in , and grass tufts two squares tall in with tips.
-
Drop in the reference photo and scale it
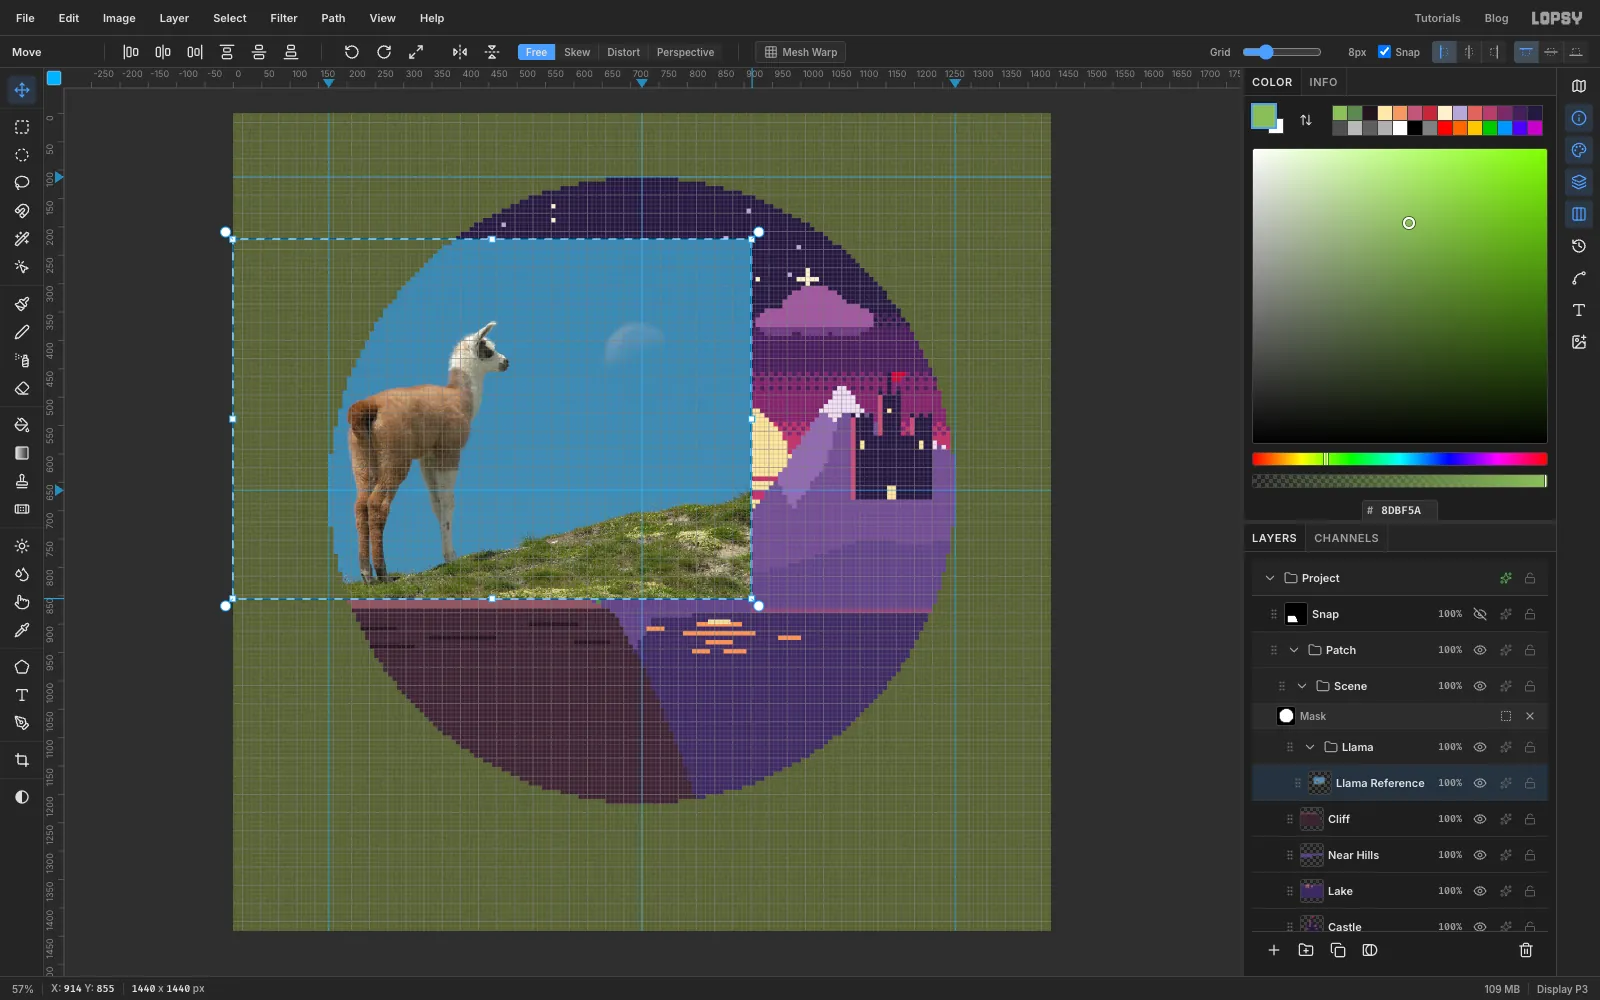
Select Cliff, click New Group and name it Llama. Download the photo linked at the top of this tutorial and drag the file onto the canvas. Lopsy shrinks it to fit the canvas and selects it, with the Move tool active. Rename the layer Llama Reference.
Hold Cmd, which keeps the proportions, and drag the bottom-right handle up and to the left until the photo's right edge reaches about 910 on the top ruler. The llama is then roughly 450 px tall. Press Enter to apply.
-
Place it on the ledge
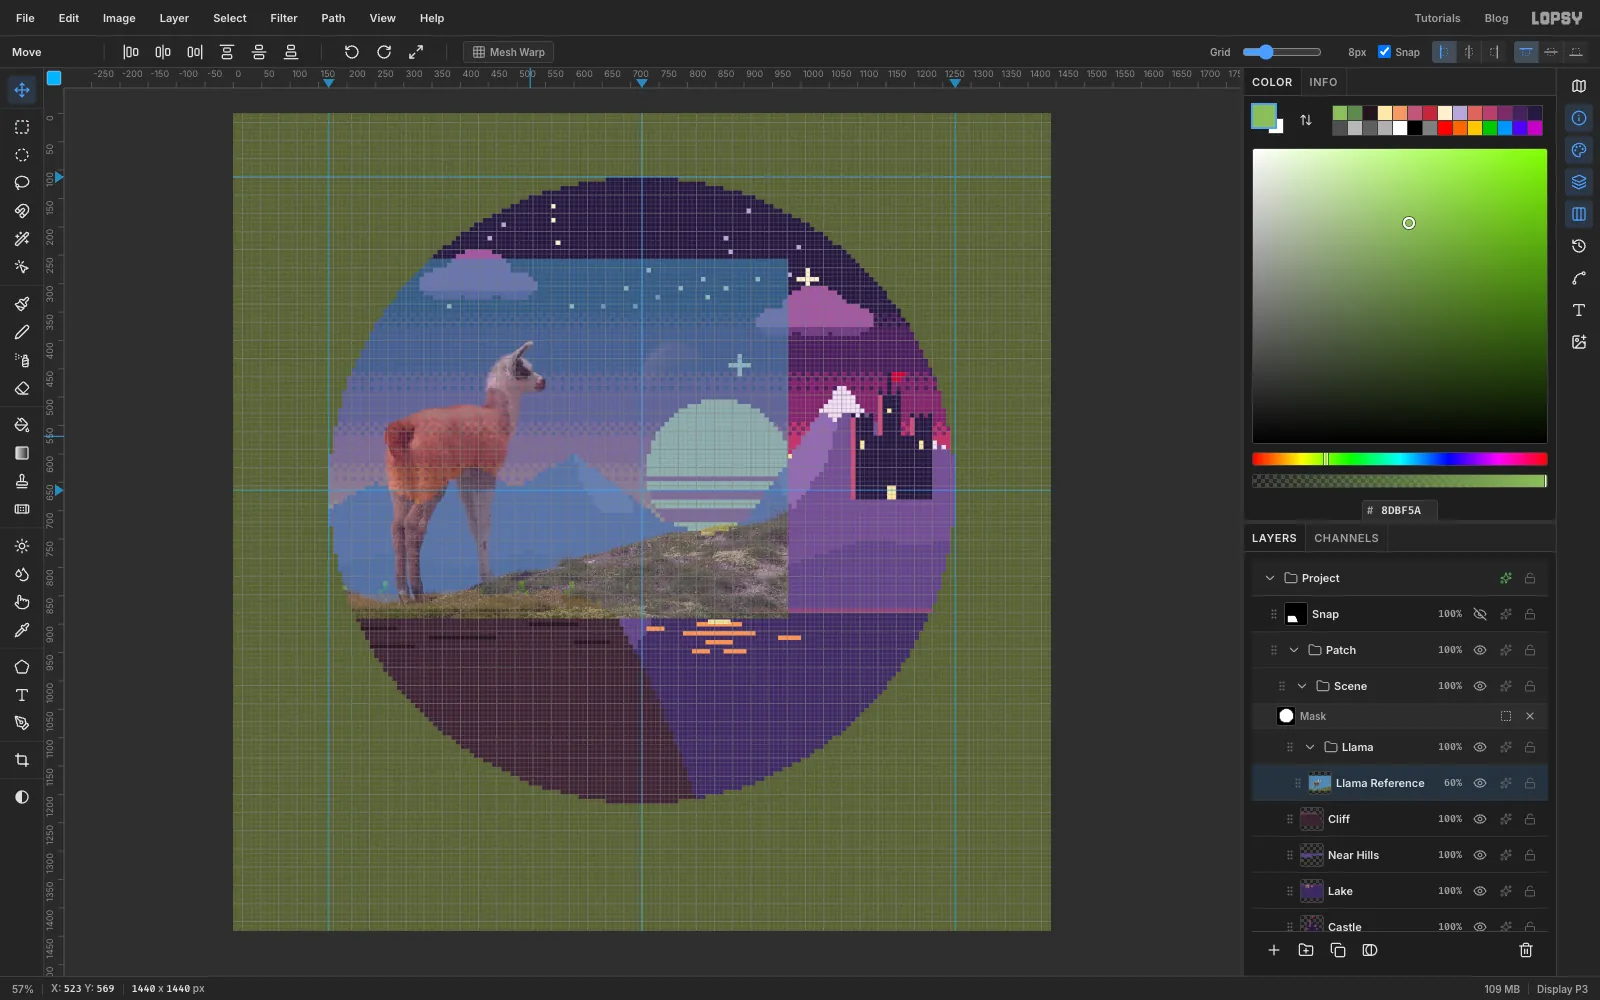
Drag the photo with the Move tool until the llama's back hooves rest on the ledge and its head is level with the top of the sun (the photo's top-left corner ends up near 67, 253). Set the layer's opacity to 60% so you can see both the photo and the scene.
-
Trace the llama with the Lasso
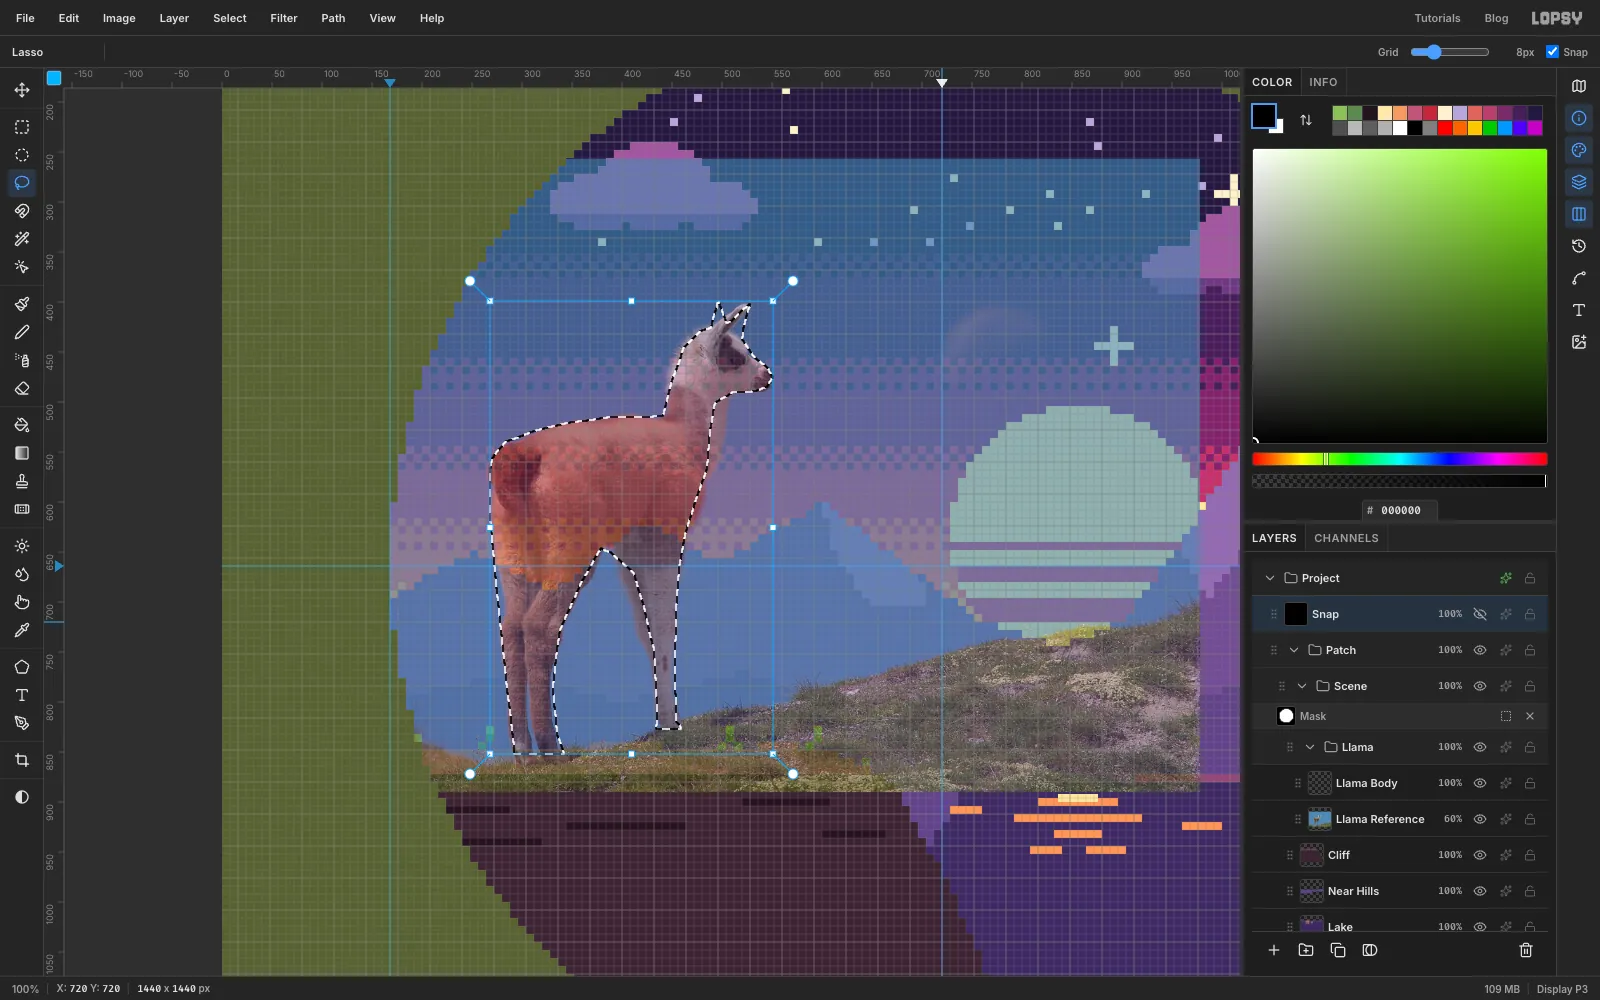
Add a layer called Llama Body. Pixel-snap the llama, using the Lasso for step 2. The Lasso is freehand: hold the mouse button down, drag around the shape and let go to close it. Zoom to 100% and trace just outside the fur. Start at the top of the rump and go clockwise:
- Along the back to the base of the neck.
- Up the back of the neck and around both ears (the far ear peeks out behind the near one).
- Over the forehead to the nose, under the jaw and down the throat and chest.
- Down the front of the front leg to the hoof, back up its inside, across the belly, and down and around the hind legs to the rump.
In the photo the front legs overlap and the hind legs stand together, so trace each pair as one shape. You'll split them with the Pencil later. You don't need to be precise, because snapping to 8 px squares smooths out small wobbles. Fill the snapped shape with cream .
-
Colour the coat
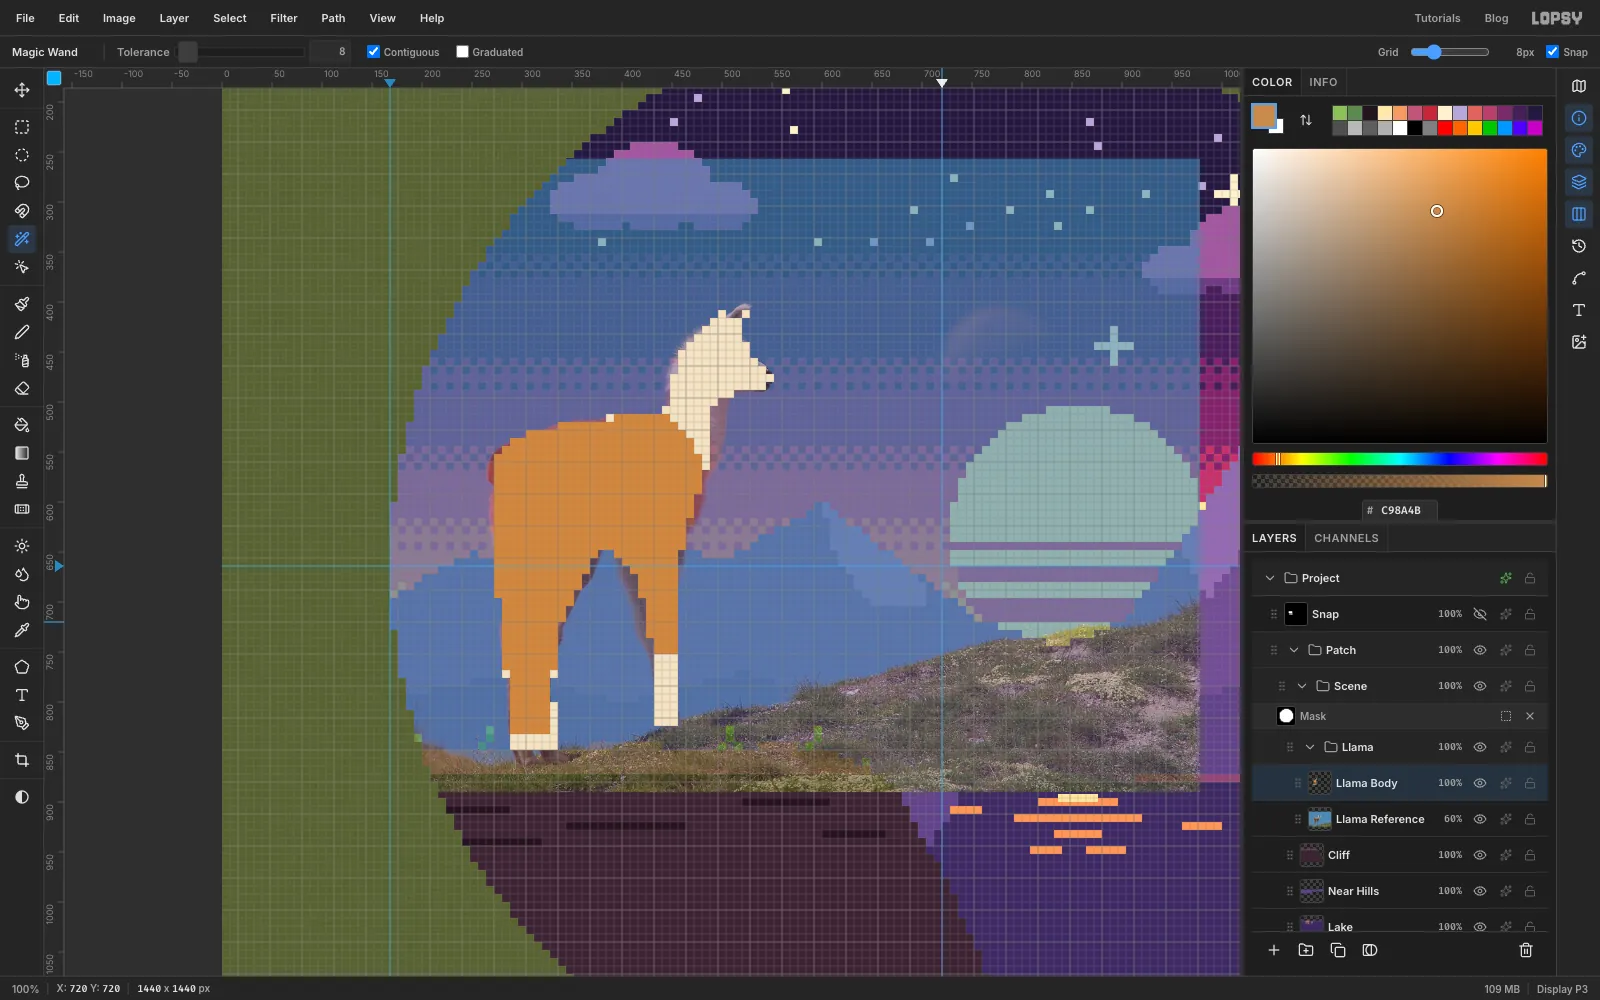
Pixel-snap a second lasso that covers the body, the hind legs and the front legs, but not the neck and head. On the front legs, stop the lasso about seven squares above the hooves, so the bottoms of the legs stay cream as socks. Before filling, select Llama Body and Shift+Alt-click the llama with the contiguous Magic Wand, so the coat stays inside the outline. Fill with and deselect. The head, neck and front socks stay cream.
-
Fix the legs and ears with the Pencil
Zoom to 200% and pick the 8 px Pencil. In the photo the ground slopes, so the front leg stops short of the ledge. Extend it in cream so both pairs of hooves stand on the rock.
In the photo the far front leg is hidden, so draw it yourself: a column two squares wide, two squares to the left of the near front leg, running from the belly down to the ledge. Paint it in shadow tan and its bottom seven rows in for the sock. Make the ears one square taller, and colour the inner edge of the near ear and the whole far ear in .
-
Shade the belly, rump and far hind leg
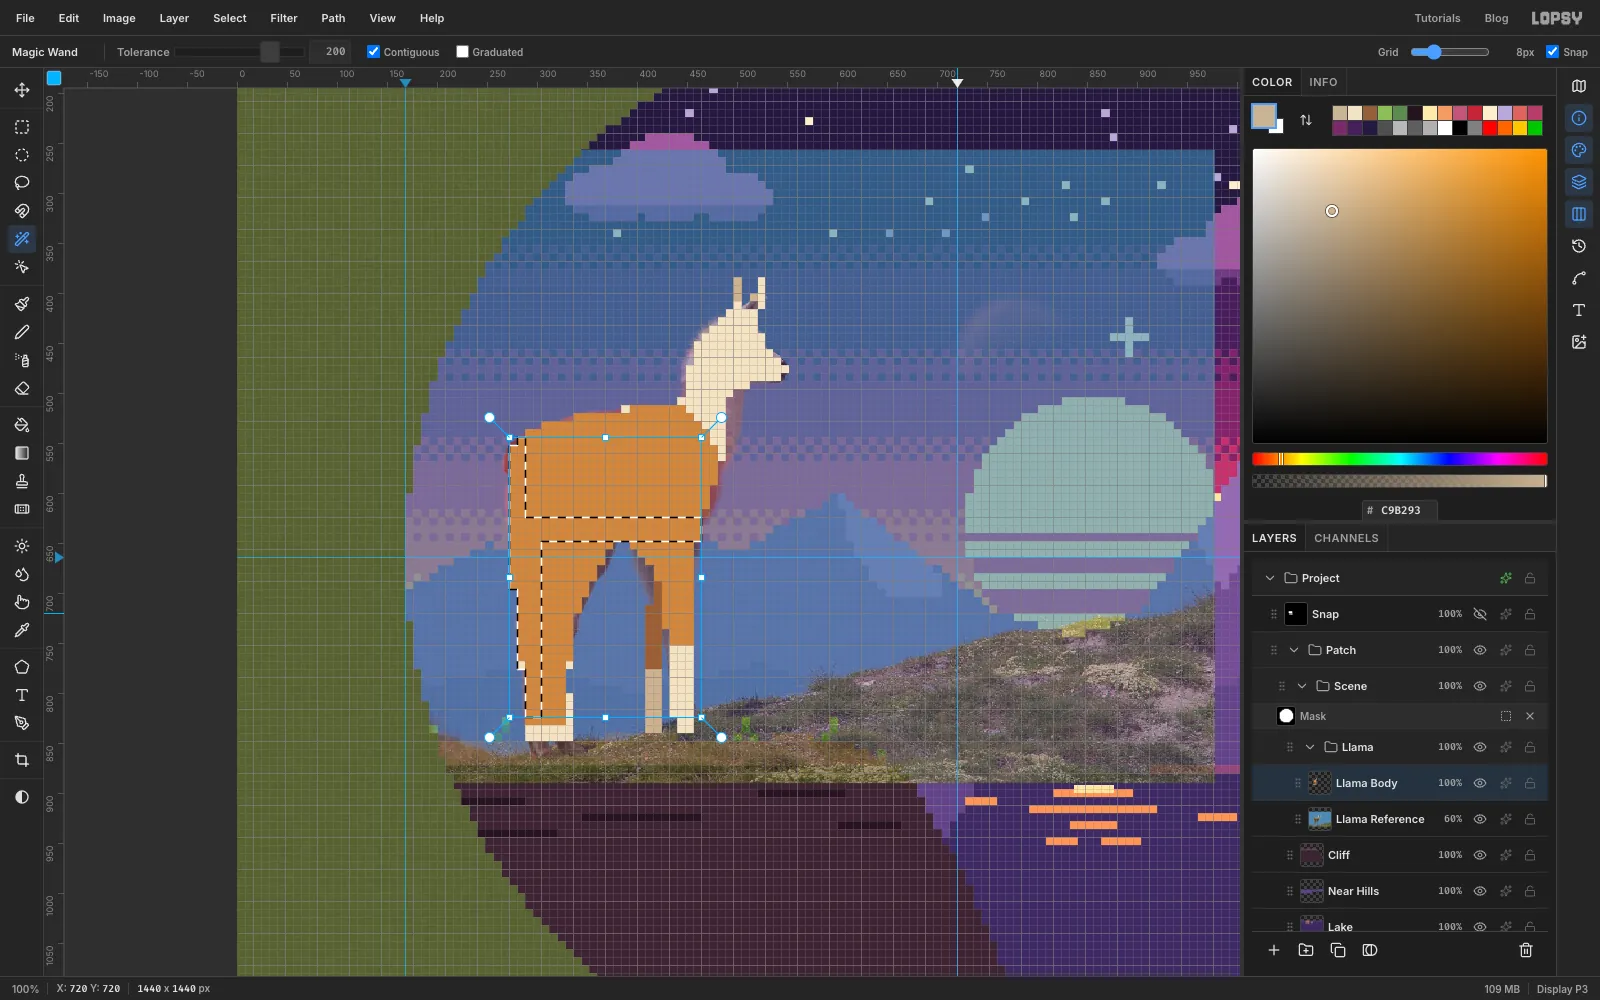
Shading on a grid is just more marquees. Draw a rectangle over the bottom three rows of the body. Shift-add a two-square column down the back of the rump, from the top of the back to the hooves, and a three-square column over the left half of the hind legs, from the belly to the ledge. Select Llama Body and Shift+Alt-click it with the Magic Wand at Tolerance 200, so both the cream and the tan count as part of the llama. Fill with and deselect.
Now finish the legs with the Pencil:
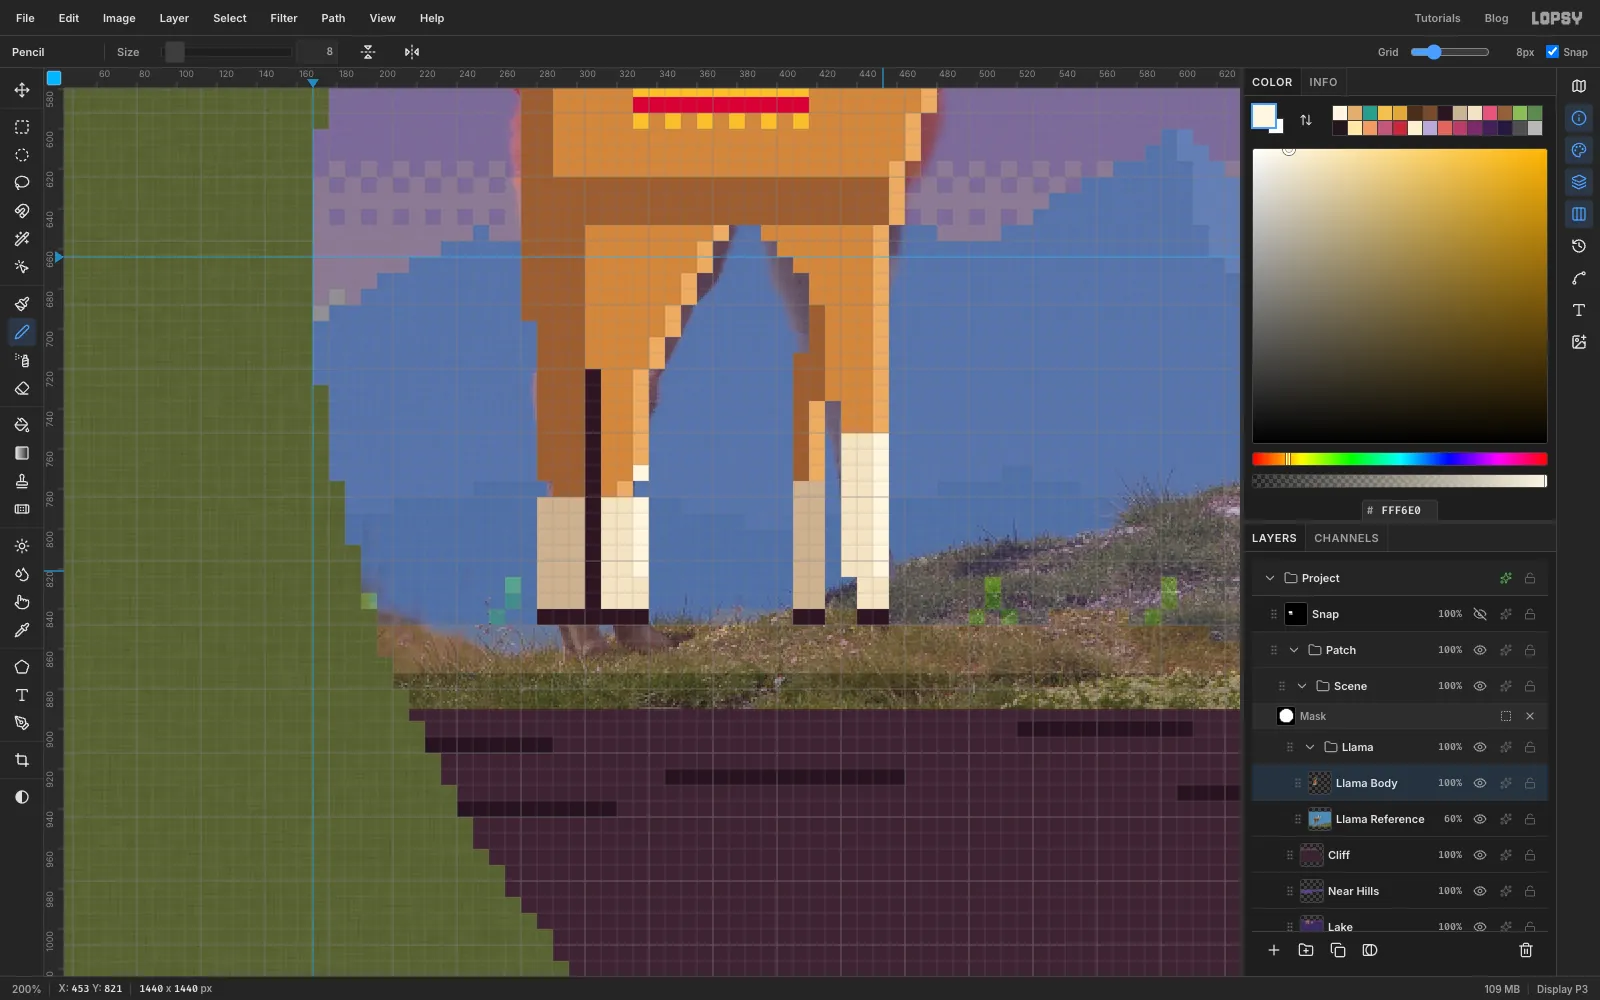
- Paint the bottom seven rows of the hind legs as socks: cream on the right half and on the shaded left half.
- Draw a one-square line of down the middle of the hind legs, from the belly shade to the ledge. It splits them into a near leg and a far leg.
- Finish with a row of hooves along the bottom of every leg.
-
Give it a face and ear tassels
With the Pencil:
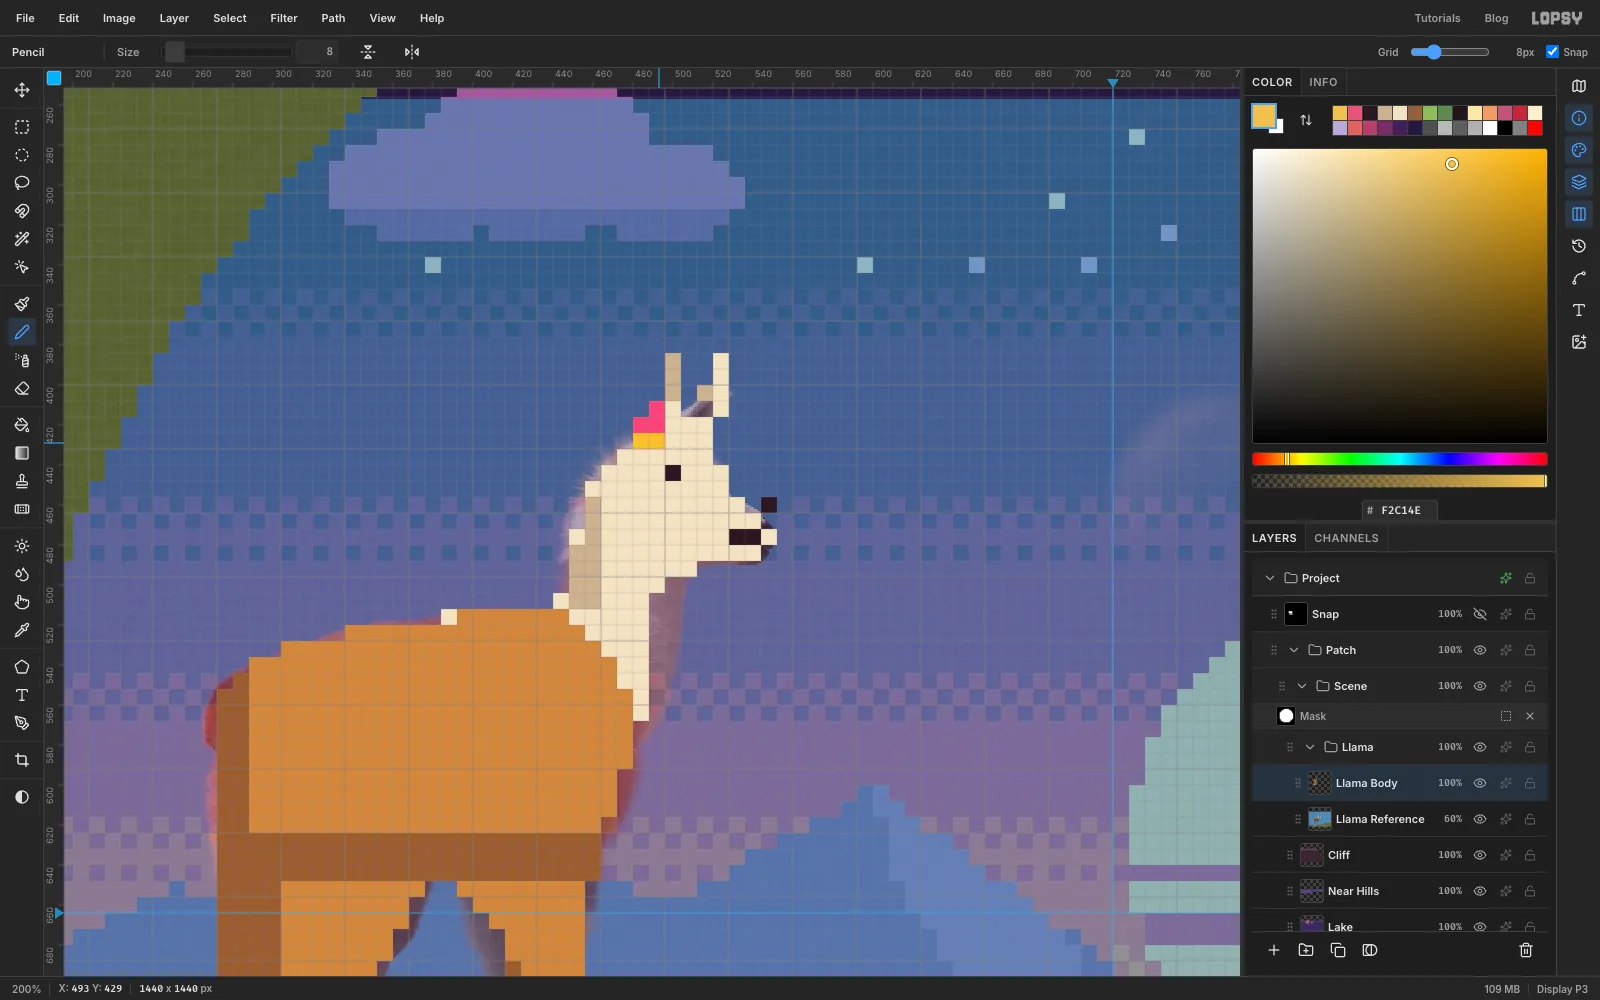
- Draw a shadow line one square wide and about seven squares long down the back of the neck in .
- In , click a one-square eye two squares below the ears and two squares in from the back of the head, so it sits in clear cream and doesn't touch the outline. Click one square for the nostril at the end of the muzzle and two for the mouth underneath.
- Andean llamas often wear coloured yarn tassels in their ears. Click a few squares at the base of the ears and two squares under them.
-
Weave the saddle blanket
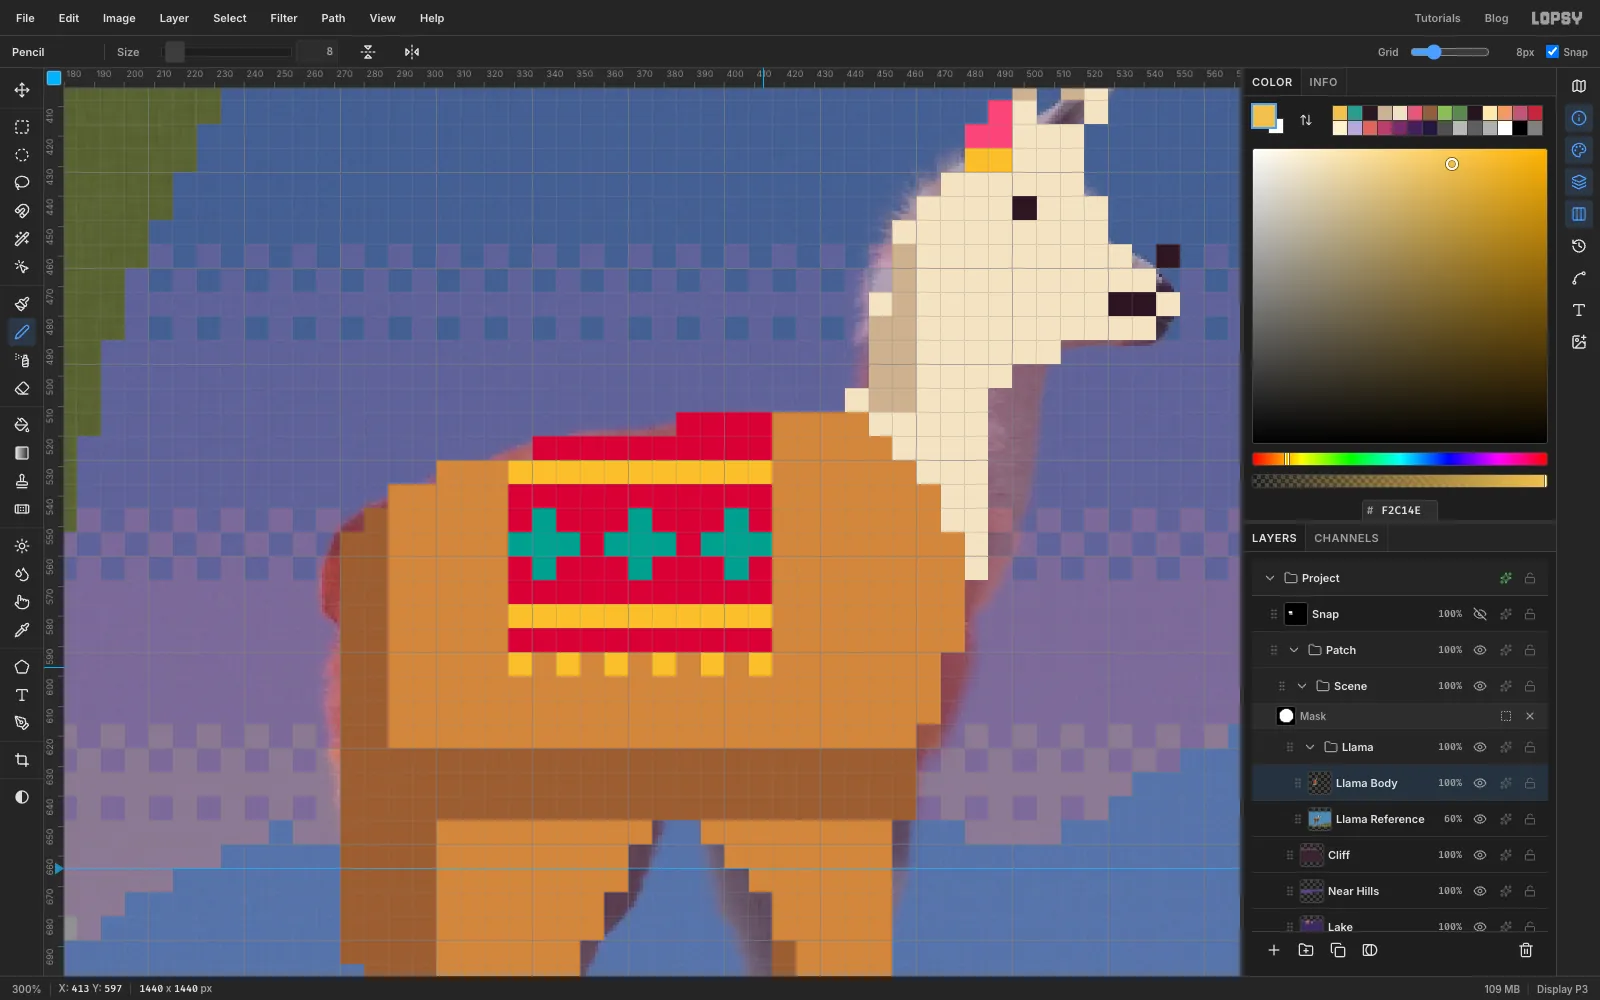
Marquee a block over the middle of the back (328, 504 → 416, 592) and intersect it with the llama using Shift+Alt and the Magic Wand. Fill it with . The top edge follows the curve of the back.
While the blanket is still selected, use the Pencil to draw a yellow stripe across the third row and the second-to-last row. Draw a band of three teal crosses across the middle. The selection keeps every click inside the blanket. Deselect, then click a yellow fringe of alternate squares just under the bottom edge.
-
Add a pack and a pennant
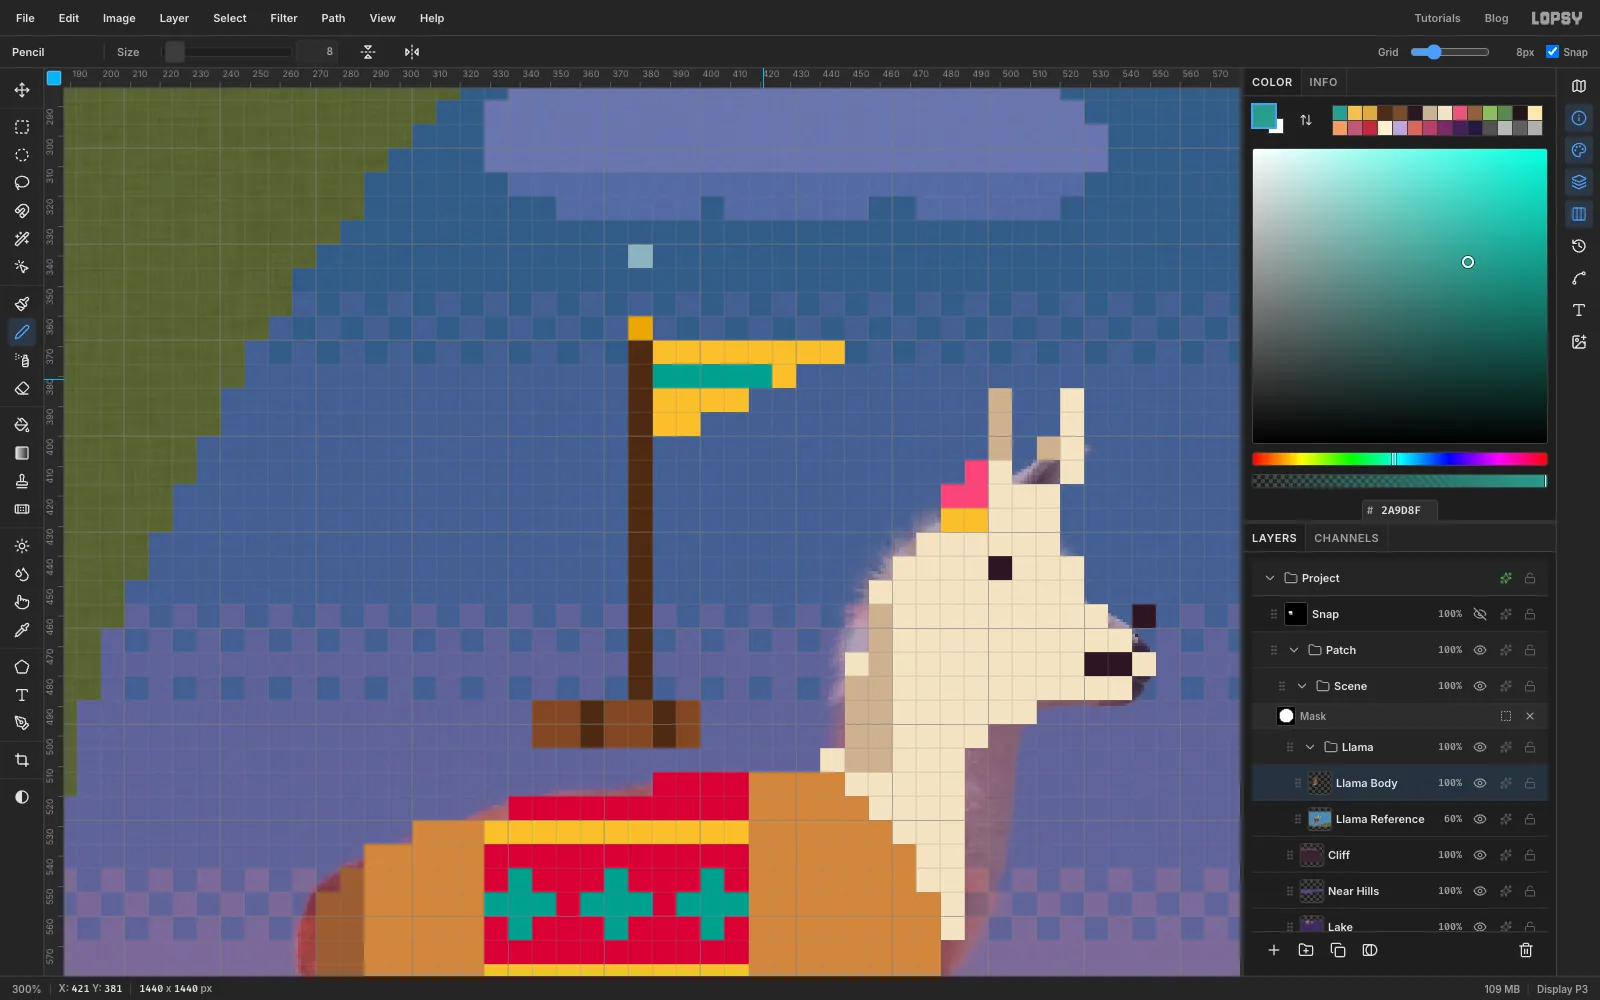
On top of the blanket, draw a pack two rows tall and seven squares wide in , with two strap columns in . Draw a pole straight up from the pack in , about fifteen squares tall: click the bottom square and Shift-click the top one. Put a gold knob on the top.
The pennant is four rows that get shorter: eight, six, four and two squares, flying to the right from the top of the pole in . Paint the second row teal.
-
Catch the sunset on its edges
The sun is to the llama's right. Find every square whose right-hand neighbour is empty: the front of the face, the chest, the back of the pack and the front edge of each leg. Paint those squares lighter, using on the tan coat and on the cream. A one-square rim light like this makes a flat sprite look round.
-
Outline the llama
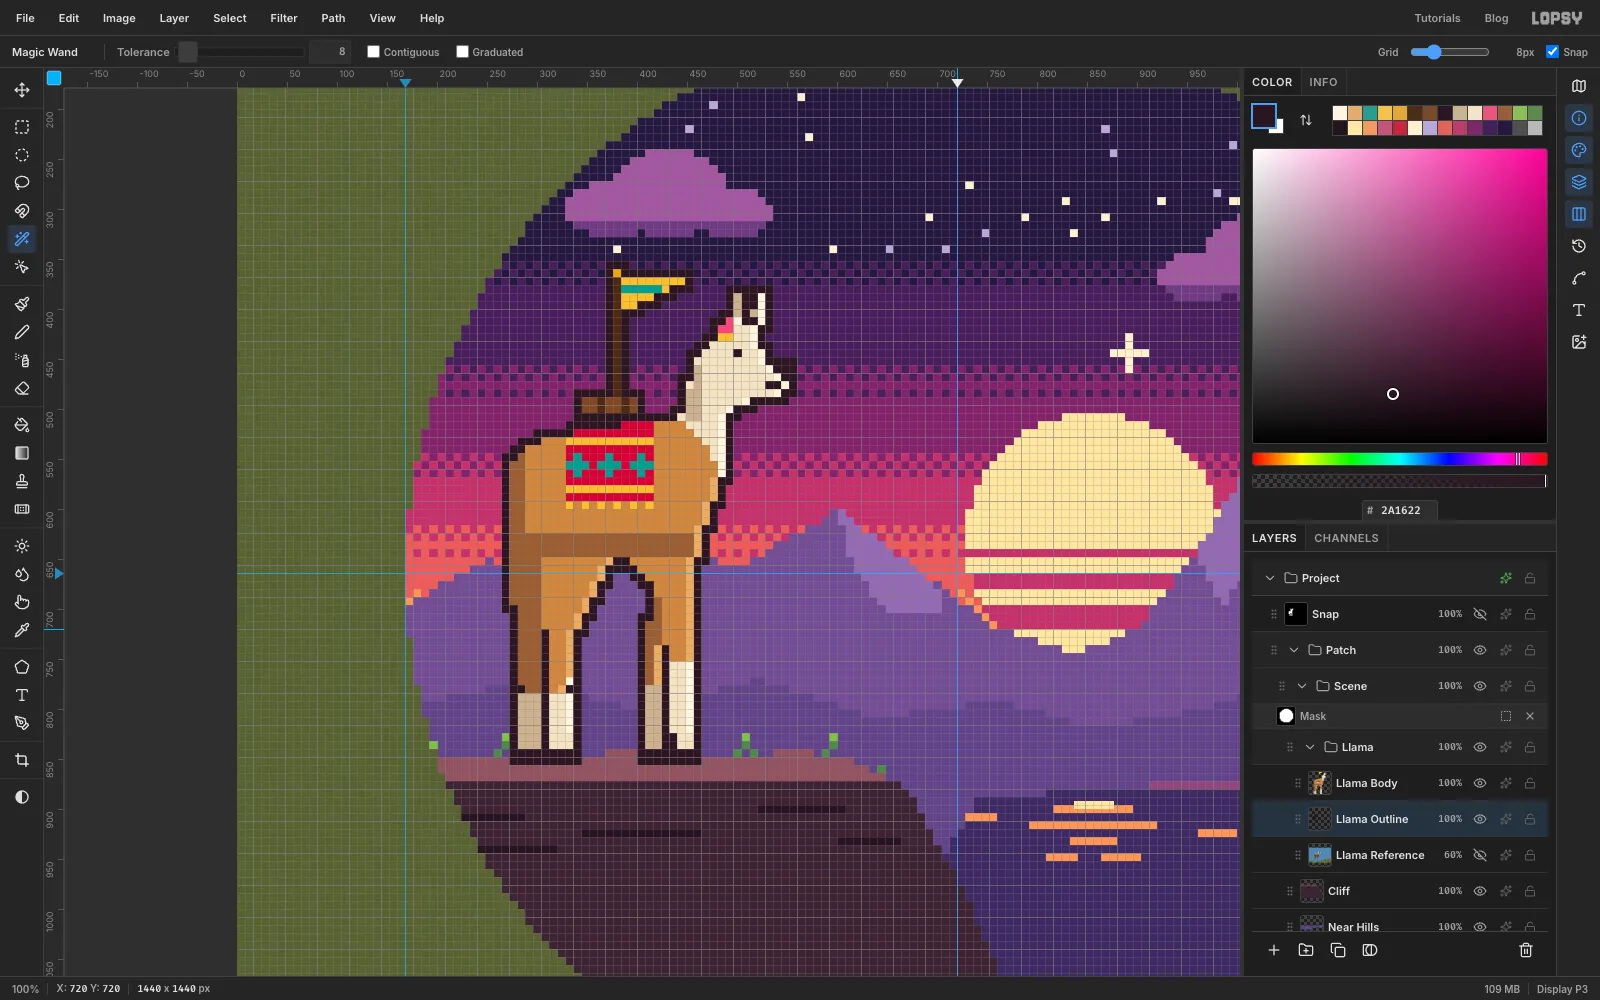
Select Llama Reference and add a layer called Llama Outline. It sits under Llama Body. Pixel-snap again, but for step 2 Cmd-click the Llama Body thumbnail and choose Select → Grow… with 8 px. Fill the snapped shape with and deselect. Hide the Llama Reference layer.
Select the Llama group and drag it two squares (16 px) to the right with the Move tool, so it stands a little further onto the ledge. The outline, body and hidden photo all move together.
-
Add birds over the sun
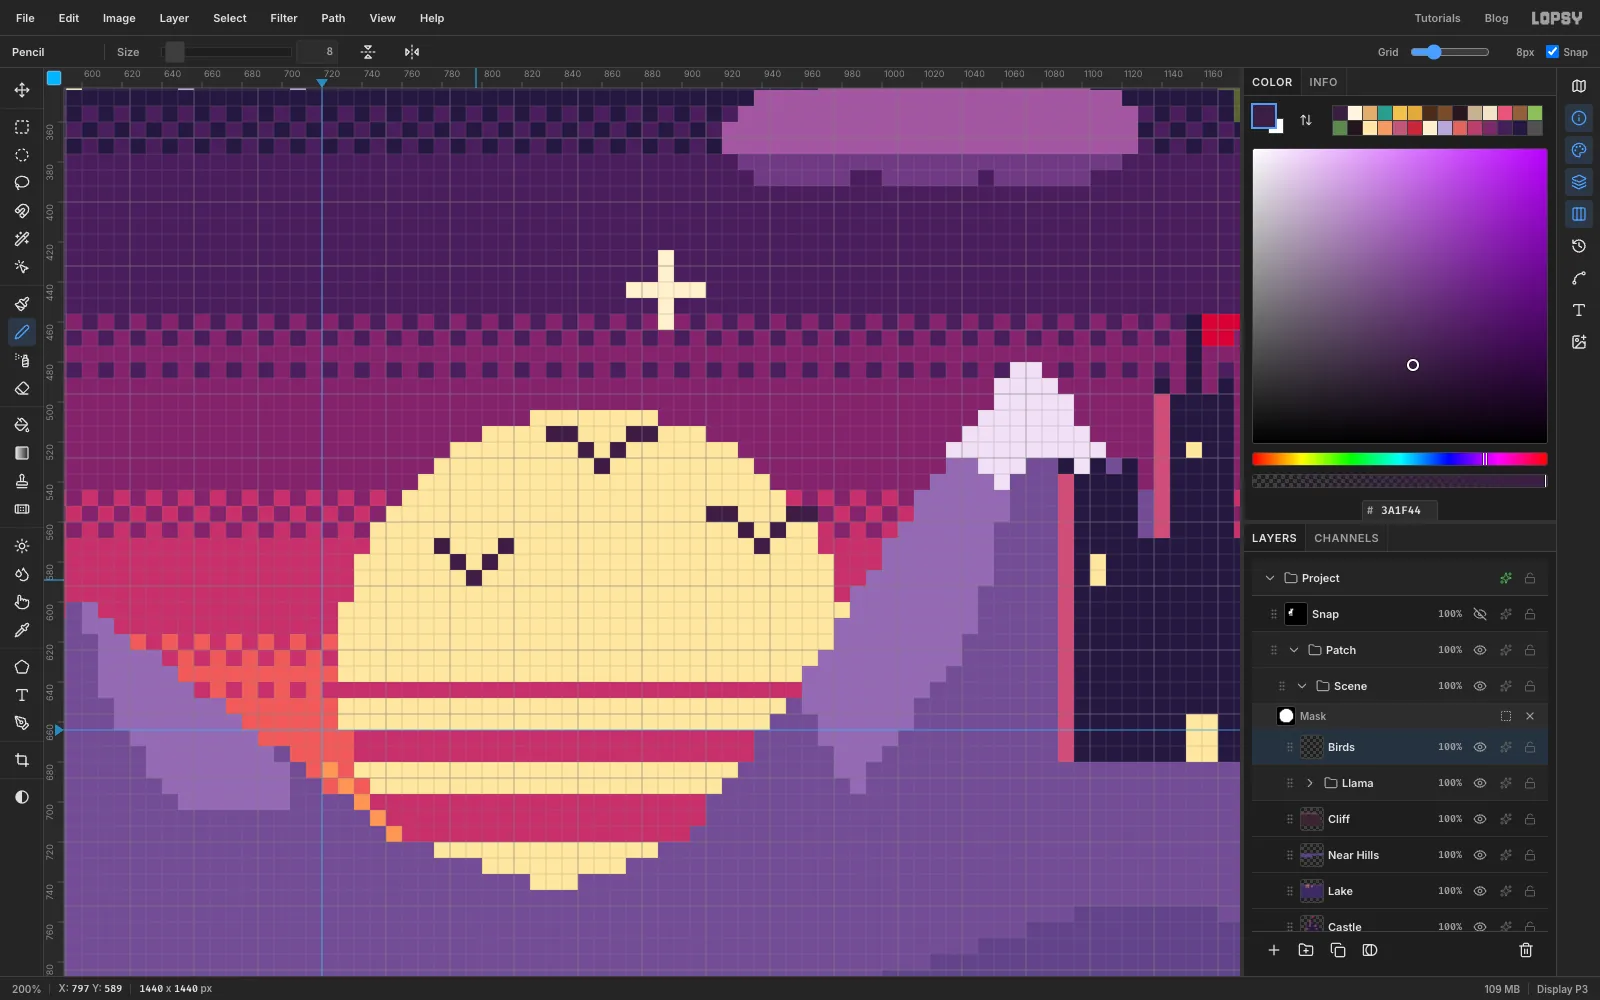
Collapse the Llama group and, with it selected, click Add Layer. The new Birds layer appears above the group, not inside it. With the 8 px Pencil and , draw three small V shapes over the sun: two seven squares wide, one five squares wide.
-
Pencil one HP heart
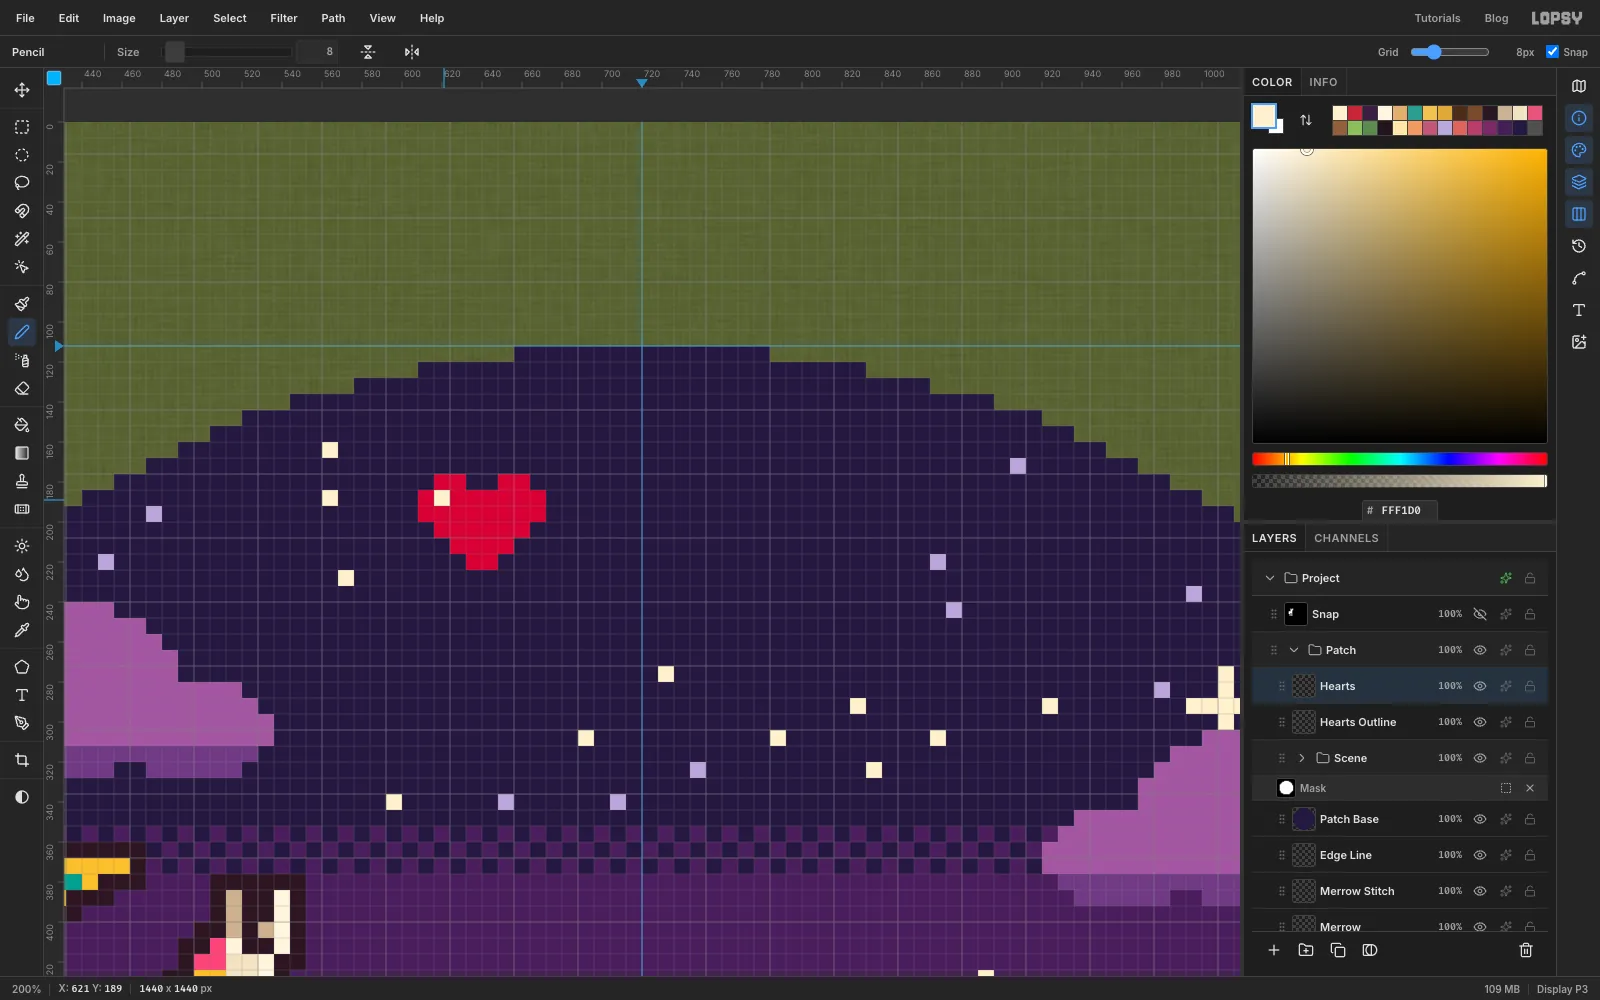
Collapse the Scene group, select it and add two layers above it: Hearts Outline, then Hearts. On Hearts, draw a heart eight squares wide and six tall in , starting at 608, 176:
- Skip one square, then two squares, a gap of two, and two squares.
- Two full rows of eight.
- Six, then four, then two, each centred.
Click one square in the upper-left lobe for the shine.
-
Copy it, empty half, and outline them
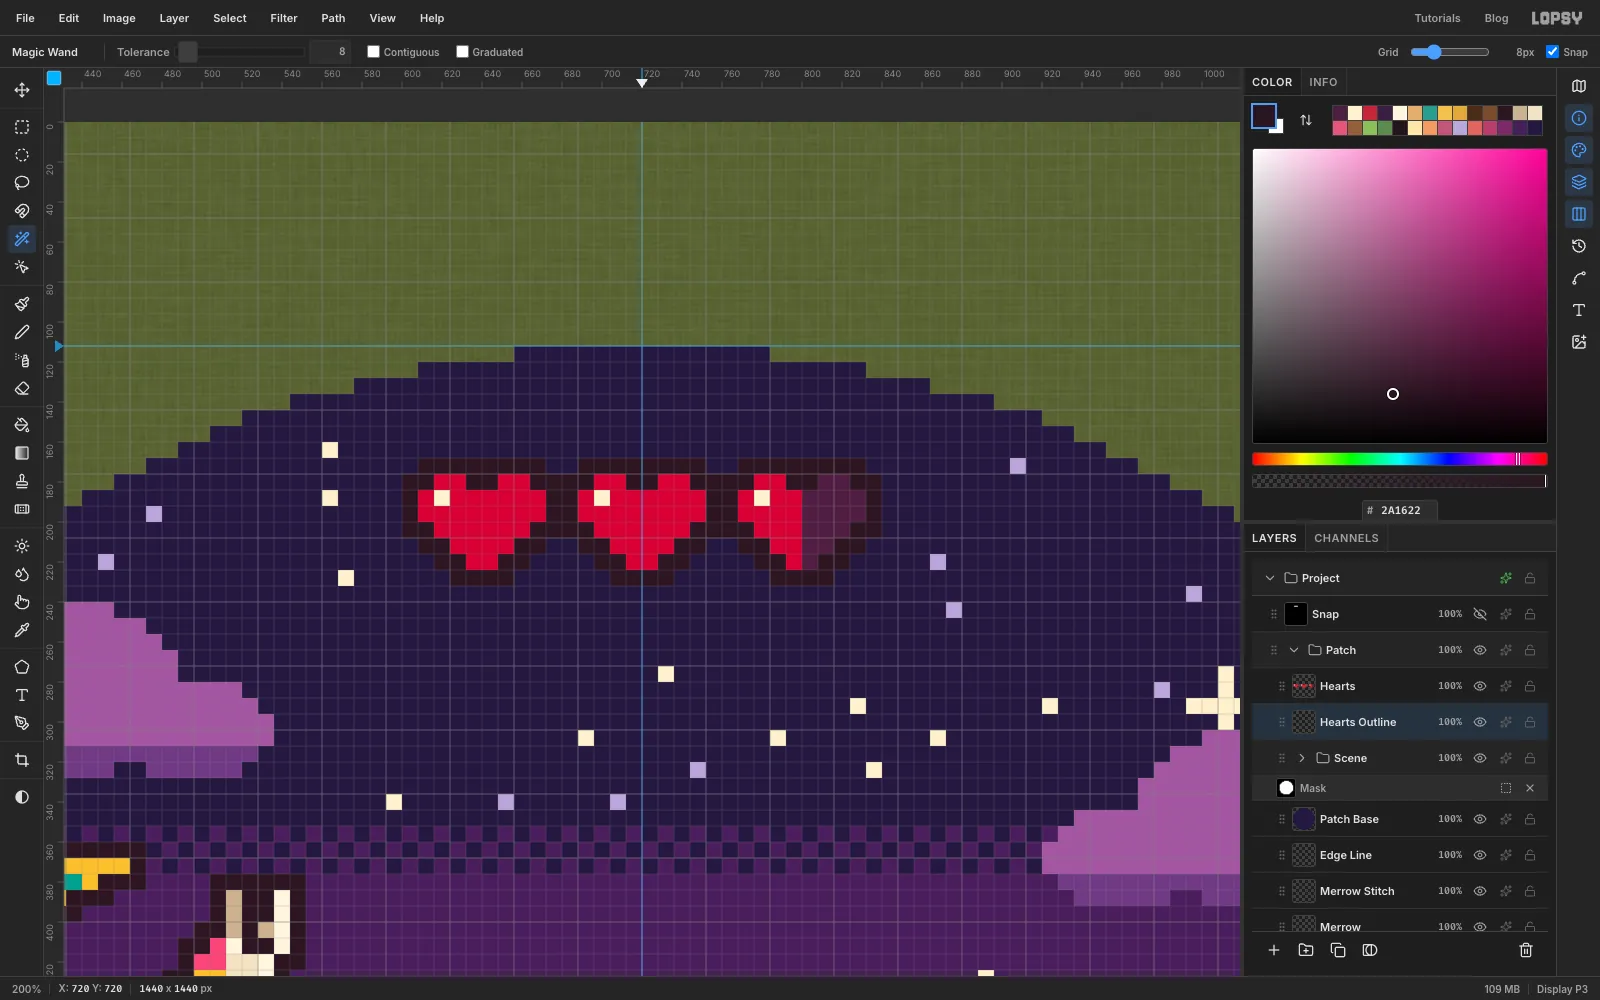
Marquee the heart (608, 176 → 672, 224) and copy it. Paste, drag the copy 80 px to the right and merge it down. Paste again (it lands on the first heart), drag this copy 160 px to the right and merge it down. To show "two and a half lives", marquee the right half of the third heart (800, 176 → 832, 224). Then click it with the contiguous Paint Bucket in .
Select Hearts Outline and pixel-snap: Cmd-click the Hearts thumbnail, Select → Grow… by 8 px, then fill with .
-
Make the ribbon banner
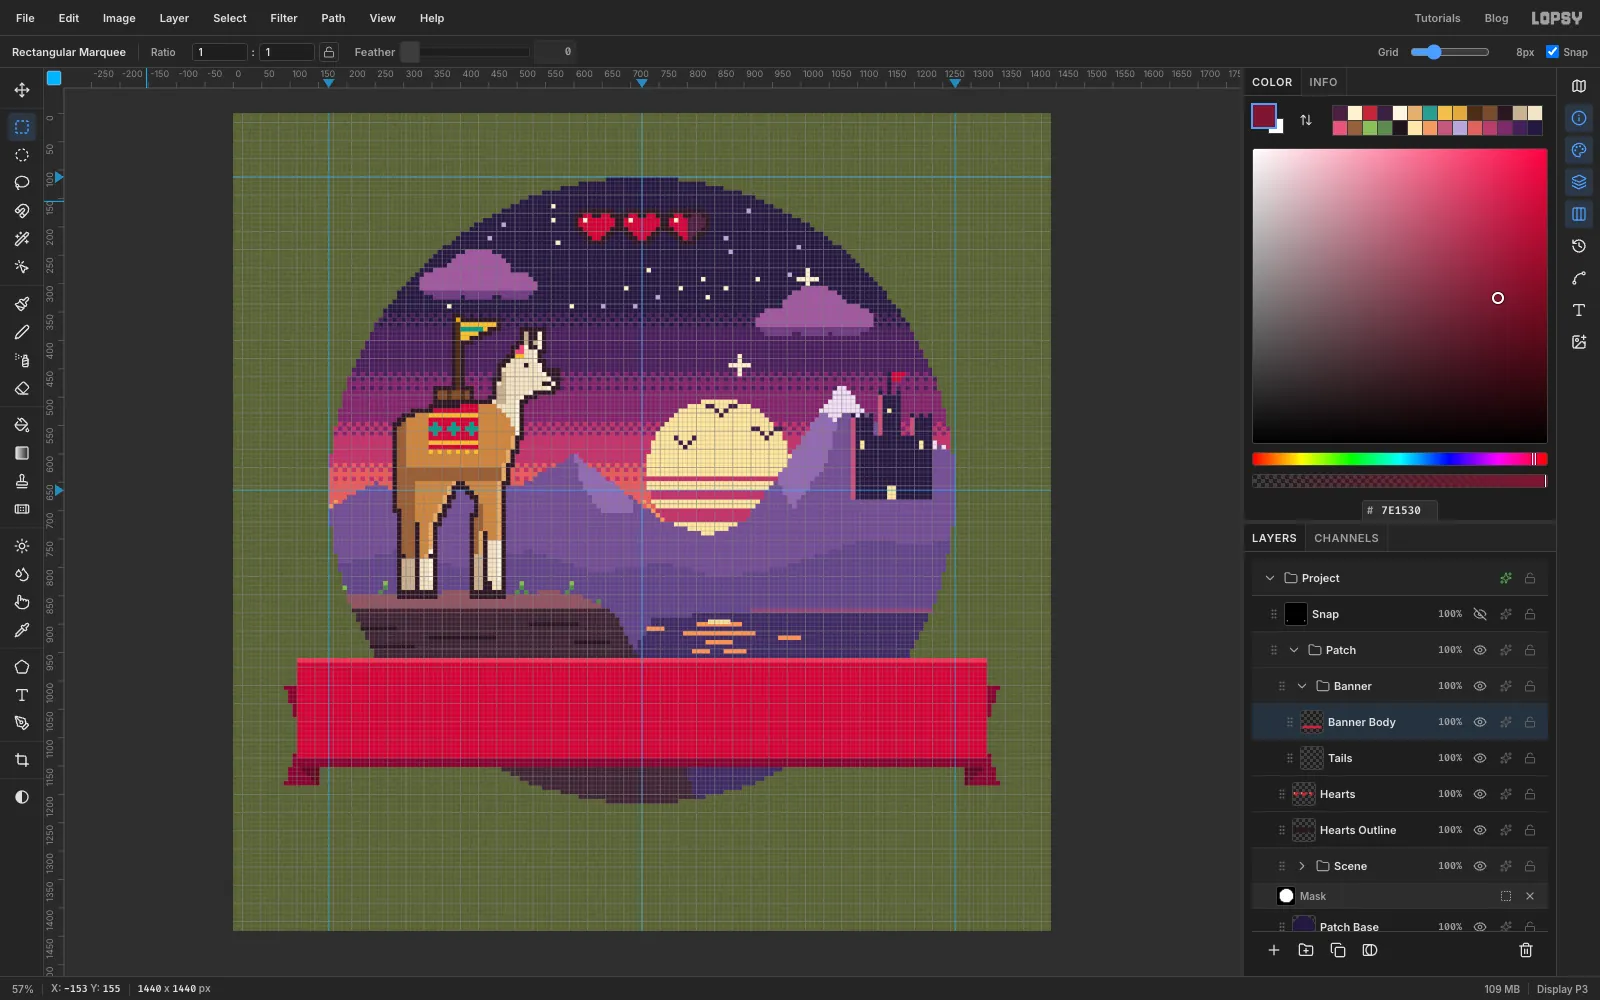
With Hearts selected, click New Group and name it Banner. Add a layer called Tails. Pixel-snap the two tails together. For step 2, drag the Lasso in straight hops around the left tail: a tall block from x 88 to x 152 and y 1008 to y 1184, with a V cut into its outer (left) end that reaches in to about x 120. Pixel-snap squares off any wobble in the straight sides. Hold Shift and lasso the mirror image on the right, from x 1288 to x 1352. Fill with .
Pixel-snap the two folds the same way. Each is a small right-angled triangle under an end of the banner, with corners at 112, 1152, 152, 1152 and 152, 1184 on the left (and 1328, 1152, 1288, 1152, 1288, 1184 on the right). Fill them with .
Add a layer called Banner Body. Fill 112, 960 → 1328, 1152 with . Fill the top row (112, 960 → 1328, 968) with and the bottom two rows (112, 1136 → 1328, 1152) with .
-
Add diamond studs at the ends
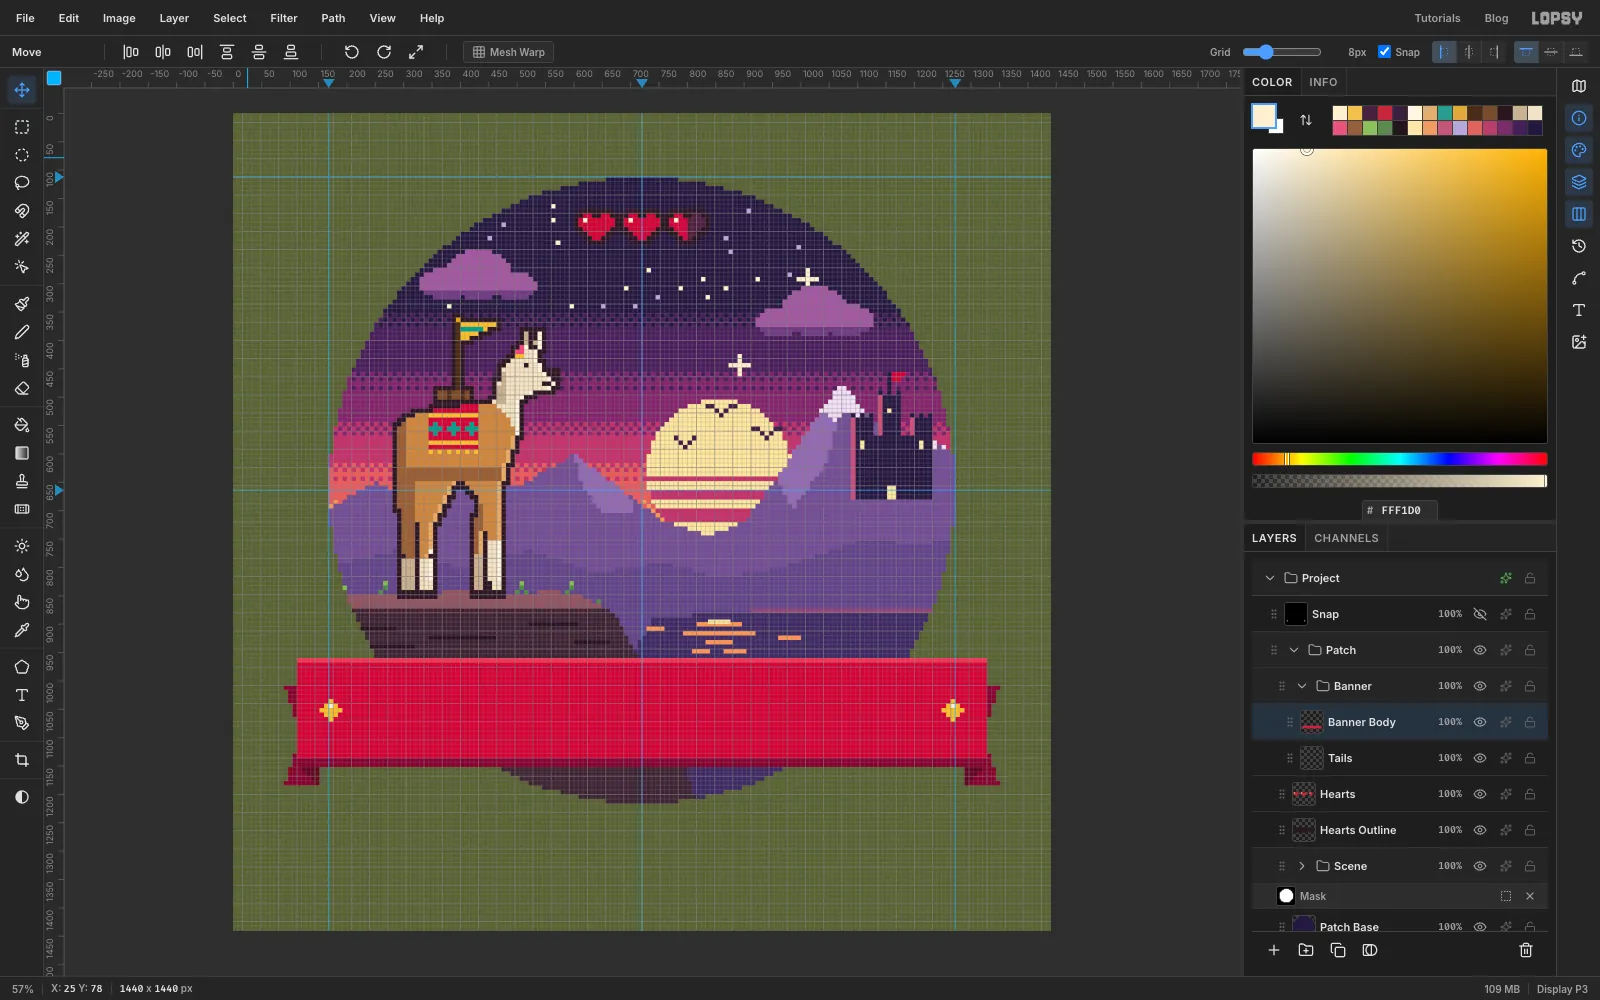
With the Pencil, draw a five-square diamond in near the left end of the banner, centred on x 172, with one square for the shine. Marquee it, copy, paste, choose Image → Flip Horizontal and drag the copy to the same spot at the right end. Merge it down.
-
Set the title in a pixel font
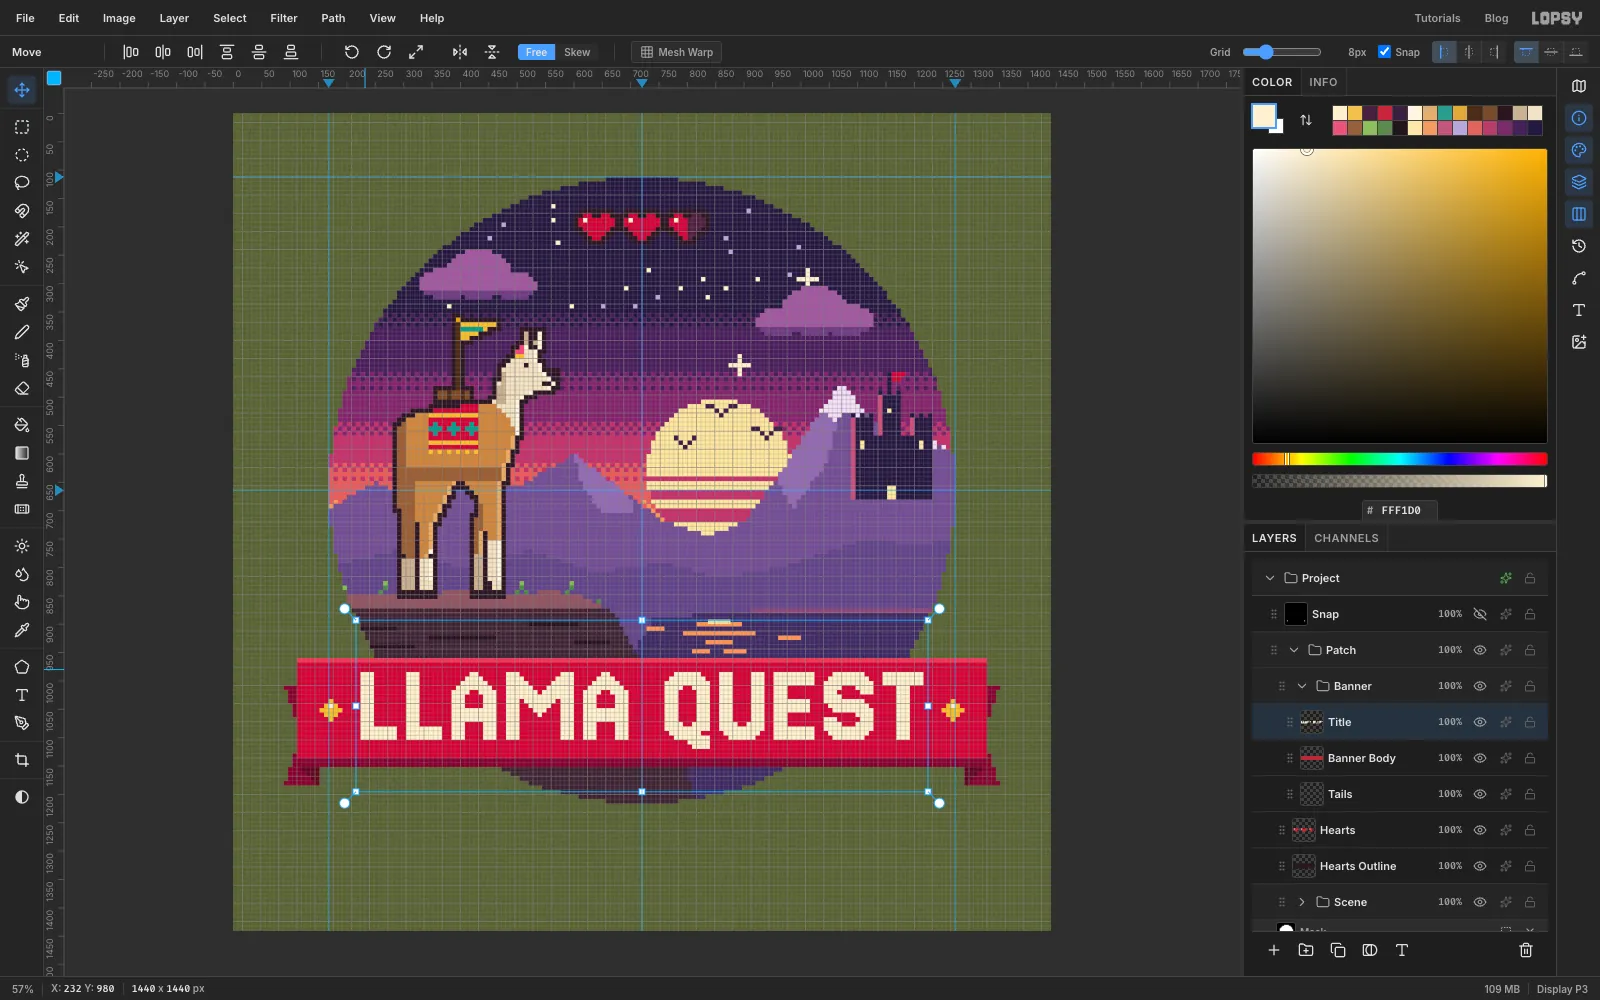
Pick the Text tool. Choose Jersey 15, set the size to 216 px and the colour to . At exactly 216 px, each pixel of the font is 8 document pixels, so the letters line up with the art. Click on the banner and type LLAMA QUEST, then press Tab to commit. Rename the new text layer Title.
Text lands wherever you clicked, so it's rarely on the grid. With Snap on, each arrow press moves a layer by a whole grid square. Untick Snap in the options bar for a moment, so the arrows move 1 px a press. With the Move tool, place the letters so their left edge sits at x 224 and the tops of the capitals at y 984. That centres the title, with about 112 px of red on each side for the diamonds. Tick Snap again afterwards.
-
Give the title a hard shadow
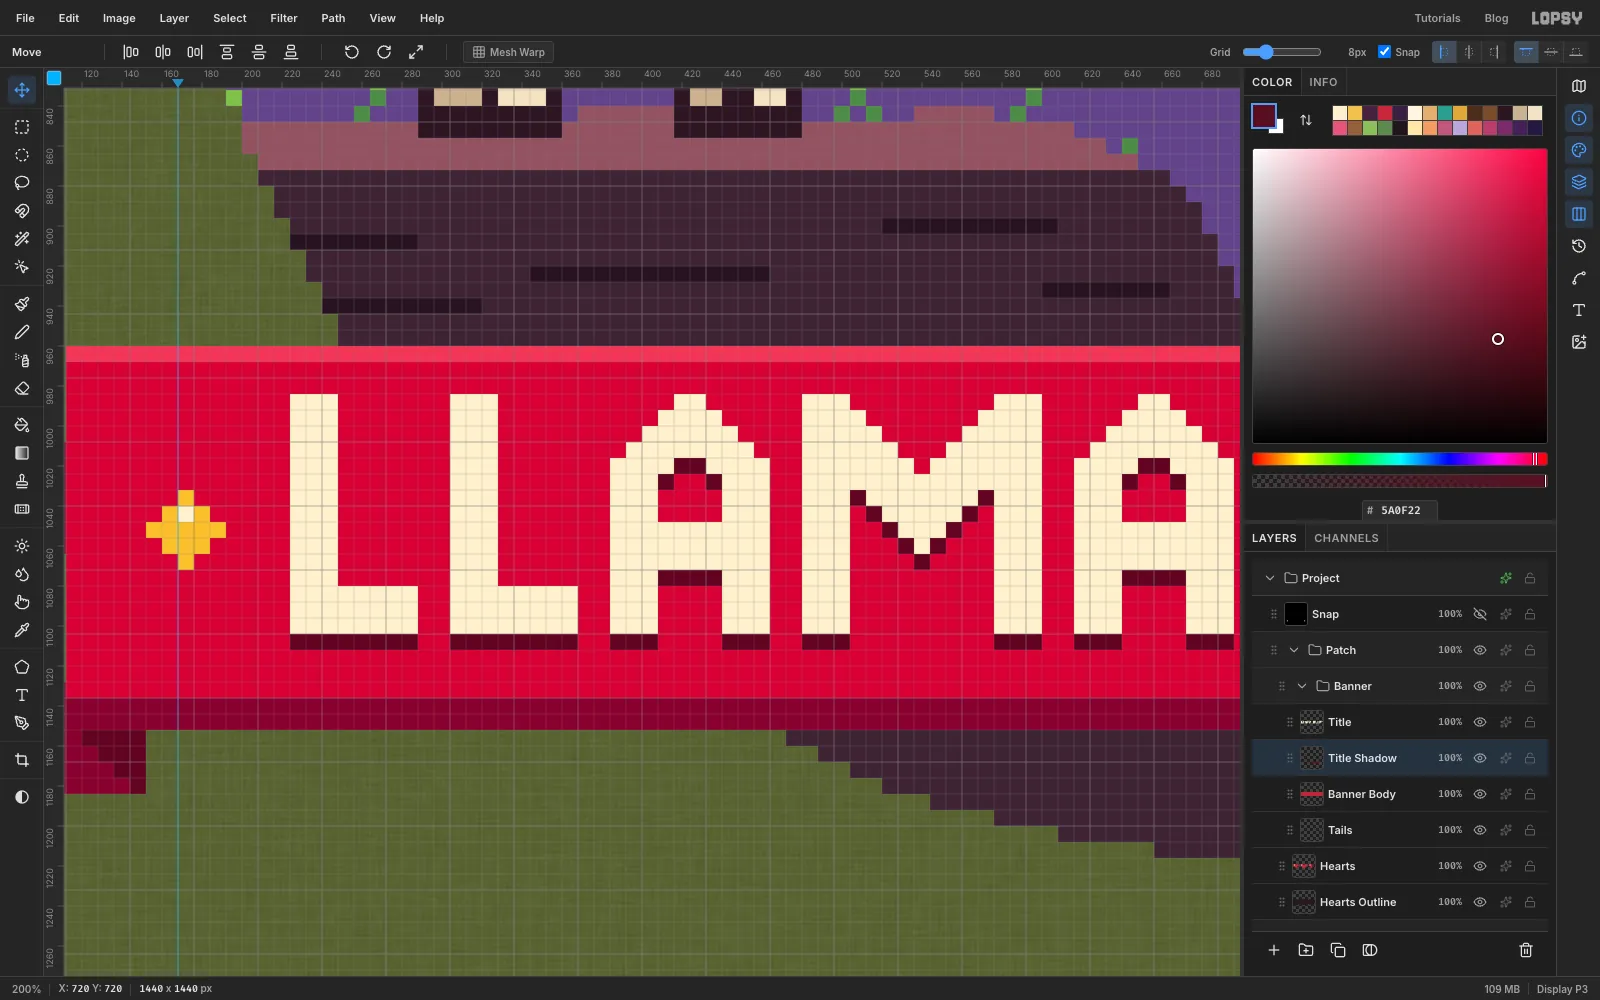
With Title selected, click Rasterize Layer in the Layers panel footer. Select Banner Body and add a layer called Title Shadow, so it sits between the banner and the title. Cmd-click the Title thumbnail, select Title Shadow and fill with . Deselect. With Snap back on, select the Move tool and press the down arrow once. The shadow drops exactly one grid square.
The capitals and their shadow take up 984–1112. Only the tail of the Q dips lower, and it still clears the dark shade rows by a square. That leaves clear red above and below the title, inside the highlight and shade rows.
-
Draw a one-pixel edge around the patch
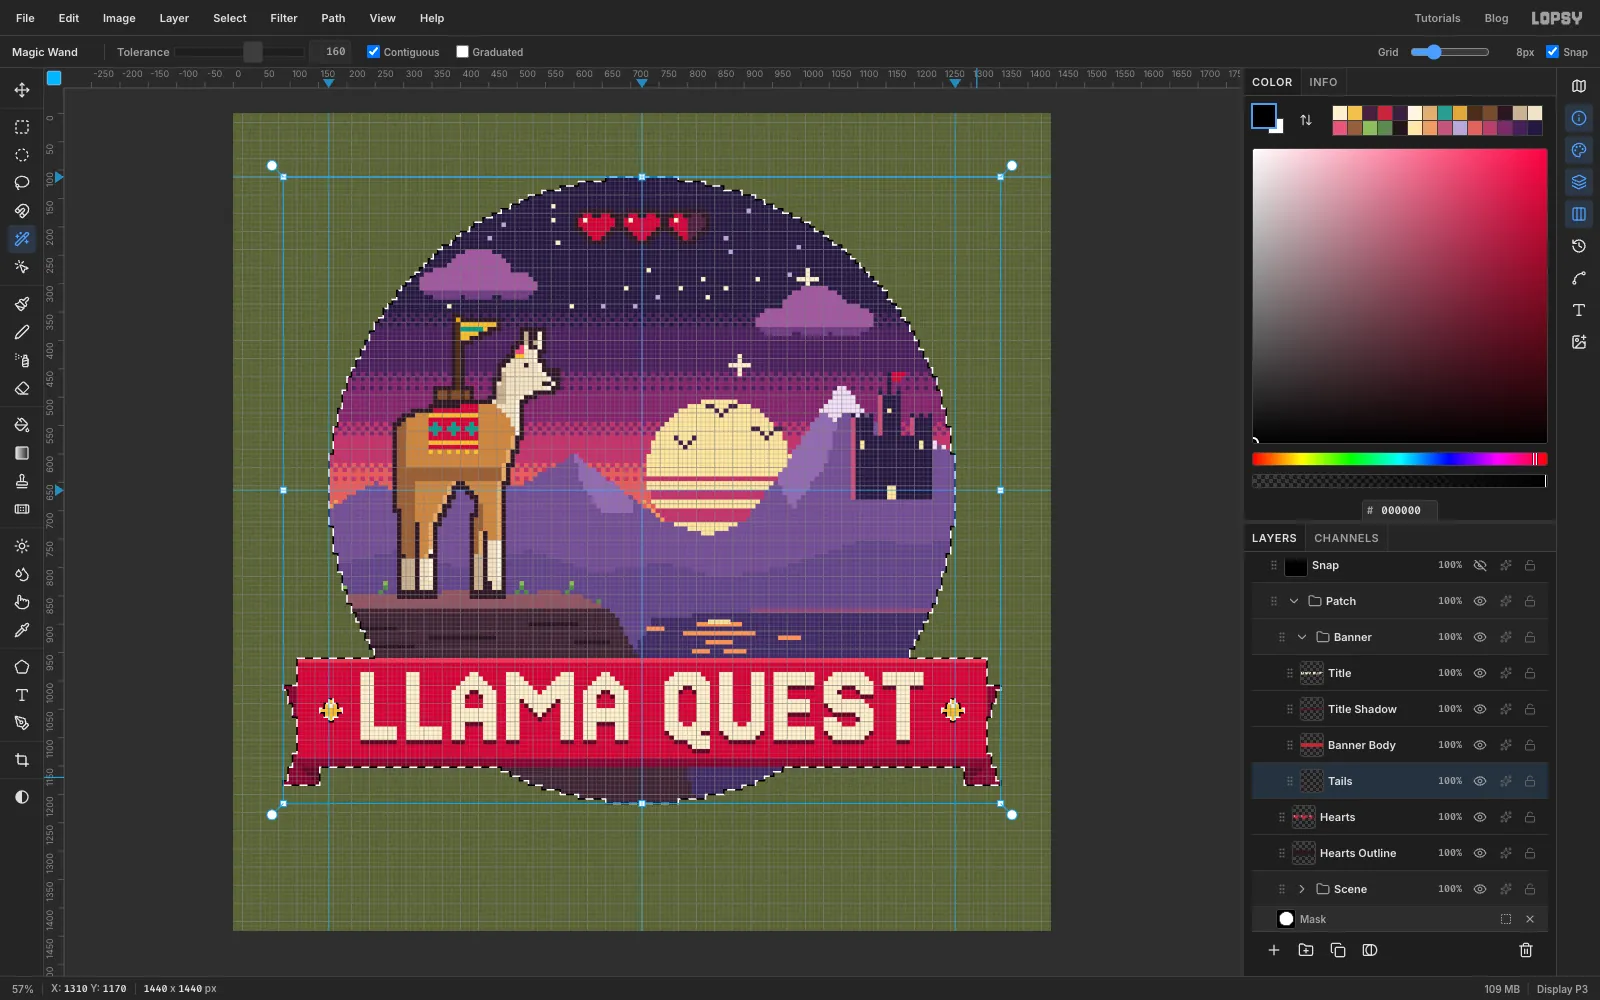
Select Edge Line and pixel-snap the whole patch silhouette. For step 2, use the contiguous Magic Wand at Tolerance 160:
- Select Patch Base and click the disc.
- Select Banner Body and Shift-click the banner.
- Select Tails and Shift-click each tail.
Then choose Select → Grow… by 8 px. After the snap, fill Edge Line with .
-
Add the gold merrowed border
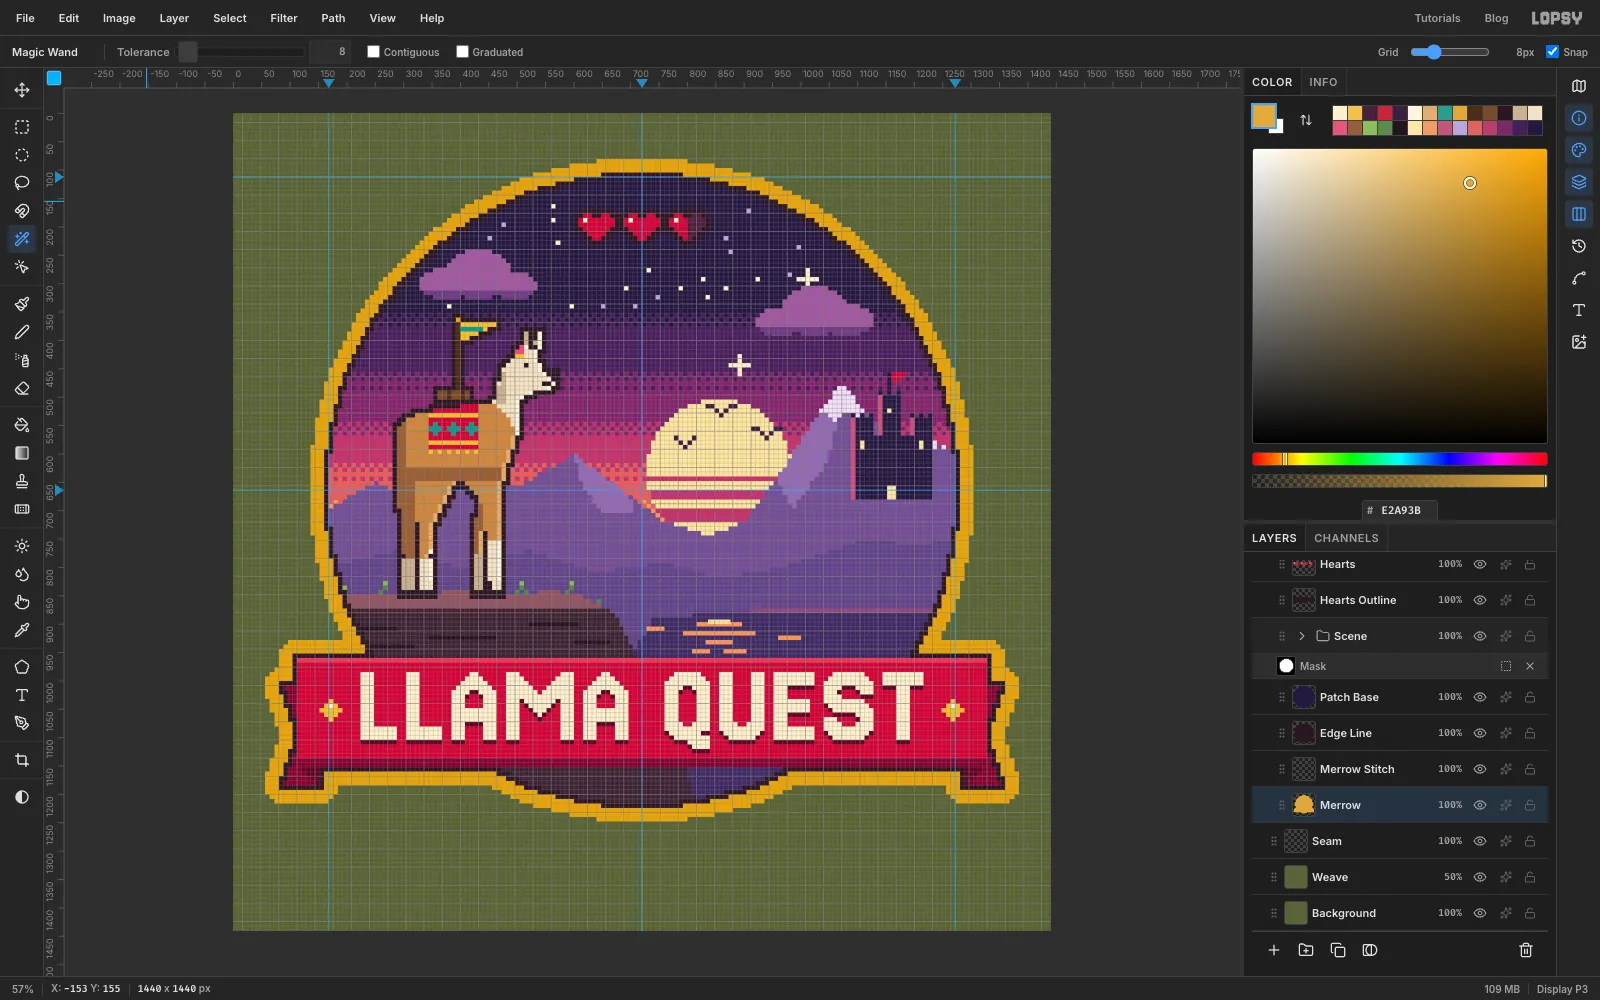
Select Merrow and pixel-snap the same silhouette, this time grown by 32 px. Fill it with . The edge is a soft, stepped curve, like the rolled stitch of a real merrowed patch.
Open Merrow's Layer effects and turn on Drop Shadow: Offset X 6, Offset Y 14, Blur 18, Spread 0, Opacity 70%, colour . Now the patch looks raised off the canvas.
-
Texture the border with satin stitches
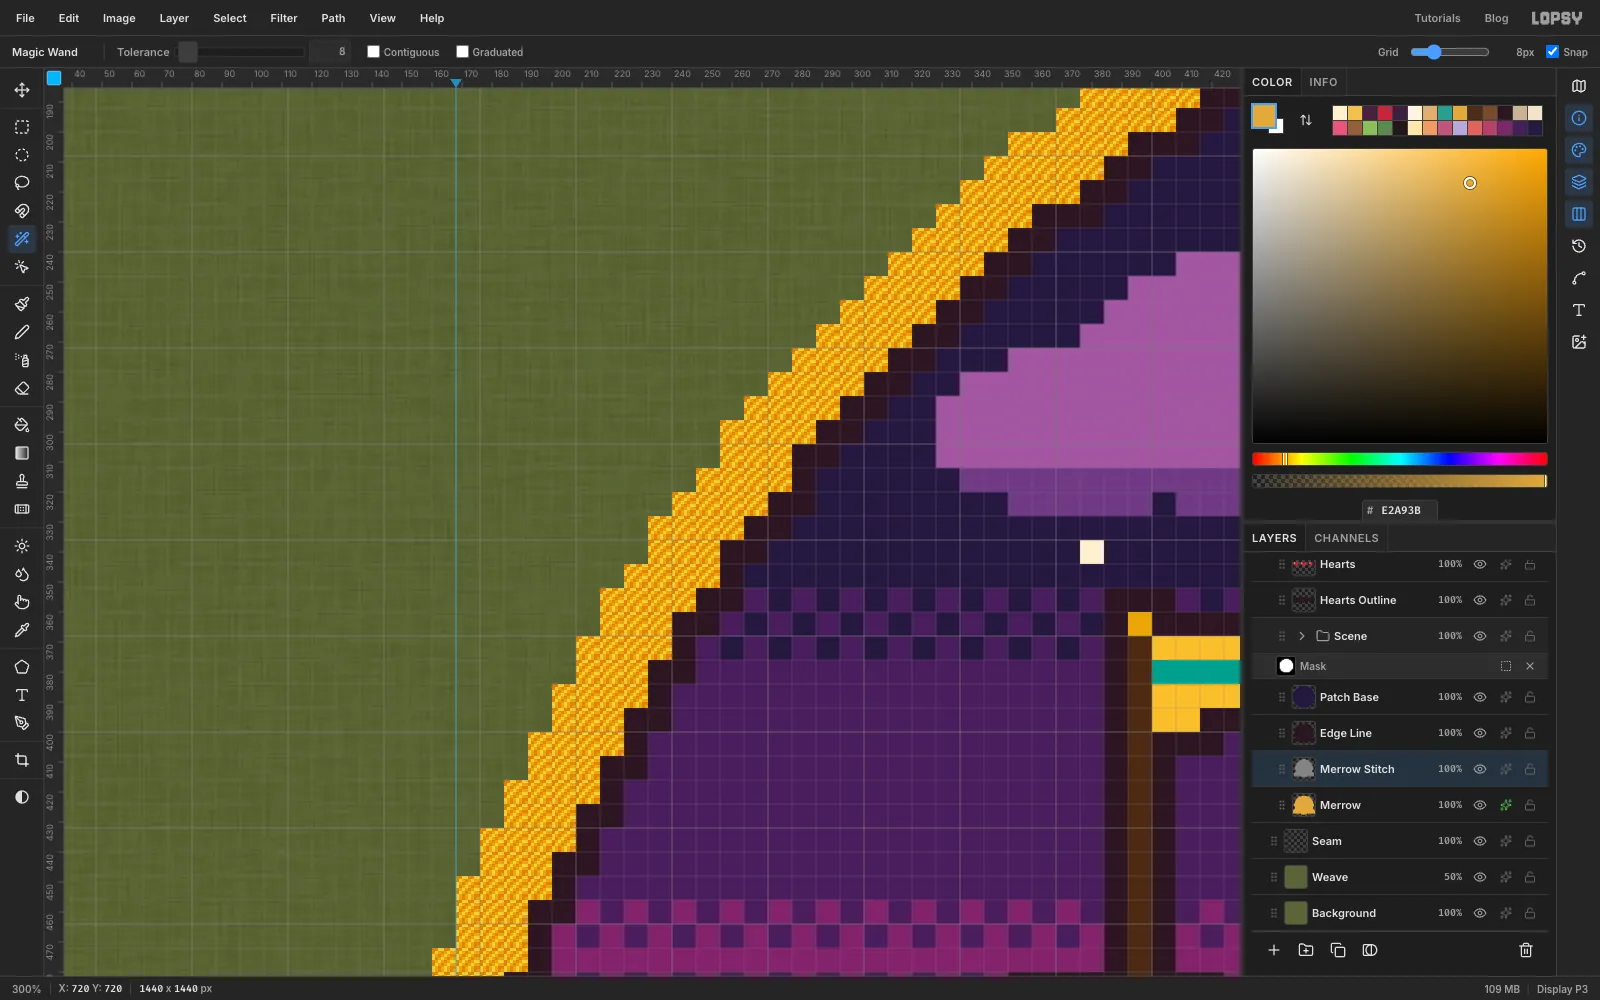
Cmd-click the Merrow thumbnail, select Merrow Stitch and choose Edit → Fill with Pattern… with the satin tile. Deselect and set the layer's blend mode to Overlay. The grey stripes lighten and darken the gold into diagonal stitches.
-
Cross-stitch every pixel
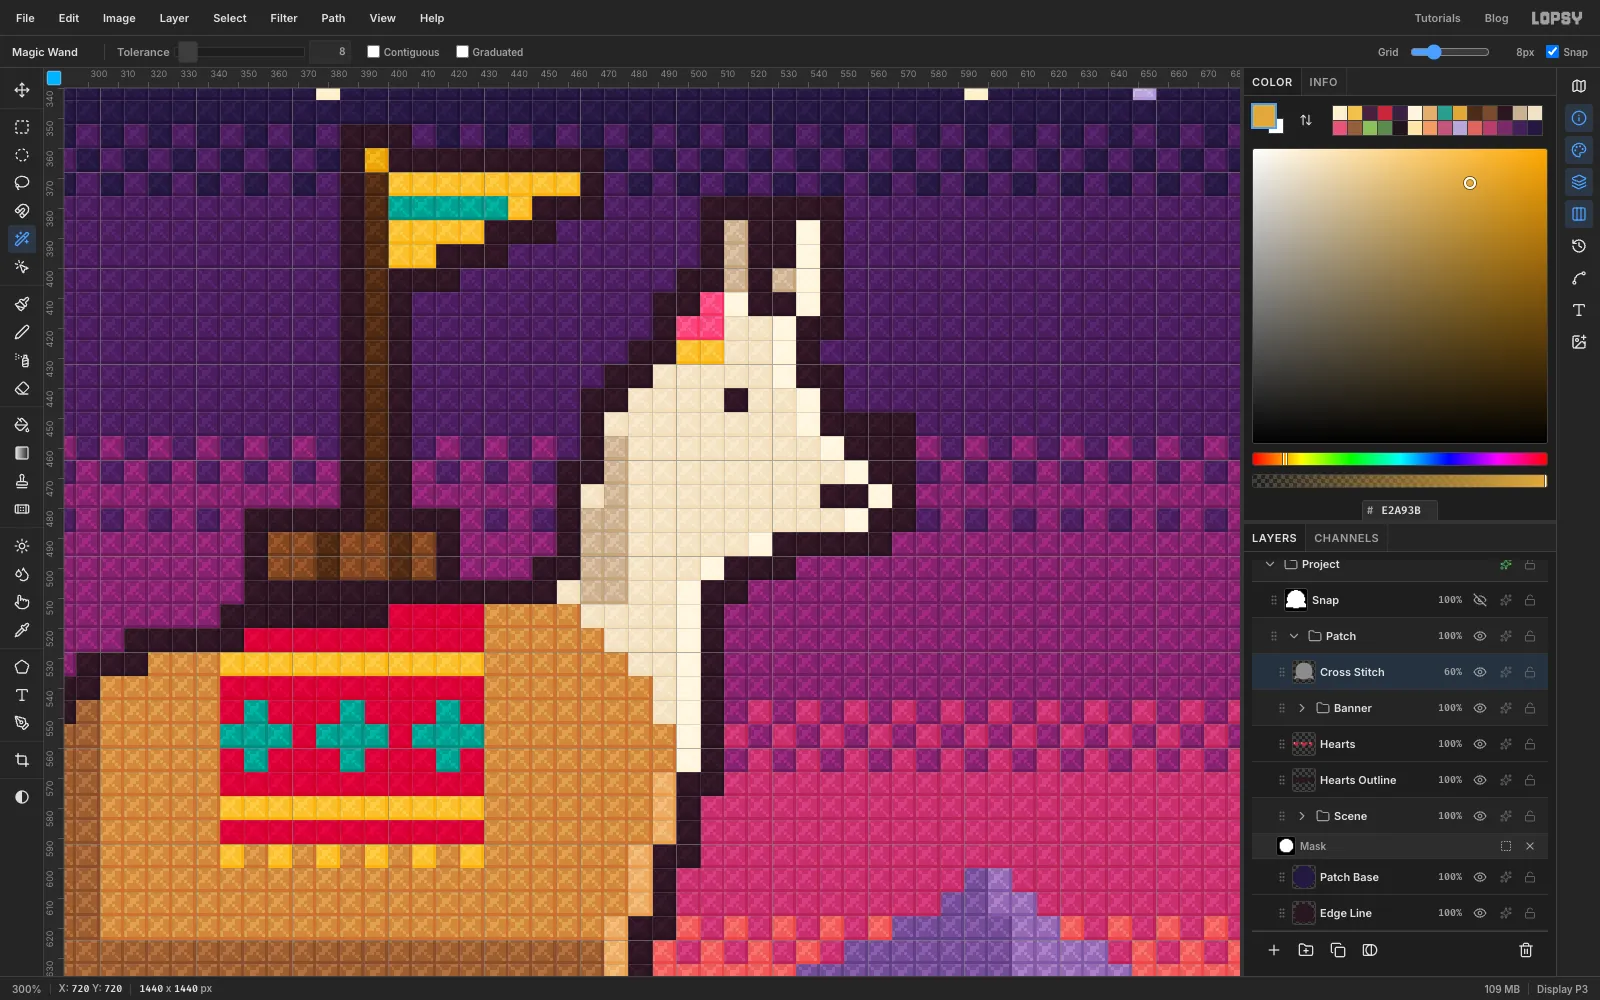
Collapse the Banner group, select it and add a layer called Cross Stitch. It's the top layer of the patch. Cmd-click the Edge Line thumbnail to select the patch, then Fill with Pattern… with the cross-stitch tile. Deselect, set the blend mode to Overlay and the opacity to 60%.
The 8 px tile lines up with the grid, so every art pixel gets exactly one X. From a distance it reads as thread texture.
-
Trim the canvas
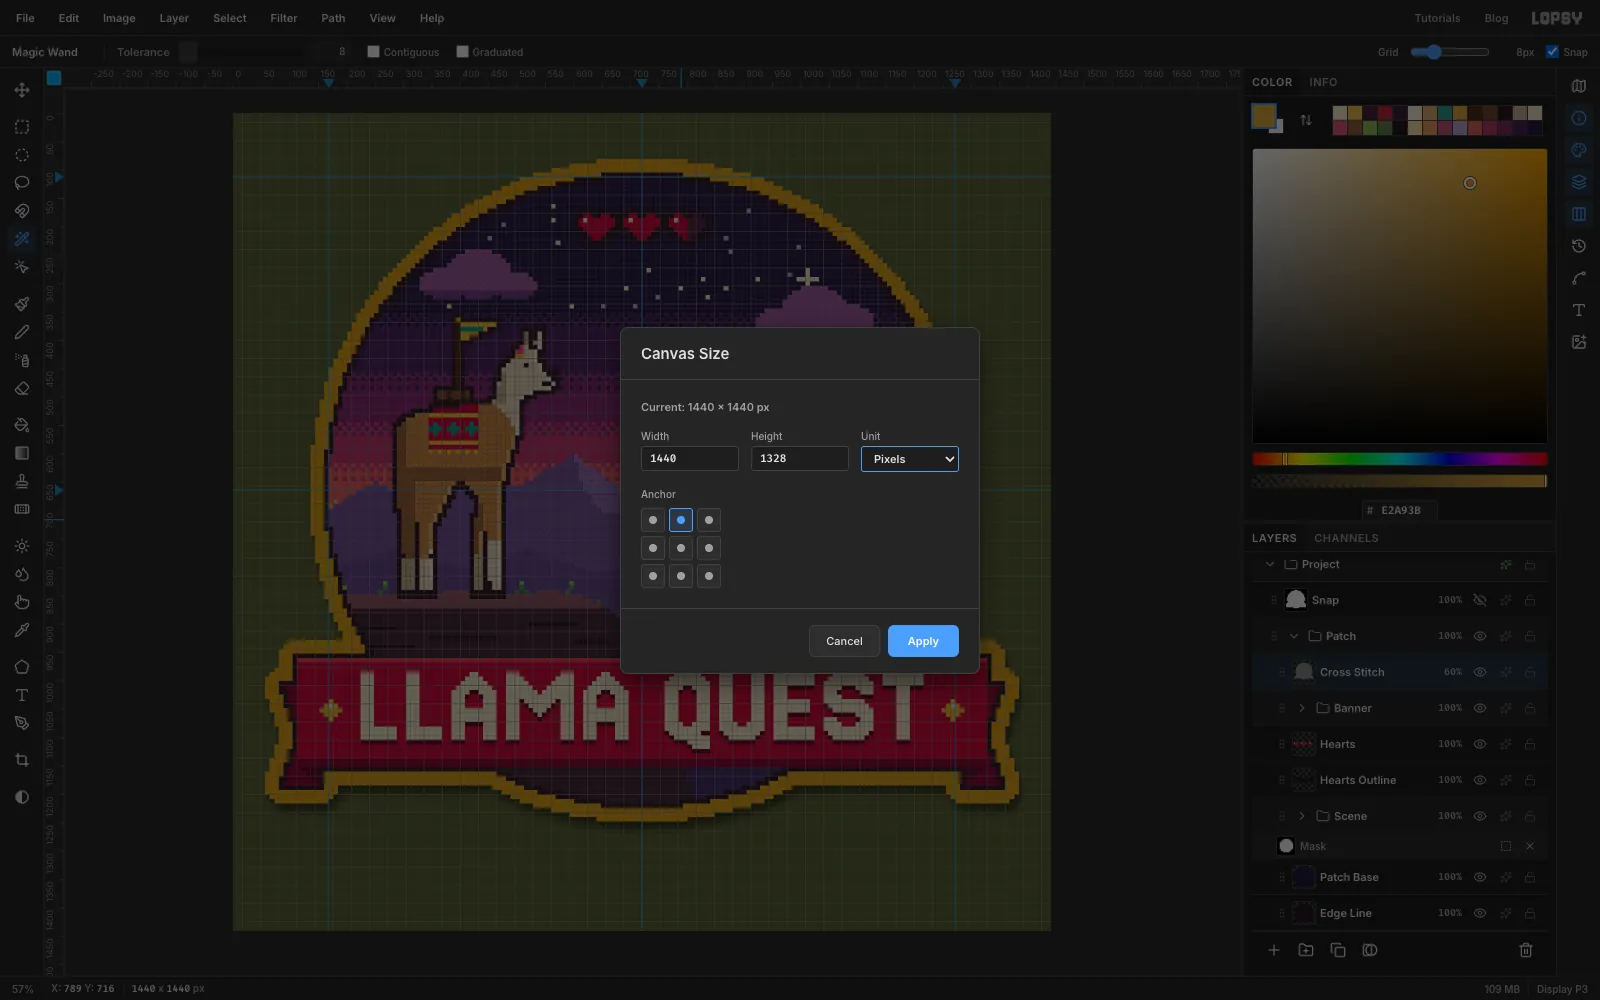
The patch sits high on the canvas, with about 80 px above it and much more below. Choose Image → Canvas Size…, click the top-centre anchor and set Height to 1328. The extra canvas is trimmed from the bottom, which leaves the same 80 px of canvas above and below the patch.
-
Stitch a seam across the backpack
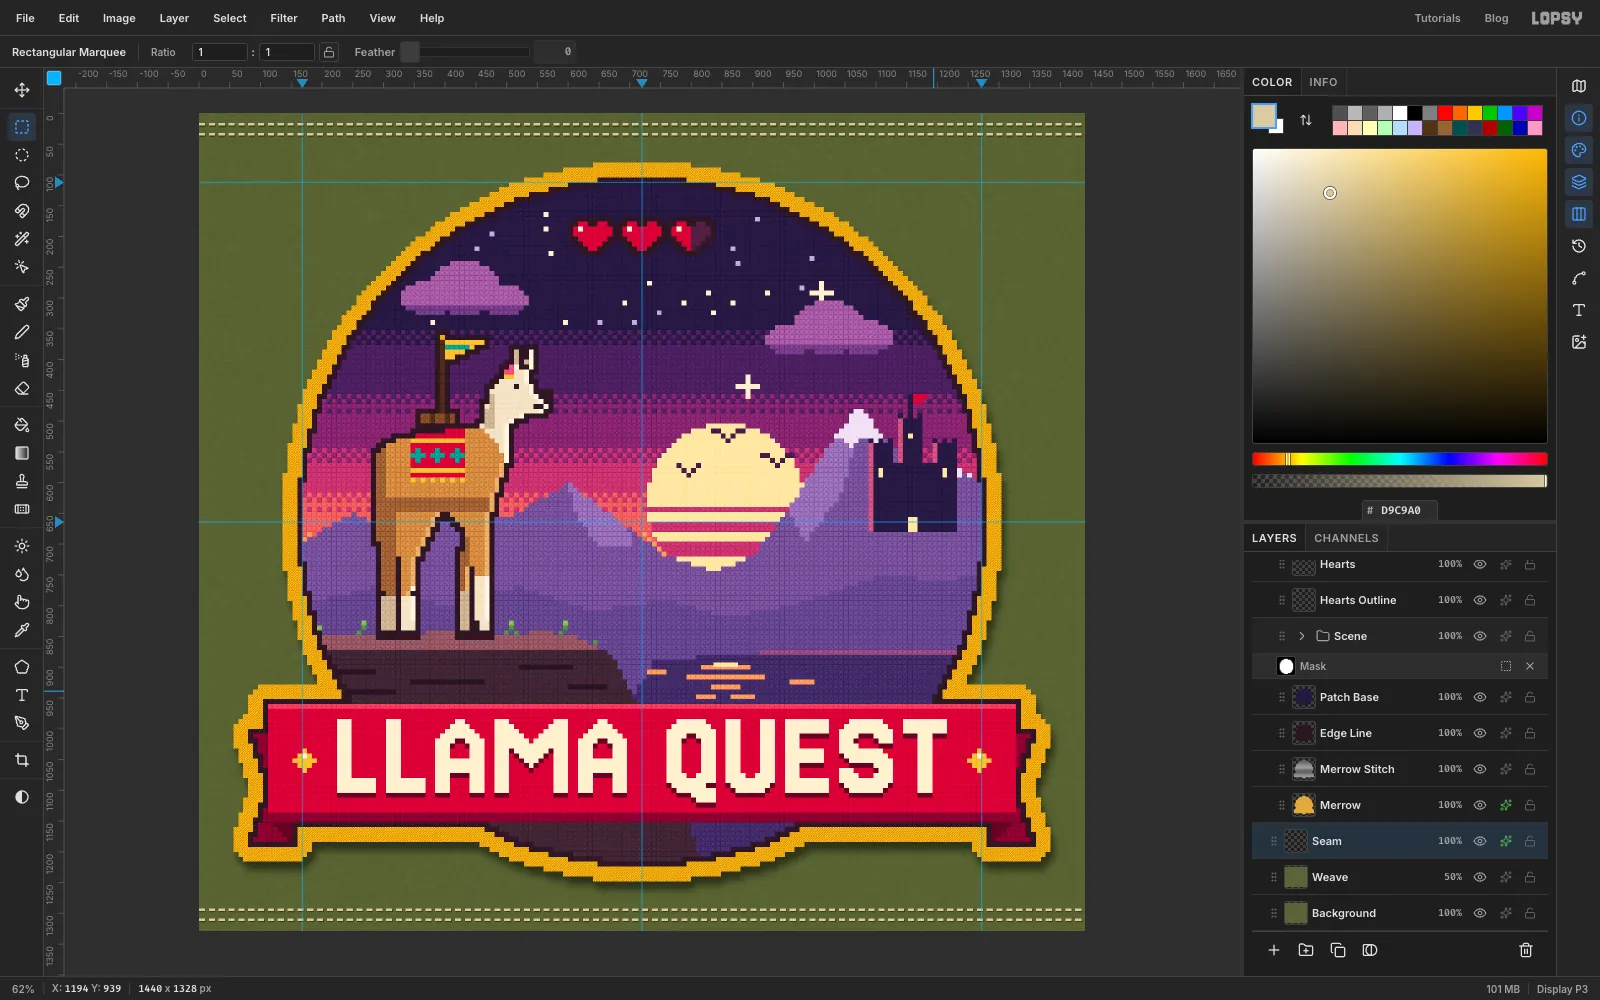
Select Seam. The strips are only 4 px tall, so Snap would collapse a drag. Use the exact-corners dialog for each one and fill it with Fill with Pattern… using the seam dash: 0, 16 → 1440, 20, then 0, 32 → 1440, 36, 0, 1292 → 1440, 1296 and 0, 1308 → 1440, 1312. Deselect. Give the layer a small Drop Shadow (Offset X 1, Offset Y 2, Blur 2, Opacity 60%, colour ) so the thread sits on top of the cloth.
-
Clean up, save and export
Delete the Snap layer. You don't need it any more. Choose File → Save Project to keep a
.lopsywith every layer, then File → Quick Export PNG for the finished patch.