Make an 8-Bit Pixel Art Logo for a Game Studio
Build an 8-bit logo sheet in Lopsy with a pixel badge, a hand-painted coyote sprite, a Gradient Map palette, a pixel-font wordmark and small variants.
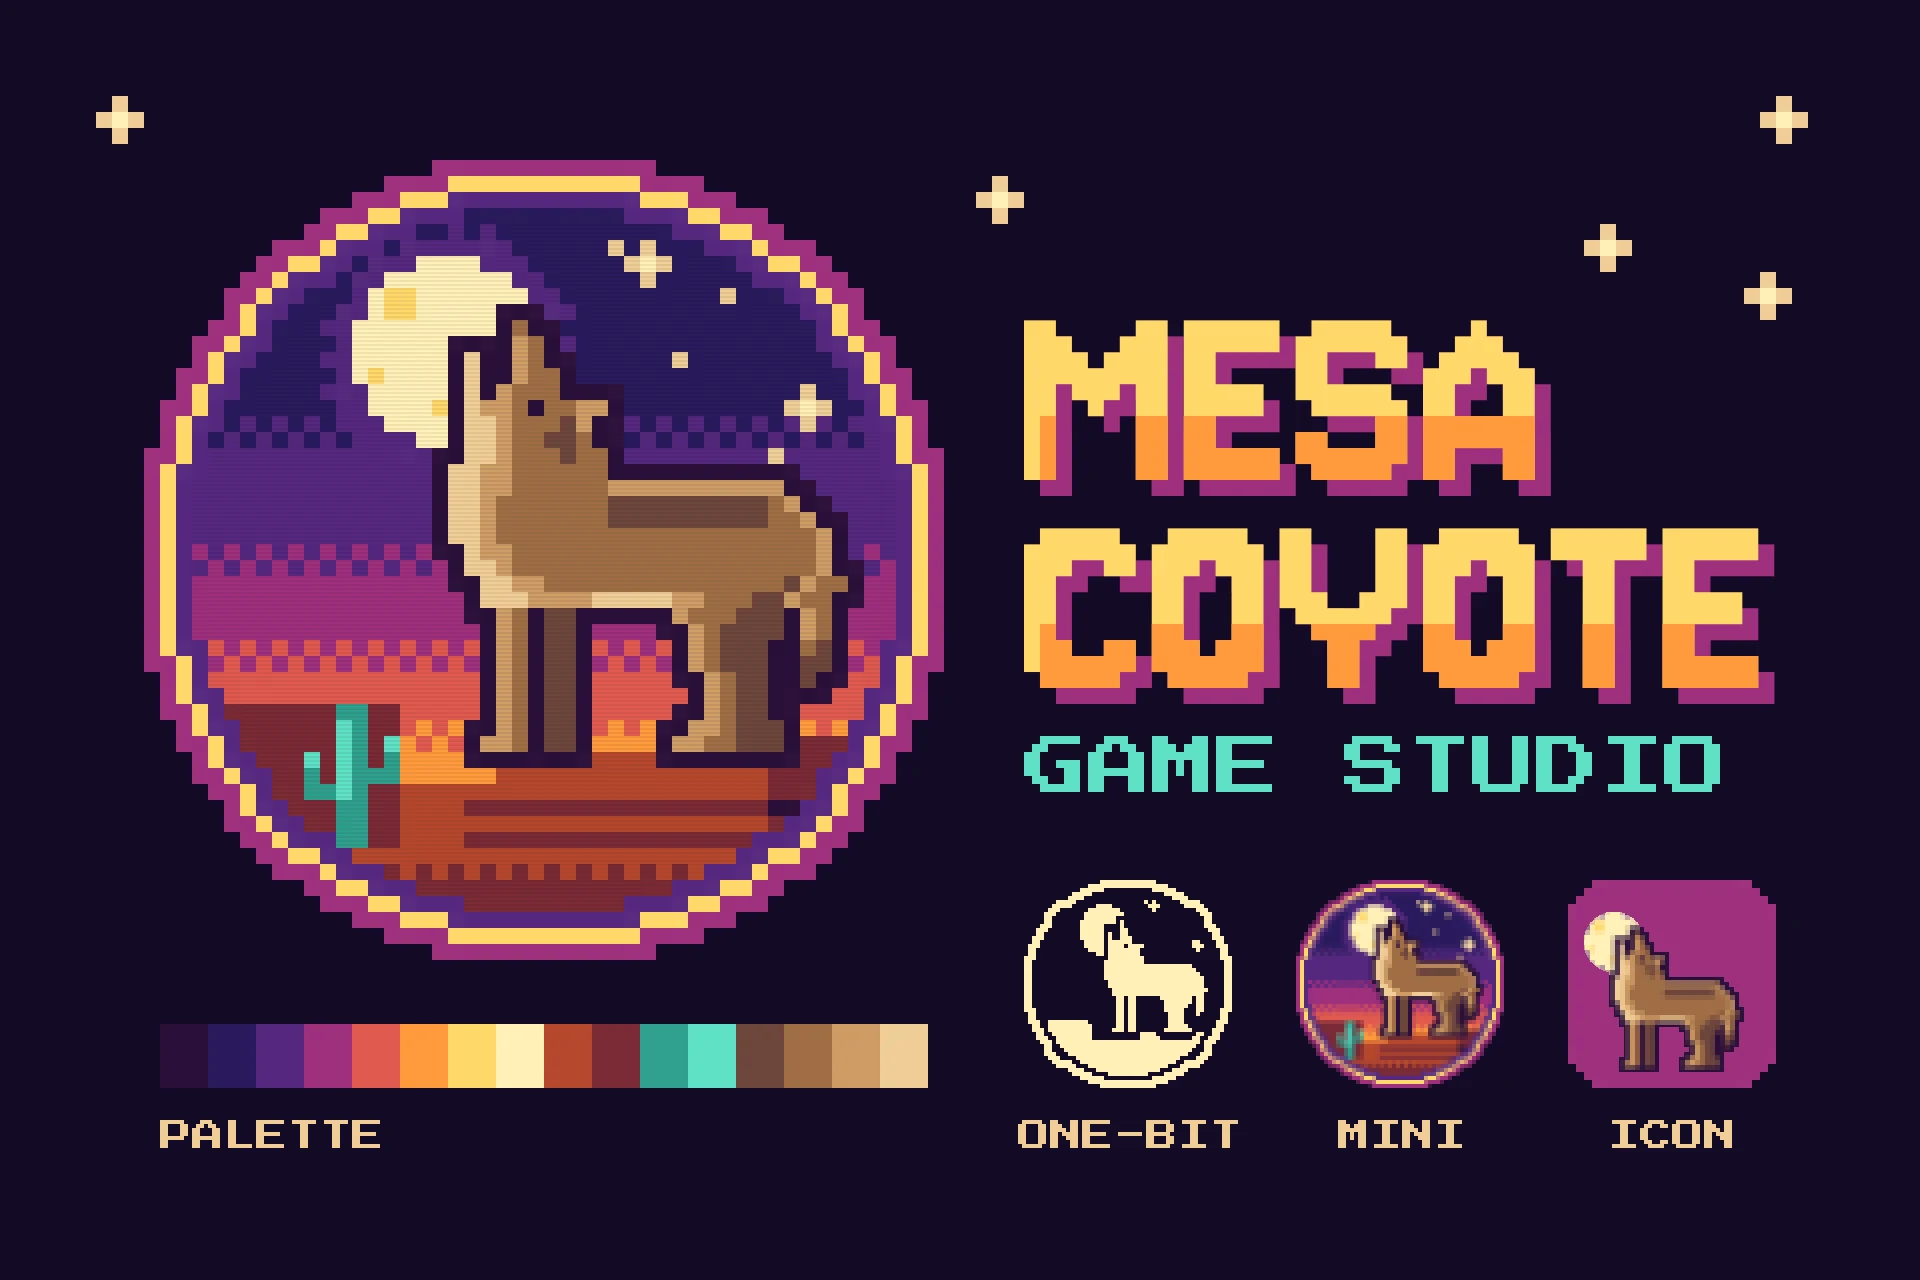
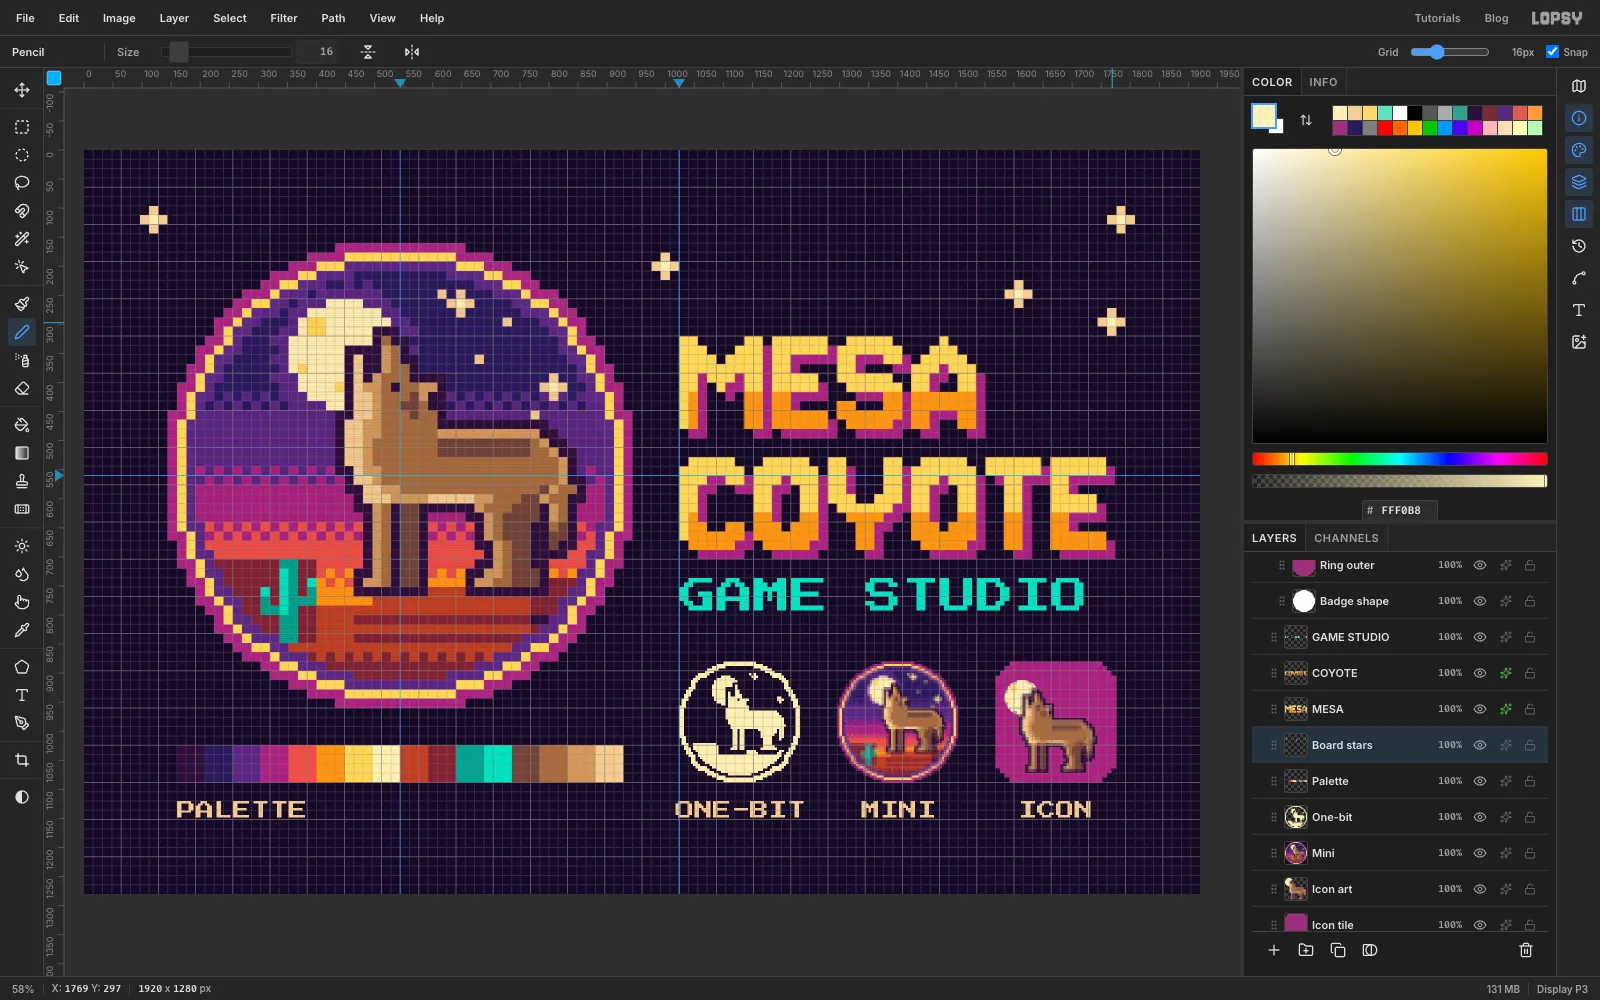
A good game studio logo has to work as a big splash screen and as a tiny icon. In this tutorial you'll make a logo sheet for an invented studio, Mesa Coyote. It has a round 8-bit badge with a howling coyote on a desert mesa, a stacked pixel-font wordmark, the palette, and three small variants: a one-colour version, a quarter-size badge and an app icon.
The canvas is 1920 × 1280 px. Every "pixel" of the art is a 16 × 16 px cell on the grid. Four techniques do most of the work:
- Pixel-snapping. Draw a smooth shape, fill it white on black, then Pixelate and Threshold it. Any circle or rounded shape comes out as clean stair-stepped cells. You'll use this for the badge, the rings, the moon and its halo, the coyote's outline, the one-colour version and the icon tile.
- The Pencil at 16 px. Each click in the middle of a cell paints exactly that cell. Click, then Shift-click, to paint a straight run.
- A Gradient Map on a group. You paint the coyote in four greys, and the group's Gradient Map turns them into four warm browns. That lets you recolour the whole sprite later by changing four colours.
- A pixel font sized to the grid. Jersey 10 at 298 px makes one font pixel 16 px, so the wordmark matches the badge.
For the coyote you'll use a public domain photo by the US Fish and Wildlife Service, Howl (cropped).jpg) on Wikimedia Commons. It is only a guide: you paint the sprite yourself.
The palette:
- Background (not an ink)
- Outline plum
- Sky → → → →
- Gold , moon
- Mesa , shadow , lit lip
- Cactus , highlight and subtitle
- Coyote / / / (painted as black, , and white through a Gradient Map)
-
Set up the canvas, the grid and guides
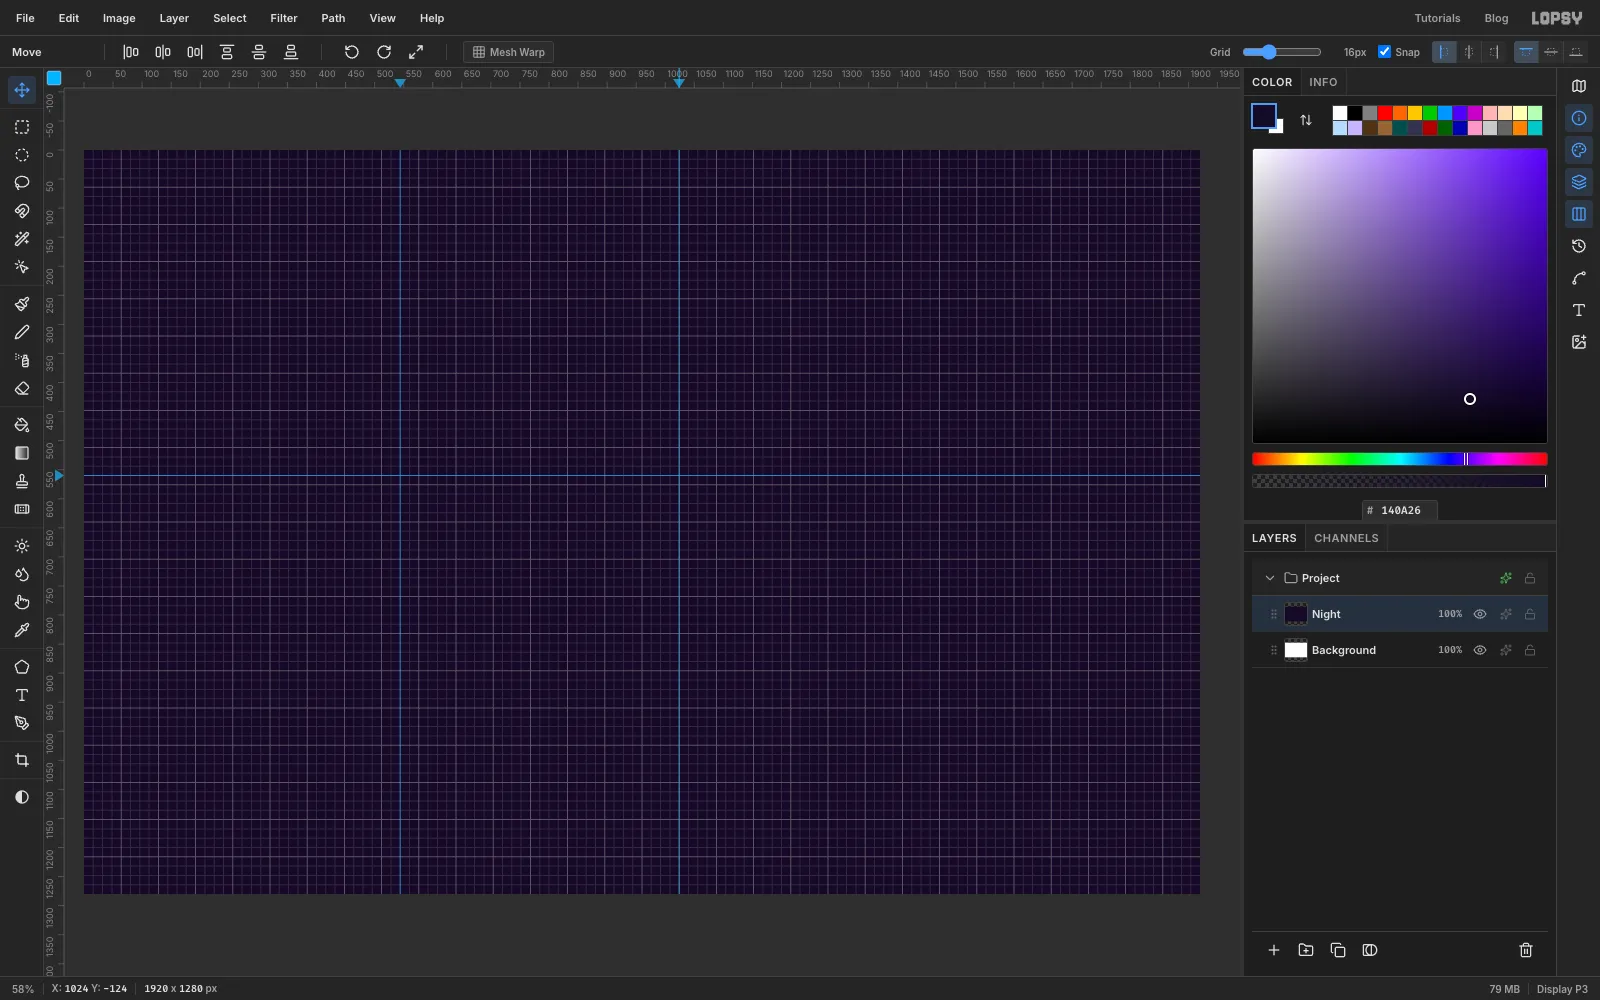
Choose File → New, make a 1920 × 1280 document and click Create. Set the foreground colour to in the Color panel's hex field, choose Edit → Fill and rename the layer Night (double-click its name).
Choose View → Show Grid. The grid size in the options bar is already 16px, and Snap turns on with it. Leave both on unless a step says otherwise. Every fourth grid line is brighter, which makes cells easy to count.
The X and Y at the bottom left of the window show the canvas position under the pointer. In this tutorial a cell is named by its top-left corner, and a box or a run of cells by its outer edges.
Add three guides by clicking the rulers, watching the X/Y readout as you hover. Click the top ruler at 544, the centre of the badge, and again at 1024, where the wordmark will start. Then click the left ruler at 560.
-
Draw the badge circle
In the Layers panel, click New Group and name it Badge. With the group selected, click Add Layer so the new layer lands inside the group. Name it Badge shape.
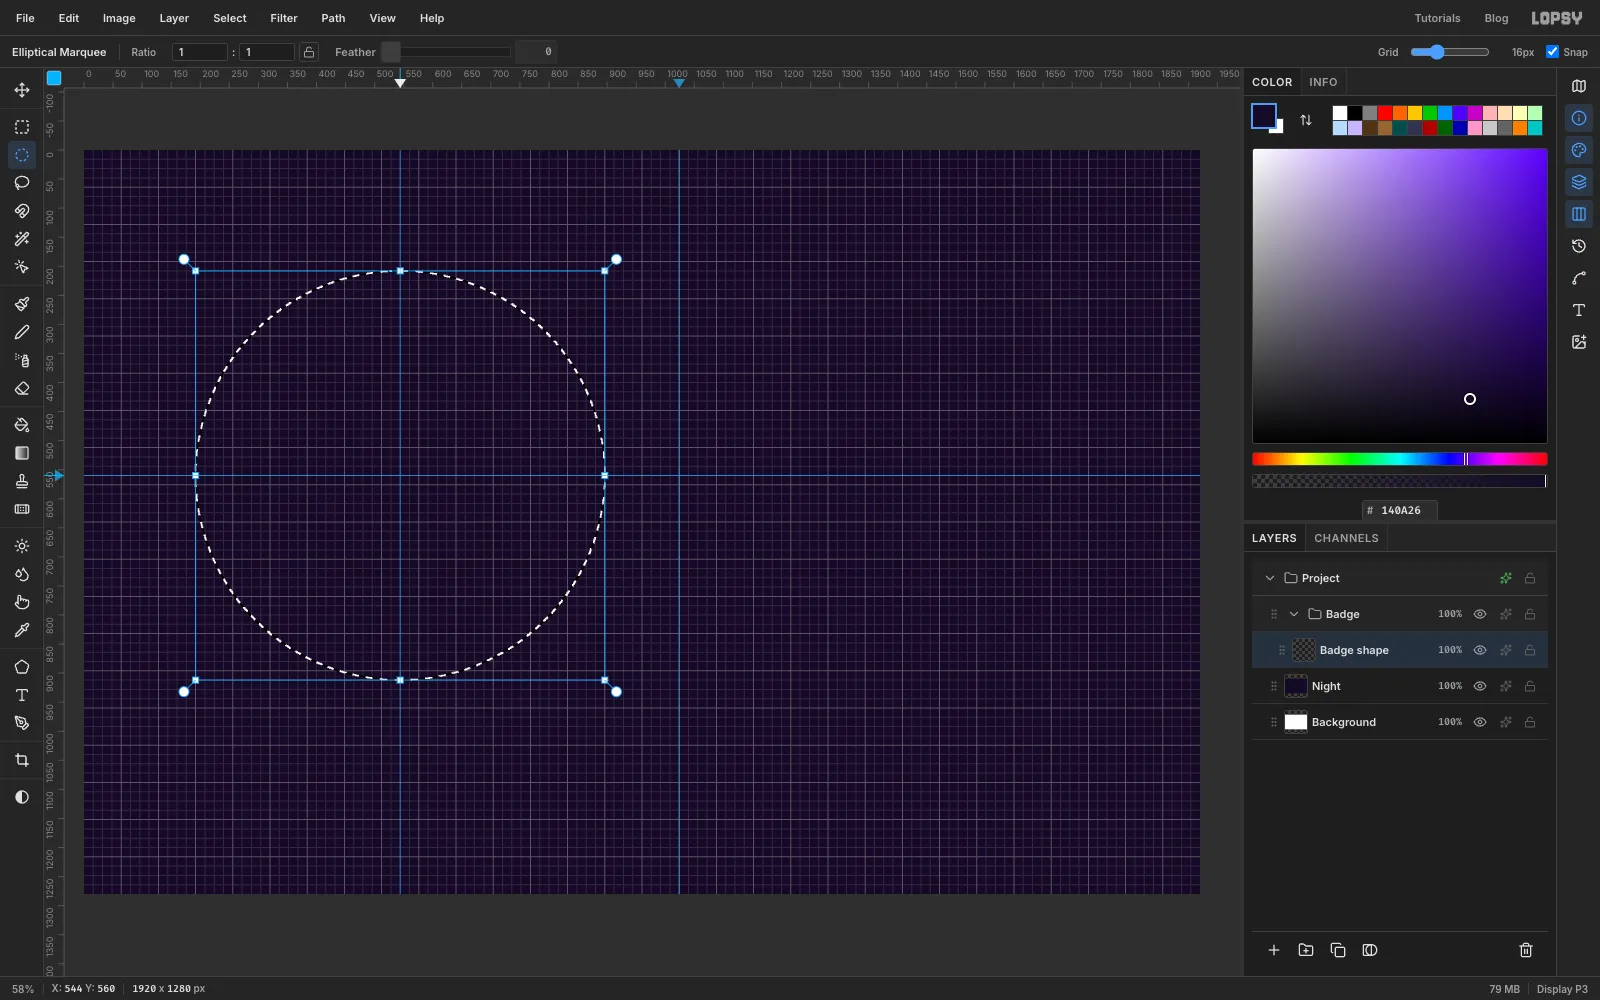
Choose the Elliptical Marquee tool. With nothing selected, click once on the canvas without dragging. A dialog opens where you can type the corners exactly. Enter From 192, 208 and To 896, 912 and press Select. This gives a circle 704 px across, centred on the two guides.
-
Turn the circle into pixels
This is the pixel-snap recipe you'll repeat all through the tutorial:
- Set the foreground to white () and choose Edit → Fill.
- Choose Select → Inverse, set the foreground to black () and choose Edit → Fill again. The layer is now fully opaque.
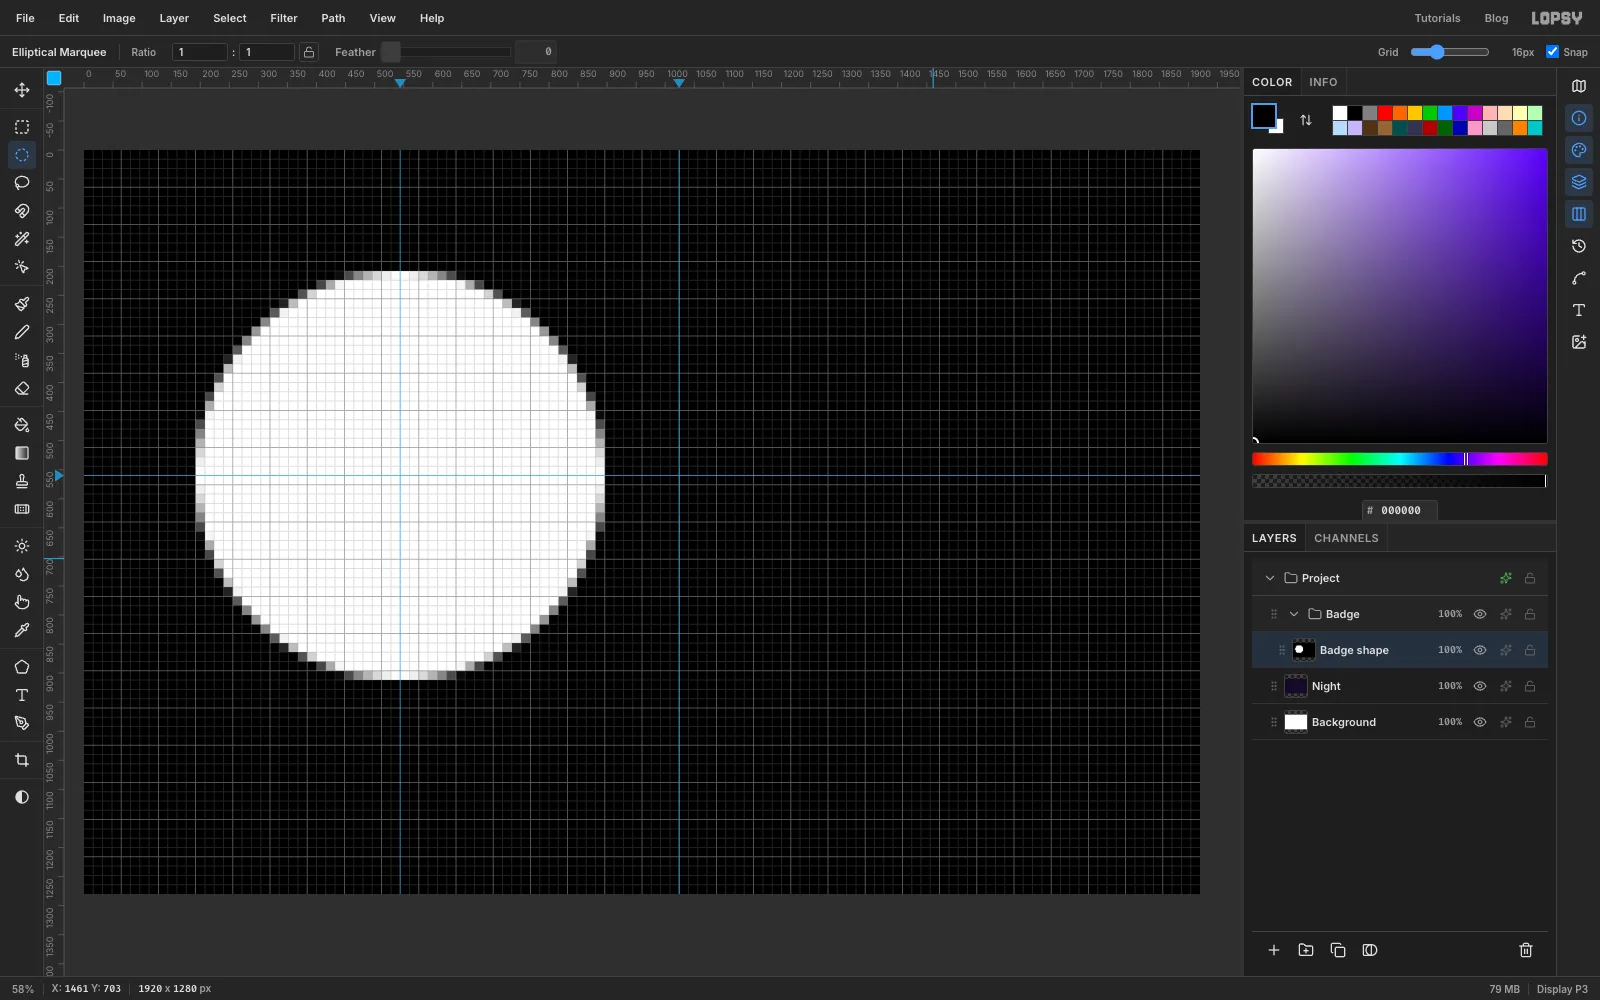
- Press Cmd+D to deselect, then choose Filter → Pixelate…, set Block Size to 16 and click Apply.
The blocks line up with the grid because the layer now covers the whole canvas, so Pixelate starts its blocks at the canvas corner. The edge blocks are grey, because each one averages the white and black inside it.
-
Clean up with Threshold and the Magic Wand
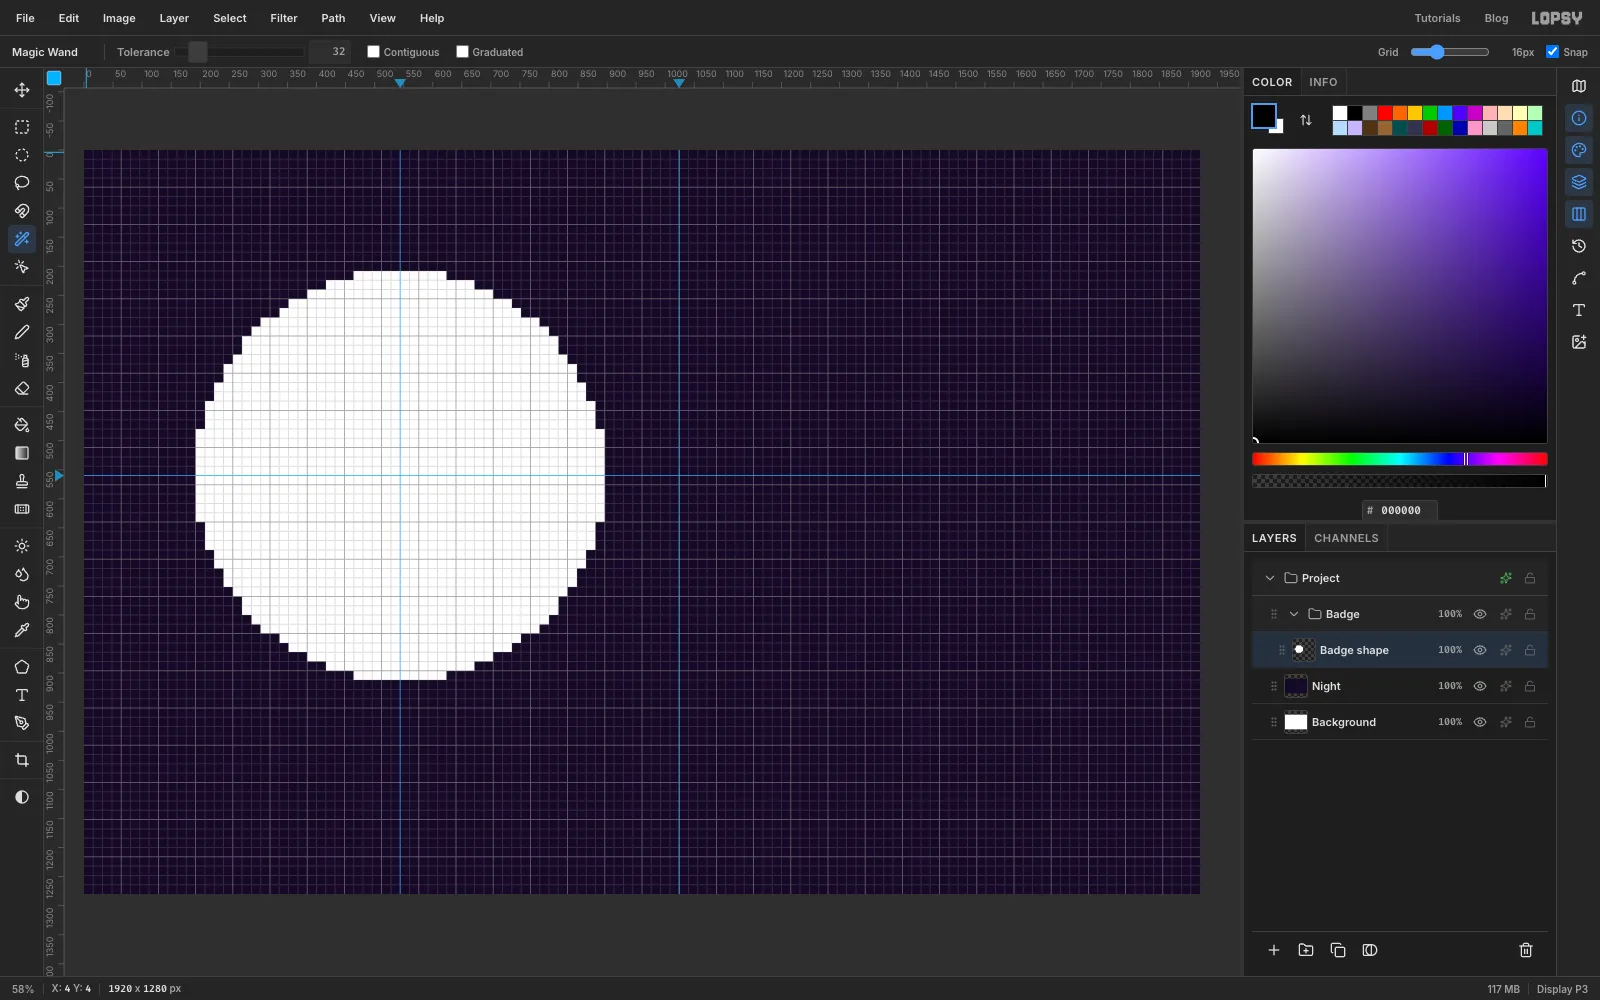
Choose Filter → Threshold…, leave Level at 128 and click Apply. Every grey cell becomes either white or black, so the edge is now a clean staircase.
Choose the Magic Wand, set Tolerance to 32 and untick Contiguous. Click anywhere black, for example the top-left corner of the canvas, press Delete, then Cmd+D. What's left is a white pixel disc on a transparent layer.
That's the whole pixel-snap recipe: fill white, Inverse, fill black, deselect, Pixelate 16, Threshold 128, then a non-contiguous wand click on the black and Delete. Later steps just say "run the pixel-snap recipe". They also say "recolour", which means: Cmd-click the layer's thumbnail, set the foreground colour, choose Edit → Fill and press Cmd+D.
-
Add the three rings
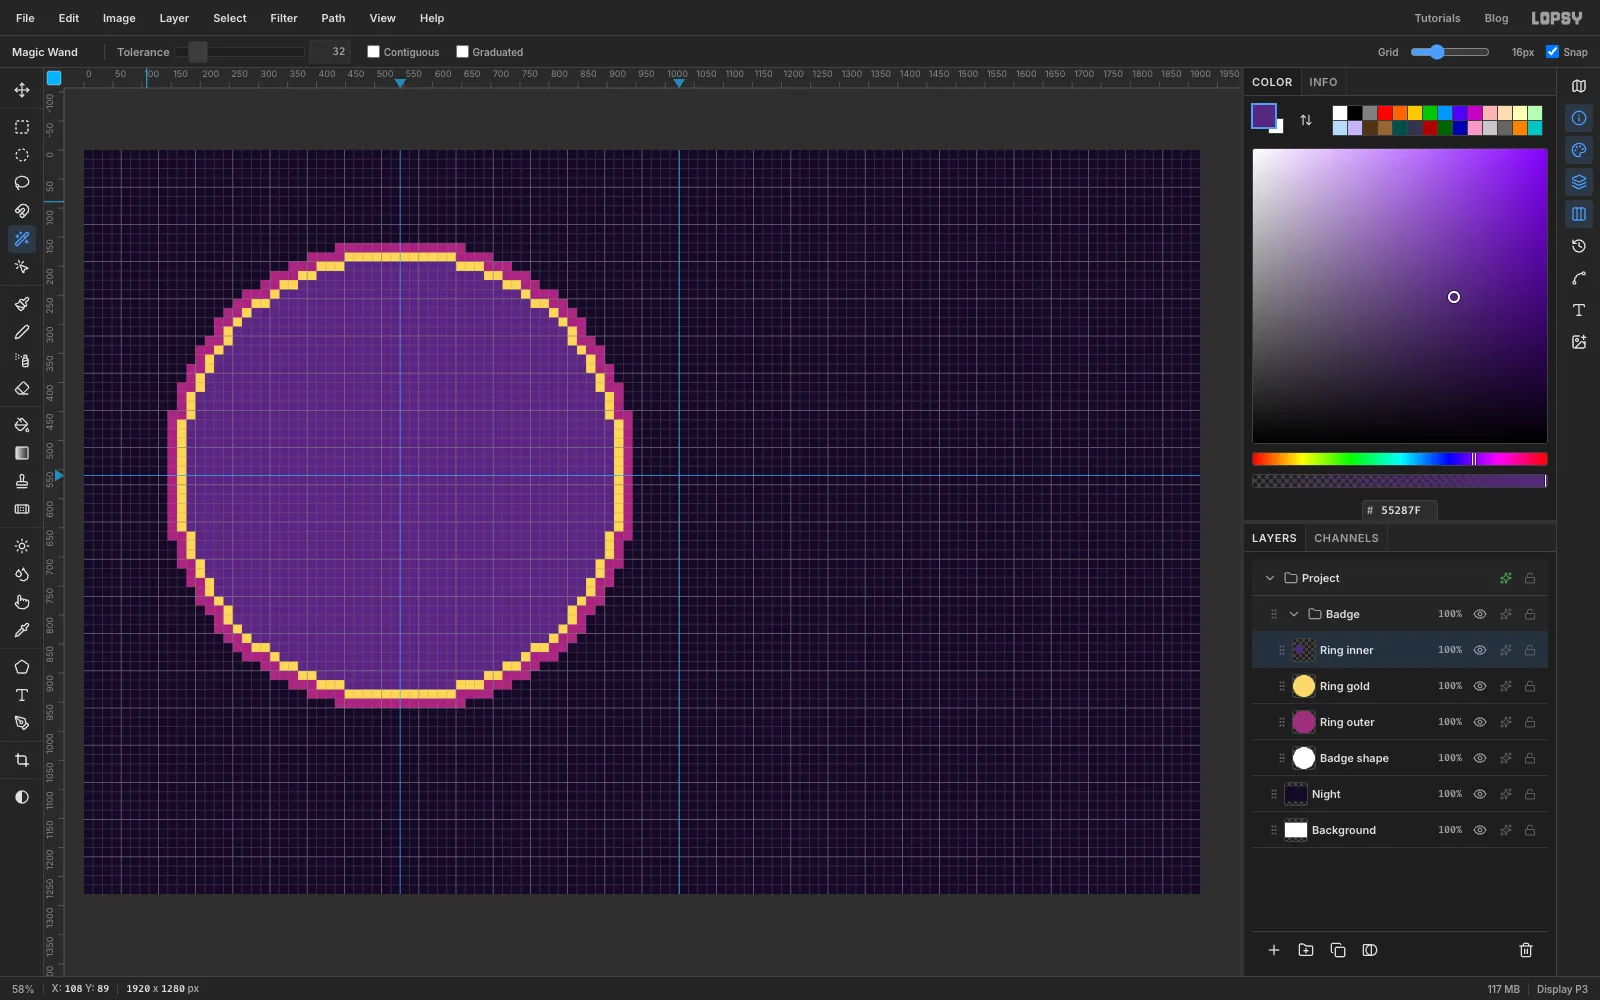
The rings are three discs stacked on top of each other, each one cell smaller than the one under it. Click Add Layer and name it Ring outer. Cmd-click the Badge shape thumbnail to load the disc as a selection. Choose Select → Grow…, enter 48 and click Apply. Run the pixel-snap recipe on this layer, then recolour it (magenta).
Repeat twice more, each time Cmd-clicking Badge shape (not the last ring): Ring gold with Grow 32 and , then Ring inner with Grow 16 and . Each new layer goes above the last one, so you see three 1-cell rings around a purple centre.
-
Fill the sky in bands
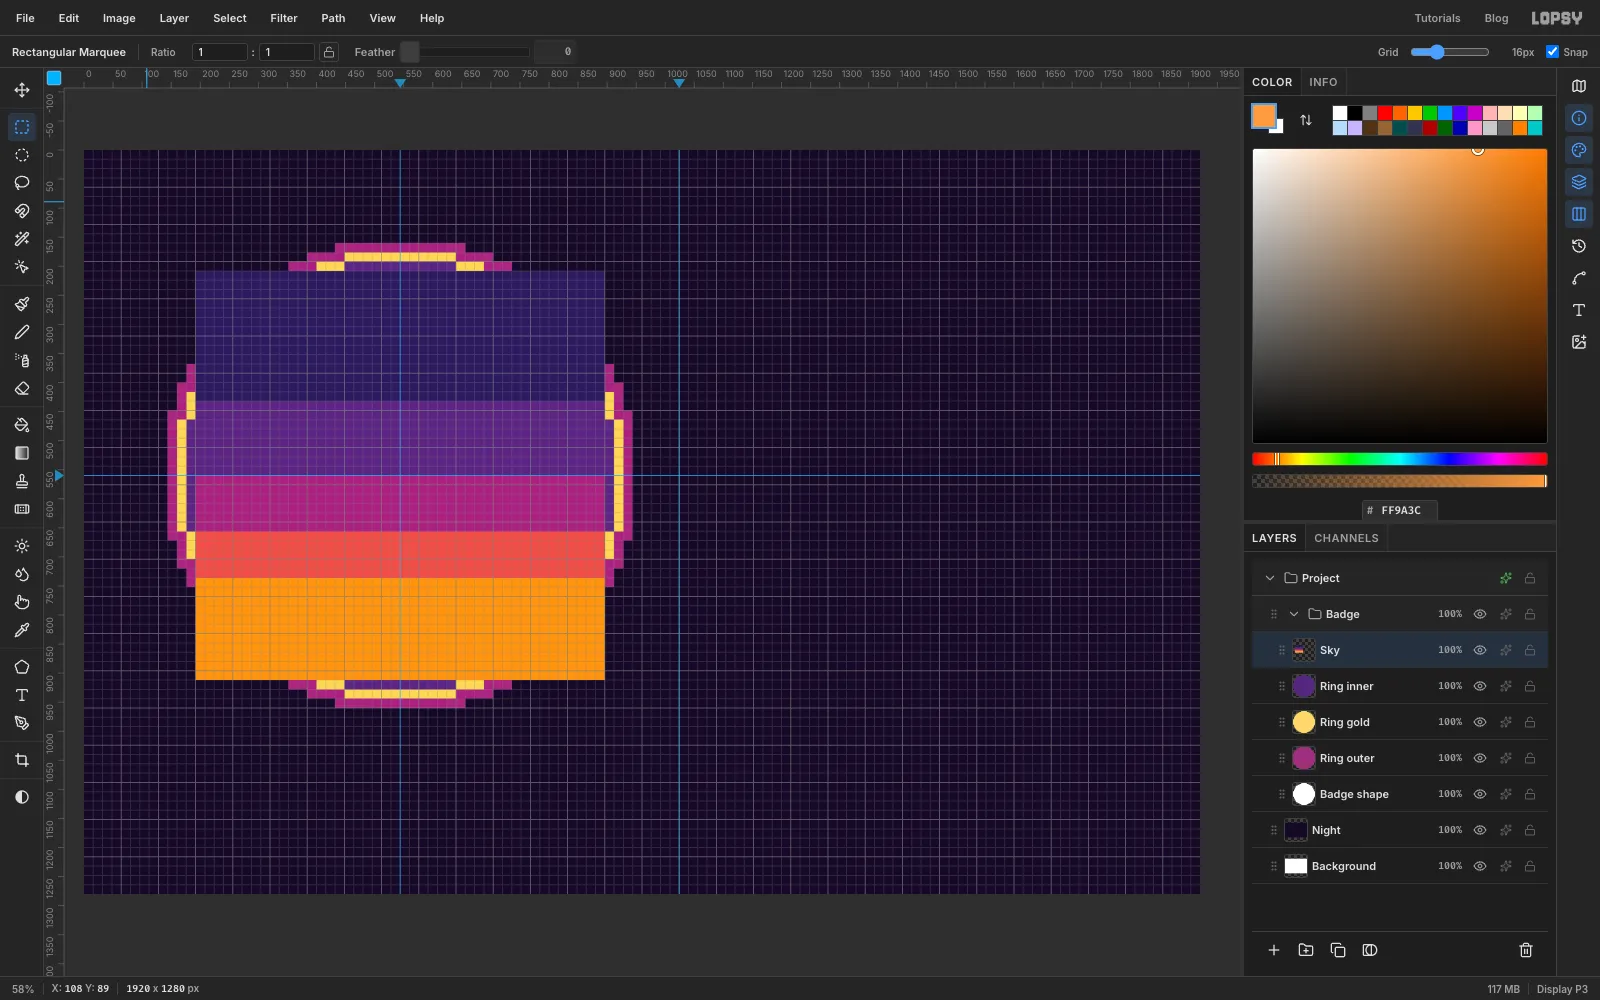
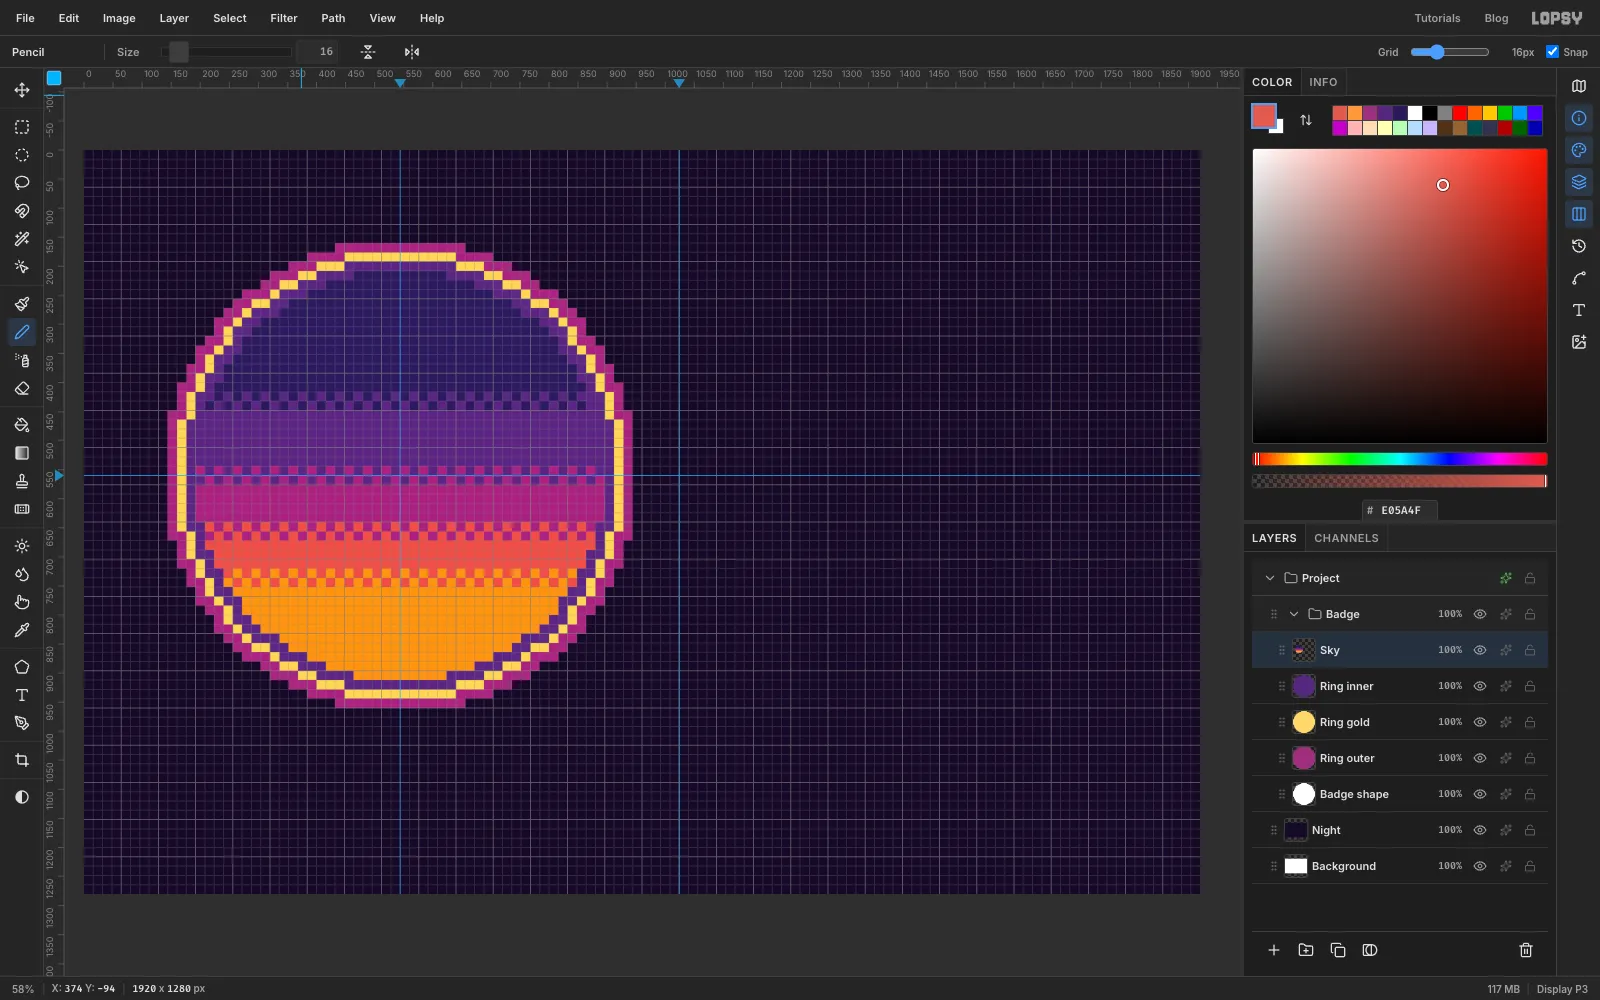
Select Ring inner and add a layer named Sky. With the Rectangular Marquee, drag one band at a time from the left edge of the circle (x 192) to the right edge (x 896), and fill each one. Grid snapping makes the edges land on cells.
- from y 208 to 432
- from 432 to 560
- from 560 to 656
- from 656 to 736
- from 736 to 912
Press Cmd+D when you're done. Don't worry about the corners yet. You'll trim the bands to the circle in a moment.
-
Soften the seams with a checkerboard dither
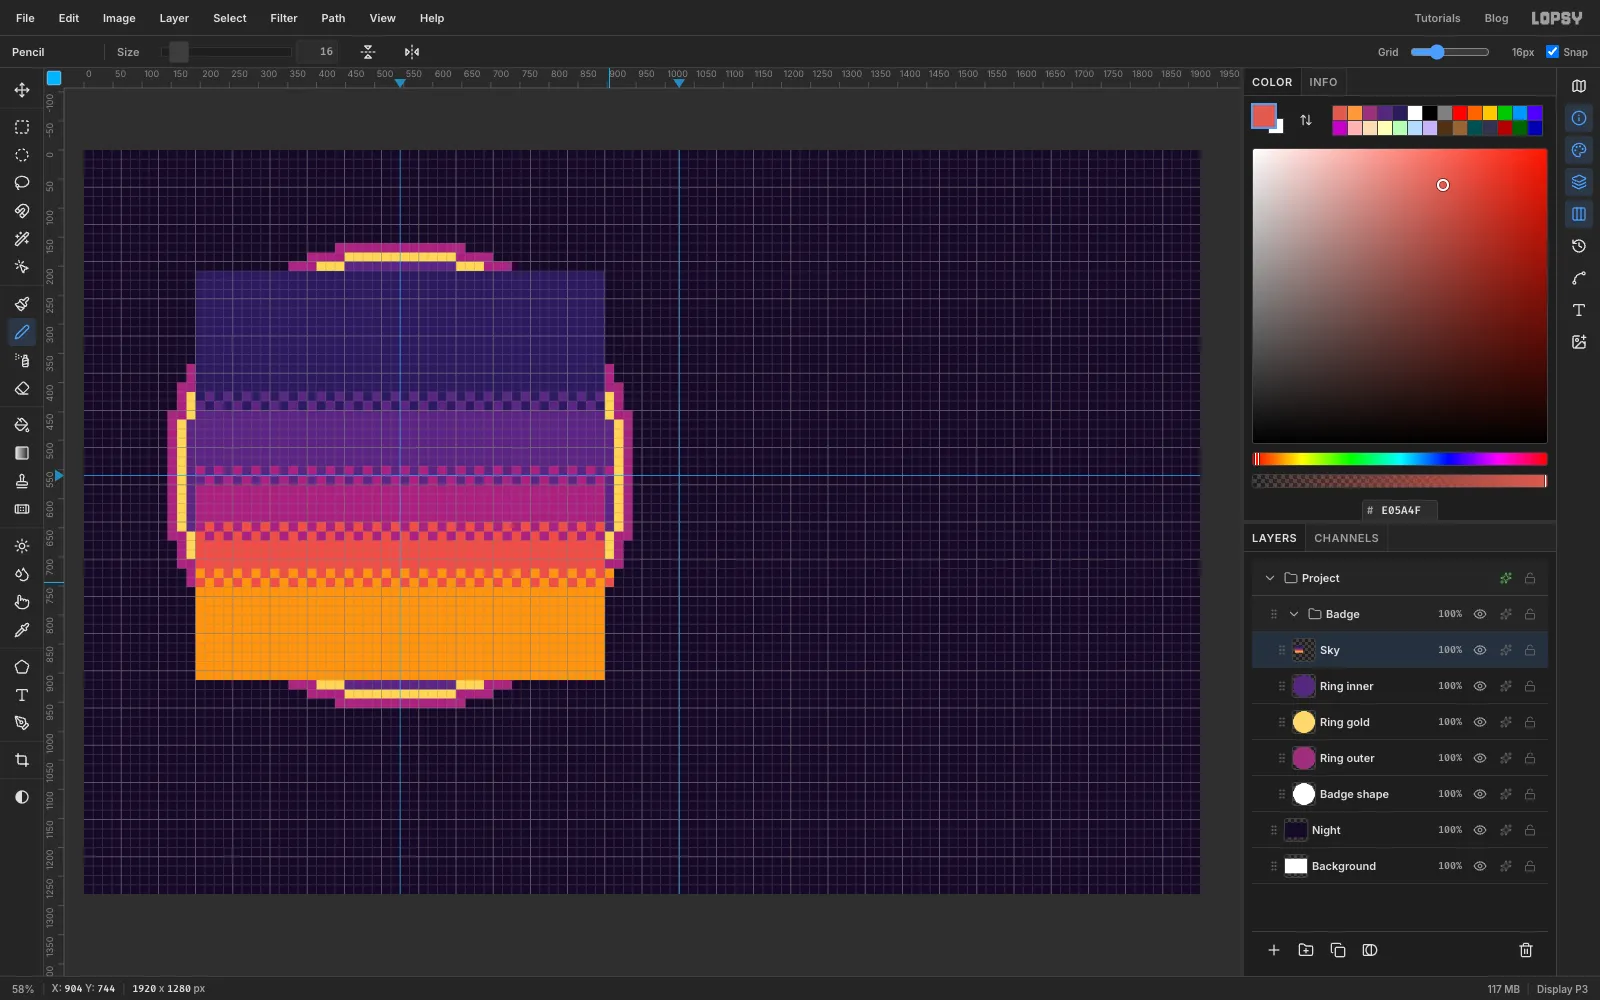
8-bit games couldn't blend colours, so they used dithering: a checkerboard of the two colours where they meet. Choose the Pencil. In the options bar, type 16 into Size. Now every click in the middle of a cell paints exactly that cell.
At each seam, work on the two rows that touch it:
- In the last row of the upper band, paint every other cell with the colour below.
- In the first row of the lower band, paint the same columns with the colour above.
Together the two rows make a checkerboard. At the first seam (navy to purple), skip the first cell at x 192 and start on the next one. At the next seam start on x 192 itself, and keep alternating, so the dither teeth don't line up from seam to seam. You only need cells inside the rings, because the corners get trimmed next. The recent colours under the Color panel's swatch save retyping the hex codes.
-
Trim the sky to the badge
Cmd-click the Badge shape thumbnail, choose Select → Inverse and press Delete. Everything outside the circle is gone. Press Cmd+D.
You'll trim several later layers the same way.
-
Add a few stars
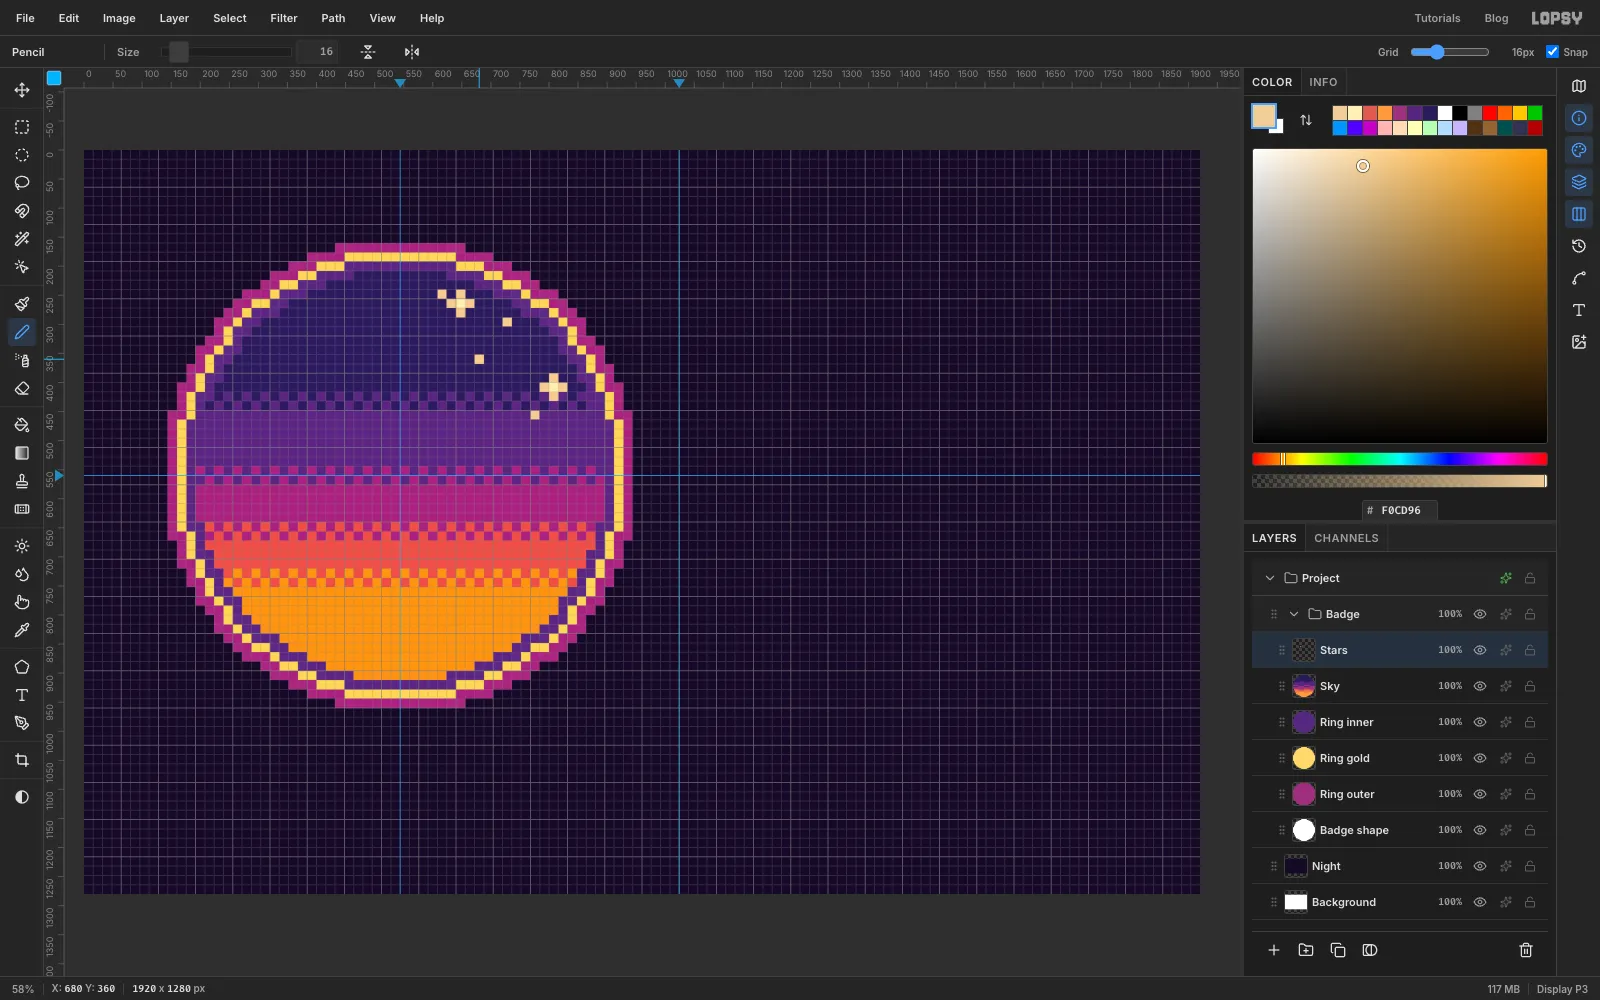
Add a layer named Stars. With the Pencil still at 16, paint two plus-shaped stars in the navy part of the sky, on the right where the moon won't be. For each one, paint the centre cell in and the four cells around it in . Centre them on the cells at (640, 256) and (800, 400). Add four single cells nearby. Keep stars out of the bright bands near the horizon.
-
Paint the moon and its halo
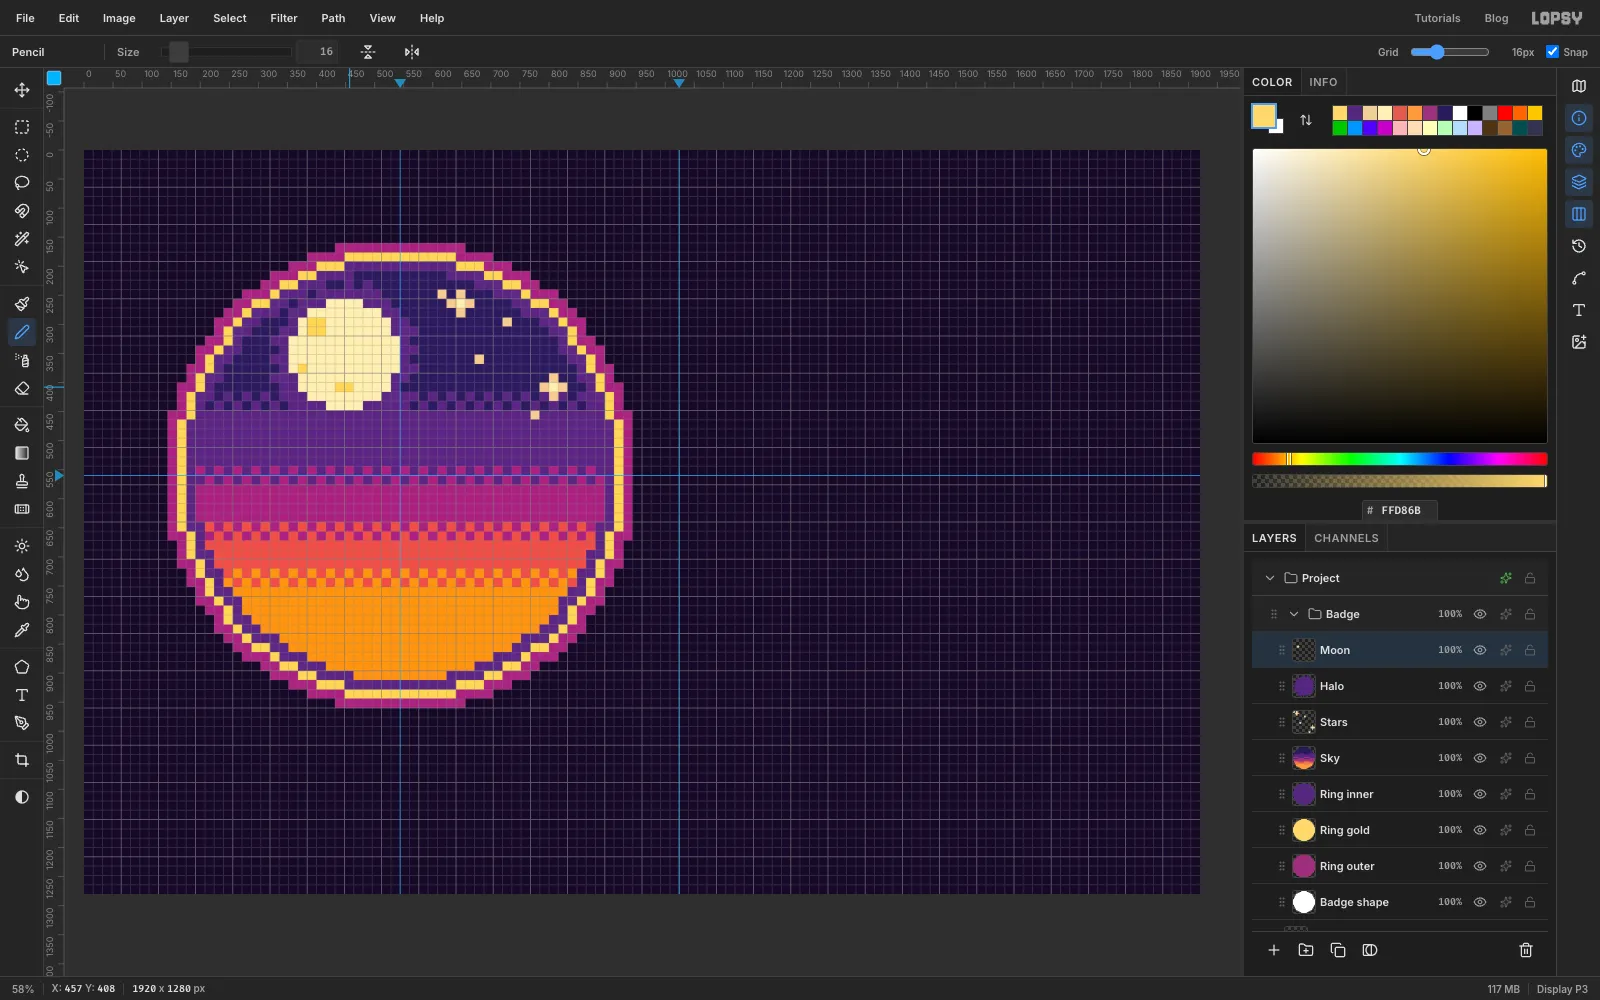
Add a layer named Moon. Click once with the Elliptical Marquee and type From 352, 256, To 544, 448. Run the pixel-snap recipe, then recolour the disc . With the Pencil, paint a few craters in : a 2 × 2 block near the upper left and two smaller ones lower down. Keep them away from the right side of the moon, which the coyote's muzzle will cover.
For the halo, select the Stars layer and add a layer named Halo, so it sits under the moon. Cmd-click the Moon thumbnail, choose Select → Grow… with 16, run the recipe and recolour it . That gives a solid 1-cell ring. Make sure nothing is selected, then paint every other cell one ring further out with the Pencil in the same purple, so the glow fades. Trim the Halo to the badge the same way as the sky.
-
Block in the mesa
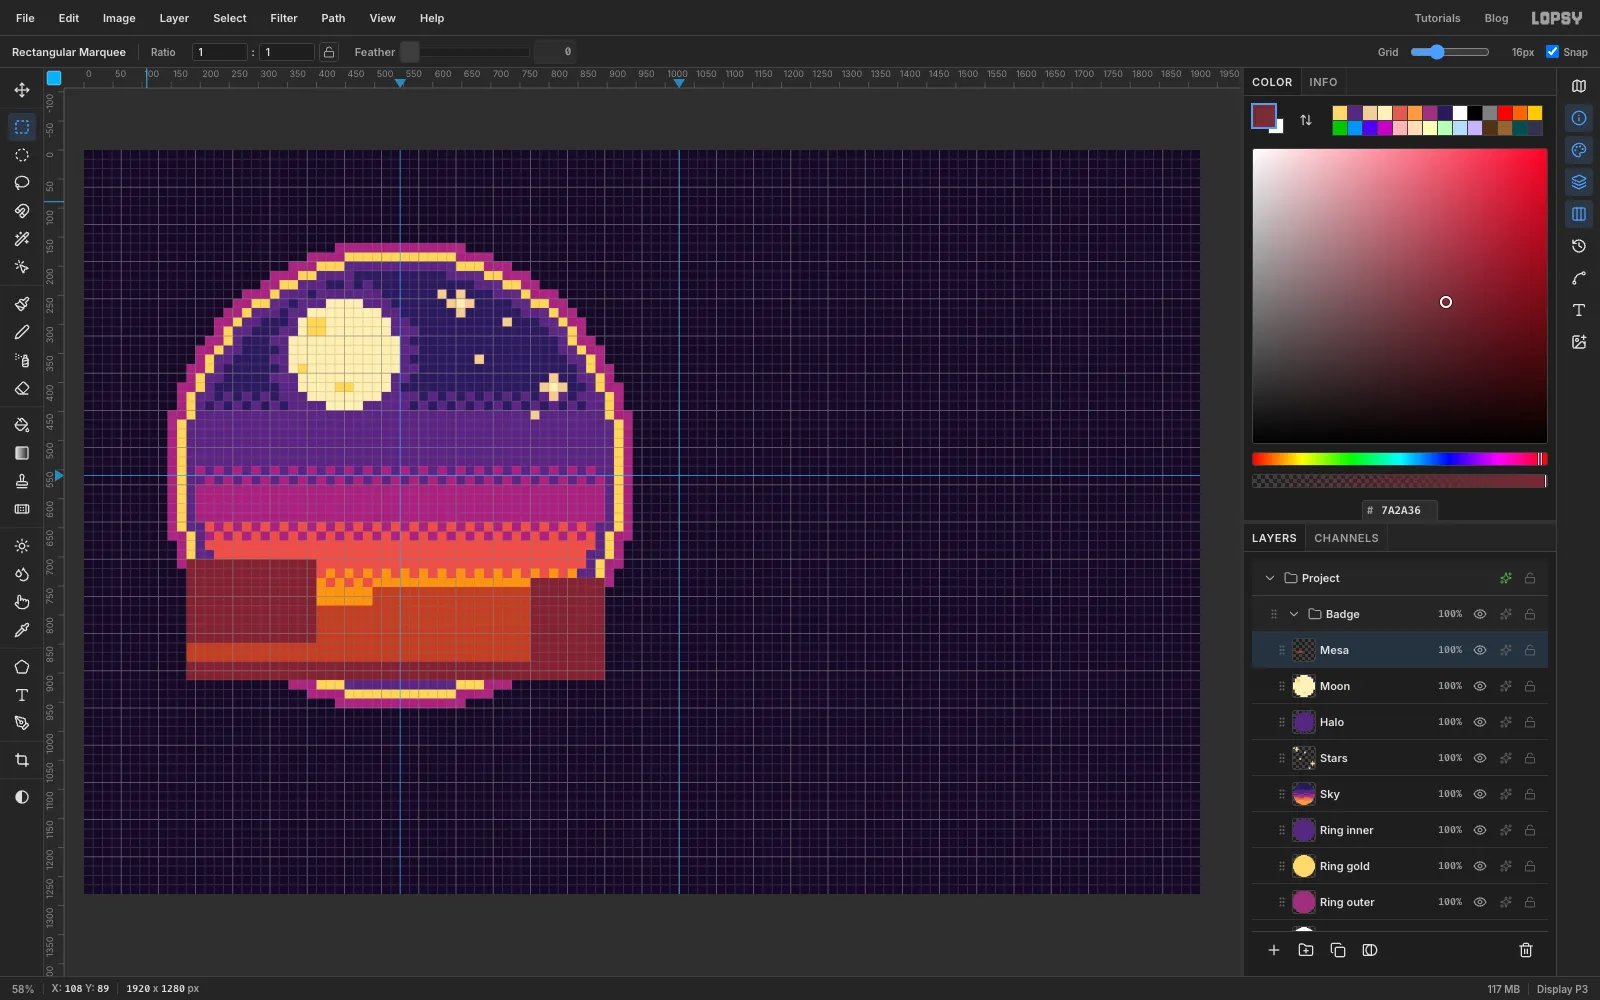
Select Moon and add a layer named Mesa. Build the landscape from rectangular marquees and Edit → Fill:
- A distant butte in : x 176 to 400, y 704 to 848.
- The ground: from y 848 to 880 and from 880 to 912, both across the whole badge (x 176 to 896).
- The mesa body in : x 496 to 768, y 752 to 848, plus a lower step on its left from x 400 to 496, y 784 to 848.
- The lit lip in : a one-cell strip along the top of the mesa (y 736 to 752) and of the step (y 768 to 784).
- The shadowed right side in : x 768 to 896, y 736 to 880.
Press Cmd+D.
-
Add rock layers and the cactus
With the Pencil and , draw two rock strata across the lit face of the mesa. Click the cell at the left end and Shift-click the cell at the right end: the rows at y 800 and y 832, cells x 464 to x 752. Continue the same two lines across the shadowed side in , cells x 768 to x 880. Then dither the ground: paint every other cell of the row at y 864 in . Trim the layer to the badge.
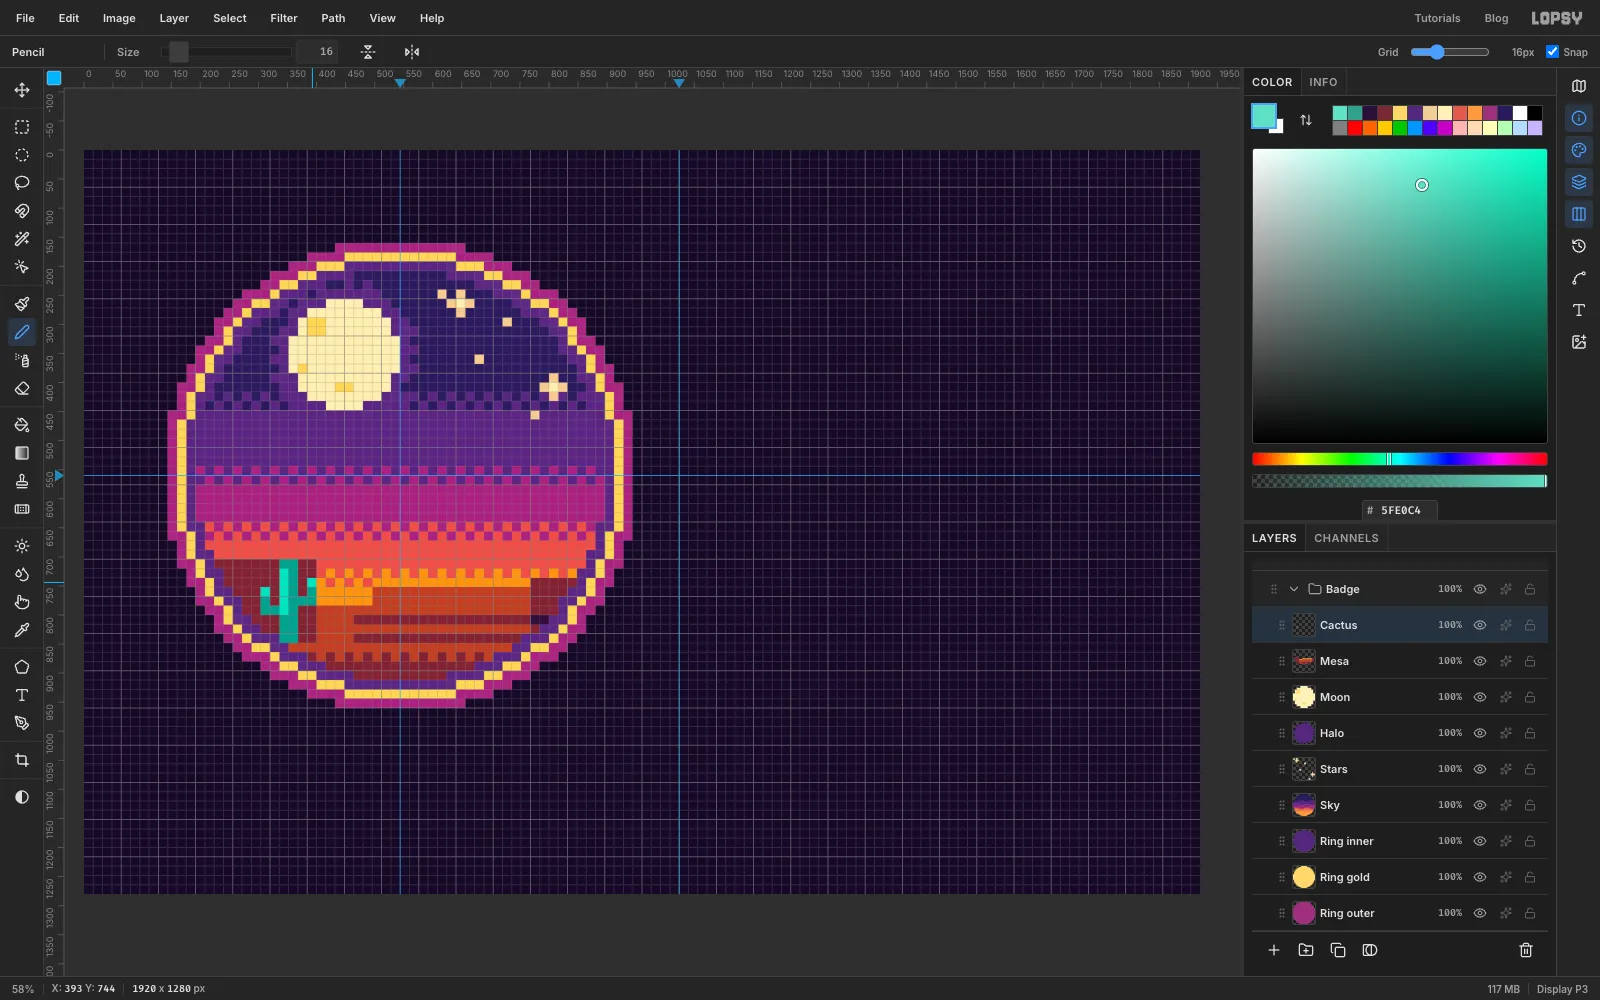
Add a layer named Cactus and draw a saguaro in :
- The trunk is two cells wide (x 336 and x 352), from y 704 down to the ground, ending with the row at y 832.
- The left arm is three cells at x 304, from y 752 to y 784, joined to the trunk by the cell at (320, 784).
- The right arm is three cells at x 384, from y 736 to y 768, joined by the cell at (368, 768).
Add a highlight down the trunk's left column from y 720 to y 784, and on the top cell of each arm.
-
Paste the reference photo
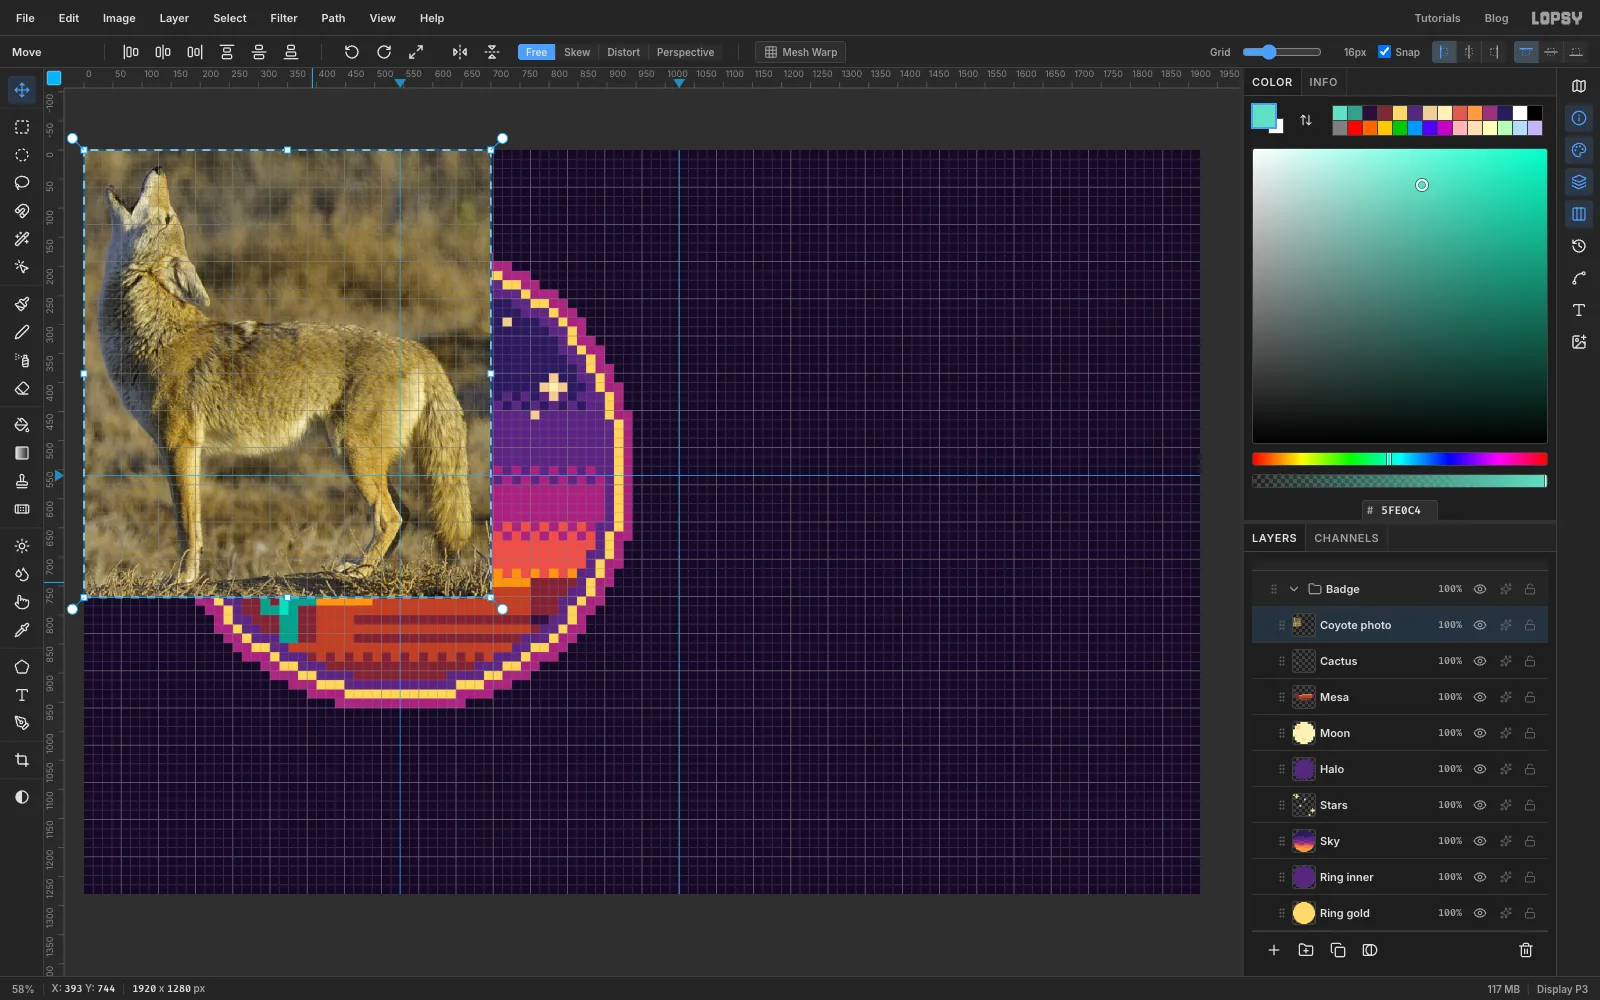
Open the coyote photo.jpg) in your browser, right-click it and choose Copy Image. The screenshots use a copy trimmed close to the coyote, but the whole photo works the same way. Click Cactus in the Layers panel and press Cmd+V. The photo lands in the top-left corner as a new layer, selected, with the Move tool active. Rename it Coyote photo.
-
Scale the photo to the badge
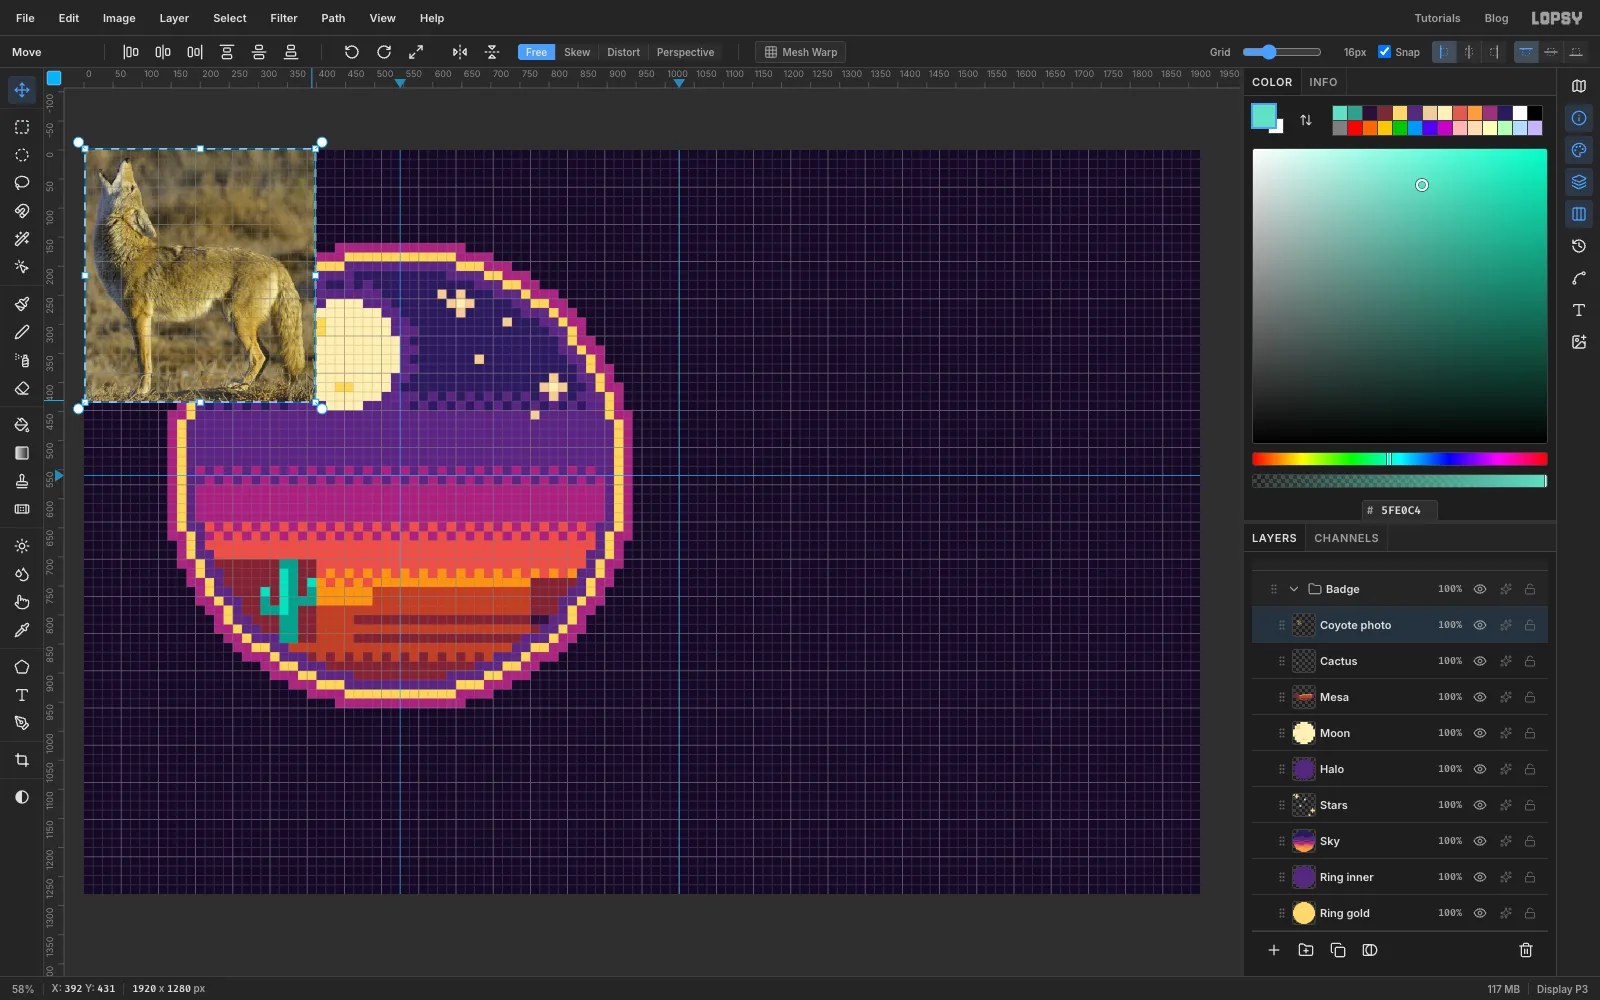
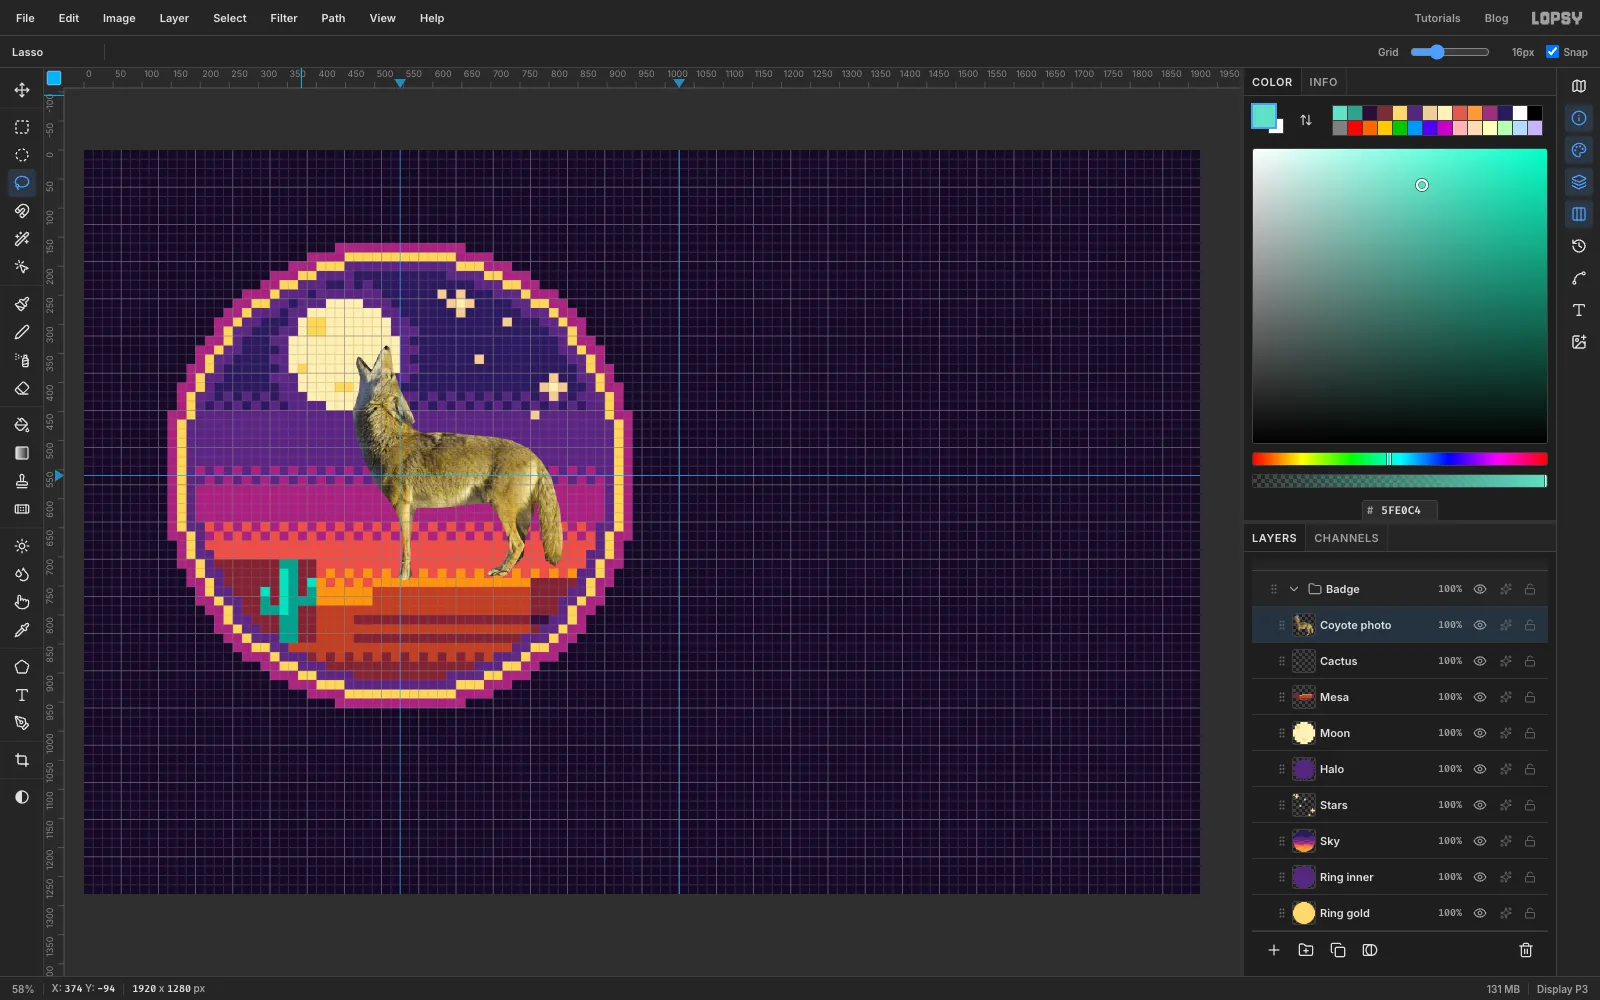
Hold Cmd and drag the bottom-right corner handle up and to the left. Cmd keeps the proportions. Stop when the coyote is about 27 cells (430 px) tall from nose to paws. Press Cmd+D to commit the scale, then drag the photo so the coyote stands on the mesa's orange lip with its nose just in front of the moon.
-
Trace the coyote with the Lasso
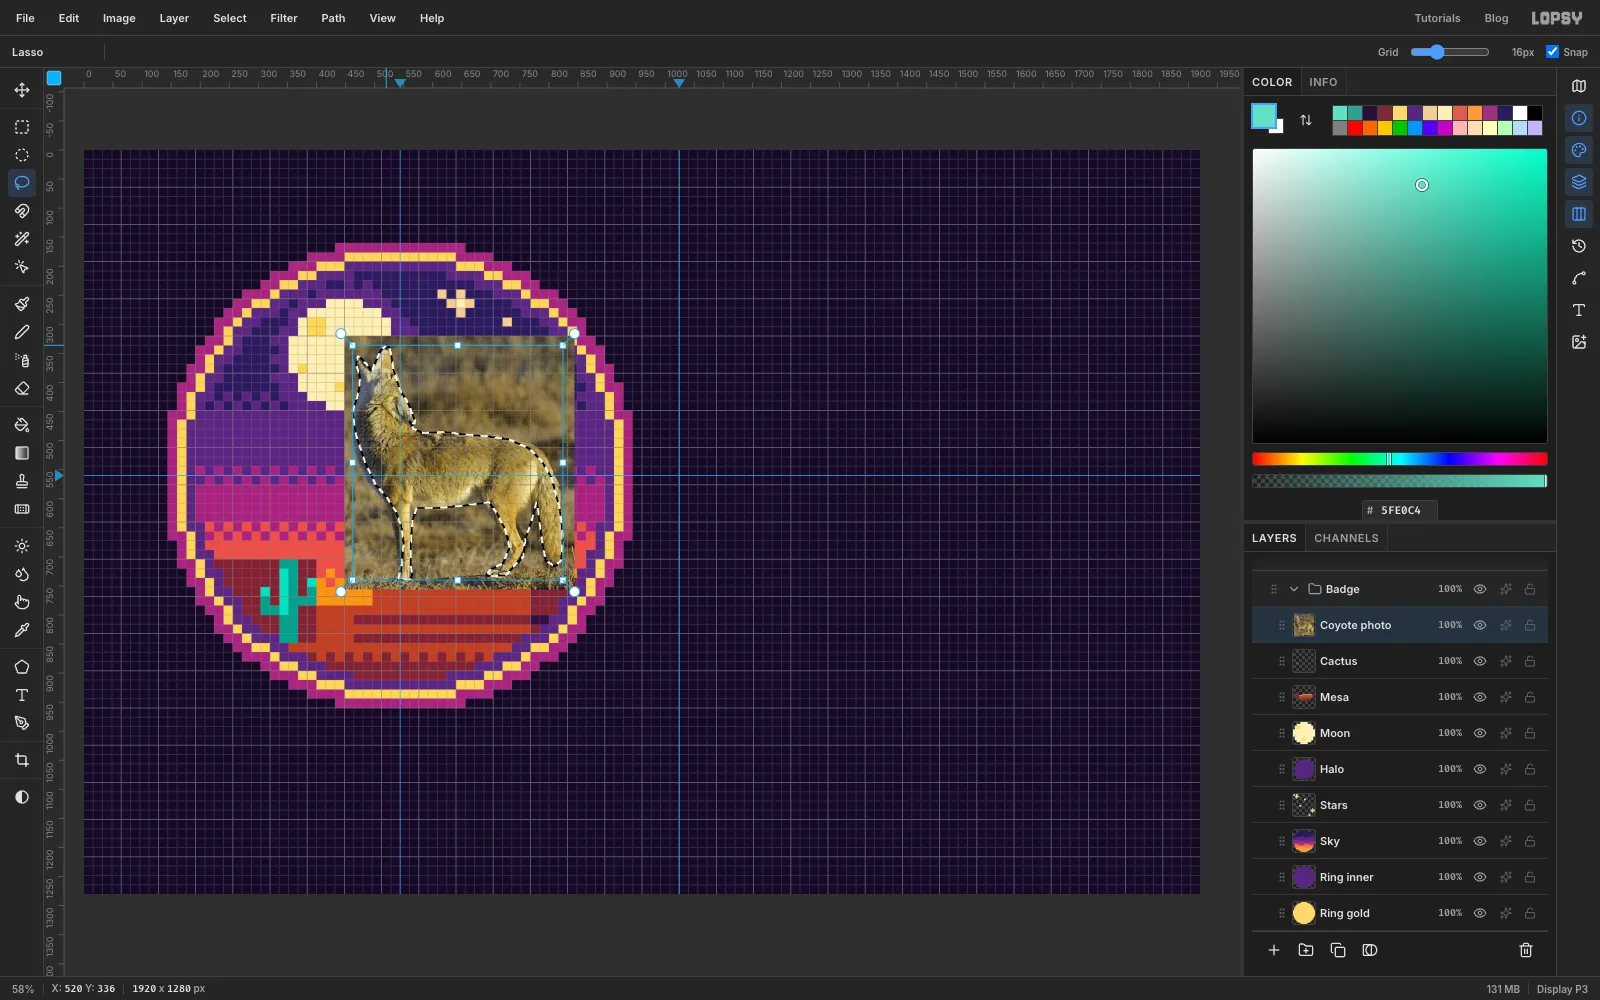
Choose the Lasso and drag around the coyote, close to its fur. Take in the open jaws, the laid-back ear, both front legs, the hind leg and the hanging tail. It doesn't have to be perfect, because this is only a guide.
-
Cut the coyote out
Choose Select → Inverse, press Delete and then Cmd+D. Only the coyote is left on the layer.
-
Pixelate the photo into a guide
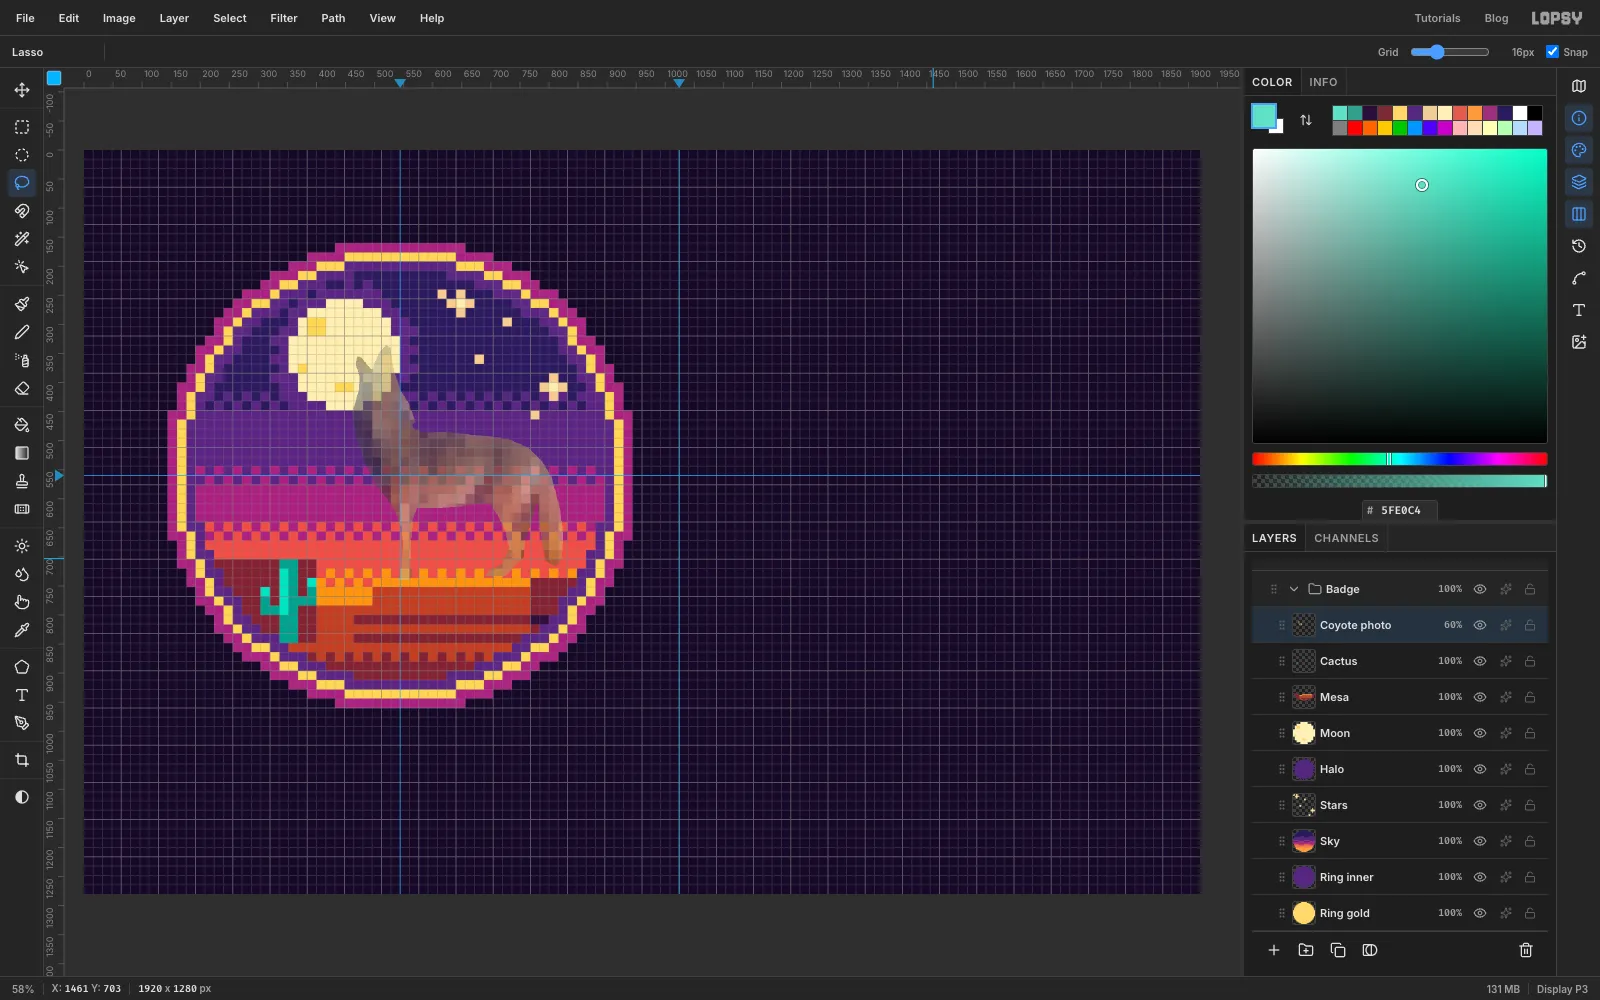
Choose Filter → Pixelate… with Block Size 16. Now you can see roughly which cells belong to the coyote and how light each one is. Click the opacity value on the layer's row and set it to 60%, so you can see your own cells over it.
-
Read the coyote chart
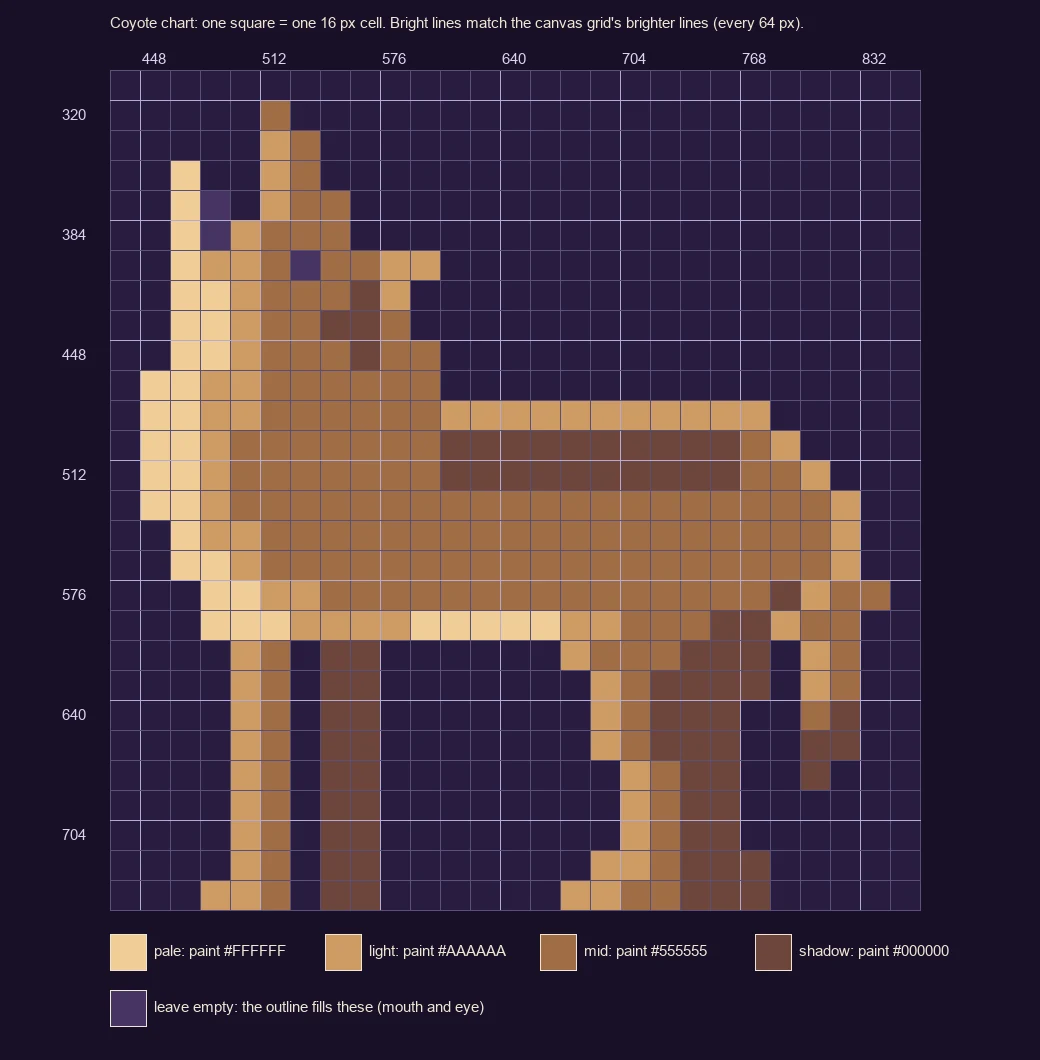
The pixelated photo shows where the coyote is, but a good sprite needs cleaner shapes than a photo gives you. Use this chart as your pattern. Its bright lines match the canvas grid's brighter lines, and the labels are canvas pixels. The nose tip is the single cell at x 512, y 320. The bottom row of the paws is at y 736, the same row as the mesa's orange lip, so the coyote stands on it.
These details came from the photo, then got exaggerated so they read at this size:
- The upper jaw is longer than the lower one, with the mouth left empty.
- The ear sticks out behind the eye.
- The back is level, with a dark saddle along it.
- The far legs and the tail tip are the darkest tone.
- The throat, chest and belly are pale.
-
Set up a Gradient Map for the coyote
Select Coyote photo and click New Group. Name the group Coyote, then click Add Layer to put a layer named Coyote sprite inside it.
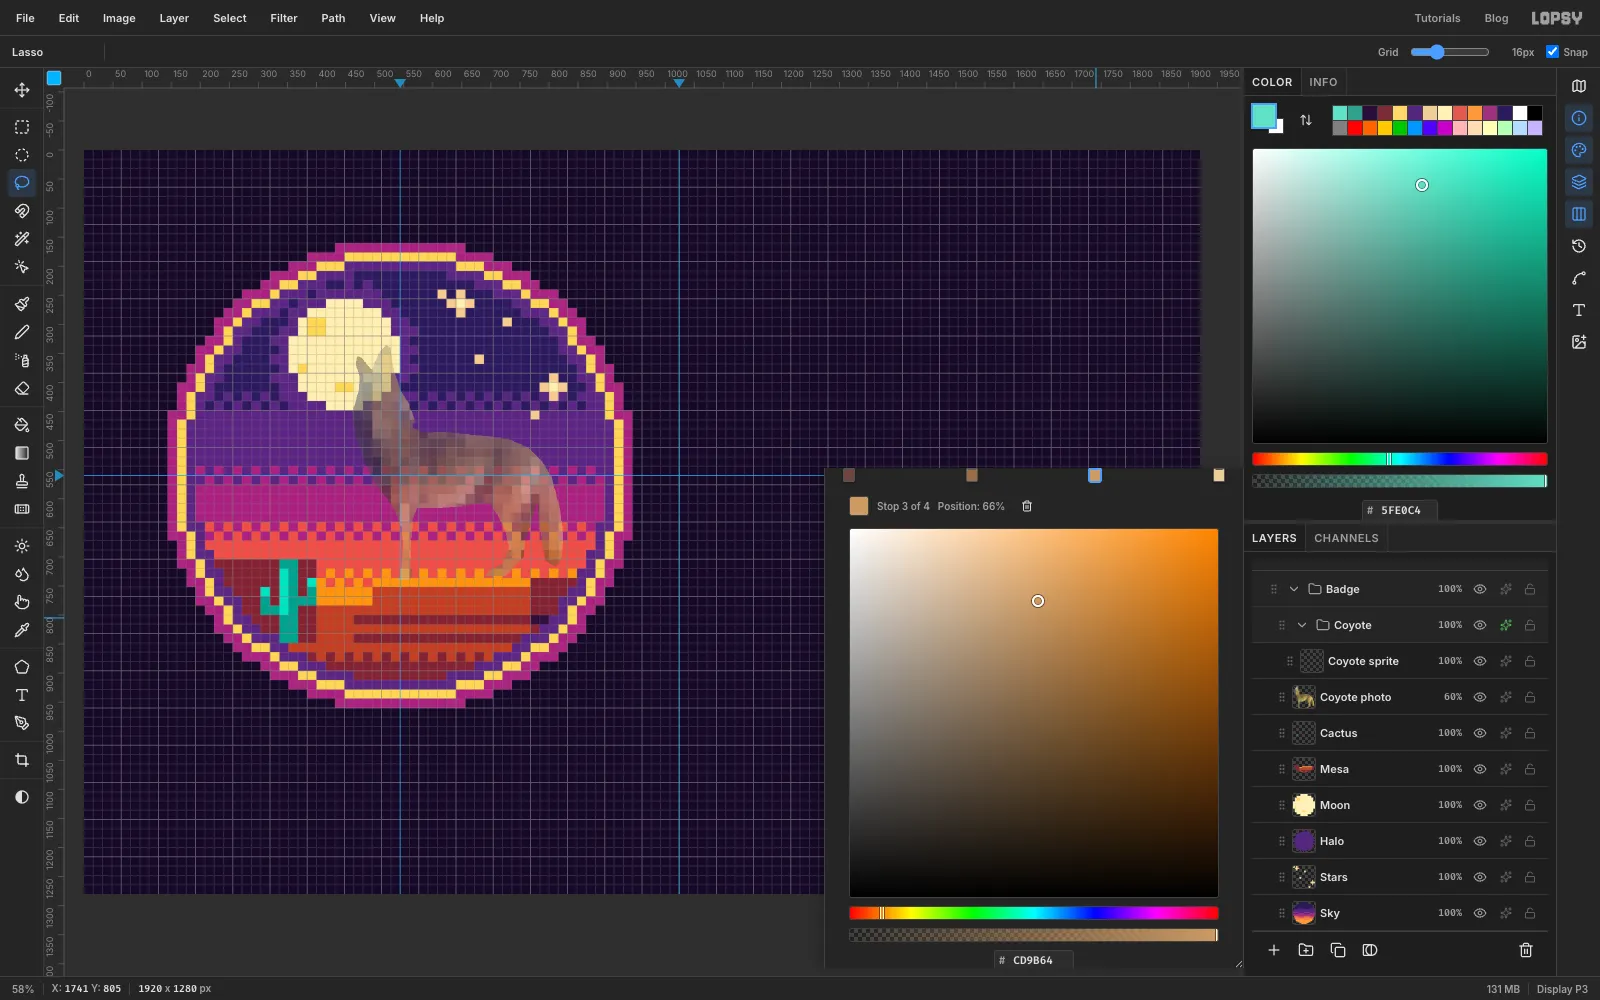
Click the ✦ button on the Coyote group's row to open its effects drawer. Click Add Adjustment → Gradient Map. Click the left stop and type in the picker's hex field, then click the right stop and type . Click the gradient bar a third of the way along to add a stop. The readout under it should say about 33%. Make it . Then add another at about 67% and make it . Close the drawer. Getting the two middle stops close to a third and two thirds matters: that's where the two greys fall, so they come out as exactly those browns.
Now anything painted in the group in black, , or white comes out as these four browns.
-
Paint the light tone
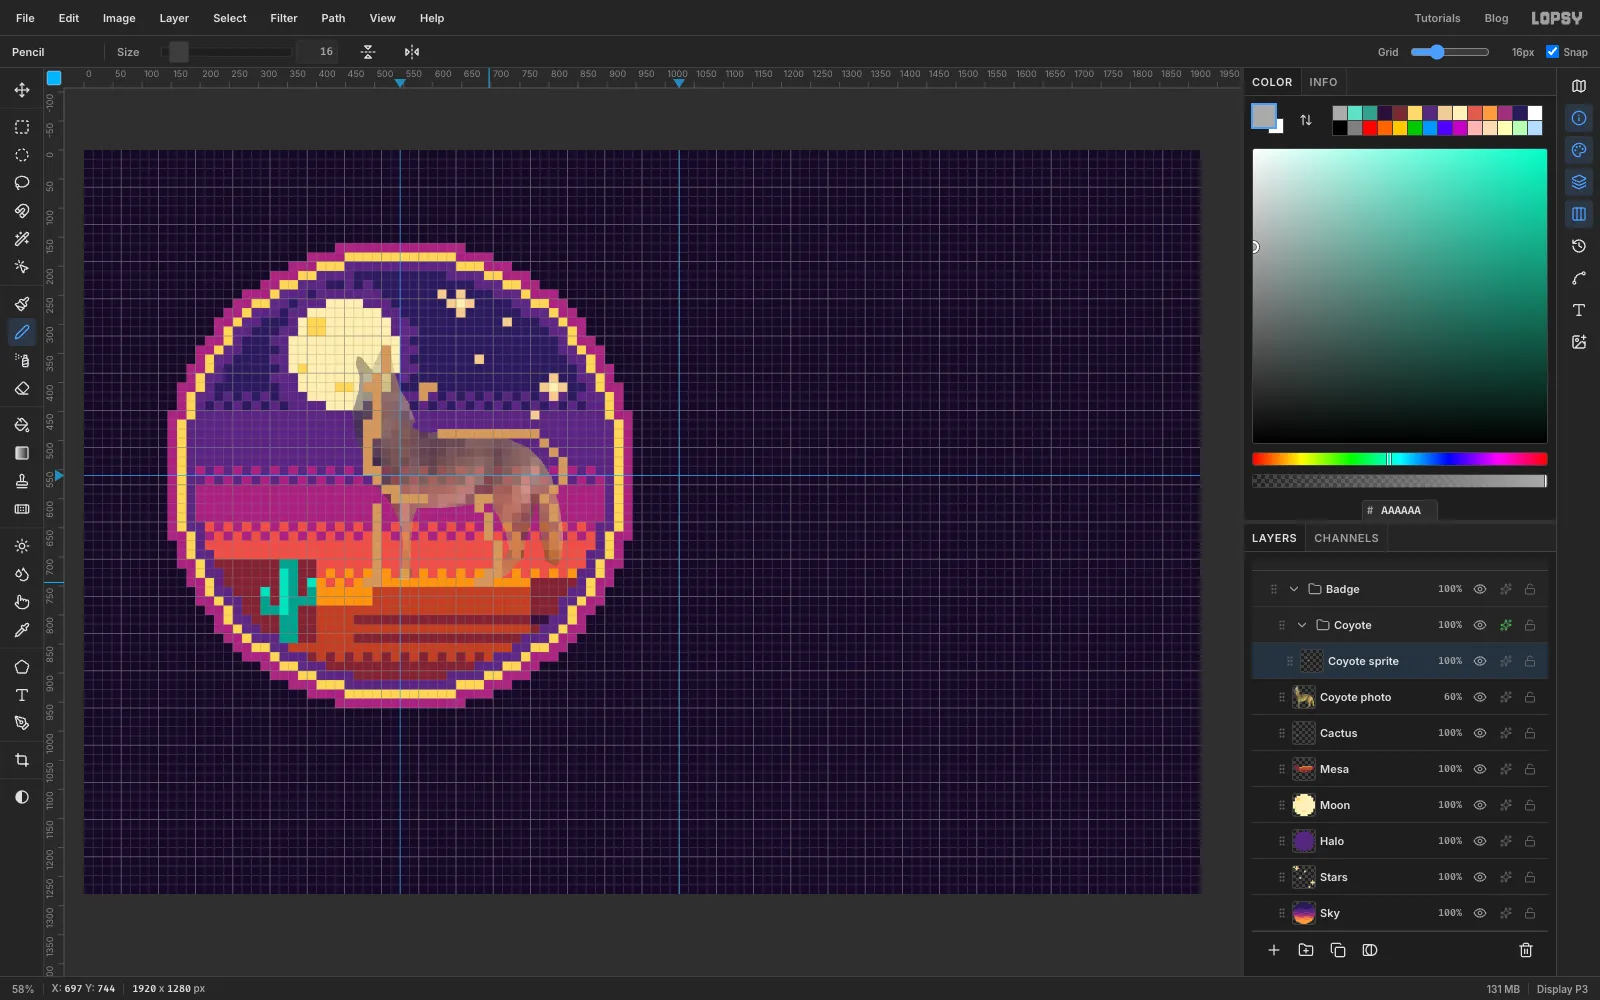
Select Coyote sprite, choose the Pencil (Size 16) and set the foreground to . Following the chart, paint every light-tan cell. Work row by row from the top, reading each row's y from the chart. Click a cell, then Shift-click the last cell in the same row to paint a whole run at once.
-
Paint the mid tone
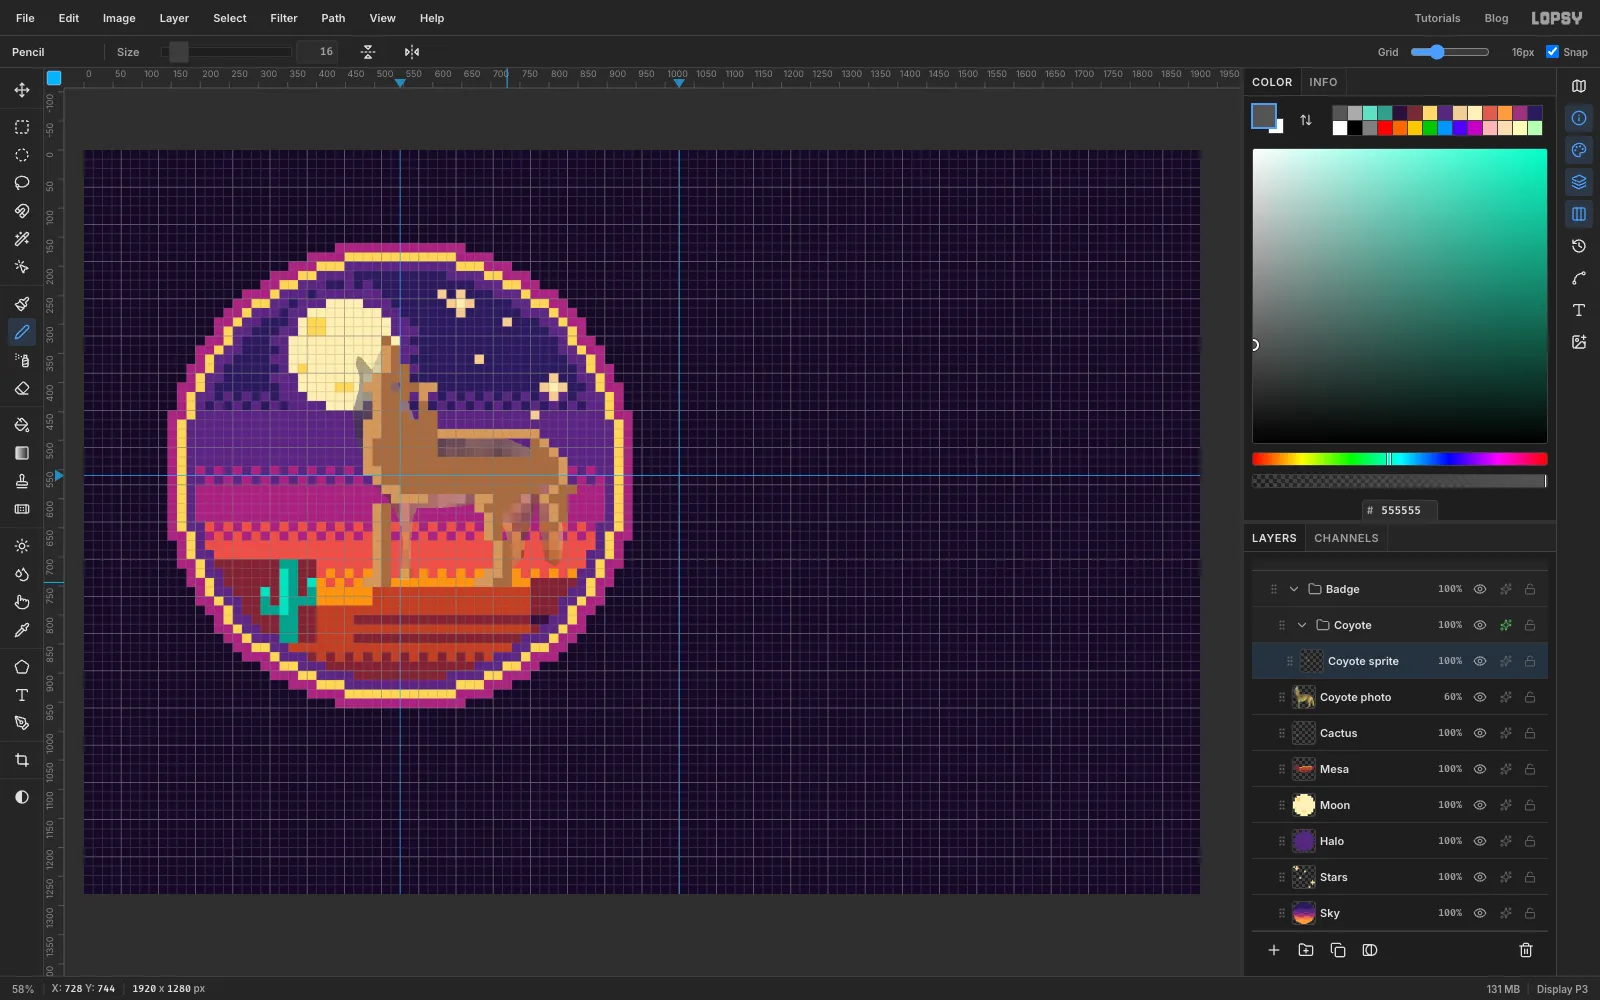
Set the foreground to and paint all the medium-brown cells. This is the biggest fill: most of the head, neck and body.
-
Paint the shadows
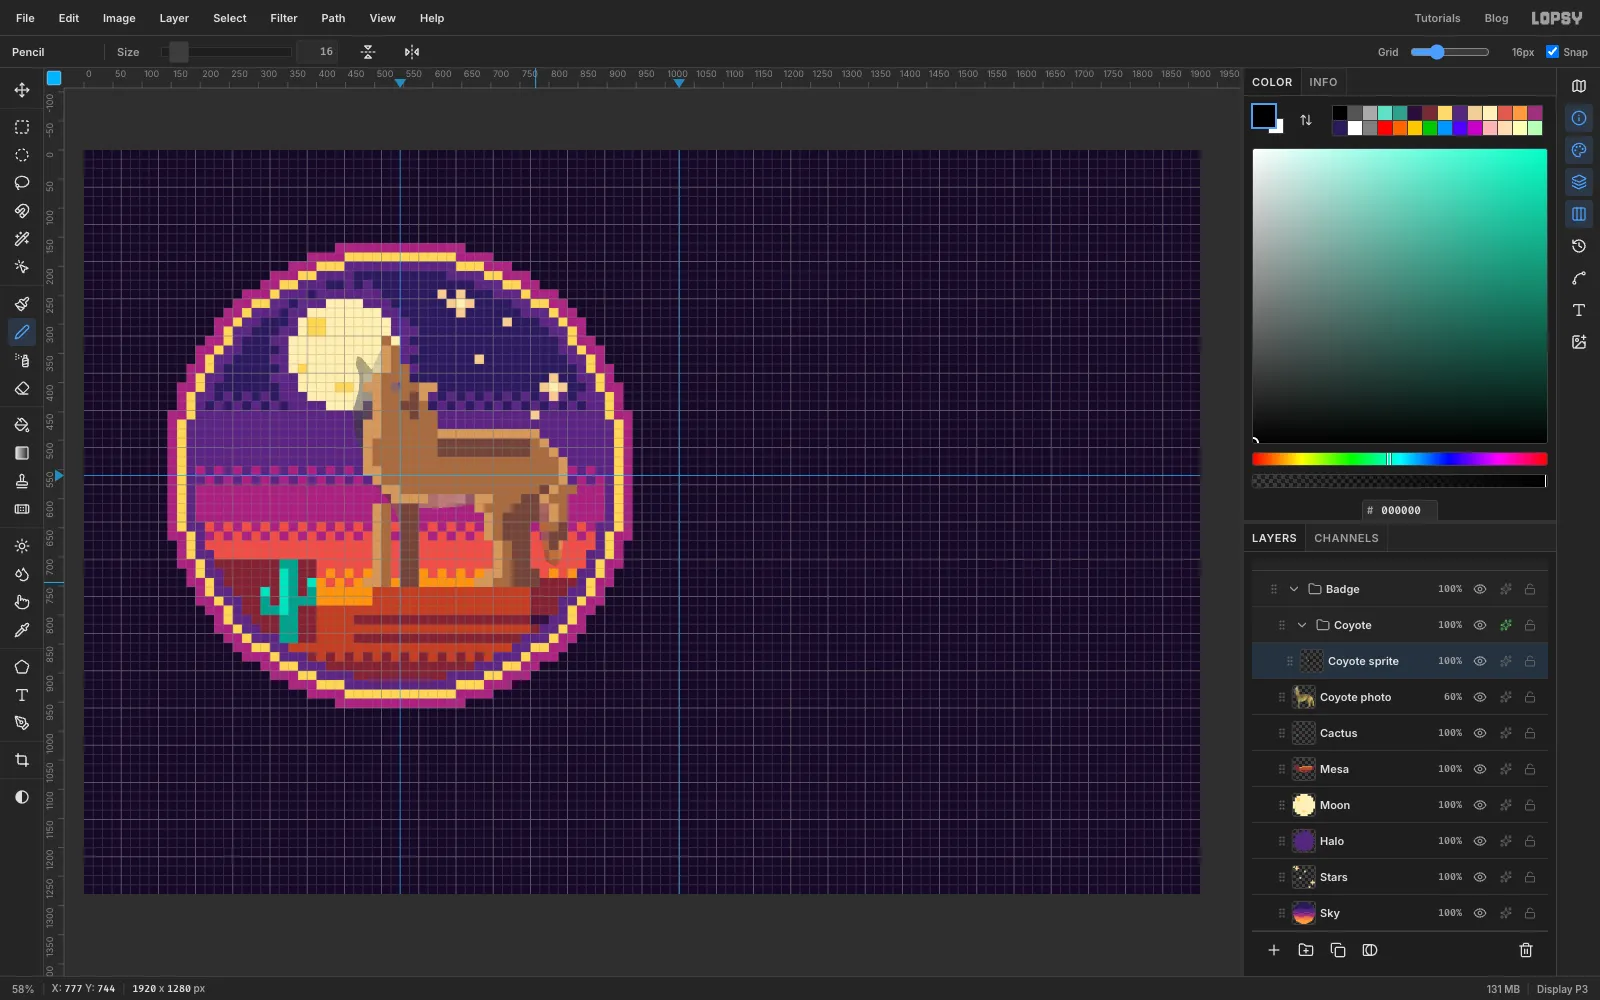
Set the foreground to black () and paint the dark-brown cells: the inner ear, the saddle along the back, the far front leg, the far hind leg and the tail tip.
-
Paint the pale fur
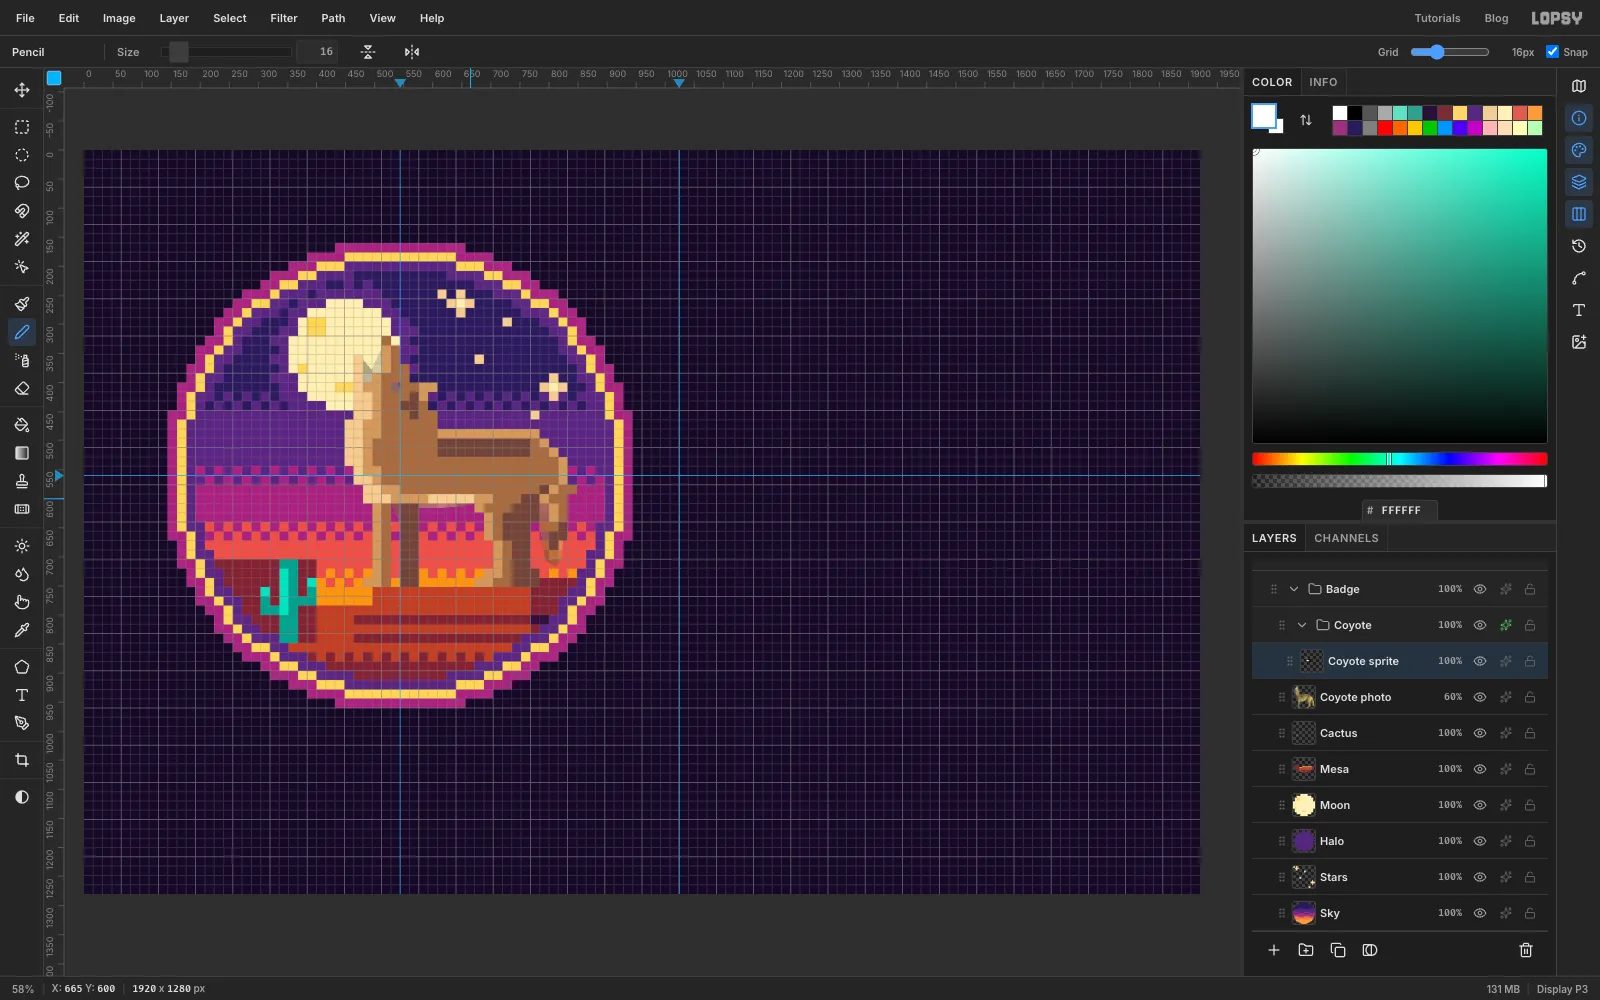
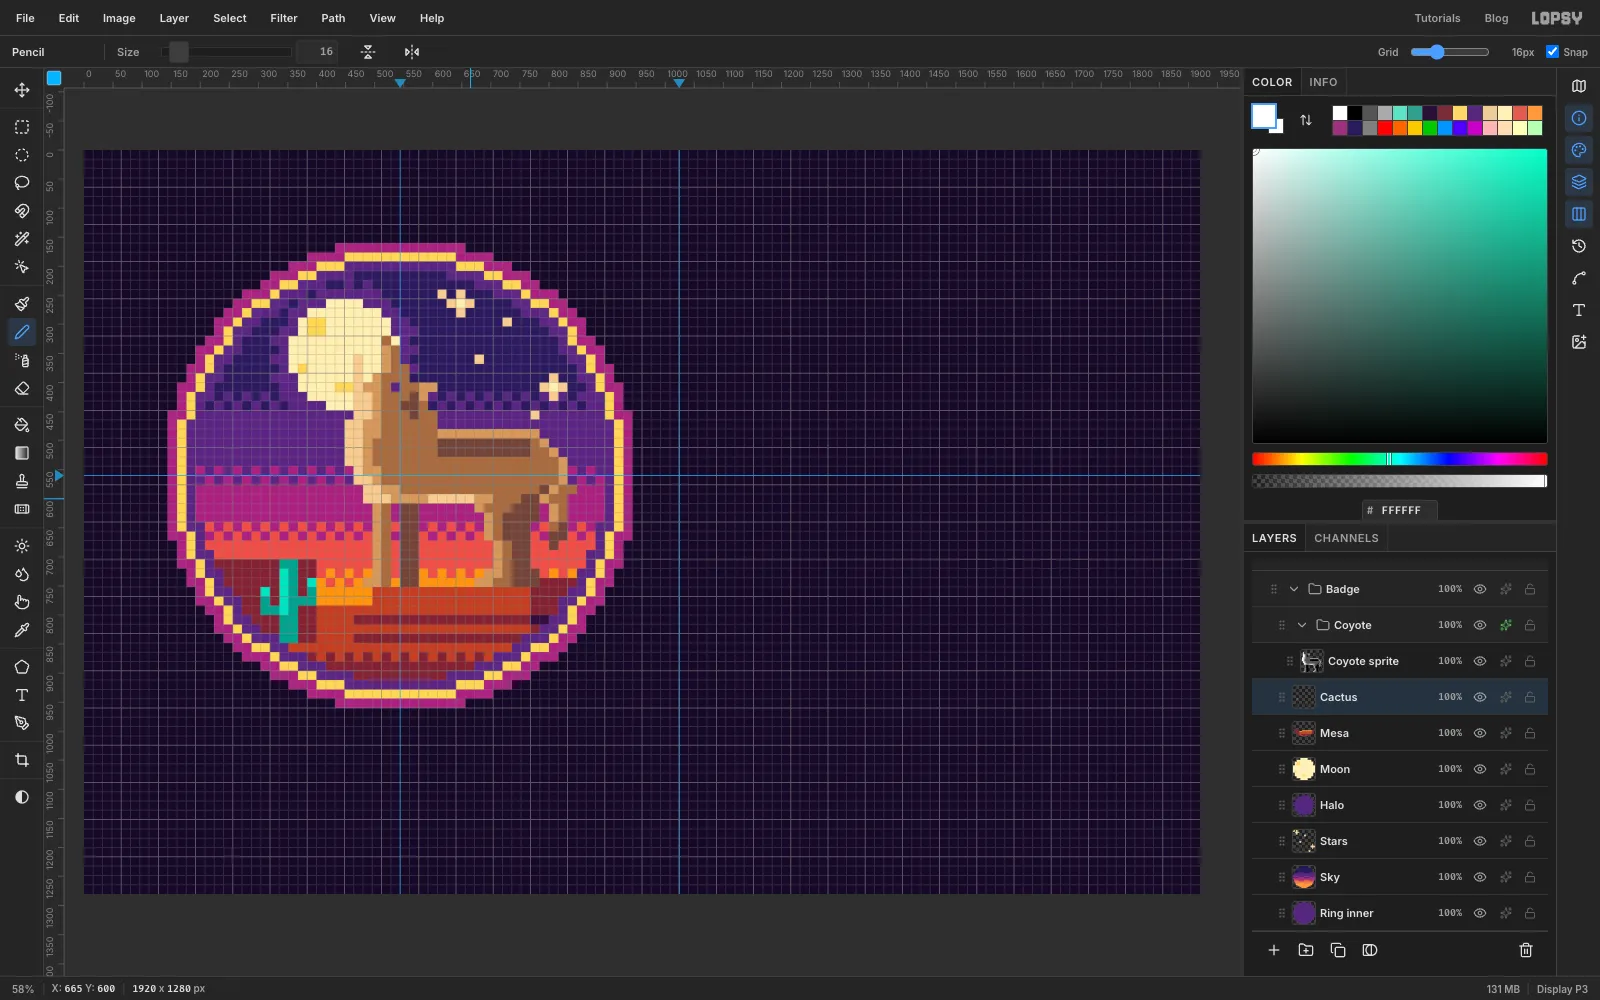
Set the foreground to white and paint the pale cells down the throat, chest and belly. Leave the mouth and eye cells marked "leave empty" on the chart unpainted. The outline will show through them.
-
Delete the guide
Select Coyote photo and click Delete Layer. The sprite stands on its own now.
-
Add the outline
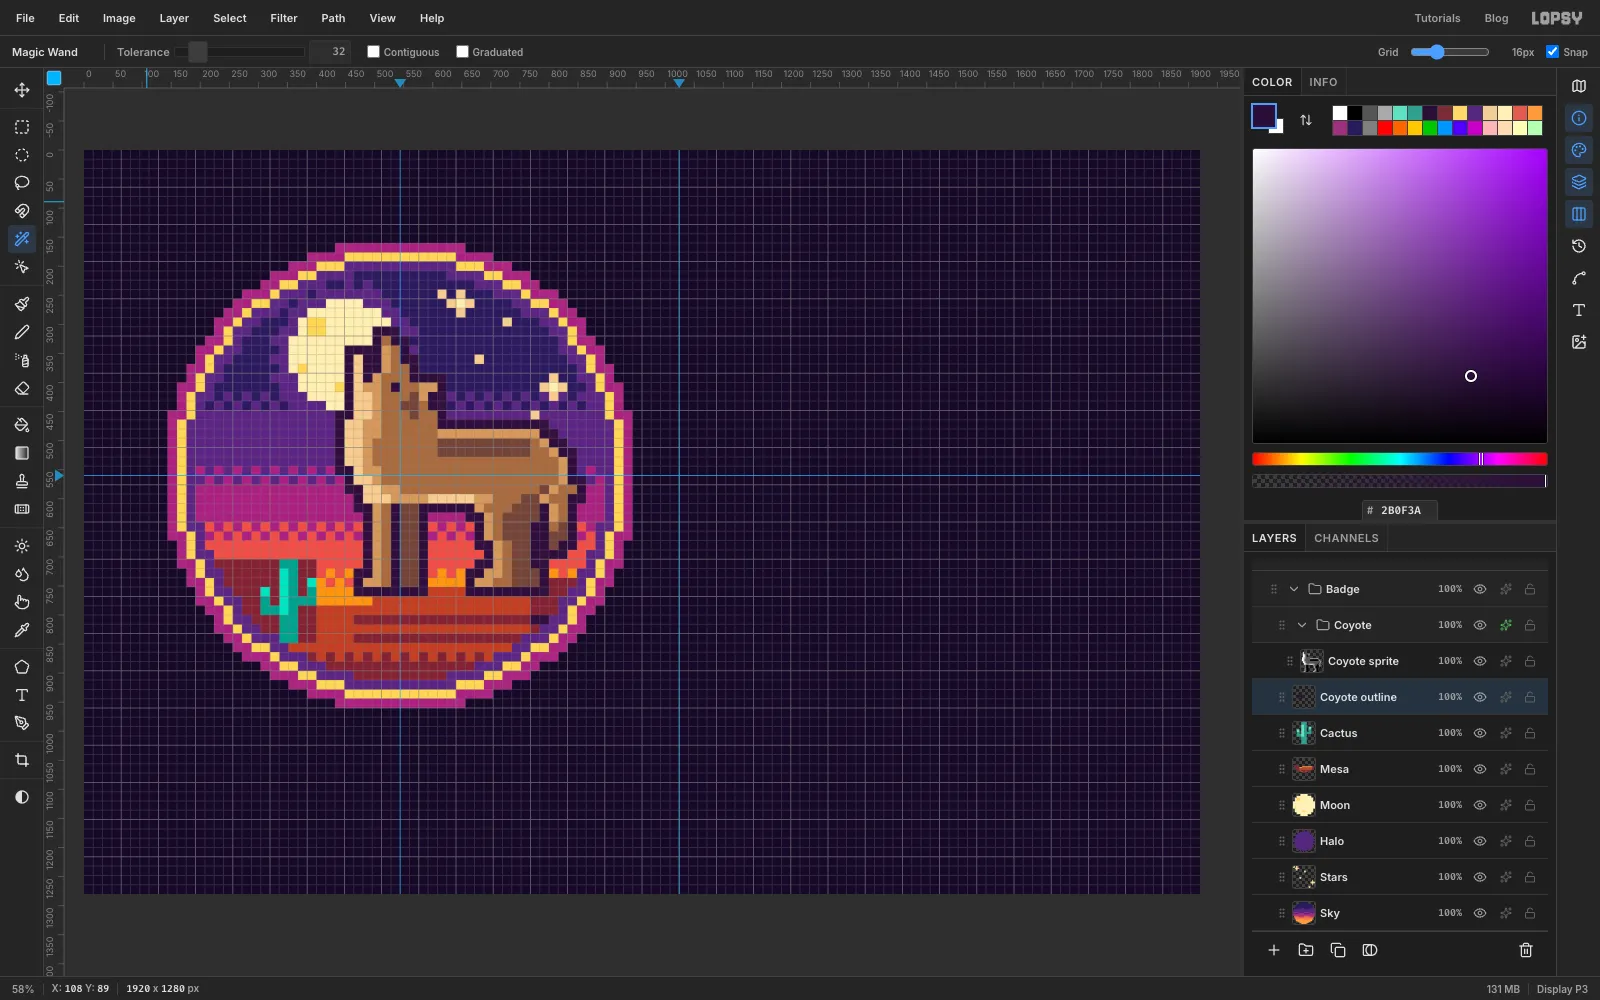
Select Cactus and add a layer named Coyote outline. It sits under the Coyote group. Cmd-click the Coyote sprite thumbnail, choose Select → Grow… with 16, and run the pixel-snap recipe on this layer. Recolour the result .
The outline is one cell wide all the way round. It also fills the empty mouth and eye cells.
-
Type GAME STUDIO and COYOTE
Type the lower line first. A click just below an existing text layer can land inside its text box and edit it instead of starting a new one.
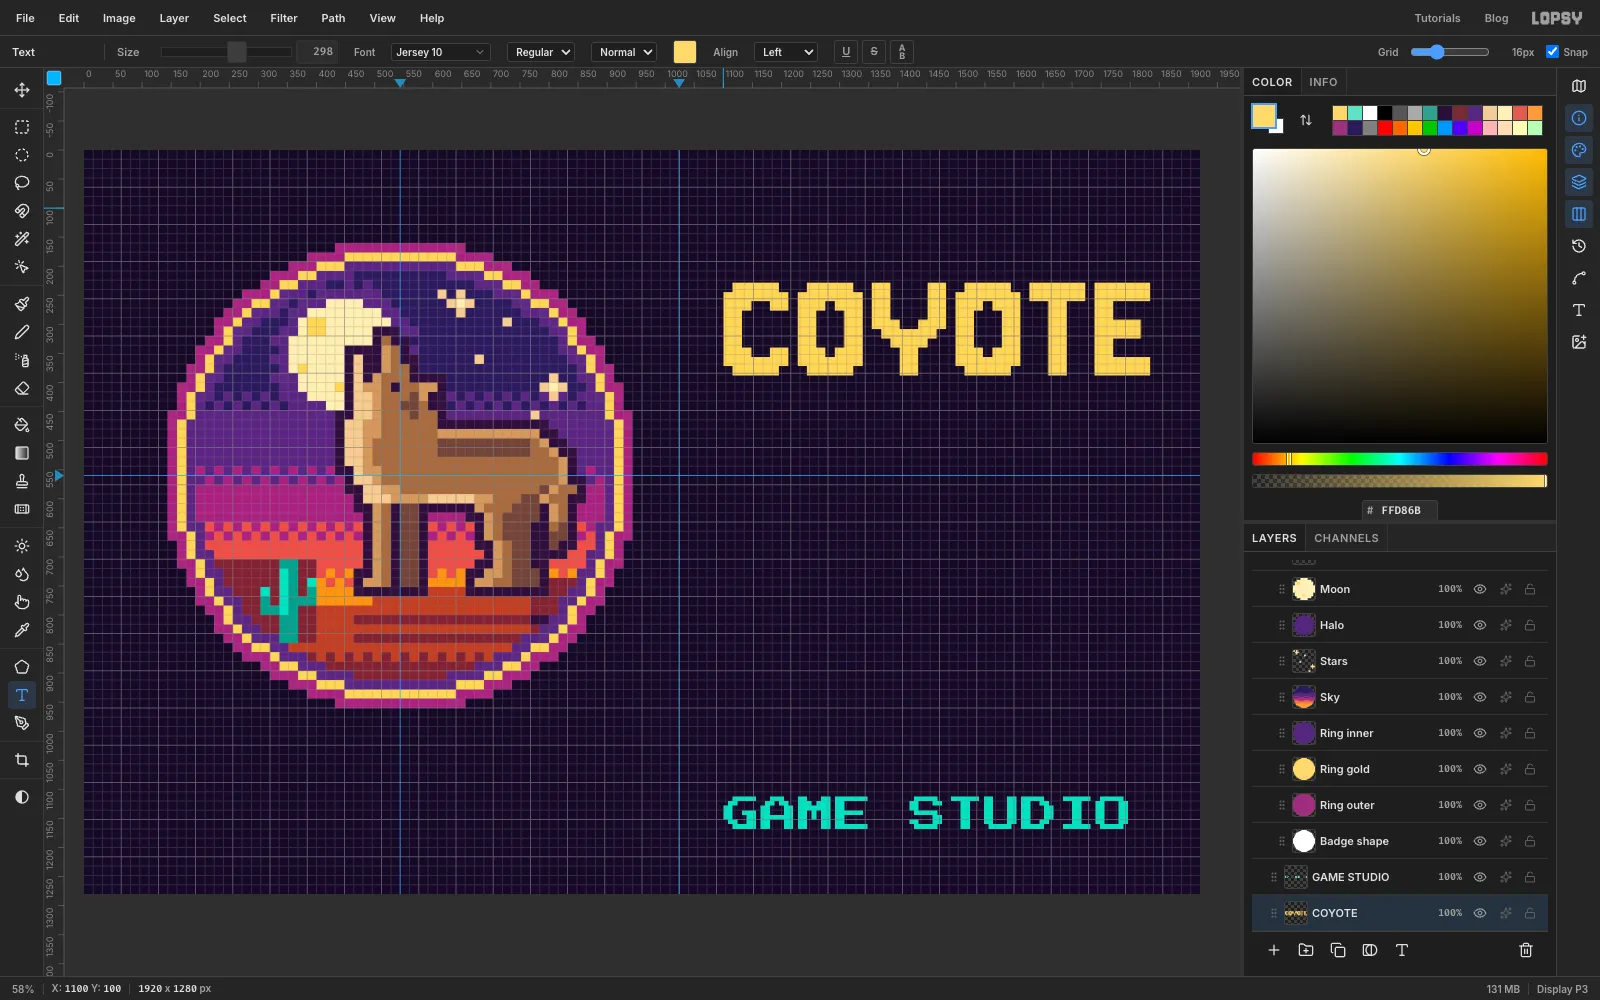
Select the Night layer, so new type isn't added to the badge. Choose the Text tool. In the options bar, set Size to 64 and the font to Press Start 2P, and set the foreground colour to . New text takes the foreground colour. Click near the bottom right of the canvas, type GAME STUDIO and press Tab to finish.
Select Night again. Set the font to Jersey 10, Size to 298 and the foreground to . Click near the top right, type COYOTE and press Tab. At 298 px, one pixel of Jersey 10 is almost exactly 16 px, so the letters match the badge's cells.
-
Add MESA and line up the wordmark
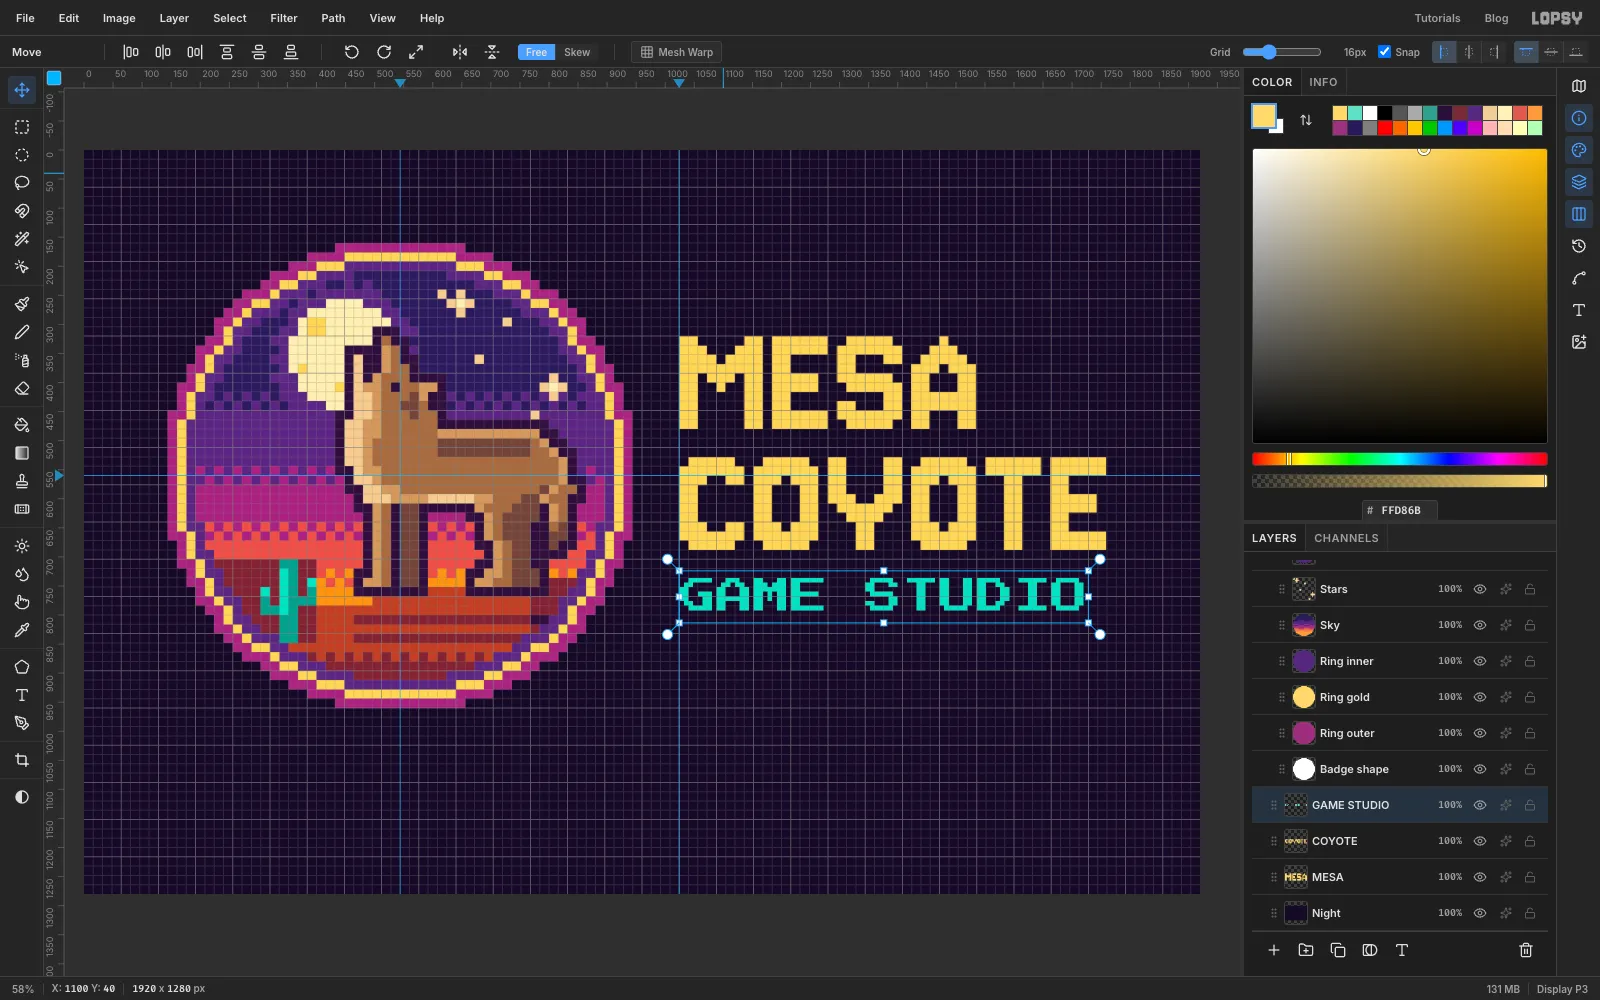
Select Night, then click near the very top of the canvas and type MESA with the same settings. Use the Move tool to put each word's left edge on the 1024 guide:
- MESA with the top of its letters at y 320
- COYOTE at y 528
- GAME STUDIO at y 736
To place them exactly, untick Snap in the options bar, nudge with the arrow keys (1 px per press), then tick Snap again.
-
Split the letters into two colours
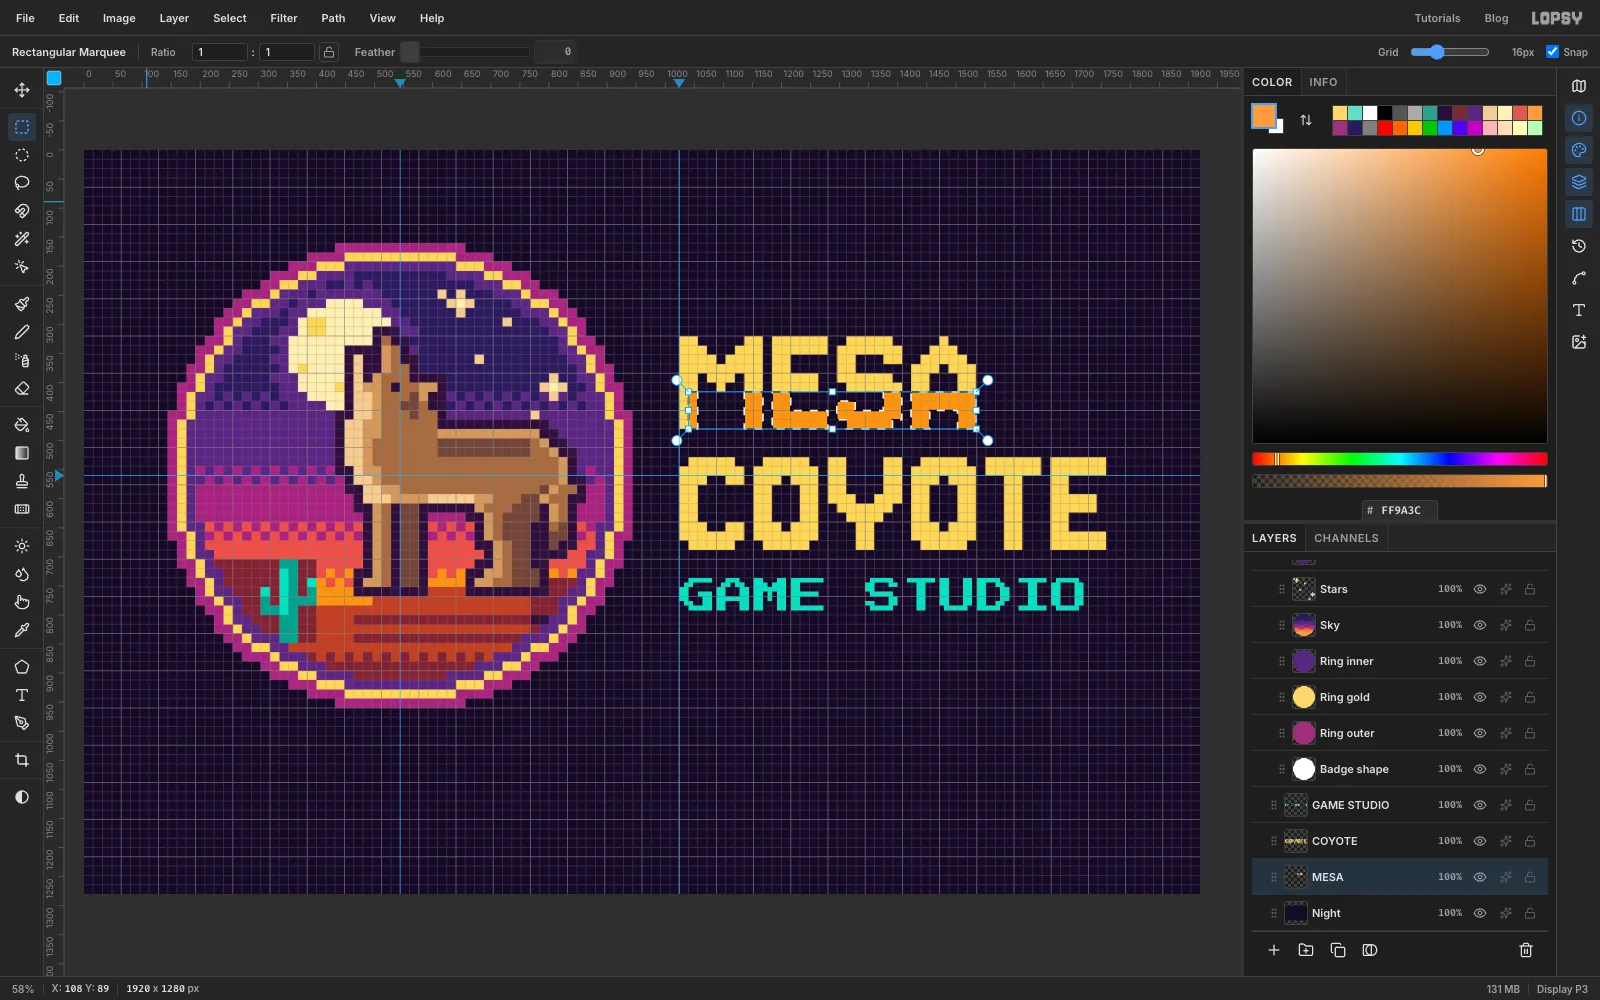
Arcade logos often split a word into two colours. Select MESA and click Rasterize Layer at the bottom of the Layers panel. Cmd-click its thumbnail to select the letters. Choose the Rectangular Marquee, hold Shift and Alt, and drag a box from just left of the word at y 416 to past its right end and below the letters. Shift and Alt together keep only the overlap, so just the lower part of the letters stays selected.
Fill it with and deselect. Do the same for COYOTE, starting the box at y 624. The split falls at the same row of font pixels in both words.
-
Give the wordmark a hard drop shadow
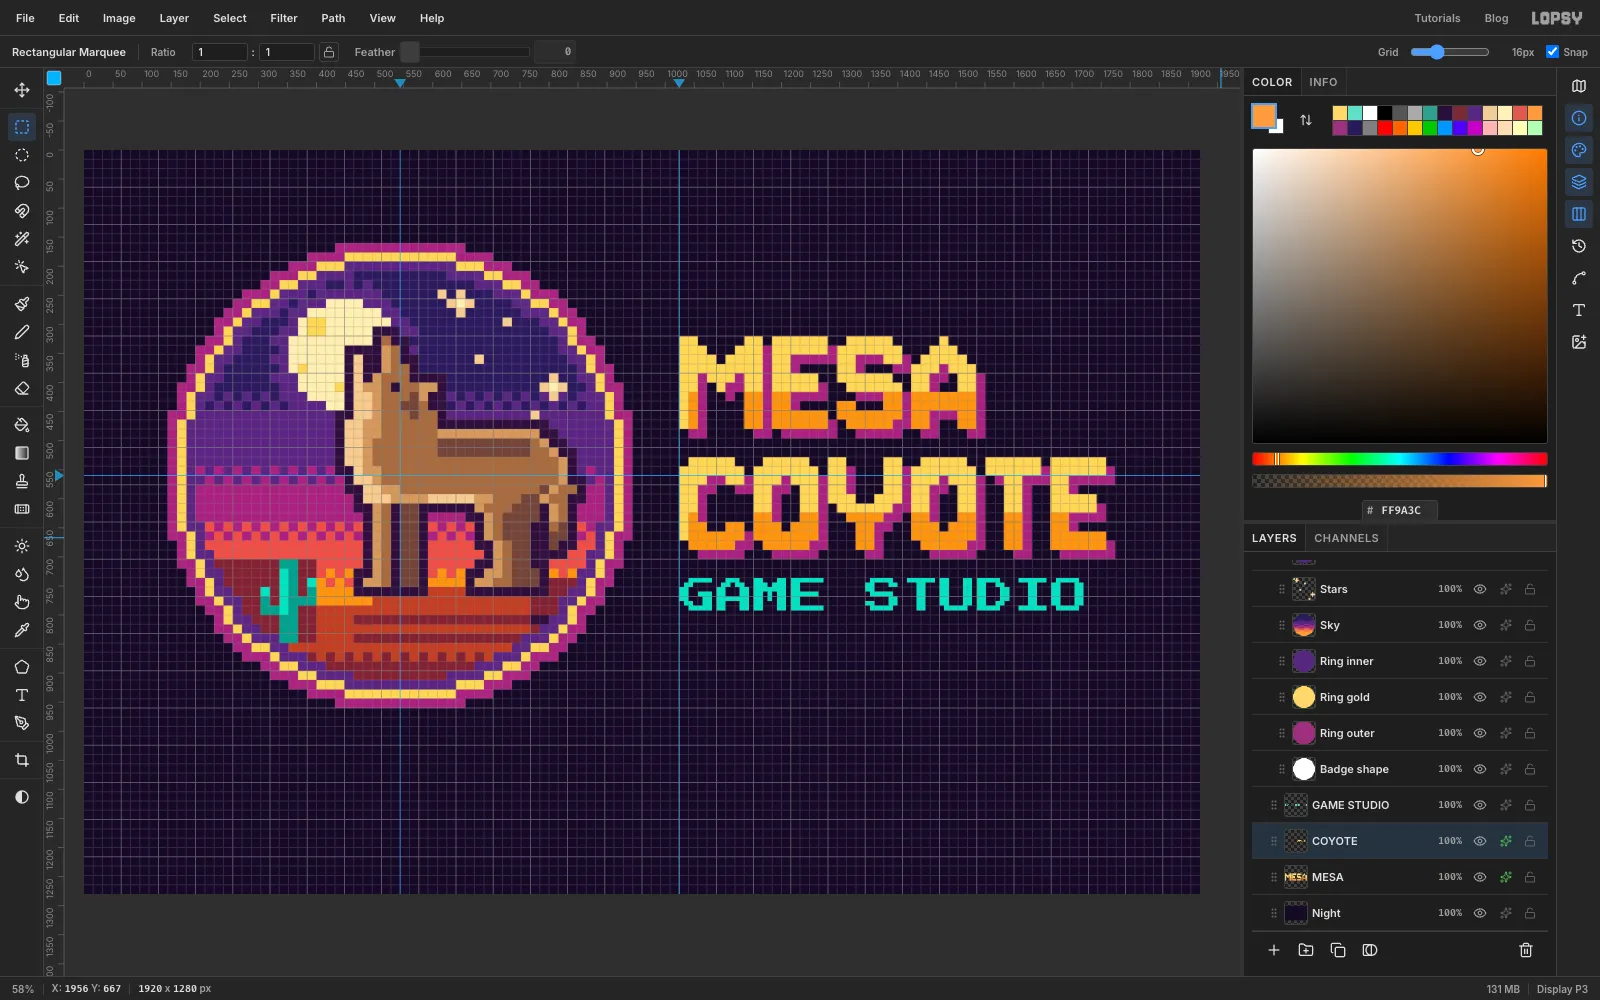
Open MESA's effects with its ✦ button and turn on Drop Shadow. Set the colour to , Offset X and Offset Y to 16, Blur and Spread to 0, and Opacity to 100. A shadow with no blur is exactly one cell, so it looks like pixel art. Do the same for COYOTE.
-
Add the palette bar
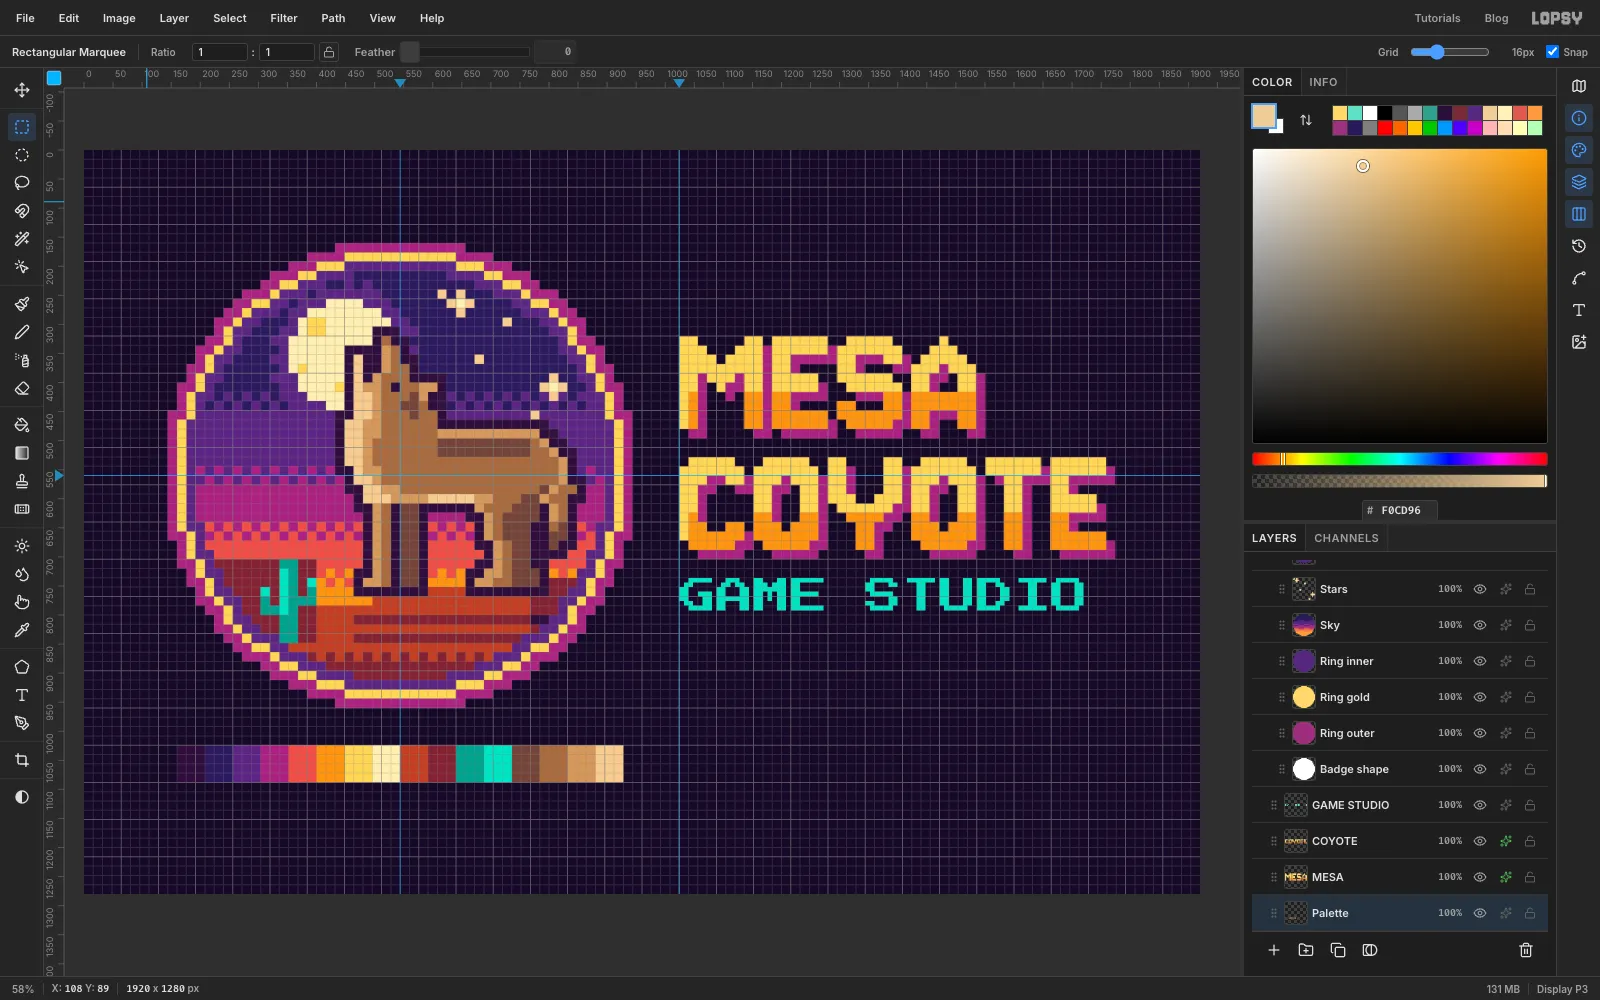
Select Night and add a layer named Palette. With the Rectangular Marquee, draw sixteen chips, each 48 × 64 px, side by side from x 160 to 928 at y 1024. Fill them in this order: , , , , , , , , , , , , , , , .
These are every ink on the sheet. A palette bar is a promise, so if you add a colour to the art, add it here too.
-
Build the one-colour version
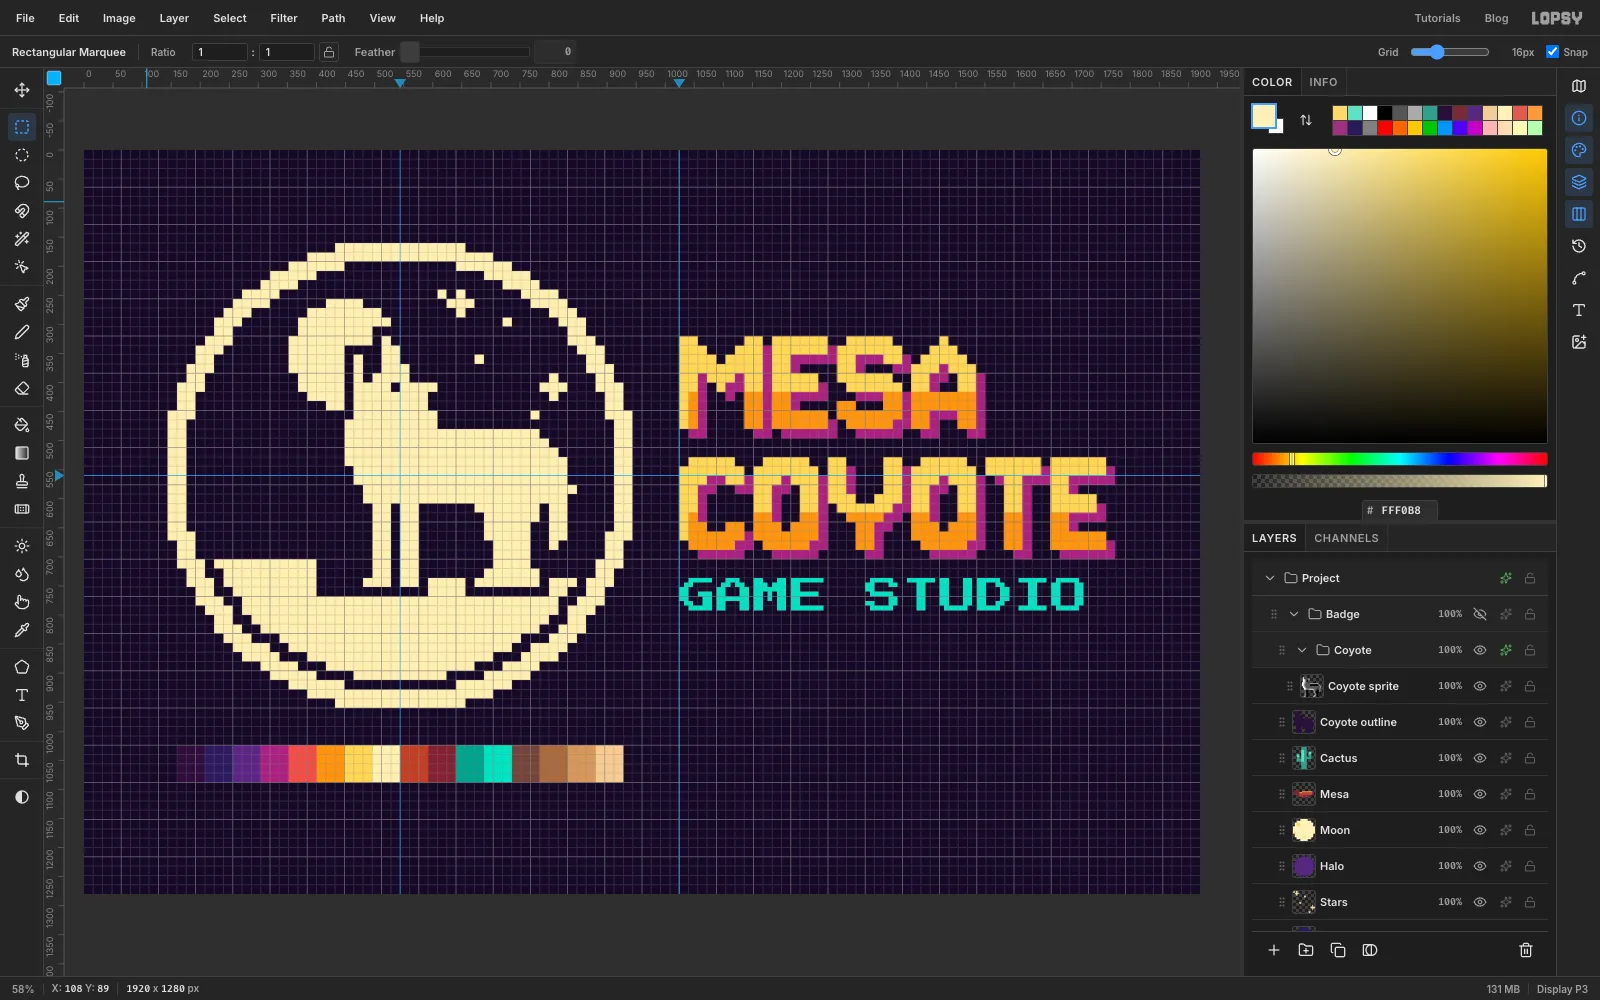
Brands need a version that prints in one ink. Select Night and add a layer named One-bit. It sits under the Badge group, so click the eye on the Badge row to hide the group while you work. Set the foreground to , then build the layer from the badge's own shapes:
- Cmd-click Ring outer and fill. Then Cmd-click Ring inner and press Delete. That leaves a thick ring.
- Cmd-click Moon and fill. Do the same for Stars and Mesa.
- Cmd-click Coyote outline and press Delete. This cuts a gap where the coyote will go.
- Cmd-click Coyote sprite and fill.
Press Cmd+D and show the Badge group again.
-
Shrink the one-colour version
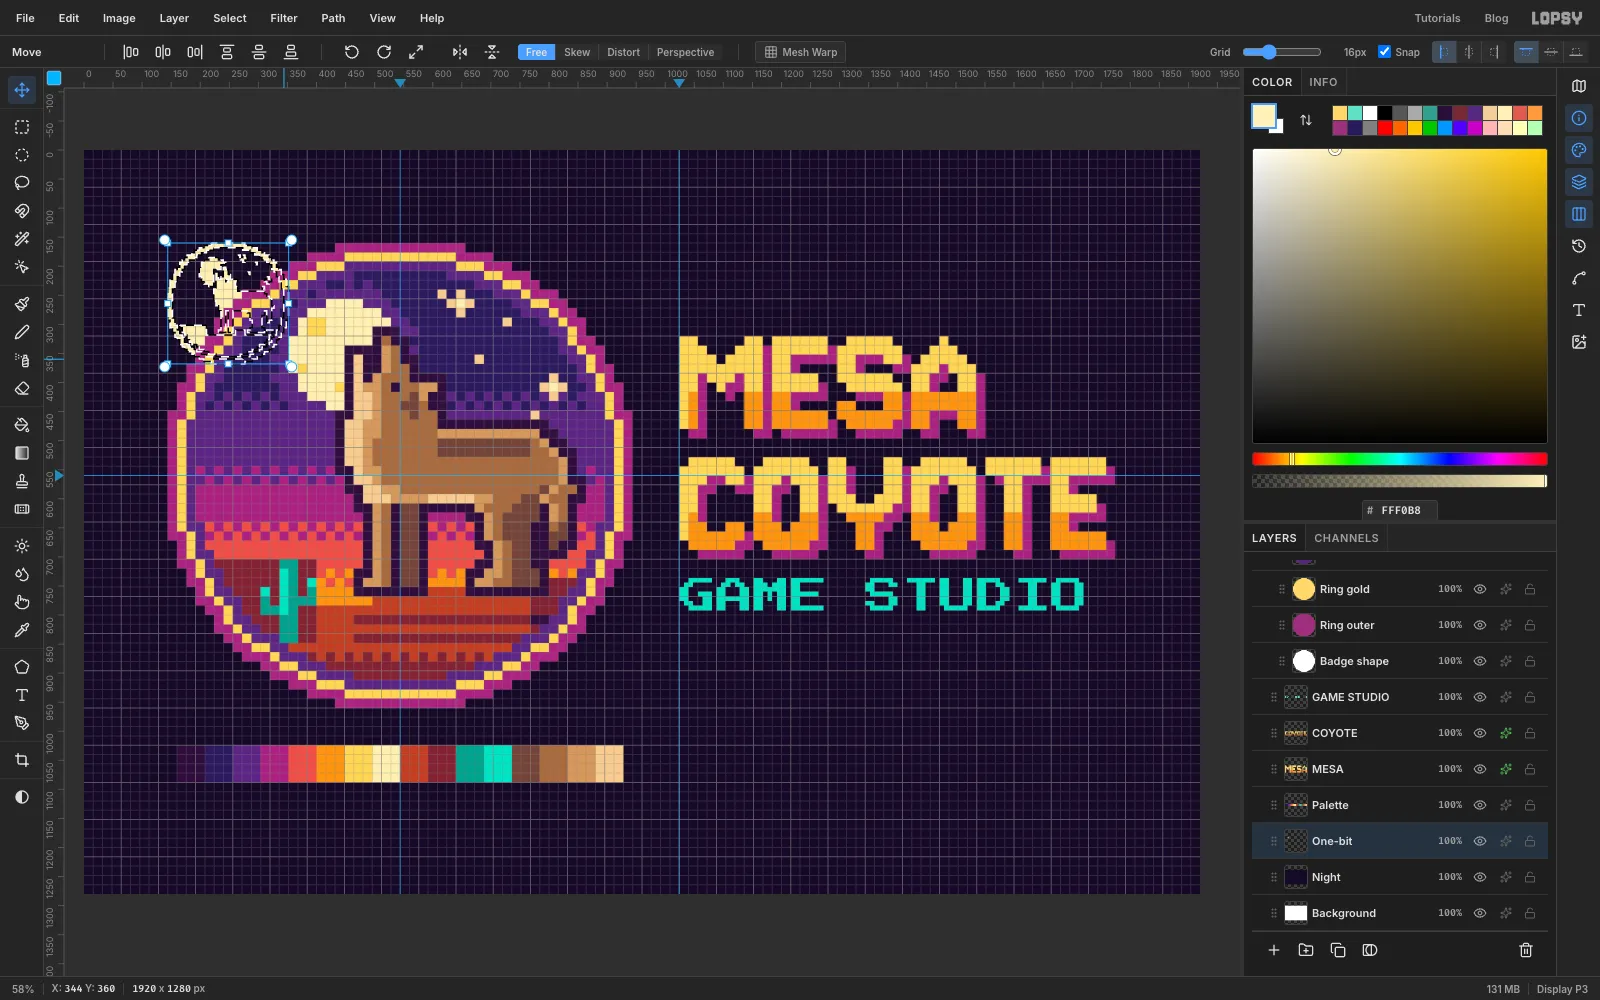
Cmd-click the One-bit thumbnail, so the transform box hugs the badge instead of the whole canvas. With the Move tool, hold Cmd and drag the bottom-right corner handle in until the box is about a quarter of its size, 13 cells (208 px) across. The handle snaps to the grid, so it stops there easily. Press Cmd+D, then drag it to the bottom row so its top-left corner is at (1024, 880).
Scaling blurs pixel edges, so snap it back to pixels. Cmd-click its thumbnail and run the pixel-snap recipe with Block Size 4 instead of 16, then recolour it . At this size one 16 px cell is about 4 px.
-
Copy the full-colour badge
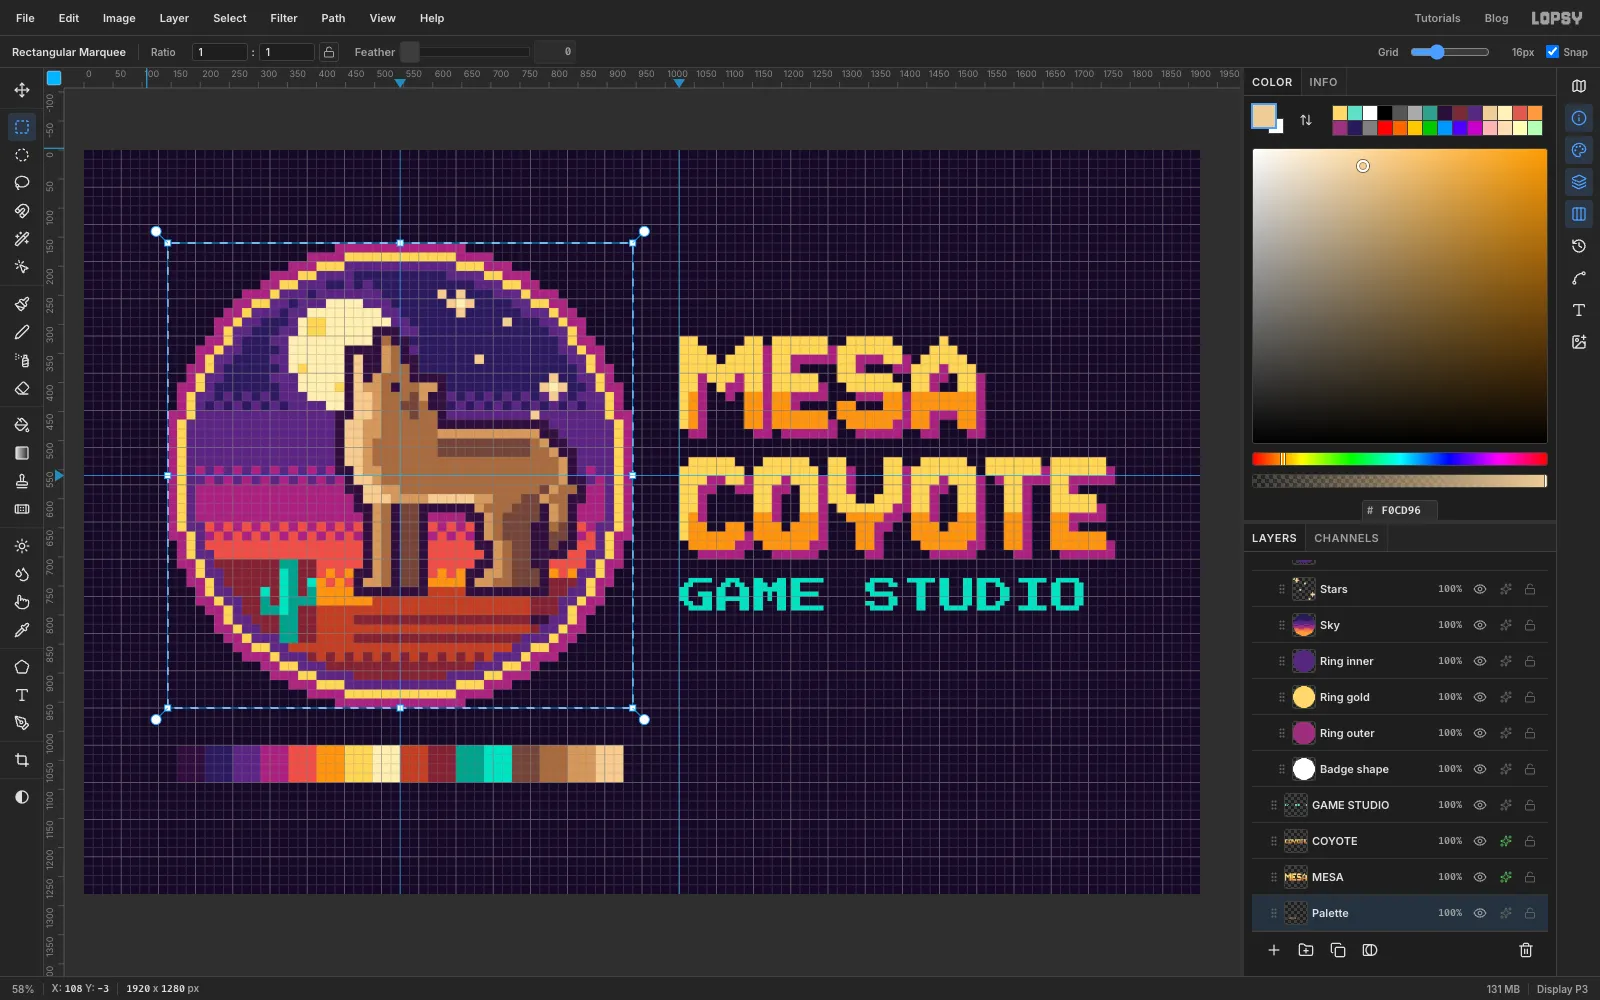
With the Rectangular Marquee, select the badge from (144, 160) to (944, 960), which takes in the outer ring. Choose Edit → Copy Merged. It copies what you see, Gradient Map included, rather than a single layer. Press Cmd+D.
-
Paste the mini badge
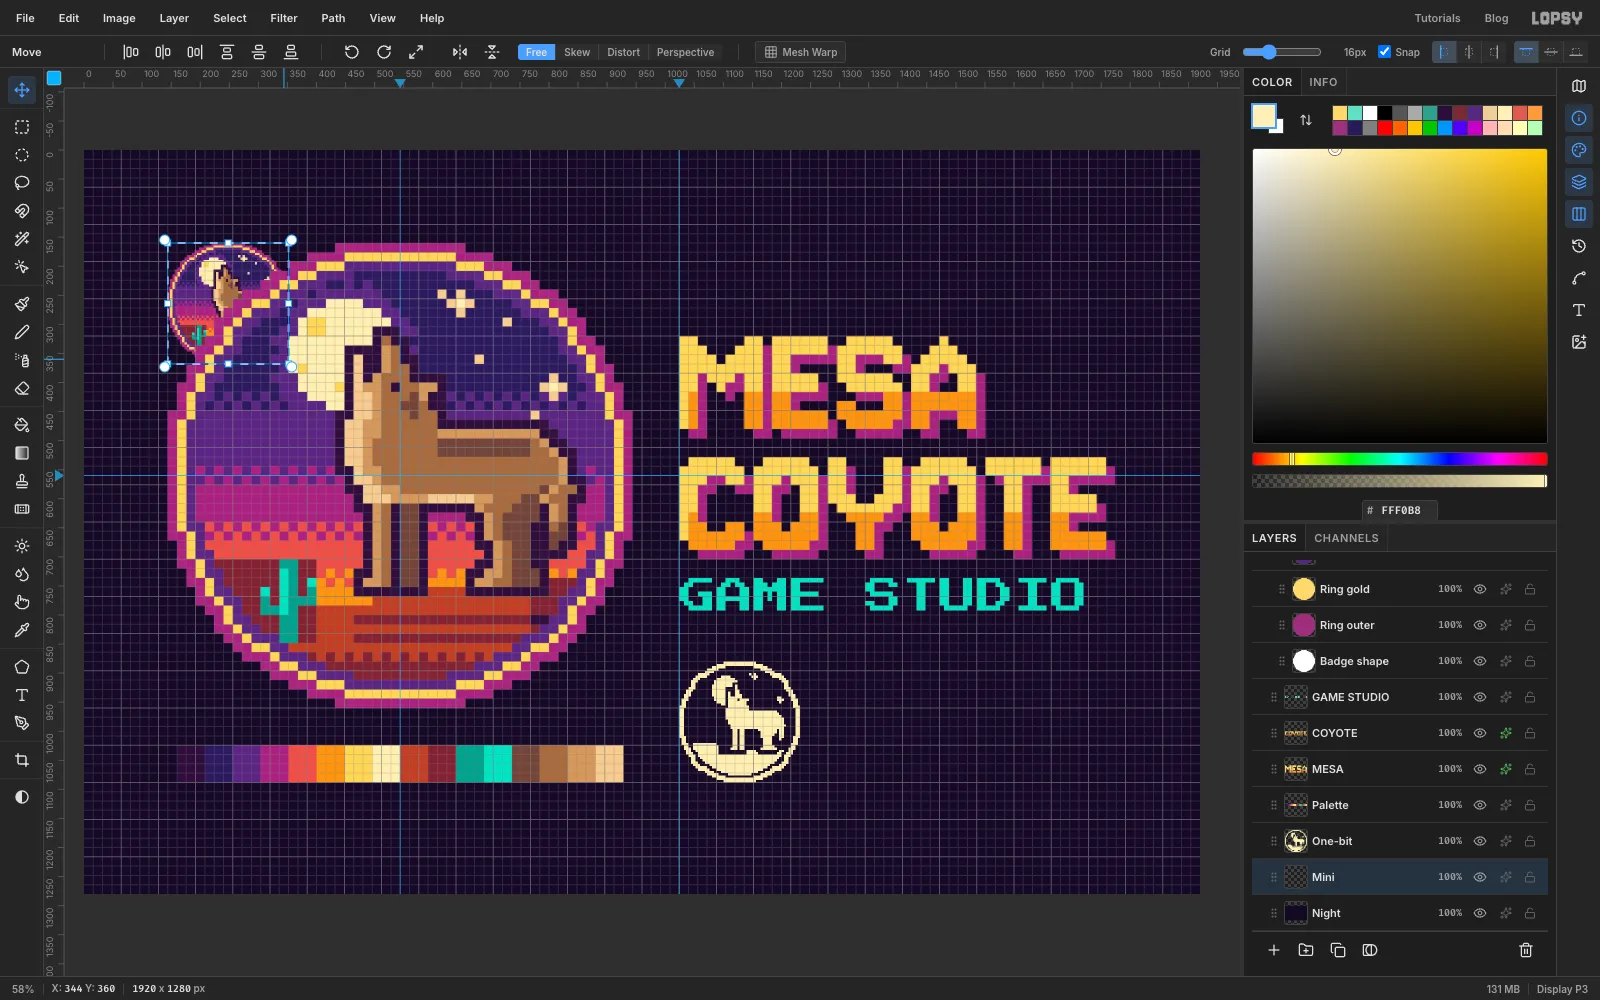
Select Night and choose Edit → Paste. The copy lands exactly where the badge is, selected. You won't see it, because it's under the Badge group, but its transform box shows where it is. Name it Mini.
Hold Cmd and drag its bottom-right handle in to 13 cells (208 px) across, like the one-colour version. Press Cmd+D and drag it to (1296, 880), so the gaps on both sides of it are 64 px. Then choose Filter → Pixelate… with Block Size 4. That evens out the softest edges, so it reads as pixel art again.
-
Make the app icon tile and select its art
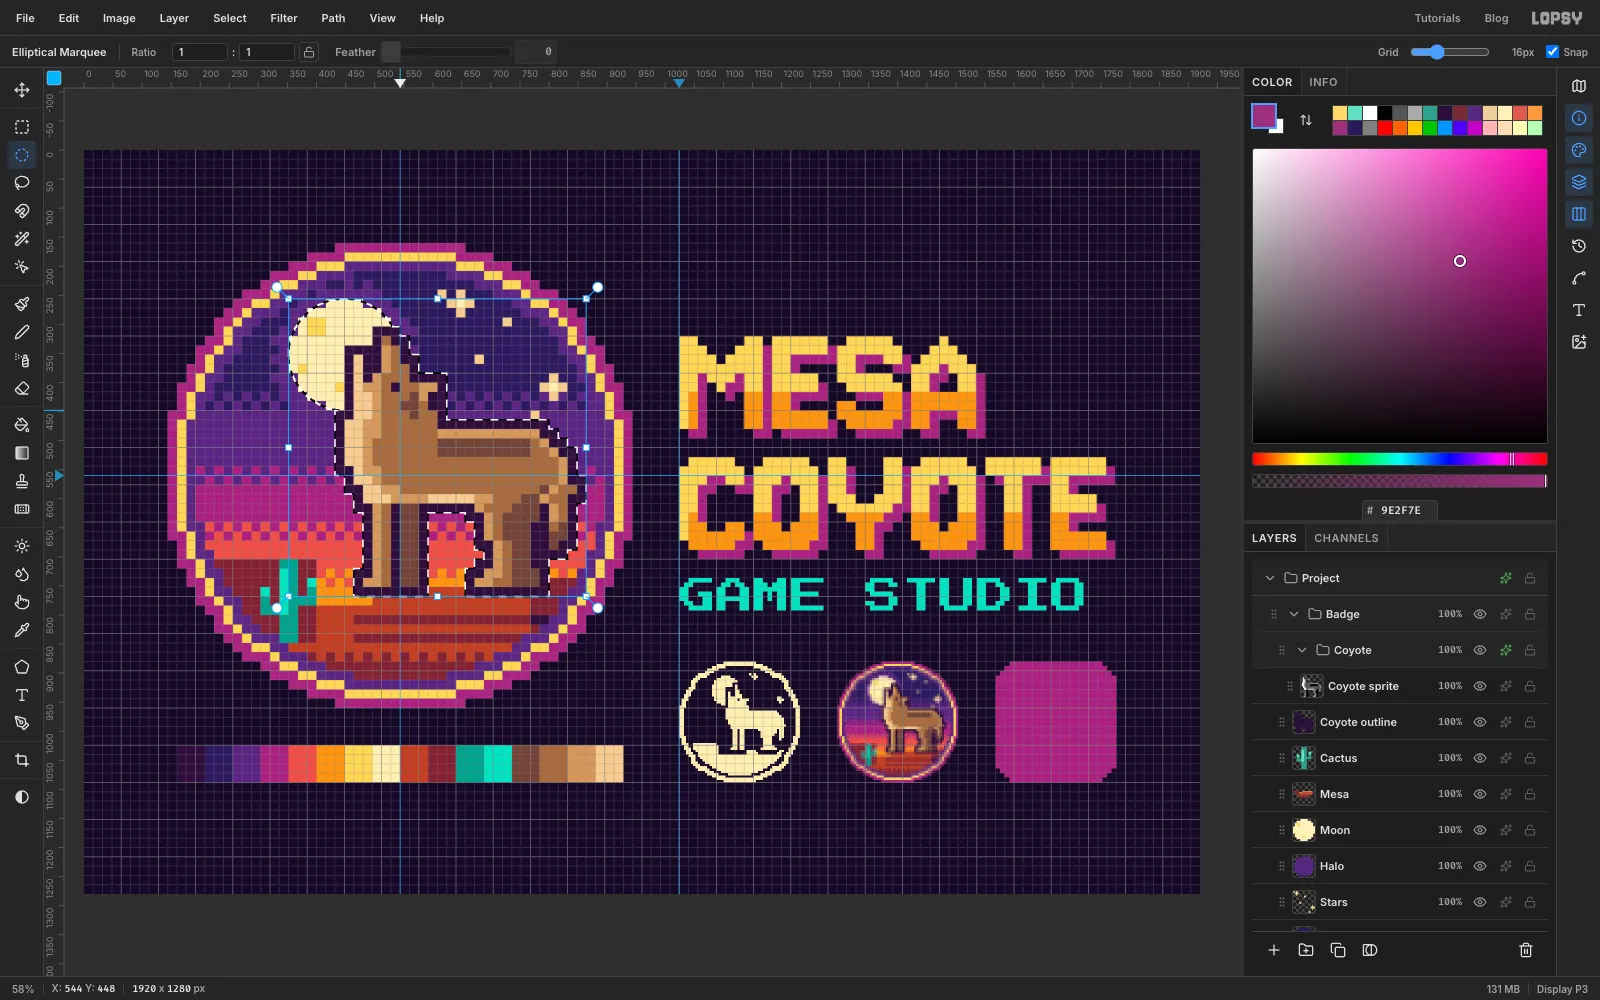
Select Night and add a layer named Icon tile. Drag a 208 × 208 px Rectangular Marquee with its top-left corner at (1568, 880). Choose Select → Shrink… with 40, then Select → Grow… with 40. This rounds the corners. Run the pixel-snap recipe with Block Size 8, which gives the corners 8 px steps, a size between the badge's cells and the variants'. Recolour it .
Next, select the art for the icon:
- Cmd-click the Coyote outline thumbnail. The outline covers the whole coyote, so this selects all of it.
- Choose the Elliptical Marquee, hold Shift and drag over the moon. Shift adds to the selection.
- Choose Edit → Copy Merged and press Cmd+D.
-
Paste and fit the icon art
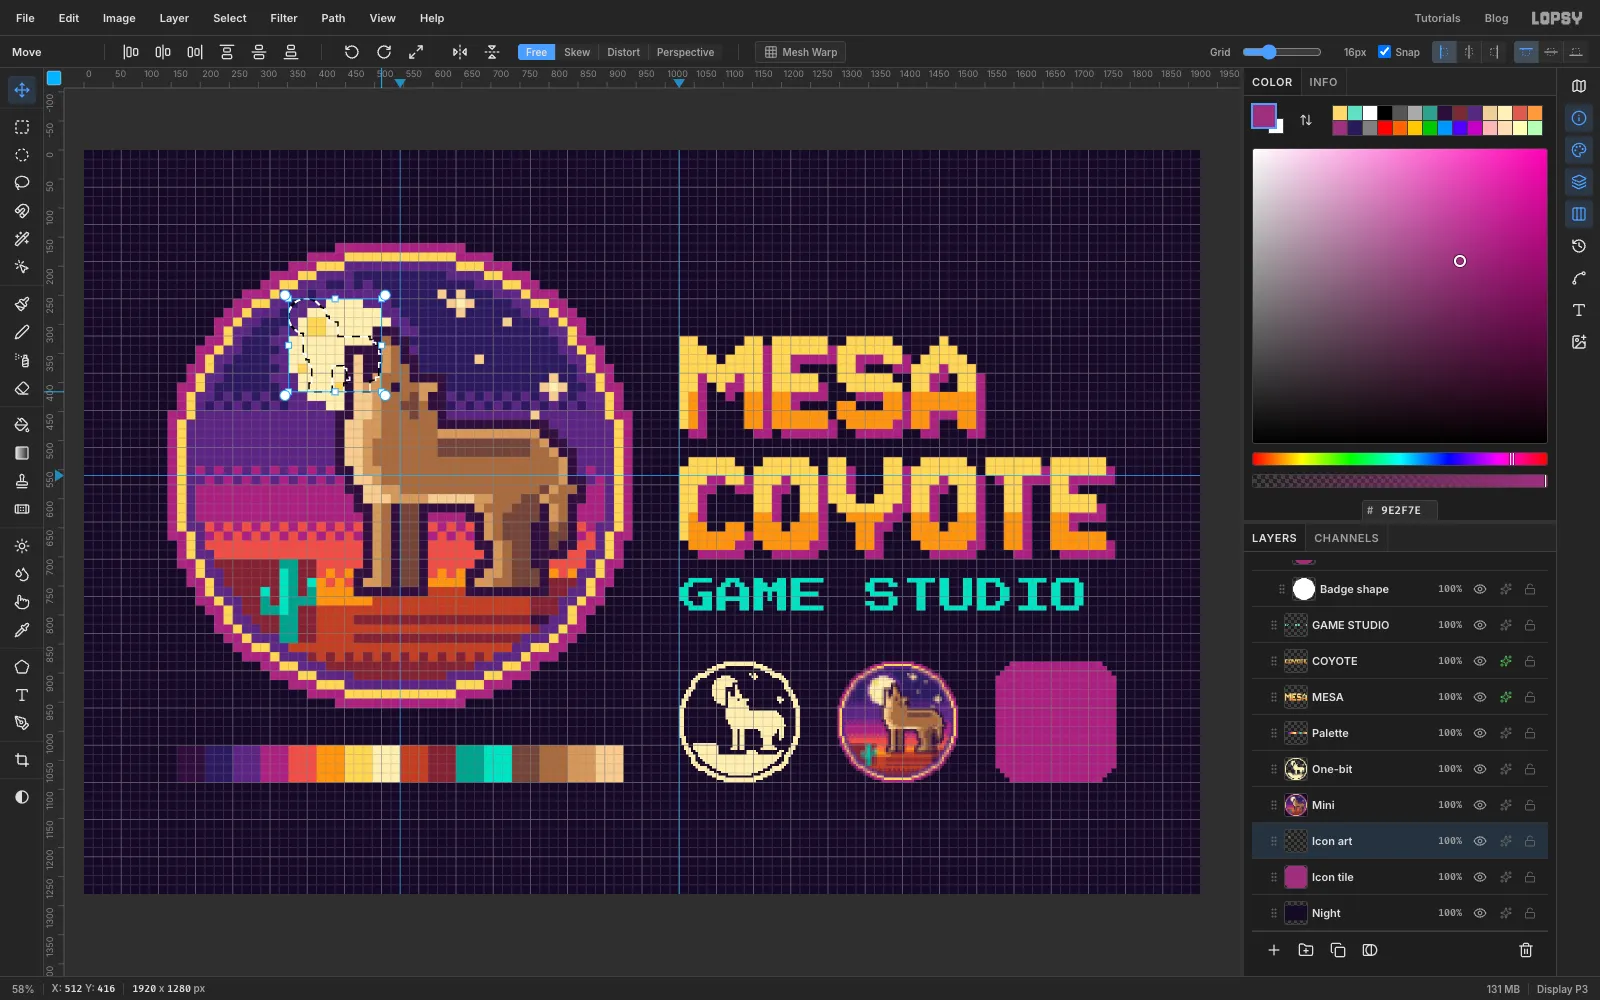
Select Icon tile and choose Edit → Paste. Name the new layer Icon art. Hold Cmd and drag its bottom-right handle in until the art is about 11 cells (176 px) wide, so it fits the tile with some breathing room. Press Cmd+D and drag it onto the tile, with the coyote's paws near the bottom edge.
Then run Pixelate to make it crisp again. For Block Size, take 16 times your scale and round it. At about a third of the size that's 5.
-
Label the bottom row
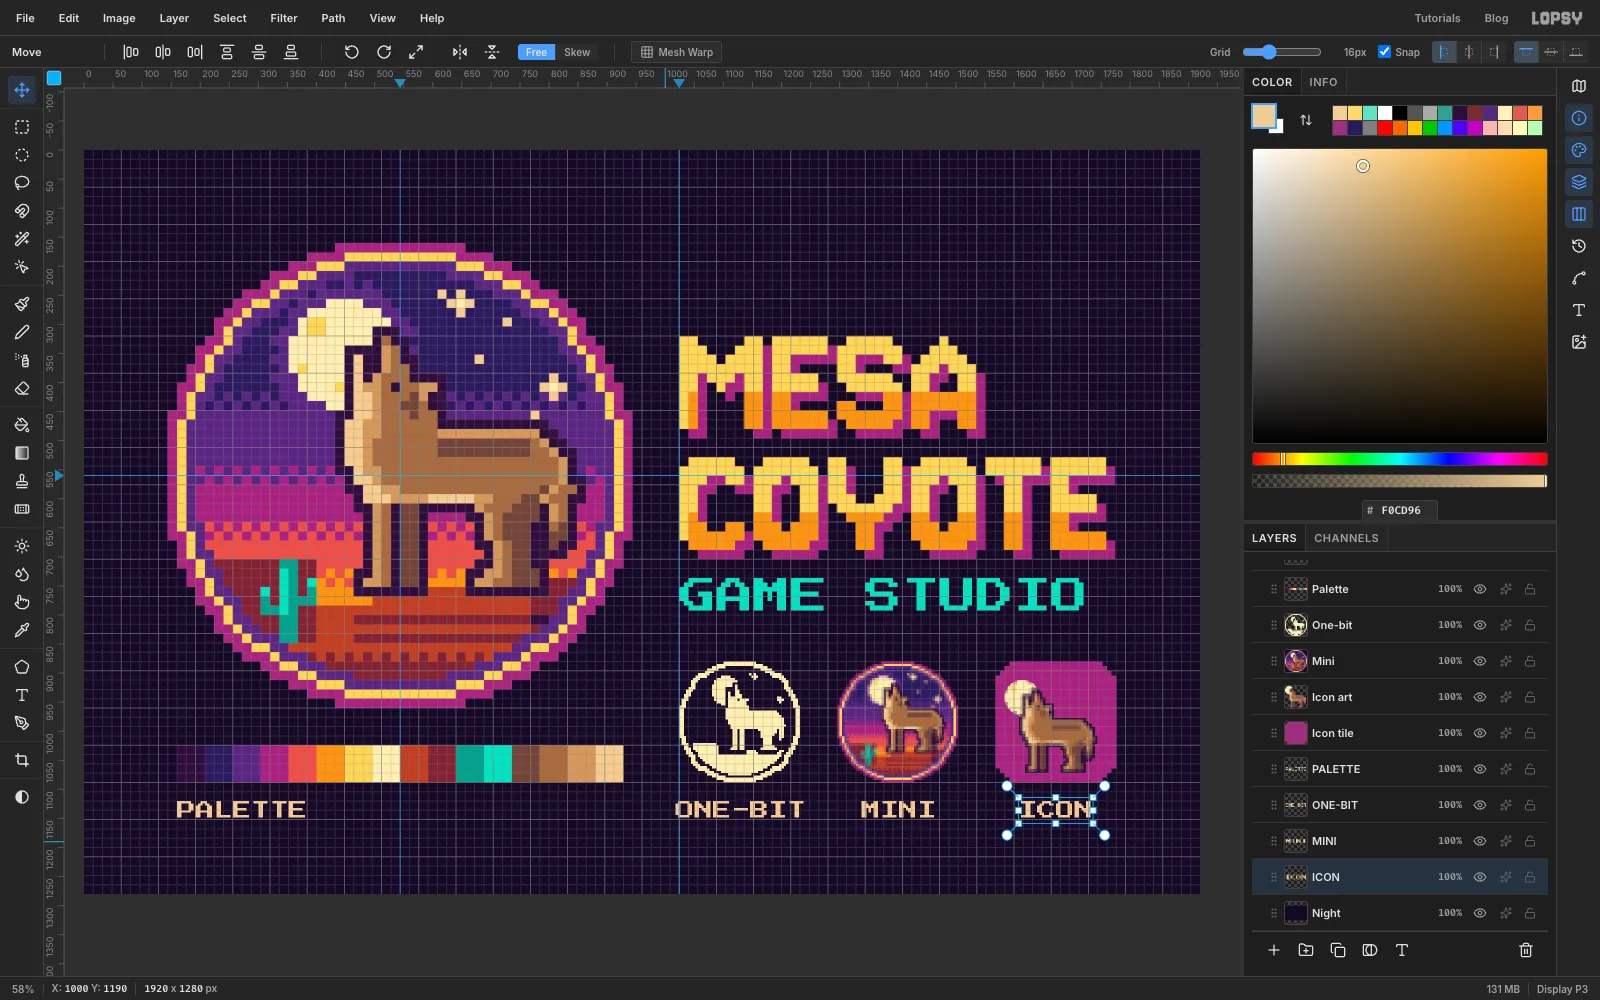
Select Night. With the Text tool, set Press Start 2P, Size 32 and the foreground , then type PALETTE, ONE-BIT, MINI and ICON, each in an empty spot. Select Night again before each one. At 32 px, Press Start 2P draws 4 px pixels, small enough to sit quietly under the art.
Put the top of every label at y 1120. Line PALETTE up with the left end of the bar, and centre each other label under its variant.
-
Add CRT scanlines to the badge
First make a pattern tile. Add a temporary layer. Click once with the Rectangular Marquee and type From 0, 0, To 4, 2, then fill it black. Press Cmd+D, click once again and type From 0, 0, To 4, 4. Choose Edit → Define Pattern, deselect and delete the temporary layer.
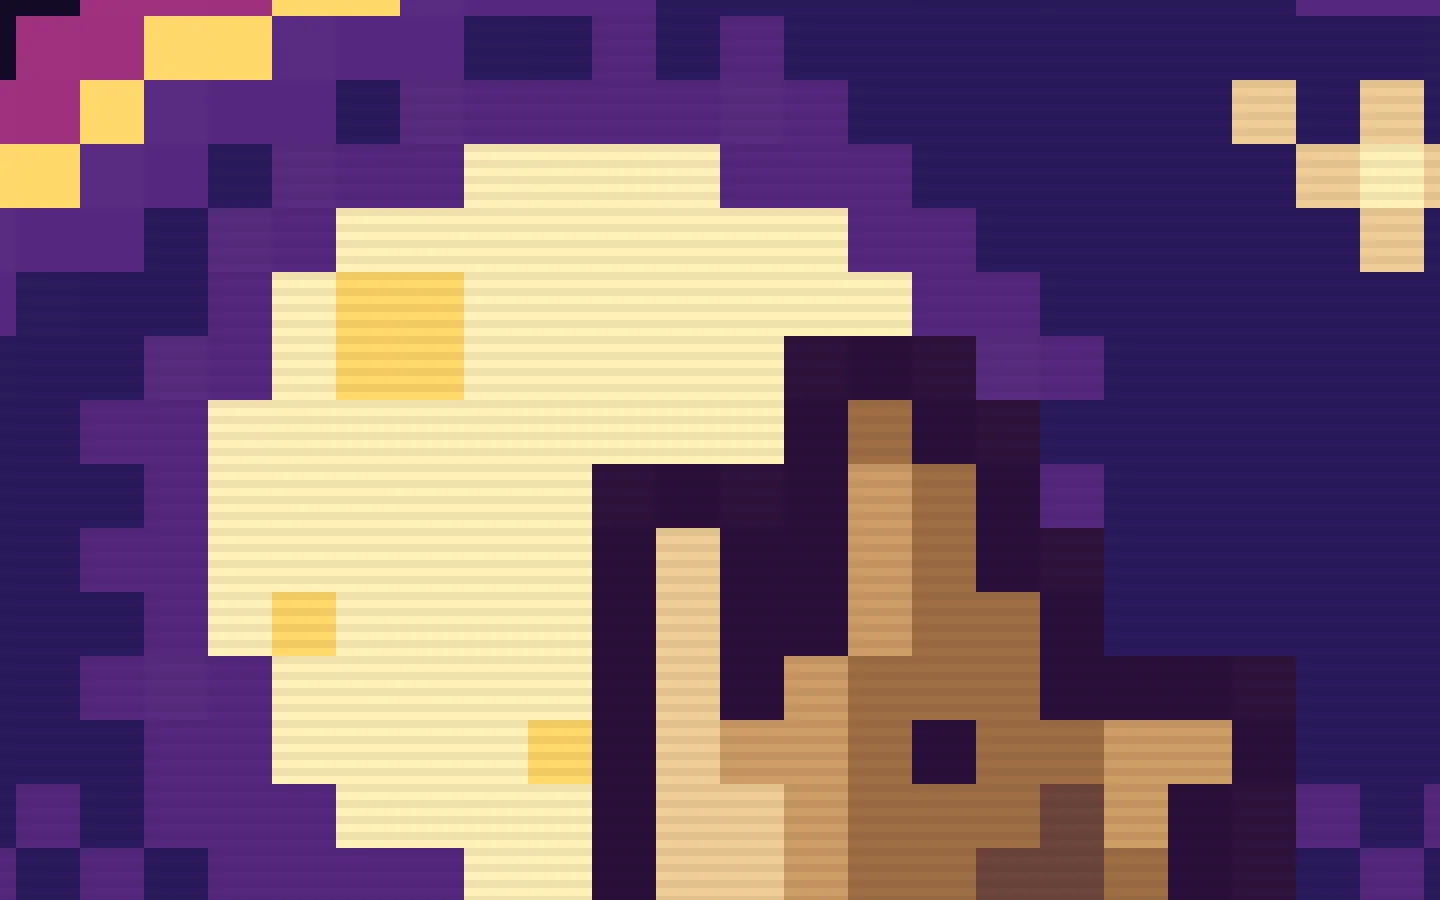
Expand the Badge group if it's collapsed, select its row and click Add Layer. The new layer lands at the top of the group. Name it Scanlines. Choose Edit → Fill with Pattern…, pick the pattern you just made and click Apply. Trim it to Badge shape as before and set the layer's opacity to 6%. Any more and the moon looks striped. The close-up above is at twice actual size. At normal size the lines are just a texture.
-
Finish with a few stars and export
Select Palette and add a layer named Board stars. Paint five plus-shaped stars with the Pencil, as before: arms in and centres in . Keep them at least 96 px from the canvas edges and well clear of the type.
Choose File → Quick Export PNG for the image and File → Save Project to keep the layers.