Make an 8-Bit Pixel Art Album Cover with Goblin Sprites
Design a chiptune album cover as an NES title screen in Lopsy, with Pencil sprites on a 16 px grid, a brick pattern, palette swaps and a banded pixel logo.
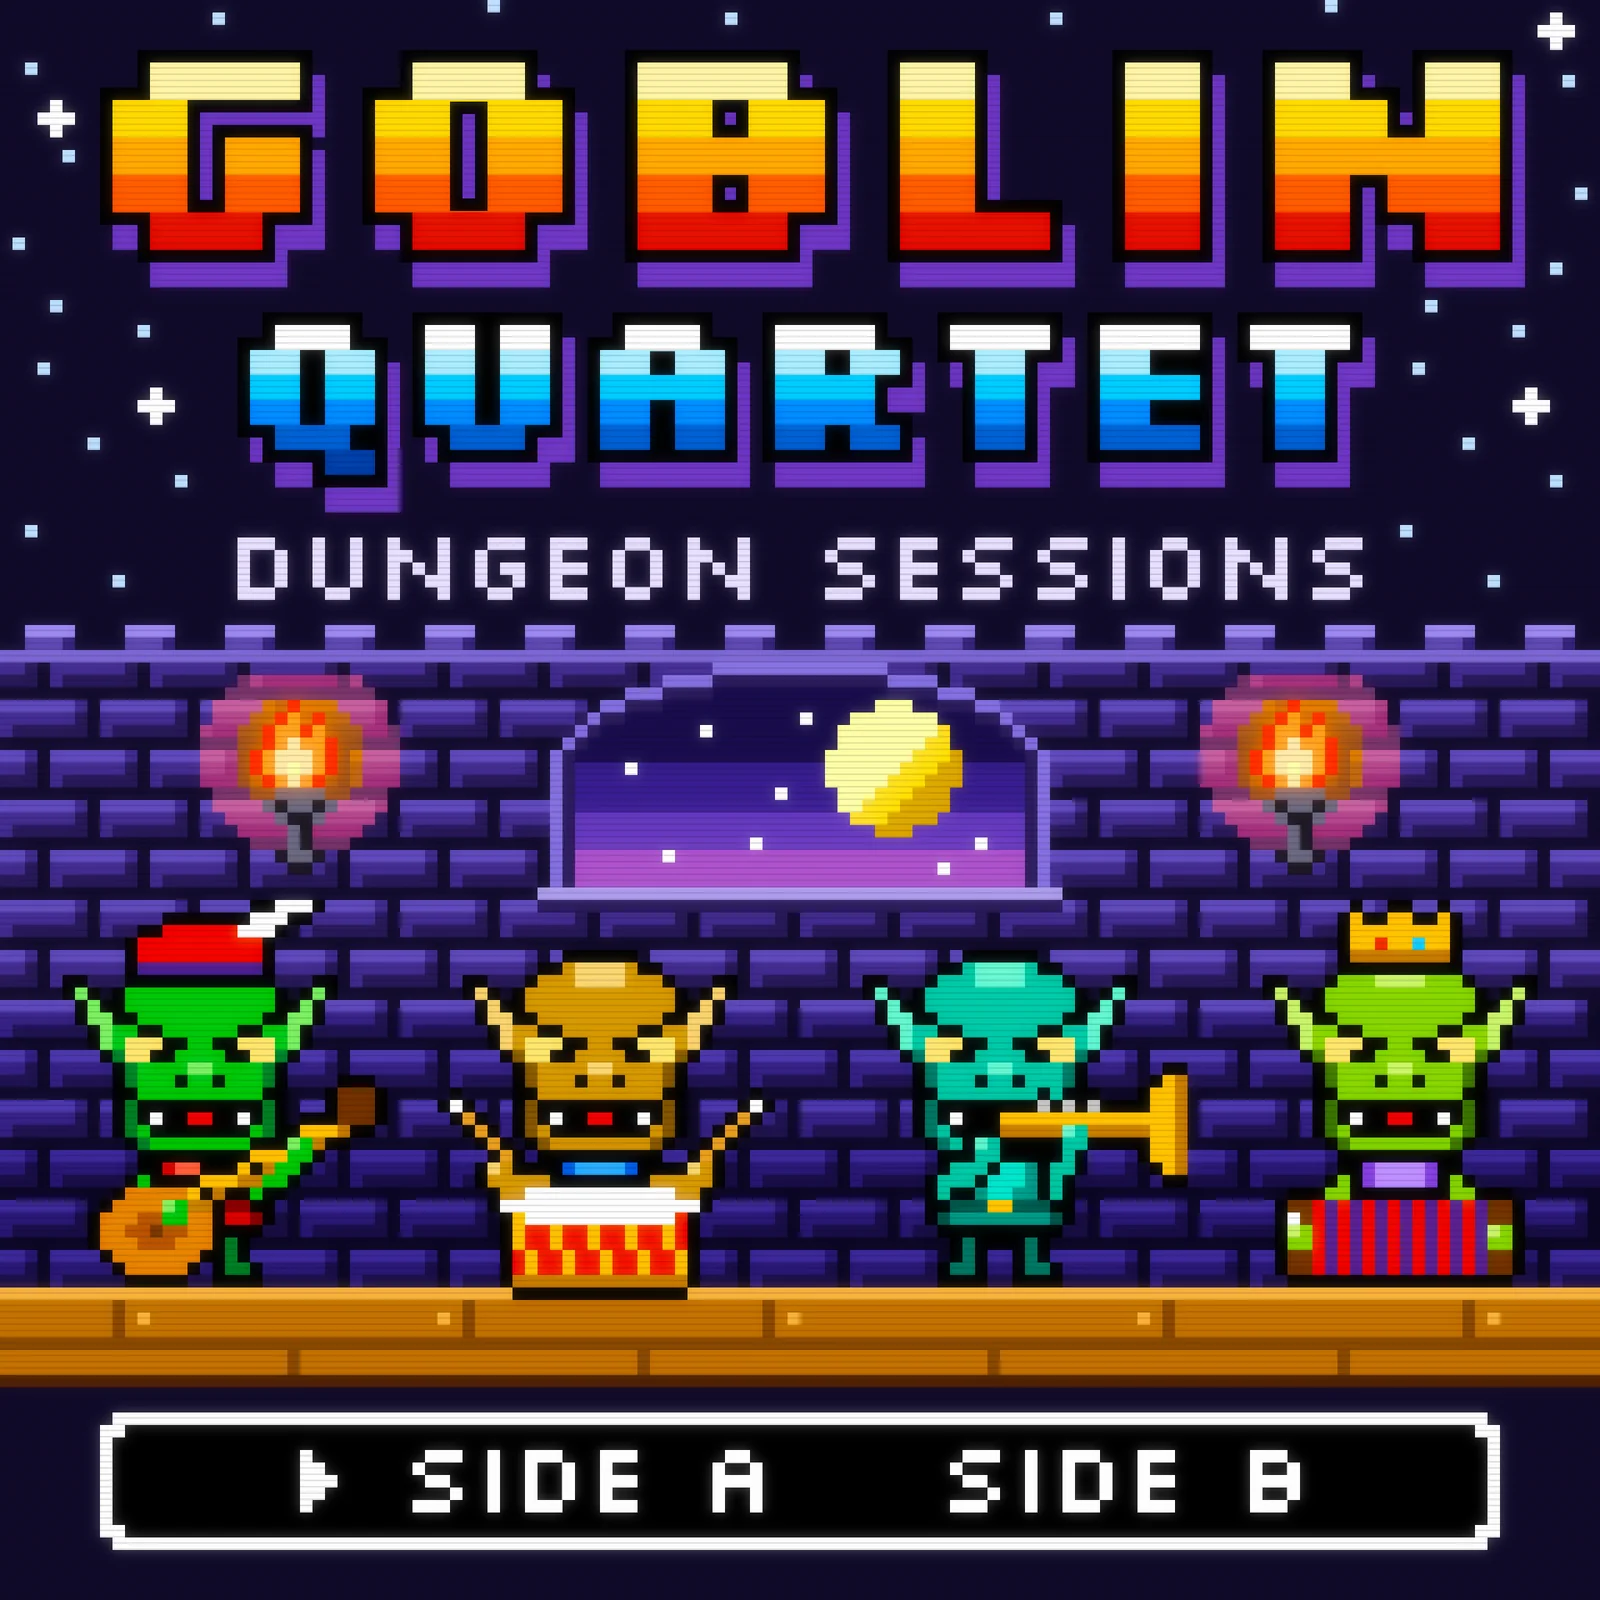
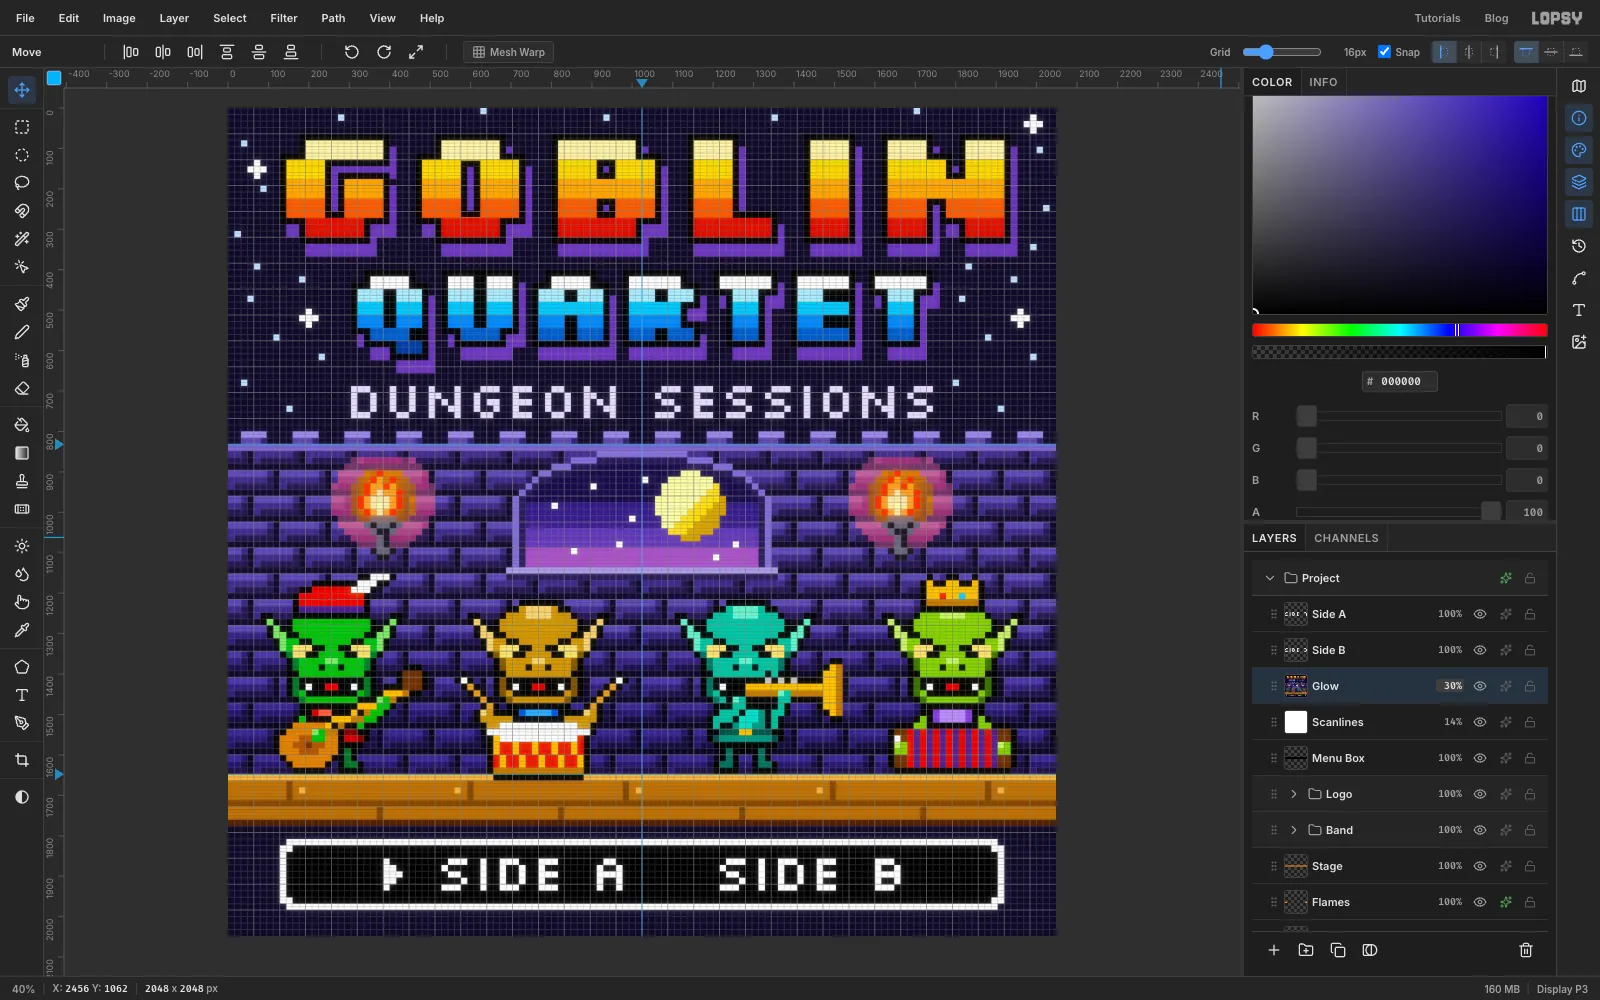
Chiptune bands make music on old game consoles, so their album covers often borrow the look of the games: a big striped logo, a little scene of sprites and a menu waiting for you to press Start. In this tutorial you'll make the cover for Goblin Quartet: Dungeon Sessions as if it were the title screen of a forgotten 1987 cartridge.
The canvas is 2048 × 2048 px, but you'll treat it as a 128 × 128 screen. Every "pixel" of the art is a 16 × 16 px cell. The grid shows the cells, and the Pencil at 16 px paints one cell per click when you click in the middle of one. Lines are a click and a Shift-click, as usual. You'll build the wall from one brick tile and a pattern fill. You'll paint one goblin with mirror symmetry and turn it into a band of four with duplicates and Magic Wand palette swaps. Then you'll set the logo in a pixel font and give it NES-style colour bands, an outline and a drop shadow.
Nothing in this picture is rotated or scaled. Free rotation and scaling resample pixel art and blur its edges, so everything is placed with whole-cell moves and nudges, and recoloured with colour swaps.
The palette:
-
Night sky
-
stars
-
Bricks
-
Battlements
-
Window frame
-
sill
-
Window sky
-
Moon
-
Torch iron
-
flame
-
Torch light
Color layer
-
Torch warmth
Screen layer
-
Stage
-
lip
-
seams
-
front edge
-
Goblin skin
-
outline
-
eyes
-
tongue
-
Goblin tunic
-
buckle
-
GOBLIN stripes
-
QUARTET stripes
-
Logo shadow
-
subtitle
-
Wall shade
Multiply
-
Set up a 16 px grid and guides
Choose File → New, make a 2048 × 2048 document and click Create. Select the Background layer, set the colour to in the Color panel and choose Edit → Fill. Rename Layer 1 to Stars.
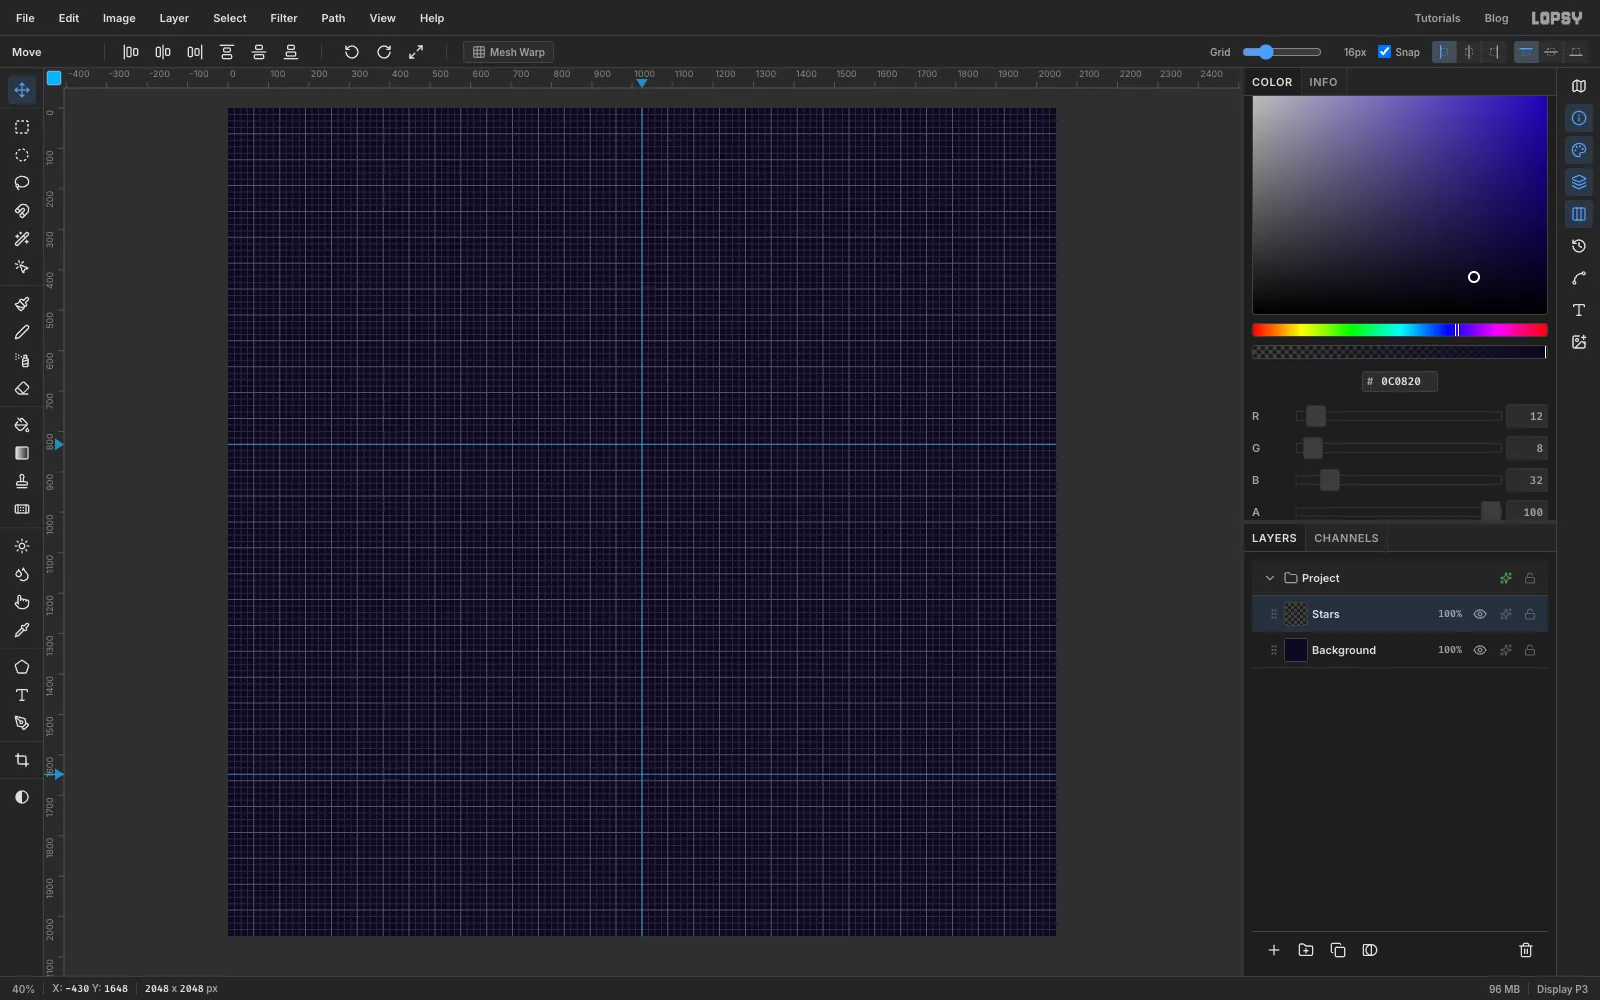
Turn on View → Show Grid. In the options bar, drag the Grid slider to 16px and make sure Snap is ticked. Marquees and Move drags now land on whole cells.
Hold Cmd and click the middle of the top ruler. Cmd-clicking a ruler snaps the guide to a layout fraction, so this one lands exactly on the centre line at 1024. Then add two horizontal guides on the left ruler, at 832 (the top of the castle wall) and 1648 (the top of the stage). Guides beat the grid when a marquee snaps, so they must be exact. Zoom to 100%, and watch the Y readout in the status bar until it shows 832 (then 1648) before you click.
-
Scatter pixel stars
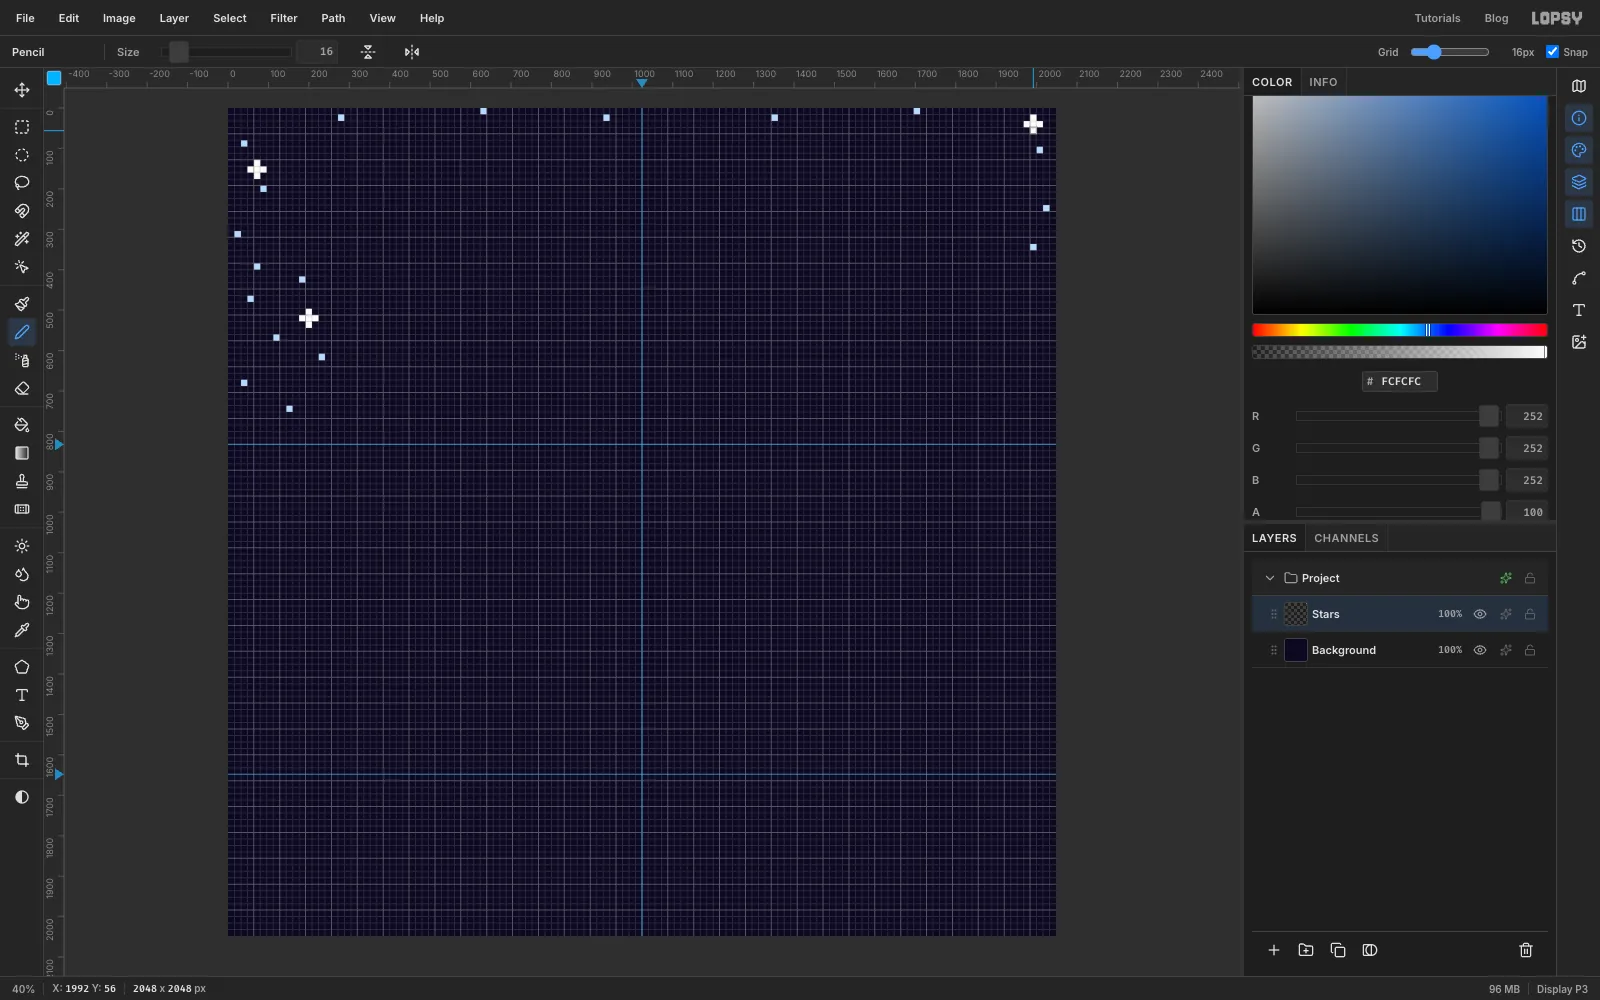
Pick the Pencil (N) and set its Size to 16 in the options bar. The Pencil paints hard square dabs, so one click in the middle of a cell fills that cell. On the Stars layer, click single stars in along the very top of the canvas and down both sides. Keep the middle of the top half empty, because the title goes there.
For a twinkle, switch to , click a cell, then click the cells directly above, below, left and right of it to make a small plus. Make three: one near the top-left corner, one near the top-right corner and one a little lower on the left.
-
Copy a cluster of stars to the other side
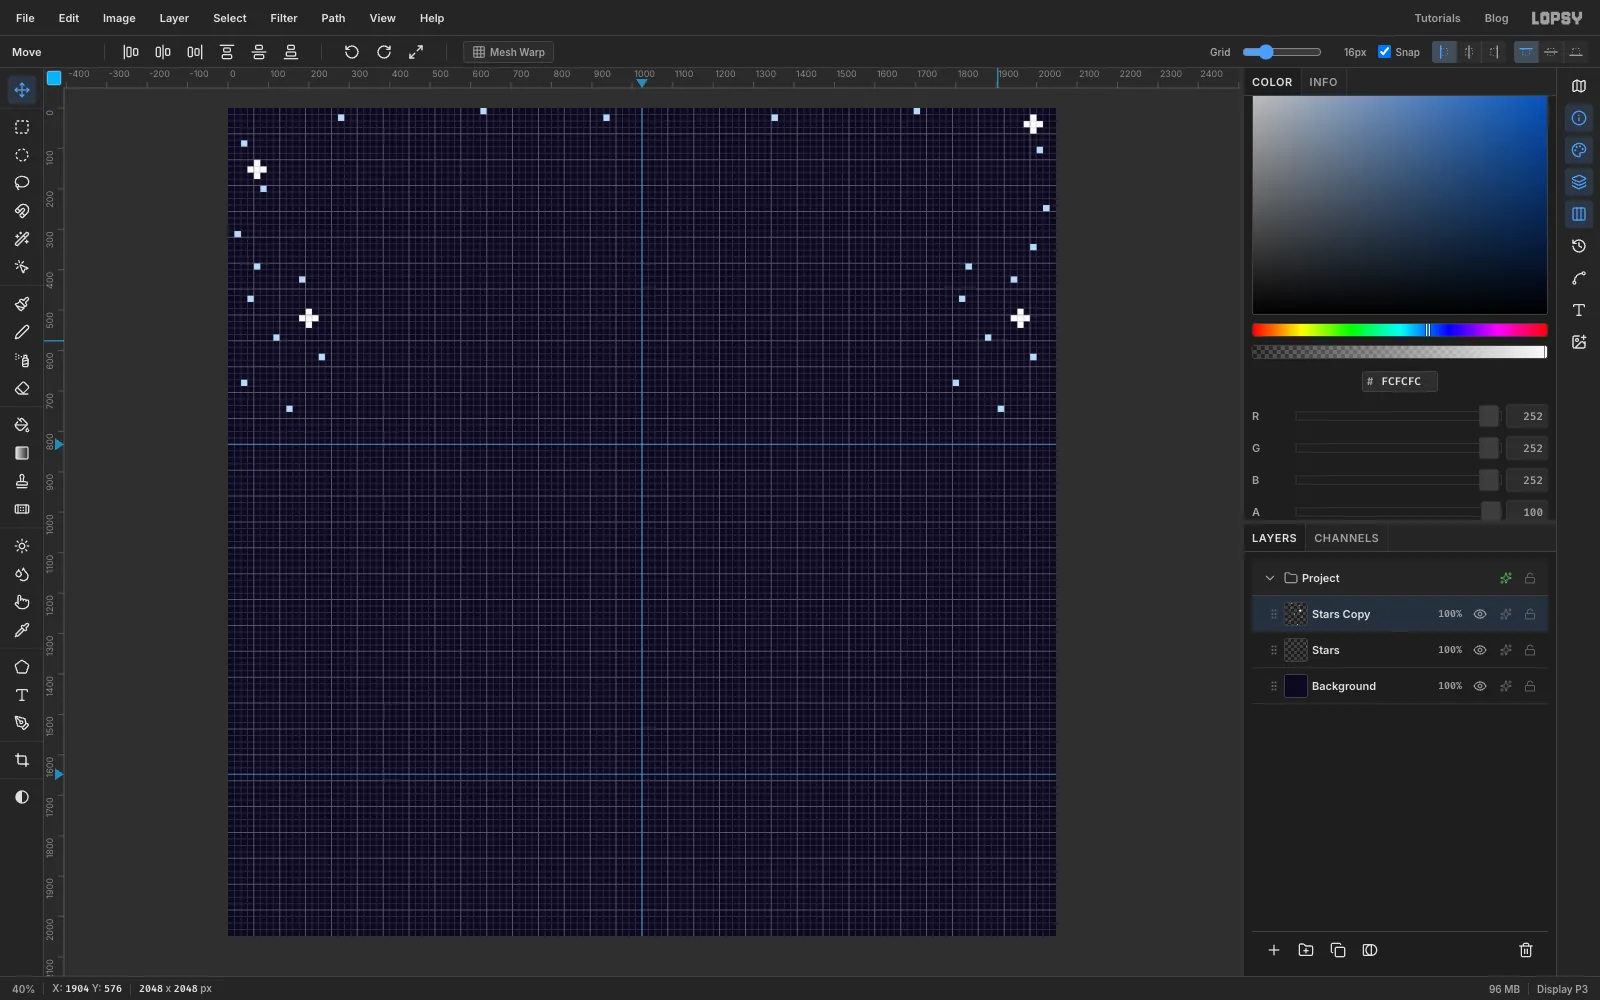
Pick the Rectangular Marquee (M) and drag a box around the stars in the lower-left corner of the sky: the left 18 cells, from y 384 down to the top of the wall area at 768. Press Cmd+C, then Cmd+V. The paste lands in place on a new layer. Rename it Stars Copy and press Cmd+D.
Switch to the Move tool (V) and drag the copy to the right until it sits against the right edge (1760 px across, at the same height). Snap keeps it on the grid. Choose Layer → Merge Down to fold it back into Stars.
-
Paint one brick tile
Add a layer called Brick Tile. Old consoles drew backgrounds from small tiles, and you'll do the same.
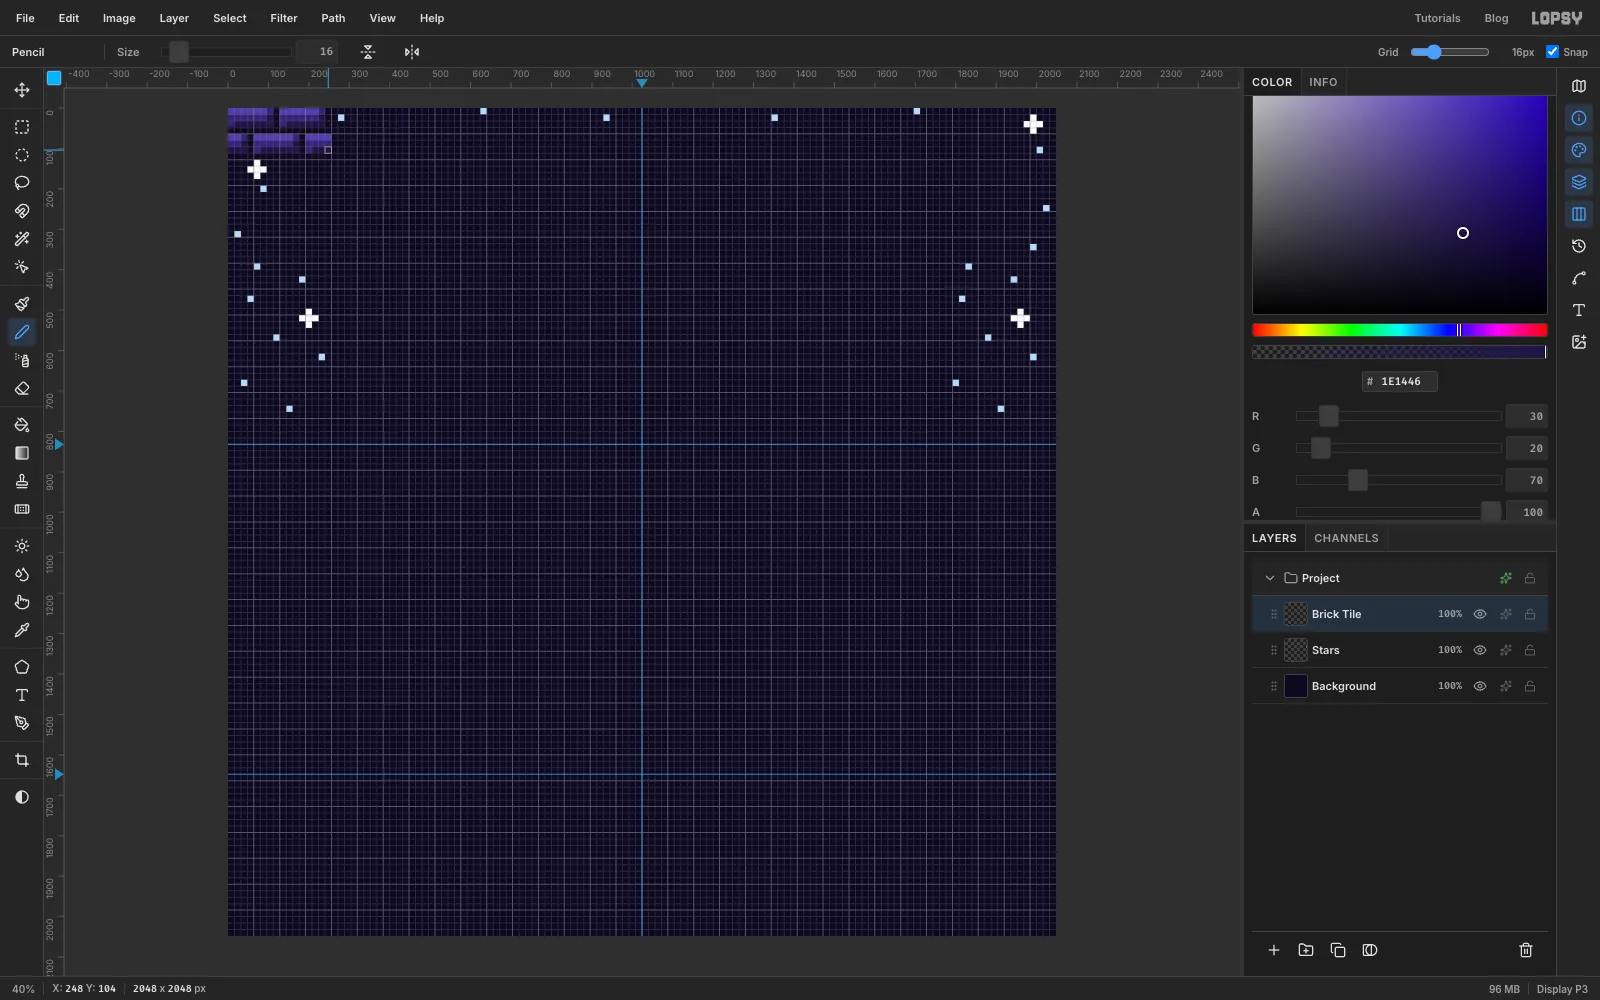
With the Rectangular Marquee, drag a box in the top-left corner from 0, 0 to 256, 128. That's 16 × 8 cells. Fill it with for the mortar and deselect.
With the Pencil, paint two courses of bricks:
- Each brick is 7 cells wide and 3 cells tall, with a 1-cell mortar gap on its right and below it.
- The top course starts at the left edge.
- The bottom course is offset 4 cells to the right, and wraps round the tile's edge.
- Fill each brick with .
- Paint its top row, except the last cell, in for the lit edge.
- Paint its bottom row, except the first cell, and the last cell of its middle row in for the shadow.
-
Define the tile as a pattern
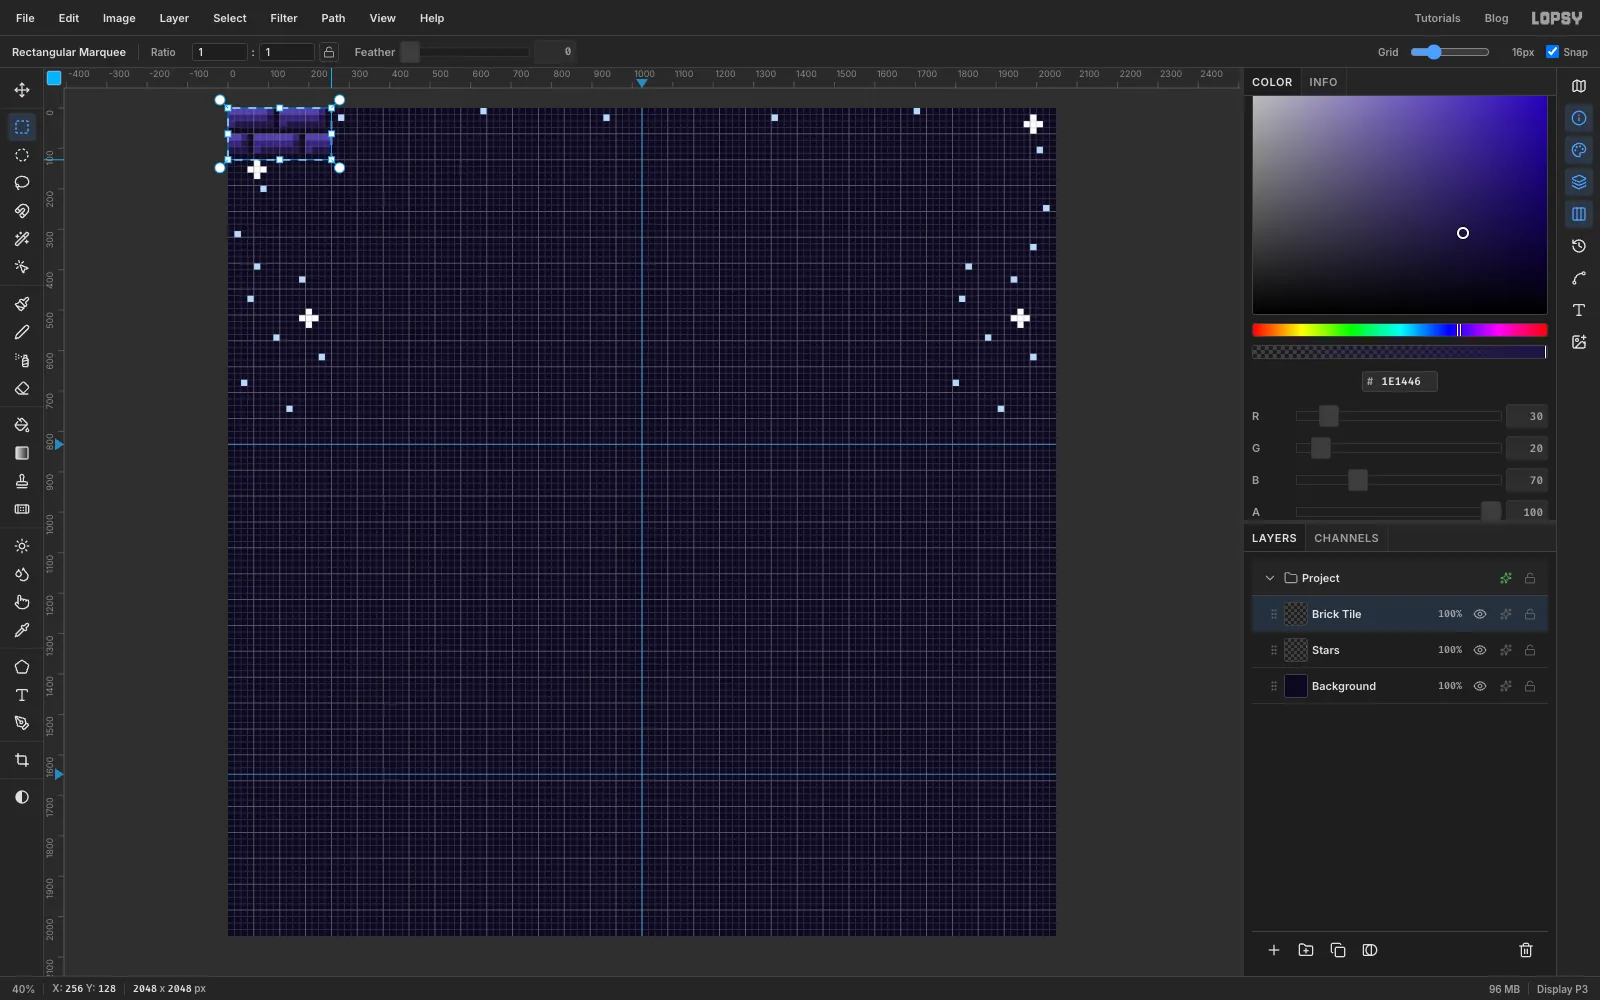
Drag the marquee from 0, 0 to 256, 128 again so it hugs the tile, and choose Edit → Define Pattern. Press Cmd+D, then delete the Brick Tile layer with the trash button at the bottom of the Layers panel. The pattern is kept.
-
Fill the wall with the brick pattern
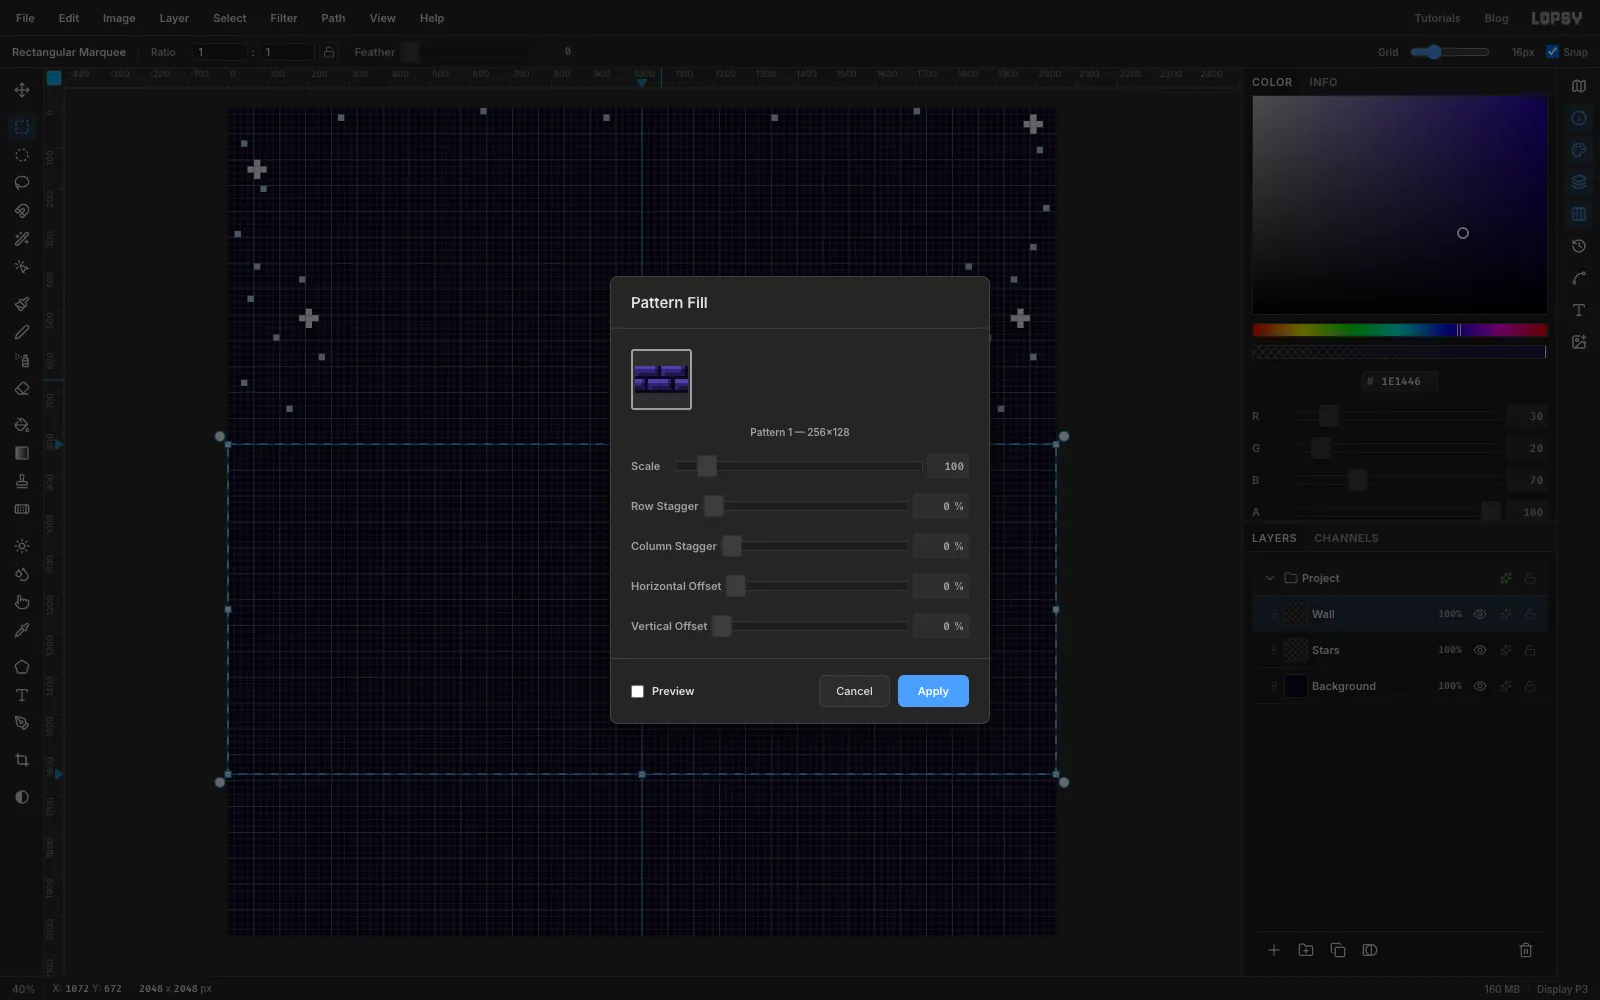
Select Stars and add a layer called Wall. Drag a marquee from the left edge at the 832 guide to the right edge at the 1648 guide.
Choose Edit → Fill with Pattern…, click the brick tile and leave Scale at 100 and every offset at 0. Click Apply and deselect. The pattern is lined up with the document's top-left corner, and 832 is a multiple of one brick course (64 px), so the wall starts cleanly on a mortar line.
-
Add battlements
Add a layer called Battlements. With the Pencil:
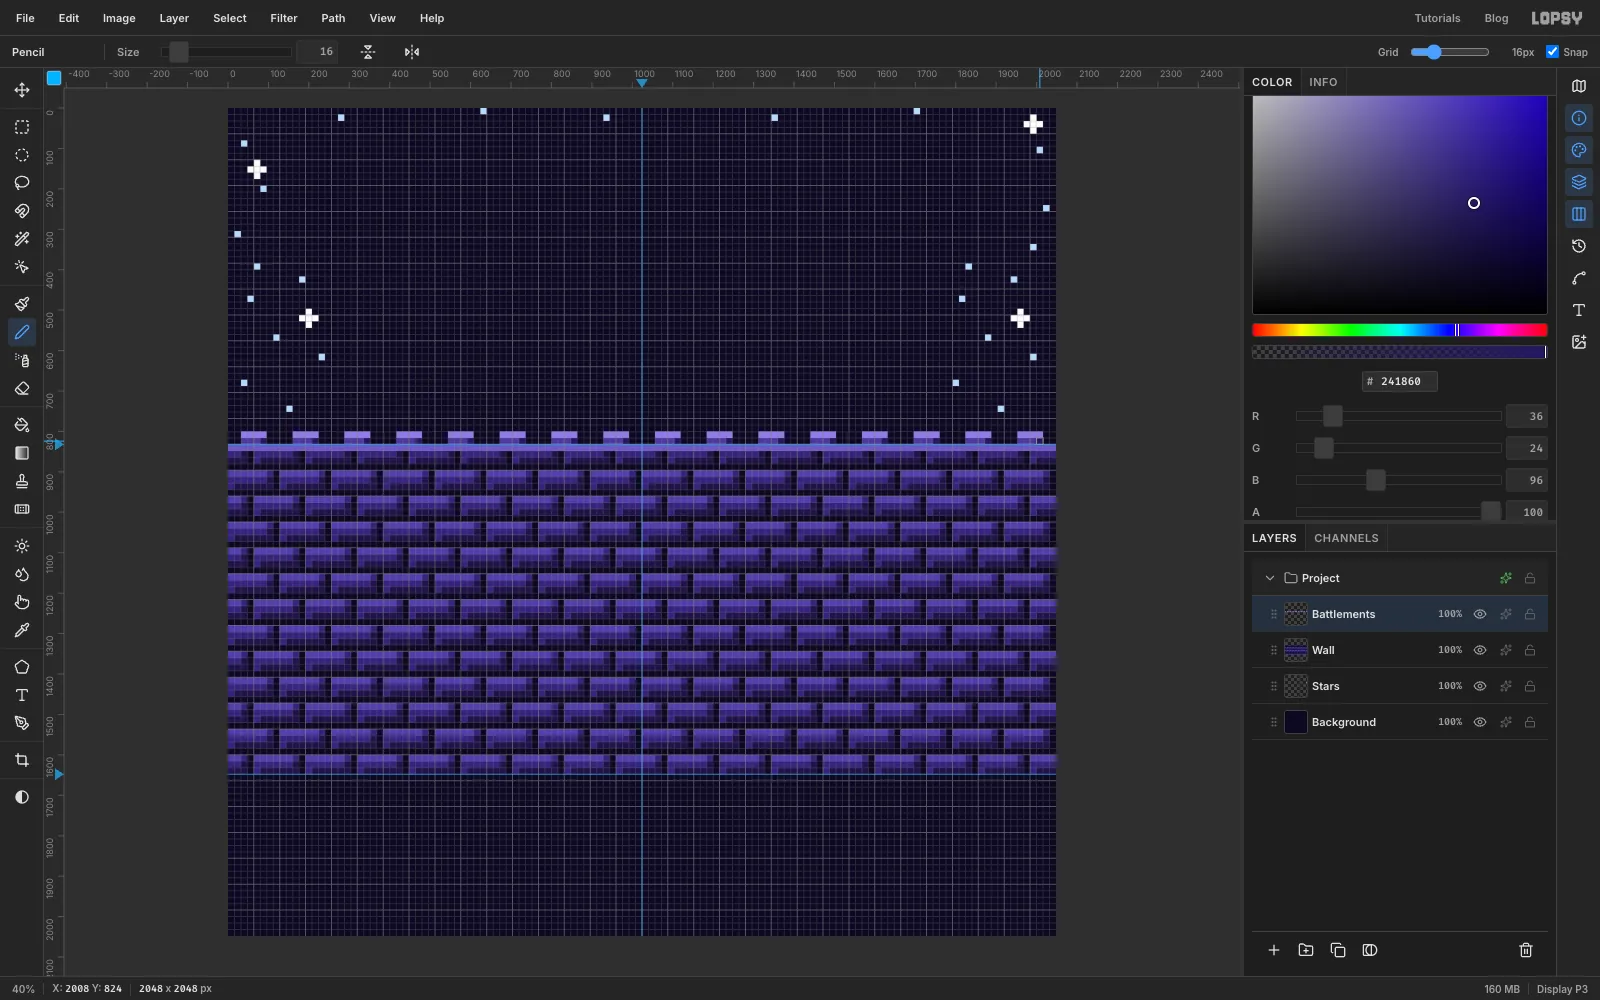
- In , click the left end of the top row of the wall (y 832) and Shift-click the right end. That's the coping ledge.
- On the two rows above the ledge, paint 16 merlons, each 4 cells wide with a 4-cell gap. Start the first one 2 cells in from the left edge.
- Each merlon's top row is .
- Its bottom row is .
- The right-hand cell of the bottom row is .
The light top and shaded side make the merlons read as solid stone, not as one more course of bricks.
-
Draw the window frame
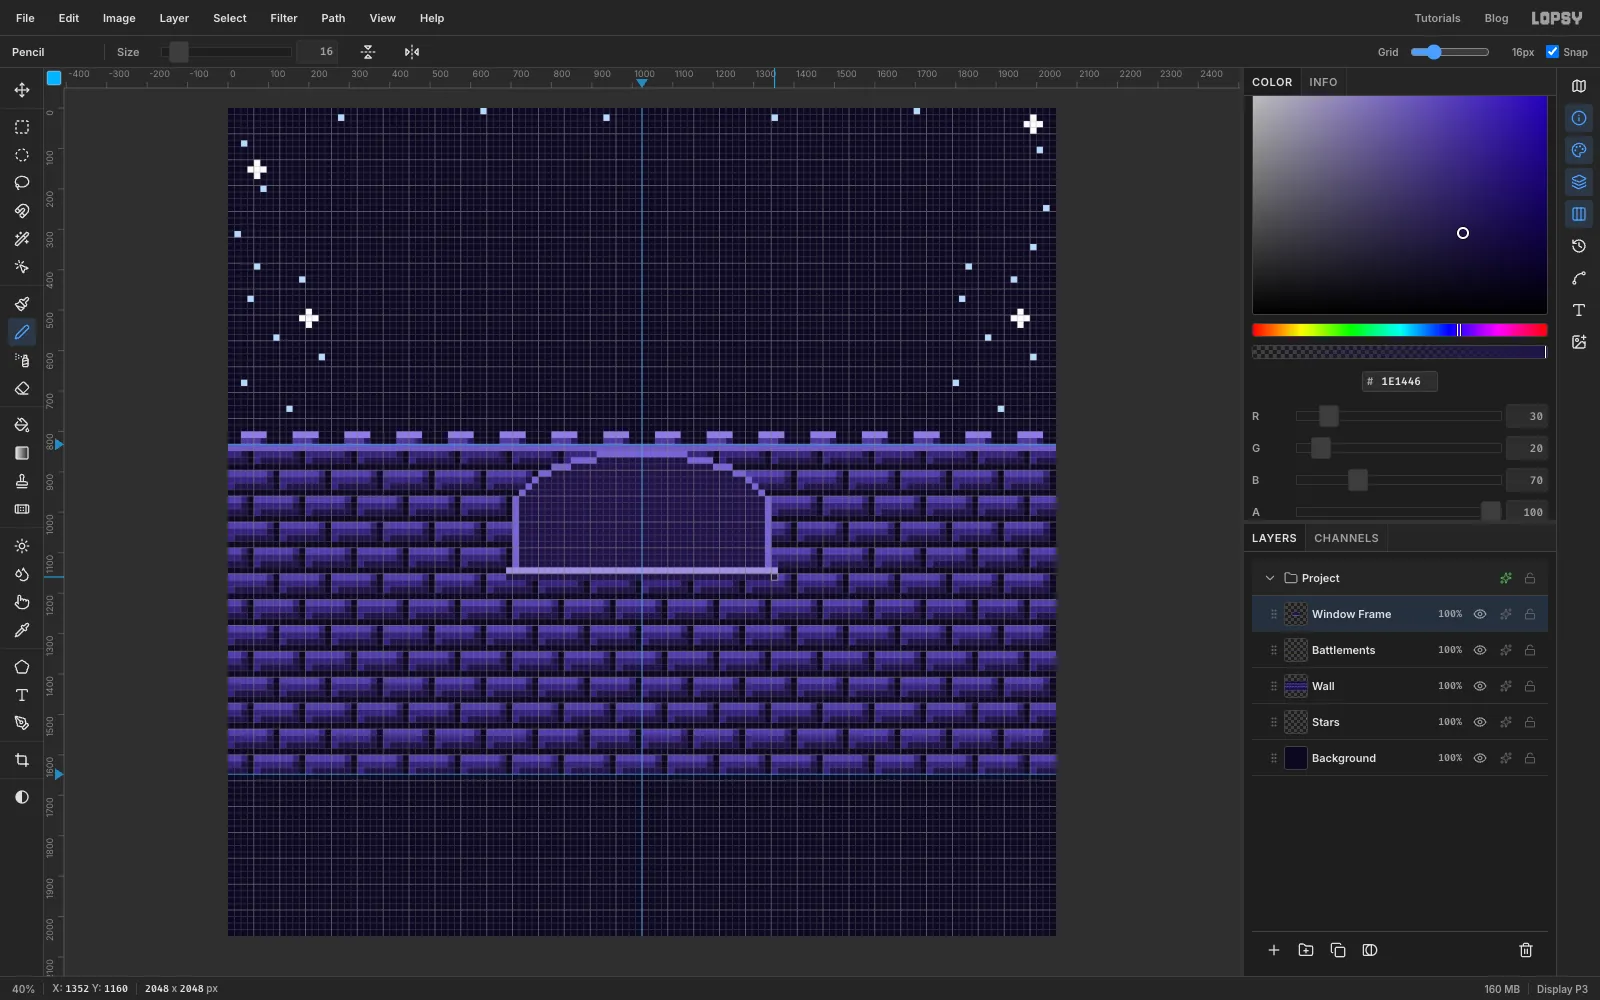
Add a layer called Window Frame. The window opening is 36 cells wide, from x 736 to 1312, centred on the middle guide. Its round top peaks at y 880 and its sides are straight from y 960 down to y 1136.
Every arch is painted as rows centred on the middle guide, one Shift-click run per row. Work from the top down.
- The outer frame, in , starts two cells above the opening, at y 848. Its rows are 14, 22, 28, 32, 34, 36 and 38 cells wide, then 40 cells on every row from y 960 down to y 1136.
- The dark rim, in , goes over it, starting one cell lower at y 864. Its rows are 14, 22, 28, 32, 34 and 36 cells wide, then 38 from y 960 down.
That leaves a light outer frame and a dark inner rim.
For the sill, paint a row from x 688 to 1360 along the bottom of the window (y 1136), then a row under it.
-
Fill the window with flat sky bands
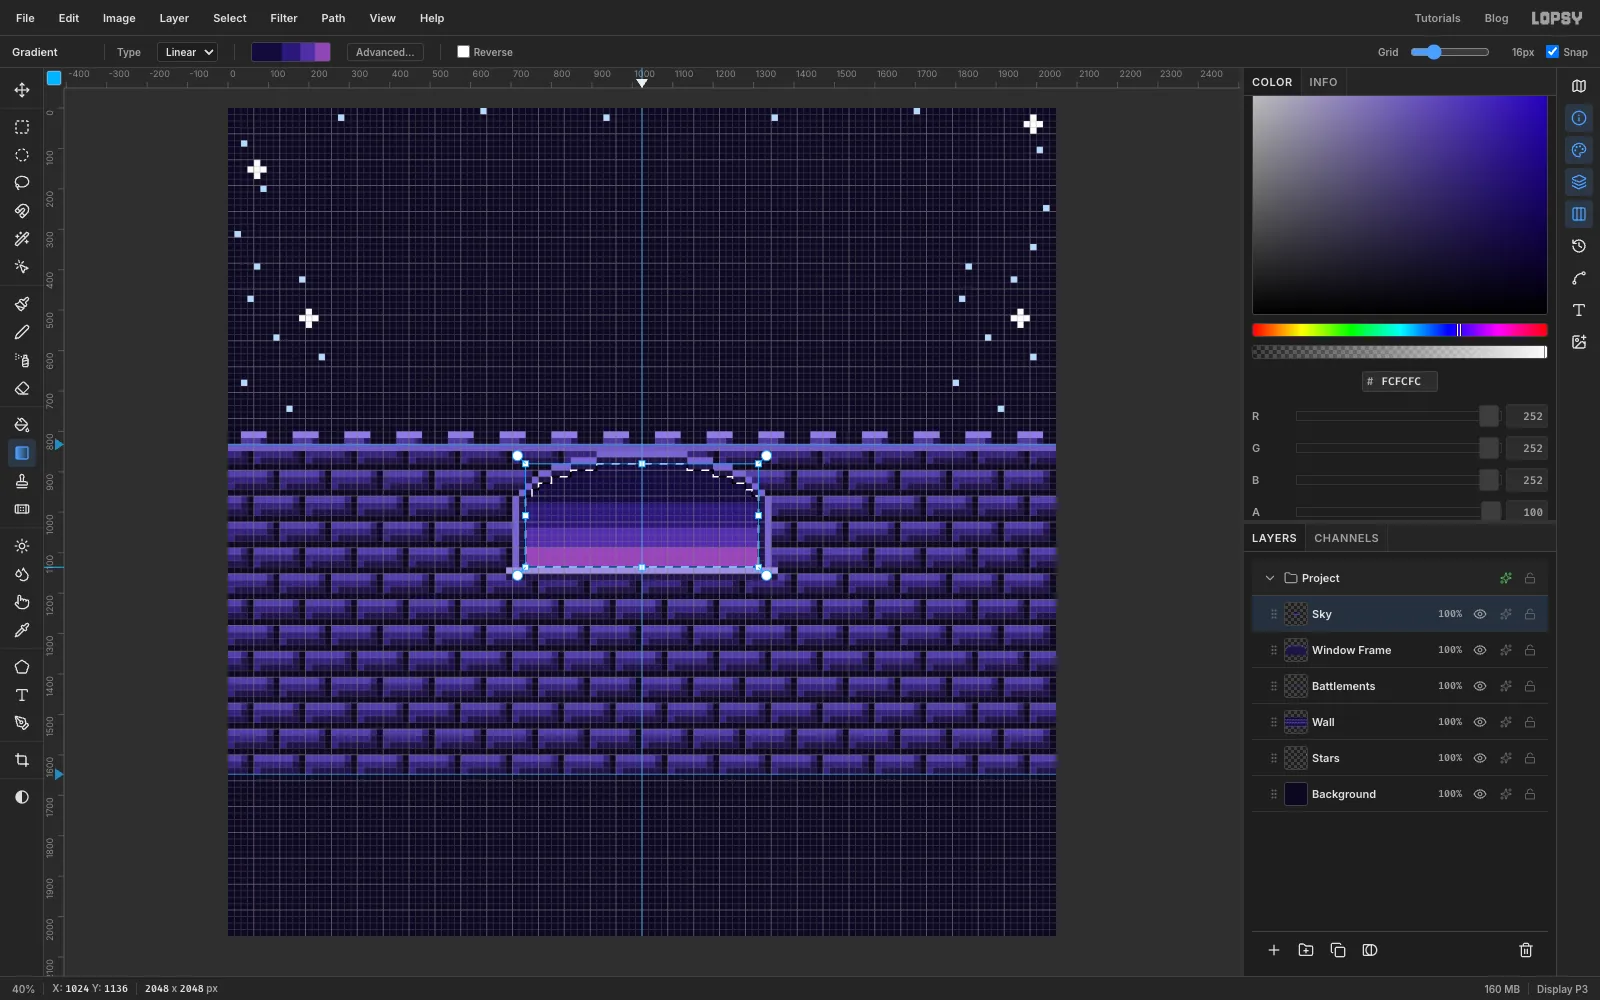
Add a layer called Sky and paint the opening itself in white with Pencil runs. It starts at y 880, and its rows are 14, 22, 28, 32 and 34 cells wide, then 36 from y 960 to the sill. Cmd-click the Sky thumbnail to select the opening.
Pick the Gradient tool from the toolbox, keep Linear, and open Advanced…. Click the bar to add a stop, drag it while the readout shows its position, and type its colour in the Hex field. Pair the stops two percent apart, so the gradient comes out as four nearly flat bands, the way an NES sky is banded:
- at 0% and 37%
- at 39% and 61%
- at 63% and 80%
- at 82% and 100%
Click Done, then drag straight down from the top of the window to the bottom.
-
Snap the sky bands to the pixel grid
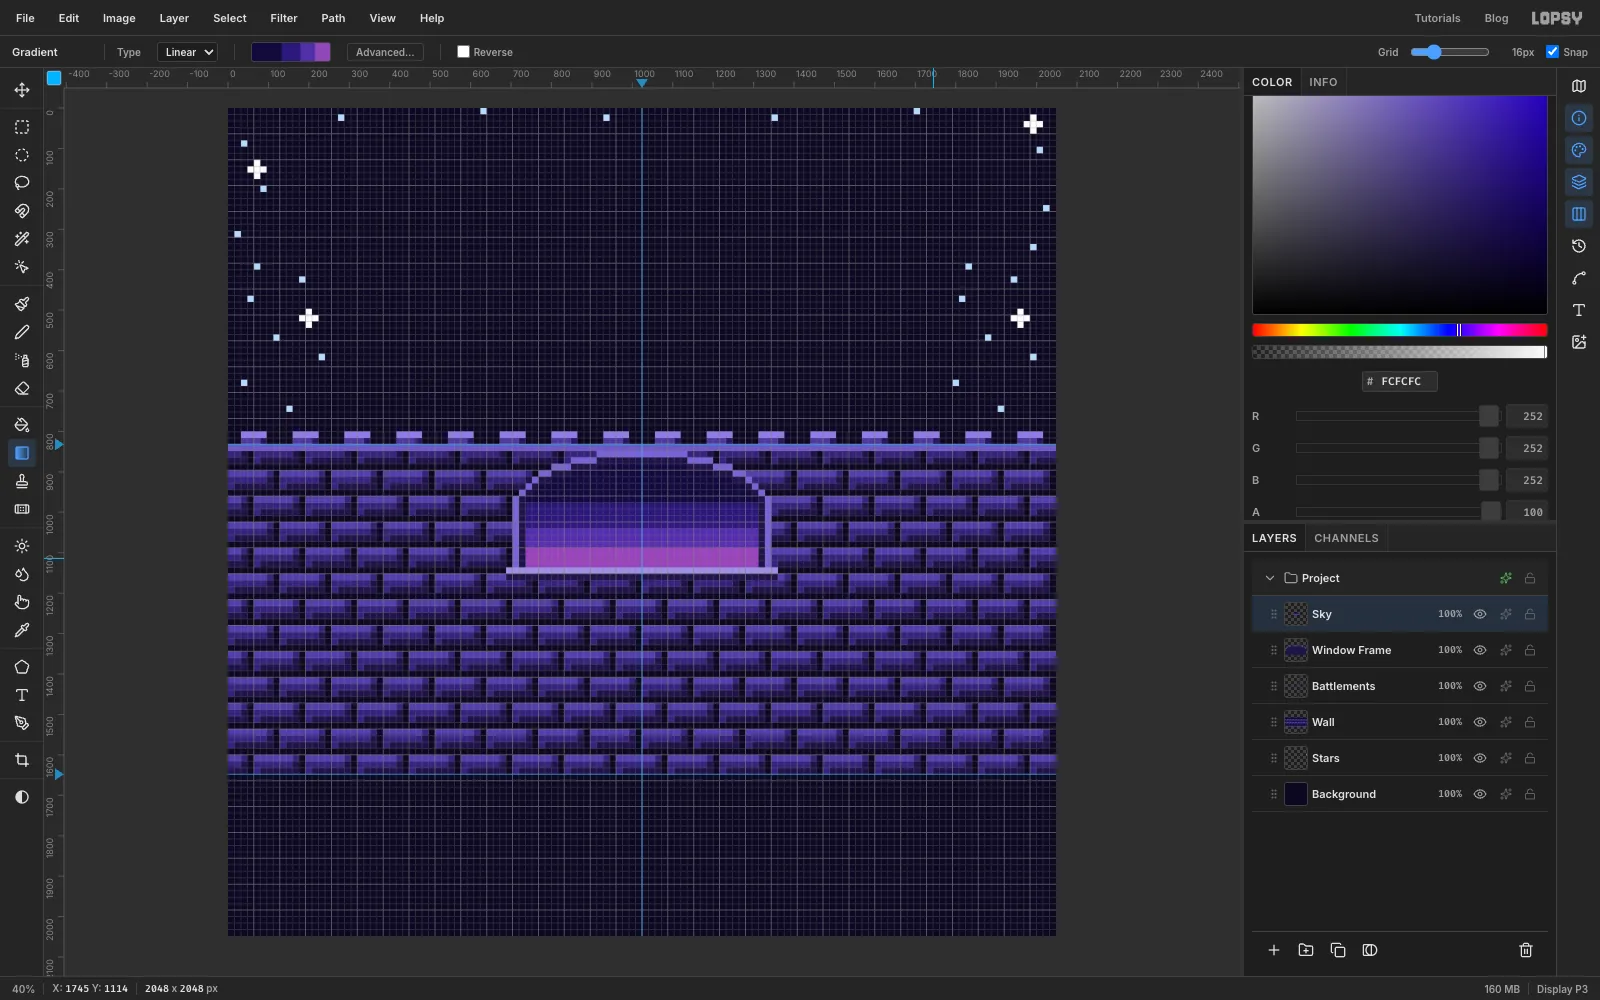
Press Cmd+D. Choose Filter → Pixelate…, set Block Size to 16 and click Apply. Each block becomes one flat cell. Where a soft band edge fell inside a cell, it becomes a single in-between row, like the stepped colour ramps in old game skies. The sky now sits on the same grid as everything else.
-
Paint the moon
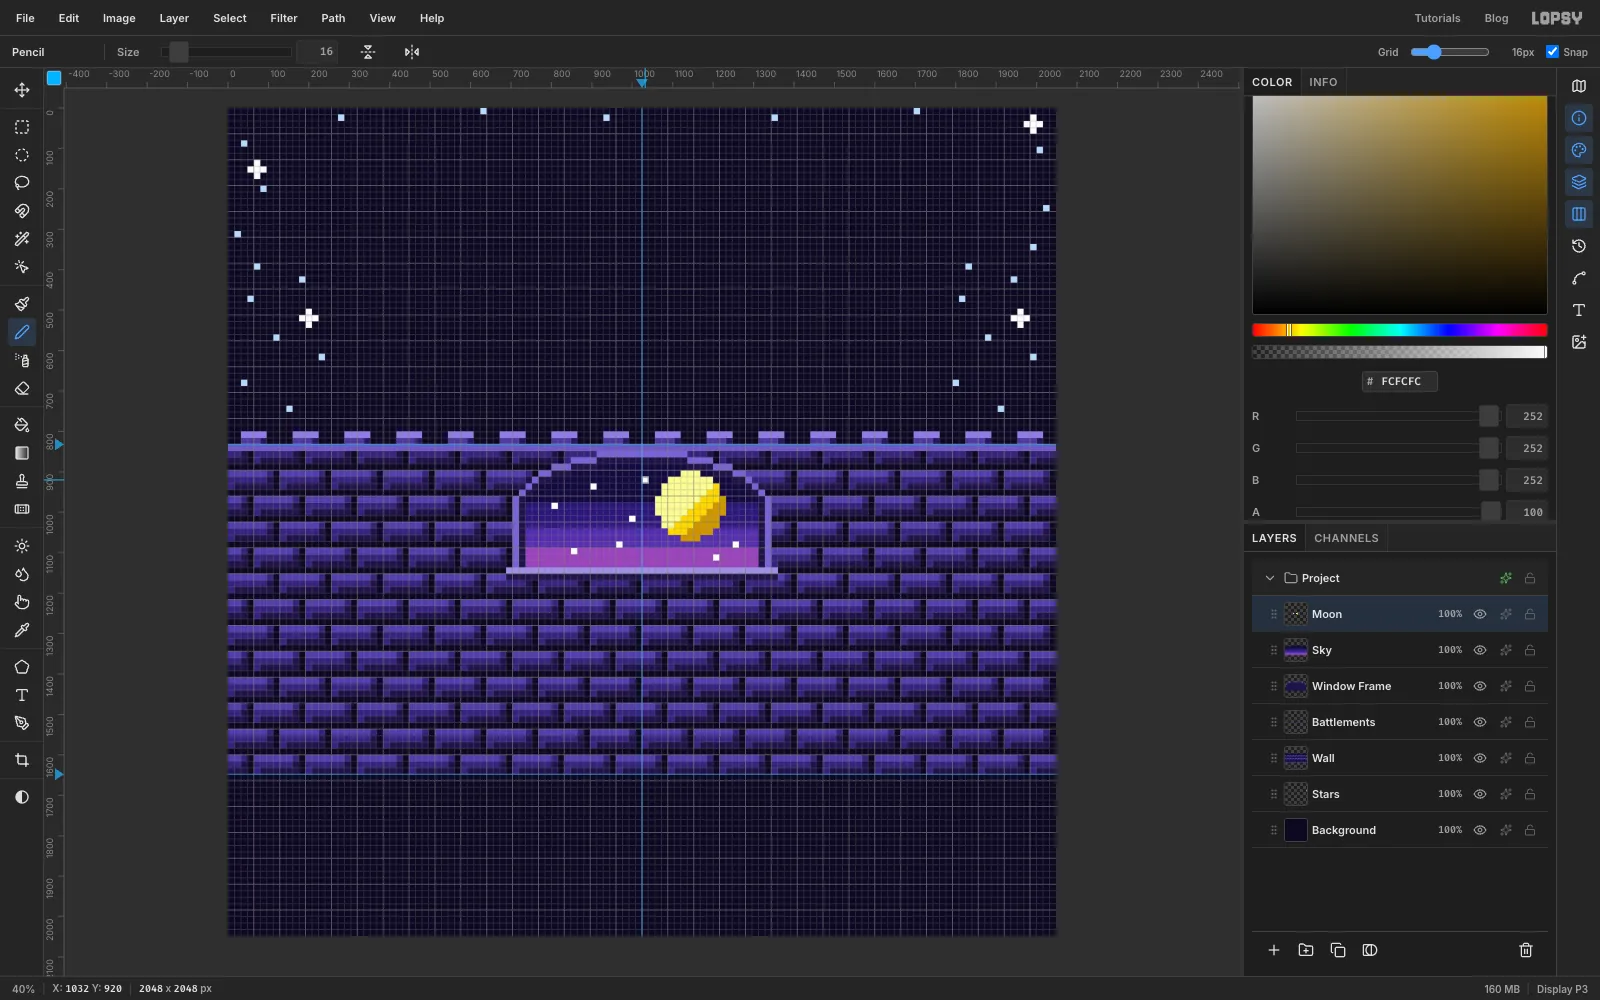
Add a layer called Moon. In the right half of the window, paint an 11-cell-wide round moon centred around x 1144, y 984:
- Rows of 3, 7, 9, 9, 11, 11, 11, 9, 9, 7 and 3 cells, from top to bottom.
- on the upper-left side.
- through the middle.
- on the lower-right rim.
Click eight single white stars around the moon, keeping them inside the window.
-
Hang two torches
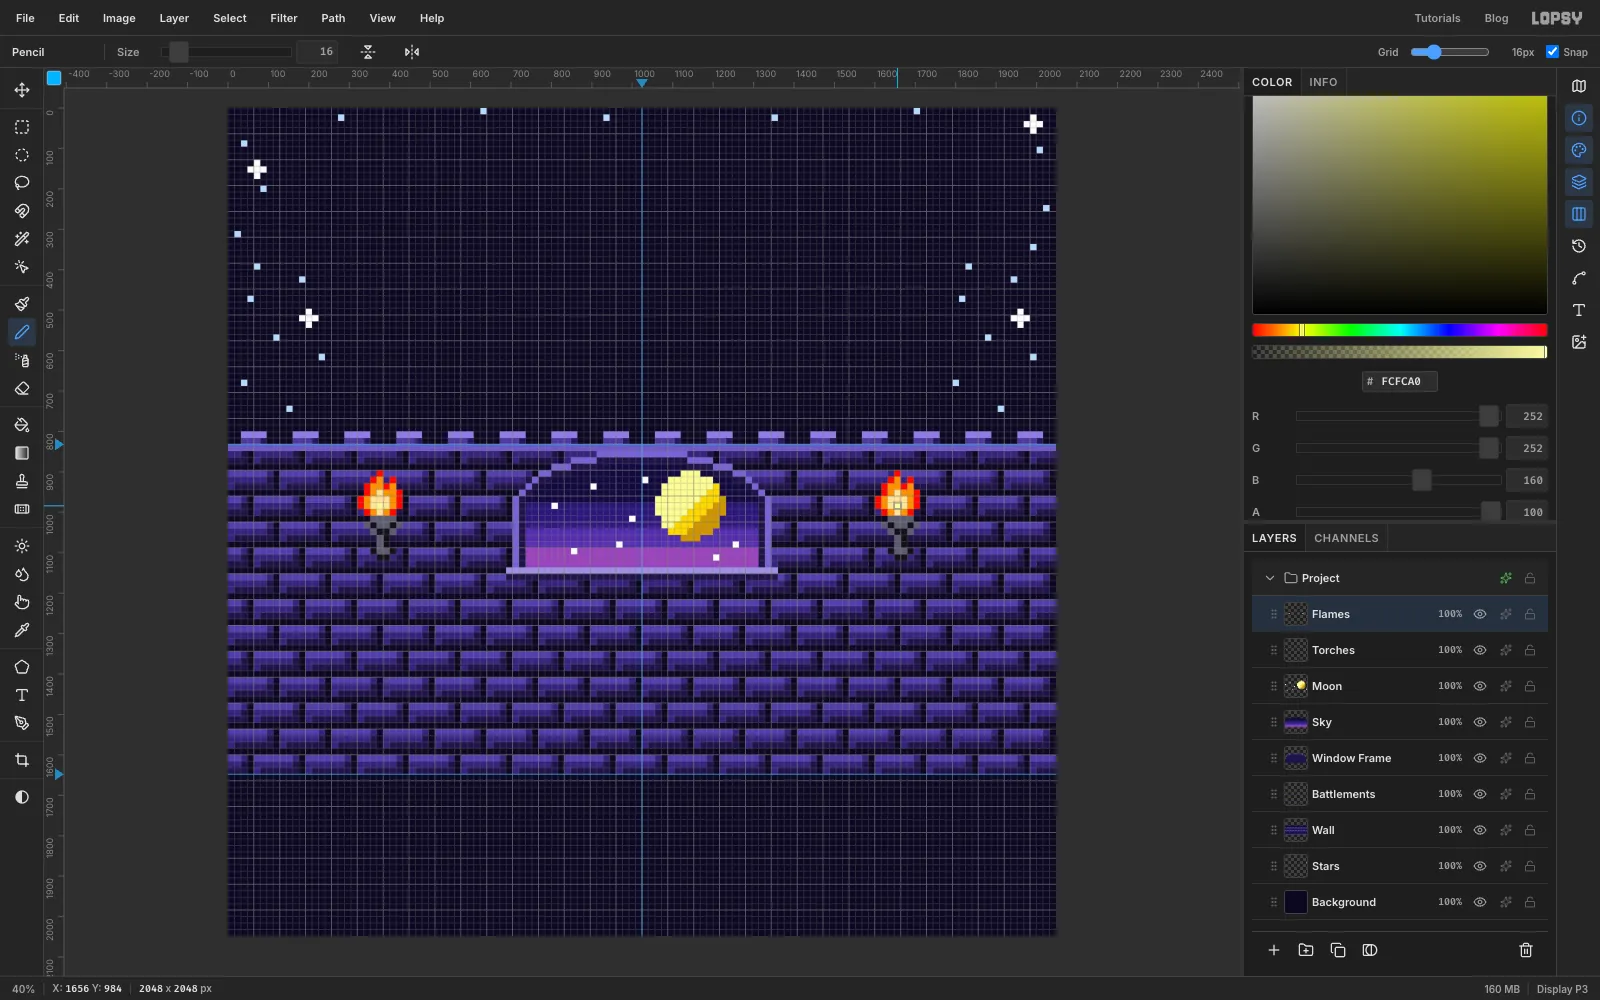
Add a layer called Torches. On each side of the window, centred on x 384 and x 1664, paint an iron bracket 7 rows tall, starting at y 1008. From the top, its rows are 4, 6, 4, 2, 2, 4 and 2 cells wide. That's a cup on a narrow stem with a small foot. Use with for the shadowed cells.
Add a layer called Flames. Just above each bracket, starting at y 896, paint a flame 7 rows tall. Its rows are 1, 3, 4, 6, 7, 7 and 5 cells wide, leaning slightly to the left. It's red on the outside, orange inside, and a core with one hot cell near the bottom.
-
Paint stepped light pools
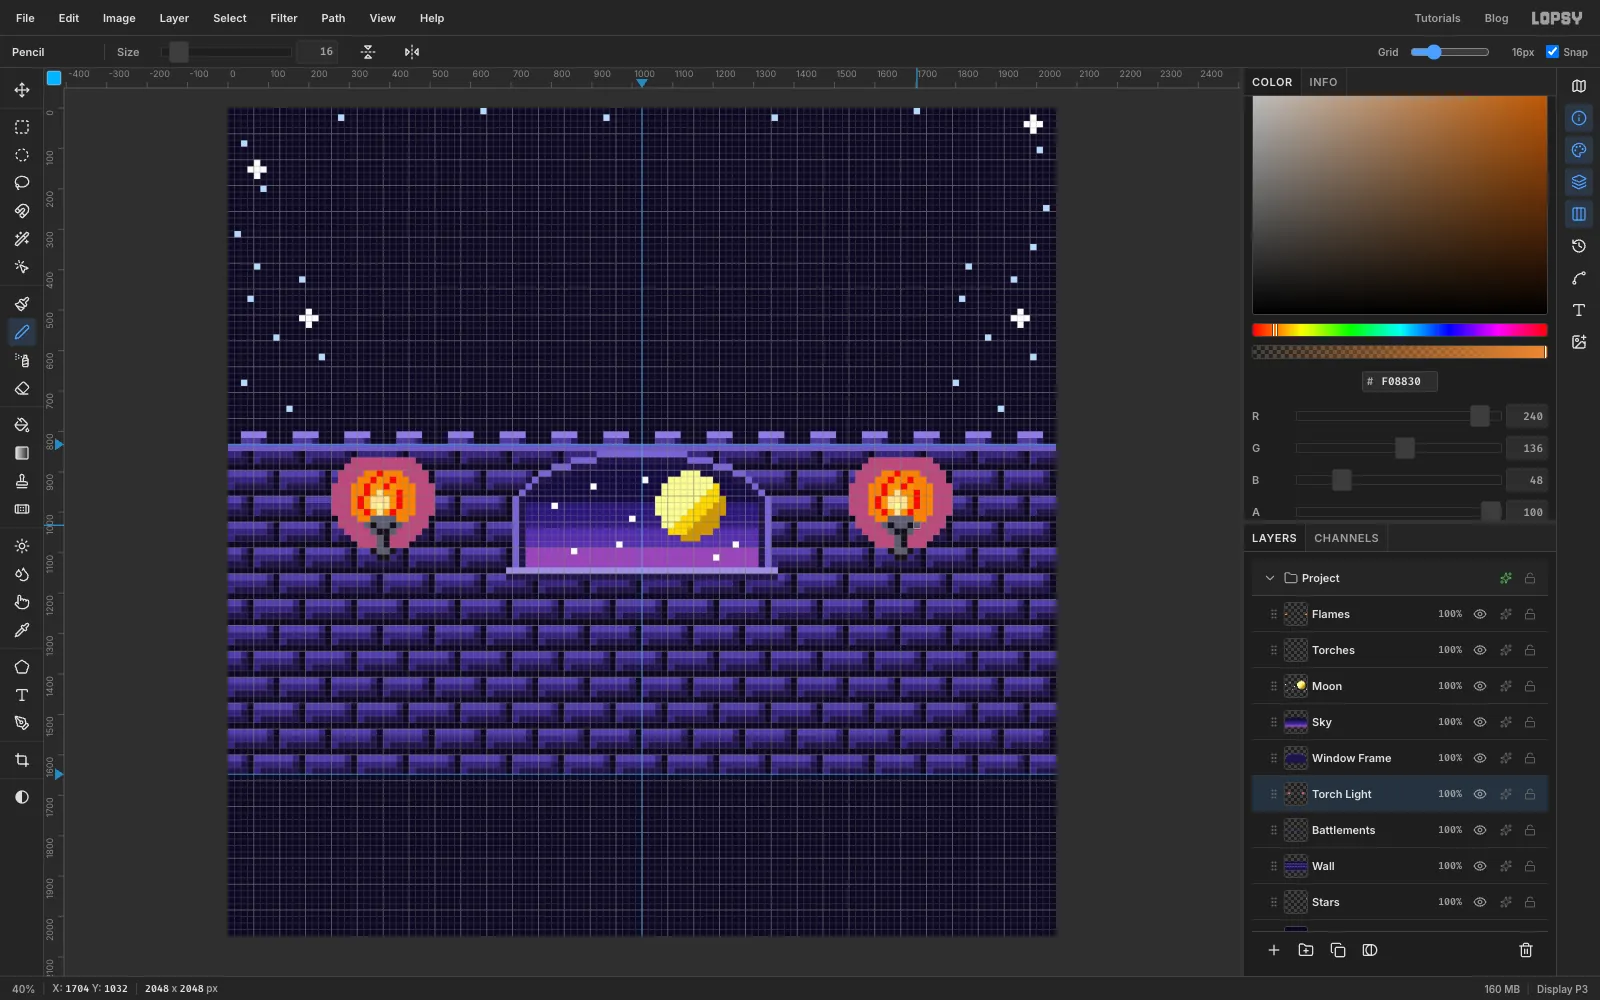
Select Battlements and add a layer called Torch Light. It lands just above Battlements.
With the Pencil, paint a stepped disc in around each torch, centred on x 384 and x 1664. Start at y 864, one cell below the ledge, with rows 10, 12, 14, 14, 16, 16, 16, 16, 16, 14, 14, 12, 10 and 8 cells wide.
Then paint a smaller disc on the same centres, starting at y 896, with rows 6, 8, 10, 10, 10, 10, 10, 8 and 6 cells wide.
-
Recolour the bricks with the Color blend mode
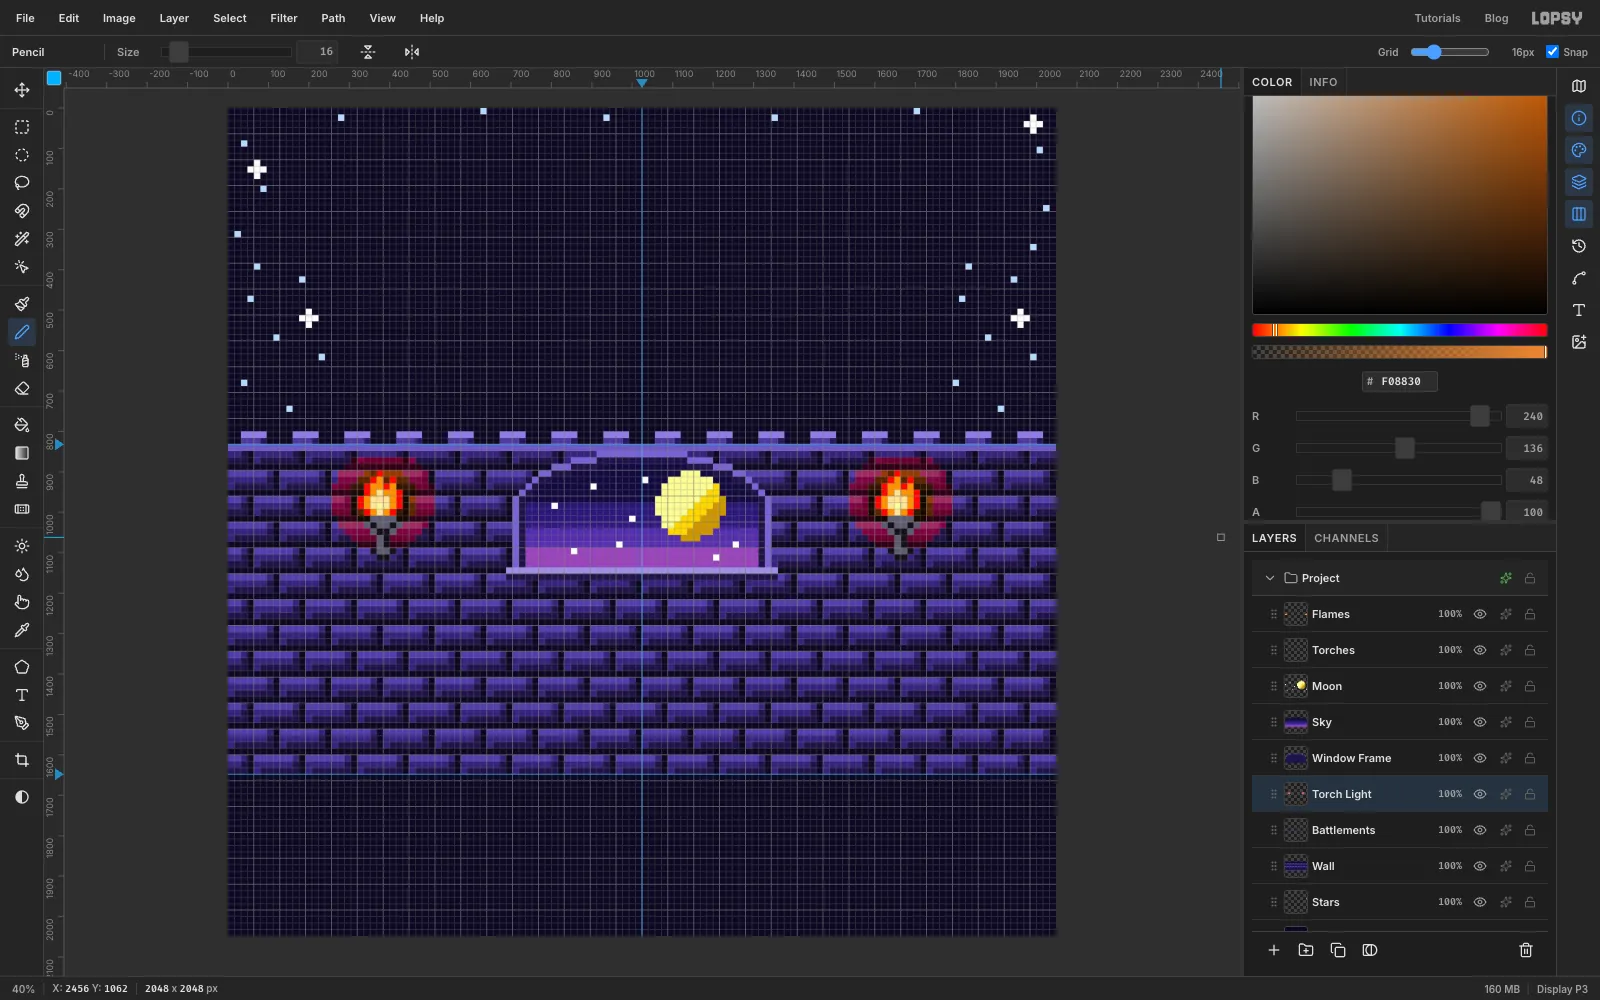
Open the Torch Light layer's effects button and set the Blend to Color. A Color layer keeps the brightness of the bricks underneath and only changes their hue. The bricks inside the rings turn warm, but every mortar line and highlight stays.
-
Brighten the light with a Screen copy
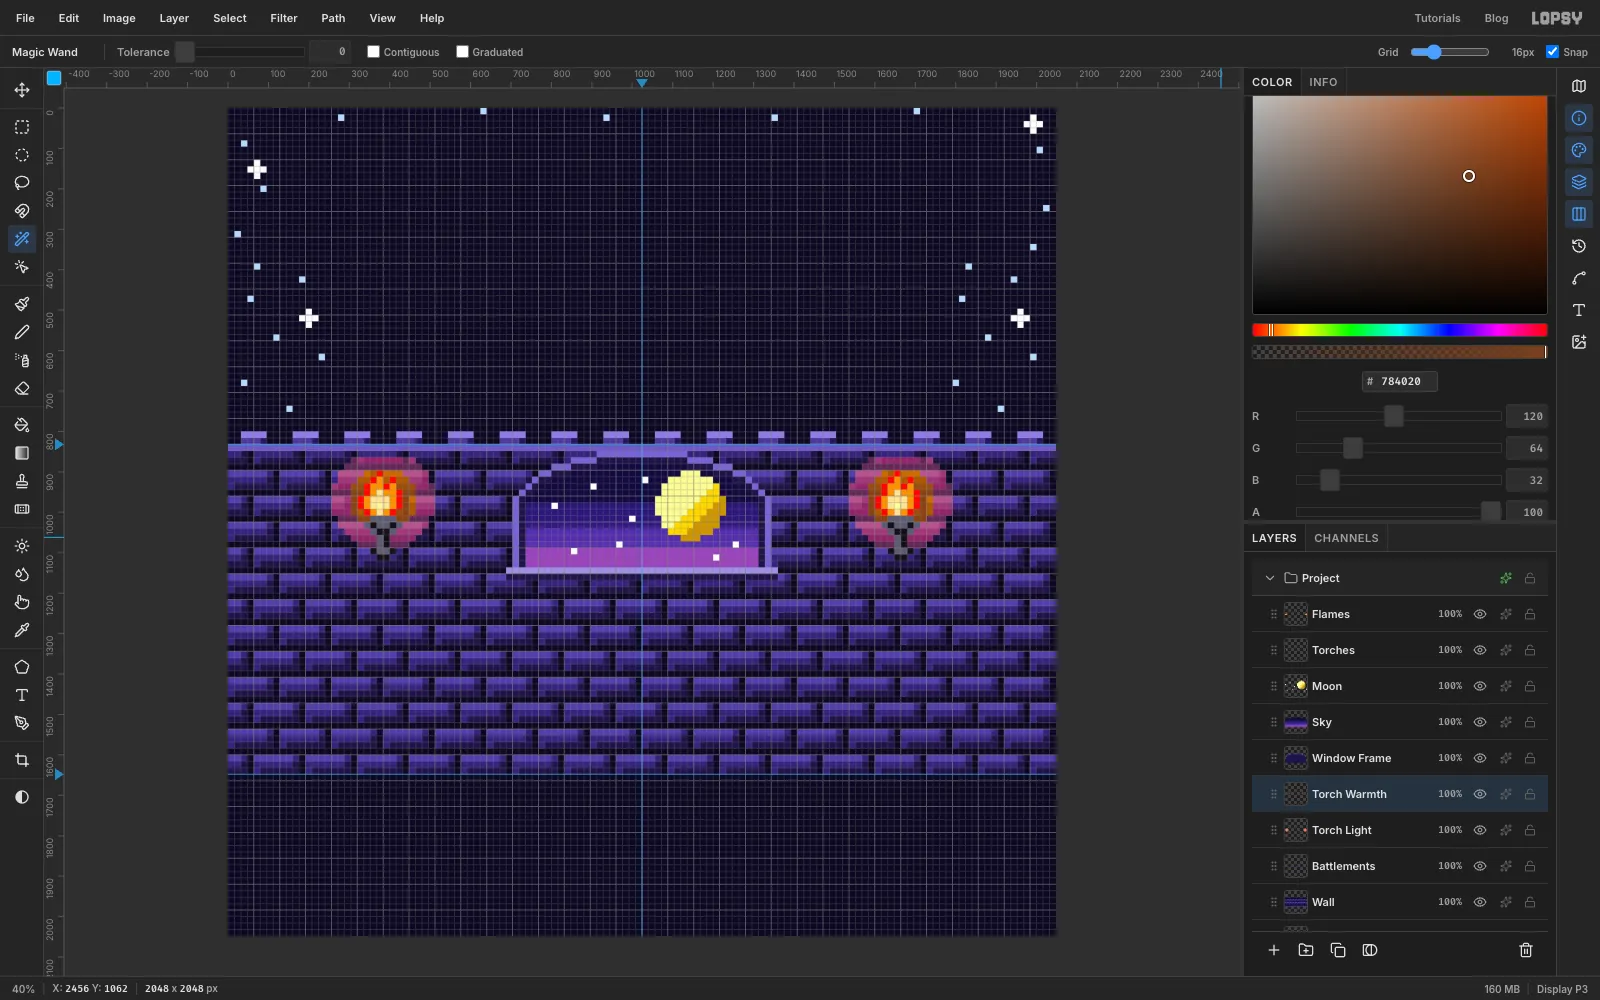
The Color layer recoloured the bricks but left them as dark as before, so they look scorched rather than lit. Choose Layer → Duplicate Layer, click the copy's row in the Layers panel, and rename it Torch Warmth.
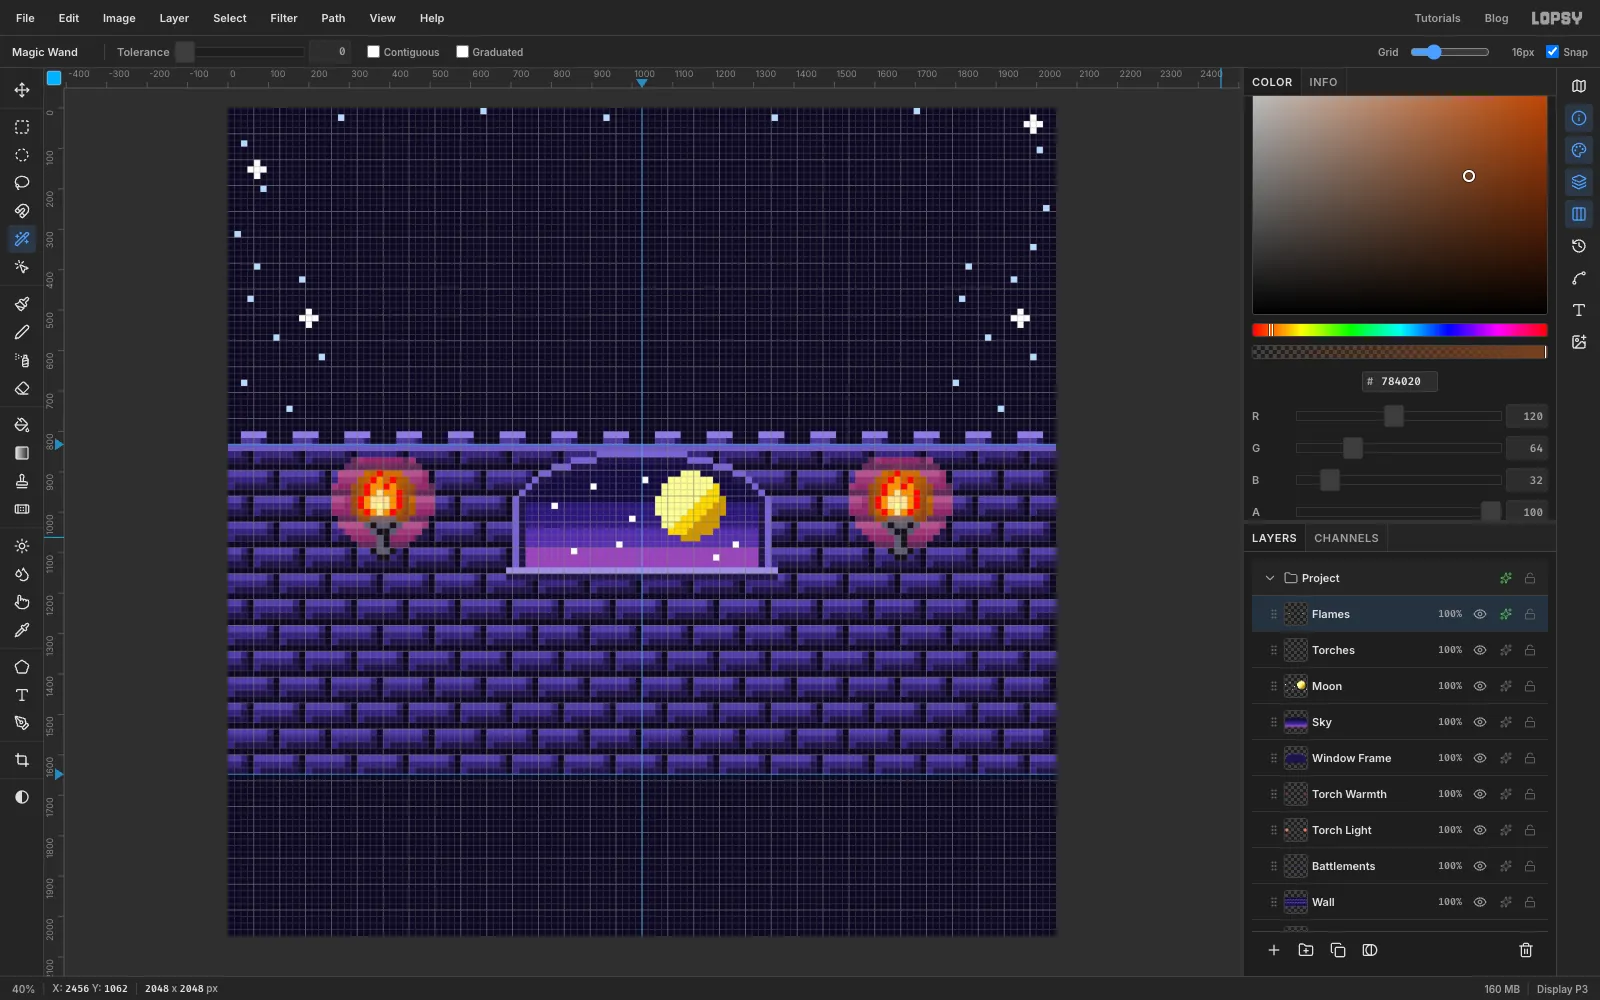
Pick the Magic Wand (W), set Tolerance to 0 and untick Contiguous. On Torch Warmth:
- Click a pink cell. Both outer rings are selected. Fill them with .
- Click an orange cell and fill both inner discs with .
Deselect, and set this layer's blend mode to Screen. Screen only ever lightens, so the bricks inside the rings brighten by steps.
-
Give the flames a glow
Select Flames, open its effects and turn on Outer Glow: colour , Size 40, Opacity 70. This is the only soft effect in the scene, so keep it on the flames themselves.
-
Lay the wooden stage
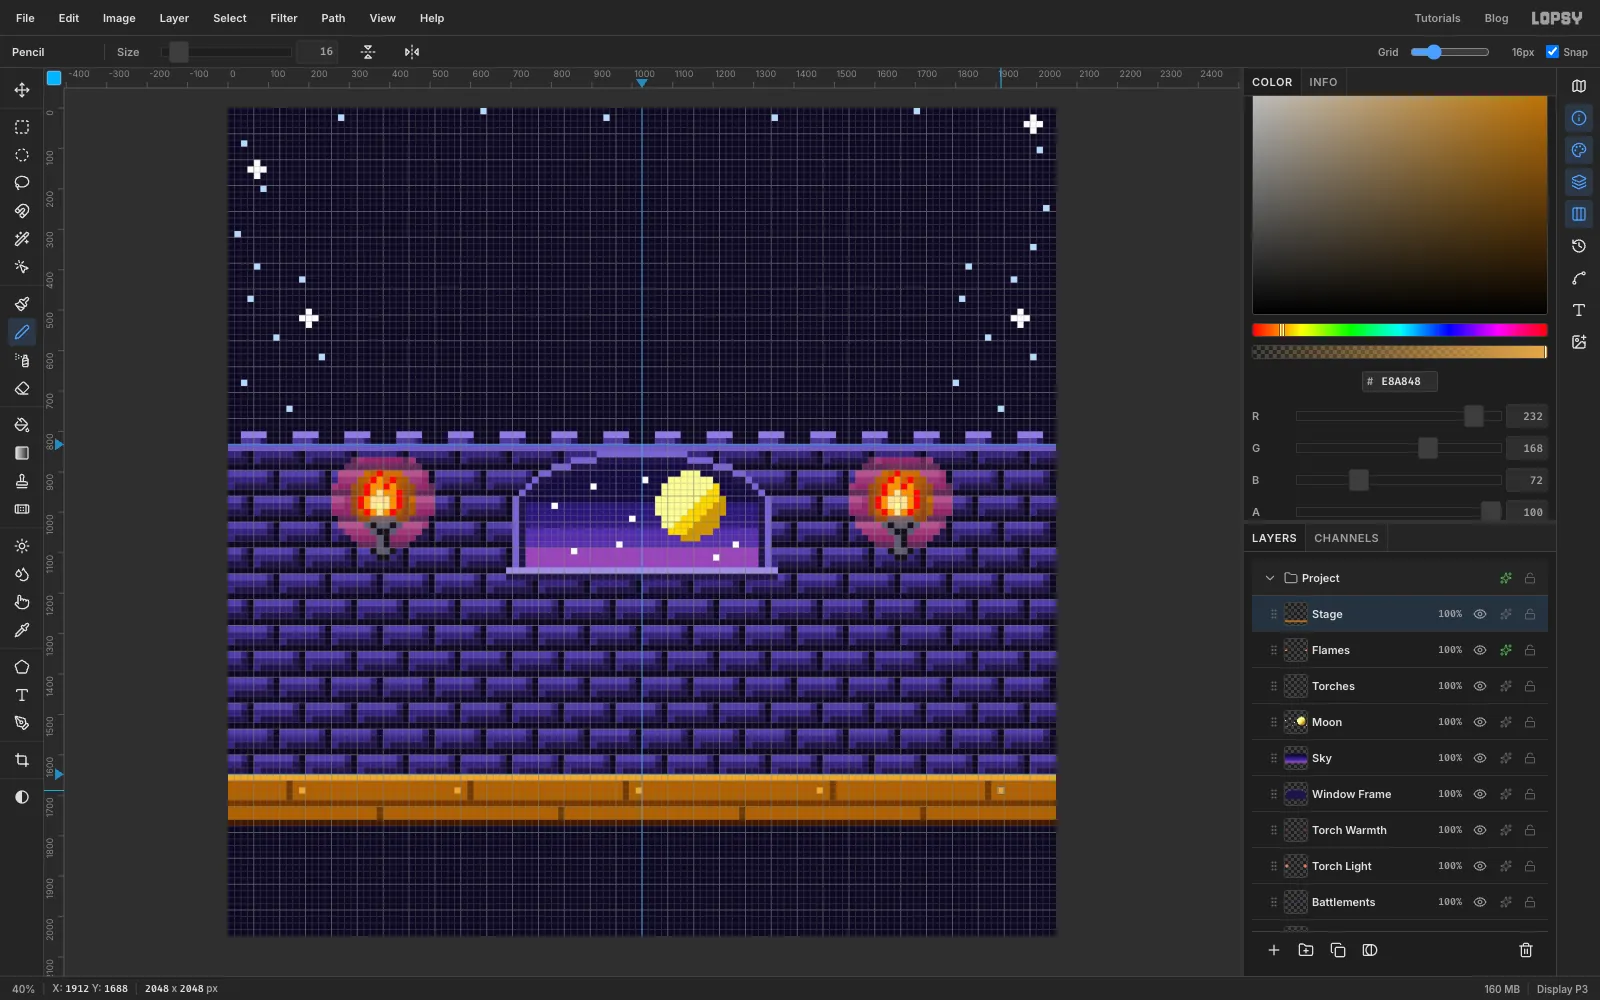
Select Flames and add a layer called Stage. With the Rectangular Marquee, drag from the left edge at the 1648 guide down eight cells to y 1776, across the full width. Fill it with and deselect.
With the Pencil, draw three full-width lines. Click a cell at the left edge and Shift-click the same row at the right edge:
- The lip on the top row (y 1648) in .
- A seam between the planks on the fifth row (y 1712) in .
- The front edge on the bottom row (y 1760) in .
Add short vertical plank joints in , three cells tall in the top plank and two in the bottom one, staggered. Click a few nail heads near the joints.
-
Plan the goblin sprite
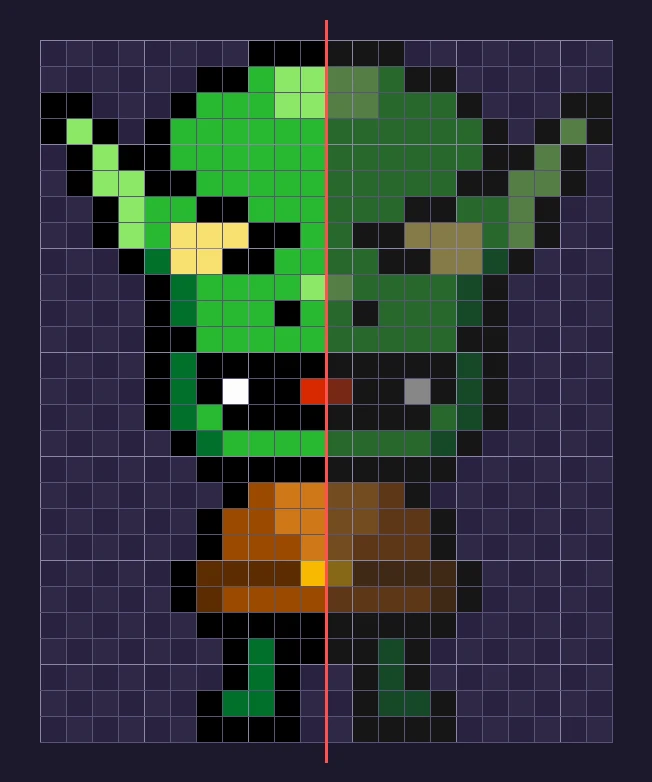
This chart is the goblin, cell for cell. It's 22 cells wide and 27 tall, and it's symmetrical, so you only need to paint the left half. The dimmed right half is what the mirror will paint for you.
From the top down:
- Head: a tuft and the ears in three greens.
- Face: an angry brow, yellow eyes with black pupils, a long nose and a black grin with a white fang and a red tongue at the centre.
- Body: a brown tunic with a gold belt buckle, then two thin legs and feet.
Every shape has a one-cell black outline.
-
Paint half a goblin with symmetry
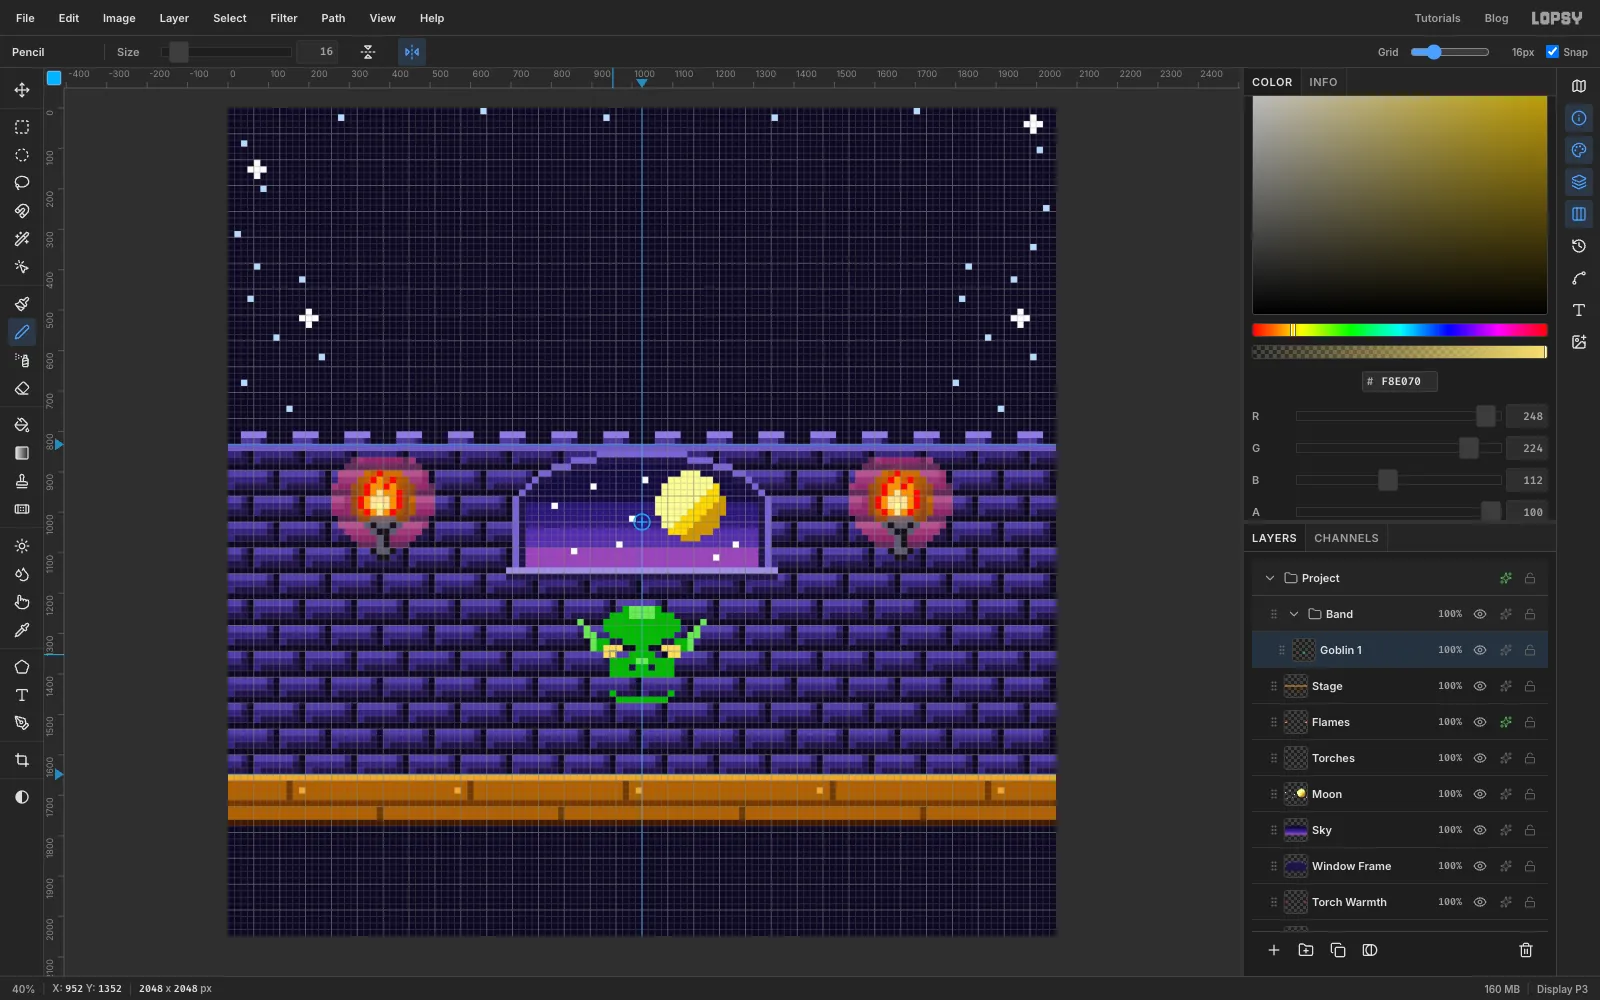
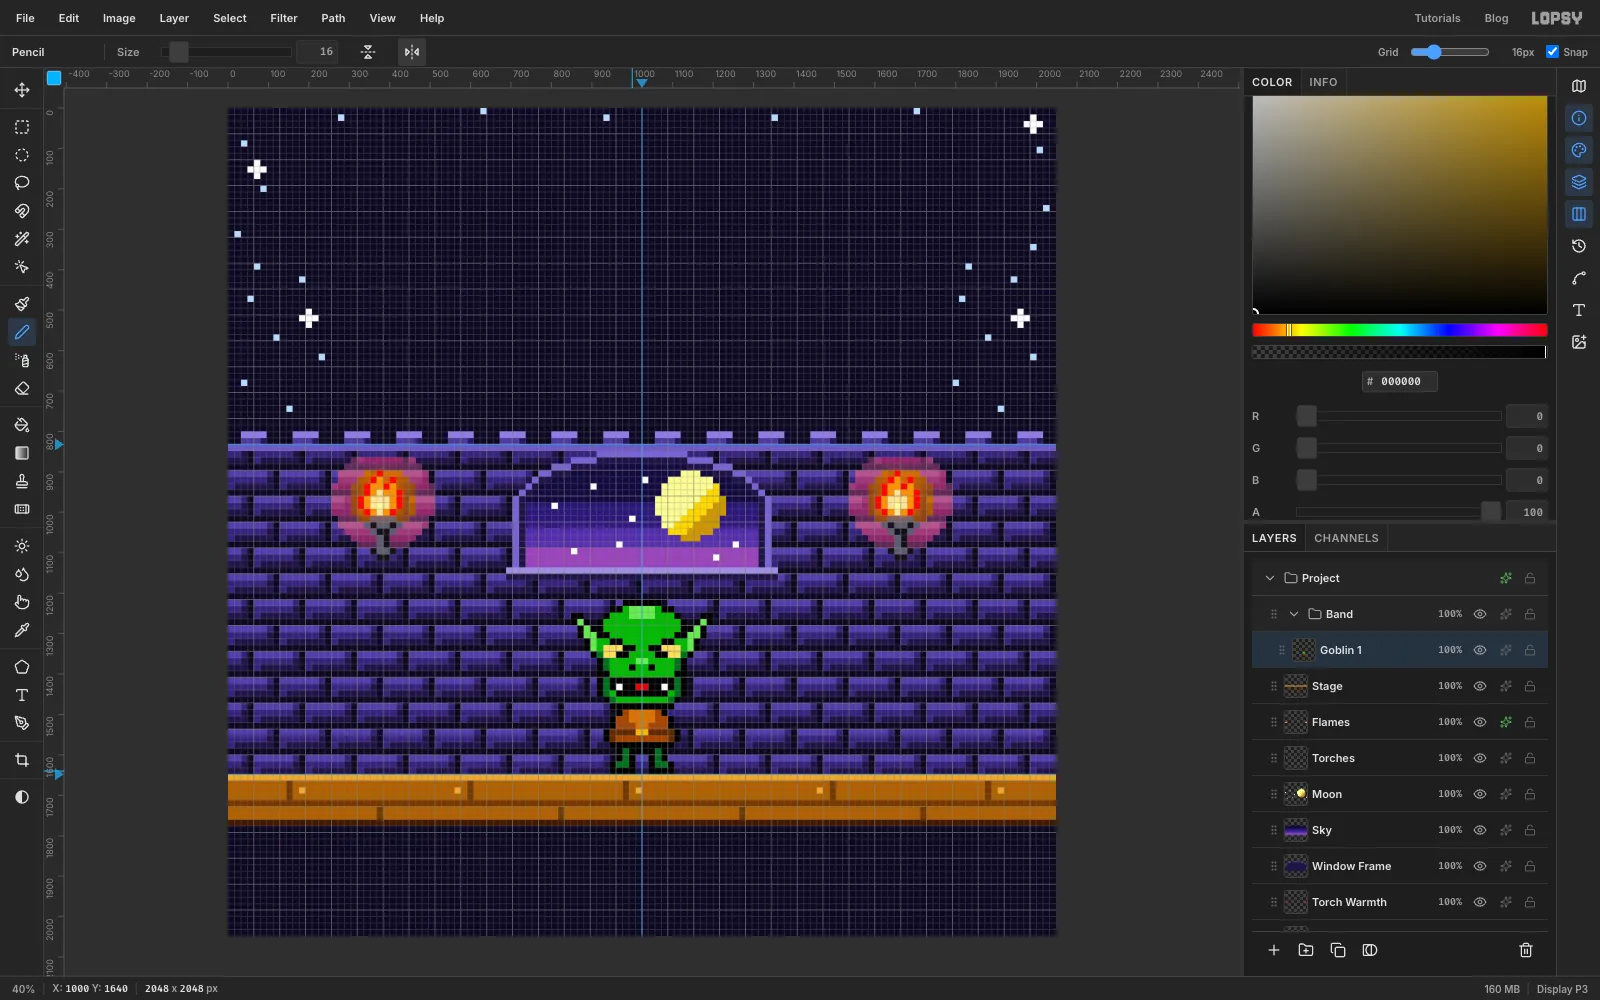
Select Stage and click New Group at the bottom of the Layers panel. Name the group Band. With Band selected, click Add Layer. The new layer goes inside the group. Name it Goblin 1.
Pick the Pencil and turn on Symmetry Vertical in the options bar. Every dab is now mirrored across the centre line of the canvas, your guide at 1024.
Paint the left half of the chart. Paint each colour run with a click and a Shift-click. The sprite's left edge is at x 848 and its top at y 1216, so its feet land on the stage lip. Start with the greens and the eyes. The right half appears as you go.
-
Finish the first goblin
Work through the remaining colours: eyes, teeth, tongue, tunic and buckle. Do the black outline last. Then turn Symmetry Vertical off again.
-
Duplicate the goblin into a quartet
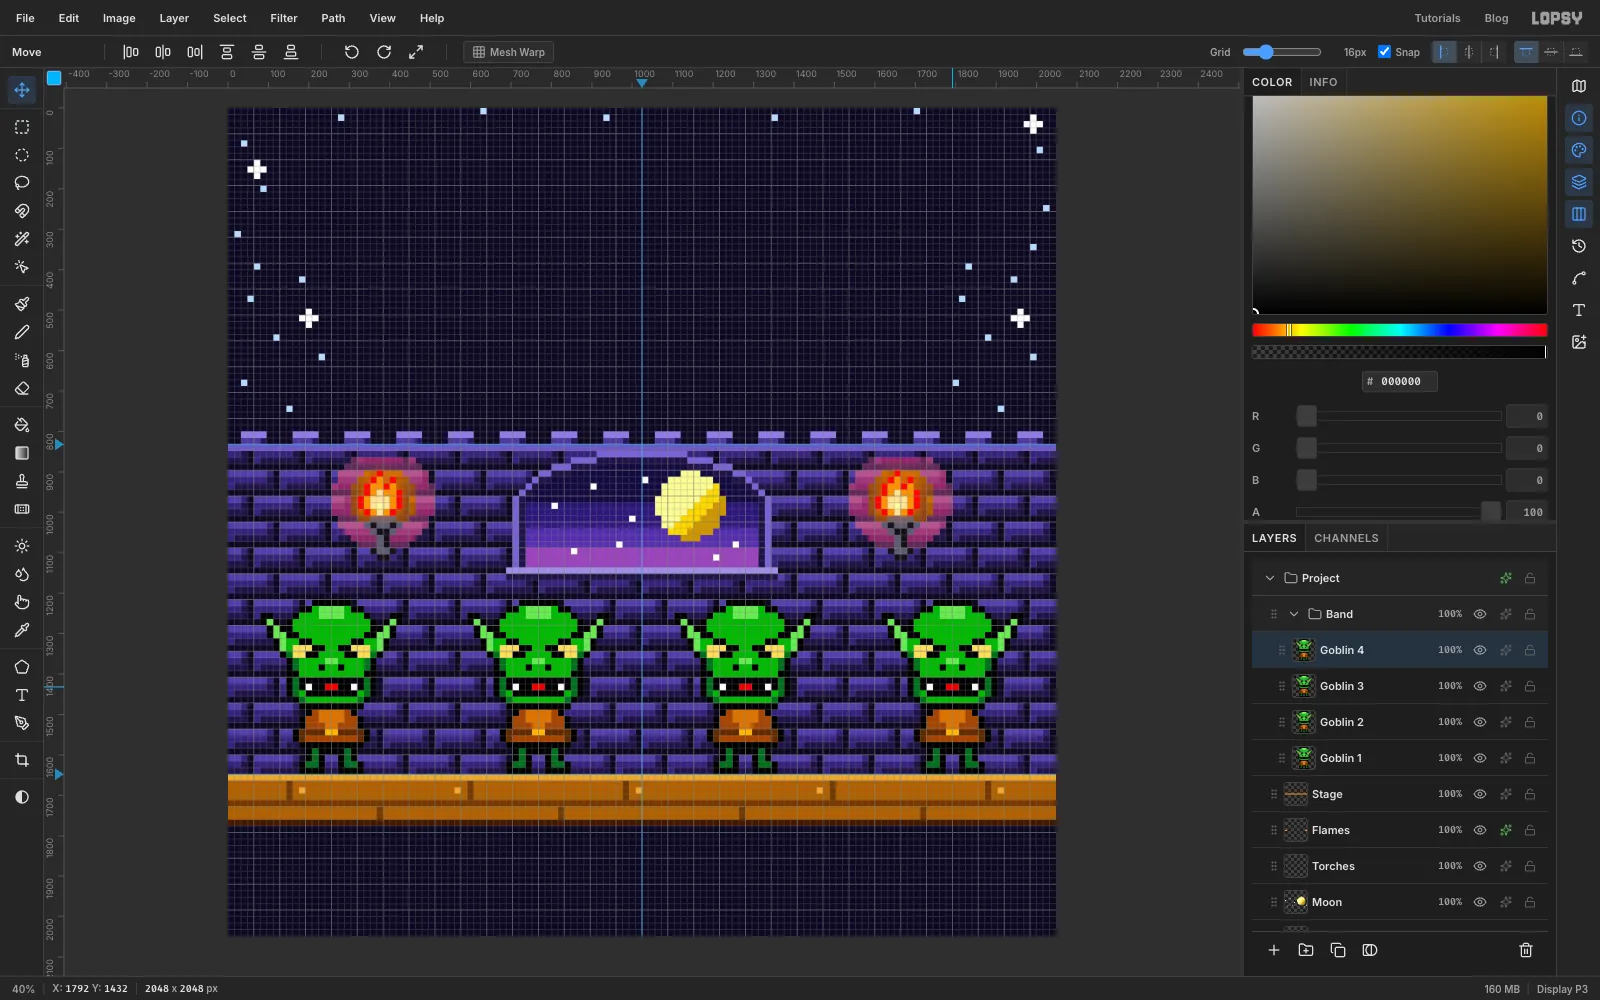
Choose Layer → Duplicate Layer three times. After each duplicate, click the copy's row so the copy is the active layer. Name the copies Goblin 2, Goblin 3 and Goblin 4.
With the Move tool and Snap on, drag each goblin sideways to its spot. Keep each one at the same height:
- Goblin 1 goes 768 px left, so its left edge is at x 80.
- Goblin 2 goes 256 px left, to x 592.
- Goblin 3 goes 256 px right, to x 1104.
- Goblin 4 goes 768 px right, to x 1616.
-
Palette-swap the goblins
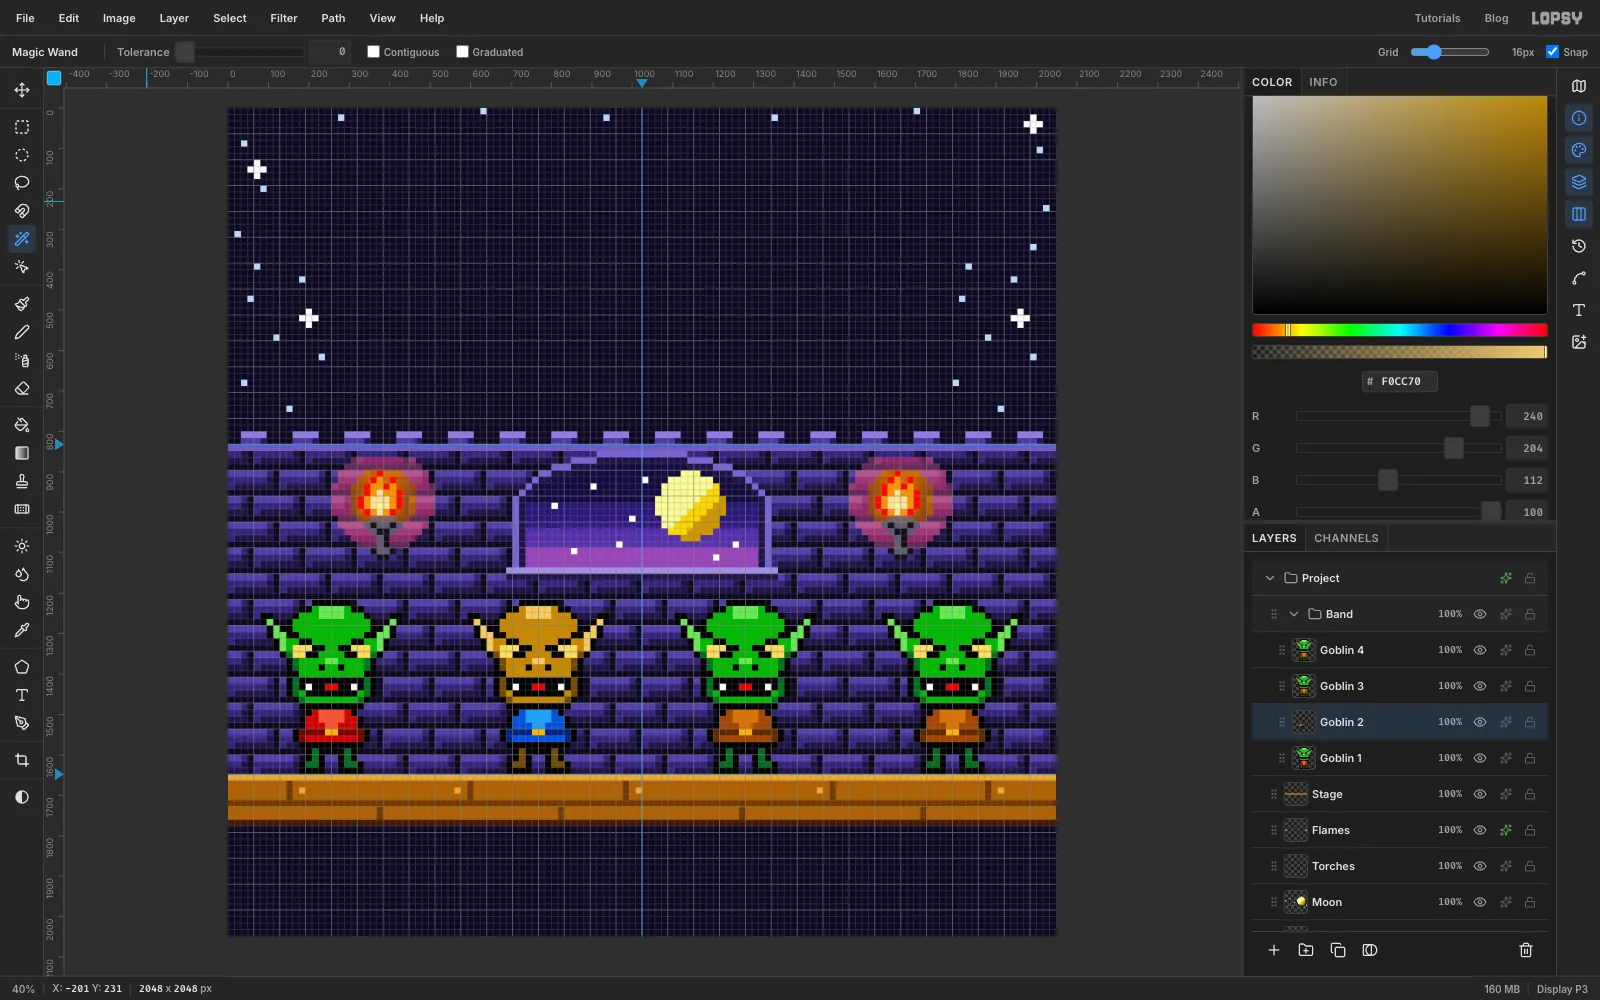
NES games reused one sprite in different colours. You'll do the same with the Magic Wand, still at Tolerance 0 with Contiguous off. Select a goblin's layer and:
- Click one cell of a colour. Every cell of that exact colour is selected.
- Set the new colour and choose Edit → Fill.
- Press Cmd+D and move on to the next colour.
The tunic colours are (mid), (light) and (dark). The skin colours are , and .
- Goblin 1: a red tunic, / / .
- Goblin 2: a blue tunic, / / , and ochre skin, / / .
- Goblin 3: a teal tunic, / / , and teal skin, / / .
- Goblin 4: a purple tunic, / / , and lime skin, / / .
-
Plan the instruments
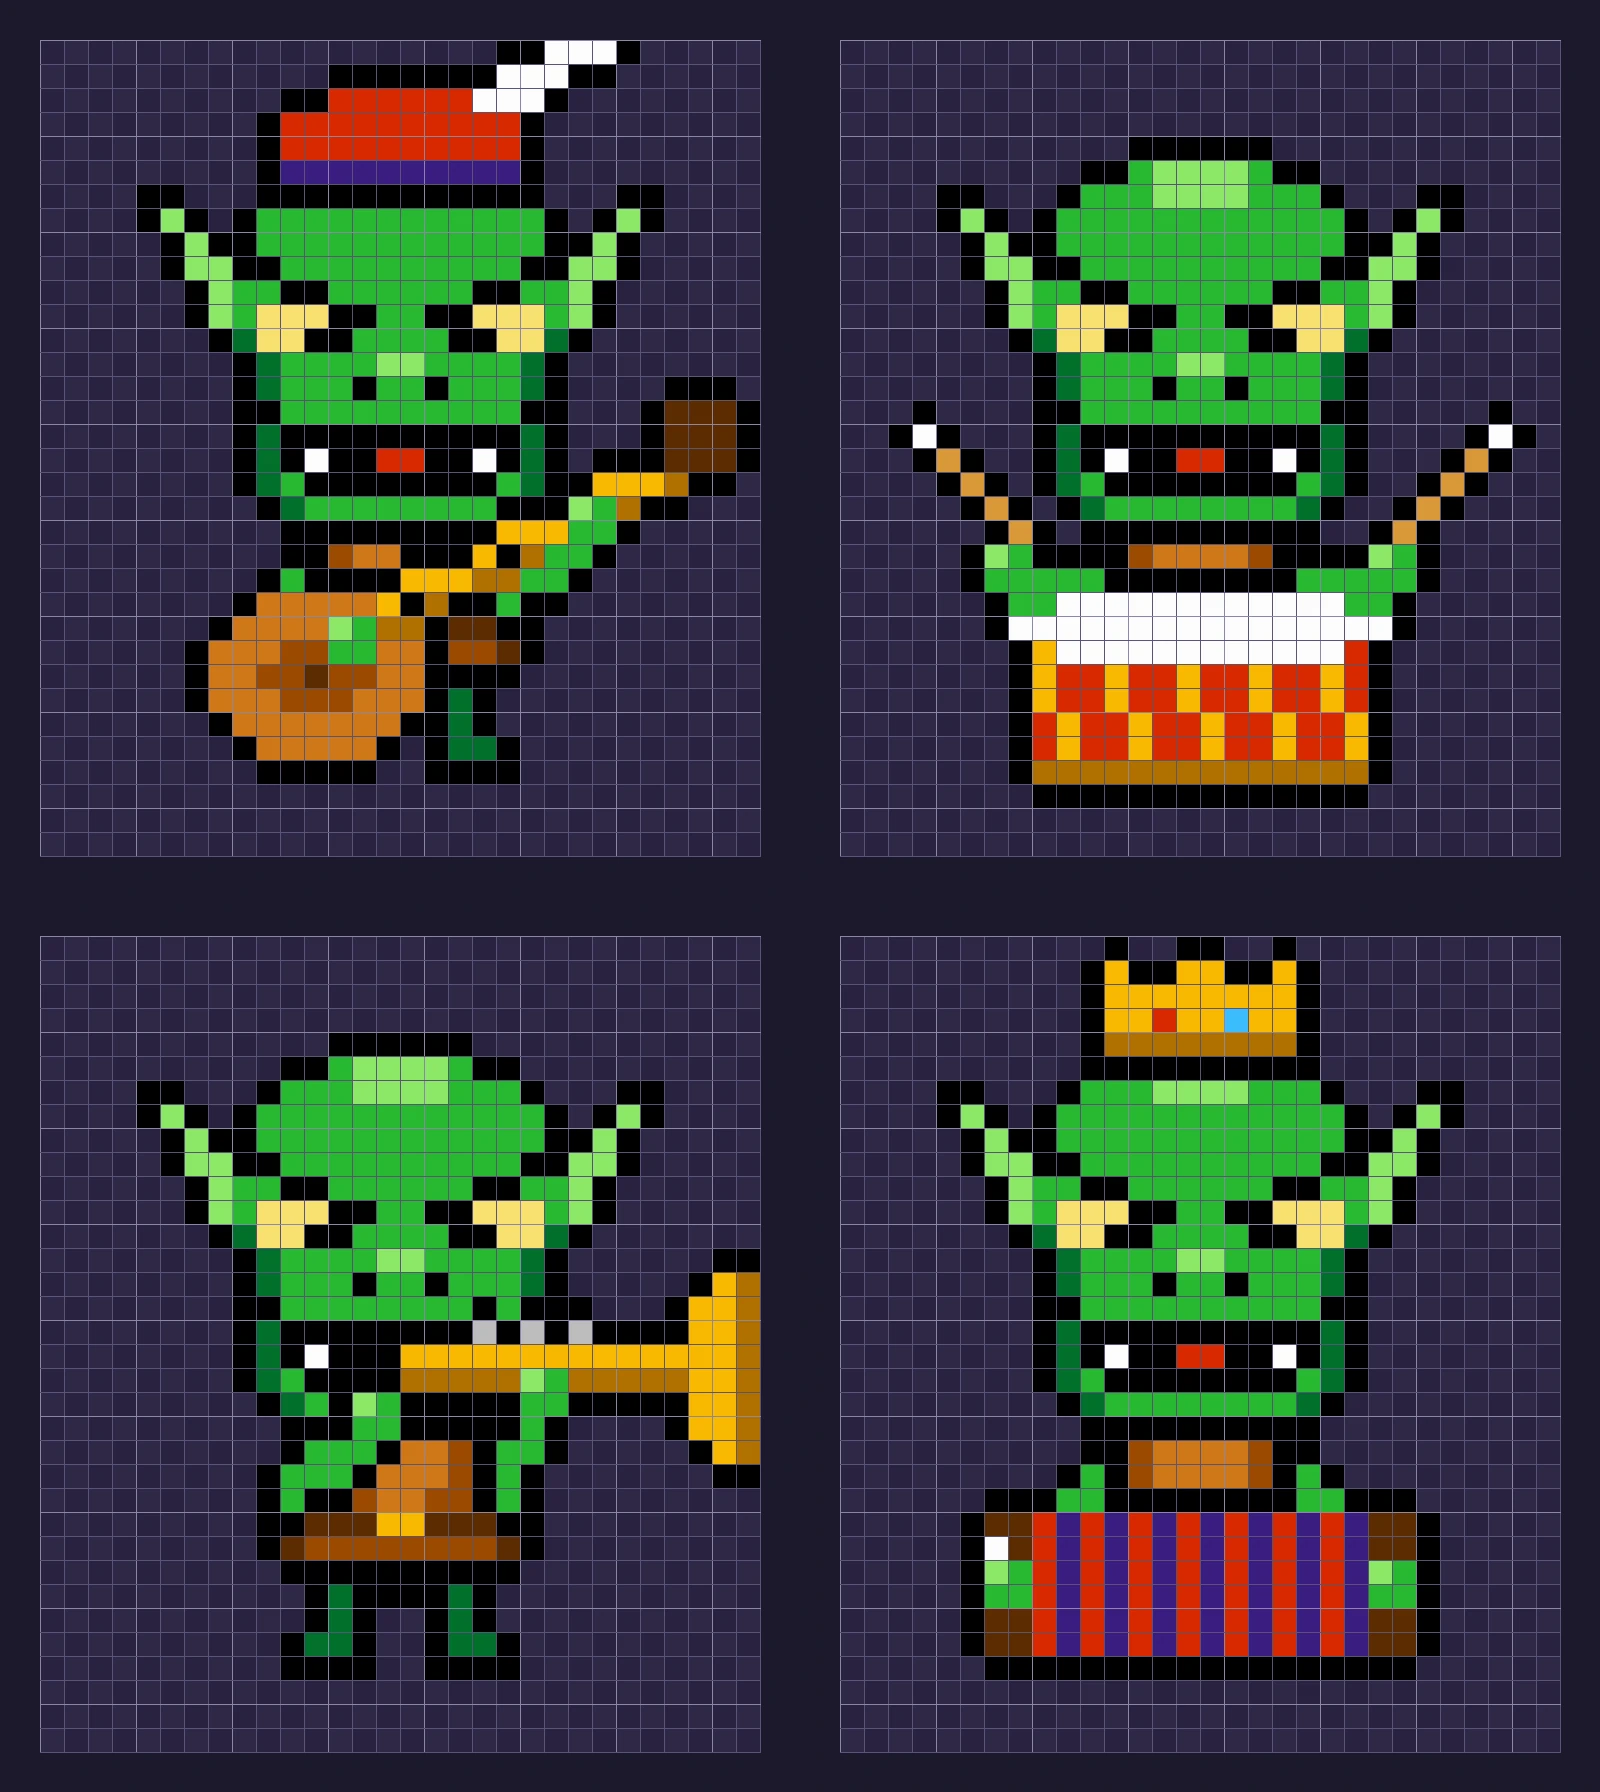
Each instrument goes on its own layer above its goblin, with the arms that hold it. That way the body underneath stays untouched. The chart shows each goblin with its instrument on the same 16 px cells. Line each instrument up with the goblin's eyes and feet on the canvas. The chart's darker lines fall every 4 cells.
- Lute: a round body with a dark sound hole, held low on the left, and a gold neck rising to the right to a brown pegbox. Also a red cap with a brim and a white feather.
- Drum: a red drum with gold zig-zags and a white head, in front of the legs, and two sticks raised outward with white tips.
- Horn: a gold horn running from the mouth to a flared bell on the right, with three valves.
- Accordion: red and bellows in stripes between two brown end boards, with white buttons on the left. Also a gold crown with a red and a jewel.
-
Paint the lute and the drum
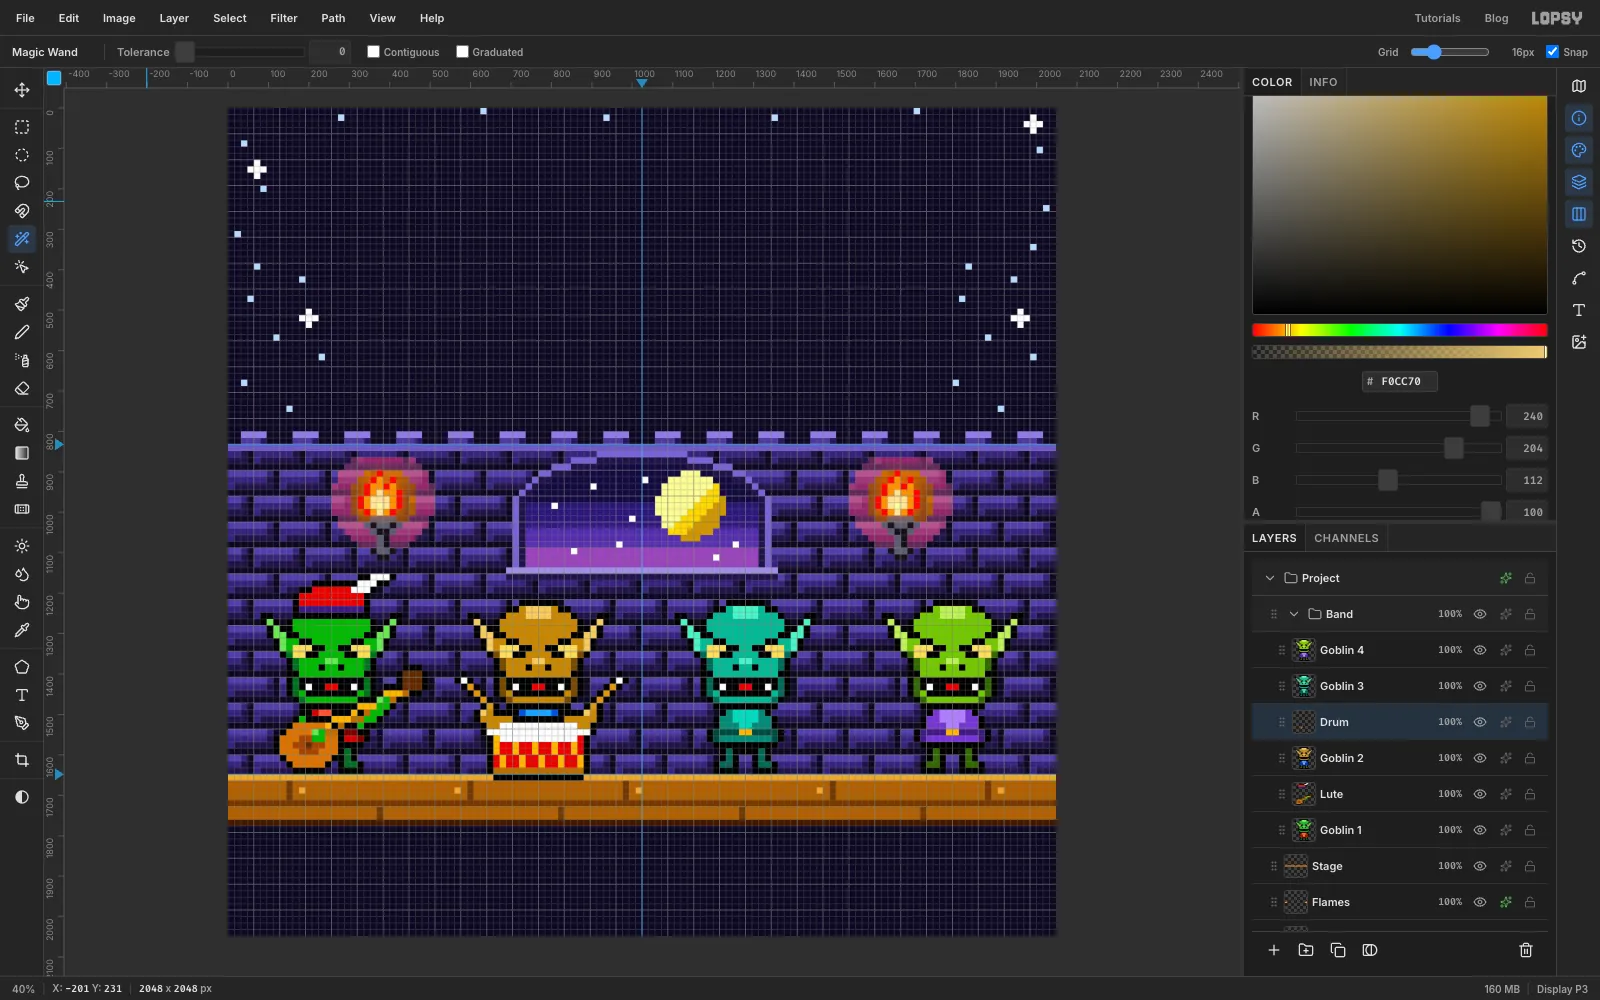
Select Goblin 1, add a layer called Lute and paint the lute, the cap and the two arms from the chart. The arms are two cells thick, in with a highlight on each hand. Outline everything in black.
Select Goblin 2, add a layer called Drum and paint the drum, the sticks and the arms. The arms on the chart are green, so recolour them to this goblin's skin with the Magic Wand on the Drum layer:
- becomes .
- becomes .
-
Paint the horn and the accordion
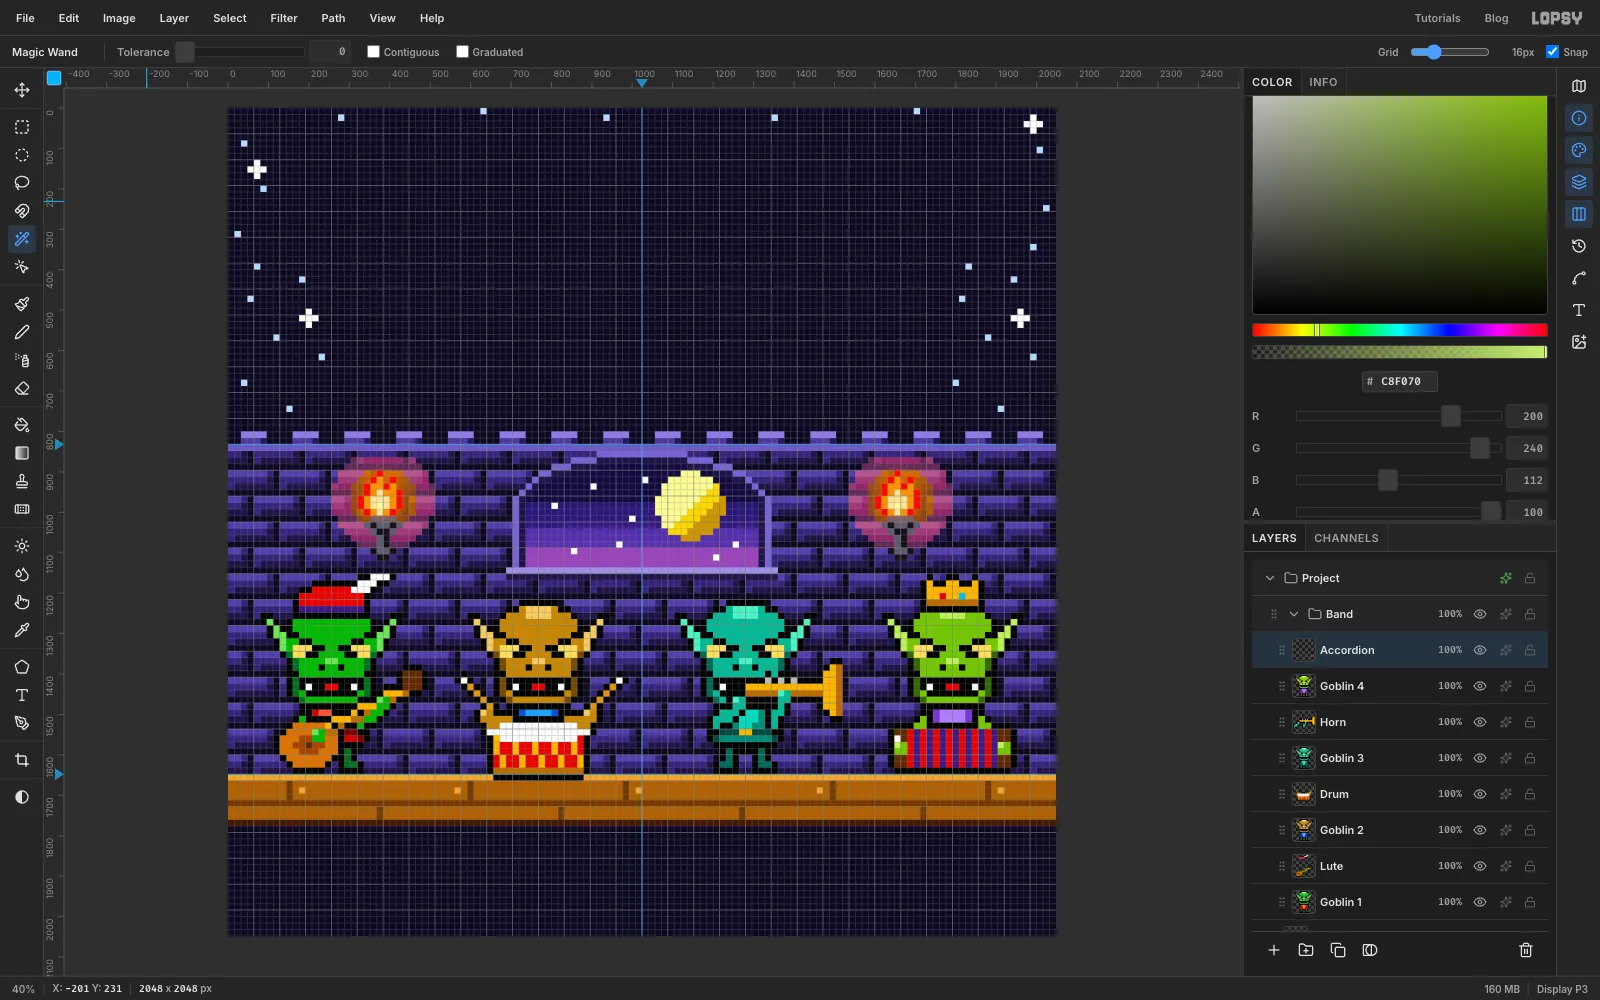
Select Goblin 3, add a Horn layer and paint the horn and arms. Then wand-swap the arms to / .
Select Goblin 4, add an Accordion layer and paint the accordion, the crown and the arms. Then wand-swap the arms to / .
Collapse the Band group with its arrow. If you ever need to move the whole band, select the group with the Move tool active. An arrow key then moves all eight layers by one cell.
-
Type the title in a pixel font
With Band still selected and collapsed, click New Group and name it Logo. Click Add Layer to put a layer inside it, and name it Logo Outline. Keep it selected, so the type you add next lands above it.
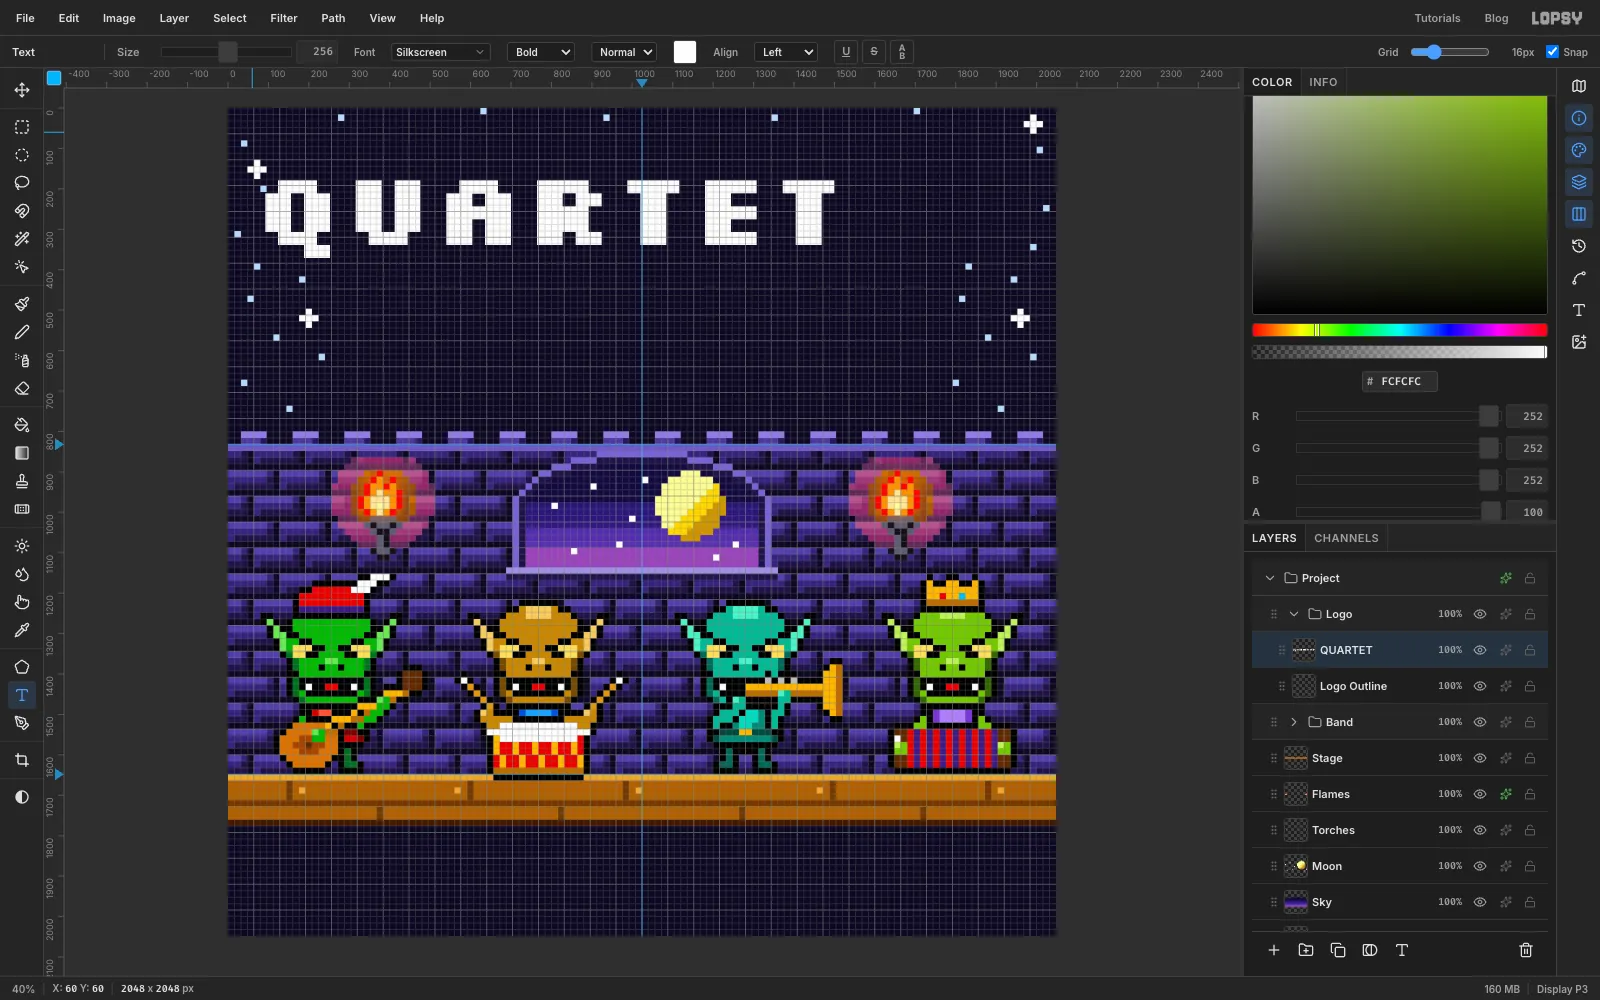
Pick the Text tool (T). In the options bar, choose Silkscreen, set Font weight to Bold and Size to 256, and set the colour to white. Silkscreen is drawn on a 5-pixel-tall grid, so at 256 px each of its pixels is exactly two cells. Click in the empty sky near the top left, type QUARTET and press Tab to commit. Then click Rasterize Layer at the bottom of the Layers panel.
Type GOBLIN the same way at 384 px, which is three cells per font pixel, and rasterize it too.
-
Line the title up on the grid
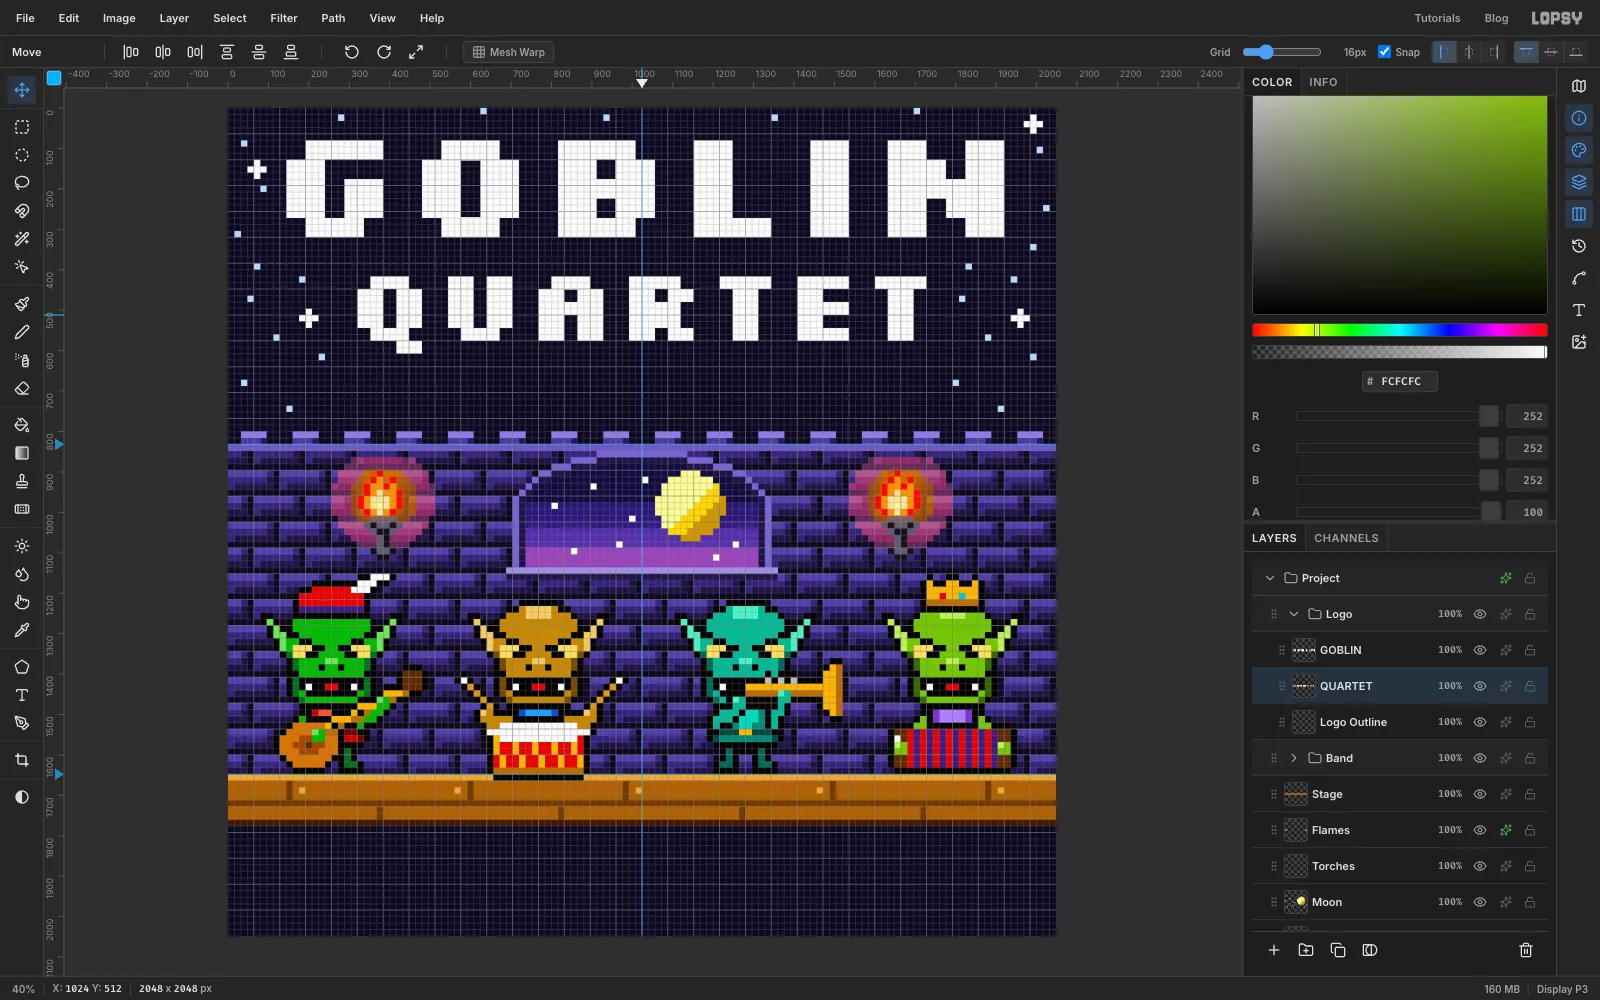
With the Move tool and Snap on, drag GOBLIN until the top-left corner of its letters sits at 144, 80. That leaves a four-cell margin above it, counting the outline you'll add. Drag QUARTET to 320, 416. Snap puts the letters' pixels exactly on the grid.
-
Select one stripe of the letters
NES logos were often coloured in horizontal stripes, one colour per row of pixels. GOBLIN's letters are five font pixels tall, and each is 48 px, so it gets five stripes.
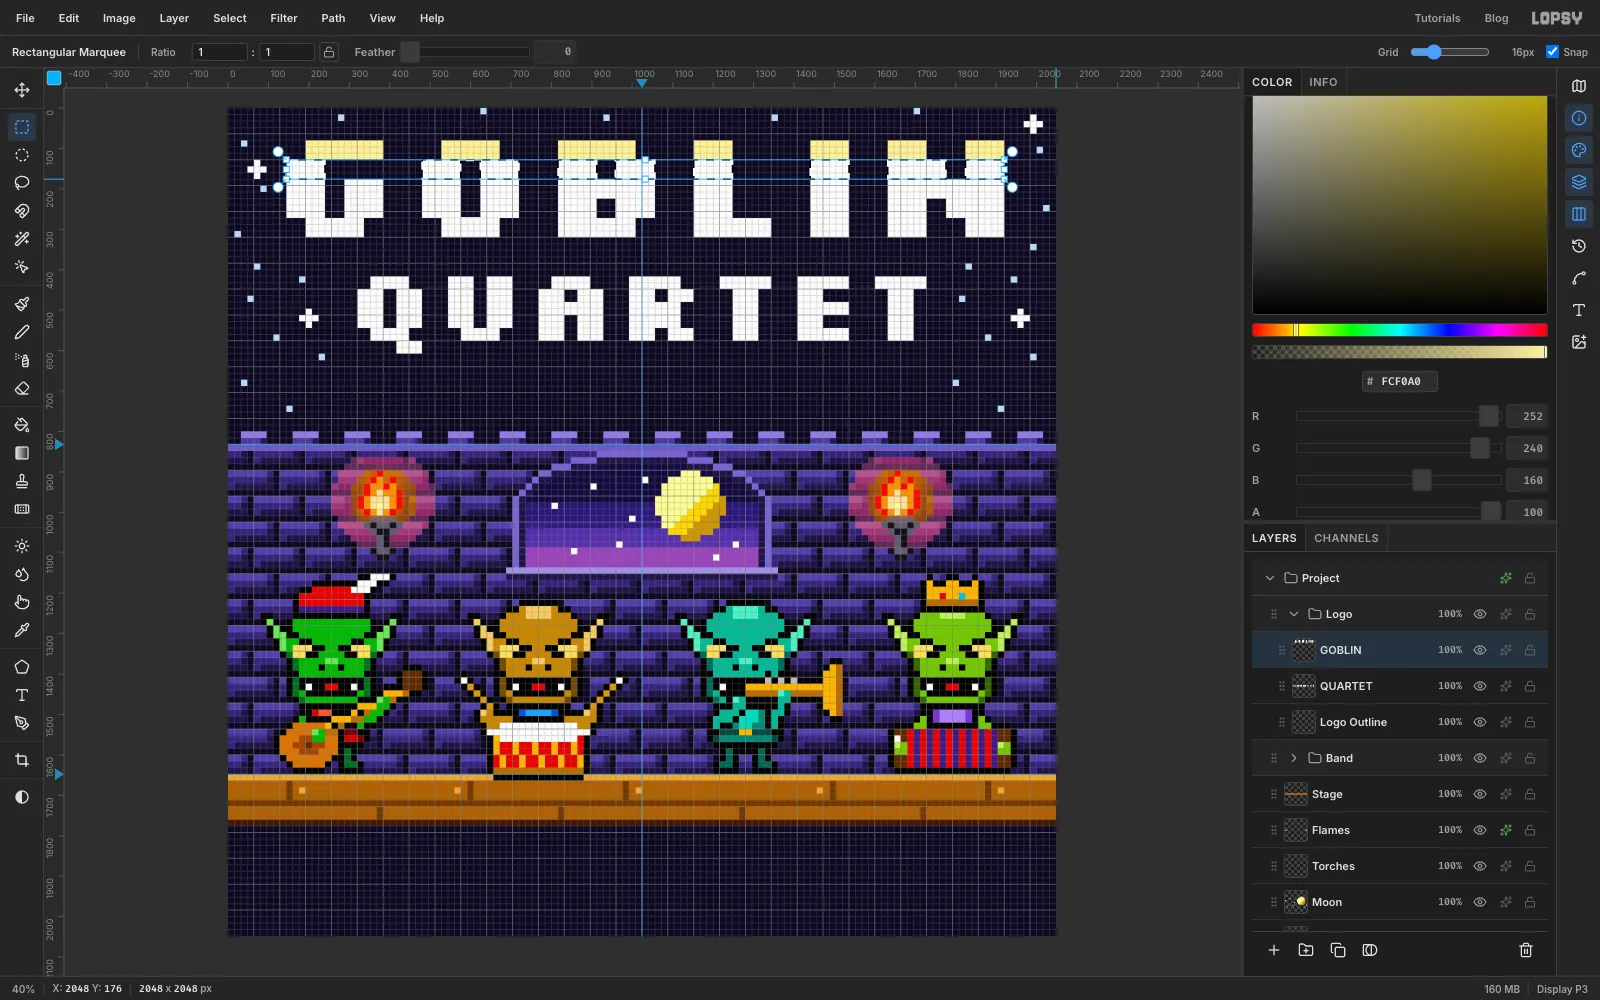
Cmd-click the GOBLIN thumbnail to select the letters. Pick the Rectangular Marquee. Hold Shift+Alt and drag a band across the whole canvas from y 80 to y 128. Shift+Alt intersects, so only that stripe of the letters stays selected. Fill it with .
The screenshot shows the next round: the first stripe is already pale yellow, and the letters have been reselected and intersected with the second band, y 128 to 176.
-
Stripe the whole title
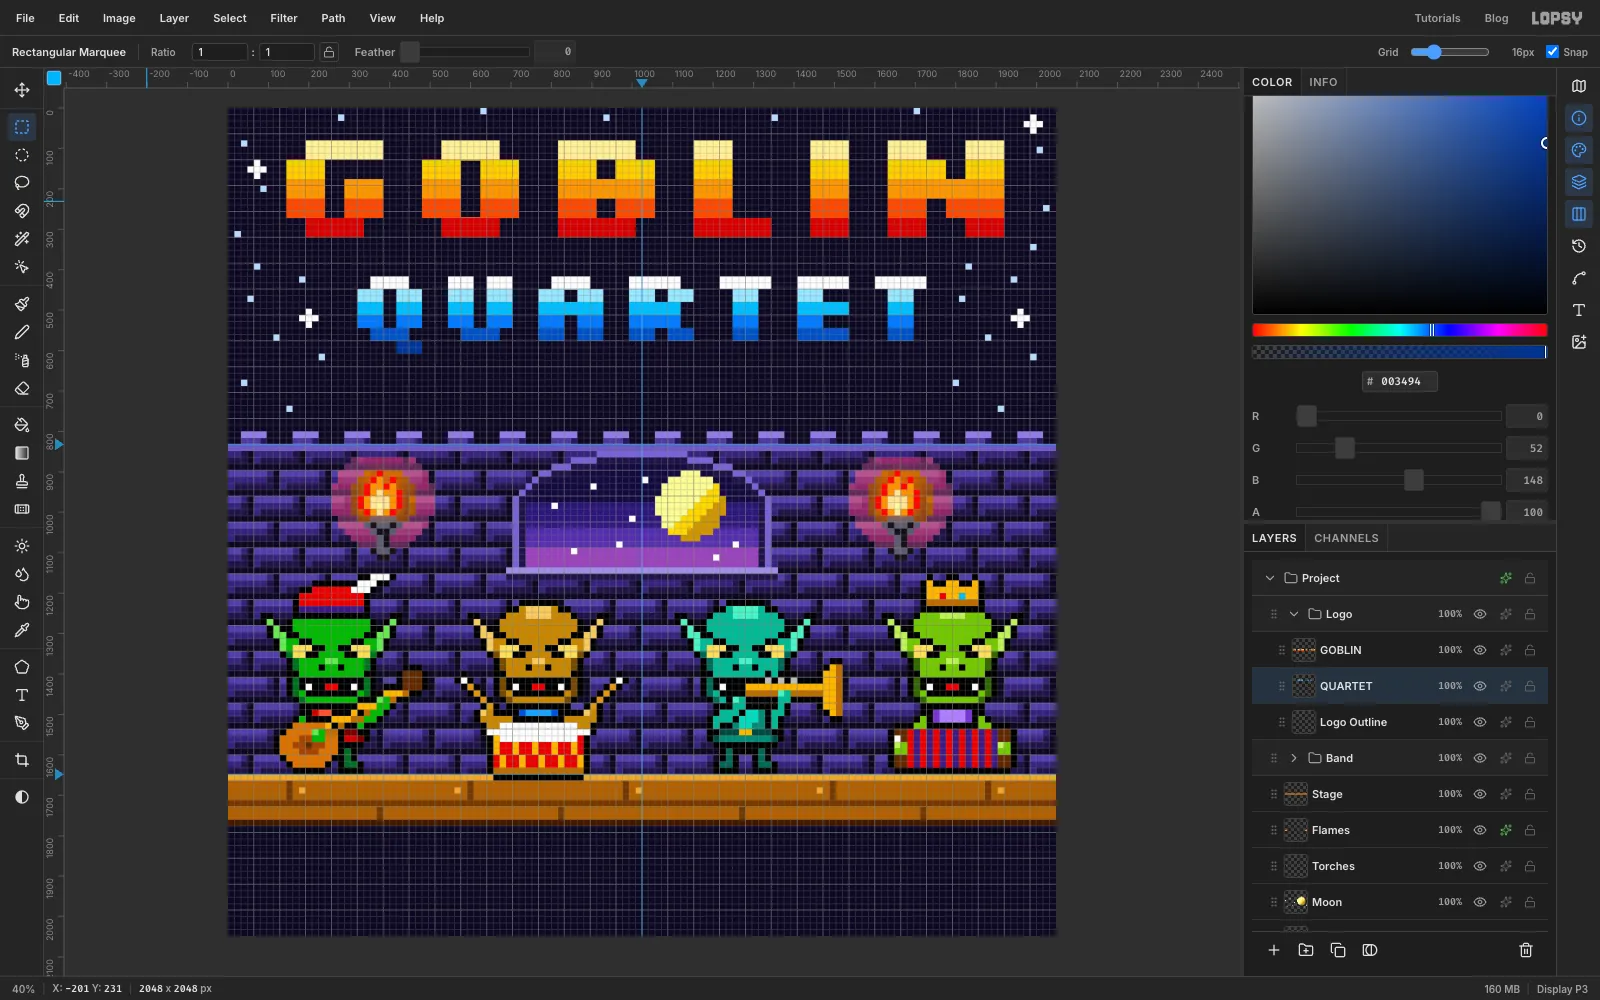
Repeat for the other four stripes of GOBLIN, 48 px each, reselecting the letters each time with Cmd-click:
- y 128–176 in
- y 176–224 in
- y 224–272 in
- y 272–320 in
QUARTET's font pixels are 32 px tall. Give it six stripes from y 416. The sixth is the tail of the Q.
-
Fill the outline layer
Select Logo Outline and set the colour to black:
- Cmd-click the GOBLIN thumbnail and choose Edit → Fill.
- Cmd-click the QUARTET thumbnail and fill again.
- Deselect.
You now have black copies of both words hidden under the letters.
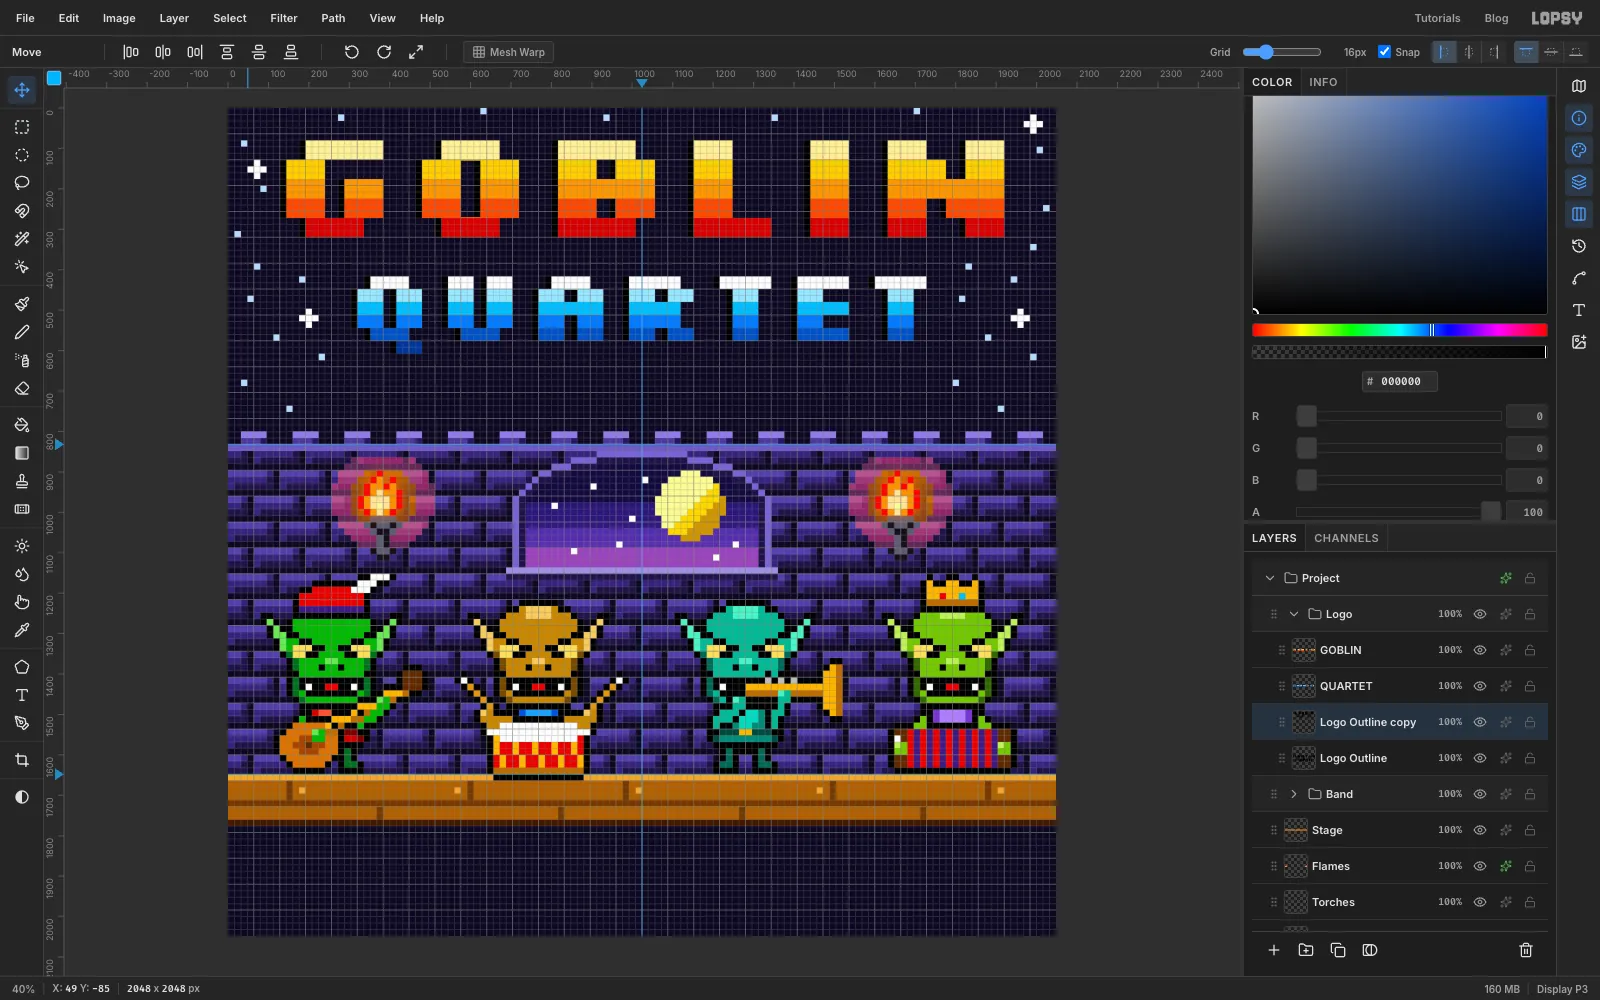
A pixel outline should have square corners. The Stroke effect and Select → Grow round them off, so spread the black by whole cells instead. Choose Layer → Duplicate Layer, click the copy's row, and with the Move tool press Left once. With the grid on, one press moves exactly one cell. Choose Layer → Merge Down.
-
Finish the square outline
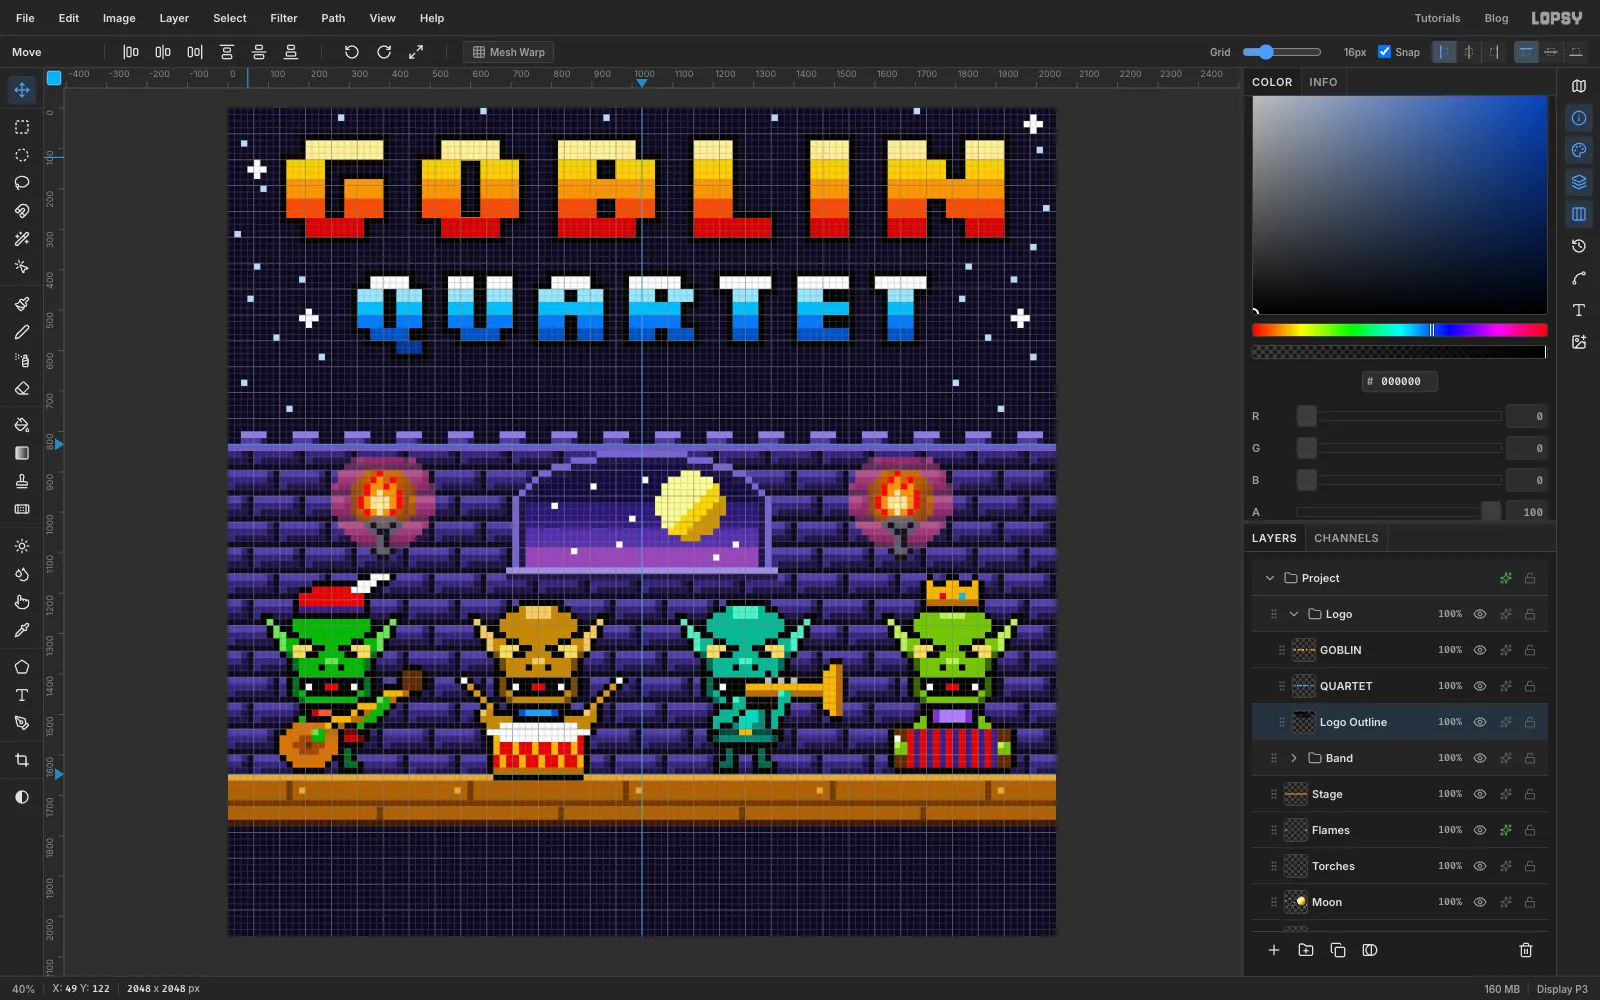
Repeat the duplicate, nudge and merge three more times: once with Right, once with Up and once with Down. The black now extends one cell past the letters on every side. The corners come out square because each copy moves in a straight line.
-
Drop an extruded shadow
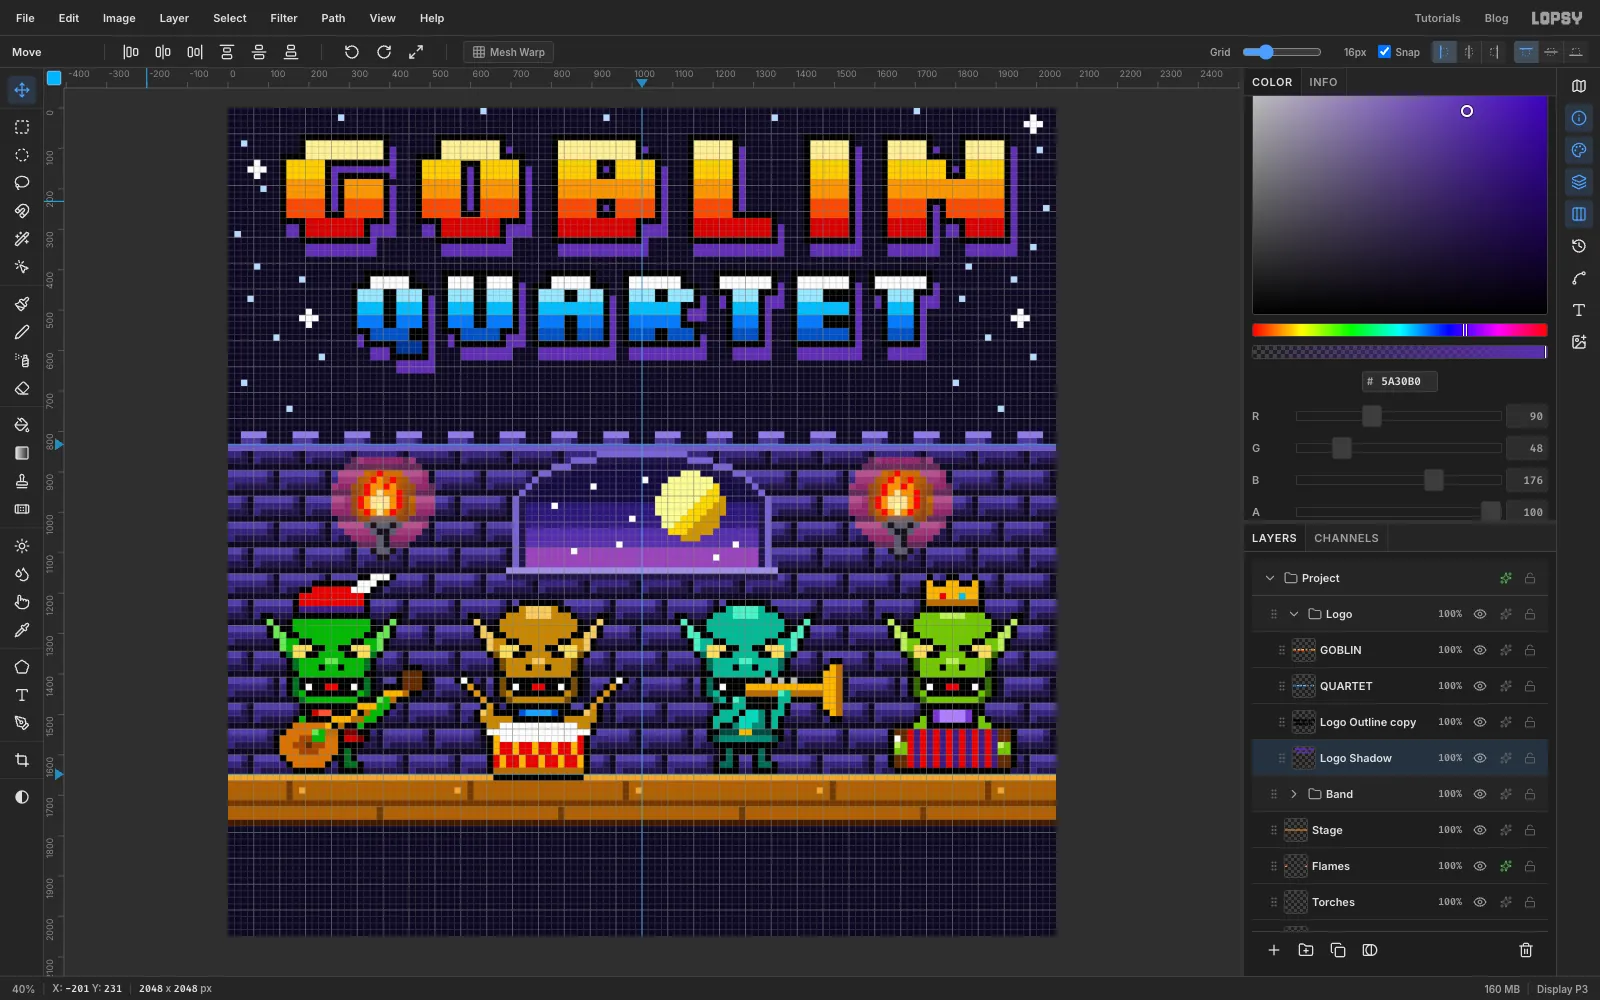
Duplicate the outline layer once more. The copy, Logo Outline copy, stays on top as the outline. You can rename it Logo Outline if you like, but the screenshots keep the default name. Click the original Logo Outline underneath and rename it Logo Shadow.
Cmd-click its thumbnail, fill it with and deselect. With the Move tool, press Down twice and Right once.
-
Set the subtitle
Select GOBLIN, so the subtitle lands inside the Logo group. Then pick the Text tool:
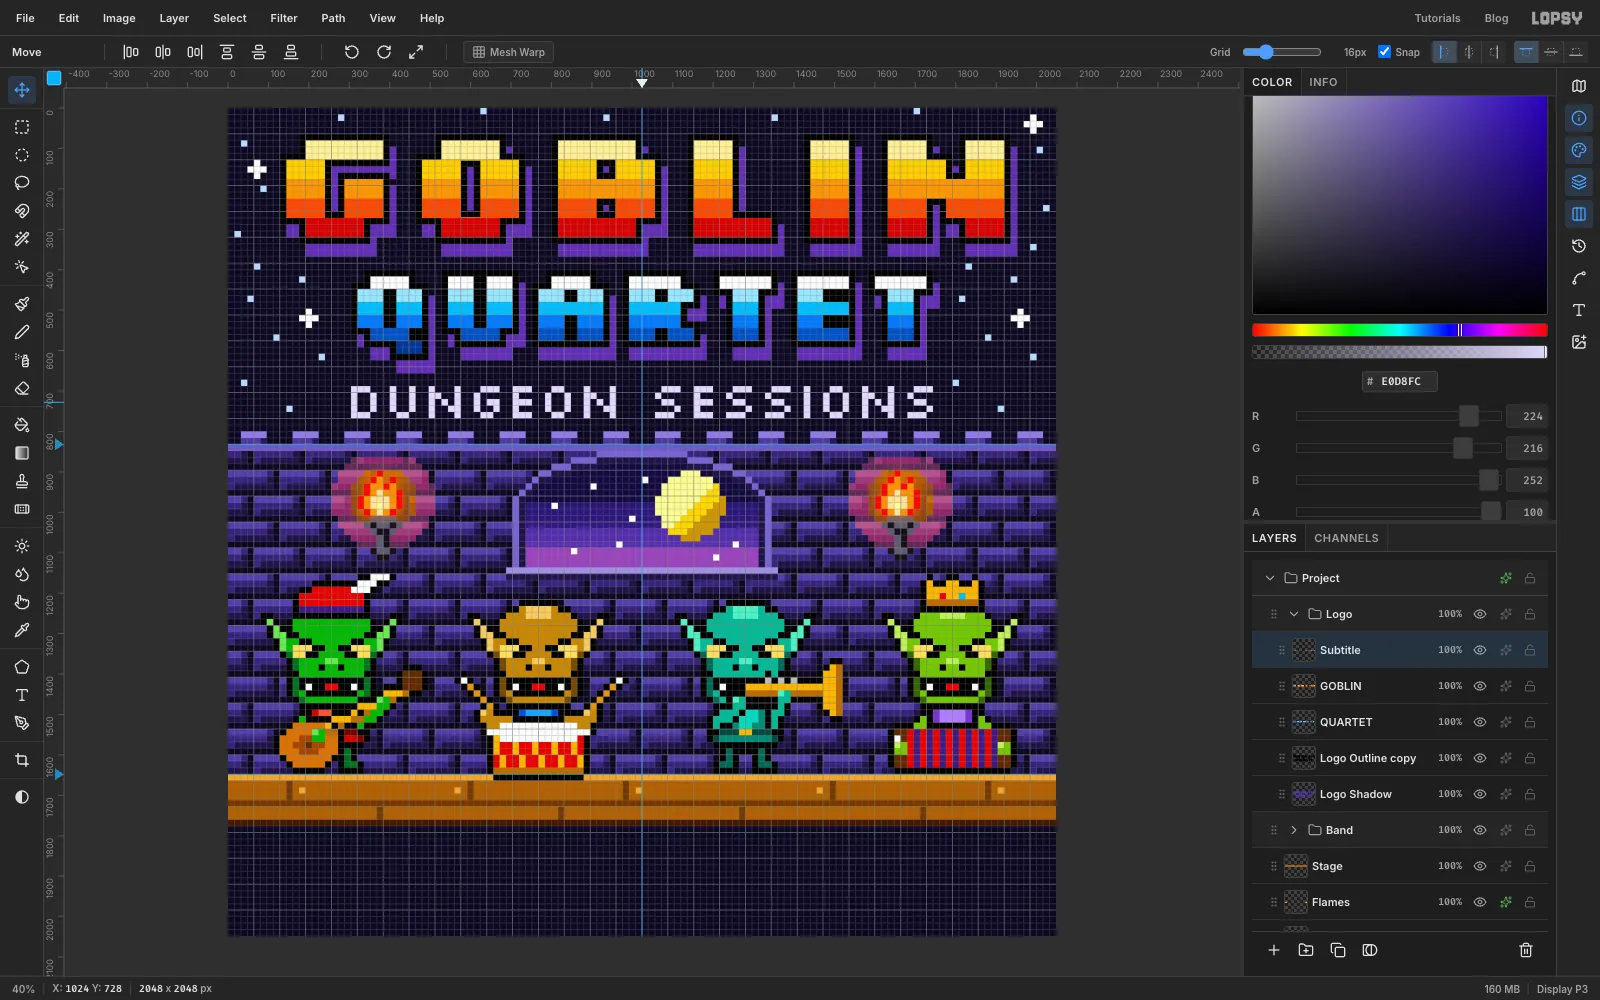
- Font Silkscreen, Font weight Regular, Size 128.
- At 128 px, one font pixel is one cell.
- Colour .
Type DUNGEON SESSIONS in empty sky, press Tab and rasterize it. Rename the layer Subtitle and drag it to 304, 688.
There are now two cells between QUARTET's shadow and the subtitle, and two cells between the subtitle and the merlons.
-
Draw the menu box
Collapse the Logo group and, with it selected, click Add Layer. A new layer next to a collapsed group goes above the group, not inside it. Name it Menu Box.
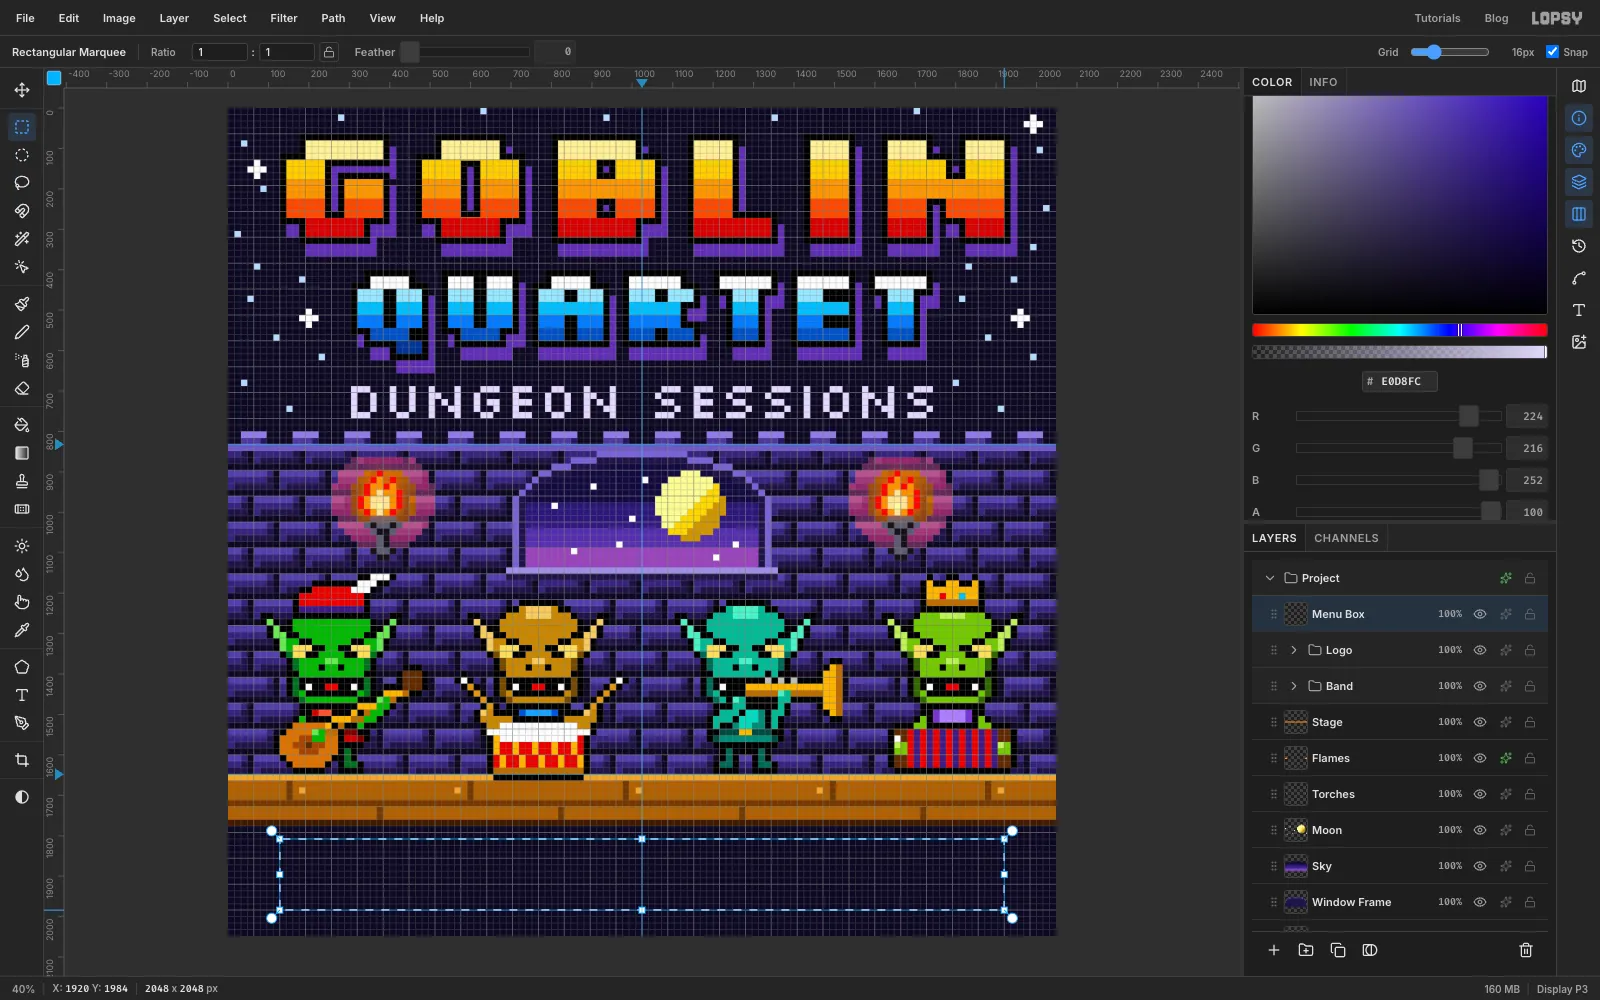
With the Rectangular Marquee, drag from 128, 1808 to 1920, 1984. That's 112 × 11 cells, with two cells of space below the stage and four cells above the bottom edge of the canvas.
-
Give the box a rounded pixel border
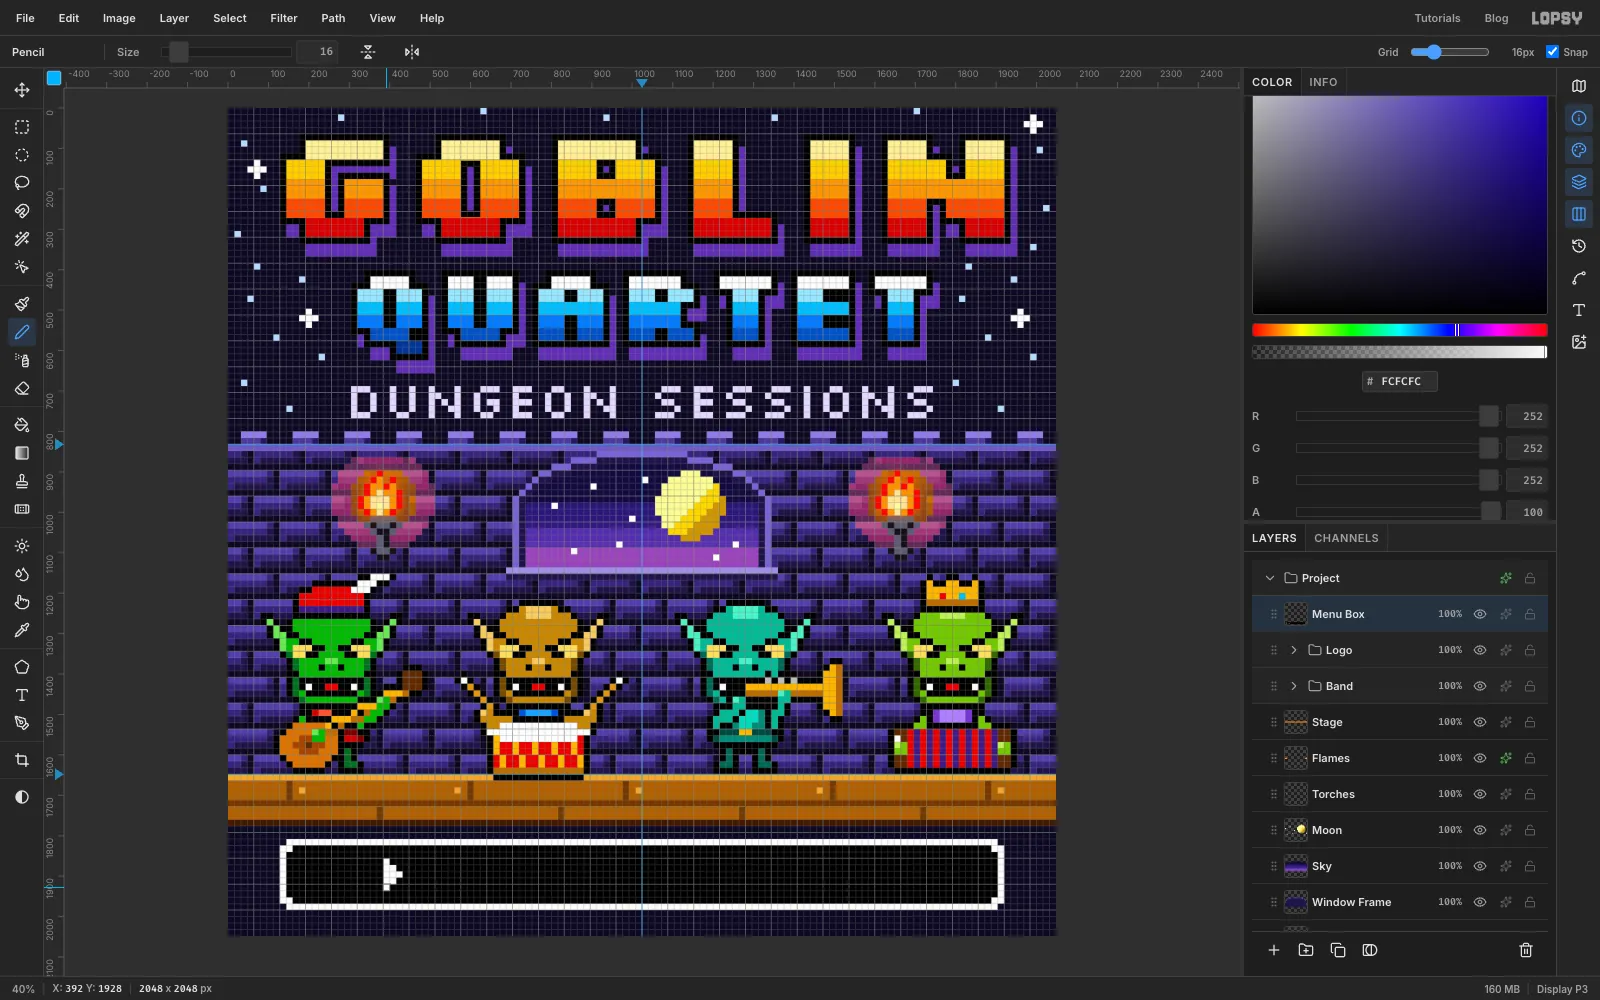
Fill the marquee with white. Choose Select → Shrink…, enter 16 and fill again with black. That leaves a white border one cell wide. Deselect.
Round the corners the way game menus do. With the Pencil:
- Click each of the box's four outer corner cells in , so they disappear.
- Click the four cells diagonally inside them in white, so the border turns the corner.
For the cursor, paint a small white arrow pointing right. It's five rows of 1, 2, 3, 2 and 1 cells, starting at x 384 and y 1856.
-
Write the menu
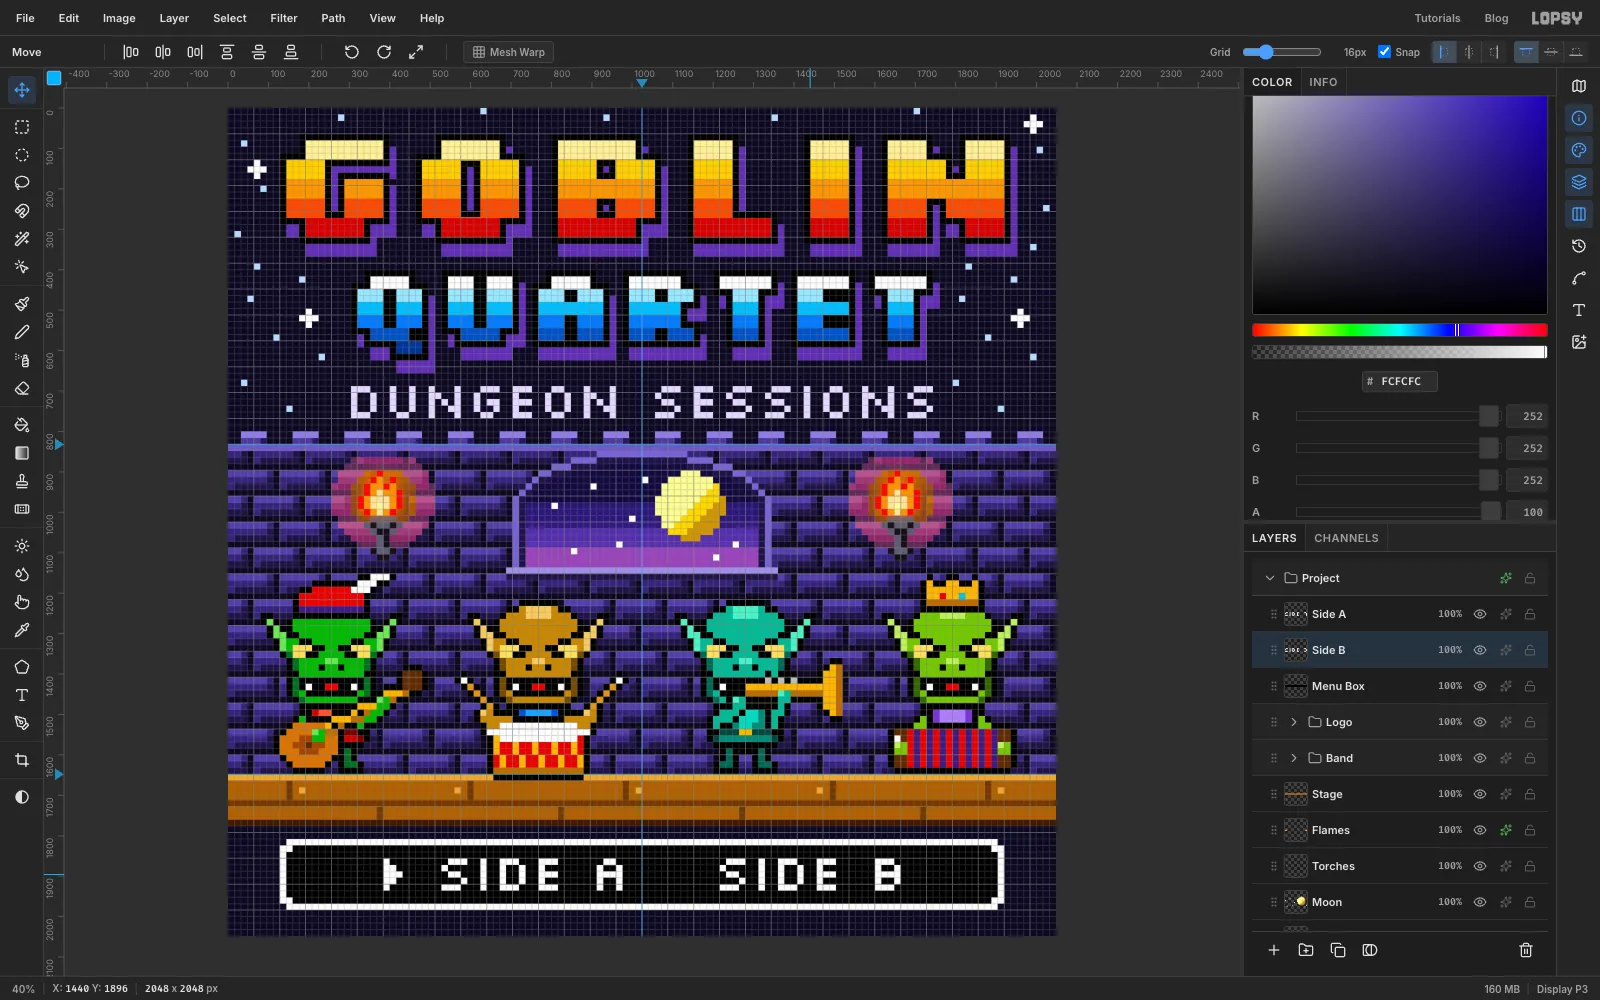
With Menu Box selected, use the Text tool with Silkscreen Regular at 128, white, to type SIDE A and SIDE B as two separate layers. Rasterize both, and name the layers Side A and Side B.
Drag SIDE A to 528, 1856 and SIDE B to 1216, 1856. This gives:
- six cells (96 px) between the cursor and the S, so it reads as a cursor and not as part of the word;
- equal padding left and right inside the box: 15 cells on each side;
- two cells above and below the letters.
-
Shade the lower wall
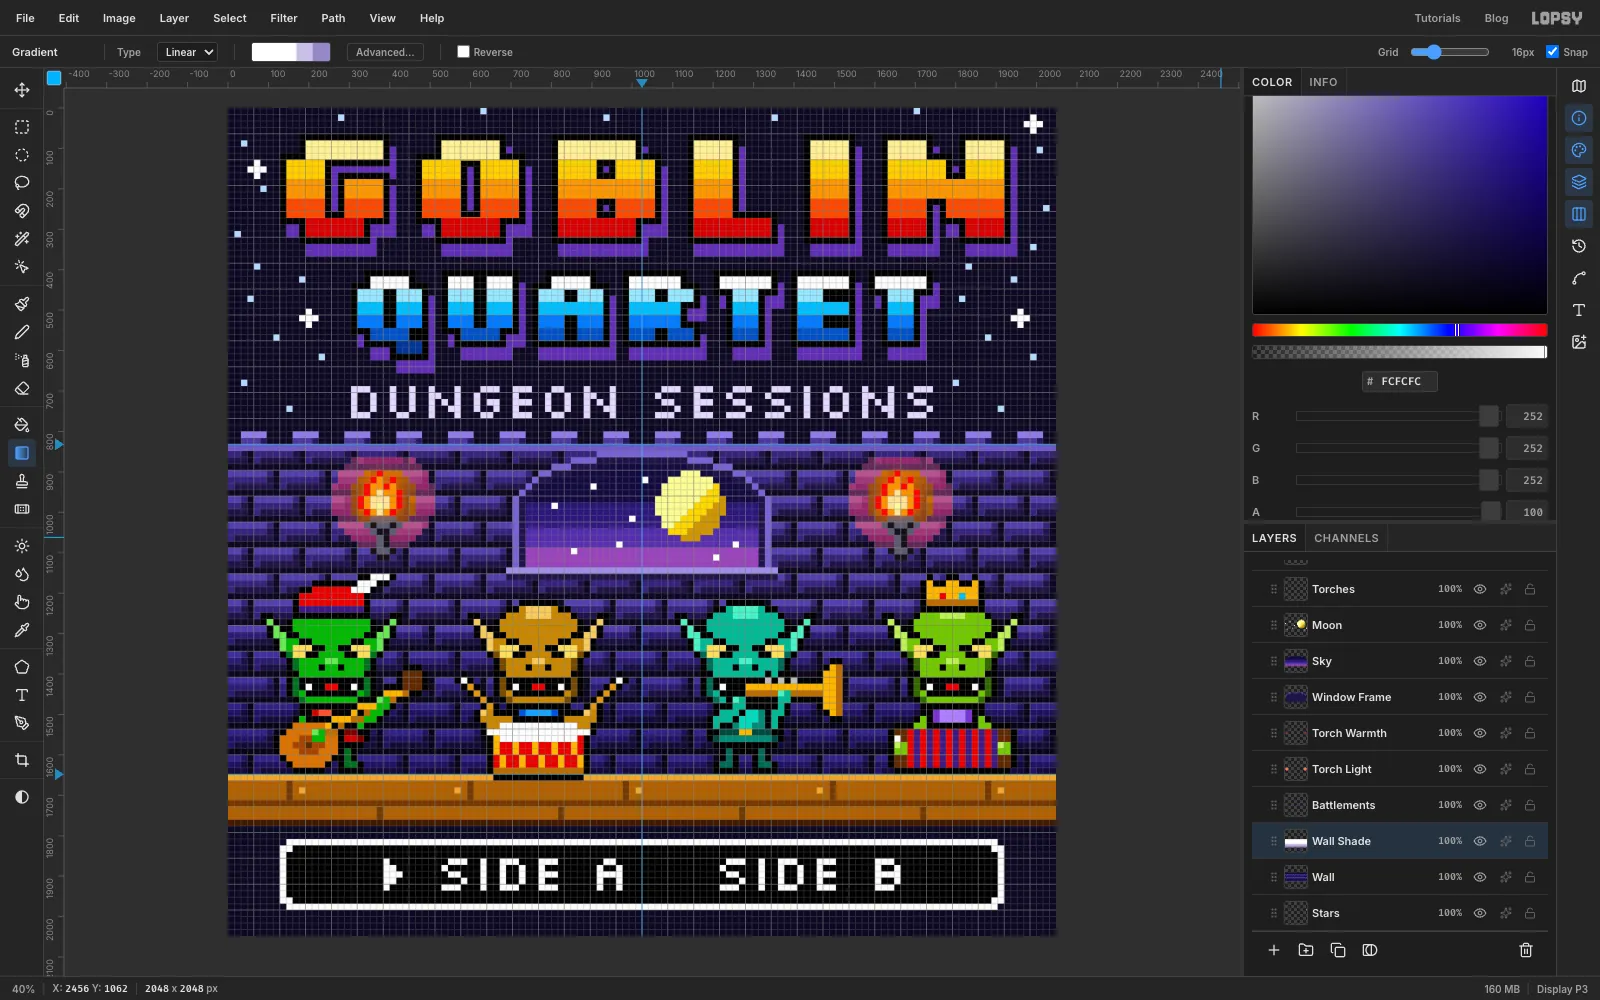
Select Wall and add a layer called Wall Shade. Marquee the wall, from the 832 guide to the 1648 guide across the full width.
With the Gradient tool, make hard stops:
- at 0% and 56%
- at 58% and 77%
- at 79% and 100%
Drag from the top of the wall to the stage. Deselect and set the layer's blend mode to Multiply. White leaves the bricks alone, and the two lilac steps darken the lower wall behind the band.
-
Make a scanline tile
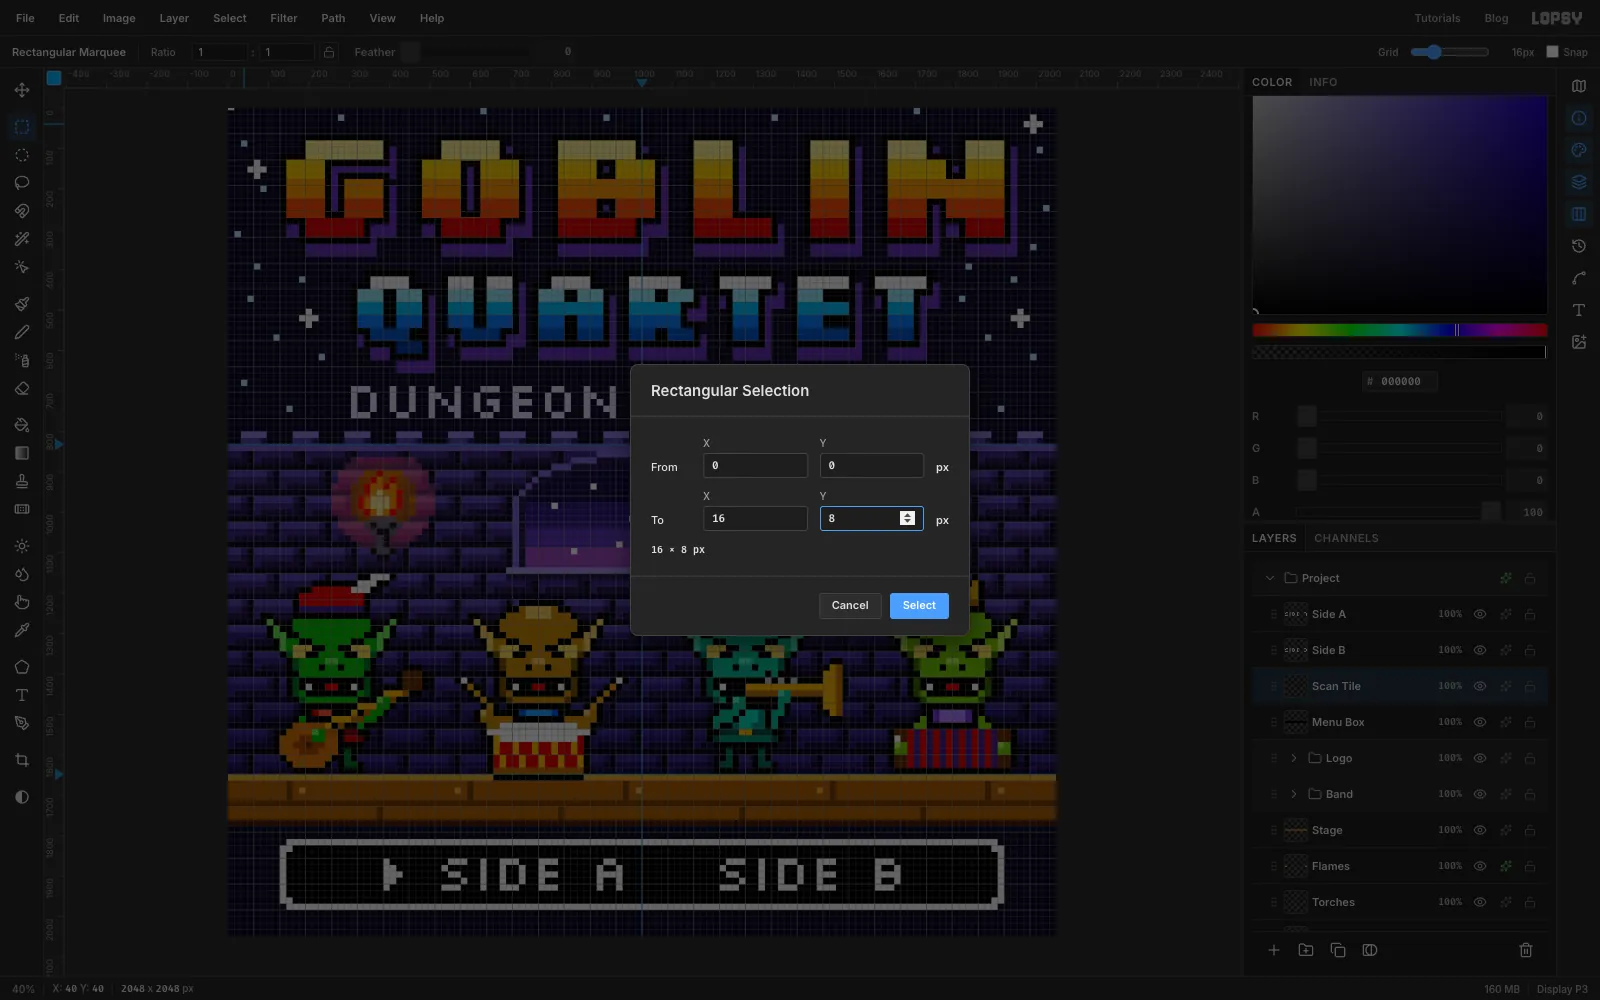
Select Menu Box and add a layer called Scan Tile. Untick Snap in the options bar, because this tile is smaller than one cell.
With the Rectangular Marquee and nothing selected, click the canvas once without dragging. The Rectangular Selection dialog opens.
- Enter From 0, 0 To 16, 8, click Select and fill with white.
- Open the dialog again, enter From 0, 6 To 16, 8, and fill with black.
- Select 0, 0 to 16, 8 once more and choose Edit → Define Pattern.
- Deselect and delete the Scan Tile layer.
-
Lay the scanlines over the scene
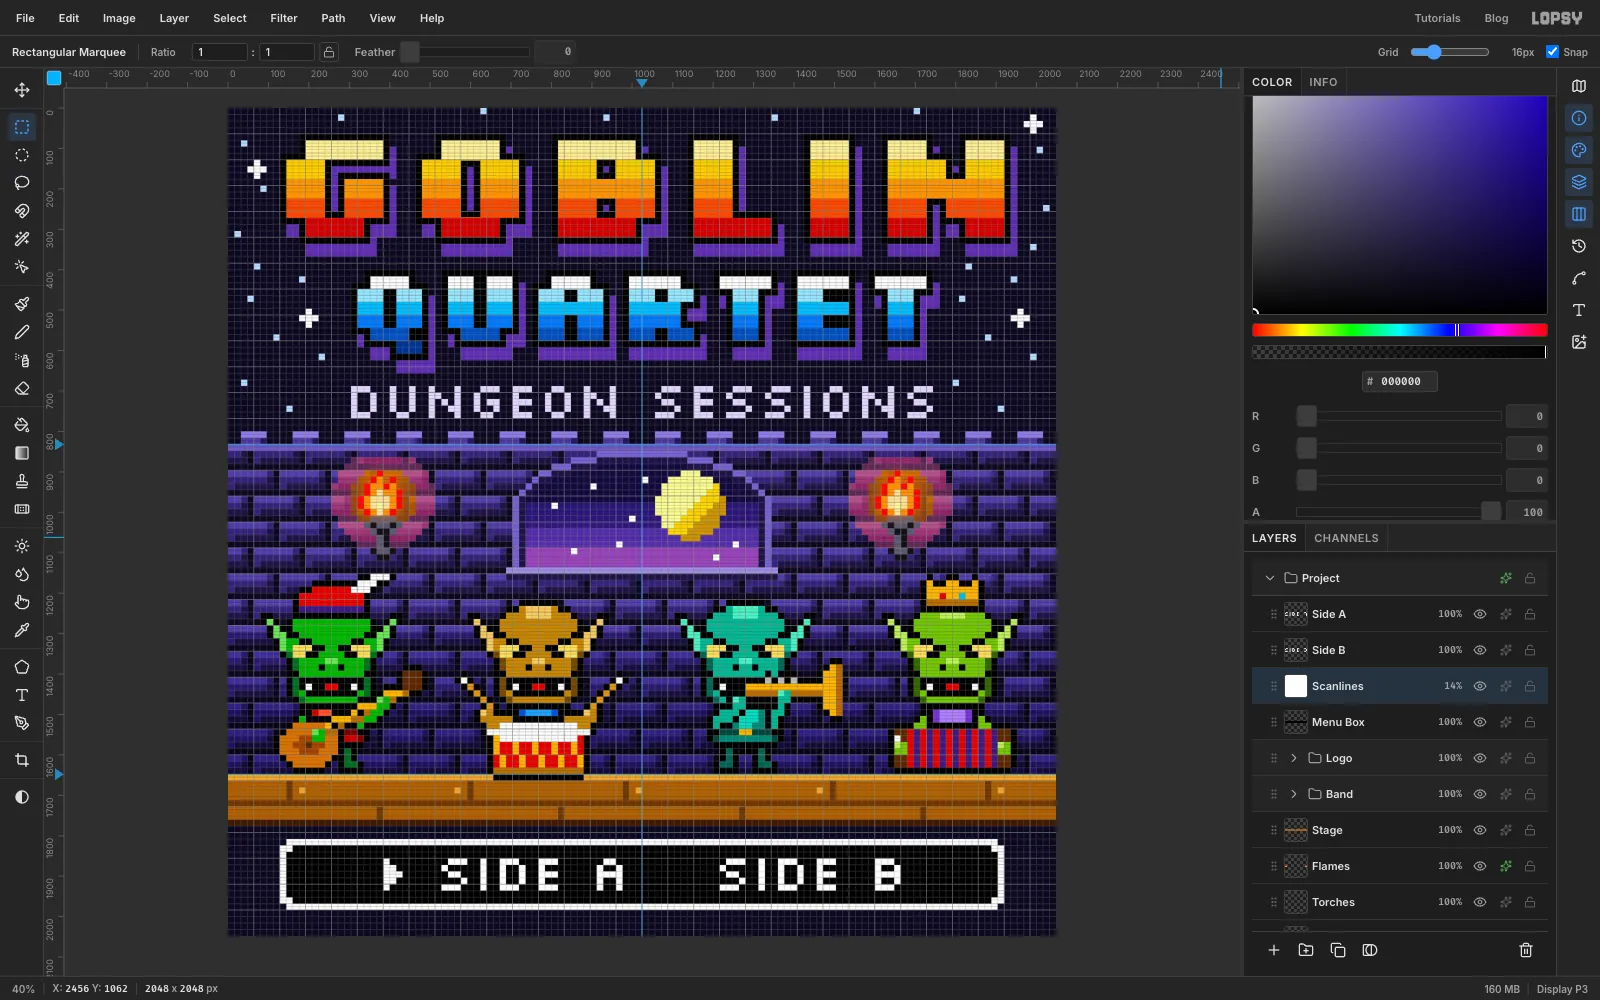
Add a layer called Scanlines. Choose Select → All, then Edit → Fill with Pattern…, pick the new 16 × 8 tile and click Apply. Deselect, set the blend mode to Multiply and the layer opacity to 14%. Tick Snap again.
The new layer sits just above Menu Box, so the scanlines cover the whole picture except the Side A and Side B text, which stays crisp on top.
Keep it subtle. Strong scanlines chop each cell into stripes and muddy small details like the goblins' faces.
-
Add a phosphor glow
With Scanlines selected:
- Choose Select → All, then Edit → Copy Merged, and deselect.
- Edit → Paste puts a flat copy of the whole picture on a new layer. Rename it Glow.
- Choose Filter → Gaussian Blur… with Radius 24.
- Set the blend mode to Screen and the opacity to 30%.
The bright colours now bloom softly, like an old TV. The pixels underneath stay sharp.
Choose File → Quick Export PNG to export the cover, and File → Save Project to keep the layers.