Make an 8-Bit Pixel Art T-Shirt from a Trail Camera Photo
Turn a night-time trail camera photo into an 8-bit T-shirt print in Lopsy, using Pixelate, Posterize, palette swaps, pattern-fill dither and Pencil sprites.
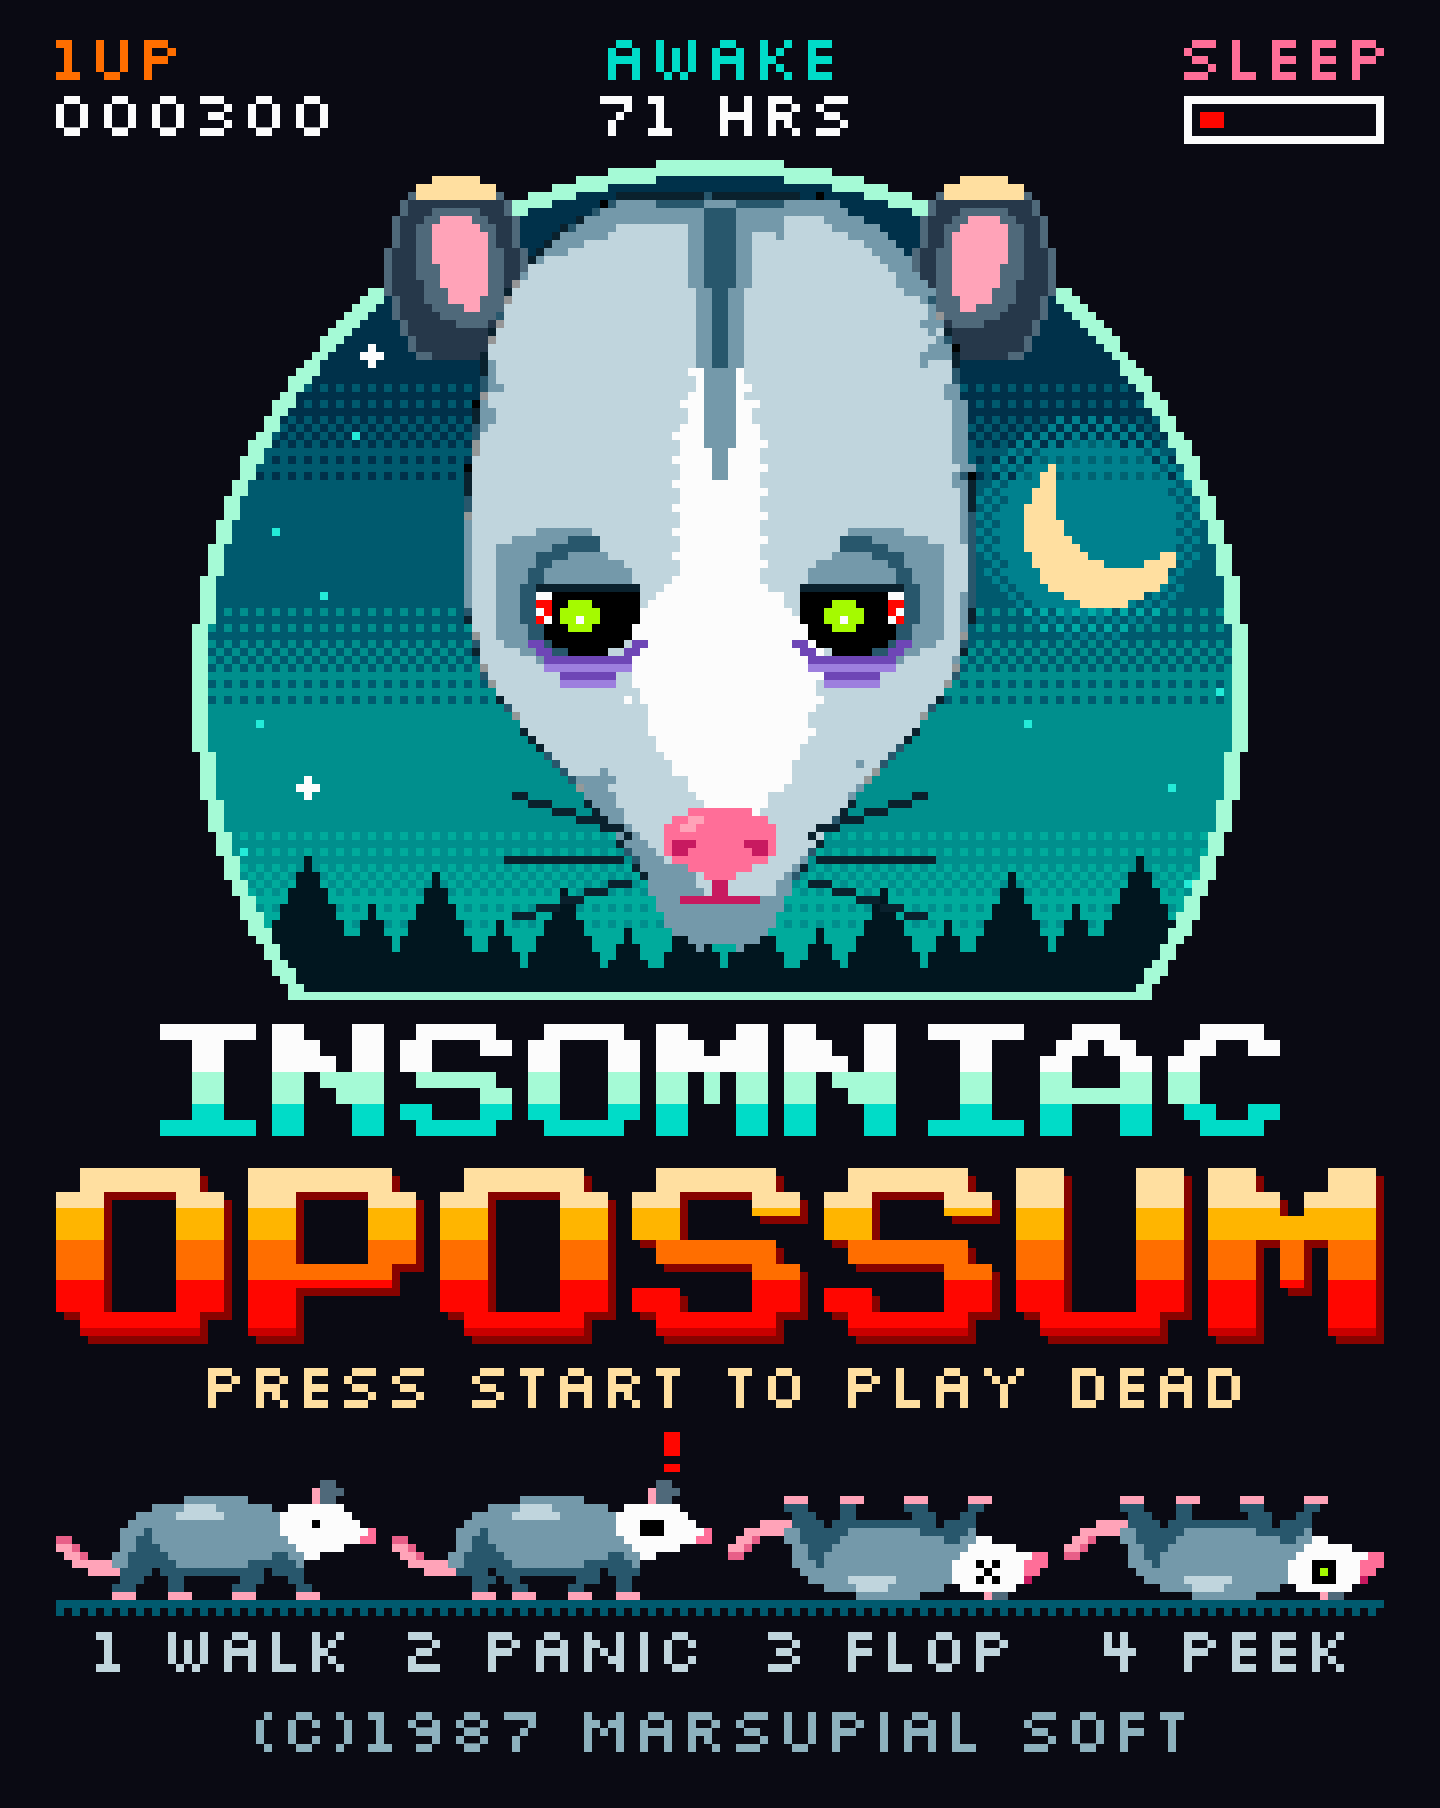
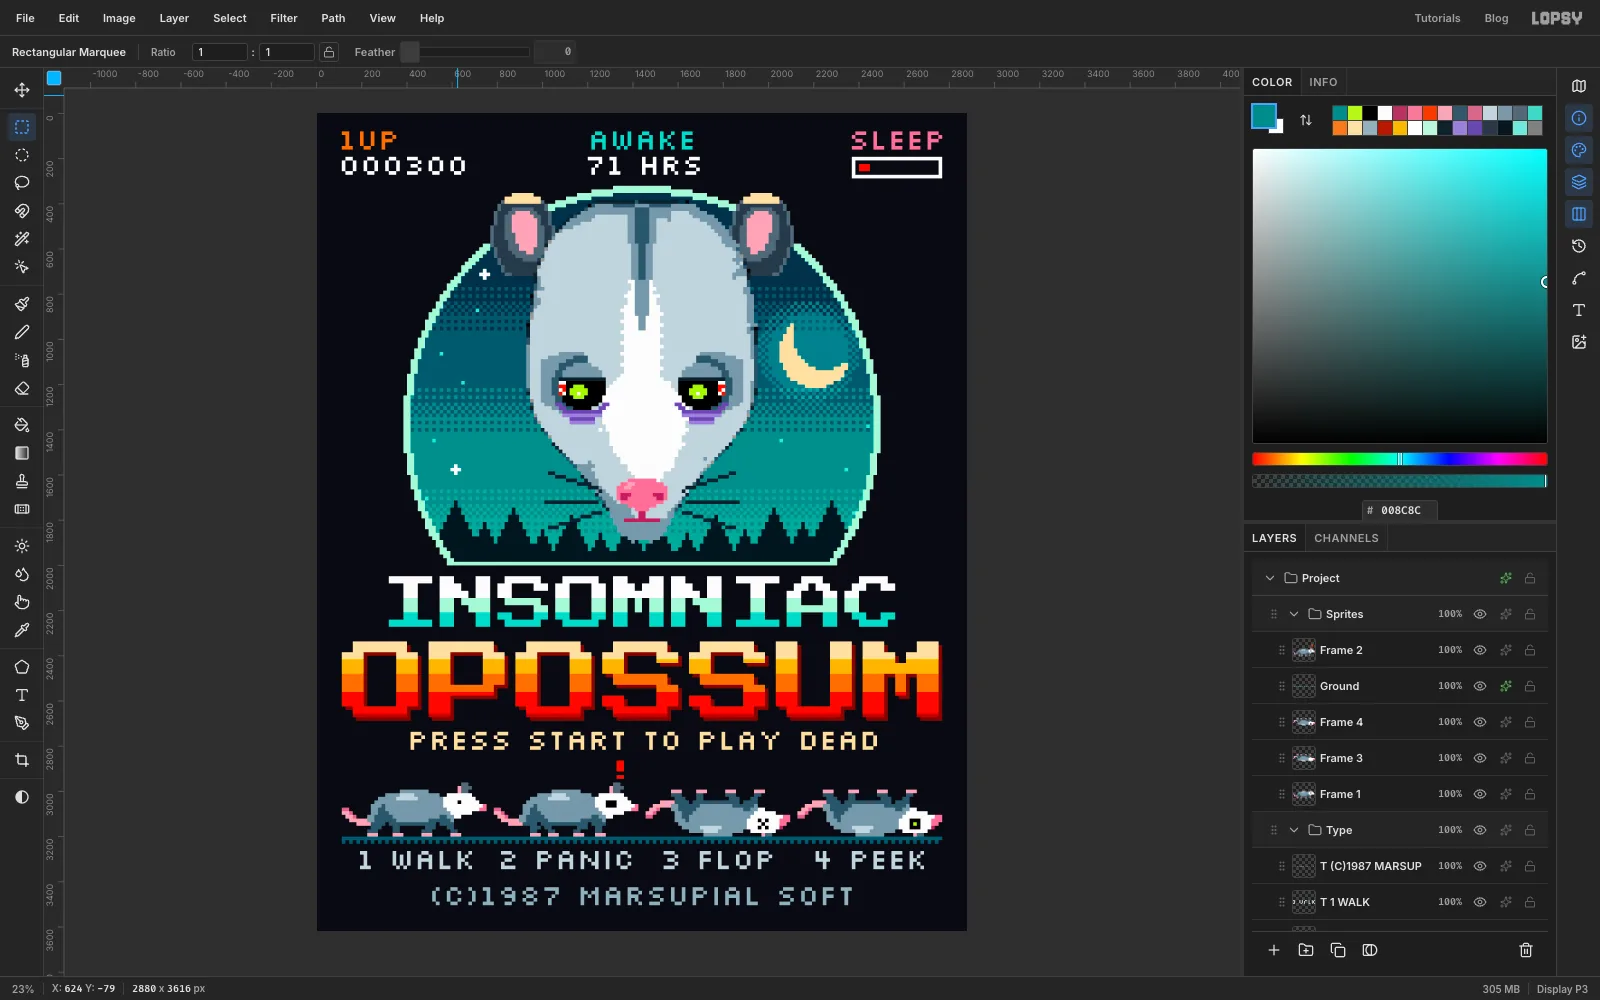
Opossums are up all night, and they have the trail camera photos to prove it. In this tutorial you'll turn one of those photos into a T-shirt print styled as the title screen of a forgotten 1987 game: Insomniac Opossum. The score display counts the hours it has been awake, the sleep bar is nearly empty, and the only way to win is to press Start and play dead.
The head isn't drawn from scratch. You'll cut it out of a real photo, then let Pixelate and Posterize turn it into chunky blocks of flat tone. Those blocks give you believable shading that would be hard to invent by hand. After that you'll swap the greys for a limited palette and paint the character on top: the fur pattern, tired eyes, nose and whiskers.
The photo is Didelphis virginiana 367934275.jpg by henrya, on Wikimedia Commons, released under CC0 (public domain). Download the original 2048 × 1152 px file. Any front-on photo of an animal's face on a dark background will work the same way.
How the grid works. The canvas is 2880 × 3616 px, but you'll treat it as a screen of 180 × 226 chunky pixels, called cells here. Each cell is 16 × 16 px. A position like "cell 48, 22" means column 48, row 22, counting from 0 at the top left. Multiply by 16 to find it on the rulers: cell 48, 22 starts at x 768, y 352.
Habits for the whole tutorial:
- The Pencil doesn't snap to the grid. Its 16 px square is centred on the pixel under the pointer, so aim for the exact centre of a cell. Zoom to 100% or more, and check the X and Y readout in the status bar: each should be a multiple of 16 plus 8, such as 776 and 360 for cell 48, 22. Hold Space and drag to pan.
- A line is a click on the first cell, then Shift-click on the last.
- To get an exact selection, press Cmd+D so nothing is selected, then click once with a marquee tool without dragging. A dialog opens with From X / Y and To X / Y boxes. Type the numbers and press Enter. If something is already selected, the click only deselects it. Exact numbers matter in this tutorial because everything has to land on the 16 px grid.
- Double-click a layer's name to rename it. The icons at the bottom of the Layers panel include + (Add Layer), two overlapping squares (Duplicate Layer) and the bin (Delete Layer). Hover over one to see its name.
Free rotation and scaling blur pixel art, so you'll only use them before an element is pixelated. After that, everything moves by whole cells.
The palette:
-
Shirt
the background, not an ink
-
Sky
-
Ring
-
moon
-
halo
Screen layer
-
Stars
-
pines
-
Fur
-
Ears
-
inner ear
-
ear tips
-
Eyes
-
veins
-
Eye bags
-
Nose
-
INSOMNIAC stripes
-
OPOSSUM stripes
-
extrusion
-
Small type
-
Sprite tail
-
ear
-
Set up the shirt and the 16 px grid
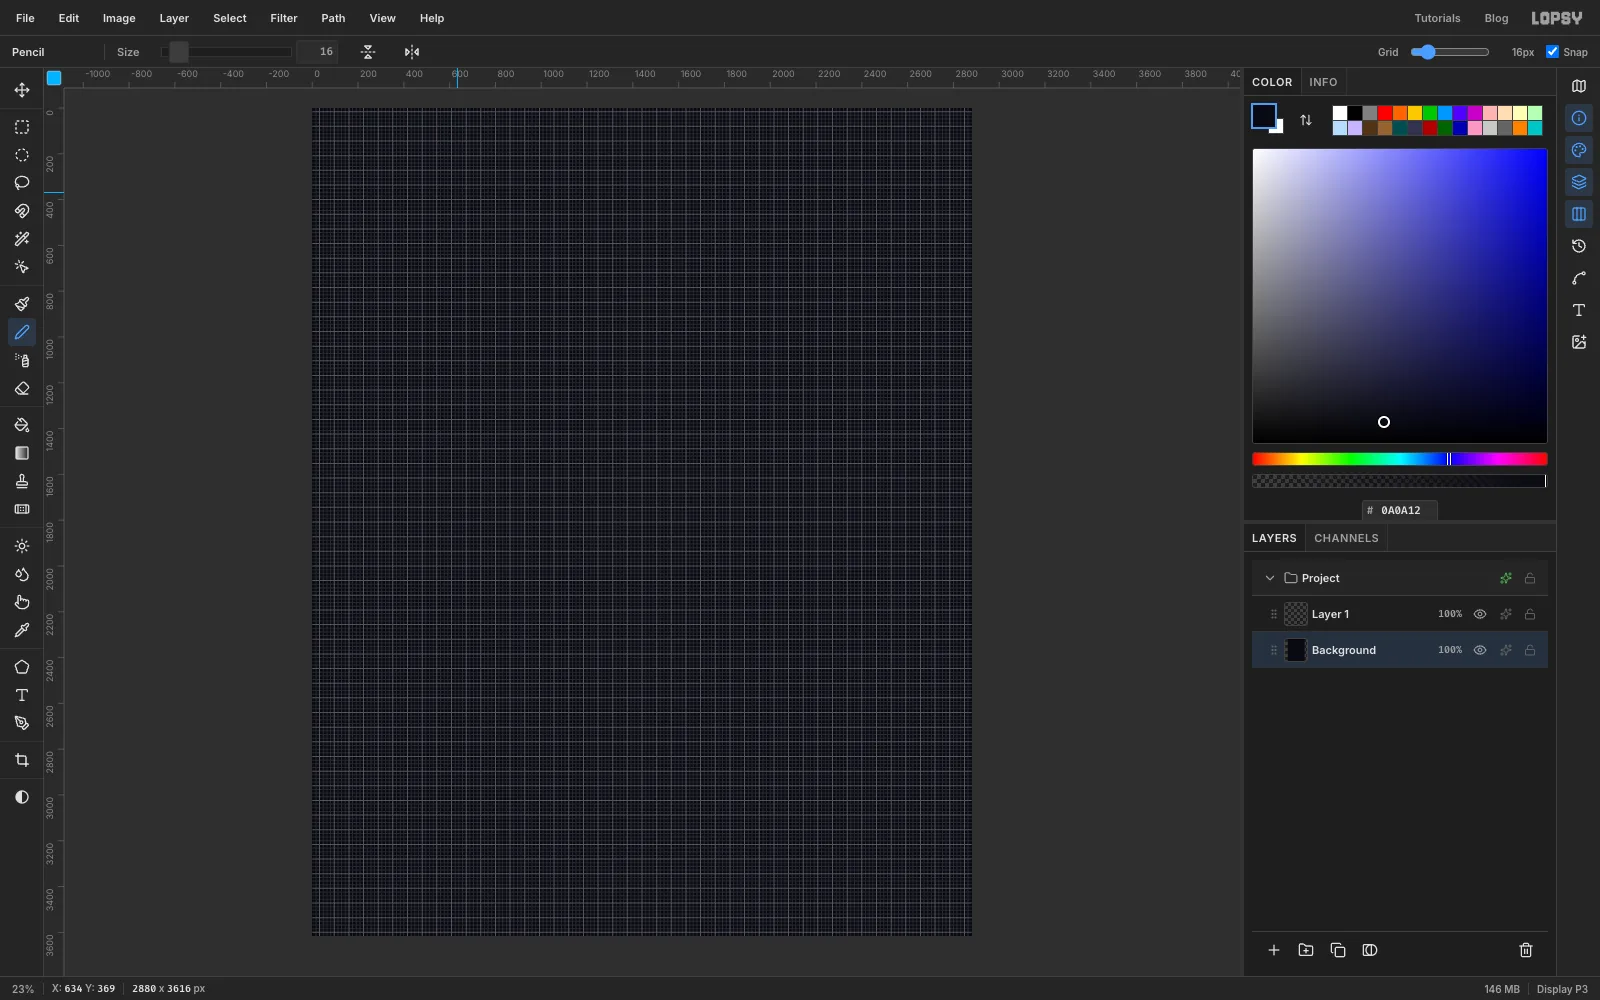
Choose File → New, enter 2880 × 3616 px and click Create. The height matters: Lopsy's grid is centred on the document, and 3616 px is an even number of cells (226). That puts the grid lines on exact multiples of 16, so they line up with the blocks Pixelate makes later.
Click the Background layer, set the colour to in the Color panel, and choose Edit → Fill. This colour stands in for the shirt.
Turn on View → Show Grid. In the options bar, check that Grid says 16px and Snap is ticked. Press N for the Pencil and set Size to 16, so one click paints one cell.
Toggle the grid off and on with View → Show Grid as you like while you work. It's hidden in most of the following screenshots so you can see the art. Whenever you nudge something by a whole cell, the grid has to be on.
-
Make a stepped circle with a stencil
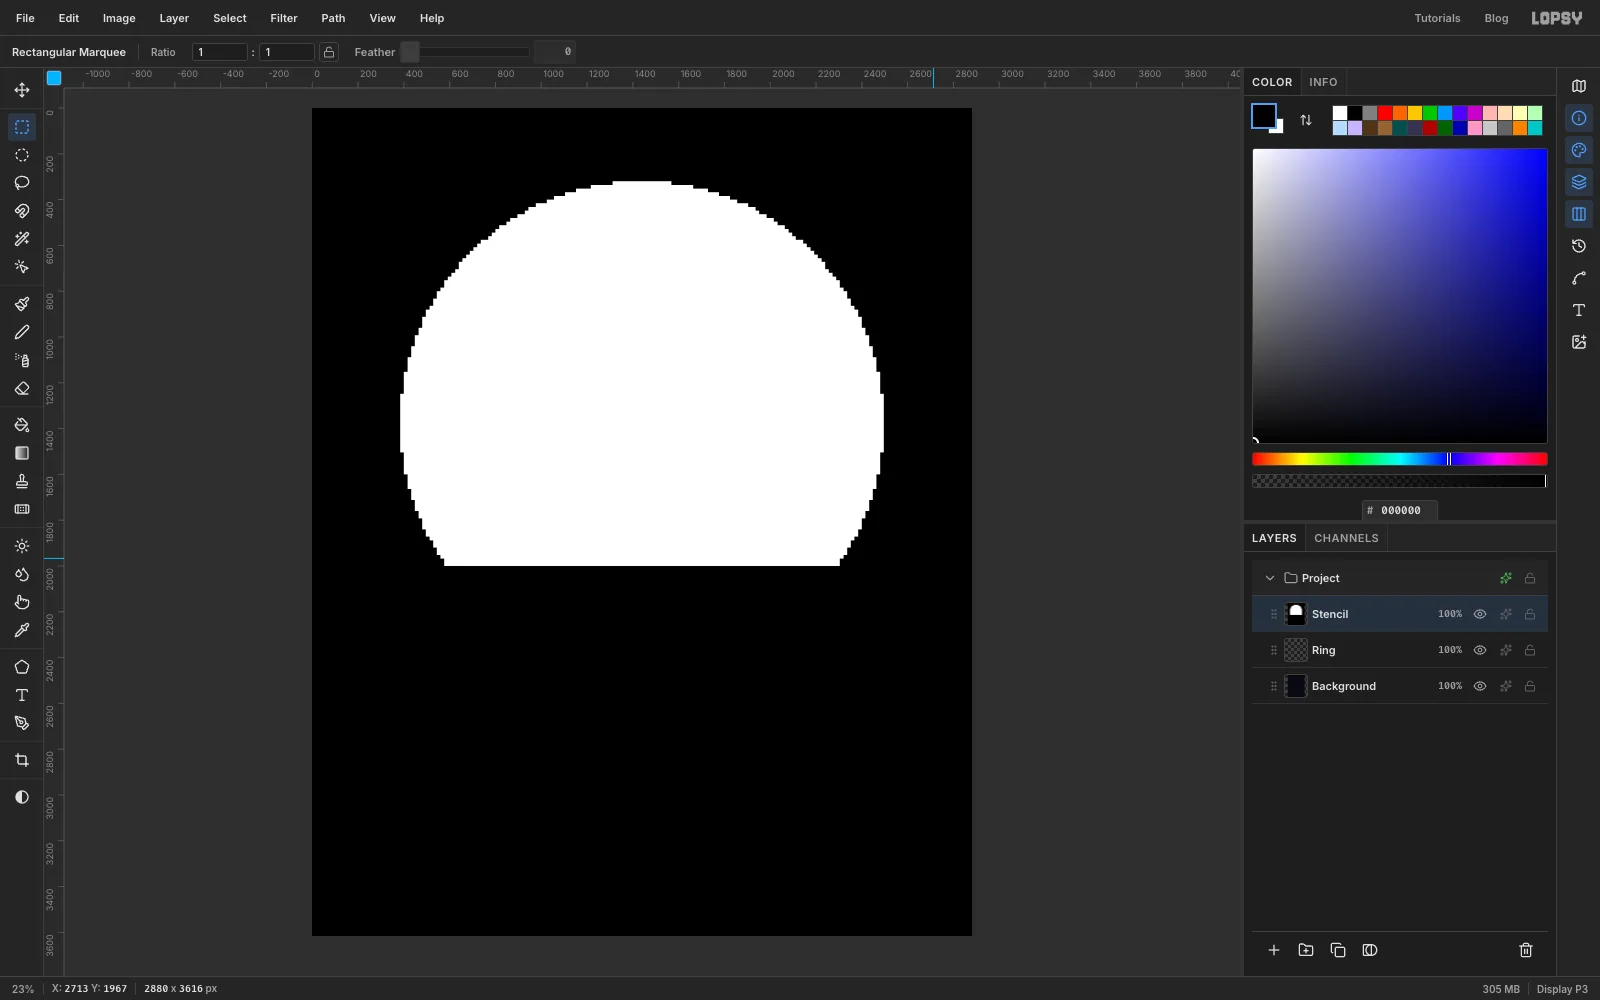
A selection circle has a smooth edge, which would look wrong here. This trick gives you a perfect stair-stepped circle. You'll use it several times, always on a temporary Stencil layer at the top of the stack, so you can see what you're doing.
Rename Layer 1 to Ring, and leave it empty for now. Click Add Layer and name the new layer Stencil. Then:
- Set the colour to and choose Edit → Fill.
- Choose the Elliptical Marquee from the toolbox and click once on the canvas. Enter From 384, 320 and To 2496, 2432. Set the colour to and choose Edit → Fill.
- Flatten the bottom of the circle so it can sit on the title. Press Cmd+D, press M for the Rectangular Marquee, click once and enter From 0, 2000 and To 2880, 3616. Fill it with , then press Cmd+D.
- Choose Filter → Pixelate and set Block Size to 16. Click Apply.
- Choose Filter → Threshold and set Level to 128. Click Apply.
Pixelate averages each 16 px block, and Threshold forces each block to pure black or white. That leaves a shape made of whole cells. The rest of this tutorial calls those five steps "make a stencil".
-
Add the ring and the sky
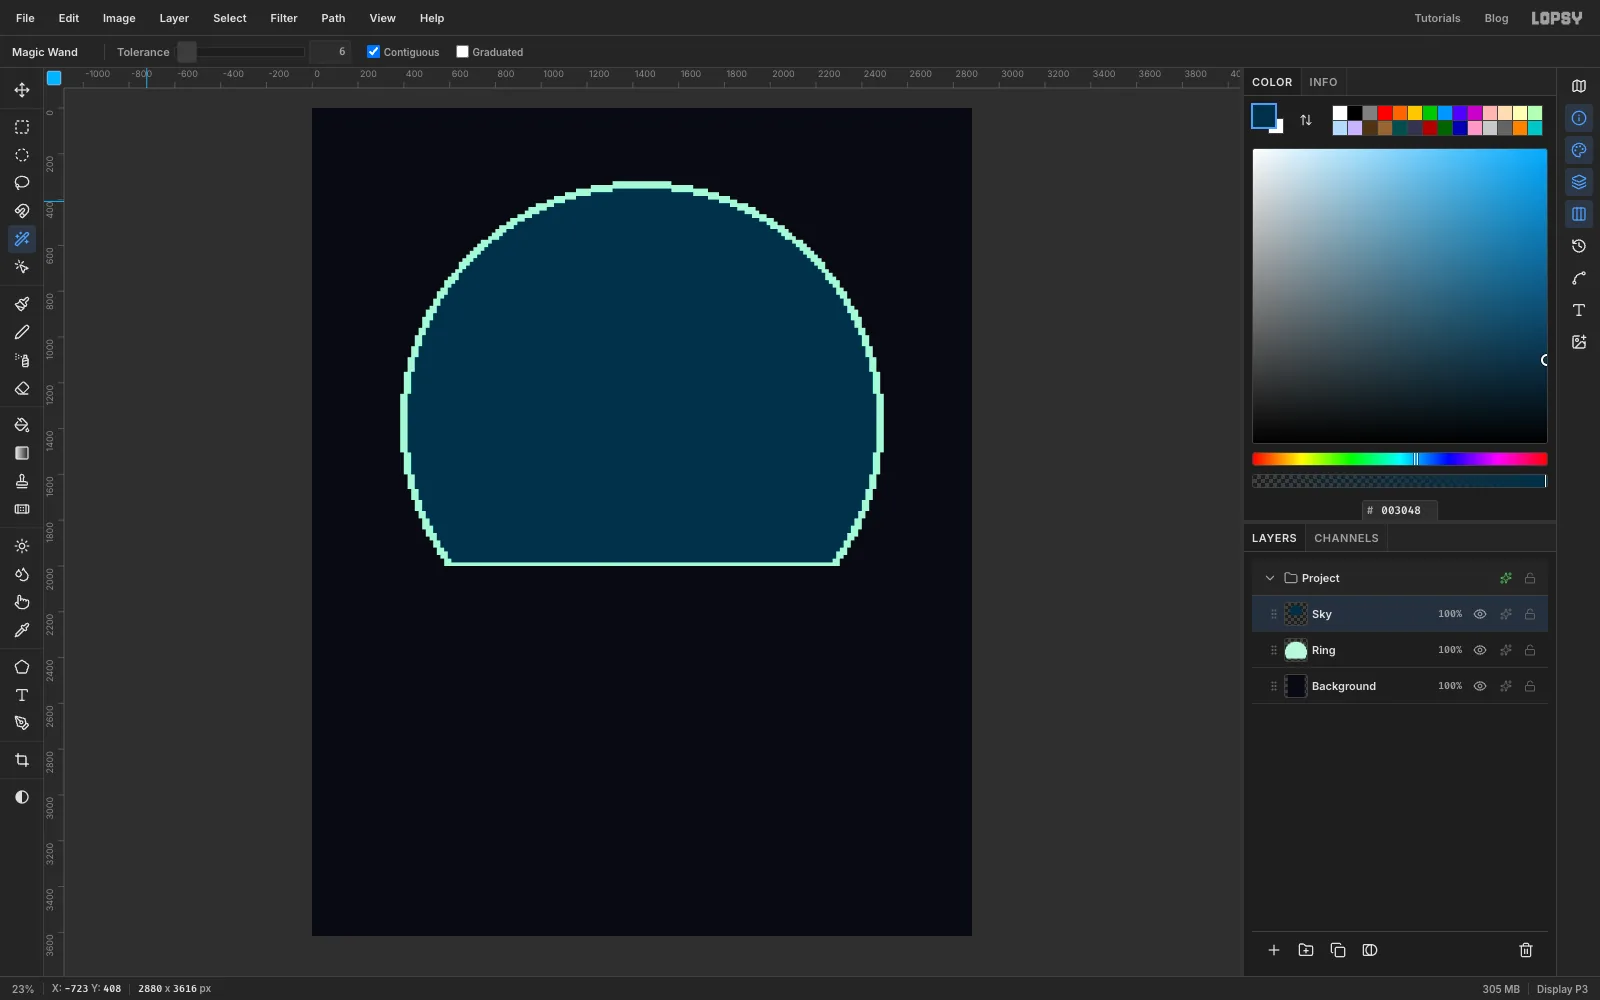
Press W for the Magic Wand. Set Tolerance to 6, tick Contiguous, and click inside the white shape. Delete the Stencil layer with the bin icon. The selection stays behind. Click the Ring layer, set the colour to , choose Edit → Fill, and press Cmd+D.
Now do the same for the sky, with a slightly smaller circle. With Ring still active, click Add Layer and name it Sky. Click Add Layer again, name it Stencil, and make a stencil with these numbers:
- Elliptical Marquee: From 416, 352, To 2464, 2400, filled with
- Rectangular Marquee: From 0, 1984, To 2880, 3616, filled with
- Pixelate Block Size 16, then Threshold Level 128
Press W and click inside the white shape. Delete Stencil, click Sky, fill the selection with , and press Cmd+D.
The sky stops one row above the ring's base, so the ring closes neatly along the bottom.
-
Paint three dither tiles
Old consoles couldn't do smooth gradients, so artists blended two colours with checker patterns called dither. You'll make three pattern tiles: 25%, 50% and 75% coverage.
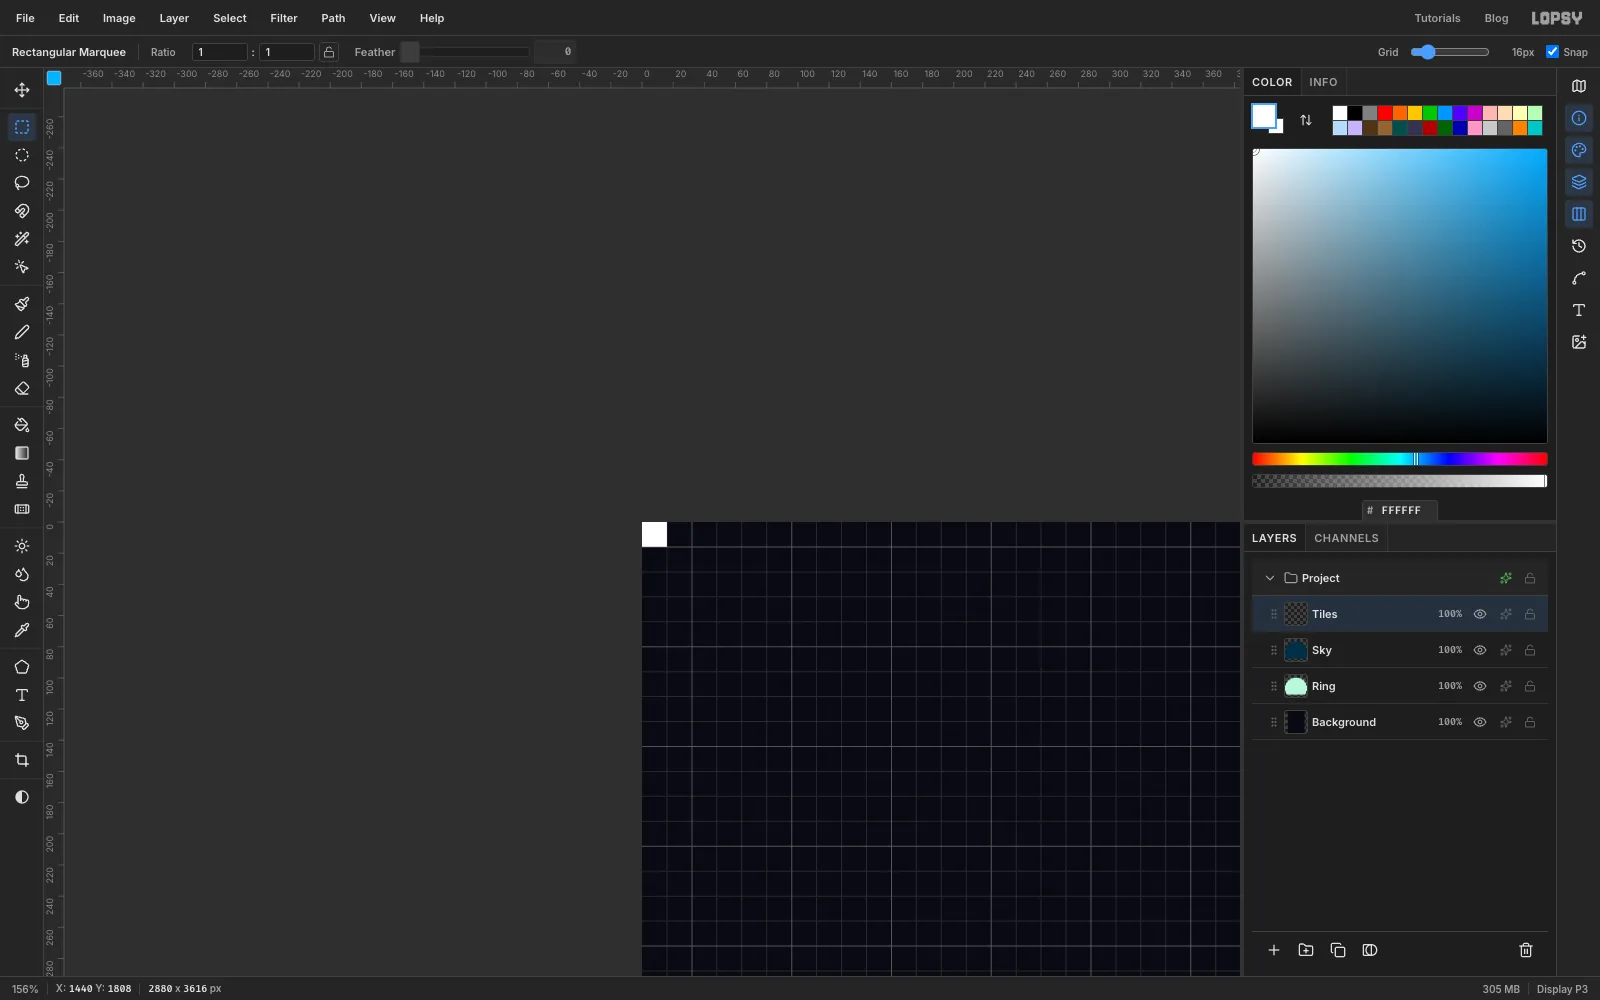
Click the Sky layer, click Add Layer, and name it Tiles. Zoom in on the top left corner of the canvas. Press N and set the colour to .
- Click the first cell (cell 0, 0). Press M, click once on the canvas and enter From 0, 0, To 32, 32. Choose Edit → Define Pattern, then press Cmd+D. That's Pattern 1, with one cell of four filled.
- Press N and click cell 1, 1, the cell diagonally below the first. Select the same 32 × 32 area, define it as a pattern again, and press Cmd+D. That's Pattern 2, a checkerboard.
- Press N and click cell 1, 0, the cell to the right of the first. Select the same area, define it once more, and press Cmd+D. That's Pattern 3, with one cell of four empty.
Delete the Tiles layer with the bin icon, then choose View → Fit to Screen.
-
Fill the first dither band
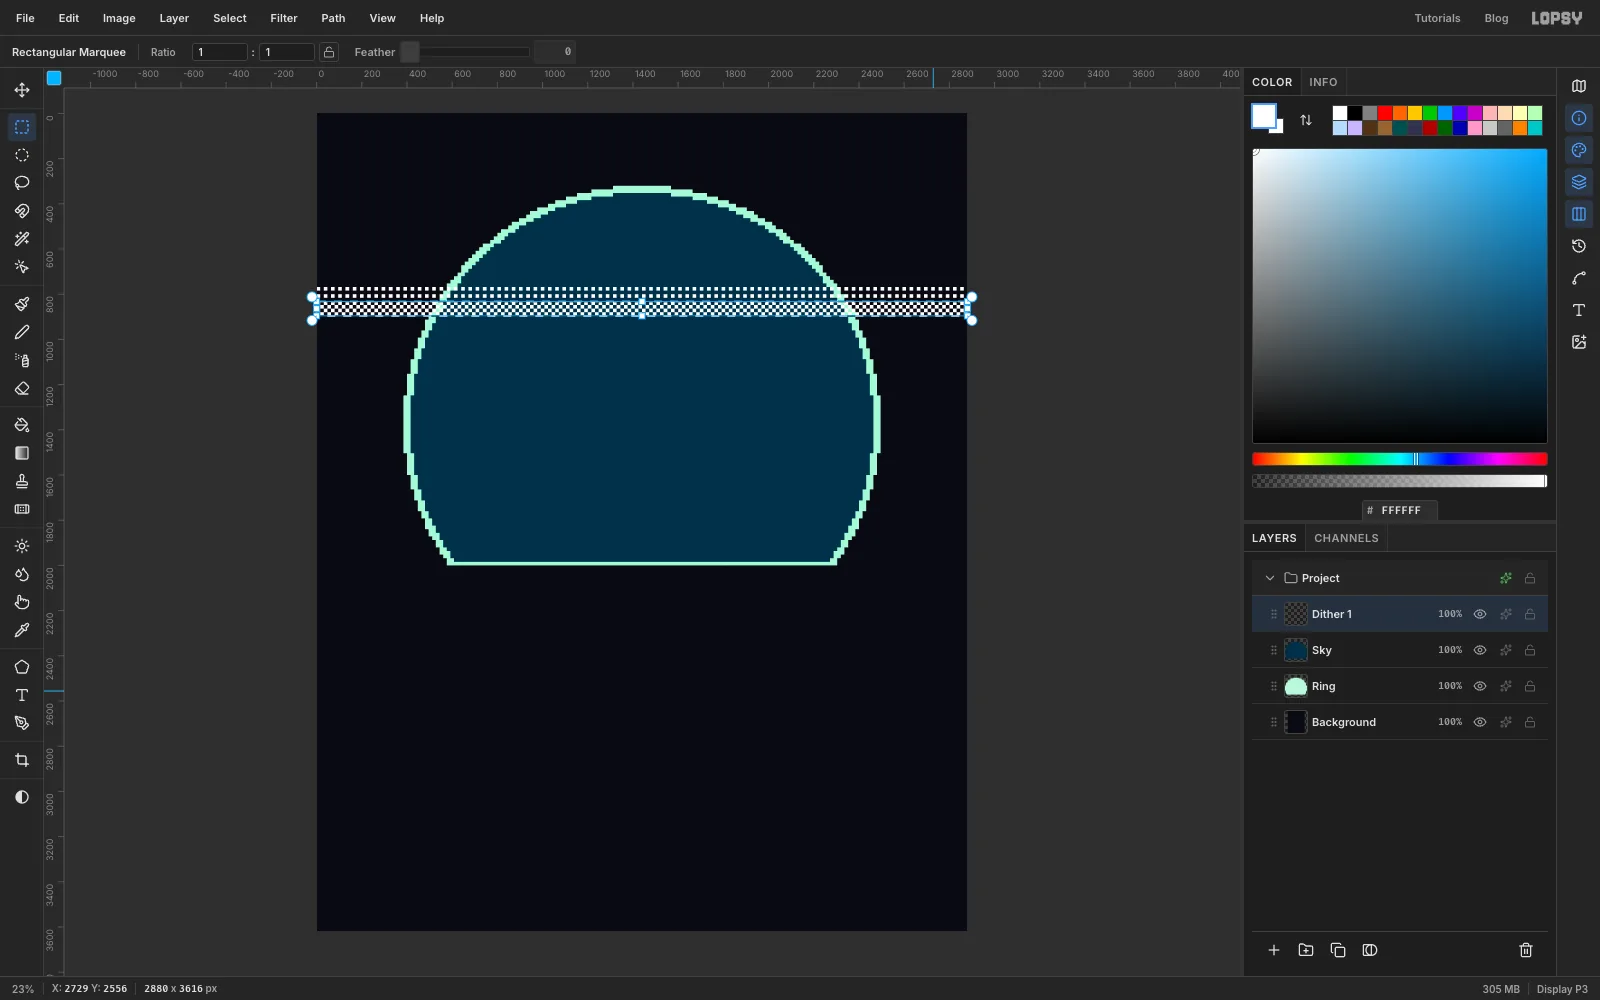
Click the Sky layer, click Add Layer, and name it Dither 1. You'll build a band from sparse to dense, each step 4 cells (64 px) tall, across the whole width.
For each row below, use the click-once dialog on the Rectangular Marquee, then choose Edit → Fill with Pattern..., click the pattern and click Apply. Press Cmd+D before the next one.
- From 0, 768, To 2880, 832: Pattern 1
- From 0, 832, To 2880, 896: Pattern 2
- From 0, 896, To 2880, 960: Pattern 3
The pattern dialog lists the tiles in the order you defined them. Hover over one to see its size.
-
Tint the band with Color Overlay
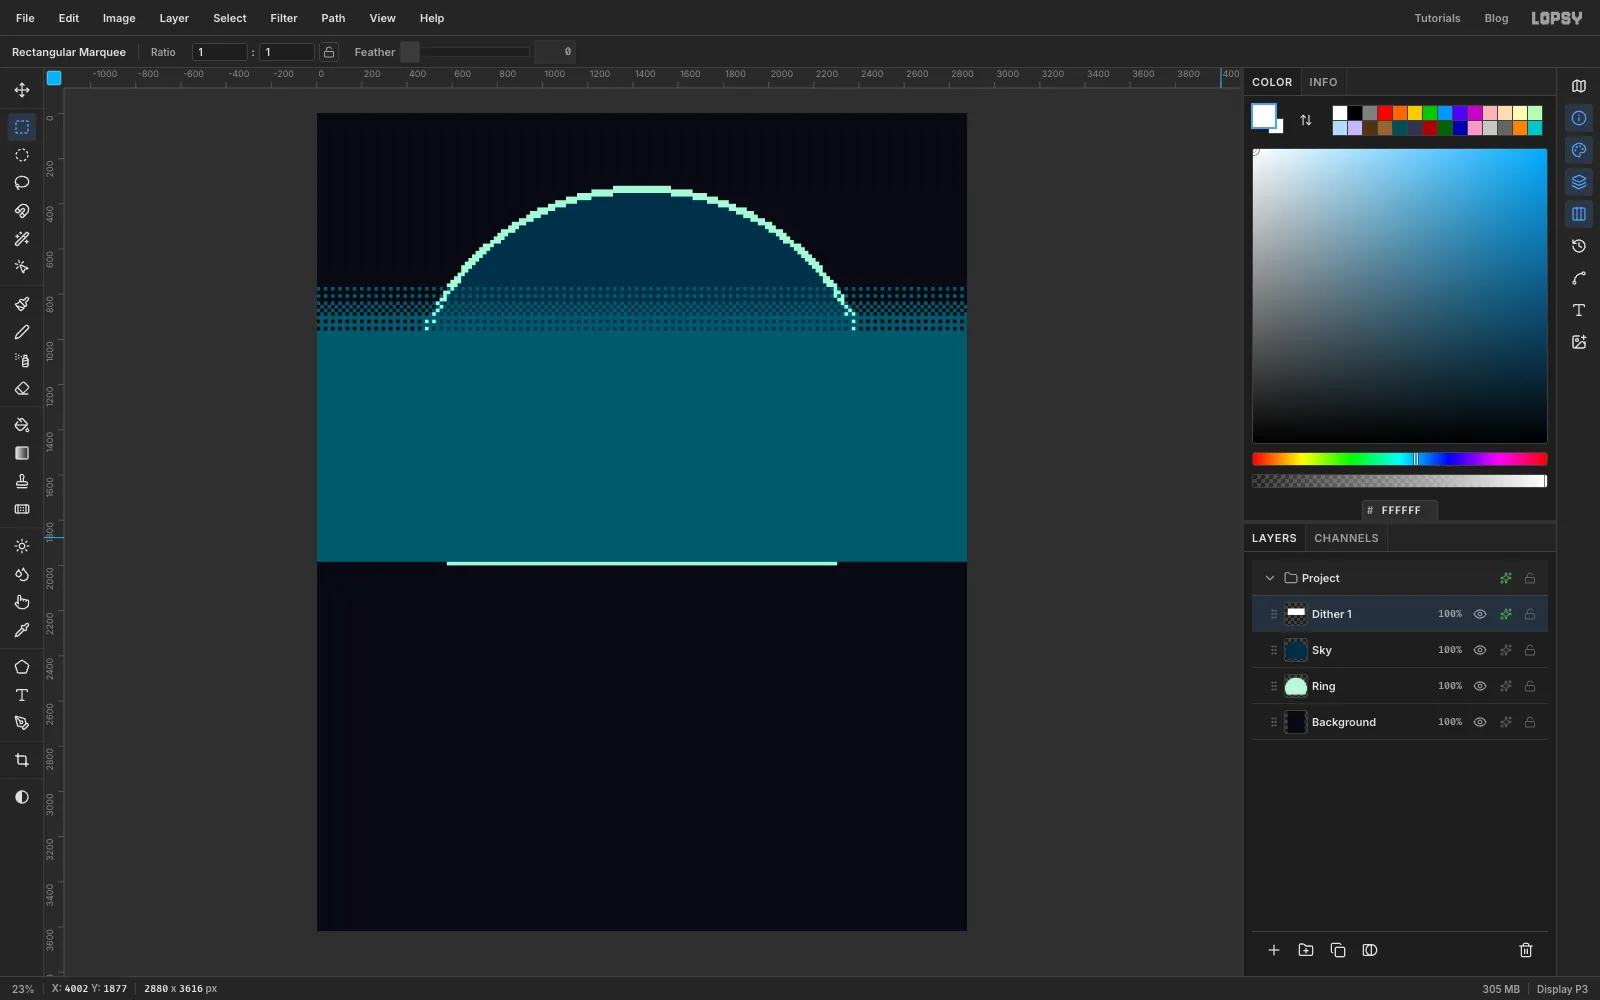
Finish the band with a solid block beneath it. Press M, click once and enter From 0, 960, To 2880, 1984. Fill it with using Edit → Fill, then press Cmd+D.
Click the sparkle icon on the Dither 1 row to open the effects drawer. Tick Color Overlay and set its colour to . Close the drawer.
Painting everything white and colouring it with an overlay means you can retune each sky colour later with one change.
-
Add the other two bands
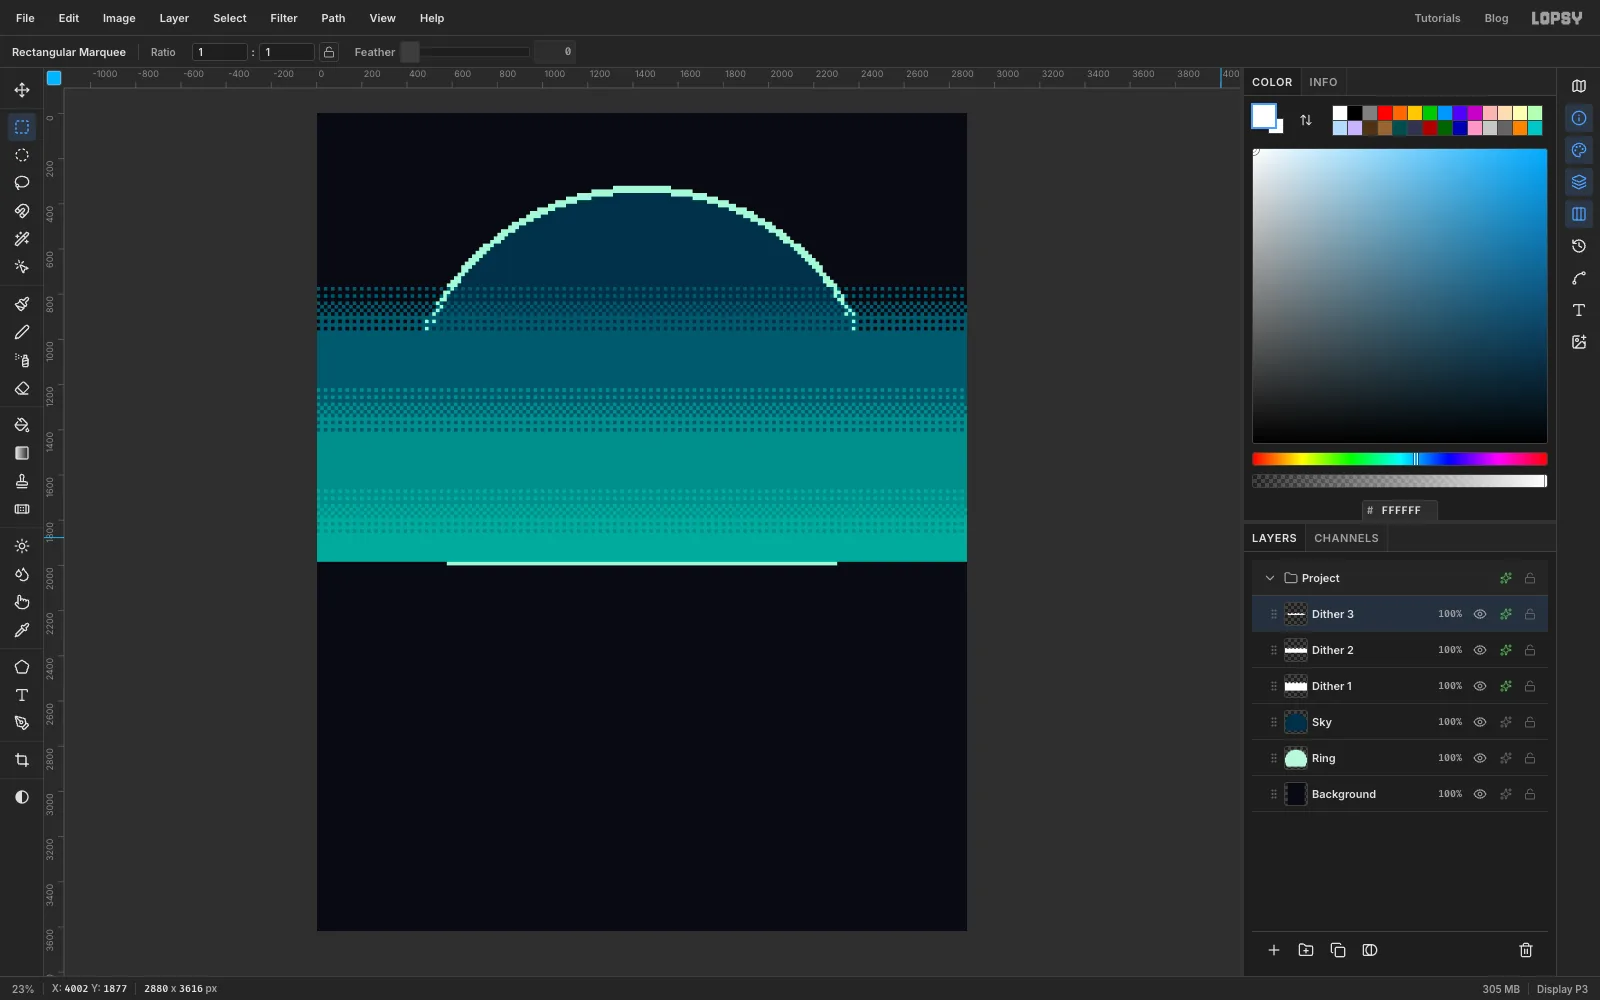
Click Dither 1, click Add Layer, name it Dither 2, and repeat with these numbers. Then do the same on a Dither 3 layer above it.
Dither 2
- From 0, 1216, To 2880, 1280: Pattern 1
- From 0, 1280, To 2880, 1344: Pattern 2
- From 0, 1344, To 2880, 1408: Pattern 3
- From 0, 1408, To 2880, 1984: Edit → Fill with
- Color Overlay
Dither 3
- From 0, 1664, To 2880, 1728: Pattern 1
- From 0, 1728, To 2880, 1792: Pattern 2
- From 0, 1792, To 2880, 1856: Pattern 3
- From 0, 1856, To 2880, 1984: Edit → Fill with
- Color Overlay
The bands spill out past the ring for now. You'll trim them in a moment.
-
Rotate a crescent moon on a stencil
First, the halo, a soft patch of light with a checker edge.
- Click Dither 3, click Add Layer and name it Halo.
- Click Add Layer, name it Stencil, and make a stencil from a white Elliptical Marquee, From 1952, 832, To 2400, 1280. This one has no flat base. Press W, click inside the white disc, and delete Stencil. Click Halo, choose Edit → Fill with Pattern... with Pattern 2, and press Cmd+D.
- Do the same with a smaller stencil, From 2000, 880, To 2352, 1232. This time click Halo and use Edit → Fill with . Press Cmd+D.
- Open the effects drawer on Halo. Set Blend to Screen and turn on Color Overlay in . Close the drawer.
Then the moon. With Halo active, click Add Layer and name it Night. Click Add Layer again and name it Stencil.
- Fill the layer with . Fill an Elliptical Marquee, From 2048, 896, To 2368, 1216, with .
- Bite the crescent out by filling a second Elliptical Marquee, From 2128, 864, To 2416, 1152, with . Press Cmd+D.
- Turn the grid off (View → Show Grid). With it on, rotation snaps to 15° steps.
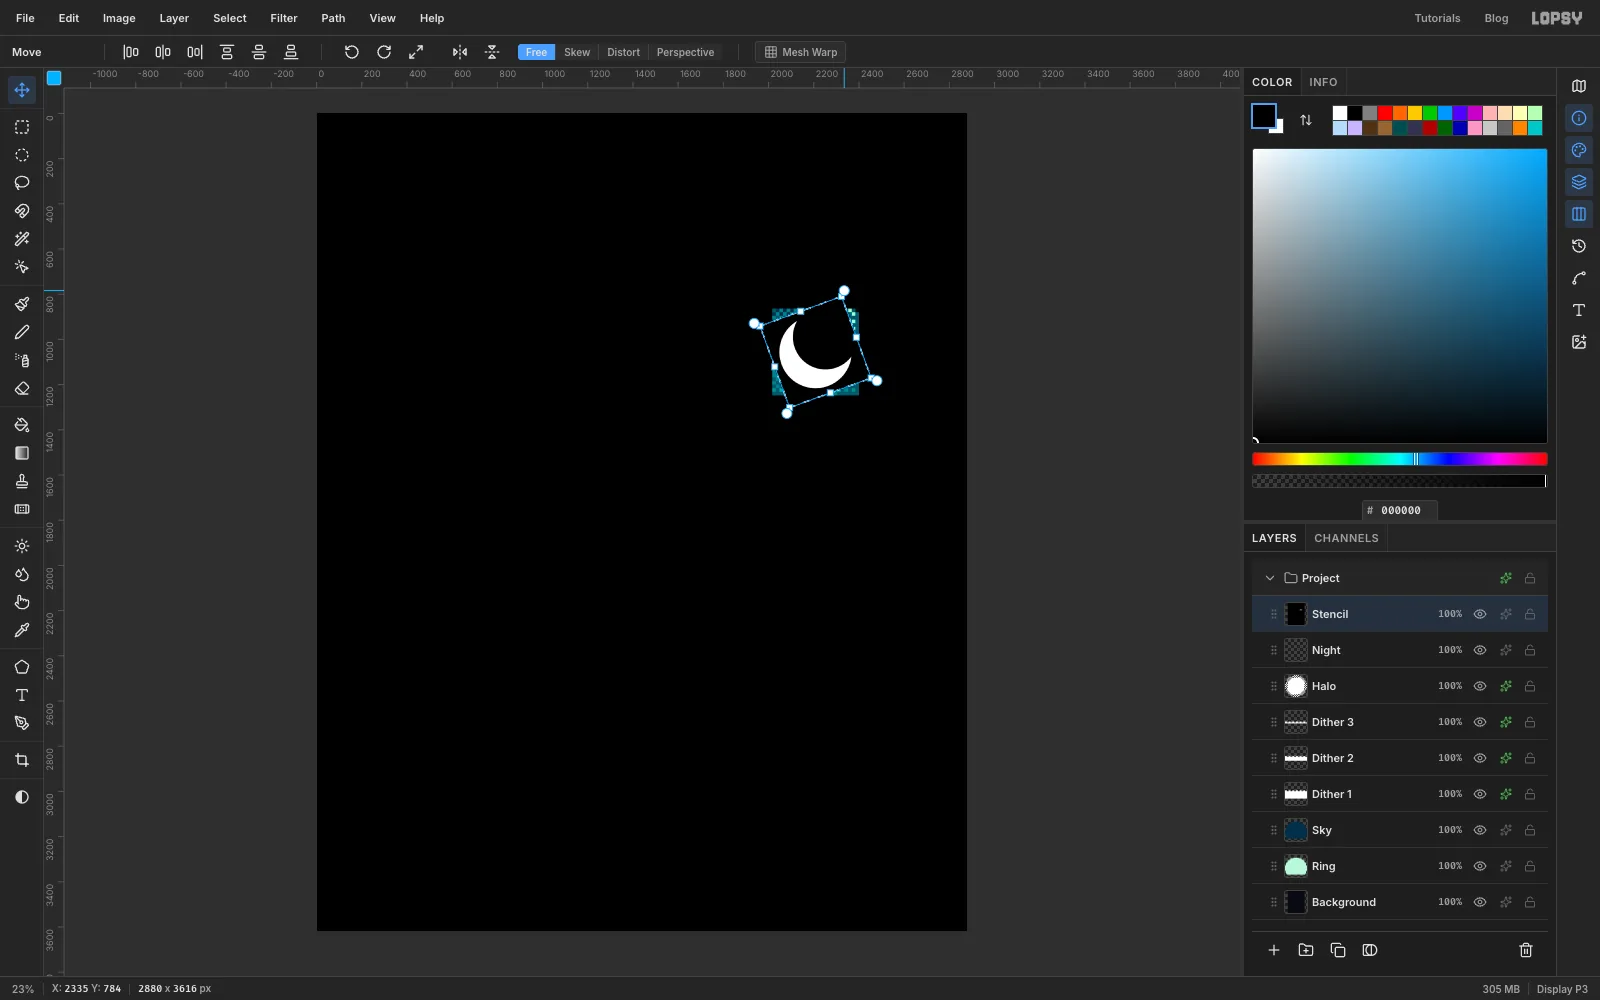
- Press M, click once and enter From 2016, 864, To 2400, 1248. Press V for the Move tool and drag the round handle just outside a corner of the box to tilt the moon about 20° anticlockwise. Press Cmd+D to commit it.
- Run Pixelate 16 and Threshold 128. The rotated curve becomes clean steps.
Rotating here is safe because the pixelate step comes afterwards.
-
Fill in the moon, stars and pines
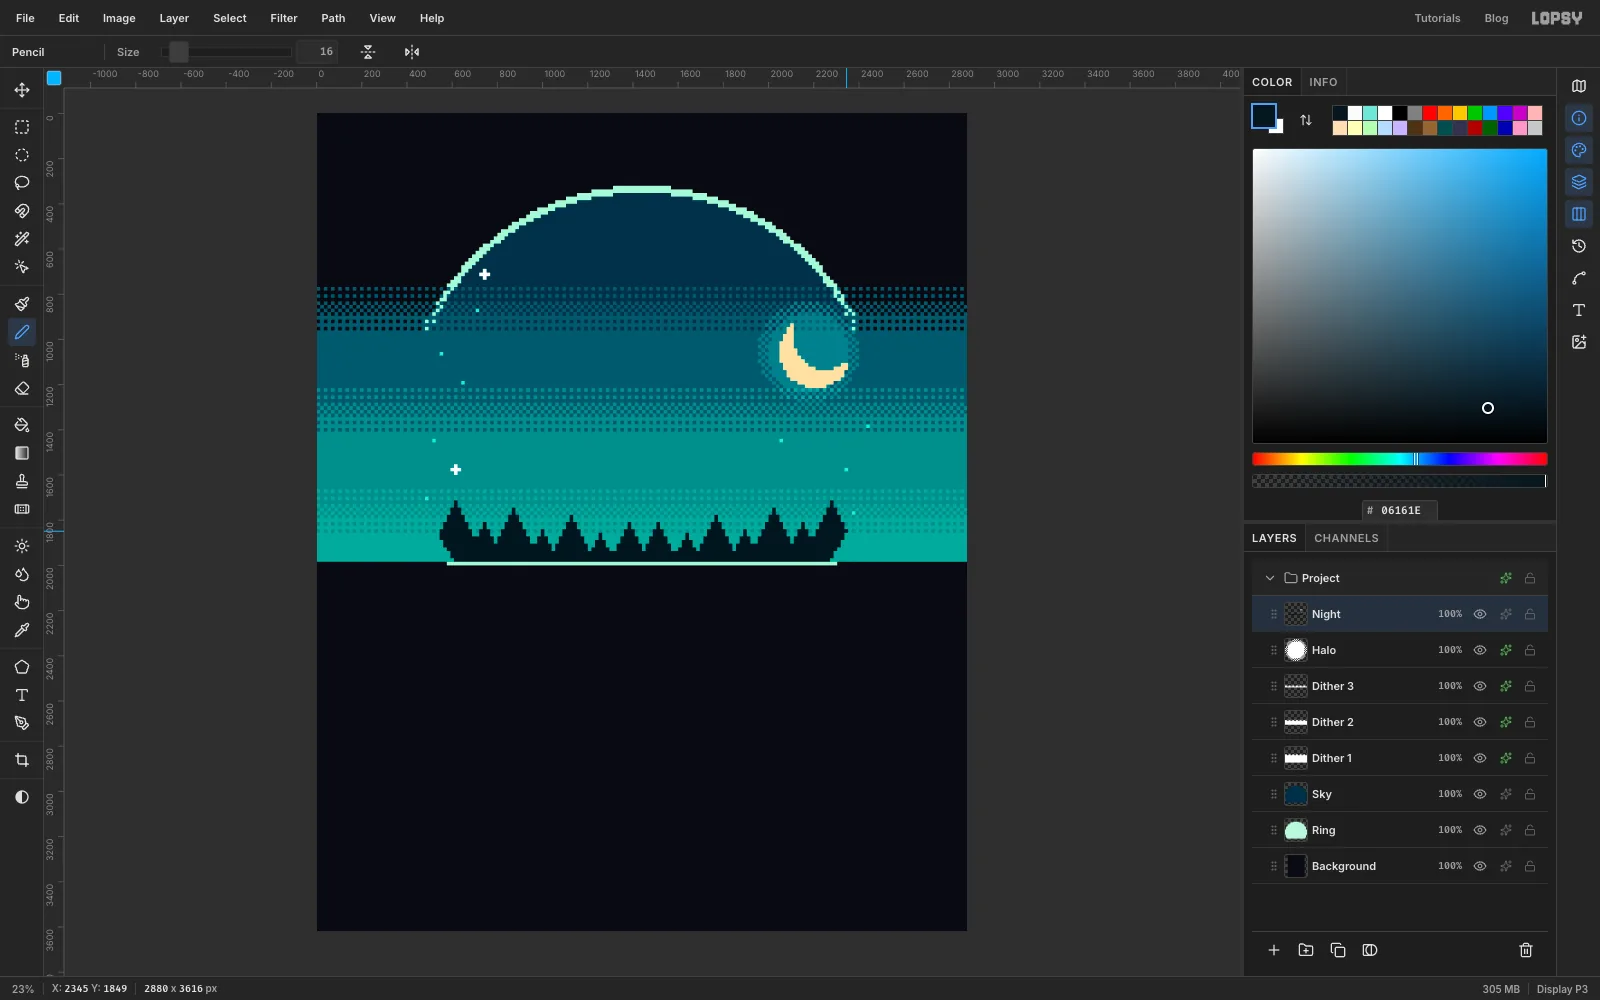
Press W and click inside the white crescent, with Contiguous still ticked. Delete Stencil, click Night, set the colour to , choose Edit → Fill, and press Cmd+D. Turn the grid back on so you can count cells.
Stay on Night and press N for the Pencil, still at Size 16.
- Small stars: about a dozen single cells of , scattered around the sides of the sky. The head will cover the middle, so don't bother with that.
- Big stars: three small crosses of , 5 cells each, in the upper left, the right and the lower left.
- Pines: set the colour to . Each pine is a triangle of vertical lines, all ending on row 123 (y 1968). Click the top cell of a column, then Shift-click down to row 123. Each column is 2 cells shorter than the one beside it, so the sides stay at a steady slope. Make about sixteen pines of mixed height, 8 to 17 cells tall, from one side of the sky to the other, overlapping them slightly. Fill the gaps at the base with a low band of 3 rows.
Keep the pines pointing up with clear tips. If they're too even, they start to look like icicles hanging from the title.
-
Trim everything to the sky
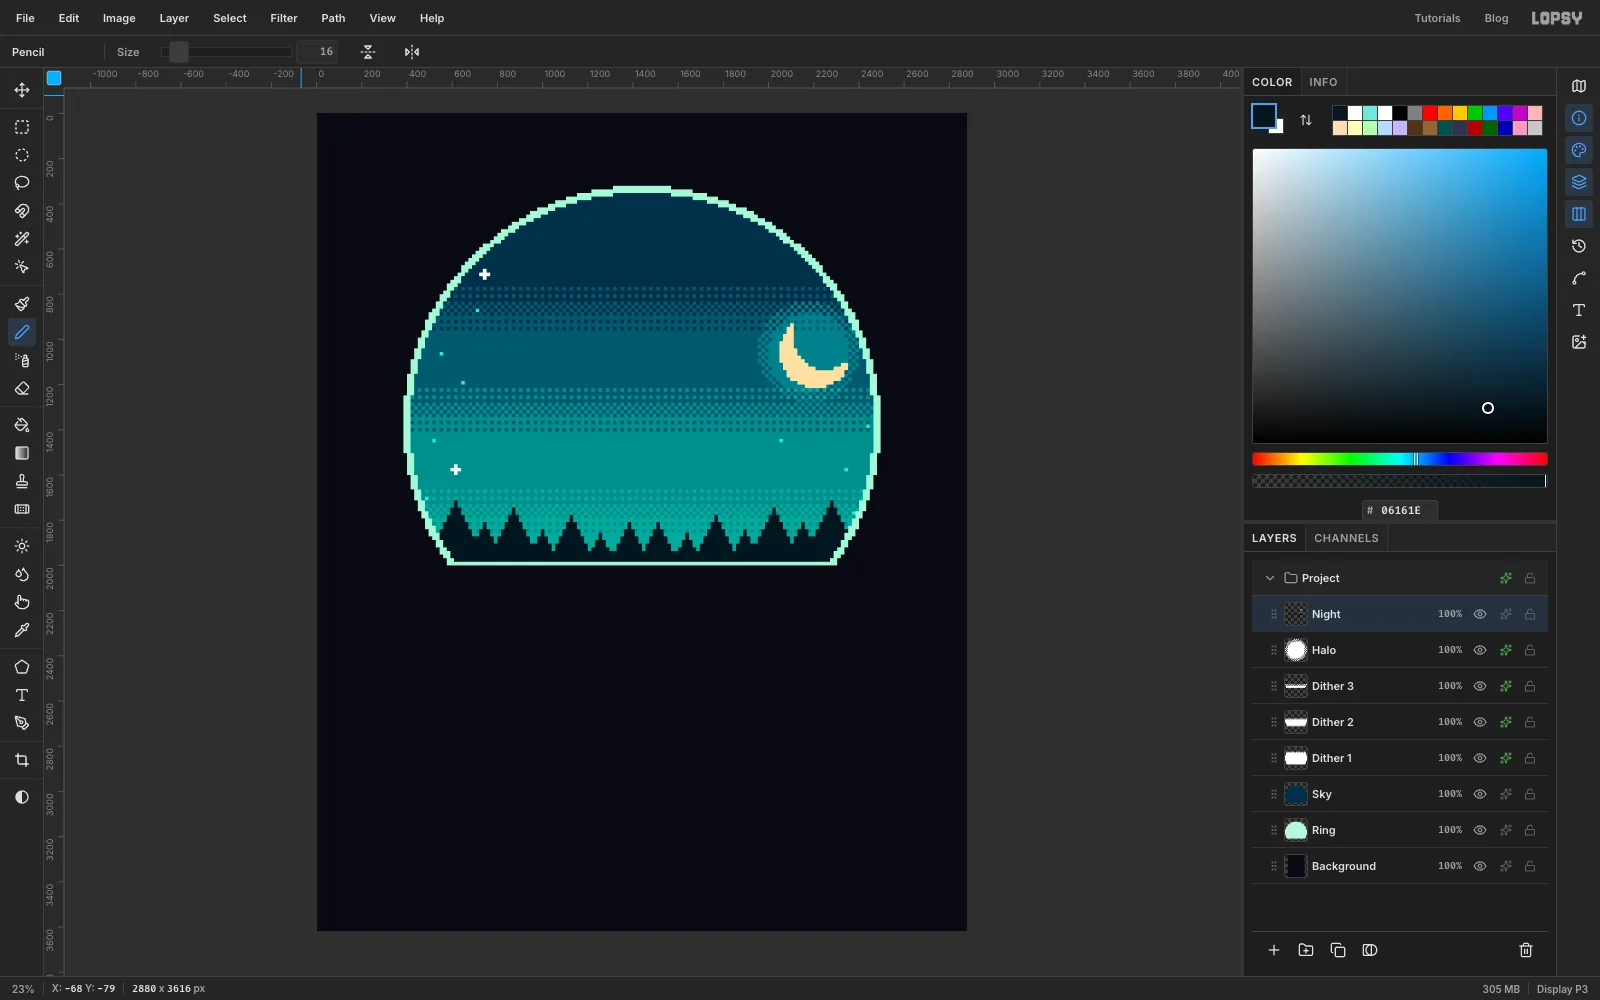
Click the Sky layer. Hold Cmd and click its thumbnail to select its shape, then choose Select → Inverse. The selection is now everything outside the sky.
Click each of these layers in turn and press Delete on each: Dither 1, Dither 2, Dither 3, Halo, Night.
Press Cmd+D.
-
Paint the ears with Symmetry
Click Night, click Add Layer, and name it Ears. Press N, and click the Symmetry Vertical button in the options bar, the second of the two mirror icons after Size. Whatever you paint on the left now appears mirrored on the right, around the middle of the document.
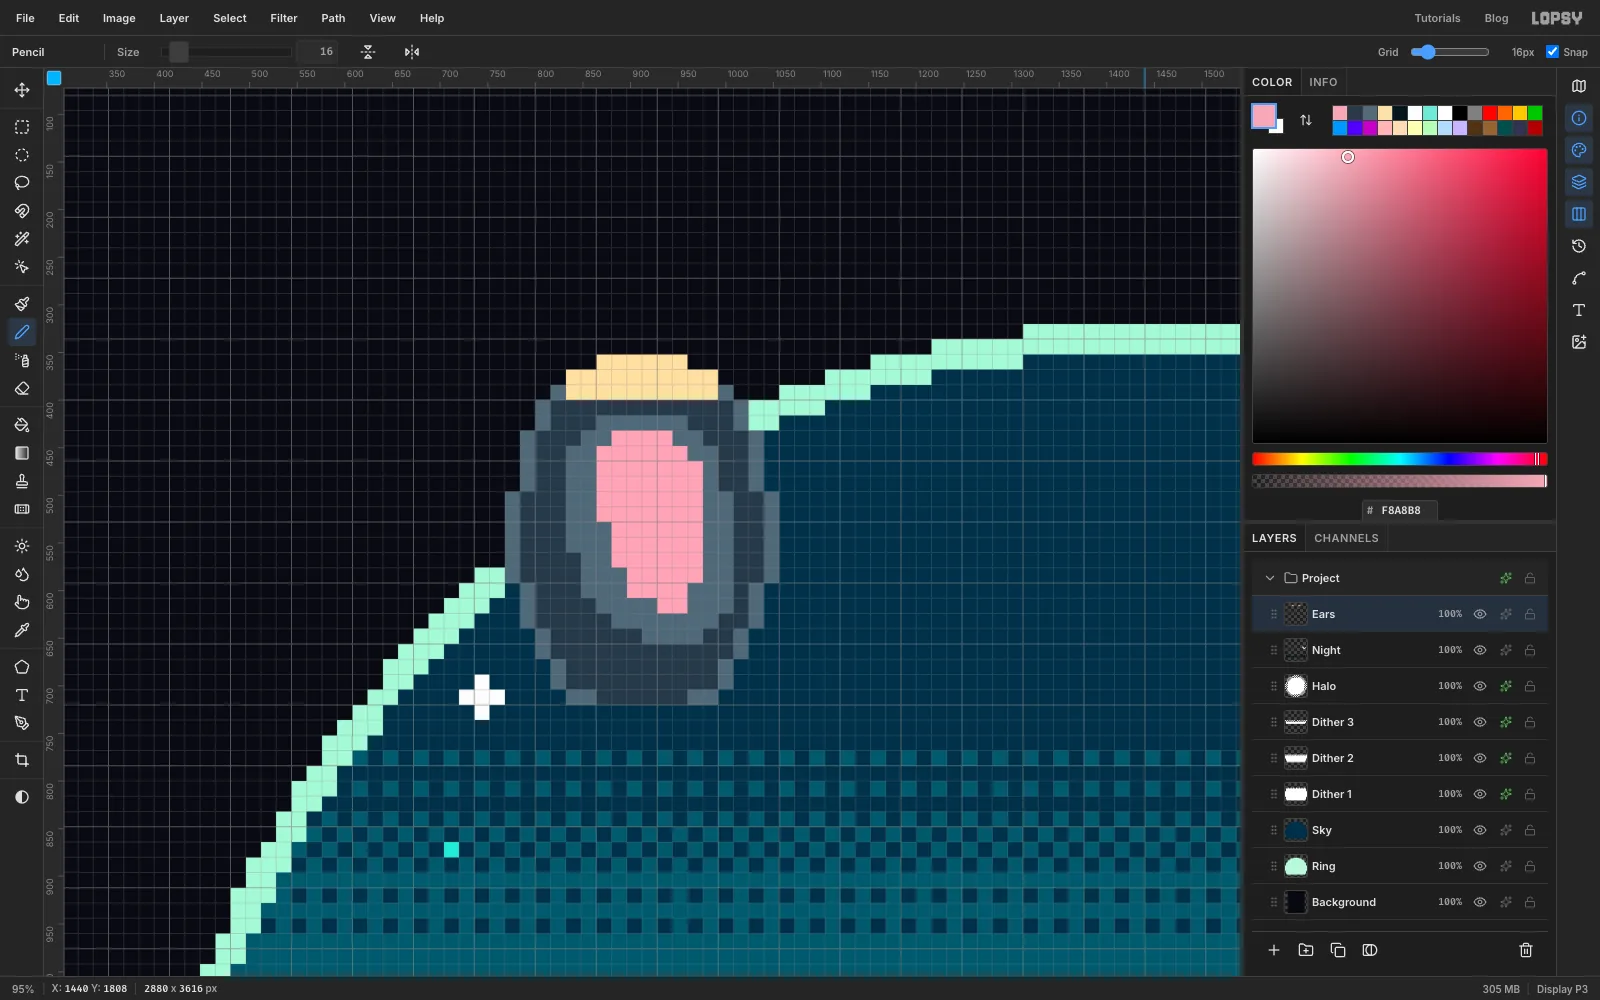
Paint the left ear in the area from cell 48, 22 to cell 65, 44, as in the picture:
- An upright oval of .
- A ring 2 cells wide of , inside the oval and on its outer edge.
- A long pink centre of , about 7 cells wide and 13 cells tall, with a slight lean.
- The top 3 rows in cream, . Real opossums have pale ear tips, and this also stops the dark ears vanishing into a dark shirt.
Click Symmetry Vertical again to turn it off. While it's on, a Cmd-press on the canvas moves the mirror's centre instead of doing anything else, and that would block the scaling in the next few steps.
-
Drop in the trail camera photo
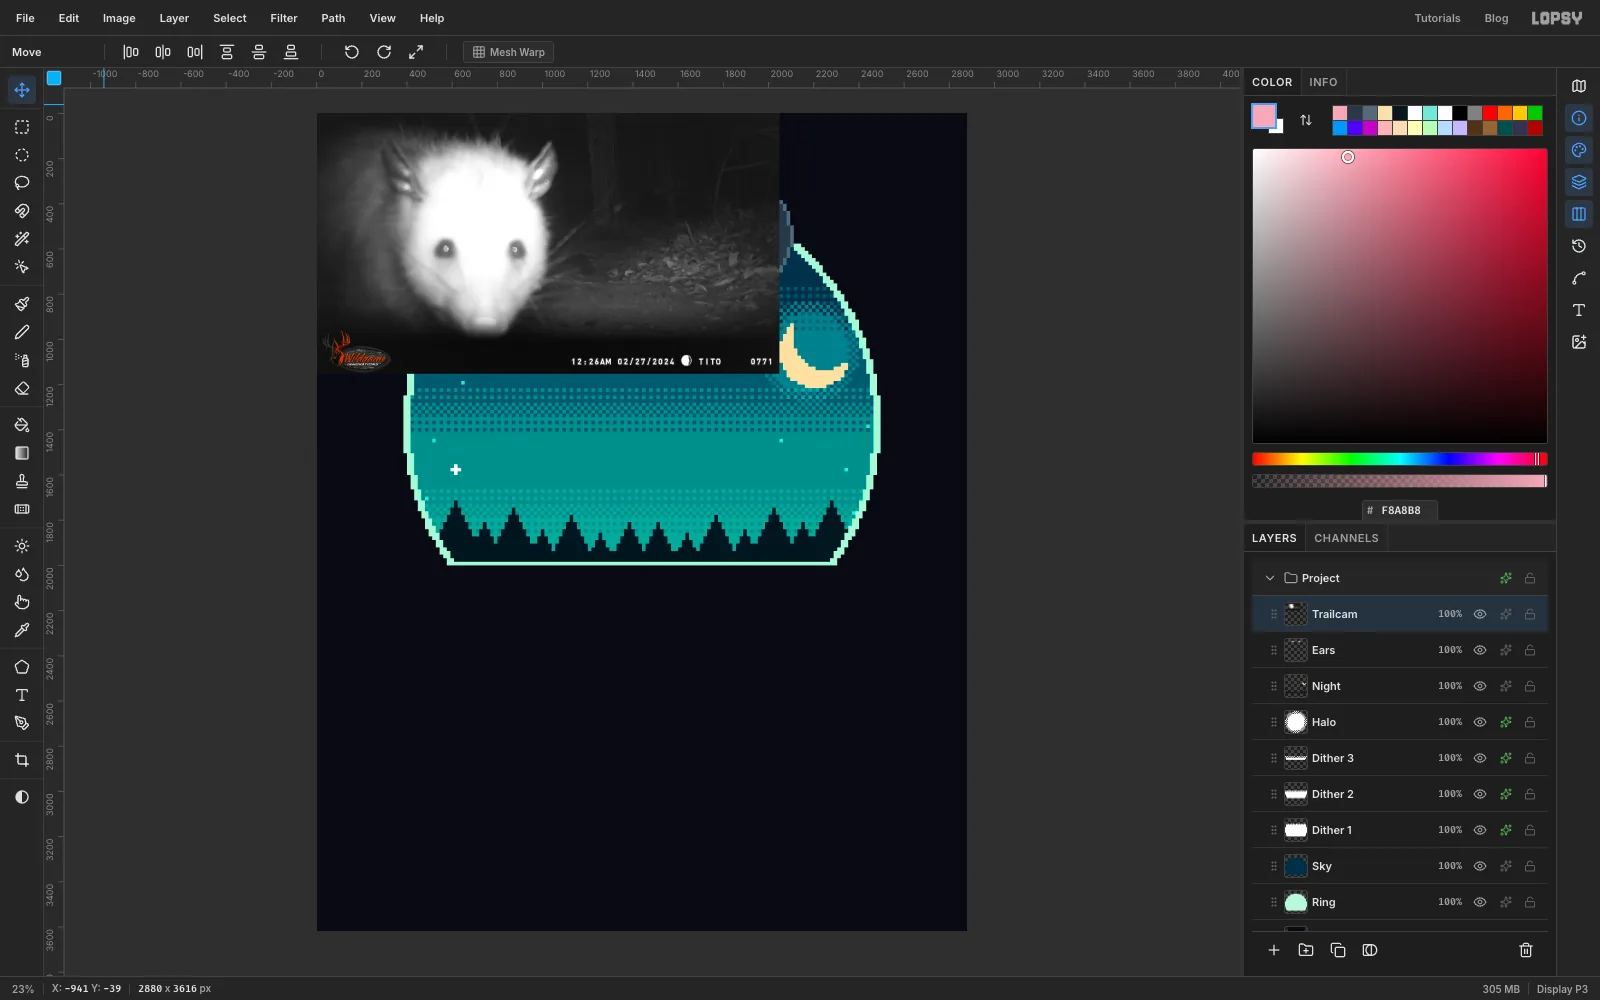
Make sure Ears is the active layer. Drag the photo from your computer onto the canvas. It arrives as a new layer in the top left corner. Rename it Trailcam and press Cmd+D if anything is selected.
The photo is a perfect starting point. The face is blown out to a bright white, the background is nearly black, and the eye sockets are soft dark smudges.
-
Lasso just the head
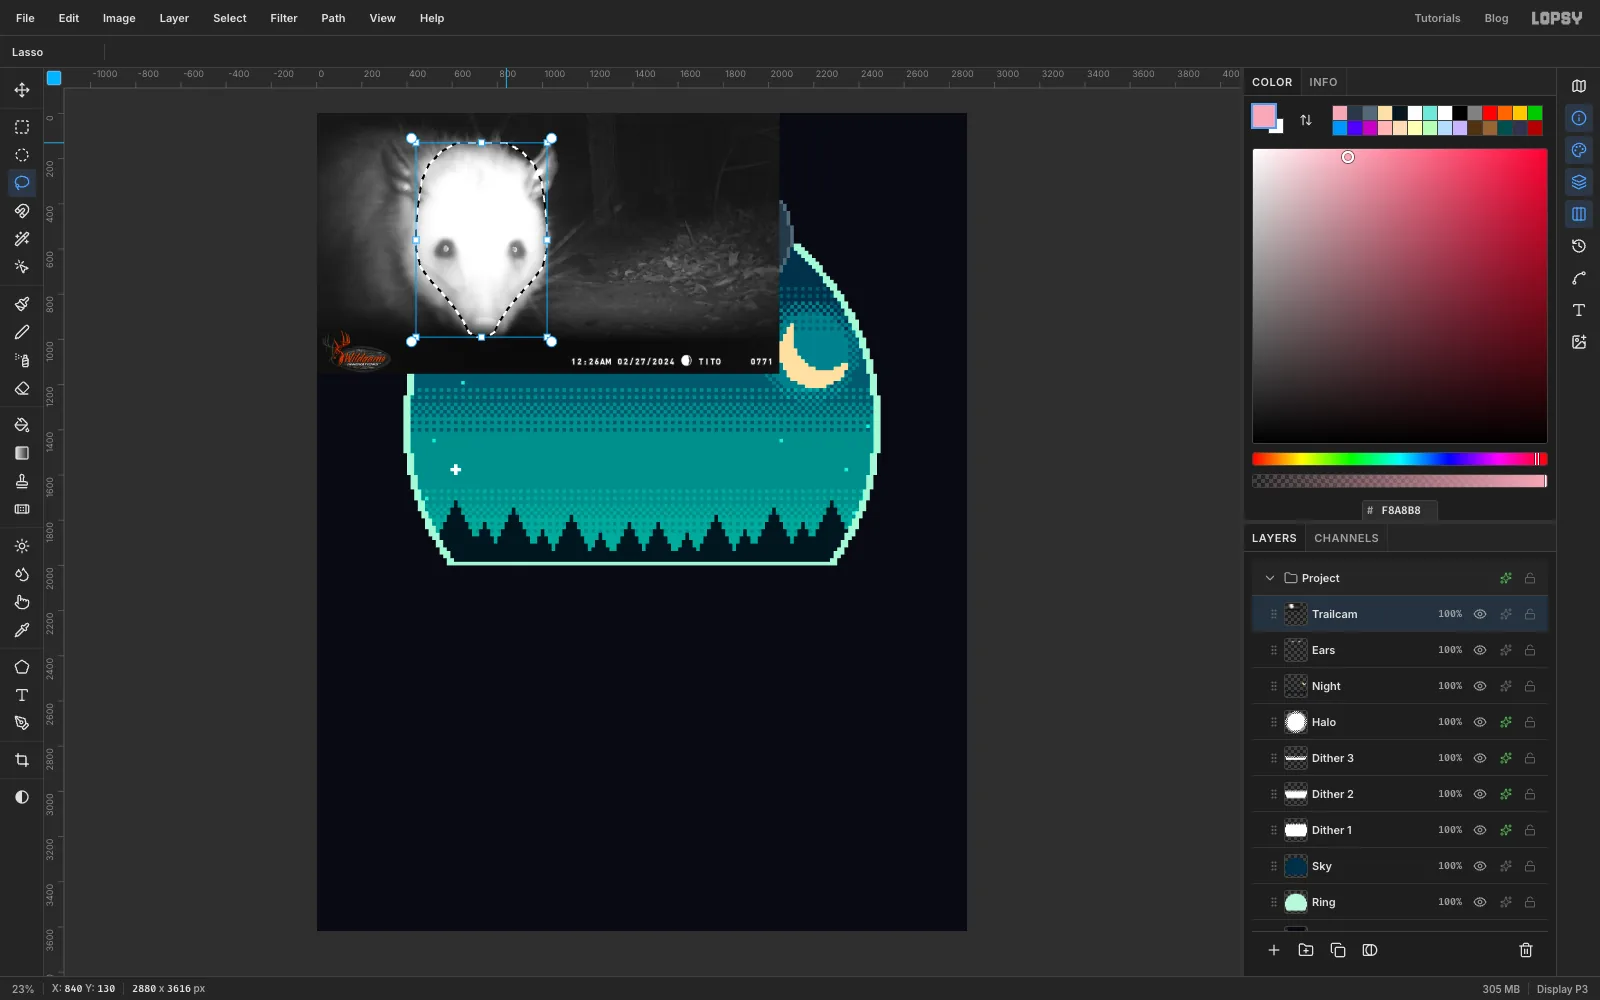
Press L for the Lasso. Trace around the head in one continuous drag and close the loop:
- Start at the crown, between the ears.
- Go down the outside of each cheek, staying on the fur.
- Taper in to a narrow chin, just below the nose.
- Leave out the ears, the body on the left and the background. You've already painted better ears.
Make it close to symmetrical, even if the photo isn't. A narrow, pointed head reads as an opossum. A wide one looks like a rat.
Choose Select → Inverse and press Delete, then press Cmd+D.
-
Scale the head up
Turn the grid off if it's on, because you want this placement to be free.
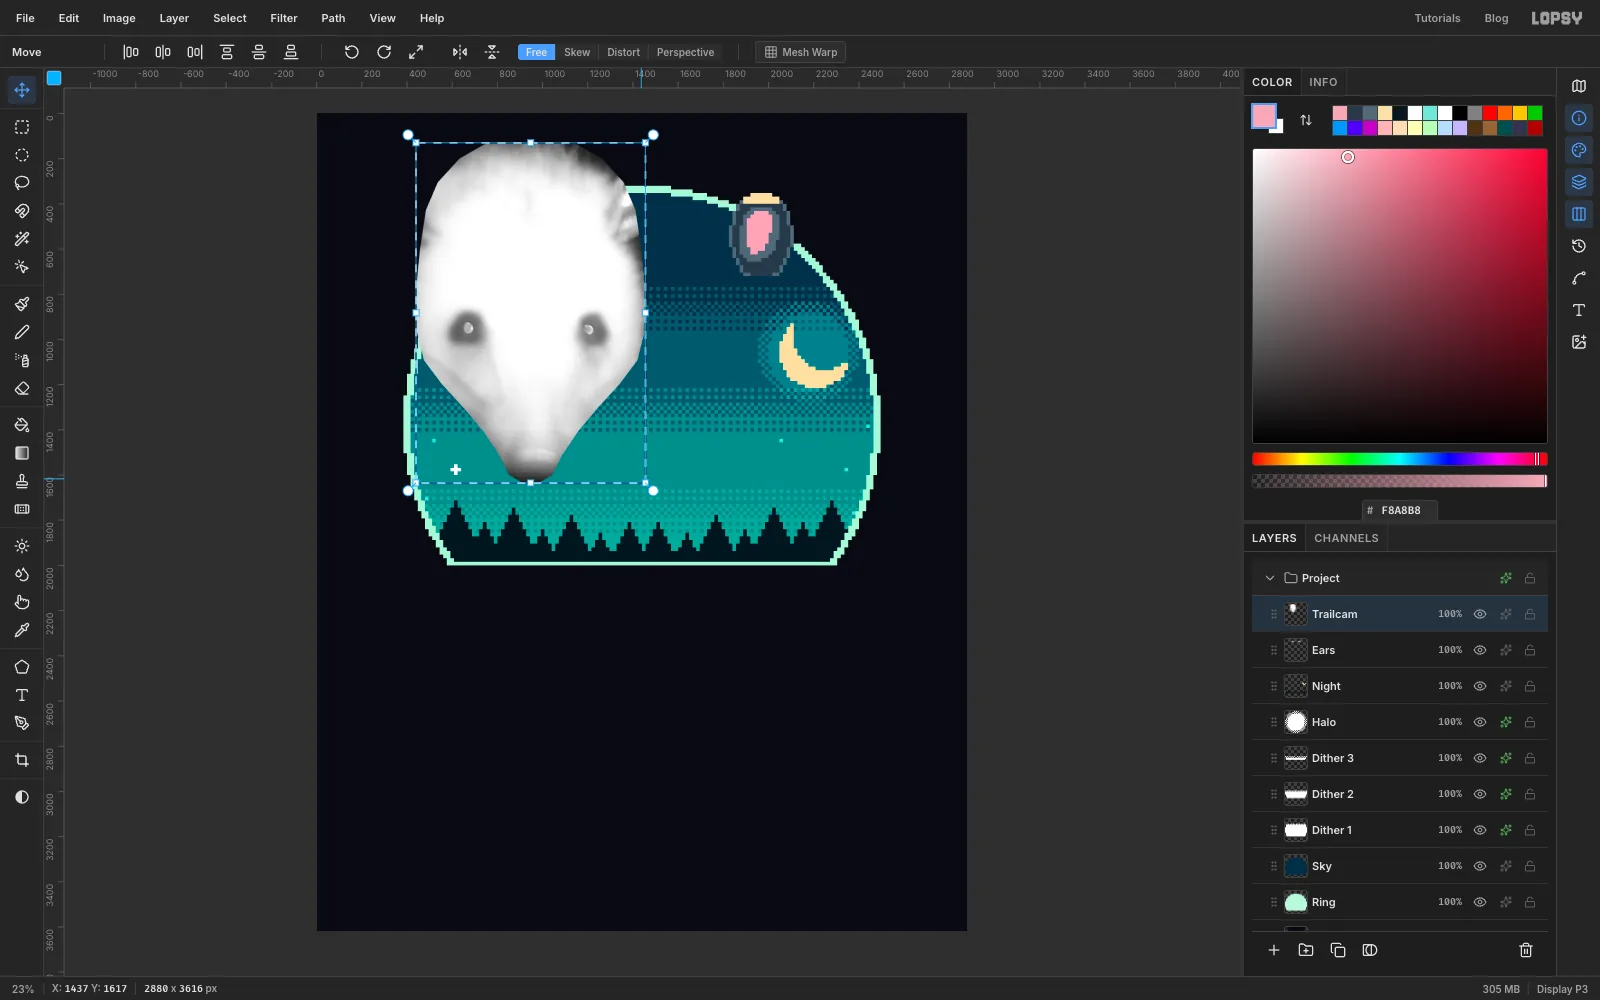
Press M and drag a marquee around the head, keeping it tight. Press V for the Move tool. Hold Cmd and drag the bottom right corner handle outward until the head is 75% bigger than it was, about 1,015 px wide and 1,505 px tall. Judge it on the rulers. Holding Cmd keeps the proportions.
At this zoom the round rotate handle sits right beside the corner square. If the box starts to turn instead of growing, press Cmd+Z and grab just inside the corner.
Press Cmd+D to commit the scale. Enter doesn't commit a Move-tool transform.
-
Place the head on the roundel
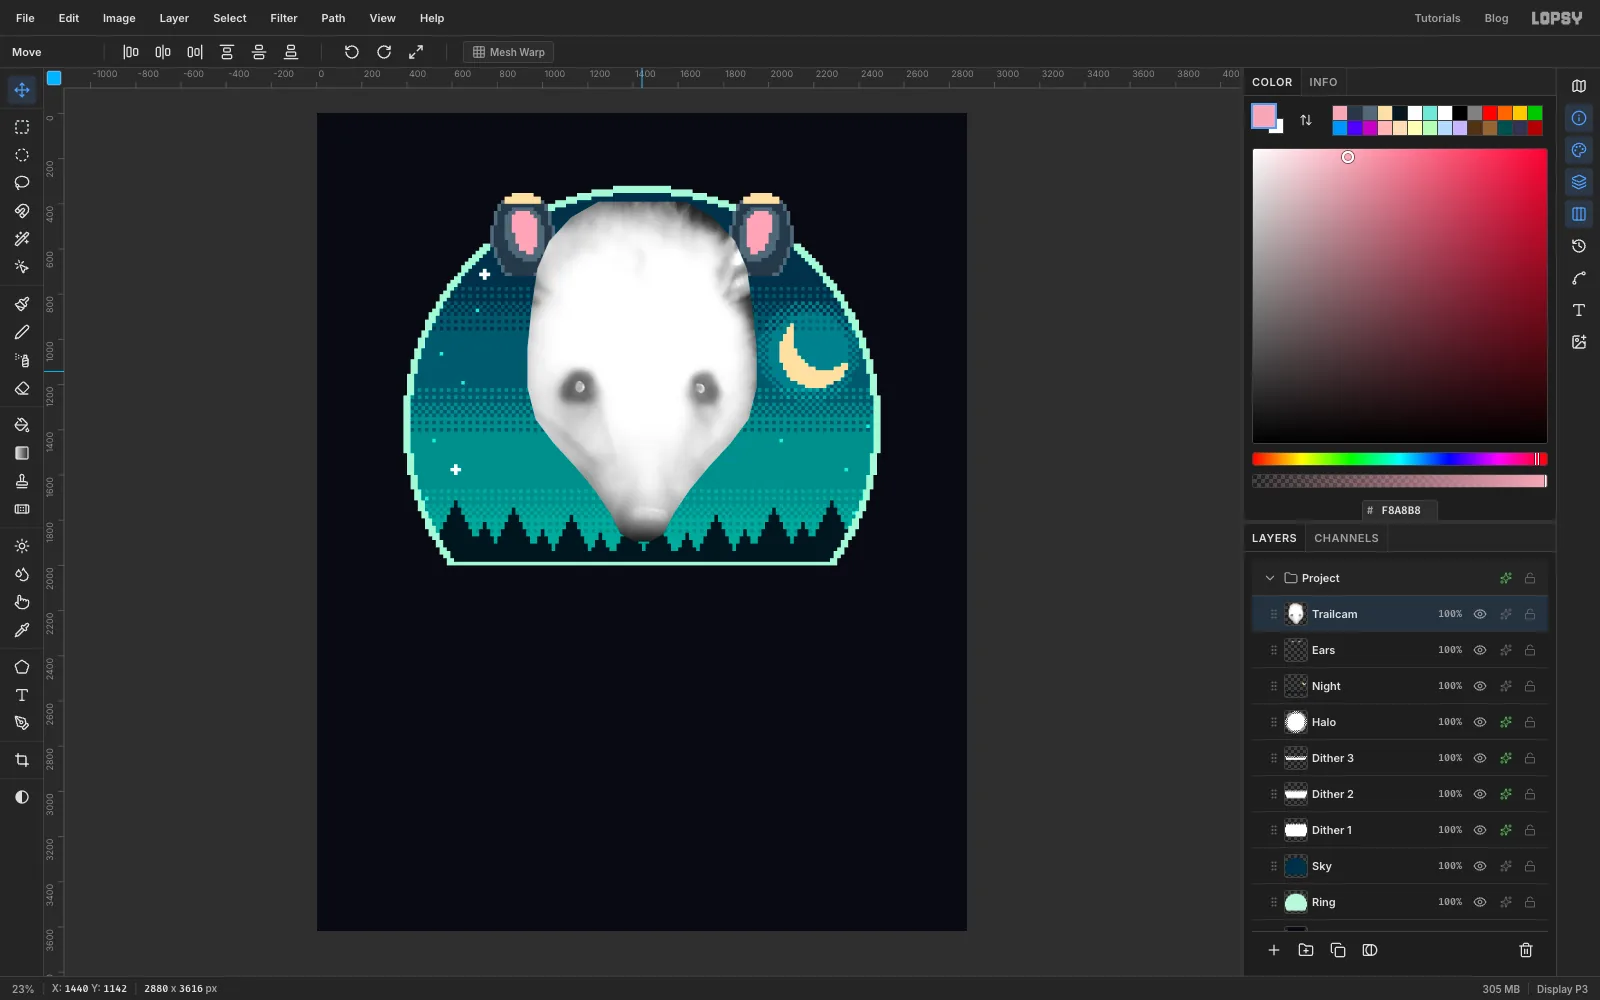
With nothing selected and the Move tool still active, drag the head so it's centred on the middle of the canvas, x 1440, with the top of its head around y 390. The chin should end just above the base of the sky, near y 1890, and the ears should sit behind the top corners of the head. The rulers help you judge this.
Soft edges are fine, since this is the last moment the head will look like a photo.
-
Back the head with black
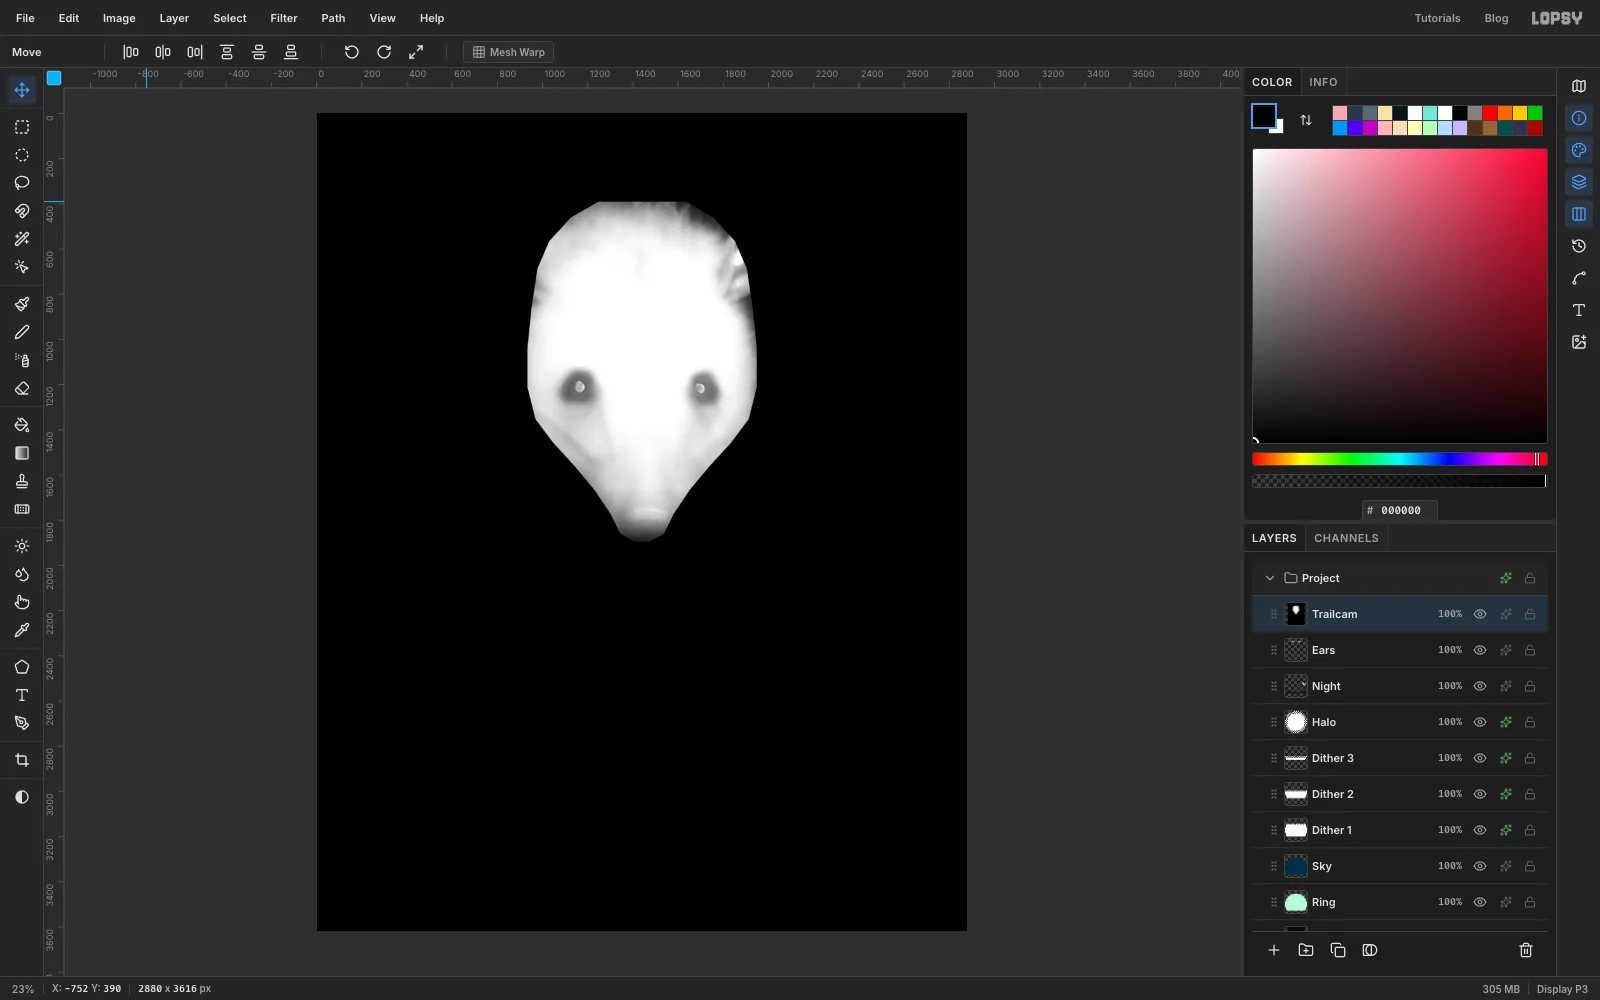
Pixelate leaves transparent areas alone, so a cut-out would keep its smooth outline. To get stair-stepped edges, the layer has to be solid first.
Click the Trailcam layer. Hold Cmd and click its thumbnail, then choose Select → Inverse. Set the colour to , choose Edit → Fill, and press Cmd+D.
The whole layer is now opaque, and it covers everything underneath for a moment.
-
Pixelate the head
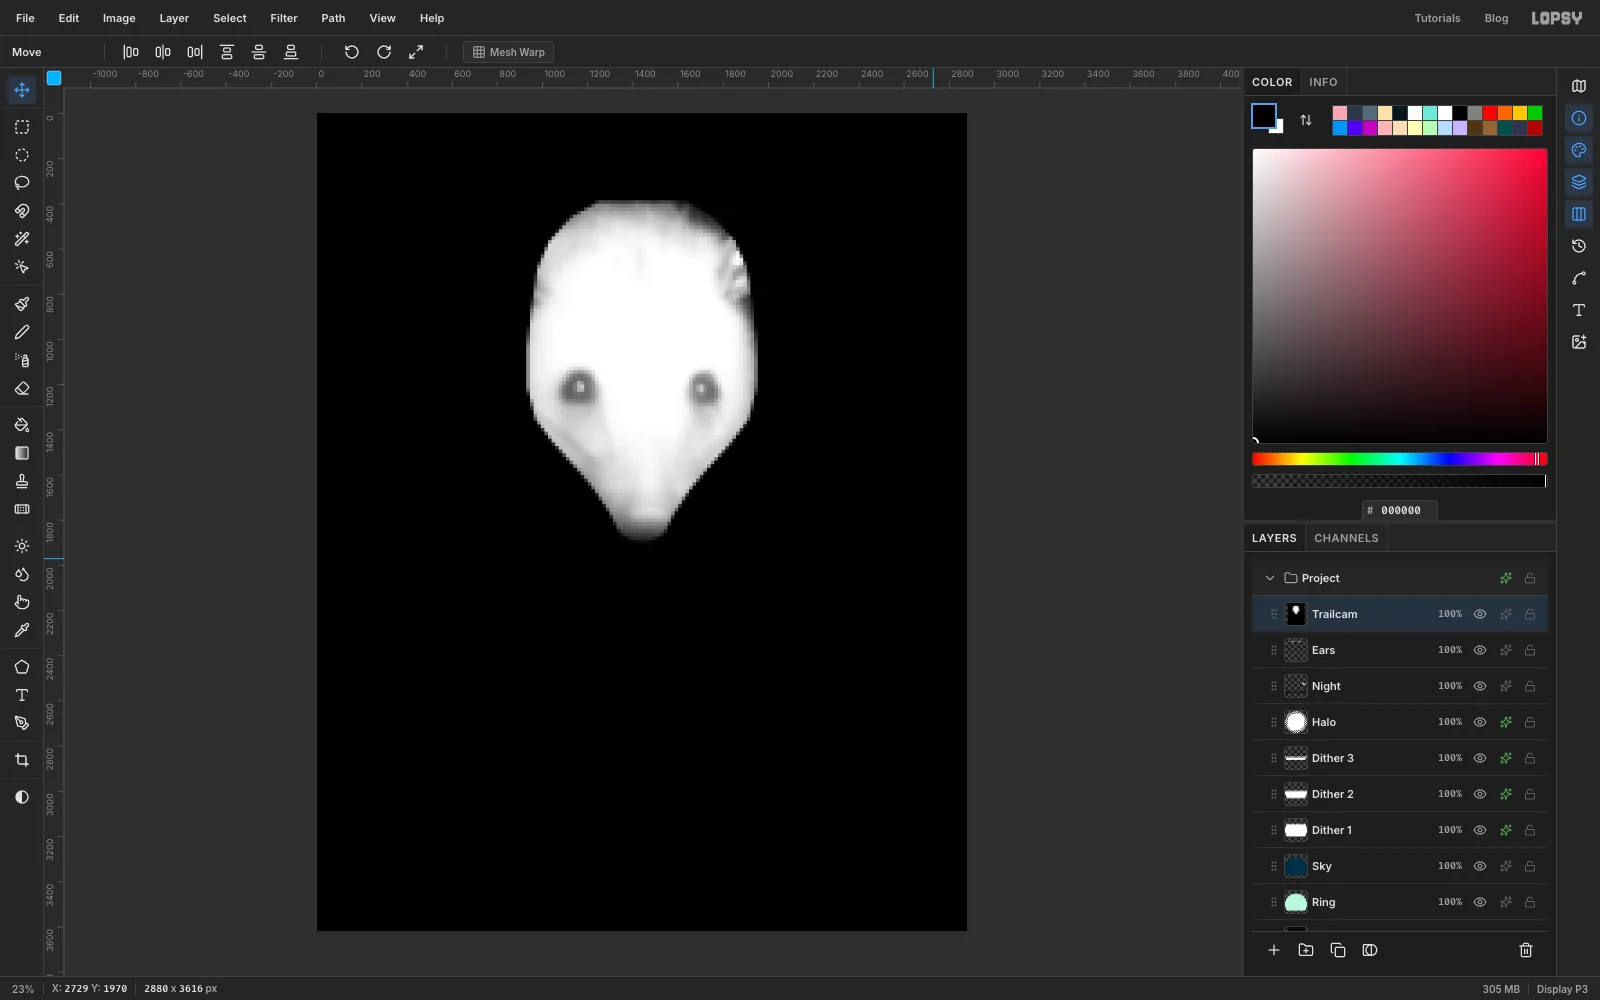
Choose Filter → Pixelate, set Block Size to 16, and click Apply.
Each 16 px block becomes a flat average of the photo beneath it. Since the layer now fills the whole canvas, the blocks line up exactly with your grid.
-
Posterize it to six tones
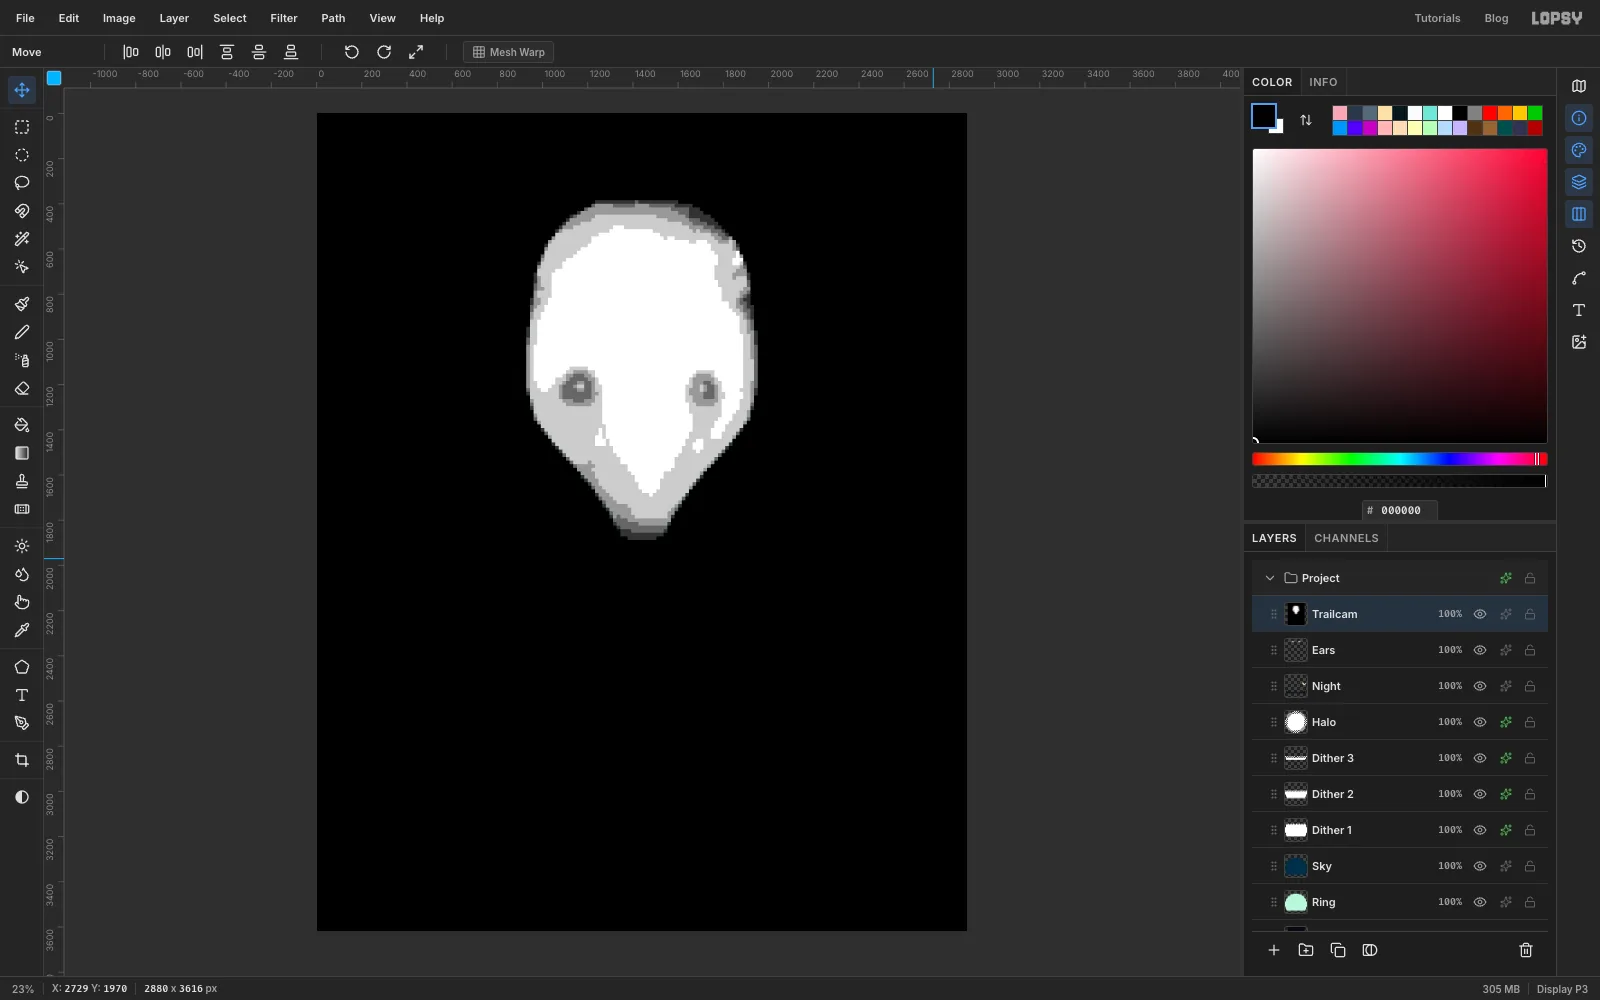
Choose Filter → Posterize, set Levels to 6, and click Apply.
Every block snaps to one of six greys: black, four in-between tones and white. This is where you get the natural shading: darker around the rim and the eye sockets, and bright across the forehead and muzzle.
-
Swap the greys for the palette
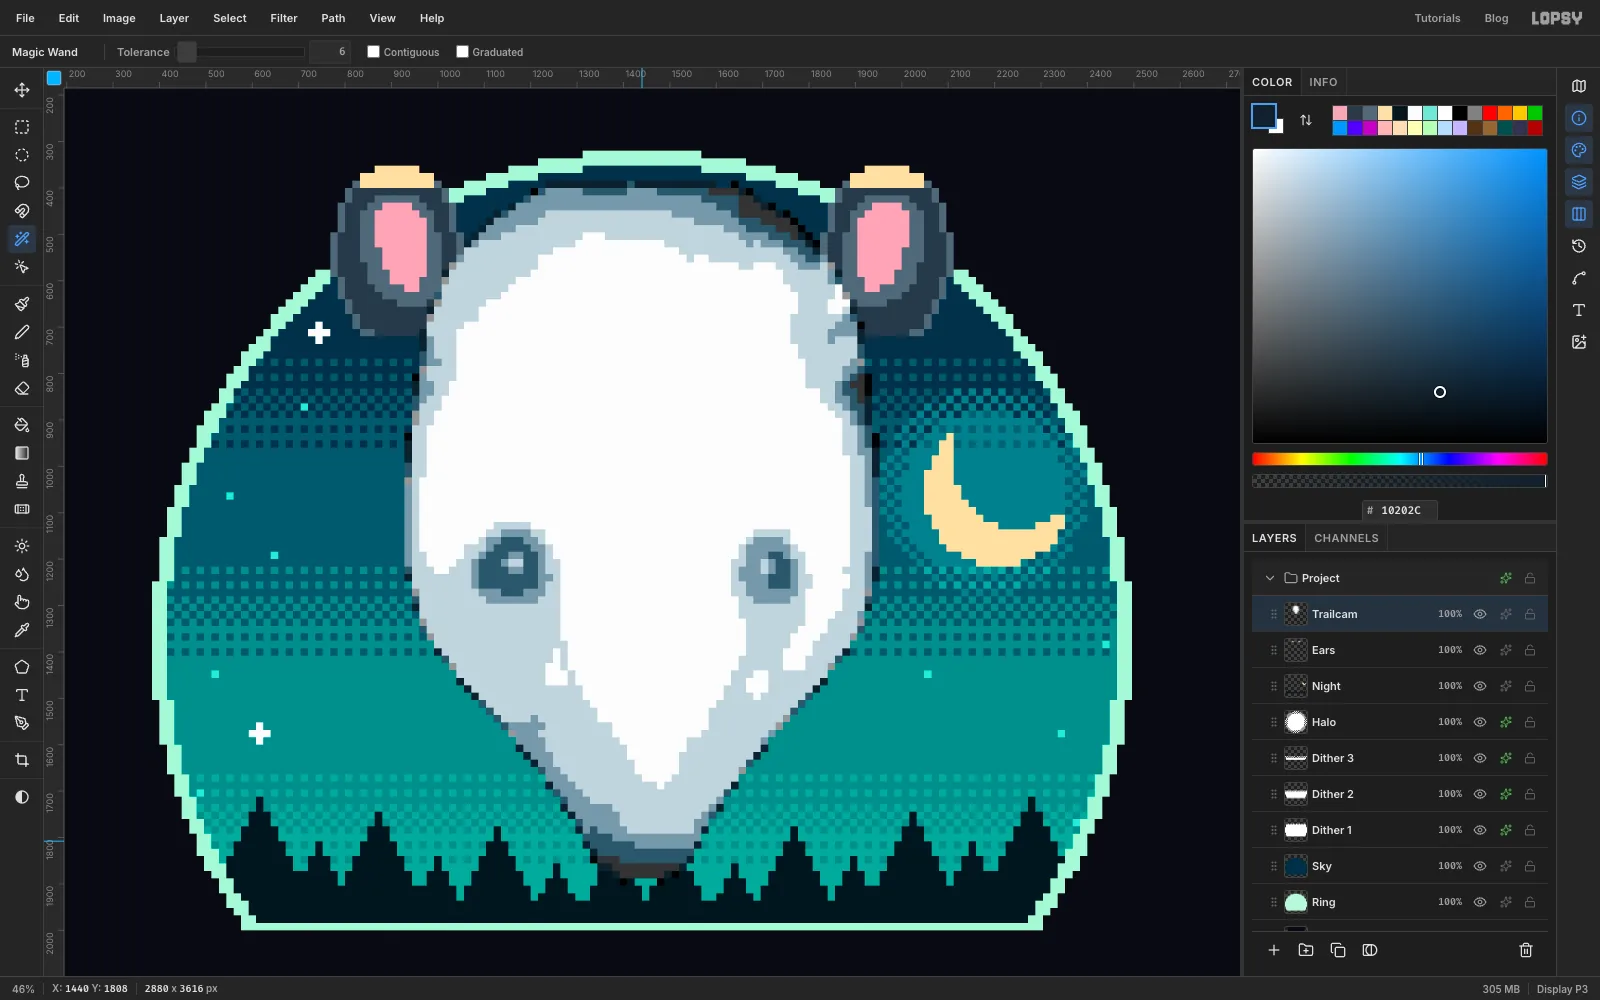
First remove the black. Press W, keep Tolerance at 6 with Contiguous ticked, and click the black in a corner of the canvas. Press Delete, then Cmd+D. The sky and ears come back. Any black enclosed inside the head stays, which is what you want.
Now untick Contiguous. With it off, one click selects every matching block across the layer. For each pair below, click a block of that grey, choose Edit → Fill with the new colour, and press Cmd+D. Work from lightest to darkest:
- White becomes
- Light grey () becomes
- Mid grey () becomes
- Darker grey () becomes
- Darkest grey () becomes
You can check a block's grey with the Eyedropper, I. The cool blue tint is what ties the head to the night sky.
-
Paint the fur pattern
At this point the head is a big white blob, more like a ghost than an opossum. Real ones have a white face with greyer fur around it, so you'll cover the white and paint a narrow part of it back.
Click Trailcam. Press W, with Contiguous still unticked, and click a white block. Click Add Layer and name it Fur. Set the colour to , choose Edit → Fill, and press Cmd+D. All the white is now pale grey.
Press N, turn the grid on if it's off, and paint on Fur with Shift-click lines:
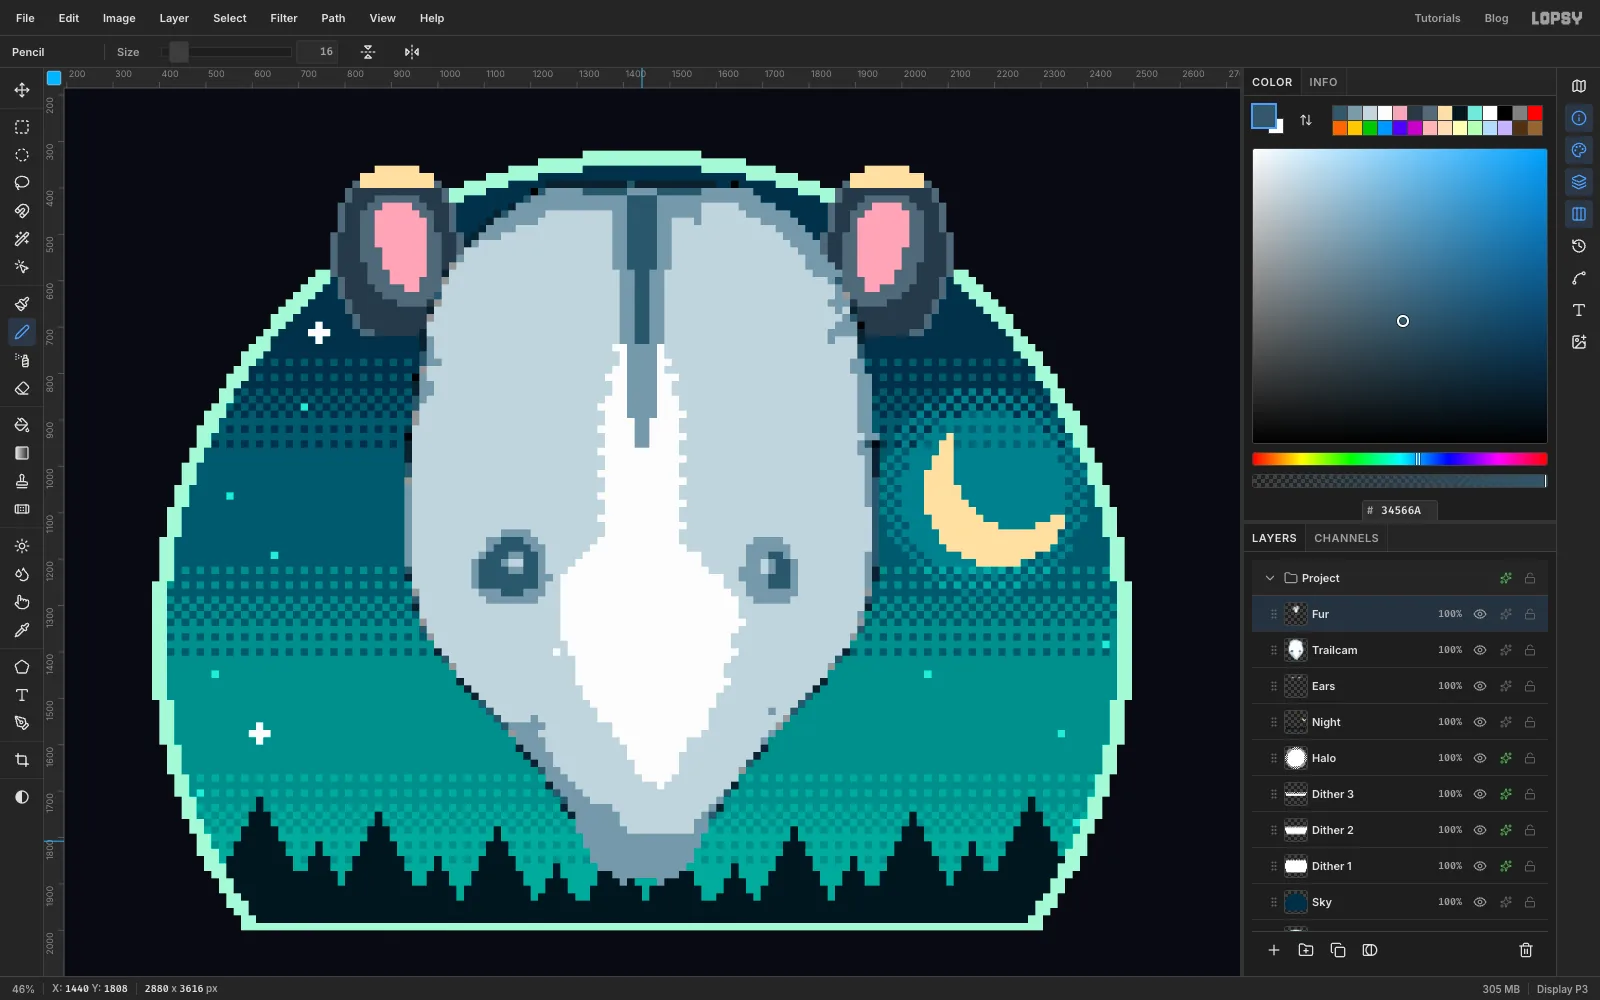
- Paint the blaze back in . It starts about 6 cells wide at the brow near row 46 and stays narrow down the forehead. It widens between the eyes to about 26 cells across the muzzle around row 80, then narrows towards the nose. Make the edge slightly ragged by going in and out a cell, so it reads as fur rather than a cut shape.
- Shade the rim. Paint the outer 2 cells of the head in wherever they're pale grey, for a rounded skull. Cover the dark chin in the same colour.
- Tidy up. Paint out any odd specks or dark diagonals from the photo. On the right cheek, around rows 48 to 58, square up the edge so it matches the left side.
- Add the crown stripe. Paint a tapering stripe from between the ears (row 26) down to the brow (row 59): in the middle and either side. Start it 8 cells wide and narrow it as it goes down.
-
Add the eyes with Symmetry
Hold Cmd and click the Trailcam thumbnail to select the head's shape, then click the Fur layer. Press N and turn Symmetry Vertical back on.
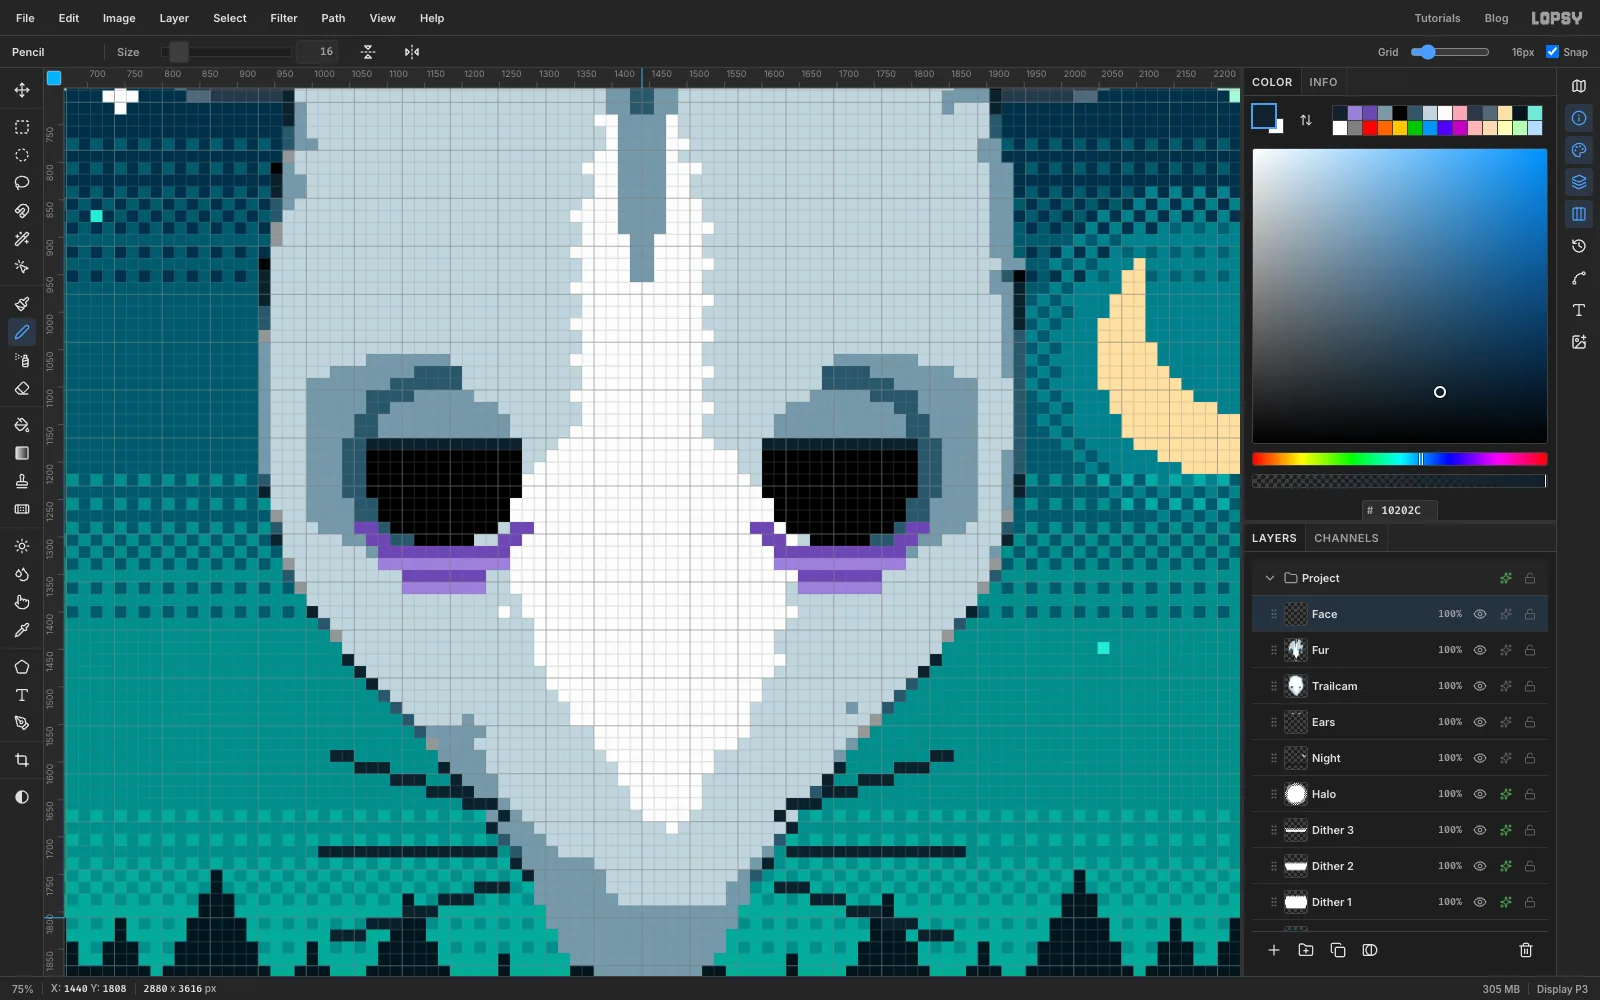
Paint soft patches around the eyes, centred on cell 73, 75. Use within about 8 cells of the centre and just beyond that, keeping to the side of the head rather than the blaze. The selection keeps the paint on the head. Press Cmd+D.
Click Add Layer and name it Face. With Symmetry still on, paint the left side and let the right follow:
- Eye: a black () circle 13 cells wide, from cell 67, 69 to cell 79, 81.
- Heavy lid: cover the top 4 rows of the eye in flat , and add a 1-cell lash line of on row 73, right across the eye. A flat lid is what makes the eye look tired.
- Bags: starting on row 80, paint a crescent under the eye, 6 rows deep, alternating and .
- Whiskers: three thin lines of fanning out from the muzzle, starting near rows 104, 107 and 110 and each about 15 cells long. Use Shift-clicks with a slight slope for the outer two.
Turn Symmetry Vertical off before going on.
-
Finish the face by hand
Paint these on the Face layer with Symmetry off. A mirrored glint would make the opossum look cross-eyed, so both glints sit on the same side of their eyes.
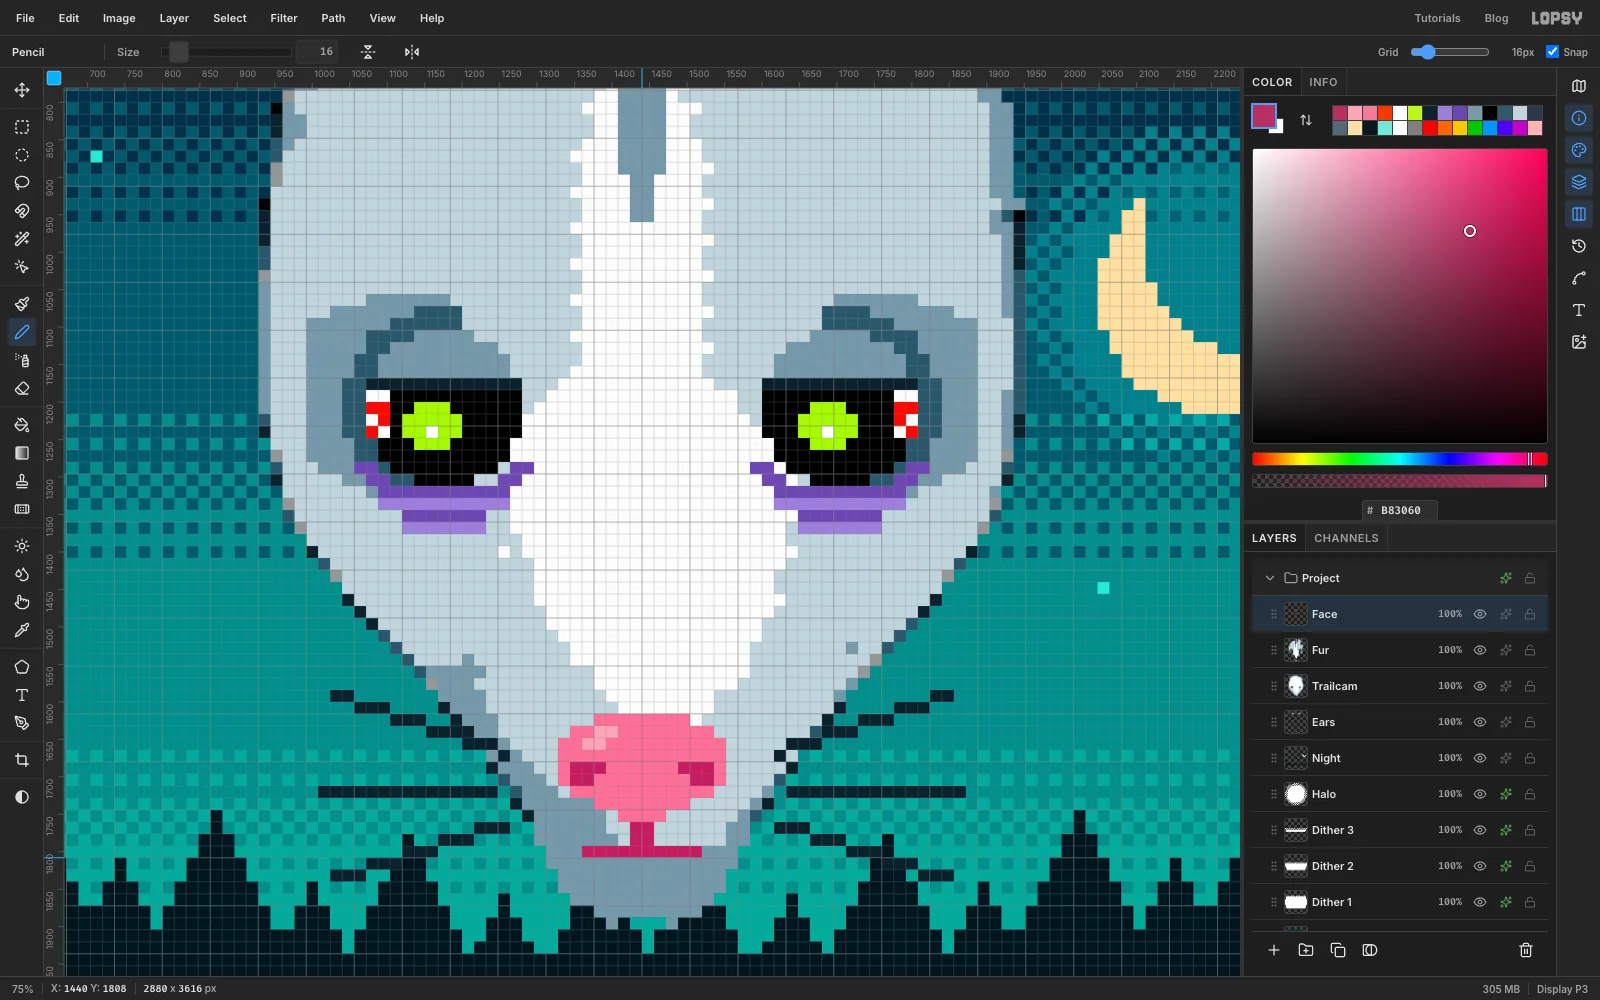
- Glint: a small oval of , 5 cells wide and 4 tall, starting at cell 70, 75 in the left eye and cell 103, 75 in the right. Put a single cell in the middle. This is the green shine you see in real night-time animal photos.
- Bloodshot corners: at the outer corner of each eye, paint a wedge of 2 cells wide and 4 tall, on rows 74 to 77. Then add a few cells of inside each wedge as veins.
- Nose: a rounded shape 14 cells wide and 9 tall, from cell 83, 101, in . Add a highlight of on the upper left and two nostril patches of .
- Mouth: a 2-cell-wide line of going down from the nose for 2 rows, then a 10-cell-wide line across, on row 112.
That's the hero finished. Look at it from across the room. If it reads as an exhausted opossum rather than a white rat, you're done.
-
Set INSOMNIAC with colour bands
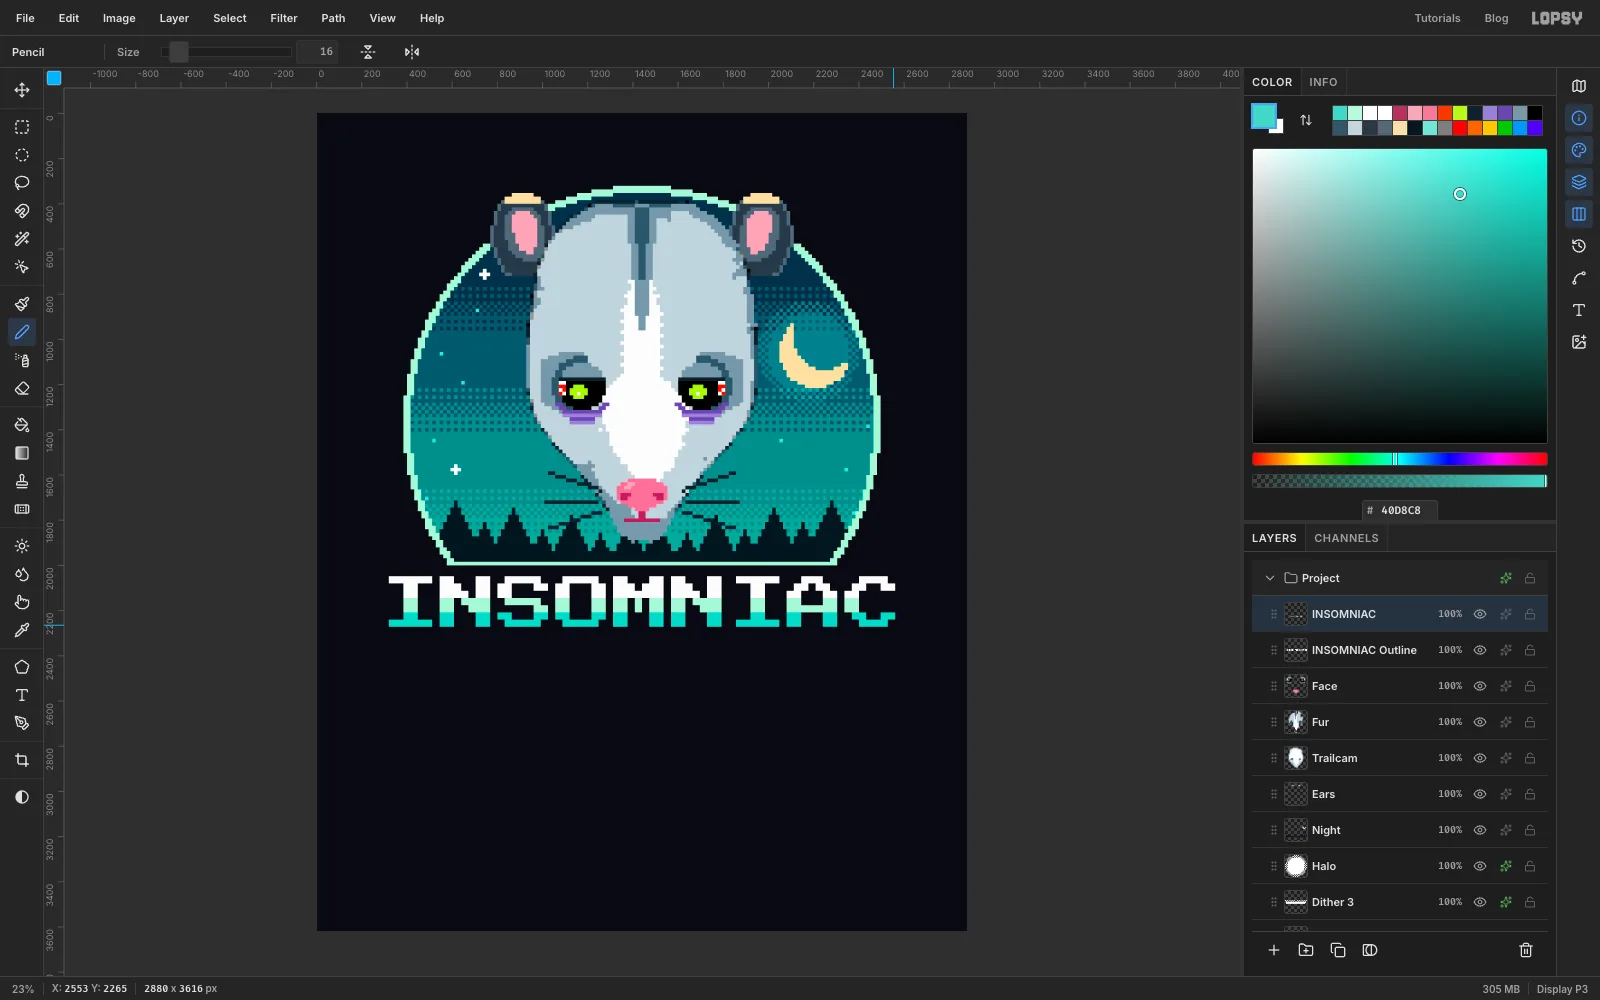
Click the Face layer and press T for the Text tool. Choose the font Press Start 2P, Size 256, and set the colour to . Click in the empty space below the roundel, type INSOMNIAC, and press Tab to commit it.
At Size 256 each font pixel is exactly 2 cells wide. Click Rasterize Layer at the bottom of the Layers panel and rename the layer INSOMNIAC Outline. Now place it. With the grid on, press V and drag the word so its top left corner lands at x 320, y 2048. On a rasterized layer, the corner of the letters snaps to the grid.
Click Duplicate Layer, click the new copy's row, and rename it INSOMNIAC.
Colour bands. Cmd-click the INSOMNIAC thumbnail so paint stays inside the letters, then press N. Paint Shift-click lines straight across the word, one row of cells at a time. The word is 14 rows tall, from row 128 to row 141:
- Rows 128 to 133:
- Rows 134 to 137:
- Rows 138 to 141:
Press Cmd+D.
Outline. Click INSOMNIAC Outline, Cmd-click its thumbnail, and fill it with the shirt colour . Press Cmd+D. Now turn on the grid and thicken it by one cell in each direction:
- Click Duplicate Layer, then click the copy's row.
- Press V and press an arrow key once to move it one cell.
- Choose Layer → Merge Down.
Do that once each for left, right, up and down. This makes square pixel corners. Select → Grow and the Stroke effect would round them.
-
Build OPOSSUM with a solid extrusion
Click the INSOMNIAC layer. Press T, set Size 384, colour , click in the empty space below, type OPOSSUM, and press Tab. At this size each font pixel is 3 cells wide.
Click Rasterize Layer, rename it OPOSSUM Outline, press V and drag it so the letters start at x 112, y 2336, with the grid on so they snap.
Click Duplicate Layer twice. Name the middle copy OPOSSUM Extrude and the top copy OPOSSUM, clicking each row before you rename it.
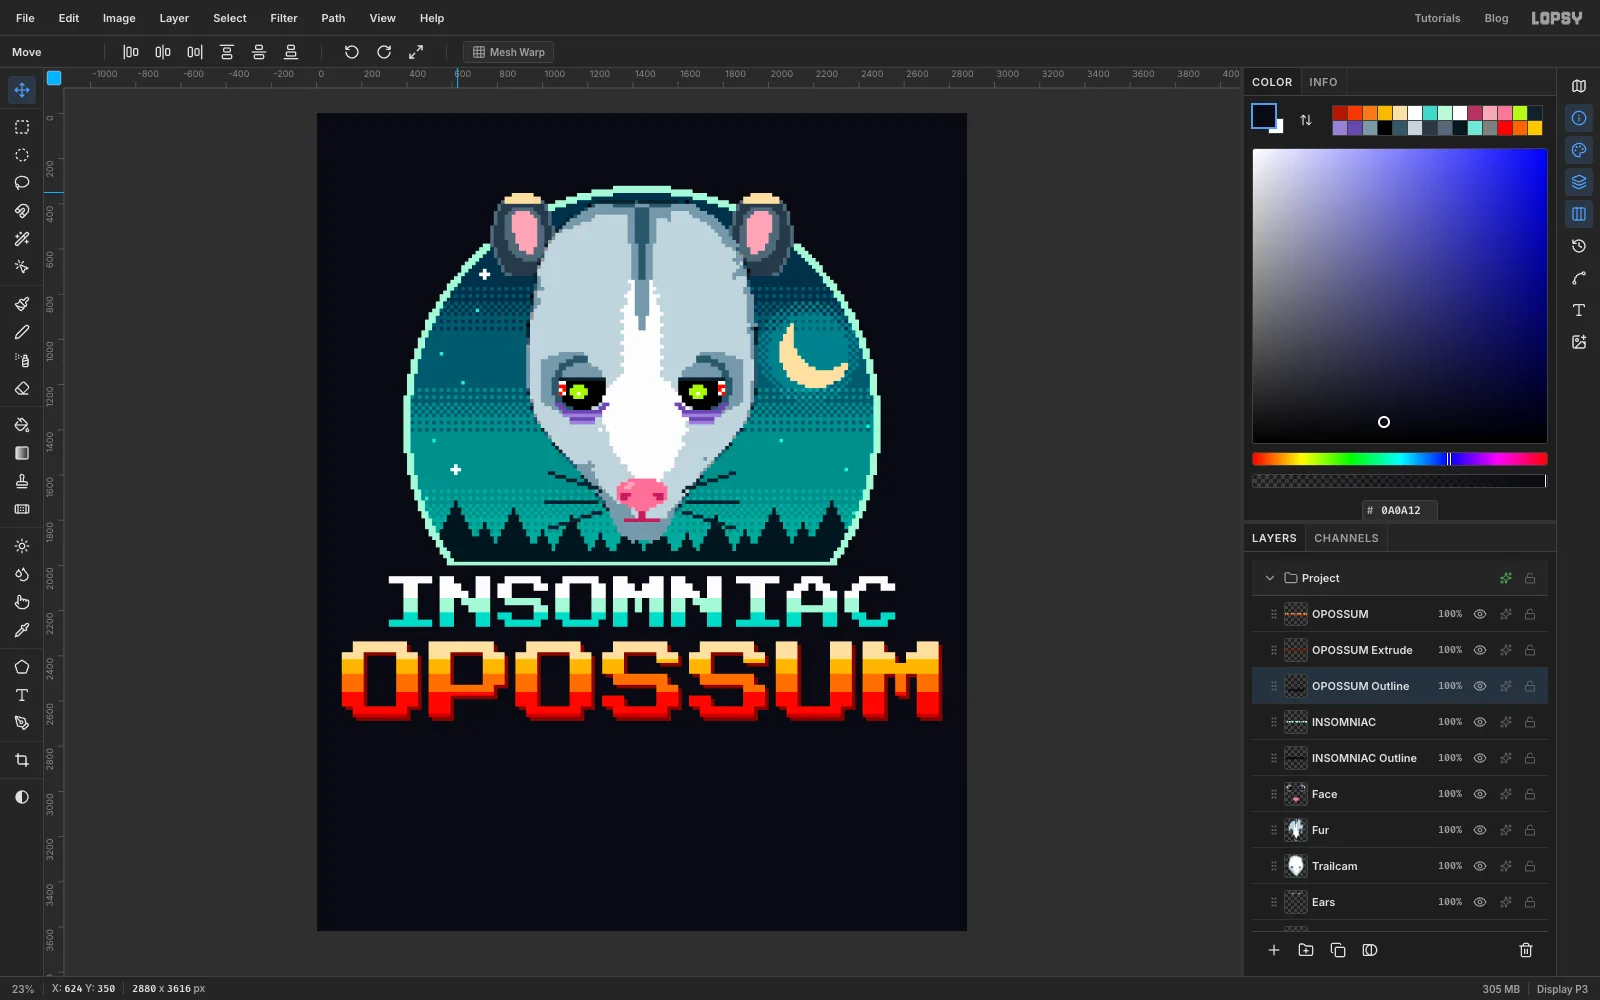
Bands. Cmd-click the OPOSSUM thumbnail and paint rows across the word with the Pencil. It's 21 rows tall, from row 146 to row 166:
- Rows 146 to 150:
- Rows 151 to 154:
- Rows 155 to 159:
- Rows 160 to 165:
- Row 166:
Press Cmd+D.
Extrusion. Click OPOSSUM Extrude, Cmd-click its thumbnail, fill it with , and press Cmd+D. With the grid on and the Move tool active, press the right arrow once and the down arrow once.
Outline. Click OPOSSUM Outline, Cmd-click its thumbnail, fill it with , and press Cmd+D. Then duplicate, nudge and merge as before, five times: first one cell right and one cell down, then left, right, up and down. The first pass makes the outline wrap around the extrusion too.
-
Add the score display and small type
All the small type is Silkscreen at Size 128, where one font pixel is one cell. For each line:
- Click the OPOSSUM layer, press T, and set the size and colour.
- Click in clear space, type the text, and press Tab.
- Click Rasterize Layer. Press V and, with the grid on, drag the line into place. Rasterizing makes the corner of the letters snap to the grid, so each line stays crisp.
The position is where the top left of the letters should land.
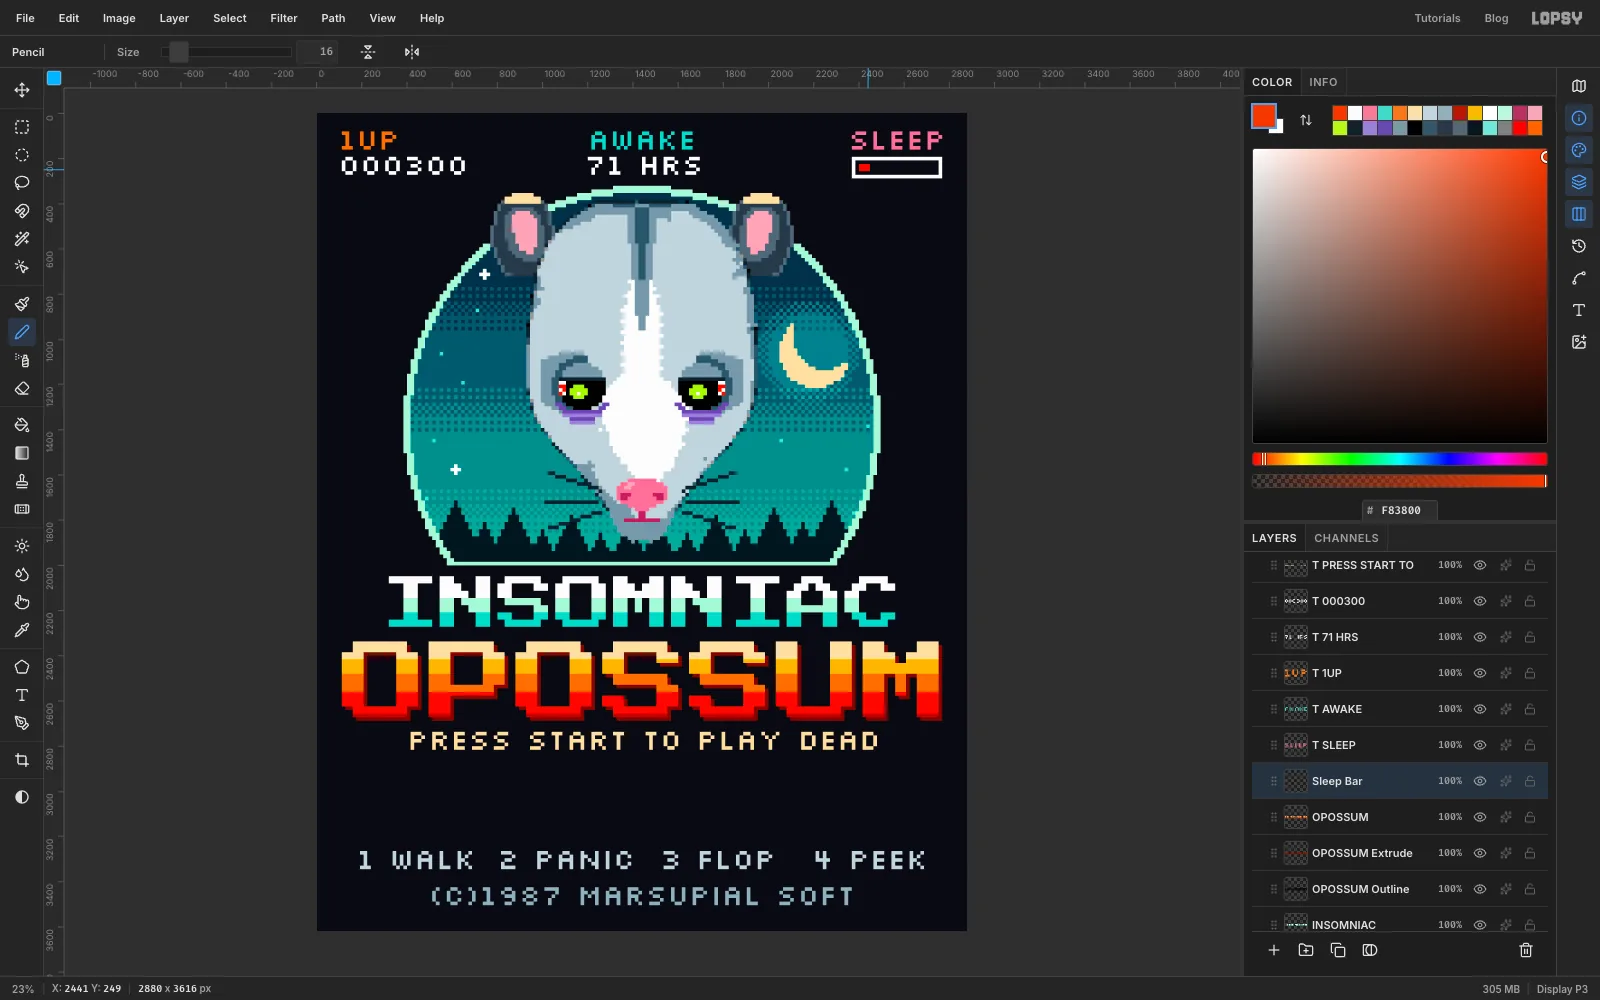
(C)1987 MARSUPIAL SOFT, , cell 32, 2141 WALK, , cell 12, 2042 PANIC, , cell 51, 2043 FLOP, , cell 96, 2044 PEEK, , cell 138, 204PRESS START TO PLAY DEAD, , cell 26, 171000300, , cell 7, 1271 HRS, , cell 75, 121UP, , cell 7, 5AWAKE, , cell 76, 5SLEEP, , cell 148, 5
For the sleep bar, click the OPOSSUM layer, click Add Layer and name it Sleep Bar. Press N and draw a box with Shift-click lines, from cell 148, 12 to cell 172, 17. Then paint a tiny red fill inside it, 3 cells wide and 2 tall, from cell 150, 14. Nearly empty: that's the joke.
Check the margins: the score display, OPOSSUM and the sprites should all stop 7 cells from each edge of the shirt.
-
Paint the first sprite
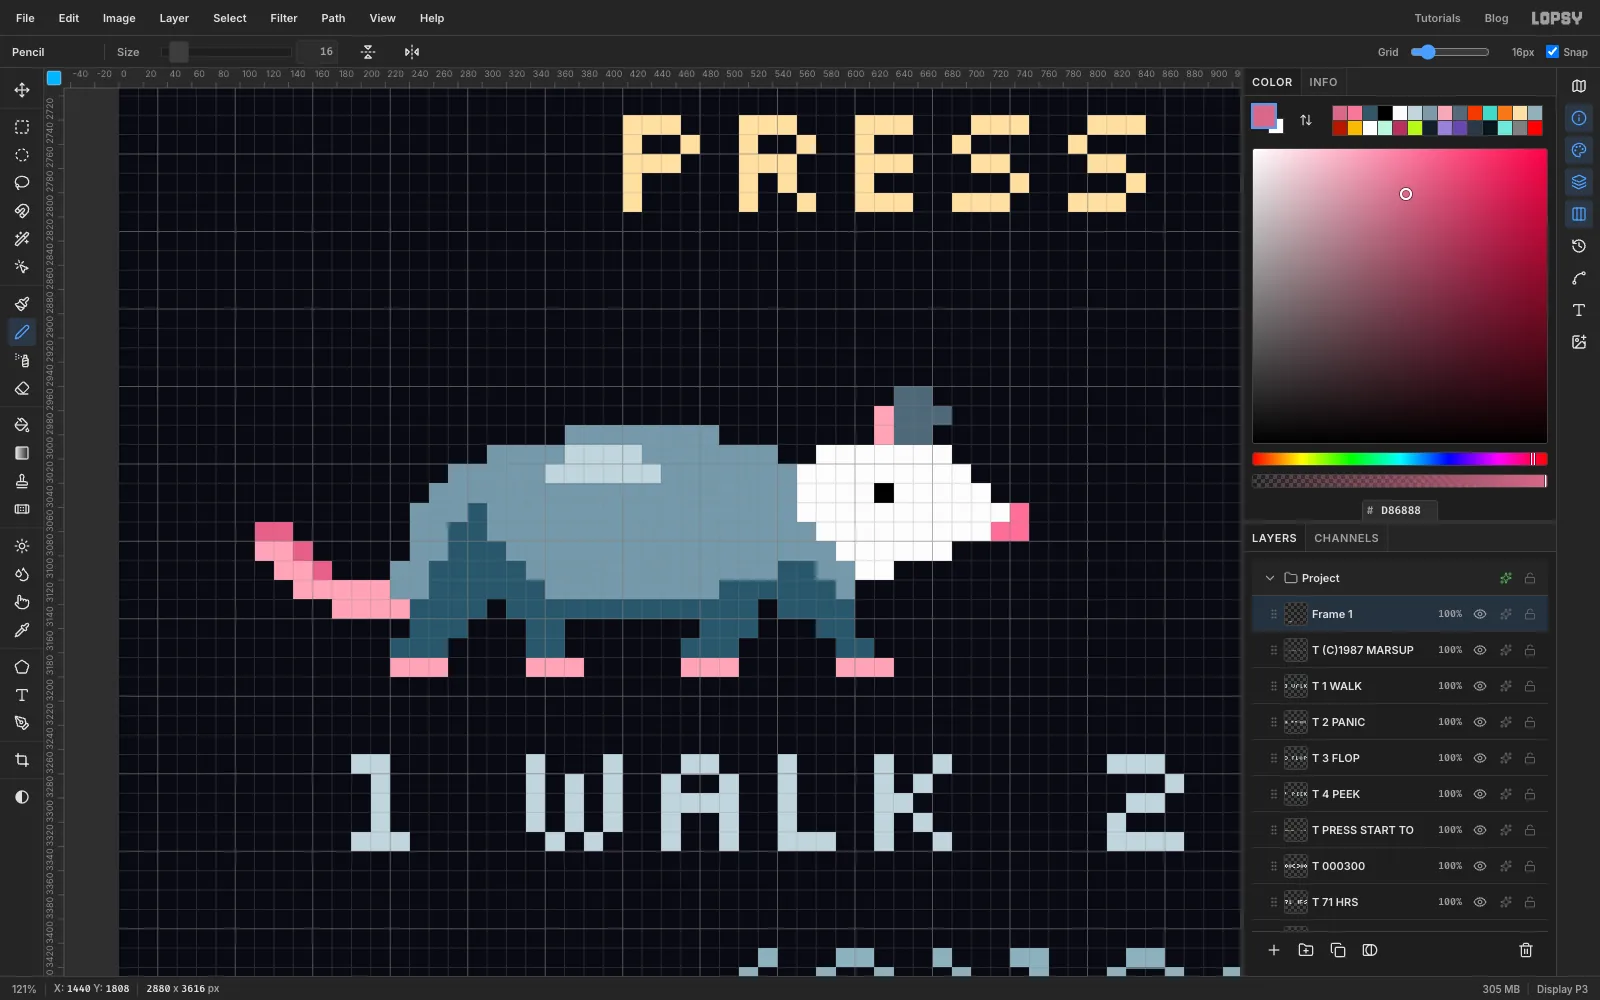
Click the top text layer (the (C)1987 line), click Add Layer and name it Frame 1. This sprite is 40 cells wide and 15 tall, from cell 7, 185, and it's painted a cell at a time. With the grid on, count cells from the close-up.
- Body: a long oval of , with an arched back, from column 15 to column 37.
- Shading: along the belly and hind quarters, and for the legs on the far side. Add a small highlight of on the back.
- Head: a wedge of pointing right, ending at a nose. Add a single black cell for the eye.
- Ear: , sticking up behind the head, with a edge.
- Tail: a long, bare tail running down and back from the rump, with a little at the tip.
- Legs: four short legs in a walking pose, with feet on the bottom row.
-
Duplicate it for the panic frame
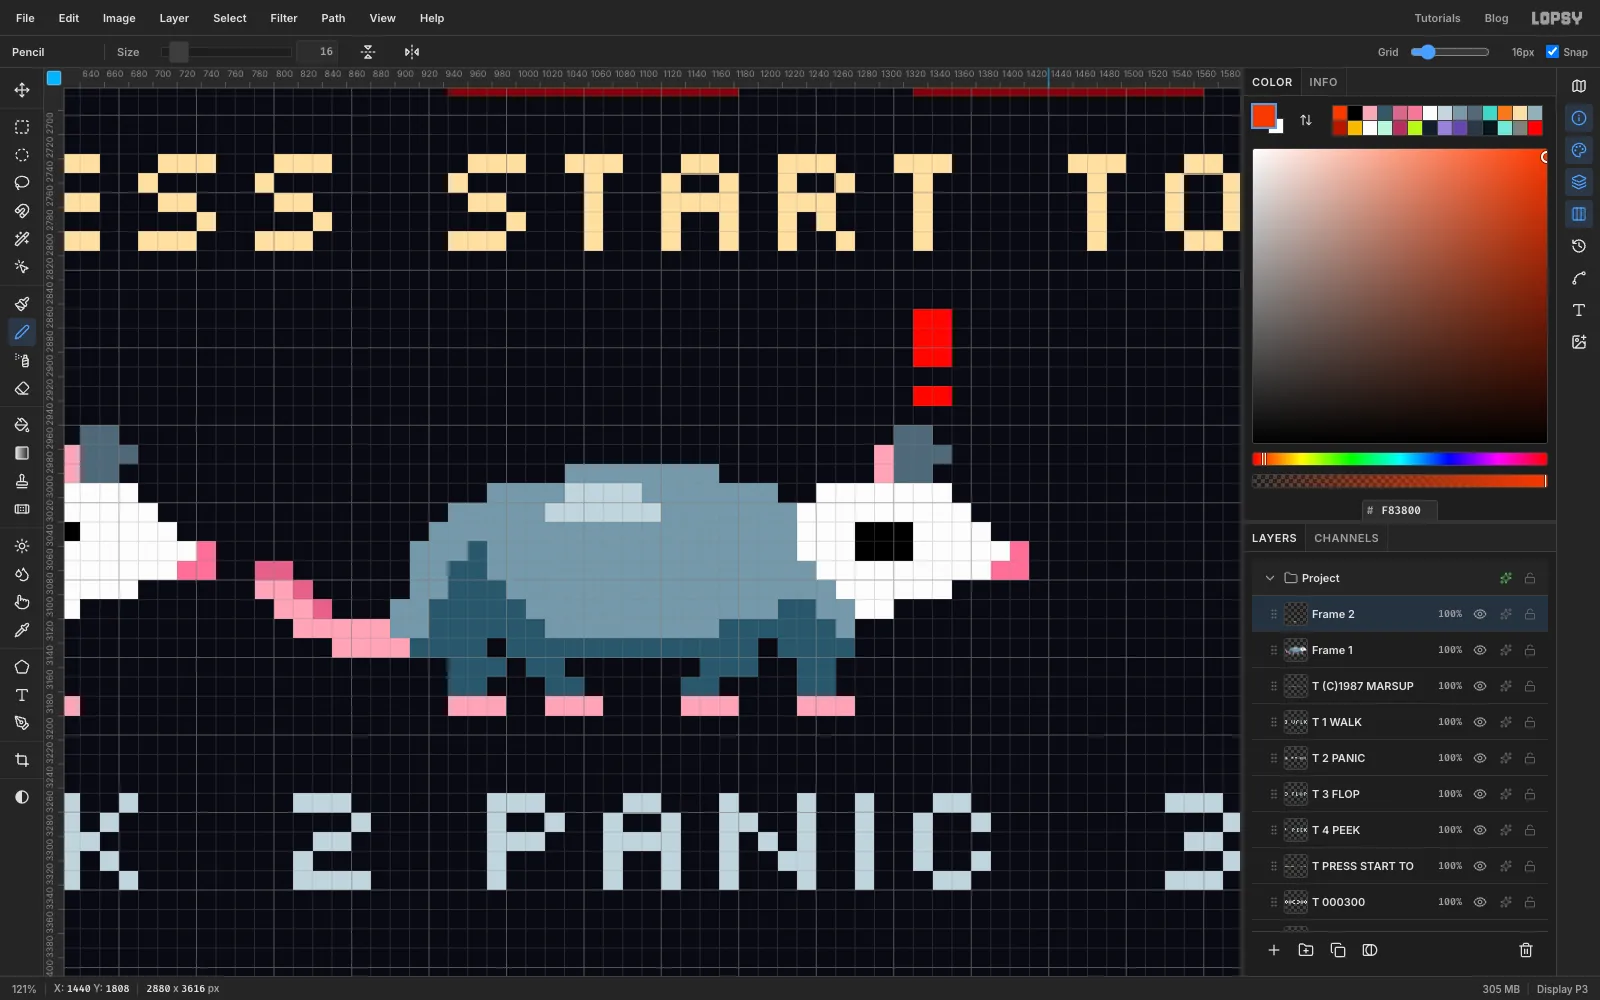
Click Duplicate Layer, click the copy's row, and rename it Frame 2. Press V with the grid on. Drag the copy 42 cells to the right, so it starts at cell 49, 185. Snap keeps its top left corner on the grid. Watch that it doesn't shift up or down.
Now change the pose:
- Press M, click once with nothing selected, and enter From 784, 3152, To 1424, 3200. That's the bottom 3 rows of the sprite. Press Delete, then Cmd+D.
- Press N and repaint the legs pulled together, in the same colours.
- Make the eye wide: a 3 × 2 block of in place of the single cell.
- Add a red exclamation mark above the head, 2 cells wide: 3 rows for the stroke, a gap of 1 row, and 1 row for the dot.
-
Flip a copy on its back
Opossums really do fall over and play dead. Happily, flipping a sprite is safe because no pixels get resampled.
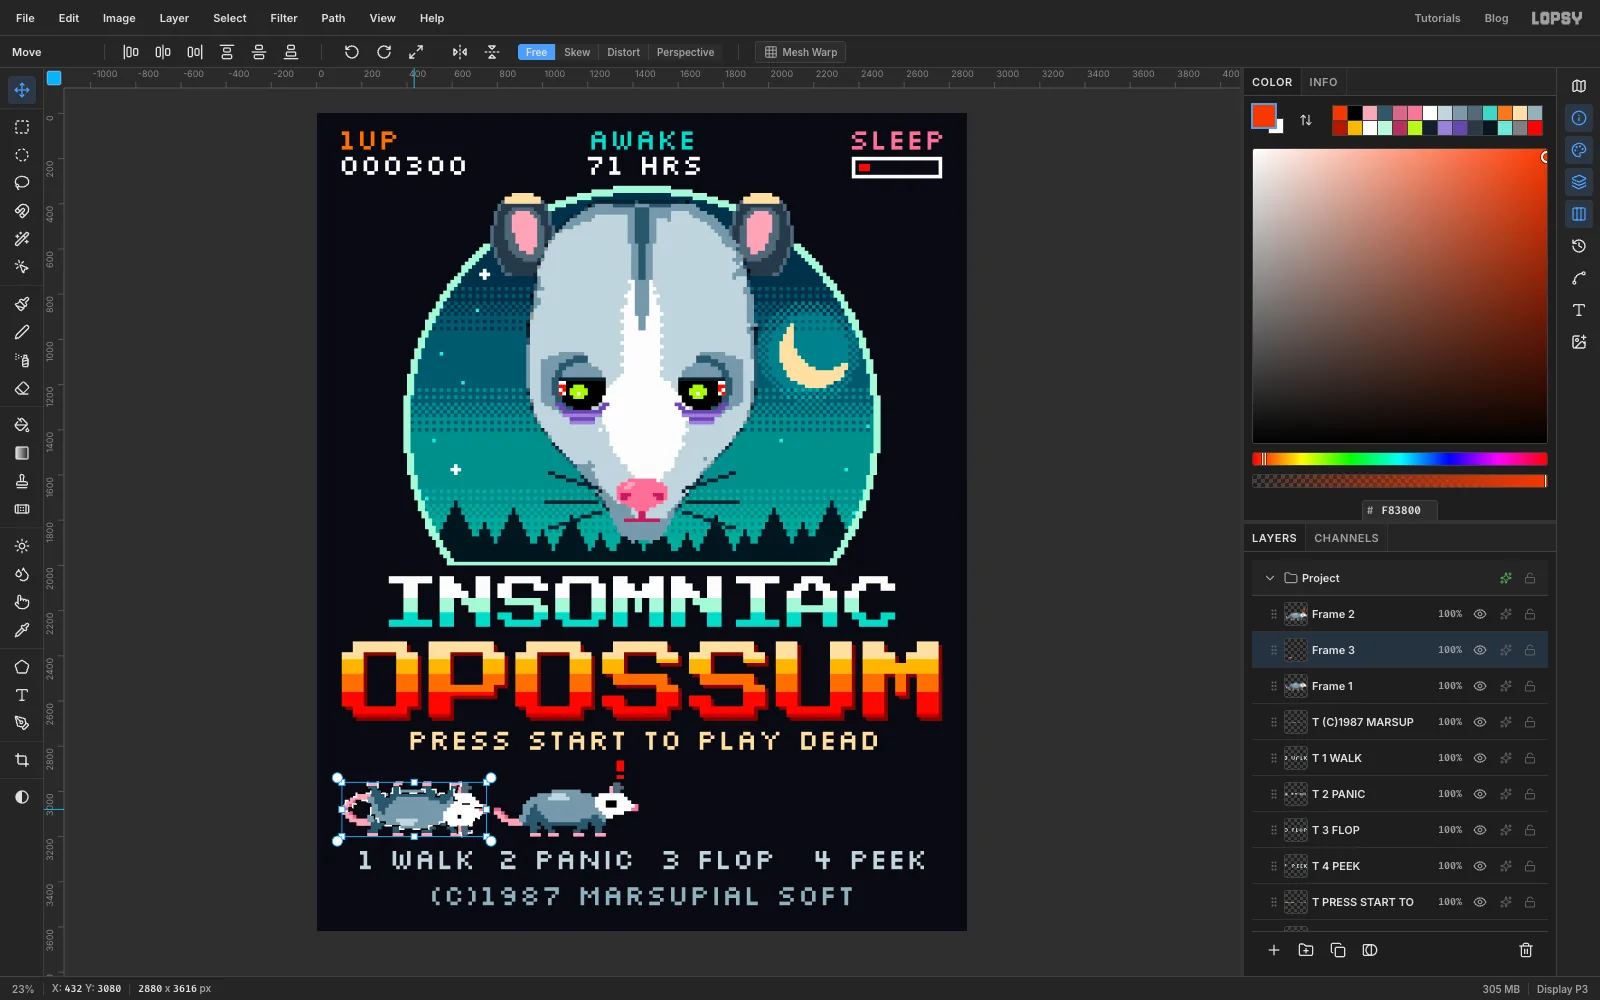
Click Frame 1, click Duplicate Layer, click the copy's row and rename it Frame 3. Press M, click once, and enter From 112, 2960, To 752, 3200 to select the whole sprite. Press V and click Flip Vertical in the options bar. Press Cmd+D.
With the Move tool and the grid on, drag it 84 cells to the right, to start at cell 91, 185.
-
Lower it and add the dead face
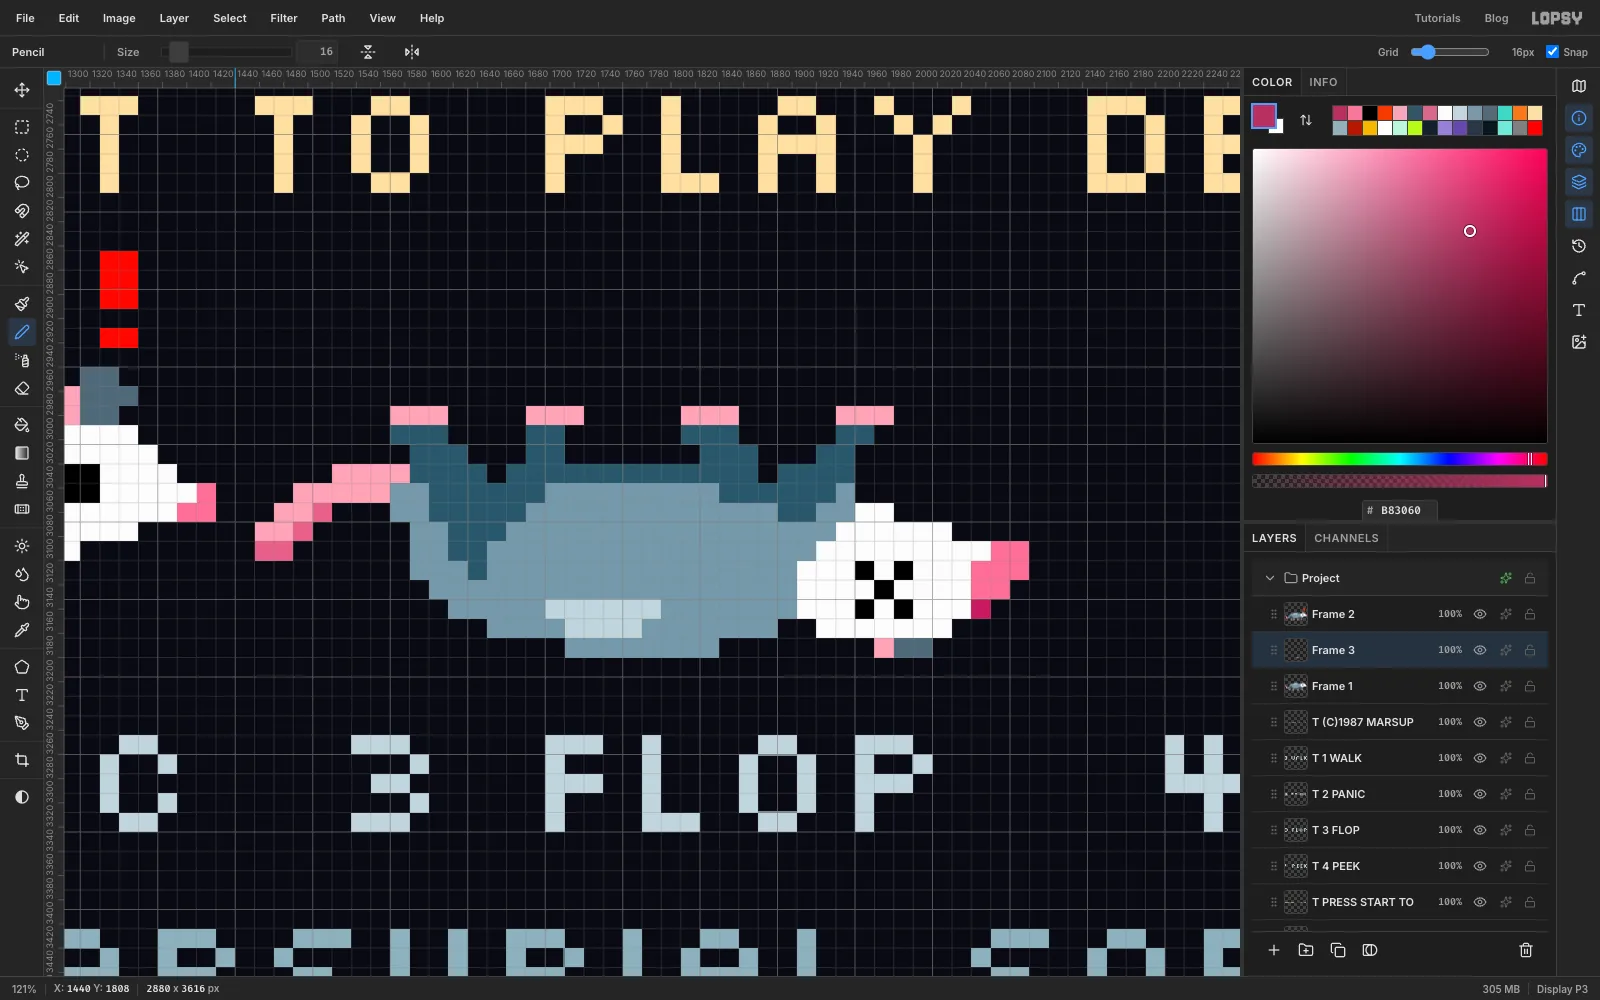
The ears are on the bottom now and they're holding the body up in the air. Press M, click once, and enter From 1456, 3168, To 2096, 3200 to select the bottom 2 rows. Press Delete, then Cmd+D.
Press V with the grid on and press the down arrow twice, so the back rests on the ground line you'll draw soon.
Press N and paint:
- X eye: 5 black cells in an X, on the white head.
- Tongue: 2 × 2 cells of at the tip of the snout, with one cell below.
-
Duplicate it for the last gag
The fourth frame is the punchline: it's only pretending.
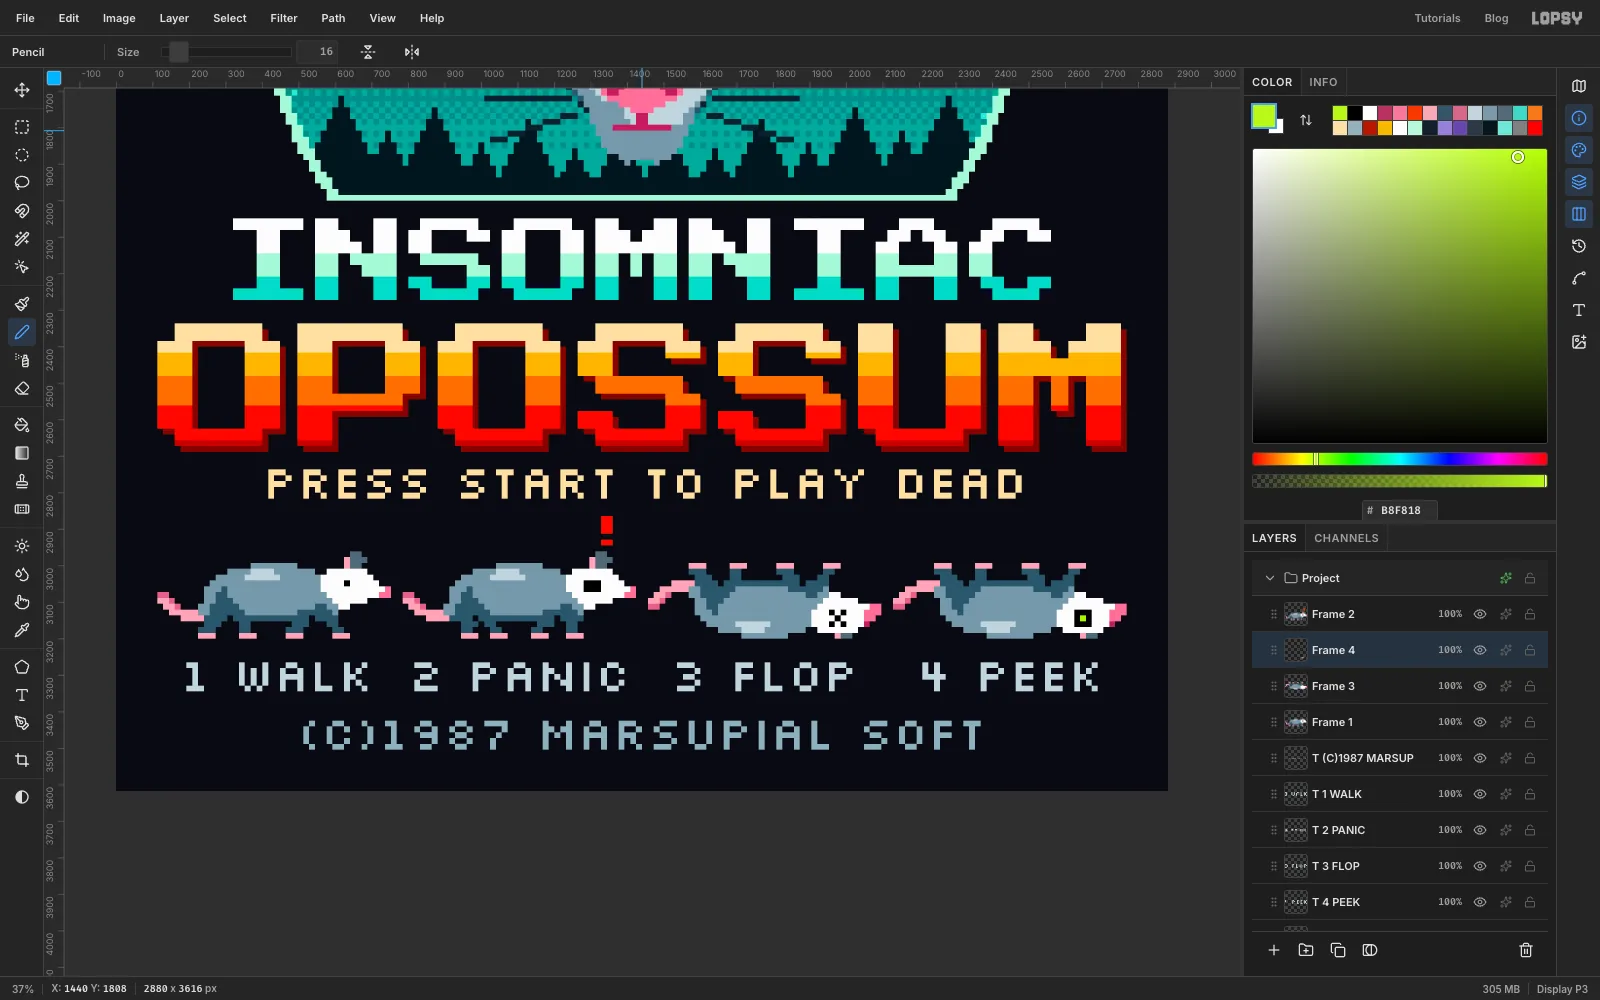
With Frame 3 active, click Duplicate Layer, click the copy's row and rename it Frame 4. Press V and drag it 42 cells to the right, to start at cell 133.
Press N. Paint over the X with , then paint a 3 × 3 black eye in the same place, with a single cell in the centre. It's peeking to check whether you've left.
-
Draw the ground line
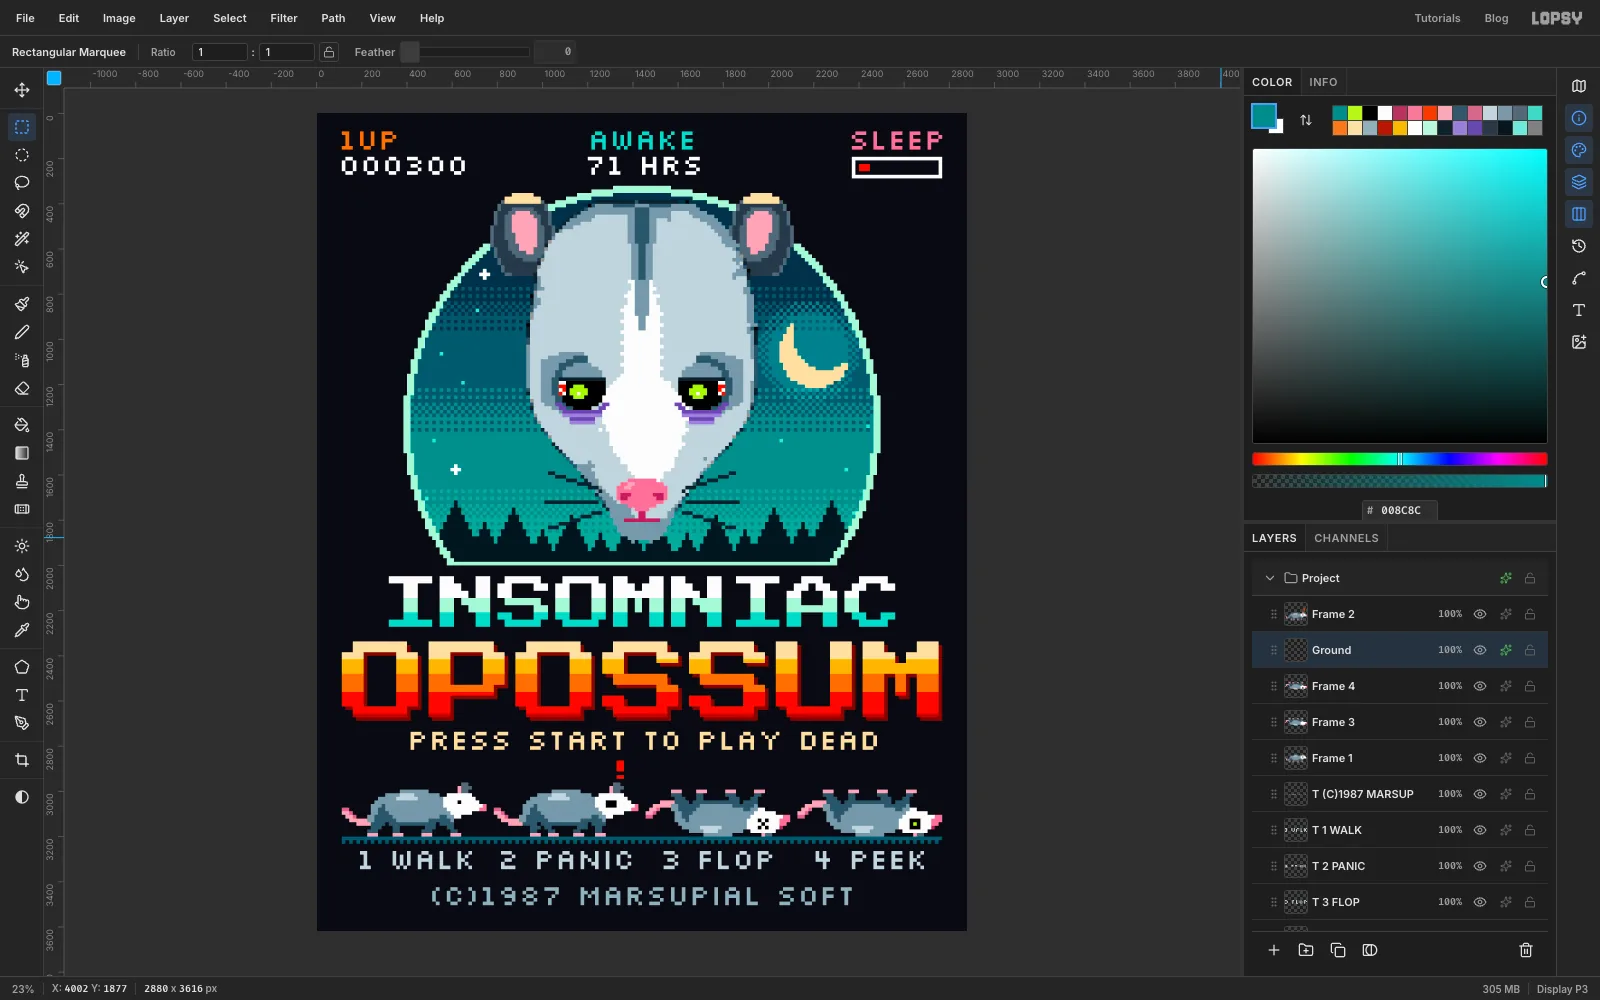
Click Add Layer and name it Ground. Press N and draw one straight line from cell 7, 200 to cell 172, 200, using click and Shift-click. Any colour will do for now.
For the broken row beneath it, press M, click once and enter From 112, 3216, To 2768, 3232. Choose Edit → Fill with Pattern..., use Pattern 2, and press Cmd+D.
The line and the checker row are different colours at this point. Open the effects drawer and turn on Color Overlay in to bring them together as one dark teal.
-
Group the layers and export
Tidy the Layers panel. For each set below, click the bottom layer, Shift-click the top layer, and click Group Layers at the bottom of the panel. Rename each group.
- Roundel: Ring up to Night
- Opossum: Ears up to Face
- Title: INSOMNIAC Outline up to OPOSSUM
- Type: Sleep Bar up to the (C)1987 line
- Sprites: Frame 1 up to Frame 2. The duplicates landed in the middle of the stack, so this range also takes in Frames 3 and 4 and Ground.
Now you can click a group and nudge it with the arrow keys while the grid is on, to move the whole thing by exact cells.
Turn the grid off and choose View → Fit to Screen. Choose File → Quick Export PNG for the picture and File → Save Project to keep the layers.
For the printer, hide the Background layer before exporting if they want a transparent file. The dark outlines are painted in the shirt colour, so they'll need to print as ink if the shirt is a different colour.