Make an 8-Bit ZX Spectrum Loading Screen Album Cover
Turn two public-domain photos into a 1-bit dithered ZX Spectrum loading screen in Lopsy, with colour clash, tape-loading stripes and a half-loaded screen.
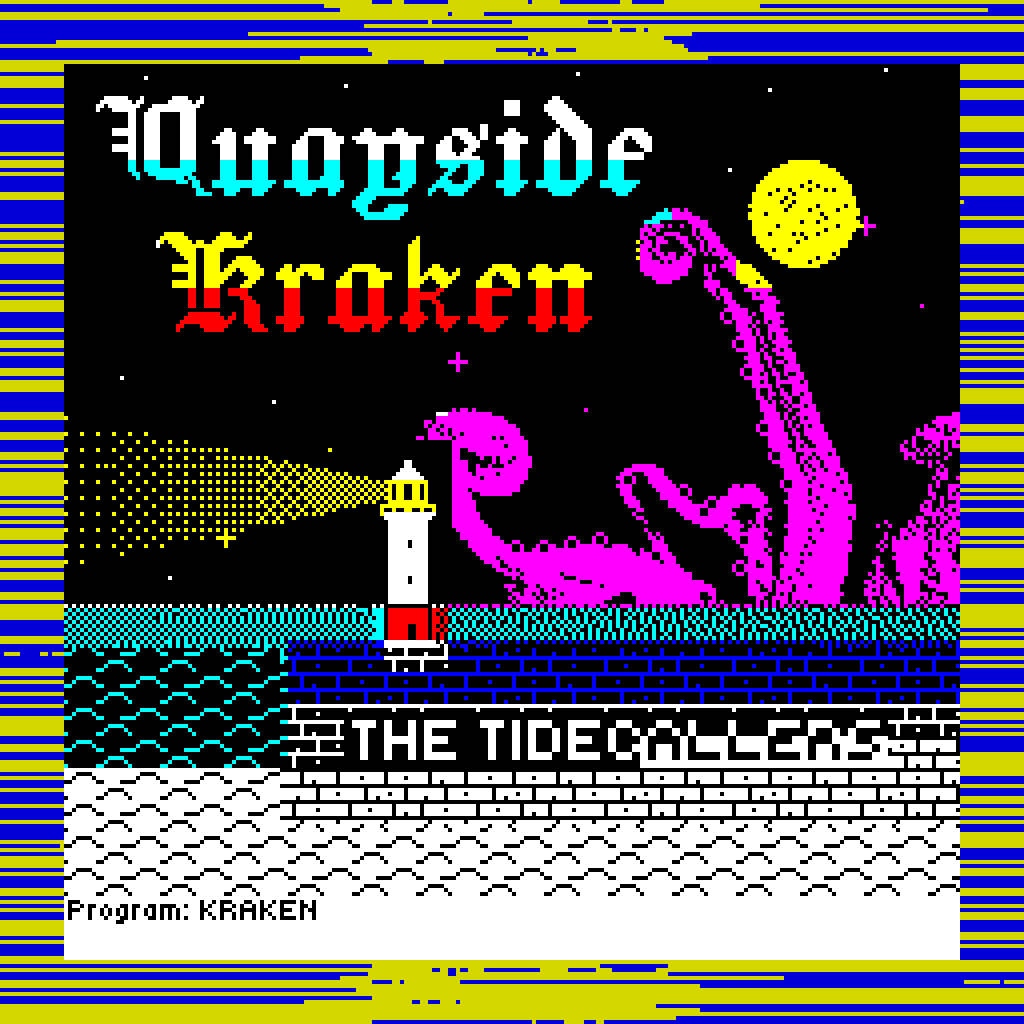
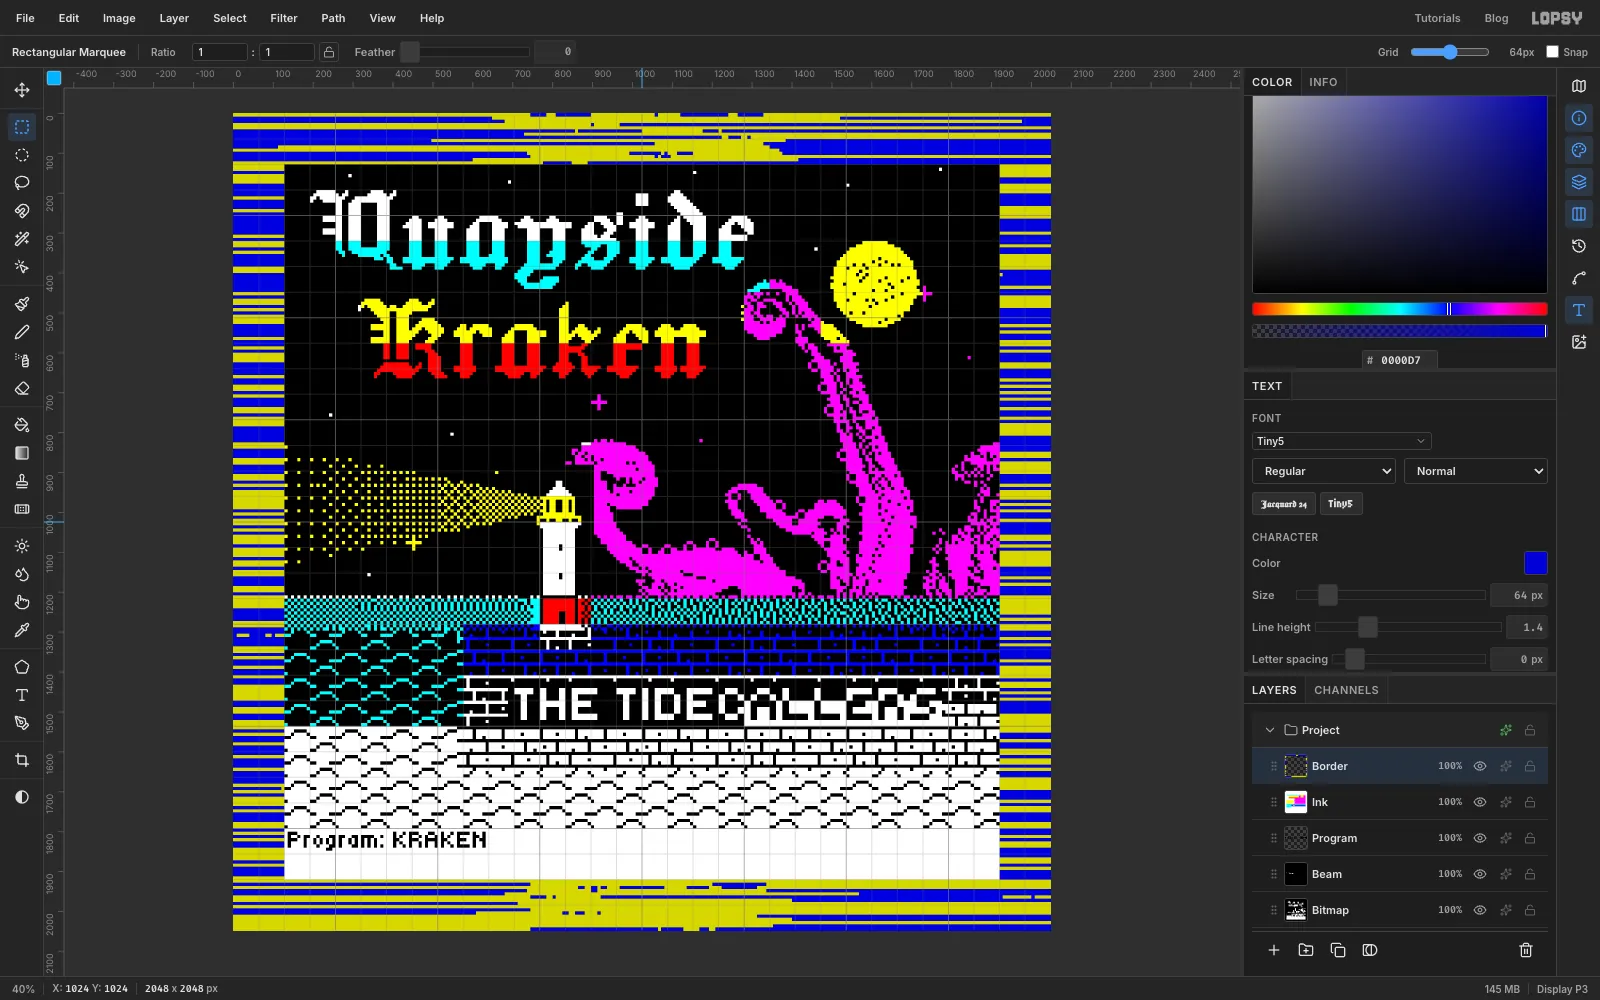
On a ZX Spectrum, a game took several minutes to load from cassette. While you waited, the loading screen appeared a bit at a time: first the black-and-white picture, row by row, then the colour, while the border flickered with yellow and blue stripes. Chiptune bands still borrow that look. In this tutorial you'll make the cover for Quayside Kraken by the (made-up) band The Tidecallers, stopped at the moment the colour is half loaded.
The Spectrum's limits are what make the style, so you'll follow them:
- One pixel is 8 × 8 px. The finished cover is 2048 × 2048 px. The picture area is 1792 px, which is 224 Spectrum pixels across, inside a 128 px border.
- The picture is 1 bit. Every pixel is on (ink) or off (paper). Tone comes from dithering, a pattern of dots.
- Colour comes in 8 × 8-pixel cells (64 × 64 px here). Each cell has one ink colour, so when two objects share a cell they both take its colour. That "colour clash" is part of the look, and you'll use it on purpose.
The picture starts as two photos from Wikimedia Commons: Andy Li's Newhaven Breakwater Lighthouse (CC0) and a plate of a giant Pacific octopus from the Bulletin of the United States Fish Commission, Enteroctopus dofleini (public domain). You'll cut the octopus out, stand it up behind the breakwater, and turn the whole scene into a 1-bit dither with Indexed Color. After that it's pixel work: a hand-drawn lighthouse, pattern-filled stone and waves, a dithered beam and a pixel-blackletter title. Colour goes on last, on a single Multiply layer.
You'll use:
- Magic Wand, Rectangular and Elliptical Marquee (with Shift to add and Shift+Option to intersect), the exact-corners marquee dialog, the Pen tool and Path to Selection
- the Move tool's scale handles and Rotate 90° CW, a group move
- Flatten Image, Canvas Size, Image Size, Image → Mode (Grayscale, Indexed Color with dithering, RGB)
- the filters Pixelate, Threshold, Brightness/Contrast, Invert, Add Noise and Motion Blur
- the Pencil, the Brush, the Gradient tool, Define Pattern and Fill with Pattern
- the Screen and Multiply blend modes, Merge Down, the grid with Snap, and text in Jacquard 24 and Tiny5
The palette. The first two rows are the Spectrum's bright colours. The border can only use the normal (darker) ones.
-
Paper
-
ink
-
Bright cyan
-
bright magenta
-
bright yellow
-
Bright red
-
bright blue
-
Border blue
-
border yellow
-
Moon
-
craters
-
moon glow
-
Noise grey
-
Make an oversized canvas and drop in the lighthouse
Choose File → New and make a 2400 × 2400 document. It's bigger than the picture will be, so the photos can hang over the edges while you arrange them. Later you'll crop it to 1792 × 1792.
Rename Layer 1 to Night Sky and fill it with black (, then Edit → Fill).
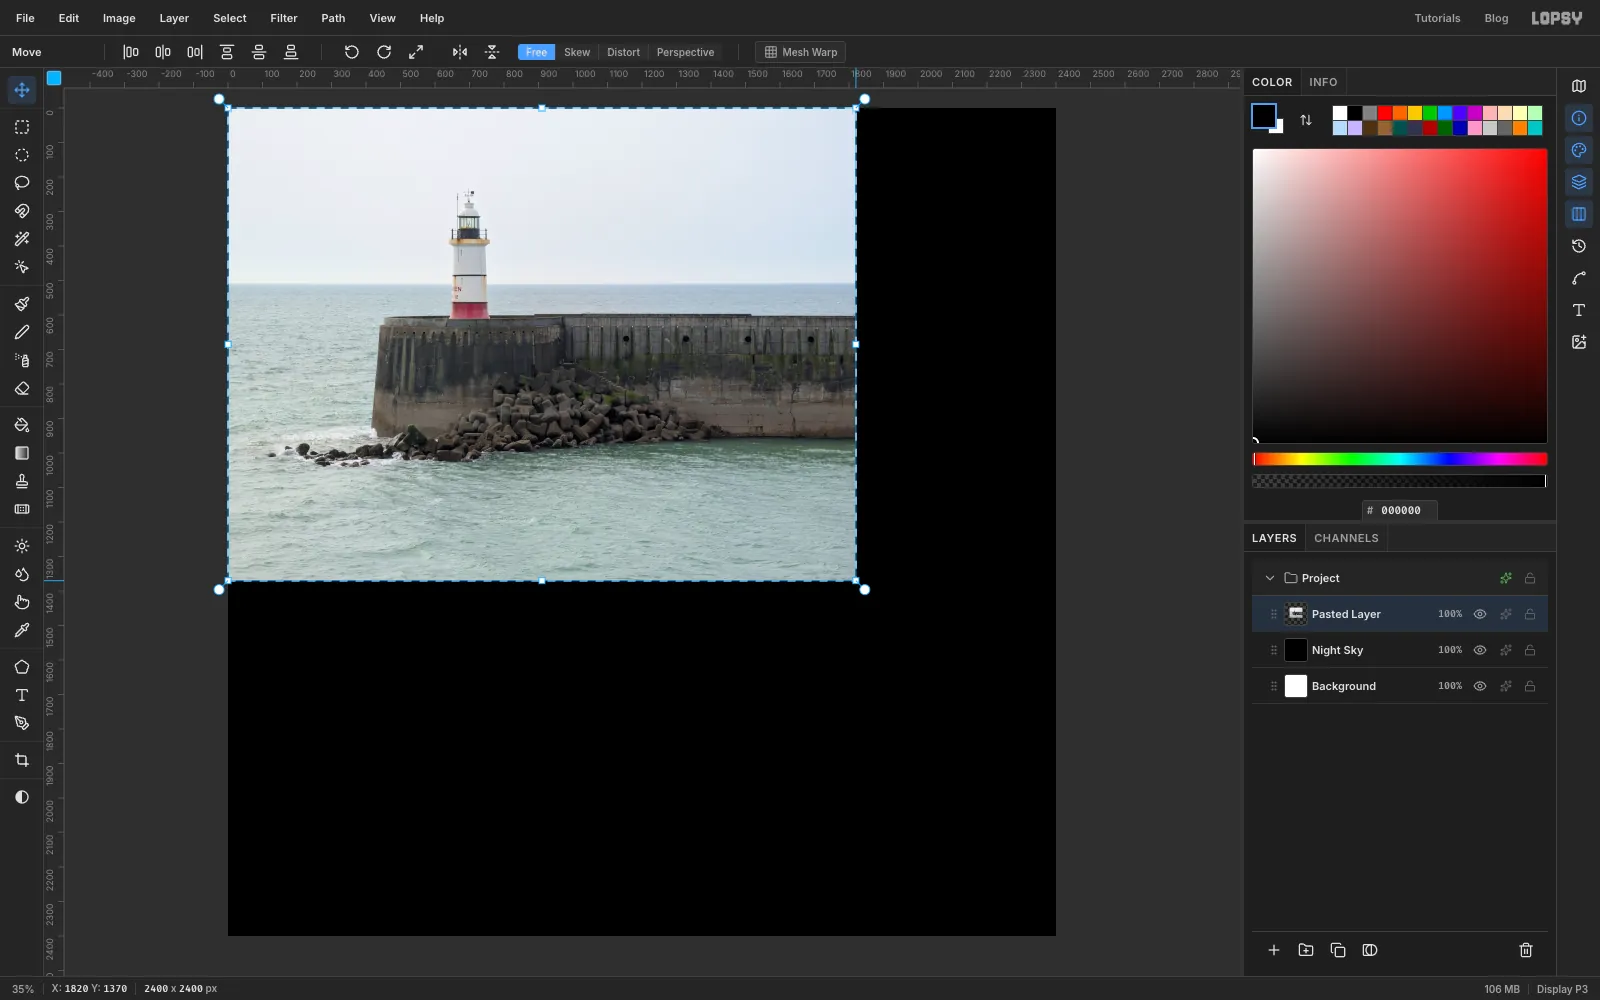
Drag the lighthouse photo from your desktop onto the canvas. It lands in the top-left corner with its transform handles showing. Hold Cmd and drag the bottom-right handle out until the photo is 1820 px wide, then press Return. Rename the layer Quay.
-
Place the quay and remove its sky
With the Move tool, drag the photo down and right until its top-left corner is at 290, 872. The lighthouse is now a little left of centre in the middle of the canvas.
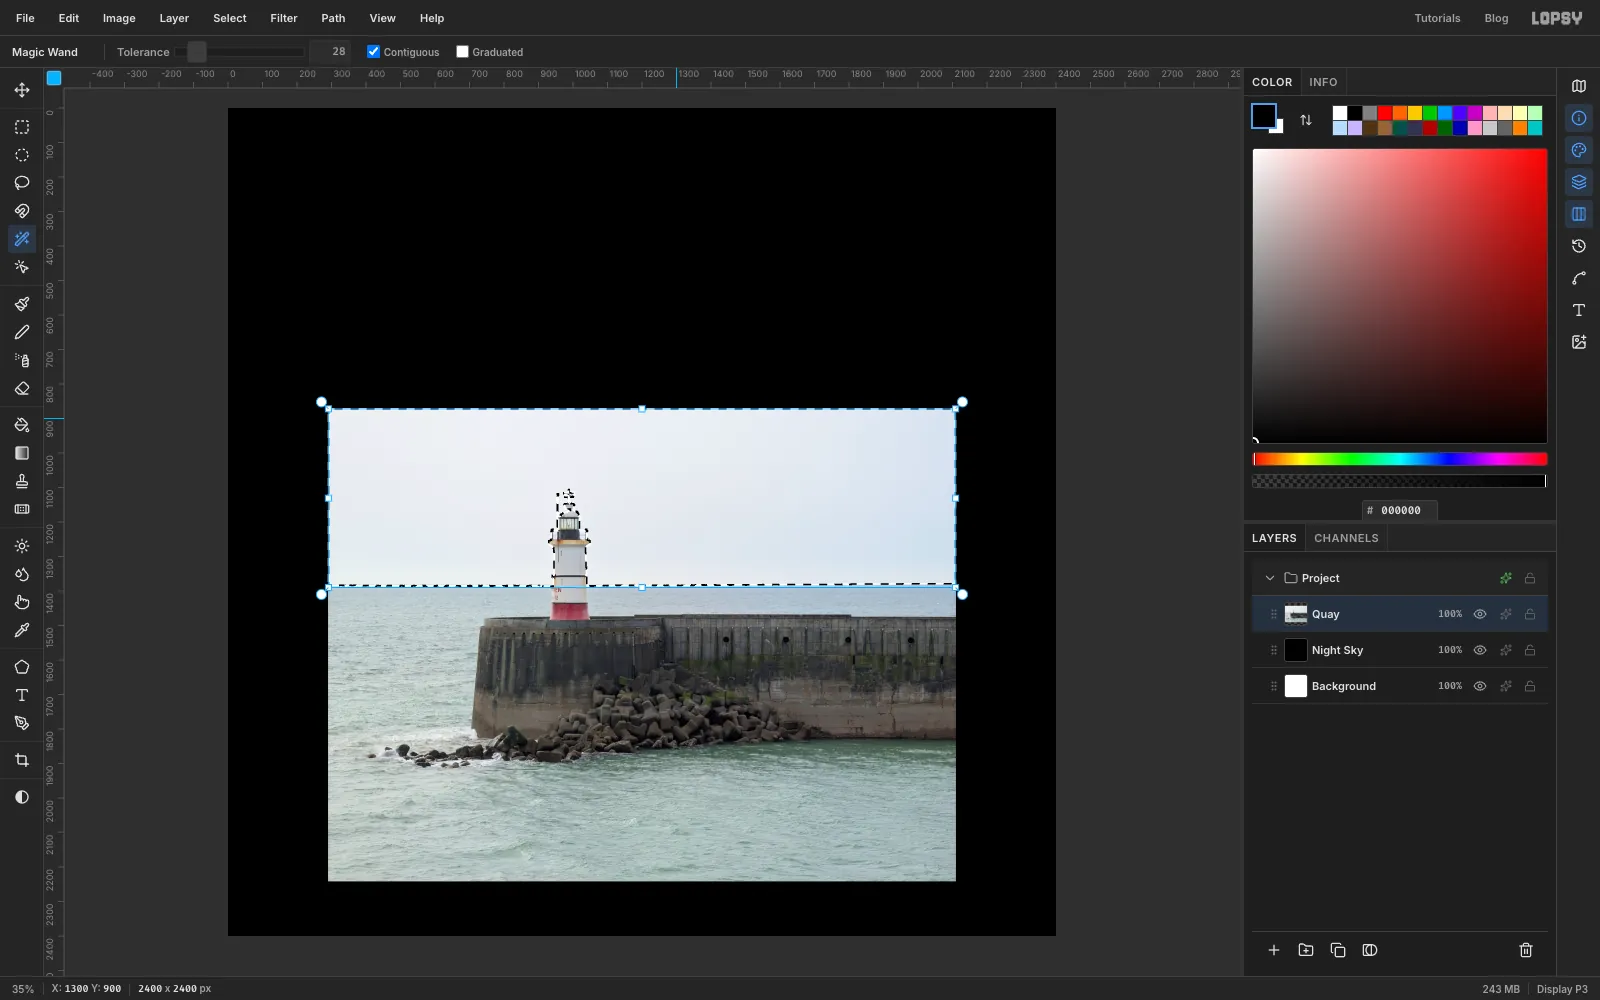
Choose the Magic Wand, set Tolerance to 28 and leave Contiguous on. Click the sky to the left of the lighthouse, then Shift-click the sky to its right and above the breakwater. Check that the lantern isn't selected, then press Delete and Cmd+D. The black Night Sky layer shows through.
-
Hang a moon
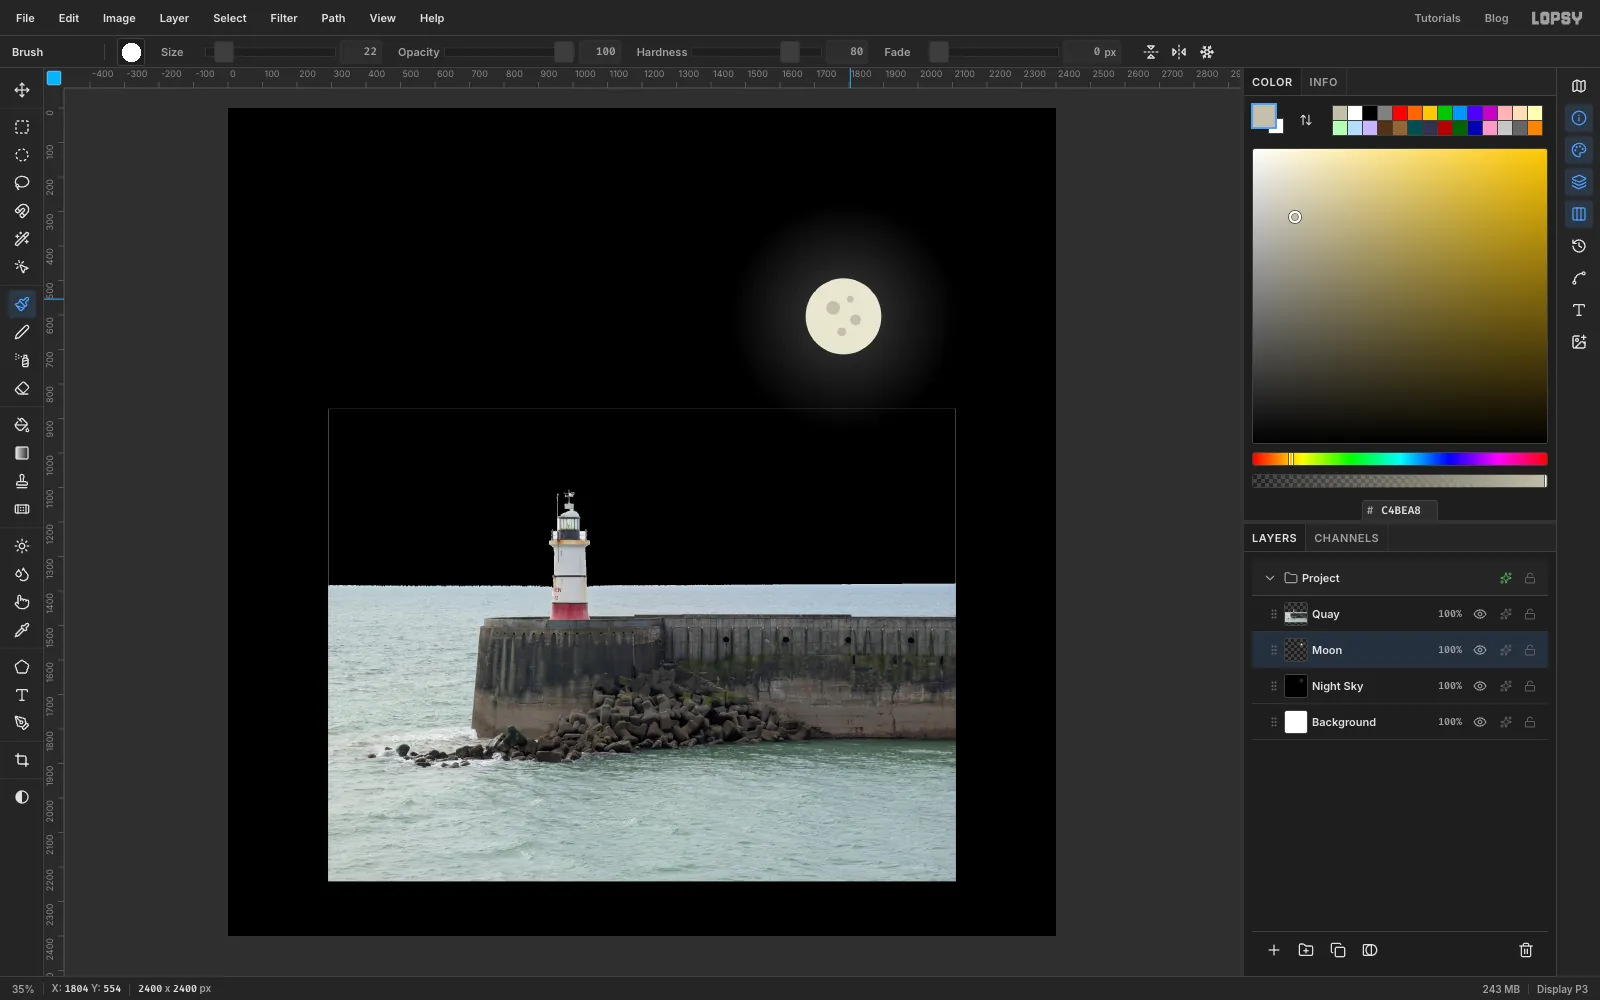
Select Night Sky and choose the Gradient tool. Set Type to Radial, click Advanced… and make two stops: on the left and on the right. Drag from 1784, 604 about 330 px to the right. That's the moon's glow.
Click Add Layer and name the layer Moon. With the Elliptical Marquee, drag a circle from 1674, 494 to 1894, 714 and fill it with . Press Cmd+D. Switch to the Brush, set the colour to , and click four craters on the moon at sizes 44, 34, 28 and 22.
-
Bring in the octopus
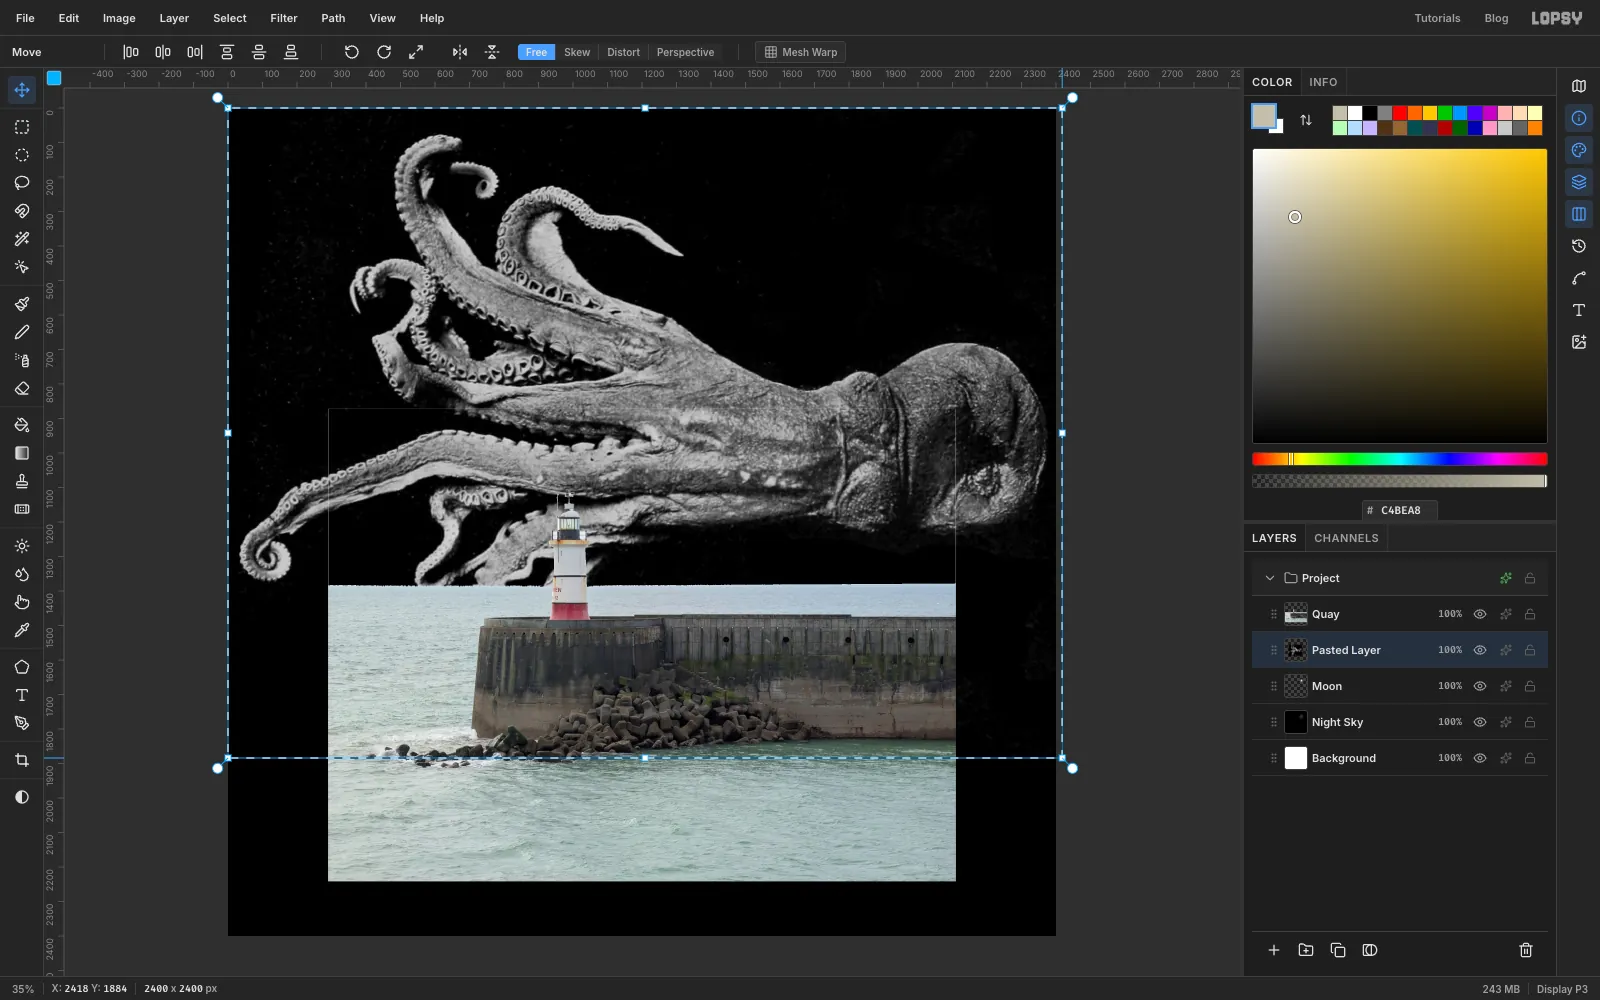
Keep Moon selected so the octopus lands above it, then drag the octopus photo onto the canvas. Hold Cmd and drag its bottom-right handle out until it's 2418 px wide, then press Return. Rename the layer Kraken.
-
Stand the octopus up
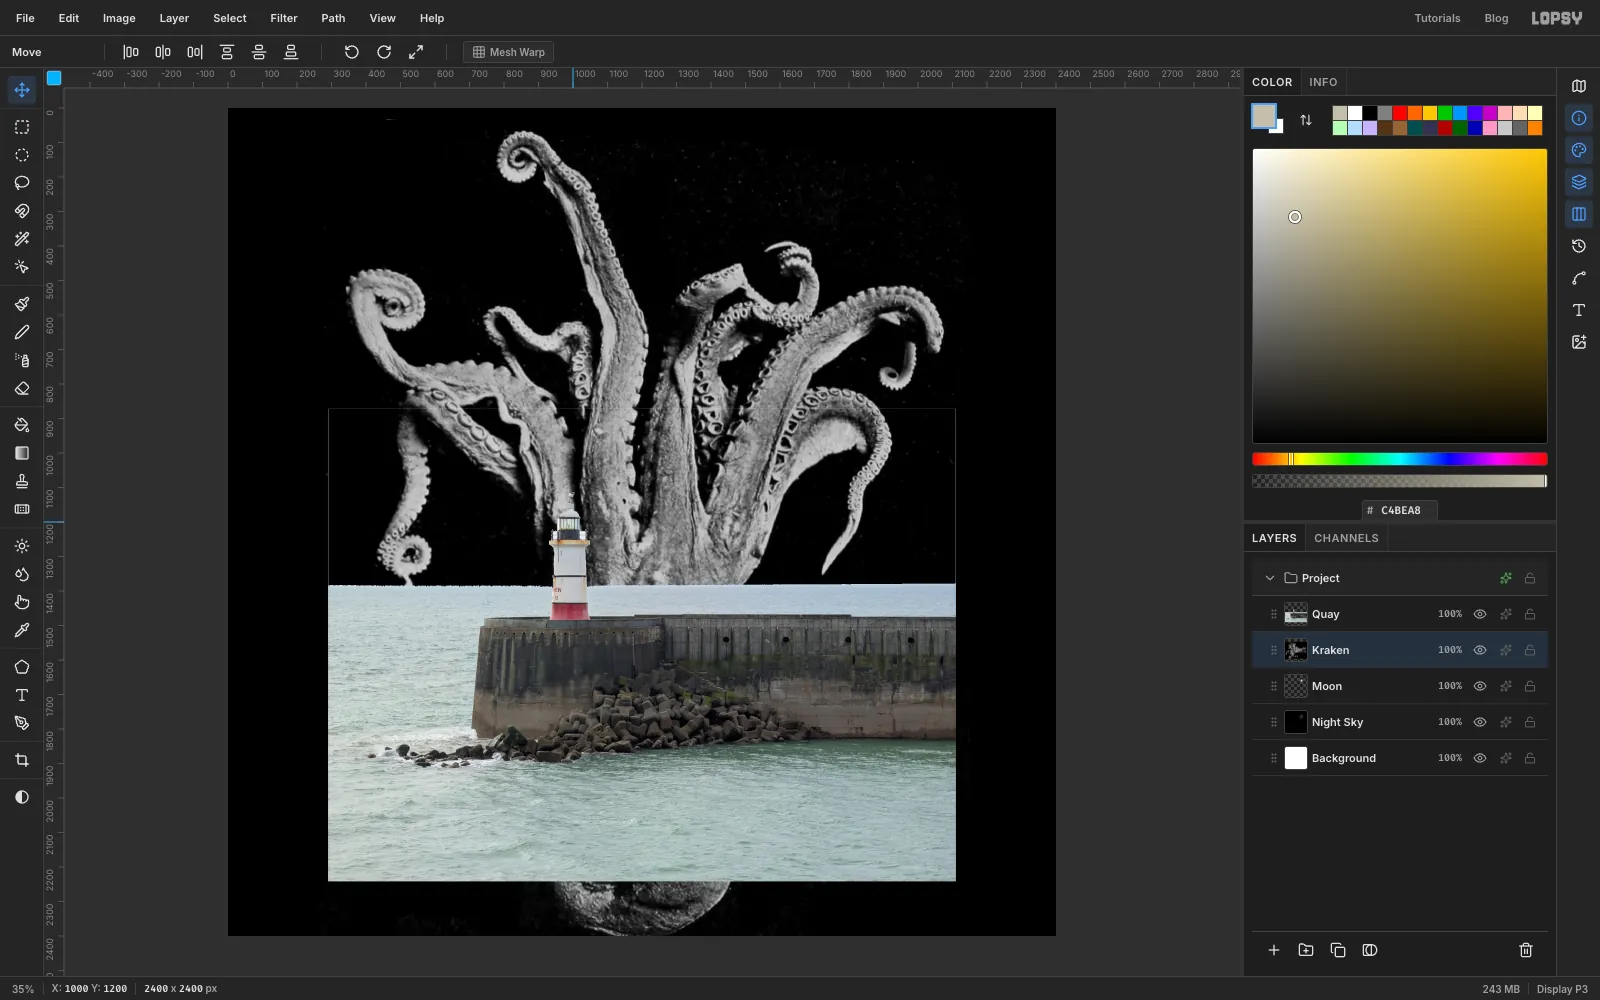
In the plate, the arms point left. To make them rise out of the sea, turn the plate a quarter turn clockwise: with the Move tool active, click Rotate 90° CW in the options bar.
-
Put the kraken behind the quay
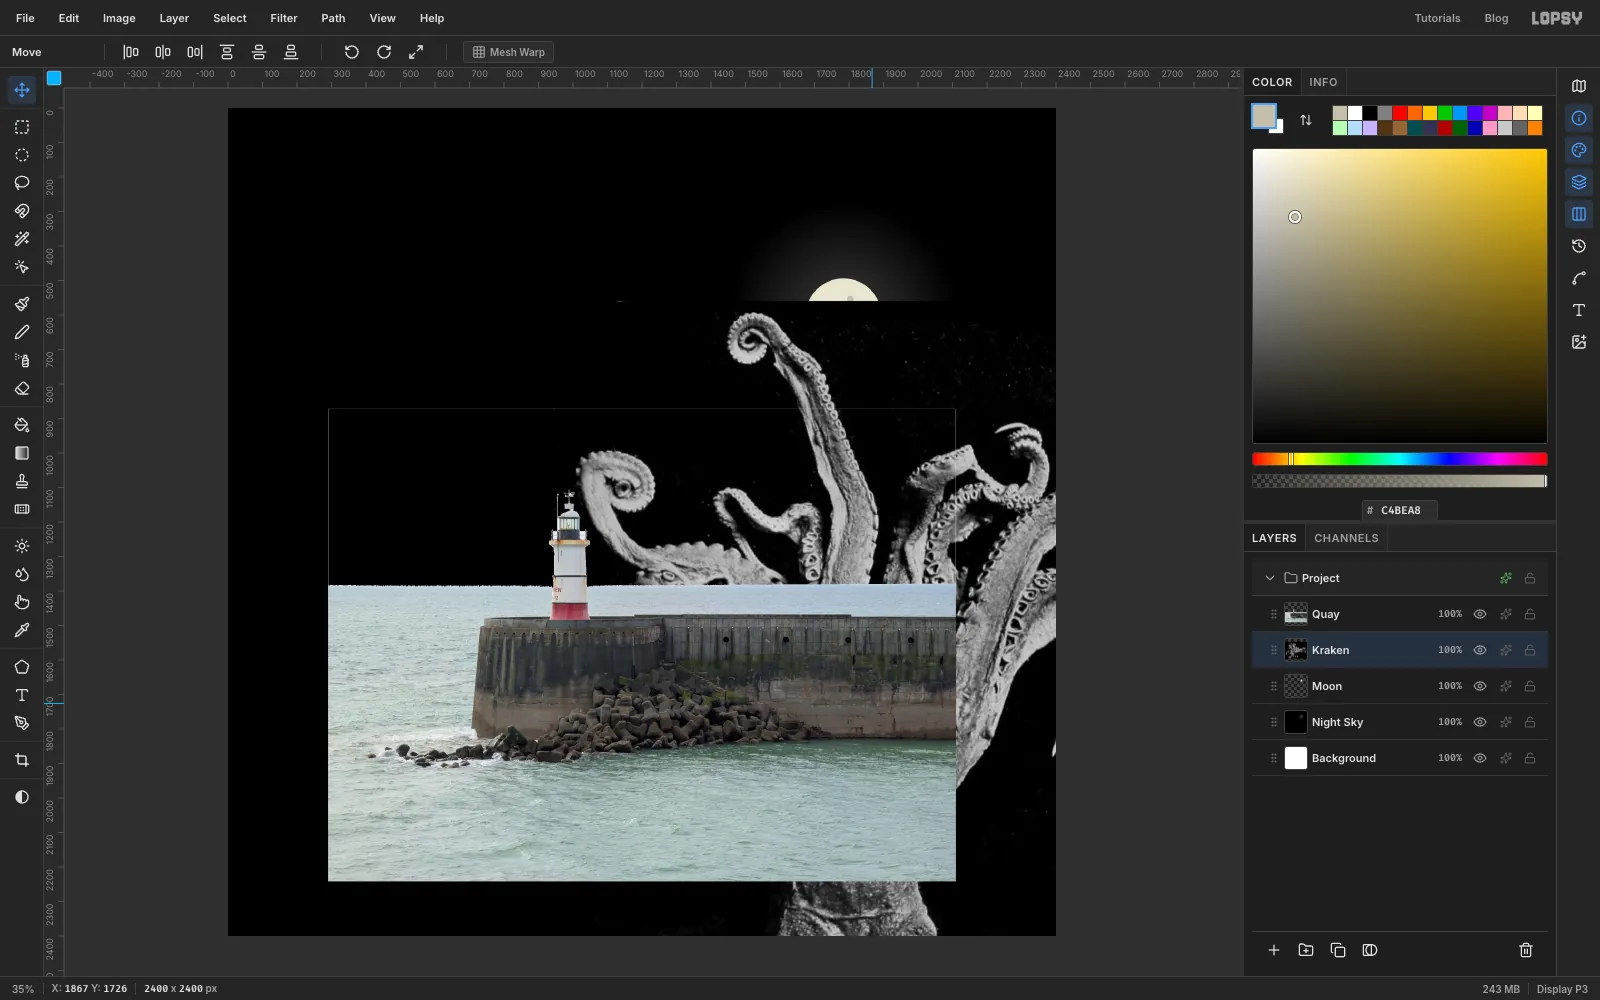
Drag the octopus so the plate's top-left corner sits at 934, 559. Its arms now rise behind the breakwater to the right of the lighthouse. Kraken is below Quay in the Layers panel, so the breakwater and the sea hide its body.
-
Cut out the octopus
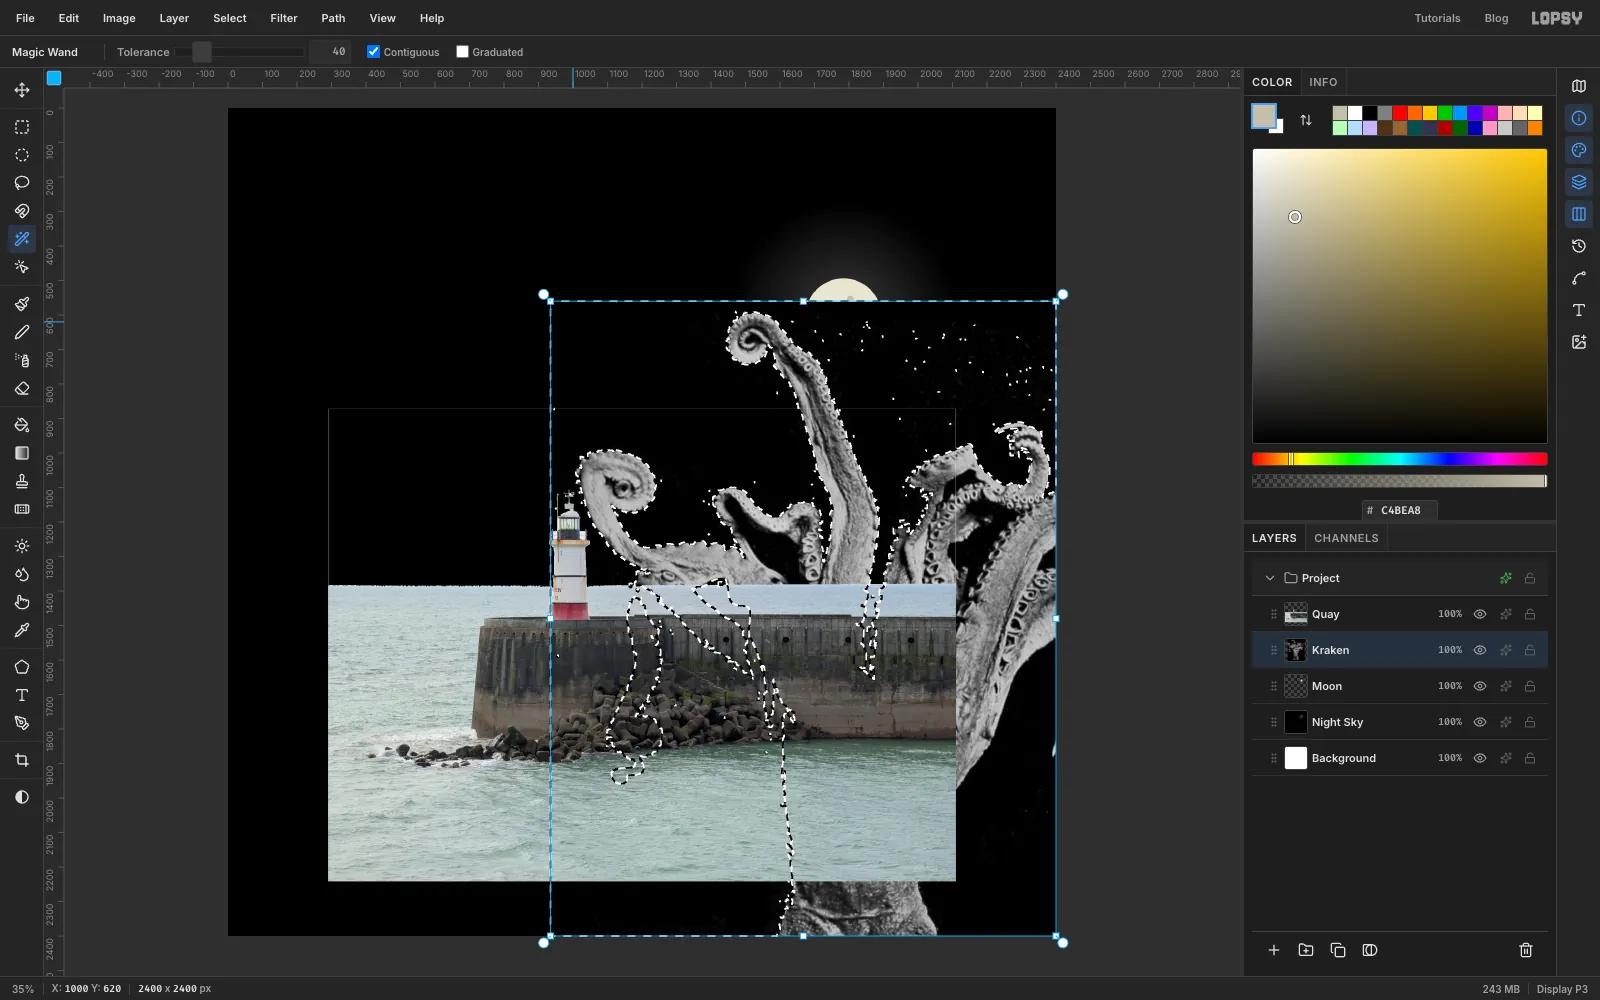
With Kraken selected, choose the Magic Wand, set Tolerance to 40, and click the black background between the arms. Press Delete and Cmd+D. The moon shows again behind the arms.
-
Grade the scene for night
The dithering step later turns light into dots, so now is the time to decide what should be bright:
- Select Kraken and choose Filter → Brightness/Contrast… with Brightness 30, Contrast 25. The arms become the brightest thing in the picture.
- Select Quay and apply Brightness −20, Contrast 10.
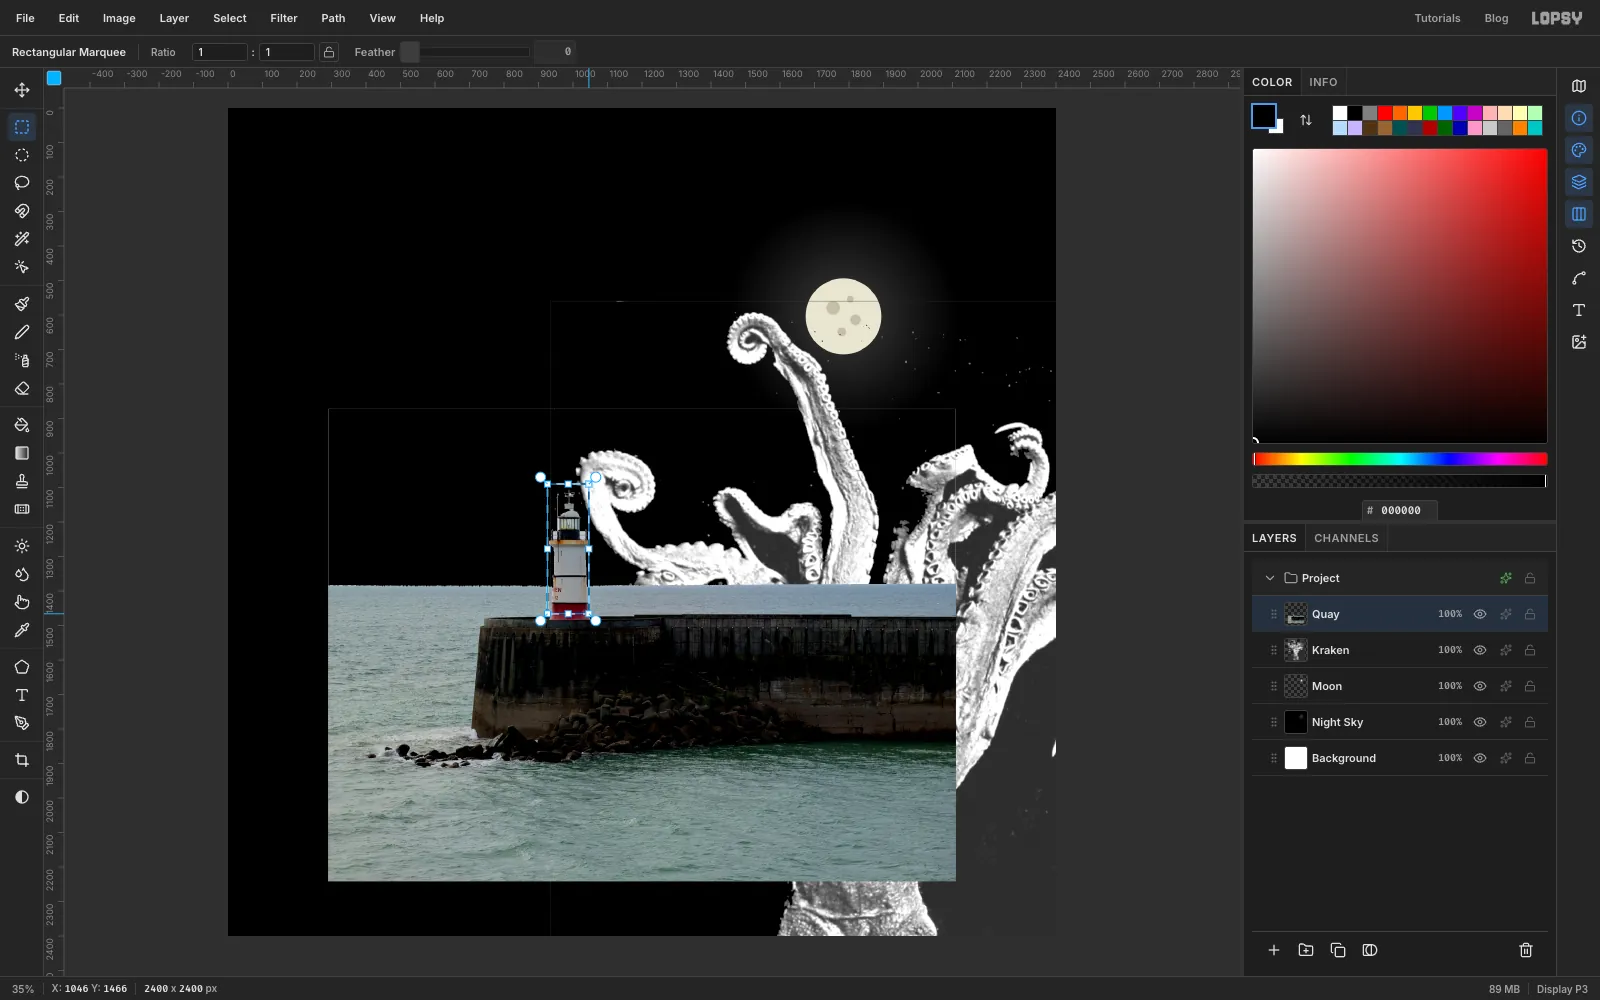
- Draw a rectangular marquee round the lighthouse tower, from about 926, 1090 to 1046, 1466. Apply Brightness 45, Contrast 20 so the white tower stays white. Press Cmd+D.
-
Light the lantern
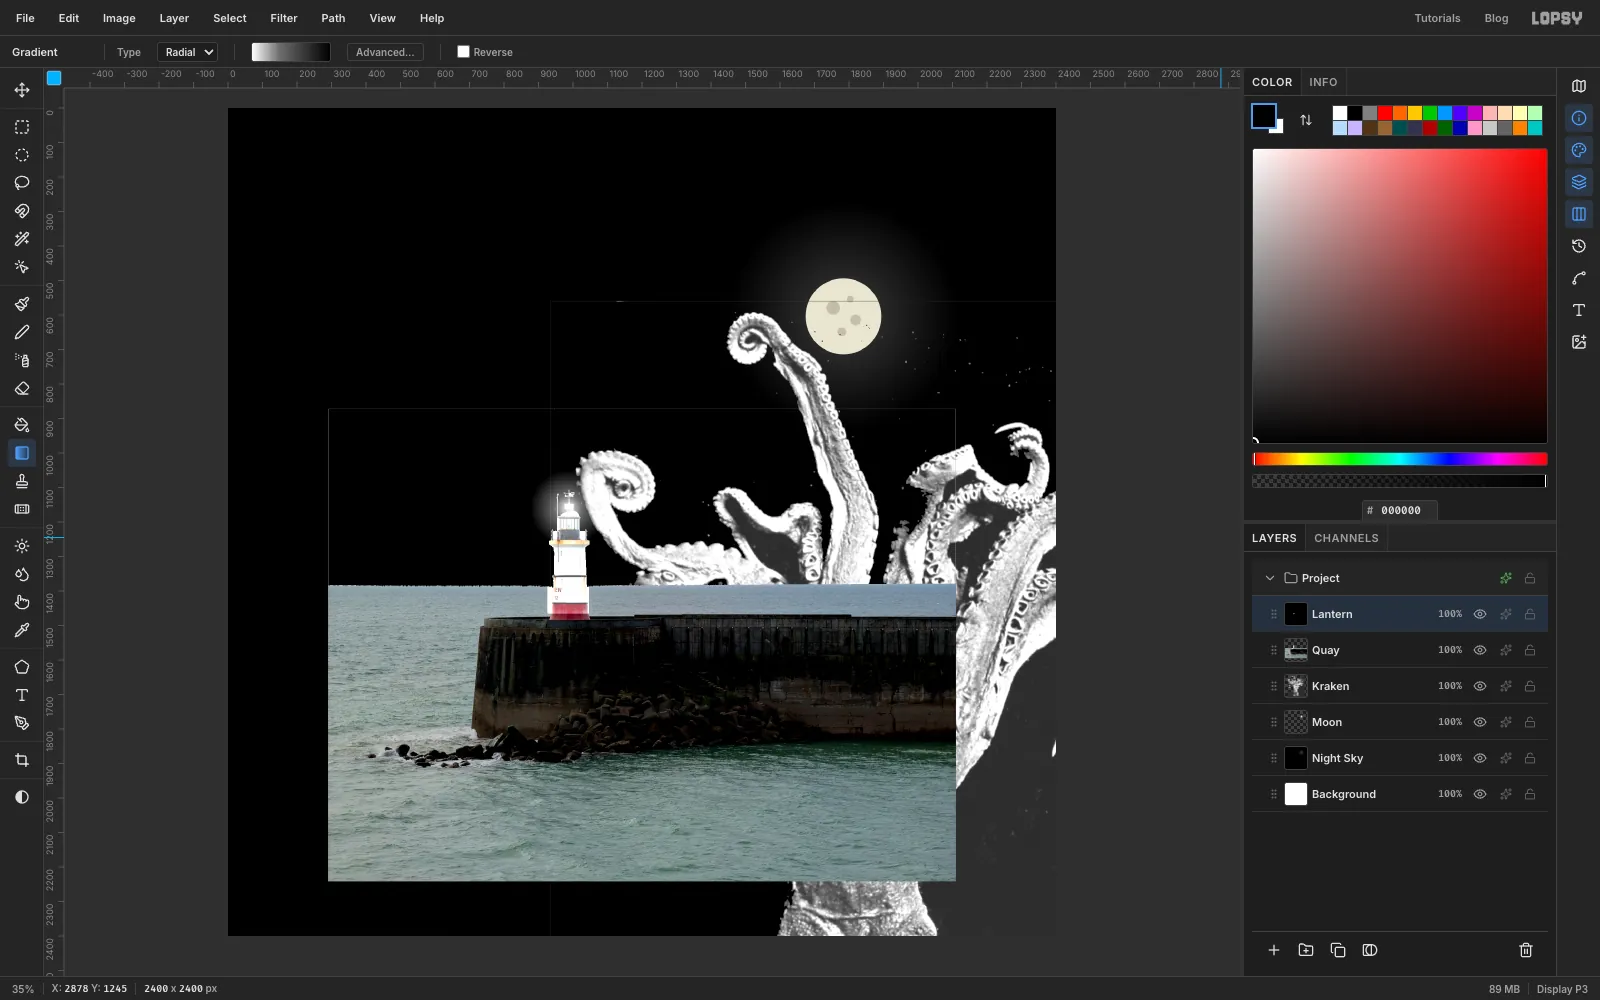
With Quay selected, click Add Layer and name the layer Lantern. Set up a radial gradient with three stops: at the left, about a third of the way along, and at the right. Drag from the middle of the lantern (about 986, 1160) 110 px to the right.
Open the layer's effects (the ✦ button), set the Blend Mode to Screen and close the panel. The black disappears and only the glow is left.
-
Crop to the Spectrum screen
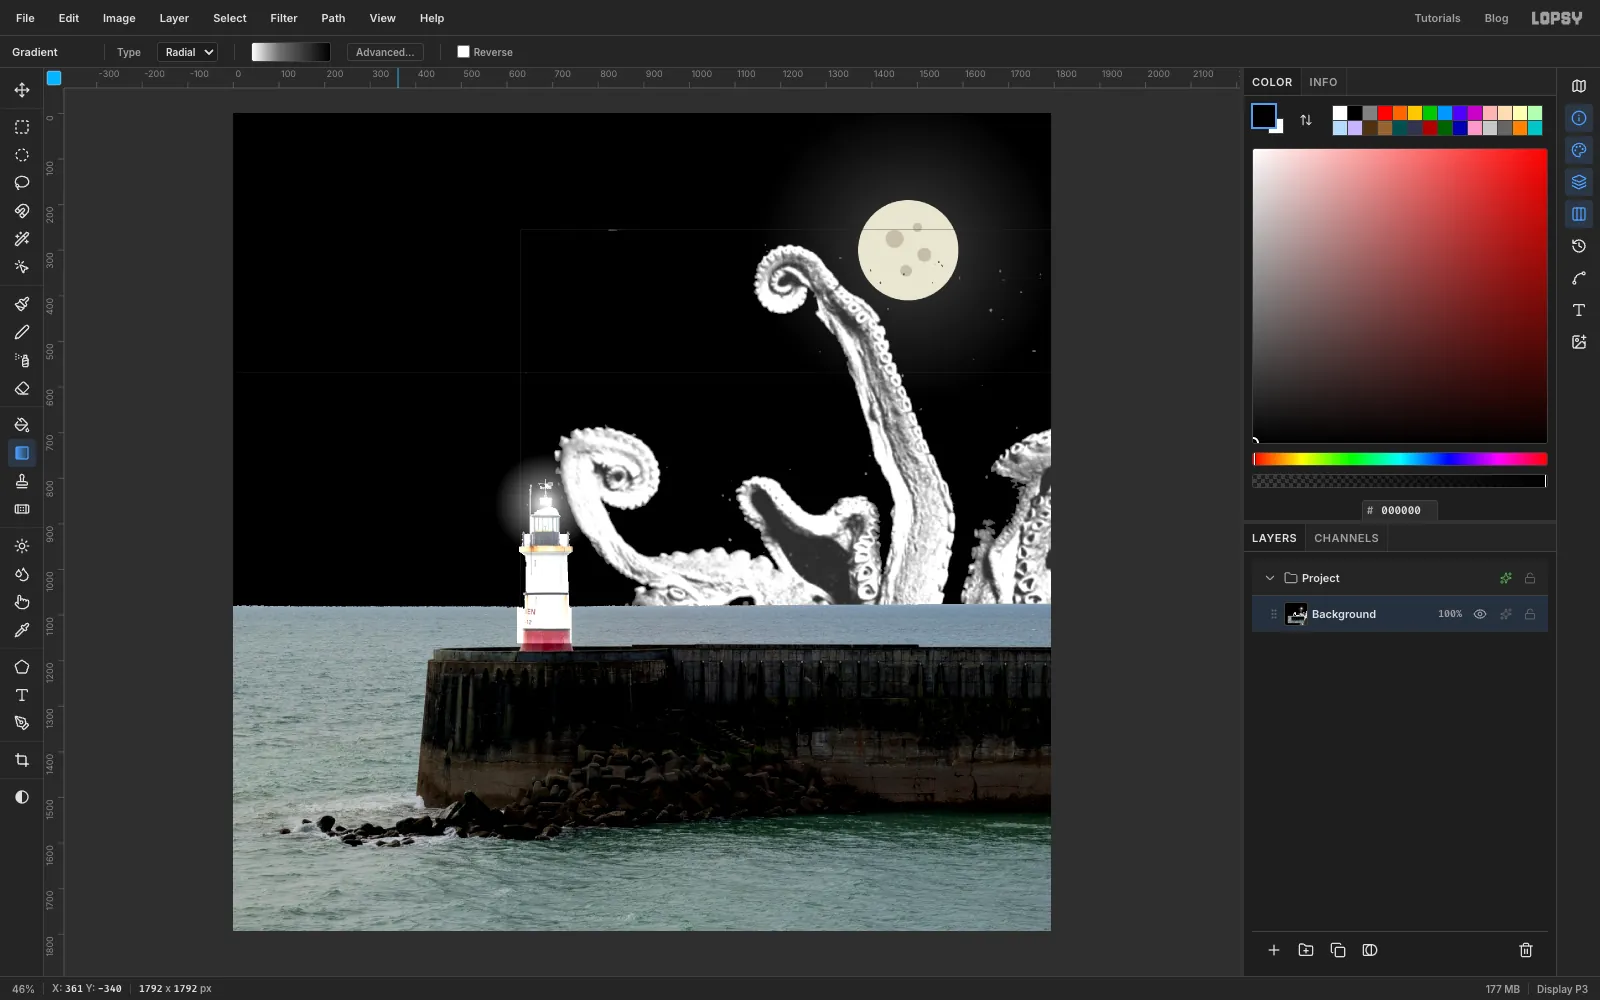
Choose Layer → Flatten Image. Then choose Image → Canvas Size…, set 1792 × 1792, leave the anchor in the centre and click Apply. The pasteboard is trimmed away.
-
Pixelate and shrink to Spectrum resolution
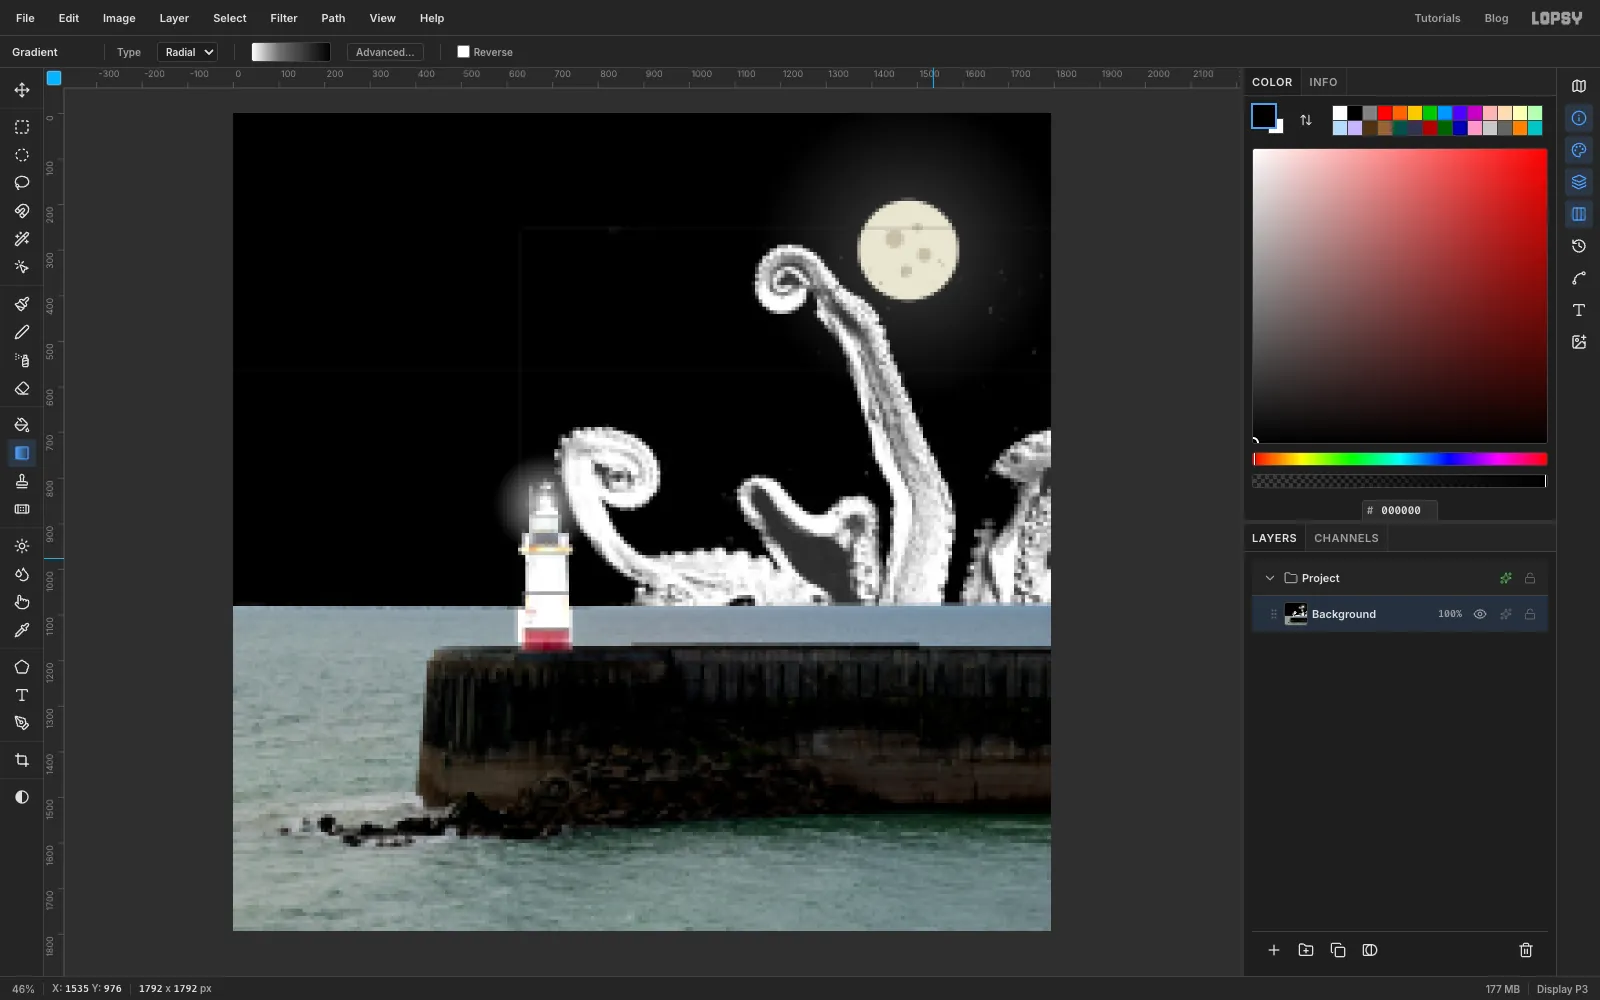
Choose Filter → Pixelate… with Block Size 8 and click Apply. Every block is now the average of the photo under it.
Then choose Image → Image Size… and set 224 × 224. Each 8 px block becomes one pixel, which gives you the scene at the Spectrum's own resolution.
-
Convert to grayscale
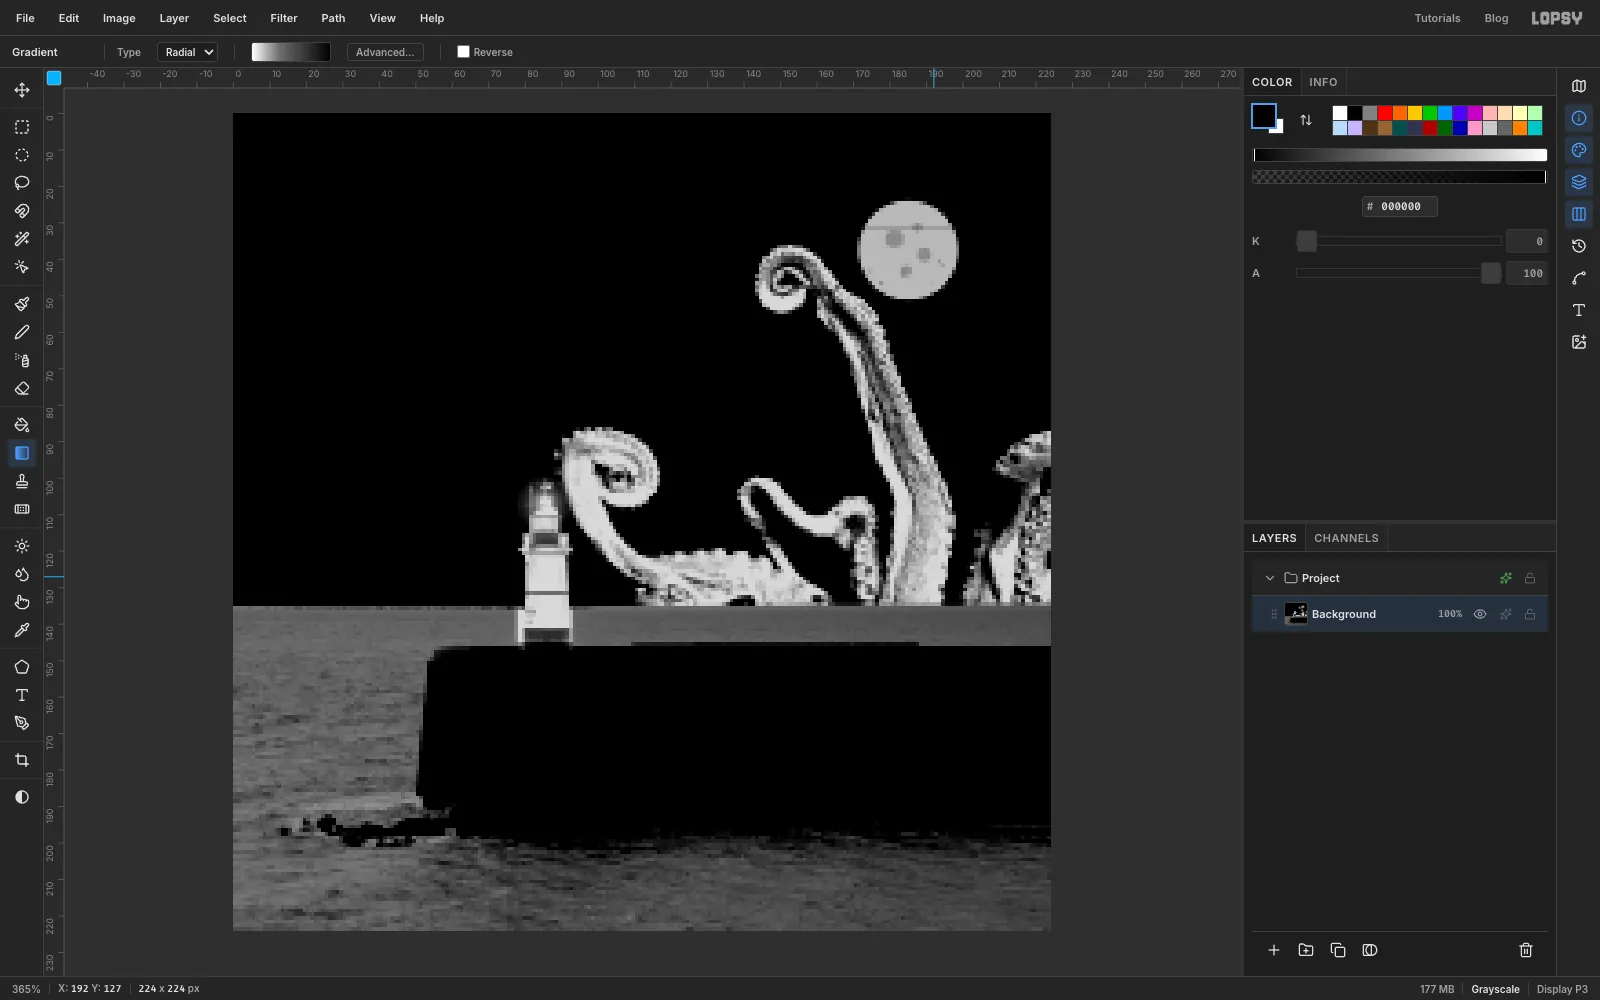
Choose Image → Mode → Grayscale. Then apply Brightness/Contrast with Brightness −25 and Contrast 20, so the sea turns a darker grey while the arms stay light.
-
Give Indexed Color pure black and white to aim for
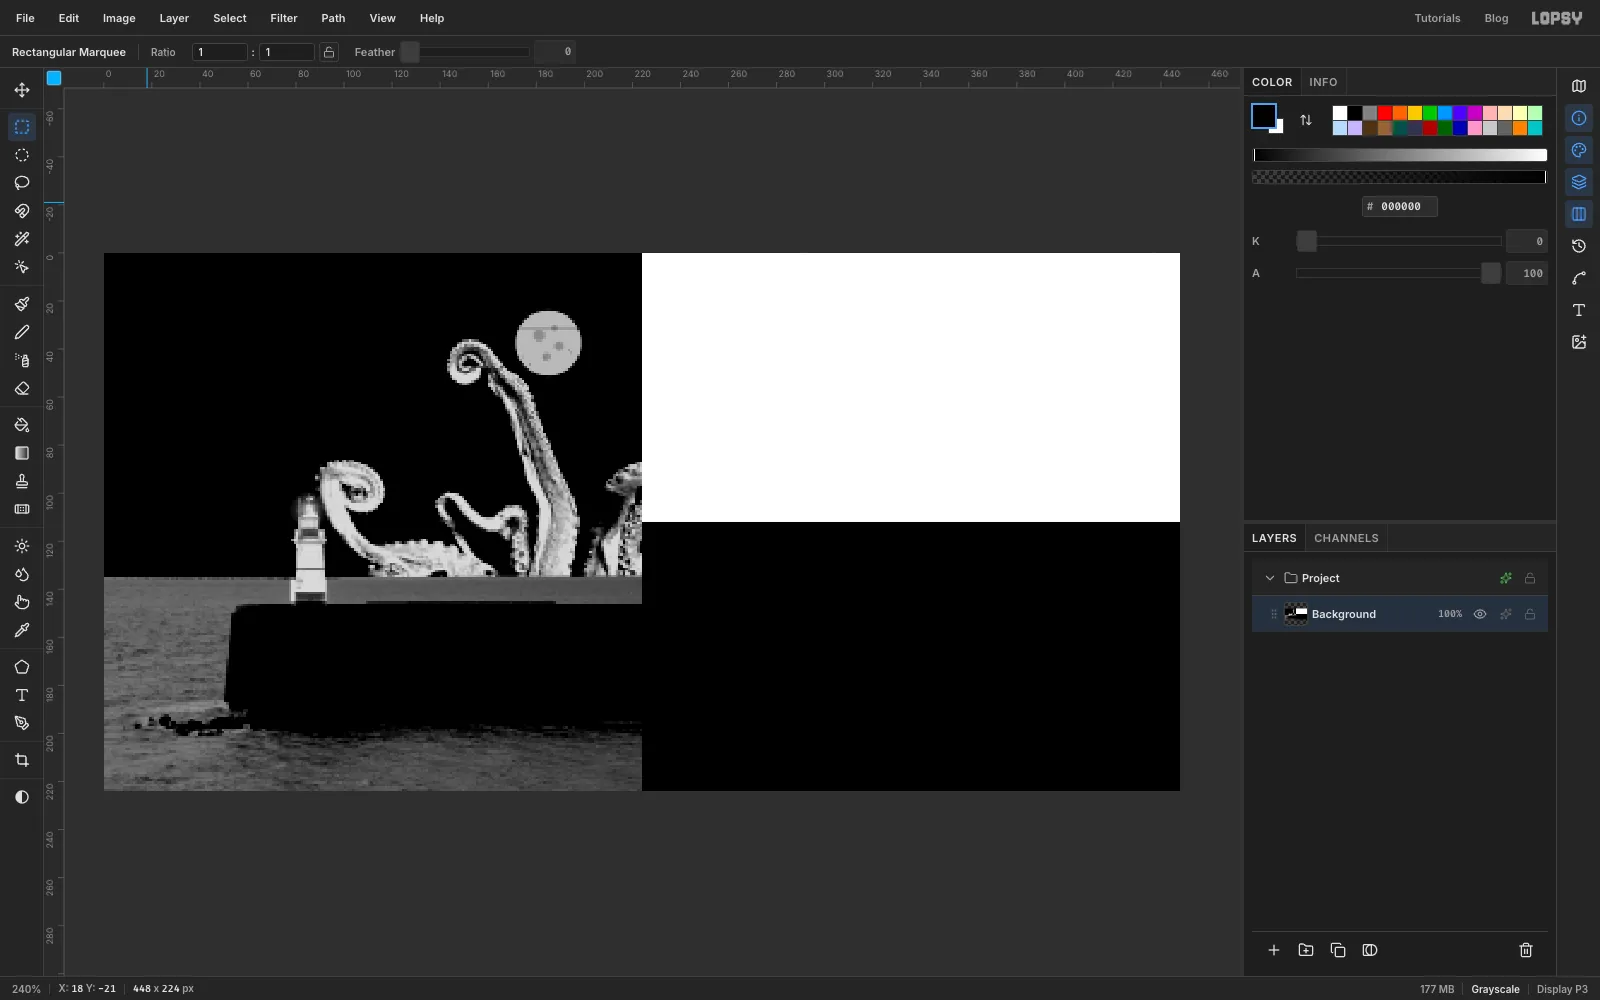
Next, Indexed Color will reduce the picture to two colours. It picks those colours by averaging the picture's own tones, and here it would pick black and a mid grey. Everything lighter than that grey would come out flat, with no dots. To make it pick black and near-white, give it some of each to average.
Choose Image → Canvas Size…, set 448 × 224, click the left middle anchor and click Apply. Fill the top half of the new strip, from 224, 0 to 448, 112, with white, and the bottom half with black.
-
Dither to two colours
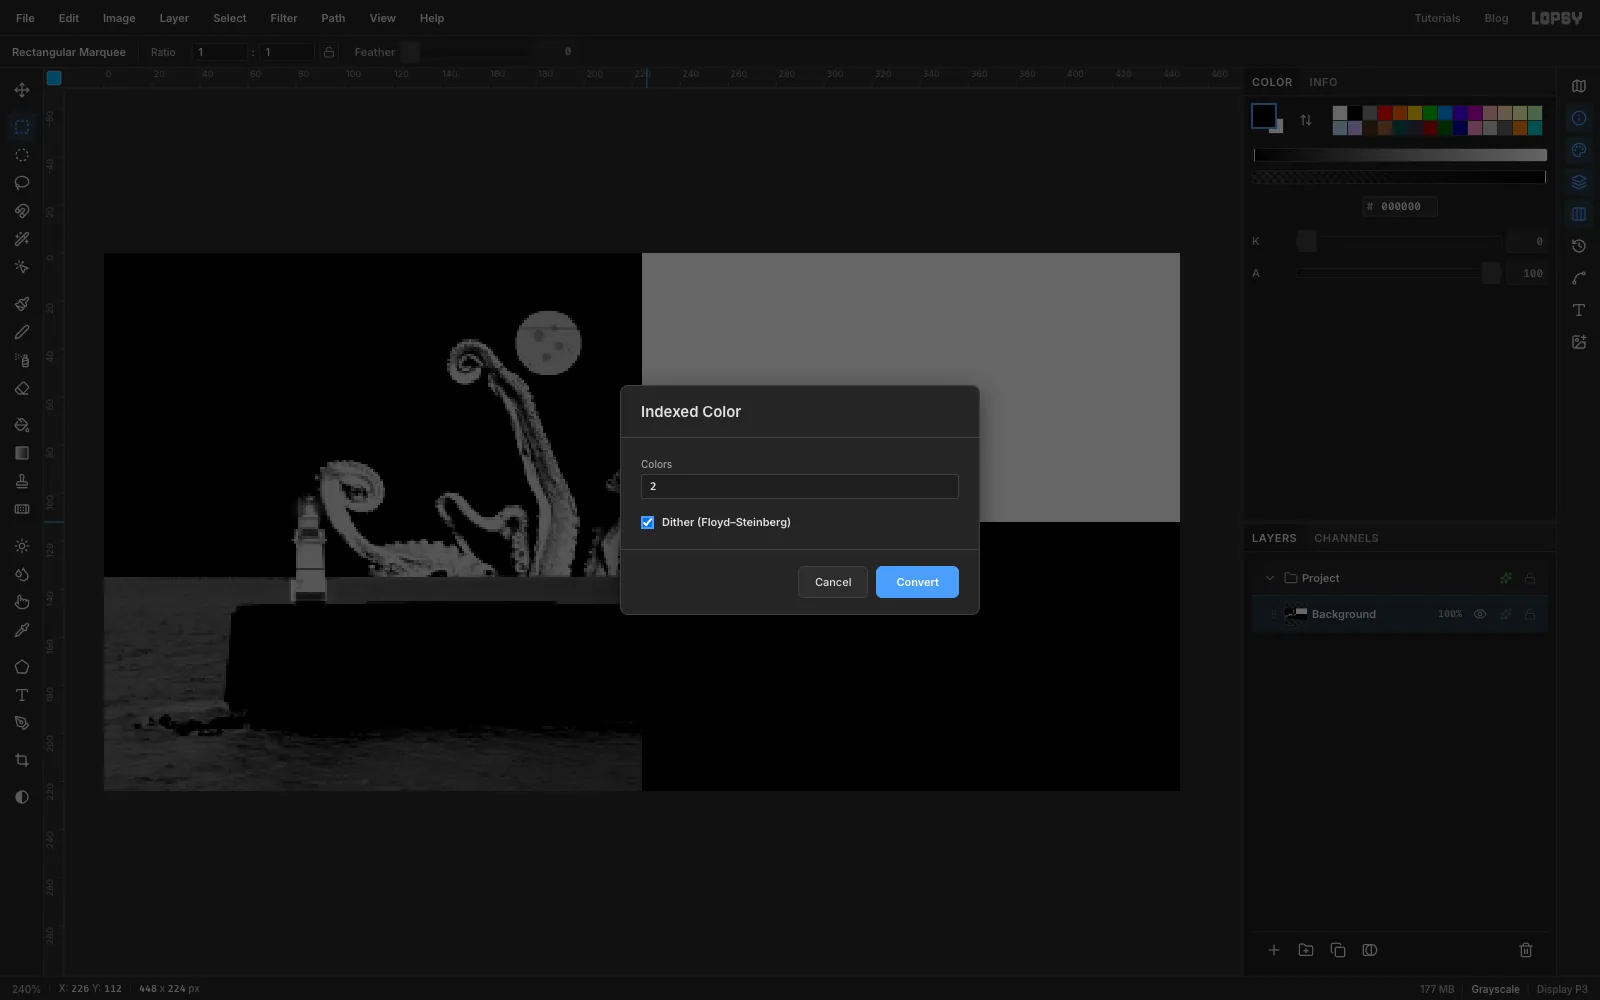
Choose Image → Mode → Indexed Color…. Set Colors to 2, tick Dither (Floyd–Steinberg) and click Convert.
-
Check the dither
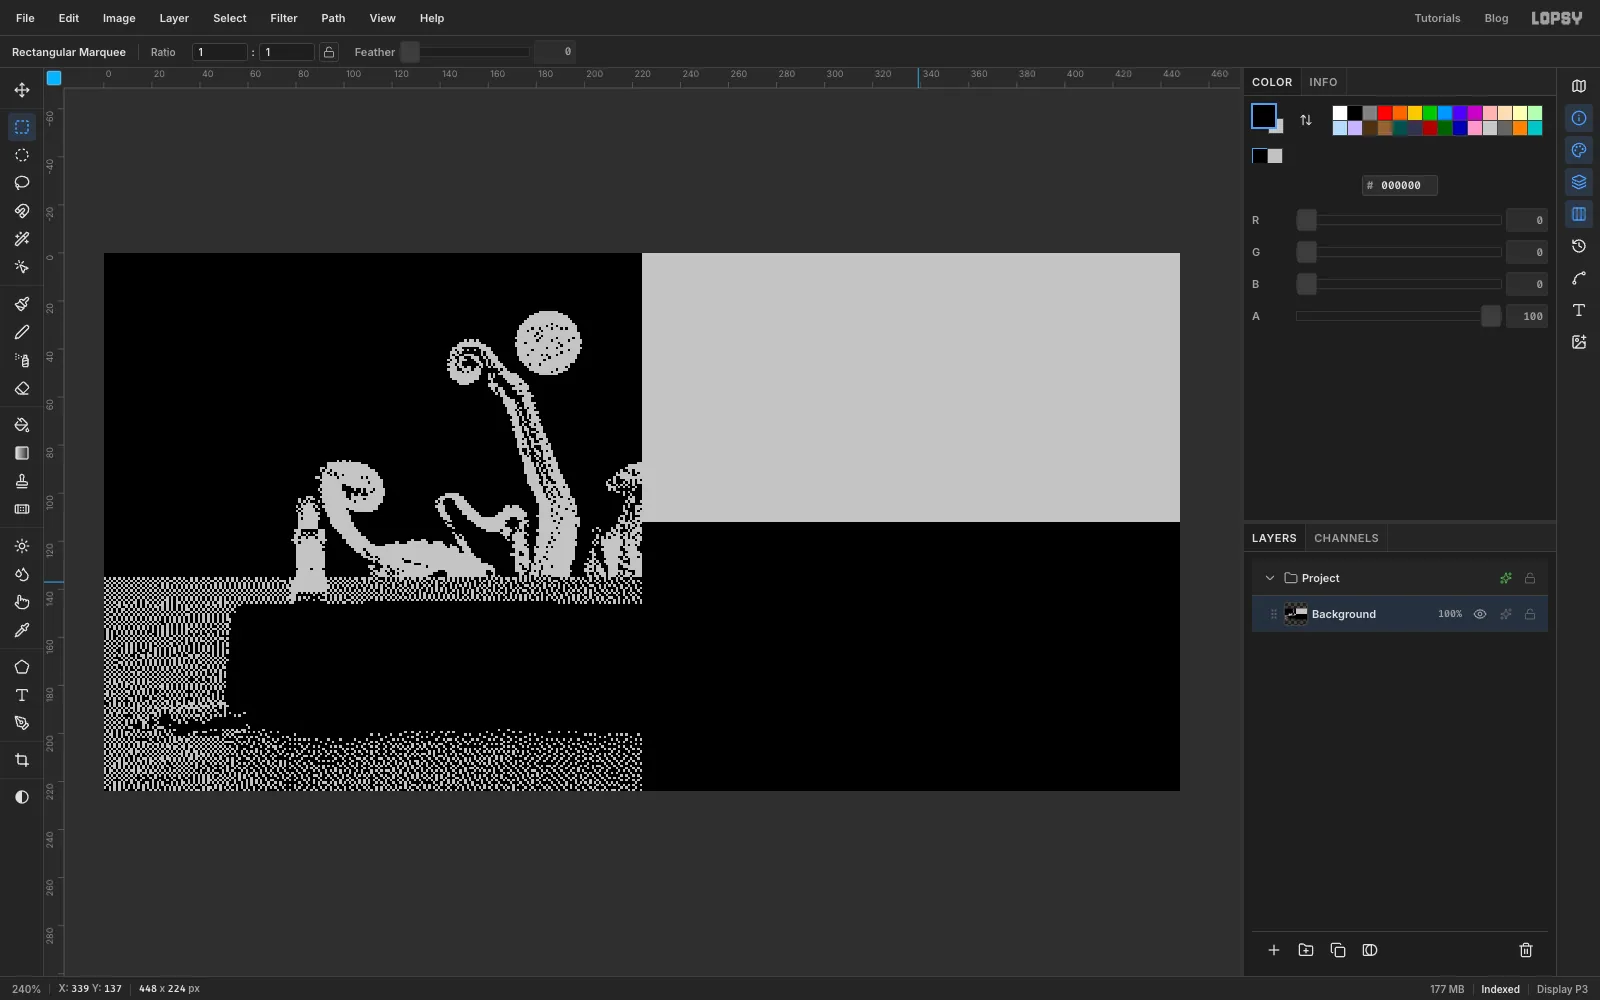
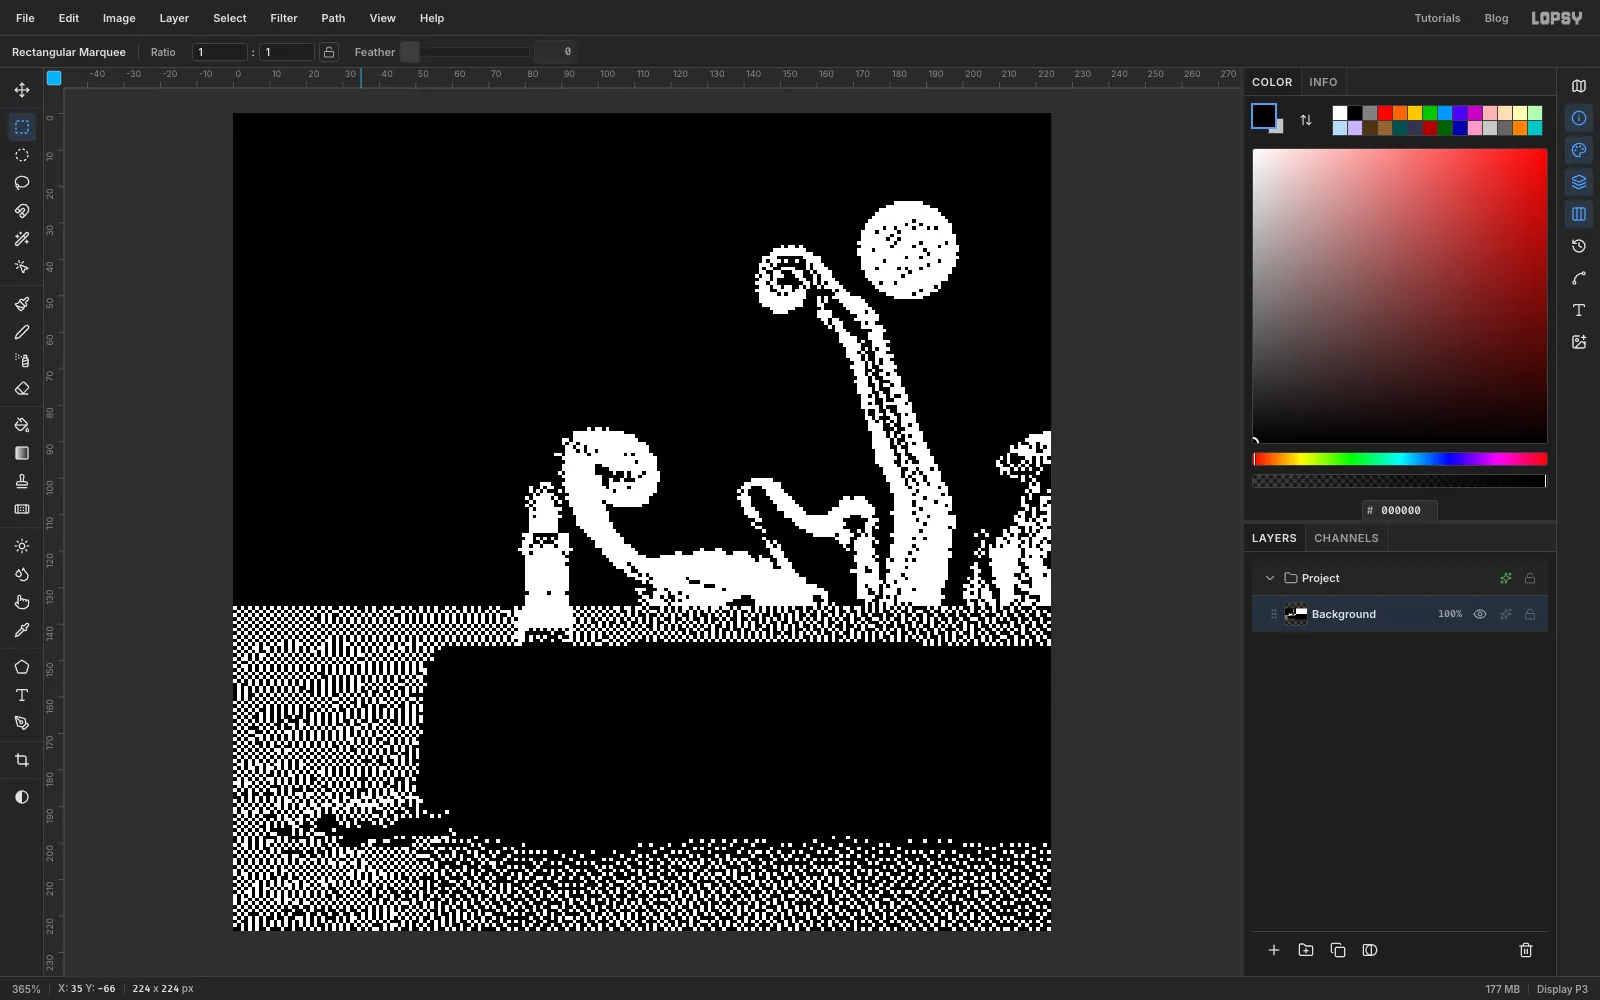
Zoom in and check the result. The picture is now just black and a light grey, and the tones are spread as dots: the moon, the arms and the sea are all dithered. If the sea came out flat, undo and check the two swatches.
-
Clean up to pure black and white
Choose Image → Mode → RGB Color. Then apply Filter → Threshold… with Level 128 to snap the two greys to pure black and white.
Finally, choose Image → Canvas Size… with 224 × 224 and the left middle anchor to cut the swatches off again.
-
Scale it back up
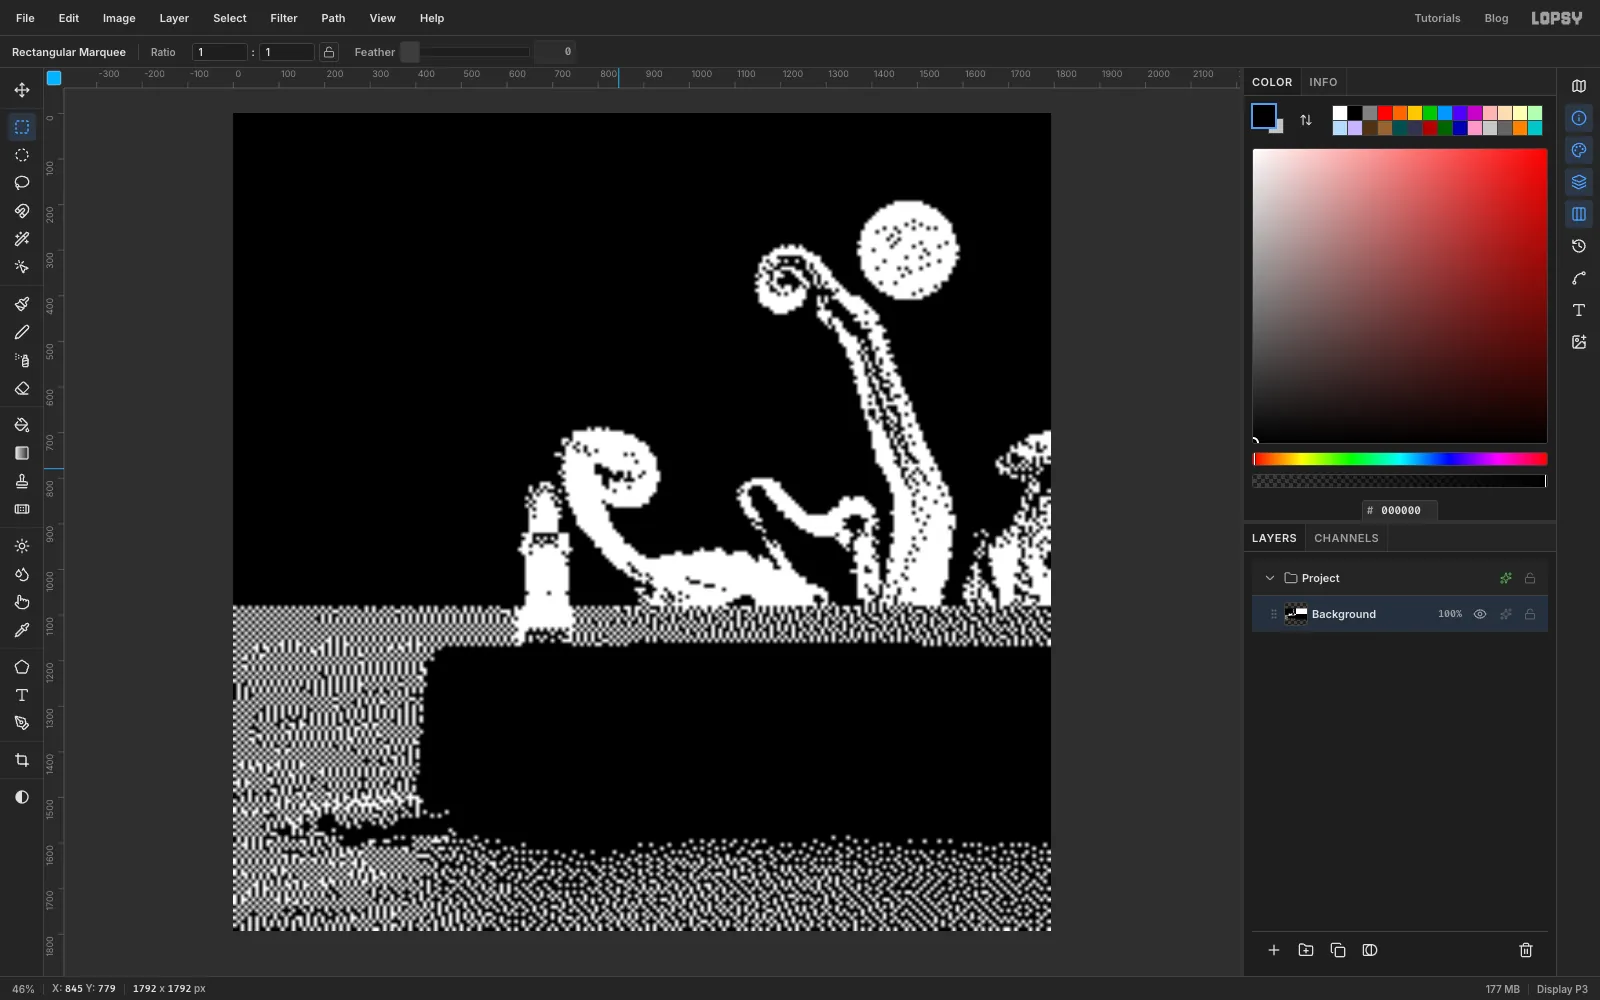
Choose Image → Image Size… and set 1792 × 1792. Each pixel is now 8 × 8 px, but scaling up softens the edges, so the dots look rounded.
-
Make the pixels crisp
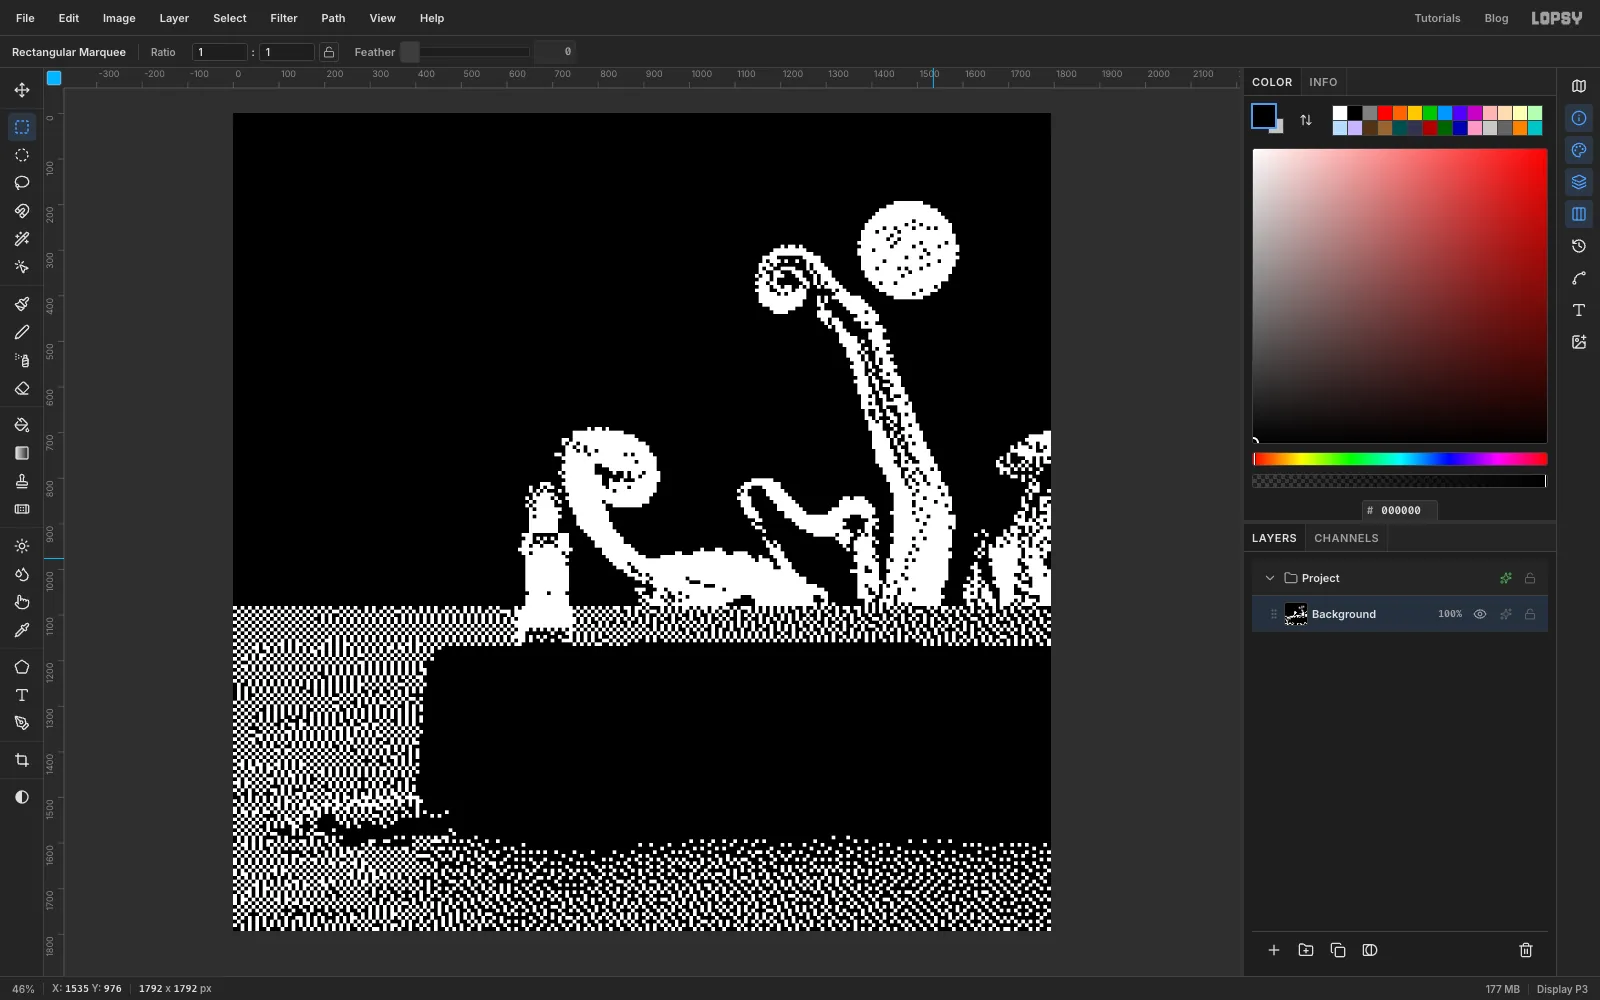
Apply Pixelate with Block Size 8, then Threshold at 128. Every Spectrum pixel is a hard 8 × 8 square again.
-
Make room for the border and show the attribute grid
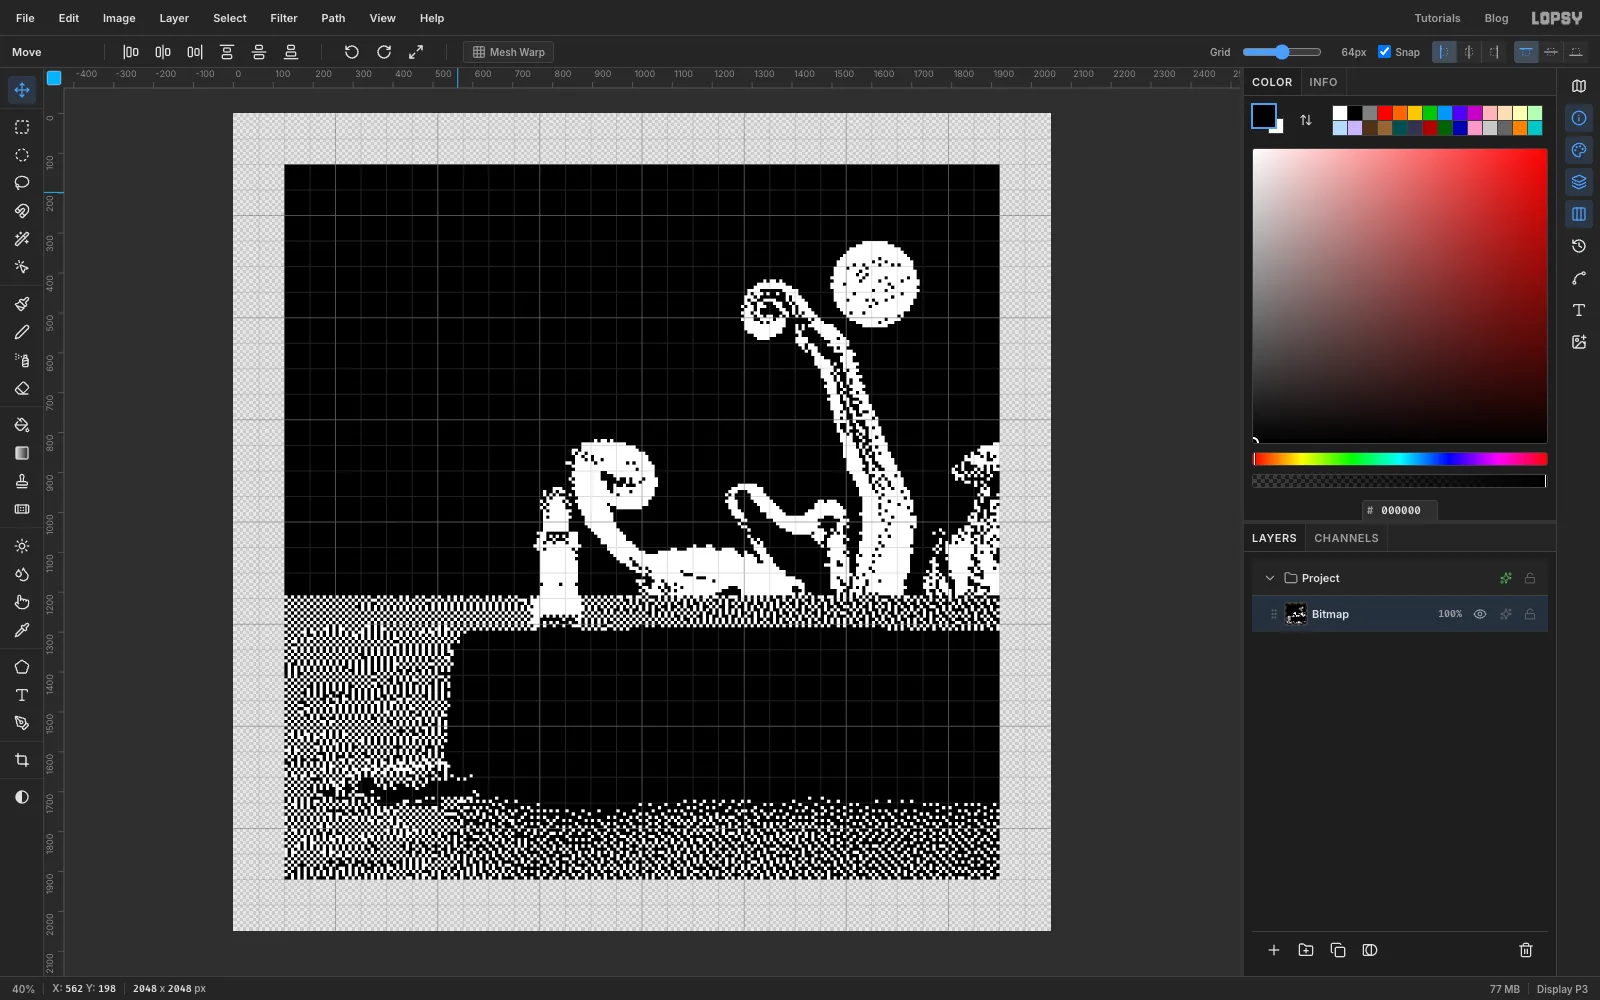
Choose Image → Canvas Size… and set 2048 × 2048 with the centre anchor. That adds the 128 px border round the picture.
Rename the layer Bitmap. Choose View → Show Grid, drag the Grid slider in the options bar to 64px and make sure Snap is ticked. Each grid square is one colour cell. You'll switch the grid to 8 px for the pixel drawing and back to 64 px for the colour.
-
Plan the lighthouse sprite
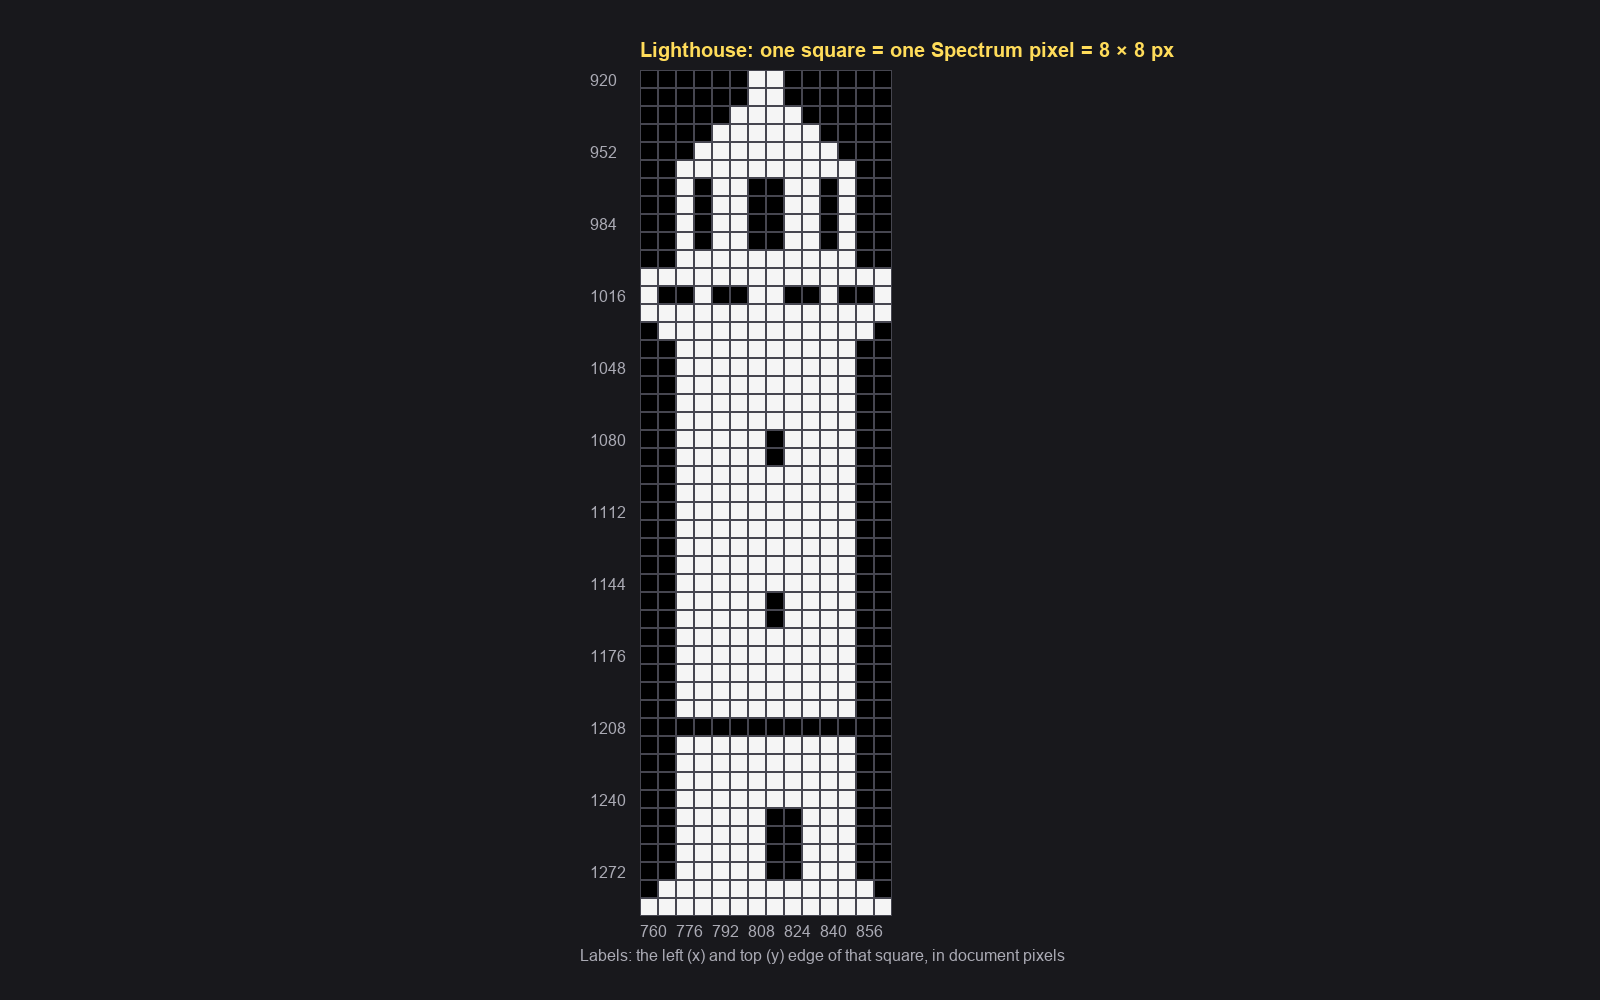
At this size the photo's lighthouse has dithered into a white blob. Redraw it as a sprite, one square per Spectrum pixel. The numbers give the left edge of every second column and the top edge of every fourth row, in document pixels.
-
Clear a space for the lighthouse
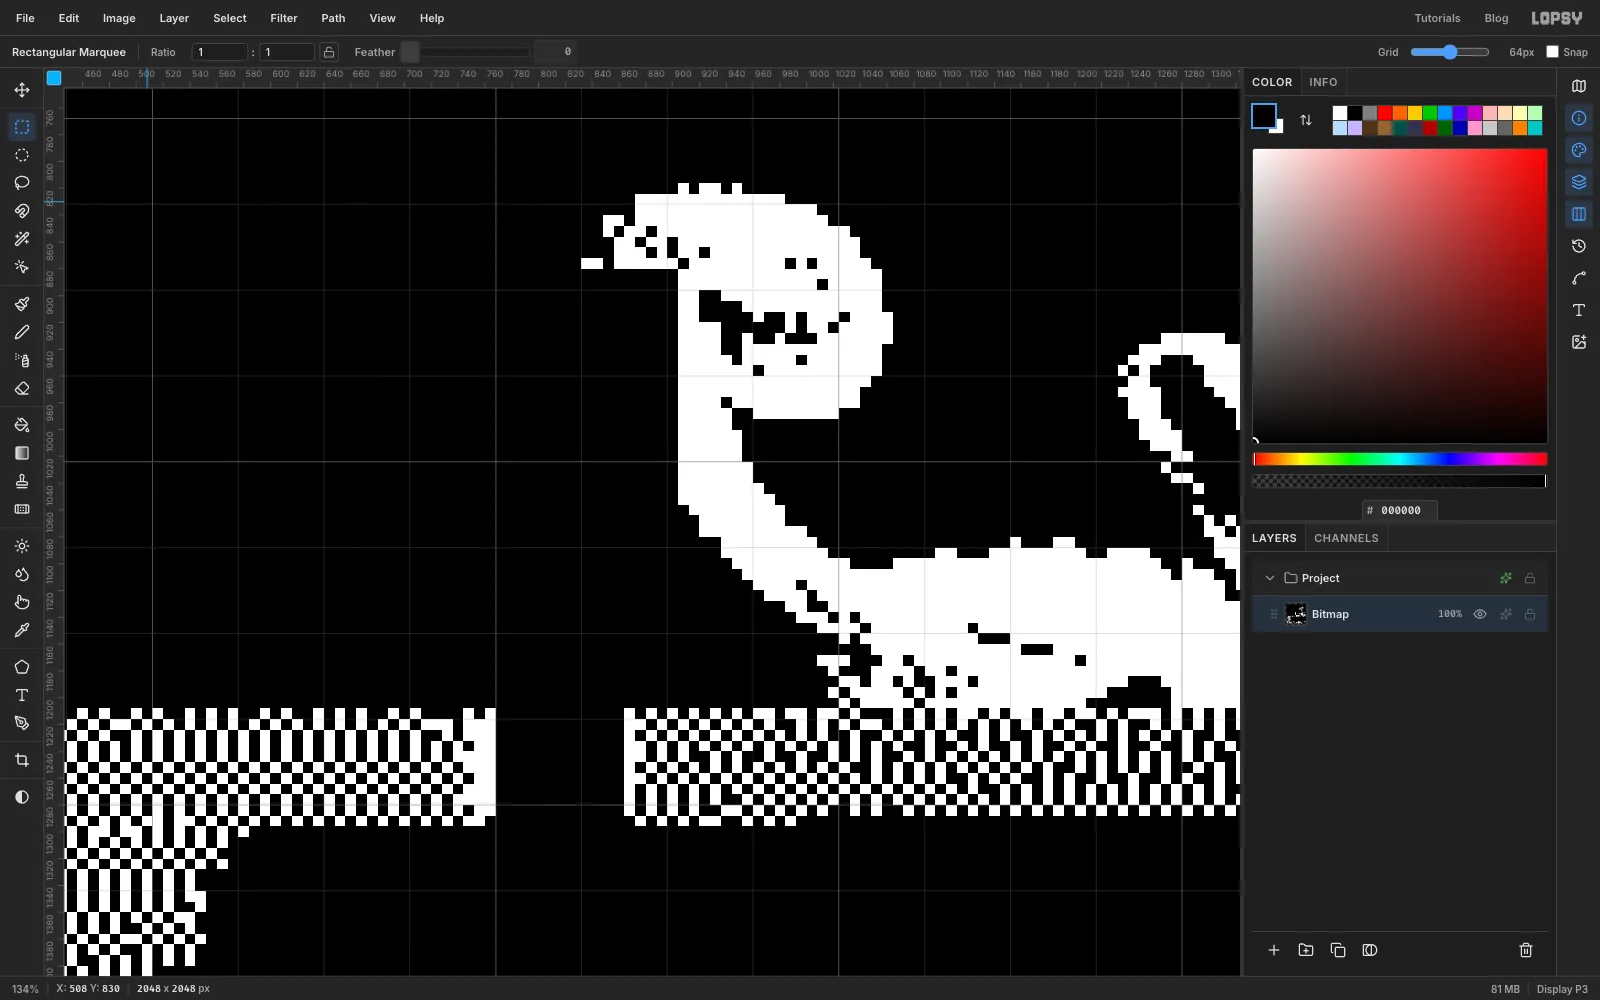
For the pixel work, set the Grid slider to 8px and untick Snap, so each grid square is one Spectrum pixel. Zoom in on the lighthouse to 300 % or more. Select Bitmap and fill two exact rectangles with black: 744, 880 to 904, 1208 (the lantern and tower, plus a gap against the arm), and 768, 1208 to 864, 1296 (the base, which stands in the sea).
-
Draw the lighthouse
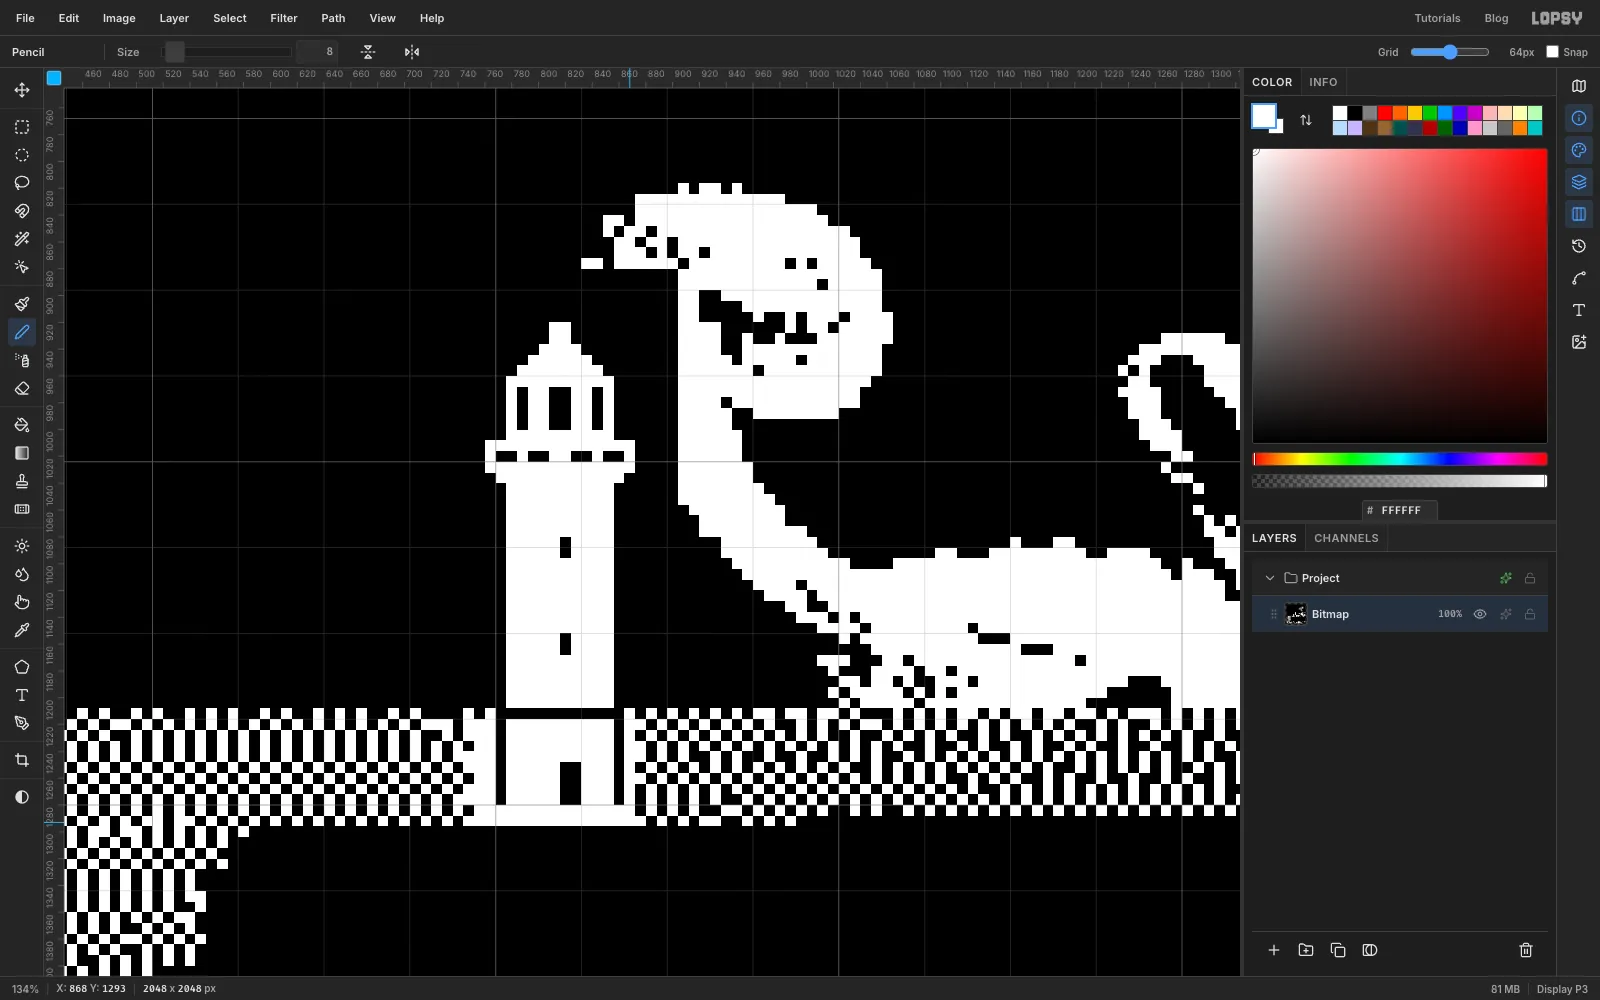
Choose the Pencil, set Size to 8 and the colour to white. A dab of 8 px fills one grid square exactly when you click in its middle, so stay zoomed in. Work down the chart row by row. Click the first pixel of each run, then Shift-click the last one to draw the line between them.
-
Give the arms suckers
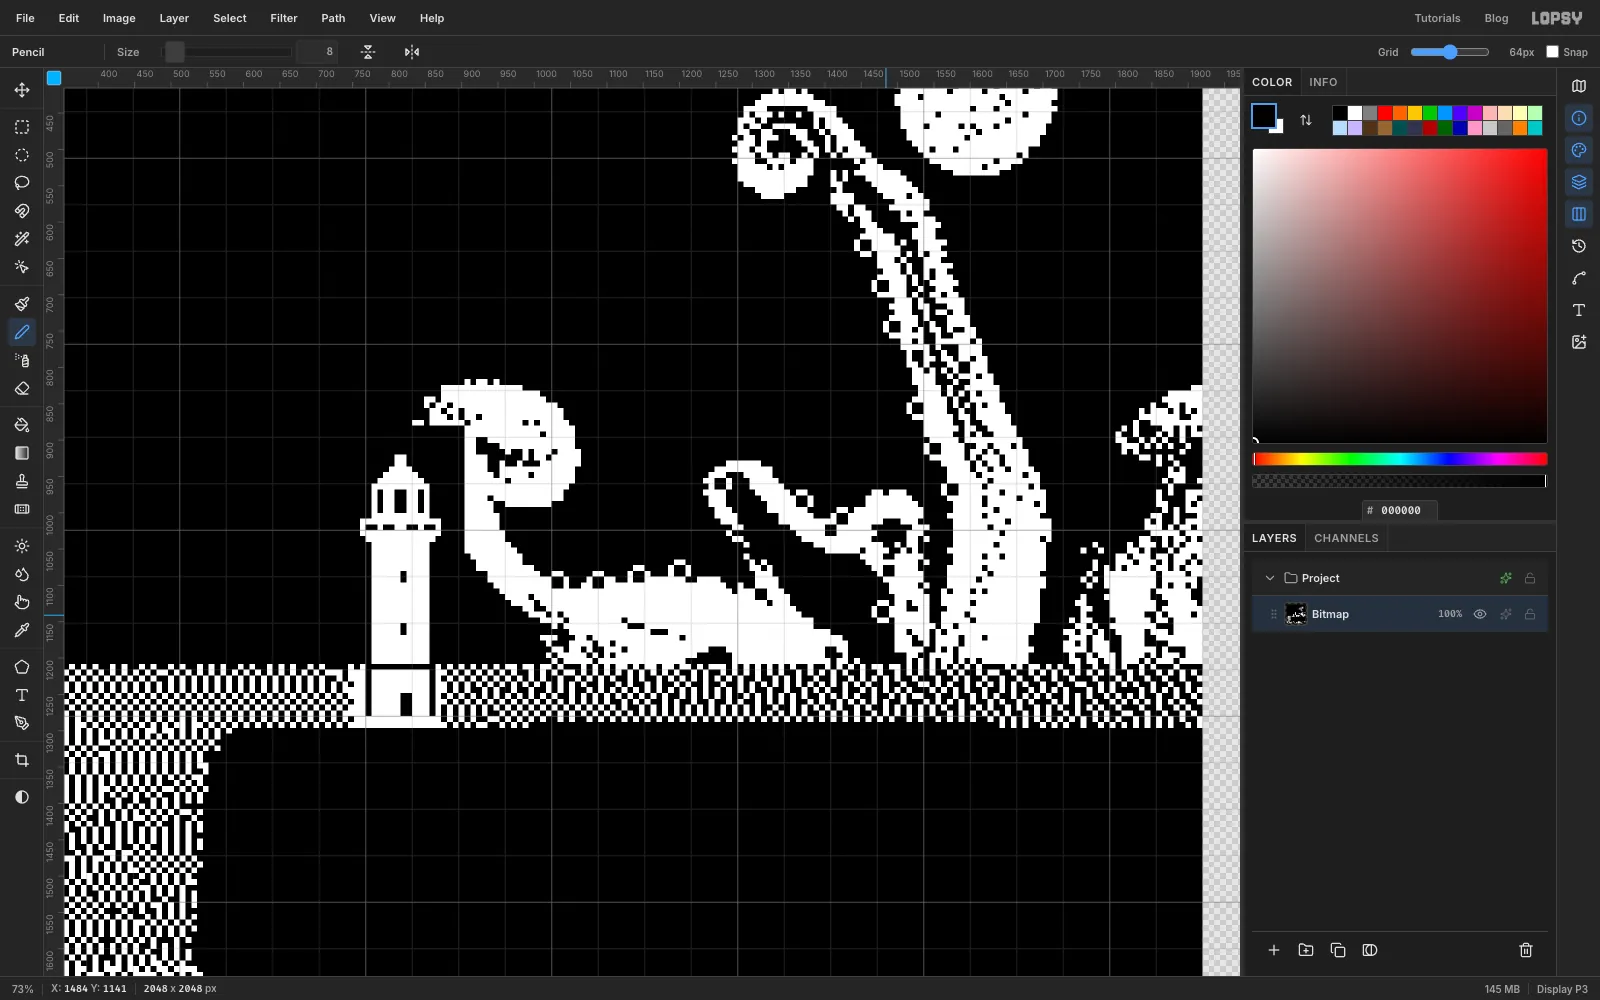
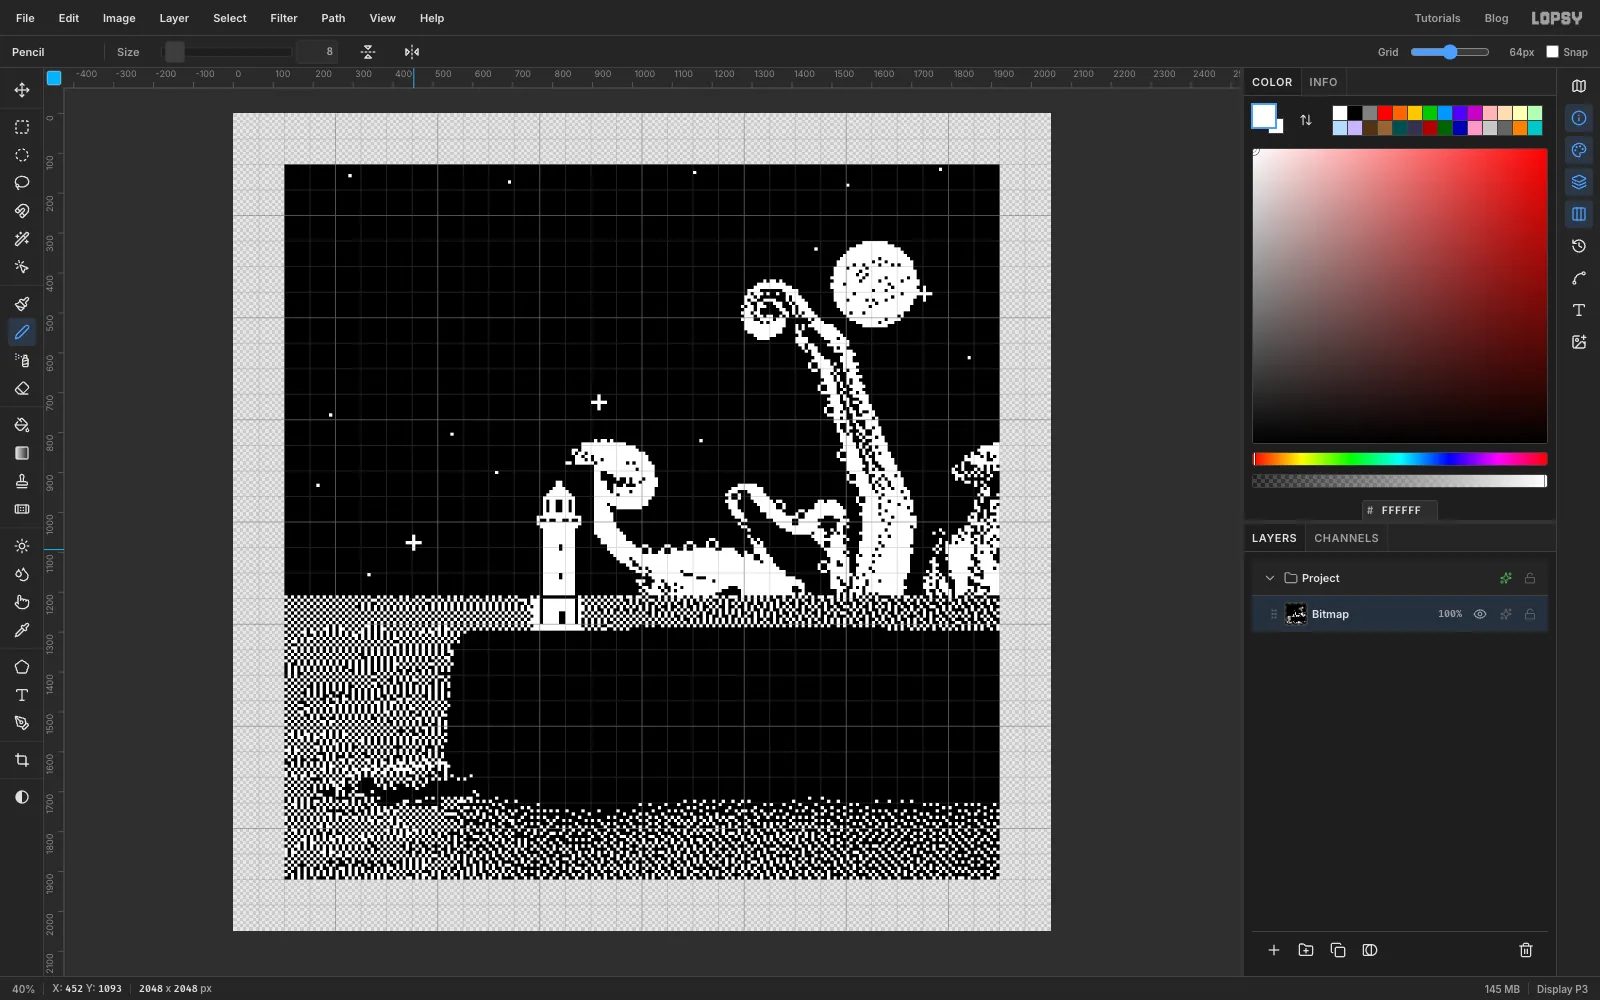
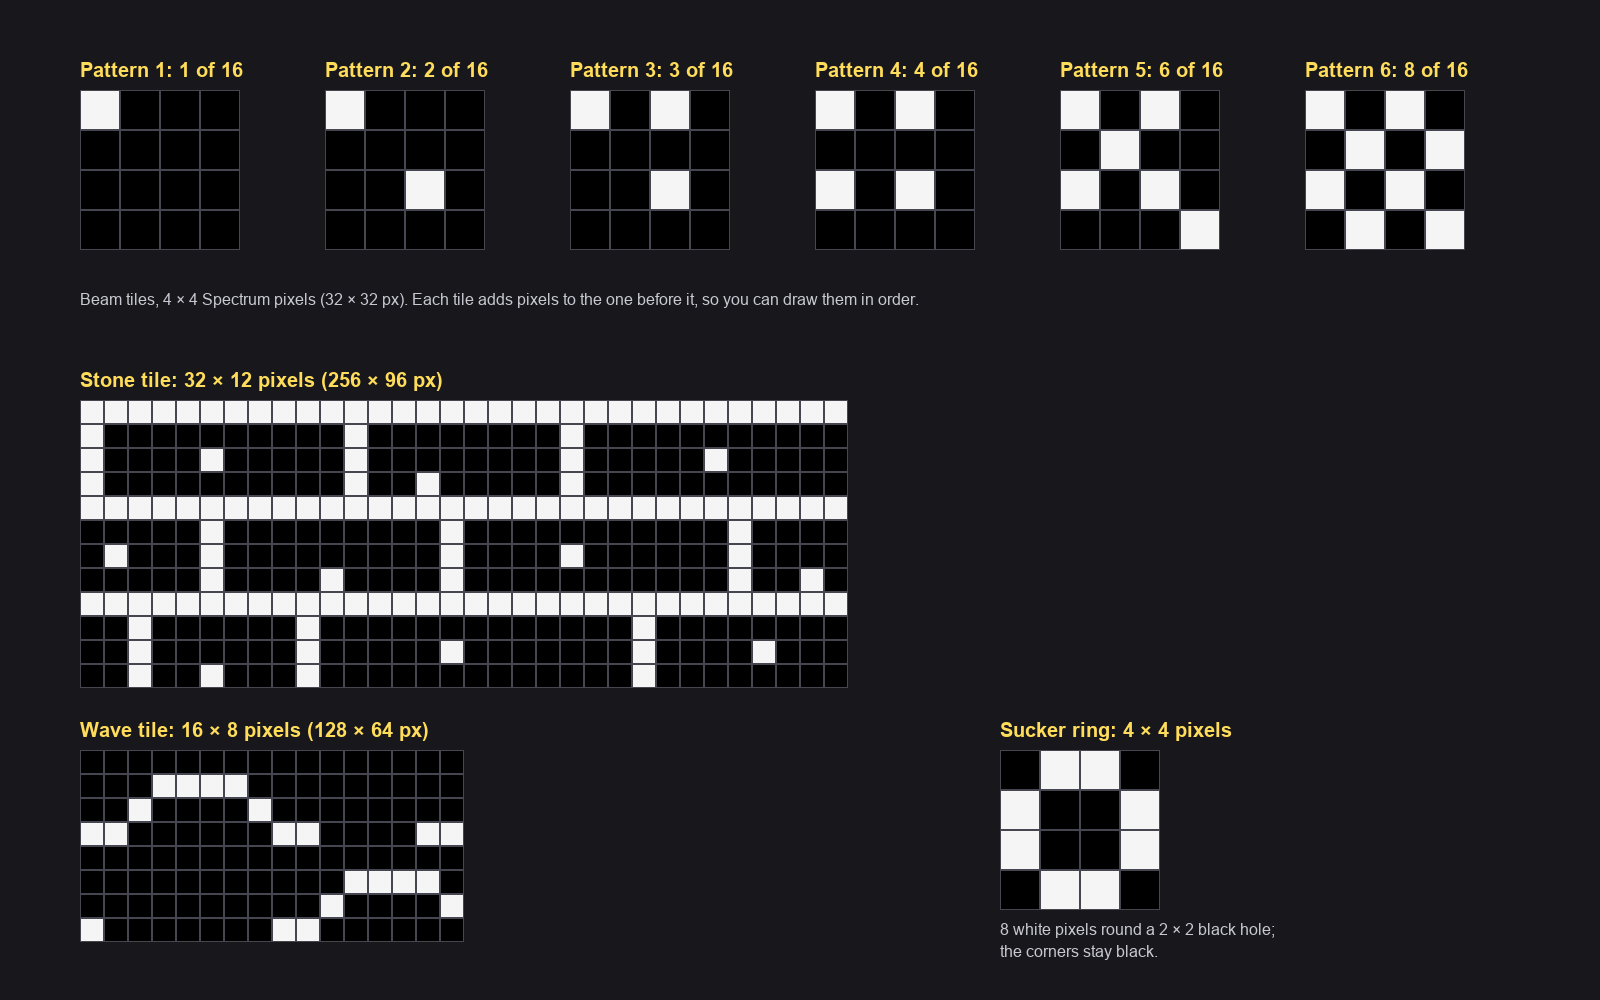
With the dither alone, the arms could belong to a sea serpent. Suckers make them an octopus. Each sucker is a small ring in a 4 × 4 square: two white pixels on each side, the four corners left black, and a 2 × 2 black hole in the middle. It's also drawn in the tile chart a few steps on.
With the Pencil at 8 px, draw a ring every 7 Spectrum pixels (56 px) or so, centred on the edge of the arm. Go down the inner (left) edge of the tall arm, then along the top edge of the low arm that curls over the lighthouse. Draw the white pixels first, then switch to black and click the four hole pixels, because the inside of the arm is already white.
-
Scatter stars
Still on Bitmap with the white Pencil, click single pixels around the sky for stars, keeping clear of where the title will go (the top-left quarter). For three bigger twinkles, draw a 5 × 5 plus sign: a five-pixel line across, then two pixels above and two below the middle.
-
Make the dither tiles
The beam fades from dense dots near the lamp to sparse ones far away. That takes six small patterns. Each is a 4 × 4-pixel tile from the same ordered (Bayer) dither, and each one adds pixels to the one before it, so neighbouring bands blend and you can draw them one after another.
Select Bitmap, click Add Layer and name the layer Beam. Fill it with black and set its blend mode to Screen, so the black is see-through and only white will show.
With the white Pencil at 8 px, draw the tiles in an empty patch of sky, with the tile's top-left corner at 1600, 192. Start with 1 of 16: click its single pixel, select 1600, 192 to 1632, 224 and choose Edit → Define Pattern. Add the next pixels to make 2 of 16 and define it again, and so on up to 8 of 16. Then fill the square with black.
The patterns are numbered in the order you define them, Pattern 1 (1 of 16) to Pattern 6 (8 of 16). If you've defined patterns before in this session, the numbers start higher, so go by the thumbnails.
-
Select the beam
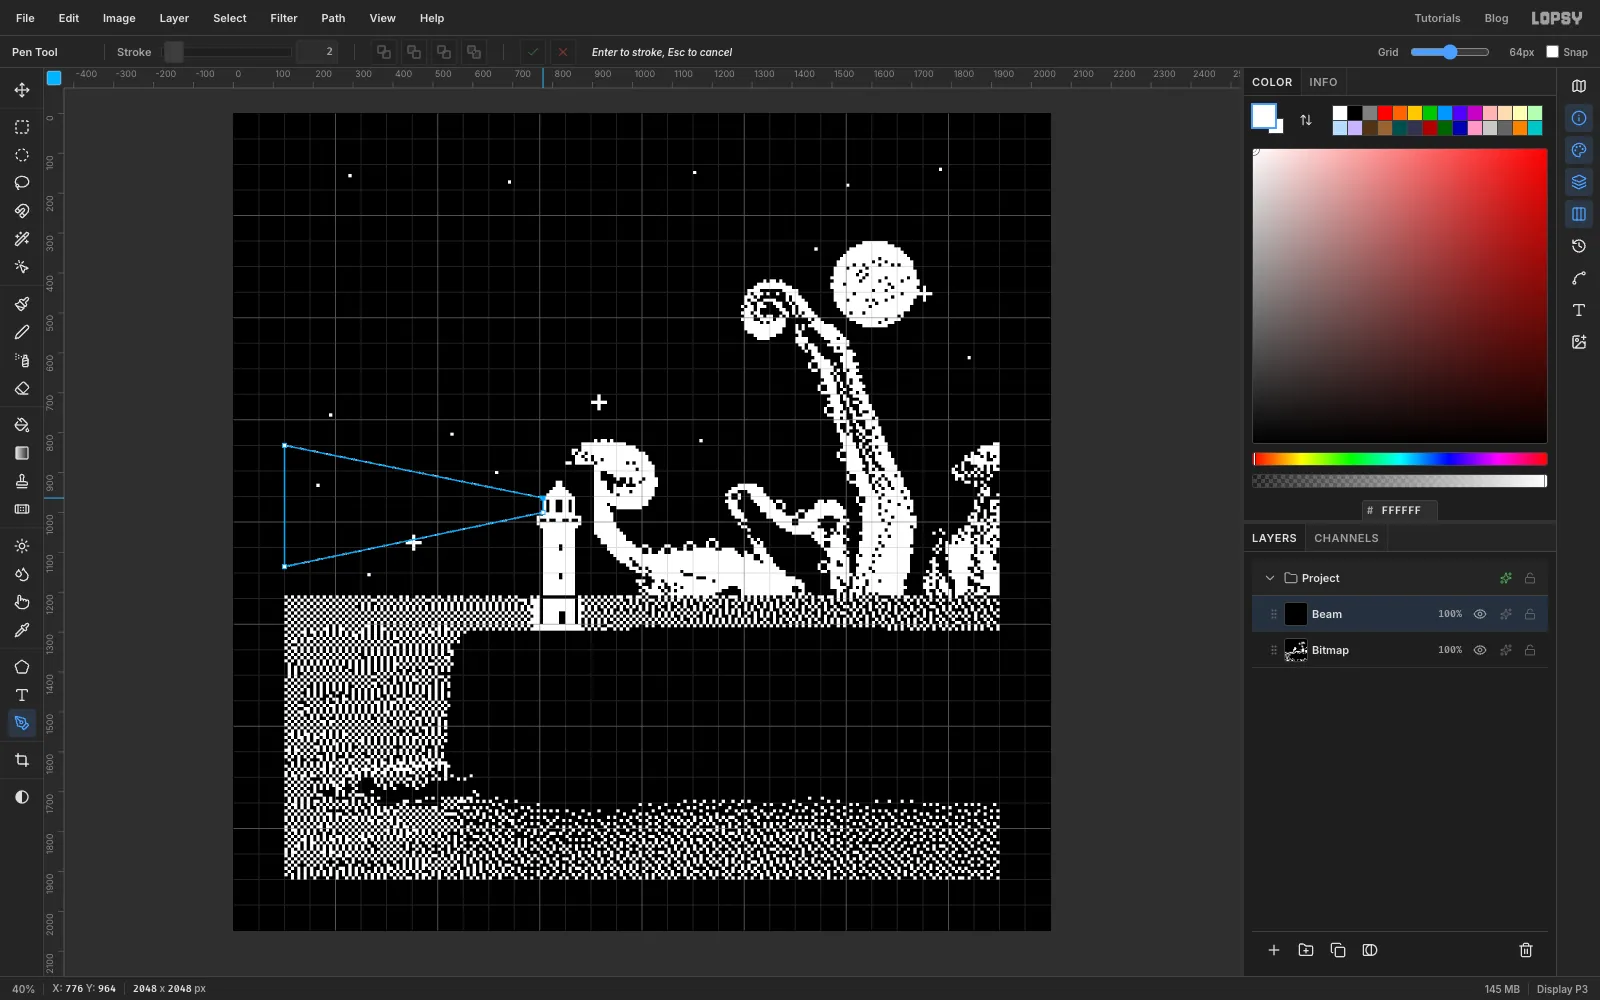
Choose the Pen tool and click four corners: the top of the lantern glass at 776, 964, the left edge of the picture at 128, 832 and 128, 1136, and the bottom of the glass at 776, 1000. Click the first point again to close the path.
In the Paths panel, click Path to Selection. Keep the path, because you'll use it five more times. Choose Edit → Fill with Pattern…, pick Pattern 1 and click Apply. The whole cone gets the sparsest dots.
-
Fill the beam in rings
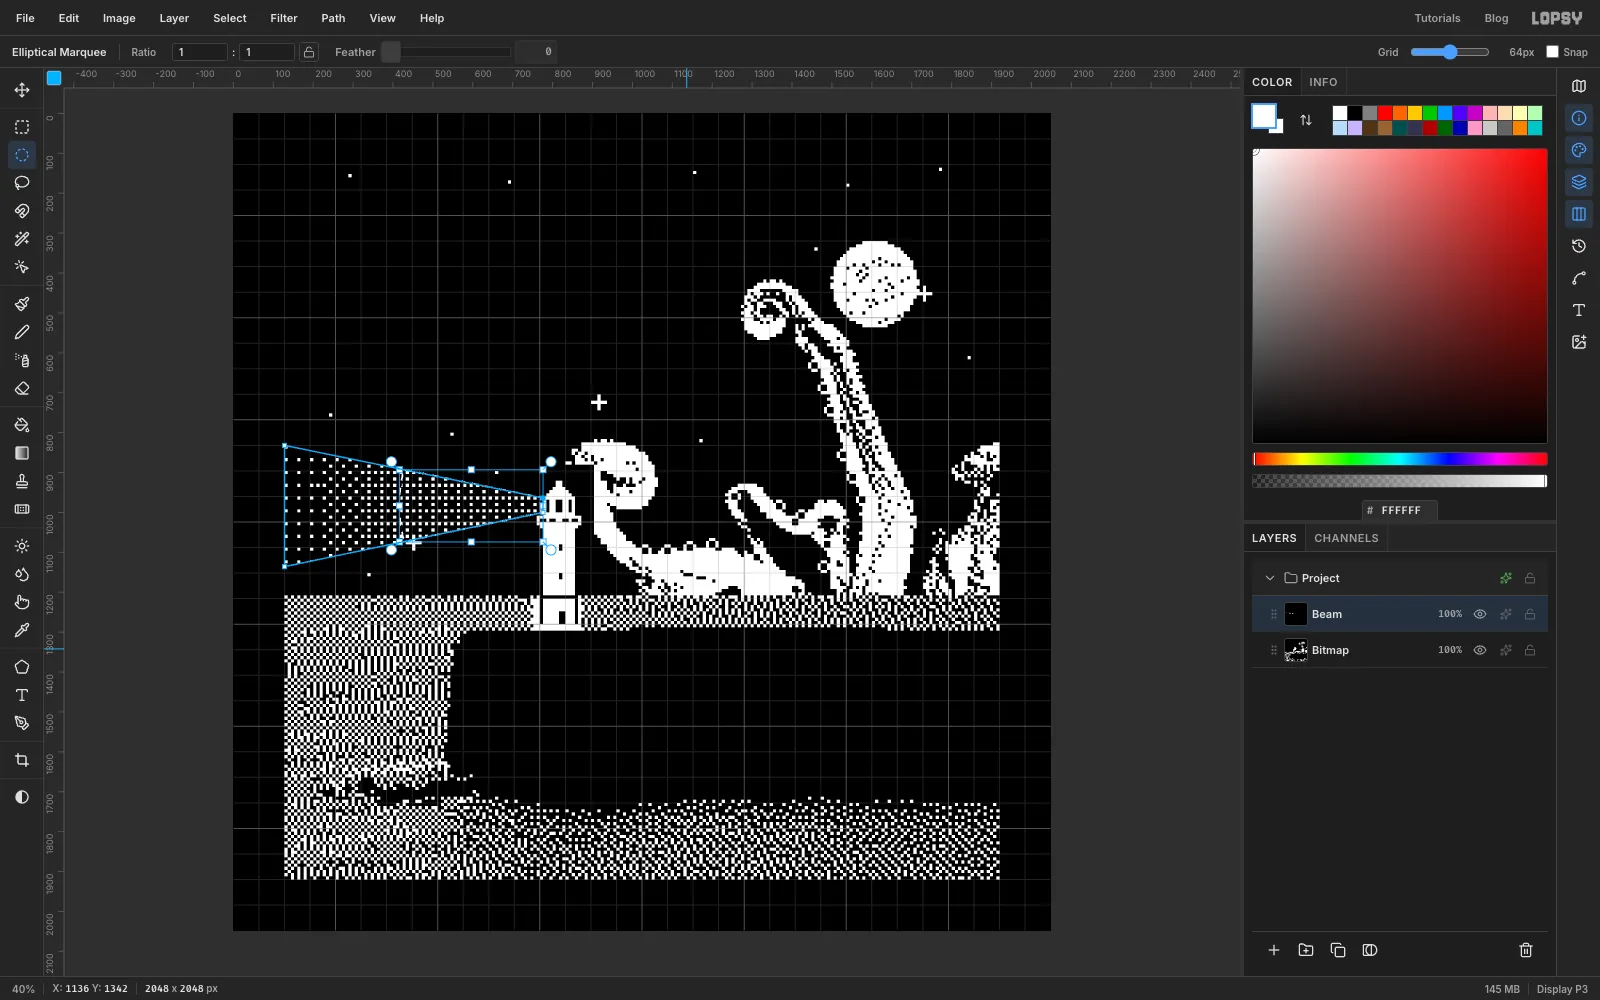
Now fill denser rings nearer the lamp. Each ring is the cone intersected with a circle centred on the lantern at 776, 982:
- Click Path to Selection again.
- Choose the Elliptical Marquee, hold Shift+Option and drag a circle round the lantern. Only the part of the cone inside the circle stays selected.
- Fill with the next pattern.
The circles, biggest first (zoom out so the whole drag fits on screen):
- 216, 422 to 1336, 1542 (radius 560), Pattern 2
- 316, 522 to 1236, 1442 (radius 460), Pattern 3
- 416, 622 to 1136, 1342 (radius 360), Pattern 4
- 516, 722 to 1036, 1242 (radius 260), Pattern 5
- 616, 822 to 936, 1142 (radius 160), Pattern 6
Then press Cmd+D and delete the path in the Paths panel.
-
Snap the beam to the pixel grid
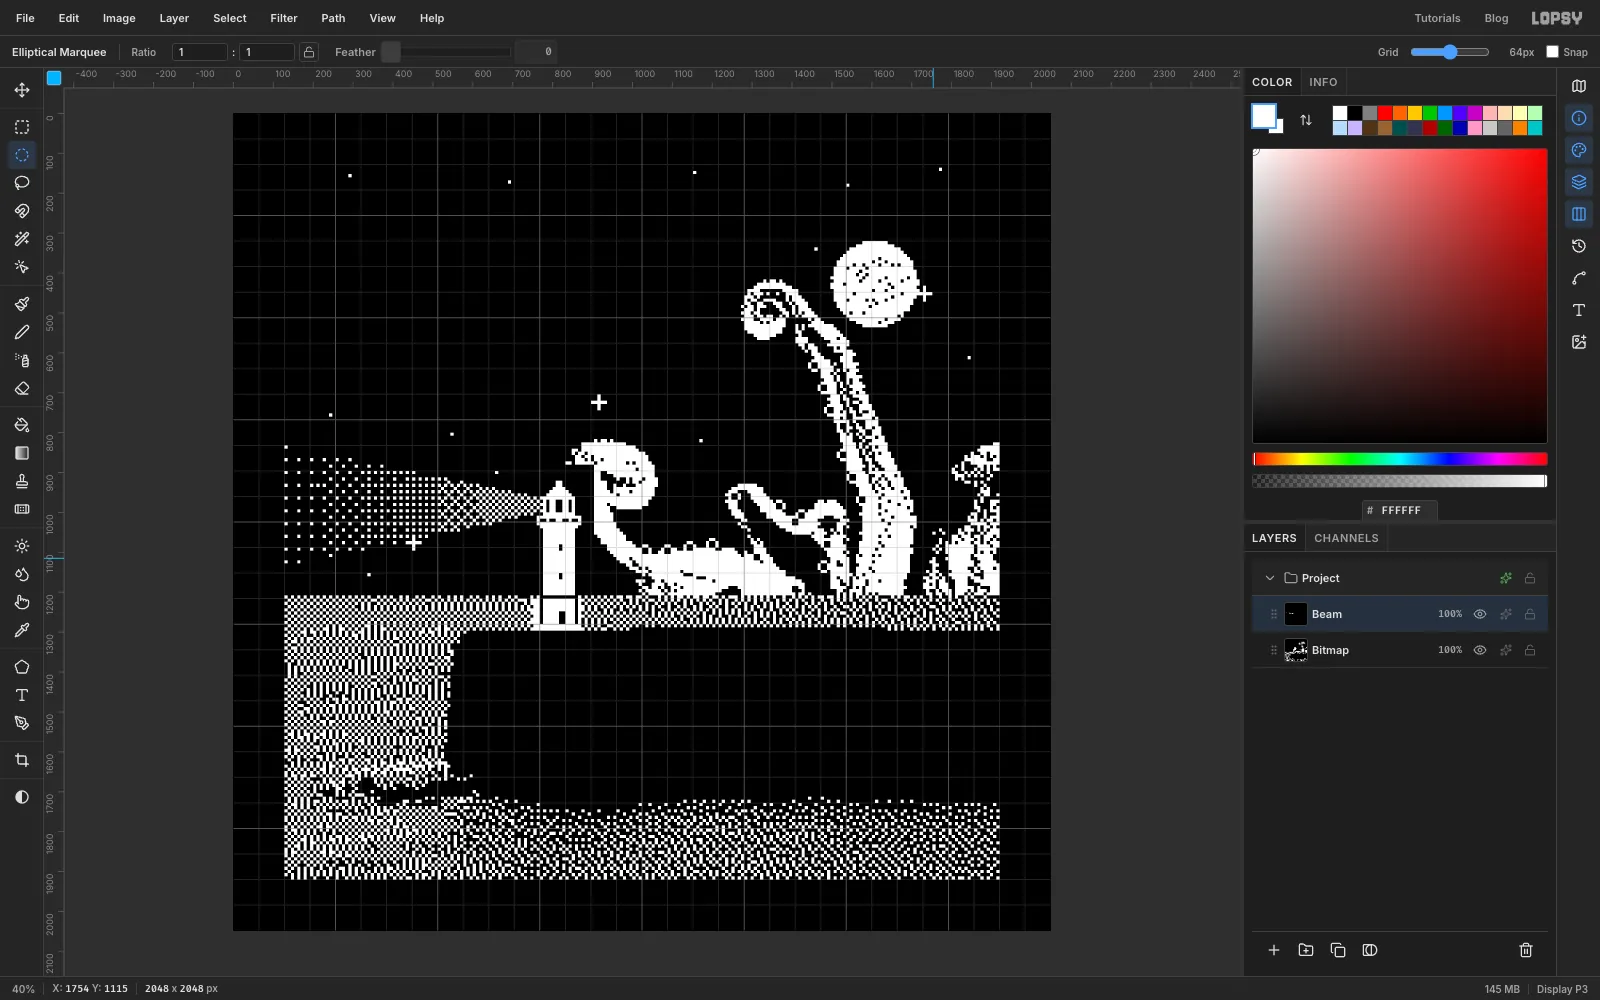
The cone's sloping edges cut some dots in half. Apply Pixelate at 8 and Threshold at 128 to the Beam layer to turn every half dot into a whole pixel or nothing.
-
Draw a stone tile
The breakwater is a flat black slab. Give it stone courses.
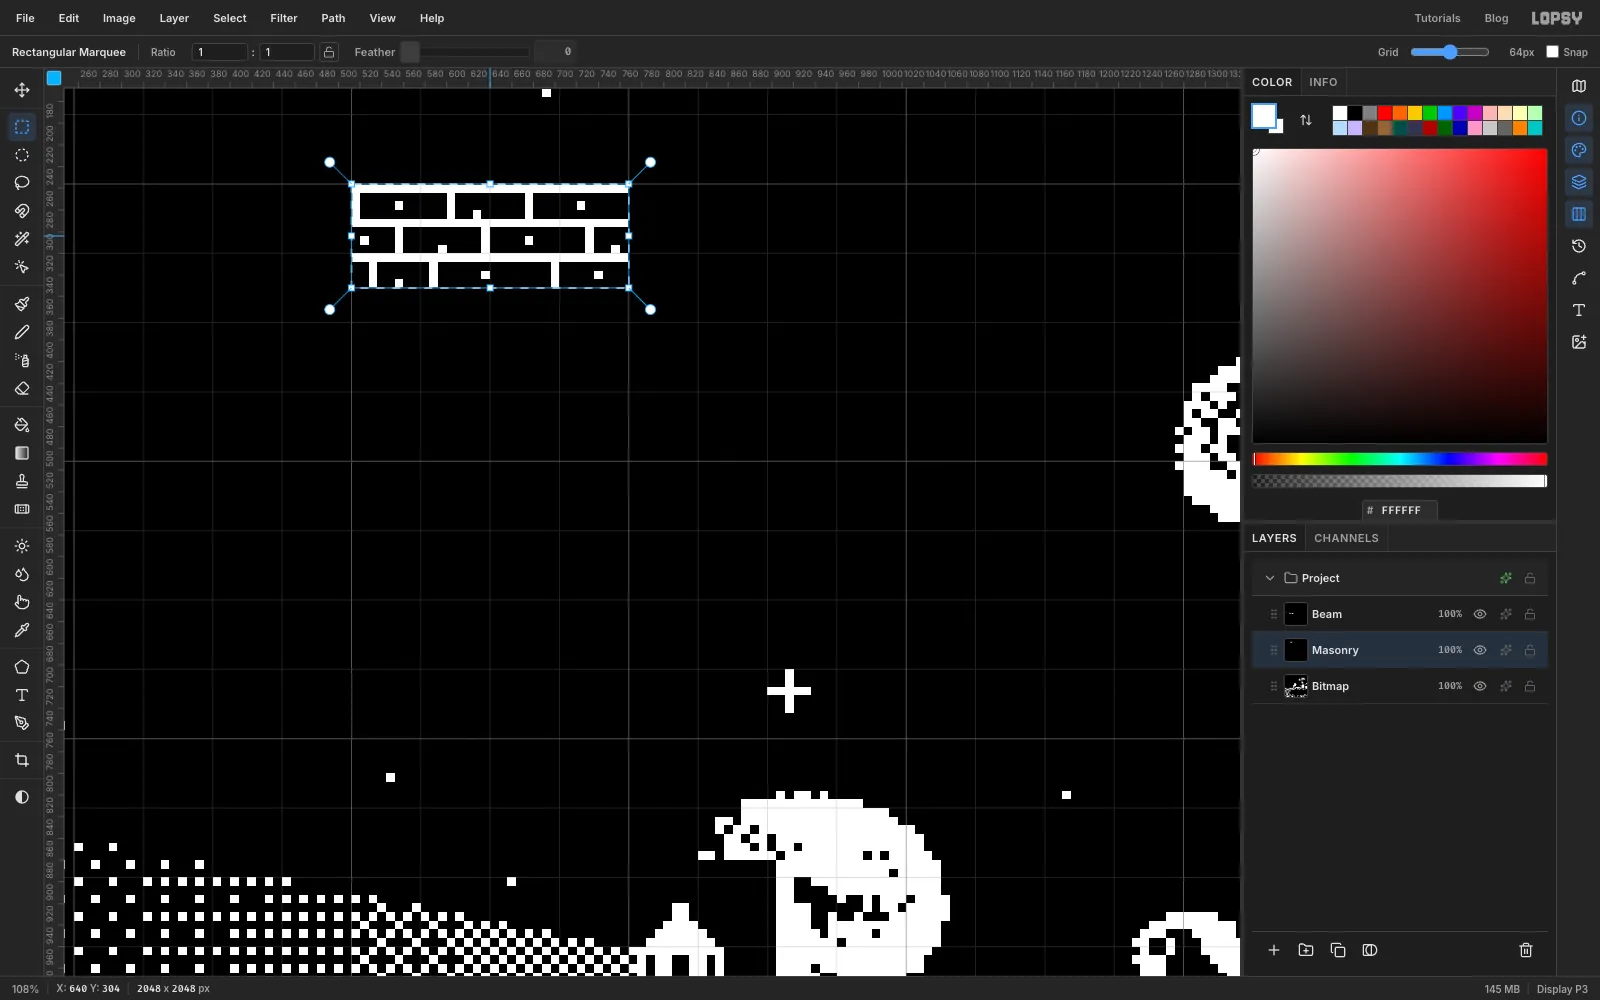
Select Bitmap, click Add Layer, name it Masonry, fill it with black and set it to Screen. With the 8 px grid showing and the white Pencil at 8 px, draw the stone tile from the chart with its top-left corner at 512, 256. That's three courses of blocks, the joints staggered from course to course, and a speck or two in each block.
Select 512, 256 to 768, 352 and choose Edit → Define Pattern (Pattern 7). Fill the selection with black.
-
Fill the breakwater with stone
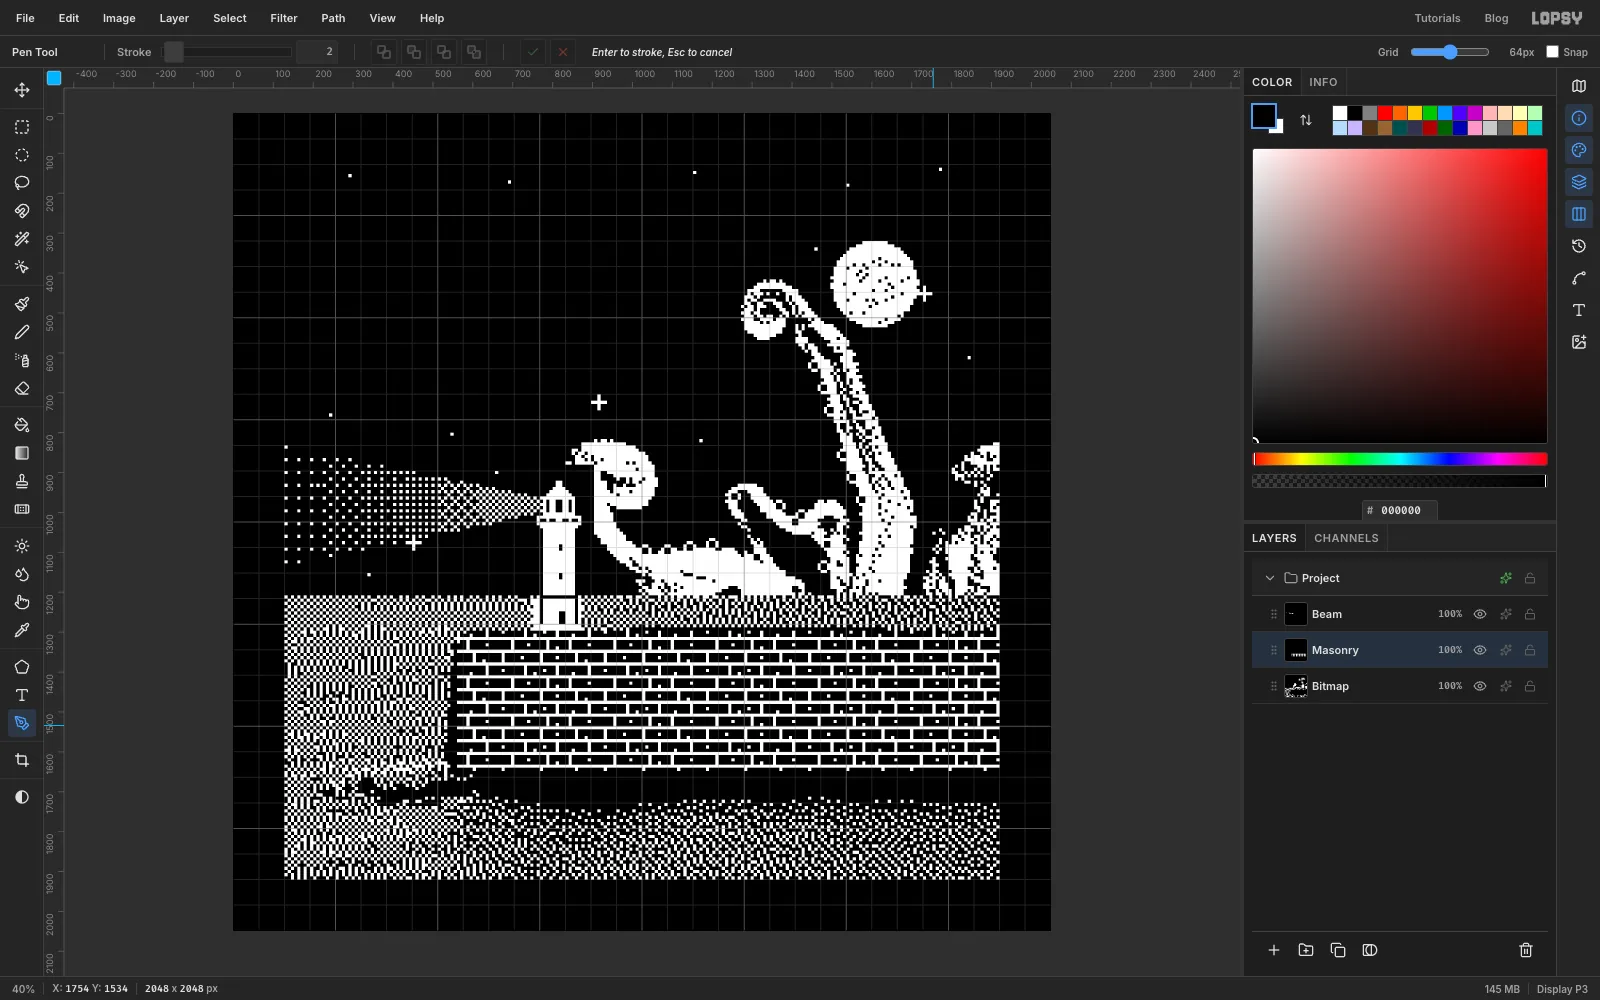
With the Rectangular Marquee, select the breakwater from 560, 1296 to 1920, 1648 and Fill with Pattern using Pattern 7. Press Cmd+D.
-
Draw a wave tile
The dithered sea in front of the breakwater is noisy. A wave pattern reads as water at a glance.
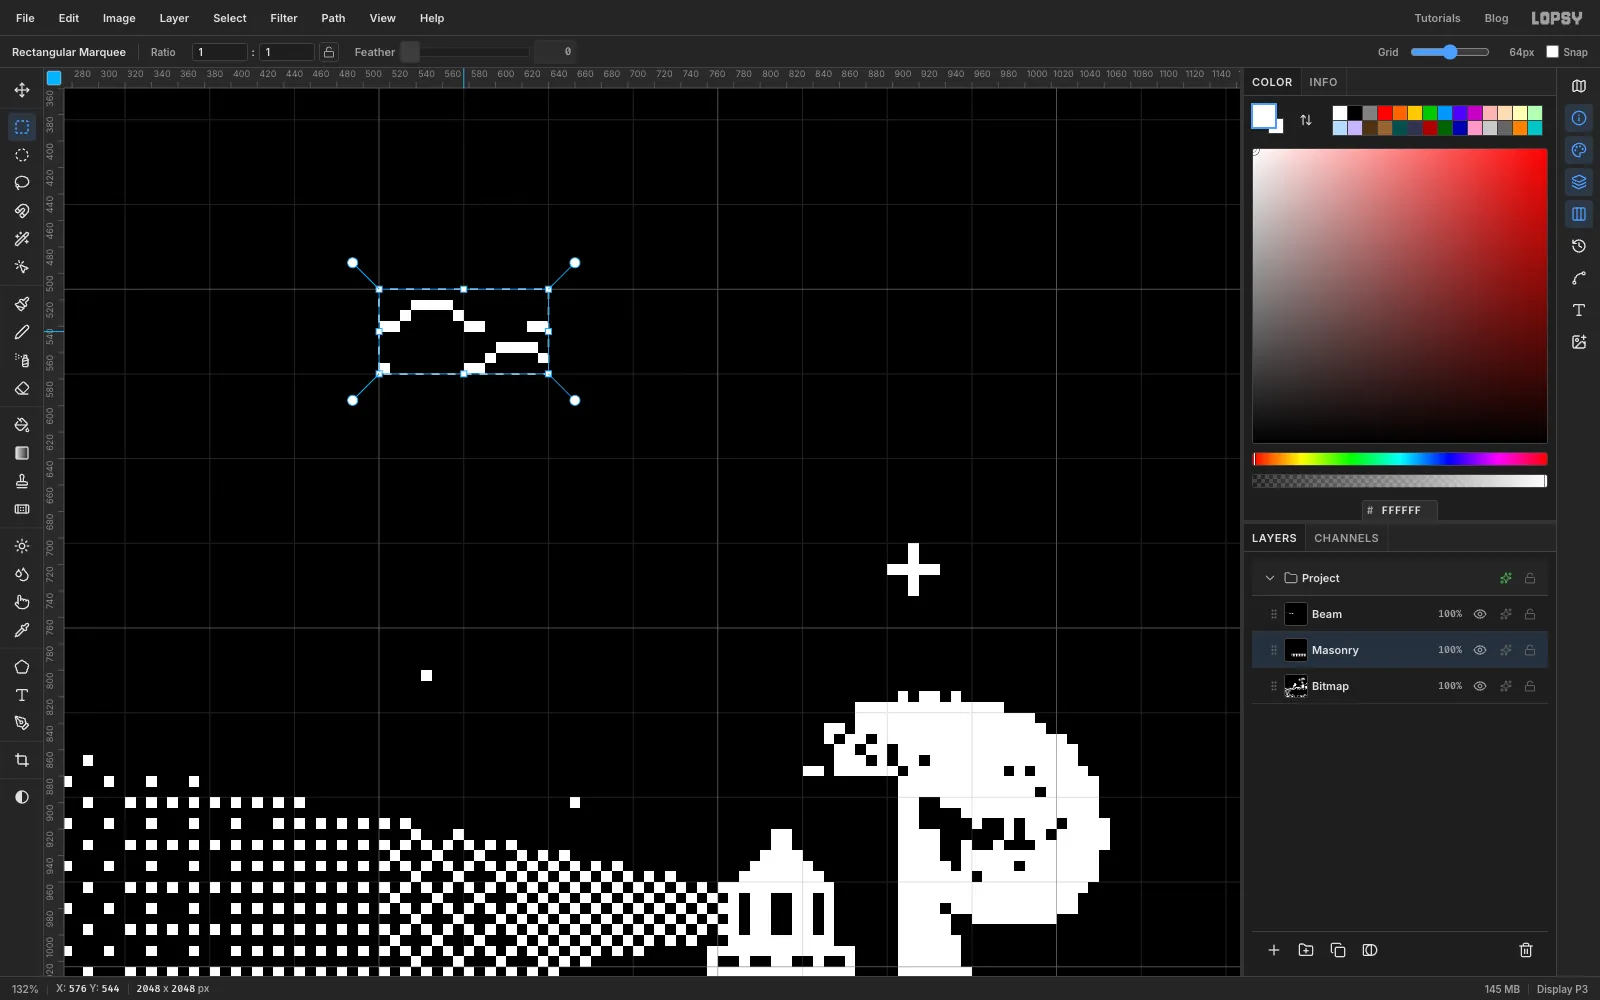
Still on Masonry, draw the wave tile from the chart with its top-left corner at 512, 512. Select 512, 512 to 640, 576, choose Define Pattern (Pattern 8) and fill the selection with black.
-
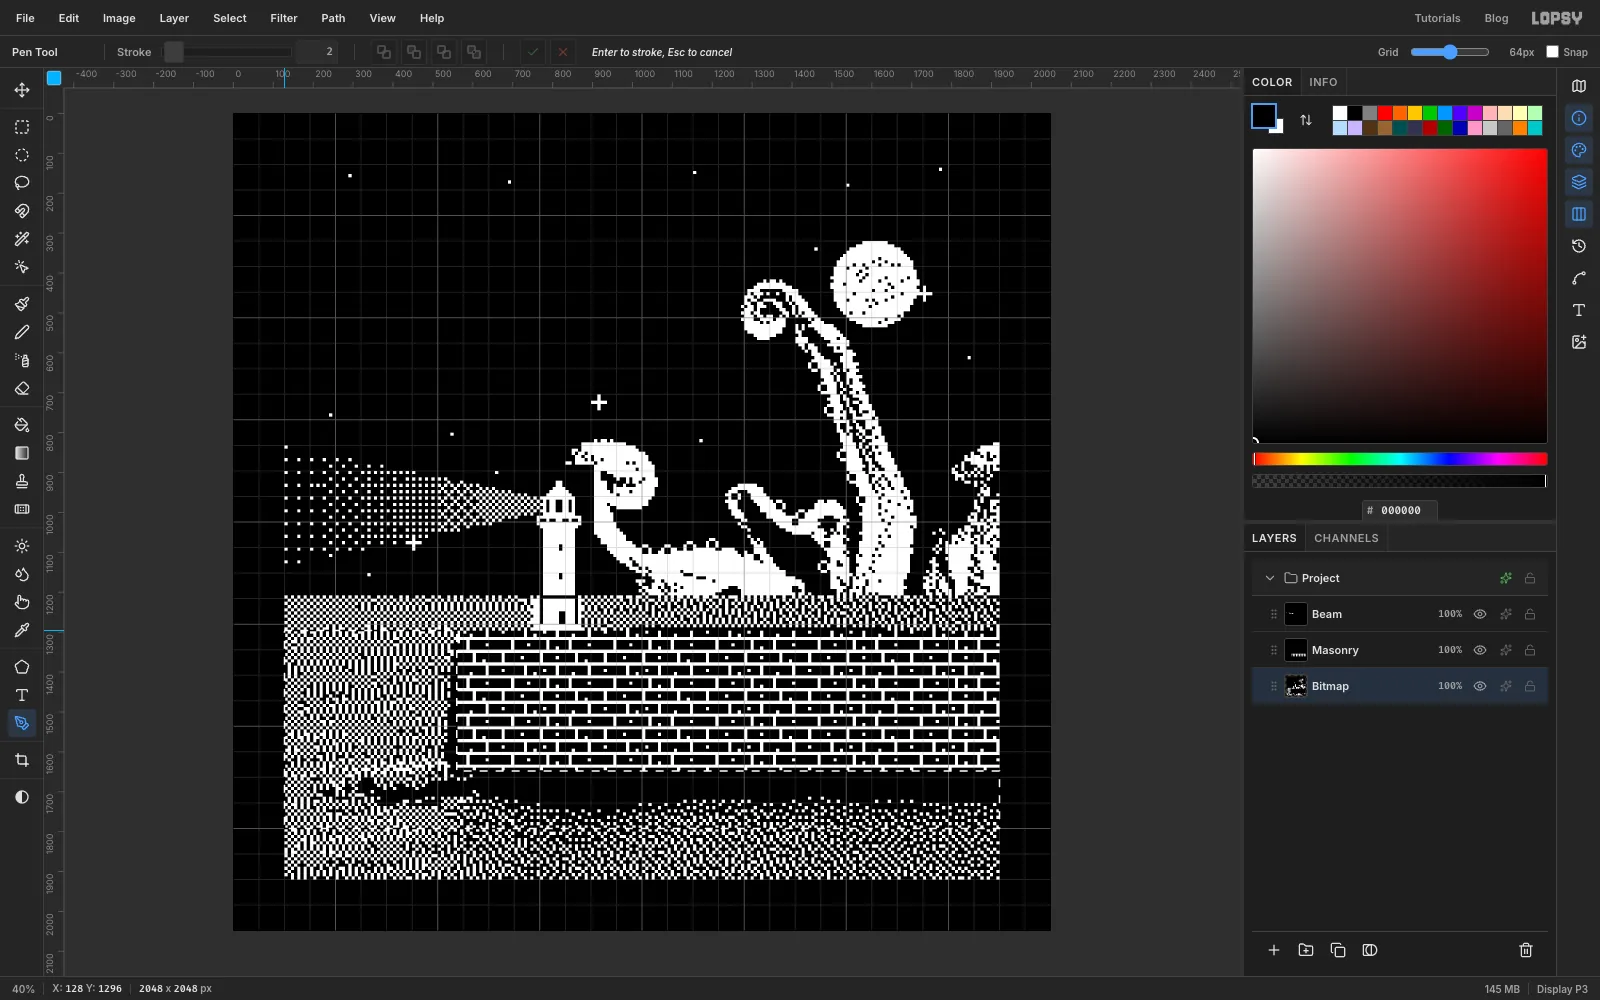
Select the sea
Select the sea in front of the breakwater with the Rectangular Marquee, from 128, 1296 to 560, 1792. Then hold Shift and drag from 560, 1648 to 1920, 1792 to add the strip below the breakwater.
-
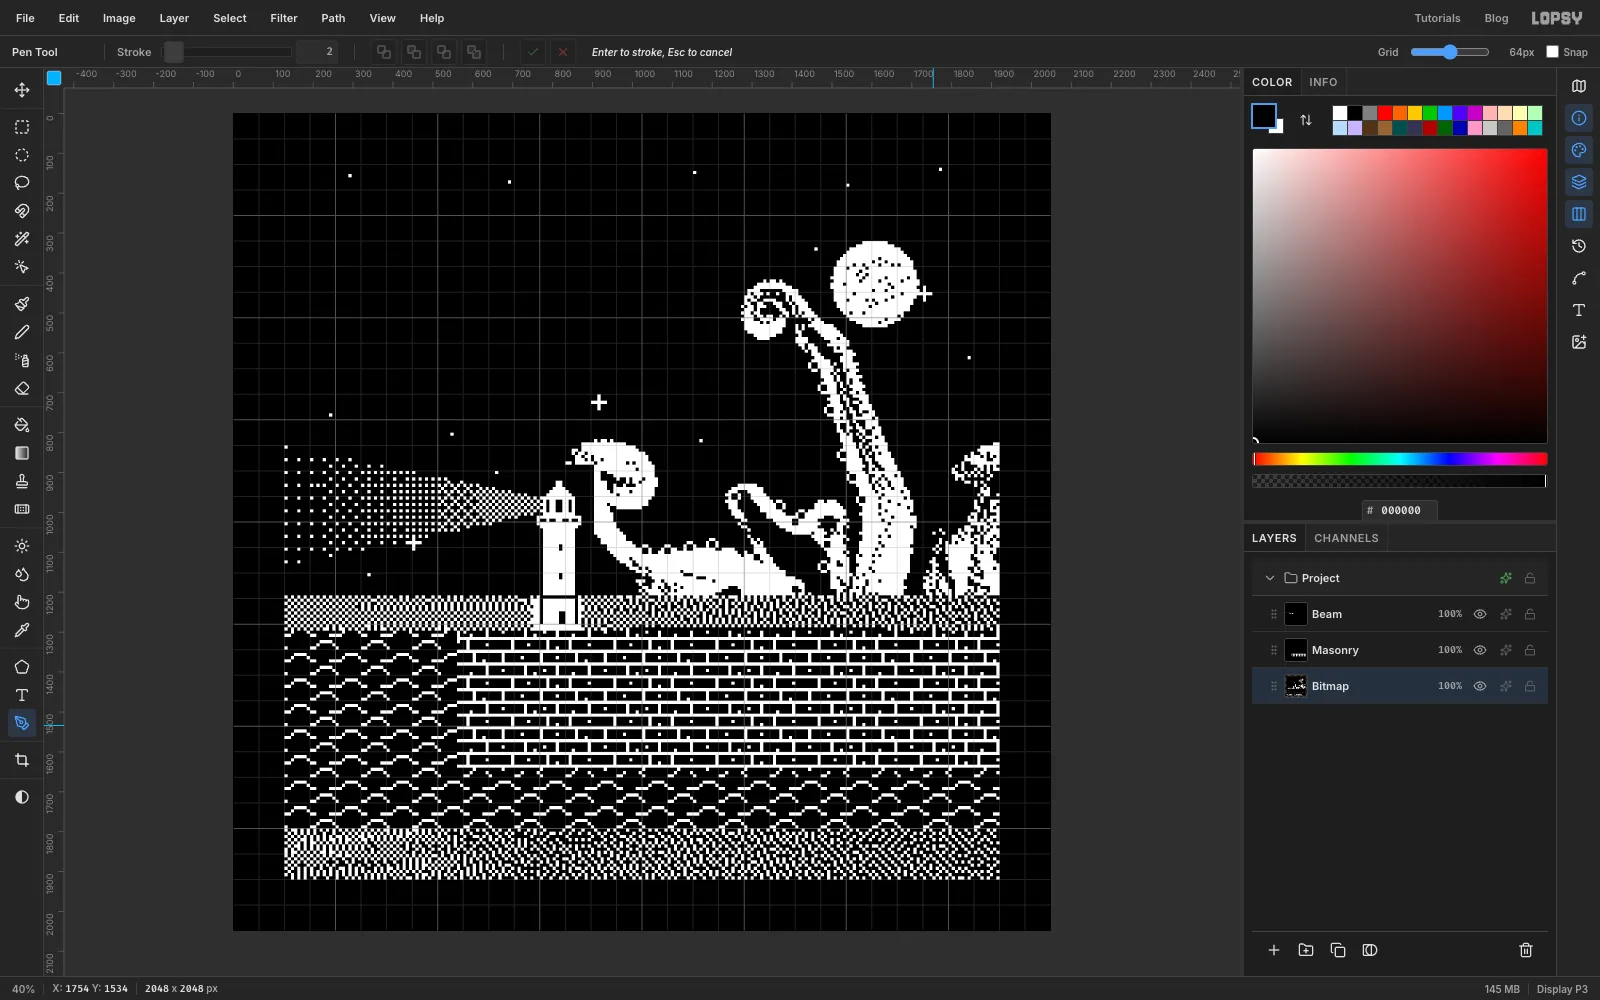
Fill the sea with waves
Select Bitmap, so the waves replace the dither instead of adding to it, and Fill with Pattern using Pattern 8. Press Cmd+D.
-
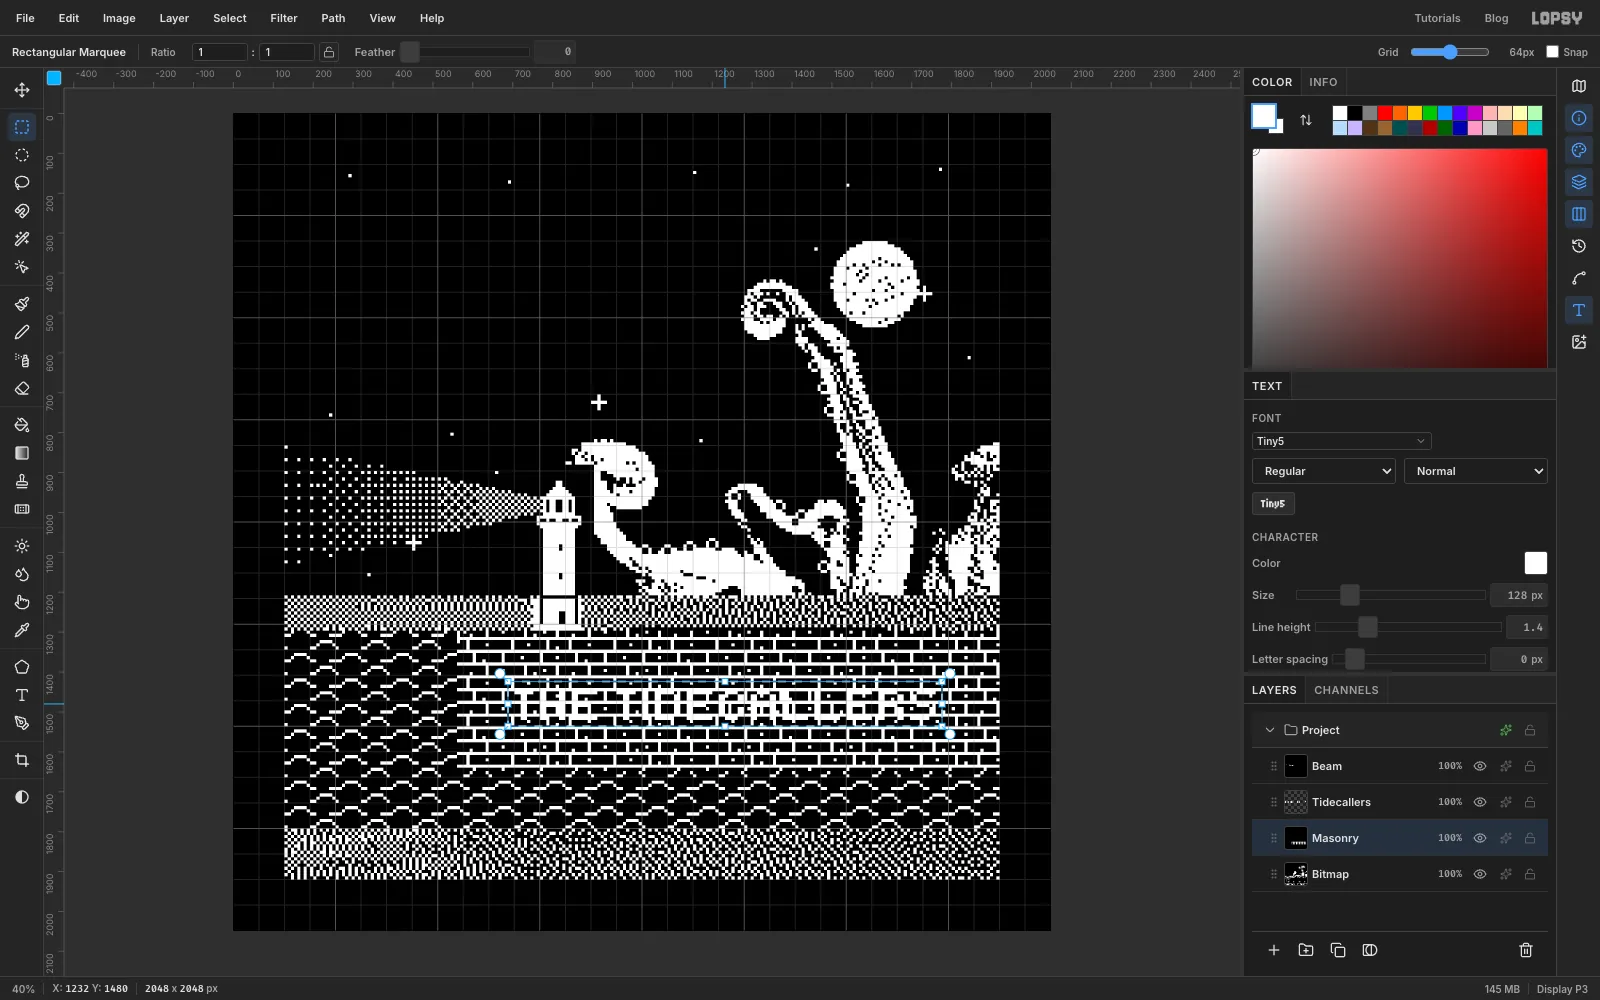
Paint the band name on the wall
Select Masonry, choose the Text tool and set the font to Tiny5, Size 128, colour white. At 128, one Tiny5 pixel is 16 px, exactly two Spectrum pixels. Click on the wall and type THE TIDECALLERS, then press Tab. Rename the layer Tidecallers. With the Move tool, nudge it with the arrow keys until the letters start at 704, 1440. Both numbers are on the 16 px lattice, so every edge lands on a whole Spectrum pixel.
On Masonry, fill an exact rectangle from 688, 1424 to 1776, 1536 with black. That's a painted sign panel one font pixel (two Spectrum pixels) wider than the letters all round.
-
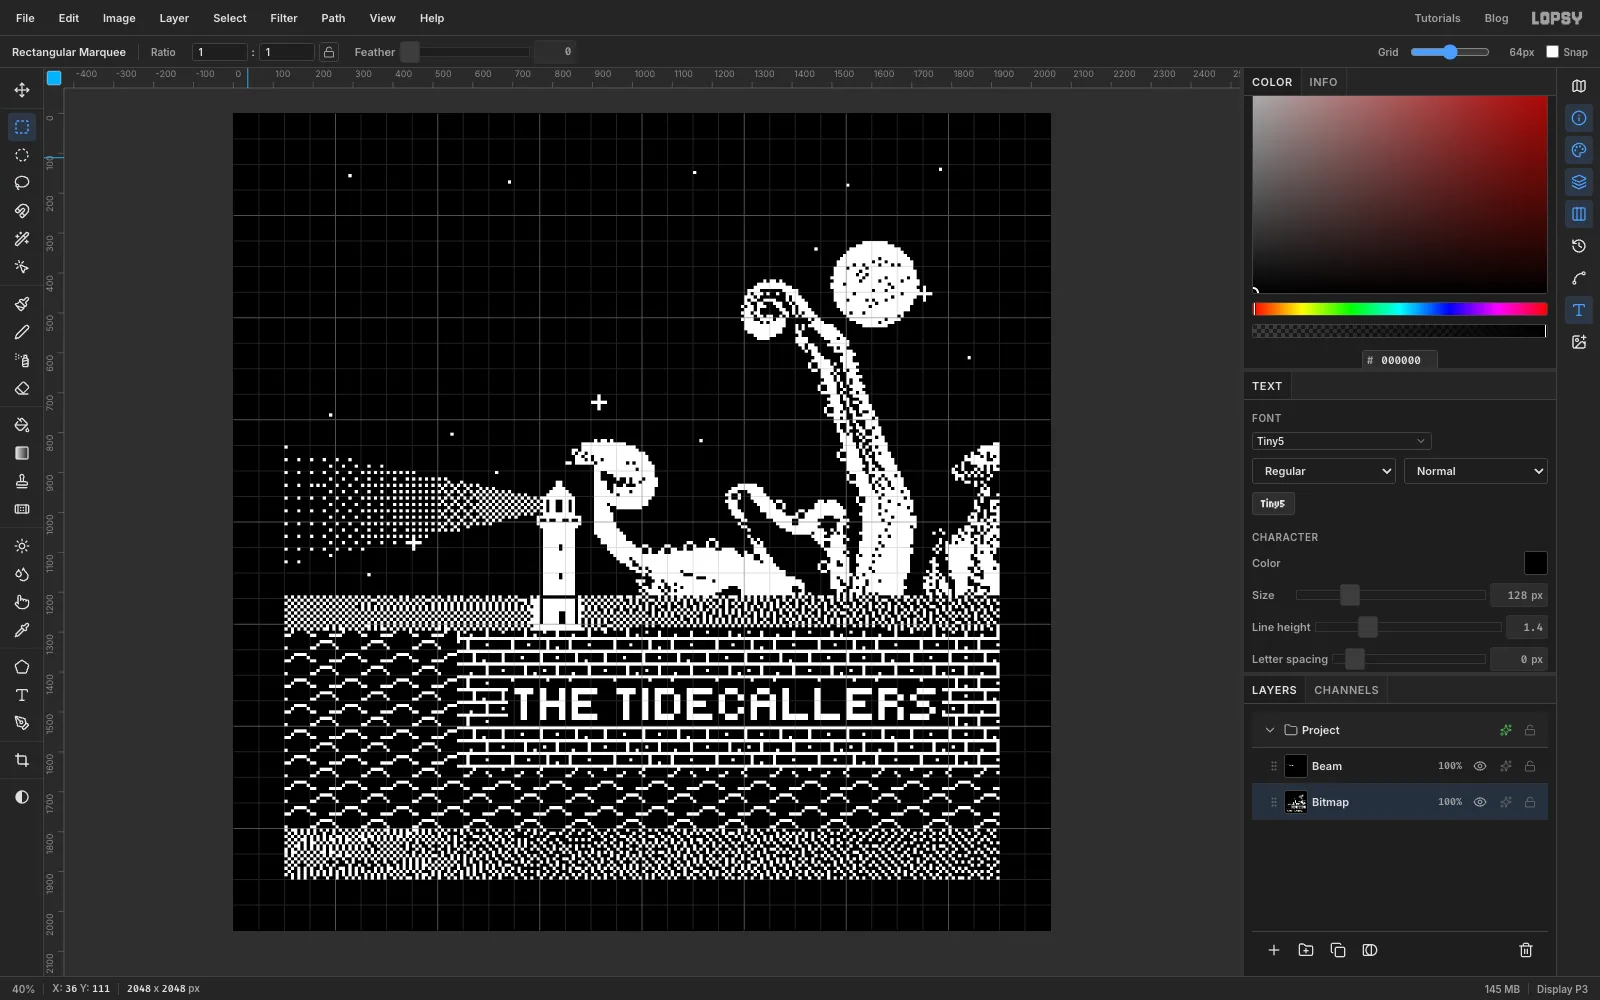
Merge the wall into the picture
Select Tidecallers, click Rasterize Layer, then choose Layer → Merge Down to merge it into Masonry. Choose Merge Down again to merge Masonry into Bitmap. The Screen blend bakes in, and the stones, waves and name are now part of the 1-bit picture.
-
Choose where the colour stops loading
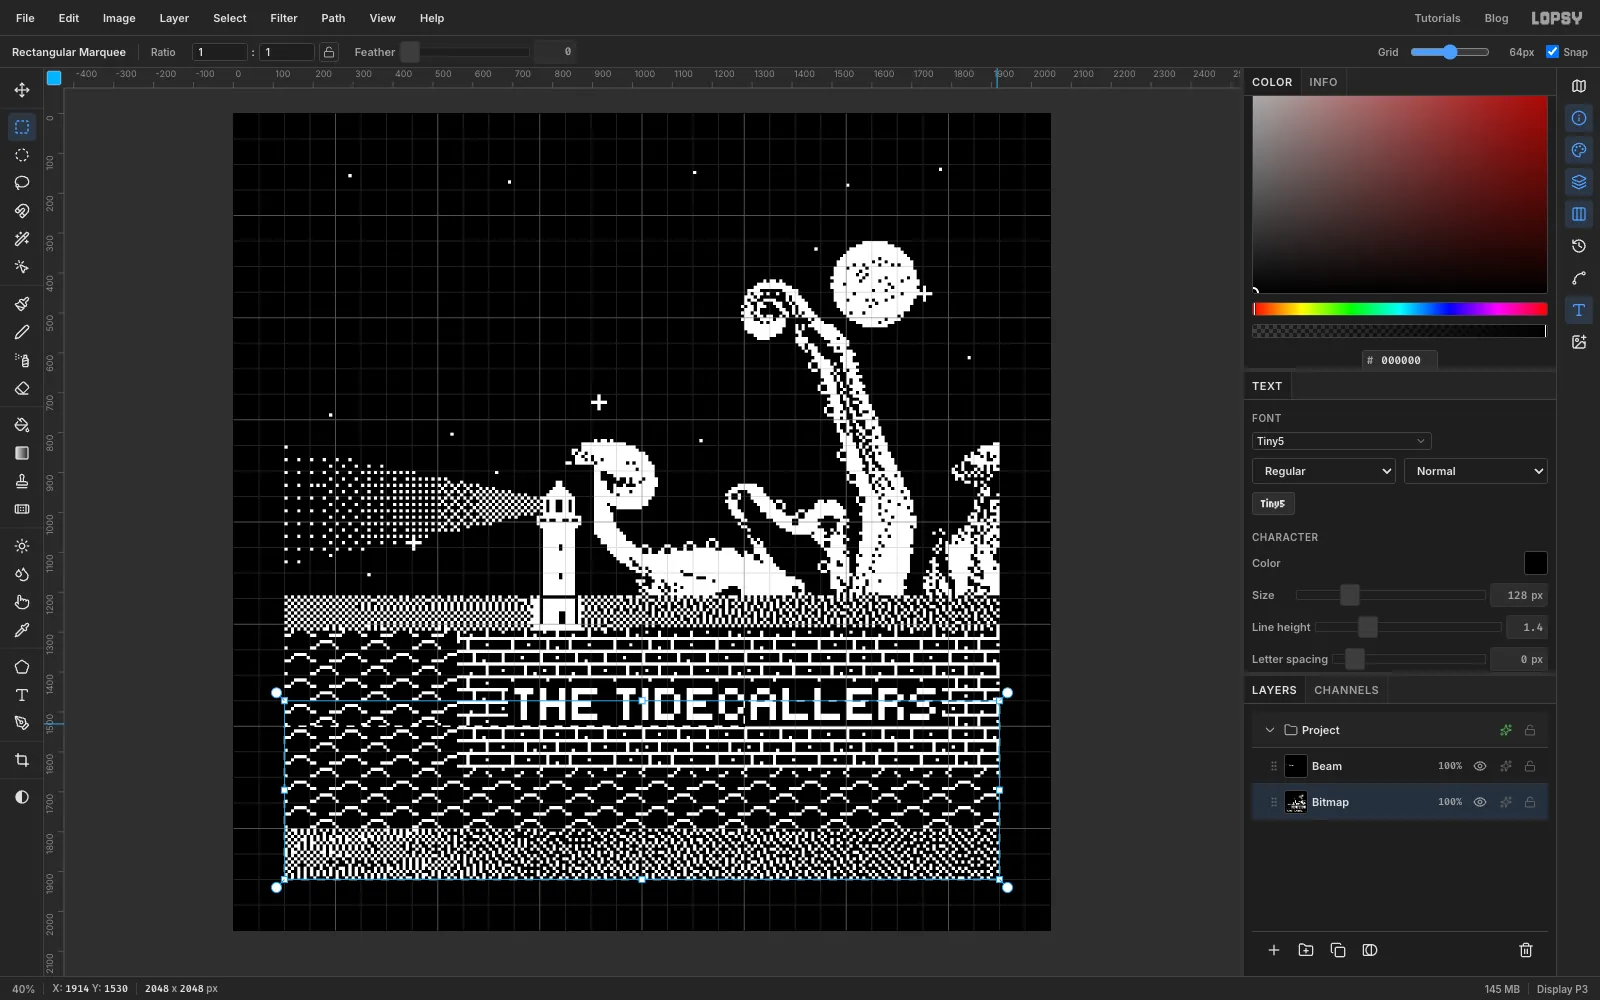
The Spectrum loads colour one cell at a time, left to right and top to bottom. The cover freezes partway through the row that holds the band name, so the missing colour lands on something you can read.
Tick Snap again. On Bitmap, drag a marquee over the bottom six rows of cells, from 128, 1536 to 1920, 1920. Then hold Shift and drag from 1280, 1472 to 1920, 1536 to add the end of the row above.
-
Show the unloaded part as black on white
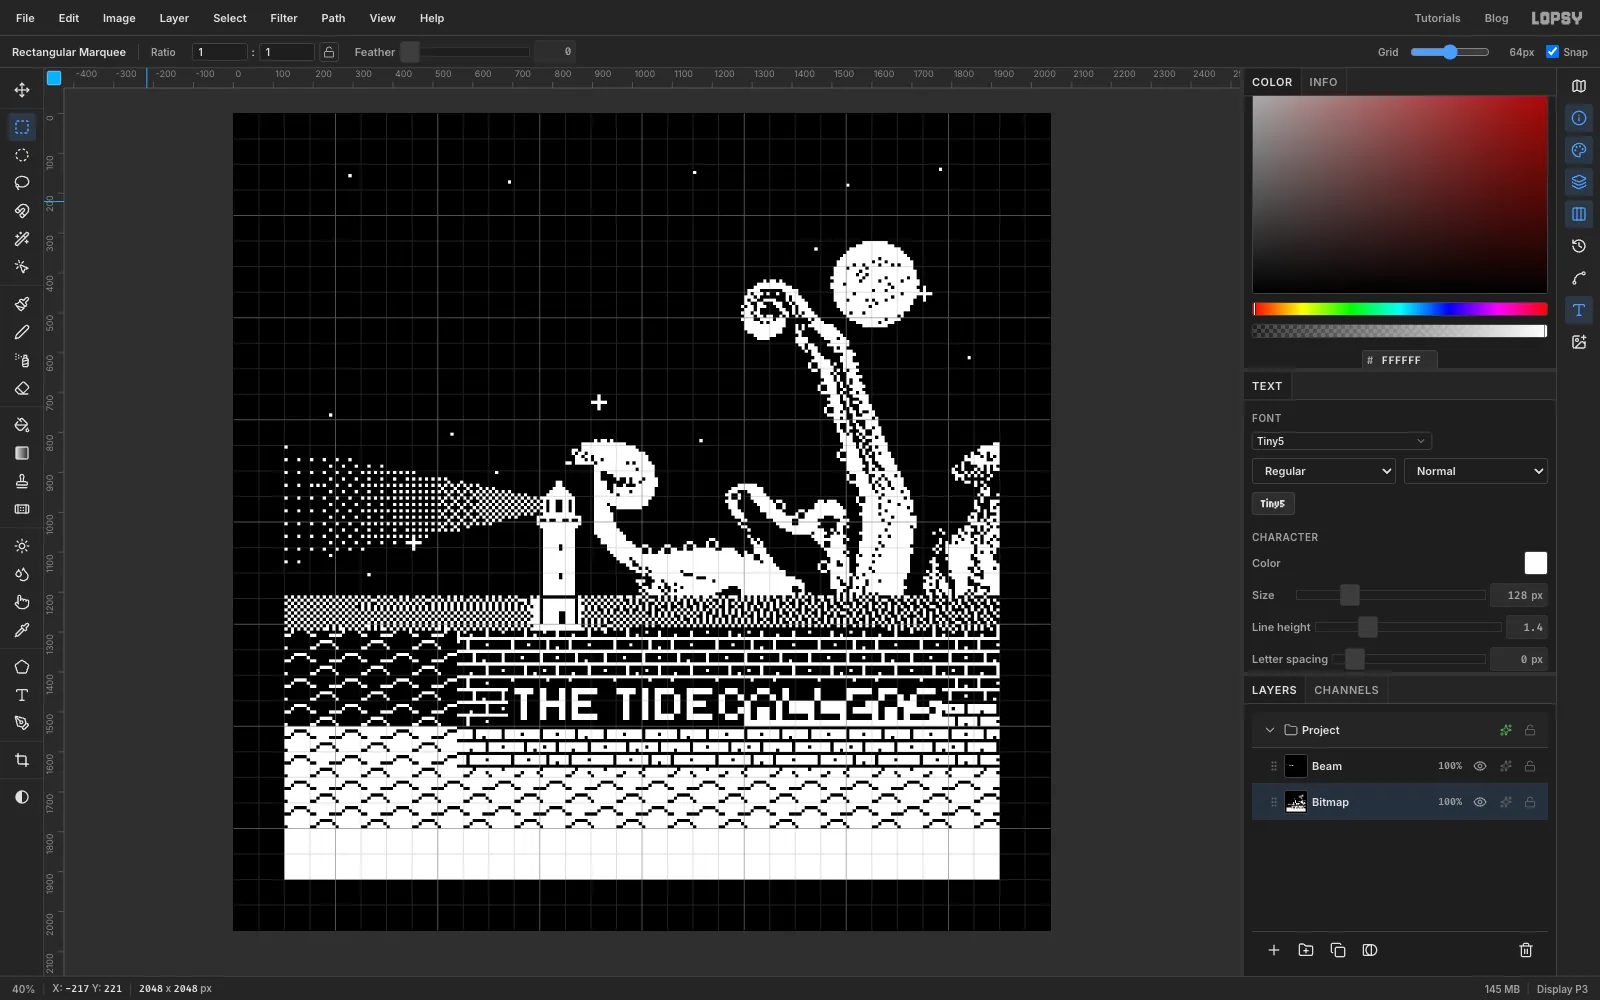
Where no colour has arrived, a Spectrum shows its default: black ink on white paper. Choose Filter → Invert. The stones, waves and the bottom of the letters turn black on white.
Then select the bottom two rows, 128, 1792 to 1920, 1920, and fill them with white. That's where the computer prints its message.
-
Add the loading message
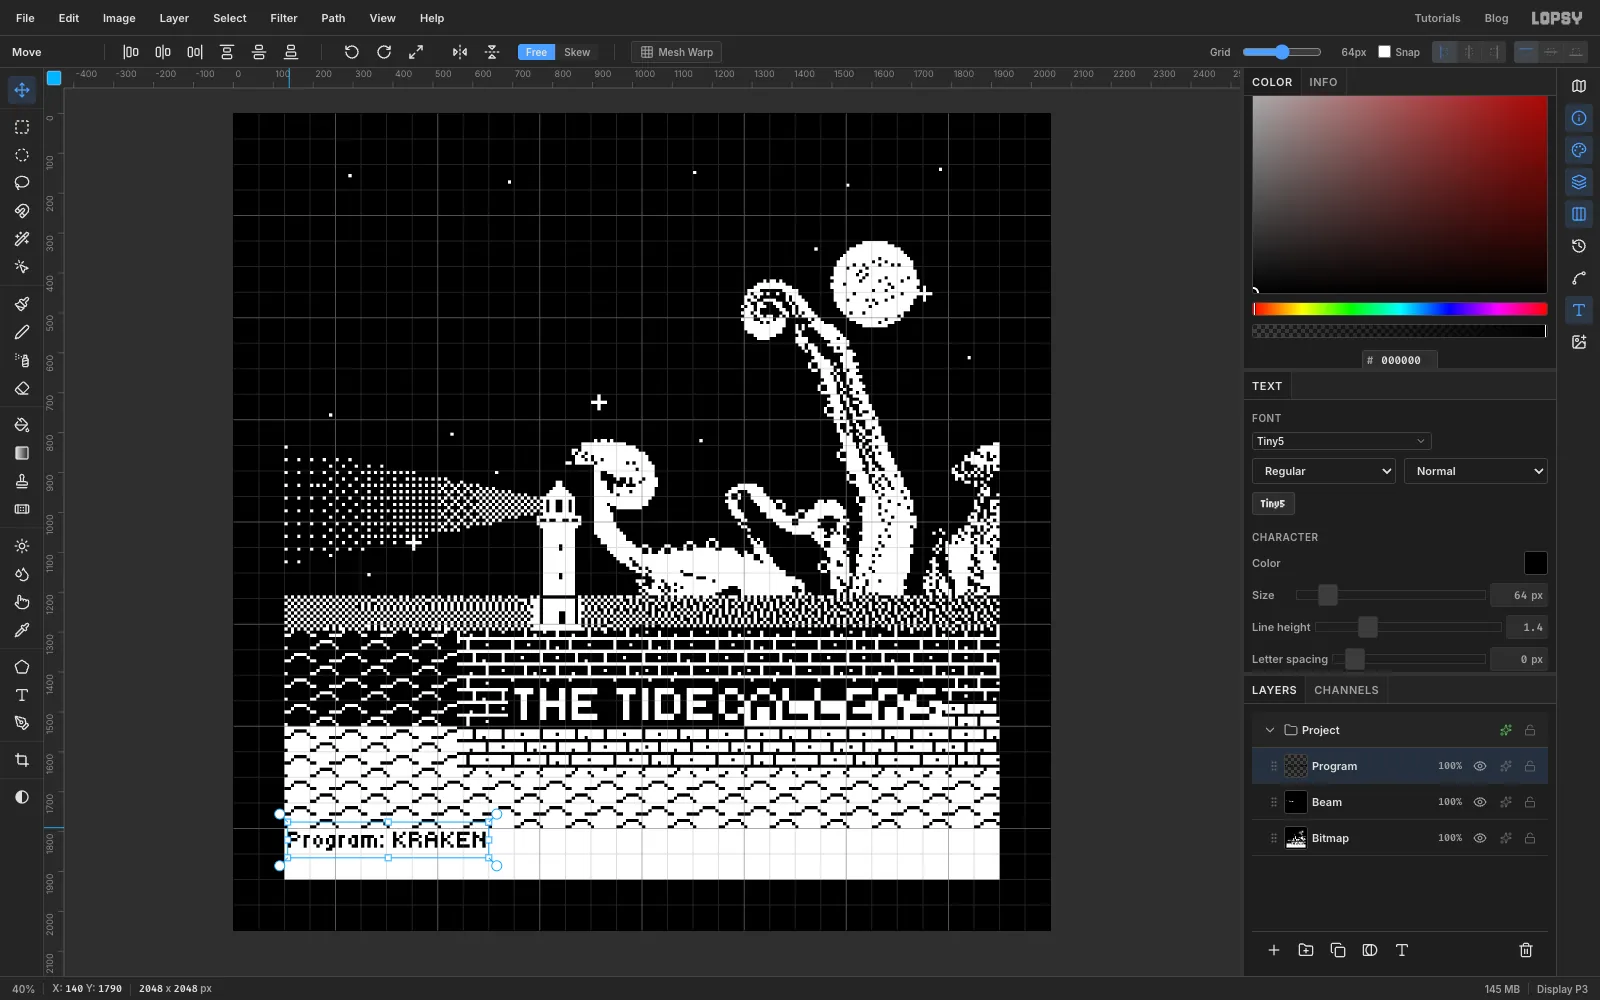
Untick Snap. Select Beam, choose the Text tool, set Tiny5 at Size 64 (one font pixel = one Spectrum pixel) in black, and click in the white strip. Type Program: KRAKEN, press Tab and rename the layer Program. Nudge it until the text starts at 136, 1800. This is the line the Spectrum prints when it finds a program on the tape.
-
Type the title
Select Beam and click New Group in the Layers panel. Name the group Title, so both lines can be moved together.
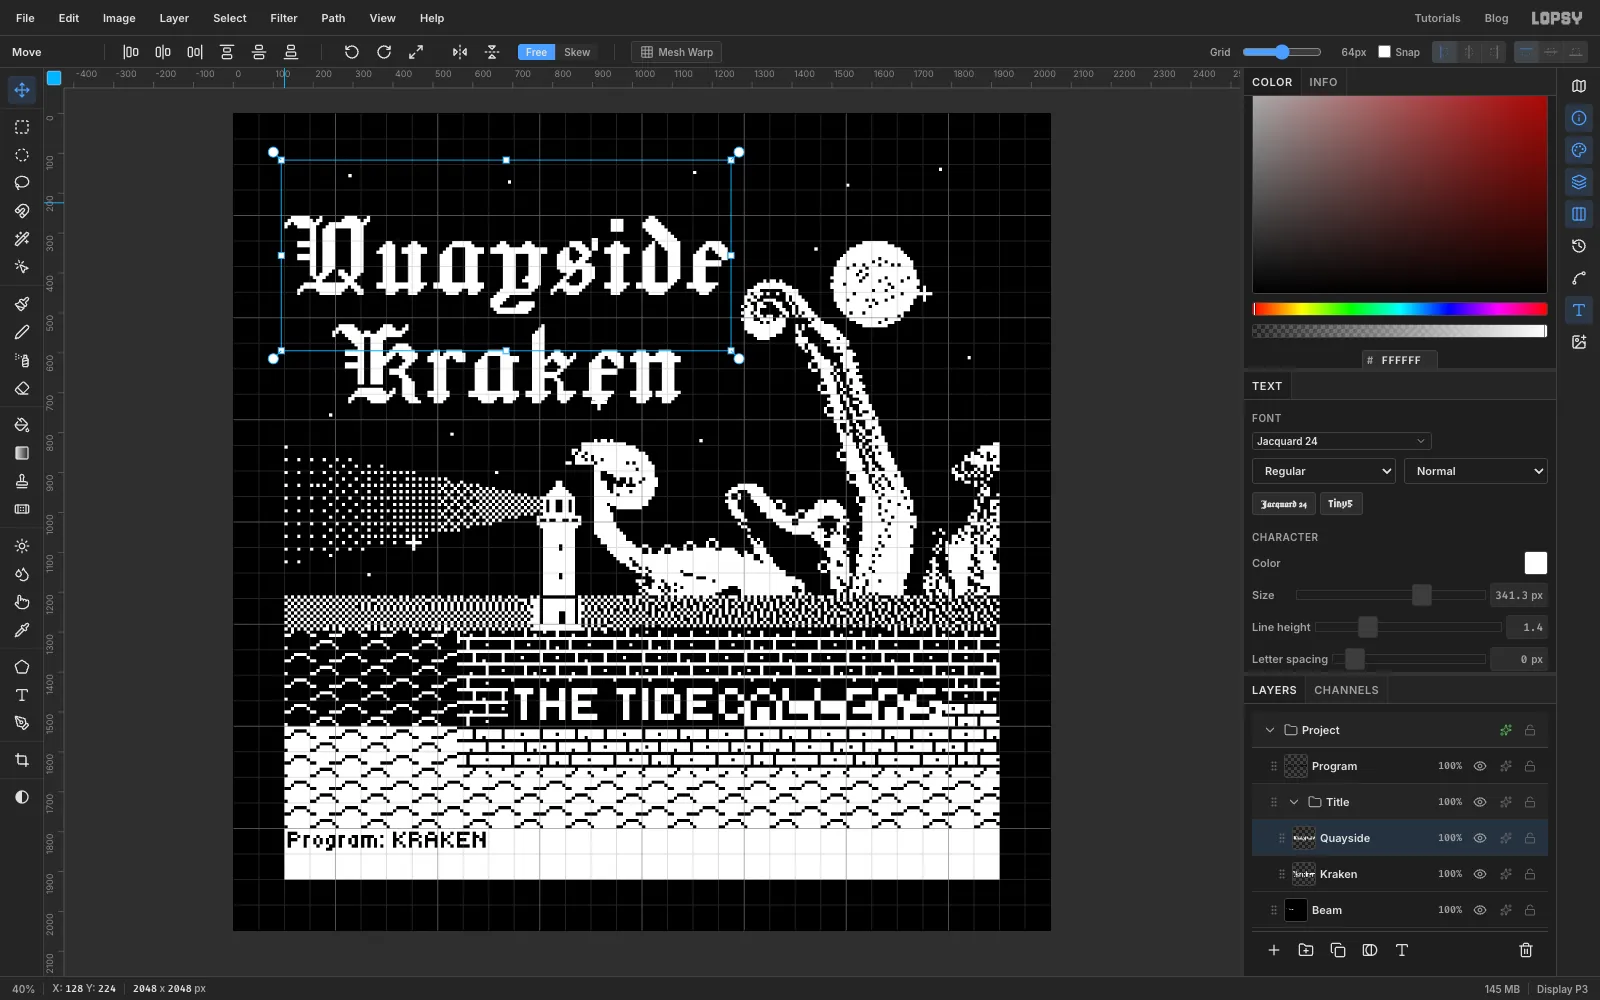
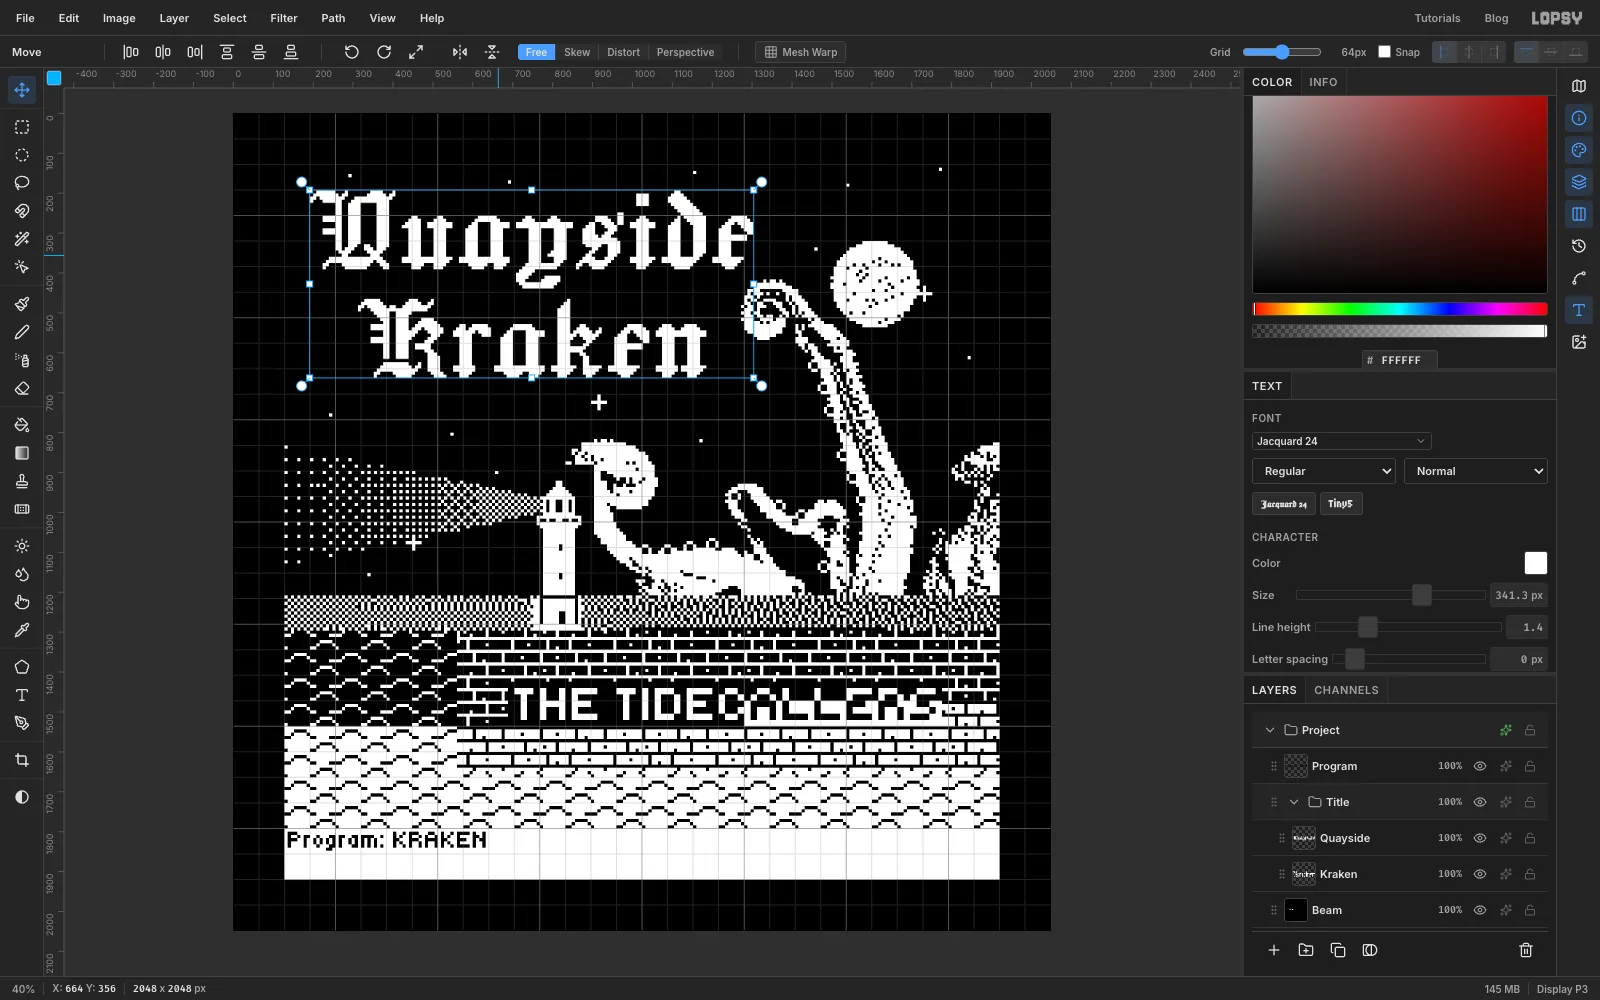
Choose Jacquard 24, a pixel blackletter, in white. Each of its pixels is 3/128 of the font size, so at Size 341.33 one font pixel is exactly 8 px. Type the lower line first, so your click doesn't land inside an existing text box: click in empty sky, type Kraken and press Tab. Then click above it, type Quayside and press Tab.
Nudge them with the Move tool and the arrow keys so Quayside starts at 128, 256 and Kraken at 248, 528. That's one cell left of and one cell below where they belong, so you can place the pair with a single group move next.
-
Move the title into place
Click the Title group row and drag the title with the Move tool, 64 px right and 64 px up. Quayside now starts at 192, 192, one cell in from the top-left corner of the picture. Kraken sits centred under it, starting at 312, 464. Check both in the status bar, because the colour stripes later split the lines at exact rows.
-
Paint the title into the picture
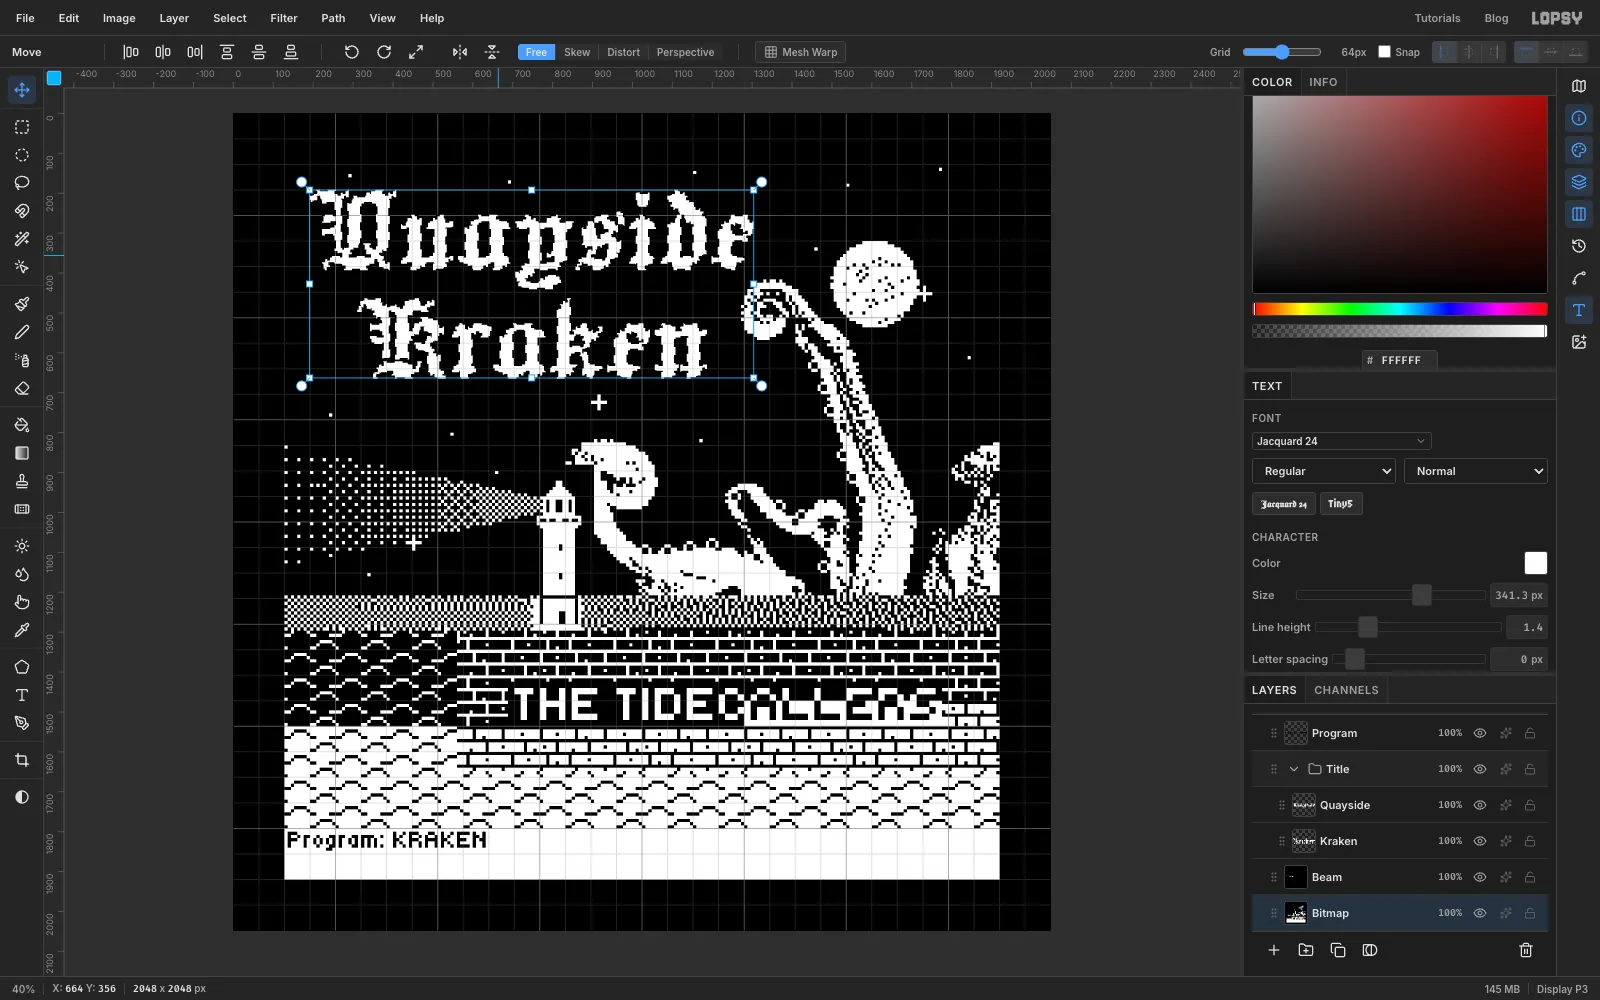
On a Spectrum, the title would be part of the picture, so make it part of the bitmap. Cmd-click the Quayside thumbnail to select its letters, then Cmd+Shift-click the Kraken thumbnail to add them. Select Bitmap, fill the selection with white and press Cmd+D.
Then select the Title group and click Delete Layer. The group and both text layers go, and the title stays in the picture.
-
Snap the title to the pixel grid
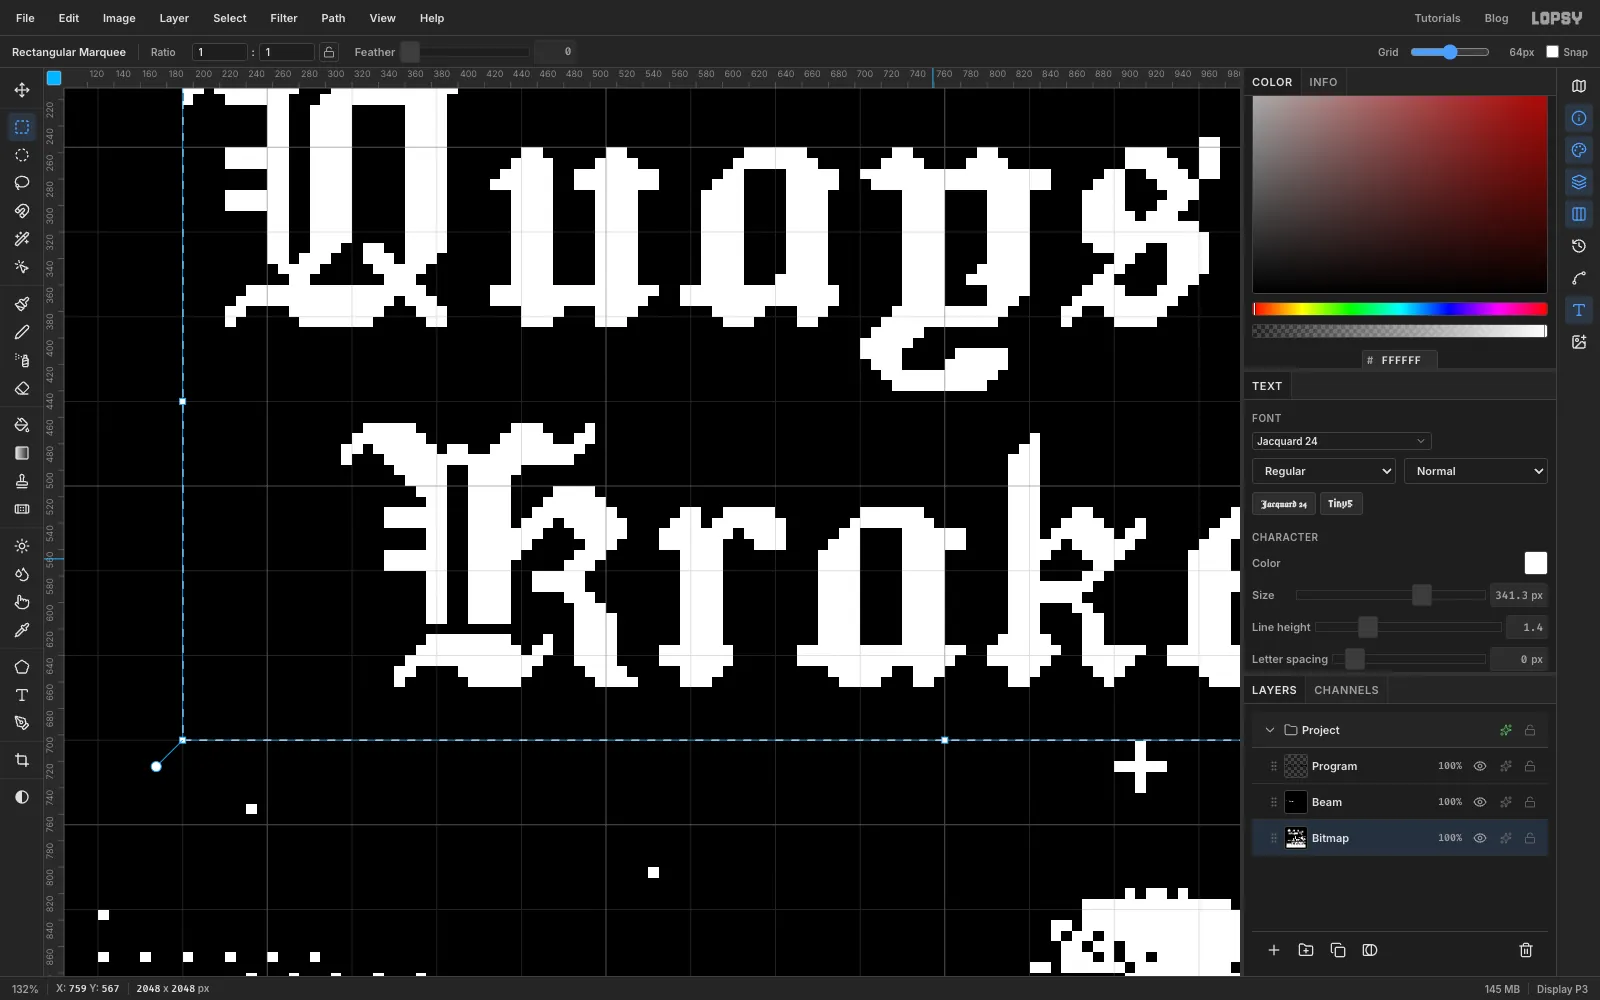
The type is smooth at its edges, and Spectrum pixels have no in-between greys. Select the title area, 192, 192 to 1344, 704, and apply Pixelate at 8 and Threshold at 128. Every edge snaps to a whole Spectrum pixel.
-
Fix the Q
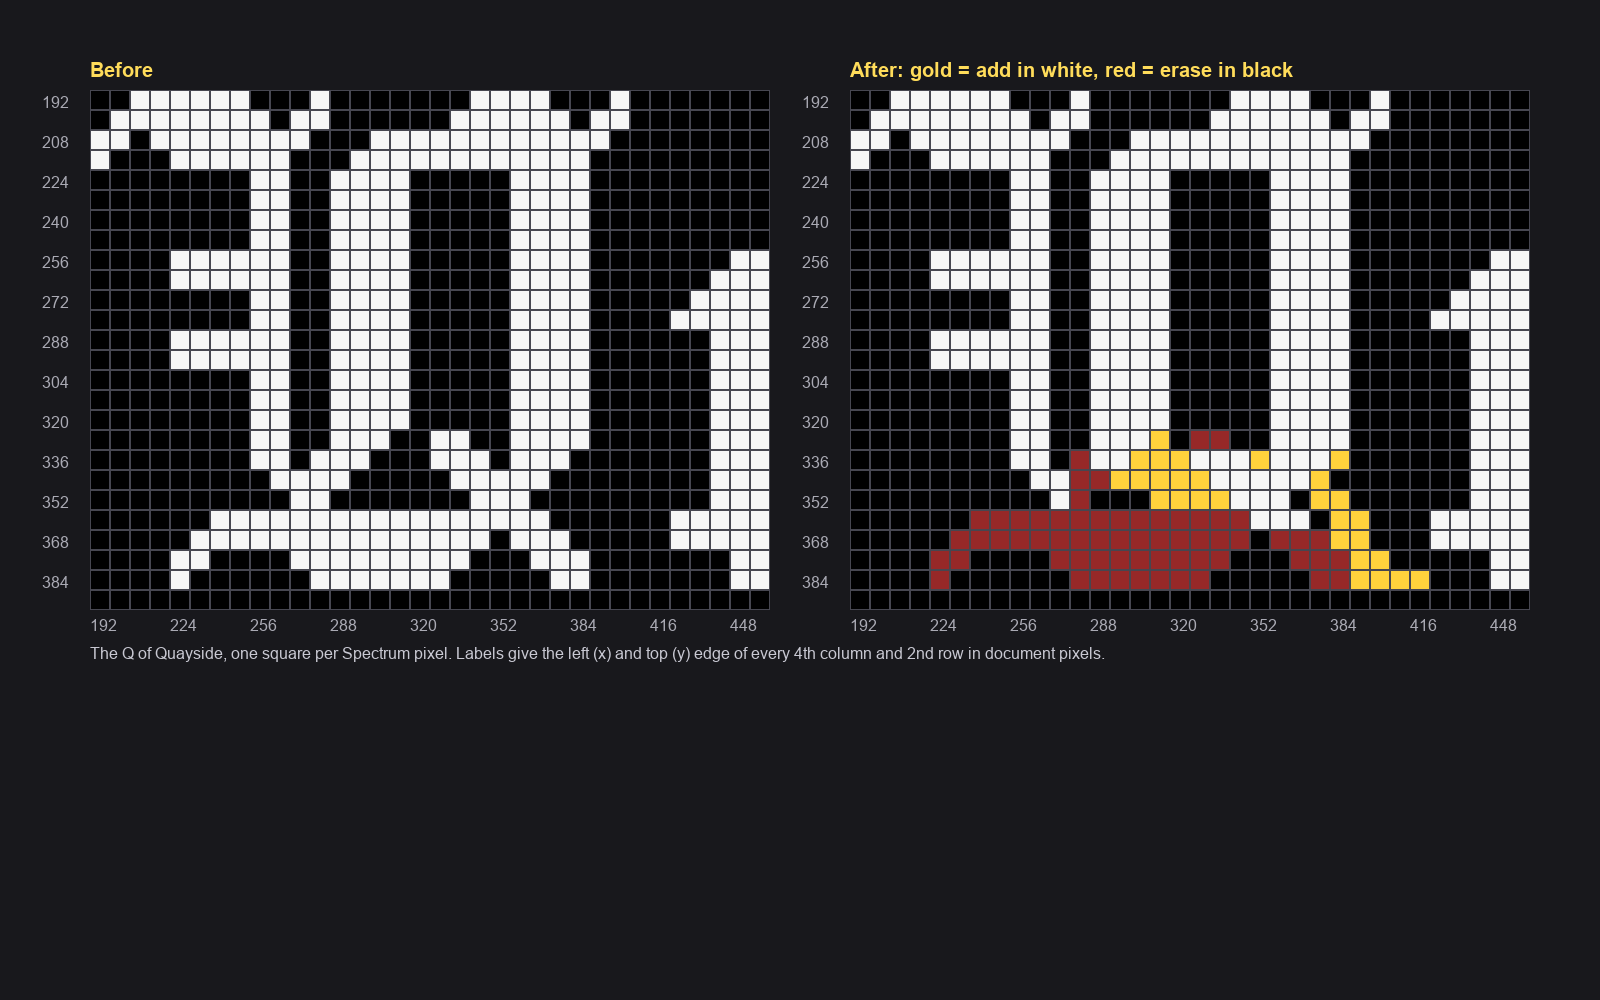
In this blackletter, the bottom of the Q is open with a small cross under it, so at a glance "Quayside" reads as "Uuayside". Fix it on Bitmap with the 8 px grid showing and the Pencil at 8 px, using the chart:
- In white, fill the gold squares. They close the bottom of the bowl with two solid rows and draw a tail two pixels thick that runs down and to the right.
- In black, fill the red squares. That removes the little cross and the flat swash under the letter.
-
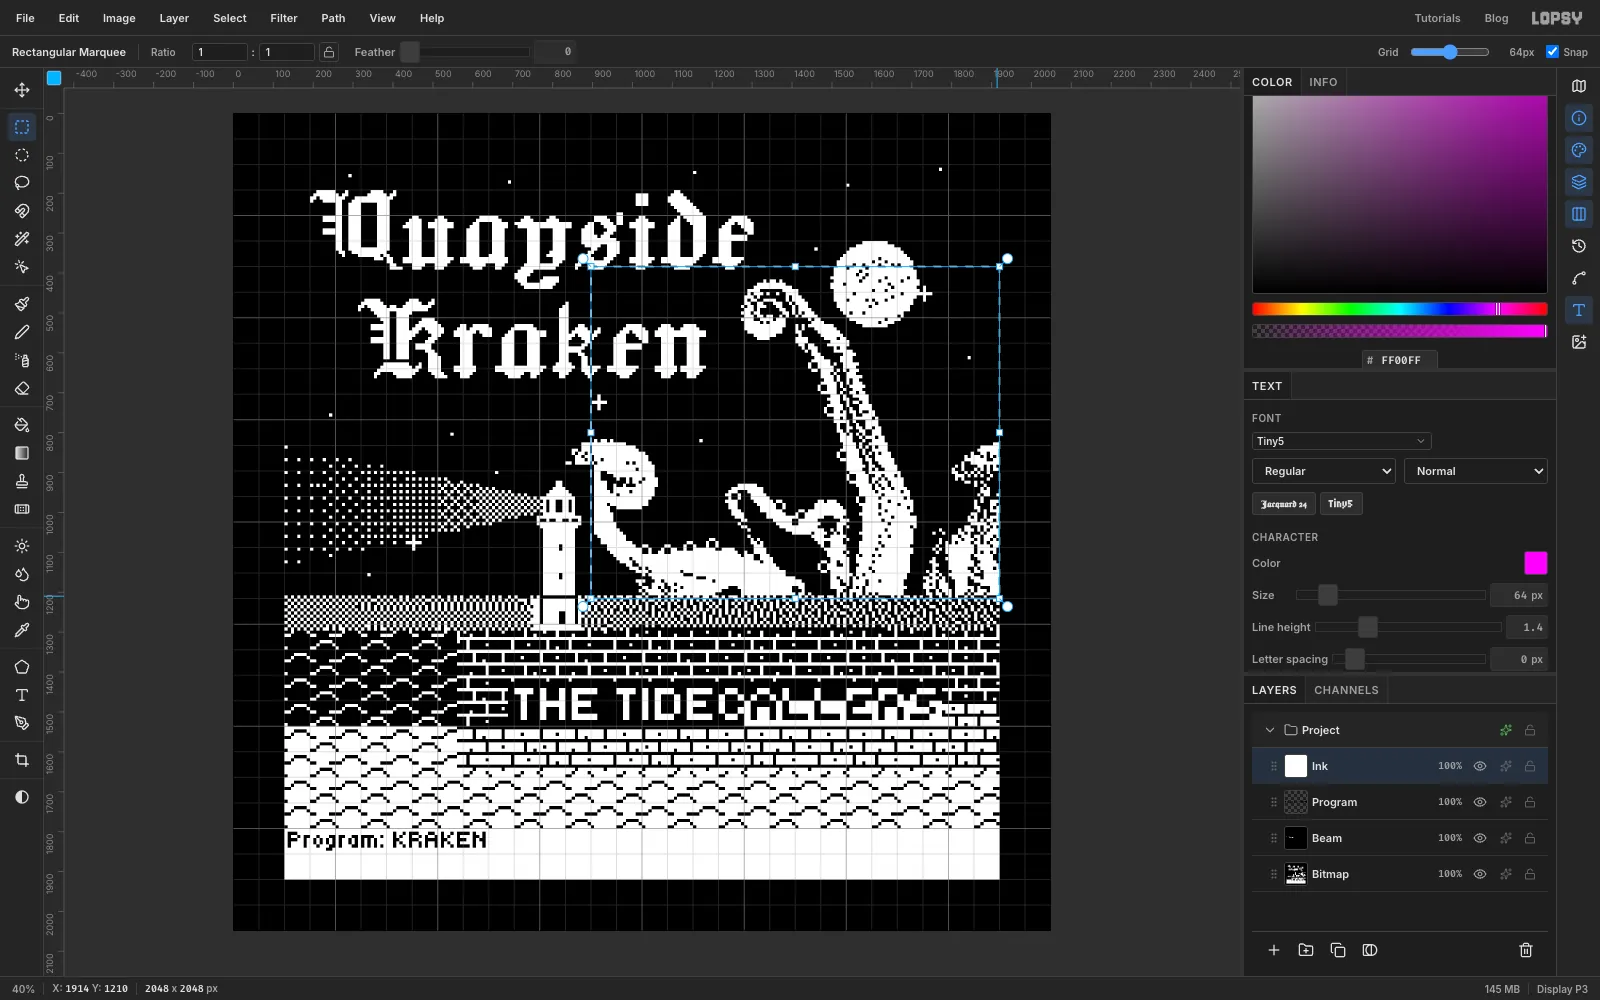
Start the colour layer
Select Program and click Add Layer. Name the layer Ink, fill it with white and set its blend mode to Multiply. White leaves the picture alone. Any other colour tints the white pixels in that cell and leaves the black ones black, which is how the Spectrum's ink works.
Set the Grid back to 64px and tick Snap. From now on, every colour is a marquee dragged from cell corner to cell corner and filled with Edit → Fill.
-
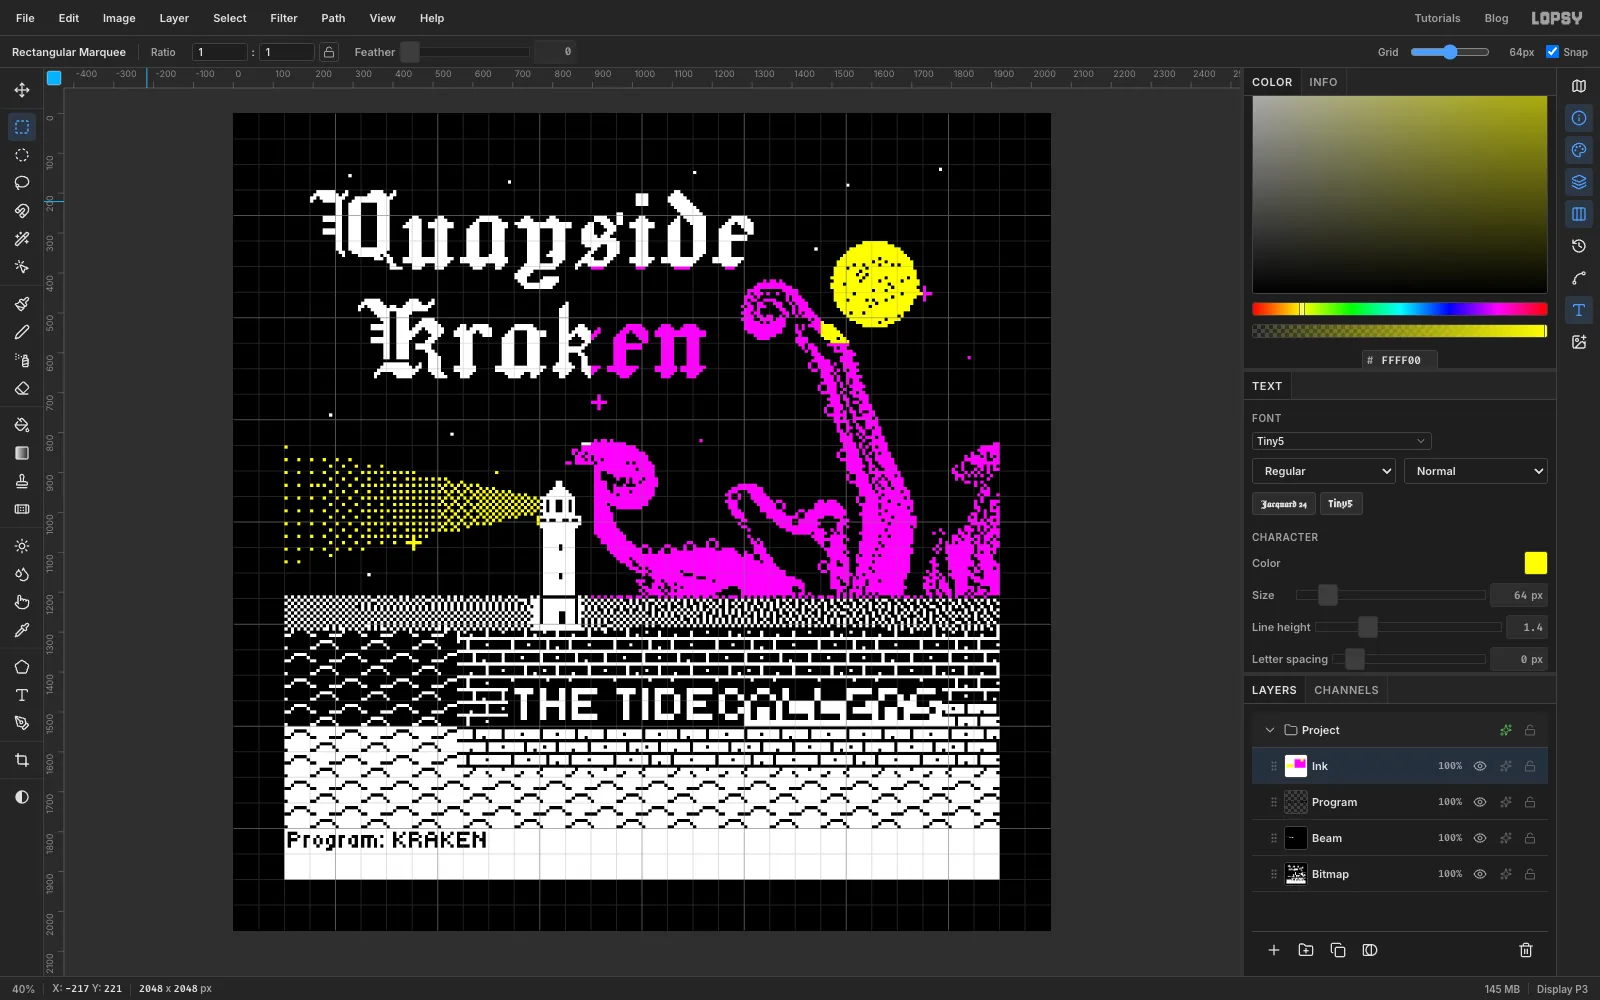
Colour the kraken, the moon and the beam
Fill these areas in this order. Each one paints over the cells before it:
- Bright magenta : 896, 384 to 1920, 1216 for the arms, plus the single cell 832, 832 to 896, 896 for the tip of the curl.
- Bright yellow : 1472, 320 to 1728, 576 for the moon. The arm next to it turns yellow too, which is the colour clash you want.
- Bright yellow: 128, 832 to 768, 1152 for the beam, and 768, 960 to 896, 1024 for the lantern.
-
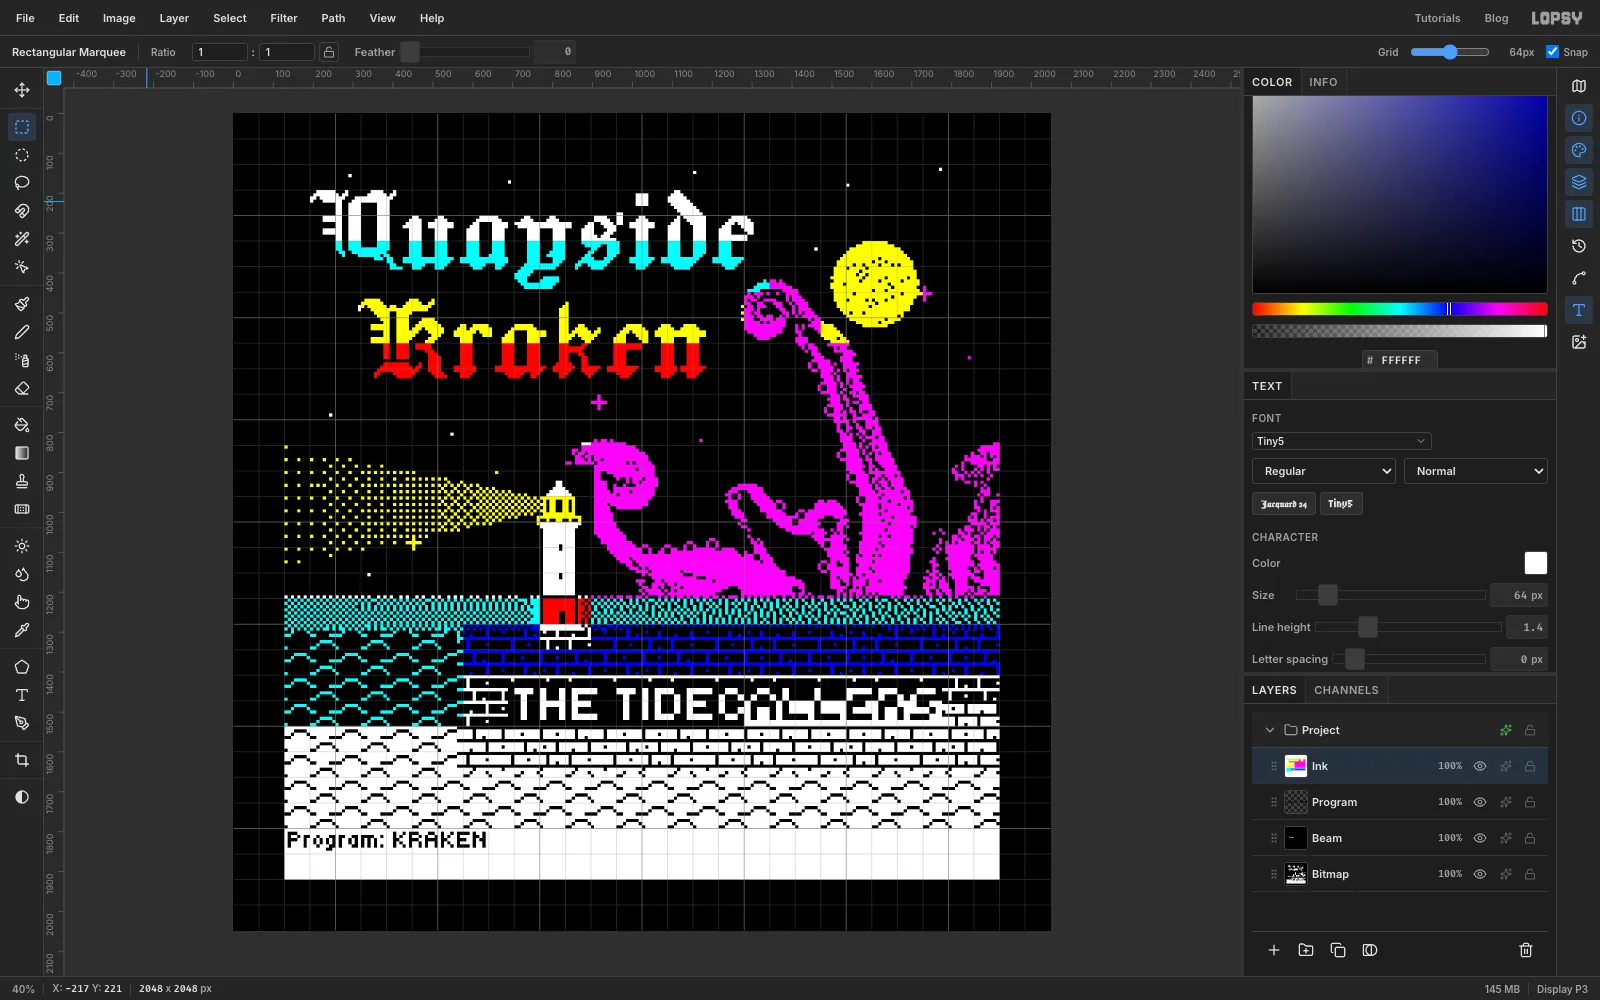
Colour the title and the sea
Give the title Spectrum-style colour stripes, one per row of cells:
- Bright cyan : 192, 320 to 1344, 448. That's the lower half of Quayside. Its top half stays white.
- Bright yellow: 320, 448 to 1280, 576, the top of Kraken.
- Bright red : 320, 576 to 1280, 704, the bottom of Kraken.
Then the sea and the quay:
- Bright cyan: 128, 1216 to 1920, 1280, the distant sea.
- Bright red: 768, 1216 to 896, 1280, the lighthouse base.
- Bright cyan: 128, 1280 to 576, 1536, the waves.
- Bright blue : 576, 1280 to 1920, 1408, the top of the wall.
- White: 768, 1280 to 896, 1344, so the lighthouse plinth stays white.
Leave everything else white. That includes the band name, and above all the unloaded rows, which must stay black on white.
-
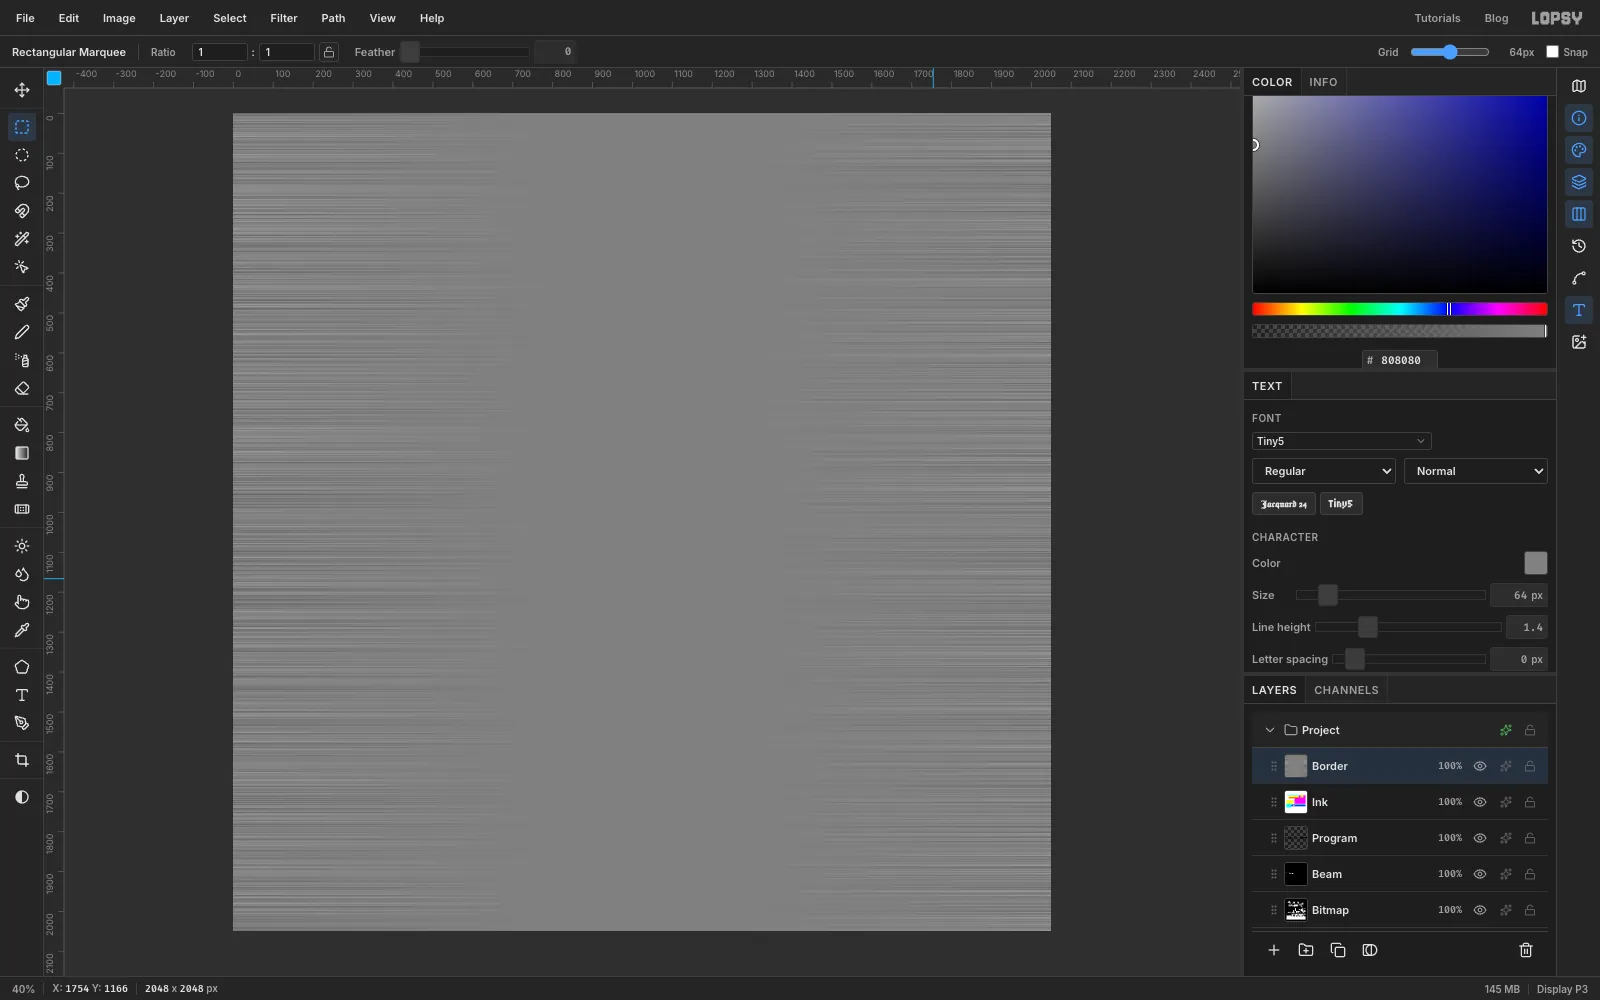
Make the border noise
While a Spectrum loads, the border flickers with thin yellow and blue stripes that break off at random points.
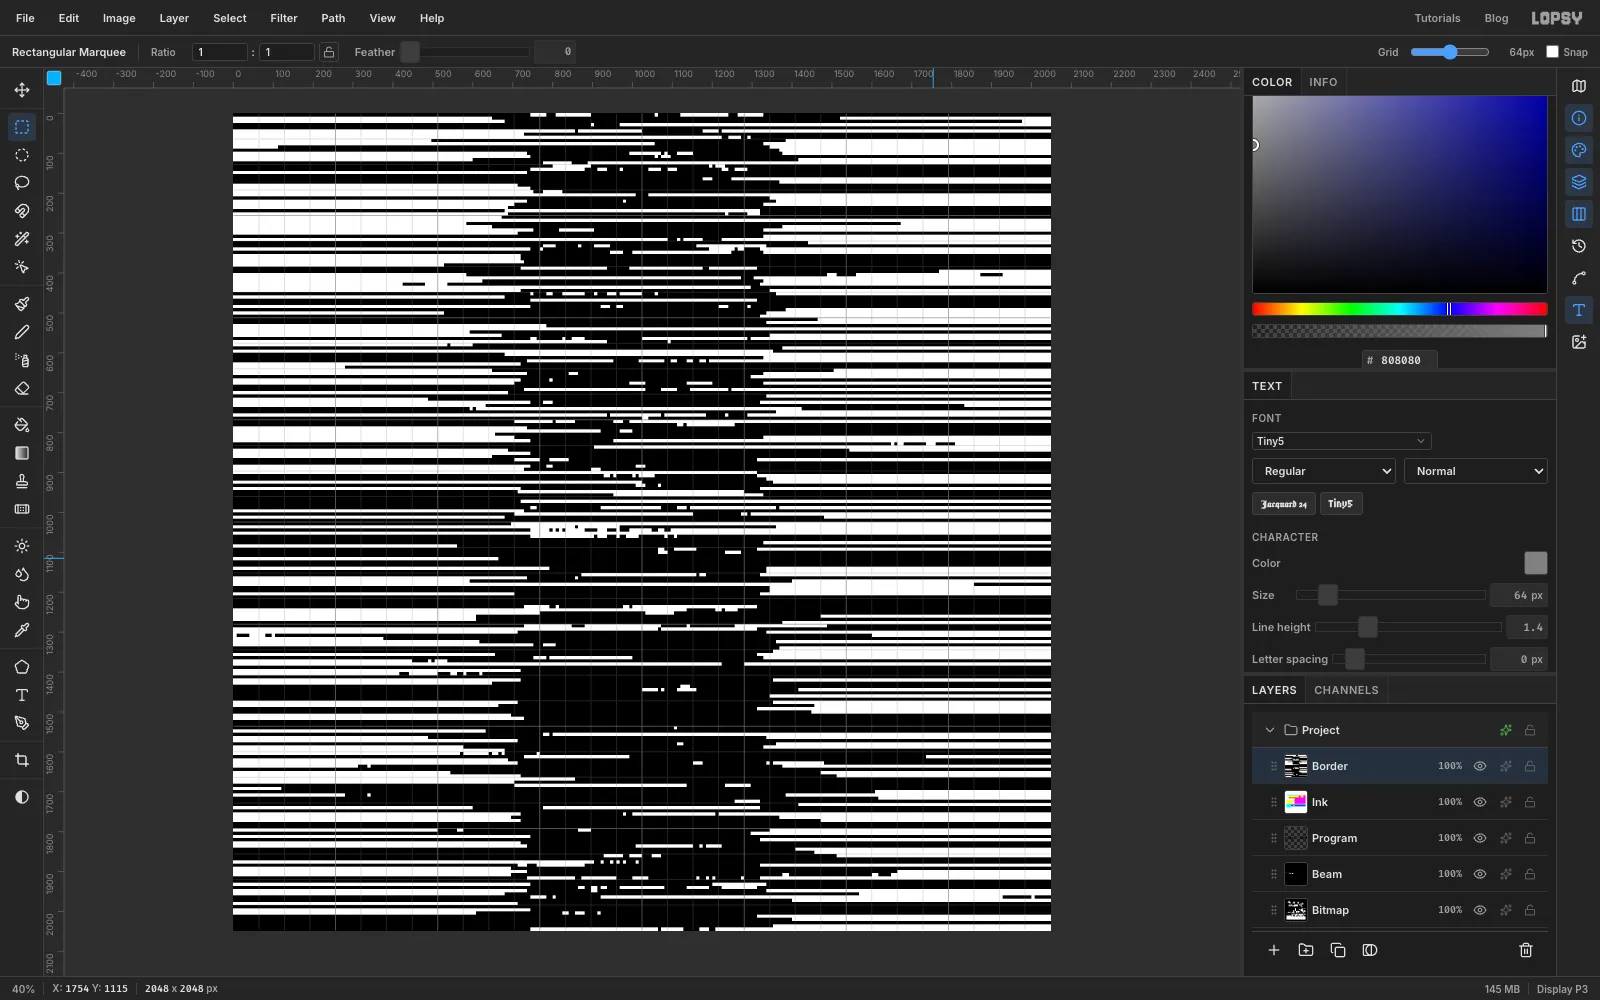
Select Ink, click Add Layer and name the layer Border. Fill it with . Choose Filter → Add Noise… with Amount 100 and Mono, then Filter → Motion Blur… with Angle 0 and Distance 1500. Each row now drifts slowly between a little lighter and a little darker than mid-grey.
-
Turn the noise into stripes
Apply Pixelate at 8 and Threshold at 128. Each row of Spectrum pixels becomes black or white, with breaks where the row crosses the middle grey.
-
Colour the border
Choose the Magic Wand, set Tolerance to 10, untick Contiguous, and click a white stripe. Fill the selection with . Choose Select → Inverse and fill with . These are the Spectrum's normal yellow and blue, because the border can't show the bright ones.
Finally, select the picture area, 128, 128 to 1920, 1920, and press Delete to clear the stripes from it. Press Cmd+D and export with File → Quick Export PNG.